 Threads

Building a gaming PC requires experience and knowledge of which component best suits and complements the other in your build. Having a rough image of what your PC looks like and what programs you want it to run can help when choosing certain parts, such as the GPU, processor, etc.
Key Takeaways
- During the planning phase, consider your budget, the upgradability of your PC, its performance, looks, and overclocking potential.
- In the building phase, get compatible components and build your gaming PC by connecting every element.
- For the maintenance phase, monitor the thermals and performance of your PC to look for any anomalies, and clean the rig regularly.
The Planning Phase
In the planning phase, I will walk you through the factors you must consider before buying your components for a gaming PC.
Budget
Staying within your budget is essential. To achieve this, compare prices from different stores rather than purchasing all components from one place. Research component prices thoroughly. If you find a part you like but a bit too expensive, you can also explore the used market for cost-effective options.
While secondhand components can offer better value for money, they come with risks. For beginners without technical knowledge and testing expertise, it’s not recommended due to the potential for financial loss. Here is approximately how much it cost me to build my gaming PC.
Our reviewers tested gaming PCs under $500, $1000, $1500, $2000, and $5000, so review them to get an estimate of your budget.
Upgradability
Choose components that support future upgrades, ensuring your PC stays relevant. With this approach, you can easily enhance your system’s performance by upgrading RAM, GPU, or other critical components without investing in an entirely new rig, saving you money and keeping your PC up to date. Check out the best CPU and RAM for gaming tested by our reviewers on various aspects to help make your pick easier.
Performance
When building a gaming PC, prioritize top-notch performance and component compatibility to avoid bottlenecks. This ensures that all parts work seamlessly together, unlocking the full potential of your setup.
Looks
Even though looks are not nearly as important as the other factors, they can still matter to some gamers. You can show off your gaming PC build to your friends or make it in your style, setting it apart from other forms.
Overclocking Potential
Unless you want to squeeze every bit of performance out of your rig and have the technical knowledge to succeed, this factor might not appeal to you.
The overclocking potential refers to your PC’s ability to handle high thermals to deliver more performance than it was meant to by default. When you overclock your PC, you feed it with more power, hoping your system runs stable and delivers higher performance.
Addressing the extra heat generated to maximize your system’s performance through overclocking is crucial. Get a robust cooling system to manage this heat effectively. Additionally, a capable power delivery system is essential to provide the required power seamlessly to components like the CPU, GPU, and RAM.
A high-quality CPU cooler, top-tier power supply, and a sturdy motherboard to support overclocking are indispensable features in any gaming PC build.
Prebuilt Systems Vs Custom Gaming PC
You can purchase a prebuilt gaming PC from any store, and it even provides a warranty, saving you from manufacturer hassles. However, customization options are limited, and swapping components can be pricier. While you can upgrade a prebuilt PC to some extent, it’s more flexible than a custom PC.
Meanwhile, the idea behind a custom gaming PC is simple: you buy particular components from different places or just a single store (depending on your preference) and build the system yourself at home.
On the other hand, building a custom PC takes more time and requires ample knowledge about PC components to make the right pick, but you get complete control of the customizations.
Which One Should You Go For?
I recommend you build your custom setup to save some cash. However, purchasing a prebuilt arrangement is best if you lack time and the required PC knowledge.
Building a PC is relatively easy. In fact, with a couple of Phillips Head screws and a few other tools, you can get right down to business. I recommend you go for magnetic screwdrivers to avoid losing screws. Here are a few essential tools required for building a gaming PC:
The Building Phase
By this point, you should have a rough idea of what type of gaming PC you’re after and your budget. With these answers in mind, move to the building phase.
Get The Components
For a good gaming setup, you need to do lots of market research and select the components that offer the perfect blend of performance and price. To get an idea of the compatibility and pricing for each element, I use PCPartPicker. Select the parts, and see how your build turns out.
Furthermore, these buying guides will help you purchase a top-notch GPU, RAM, CPU, motherboard, and CPU cooler. Every part you select must go perfectly with the rest of the components.
Avoid Basic Mistakes
If you’re a beginner, you’ll likely make many mistakes throughout your first PC-building experience. Therefore, familiarize yourself with the PC building mistakes you have to avoid before you begin.
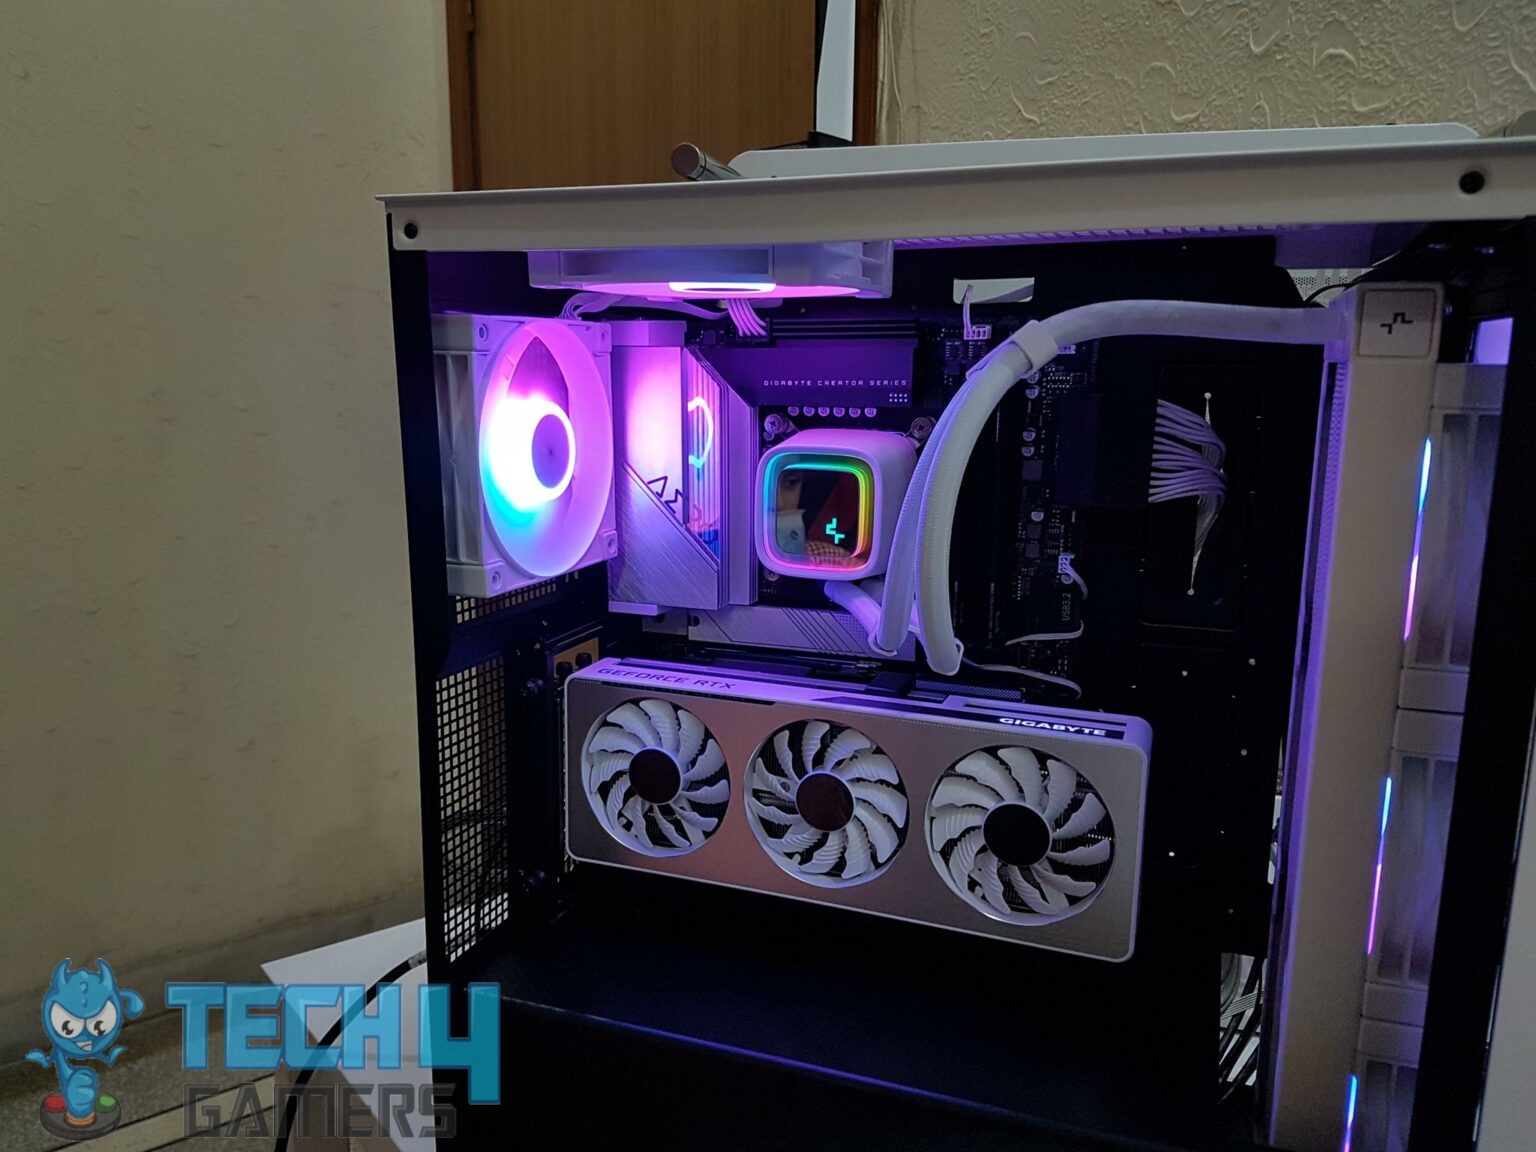
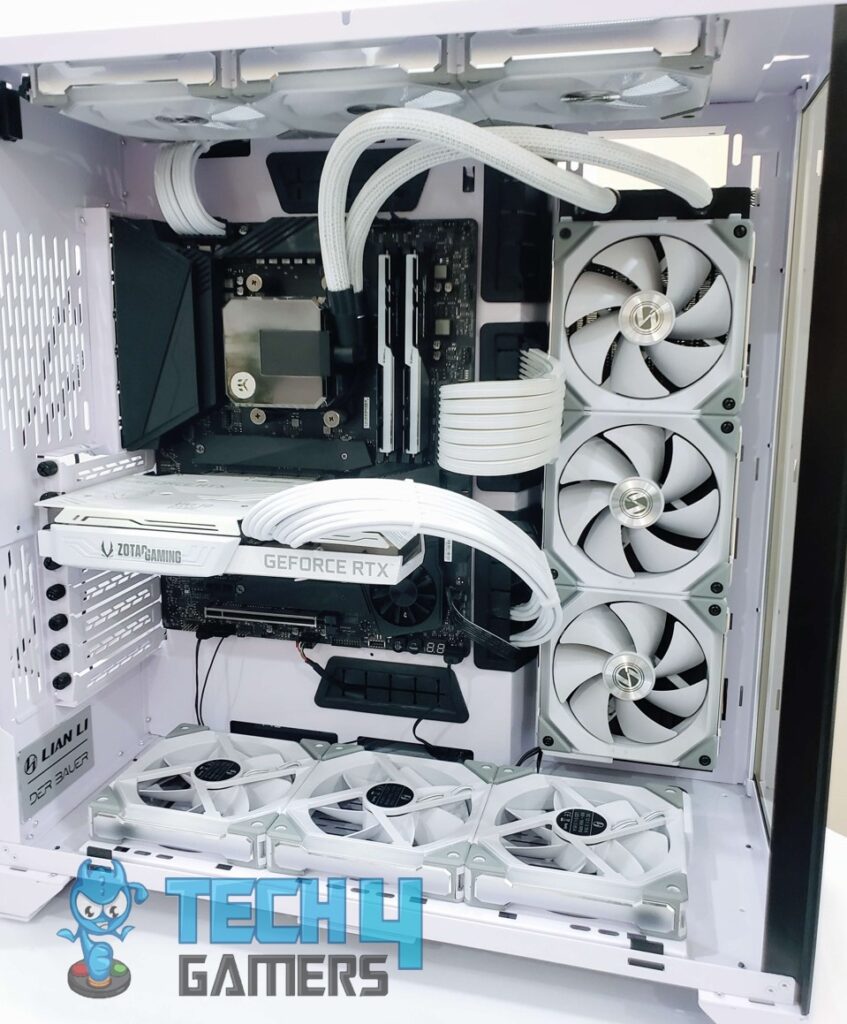
Installing Components
It took me about 2 hours to align and install all the components correctly into the PC. While the duration varies with one’s experience, maintain focus during PC building to avoid errors and mishaps.
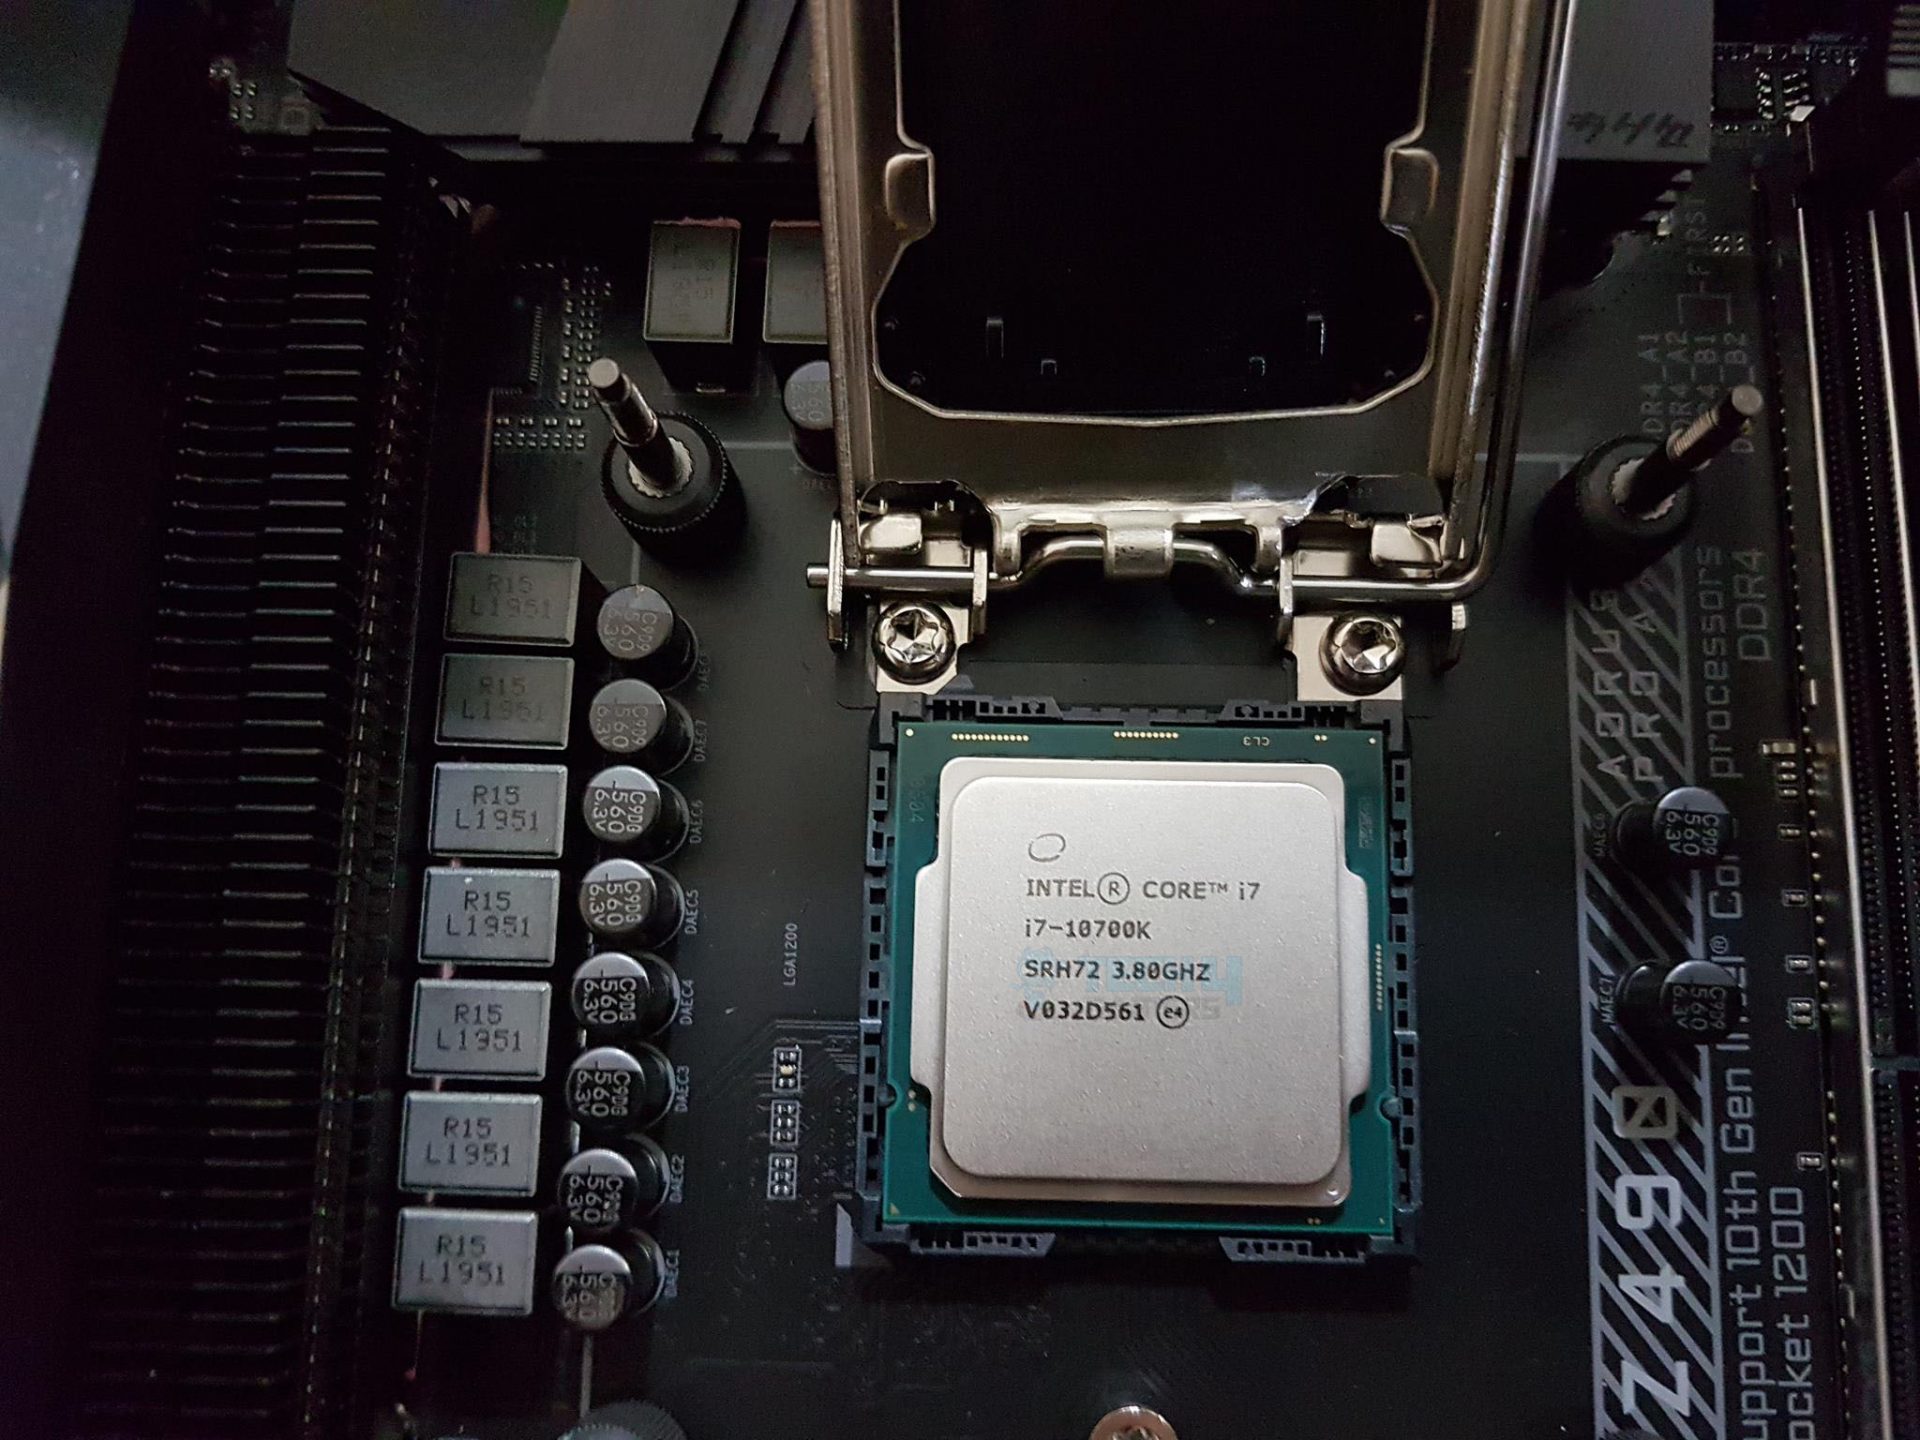
I began the assembly with the processor. While handling, hold the processor from its edges and never from the bottom. Then, follow these steps:Processor
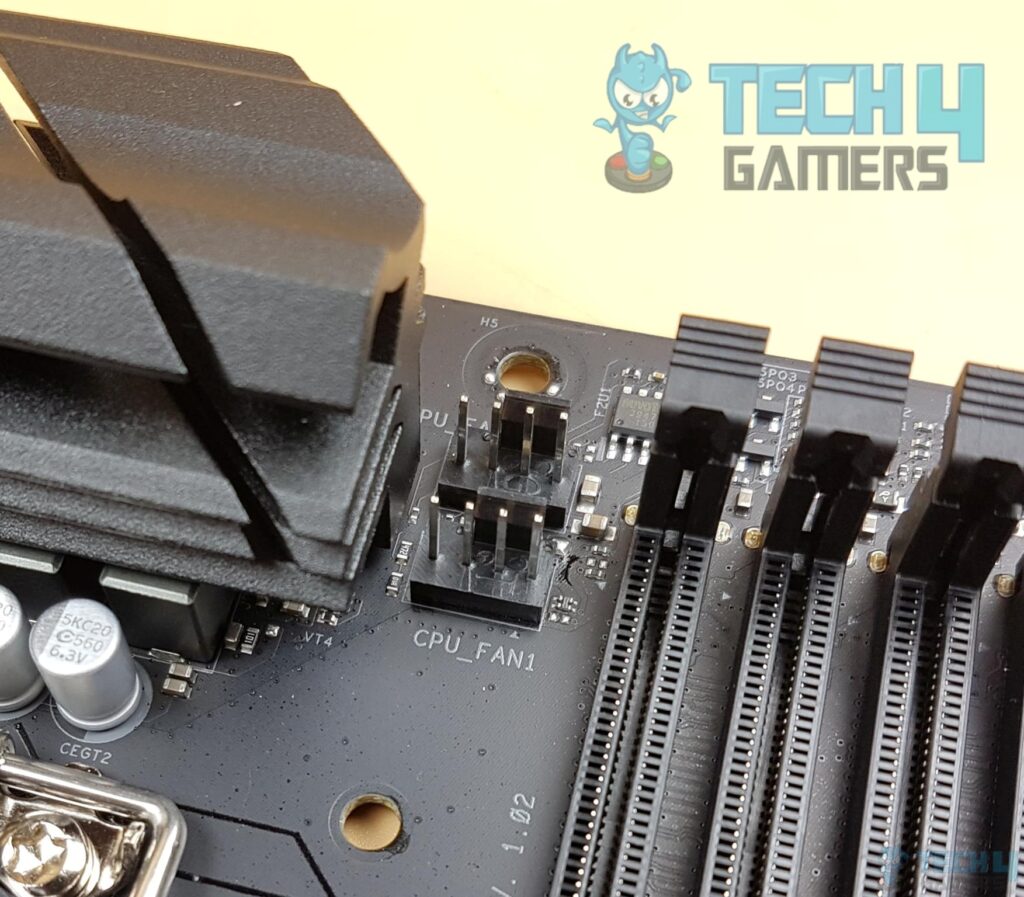
Review your motherboard’s manual once and check out its DIMM slot configuration for optimal performance. Conventionally, if you have 4x DIMM slots and want to install 2x RAM sticks, the first stick should go in the first slot furthest from the CPU socket, and the second stick should go in the second slot away from the CPU socket. Install the RAM sticks in alternate places. Take note of the instructions below to proceed.RAM

Bring out a Phillips screwdriver and some thermal paste for this step. The instructions for installing a CPU cooler vary depending on your motherboard socket, cooler type, and platform; thus, refer to the installation guide. This is the procedure I followed.CPU Cooler

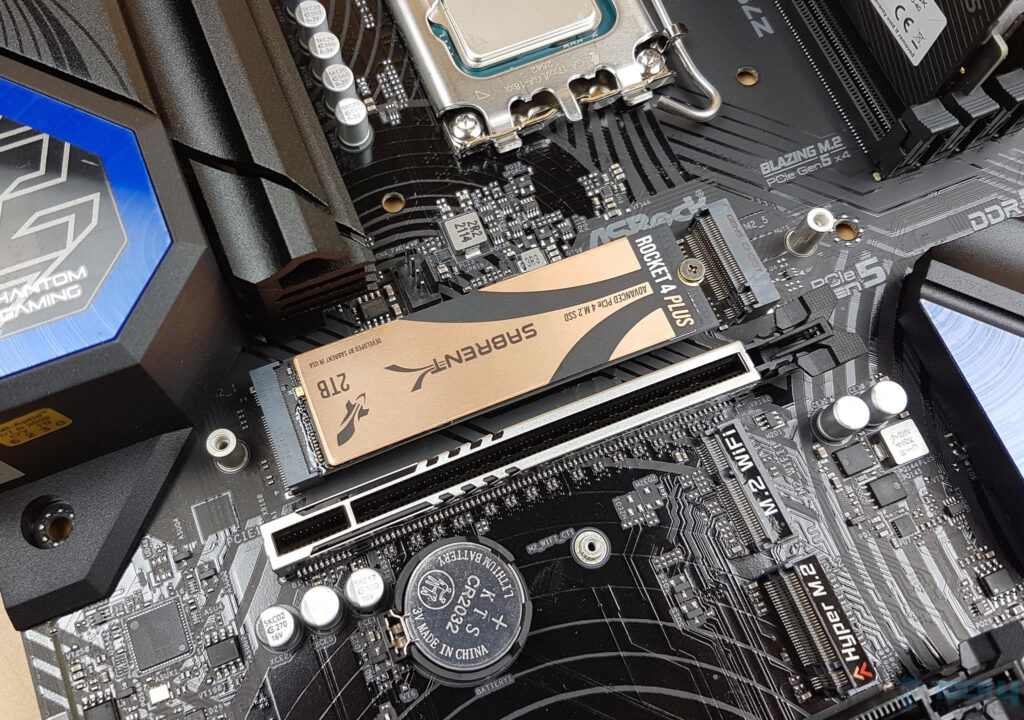
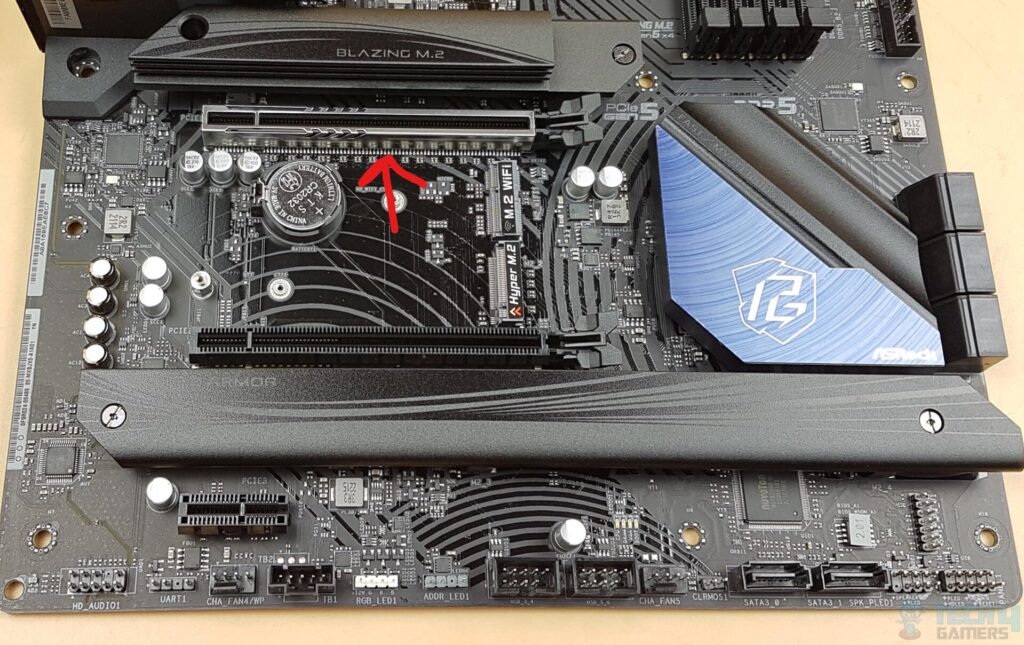
Installing an M.2 SSD is straightforward. Before securing it, consult your motherboard’s manual to identify the M.2 slot location – a horizontal slot, about an inch long, with a screw at one end. It is typically found near the CPU socket or PCIe slots in the lower half of the motherboard. Once you have located the M.2 slot, use these steps.M.2 SSDs
First, install the IO Shield. Place the IO Shield on the case and gently press each corner until it snaps into its place. With the IO Shield good to go, here’s how you can install the motherboard.Motherboard
After installing the CPU Cooler and the motherboard, it’s time to place the power supply unit to power the components. All you have to do is follow the steps below.PSU
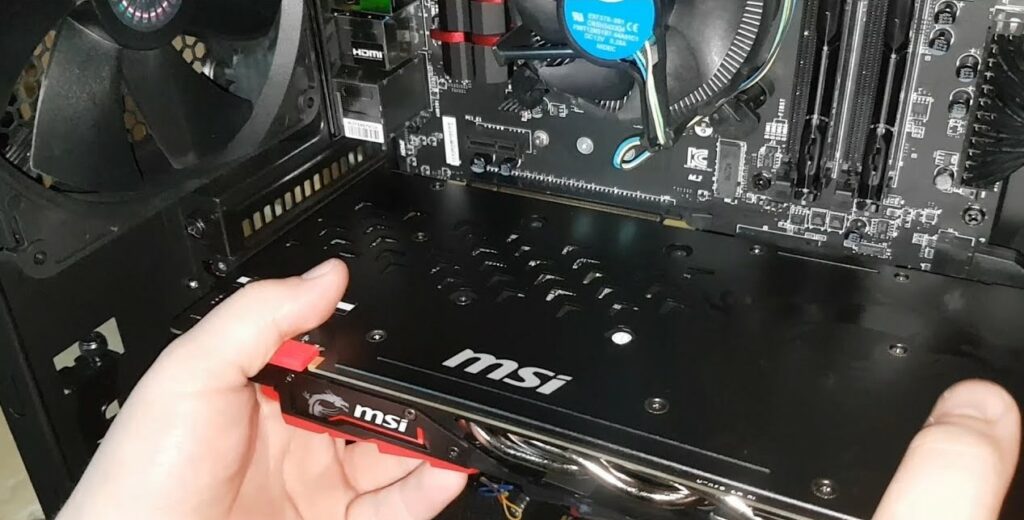
Identify the x16 PCIe slot to install the GPU. It should be colored differently than the other PCIe slots, and even if it’s the same color, it will be a bit long. If you can’t identify it, refer to your motherboard’s manual to be safe.GPU
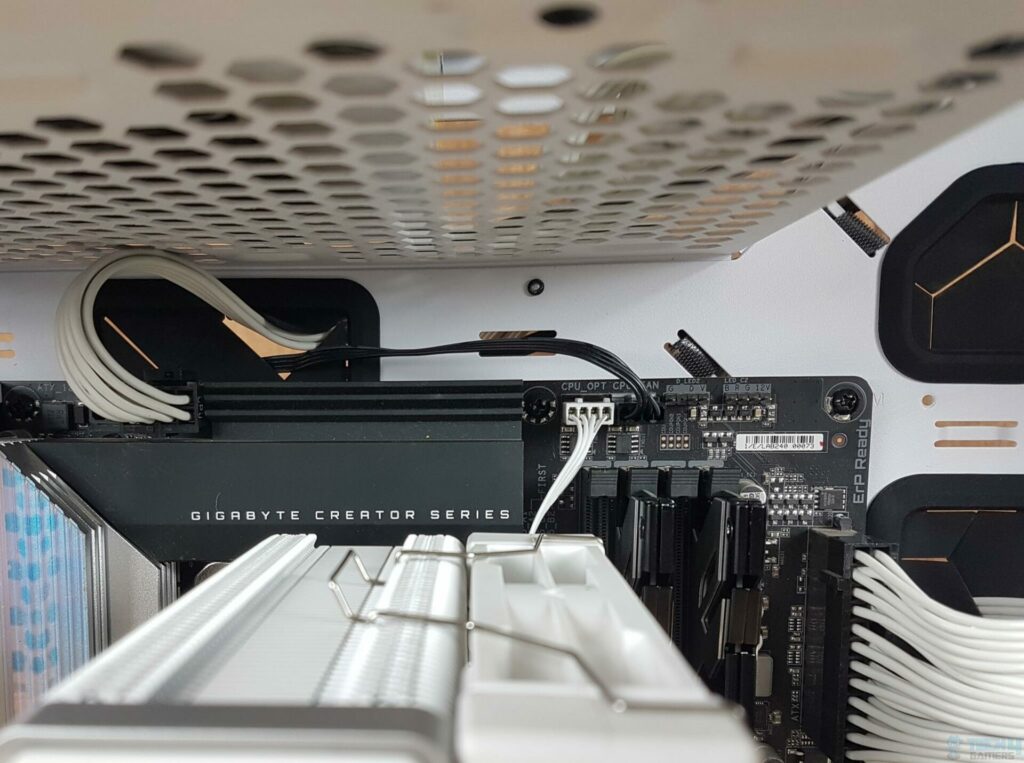
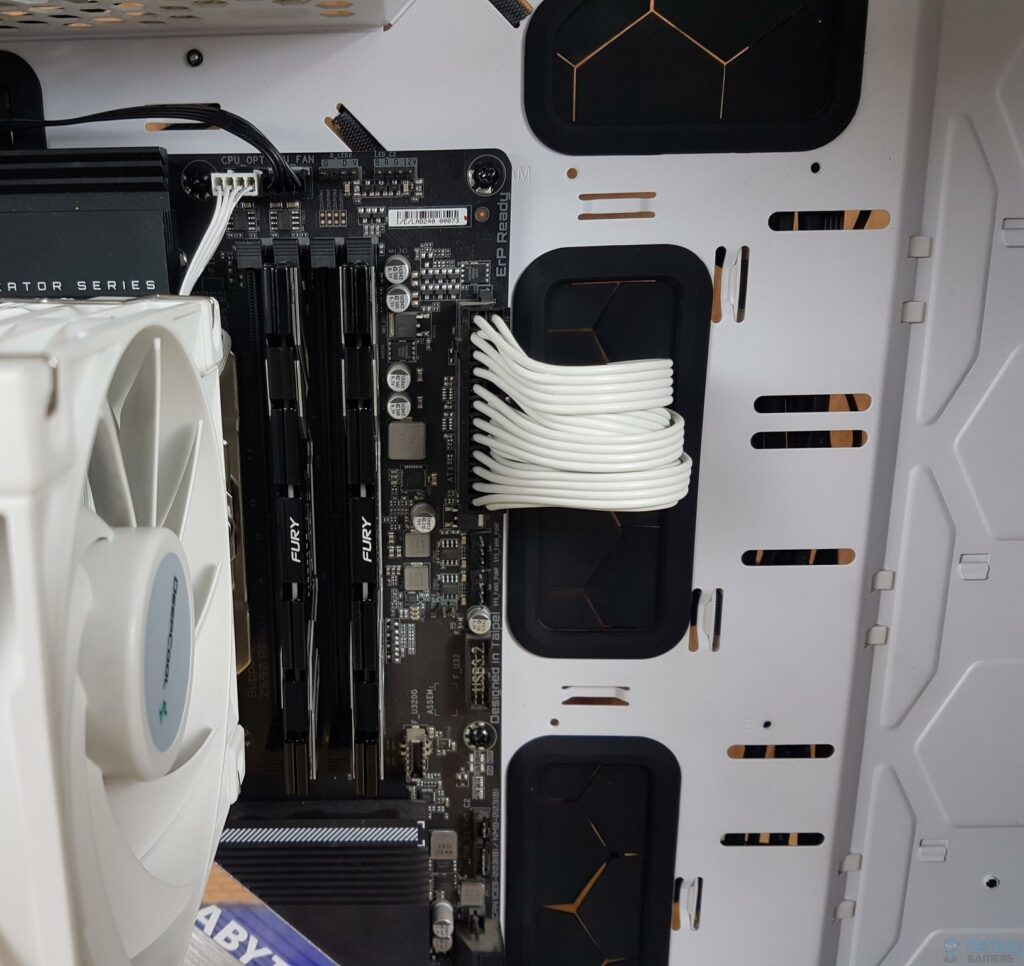
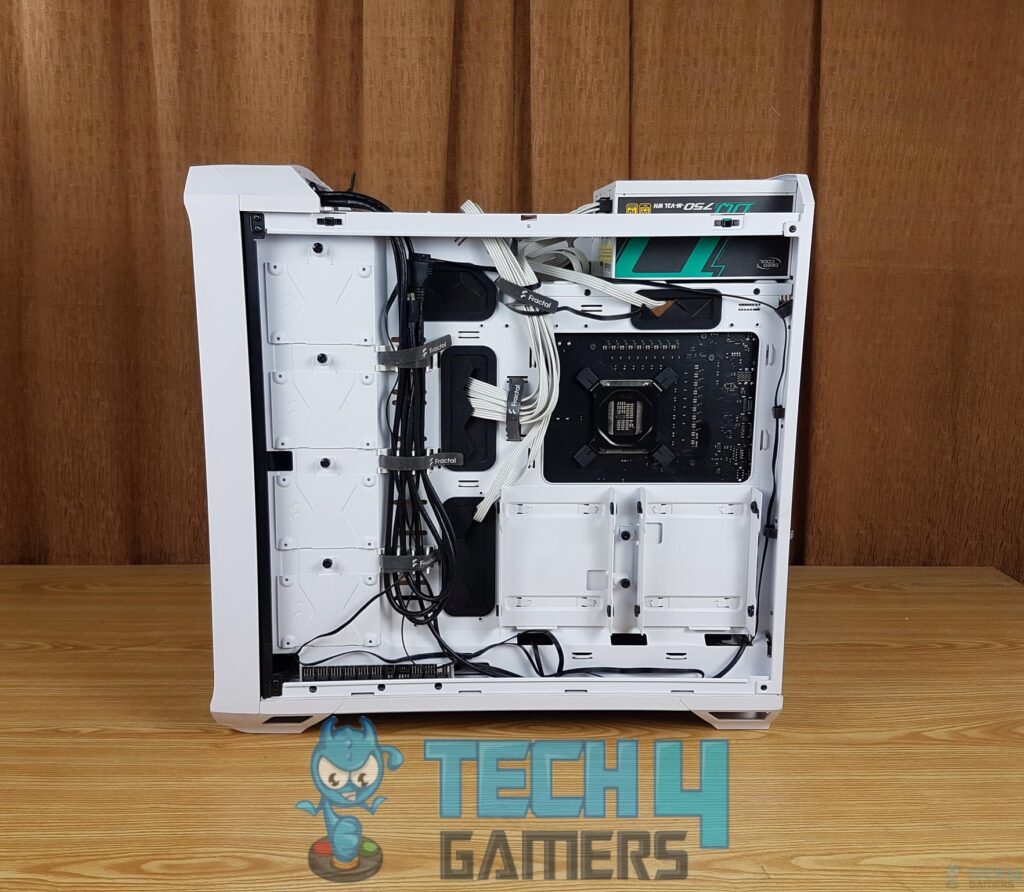
When building the rig, I used velcro straps and zip ties to manage the cables properly. First, group together the wires that seem to be going to the same place or near each other, then tie them up with a velcro strap or a zip tie and route them so that they neither block the airflow nor are they visible.Cable Management
Once the component installation is completed, install the preferred Operating System on your gaming PC. I chose Windows 11. To get your new gaming PC up and running, follow these steps.OS
The Maintenance Phase
Check all connections and components in the BIOS to ensure proper detection of RAM, storage, and other elements. Monitor temperatures and performance once everything is confirmed.
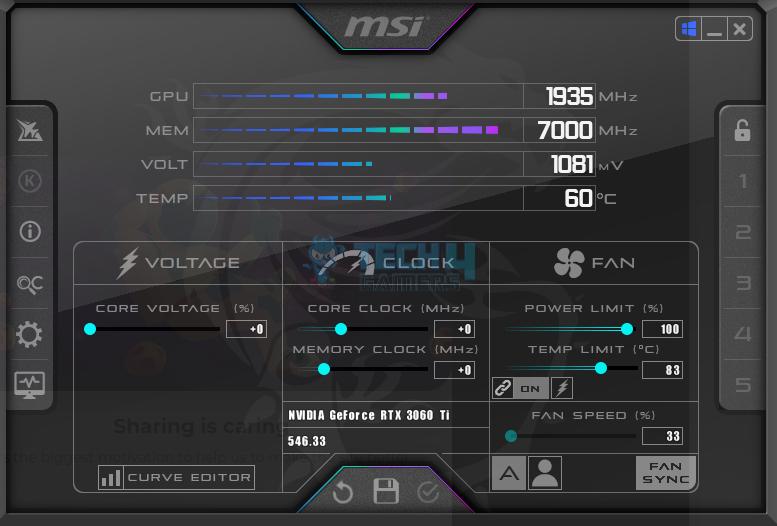
Monitor Thermals and Performance
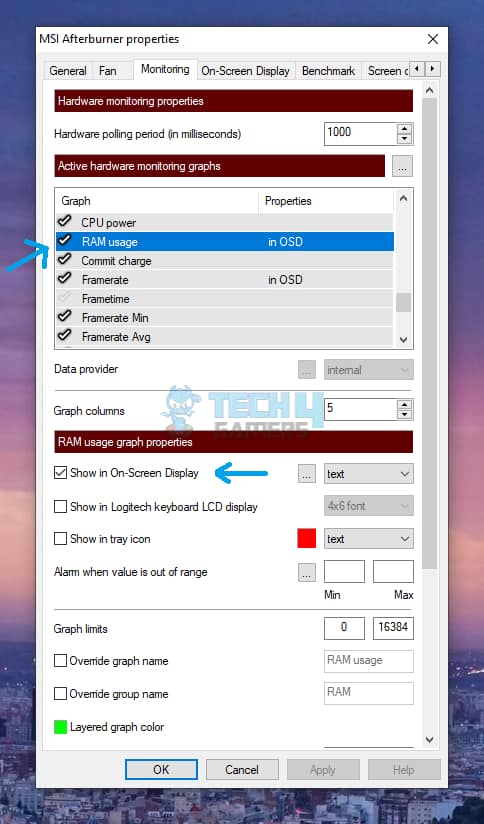
I use MSI Afterburner to monitor my PC’s thermals. Play a few games and notice the performance. If your PC faces thermal problems, it might be due to improper air cooler installation. Recheck whether it’s seated correctly and whether the thermal paste is adequate. Additionally, follow the techniques to lower GPU and CPU temperatures.
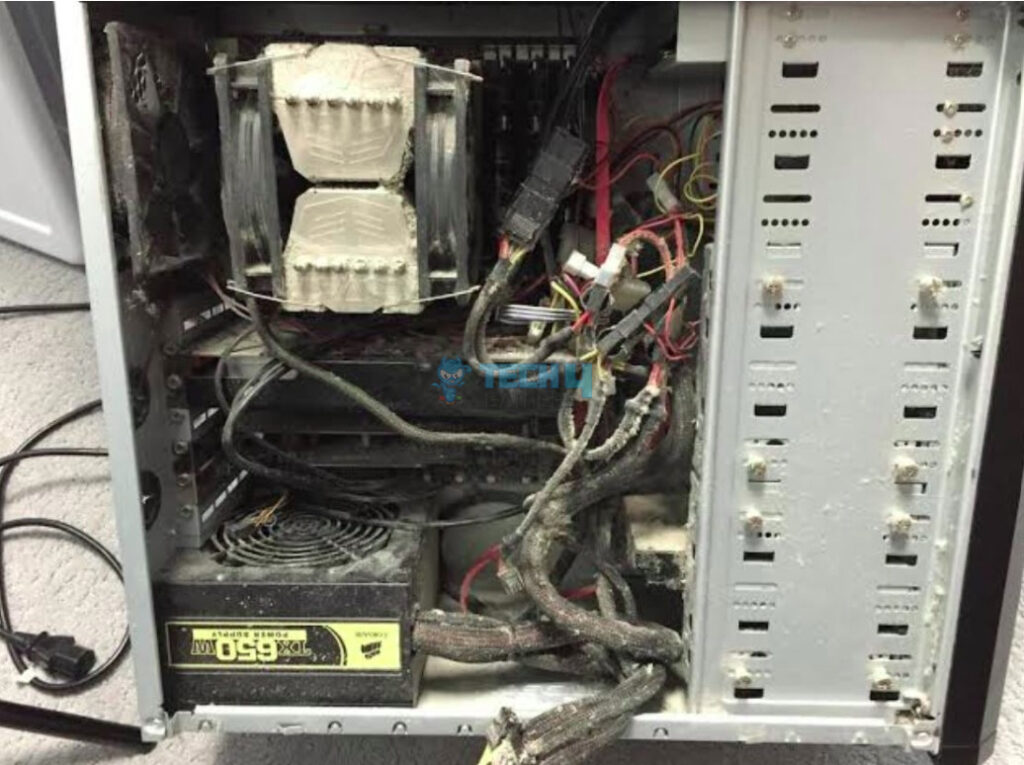
Cleaning
Dust accumulation on the motherboard and components can trap heat and hinder airflow, impacting system performance over time. Regularly clean the PC and its components, like PC fans and motherboard, to maintain optimal conditions.
Final Words
From gathering the components to putting them together and testing their performance, building a gaming PC was challenging, but the above process was very helpful in ensuring I built my setup without many problems. Using my knowledge and expertise around PC building, I picked the latest components to keep my PC in line with the most recent technology, so if you have a good budget, I suggest that’s what you should do as well if going for a custom gaming PC.
Frequently Asked Questions
Building your setup allows you creative freedom and is cheaper; however, it requires skill and knowledge.
Inexpensive components do not function as well as expensive ones. Check what CPU is compatible with your build at your price point.
I recommend you avoid purchasing secondhand builds as they are more prone to issues.
More About Gaming PCs:
- How To Build A White Gaming PC in 2024
- How Long Do Gaming PCs Last? [Full Guide]
- How Much Does A PC Weigh? [Gaming PC Weight]
- Gaming PC Power Usage: How Much Is Required?
Thank you! Please share your positive feedback. 🔋
How could we improve this post? Please Help us. 😔
[Wiki Editor]
Ali Rashid Khan is an avid gamer, hardware enthusiast, photographer, and devoted litterateur with a period of experience spanning more than 14 years. Sporting a specialization with regards to the latest tech in flagship phones, gaming laptops, and top-of-the-line PCs, Ali is known for consistently presenting the most detailed objective perspective on all types of gaming products, ranging from the Best Motherboards, CPU Coolers, RAM kits, GPUs, and PSUs amongst numerous other peripherals. When he’s not busy writing, you’ll find Ali meddling with mechanical keyboards, indulging in vehicular racing, or professionally competing worldwide with fellow mind-sport athletes in Scrabble. Currently speaking, Ali’s about to complete his Bachelor’s in Business Administration from Bahria University Karachi Campus.
Get In Touch: alirashid@tech4gamers.com


