 Threads

From selecting components to putting them together like Legos, it is always fun to build a PC. However, you must avoid a few PC building mistakes to prevent components from getting damaged. For instance, you need to ground yourself to not short anything.
Many first-time builders make many mistakes, which can cost a ton of time and money. To help you avoid them, we have compiled a list of the most common PC-building mistakes beginners will likely make.
Let’s dive right in!
Key Takeaways
- Always buy a reliable PSU that provides the required wattage. Also, you should make sure the components you’re purchasing are compatible.
- Assemble the PC on a large and suitable surface. Place the IO shield and the standoff screws in the casing first.
- Make sure you’re installing the CPU correctly. Apply the right amount of thermal paste and remove the plastic cover on the heatsink. Also, always install the RAMs in the right DIMM slots correctly.
- Install the fans in the right orientation to provide good airflow. Make sure you have plugged everything in. Always connect the display to the GPU, not the motherboard.
- Once your PC is up and running, monitor the temperatures for abnormalities. Also, holding on to your component’s boxes and warranty cards is best.
PC Building Mistakes To Avoid
Following are some mistakes you must avoid while building your PC:
Cheaping Out On The Power Supply
When building a budget PC, you can cut costs here and there. But you must never buy a low-quality PSU to save a few bucks.
By saying, “Never cheap out on the power supply”, we don’t mean that you should buy the highest-end PSU available on the market; we mean that you should go for an affordable PSU from a reliable brand that can provide adequate power for your components.
Before purchasing a PSU, it is always best to estimate how much power your PC will need, and then you can select a PSU that can provide a little over that required power.
Many power supply calculators, such as CoolerMaster and OuterVision, are available online. These calculators can estimate the wattage the PSU you’re looking for should provide.
Buying Incompatible Components
Buying incompatible components is another rookie mistake a first-time PC builder will likely make. For instance, you should not buy DDR3 RAMs with a motherboard that supports DDR4 because that would be incompatible.
Building a virtual PC with your components on sites like PCPartPicker is best to avoid such issues. This will tell you whether the selected components are compatible.[1]
Another thing to consider is ensuring your selected PC parts don’t bottleneck. A bottleneck happens when there is a huge performance difference between your components.[2] Hence, the higher-powered component won’t work to its fullest.
For instance, if you pair a 3080Ti with an i5-3470 processor, the GPU will not perform to its full potential because of a bottleneck. You can use an online bottleneck calculator to look for bottleneck issues.
Not Building On A Suitable Surface
Once you have got everything together, a common mistake you might make is assembling your PC on a small, uneven, or overall unsuitable surface. If you don’t want to lose anything, keeping everything organized on a large, clear surface is best.
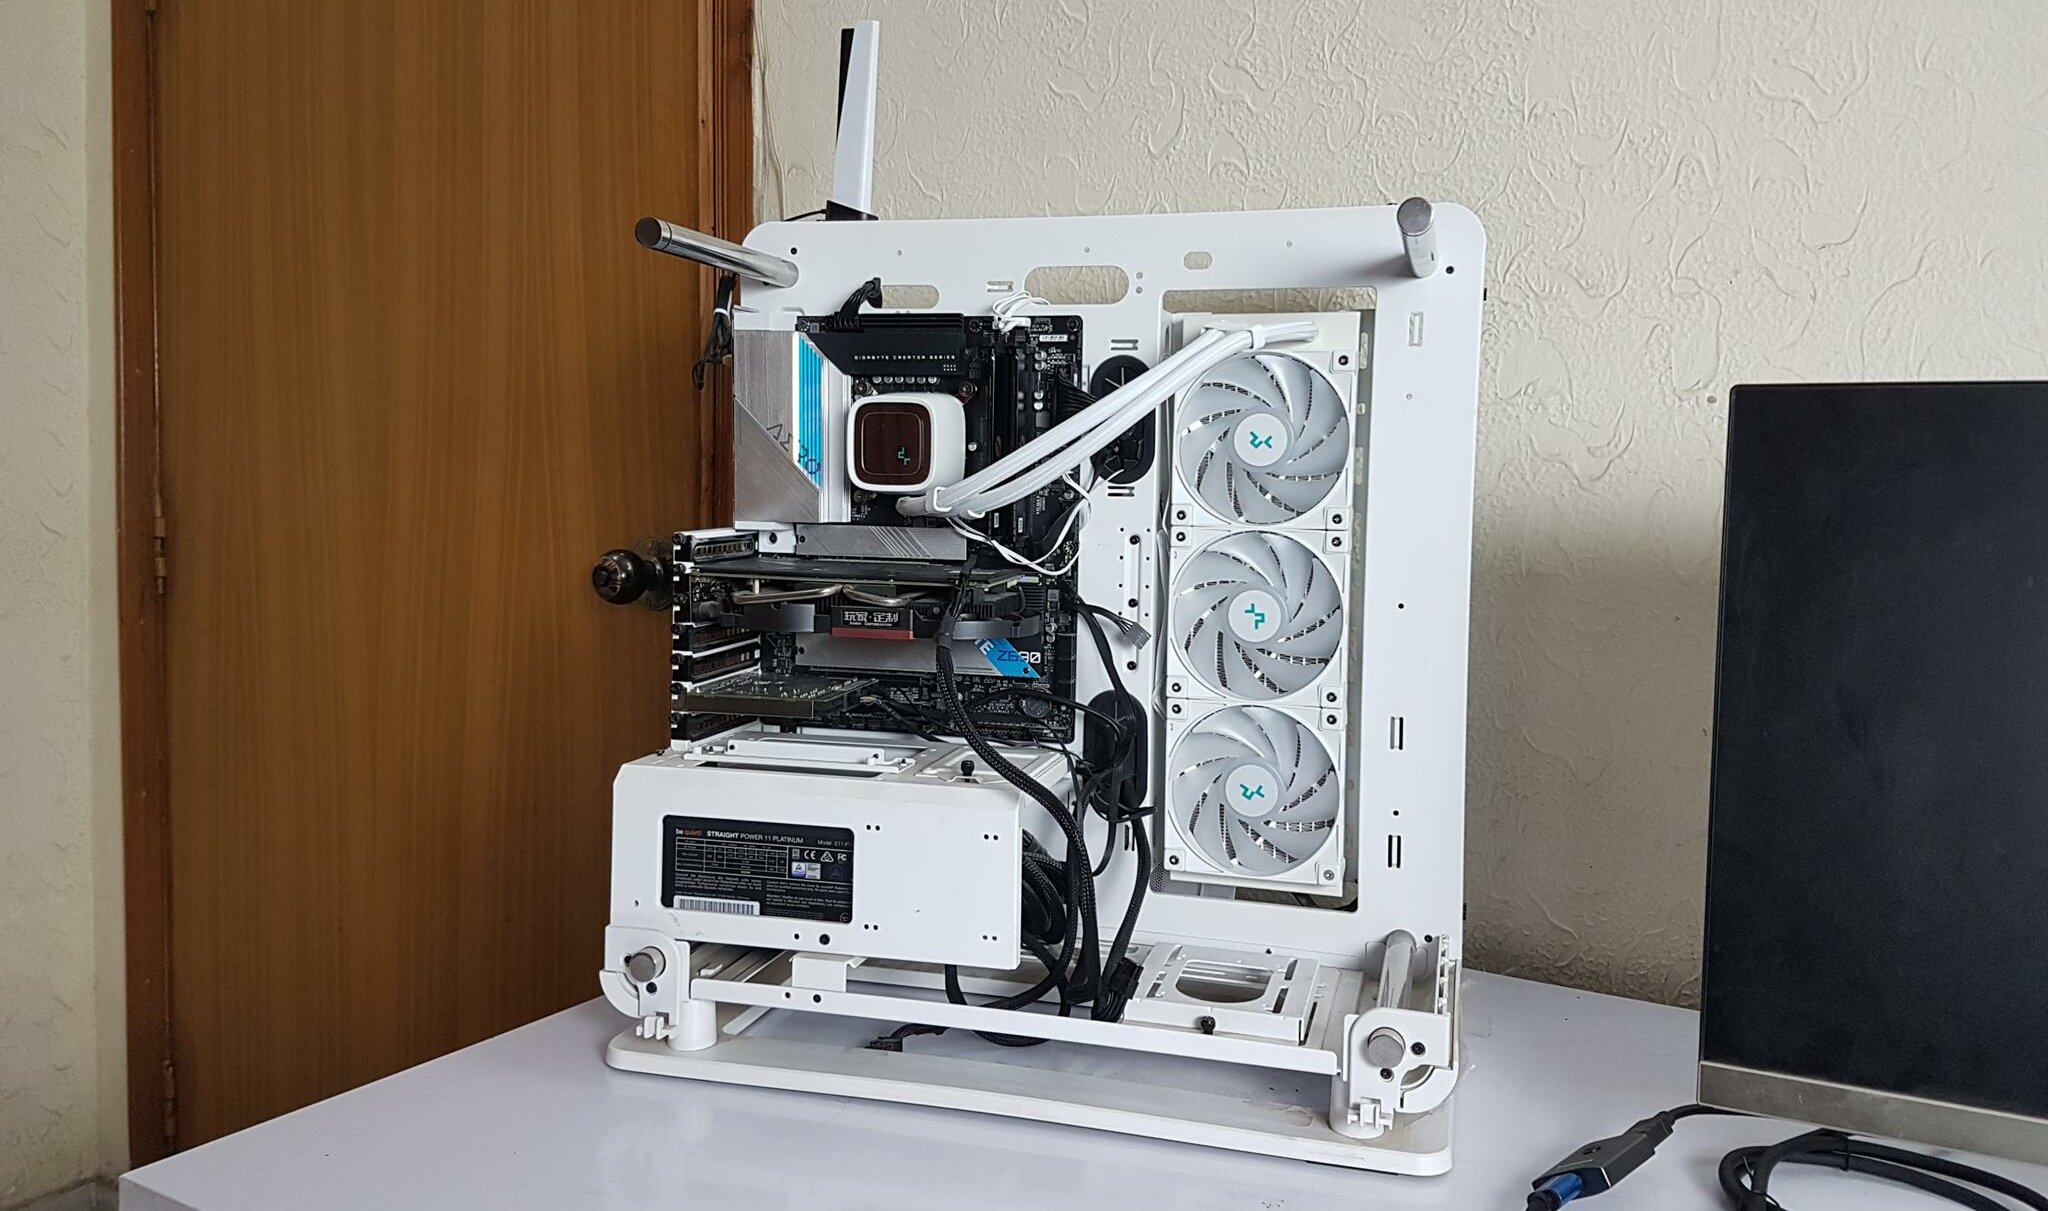
When assembling your PC, you should never put any component on a metal or conductive surface. Because once powered on, the metal surface can fry the electronics. Additionally, it is best to build your PC or at least place your motherboard on an anti-static foam. Otherwise, simply wearing an anti-static wristband can also be a safer choice.
Forgetting The IO Shield
One of the most common PC-building mistakes is forgetting the IO shield. You will find one in your motherboard’s box. This IO shield must be installed BEFORE mounting the motherboard on the PC case.[3]
An IO shield is an important part of your PC; it prevents the motherboard from collecting dust and protects it against EMI and static discharge. When building a PC, it is very common to forget the IO shield, and by the time you realize its absence, the motherboard might already be mounted on the case.
Once the motherboard is mounted, there might not be enough room to install the IO shield, so you must remove the motherboard again. That’s why it’s best to install the IO shield on the casing as soon as you unbox the motherboard.
Forgetting The Motherboard Standoff Screws
Another beginner mistake that many builders make is forgetting to install the standoff screws. These standoff screws create a space between the motherboard and the PC casing.
The space is necessary so your motherboard does not directly touch the case’s metal surface, protecting it against short circuits and other electrical damage. If you don’t know where to install them, then align your motherboard with the casing and screw the standoffs in the case’s holes.
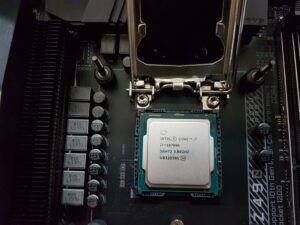
Incorrectly Installing The CPU
Once you have the case equipped with the IO shield and the standoff screws, it’s time to start installing components to the motherboard.
The first part you’re likely to install is the CPU, and before you do so, it’s best to keep in mind that CPUs and computer parts, in general, are quite fragile. So, you must keep a gentle hand because mishandling can cost you a lot.
Many novice PC builders end up incorrectly installing the CPU, which can bend its pins and render it useless. First, you should not hold the CPU from its top or bottom; the correct way to hold a CPU is from its sides.
After that, when inserting it in the socket, look for the marking on the chip’s corners. These marks will tell you how to line up the chipset with the socket.
Once the CPU’s markings align with the motherboard’s markings, you can install the CPU.
Applying Too Much Or Too Little Thermal Paste
Once you have the CPU in place, you will apply thermal paste. Many beginners fear that they might apply too little thermal paste, so they do it too much. Which, in turn, can have an opposite effect where your CPU’s thermals don’t perform as well.
Similarly, applying too little thermal paste is also not good. The lack of thermal paste will cause the heatsink to perform ineffectively, resulting in high temperatures.[4]
As a general rule, you should apply thermal paste equivalent to the size of a grain of rice in the middle of your CPU.[5] The heatsink will then spread the thermal paste evenly across the chipset.
Forgetting To Remove The CPU Cooler’s Plastic Cover
Before installing the CPU cooler, you need to remove the plastic cover on the heatsink. Most CPU coolers come with this cover, usually labeled “remove before use.”
Without removing this cover, your CPU cooler will not touch the thermal paste, so it will not cool anything. The plastic cover will soon melt due to the heat from the processor, and having molten plastic on your CPU is never a good thing. Also, on CPU coolers and forgetting things, always connect the power cable to the motherboard.
The cable must be wrapped around the cooler fans and connected to a port near the CPU socket labeled “CPU FAN” or something similar.
If you cannot find the connector, refer to the manual with the motherboard.
Incorrectly Installing The RAM
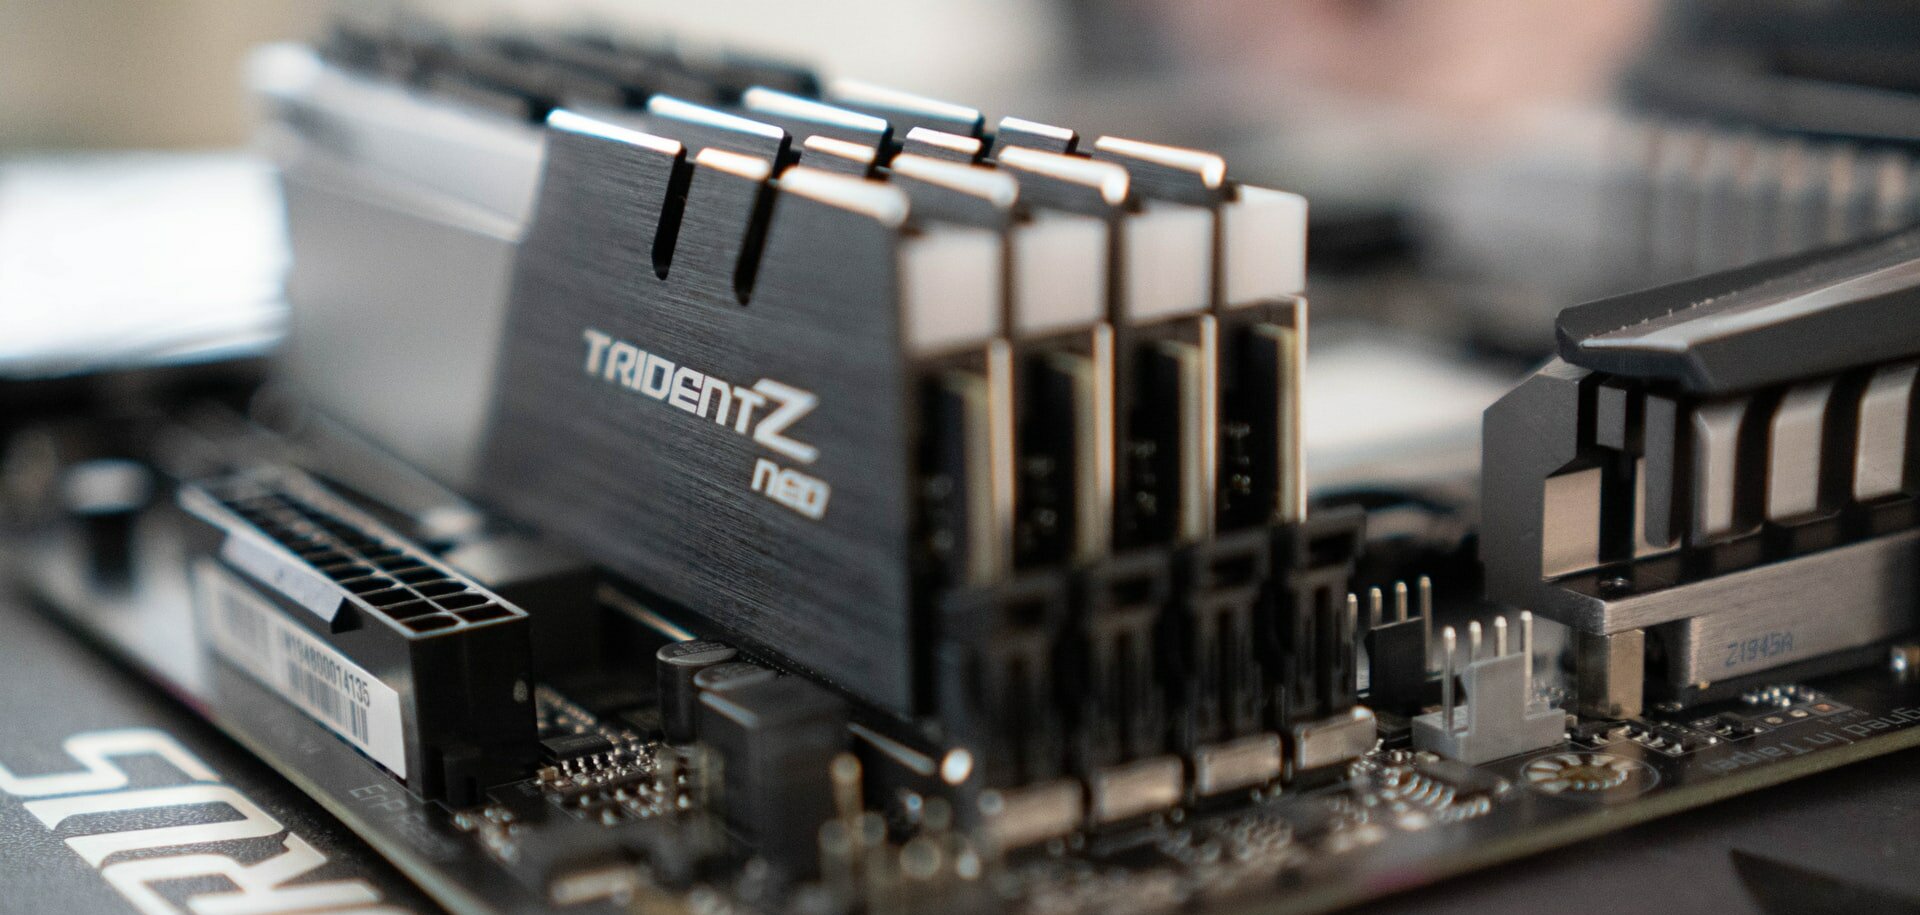
If this is your first time building a PC, you will likely make this mistake. You might be thinking, how is this difficult? There are four RAM slots, and I have two RAMs. I can insert them in the slots, and the work is done.
Well, first of all, you cannot insert the RAMs into just any slot. You must go through the motherboard’s manual to see which slots to populate first with dual-channel memory. In most cases, the RAMs should be installed in alternate slots. Similarly, the RAM should be installed in the slot furthest from the CPU socket for a single memory stick.
It is highly recommended that you check the motherboard’s manual for more information about the RAM slots.
Many users also find it difficult to install the RAMs correctly, apart from inserting them in the wrong slots. If you look closely, you will notice that the pins on the RAM stick and the slot are split 60/40. Once the RAM is properly installed, you will hear two clicking sounds.
Not Installing Case Fans The Right Way
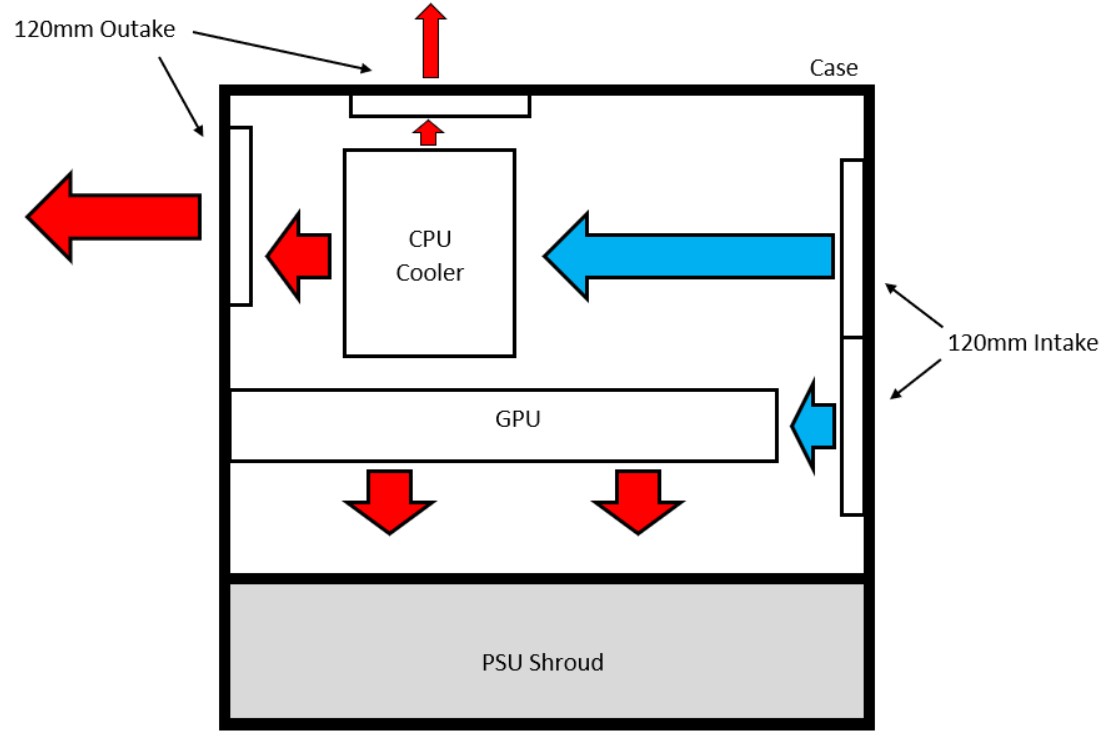
Many don’t know this, but poor airflow is one of the major PC building mistakes, causing issues like reducing your motherboard’s lifespan, due to overheating. Having good airflow, a liquid-cooling system is an excellent option.[6]
If your PC case has pre-installed fans, you shouldn’t worry about making this mistake. However, if you plan to install your fans, you should pay attention to how you orient them, as it can make or break your PC’s airflow.
You should remember that hot air rises from the bottom towards the top, while most heat-generating components are placed at the back of your casing.
So, as a general rule of thumb, it’s best to install the fans that will suck cool air from the room at the front and the bottom of the PC and install the fans that will blow out the hot air from the PC to the surroundings at the back and the top.
Forgetting To Plug In Everything
It might sound obvious initially, but many people forget to plug in a cable or two, preventing their PC from powering on. This mistake is extremely frustrating because once you have put everything together and something does not seem to work, you must trace back which cable you forgot to plug in.
In addition, if another component hides the connector or the port, you must remove it to fix the mistake. That’s why ensuring every component is correctly plugged in before you finish your build is necessary.
You can create a paper checklist to list everything you need to plug in and everything you have already plugged in. For starters, ensure the CPU, the motherboard, and the GPU are plugged in with the power supply. You also need to connect the front I/O panel, the CPU fans, the RGB lighting (if you’re using them), and much more.
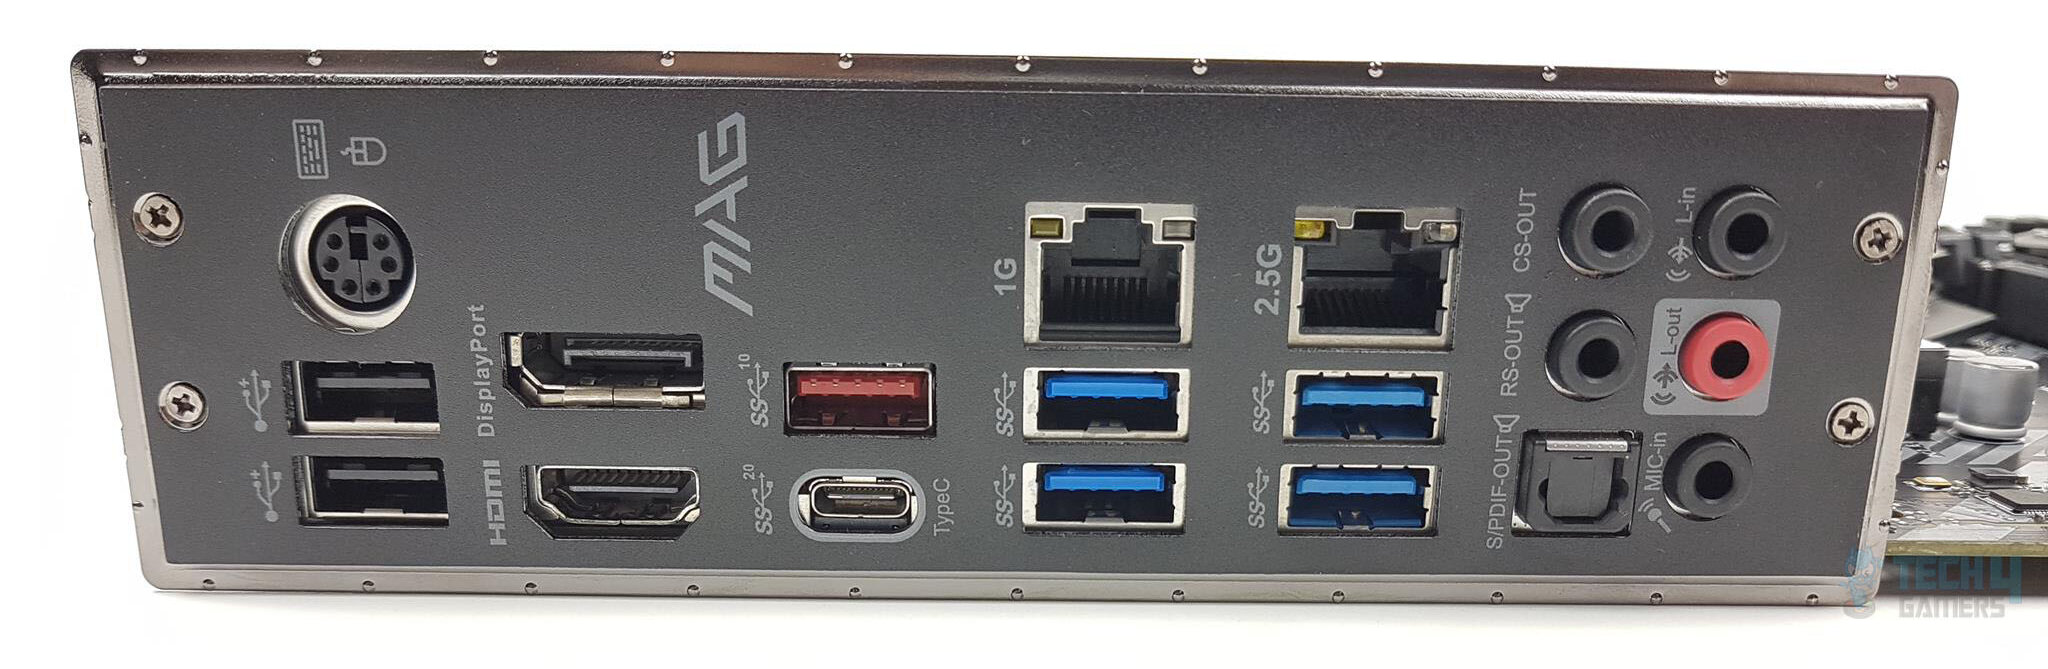
Plugging The Display To The Motherboard
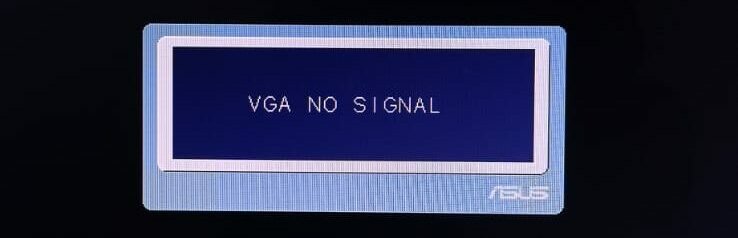
You assemble your entire PC, plug everything in, and finally boot it up. You hear your fans spinning, and everything boots up, but there is no display. This is one of the most common issues that novice PC builders run into, and the solution is quite simple.[7]
It happens because you plug your monitor into the display port of the motherboard instead of the GPU. So, everything will boot up, but your monitor will show nothing except the “No Signal” box.
Even if your monitor works and starts displaying, you will notice a significant lack of performance because your PC uses the CPU’s integrated graphics, not the dedicated one.
To avoid this mistake, plug the monitor into the display port of the graphics card.
Not Monitoring Temperatures
Many new builders don’t monitor the temperatures once the build is up and running. This mistake can be very costly if something wrong with the PC doesn’t show up immediately.
For instance, your CPU might run too hot because the cooler is not installed properly. So, it’s best to monitor the temperatures after building a PC. You can use software like Speccy, MSI Afterburner, and HWMonitor.
It is recommended that multiple software programs be used to monitor the temperatures, as it is common for them to bug out and show inaccurate readings.
Throwing Away Boxes And Warranty
It is always best to keep the warranty cards and the boxes. Everything might work perfectly for now, but you don’t know whether your GPU will encounter issues shortly.
Many users make the mistake of throwing away their component’s boxes and warranty. Apart from the warranty, you should still hold on to the boxes if you plan to resell the components.
Final Words
These were some PC-building mistakes that you should avoid. Everybody learns from mistakes; you’re likely to make many of them if it is your first time building a PC. However, it is best to research as much as possible to avoid any mistakes that might cost you a lot.
More Helpful Resources By Tech4Gamers:
- The Steps To Install IO Shields Correctly
- How Much Does It Cost To Ship a PC? [2024]
- Why Are PC Parts So Expensive Right Now? [2024]
- How Much Is My PC Worth? [Valuation Guide]
- Wall-Mounted PC: Everything You Need To Know
- How Long Does it Take to Build A PC? [SOLVED]
References:
-
NYC Data Science Academy. Value-based PC Part selection. Retrieved from https://nycdatascience.com/blog/student-works/r-shiny/value-based-pc-part-selection/
-
Diva. Performance Anomaly Detection and Bottleneck Identification. Retrieved from https://umu.diva-portal.org/smash/get/diva2:839537/FULLTEXT01
-
Leolabs.org. Building an Ivy Bridge Hackintosh – The Build. Retrieved from https://leolabs.org/blog/hackintosh-2/
-
Can Bad or Low-Quality Thermal Paste Cause Overheating? (Solution to Fix It!). Retrieved from https://koolingmonster.com/insights/can-bad-or-low-quality-thermal-paste-cause-overheating-solution-to-fix-it
-
How does heat sink compound (thermal paste) work. Retrieved from https://www.chemtronics.com/how-does-heat-sink-compound-thermal-paste-work
-
University of South Carolina. Liquid Cooling System for a High Power, Medium Frequency, and Medium Voltage Isolated Power Converter. Retrieved from https://scholarcommons.sc.edu/cgi/viewcontent.cgi?article=8381&context=etd
-
ASUS. Need Help No VGA Signal?! Retrieved from https://rog-forum.asus.com/t5/hardware-build-advice/help-with-monitors-vga-no-signal/td-p/377938
FAQs
It is always best to install the CPU first, after that, apply the thermal paste, then install the cooler, and then move on to installing RAMs. Sometimes, the cooler can make it difficult to install RAMS. So, you might have to install the RAMs first.
Start by reapplying the thermal paste. If that doesn’t lower the CPU temperatures, then might have to invest in a good CPU cooler. Also, make sure that your casing fans are placed correctly to provide good airflow.
Thank you! Please share your positive feedback. 🔋
How could we improve this post? Please Help us. 😔
[Wiki Editor]
Ali Rashid Khan is an avid gamer, hardware enthusiast, photographer, and devoted litterateur with a period of experience spanning more than 14 years. Sporting a specialization with regards to the latest tech in flagship phones, gaming laptops, and top-of-the-line PCs, Ali is known for consistently presenting the most detailed objective perspective on all types of gaming products, ranging from the Best Motherboards, CPU Coolers, RAM kits, GPUs, and PSUs amongst numerous other peripherals. When he’s not busy writing, you’ll find Ali meddling with mechanical keyboards, indulging in vehicular racing, or professionally competing worldwide with fellow mind-sport athletes in Scrabble. Currently speaking, Ali’s about to complete his Bachelor’s in Business Administration from Bahria University Karachi Campus.
Get In Touch: alirashid@tech4gamers.com


