 Threads

When building a PC, you might run into many parts you don’t know about. It can be an alien cable or an unheard port, which will make you scour the Internet and skim the instruction manual.
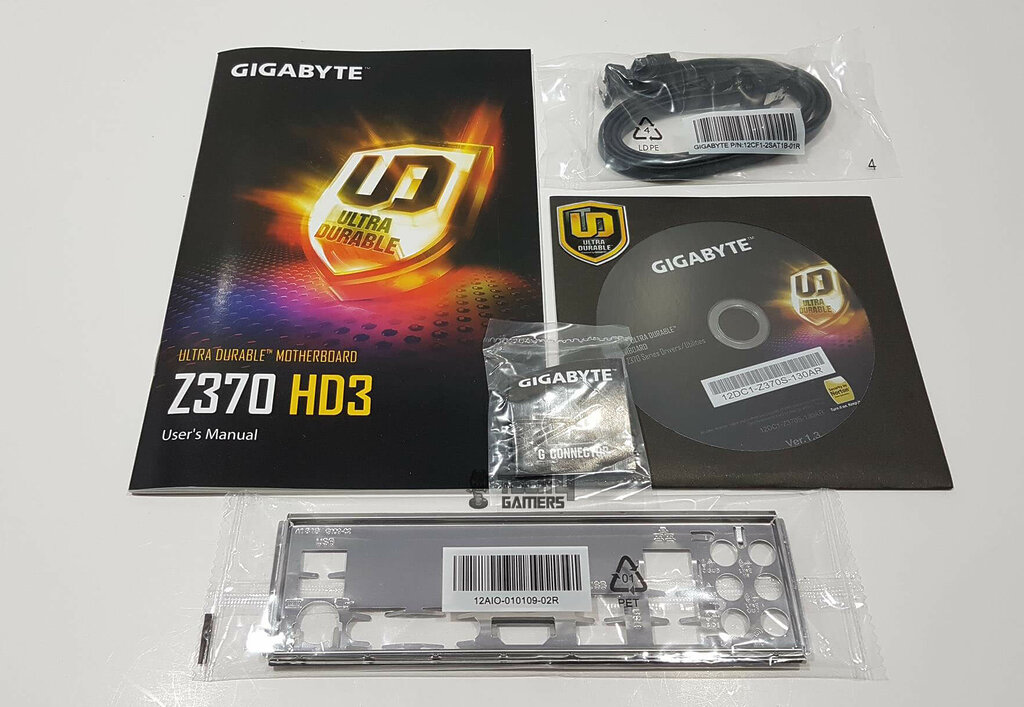
Similarly, you might also find a metal plate along with your motherboard. It has cutouts for all the different ports and sharp prongs around them. This plate you’re looking at is an IO shield. Now if you don’t know what an IO shield is or how to install it, then worry not, as this guide will cover everything there’s to know about it.
Let’s get started!
Key Takeaways
- An IO shield is a metal plate that comes with your motherboard. It protects the motherboard against EMI and static discharge.
- It also blocks off any dust or moisture that might be getting into your PC.
- First, you need to remove the old IO shield. After that, the IO shield should be found in the right orientation by aligning it with the motherboard. Finally, place the IO shield in the hole and push it in. If needed, bend the prongs so they can touch the ports.
What Is An IO Shield?
Almost all cases, every motherboard comes with a metal plate called the IO shield. As the name suggests, it shields the input/output ports of the motherboard[1].
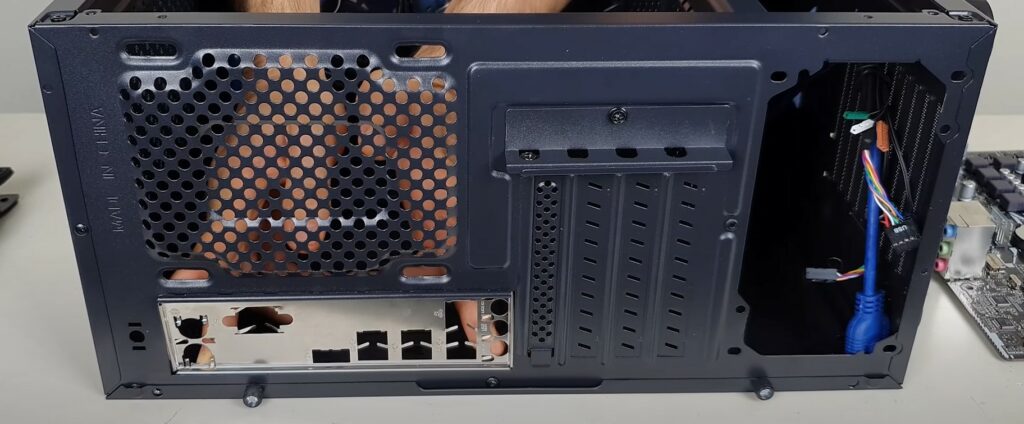
The hole at the back of your PC case is where the IO shield is installed, a crucial step before fixing the motherboard. If you skip this step initially, you’ll likely need to remove the motherboard later to install the IO shield, which can be quite inconvenient. Installing the IO shield right after unboxing everything is recommended to avoid this hassle.
Uses of An IO Shield
IO shields were originally used to protect analog computers from electromagnetic interference from external components[2]. Well, everything has gone digital today, and even though your computer will probably not get any EMI, it is still best to use an IO shield. Besides that, since an IO shield is installed on the PC casing, which the PSU grounds, it can also protect your motherboard against static discharge from your fingers.
Additionally, an IO shield also protects your computer from tons of dust[3]. Just imagine, for a second, without an IO shield, the back of your casing will have a huge hole from which you can see inside your casing, and a lot of dust will get inside from that hole.
Not just dust, a huge hole right at the back of your casing will also invite all sorts of insects and bugs, which can get messy. So, it’s best to install an IO shield to protect your PC.
How To Install An IO Shield
Now that you know what an IO shield is and its usefulness, you should also learn how to install it on the PC case. The process is not difficult at all, and if you plan to build your entire rig by yourself, installing an IO shield should be a cakewalk.
Remove The Old IO Shield
If your case has an old IO shield already installed and your new motherboard comes with its own IO shield, then you should remove the old one from the case first. Using the old IO shield with a new motherboard may cause compatibility issues when installing the motherboard in the case.
So, to remove the old IO shield, gently press it from outside the case until it clicks and falls inside. You can apply more pressure if needed until it comes out completely.
Find The Right Orientation And Bend The Prongs
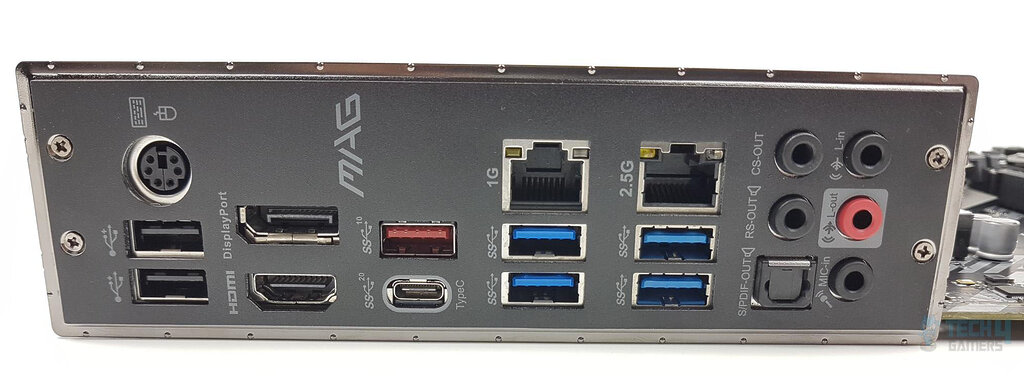
Before installing the new IO shield, it is best to align it correctly with the motherboard to find the right orientation[4]. Ensure each port cut-out aligns perfectly with its respective port, leaving no ports blocked by the IO shield. This step helps avoid installing the IO shield upside down, which would not work.
You may notice prongs around the port cut-outs when aligning the IO shield[5]. These prongs ground the ports to protect the motherboard from static discharge. It’s advisable to bend these prongs before installing the IO shield.
Align the IO shield and the motherboard precisely, then push the motherboard forward so the ports fit through the IO shield’s cut-outs. Bend the prongs to ensure they make contact with the ports, with larger prongs touching the top of the ports and smaller ones touching them directly.
Once done, you can start installing the IO shield on the case.
Install The IO Shield
To install the IO shield:
- First, make sure the case is placed on a flat surface and it will not move when you’re installing the IO shield.
- With its right orientation, place the IO shield in its place on the case from the inside.
- Once placed, you need to fit it correctly. So, gently push the shield by applying equal force to each corner one by one.
- You will hear lots of clicking noises, that’s the sound of the IO shield sitting in its place.
You might notice that the entire installation process was not difficult at all. In fact, compared to the rest of the build, the IO shield is one of the easiest parts to install. However, once it is in its place, you must ensure it is installed correctly.
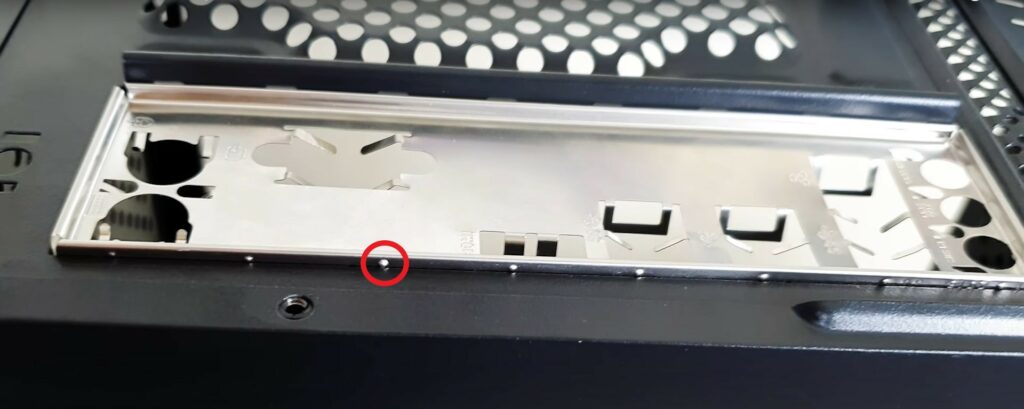
Notice that there are little metal bumps around the entire IO shield. If installed correctly, these bumps will be visible from inside the case. On top of that, you can also apply just a little force on the IO shield to try to move it. If it wiggles, then it means it is not installed correctly.
Make sure the IO shield is sturdy when in place because otherwise, the motherboard ports will not align perfectly with their respective cut-outs.
What To Do When IO Shield Is Not Installed Correctly
If there is not enough room to work with and installing the IO shield is challenging, removing the rear exhaust fan from the case can provide more room. To remove the rear exhaust fan on the casing, you have to unscrew the fan, and it will come out on its own.
Similarly, after installation, if you find that the IO shield is wiggling a lot, then:
- Place the case down so the IO shield lines up with the table.
- Next, put the motherboard inside the case and align its ports with the port cut-outs on the IO shield.
- Gently push the motherboard to bring the ports out of their respective cut-outs. Bend the prongs again if needed to make sure they are touching the ports.
- Finally, start screwing the motherboard to install it in the motherboard.
After following these steps, you will notice that the IO shield no longer moves around.
How Important Is An IO Shield On Motherboard
You may wonder how important is an IO shield and what could go wrong if you don’t install one on your PC. Besides the basic protection against EMI and static discharges that can potentially fry your motherboard or at least its ports, the lack of an IO shield also exposes your motherboard to dust.
Over time, dust can build up over your motherboard, and thus it will begin to retain heat that can cause overheating problems. This can significantly reduce your motherboard’s lifespan[6]. On the other hand, to prevent this, you will have to clean your PC a lot. Maintaining and cleaning your PC regularly is a good thing, but the lack of an IO shield will increase the job to quite an extent.
Overall, having a huge hole on the back of your casing is never a good idea, Other than dust, it will also allow moisture and humid air to get in. So, when building your rig, it is highly recommended that you install an IO shield.
Summary
An IO shield is a metal plate that comes with your motherboard. It has port cut-outs so it can align with the motherboard perfectly. It protects the motherboard against EMI that might come from external components and against your finger’s static discharge
On top of that, the IO shield also plays an important role in blocking any dust or moist air from getting into your PC. Installing an IO shield is not difficult at all. You just have to do is find the right orientation and then place it in the hole by pushing it.
Related Helpful Resoures By Tech4Gamers:
- HDMI On Motherboard Not Working [SOLVED]
- Motherboard Form Factors
- Motherboard RGB Header
- PC Chipsets
- Can A Motherboard Bottleneck A GPU?
References:
-
-
-
What is an (input/output) I/O plate. Retrieved from https://www.lenovo.com/us/en/glossary/io-plate/?orgRef=https%253A%252F%252Fwww.google.com%252F
-
What is the purpose of an IO shield on a computer case. Retrieved from https://electronics.stackexchange.com/questions/9850/what-is-the-purpose-of-an-io-shield-on-a-computer-case
-
IO shield.docx – One of the most frequently asked questions. Retrieved from https://www.coursehero.com/file/91736842/IO-shielddocx/
-
E15379_ROG_CROSSHAIR_VIII_HERO_UM_WEB.pdf. Retrieved from https://dlcdnets.asus.com/pub/ASUS/mb/SocketAM4/ROG_CROSSHAIR_VIII_HERO/E15379_ROG_CROSSHAIR_VIII_HERO_UM_WEB.pdf
-
What’s with the metal “prongs” on this motherboard IO backplate. Retrieved from https://www.neowin.net/forum/topic/1168199-whats-with-the-metal-prongs-on-this-motherboard-io-backplate/
-
Does dust affect PC performance?. Retrieved from https://leeharveycomputing.co.uk/does-dust-affect-pc-performance/#
-
-
FAQs
Usually, every motherboard comes with its own IO shield. However, if you have lost yours, or if yours didn’t ship with one, then you can simply order it from eBay. It shouldn’t cost above $10.
If your case comes with a pre-installed IO shield, then check if it’s compatible with the motherboard you’re using. If it is, then simply screw in the motherboard, otherwise, take out the pre-installed IO shield and install your new IO shield.
Thank you! Please share your positive feedback. 🔋
How could we improve this post? Please Help us. 😔
[Wiki Editor]
Ali Rashid Khan is an avid gamer, hardware enthusiast, photographer, and devoted litterateur with a period of experience spanning more than 14 years. Sporting a specialization with regards to the latest tech in flagship phones, gaming laptops, and top-of-the-line PCs, Ali is known for consistently presenting the most detailed objective perspective on all types of gaming products, ranging from the Best Motherboards, CPU Coolers, RAM kits, GPUs, and PSUs amongst numerous other peripherals. When he’s not busy writing, you’ll find Ali meddling with mechanical keyboards, indulging in vehicular racing, or professionally competing worldwide with fellow mind-sport athletes in Scrabble. Currently speaking, Ali’s about to complete his Bachelor’s in Business Administration from Bahria University Karachi Campus.
Get In Touch: alirashid@tech4gamers.com


")

