

It can be quite a frustrating experience to find that the HDMI port on your motherboard is not working. No matter how much you try to connect your monitor, there’s simply no HDMI signal.
Well, before you head over to a PC repair shop and drop some big bucks on the diagnosis, follow along with this guide as we walk you through the several ways that can fix the HDMI port on your motherboard.
Key Points From The Article
If the HDMI port on your motherboard is not working, then:
- Make sure HDMI is selected as the monitor source.
- Inspect the HDMI cable and the ports for physical damage.
- Enable the integrated graphics of your CPU from BIOS or Device Manager.
- Update drivers and Windows.
- Roll back from the latest drivers and Windows updates.
How To Fix HDMI Not Working On Motherboard
Select HDMI As The Source
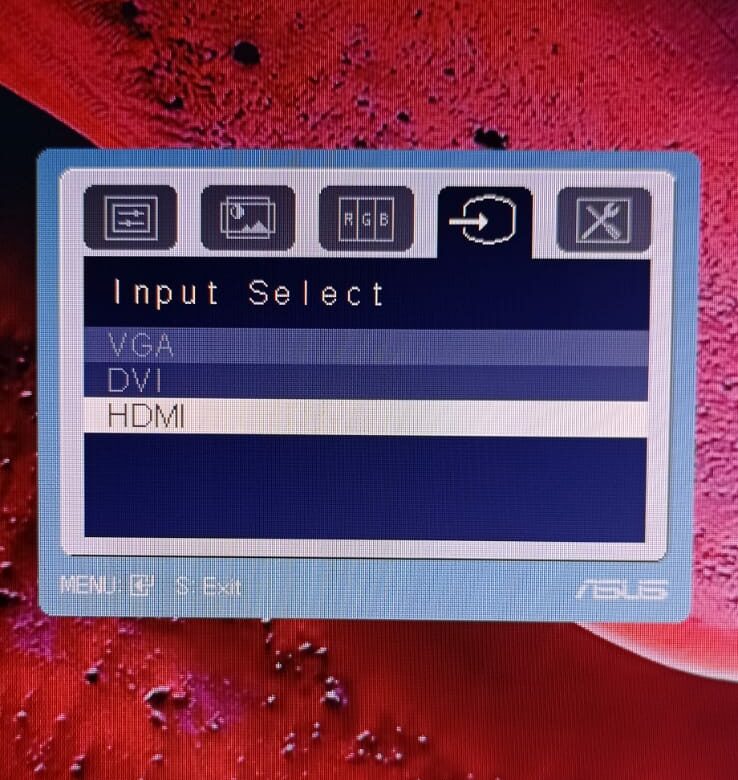
First, make sure HDMI is selected as the monitor’s source as this is the most common reason behind monitors not detecting their connected devices. If VGA, DVI, or any other display port is selected as the source, then you will not receive HDMI signal from your PC.
Inspect For Physical Damage
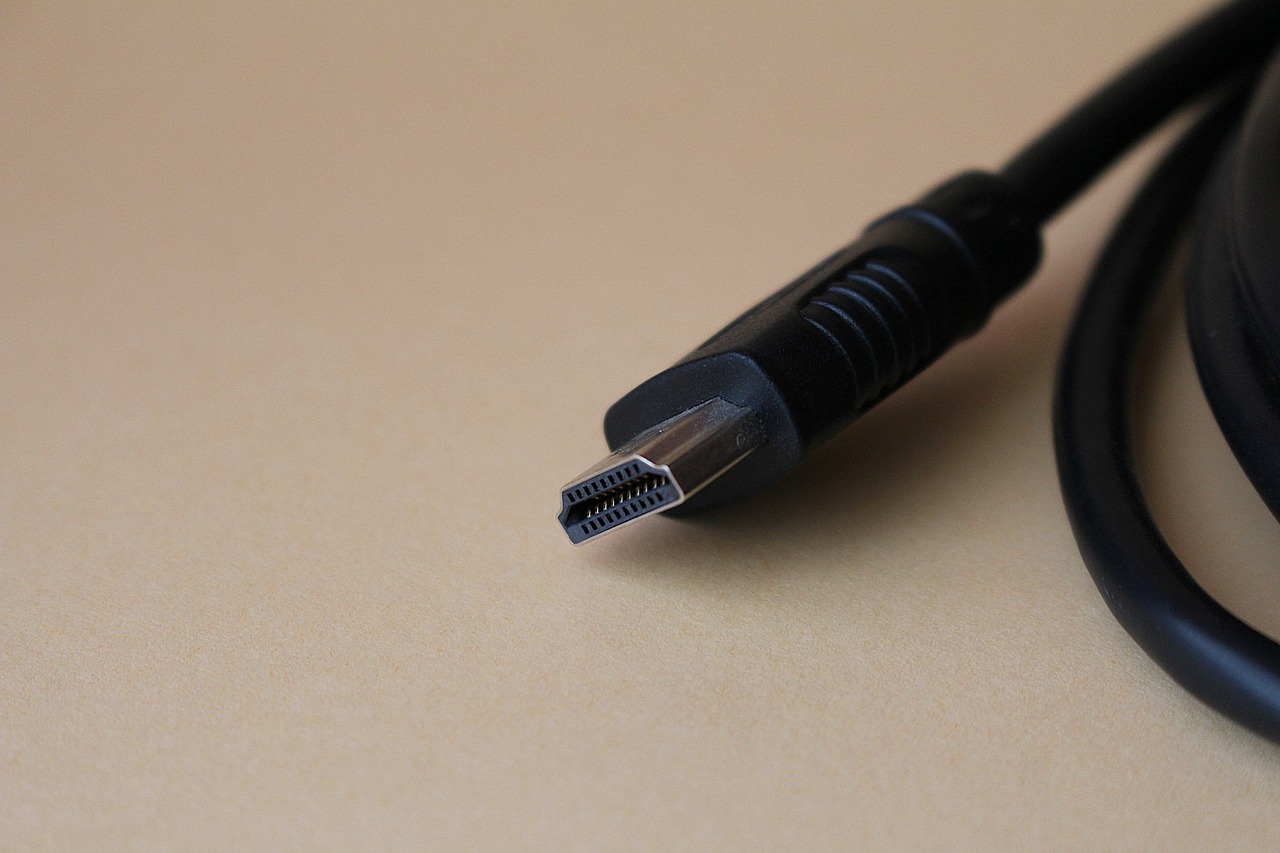
Before you start tweaking around with the BIOS and other settings, your monitor may not be detecting the PC due to physical damage to either the HDMI cable or the HDMI port on the motherboard itself.
Make sure the HDMI cable is working, and look for any bends or signs of wear and tear throughout the cable. Also, make sure both the male connections are inserted into the HDMI ports firmly and correctly. While you’re at it, you can also try to use a different HDMI cable just to be on the safe side.
If the HDMI cable is fine, then you need to look for any signs of physical damage to the ports themselves. First, pull out a flashlight and start examining the insides of the port. Check if the pins are bent or desoldered. If you find any sign of physical damage, then this is likely to be the cause behind the HDMI port not working on your motherboard.
From here, you can replace the board or send it for repairs. However, if you’re feeling lucky, then you can also try the rest of the fixes and maybe the HDMI port will start working.
Enable Integrated Graphics
First, make sure your CPU has an iGPU. For this, simply Google your processor and check if it has integrated graphics.
If you find that your processor does not have an iGPU, then you cannot use the HDMI port on the motherboard. Instead, you will have to use a dedicated GPU. However, if your processor has an iGPU, then you need to enable it.
You can do so either from the Device Manager or the BIOS. Keep in mind that for any software configuration, you will need to use your PC, and for that, you need a display. Well, you can borrow a dedicated GPU from your friend to start configuring your PC.
Here’s how to enable integrated graphics from the BIOS:
- First of all, restart your computer.
- The steps may be a bit different for your PC as the BIOS settings vary according to the motherboard. However, to open the BOOT menu in most motherboards, you need to press the ESC, F1, F2, F8, F12, or the Delete key.
- To navigate through the BIOS settings, you can use the arrow keys and the Enter key. First, you need to look for Graphics Configuration. You can find it under the Advanced -> System Agent Configuration. If you cannot find it, then head over to your CPU settings.
- After that, look for the option to enable the iGPU, Internal Graphics, iGPU Multi-Monitor, Integrated Graphics, or anything like that.
- Finally, exit the BIOS settings (most likely by pressing the ESC key) to restart your computer.
Similarly, here’s how to enable integrated graphics from the Device Manager.
- On the desktop, press the Windows key to bring up the search bar.
- Next, type “Device Manager” and press Enter.
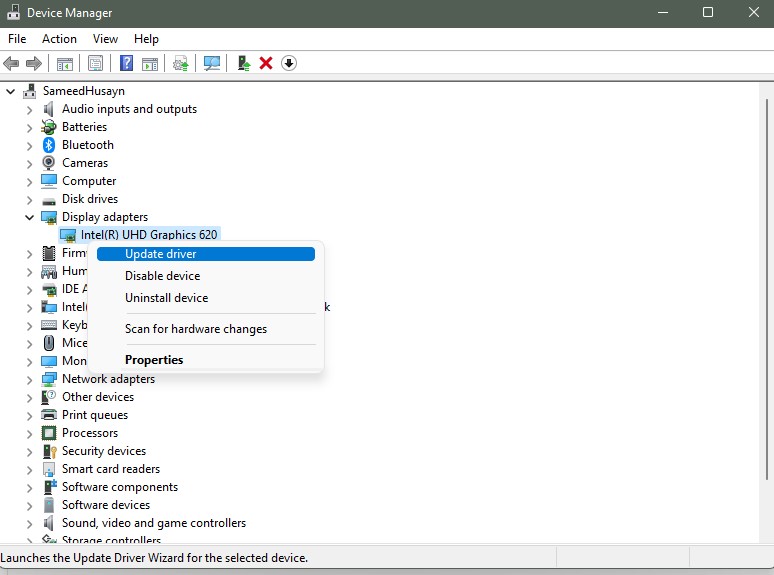
- In the Device Manager window, click the Display adapters section.
- Right-click on the integrated graphics (named after your processor) and select Enable device from the drop-down menu.
Once the integrated graphics are enabled, try using the HDMI port on your motherboard to see if it works.
Update Drivers
If your monitor is still not detecting the PC, then you need to update the integrated graphics drivers along with your Windows. Here’s how to update the drivers:
- On the desktop, press the Windows key to bring up the search bar.
- Next, type “Device Manager” and press Enter.
- In the Device Manager window, click the Display adapters section.
- After that, right-click on the integrated graphics (named after your processor) and select Update driver from the drop-down menu.
- In the pop-up window, you can either search automatically for drivers, or you can browse the driver on your computer. It’s best to search automatically for drivers.
If you’re using an Intel chipset, then you can also head over to the Intel® Driver & Support Assistant webpage and follow the on-screen instructions to download the latest drivers for your iGPU. Similarly, for AMD chipsets, you can also auto-detect and install drivers for Windows 10/11.
Once you’ve installed the latest driver for your CPU’s integrated graphics, you should also update the Windows. Here’s how:
- First, press the Windows + I keys to open Settings.
- Next, click Update & Security.
- On the sidebar, click Windows Updates.
- Finally, click Check for updates and then click Download & Install on the latest update.
Once the update is downloaded, restart the PC to install it. After that, try using the HDMI port on the motherboard to check if it’s working or not.
Roll Back Drivers

If you have previously updated the drivers or Windows, and after that, the HDMI port on the motherboard stopped working, then you can roll back to the old drivers as well. Here’s how:
- First, head over to Device Manager, and click the Display adapters section.
- After that, right-click on the integrated graphics and select Properties from the drop-down menu.
- In the new window, click the Driver tab.
- Finally, click Roll Back Driver.
Follow the on-screen instructions and the driver will be restored to the previous version.
Similarly, follow these steps to uninstall a Windows update that may be causing issues:
- First, press the Windows + I keys to open Settings.
- Next, click Update & Security.
- On the sidebar, click Windows Updates.
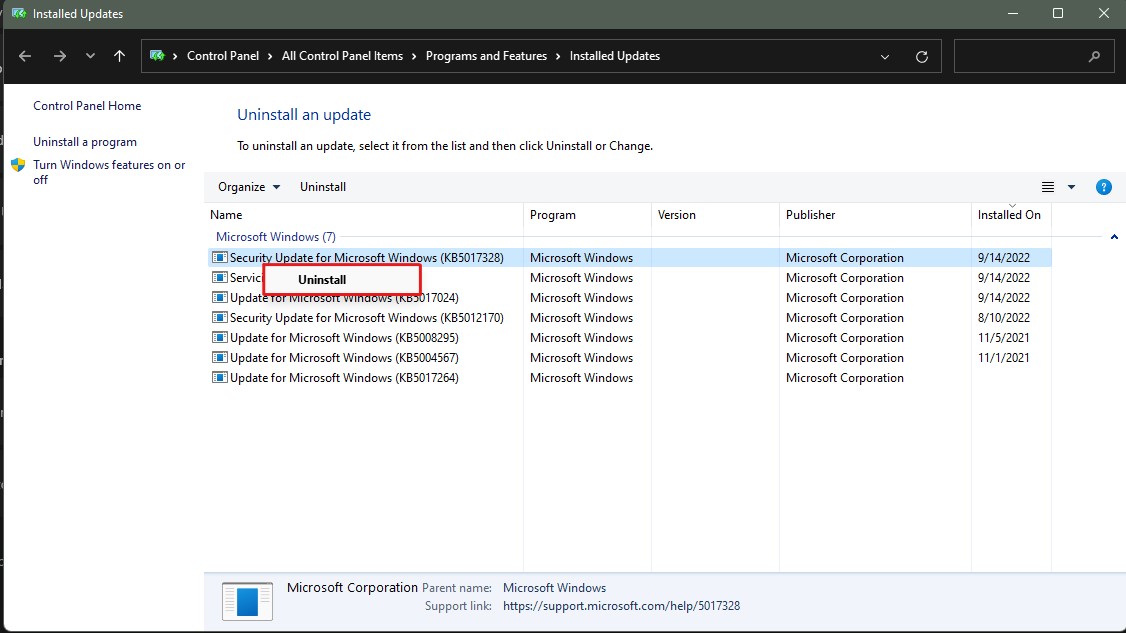
- After that, click Update history and scroll down to click Uninstall updates.
- In the Control Panel window, look for the most recent update by going through their Installed On dates.
- Finally, right-click the update and click Uninstall, then, click Yes in the confirmation window.
Restart your computer to check if your monitor is detecting the PC from the HDMI port on the motherboard or not.
Additional Fixes
If none of the fixes have worked for you, then you should also try these:
- If you’re using multiple displays, then press the Windows + P keys, and select either the Duplicate, Extend, or Second screen only option to change the display settings.
- Try to turn on the PC first, and then the monitor. Yes, this may sound strange at first but this method has actually worked for some users. Basically, instead of turning on the monitor first, or turning on both the PC and the monitor simultaneously, simply turn on the PC first, and then power on the monitor.
- Last but not least, try using a different monitor.
Summary
There are many ways to fix the HDMI port on the motherboard. You can start by selecting HDMI as your monitor source, then you can also inspect the physical damages around the HDMI ports and the cable. After that, you can try enabling the integrated graphics of your CPU. If the issue persists, then updating or rolling back iGPU drivers and Windows updates may also solve it.
FAQs
No, if your CPU does not have integrated graphics, then you cannot use the HDMI port on the motherboard. You need to either use a dedicated GPU or replace your CPU with the one that has an iGPU.
Yes, you can connect to an HDMI display by using an adapter that converts the DVI port to HDMI.
Yes, simply press the Windows + P command and select Duplicate from the menu.
Read More: Can You Use A Monitor Without PC? [SOLVED]
Thank you! Please share your positive feedback. 🔋
How could we improve this post? Please Help us. 😔
[Wiki Editor]
Ali Rashid Khan is an avid gamer, hardware enthusiast, photographer, and devoted litterateur with a period of experience spanning more than 14 years. Sporting a specialization with regards to the latest tech in flagship phones, gaming laptops, and top-of-the-line PCs, Ali is known for consistently presenting the most detailed objective perspective on all types of gaming products, ranging from the Best Motherboards, CPU Coolers, RAM kits, GPUs, and PSUs amongst numerous other peripherals. When he’s not busy writing, you’ll find Ali meddling with mechanical keyboards, indulging in vehicular racing, or professionally competing worldwide with fellow mind-sport athletes in Scrabble. Currently speaking, Ali’s about to complete his Bachelor’s in Business Administration from Bahria University Karachi Campus.
Get In Touch: alirashid@tech4gamers.com


")
