 Threads
Great Airflow!
Review Summary
The Cooler Master MasterCase H500P Mesh, an upgrade from its predecessor, excels in airflow and cooling with its mesh front panel and robust build. It supports E-ATX motherboards, features efficient cooling options, and has a tempered glass side panel for aesthetic appeal. While it offers great airflow and design, it can be challenging for cable management and hard drive access, especially with larger motherboards. This chassis is ideal for enthusiasts prioritizing cooling efficiency and visual appeal.

Overall
-
Performance - 8/10
8/10
-
Design - 9/10
9/10
-
Features - 7/10
7/10
-
Value - 8/10
8/10
Pros
- Enhanced Airflow
- Aesthetically Pleasing
- Tempered Glass Side Panel
- Robust Build Quality
- Versatile Cooling Options
- E-ATX Motherboard Support
- Comprehensive Cable Management
- Efficient Cooling Performance
Cons
- Cumbersome Hard Drive Access
- Limited Practicality of Top Panel Design
- Space Constraints with Larger Motherboards


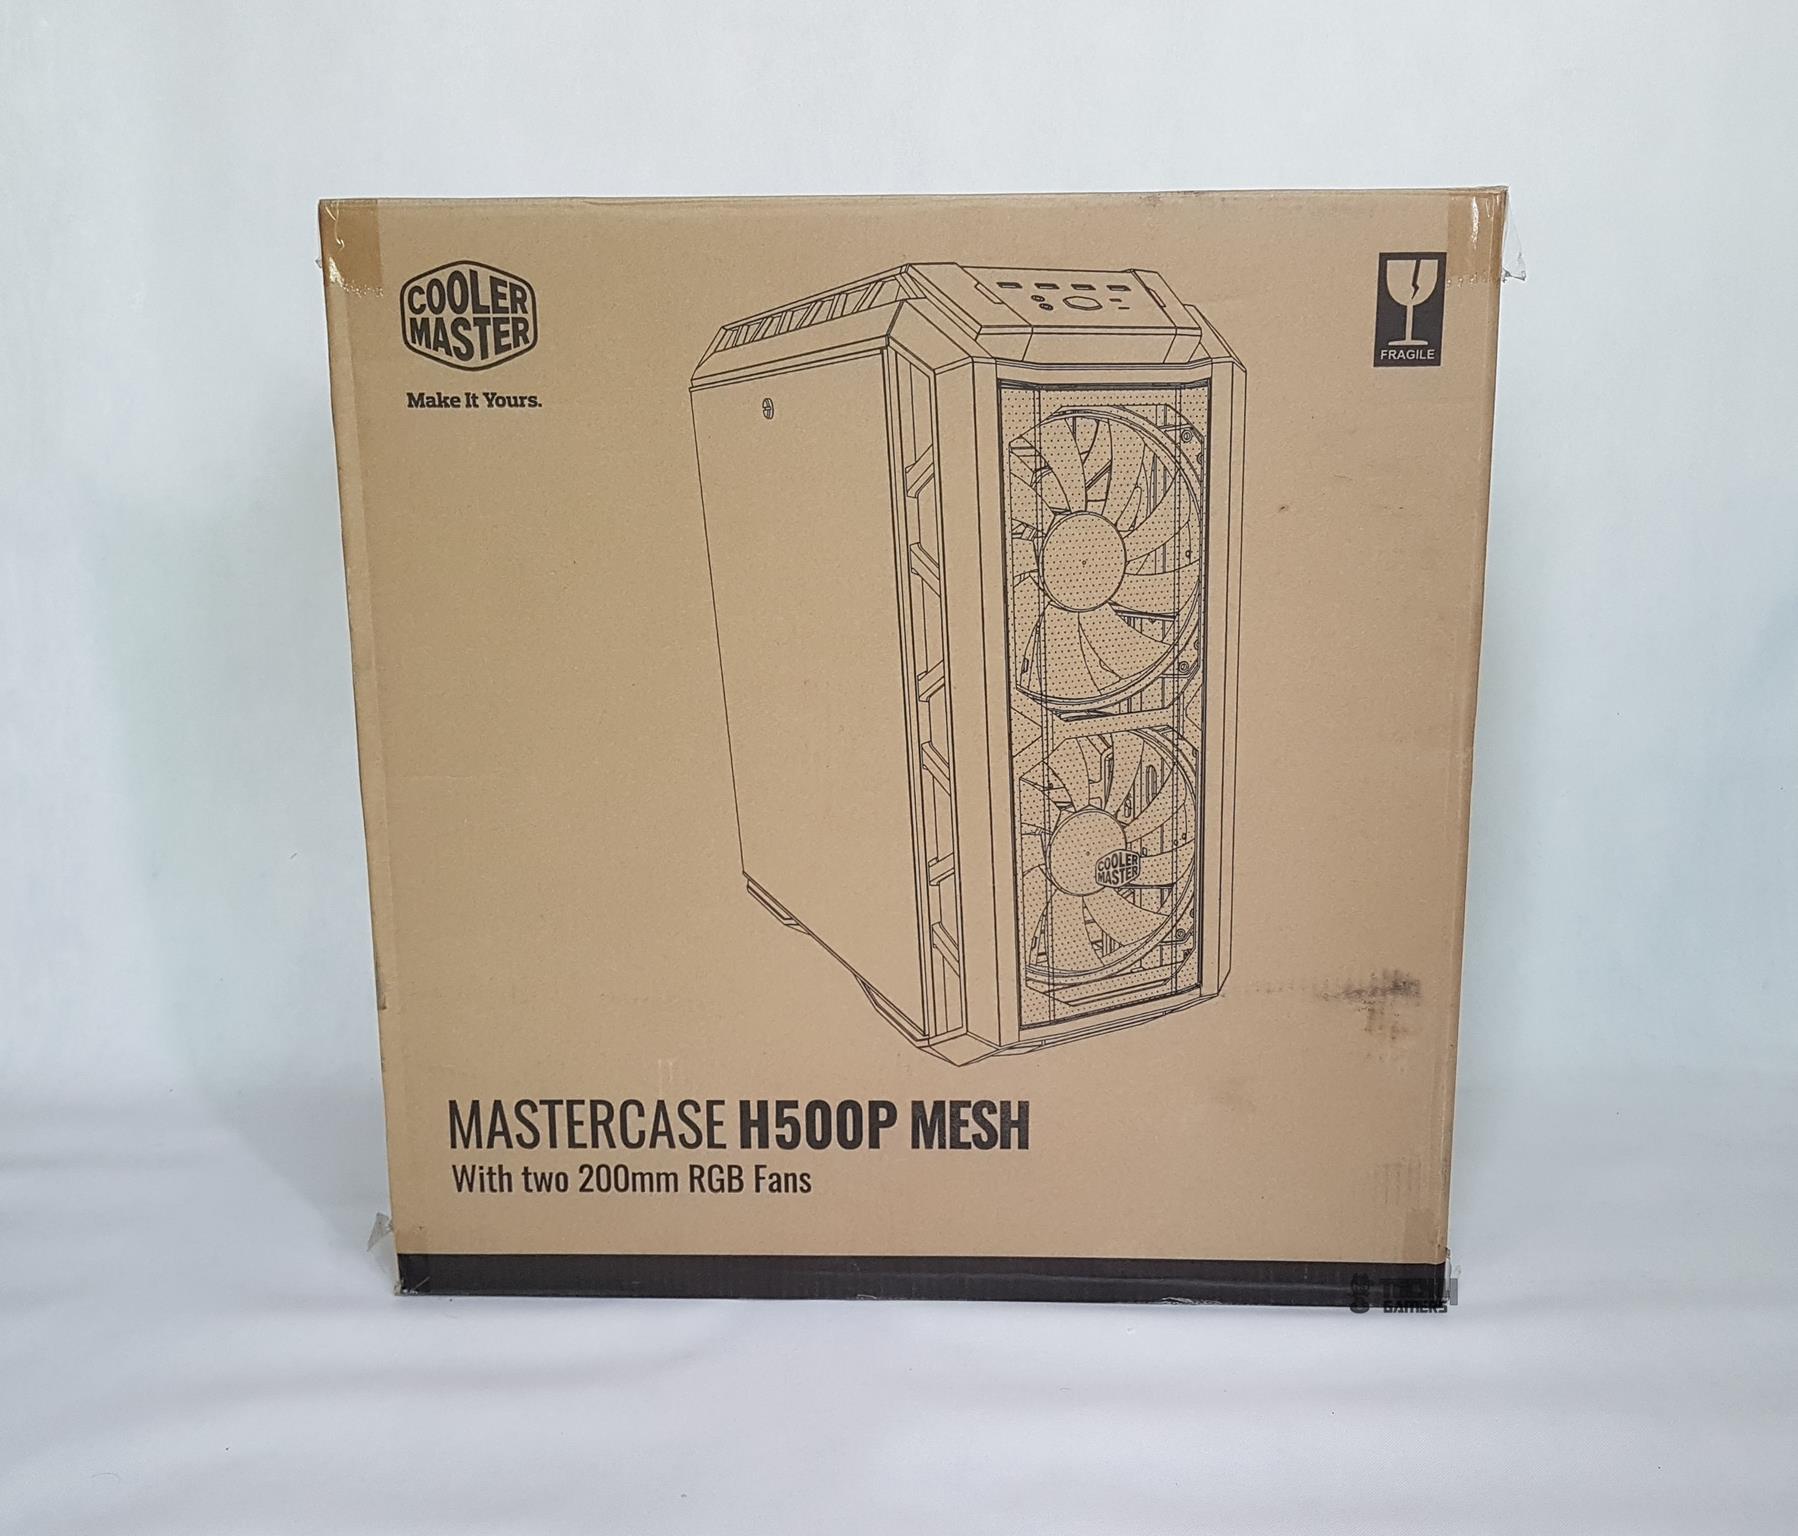
When the Cooler Master MasterCase H500P launched, its design alone made it highly popular among the PC enthusiasts. Unfortunately, a few design shortcomings resulted in the users’ complaints and more feedback for the company. The company listened and they came up with the modified version called H500P Mesh. The Mesh version has mesh upfront to ensure optimal airflow which lacked in the original H500P. Overall, the H500P Mesh has retained the killer looks of the original version but has improved several weak spots around. Let’s dive in!
- Why you can trust Tech4Gamers: Our reviews are based on dedicated hands-on testing by our team of experienced hardware experts. Find out more about how we test.
Key Takeways
- The case is good for enthusiasts seeking optimal airflow, robust design, and ample cooling support without minding some installation complexities.
- This chassis is not for users prioritizing easy hard drive access or seamless cable management, particularly with larger motherboards like E-ATX, as it might obstruct some features.
- Stand-out features include impressive airflow with mesh panels, versatile cooling support for various fan and radiator configurations, and comprehensive cable management solutions with shrouds and covers for a tidy build appearance.
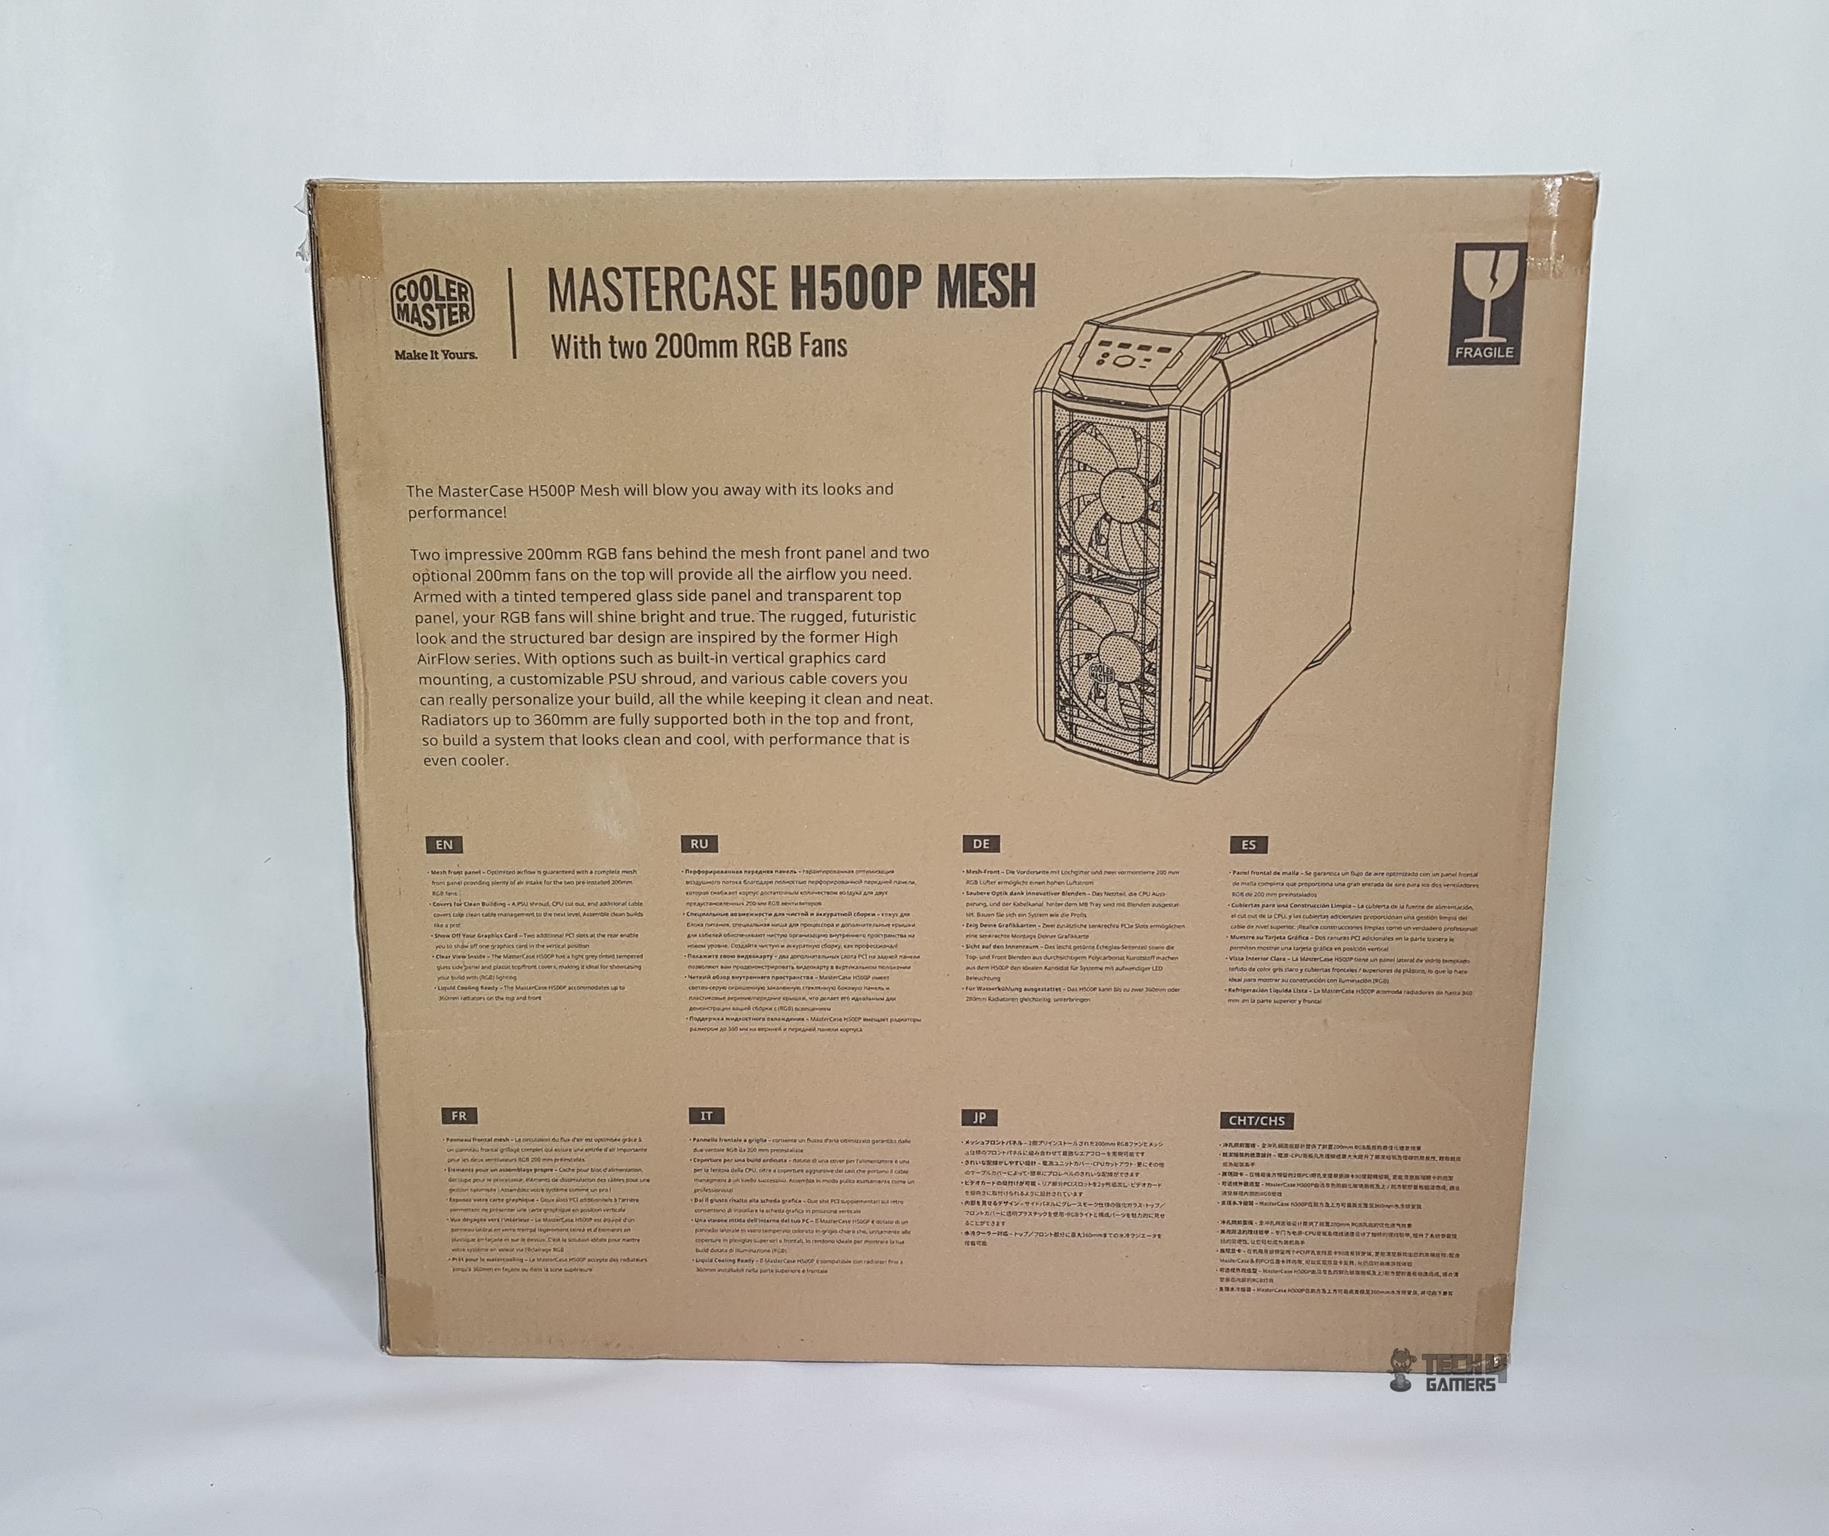
Packaging and Unboxing
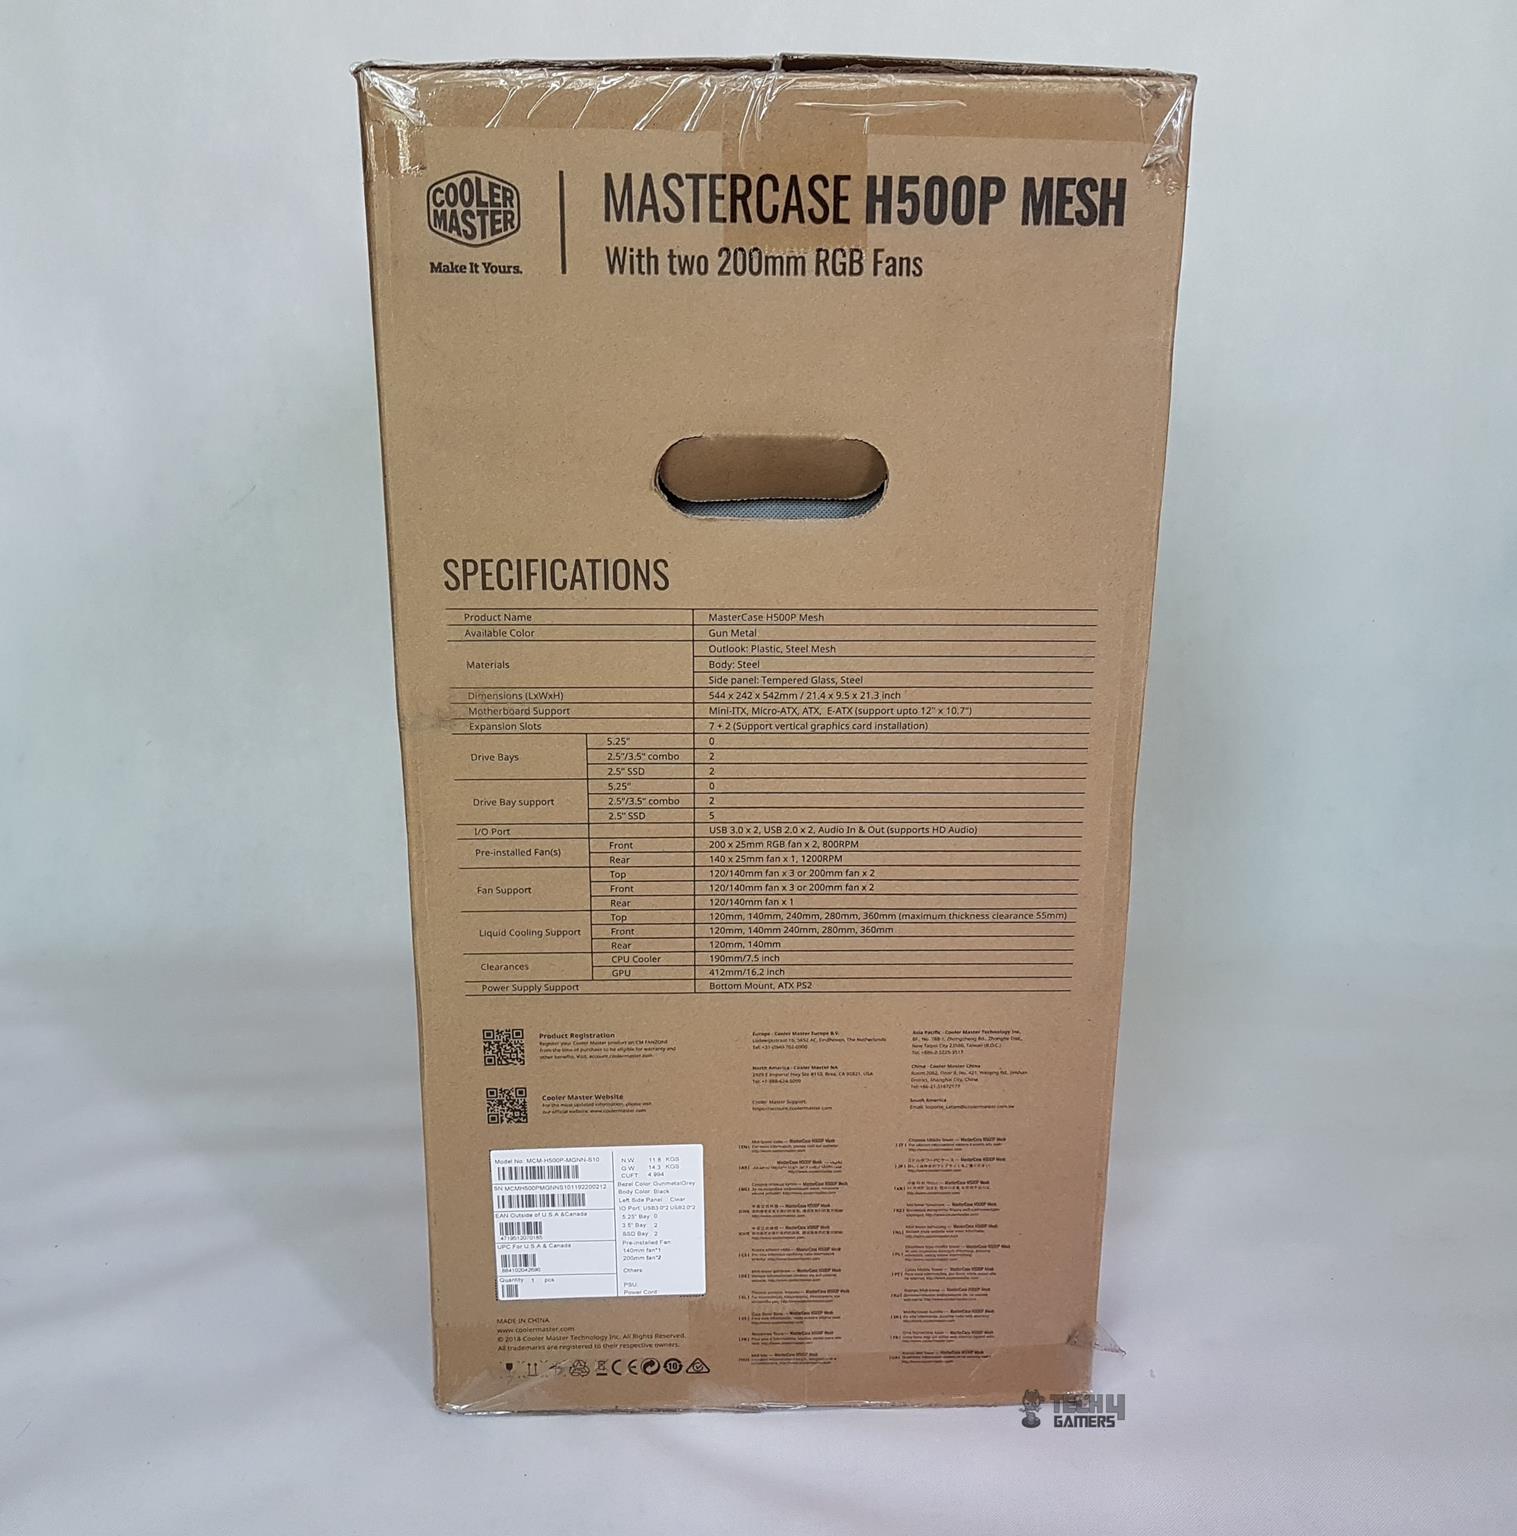
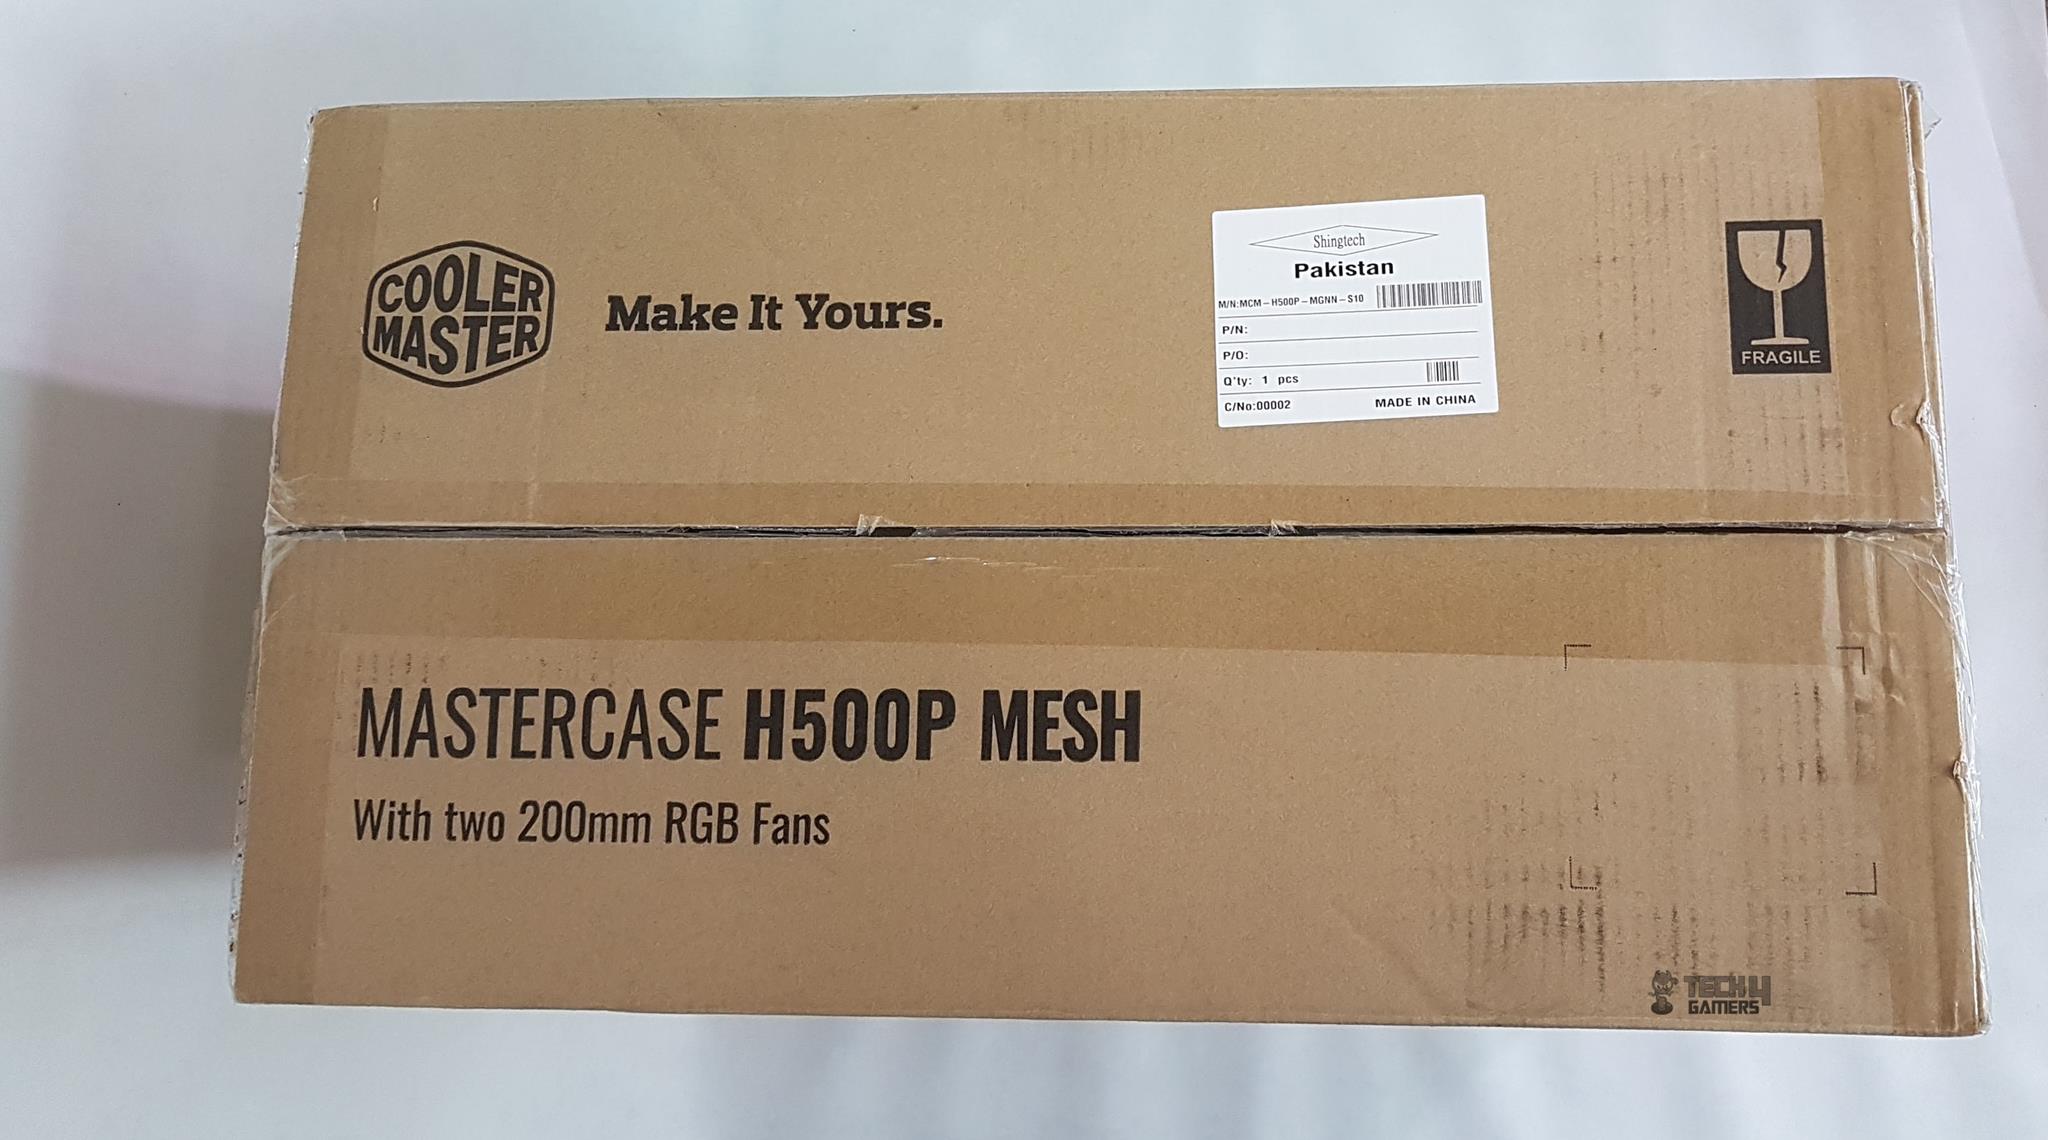
The chassis is shipped inside a cardboard box of the brown color.

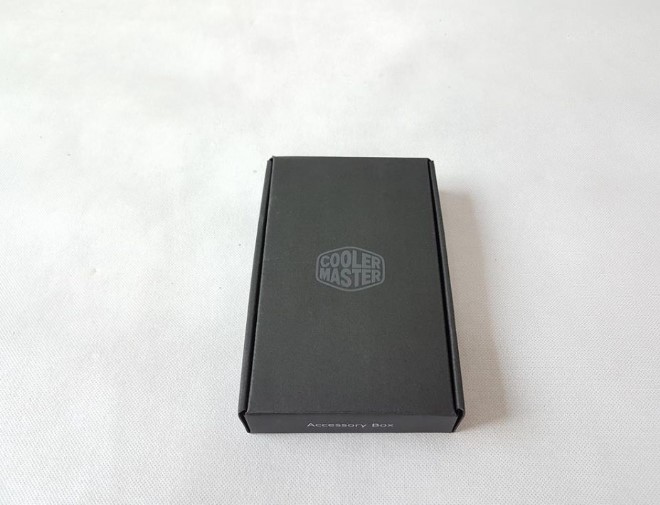
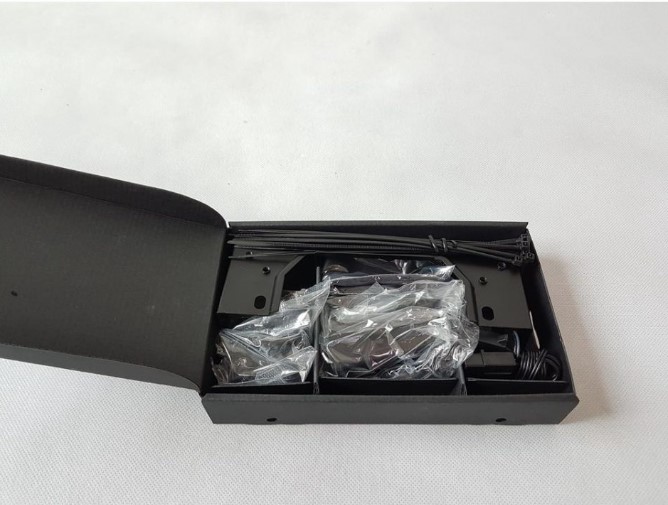
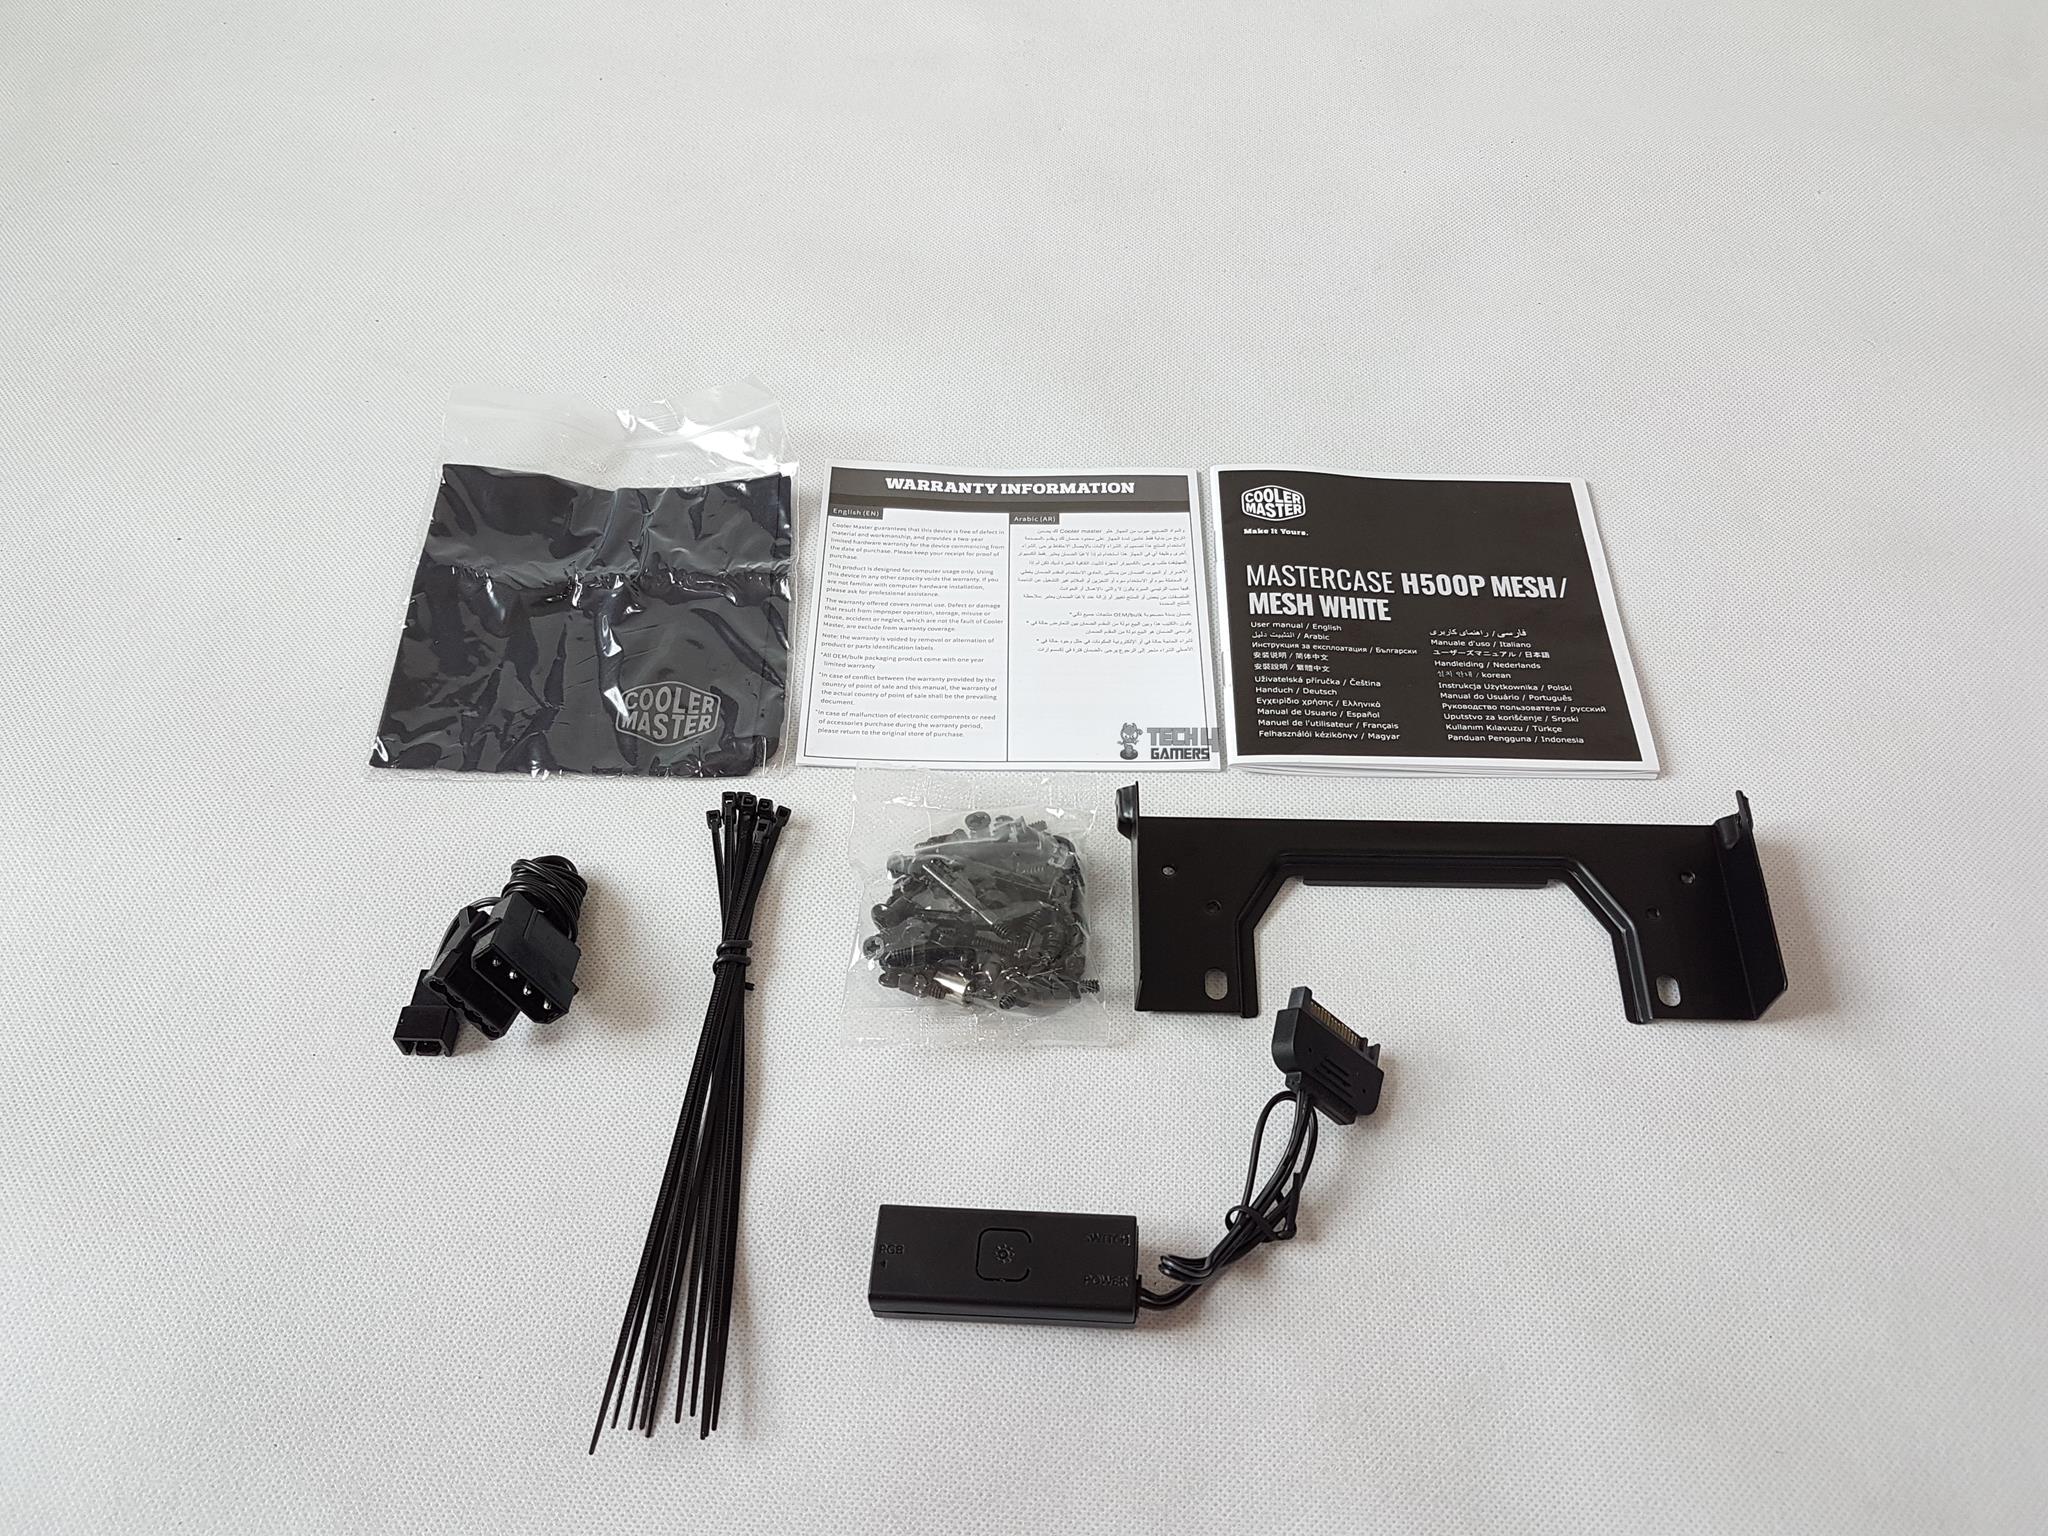
Box Contents
Let’s see what’s in the accessory box.
Design
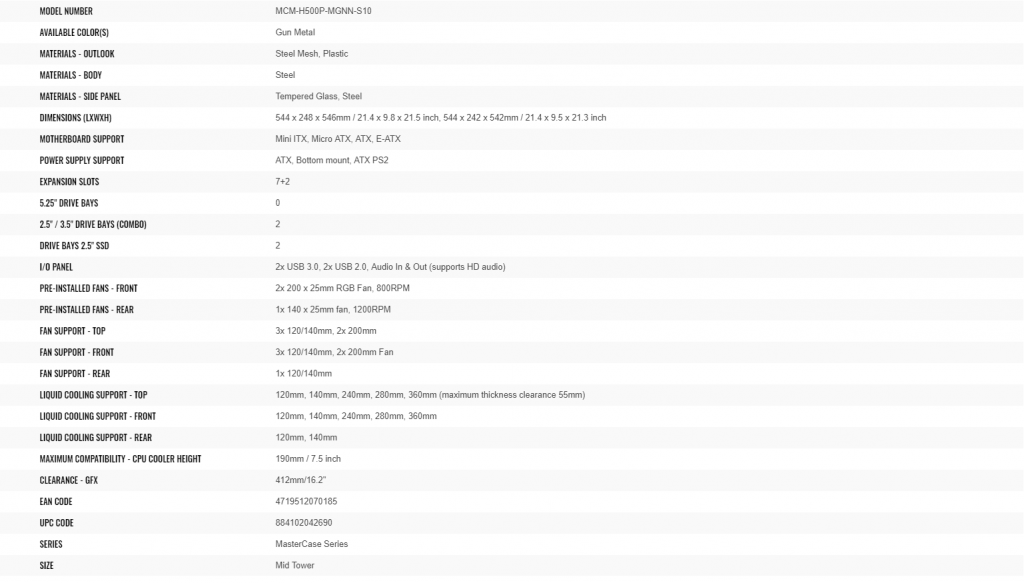
The MasterCase H500P Mesh is a mid-tower yet it supports E-ATX size motherboards. The dimension of the chassis is 544x288x546mm. It comes in two colors: White and Gun Metal. The chassis is made of steel structure, acrylic top cover, TG side panel, and steel mesh front cover.
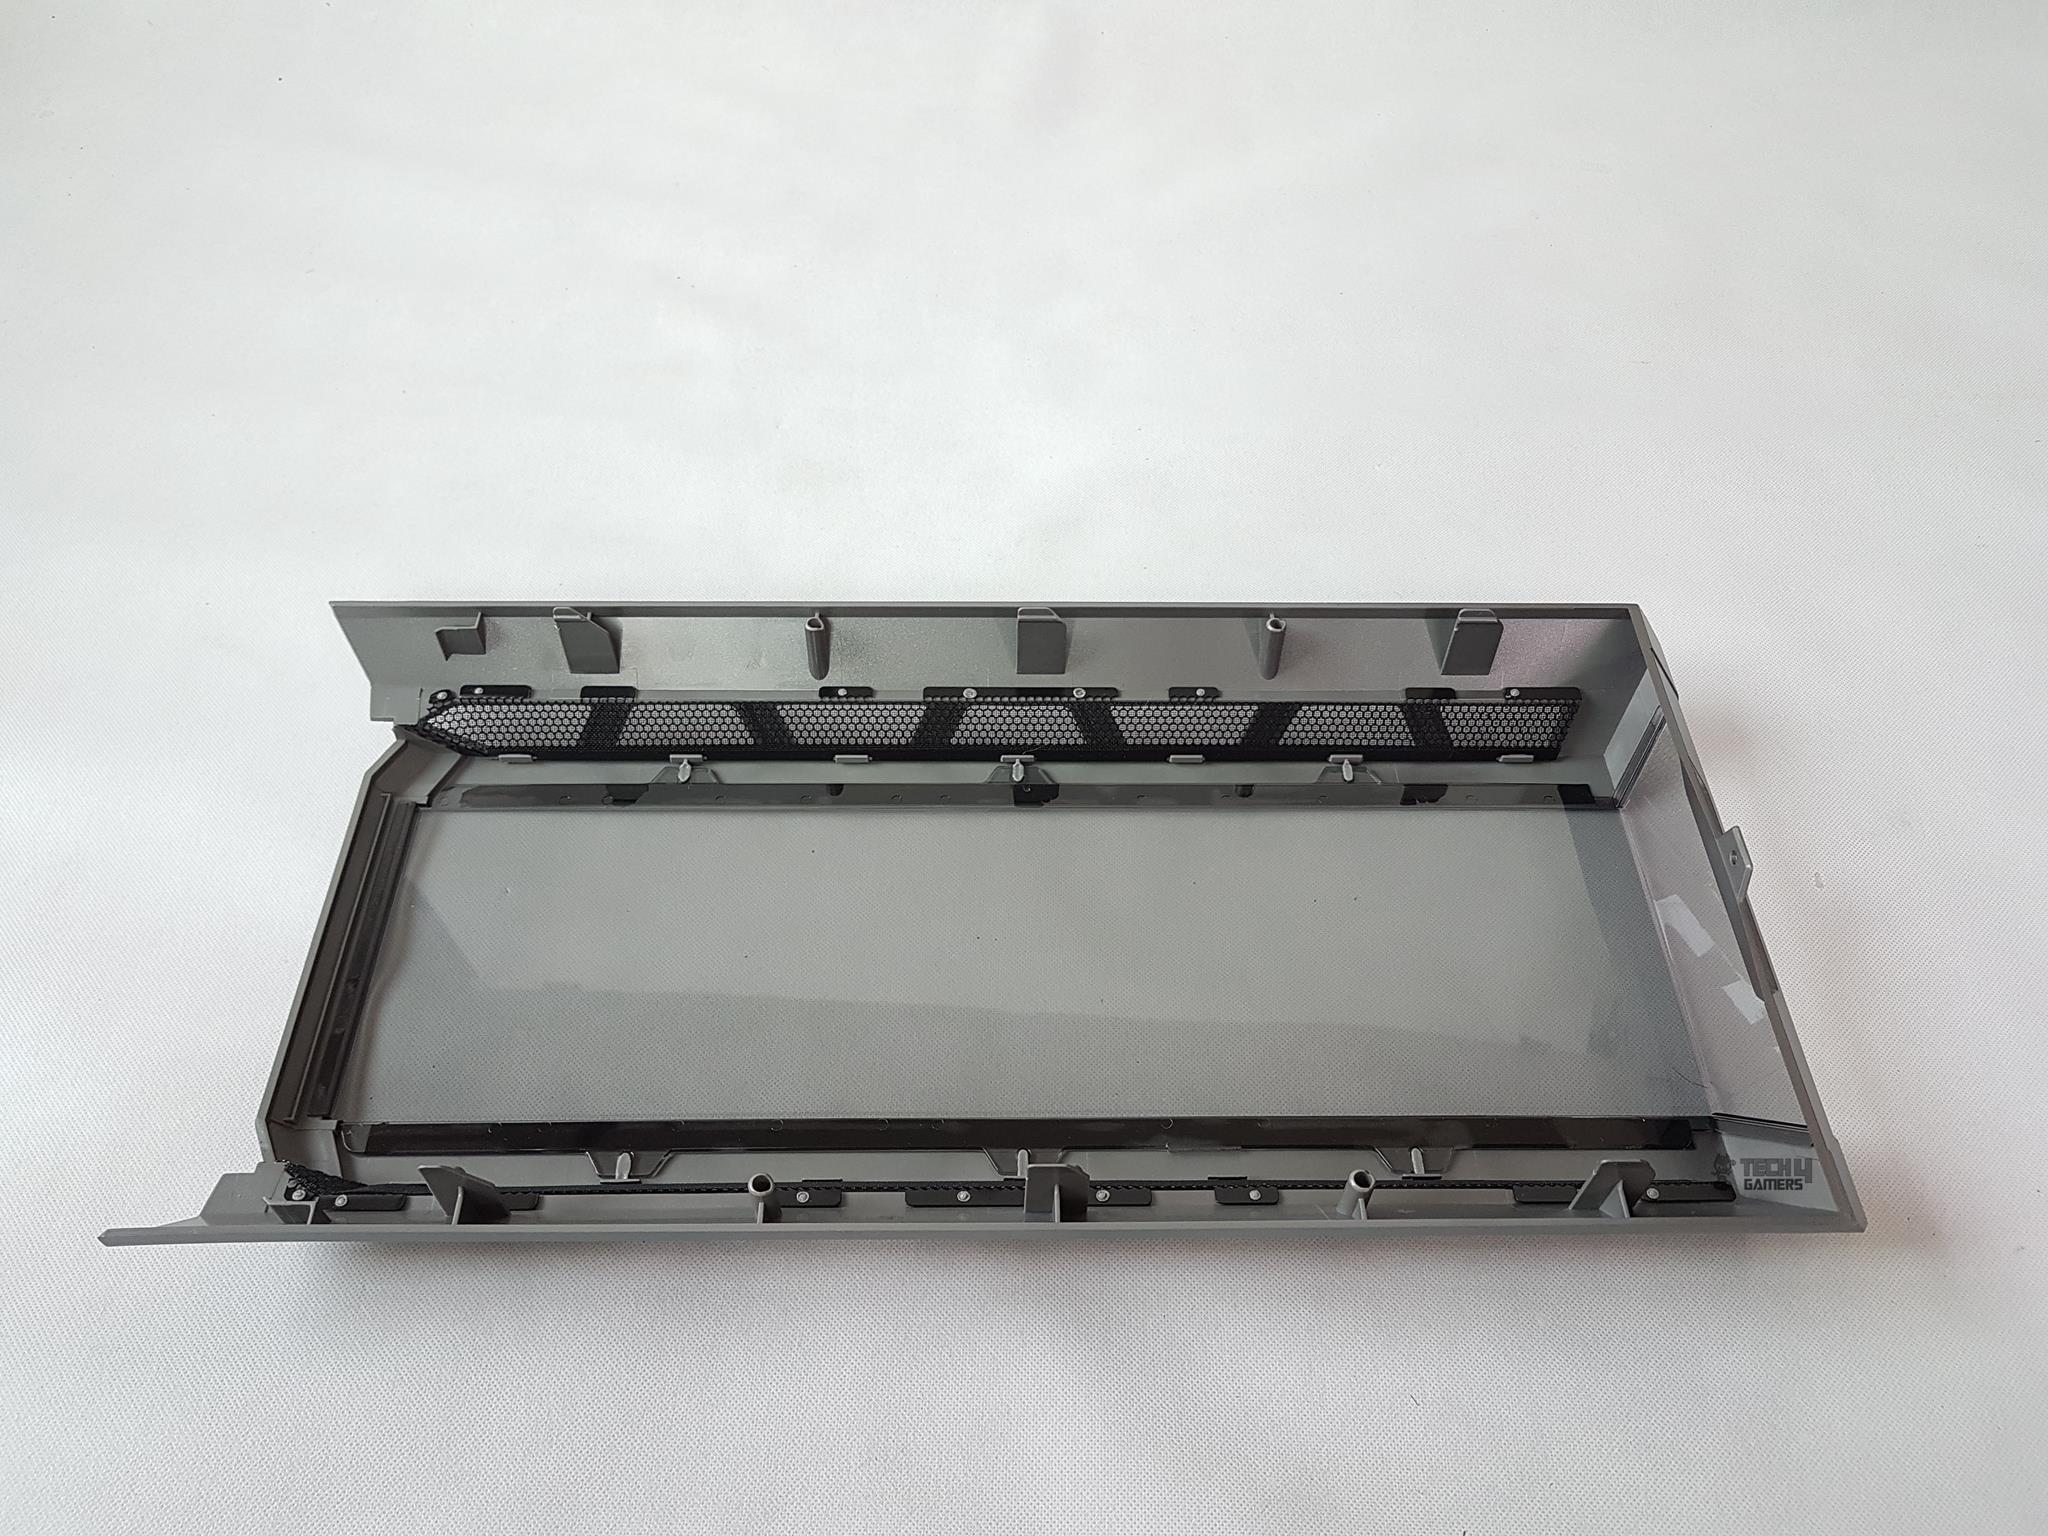
Front Panel
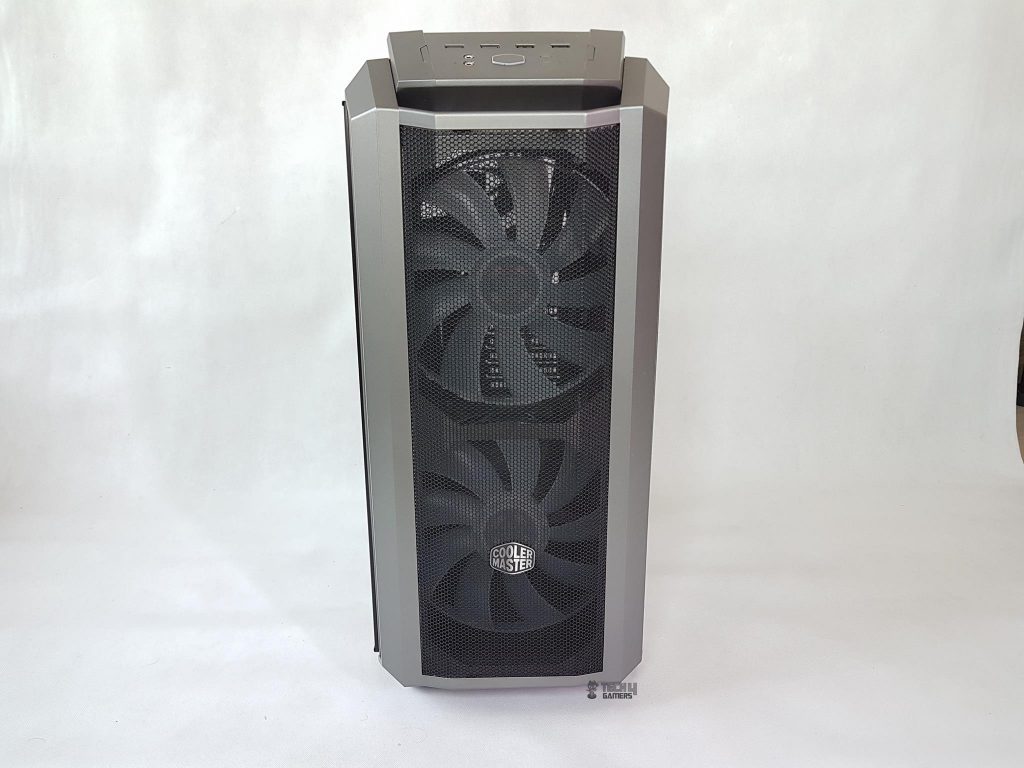
The front side of the Cooler Master MasterCase H500P Review bears an aggressive and beautiful design. It has a three-sided steel meshed panel. The panel’s frame is made of the plastic. The gun metal color outstands the design. I am sure the white color will do the same. There is a Cooler Master badge pasted above the bottom section. The two 200mm RGB fans are visible.
There is a bit of depth from the front mesh to the actual placement of the fans. This is done to ensure that the fans always draw on fresh air. The curved angled, lining on the structure of the panel really add to the overall looks of the case.

We can see the filtered or steel meshed sides of the front panel. There is a gap between the top-mounted I/O panel and the front panel towards the top side. This is where the user is supposed to hold the hand on the front panel and pull it out a bit.
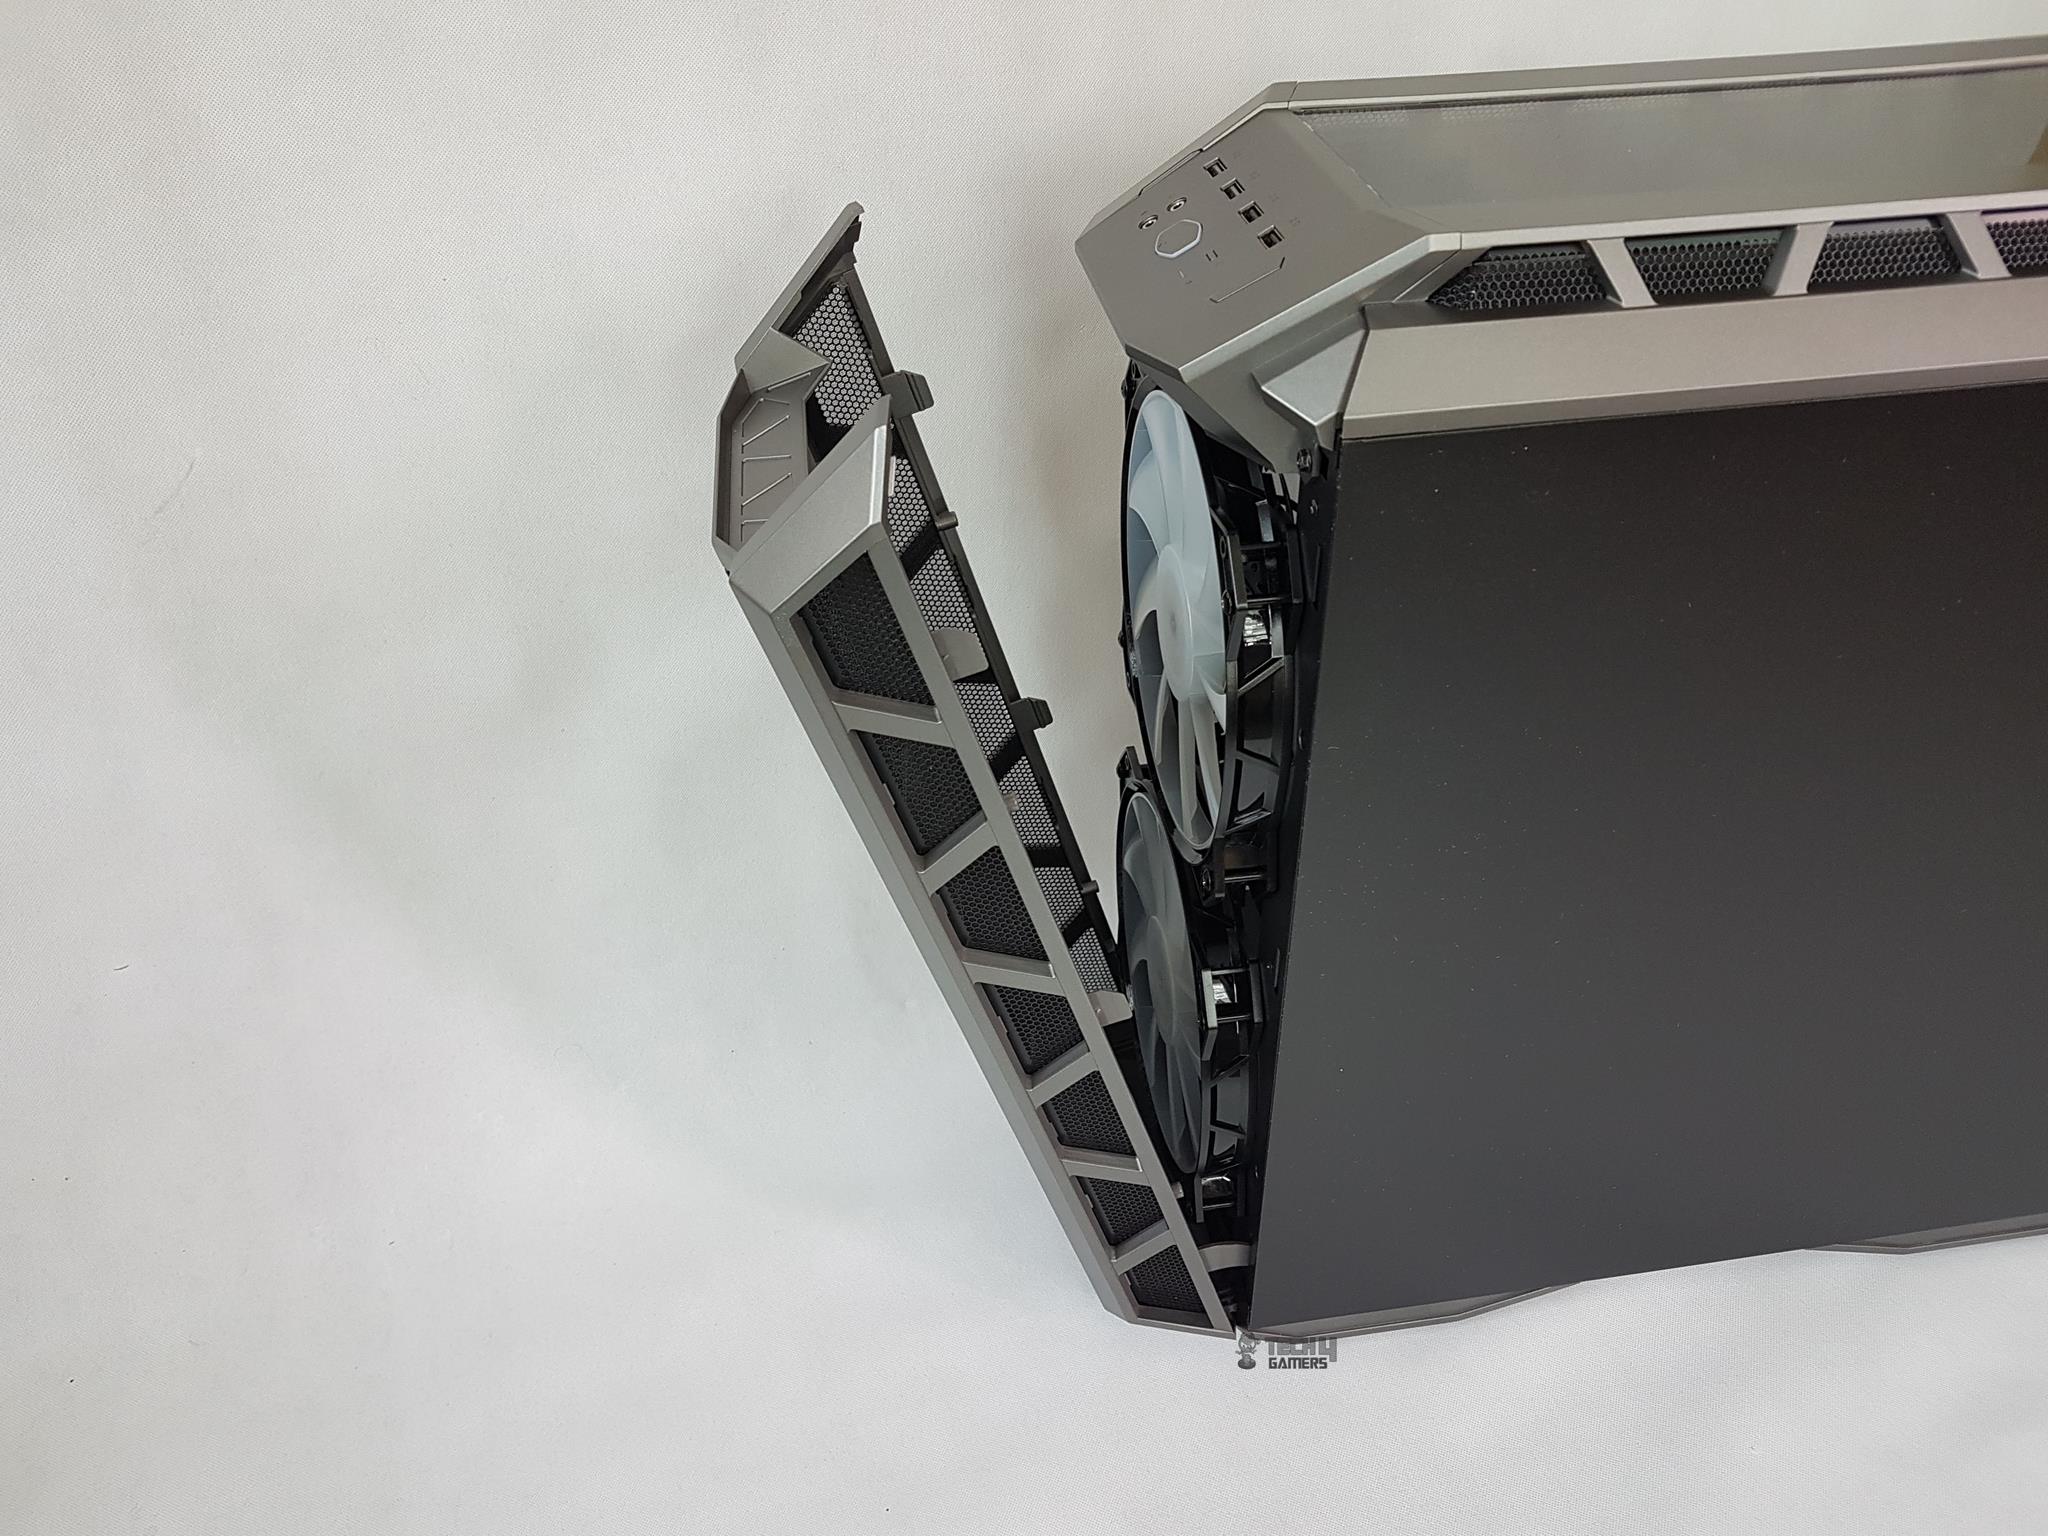
Pulling out the front panel will not fully remove it but will make it remain intact from the bottom side. This design will help in ensuring more airflow if needed without removing the front panel completely. If I remember correctly this is another improvement over the initial H500P design where the panel will come off freely. In order to pull the panel out from the top, press the middle portion of the inner section and pull it out. The middle section has a latch that secures the panel to the frame.
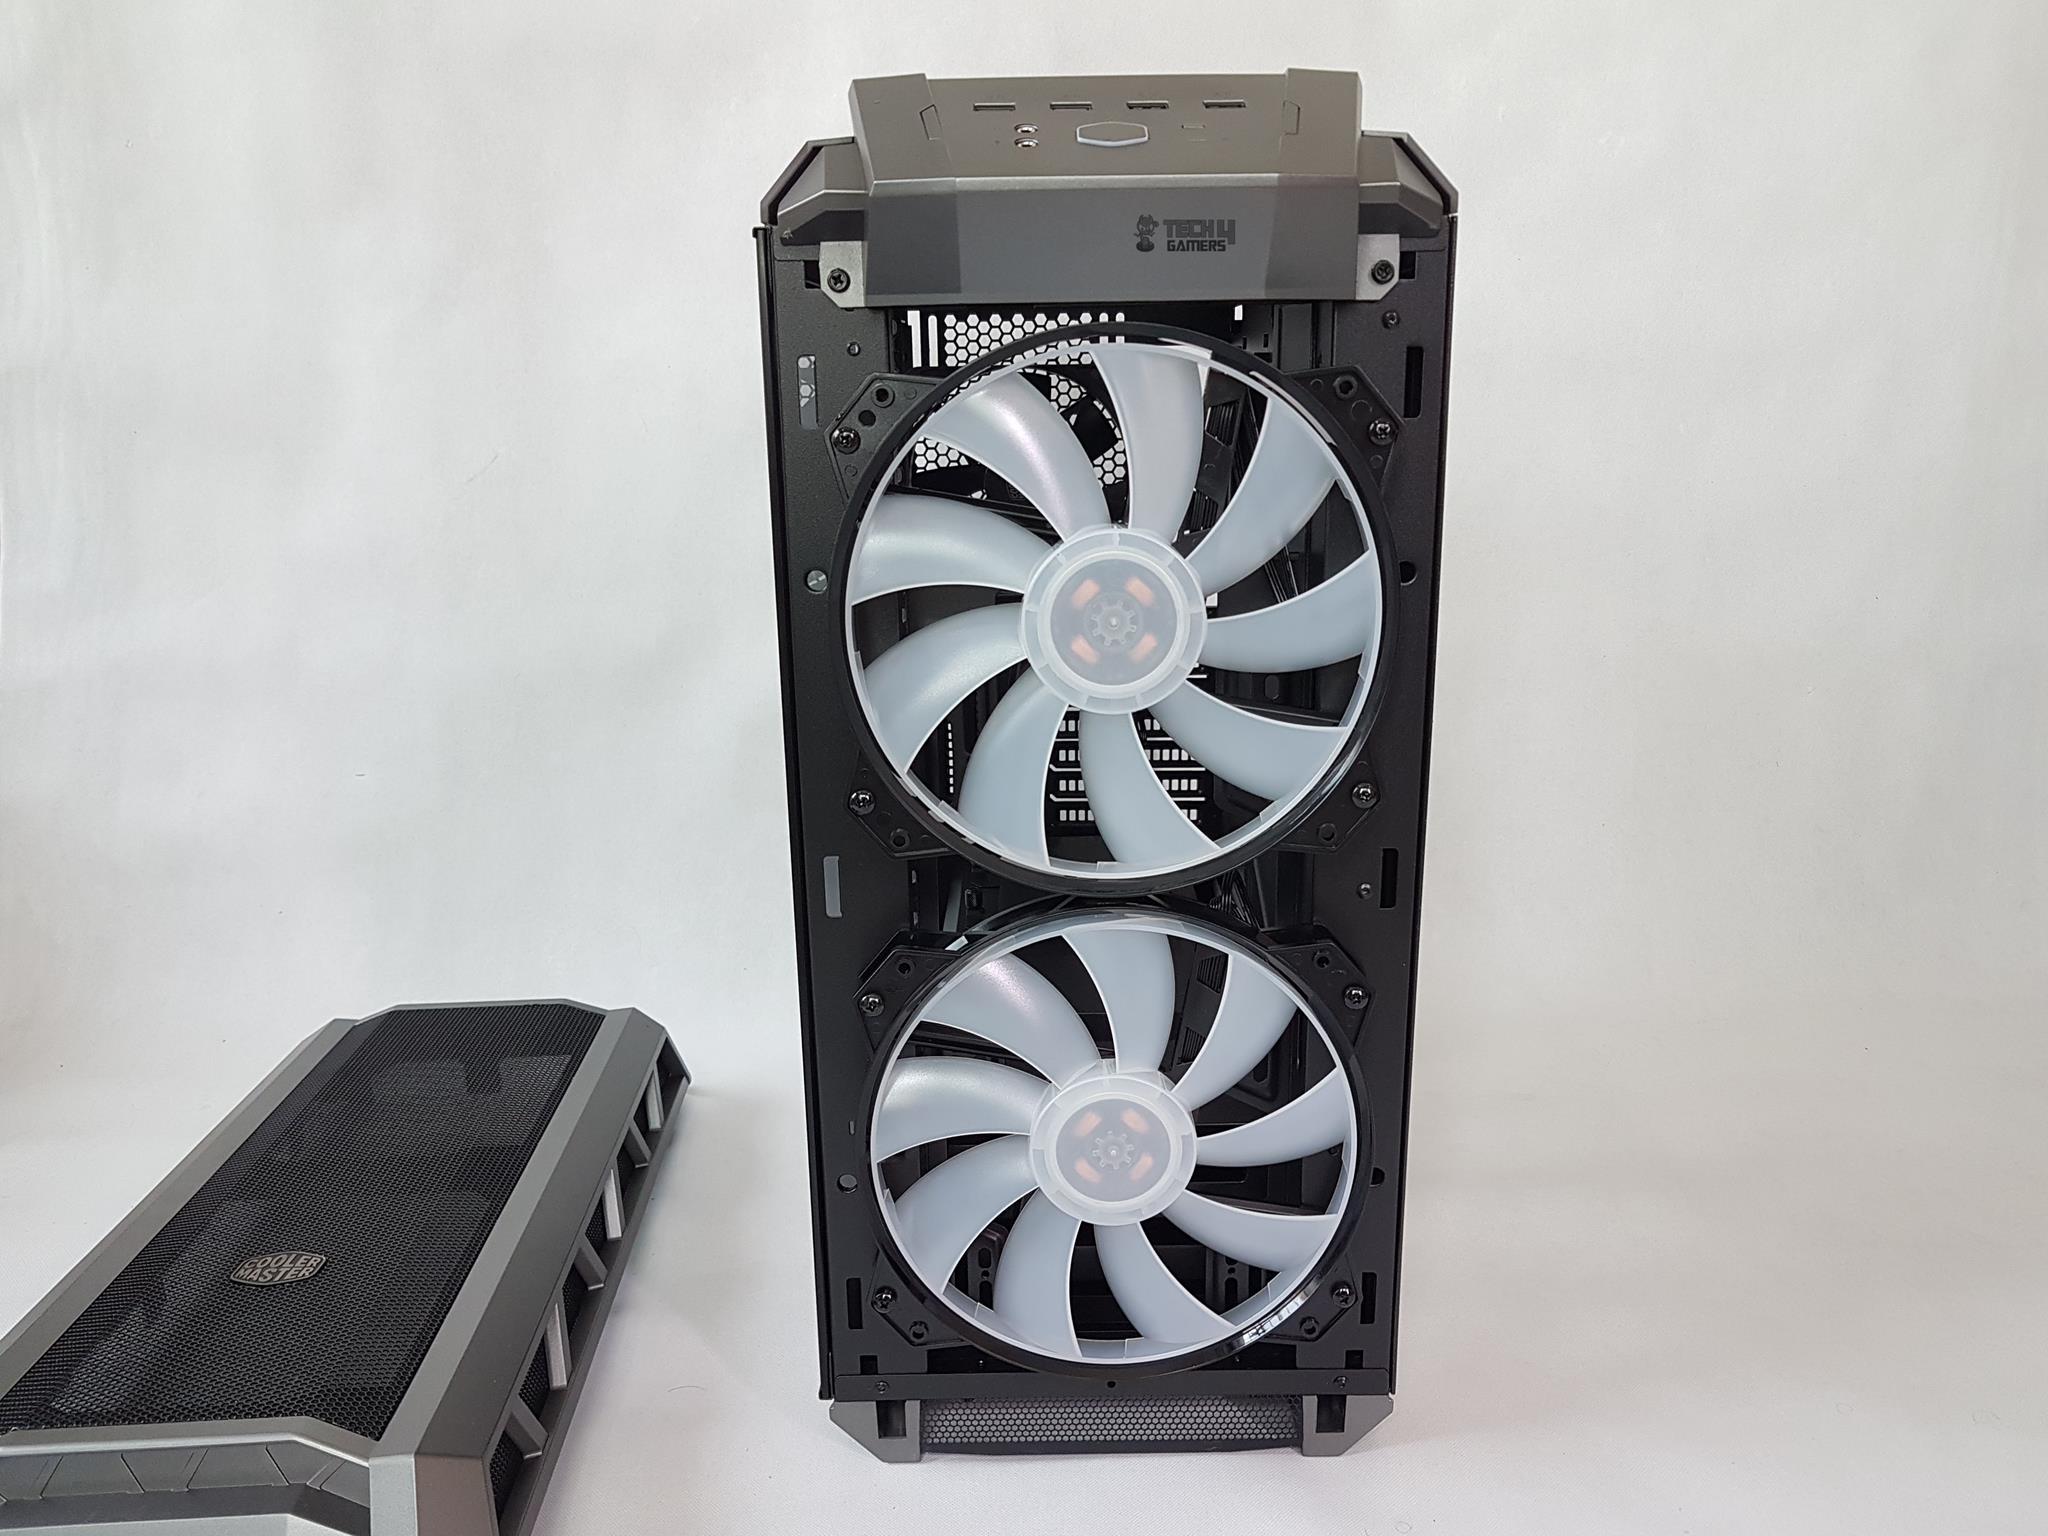
The above picture shows the front inner side after removing the panel. Two MF200R RGB fans are pre-installed. The front-mounted radiator bracket is permanently fixed and can’t be removed. Thankfully, it is designed to be more inwards as there is a gap between the bracket depth and the front-mounted fans. The user can install up to 27mm thick radiator and still use the pre-installed 200mm fans.
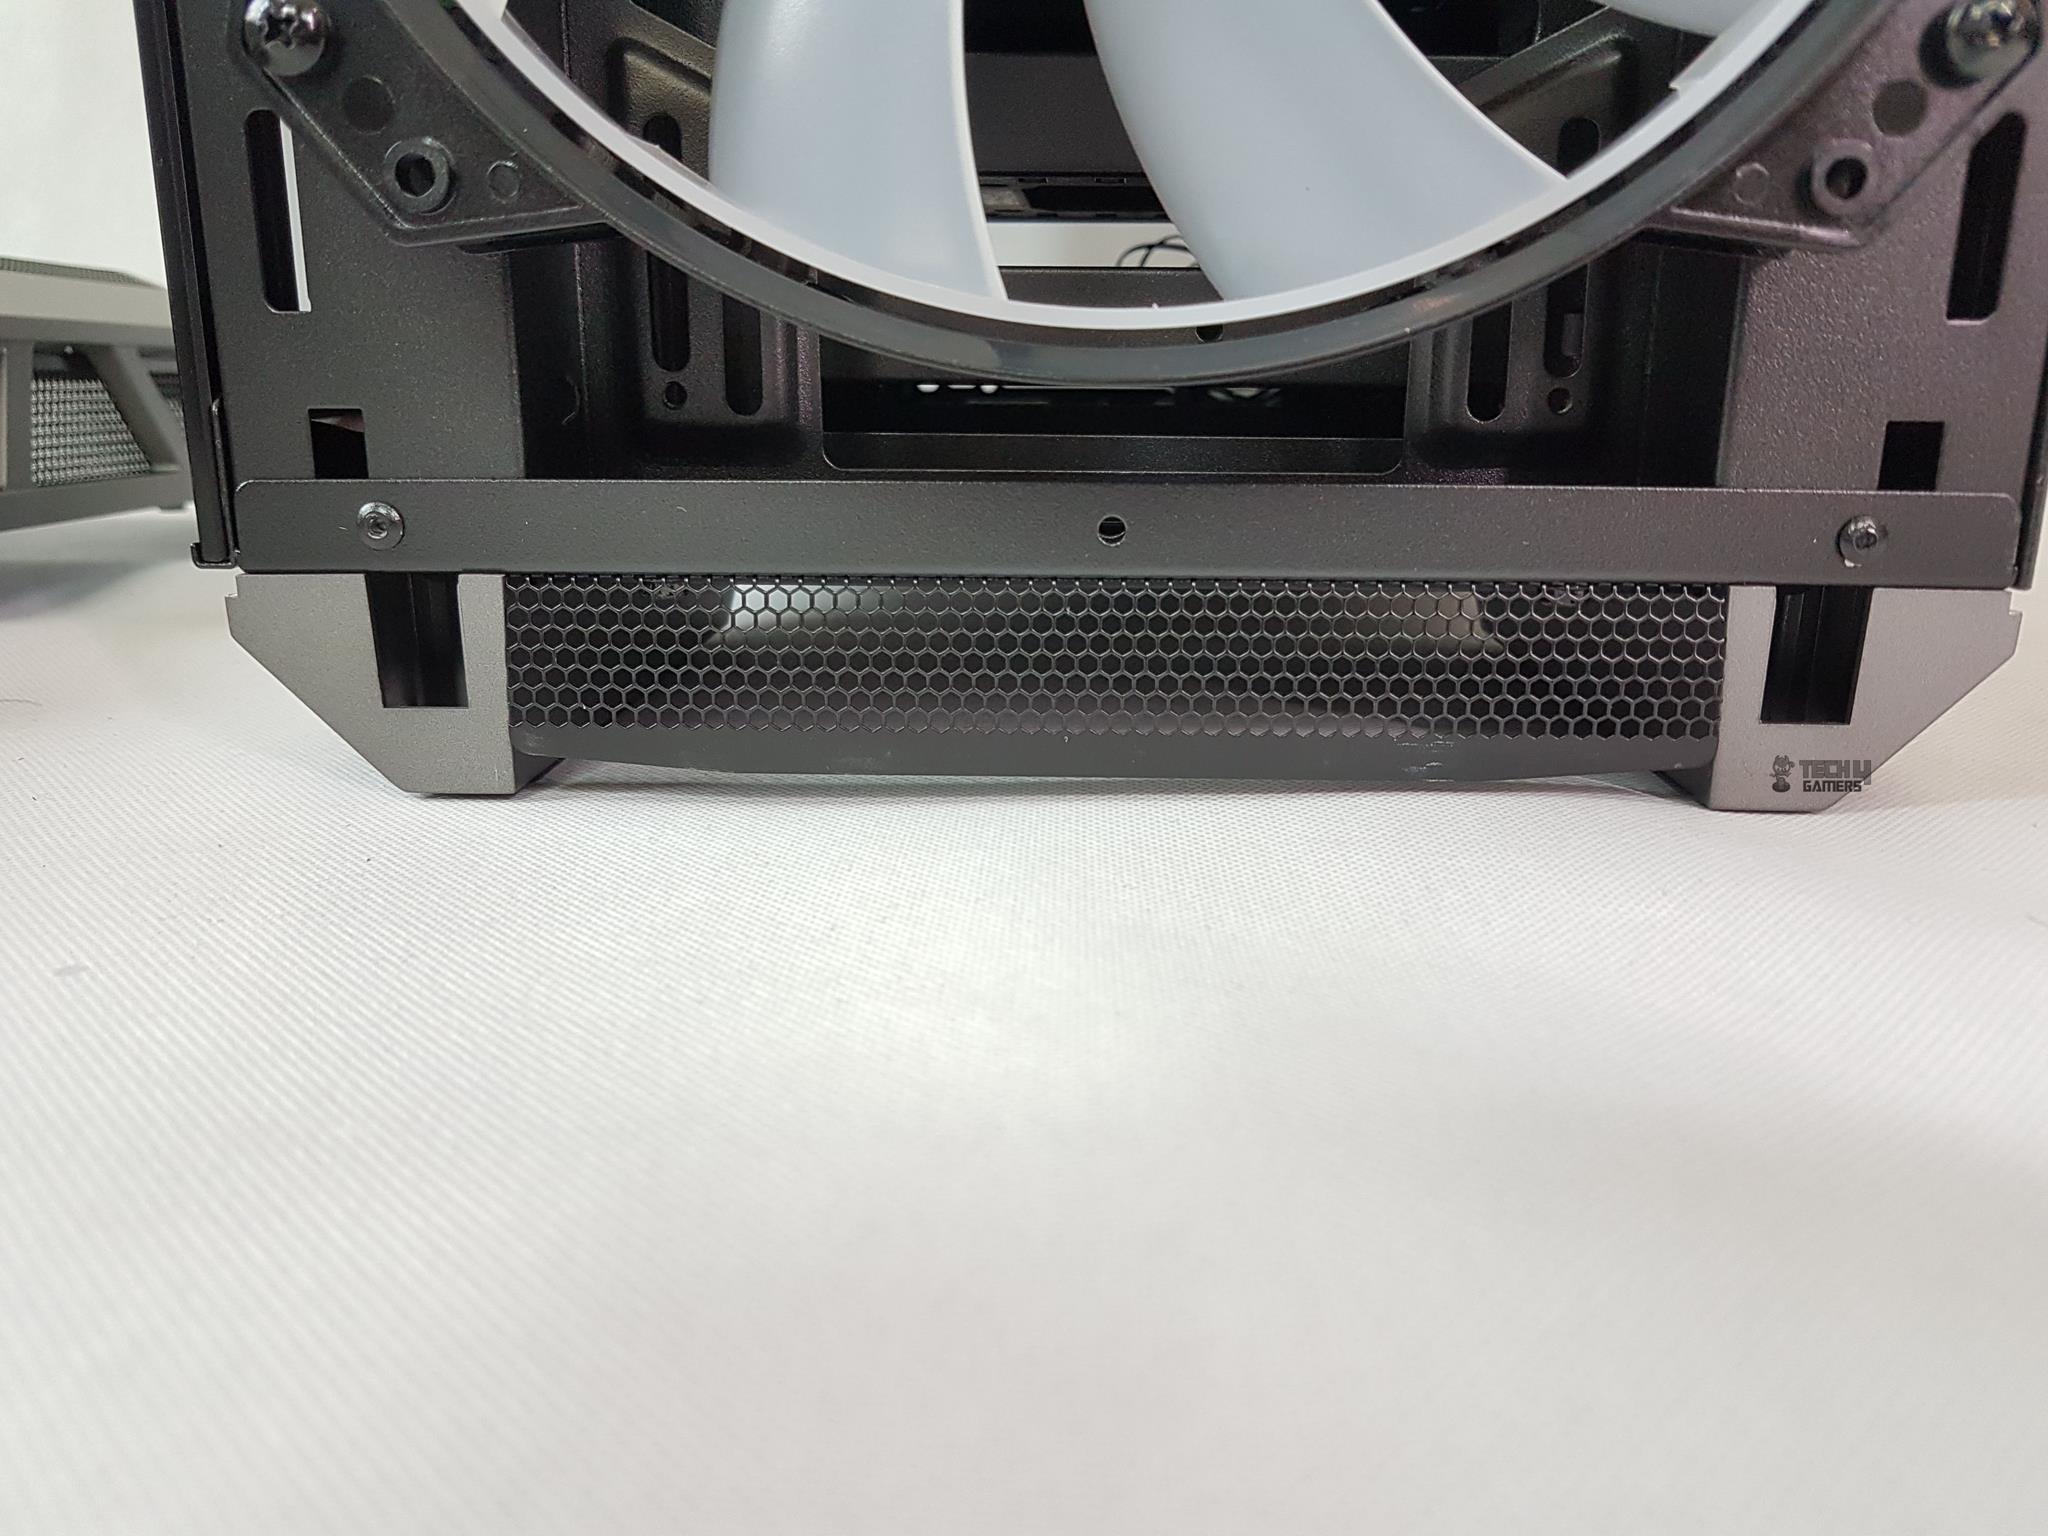
There is meshed steel at the bottom of the case on the front side. It is locked using two screws on the under-bottom side.
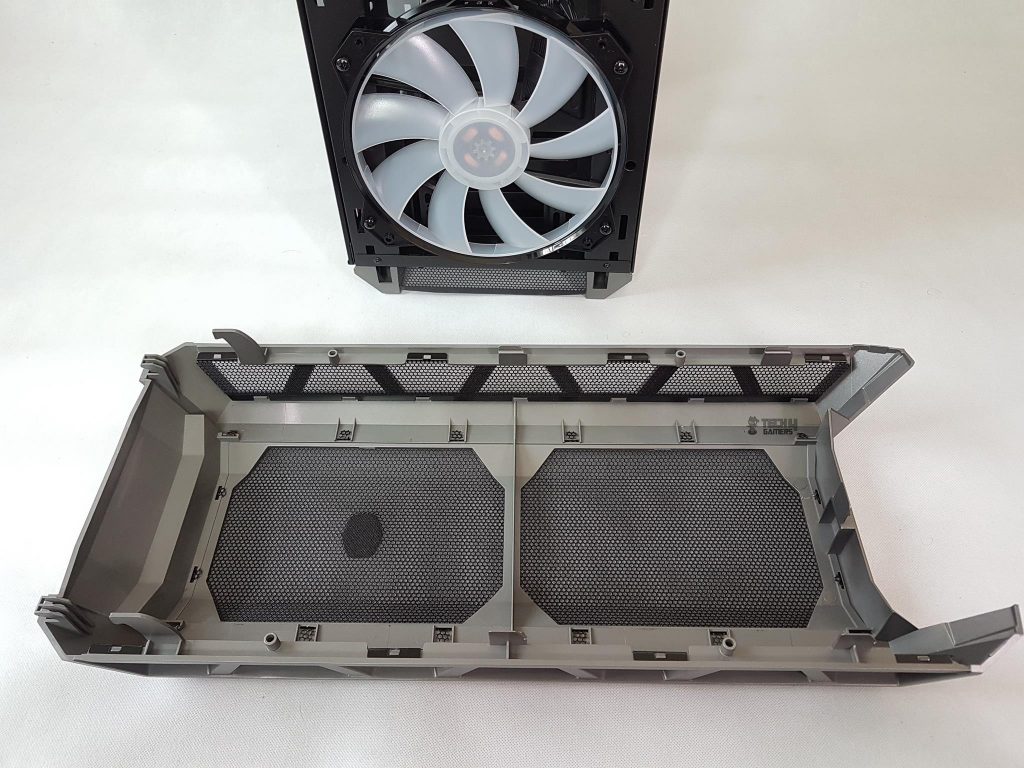
The above picture shows the inner side of the front panel. There is a thin fine layered mesh on the vented steel.
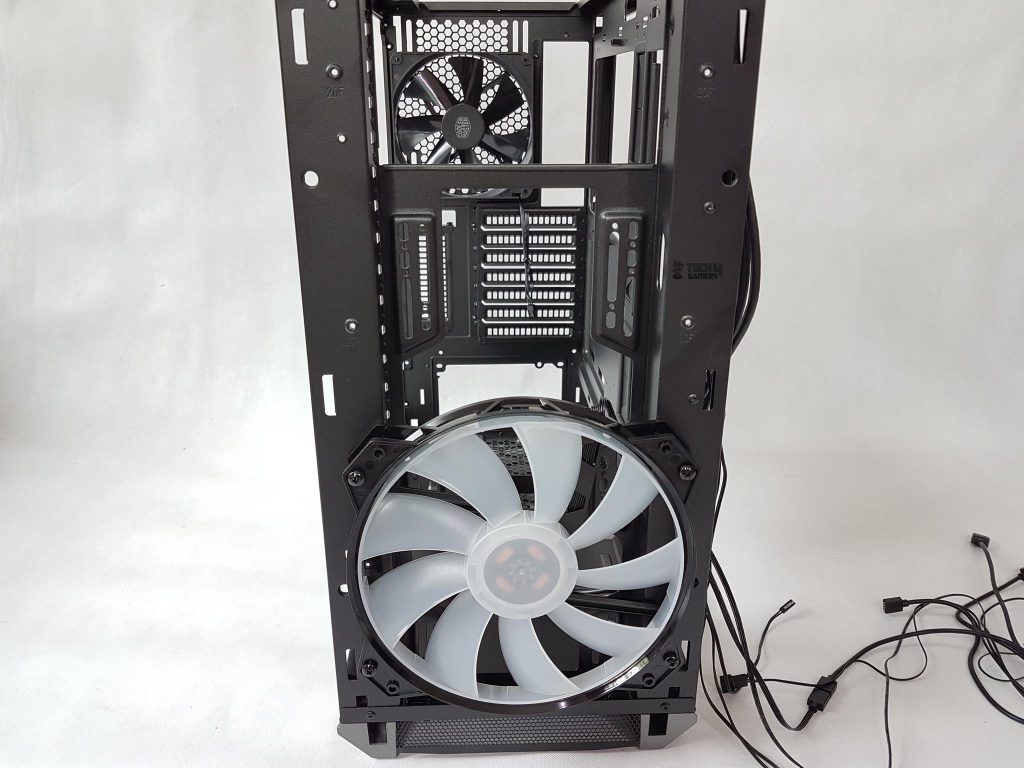
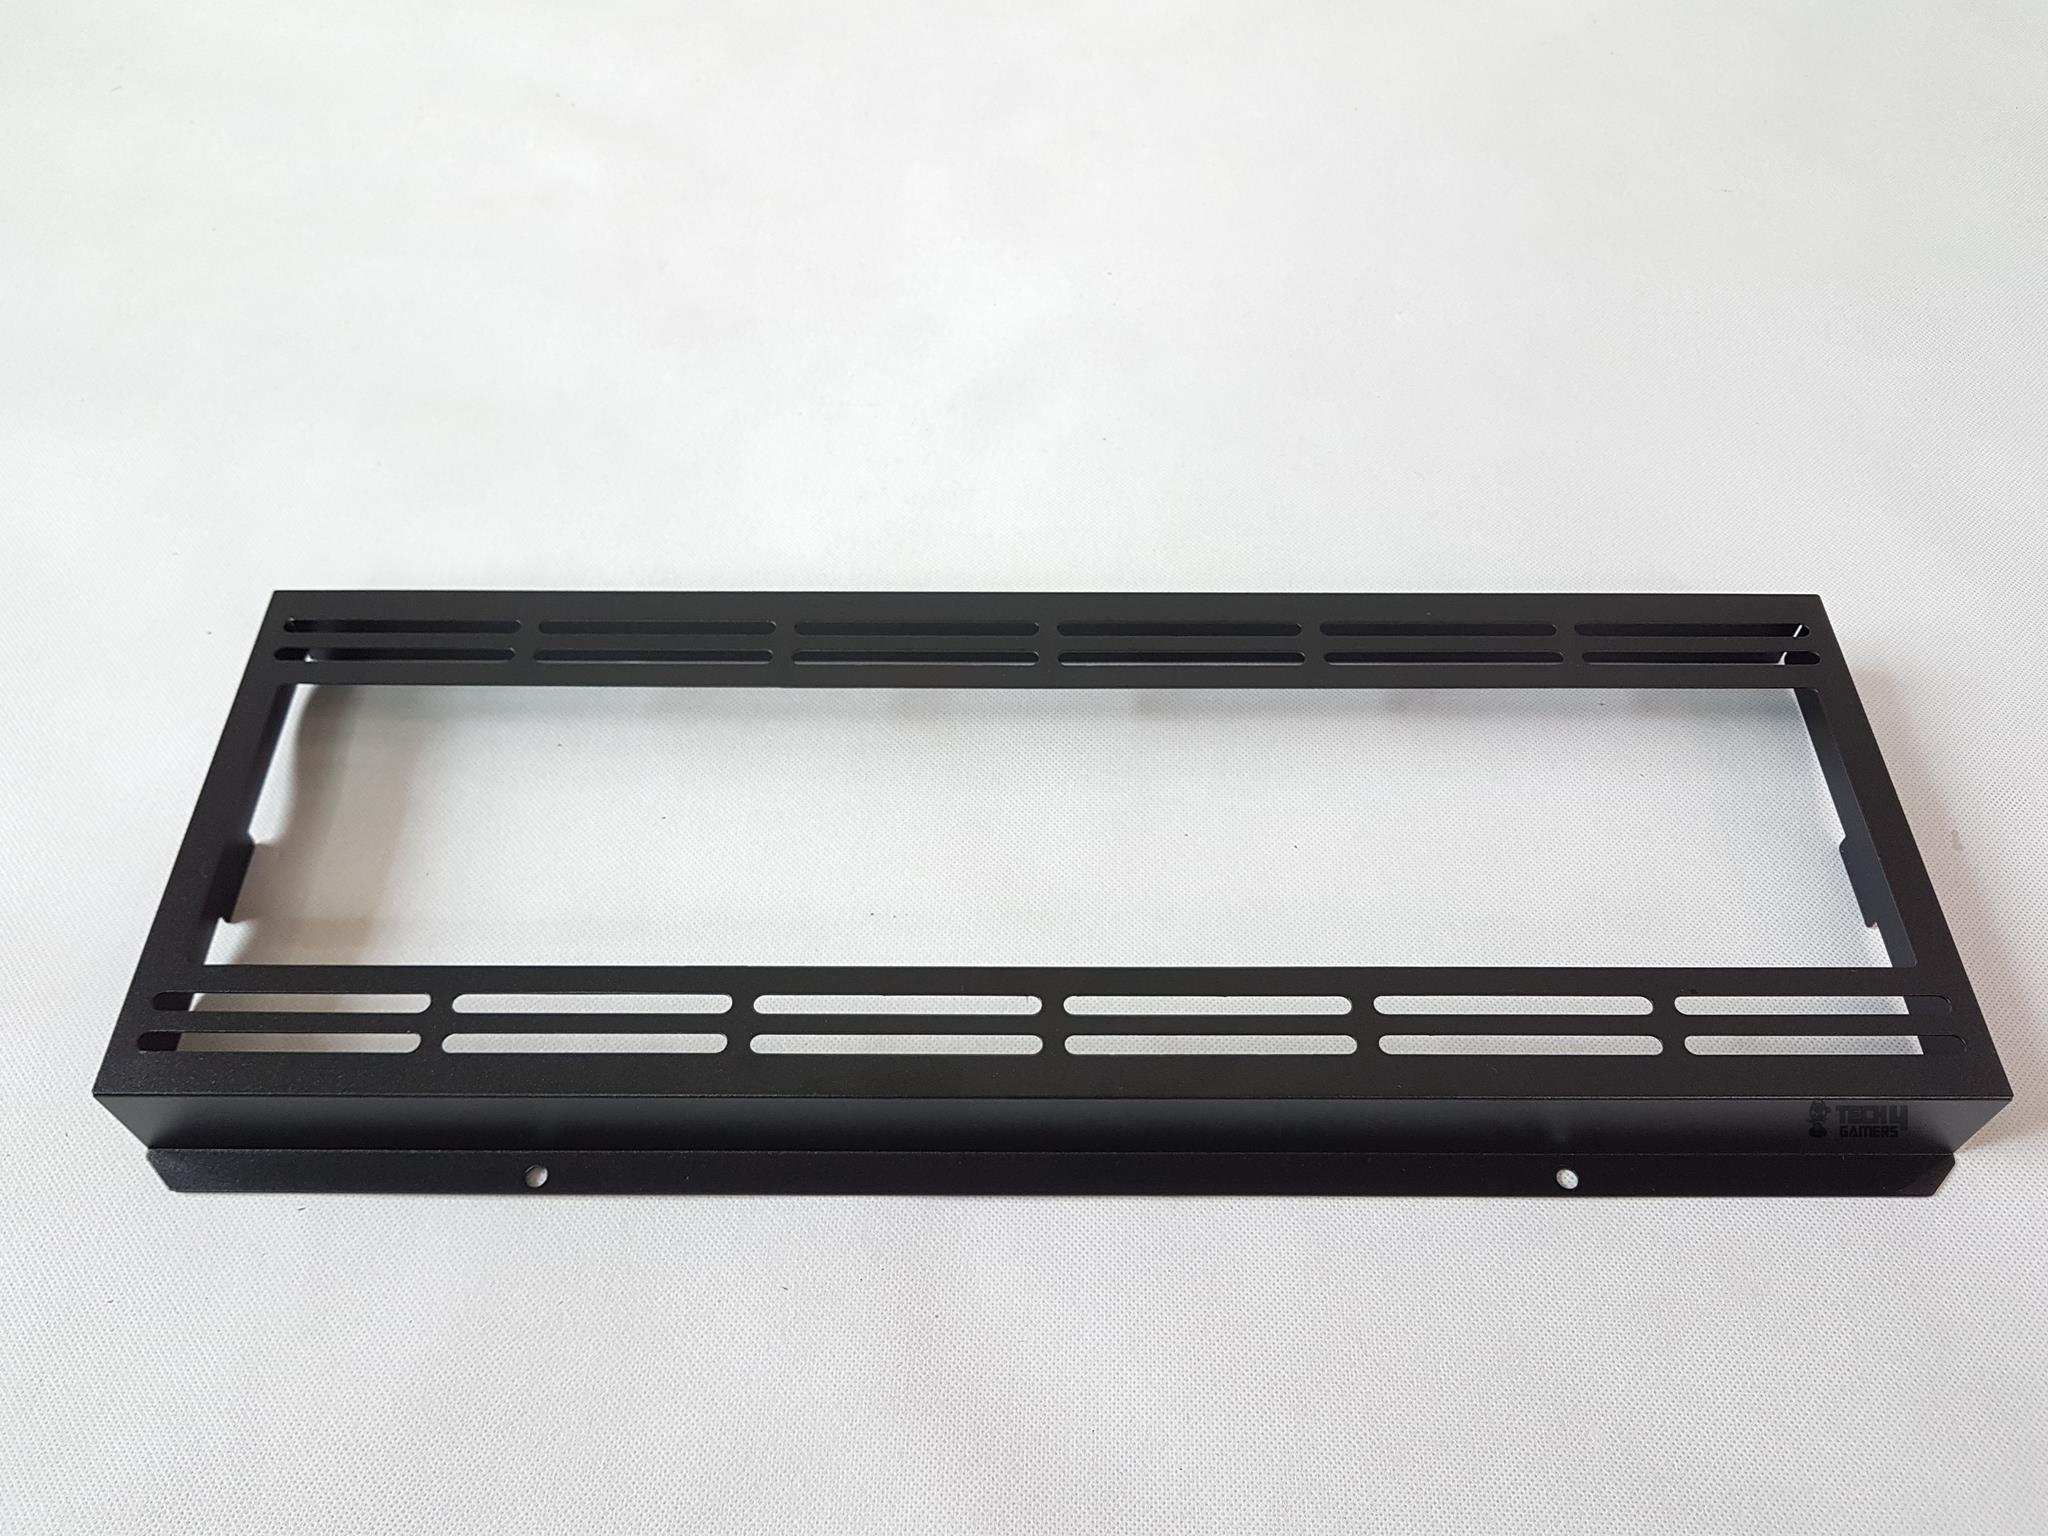
I took out one of the fans on the front side. The bracket supports up to 3 120mm or 140mm fans and up to 360mm radiator. The fan mounts are visible and 120mm mounts are adjustable. There are cutouts on the inner side of the bracket from the fan cables are routed.
MasterFan MF200R RGB Fans
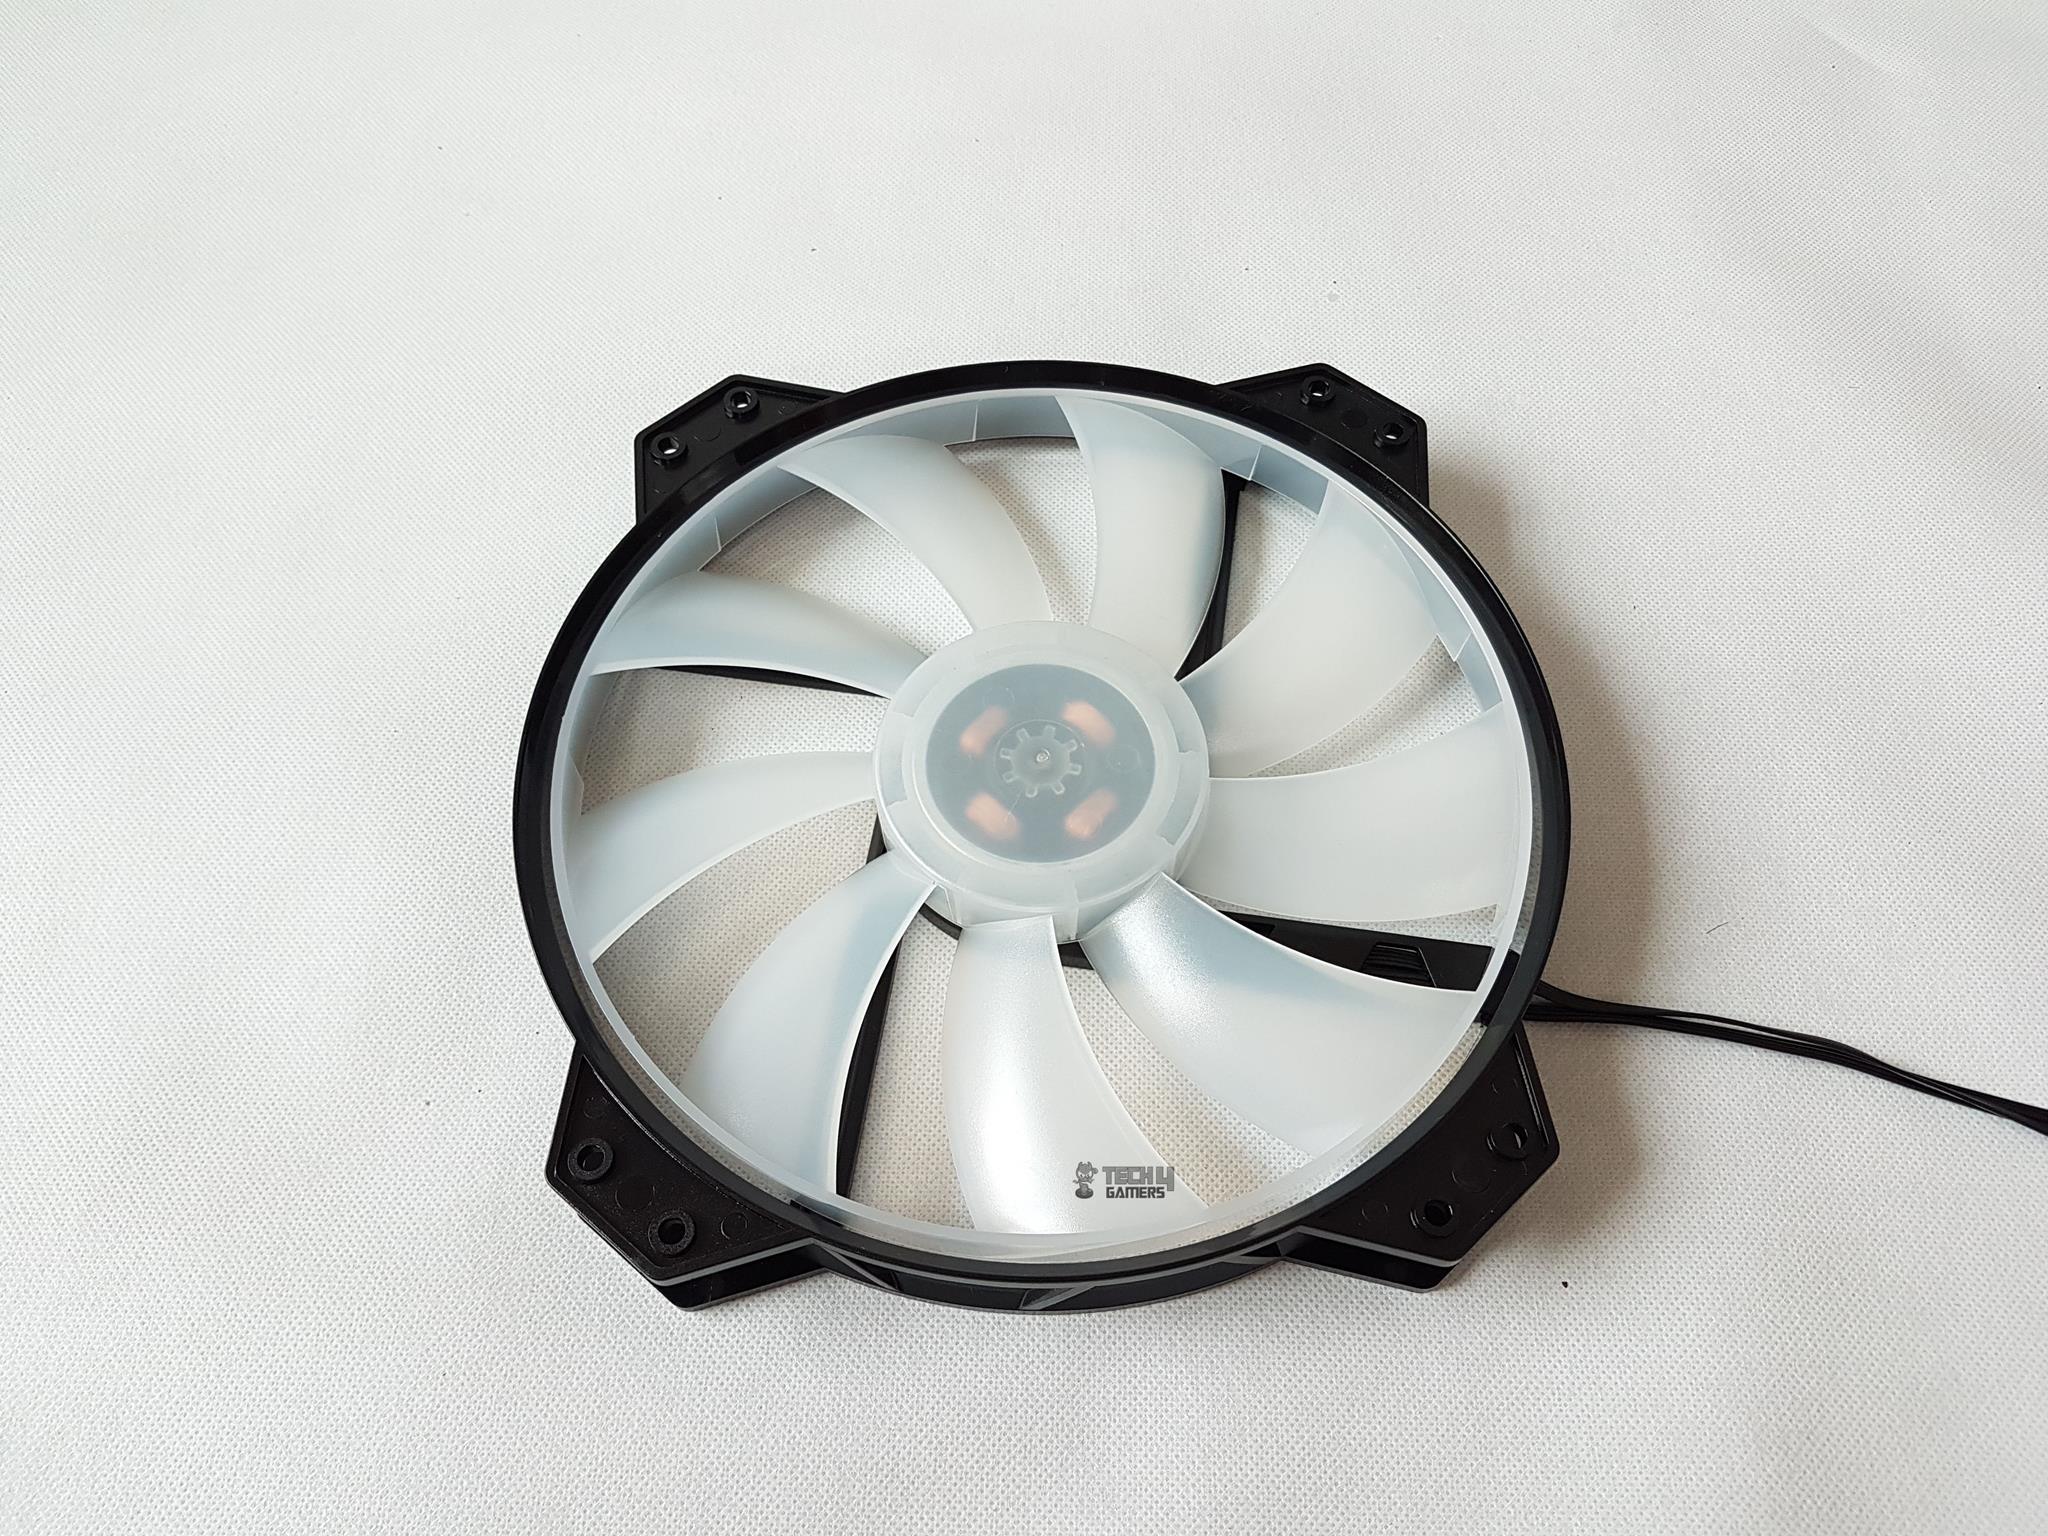
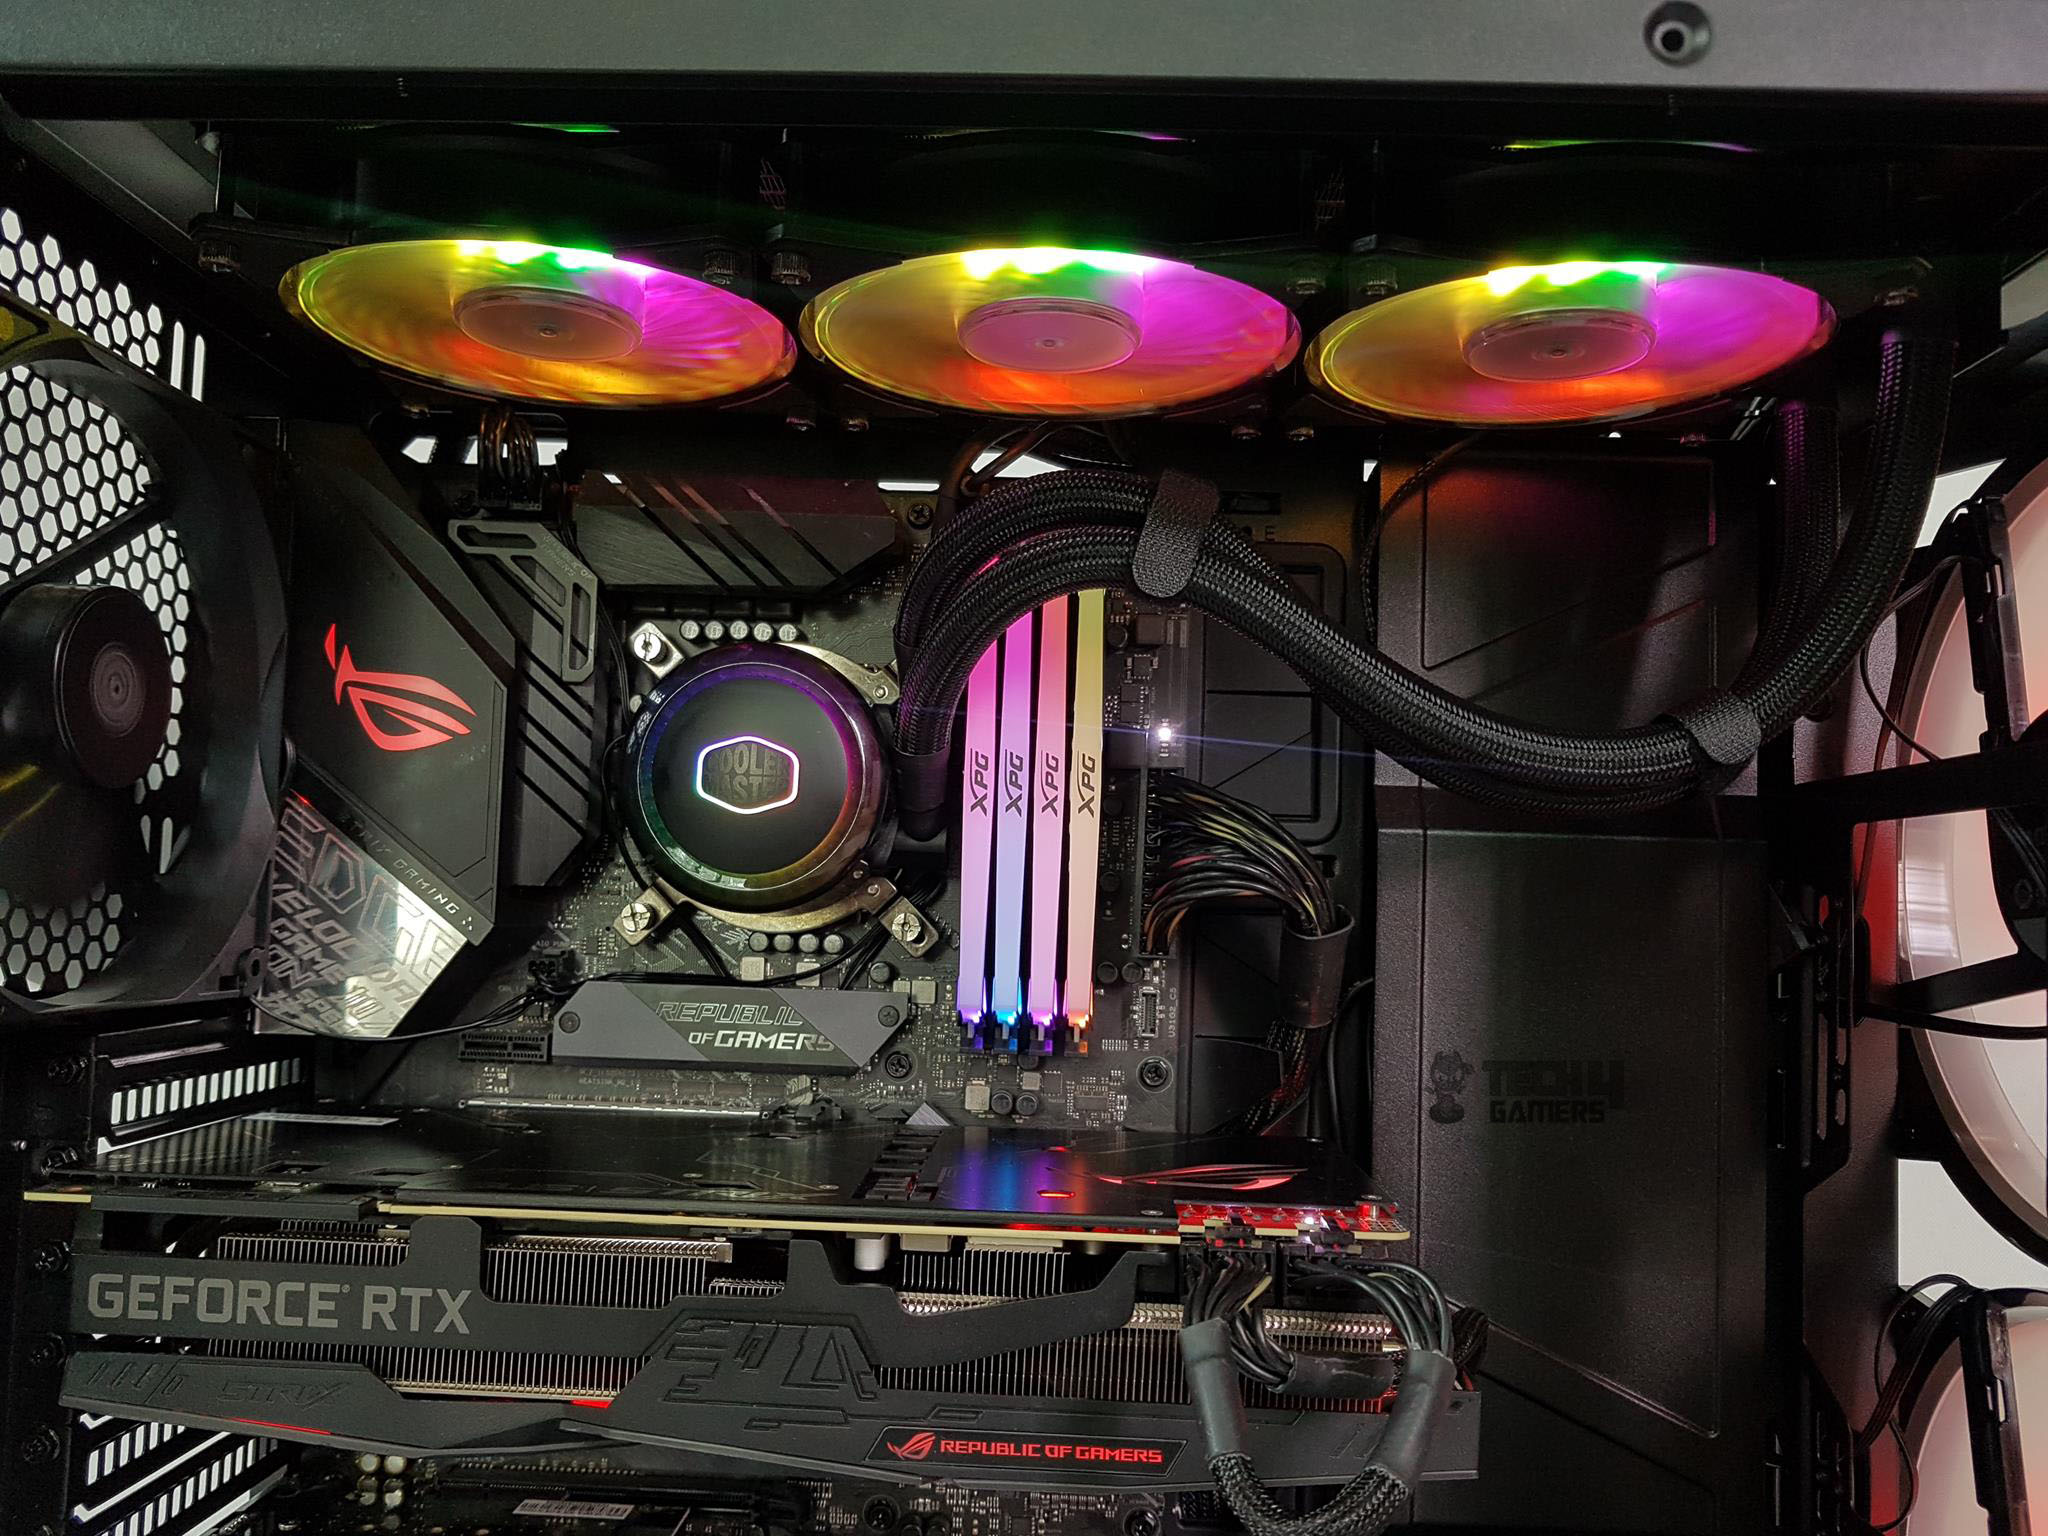
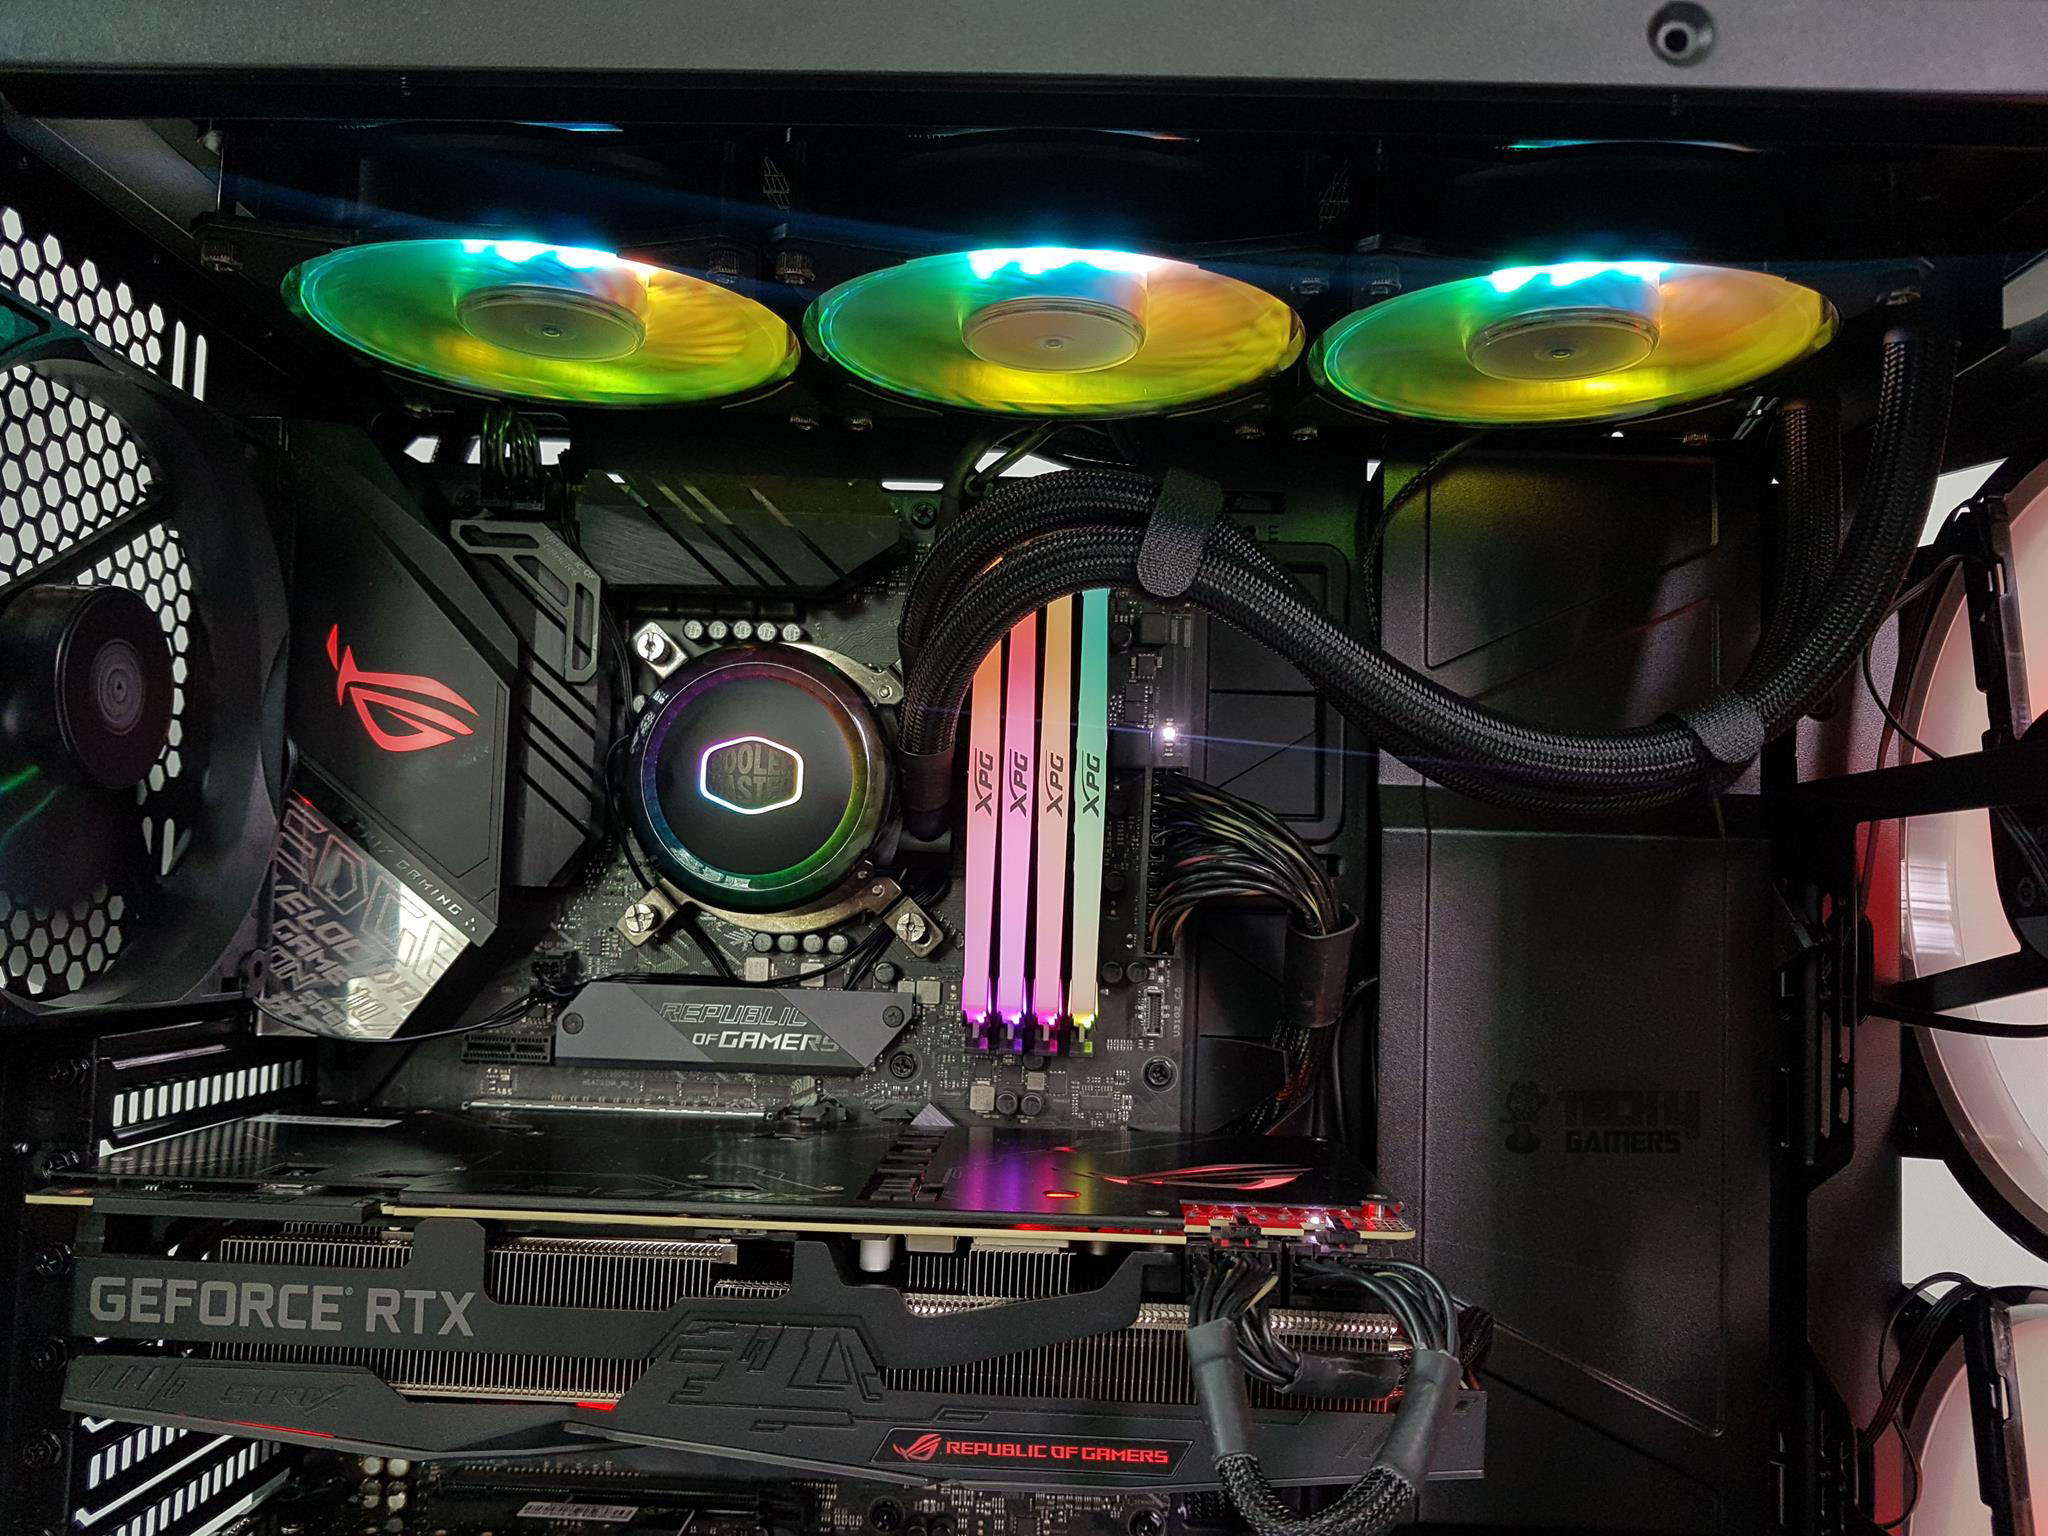
Let’s take a look at the MasterFan MF200R RGB fan. It has a diffused 9 blades and there is an inner diffused plate across the frame of the fan. The center of the fan house 8 RGB LEDs. The double-layer and diffused blades create one cool looking lighting effect. The frame of the fan is black. There is no anti-vibration pad on the mounting corners. Each mounting corner has two holes to install the fan as per the requirement.
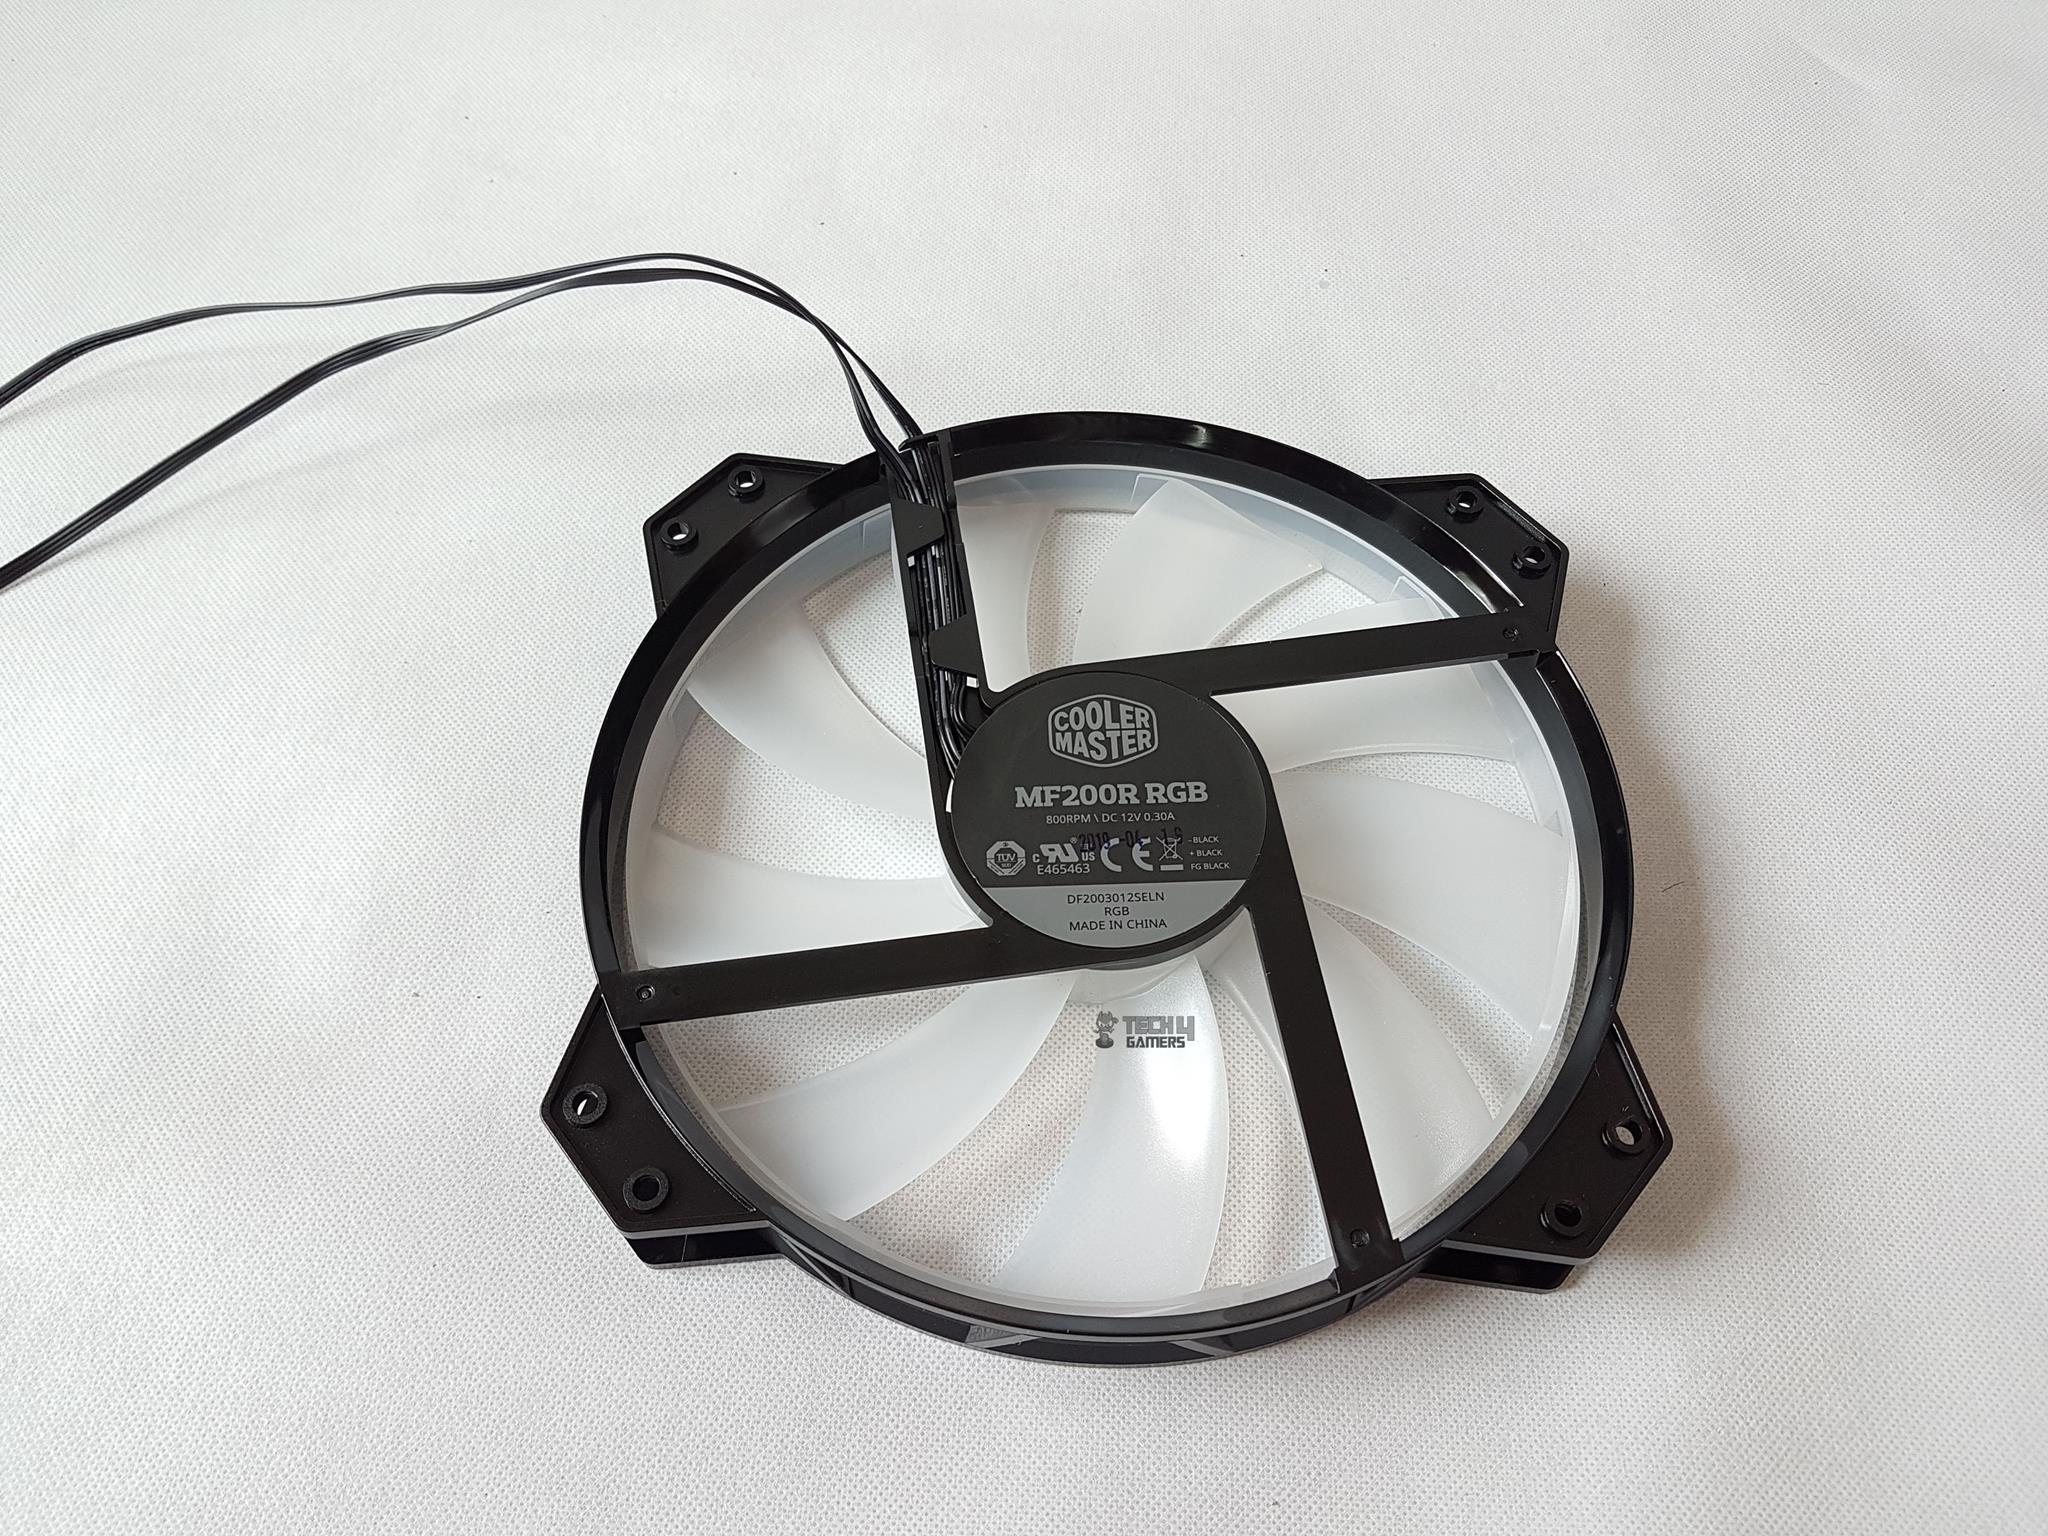
The backside of the fan shows the 4-arm assembly and has flat cables. Its powered by a 3-pin power cable and 4-pin LED cable. A quick look at the fan specifications:
| Speed | 800 RPM ± 150 |
| Airflow | 90 CFM ± 10% |
| Static Pressure | 0.8 mmH₂O ± 10% |
| Power Rating | 12V DC at 0.30A |
| MTTF | 175,000hrs |
Rear Panel
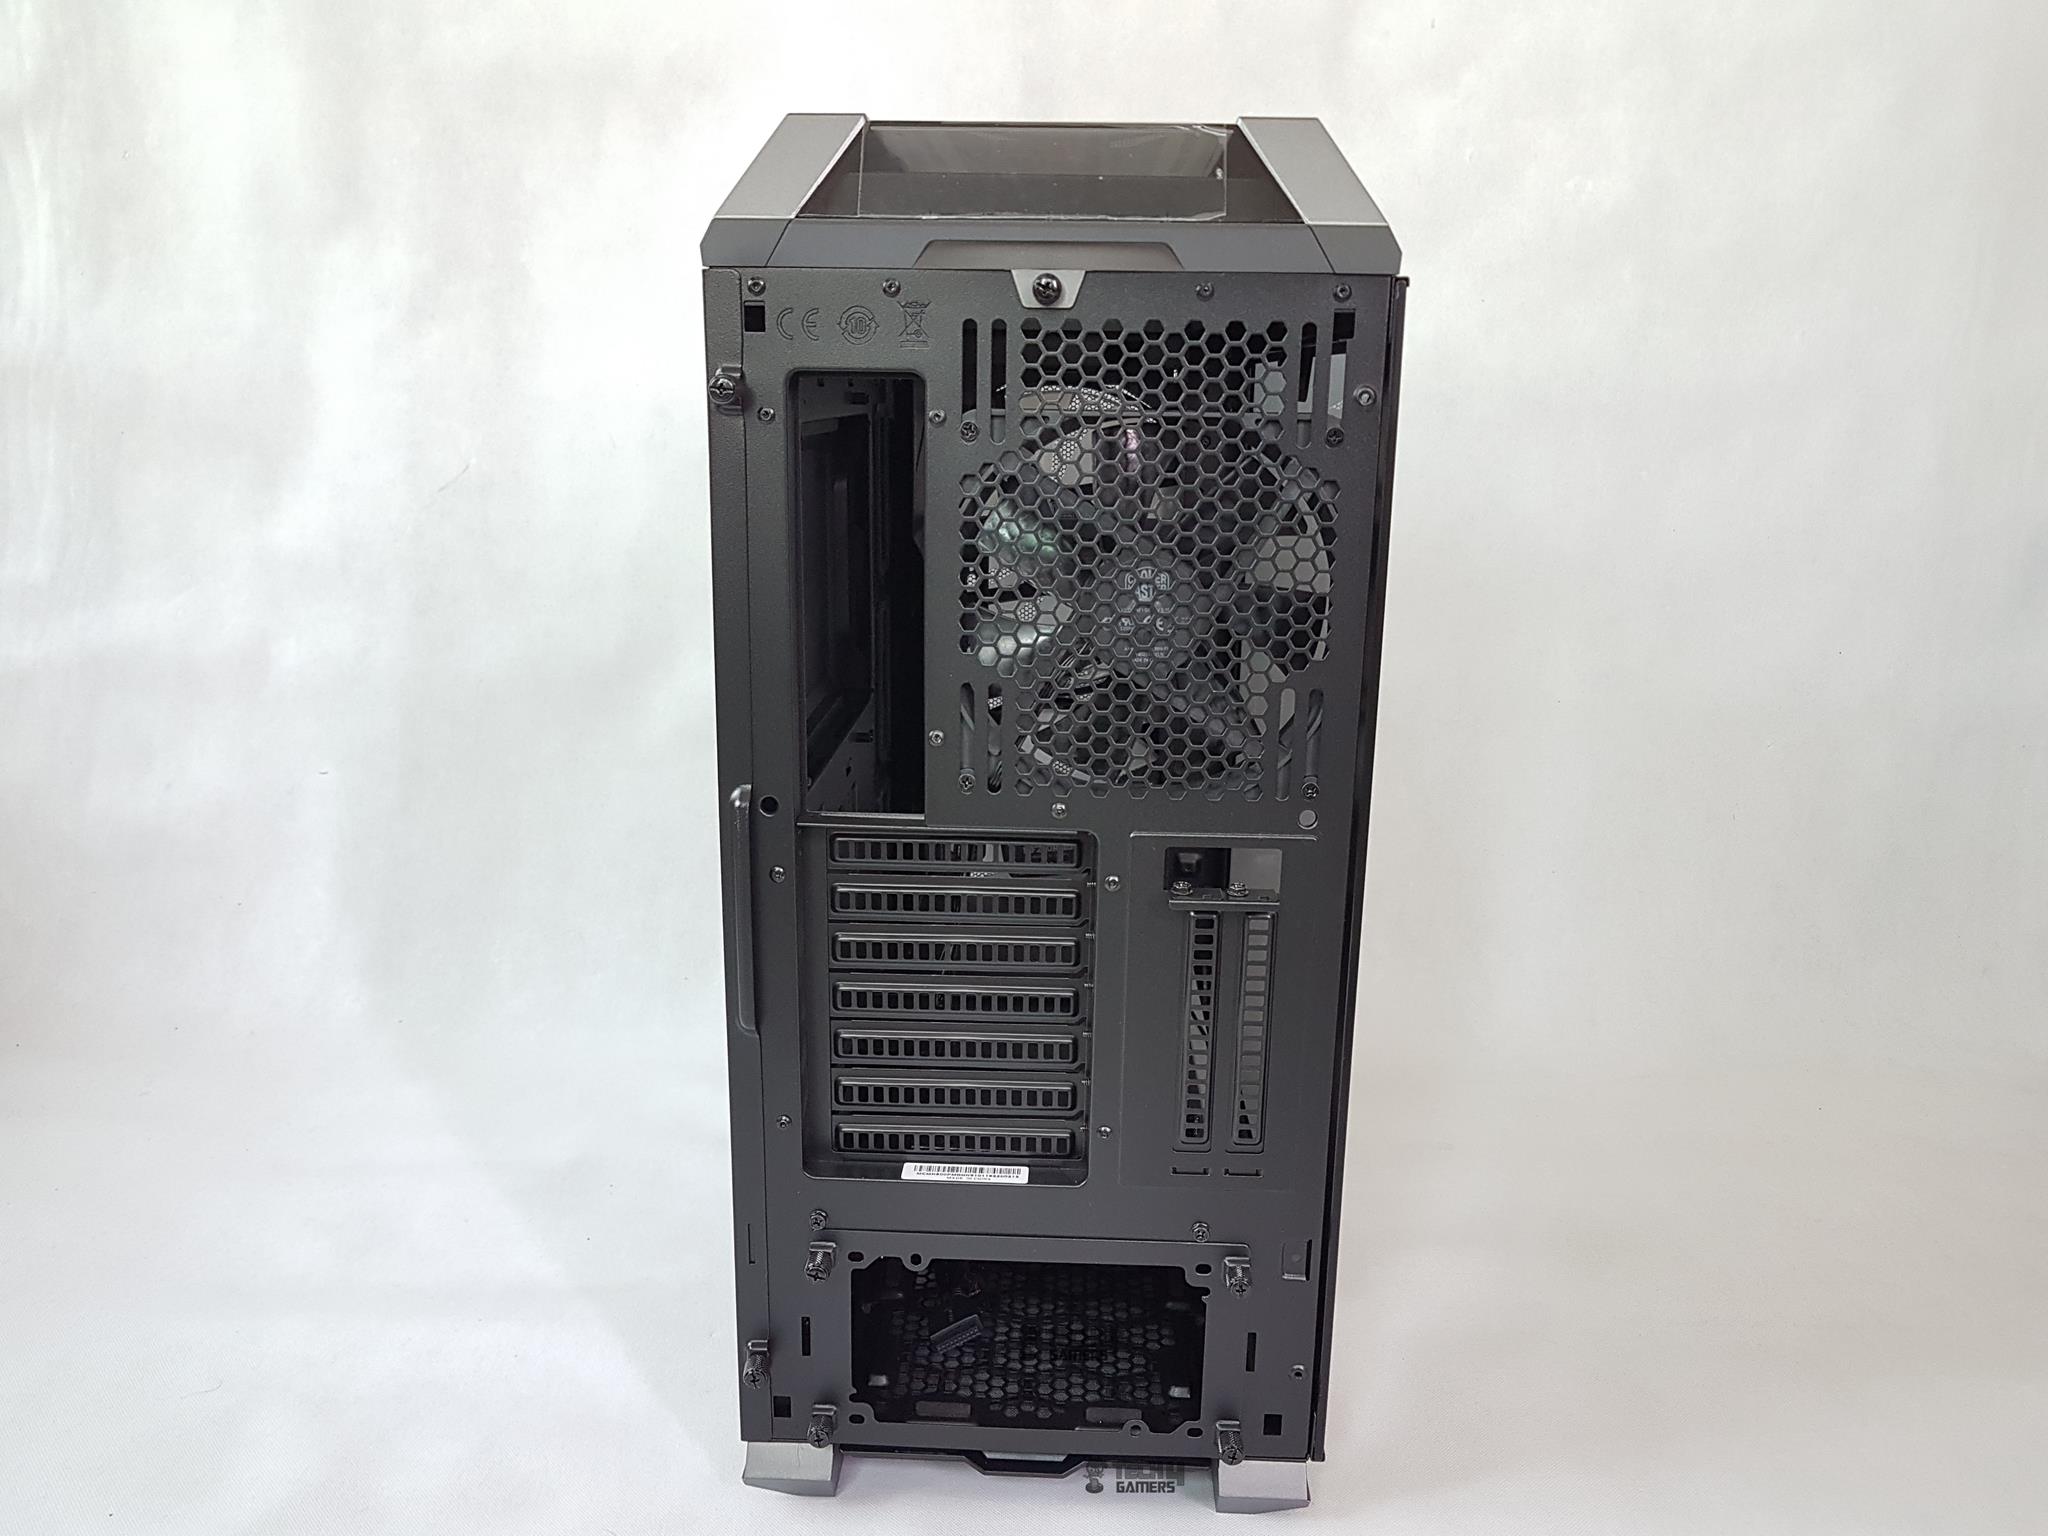
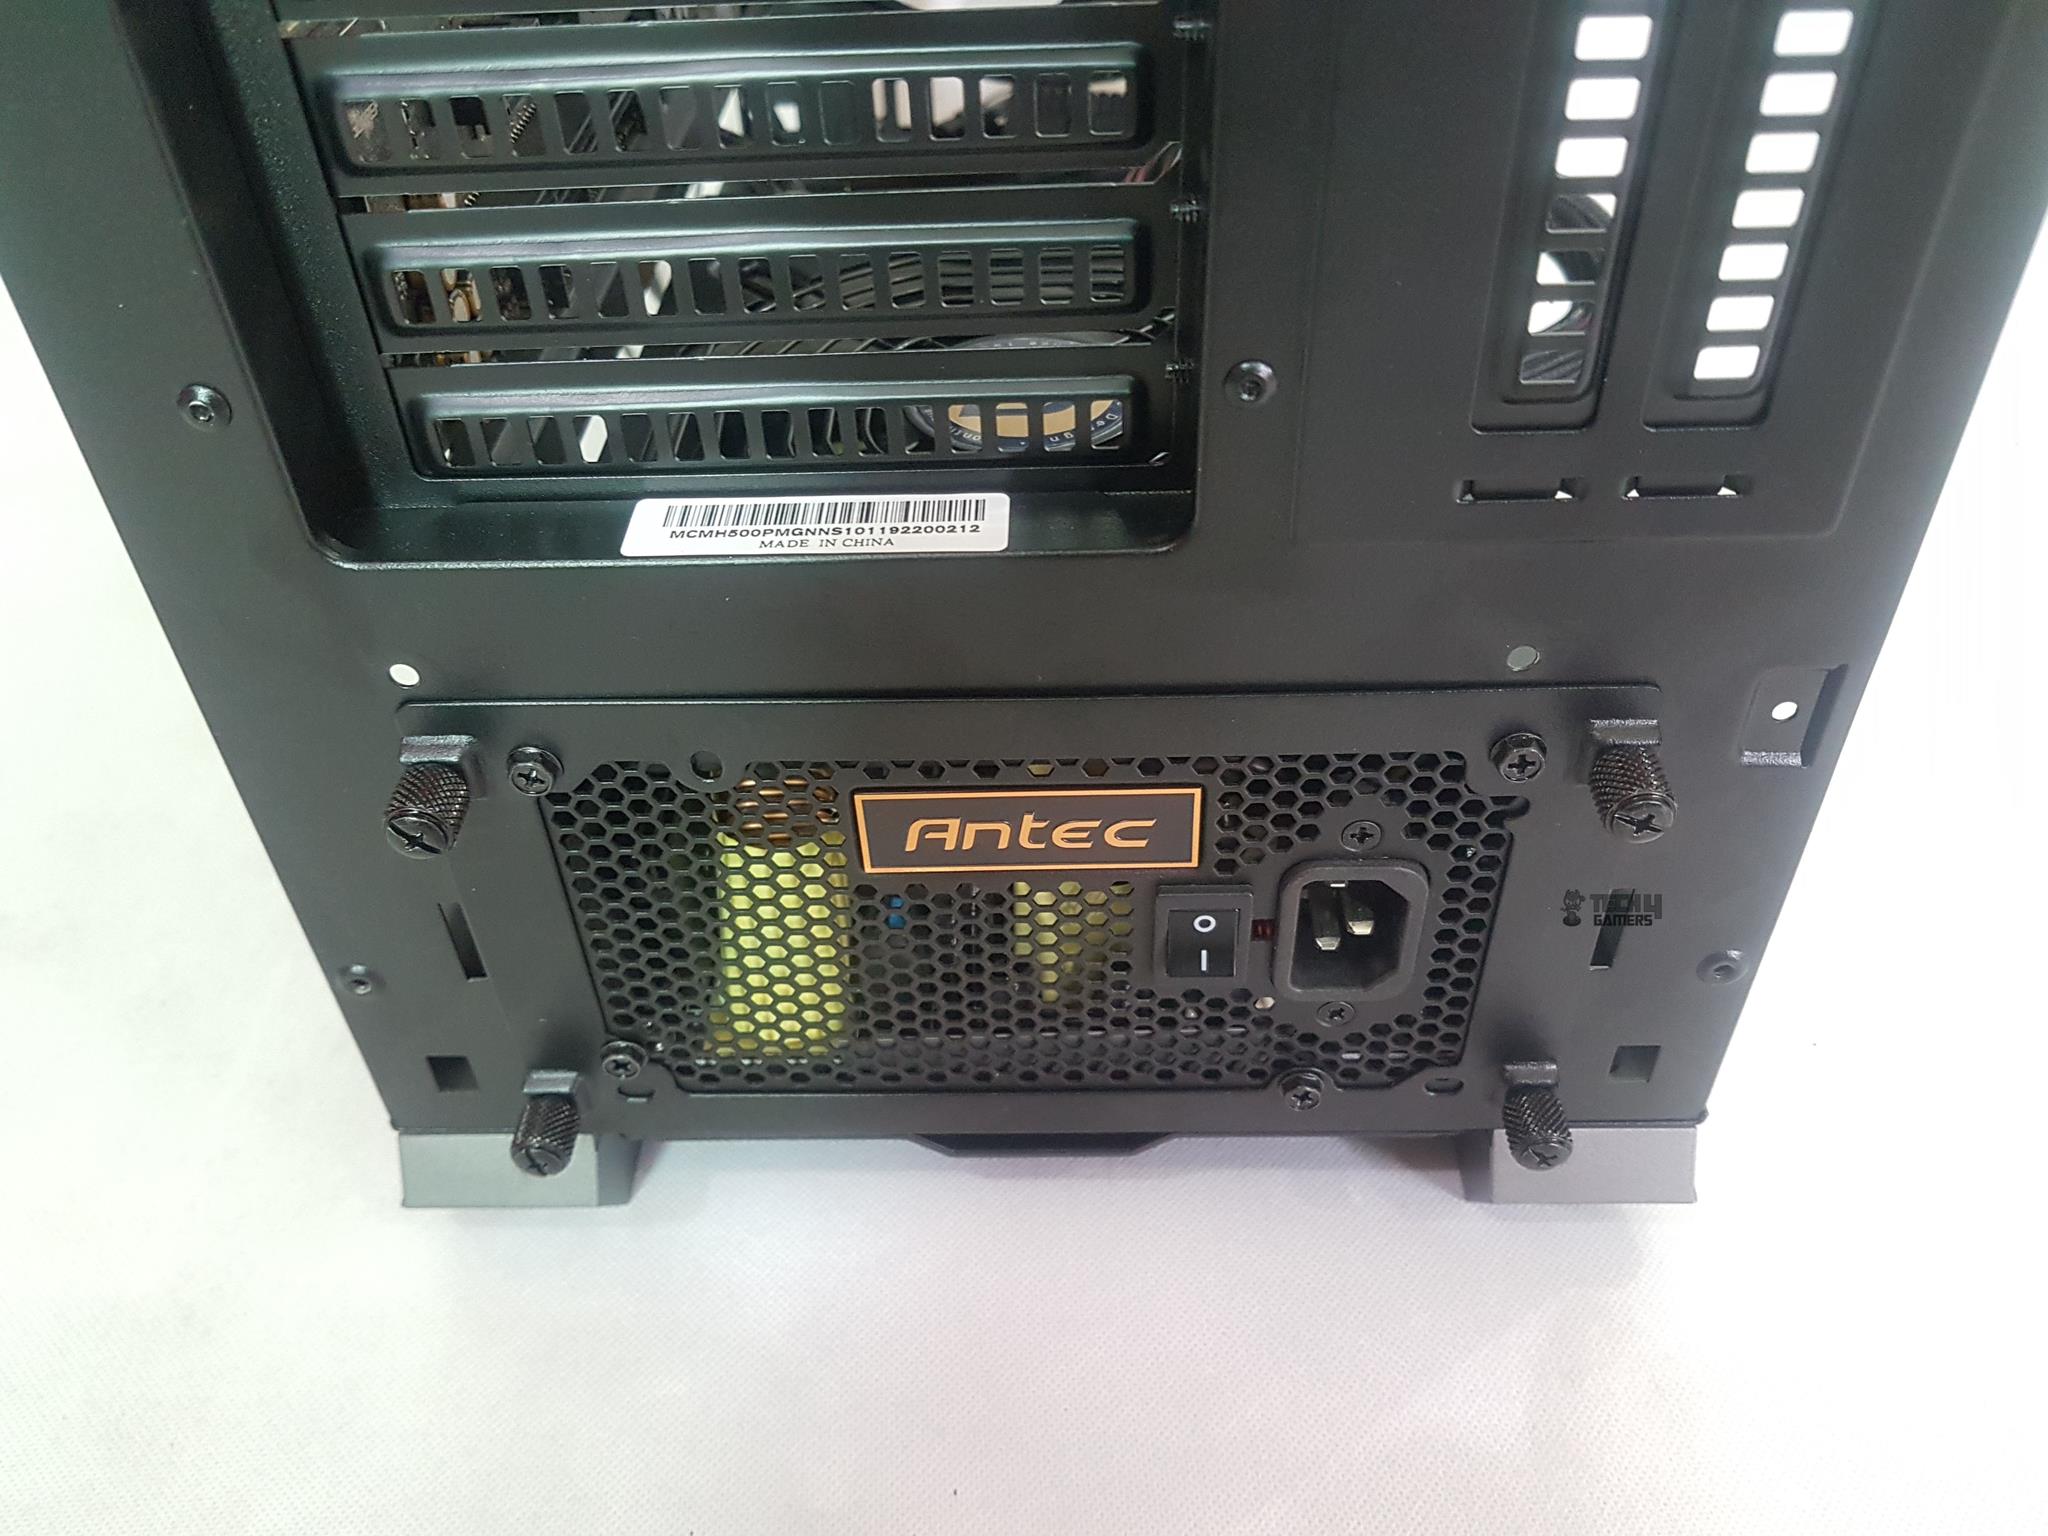
Let’s look at the casing’s rear. Starting from the top, we have a large cutout on the left side for the I/O shield of the motherboard. On its right side, there is a mounting for 120/140mm fans with height adjustment which is good. The midsection has 7 PCIe slot covers in horizontal layout and 2 in a vertical layout. There is a standard ATX PSU mounting provision at the bottom.
The good part here is that there is a PSU cover which is installed on the PSU first and then the PSU is slided in from the rear side and the captive thumbscrews are used to lock the PSU with the chassis. Reminds me of NZXT chassis design.
The top panel is secured and locked using a thumb screw from the rear side. This is not a captive screw which it should have been. This is another improvement over the H500P where the top panel comes off freely without a force. Now, it is locked using a screw though there is no other improvement done on the top panel.
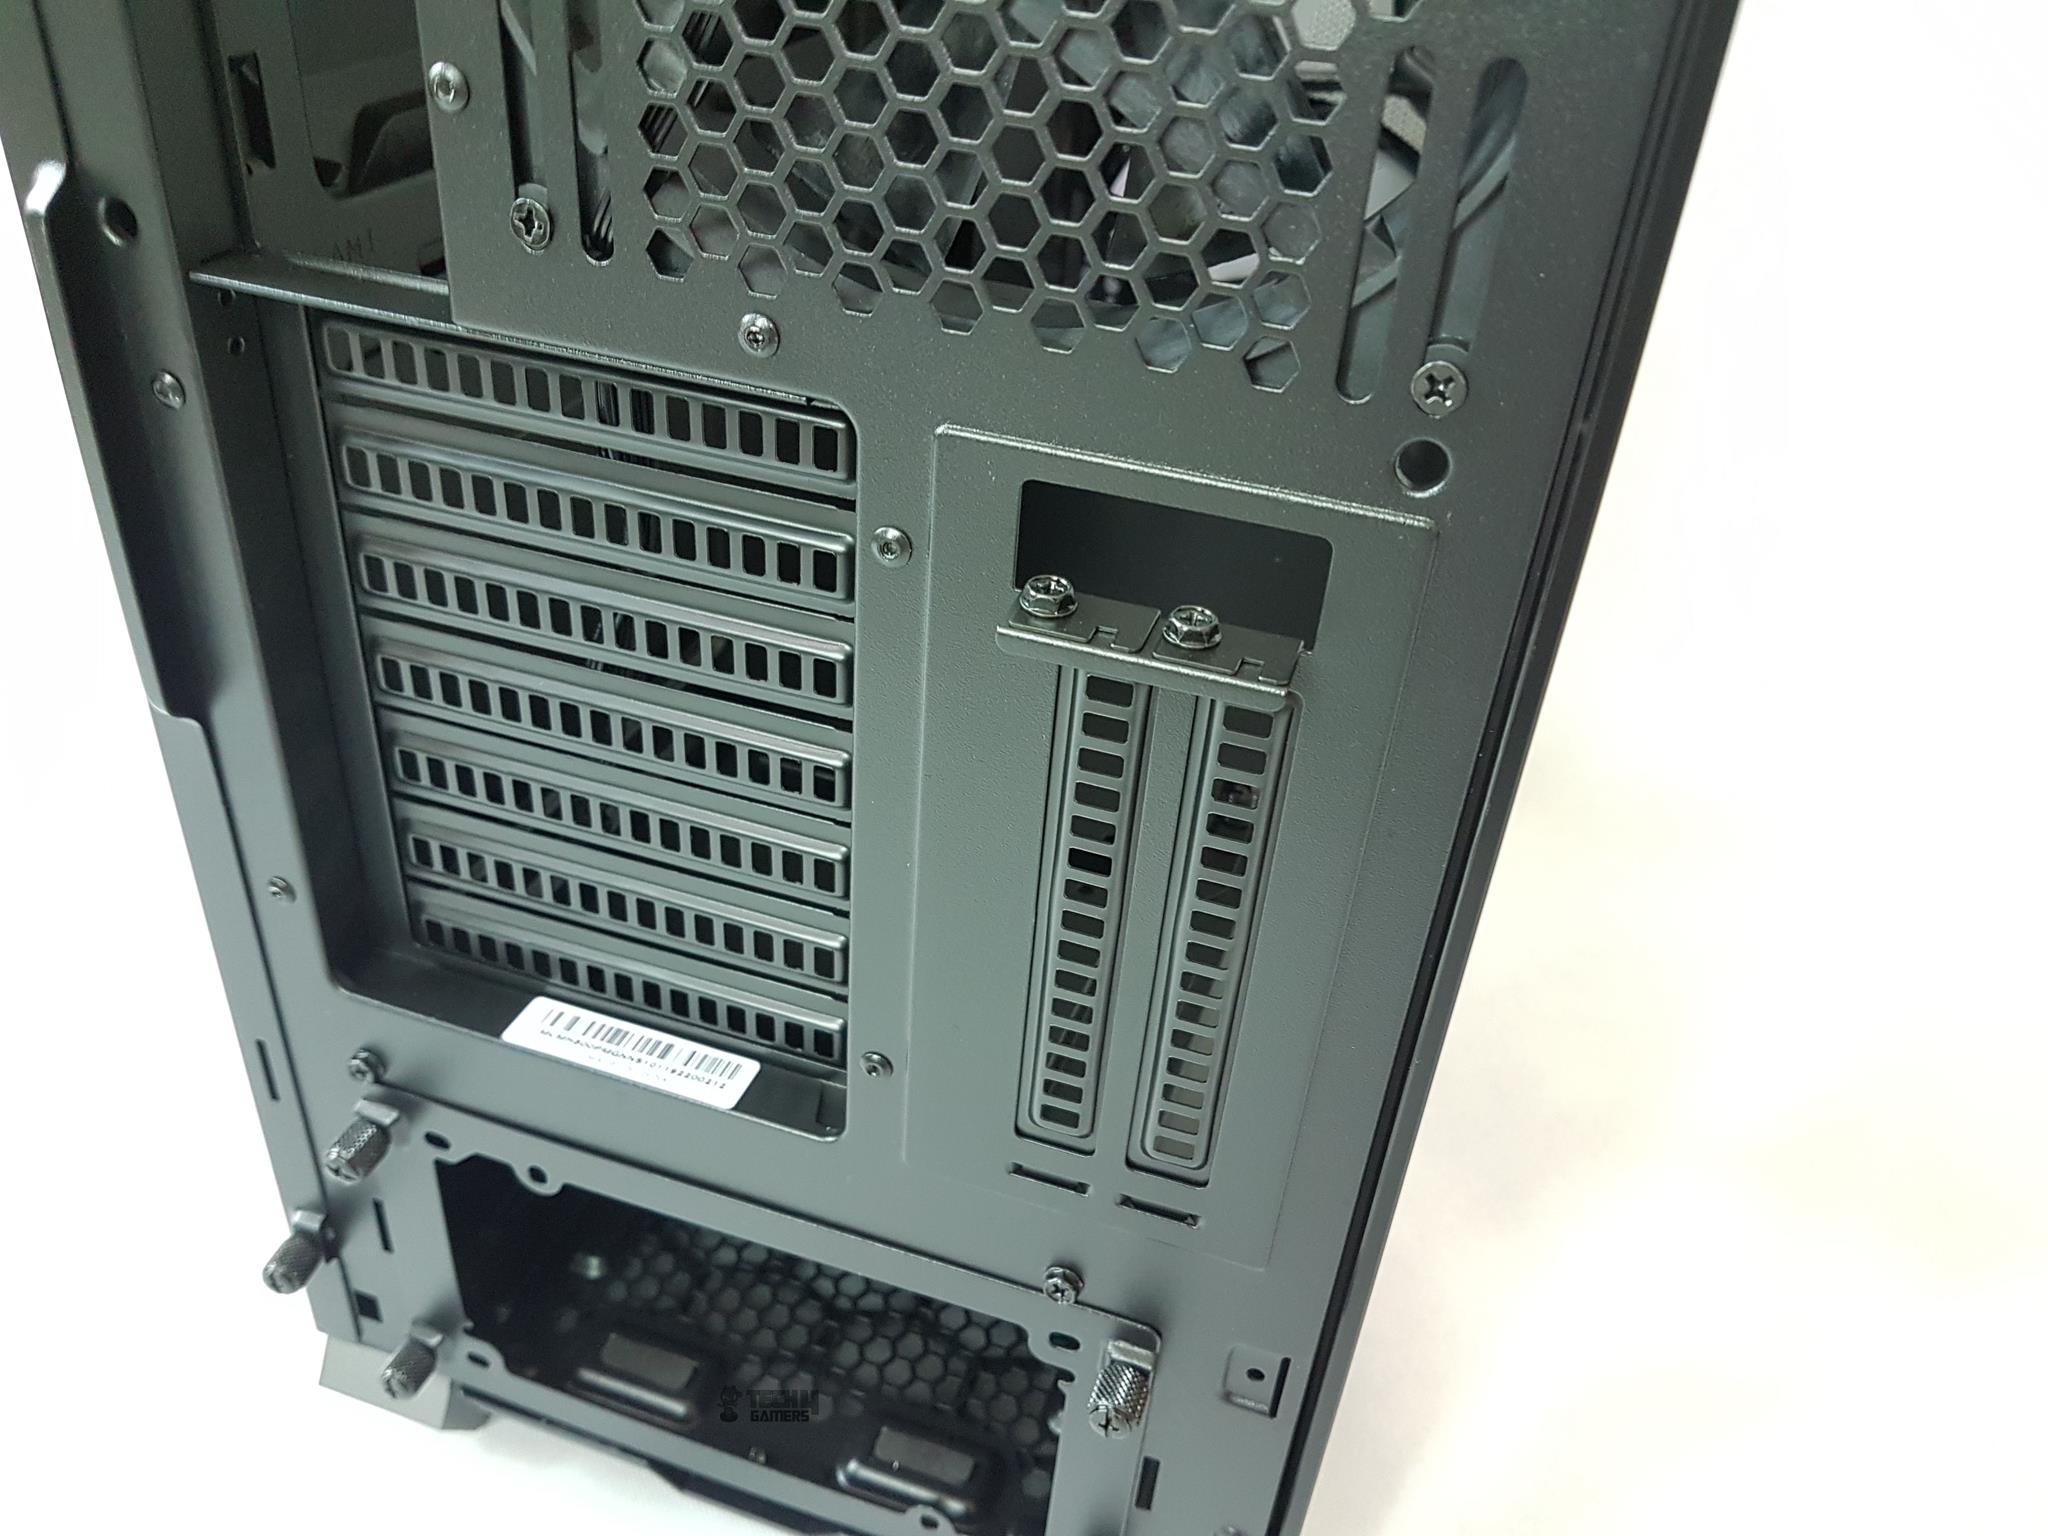
Taking a closer look at the two vertical-mounted PCIe slot covers, they are locked using M3 screws. The user can remove the screws to take off the covers and install the graphics card vertically. Please note that there is no vertical stand to provide extra durability and strength for the vertically mounted graphics card. The card’s complete weight is based on the two slots and the PCB itself.
The two M3 screws above the PSU shroud are locking the PSU shroud.
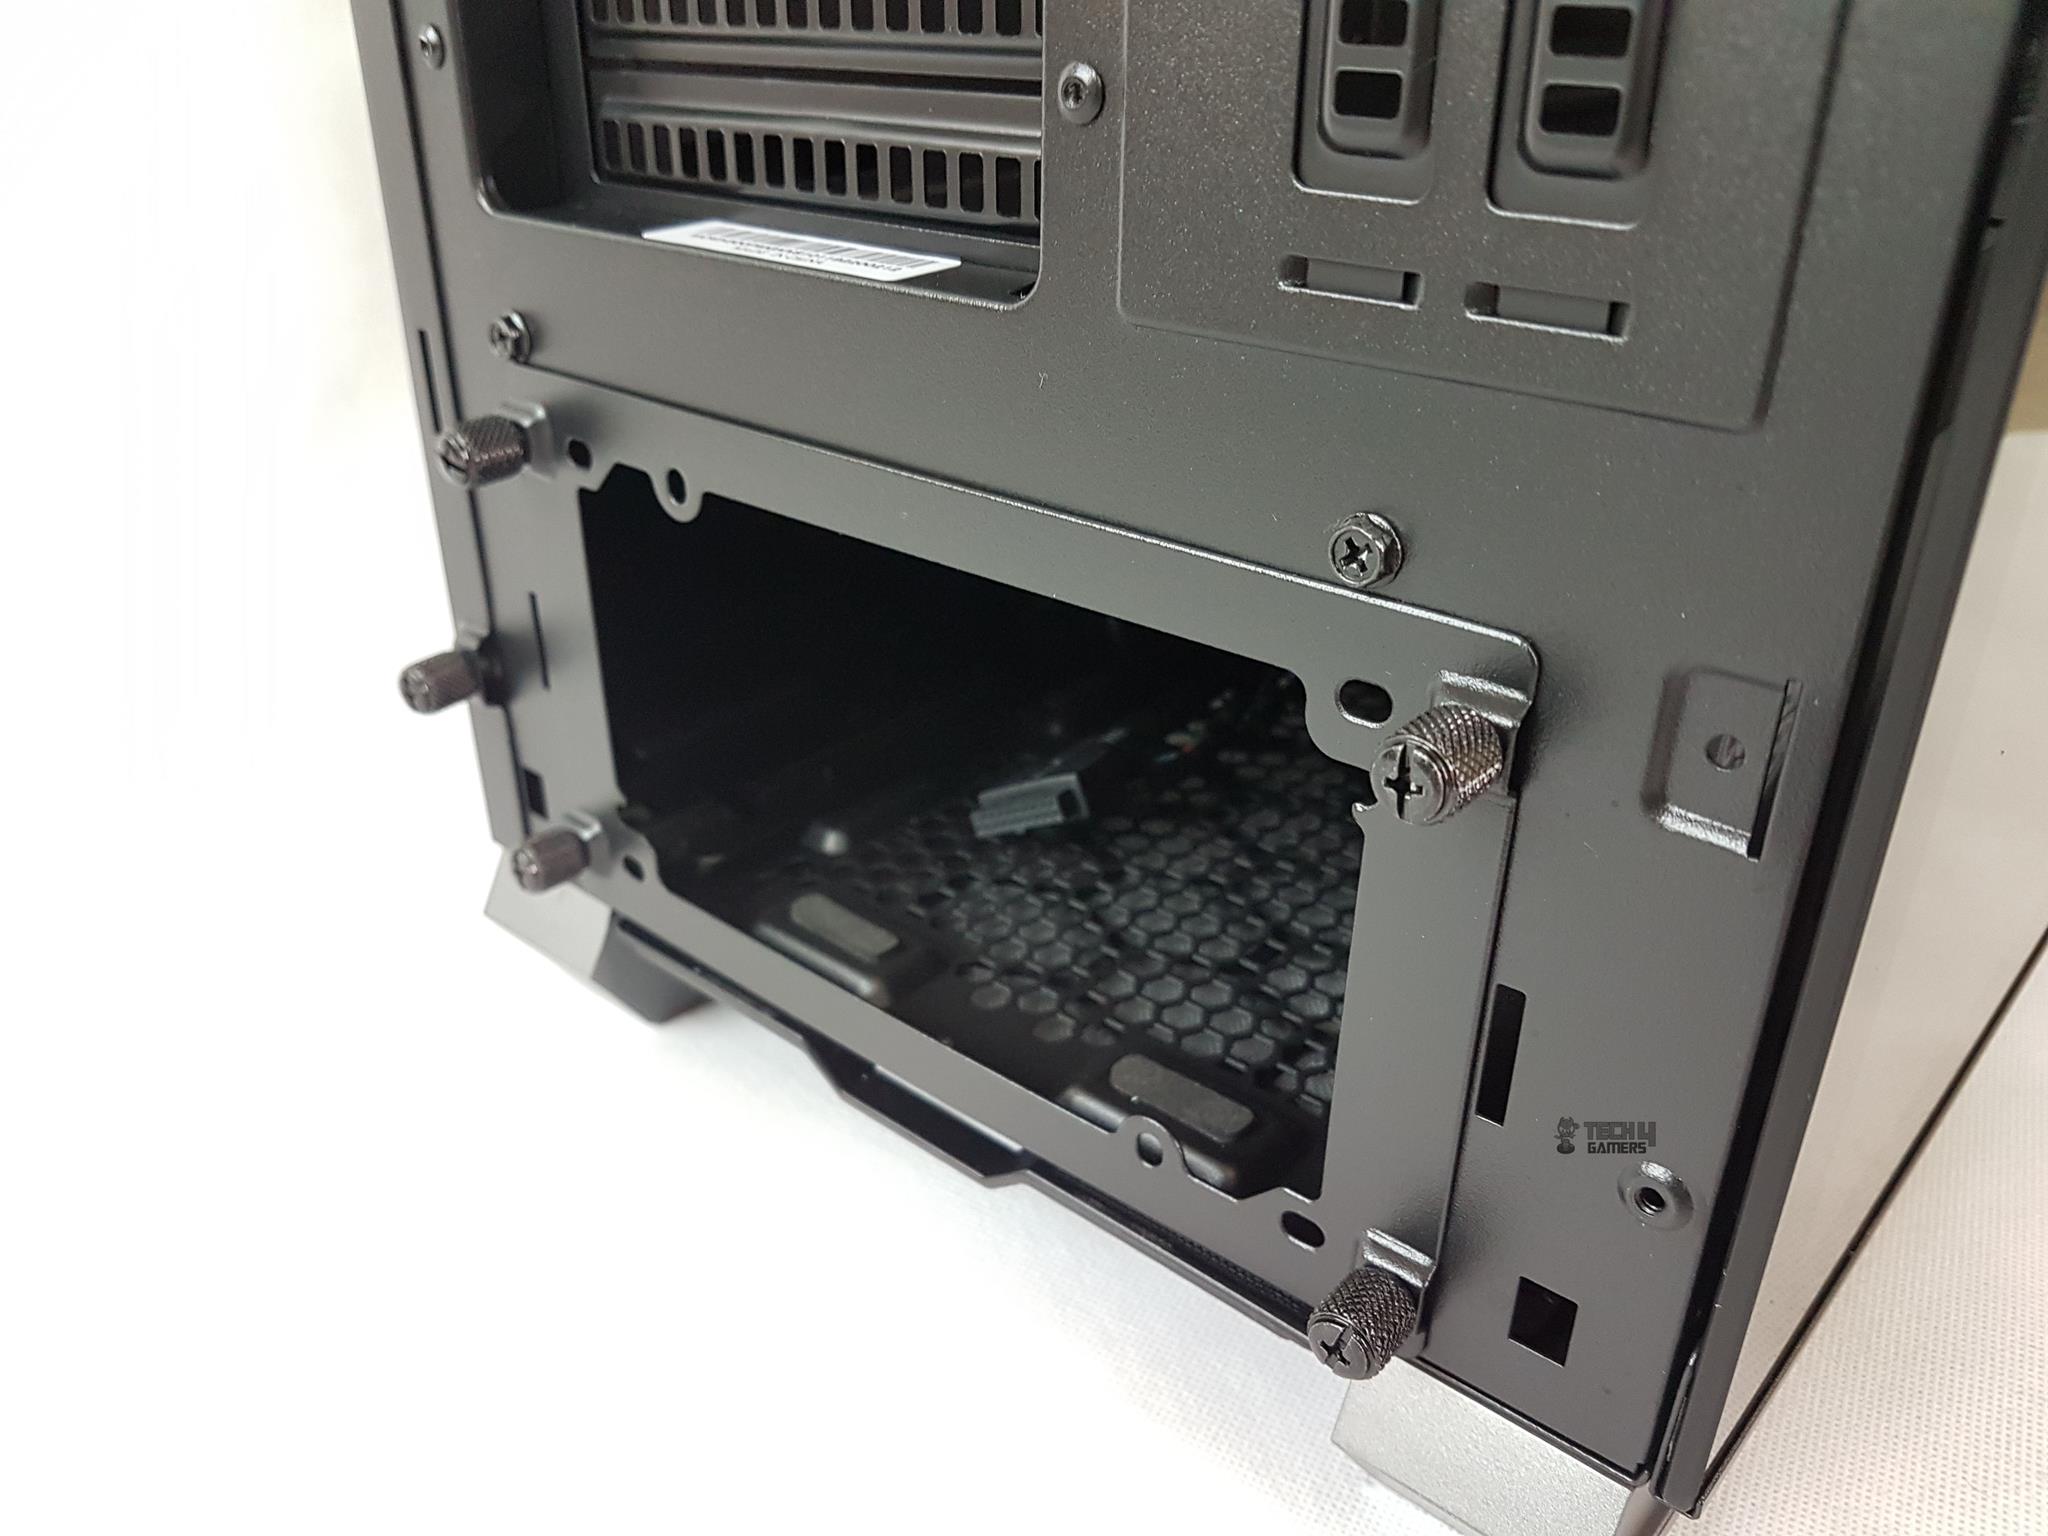
Bottom Panel
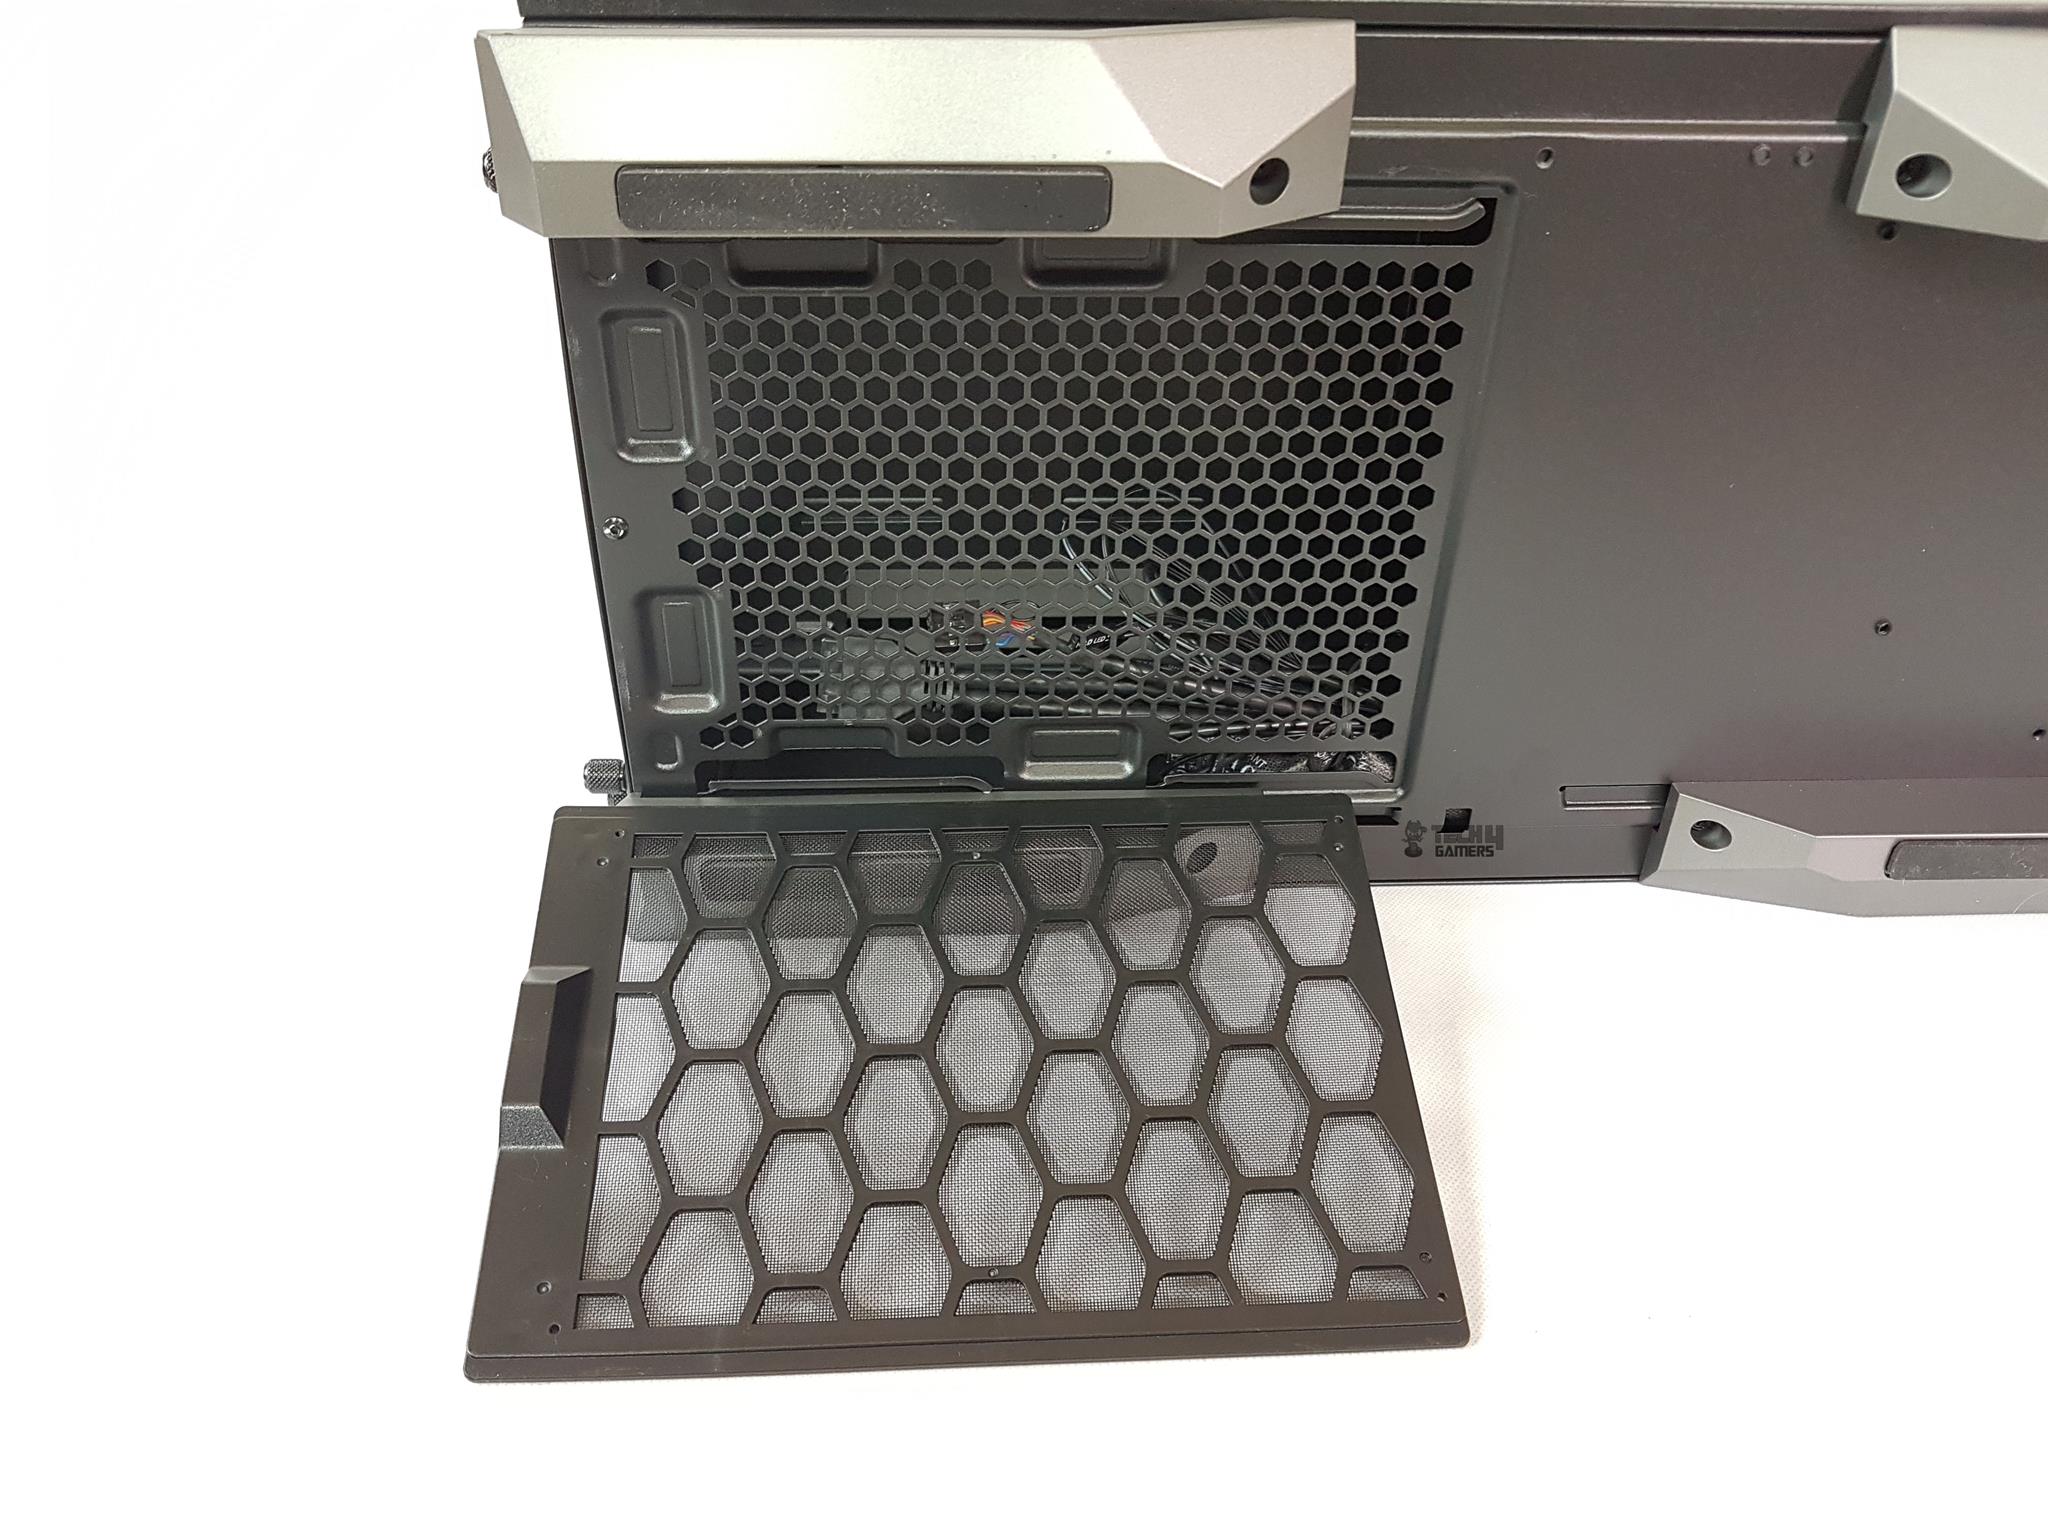
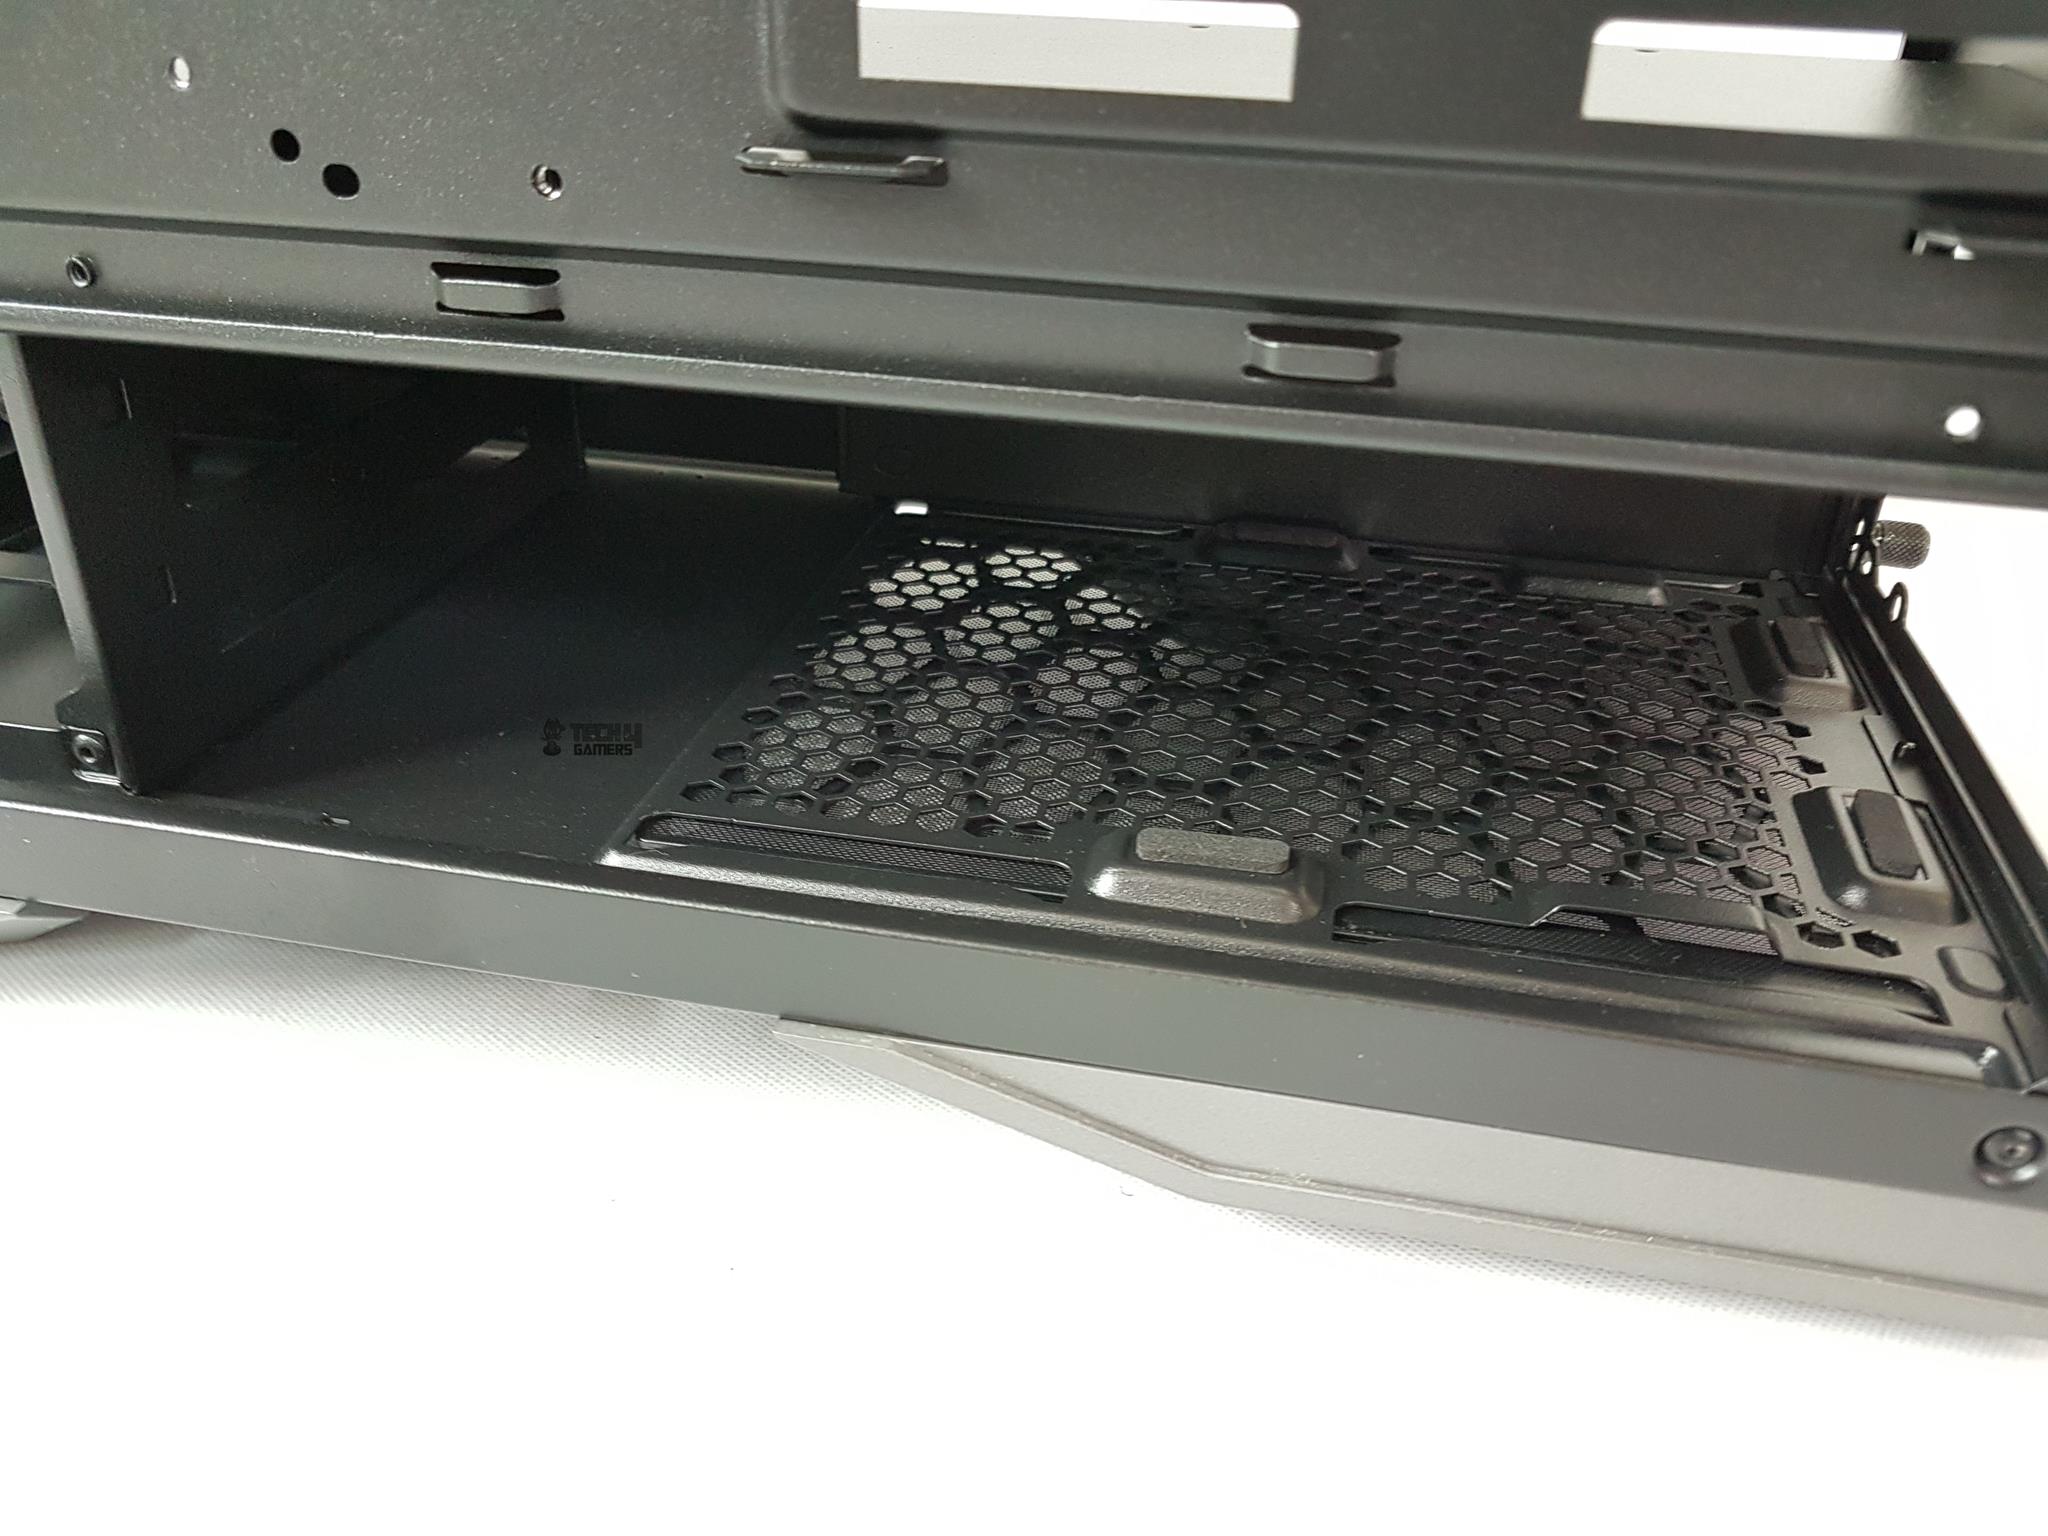
Let’s take a look at the bottom side of the chassis. There are 4 feet that are cut to shape to match the overall design symmetry and give plentiful clearance from the surface for air intake. Each foot has a large-sized rubber pad pasted on it to avoid scratching the surface. There is a removable dust filter under the PSU area.
The second picture shows the vented PSU area with the dust filter removed.
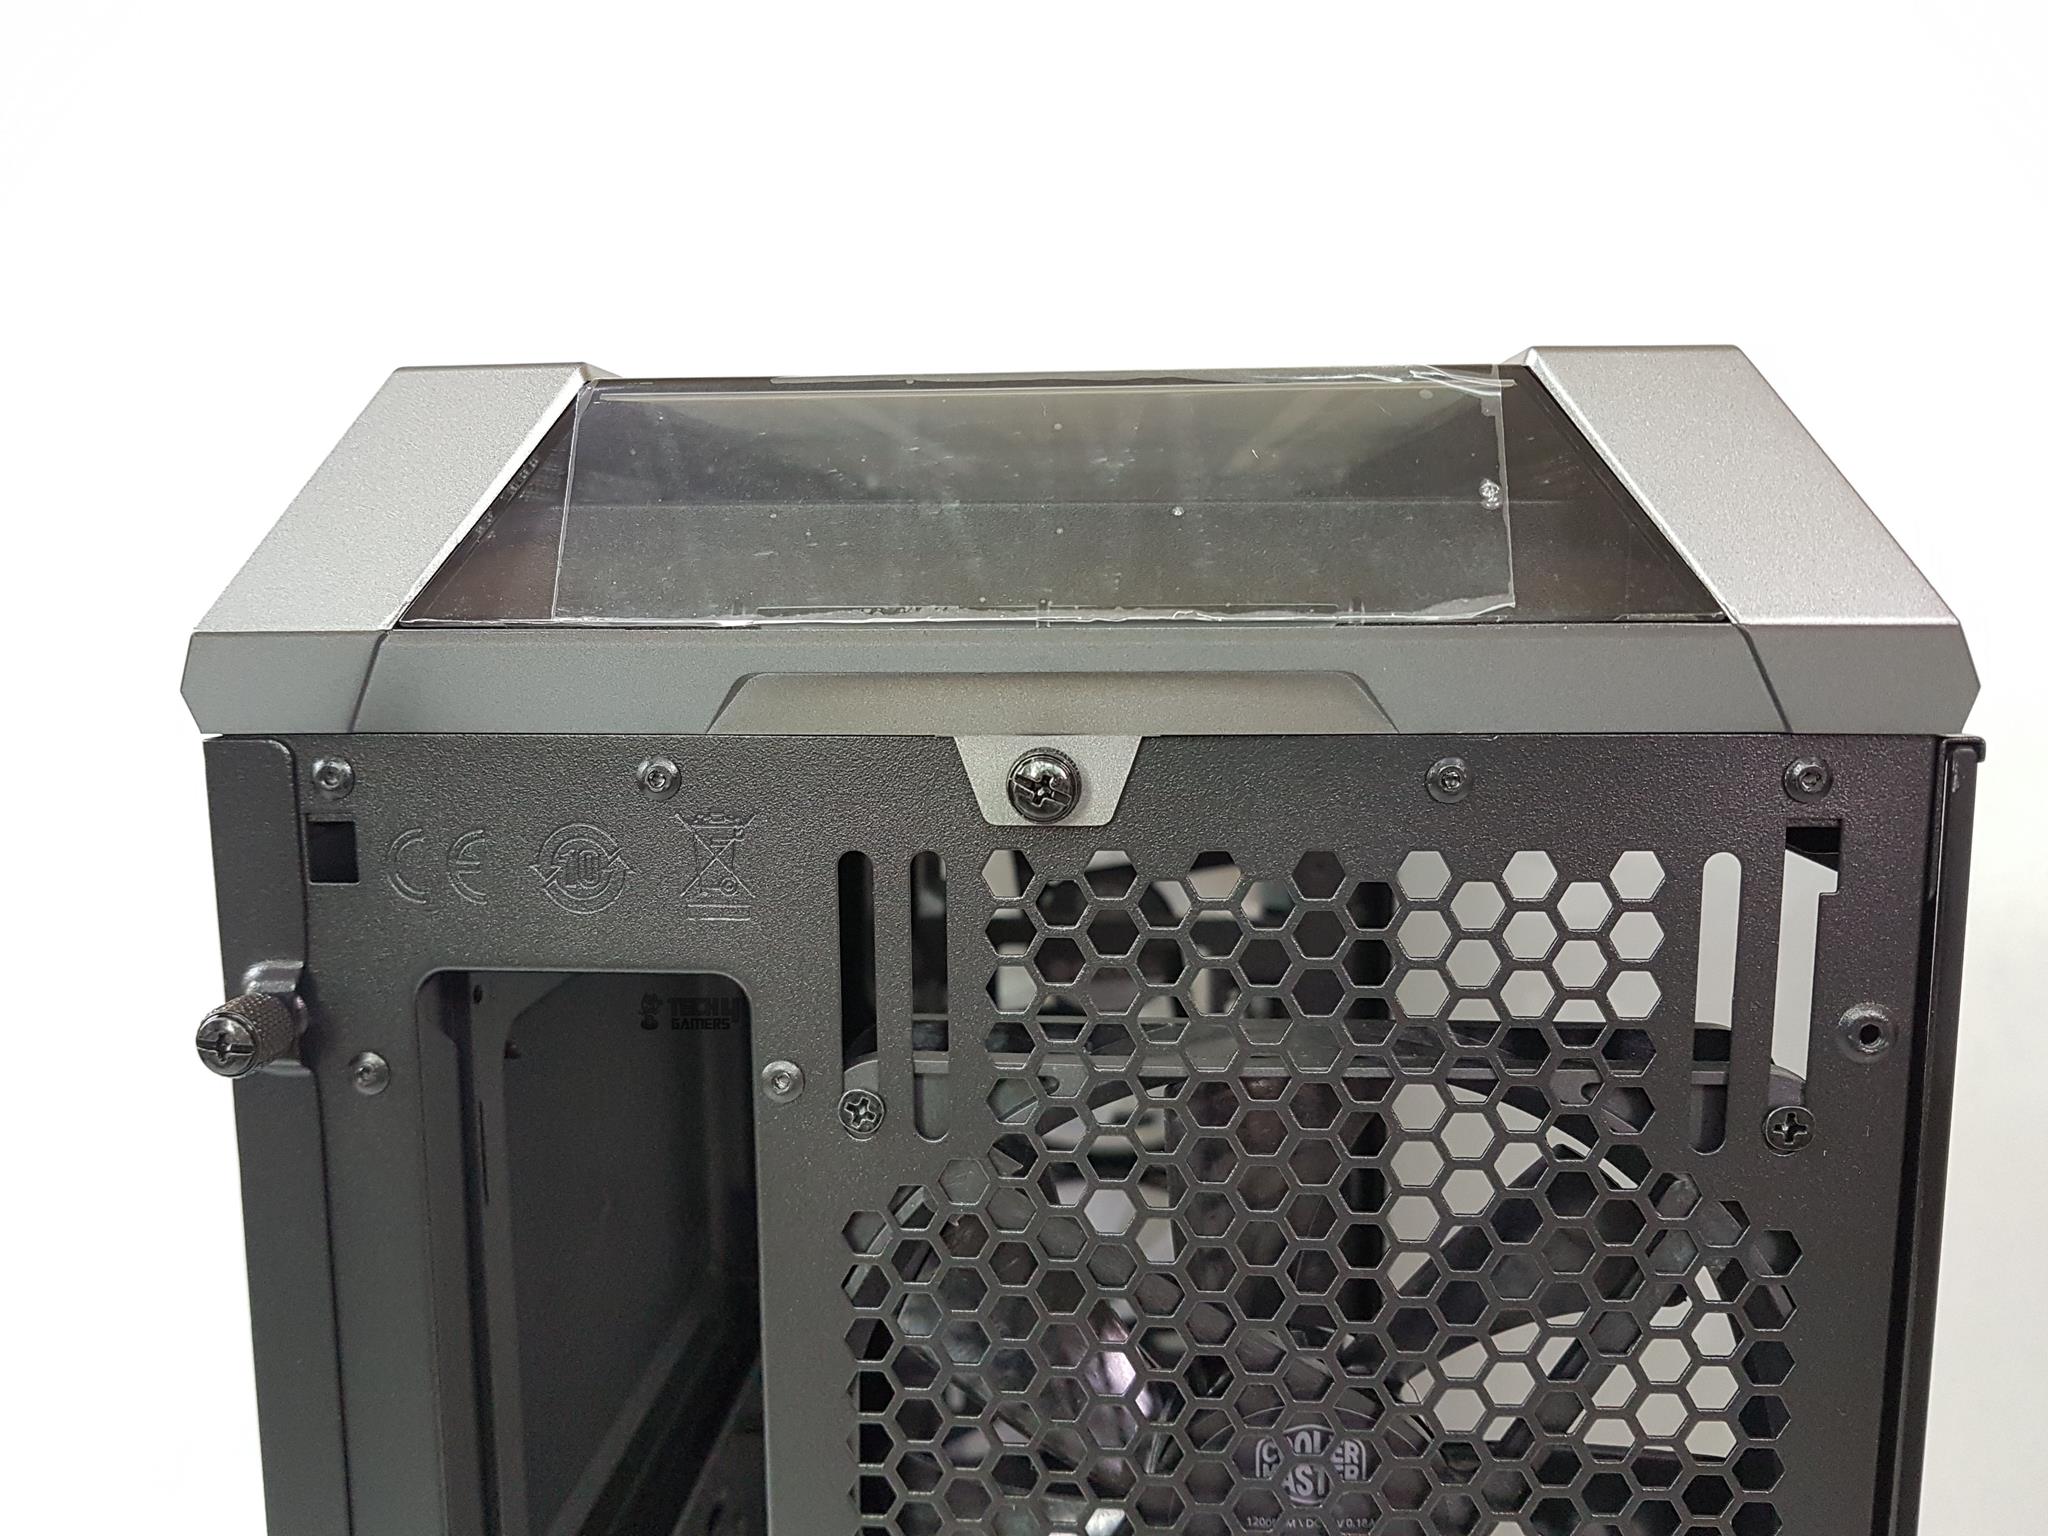
Top Panel
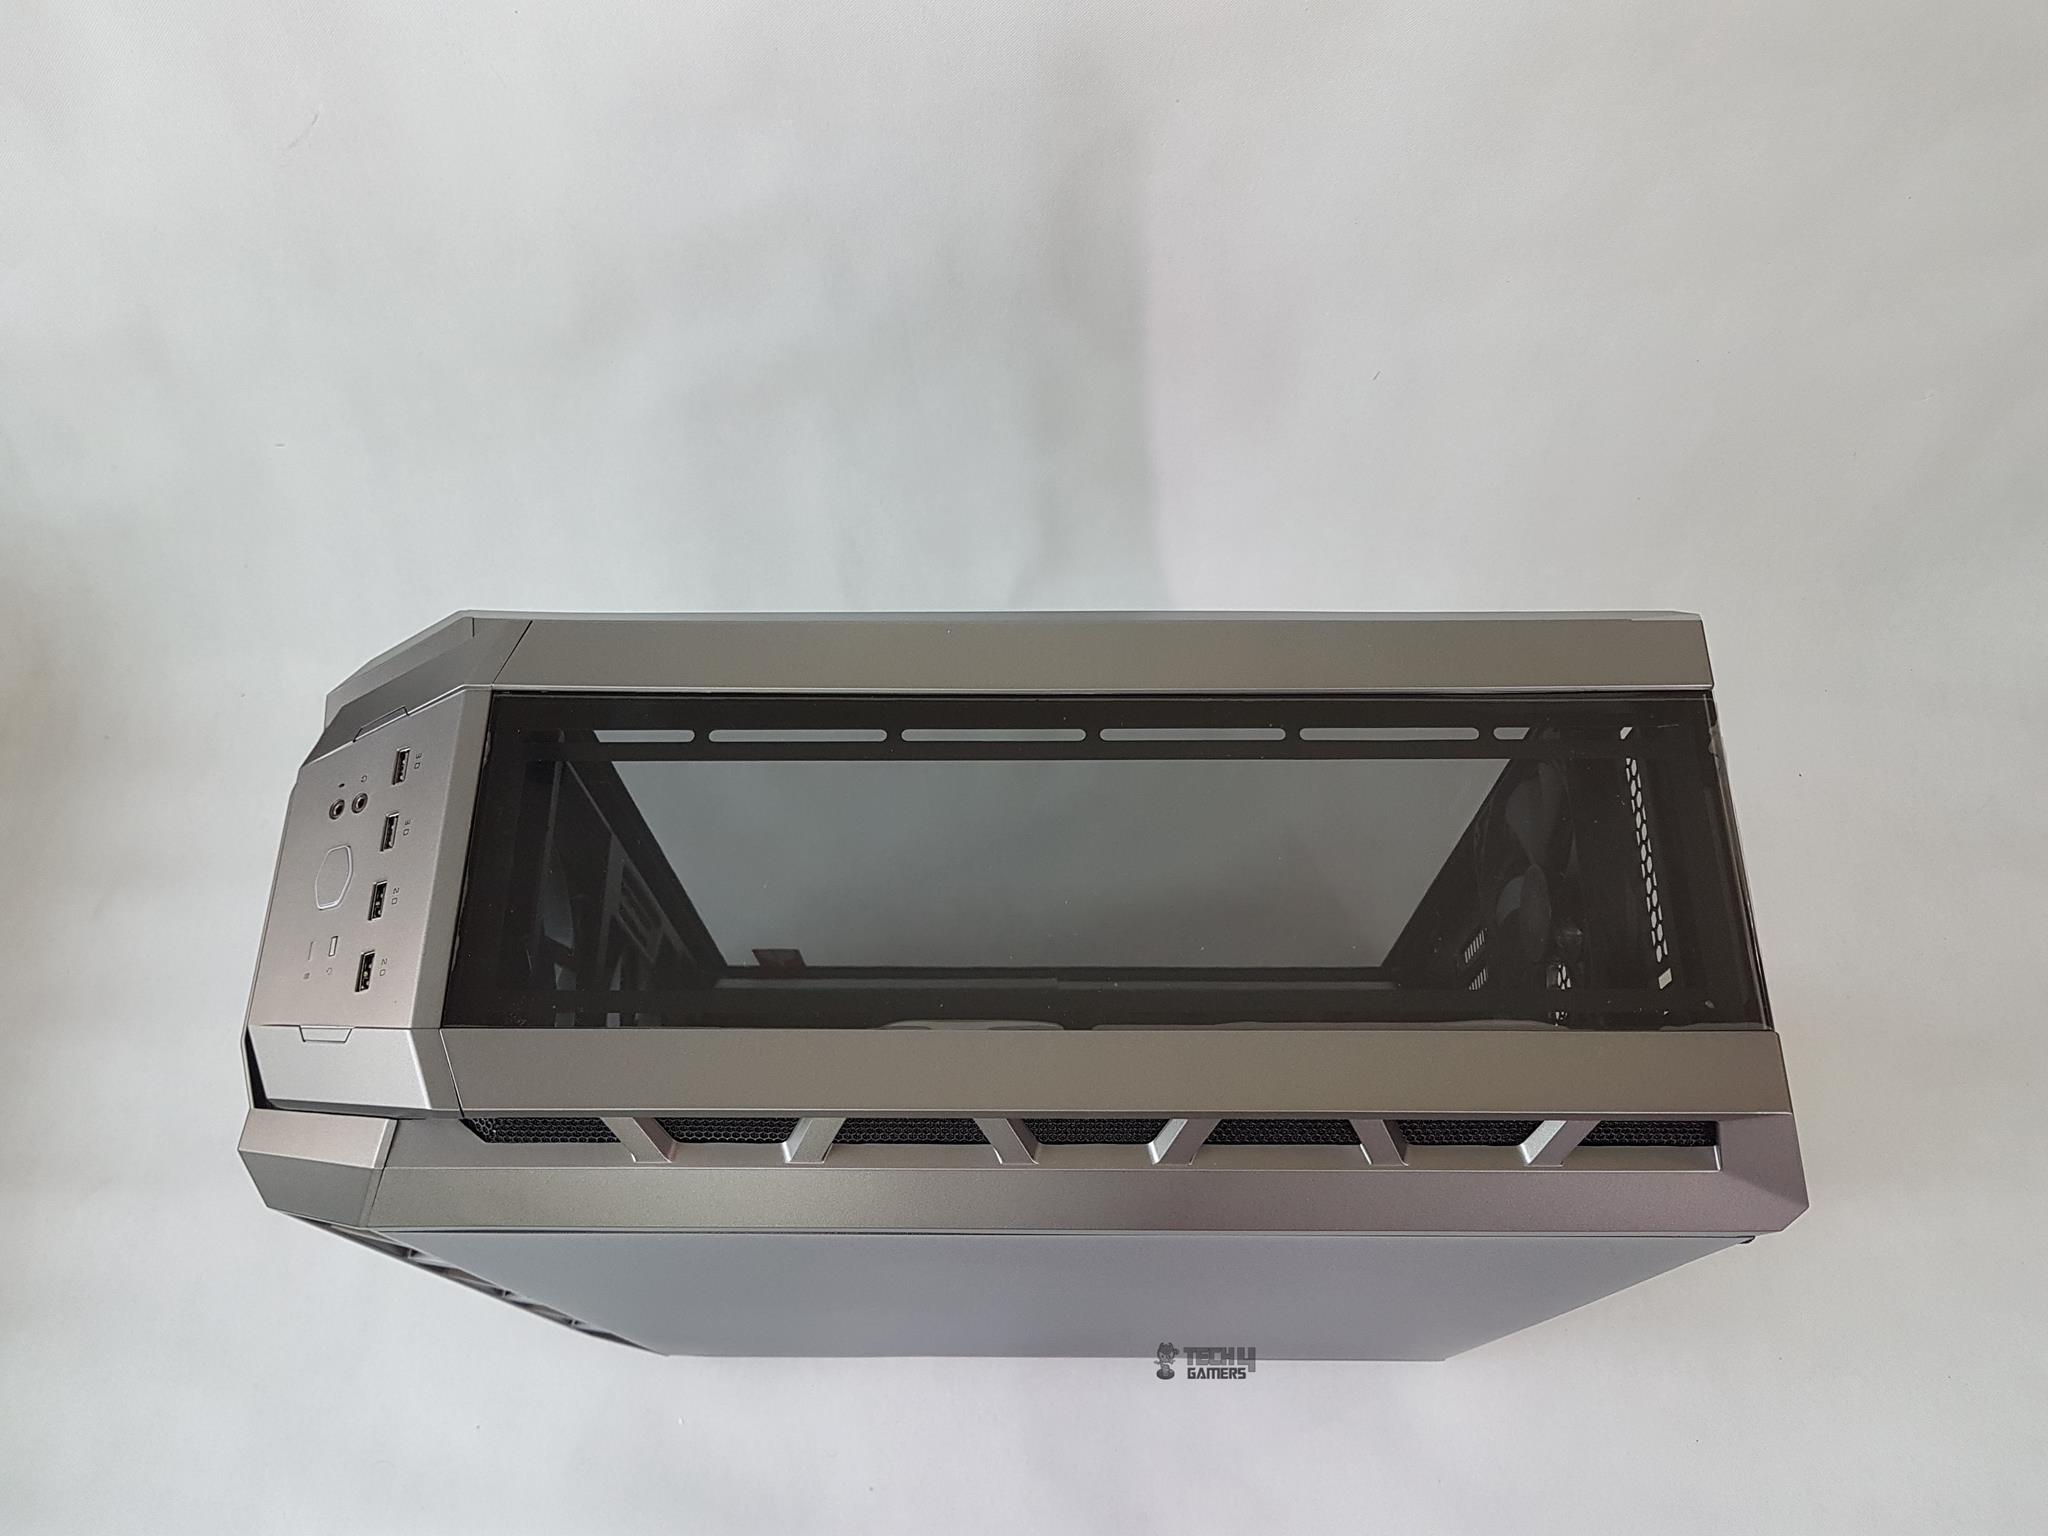
The top panel is made of the plastic and there is a transparent acrylic on it to see under the hood. This panel is exactly the same as is in the H500P with only one change which is mentioned above that it is now locked using a thumbscrew. Its sides resemble the sides of the front panel. The sides have meshed steel. This design reminds me of the top panel of the Phanteks Evolv ATX which saw too many complaints regarding the restrictive air outflow.
Though the sides of this panel have more height to them, the very nature of the design is still the same. I would not have minded the steel mesh on the top side for better air exhaust or intake. There is a protective sheet on the acrylic part.
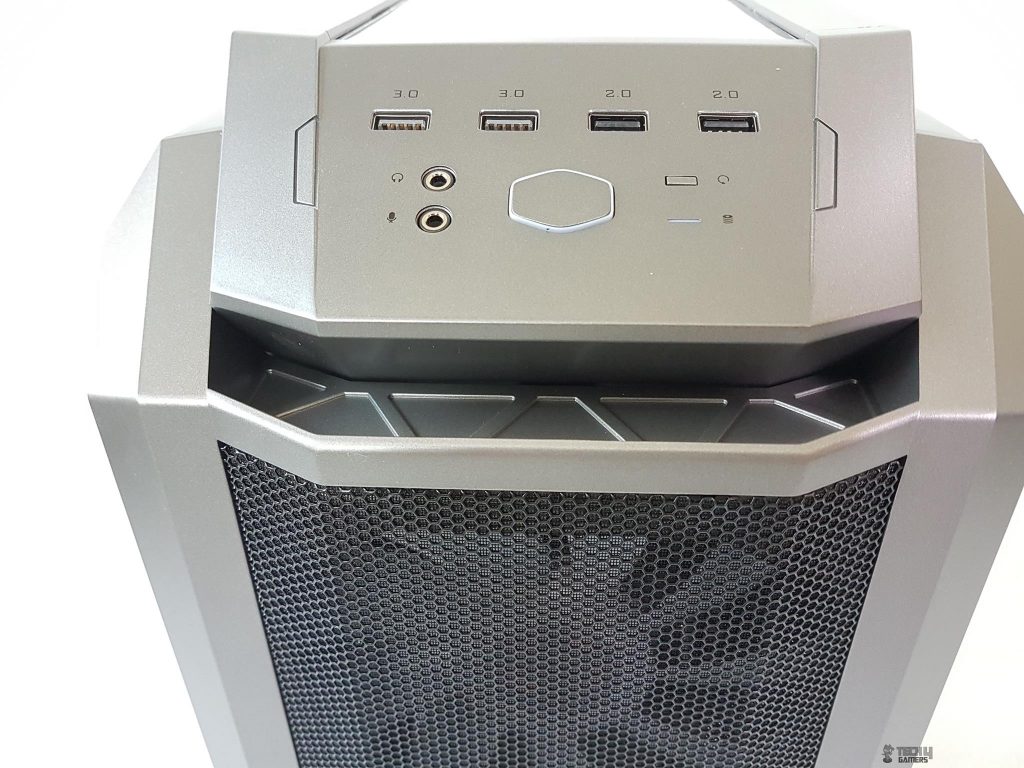
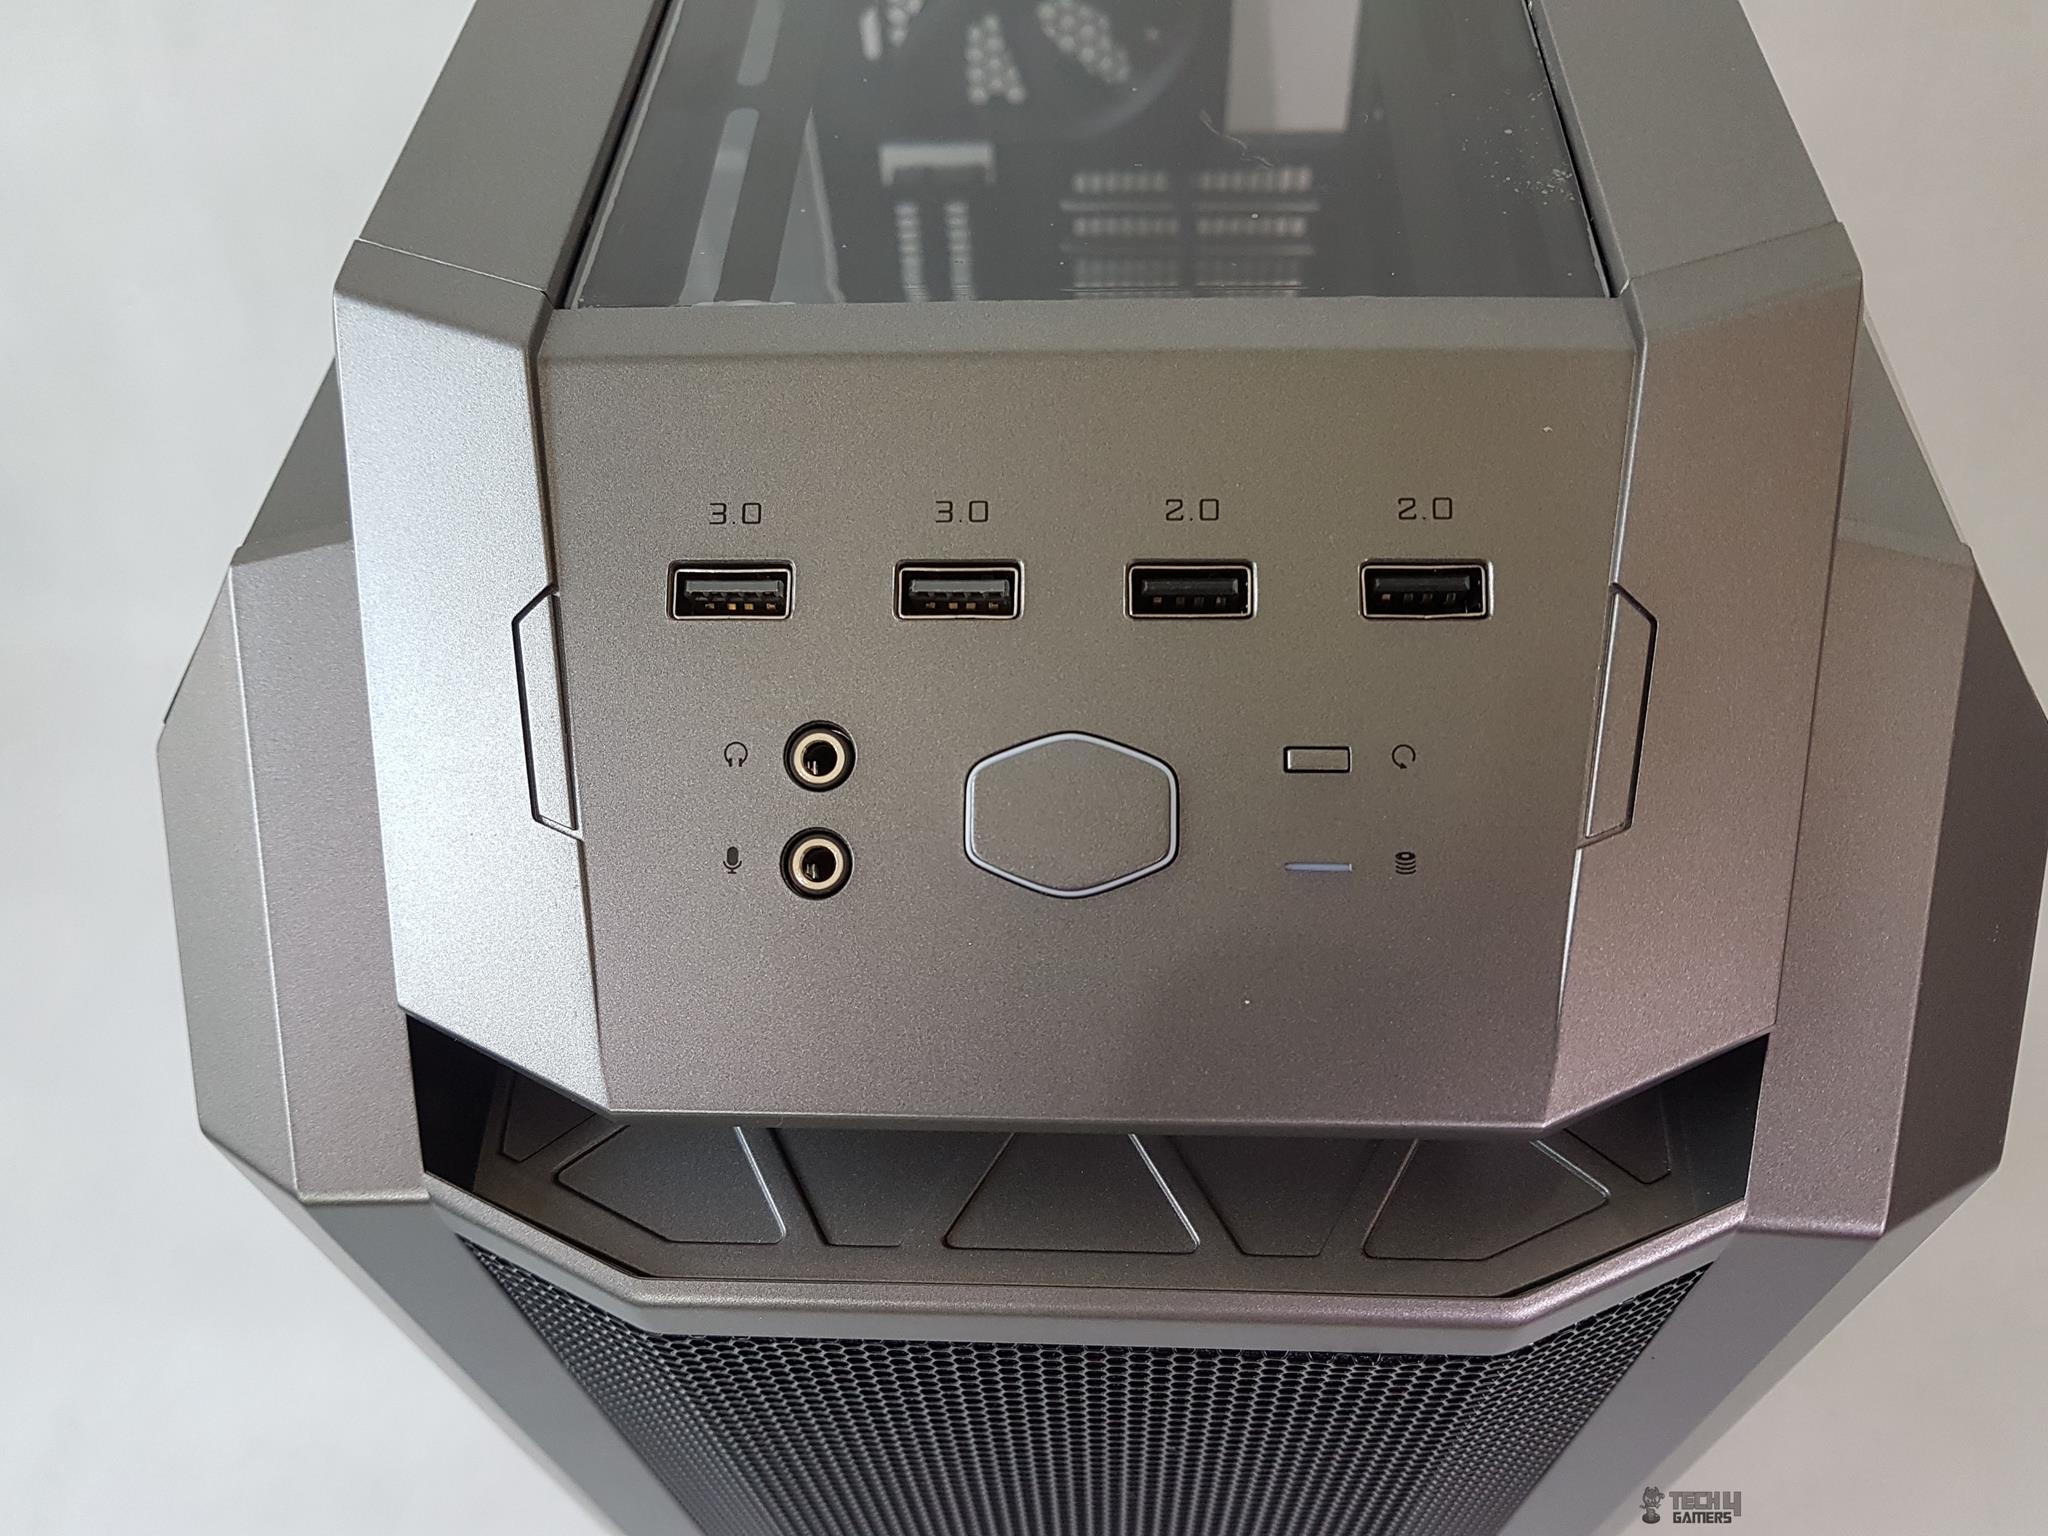
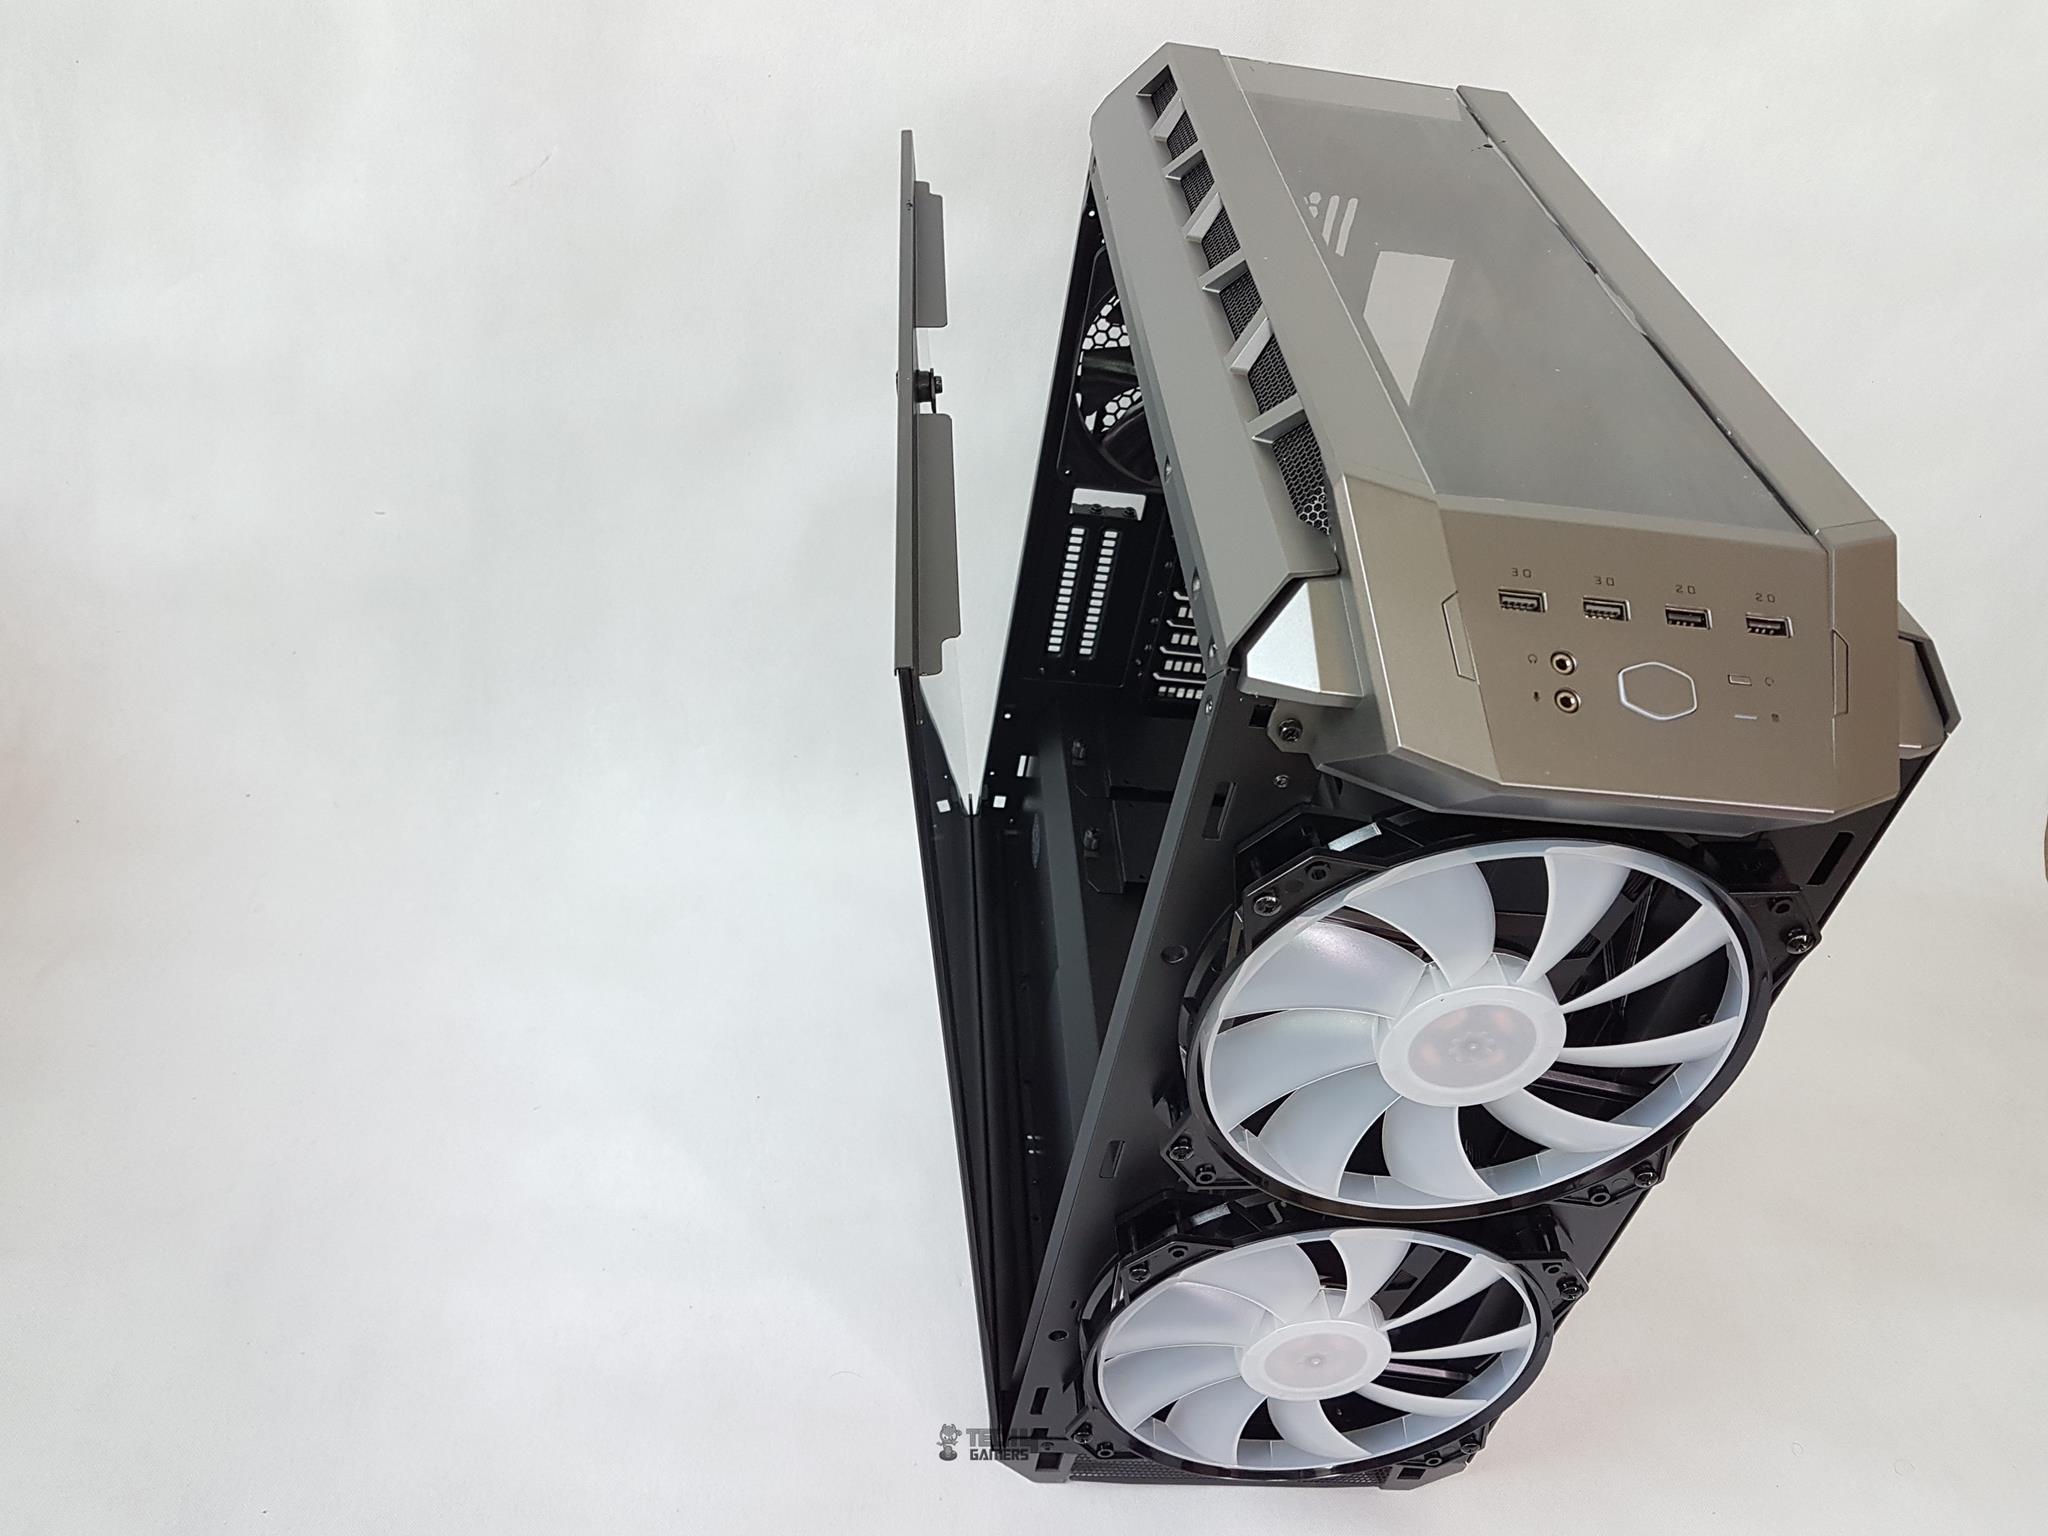
The above picture shows the front I/O panel which is designed in an angled slope going downwards from the top to the front.
Following options are present:
- 2x USB 3.0
- 2x USB 2.0
- 2x Audio Jacks
- Cooler Master logo designed power button with a nice feel to it on when pressed.
- Reset button
- LED Indicator
There is no dedicated RGB control button here and I think this was addressed in the H500M version which is the most advanced of all in this series.
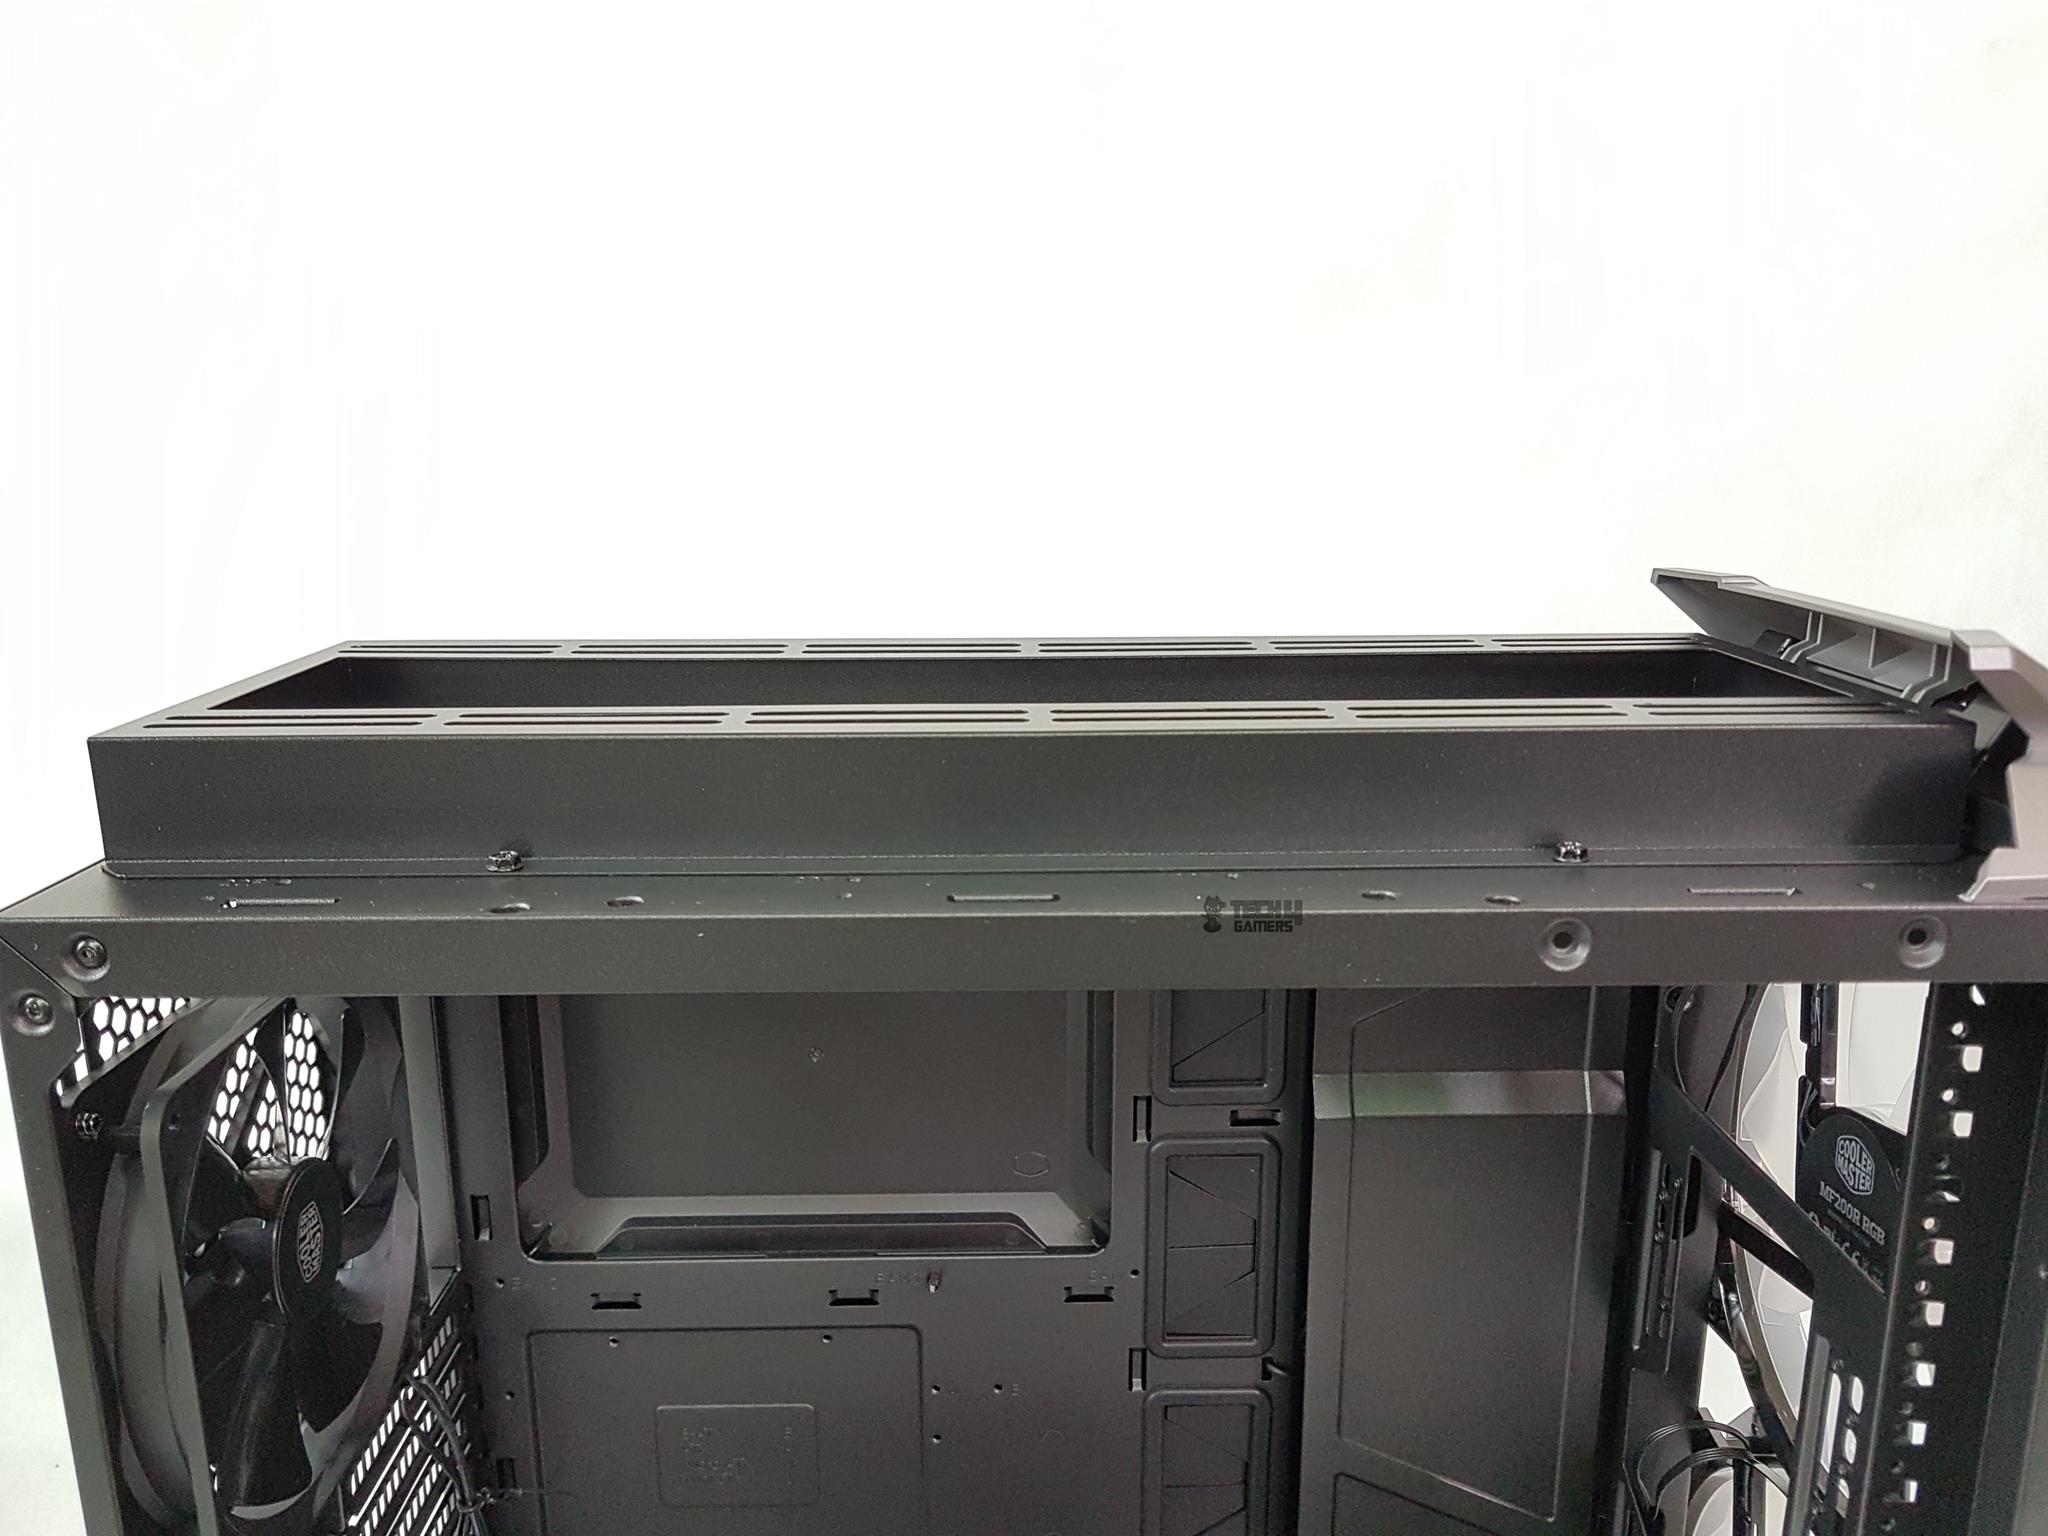
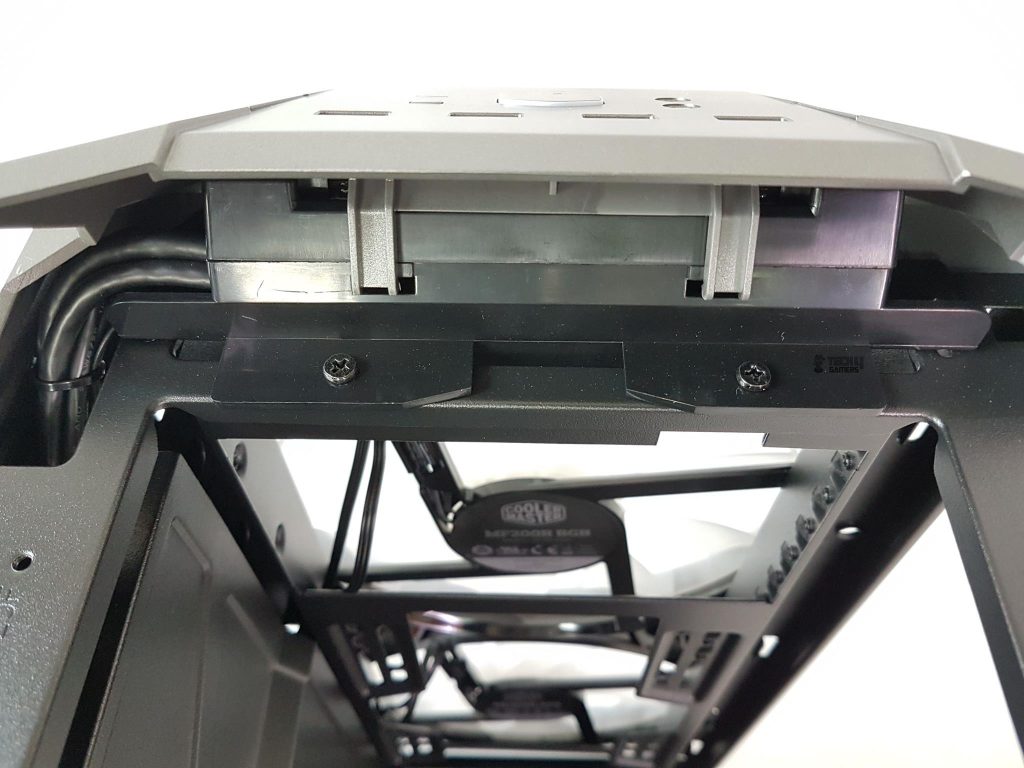
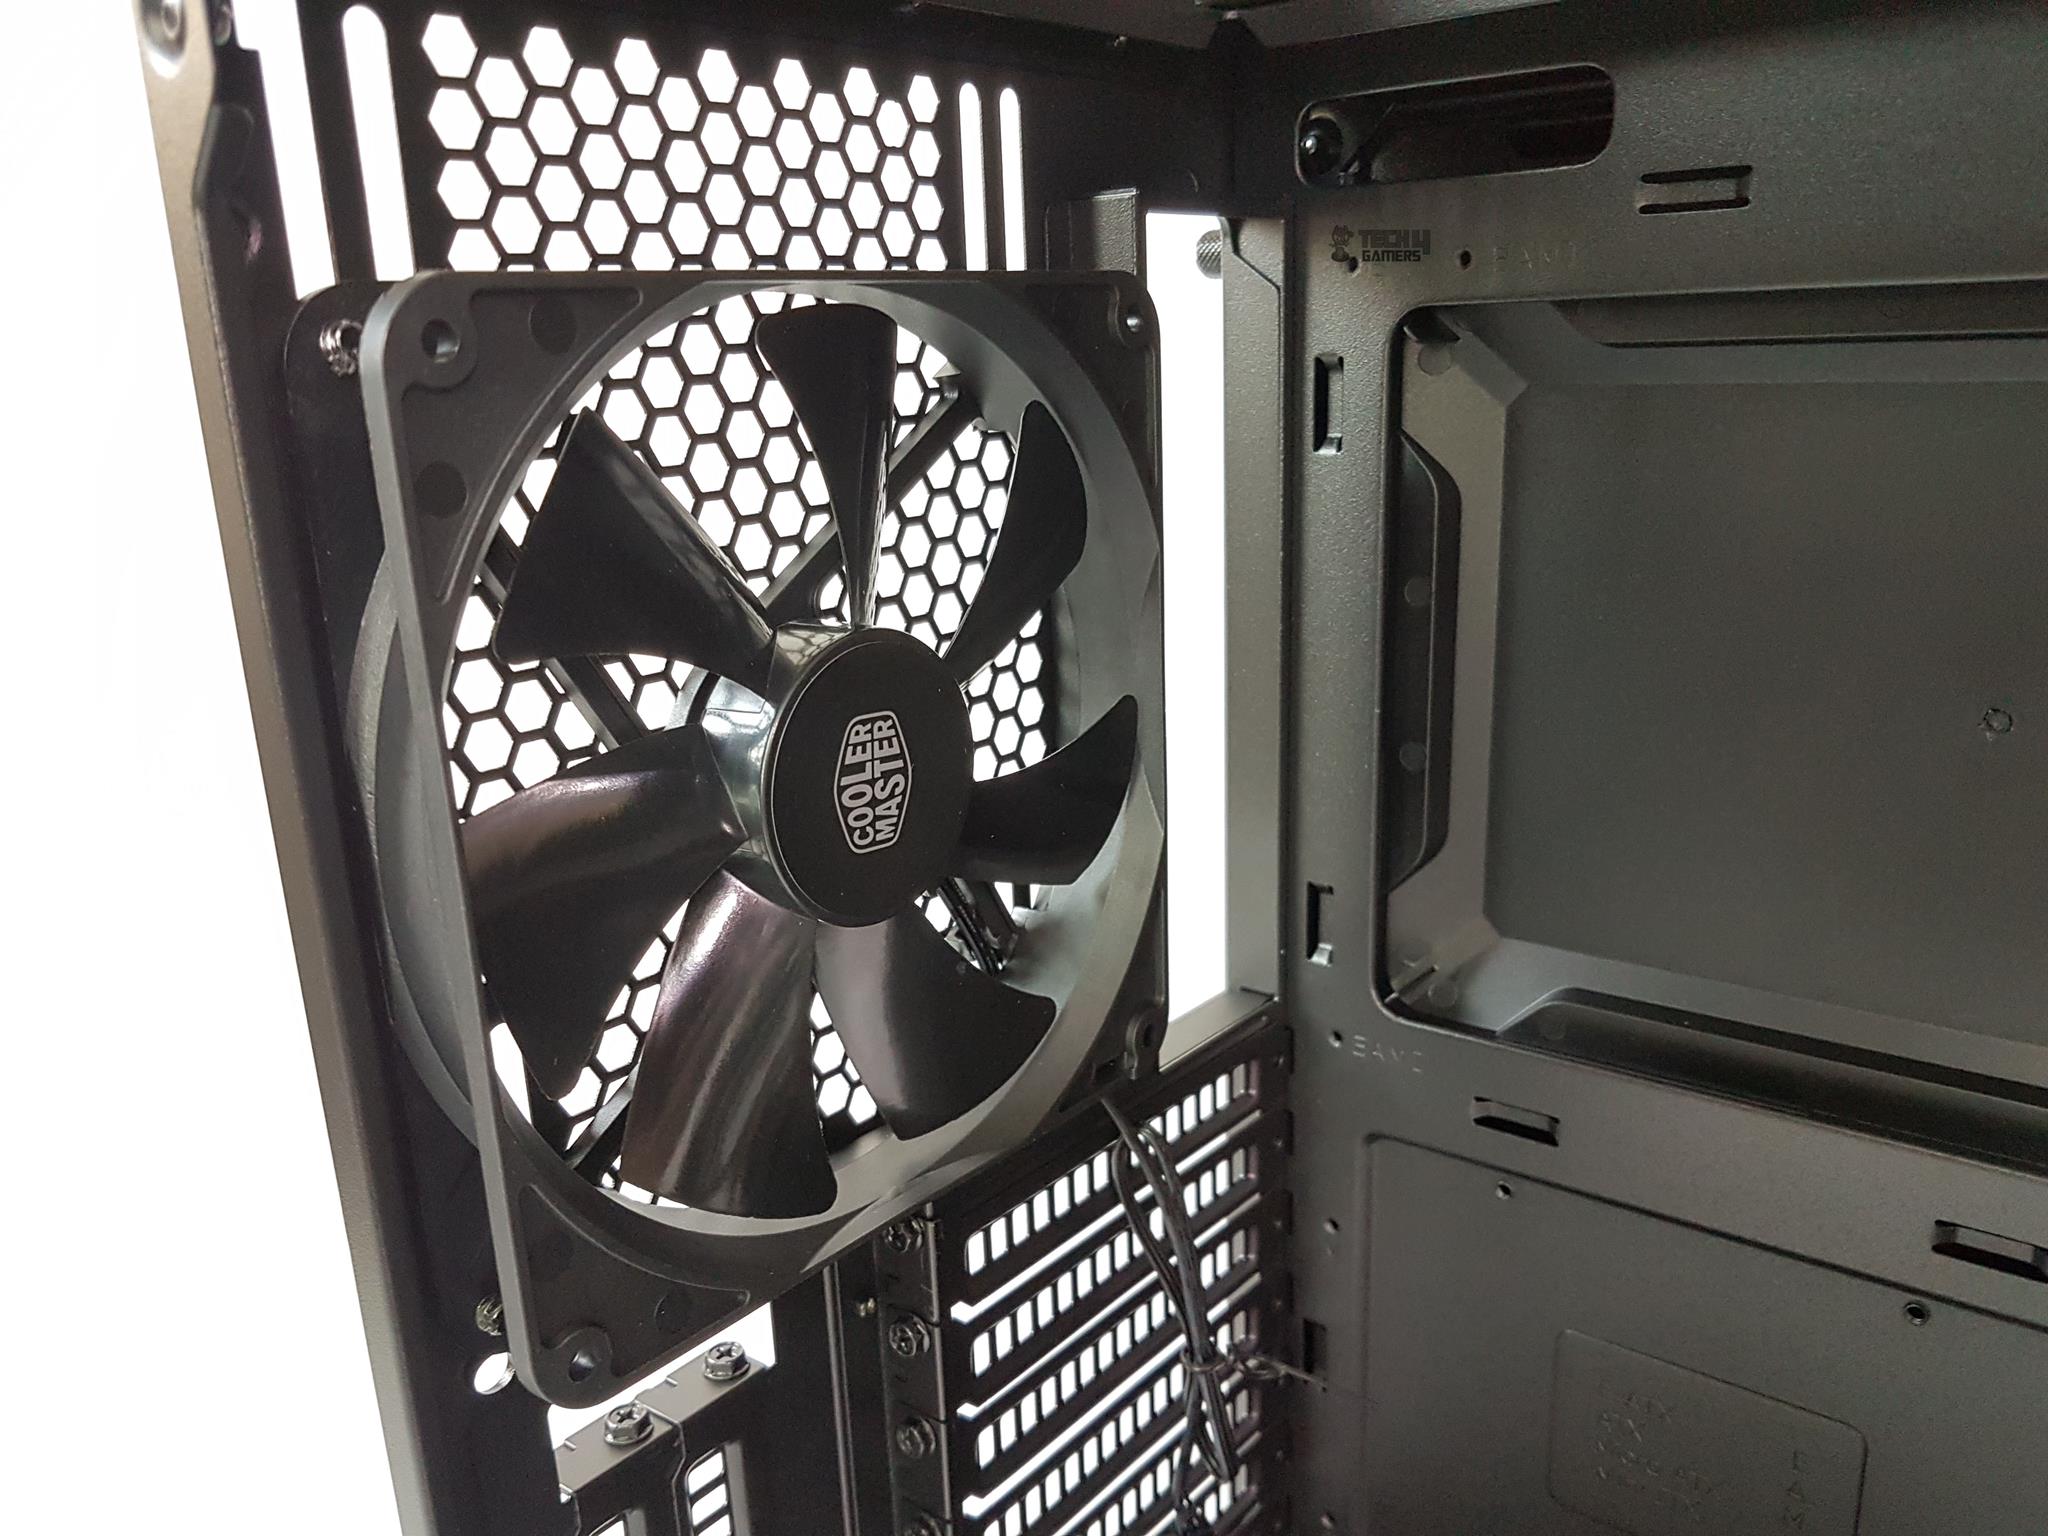
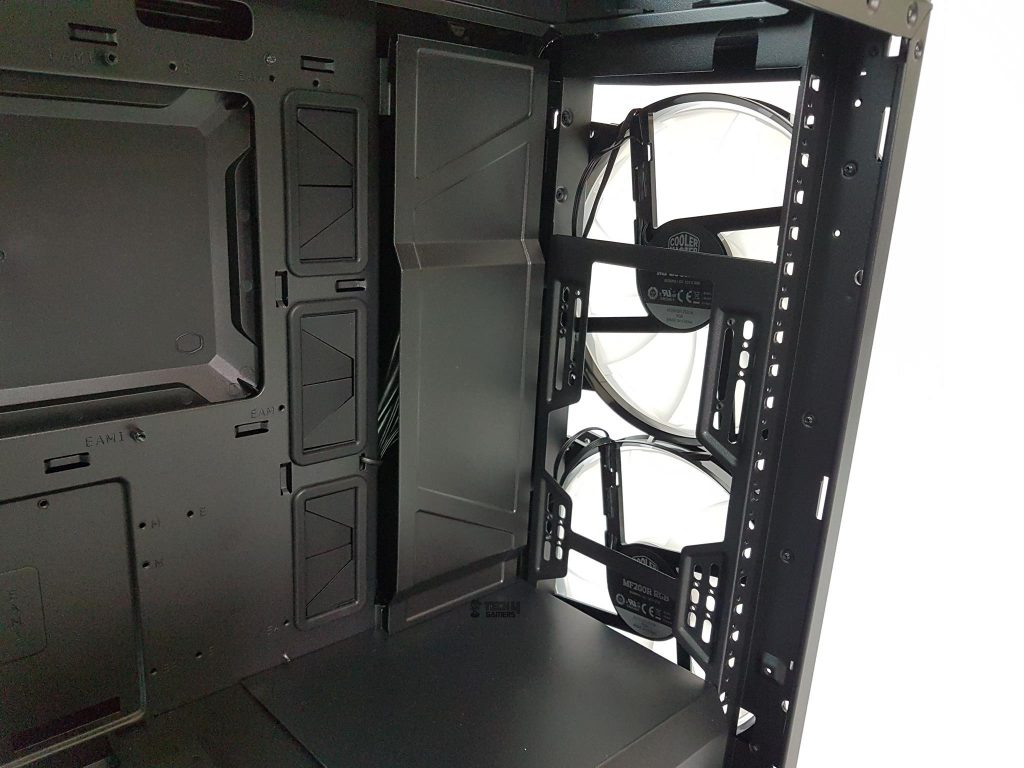
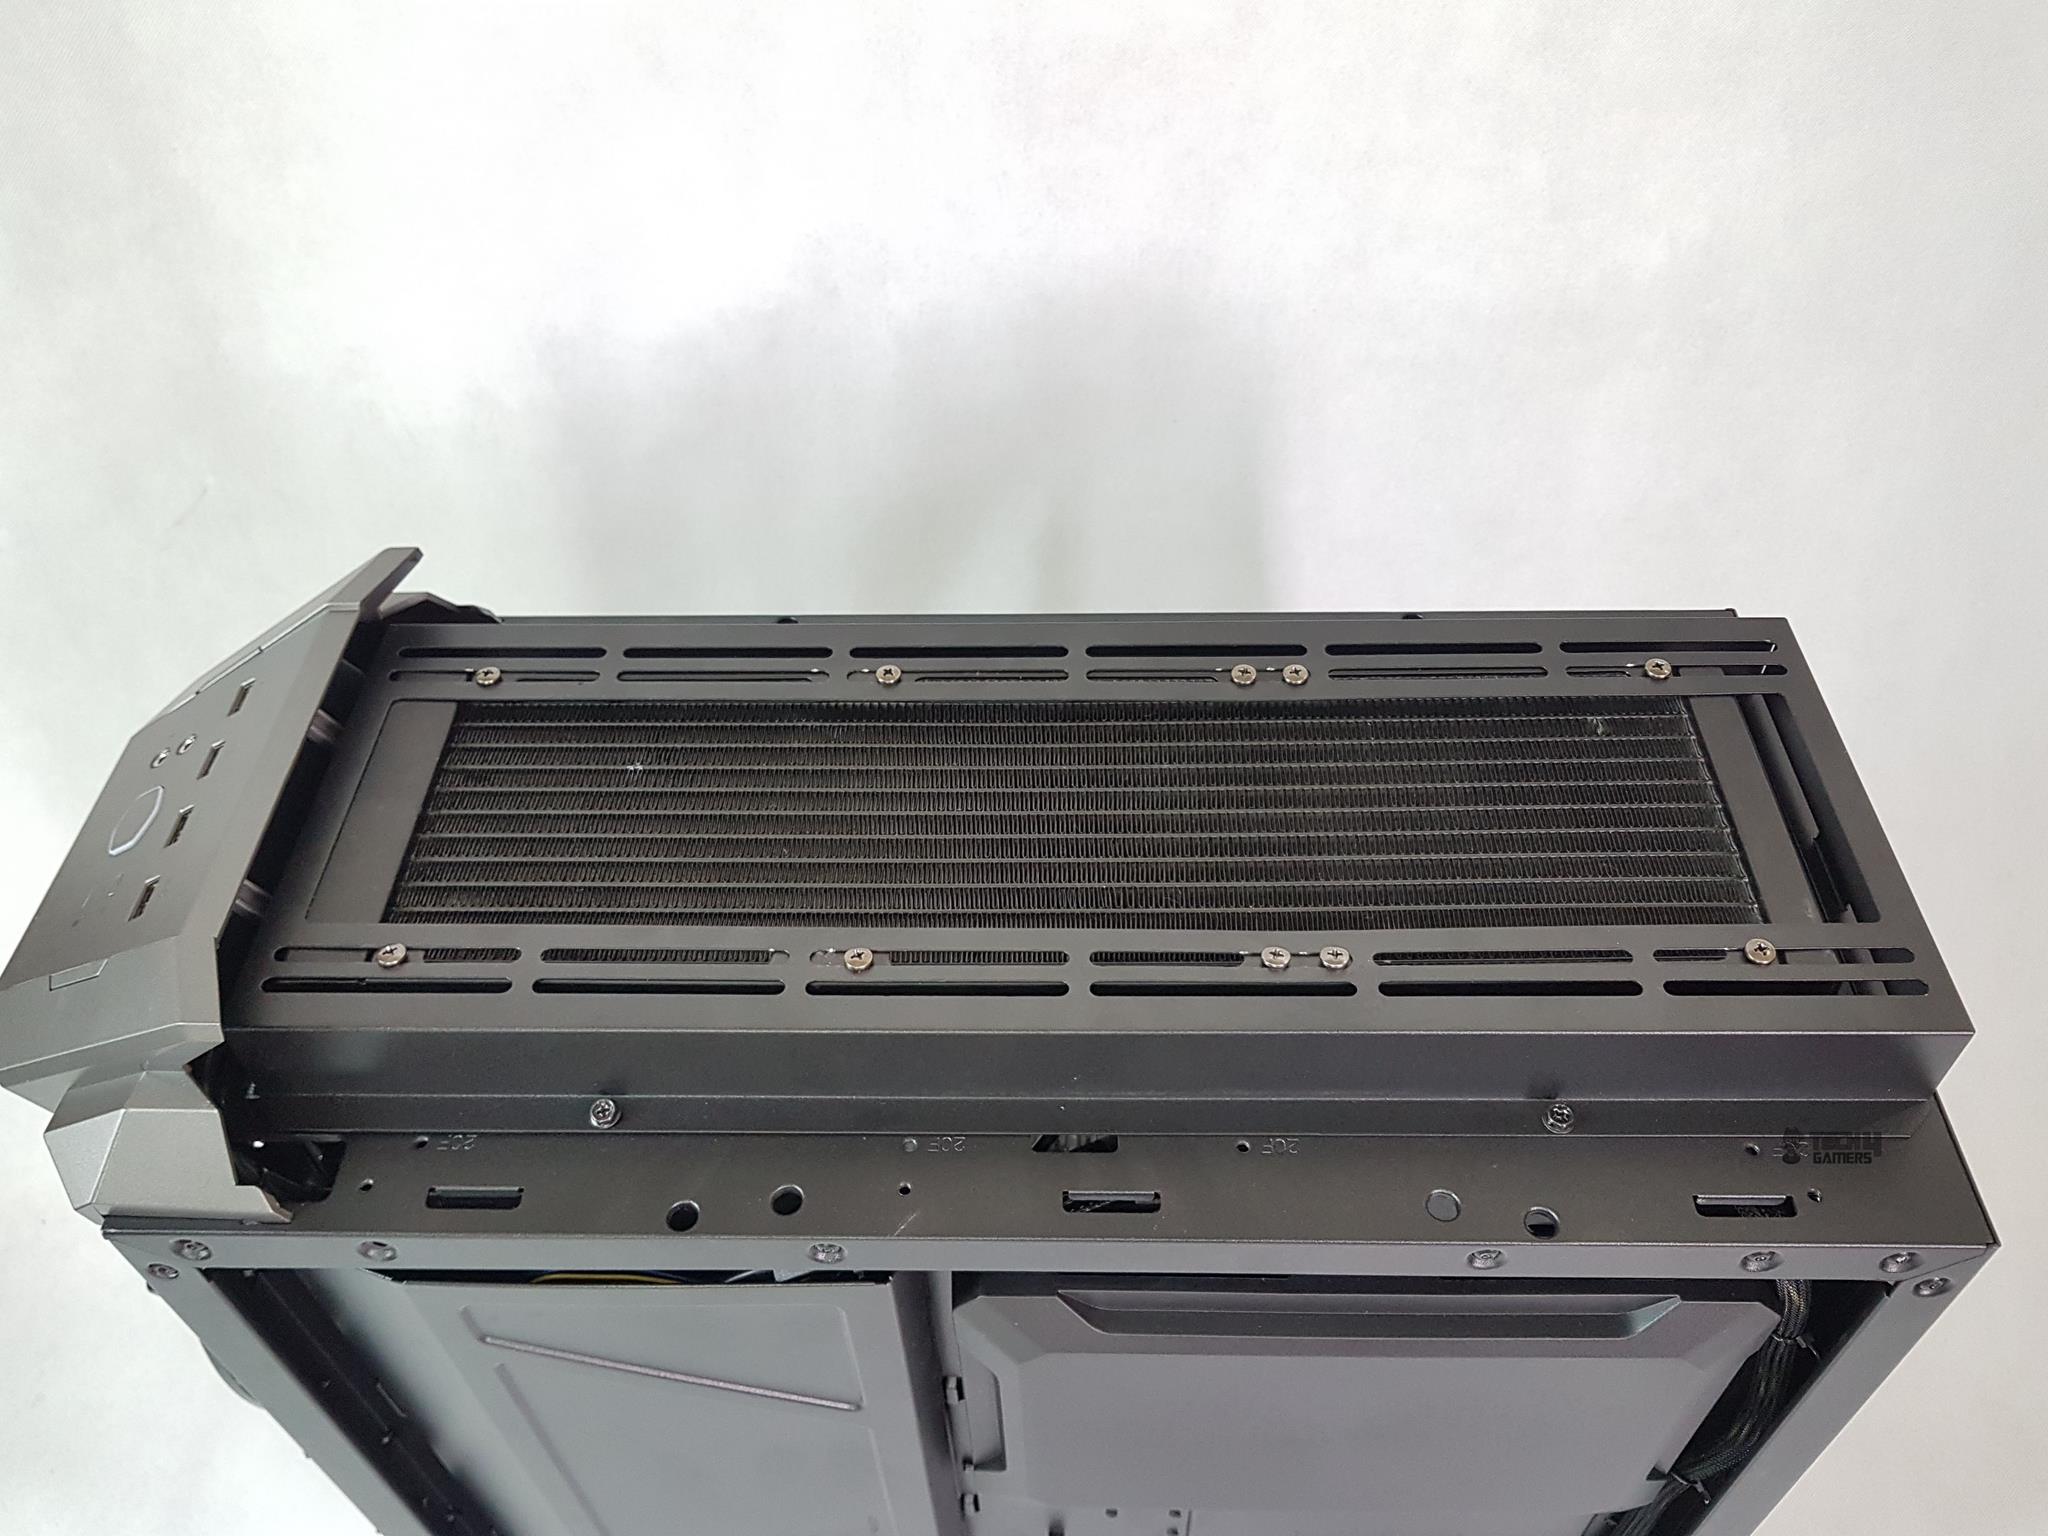
Removing the top panel off will show a radiator bracket. This bracket is secured using 4 screws. Removing these screws will allow the user to take off the bracket. The good part is, the user can take it off, install the radiator/fans and put the bracket back on and secure it. The user can install up to 3 120mm/140mm fans or 2 200mm fans and up to 360mm radiator on this bracket. The height of the bracket is approximately 27.2mm.
The I/O panel is installed using two screws on the top side. Removing these will allow the user to take the I/O panel off. I appreciate this design where the I/O panel is done independent of the front and top panels.
Take a look at the inside of the top panel and the radiator bracket, pictured above. The fans’ position on the bracket can be adjusted as this is a rail design.
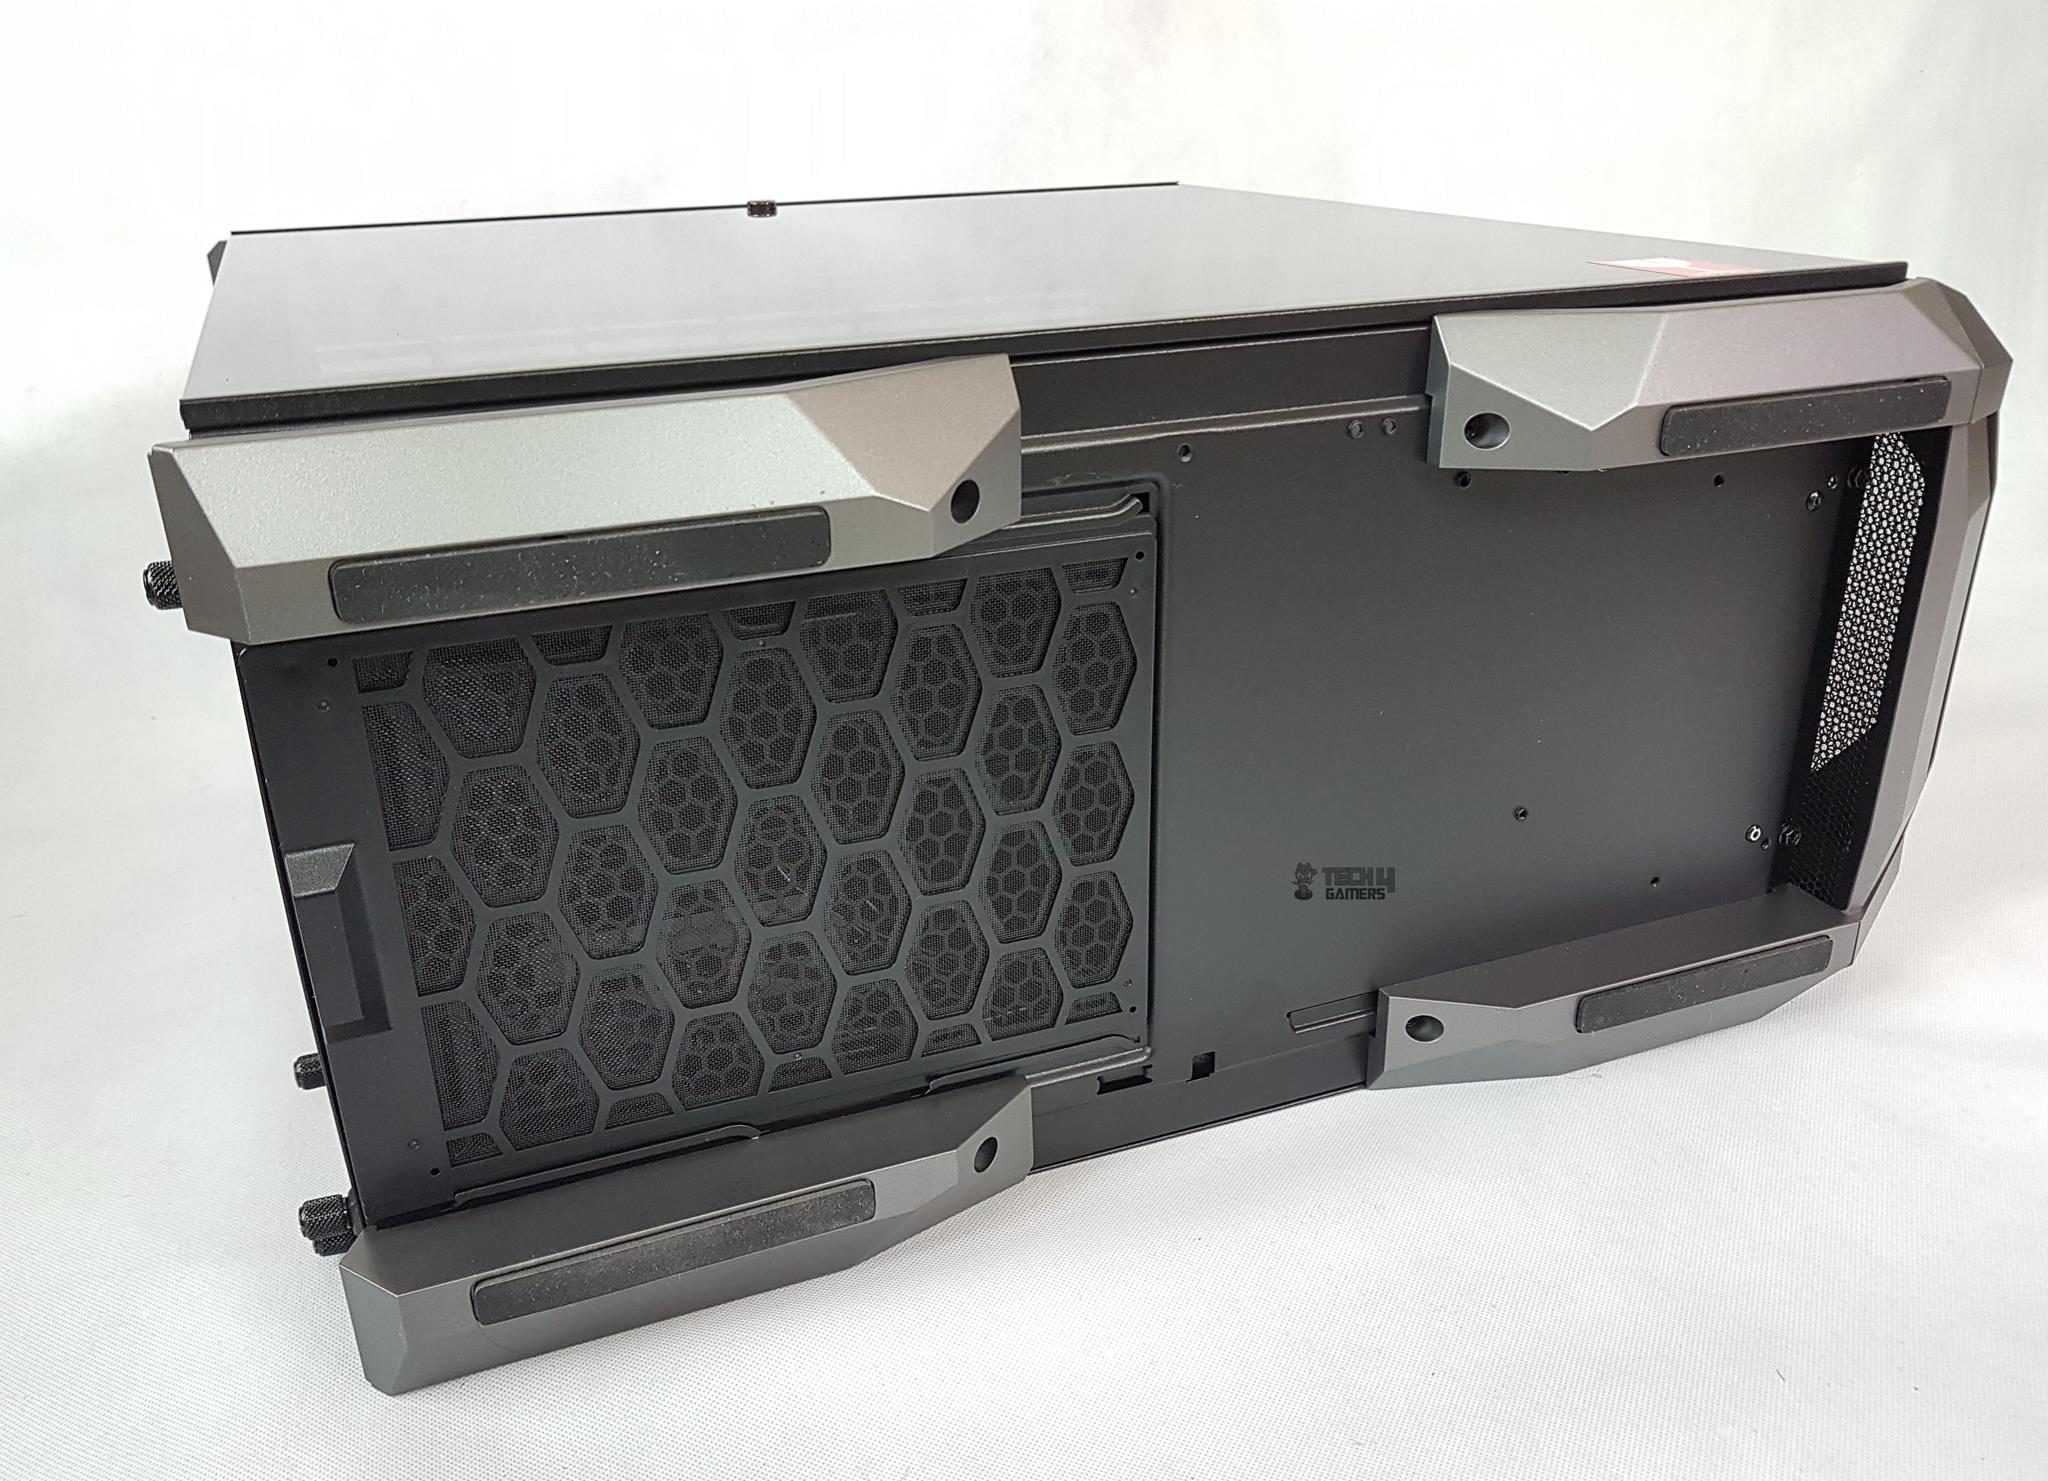
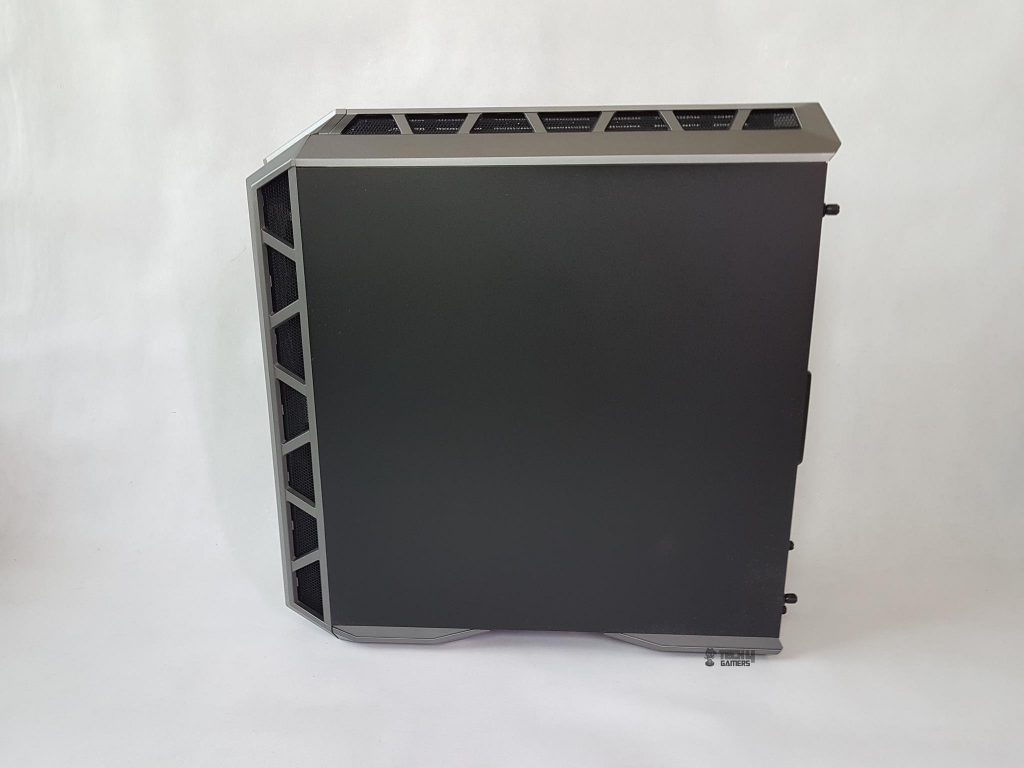
Side Panels
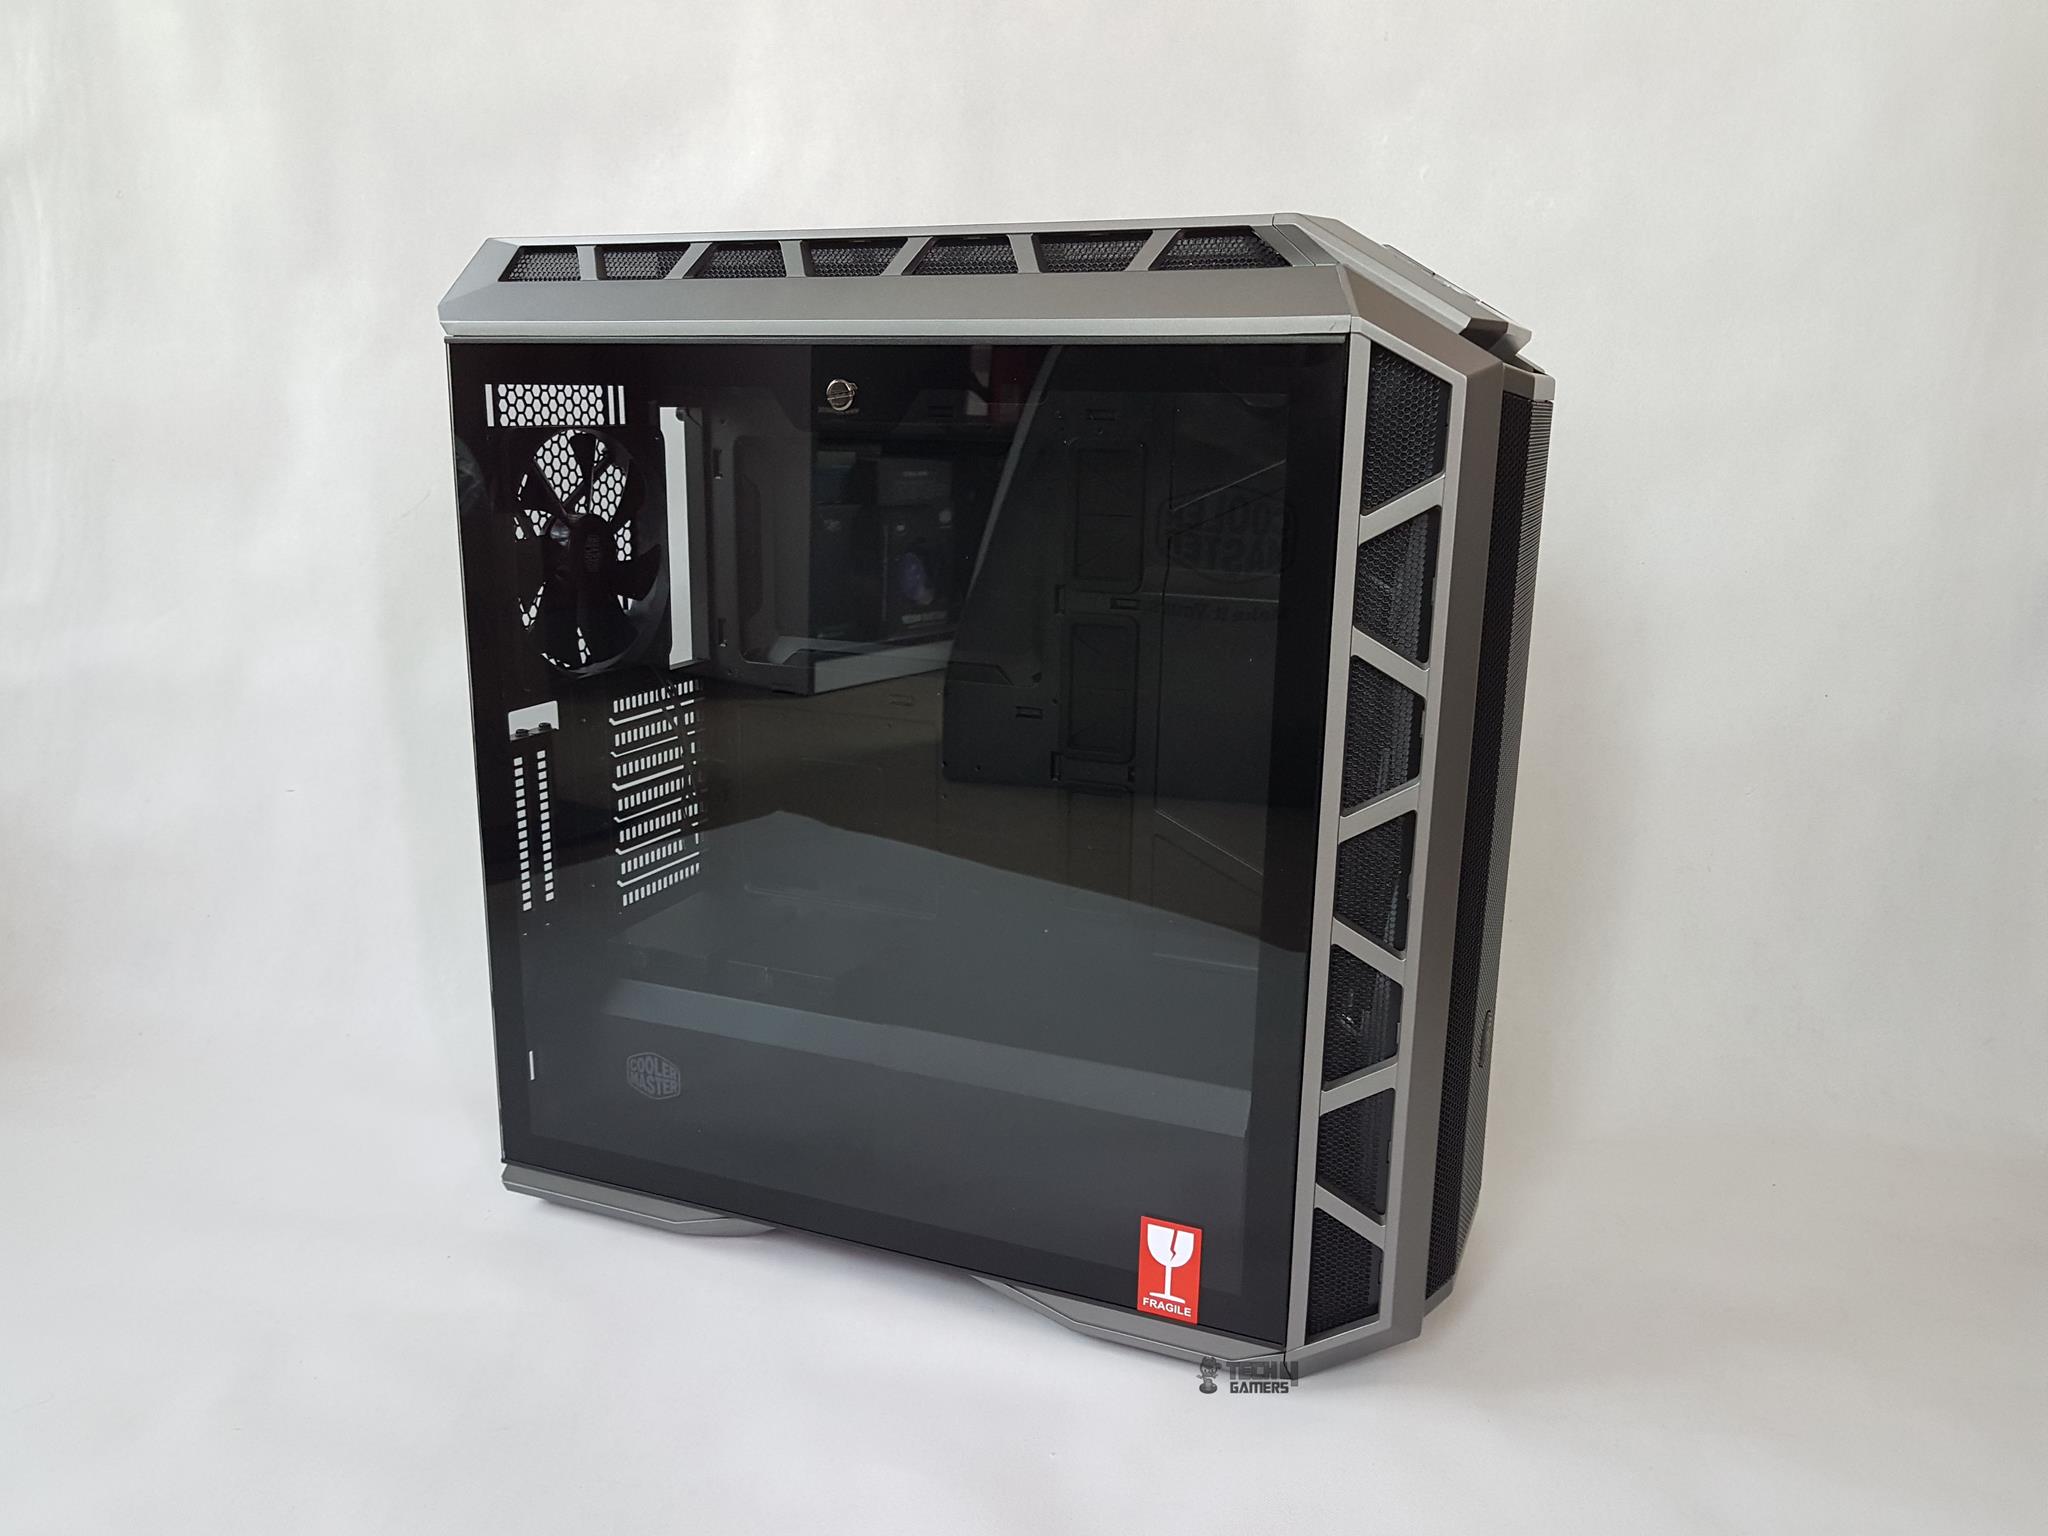
Let’s take a look at the left and right sides (exterior) of the chassis. The MasterCase H500P Mesh features a light gray tinted 4mm Tempered Glass panel on the left side. It has a fragile sticker pasted on the bottom right side. Minimal lighting will be needed to properly show off the cool build inside this chassis. The cool part of the design is how the panel is locked to the chassis frame. The border sides of the panel are dark black lined. Though they are not that apparent in the Gun Metal version, they would be more in the white version.
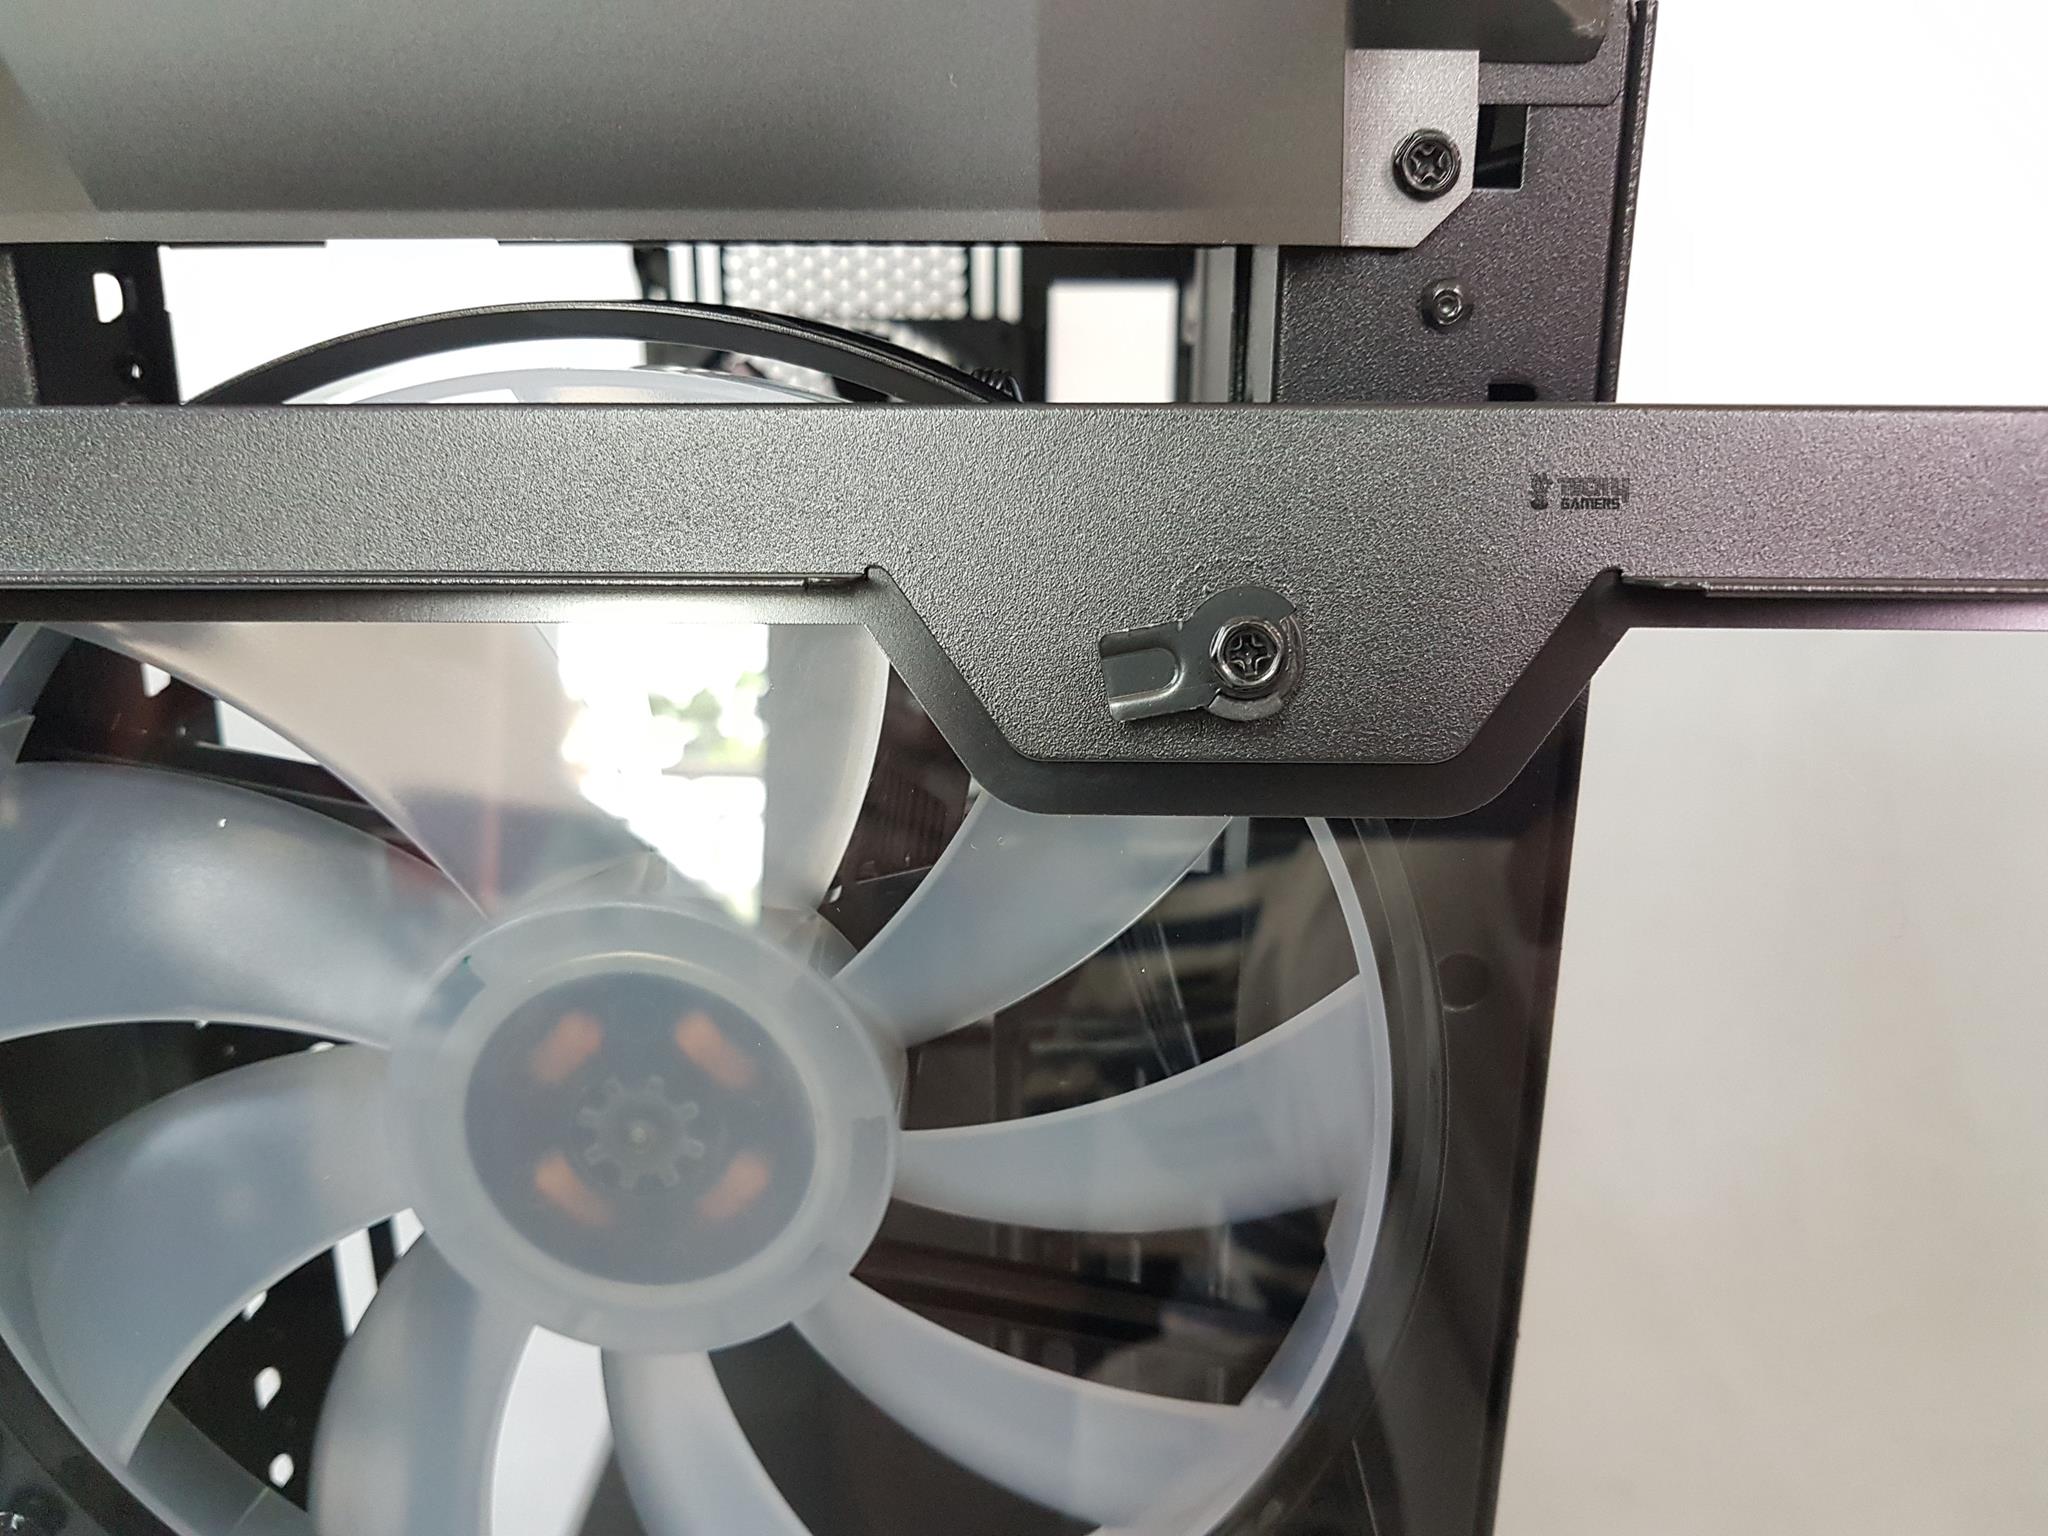
There is a large size screw on the top of the TG panel. Rotating it counter-clockwise will release the panel’s lock and it will slide open but will not fall as can be seen in the above picture. Kudos to the Cooler Master design team to cover this aspect.
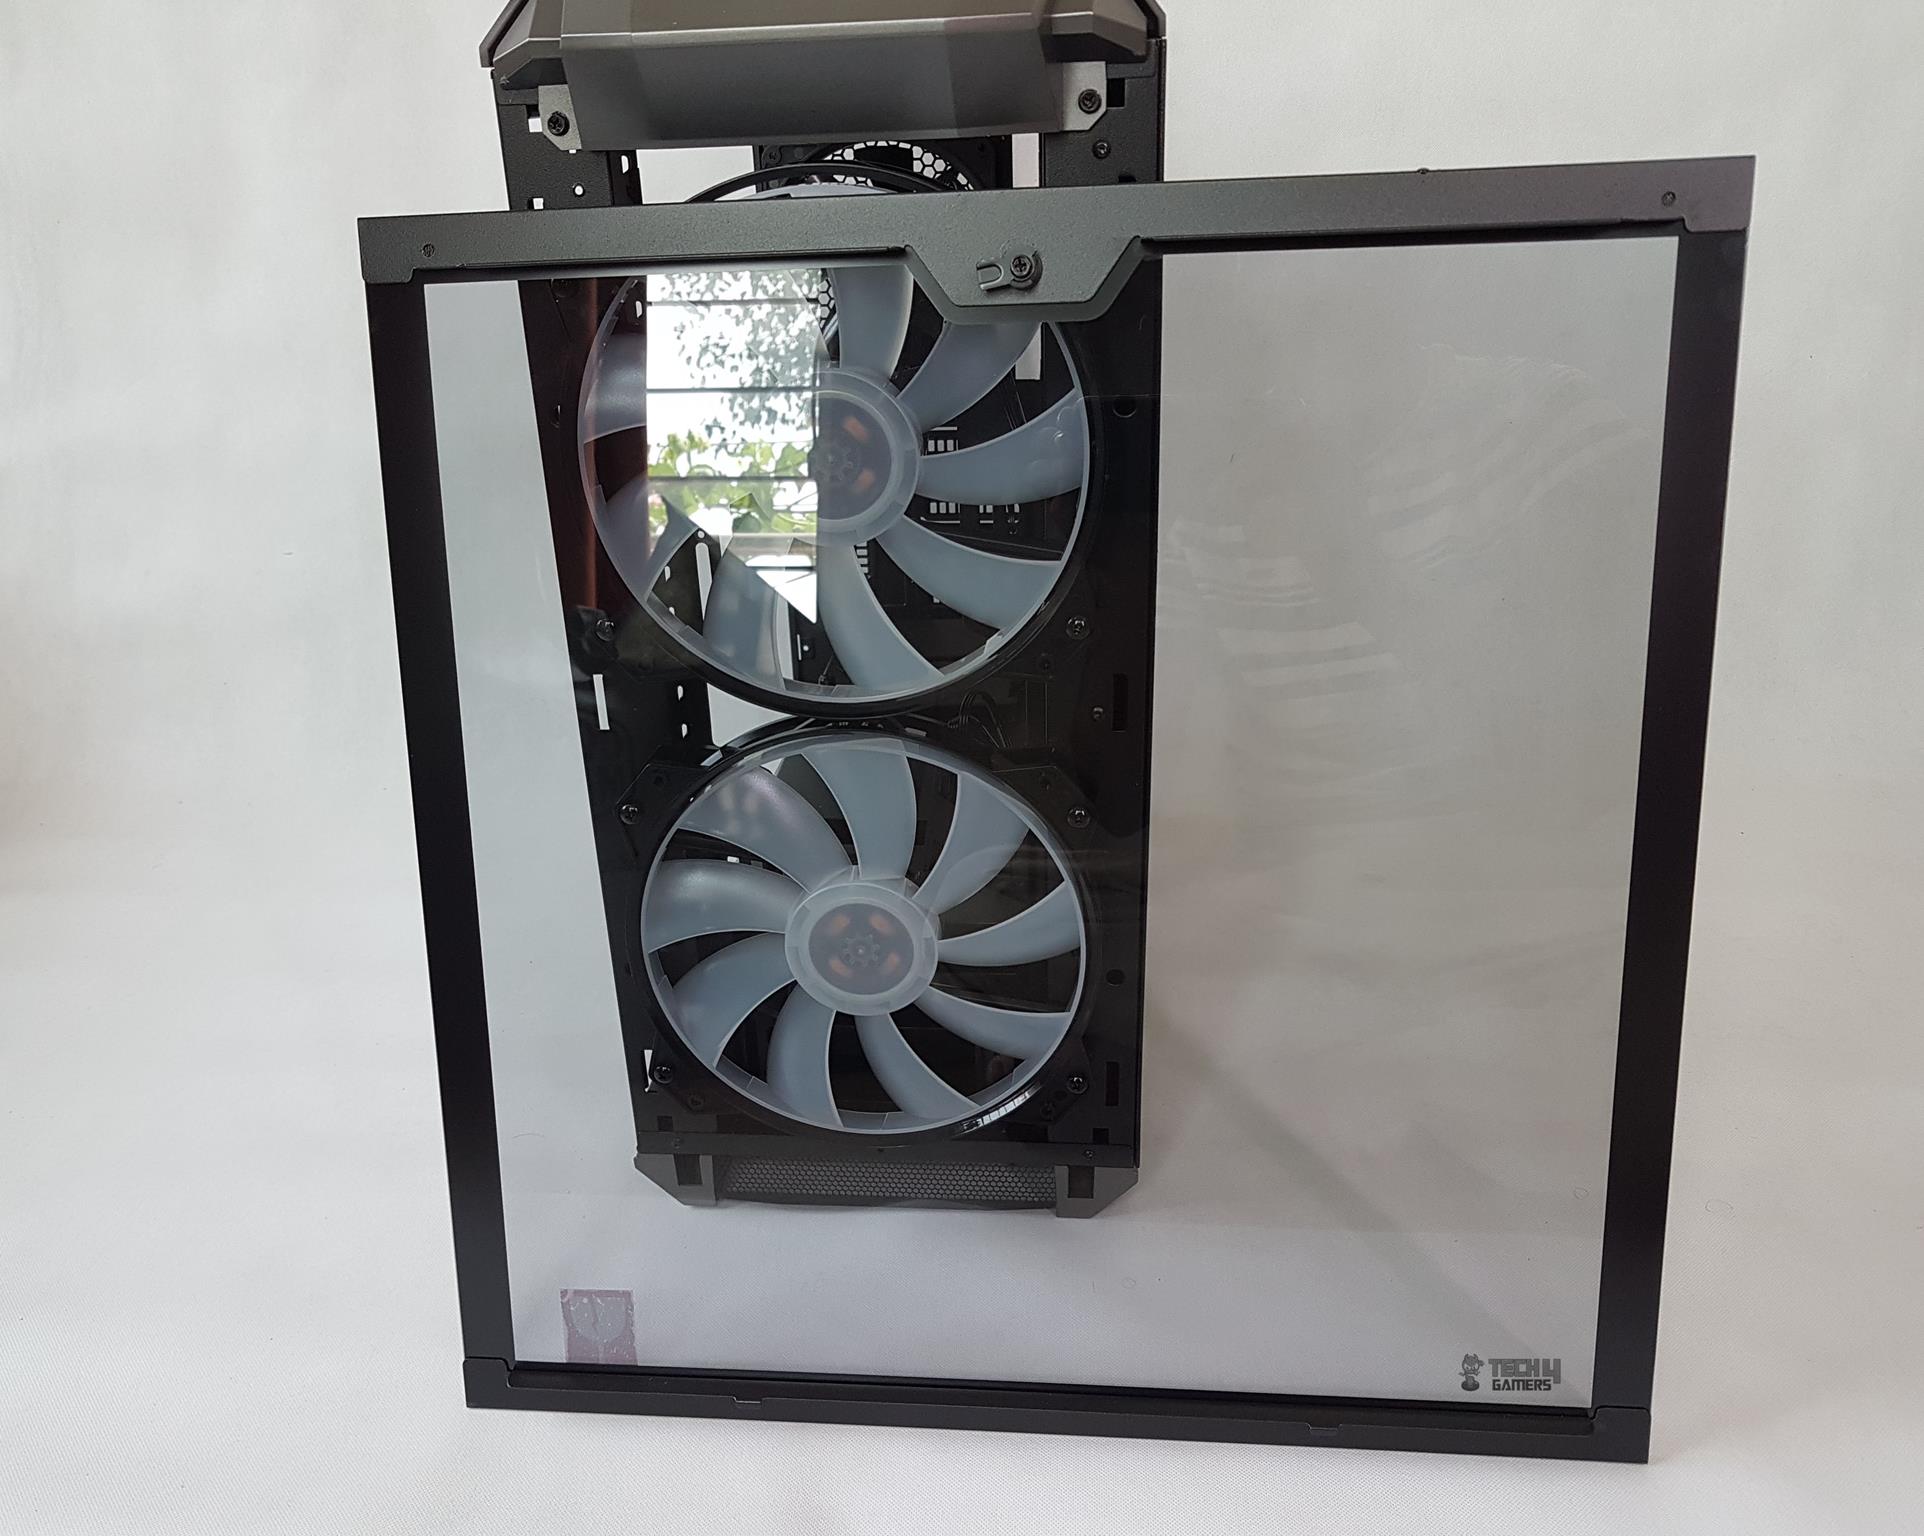
Observing the inner side of the TG panel, the bottom side of the panel has a raised, edged surface in an angular manner which sits over the chassis frame.
There is a locking mechanism on the TG panel. The hook is rotated to lock/unlock the panel from the chassis frame.
The above picture shows the backside of the MasterCase H500P Mesh. It has a solid steel panel which is locked to the chassis frame using two captive thumbscrews from the rear. Look at the overall symmetry and coherence in the design of the chassis even from the backside. Loving it!
Now that, we have taken a look at the exterior of the Chassis, it is time to take a peek at the interior.
Inside The Chassis
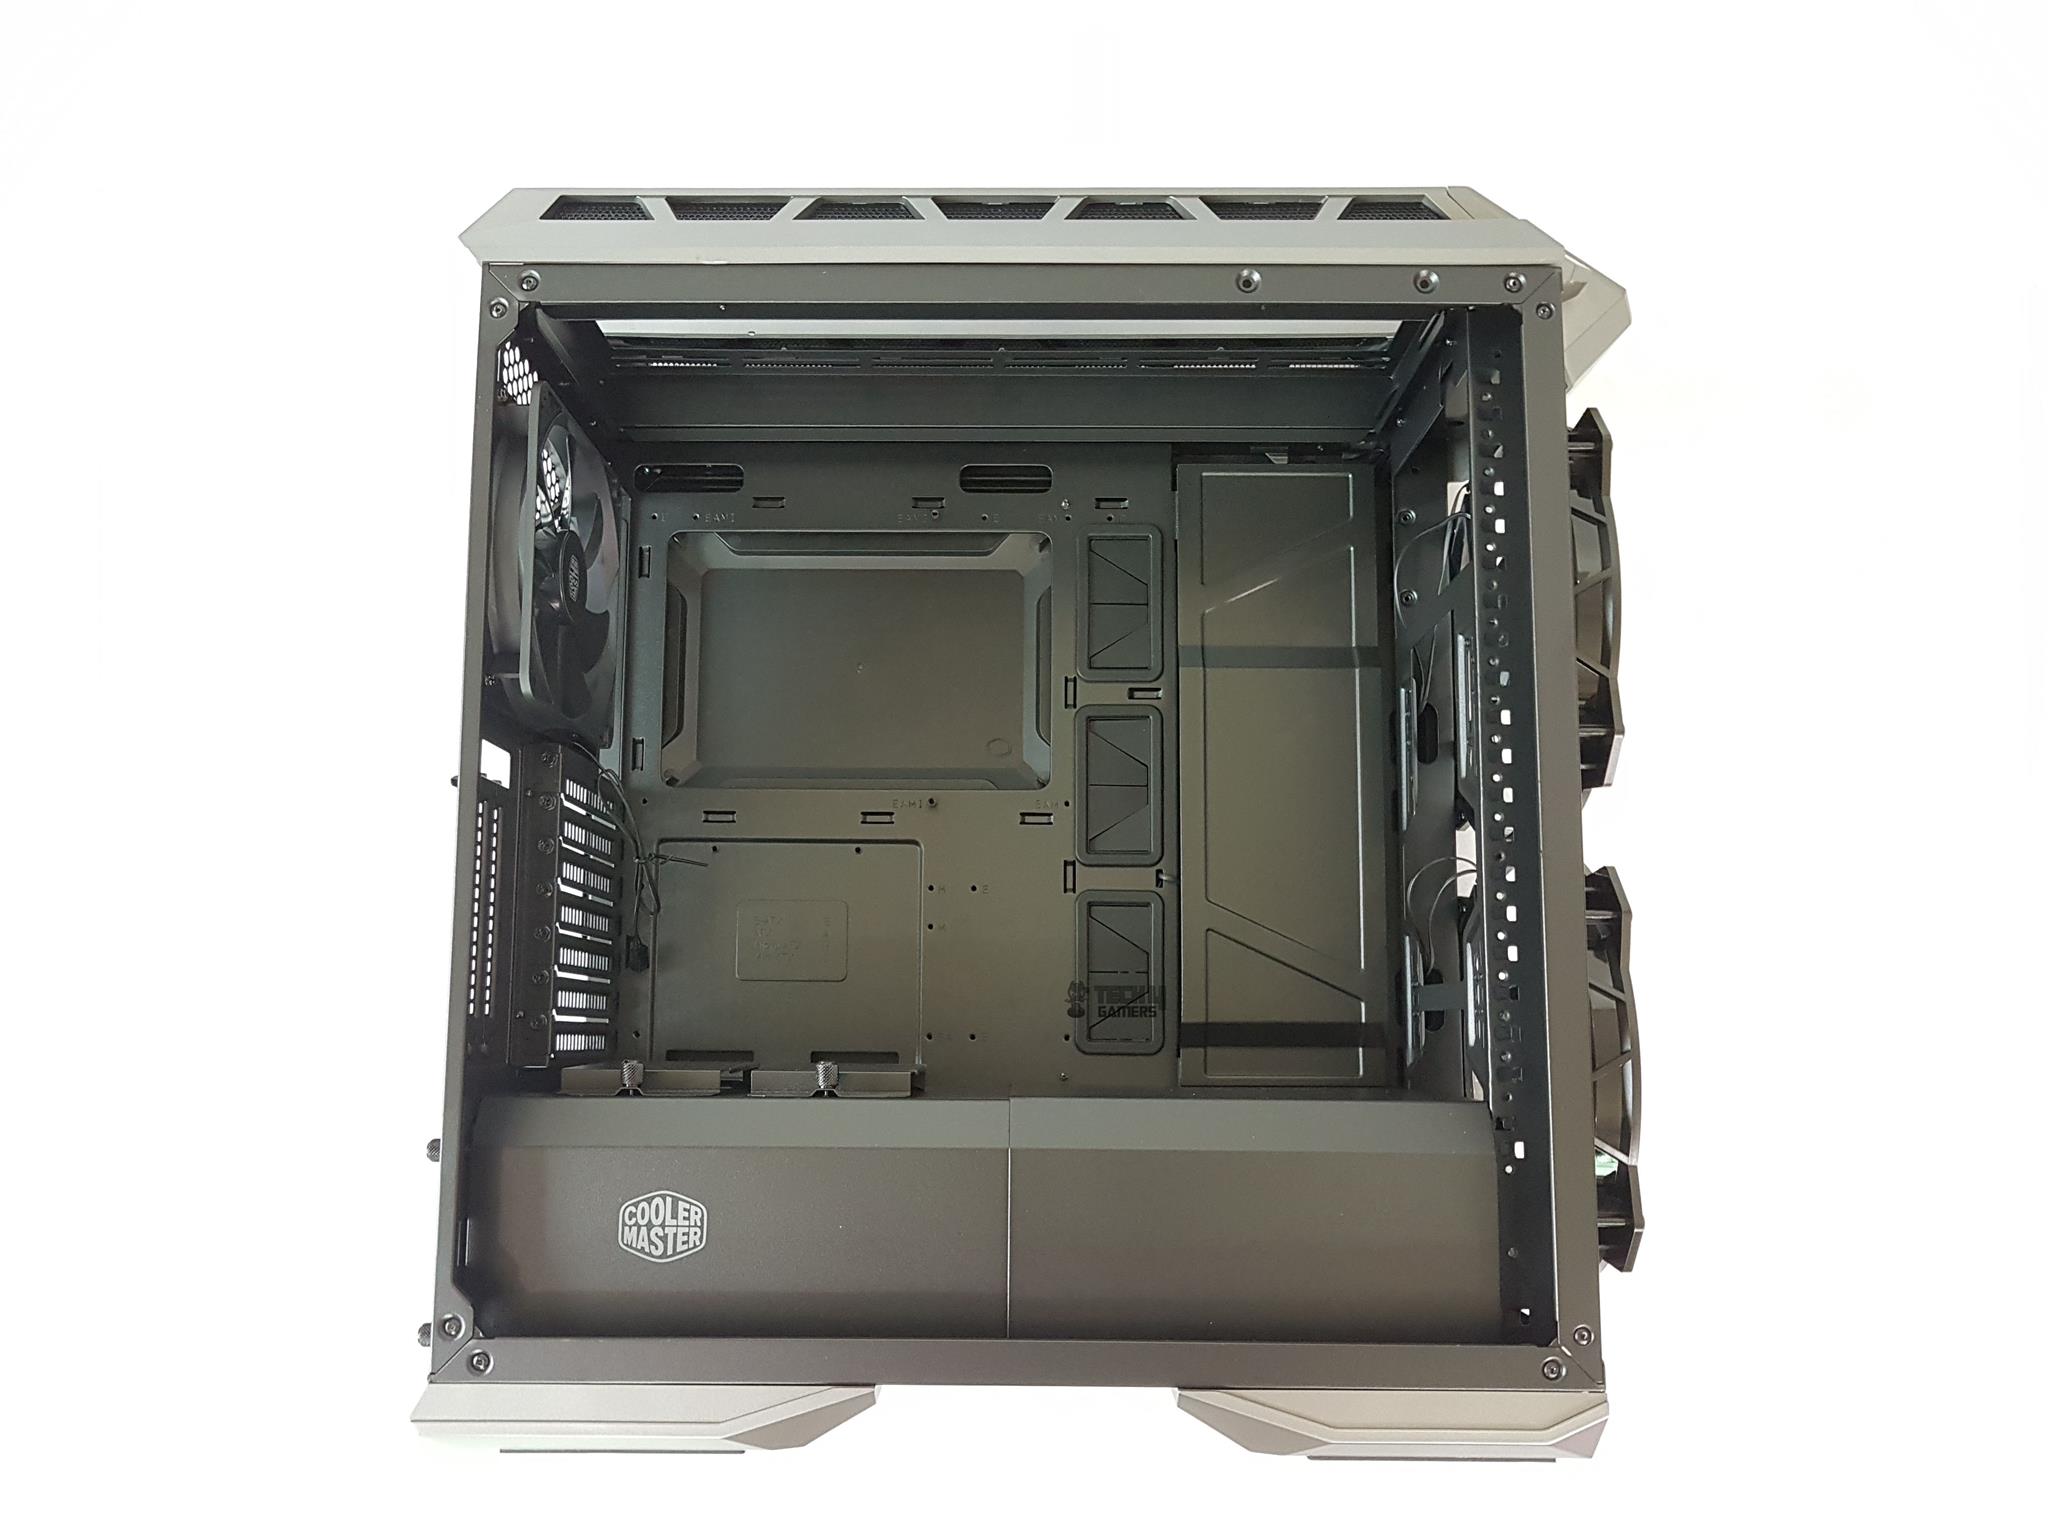
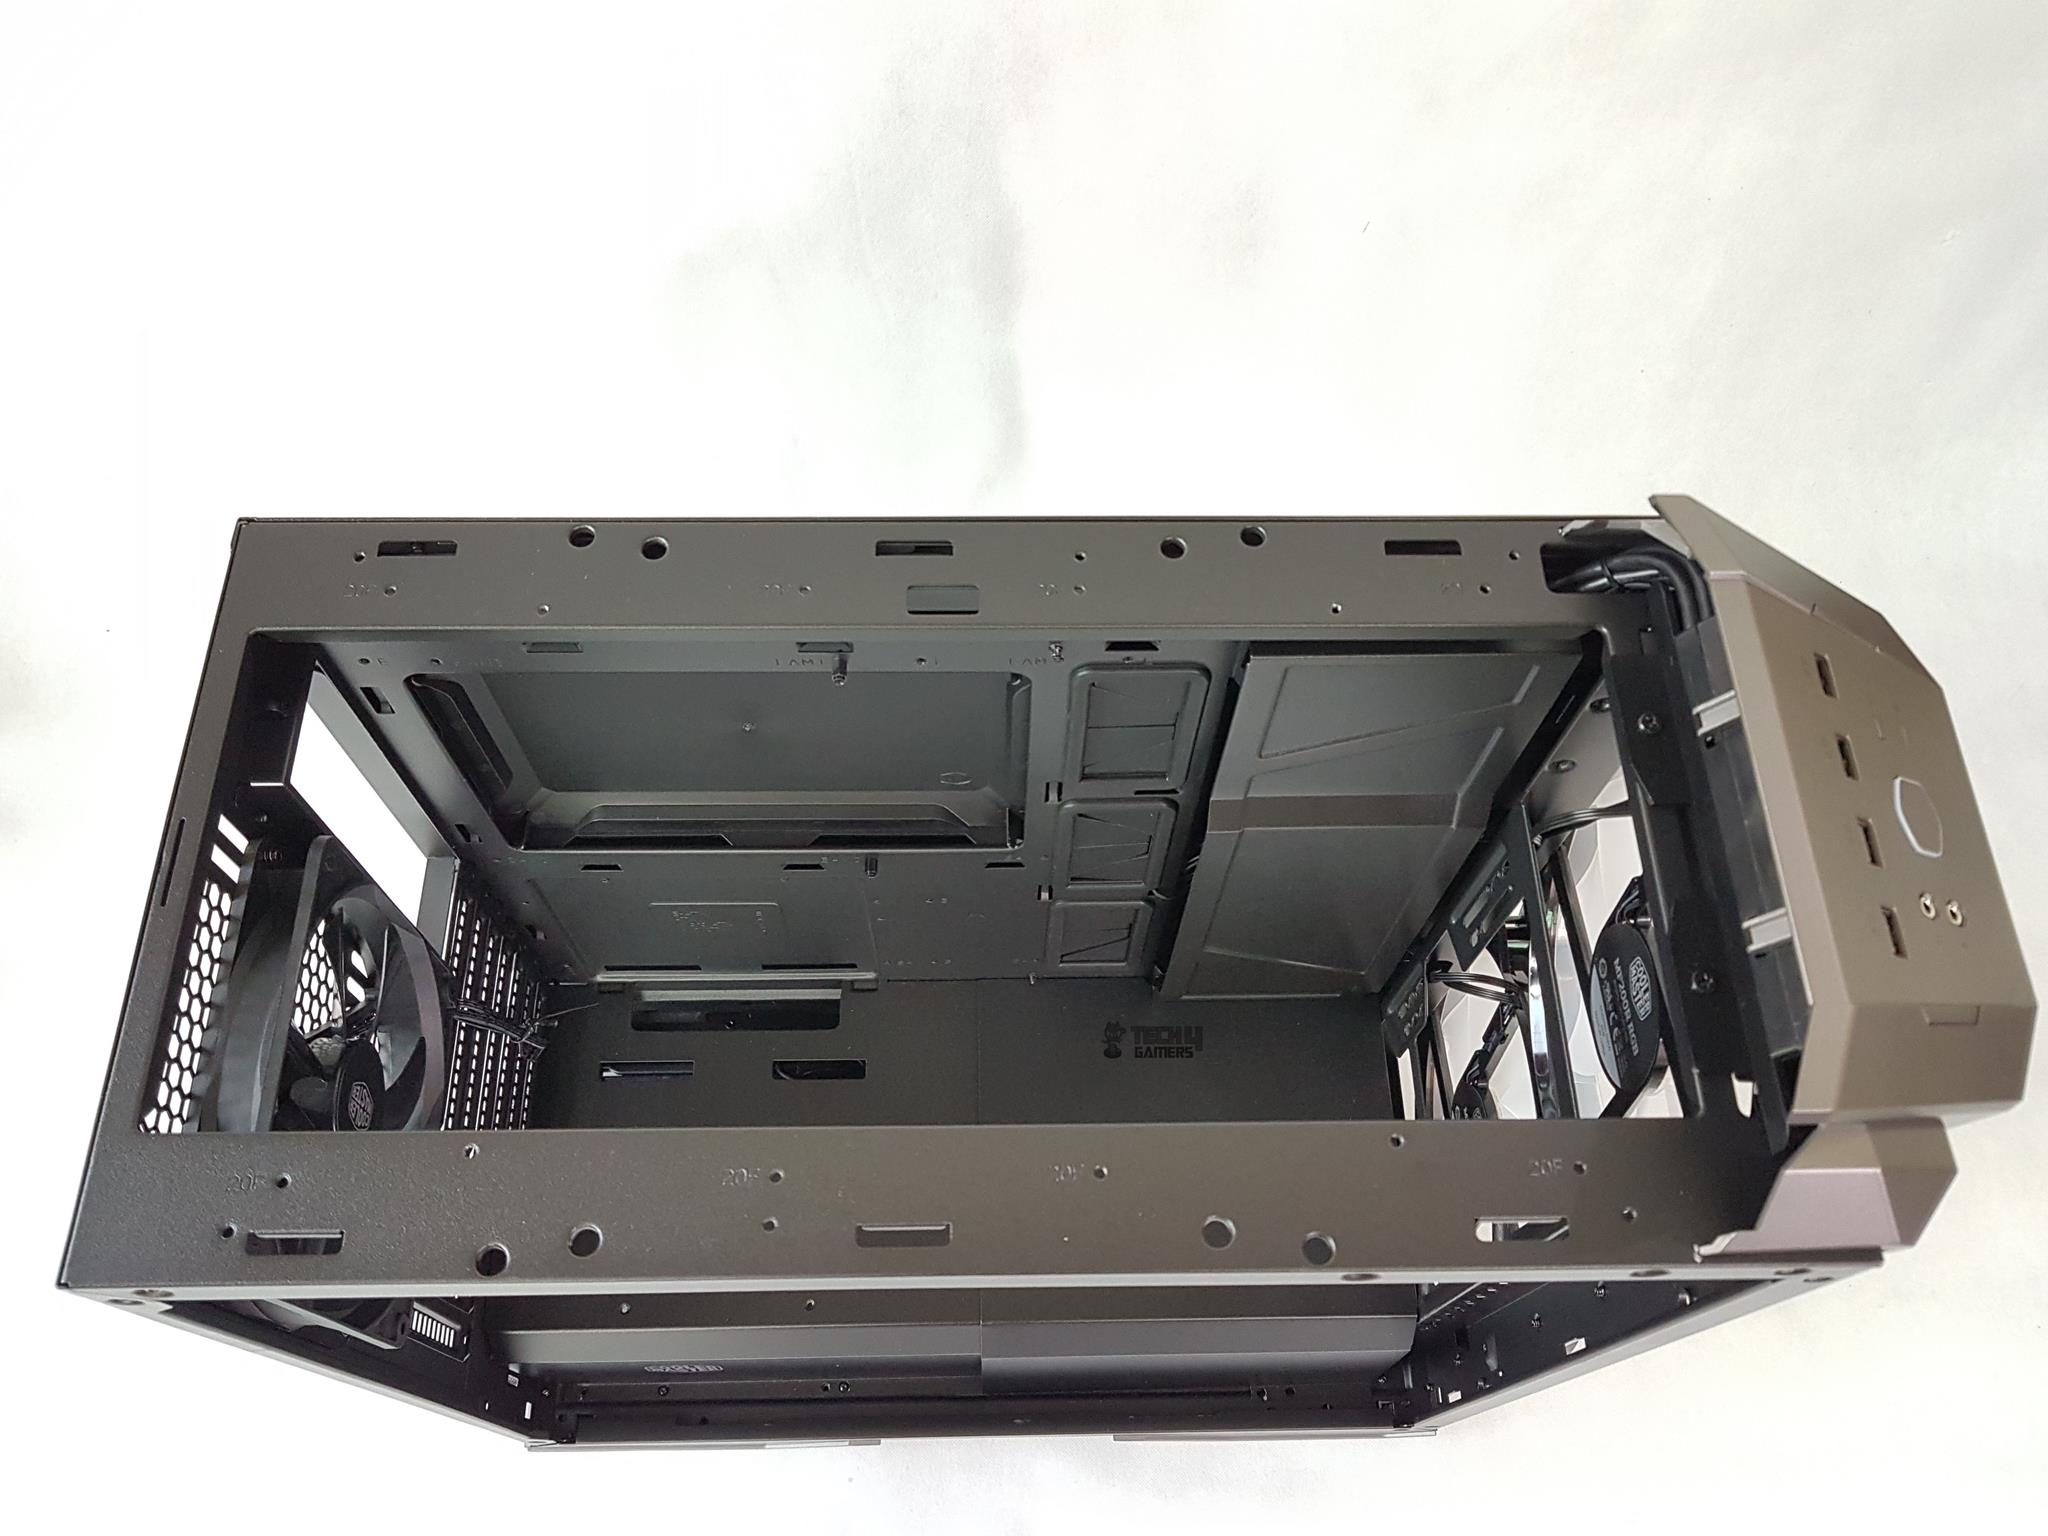
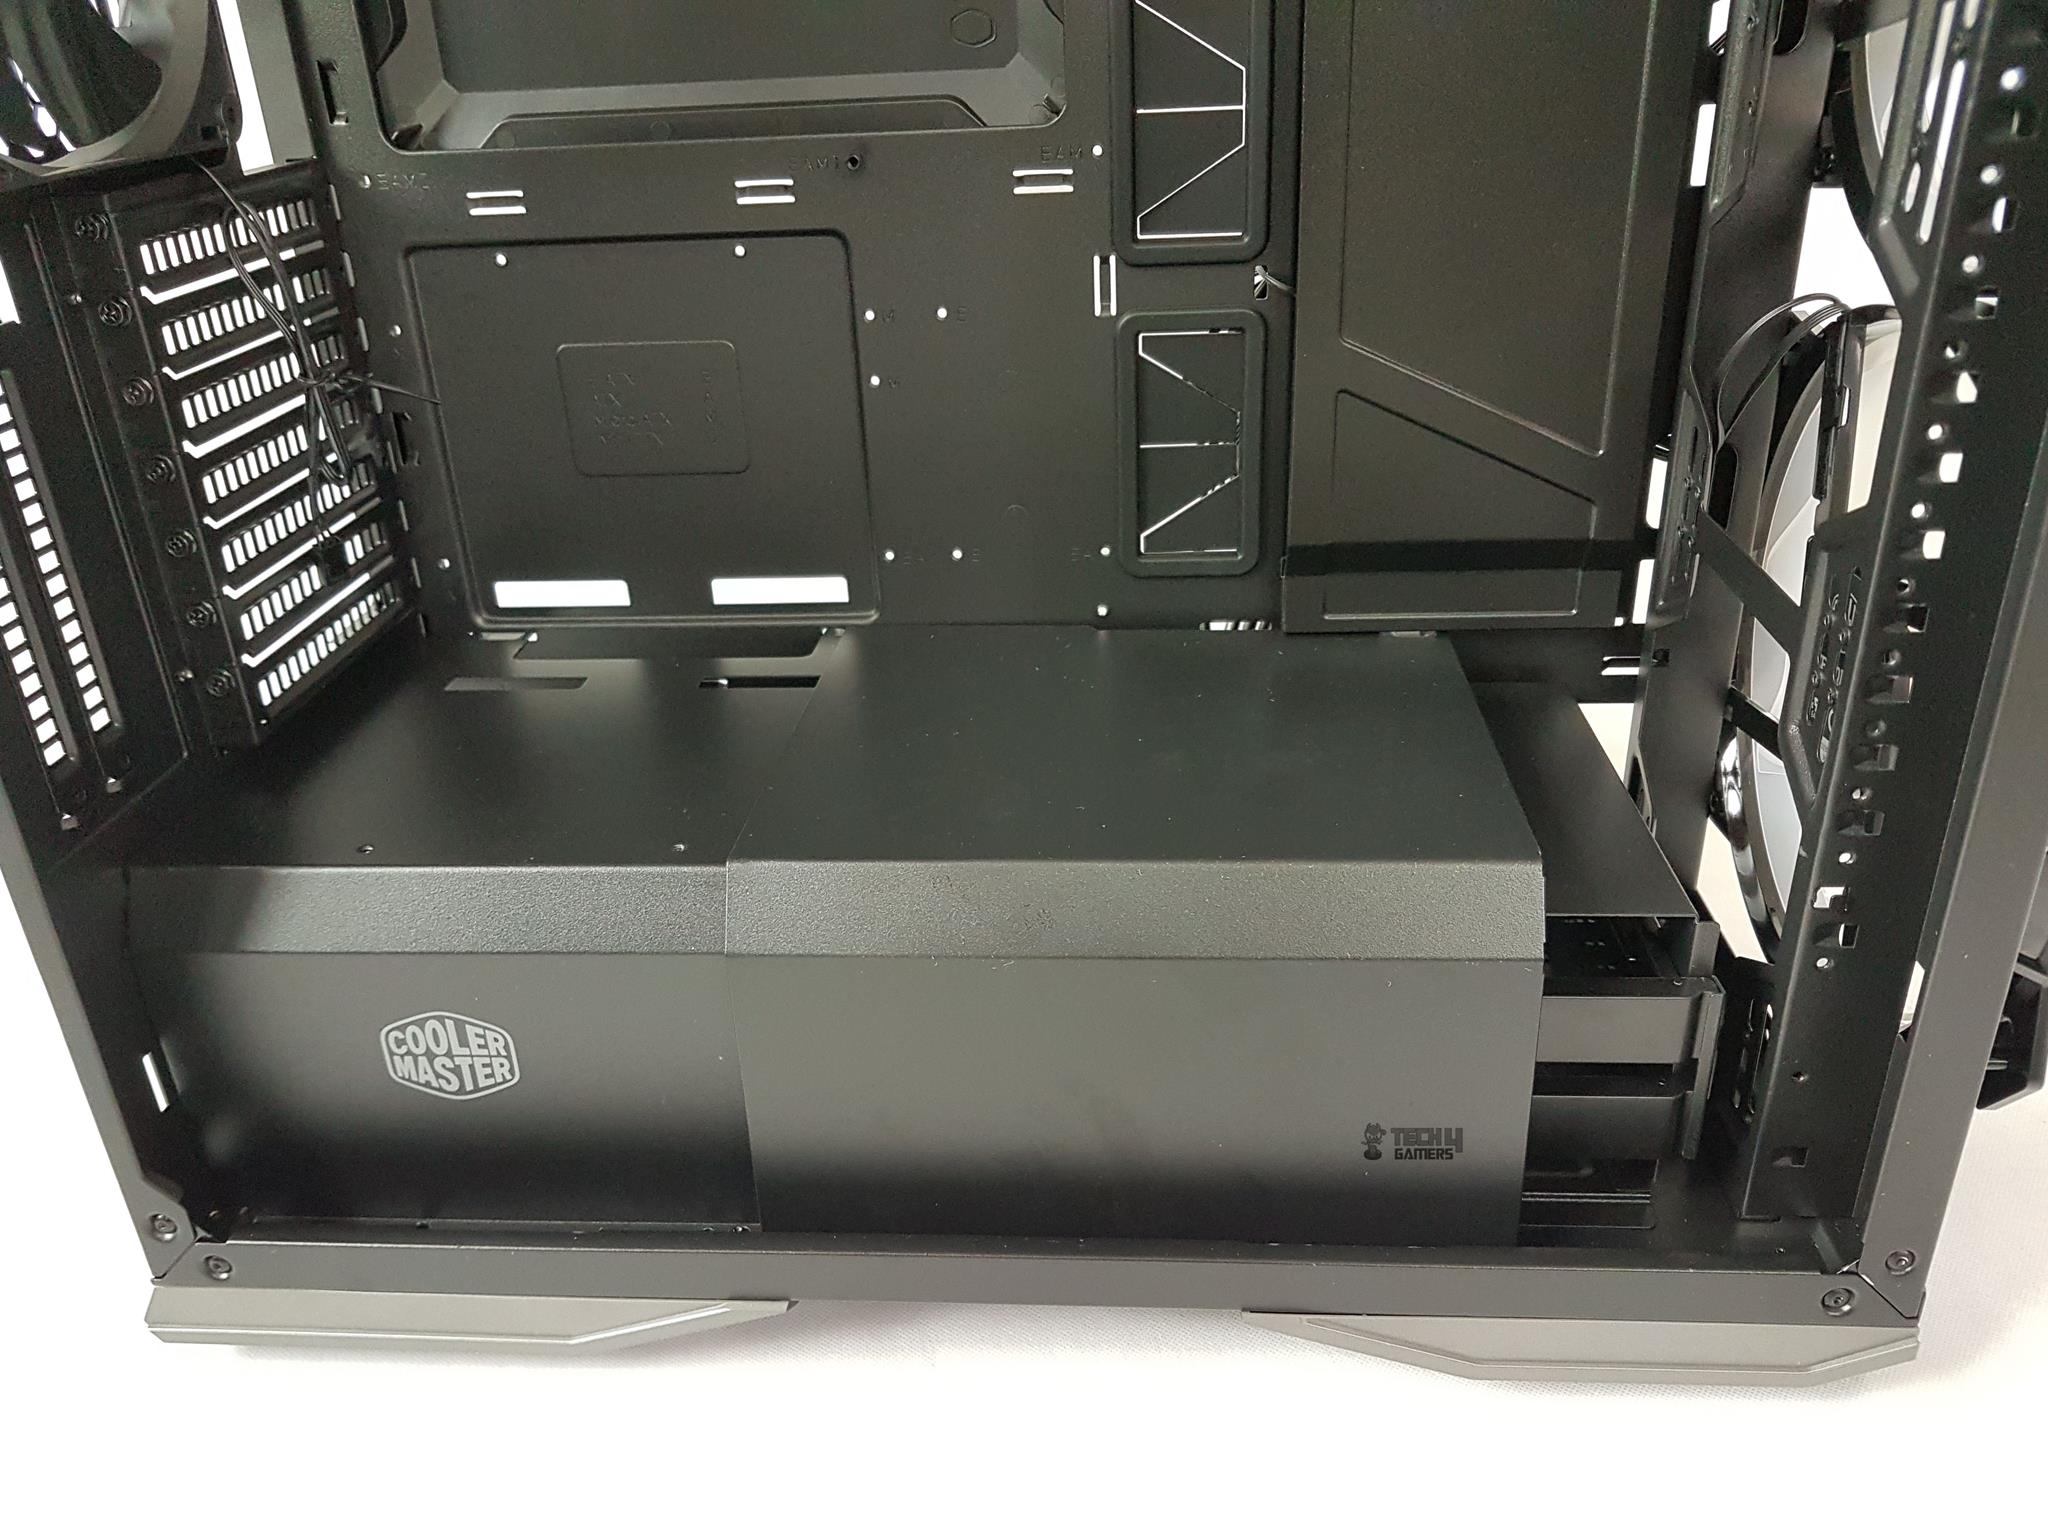
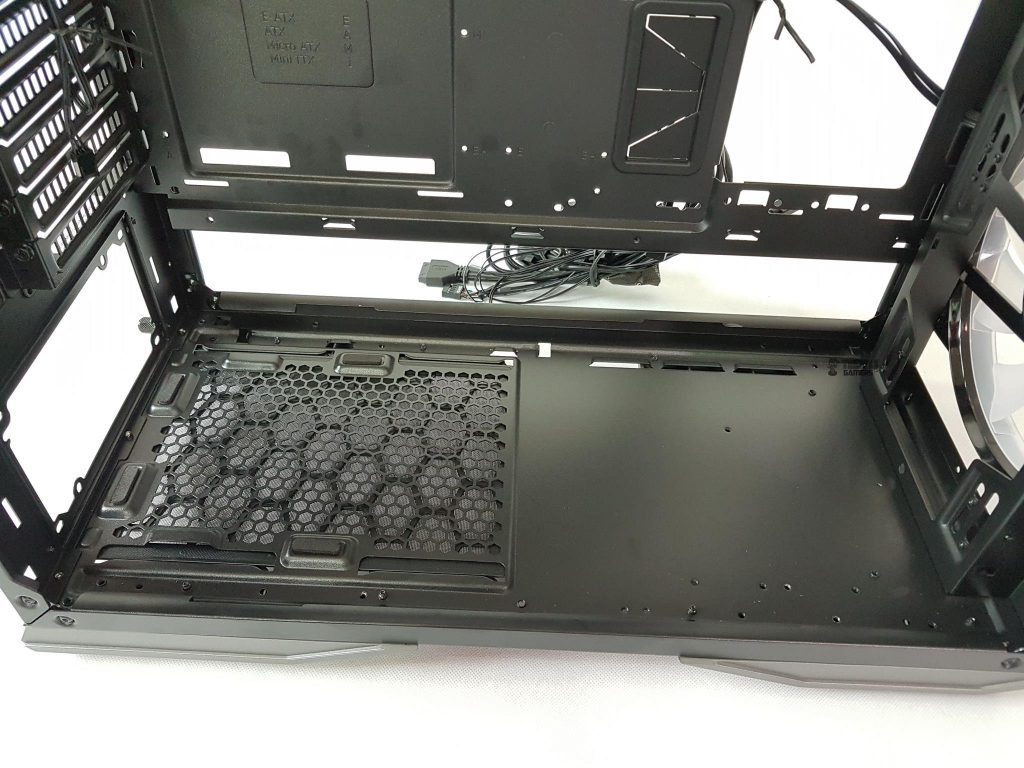
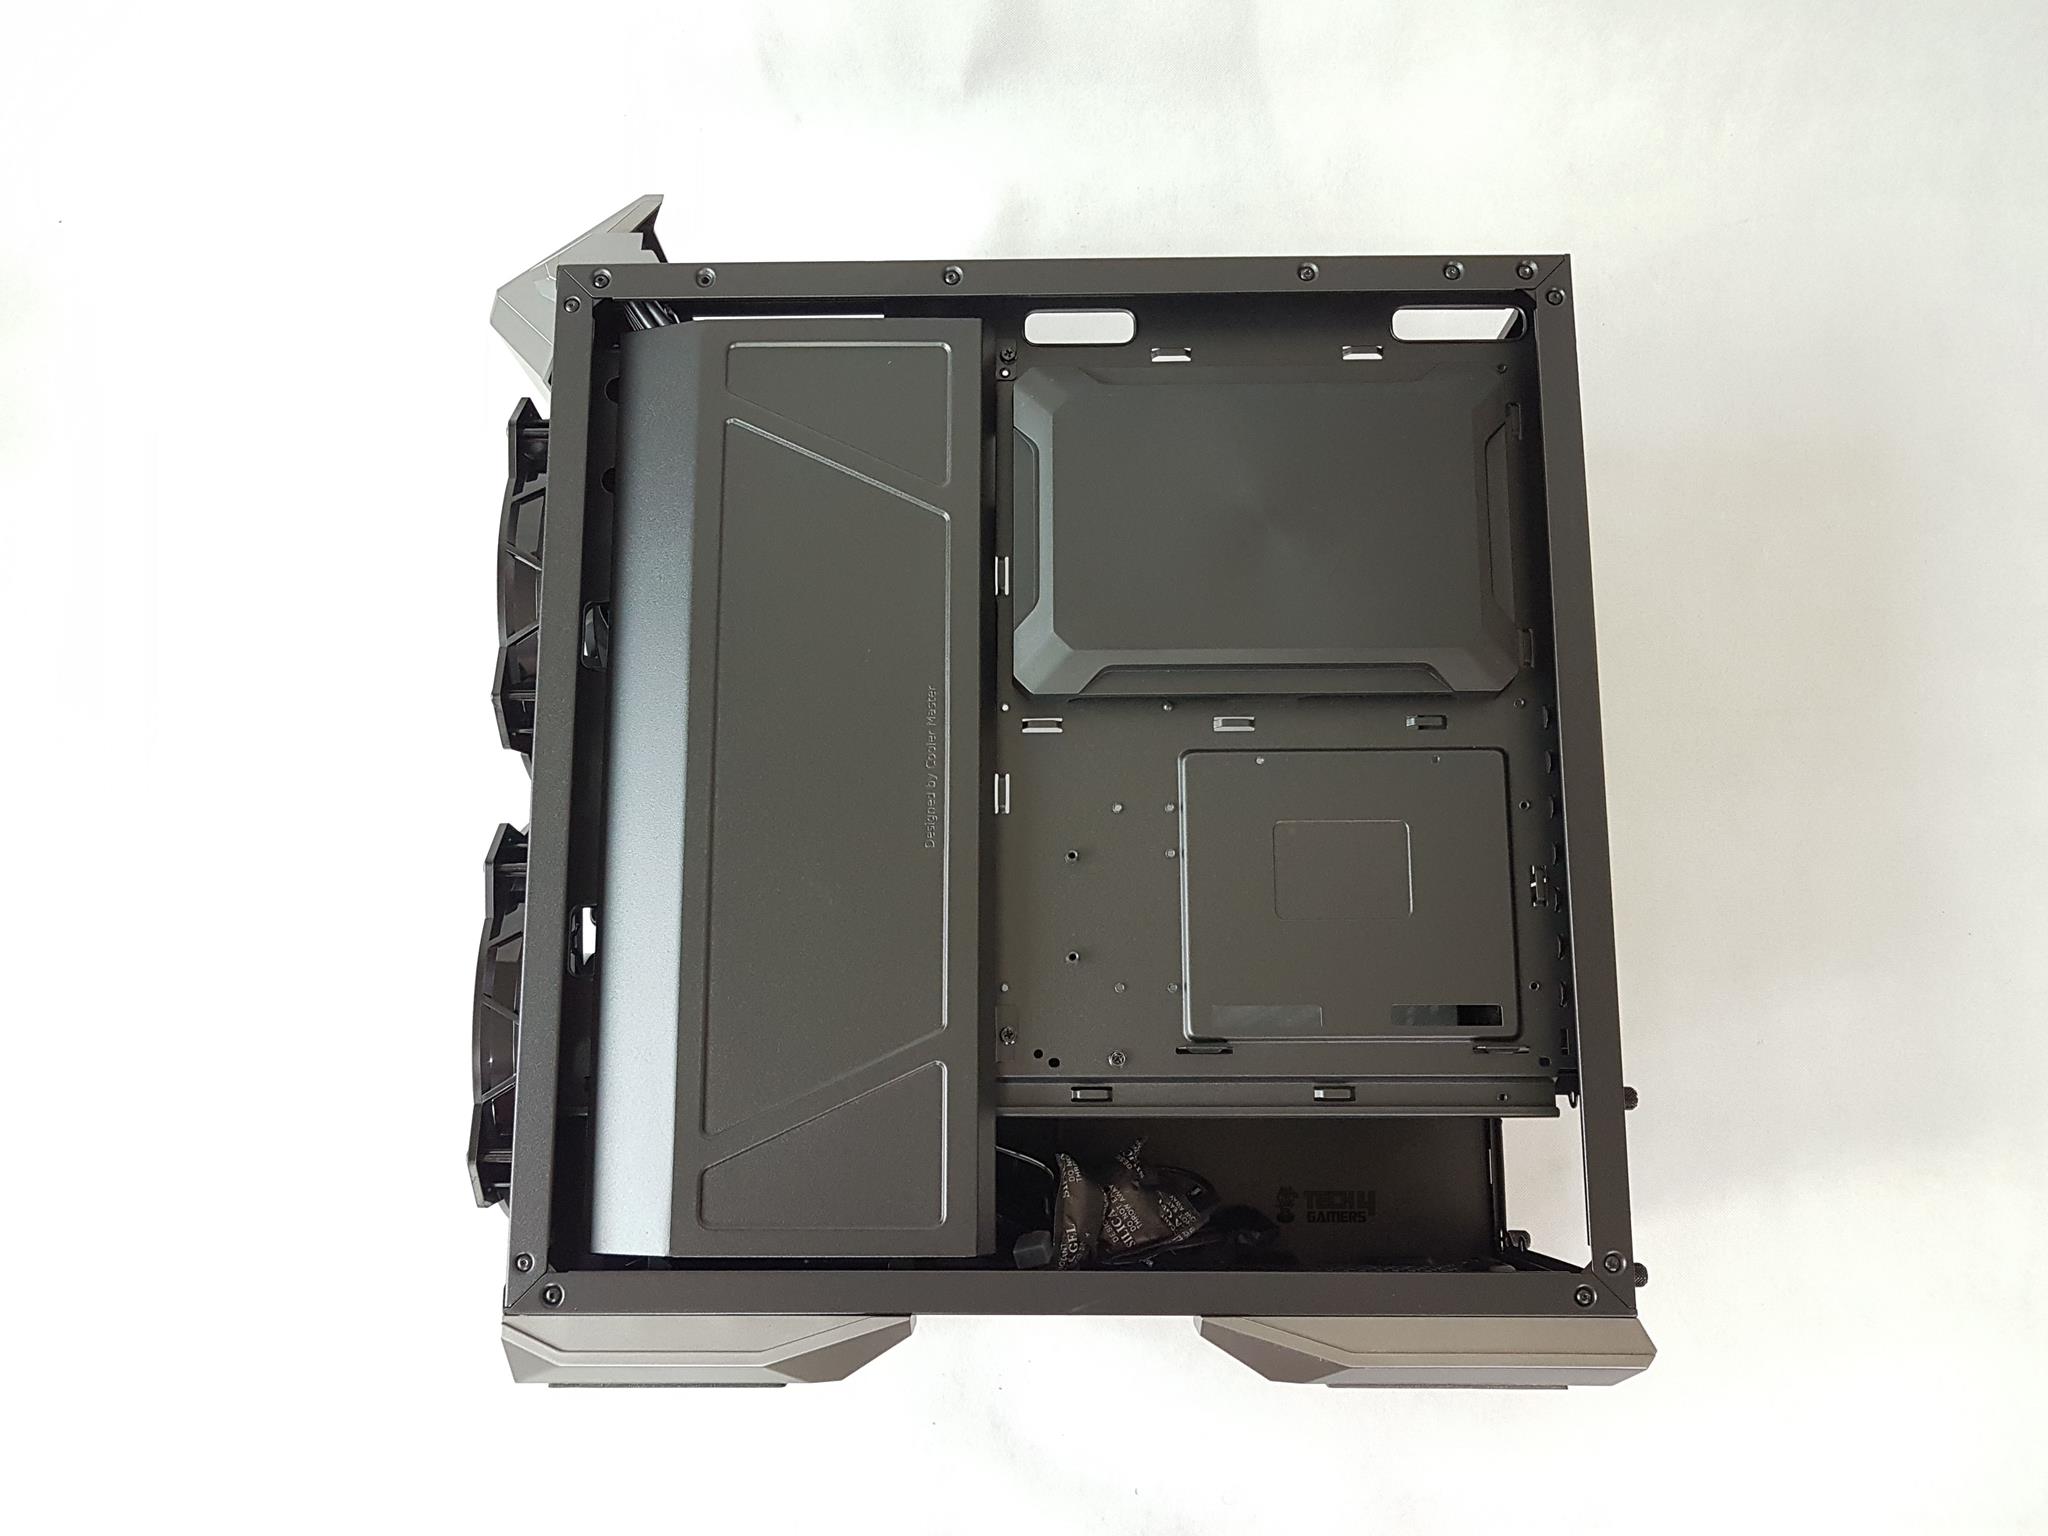
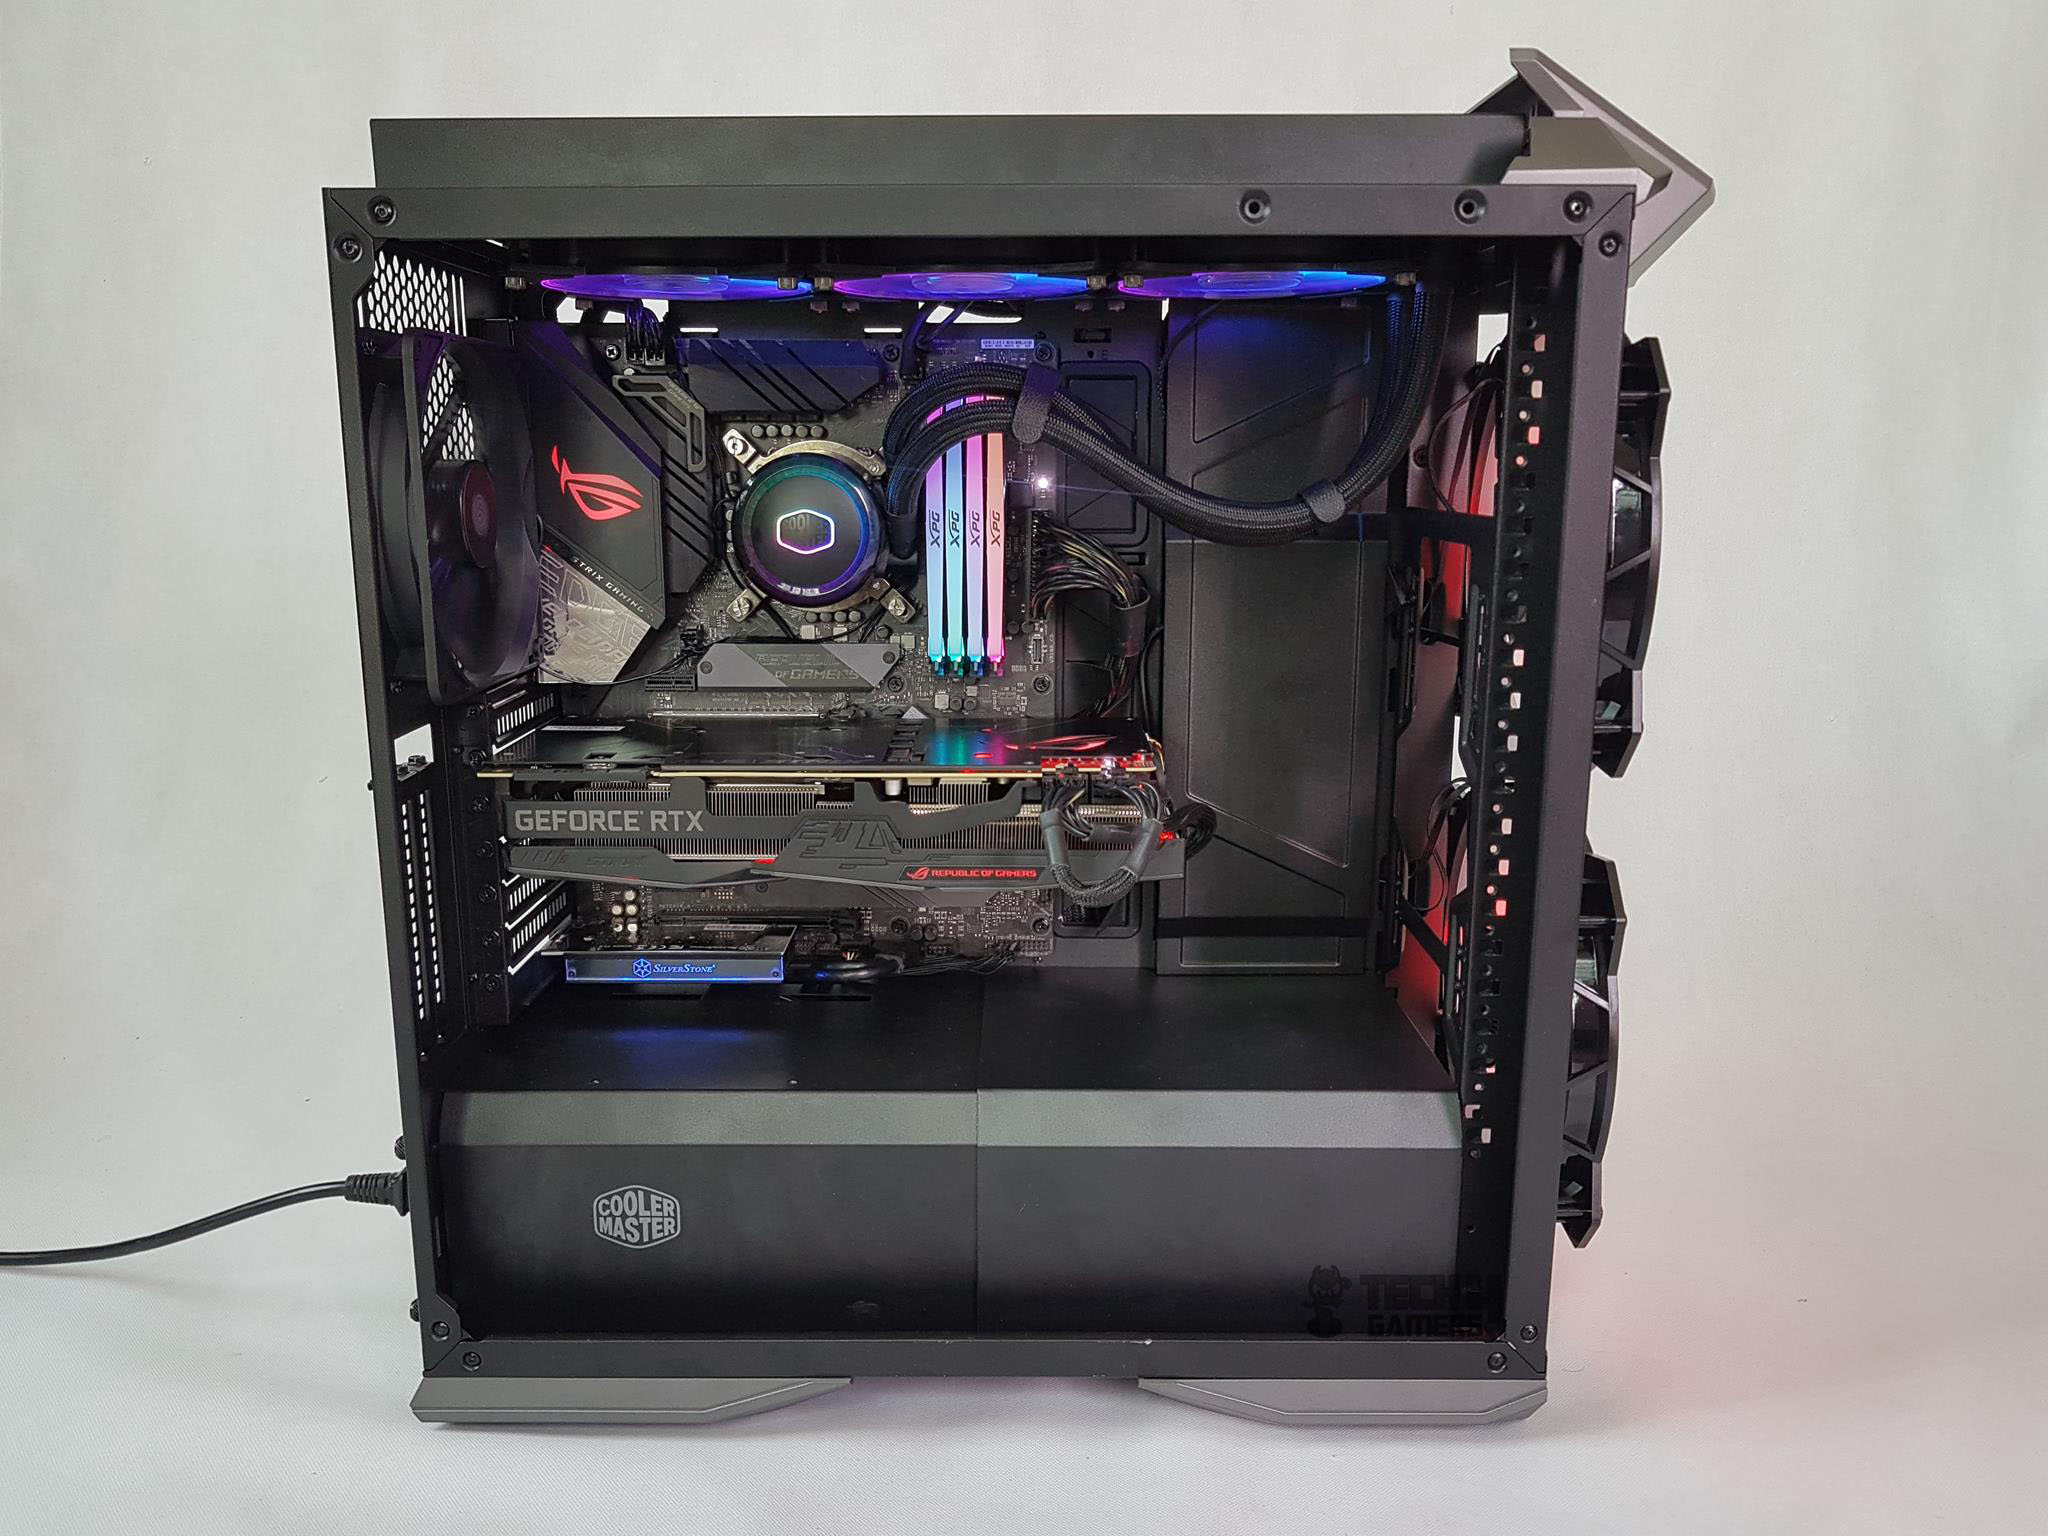
Looking inside, the MasterCase H500P Mesh has a spacious layout which is seconded by the openness look coming from the right side. This is the place where there are storage drives options etc. Here, we have a metallic cable cover only. We have metallic PSU shroud and a metallic storage drive shroud on the base. This will help the user in making cleaner build without showing cable clutter and unnecessary items.
There is one 140mm black color fan pre-installed on the rear having a rated speed of 1200 RPM and has a 3-pin flat power cable. From its design, it seems like it designed for the airflow than the static pressure.
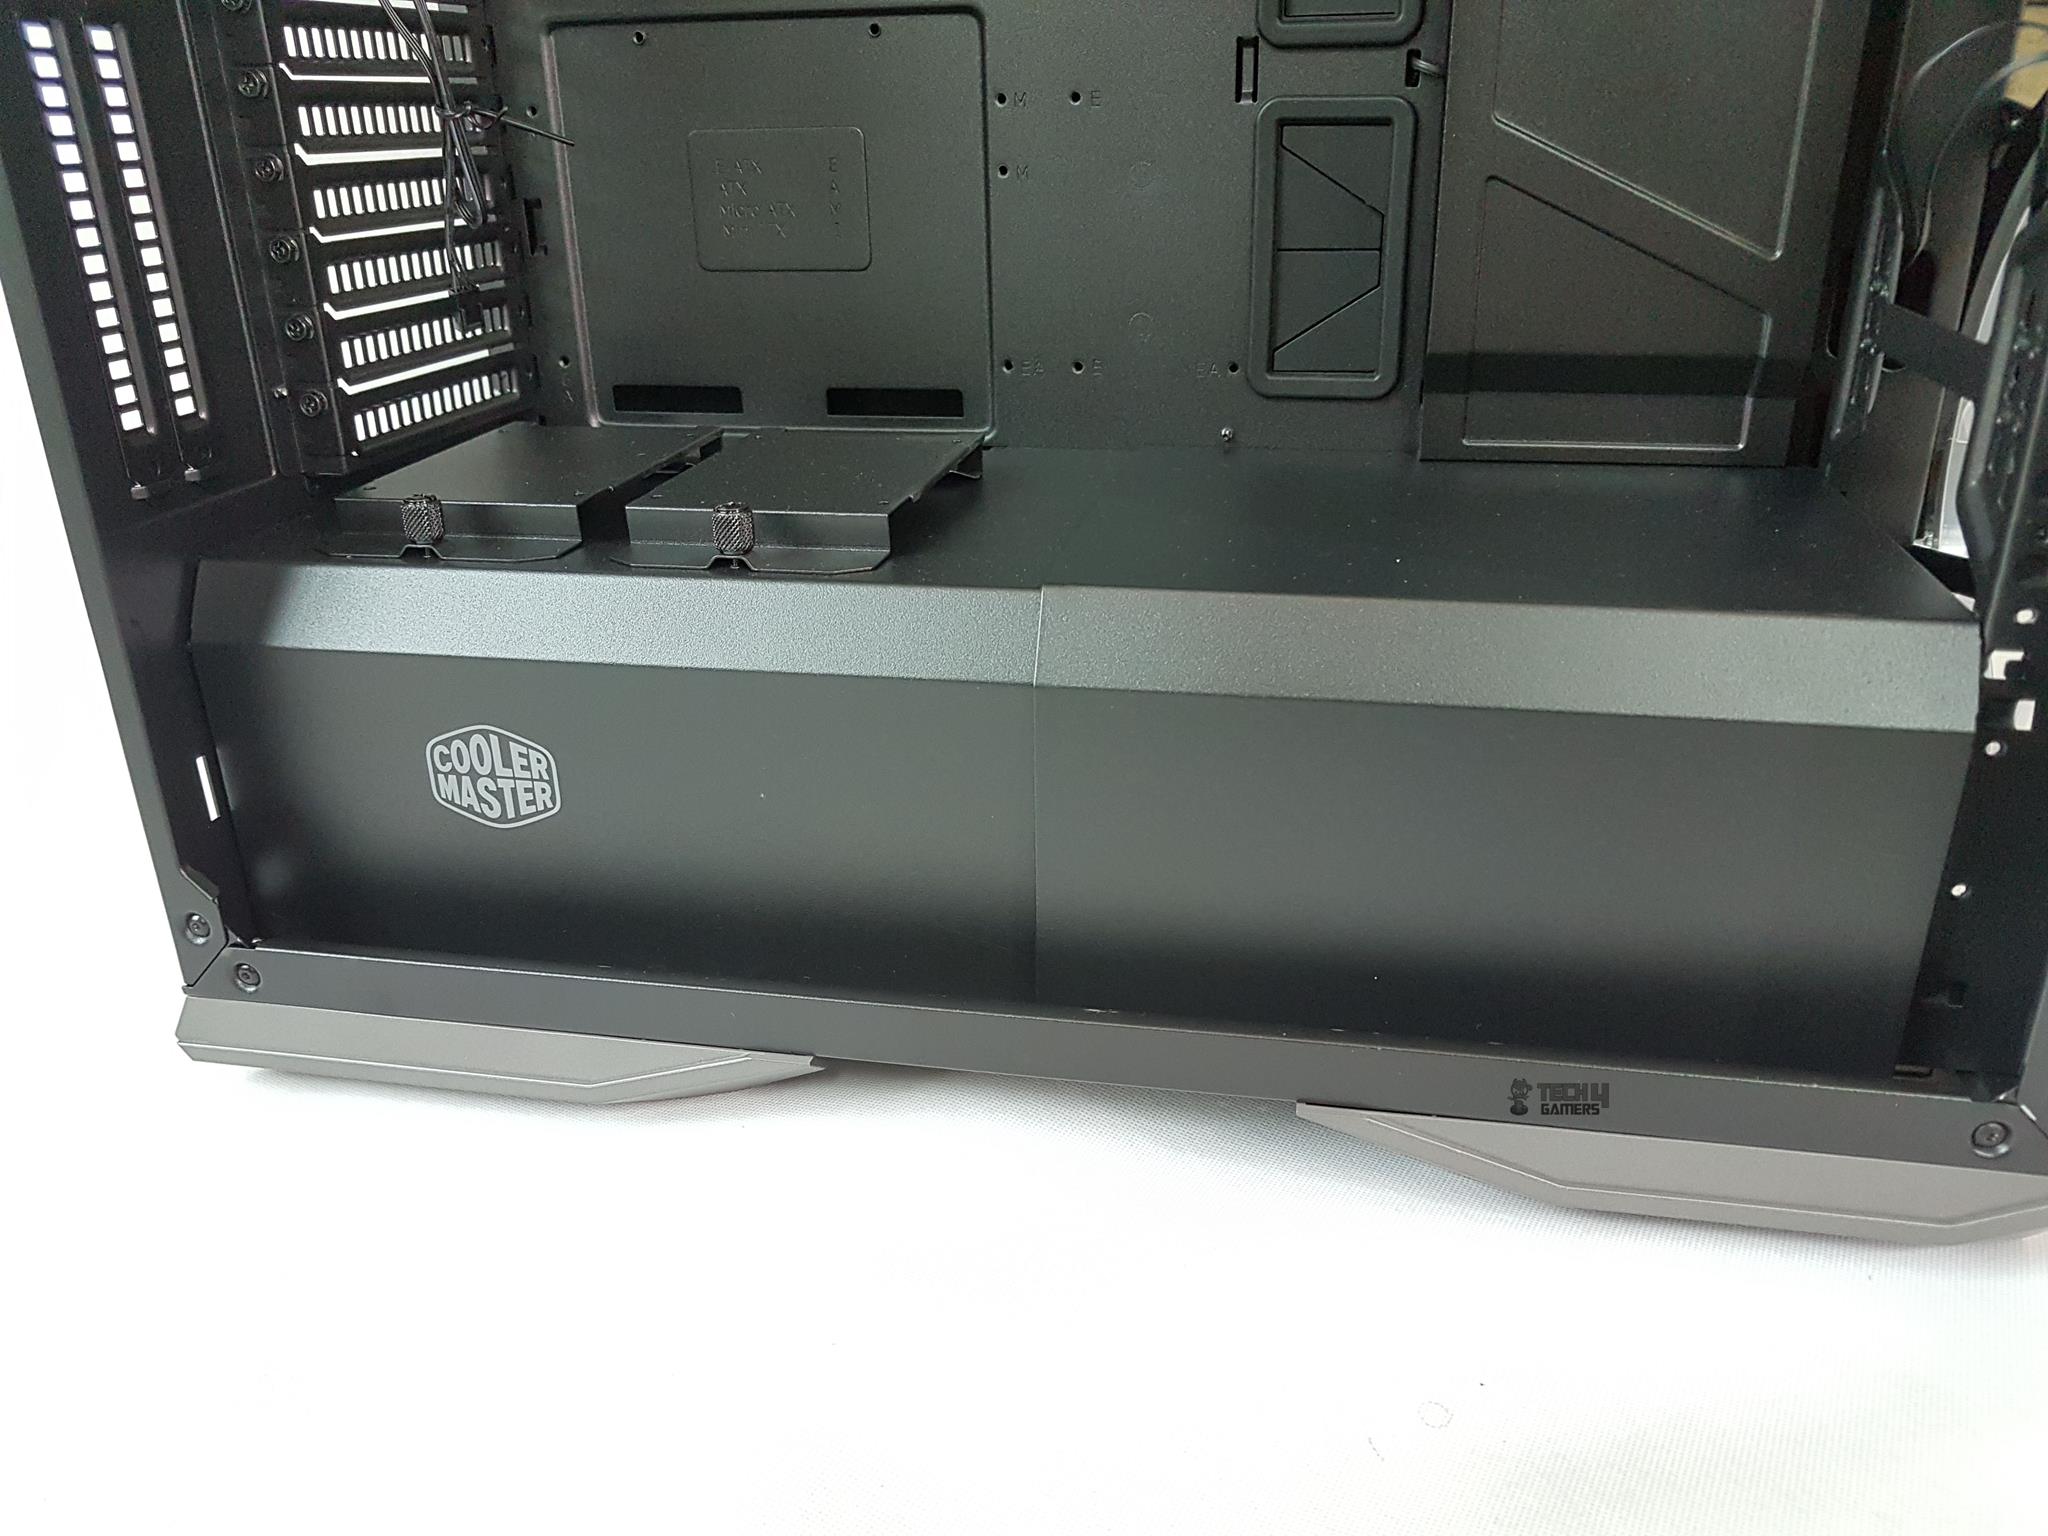
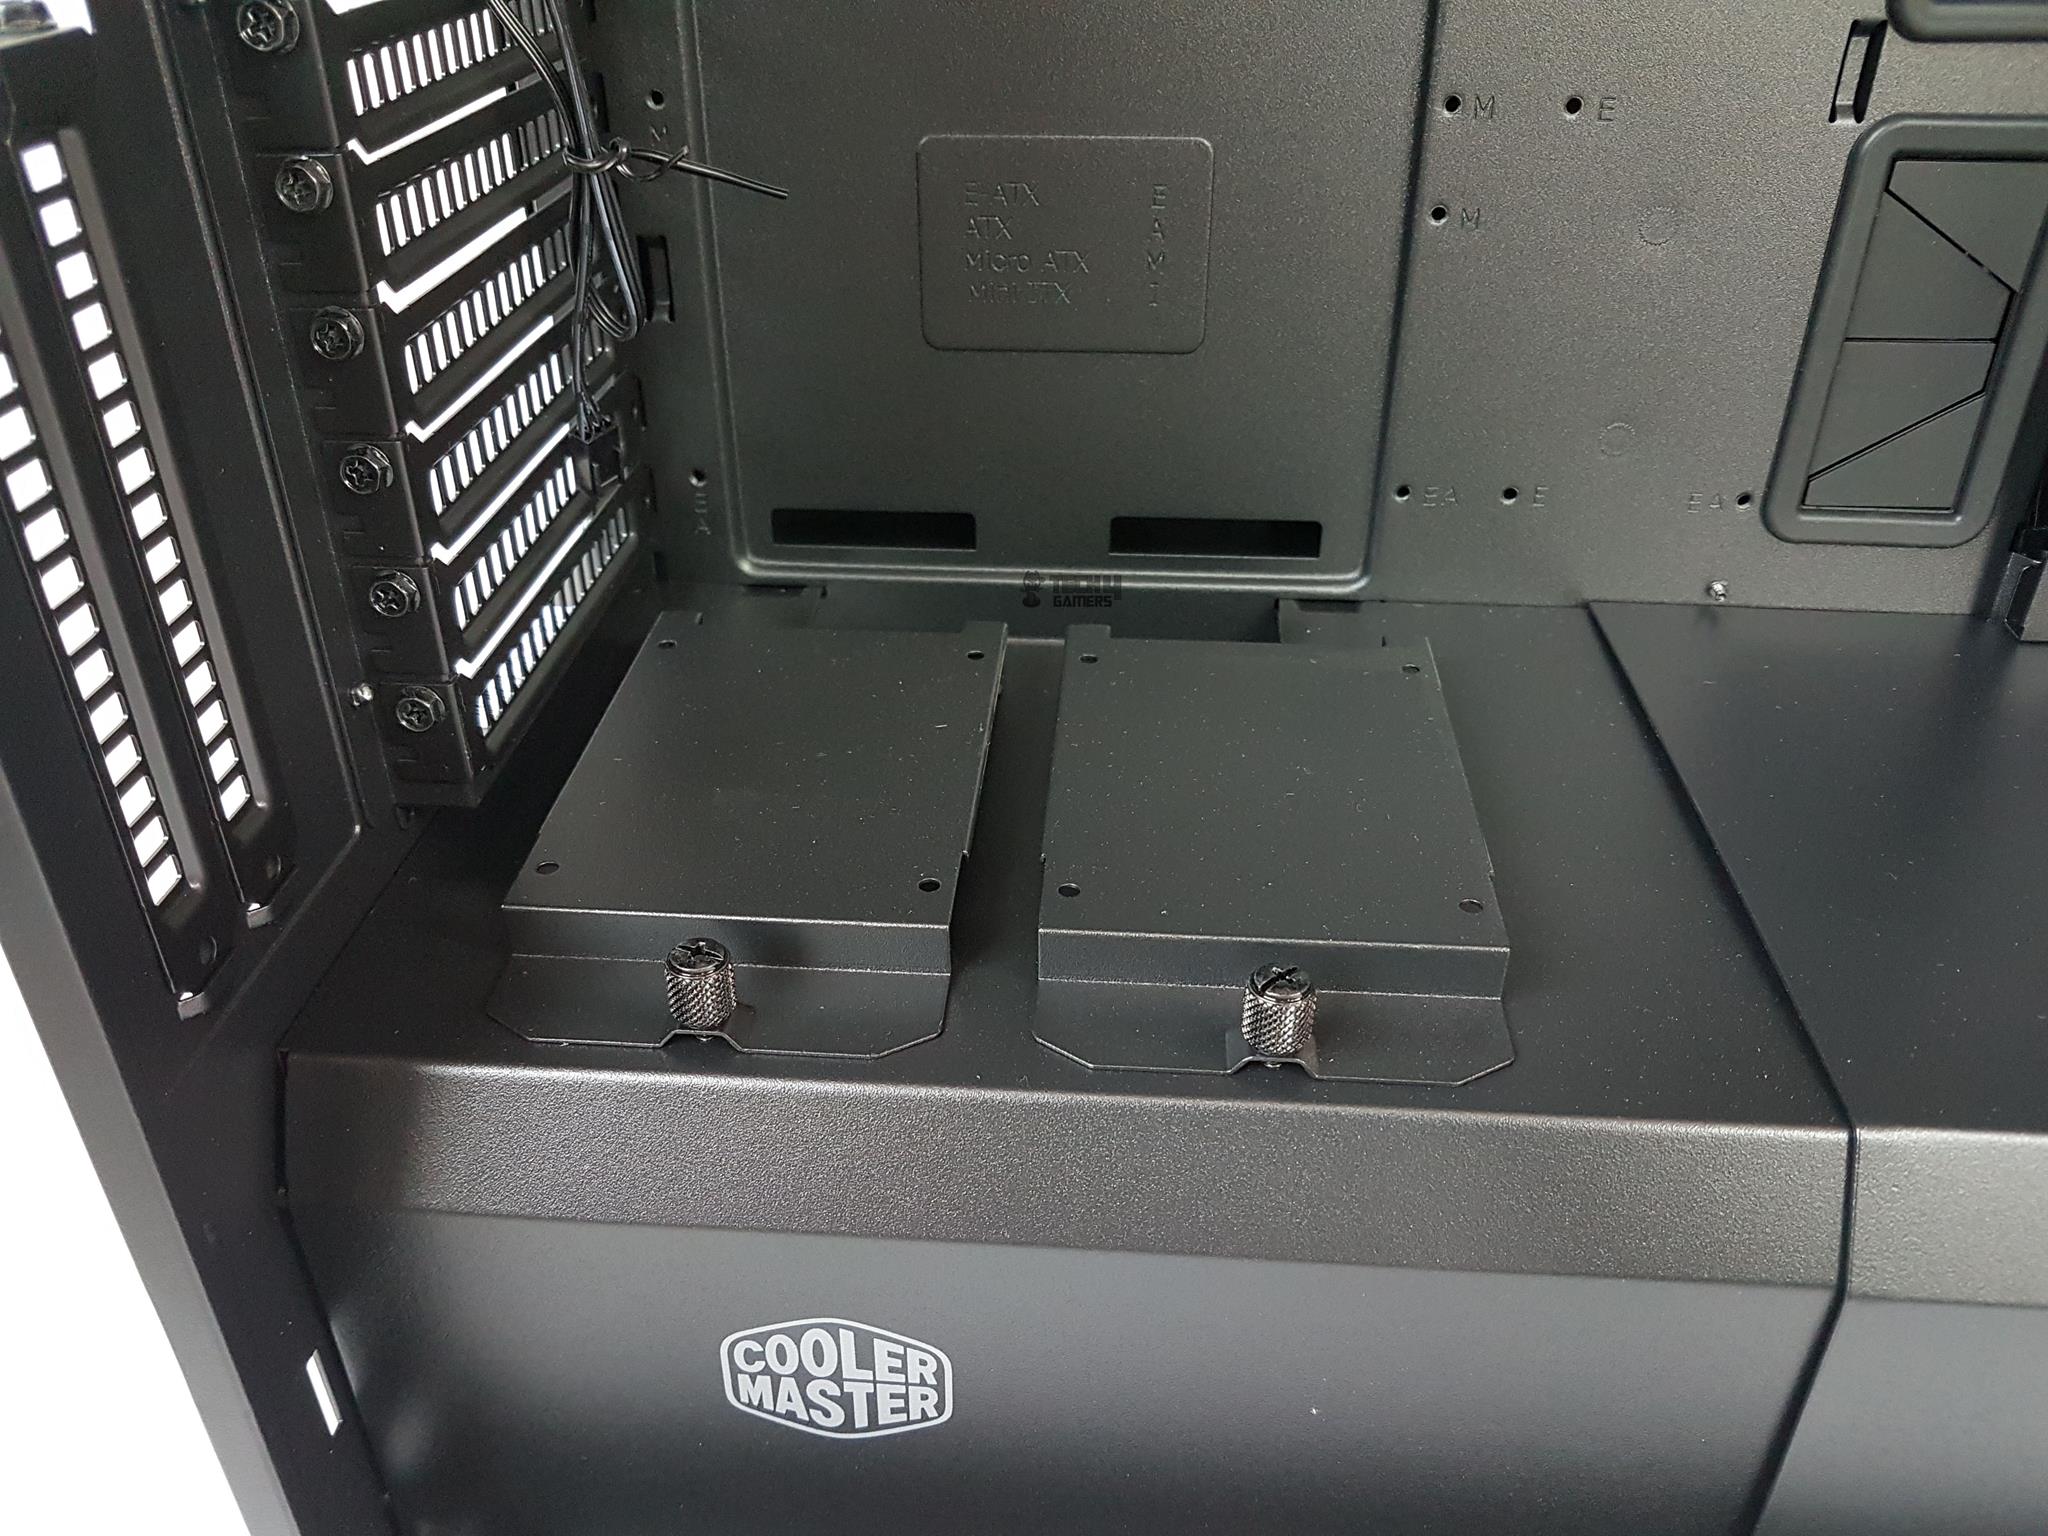
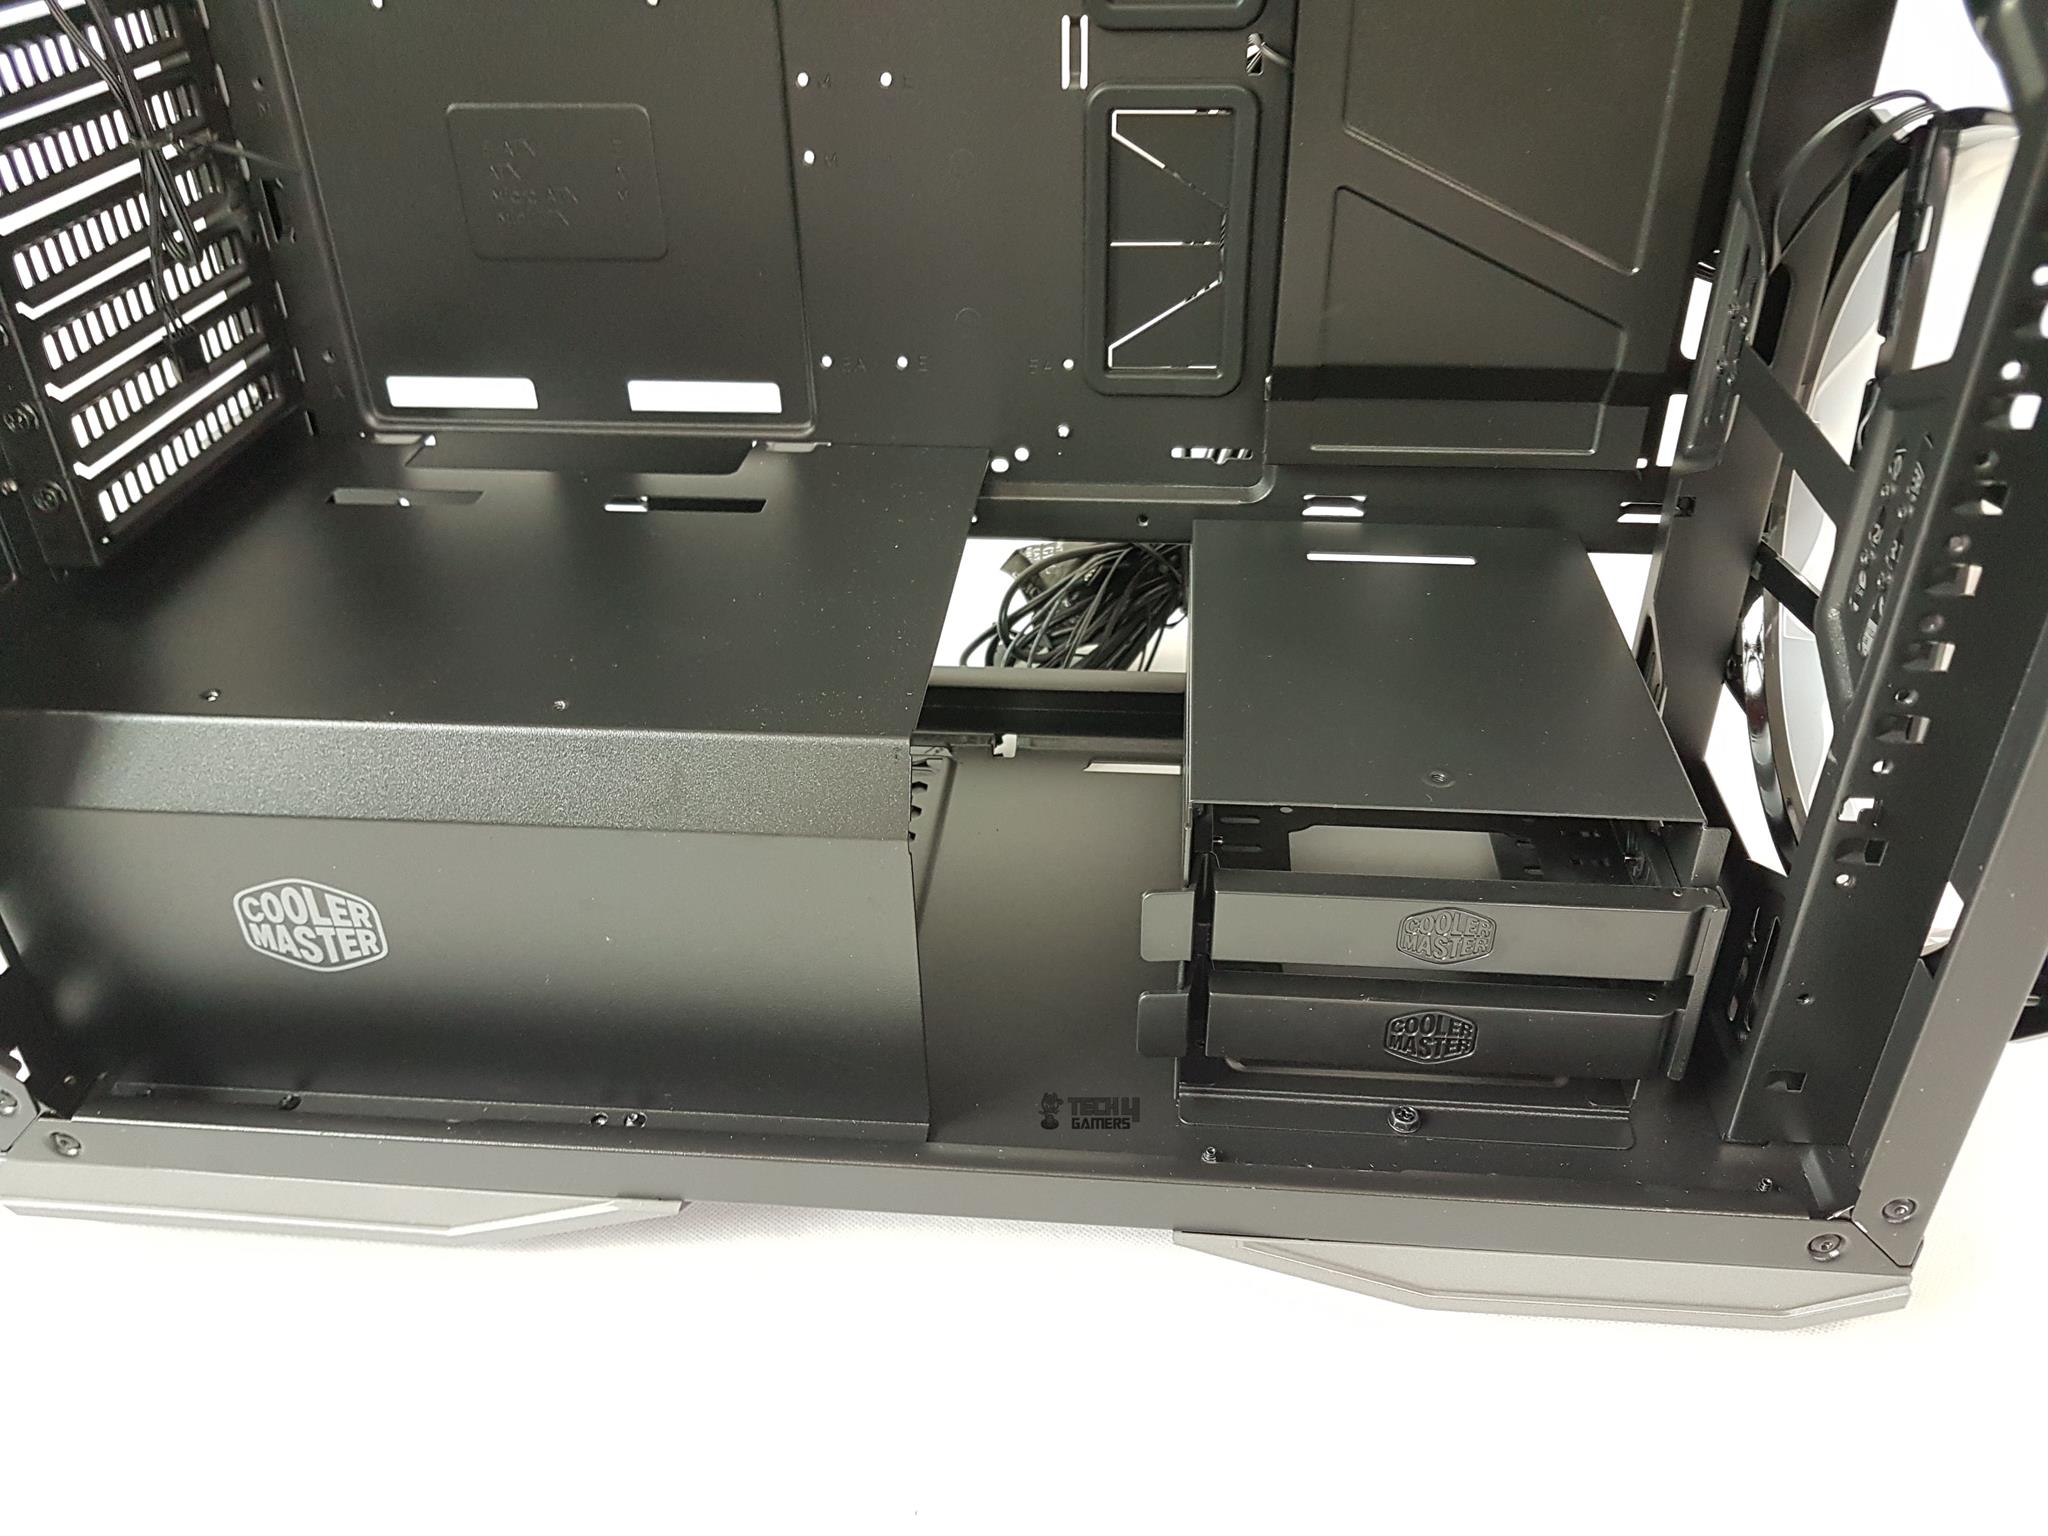
There are two beautifully designed metallic shrouds on the base of the MasterCase H500P Mesh. The PSU shroud has a Cooler Master logo on it whereas the other shroud does not have any branding.
Atop the PSU shroud are two 2.5” SATA drive brackets pre-installed using two captive thumbscrews.
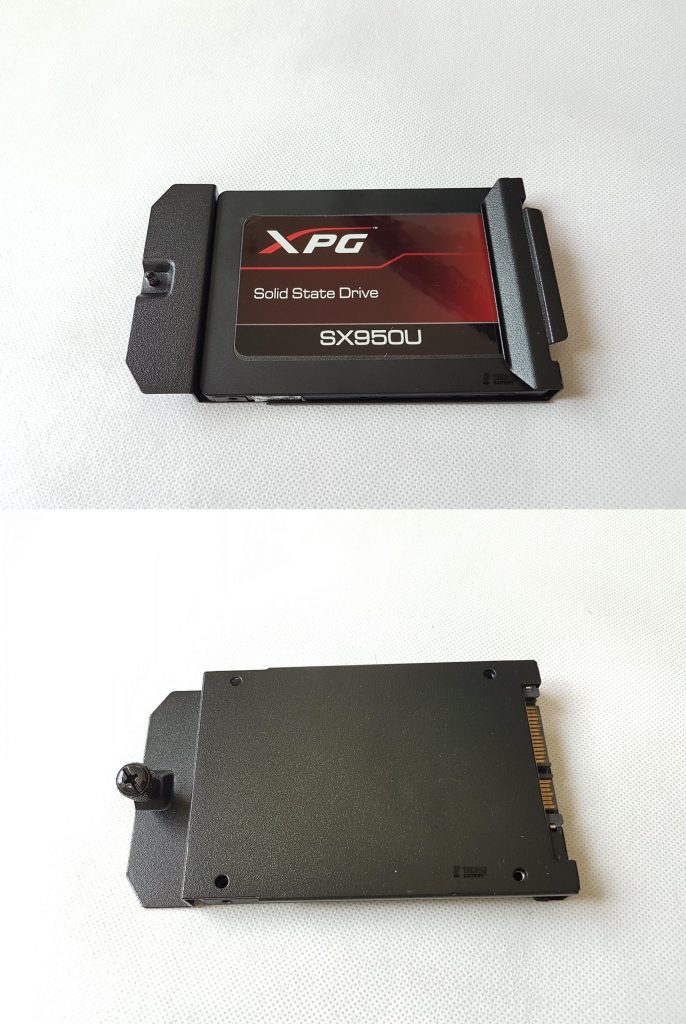
The above pictures show our 2.5” SATA SSD installed in a bracket.
Removing these two brackets reveals the PSU shroud’s cutouts. One large cutout with a ribbed border sits at the shroud’s bottom, flanked by two smaller cutouts. My concern lies here: the PSU shroud faces most of the motherboard’s bottom connectivity, yet its design limits using the bottom cutout. The snug fit with two latches and four screws restricts cable routing due to the absence of an exposed cutout on the other side.
The above pictures show that both shrouds are secured using one M3 screw on the inner side. The PSU shroud is secured using 4 screws and the storage drive shroud is secured using two screws.
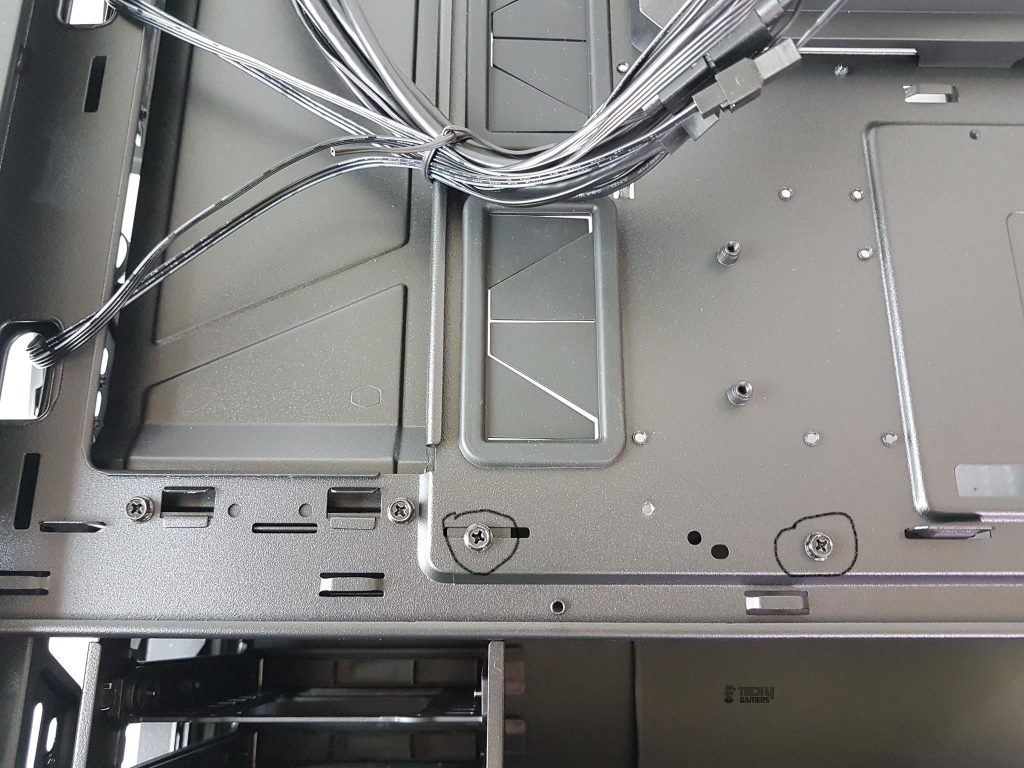
The encircled screws on the backside of the motherboard tray are securing the shrouds to the motherboard tray. They need to be removed as well before taking out the shrouds.
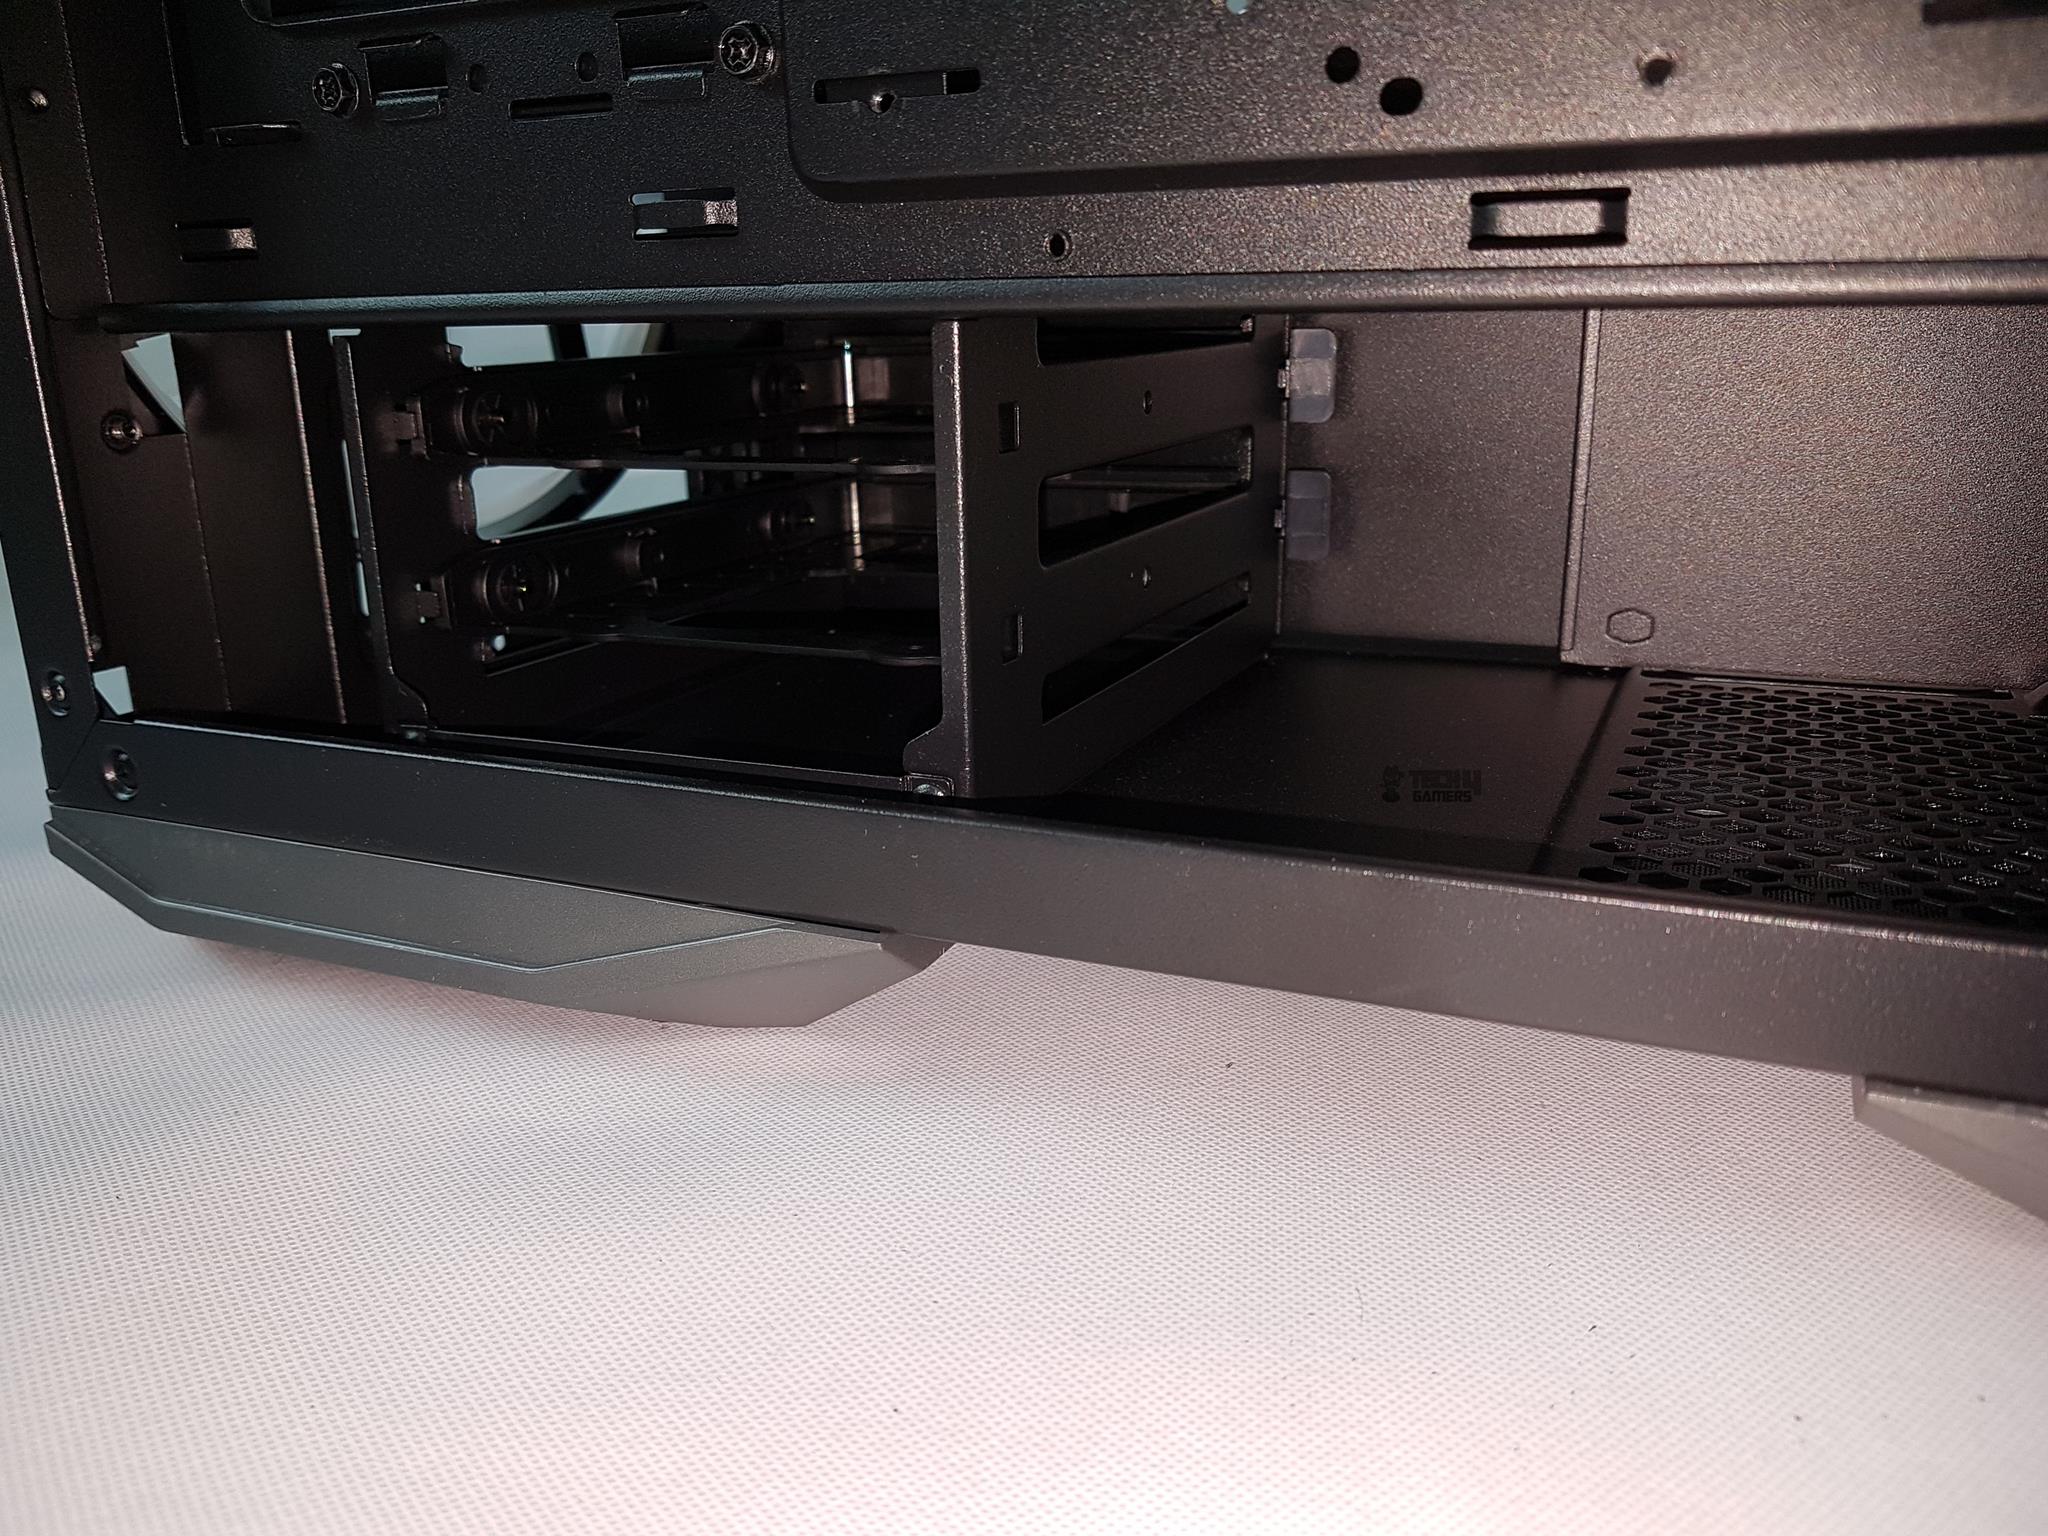
The storage cage shroud can be slided towards the PSU shroud as the hard drive cage can be installed on two pre-determined positions. Note that you will need to remove the two screws before sliding the shroud.
The second picture shows the second shroud removed. In the default position, the hard drive cage is located closer to the front side. In this layout, there is approximately 292mm of space available for the PSU and the cables.
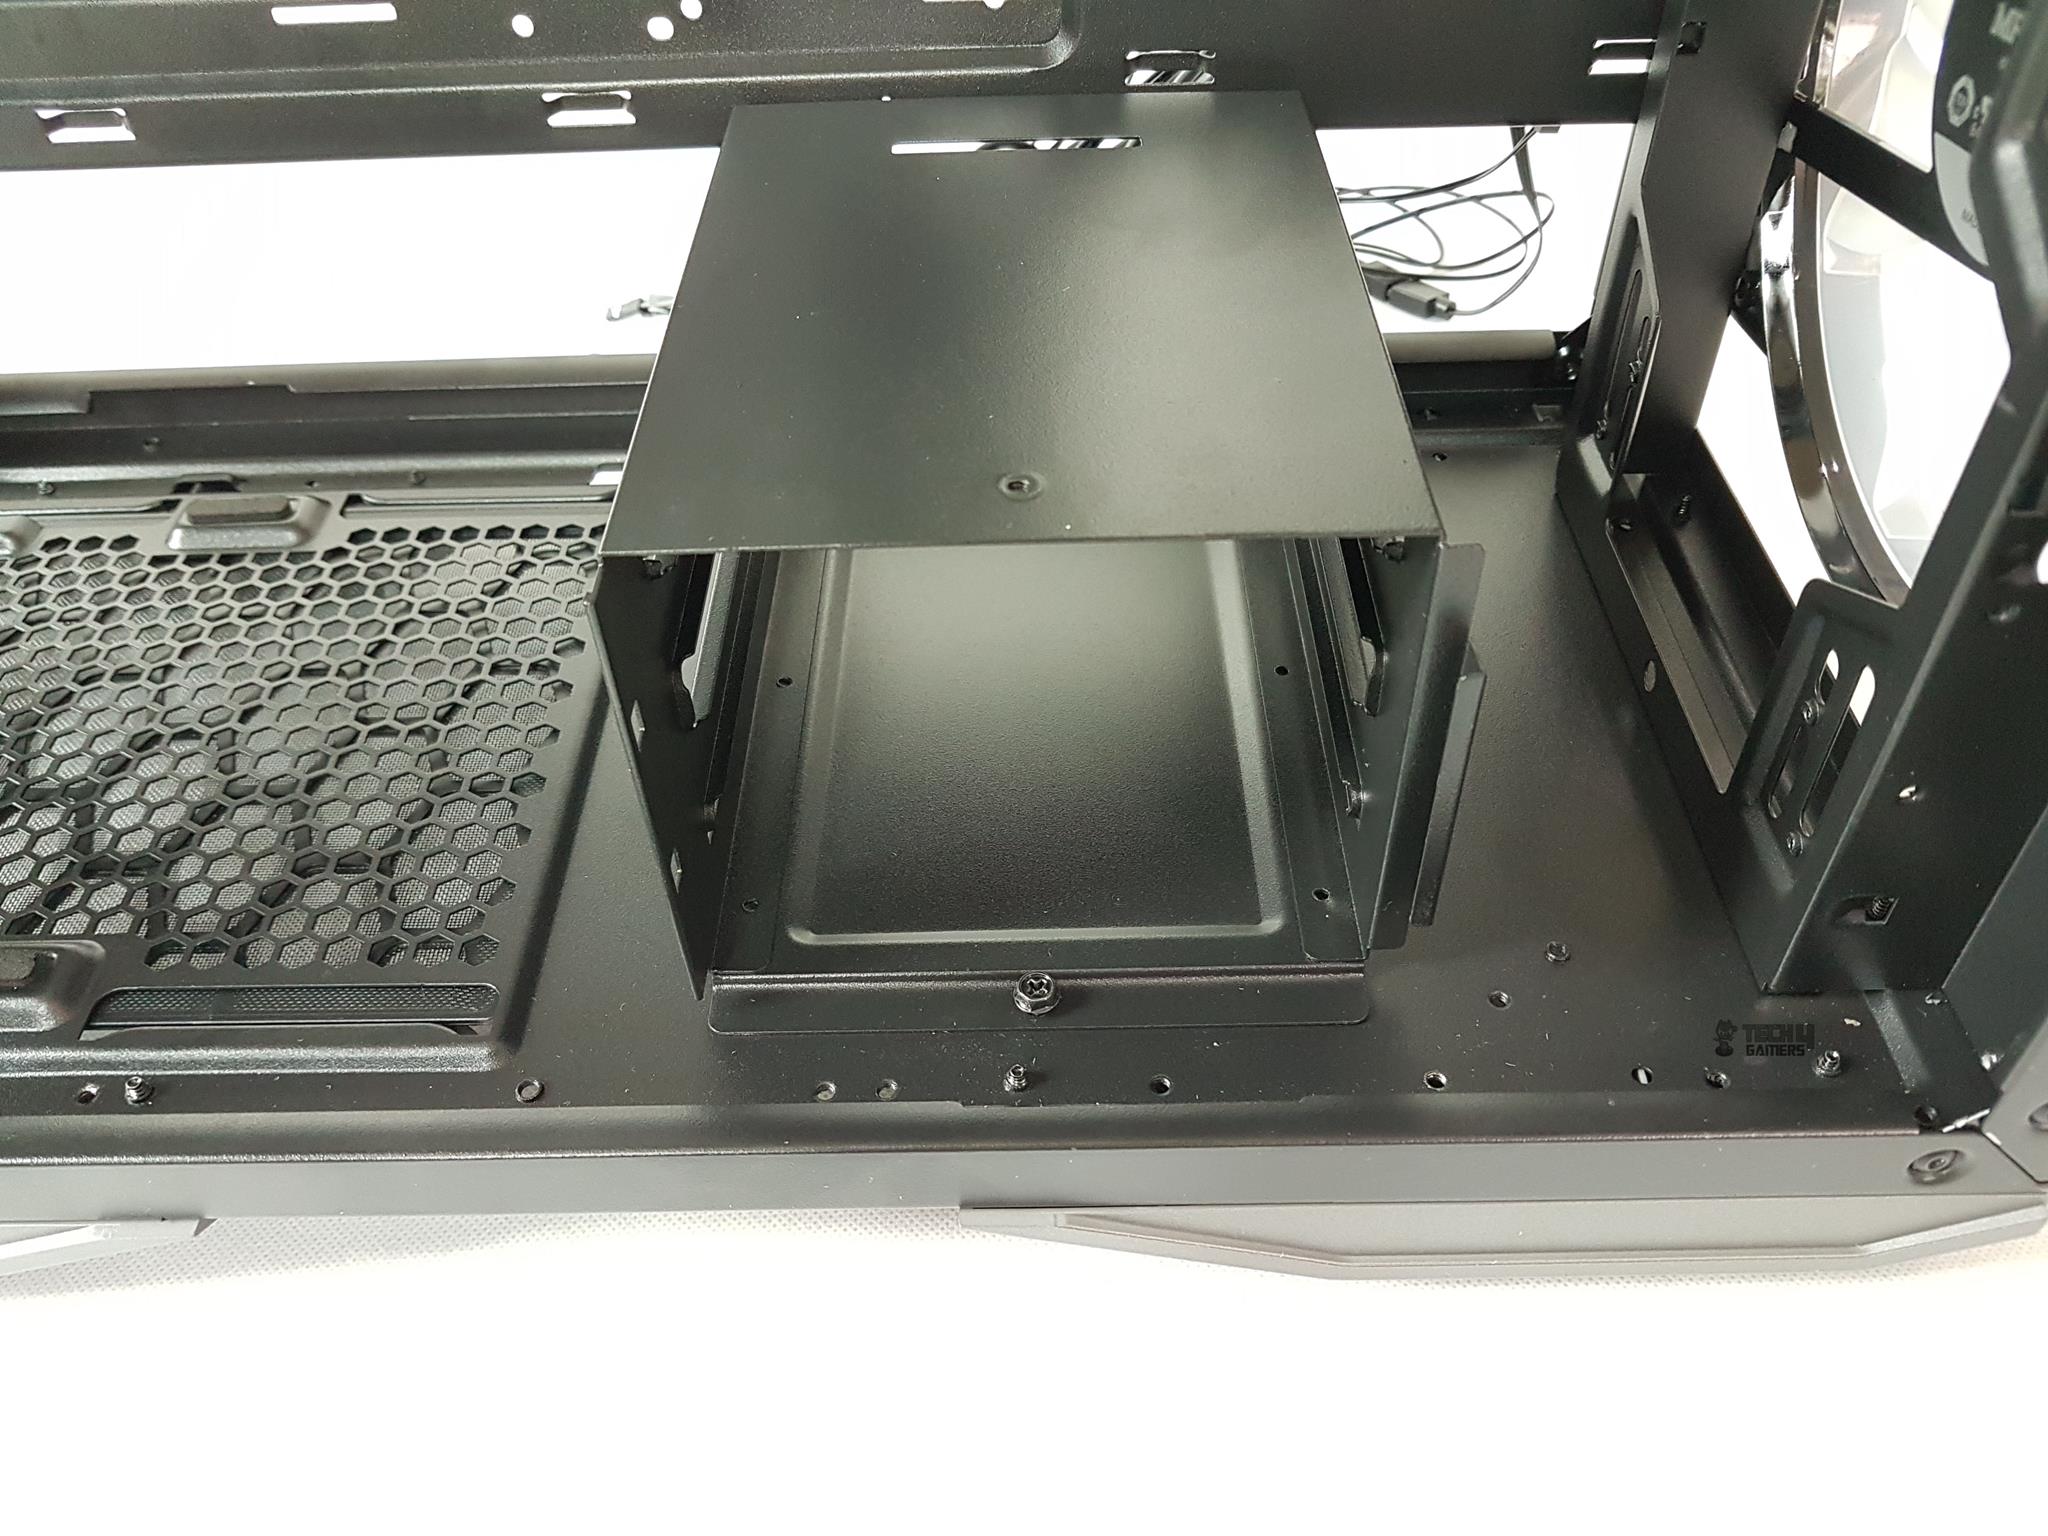
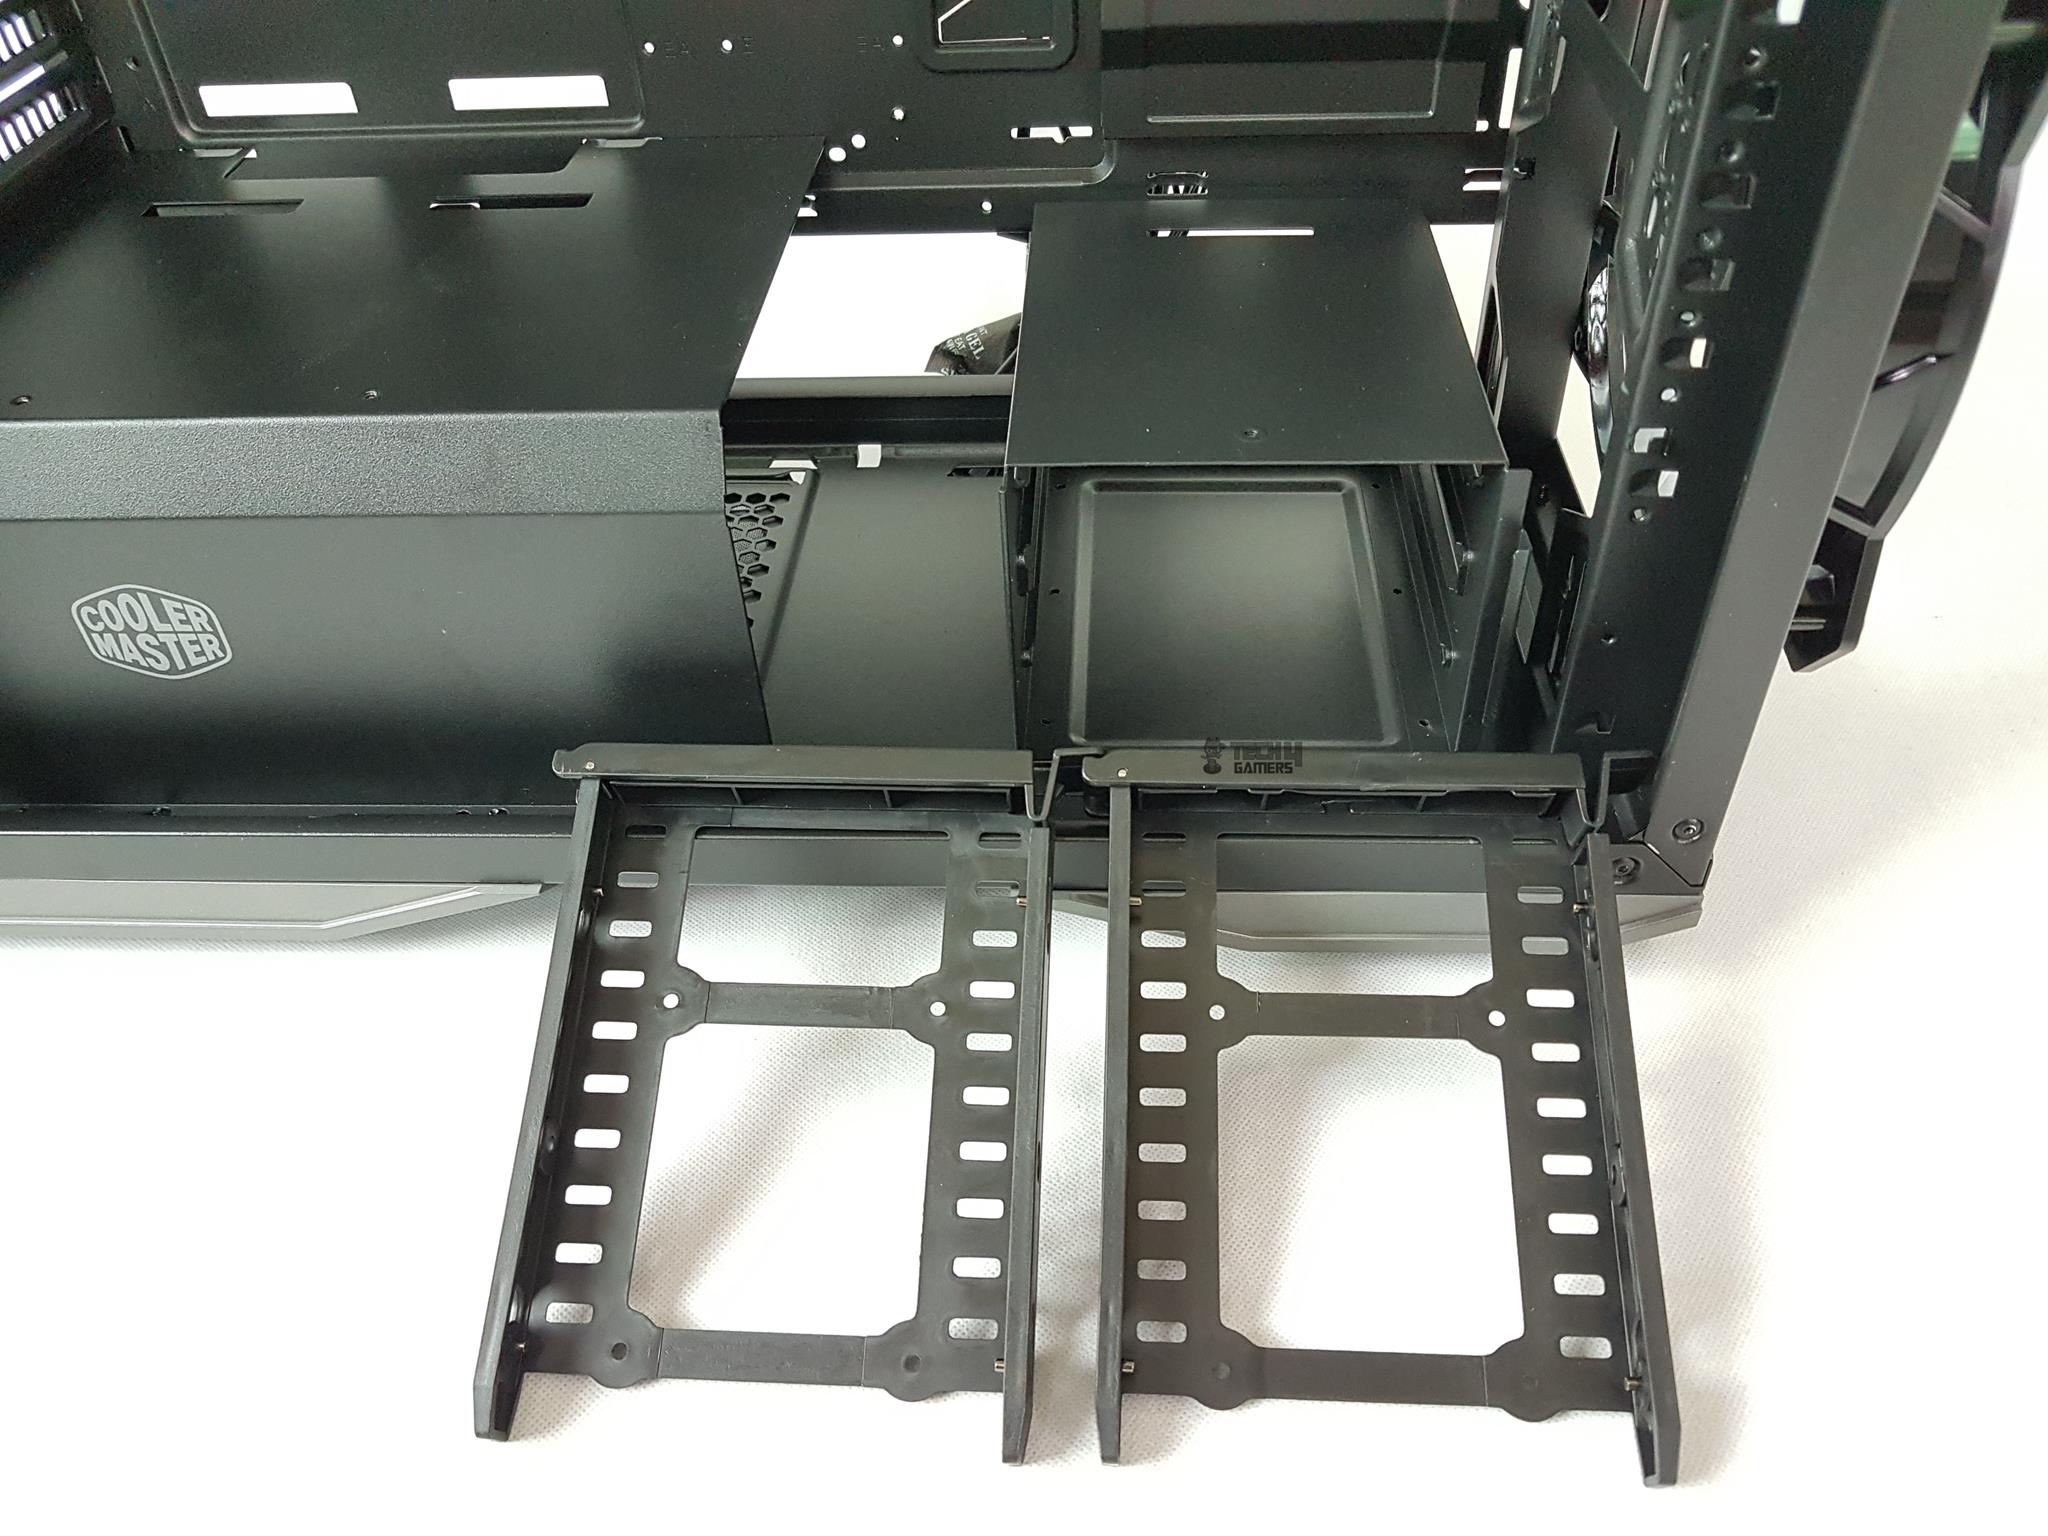
Moving the drive cage moved towards the second mounting position clears up space from the front side up to 59mm but reduces the spacing for the PSU and cables to be 250mm approximately.
The picture displays both caddies of the drive cage. However, there’s a significant design limitation with the hard drive cage: it’s only accessible from the front side. This means that to change or replace the hard drive in this chassis, you’ll need to remove both side panels. The backside panel must come off to unscrew the shroud covering the hard drive cage, while the TG panel needs removal to access both the shroud and the hard drive. Removing the shroud is necessary to reach the cage itself.
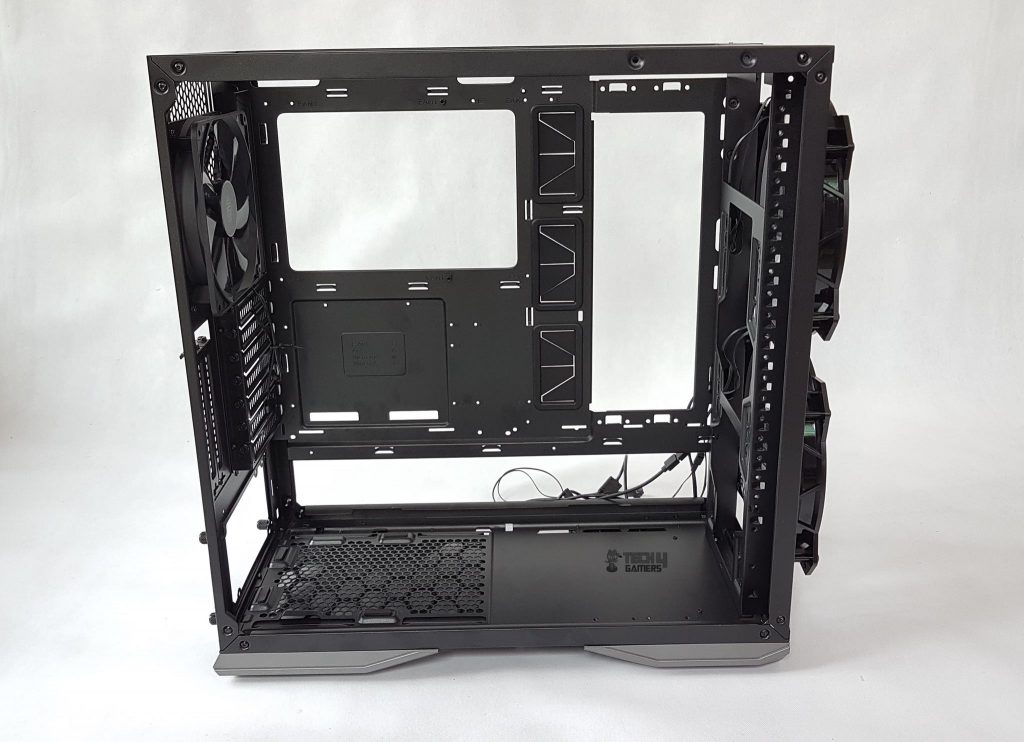
The above picture shows the base of the MasterCase H500P Mesh with everything removed.
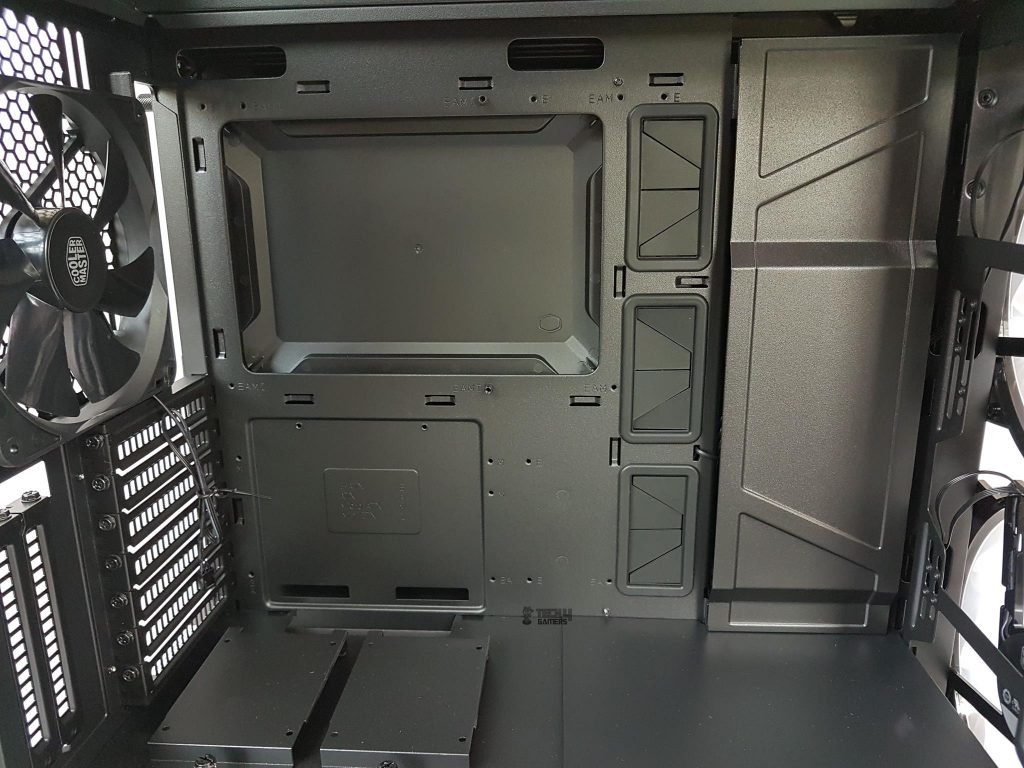
Let’s take a look at the motherboard tray area. The Cooler Master MasterCase H500P Mesh supports motherboard in Mini-ITX, microATX, ATX, and E-ATX sizes.
There are three main cutouts on the right side with stylish rubber grommets. Installing an E-ATX size motherboard will cover a certain portion of these cutouts making the cable routing difficult. The vented PCIe slot covers can be seen clearly. The area next to the rubber grommets is fully exposed and has a metallic cover attached to it.
The idea is to route the cables through this cover towards the motherboard but going that route will expose more length of the cables and non-flat cables will pose a hefty challenge in cable management. I ended up not using this cover for cable routing.
The above picture shows the inner side of the front bracket to which the radiator and fans can be installed. There is a large opened space up top. Cooler Master has provided a fan bracket in the accessory which is installed up top.
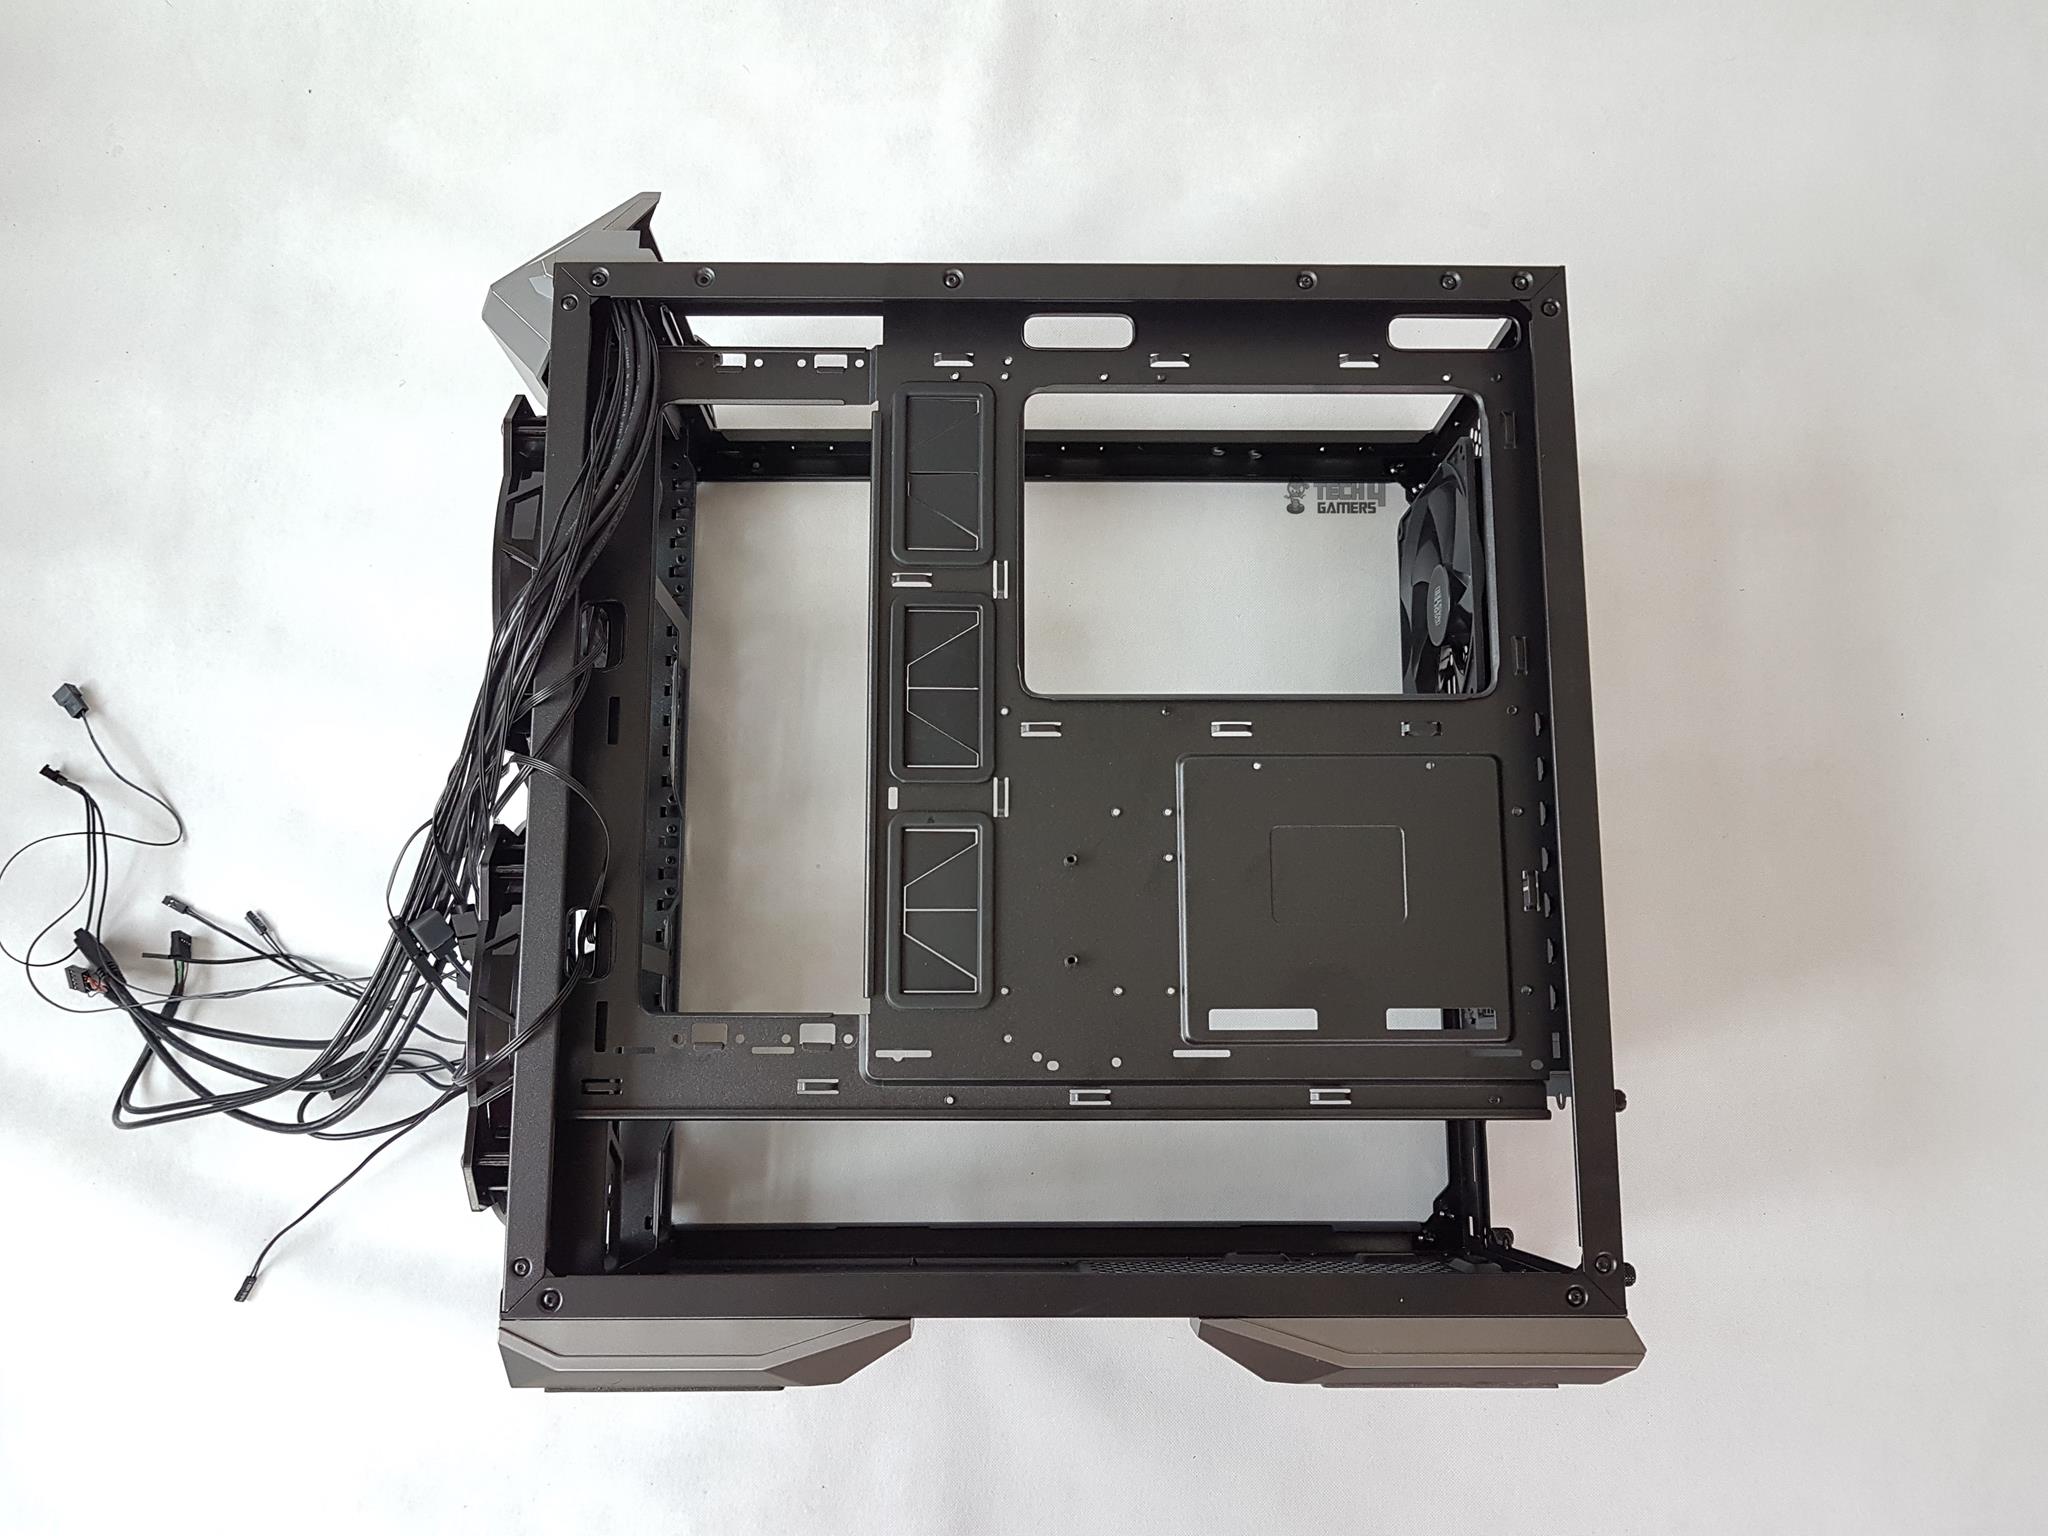
Next, you can see the skeleton of the chassis from the backside with covers removed. There are 15 cable tie dots or points. Unfortunately, there is no cable tie point on the left side of the frame which in my opinion should have been presented. There is like 20mm or so spacing on the borders for the cable management.
Pictured on the left are the raised feet with anti-vibration pads on their top. The PSU is placed on top of these feet.
On the right, you can observe the backside of the hard drive cage.
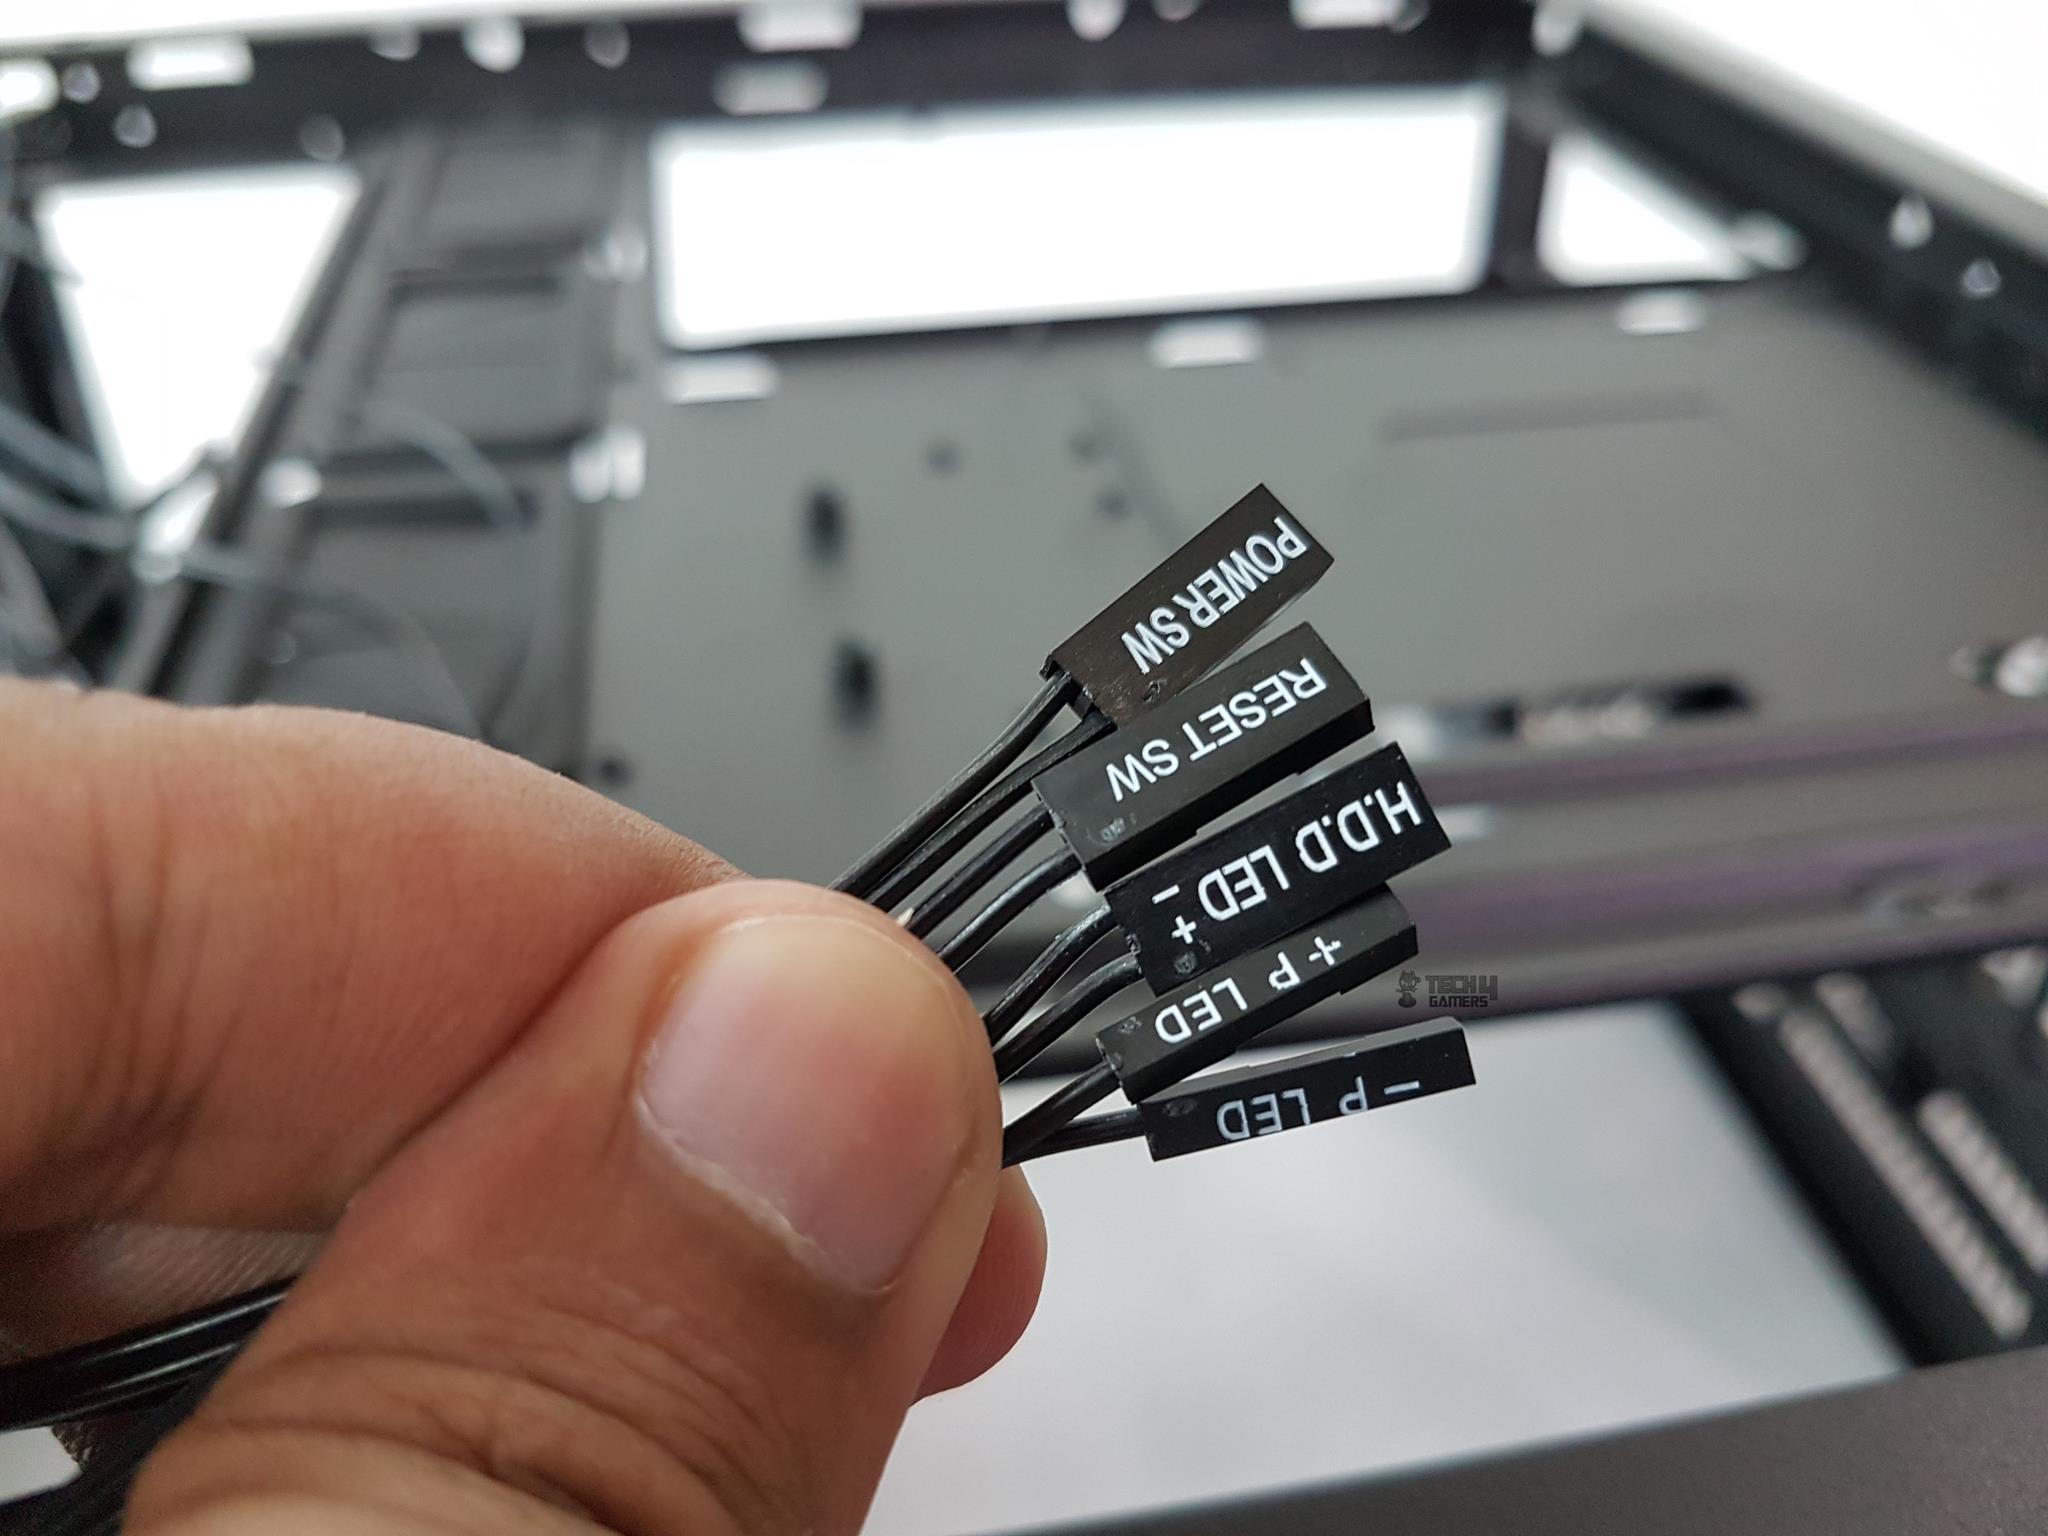
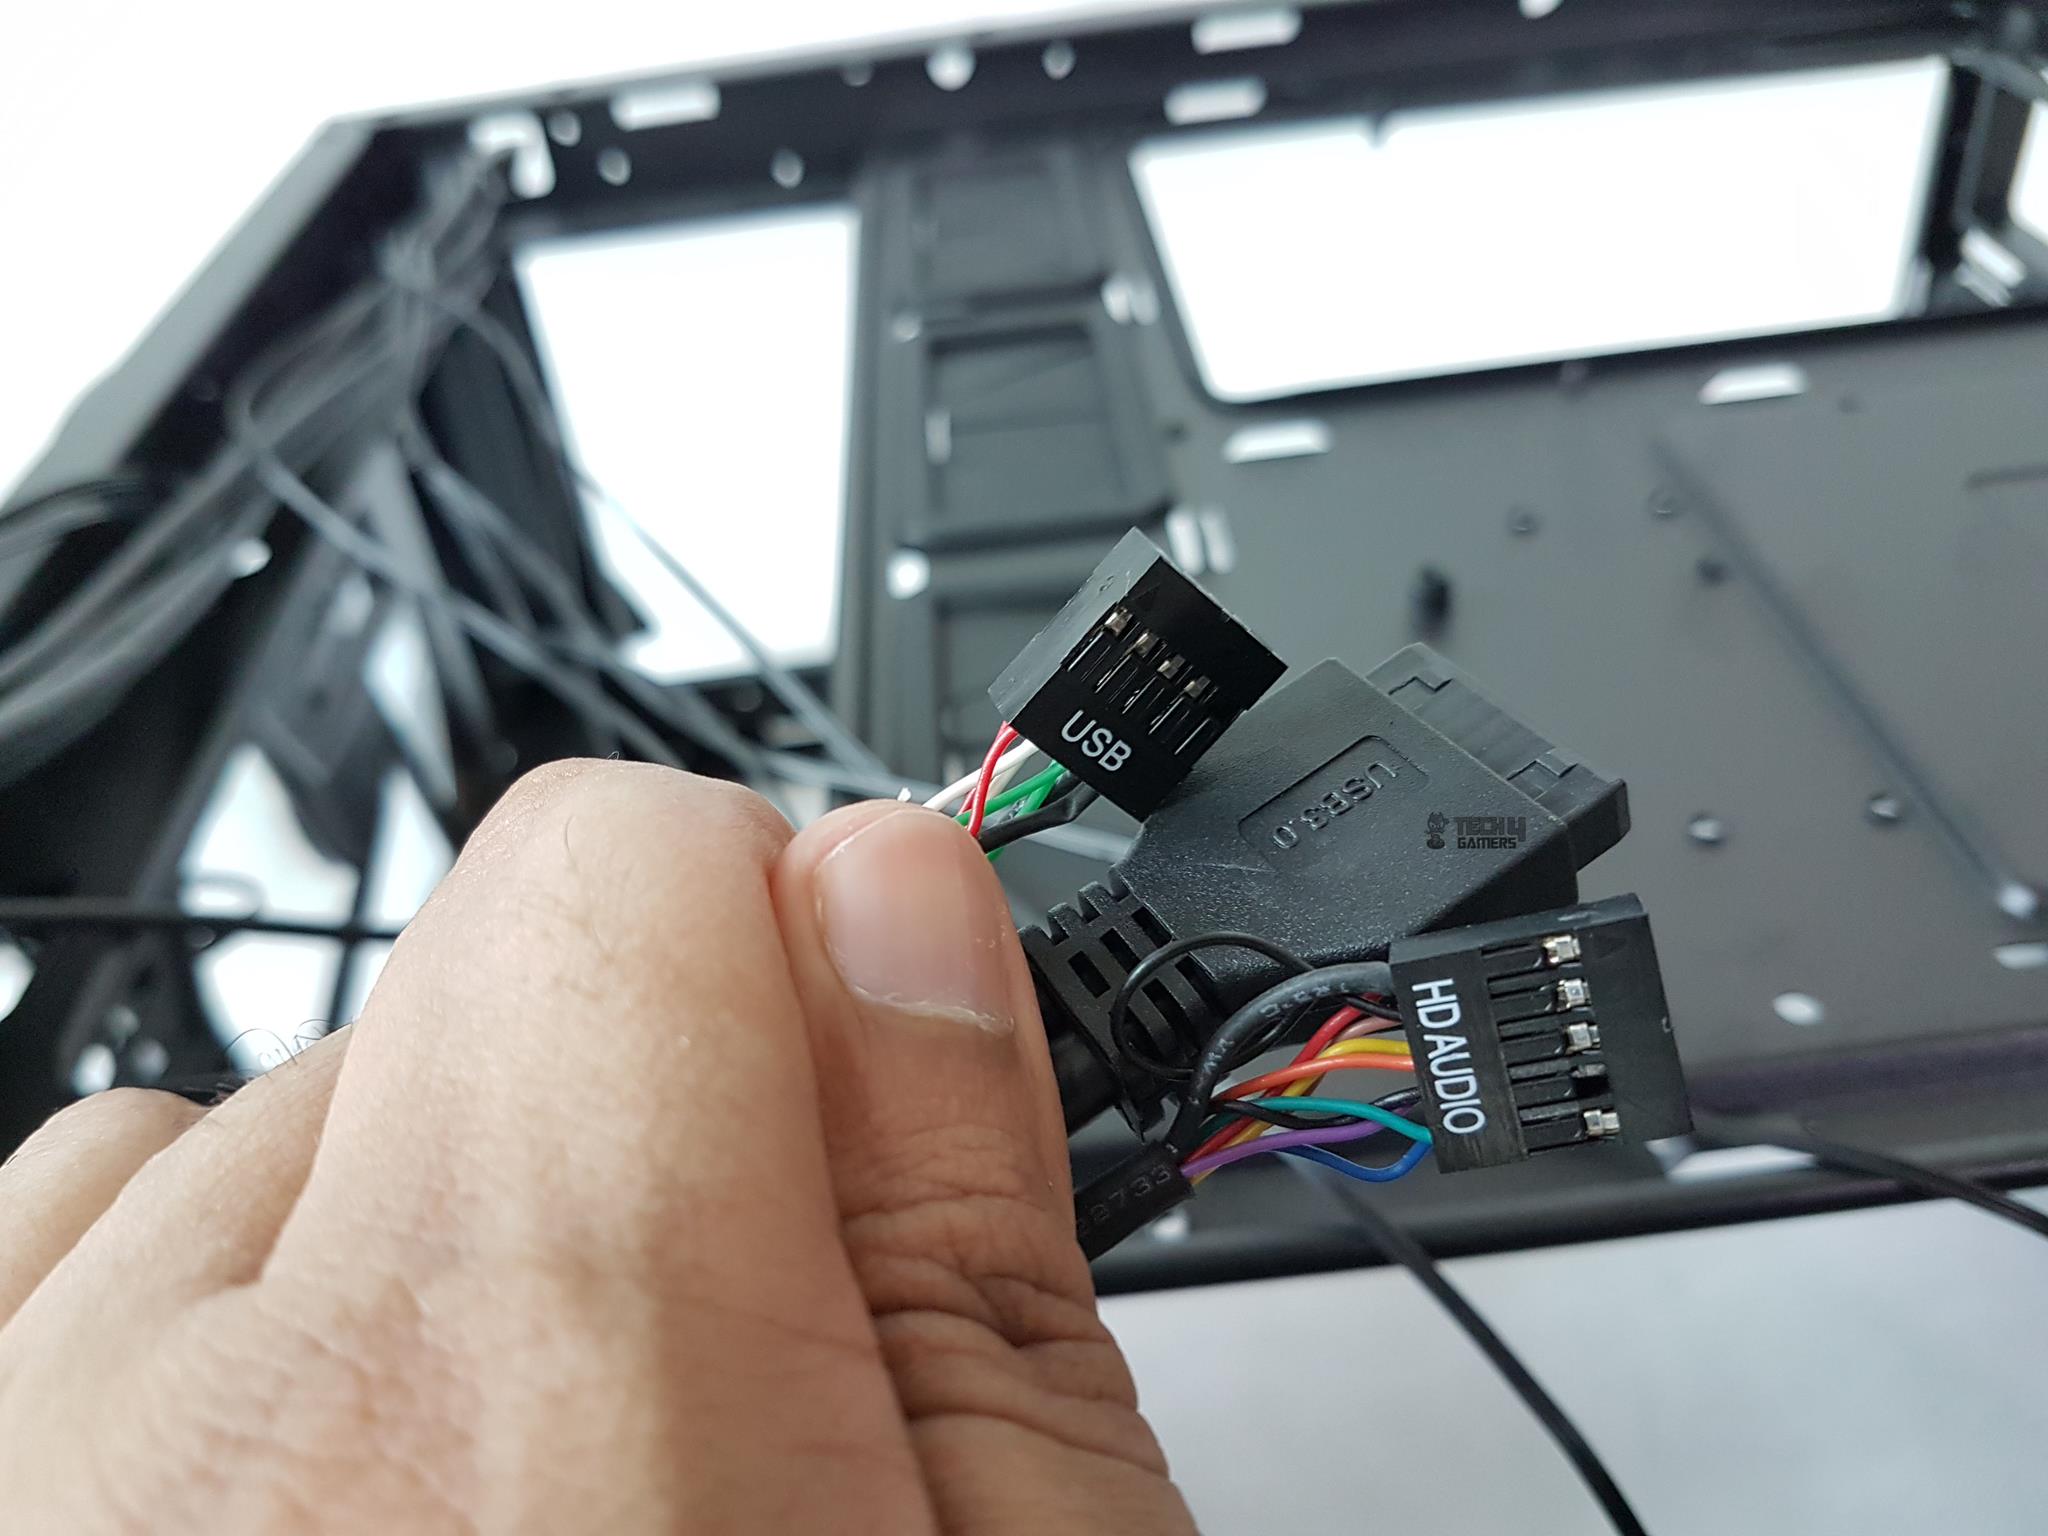
The above picture shows the front panel cables. We have standard Power, Reset, HDD LED, and Power LED cables here. In addition, we have the HD Audio, USB 2.0 and USB 3.0 cables.
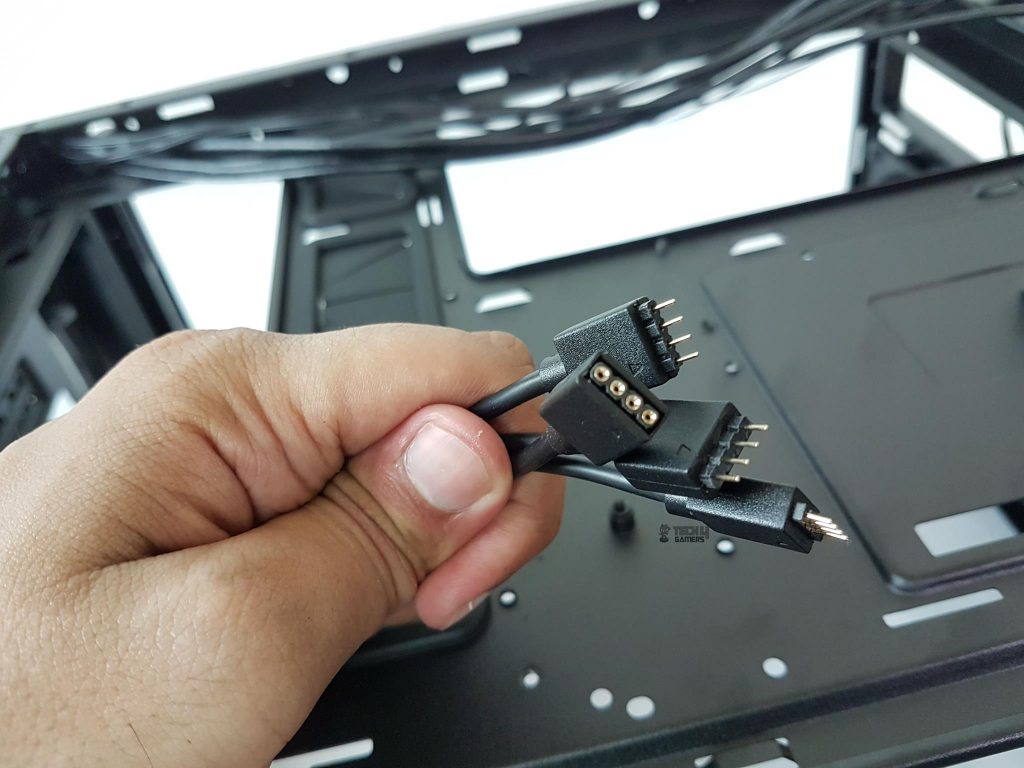
As the chassis has two RGB fans on the front, Cooler Master has provided LED splitter cable to connect both fans to a single cable. They have left a space for one more RGB LED (12V) on the splitter cable. The other end of the splitter cable is either connected to the 12V lighting header of the motherboard or to the LED hub bundled in the accessory.
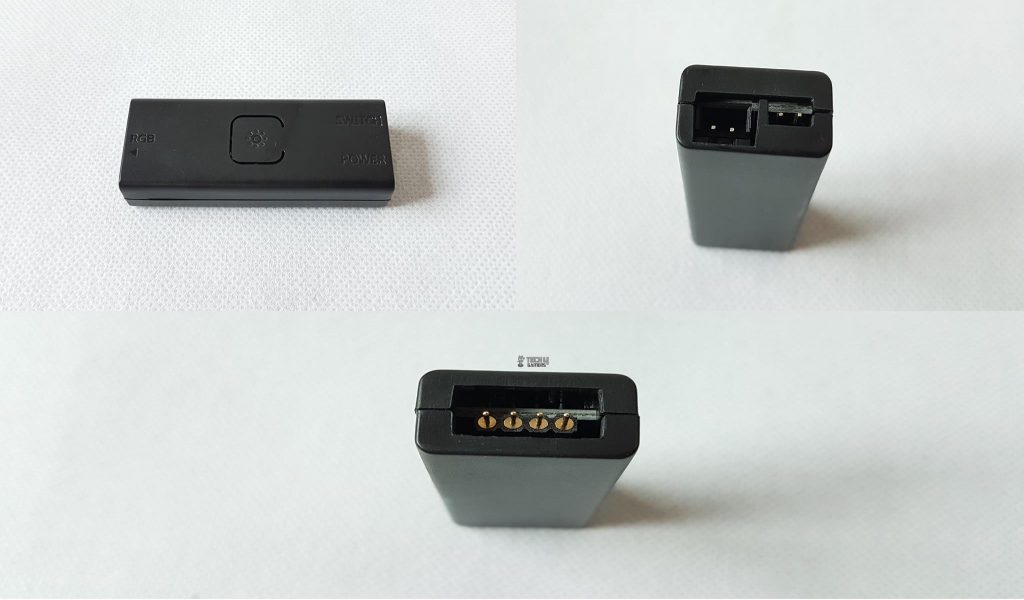
The hub has two ports on one end. One port is for the SATA cable to power it up. Meanwhile, we have a 4-pin port on the other side, to which the splitter cable is connected. The hub can be connected to the chassis front panel Reset switch but going that route will remove the reset functionality of the chassis.
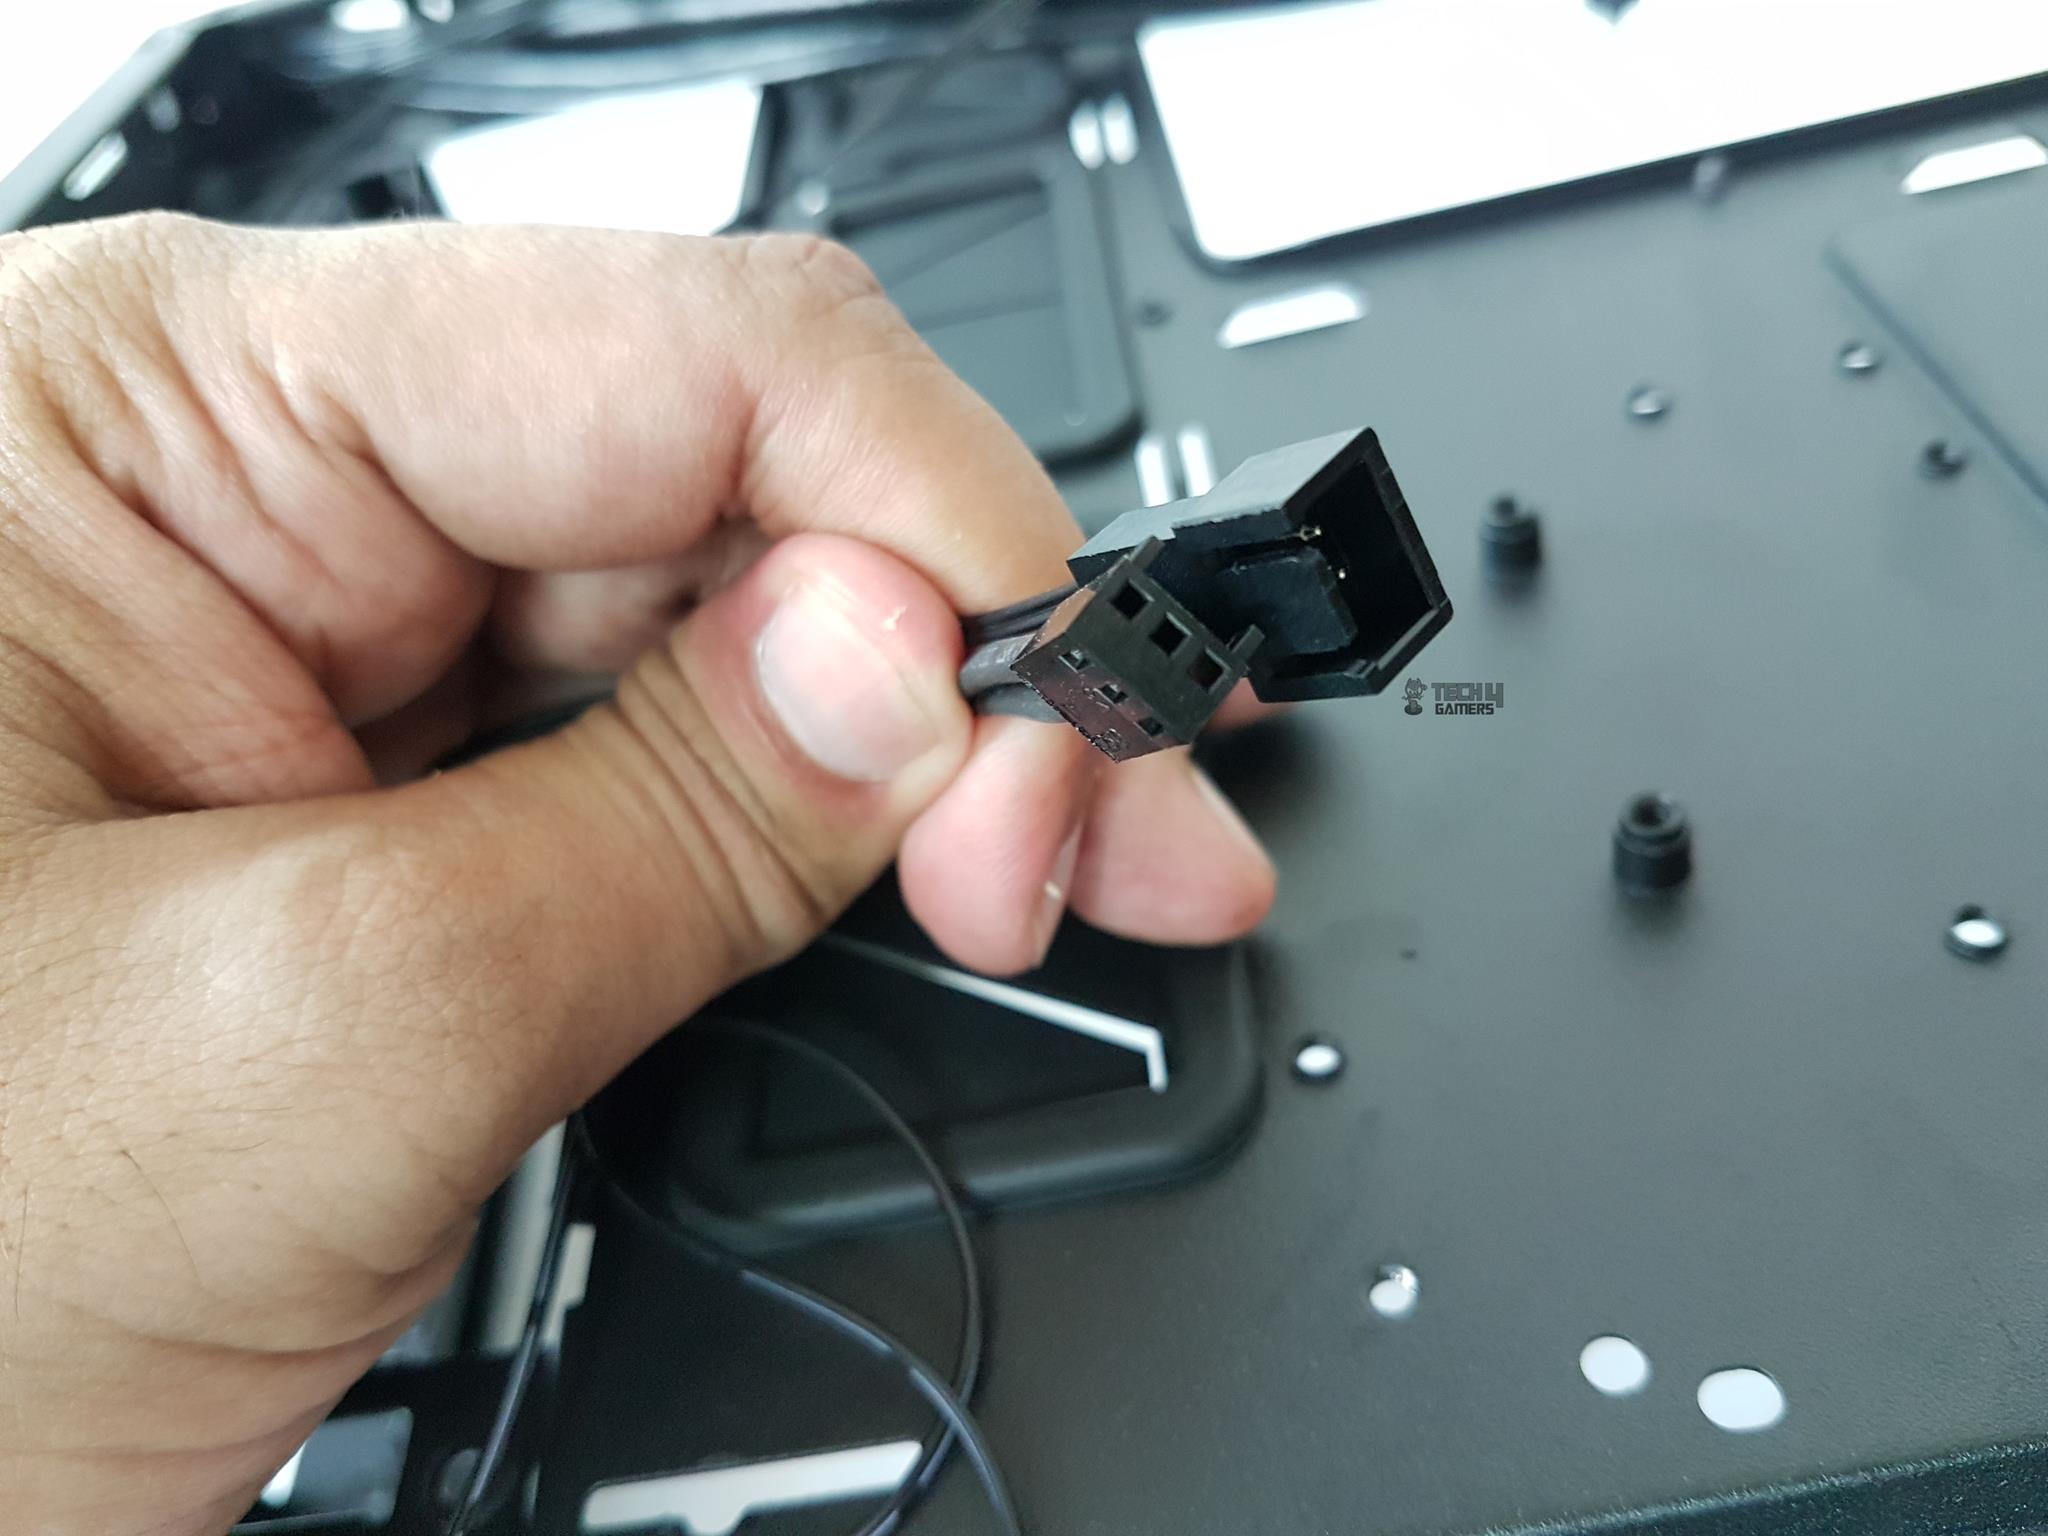

The front-mounted MF200R RGB fans have 2-pin power connectors and they are daisy-chained. One 2-pin header and a 3-pin connector are available for further connectivity. Additionally, Cooler Master has provided a Molex to fan power cable in case the user wants to connect both the front fans directly with the PSU.
The above is a picture of the Cooler Master MasterCase H500P Review with almost everything removed except the fans.
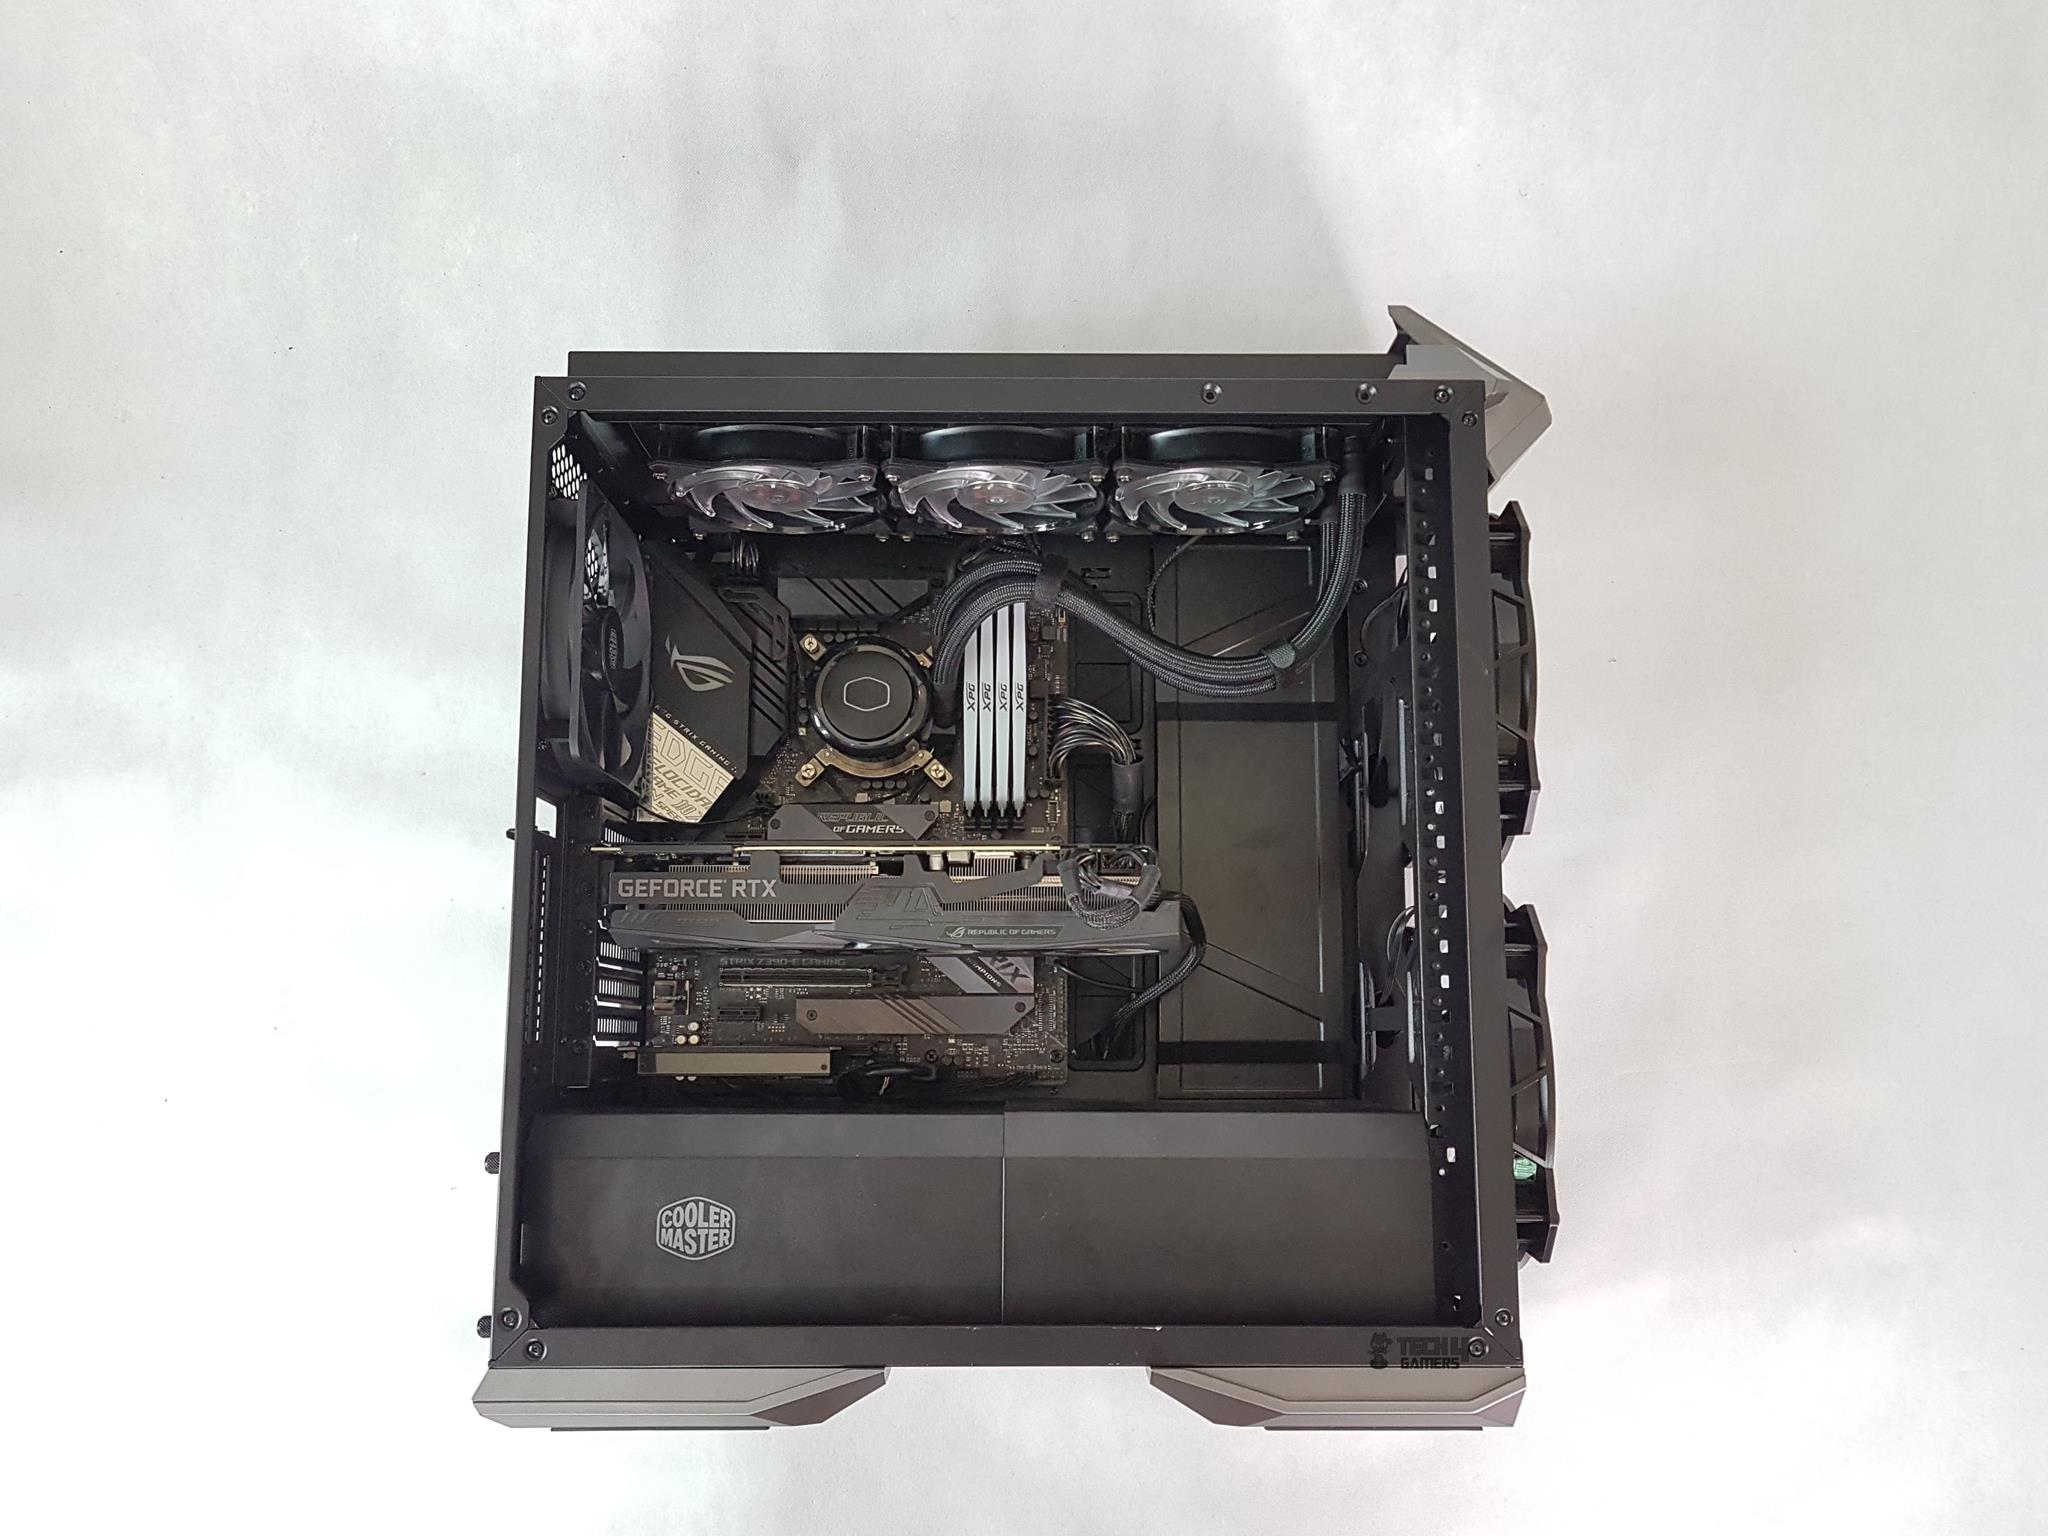
Test Build and Experience
Following test build was done to test the thermal performance of the Cooler Master MasterCase H500P Mesh:
- Intel i7 8700k
- Asus ROG Strix Z390-E Gaming
- Adata XPG Spectrix D41 32GB @ 2666MHz
- Cooler Master ML360R RGB CPU Liquid Cooler
- Asus ROG Strix GeForce RTX 2080Ti OC
- Samsung PM961 256 NVMe SSD
- Antec HCP1300
My overall building experience in the MasterCase H500P Mesh has been satisfactory. Here are some pointers to consider for installation:
- Start with the motherboard.
- You will need to install the standoffs using the provided socket.
- Remove both shrouds
- Install the PSU.
- Pass and connect the EPS cable before installing the CPU Cooler.
- Decide upon the cable routing as per your convenience.
- The bottom cables connectivity will pose a challenge due to non-availability of enough cutouts and partially because the right side shroud has no cutout as well which is understandable as this shroud can be slided.
- Spend time with the cables as if you will be putting clutter in a hope to cover the mess behind the cable cover, you will face a tough time closing the cover. The cover should have thumbscrews instead of the M3 screws.
Here are some build pictures:


Thermal Performance
For testing, AID64 5.99 was used to stress test the CPU, RAM and GPU including FPU and Cache. Each stress test was run for 30 minutes followed by 15 minutes of idling time.
The testing was done with the following configuration:
- The front panel only removed
- The top panel only removed
- Both panels removed
- Both panels on
All the fans and pump were set to run at their 100% speed. Actual temperatures are reported on the graphs. The ambient temperature was 33.2°C. Average of all cores temperature is reported whereas the maximum temperature of the graphics card is reported. Let’s see the results
CPU Thermal Performance
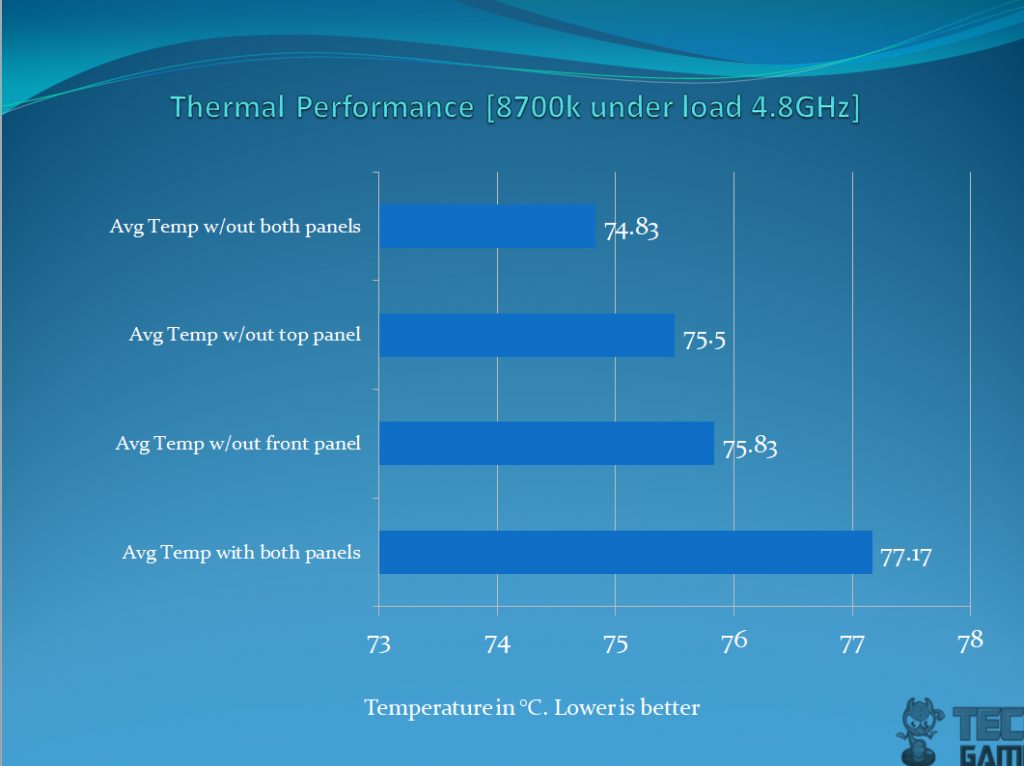
There is a difference of 2.34°C with both panels on and off. This is a marginal difference.
GPU Thermal Performance
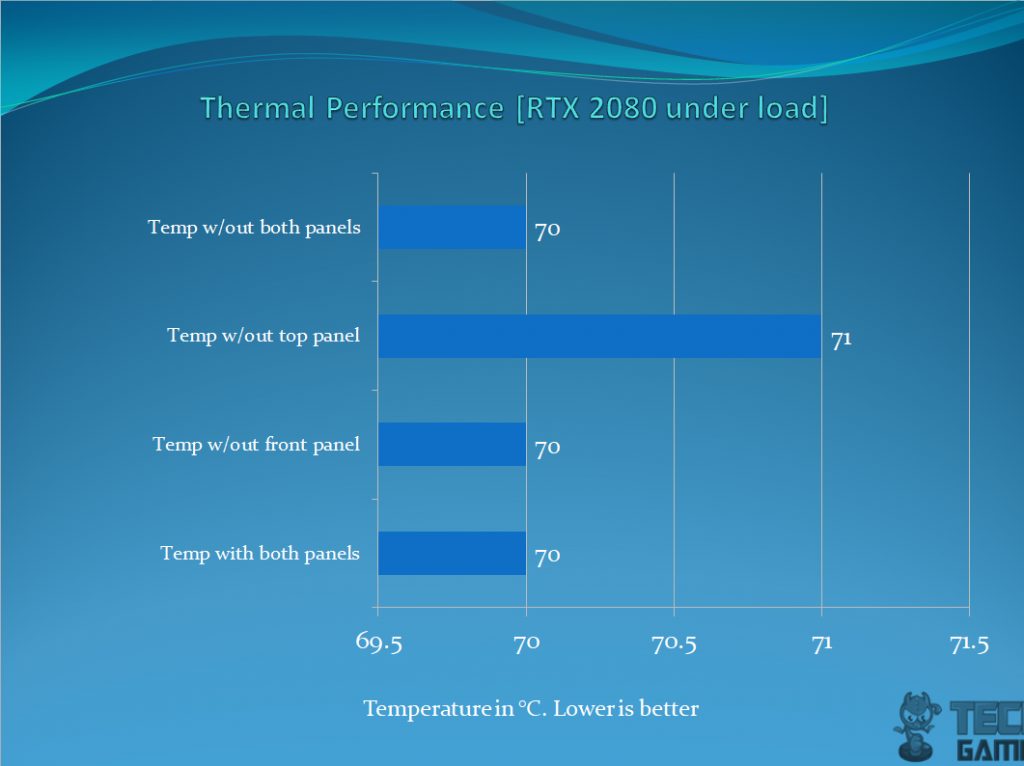
Not much of a variation for the graphics card thermals.
Should You Buy It?
Is this chassis the one for you or should you look elsewhere?
Buy It If:
✅ You Prioritize Airflow and Cooling: With enhanced mesh design and multiple fan support, it ensures efficient airflow, making it ideal for cooling-intensive setups.
✅ RGB Customization Matters: The compatibility with major motherboard RGB sync technologies and bundled RGB hub adds customizable lighting for aesthetic appeal.
✅ You Value Cable Management and Clean Look: Cable covers, shrouds, and ample space for hiding cables contribute to a cleaner, organized interior, enhancing the overall appearance.
Don’t Buy It If:
❌ Frequent Access to Drives is Essential: Cumbersome drive access, especially after setup, might be inconvenient if you regularly need to modify or access your storage.
❌ You Are An E-ATX User: Larger motherboards might cover cutouts, potentially complicating cable management and limiting accessibility.
Final Words
The Cooler Master MasterCase H500P Review is a revamped mid-tower version, addressing the flaws of its predecessor, the H500P. It’s available in white, gunmetal, and a Phantom Gaming edition. The initial H500P faced issues like obstructive acrylic panels affecting airflow and flimsy top and front panels. Cooler Master addressed these with the H500P Mesh, aiming to fix those design flaws.
The H500P Mesh boasts a bold design that I personally found appealing. Constructed from steel, meshed steel, and plastic, it features a tempered glass side panel and a revamped front panel with improved airflow due to added space between the mesh and pre-installed fans. However, the top panel’s transparent acrylic seems impractical when placed on a table; I’d prefer steel mesh here for better functionality.
The chassis offers efficient cooling support for various fan sizes and radiator options, with cable covers and shrouds for tidy cable management. But accessing the hard drive post-build can be tedious, and the cable management setup might be challenging, especially with larger motherboards. Despite some drawbacks, my overall experience with the H500P Mesh has been satisfactory, particularly appreciating its clean aesthetics.
I am thankful to the Cooler Master for giving us the opportunity to Cooler Master MasterCase H500P Review.
Recent Updates
- December 19, 2023: Few text changes to improve readability. Also added image galleries.
Thank you! Please share your positive feedback. 🔋
How could we improve this post? Please Help us. 😔
[Hardware Reviewer & Editor]
Meet Nauman Siddique, a highly experienced computer science graduate with more than 15 years of knowledge in technology. Nauman is an expert in the field known for his deep understanding of computer hardware.
As a tech tester, insightful reviewer, and skilled hardware editor, Nauman carefully breaks down important parts like motherboards, graphics cards, processors, PC cases, CPU coolers, and more.
- 15+ years of PC Building Experience
- 10+ years of first-hand knowledge of technology
- 7+ years of doing in-depth testing of PC Hardware
- A motivated individual with a keen interest in tech testing from multiple angles.
- I majored in Computer Science with a Masters in Marketing
- Previously worked at eXputer, EnosTech, and Appuals.
- Completed Course in Computer Systems Specialization From Illinois Tech
Get In Touch: nauman@tech4gamers.com


