 Threads
Best Value 360mm AIO?
Review Summary
The Cooler Master MasterLiquid ML360R RGB is an impressive 360mm cooler that delivers strong performance at an affordable price. It excels in providing excellent cooling, and the cooler’s sleek black design and RGB lighting contribute to its visually appealing aesthetics. The low-profile pump design is a notable feature, making it suitable for users working with smaller PC cases.

Overall
-
Performance - 9/10
9/10
-
Build Quality - 8/10
8/10
-
Value - 9/10
9/10
-
Features - 8/10
8/10
Pros
- Excellent performance
- Bang for the buck
- Sleek design
- Low-profile
Cons
- Loud noise


When it comes to PC Cooling and Chassis, Cooler Master needs no introduction. Ever since its foundation in 1992, the company rolled out their first CPU Cooler in 1993 with major breakthrough coming in 1999 when their first all-aluminum-based handmade chassis was launched. Cooler Master has made a strong comeback in recent times with their cooling solutions and chassis with coolers such as the Cooler Master MasterLiquid ML360R Review, which I will be reviewing today.
Key Takeaways
- The Cooler Master MasterLiquid ML360 is made for anyone who wants solid performance out of a reasonably priced 360mm cooler.
- The Cooler Master MasterLiquid ML360 is not for anyone looking to obtain a completely silent experience.
- The Cooler Master MasterLiquid ML360 provided excellent cooling performance, managing to maintain a temperature of 51.8°C on a Ryzen 7 2700X at 4.1 GHz.
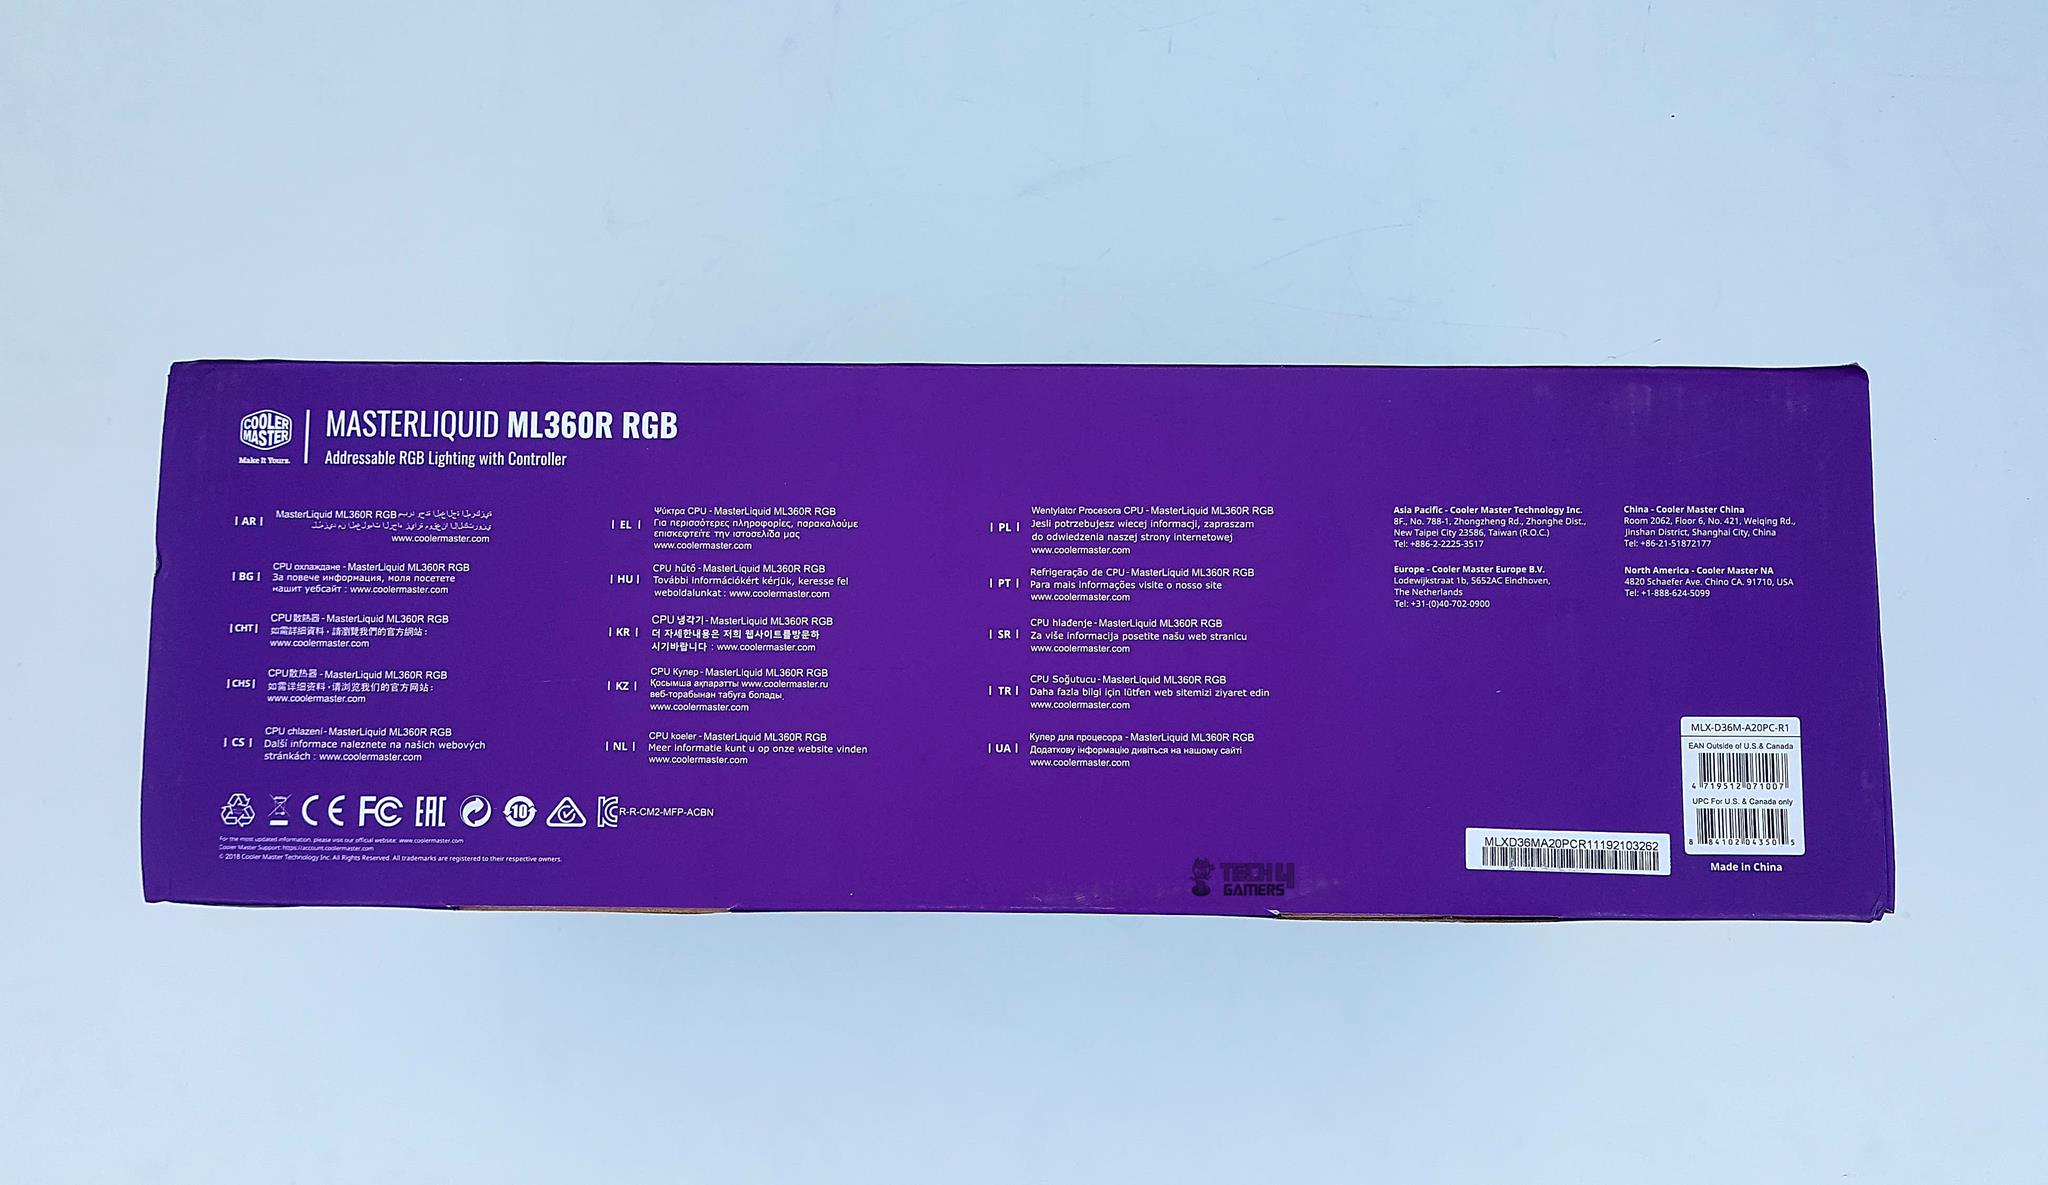
Packaging and Unboxing
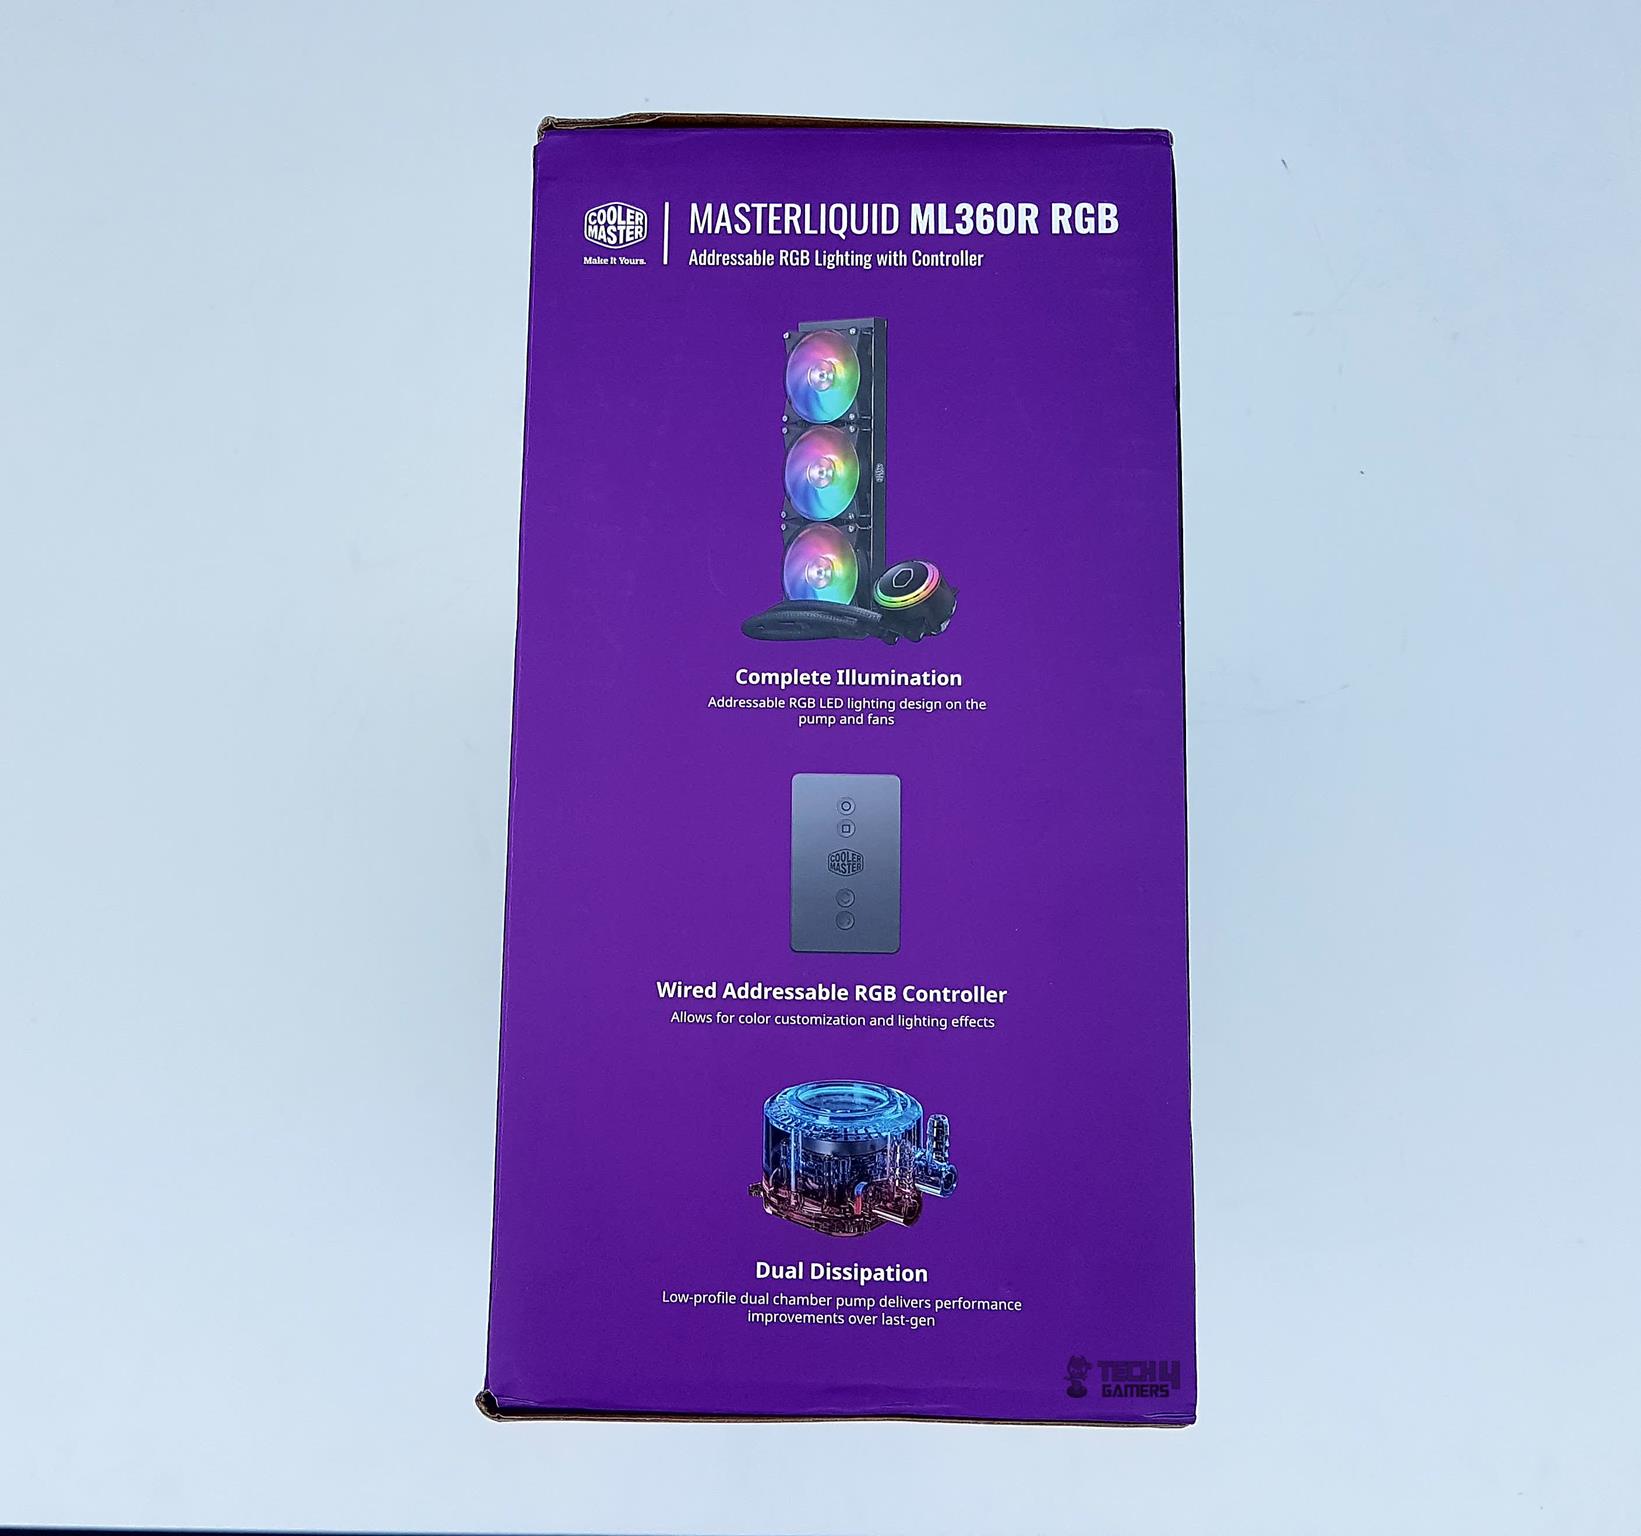
The cooler is shipped inside a cardboard box having a Cooler Master’s typical packing theme of purple and black colors.
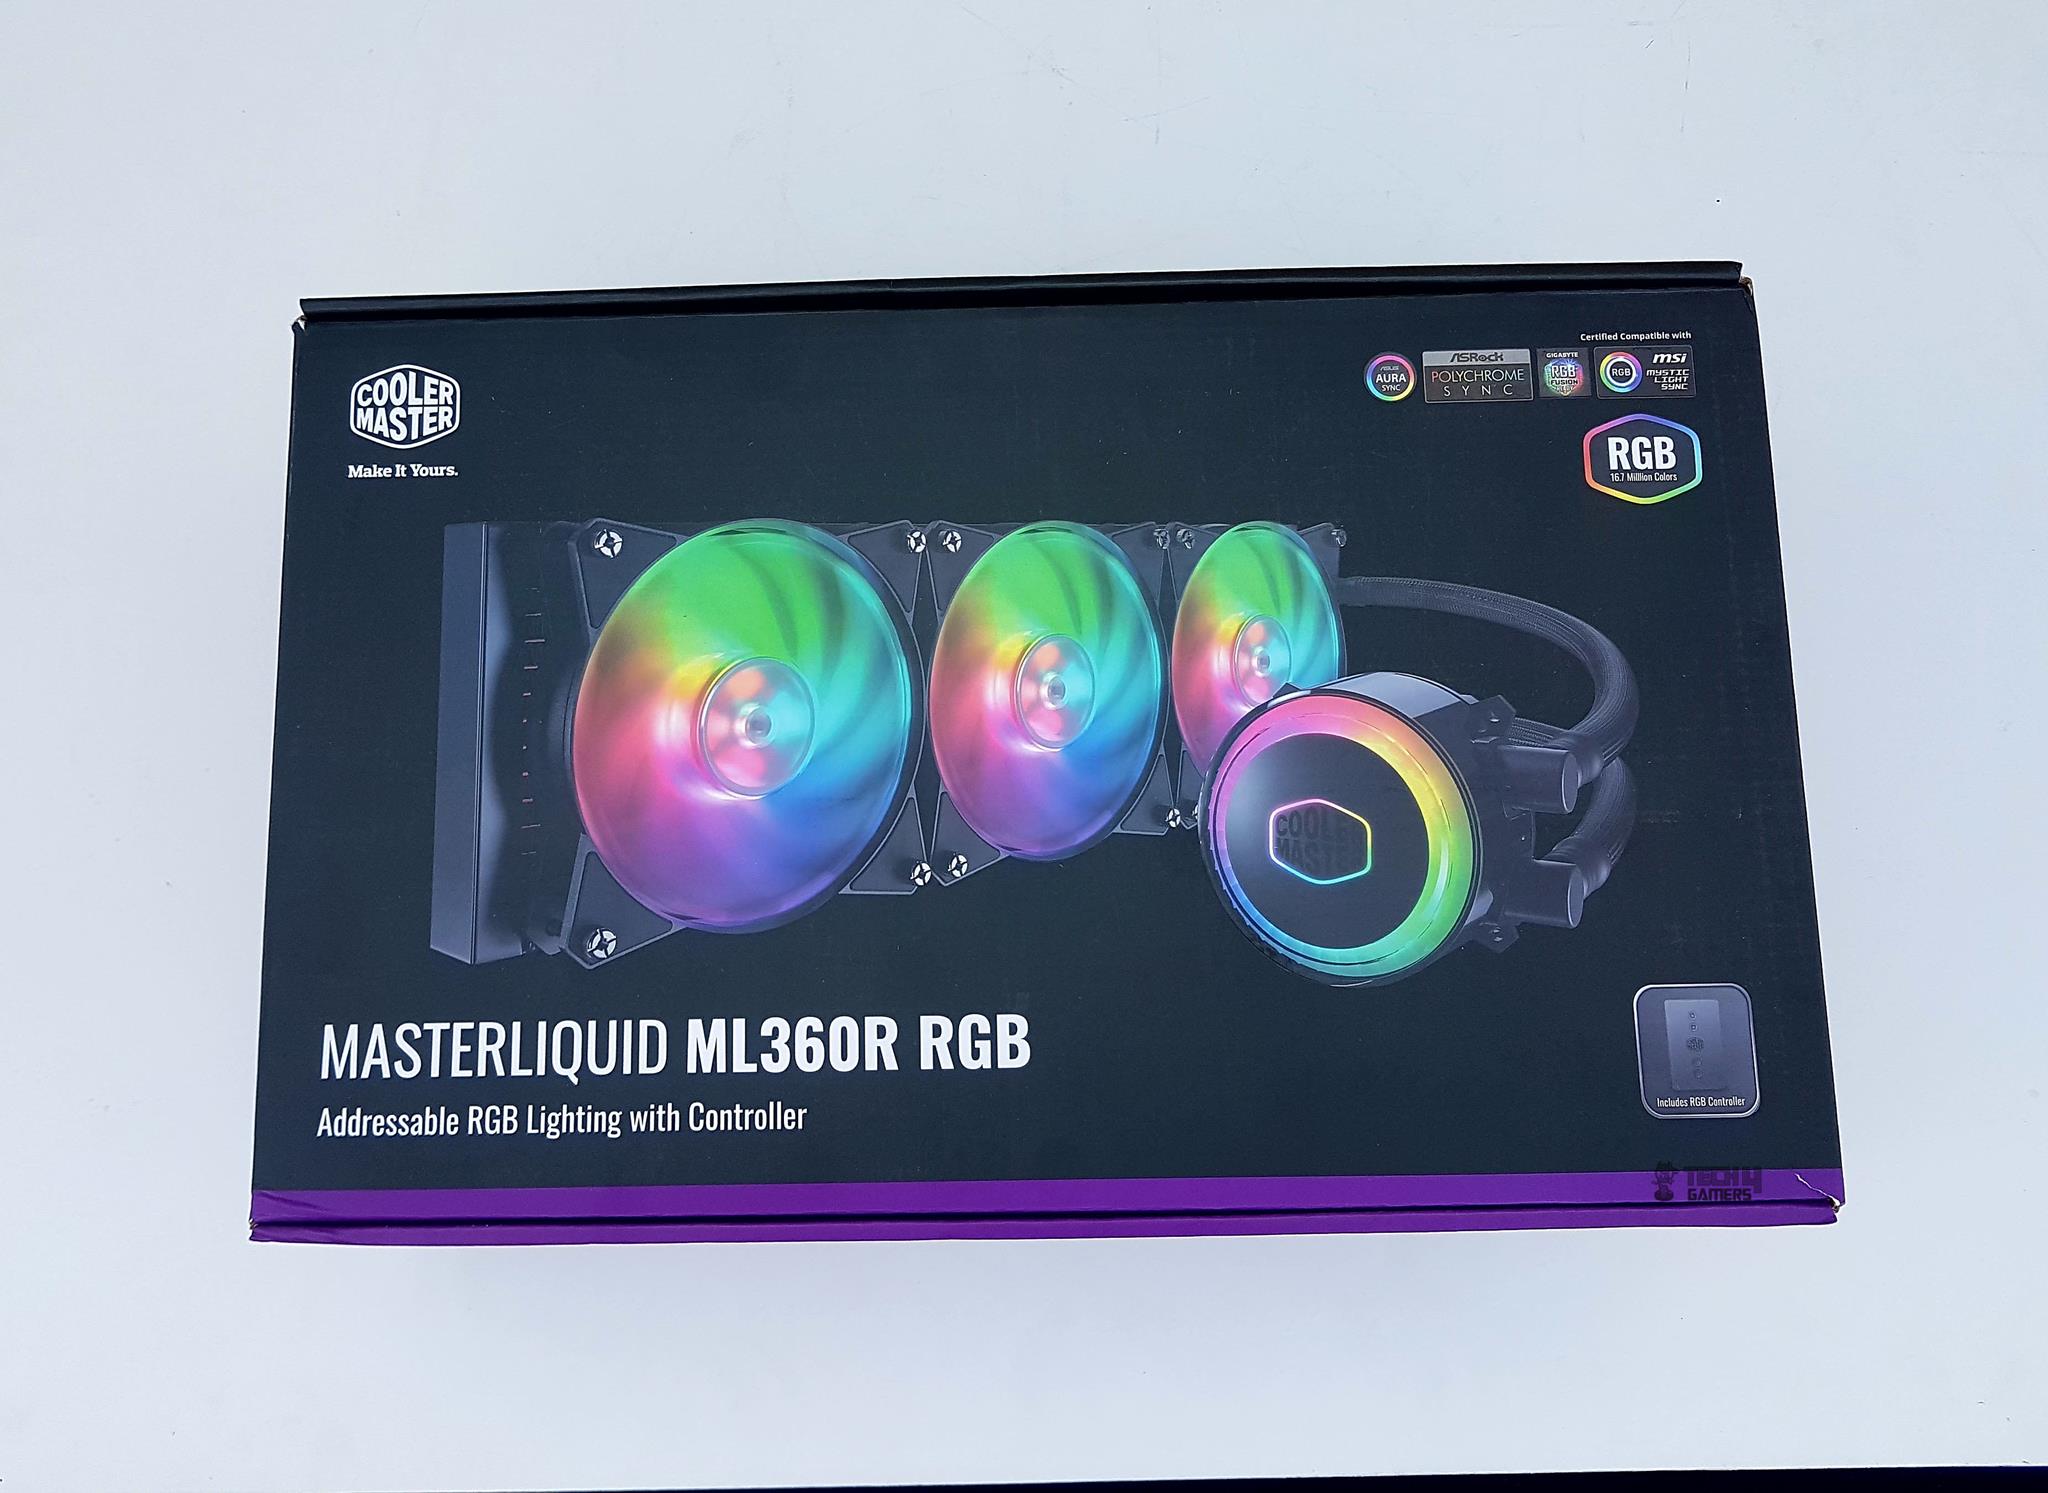

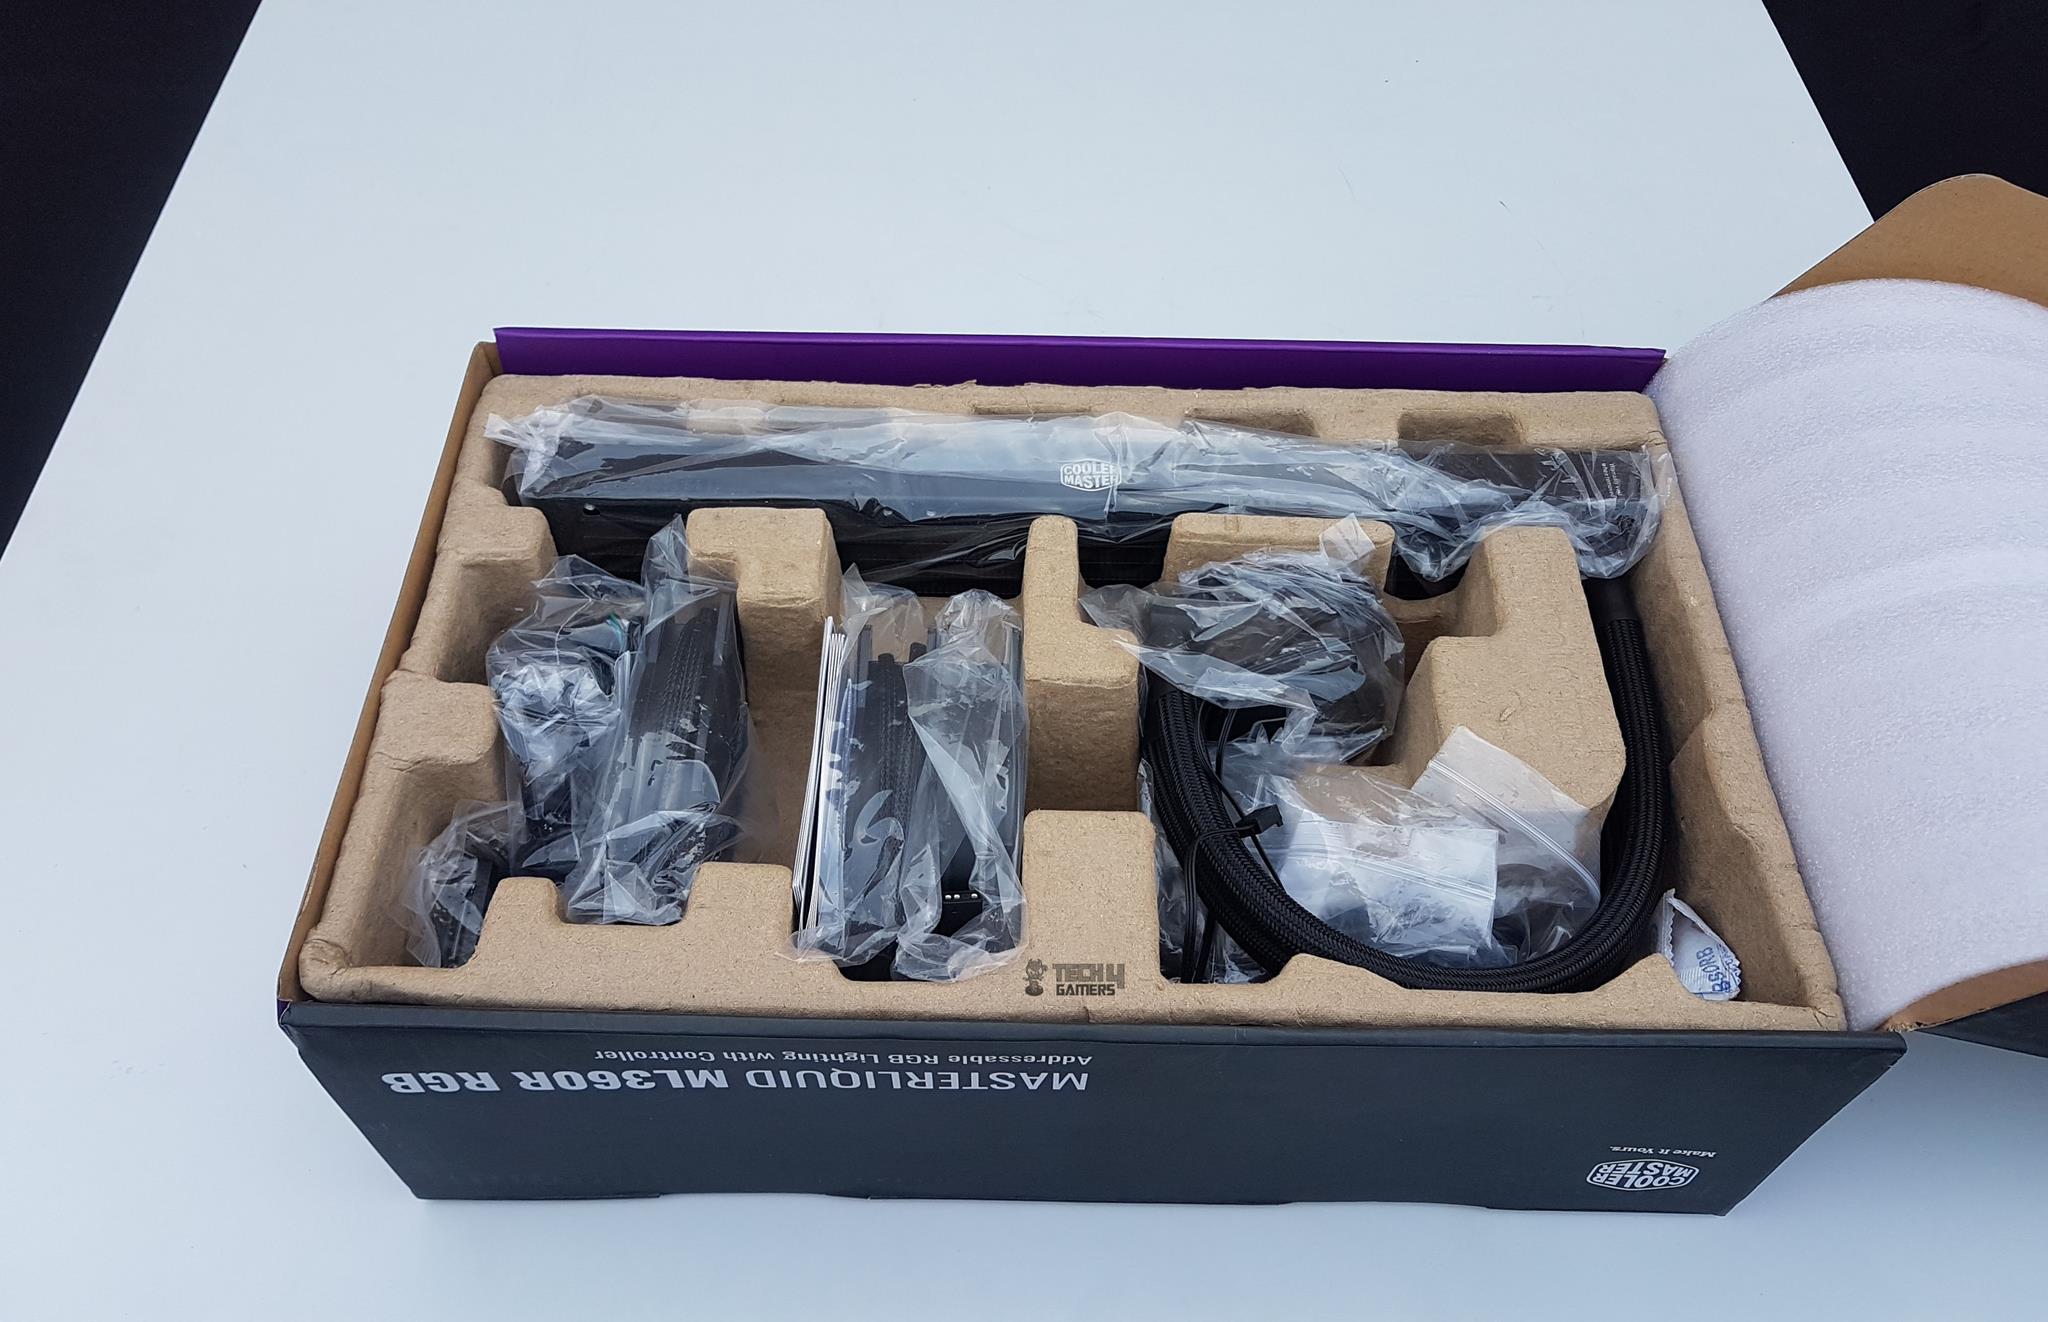
MasterLiquid ML360R Box Contents
There are a plethora of accessories included in the box
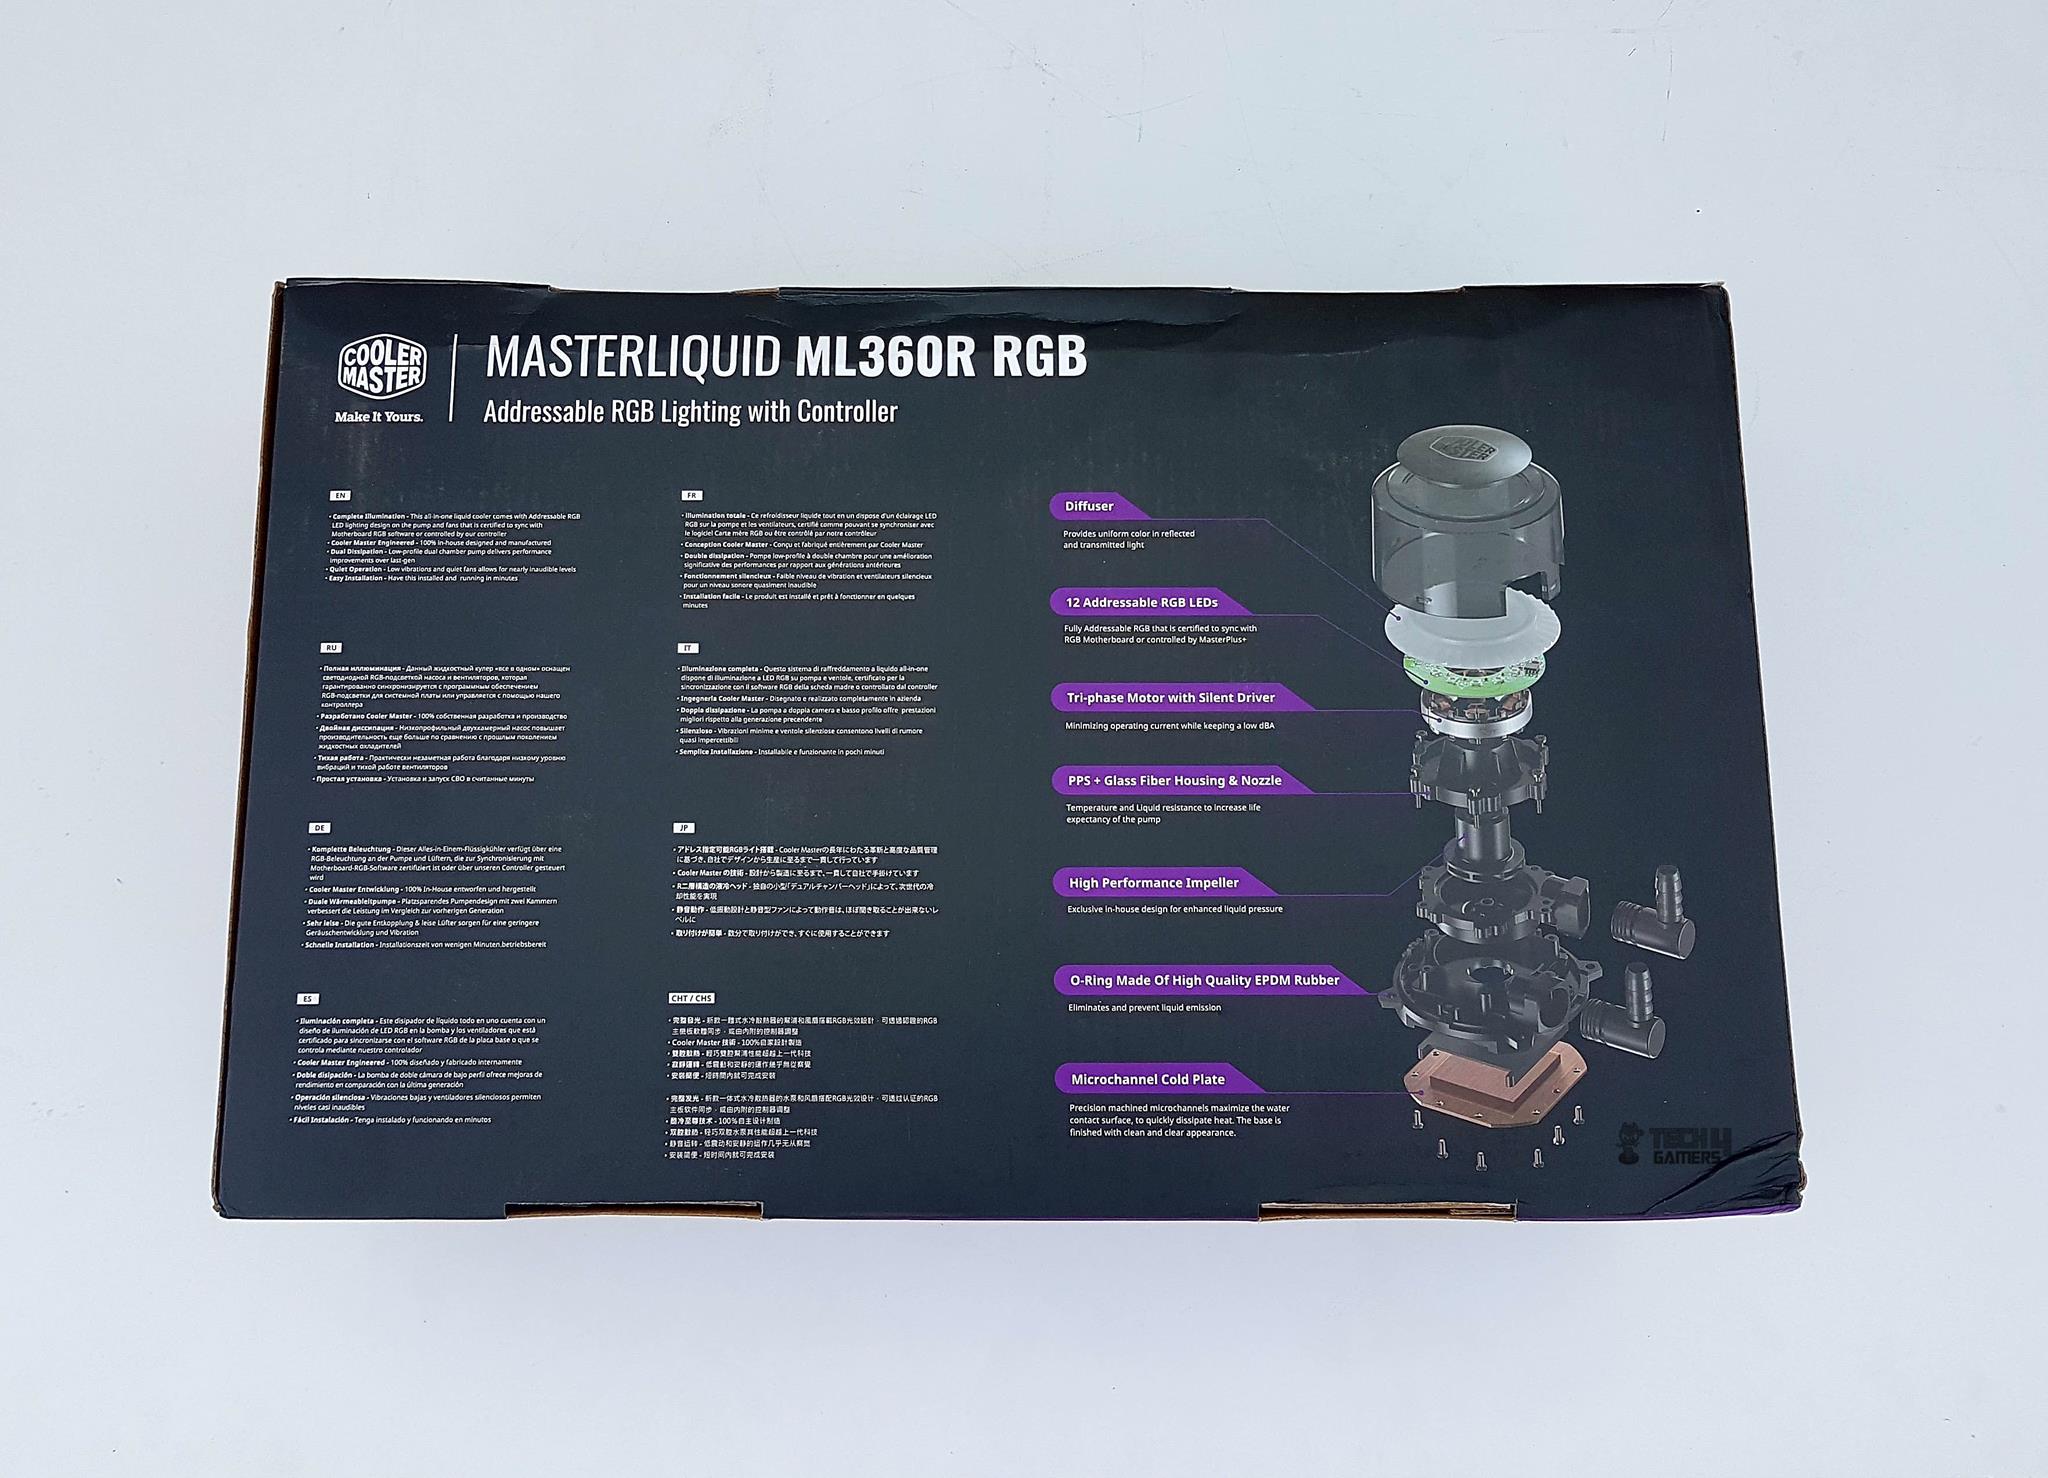
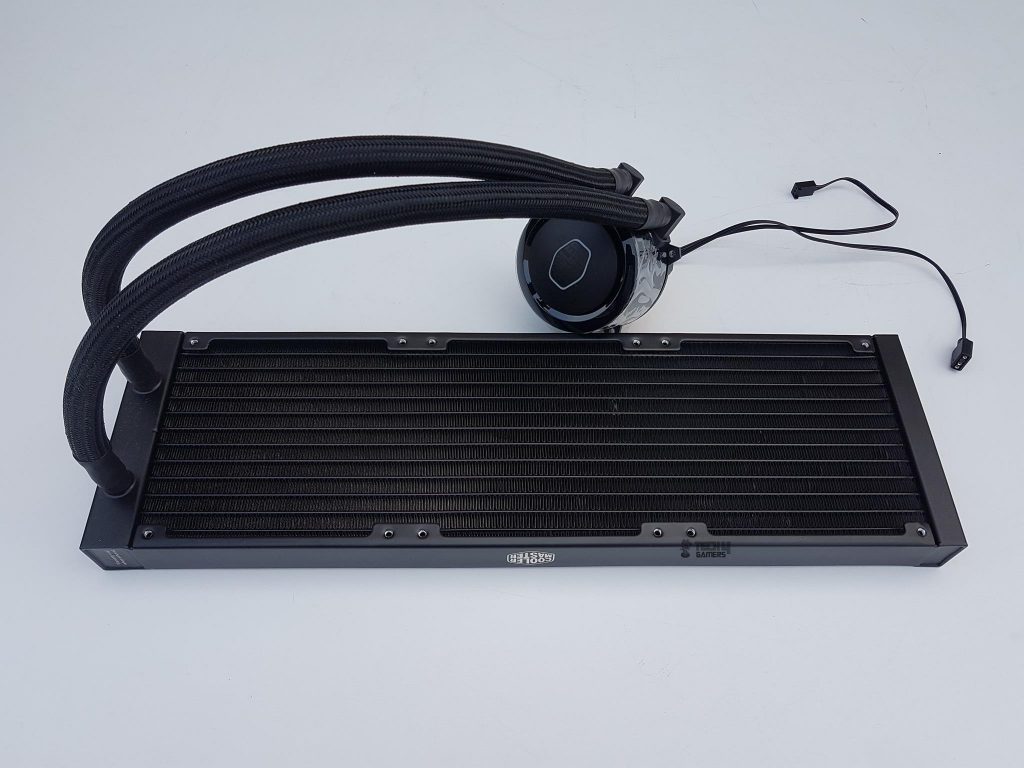
Cooler Master MasterLiquid ML360R Closer Look
At first glance, this cooler features a low-profile dual chamber block using glass fiber housing. Furthermore, Cooler Master has also included a low resistance radiator, a dual-chamber pump that outperforms its single-chamber predecessors as well as the MasterFan Air Balance fans, coupled that ensures an incredibly quiet operation.
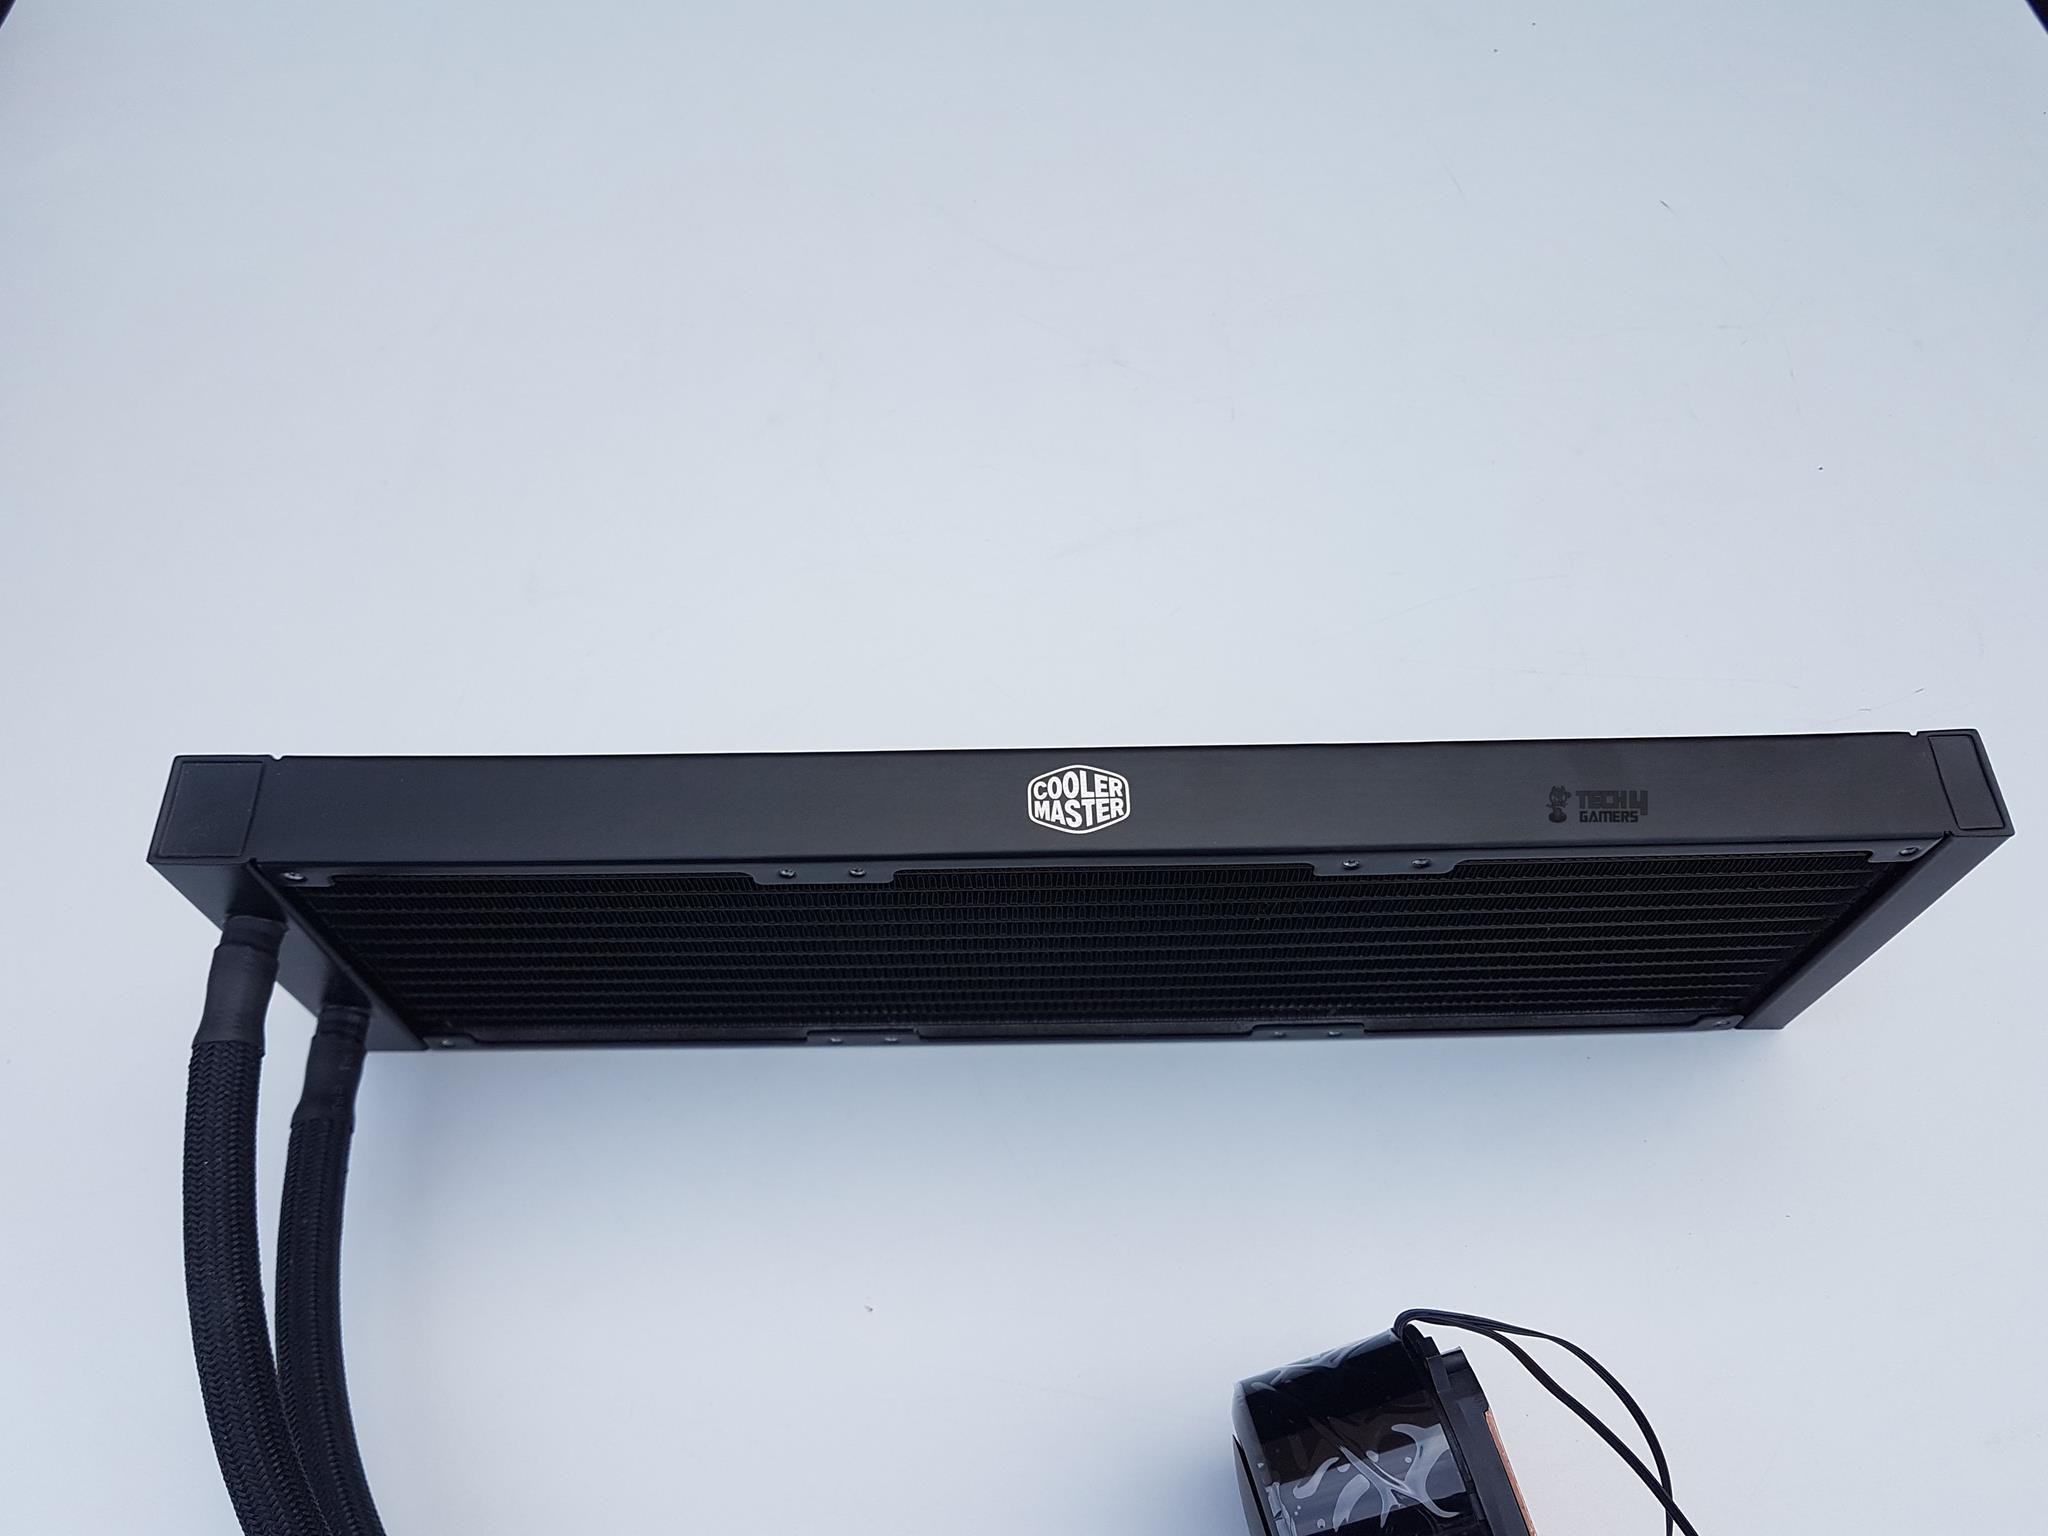
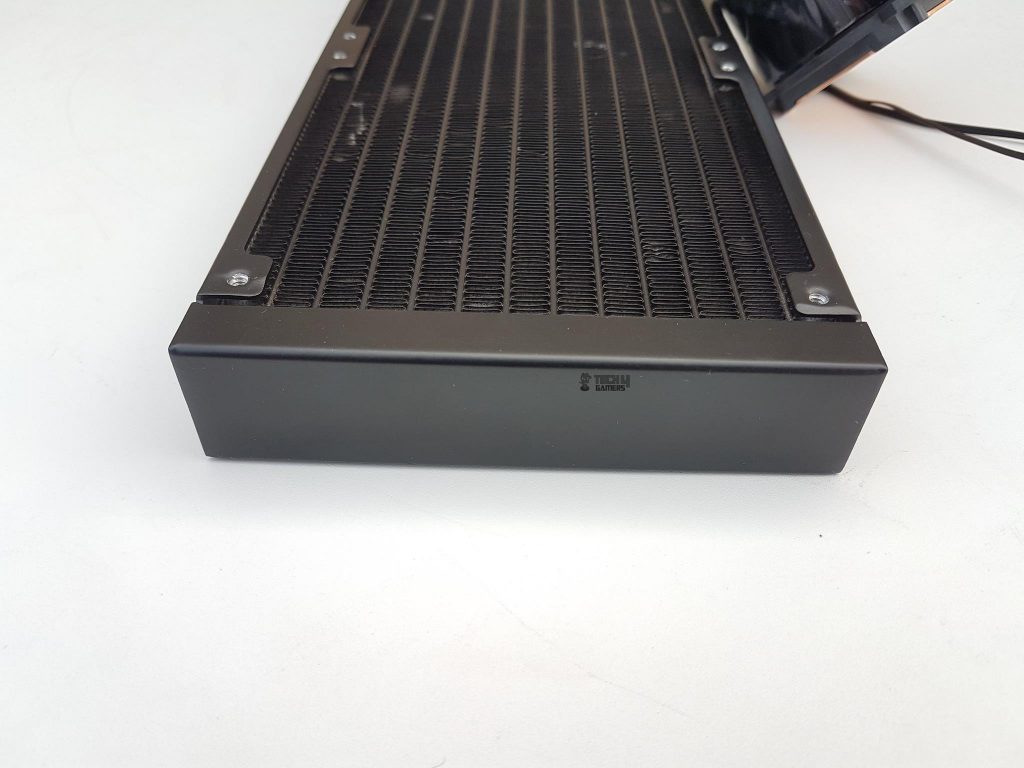
ML360R Radiator
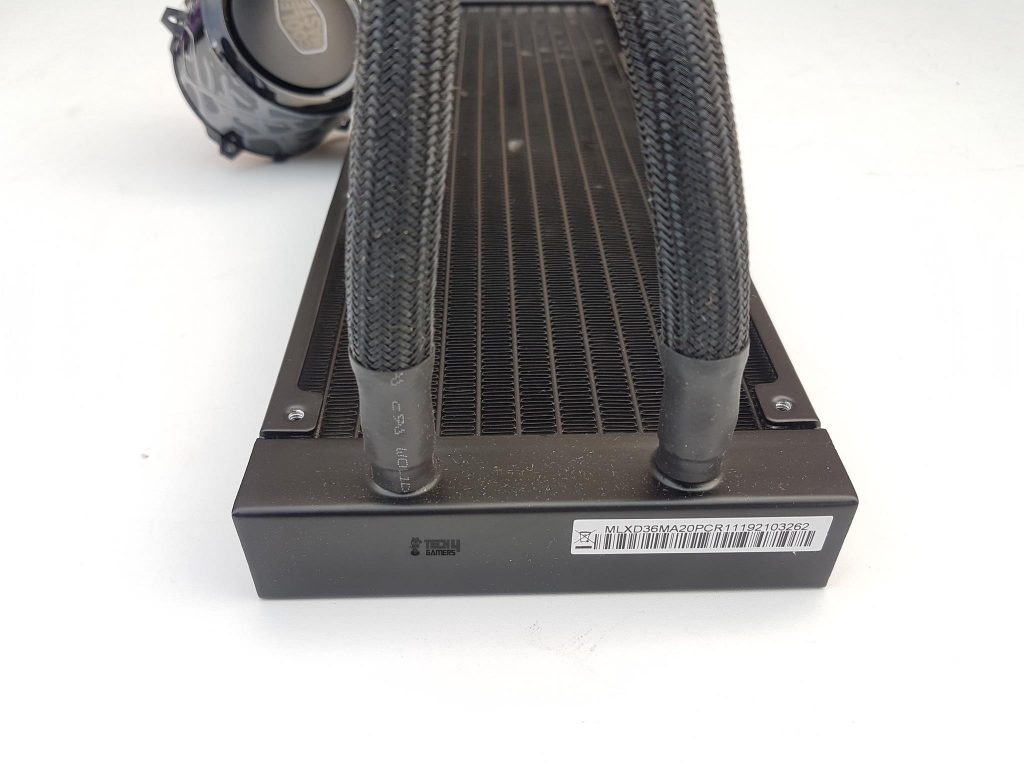
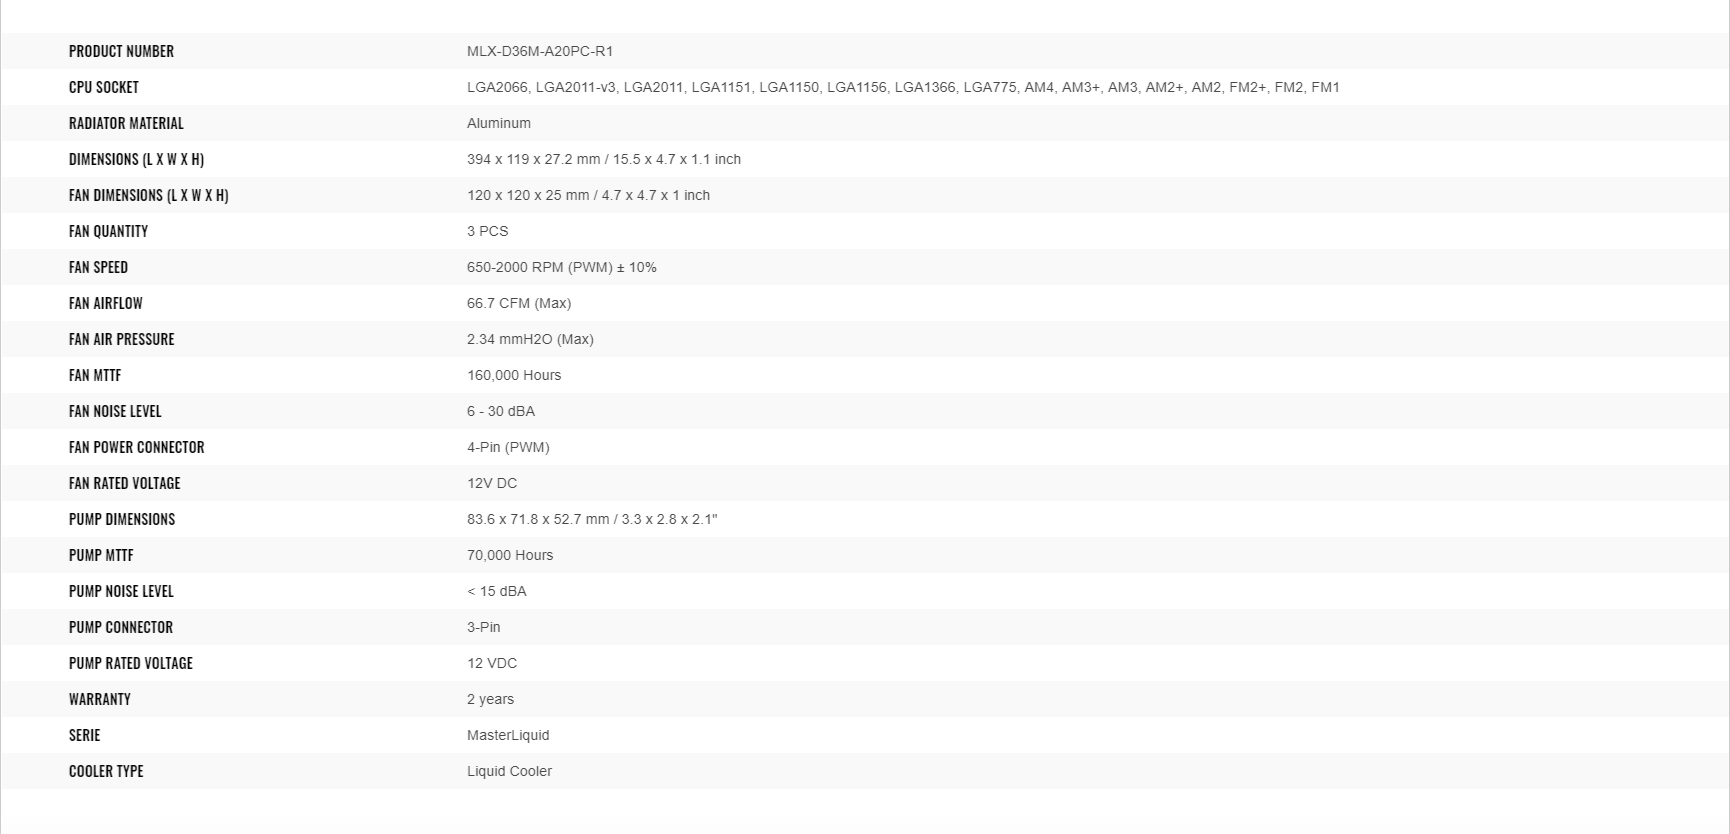
The Cooler Master 360mm cooler features a slim aluminum radiator measuring 394x119x27.2mm. When combined with 25mm fans, it reaches a total height of approximately 55mm due to thicker screw heads. The 20 FPI count of the radiator calls for fans with high airflow and air pressure. It’s designed with 13 channels and straight edges, which I liked.
It’s worth noting that the barbs have heat shrinks and a serial number sticker is conveniently placed on the near chamber/side. Overall, this cooler is a practical and well-designed cooling solution.
The Cooler Master radiator features a 394mm total length, including head chambers, and 105mm spacing between the mounting holes. It has a depth of 119mm. Note that there’s no protective plating under the mounting holes, so be cautious during fan installation to avoid damaging the fins, potentially leading to performance issues or even leakage.
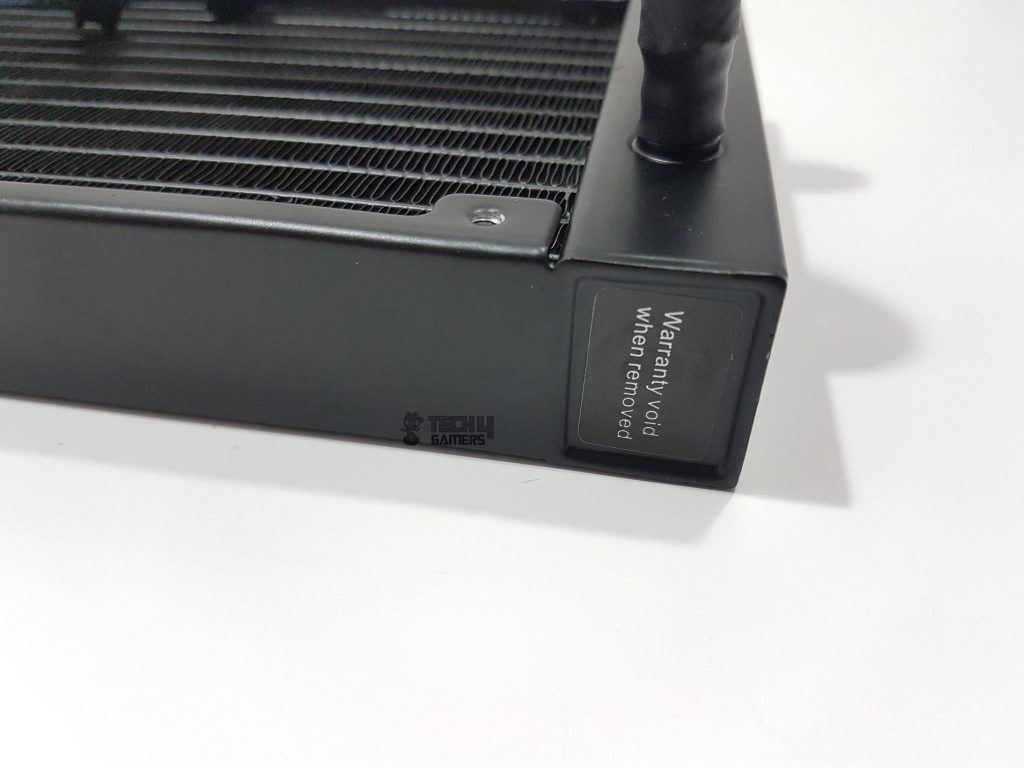
There is what seems like a refill port – if I am not wrong – on the left side of the chamber which is covered with a Warranty Void when removed sticker. The far chamber is a slim design.
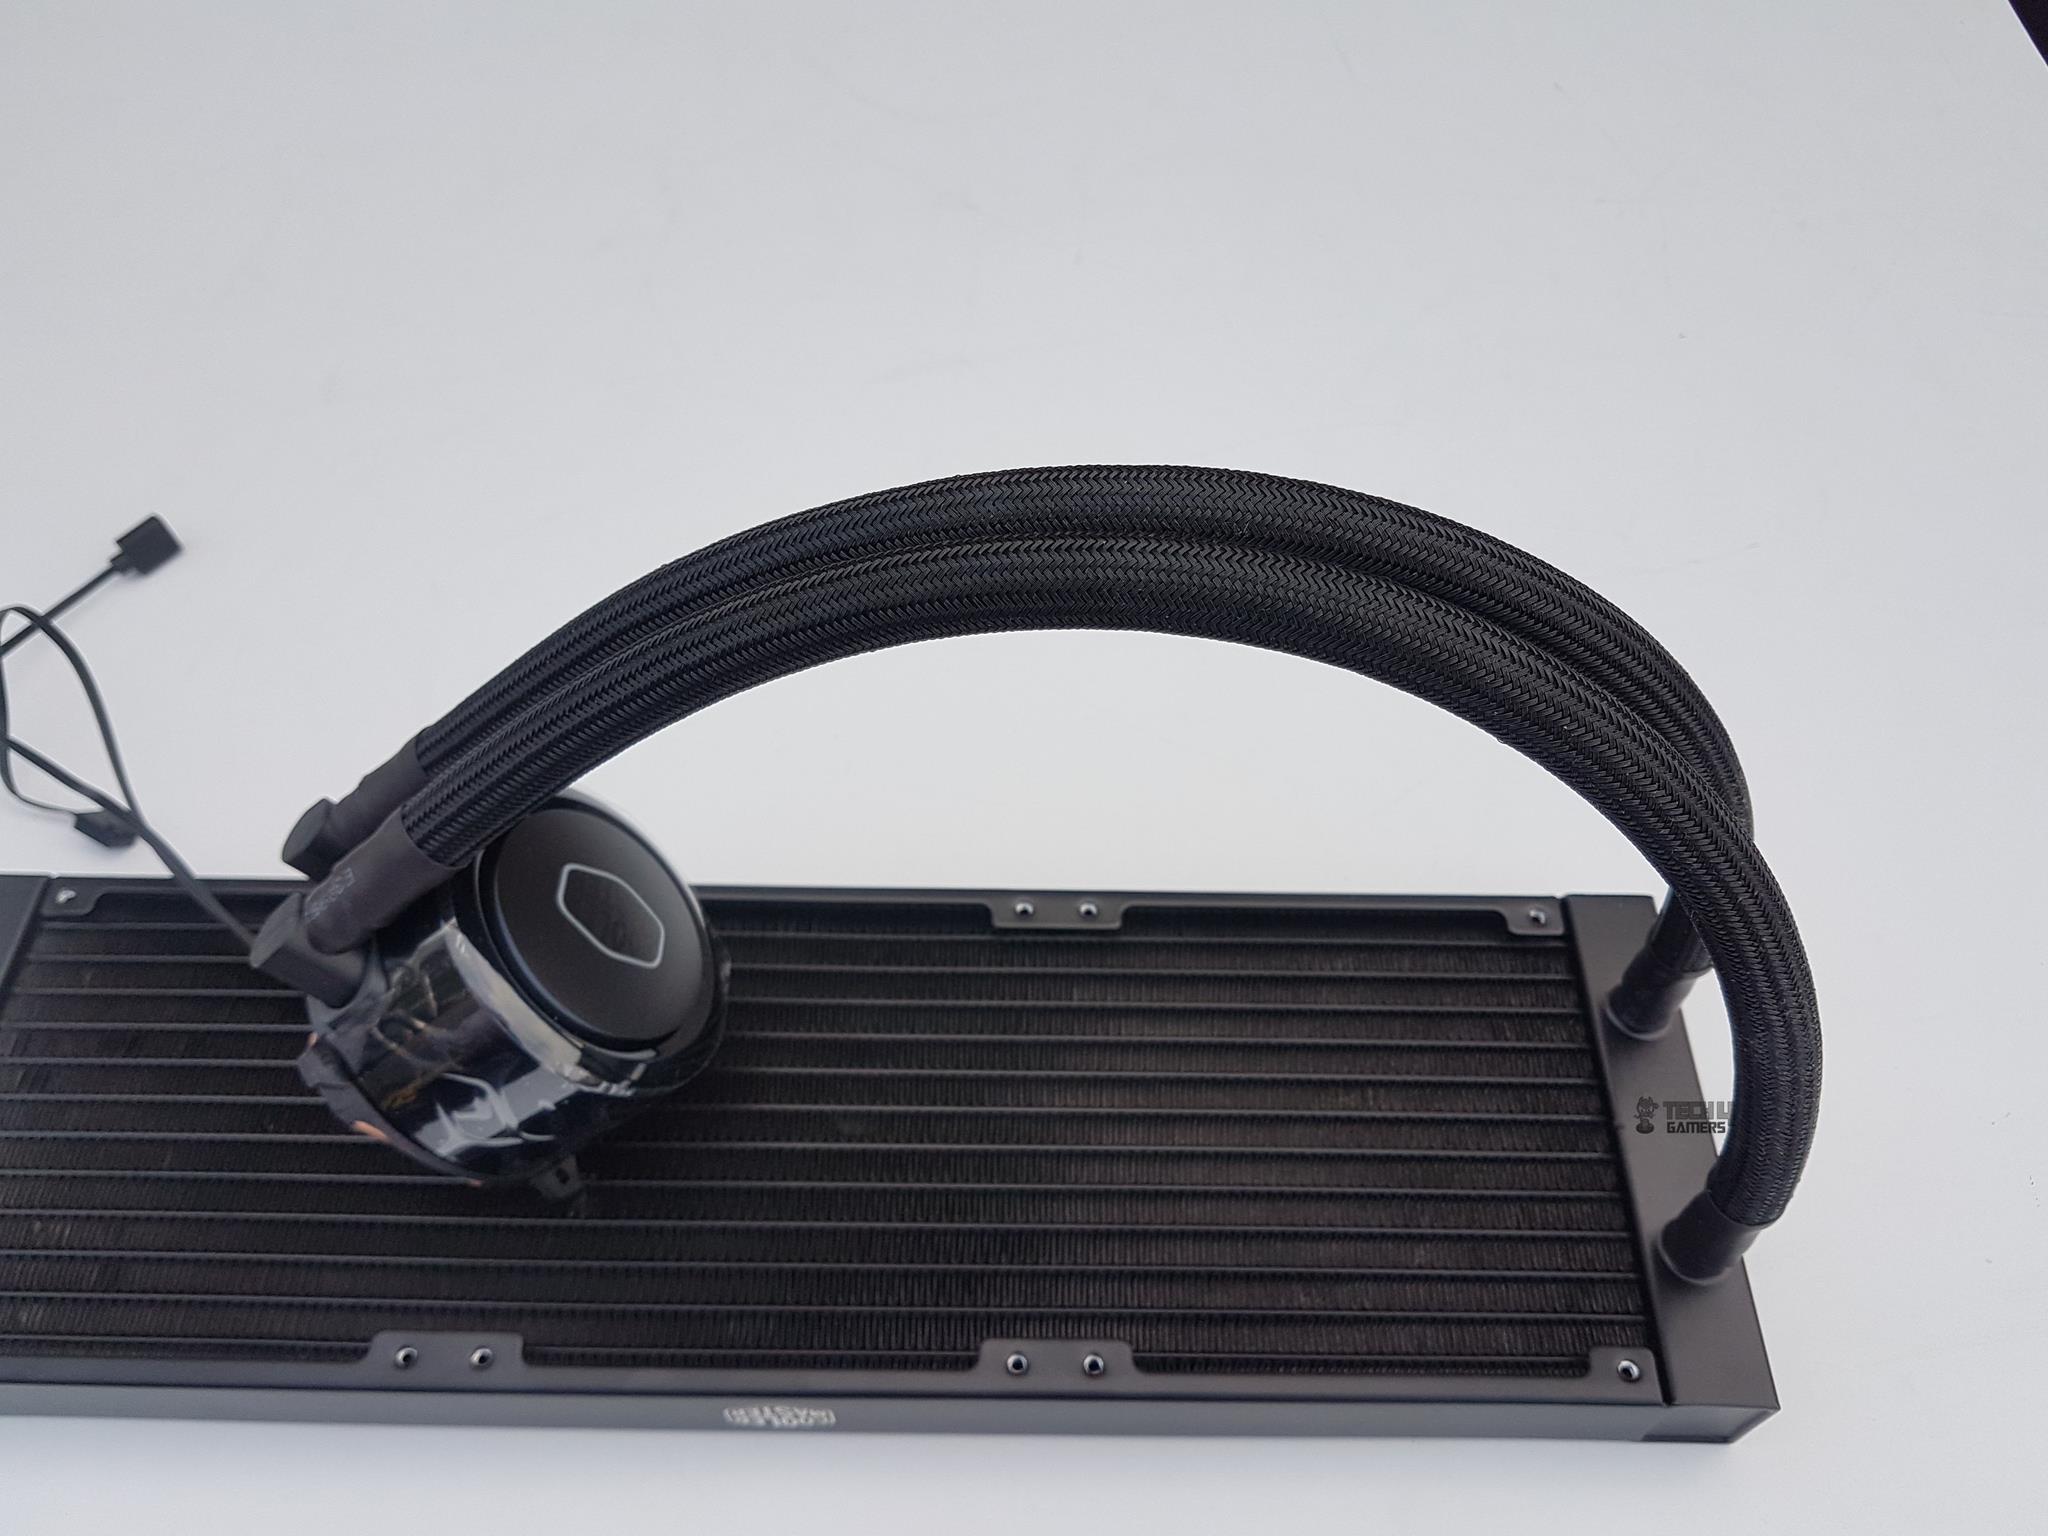
The tubing on this cooler has two layers. The inner tubing is made of FEP while the exterior is meshed and braided for a nice and clean look. The tubings are somewhat flexible on this cooler. The approximate length of the tubing without the heat shrink barbed fittings is 346mm.
Block/Pump
Let’s take a look at the main ingredient aka water block. The dimension of the block is 83.6×71.8×52.7mm. The main housing is in a circular shape. The Cooler Master uses a low profile, the dual-chamber design here. The Cooler Master is claiming that their pump is impervious to oxidation and corrosion!
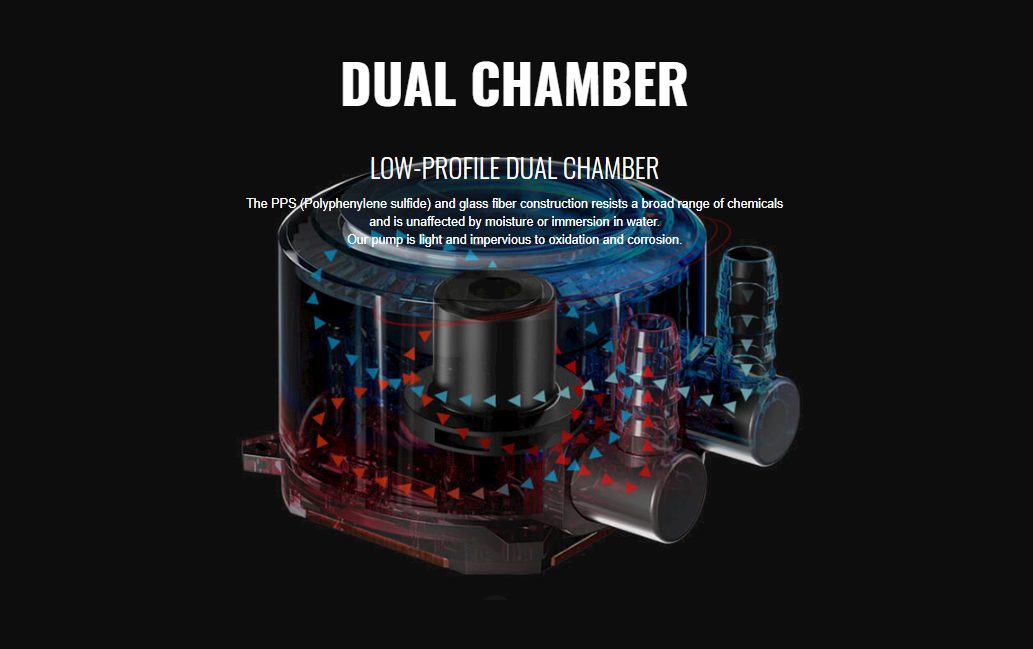
The main theme behind the dual-chamber is to isolate the flow of heated coolant from the normal coolant.
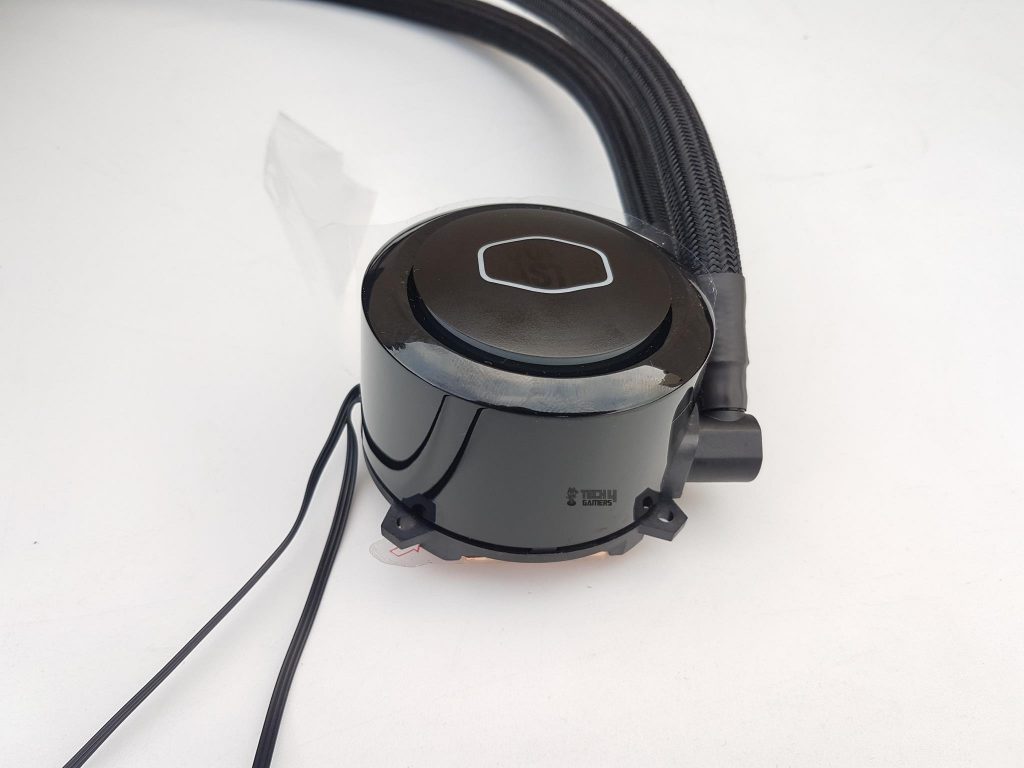
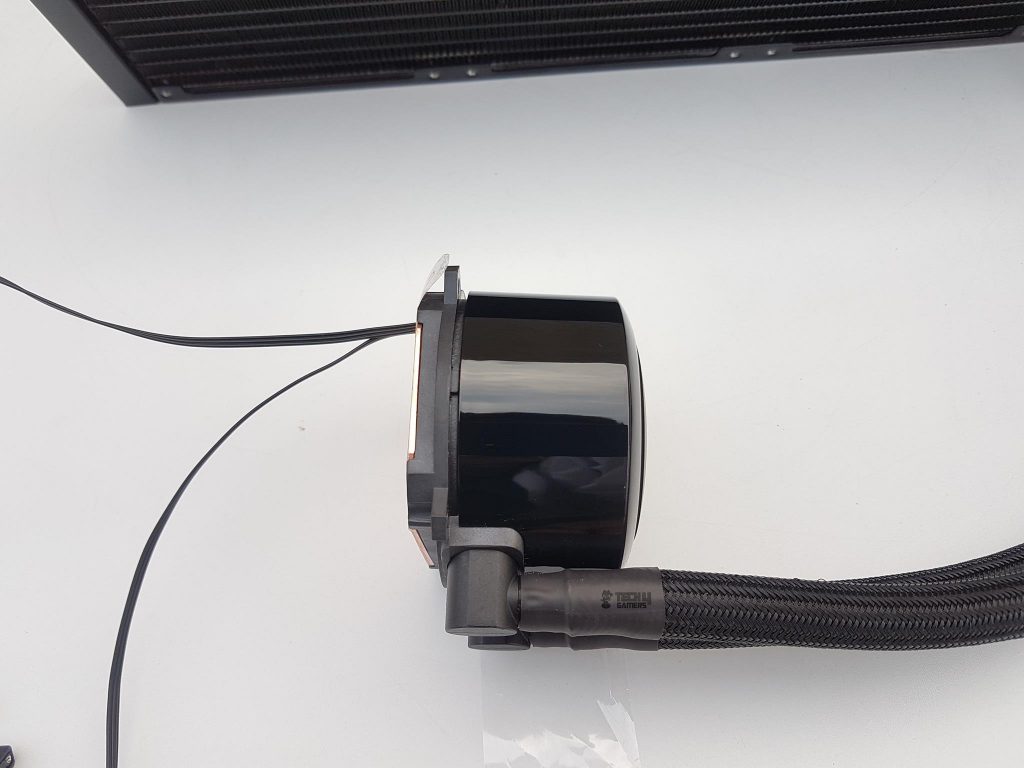
The top lid has ARGB LEDs underneath. The main housing is translucent and glossy surface reflects. There is a protective sheet wrapped around the housing in a circular manner. The top lid is a bit protruded than the rest of the housing which is obviously for the visuals.
The above picture shows the glossy side of the pump housing. The rest of the structure is made of the plastic and is finished in matte black.
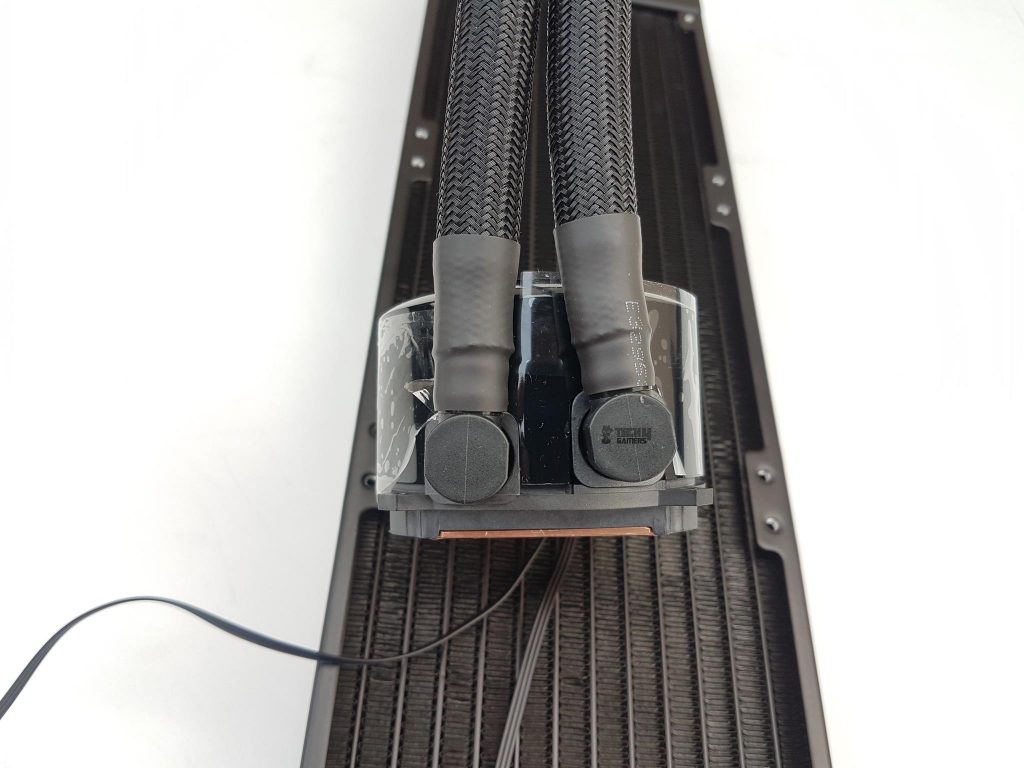
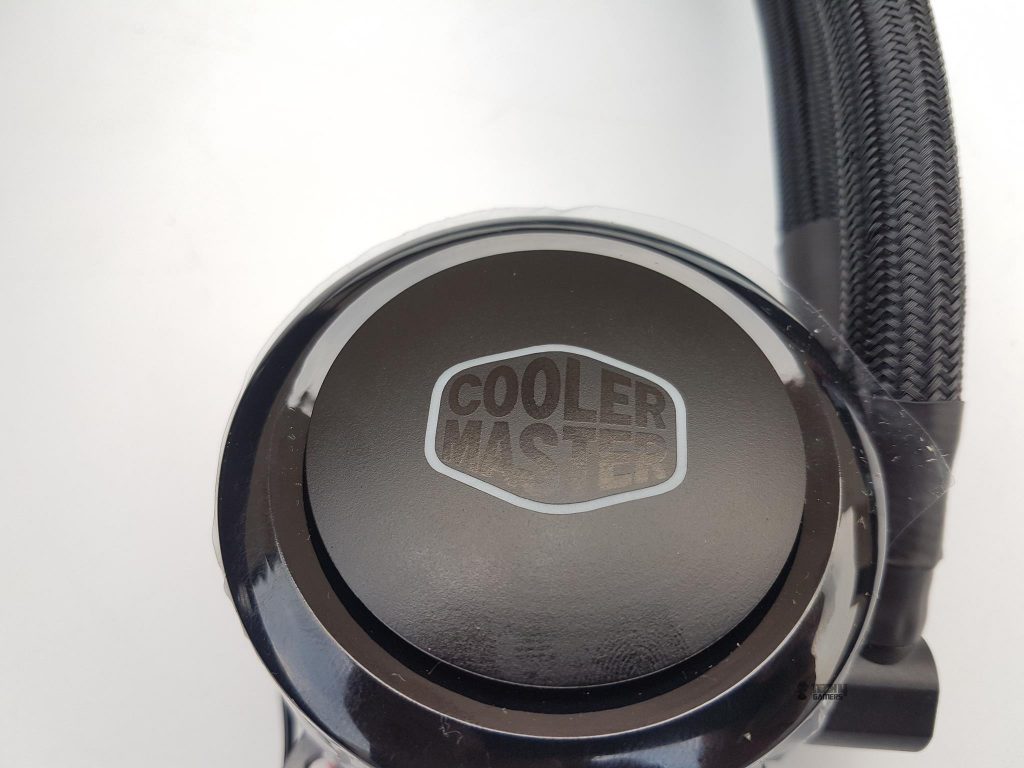
The picture displays a 90° barbed fittings implementation for tubing, offering flexibility for mounting brackets on the pump housing’s left and right sides. This setup is crucial for proper installation. On the top lid, you’ll find the illuminated Cooler Master logo when the LED cable is connected. However, the Cooler Master text doesn’t light up.
Inside the pump housing, a white diffuser ensures even lighting. A PCB with 12 ARGB LEDs is positioned below the diffuser, alongside a 3-phase motor operating at 12V DC. The motor is rated for an impressive 70,000 years of MMTF, enclosed in a PPS and fiberglass housing, making it resistant to chemicals and moisture. The noise level is rated at 15 dB(A) or less though in my experience the pump was audible.
Fans
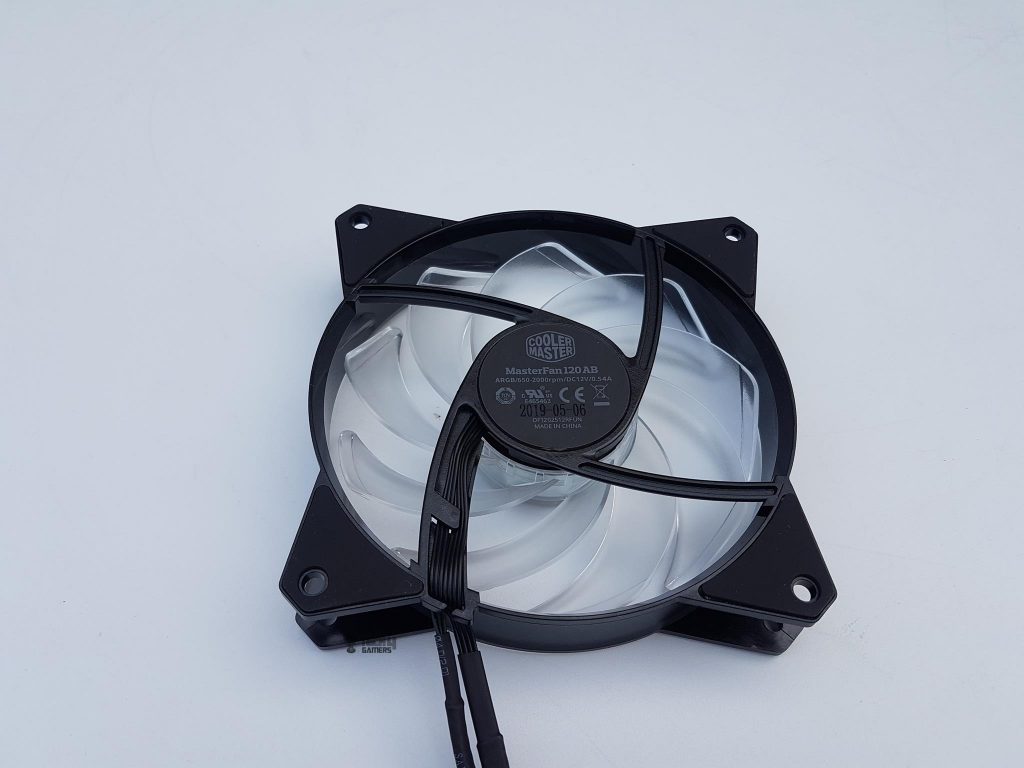
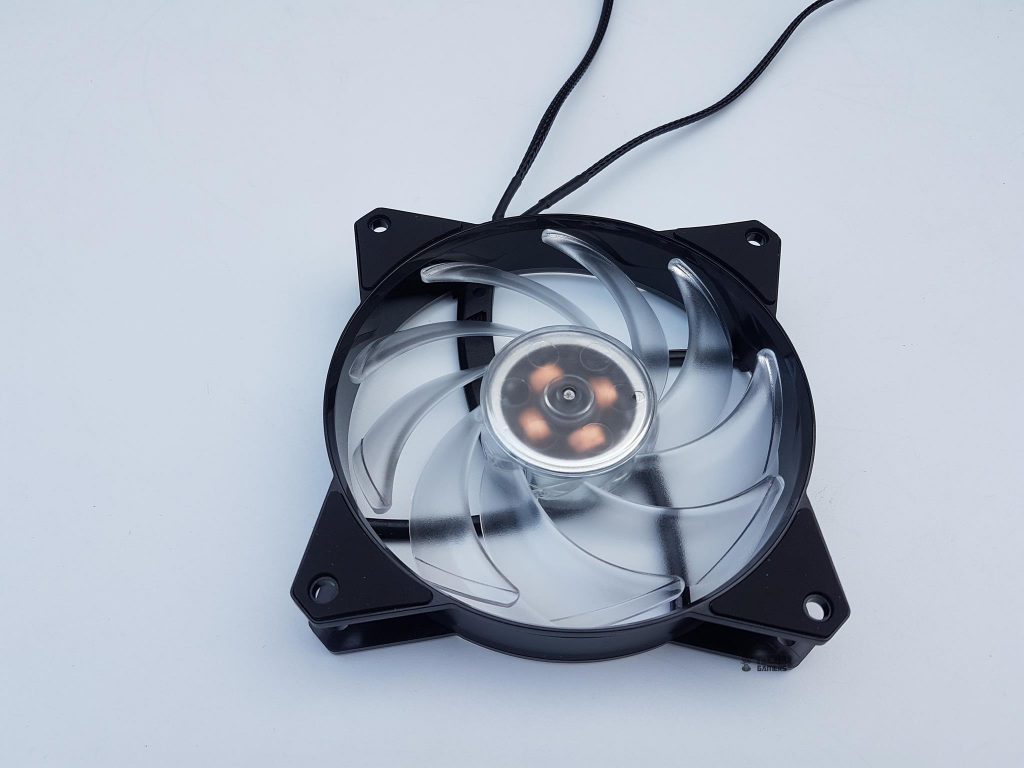
Cooler Master includes three MasterFan MF120R ARGB fans. Each fan measures 120x120x25mm, with a rated speed of 650-2000 RPM. Our samples at full speed were operating at 2115 RPM. Fan airflow is a maximum of 66.7 CFM, with a noise level of 6-30 dBA depending on the speed.
The blades are transparent to the full even the central hub is transparent. This helps to create one heck of a stunning visual effect when the lighting comes on. In summary, this cooler offers flexibility in tubing and impressive LED lighting.
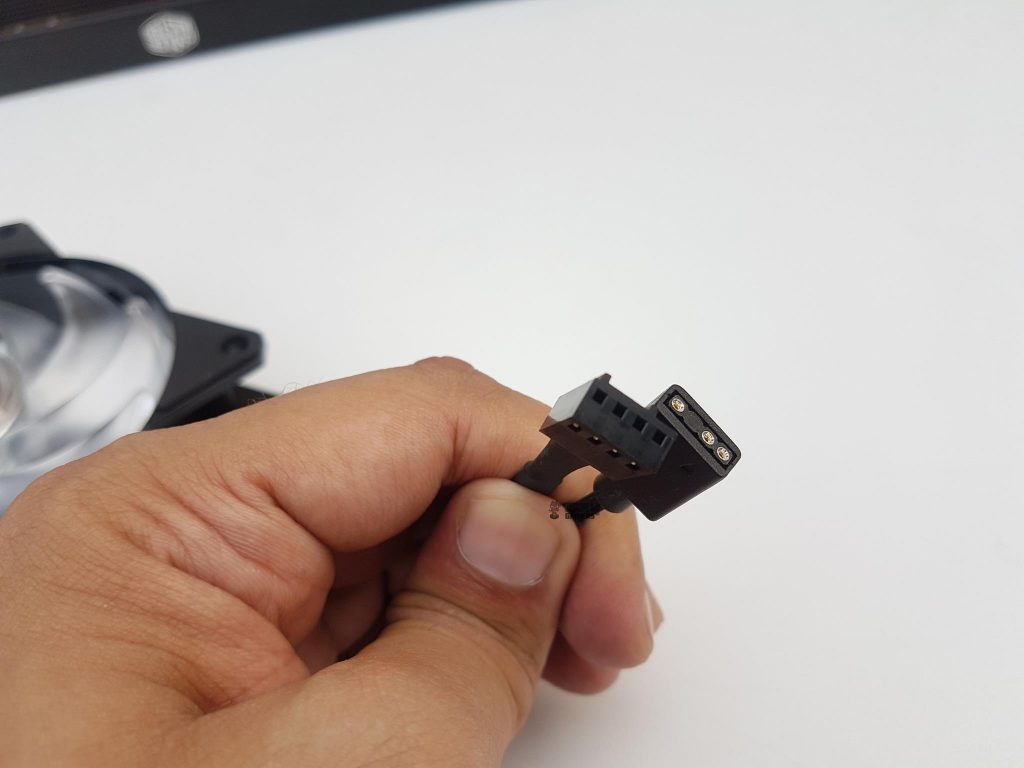

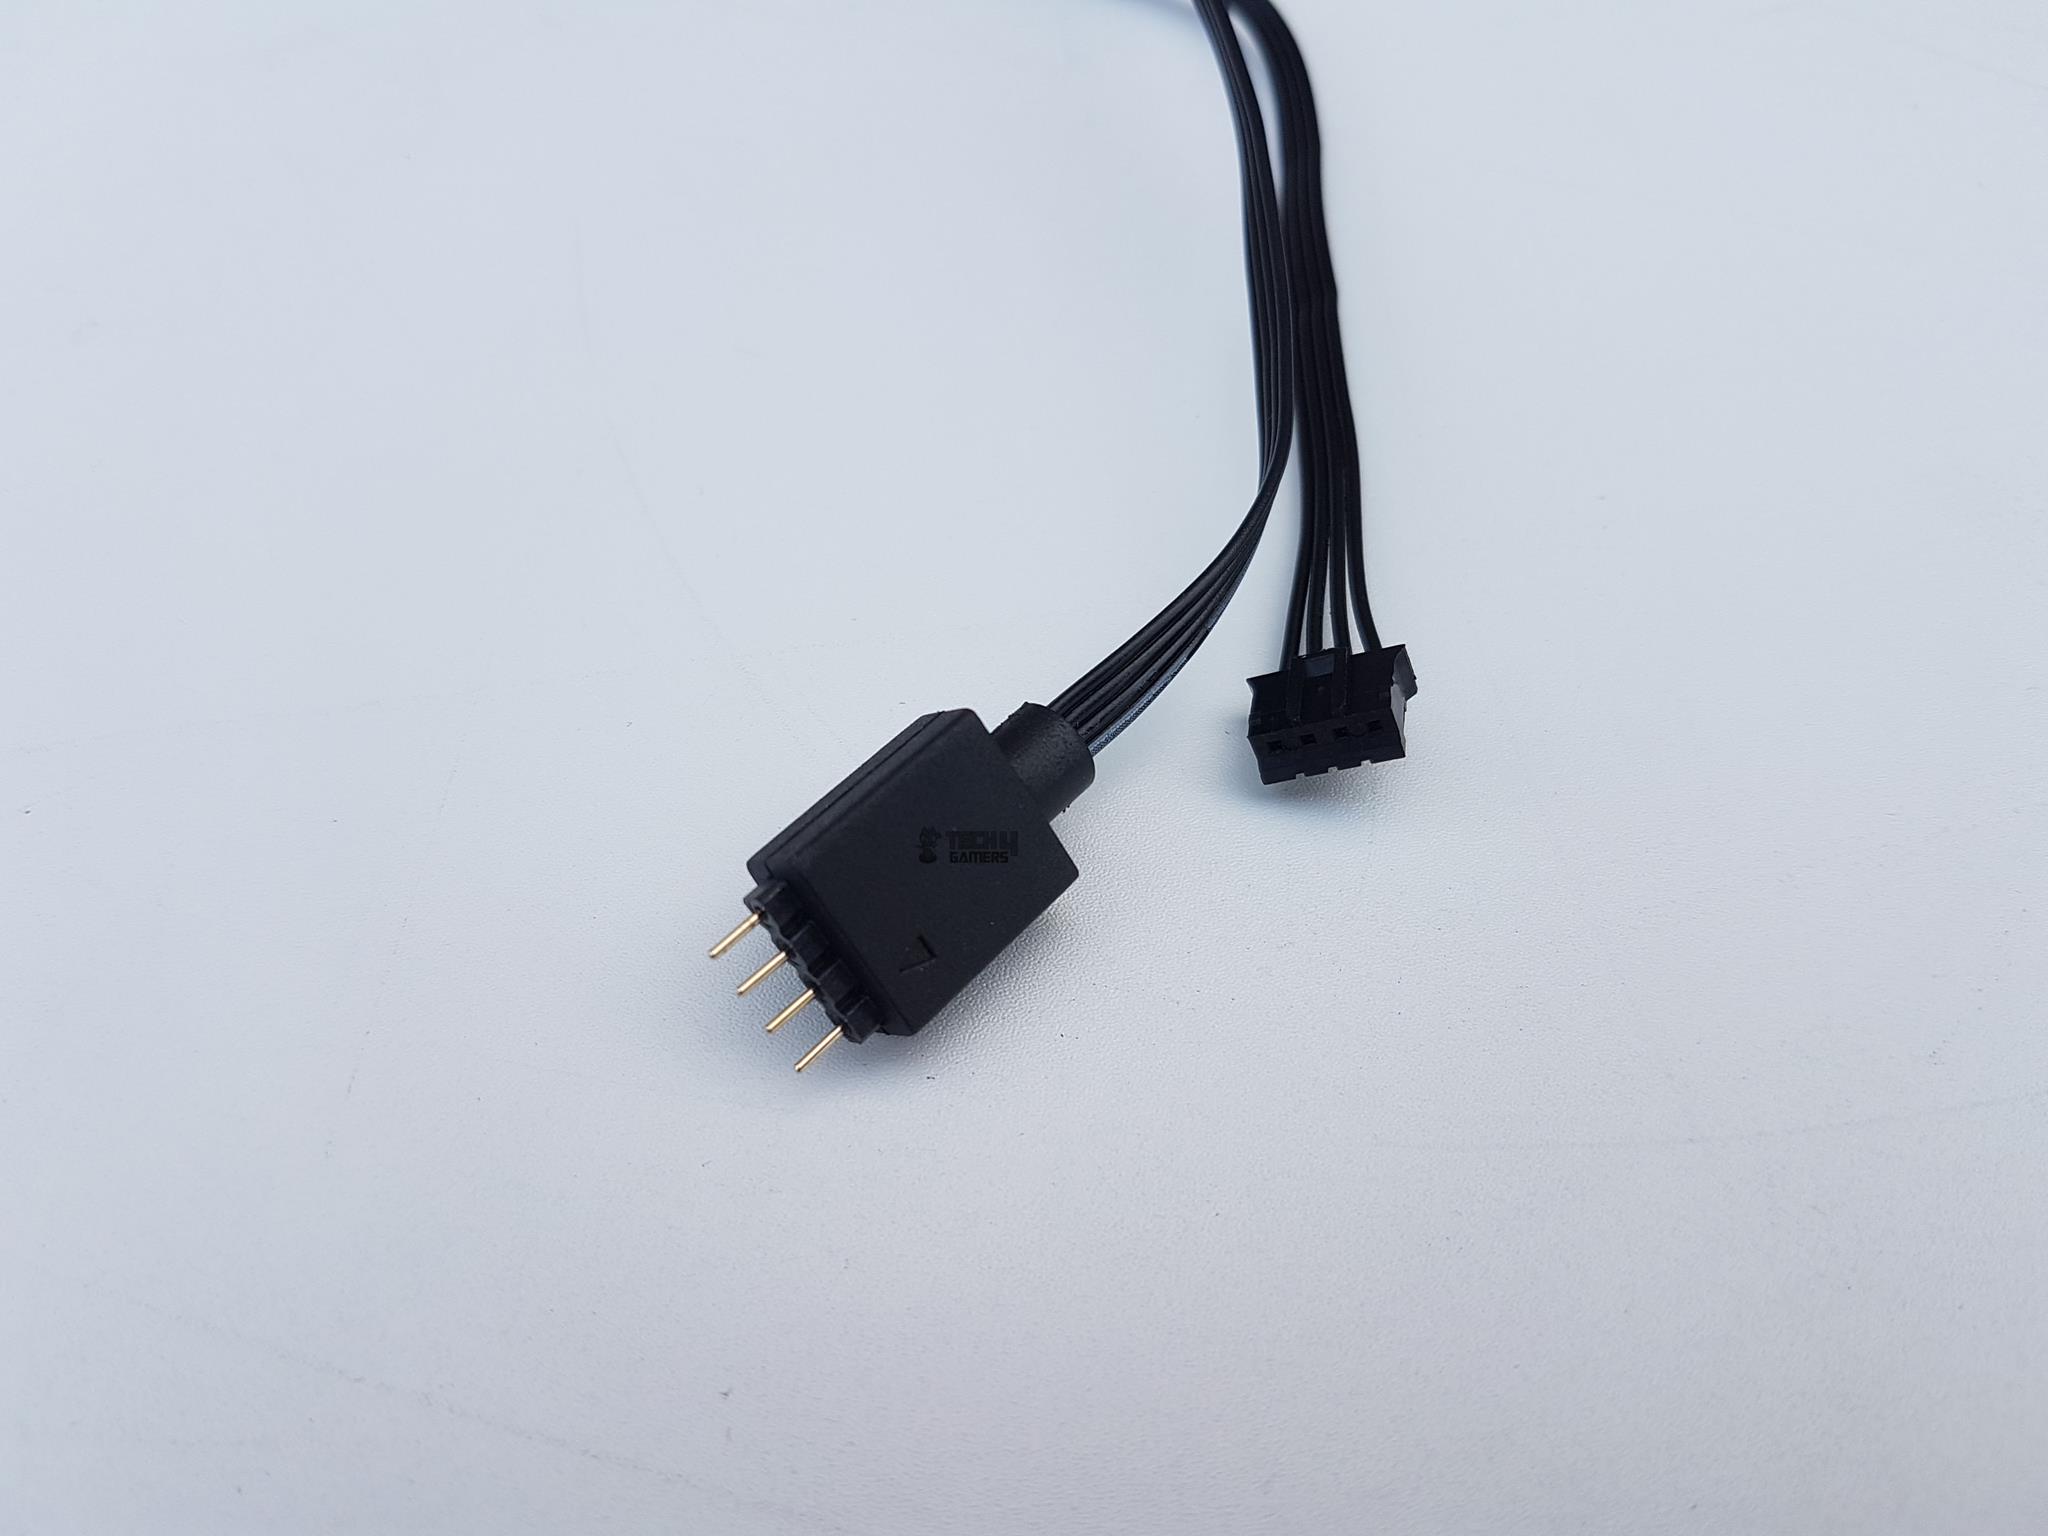
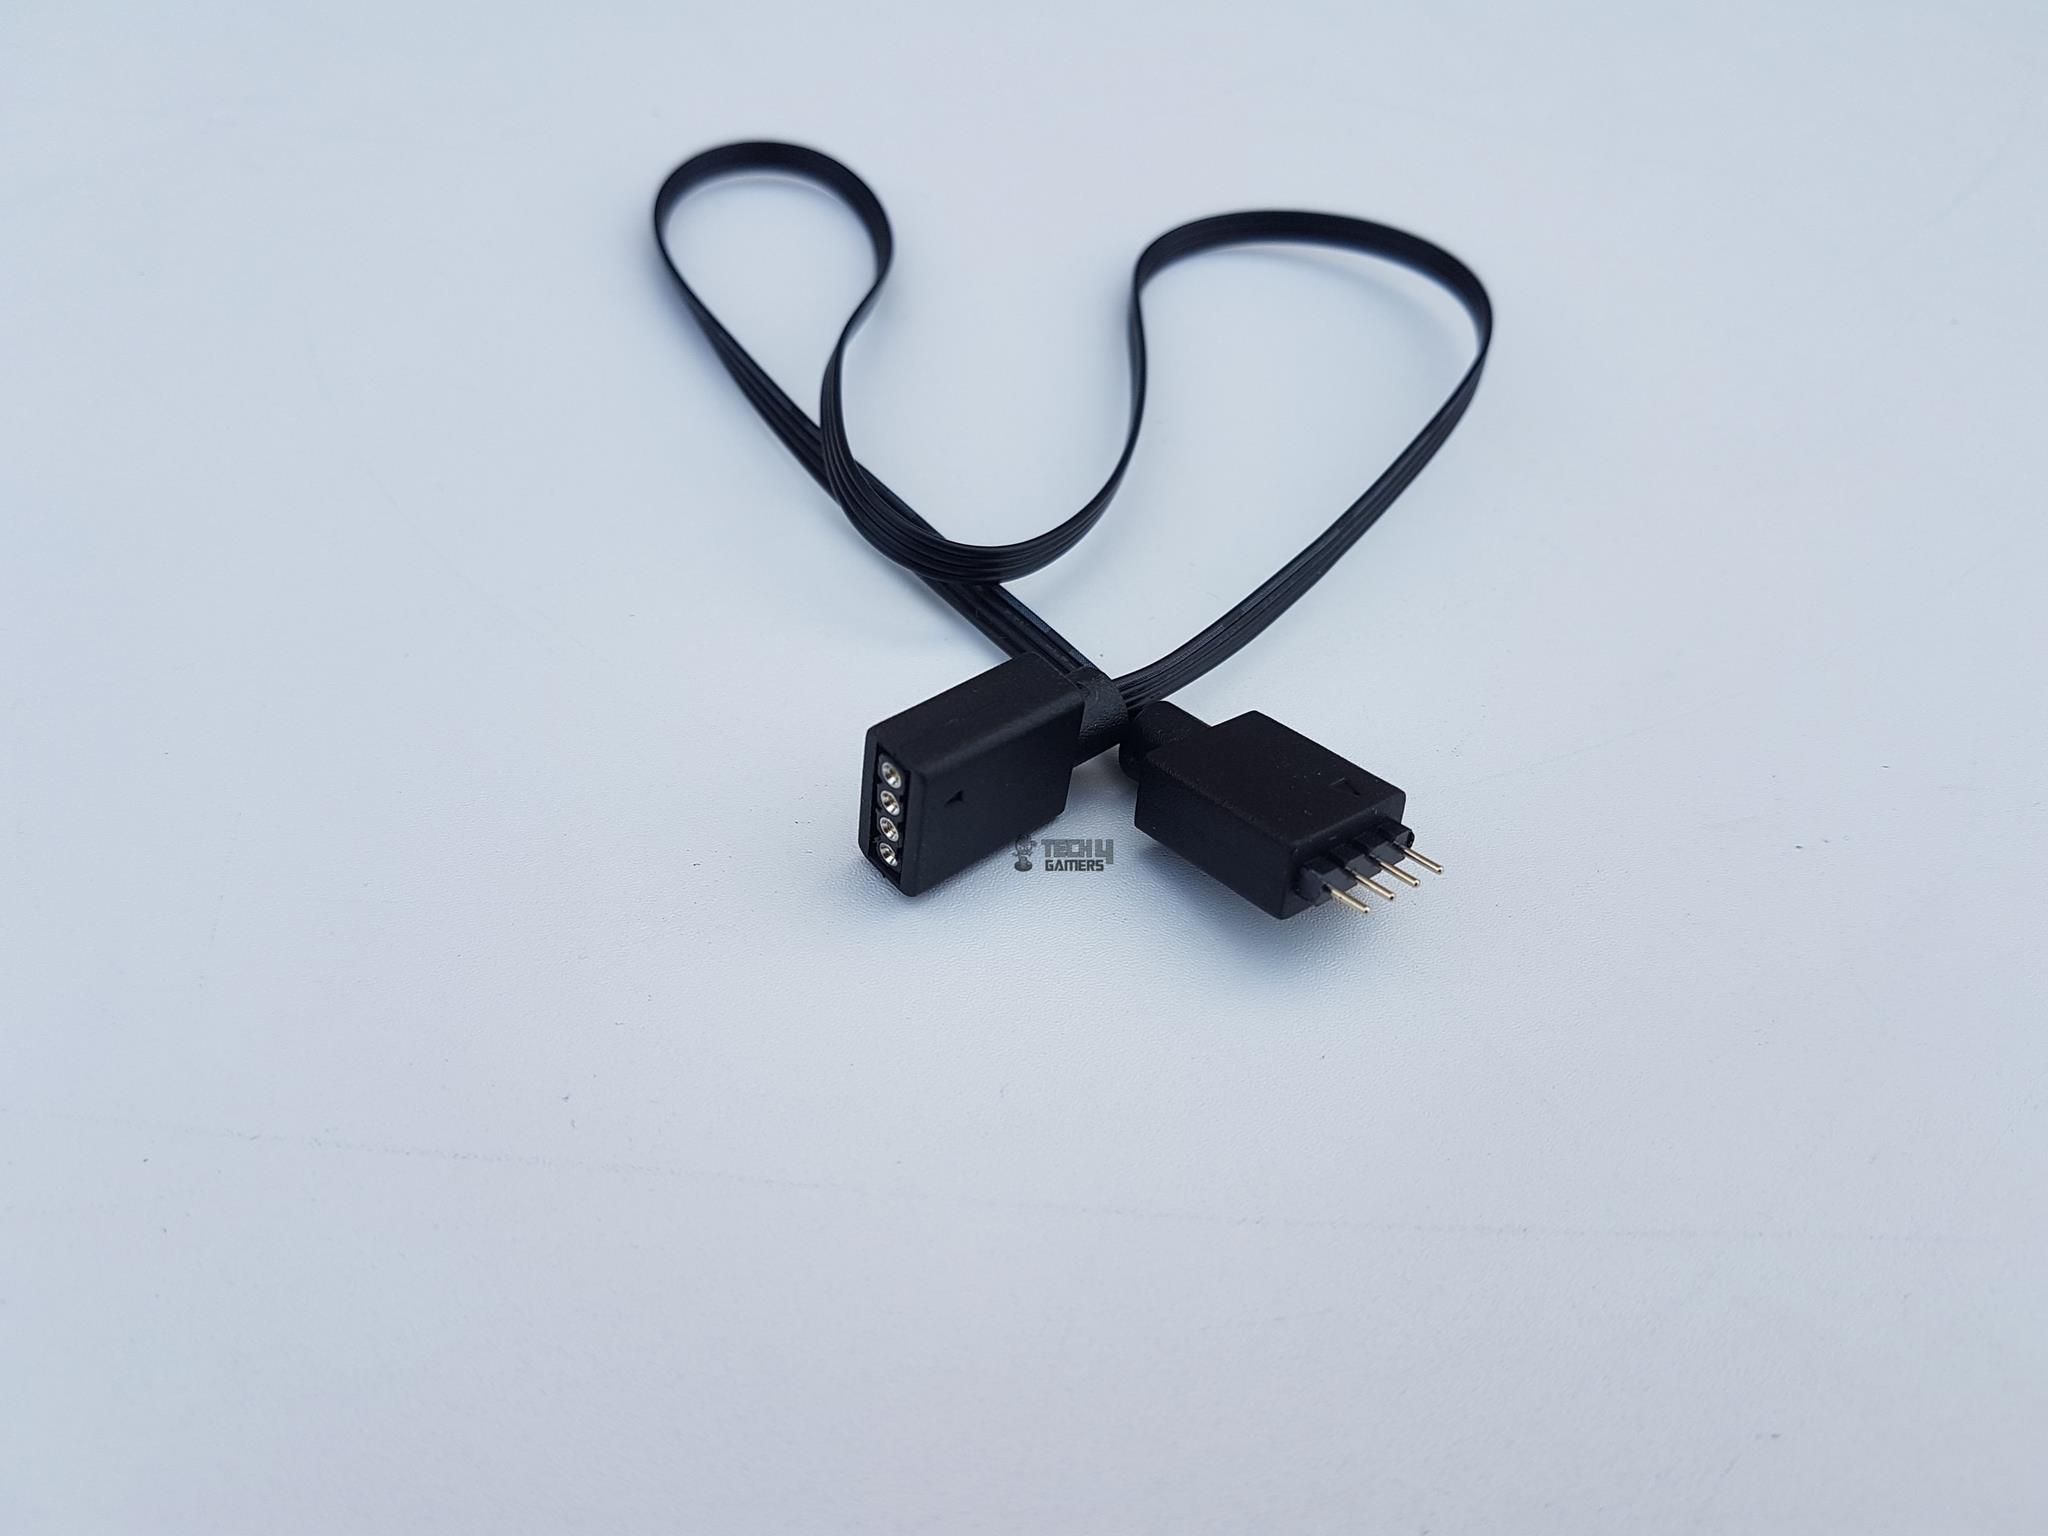
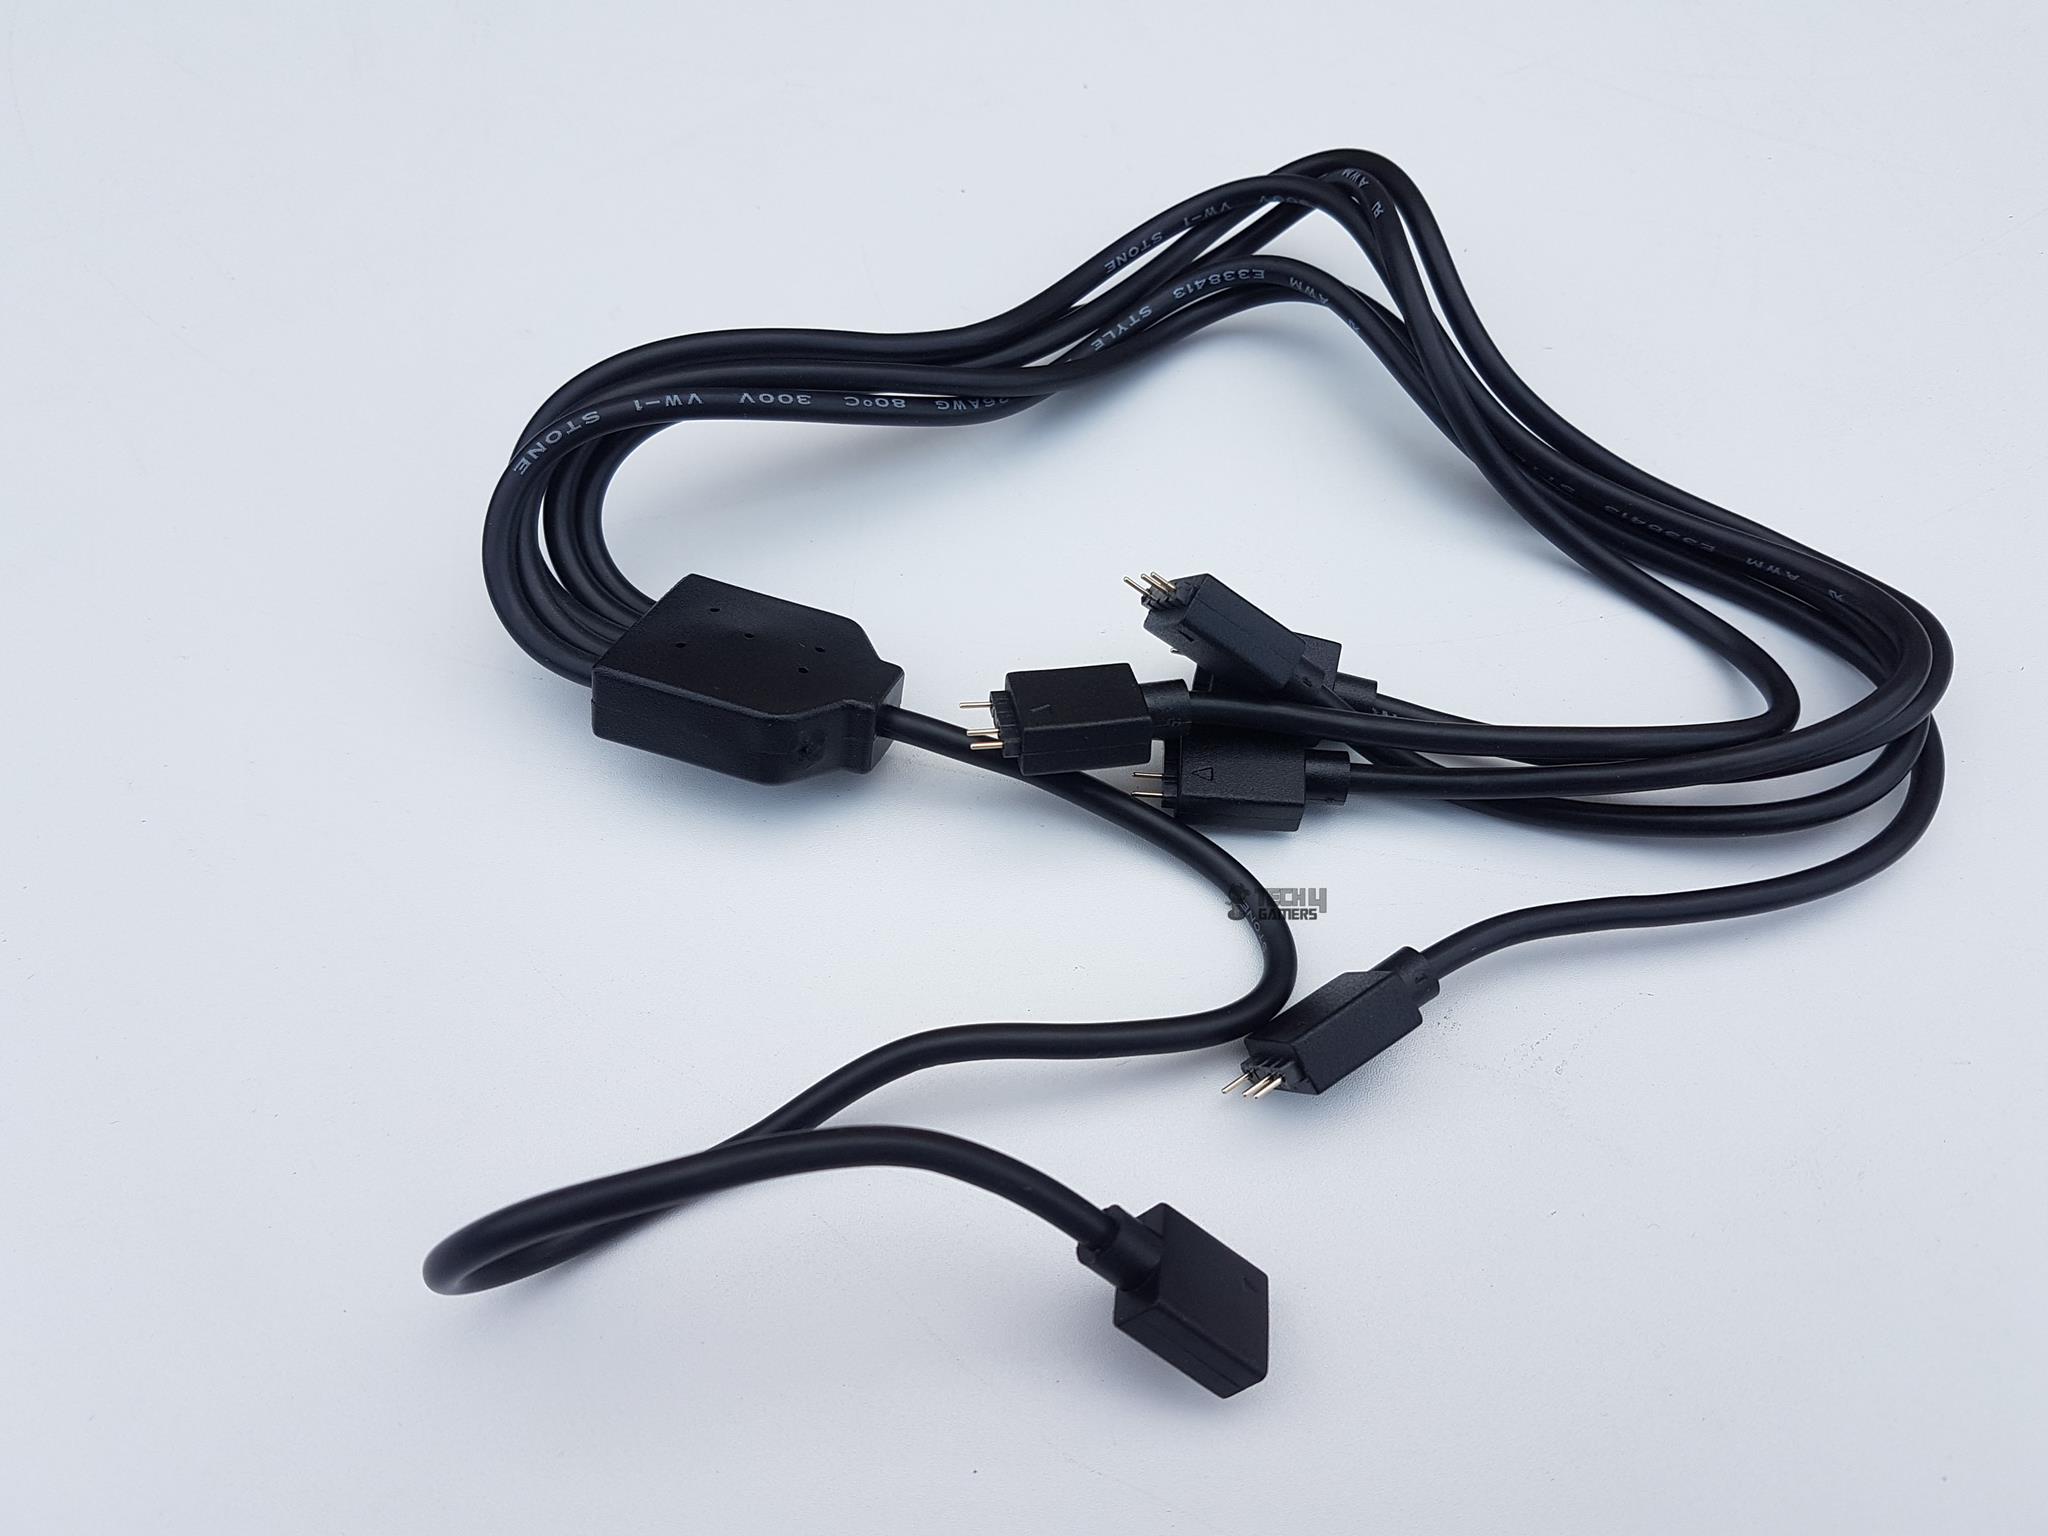
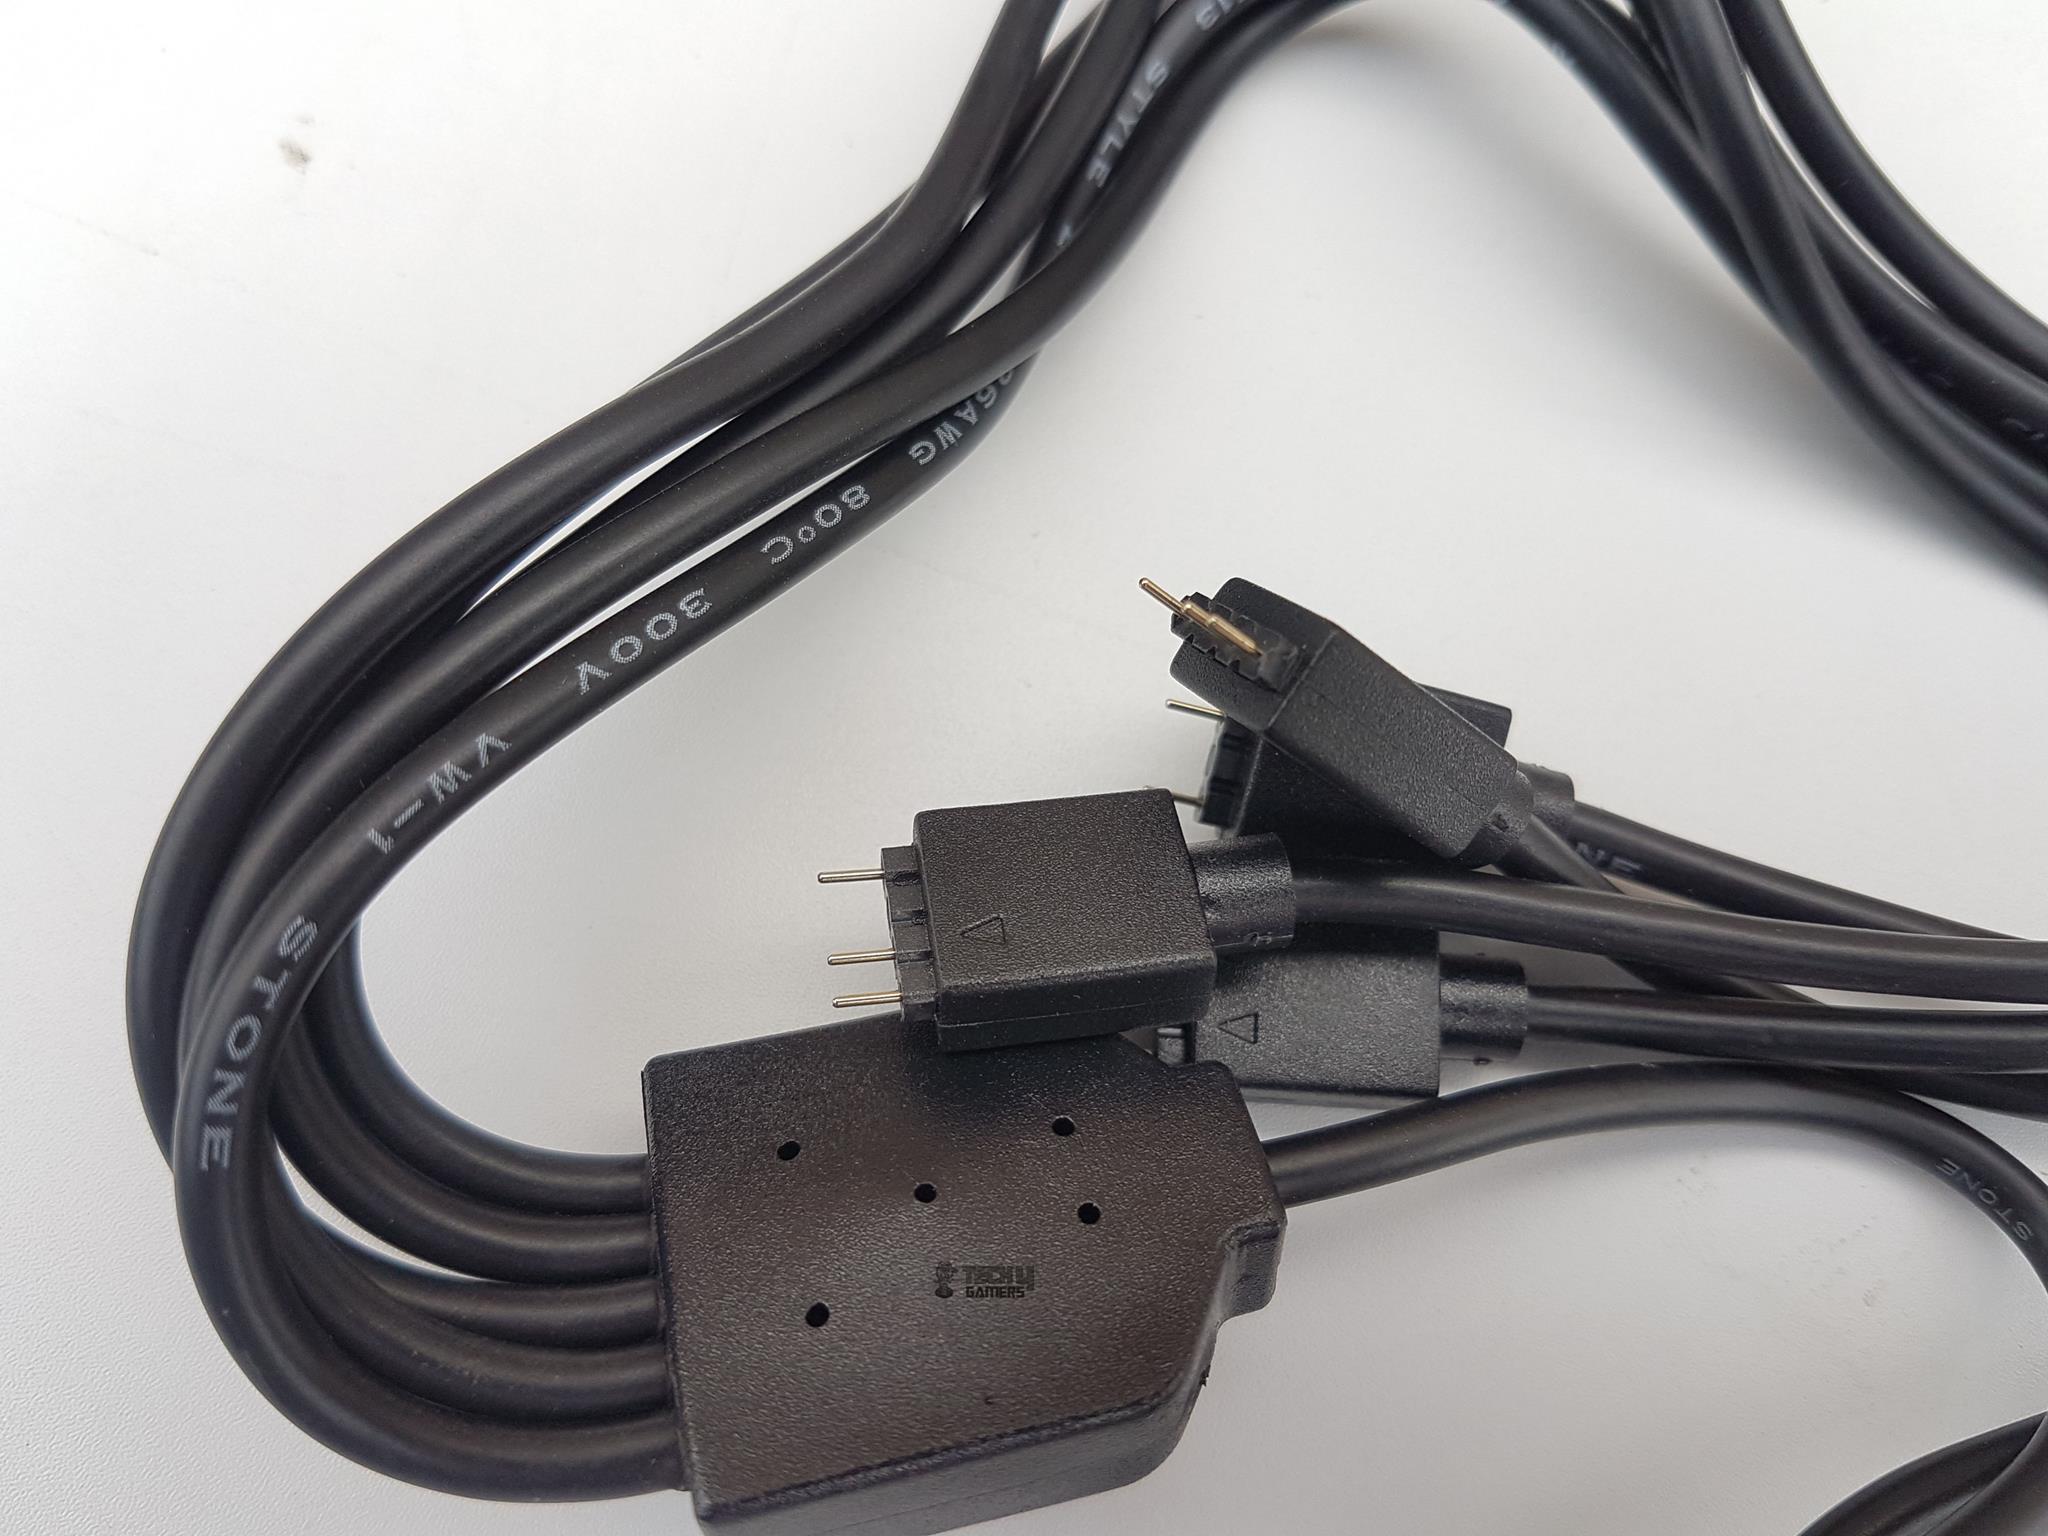
The fans have two cables: a 4-pin power connector (290mm) and an ARGB LED cable (285mm) with sleeves. A 3-way fan splitter cable (225mm) features two black connectors and one beige connector (4-pin), following a standard design.
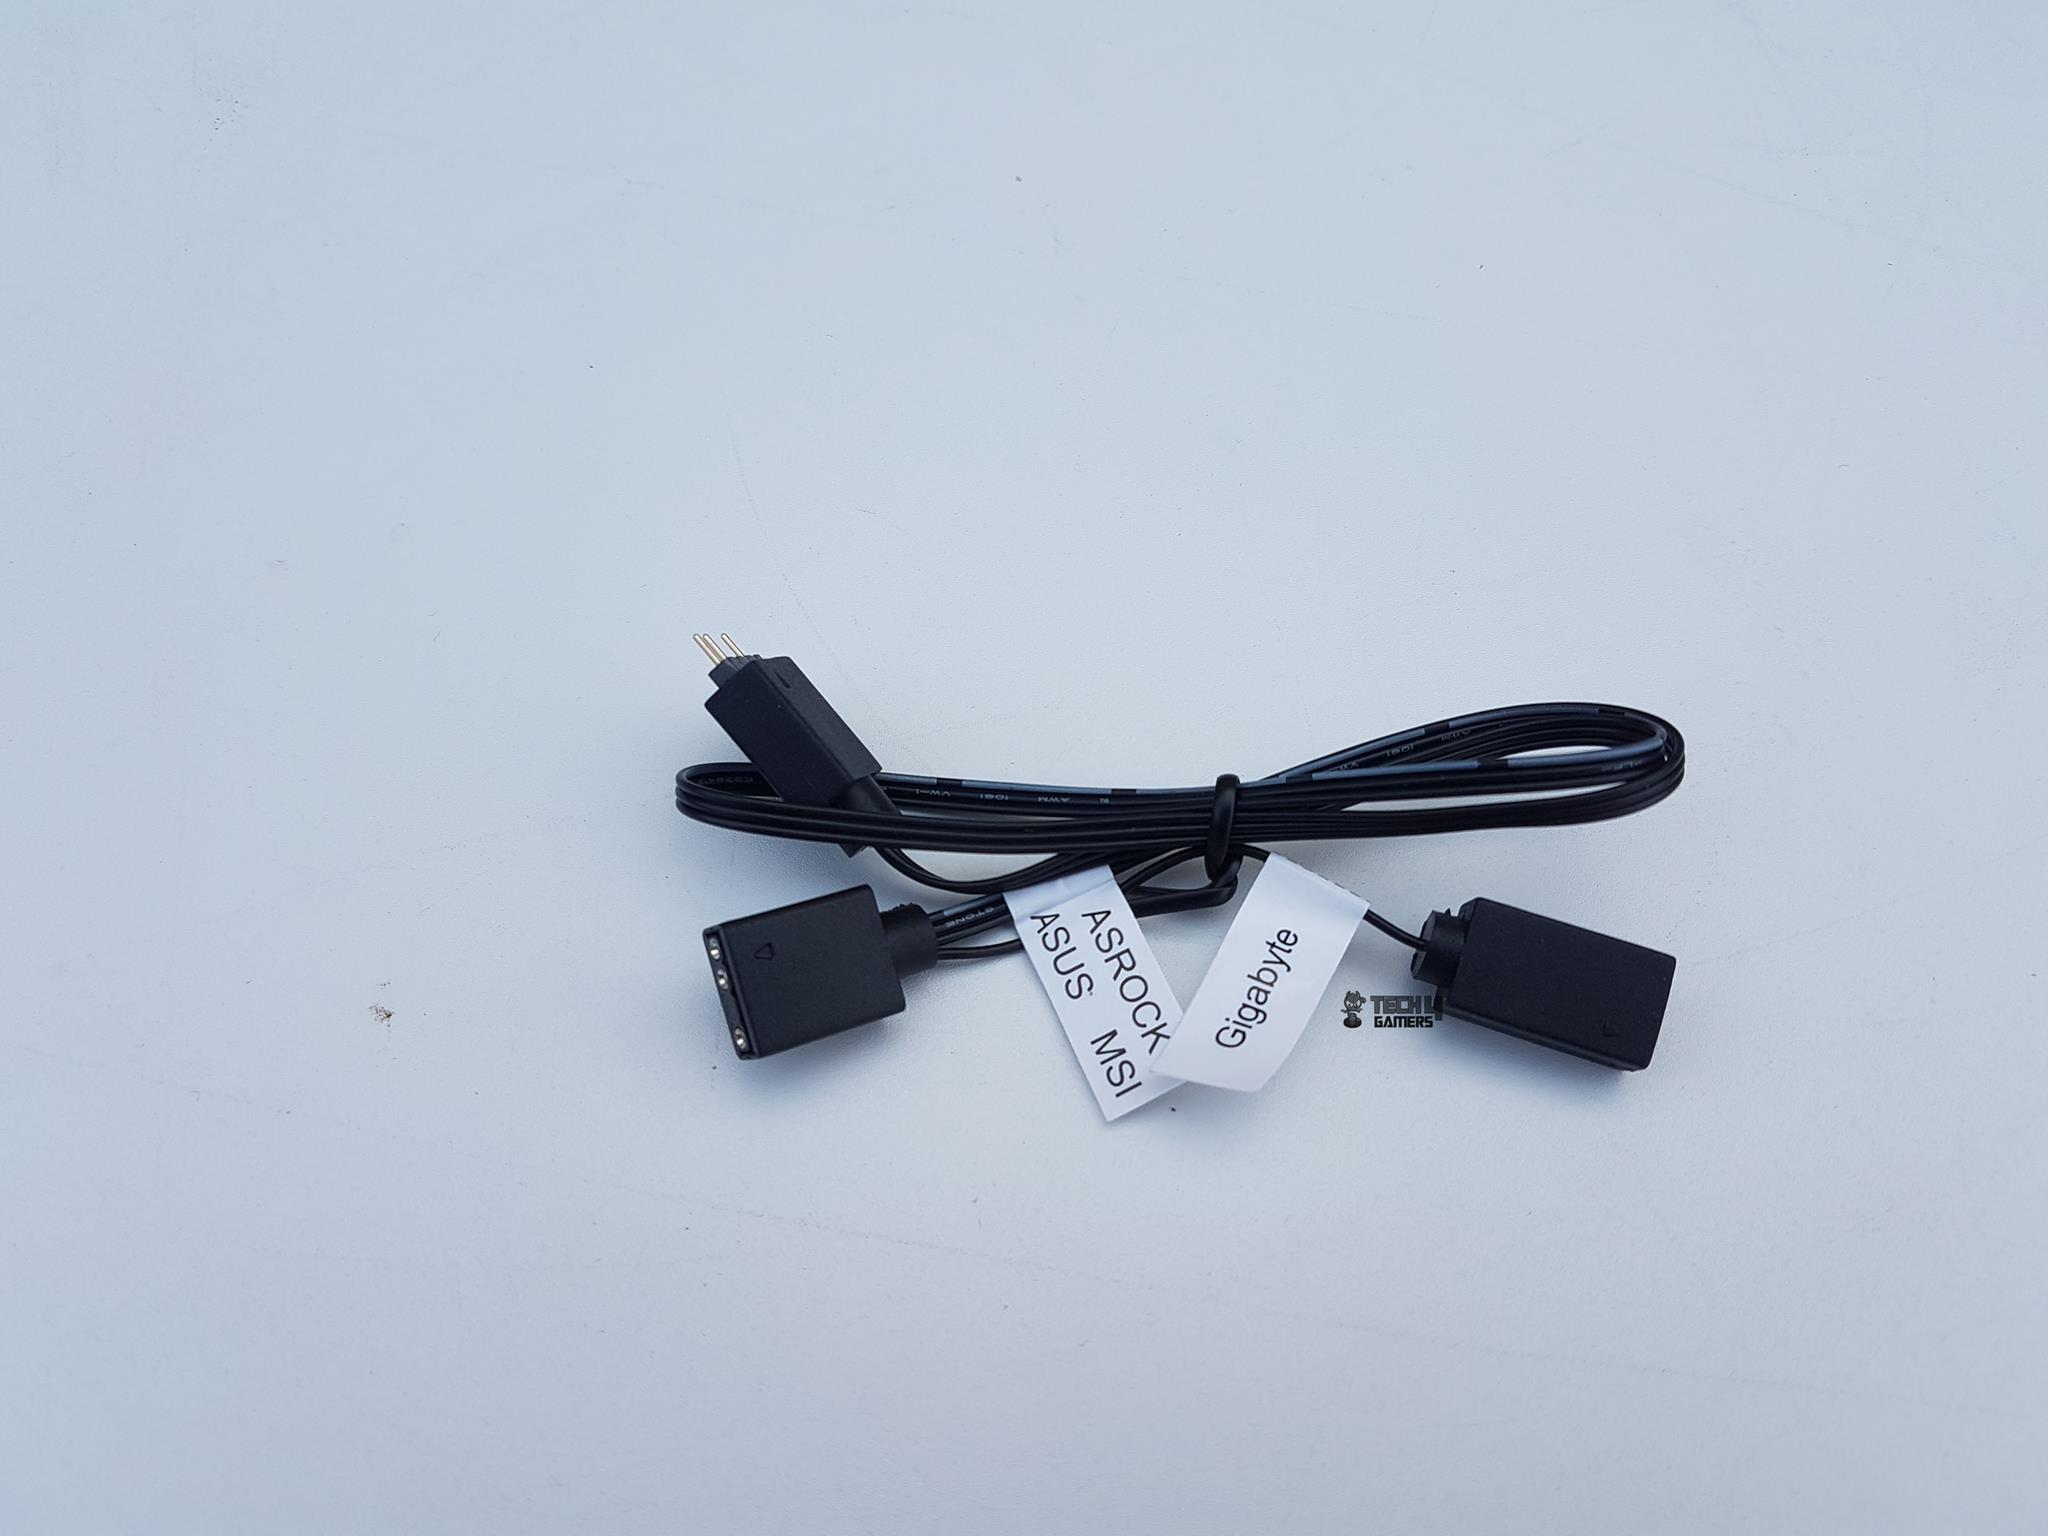
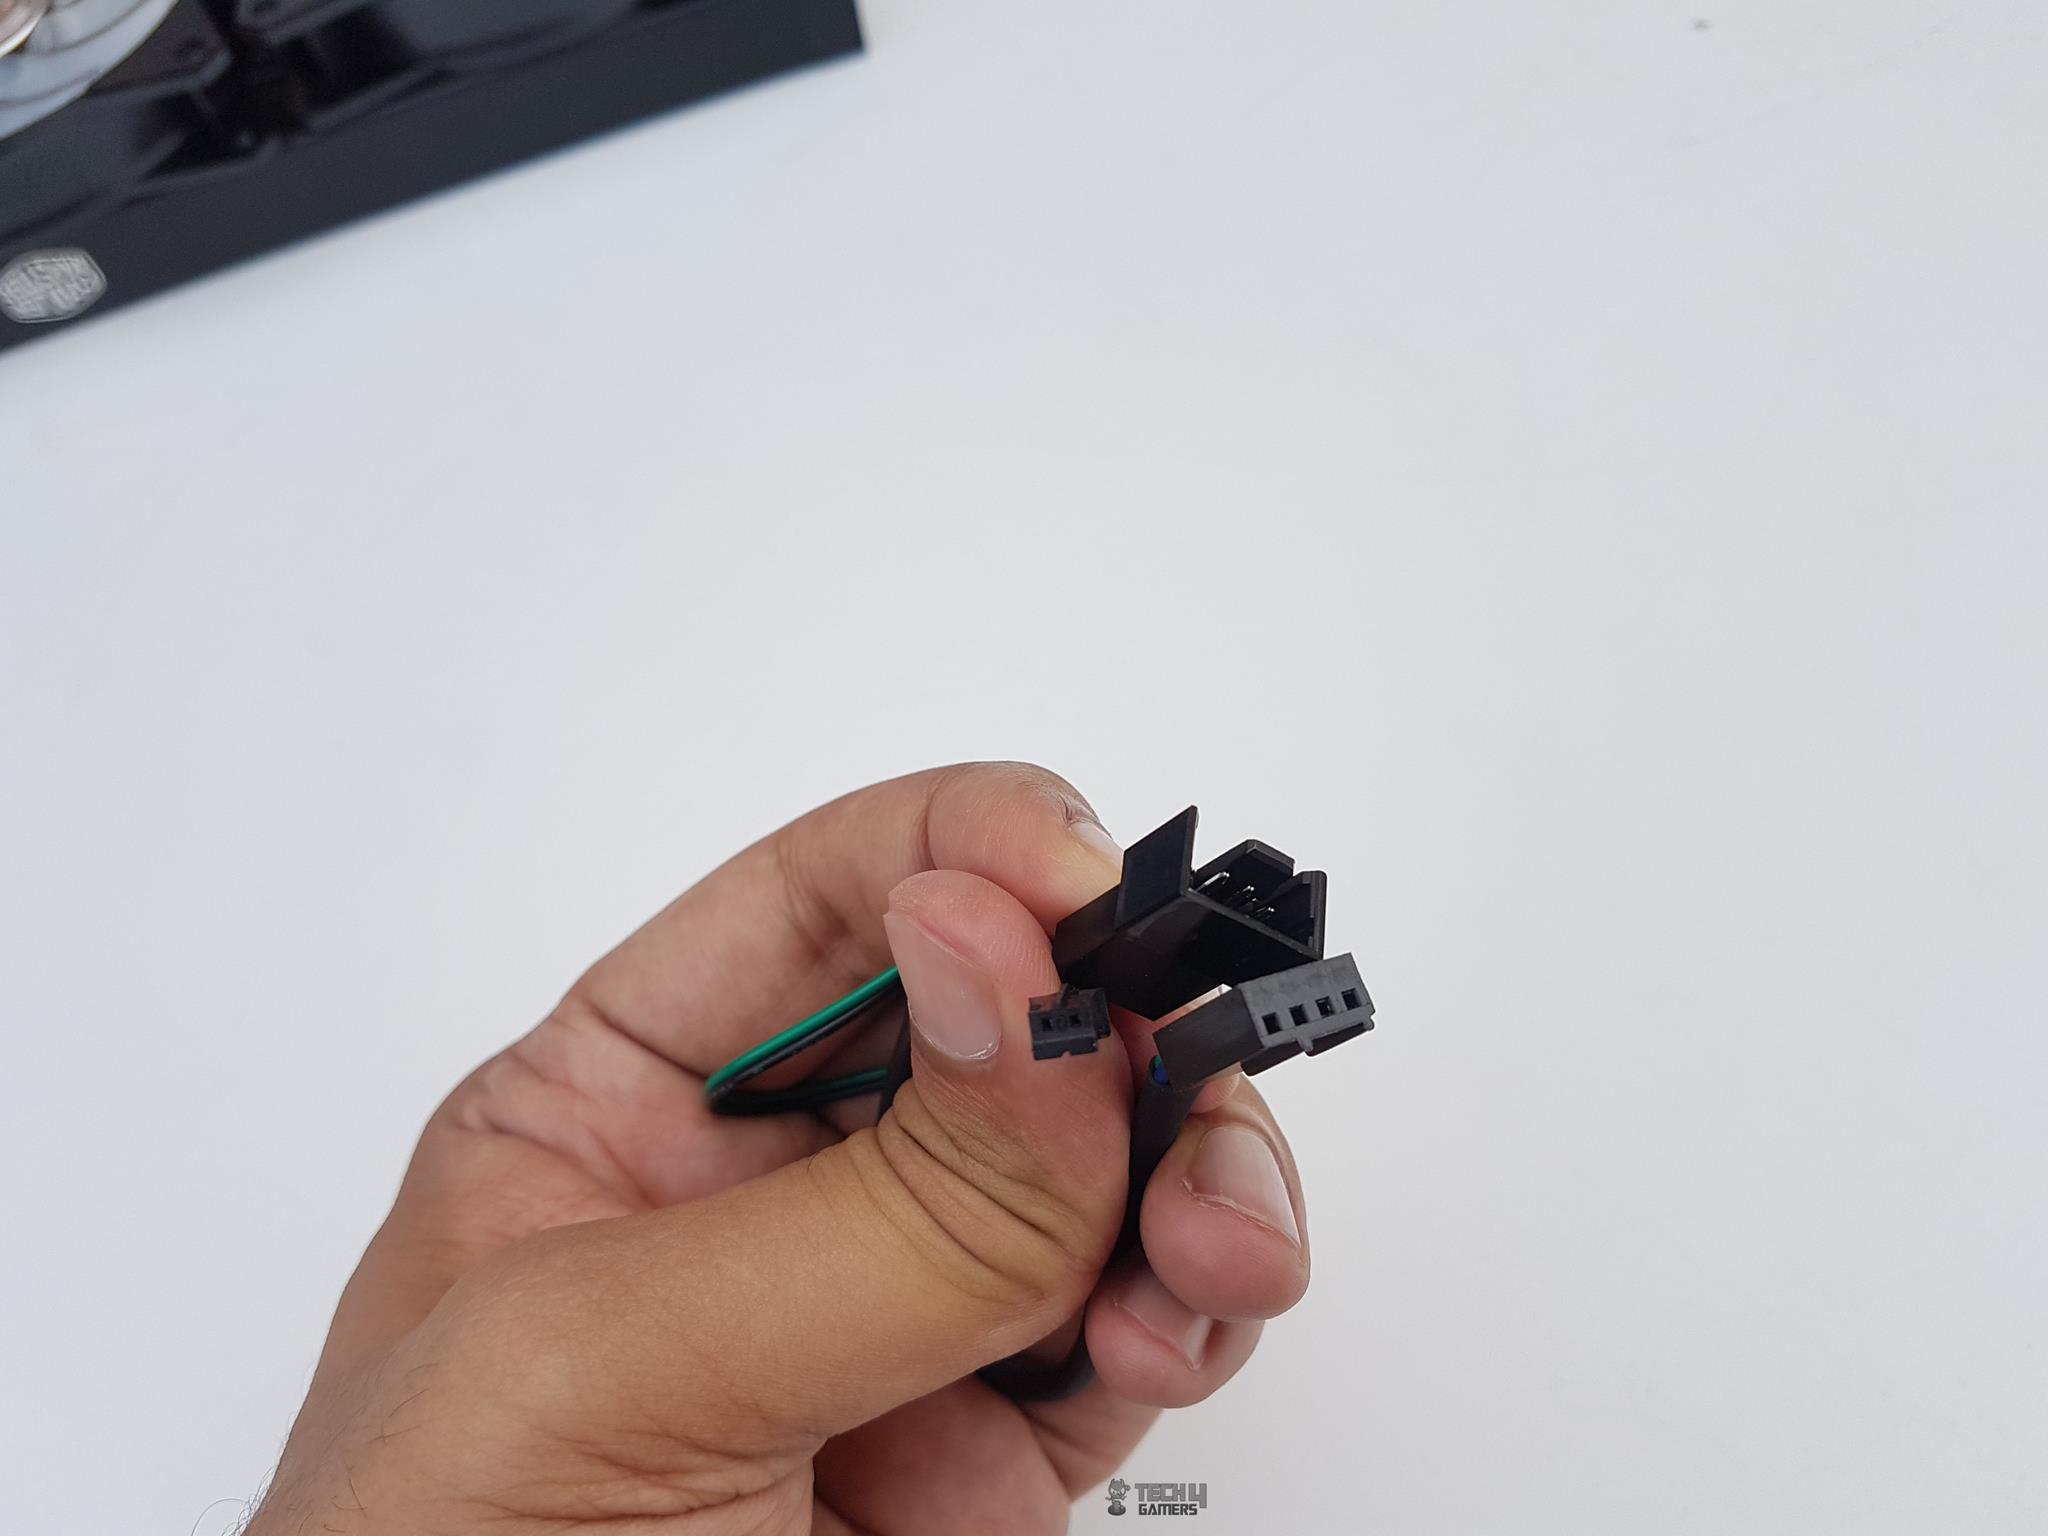
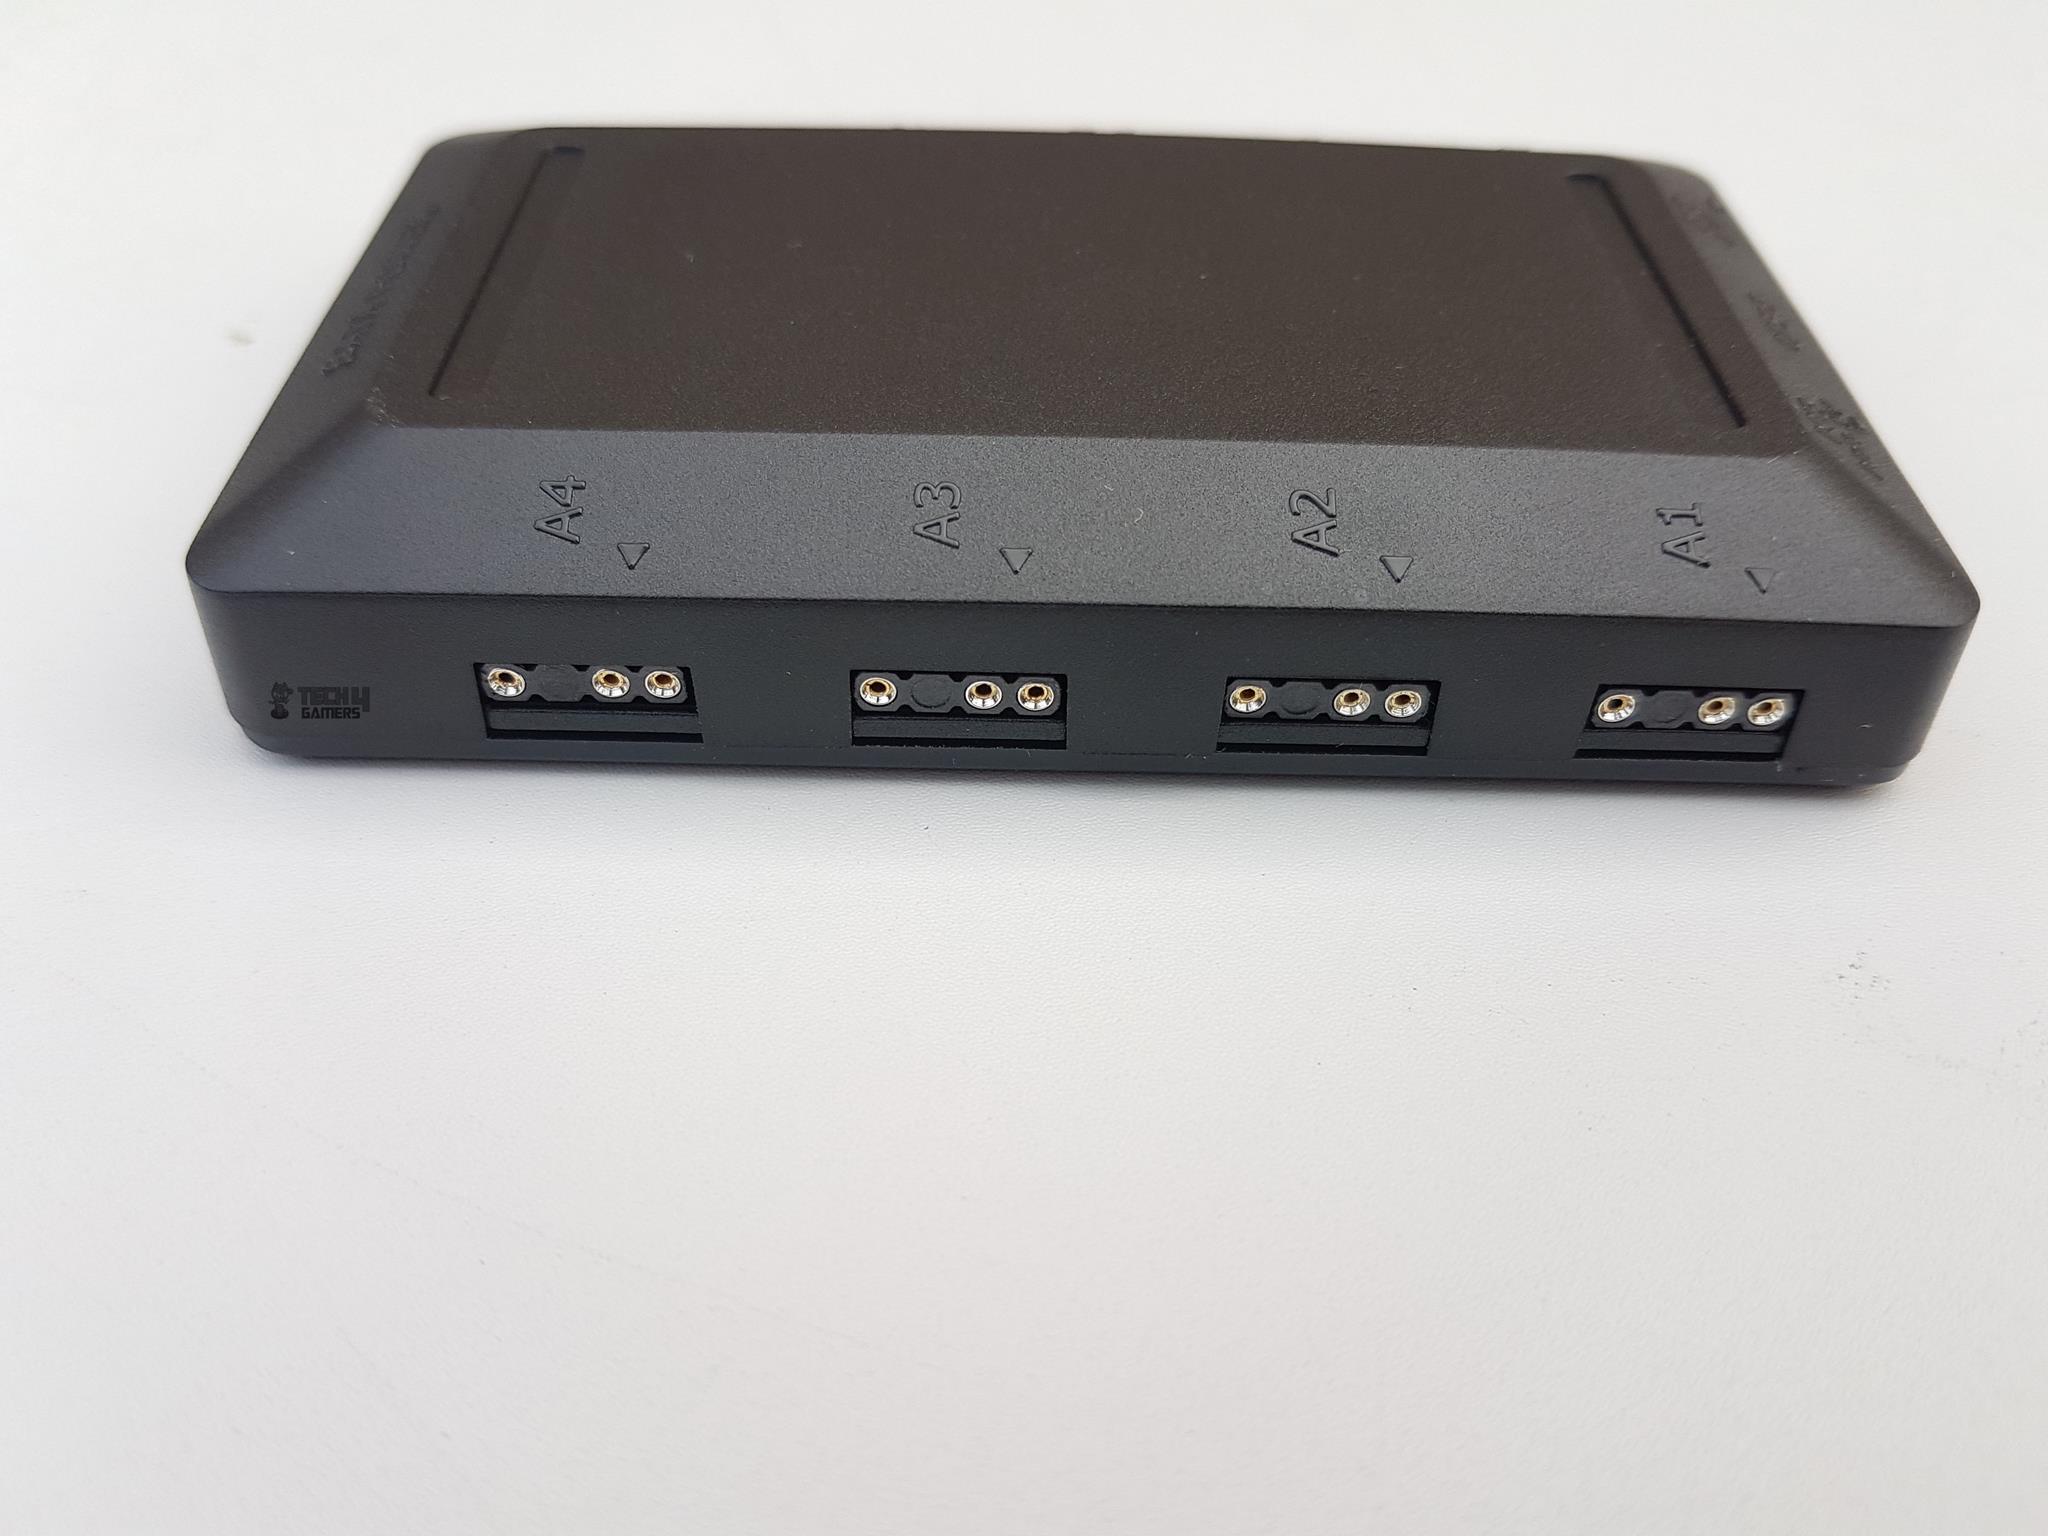
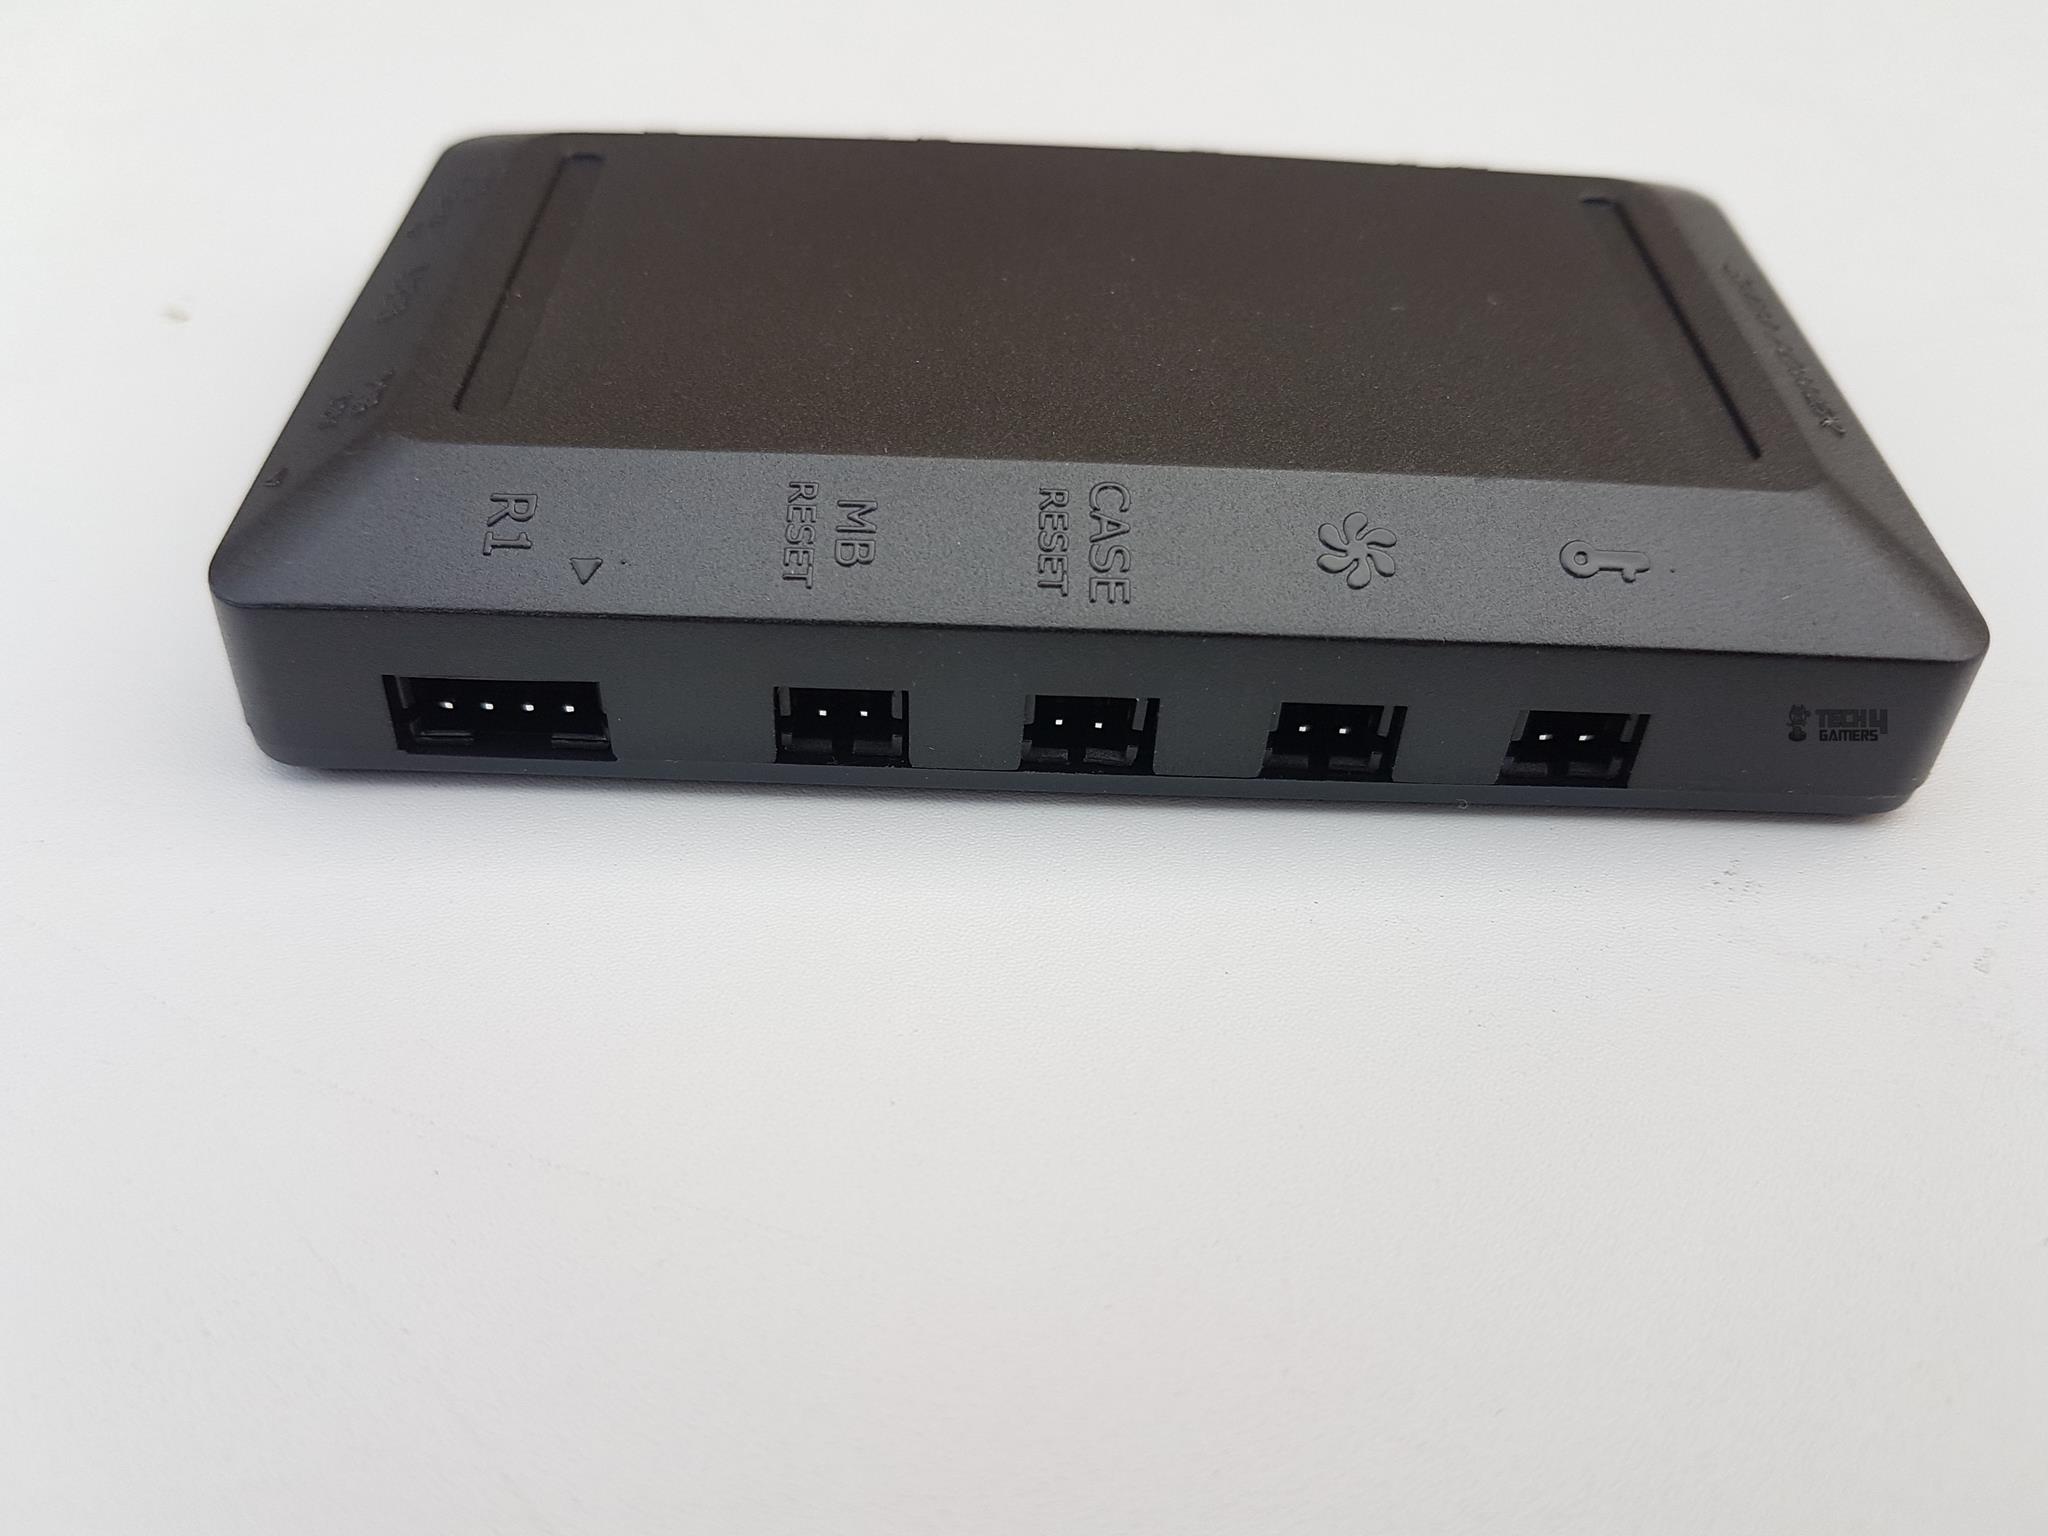
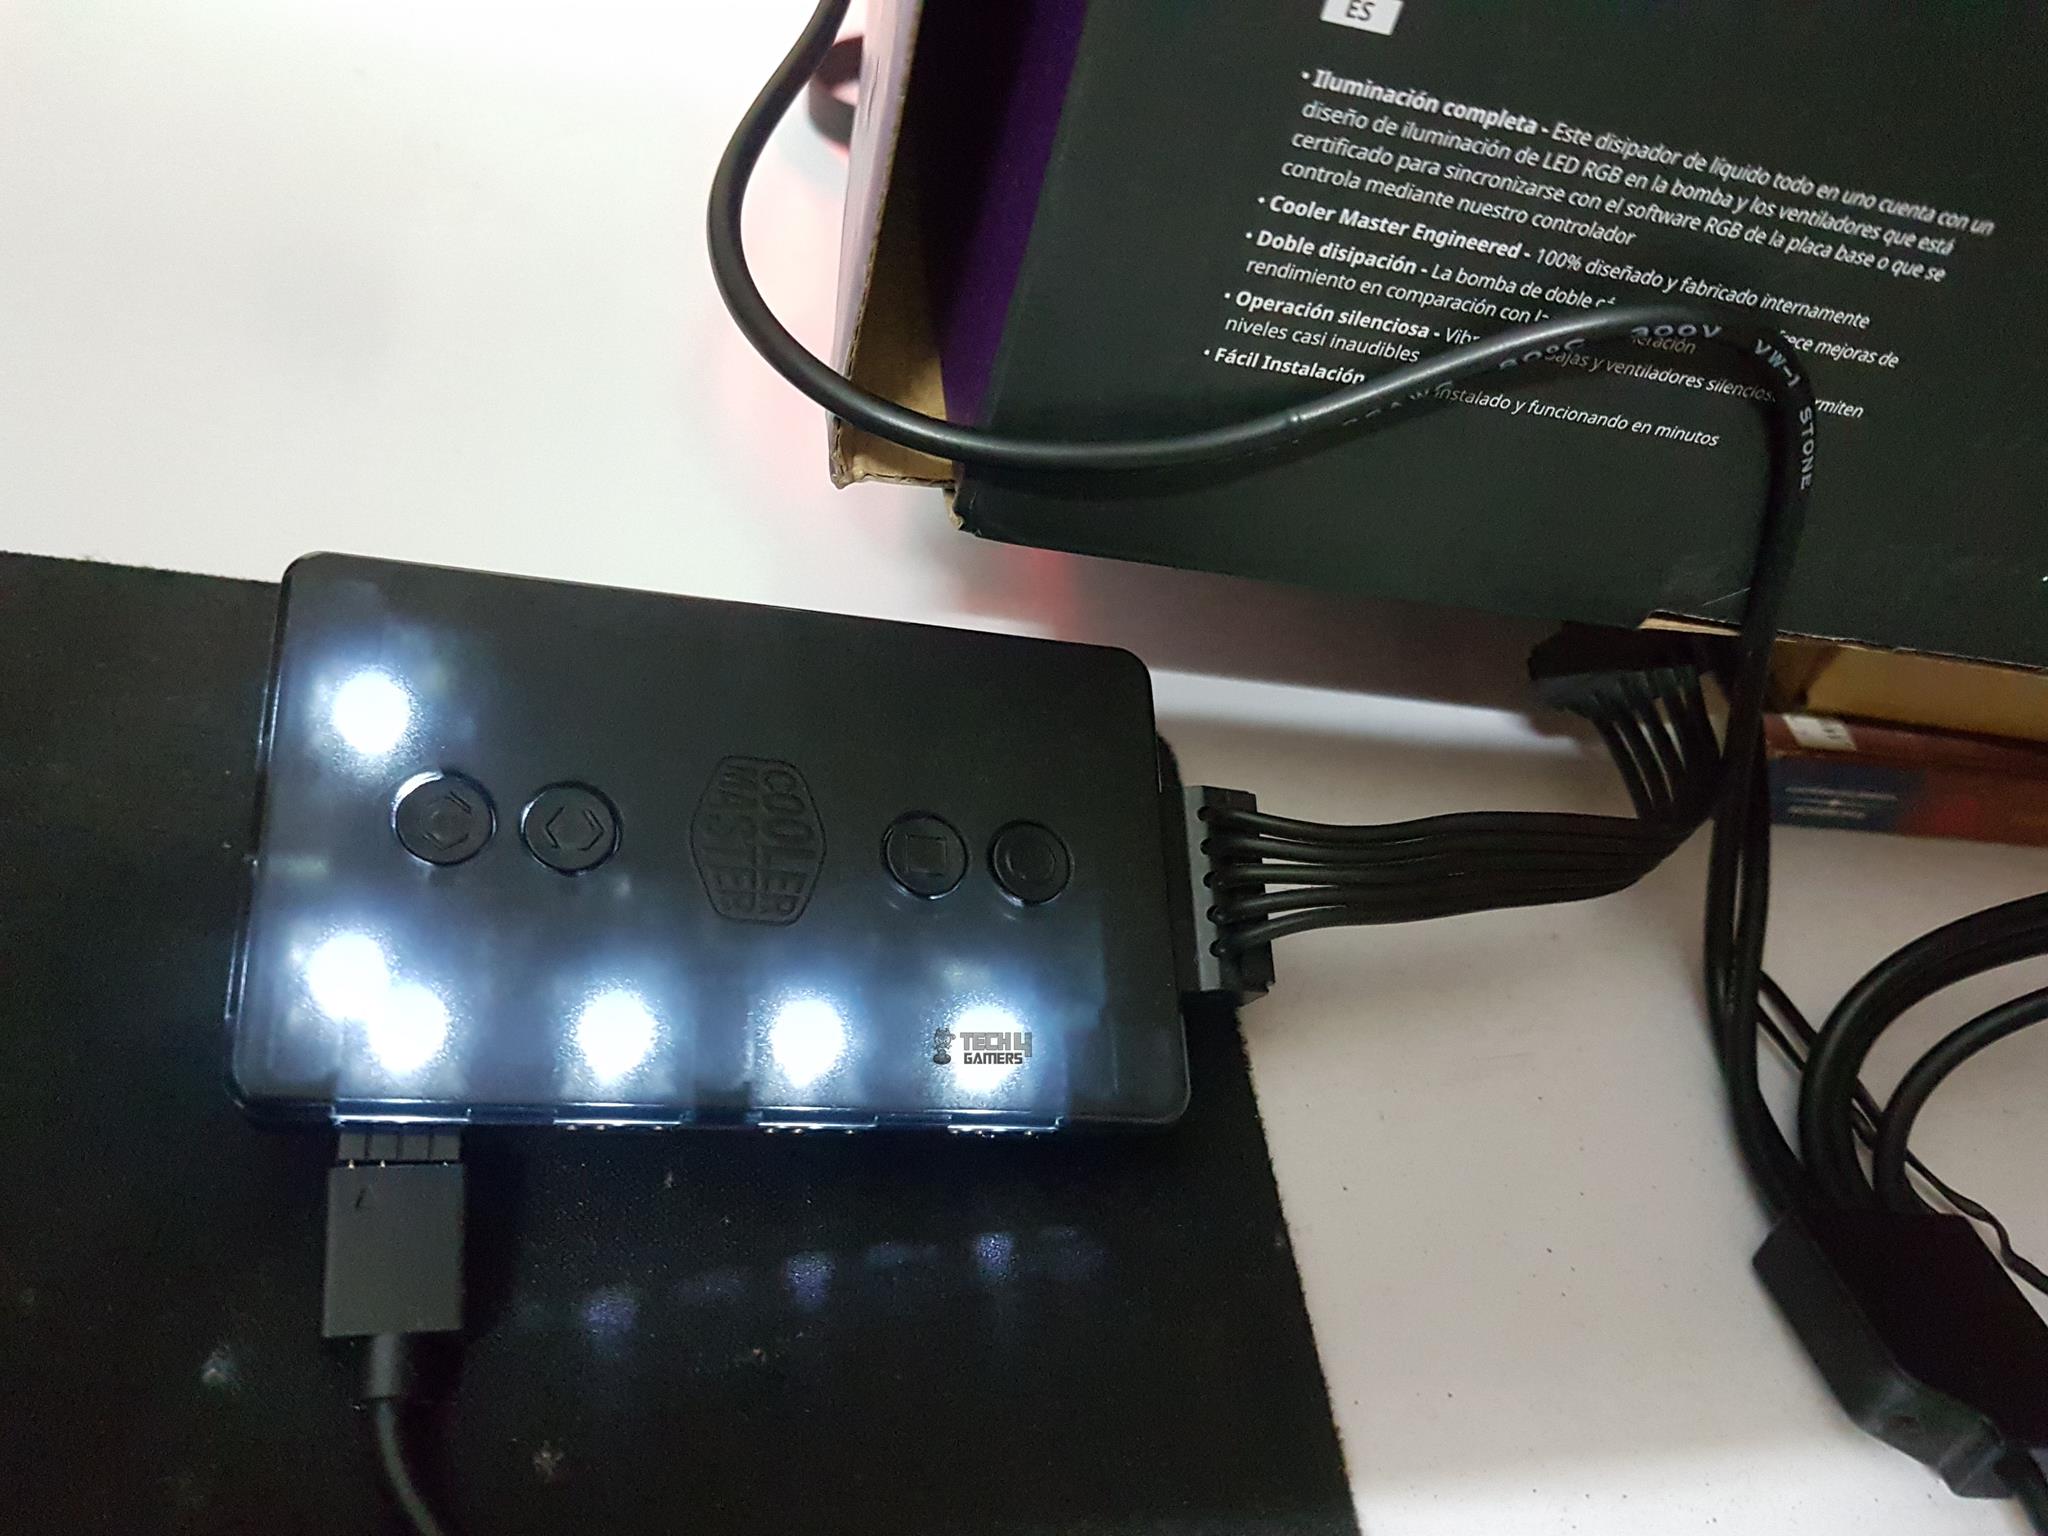
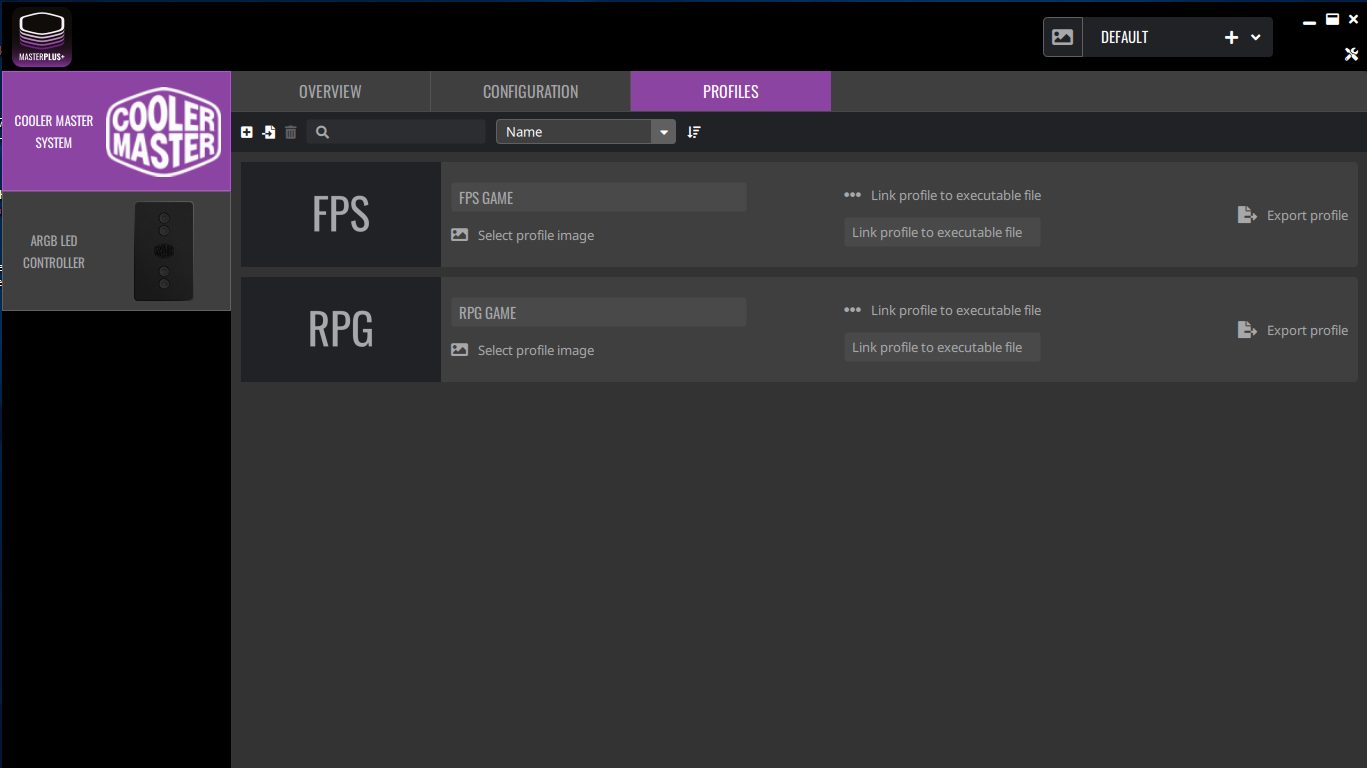
ML360R RGB Lighting Gear
Let’s take a look at what hardware and accessories Cooler Master has included.
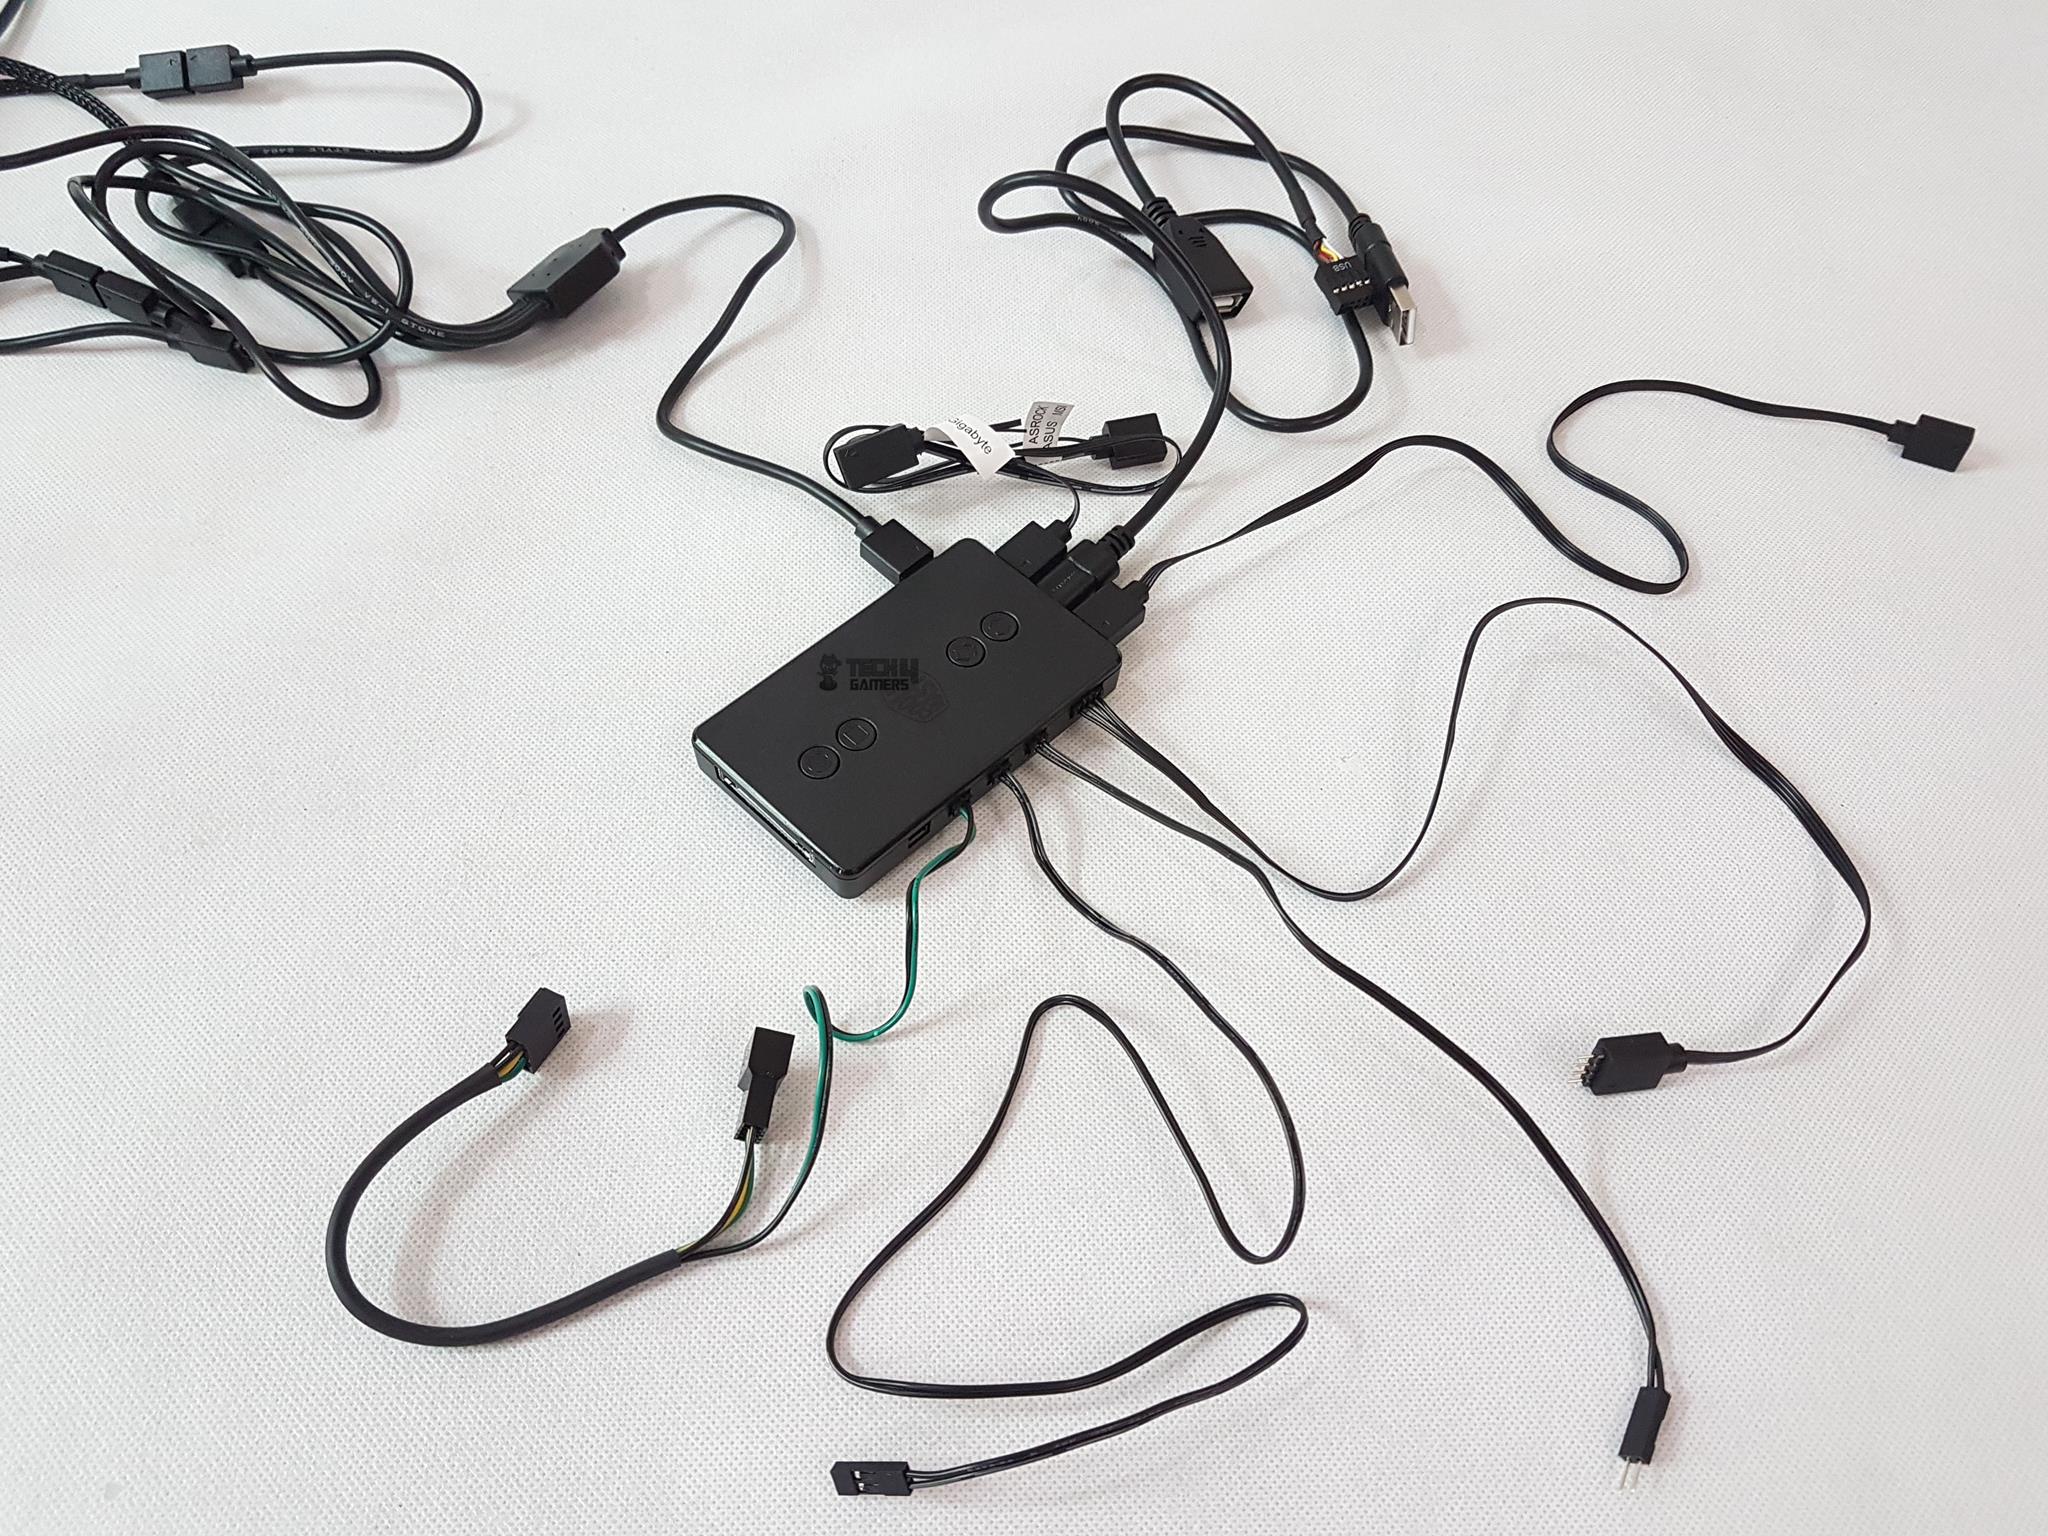


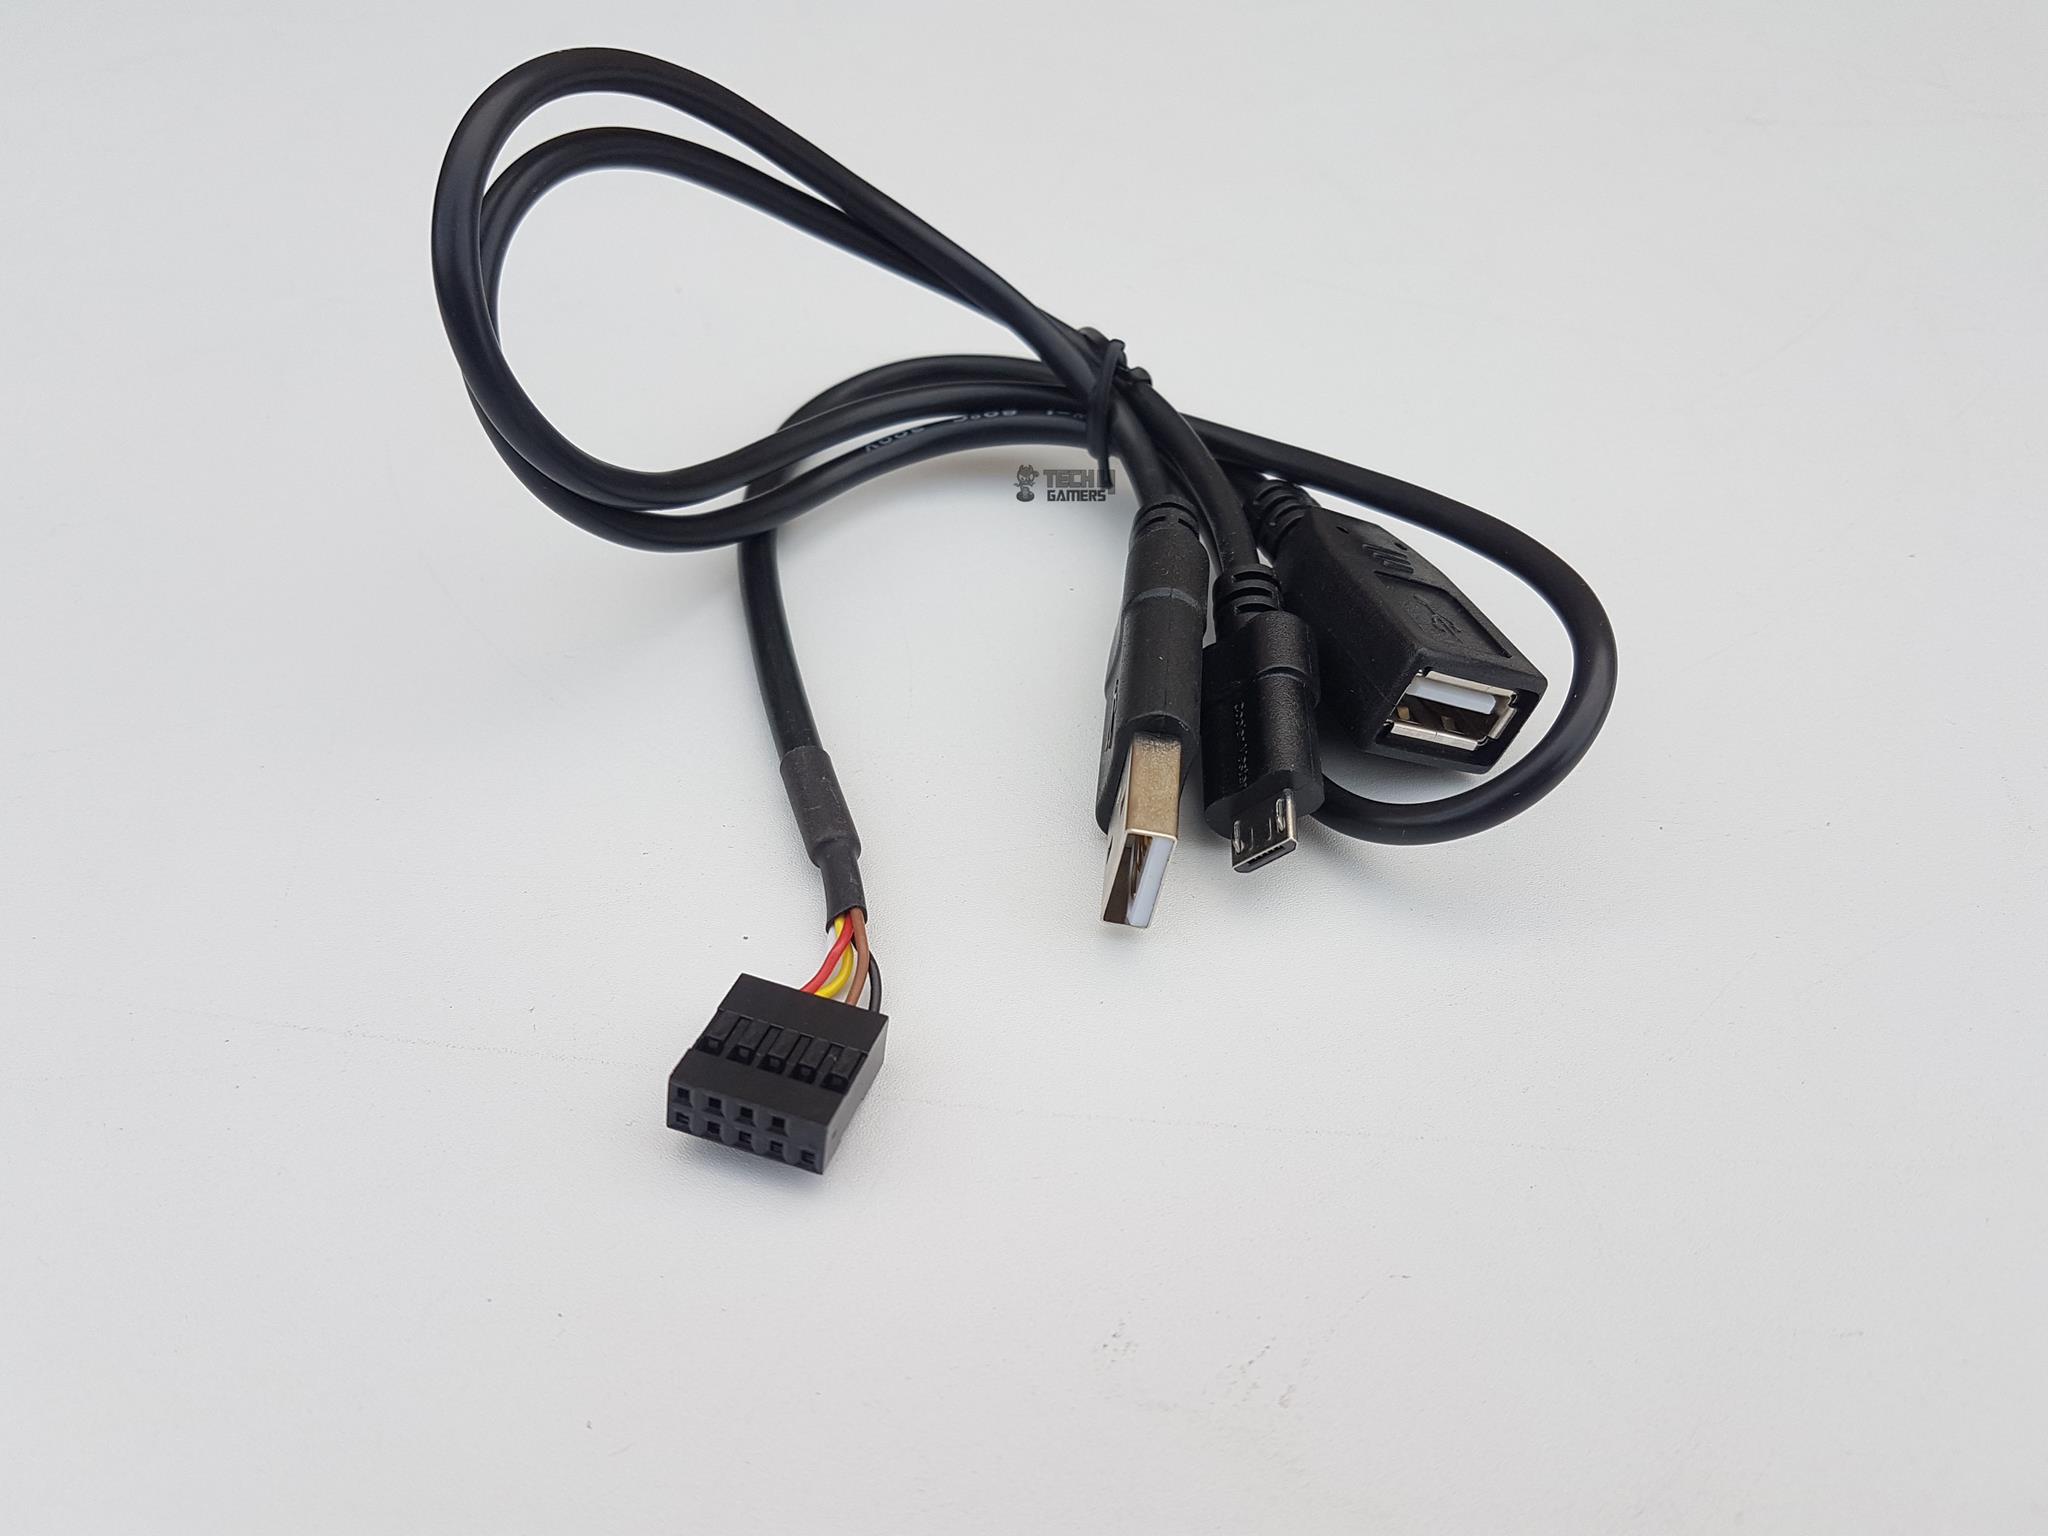
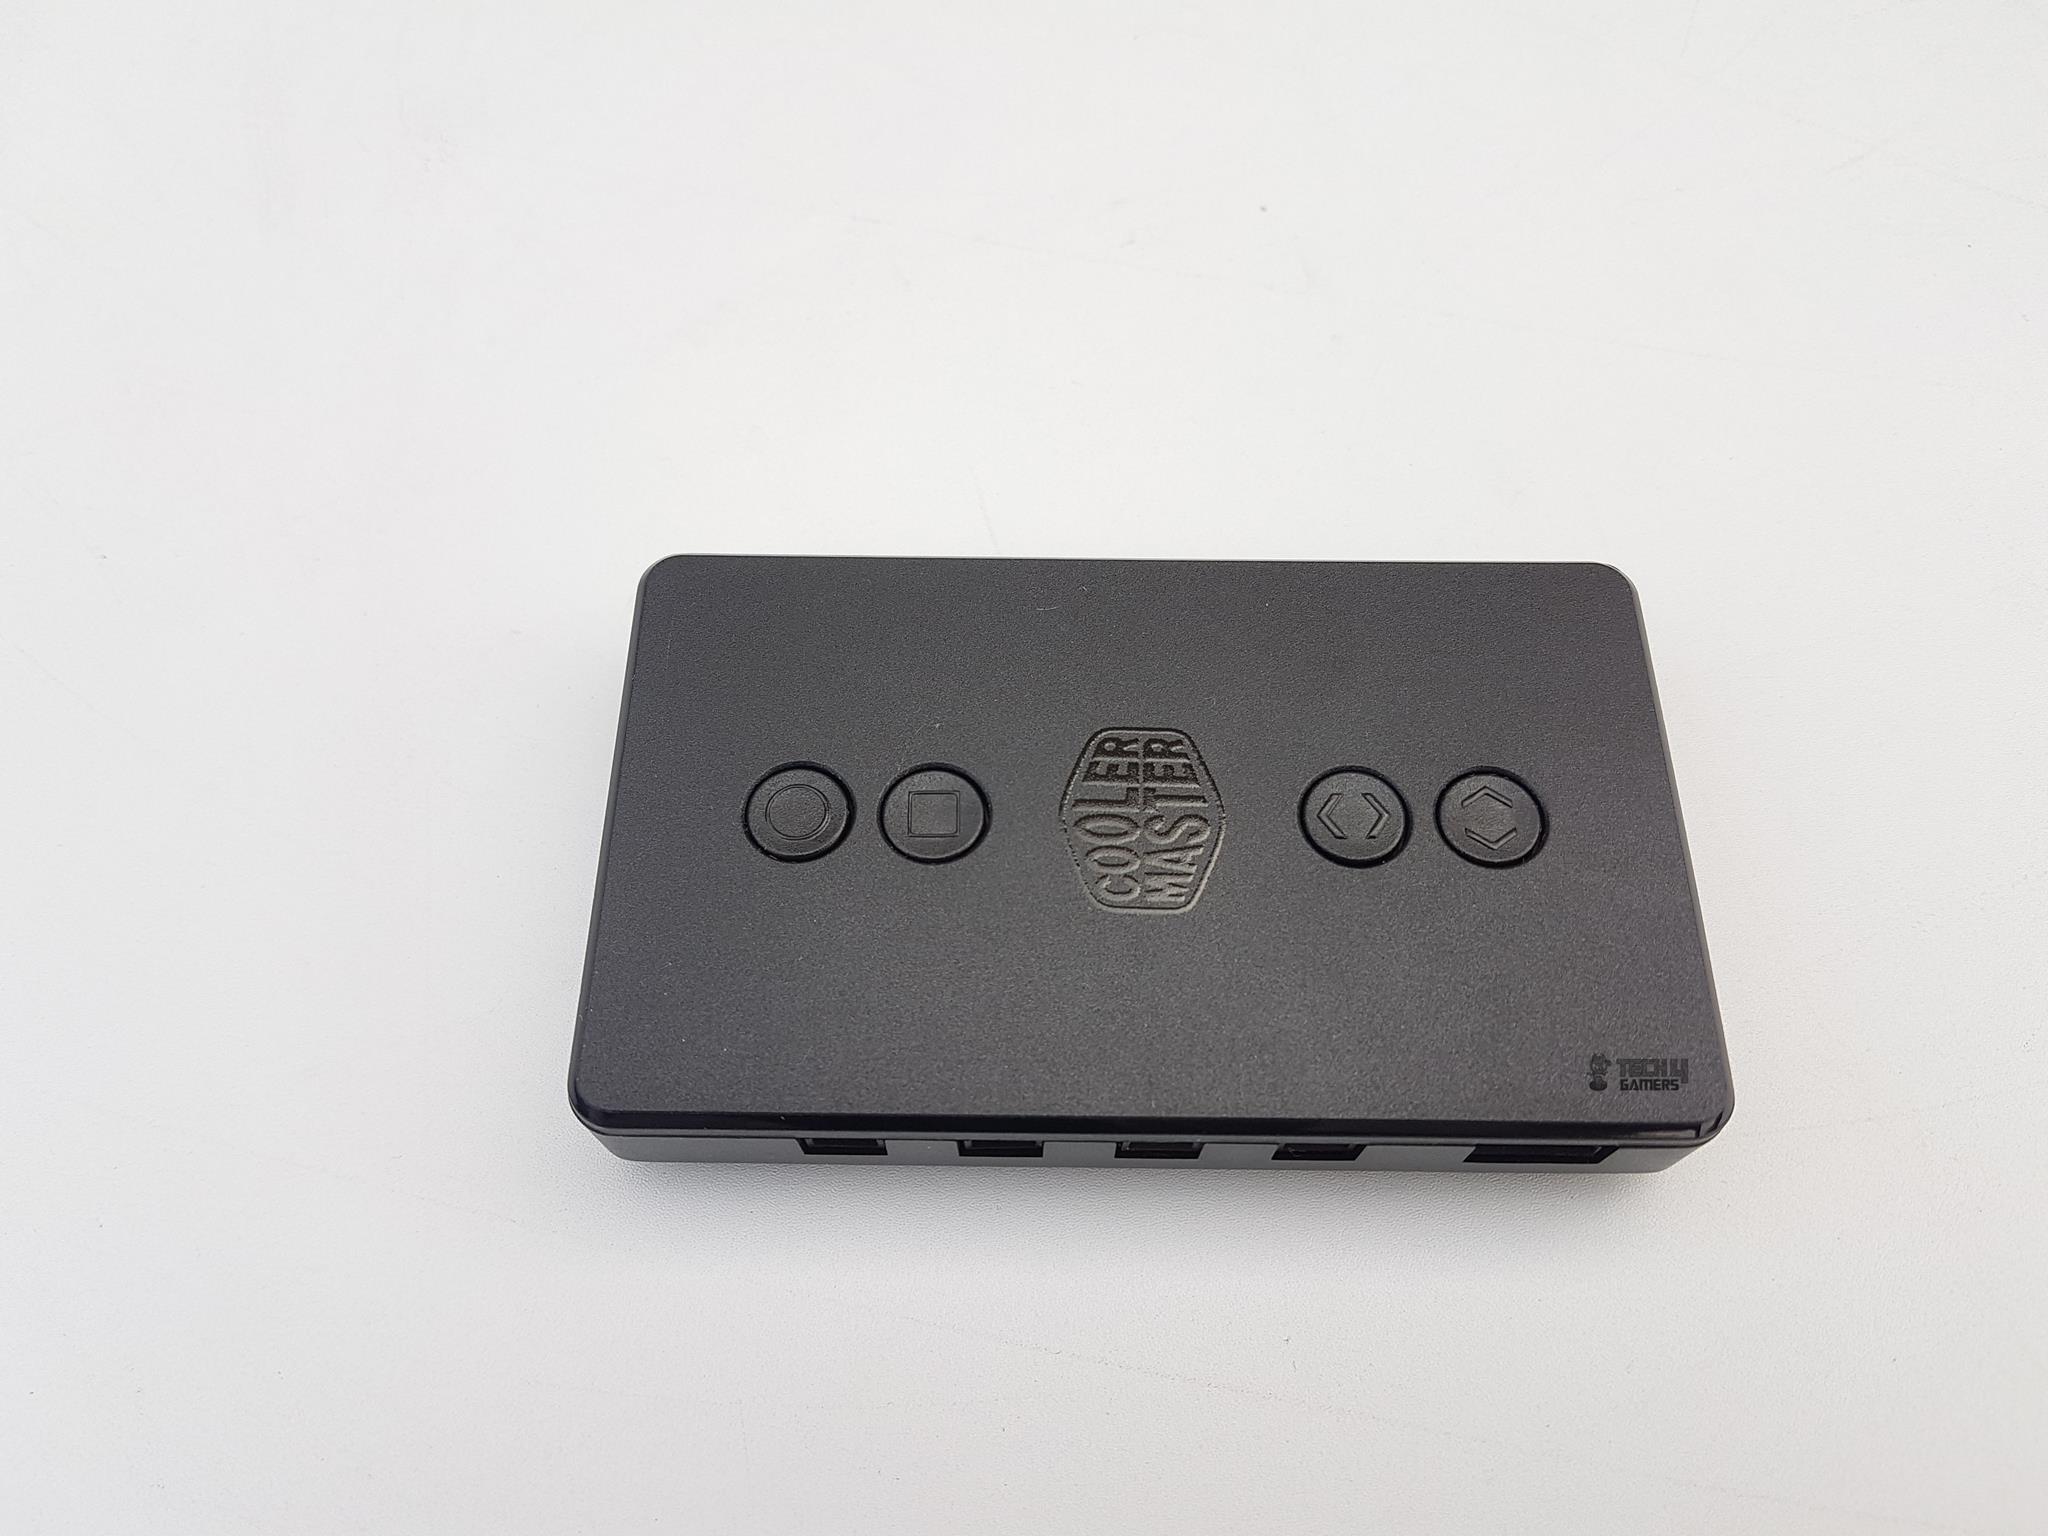


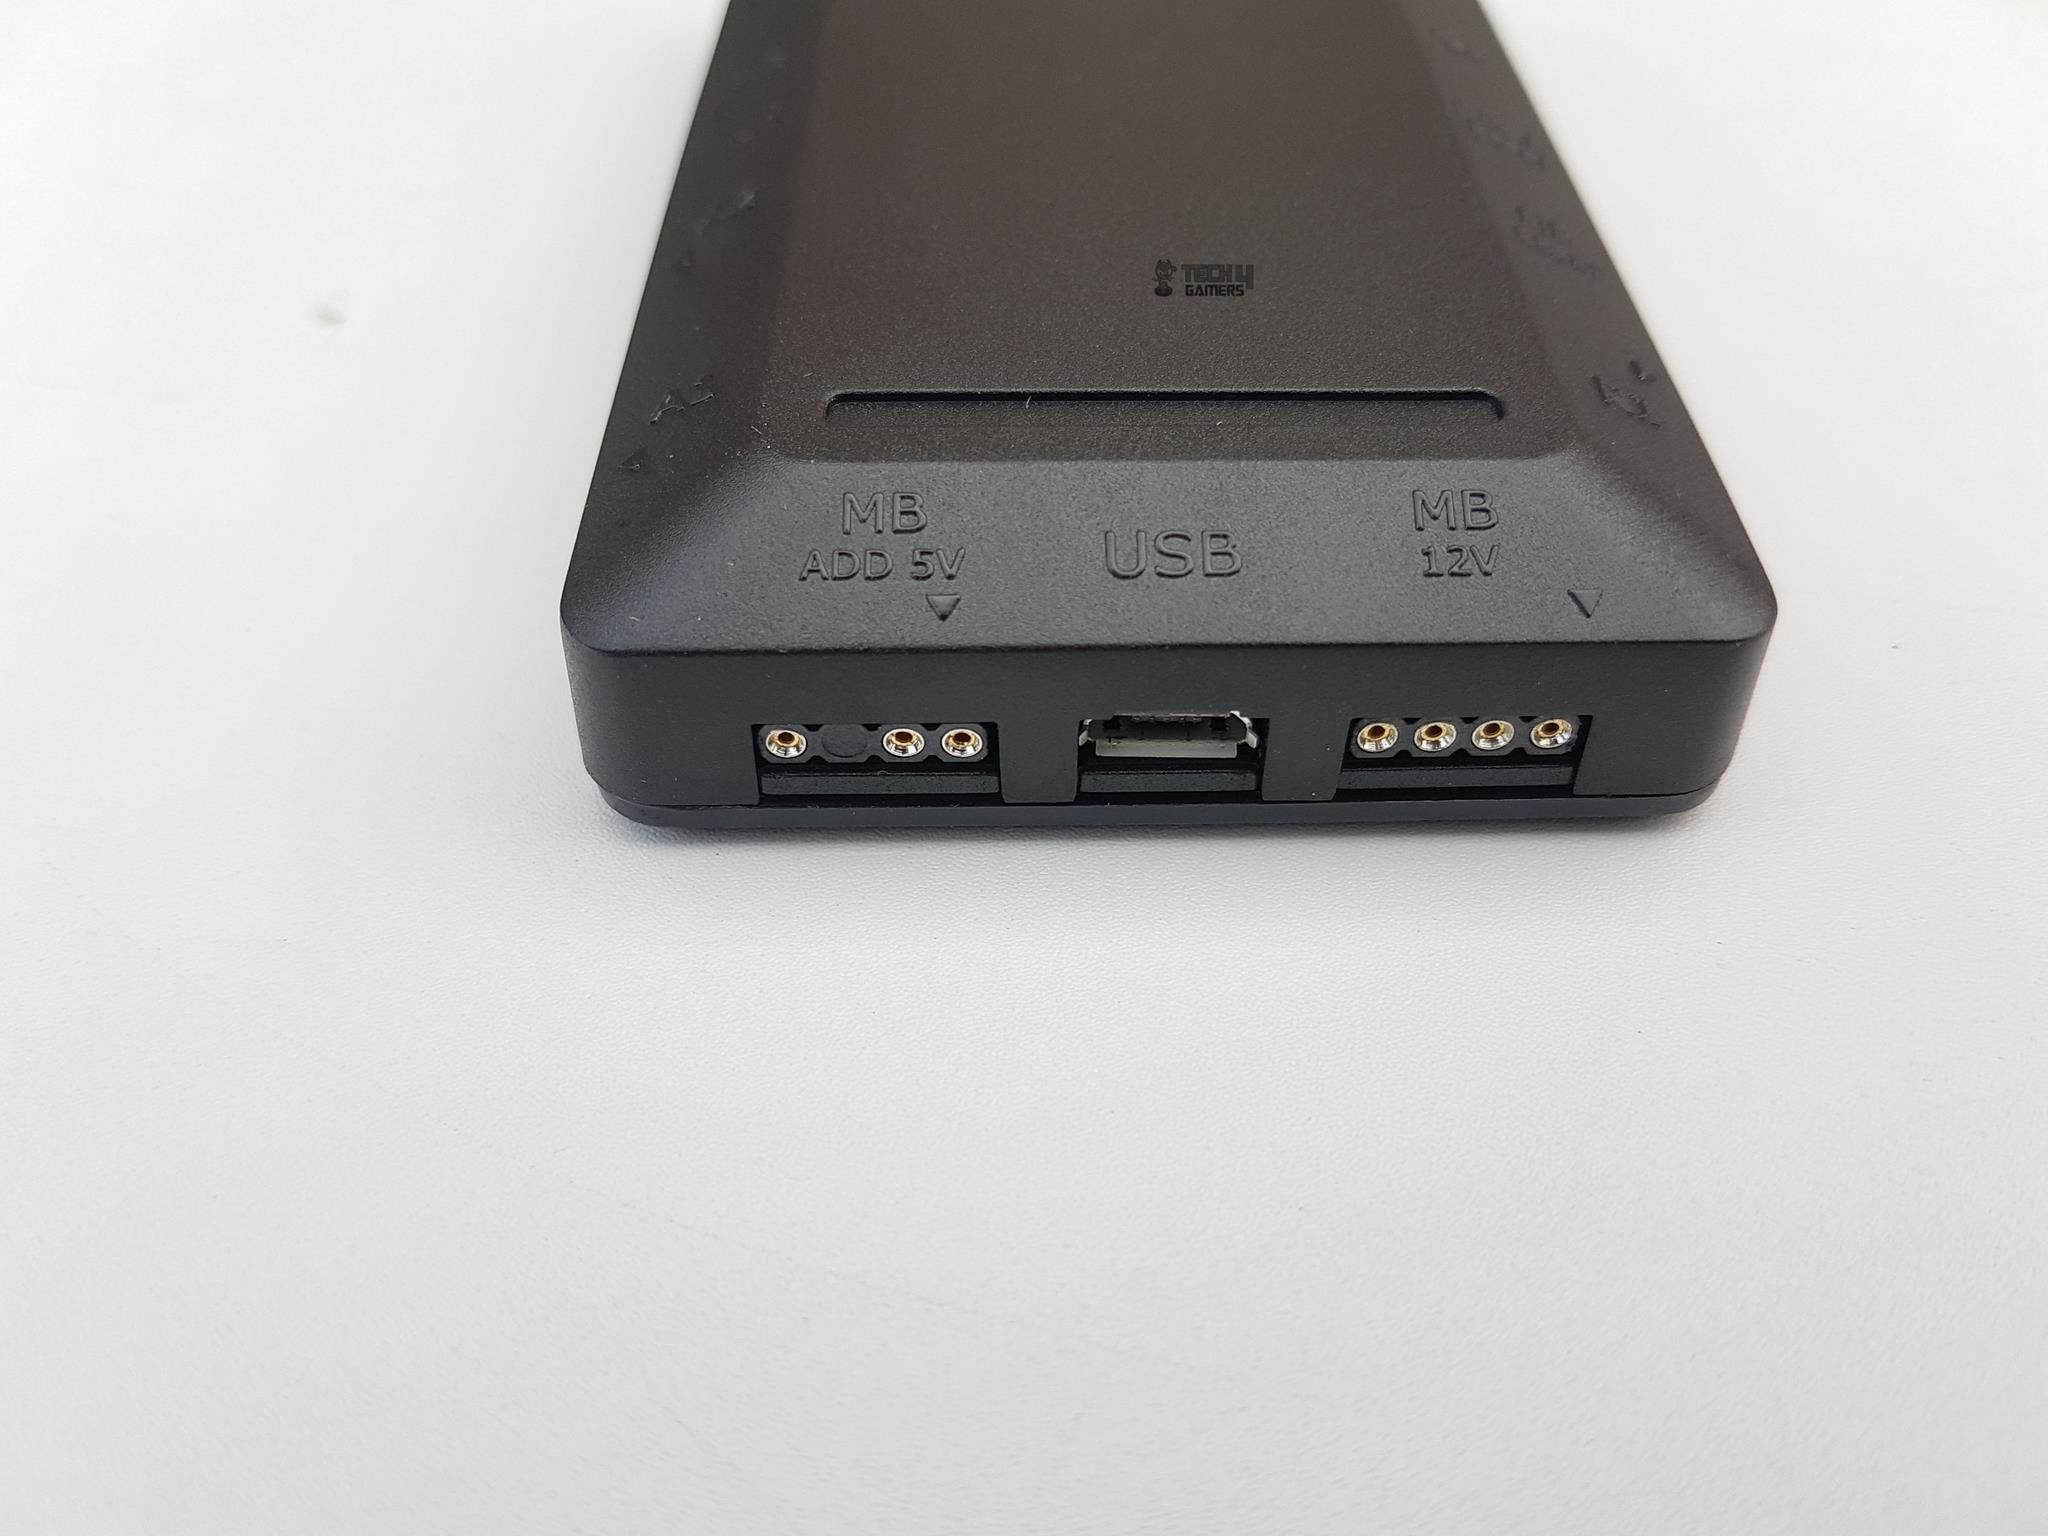
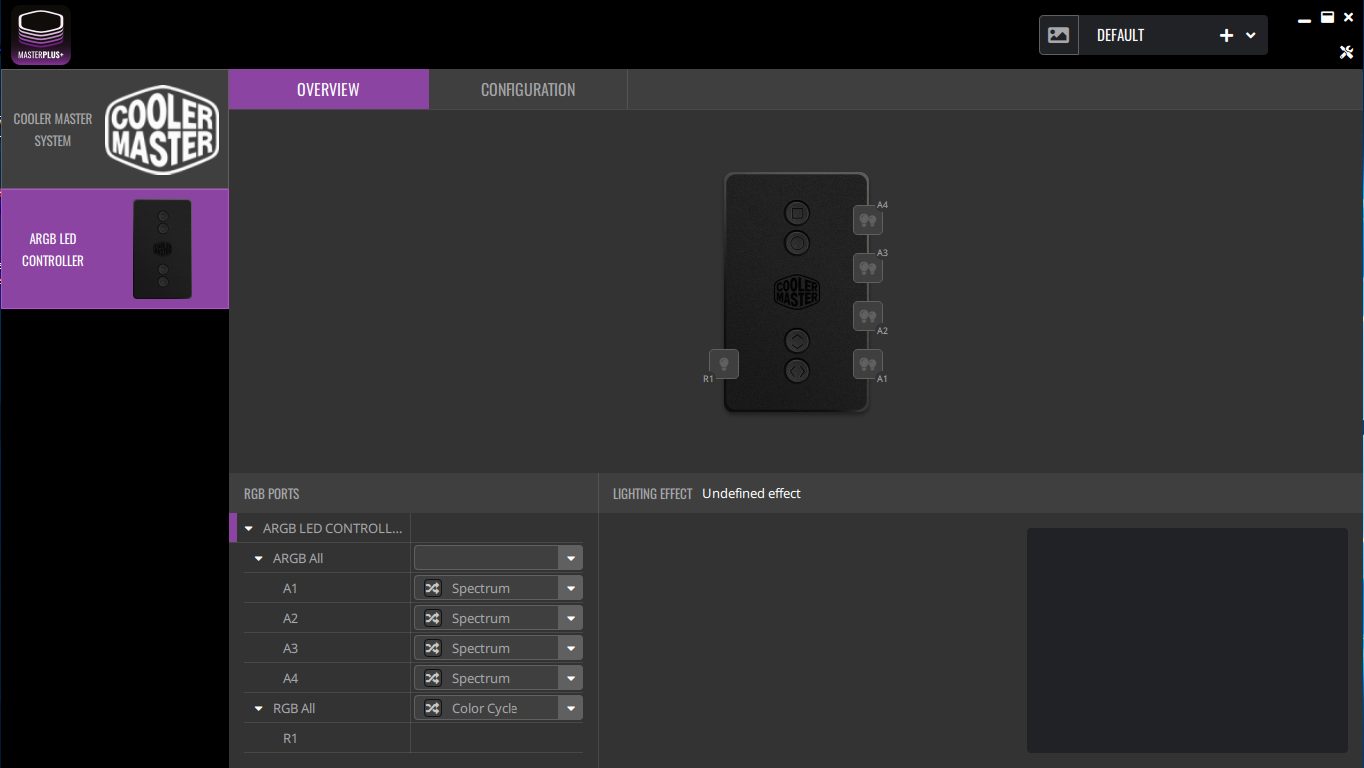
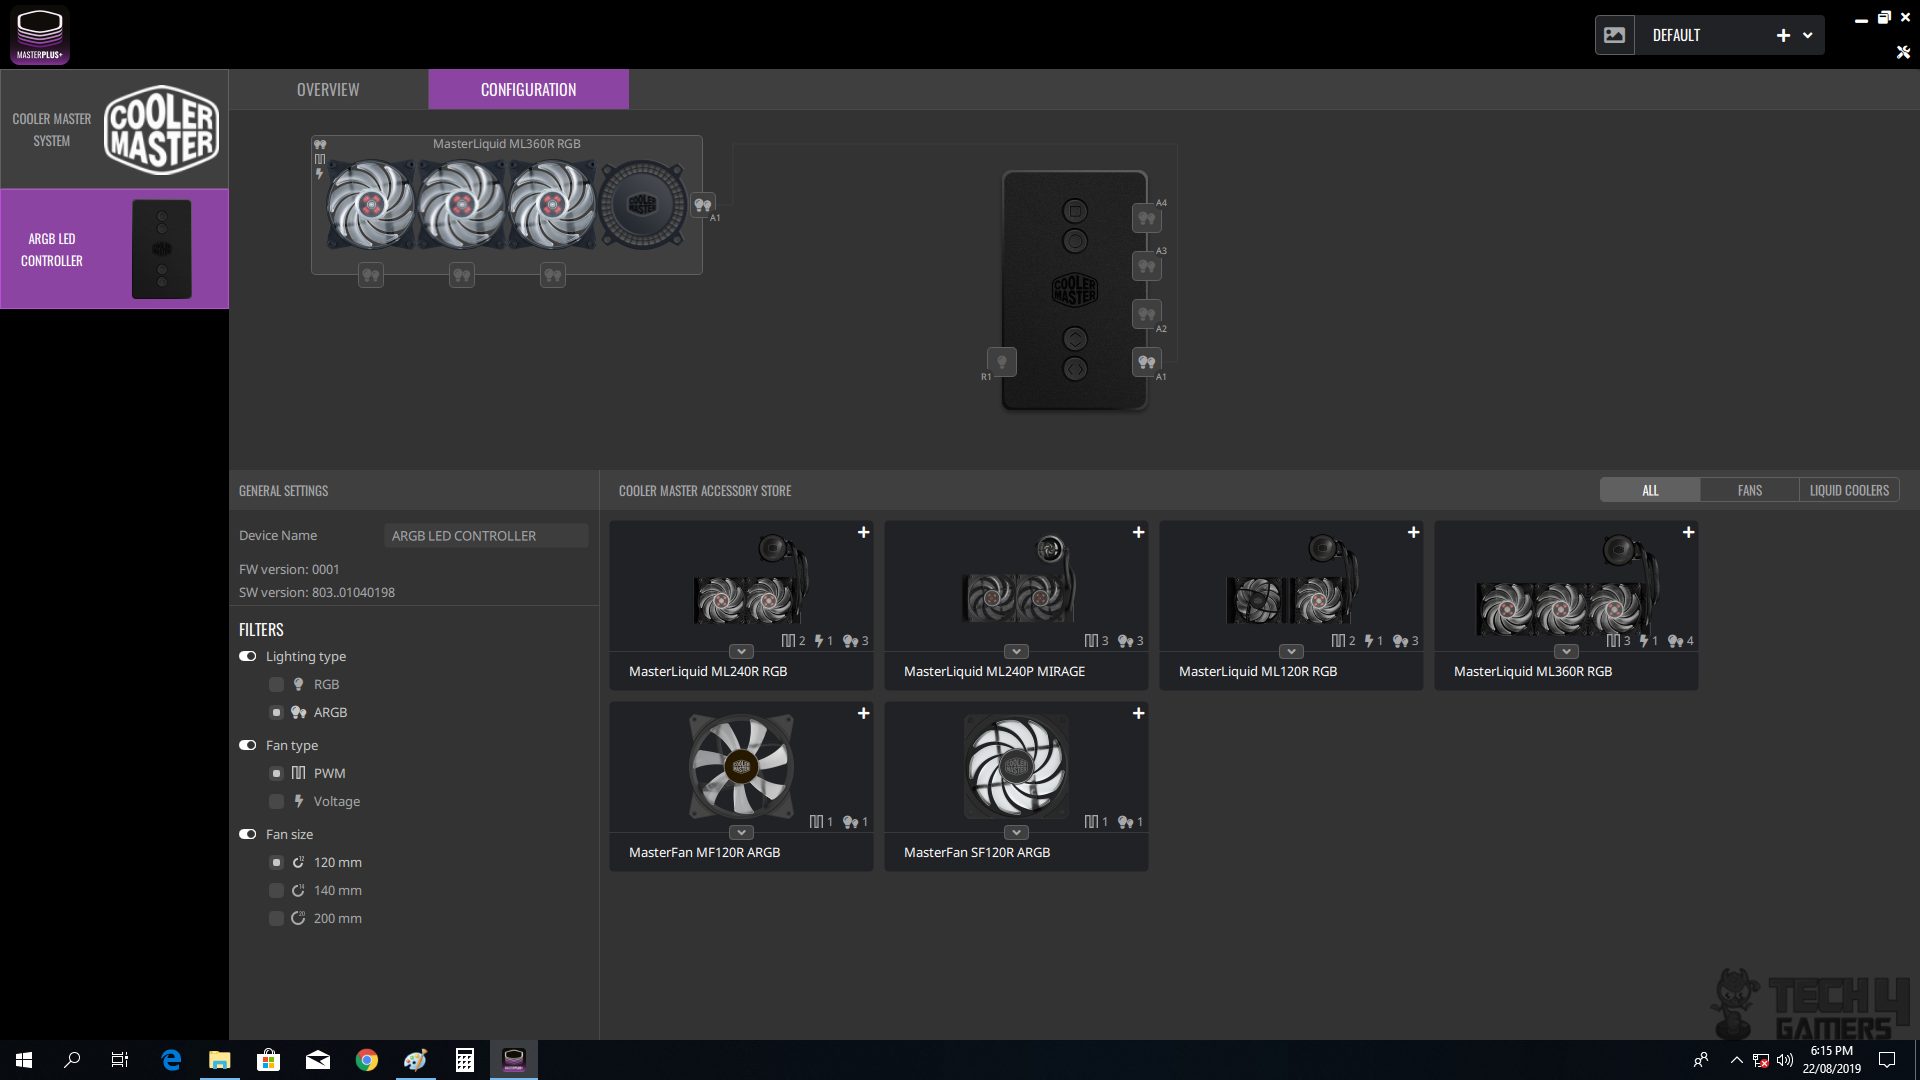
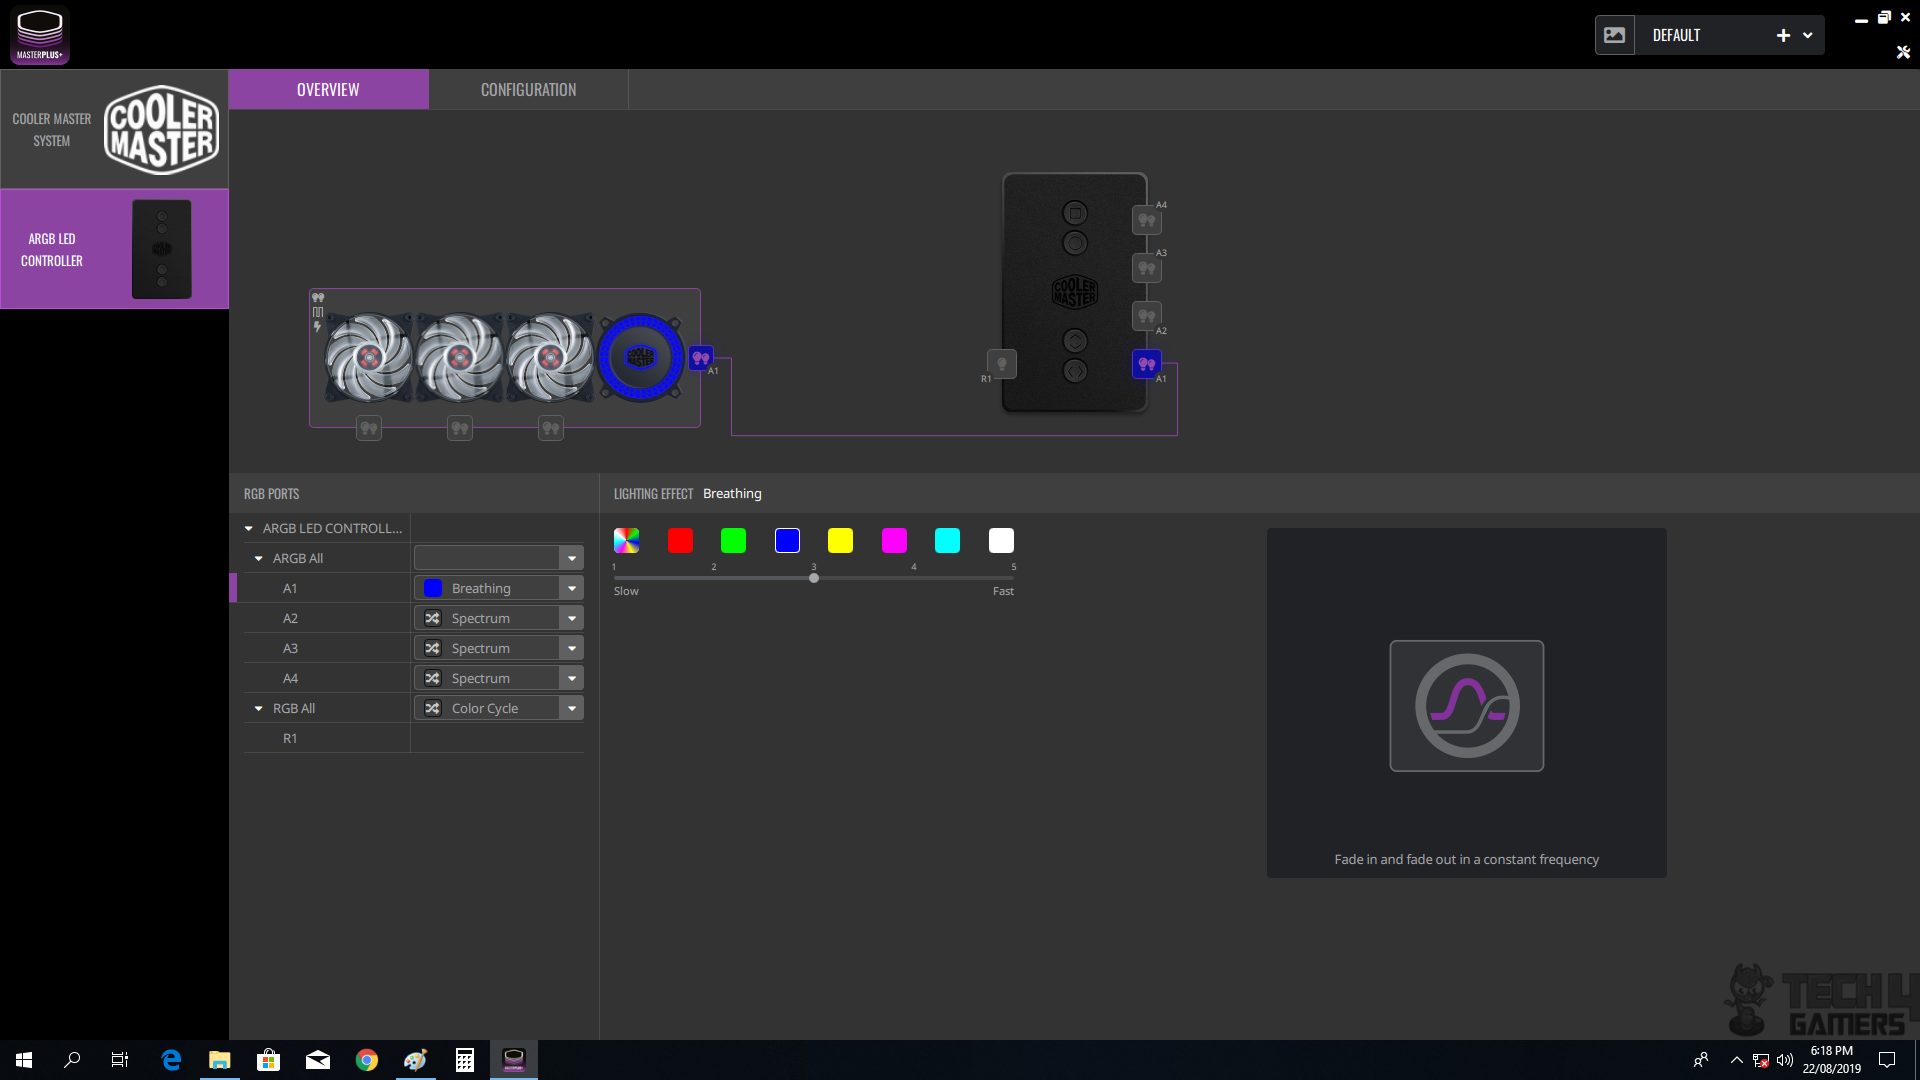
ML360R Setting up RGB Lighting
There is plenty of stuff listed in the Download section of the product page on the Cooler Master website. Click on ARGB box Firmware. The control box was not working on my both systems (when connected to the PC) first but after following these steps, I was able to get it to work fully.
- Visit Cooler Master’s website to download the latest firmware and MasterPlus software.
- Download the firmware and MasterPlus software, but don’t install it yet.
- Disconnect all cables from the controller box, including USB and SATA connections.
- Run the firmware update file.
- When prompted, connect the ARGB box to your PC via USB, ensuring no other cables are attached.
- Allow the firmware to update and monitor the status.
- Disconnect the controller box.
- Install the MasterPlus software.
- Connect the ARGB LED cables of your fans and pump to the lighting control box.
- To sync with your motherboard, connect the ARGB LED cables directly to the motherboard’s 5V ARGB header or use the control box with an ARGB Sync cable.
- Ensure the control box is set to ARGB mode before connecting it to the PC.
- Connect the box to your PC via USB and power it using the SATA cable.
- Your PC should recognize the USB device.
- Run the MasterPlus software and select the connected control box in the Configuration.
- Click on the lighting bulb icon for the specific port you connected the ARGB LEDs to.
- Choose the correct model (e.g., ML360R RGB) from the list and add it to the control box.
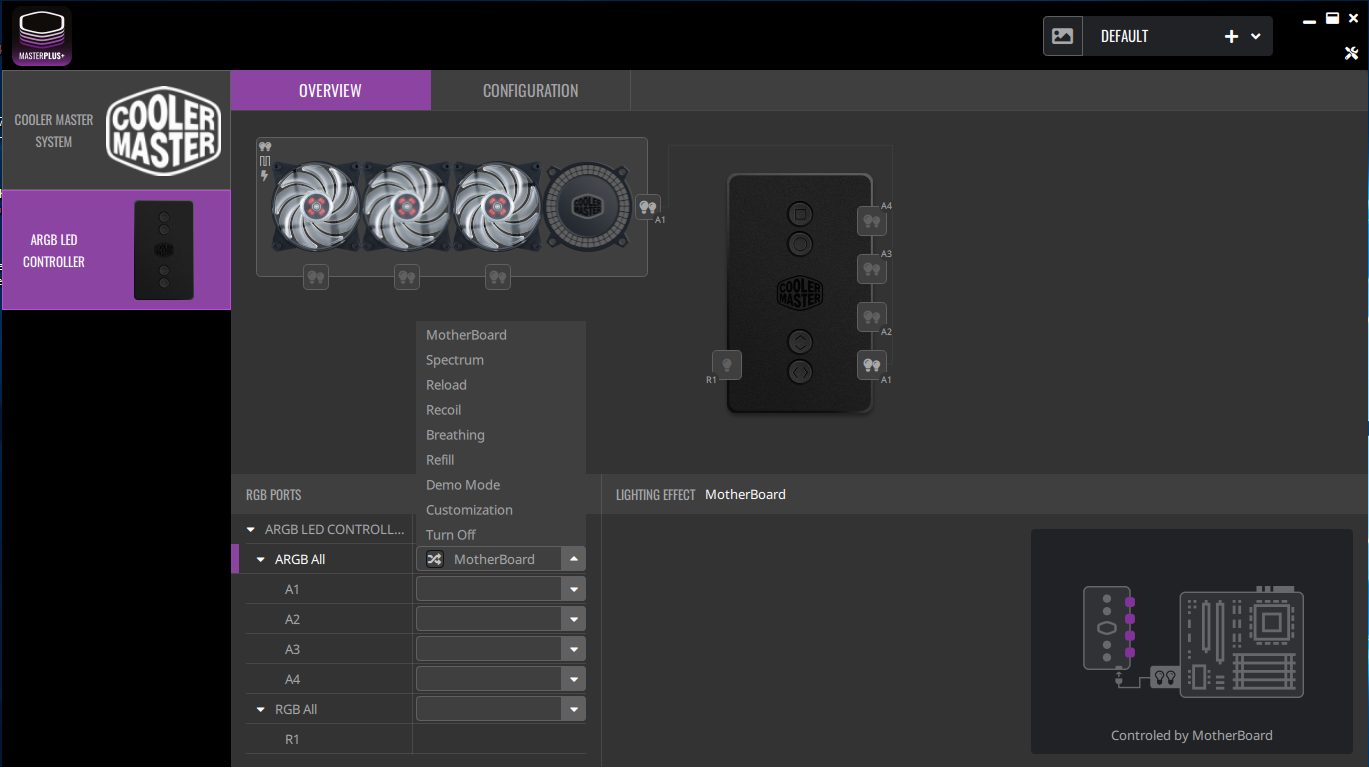
- In the Overview, select the “Motherboard” option under ARGB All to transfer lighting control to your motherboard.
- Now, you can control the lighting through your motherboard’s lighting app, like Asus AURA.
There are some important pointers here:
- You don’t need to update the control box firmware if you are not going to connect it to the PC using the USB cable.
- The USB connection is needed for two functions: using the MasterPlus software to control the lighting or connecting the control box to the motherboard lighting header so that you can control the lighting of the cooler from the motherboard’s lighting app. Bear in mind that, for the second function, you will have to use the MasterPlus software to transfer the lighting control to the motherboard.
- You can connect the ARGB LED Cables directly to the motherboard’s 5V ARGB headers and can ditch the control box altogether.
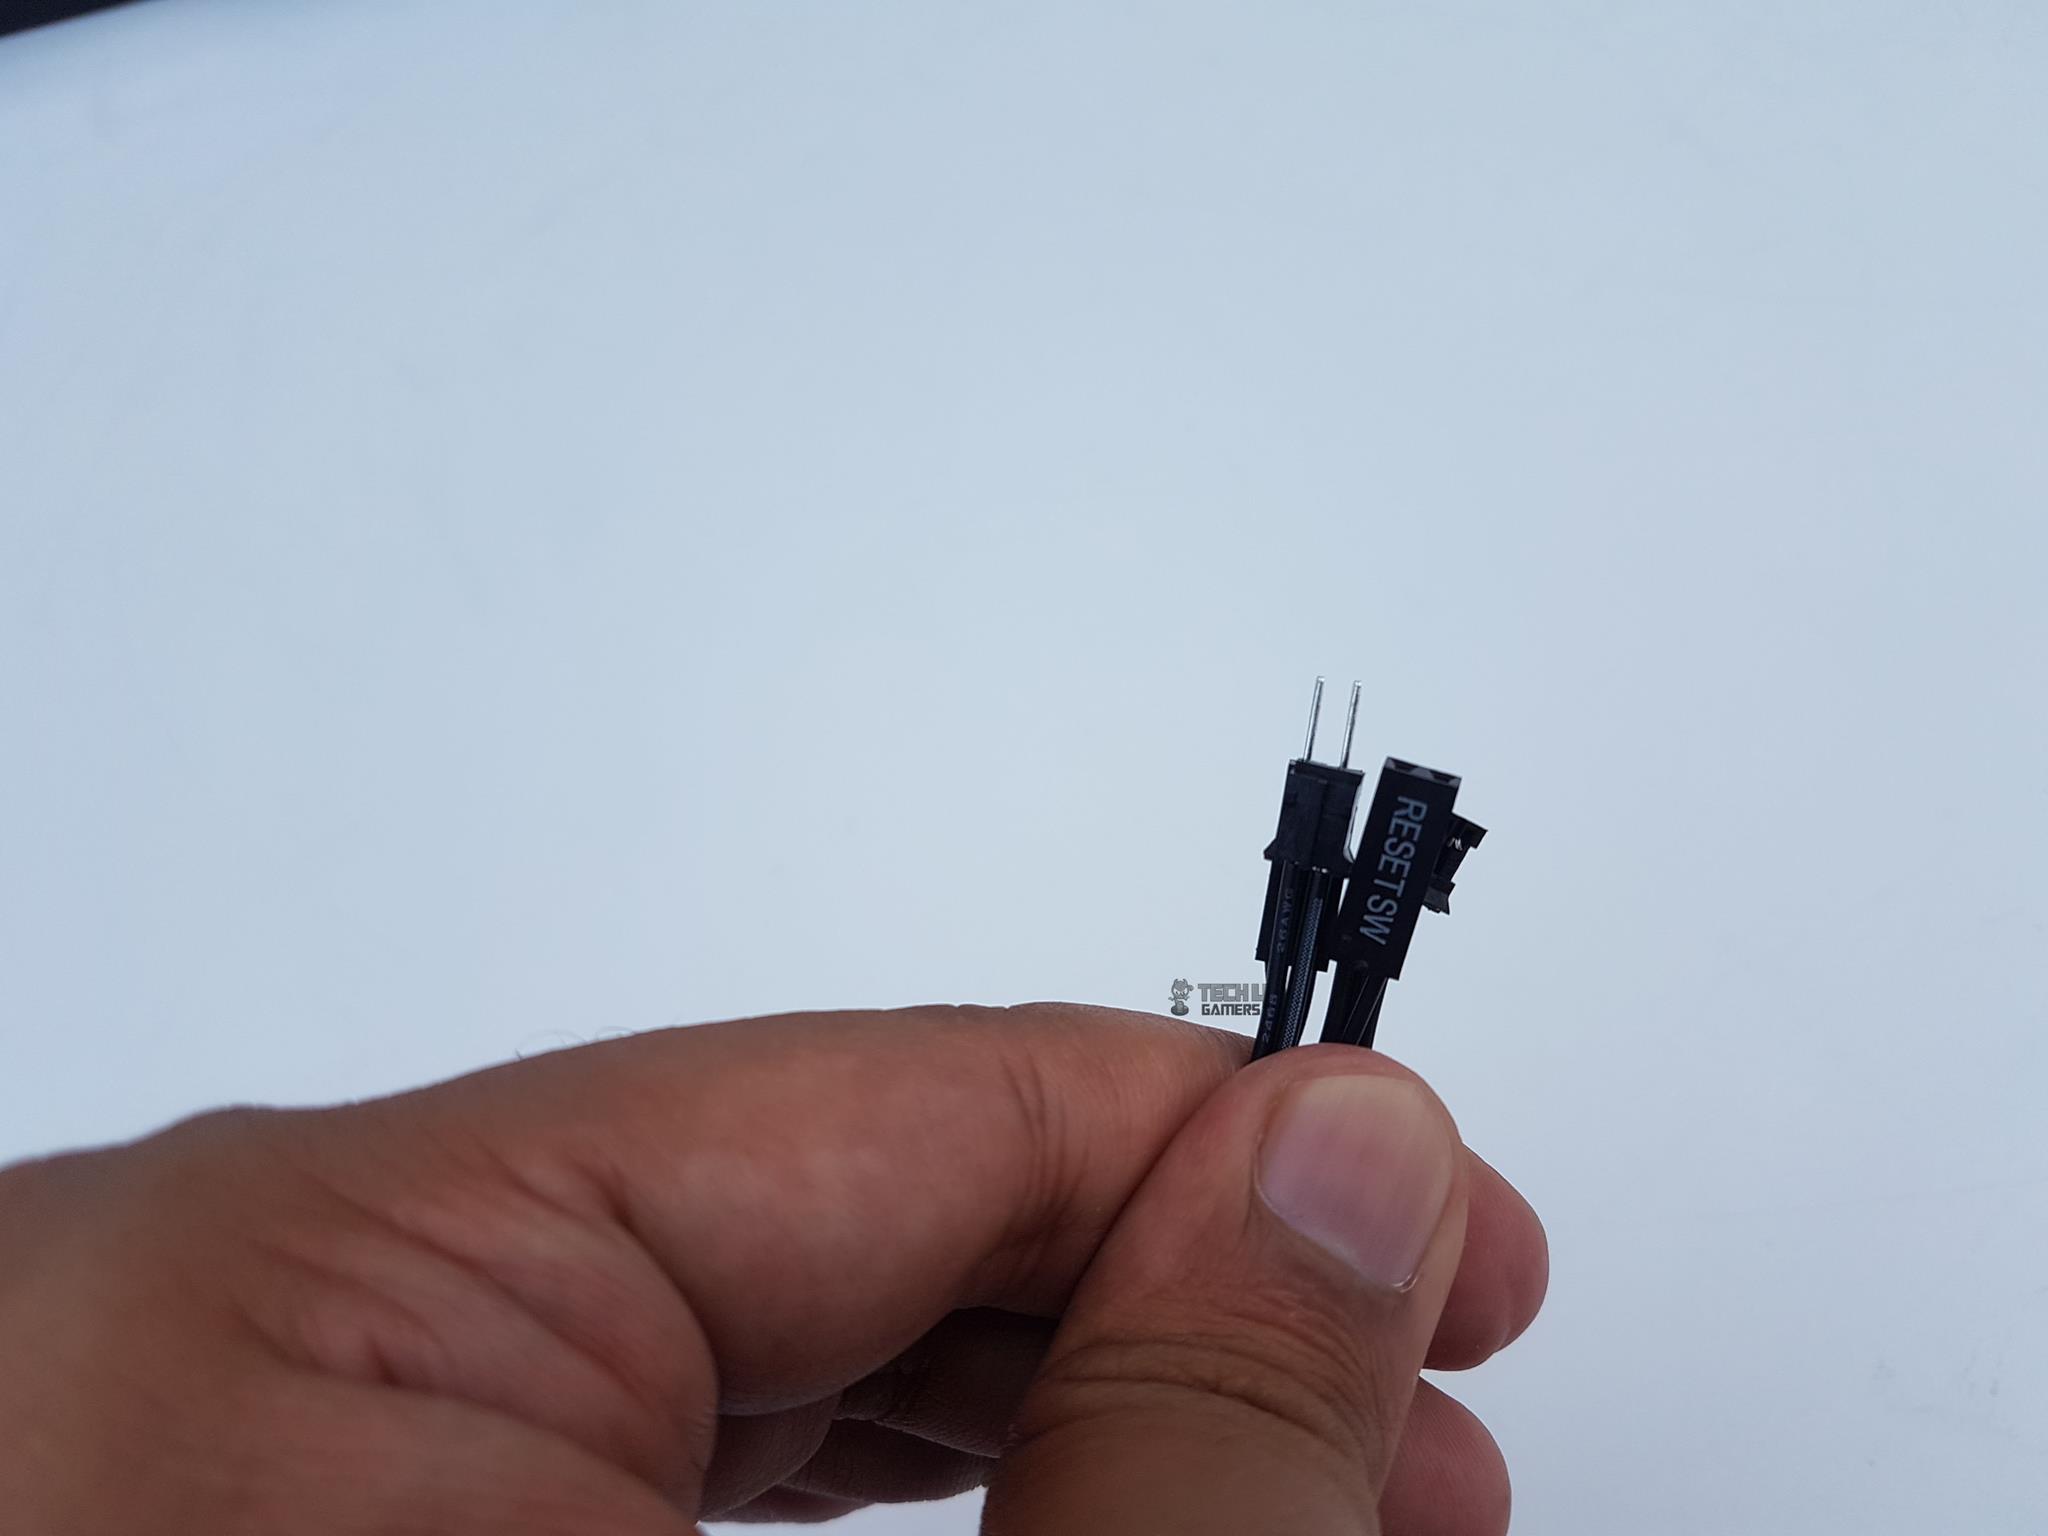
- Connecting the Reset cables is optional. If you are all about controlling the lighting using the software then all that you will need is the USB connectivity between the PC and the control box.
- You don’t need the USB connectivity if you are just going to use the control box for the built-in lighting modes.
That is all. Hopefully, this will help you set up your control box the right way to make it work.
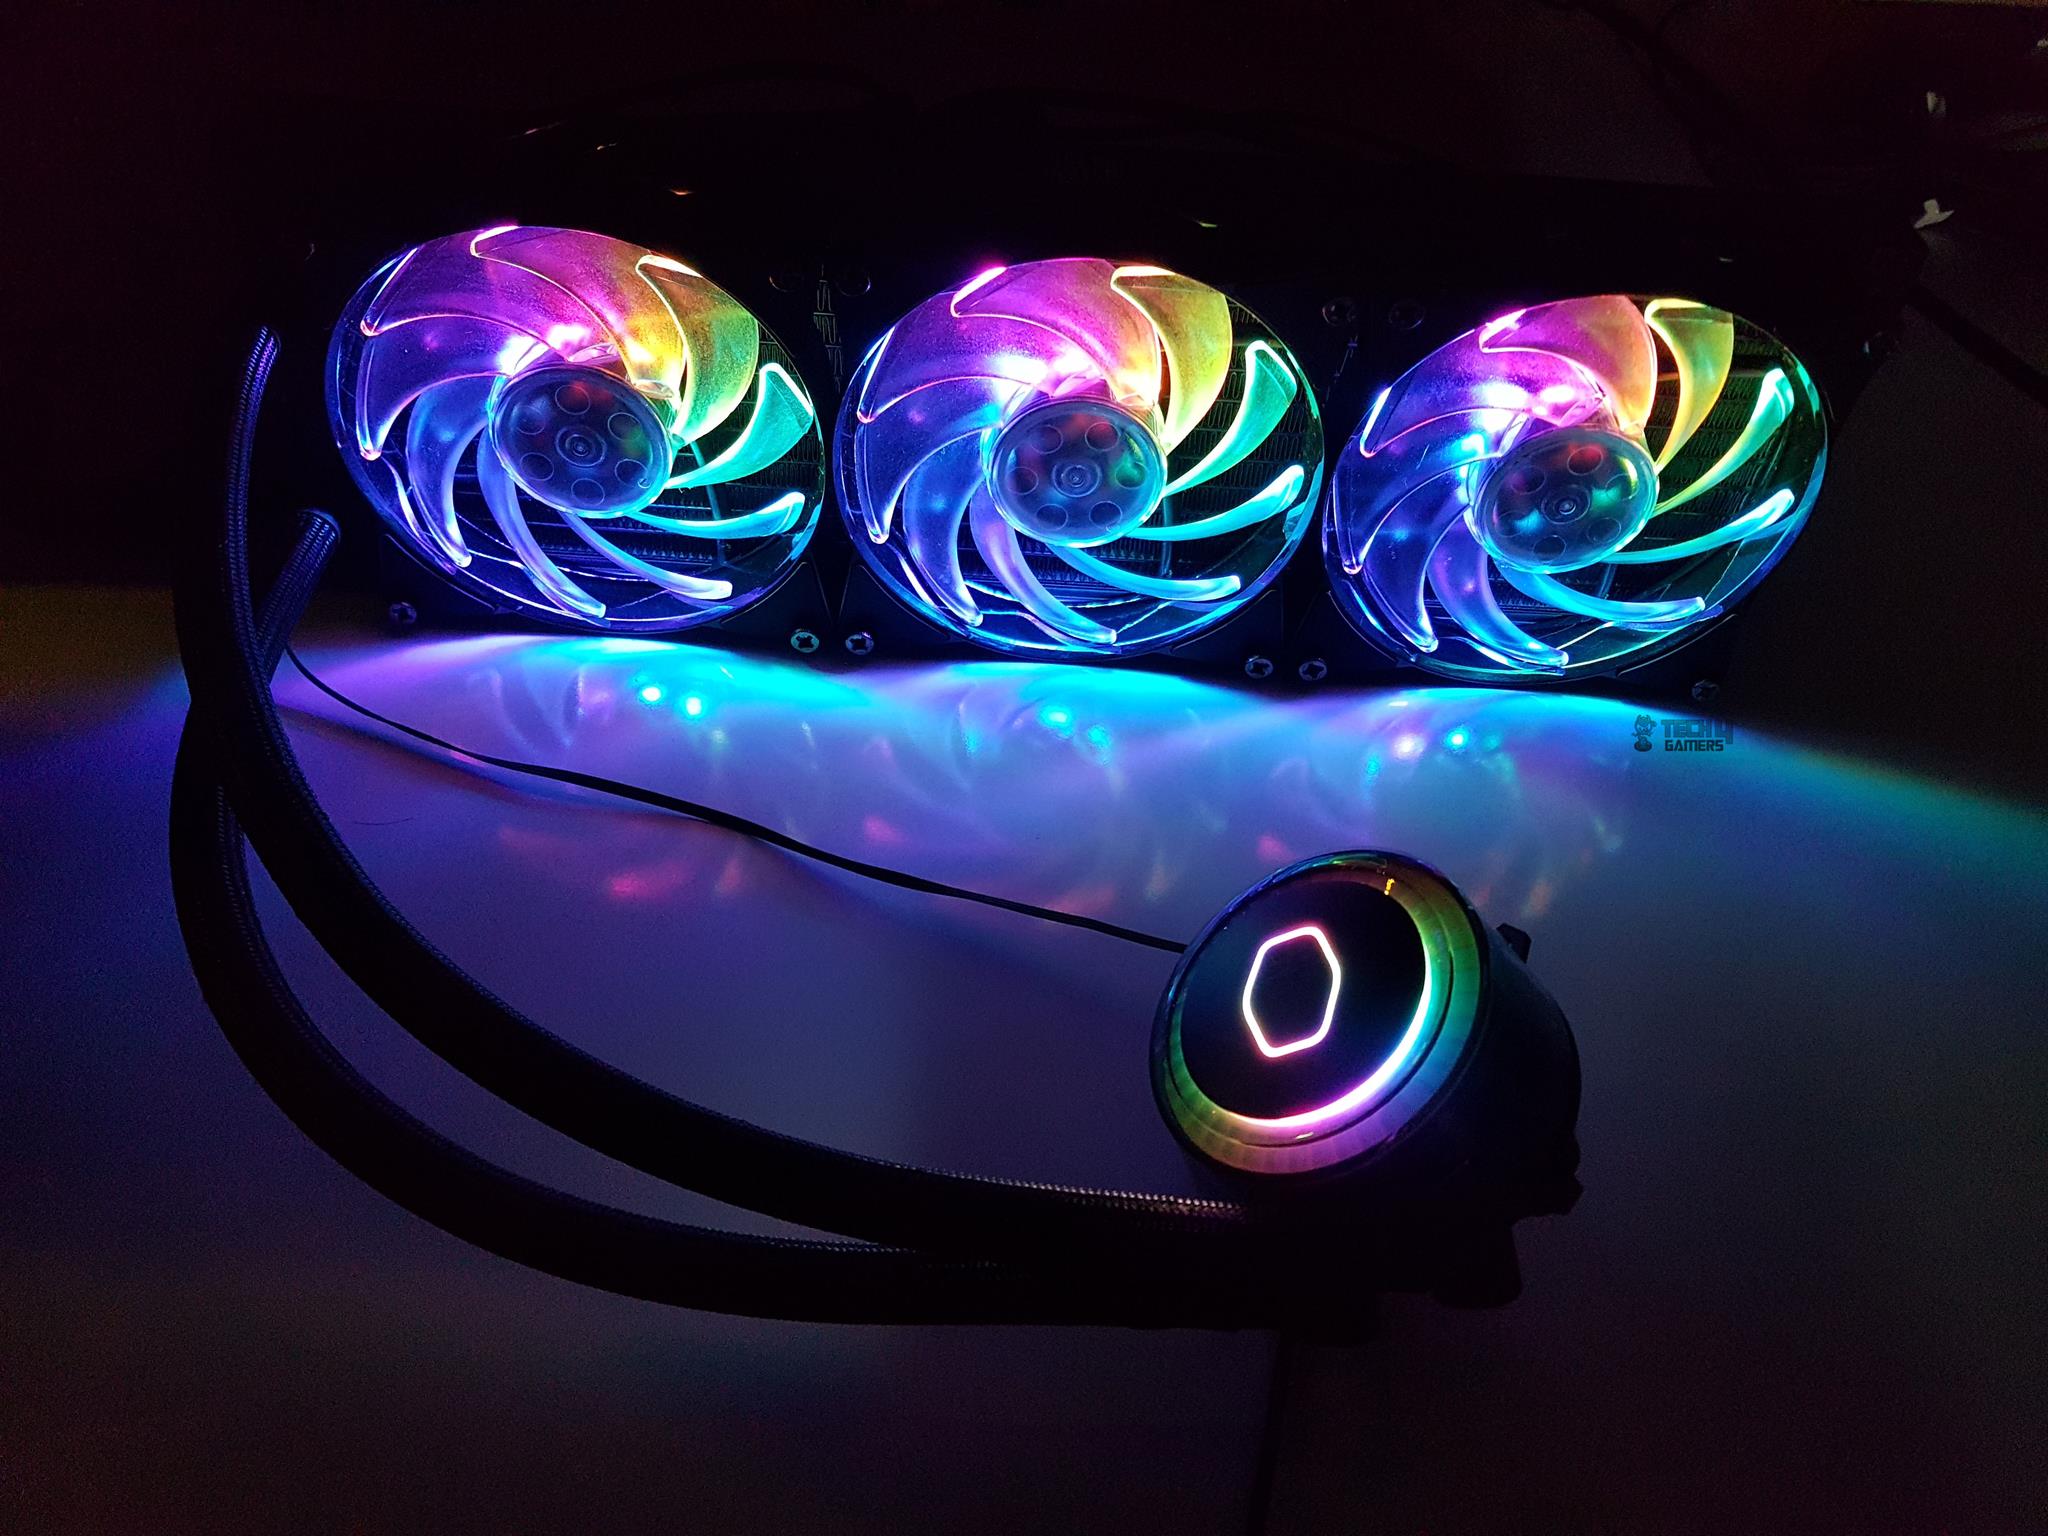
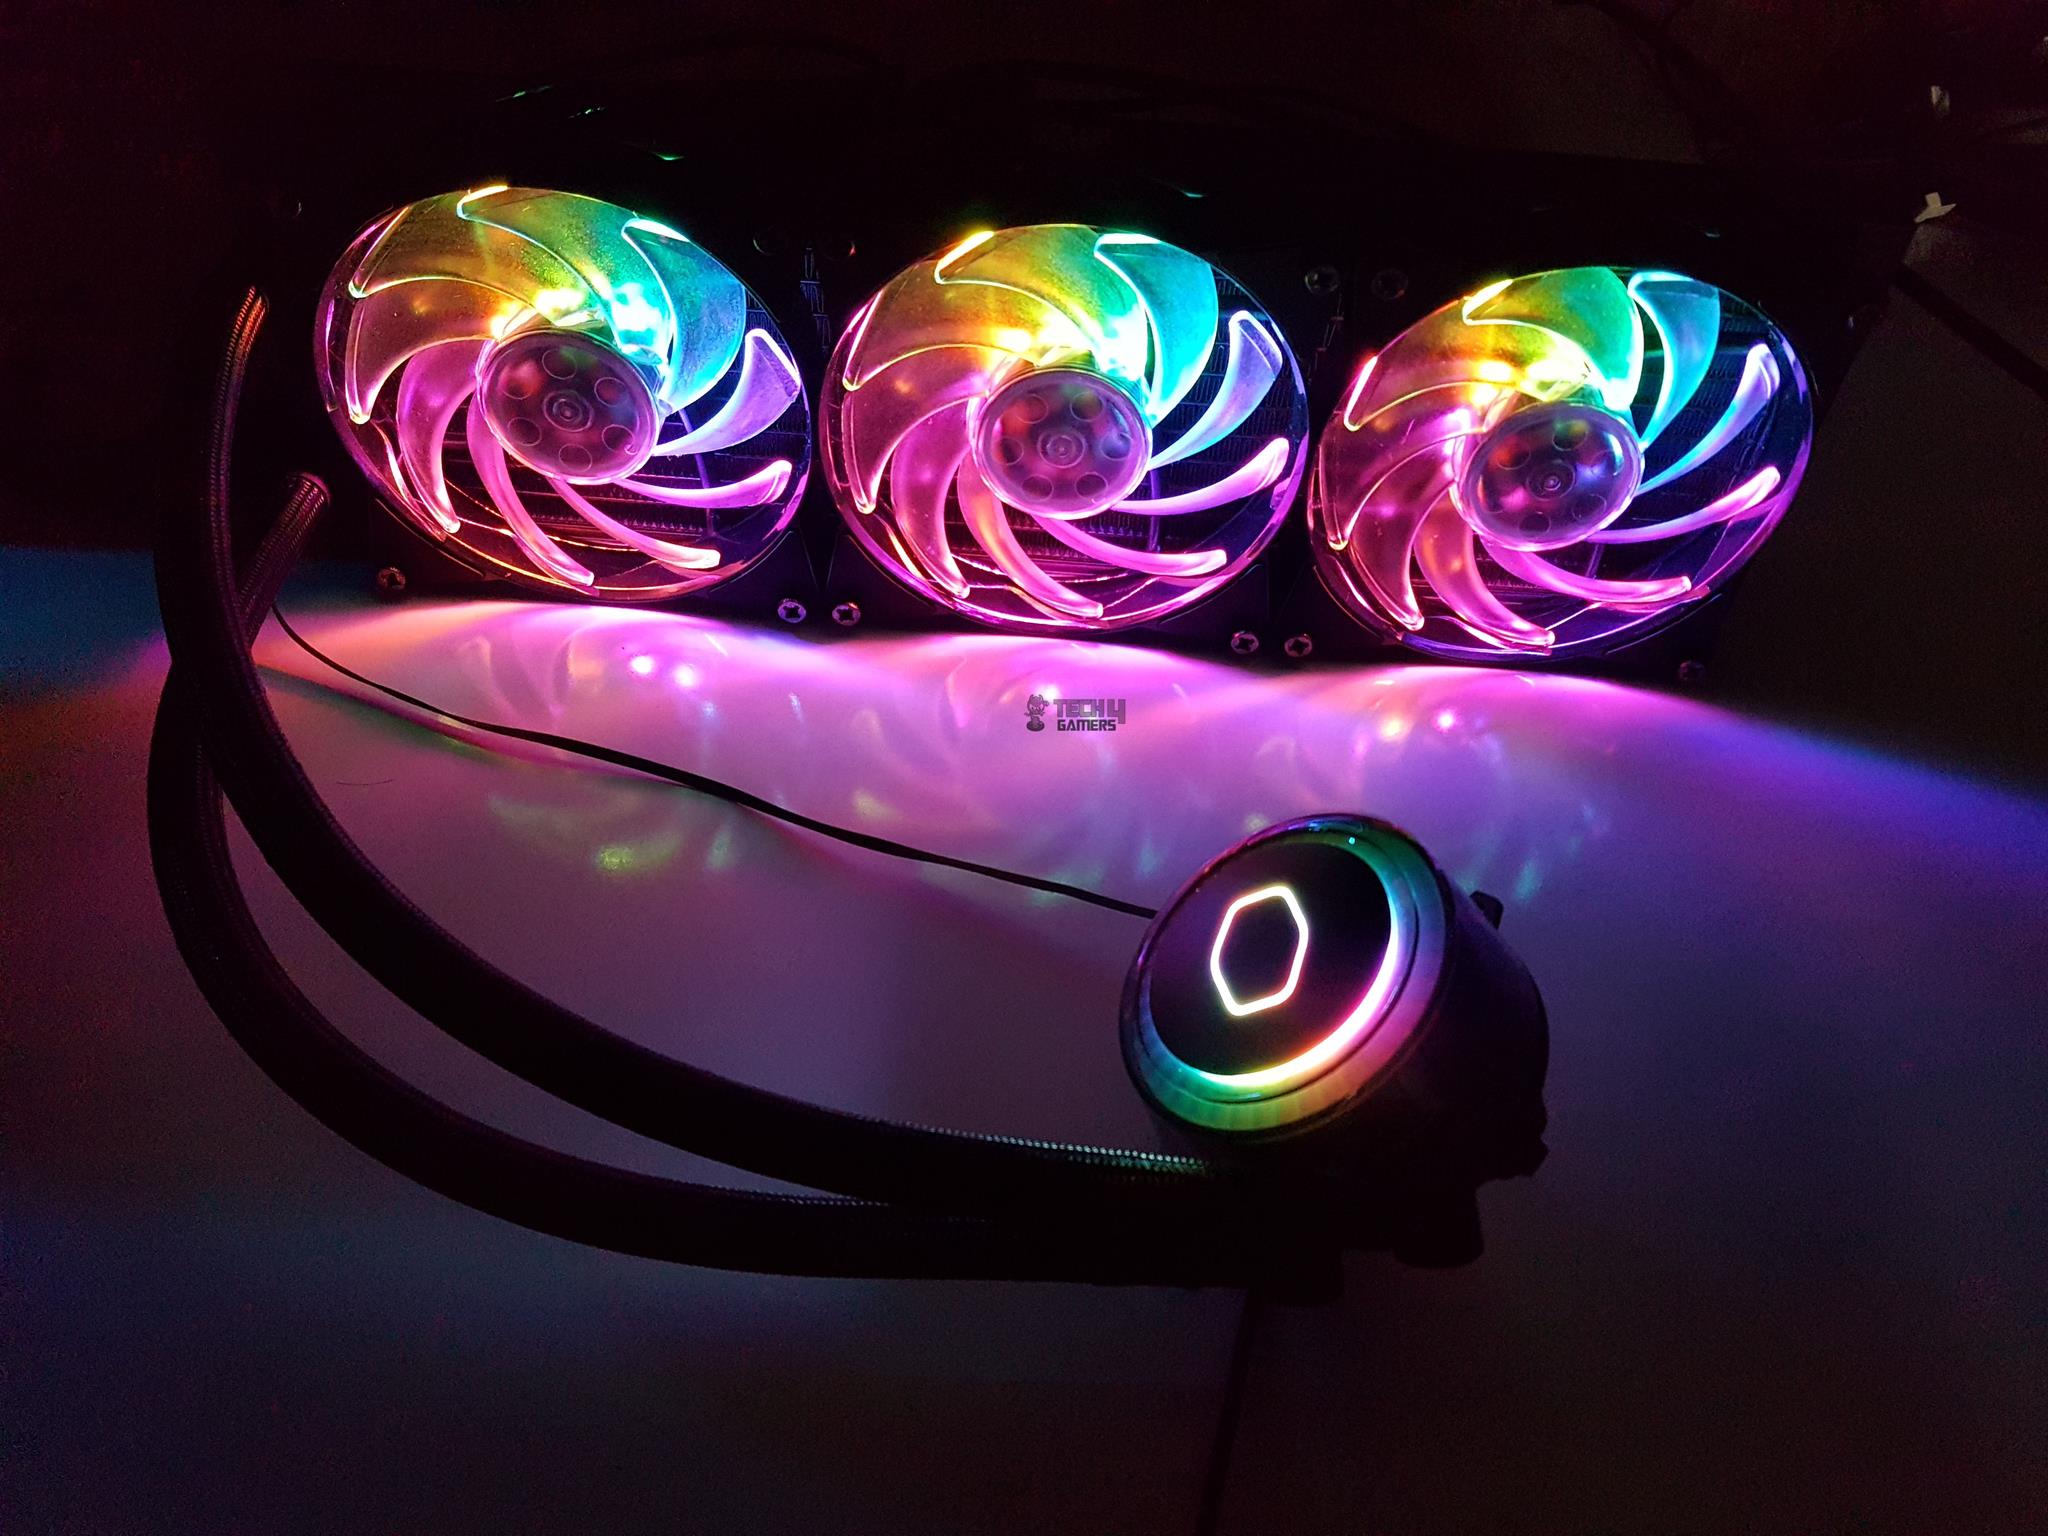
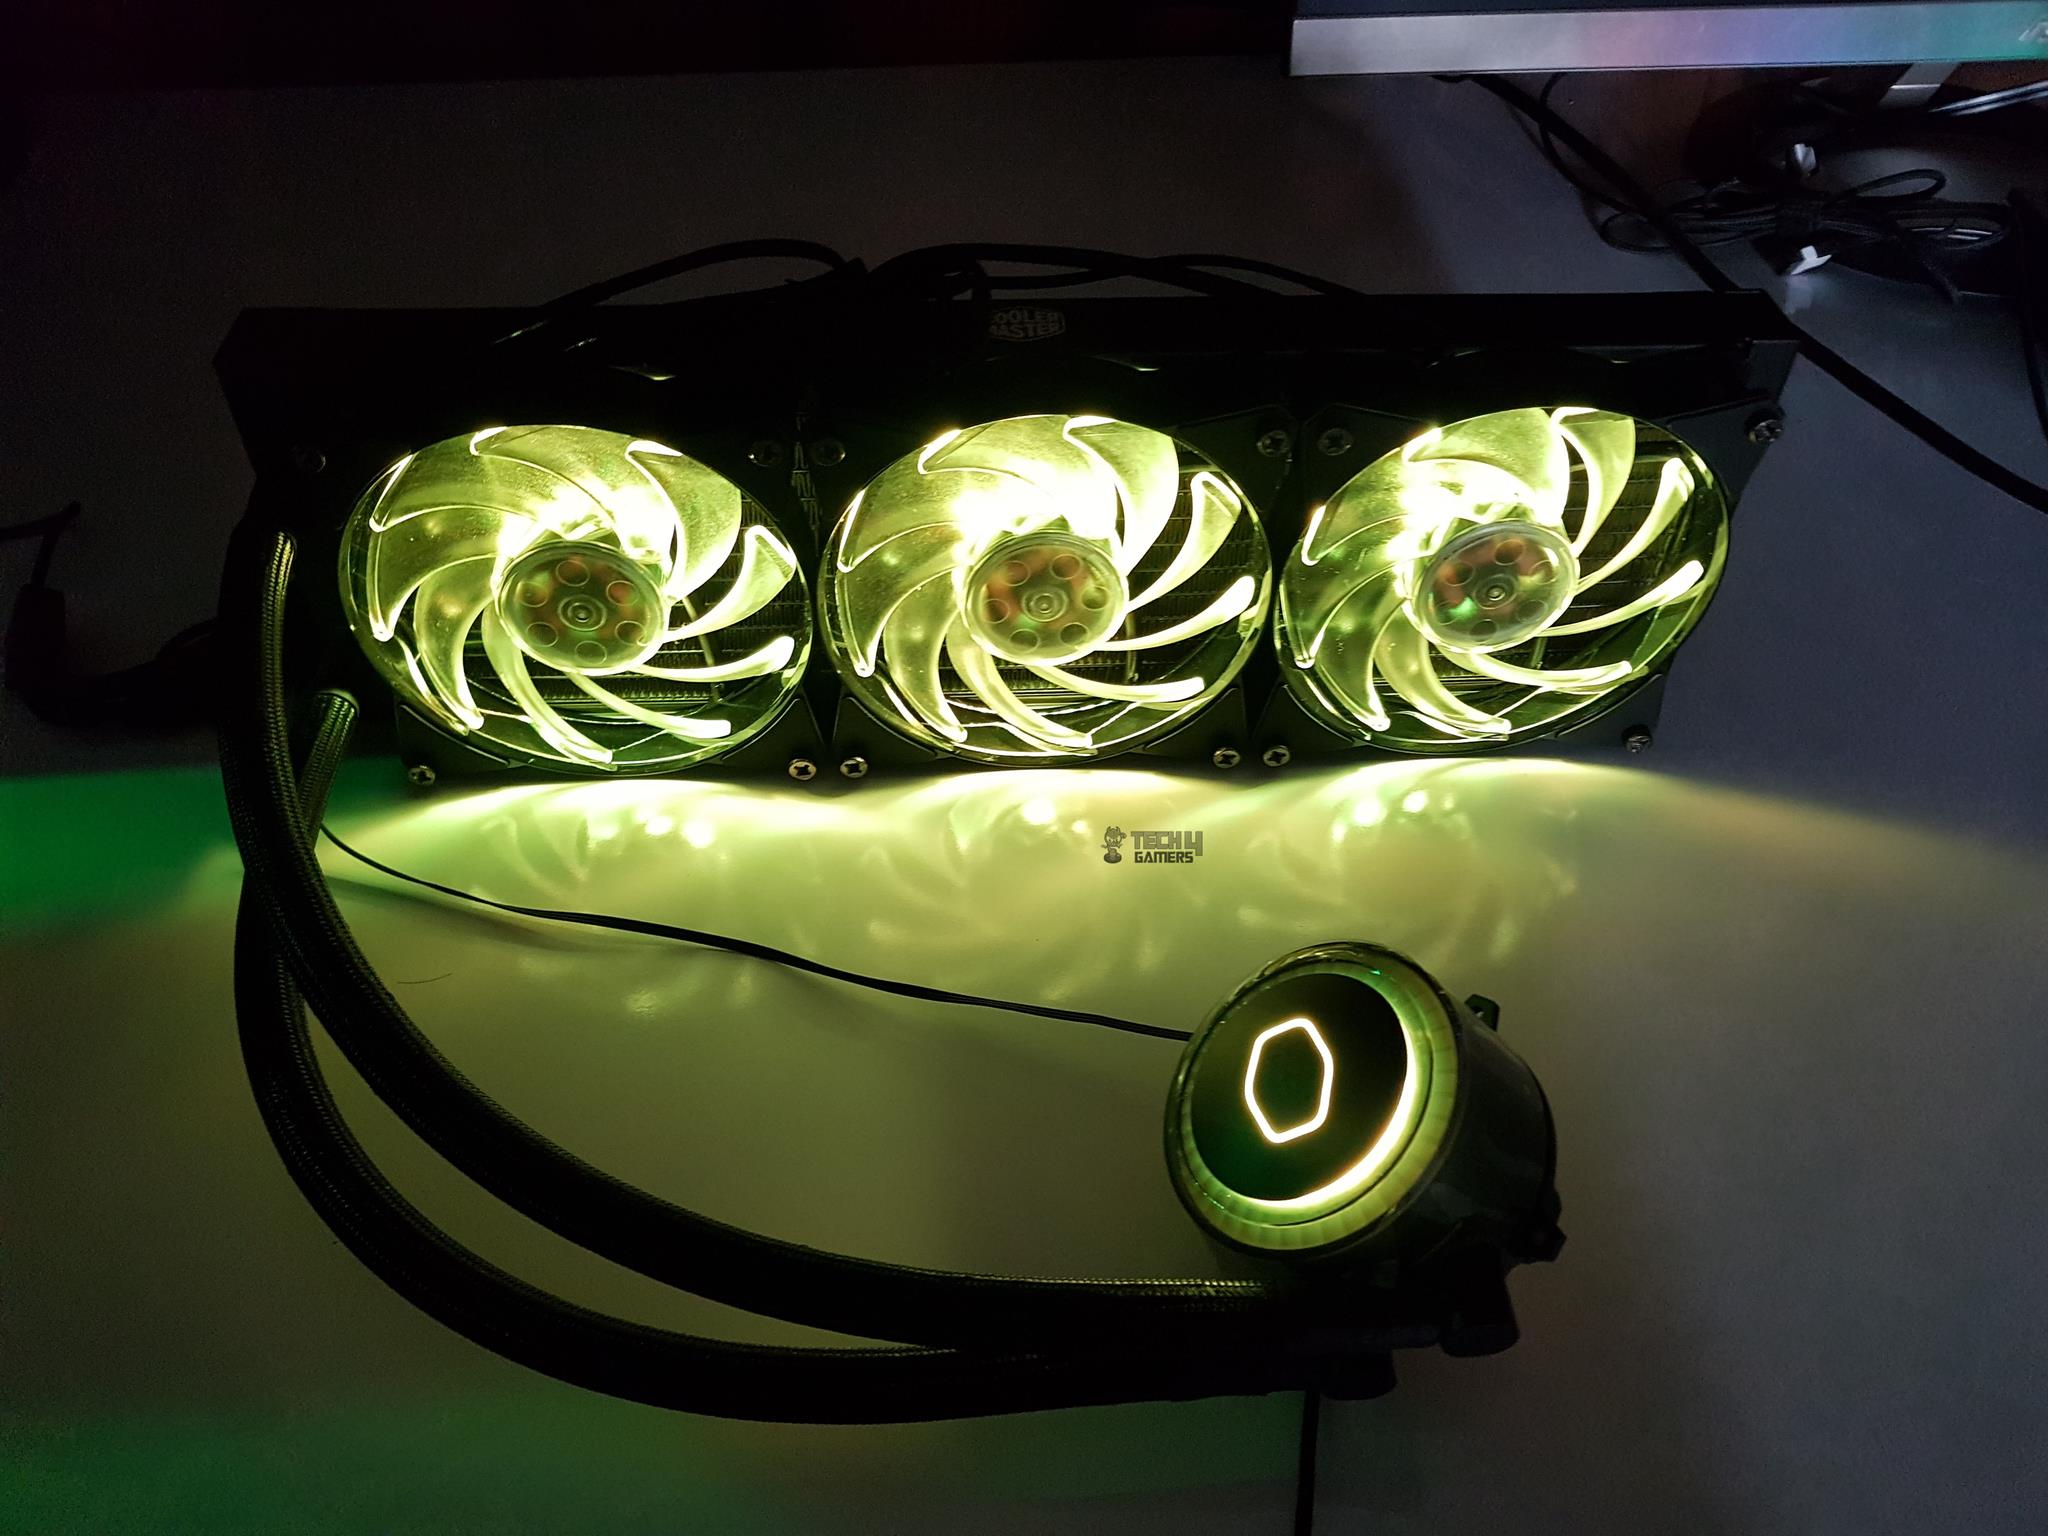
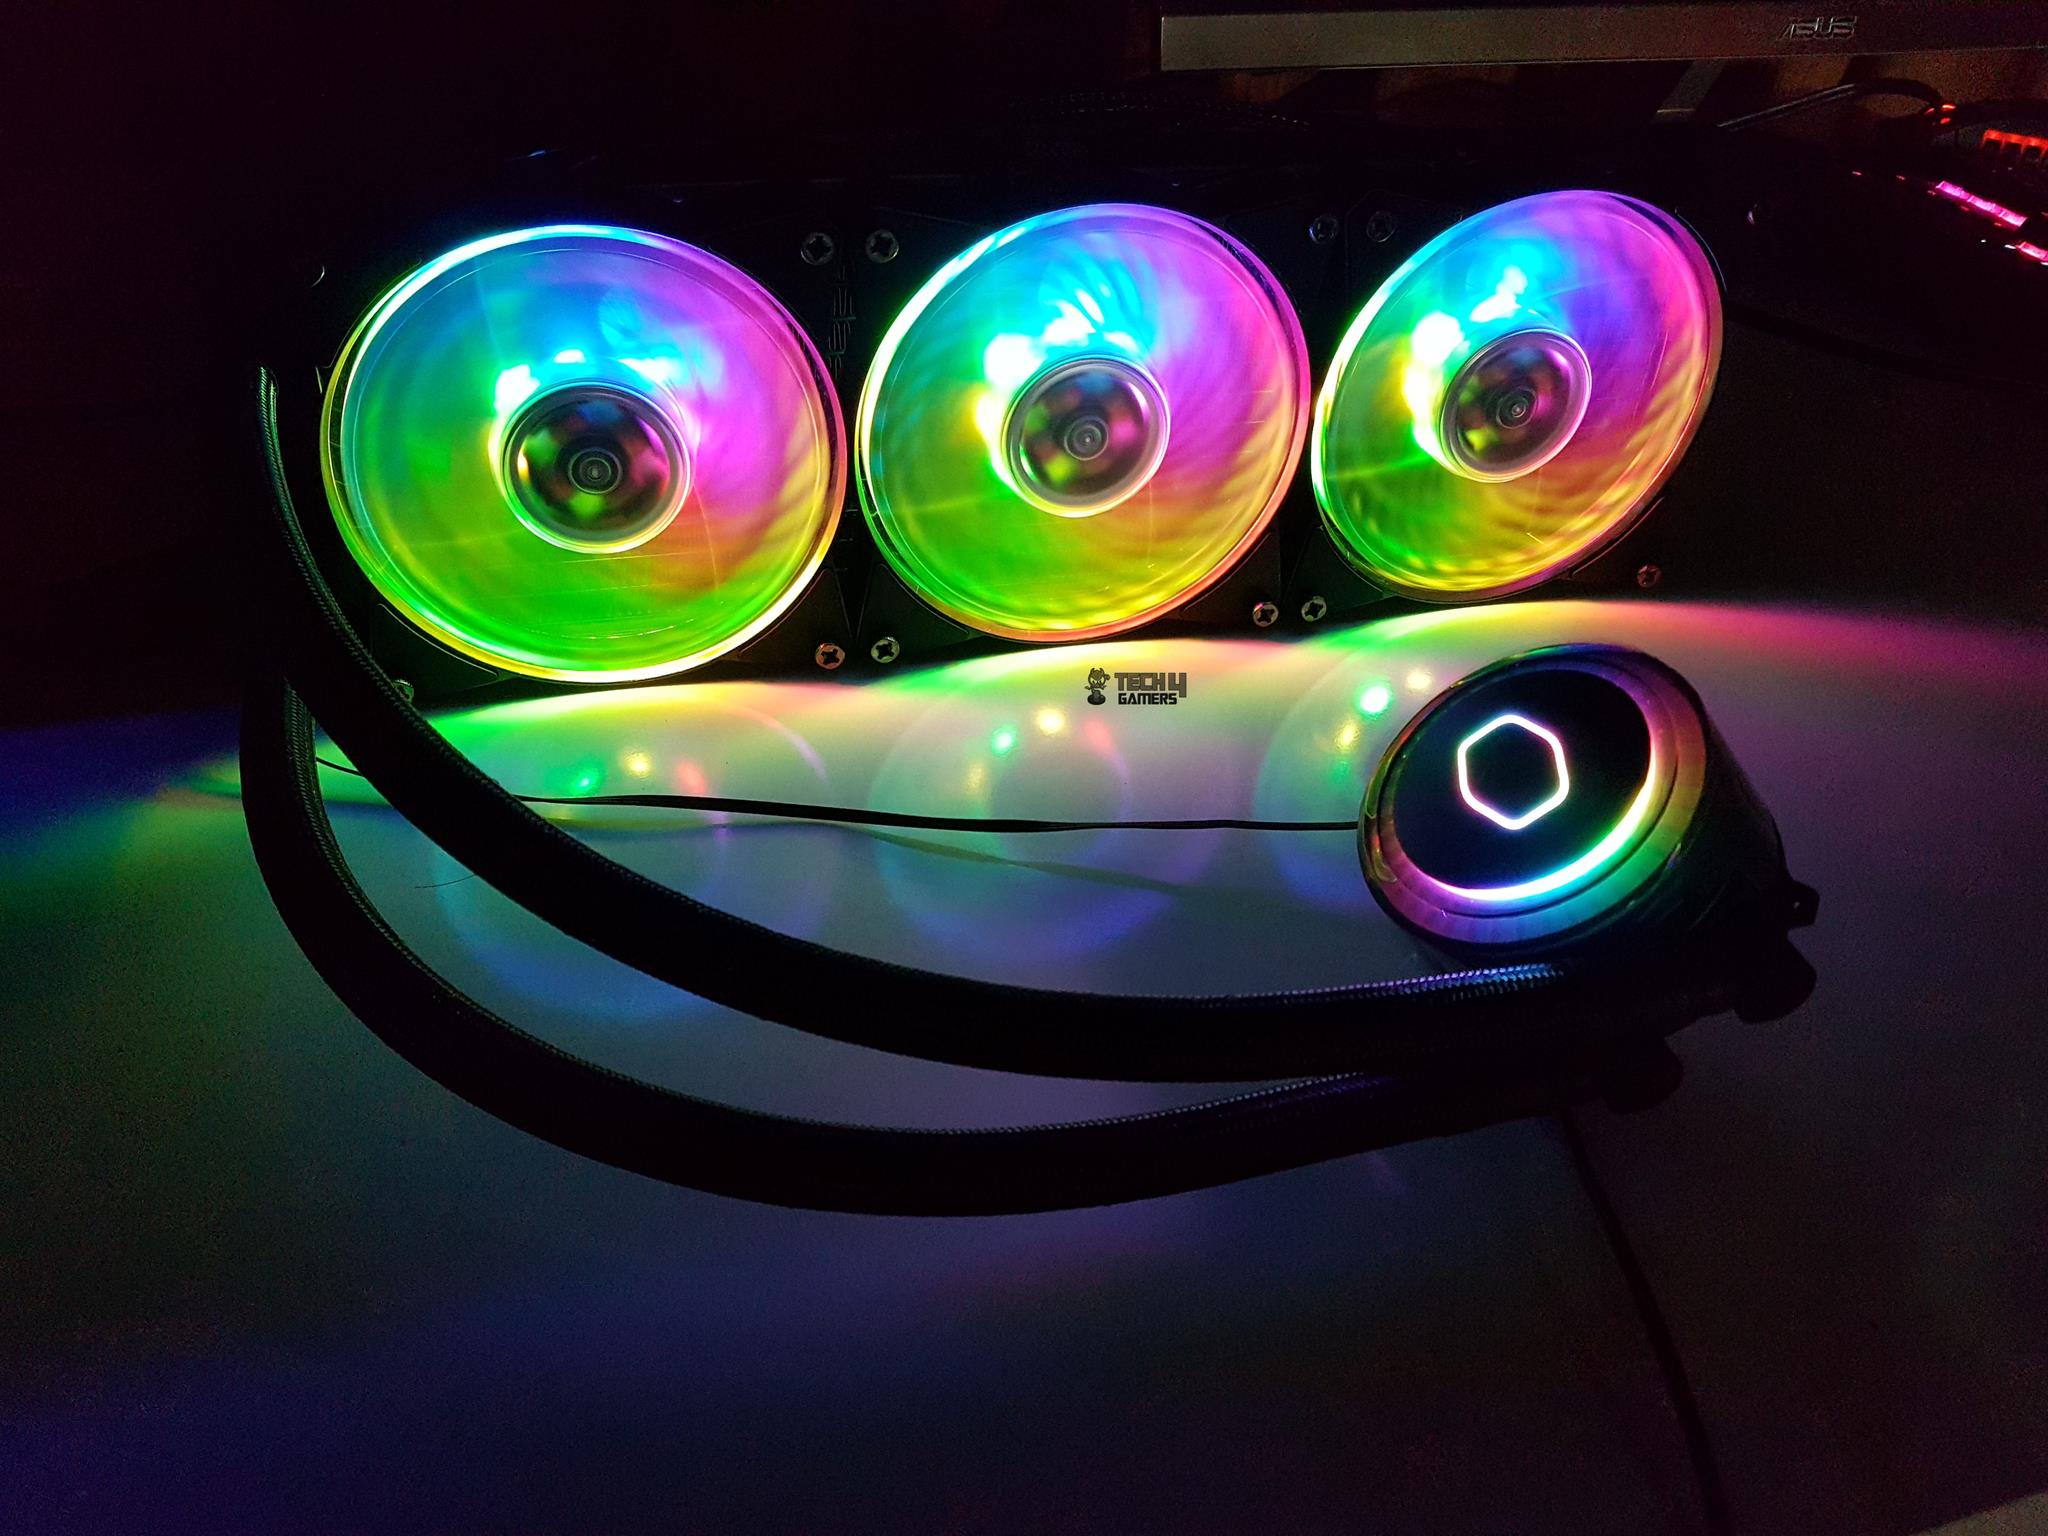
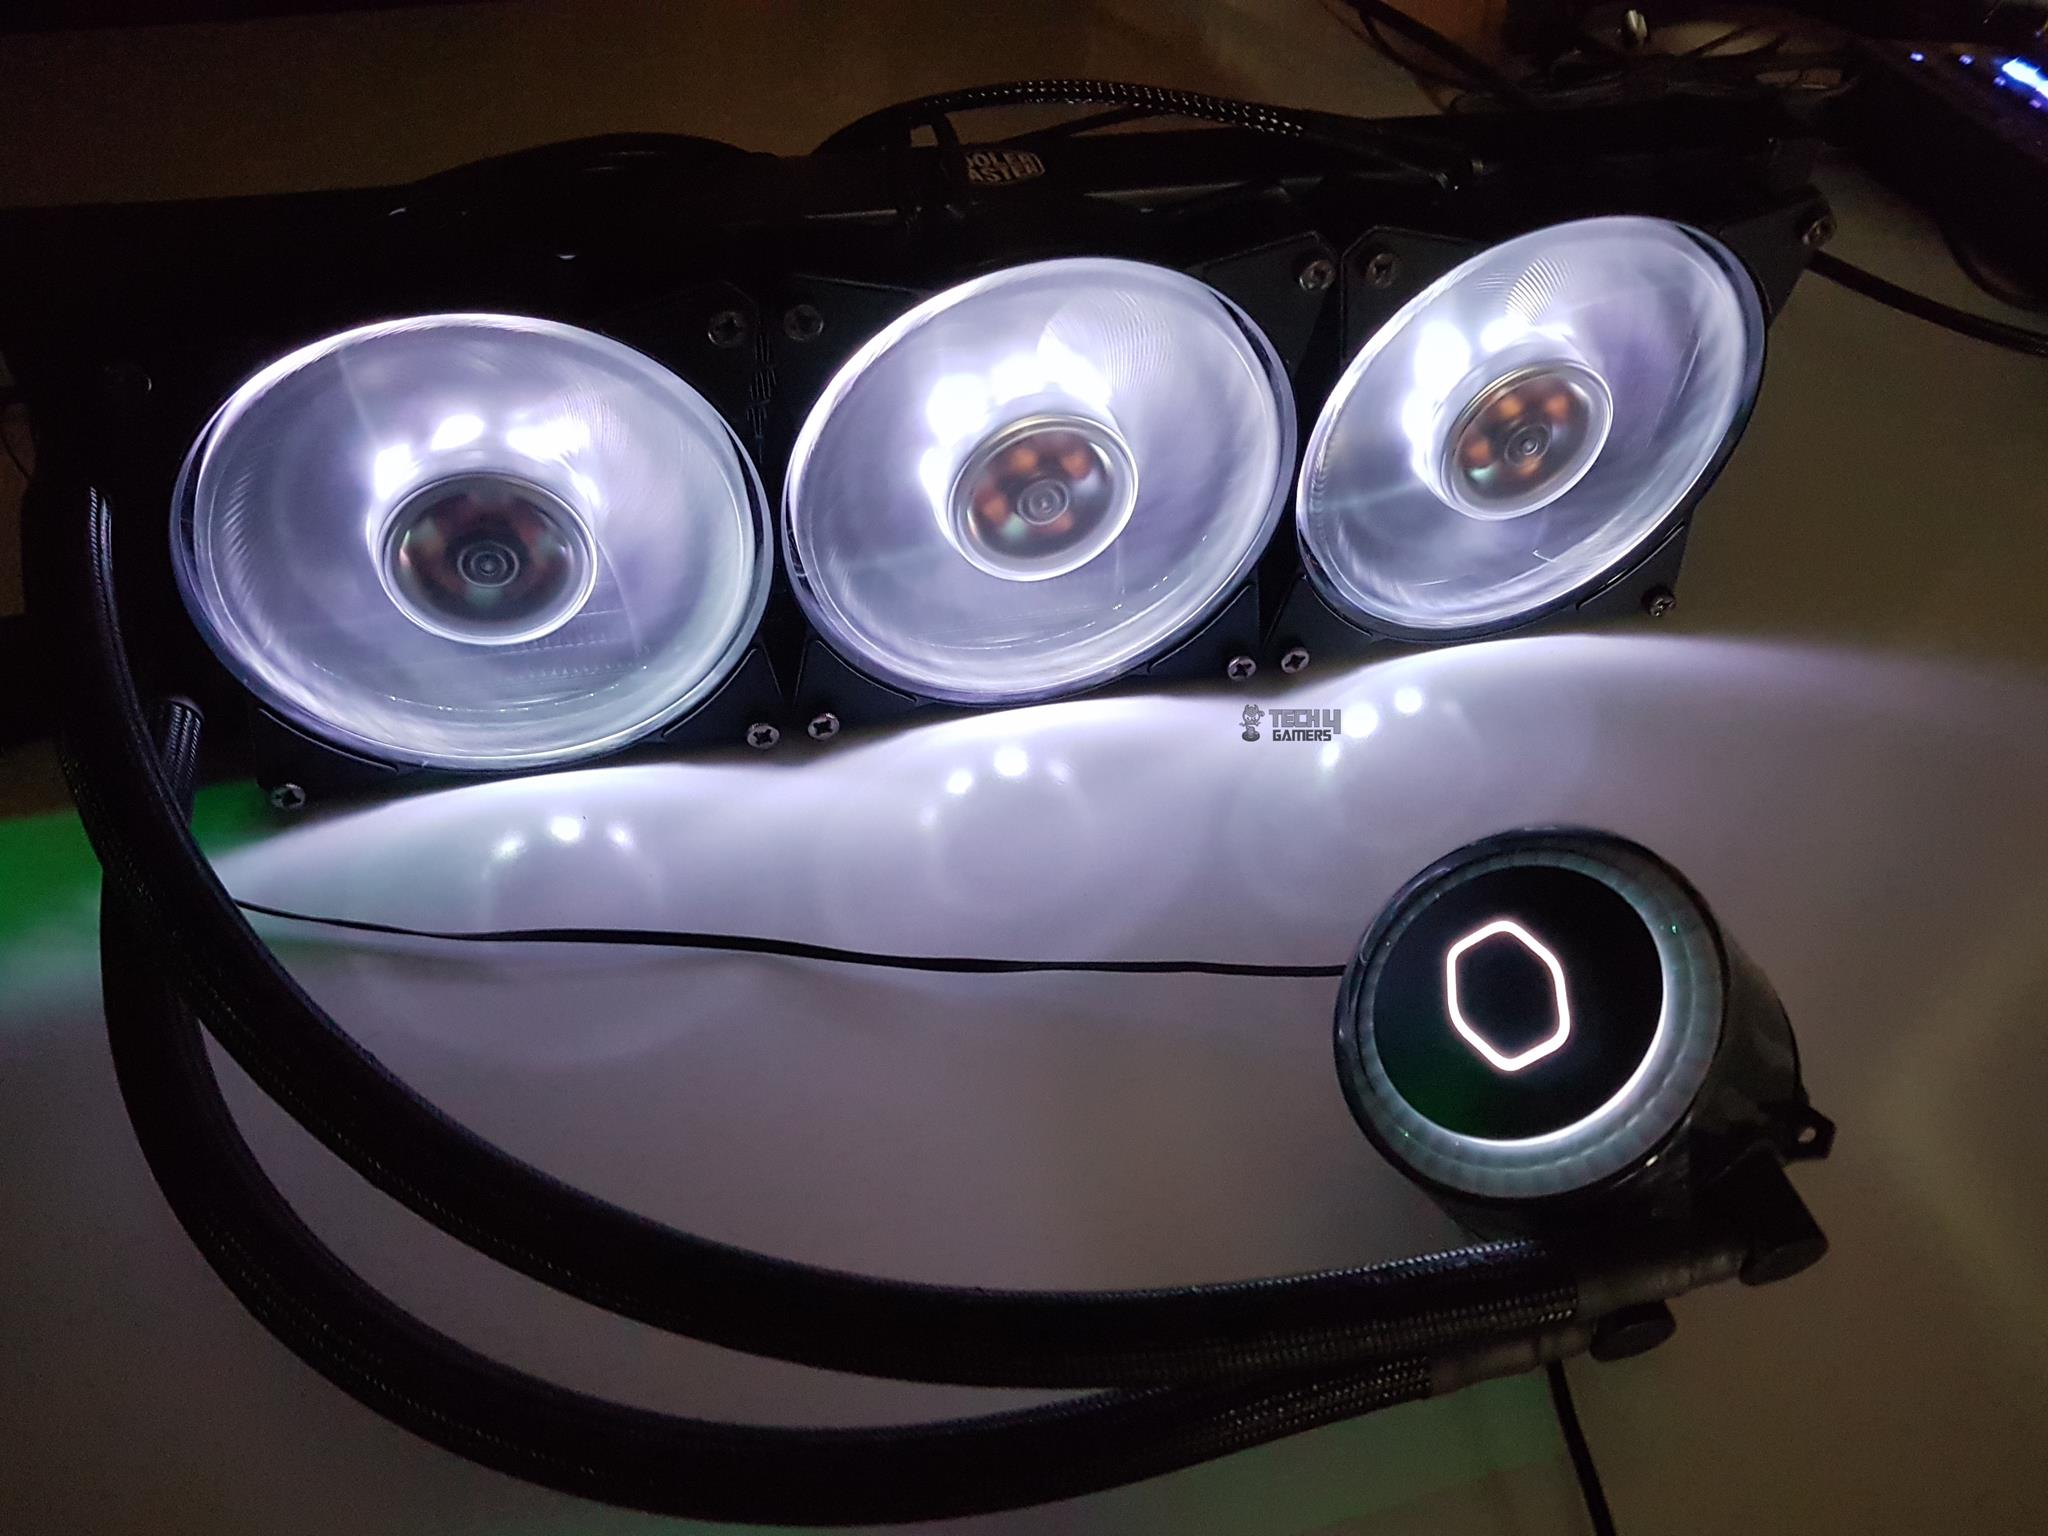
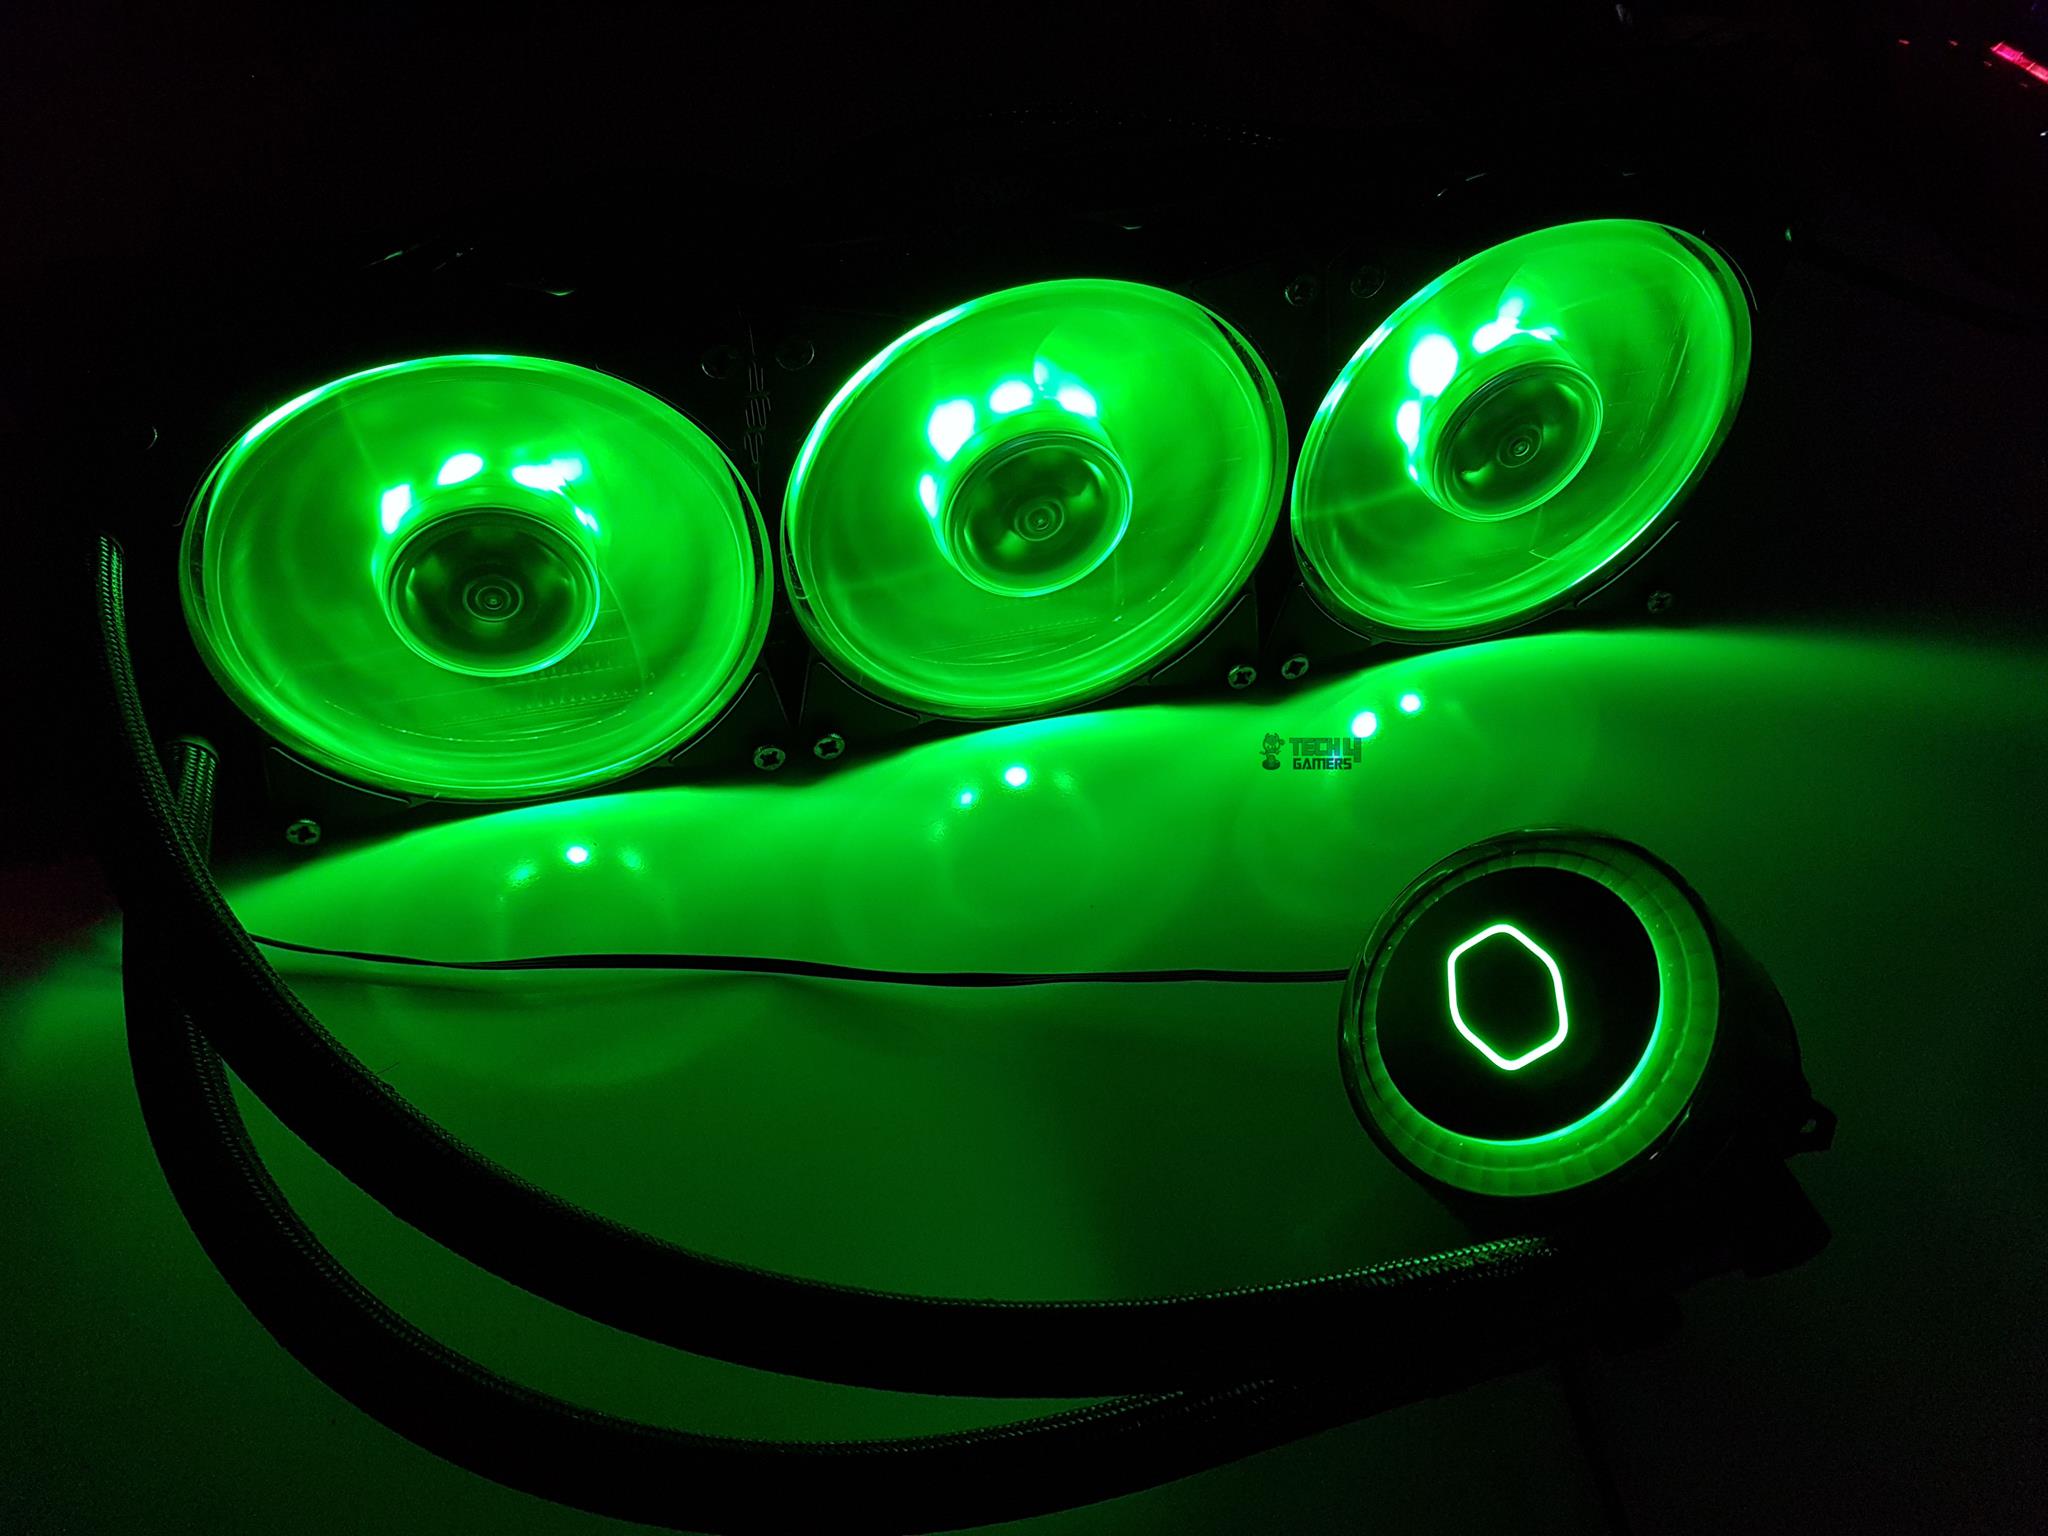
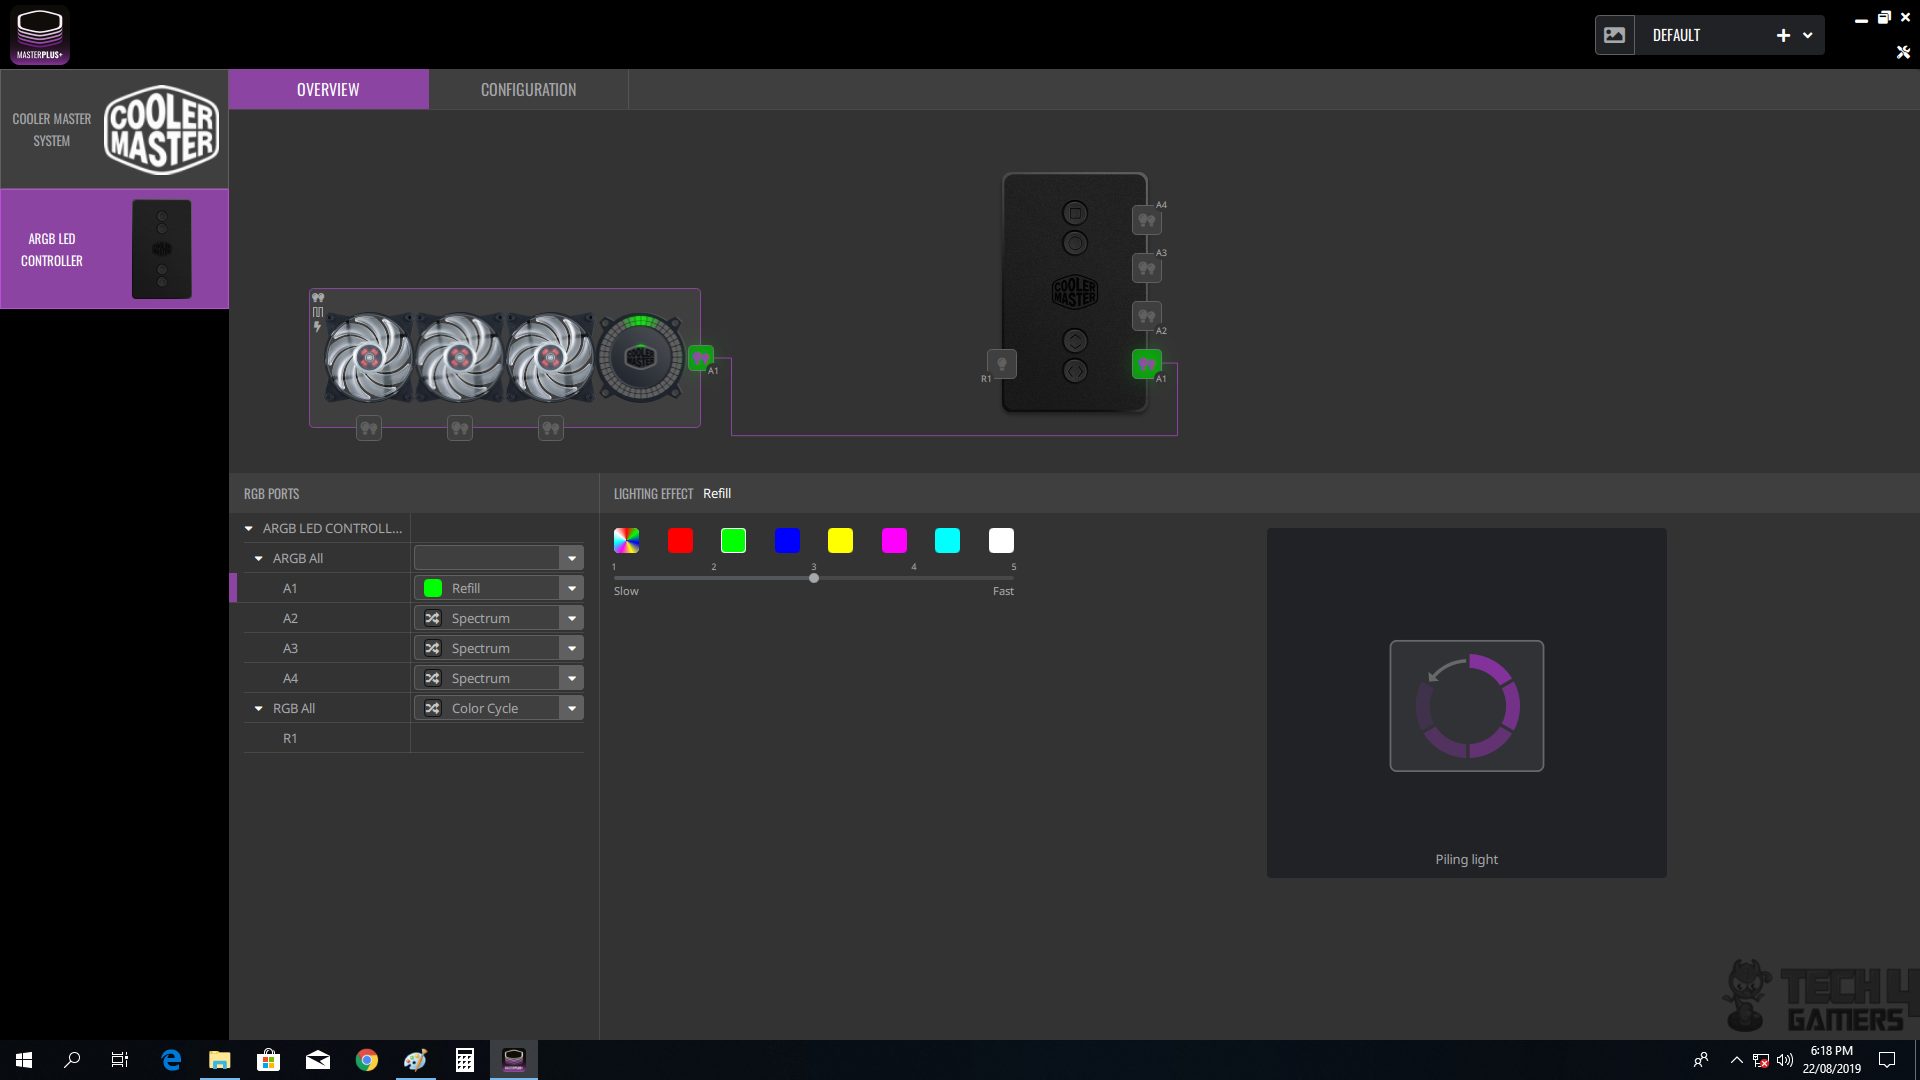
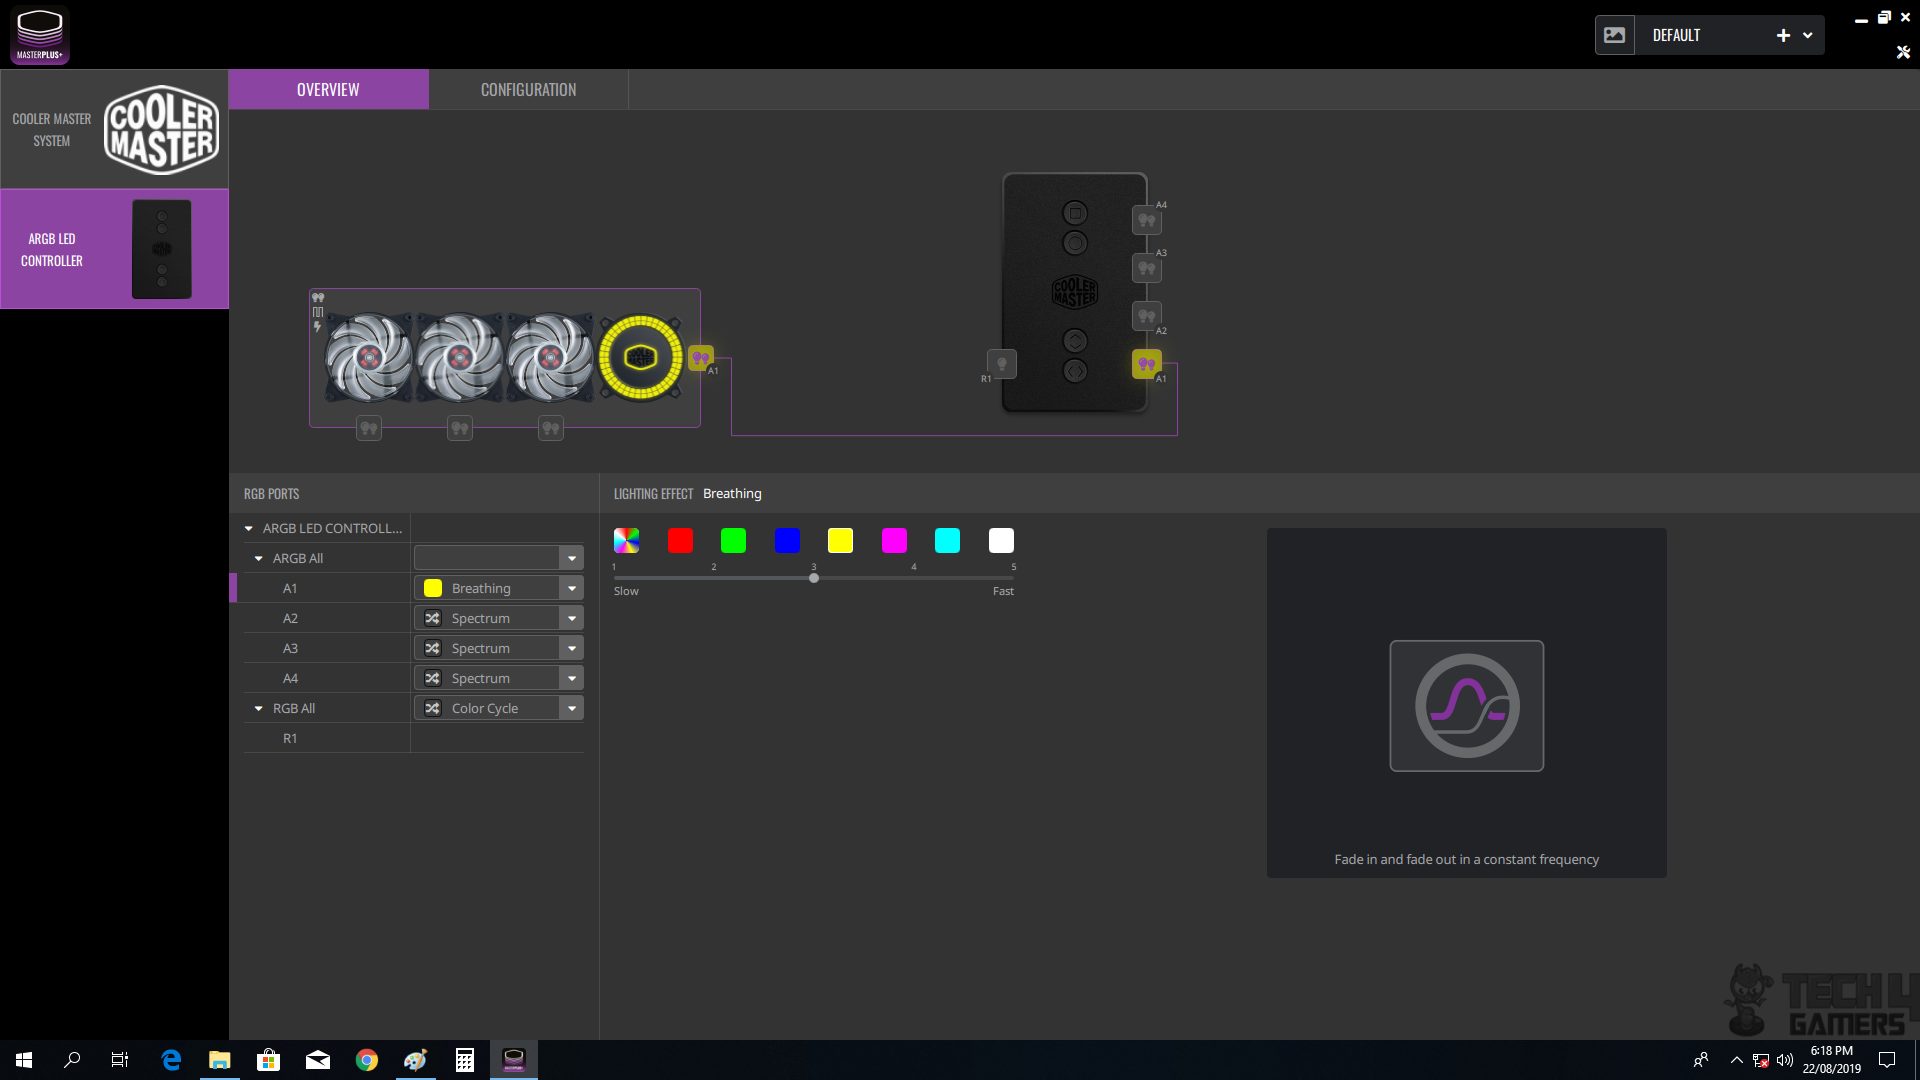
Cool Master ML360R RGB Lighting
The MF120R ARGB fans boast stunning lighting effects with 16.7M colors, which I personally find impressive. You can easily set static colors through the RGB mode on the control box or customize them using the MasterPlus software. In my opinion, the visuals are truly captivating.

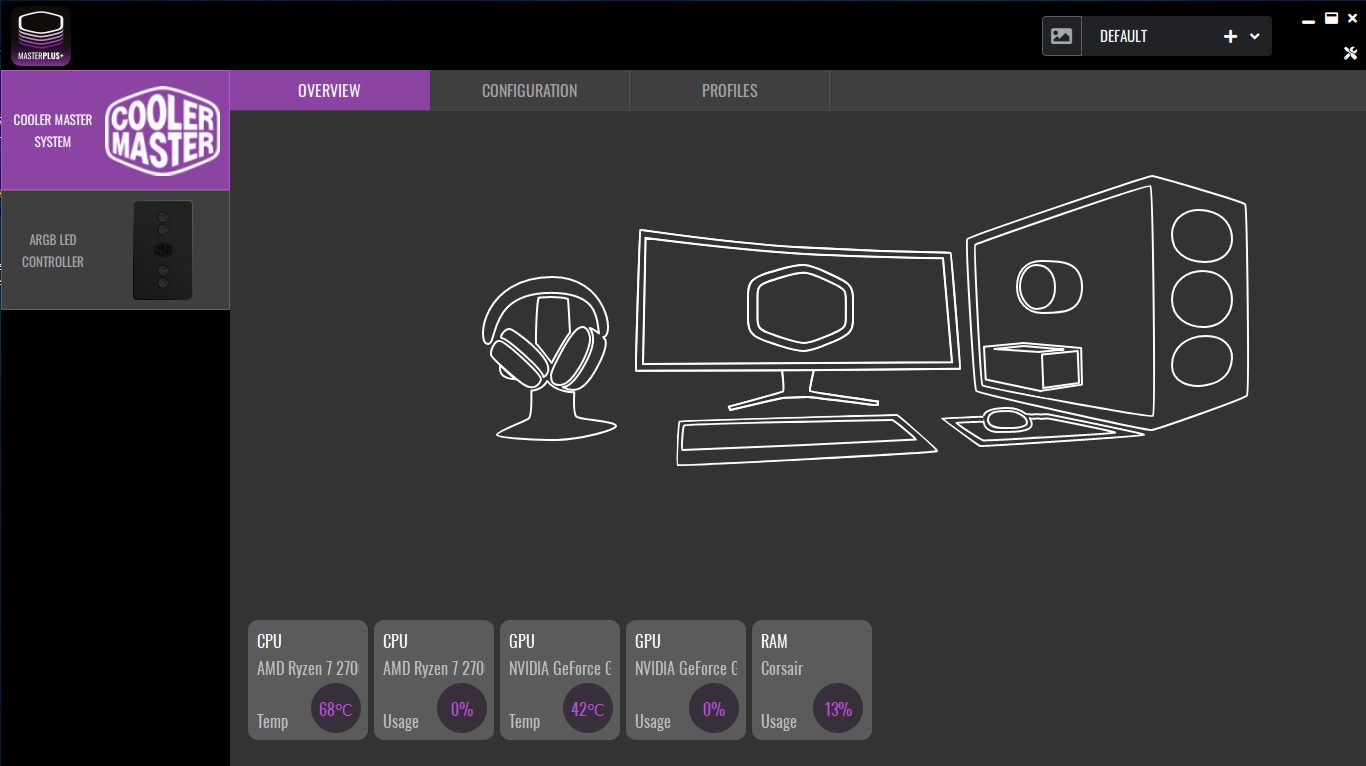
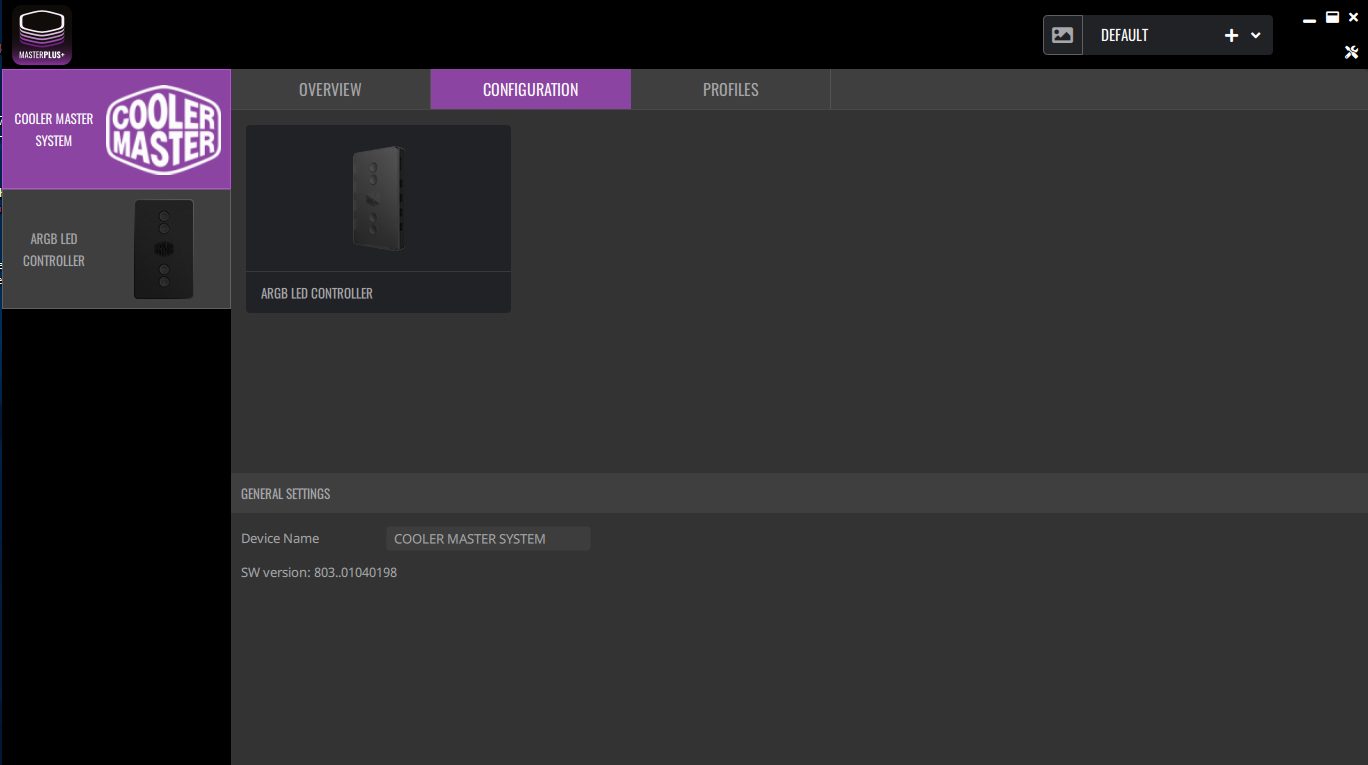
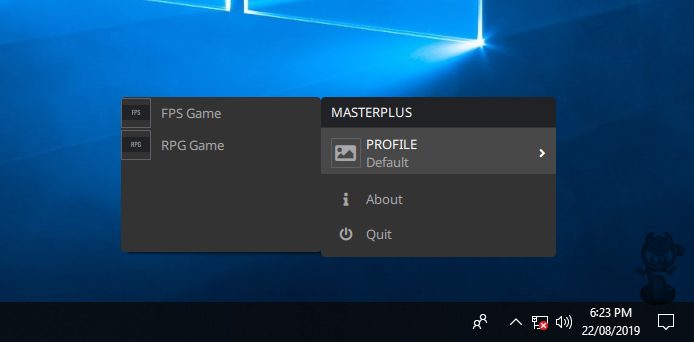
MasterPlus
I have covered the MasterPlus software as well.


ML360R Installation
I have tested this cooler on an Intel LGA2011-V3 socket (X99) and AMD AM4 platform.
Below is the installation guide for Intel LGA 2011-V3
- Install the LGA-2011 screws on the mounting holes around the CPU Socket
- Install the Intel mounting brackets on to the Cooler’s base using 4x small screws. Make sure that brackets are pointing outwards. Consult the manual before installation. The screws are mounted from the underside of the base.
- Take off the warning sticker from the base of the cooler.
- Apply the thermal paste on the CPU Surface.
- Place the cooler on the CPU by aligning the holes on the mounting brackets’ heads with the LGA 2011 screws.
- Secure the cooler by using the hex nuts. Use a screwdriver for this job and go diagonal for even pressure.
- Connect the 3-pin power cable to the CPU fan header or any of your desire fan header.
- Connect the 4-pin LED cable to the controller or RGB header on the motherboard.
- This would complete the installation.
AMD AM4 Installation
Installation on the AM4 platform is as follows:
- Install the AMD mounting brackets on to the Cooler’s base using 4x small screws. Make sure that brackets are pointing outwards. Consult the manual before installation. The screws are mounted from the underside of the base.
- Take off the warning sticker from the base of the cooler.
- Apply the thermal paste on the CPU Surface.
- The cooler will be installed on AMD stock backplate.
- Place the block on the CPU by aligning the hooks on the brackets with the latches or catchers on the stock backplate. Once placed, simply hand-tighten the screws to the full.
- Connect the 3-pin power cable to the CPU fan header or any of your desire fan header.
- Connect the 4-pin LED cable to the controller or RGB header on the motherboard.
- This would complete the installation.
Clearance and Installation Notes
The best thing about AIOs is the maximum clearance and compatibility with respect to the chassis, DIMM slots, and PCIe slots. This cooler has no such clearance issue. The tubes are not blocking any DIMM slot, and RAM modules of any height can be used. Similarly, the block is not obstructing the first PCIe x16 3.0 slot. Make sure that the chassis has provision for a 360mm radiator mounting and clearance for 55mm, and you are good to go.
Cooler Master ML360R Testing
Following test benches have been used: –
| Test Bench | Intel Test Bench | AMD Test Bench |
|---|---|---|
| Processor | Intel i7 6850k | AMD Ryzen 2700X |
| Motherboard | ASUS Rampage V Edition 10 | Asus Strix X470-F Gaming |
| RAM | Corsair Vengeance RED LED 16GB @ 2666MHz | Corsair Vengeance Pro RGB 16GB @ 3200MHz |
| SSD | Samsung 840 EVO 250GB SSD | HyperX 120GB SSD |
| Graphics Card | Colorful GeForce GTX 1050Ti Vulkan | Colorful GeForce GTX 1050Ti Vulkan |
| PSU | Corsair AX1200i | Antec HCP1300 |
Following software were used for testing and monitoring.
- Asus Real Bench v 2.44 (Intel)
- Real Temp GT v 3.70 (Intel)
- AIDA64 6.0 (AMD)
Here is the settings table for testing:
| Intel | Stock Voltage (V) | 1.130 |
| Stock Clock (MHz) | 3600 | |
| OC Voltage (V) | 1.350 | |
| OC Clock (MHz) | 4300 | |
| AMD | Stock Voltage (V) | 1.1125 |
| Stock Clock (MHz) | 3700 | |
| OC Voltage (V) | 1.3250 | |
| OC Clock (MHz) | 4100 | |
| Turbo Boost | Disabled | |
| C-States | Disabled | |
| Speed Step | Disabled | |
| XFR | Disabled | |
| Thermal Paste | Noctua NT-H1 | |
| Test Run Time | 60 minutes | |
| Idling Time | 15 minutes | |
| Fan Speed | Manually set to run at 100% speed | |
| Pump Speed | Connected to the AIO Pump header to run at 100% speed | |
We used Noctua NT-H1 thermal paste for standardization across all coolers, preventing any performance variations due to different thermal paste. Delta temperatures are displayed in the graphs, and the testing was conducted on an open-air bench system.
Keep in mind that results may vary due to factors like mounting pressure, thermal paste application, ambient temperature, and silicon differences among chips. Cooler Master MasterLiquid ML360R Review performed admirably under these conditions.
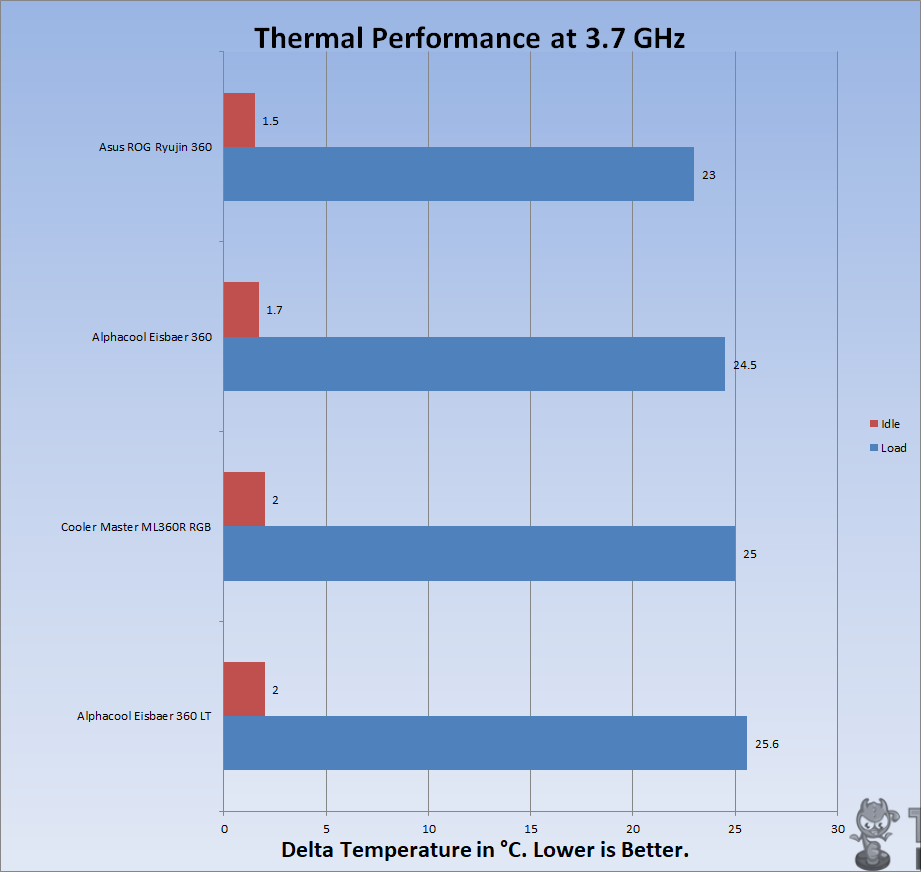
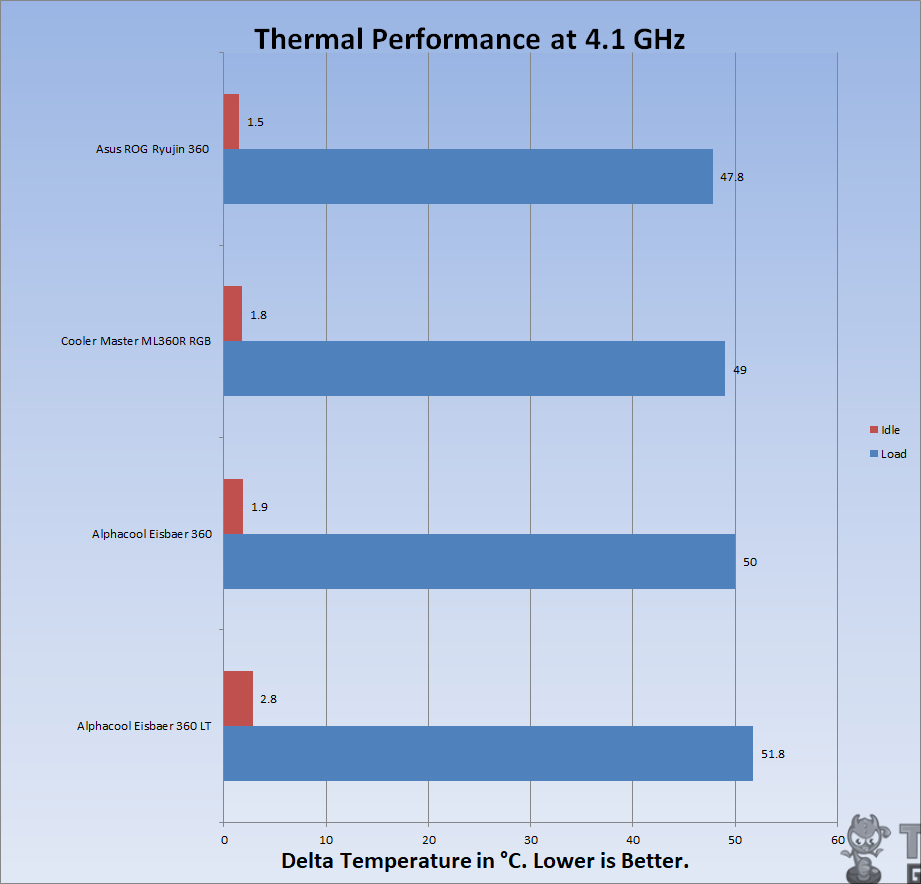
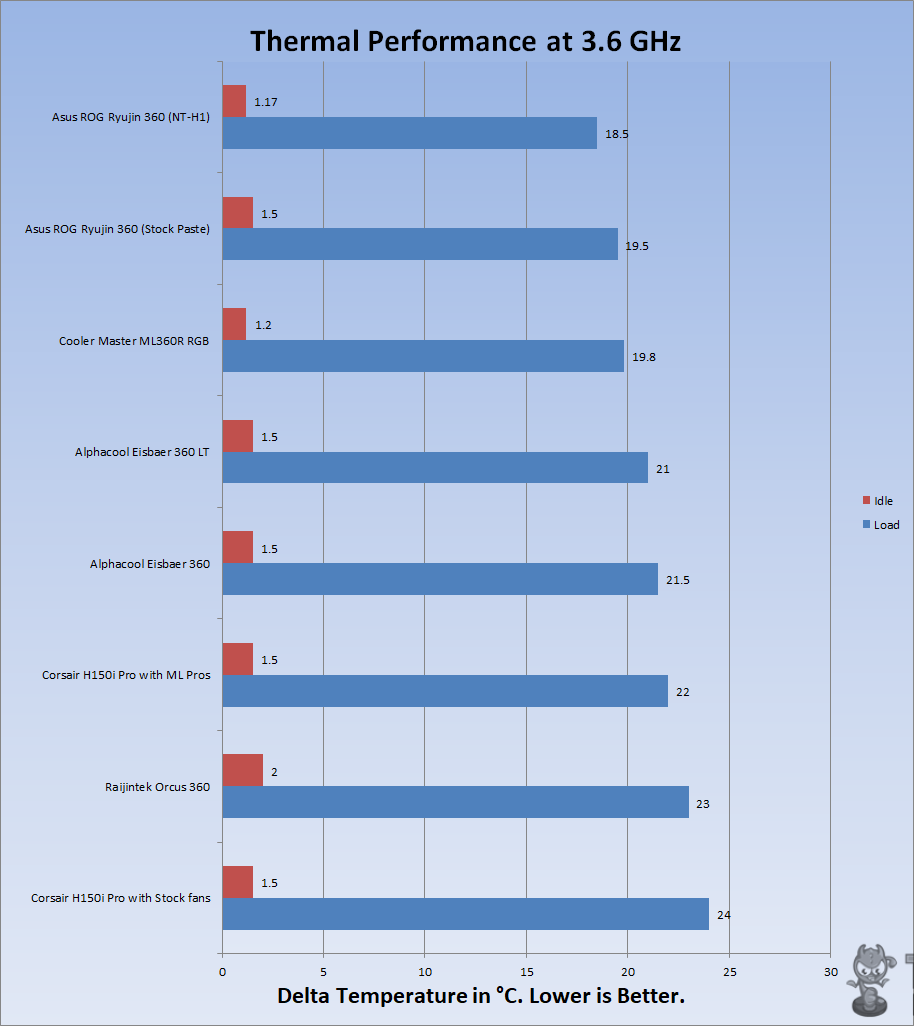
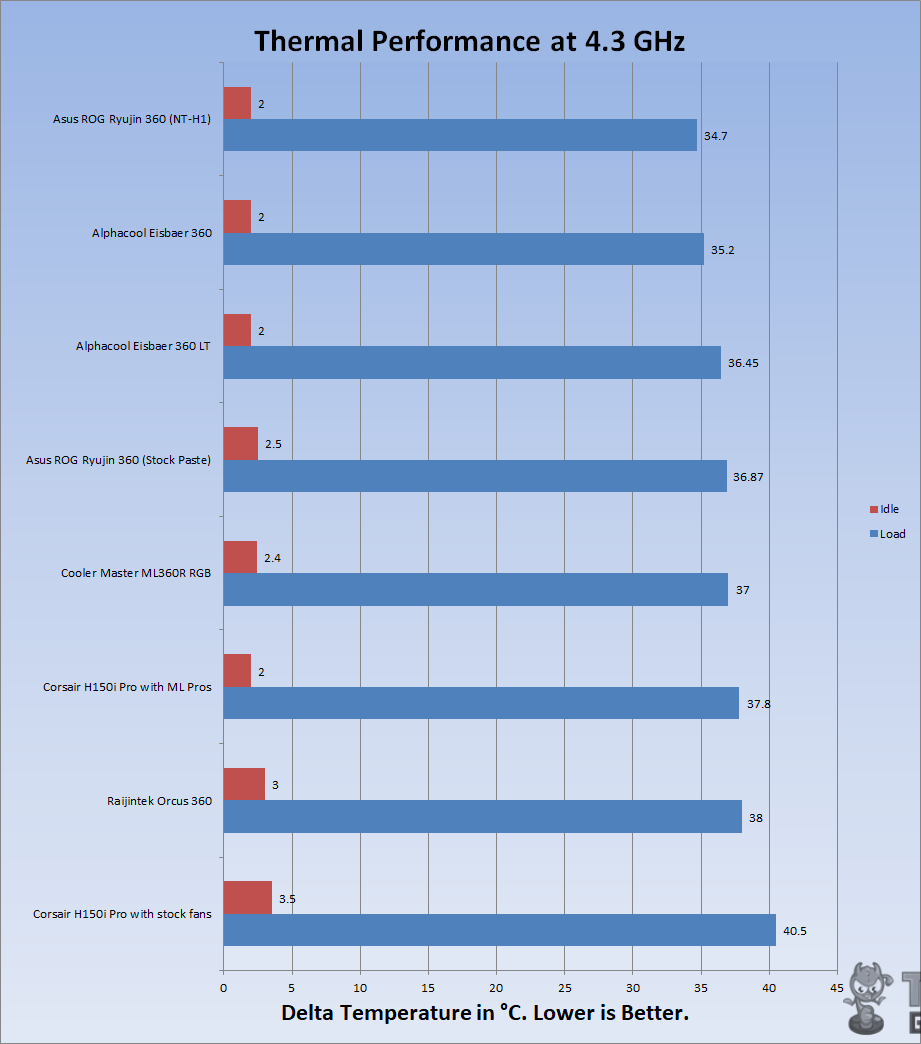
Again a good performance by Cooler Master MasterLiquid ML360R RGB is observed.
Cool Master ML360R Acoustic
I could not measure the sound level of the unit as the summer season here is at peak and ceiling fan plus noise coming out of the room would invalidate the actual sound level. Based on my experience with the fans and coolers testing so far, the fans were audible but not teasing.
Similarly, the pump is relatively louder than the other pumps which I have tested. The initial sound from the pump is due to the bubbles. Cooler Master has mentioned that running the cooler for like 15 minutes will see that noise gone.
Should You Buy It?
You Should Buy It If:
You want a value-oriented 360mm cooler: The Cooler Master MasterLiquid ML360 RGB boasts an incredible price-to-performance ratio.
You prefer a visually appealing cooler: Its sleek black design coupled with the mix of RGB makes it an aesthetically appealing 360mm cooler.
You want to benefit from a lower-profile pump: Anyone working with smaller PC case space will certainly be interested in the low-profile pump and its excellent capabilities.
You Shouldn’t Buy It If:
You want a silent cooler: Unfortunately, I noticed that the Cooler Master MasterLiquid ML360 is not capable of providing a whisper-quiet experience, which might bother some users.
You want an uncluttered experience: Given the amount of cables included, managing all of them can be a hassle, especially for anyone who wants an uncluttered experience out of the box.
Conclusion
Cooler Master’s MasterLiquid ML360R is part of their strong Master series comeback, catering to various market segments, from entry-level to enthusiasts. We previously reviewed the ML240L. The ML360R RGB features a 360mm aluminum radiator with low resistance, high flow design, and 20 FPI. It’s relatively slim, with a total height of around 55mm including fans and screws.
The pump boasts a low-profile dual-chamber design with ARGB lighting and 90° barbs and the three-phase motor operates at 12V DC, with excellent longevity. While the noise level is rated at 15 dB(A), the pump can be audible. It operates at 2115 RPM, with fan airflow up to 66.7 CFM and a noise range of 6~30 dBA.
Overall, I’m impressed with the lighting effects on the MasterFan MF120R ARGB fans. Thanks to Cooler Master for the opportunity to review the MasterLiquid ML360R RGB CPU Liquid Cooler. However, note that the pump may be audibly noisy, so consider this when making your choice.
Awards Won By The CoolerMaster MasterLiquid ML360R RGB
The CoolerMaster MasterLiquid ML360R won the following Tech4Gamers Awards.
Recent Updates
- November 5, 2023: Few text changes to improve readability. Added galleries
Thank you! Please share your positive feedback. 🔋
How could we improve this post? Please Help us. 😔
[Editor-in-Chief]
Sajjad Hussain is the Founder and Editor-in-Chief of Tech4Gamers.com. Apart from the Tech and Gaming scene, Sajjad is a Seasonal banker who has delivered multi-million dollar projects as an IT Project Manager and works as a freelancer to provide professional services to corporate giants and emerging startups in the IT space.
Majored in Computer Science
13+ years of Experience as a PC Hardware Reviewer.
8+ years of Experience as an IT Project Manager in the Corporate Sector.
Certified in Google IT Support Specialization.
Admin of PPG, the largest local Community of gamers with 130k+ members.
Sajjad is a passionate and knowledgeable individual with many skills and experience in the tech industry and the gaming community. He is committed to providing honest, in-depth product reviews and analysis and building and maintaining a strong gaming community.


