 Threads
Beautiful Looks!
Review Summary
The Thermaltake H550 is a compact mid-tower chassis notable for its sleek design, integrating a 2mm diamond-cut brushed aluminum front panel with an ARGB lighting strip. It supports standard ATX-size motherboards and offers ample cooling options, including up to a 360mm radiator in the front and a 240mm radiator on top. While it excels in aesthetics and component compatibility, the chassis is somewhat limited in front-side air intake and comes with only one pre-installed rear fan.
Hours Tested: 8-10

Overall
-
Performance - 7/10
7/10
-
Design - 9/10
9/10
-
Features - 8/10
8/10
-
Value - 8/10
8/10
Pros
- Sleek and Aesthetic Design
- Versatile Motherboard Compatibility
- Ample Cooling Options
- Effective Dust Management
- Integrated ARGB Lighting
Cons
- No Front-Mounted Fans
- No Fan Speed Control for Rear Fan
- Potential Space Constraints for Vertical GPU


Today we will be taking a look at the Thermaltake H550. This is a compact mid-tower chassis with support up to standard ATX size motherboards. It has a 2mm diamond-cut brushed aluminum front panel which packs an ARGB lighting strip on the side to create one heck of a good show. The chassis has ample support for cooling gear with a maximum of 360mm radiator up front and/or 240mm radiator up top. Let’s discuss more as we get into the review.
- Why you can trust Tech4Gamers: Our reviews are based on dedicated hands-on testing by our team of experienced hardware experts. Find out more about how we test.
Key Takeaways
- The chassis is good for ATX-sized motherboard users seeking sleek design, ample space for components, and integrated ARGB lighting.
- This chassis is not for those requiring front-mounted fans or extensive front-side air intake due to design limitations impacting thermal performance.
- Stand-out features include a bold brushed aluminum front panel, efficient cable management with a spacious shroud, and an integrated RGB switchboard for lighting control.
Let’s start with the specifications.
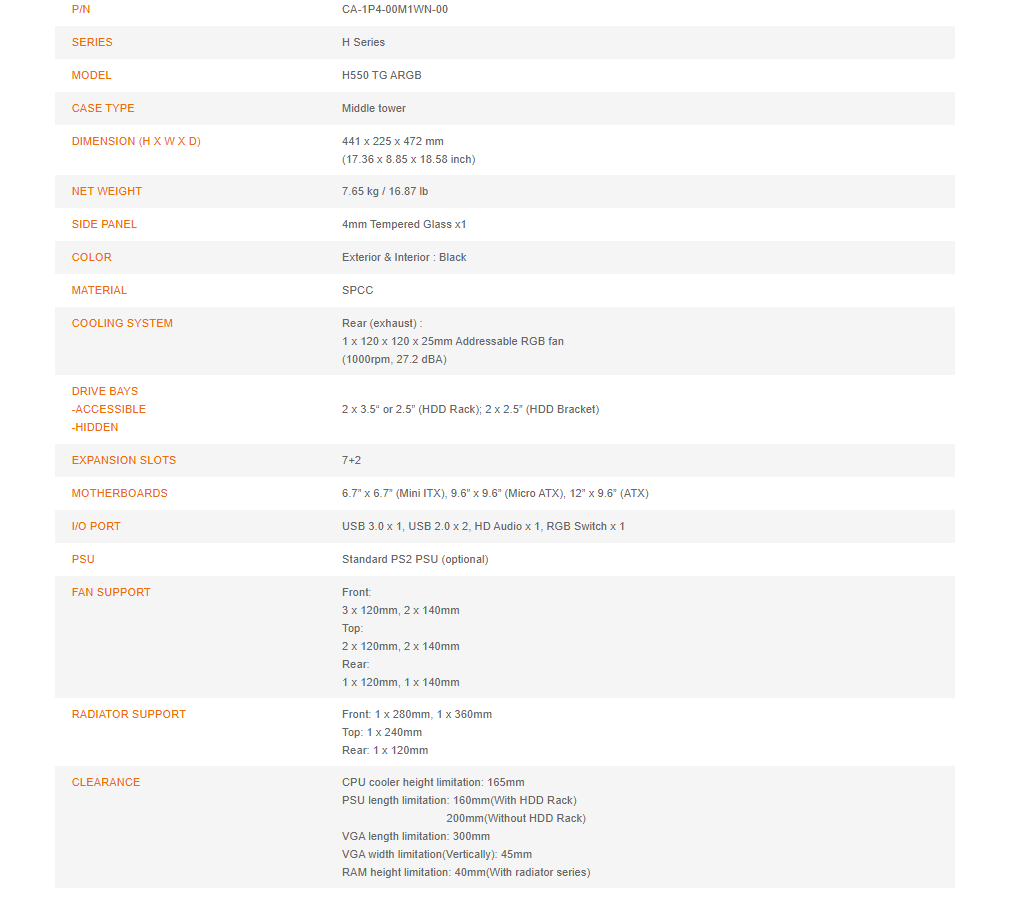
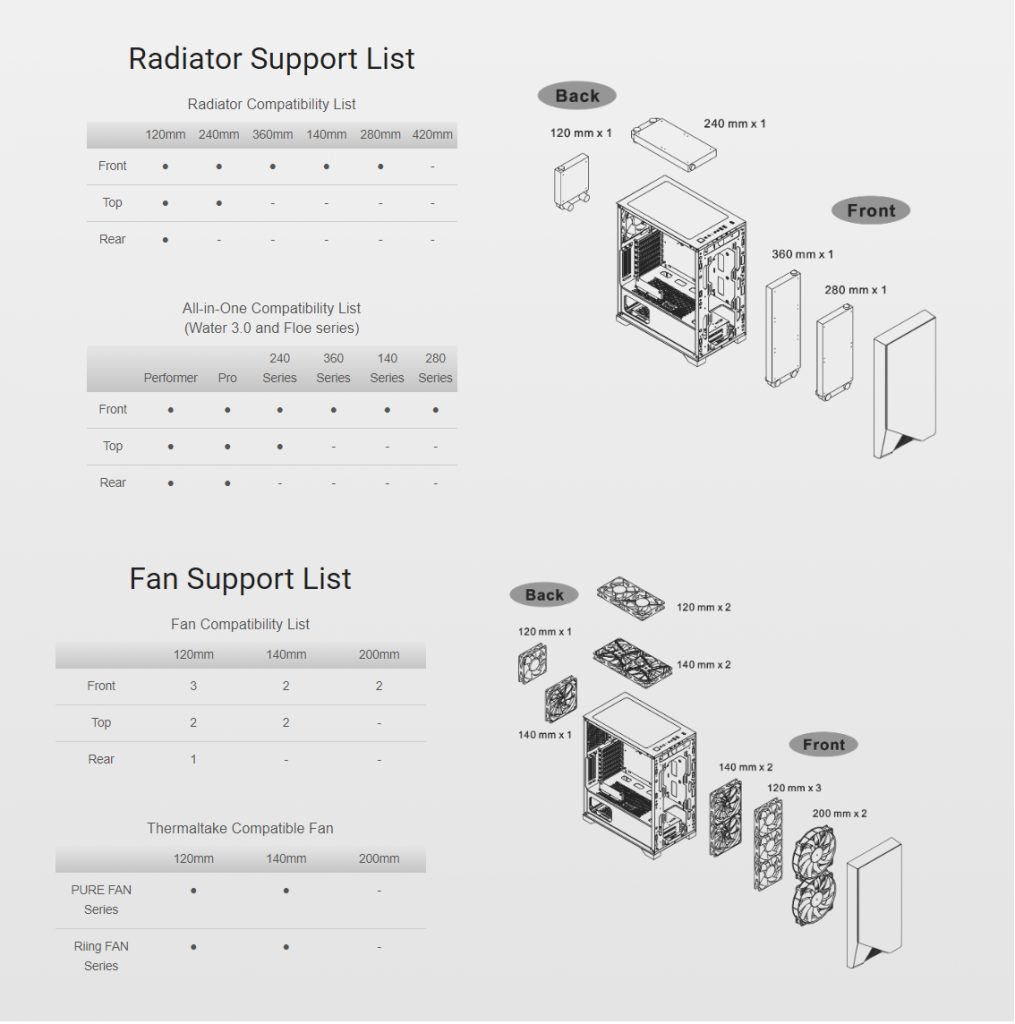
Also, pictured below is the complete listing of fan and radiator support.
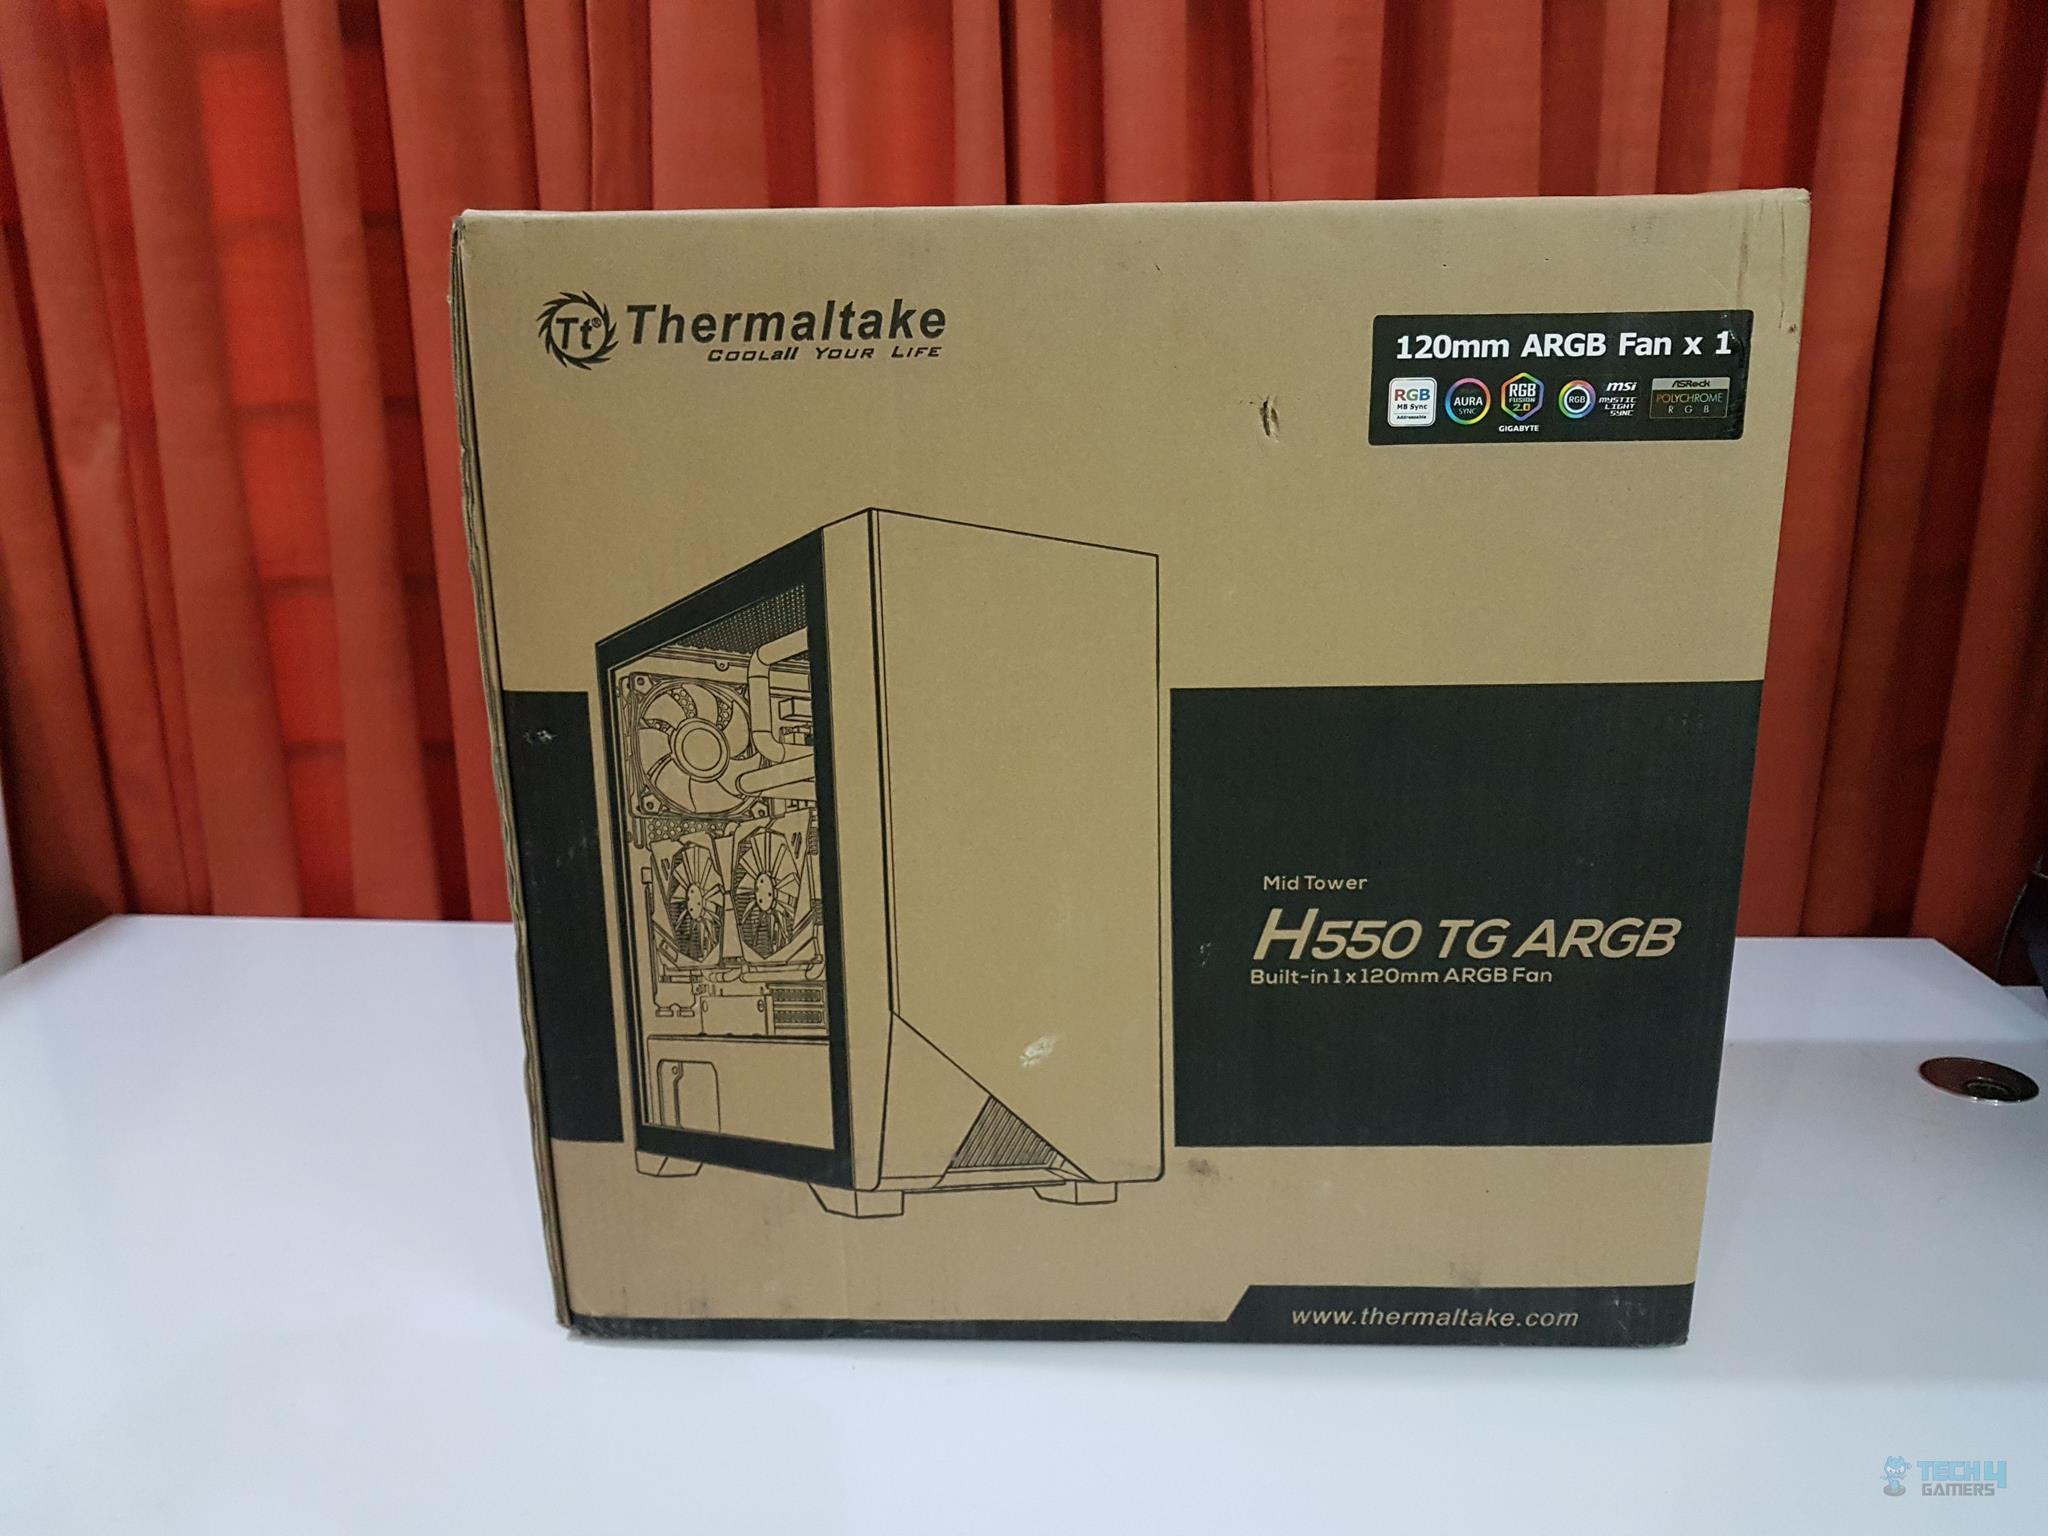
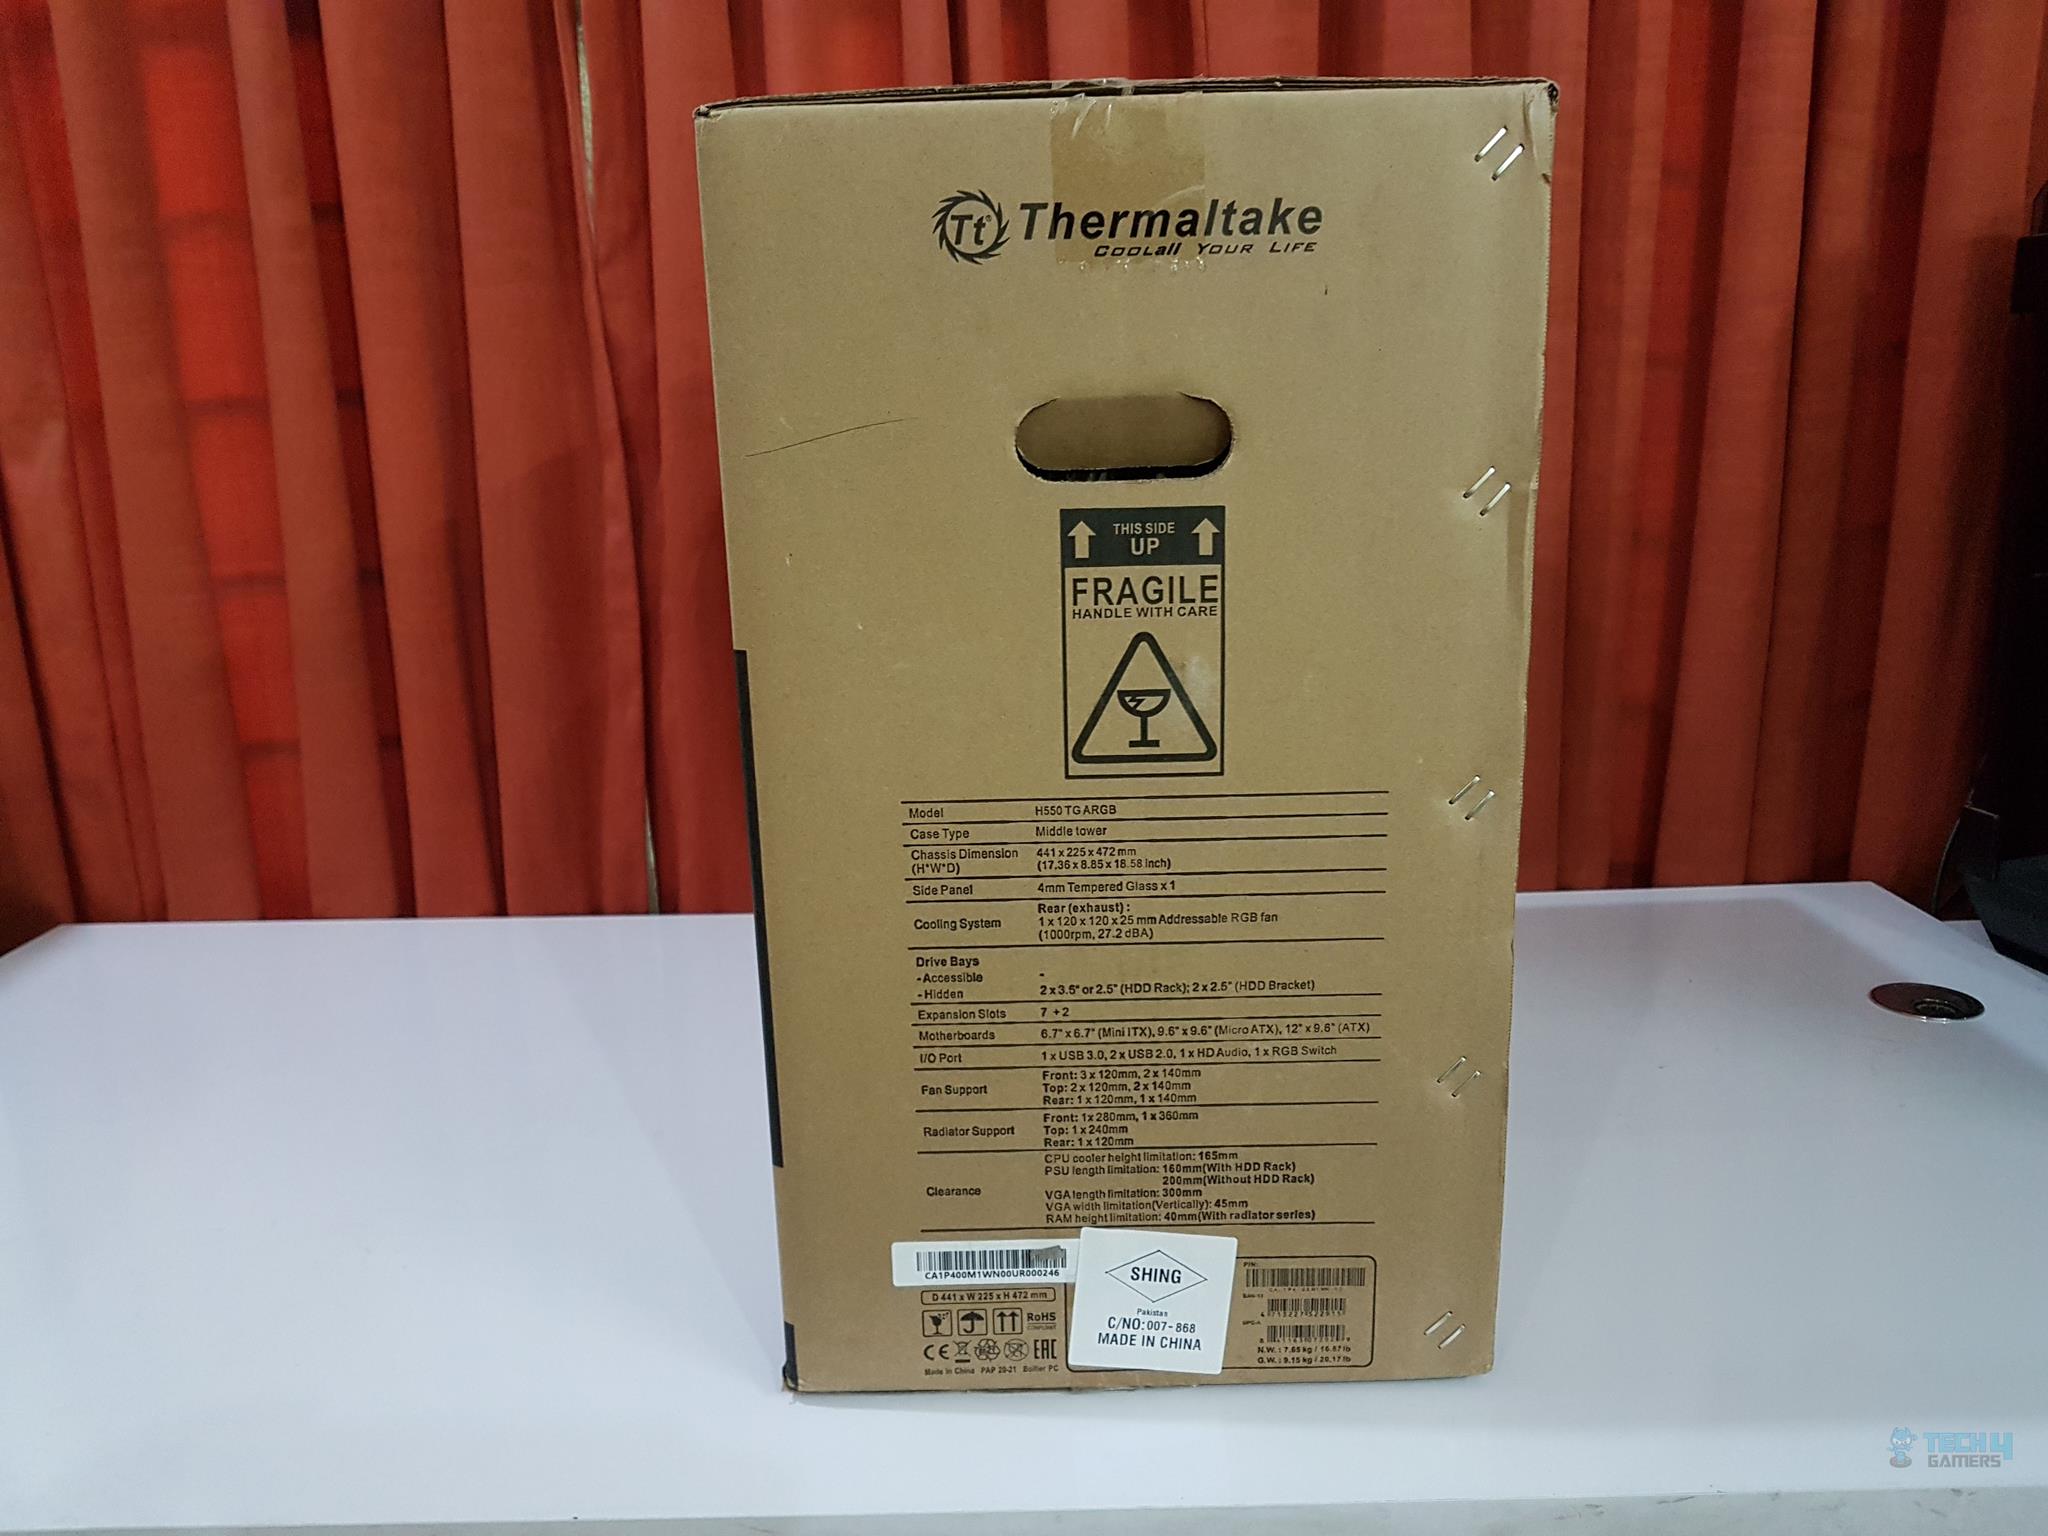
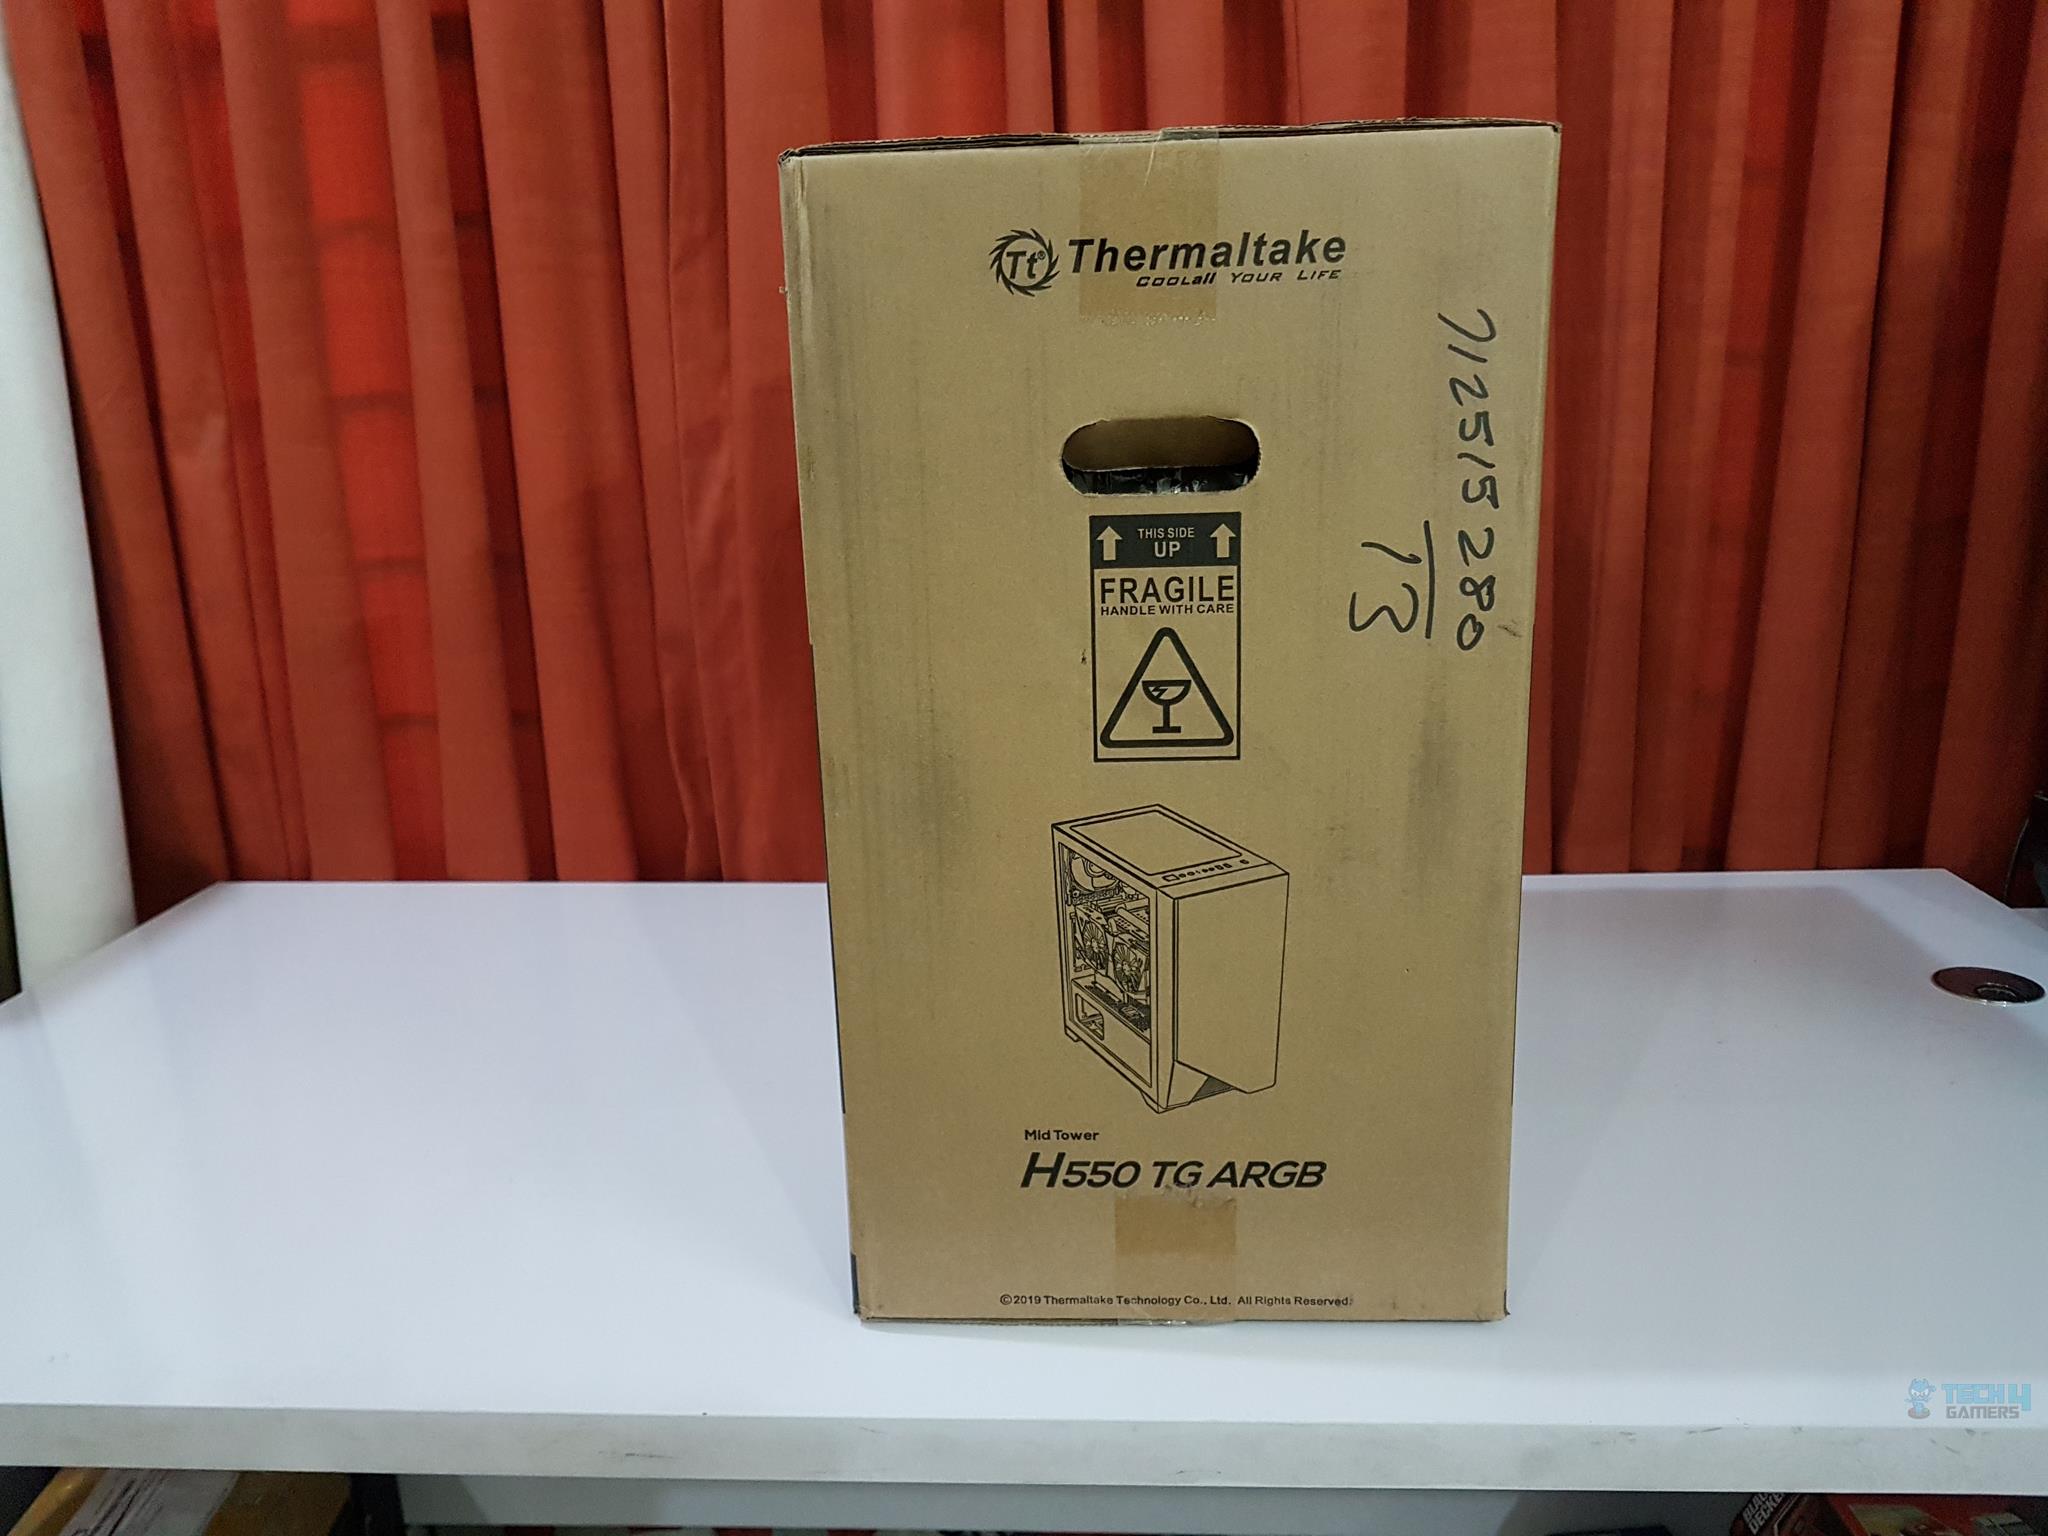
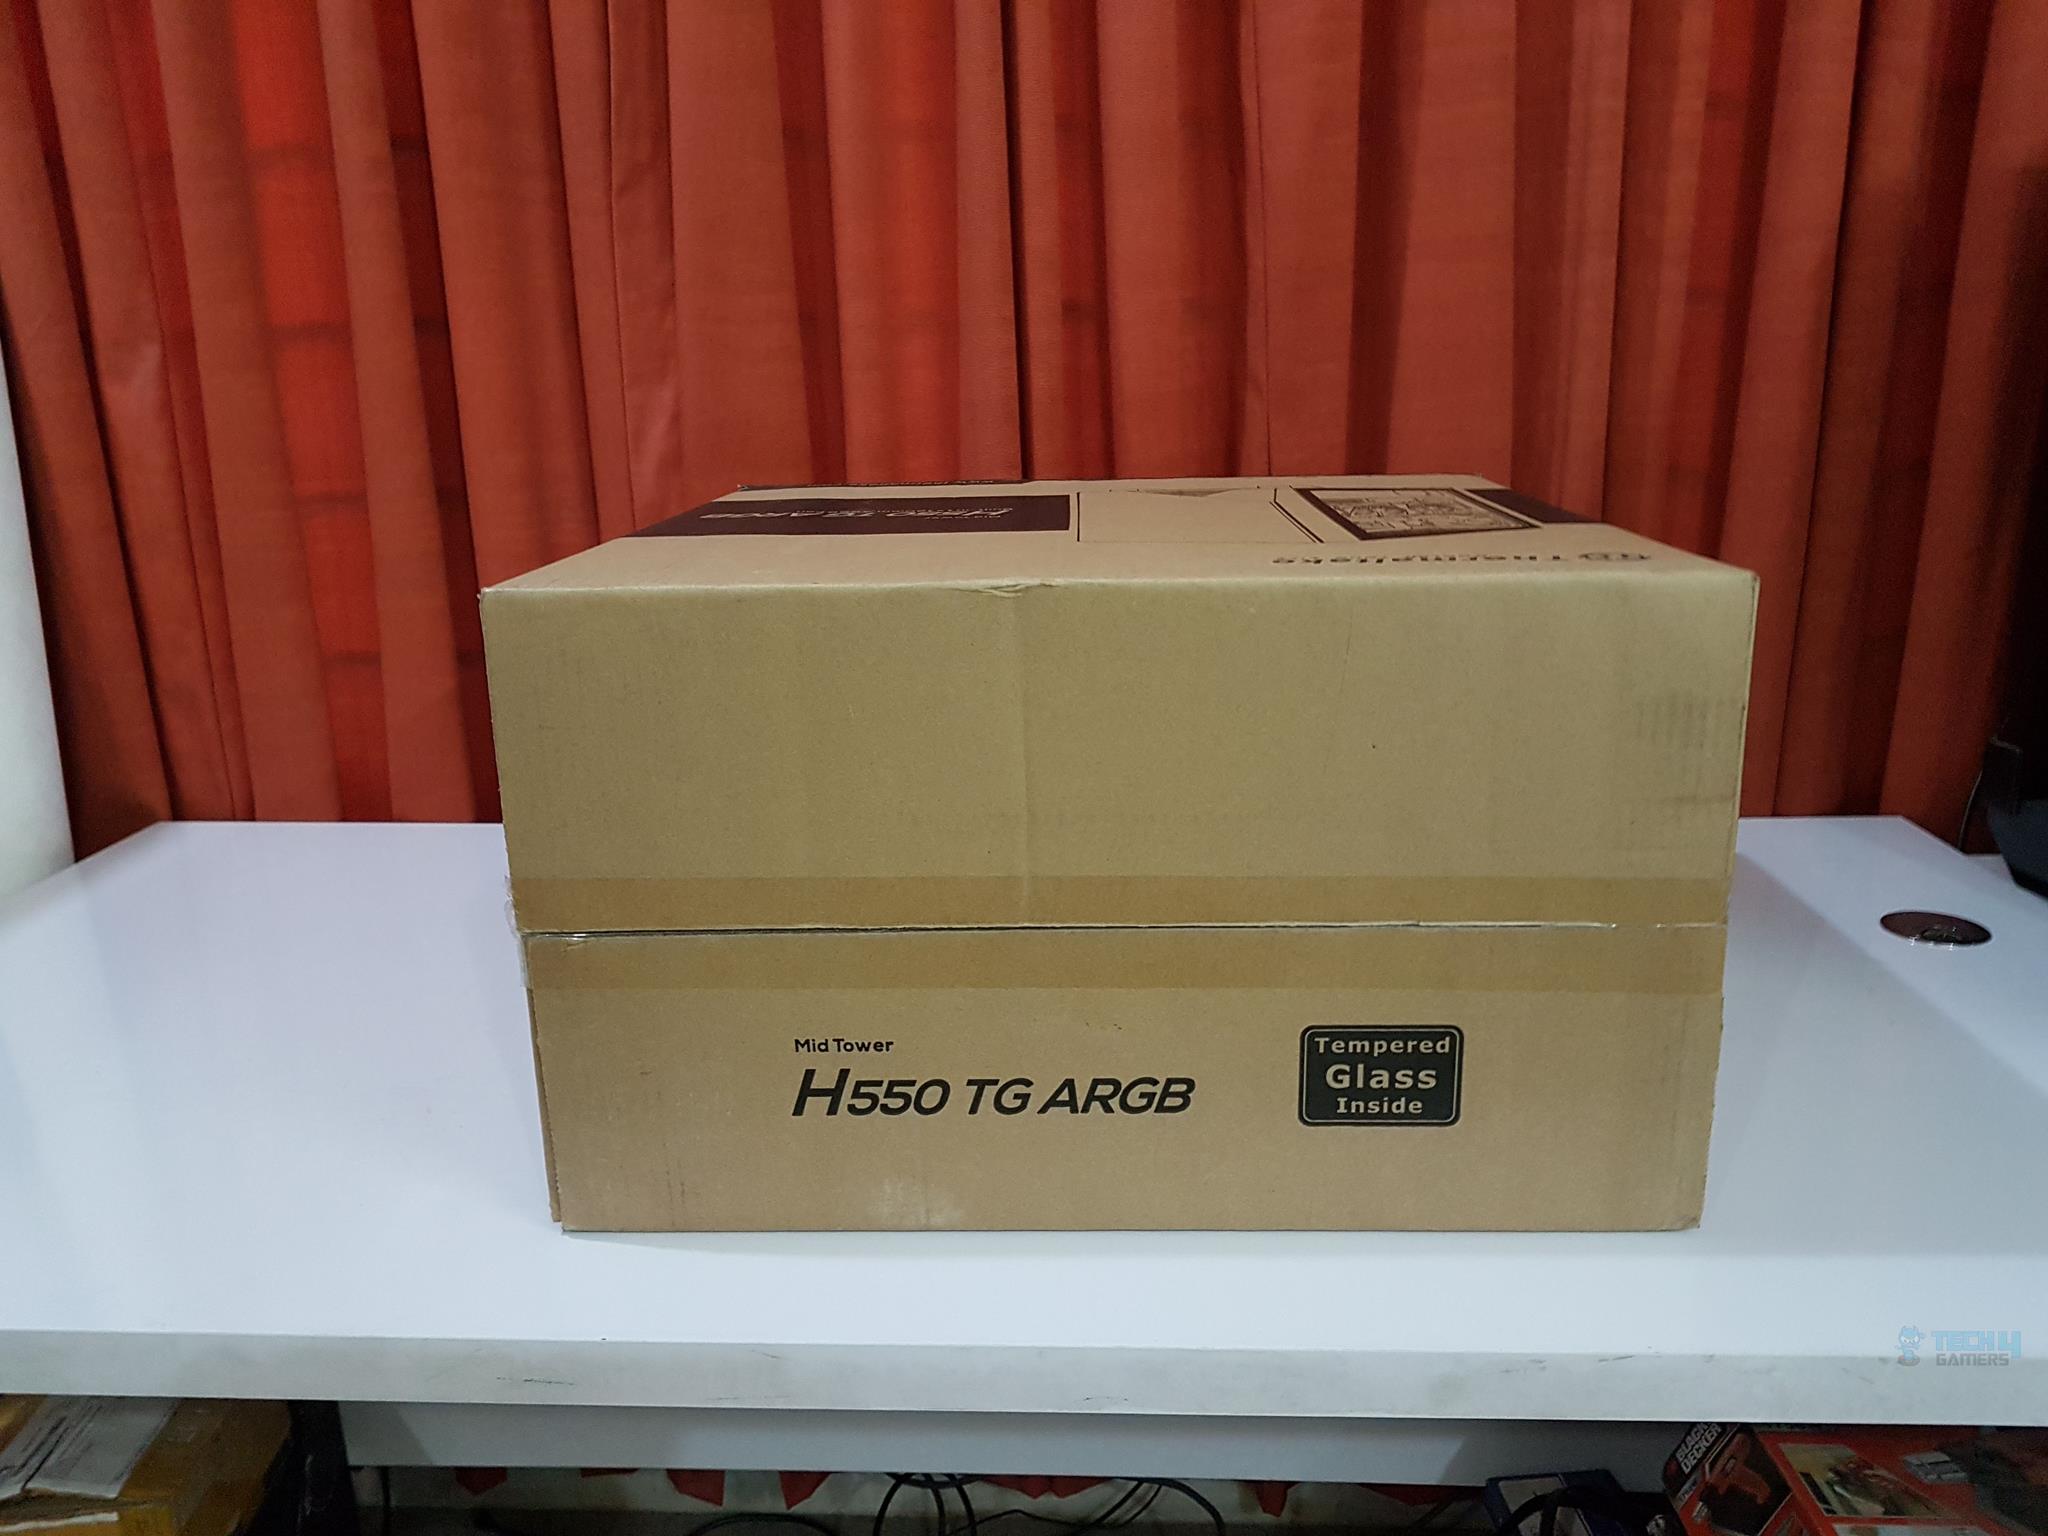
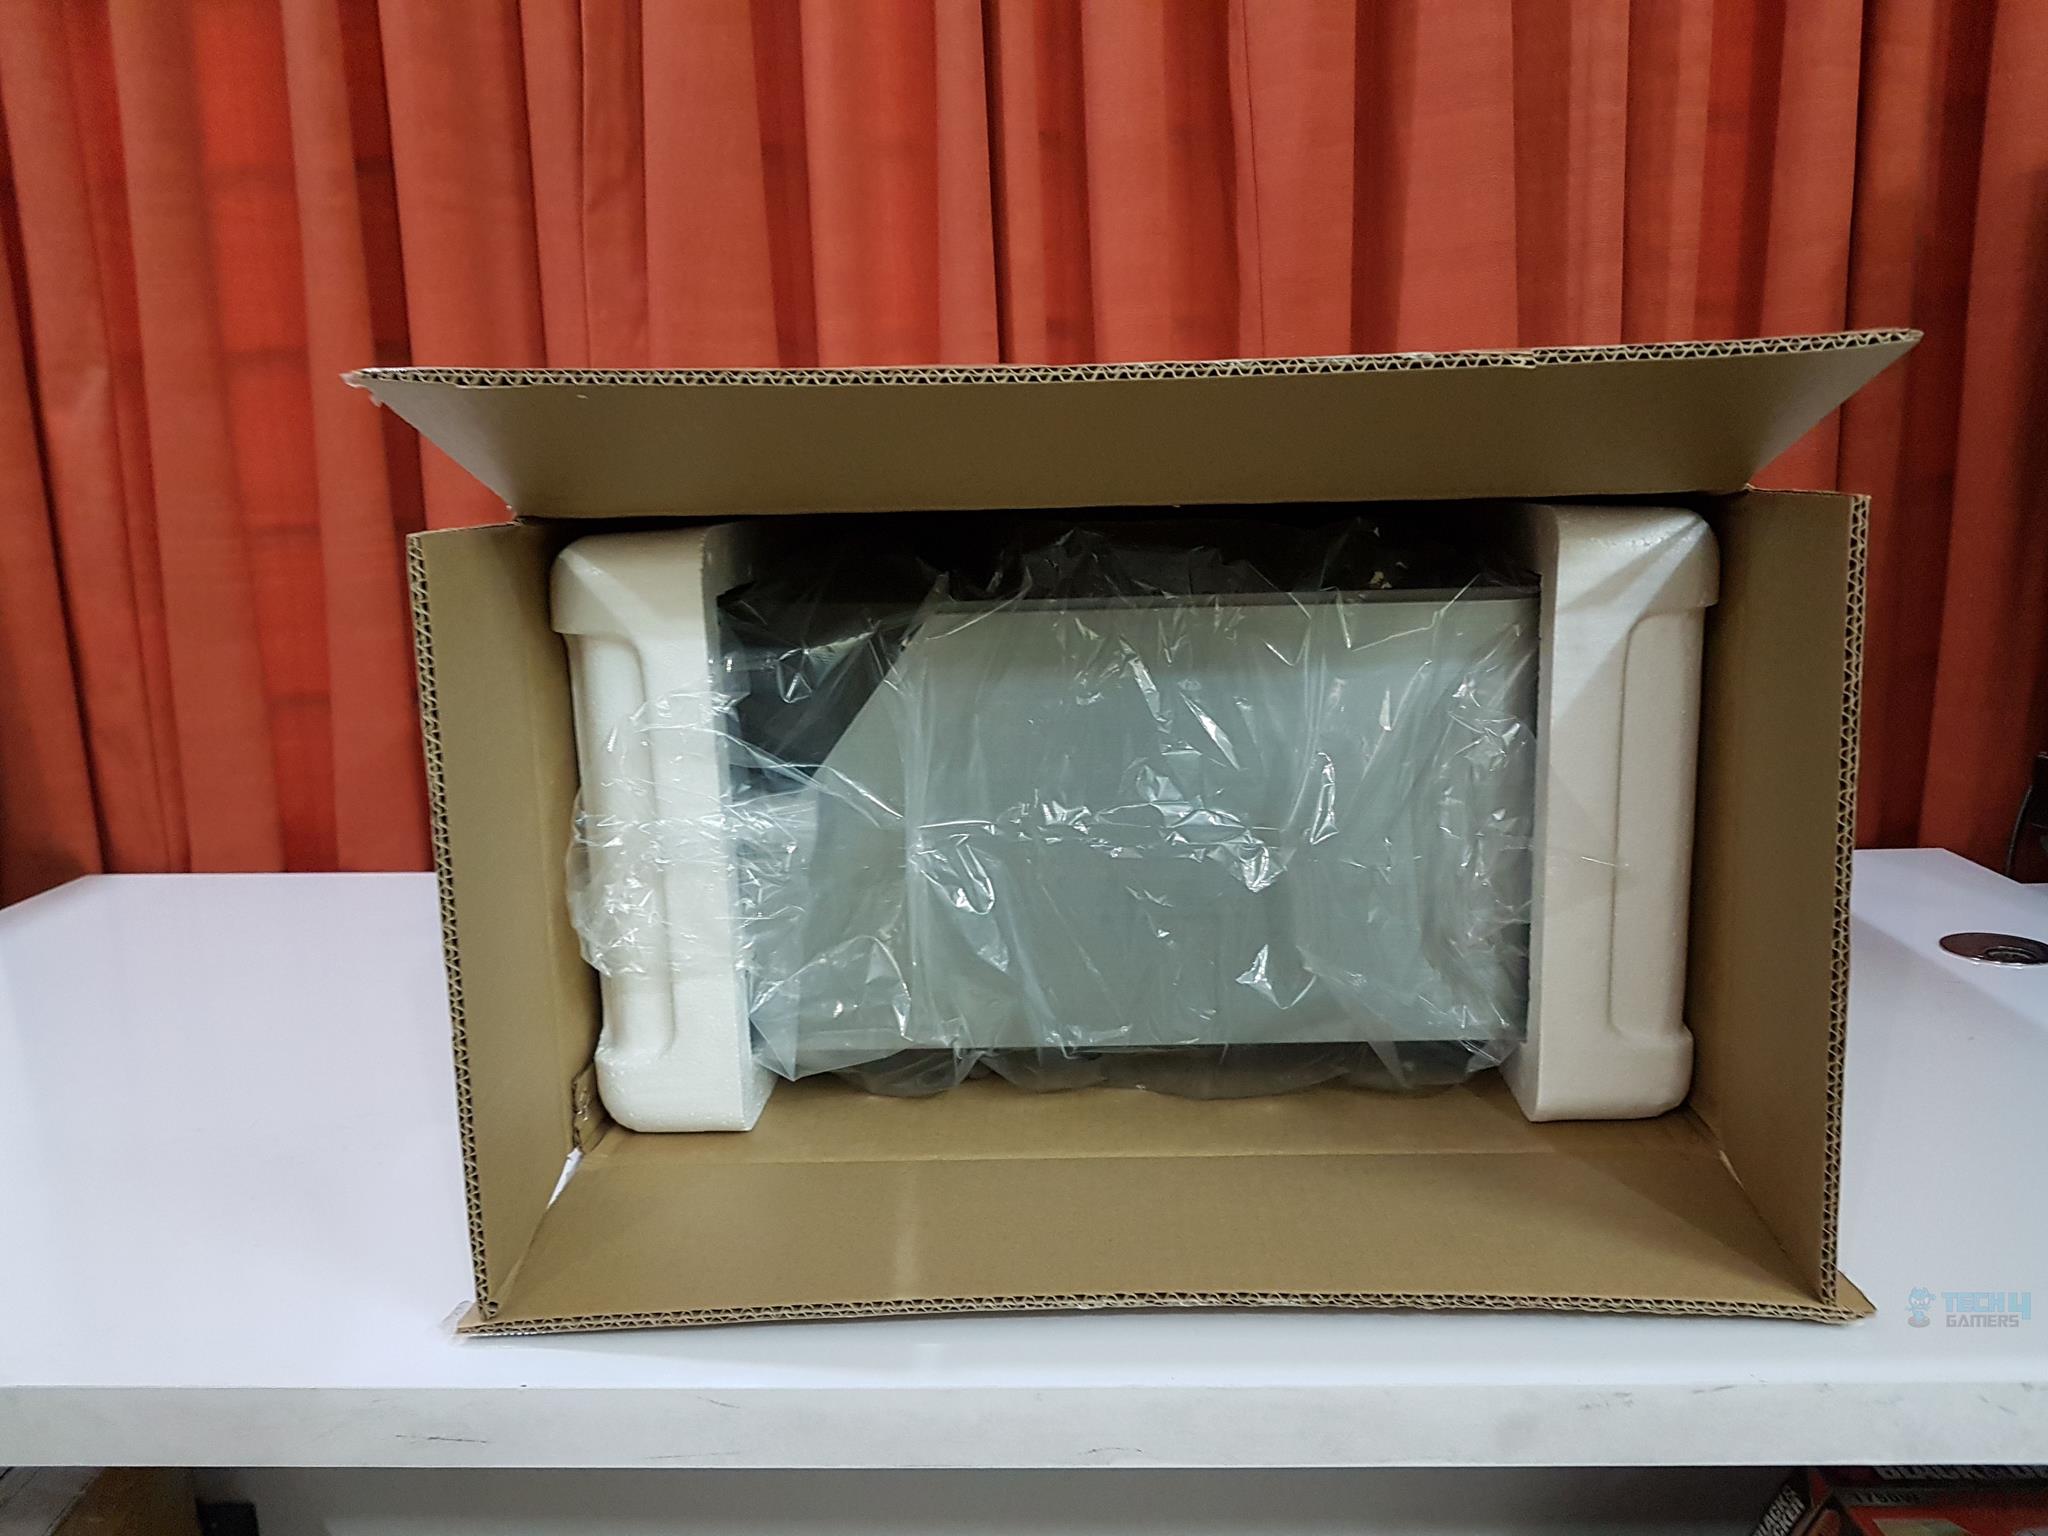
Packaging and Unboxing
The Thermaltake H550 Review is shipped inside a standard brown color cardboard box.
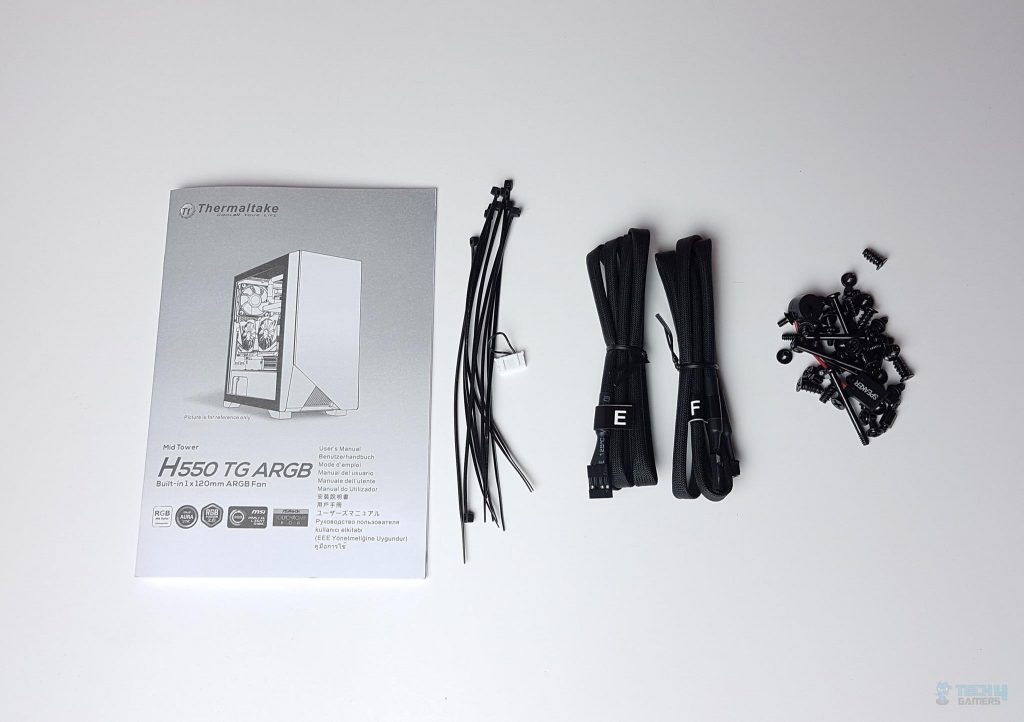
Box Contents
Let’s see what’s inside the box.
Closer Look
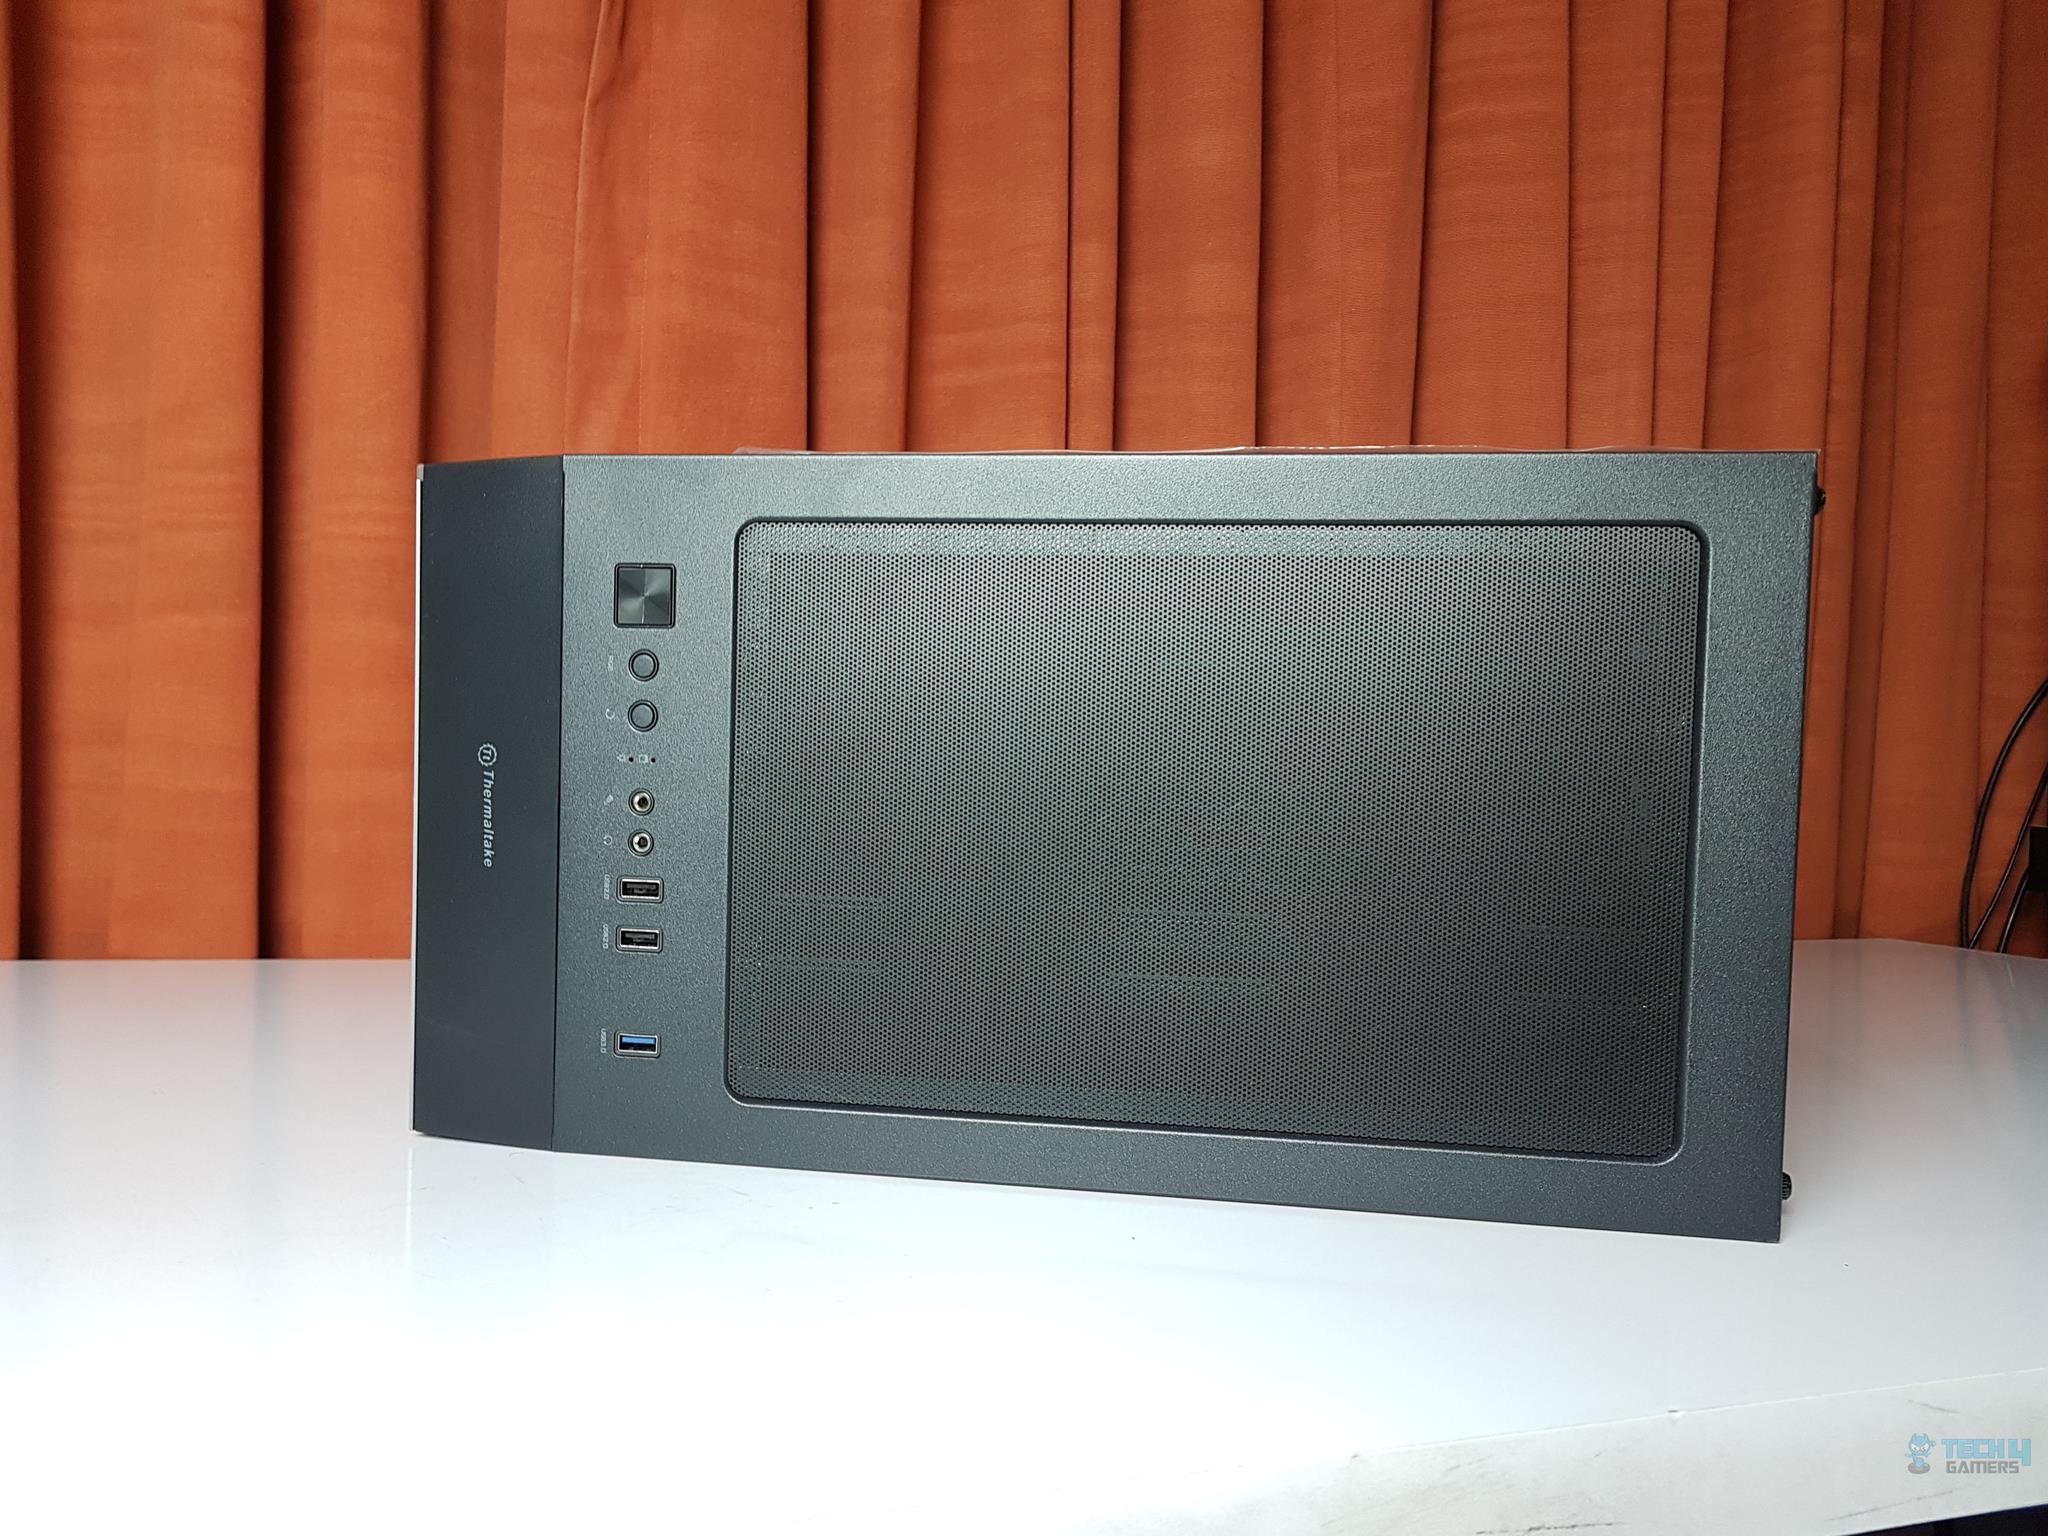
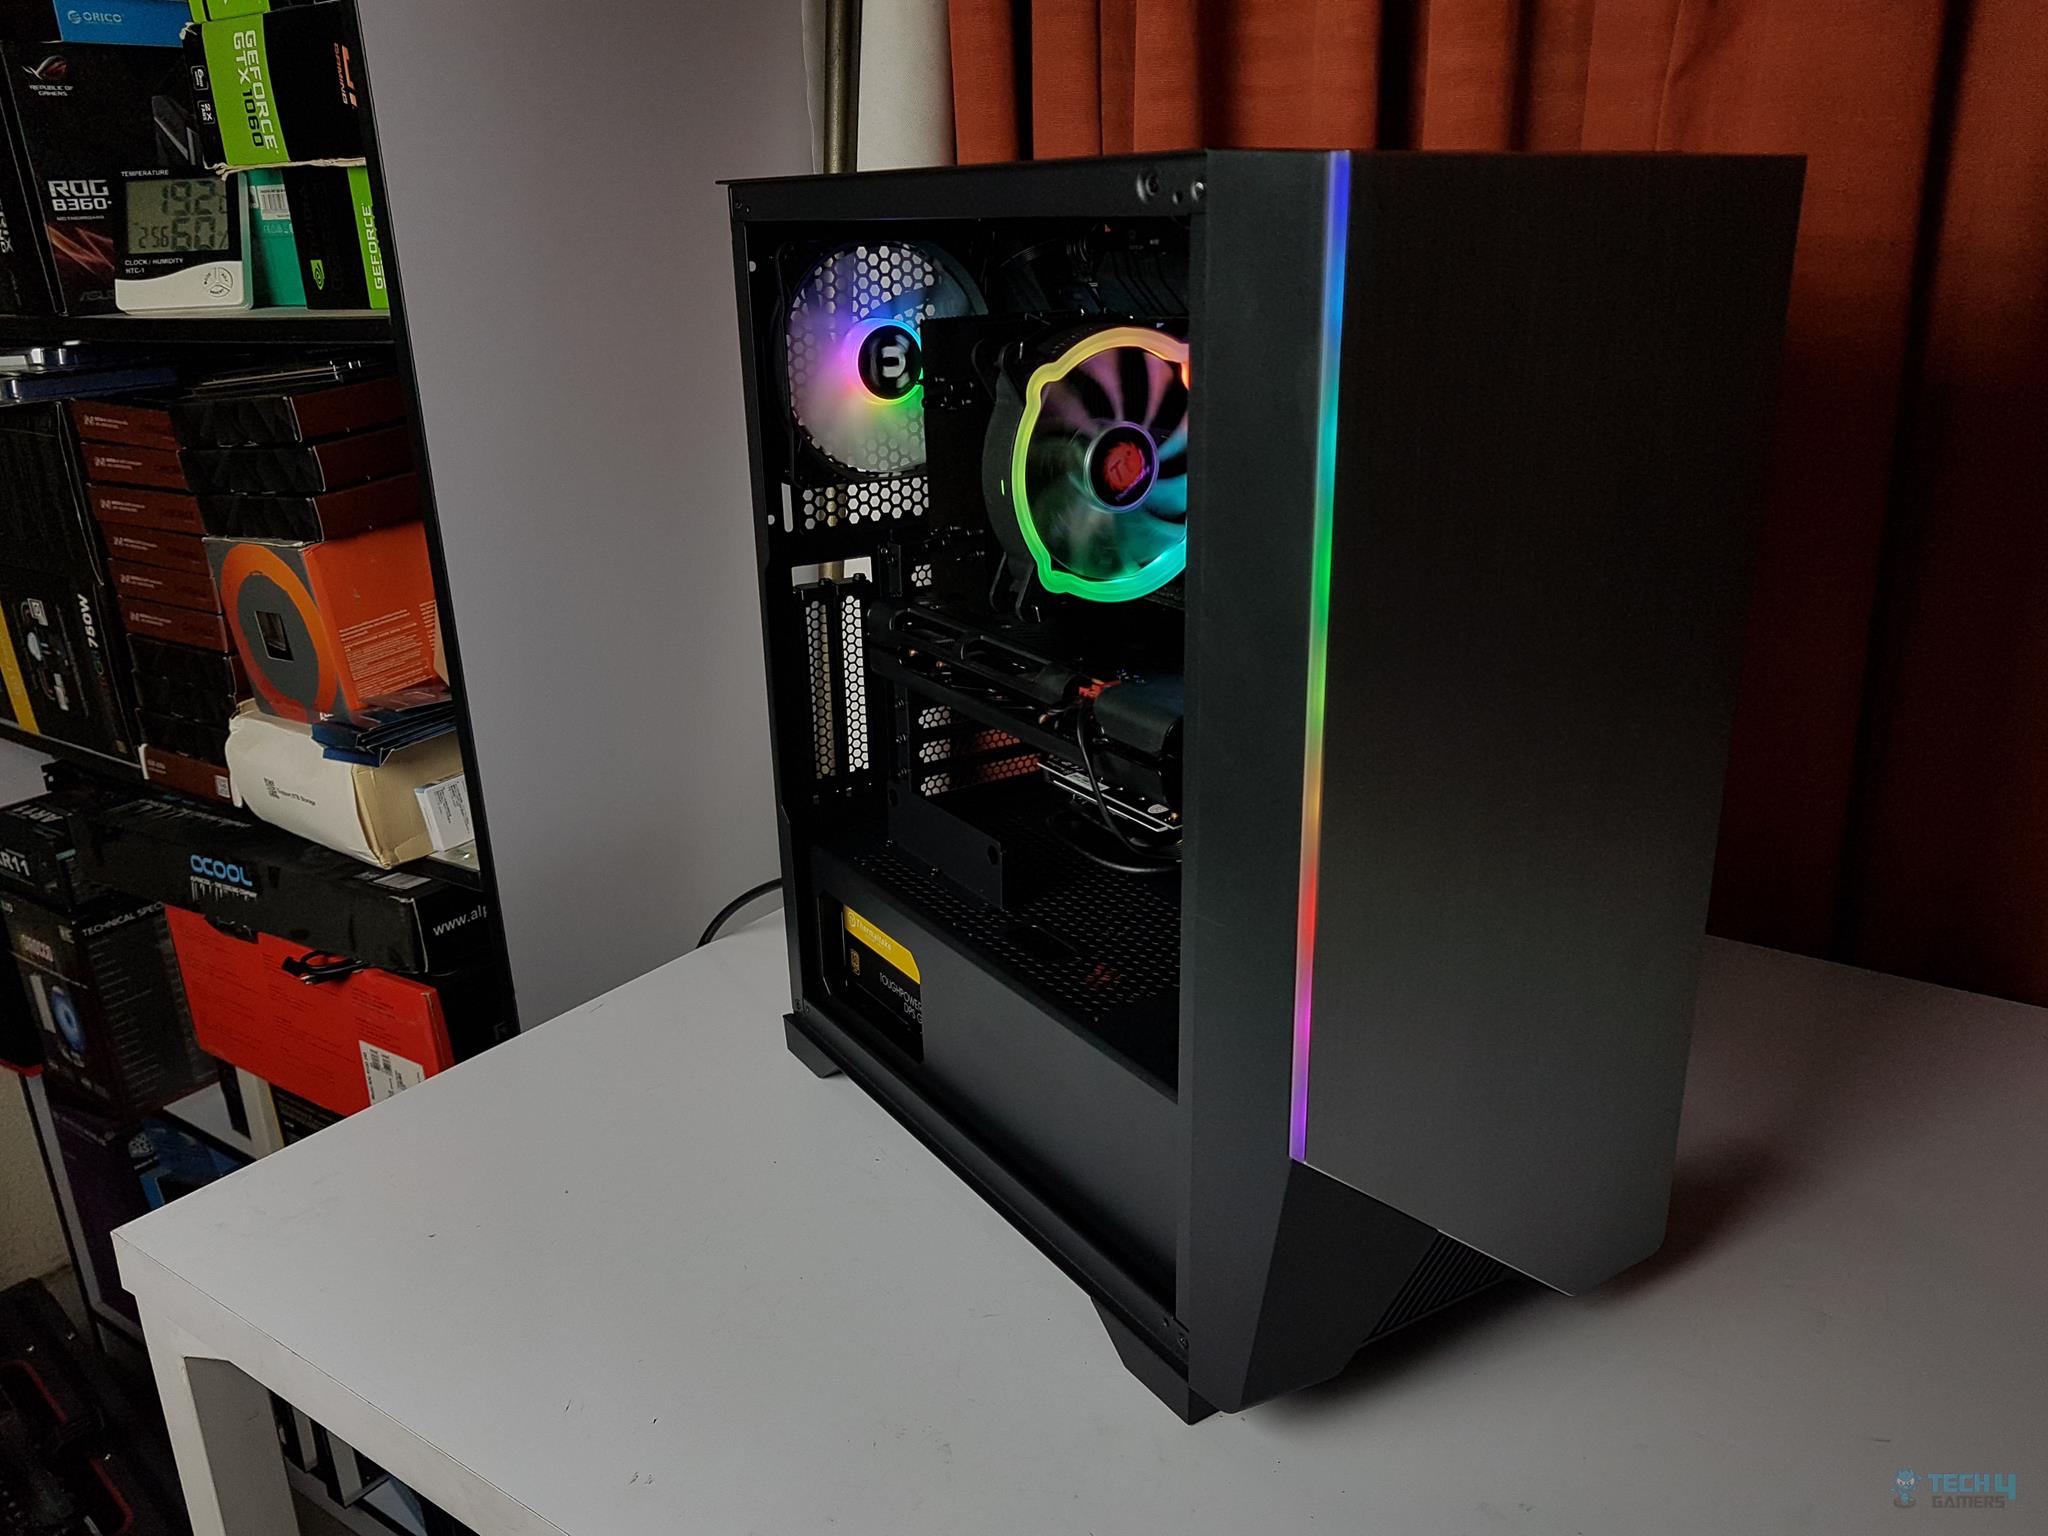
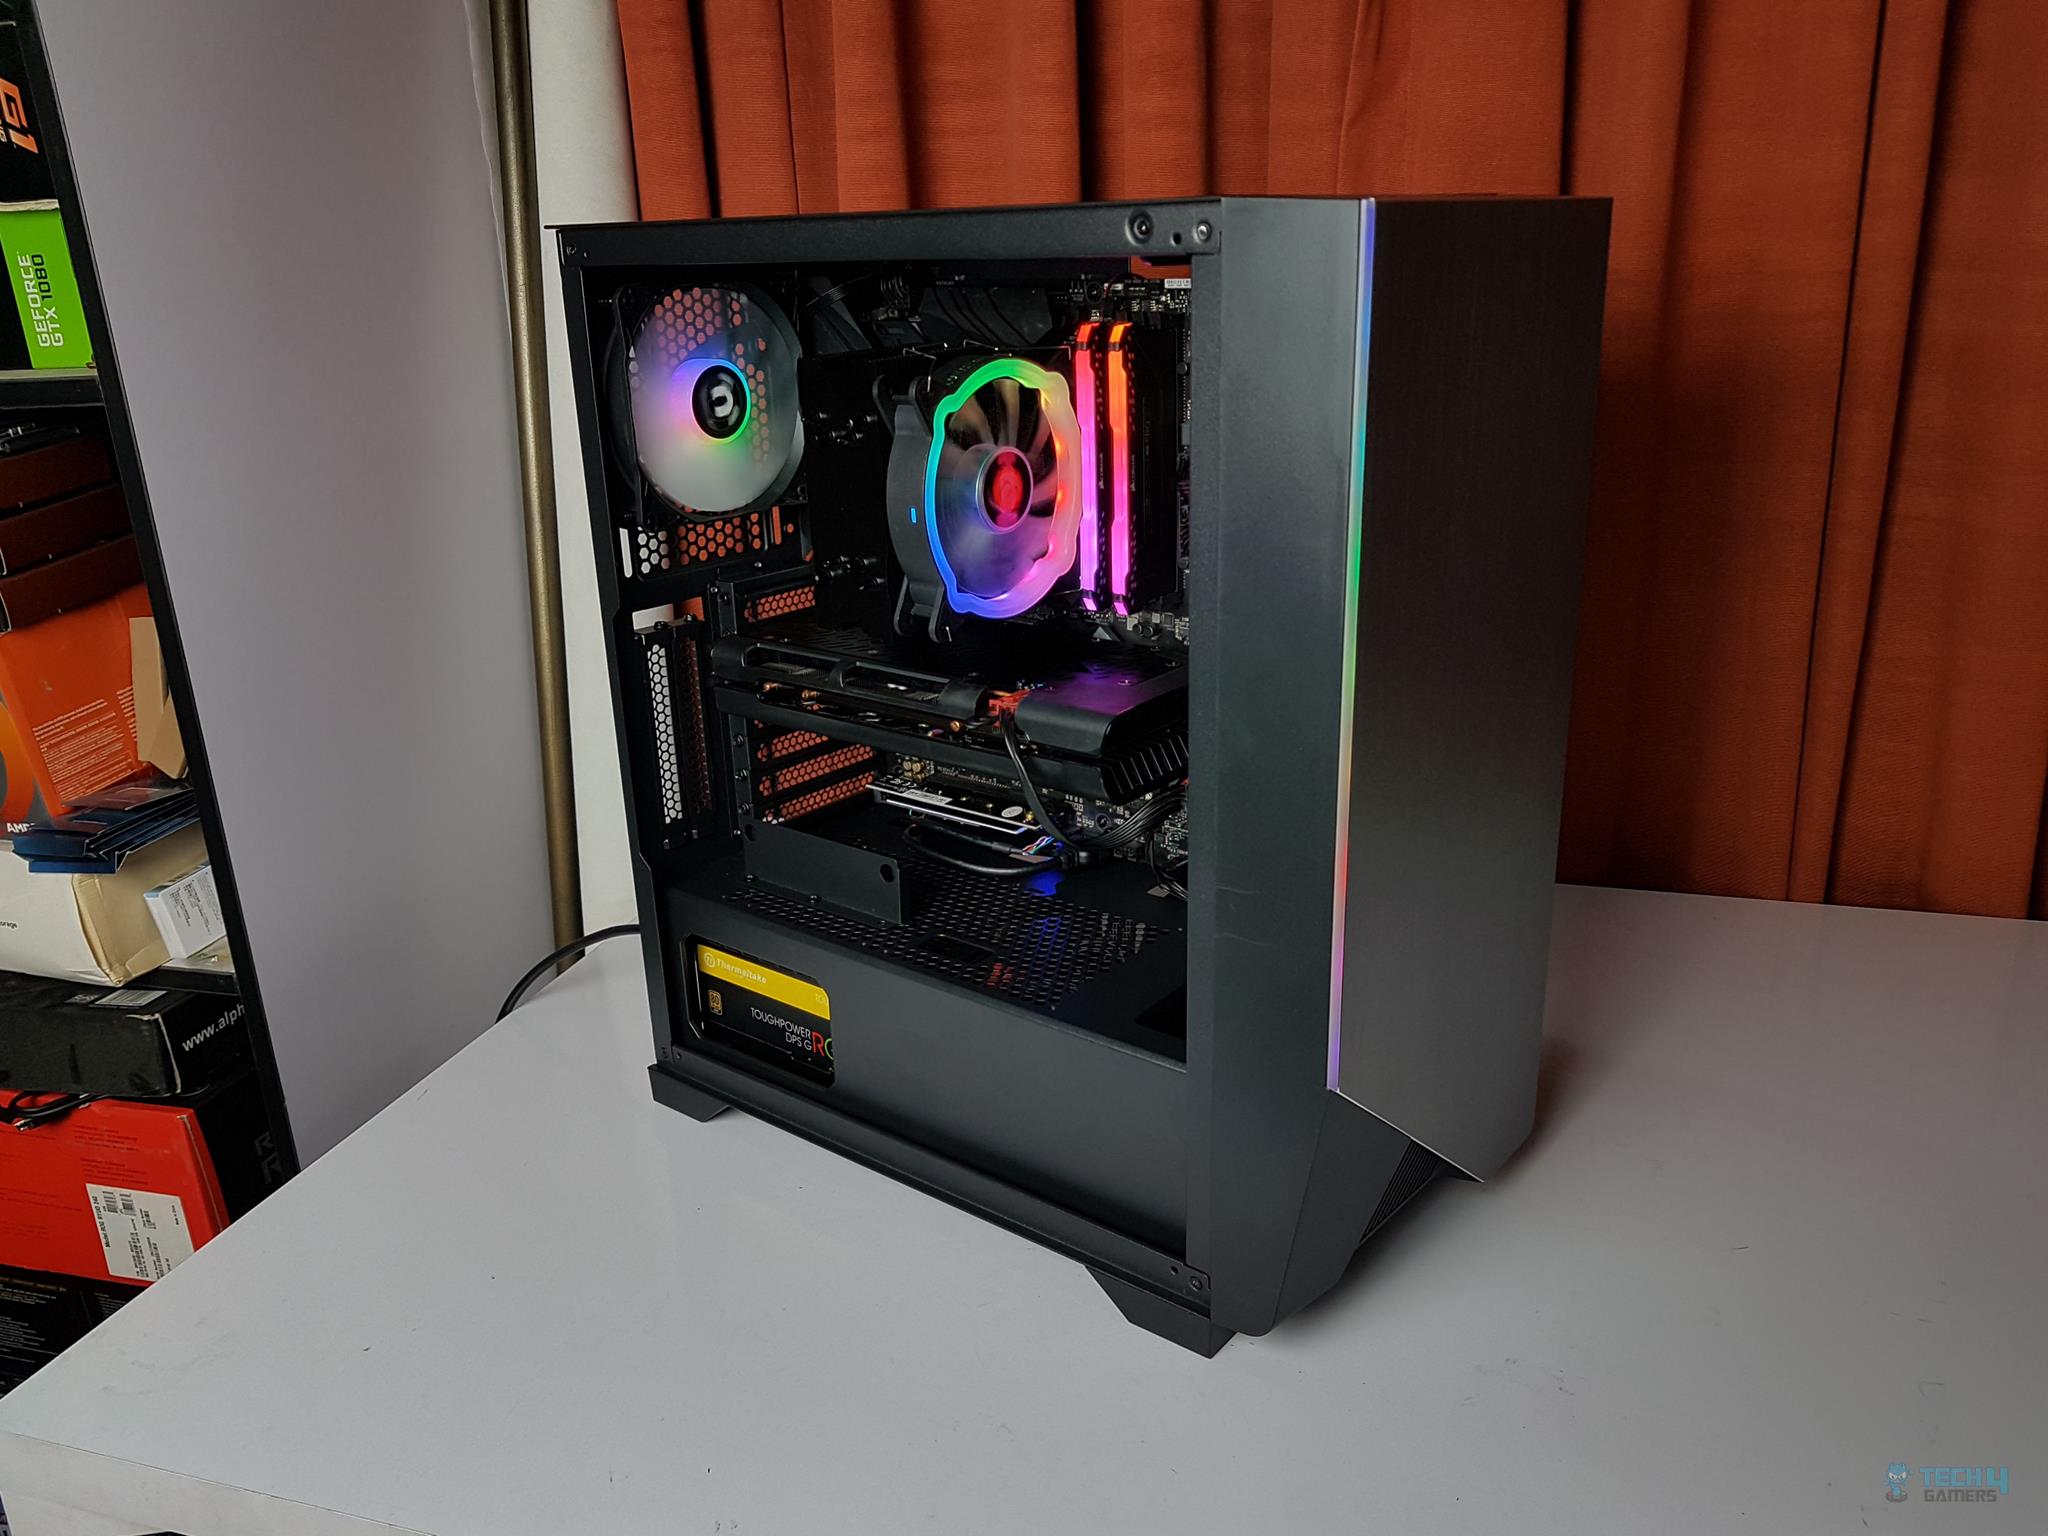
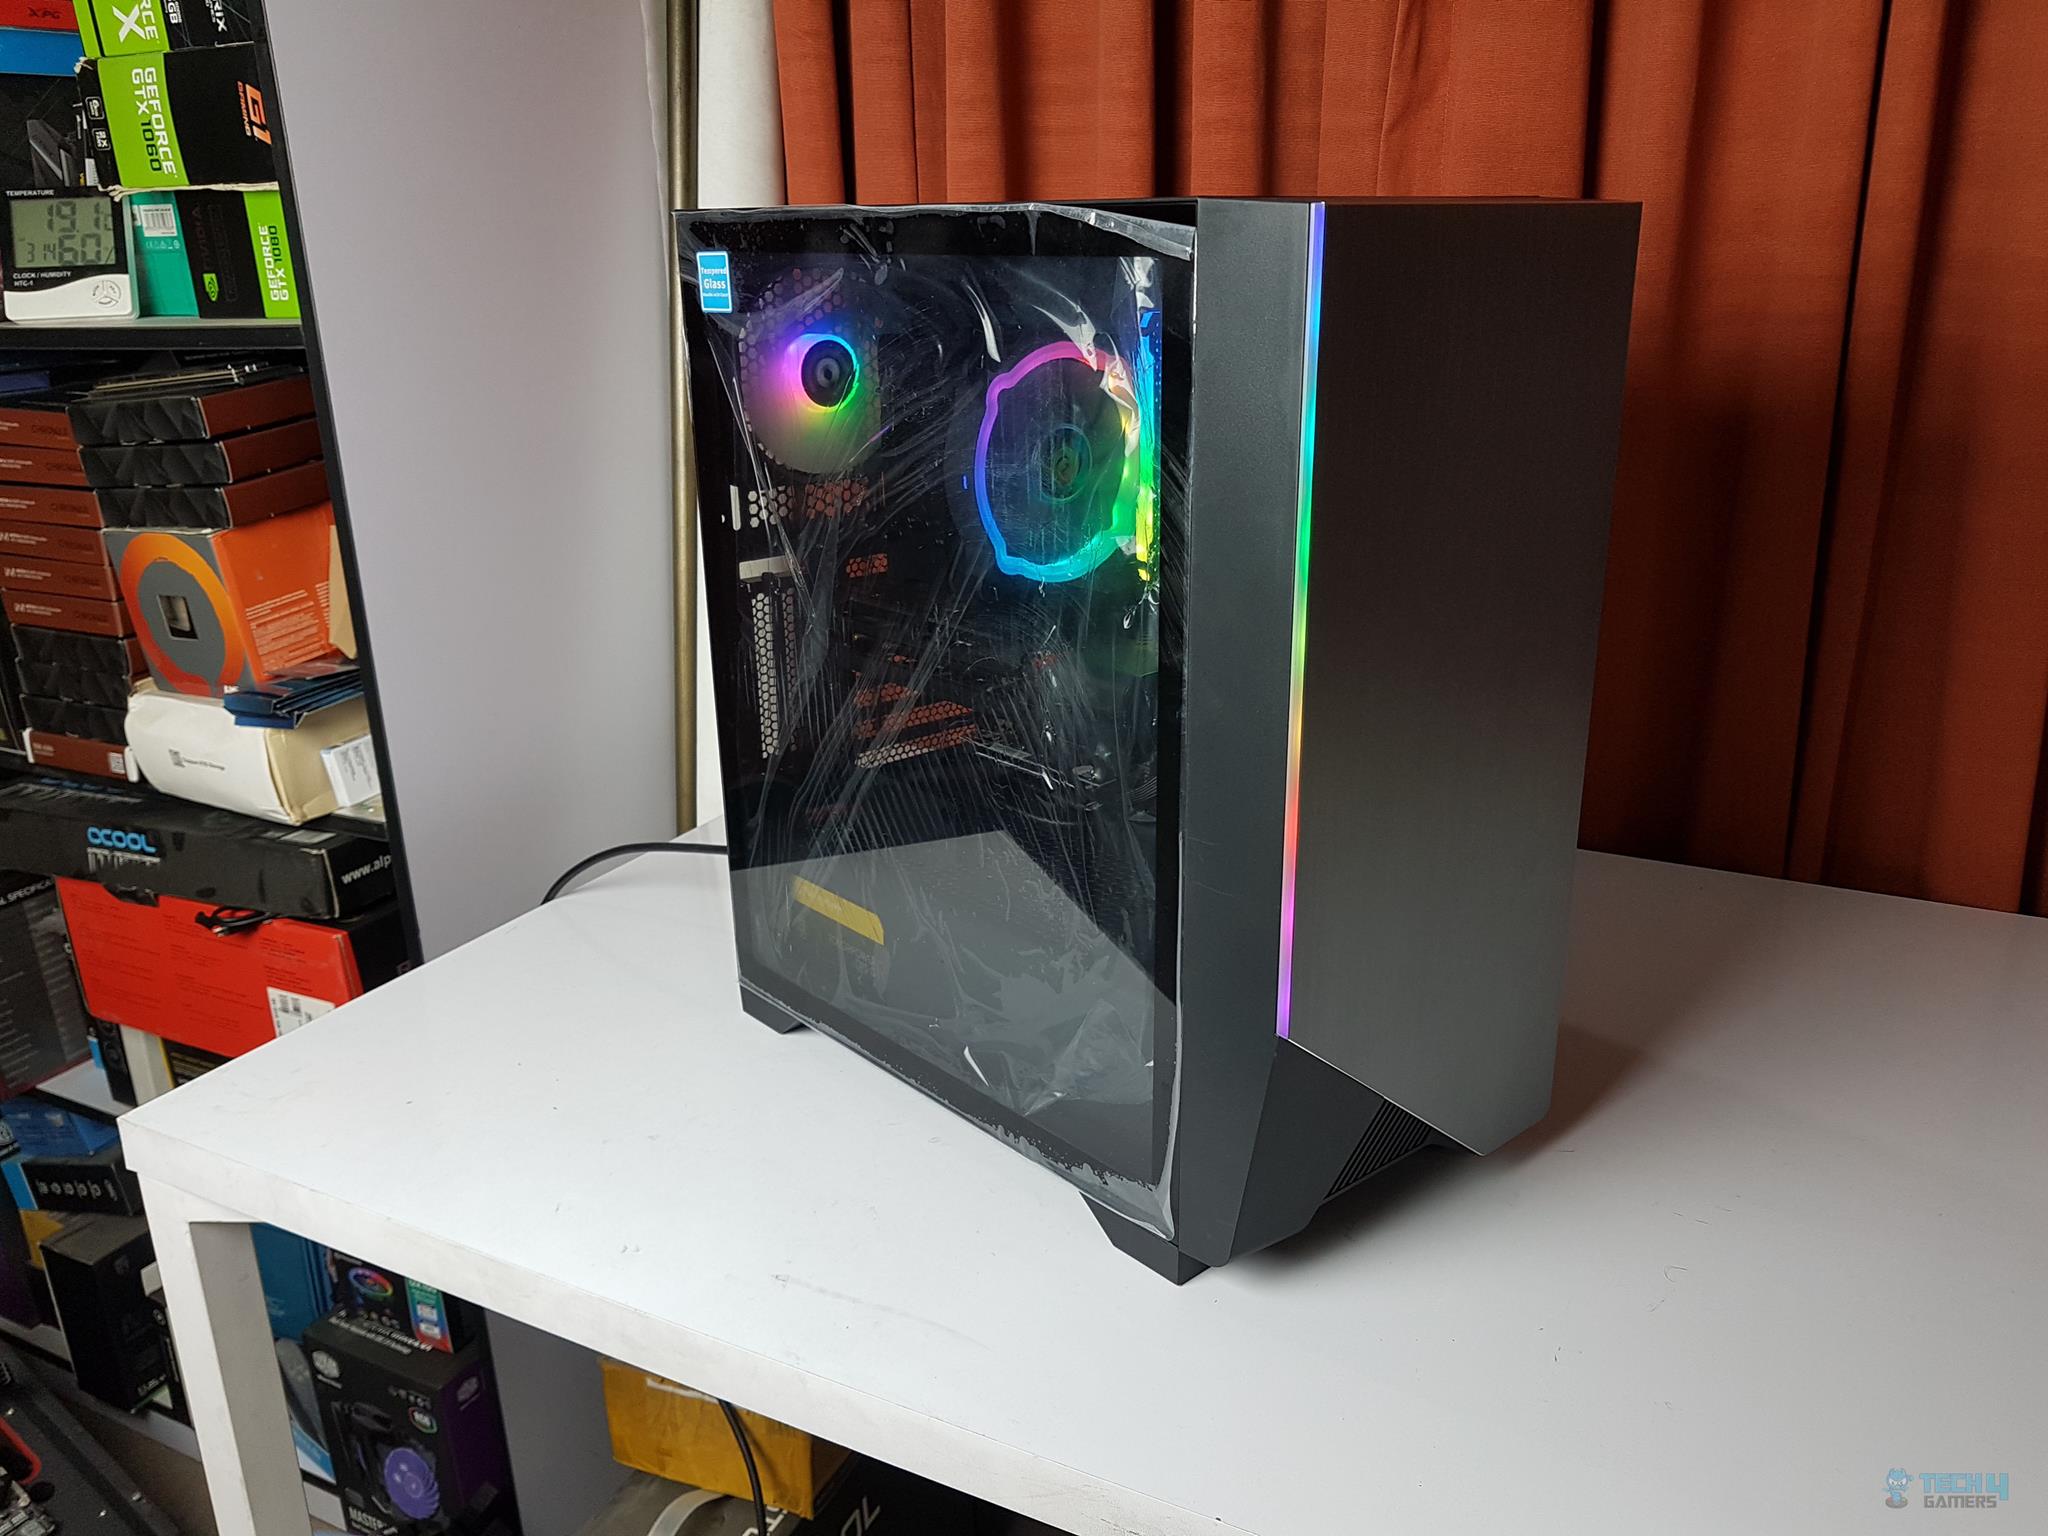
The Thermaltake H550 Review is a mid-tower having a dimension of 441x225x472mm. This chassis is from the H series which is famous for integrated lighting strip on the front panels. Its mainframe is made of SPCC material and it features one TG panel as well as diamond-cut brushed aluminum and plastic. The exterior and interior is finished in black color.
Front Panel
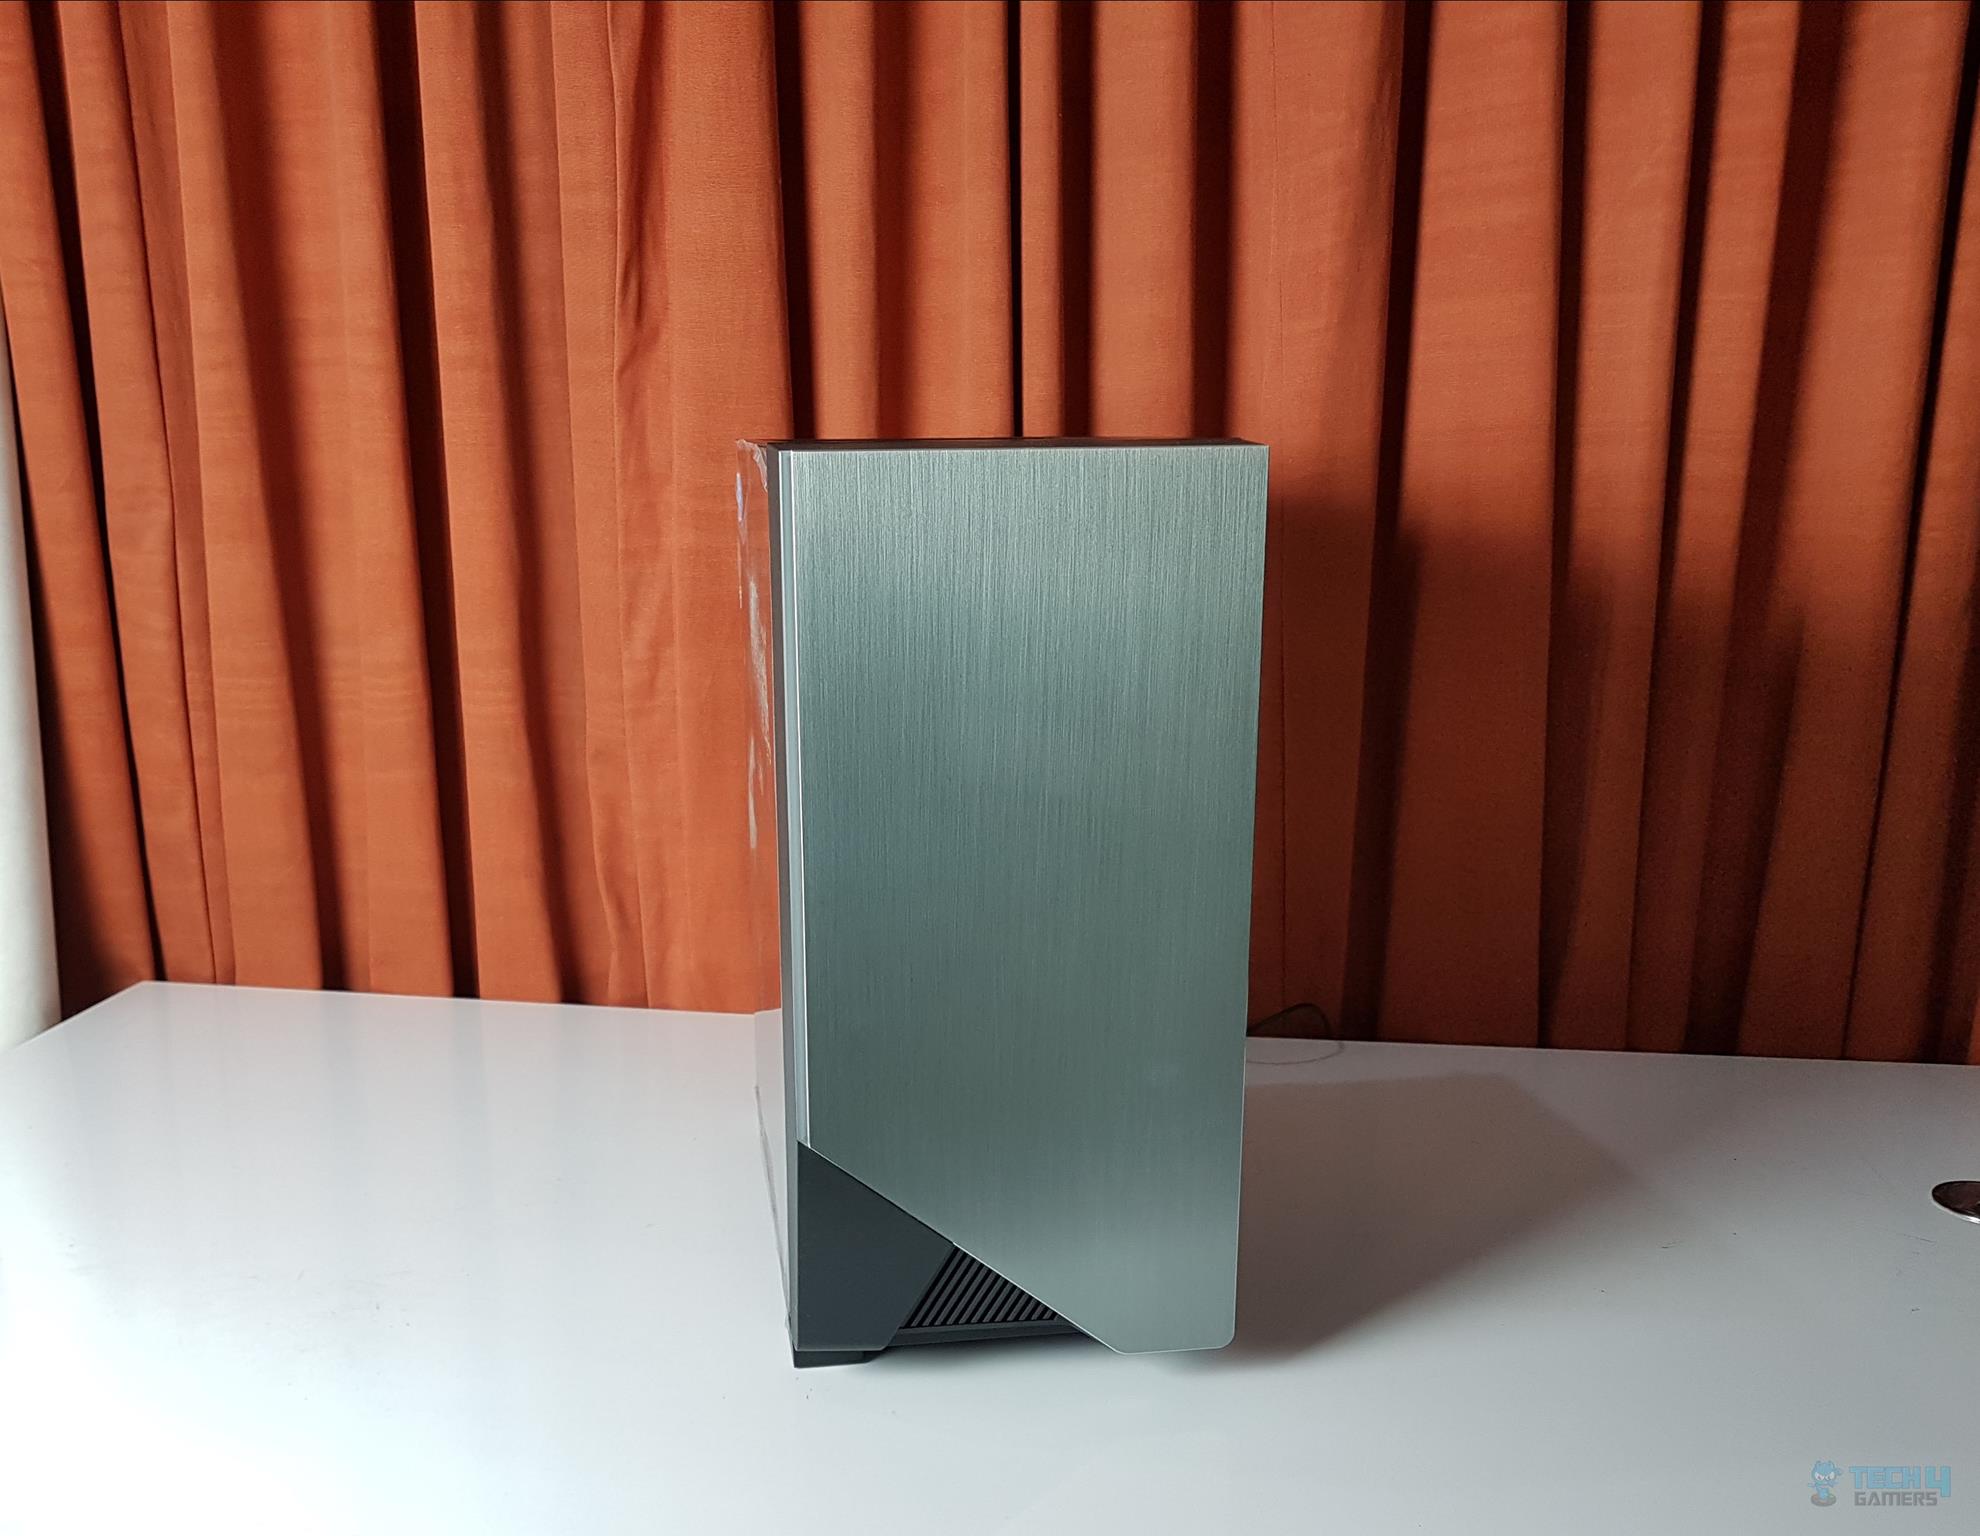
The front side of the Thermaltake H550 TG ARGB is a killer show. It has a 2mm thick brushed aluminum panel with diamond-cut angles around it creating one spectacular view and premium feel to it. There is an ARGB lighting strip incorporated in a white translucent diffuser installed on the side of the front panel.
This lighting combined with the elegance of brushed aluminum is giving this chassis a unique edge over the competition. The front cover is solid and airflow is restricted from this side.
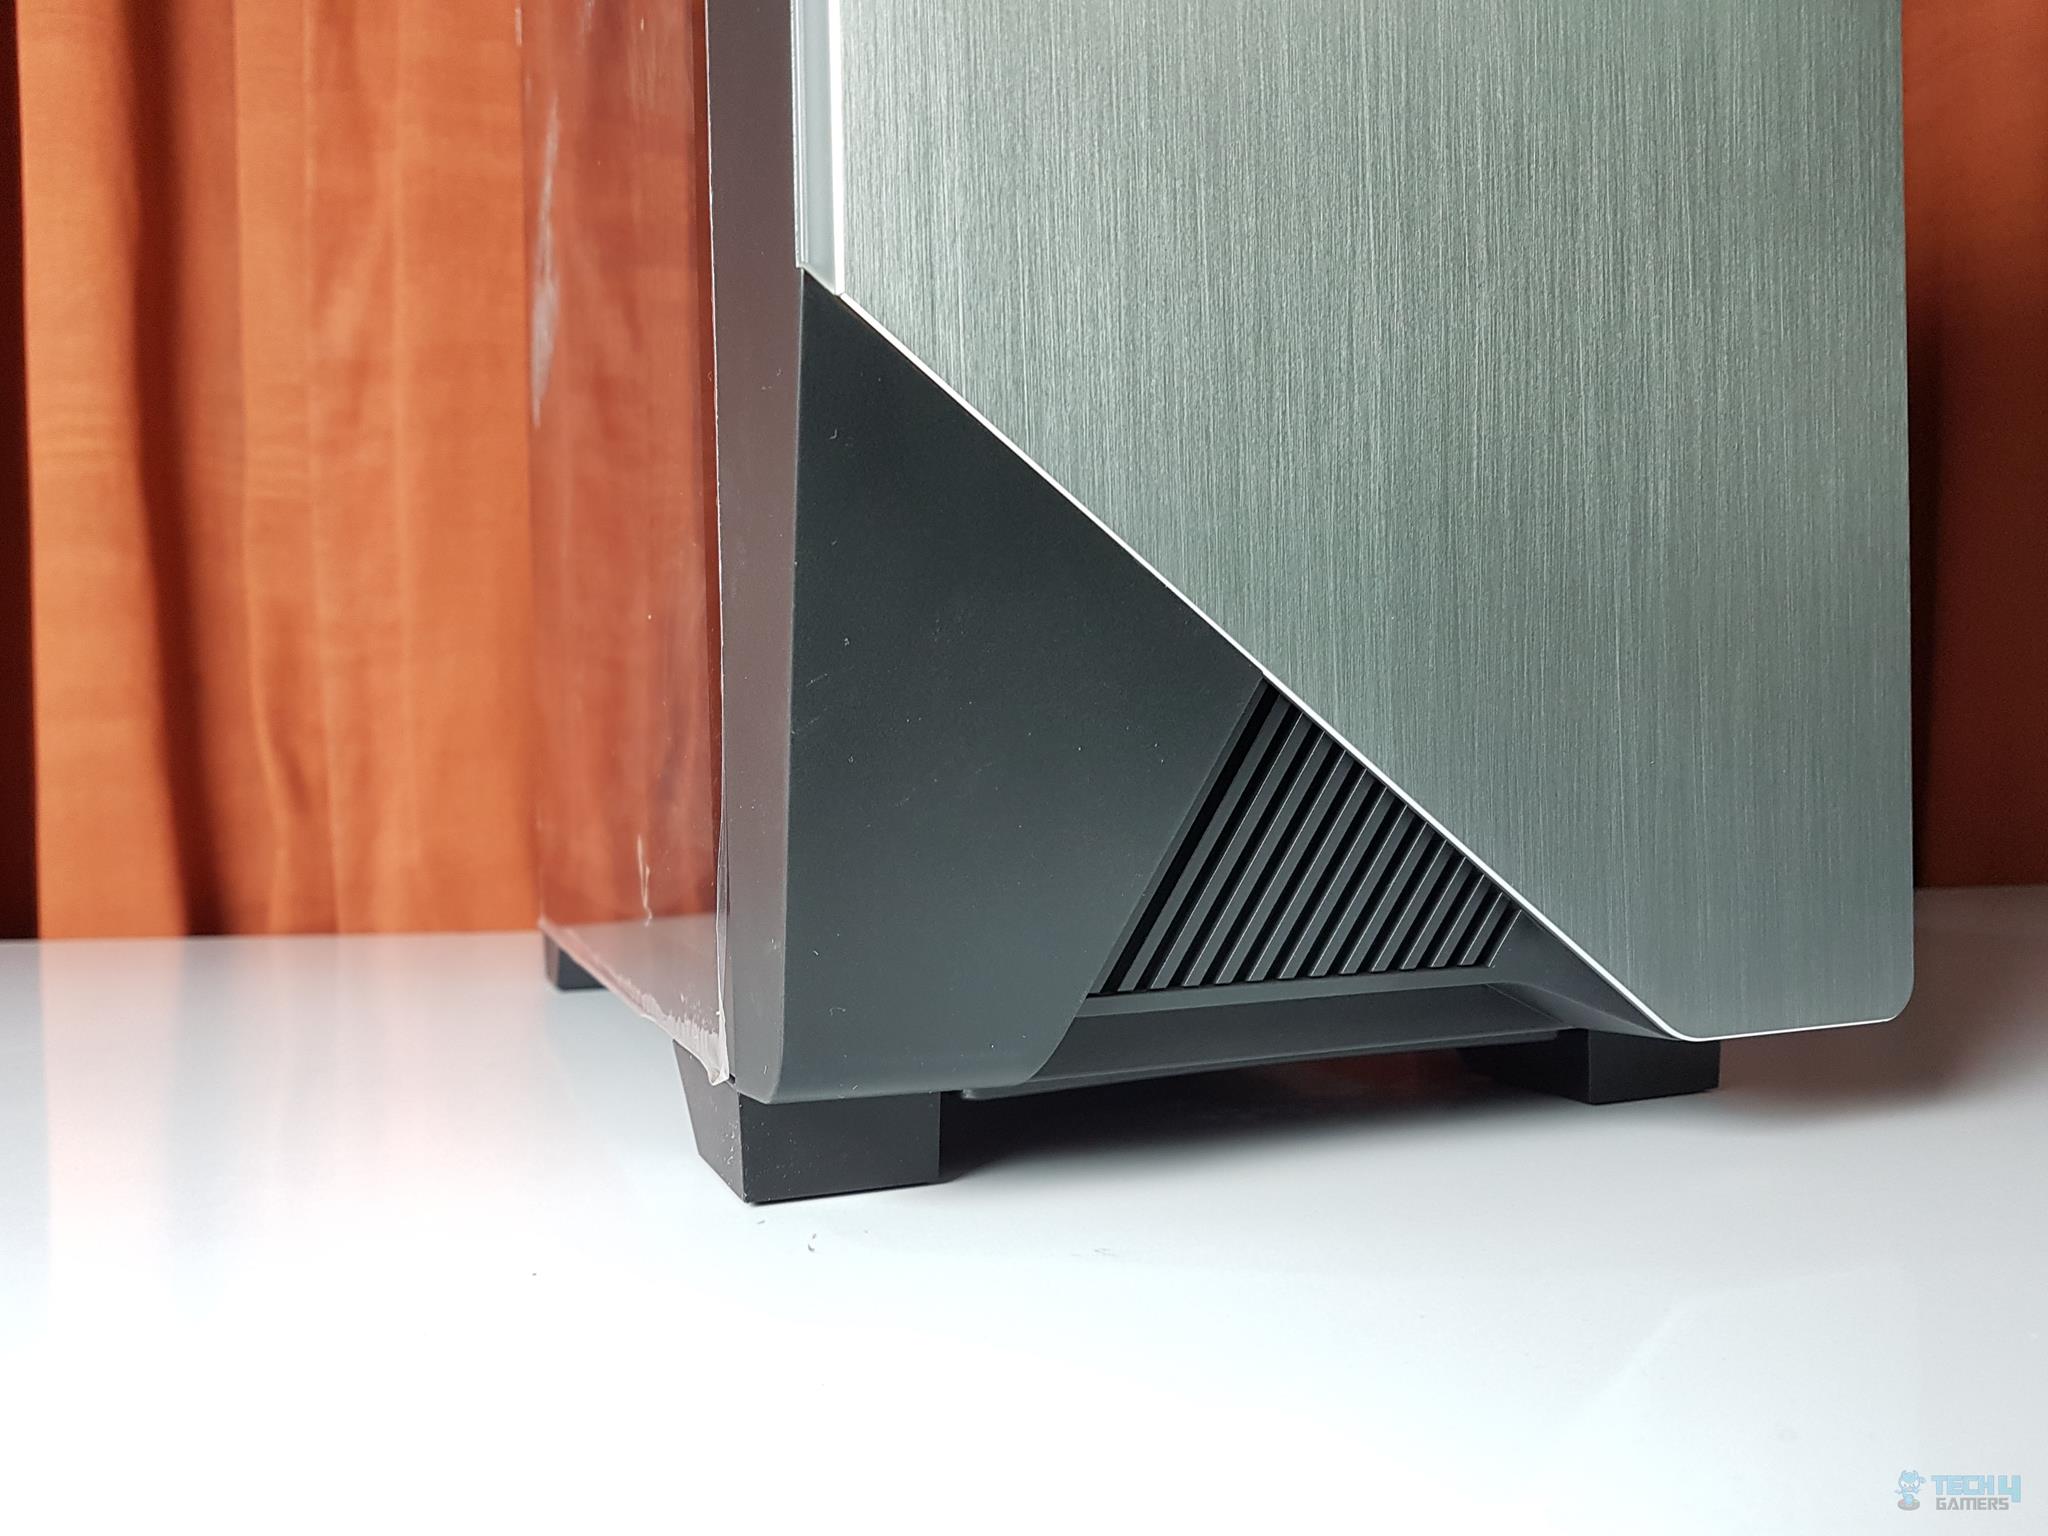
The bottom side of the front panel has cutouts. These are there to provide a good contrast to the design while providing some space for air intake.

The user can take off the front panel by pulling it out. Take care as the ARGB cable is connected and putting too much pressure while pulling the panel out may damage the connectors though there is sufficient length of the cable to avoid it. The fan mounting rail (not removable) is sturdy. It has a provision for the following:
- 120, 140, 240, 280, and 360mm radiator
- 3x 120mm, 2x140mm, 2x200mm fans
As can be seen, there is ample space for the cooling gear on the front side. For a better cooling performance, I would suggest installing the fans on the backside (the inner side) of the fan mounting rail. There are cutouts to pass the fans’ cable through. There is no pre-installed fan on the front while I was expecting 1-2 fans here.
Looking at the inner side of the front panel, the translucent white color diffuser is visible on the right side. It is running across the length of the brushed aluminum plate. The panel is made of plastic and 2mm brushed aluminum.
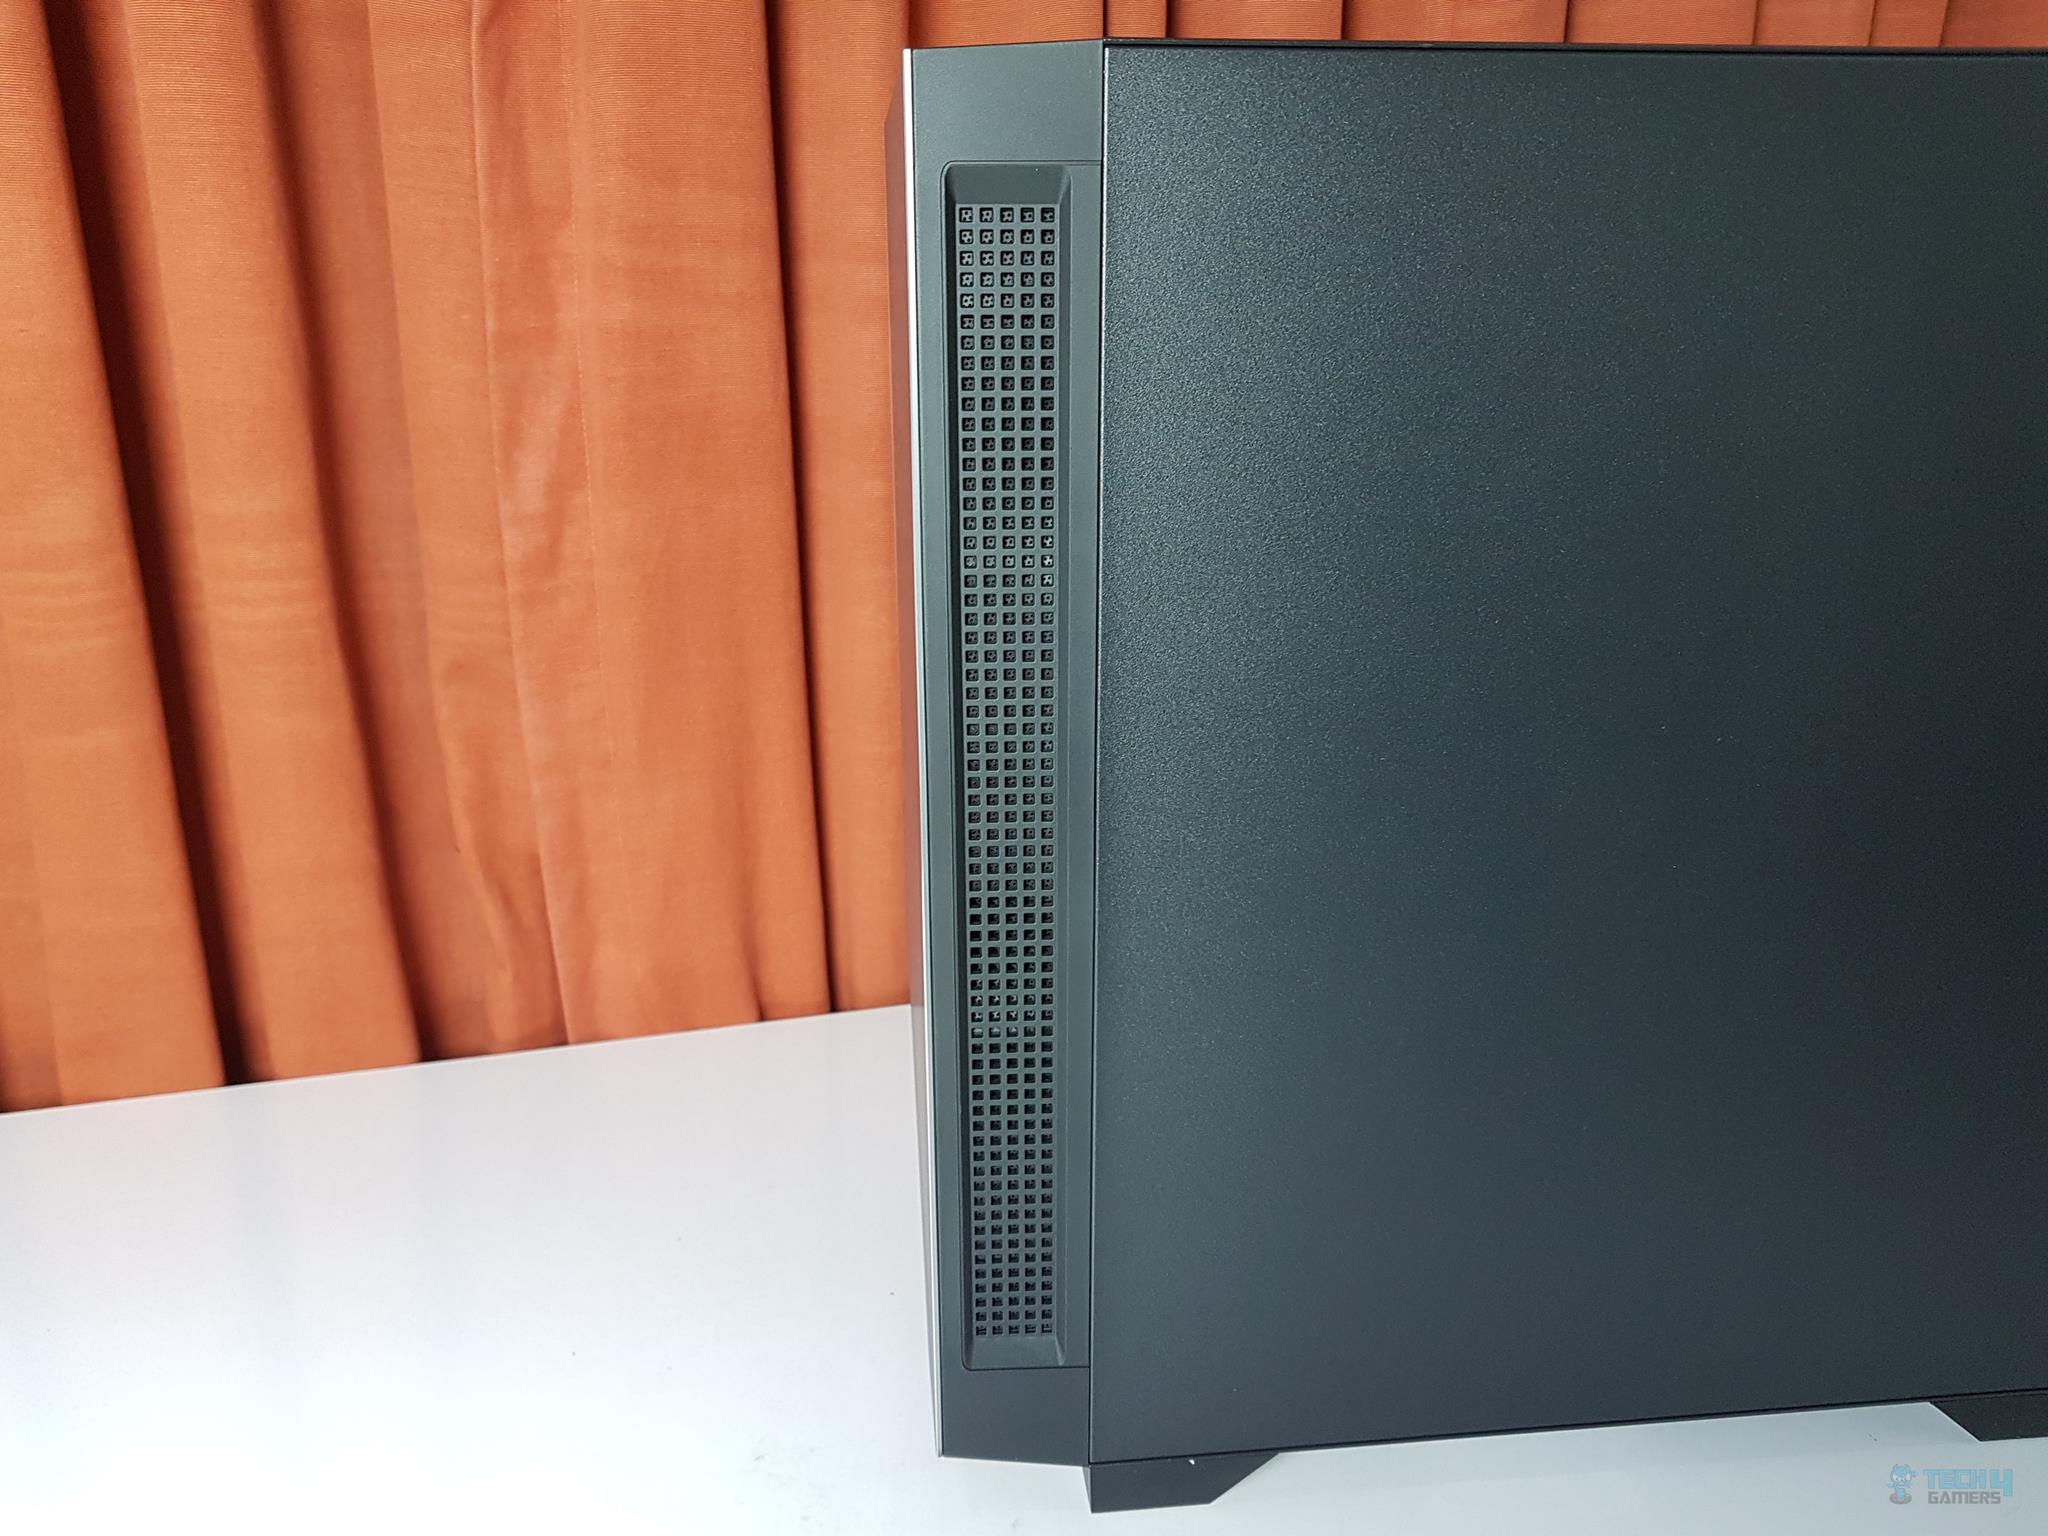
The front panel has a vented area on one side. This is the main area for the air intake in this chassis. There is a dust filter running across the length of the vented area. While it is a good design aspect to provide dust filtration, the very narrow area for air intake coupled is further restricted by the dust filter.
There is a 4-pin header on the front panel for ARGB lighting.
Rear Panel
Let’s take a look at the rear side of the Thermaltake H550 TG ARGB.
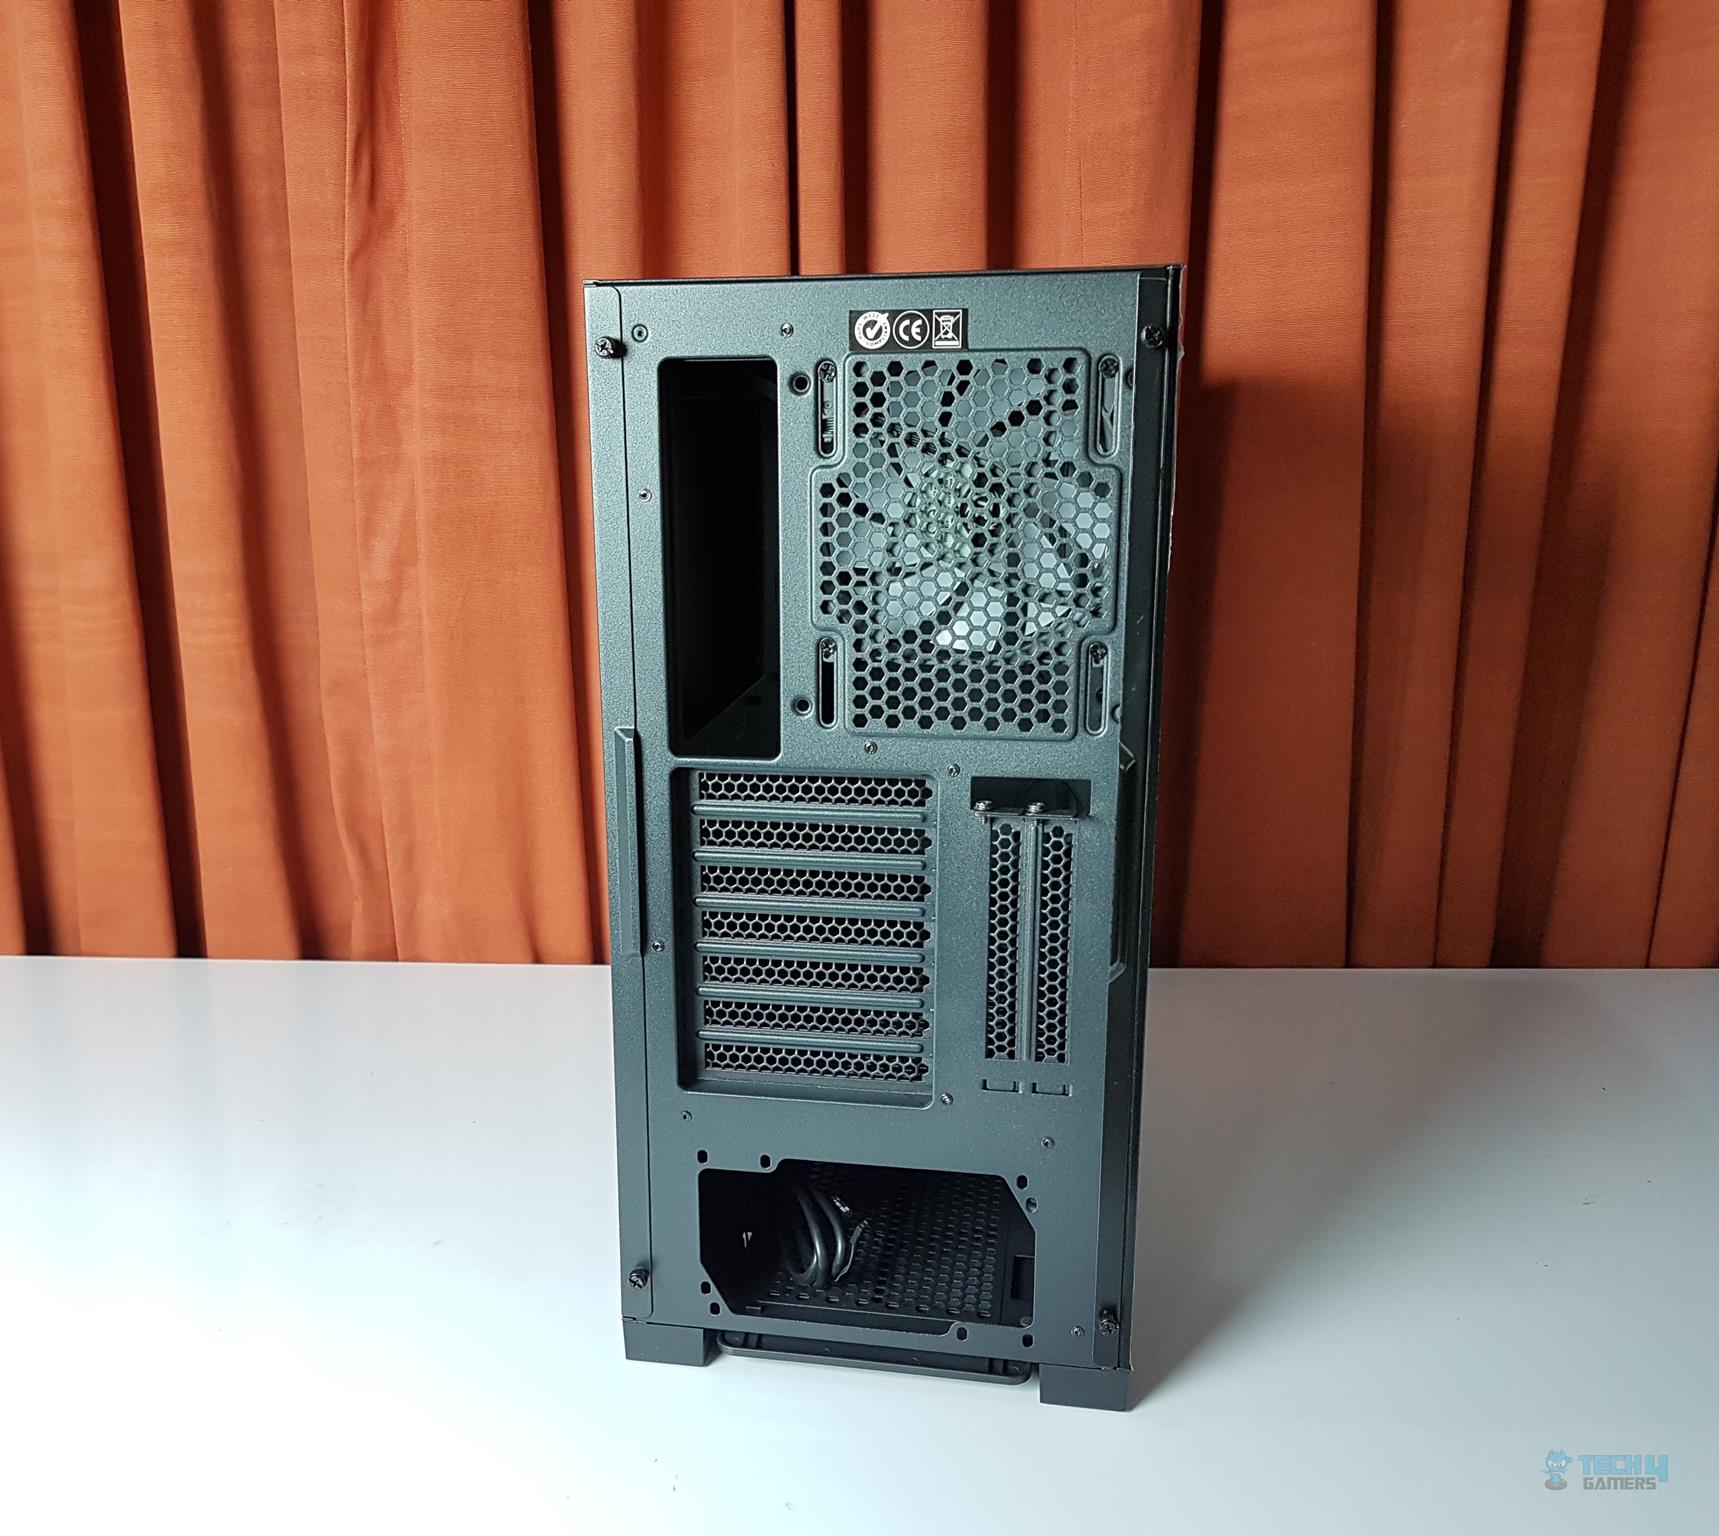
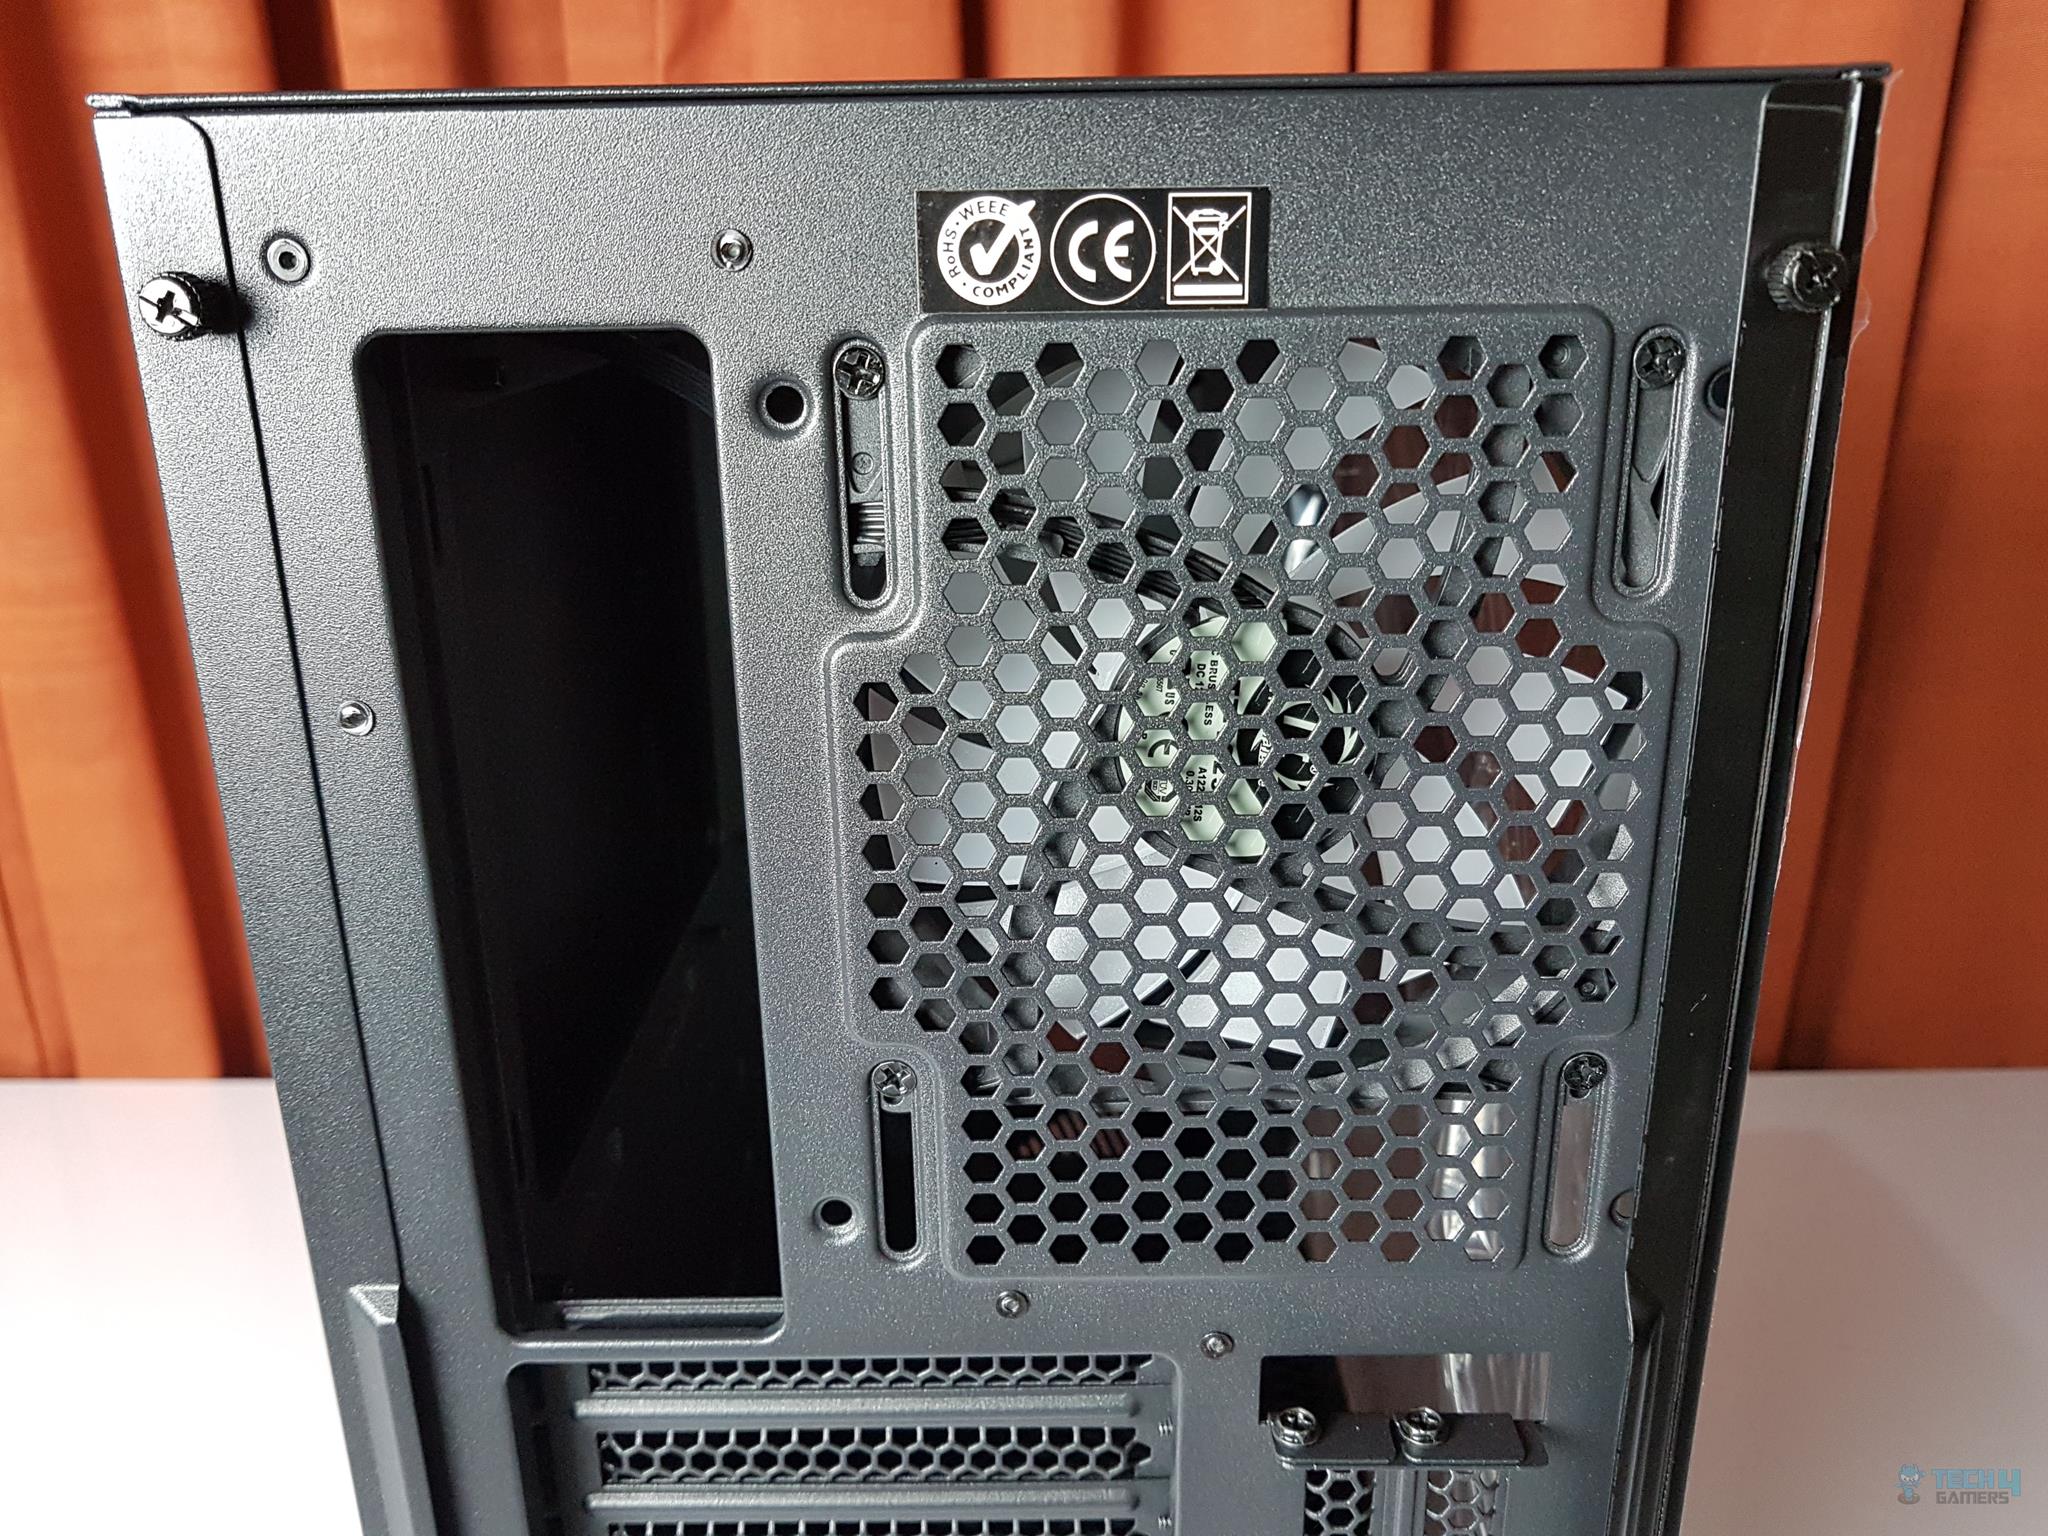
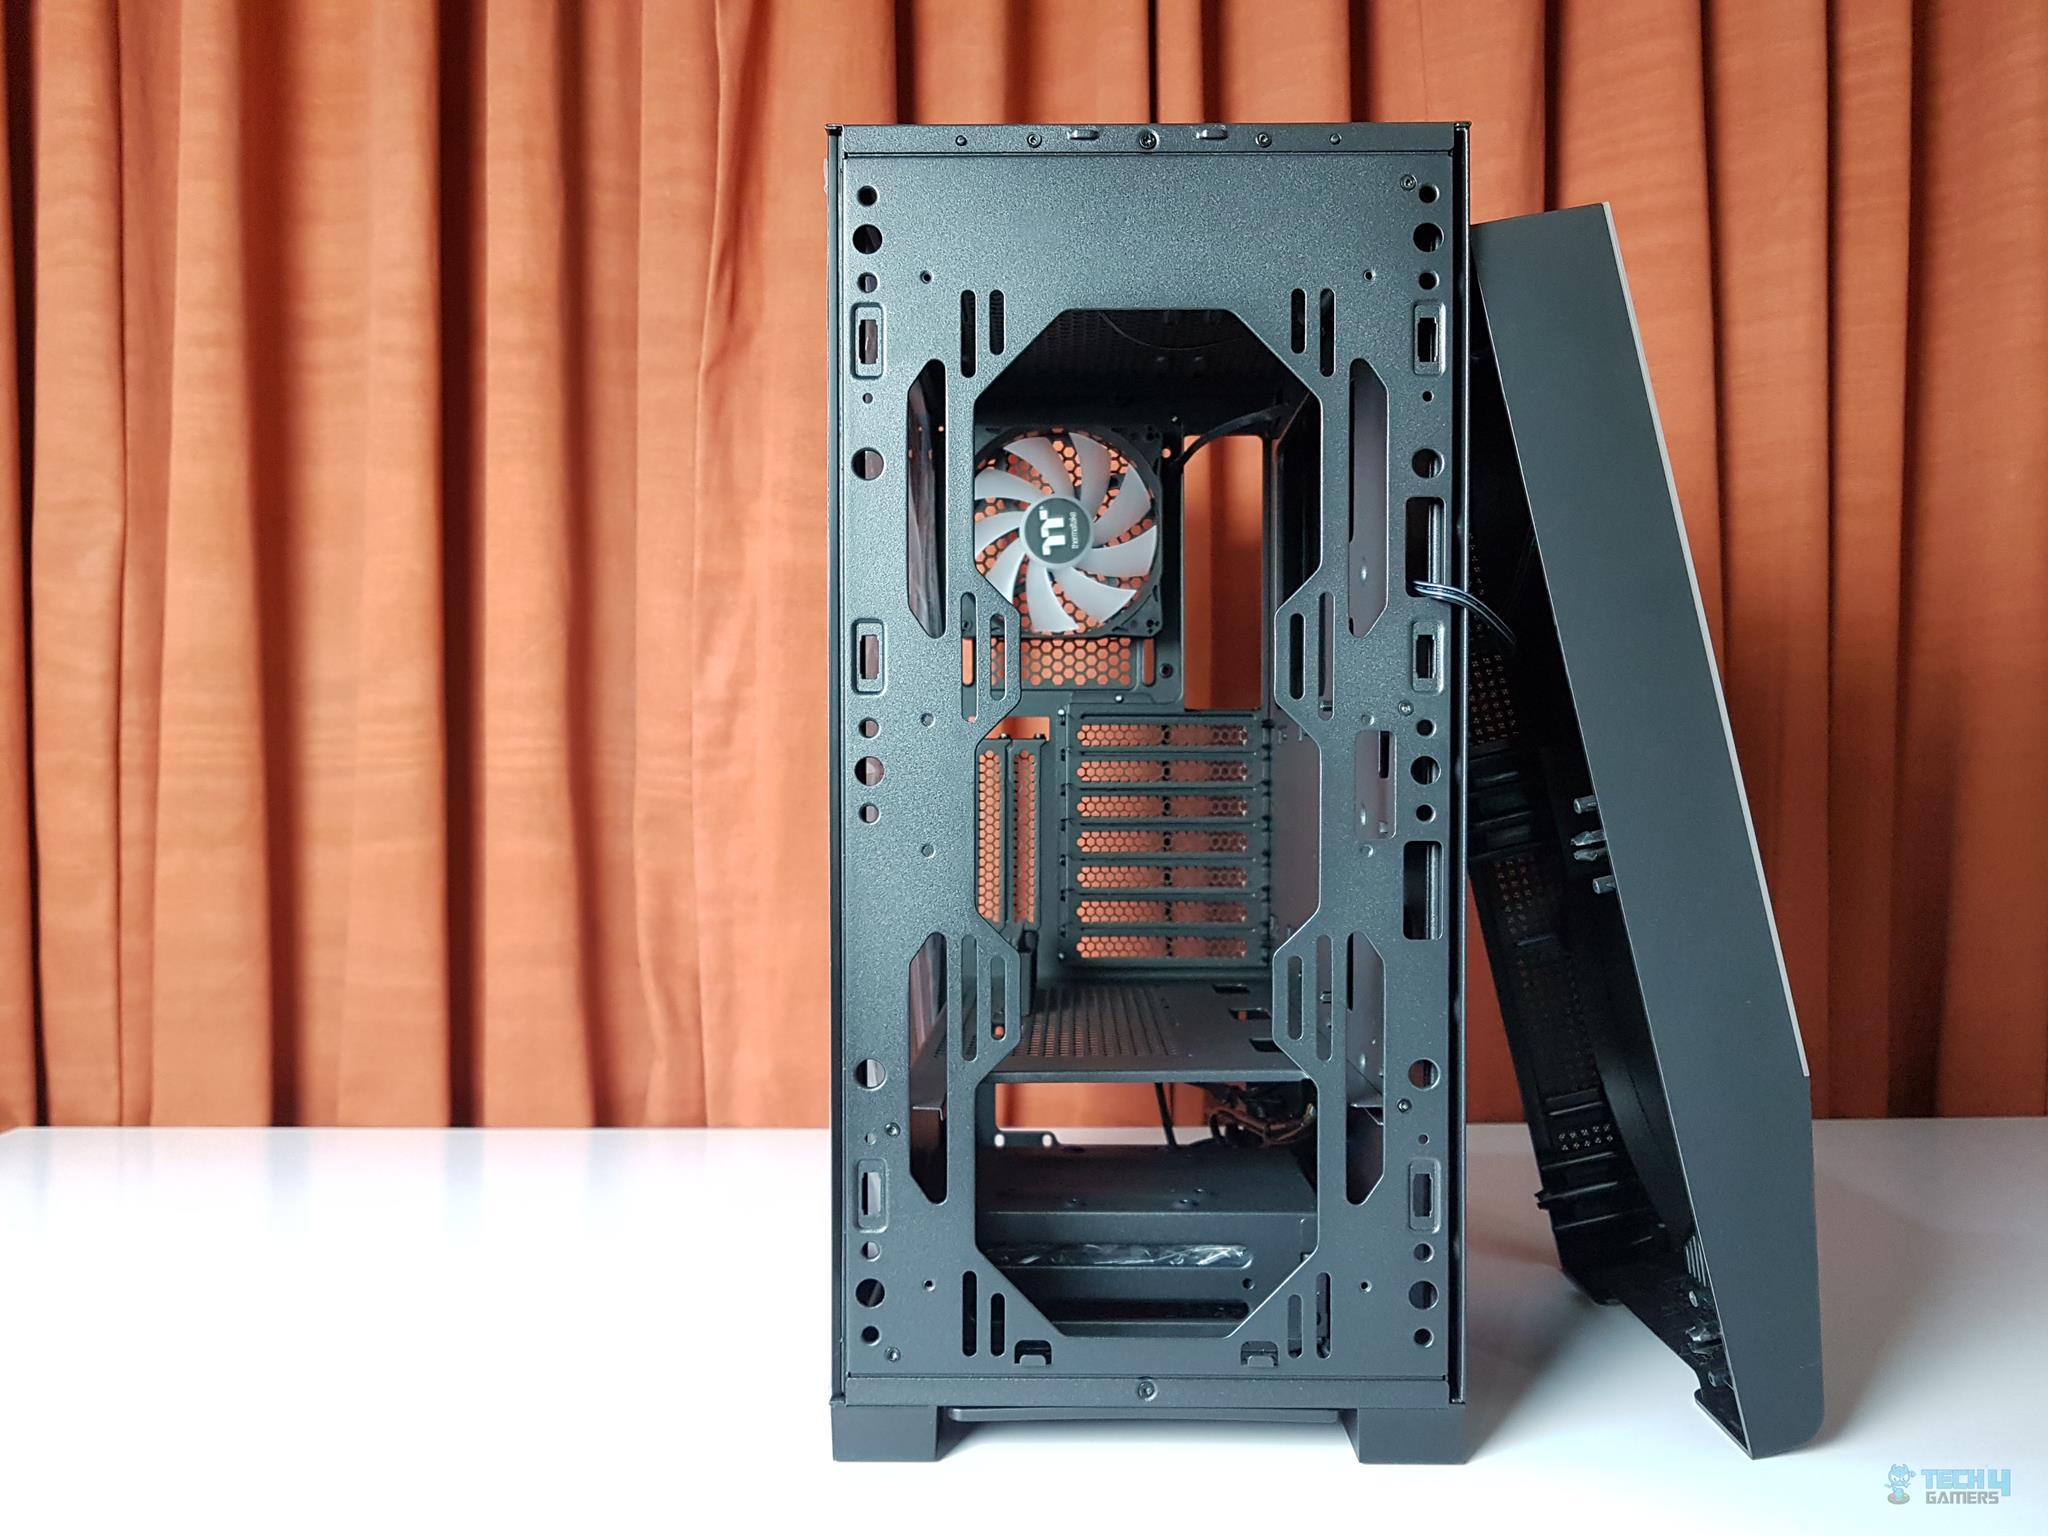
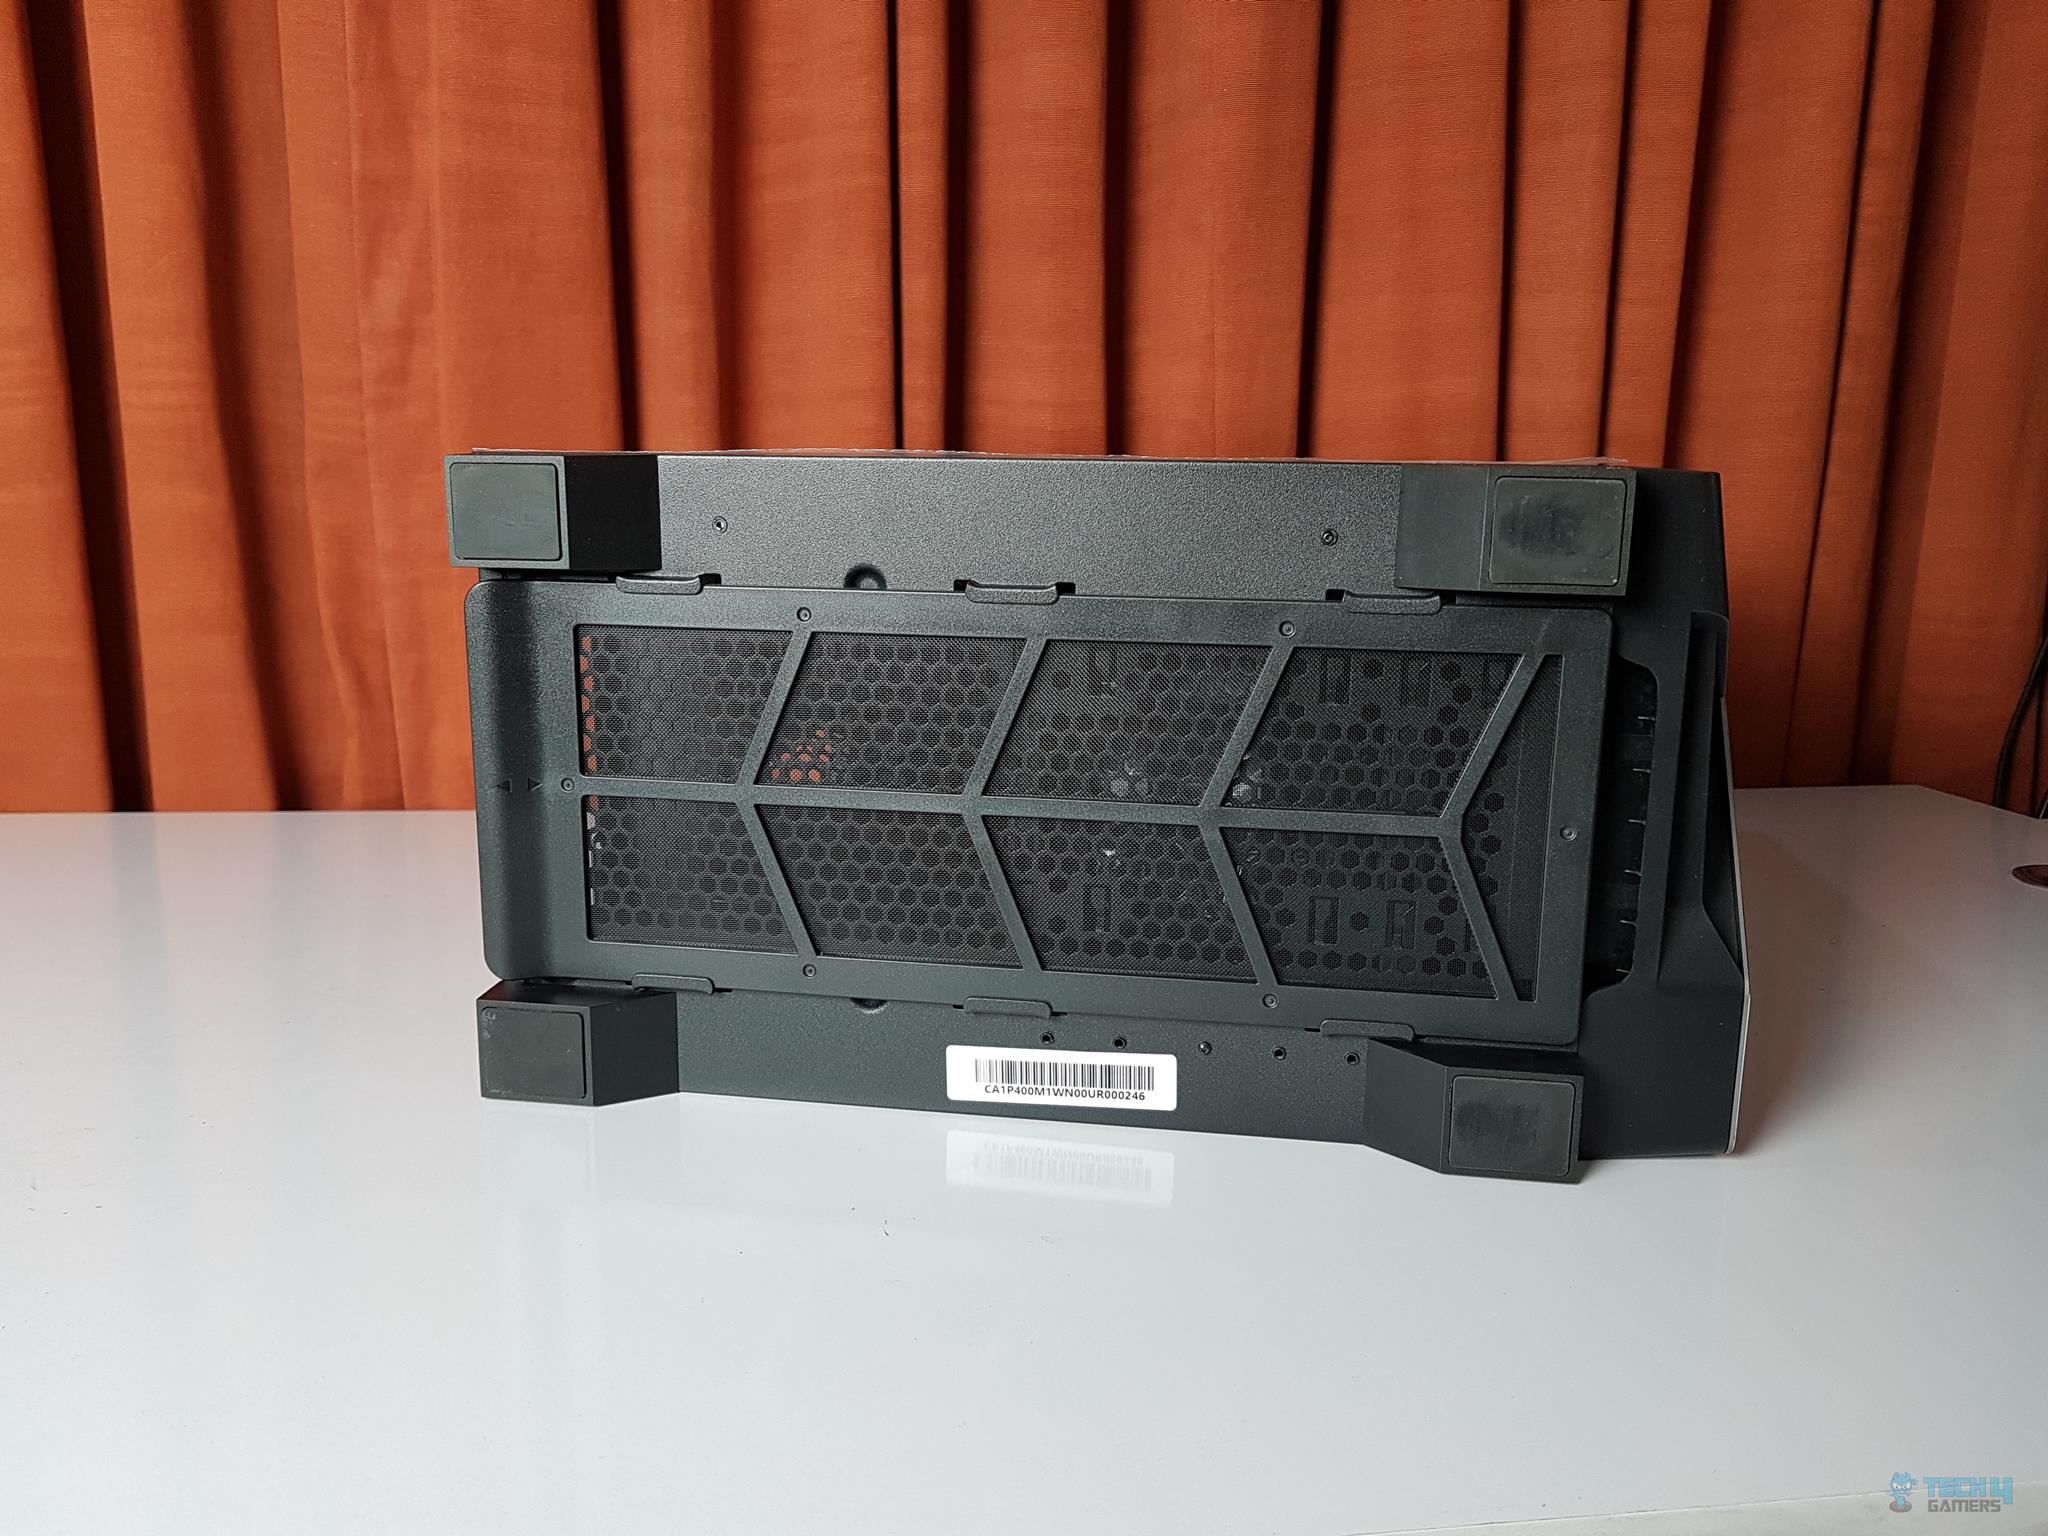
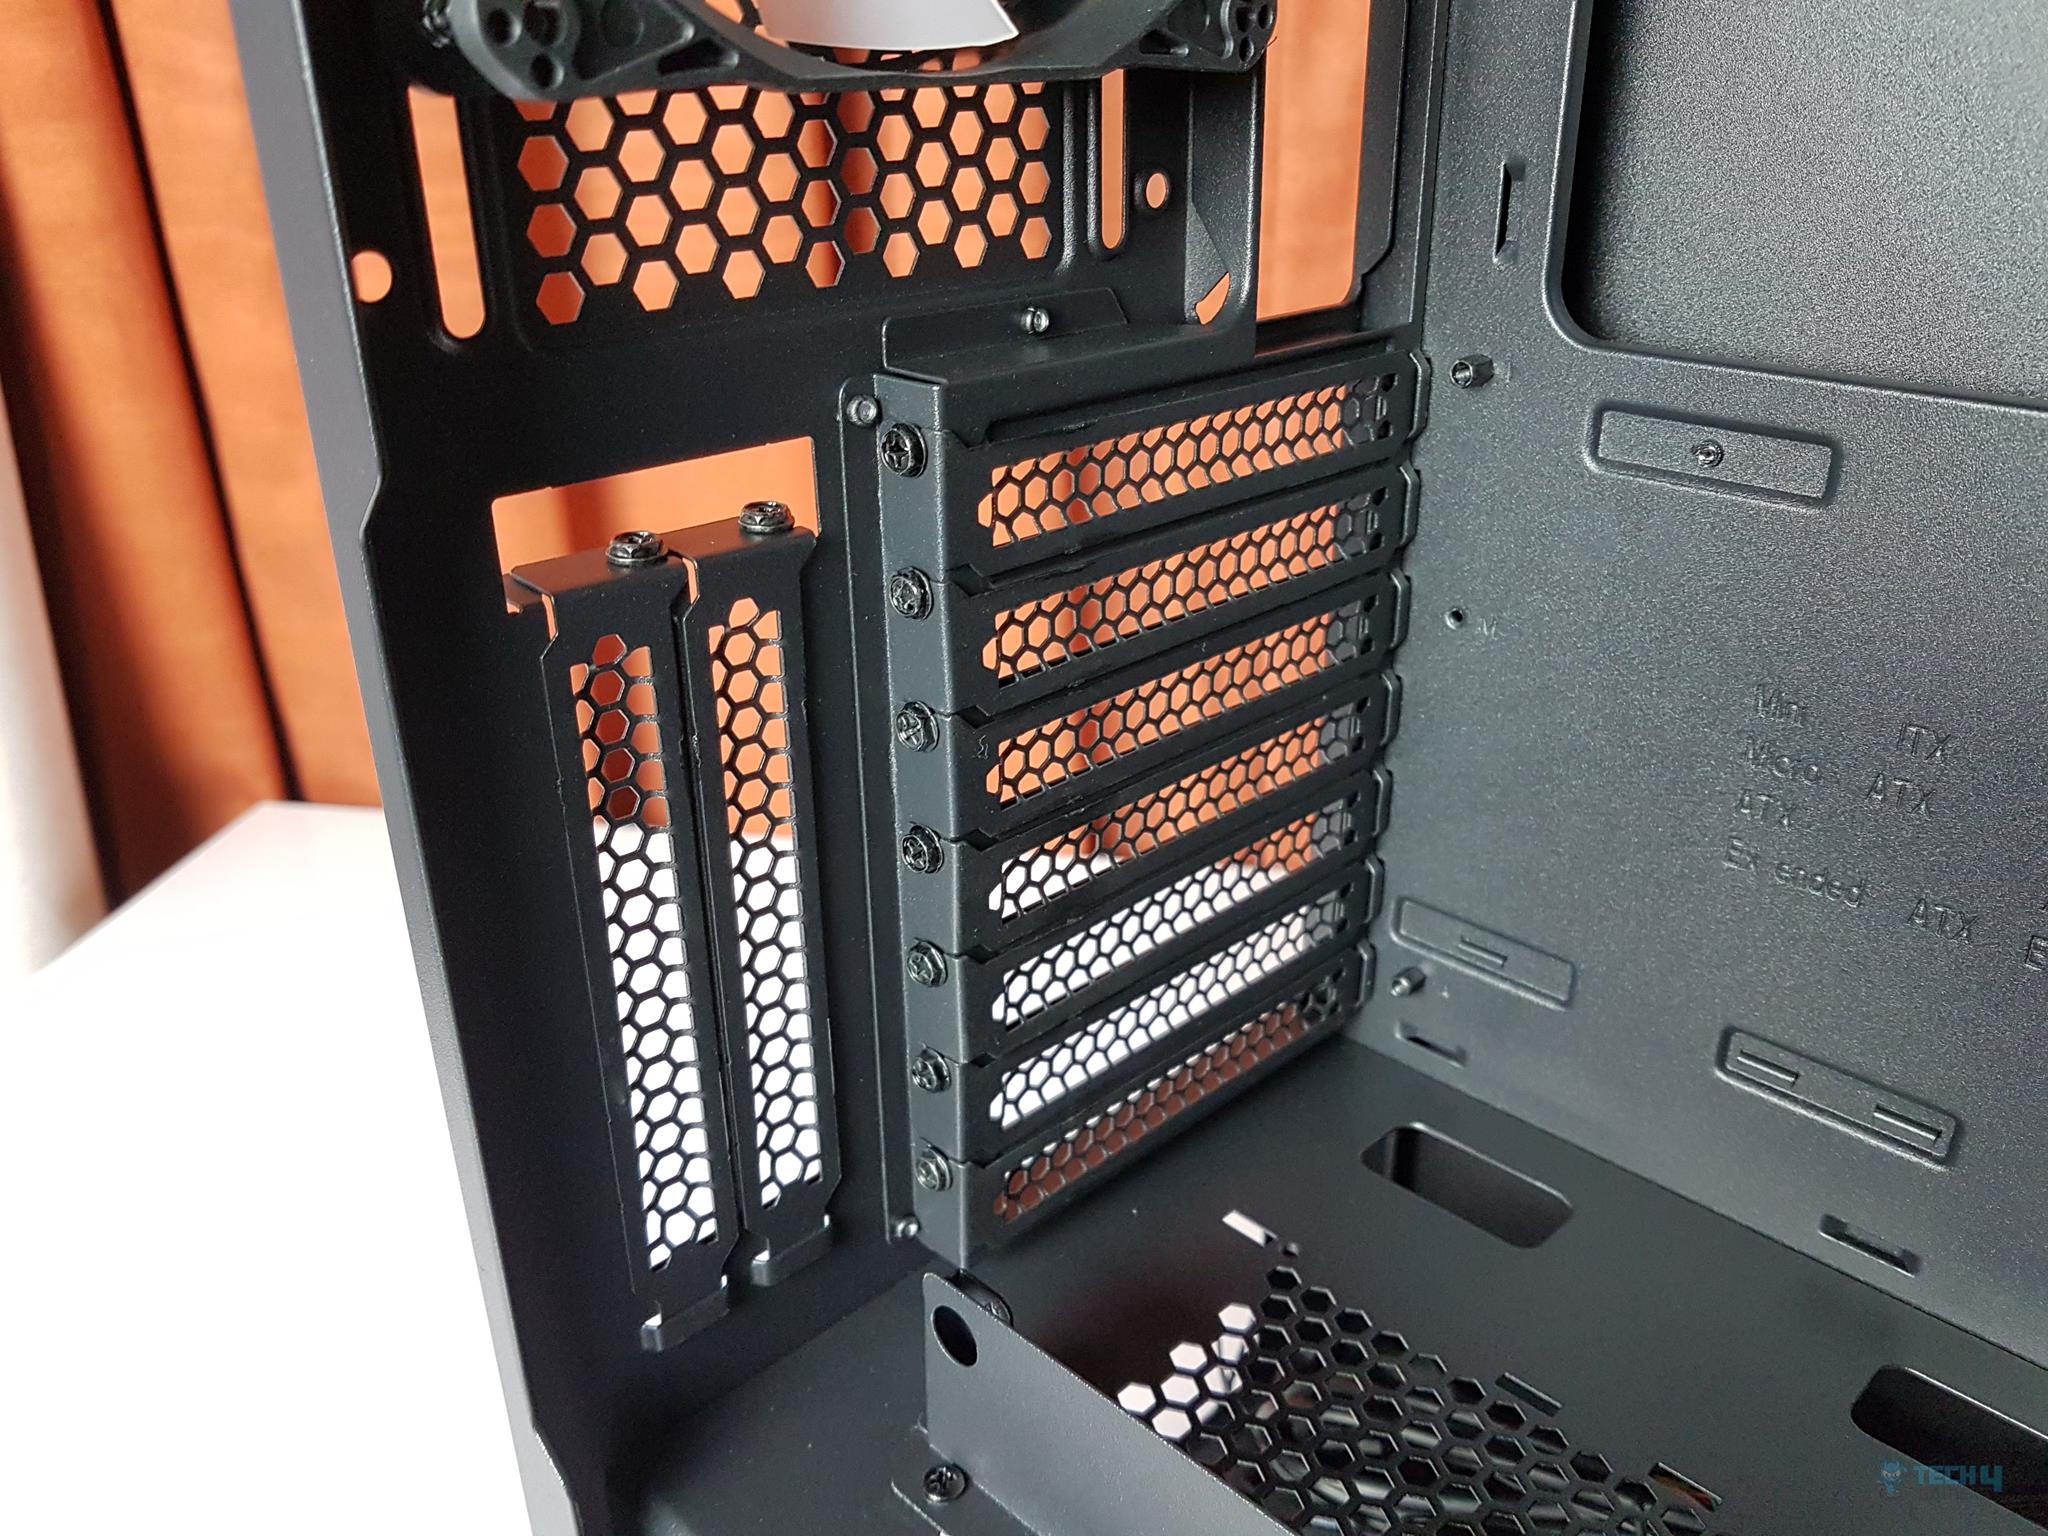
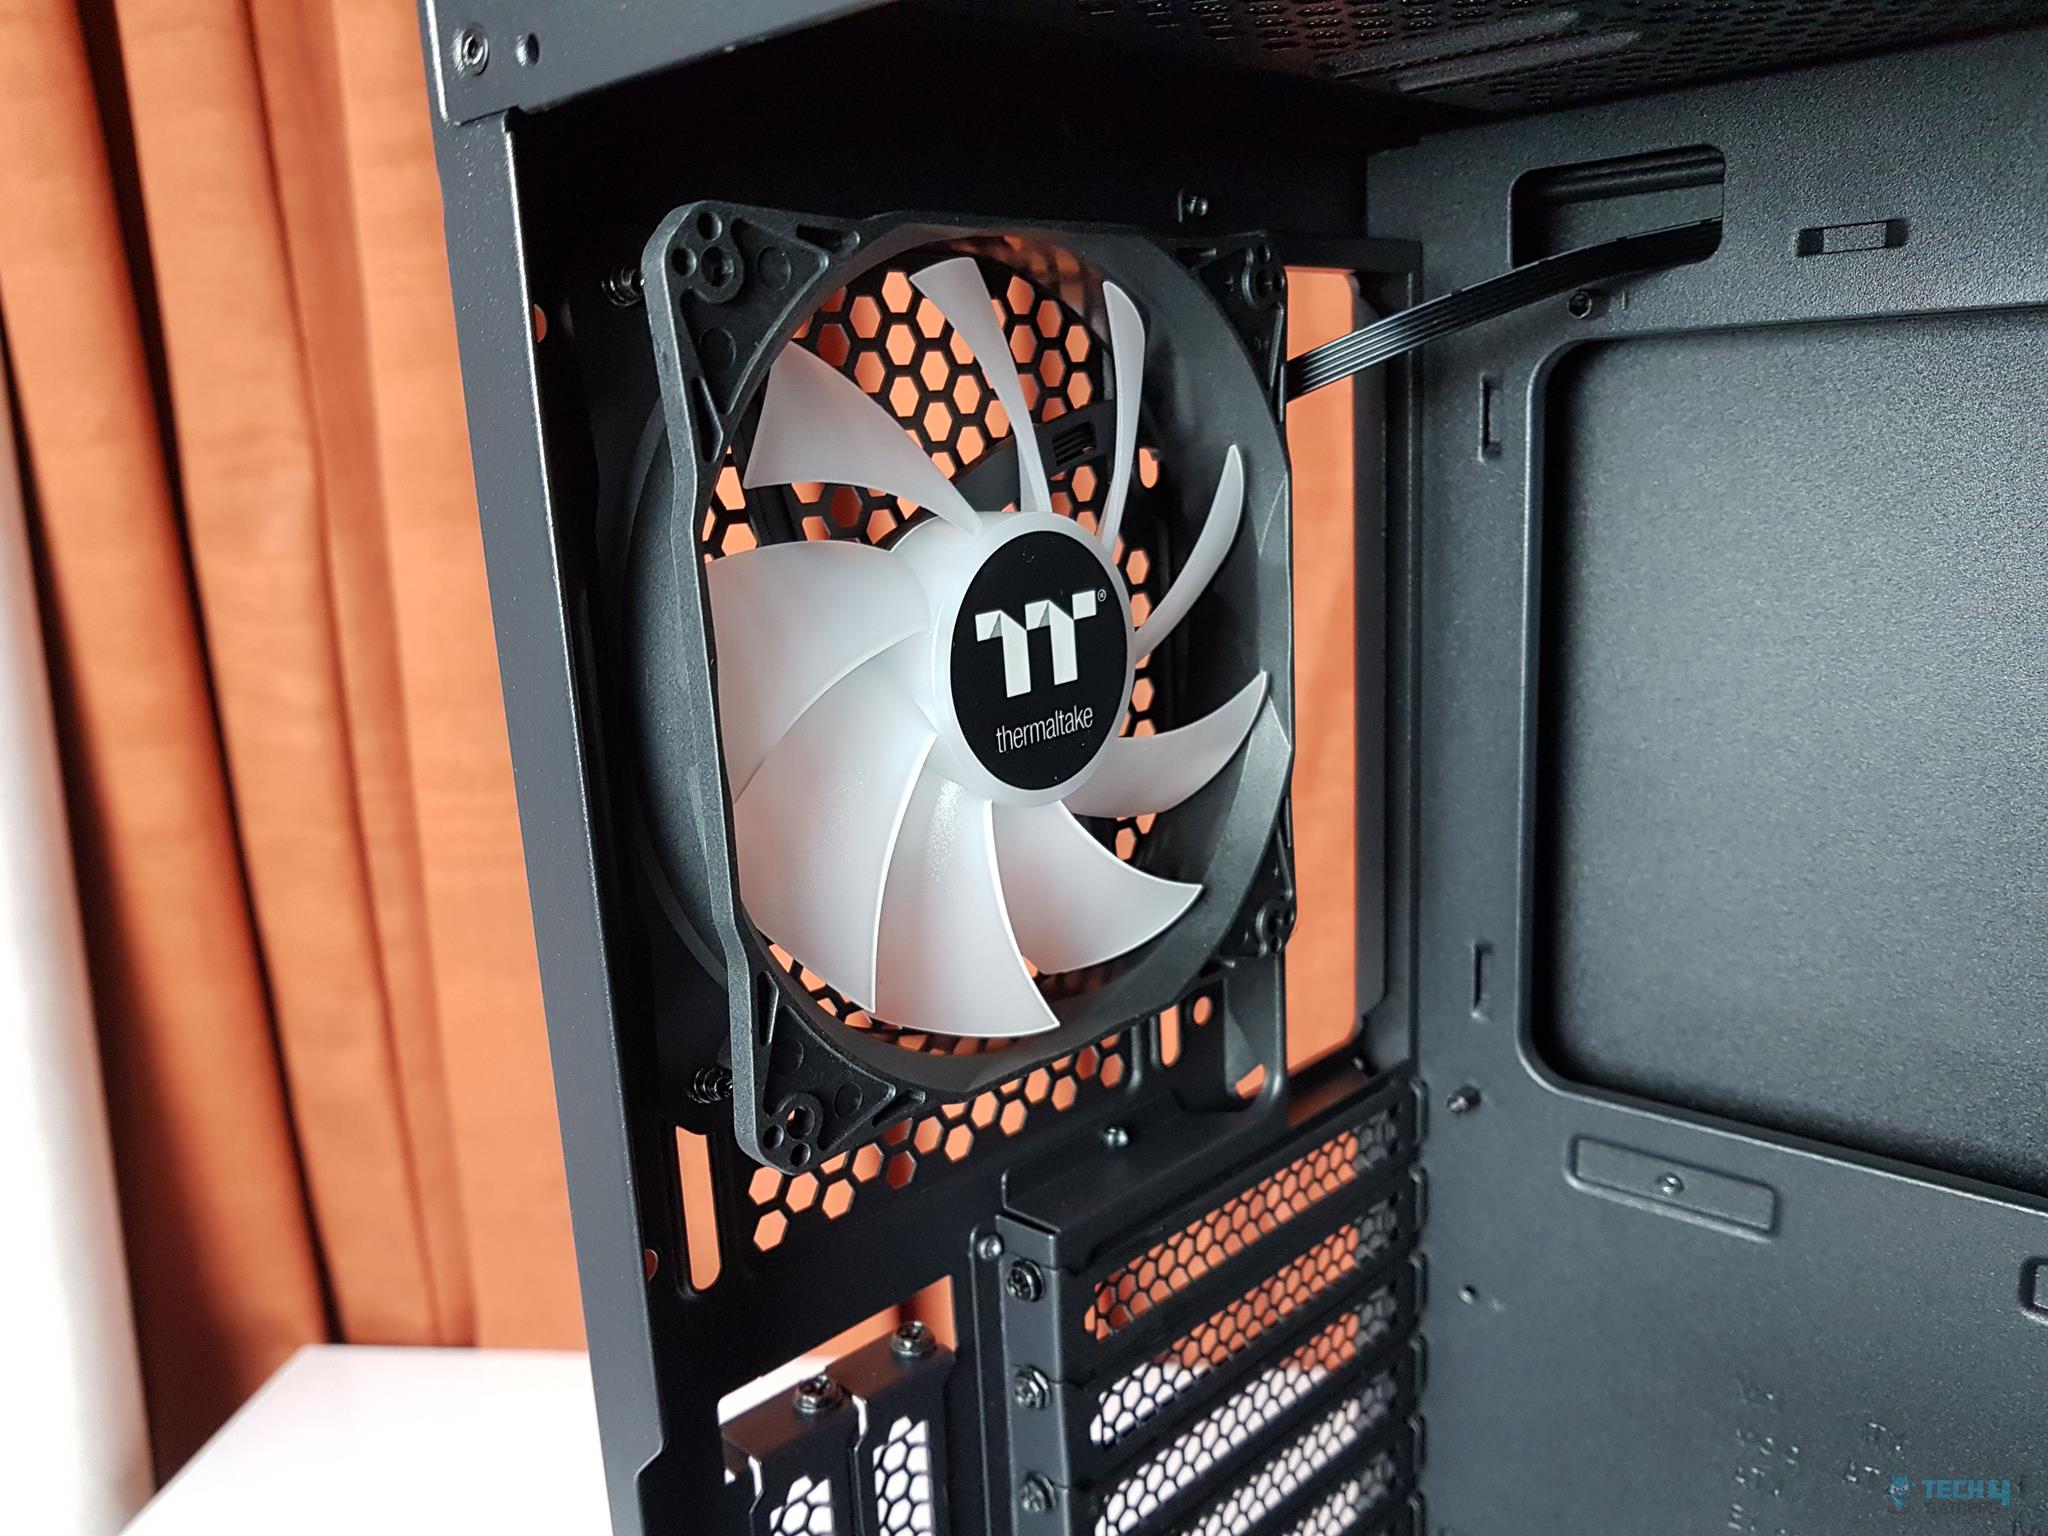
There is a large size cutout for the motherboard’s rear I/O shield. On its right side, we have a vented portion for the 120mm size fan (pre-installed). In the middle, we have 7 PCIe slots with vented covers. Area to its next has 2 more PCIe slots in a vertical layout with vented covers.
At the bottom, we have a standard ATX PSU mount. As can be seen, both side panels are secured using screws that are not thumbscrews but have bulky heads and are not captive either. The middle side of these panels suggests that they are to be slided out.
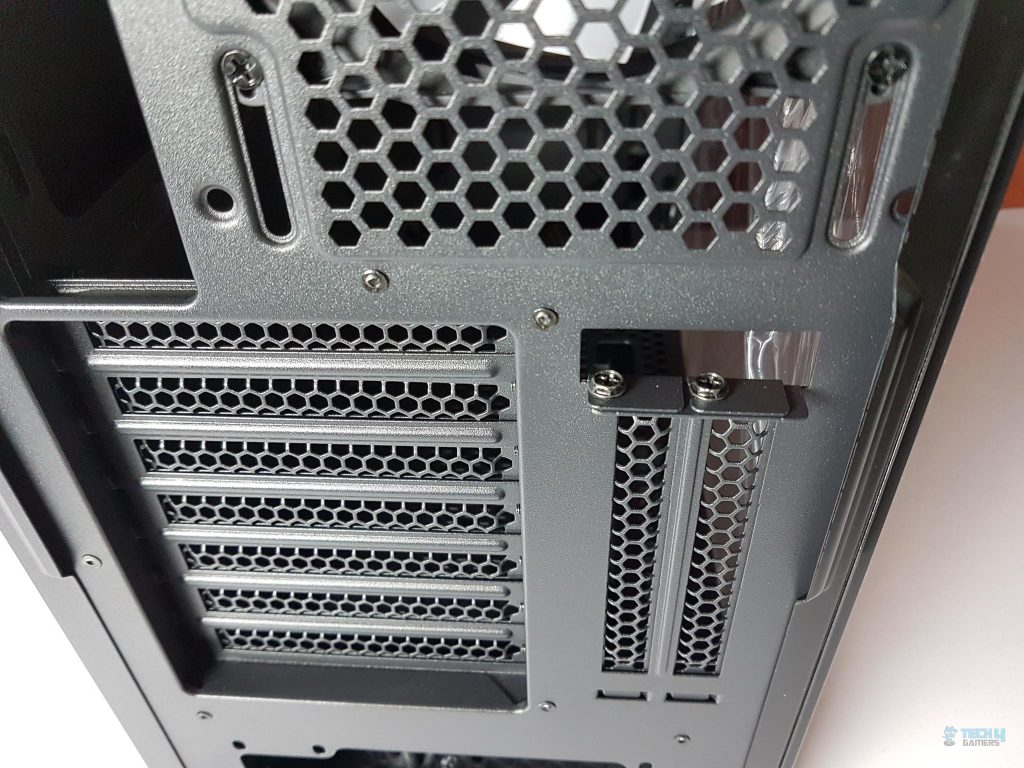
Removing the 2x vertical PCIe slot covers is as simple as taking off the two screws.
Top Side
Let’s take a look at the top side of the Thermaltake H550.

The top side of the Thermaltake H550 Review has an I/O panel on its leftmost side. There is a magnetic dust filter covering the 120/140mm fan mounts.
The image on the right shows the top with the magnetic dust filter removed. The fans can be adjusted as Thermaltake has provided rail system to slide the fans for flexible mounting.
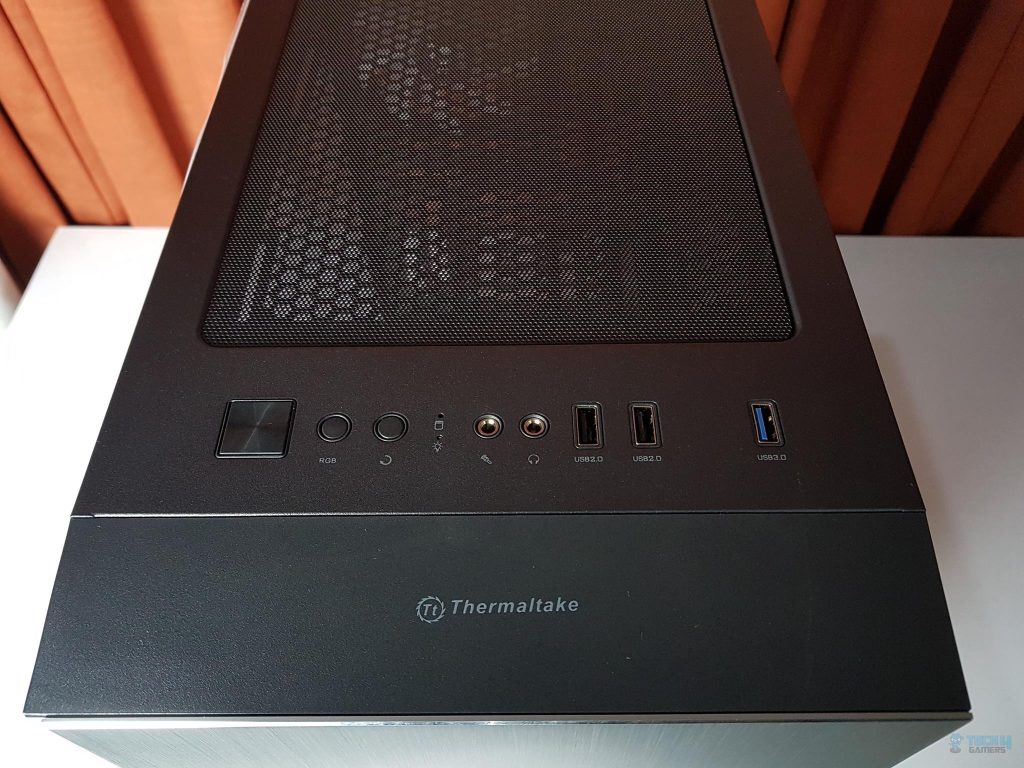
The top I/O panel includes the regular 2x 3.5mm jacks as well as three USB ports. Other than that, we have an RGB switch, LED indicator, a Reset button and a Power button. The Thermaltake brand logo and name are printed in white color on the top.
Bottom Side
We can spot 4 circular large size feet of the chassis at the bottom with the rubber mounts at their end to avoid scratching the surface on which the chassis will be placed.
These feet provide a roughly 20mm of spacing to the chassis from the bottom of the surface. There is a non-magnetic dust filter covering the entire length of the bottom section.
The non-magnetic dust filter has two tabs on the far end which are inserted in a dedicated portion of the chassis frame to lock the filter. In order to remove the filter, press it down from the tip and slide out.
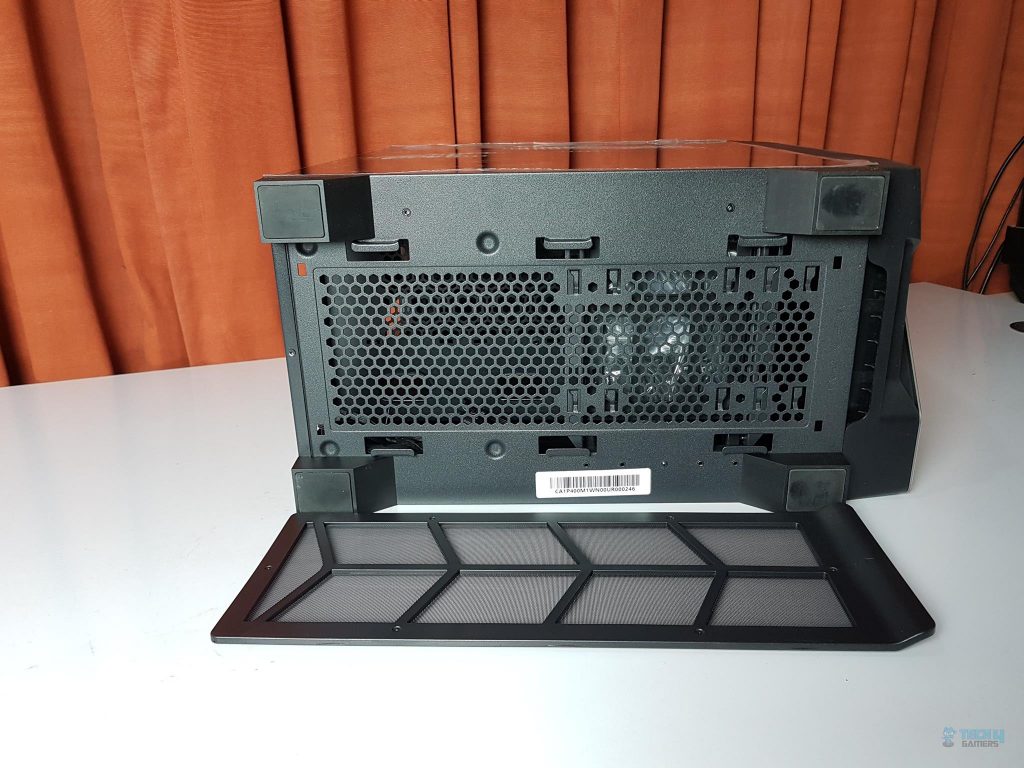
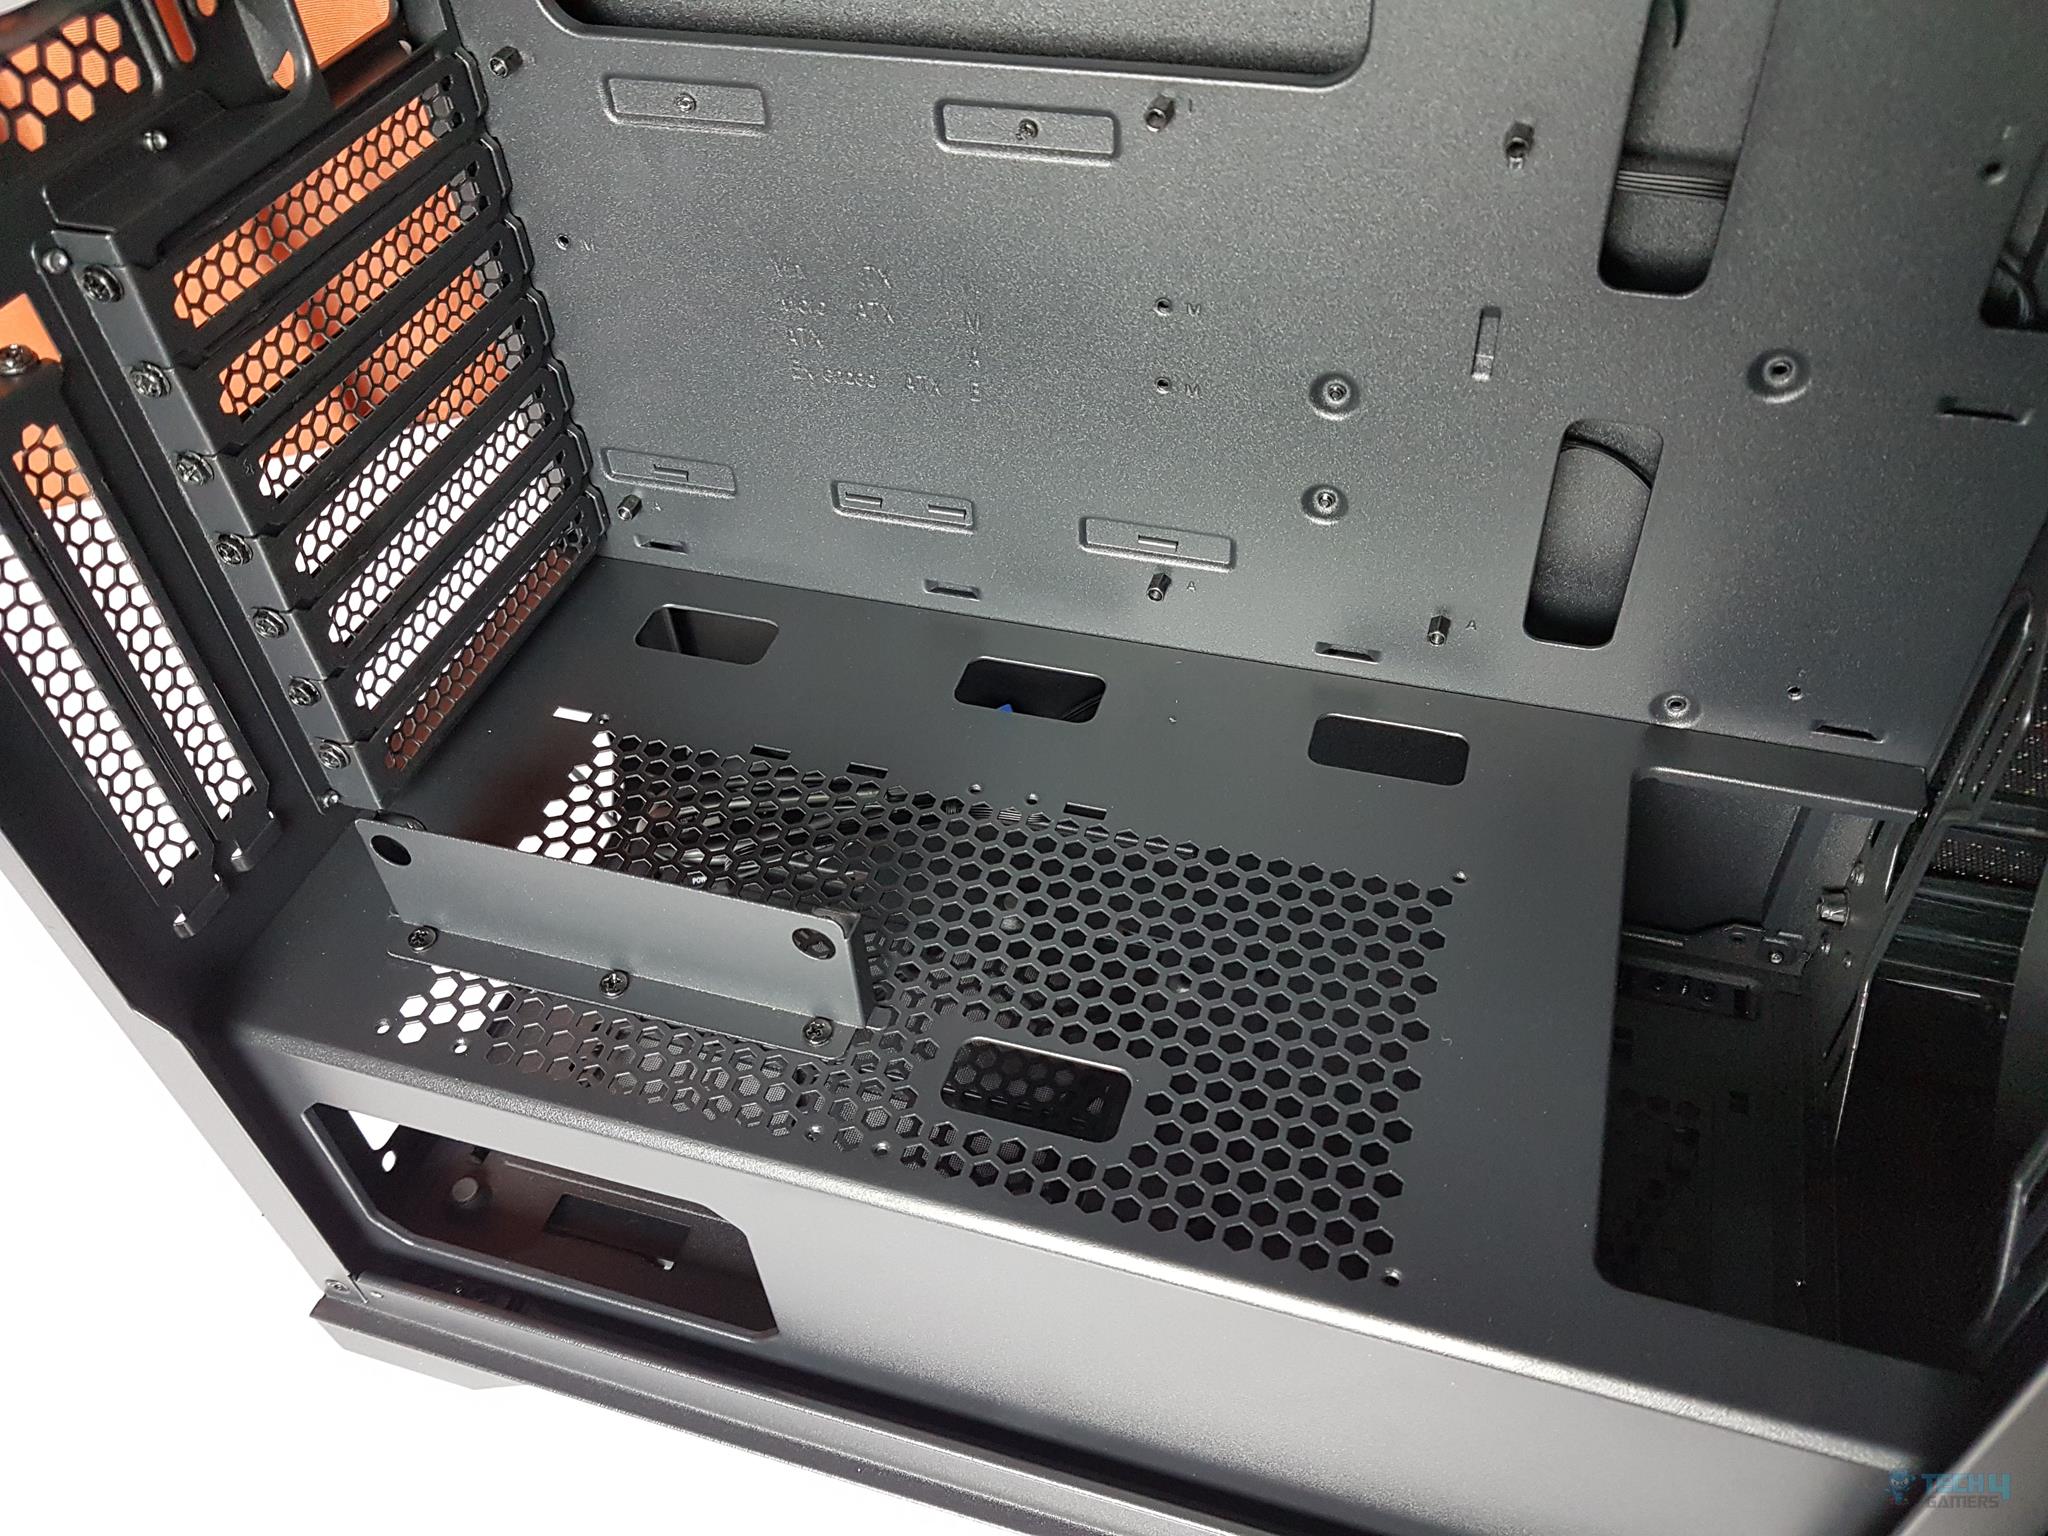
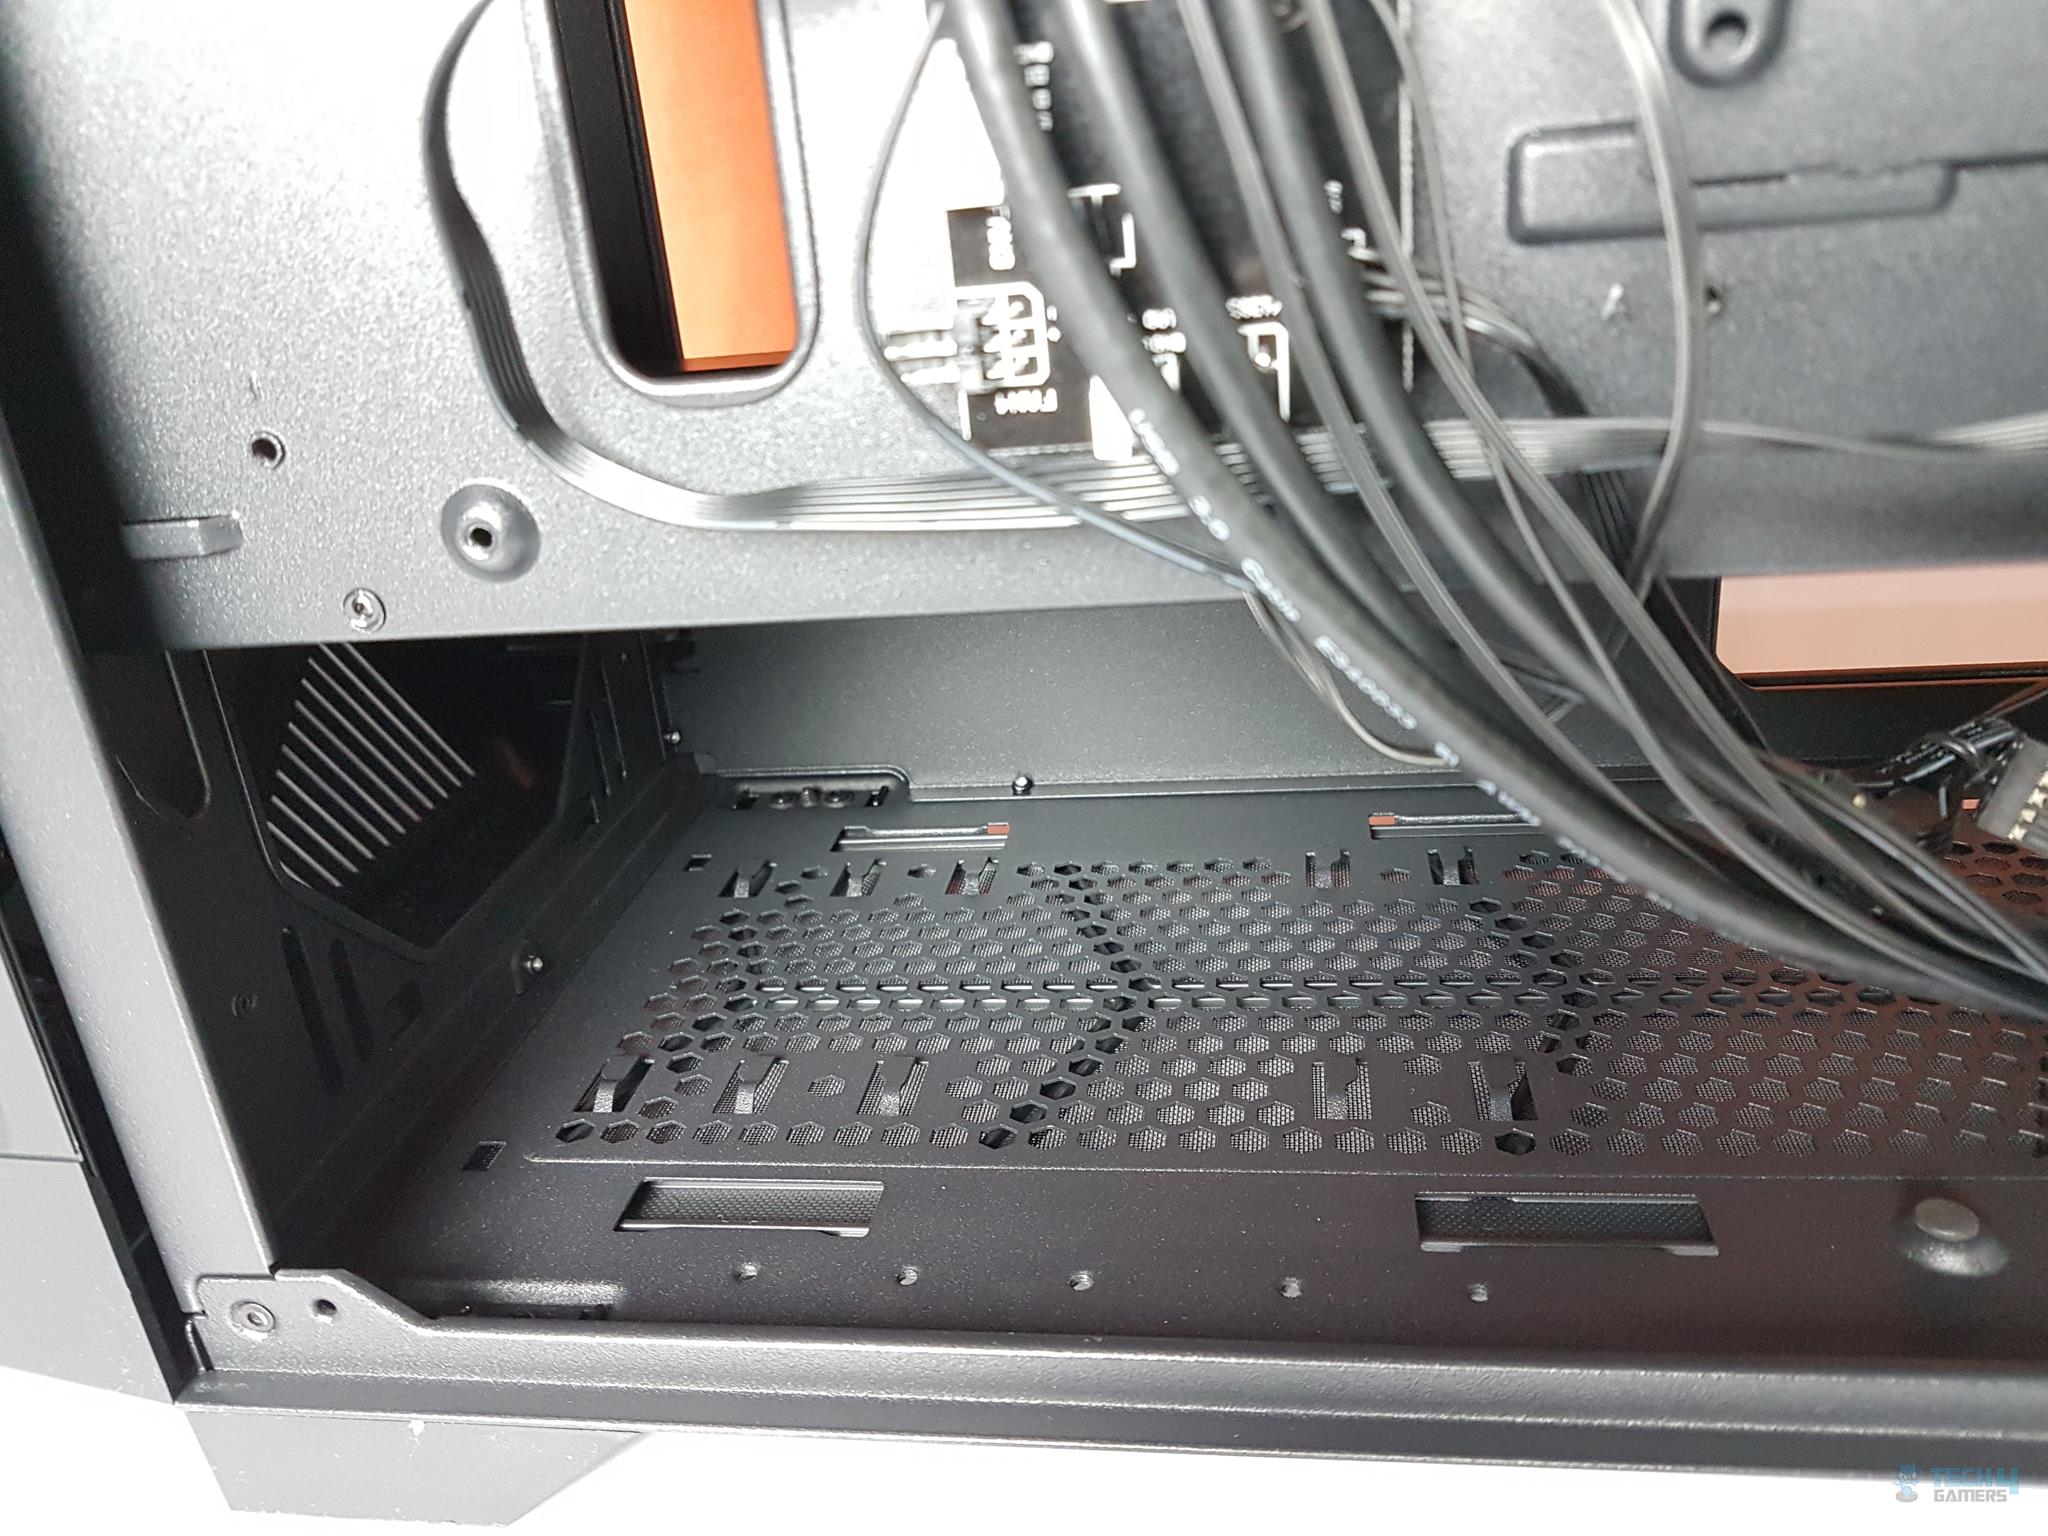
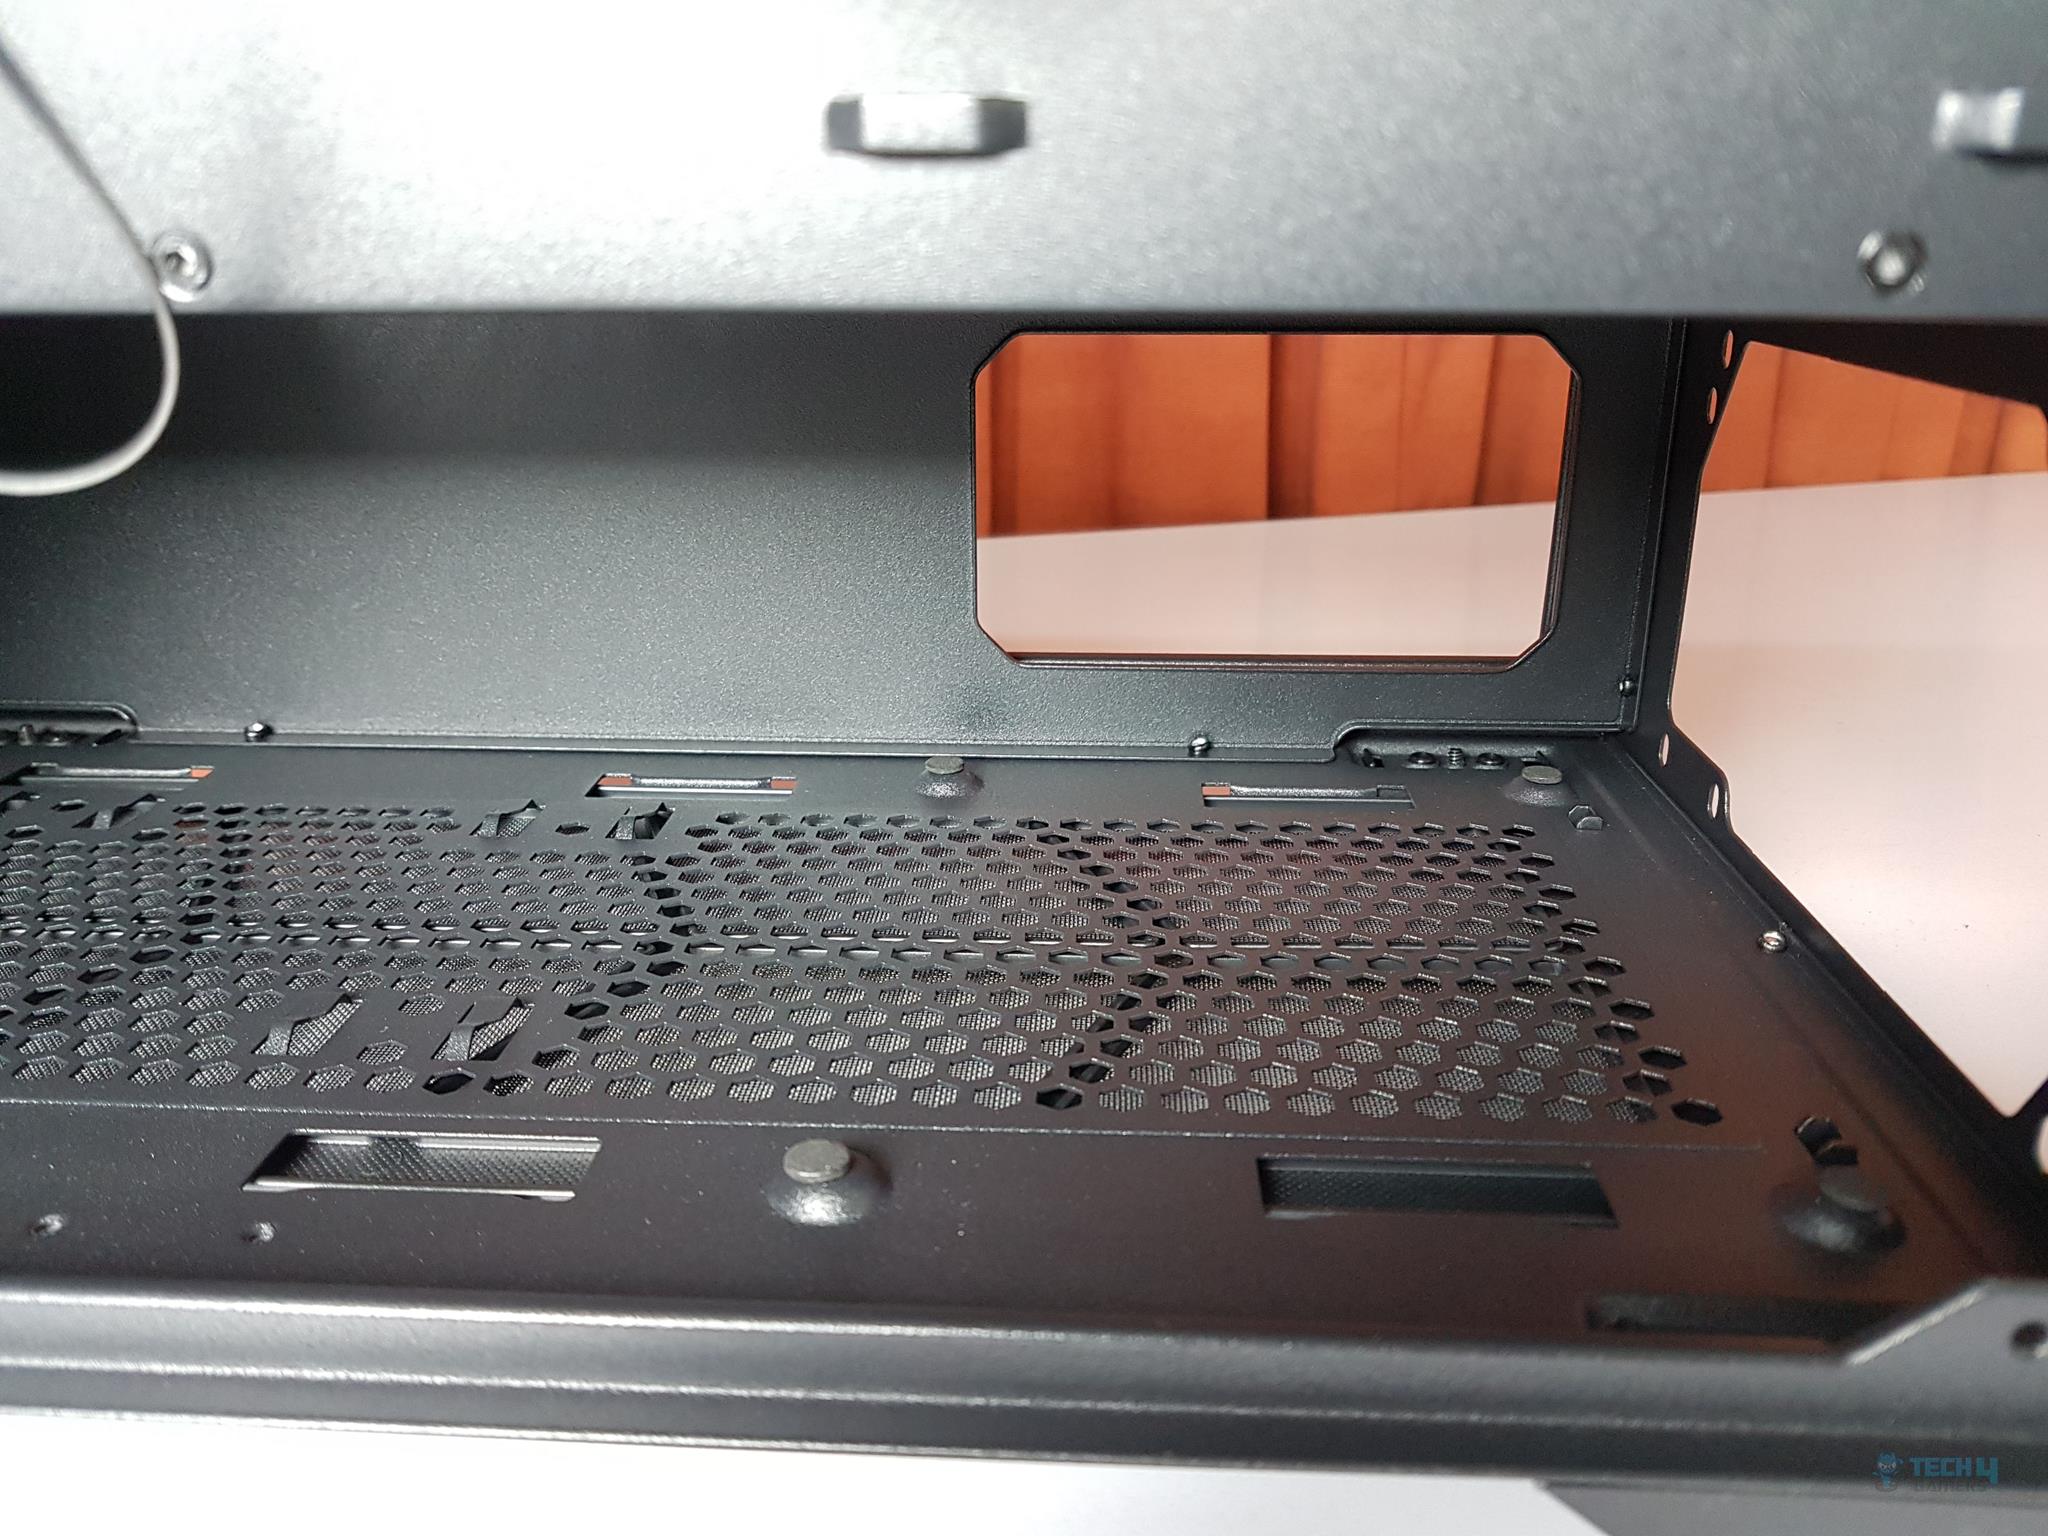
The above picture shows the dust filter removed. The vented PSU mount is now fully exposed as well as the portion under the HDD cage. The HDD cage has a useful feature in which the user can adjust the position of the cage to either make a room for thick radiator/fan on the front or to make room for more length of PSU.
The far-right side at the bottom of the chassis has a large cutout which is another air intake side for the front. This is also where you will place your fingers of the hand to have some grip while removing the front panel.
Side (Glass Panel)

The side panel features a 4mm thick tempered glass. It is installed using two screws at the rear side of the chassis. The top and bottom frames of the chassis are bit protruded to rest the panel in between them.
The panel does not fall as soon as screws are removed but one can’t be too careful while handling the TG panels! The glass has a dark tint. Lighting would be needed inside the chassis to showcase the build. There is a blue sticker is warning about the presence of the TG panel.
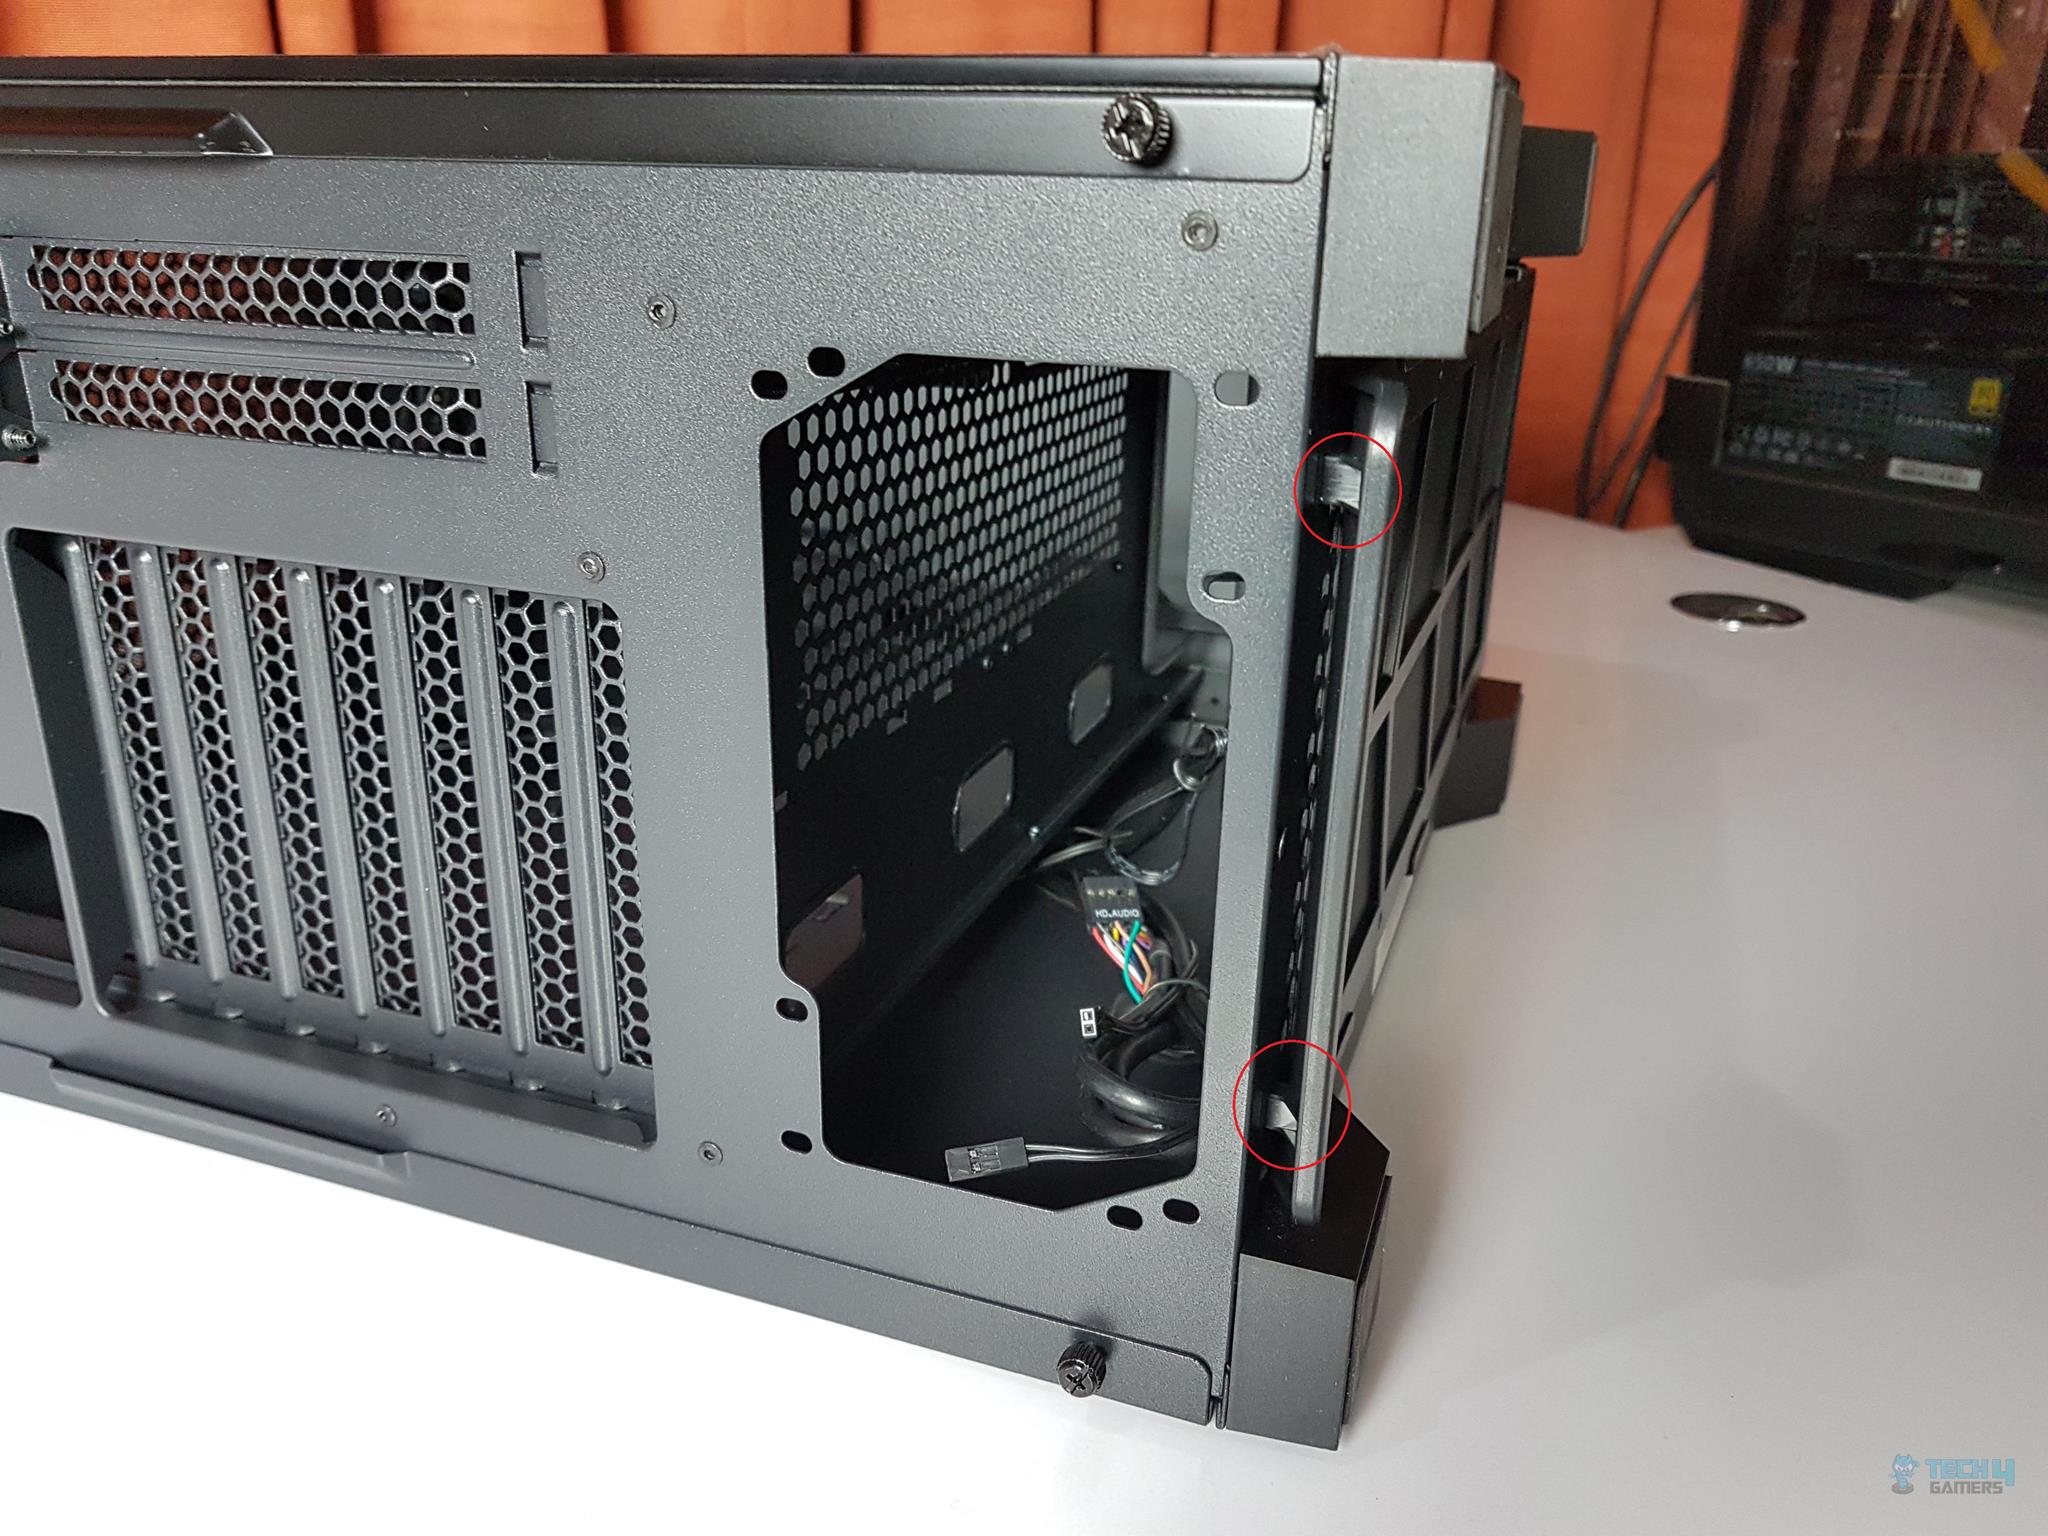
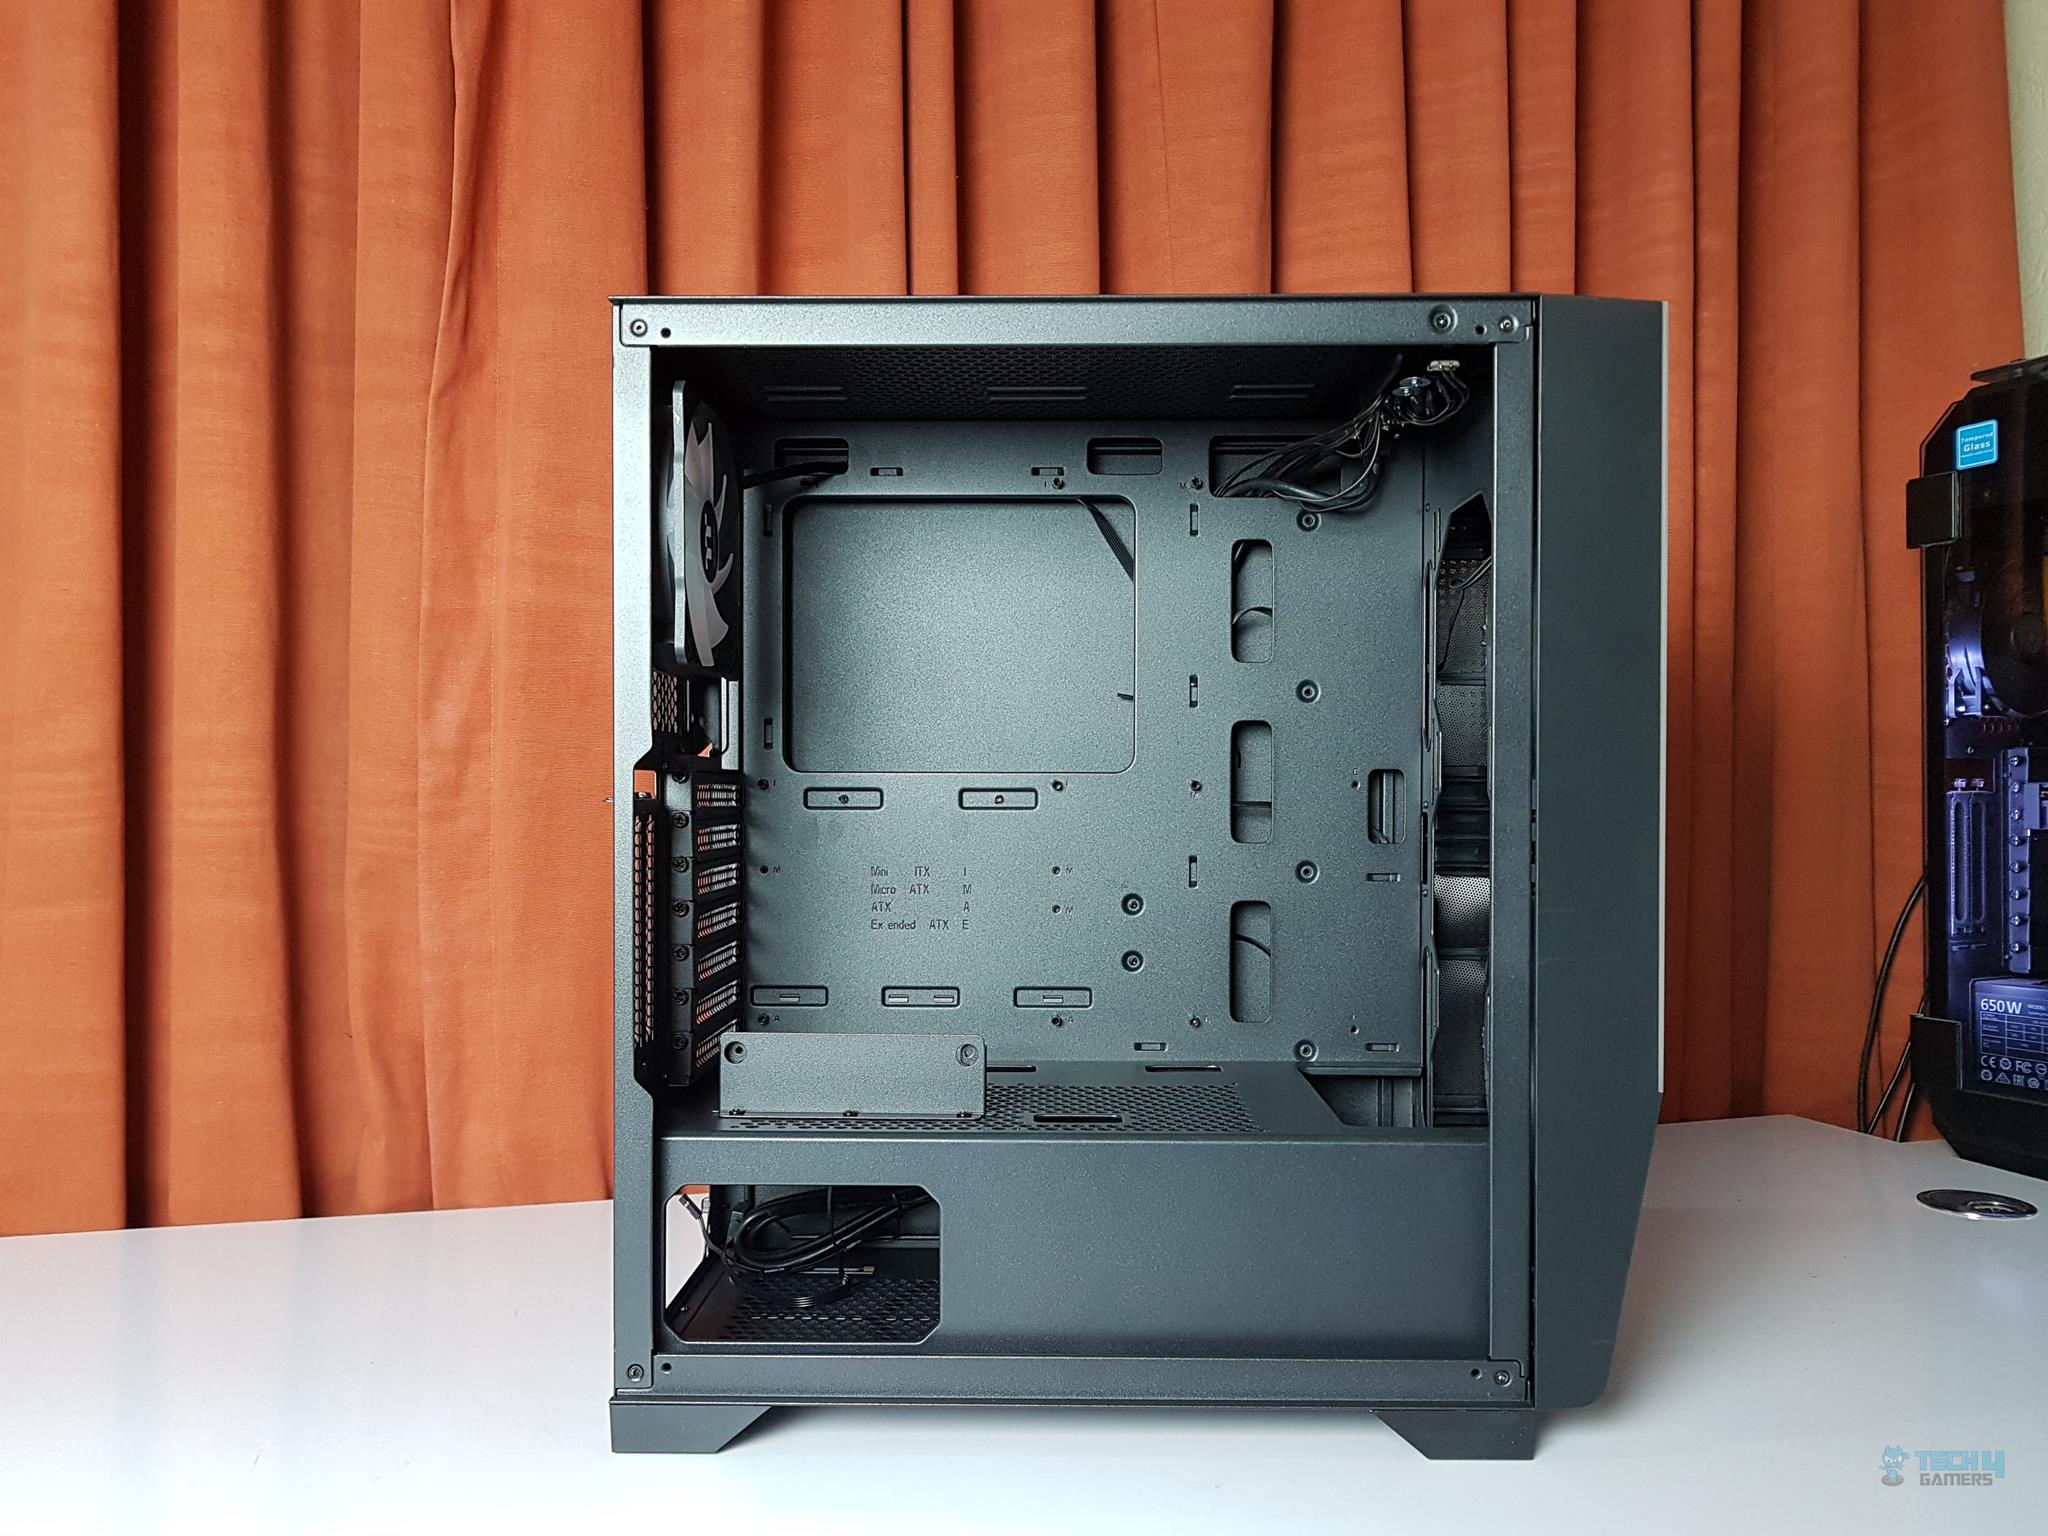
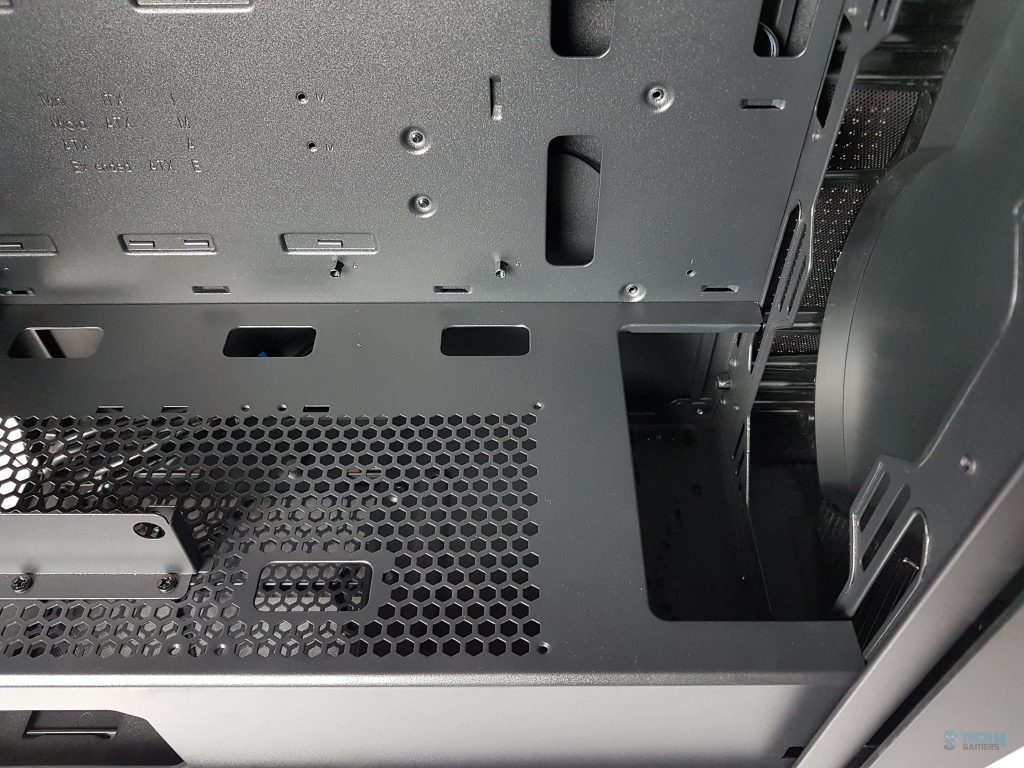
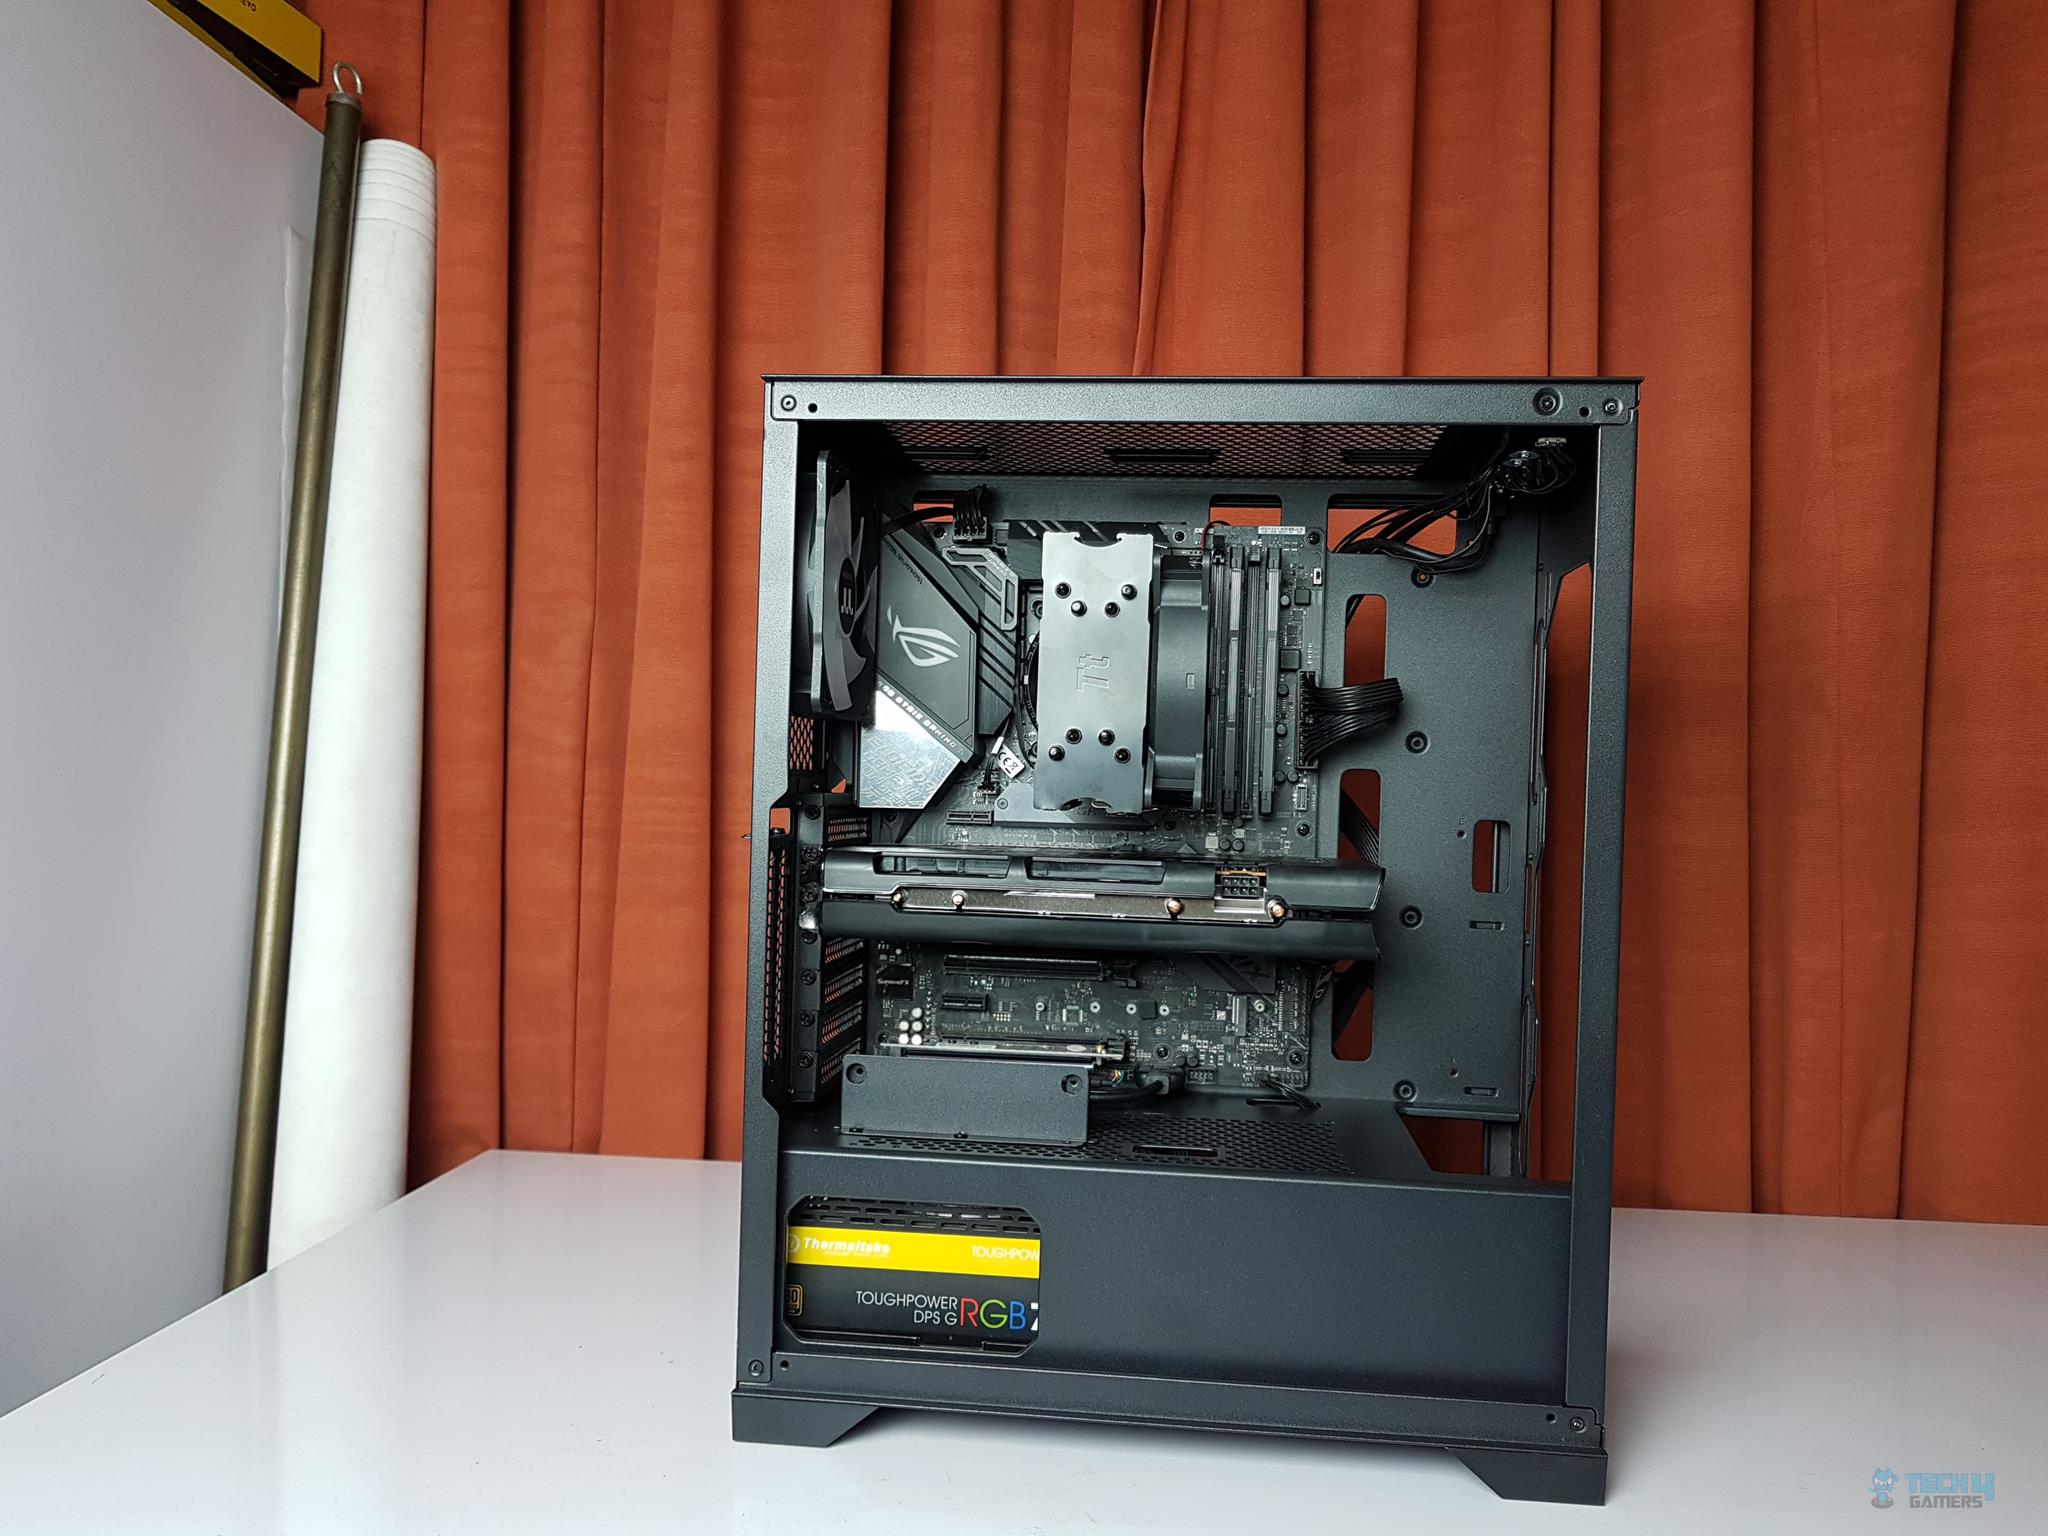
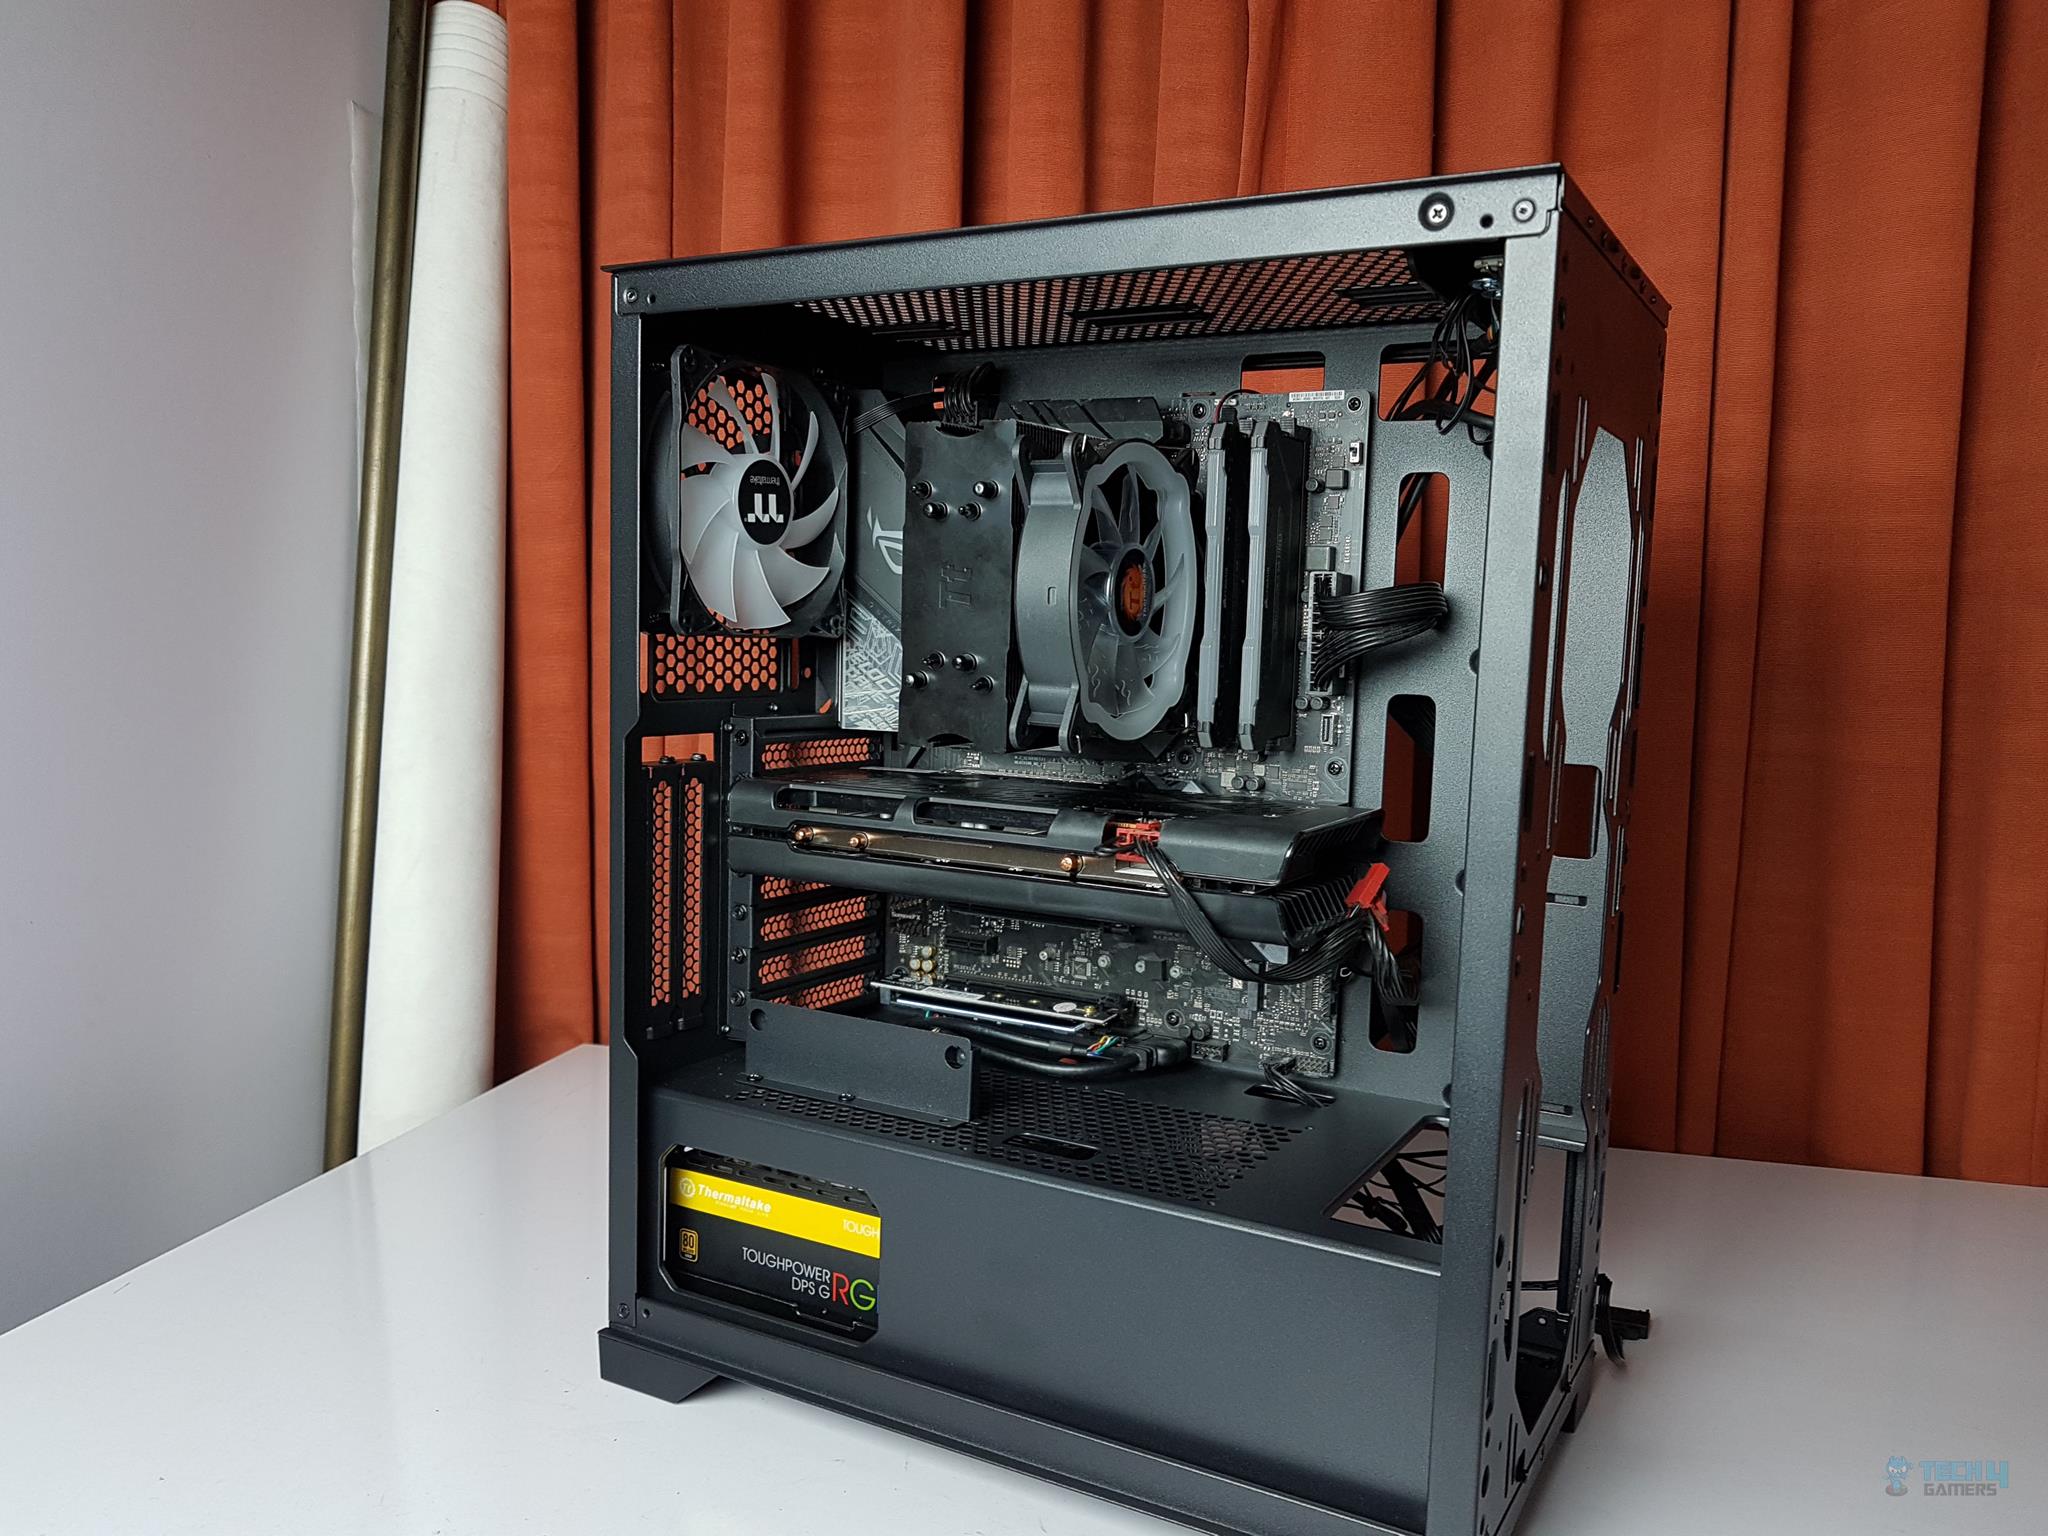
The Thermaltake H550 TG ARGB is has ample space to work around. We have a solid motherboard tray with no flex. There is a large cutout on the motherboard tray for ease of CPU cooler installation. There is a total of 6 cutouts on the tray for the cables management.
All of these don’t have rubber grommets. 9x standoffs are pre-installed in standard ATX configuration. The chassis has a PSU shroud which runs to the entire length of the chassis. There is a cutout on the left side of this shroud to show the PSU side.
The PSU shroud has a vented top portion. There are three small size cutouts facing the motherboard tray which is a wise placement as it will better help the cable passing at key points for connectivity on the motherboard. There is a GPU riser cable bracket on the top of the PSU shroud as well.
The PCIe slot covers are vented and re-usable which is a handy feature. There are not thumbscrews on the slot covers.

The above picture shows the spacious layout of the motherboard tray. The maximum length supported on the graphics card is 300mm and the CPU cooler of maximum 165mm height is supported. The supported motherboard size is mini-ITX, microATX, and ATX.
There is a displacement of approximately 30mm from the top of the chassis to the top of the motherboard. The maximum supported height of the RAM is 40mm for use with AIO.
There is a cutout on the front side of the PSU shroud. With HDD cage installed in the default position, there is a gap of 60mm from the back of the fan mounting rail to the PSU shroud which is good enough clearance for radiator and fan combination.
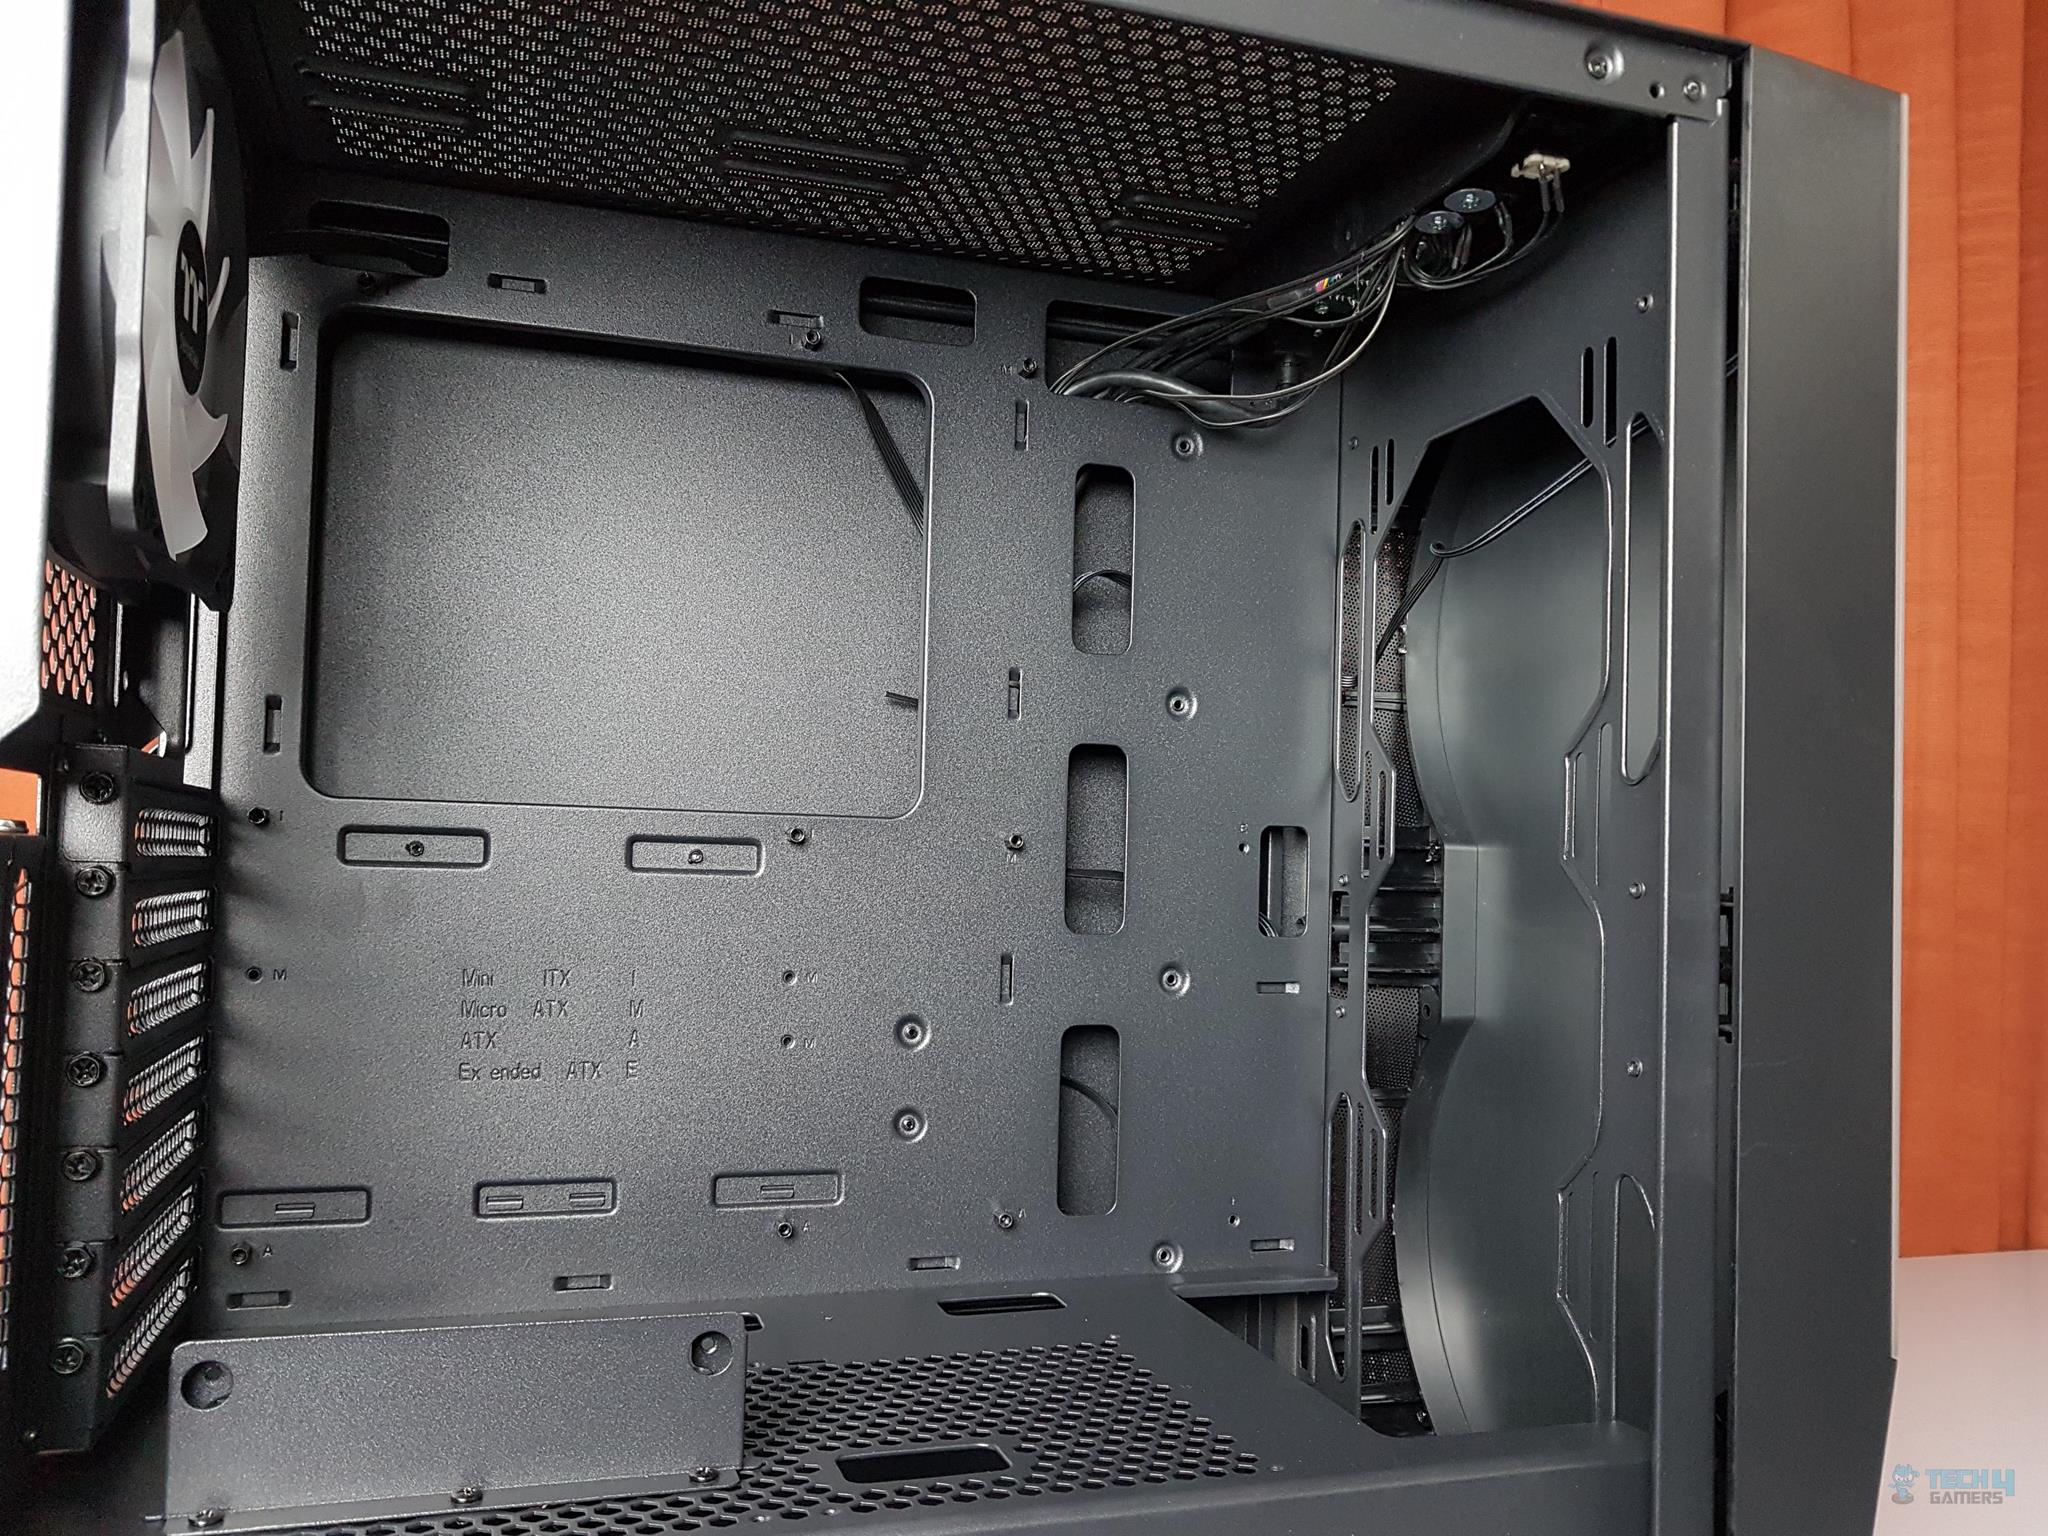
The user can install up to 2x 120mm or 140mm fans on the top though only 240mm radiator is supported on the top.
Side (Solid Panel)
Let’s take a look at the chassis from the backside.

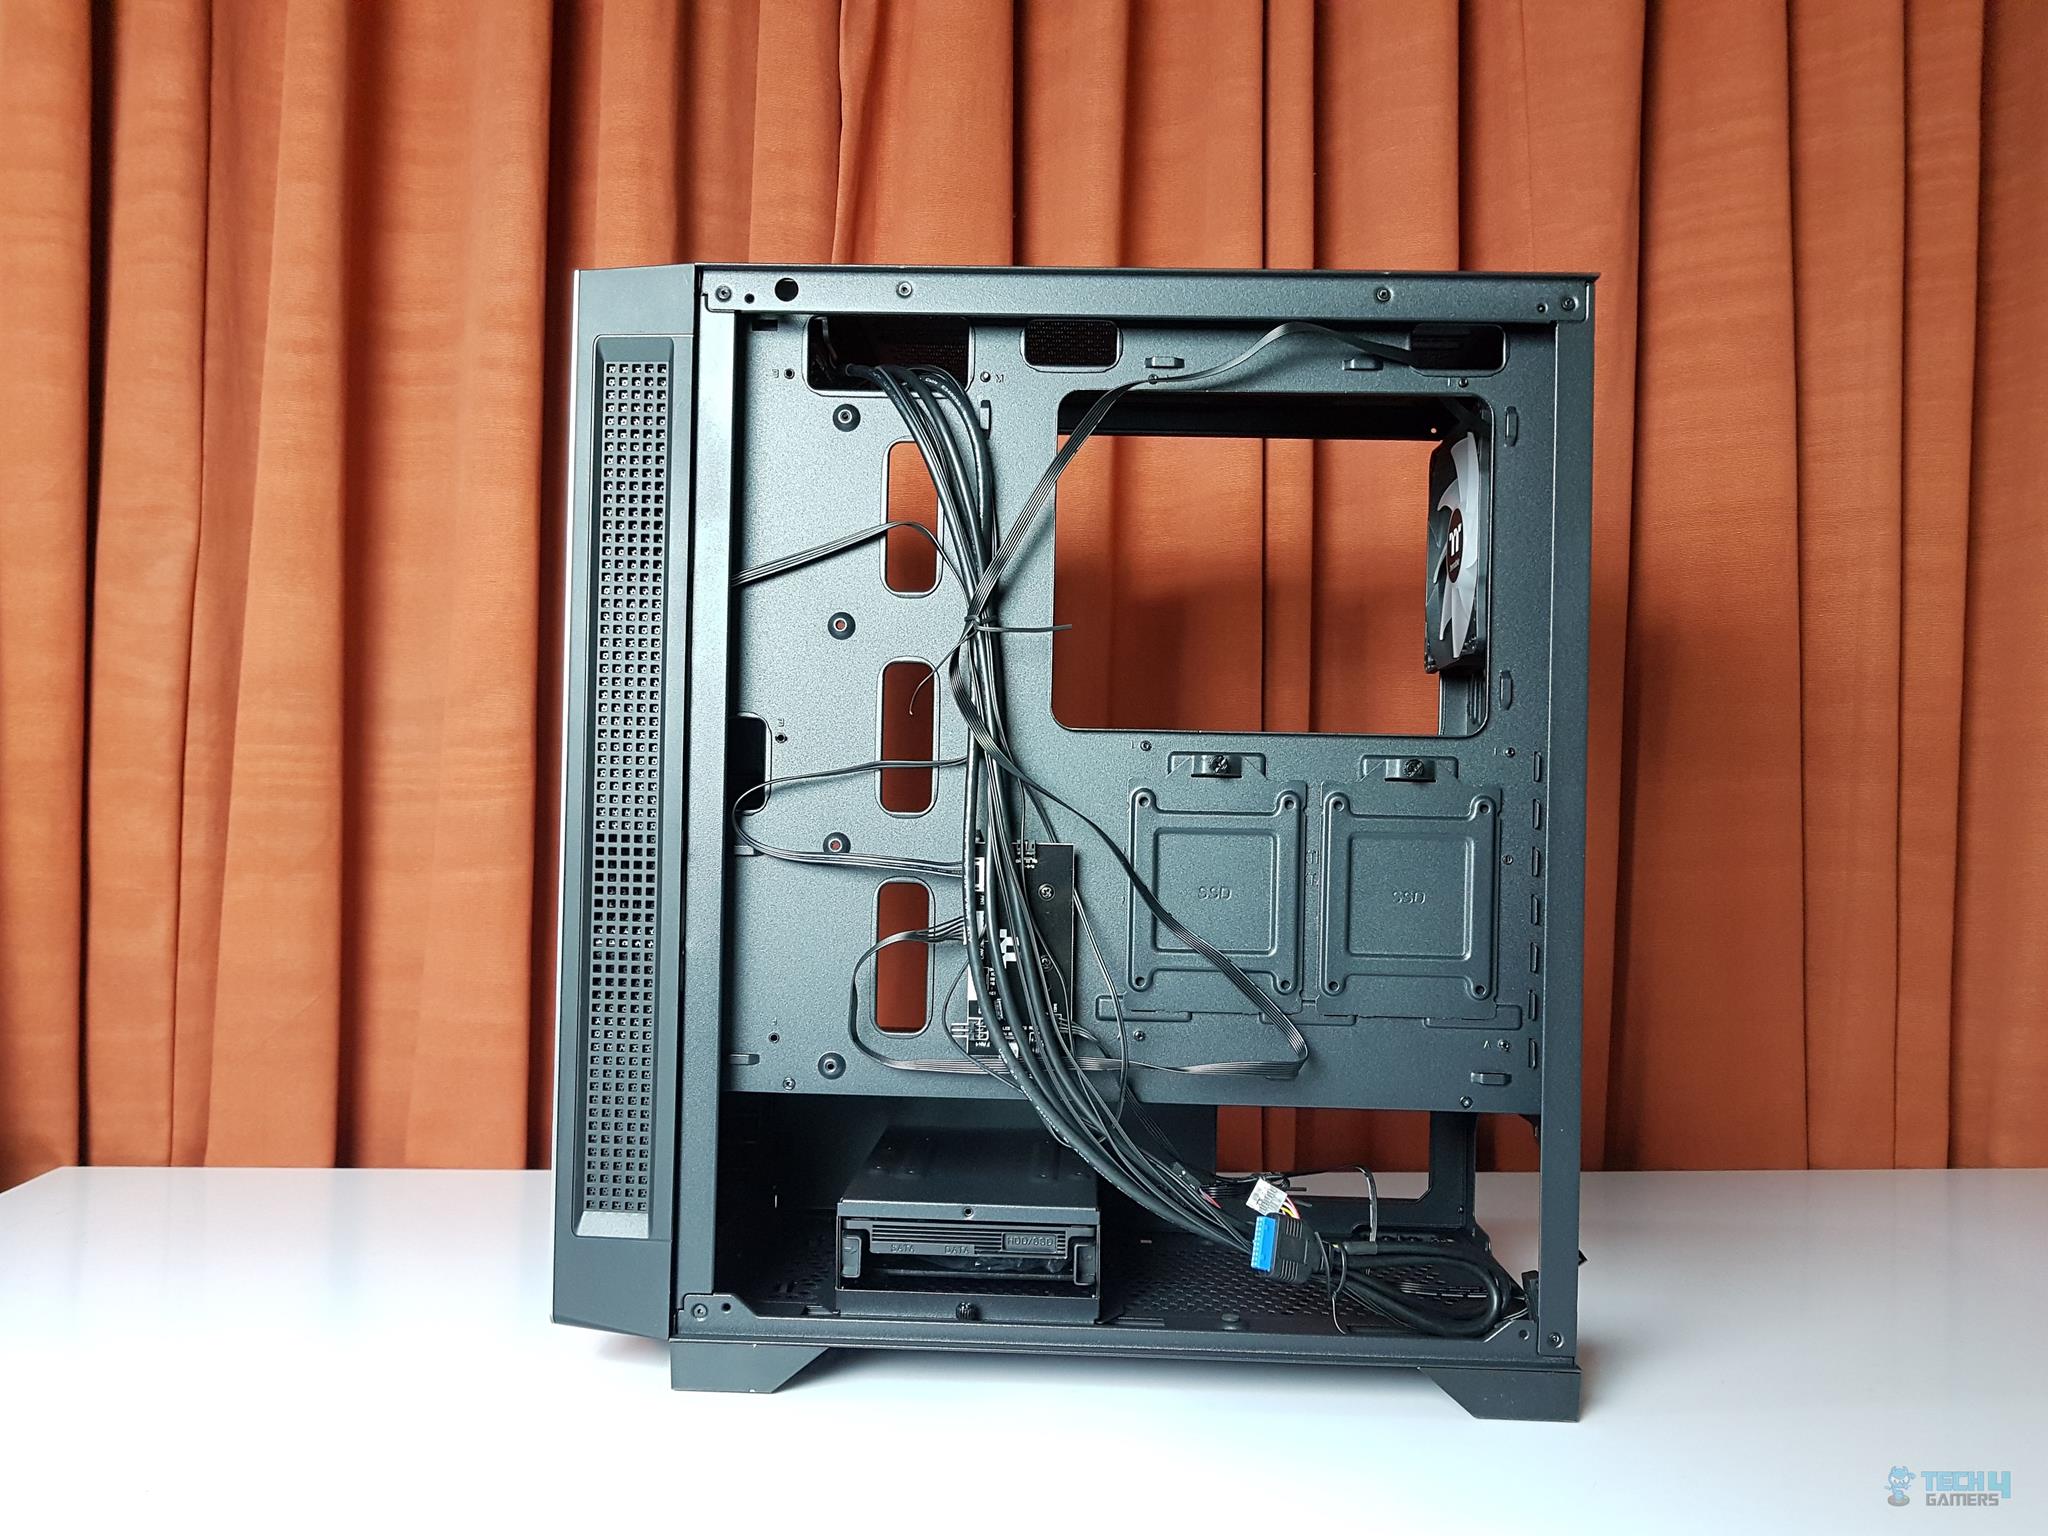
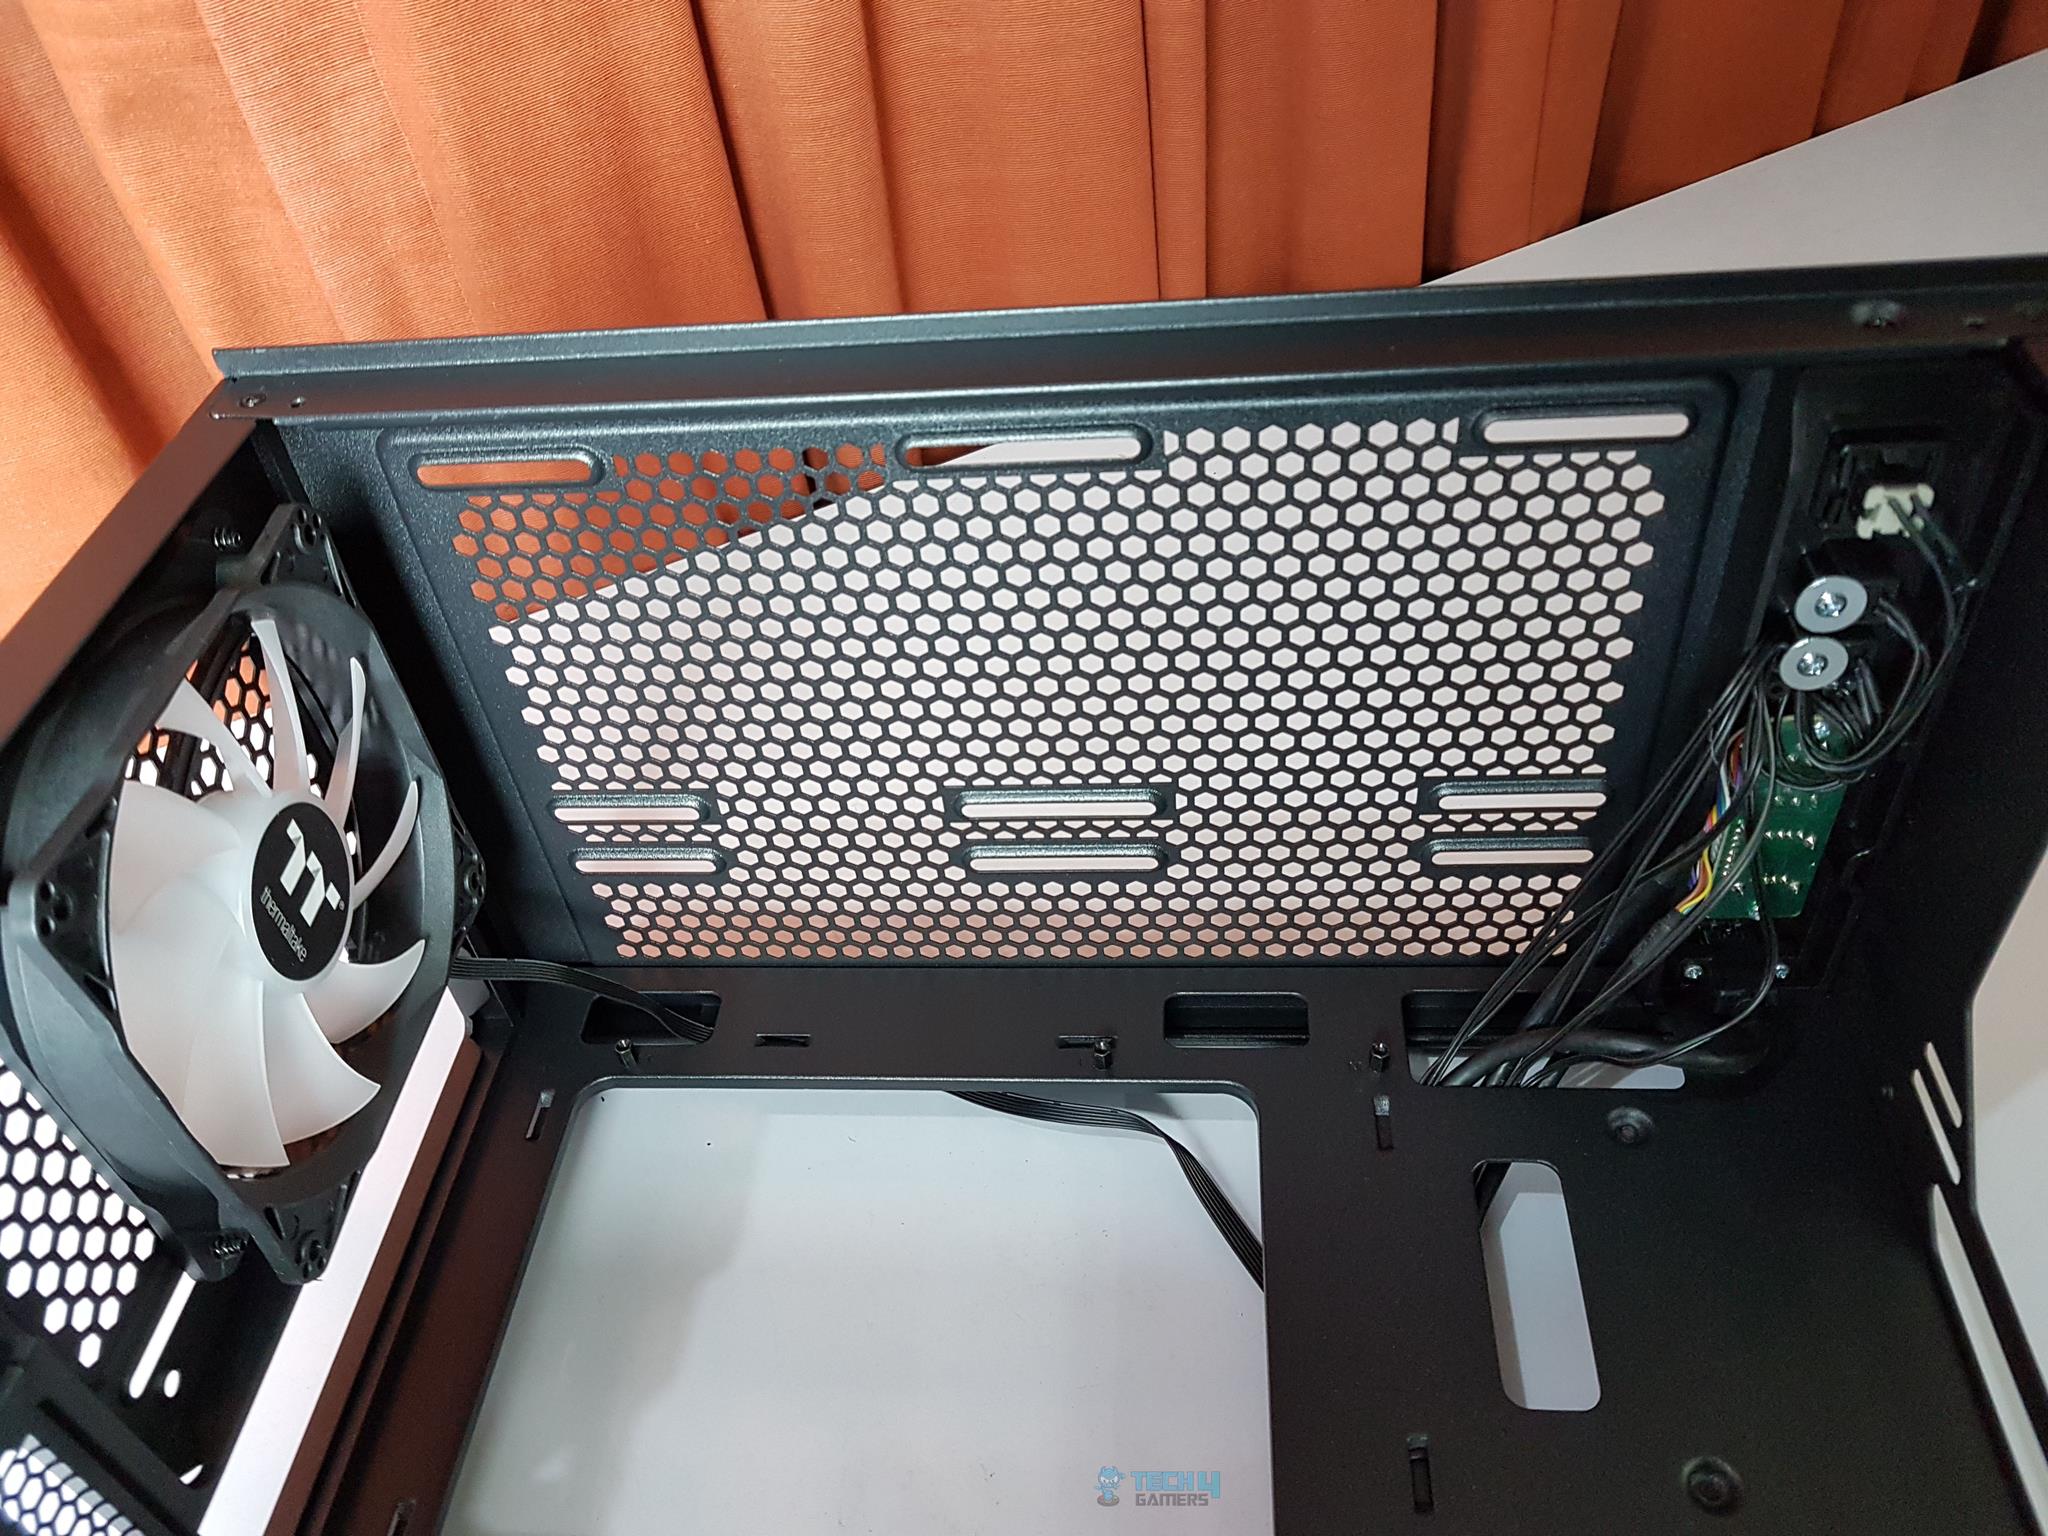
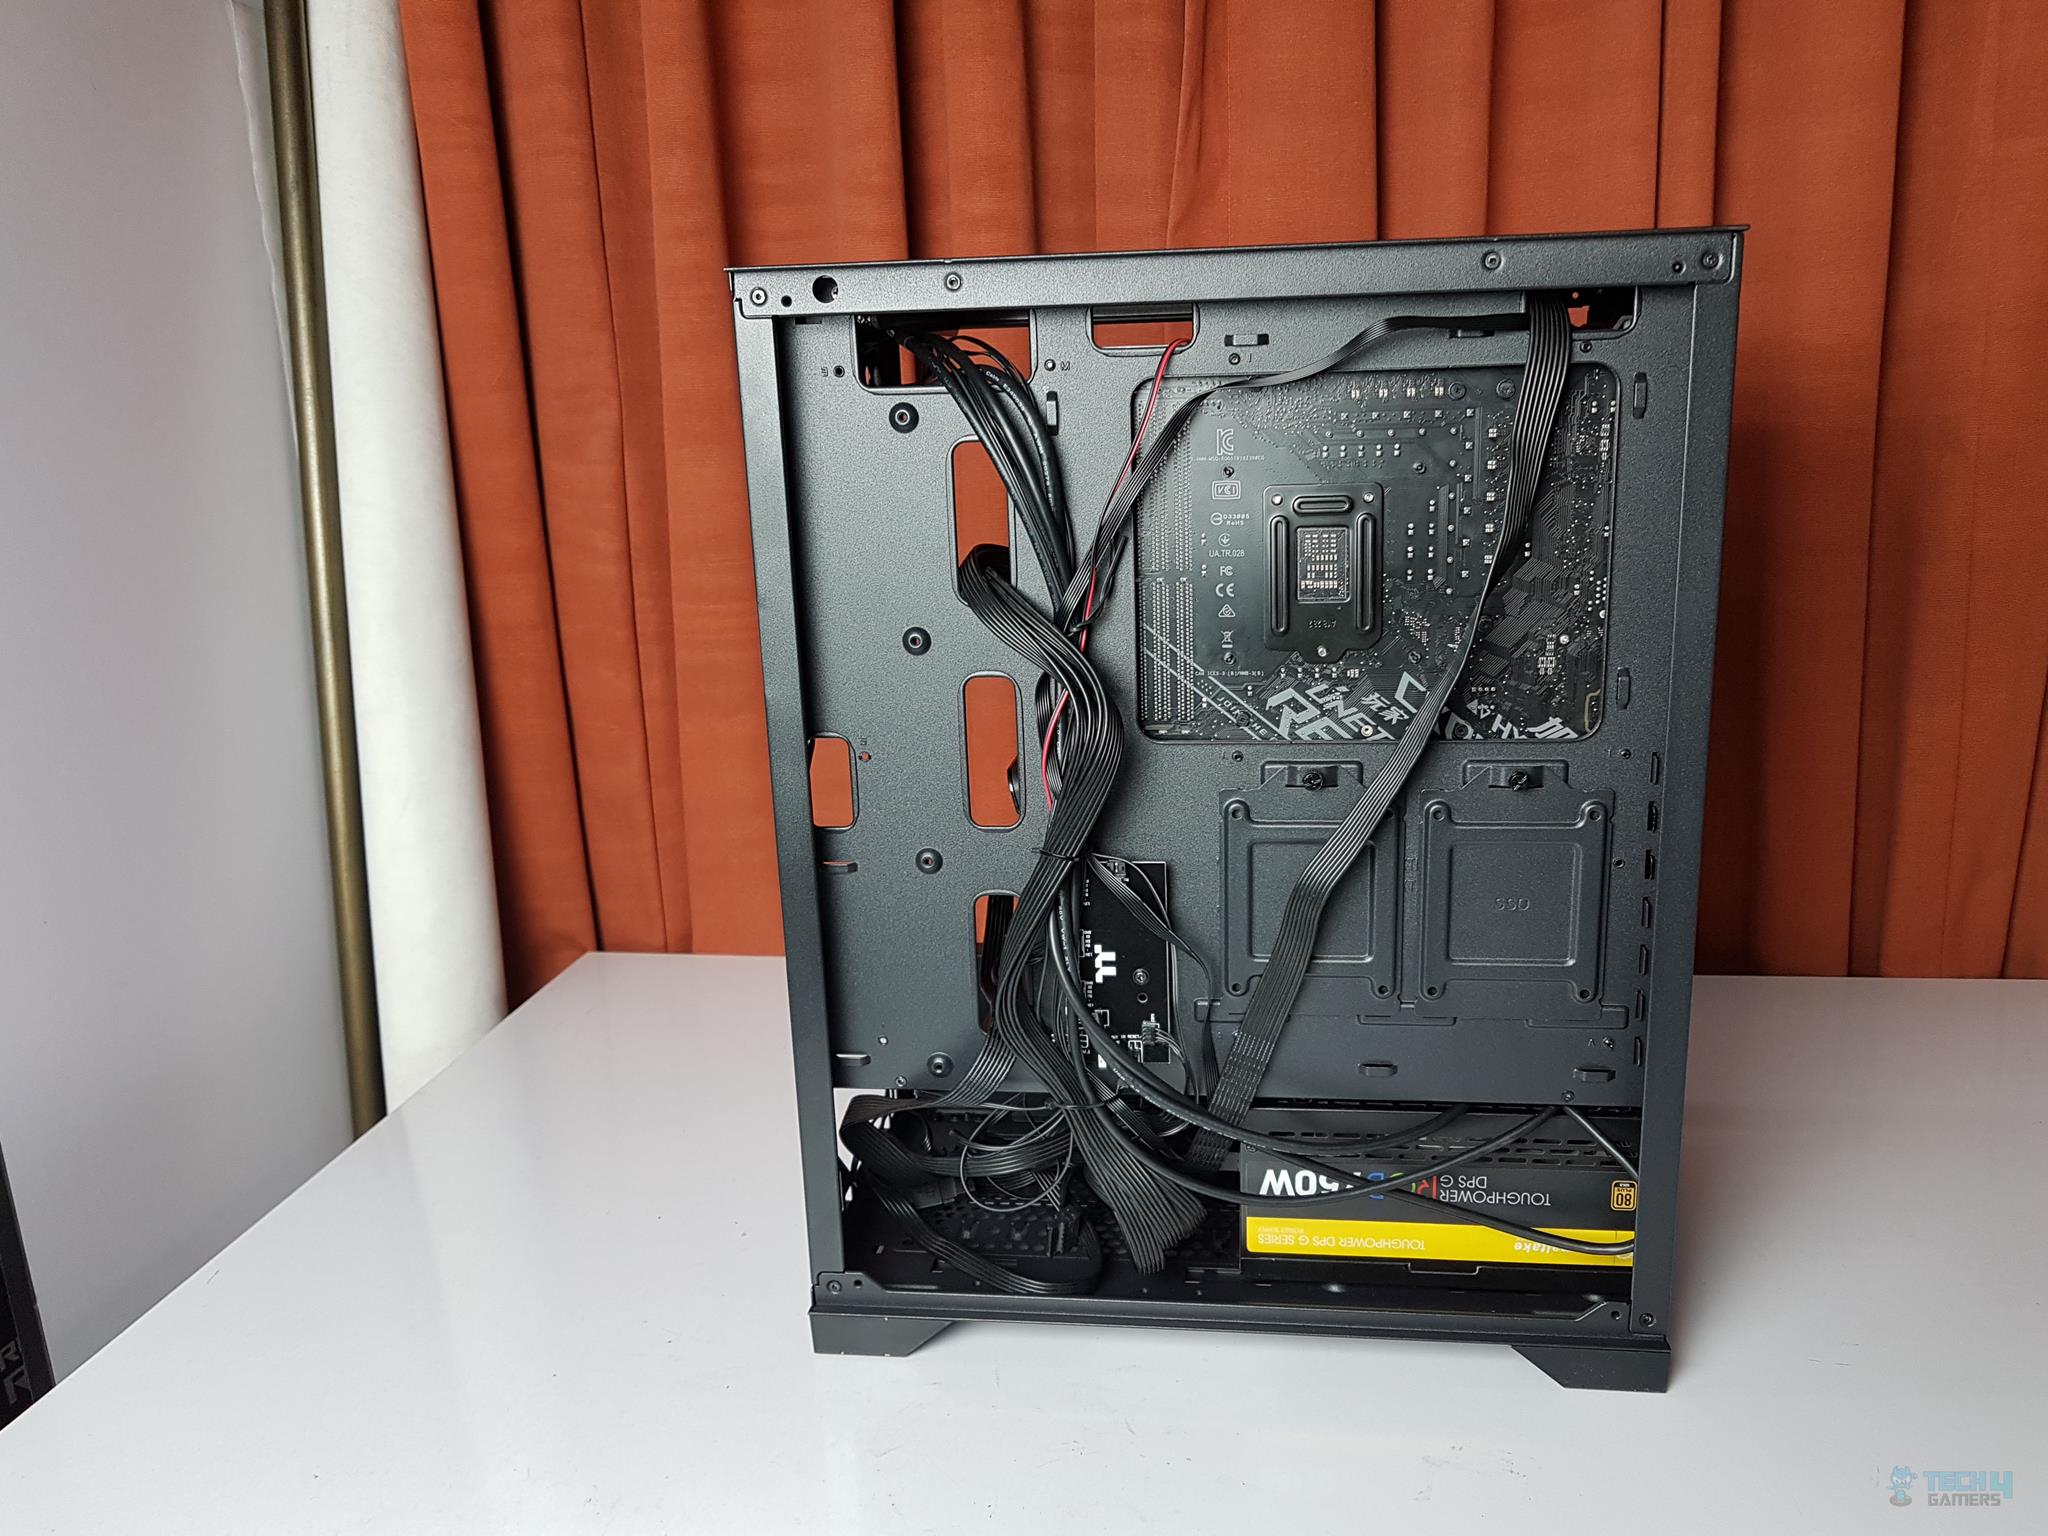
The dual-chamber design is more obvious here. There is a total of 12 cable tie points. There are two 2.5” drive brackets right below the CPU cutout hole behind the motherboard tray. The RGB switchboard is installed on the left side of these brackets. This board is not hindering any cutout which is a wise move.
The bottom chamber houses an HDD cage on the left side whereas there is a provision for the PSU housing on the right side. The drive cage is tool-less and is secured using a thumbscrew.
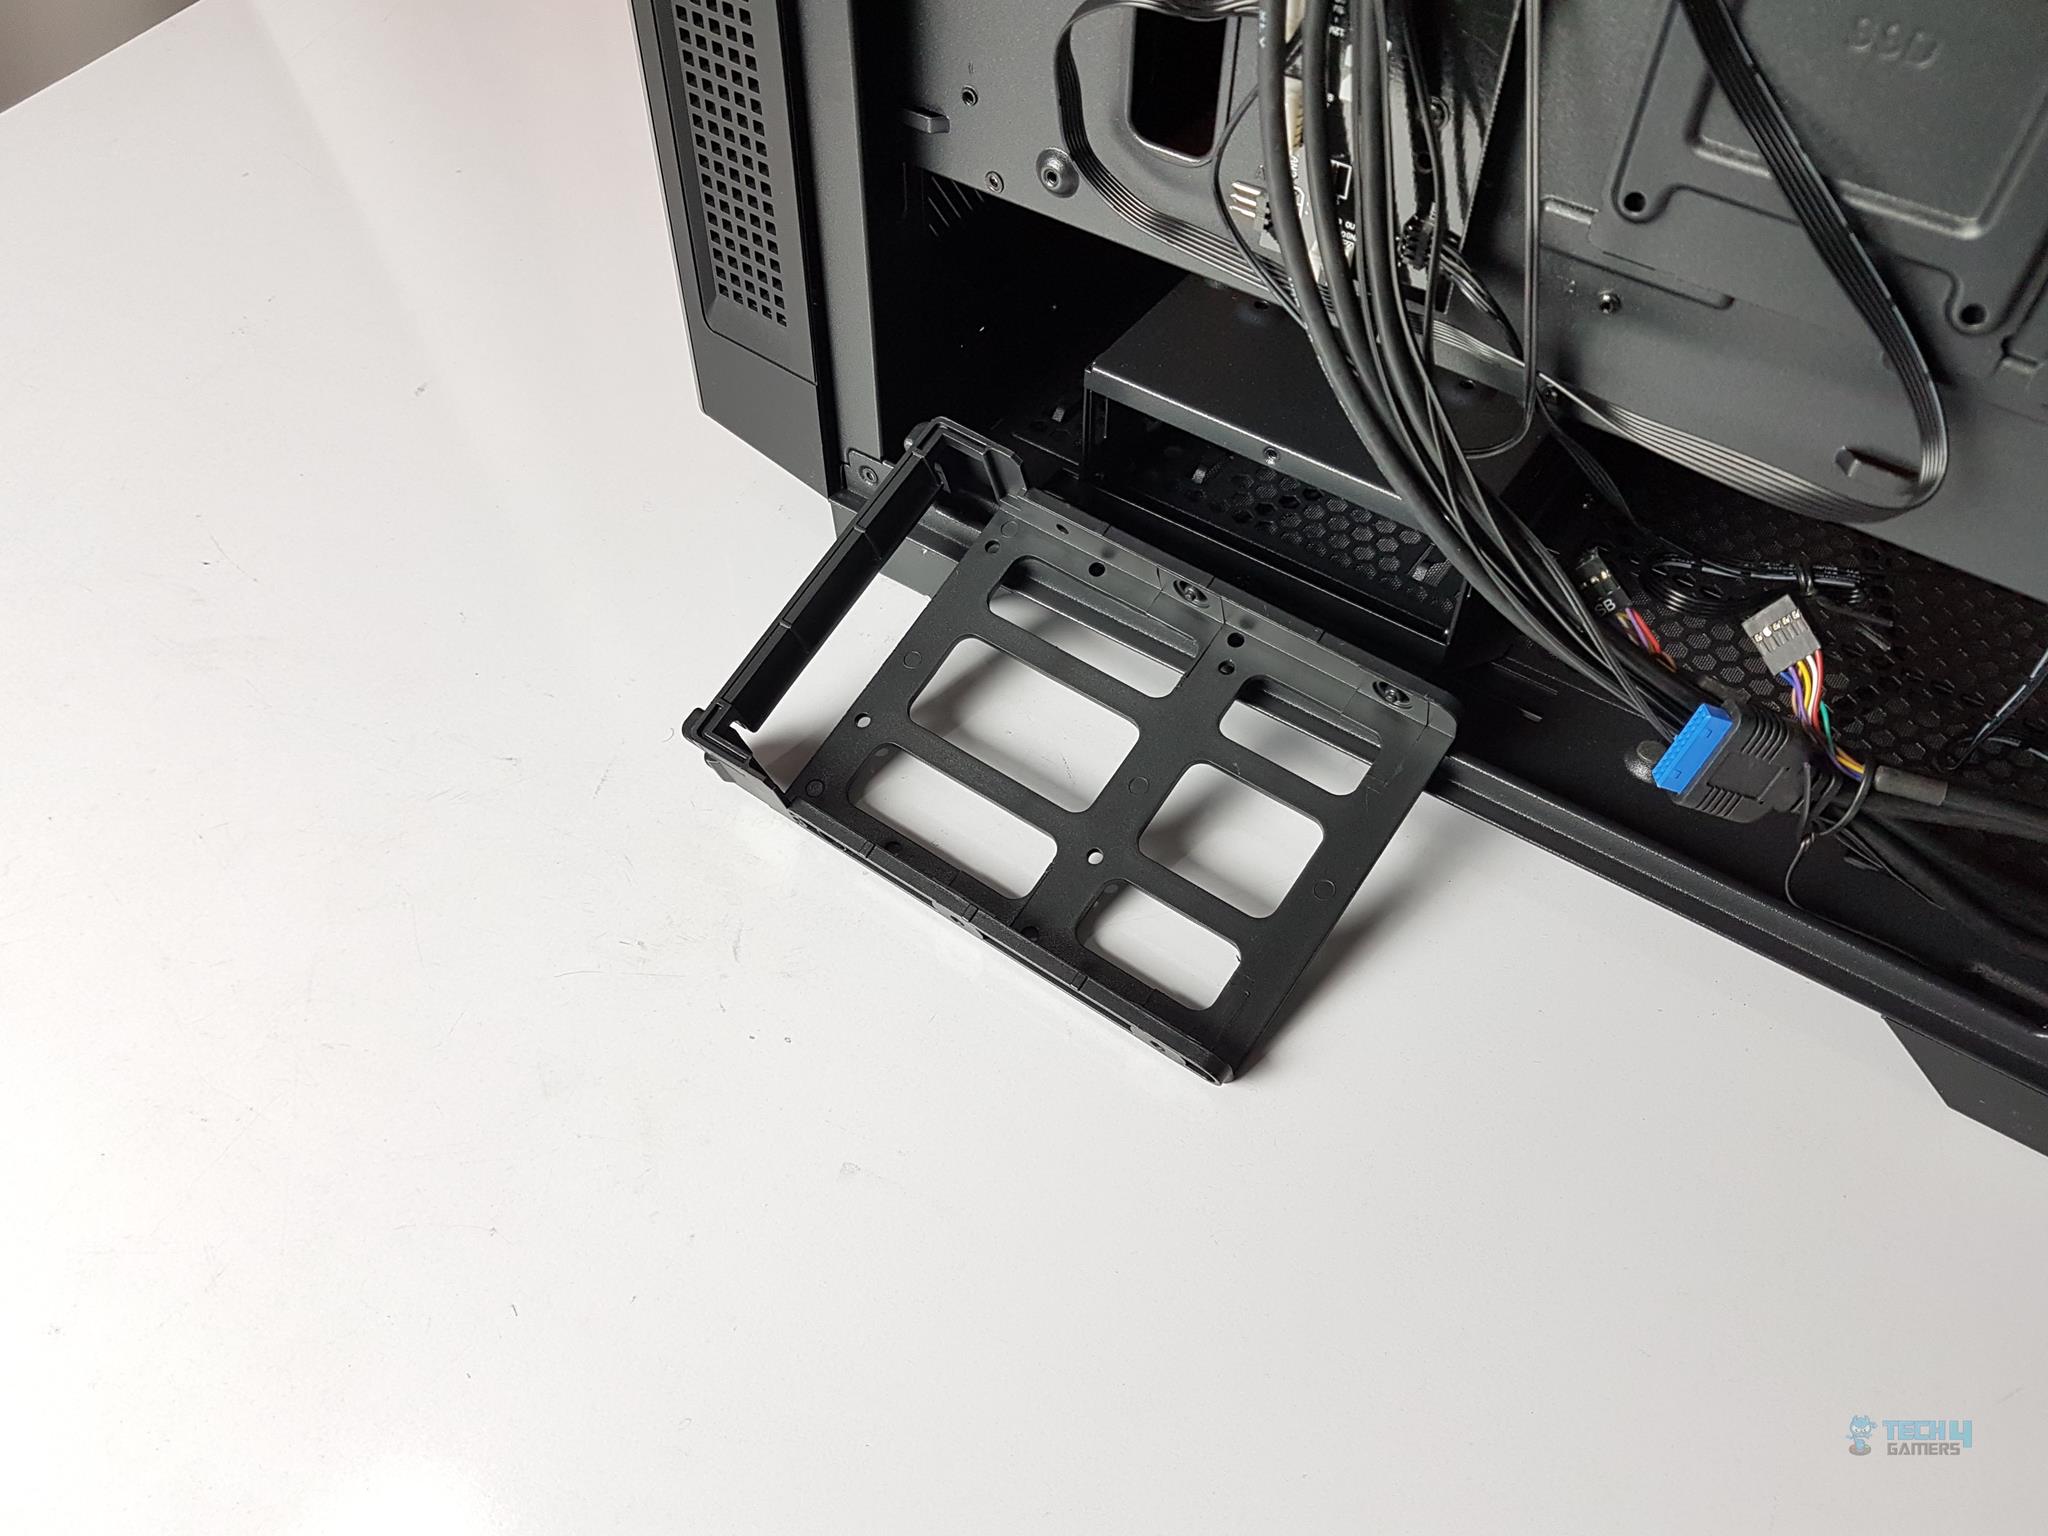
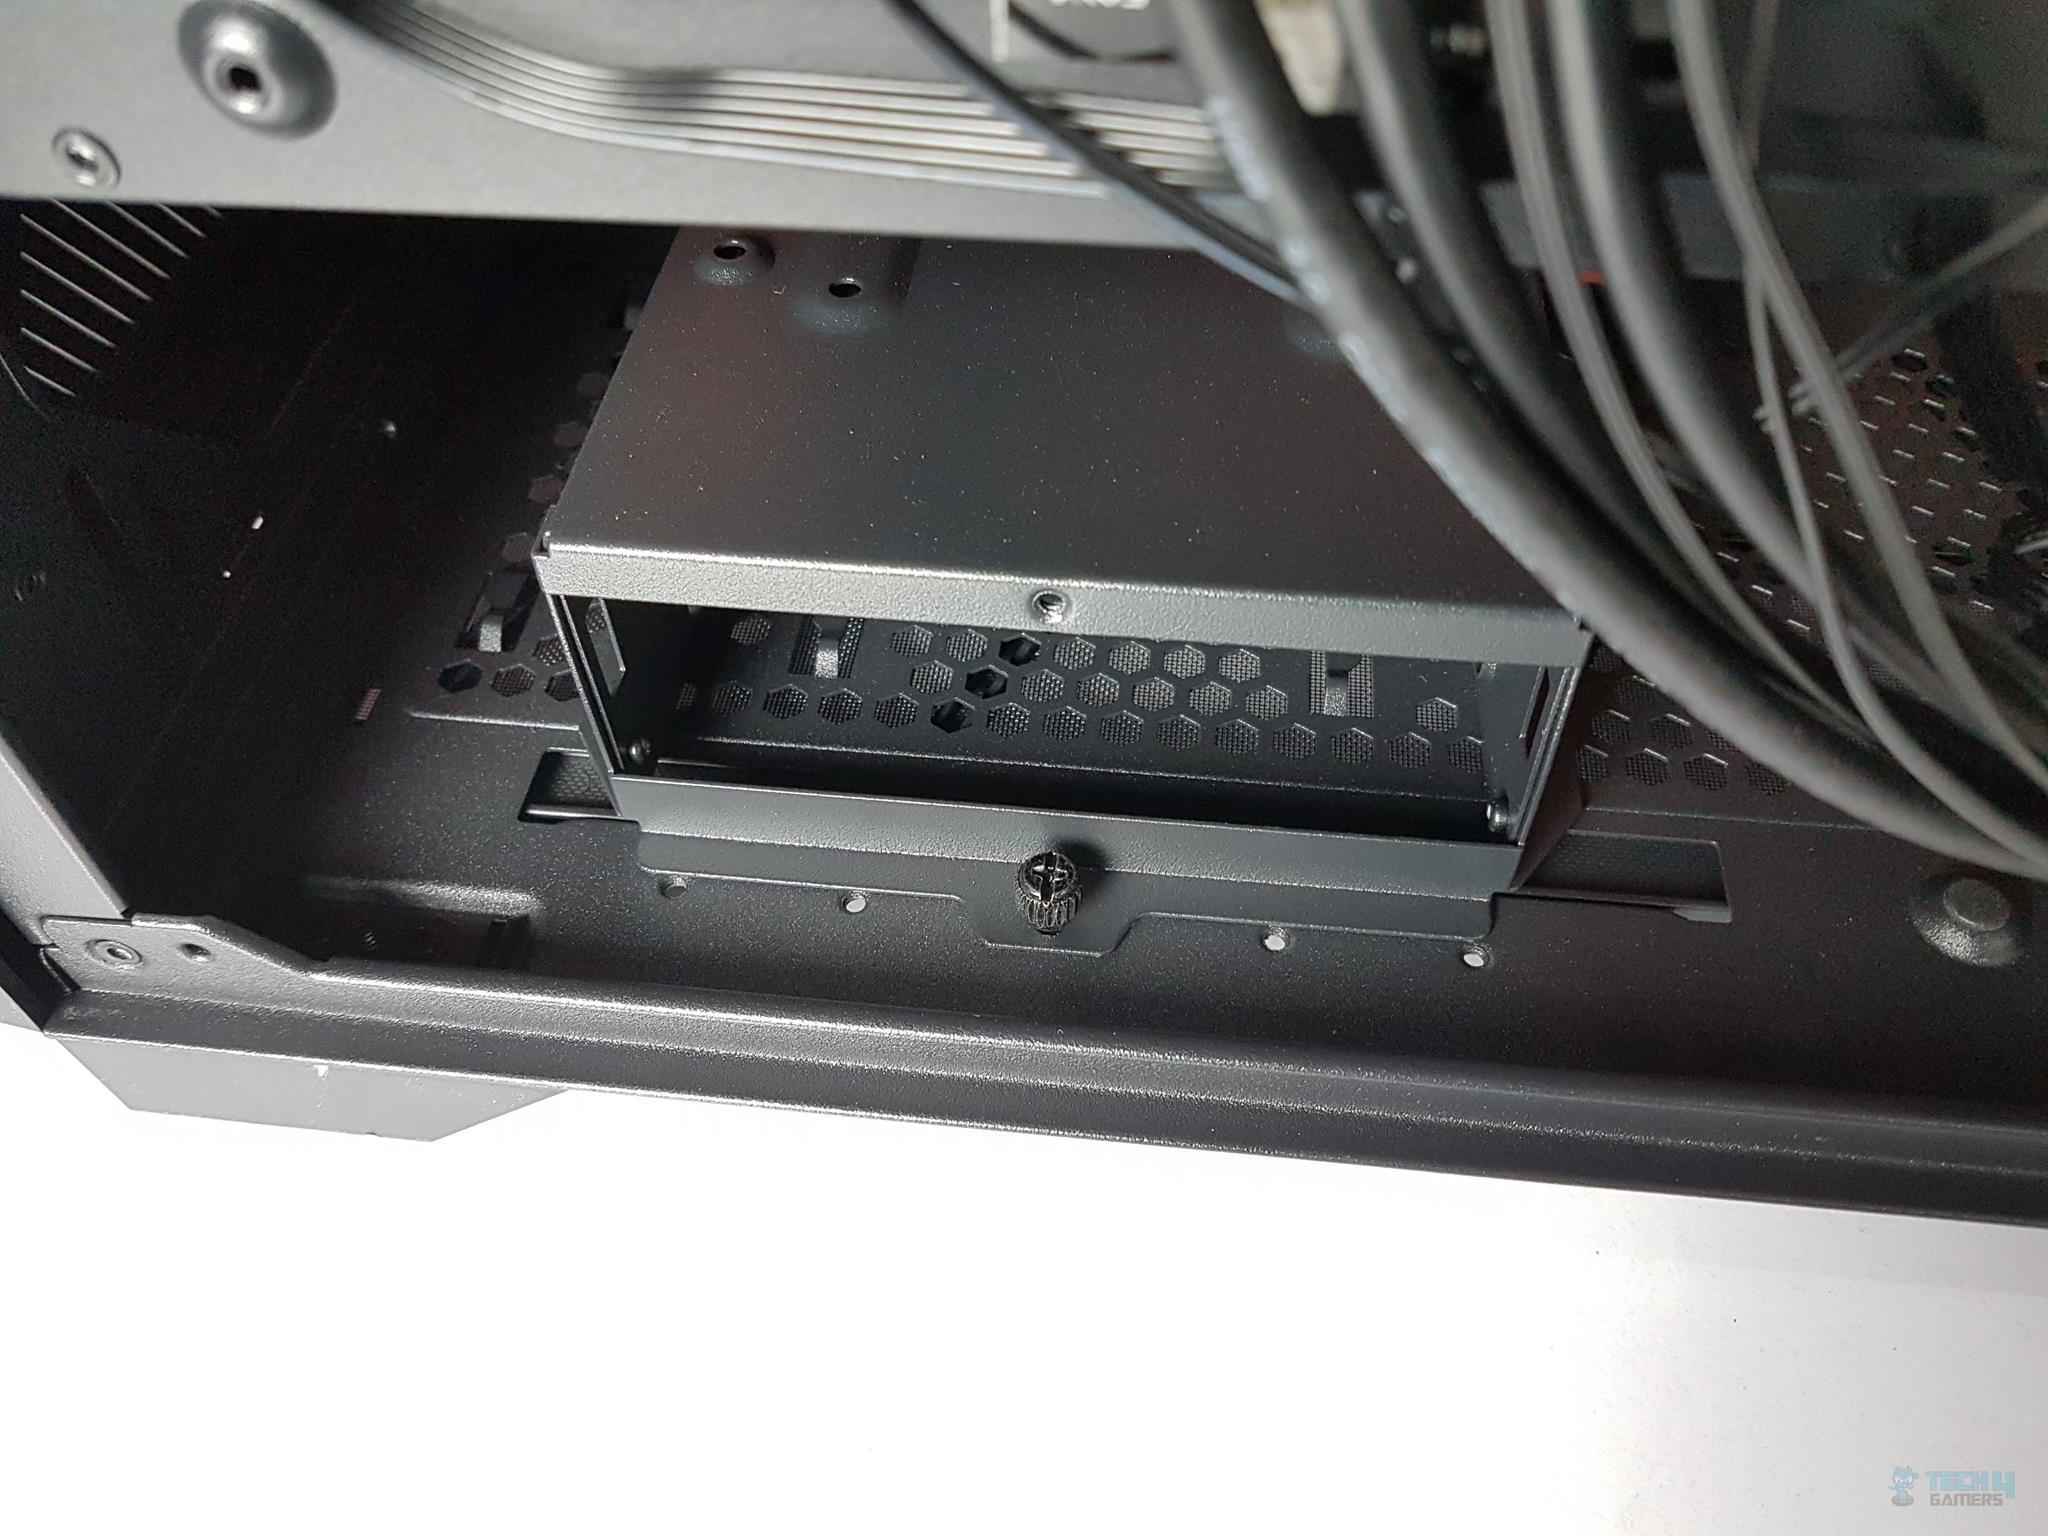
The drive caddy is made of plastic and finished in the black color. We can adjust the drive cage’s position. The user can make room for more length PSU and cables or more room for the front-mounted fans/radiator. Removing the drive cage as a whole is also possible. Without a drive cage, there is a clearance of up to 65mm for the front-mounted radiator/fan.
There are 5 drilled holes where the drive cage can be screwed in. There are 3 sets of latches on the left side and 2 sets of latches on the right side to catch the cage.
There are 4 raised feet, with each having a rubber pad pasted on it. The PSU is placed on these. Take care while installing the PSU as the rubber pads can come off easily.
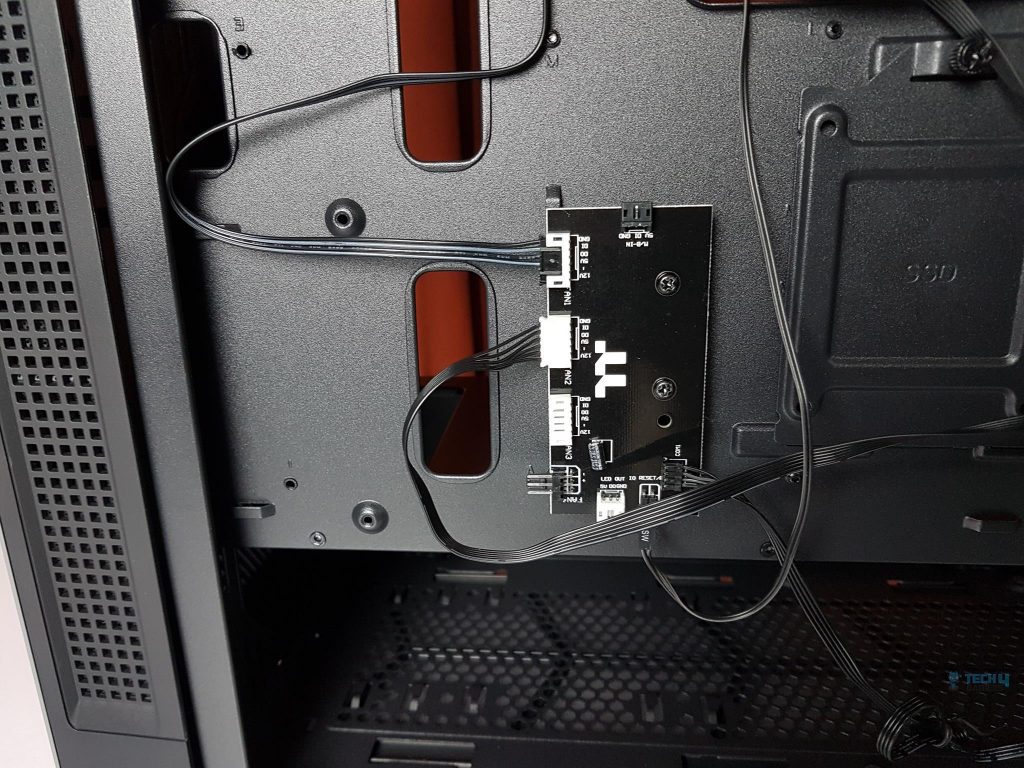
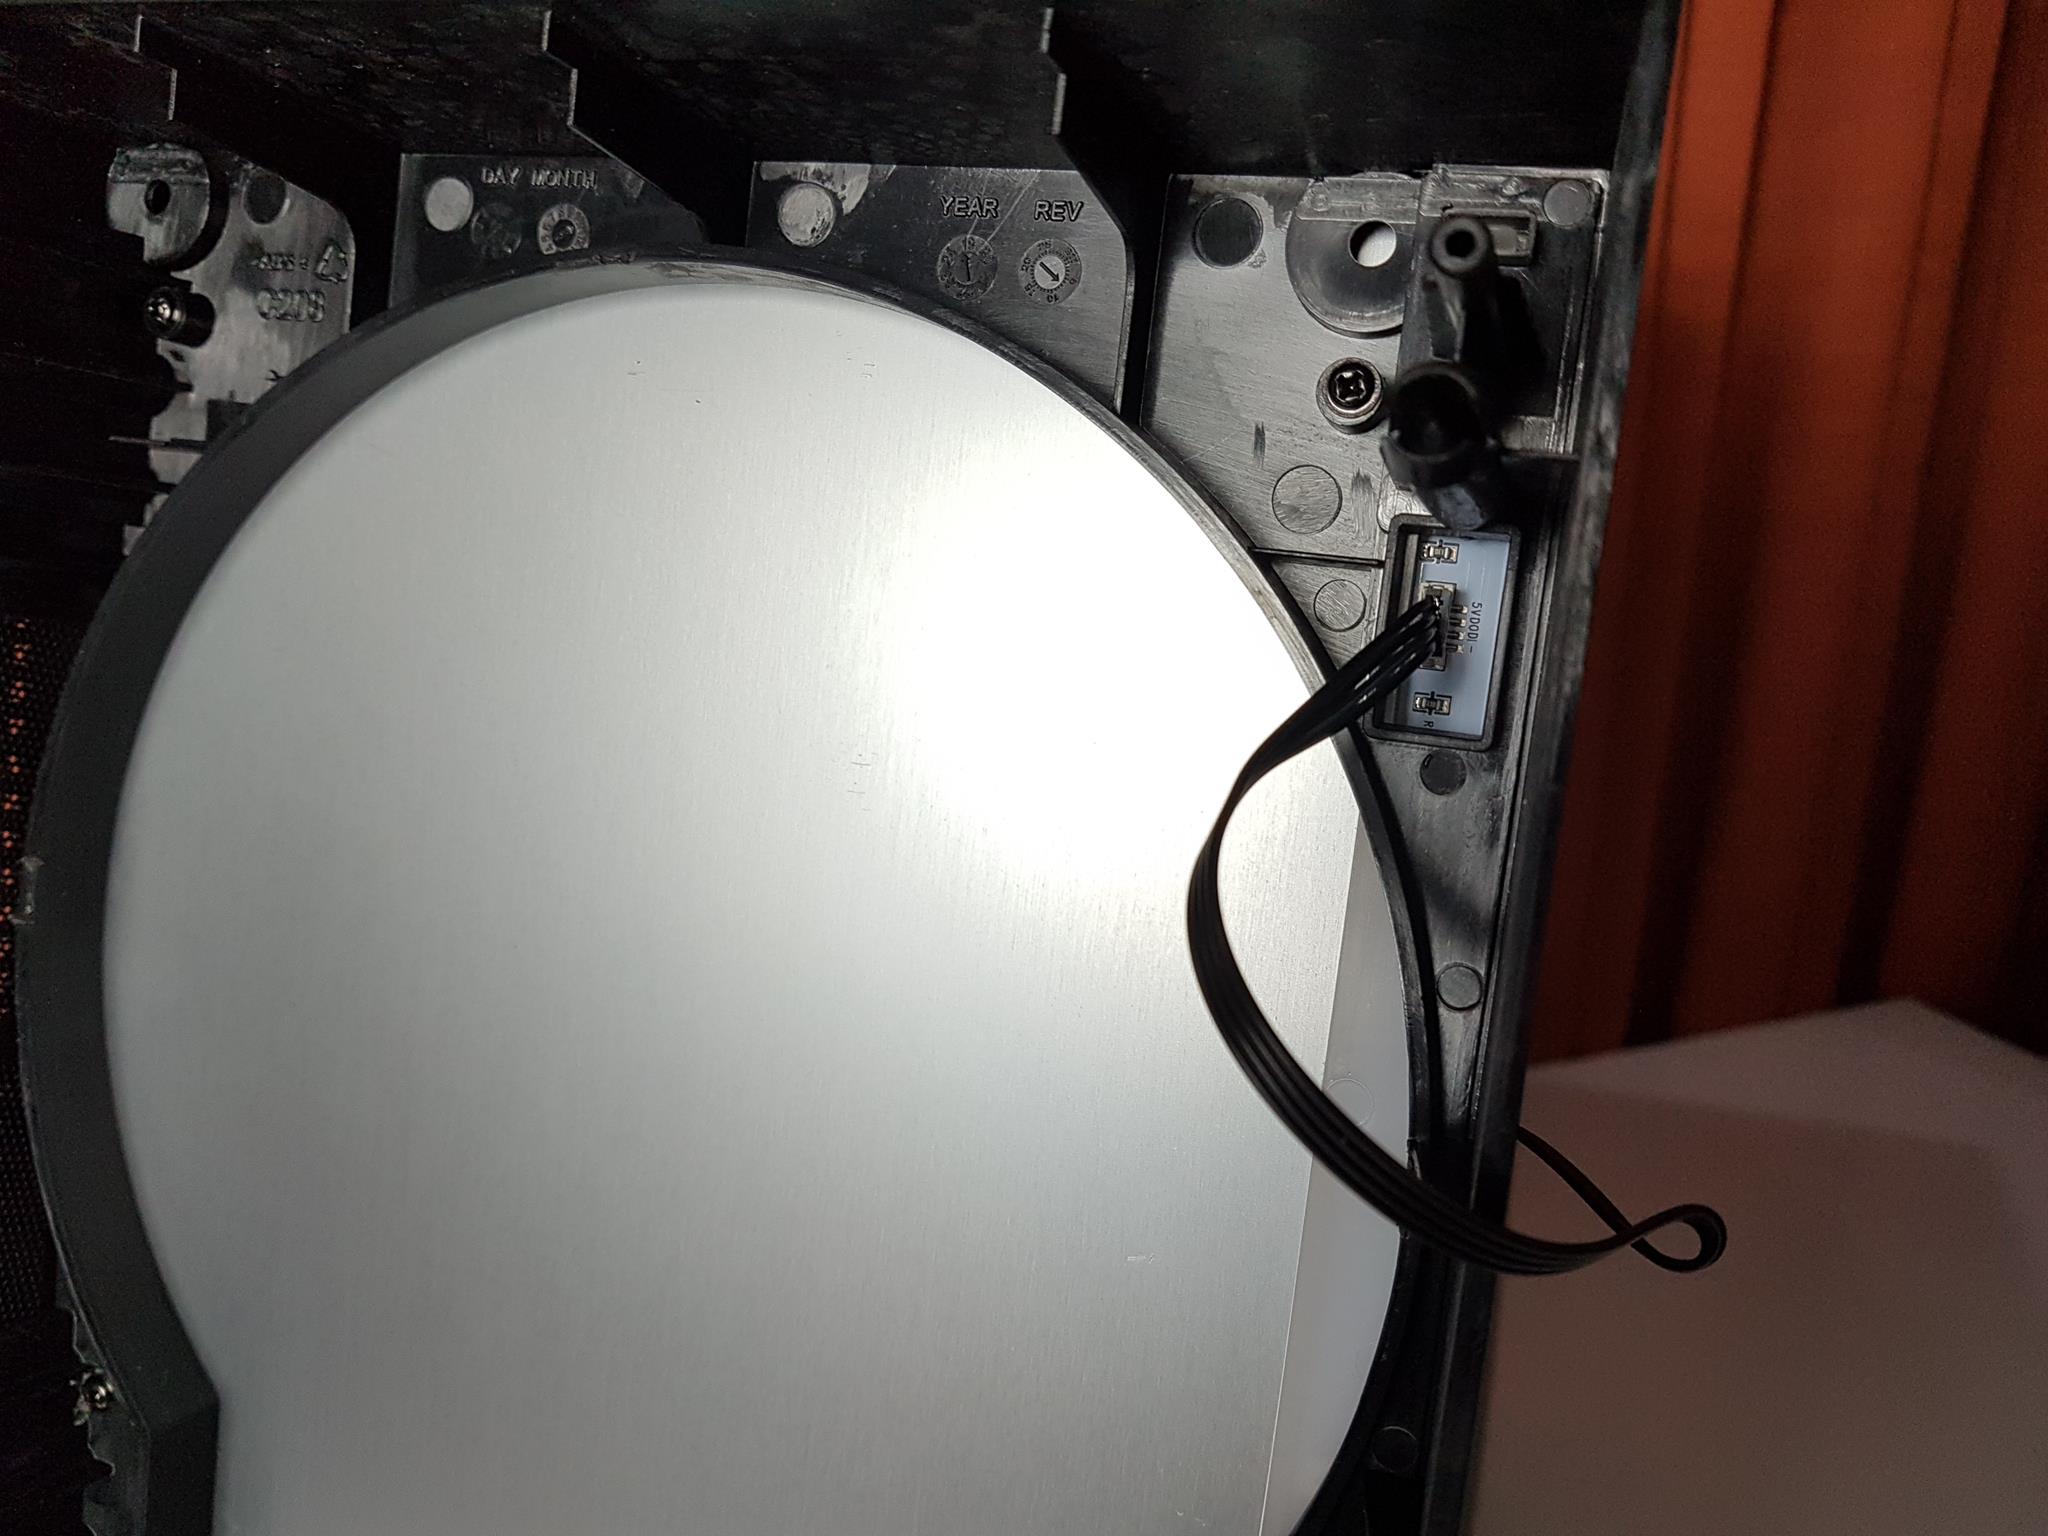
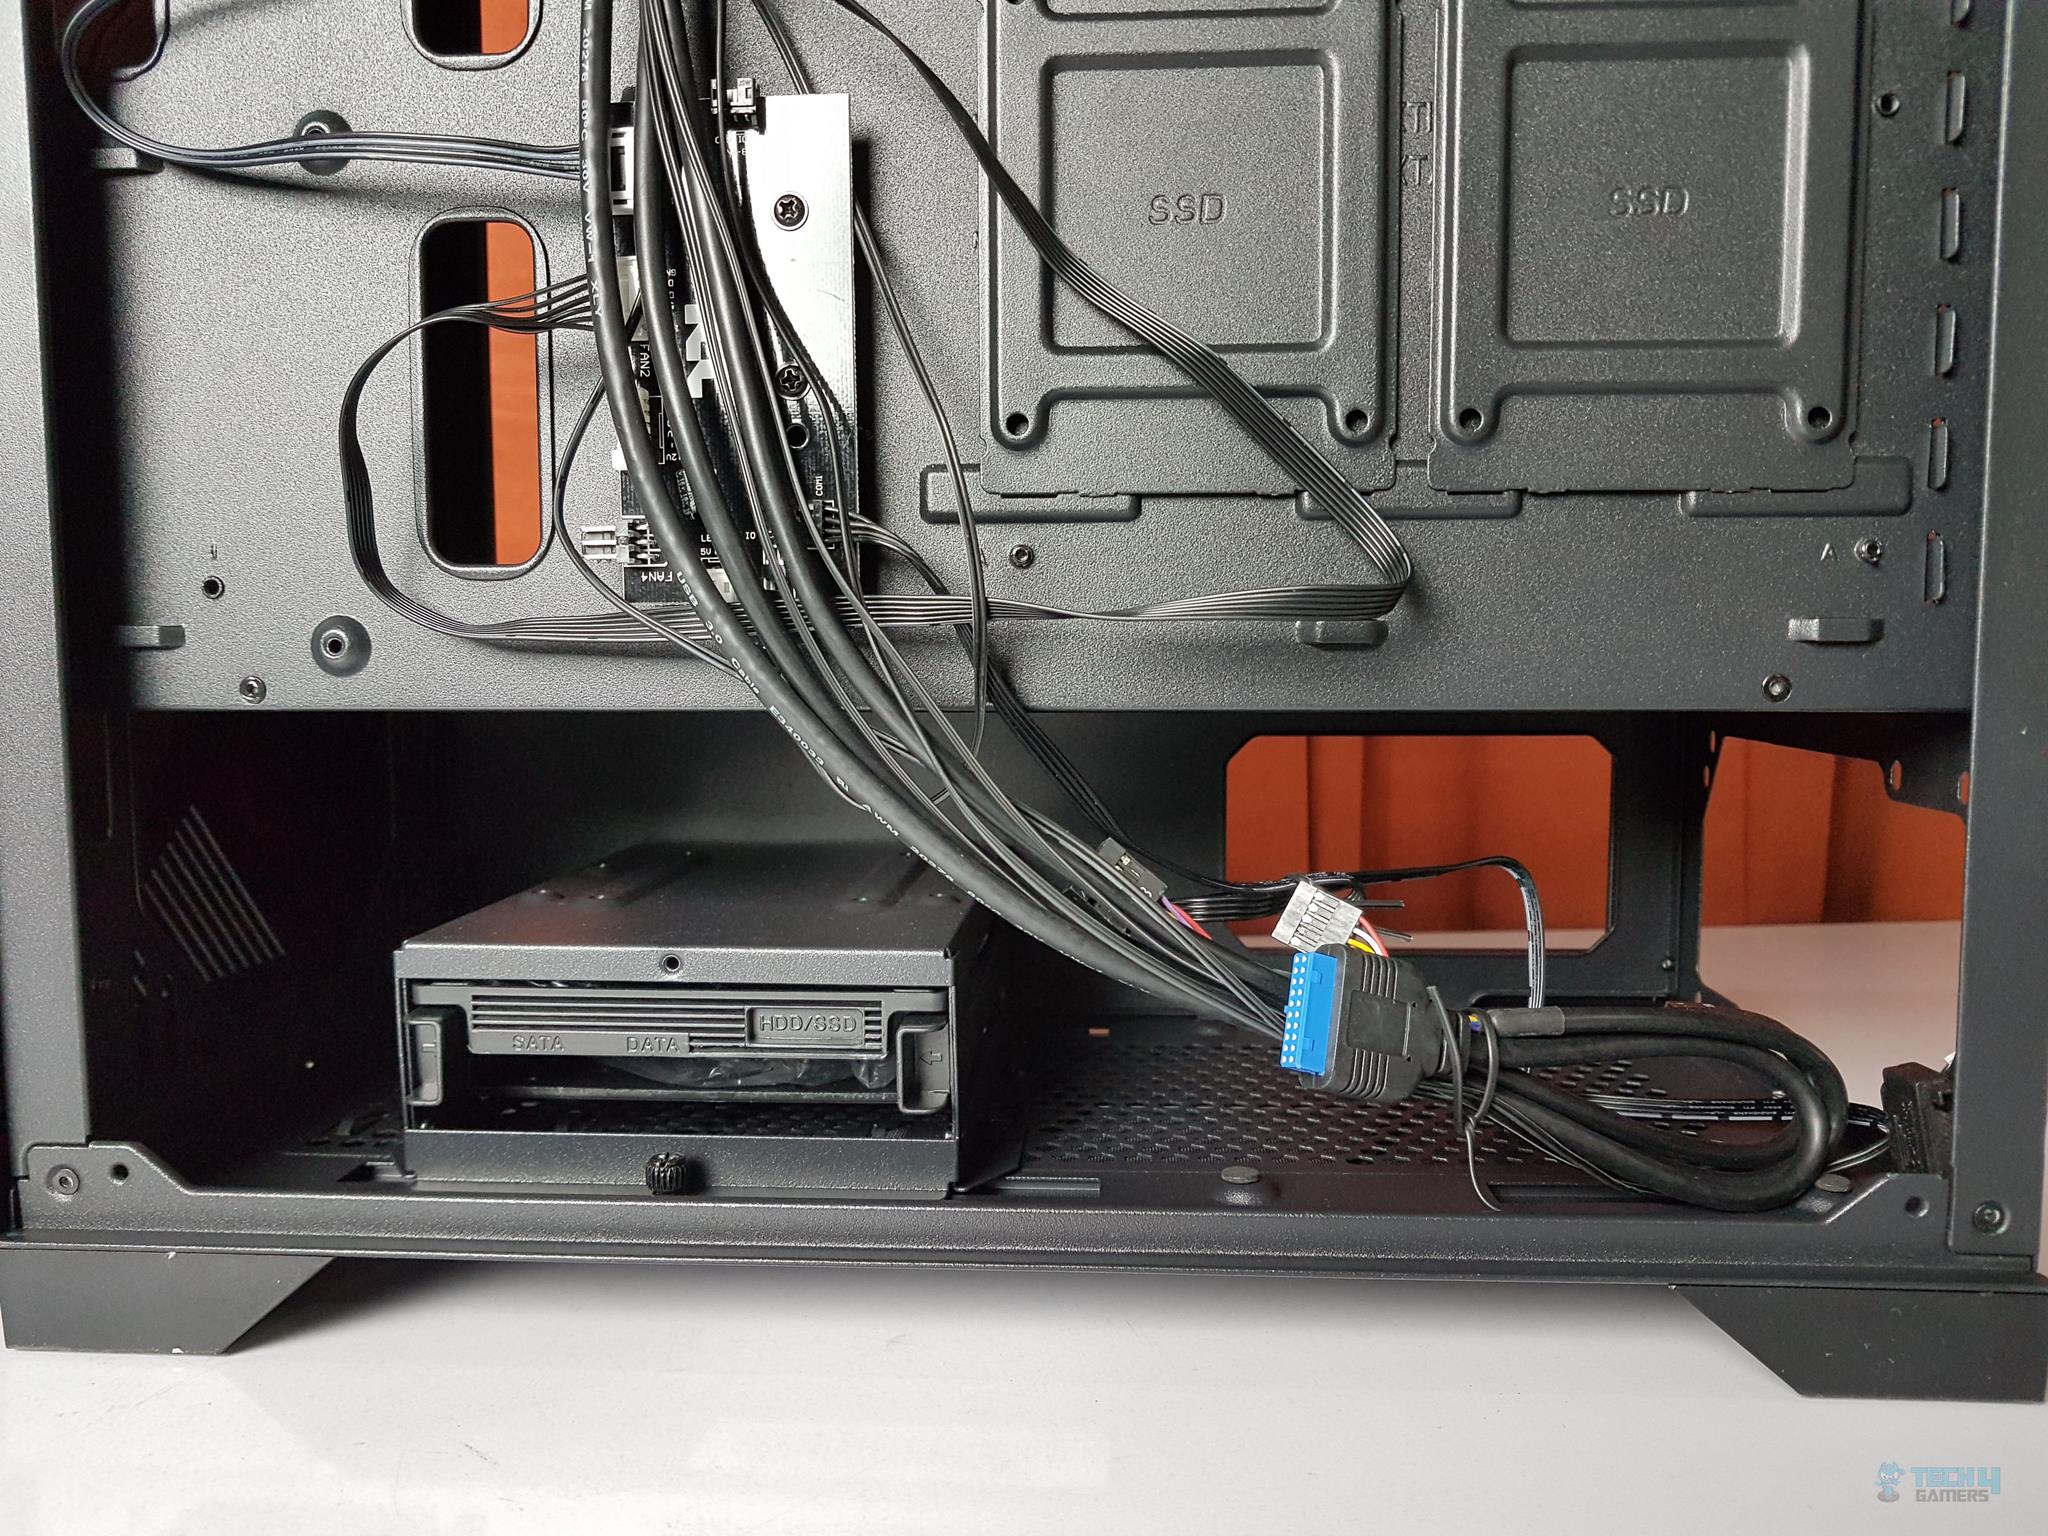
The switchboard accommodates up to 3 ARGB LED devices, with two headers in play—one for the front panel’s ARGB LED lighting strip and another for the rear fan’s ARGB LEDs. It’s crucial to note that the switchboard follows a specific sequence in its programming.
The first header, labeled as Fan1, plays a pivotal role; if no ARGB device is connected to it, the rest of the ARGB devices on other headers won’t illuminate. The 5V switchboard boasts a black color PCB with three 6-pin connectors, each combining fan power and LED power cables.
Additionally, there’s a 3-pin fan header for connecting the rear fan’s power cable, though our sample doesn’t have this fan connected to the header. Power is drawn through the SATA connector, and there’s a white connector at the bottom labeled as LED out.
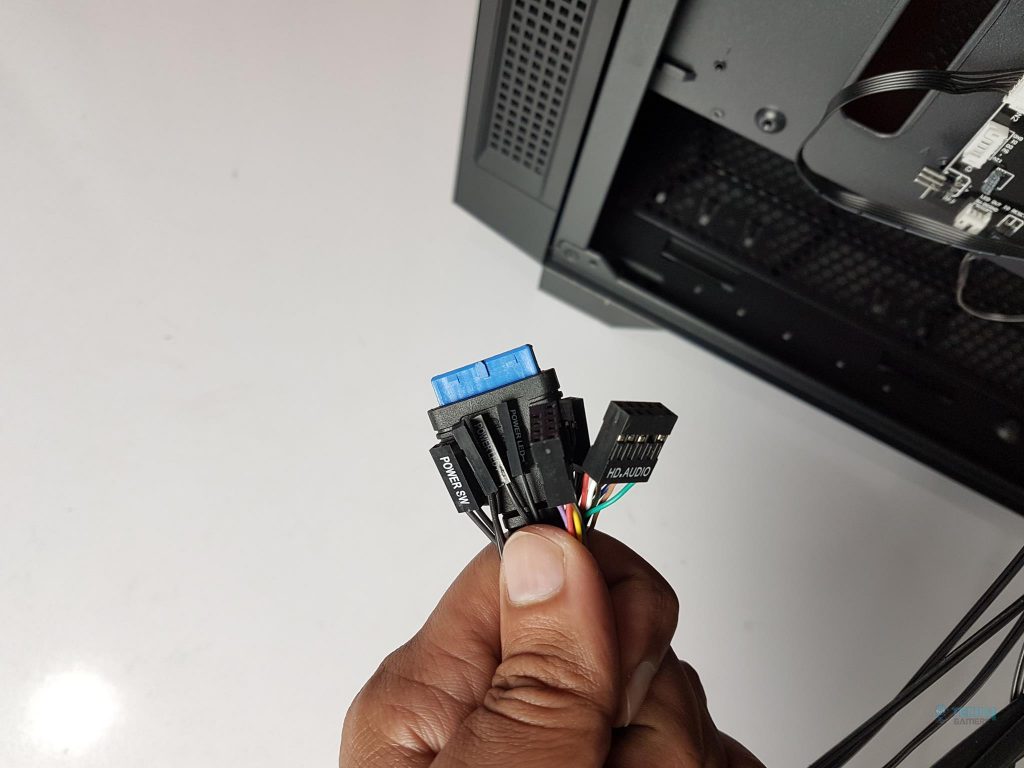
The front panel’s cables include a USB 3.0 cable, a USB 2.0 cable, a front panel HD audio cable and the system panel cables.
RGB Lighting
With the chassis design discussed at length, it is time to take a look at the RGB lighting solution. The ARGB lighting is controlled using a dedicated button on the front panel. It is pertinent to mention that the lighting can be turned off all-together, which is actually one of the modes now.
ARGB lighting is compatible with the following:
- ASUS AURA Sync
- ASRock Polychrome
- MSI Mystic Lighting
- GIGABYTE RGB Fusion 2
Long press the RGB button for 3 seconds. This will double flash/blink the lighting on the fan and the front panel. Now the user can control the lighting from the motherboard’s respective lighting software. Long press the RGB button for 3 seconds and the lighting control will be returned to the switchboard on the backside of the chassis.
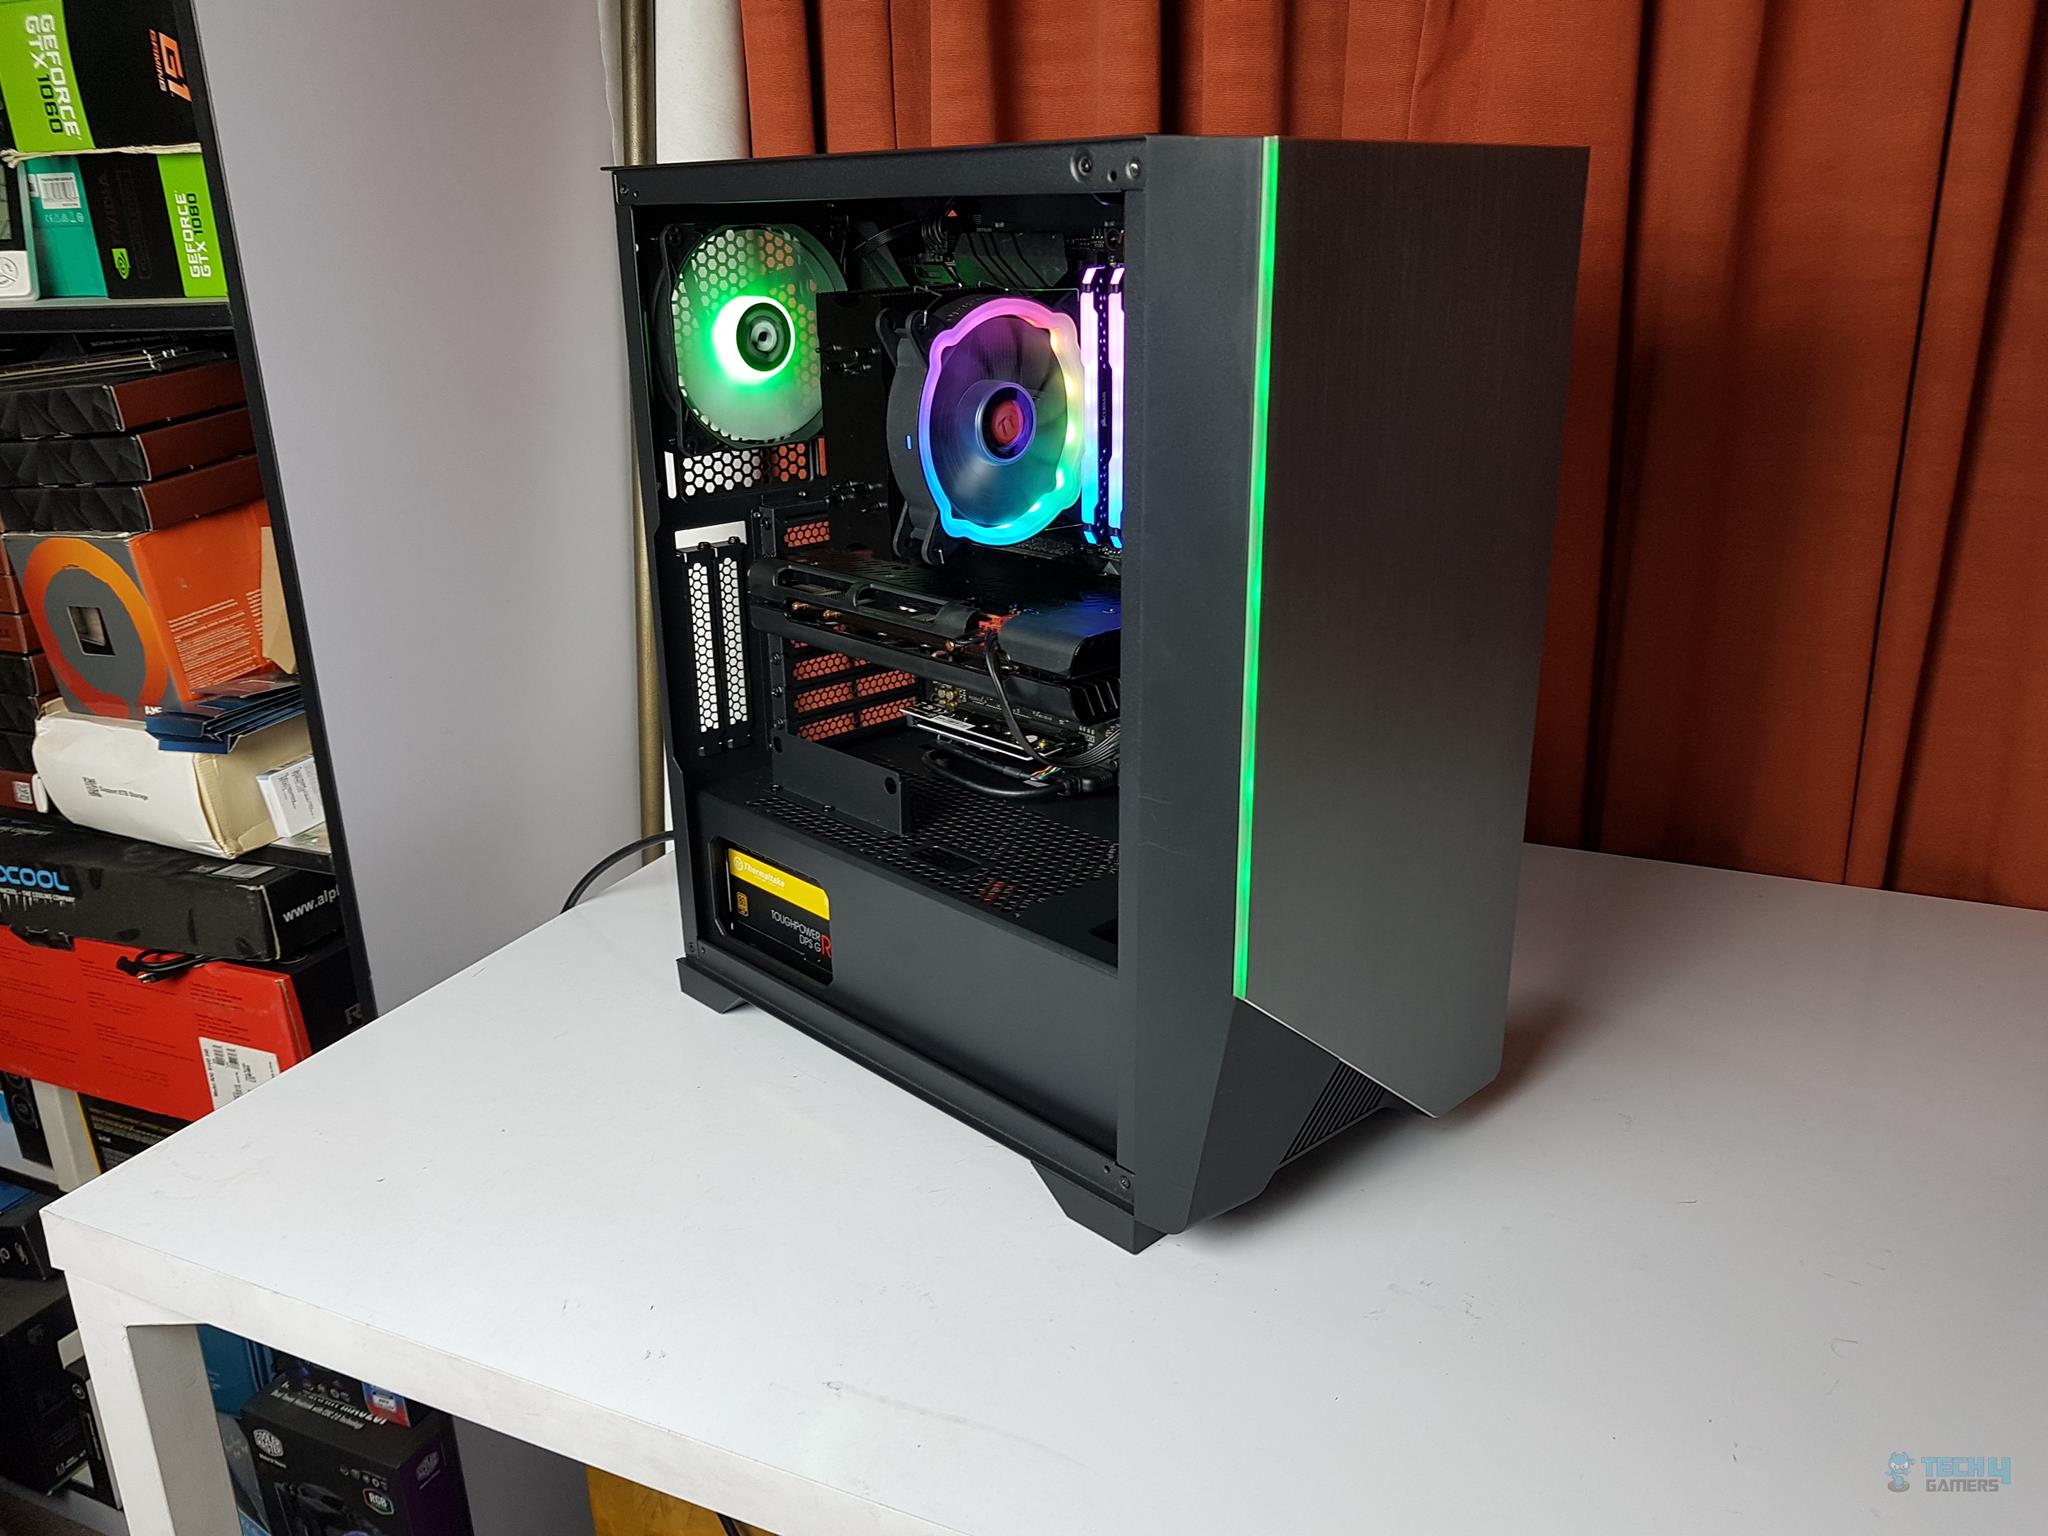
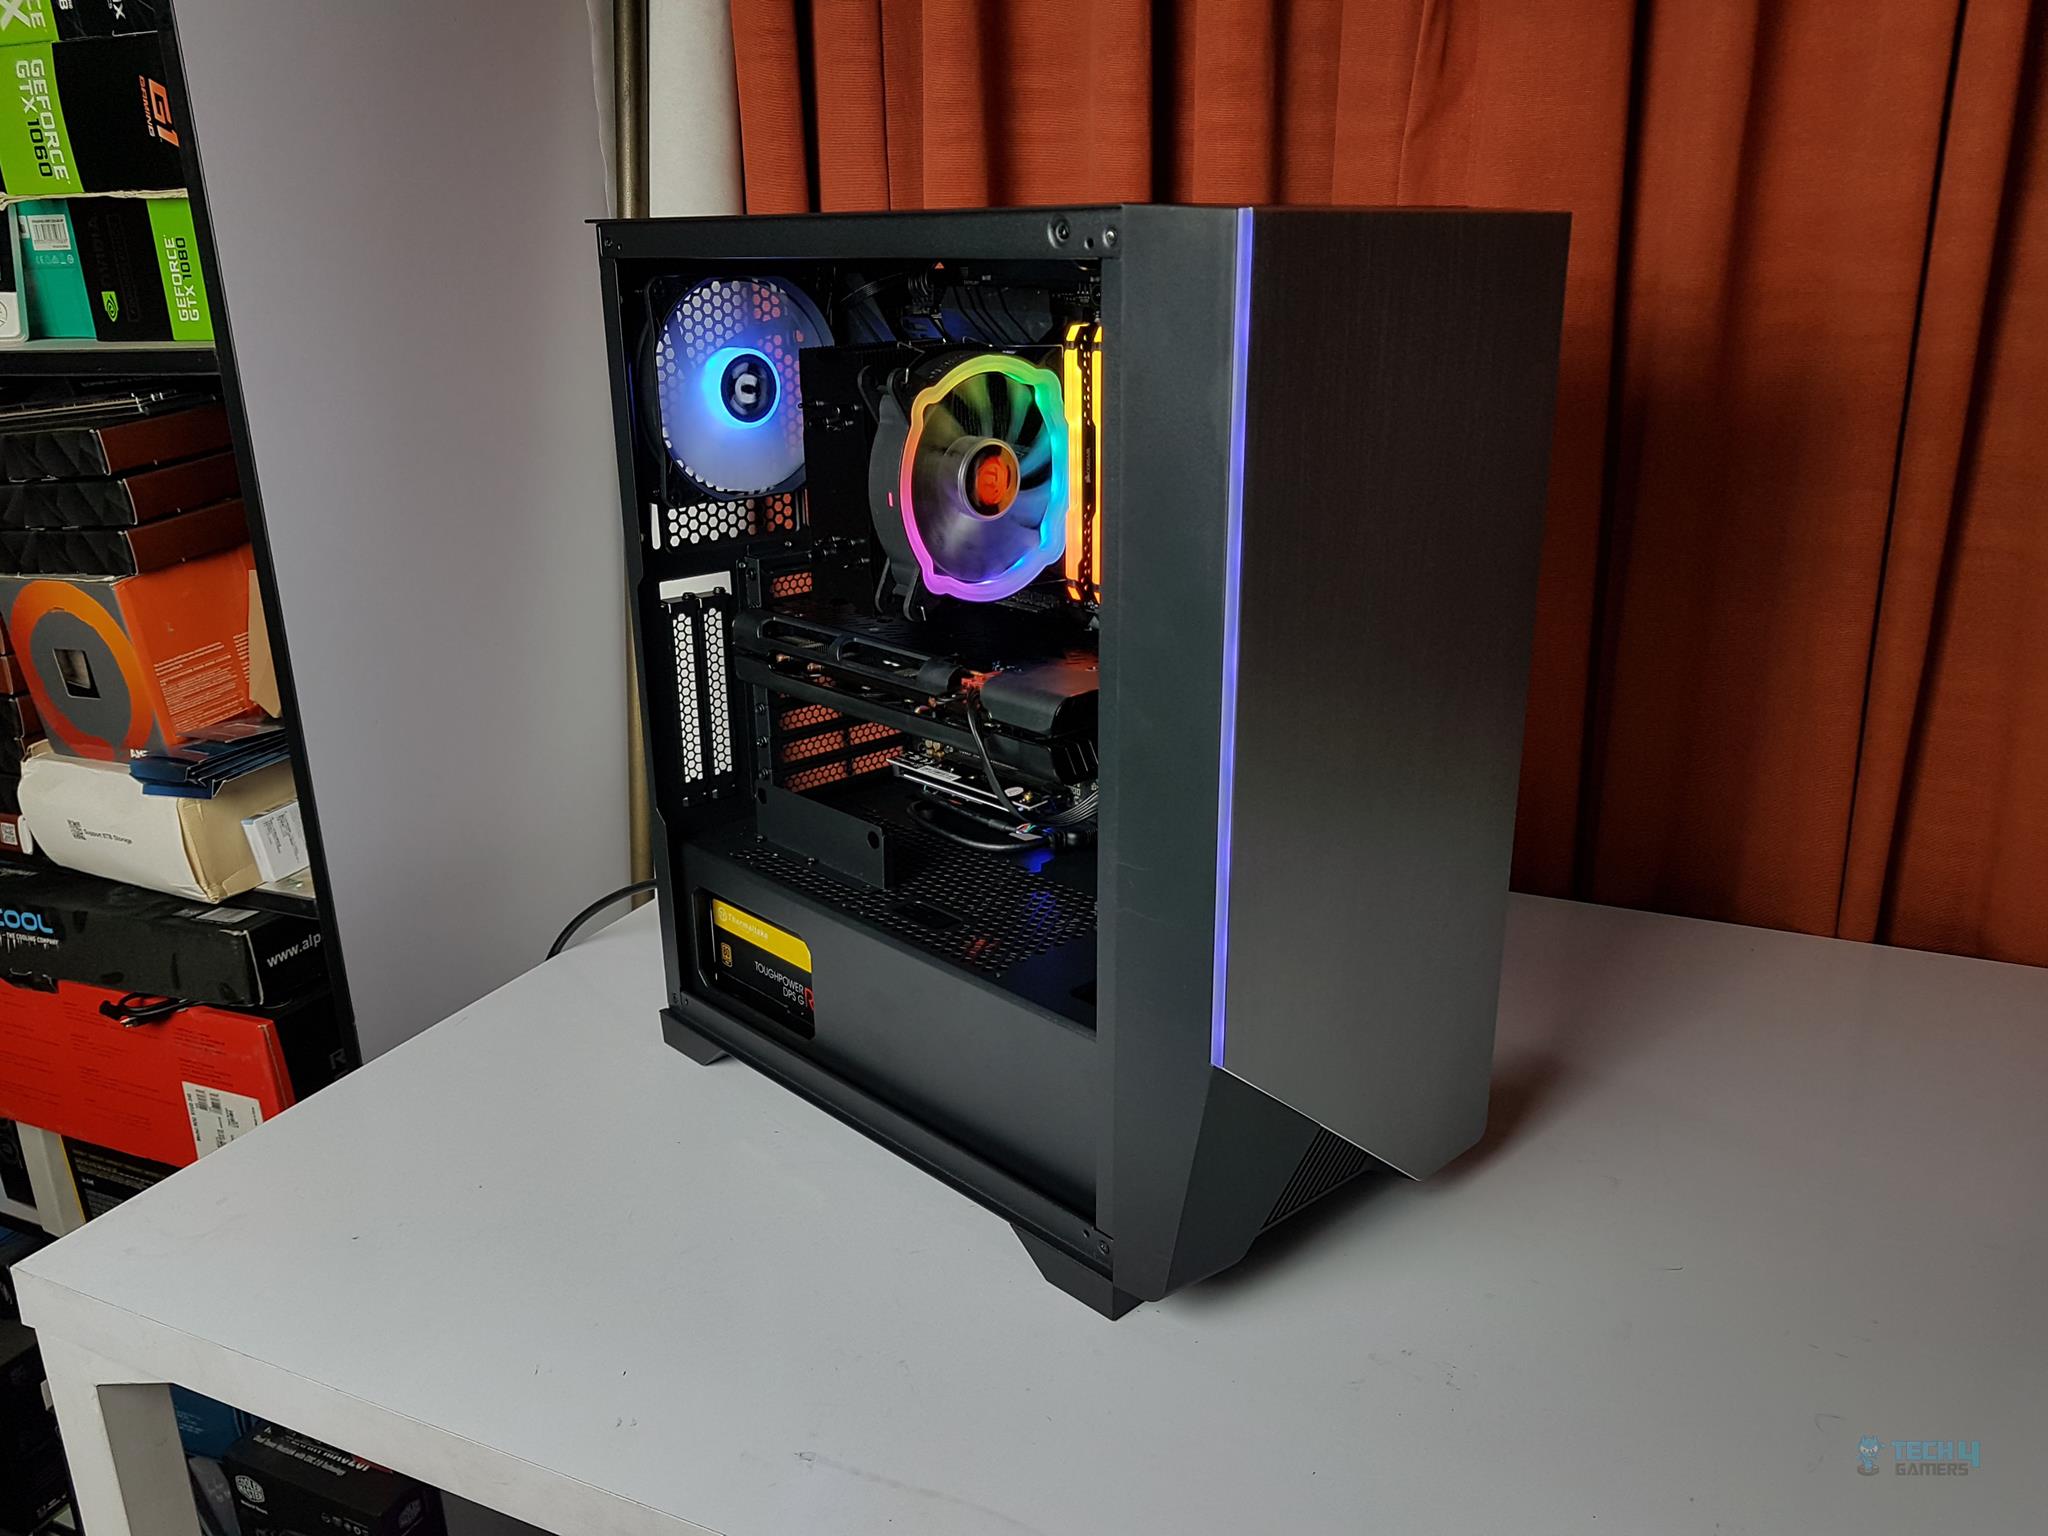
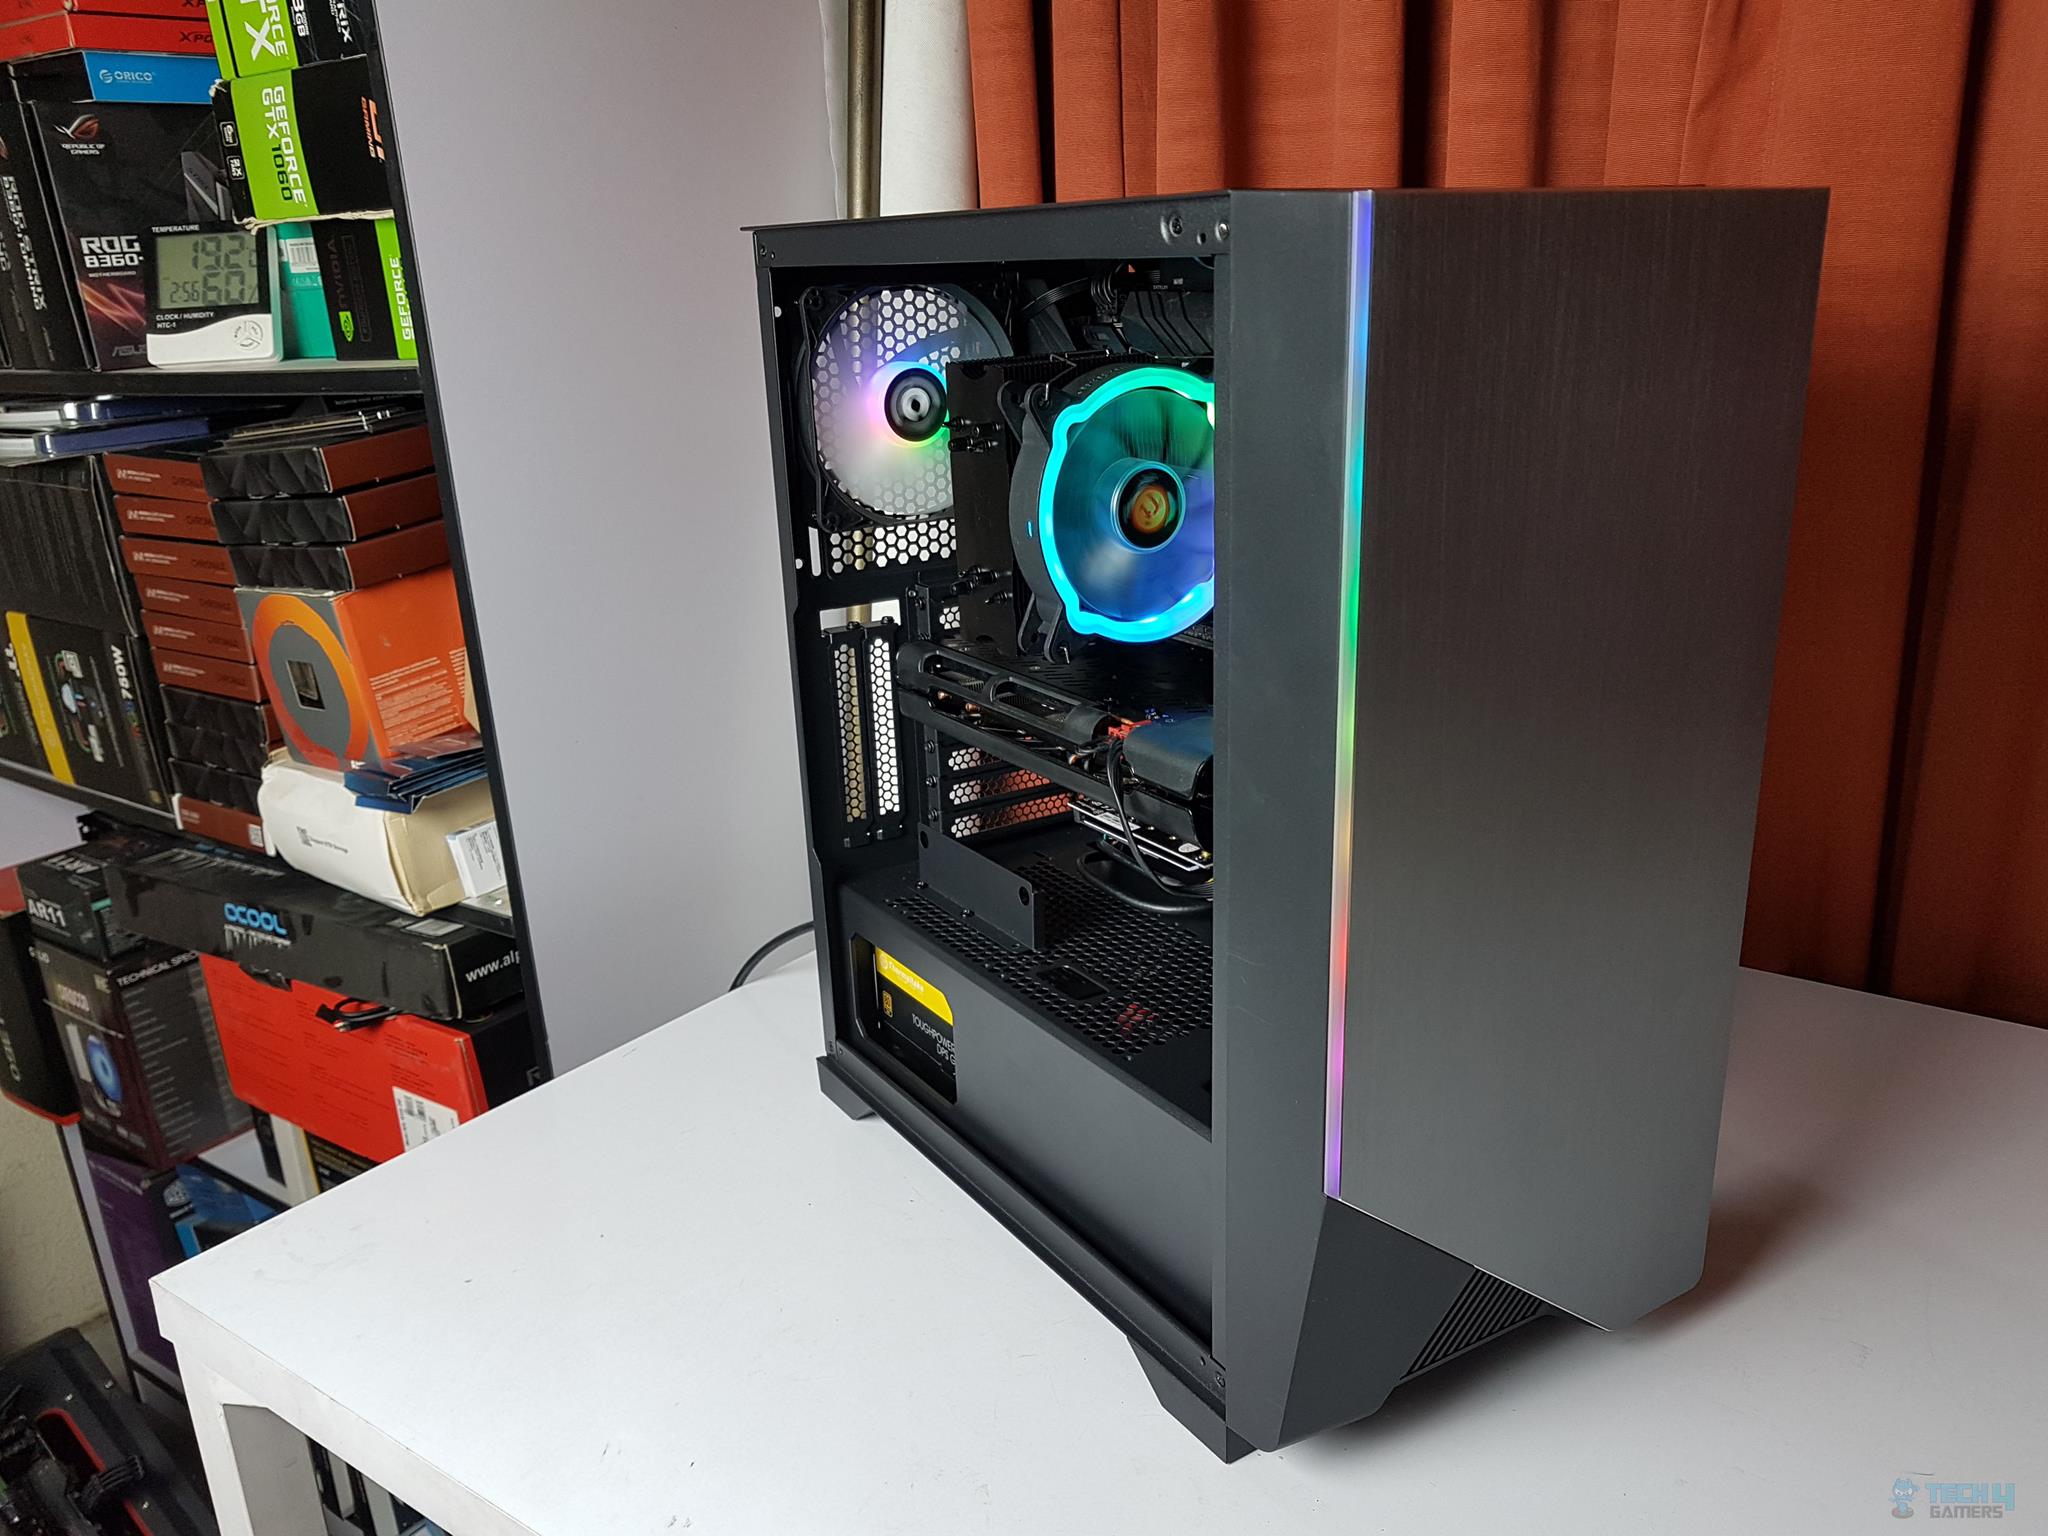
Here are some pics for your eye pleasure.
Test Build and Experience
The following configuration has been used for the test build:
- Intel i7 8700k
- Asus Strix Z390E Gaming
- CORSAIR Vengeance RGB 16GB @ 3200MHz DDR4
- Thermaltake UX200 ARGB
- XFX RX 5500XT THICC II Pro 8G
- Thermaltake TP RGB 750W PSU
- Samsung PM961 250GB SSD
My experience with the Thermaltake H550 Review was smooth overall, except for installing the graphics card vertically. The air cooler blocked the 14.5cm tall graphics card, making it impossible to fit. An AIO cooler or a shorter graphics card would have worked better.
Installing the motherboard went without a hitch. I placed the cooler and RAM outside the chassis, but they’re easily installed after the motherboard. Then came the PSU.
It’s crucial to install the PSU first before sorting out the system panel cables. The fully modular PSU allowed us to use only the necessary cables (24-pin ATX, 8+8-pin PEG, 8-pin EPS, and SATA). The PSU shroud’s cutouts made bottom-side cabling a non-issue in the Thermaltake H550 TG ARGB. The cable management space behind was about 16mm.
One needs to carefully plan the cable routing on the backside.
Here are some of the pictures that I have taken of the build:
Thermal Testing
Next up is the thermal testing using the same configuration as mentioned above. Here are some key points regarding the testing:
- There is no user control over the speed of the rear fan.
- There is no pre-installed front fan.
- In first run of the test, no fan was installed on the front side to ensure the testing of the chassis in stock configuration.
- 2x NoiseBlocker NB-BlackSilentPro PL fans were installed on the front side in the second test. These fans are rated for 1500 RPM speed and they were set to run at 100% PWM cycle.
- AIDA64 was used to stress the CPU and the Graphics Card at a time.
- A stress test was run for 30 minutes before taking temperature readings.
- A minimum of 30 minutes of idling time was ensured between both testings.
- The thermal testing is conducted with and without the front panel to see how much airflow restricted this design.
- Since both tests were run at a different time the ambient Temperature was different for both times which is why delta temperature is being used on the graphs.
- The ambient temperature for the stock configuration test was in the range of 18.5°C to 19°
- The ambient temperature for the second configuration test was in the range of 16.8°C to 17.2°
- Intel i7 8700k was boosting to 4.7GHz with Asus Enhancement mode on.
- Average of all cores’ maximum temperature readings was taken for the graph.
Here is the result:
Thermal Performance – CPU
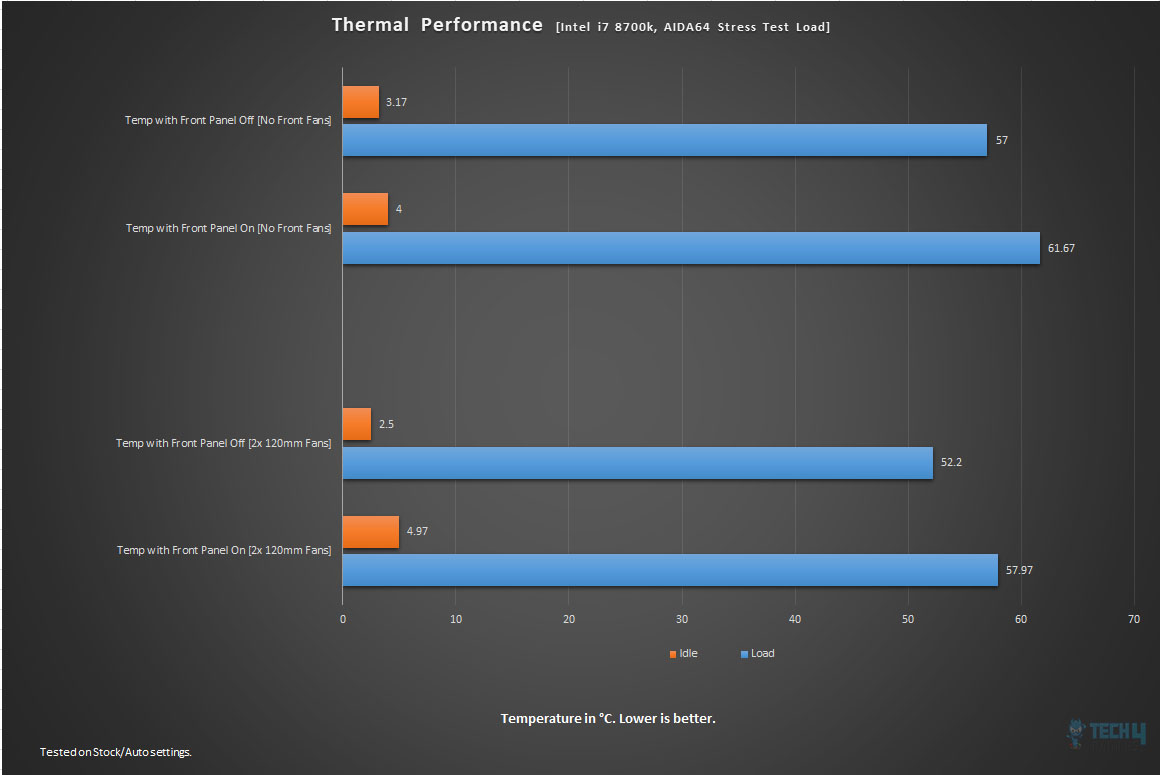
In the stock configuration, there was only a 120mm ARGB fan which comes pre-installed on the rear. The first run of the test was made with the front panel installed and the second run was done without the front panel.
There is a difference of 4.67°C and in both instances, the CPU was maintaining its boost clocks. Clearly, in stock configuration (even without front fans) the front panel is not paying a significant role in the overall thermal performance.
For the second test configuration, two Noise Blocker fans were installed on the backside of the front-mounted rail. Two runs were made; one with the front panel removed and other with front panel installed.
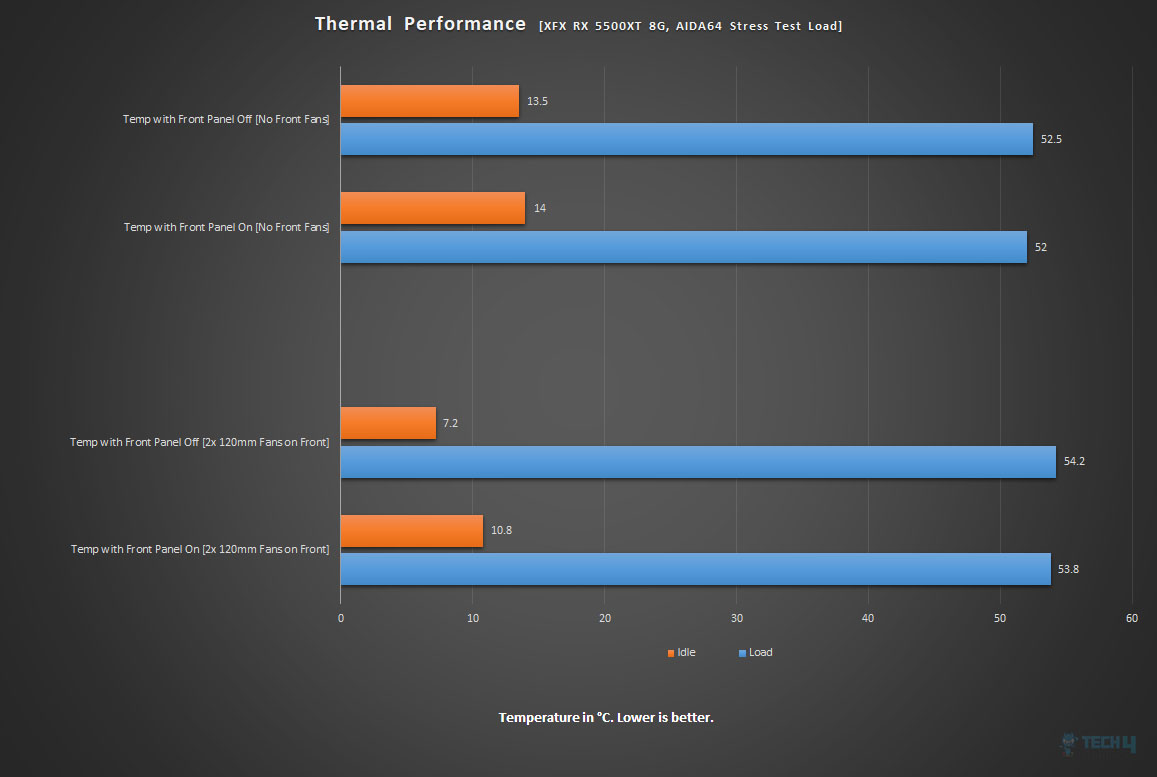
Thermal Performance – GPU
Final Words
The Thermaltake H550, part of the renowned H series, dazzles with its integrated front panel RGB lighting and a sleek 2mm brushed aluminum panel. It features SPCC material, a tempered glass panel, and a black finish both inside and out.
The build experience was smooth and hassle-free. It supports various fan configurations and radiator sizes on the front, rear, and top, with filtration for all air intake points. Despite lacking front-mounted fans and limited front air intake, the chassis impresses with its sturdy build, efficient cable management options, and an eye-catching ARGB display, making it a compelling choice at $99.99.
The two possible cons of the chassis are the lack of front-mounted fans and restricted air intake on the front side.
We are thankful to Thermaltake for giving us the opportunity to review their H550 TG ARGB PC Chassis.
Recent Updates
- December 24, 2023: A few text changes to improve readability. Also added image galleries.
Thank you! Please share your positive feedback. 🔋
How could we improve this post? Please Help us. 😔
[Hardware Reviewer & Editor]
Meet Nauman Siddique, a highly experienced computer science graduate with more than 15 years of knowledge in technology. Nauman is an expert in the field known for his deep understanding of computer hardware.
As a tech tester, insightful reviewer, and skilled hardware editor, Nauman carefully breaks down important parts like motherboards, graphics cards, processors, PC cases, CPU coolers, and more.
- 15+ years of PC Building Experience
- 10+ years of first-hand knowledge of technology
- 7+ years of doing in-depth testing of PC Hardware
- A motivated individual with a keen interest in tech testing from multiple angles.
- I majored in Computer Science with a Masters in Marketing
- Previously worked at eXputer, EnosTech, and Appuals.
- Completed Course in Computer Systems Specialization From Illinois Tech
Get In Touch: nauman@tech4gamers.com


