 Threads
Top-Tier Performance!
Review Summary
The MSI MAG PANO M100R PZ is a micro-ATX PC case that highlights MSI’s backplug motherboard compatibility, offering a distinctive, durable design with a 270-degree panoramic view through glass panels. It features extensive cooling options, including four pre-installed 120mm ARGB fans and supports for up to a 360mm radiator. The case accommodates large components, with slots for various storage configurations and high-end graphics cards. Despite its premium price, its unique aesthetics, build quality, and cooling efficiency make it an attractive option for PC builders and enthusiasts.
Hours Tested: 18

Overall
-
Design - 9/10
9/10
-
Build Quality - 9.5/10
9.5/10
-
Features - 9.5/10
9.5/10
-
Cooling - 9/10
9/10
-
Storage - 7.5/10
7.5/10
Pros
- 270ᵒ Panoramic View Design
- 4x Pre-Installed Fans
- Adequate Dust Filtration
- Rail Mount System for fans and radiators
- Stylish GPU Support Bracket
- Ample Airflow
- Integrated Fan ARGB Control hub
Cons
- A bit steep price
- Limited Storage Provision


MSI has recently introduced a backplug series of motherboards in micro-ATX size initially. They have also showcased the PC Cases that support backplug motherboards within the MSI Ecosystem. I am taking a look at the MSI MAG PANO M100R PZ case in this article that comes in black and white color.
This PC Case has a stunning design reflecting the MAG branding symbol in quite some style with a tank build quality and plenty of features that would entice you to get this case in the Backplug series. This is not my first backplug PC Case though and this concept has got some moves that could very well be forming a new trend in the PC Industry.
- Why you can trust Tech4Gamers: Our reviews are based on dedicated hands-on testing by our team of experienced hardware experts. Find out more about how we test.
Key Takeaways
- The MSI MAG PANO M100R PZ is a stylish micro-ATX case offering a 270° panoramic view through its glass panels, designed for backplug motherboards, with extensive cooling options and a clean, pillar-less aesthetic.
- You should buy the MSI MAG PANO M100R PZ if you want top-notch performance from a panoramic view case that supports backplug motherboards.
- You should not buy the MSI MAG PANO M100R PZ if you are on a tight budget or want an ATX motherboard.
The salient specifications are:
| Dimension | 440x235x405mm |
| Net Weight | 8.66Kg |
| Form Factor | Micro-ATX |
| Motherboard Form Factor | Backplug micro-ATX and ITX |
| Storage Drive Mount | 2x 2.5” or 1x 2.5” and 1x 3.5” |
| Expansion Slot | 5x |
| GPU Support | 390mm Length |
| CPU Cooler Support | 175mm |
| PSU Support | ATX with 200mm length |
| Fan Size Support |
|
| Radiator Size Support |
|
Packaging And Unboxing
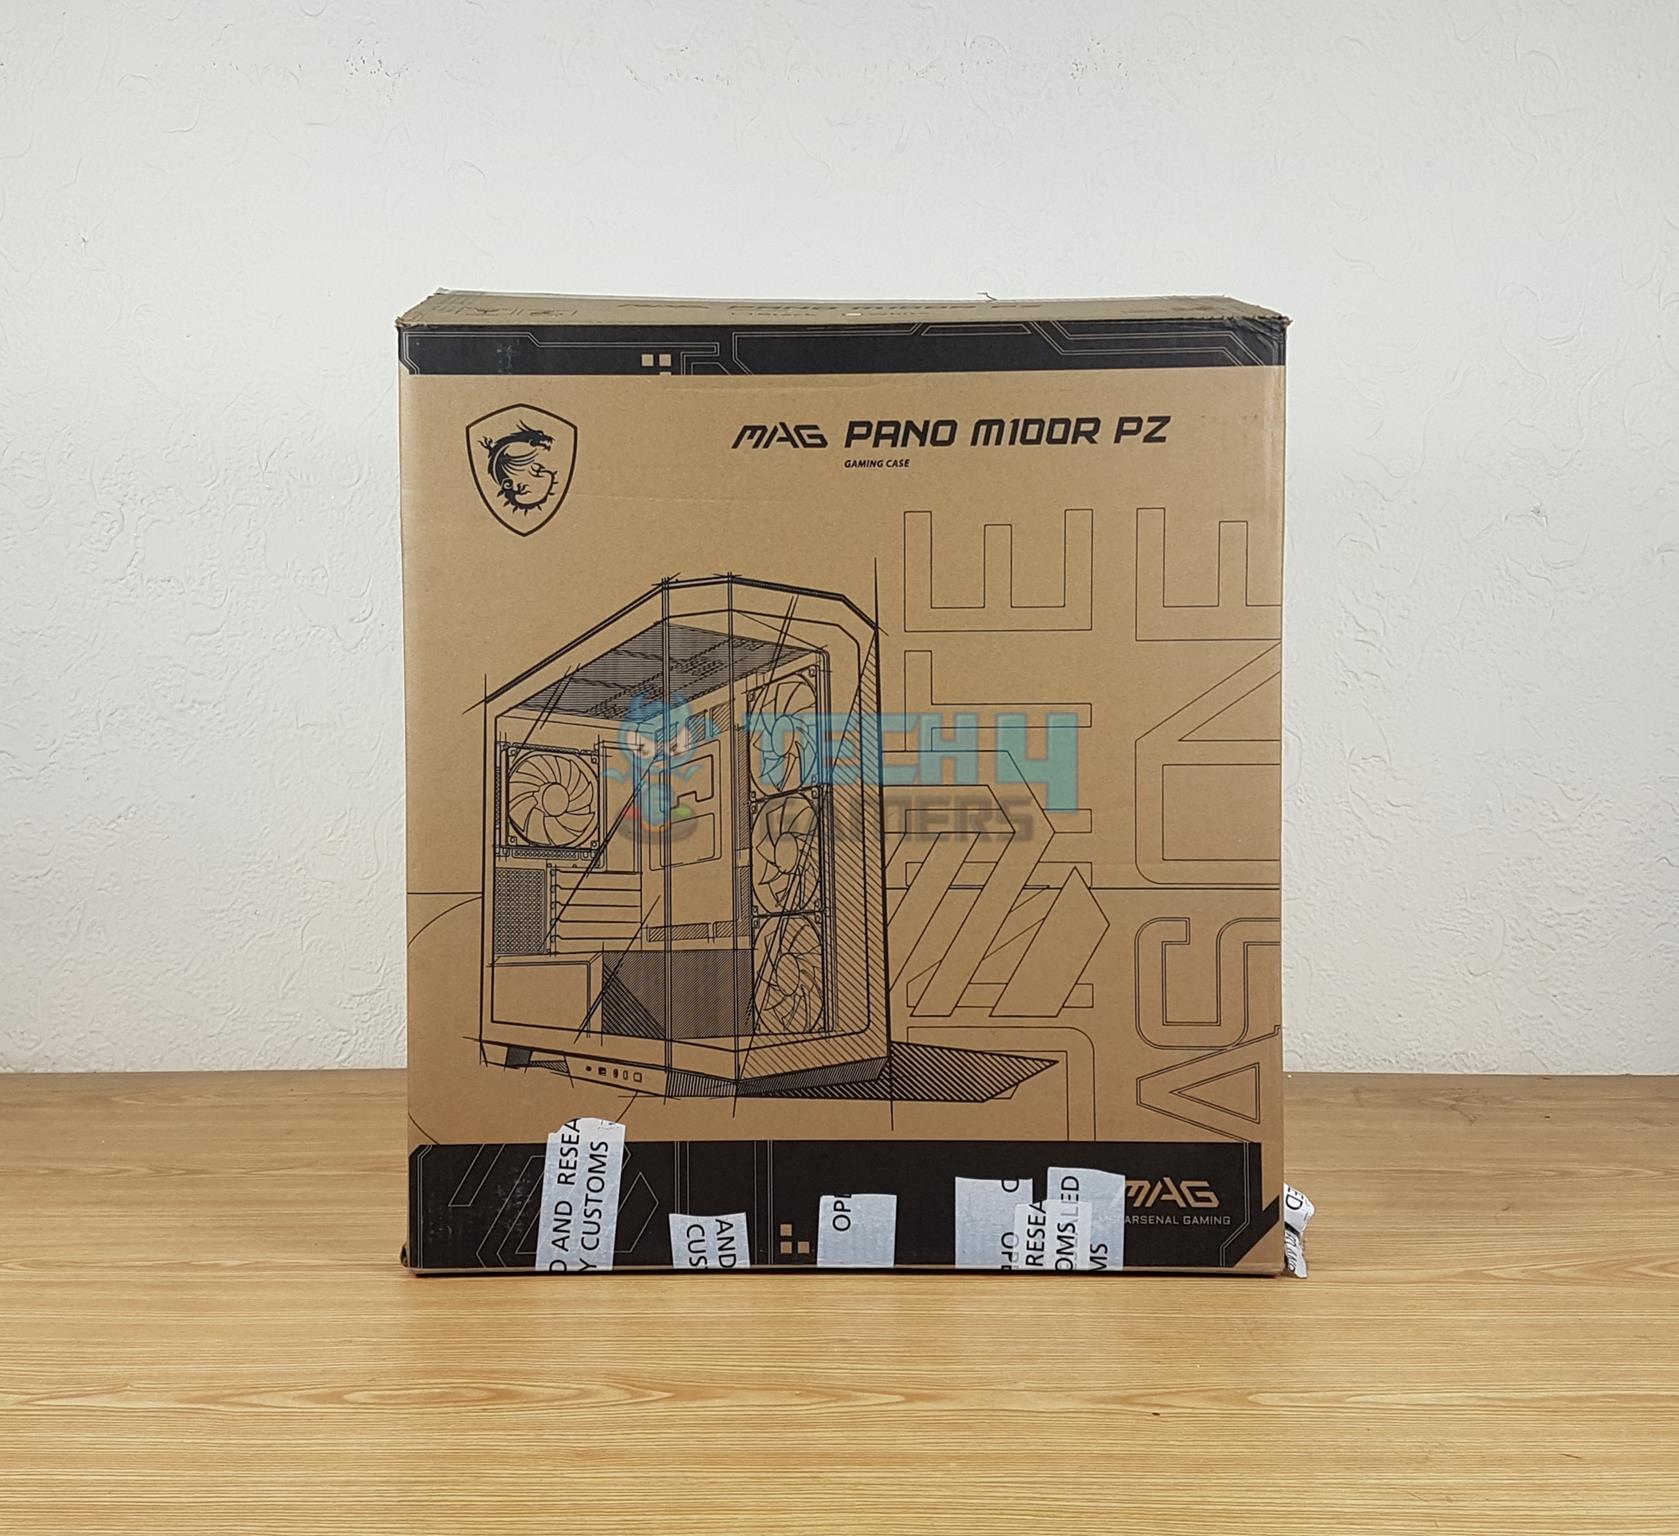

The unit is shipped inside a standard brown color cardboard box. There is a picture of the PC Case without any feature listing or details on the front and back. There are salient features listed on the side of the packing box. There are two thick black color Styrofoam pads encapsulating the PC Case.
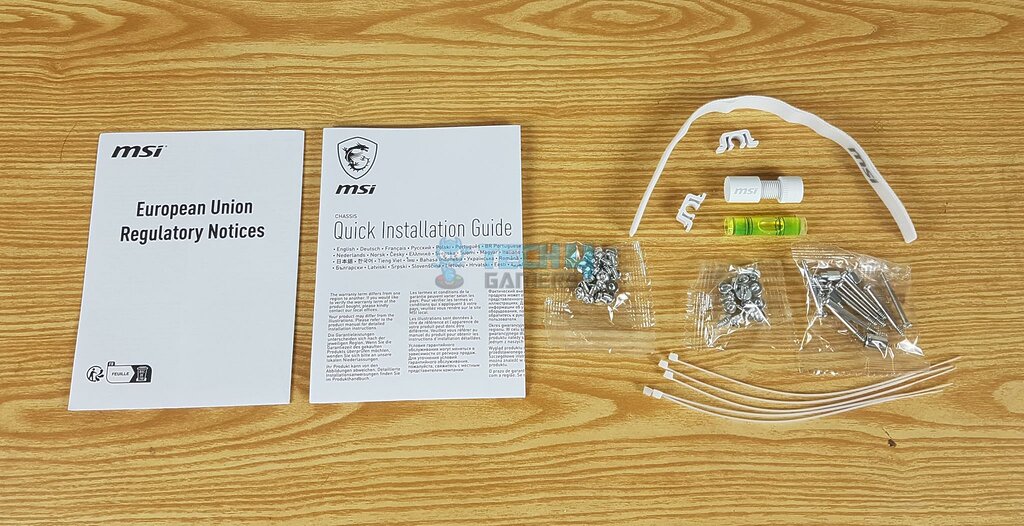
The following are provided with the case:
- 1x Installation Guide
- 1x Regulatory Notice
- Various Screws for motherboard and storage drives
- Long Screws for the fans over the radiator
- 5x white zip ties
- 2x MSI branded Velcro Straps
- 1x GPU Support bracket
- 2x Clips
- 1x Level [Spirit Level]
Design
The MSI MAG M100R PANO PZ is a micro-ATX size or form factor PC Case that has a dimension of 440x235x405mm. It has a net weight of 8.66Kg with a gross weight of 11.29Kg. It is made of SPCC, Glass, and Plastic materials. Let’s start taking a closer look from Inside and Outside views being our major categories.
Exterior
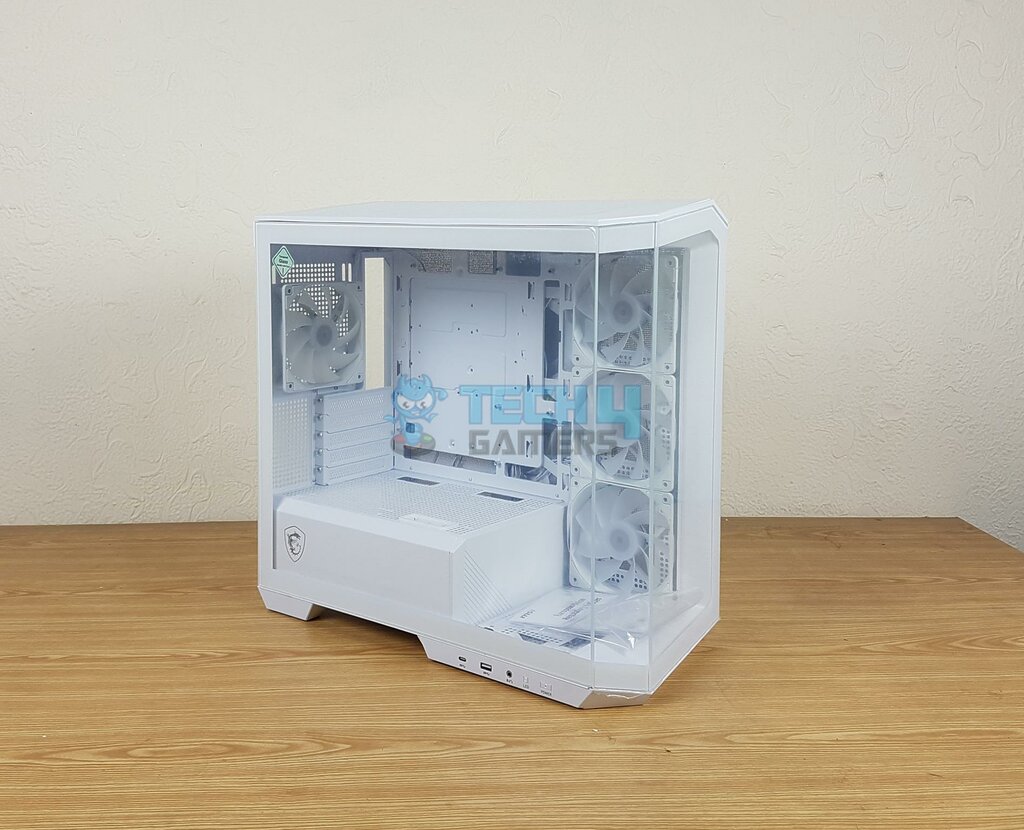
As you can see this case is all about visibility as it provides 270ᵒ panoramic view. The front has a clear glass panel which is not removable and then there is a main side glass panel. One cool aspect is that there is another glass between these two panels. This creates a pillarless design that gives an unconstructive view.
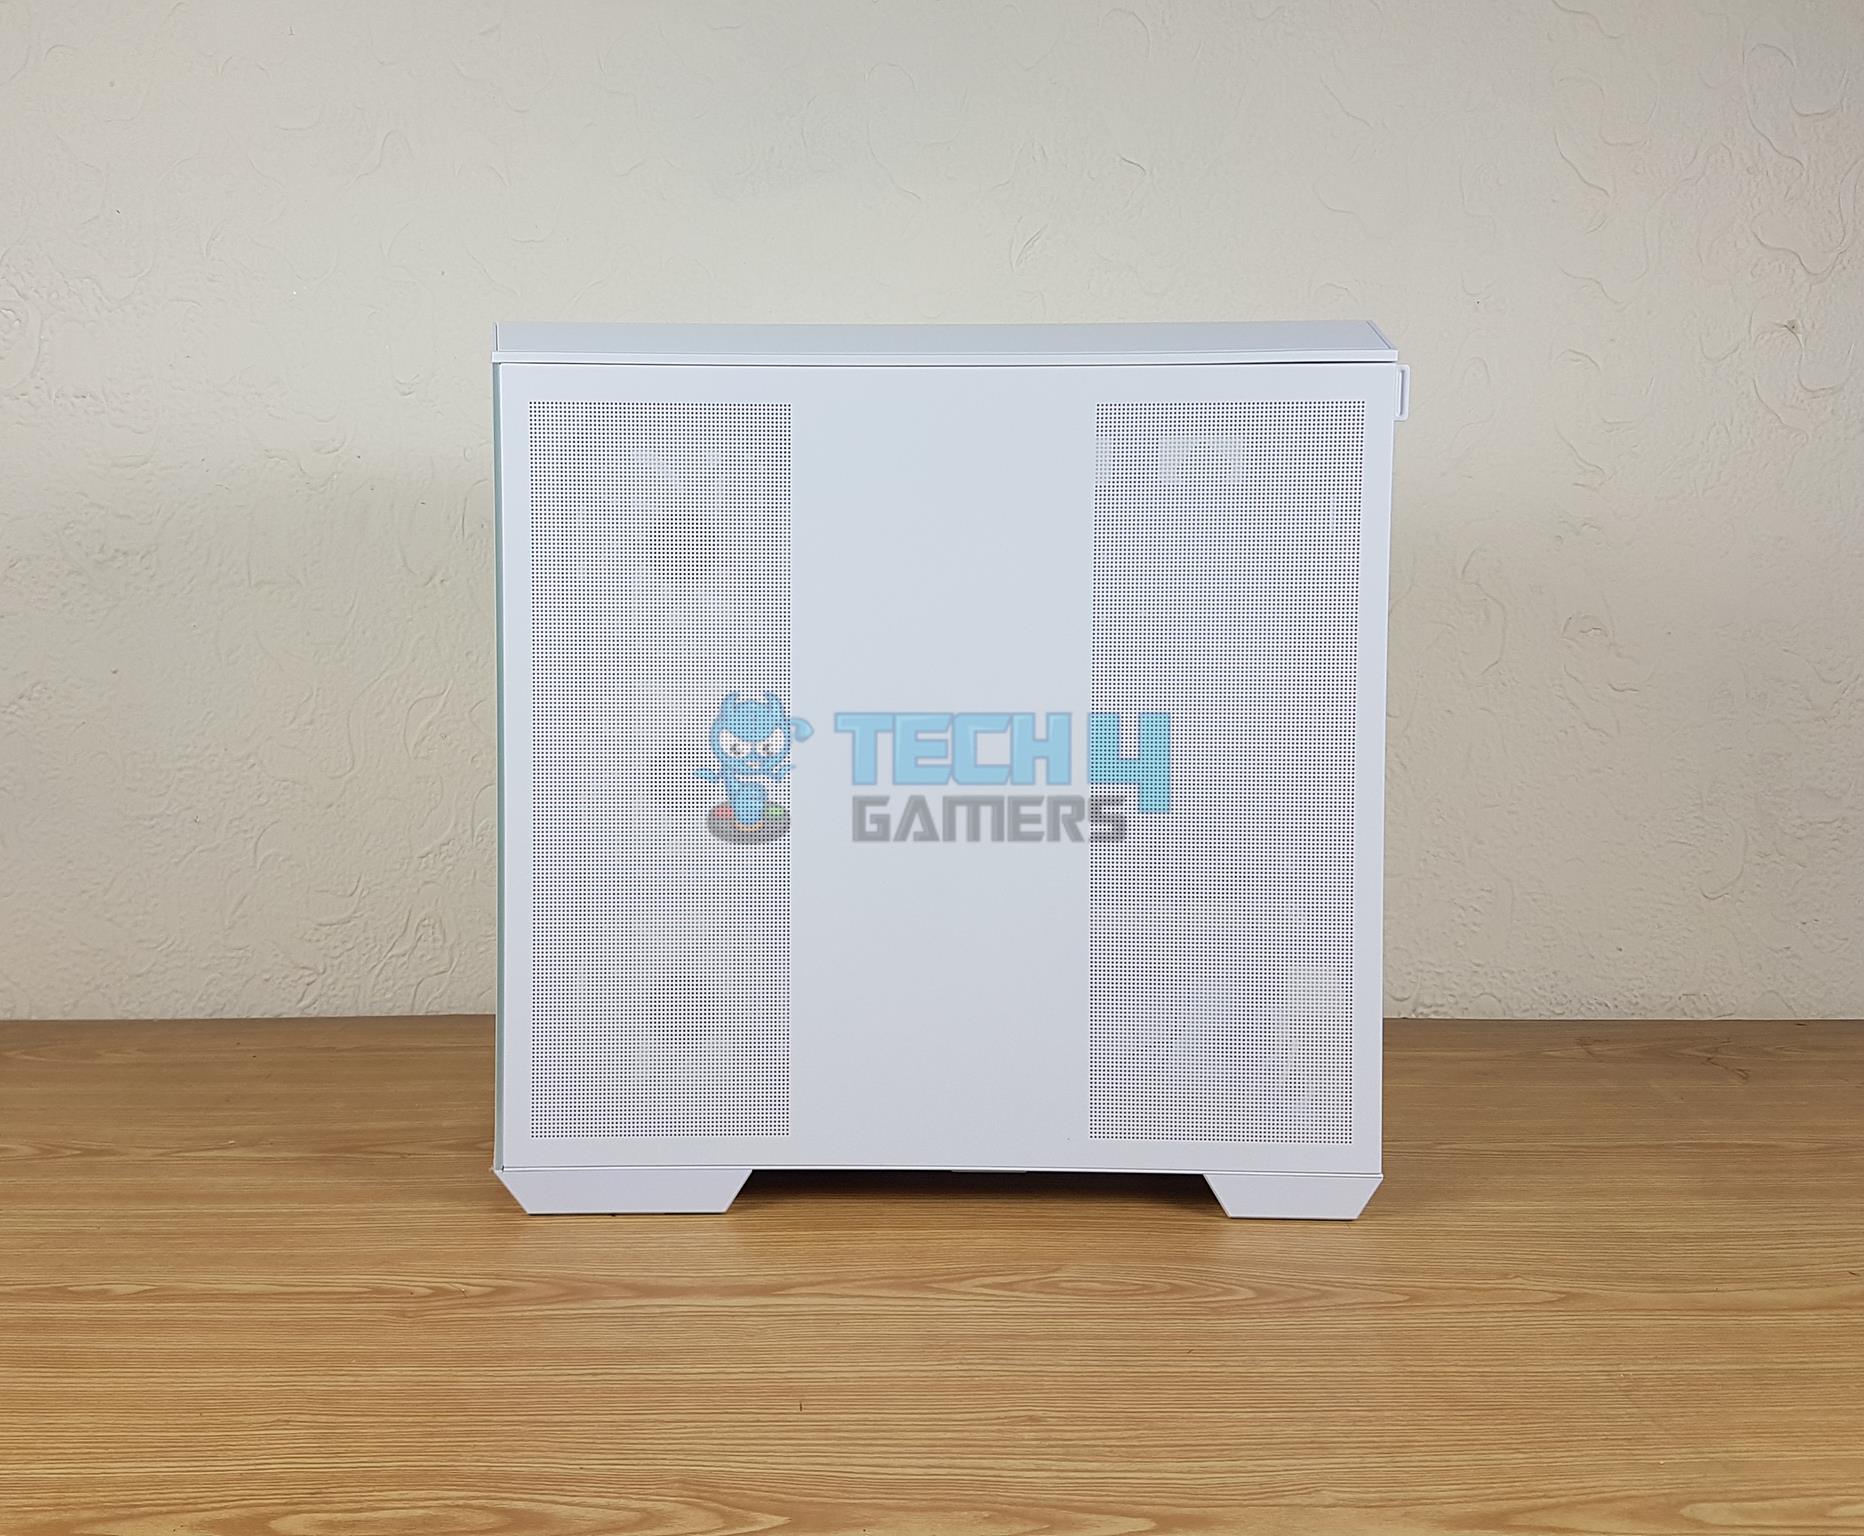
Front Panel
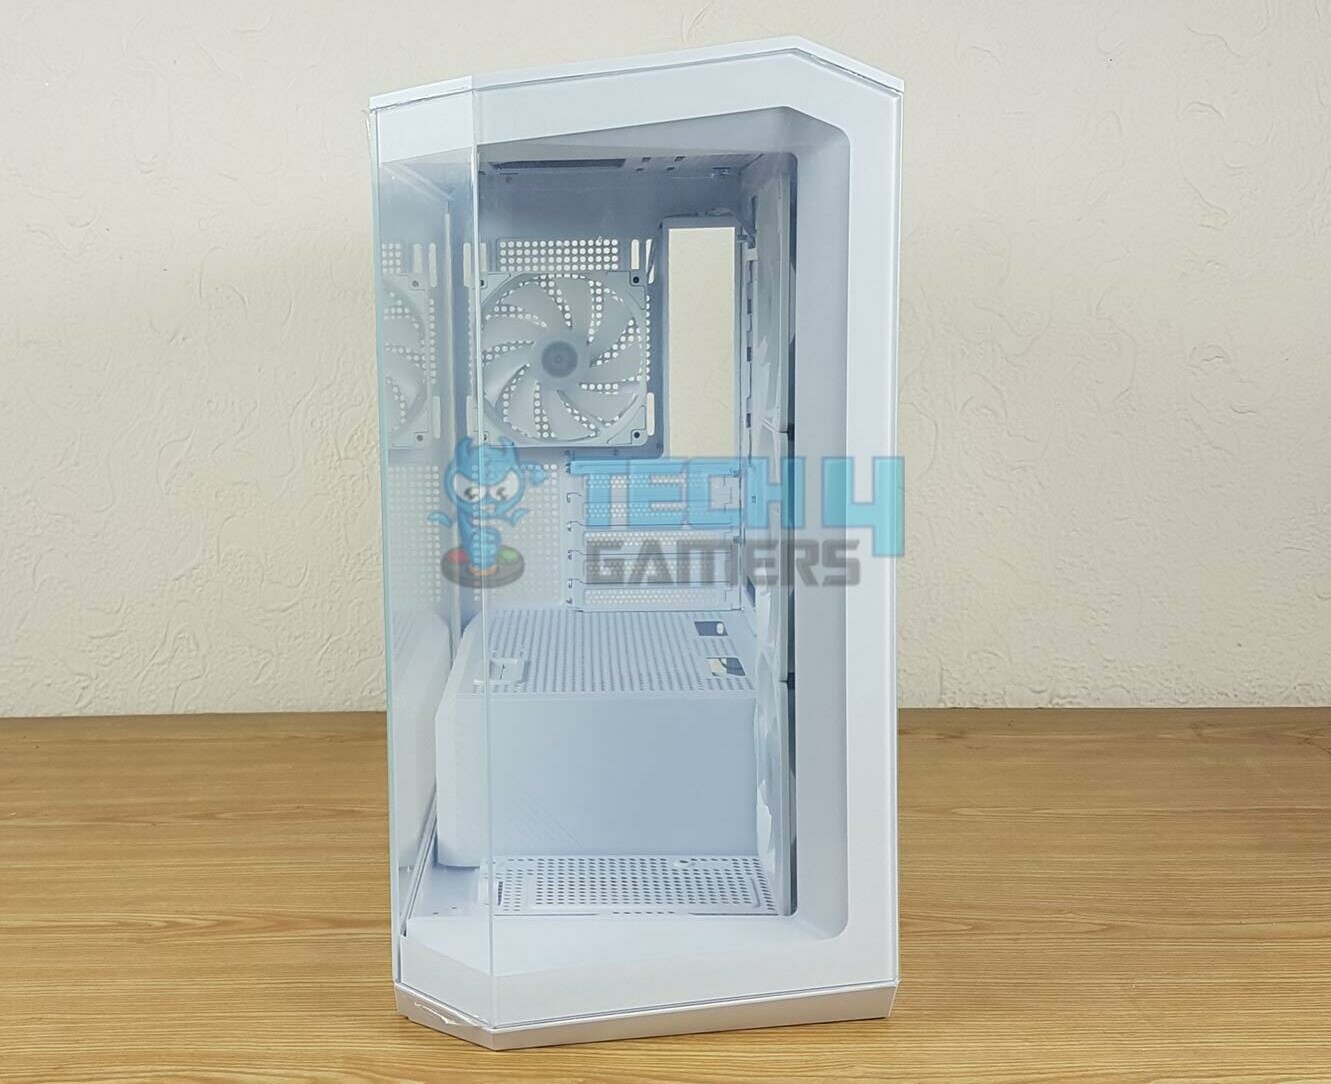
If you get a chance to take a look at this case in person, you will instantly fall in love with the overall design layout, particularly on the front and top. There is a clear glass panel that provides a complete inside view. The glass panel runs from the top to the bottom and is fixed.
There is quite some geometrical design that represents the MAG branding from MSI. I appreciate this design as it gives this case a unique look and MSI has not cut any corners as well.
Rear Panel
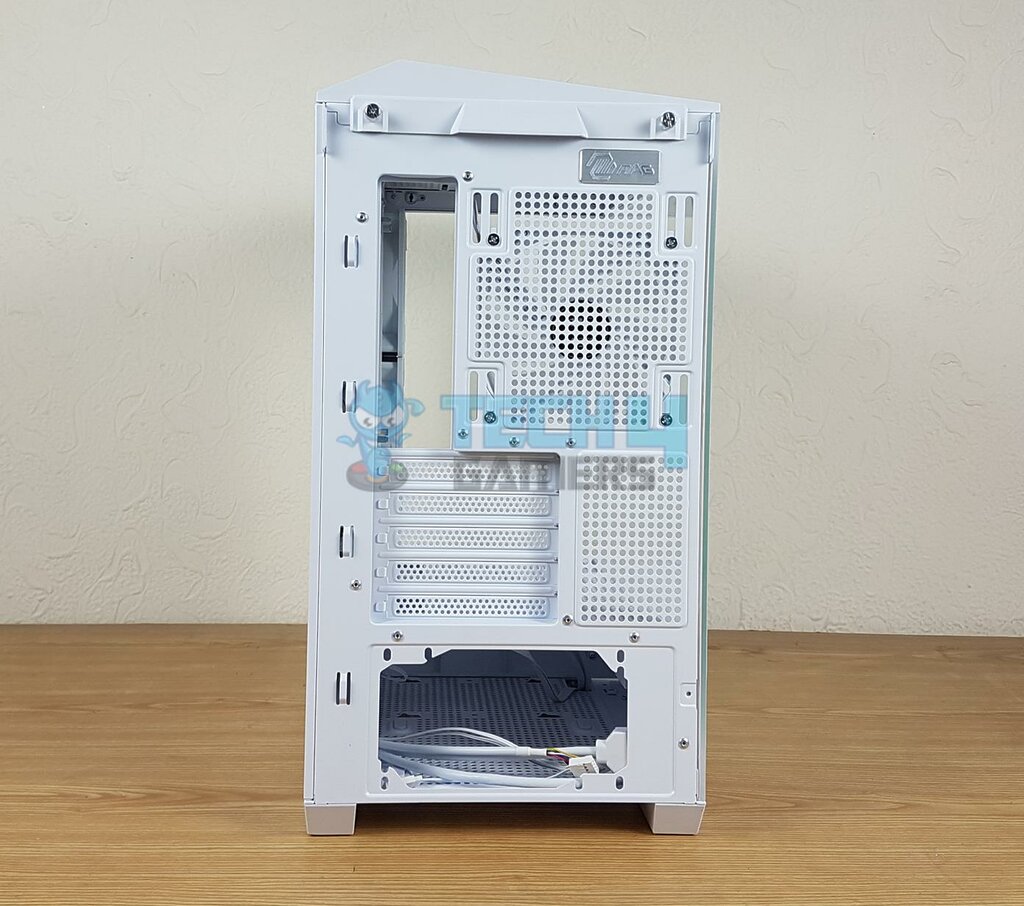
The rear view tells us that MSI has adopted the same design concept for the top cover that I will talk about later. There is a cutout providing an area for the rear IO panel of the motherboard. There is a rail mount design for the 120mm/140mm fans. 1x ARGB 120mm fan is pre-installed.
There are 5x PCIe slot covers that are removable and reusable. Then there is a standard ATX PSU mount area. The PSU is installed from the backside of this case. There are 4x cable tie points for effective cable management on the backside of this case.
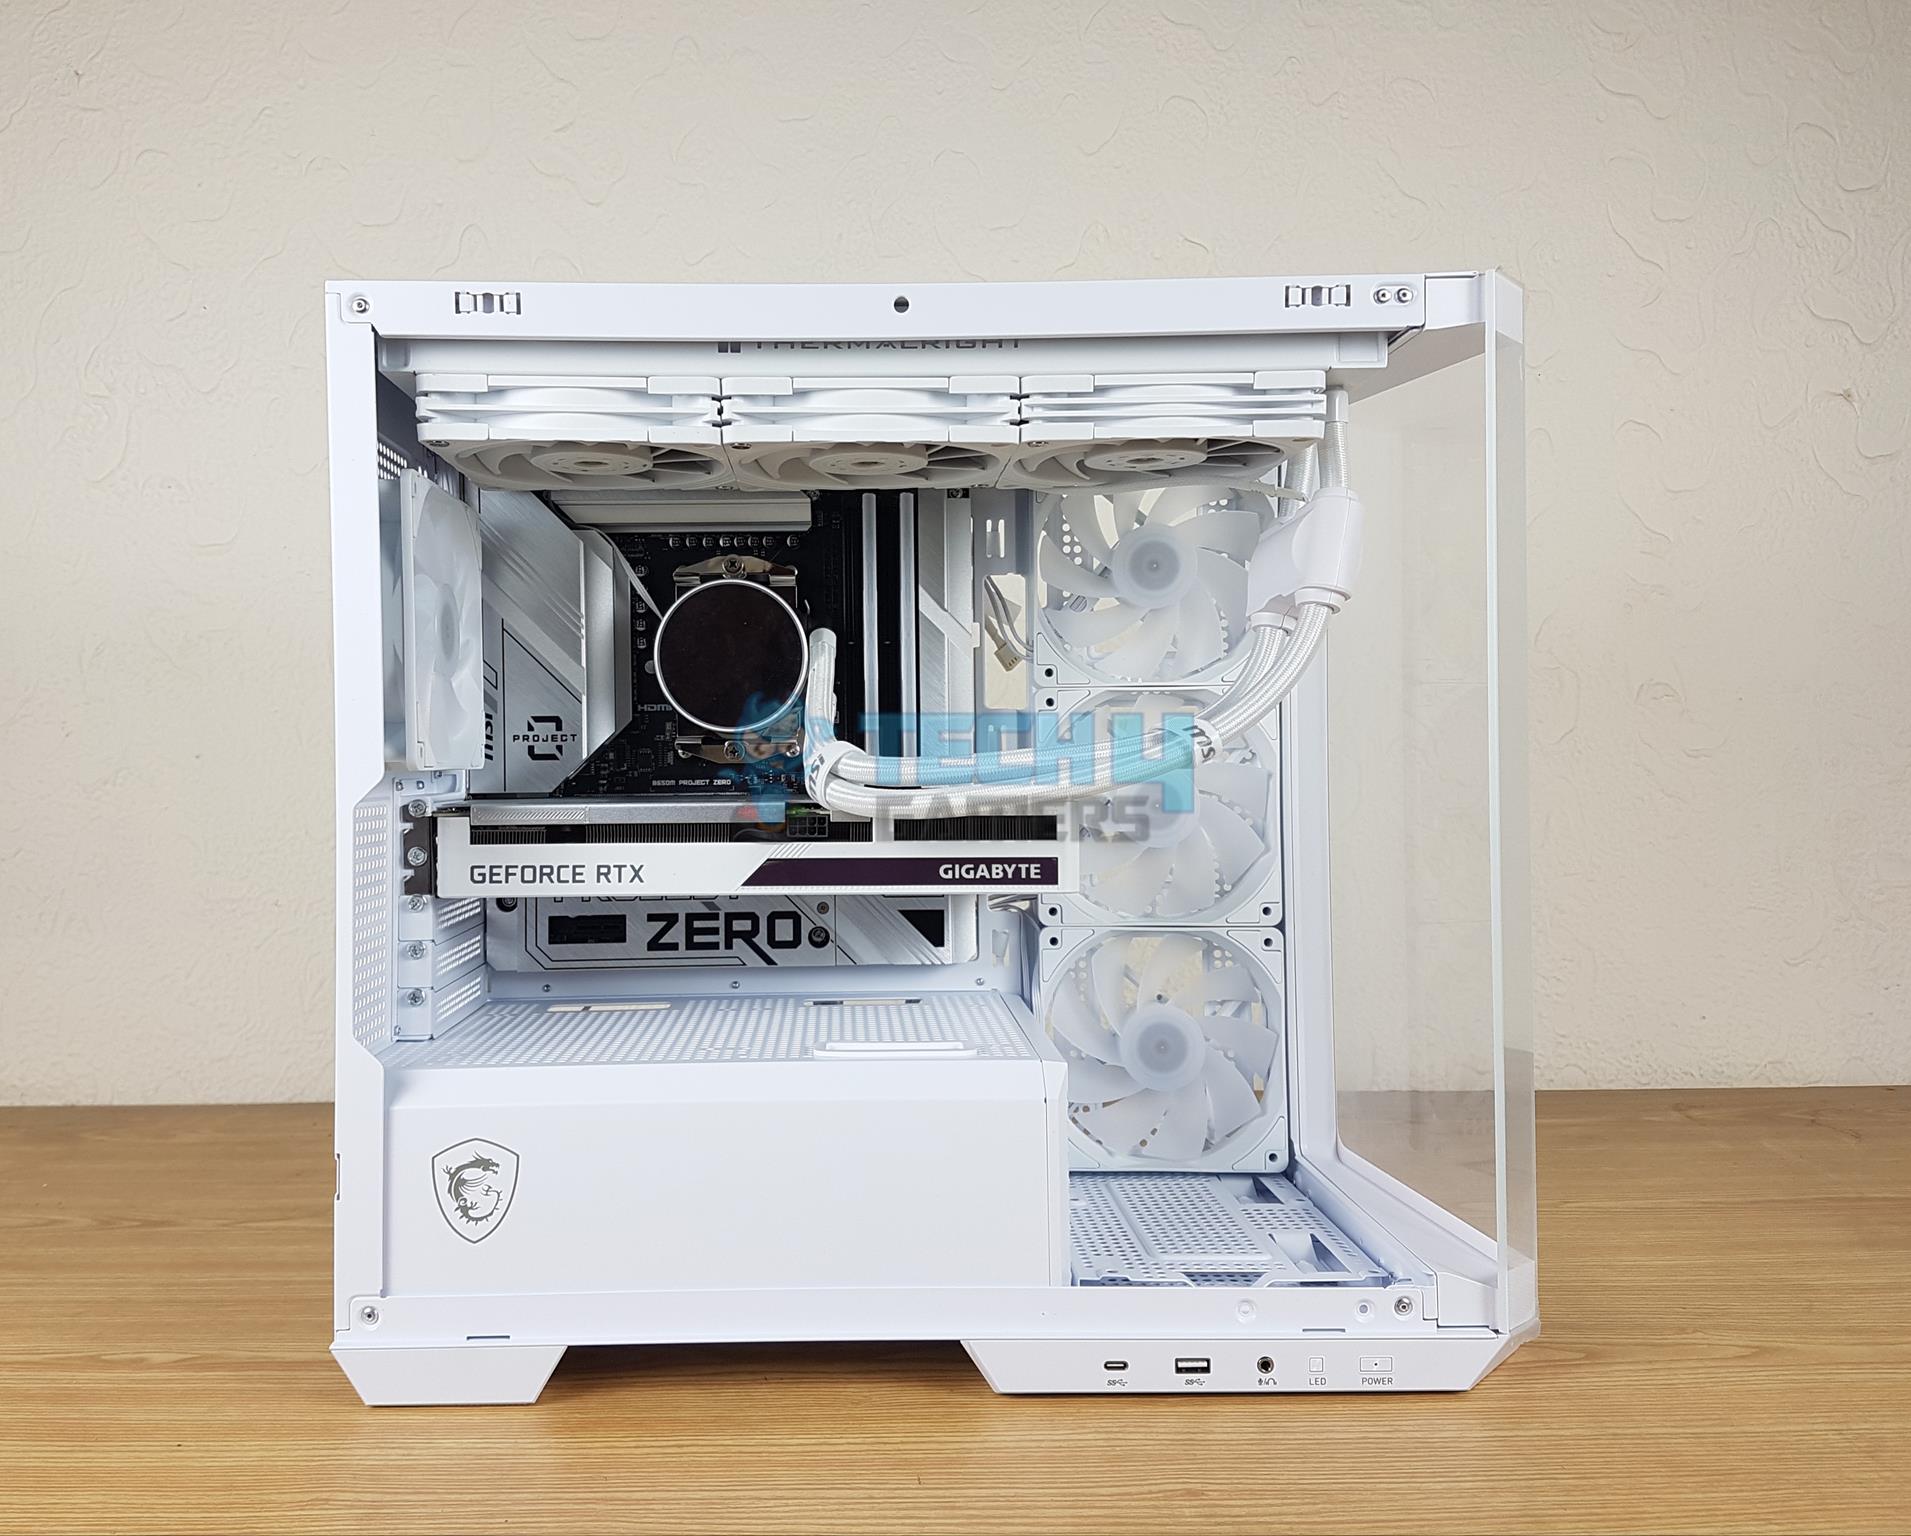
Top Panel
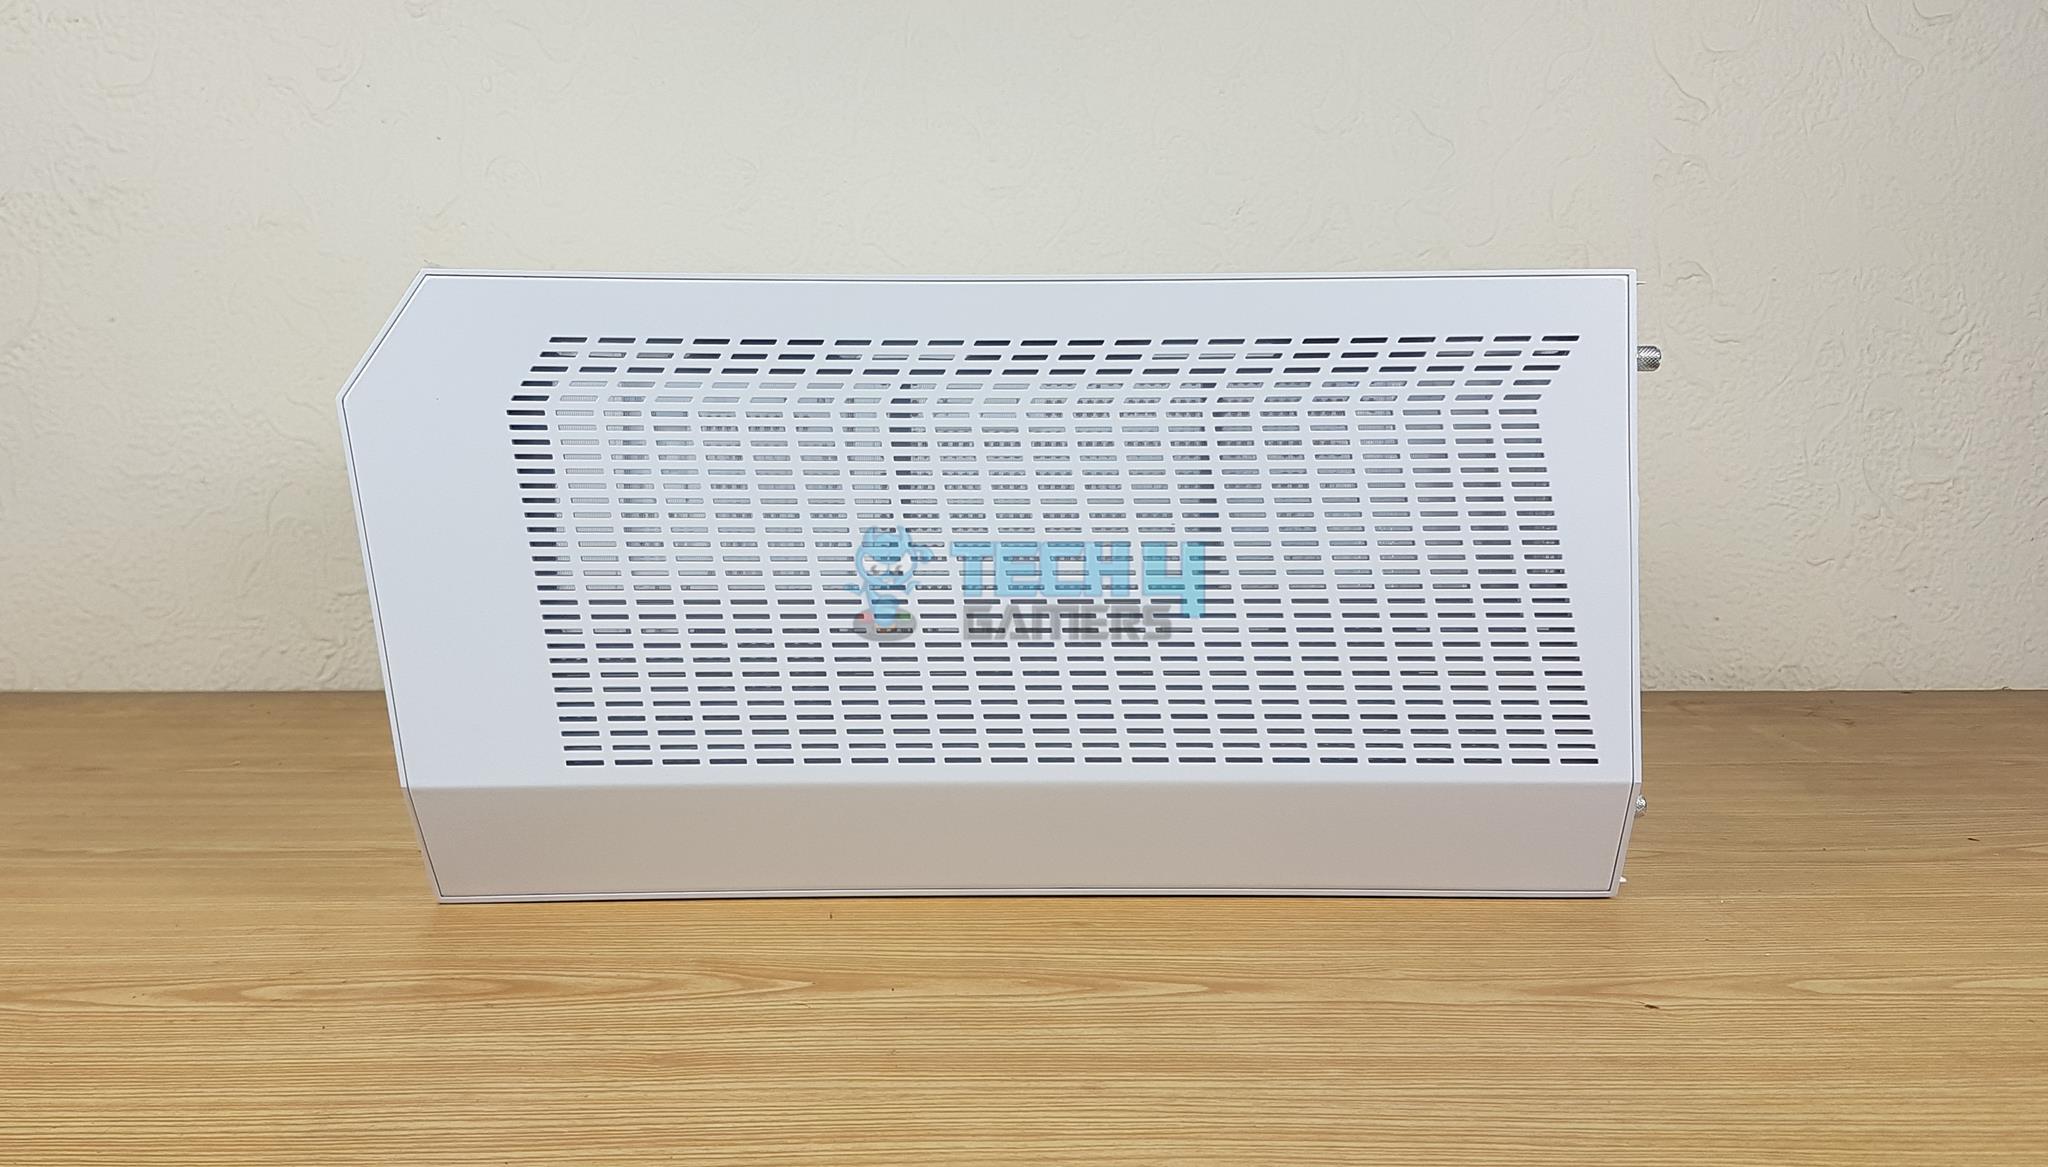
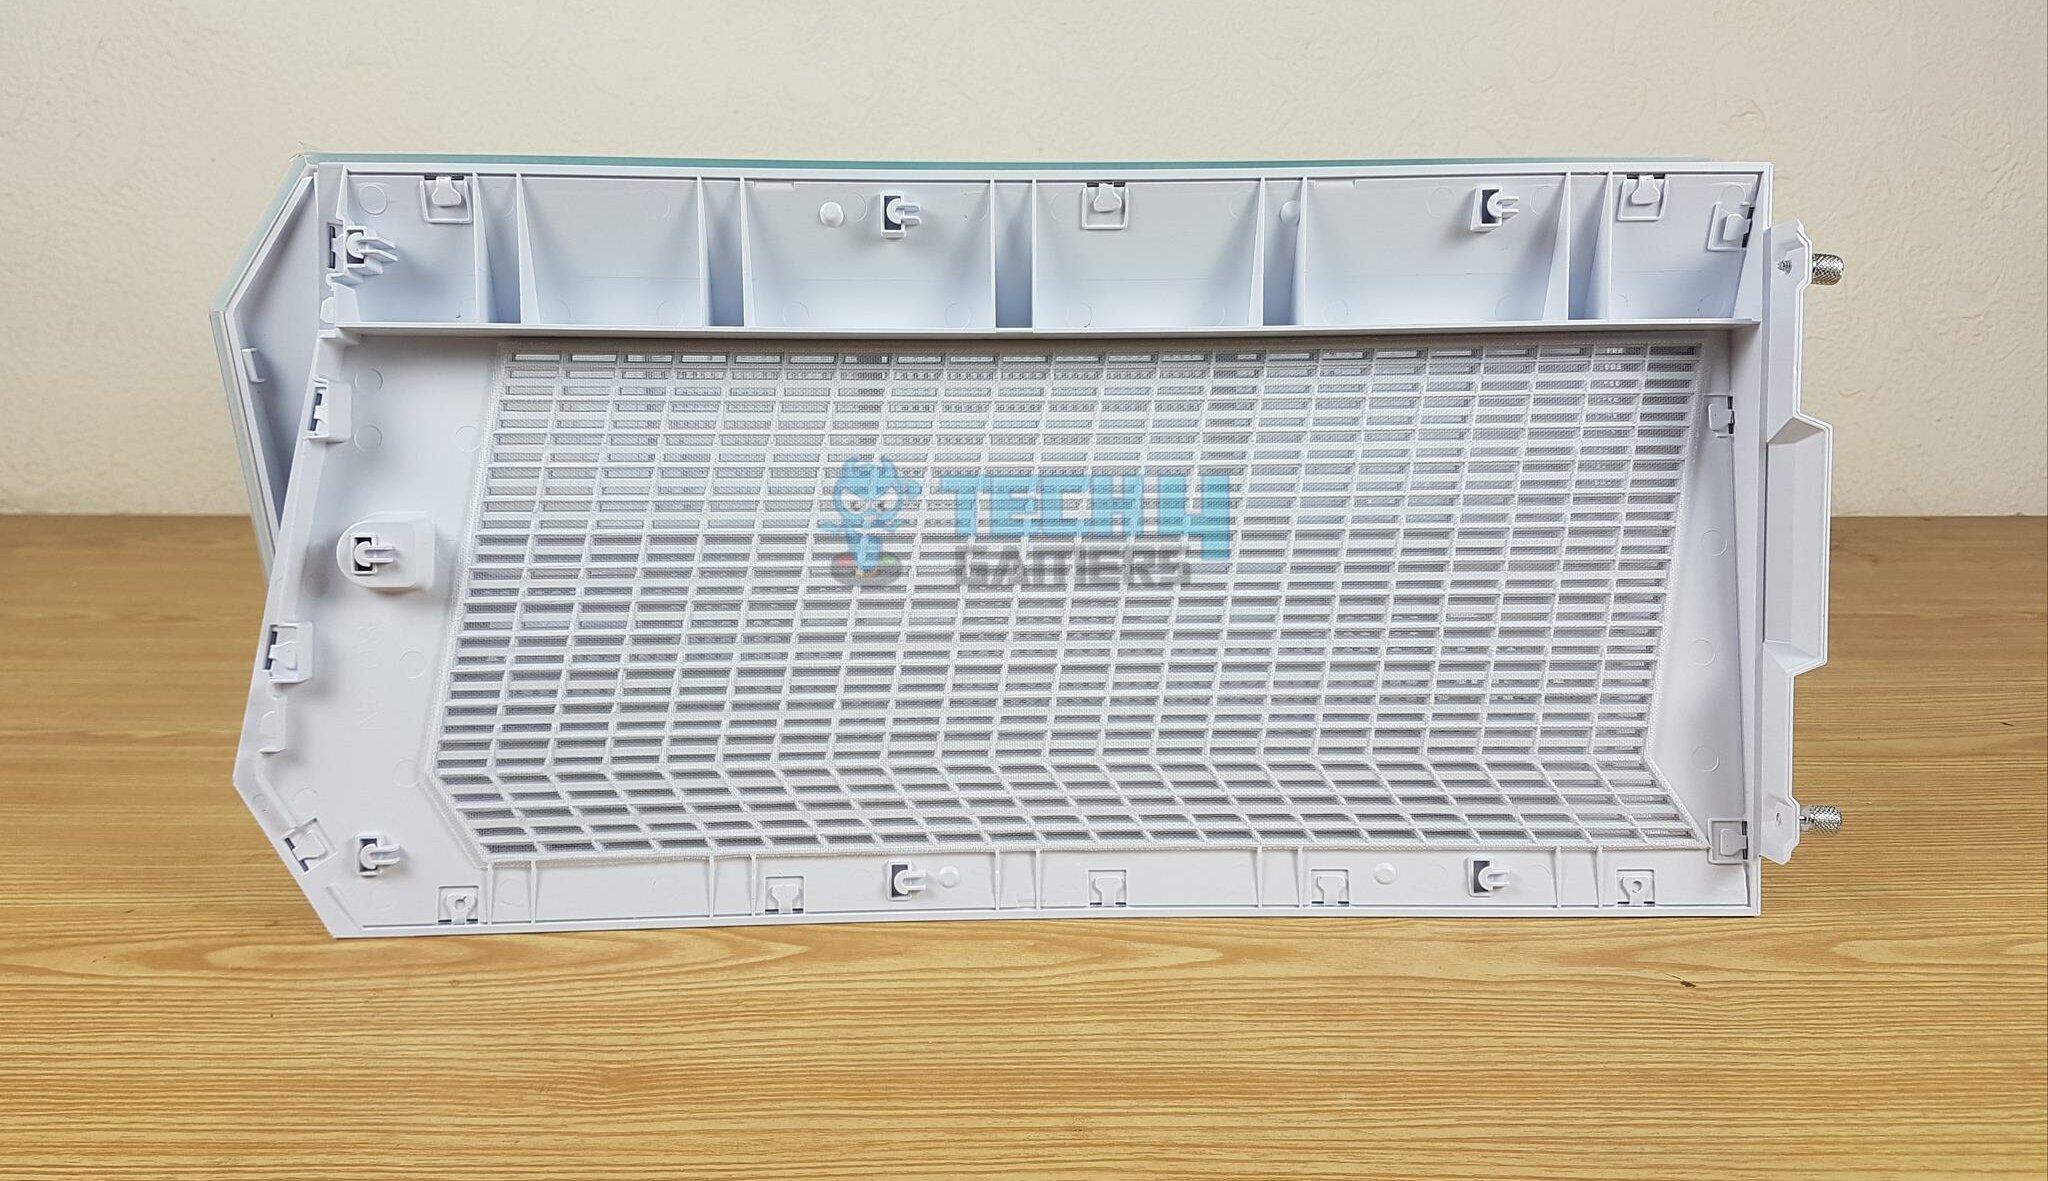
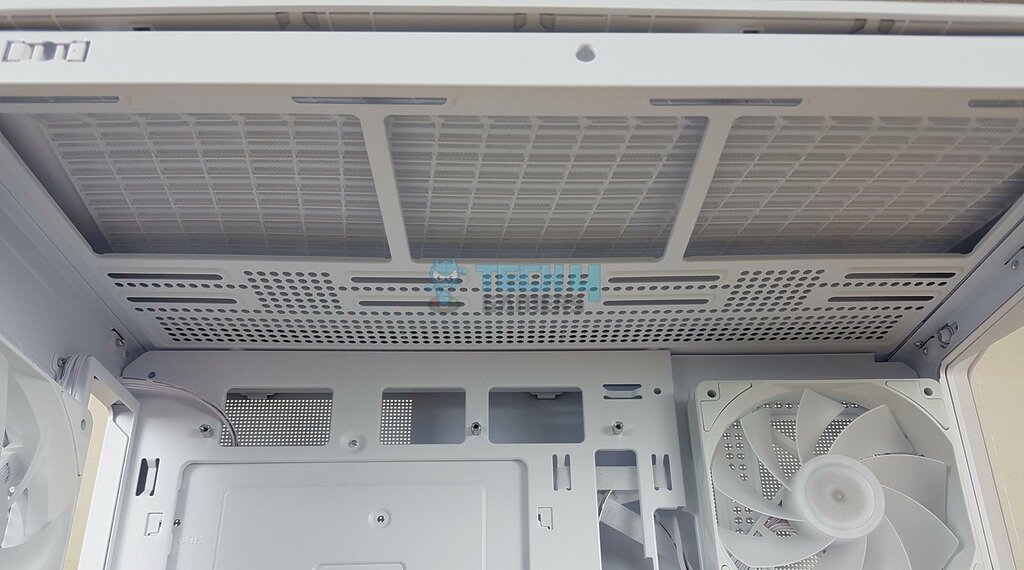
There is a MAG brand-designed top cover on this case. It has perforation over the top for ventilation. It is secured using two captive thumb screws from the rear of this case. There is a fine mesh under the top cover that acts as a dust filter. It is fixed and non-magnetic.
There is a rail mount design to install up to 3x 120mm or 2x 140mm fans or 120mm/240mm/360mm radiator. The provision of a 360mm radiator in a micro-ATX size PC Case simply tells you about the feature set of the PANO case.
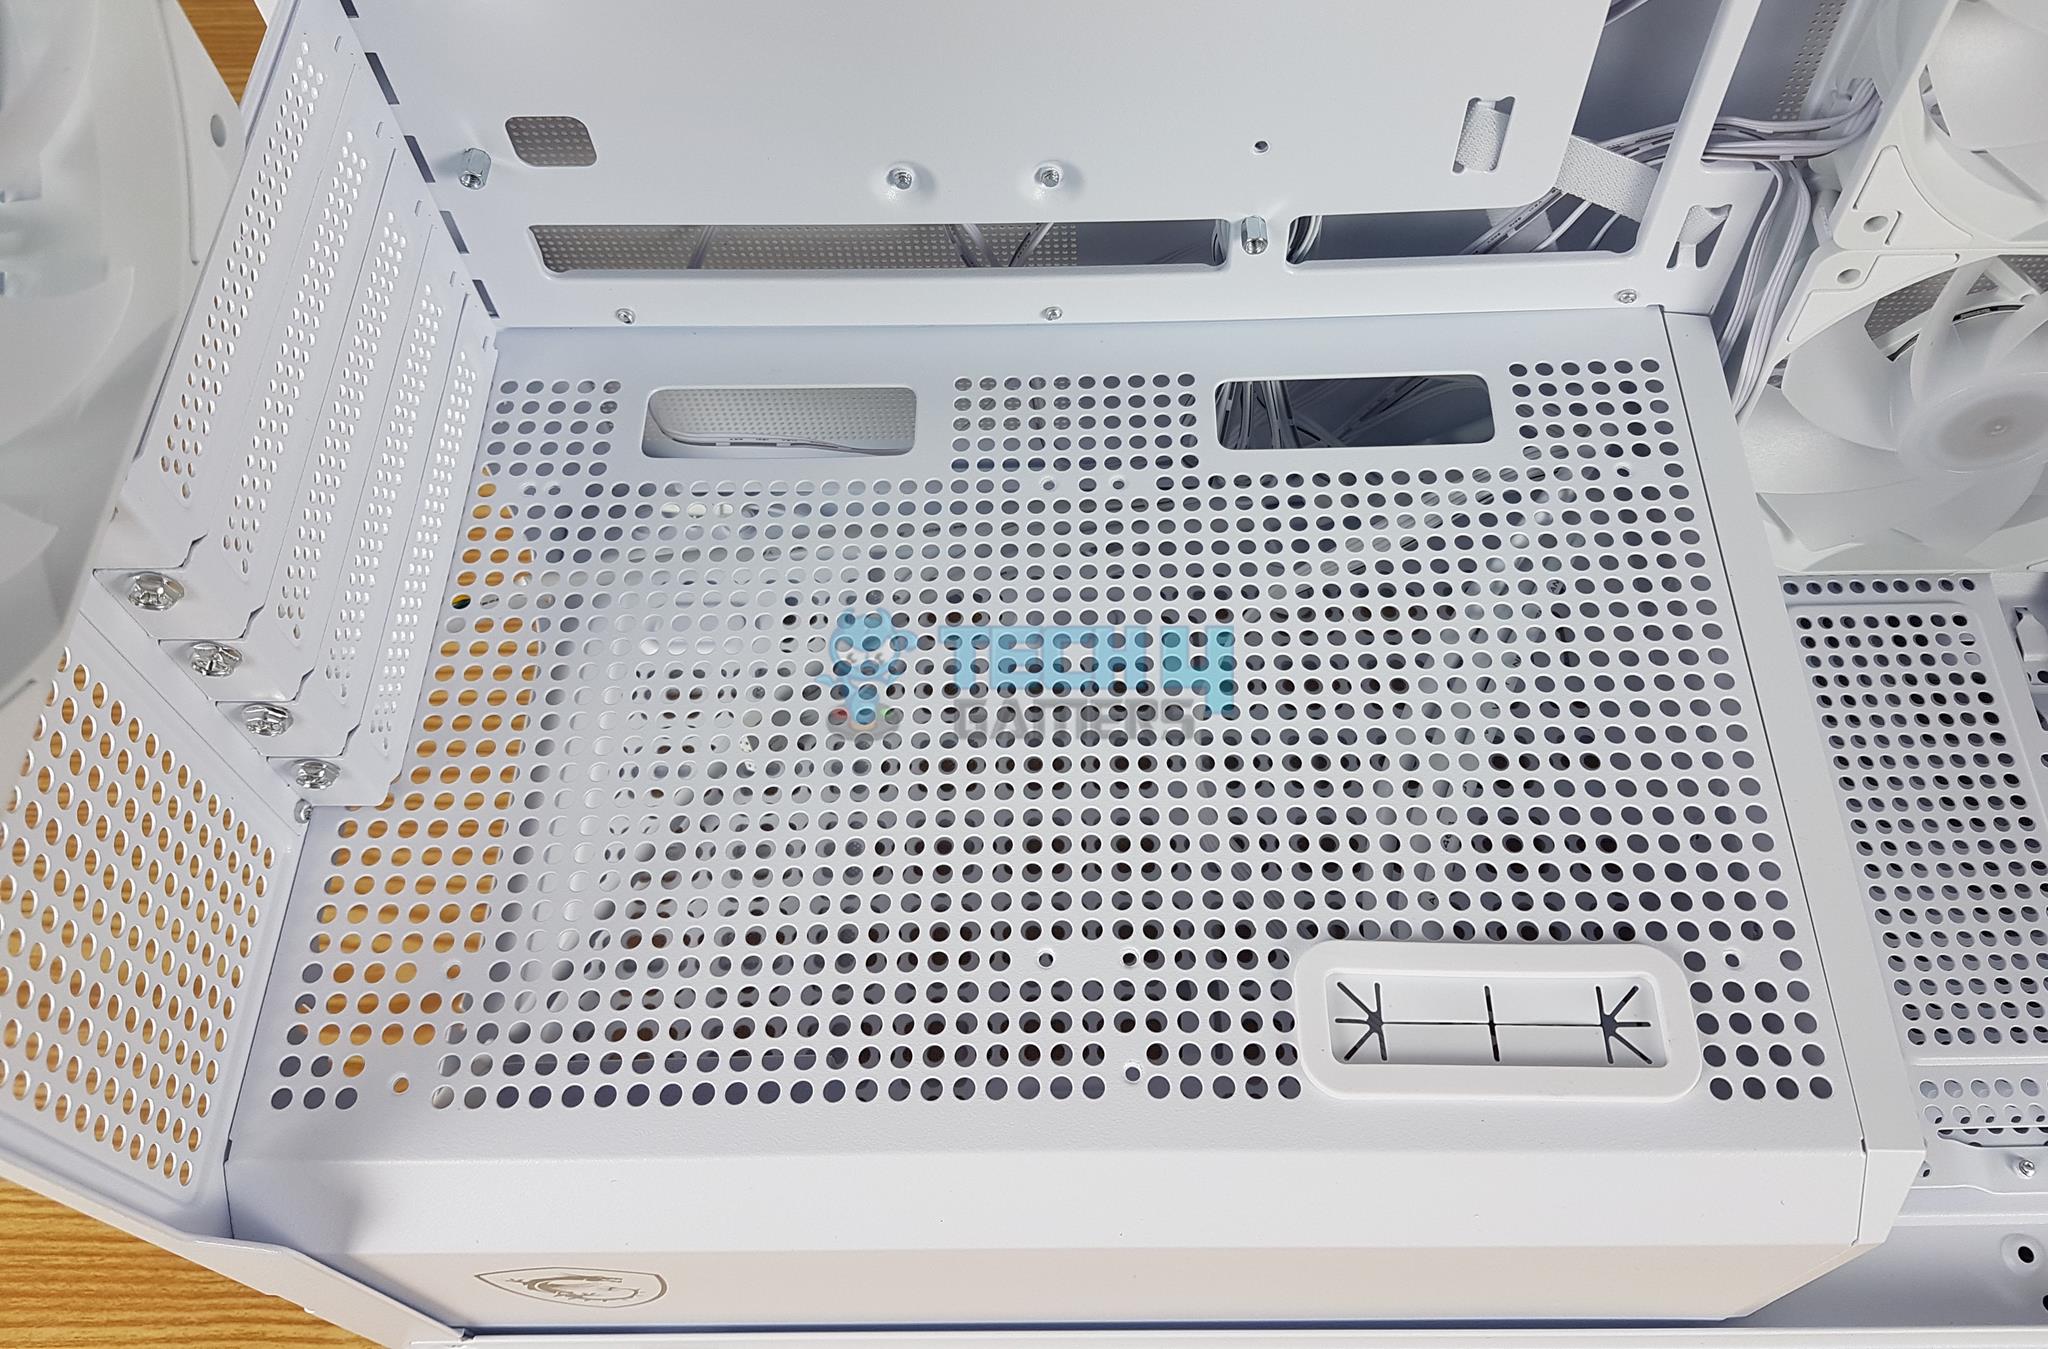
Bottom Panel
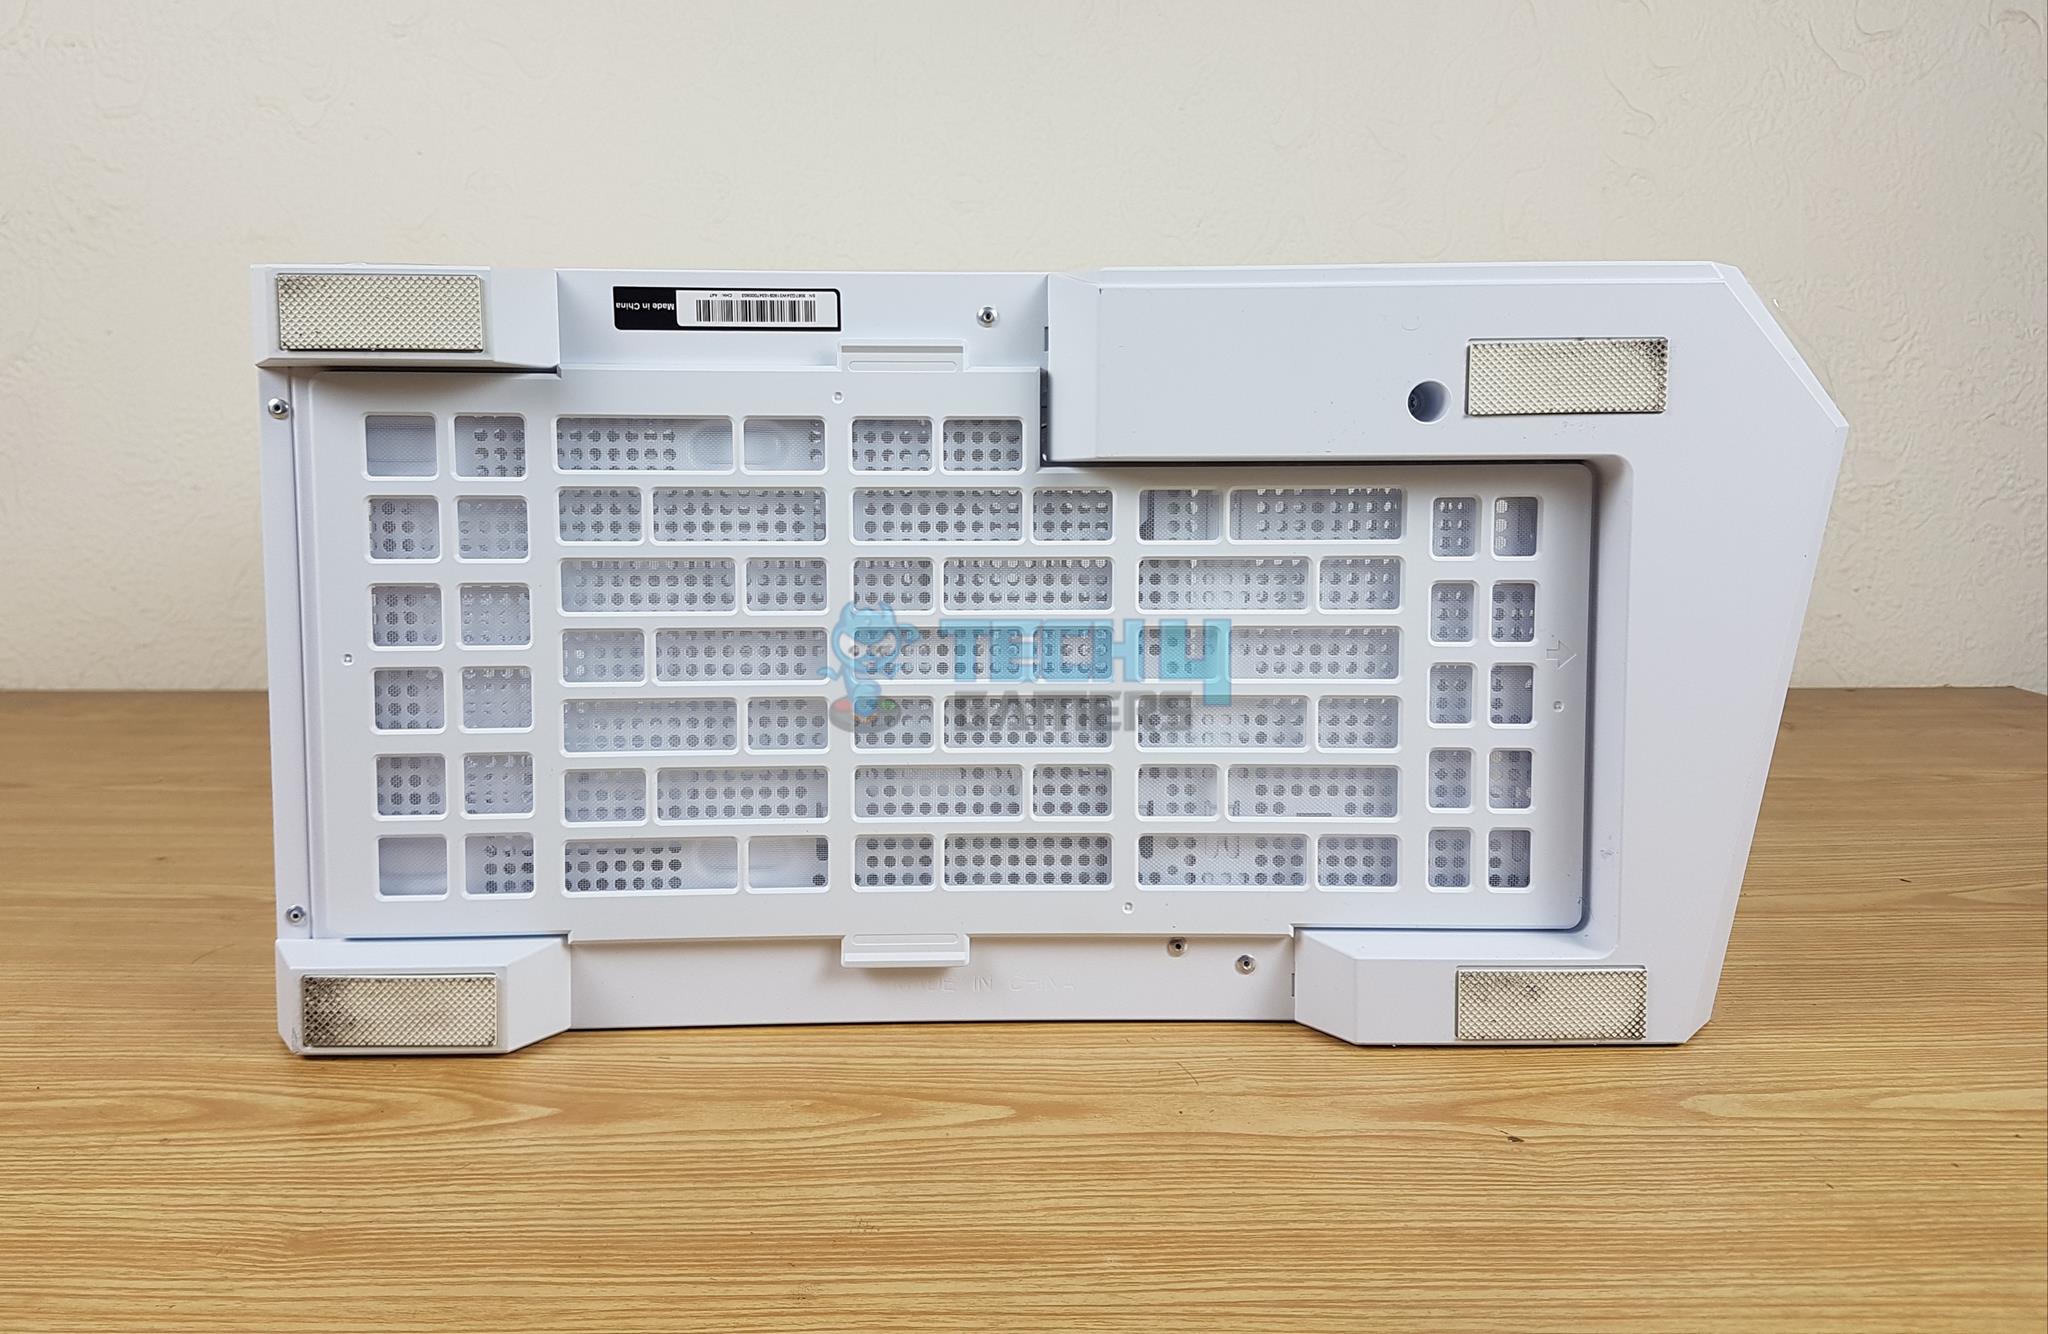
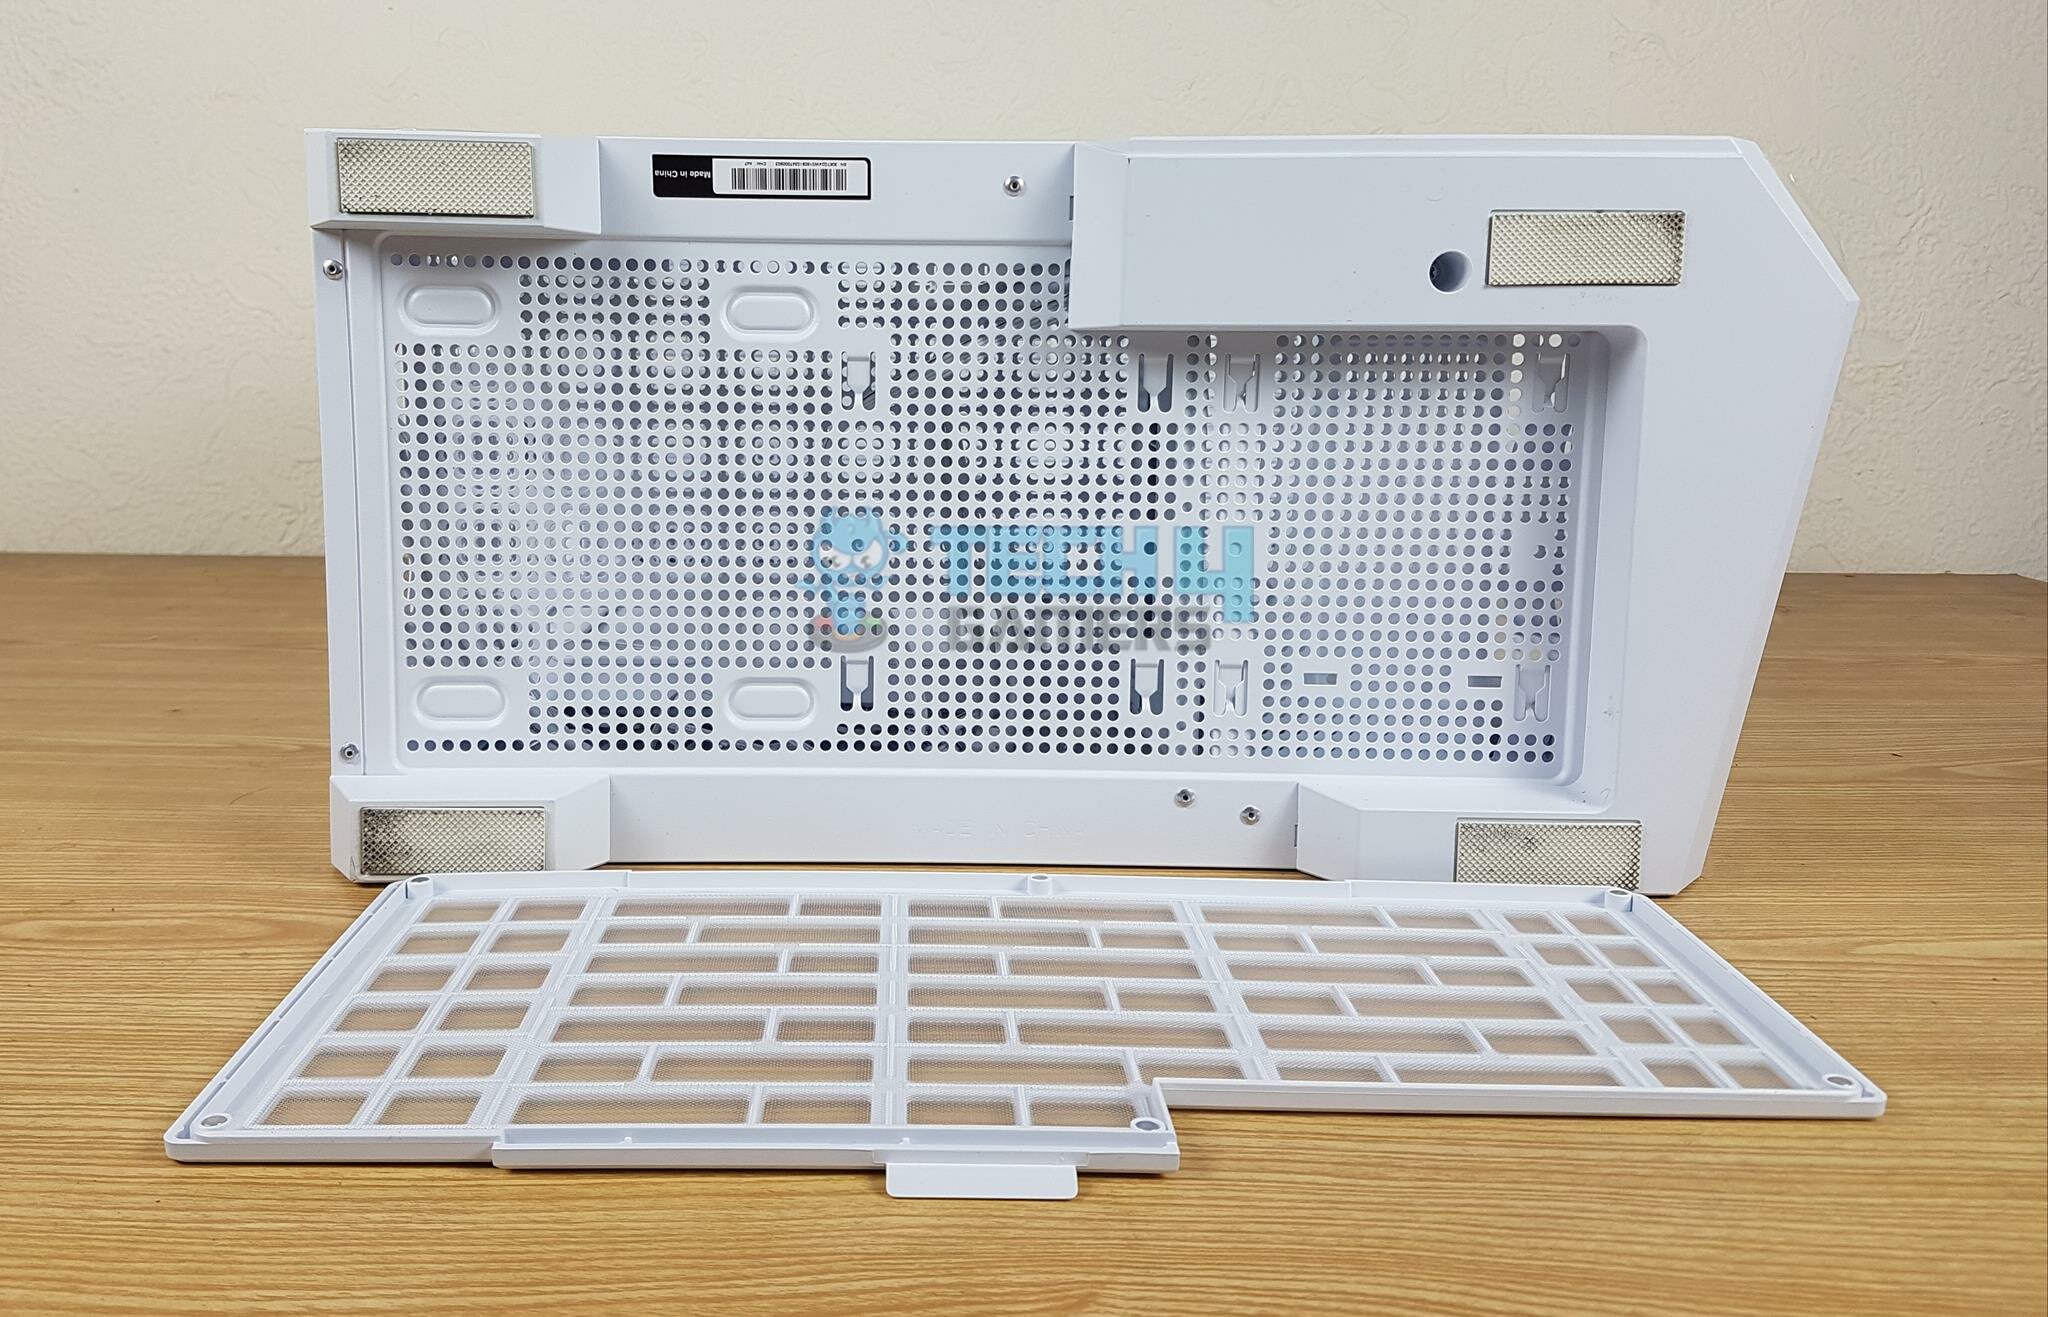
I am showing a bottom view of this case in the above pictures. There is a large-sized non-magnetic dust filter that can be removed by pulling it from the side. There are 4x anti-vibration rubber pads on the feet that are already catching dust from my table.
There is a cut-out towards the front top area that has a screw in it. This screw is holding the bottom fan bracket.
The complete bottom area is perforated providing quite some effective air intake. This case supports PSU up to 200mm and I have tested this space using CORSAIR AX1200i PSU in my test build. This PSU has 200mm length and I was still able to do decent cable management.
Side Panel

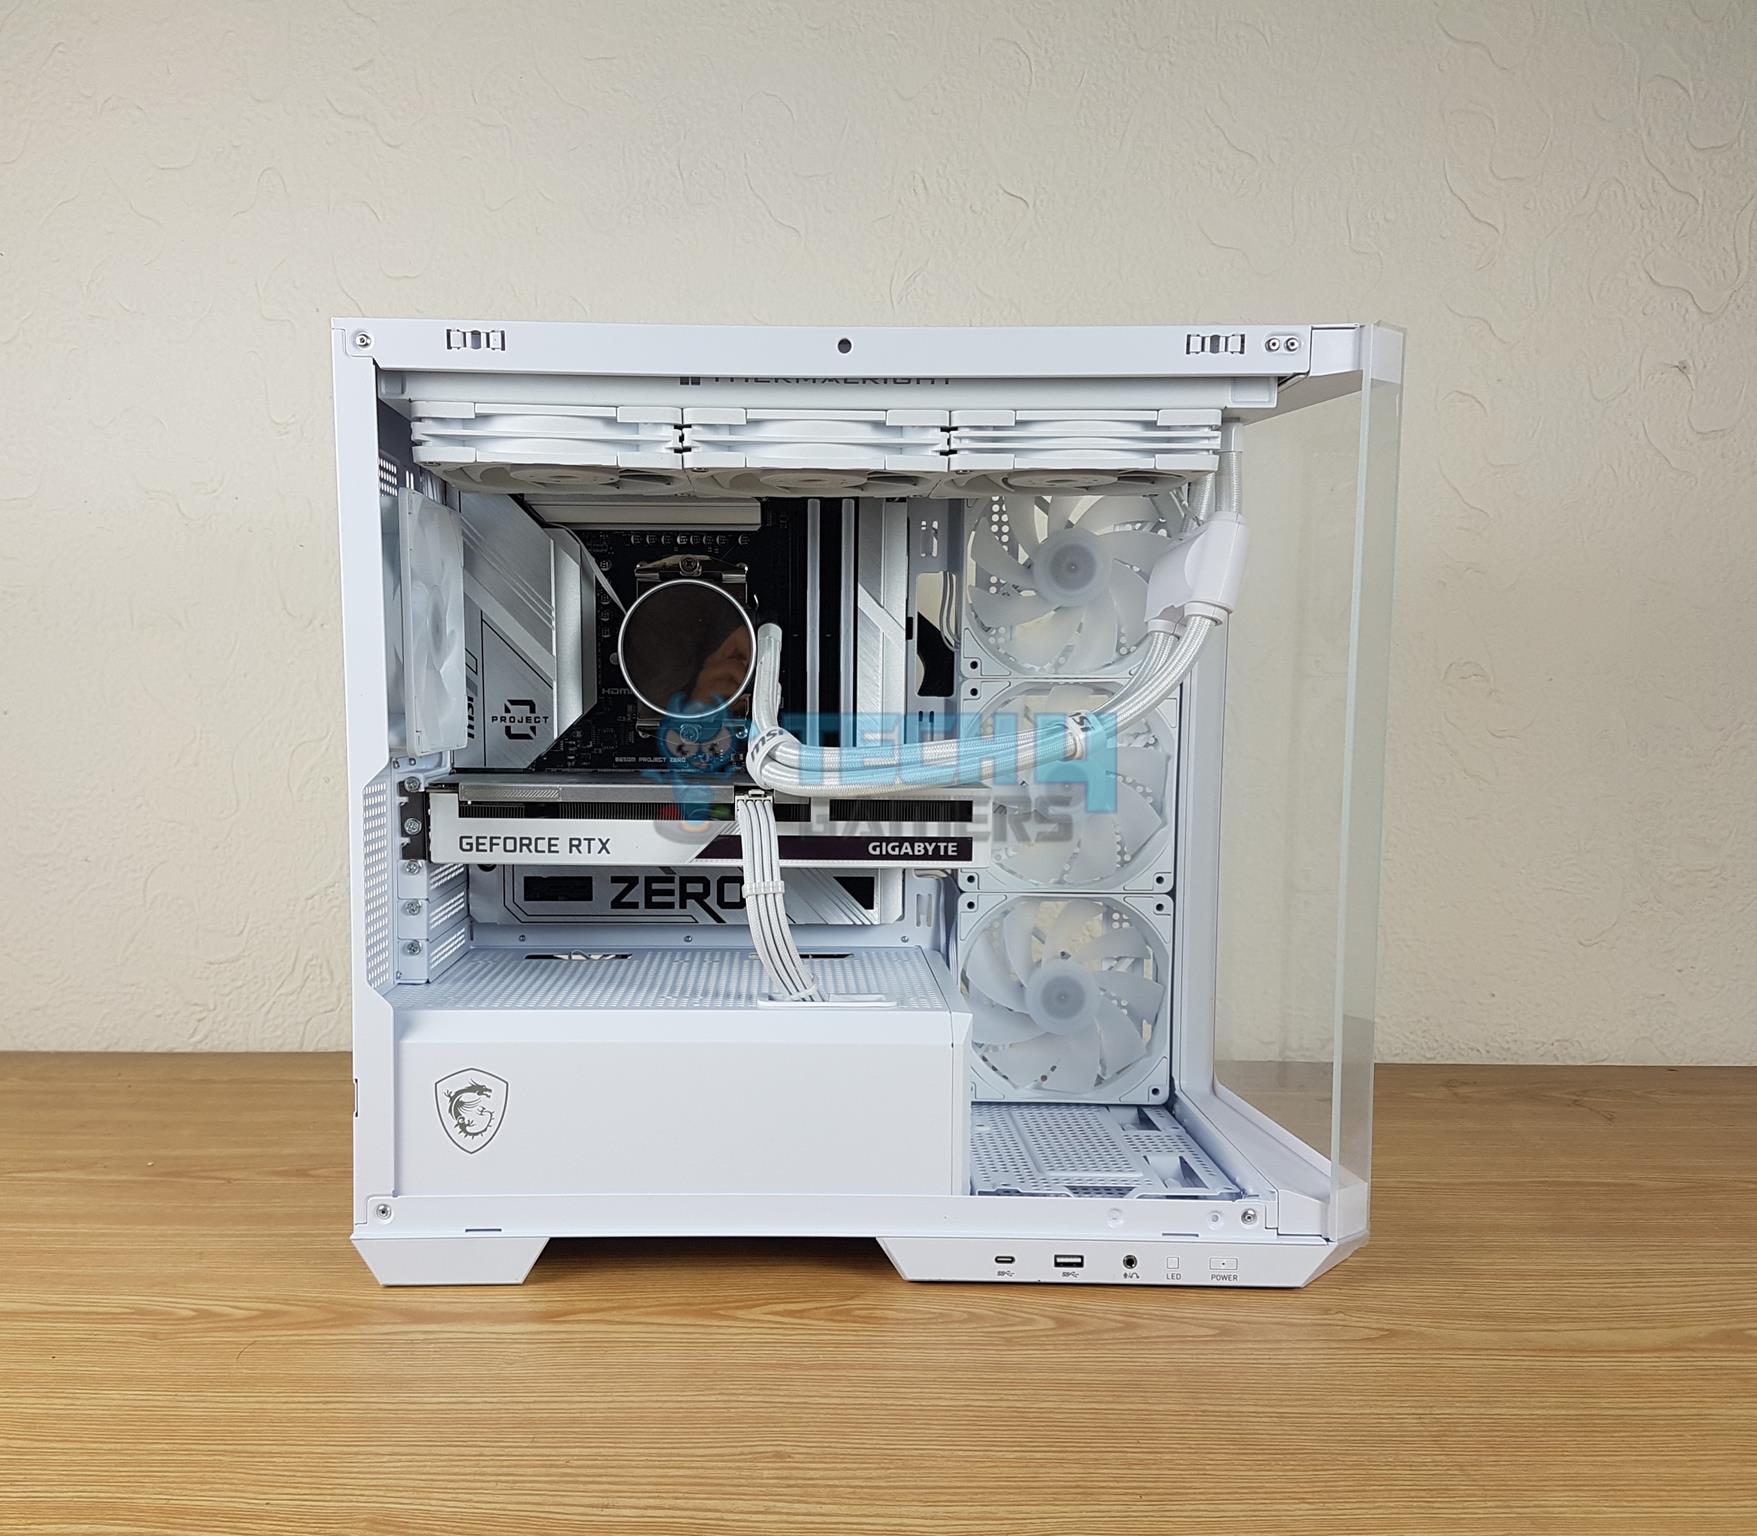
There is a 3mm tempered glass on the side panel. It is not a bezel-less in design but a 270ᵒ view has compensated that quite well. It is not tinted and provides a full and clear view. After removing the glass panel, we are moving towards the main action area of this case. We have a spacious layout to work within and by moving the cables to the back, we are no longer contended with the cable-related decisions on the front except the graphics card.
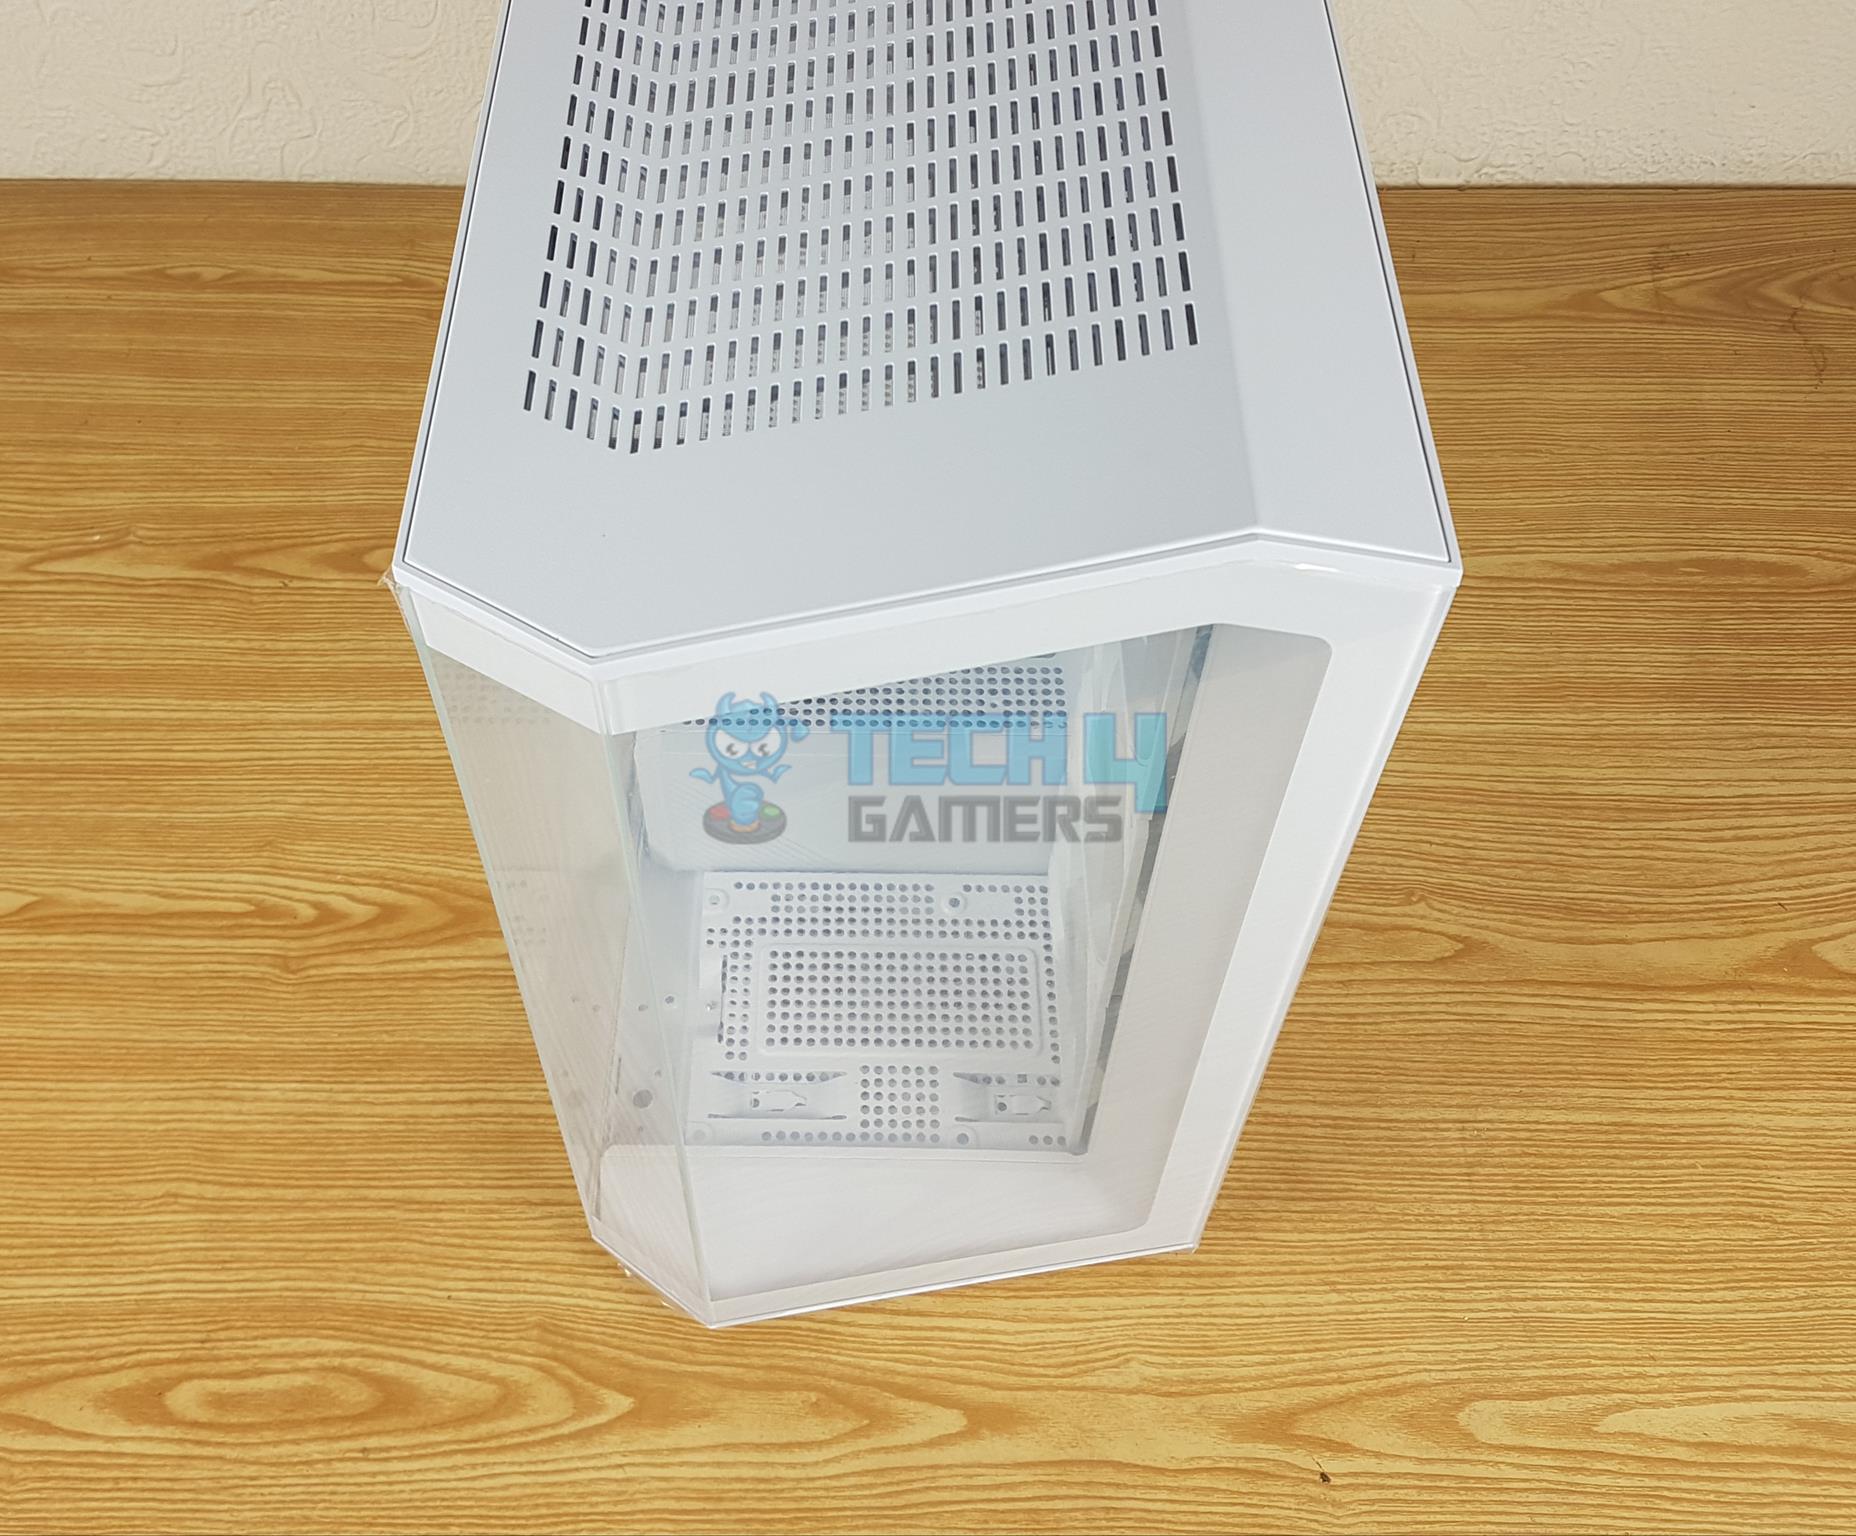
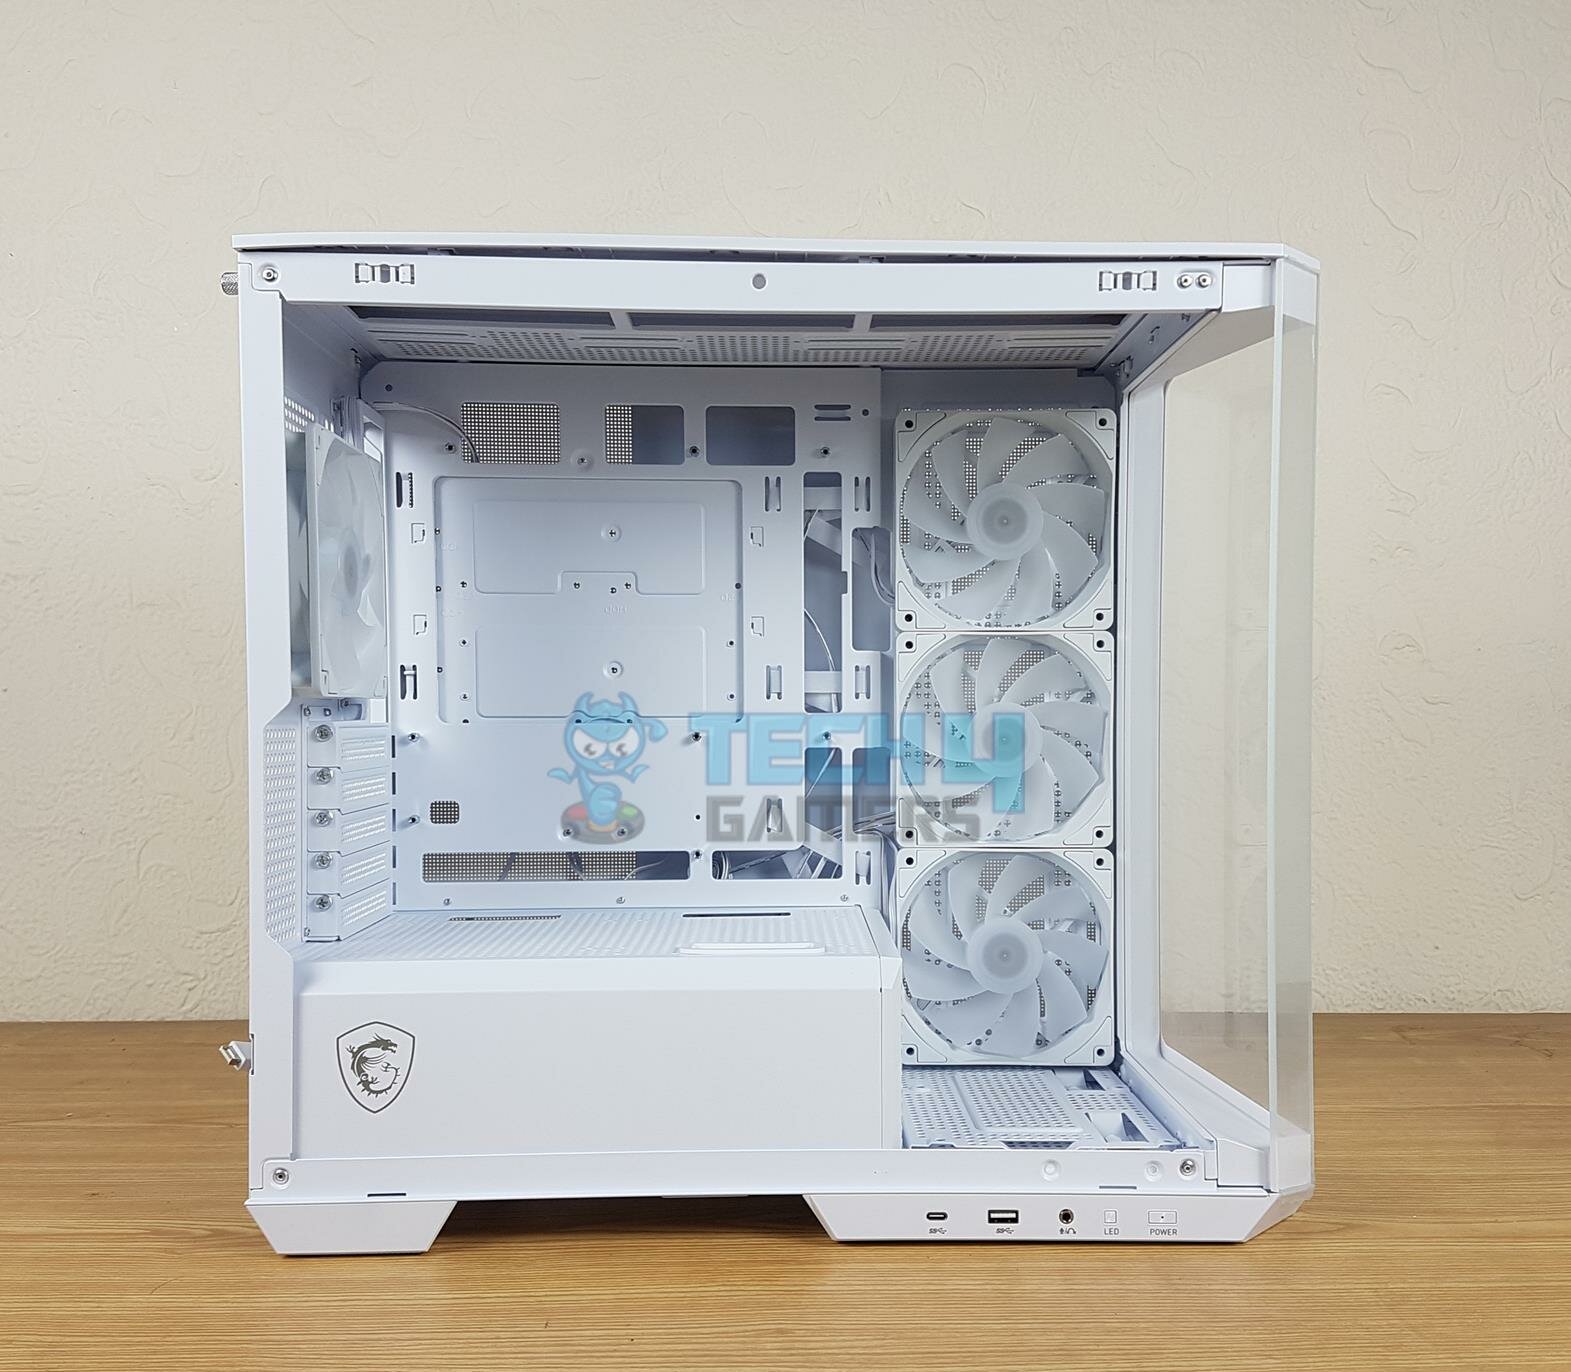
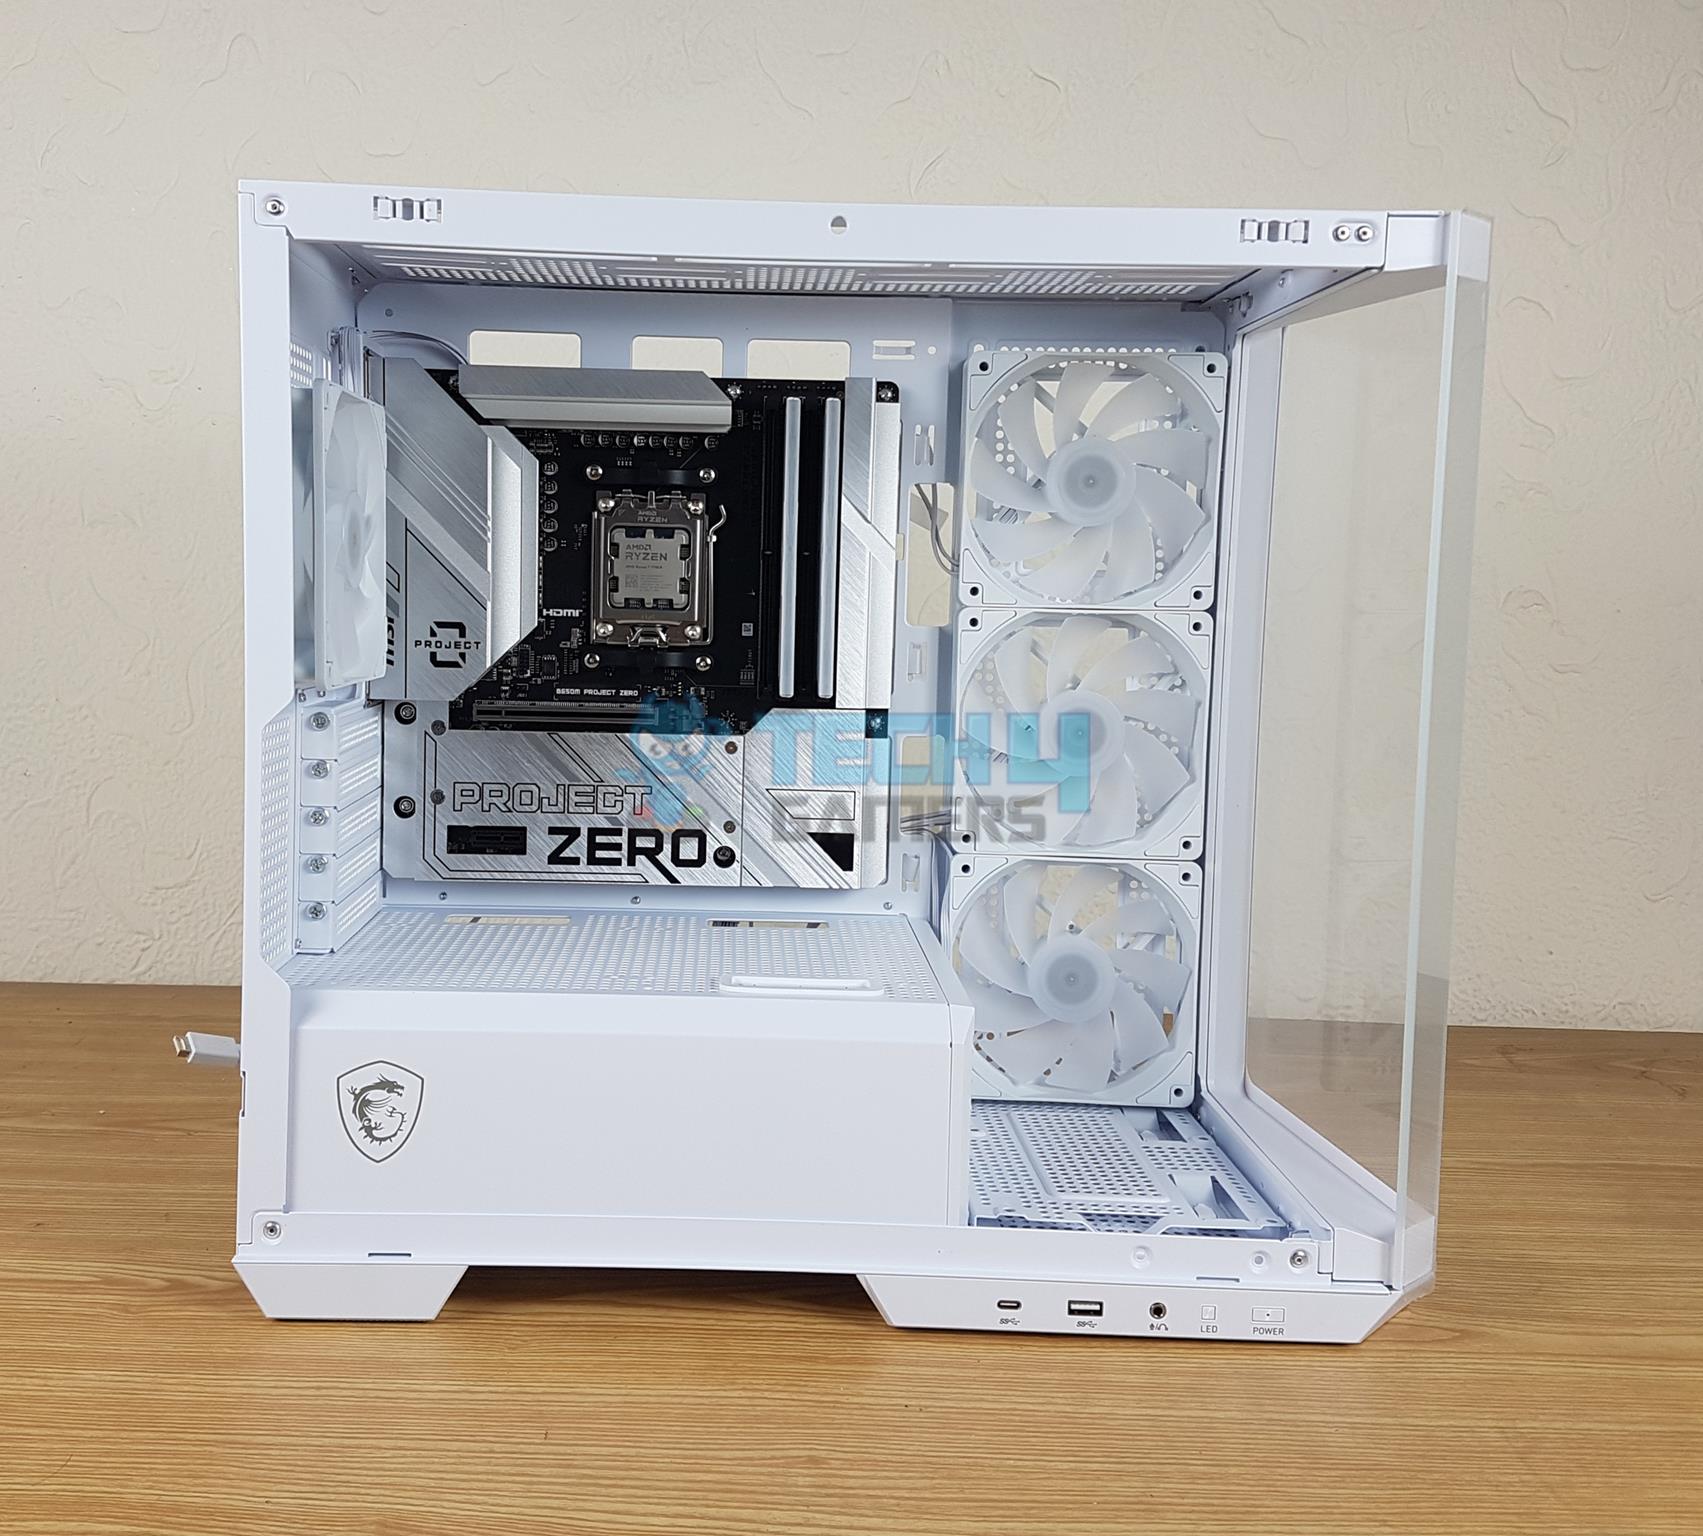
Interior
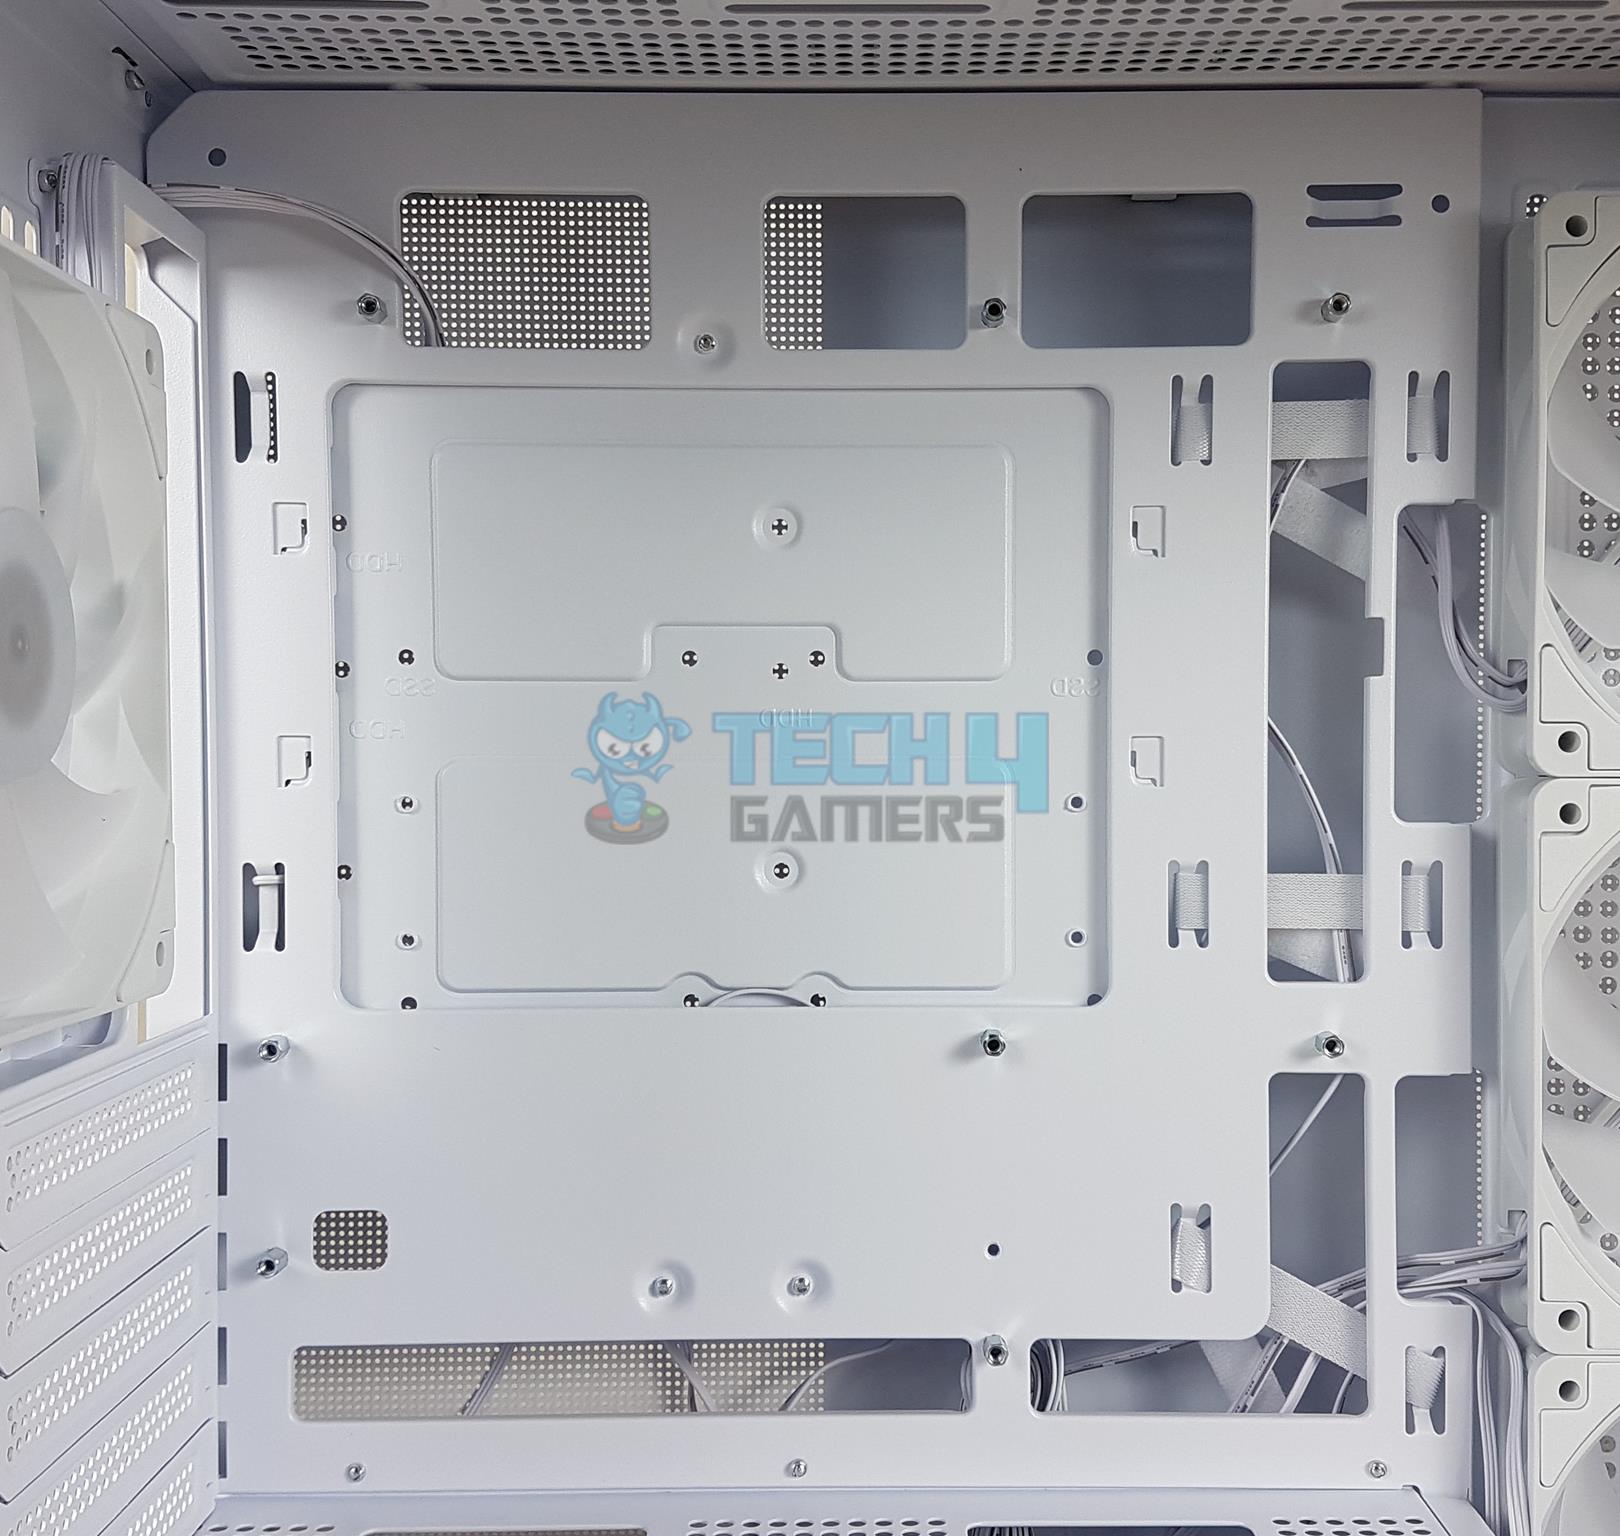
This case supports ITX and backplug micro-ATX form factor motherboard. The motherboard tray is quite sturdy and well-built. There is a large cutout that has a removable cover. There are three cutouts on top and two large-size cutouts on the side.
Similarly, there are 2 large-size cutouts. These are placed strategically so that the case conforms to the backplug motherboards in particular. The standoffs are pre-installed.
The PSU shroud has a totally vented design. There are two cutouts towards the motherboard tray that would come in handy if you decide to install 2x 120mm fans over the shroud. This also indicates that a regular micro-ATX motherboard can also be installed. There is a third cutout that has a rubber grommet. This can be used for the PEG cable.
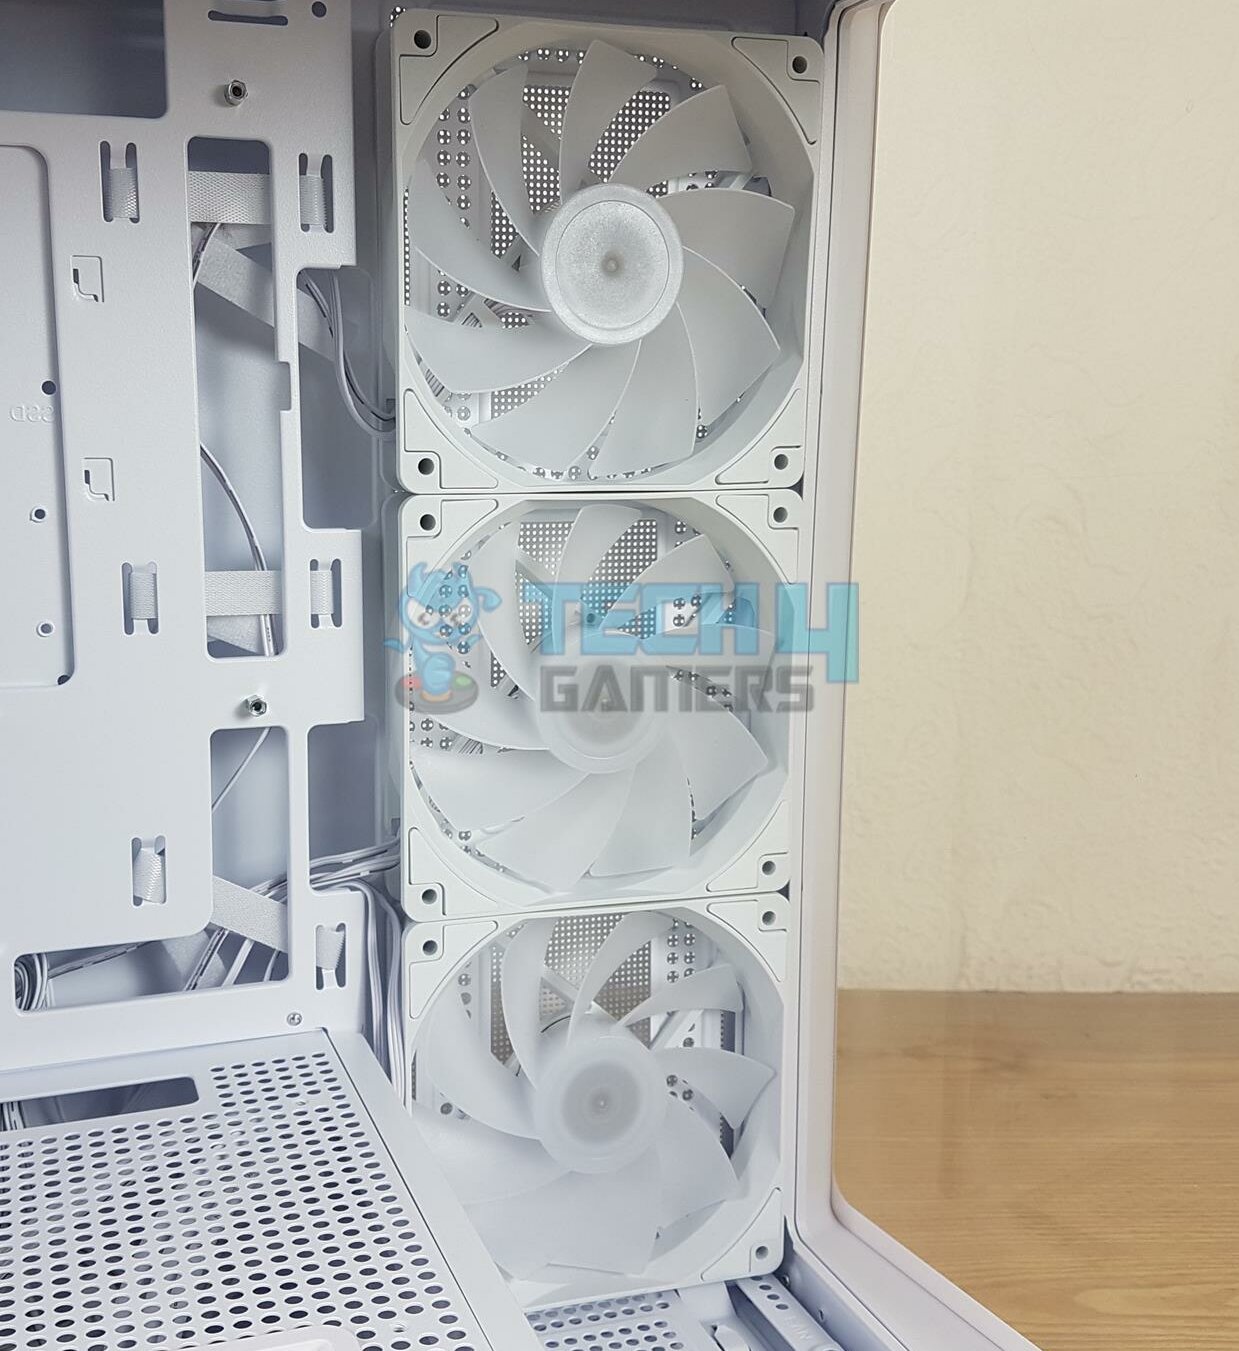
There are three 120mm ARGB fans pre-installed on the side frame. These have reverse blades for air intake and provide a clean view. There are 9x translucent blades on each fan without any branding on the center. The ARGB LEDs seem to be placed inside the center hub.
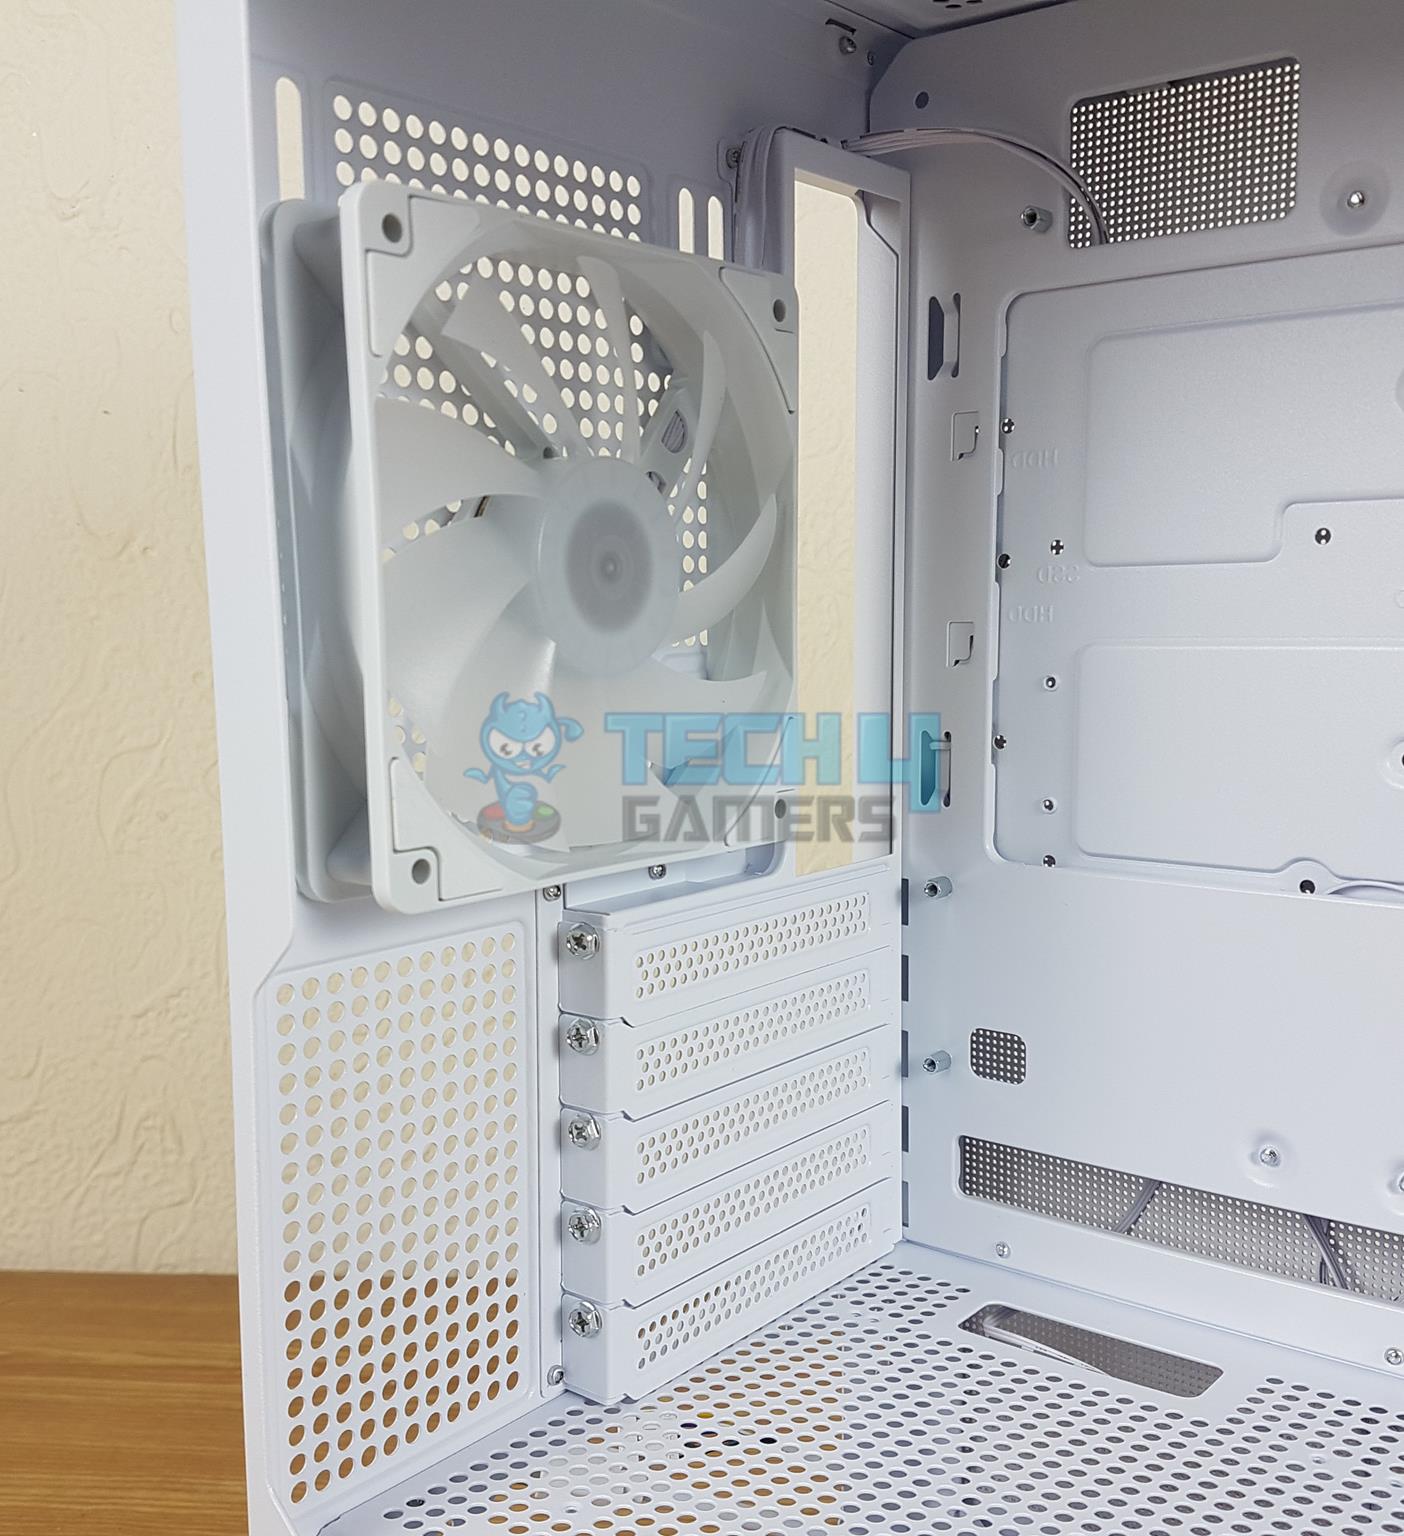
There is a 120mm ARGB fan on the rear installed in the exhaust configuration. There are 5x PCIe slot covers that are removable. There is no provision to install the graphics card vertically. MSI has provided a GPU Support bracket that would only come in handy if your graphics card has a minimum of 2.5 slot design.
There is a displacement of 42mm from the top fan bracket to the top of the motherboard. However, there is also an offset displacement of 38mm from the side which would help with the height of the RAM.
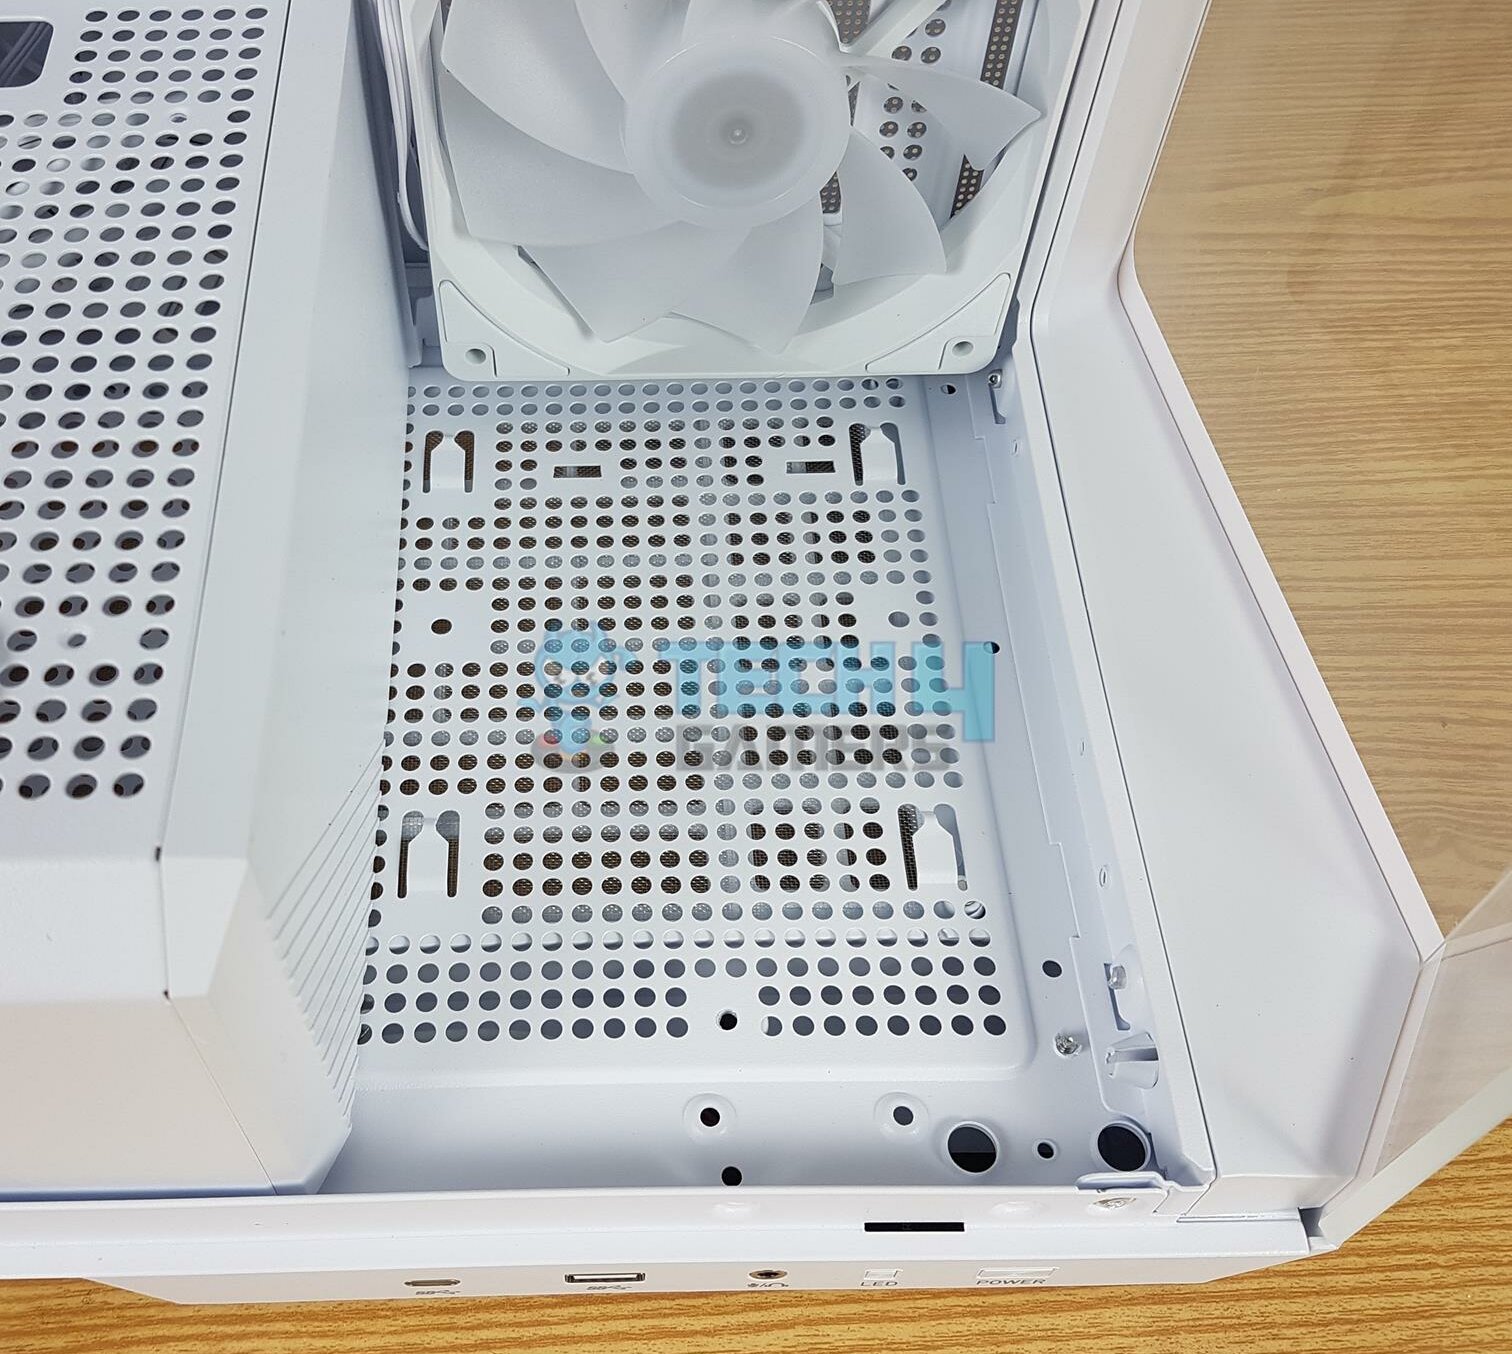
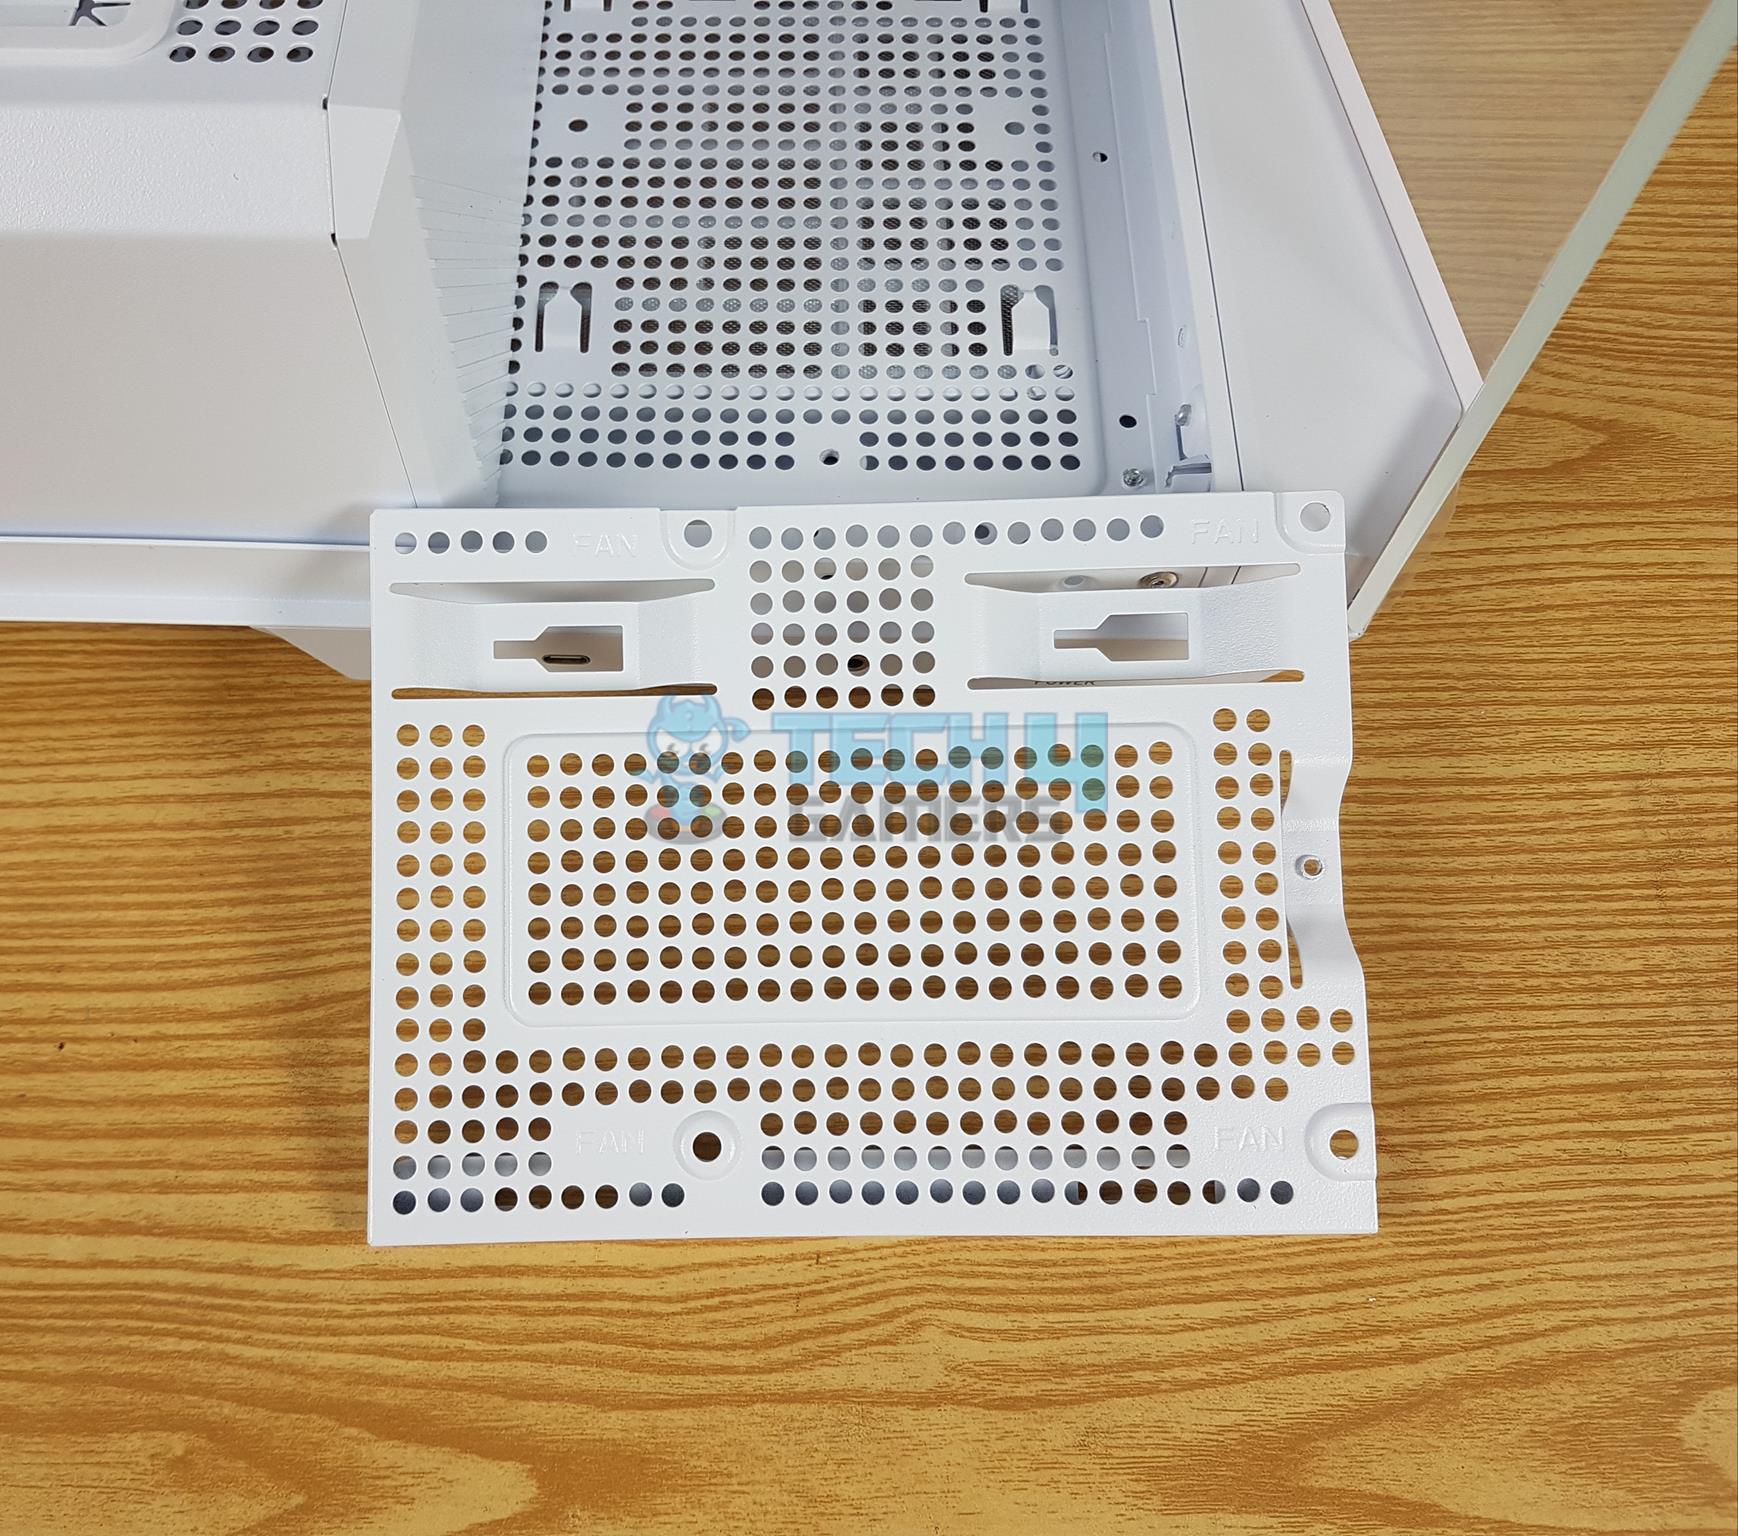
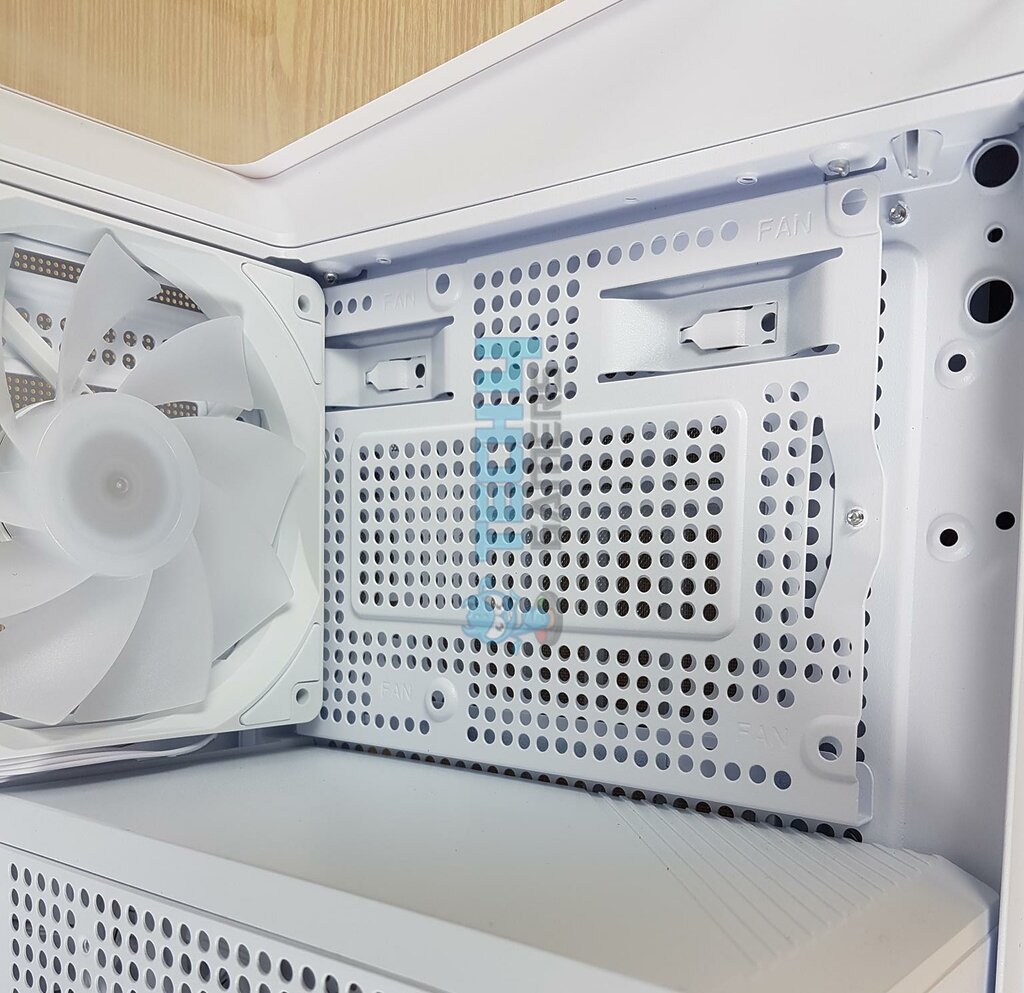
You can install a 120mm fan on the bottom for further air intake. MSI has provided a bracket for that purpose. Keep in mind that this bracket is screwed from the bottom of the case so you would need to install the fan during the installation of your hardware.
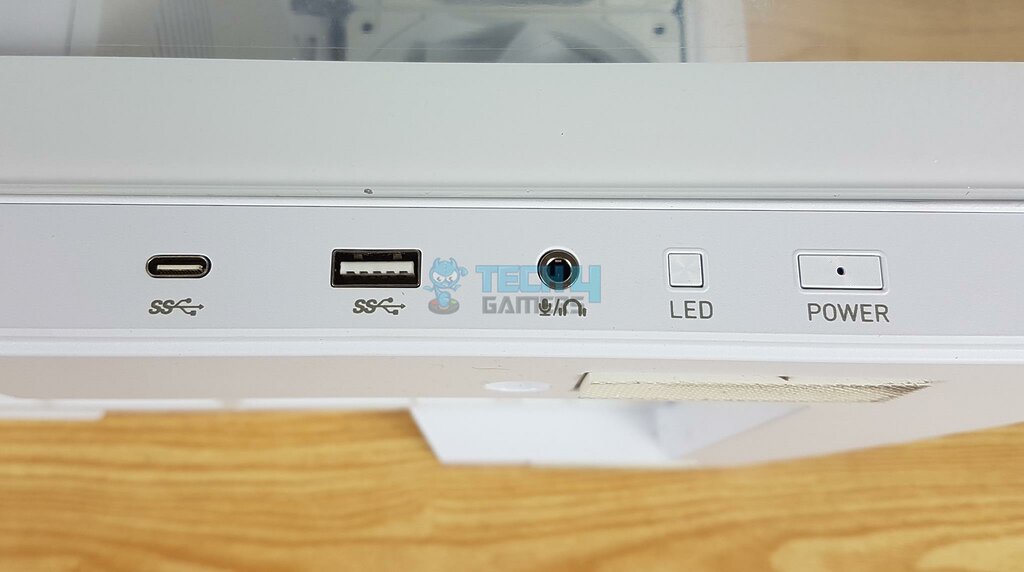
The IO ports include:
- 1x USB 3.2 Gen2x2 USB Type-C Port
- 2x USB 3.2 Gen1 Type-A Ports
- 1x Mic In/Audio Out Port
- 1x LED Switch Button
- 1x Power Button
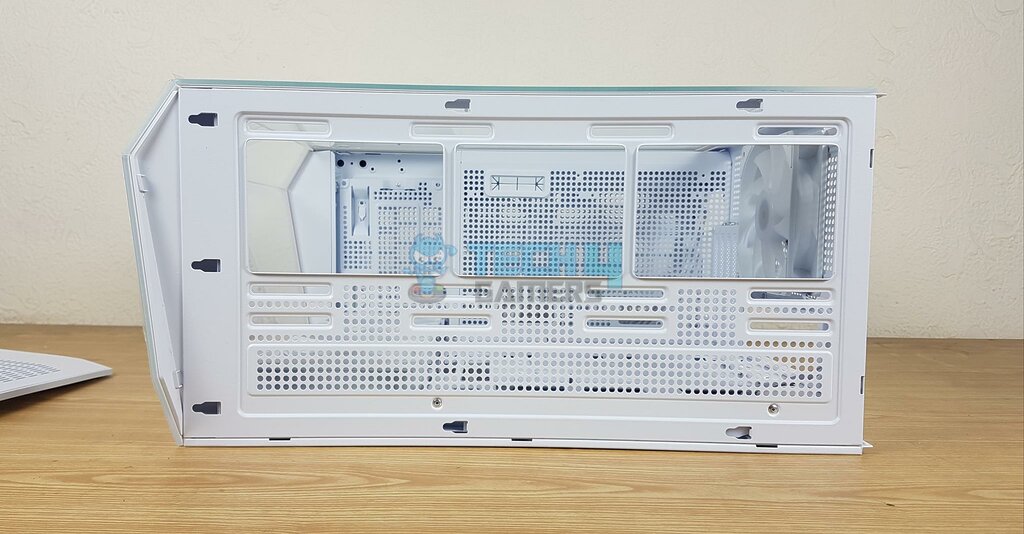
Back Panel
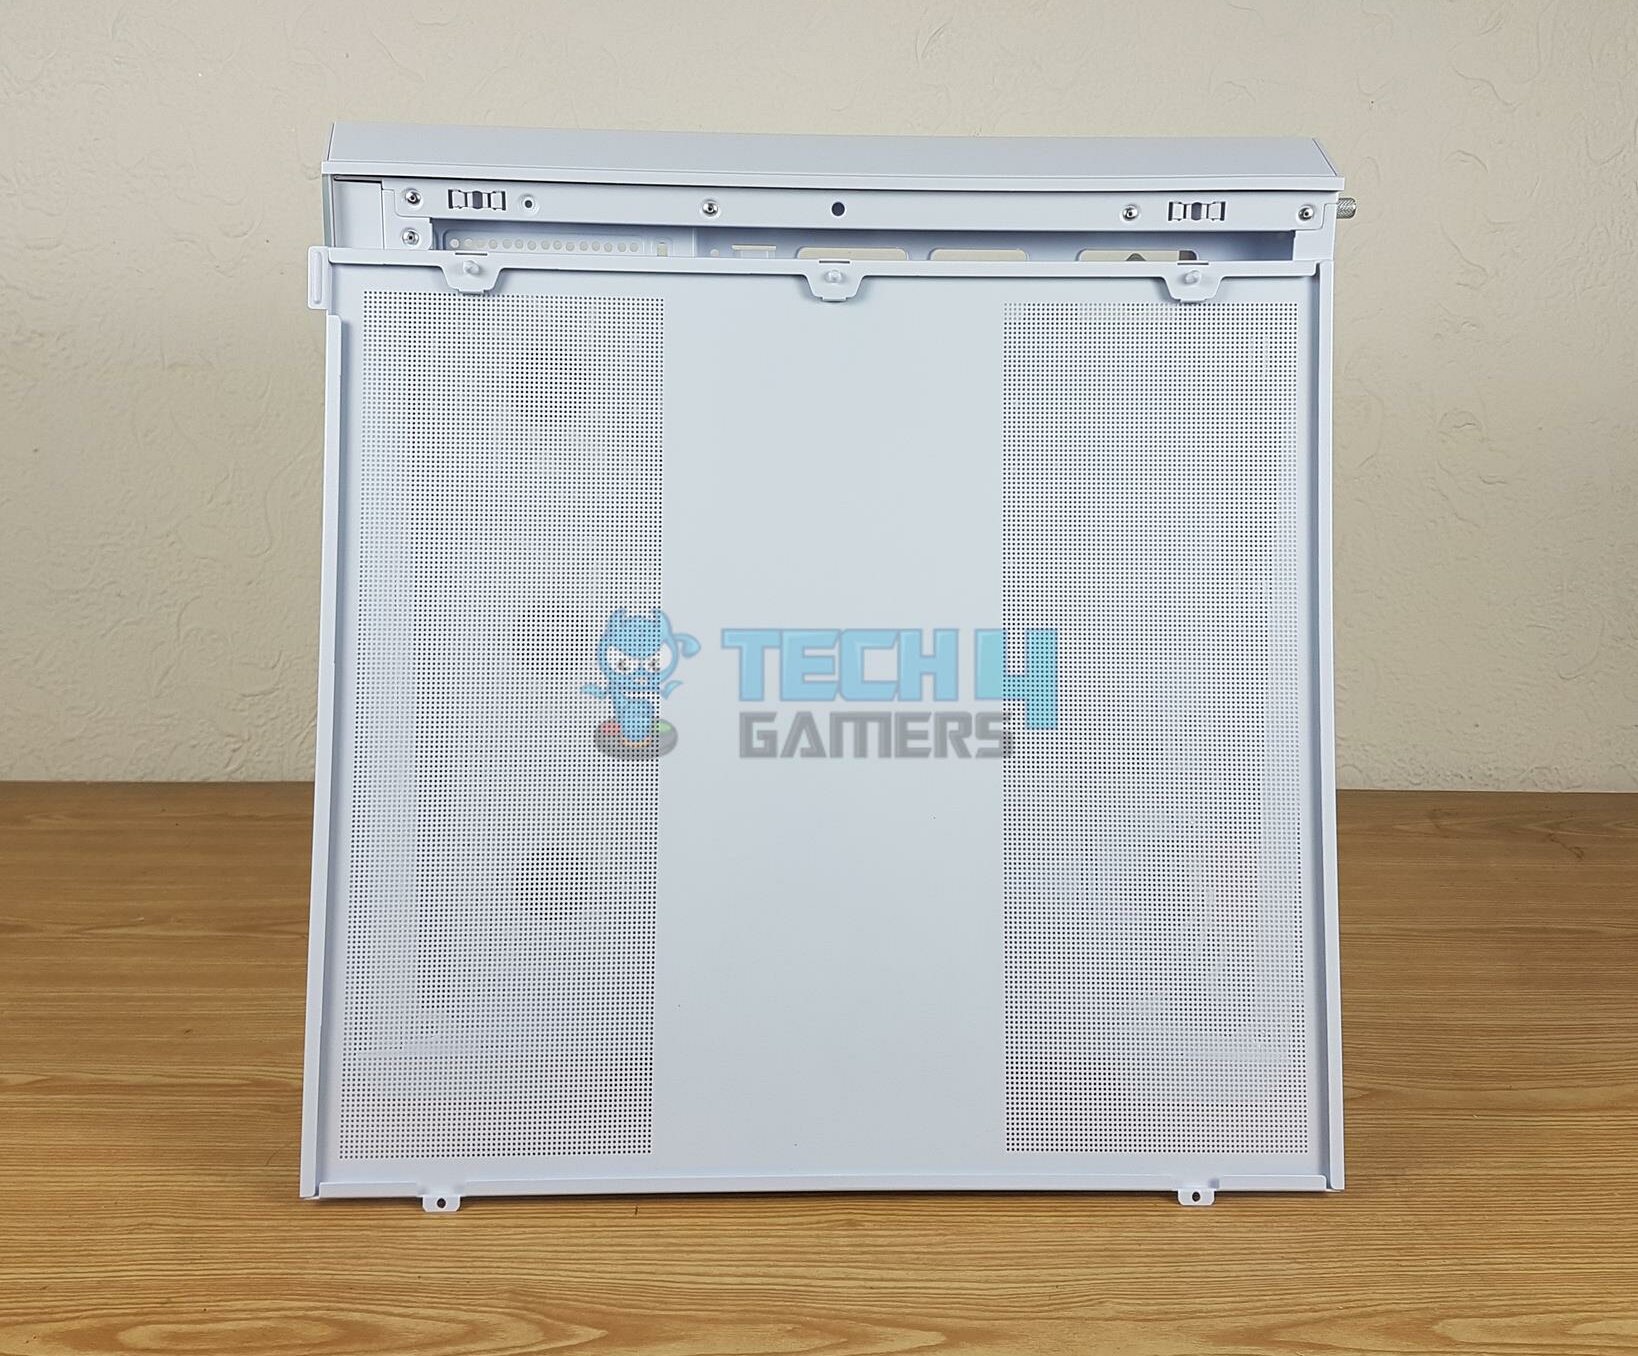
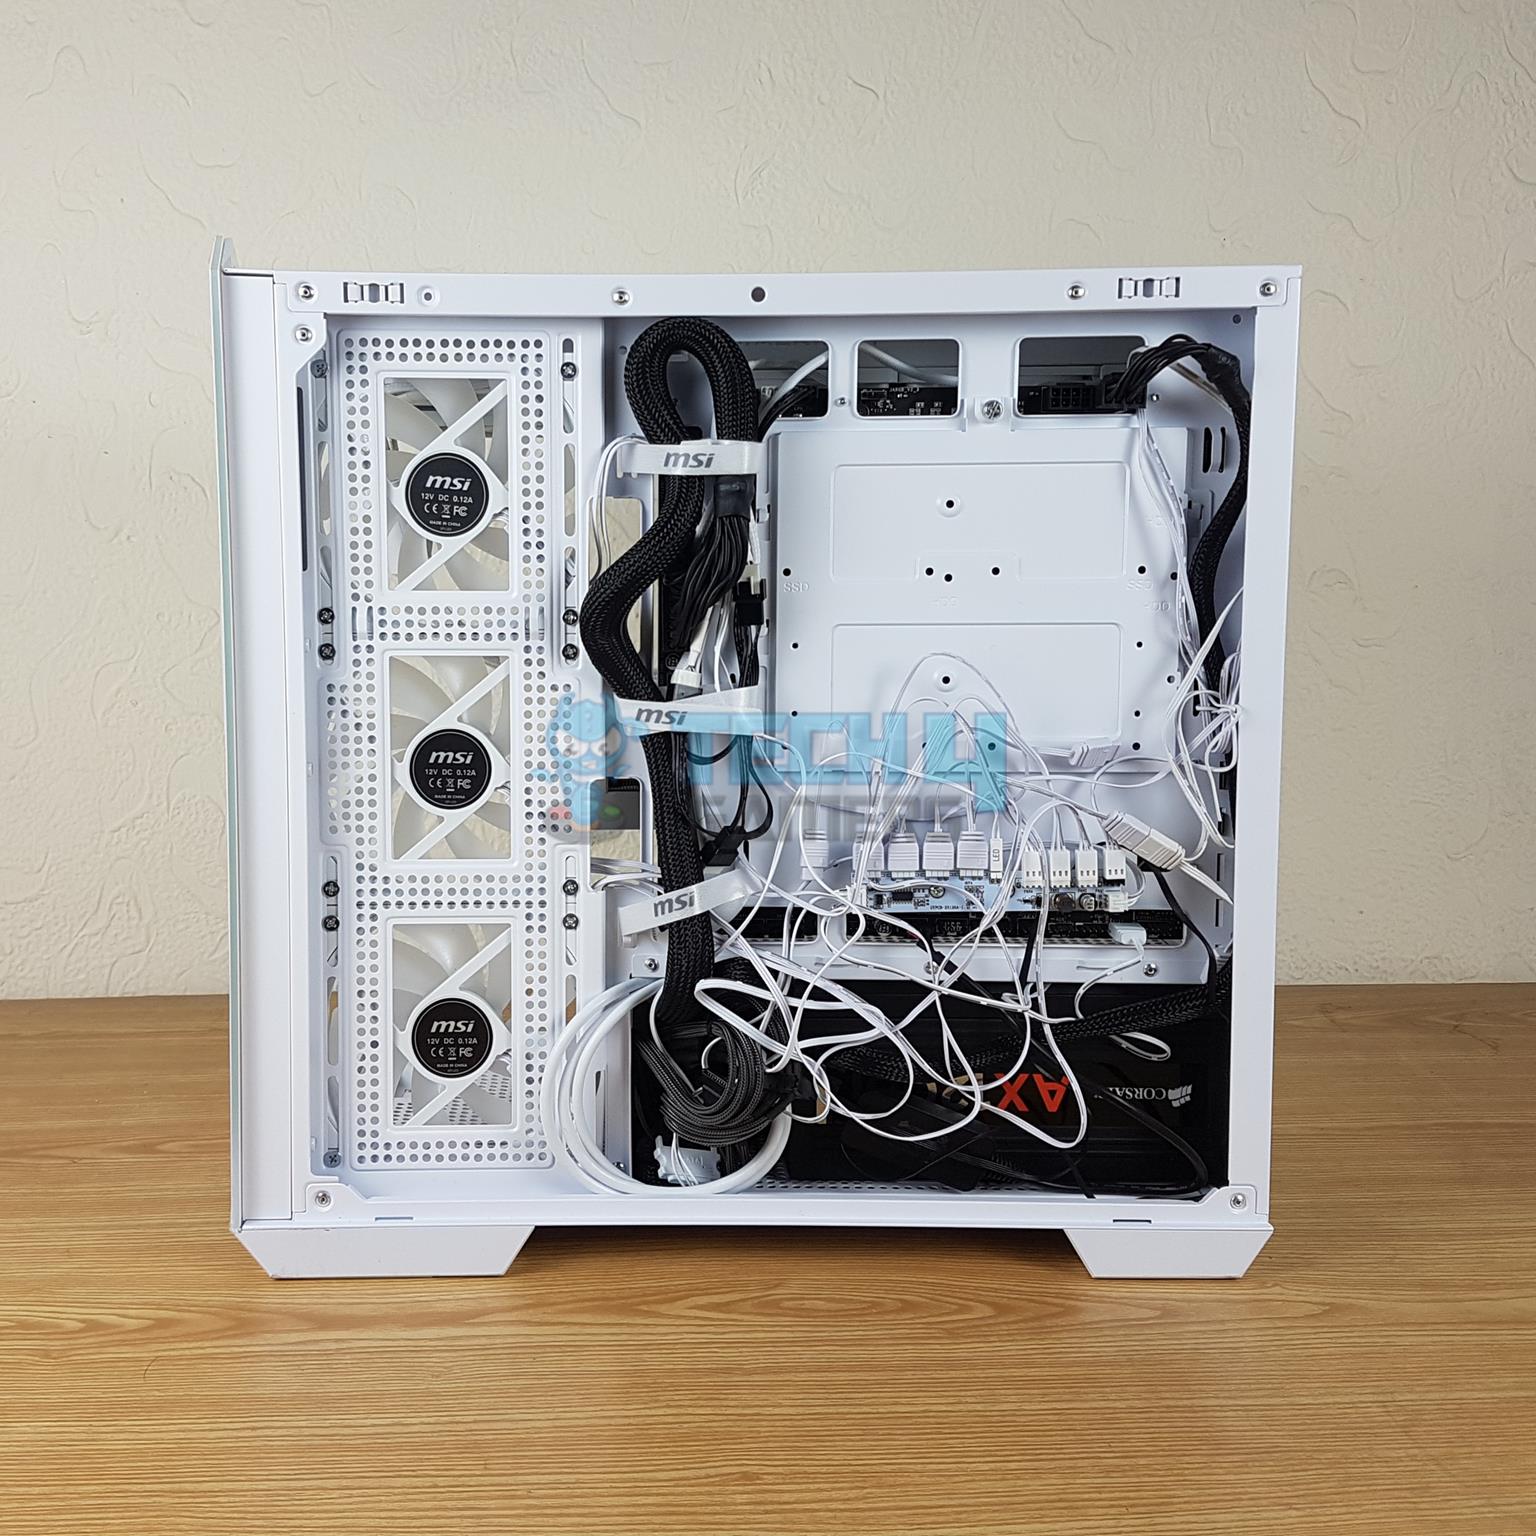
The back side panel is made of steel material and has a dual-sided perforation for effective ventilation. The left side perforation faces the 3x pre-installed 3x fans on the side. The right-side perforation area faces the motherboard tray where you can install storage drives on the backside.
There is no dust filter on this ventilated area which is my first gripe. Three studs or bolts on the top frame are used to secure the panel to the main frame.
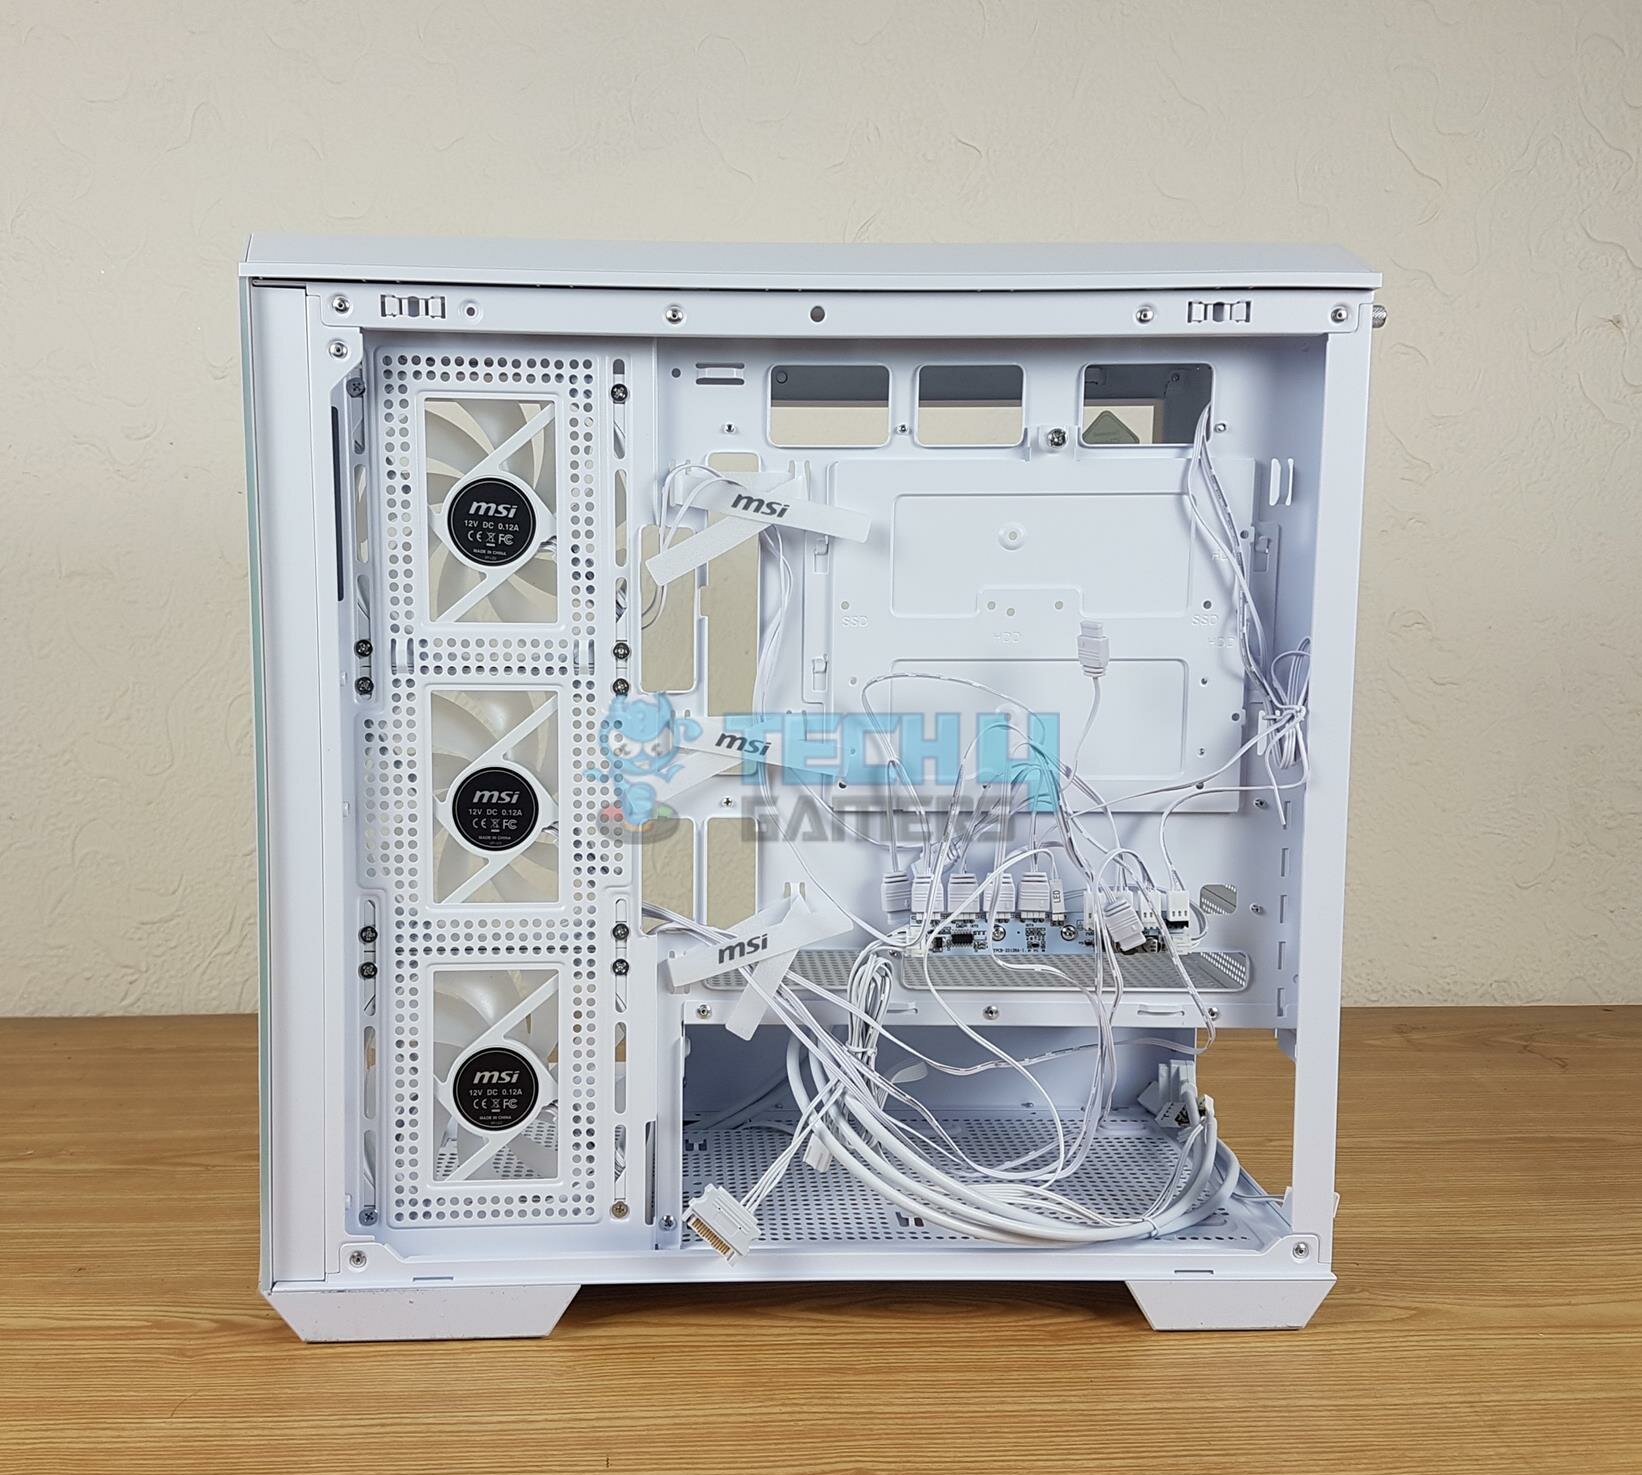
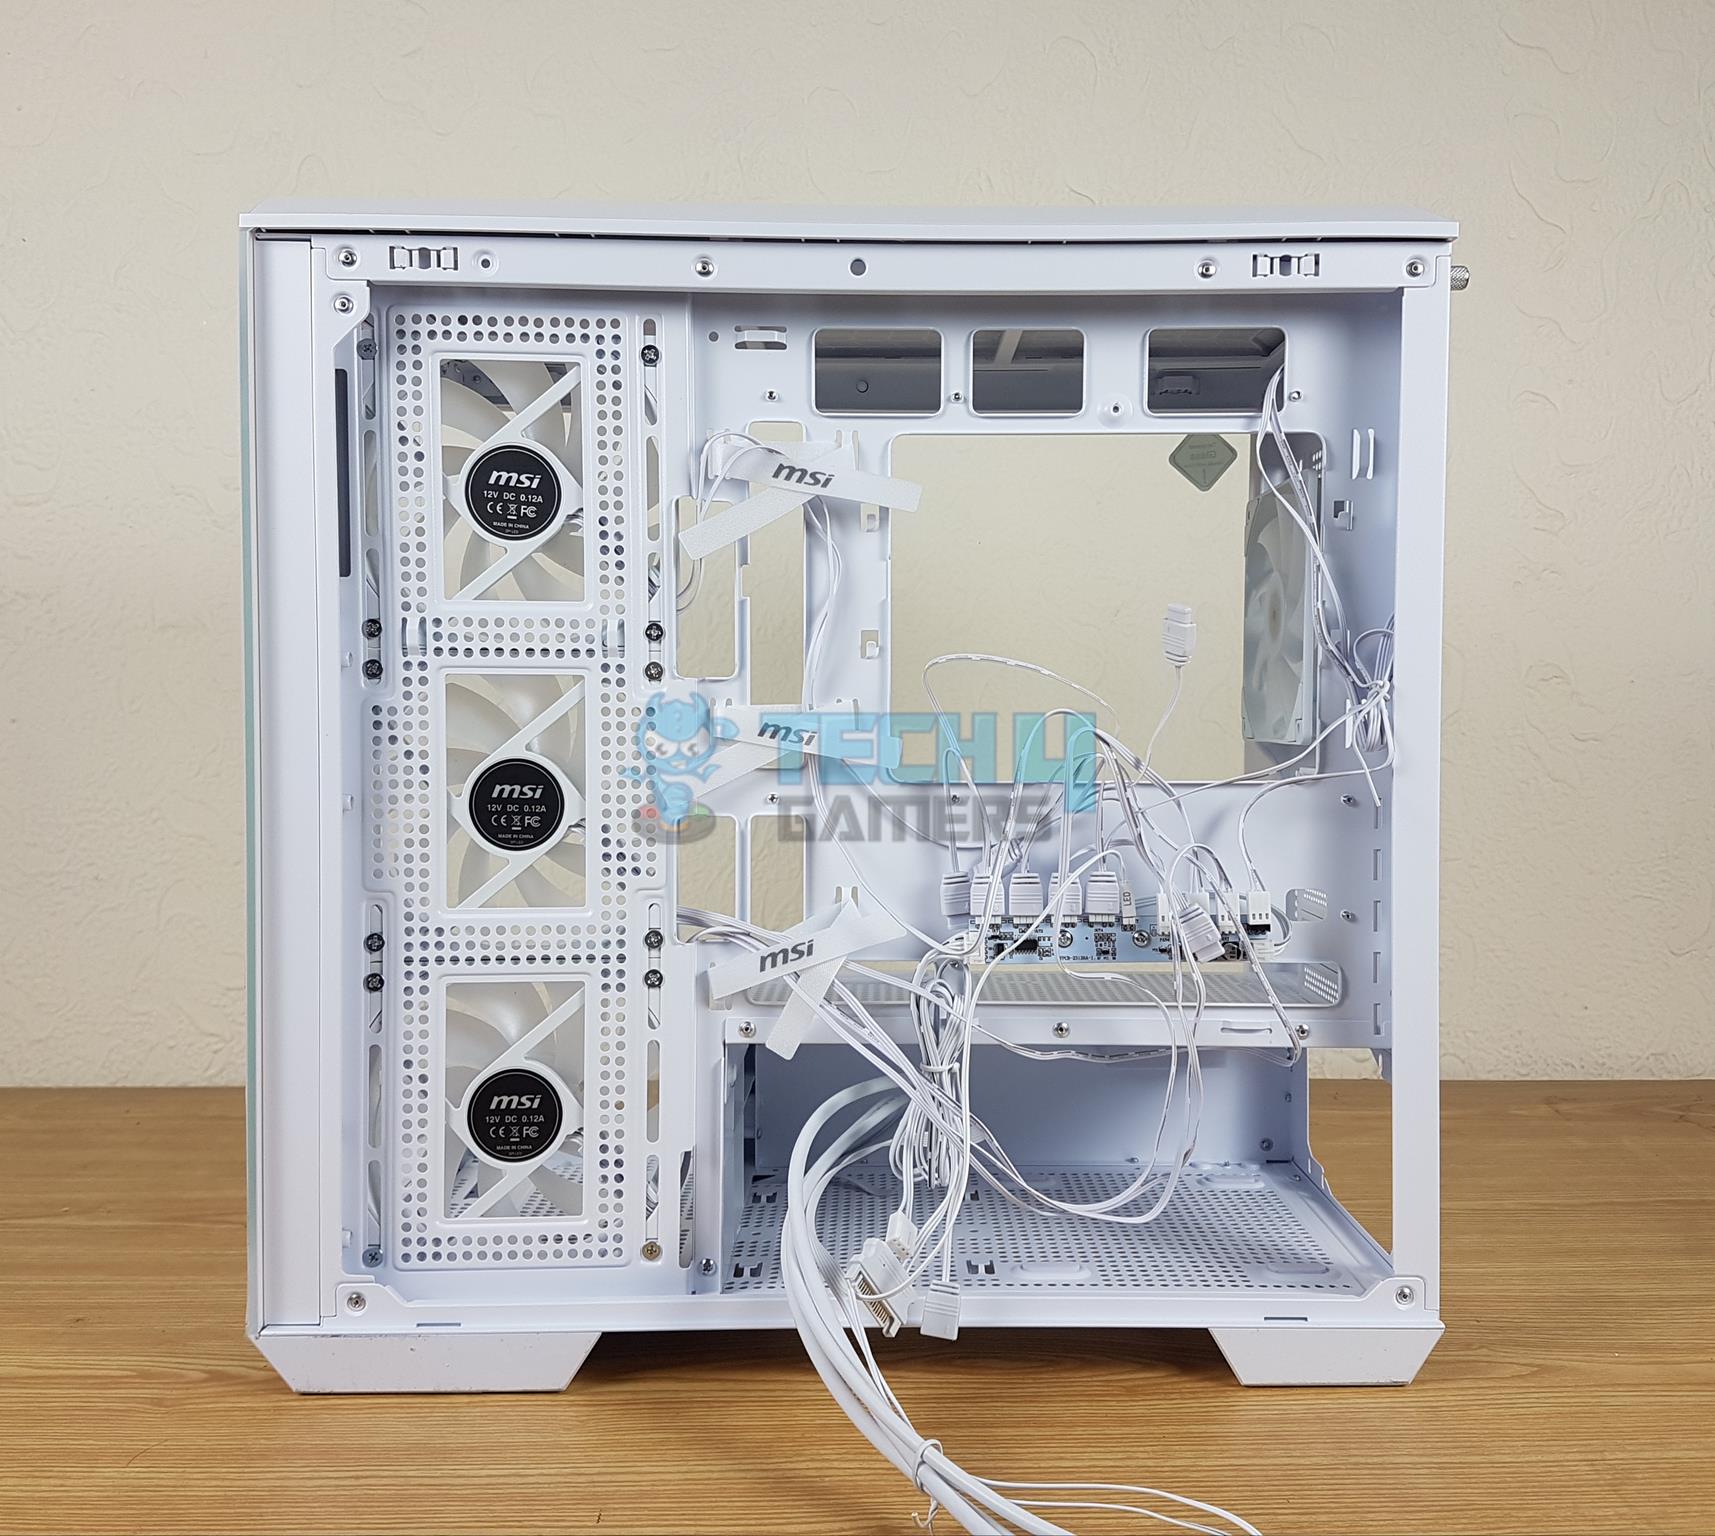
Now, we are taking a look at the inside of the case from its backside. You can see a rail mount design for the side fans (3x fans are pre-installed). There is a storage bracket that is installed over the CPU cutout in the main motherboard tray area. MSI has wisely utilized the space. This bracket can house either a combination of 1x 2.5” and 3.5” drives or 2x 2.5” drives. It has easy handling.
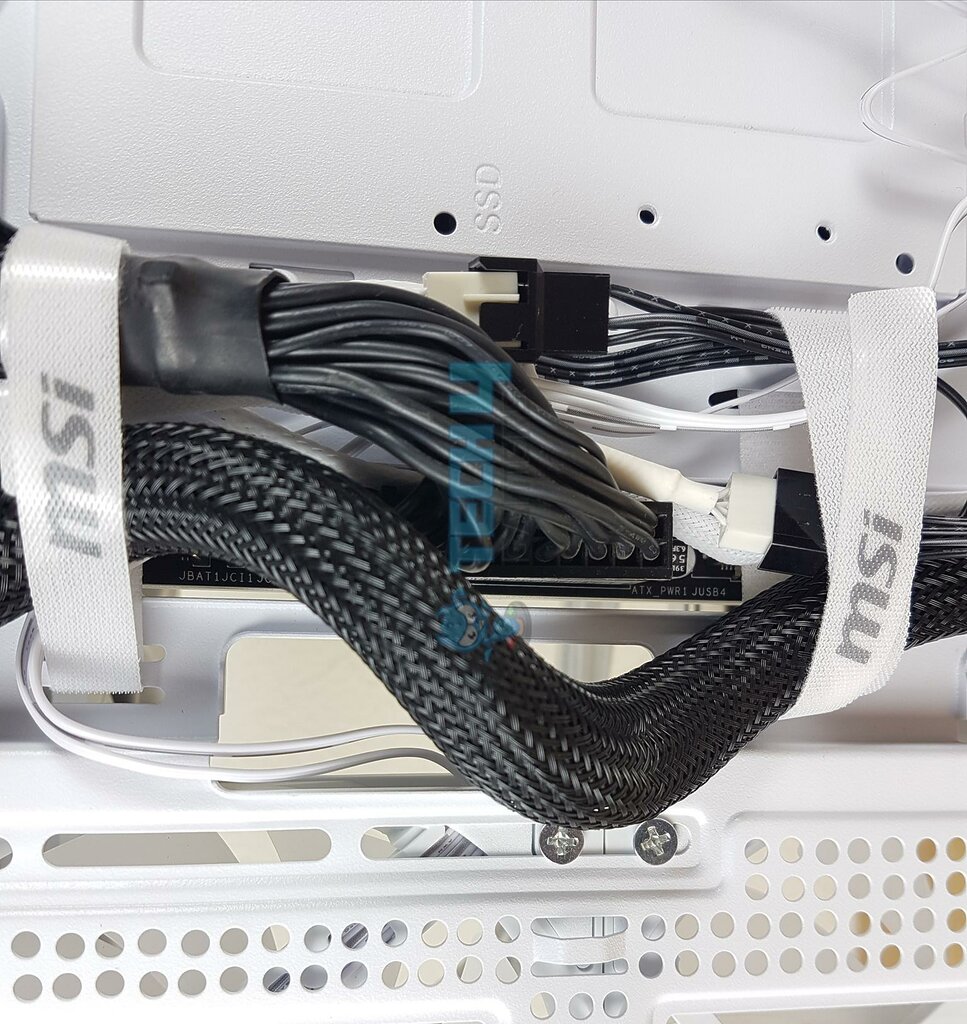
I have removed the storage bracket and shown the backside view again. There is a cable management space of 33mm which is needed because this case houses a backplug motherboard that has connections towards the backside of this case.
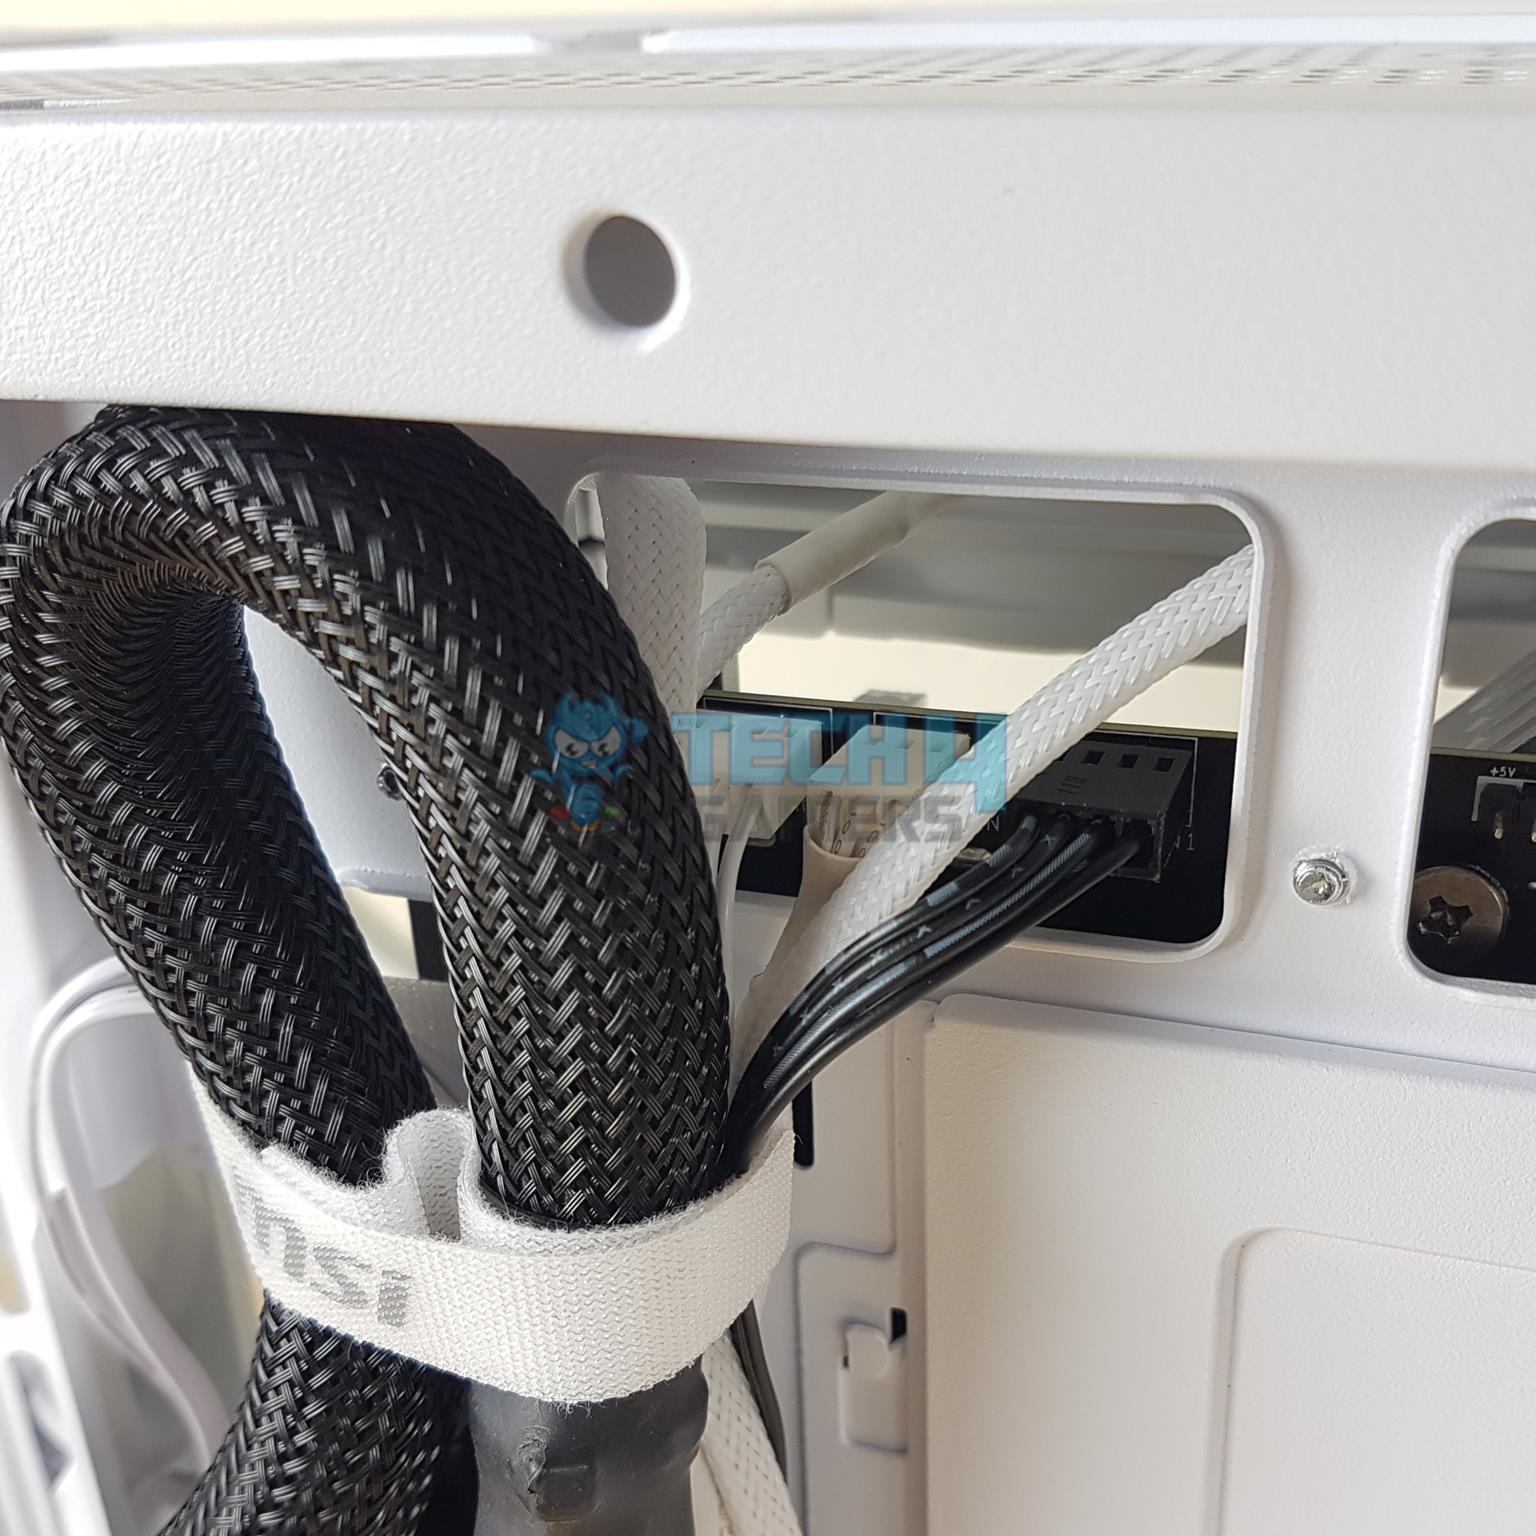
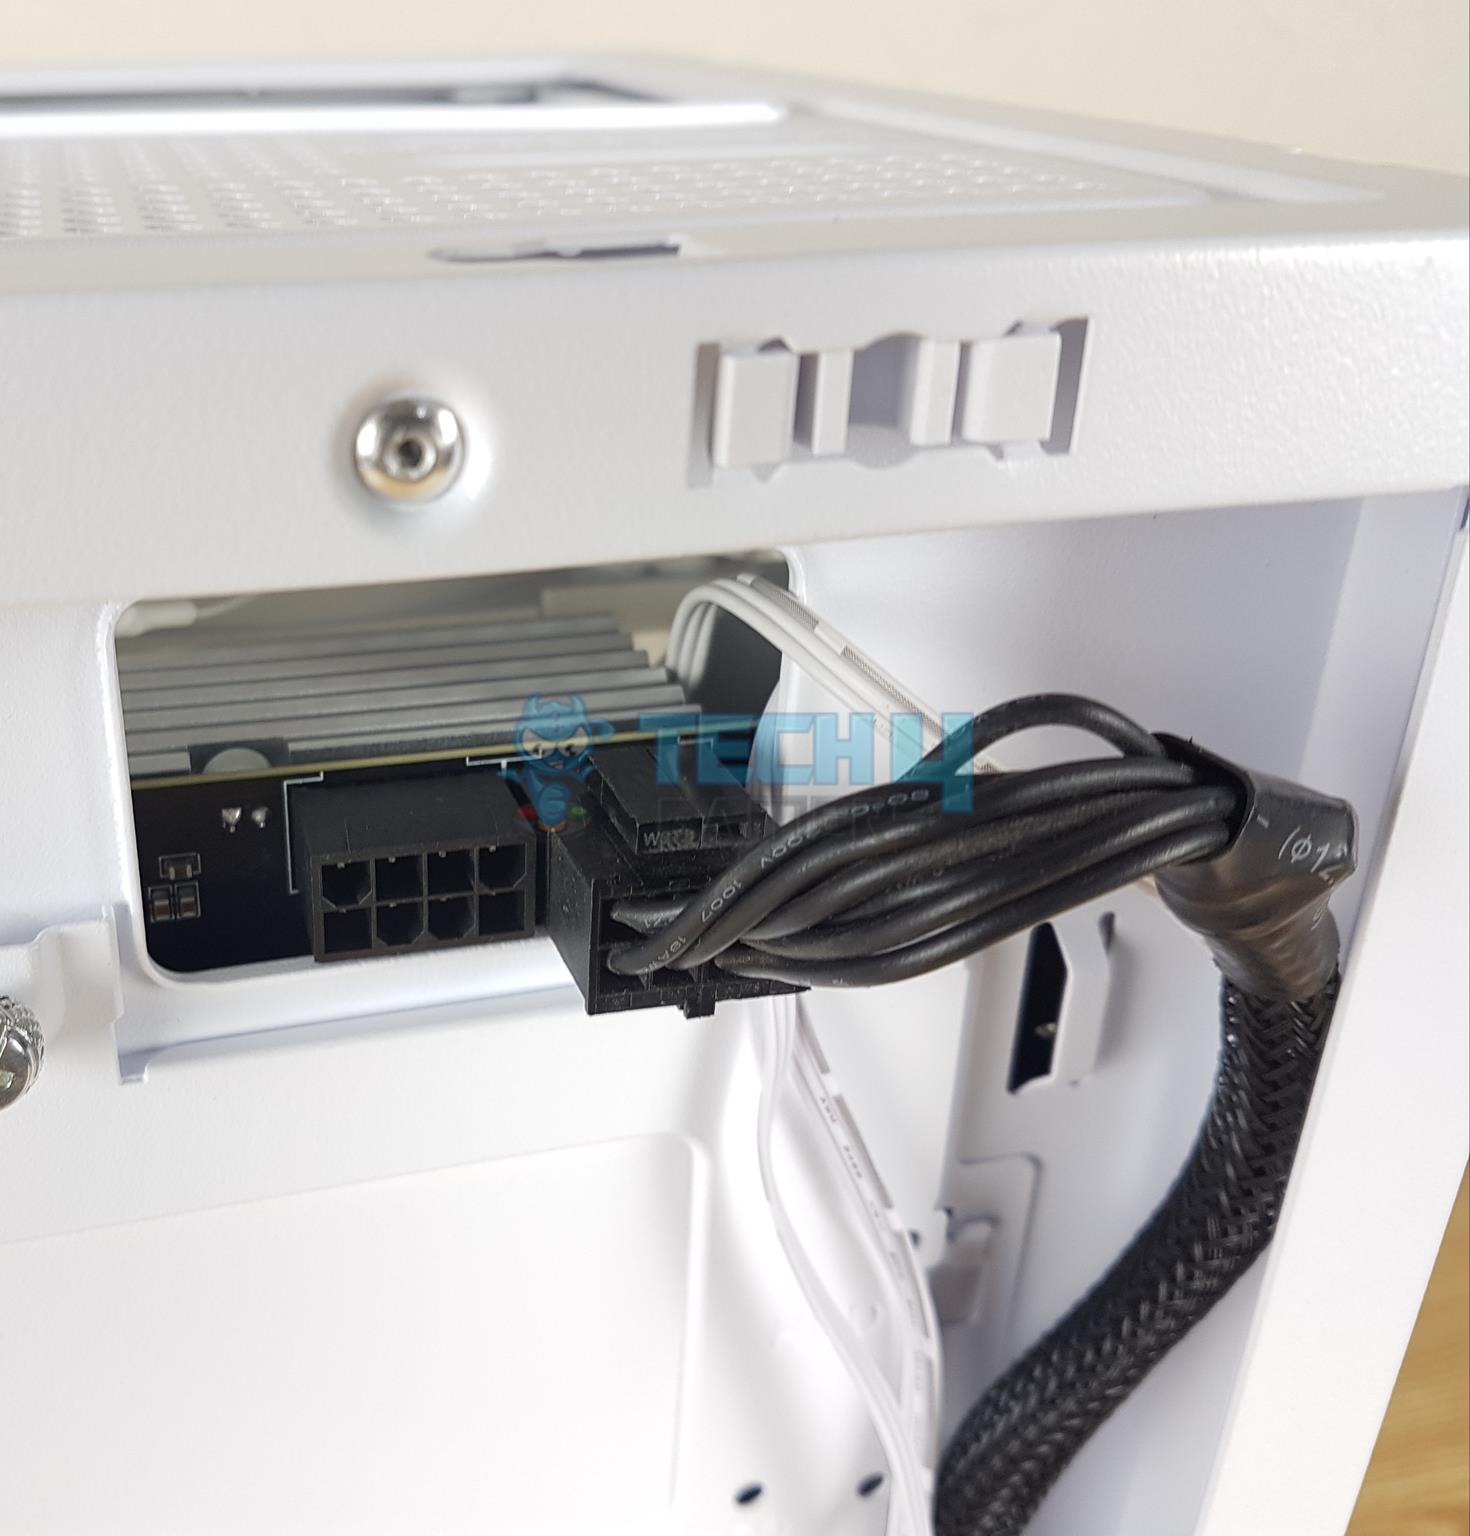
The above pictures show the back plugs on the MSI B650M PZ motherboard.
I have shown the cables connected to these connectors.
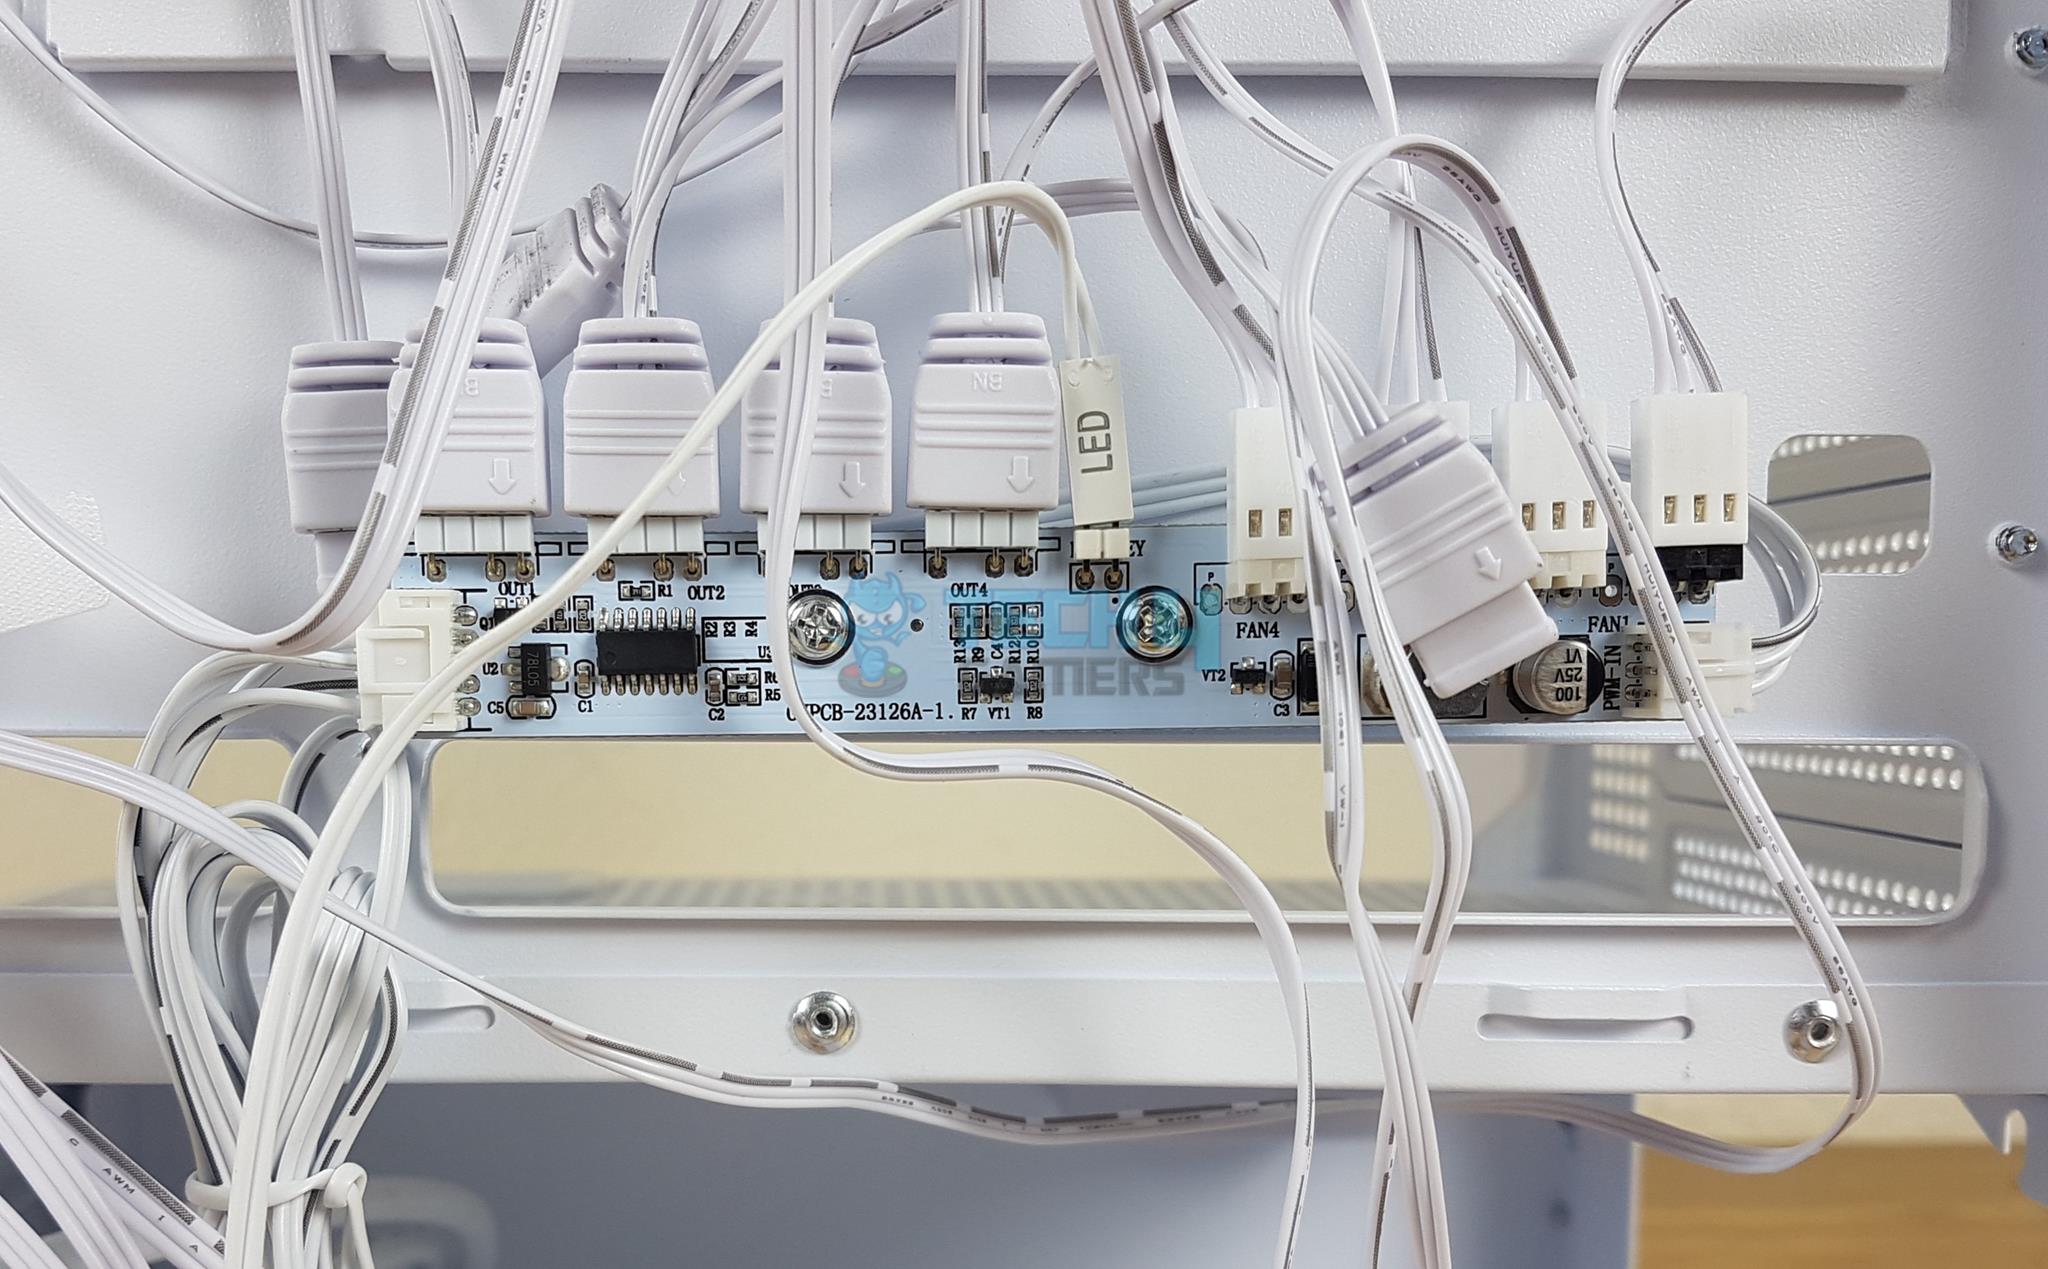
There is a 4-port ARGB and fan control hub installed below the storage bracket. This adds to the challenge of effective cable management since this case comes with 4x ARGB fans in 120mm size.
This control hub is SATA-powered and has 3-pin headers for the fans. It is wired to the LED button on the front IO Panel. This also implies that there is no Reset button on the front panel.
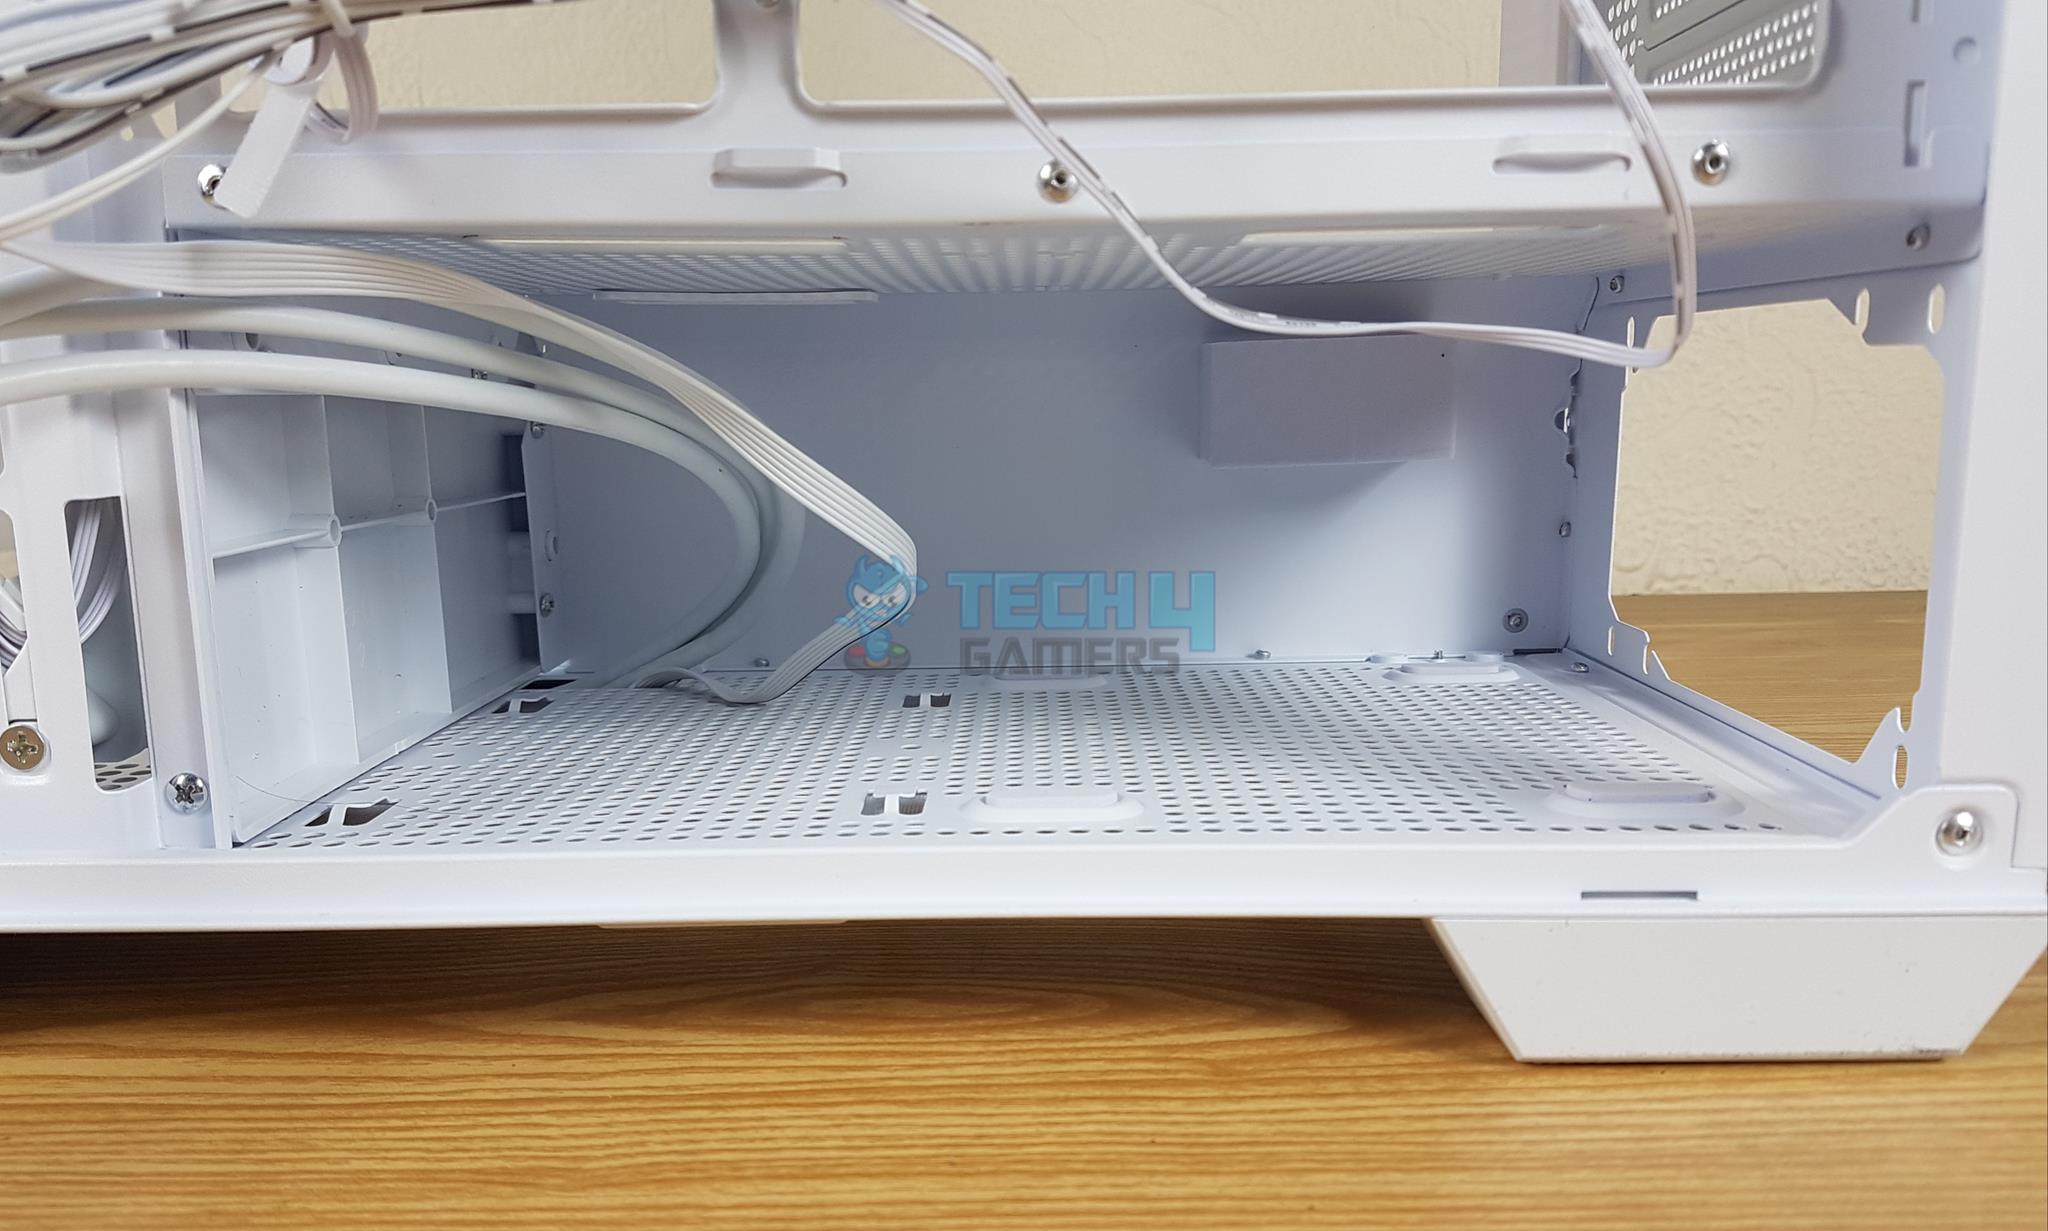
There is a PSU bay under a shroud that can house a PSU up to 200mm in length. Four feet have anti-vibration pads over them. This is where the PSU is rested. PSU is installed from the side.
Front IO Hub Cables
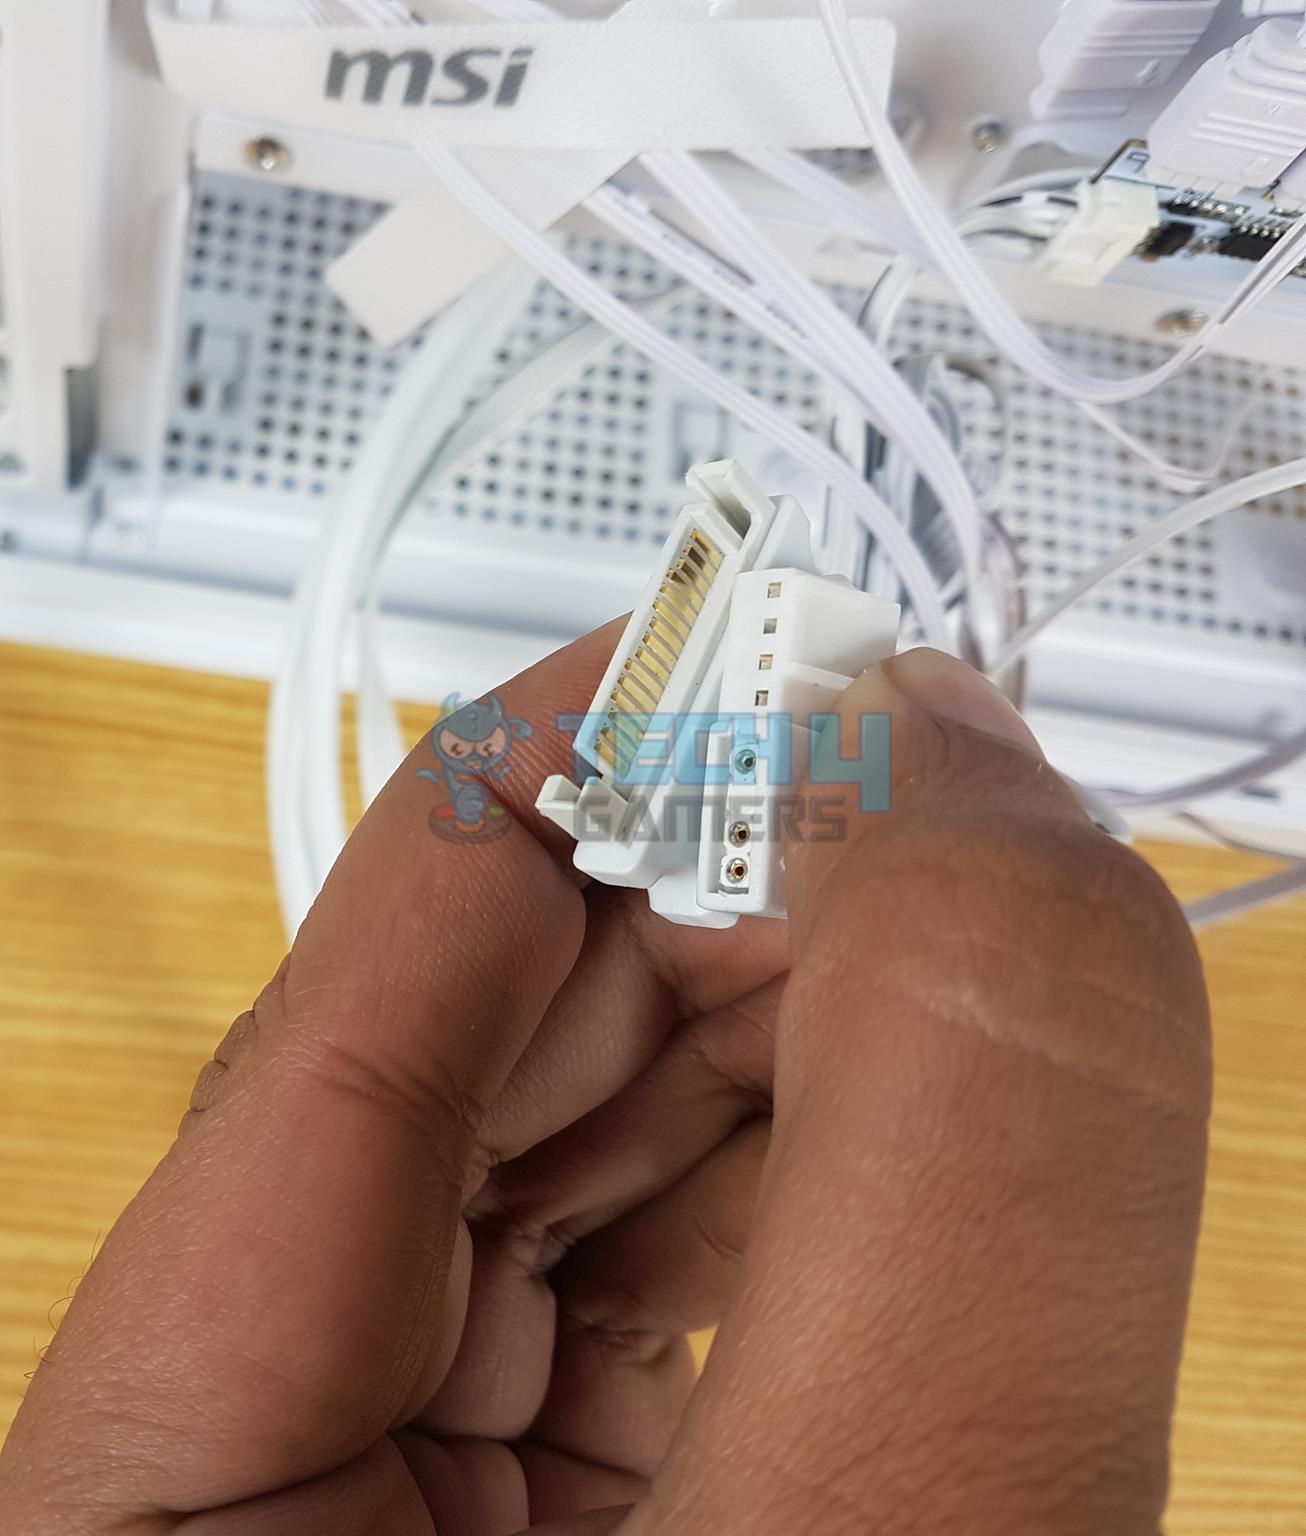
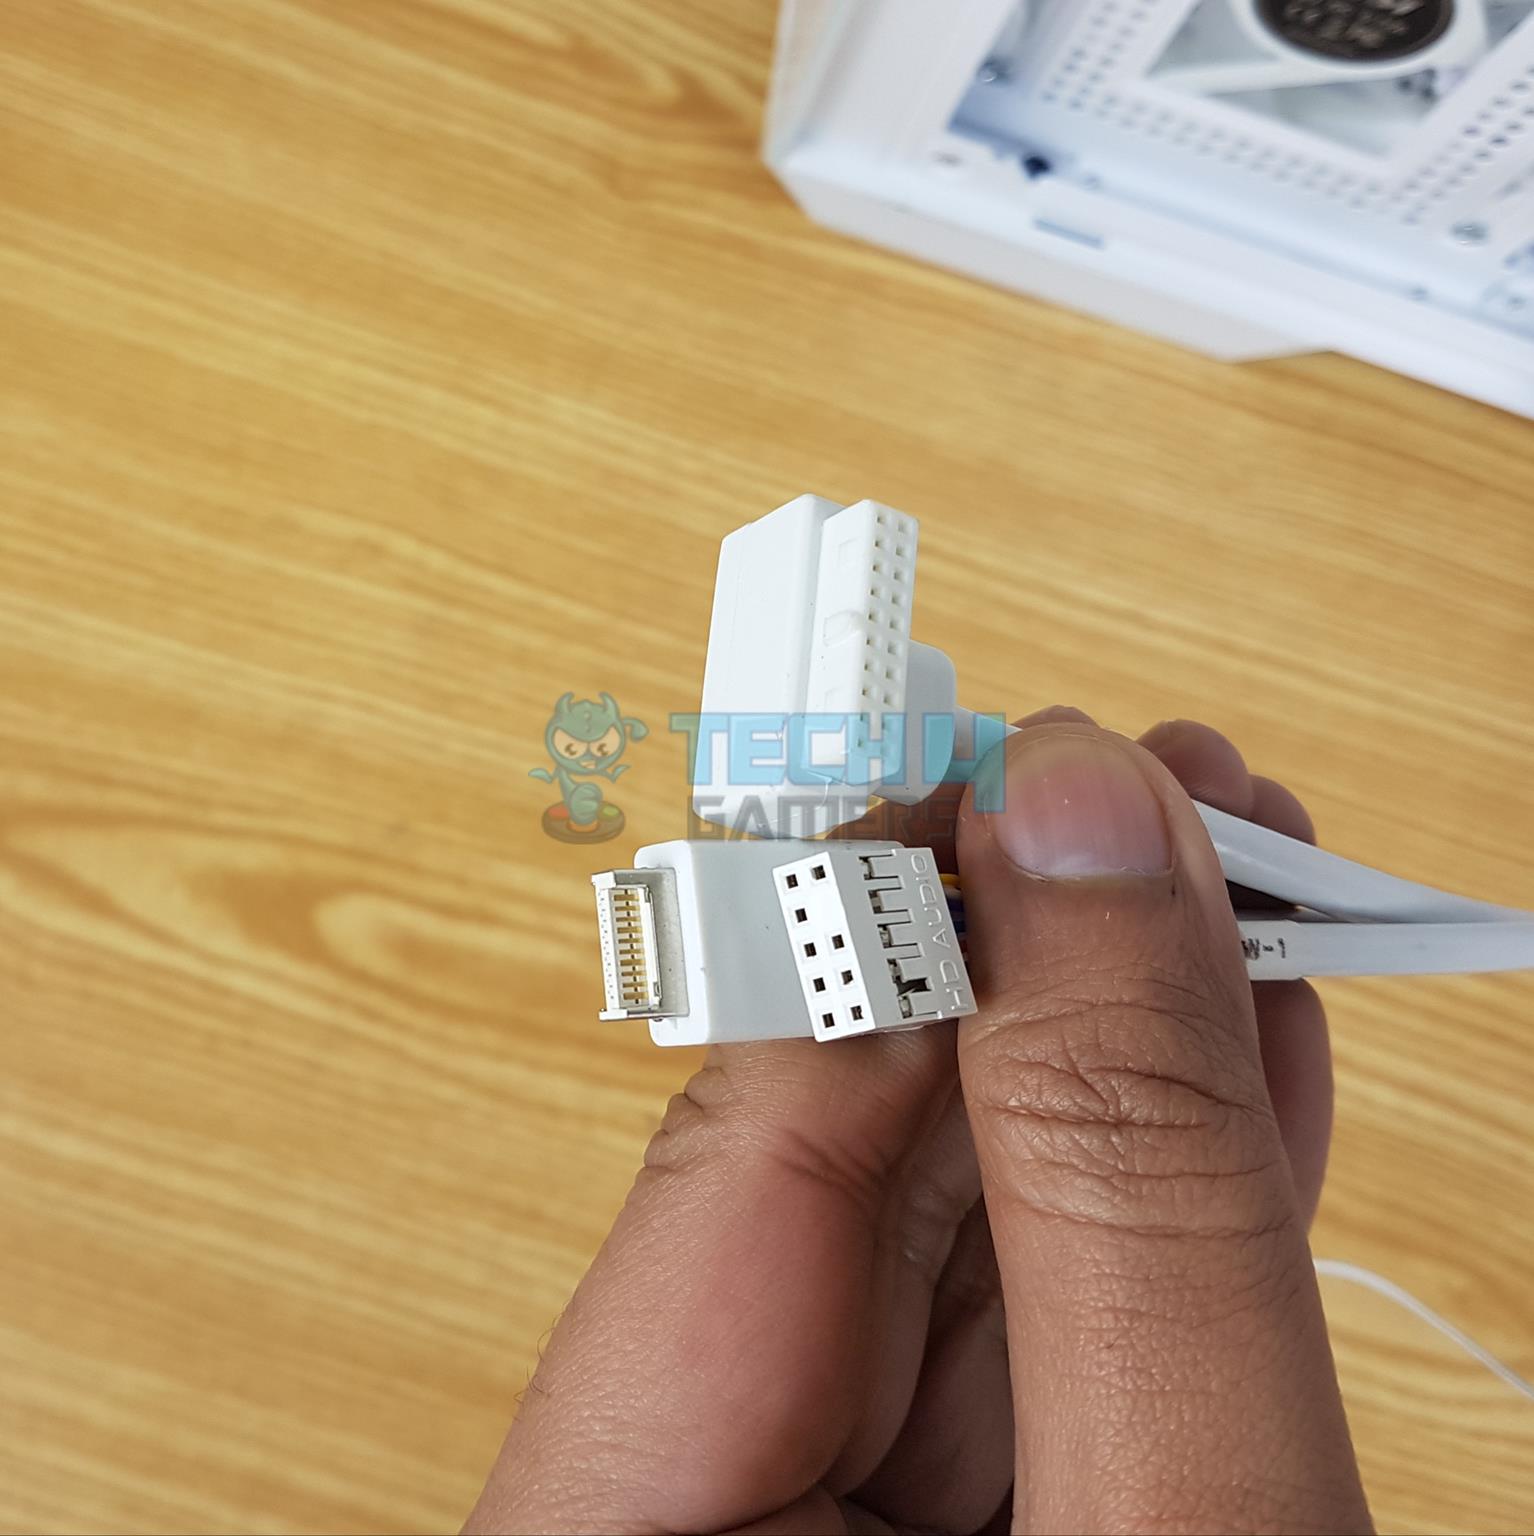
MSI has provided:
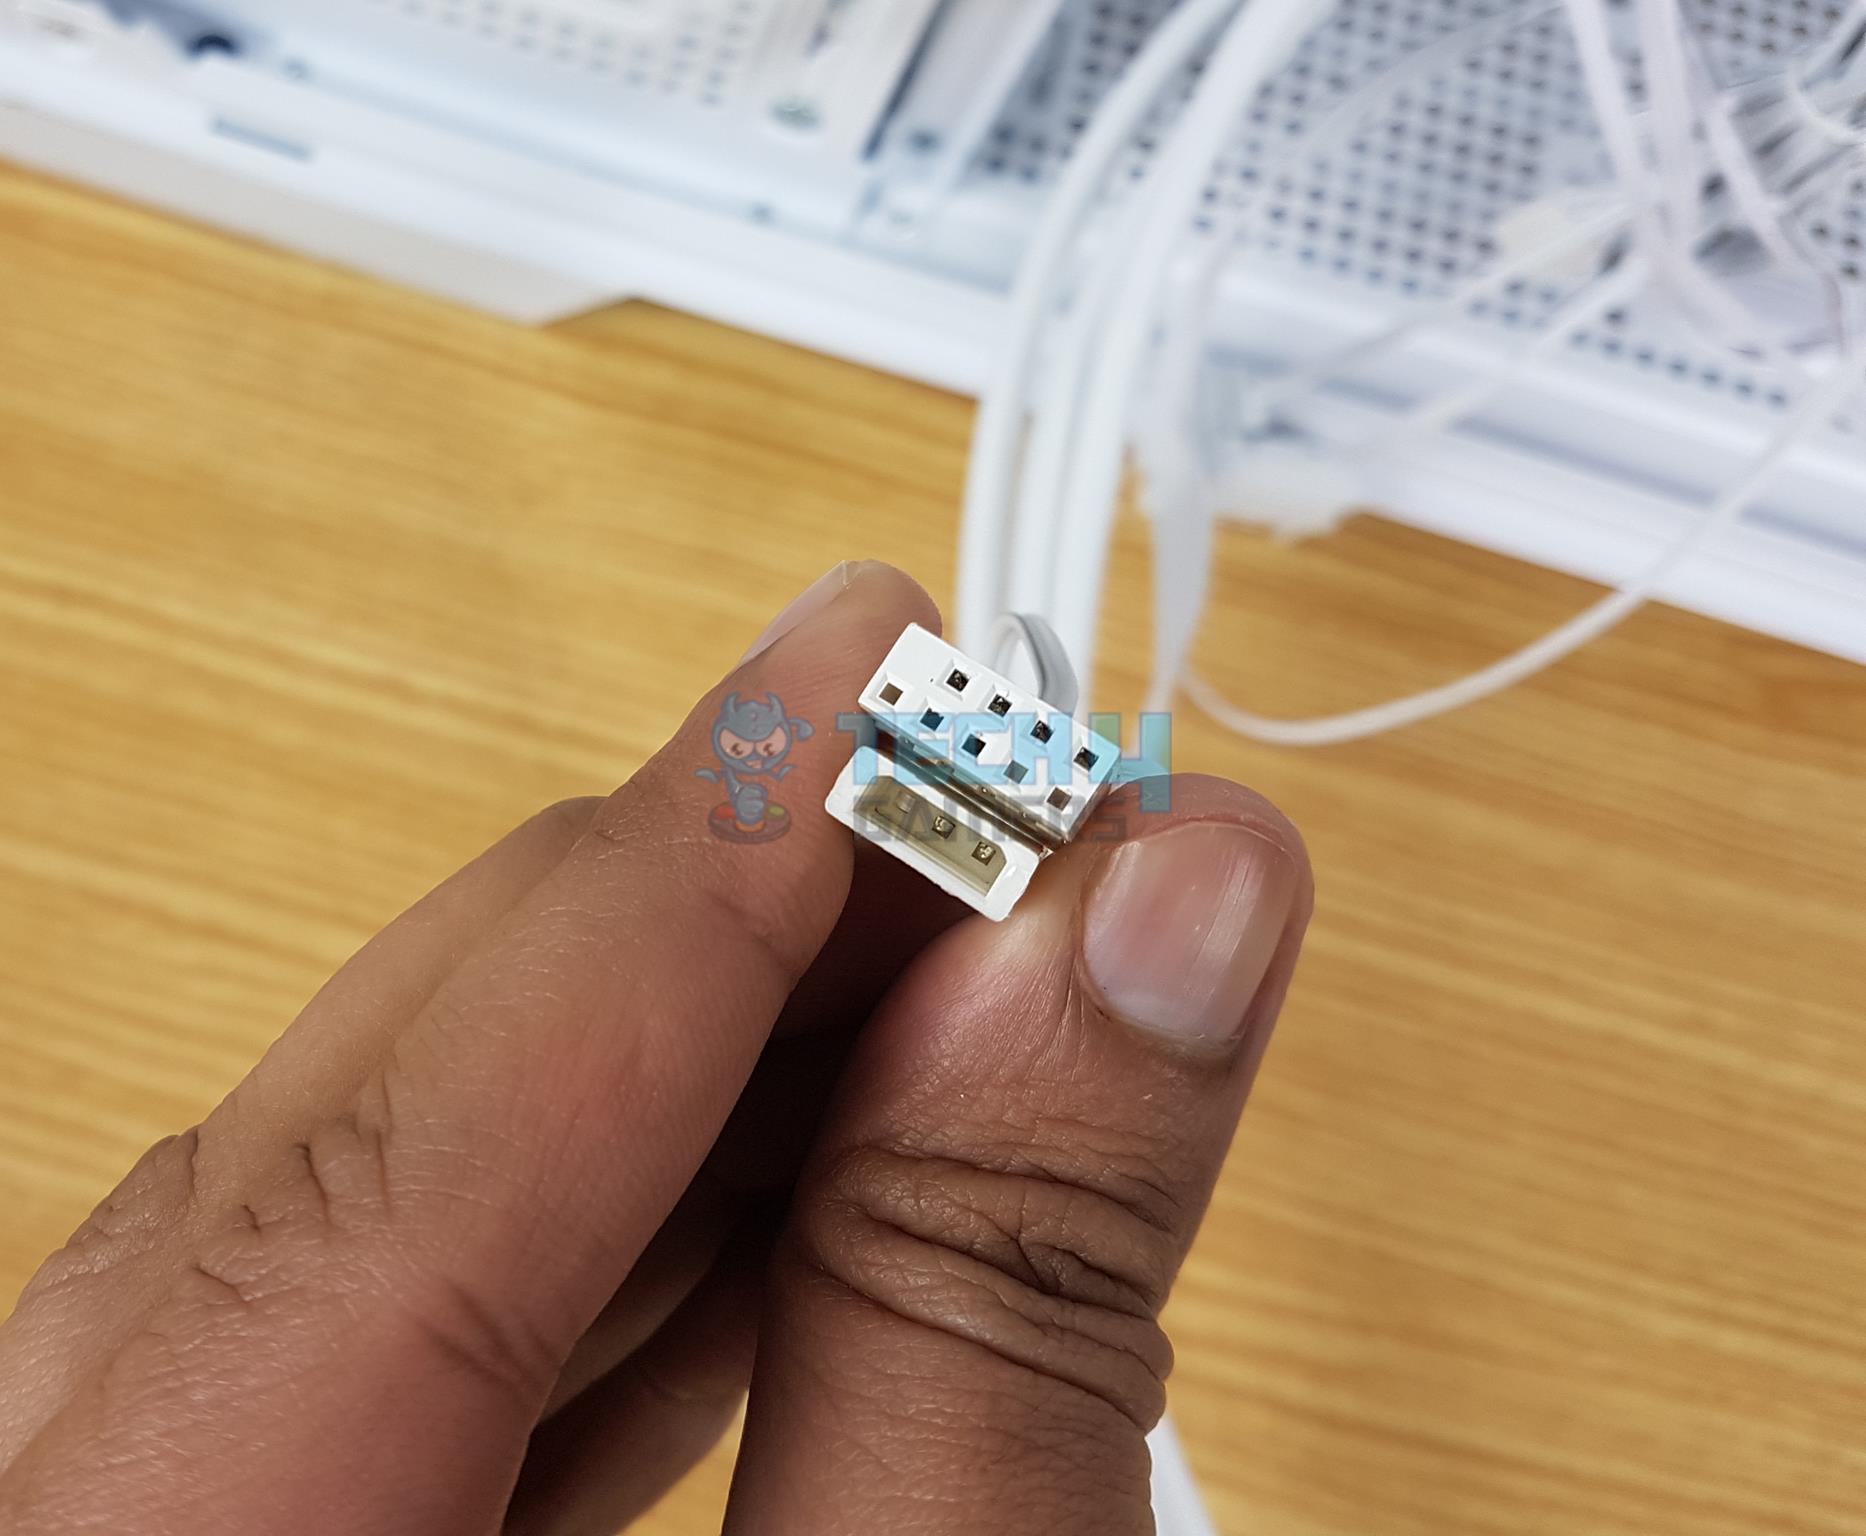
- 1x USB Type-E 3.2 Connector
- 1x USB Type-A 90ᵒ Connector
- 1x HD Audio Connector
- 1x Front Panel Connector
- 1x SATA Connector for Hub
- 1x 3-pin ARGB Connector
- 1x 4-pin Fan Connector
Test Build And Experience
I have used the following configuration to test this case:
- AMD Ryzen 7 7700X
- MSI B650M Project Zero
- Thermalright Frozen Magic 360 Scenic V2 White
- V-Color Manta RGB 32GB DDR5 5600MHz CL26
- GIGABYTE GeForce RTX 3060 VISION OC
- Western Digital SN850 500GB NVMe SSD [OS]
- Sabrent Rocket 4 Plus 4TB NVMe SSD [Games]
- CORSAIR AX1200i Platinum PSU
Building a PC inside this case is a walk in the park much thanks to all the backside connectors on the motherboard. I started with installing CPU, SSDs, and RAM on the motherboard. Next, I installed the PSU. I have used CORSAIR AX1200i which has a length of 200mm. It was an easy fit but you will have less room to tuck your cables in.
Then the graphics card was installed and cables were connected. I have used an extension cable for the graphics card. Then the CPU cooler (360mm AIO) was installed. I did not face any hurdles on the front side of the case. You would need to be crafty to route the cable management on the backside. Don’t twist or bend the cable too much for the backside connection.
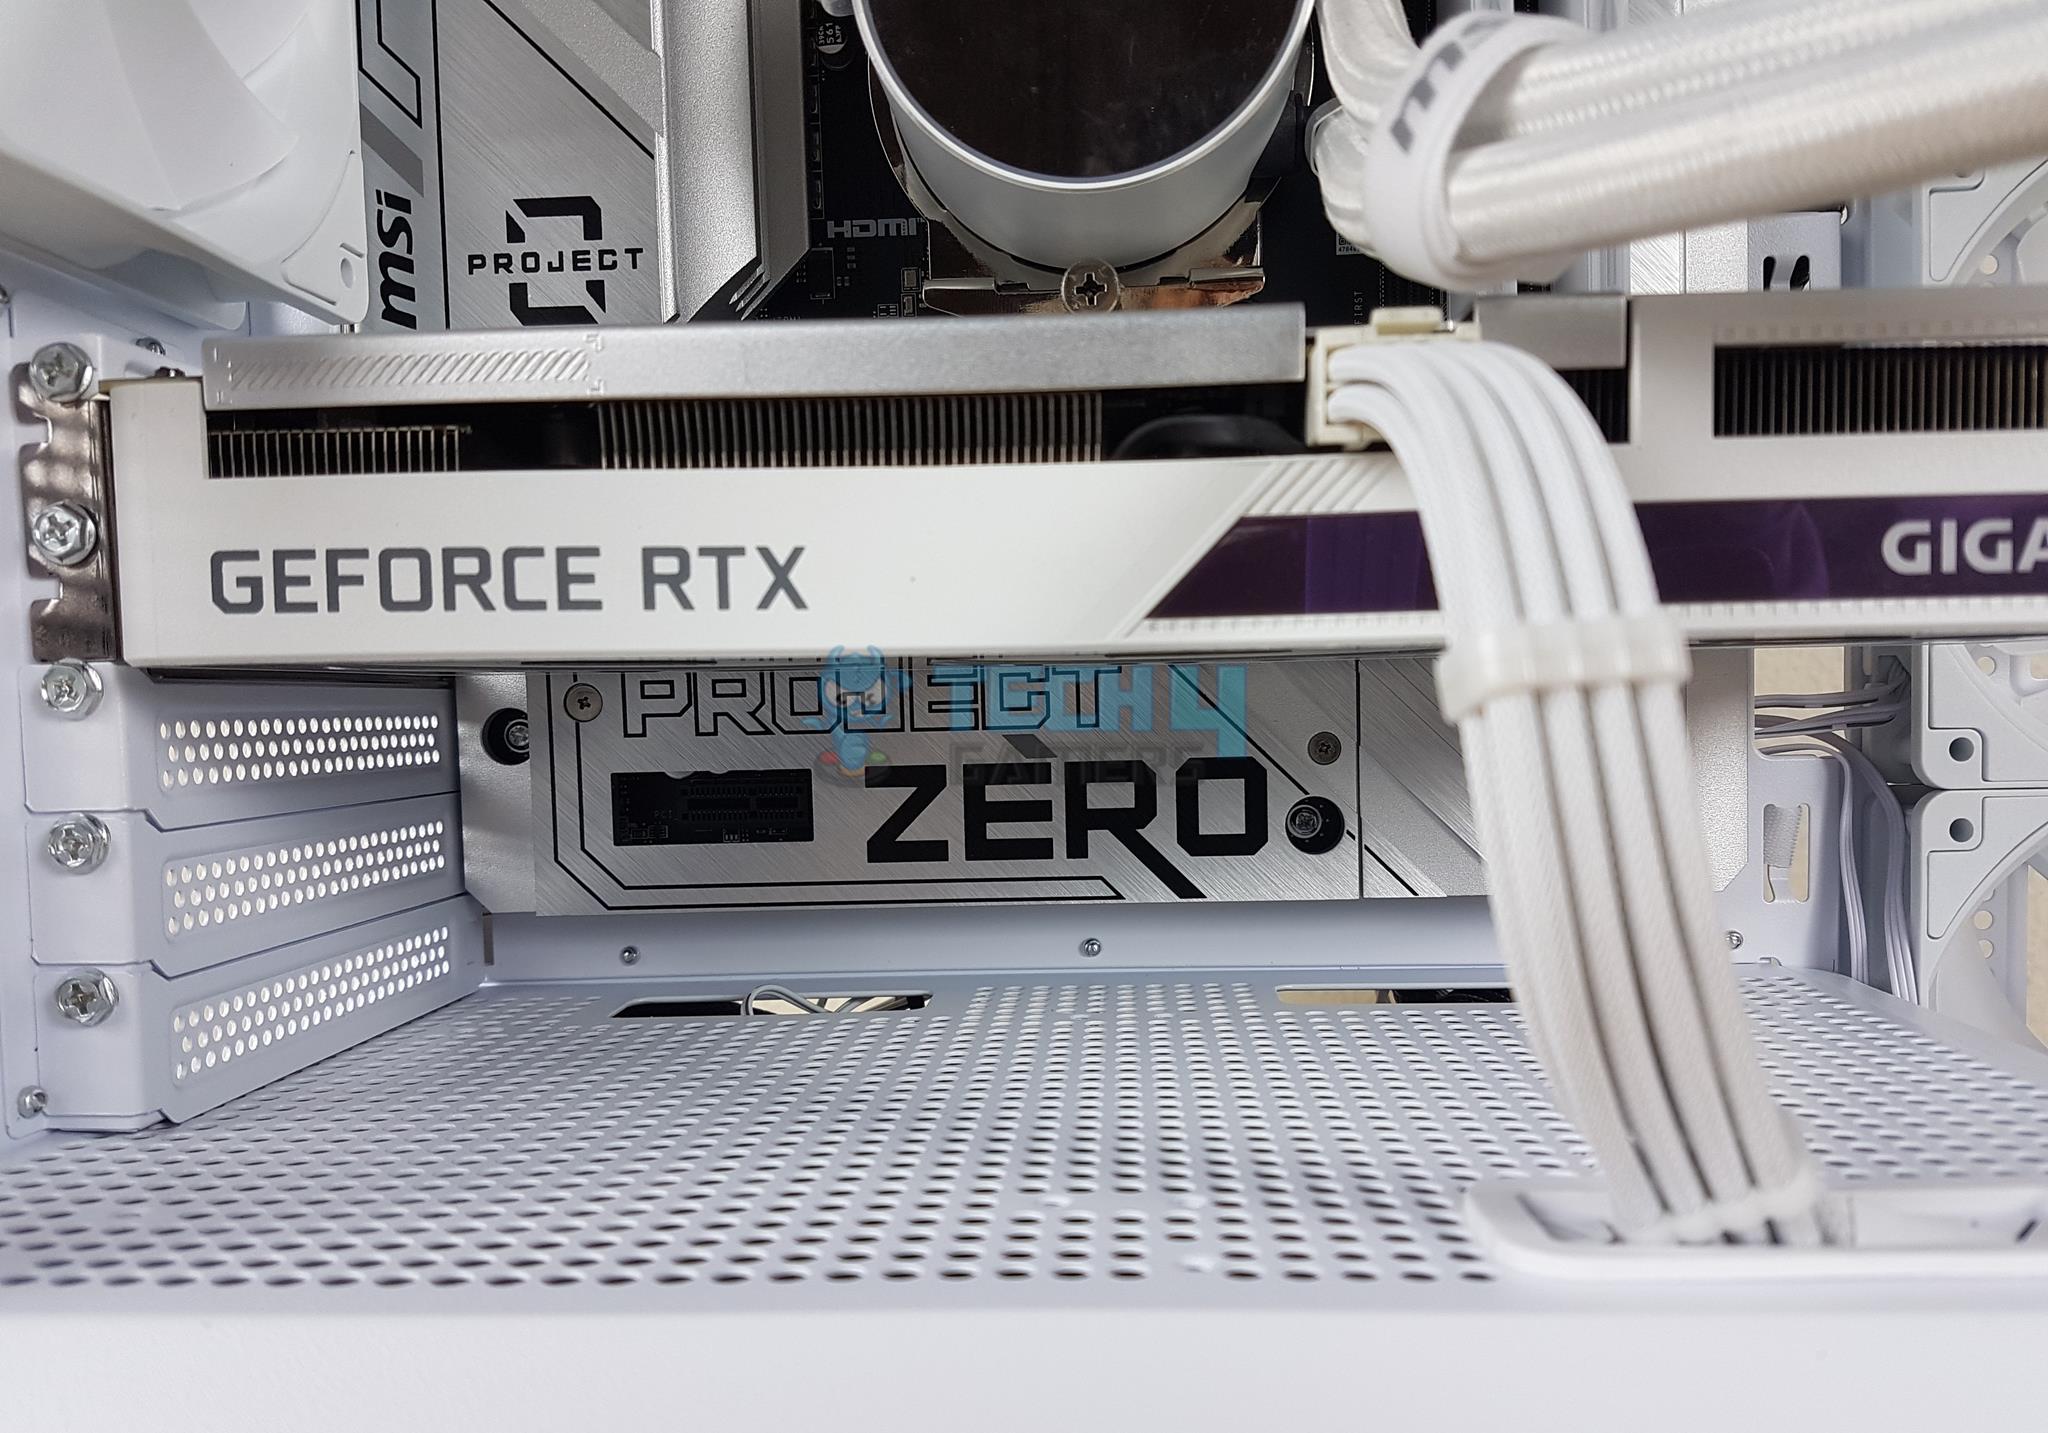
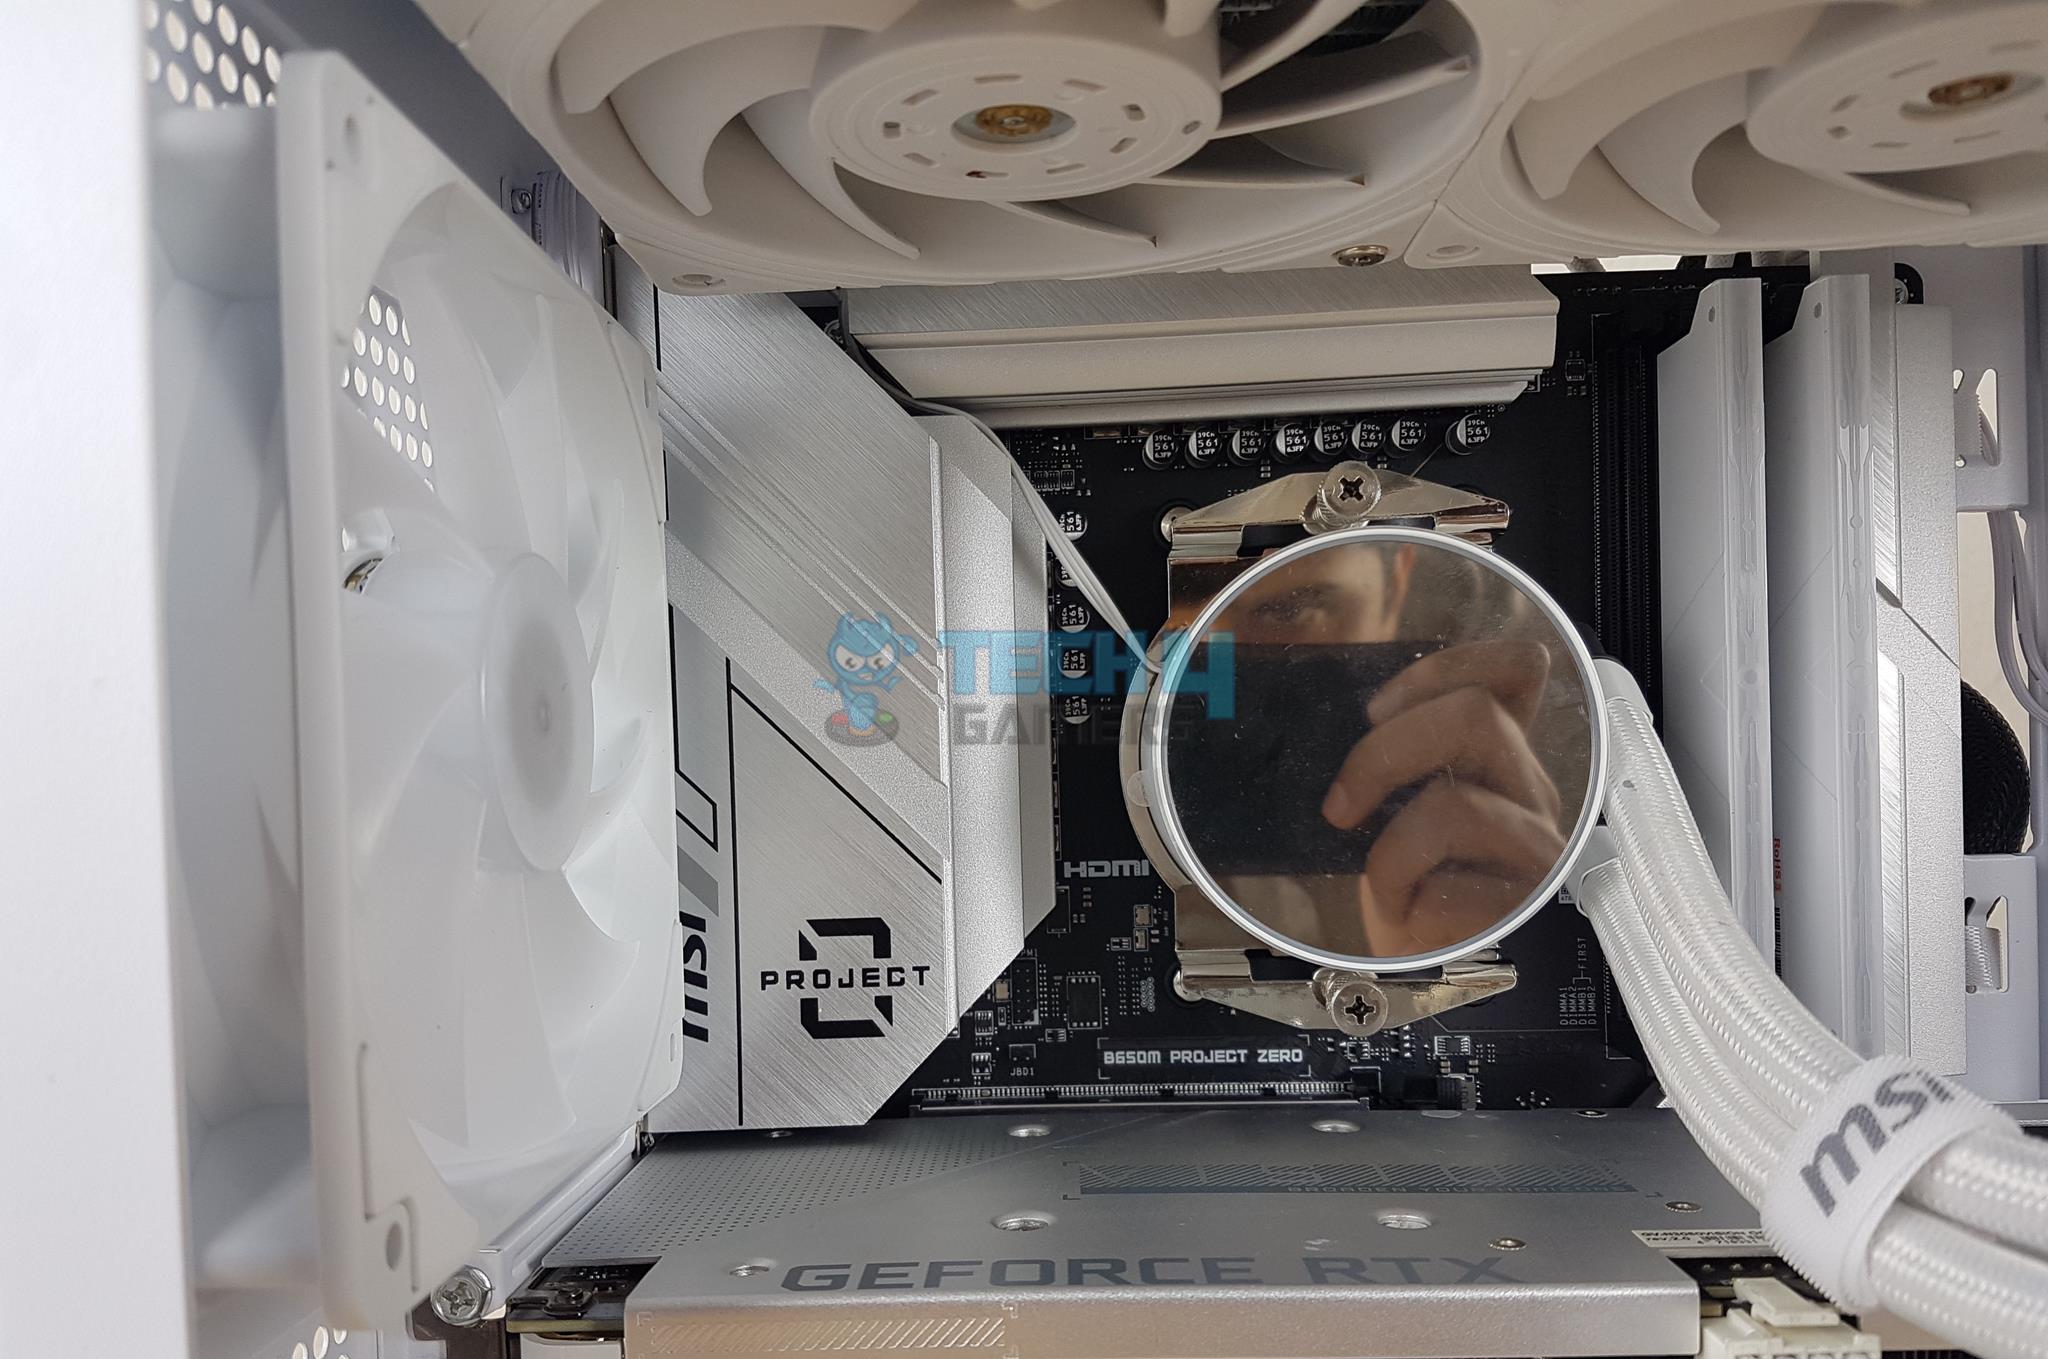
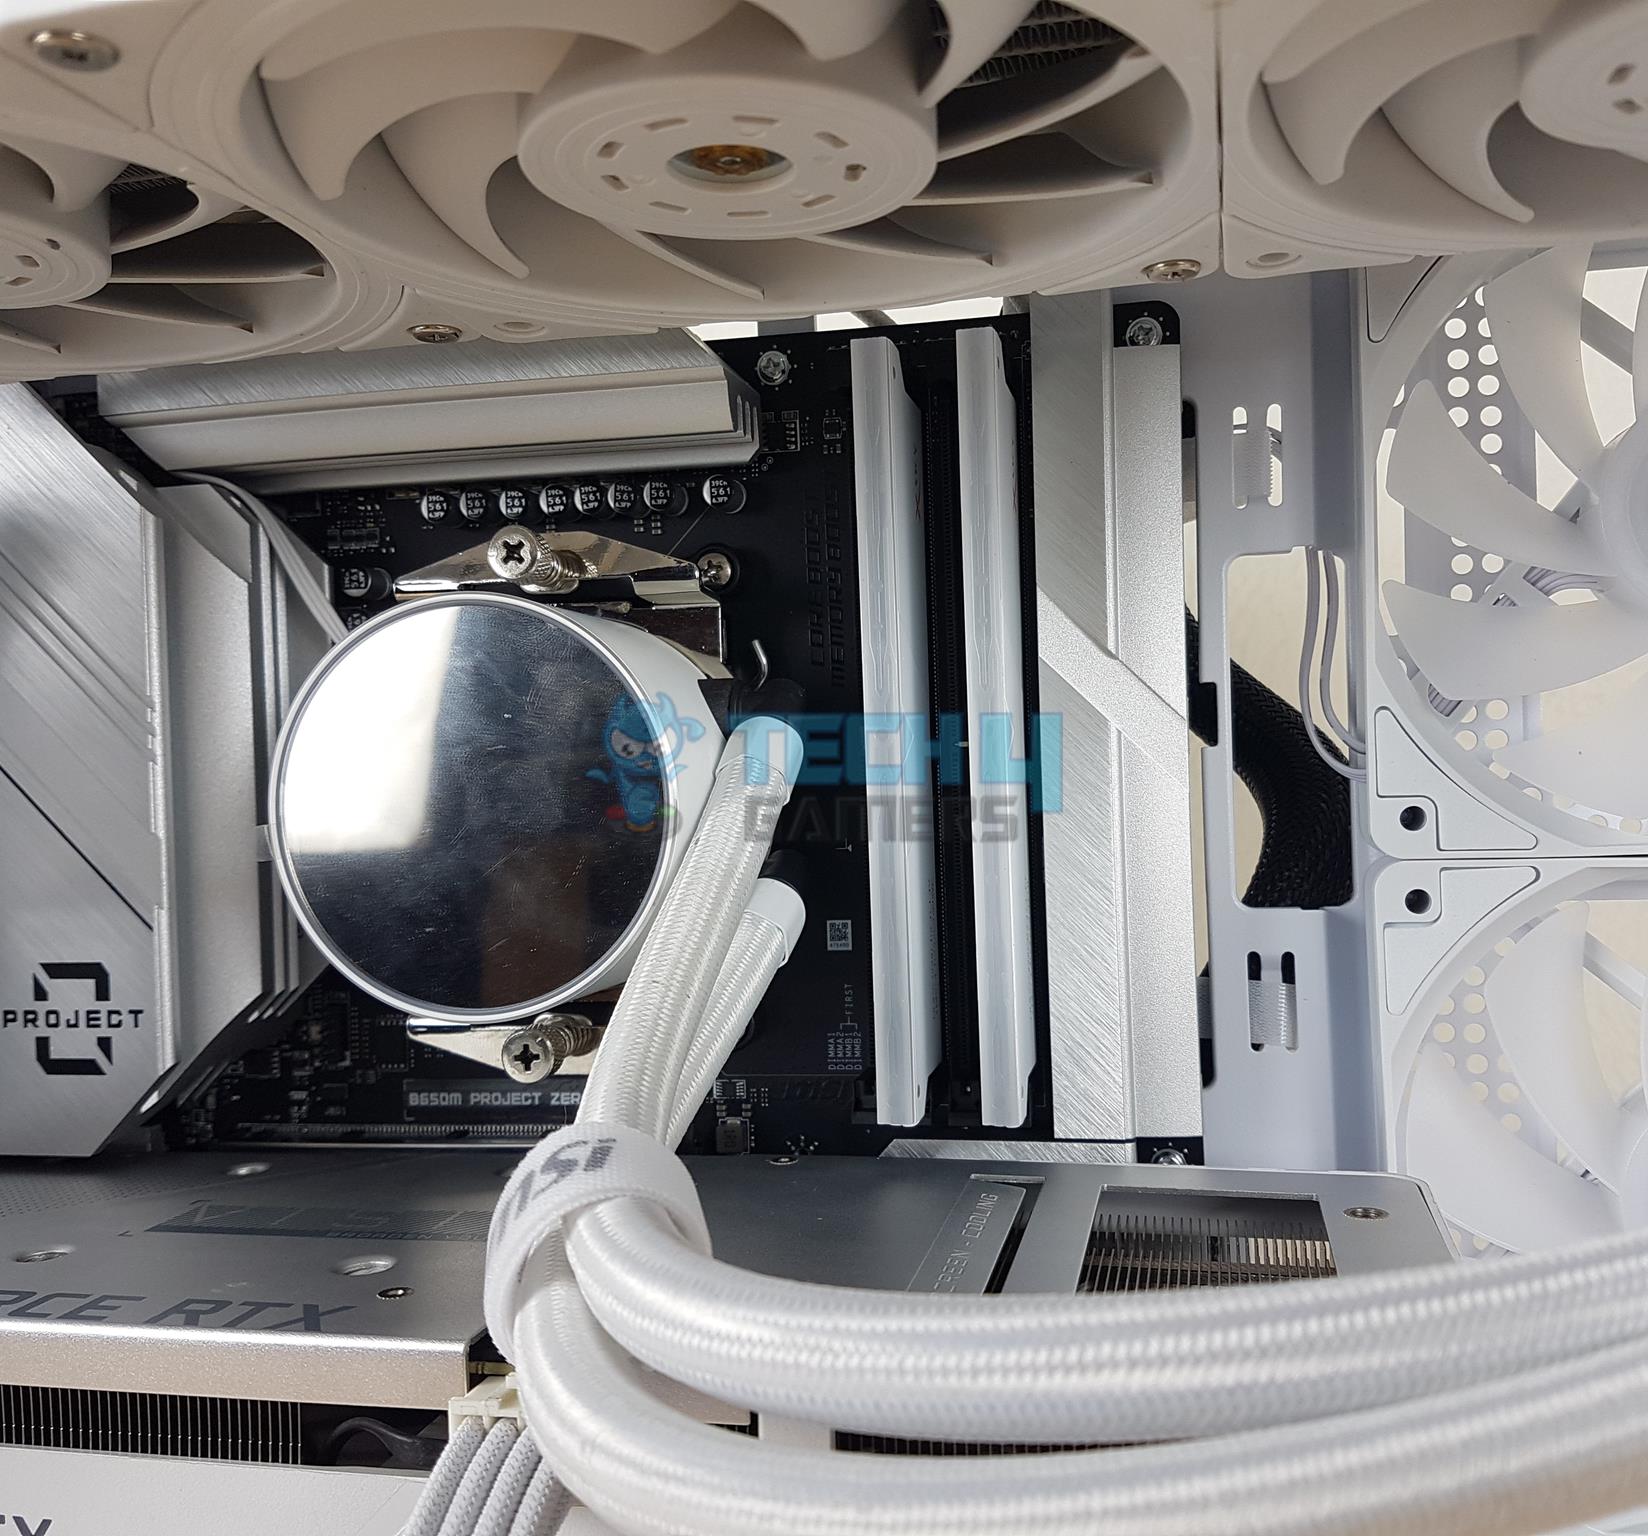
I am showing close-up views of the key motherboard areas. As you can see there is no cable anywhere in these areas; hence we have a clean look. This would also help in somewhat better airflow in the case.
Thermal Testing
I have used AMD Ryzen 7 7700X and GIGABYTE GeForce RTX 3060 VISION OC on stock configuration. The testing was done with side panels installed including the top cover. Ambient temperature was 18ᵒC and I have used AIDA64 Engineering Stress Test software for this purpose using FPU and GPU.
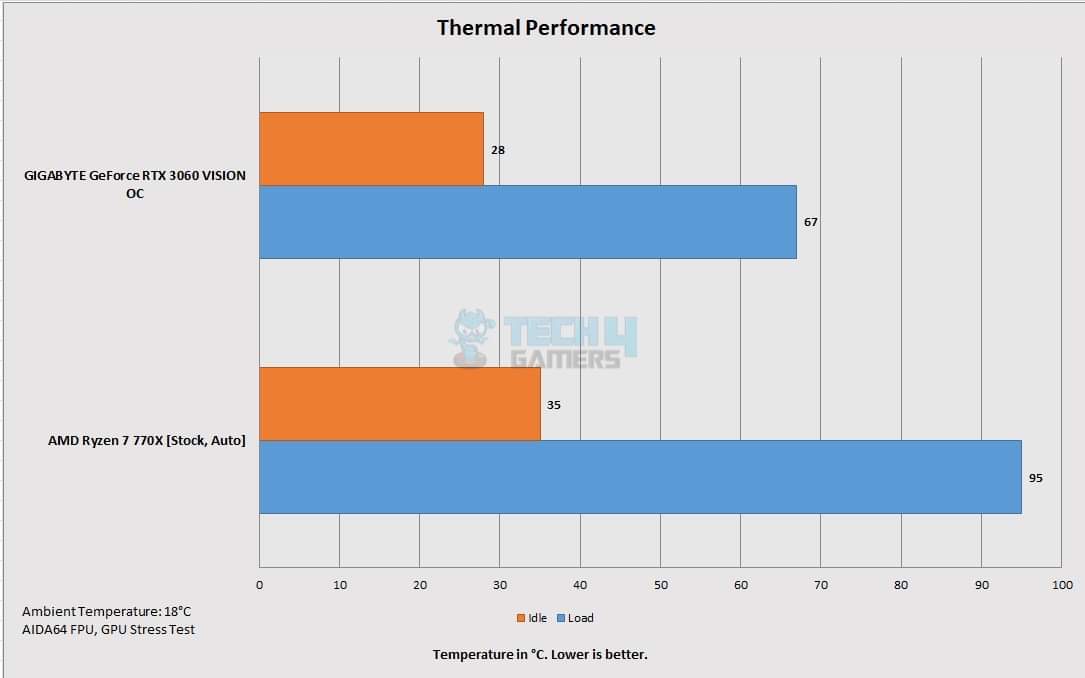
As you can see, we have good thermal performance on the graphics card. The CPU was operating at its thermal junction which is by design.
RGB Lighting
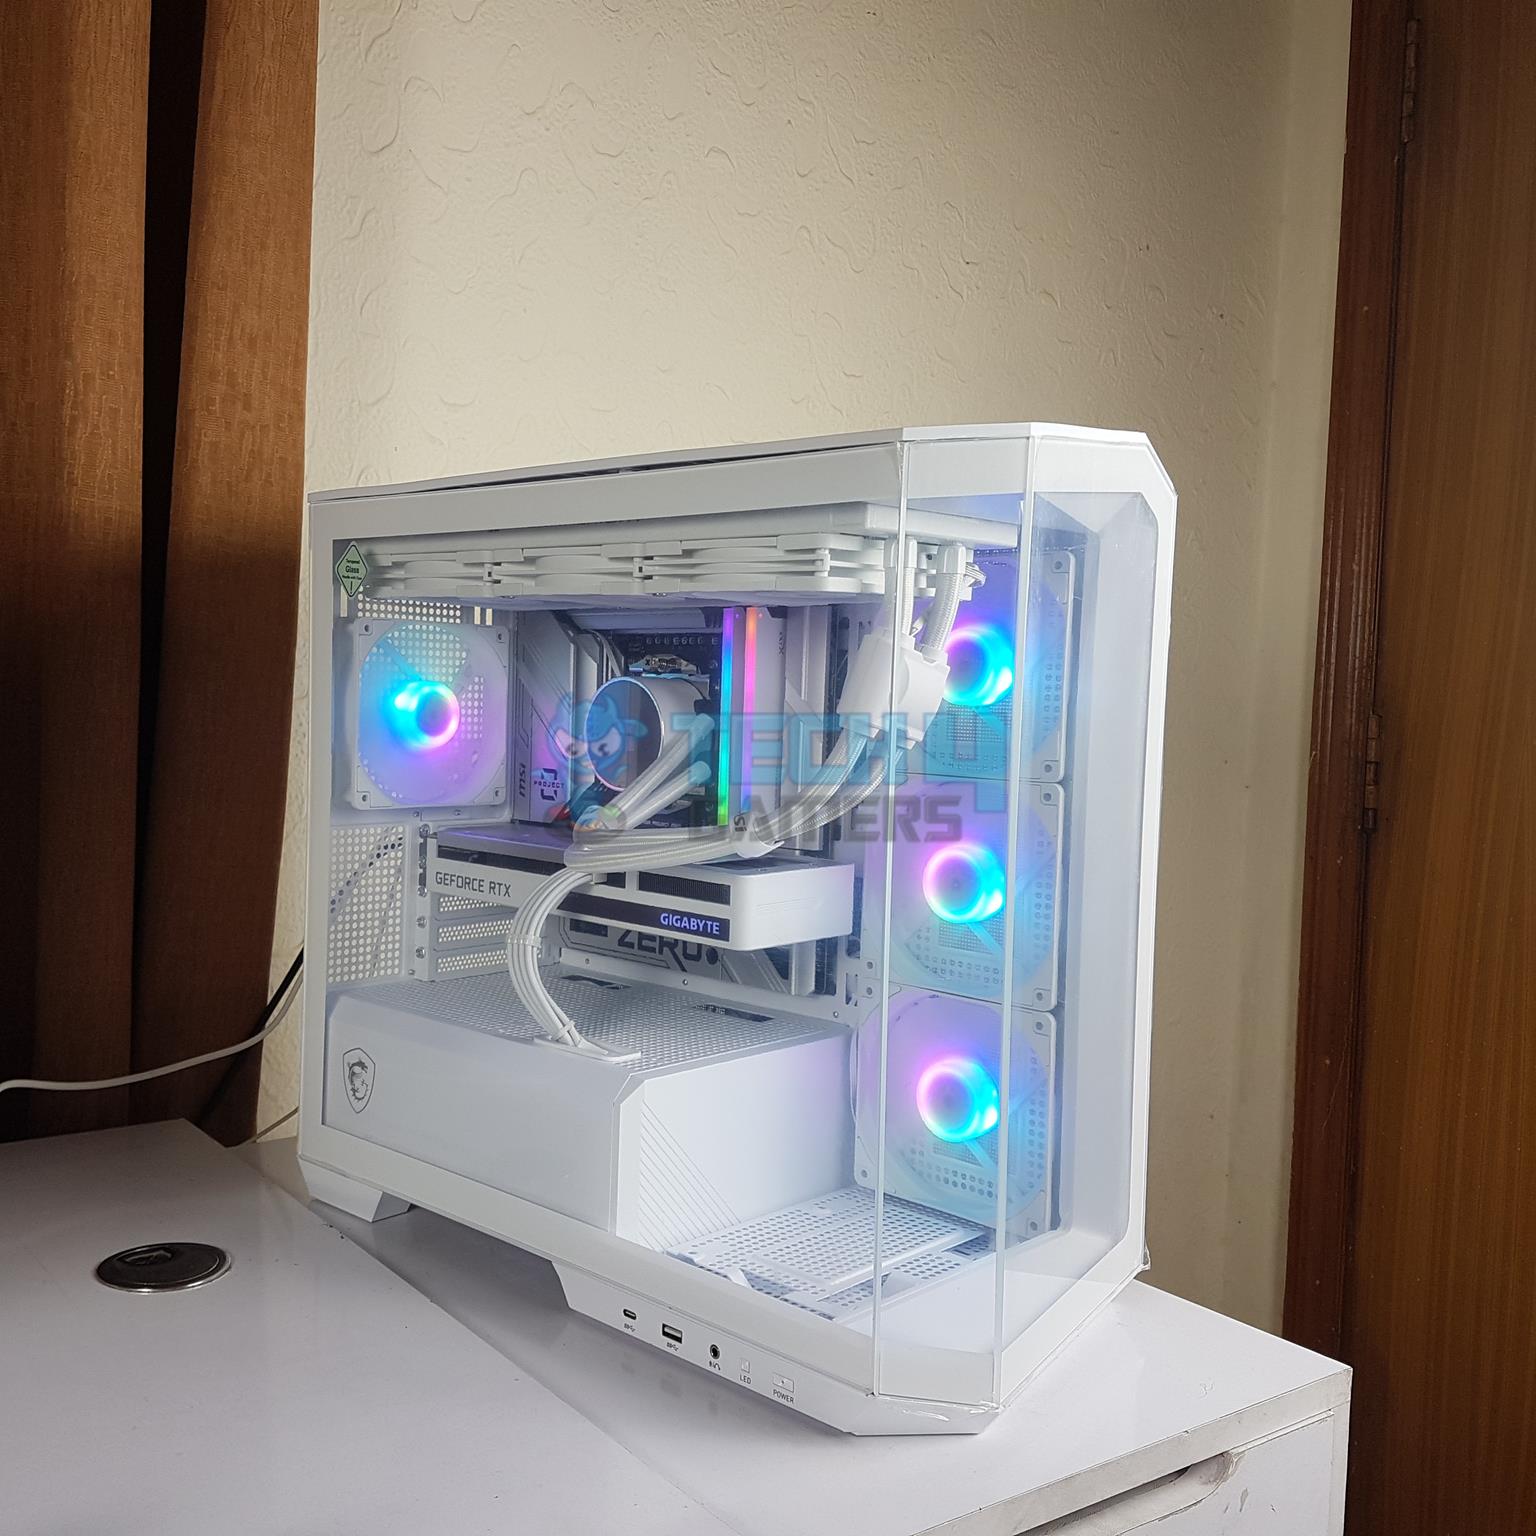
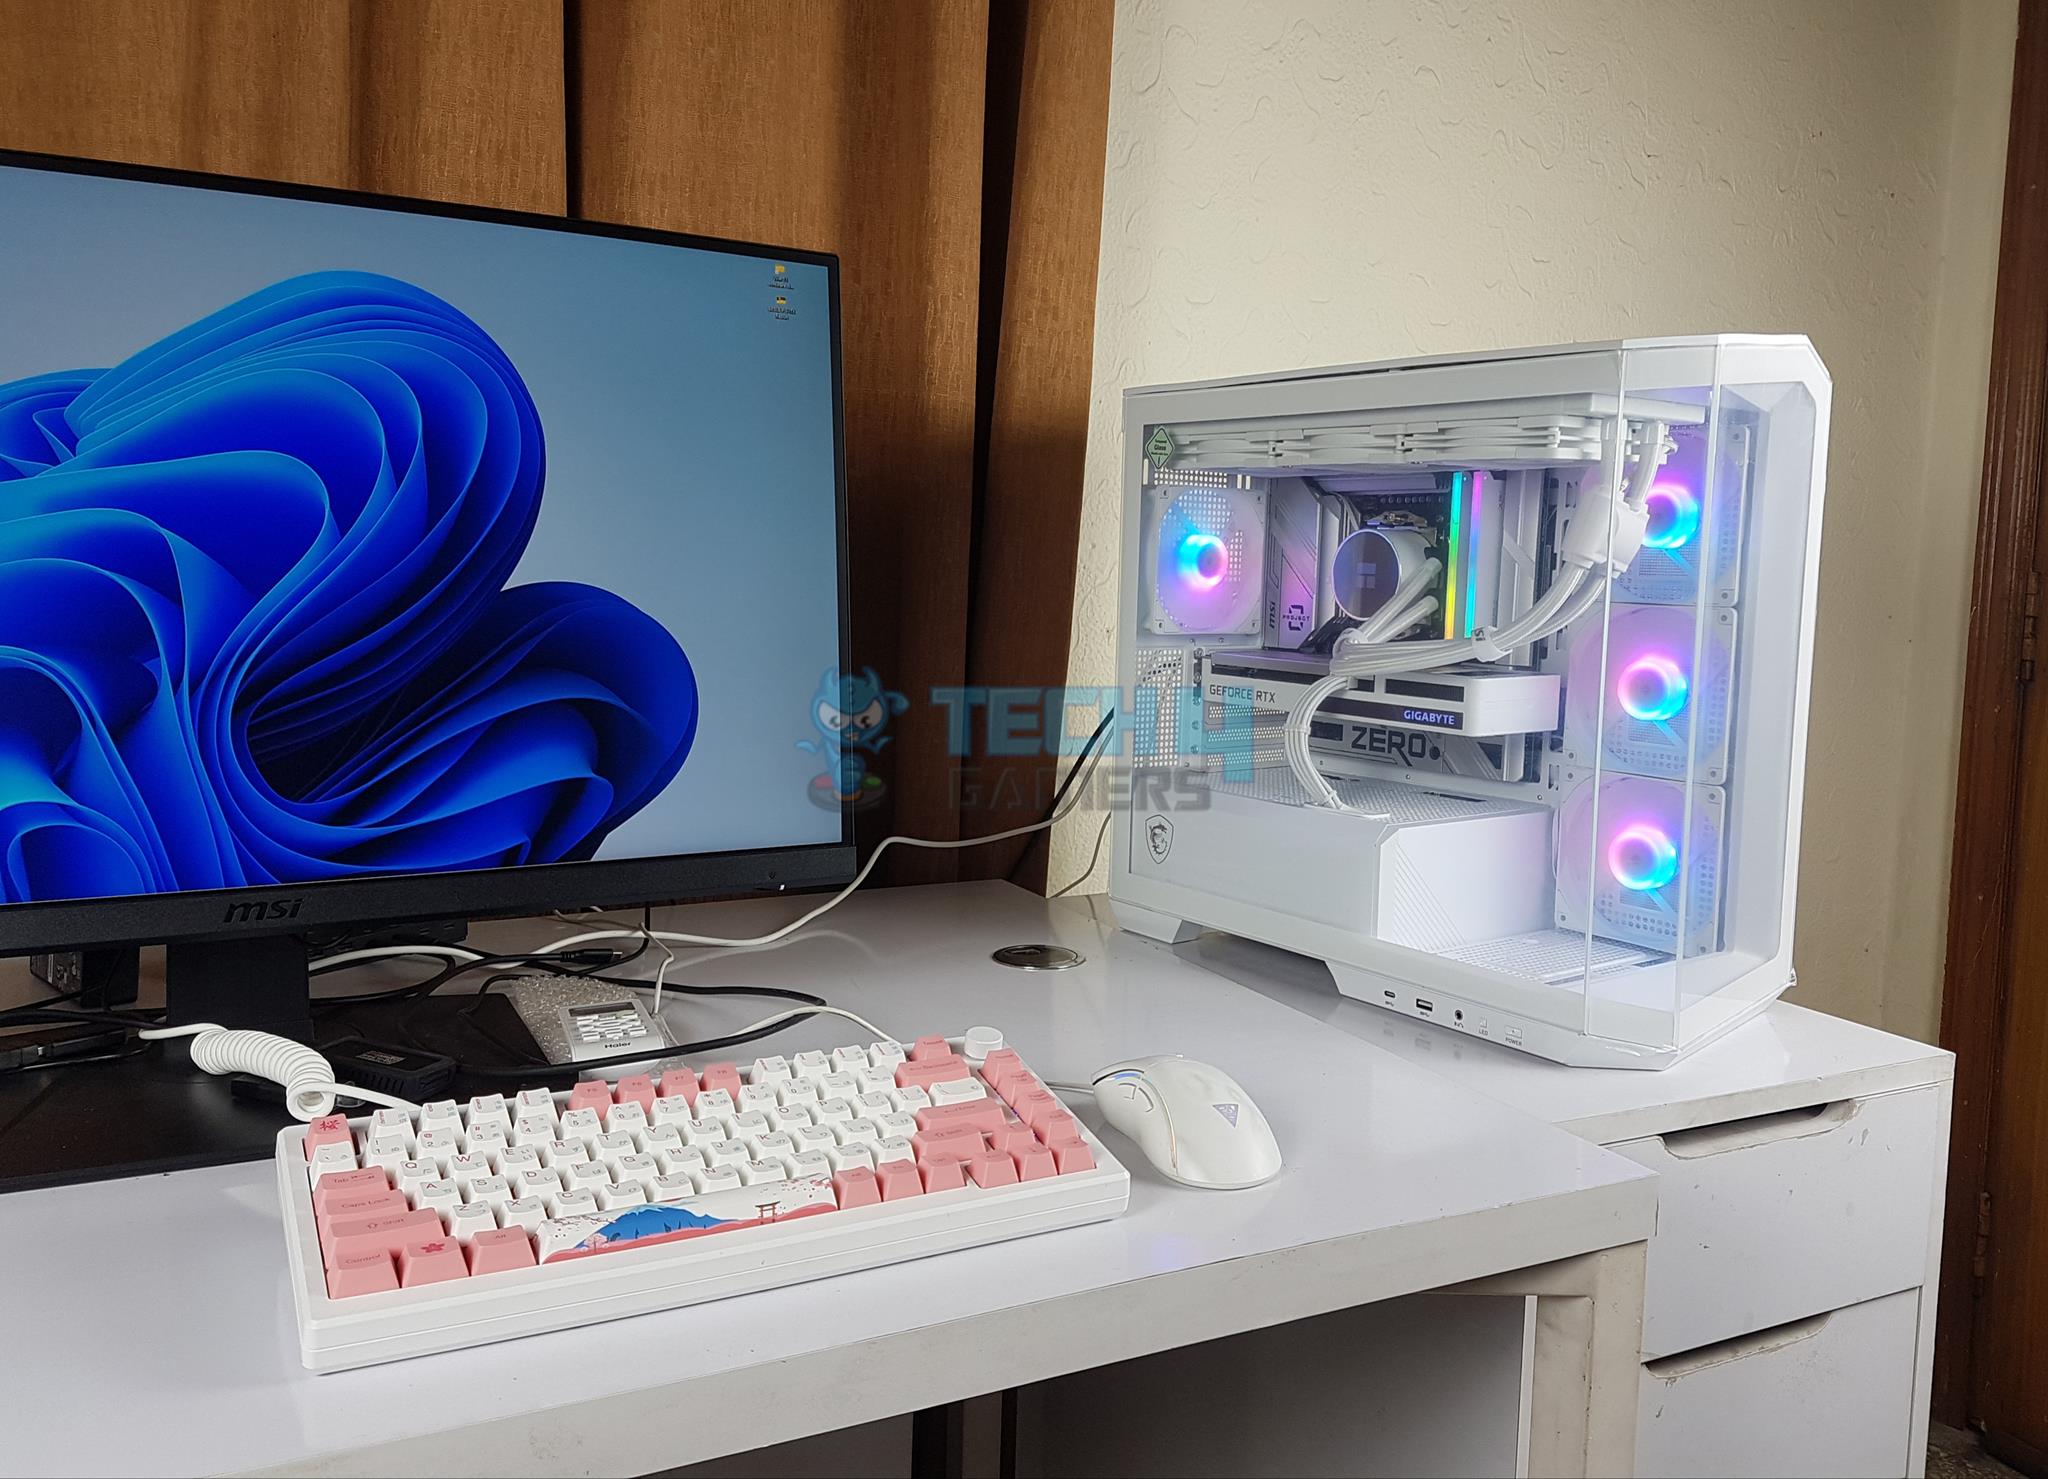
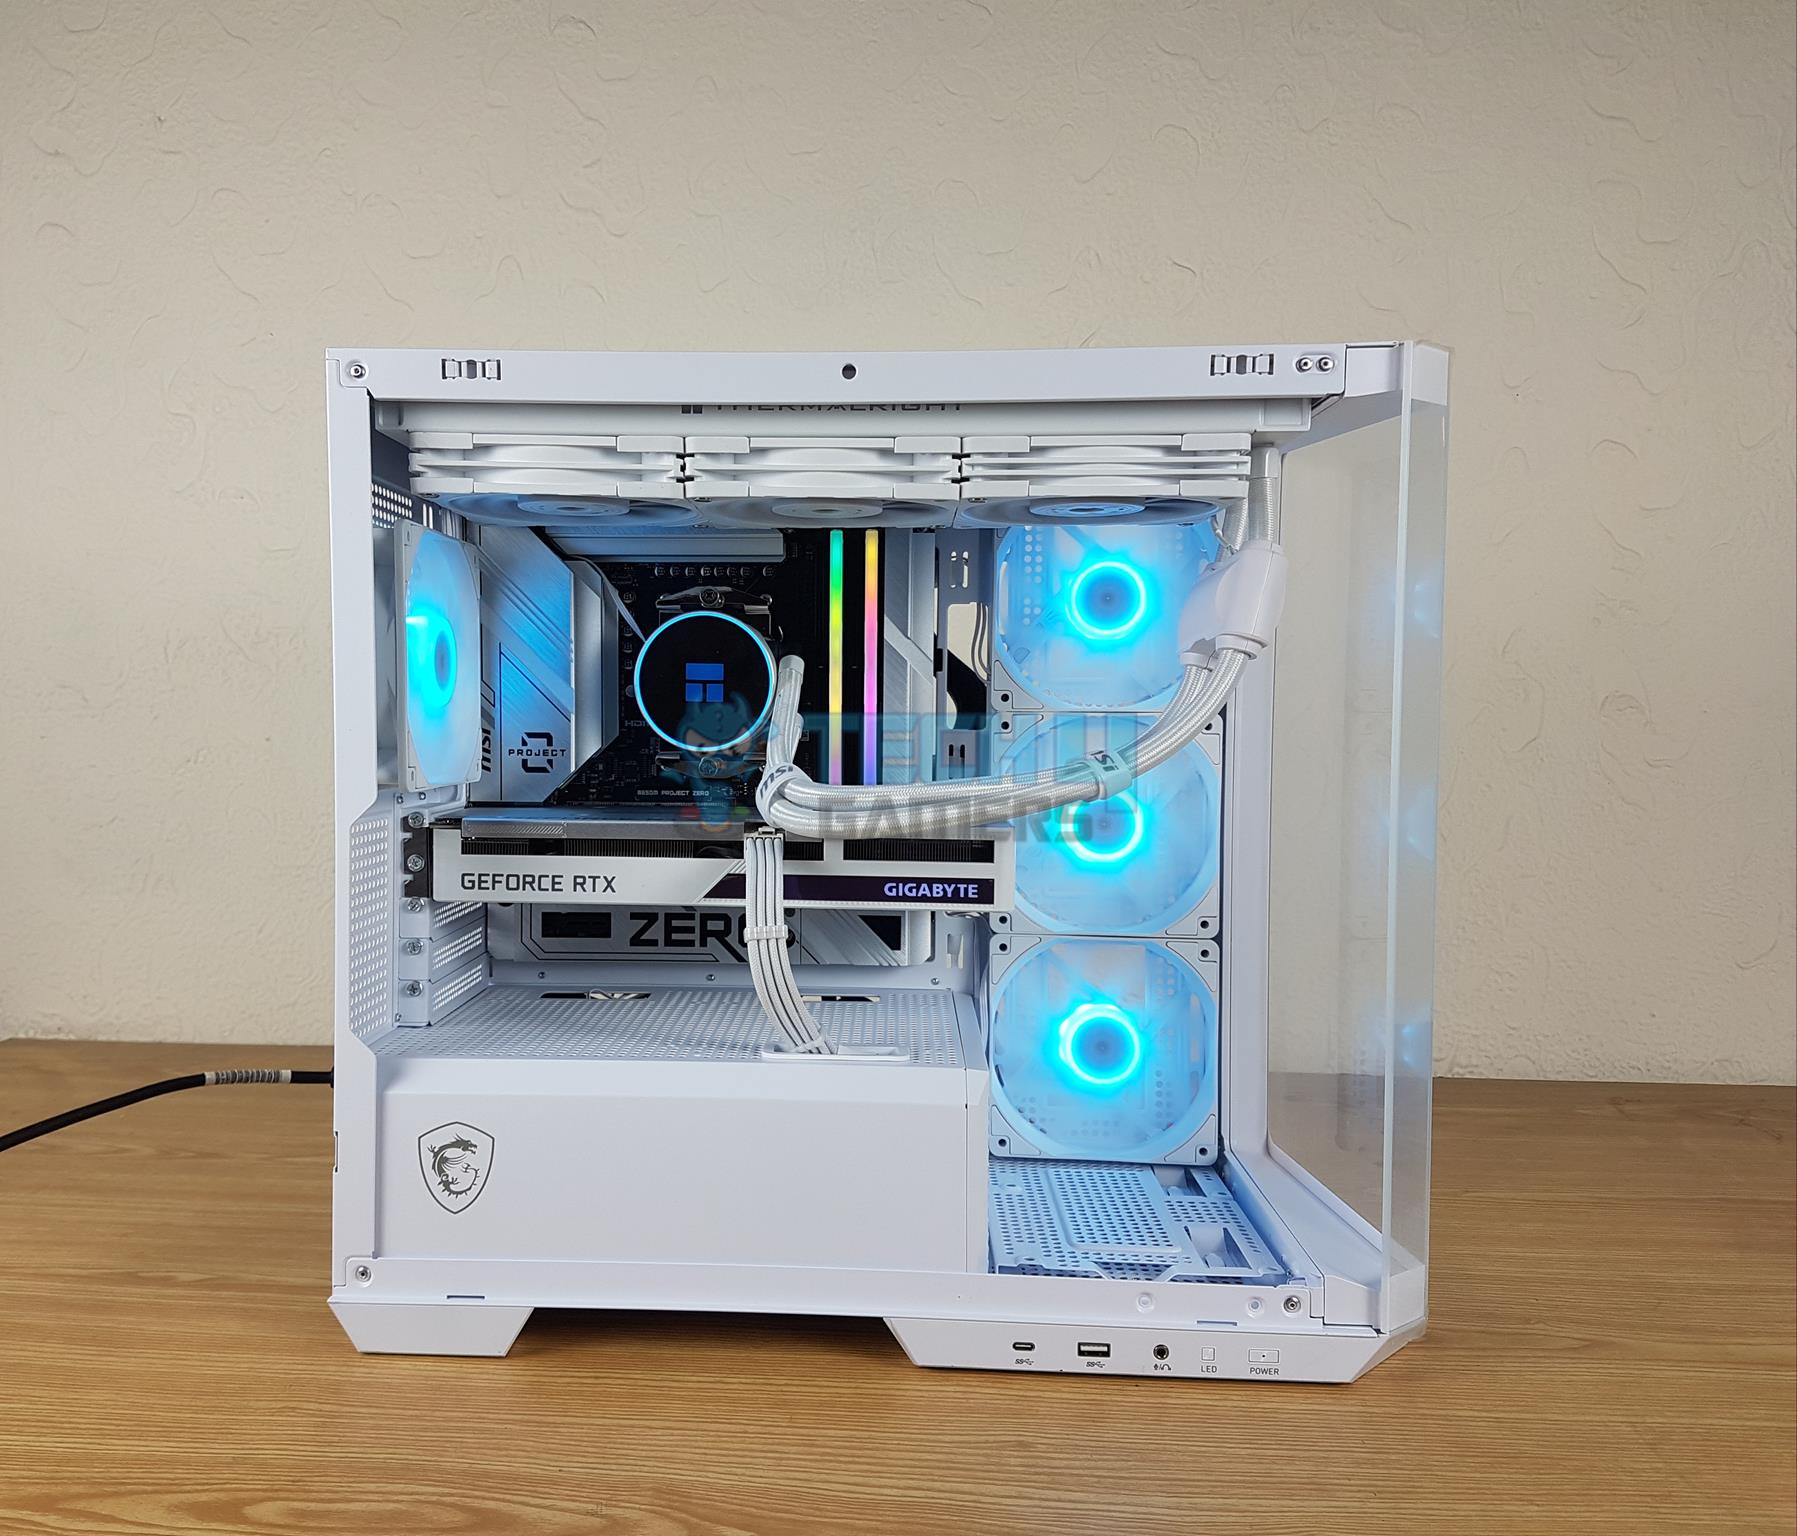
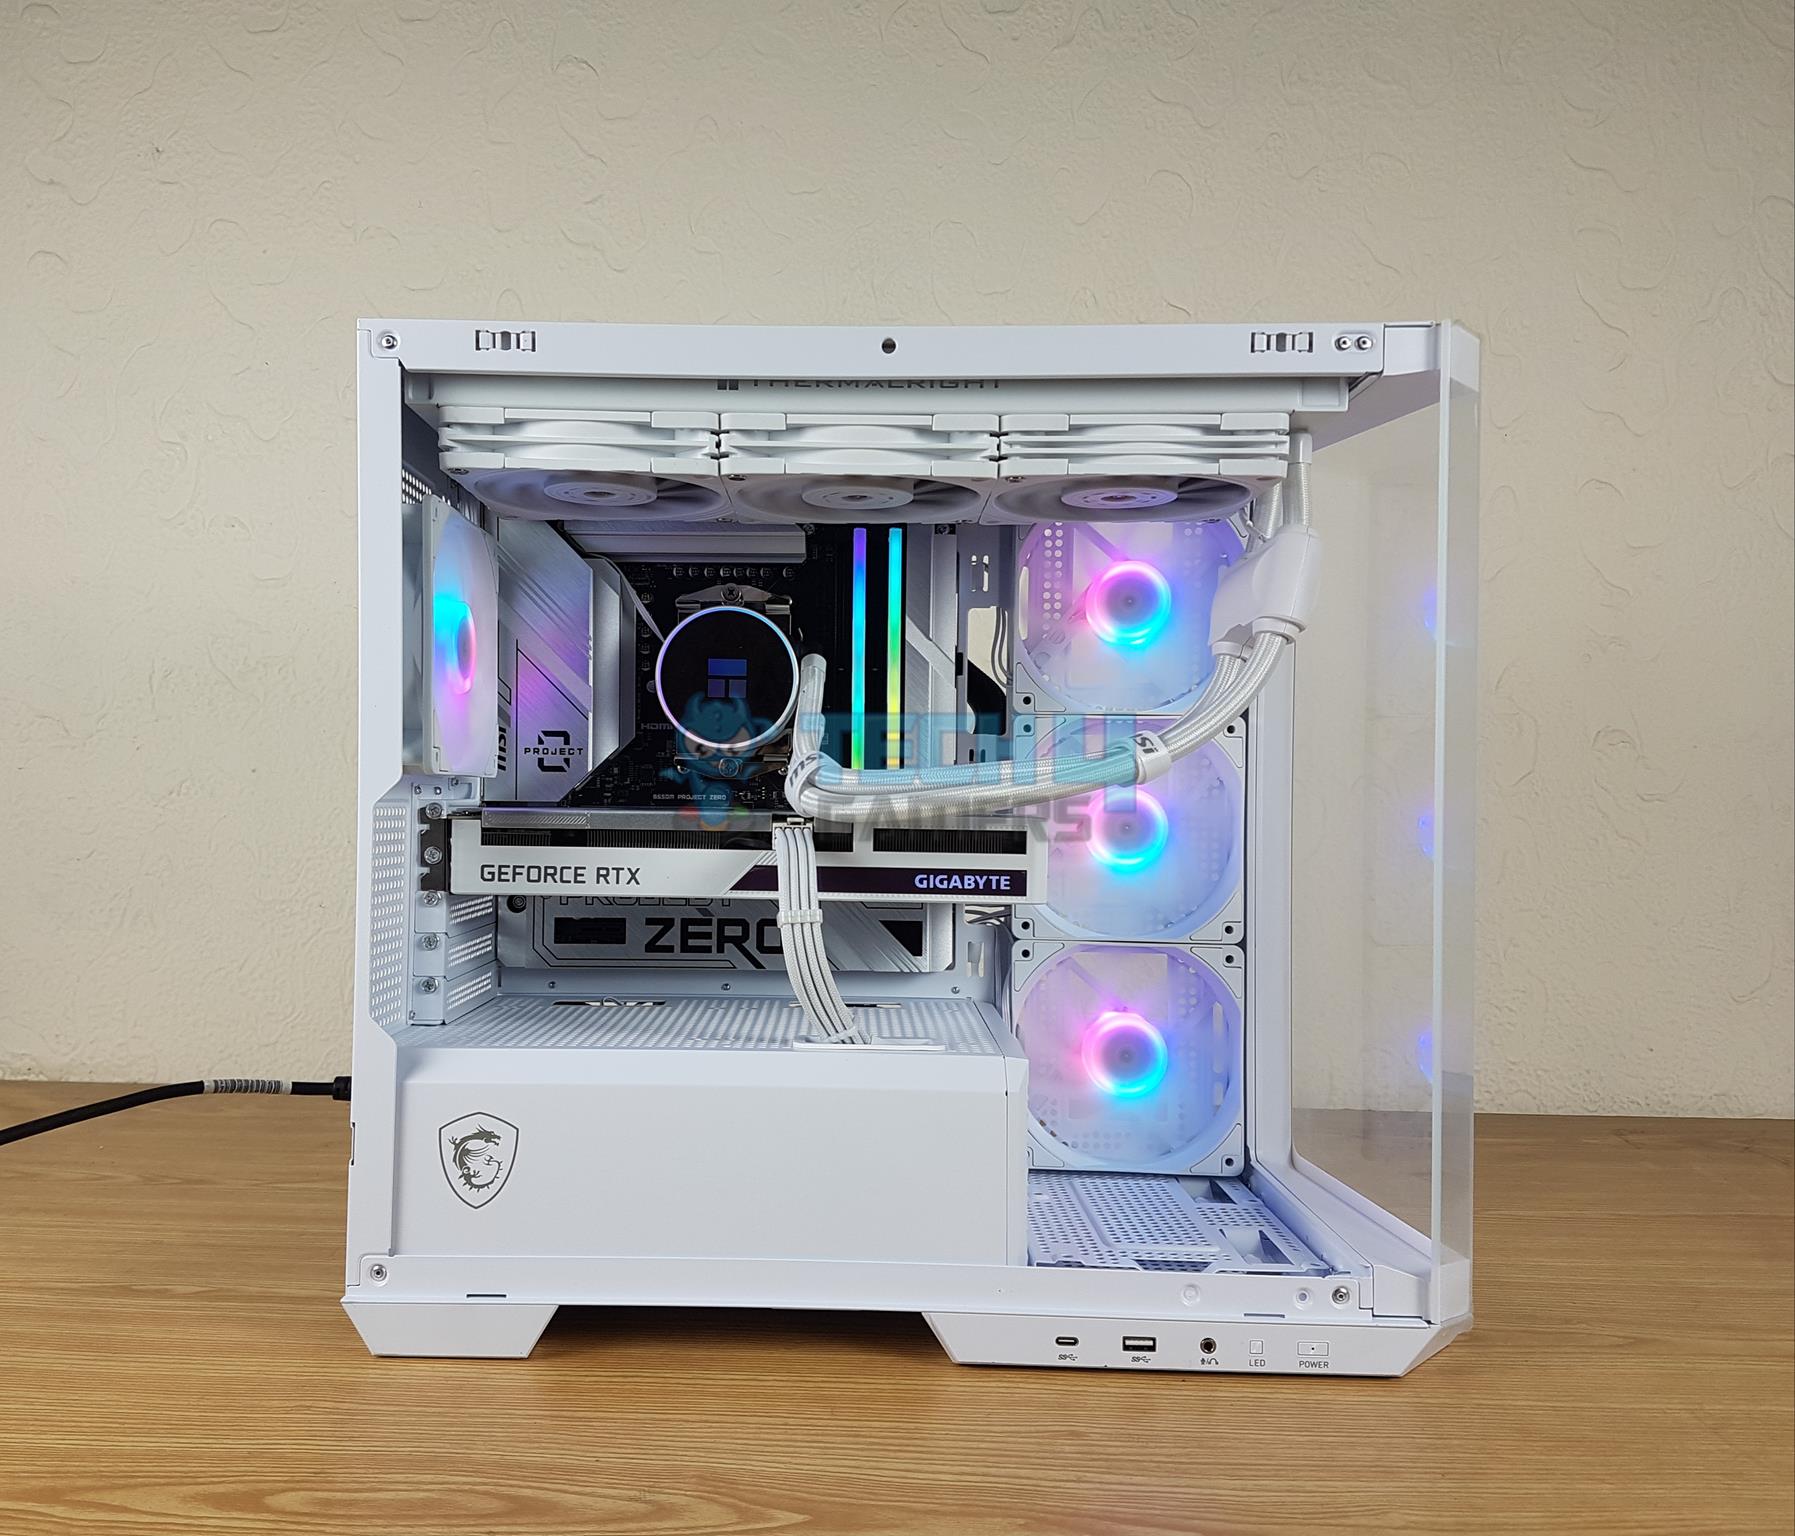
The above are a few pictures of the test build.
Should You Buy It
Buy It If
✅You like a panoramic view case: The MSI MAG PANO M100R PR has a 270ᵒ panoramic view for a brilliant display without any obstruction. This is a pillar-less design.
✅You need a case for a backplug motherboard: This case is designed for backplug motherboards like MSI B560M Project Zero for example. If you are going for these motherboards, this case is the best option for you.
Don’t Buy It If
❌You want a pocket-friendly case: If you are on a tight budget then this case is not for you since it has a retail of USD 110 for a micro-ATX size case.
❌You have a full ATX motherboard: If you have a full ATX size motherboard then this case is not for you.
Final Words
The MSI MAG PANO M100R PC case is a stylish, feature-rich option available in black and white, with a design centered around the MAG brand logo. It’s distinctive for supporting a micro-ATX backplug motherboard, similar to the XPG Invader X.
It boasts impressive cooling capabilities, accommodating up to a 360mm radiator on top and coming with 4x 120mm ARGB fans, three of which have reversed blades. Additional fans can be installed over the PSU shroud. The case offers a 270-degree panoramic view through glass panels on the front and side, featuring a pillar-free design. While the storage options are limited, it supports various drive configurations and requires PCIe SATA or NVMe drives for additional storage.
The case accommodates large graphics cards (up to 390mm) with a GPU support bracket and has a maximum CPU cooler height of 175mm. It includes a USB 3.2 Gen2x2 (20Gbps) Type-C port on the front IO Panel, a 90-degree USB Type-A connector, and a dedicated Fan ARGB controller hub.
I had a good time with this case and its ability to provide a clean outlook on the front side is the next big thing in the PC industry. MSI has stepped in with the right PC Case that checks all departments and is tanked build. The maximum temperature on my graphics card was 66ᵒC under load and the CPU was at 95ᵒC (This is by design). This case has my strong recommendation.
Thank you! Please share your positive feedback. 🔋
How could we improve this post? Please Help us. 😔
[Hardware Expert]
With a major in Computer Science, Sameed is a tech enthusiast who puts his passion for gadgets into words and creates informative blogs. From comparing different hardware to reviewing the best RAMs, motherboards, and graphics cards for your next build, Sameed has covered a wide spectrum of topics that have given him a special insight into every nook and cranny of the tech world. Sameed is also a certified expert at Computer Hardware & Networking.
Get In Touch: sameed@tech4gamers.com


