 Threads
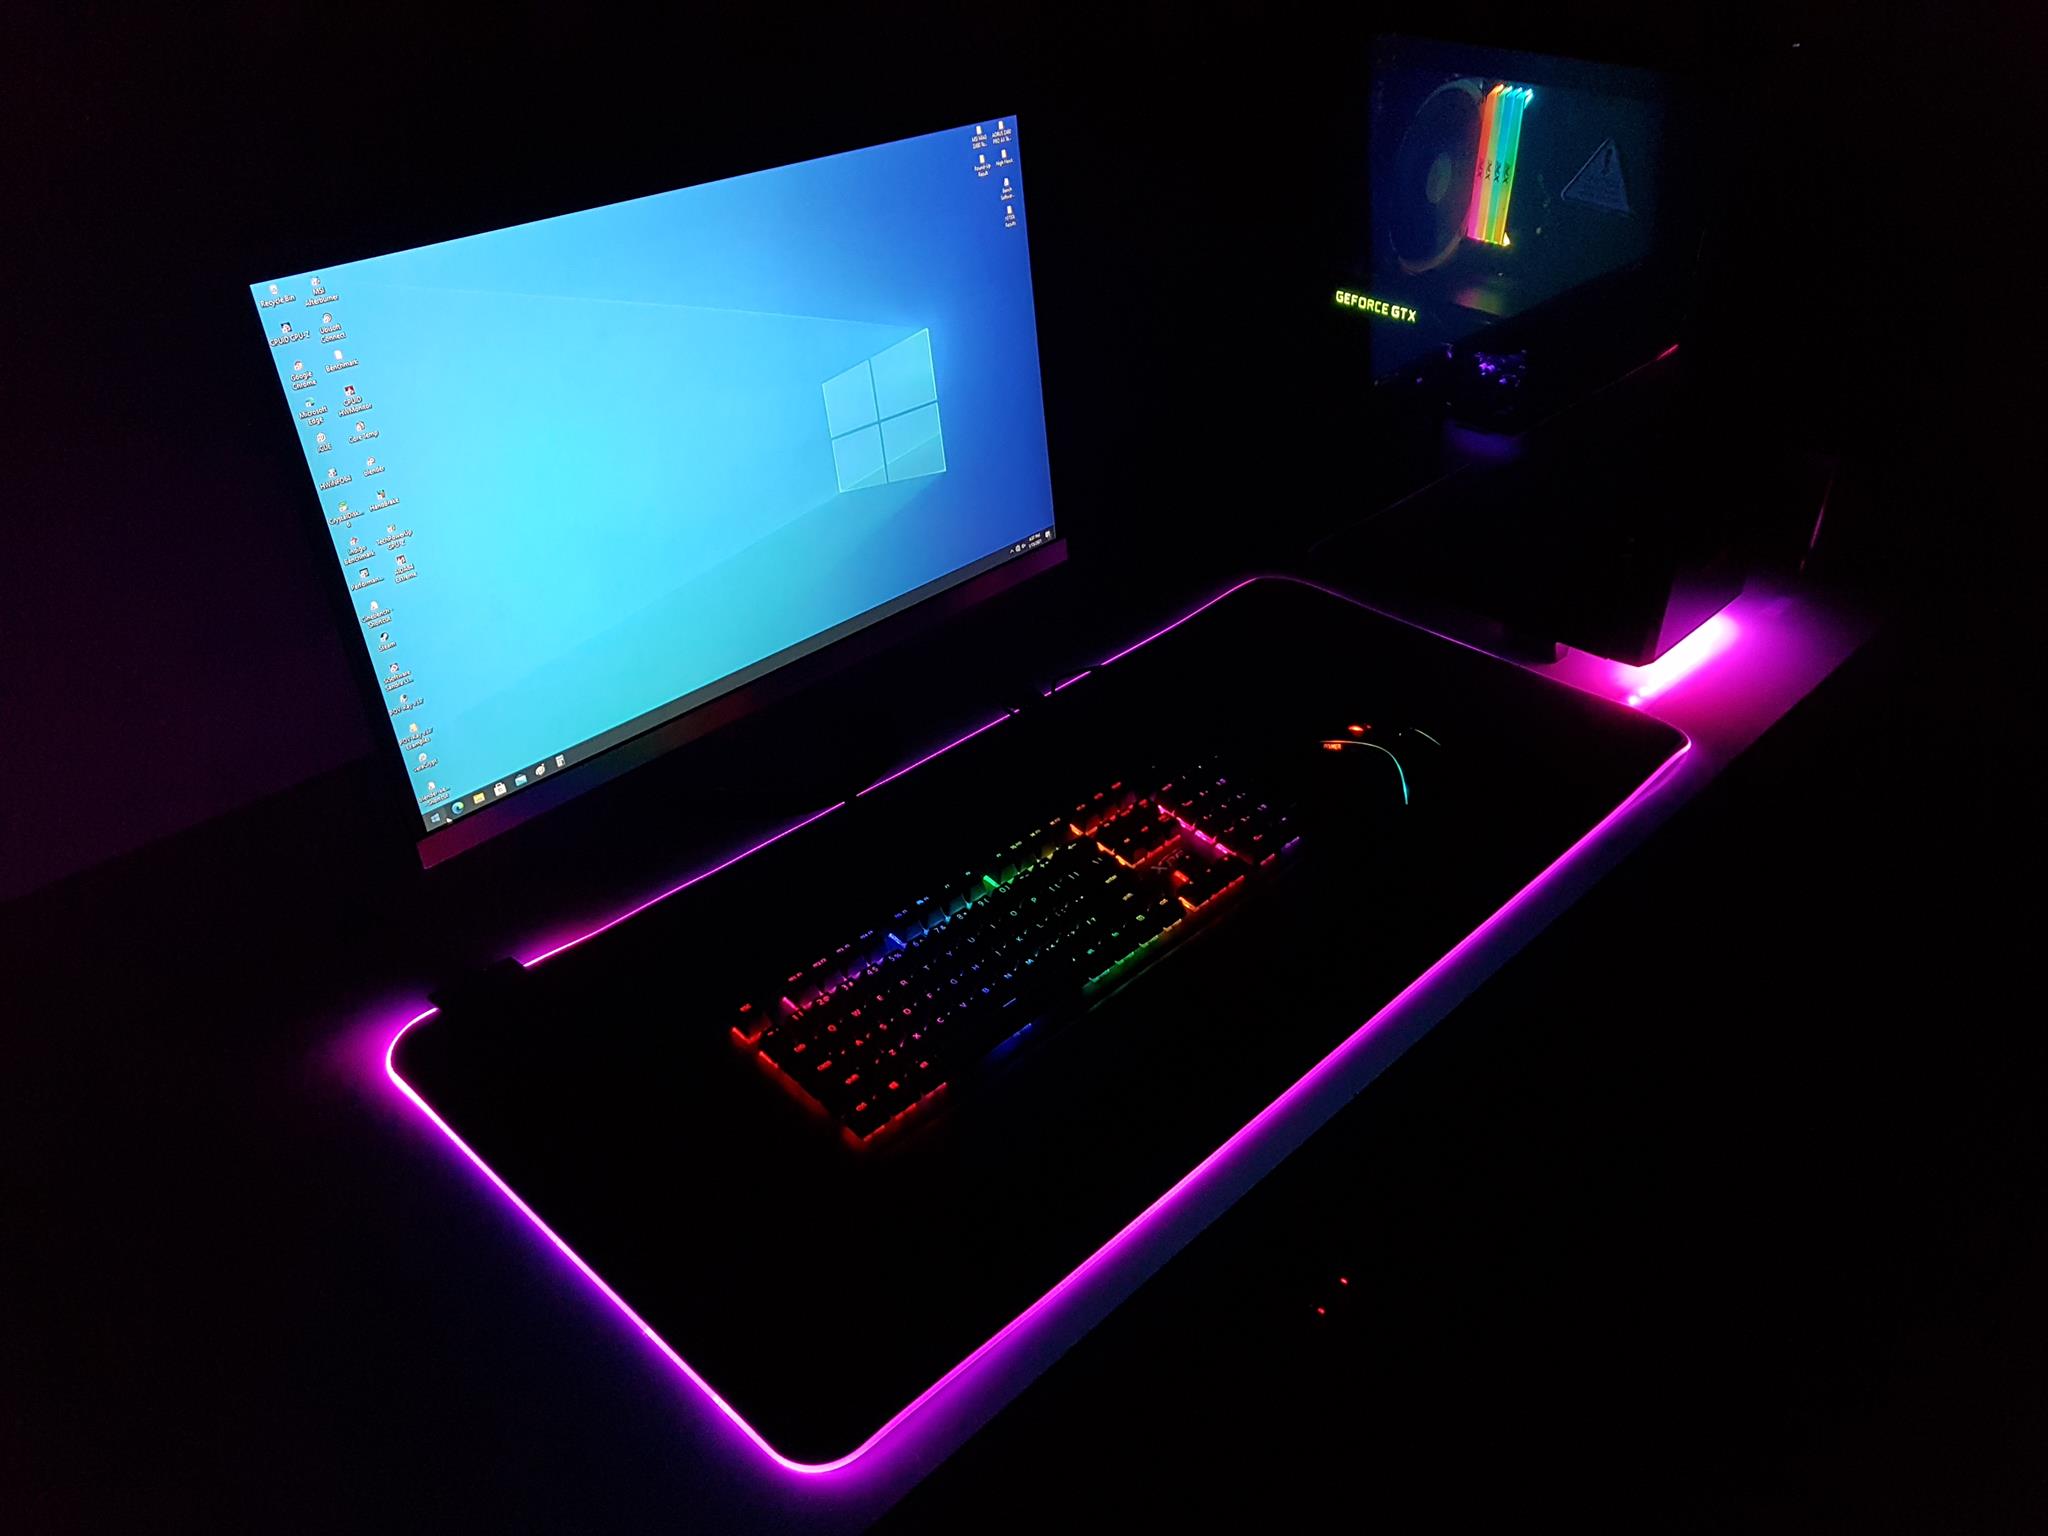
Beautiful Looks!
Review Summary
The XPG Invader Chassis impresses with its sleek design, RGB under-glow, and user-friendly tool-less build. Supporting full ATX motherboards, it offers excellent cooling flexibility. However, potential buyers planning a top-mounted AIO cooler should be cautious of space limitations and cable management challenges. The chassis demonstrated competent thermal performance in testing, with effective airflow and manageable noise levels.
Hours Tested: 8-10

Overall
-
Build Quality - 8/10
8/10
-
Design - 9/10
9/10
-
Performance - 8/10
8/10
-
Value - 8/10
8/10
Pros
- Great Performance
- Sleek Design
- Tool-less Build
- Cooling Flexibility
Cons
- Top-Mounted AIO Challenges
- Inconvenient Buttons


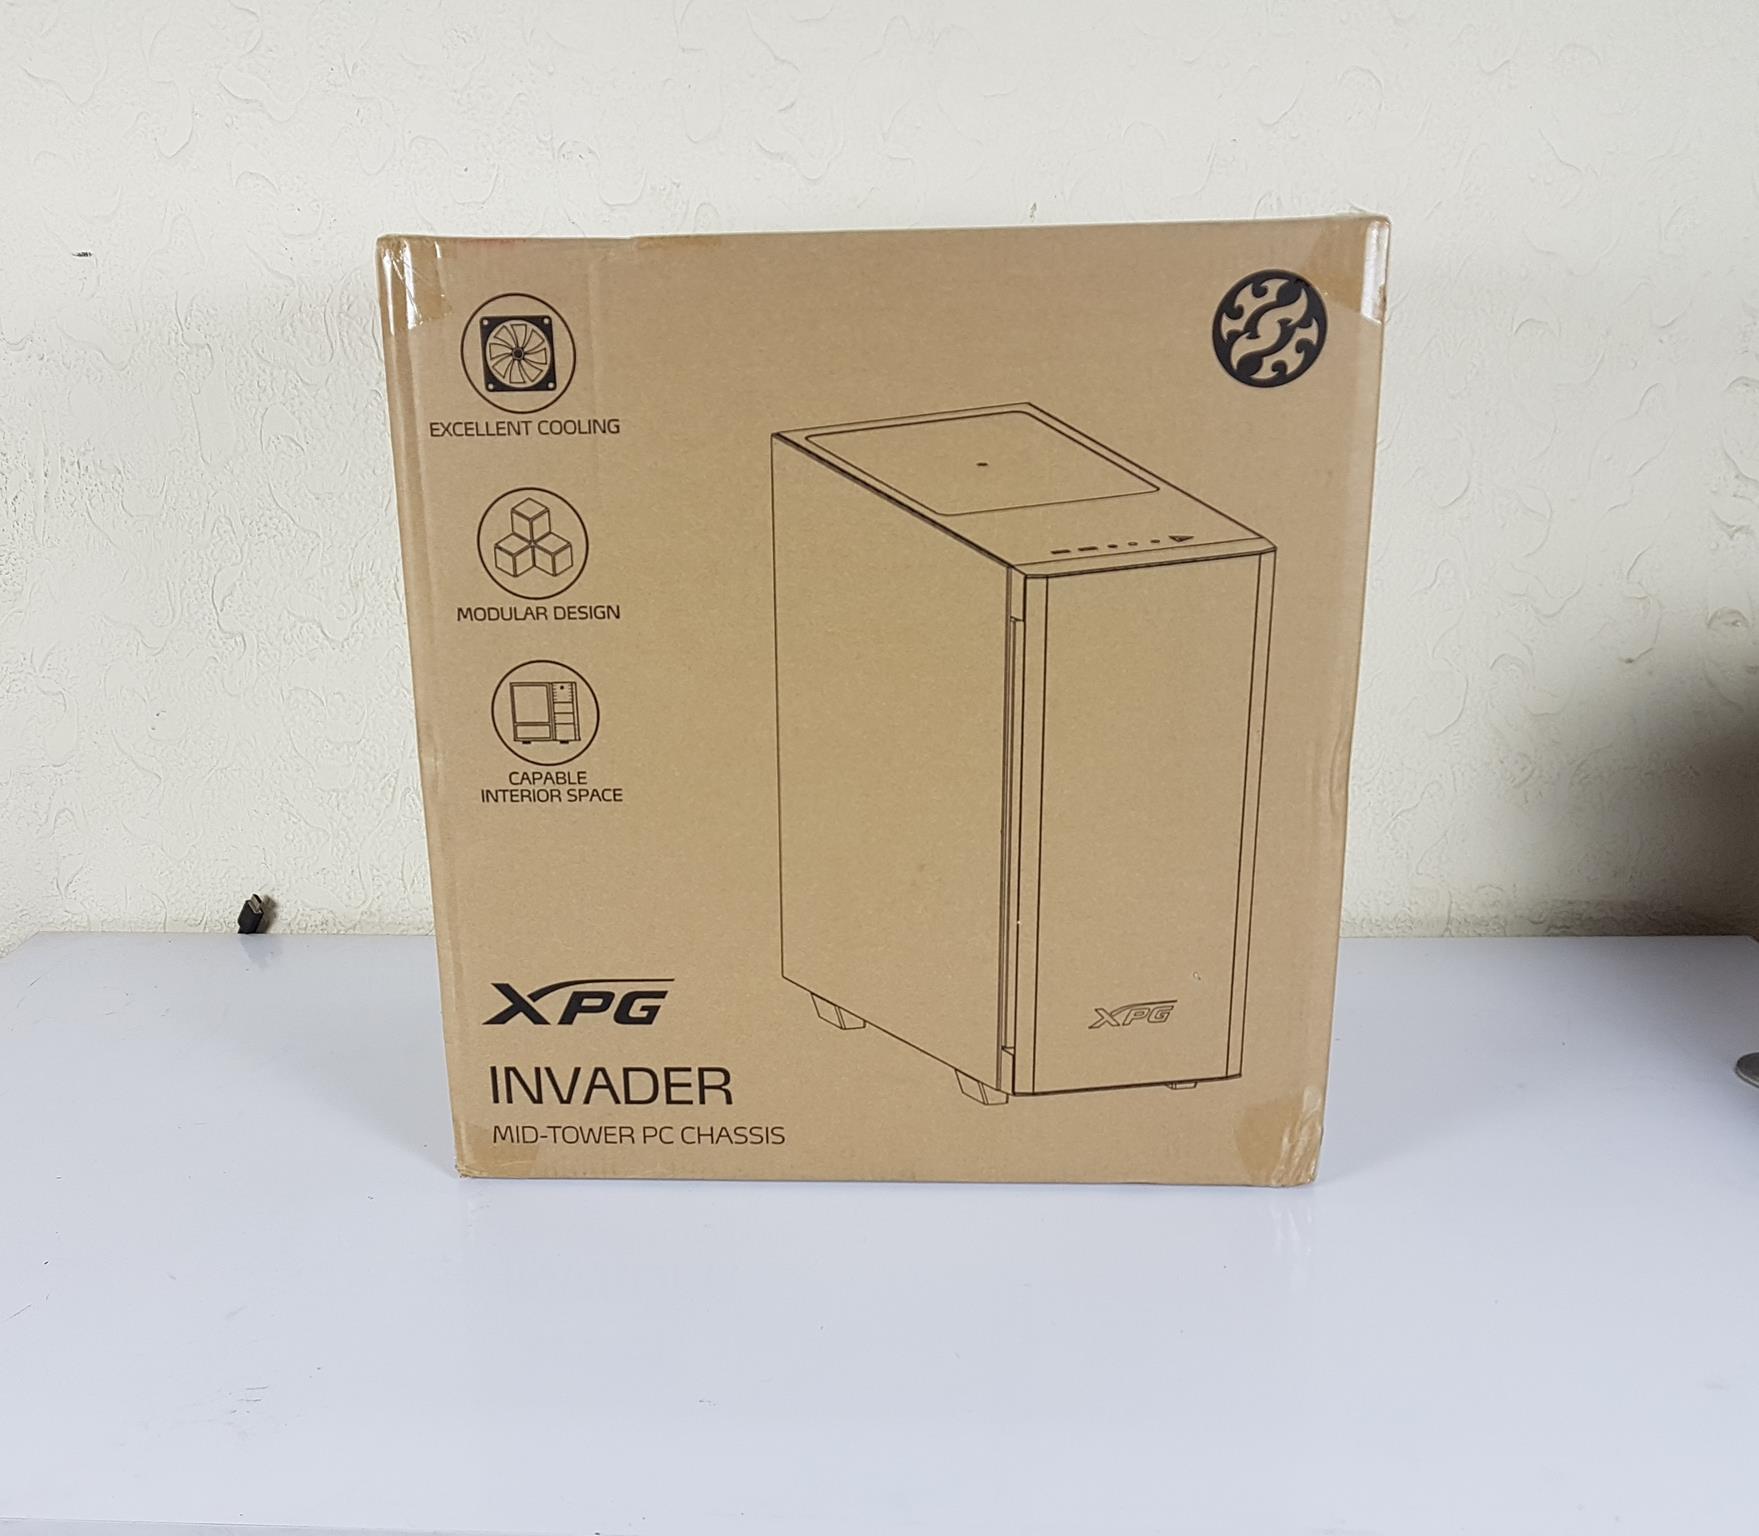
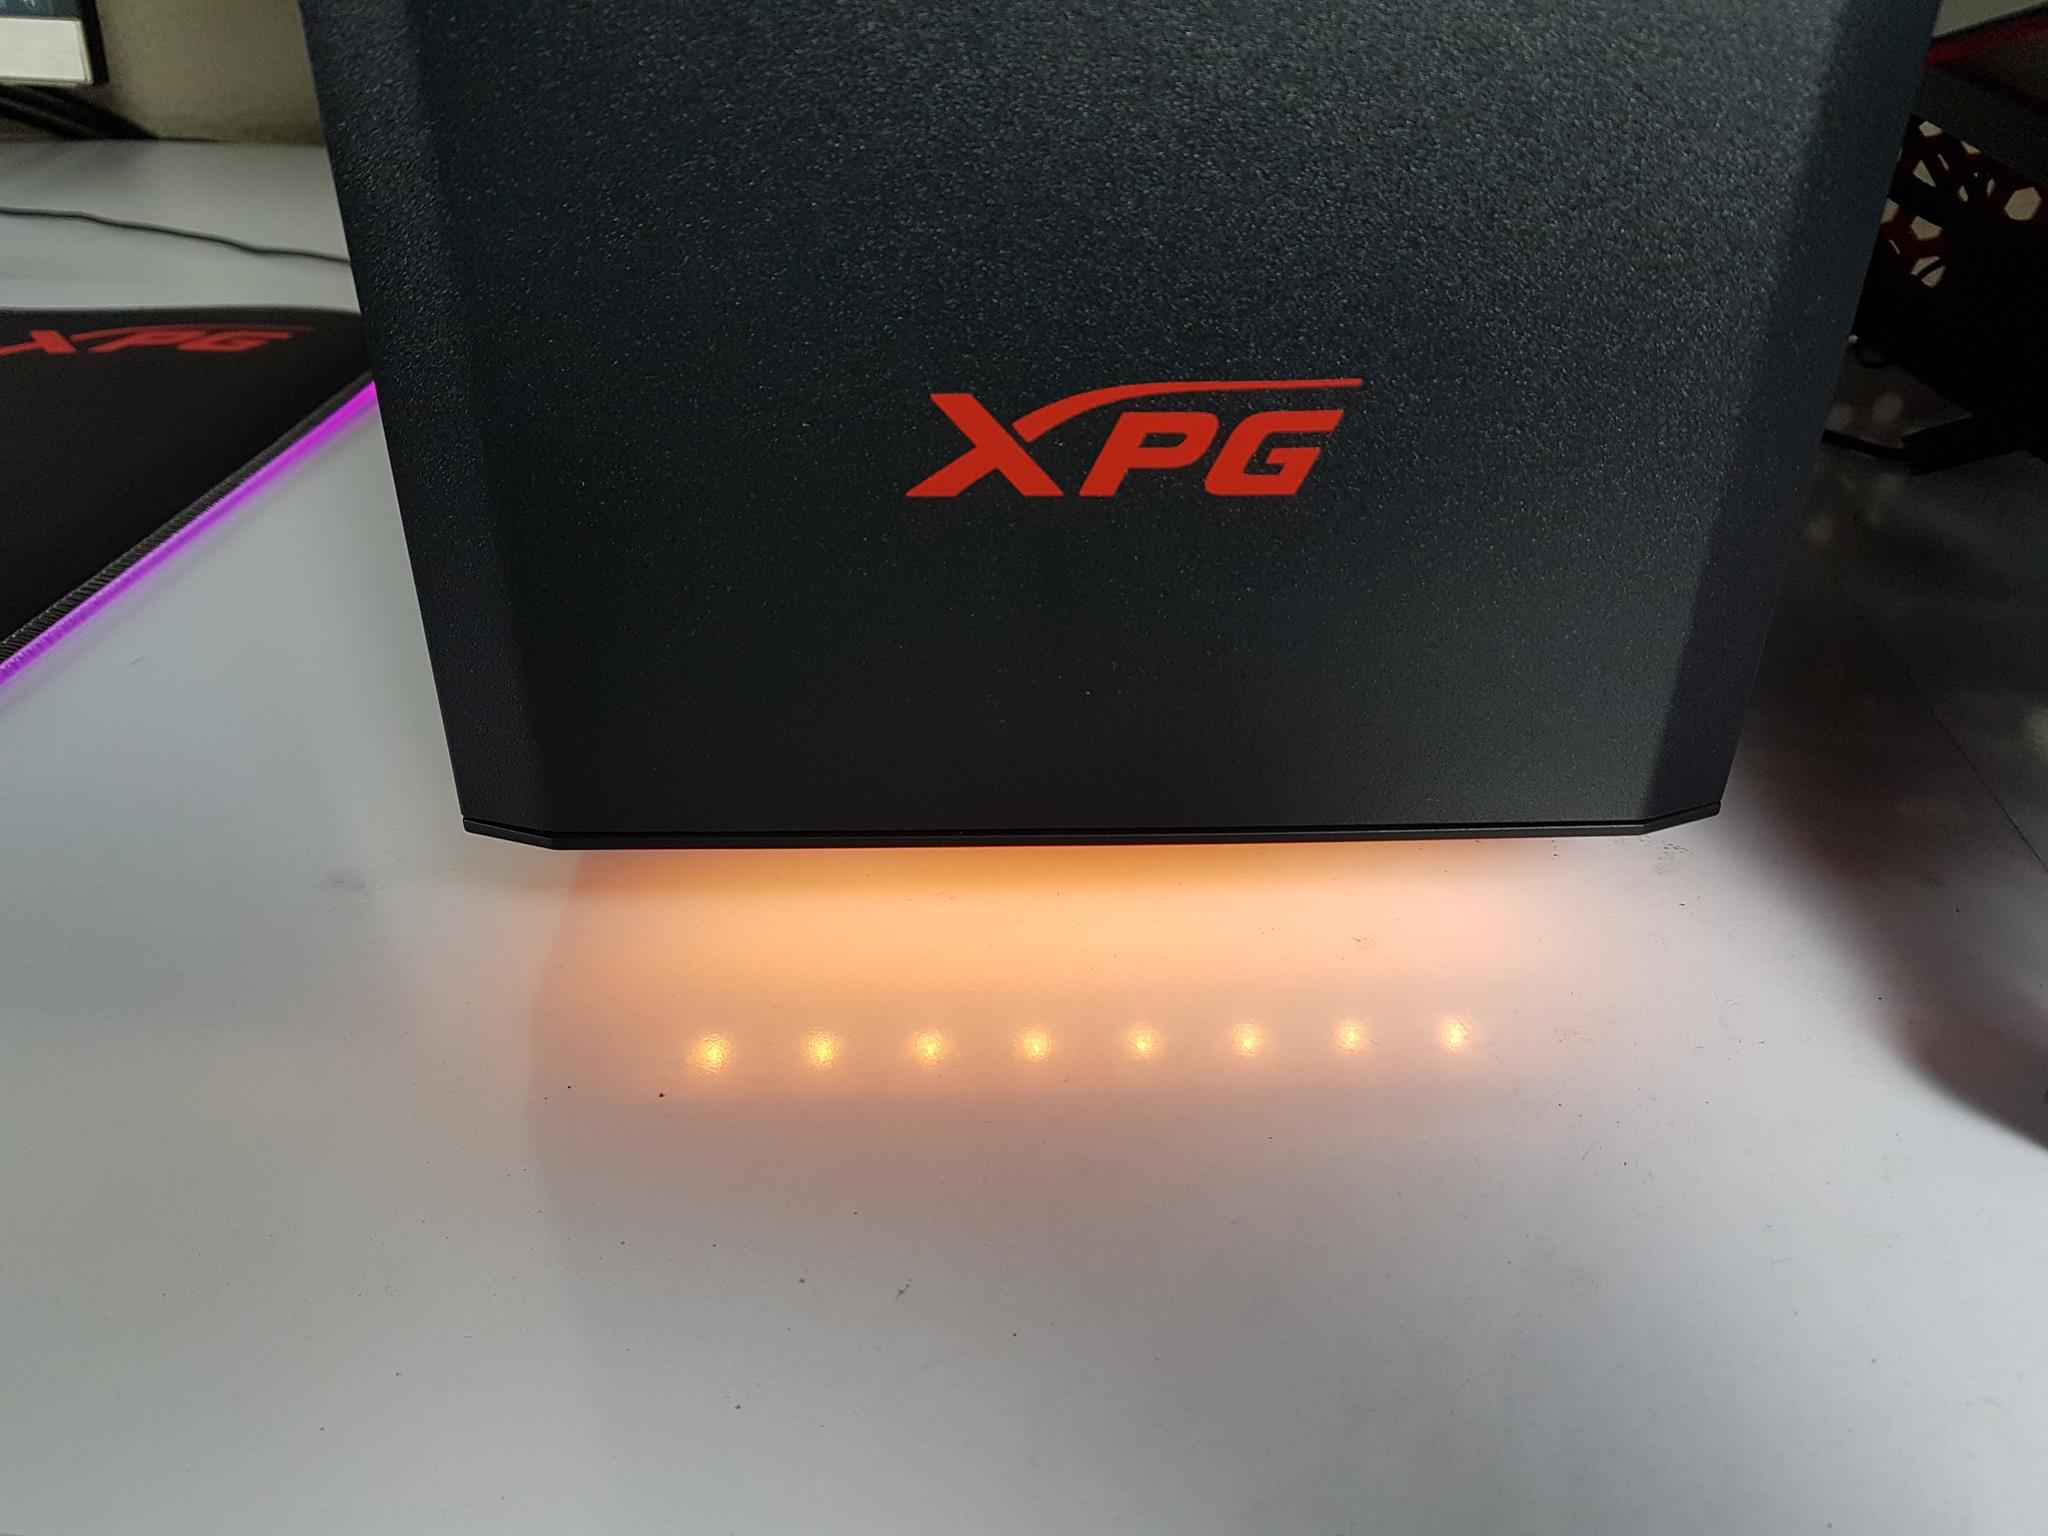
In this review, we are taking a look at their XPG Invader Chassis Review. This is a mid-tower PC chassis with support of up to full ATX-size motherboards with adequate cooling and storage provision. XPG has taken a different design approach on the front with a magnetic cover and a magnetic dust filter. Another feature is the down light design on the front which illuminates to give an under glow effect.
Key Takeaways
- XPG Invader Chassis is a sleek mid-tower PC case with a magnetic front cover, RGB under-glow, and user-friendly tool-less build features.
- You should get the XPG Invader Chassis if you appreciate a visually appealing design, prioritize a tool-less and user-friendly build, and enjoy customizable RGB lighting effects.
- You should not get the XPG Invader Chassis if you plan to install a top-mounted AIO cooler, especially with taller RAM modules, and if you have a high-airflow requirement for GPUs.
- Why you can trust Tech4Gamers: We understand the importance of making informed decisions. That’s why our team spends significant time testing every product we review. Find out more about how we test.
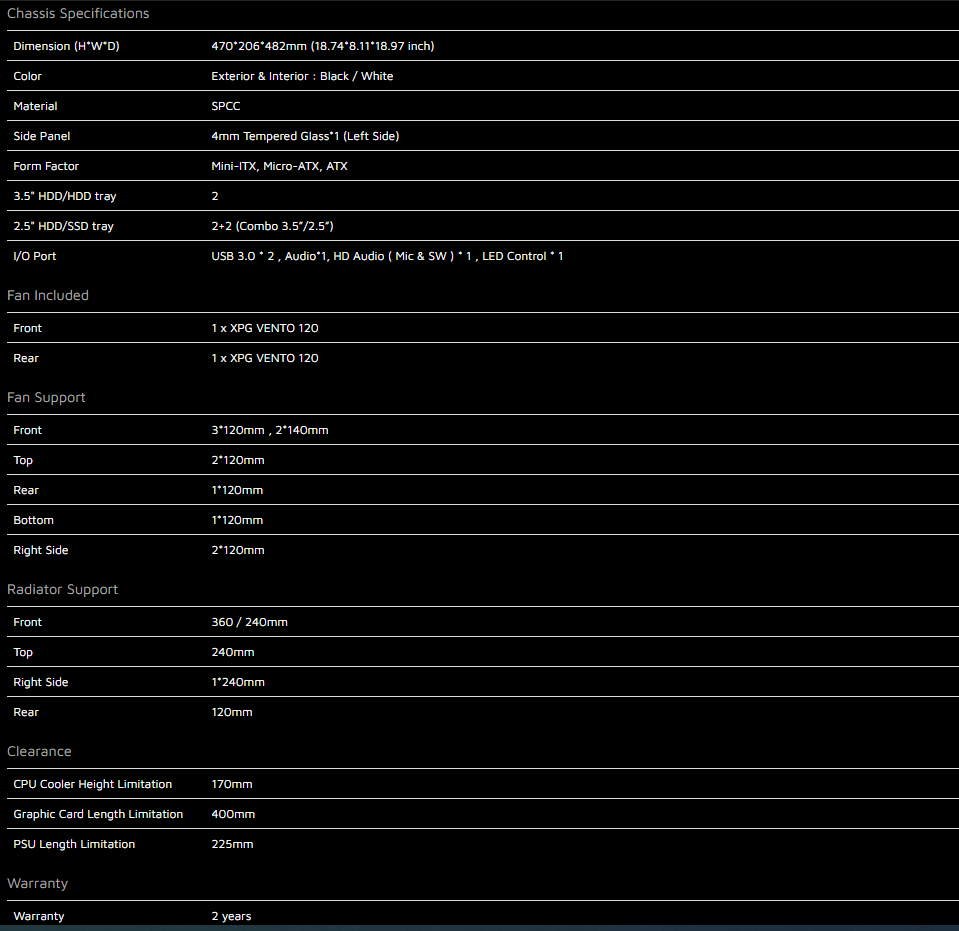
Let’s start with the specifications.
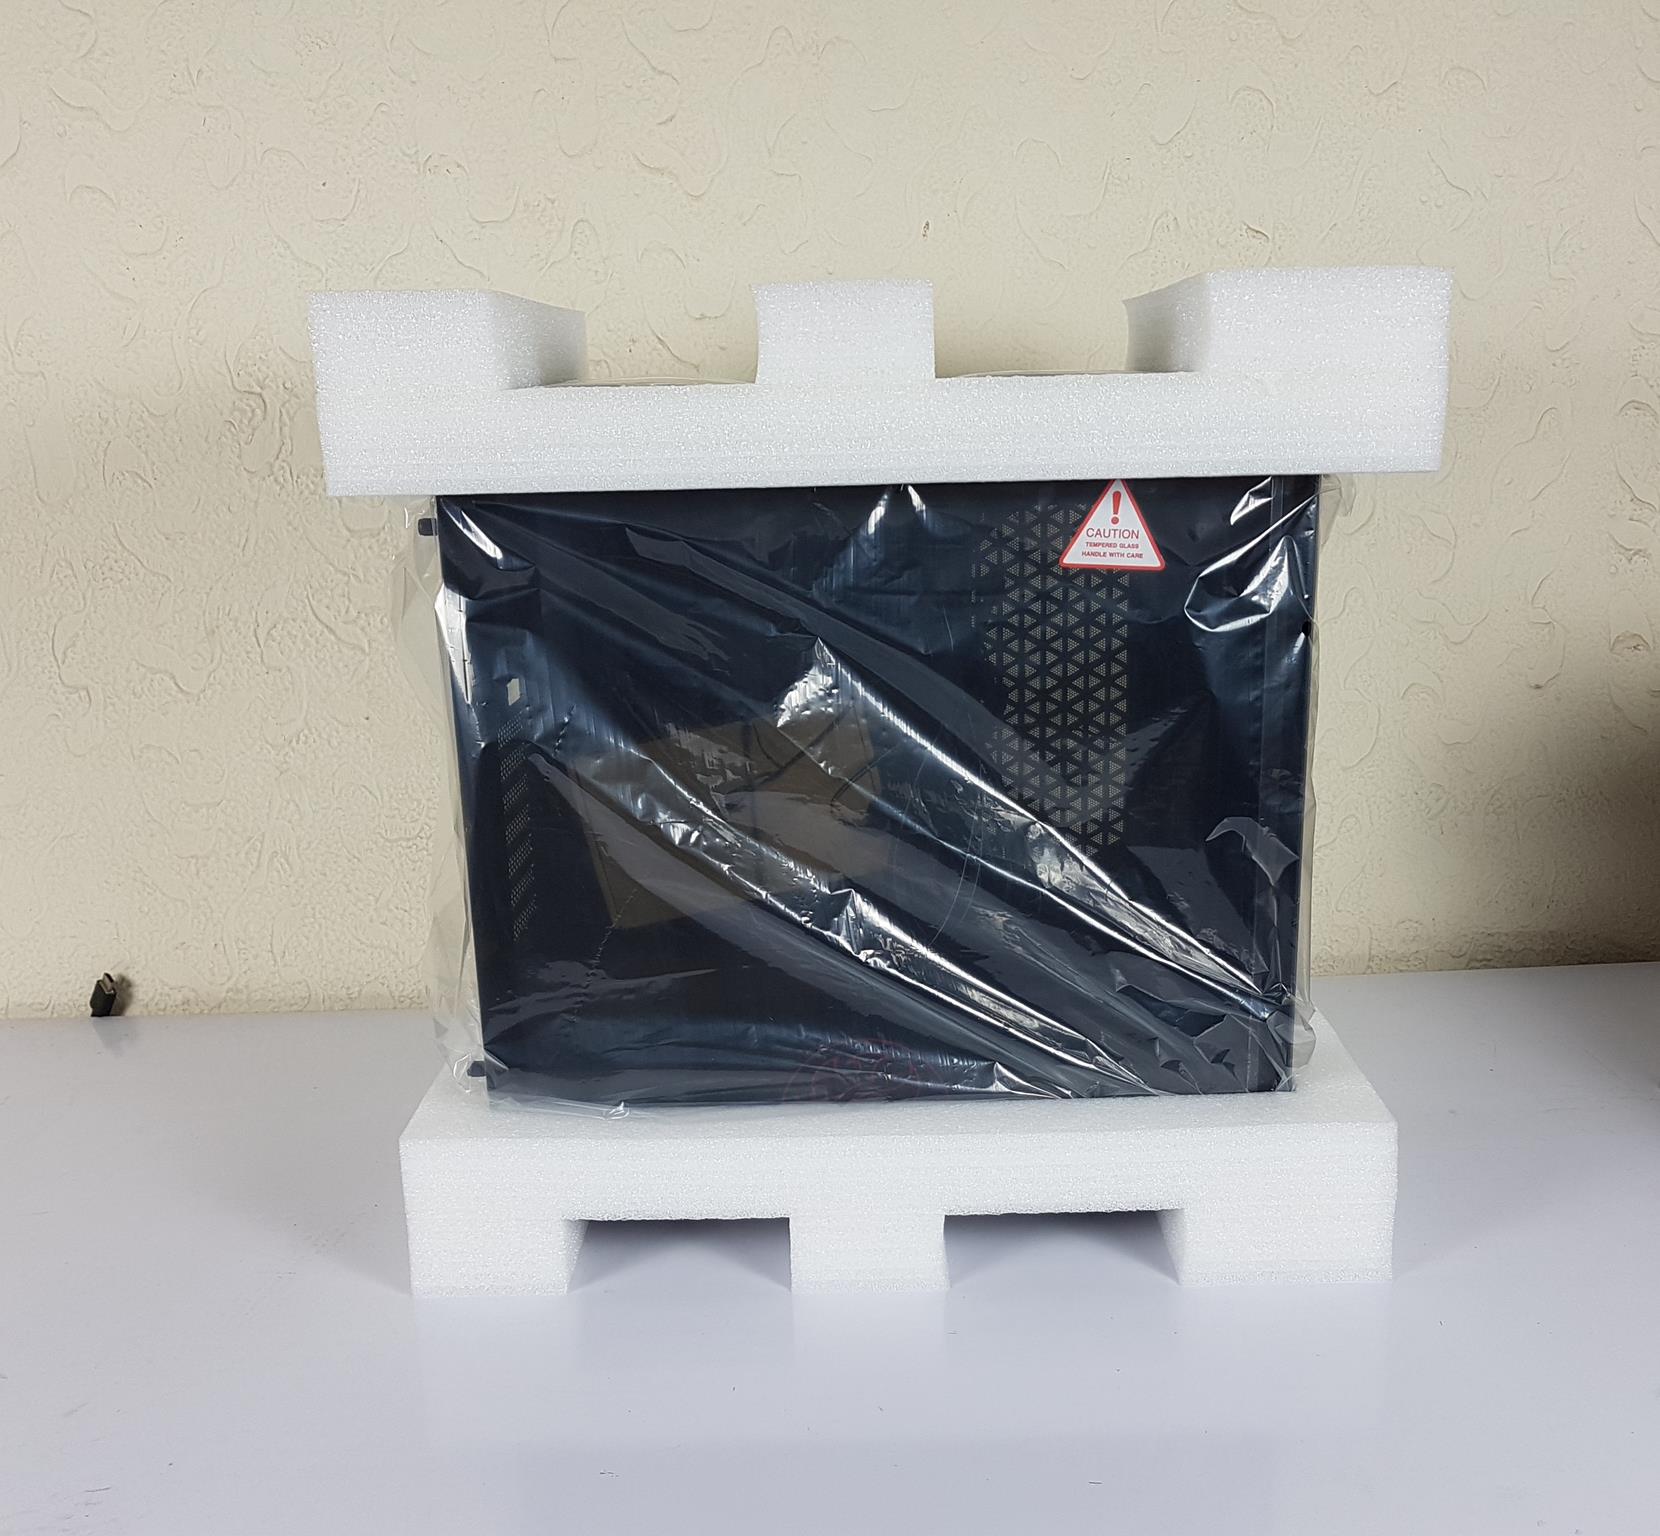
Packaging And Unboxing
The cooler is shipped inside a standard brown color cardboard box.

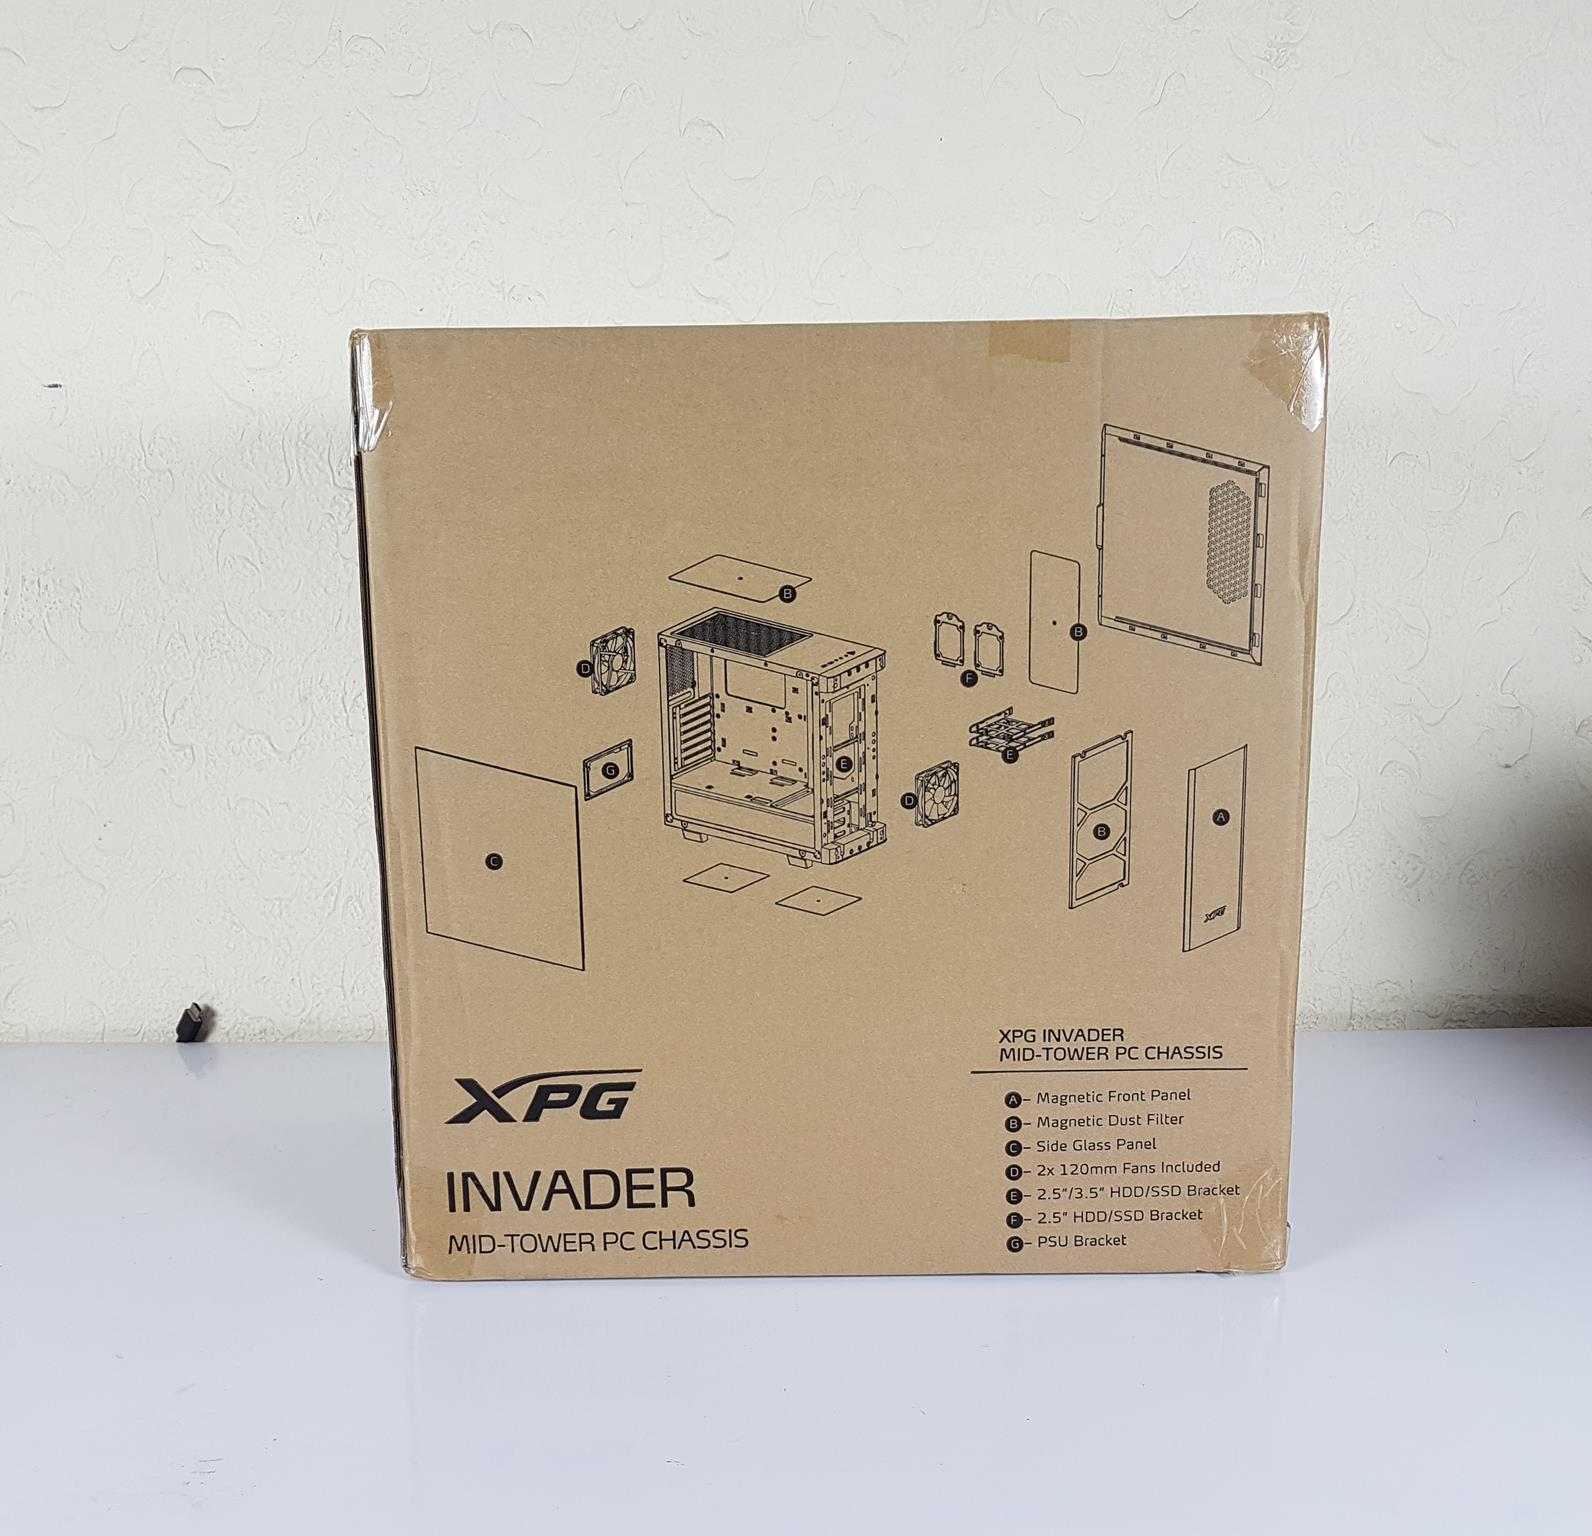
Contents
The following are included in the box:
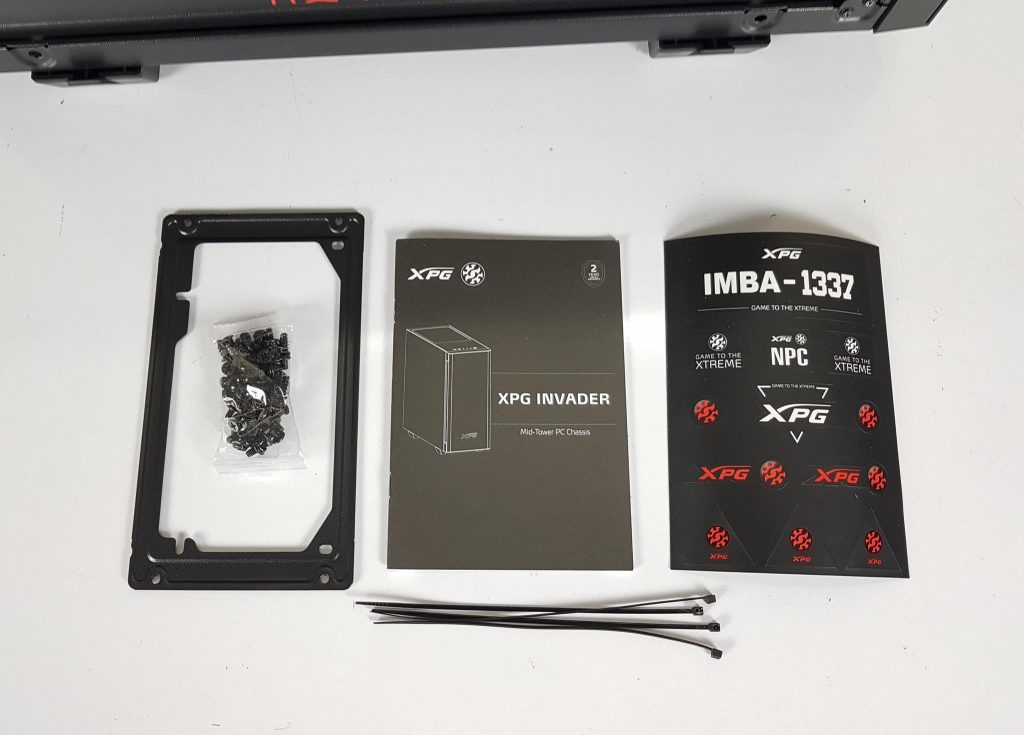
- 1x PSU Bracket
- 1x User Guide
- 1x Sticker Sheet
- 4x Zip Ties
- 1x container of the screws.
Closer Look
Introducing the XPG INVADER mid-tower chassis – sleek, versatile, and designed for easy use. With a tool-less design, high-airflow layout, and customizable front RGB downlight, it’s a head-turner. The tempered glass panels in white or black add a touch of elegance.
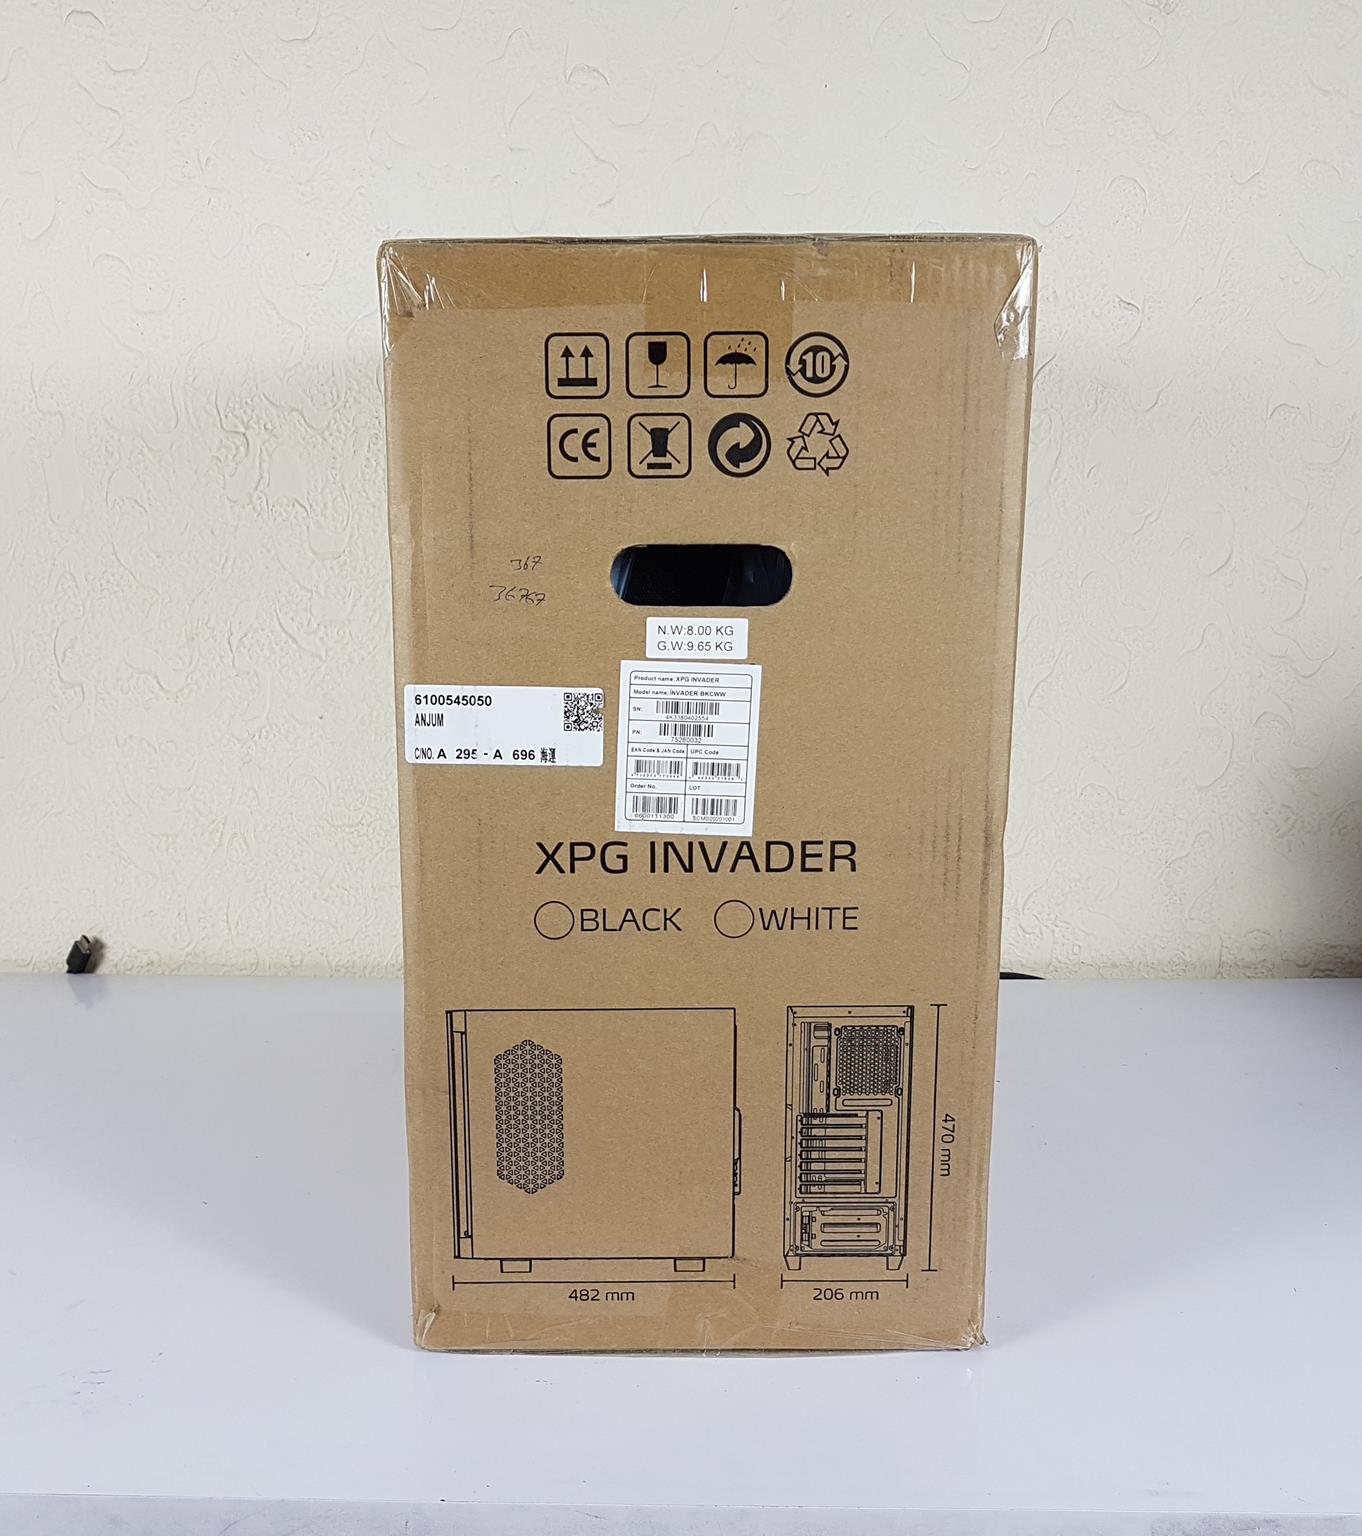
Dimensions: 470x206x482mm, made of SPCC steel, and weighs 8.0 kg. Now, let’s dive into the exterior.
XPG Invader Exterior

The XPG Invader chassis features a solid steel magnetic cover, providing a sleek design with an XPG branding in red at the bottom. The cover attaches securely using powerful magnets, allowing for convenient removal on the go. Despite the close design, airflow is addressed with a gap between the cover and the front magnetic dust filter, minimizing intake restrictions.
The backside of the front cover features a solid design with two columns of raised steel bars that insert into catchers on the main frame.
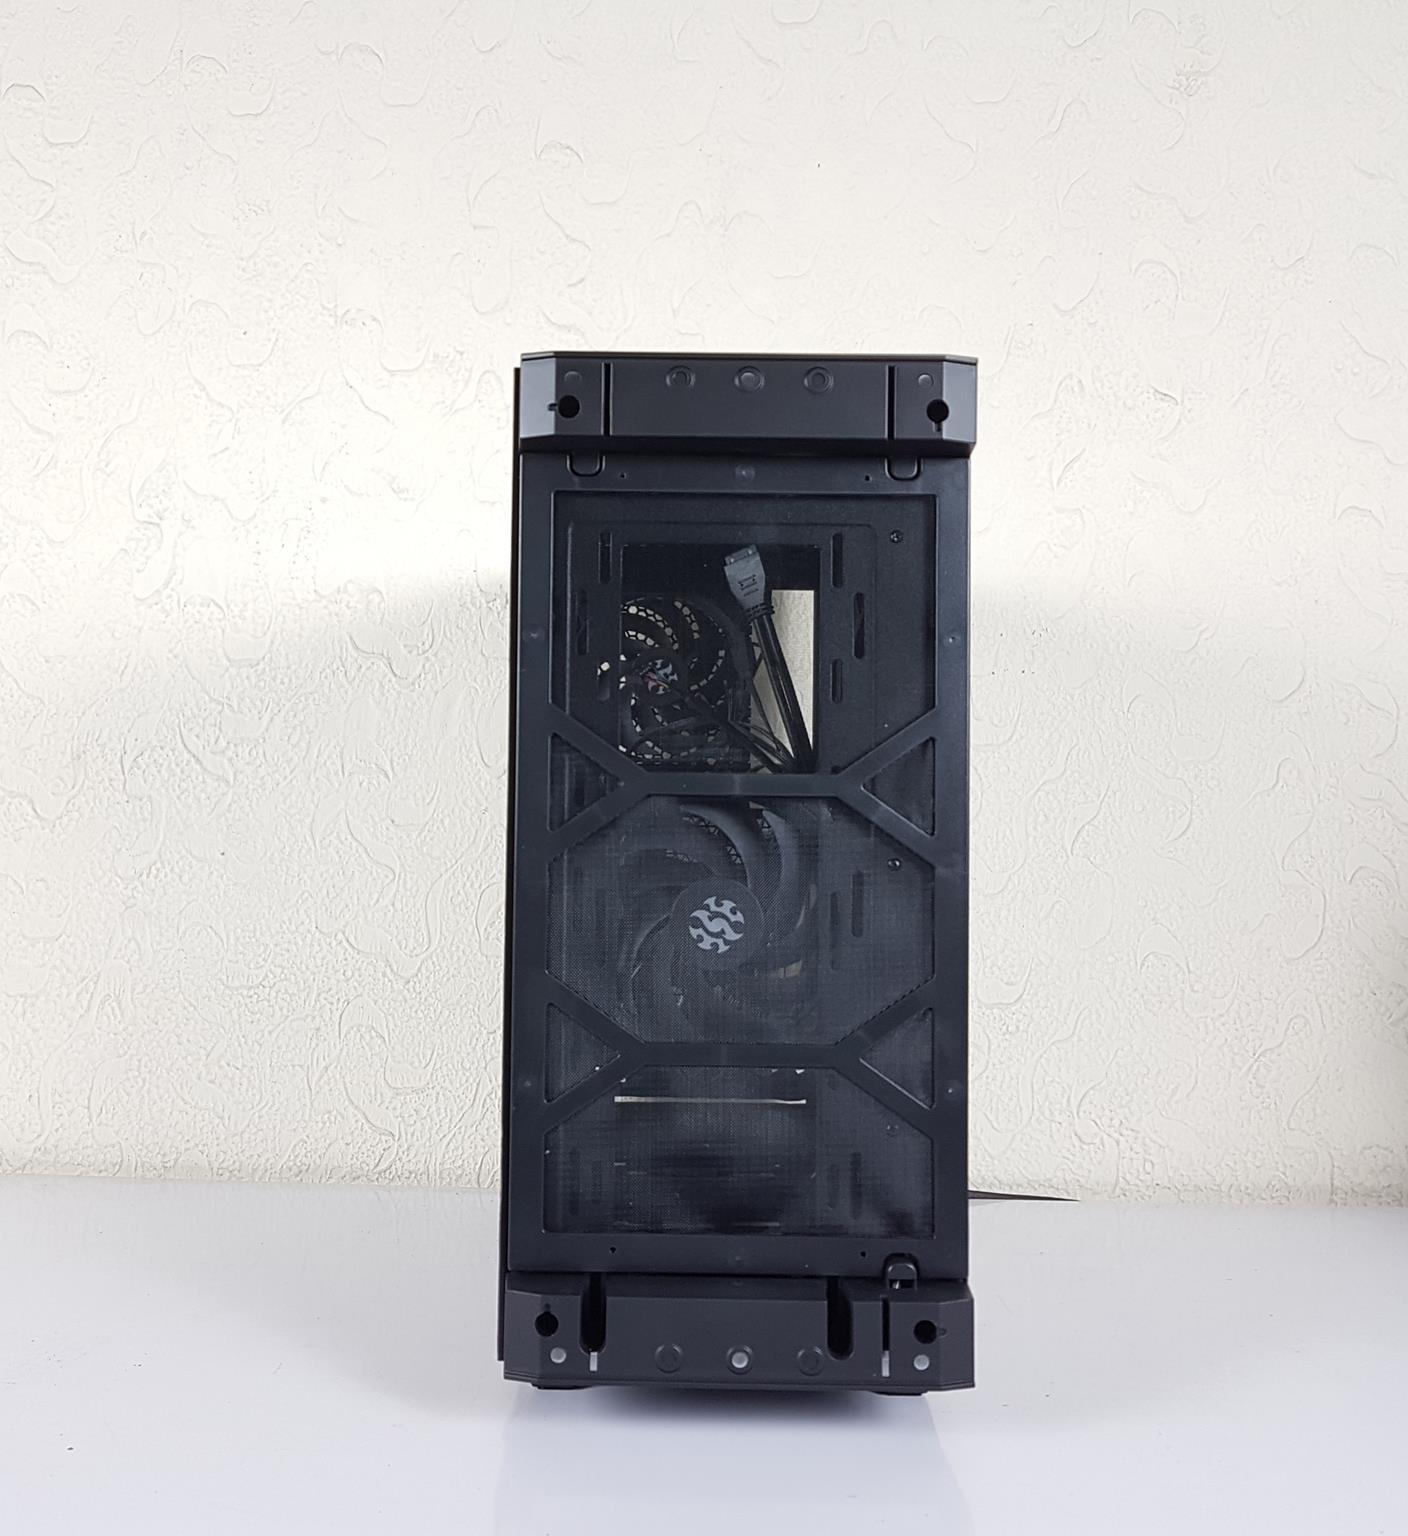
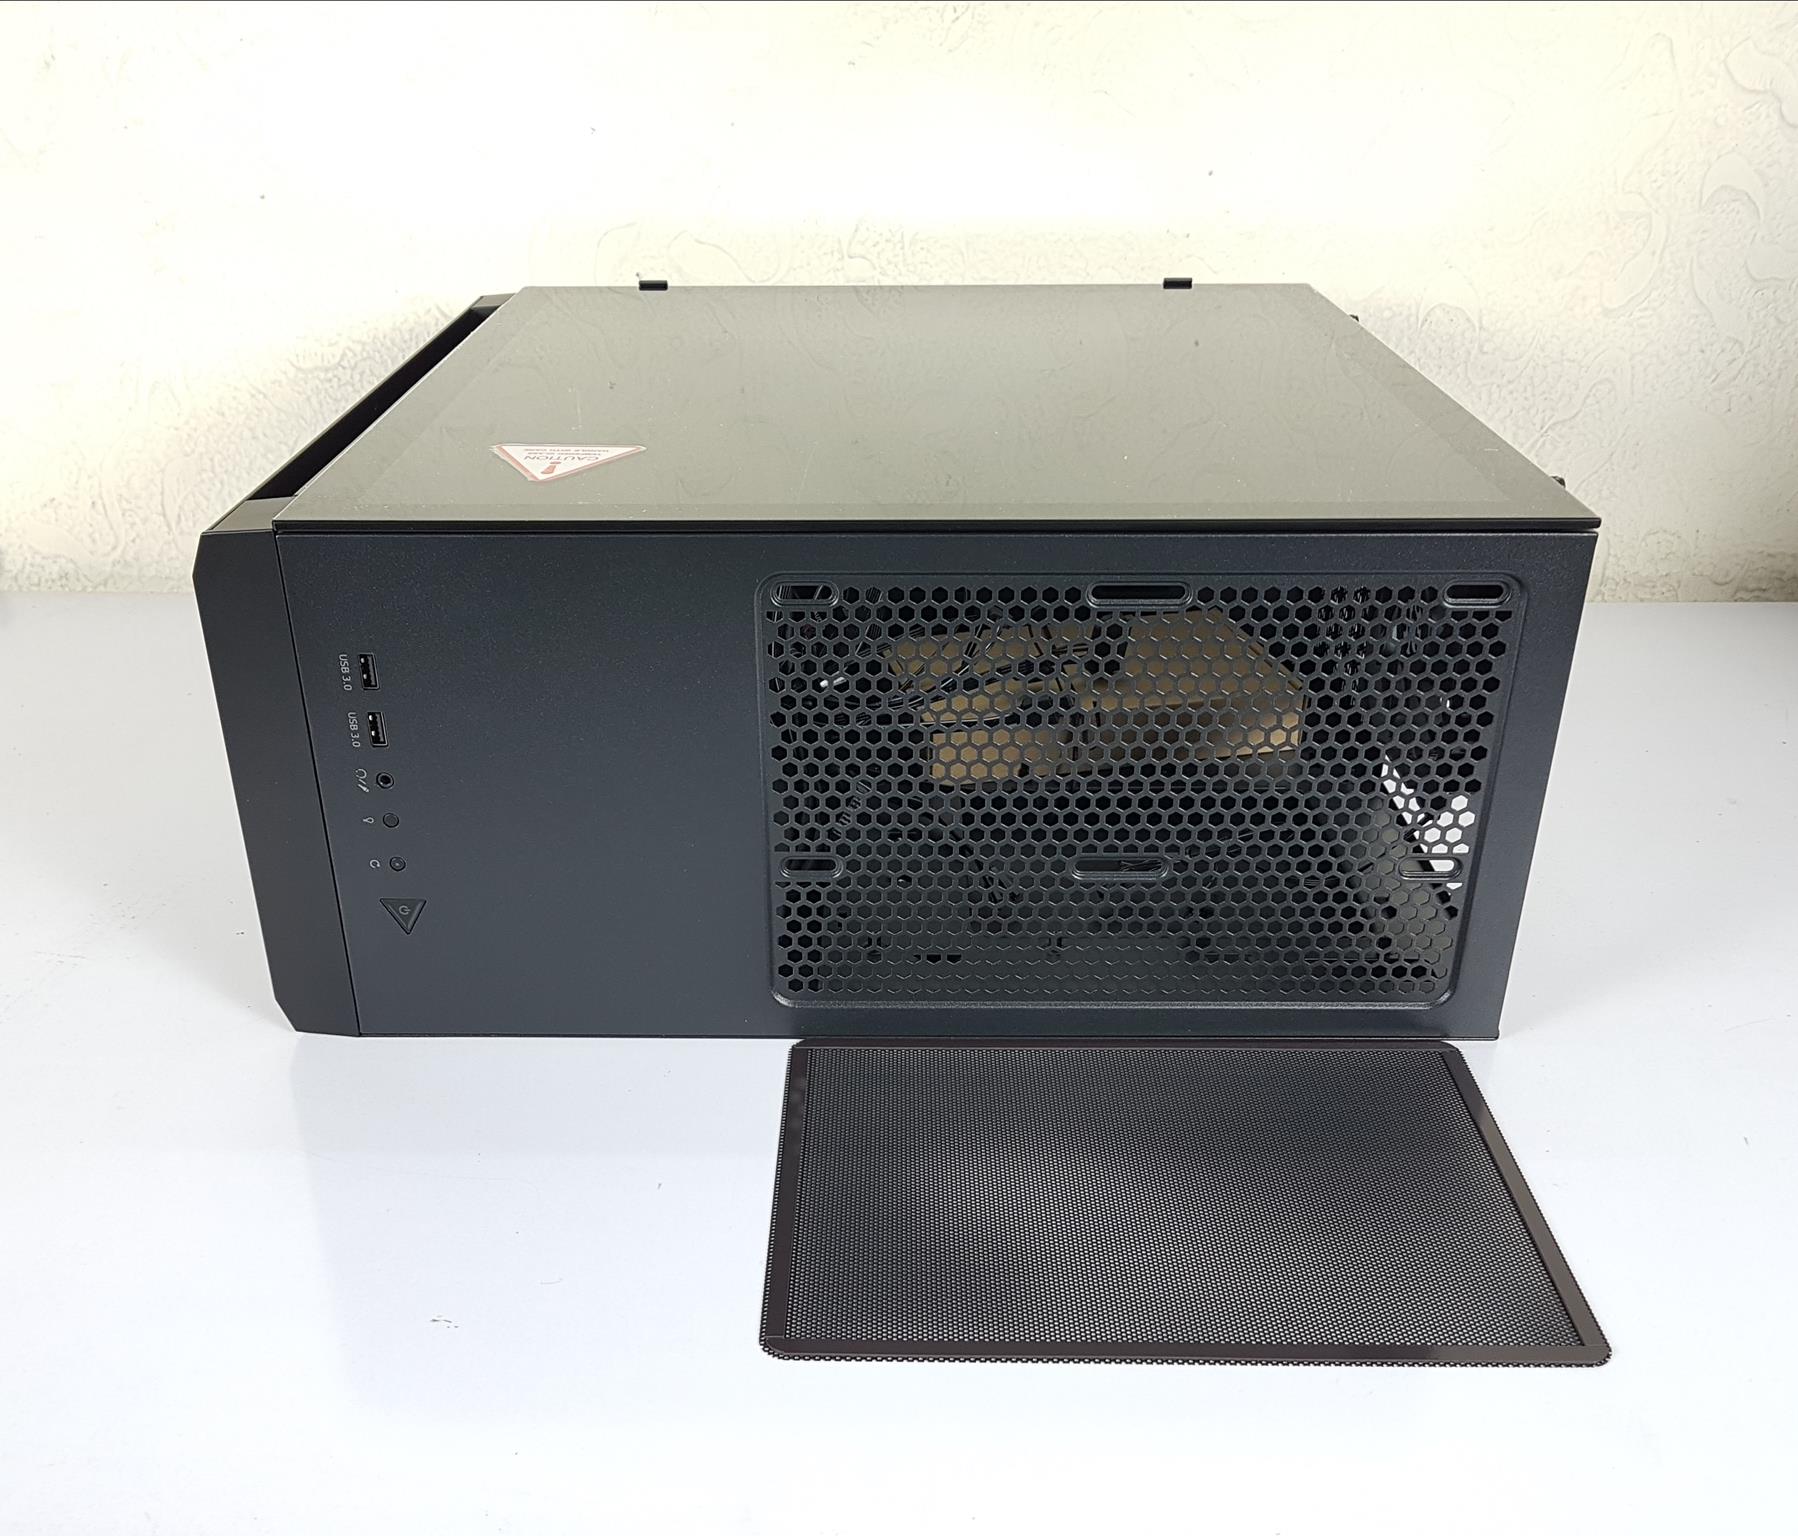
The front of the INVADER, shown above with the cover removed, reveals a magnetic dust filter for full-length filtration. Cutouts on the top and bottom align with steel bars on the front cover, secured by three magnets on both ends (Silver Color).
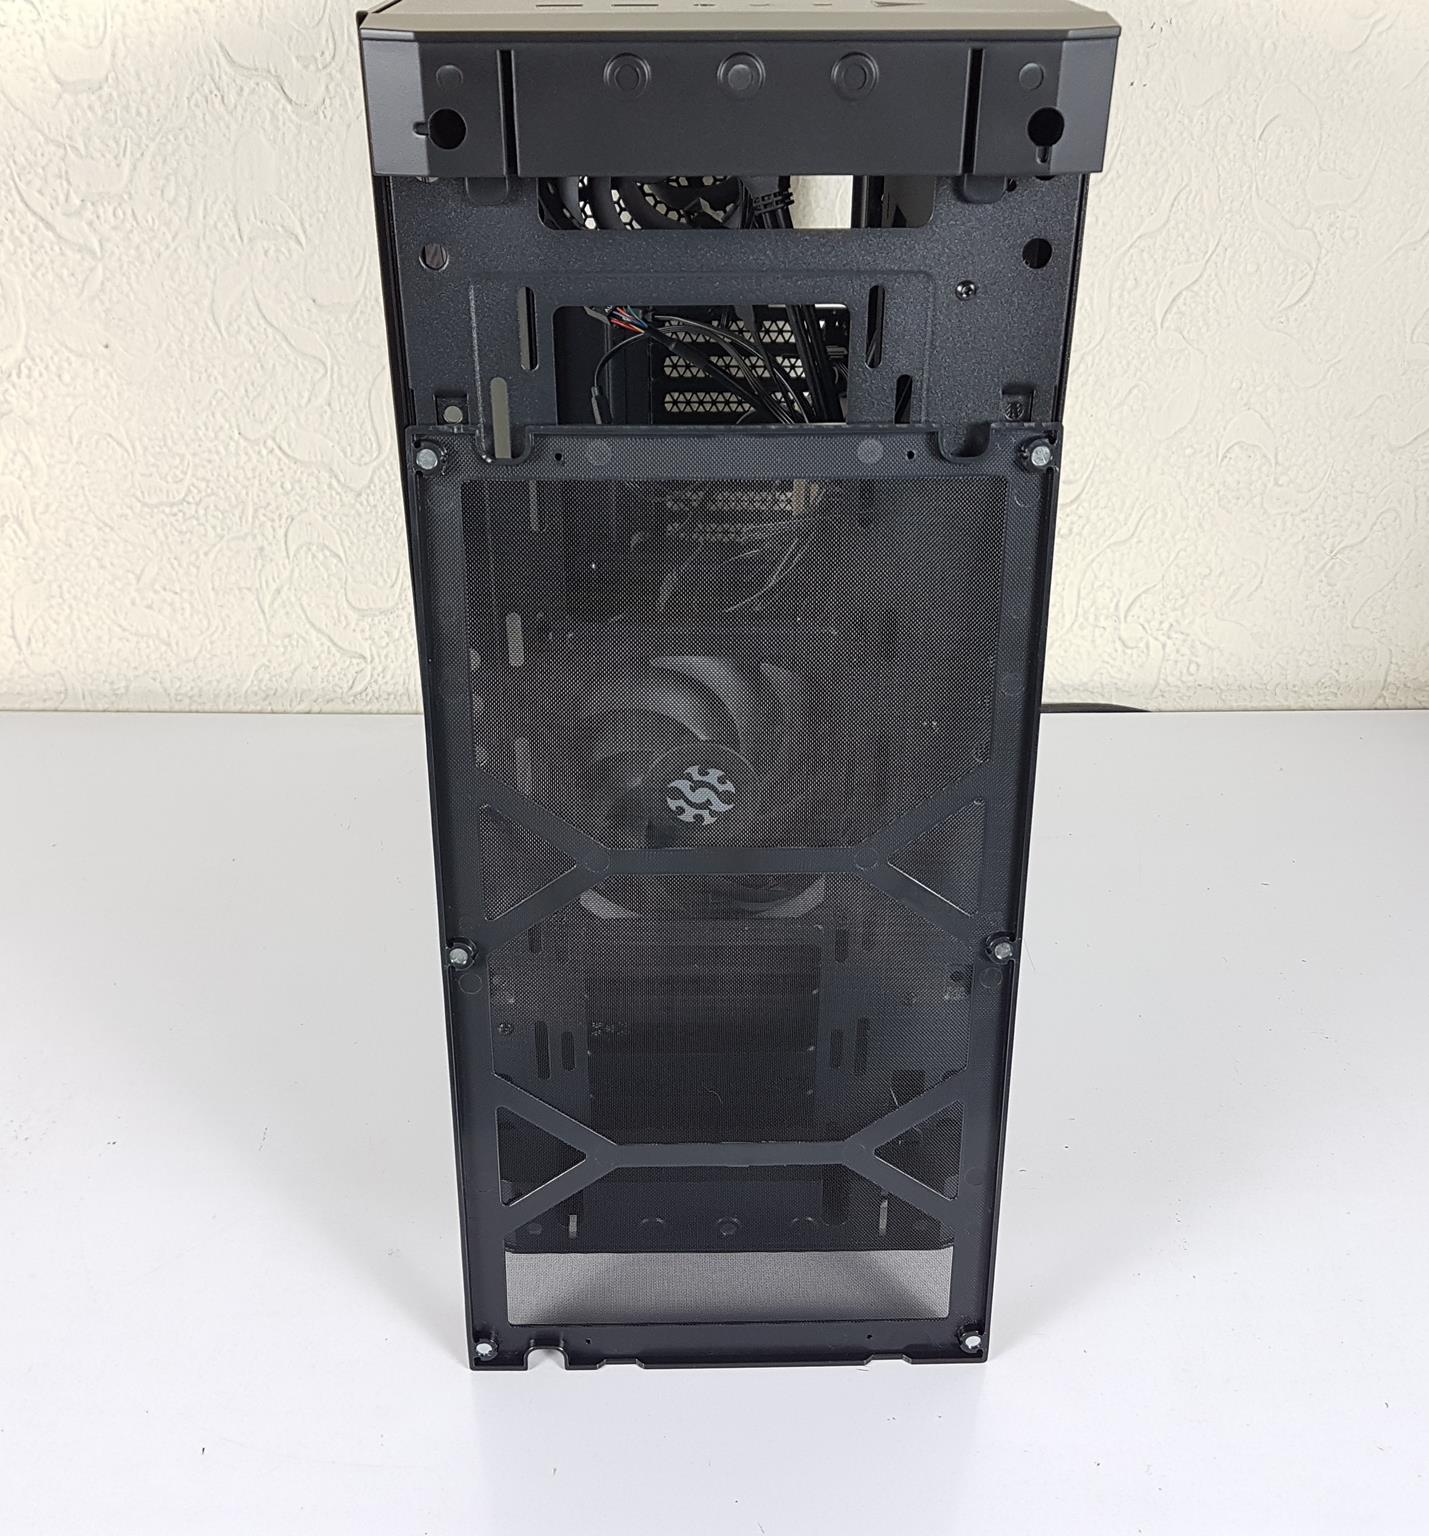
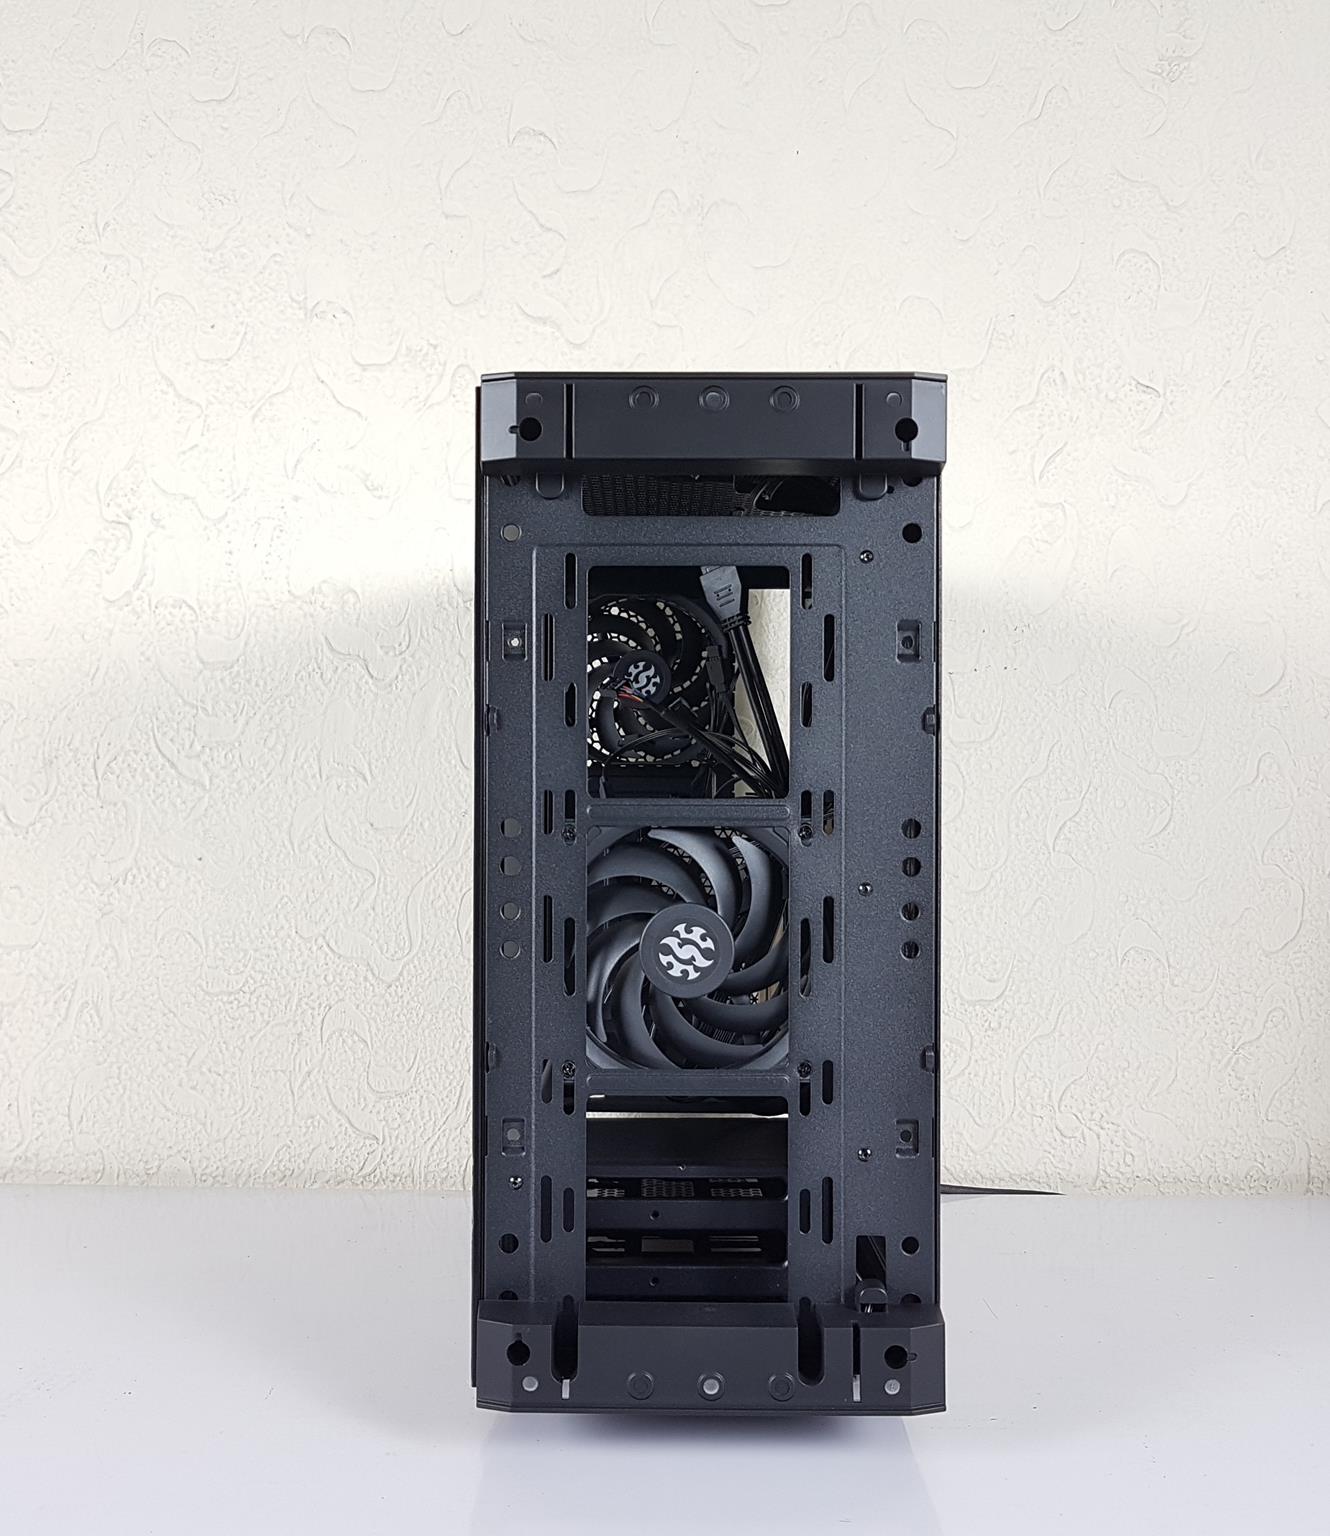
The magnetic dust filter’s backside reveals 6 silver-colored magnets for convenience. The XPG Invader Chassis includes two pre-installed VENTO 120 fans, one on the front and another on the backside. Note that installing fans on the front removes the dust filter, leaving no filtration. Cable routing is done from the inside, requiring side panel removal to access fans.
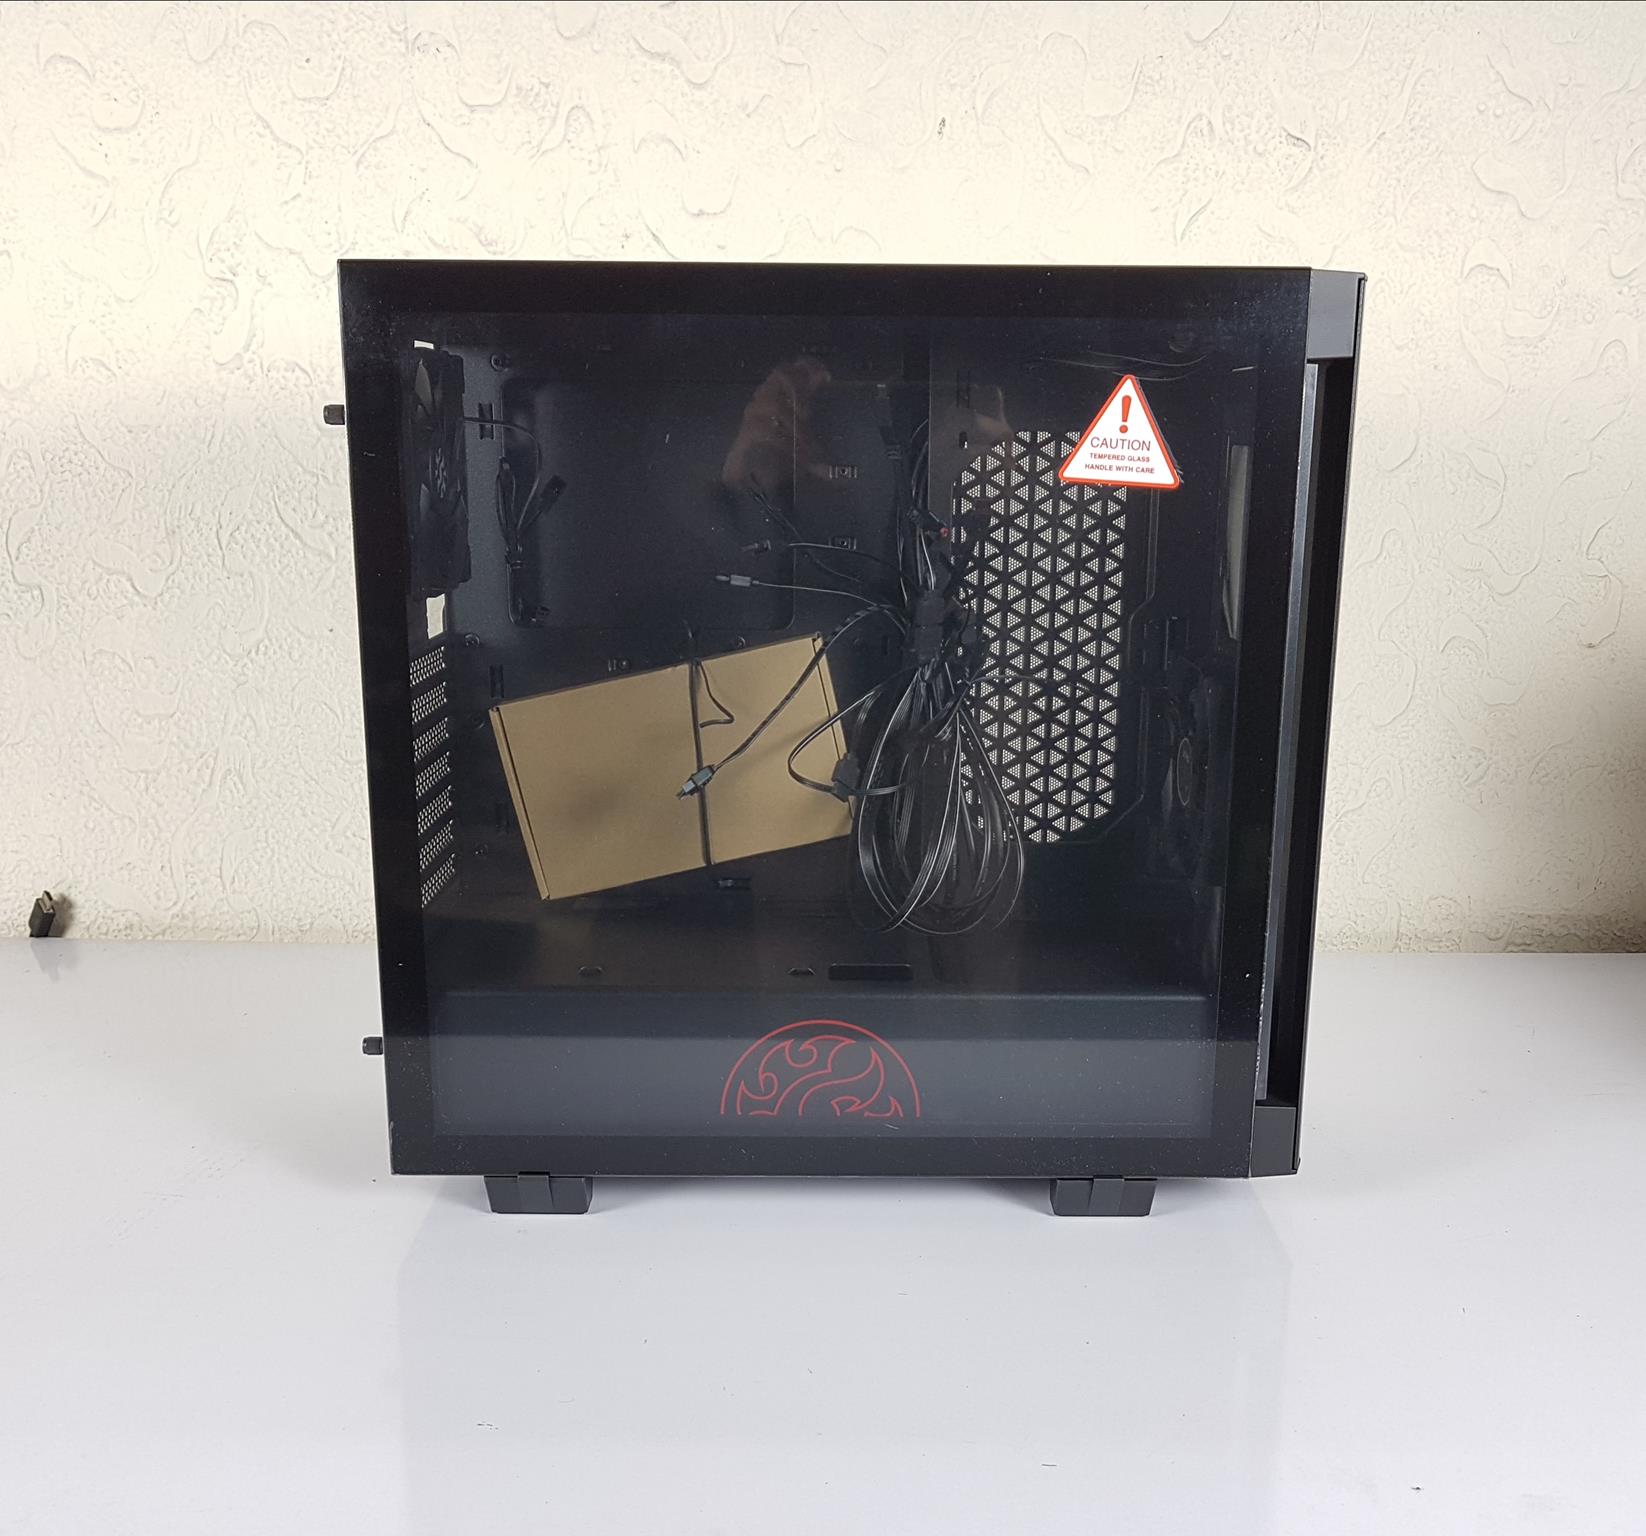
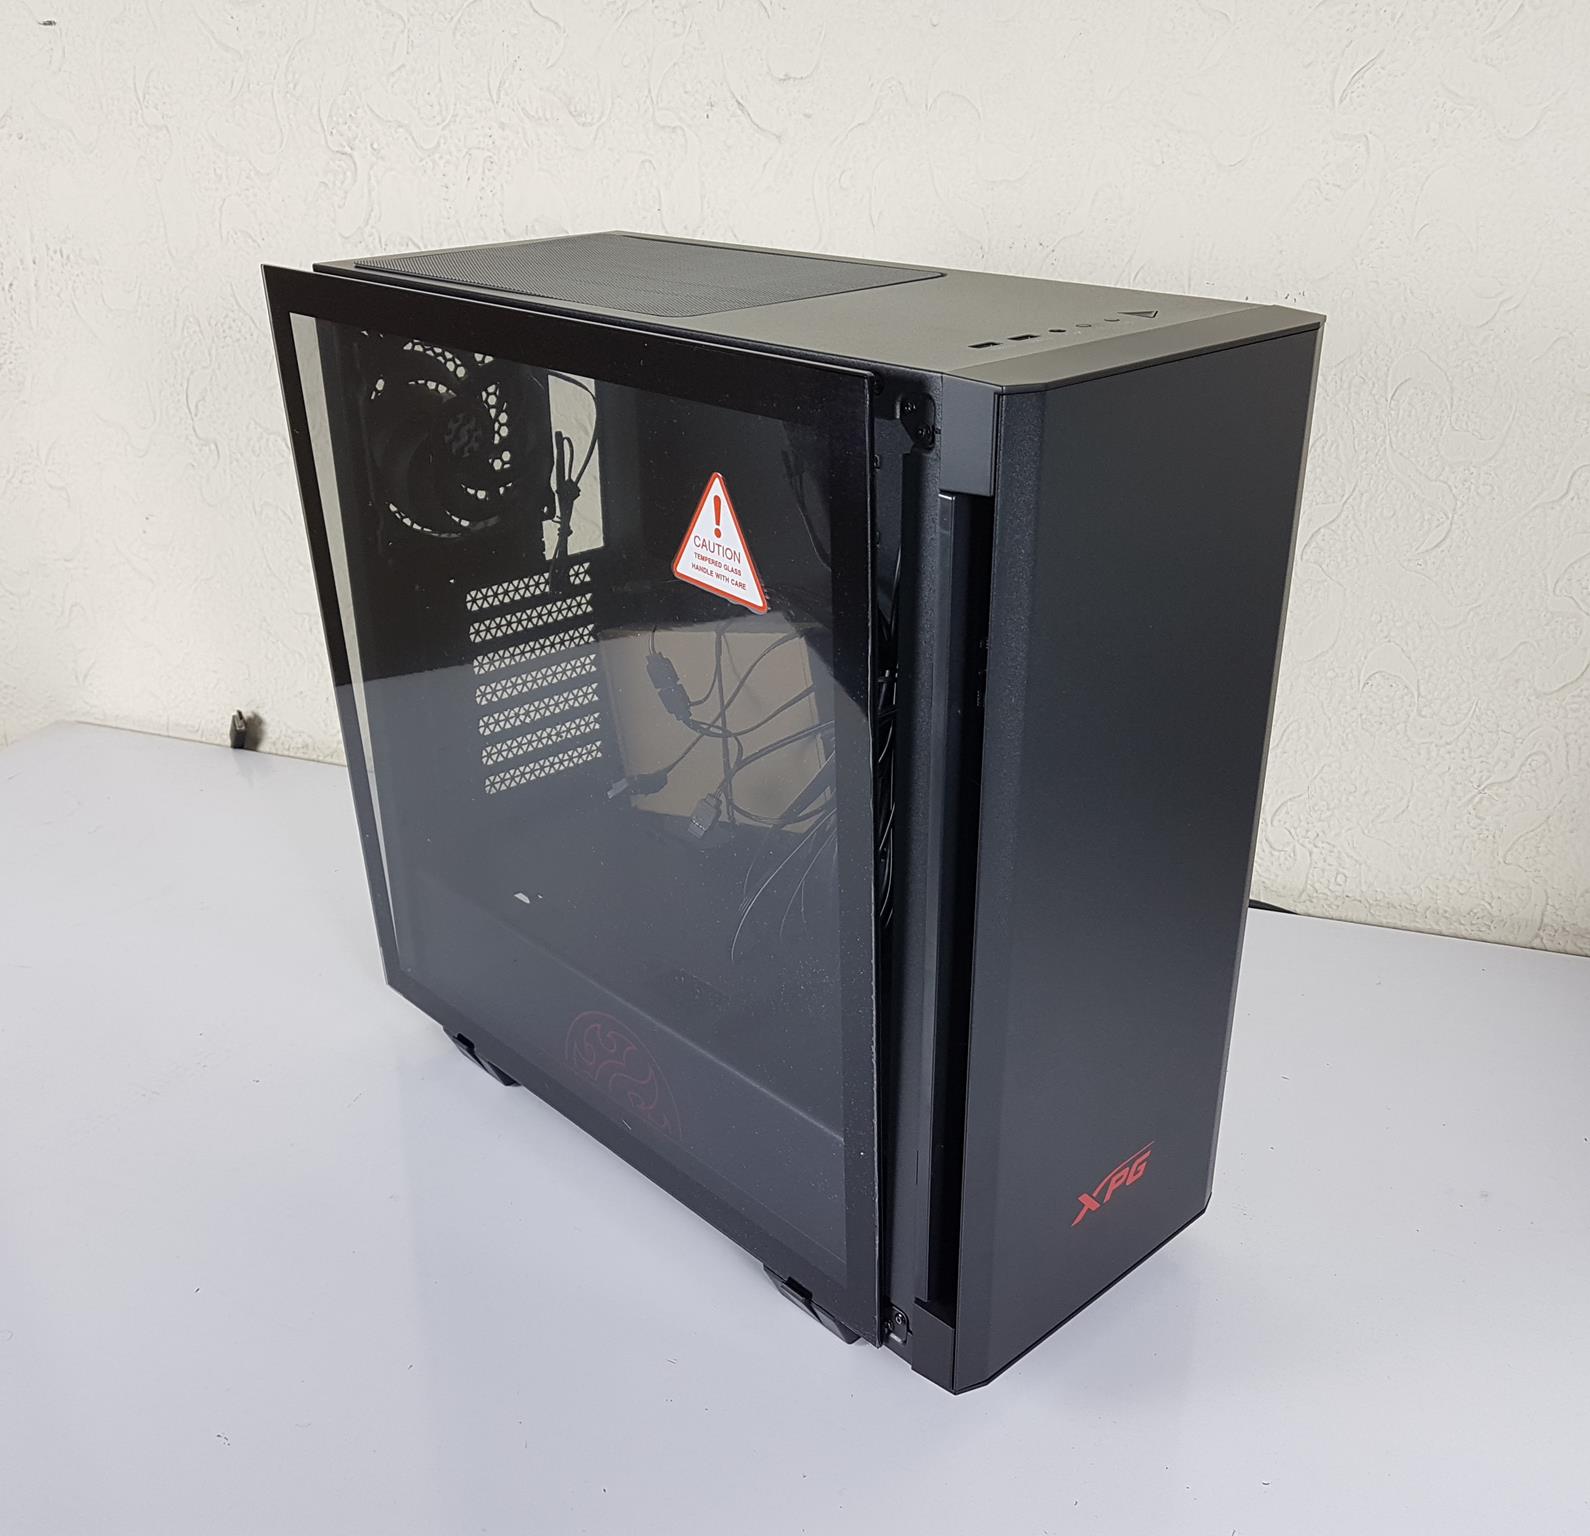
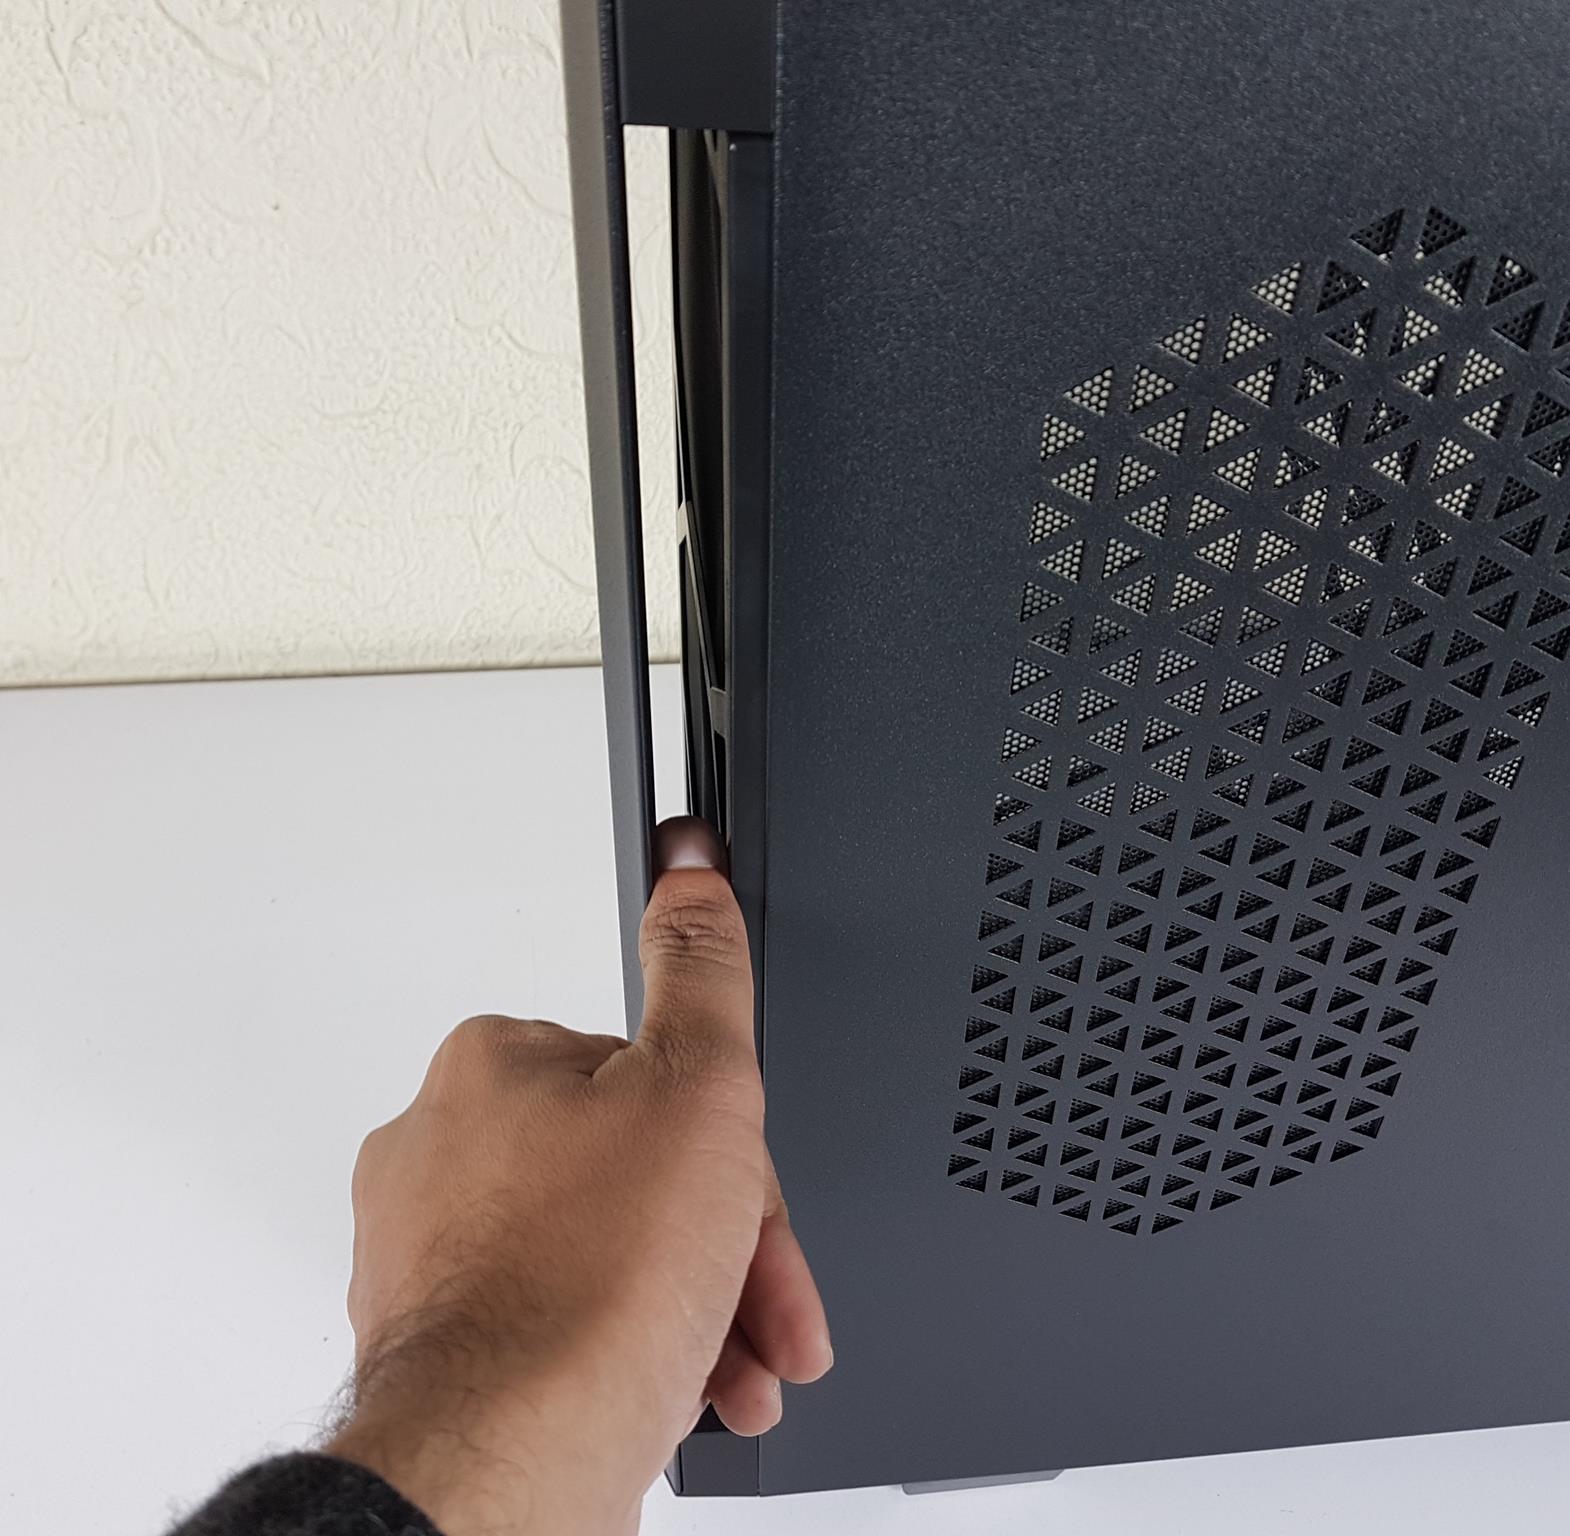
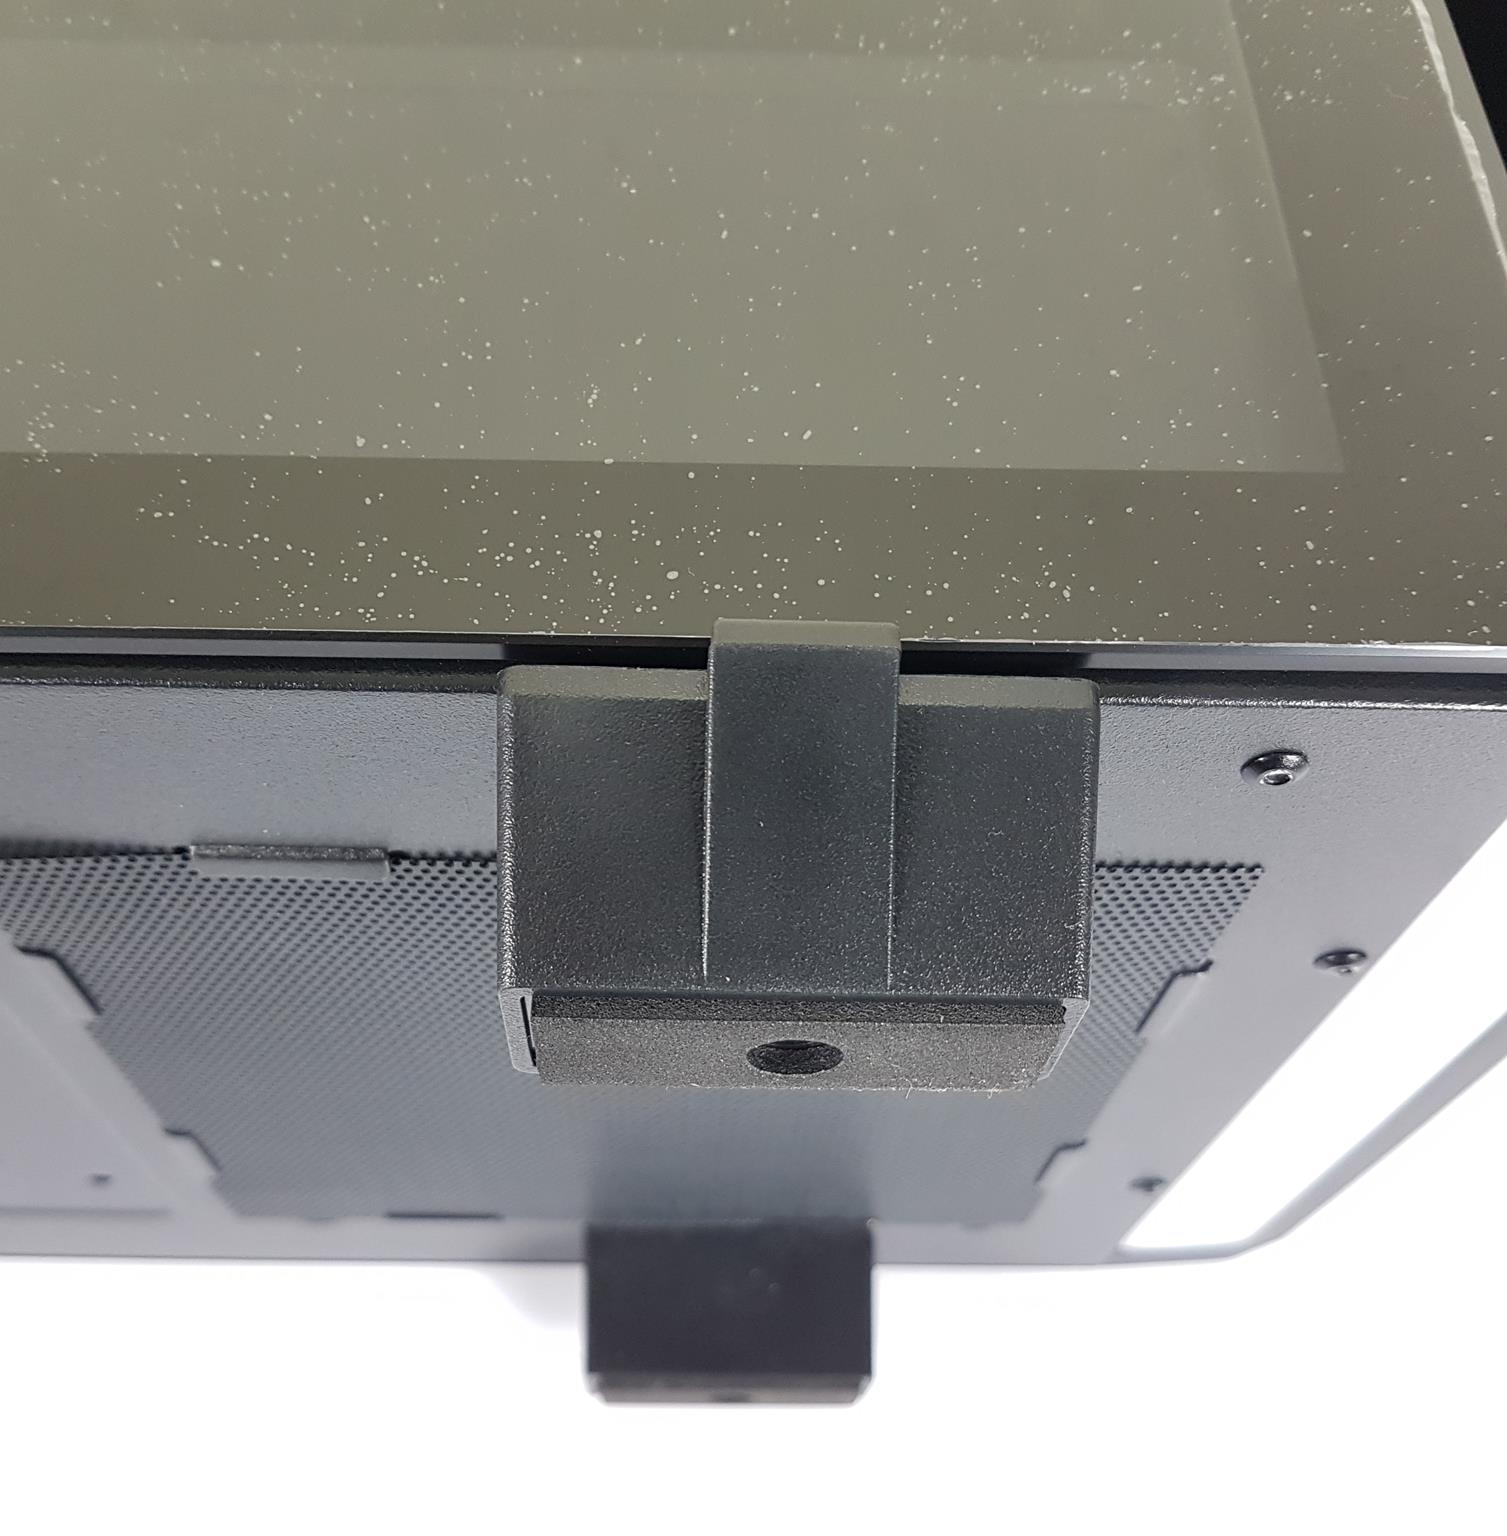
The XPG INVADER Chassis features a 4mm thick, untinted tempered glass panel covering the entire side. Secured with two rear thumb screws, it requires RGB lighting to showcase the build. Smartly designed tabs on the feet act as catchers, preventing the glass panel from falling when screws are removed. Caution is advised when handling the glass panels.
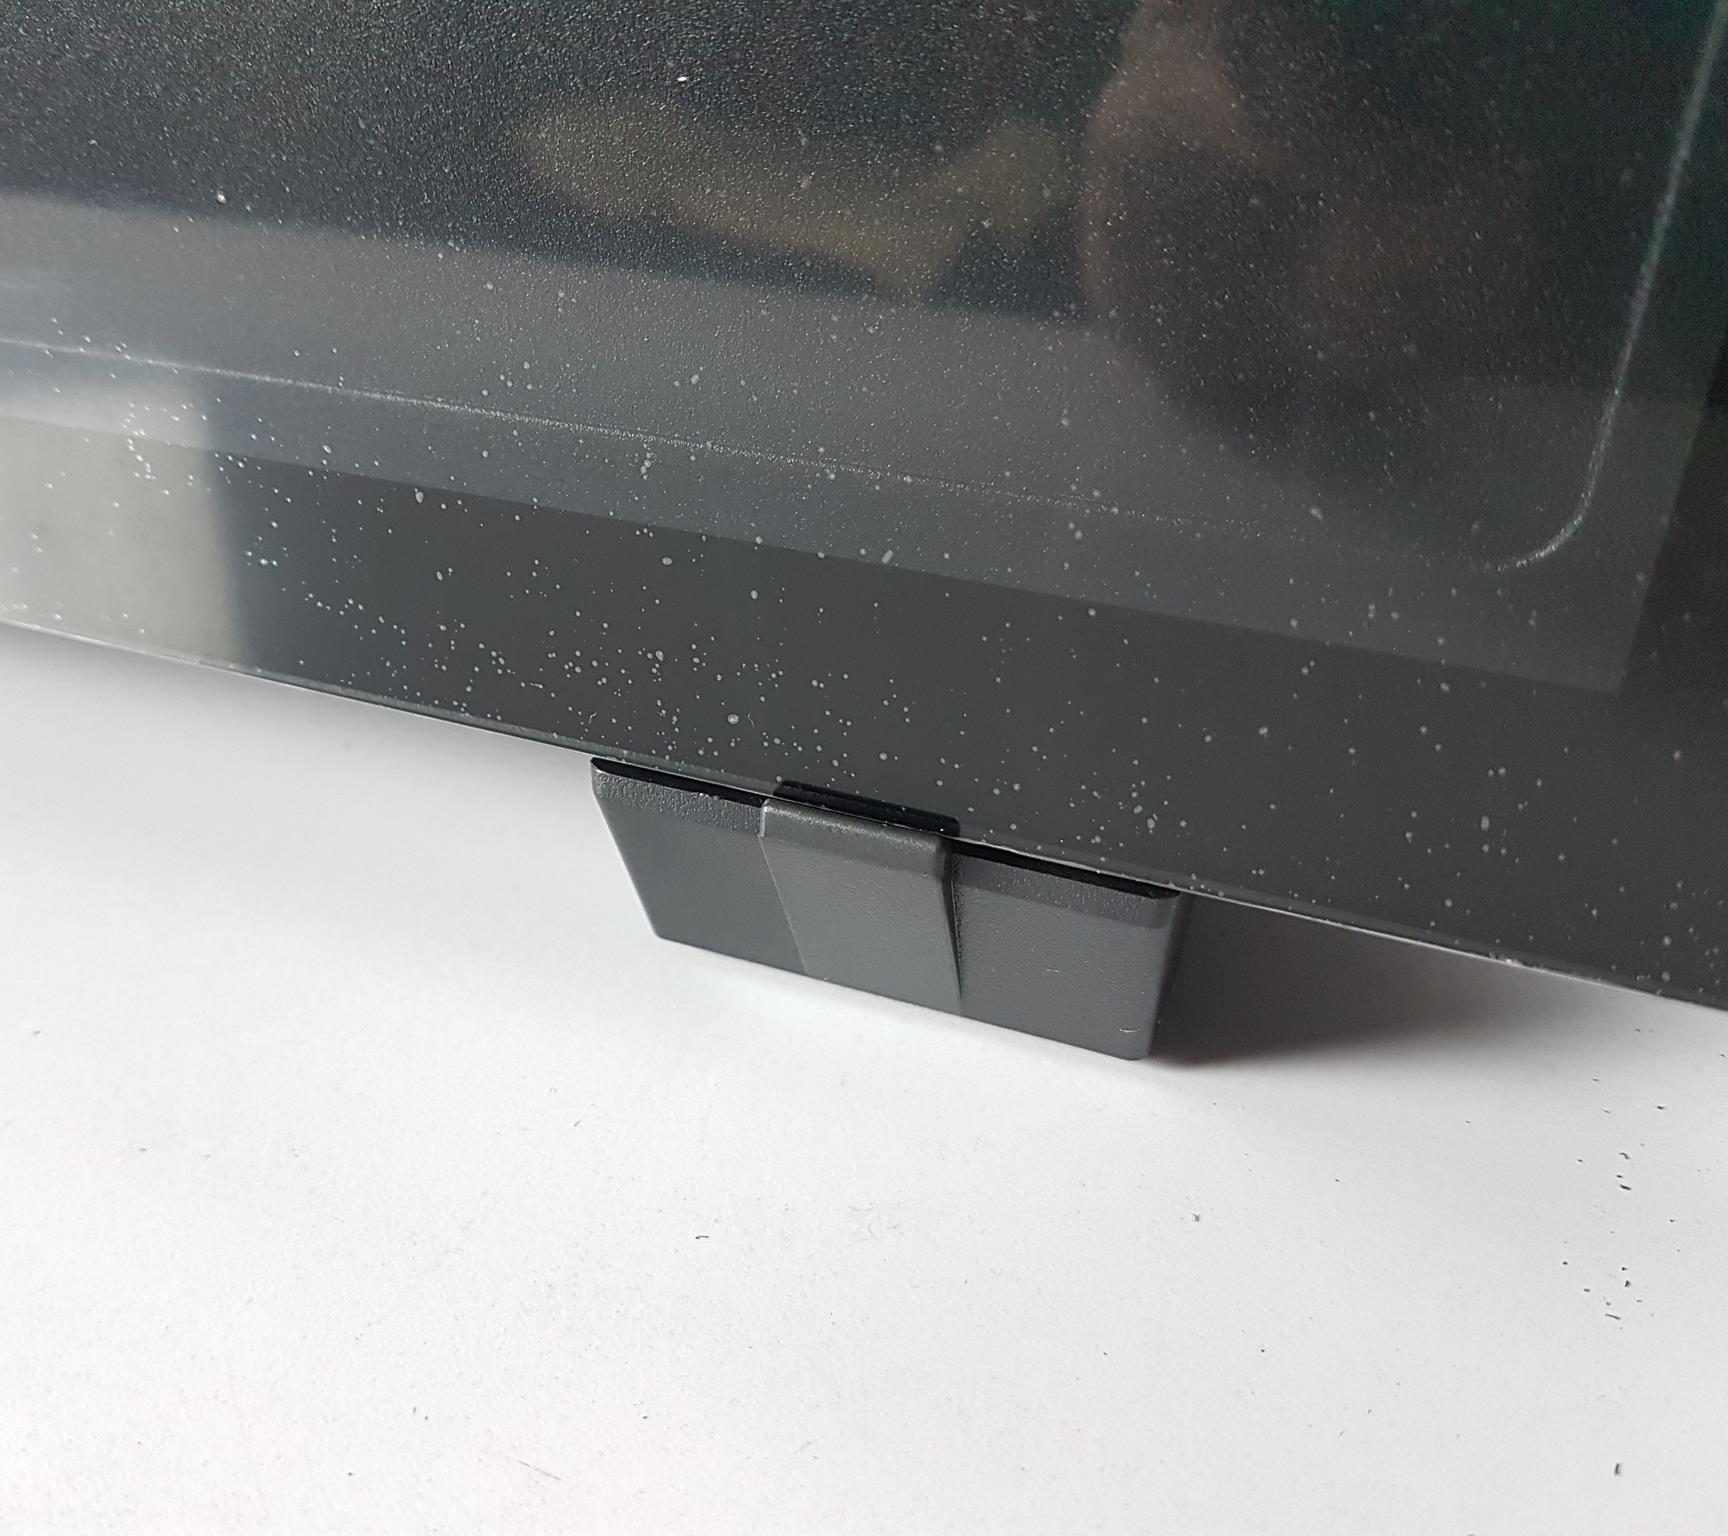
Check out the close-up of the feet’s raised tab in the picture—it cleverly secures the glass panel. Kudos to the design team for this simple yet effective solution.
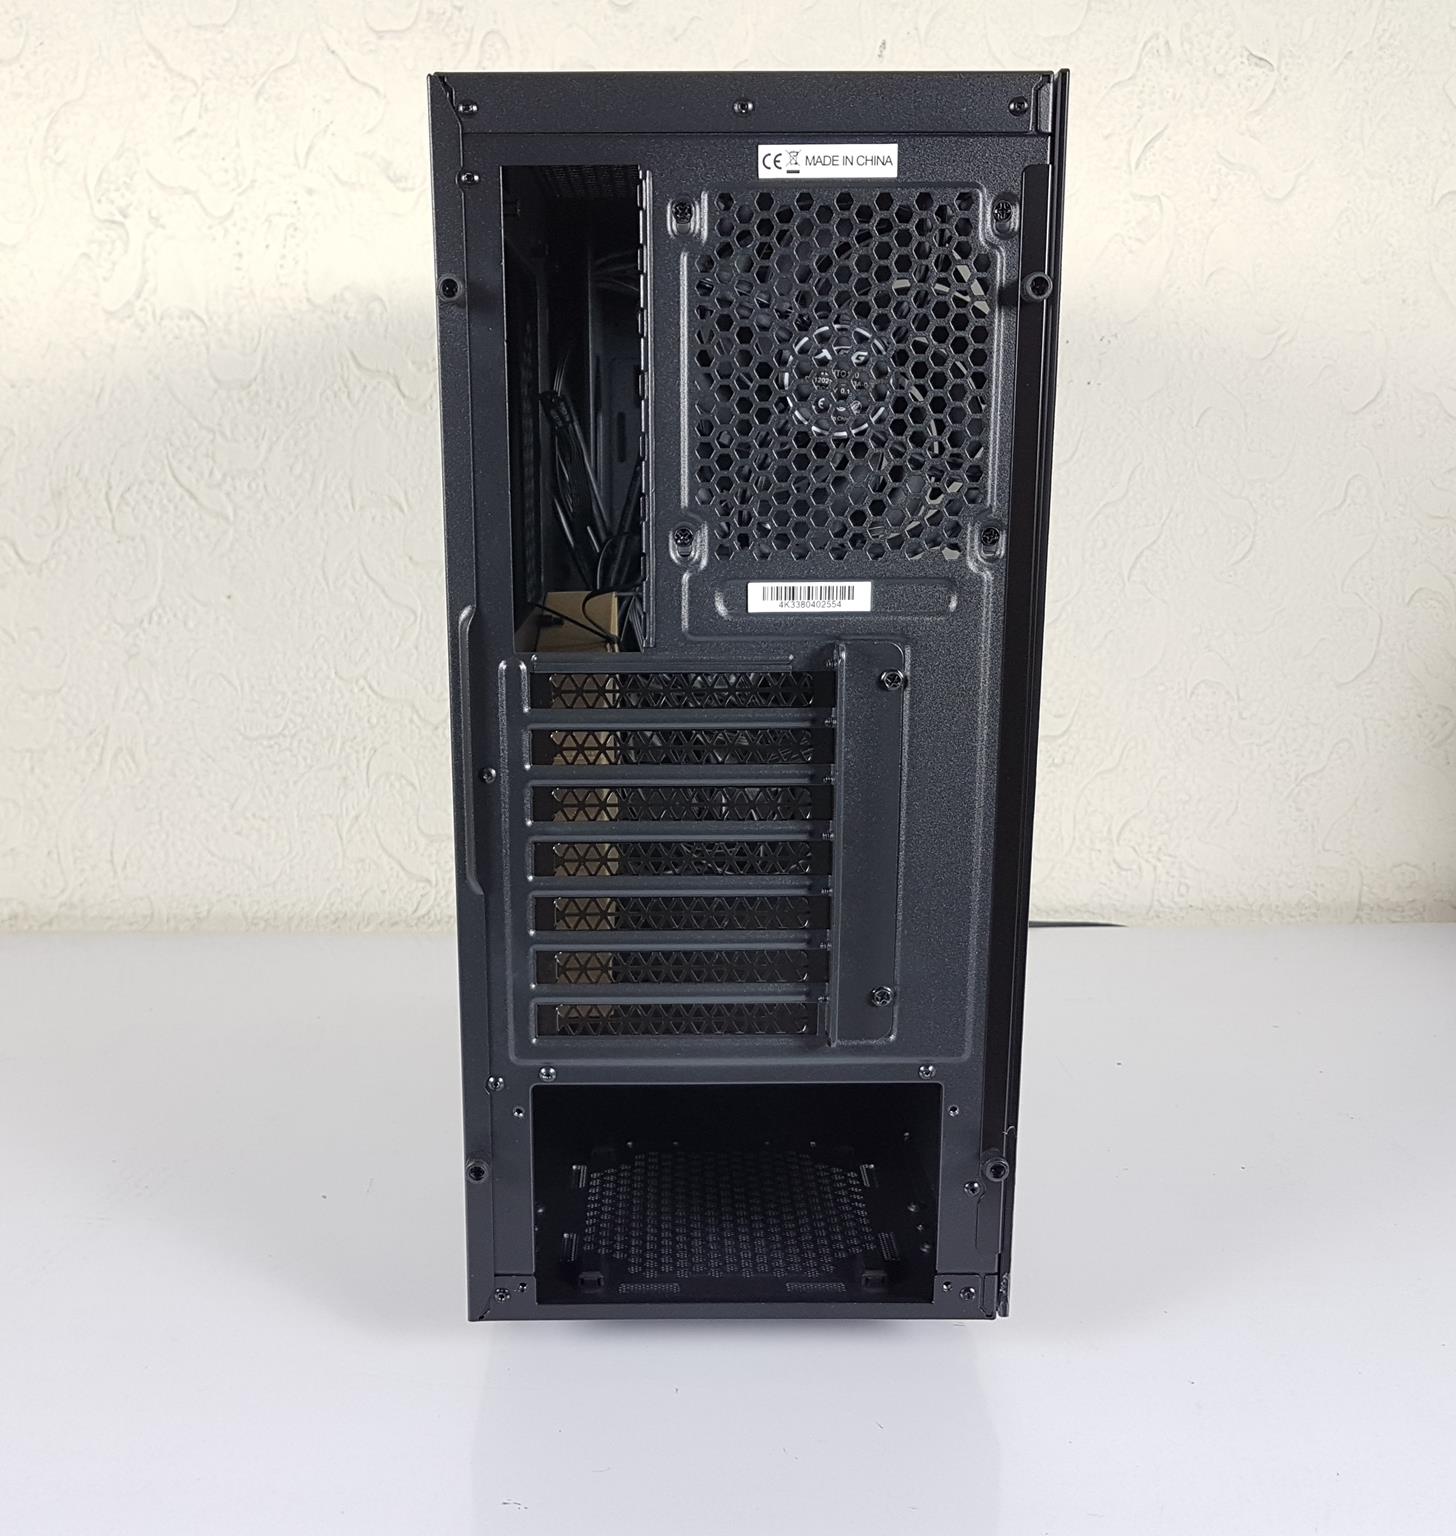
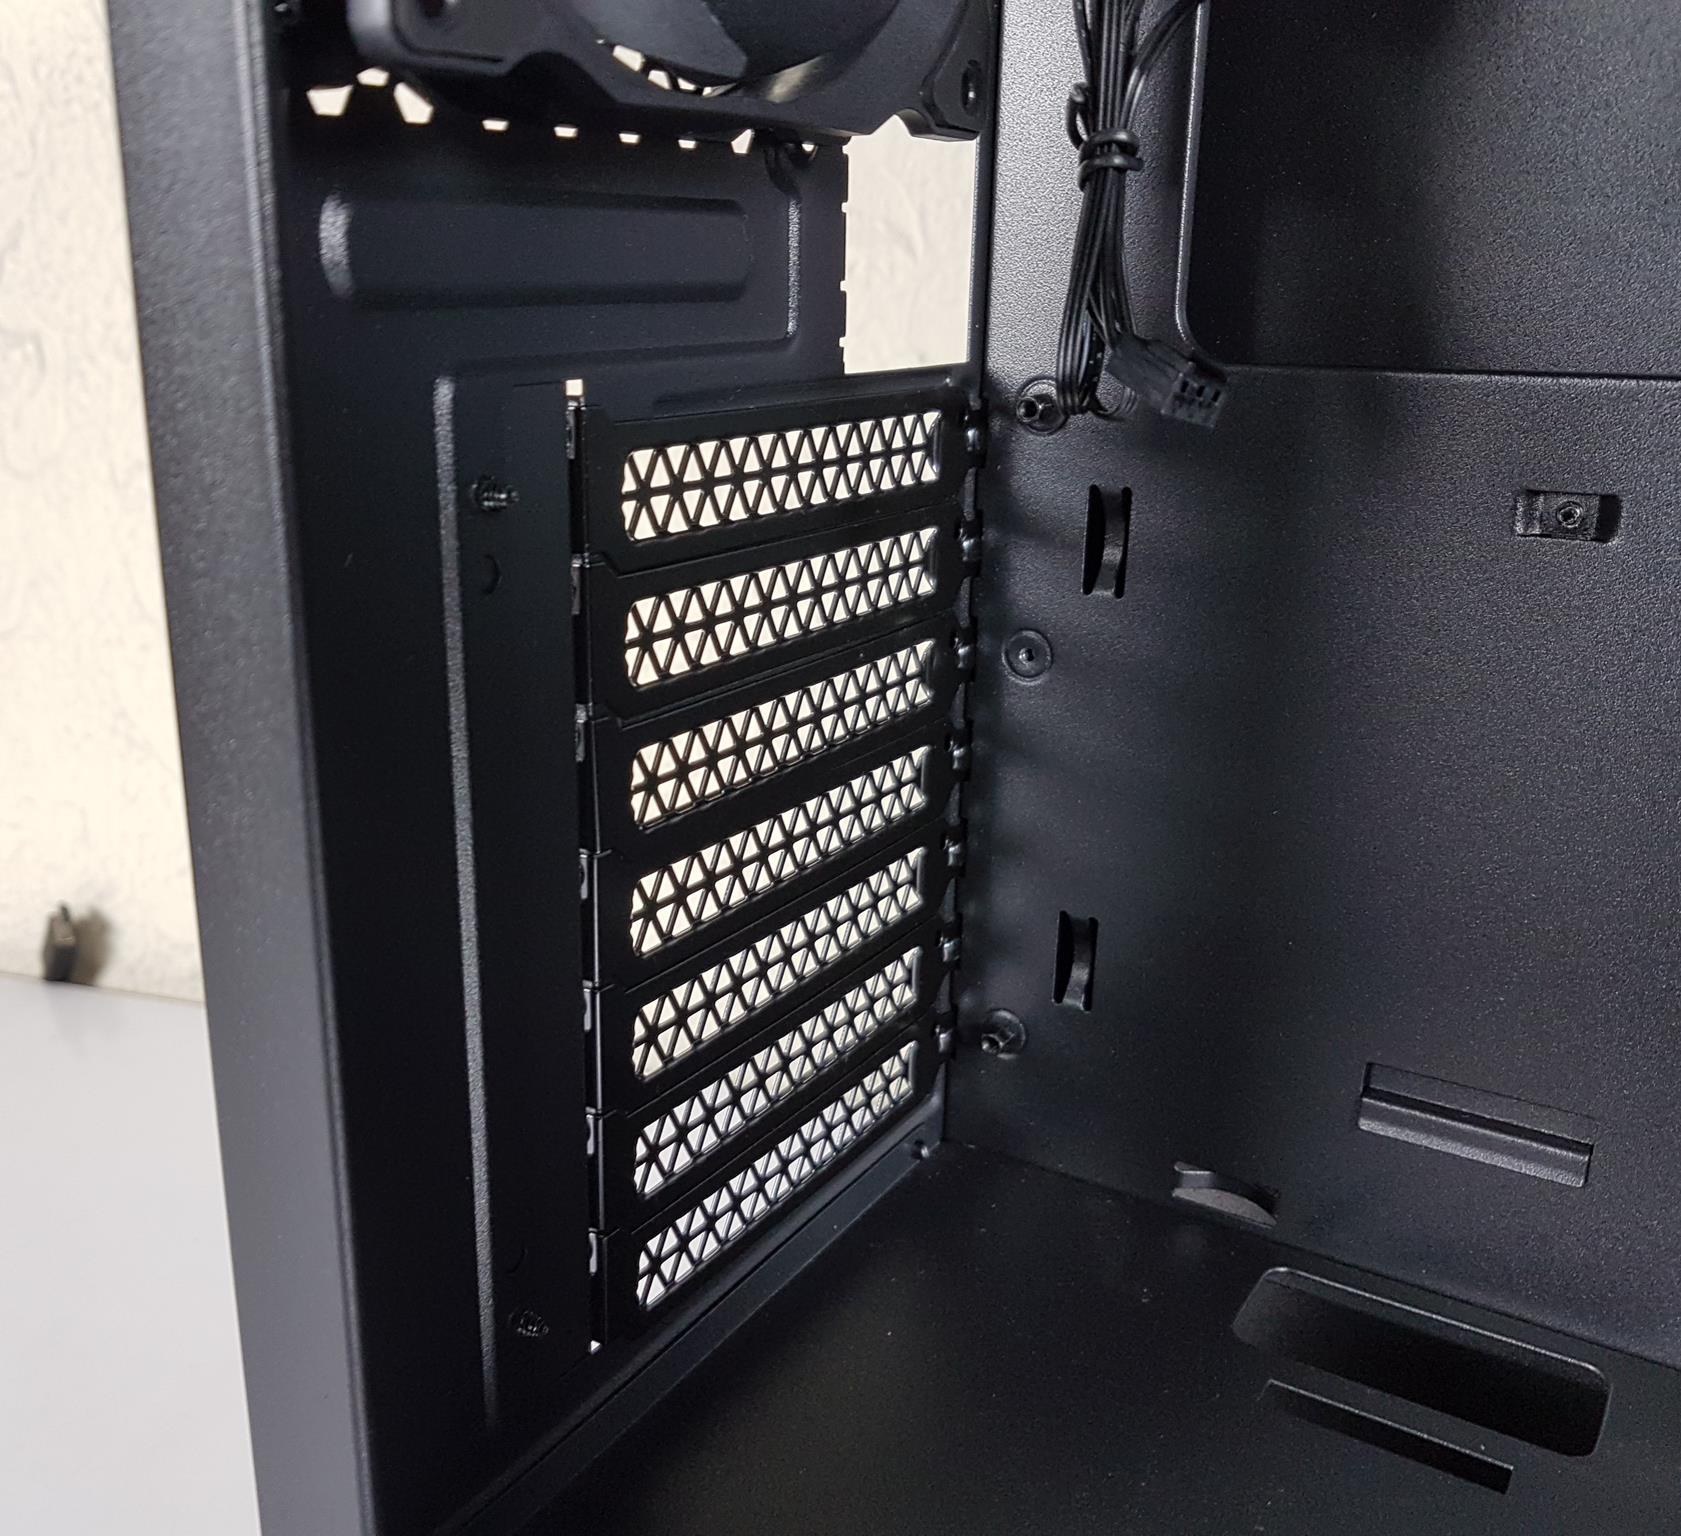
The rear has a standard layout with a cutout for the motherboard’s IO shield and a vented area for a 120mm fan, preinstalled as the XPG VENTO 120. You can adjust the rear fan’s height between two fixed positions. If installing an AIO/CLC cooler on top, consider lowering the fan’s height from the factory default.
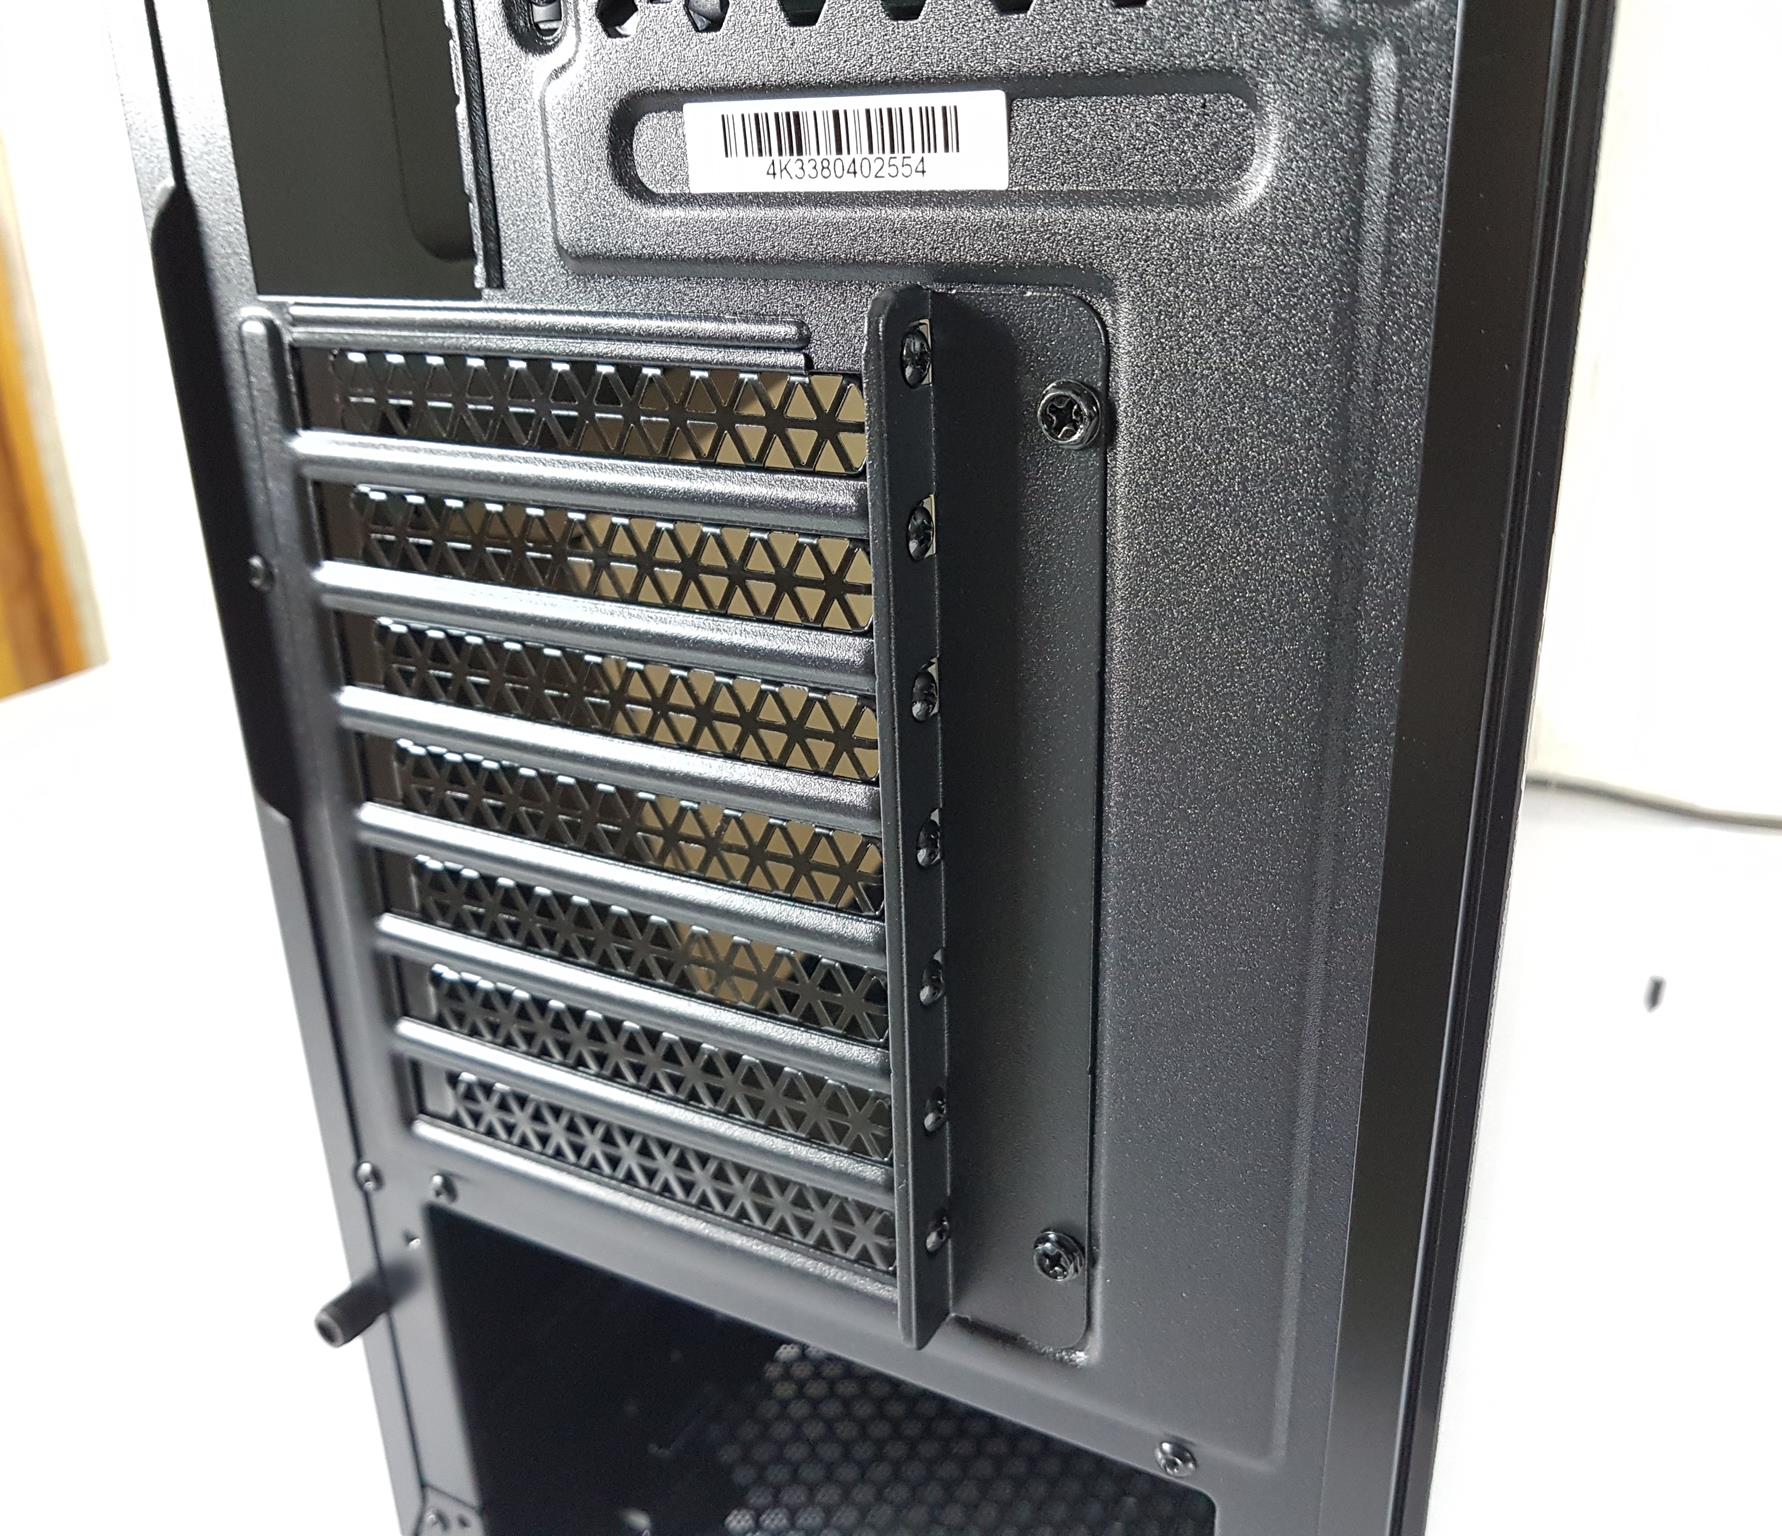
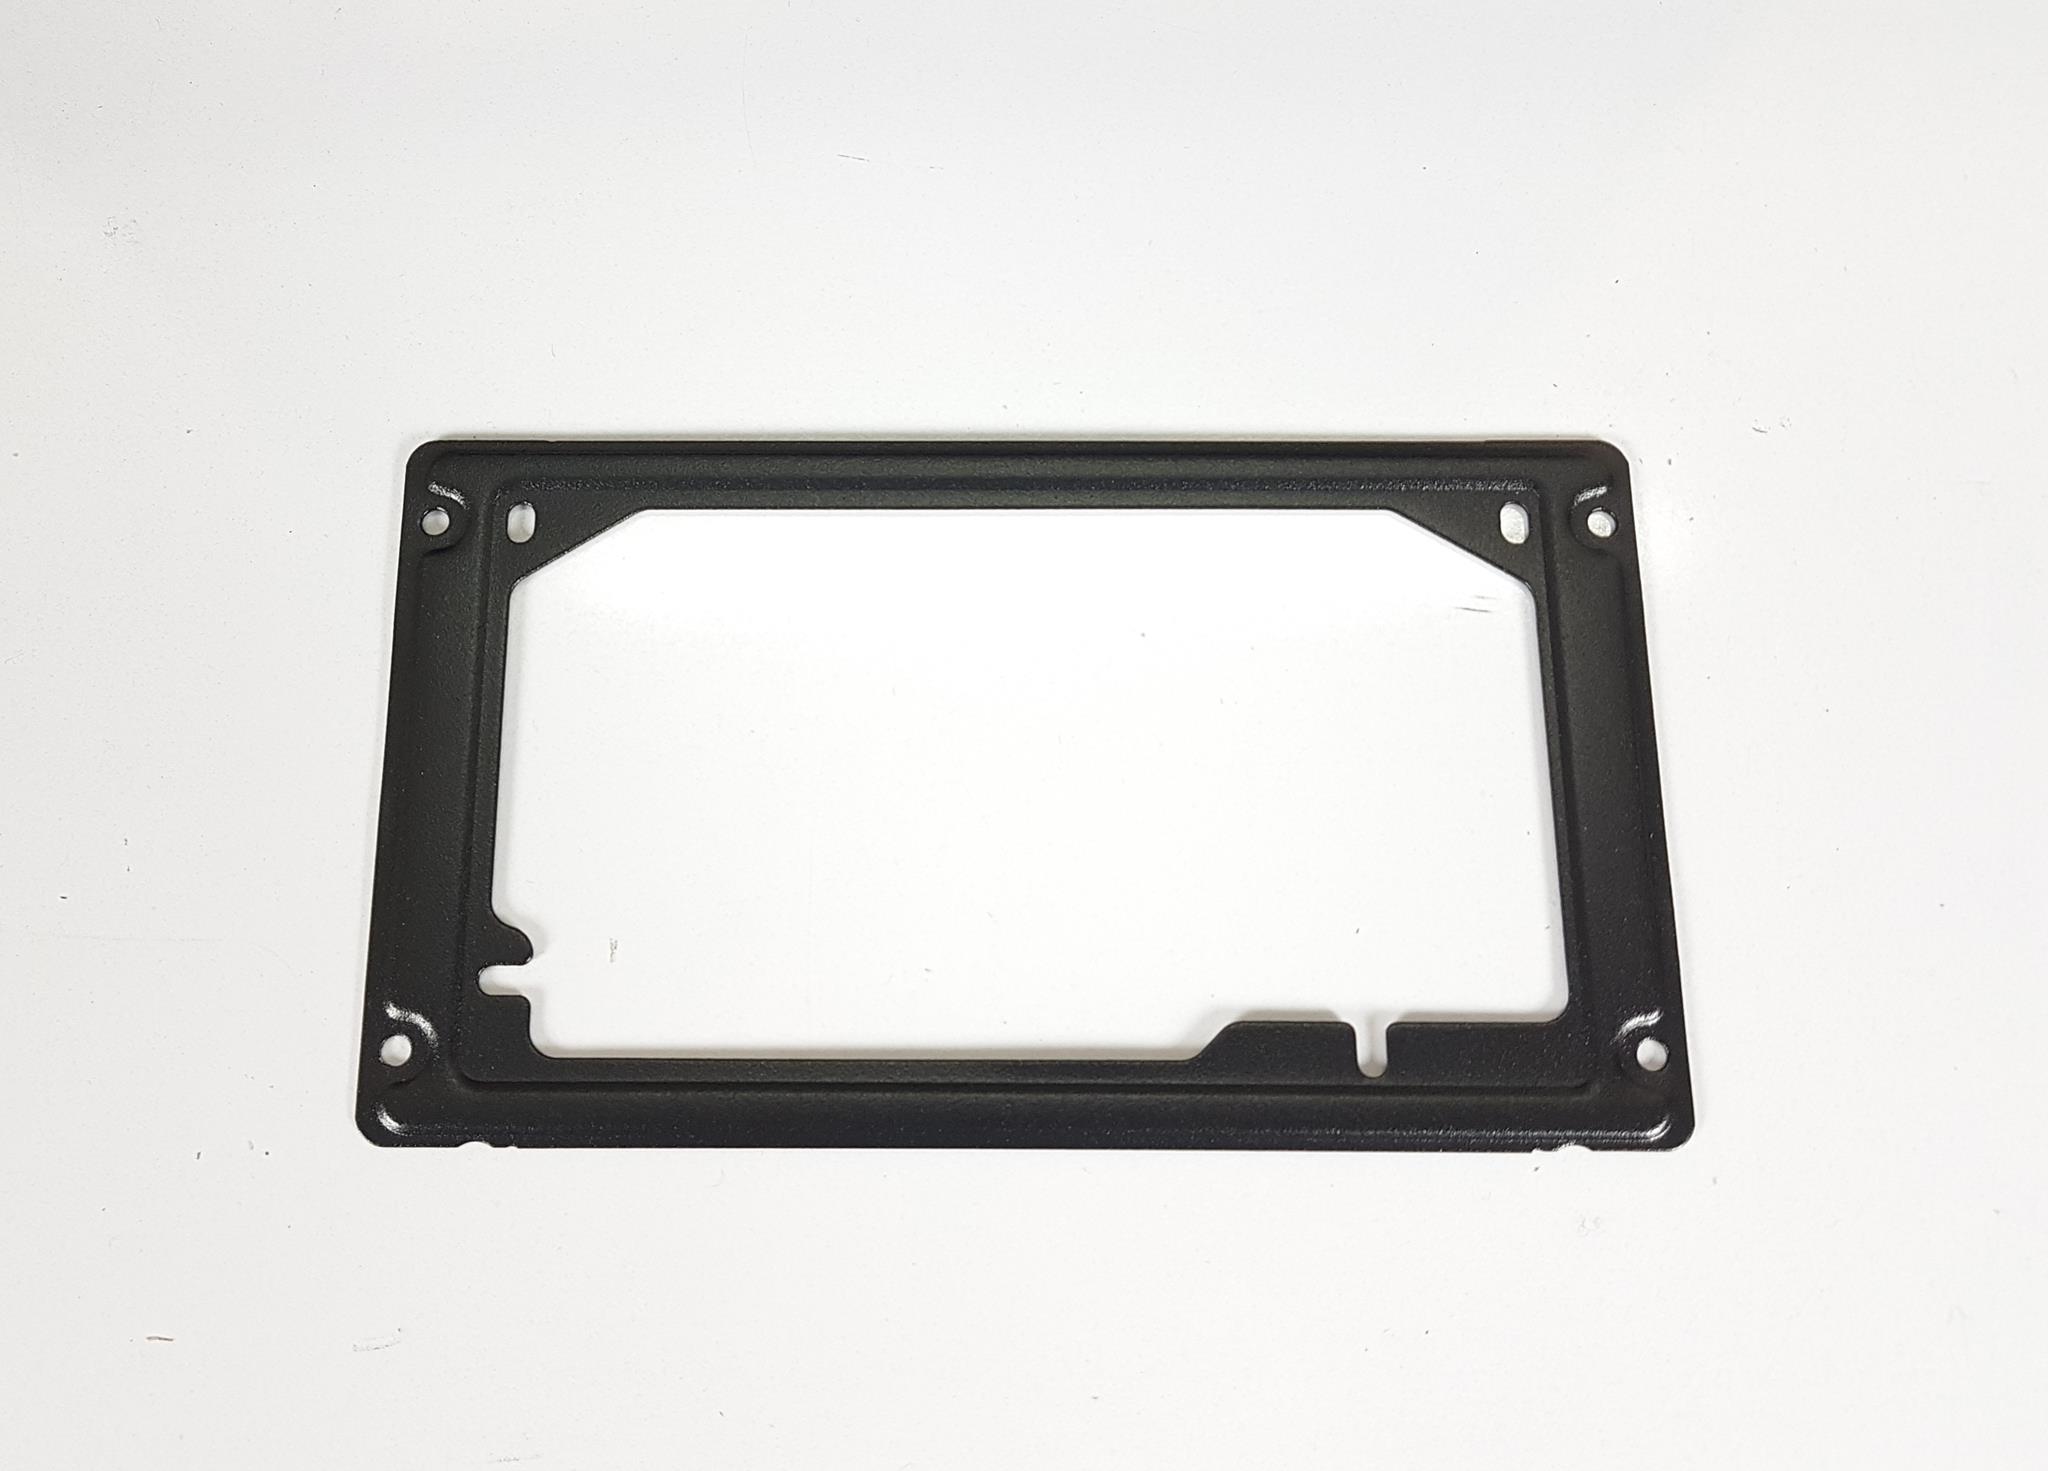
The center features 7 PCIe slots with reusable covers. These slots have raised ends outside the chassis. A PCIe bracket, secured with two screws, covers them. Remove the bracket for PCIe device installation. The bottom has a PSU mount, but no standard mounting provision. XPG includes a PSU bracket with standard ATX PSU mounting holes. Install it, slide the PSU in from the rear, and secure the bracket on the frame.
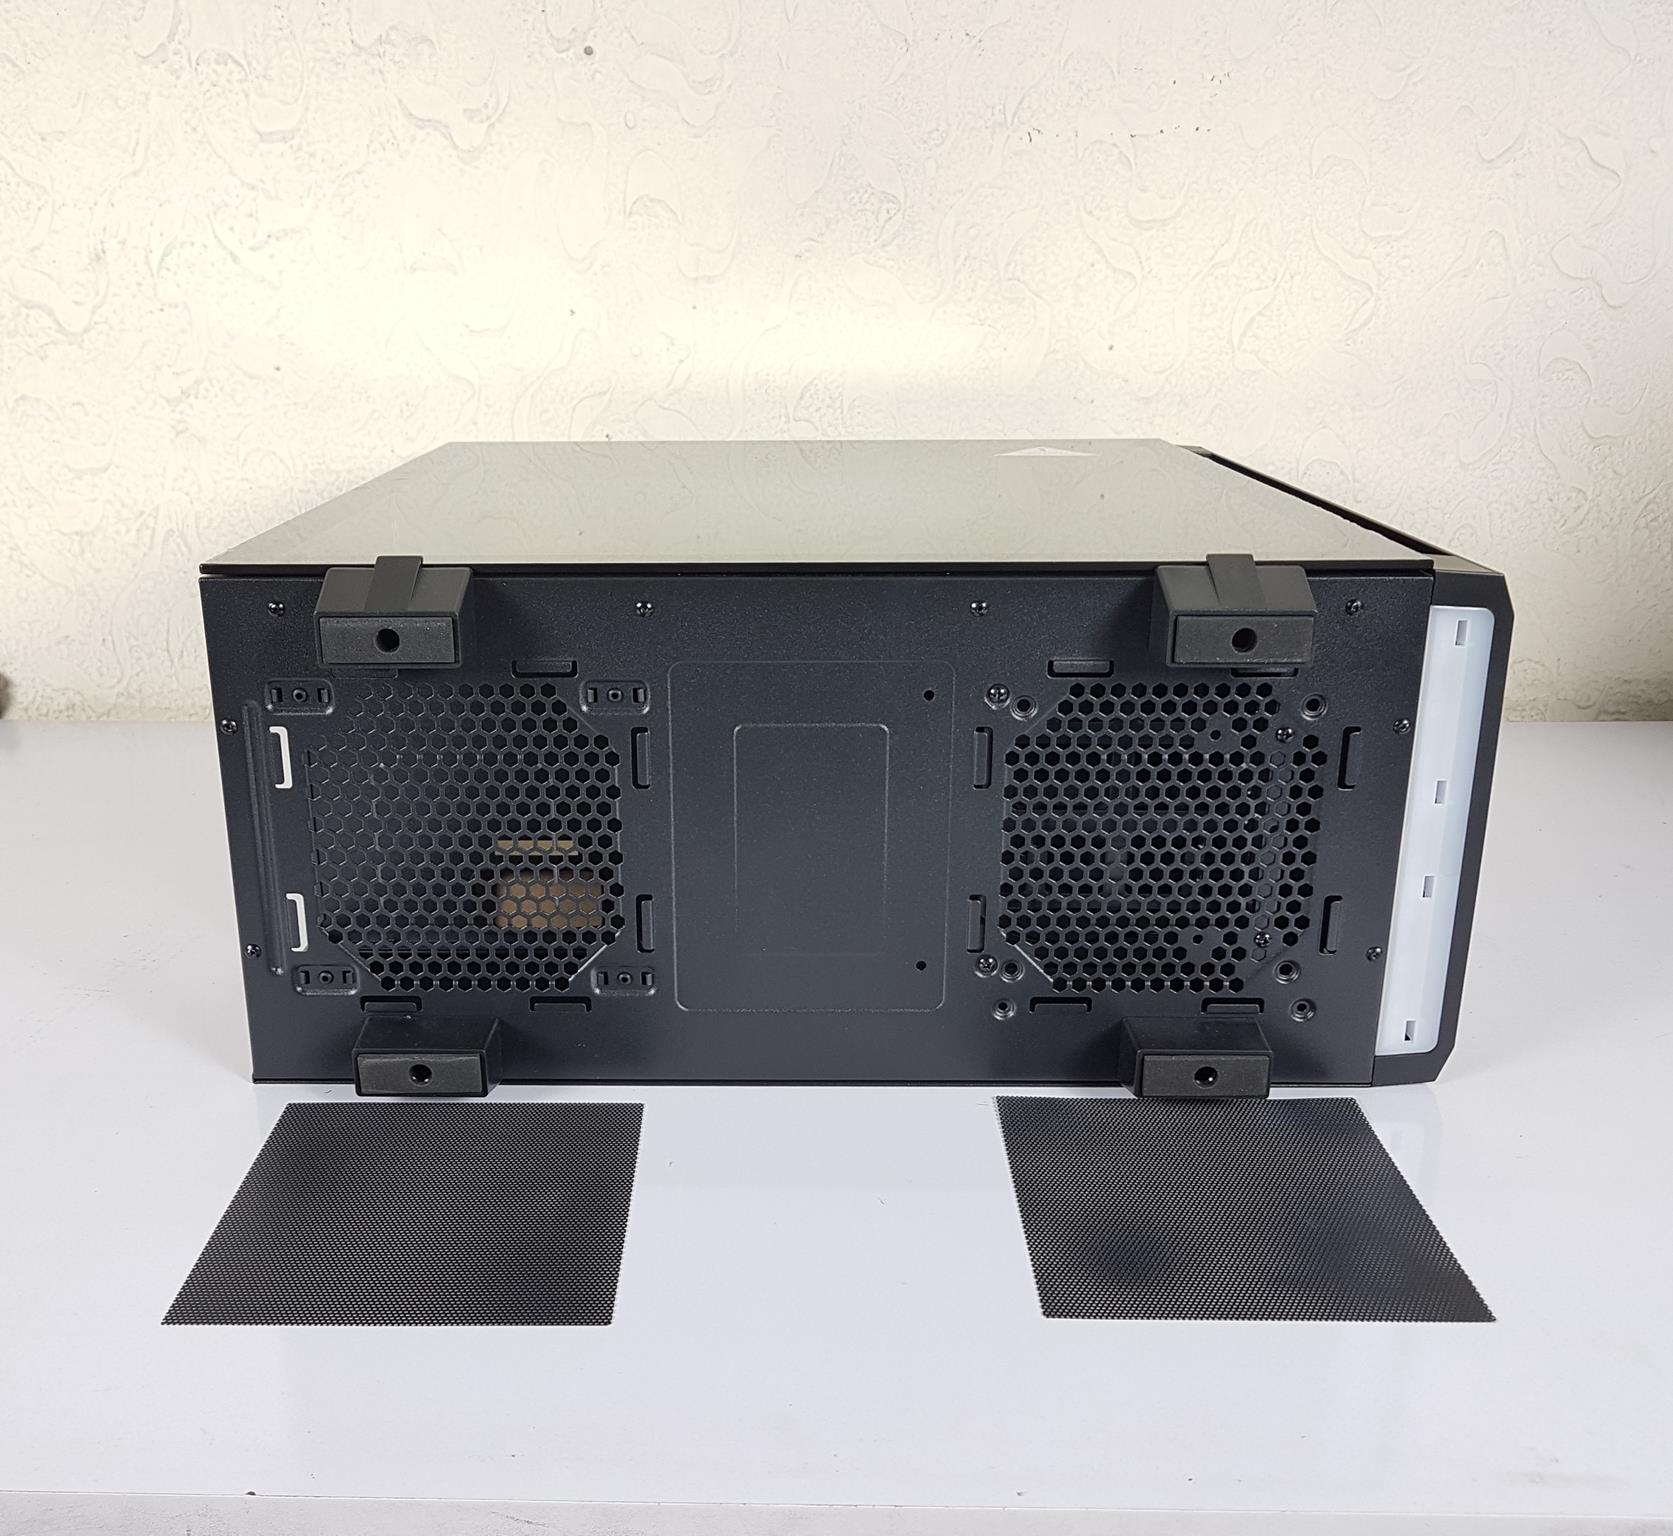
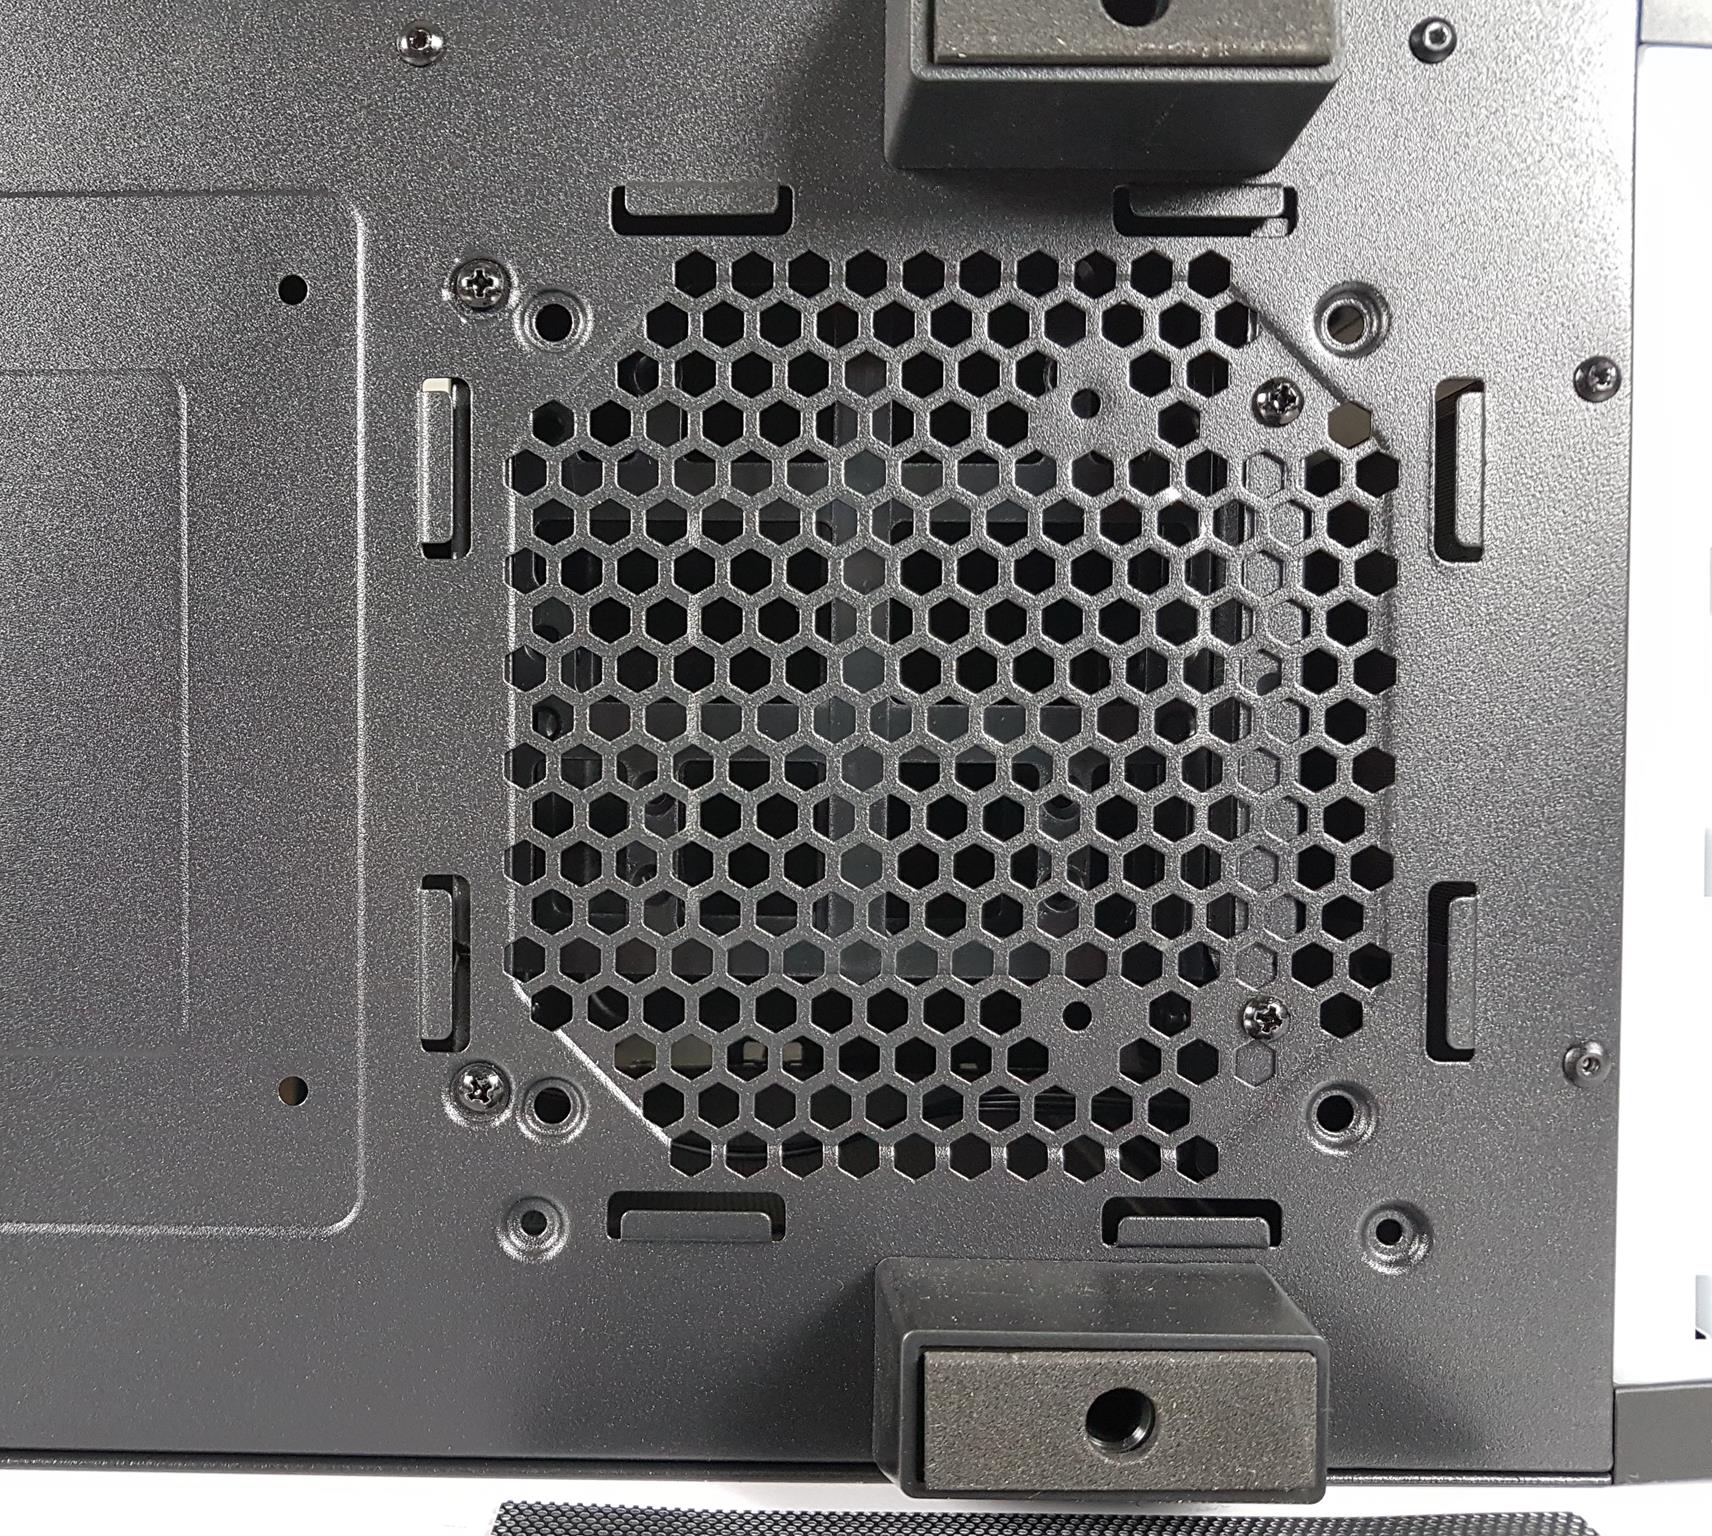
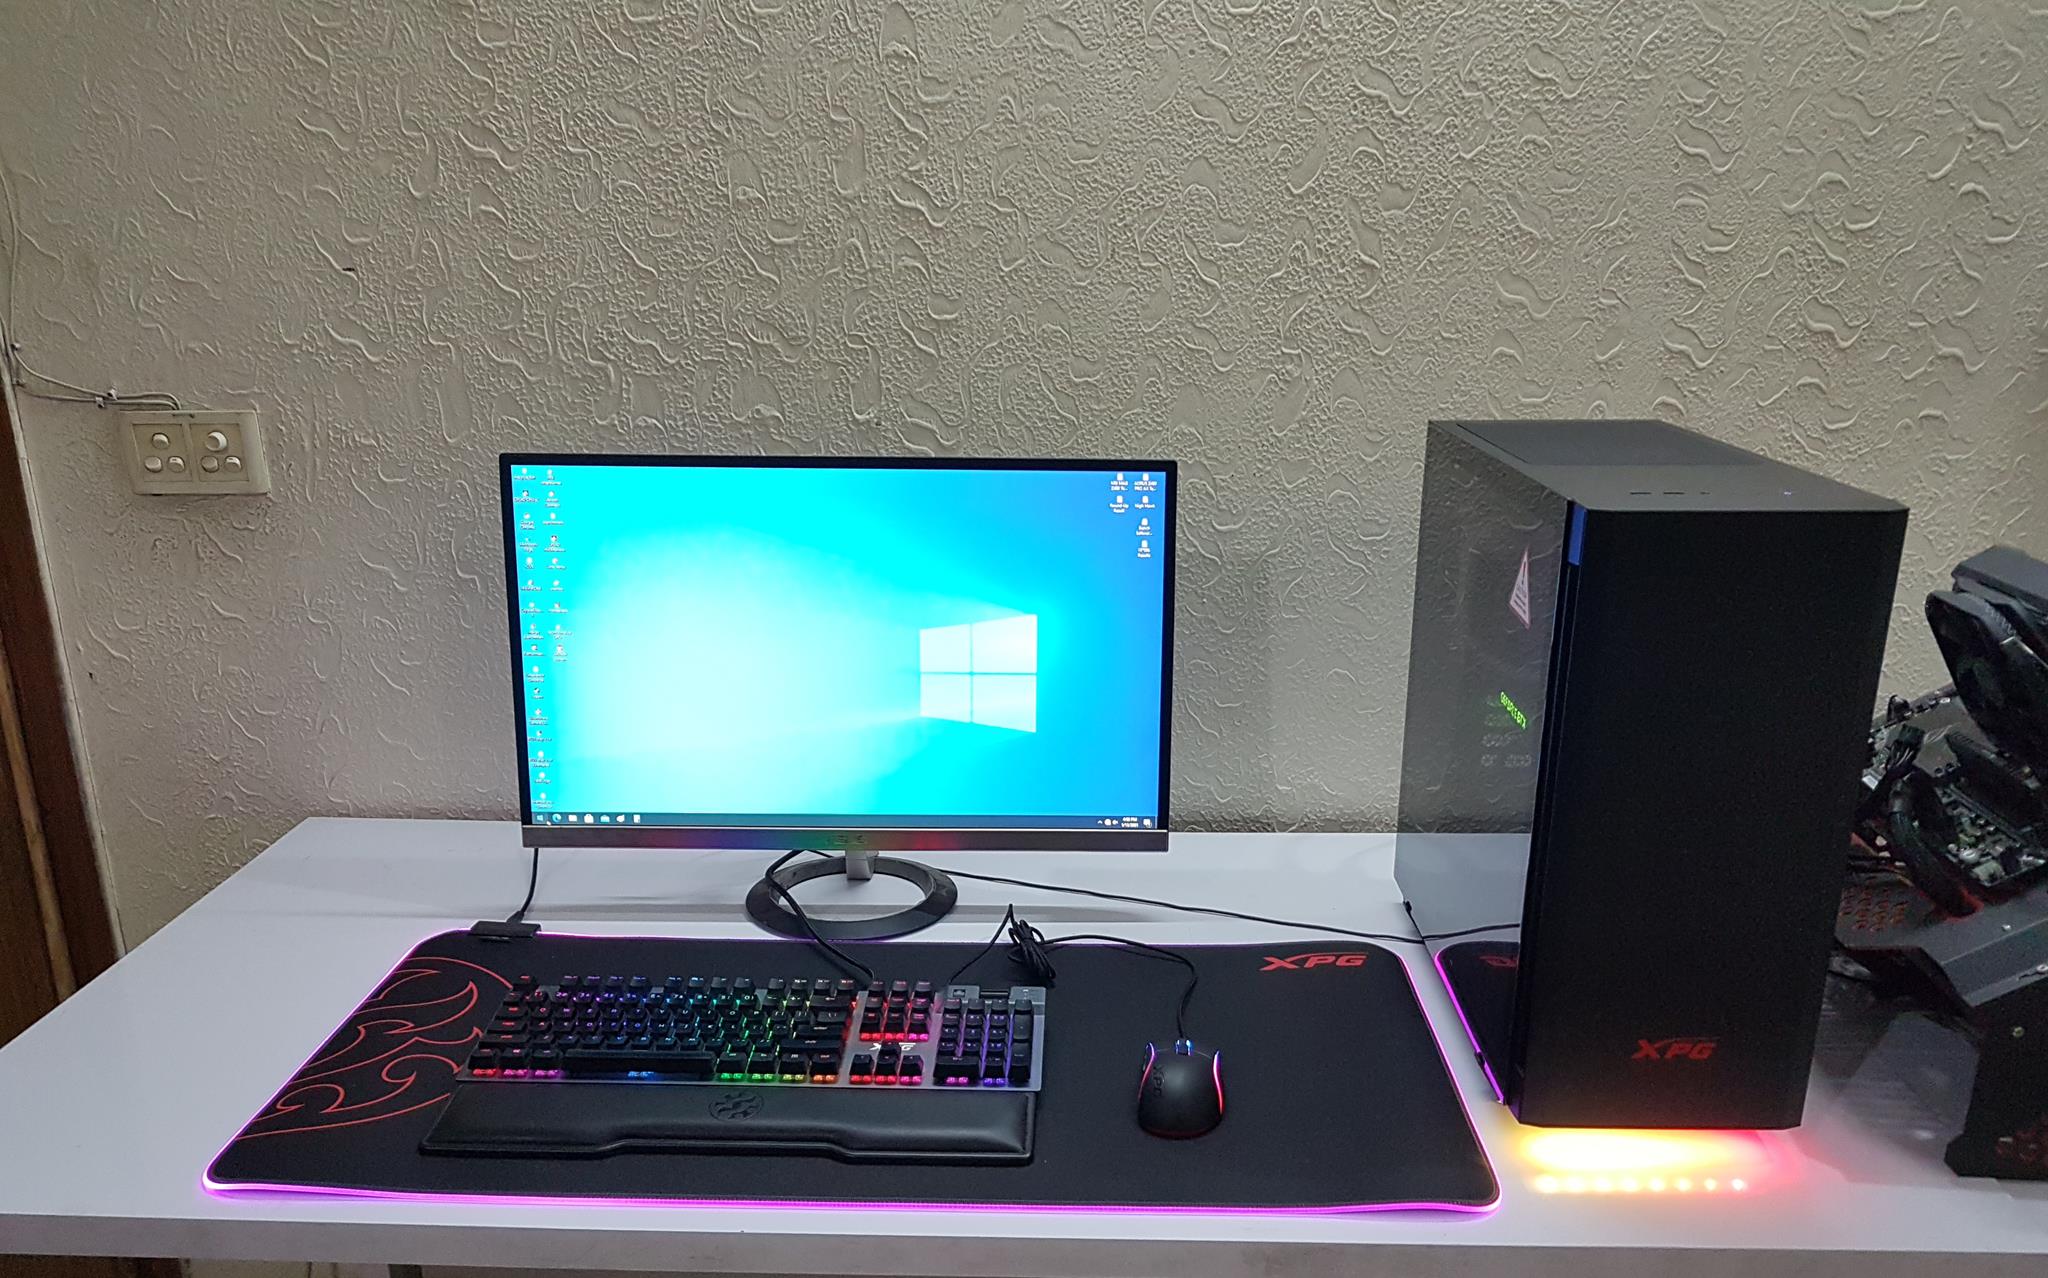
The chassis bottom features two vents. The left, under the PSU, has a non-magnetic dust filter. On the right, under the HDD cage, there’s another vent. The front underside has a diffuser with RGB LEDs for under glow. The chassis is lifted 26mm from the surface by its feet. To remove the HDD cage, take out the 4 screws.
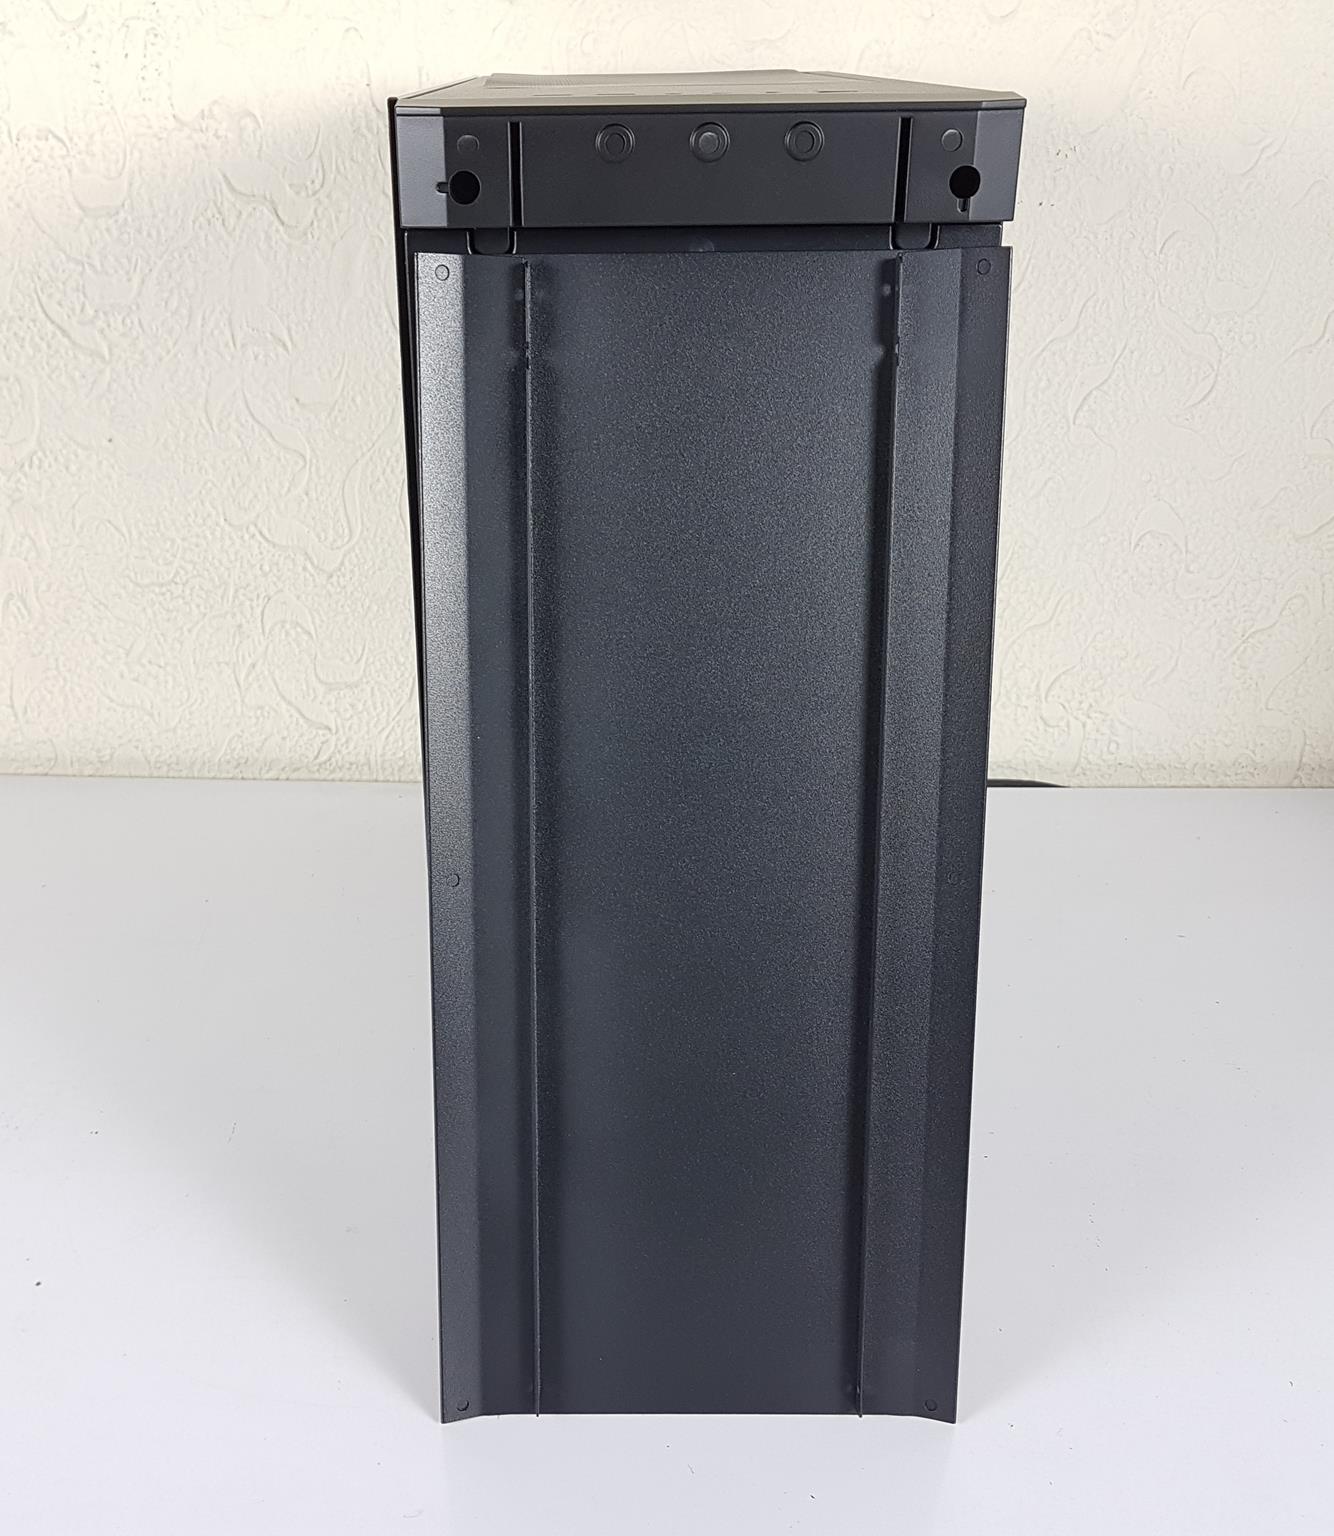
The feet have a raised surface or tab which acts as a catcher to hold the glass panel. Looking at the top side, there is a vented portion on the right side with a magnetic dust filter. We have 120/240mm fan mounts here.

Looking closely at the top, we can note that the glass panel does not fully flush with the frame of the chassis.
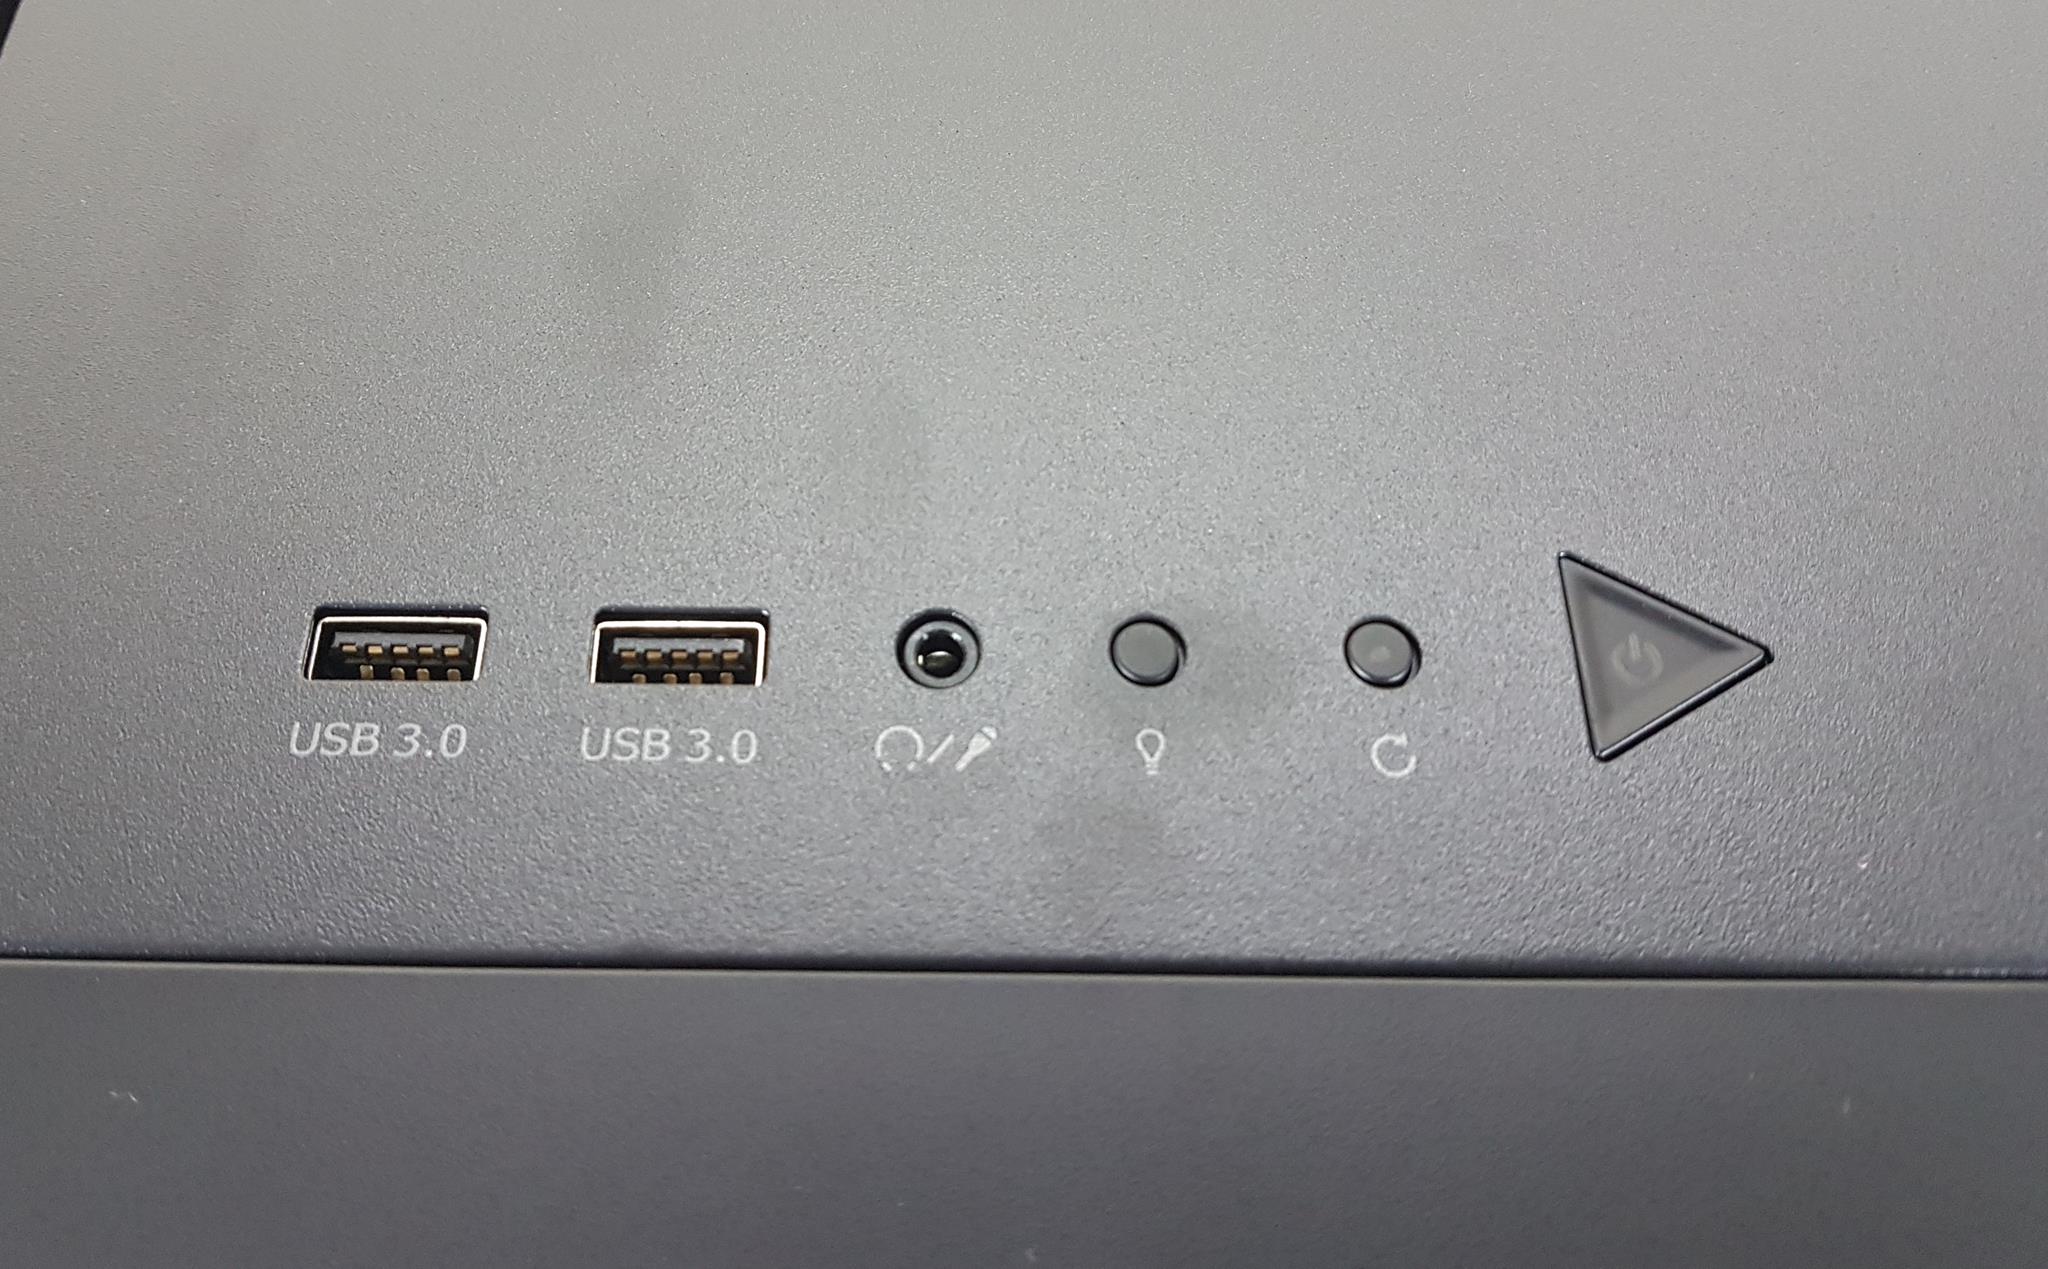
The I/O panel is located on the top of the chassis. The following connectivity options are on the I/O panel.
- Power Button
- Reset Button
- RGB Button
- Hybrid Audio port
- 2x USB 3.0 ports
The Reset and RGB buttons are not convenient to operate.

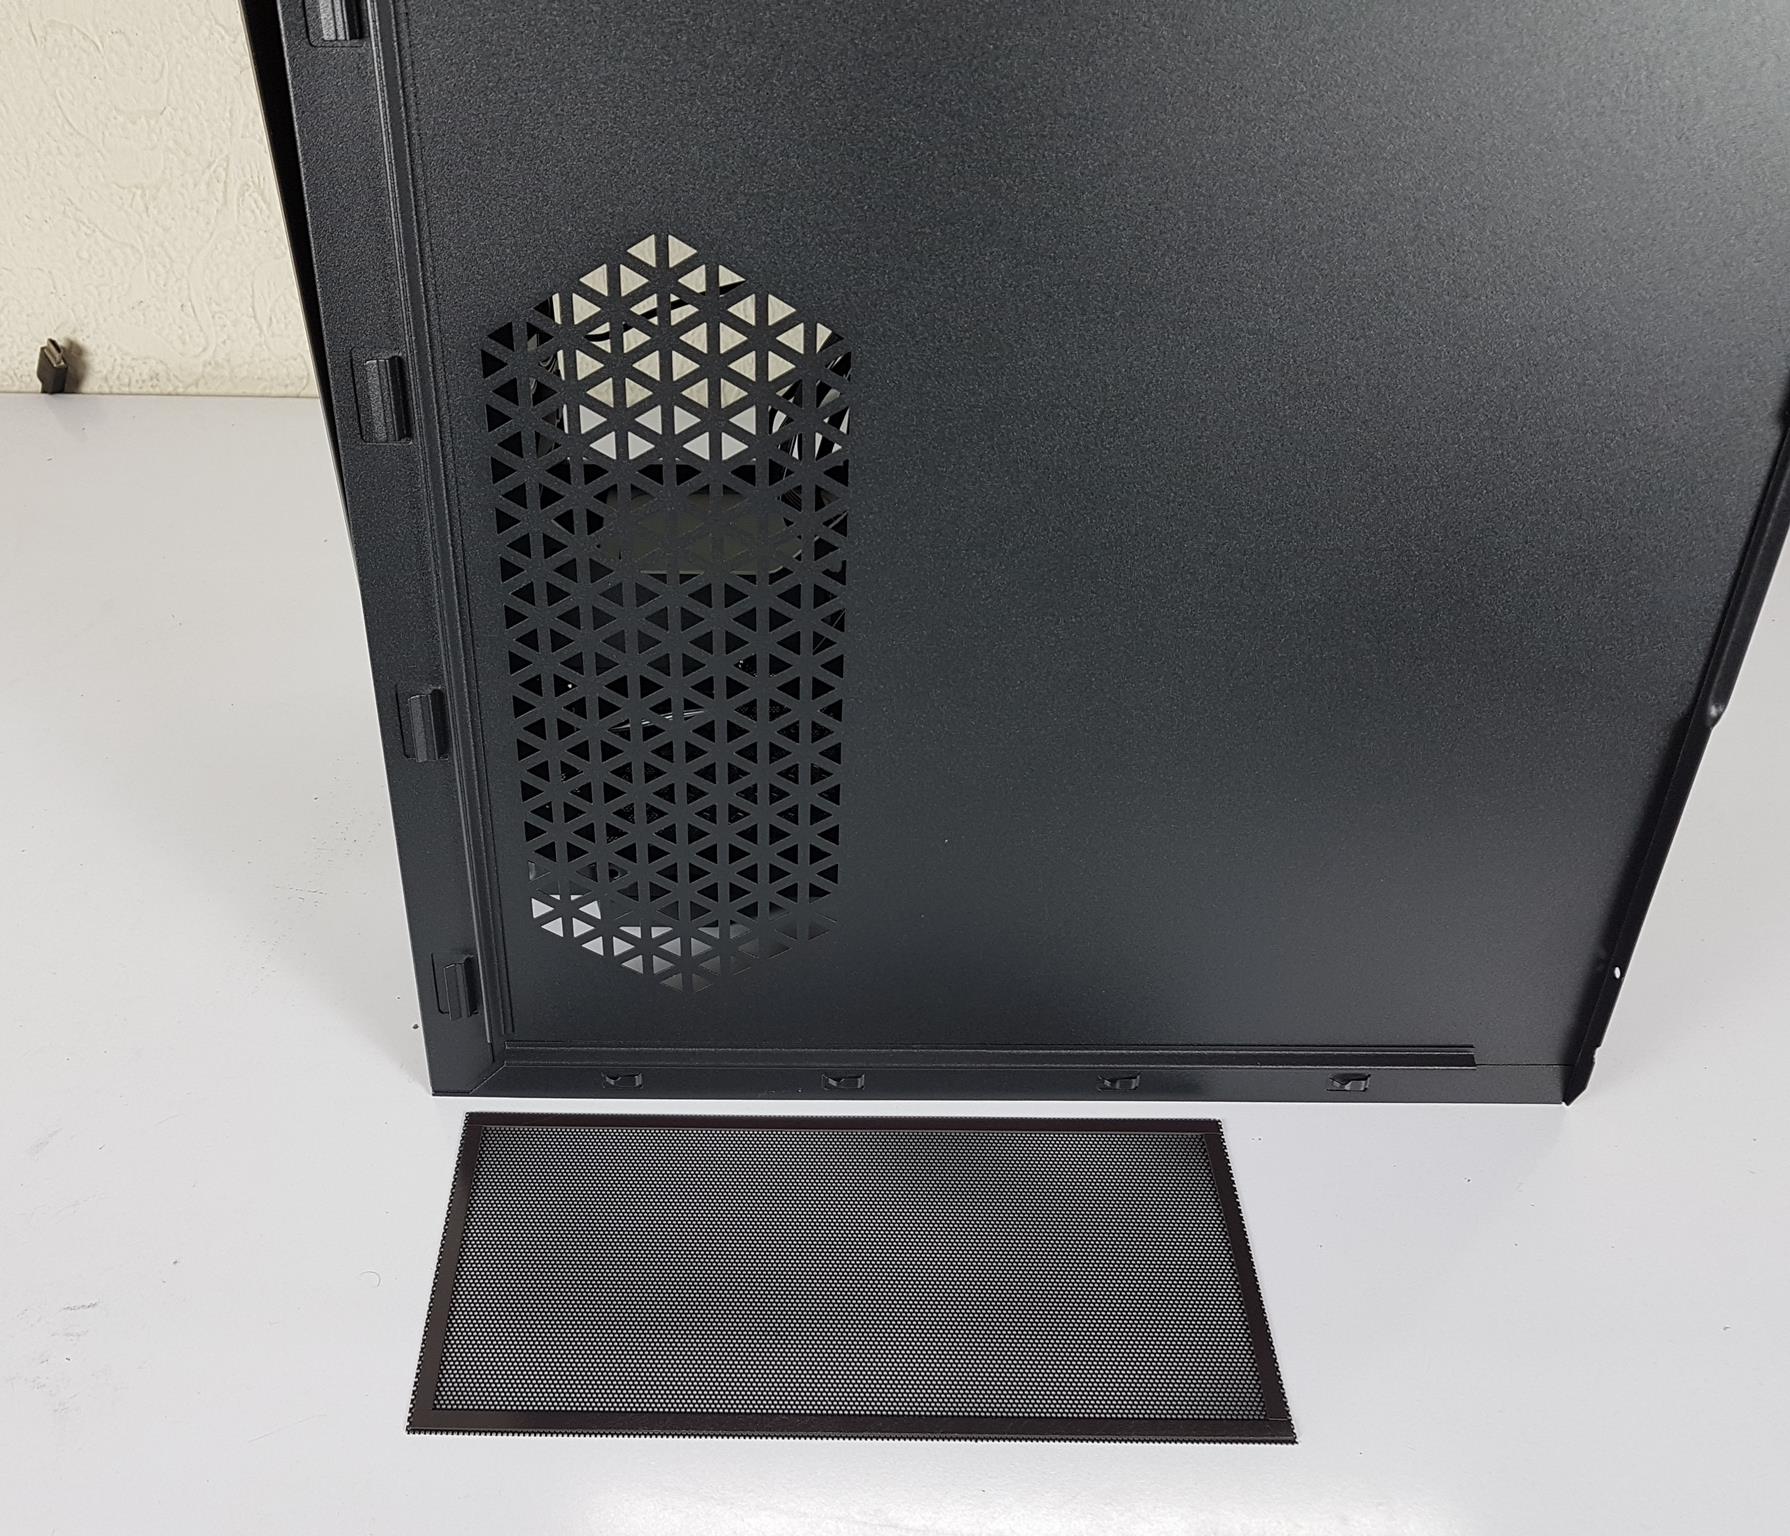
The side panel is made of steel. It has a vented portion on the left side located towards the front. This vented portion faces the side bracket where up to two 120mm fans or a 240mm radiator can be installed. The vented portion on the side panel has a magnetic dust filter.
Invader Chassis Interior
Let’s take a look at the interior of the chassis.
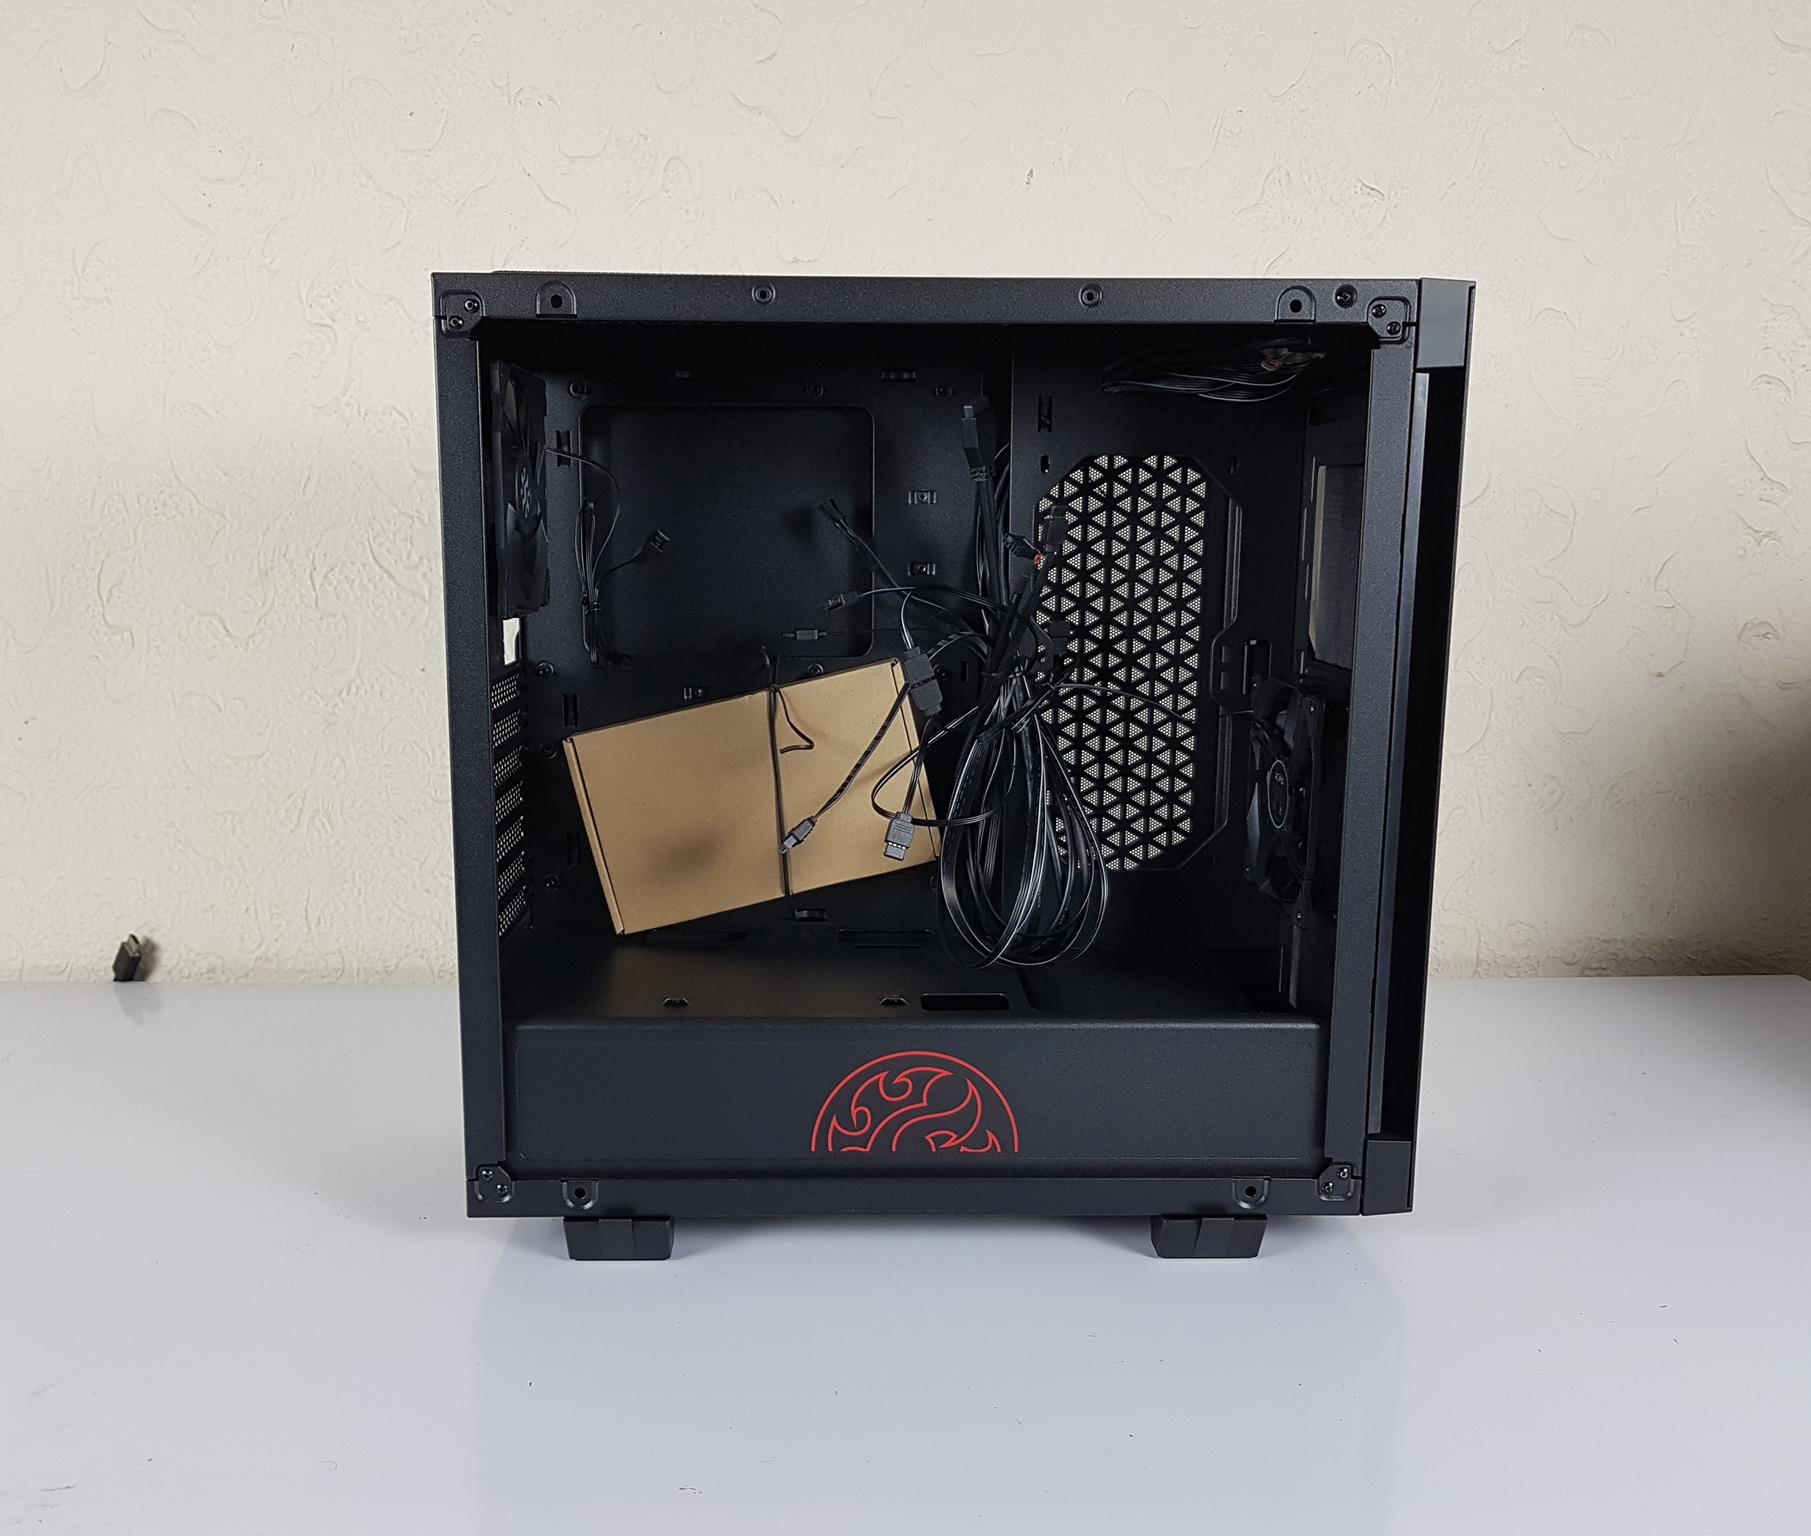
Removing the glass panel will show the accessory box tucked into the motherboard tray. The same is the case with the I/O panel’s cables.
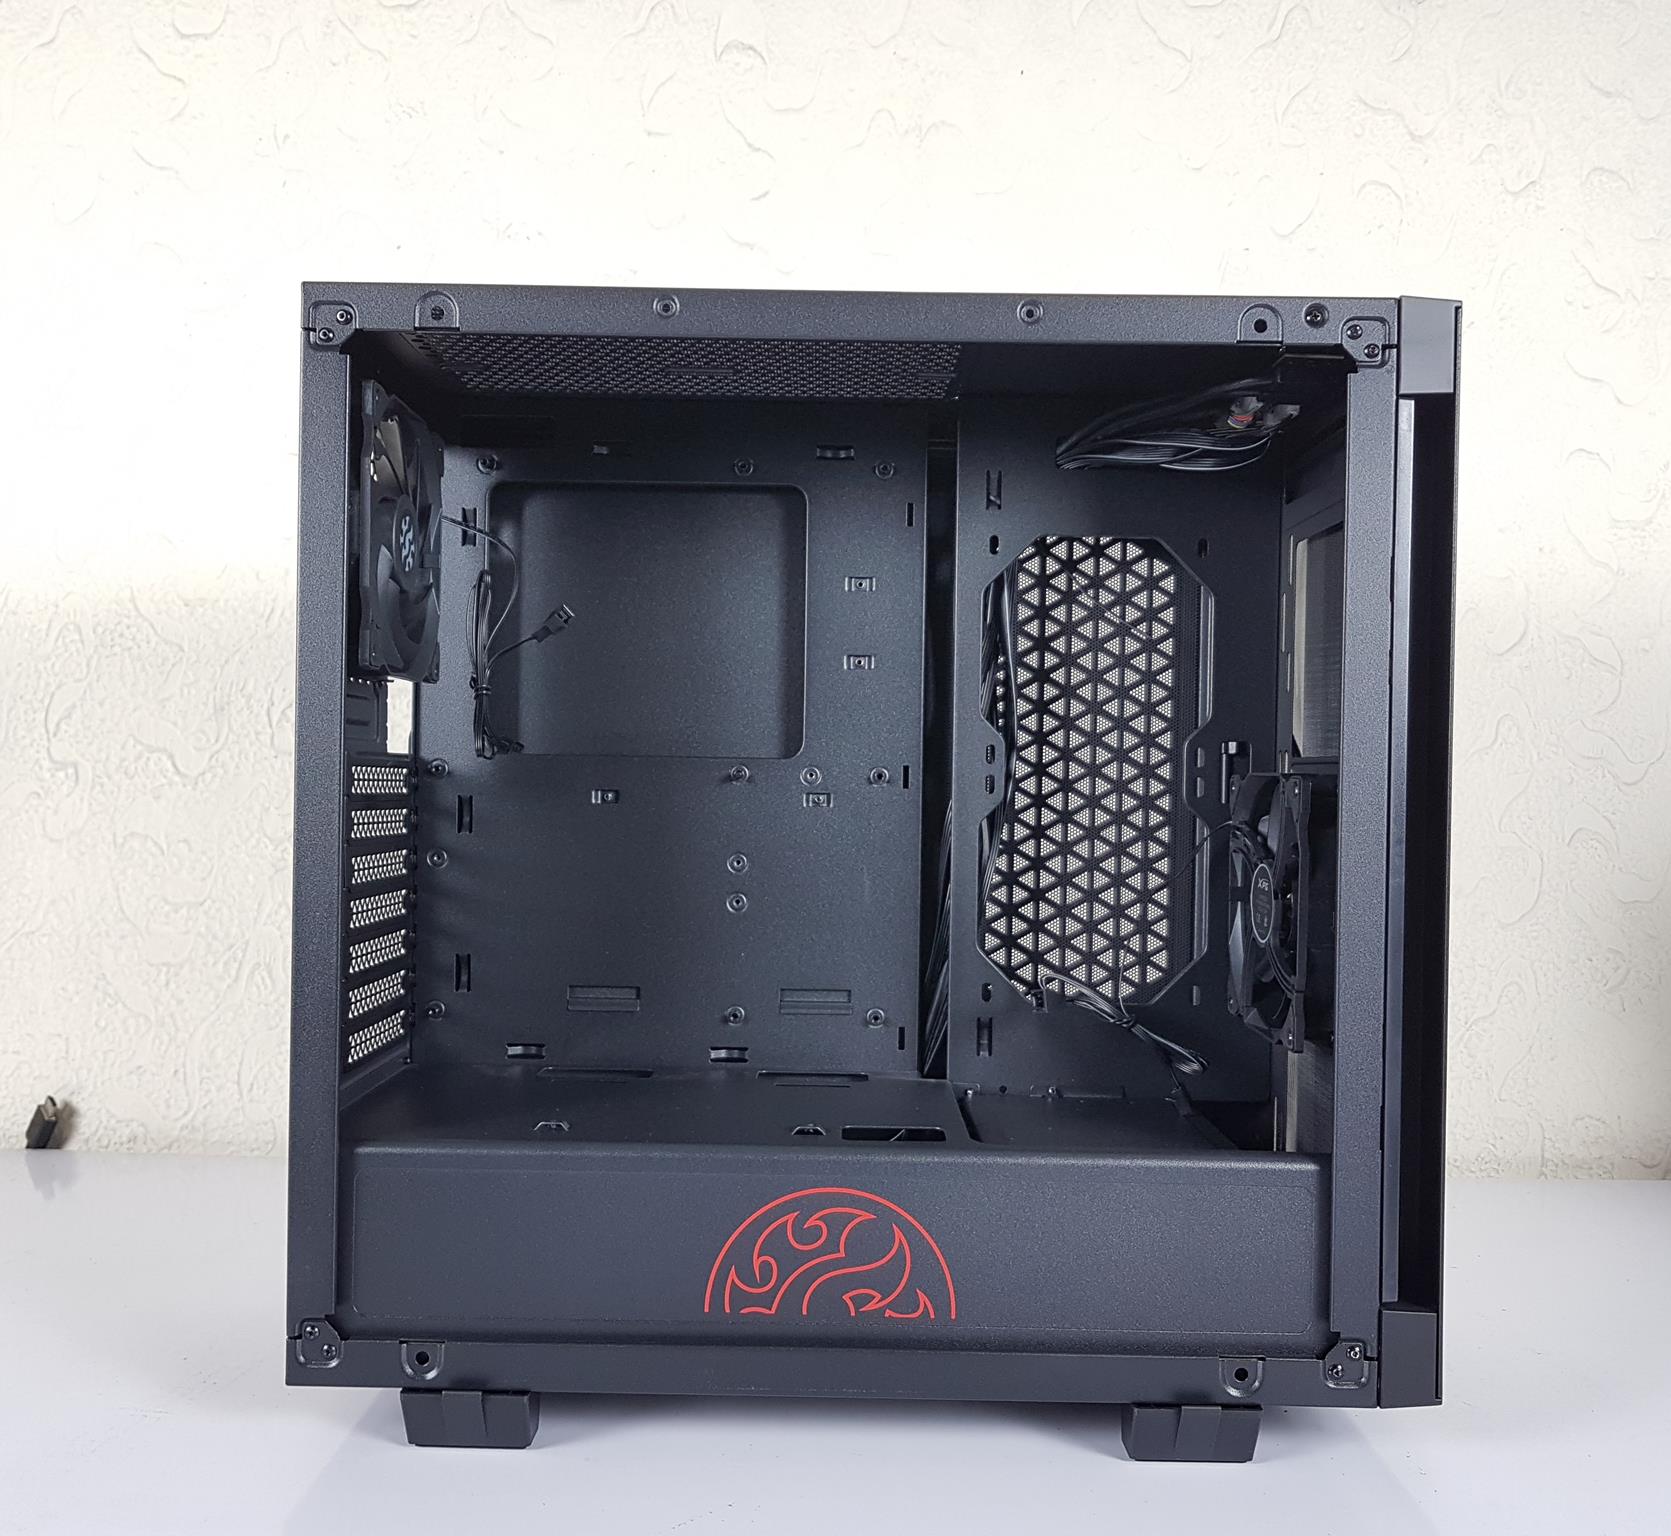
Removing the accessory box and hiding the I/O panel’s cables show the spacious layout of the chassis. The complete chassis is in black. There is an XPG logo on the PSU cover in the center.
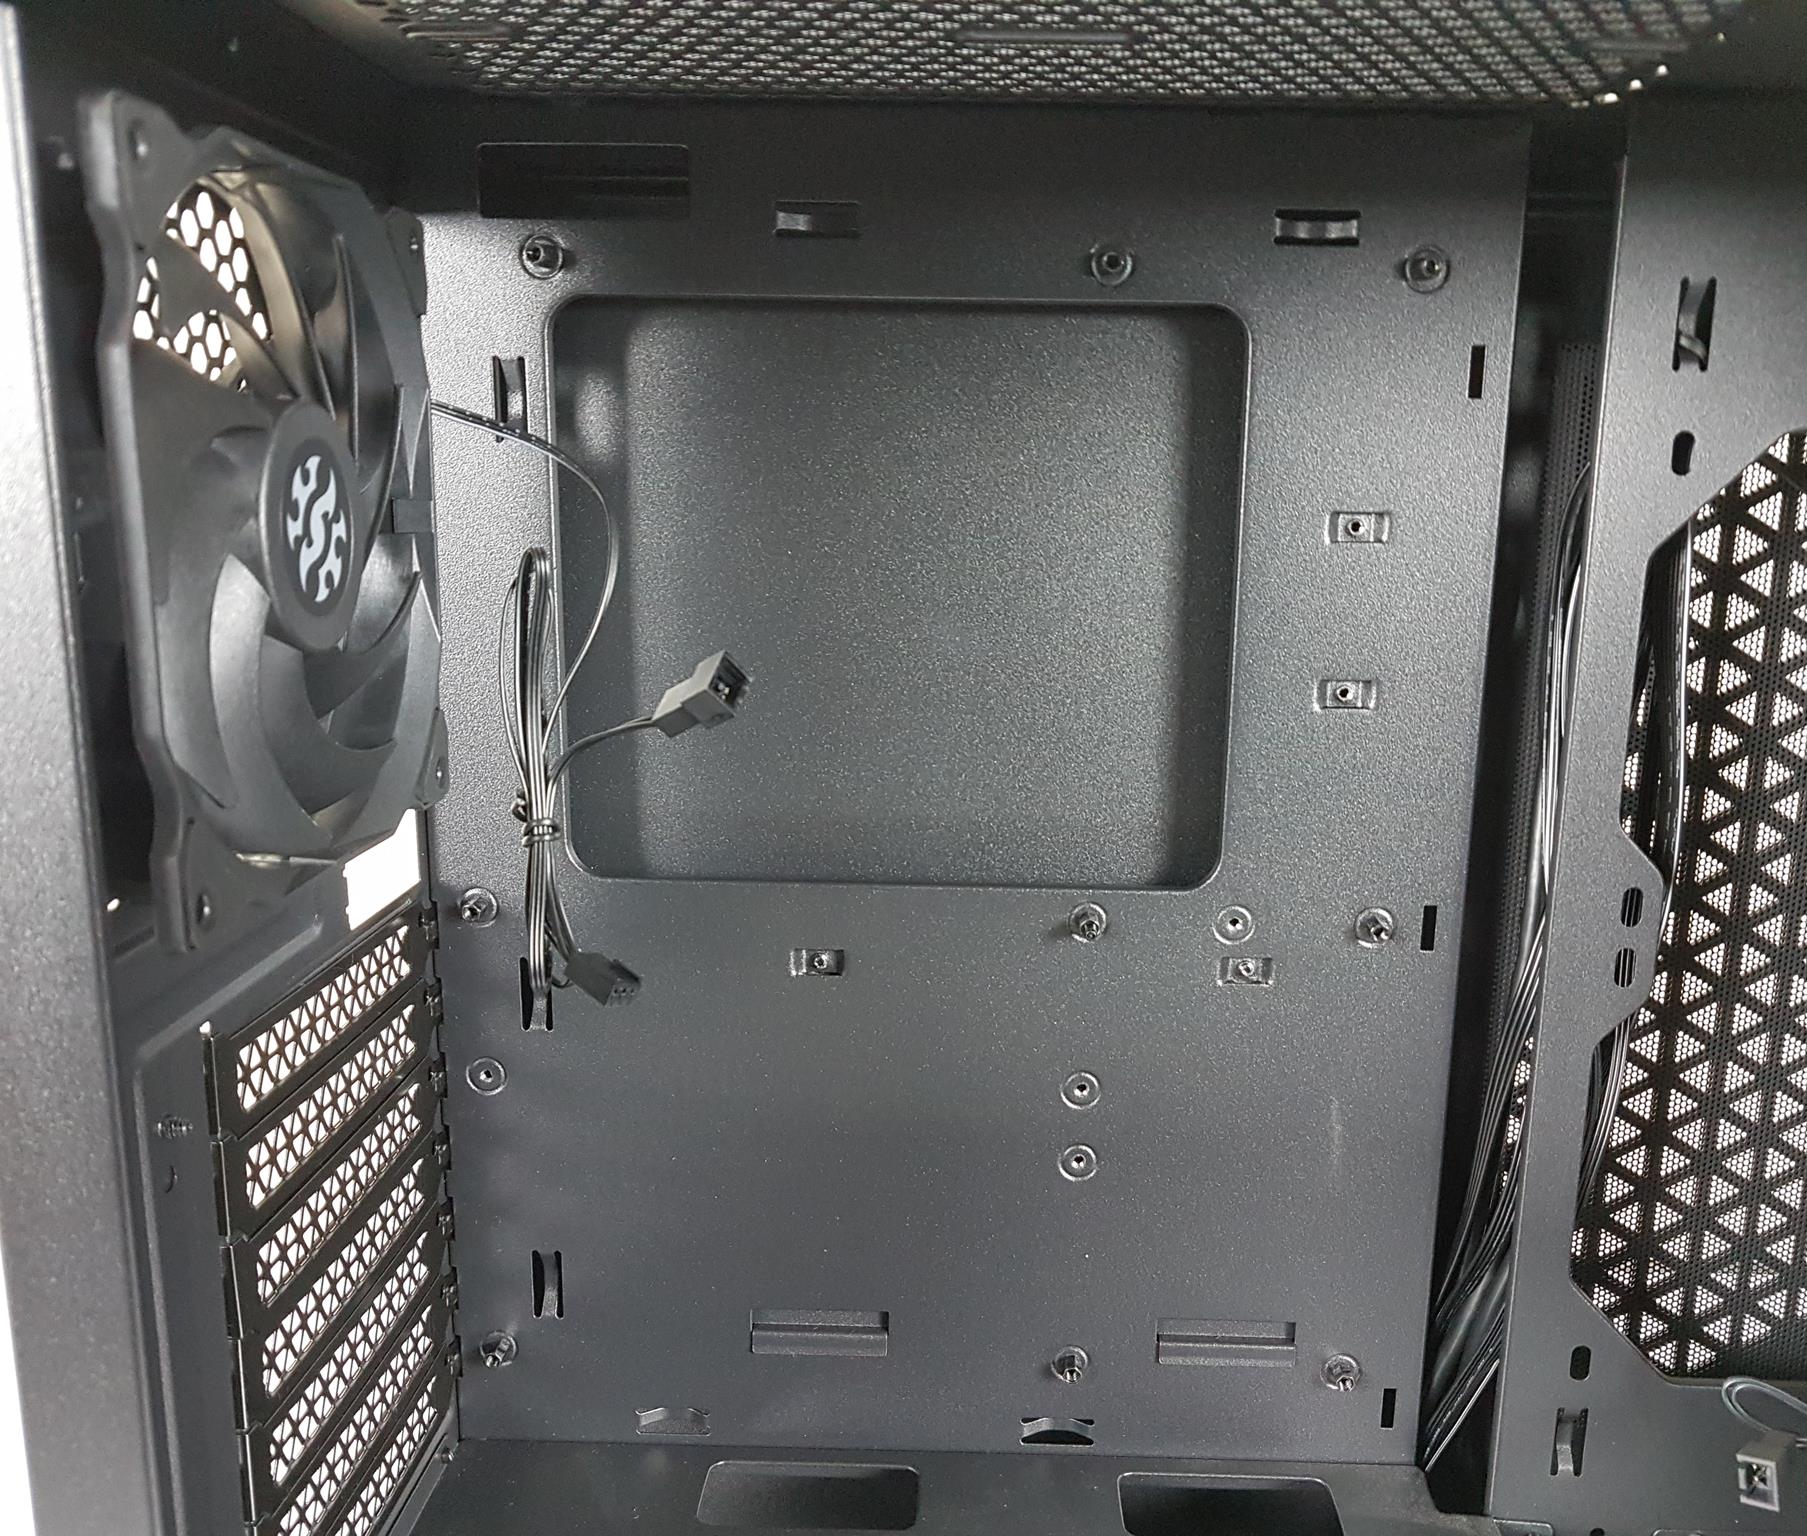
Motherboard tray with preinstalled standoffs and convenient catcher design. Large CPU cooler cutout and single EPS cable cutout on the top left, but lacks additional top cutouts.
The right side features a single large opening for design, with a slightly recessed motherboard tray. 30mm gap above the chassis frame and 50mm displacement from the radiator mount for RAM compatibility.
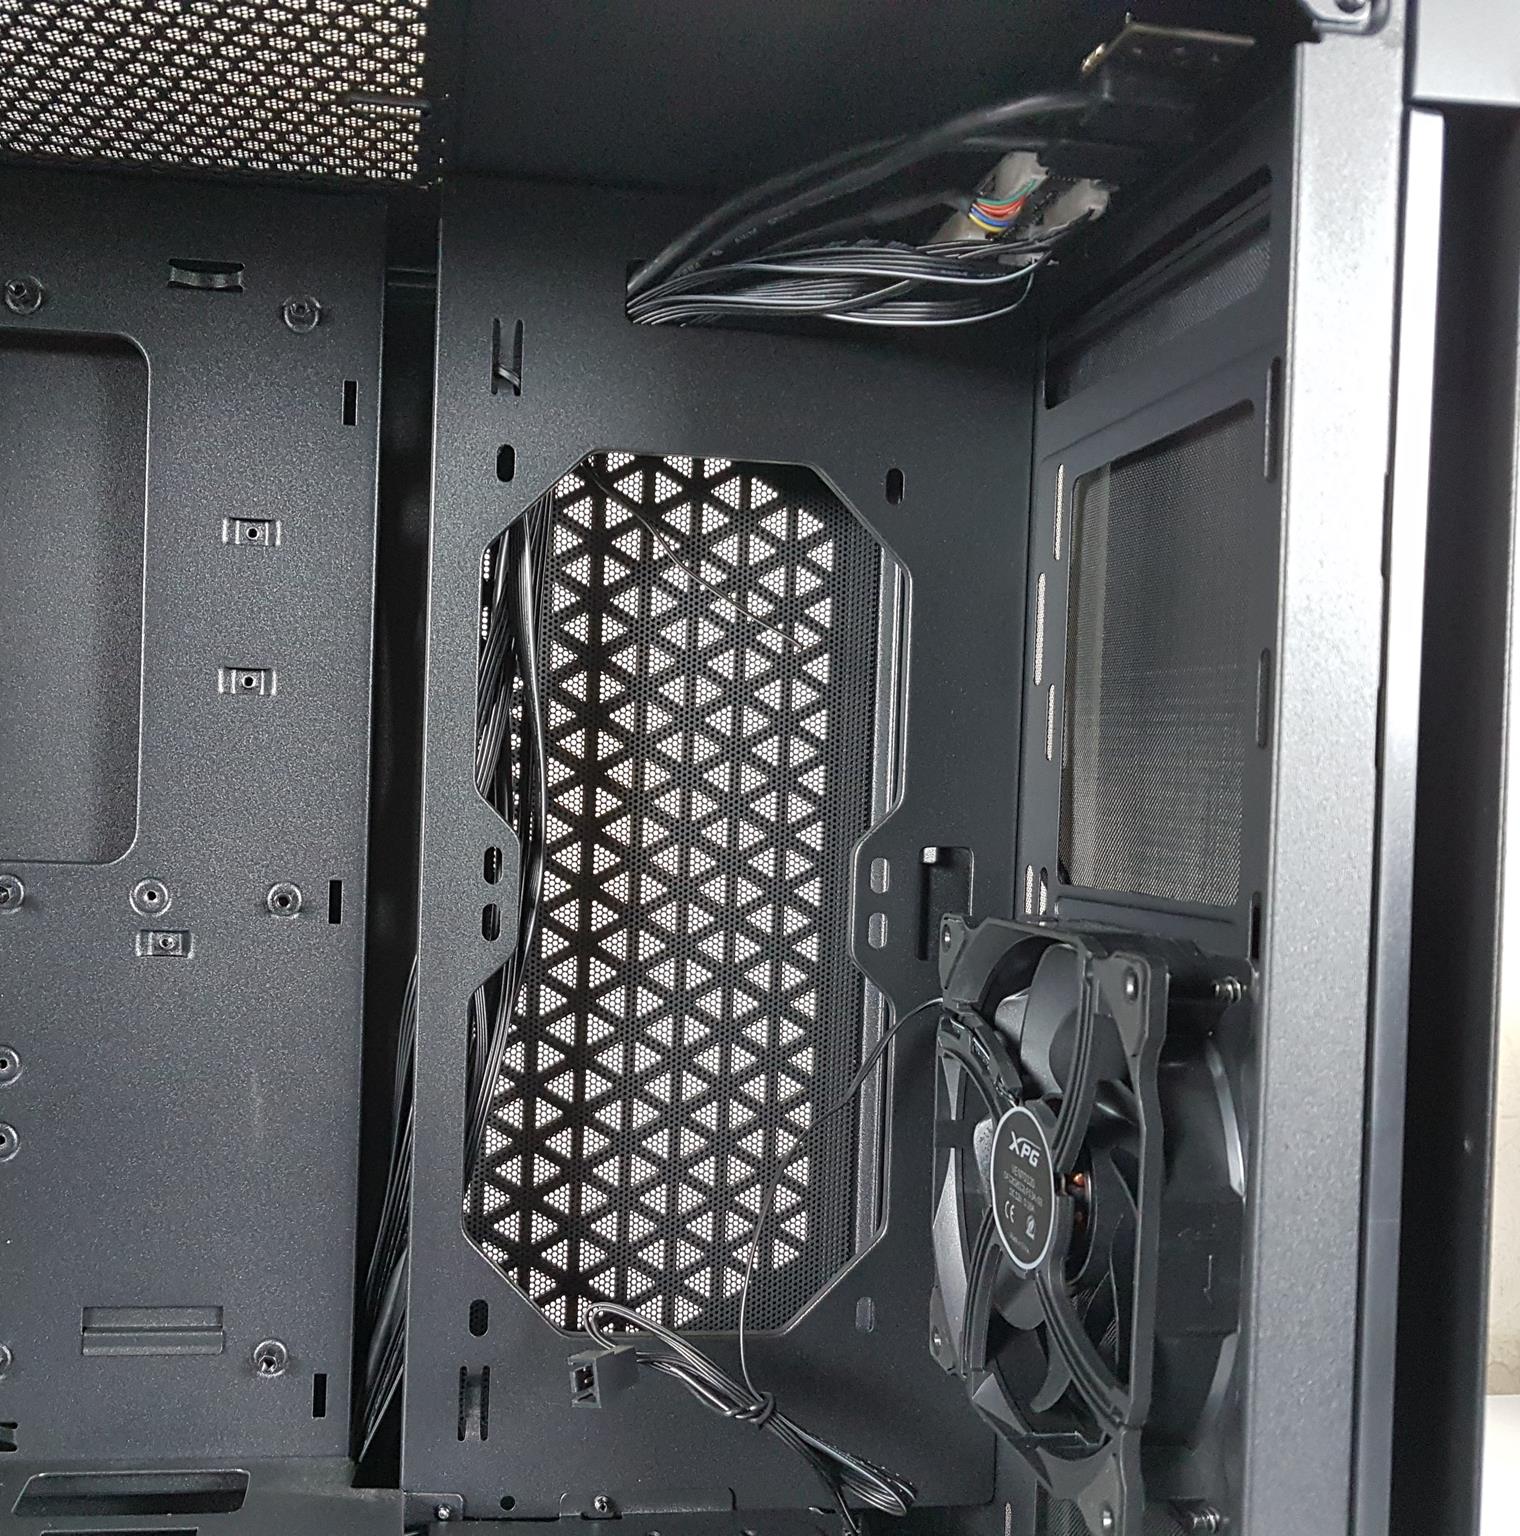
XPG INVADER Chassis side bracket supports 2x 120mm fans or 240mm radiator, positioned higher for improved functionality.
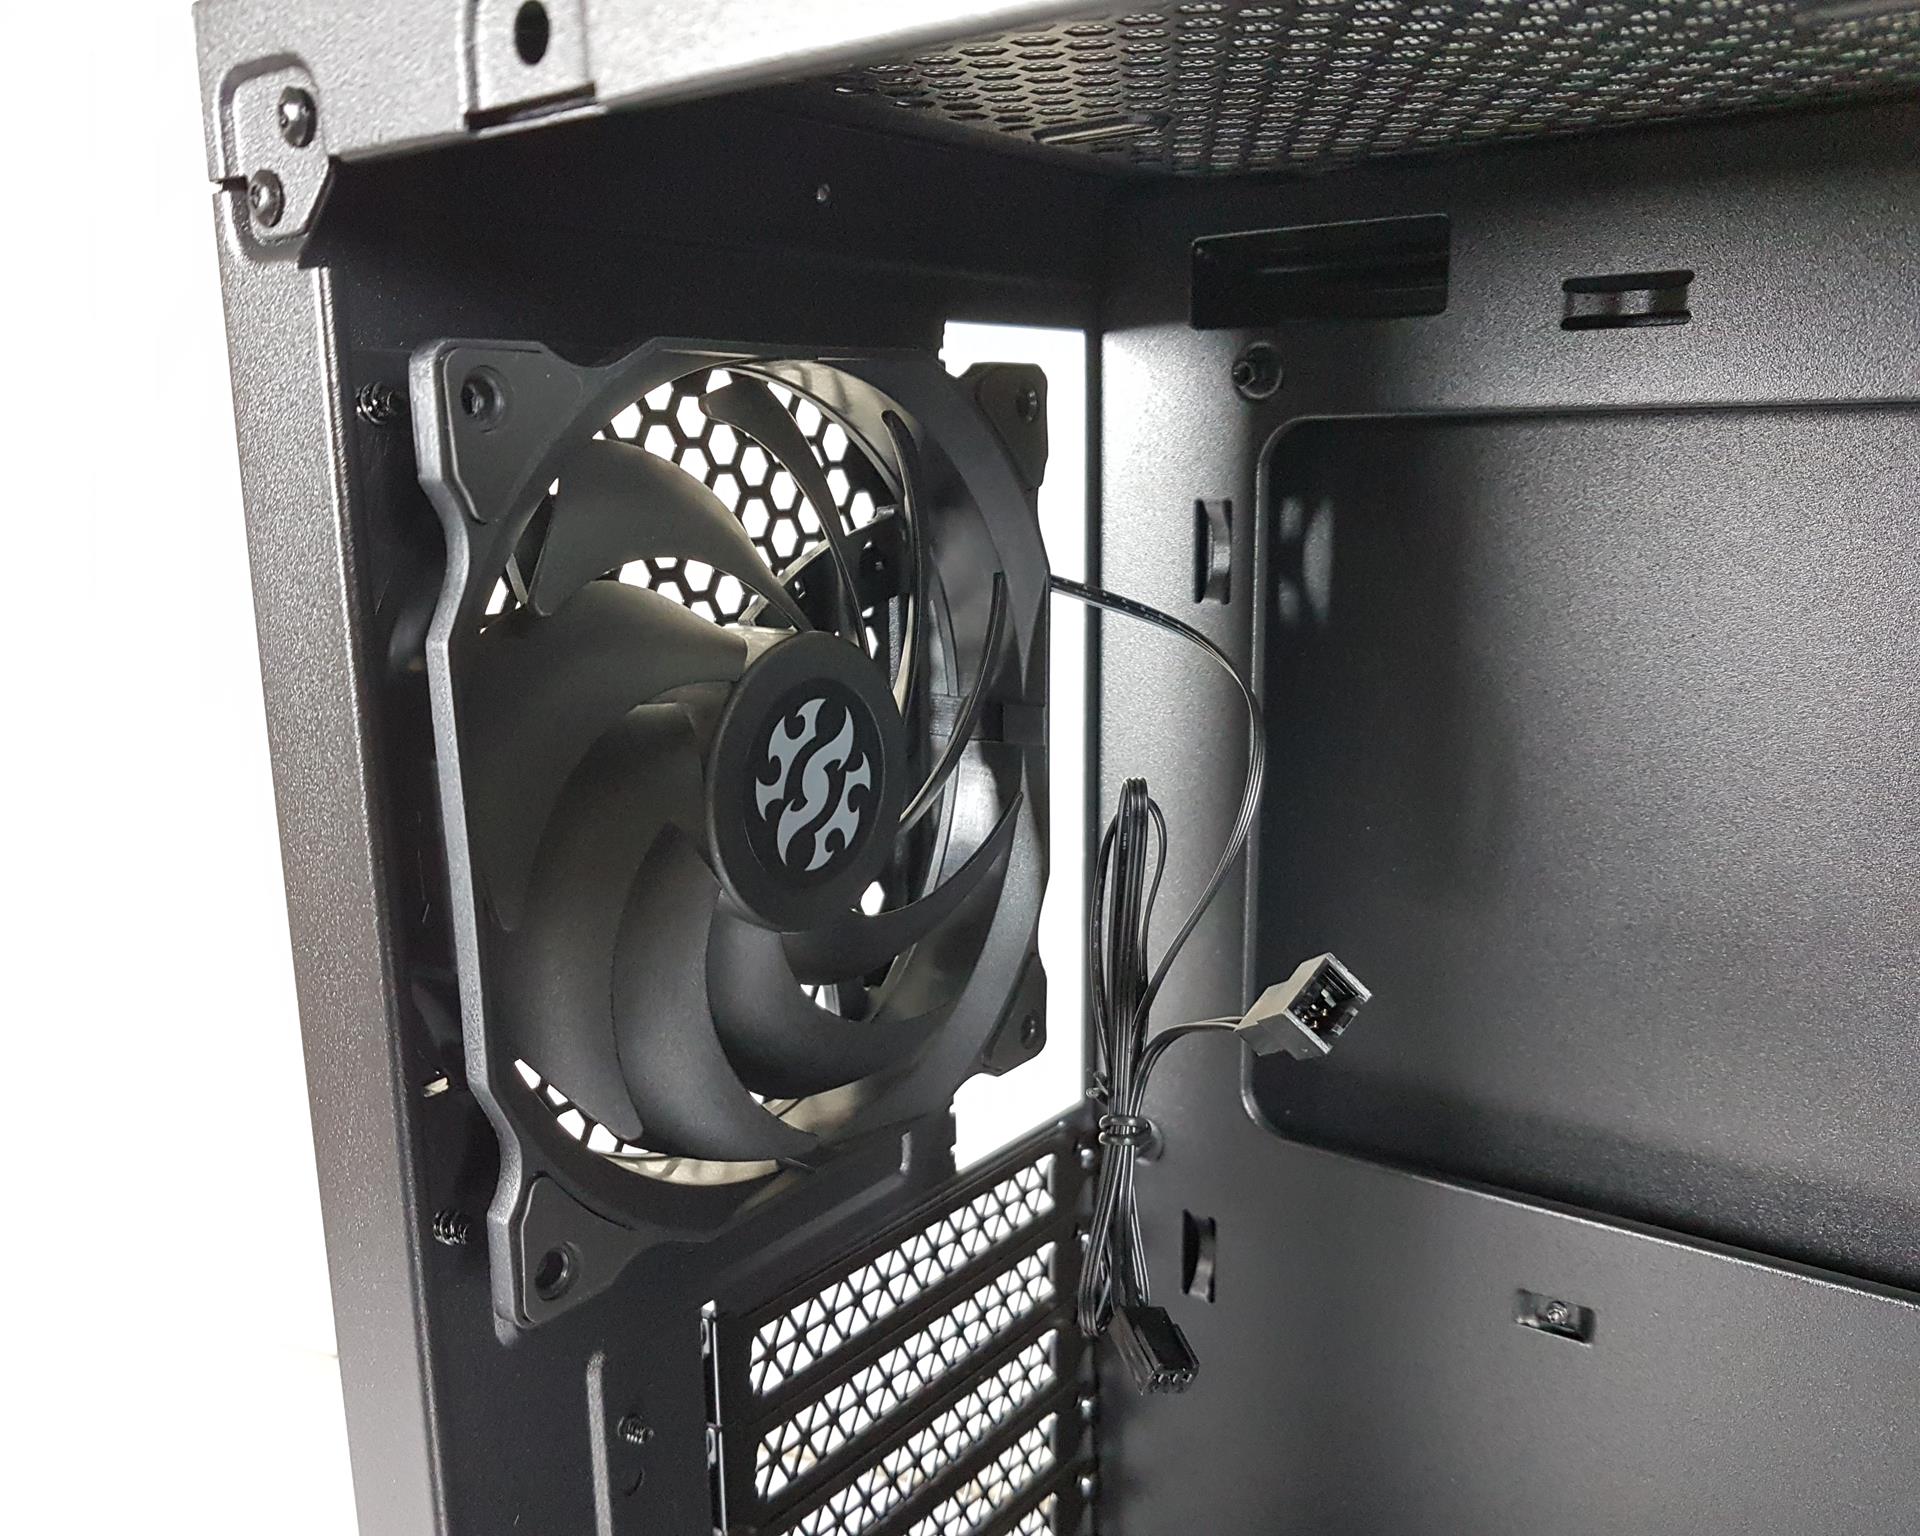
There is a 120mm fan on the rear. These VENTO 120 fans are not RGB ones. These fans come with a 3-pin connector as well as a 3-pin socket. The PCIe slots are in the same plane of the chassis frame. The covers are reusable.
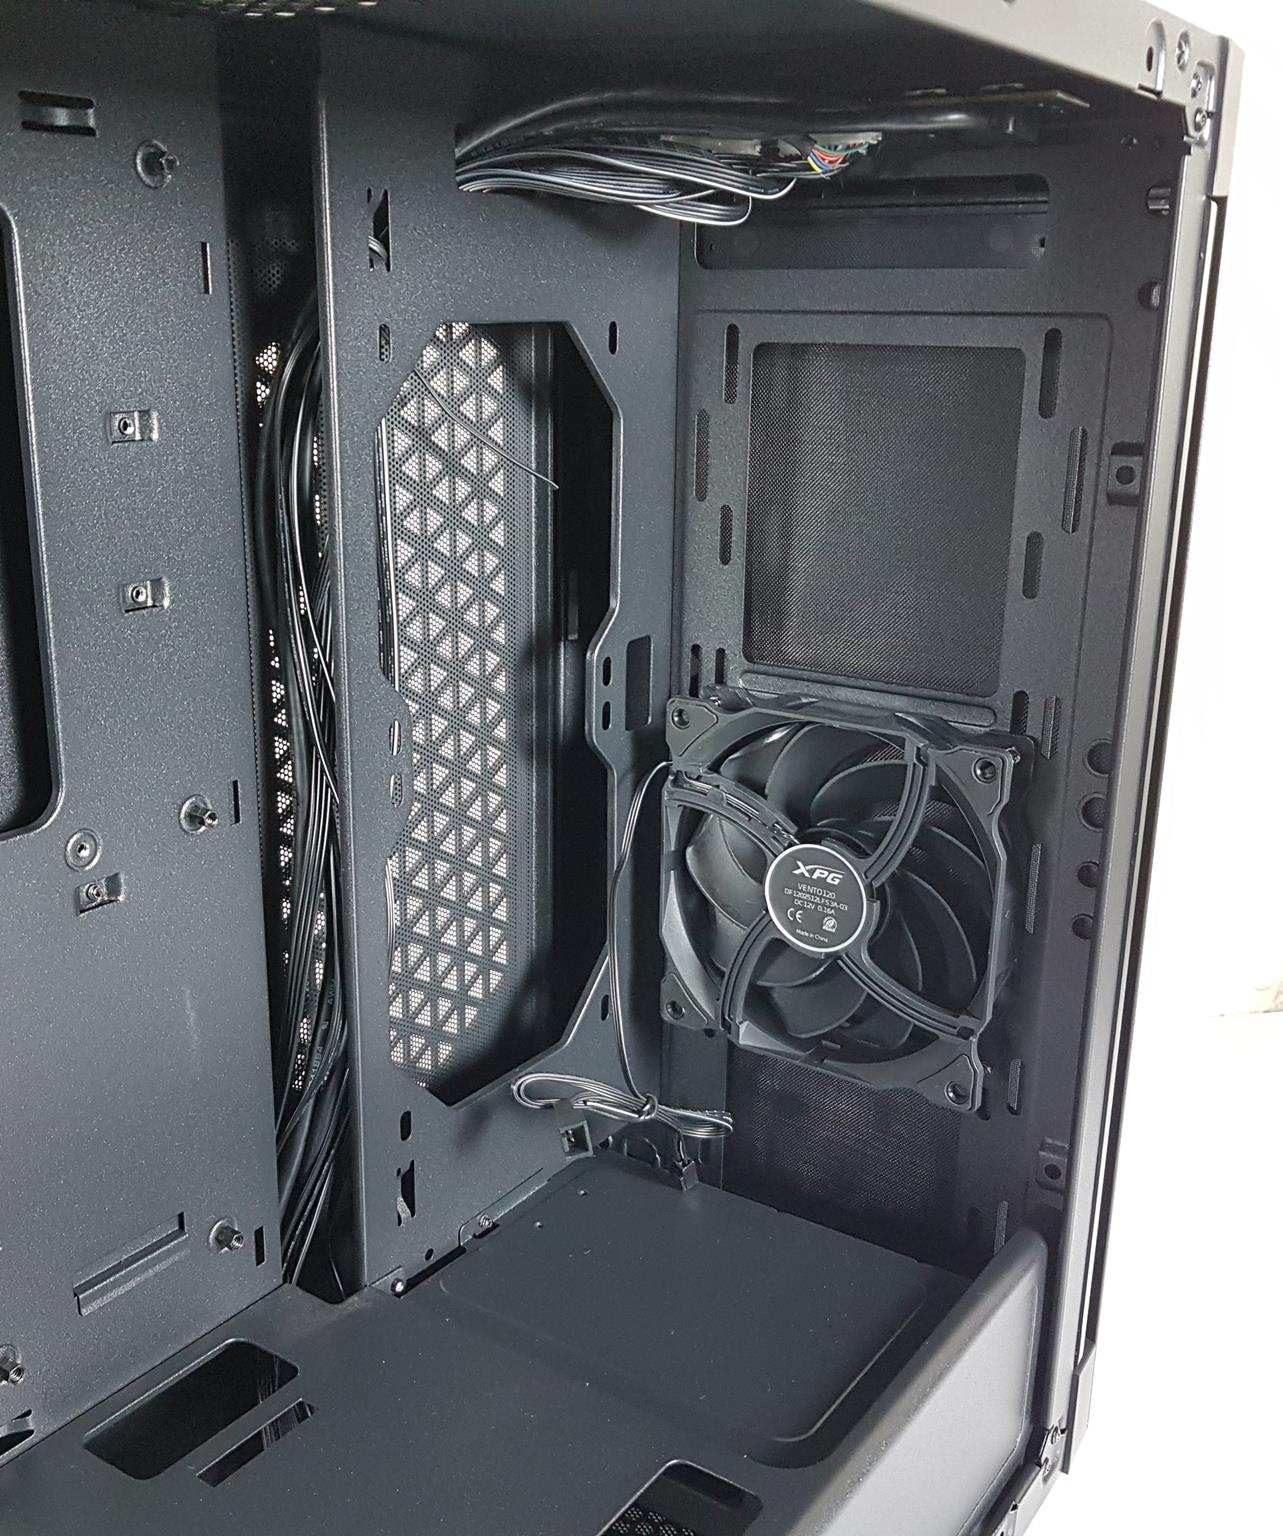
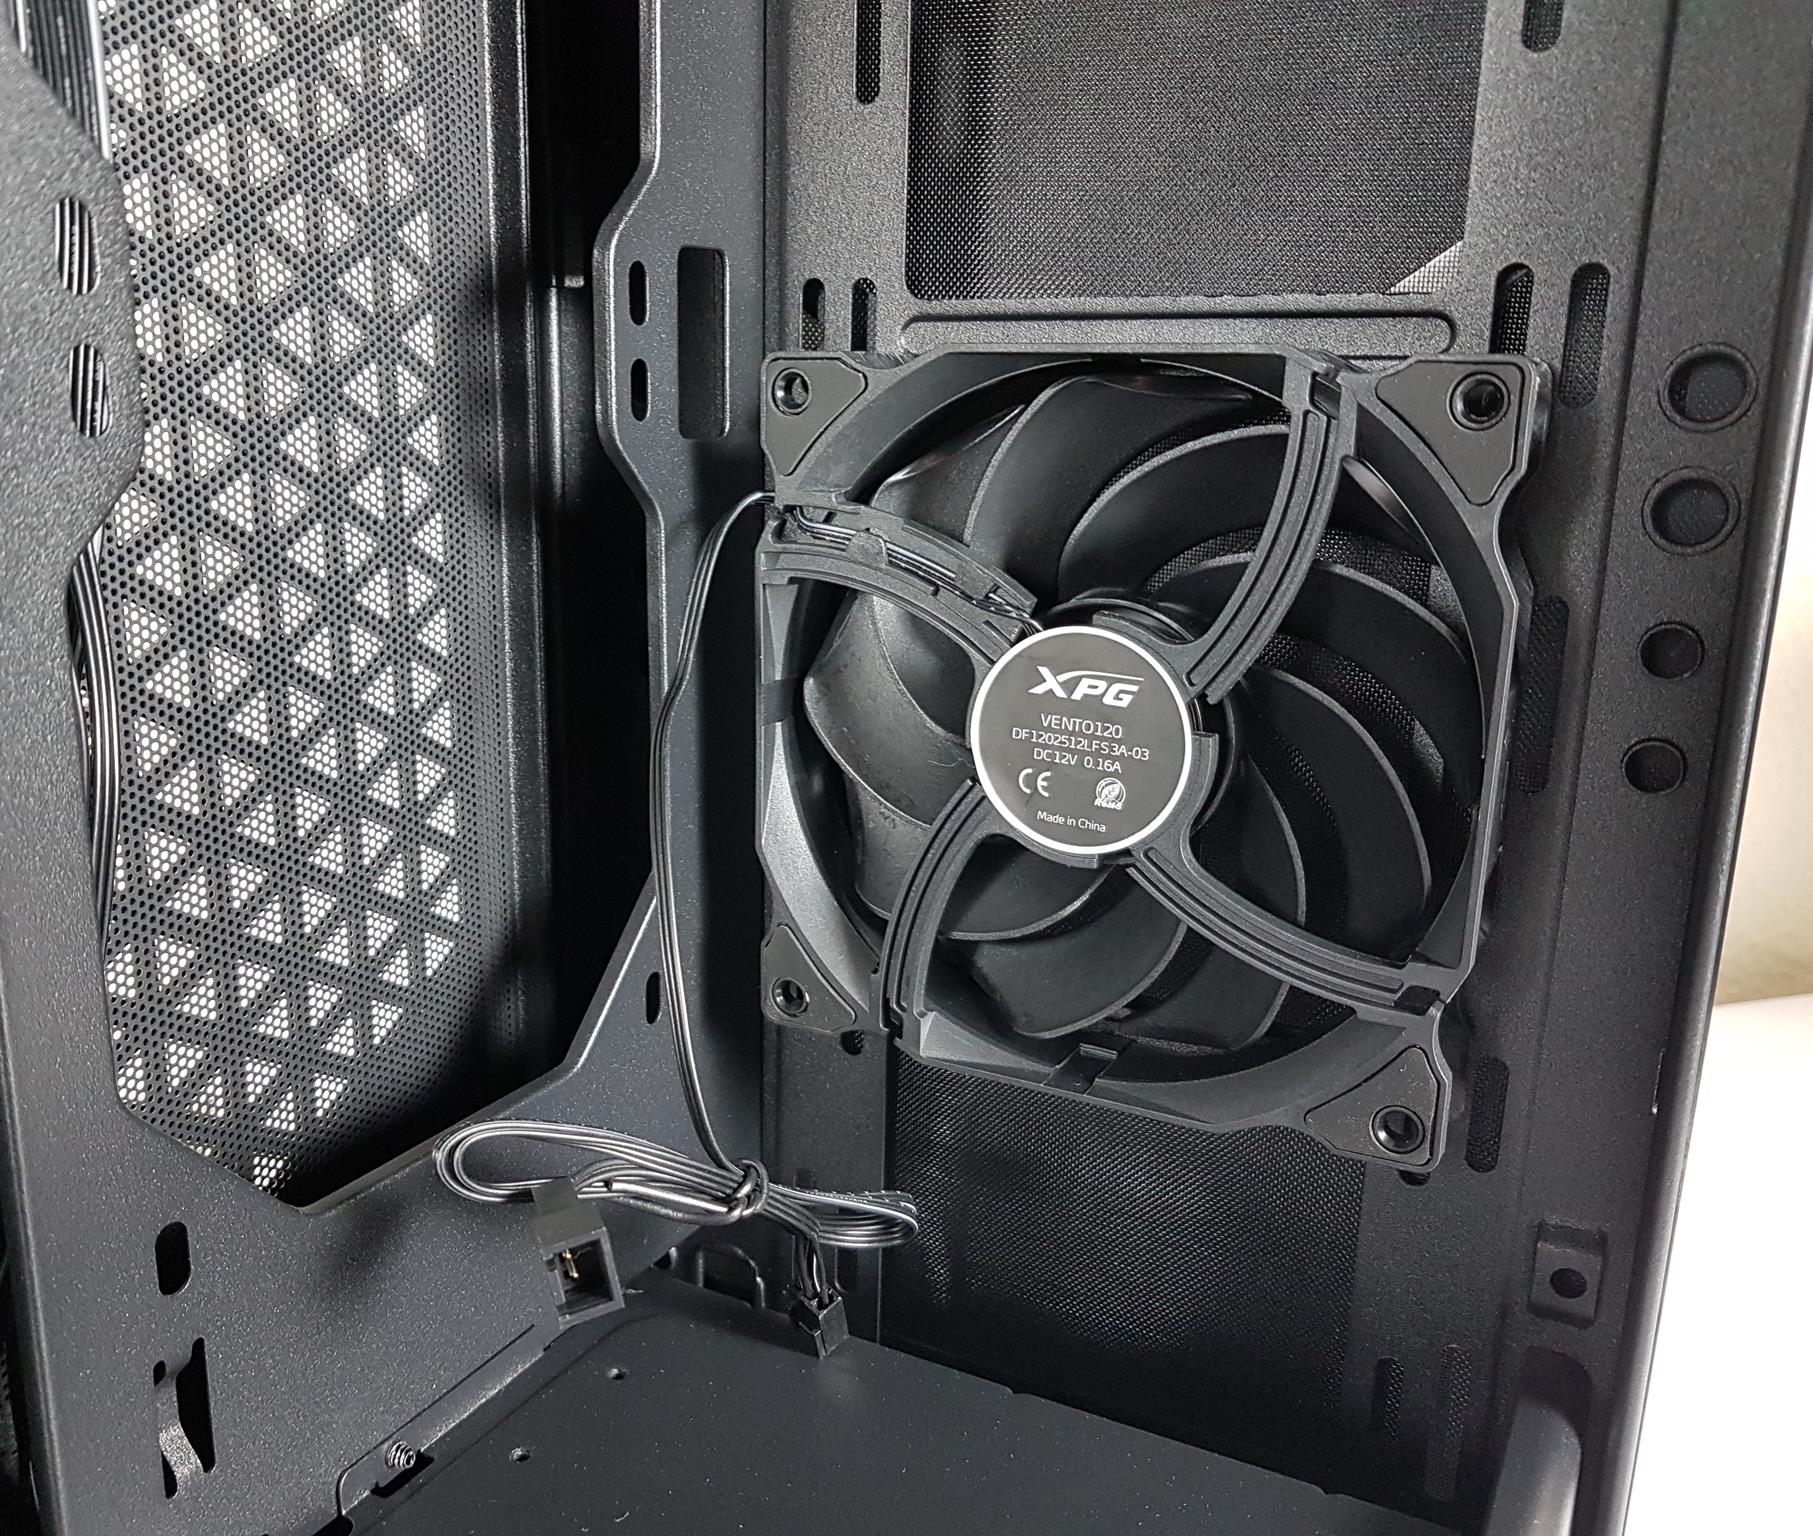
The picture shows the front fan mount provision. While the front fan won’t obstruct the side-mounted radiator, there may be airflow passage obstruction, especially with push-configured radiator fans. They would pull air from the front fans, affecting fresh air supply to the system, though some air would still reach the motherboard area.
The front side has a VENTO 120 fan with a 3-pin connector and socket; the cable can be routed on the fan’s side from the bottom section.
You can install a 240mm radiator on the front with the HDD cage. For a 360mm radiator, remove the cage to create more space.
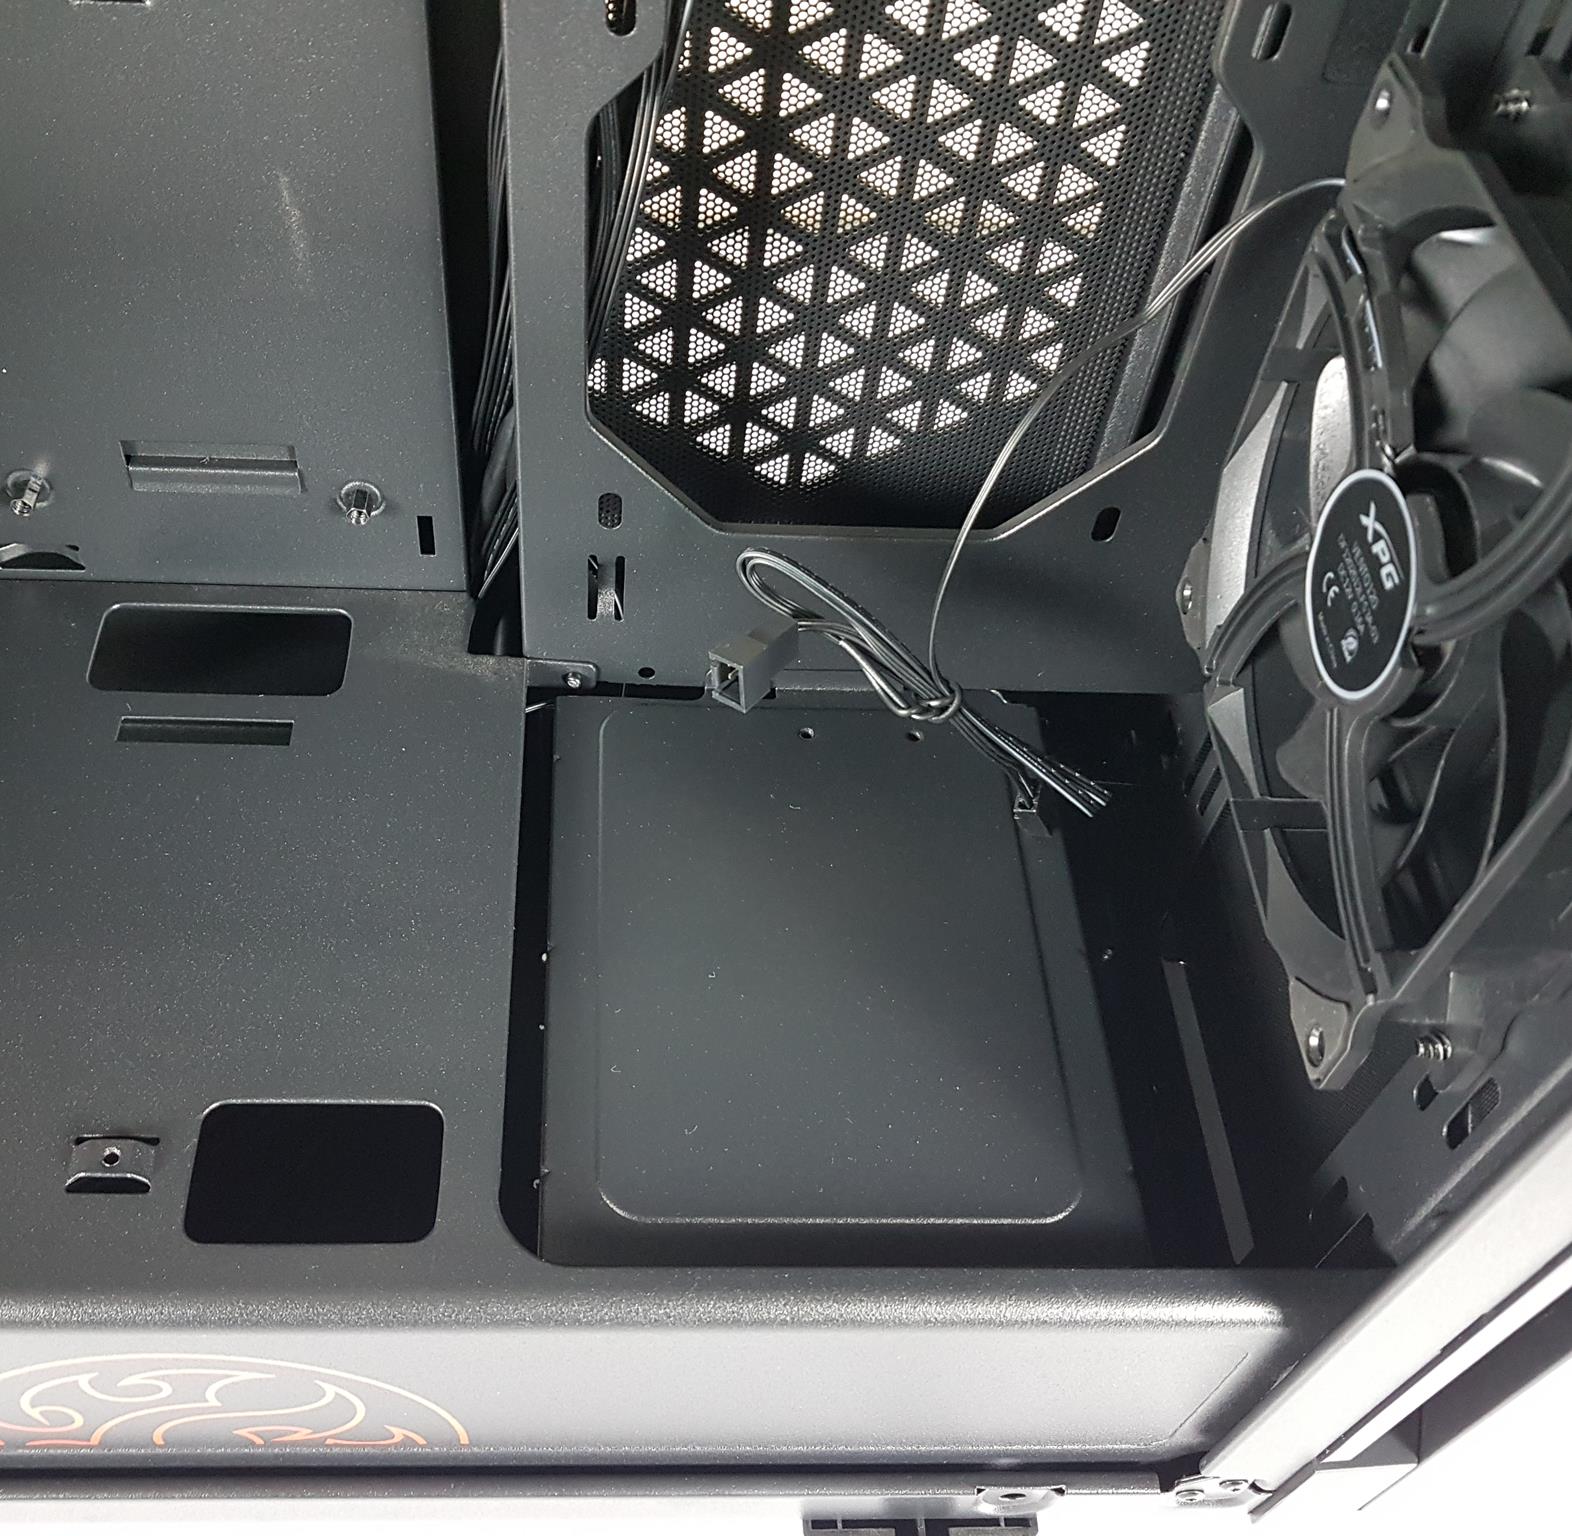
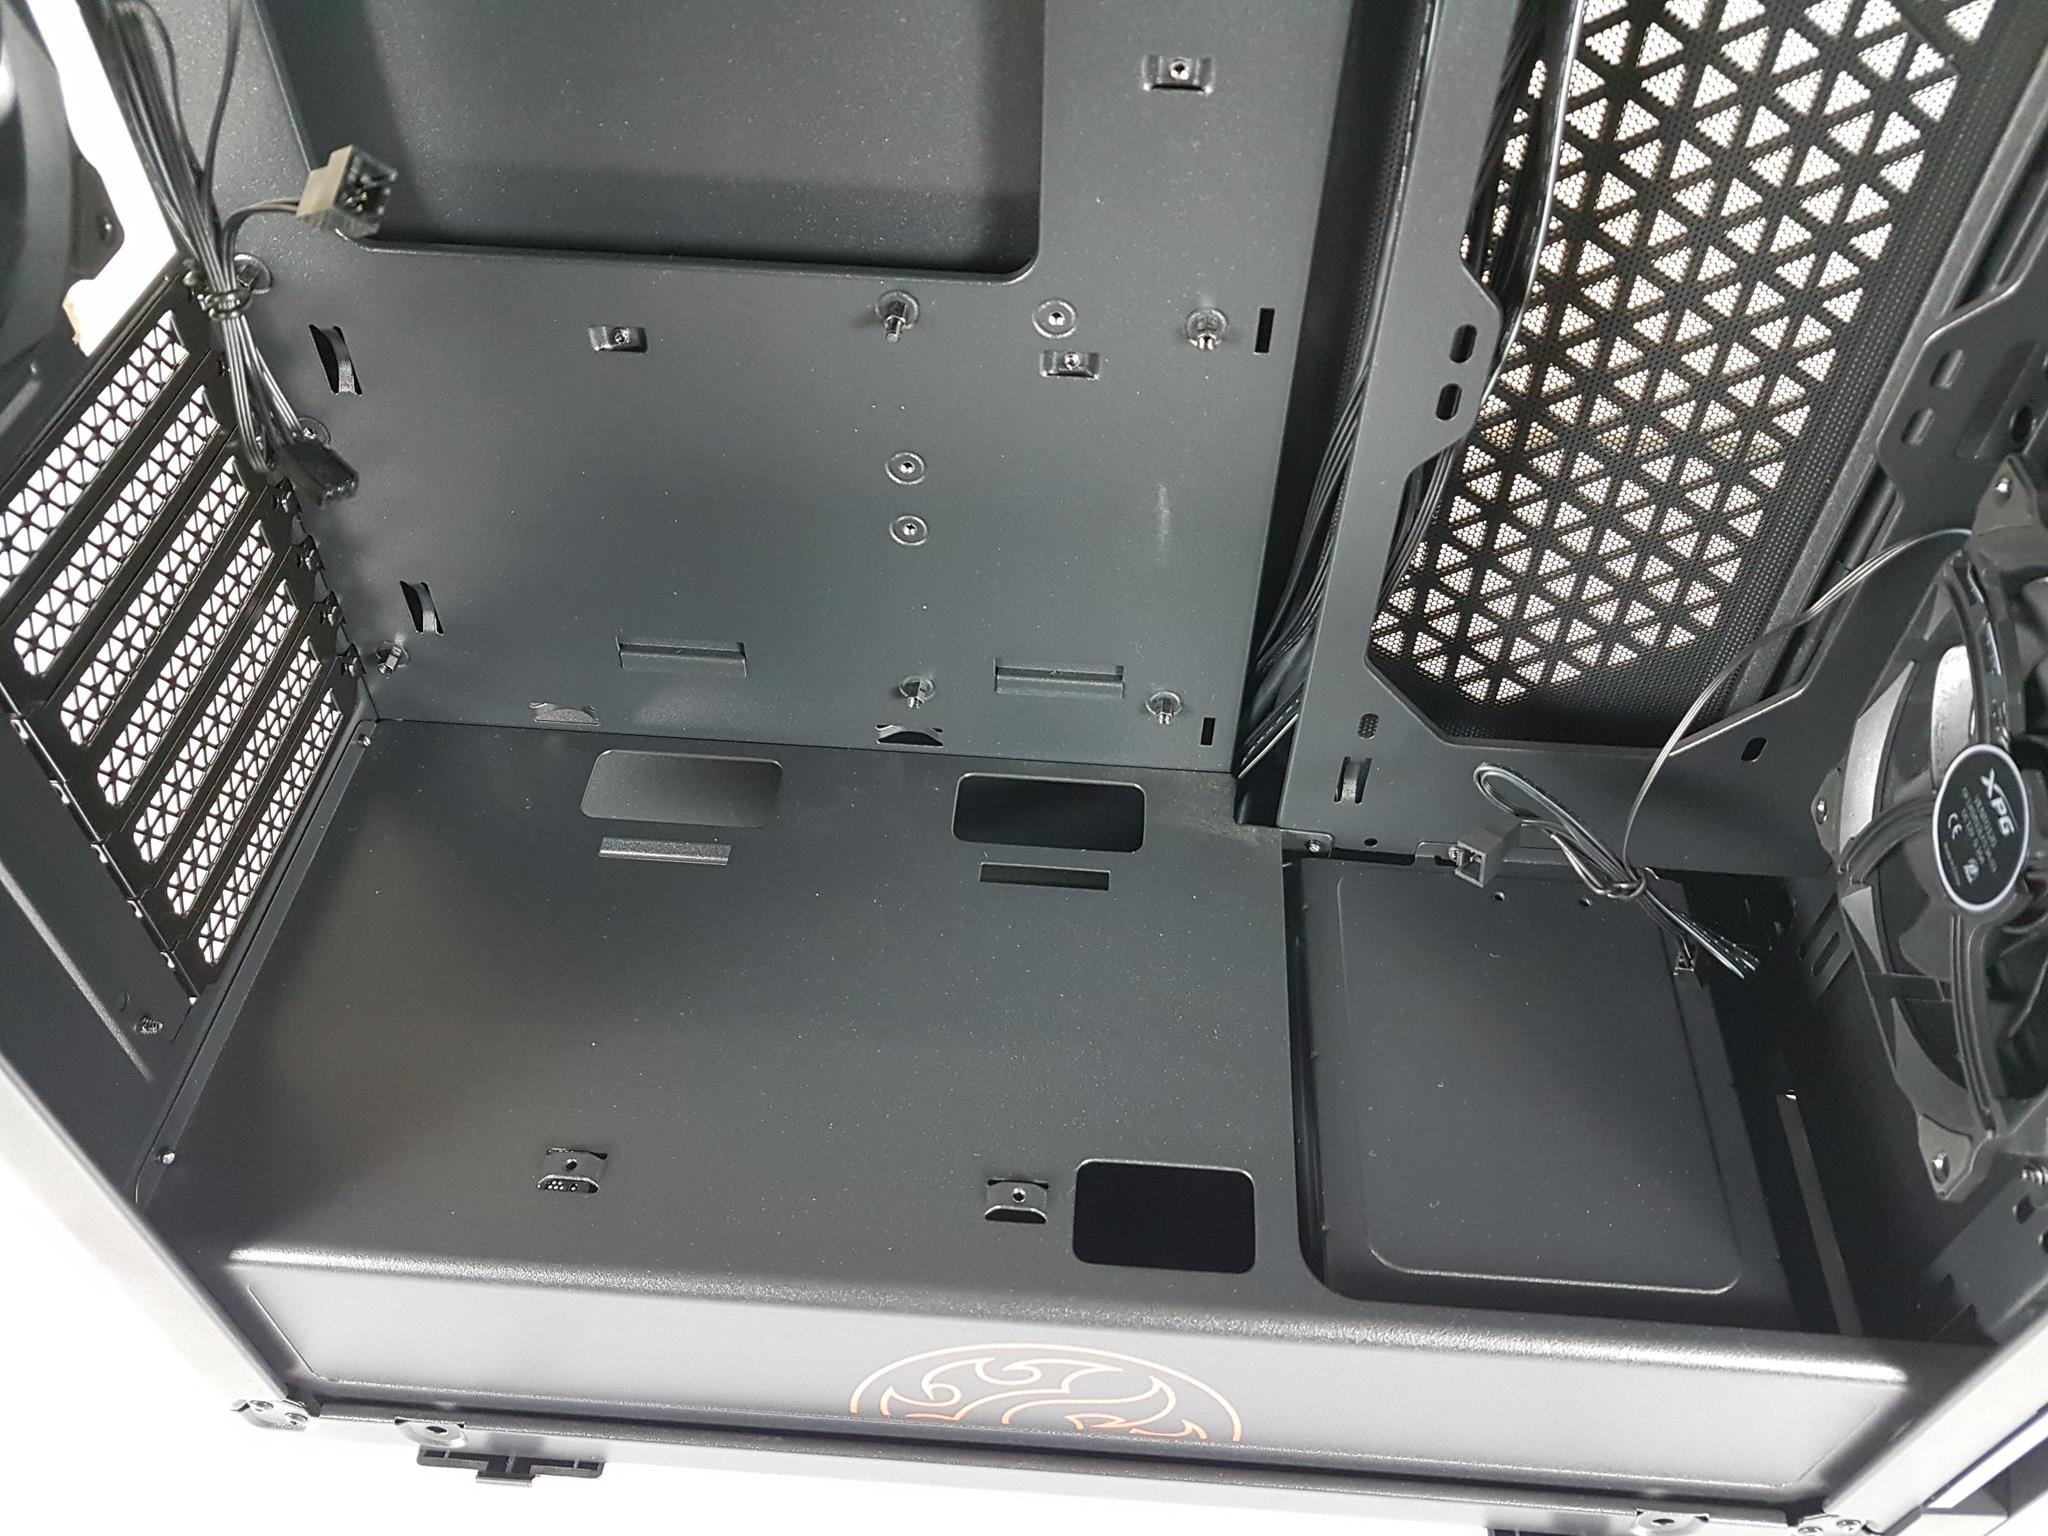
The PSU area has an almost full-length cover, leaving ample space for cooling gear on the front. Three cutouts on the cover allow optional routing of PEG cables for your graphics card.
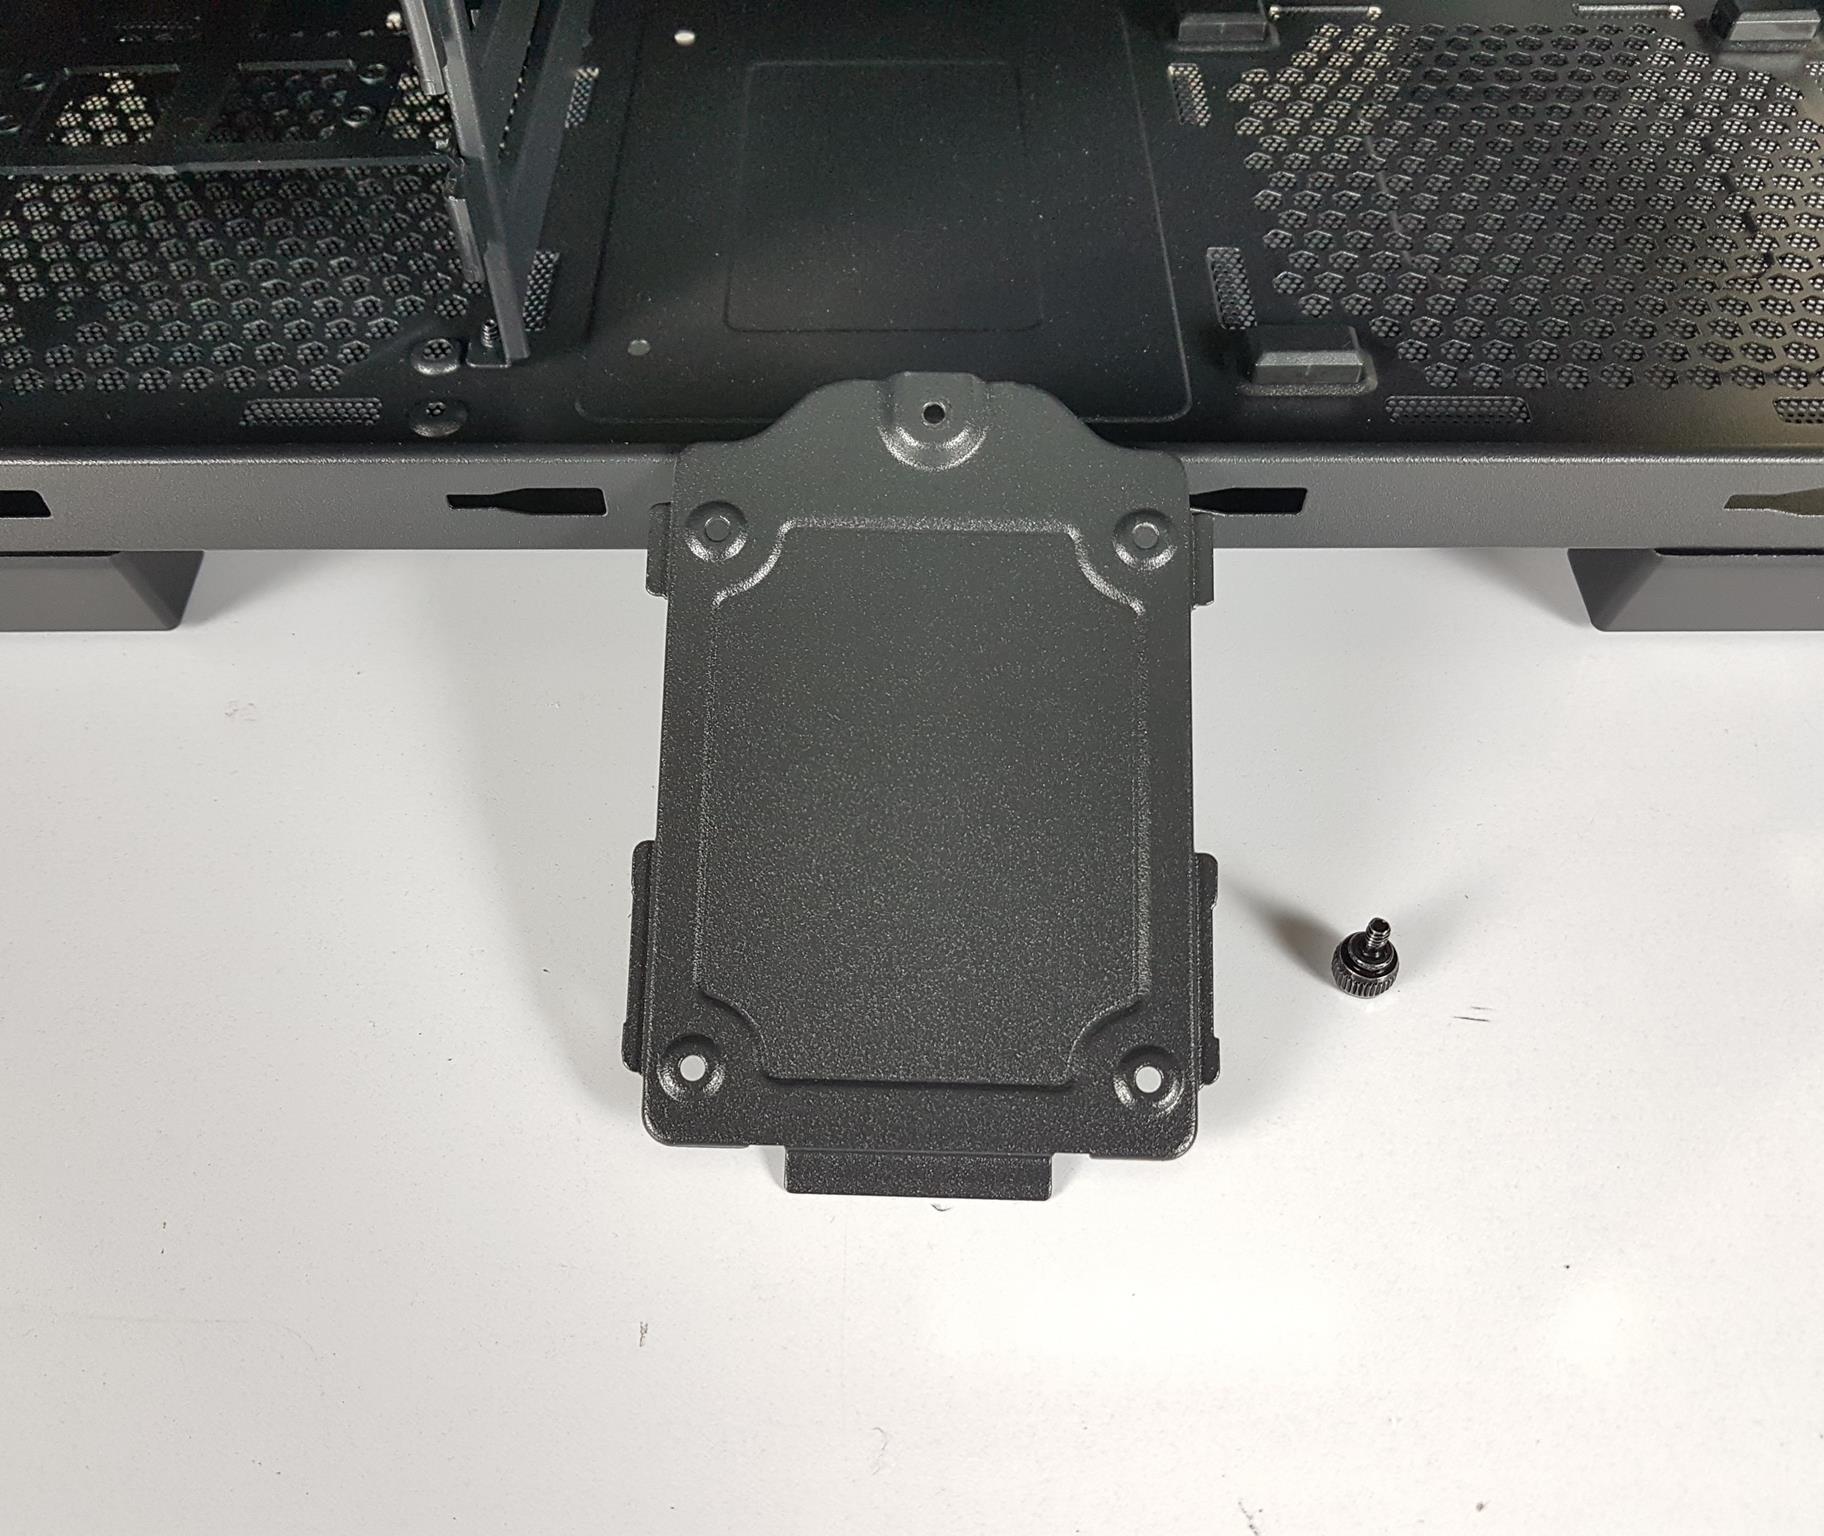
There are two 2.5″ drive mounts on the PSU cover. No brackets are provided, but two are pre-installed on the back of the motherboard tray, which can be relocated to the PSU cover if needed.
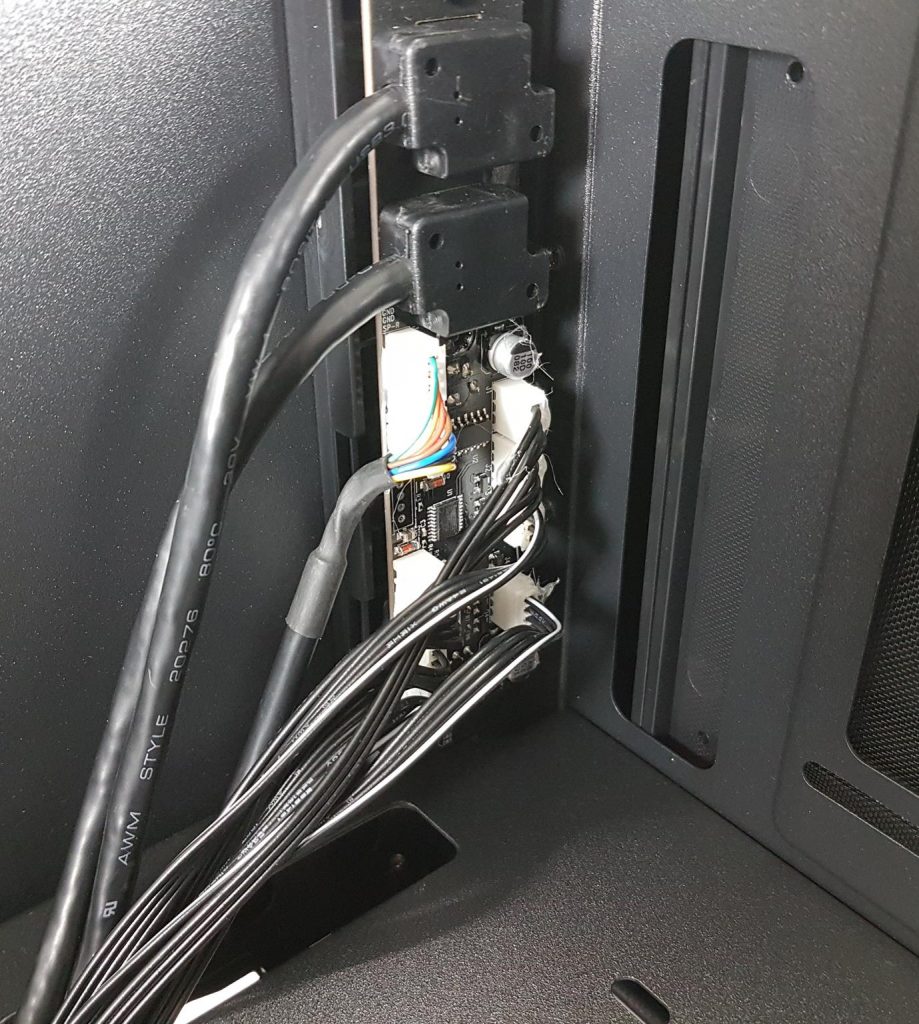
The PCB for the I/O panel is installed on the upper right side of the chassis. The PCB is in black and houses an RGB controller as well. Let’s take a look at the other side of the chassis.
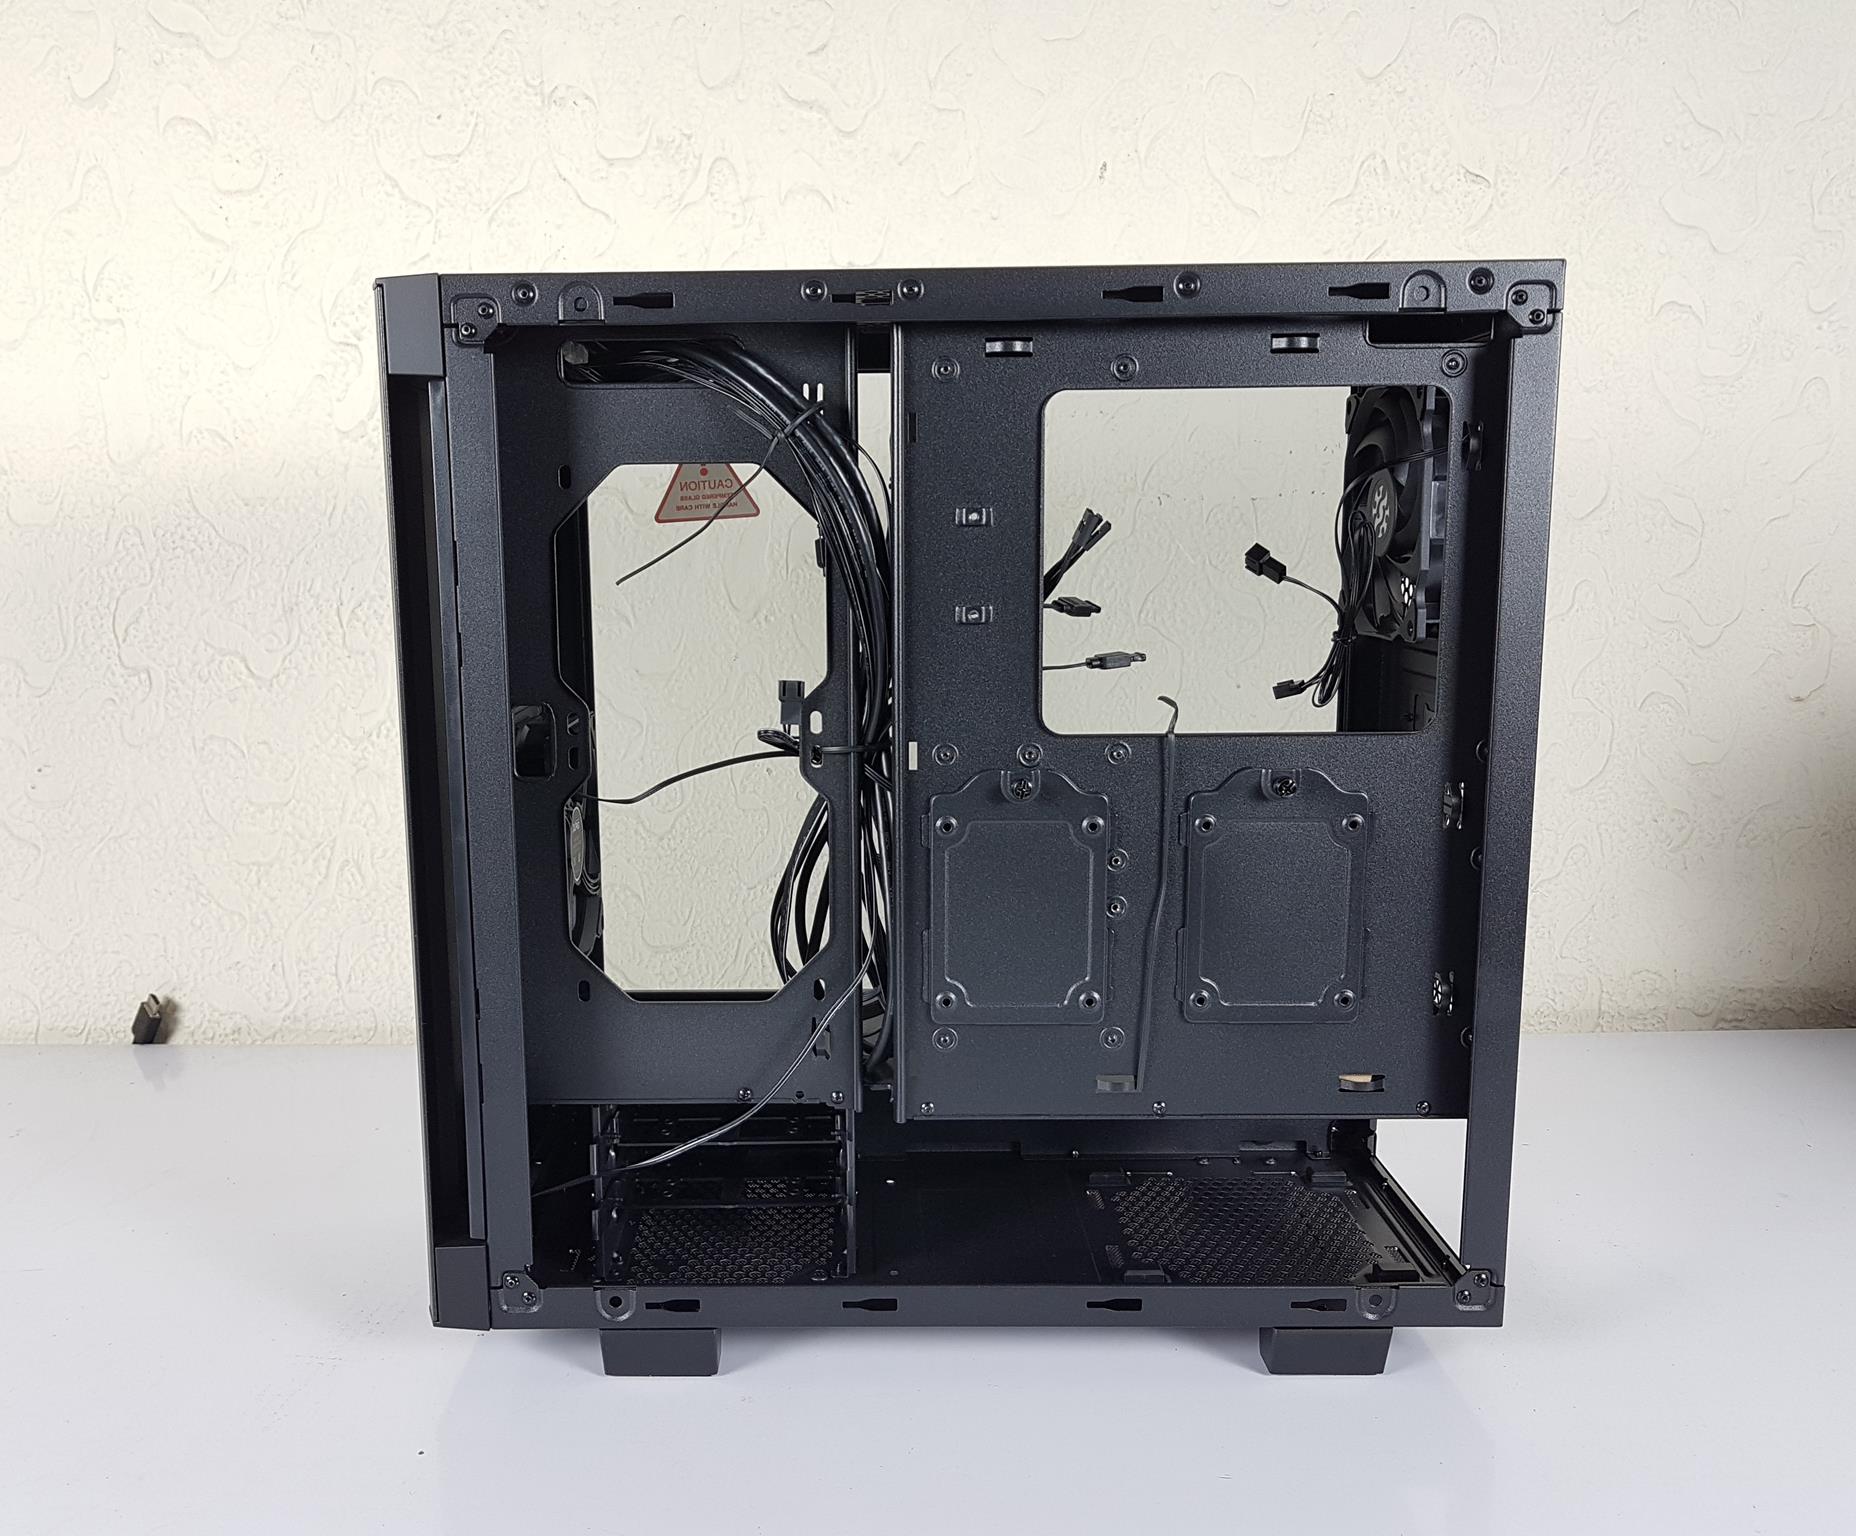
The XPG INVADER Chassis is a compact mid-tower with a recessed motherboard tray. Behind it, there are 2x 2.5” drive brackets secured with non-captive thumb screws. The motherboard tray has 7 cable tie points, offering 18mm cable management space on one side and 35mm on the bracket side.
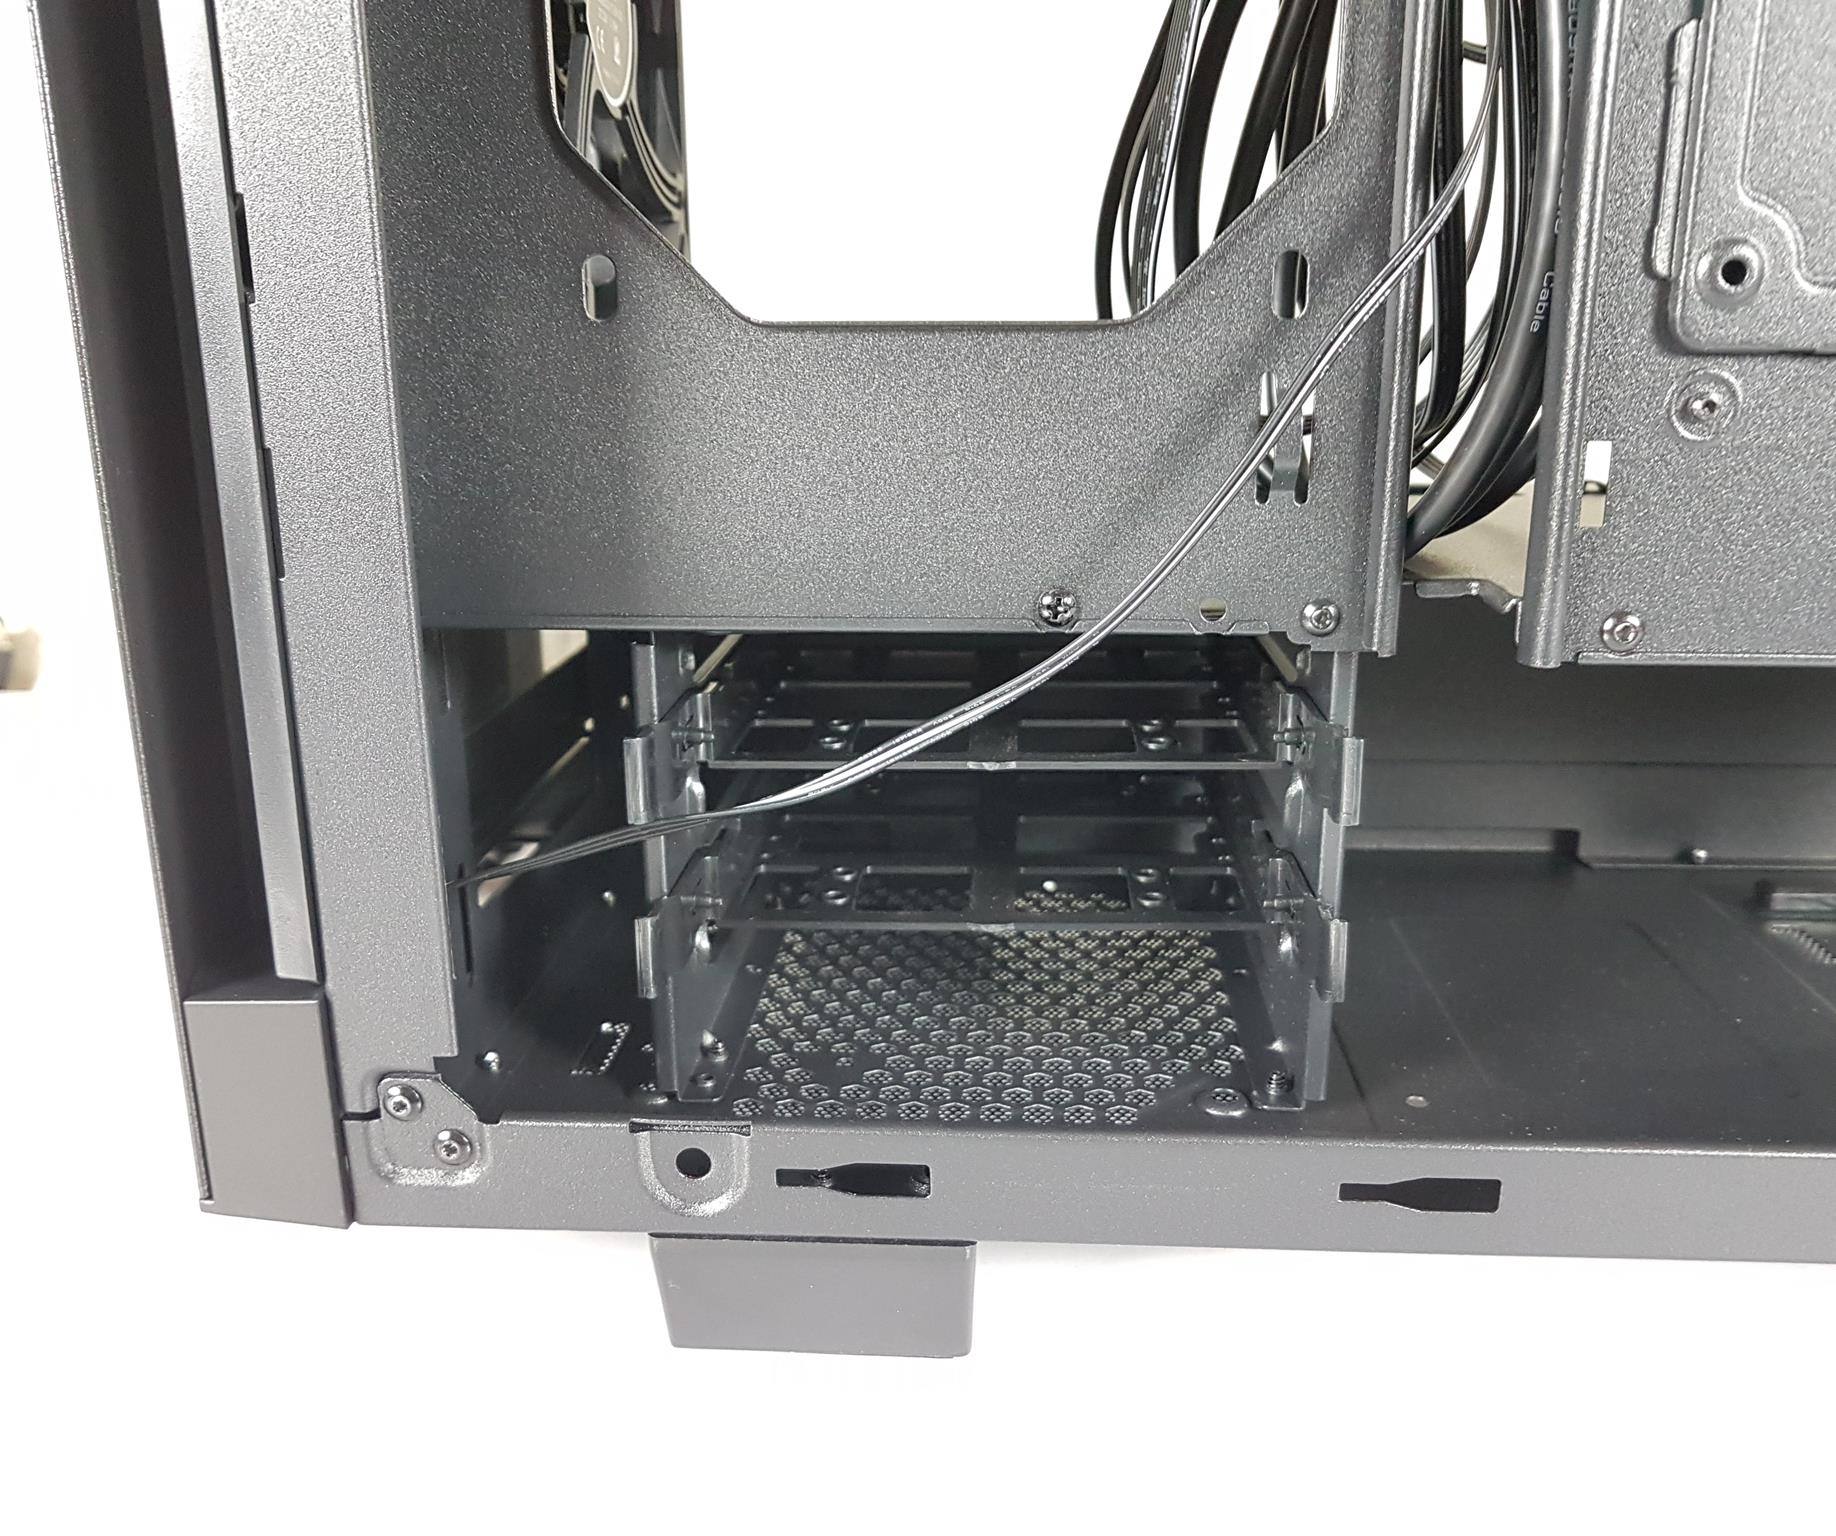
The HDD Cage attaches with 5 screws – 1 on the side bracket and 4 at the bottom. It features two tool-less drive caddies accommodating 2x 3.5” or 2x 2.5” drives each, providing flexibility for a total of 4x 2.5” drives or a combination of 2x 2.5” and 2x 3.5” drives.

The caddy is made of plastic material and is soft. It kinda makes a flimsy feeling when holding but once the drive is secured to the caddy, it remains firm. The 2.5” bracket is solid design and made of steel.
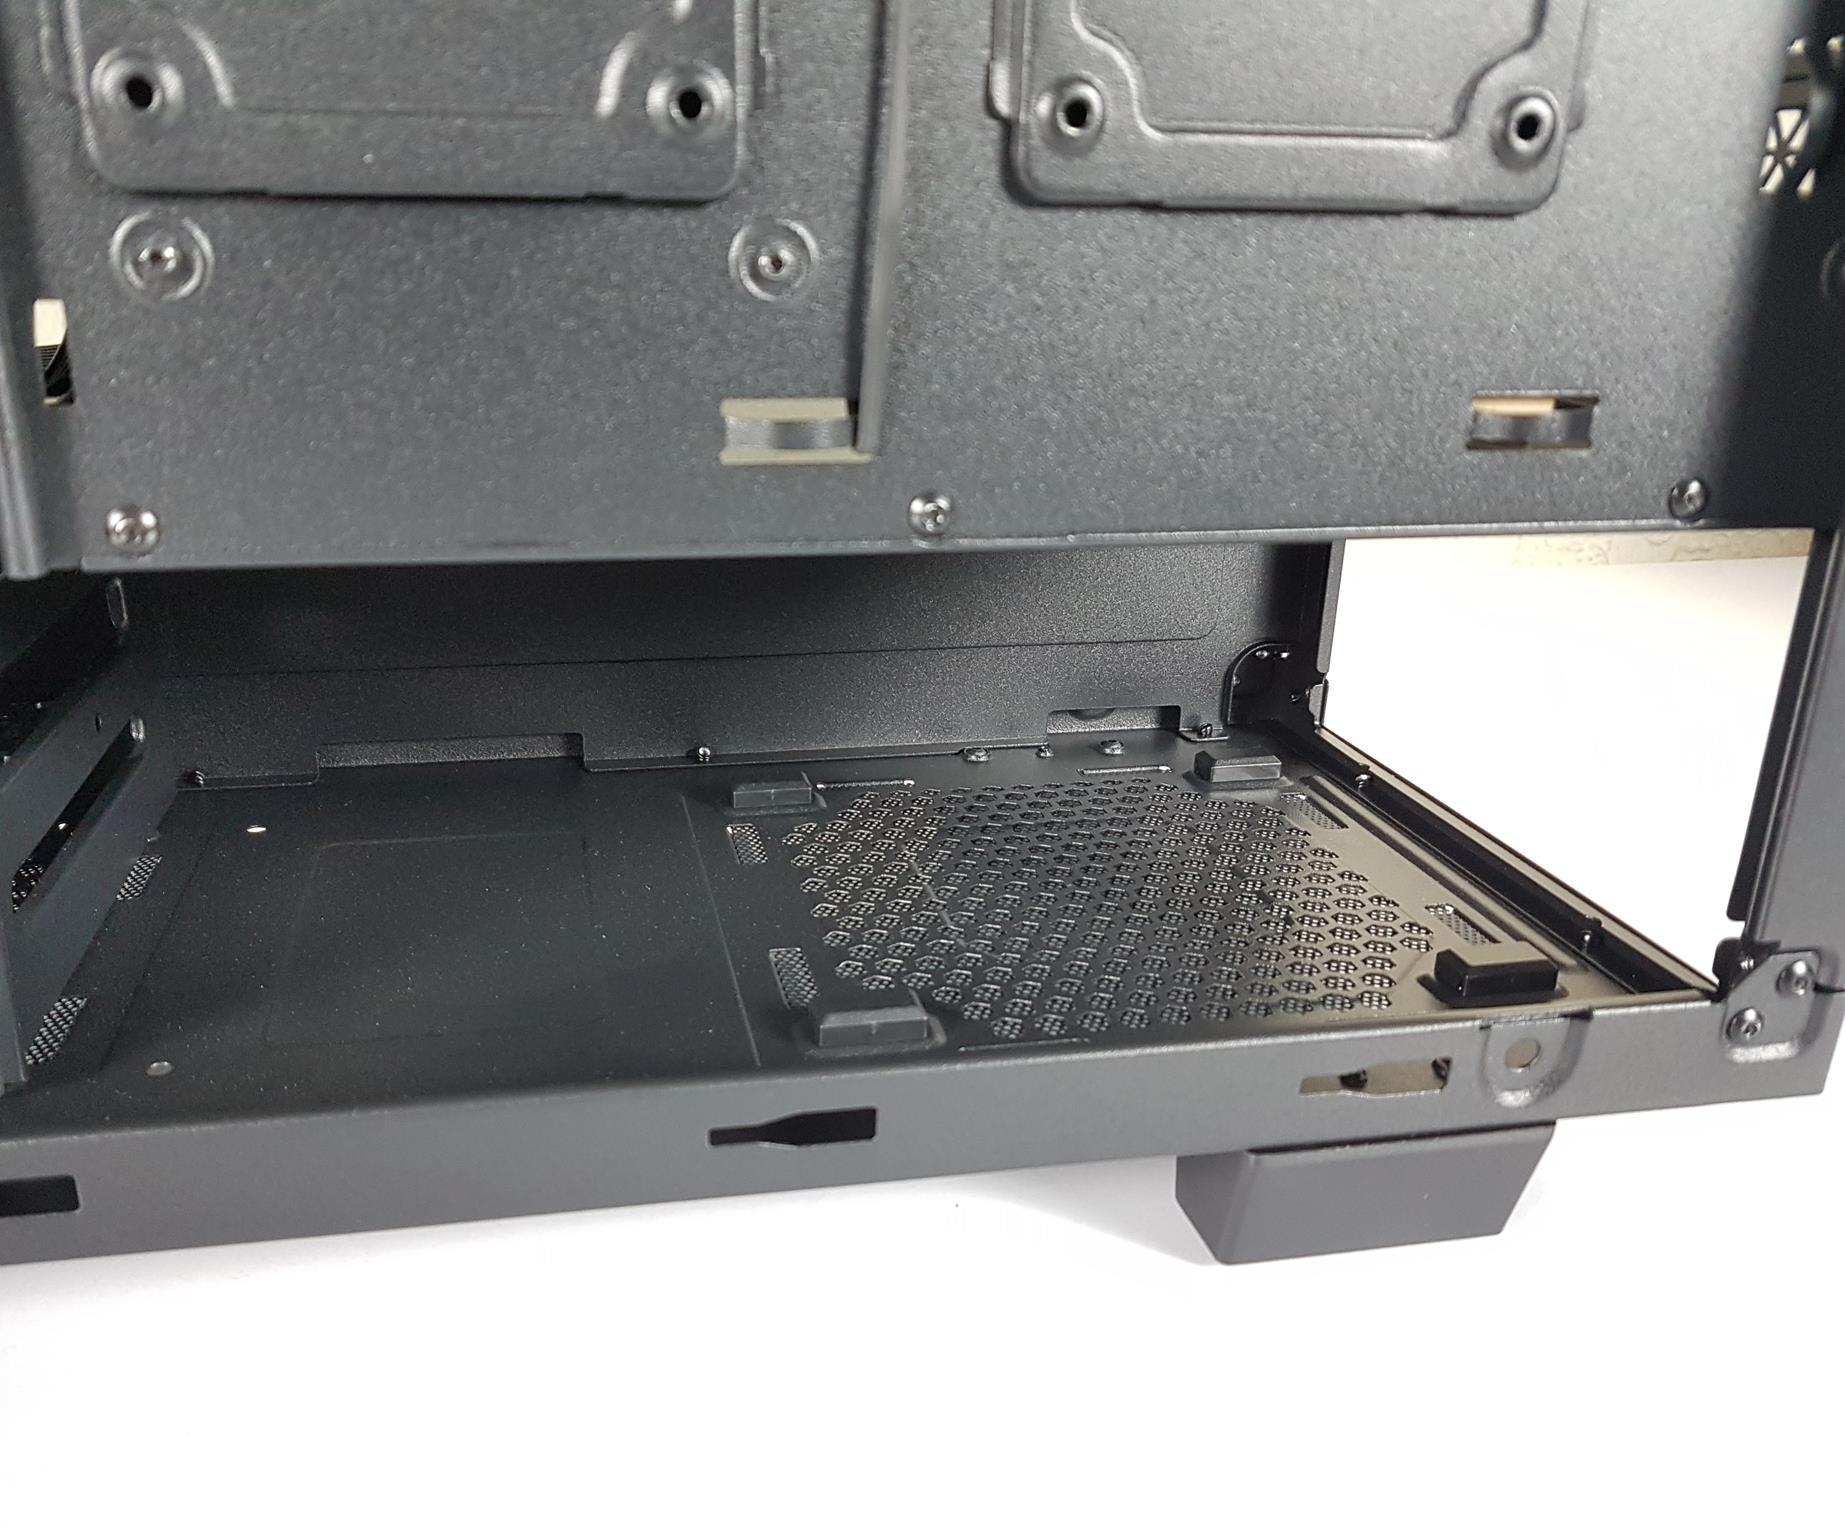
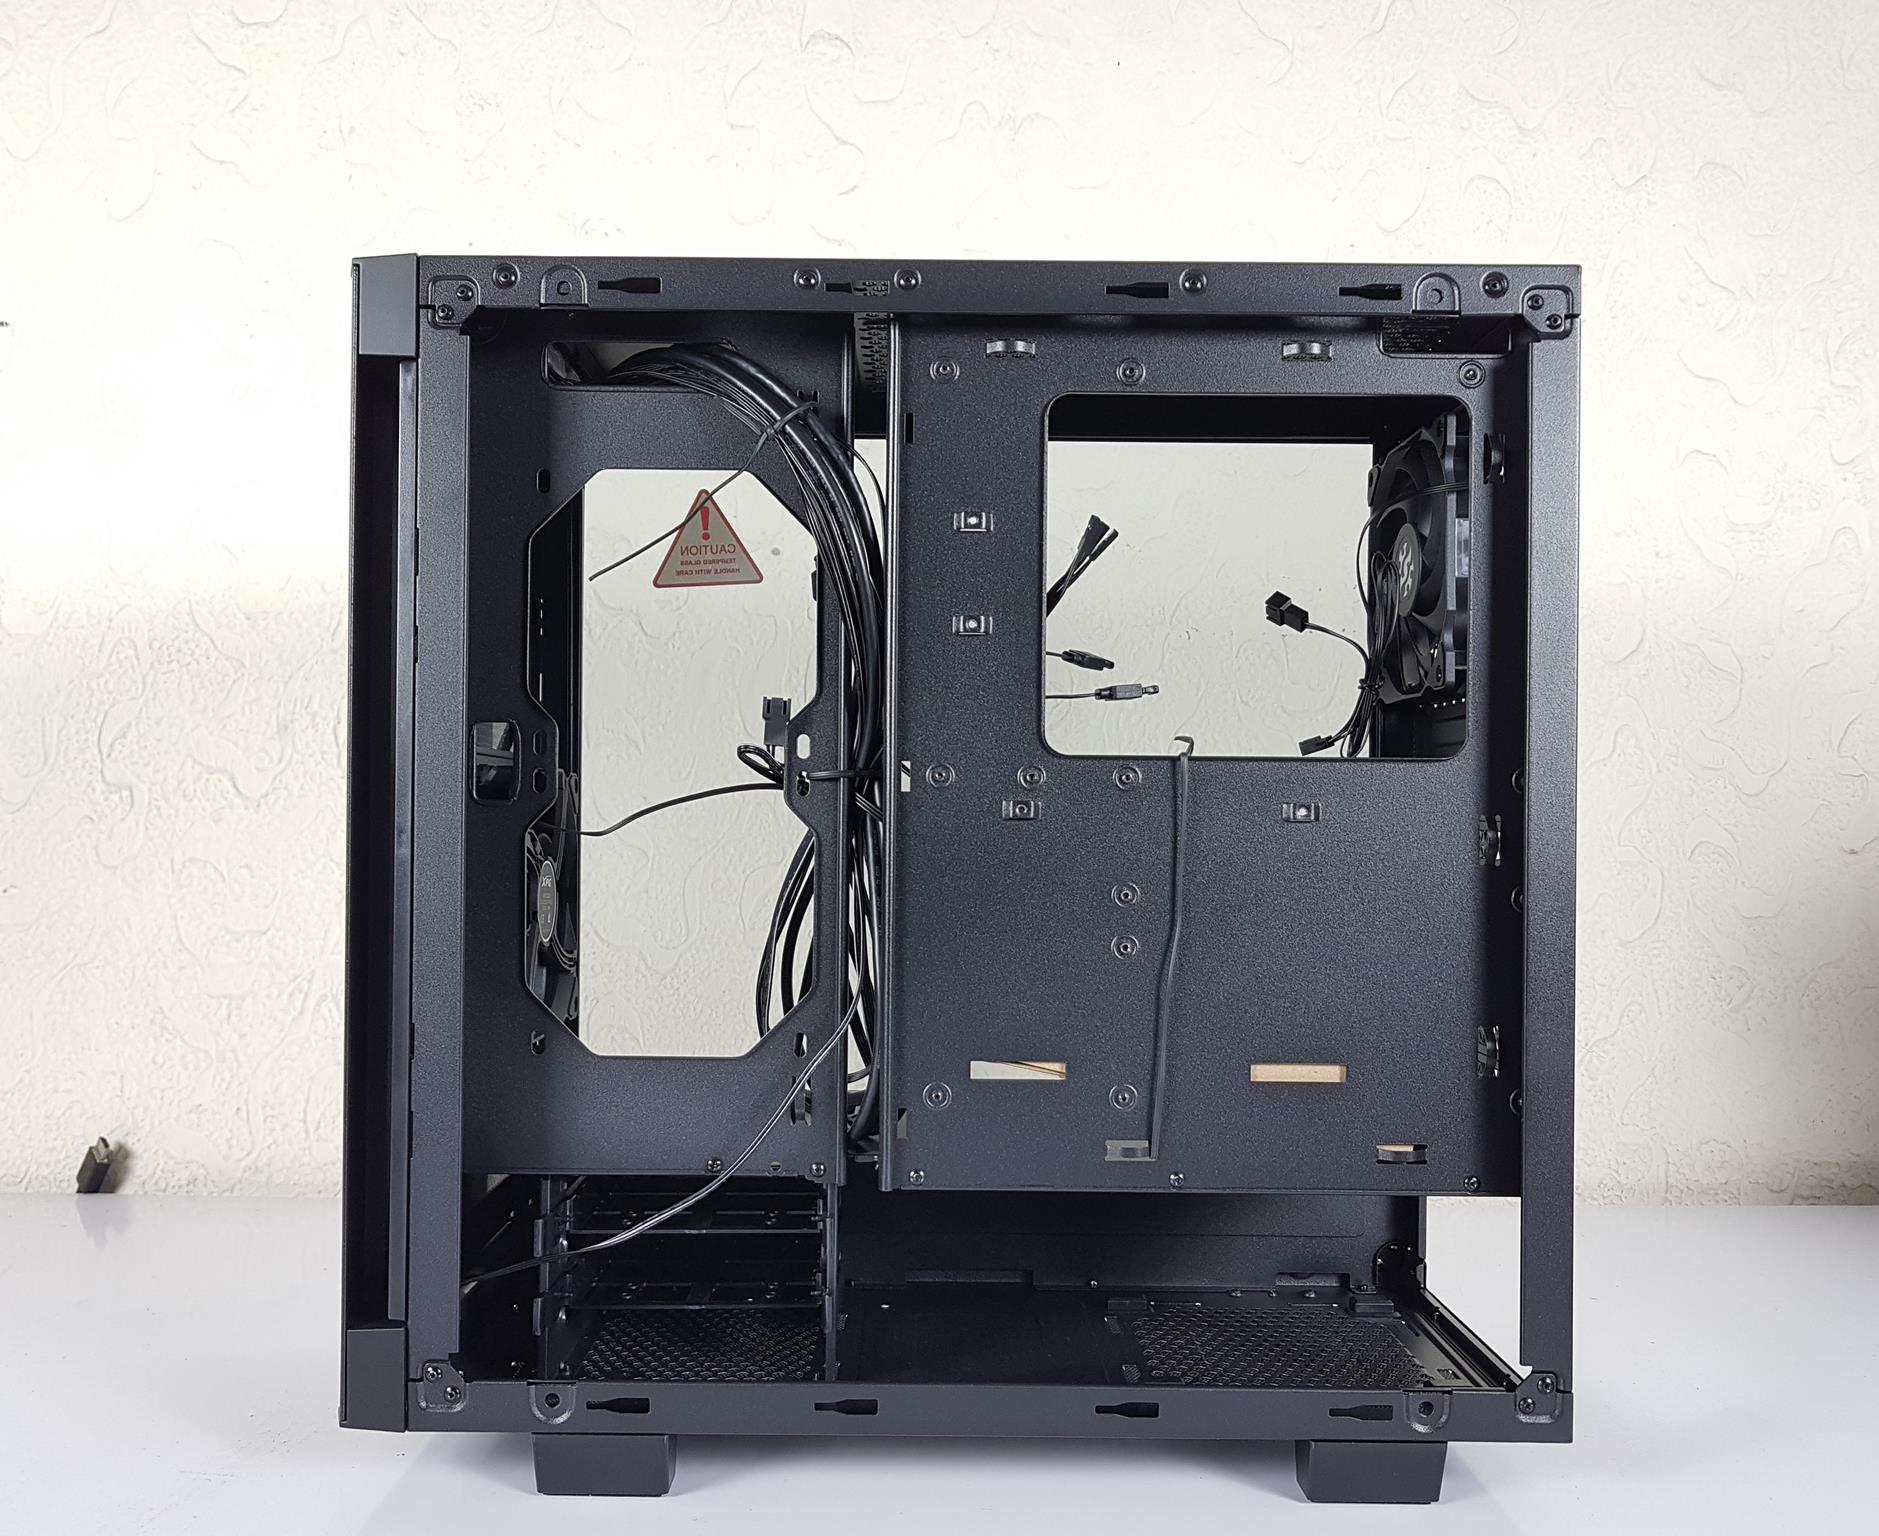
The PSU mounting area has 4 feet on which the PSU is rested when slid from the rear. We have a total length of 275mm available for the PSU and the cables with the HDD cage installed. If we remove the HDD cage then this length goes to 430mm approximately. The above picture shows the backside with the 2.5” drive brackets removed.

We have the following cables coming out of the front IO panel:
- USB 3.0
- HD Audio
- System Panel connectors
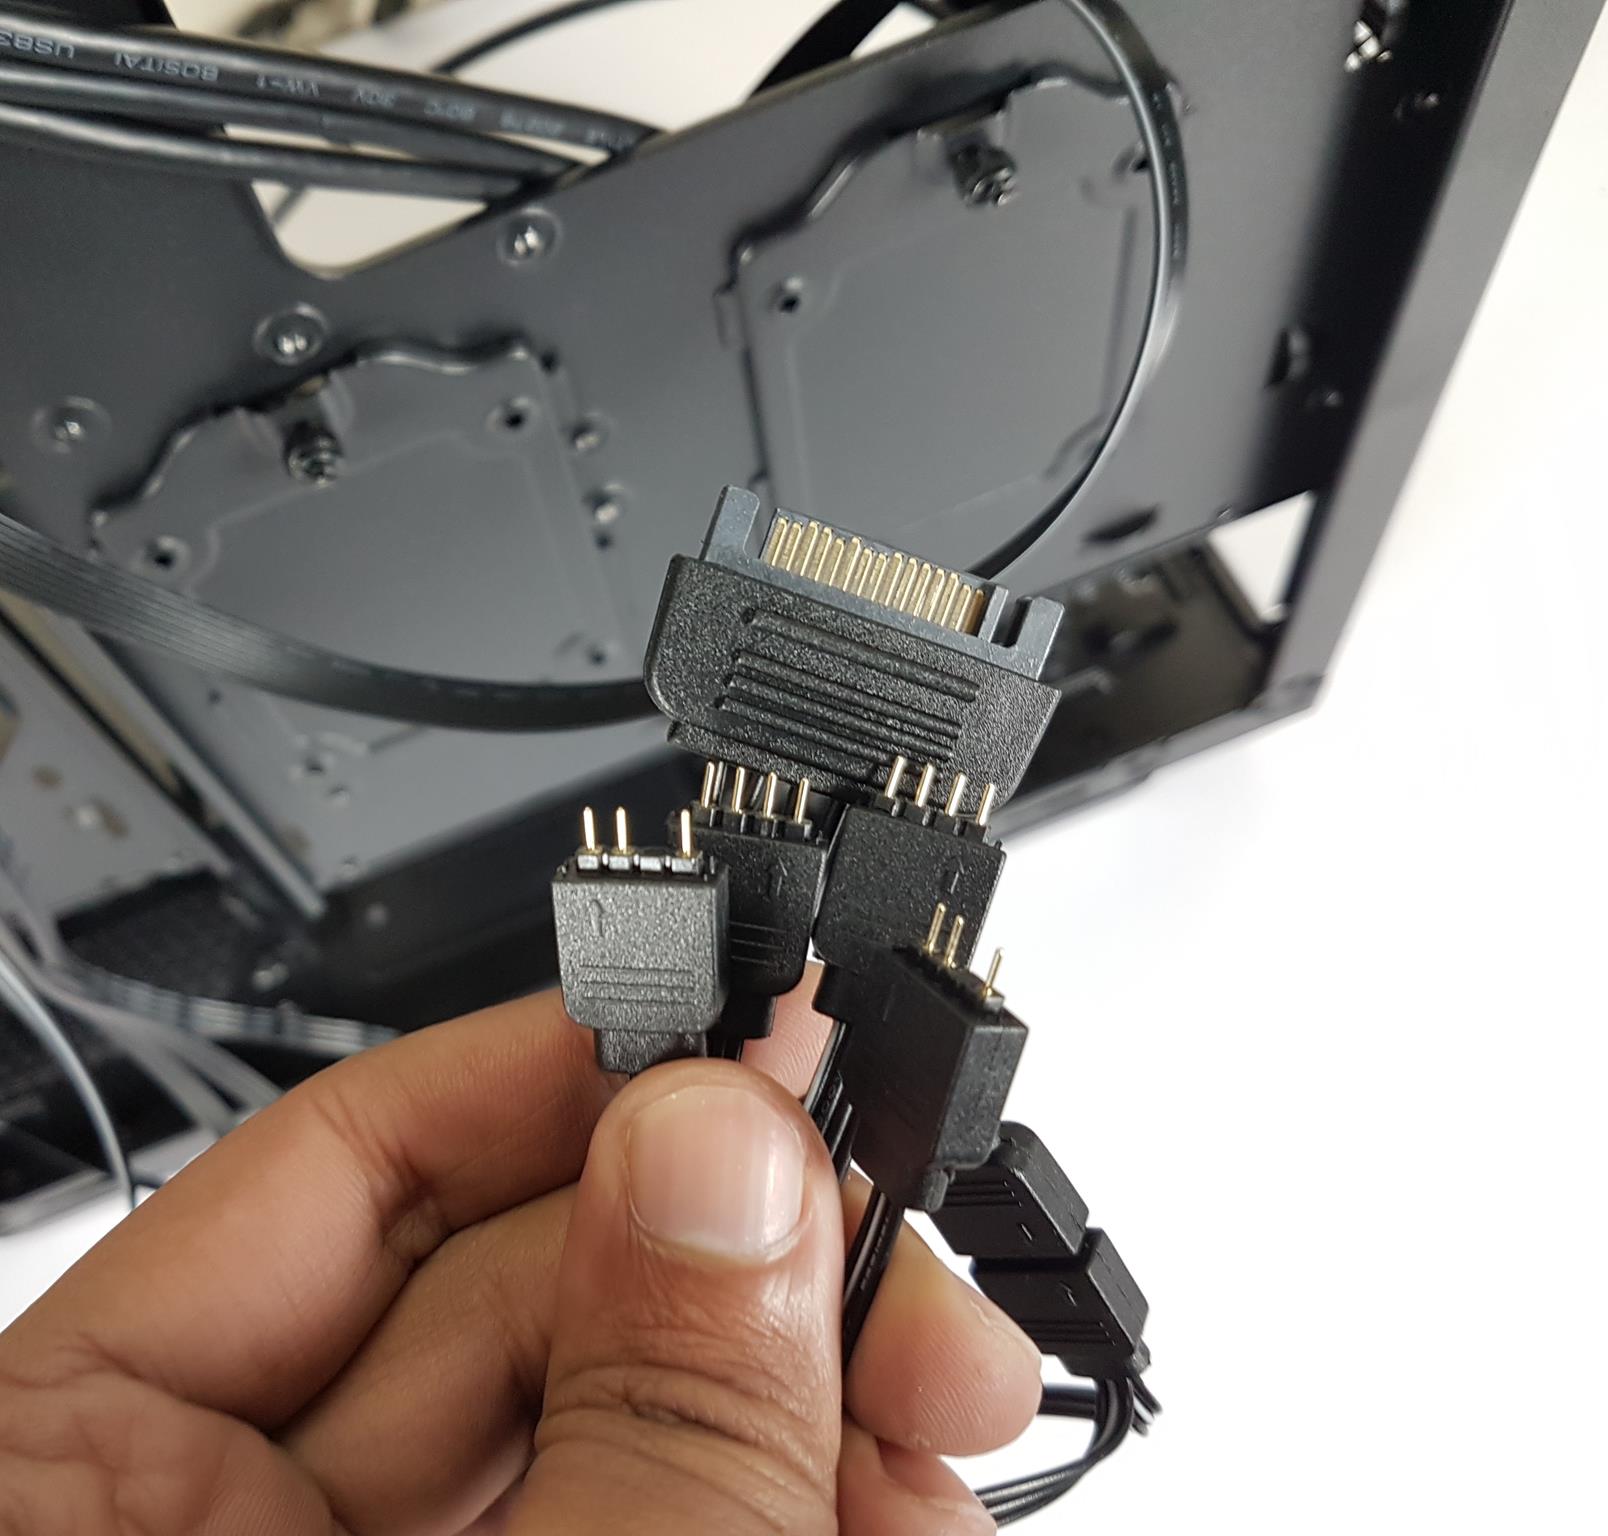
The XPG INVADER comes with an RGB controller and a front diffuser with RGB LEDs. Powering these LEDs requires a connected SATA cable to the PSU. Additionally, it provides 2 A-RGB and 2 RGB (12V) connector cables for connecting and controlling A-RGB/RGB devices through the RGB button on the top IO panel.
Cooling Provision
Following are the fan mounting possibilities:
- Up to 3x 120mm or 2x 140mm fans on the front [1x Pre-Installed]
- Up to 2x 120mm fans on the side bracket
- Up to 2x 120mm fans on the top
- 1x 120mm on the Rear [Pre-Installed]
- 1x 120mm on the bottom
Following is the radiator mounting support:
- 120mm / 240mm / 360mm on the front
- 120mm / 240mm on the side bracket
- 120mm / 240mm on the top
- 120mm on the rear
Storage Provision
Storage provision is:
- 2x 3.5” Drives
- 2+2 2.5” Drives [With a combo of 3.5” drives]
Clearance
- CPU Cooler of up to 170mm in height is possible
- Graphics Card of up to 40mm in length is possible (depending upon the front and side cooling)
- PSU length of 225mm with the HDD cage
Test Build And Experience
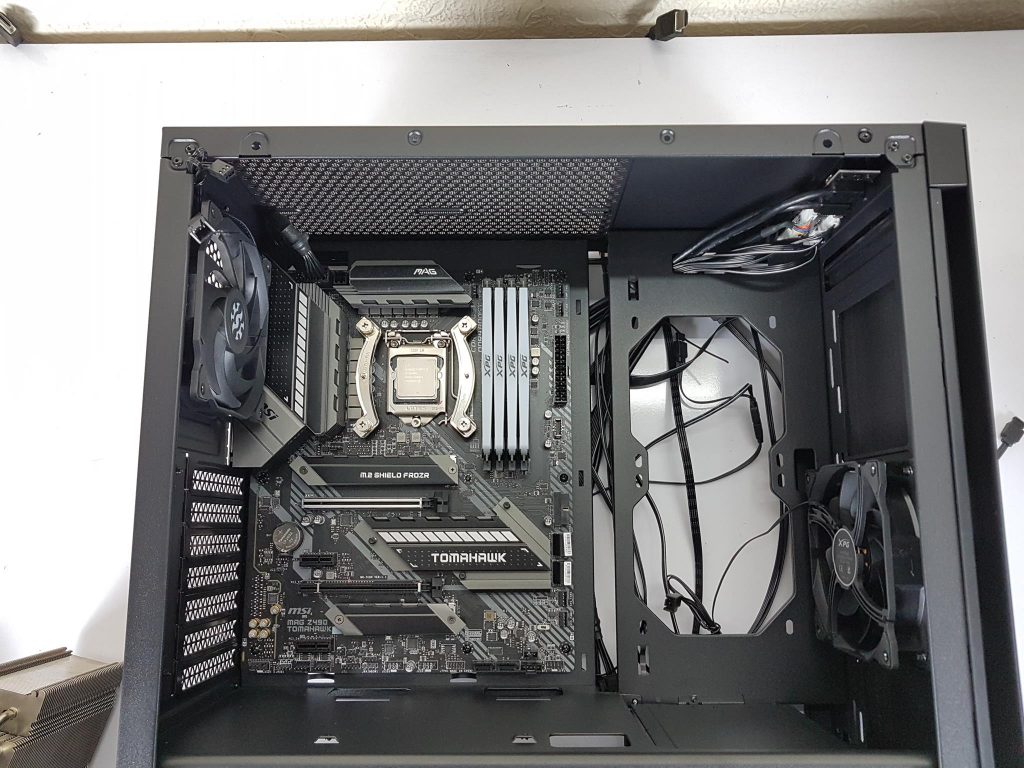
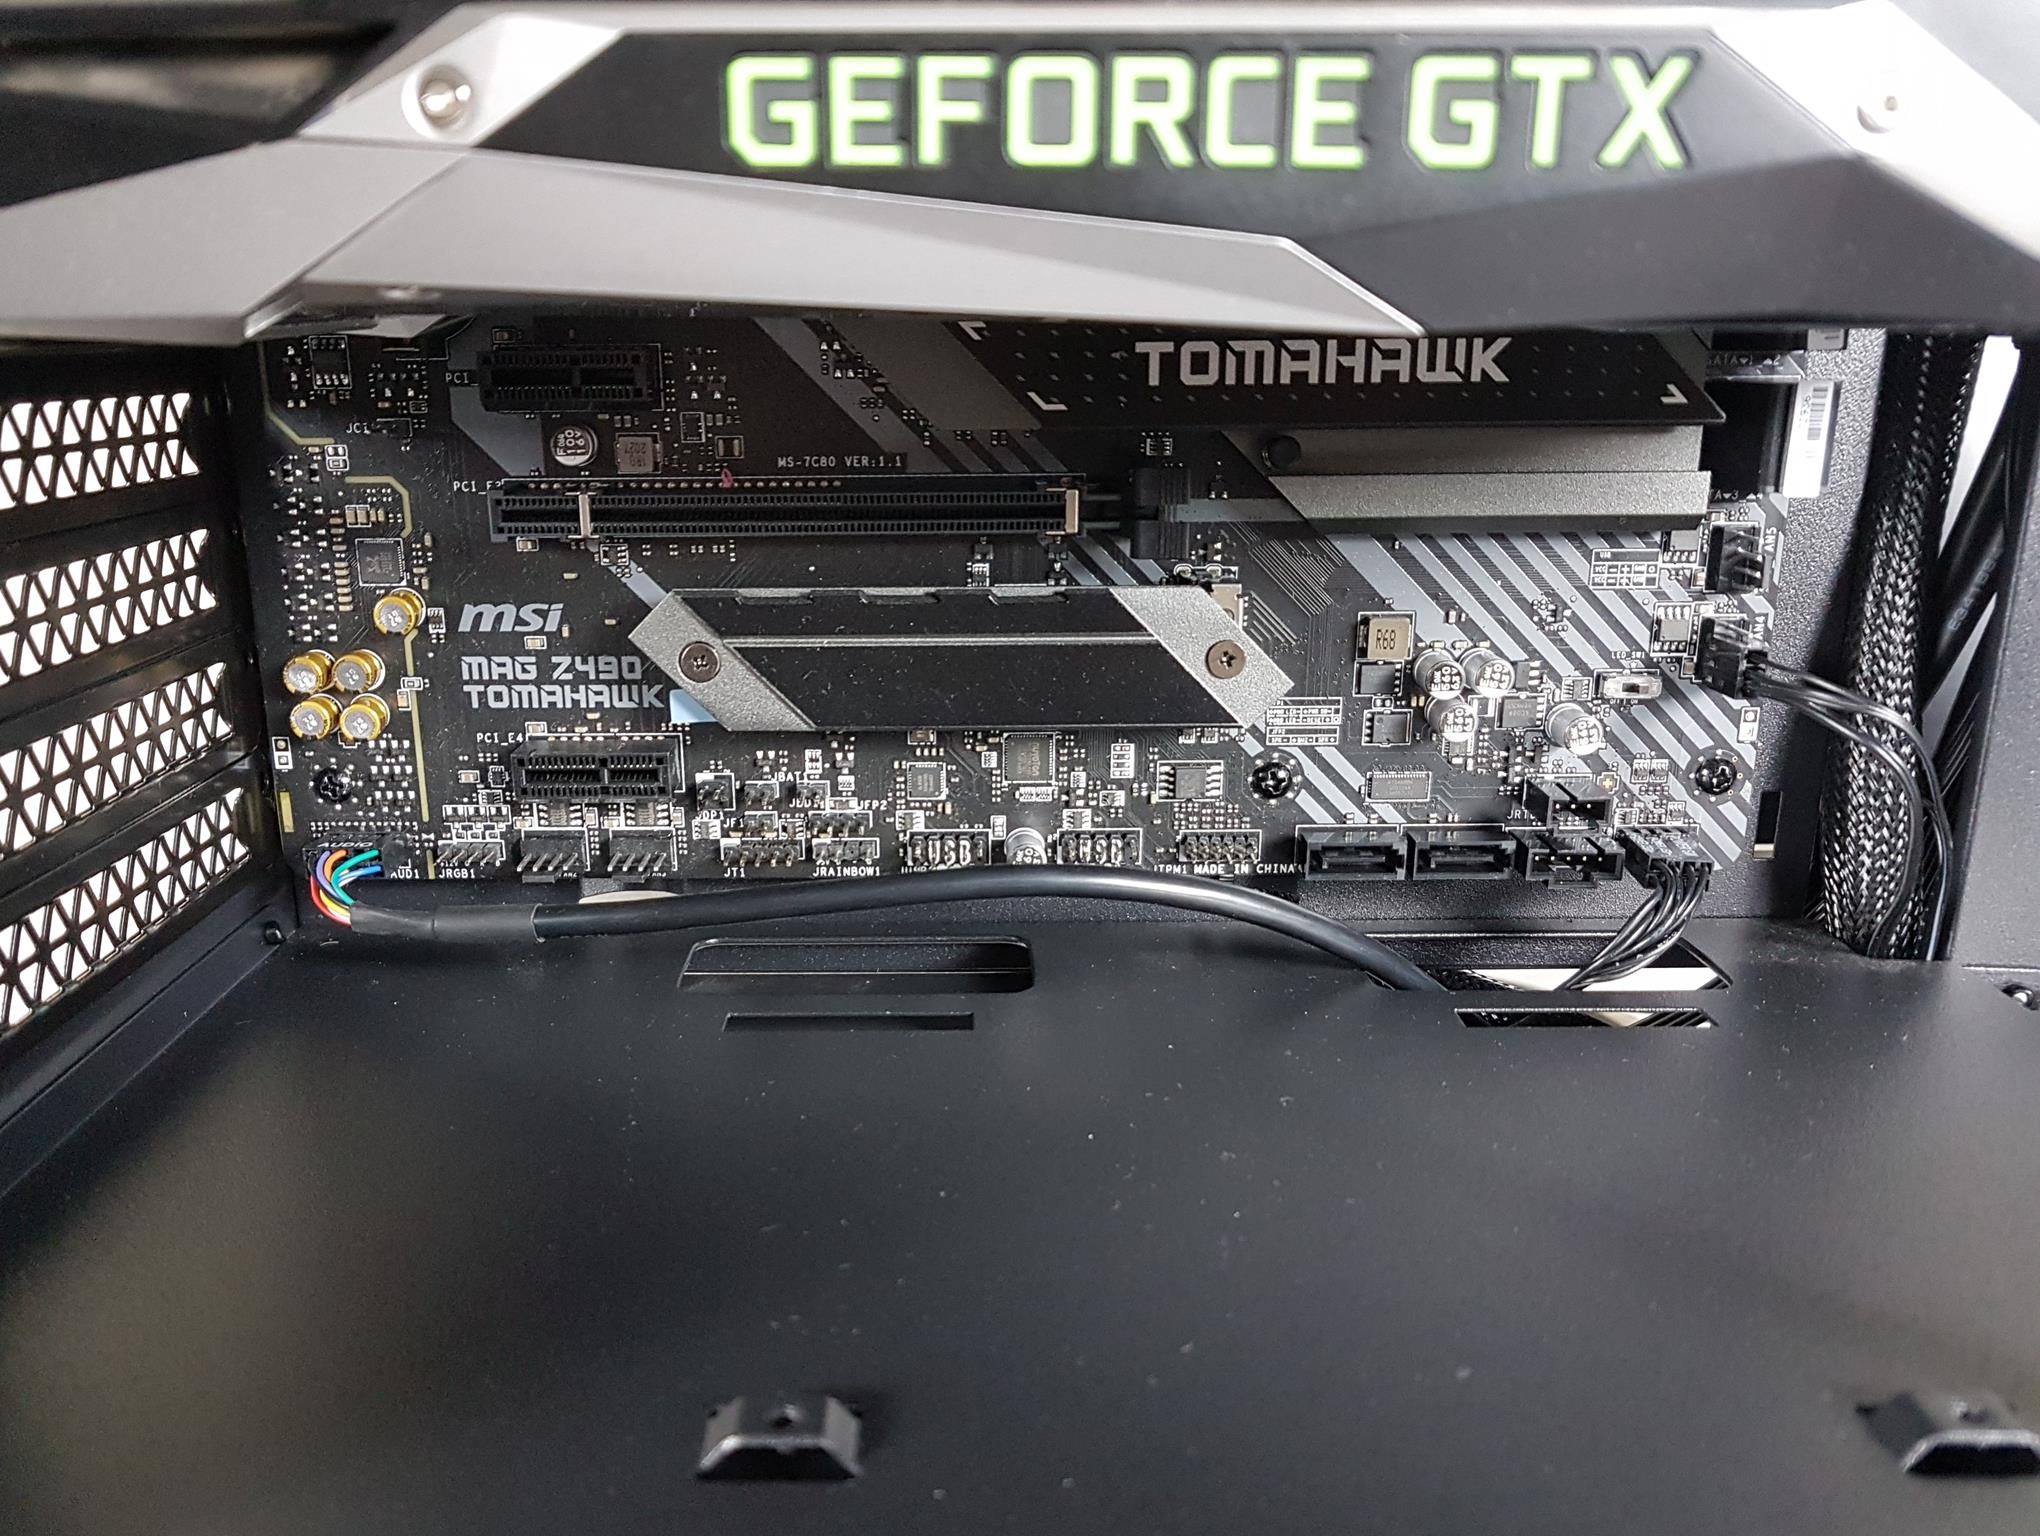
I started the test build by installing the motherboard in it. This was an easy task and the rear fan did not obstruct the motherboard’s rear I/O panel’s shroud.
Then the PSU bracket was installed on the PSU and it was slid from the rear into the chassis. In total, we would need 8x screws for the PSU mounting but this removes the hassle of sliding the PSU from the side to which the HDD cage can obstruct.
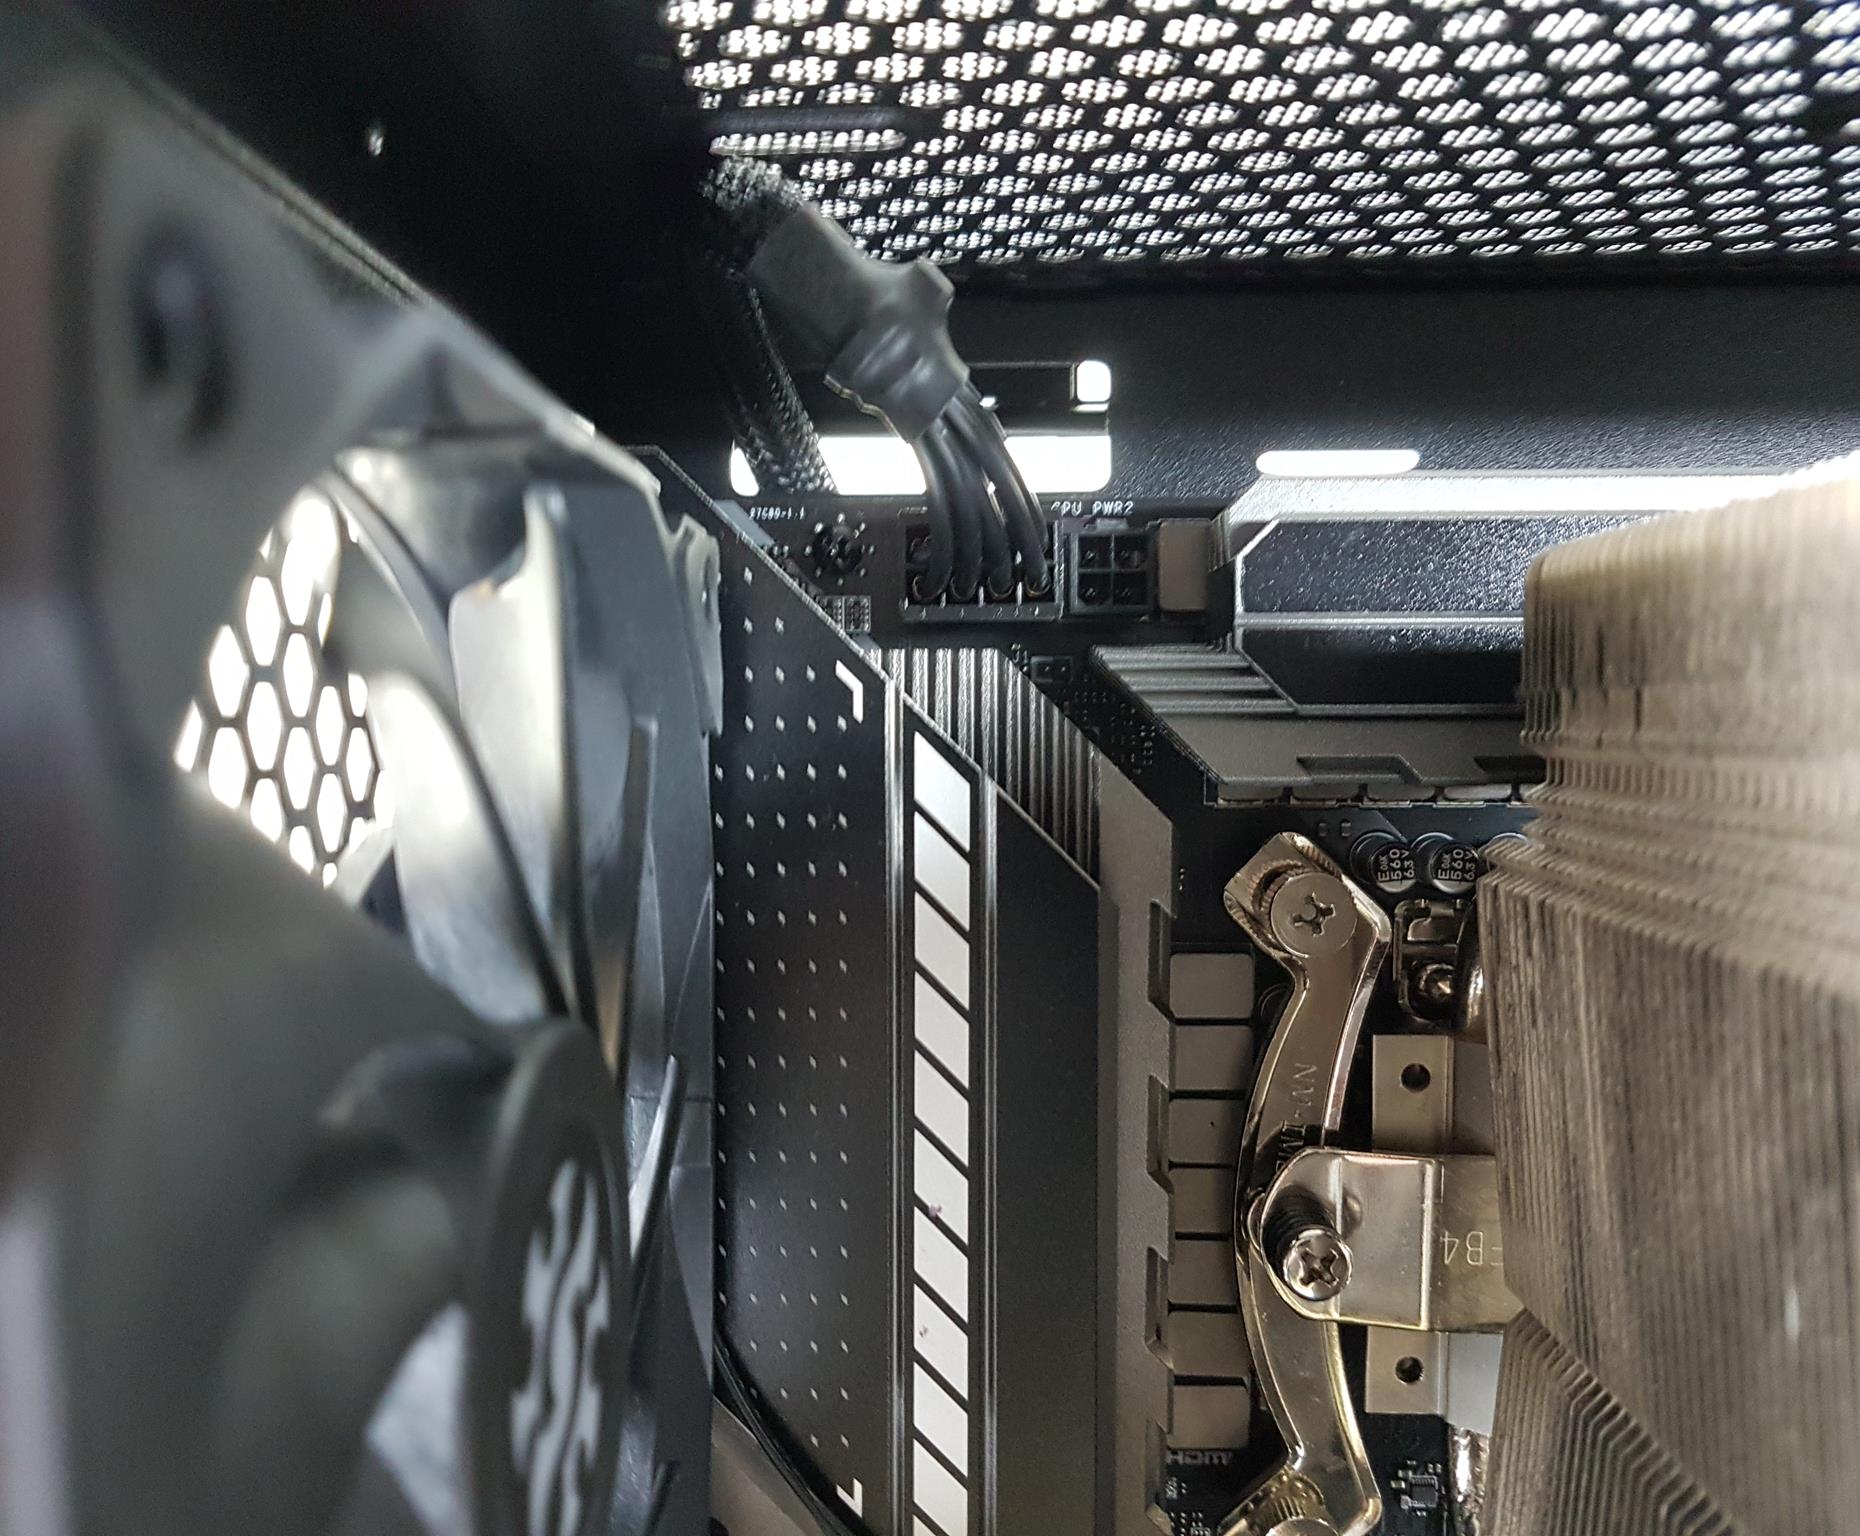
Connect the EPS connector to the motherboard before installing the CPU air cooler. Install the CPU air cooler, connecting the PWM cable to the CPU_Fan header before attaching the fan. Install the graphics card, connecting SATA cables to the motherboard before its installation.
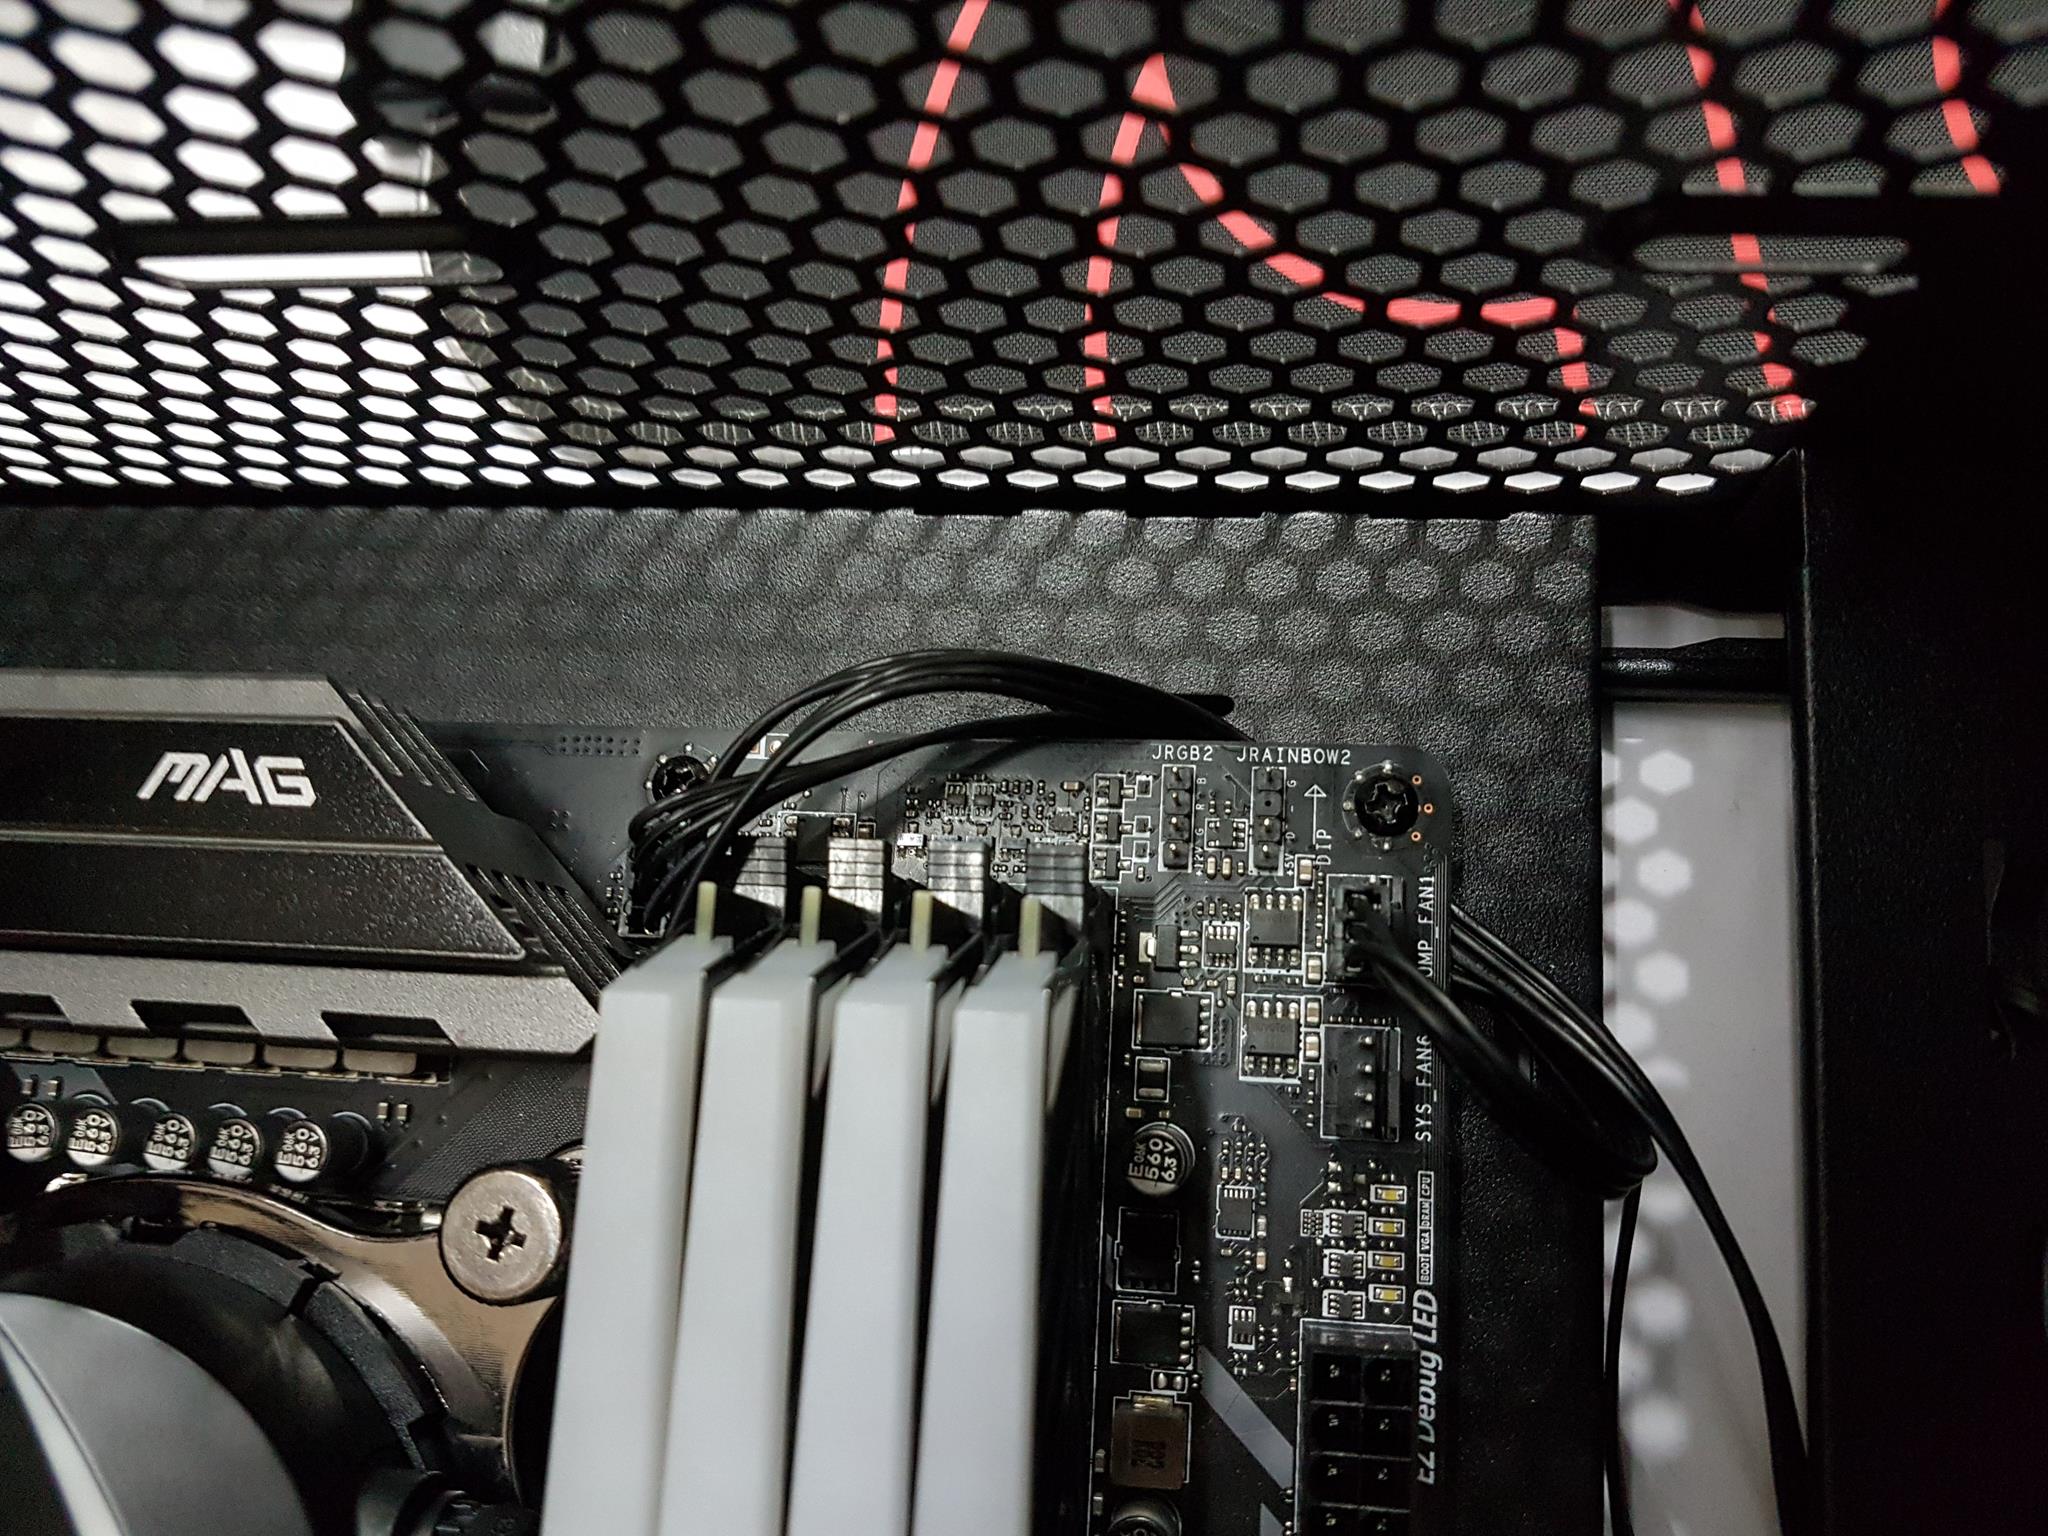
Note that the EPS connector may limit space for a top-mounted 240mm radiator. Adjust the rear fan height and tuck the EPS cable to make room. I successfully installed the XPG Levante 240 cooler using 6 screws. The Levante fits with XPG Spectrix D41 RAM; however, RAM above 45mm may hinder top AIO installation.
Since there’s no top cutout, creatively route cables (fan power, CPU cooler RGB) toward the right side cutout. I routed flat cables under the motherboard for a clean look. Non-flat cables would require routing over the motherboard.
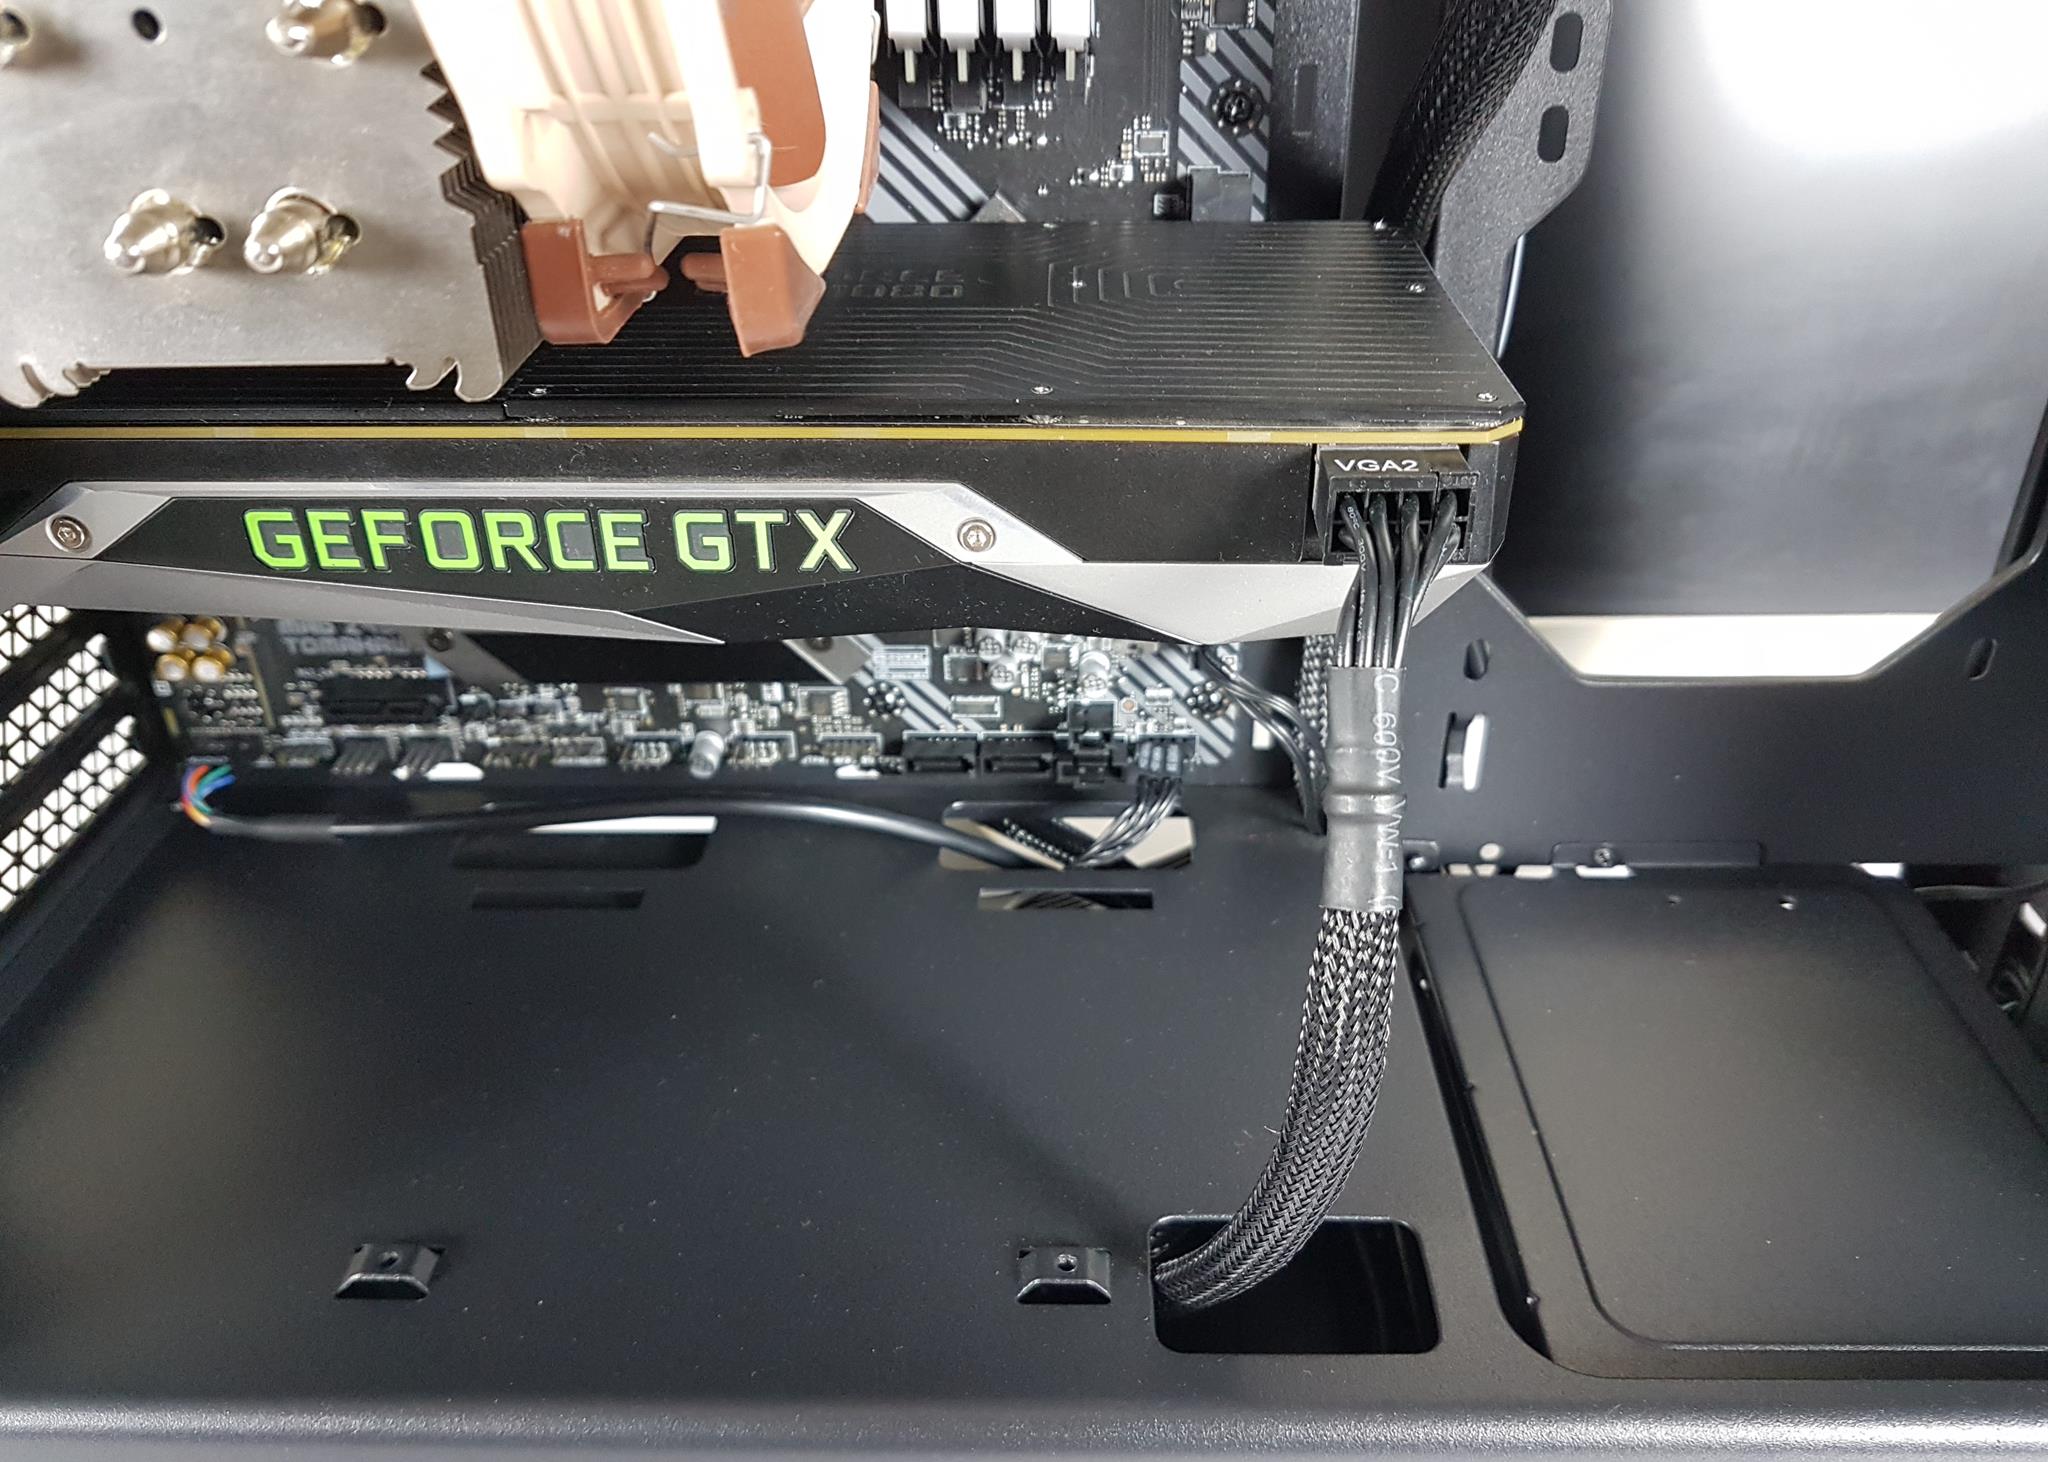
The PEG cable was routed through the near cutout on the PSU cover and connected to the graphics card for neat cable routing.
The PSU obstructed the left-side cutout on the PSU cover hence the HD Audio connector needed to be routed from the rightmost cutout. You can route this cable before installing the PSU but it would be a tight fit.
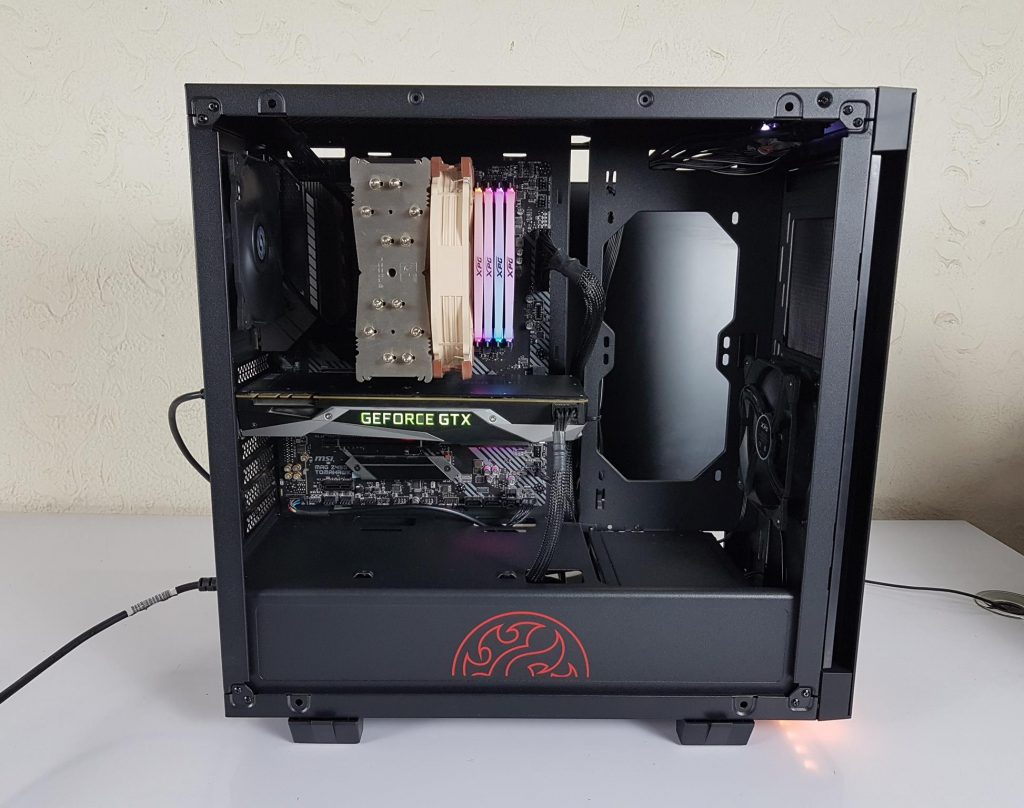
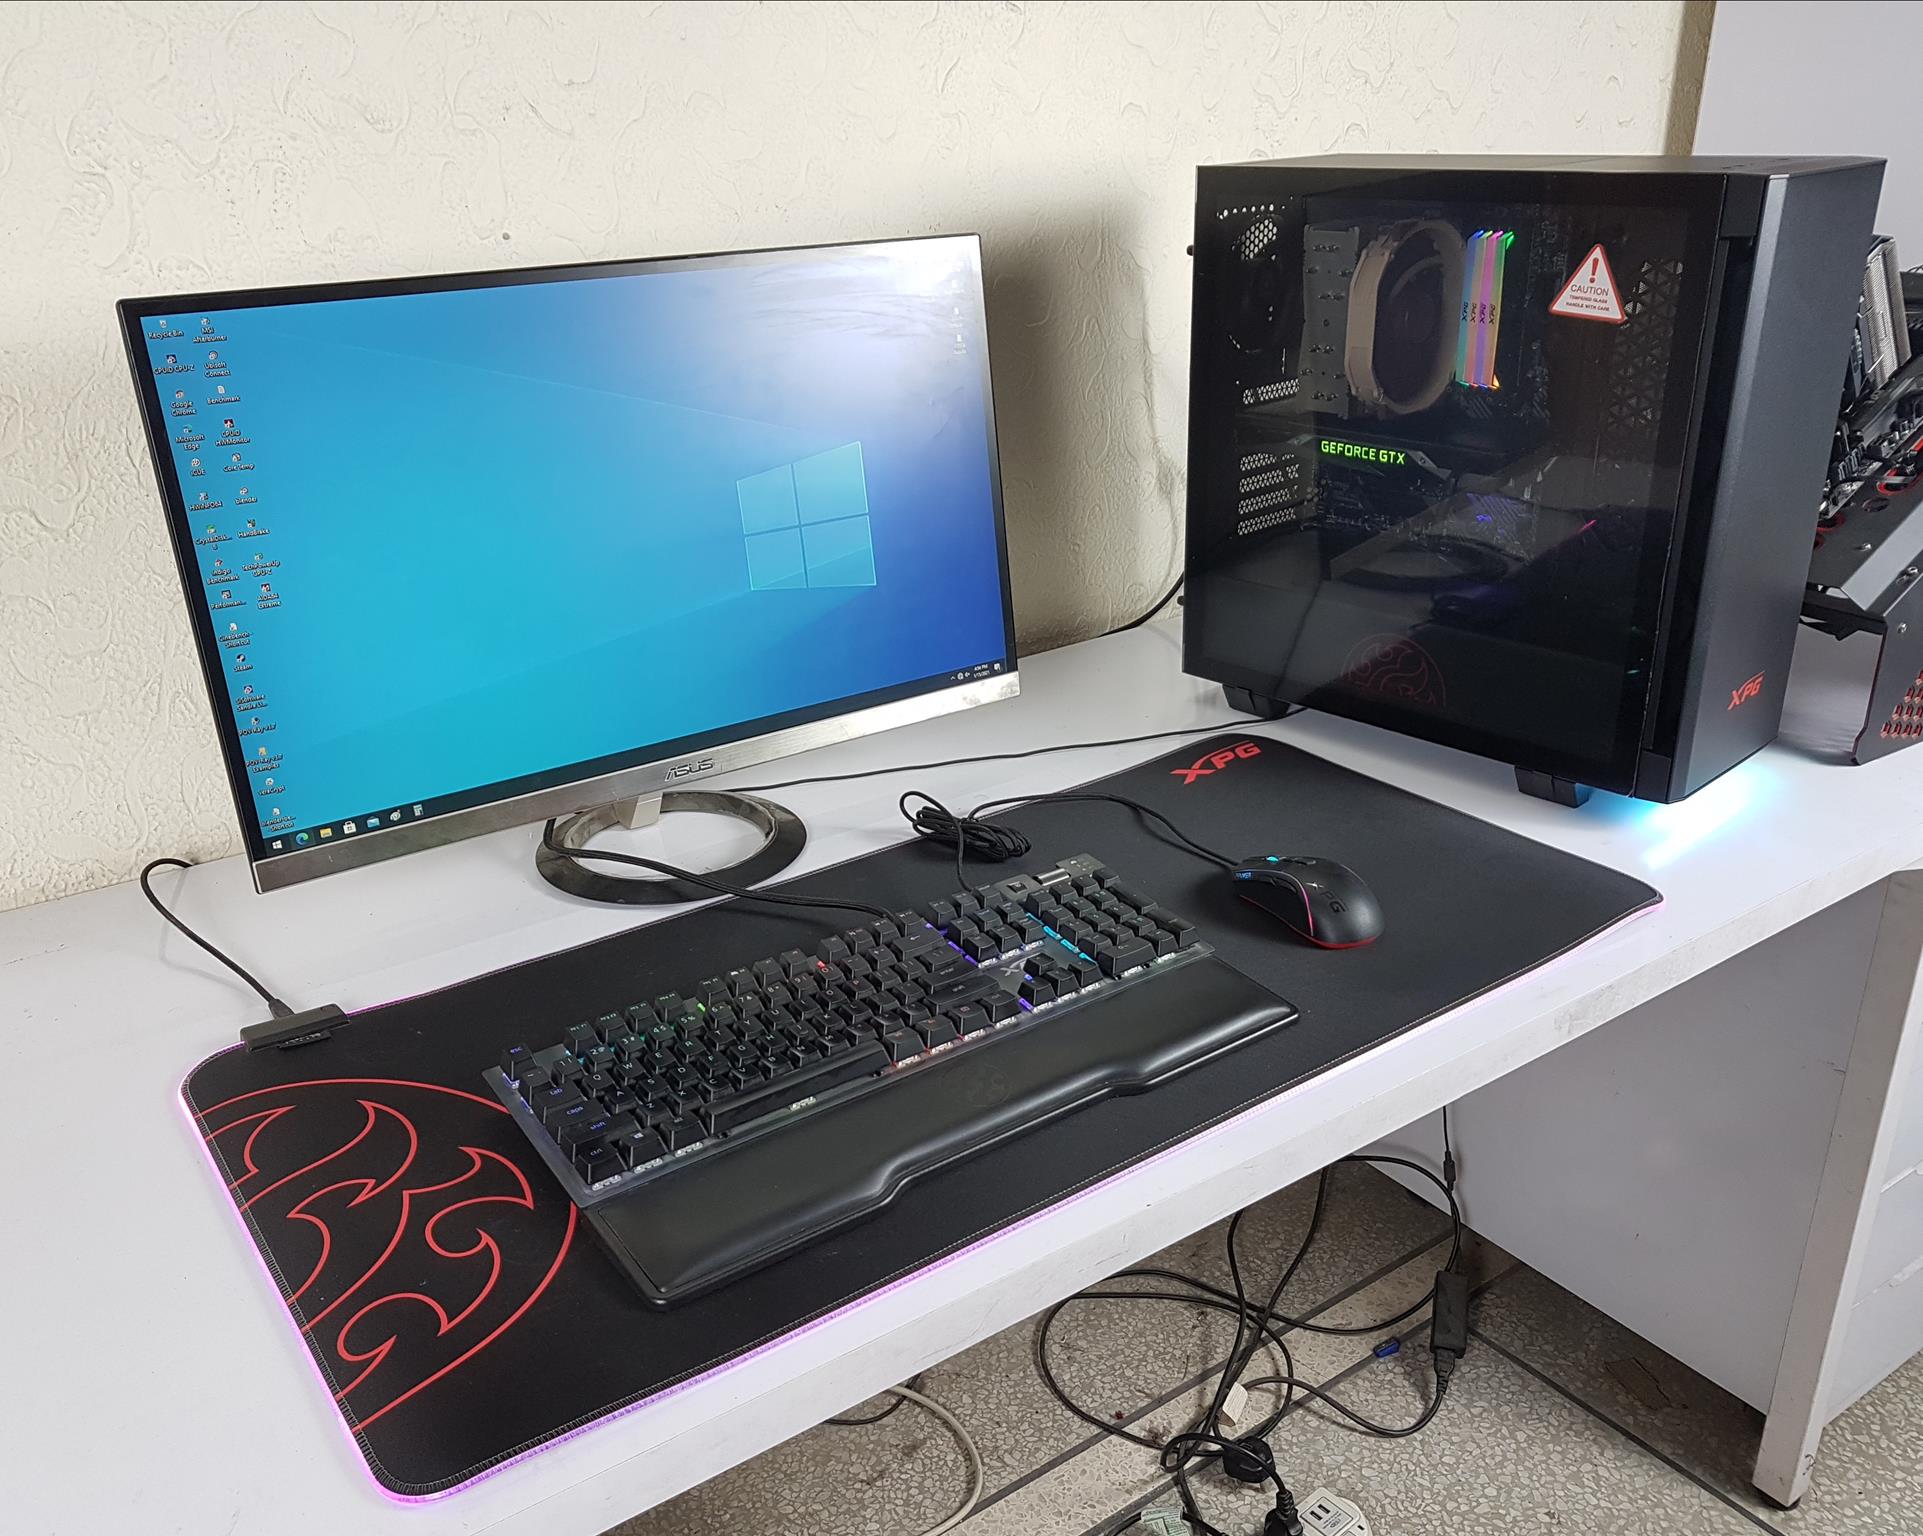
The above is a picture of the test build with a quick power-on test for the POST.
Cable management should not be an issue in this chassis. I don’t do detailed cable management as I want to check if the side panel is closed with basic management or not. The XPG INVADER passes this test.
Considerations
Installing a 240mm AIO cooler in this chassis, particularly the XPG PRIME ARGB poses challenges. The top mount is tight due to the EPS cable and RAM height. Routing the ARGB cable through the motherboard cutout is tricky; using the side bracket is the only option, requiring AIO installation on the top or front, necessitating front fan removal.
Connecting the USB 3.0 to the MSI MAG Z490 TOMAHAWK is problematic due to the right-angled header. A wider gap between the motherboard tray and the side bracket is needed for better connectivity. Increasing the chassis height slightly would improve clearance for top-mounted radiators.
Here are some pics of the build.
Chassis Testing
The following test build has been used for testing:
- MSI MAG Z490 TOMAHAWK
- Intel i7 10700k [Stock, Auto]
- Noctua NH-U14S
- XPG Spectrix D41 32GB @ 2666MHz
- Nvidia GeForce GTX 1080 FE
- Addlink S70 256GB NVMe SSD
- bequiet! Straight Power 11 850W PSU
Thermal Testing
Noctua NT-H1 is used on the CPU IHS. AIDA64 Extreme 6.30 is used for the thermal testing using FPU and GPU at a time. The following configurations have been tested and reported in the graph:
- Stock Configuration [Front Cover and Dust Filter installed]
- The Front Cover was removed, front dust filter was installed.
- The front cover and dust filter were removed.
Tested the chassis with stock fans at full speed, cooler fan on Auto PWM, and other settings on Auto in UEFI/BIOS. Conducted a 30-minute stress test using AIDA64 Extreme 6.30 (FPU and GPU) with 10 minutes of idle time. Powered off the system for a minimum of 30 minutes between each of the three runs. Let’s take a look at the results.
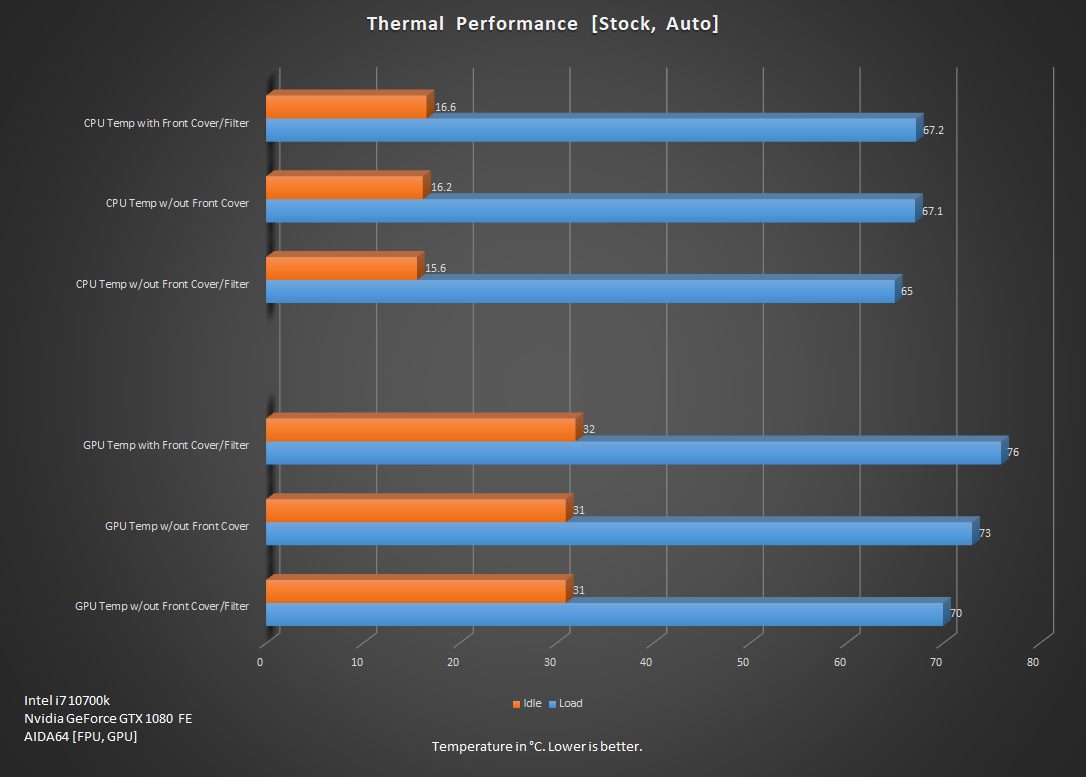
The ambient temperature was 13°C. Reporting absolute CPU temperatures without delta. Stock and open-case CPU temps were consistent at 67°C, indicating unrestricted airflow. Without the front cover and dust filter, the CPU temp dropped to 65°C, a 2°C delta within acceptable range.
For CPU cooling, airflow seems sufficient. The graphics card shows a consistent 3°C delta. Without filter and front cover, it rises to 6°C, exceeding the acceptable range. Exploring thermal performance with 2-3 fans on the graphics card could provide insights, especially for Founder’s Edition cards known for running hot on stock cooling.
Acoustic
The overall noise level was at 52 dBA on ambient 34 dBA which is good.
Should You Buy It or Not?
Upon careful review and analysis of the XPG Invader Chassis, I have concluded that:
Buy It If:
✅Sleek Design Enthusiasts: If you appreciate a sleek and modern design, the XPG Invader Chassis with its magnetic front cover and RGB under-glow offers a visually appealing option.
✅Easy Build Enthusiasts: If you prefer a user-friendly, tool-less build approach, the XPG Invader Chassis is designed with convenience in mind, making the assembly process smoother.
✅RGB Lighting Fans: For those who enjoy RGB lighting effects, the chassis features a customizable front RGB downlight and includes an RGB button on the top panel for easy control.
Don’t Buy It If:
❌Top-Mounted AIO Cooler Users: If you plan to install a top-mounted AIO cooler, especially with taller RAM modules, be cautious of potential space limitations and cable management challenges.
❌High-Airflow Requirement for GPUs: If you have a graphics card known for running hot on stock cooling, and you anticipate the need for additional fans for improved airflow, the chassis might pose challenges without extra fan installations.
Conclusion
In conclusion, the XPG Invader Chassis impresses with its sleek design, innovative features, and user-friendly build approach. The magnetic front cover, RGB under-glow, and tool-less design make it a visually appealing and convenient choice for enthusiasts. The chassis offers excellent cooling flexibility, supporting various fan and radiator configurations for optimal thermal performance in gaming setups.
However, potential buyers planning to install a top-mounted AIO cooler should exercise caution, considering the space limitations, especially regarding taller RAM modules and cable management challenges. The chassis’s specifications, packaging, and contents are well-detailed, providing a comprehensive overview for informed decision-making.
In the testing phase, the chassis demonstrated competent thermal performance, with effective airflow and manageable noise levels. The review provides valuable insights into the chassis’s strengths and considerations, offering potential buyers a well-rounded perspective.
Recent Updates
- December 17, 2023: A few text changes to improve readability.
Thank you! Please share your positive feedback. 🔋
How could we improve this post? Please Help us. 😔
[Hardware Reviewer & Editor]
Meet Nauman Siddique, a highly experienced computer science graduate with more than 15 years of knowledge in technology. Nauman is an expert in the field known for his deep understanding of computer hardware.
As a tech tester, insightful reviewer, and skilled hardware editor, Nauman carefully breaks down important parts like motherboards, graphics cards, processors, PC cases, CPU coolers, and more.
- 15+ years of PC Building Experience
- 10+ years of first-hand knowledge of technology
- 7+ years of doing in-depth testing of PC Hardware
- A motivated individual with a keen interest in tech testing from multiple angles.
- I majored in Computer Science with a Masters in Marketing
- Previously worked at eXputer, EnosTech, and Appuals.
- Completed Course in Computer Systems Specialization From Illinois Tech
Get In Touch: nauman@tech4gamers.com


