 Threads
Good Mid-Tower Option?
Review Summary
The Thermaltake Versa J24 TG RGB is an ideal chassis for mid-range budget users who would want a nice blend of Tempered glass with mesh paneling backed by built-in RGB fans with a dedicated controller that can also be connected to the motherboard lighting solution and good enough cooling potential. It is a plus that this chassis comes with 4x 120mm fans pre-installed, with three of them being RGB versions.
Hours Tested: 8-10

Overall
-
Build Quality - 9/10
9/10
-
Features - 9/10
9/10
-
Design - 9/10
9/10
-
Performance - 9/10
9/10
Pros
- Budget-friendly
- Good airflow
- Pre-installed RGB fans
- Good storage options
- Easy PSU installation
Cons
- Difficult GPU installation
- No provision for a top radiator
- Hard to put back the PSU dust filter
- No markings for motherboard sizes
- Single fan header provided


Welcome to the world of Thermaltake, where innovation meets aesthetics. Founded in 1999, Thermaltake has been on a mission to redefine the PC building and gaming experience. Today, we step into the realm of their Versa J24 TG RGB edition – a compact mid-tower chassis that promises a seamless fusion of form and function.
- Why you can trust Tech4Gamers: We understand the importance of making informed decisions. That’s why our team spends significant time testing every product we review. Find out more about how we test.
Key Takeaways
- The Thermaltake Versa J24 TG RGB is a compact mid-tower chassis designed to redefine the PC building and gaming experience.
- You should get the Thermaltake Versa J24 TG RGB if you prioritize aesthetics and RGB lighting, value effective cooling with versatile options, and appreciate thoughtful design features like a PSU shroud and dedicated SSD brackets.
- You should not get the Thermaltake Versa J24 TG RGB if you need extensive PCIe slot cover flexibility during GPU installation or have a PSU exceeding 160mm in size, as these factors may pose challenges and compatibility issues, respectively.
Here are the specifications.

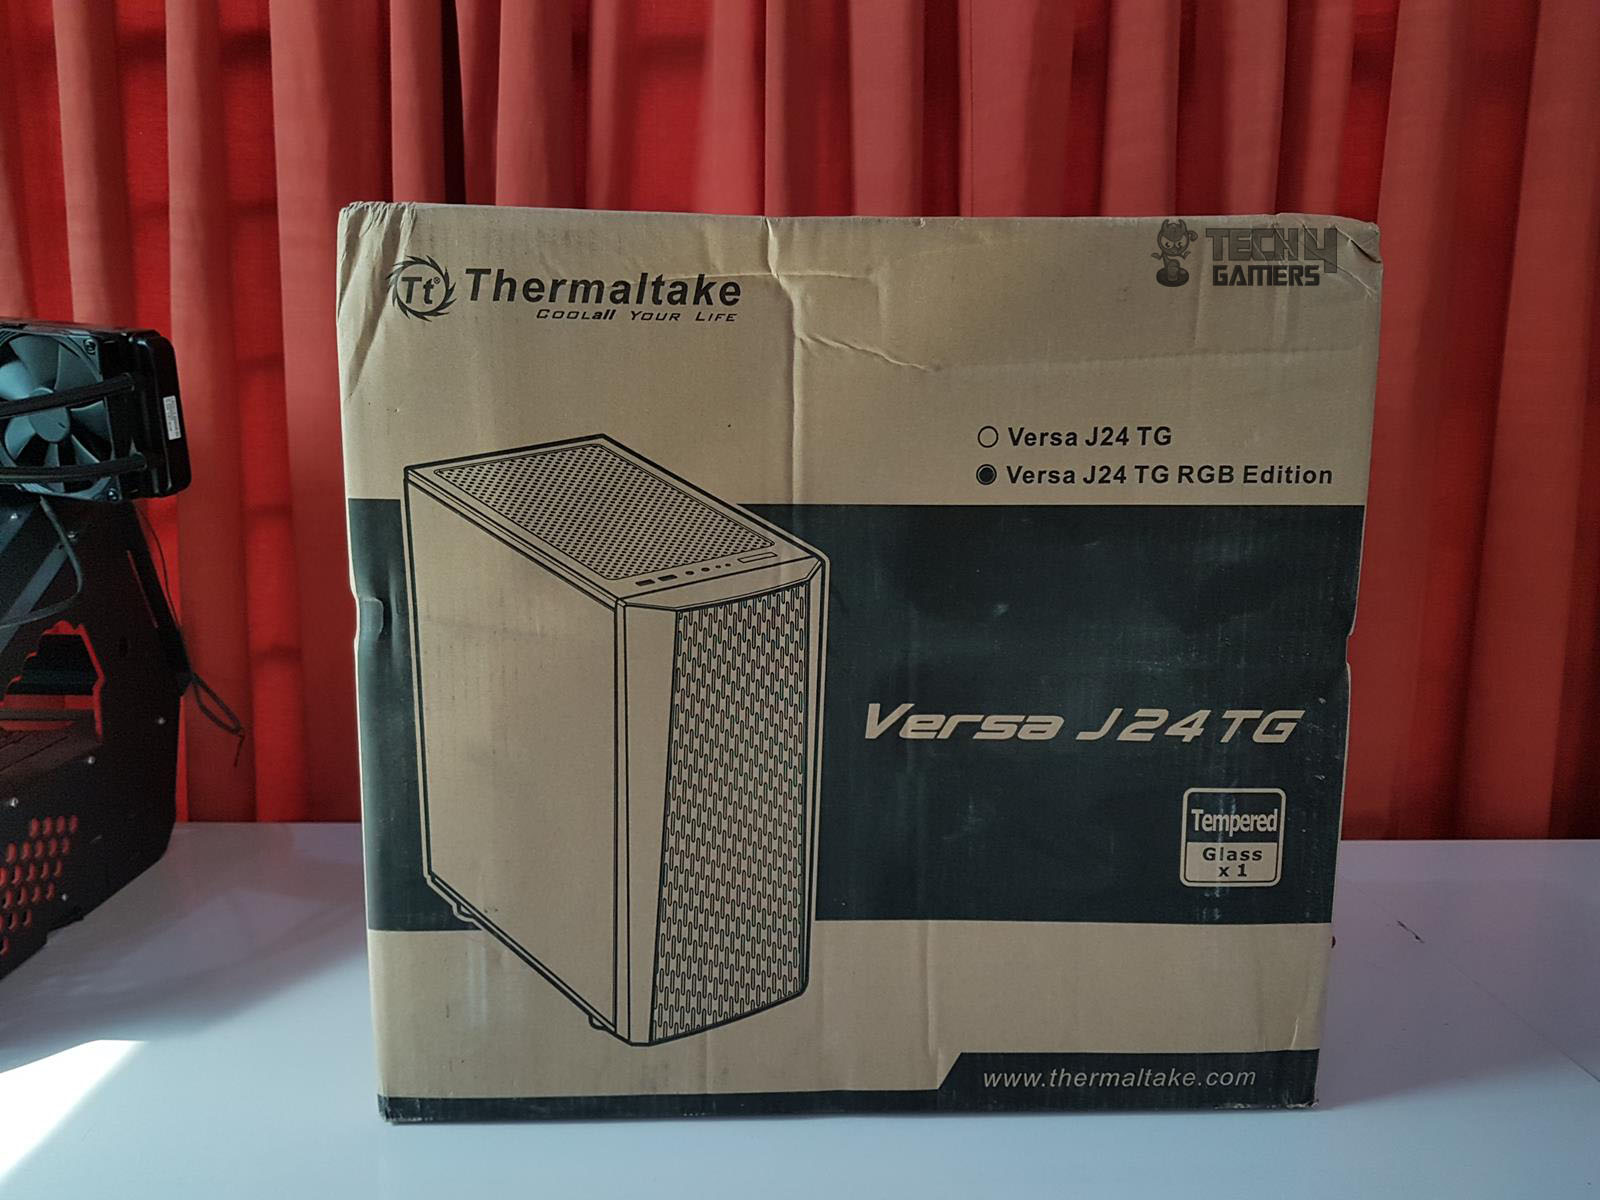
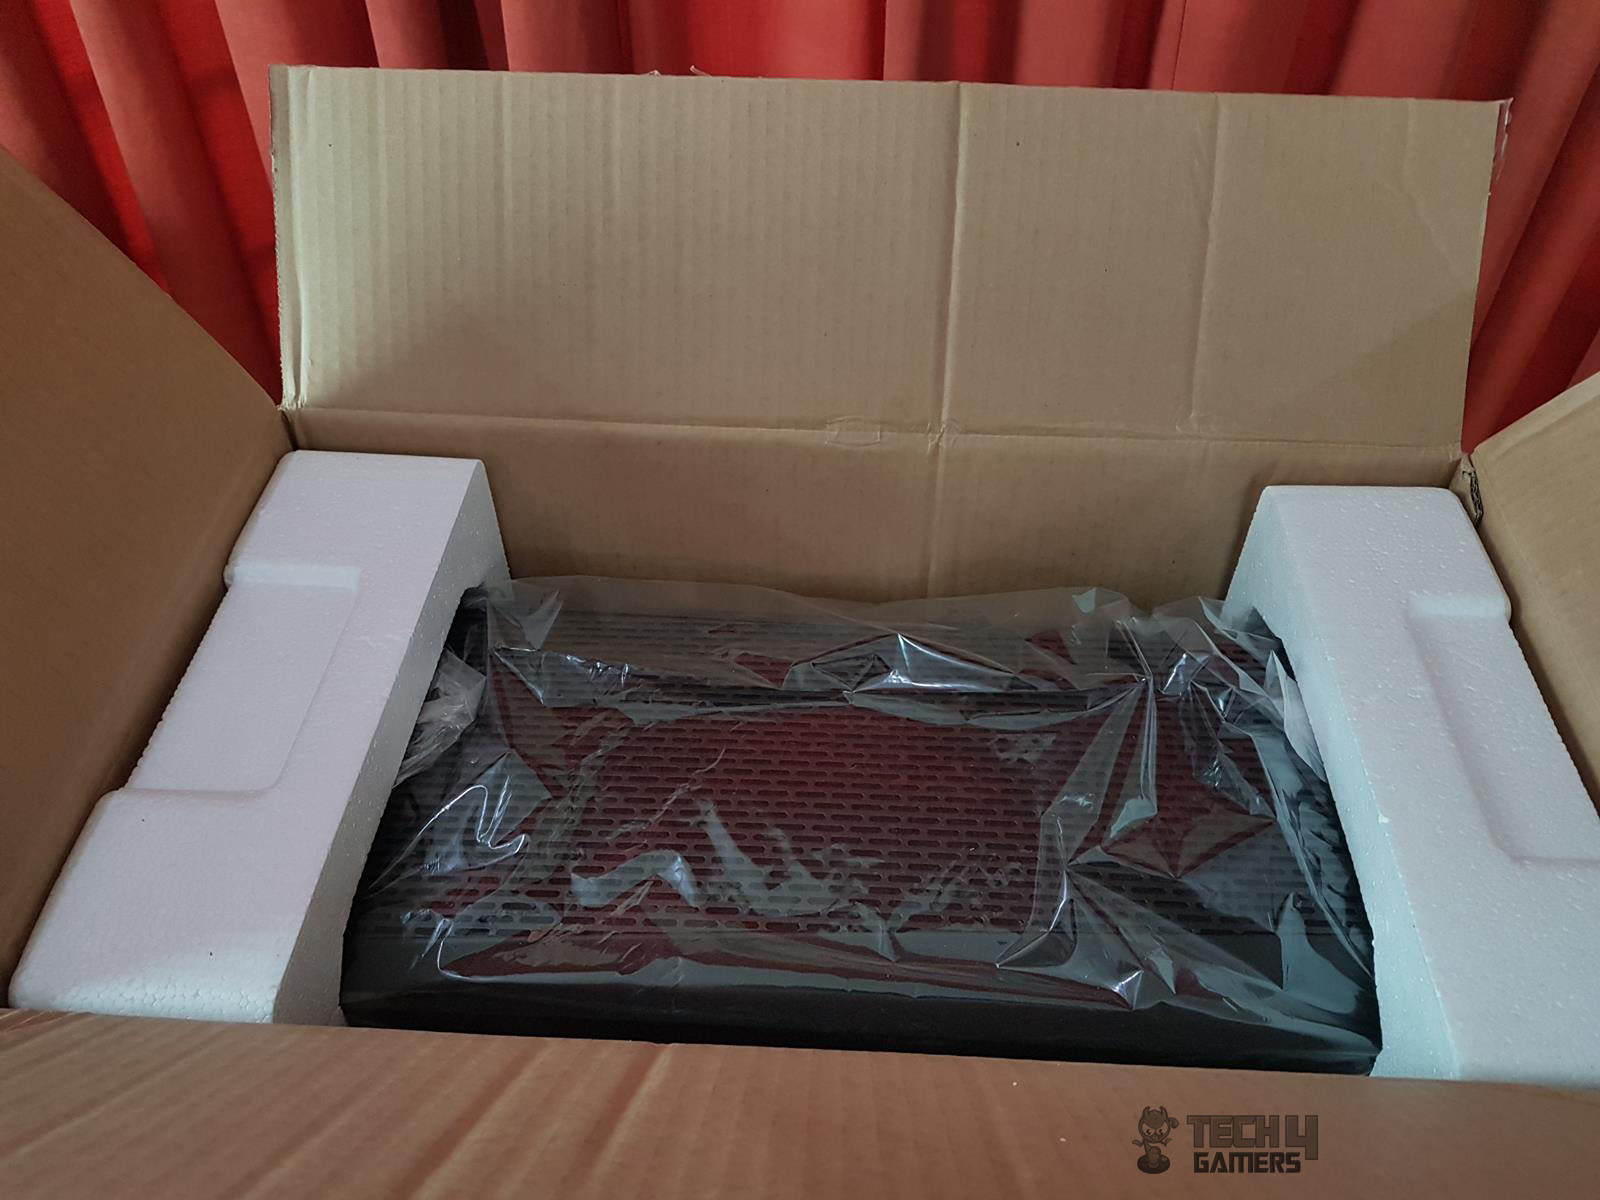
Packaging And Unboxing
The chassis is shipped inside a standard brown color cardboard box.
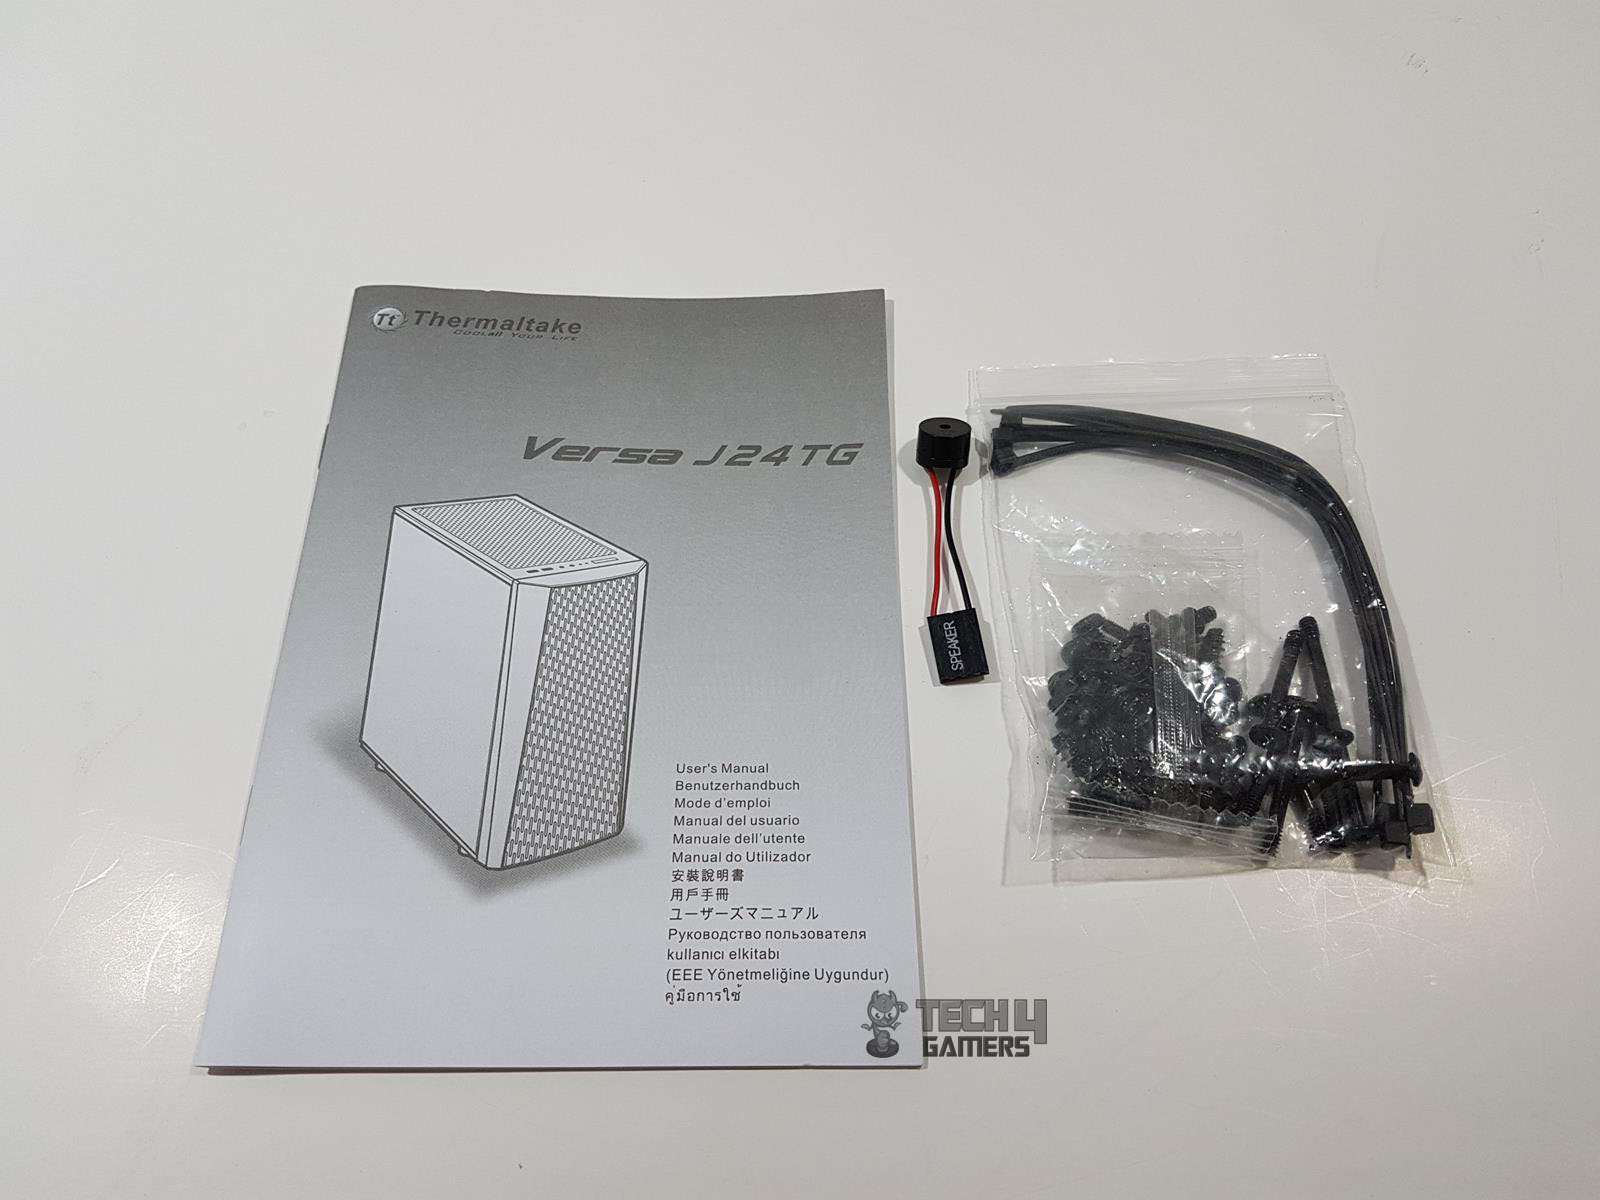
Accessories
The following accessories are provided:
- 8x 6-32x6mm Screws for Power Supply
- 17x 6-32mm Screws for motherboard/3.5” HDD
- 16x M3x5mm Screws for 2.5” SSD
- 12x T5x10mm Screws for fans
- 8x 6-32x30mm Screws for fans
- 6x Cable ties
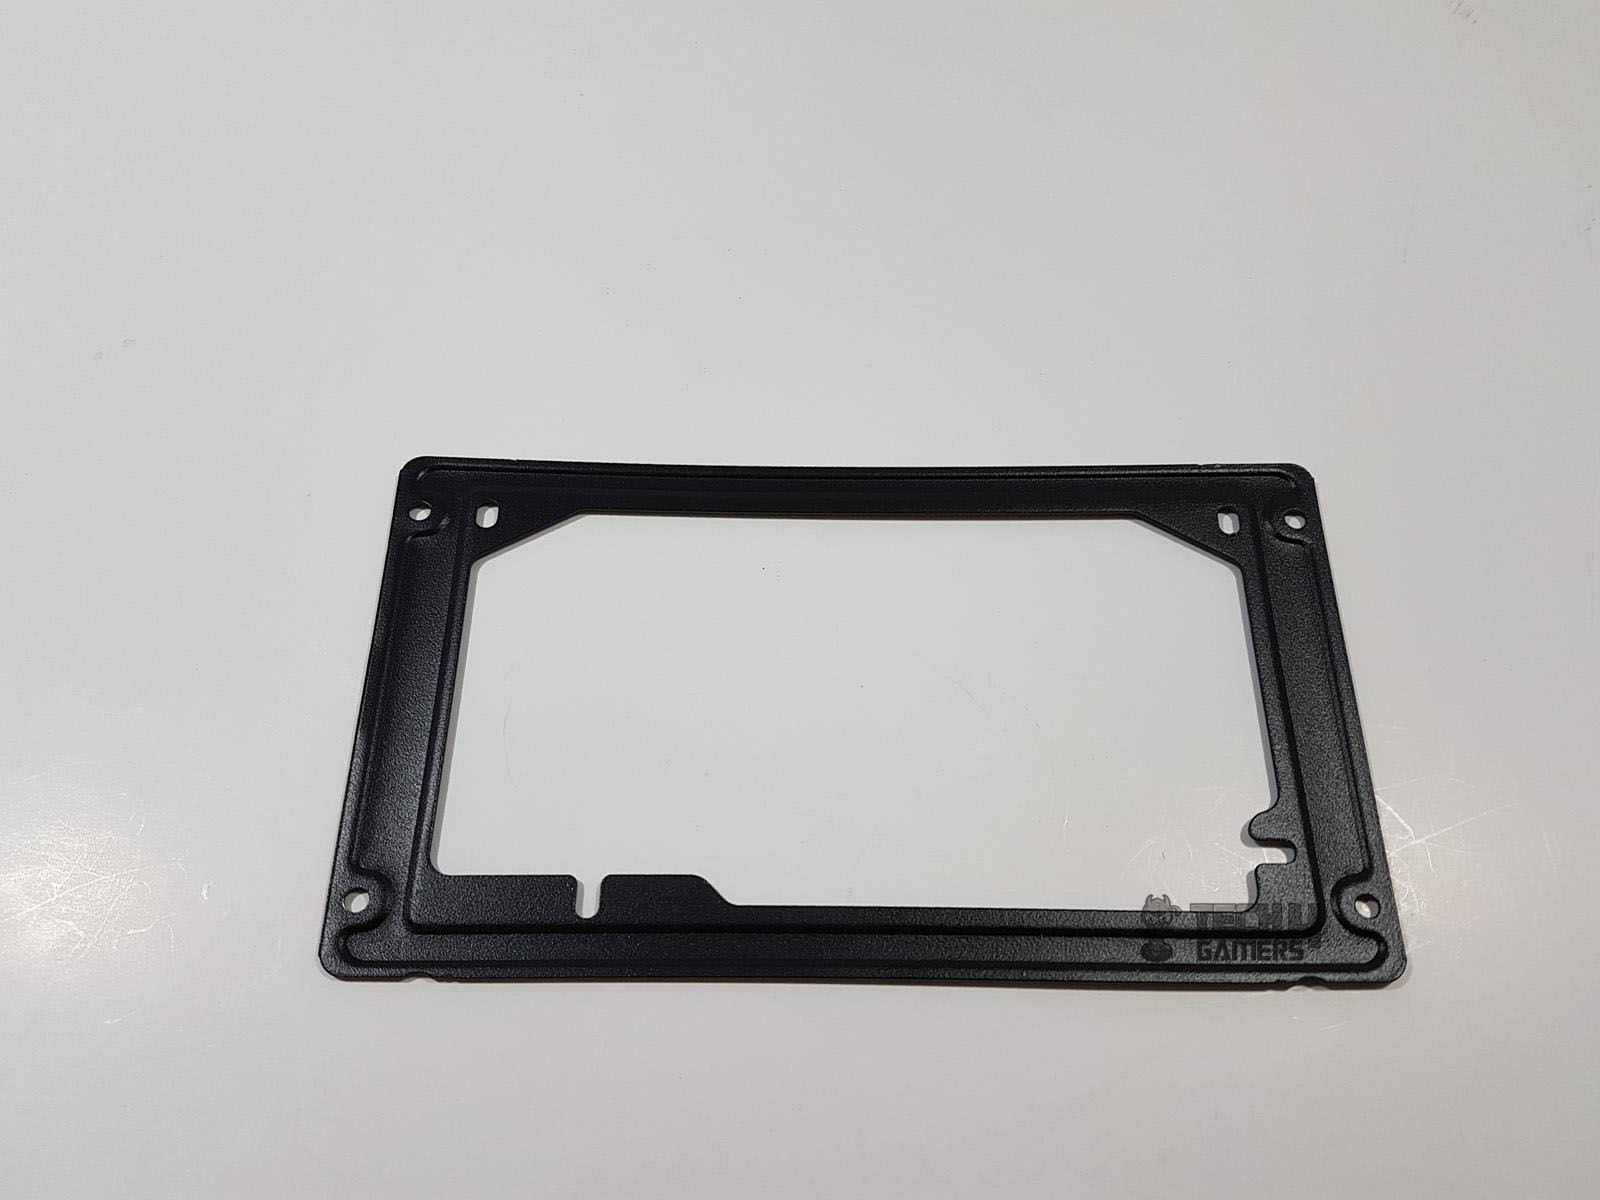
- 1x PSU Holder
- 1x Speaker
- 1x User Guide
Closer Look
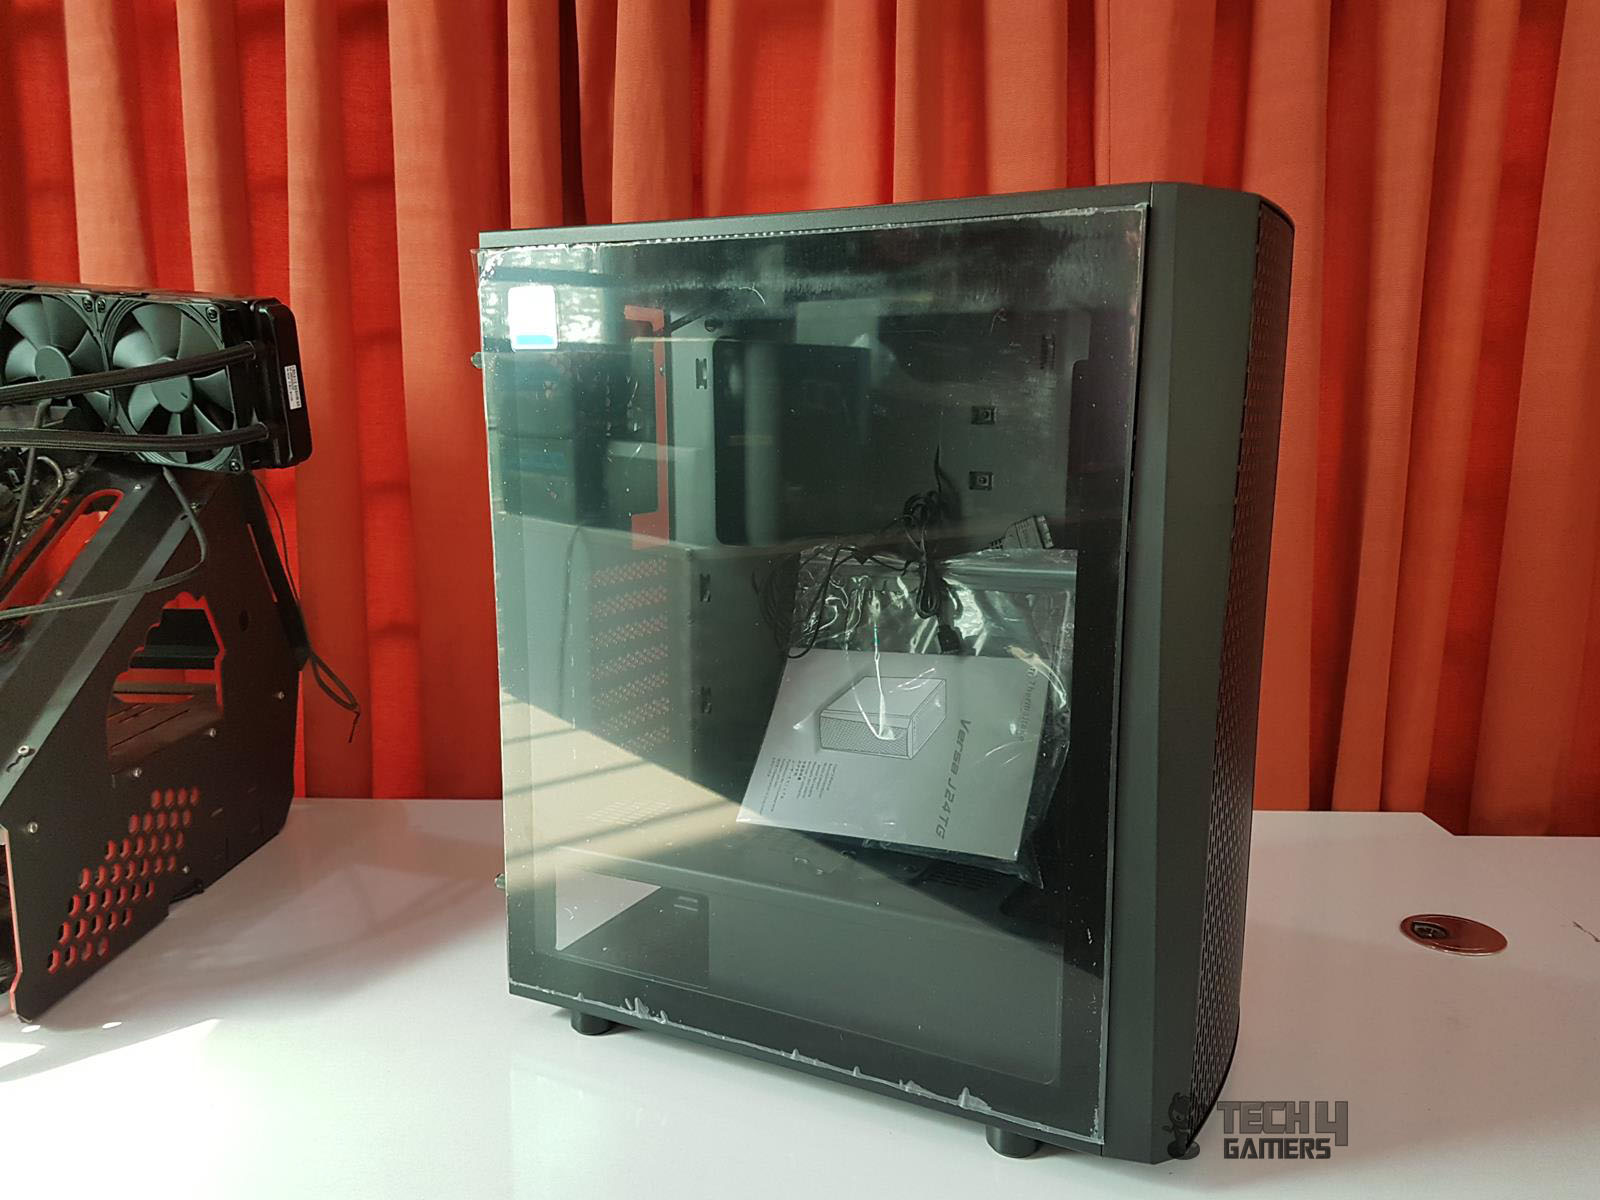
The Versa J24 TG RGB is a compact mid-tower chassis with a spacious layout, offering optimal performance out of the box. Made of SPCC material, it weighs 6.2kg and measures 462x206x414mm. The exterior and interior are black, featuring a preinstalled tempered glass (553x421x4mm) panel on the left side.
Side Views
Notably, the glass has an unusual implementation, withholding brackets attached using adhesive tape, resulting in a non-flush fit against the chassis frame. The right side panel is solid with no branding or design.

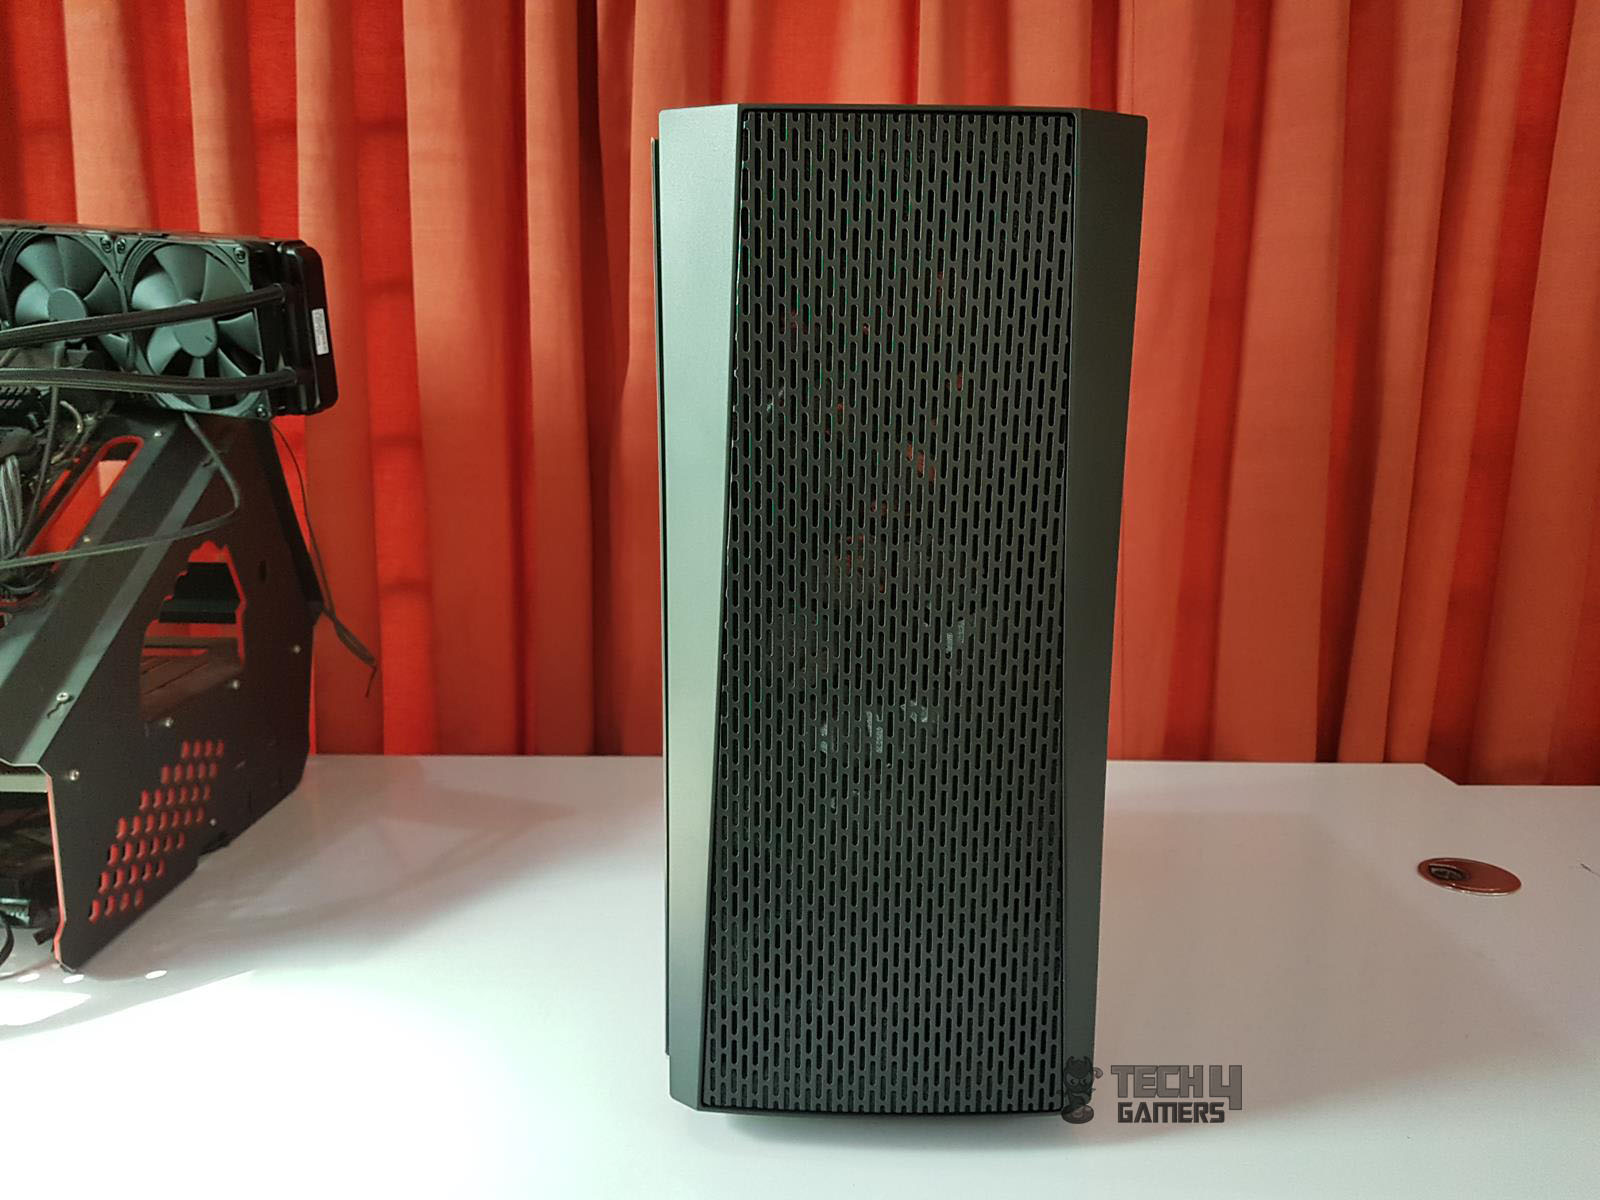
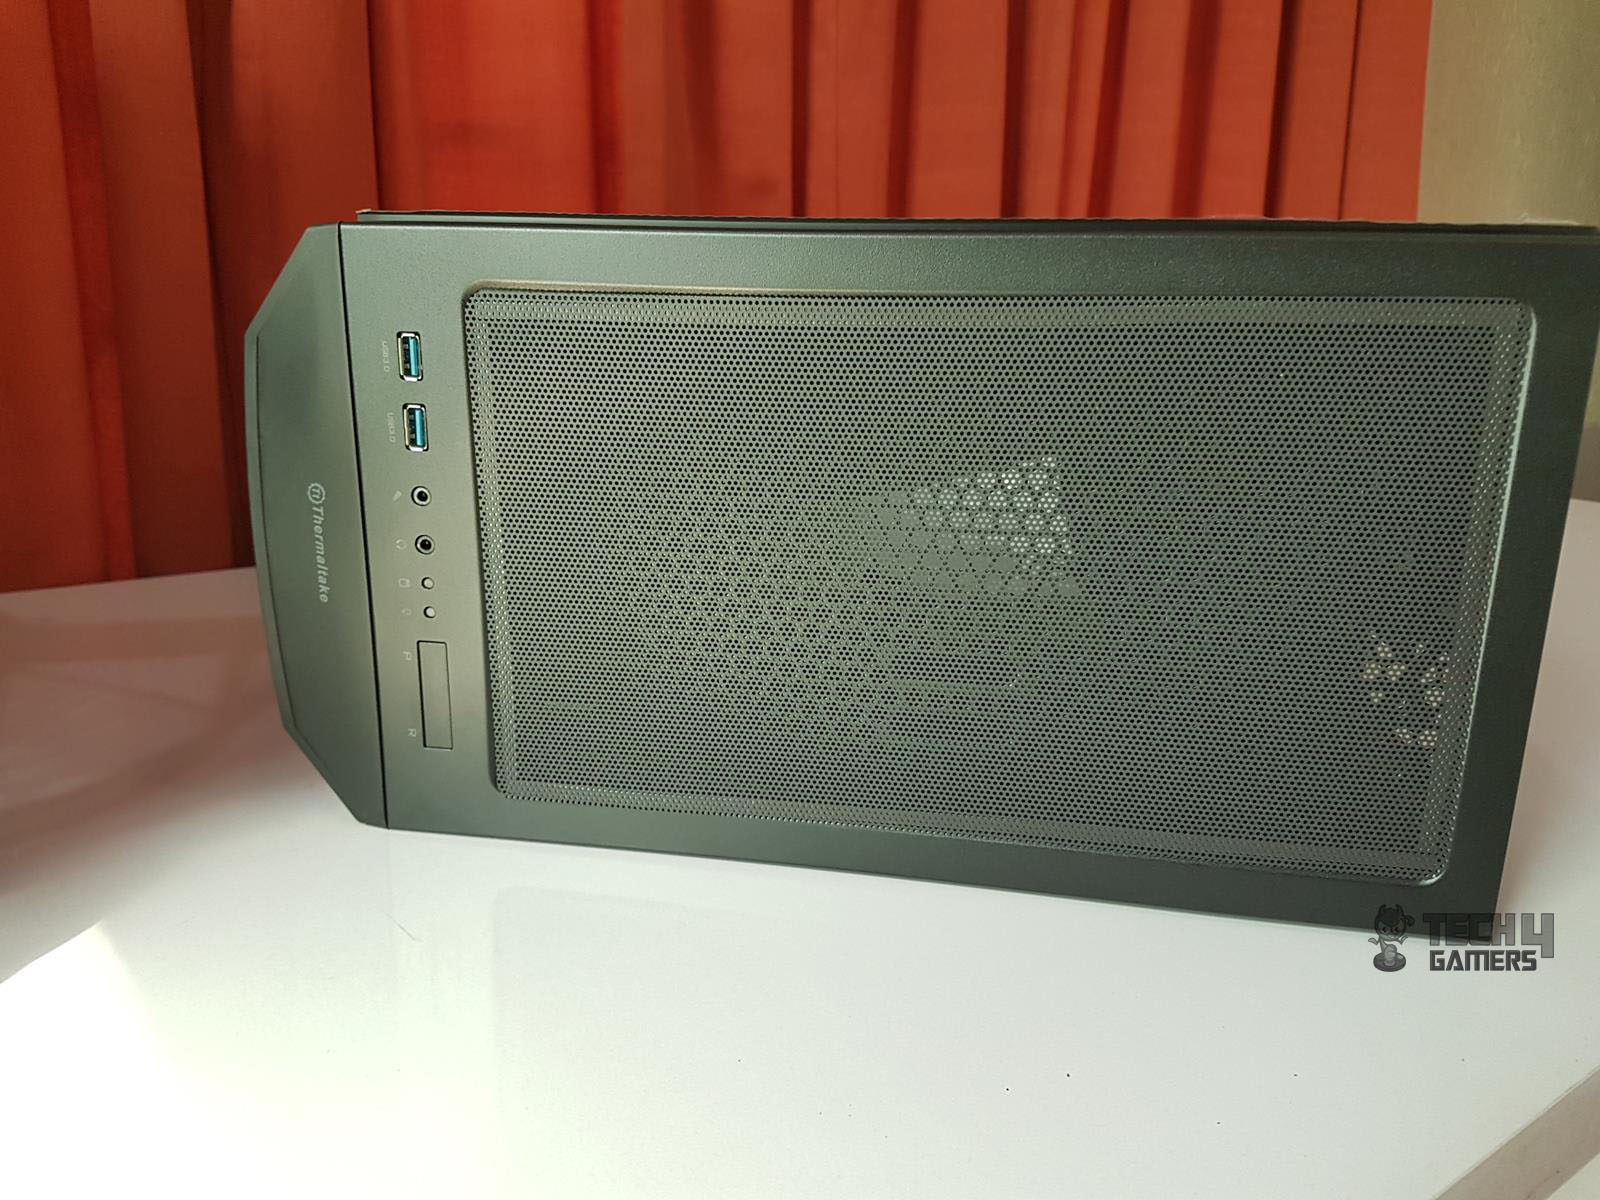
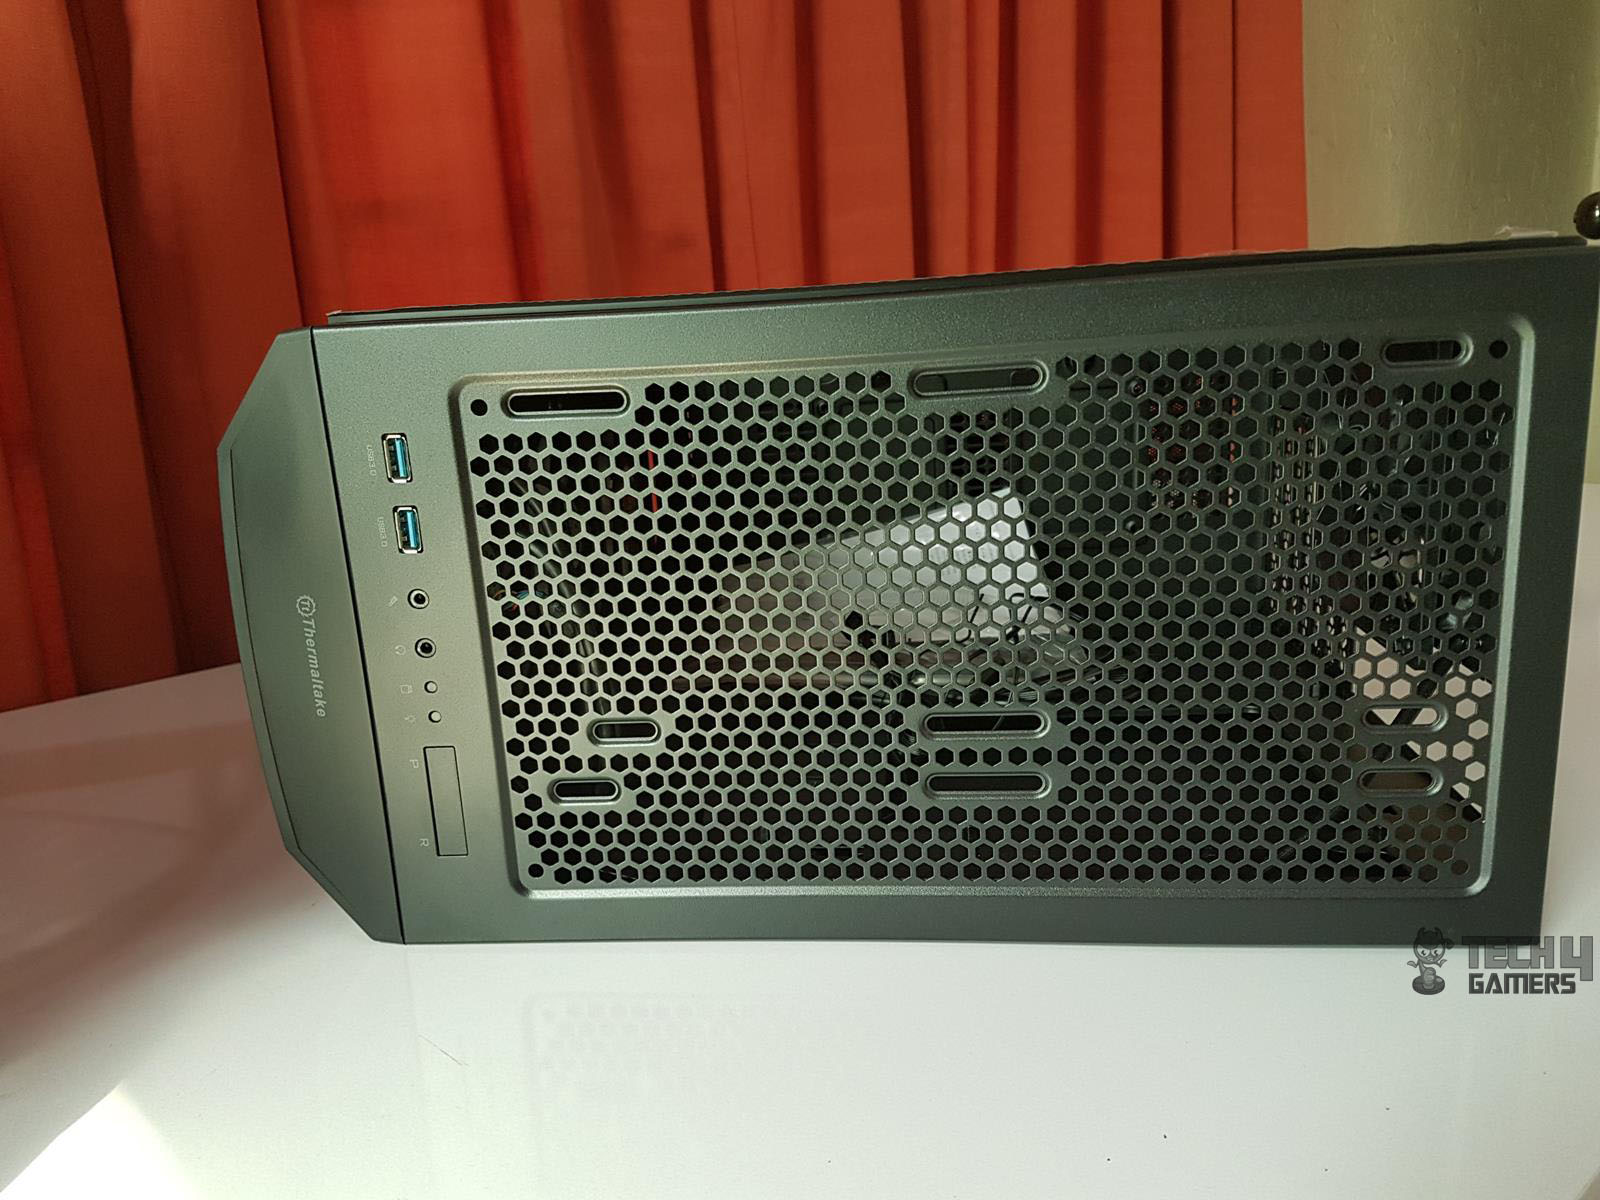
Front And Rear
I’m impressed with the front panel’s perforated mesh design, surrounded by these sleek angular covers. Taking off the front panel was a breeze, revealing Thermaltake’s sturdy build quality.
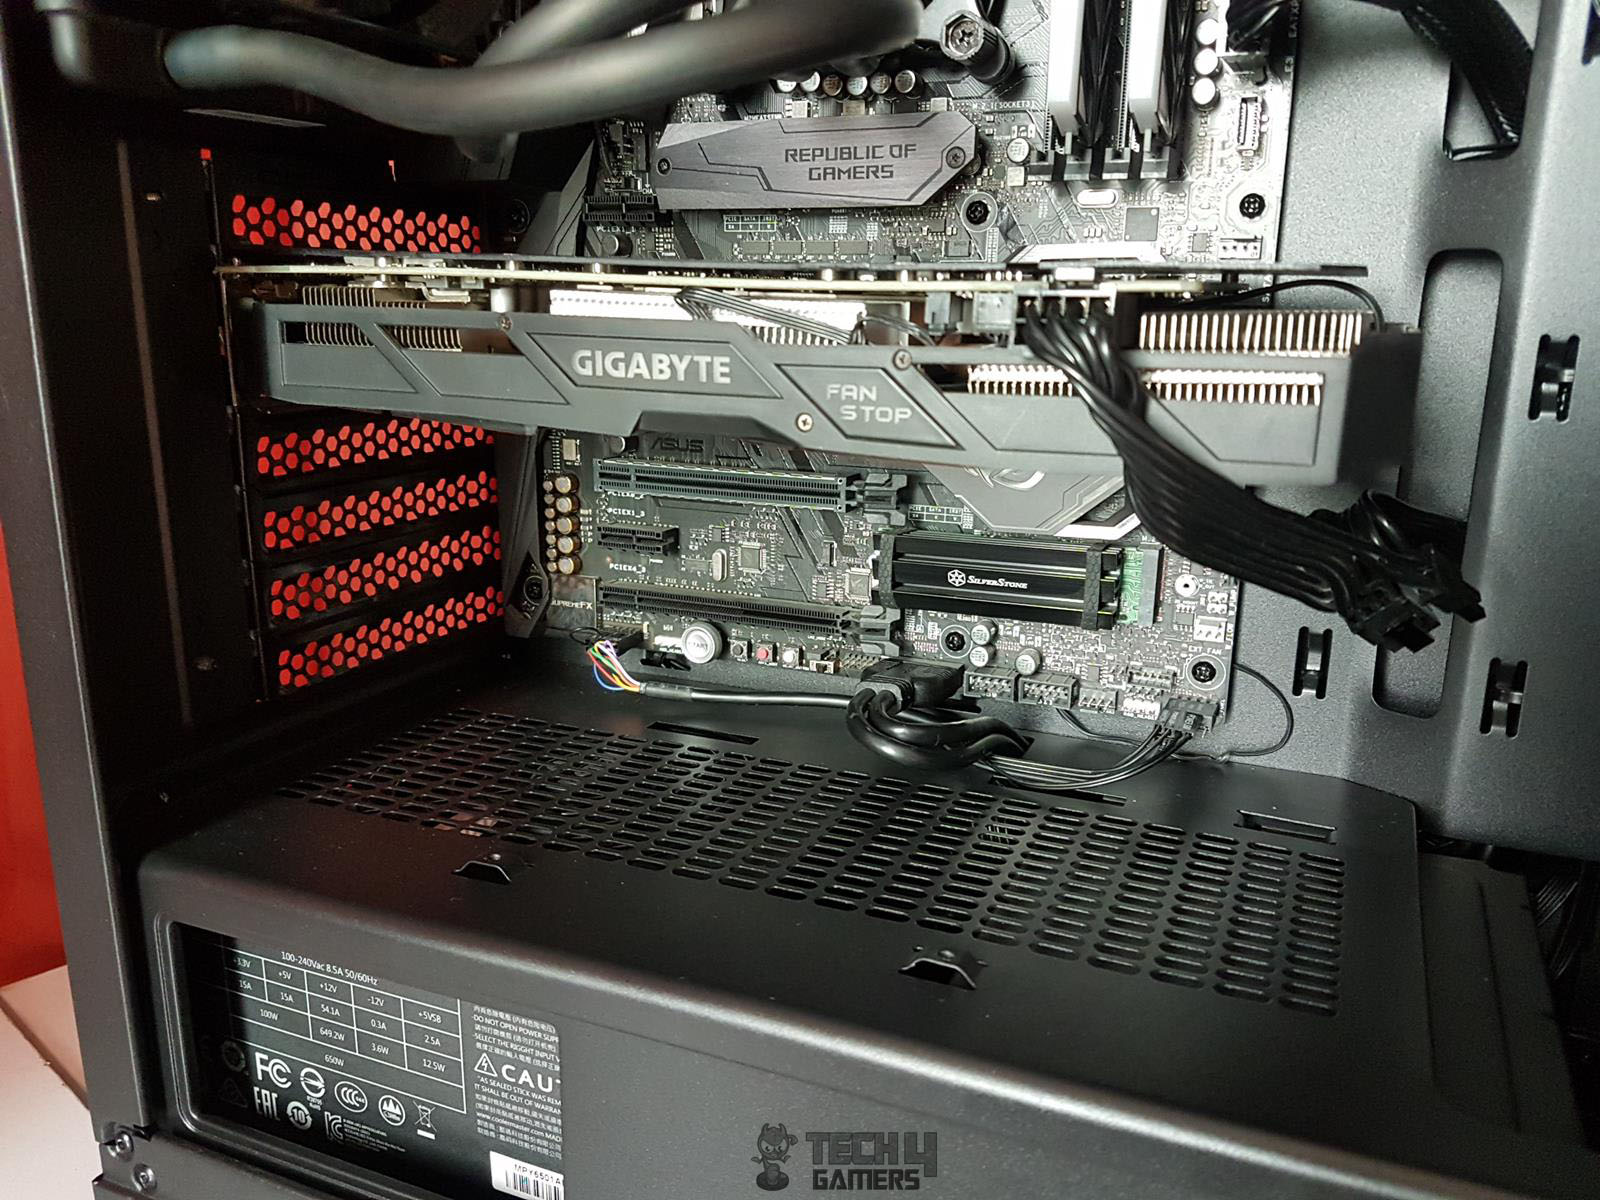
Now, onto the back – there’s a neat cutout for the motherboard I/O shield, a spot for a 120mm fan, and these cool PCIe slot covers held in place by a bracket. Just a heads up, though – be careful when installing your graphics card; there’s a narrow gap to navigate.
Down at the bottom, where you’d mount your standard ATX PSU, they’ve included a smart bracket for easy installation.

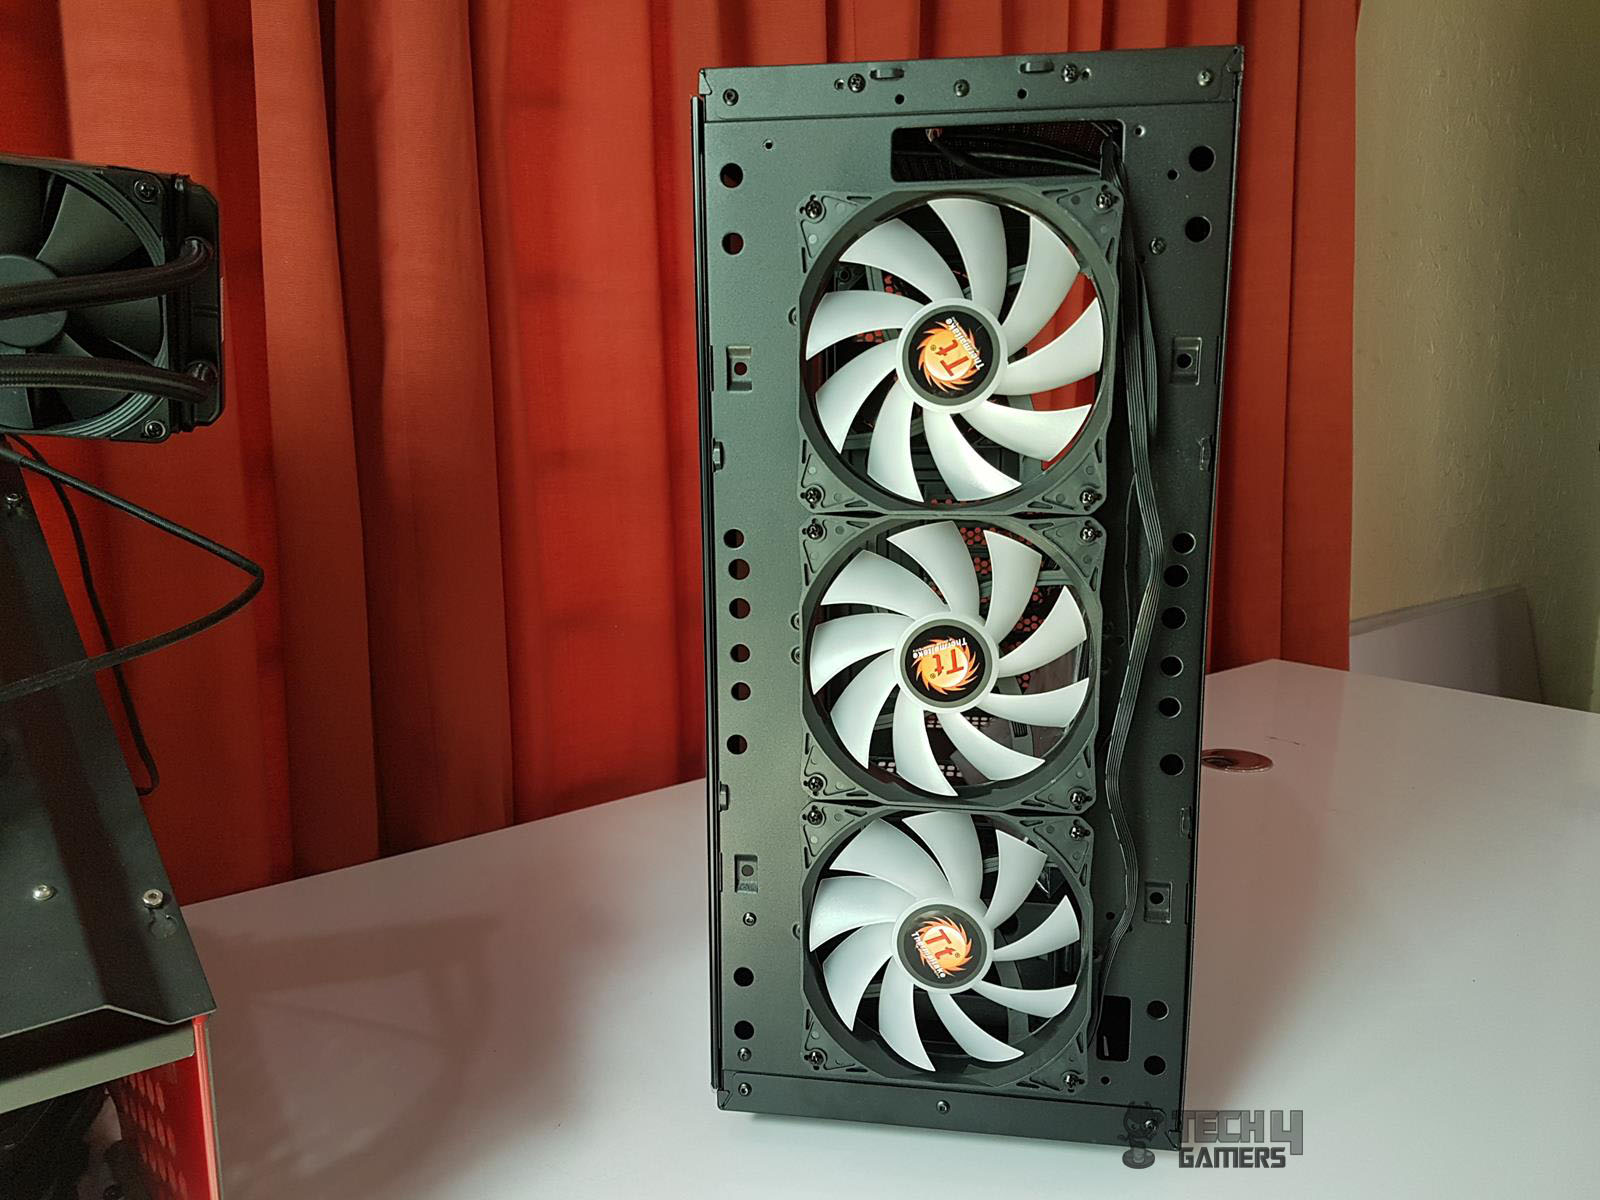
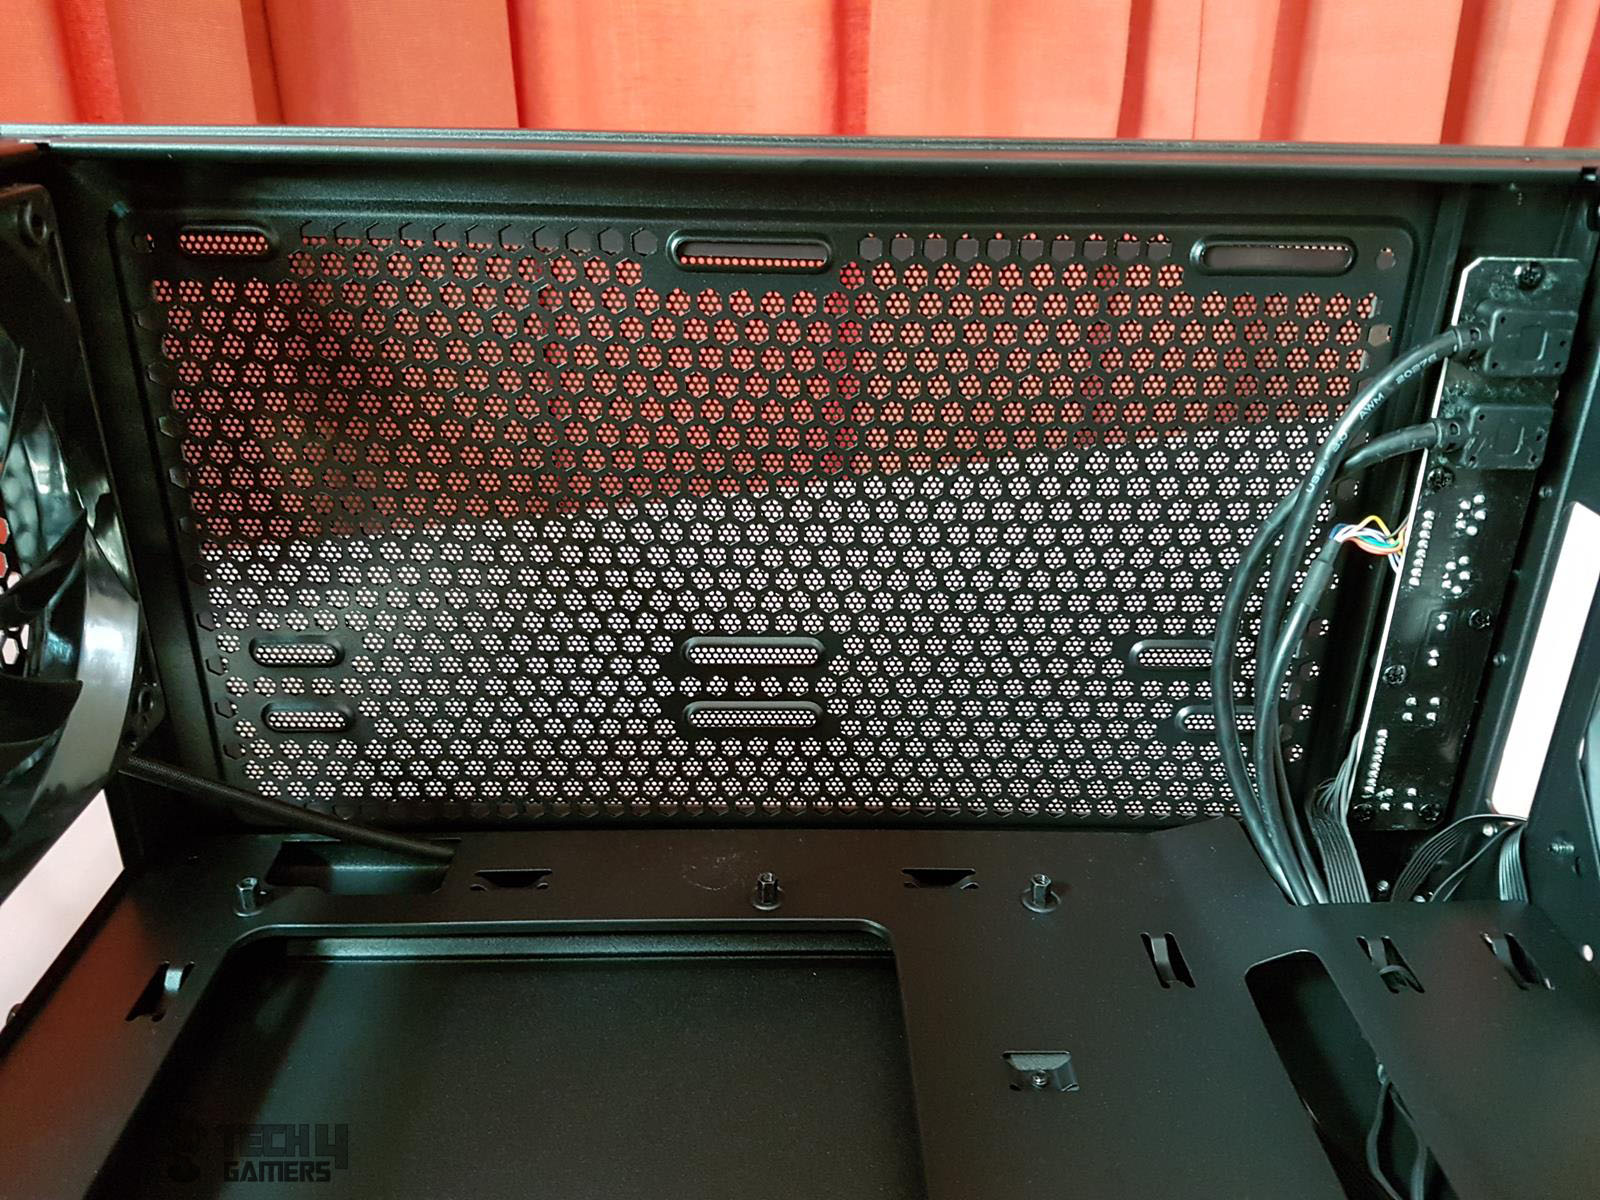
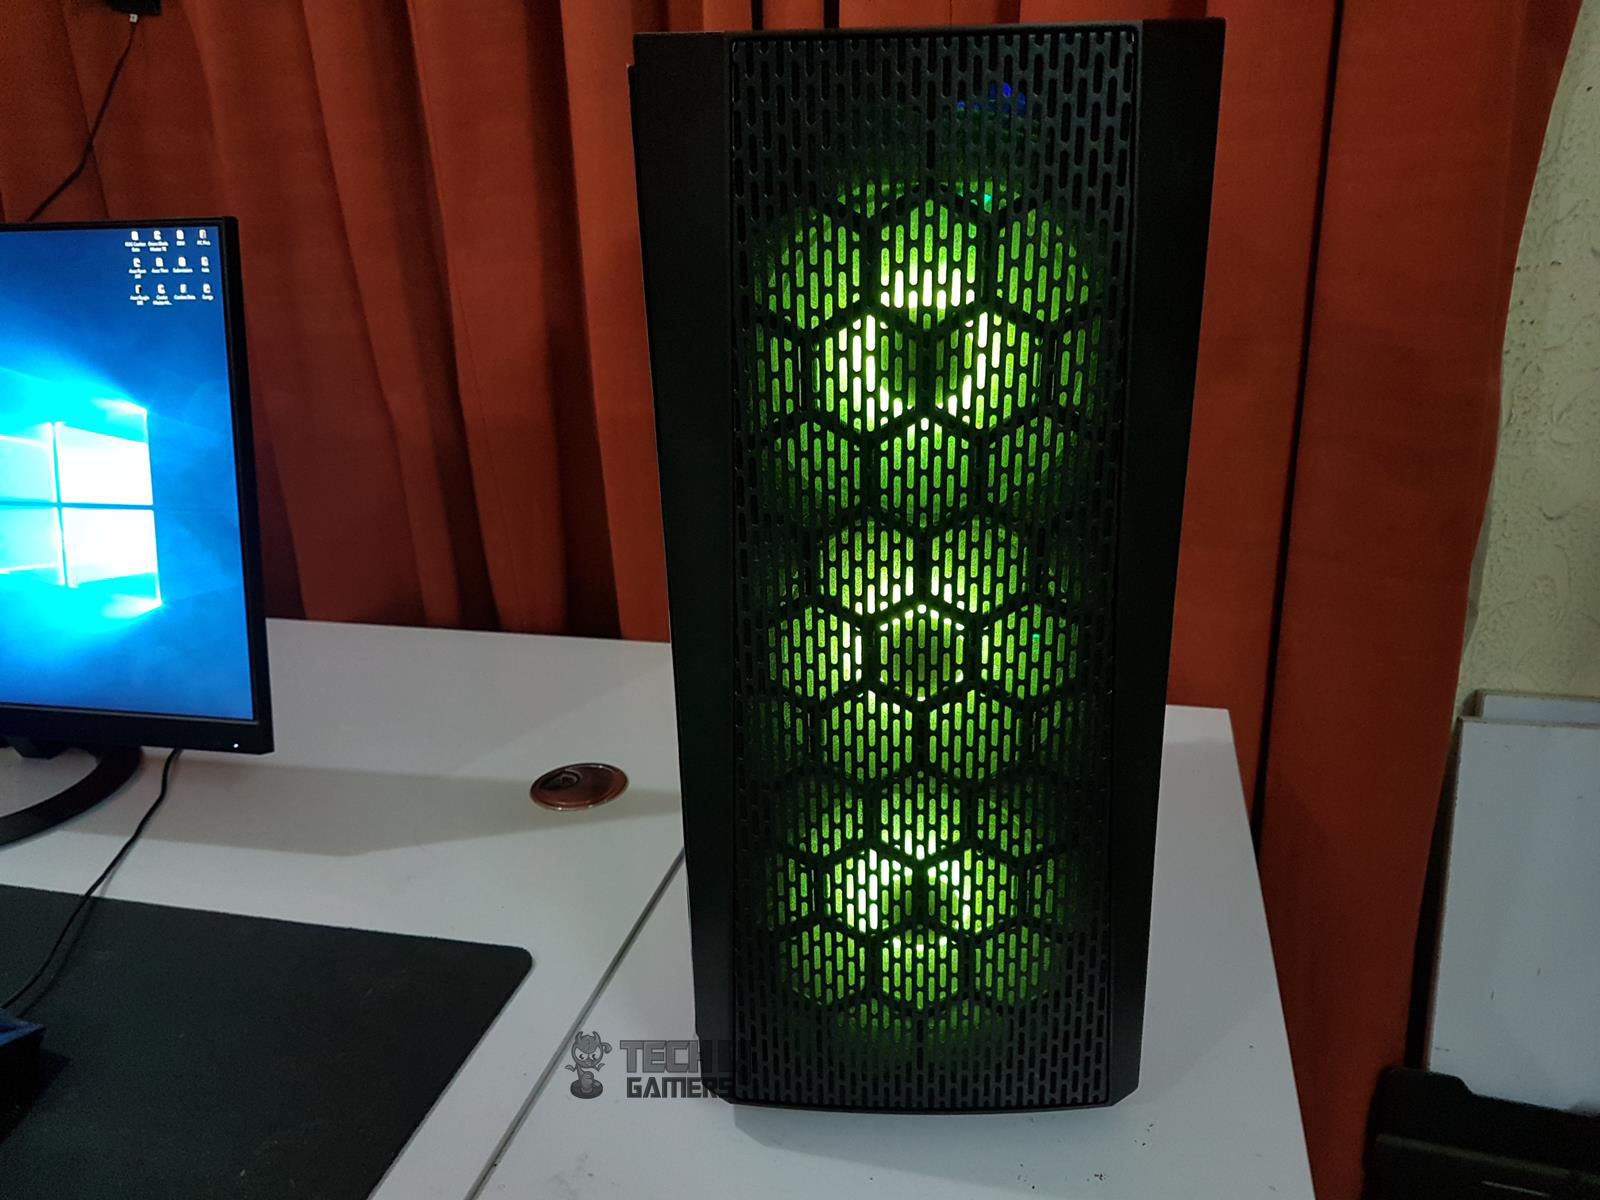
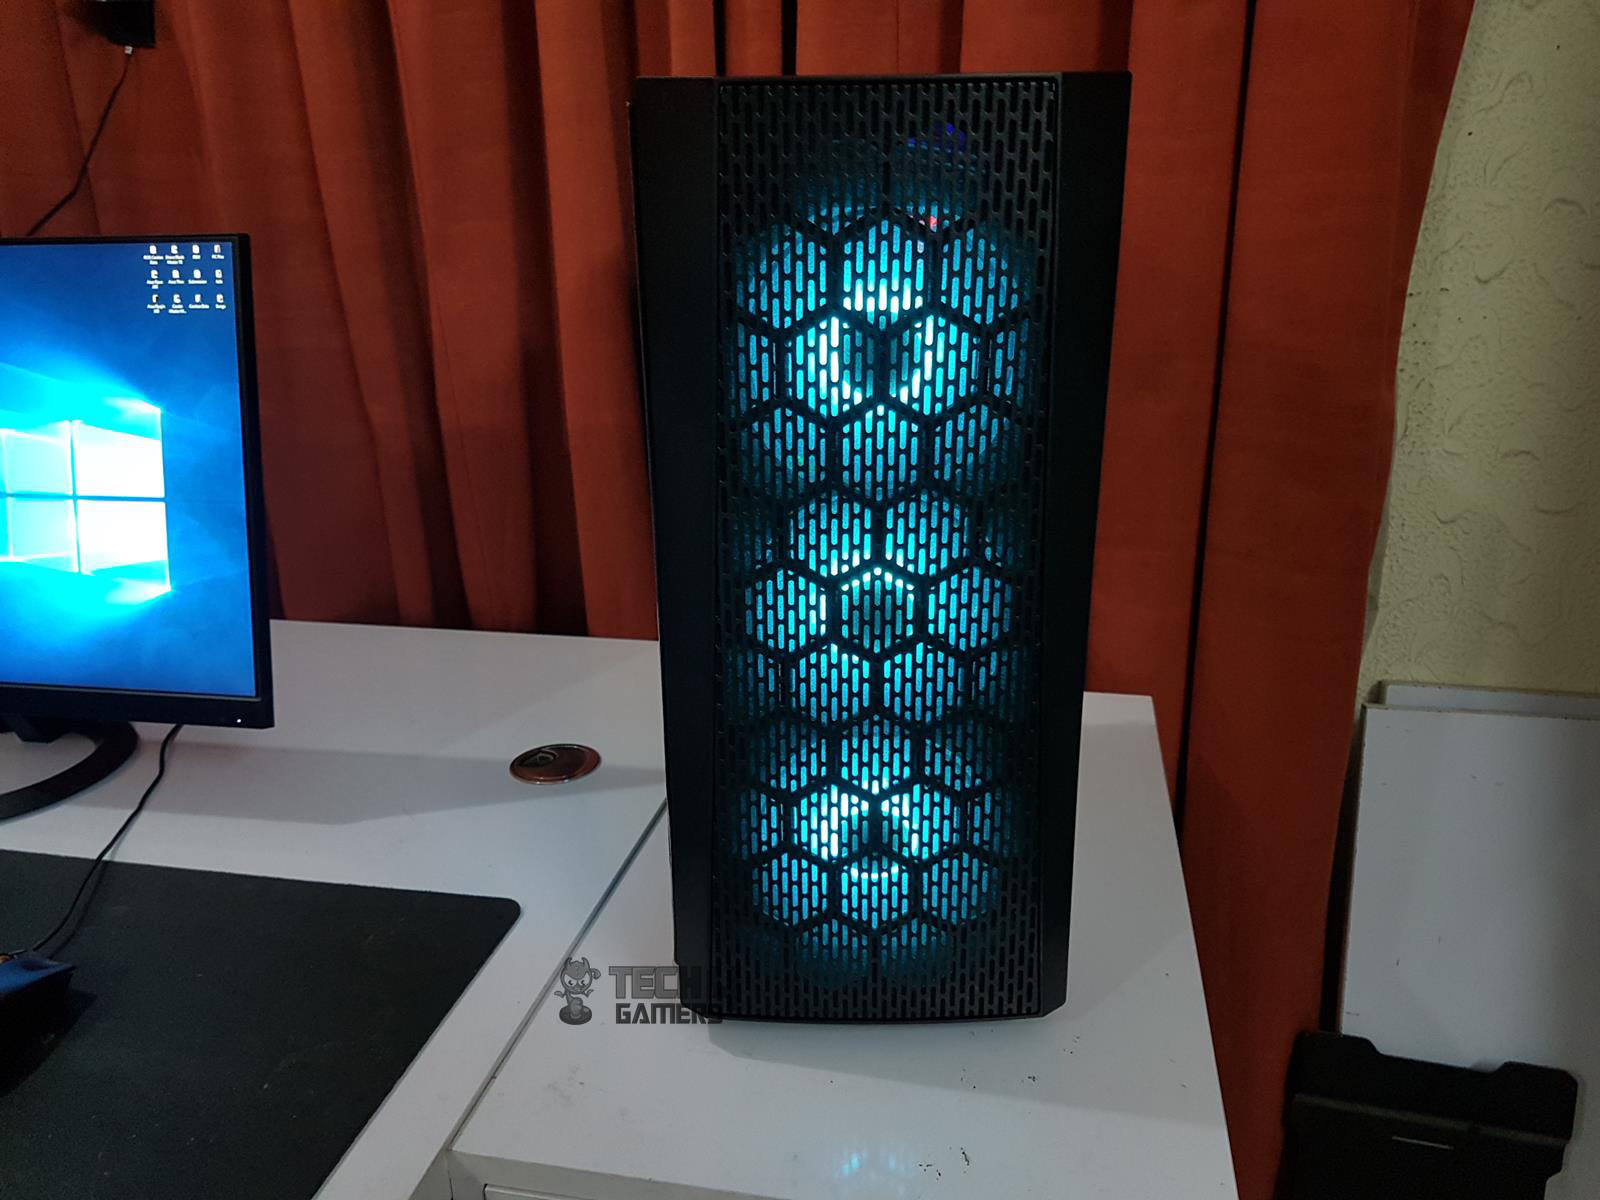
Removing the front panel reveals three pre-installed RGB fans, powered by the +12V GRB pin format. A large cutout on top and a small one at the bottom right facilitate cable routing. Thermaltake claims support for two 140mm fans, but the front cutout is optimized for 120mm fans, potentially limiting airflow.
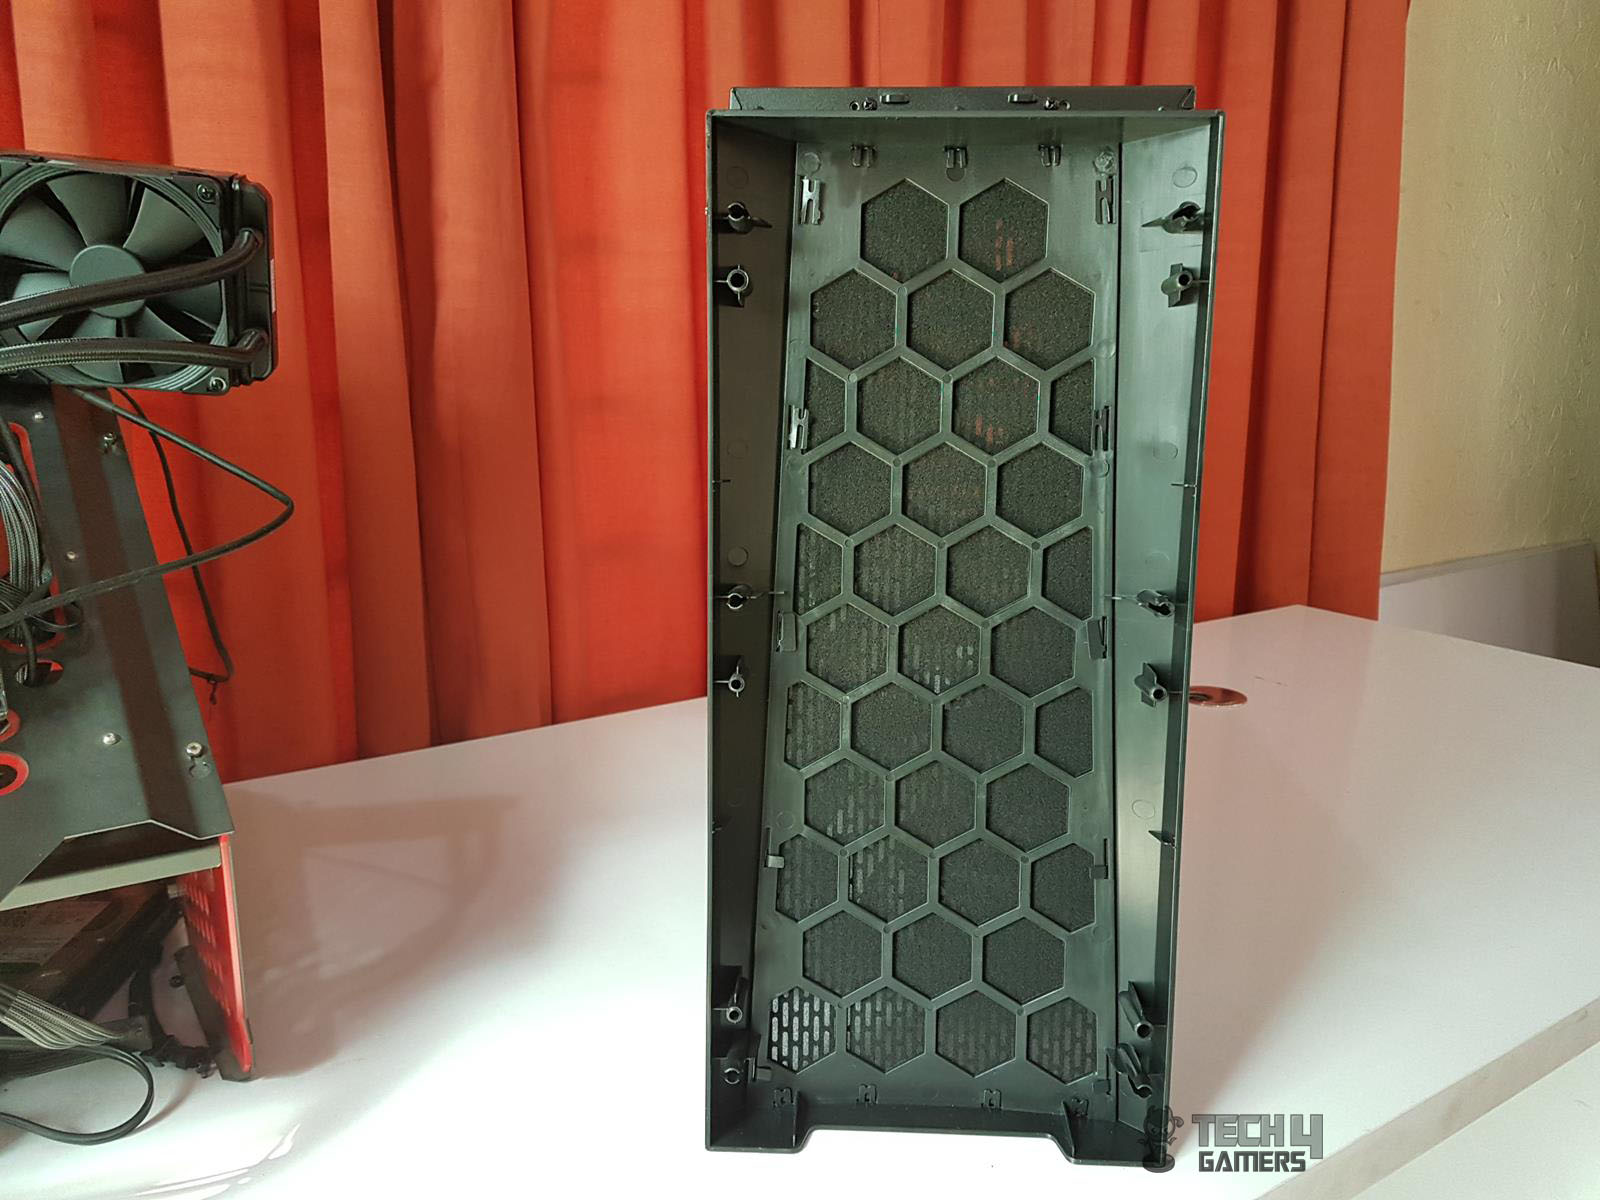
Each 120mm fan operates at 1000 RPM and 16 dBA, offering a silent experience, although the airflow may not be extensive at this speed. The front panel’s inside features a honeycomb structure with a thin foam layer, possibly serving as an air filter, but it appears non-removable.
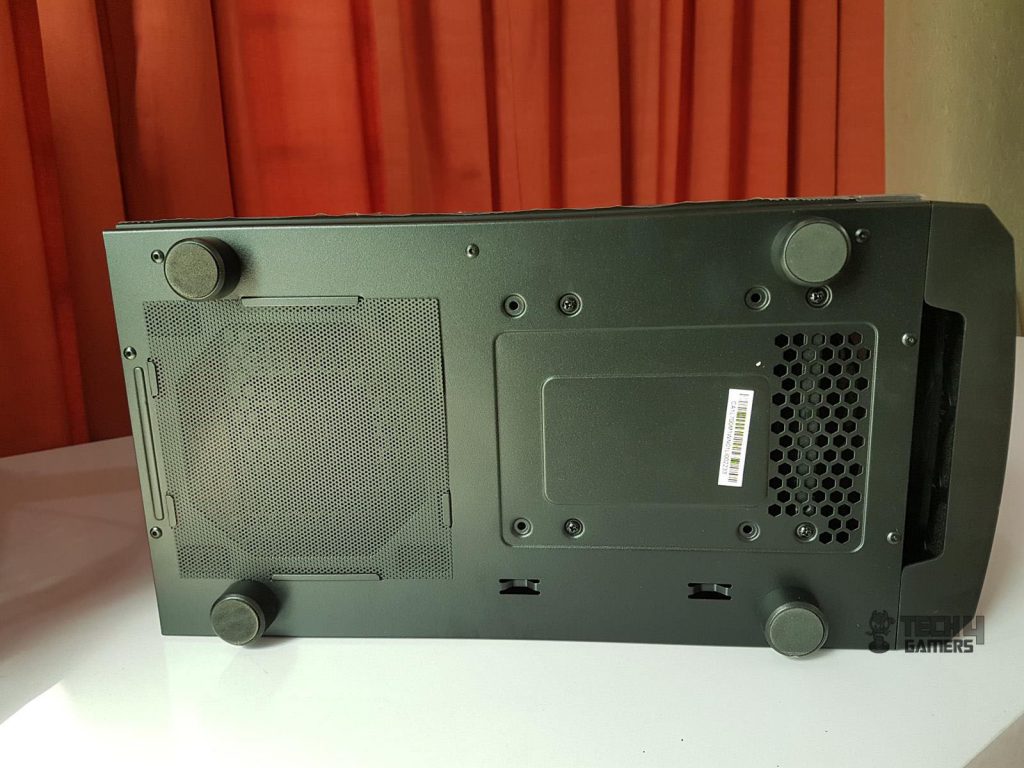
Bottom
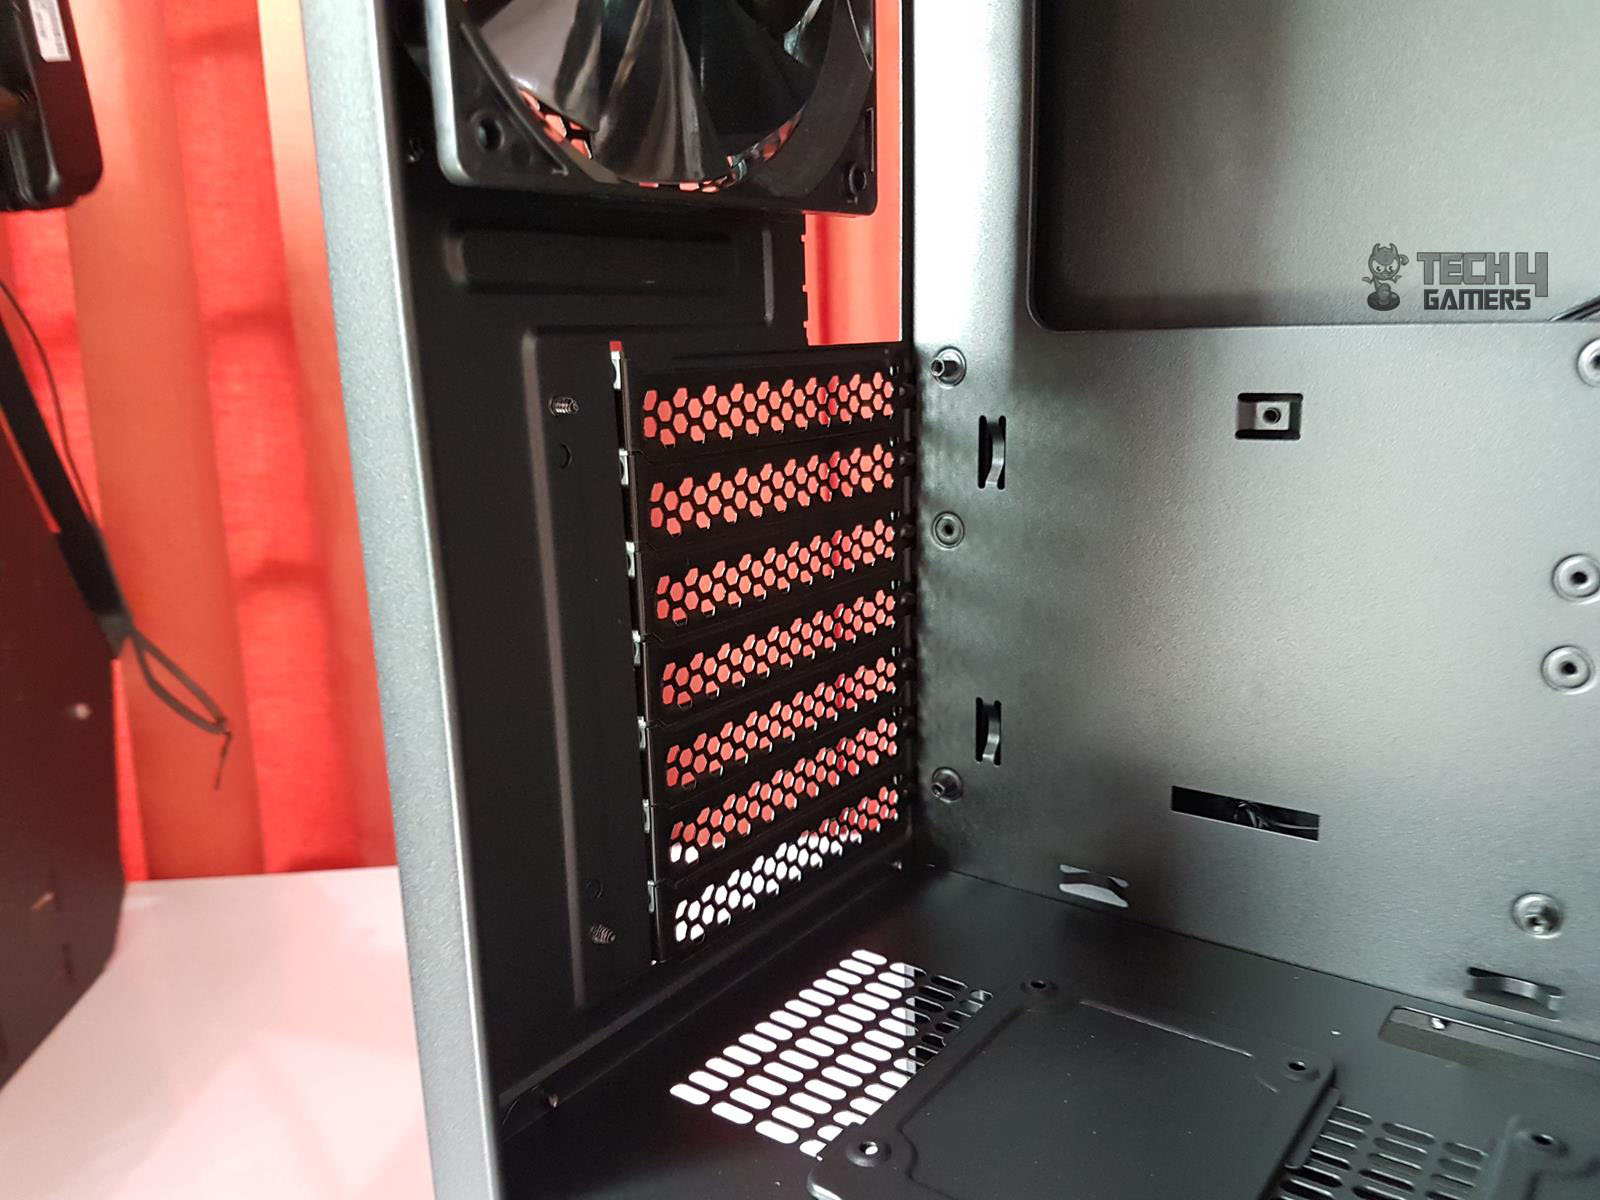
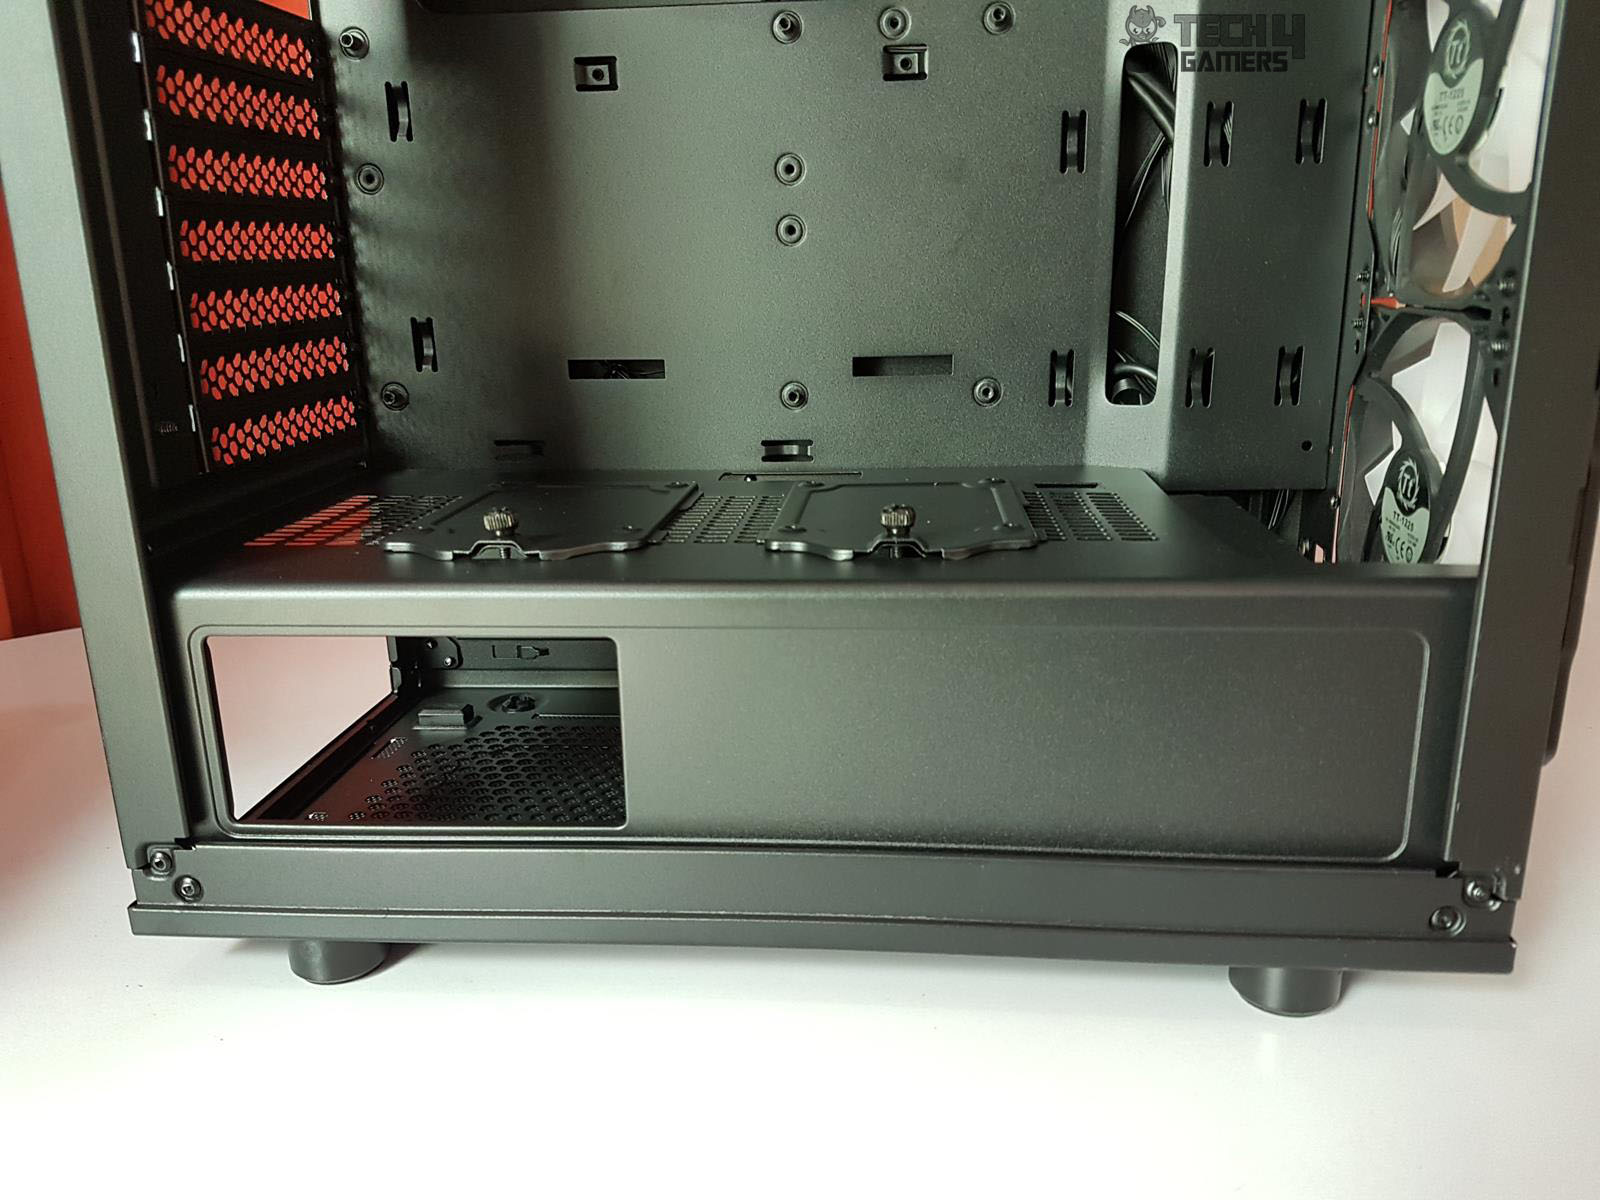
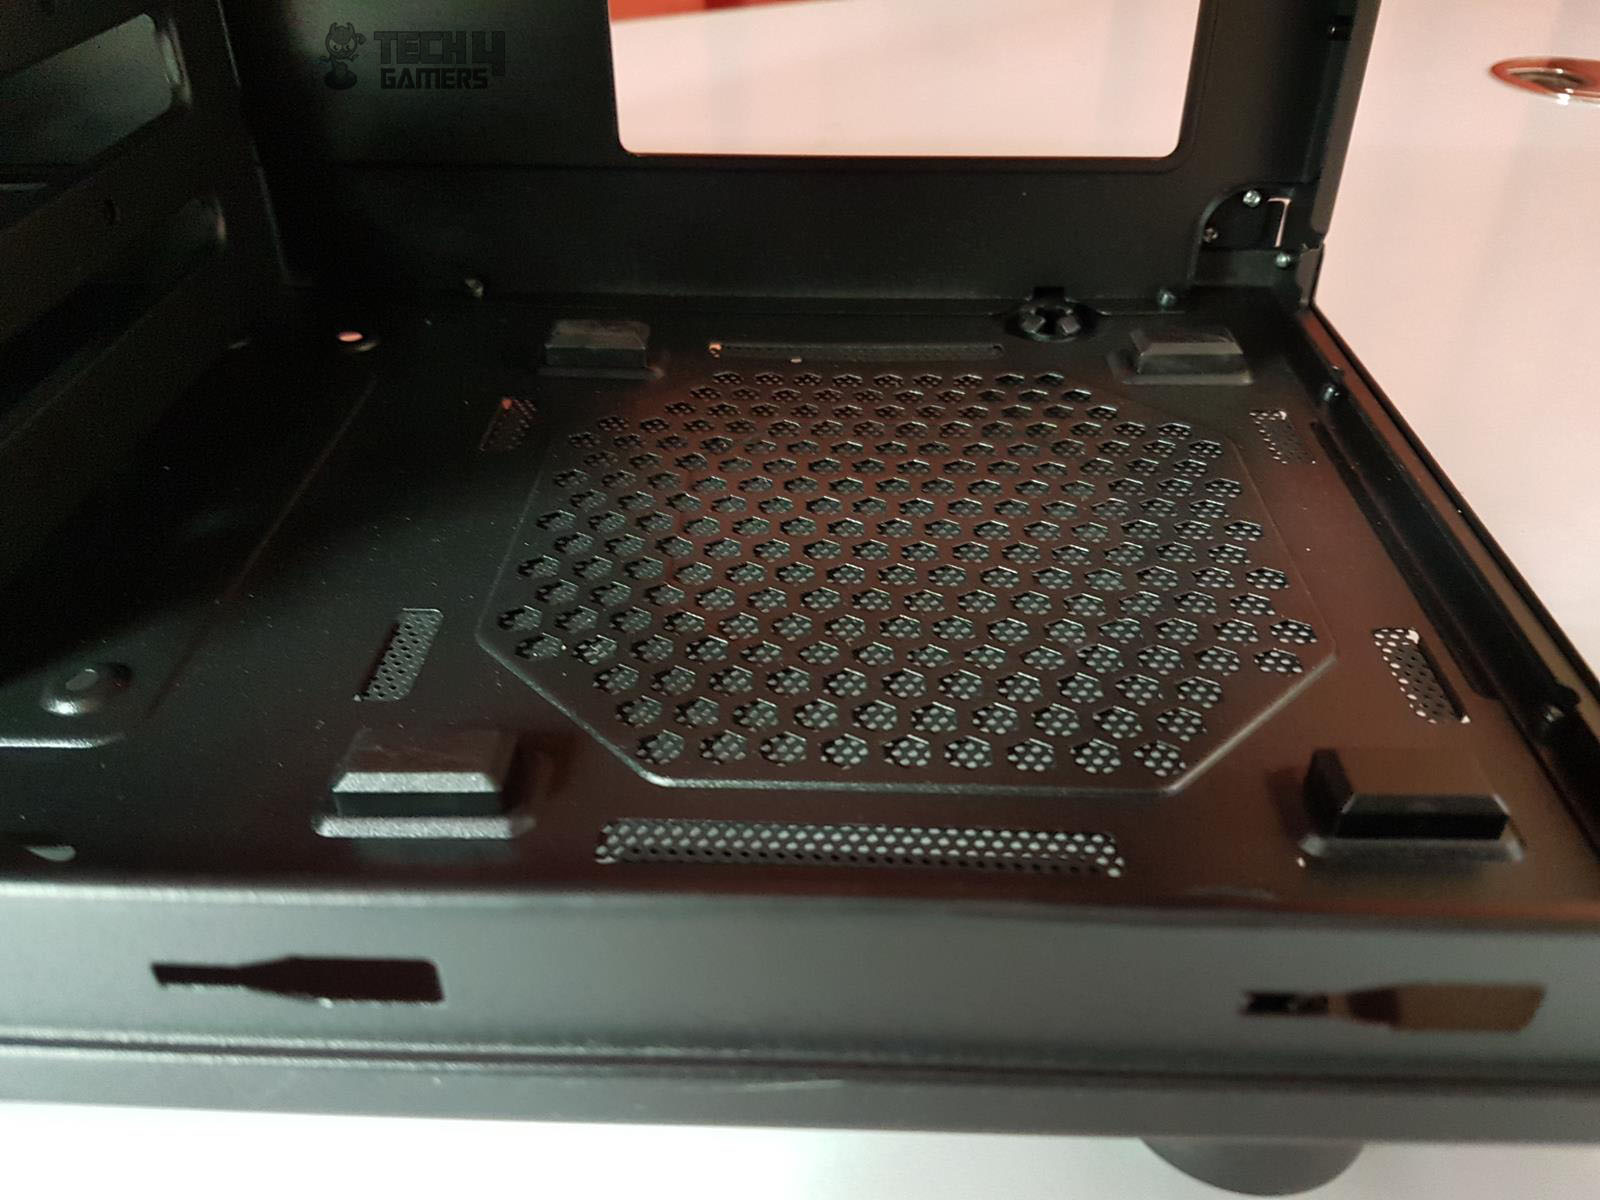
The chassis features a non-magnetic dust filter under the PSU area, challenging to reattach once removed. On the right side, 4 screws with 8 mounting holes allow flexible HDD cage placement with a 15mm gap between two sets. A perforated area exists on the right side of the HDD cage mounting.
A 17.5x124mm gap between the front panel and chassis frame serves as an air intake and aids in panel removal. Rubber-mounted feet elevate the chassis by 17mm from the surface.
Top
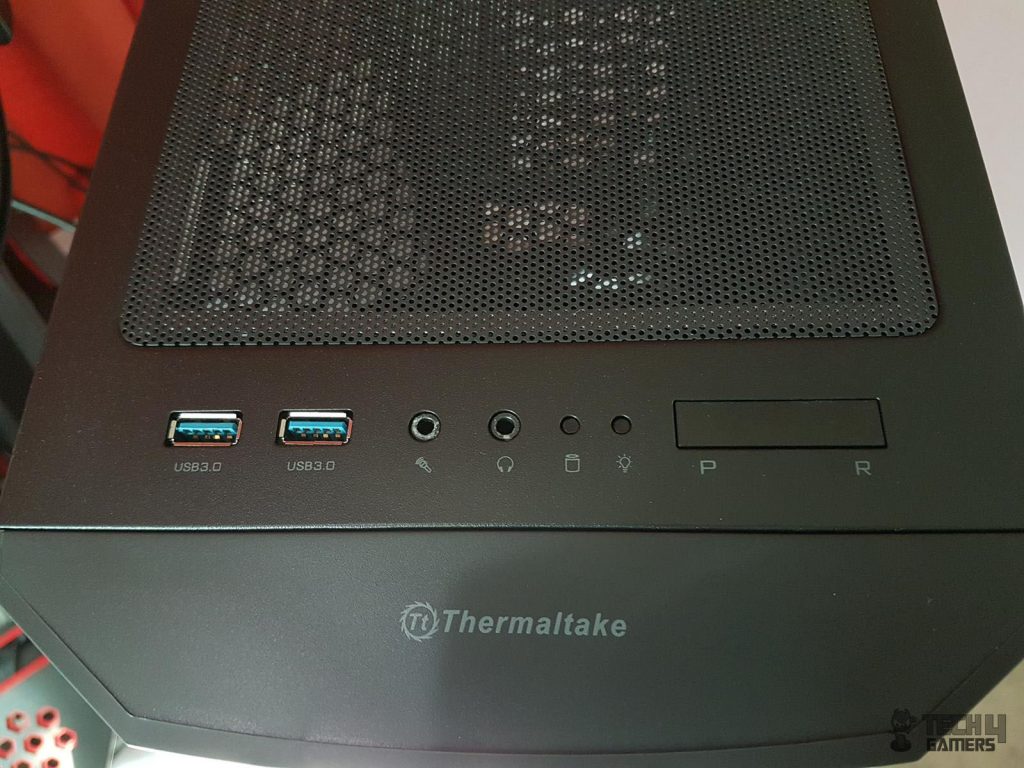
Now, onto the top side. A sizable magnetic dust filter shields the perforated section for 120/140mm fans. There’s a 30mm gap from the motherboard tray to the fan mounts, and the good news is that fan positions are adjustable. The I/O panel is conveniently placed on the top panel. Starting from the right side, we have two USB 3.0 ports, audio jacks, LED indicators, and a large-size Power and Reset button.
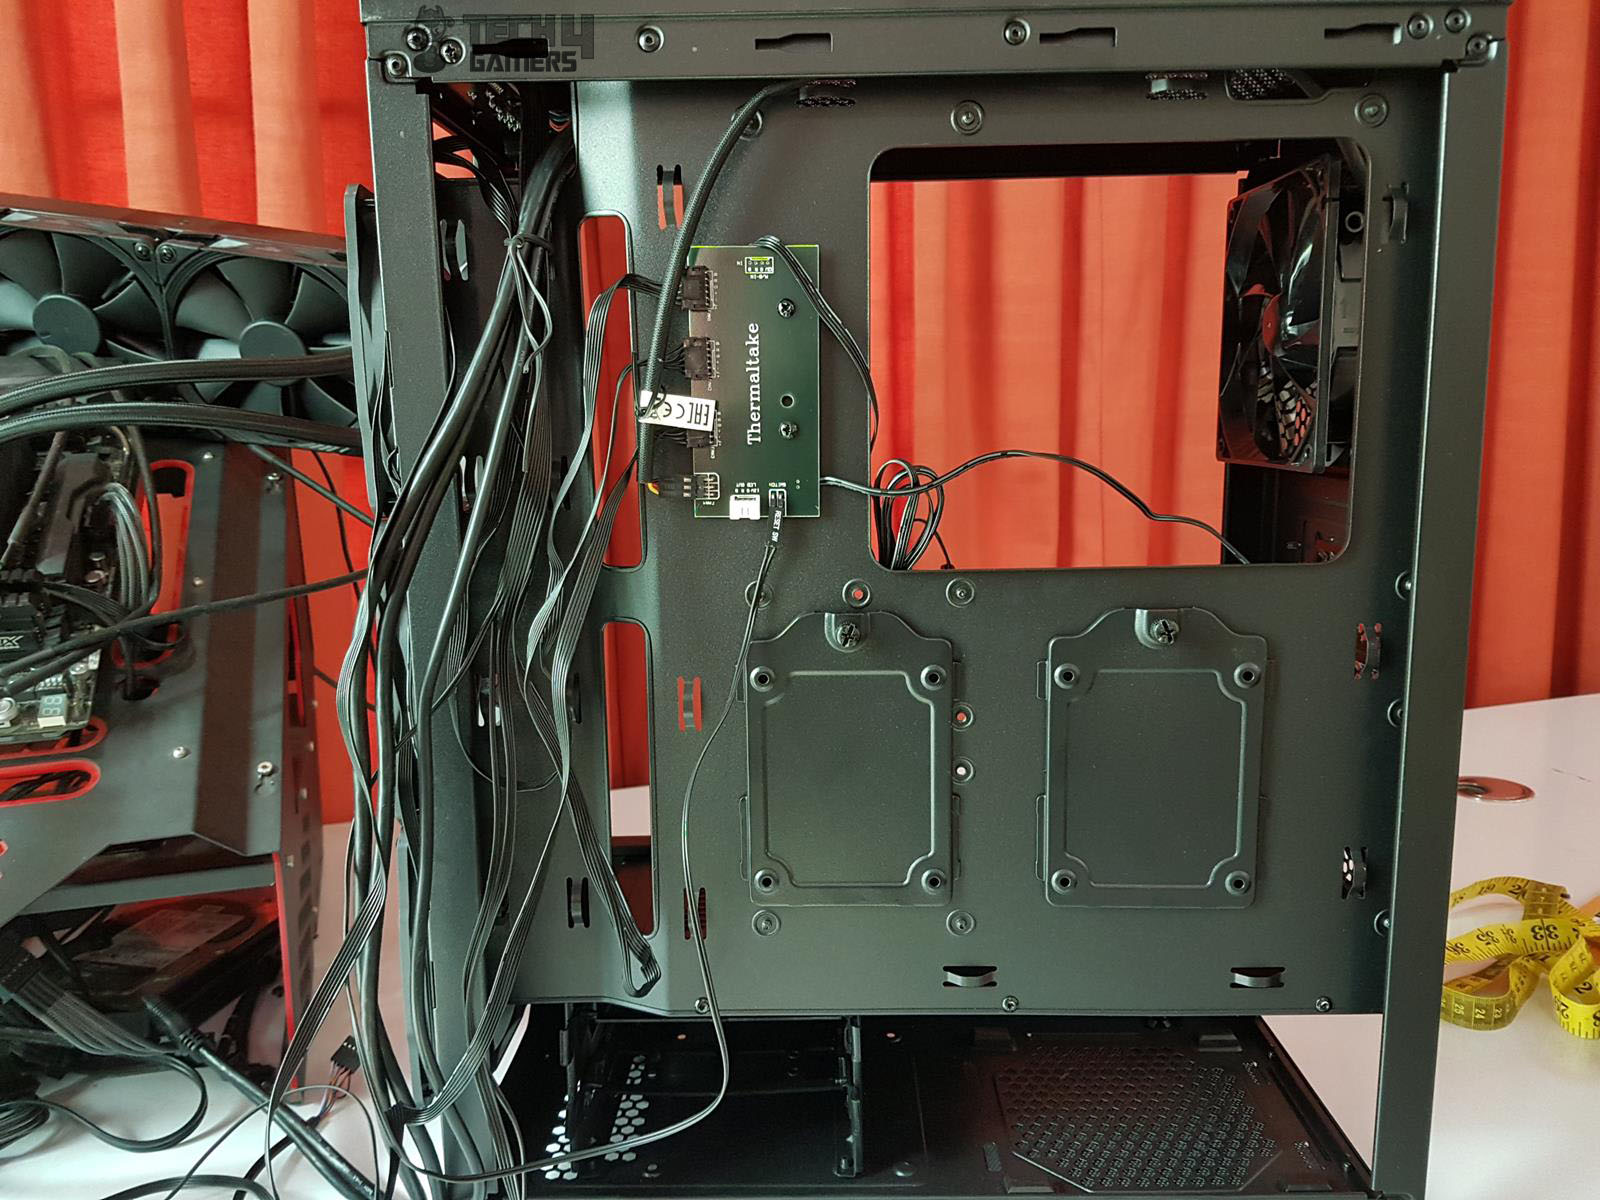
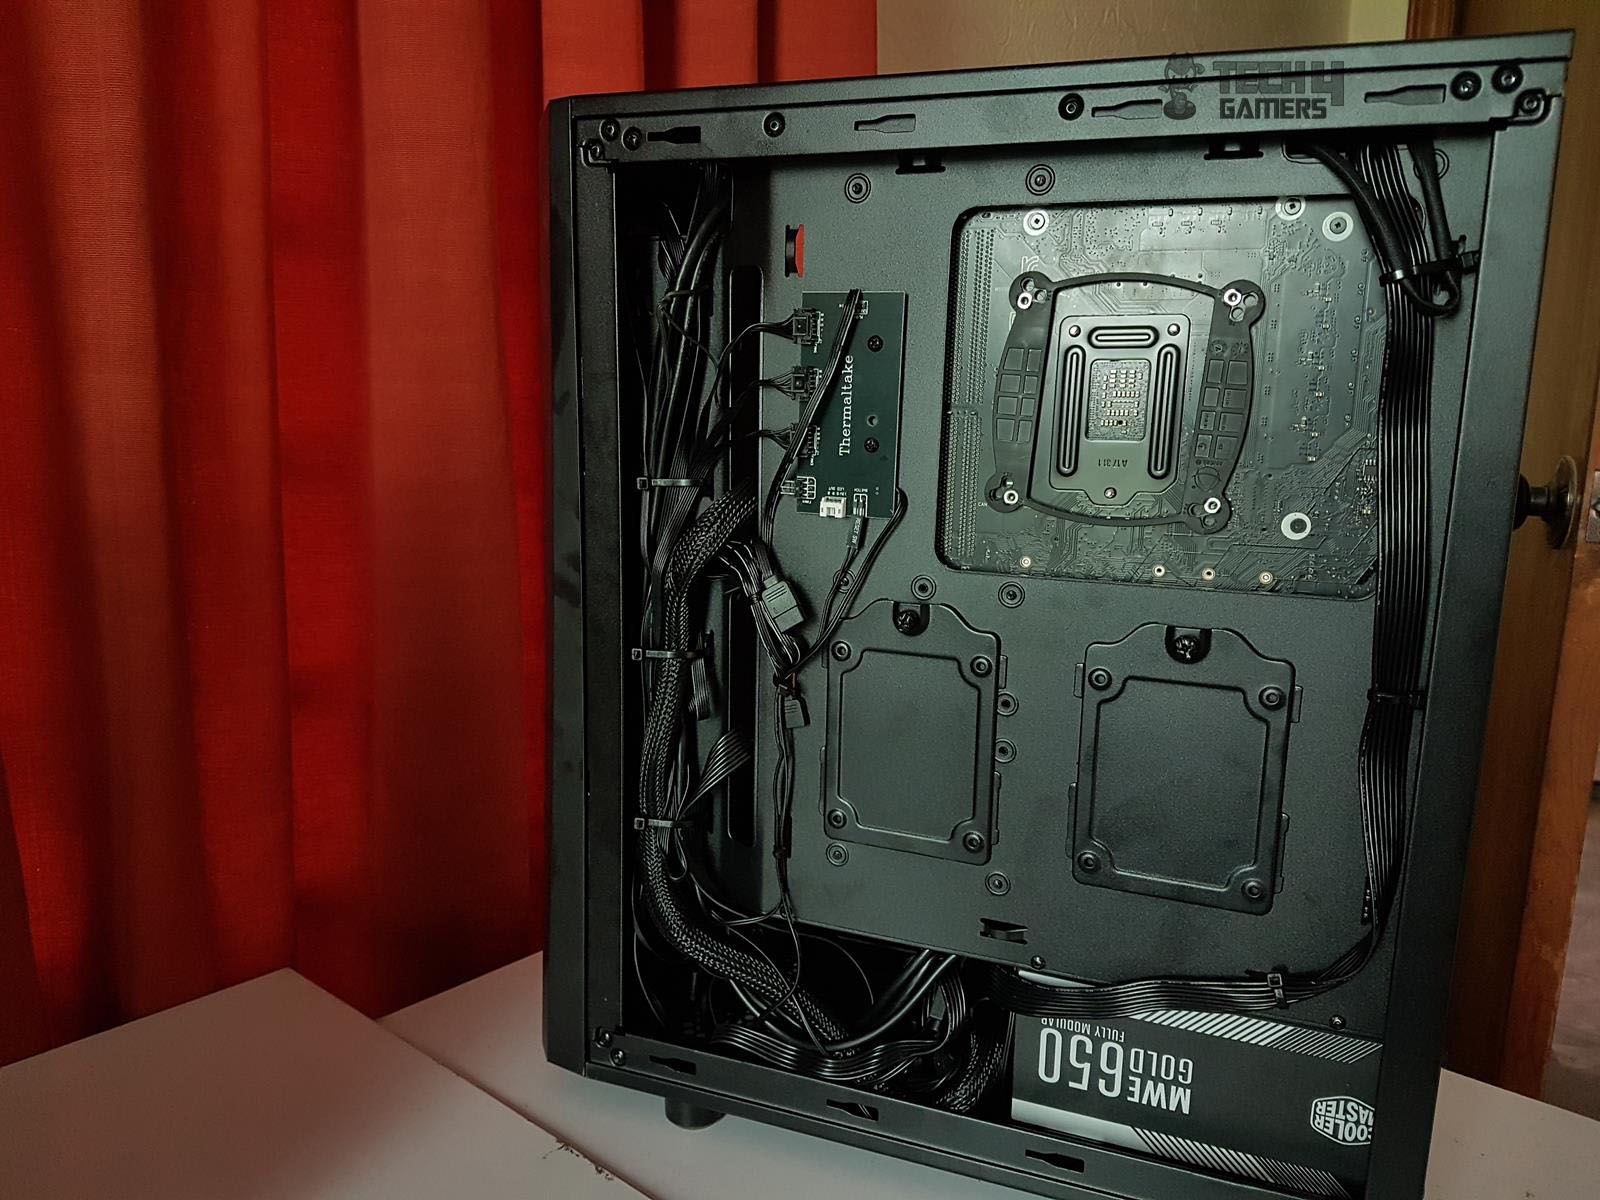
One button, two functions! Avoid pressing it from the center to prevent accidentally turning off the PC. Use the extreme ends for the desired operation. The reset button also serves as the RGB lighting controller by default. Find the dedicated controller PCB on the chassis’s backside, with the Thermaltake logo and name in white on the front panel.
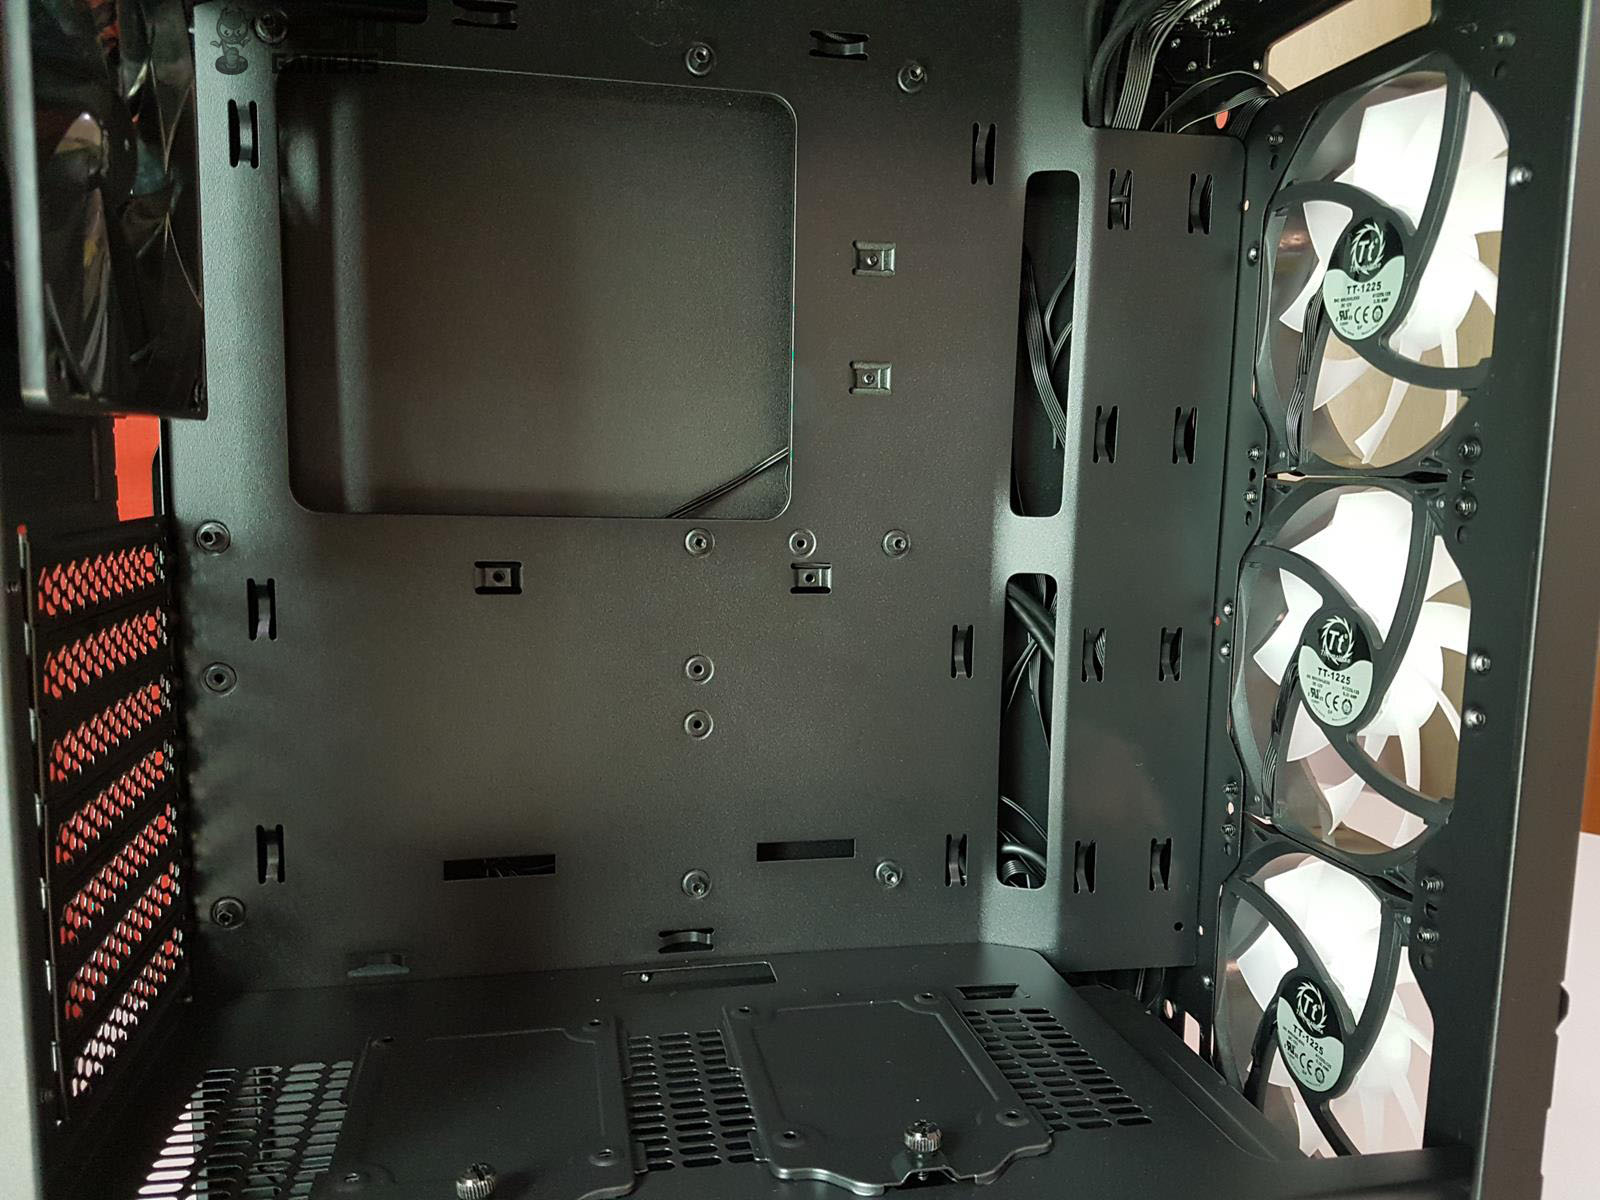
Inside View
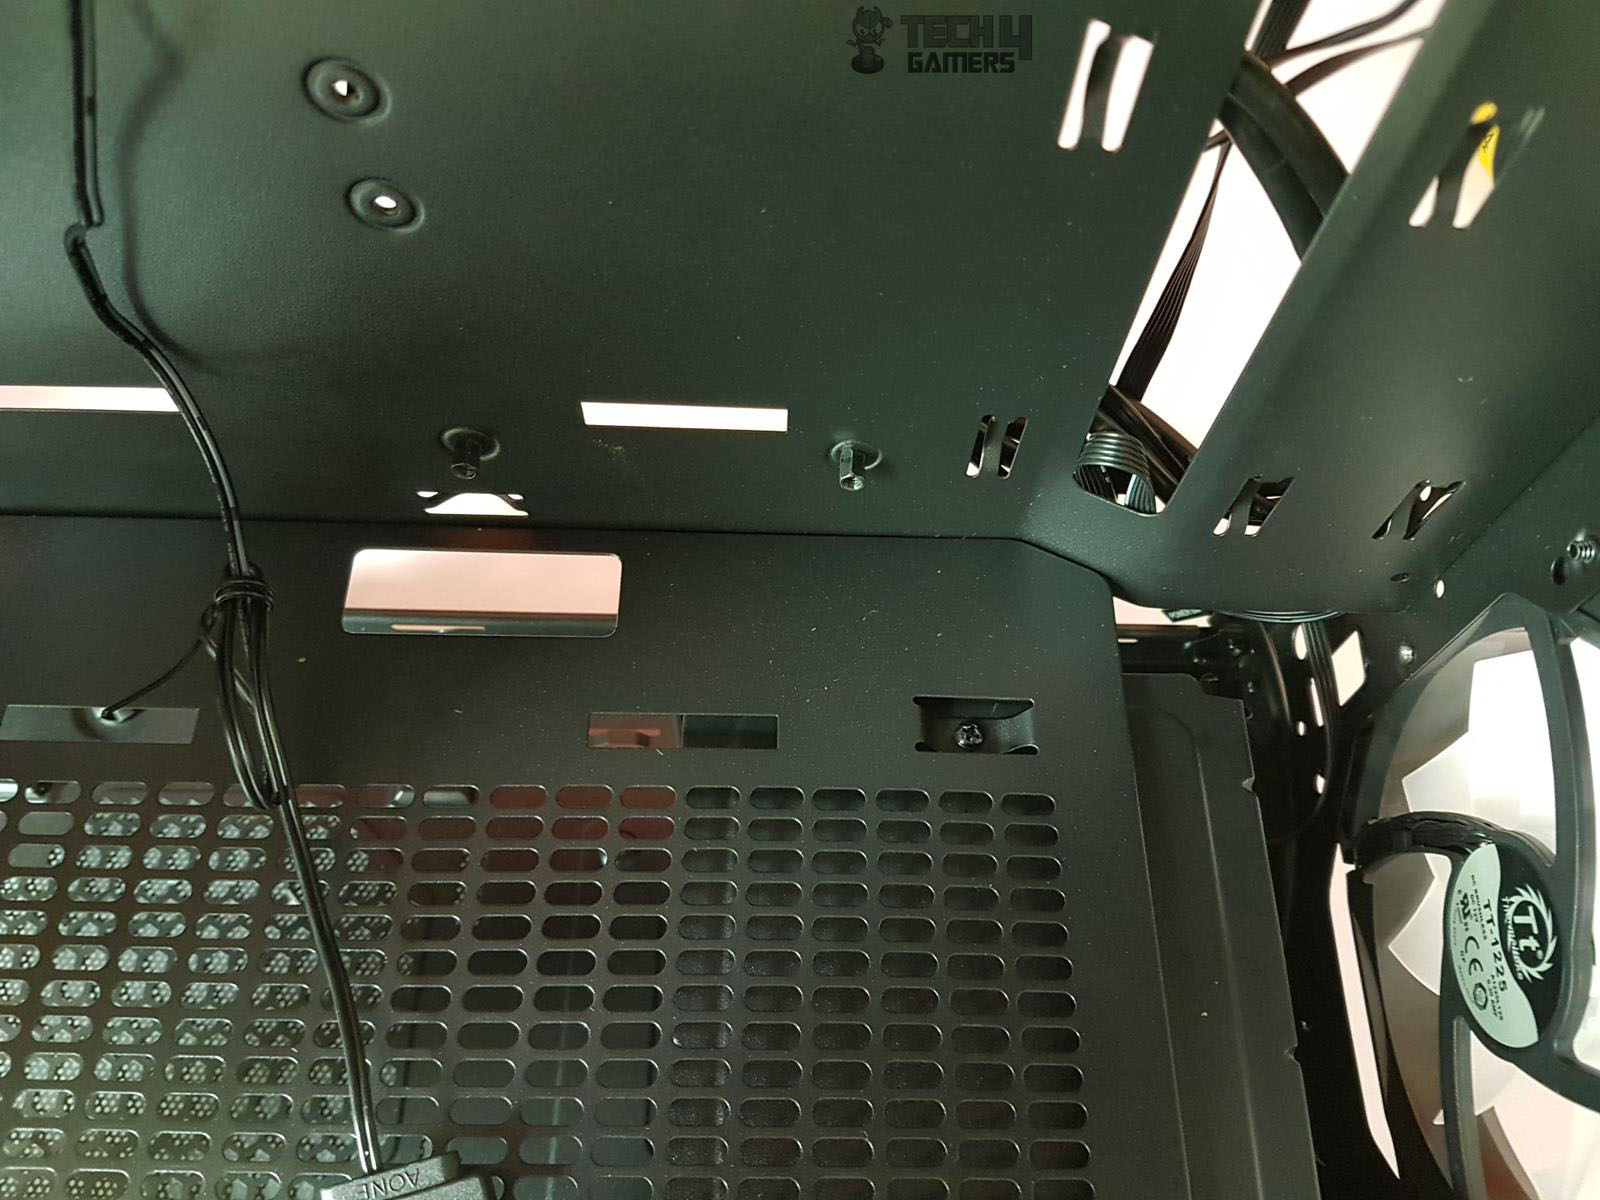
Inside, the chassis is spacious with pre-installed standoffs but lacks size markings. The solid, non-flexing motherboard tray has smart cable management cutouts. A sizable CPU cutout simplifies cooler installation. However, the 28mm top displacement rules out top-mounted radiators as specified.
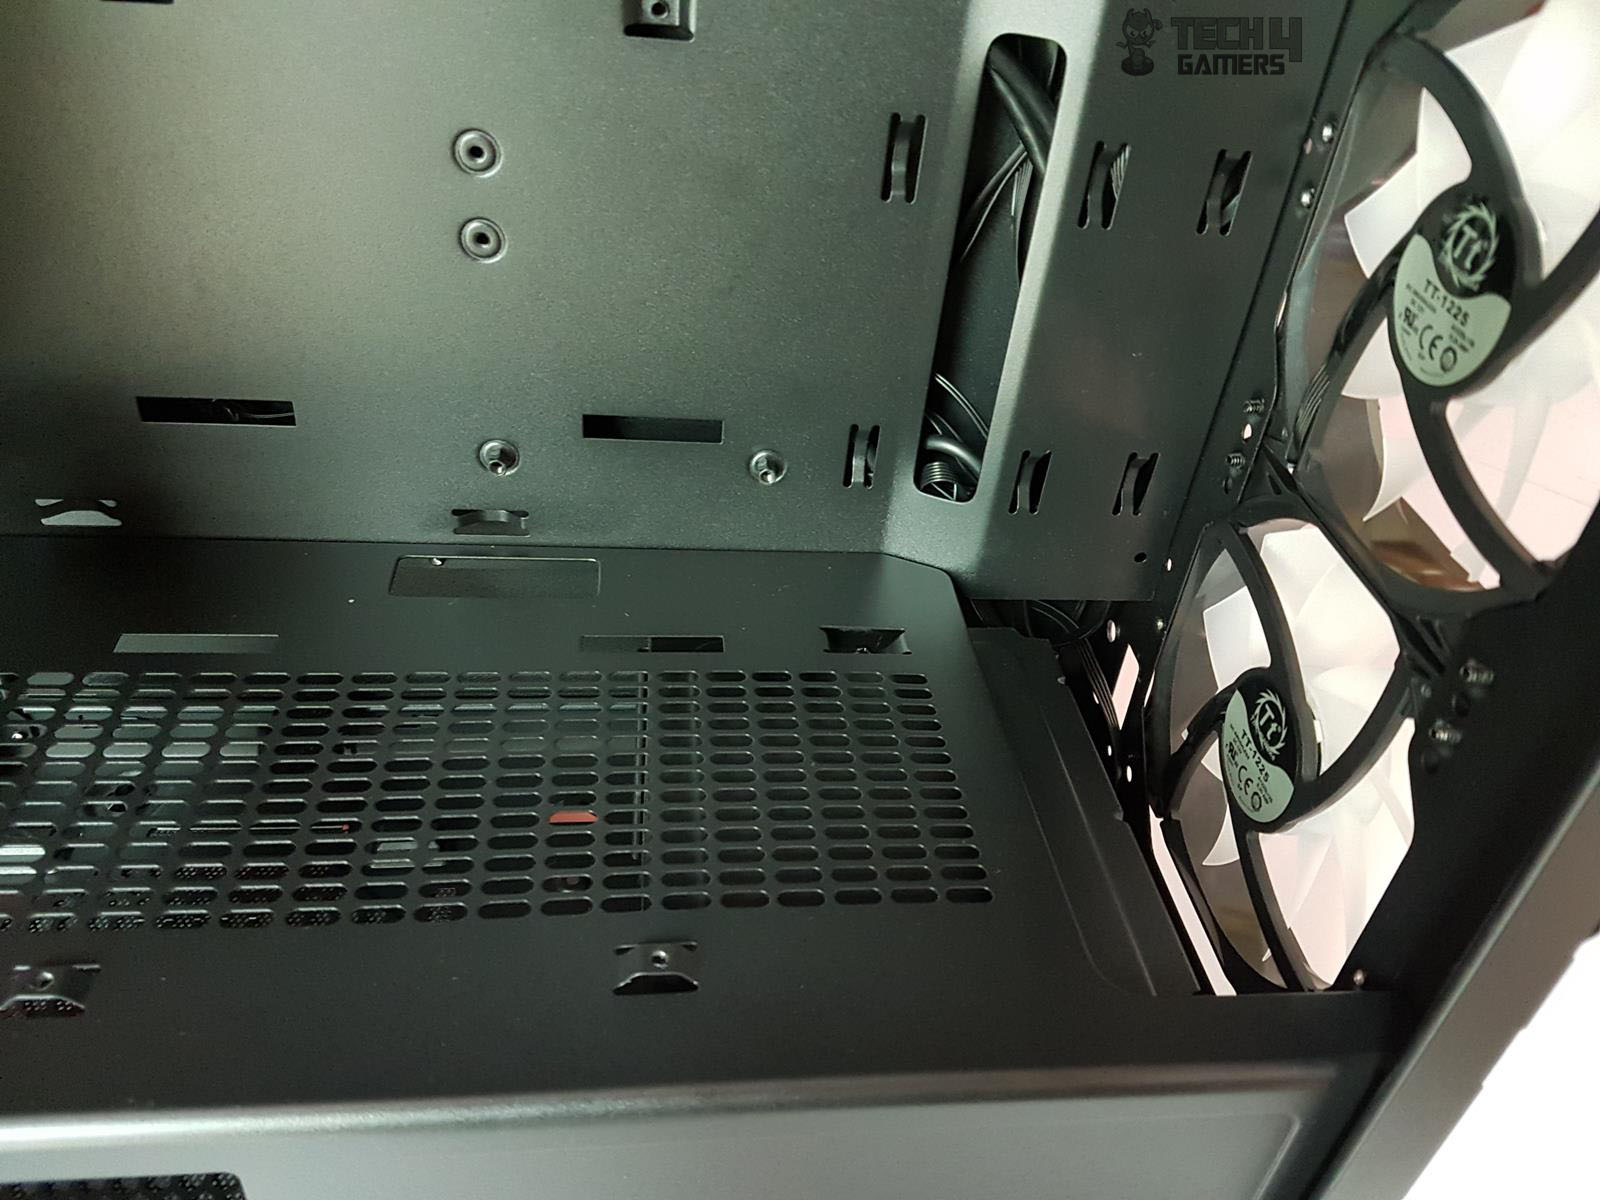
A single top-left cutout is provided for 8-pin EPS and rear fan cables for cable routing. Ensure EPS cables are passed before installing the motherboard due to top-side restrictions and chassis frame coverage on the backside.
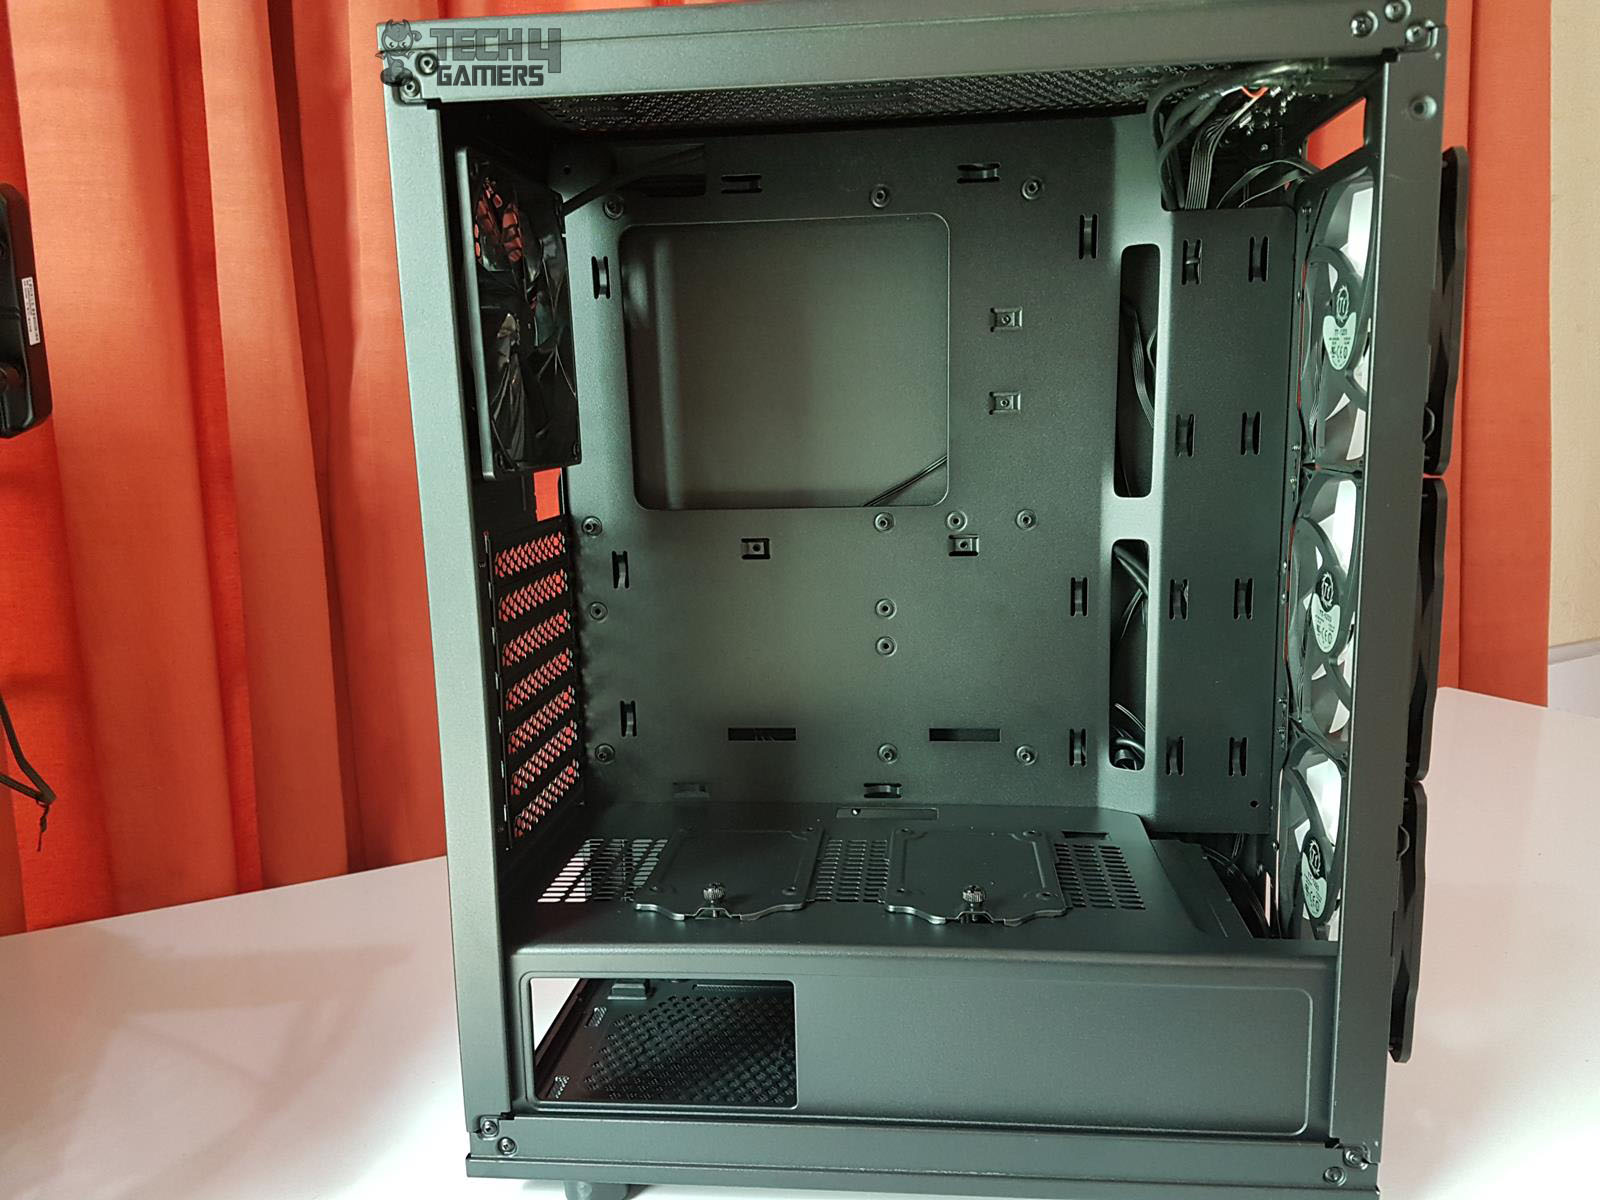
Single 120mm black fan at the rear, 1000 RPM, 16 dBA, non-RGB. PCIe slot covers aligned with the chassis frame, making graphics card installation/removal tedious. Supports up to 330mm graphics card length and 160mm CPU cooler height. PSU shroud with left cutout for PSU visibility, solid surface facing tempered glass, perforated top for ventilation.
You can see the backside of the front-mounted fans, and there’s a large cutout on the top right side for the I/O panel cables.
The gap between the shroud and the front of the chassis is approximately 62mm. The HDD cage, in its default position, takes up 22mm of this gap, leaving a 40mm gap for the radiator only. Shifting the HDD cage behind could increase this to 60mm, but it would affect PSU space, and a 160mm PSU is already a tight fit with all cables.
Consider these aspects when planning your build. There’s no space between the shroud and the side frame for an LED strip.
Time to check out the right side of the chassis. The motherboard tray is recessed, creating 24mm of cable management space on the left. There are 18 cable tie points, with 8 in a group of two on the left. Use this area to route most cables. Other areas offer about 13mm of spacing for cable management.
2.5″ SSD brackets mount behind the motherboard tray. At the bottom, there’s an HDD cage with two caddies instead of three. The PSU area allows for 190mm of space, but the raised feet lack anti-vibration rubber pads on top, which is surprising.
There is a built-in RGB switchboard in black color located on the backside of the chassis. There is a motherboard sync cable coming out from its top. At its bottom, we have a two-pin port on which the Reset cable can be plugged in to control the lighting modes.
Also, there is an LED out port as well, allowing the user to connect the RGB LED strip. The left side of the board has three 6-pin headers for controlling the lighting of the front three fans.
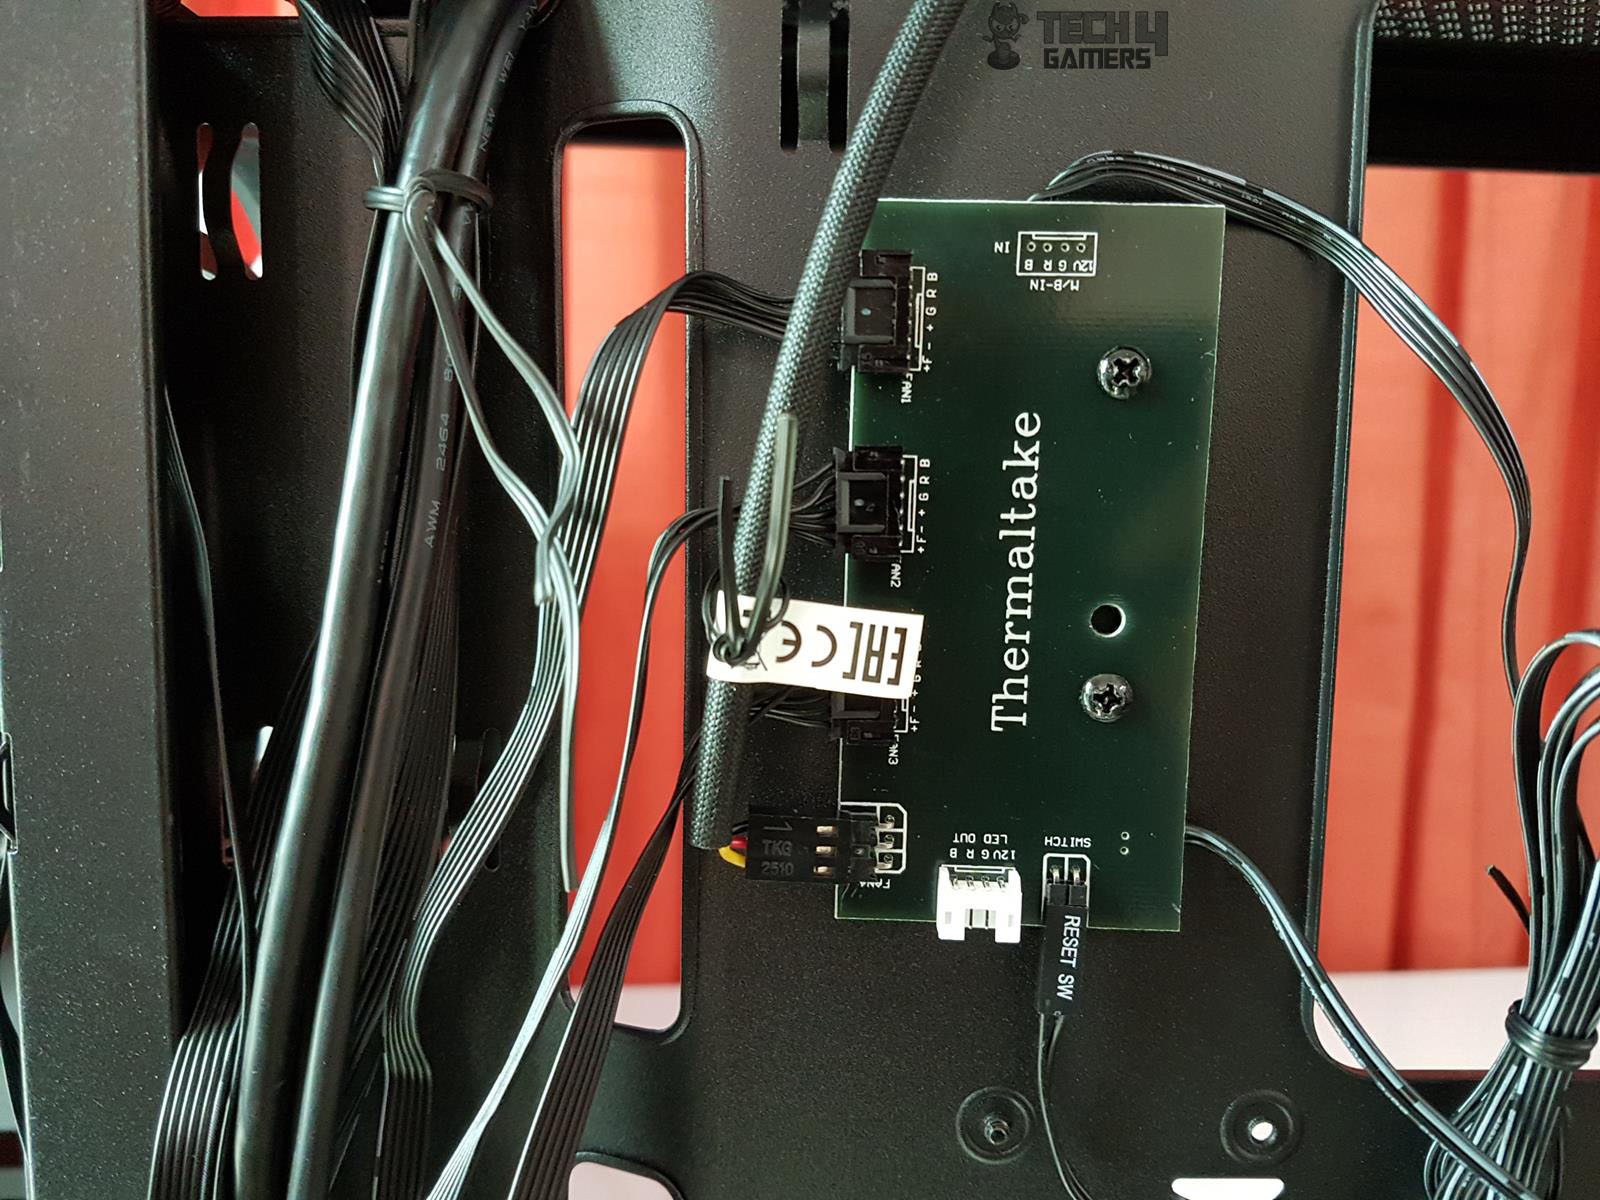
The fan speed on this board isn’t adjustable, but you can control fan lighting using the Reset button or by connecting the board to your motherboard’s lighting header (e.g., AURA Sync, RGB Fusion, Mystic Lighting, Polychrome RGB, Biostar LED DJ). Thermaltake has enhanced lighting control for this chassis.
RGB LED Lighting
With the chassis design discussed at length, it is time to take a look at the RGB lighting solution. We have a total of 3 120mm RGB LED fans pre-installed on the front side of the chassis. We have a total of 16 modes on these fans:
- Mode 1: RGB Lighting.
- Mode 2-8: Static colors (Red, Yellow, Green, Cyan, Blue, White, Purple)
- Mode 9-15: Breathe mode (Red, Yellow, Green, Cyan, Blue, White, Purple)
- Mode 16: Turns off the lighting
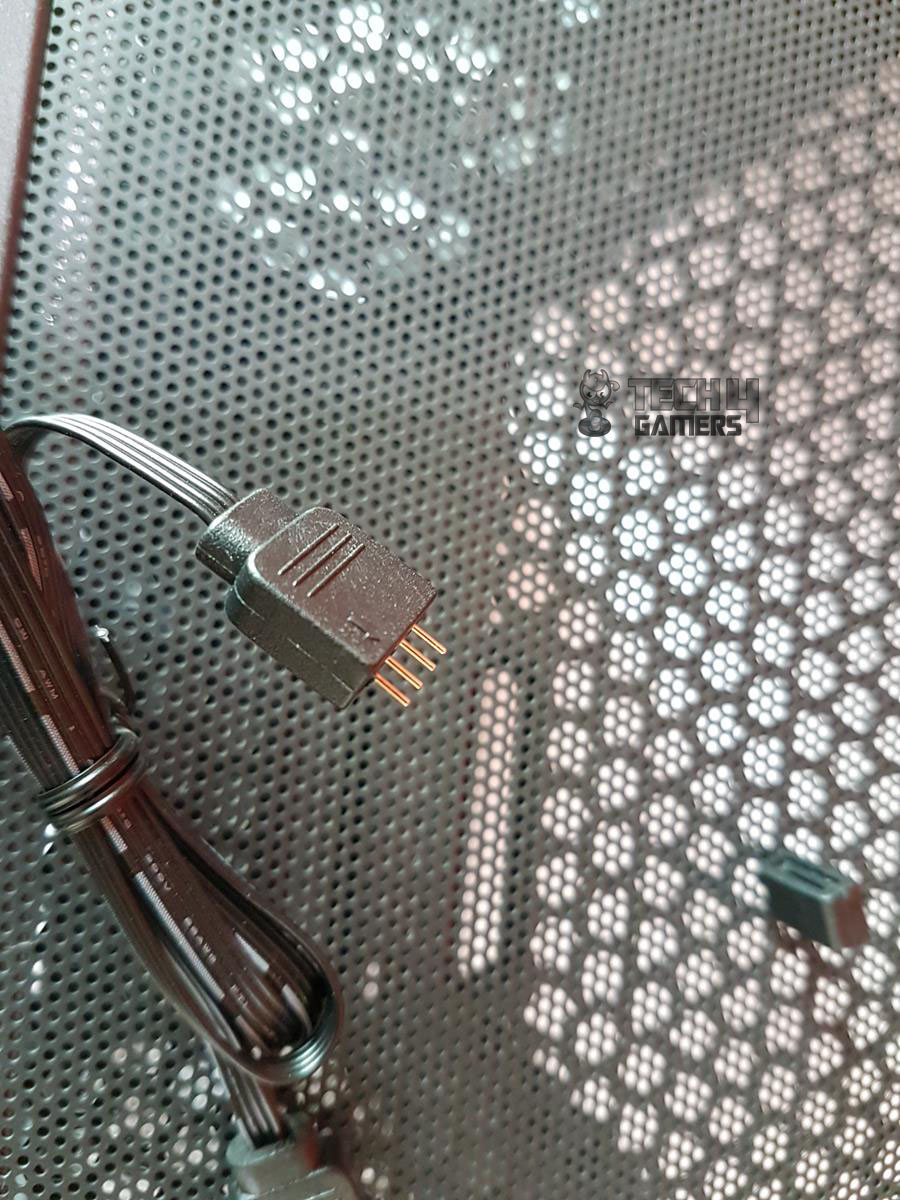
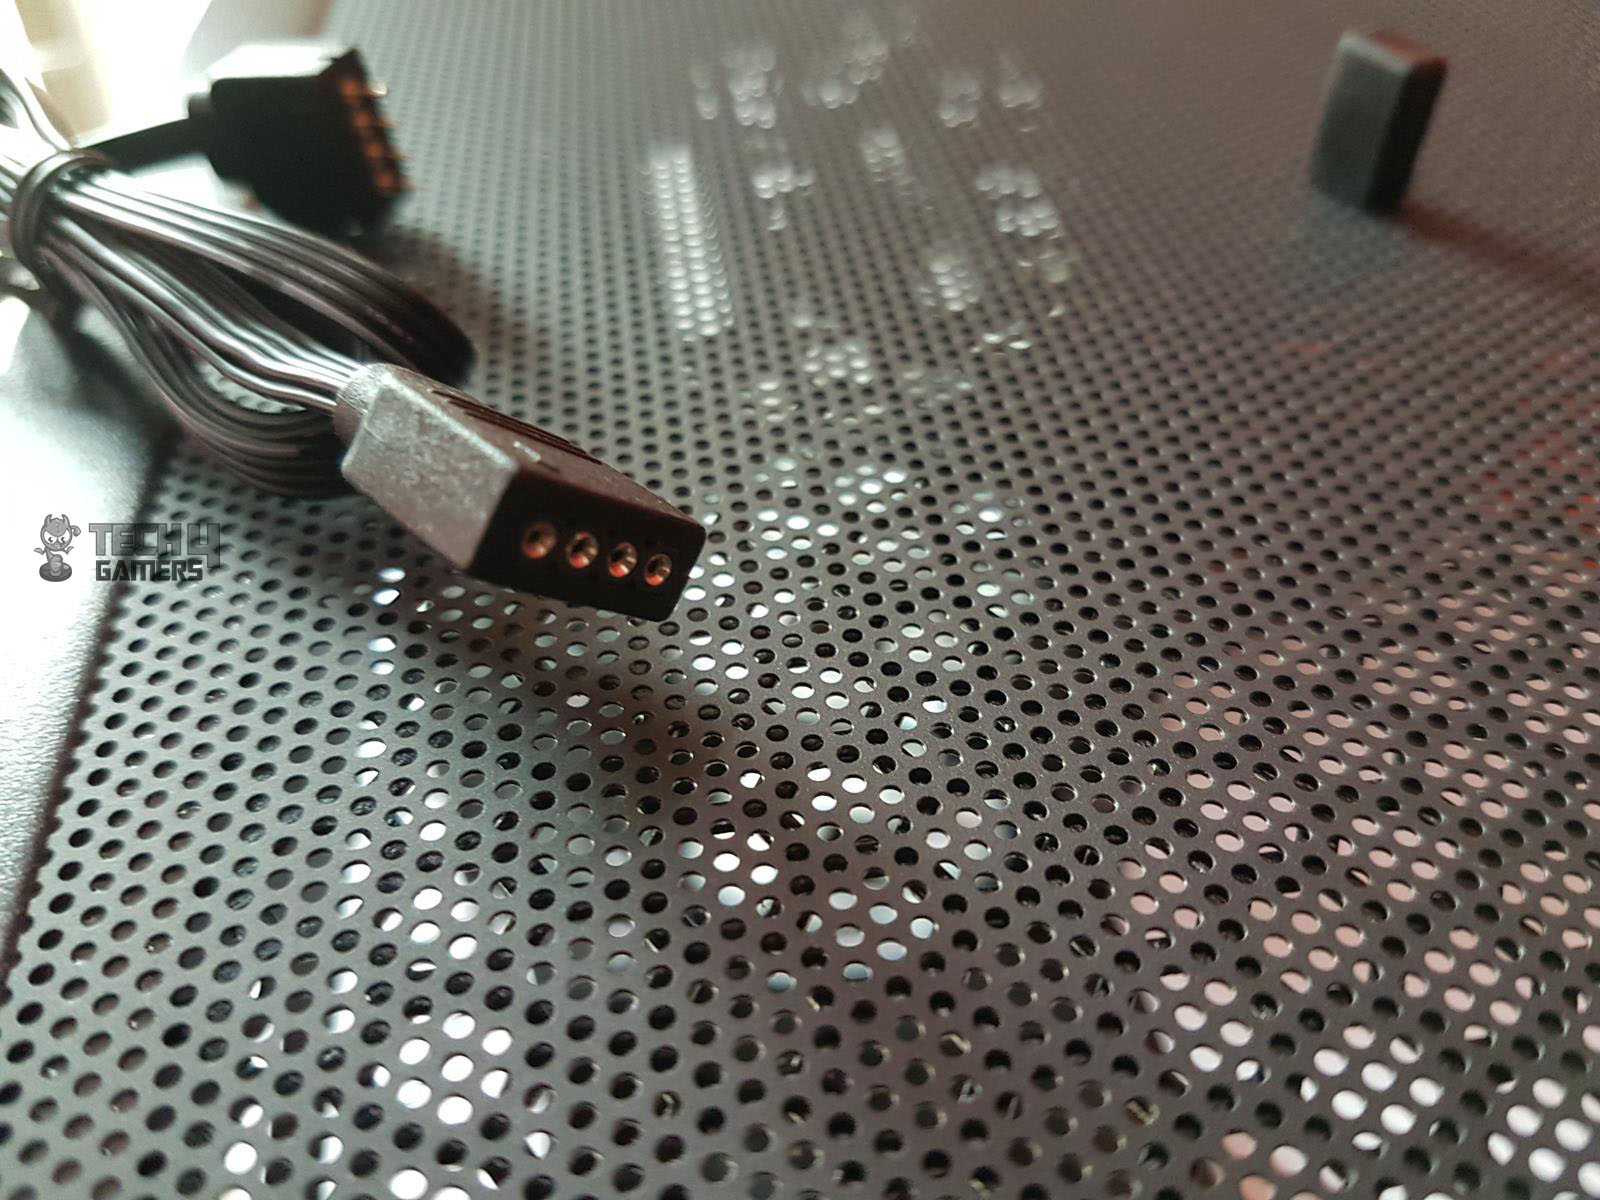
Thermaltake fans use a 6-pin proprietary connector, so default speed control is a no-go. To switch control to your motherboard, hold the RGB button (top I/O panel Reset) for 3 seconds. Connect the sync cable to a motherboard header. After two red blinks, your motherboard’s in charge.
Here are some pics for your eye pleasure.

Building/Installation
Following is the configuration of the test build:
- Intel i7 8700k
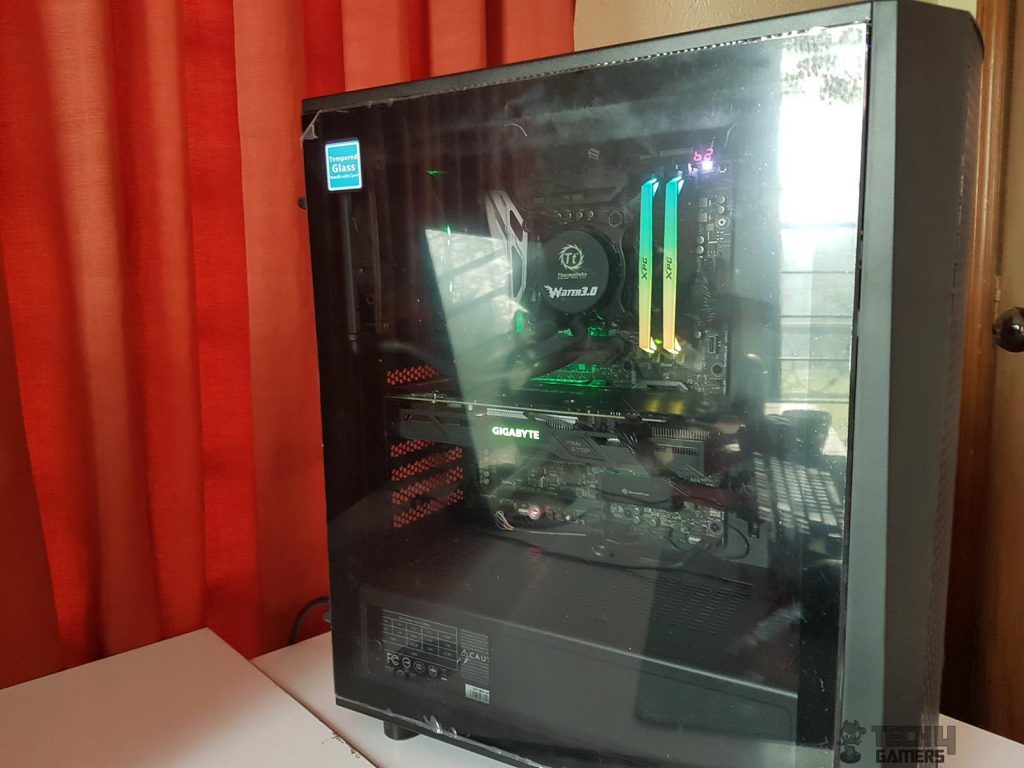
- Thermaltake Water 3.0 120mm CPU Cooler
- ADATA XPG Spectrix D41 2x8GB @ 2666MHz
- Gigabyte GTX 1060 6GB Gaming G1
- Samsung 256GB PM961 SSD
- Cooler Master 650W MWE
Installation was smooth in this chassis. I began with the motherboard and installed the CPU cooler. The Thermaltake Water 3.0 120mm AIO was used, mounted on the rear with the provided black fan. The stock fans were used for testing. The Thermaltake ToughPower 750W RGB PSU couldn’t fit due to its 180mm length.
I wish the HDD cage was removable. I routed cables through the PSU shroud cutout, connecting USB 3.0, HD Audio, and front panel connectors. The EPS cable was challenging due to the space constraints mentioned earlier.
Install the EPS cable before the motherboard. The graphics card was installed, and the remaining cables connected—24-pin ATX and 8-pin PEG. Cable management was hassle-free, thanks to the fully modular PSU.
Here are some pictures of the build:

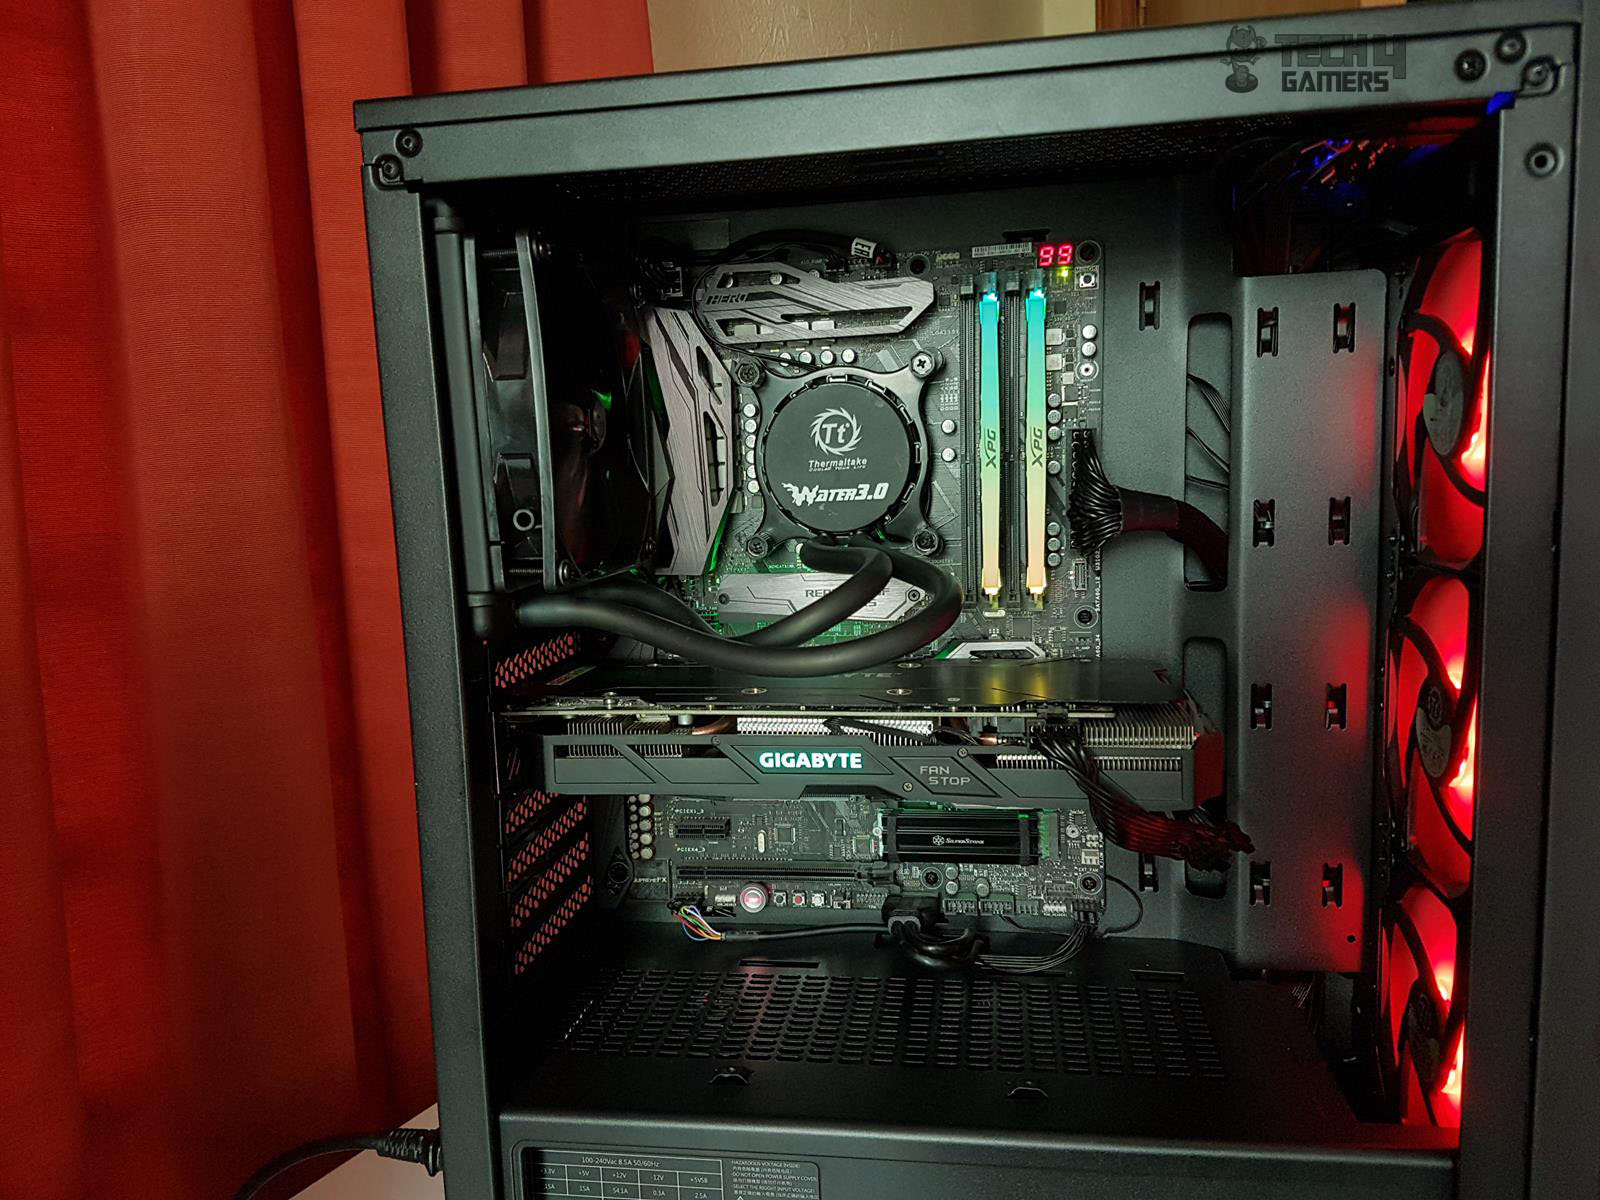
The final build achieved a clean and sleek look, reflecting Thermaltake’s design goal for the chassis.
Testing
I tested the chassis by running the CPU at 4500MHz using AIDA64 for 30 minutes, calculating the average core temperatures. After 30 minutes of idle time, I stressed the graphics card with Furmark for another 30 minutes, recording the maximum temperature. Tests were conducted with and without the front panel.
Results indicate a mere 2°C difference with the front panel on/off. This underscores the chassis’s commendable thermal performance with stock fans and the front panel on.

It is still summertime here, and certain environmental noises are beyond my control; hence I did not measure the acoustics of the completely assembled PC. But based on our testing, the build was silent.
Should You Buy It or Not?
After a thorough examination of the Thermaltake Versa J24 TG RGB PC Chassis, I’ve concluded that:
Buy It If:
✅You prioritize aesthetics and RGB lighting: The Thermaltake Versa J24 TG RGB edition offers a sleek design with a tempered glass panel and three pre-installed RGB fans, providing an attractive visual appeal.
✅Effective cooling is a priority: With versatile cooling options, including support for up to three 120mm fans or a 120/240/360mm radiator on the front, this mid-tower chassis ensures efficient heat dissipation, contributing to optimal performance.
✅You appreciate thoughtful design features: The chassis includes a PSU shroud, dedicated brackets for 2.5″ SSDs, and cable management cutouts, offering a clean and organized build.
Don’t Buy It If:
❌You need extensive PCIe slot cover flexibility: The unique PCIe slot cover design may pose challenges during GPU installation, making it less suitable for users who frequently switch or upgrade graphics cards.
❌PSU size is a concern: There are limitations on PSU size (up to 160mm), so if you have a PSU exceeding this length, you might face compatibility issues.
Conclusion
In my assessment, the Thermaltake Versa J24 TG RGB truly impressed me as a standout mid-tower chassis that flawlessly combines style and practicality. With its sleek design and a tempered glass panel featuring three pre-installed RGB fans, it immediately appeals to those who value aesthetics.
When it comes to performance, this chassis excels in effective cooling, providing versatile options for an optimal system setup. I particularly appreciated the thoughtful design elements, such as the PSU shroud and dedicated SSD brackets, which made for a clean and organized build.
However, it’s crucial to note a couple of considerations, including potential challenges like PCIe slot cover limitations during GPU installation and PSU size constraints. Despite these nuances, the Versa J24 TG RGB delivers compelling value for its features, making it a solid choice for mid-range budget users looking for a well-designed and visually striking PC-building solution.
Recent Updates
- December 16, 2023: A few text changes to improve readability.
Thank you! Please share your positive feedback. 🔋
How could we improve this post? Please Help us. 😔
[Casings & Motherboards Expert]
Faizan Ahmed is a Computer Hardware Specialist and professional writer covering all the ranges of different PC Casings alongside the latest Motherboards. He is the man to read when you’re buying a casing for your PC, need a Motherboard for your specific processor, or are concerned about the socket or CPU Cooler.
Having a keen eye for the details, his research includes the latest updates and technologies implemented in the sector and the quick response to approaching them ASAP. Before working on Tech4Gamers, Faizan has written immensely on freelancing platforms under the Tech niche, ranging from PC Components to different smart devices, software, and even Game Reviews and Guides.
He’s also written on websites like WhatIfGaming and Mondestuff. Faizan is an early PC gamer, and this prolonged interaction with the PC and Games has made him the perfect candidate for expressing his ideas and concepts in words for others in the community.
Get In Touch: faizan@tech4gamers.com


