 Threads
Good Mid-Tower Option?
Review Summary
The DeepCool MATREXX 70 ADD-RGB 3F is a mid-tower chassis that impresses with its tempered glass side and front panels to showcase your build, provision of 3x CF120 A-RGB fans on the front, and easy front panel release feature. The case has good dust filtration coverage and a flexible design for the convenient installation of fans and radiators. Though it has an airflow-restricted design, the overall build quality is good, and the case is recommended for its build experience and positive first impression.
Hours Spent: 8-10

Overall
-
Looks - 8.5/10
8.5/10
-
Build Quality - 9/10
9/10
-
Value - 9/10
9/10
-
Performance - 7.5/10
7.5/10
Pros
- Looks
- Design
- Build Quality
- Value For Money
- Dust Filtration
Cons
- Restricted Airflow
- No riser support bracket or riser cable provided


Today, we are reviewing the DeepCool MATREXX 70 ADD-RGB 3F PC Case which is a large mid-tower case supporting up to E-ATX (330mm) motherboard. Let’s dive in!
- Why you can trust Tech4Gamers: Our reviews are based on dedicated hands-on testing by our team of experienced hardware experts. Find out more about how we test.
Key Takeaways
- The chassis is good for showcasing builds with its tempered glass panels and provision for RGB lighting, suitable for enthusiasts keen on display and aesthetics.
- This chassis is not for users prioritizing high airflow due to its design limitations, despite having powerful fans, making it less ideal for heavy-duty cooling requirements.
- Stand-out features include the one-button front panel release for easy access, ample filtration systems for dust prevention, and DeepCool’s commitment to a synchronized A-RGB lighting ecosystem.
We’ll start by looking at the specifications.
| Motherboards | E-ATX/ATX/Micro ATX/Mini-ITX |
| Case Type | Middle Tower |
| Materials |
ABS+SPCC+Tempered Glass
|
| Product Dimensions (L×W×H) | 483×228×492(L×W×H) |
| Net Weight | 9.39 Kg |
| Gross Weight | 10.81 kg |
| 5.25′ Drive Bays | 0 |
| 3.5′ Drive Bays | 2 |
| 2.5′ Drive Bays | 4 |
| I/O Ports | 2×USB3.0/1×USB2.0/1xAudio(HD)/1xMic |
| Expansion Slots | 7+2 |
| Cooling Fans Support |
Pre-installed: Front: 3×120mm ADD-RGB Fan Rear: 1×120mm black fan
|
| Cable Management | 30mm Clearance |
| Liquid Cooler Support | Front: 120/140/240/280/360mm radiator; Top: 120/140/240/280/360mm radiator; Rear: 120mm radiator |
| Power Supply Type | ATX PS2 (maximum length: 200mm) |
| CPU Cooler Height Limit | 170mm |
| VGA Length Limit | 380mm (horizontal)/360mm (vertical) |
| Carton Dimension (LxWxH) | 537×285×539mm |
Packaging and Unboxing
The chassis is shipped inside a standard brown color cardboard box.
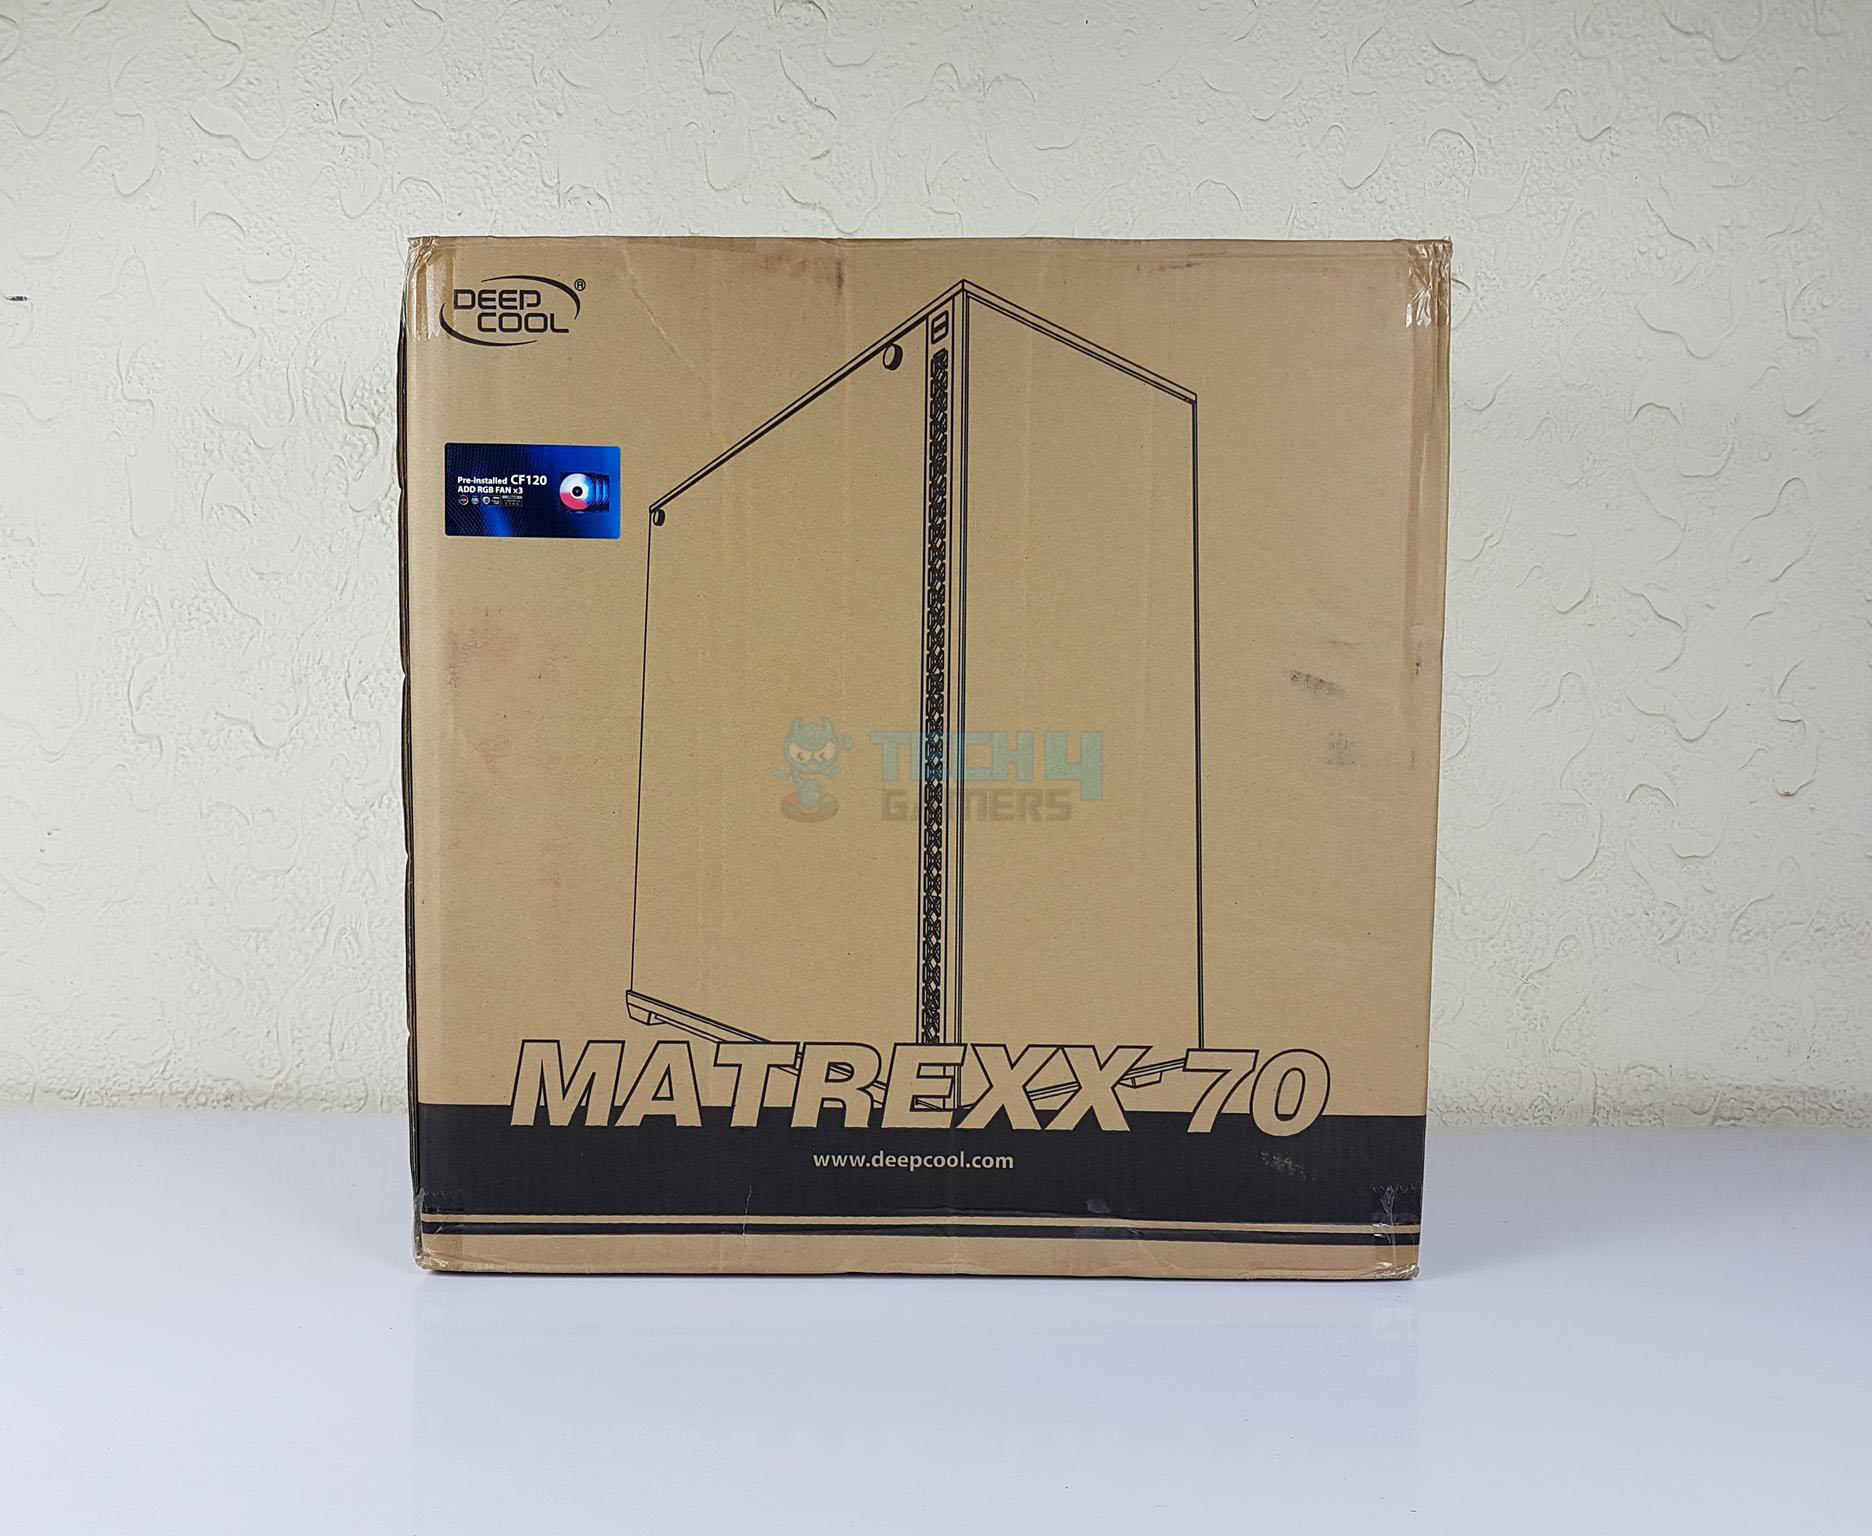

If you are wondering why such a long name and what does it indicate, it means that this edition of MATREXX 70 includes 3x CF120 A-RGB fans on the front side.
The chassis is in a transparent cover and tucked between two white color Styrofoam pads.
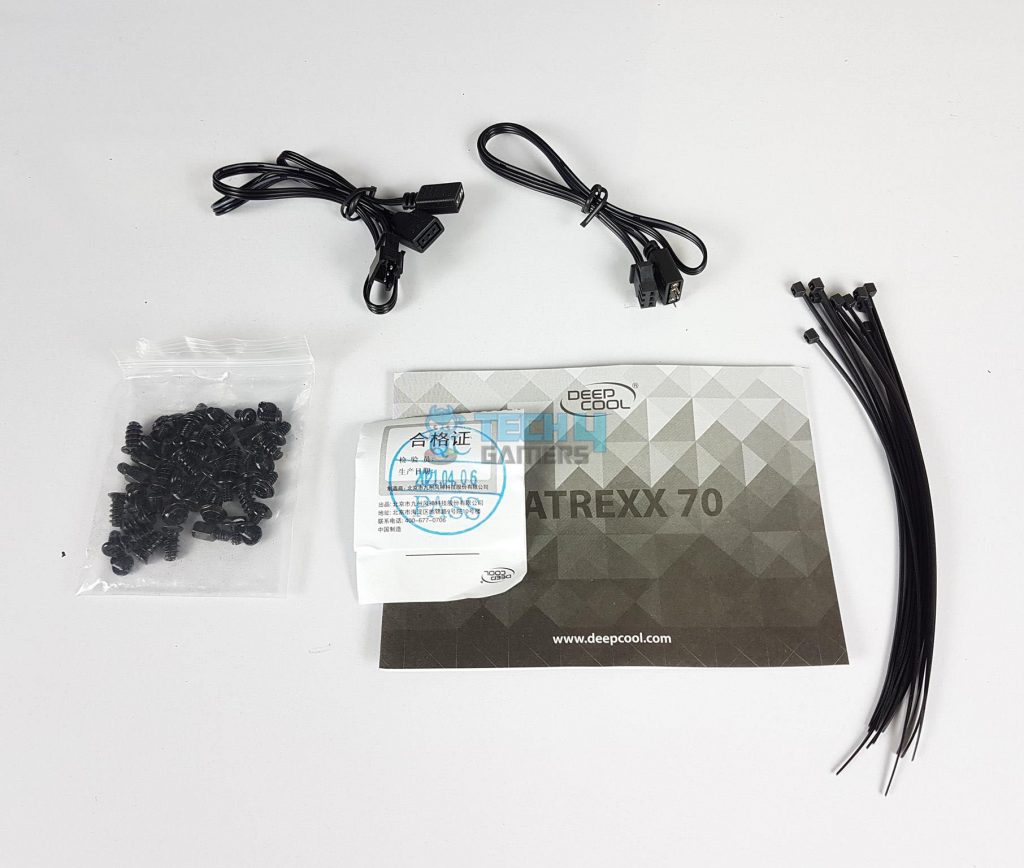
Box Contents
Let’s see what’s included in the box.
Closer Look
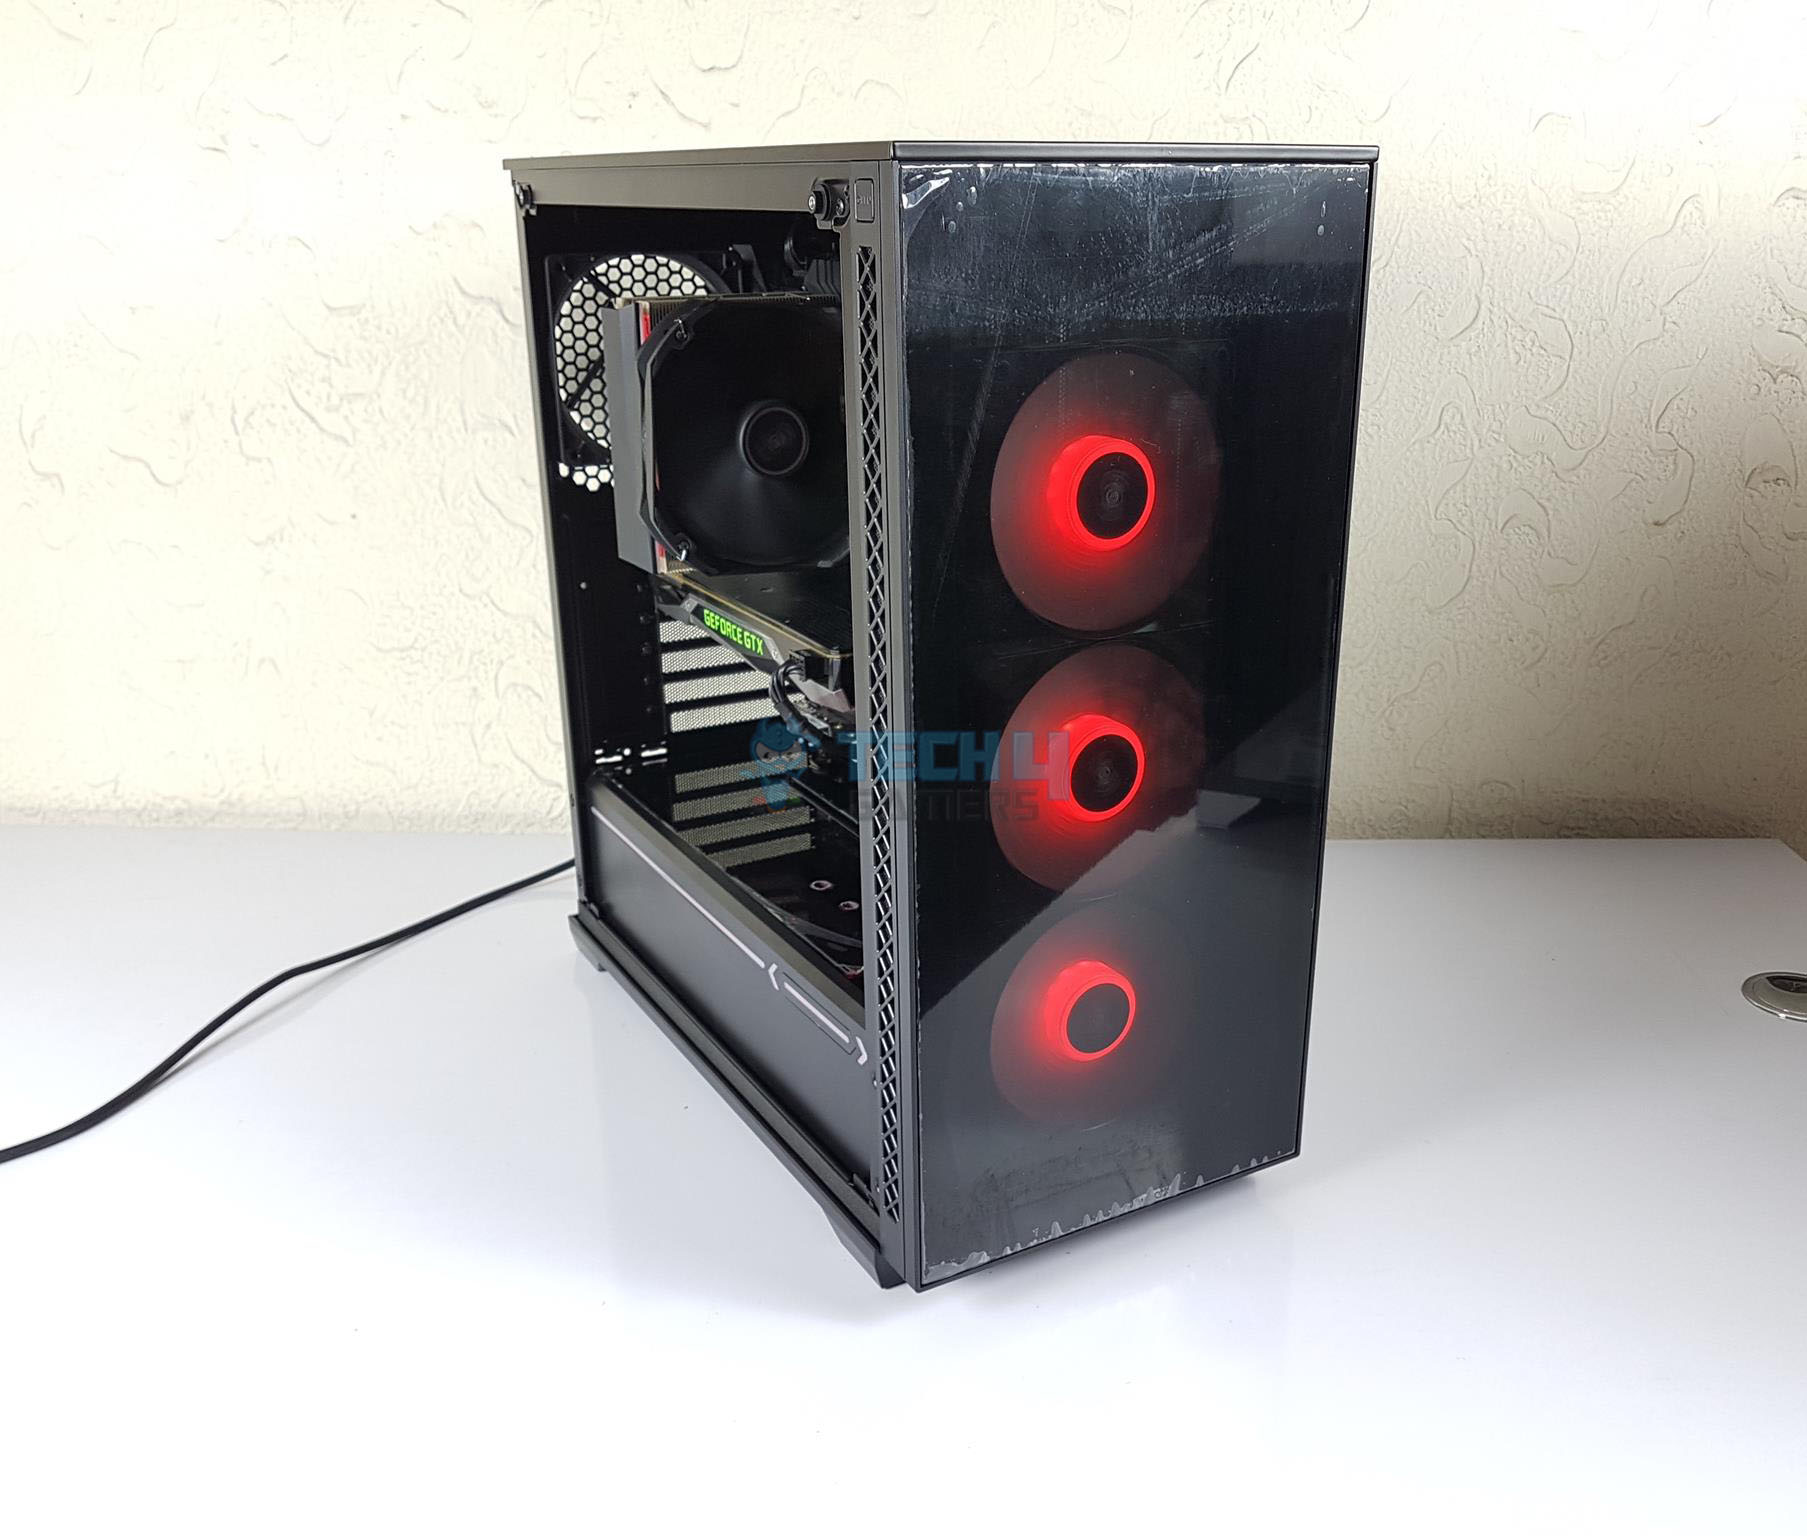
The DeepCool MATREXX 70 ADD-RGB 3F is a spacious mid-tower case available in black and white colors. It has a dimension of 483x228x492mm. It is made of steel, plastic and tempered glass.
Let’s start by taking a closer look at the front of the chassis.
Front
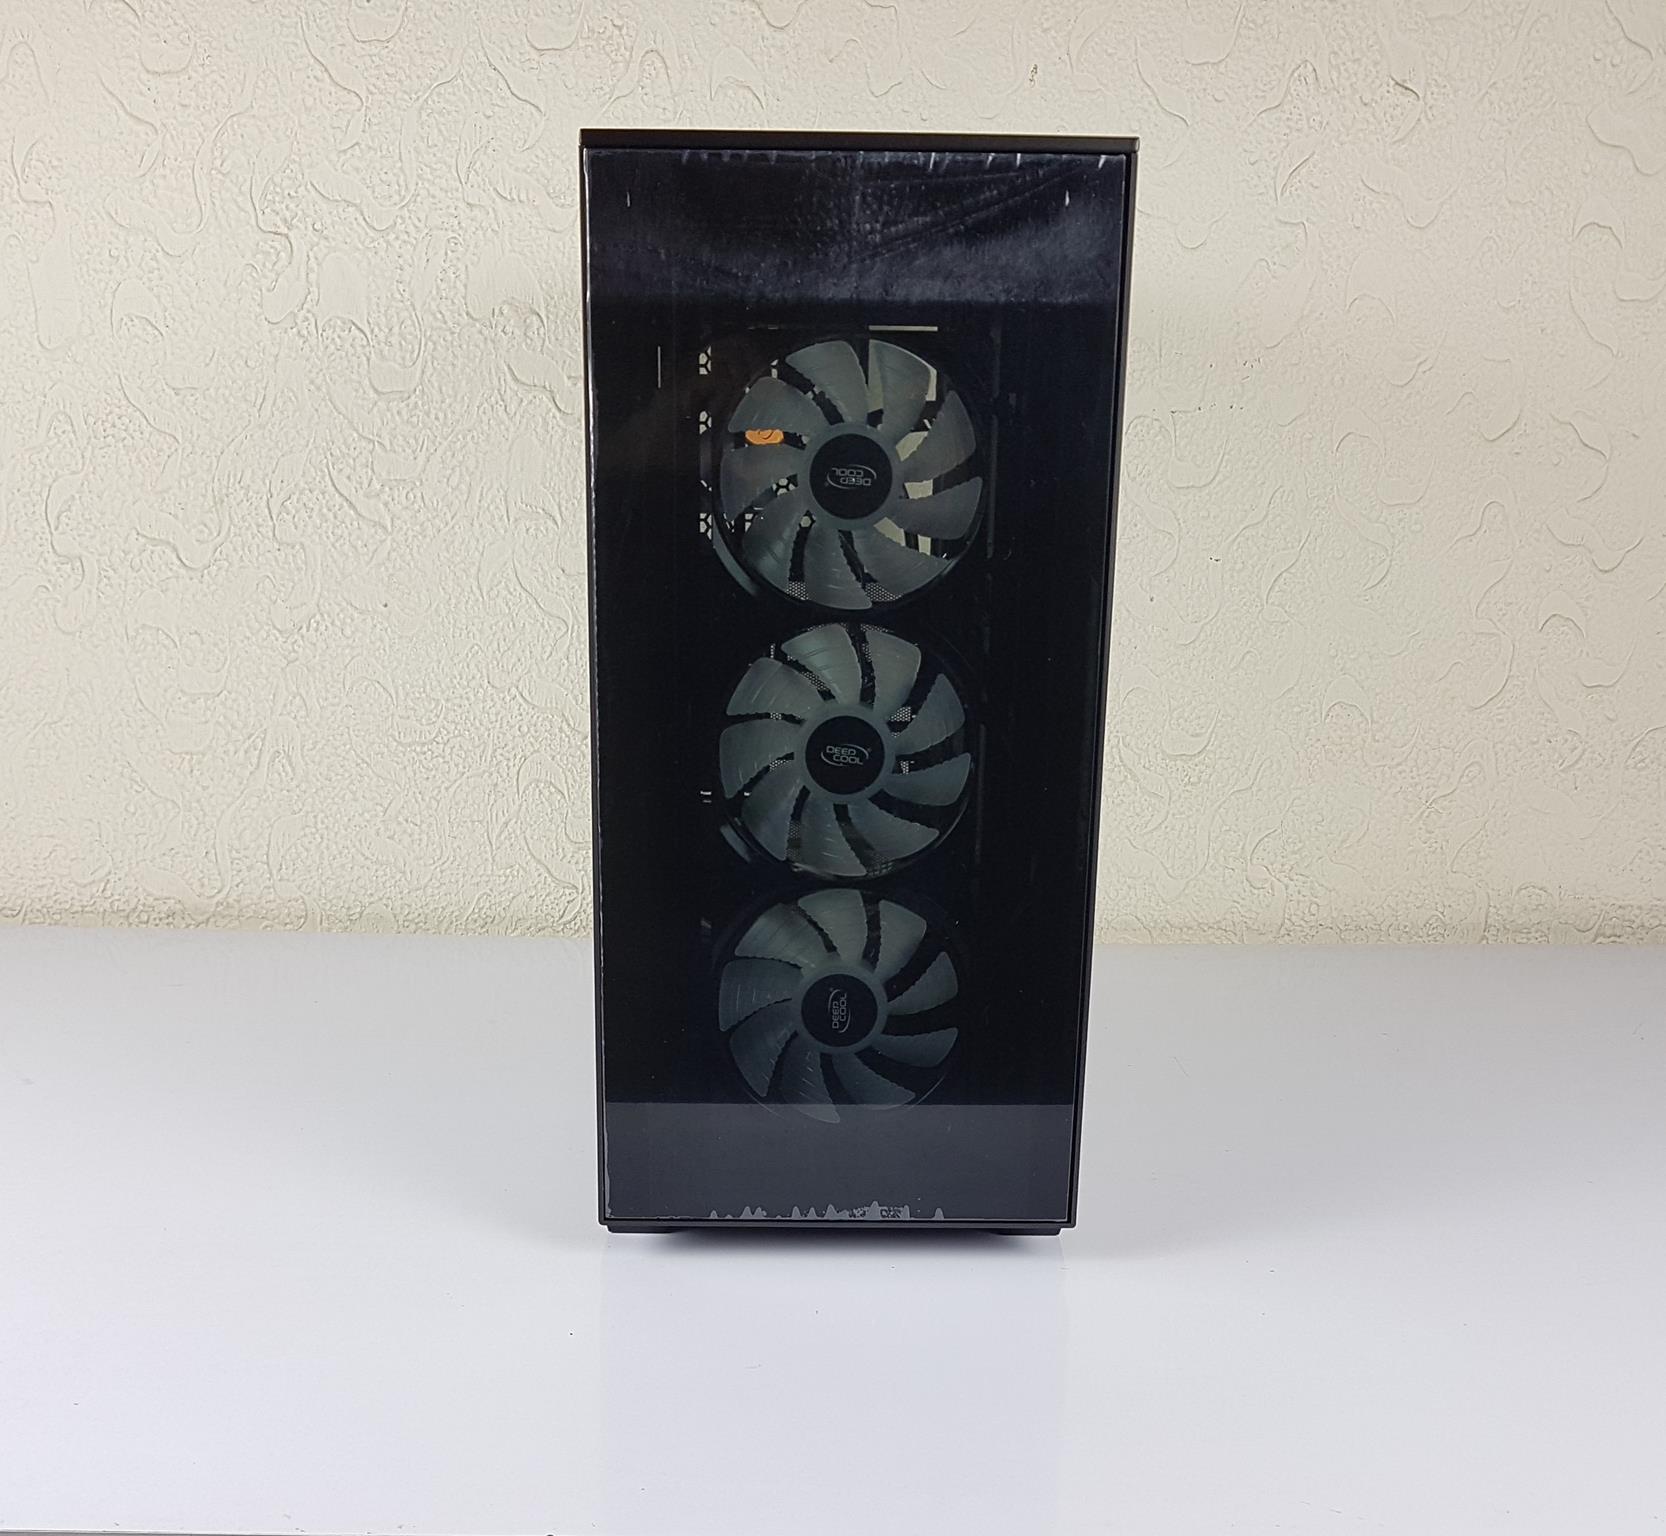
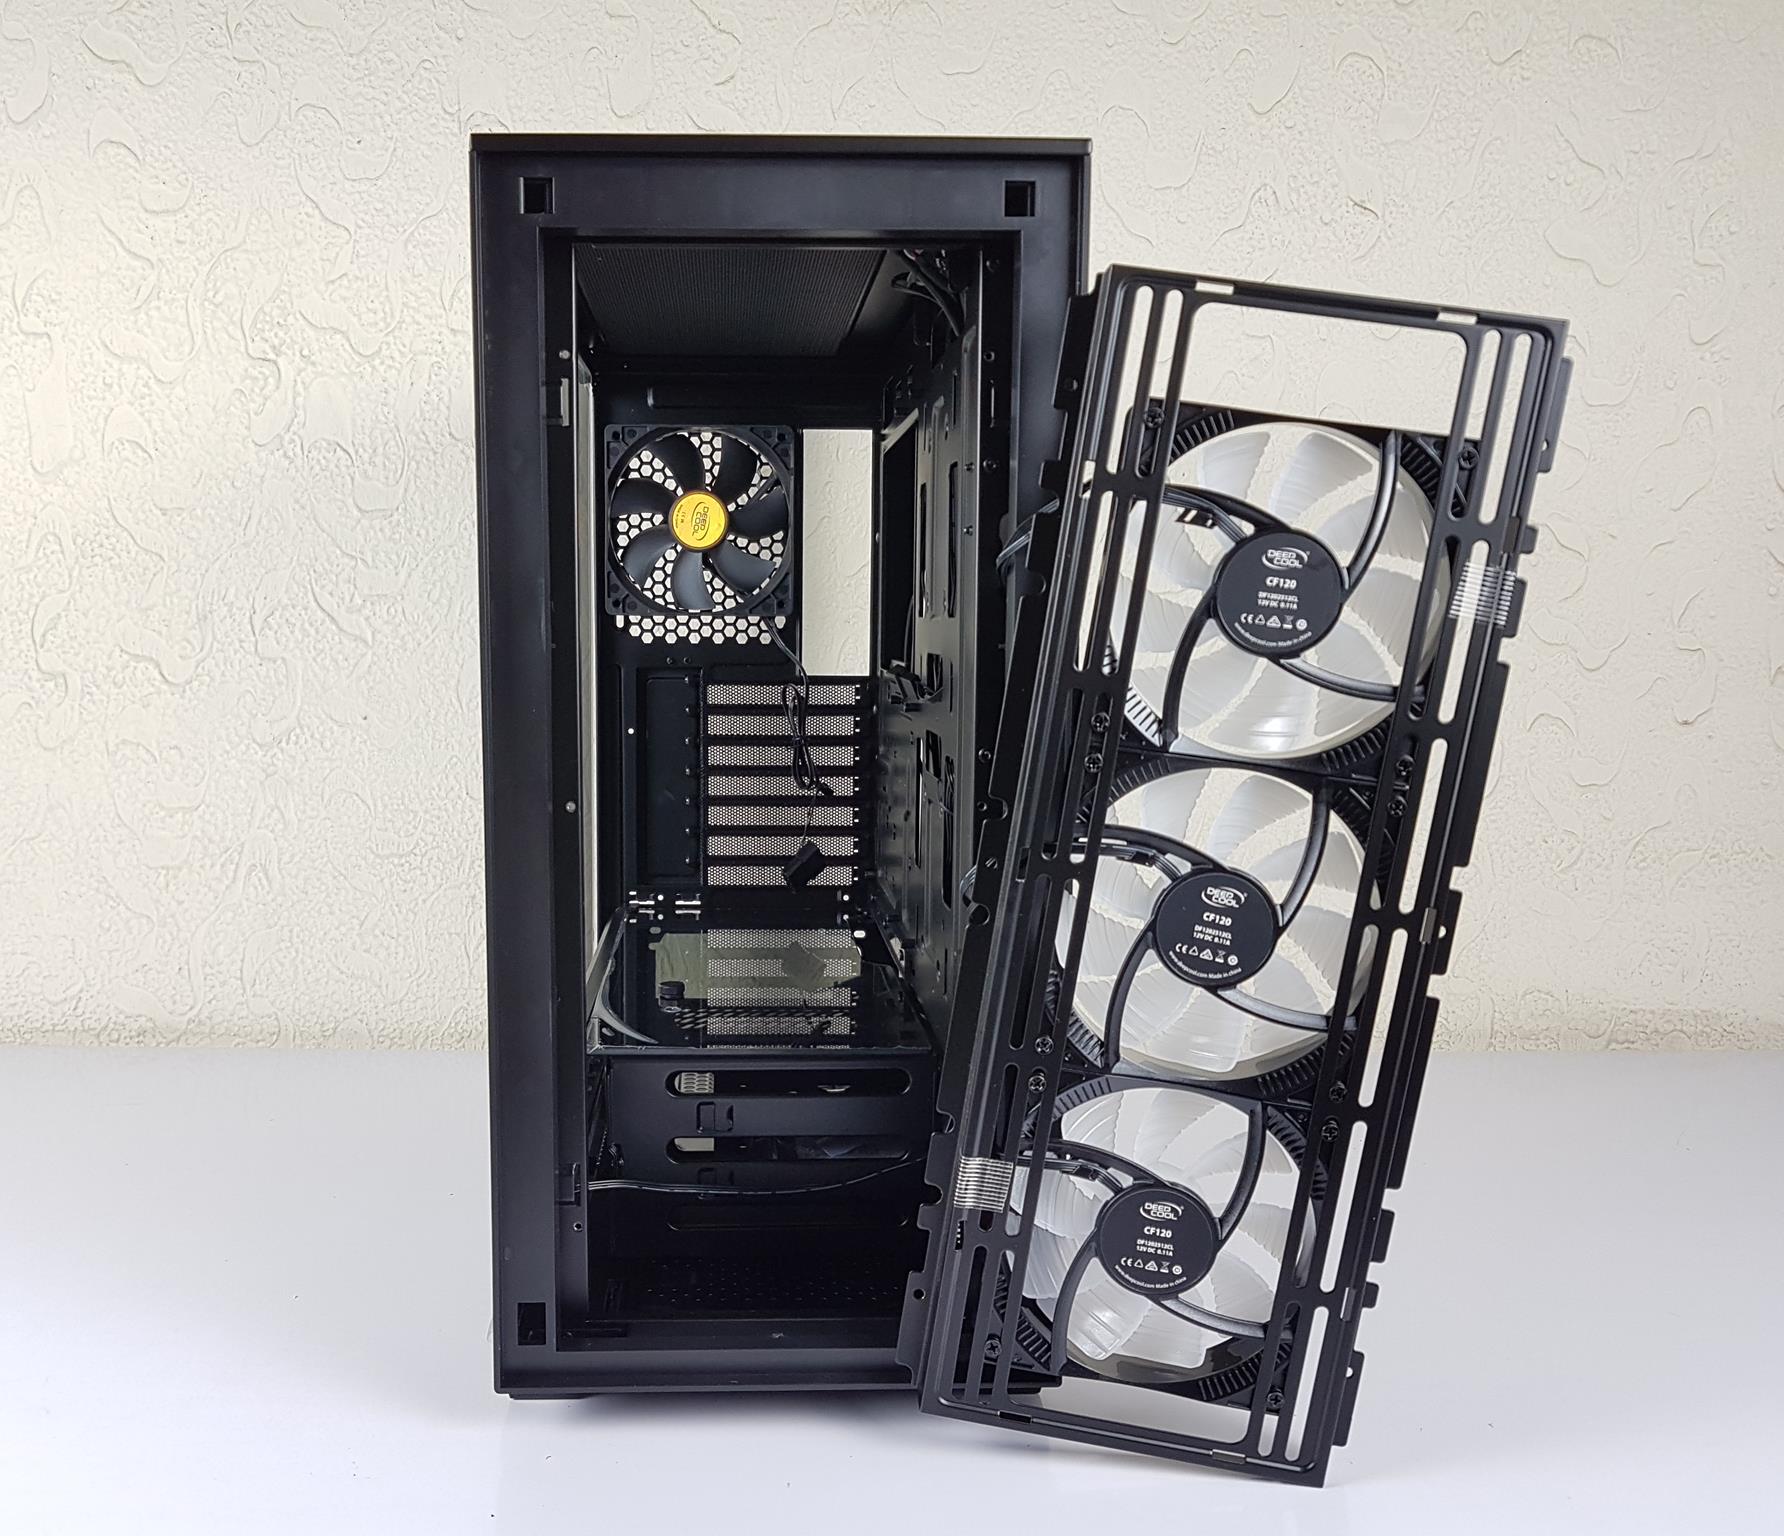
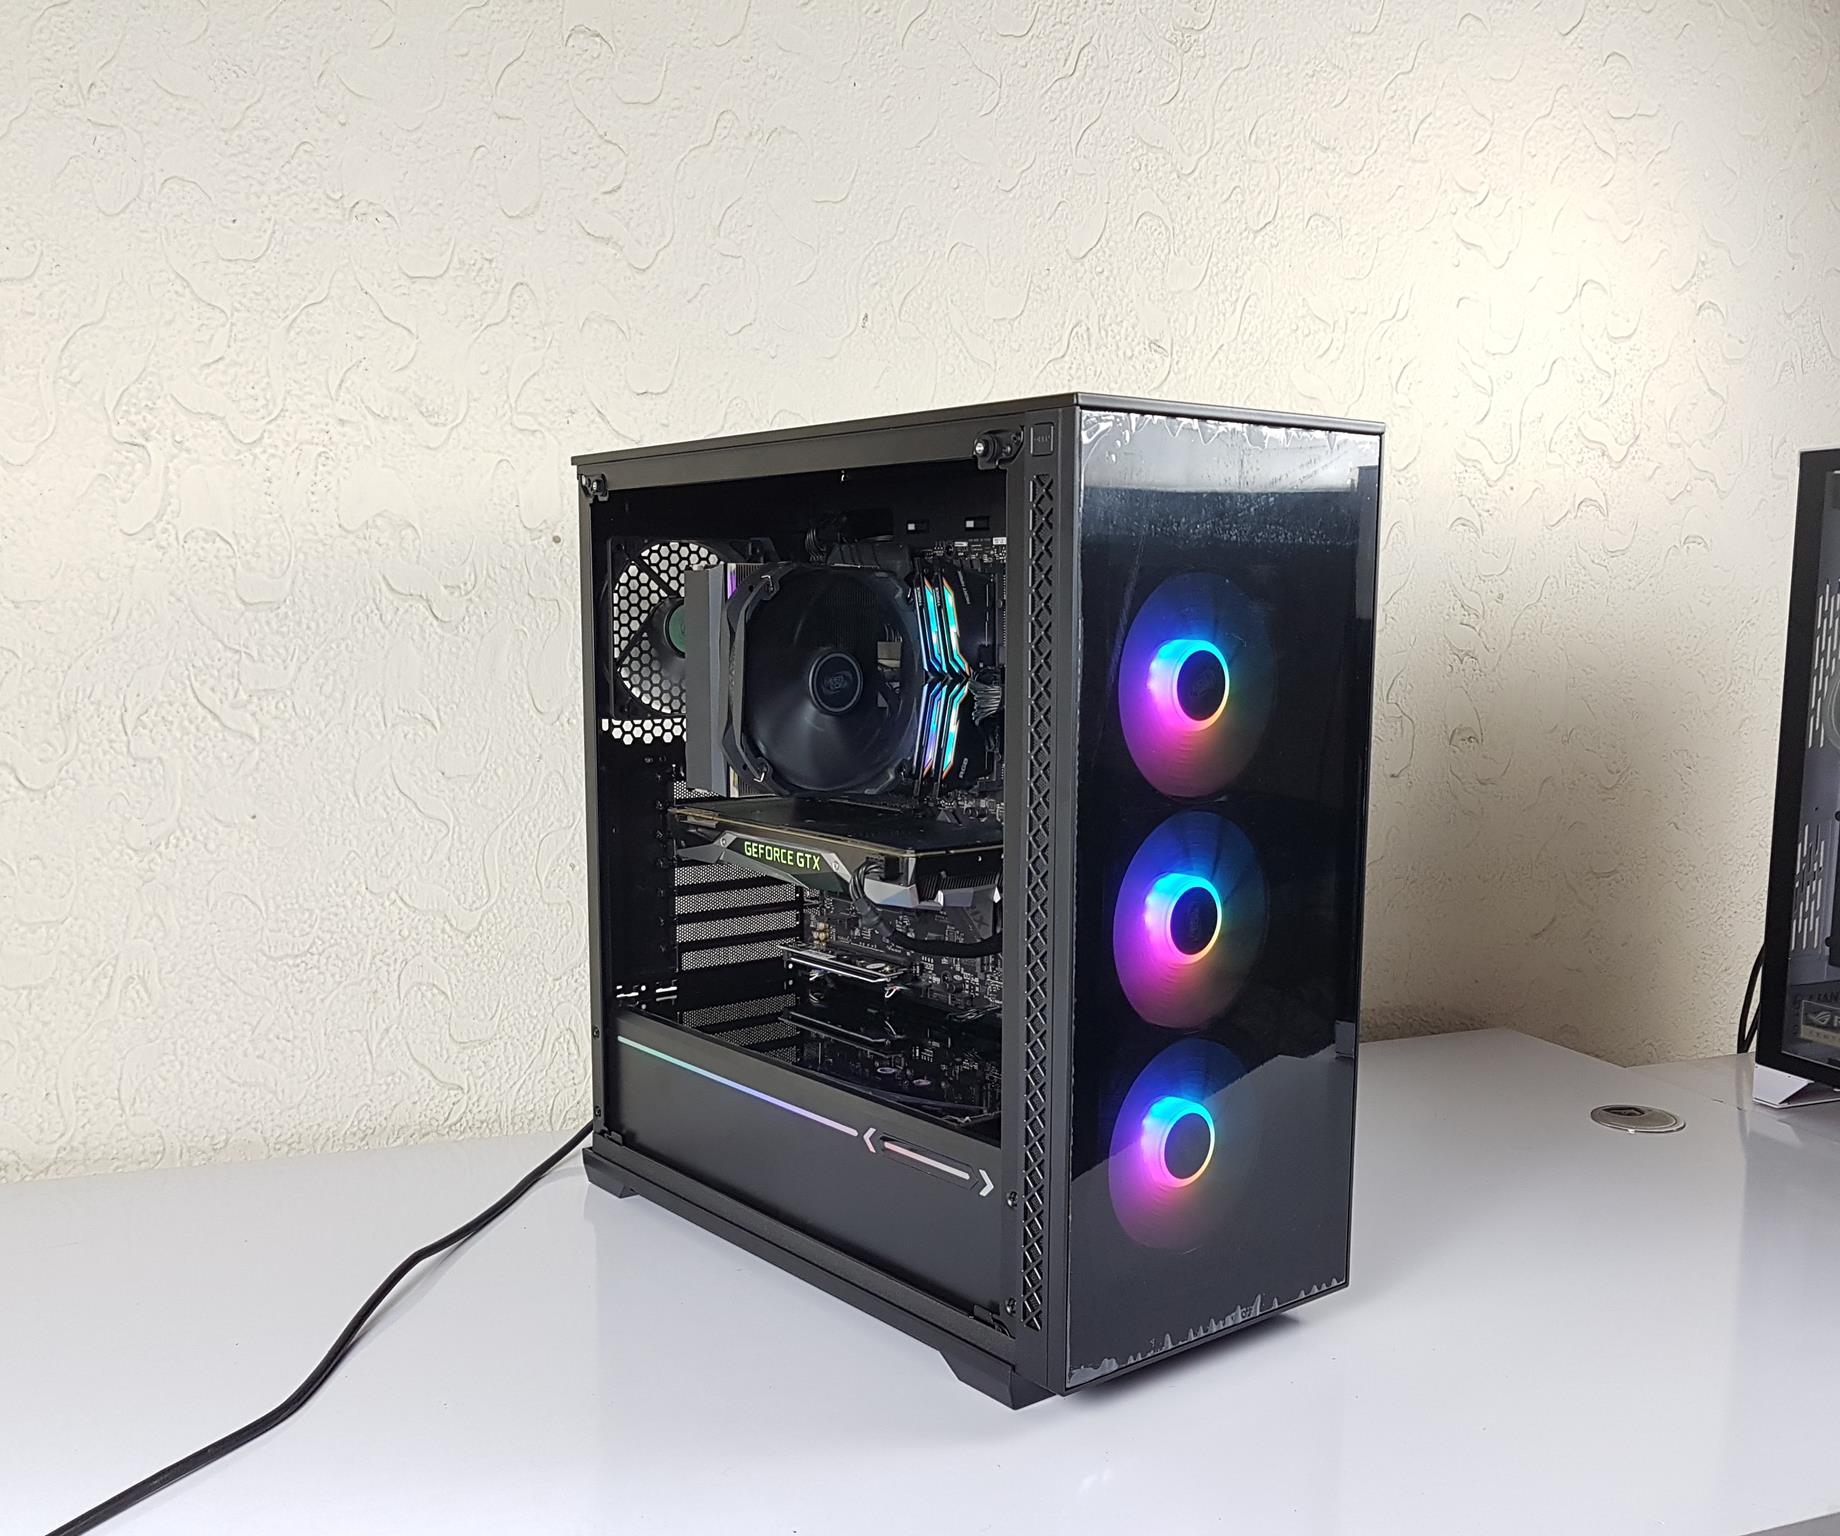
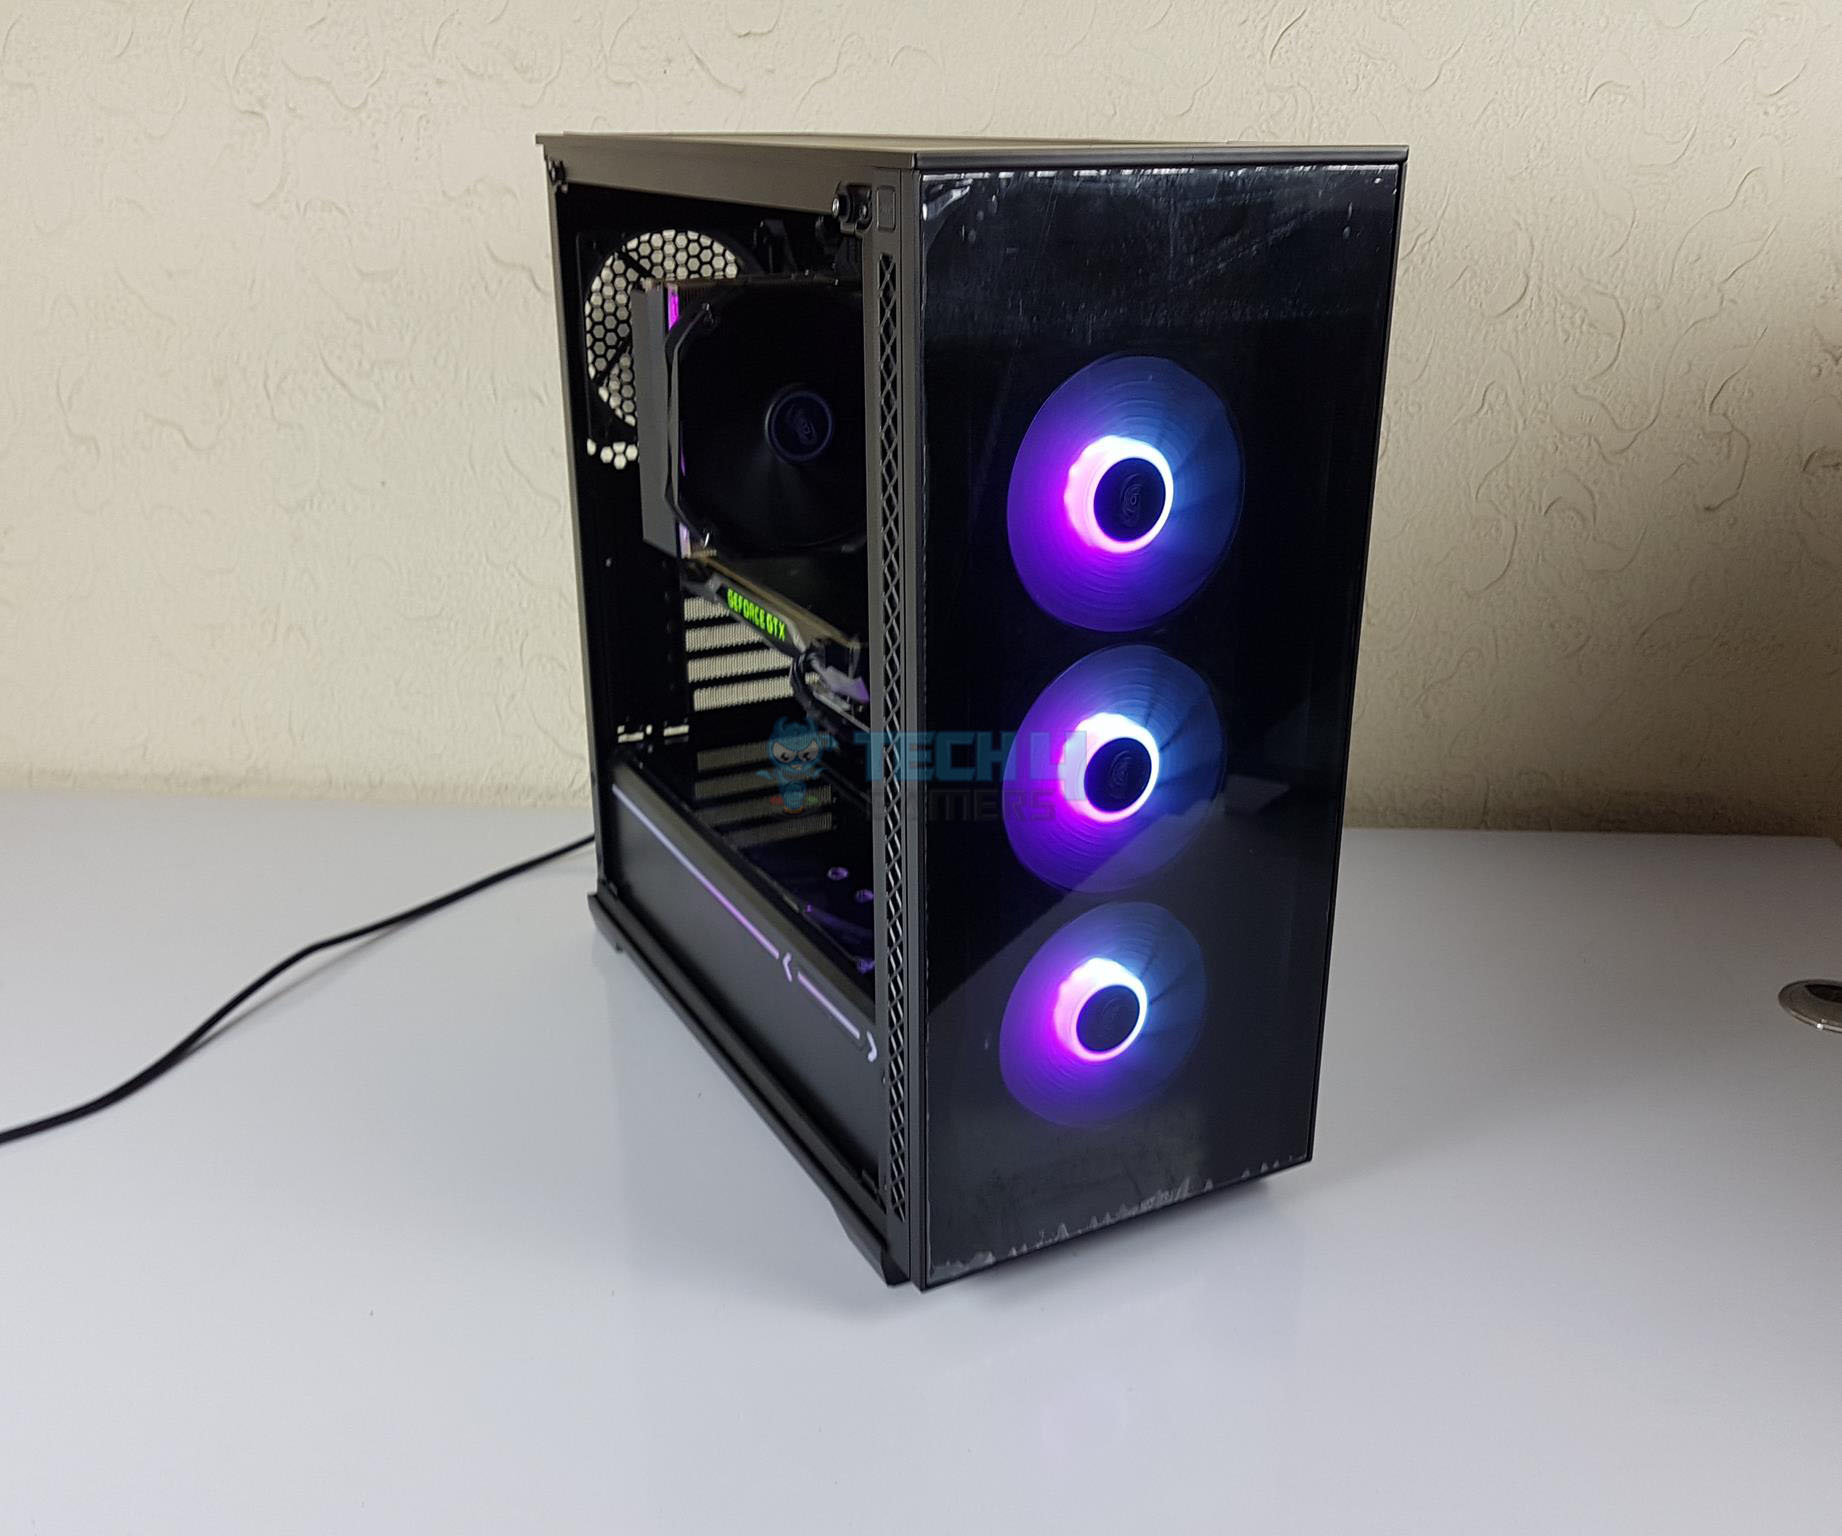
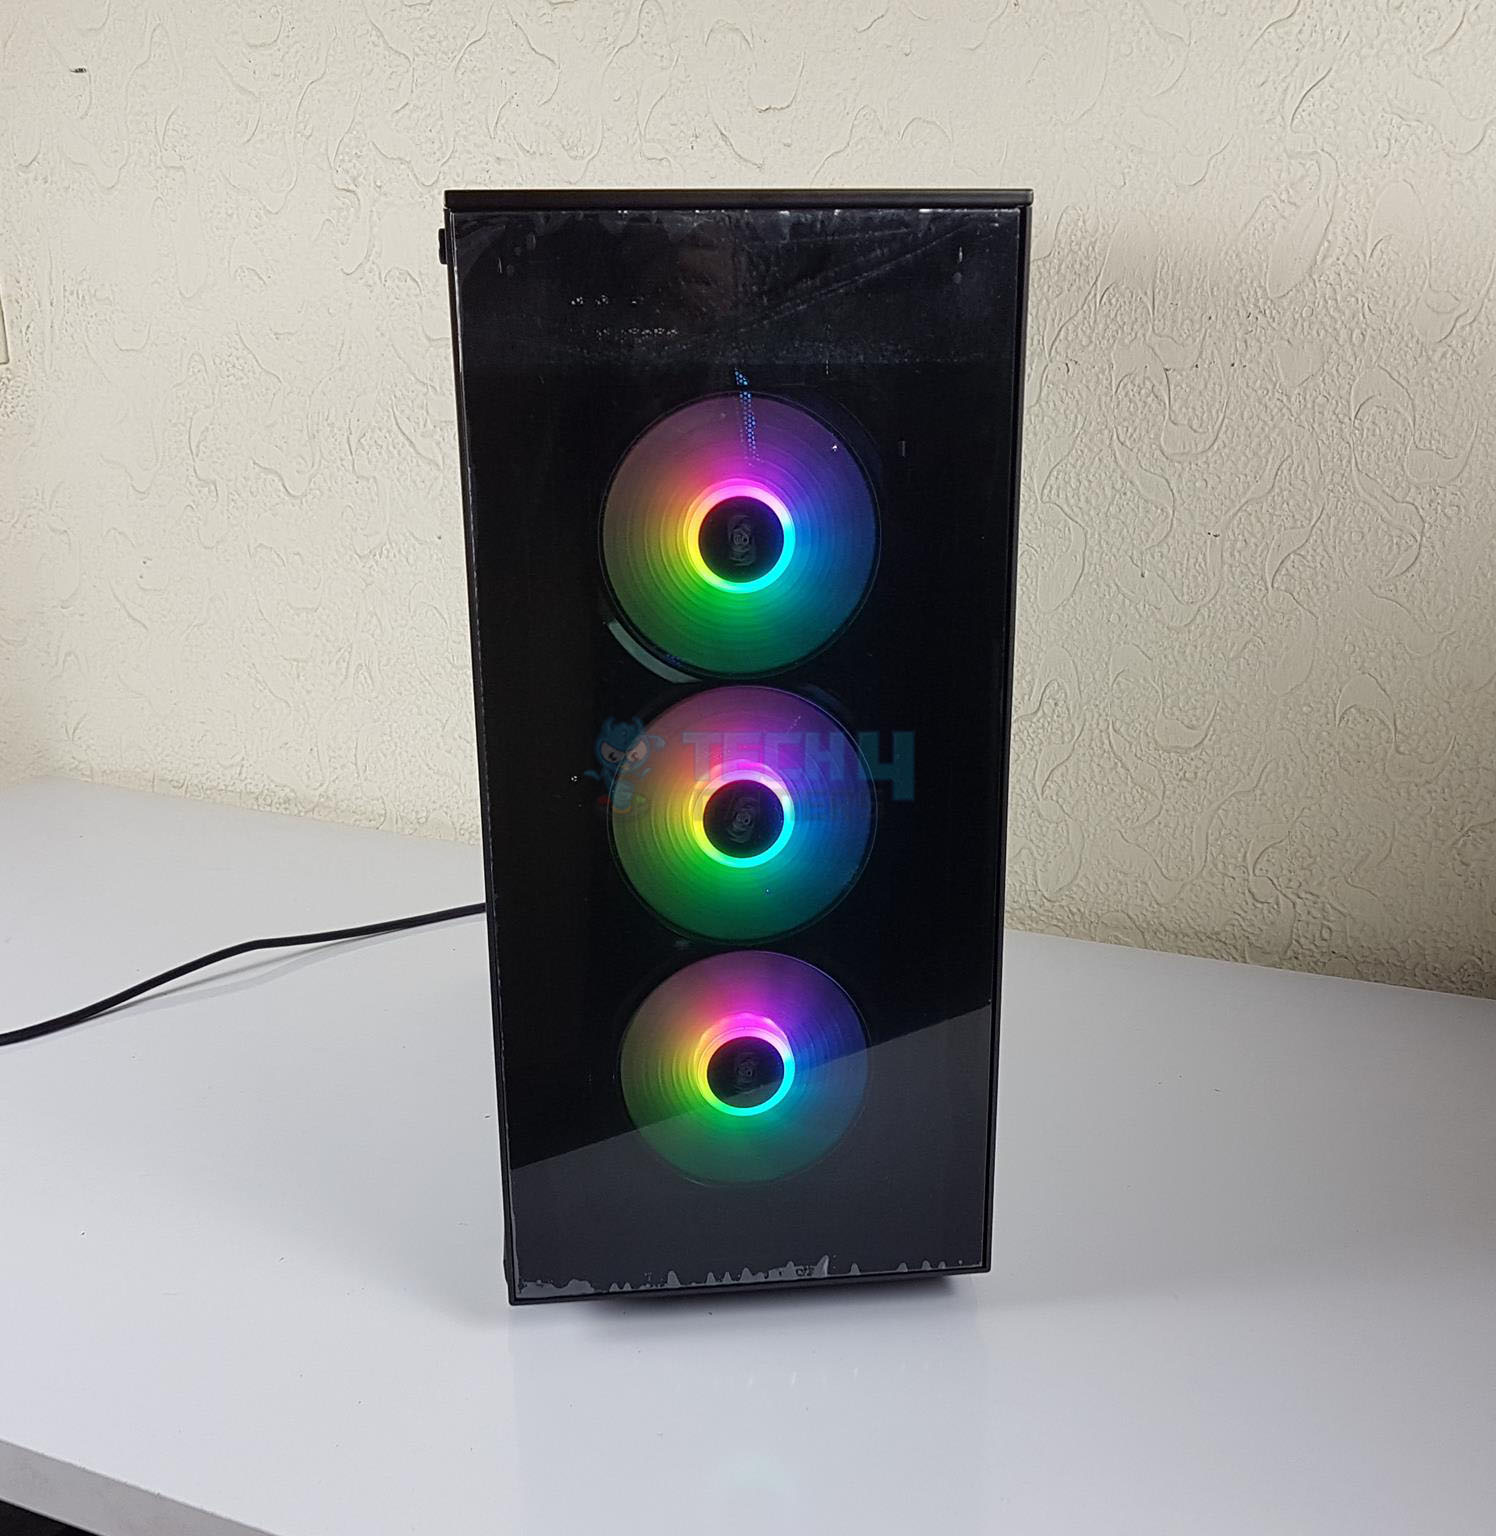
We have a tempered glass panel on the front side which is fixed on the front plastic frame. We can spot the 3x 120mm A-RGB CF120 fans behind the tinted glass. The fans have translucent blades for some vivid visuals.
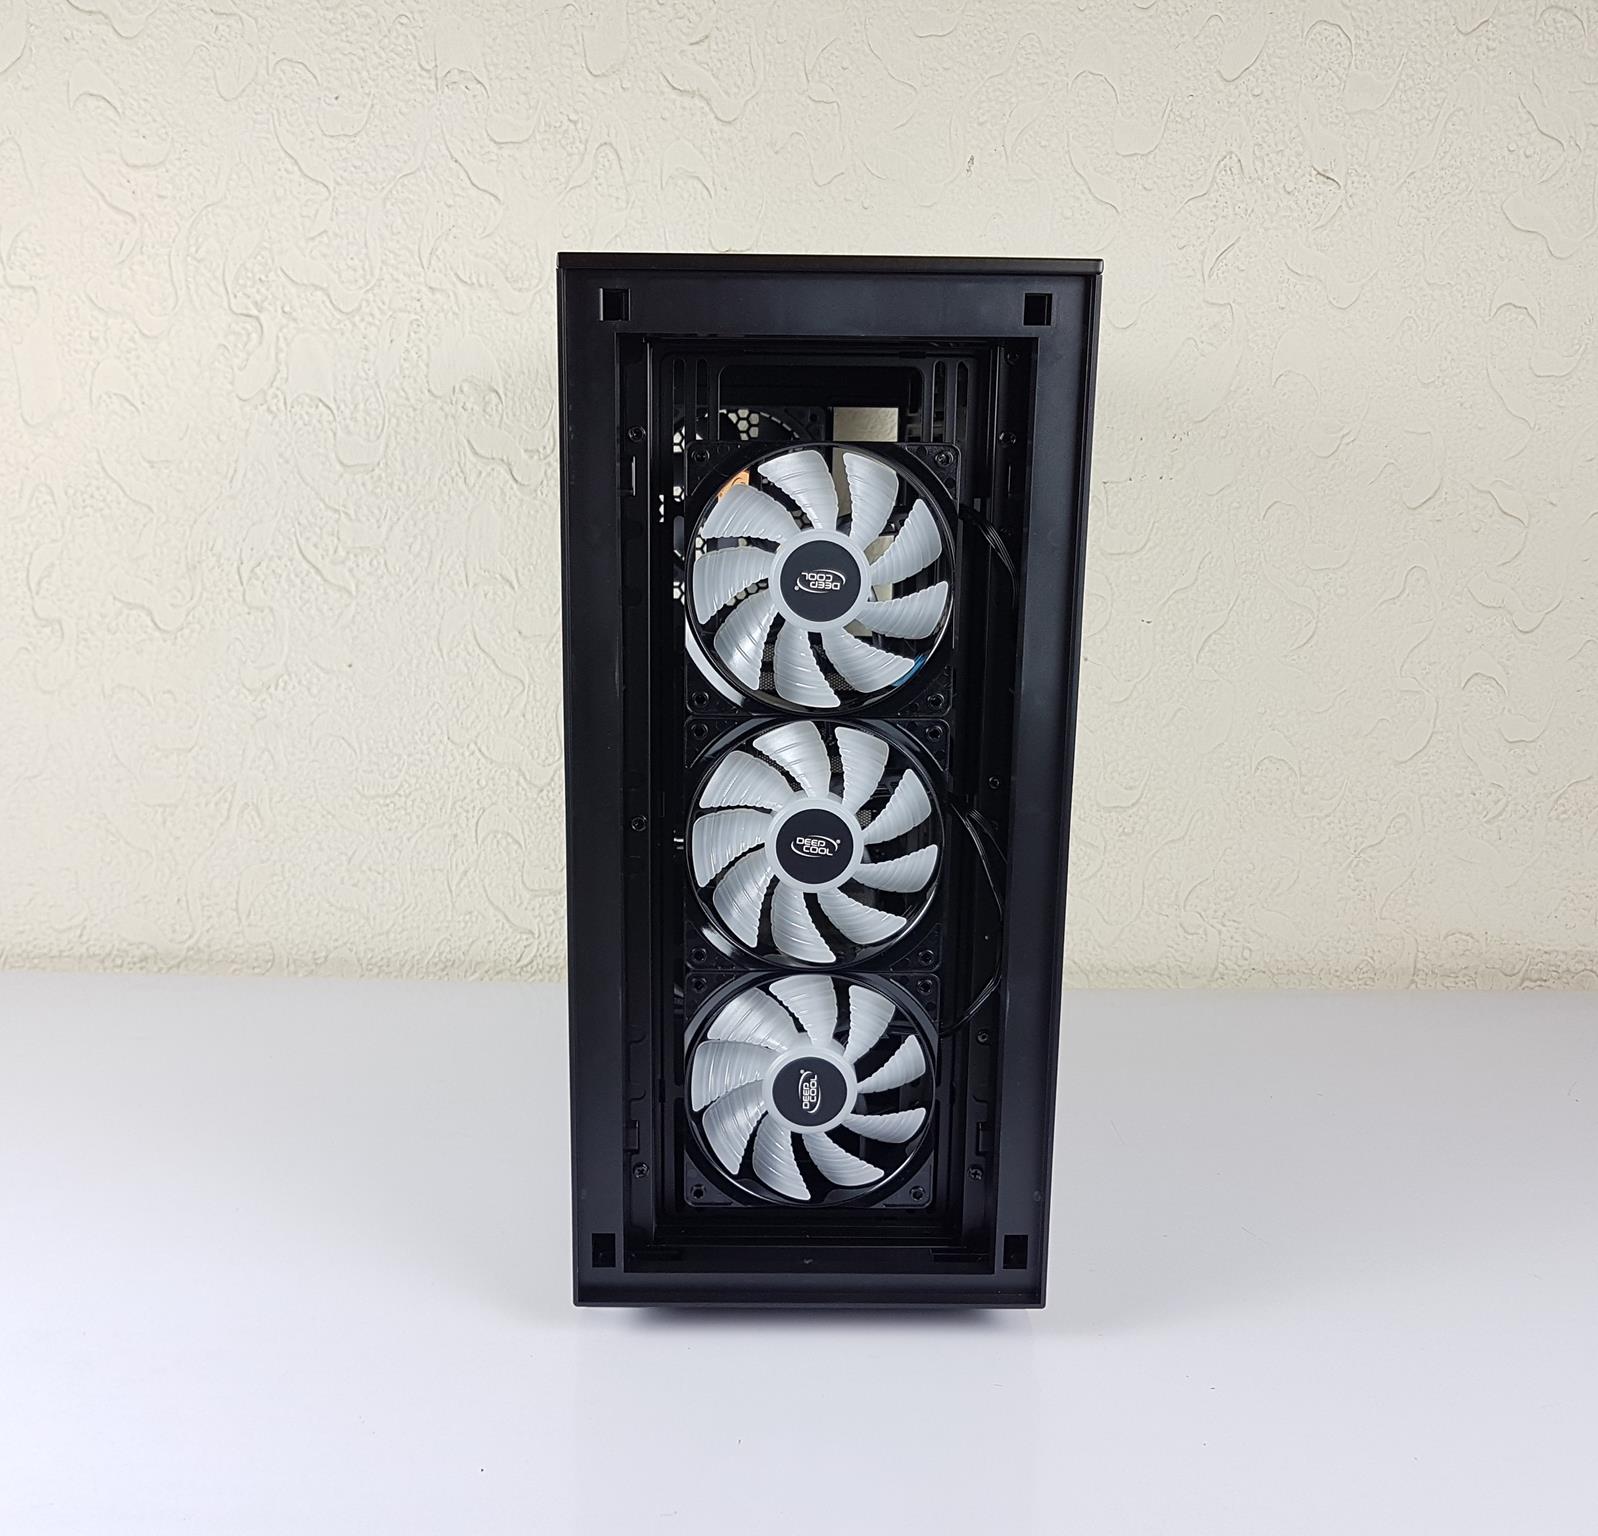
Pressing a single button easily removes the front glass panel, a really useful feature. The panel is divided: the bottom connects to the case frame, the top locks with a spring buckle. DeepCool smartly included a single button to release the MATREXX 70 ADD-RGB 3F front panel with a simple touch.
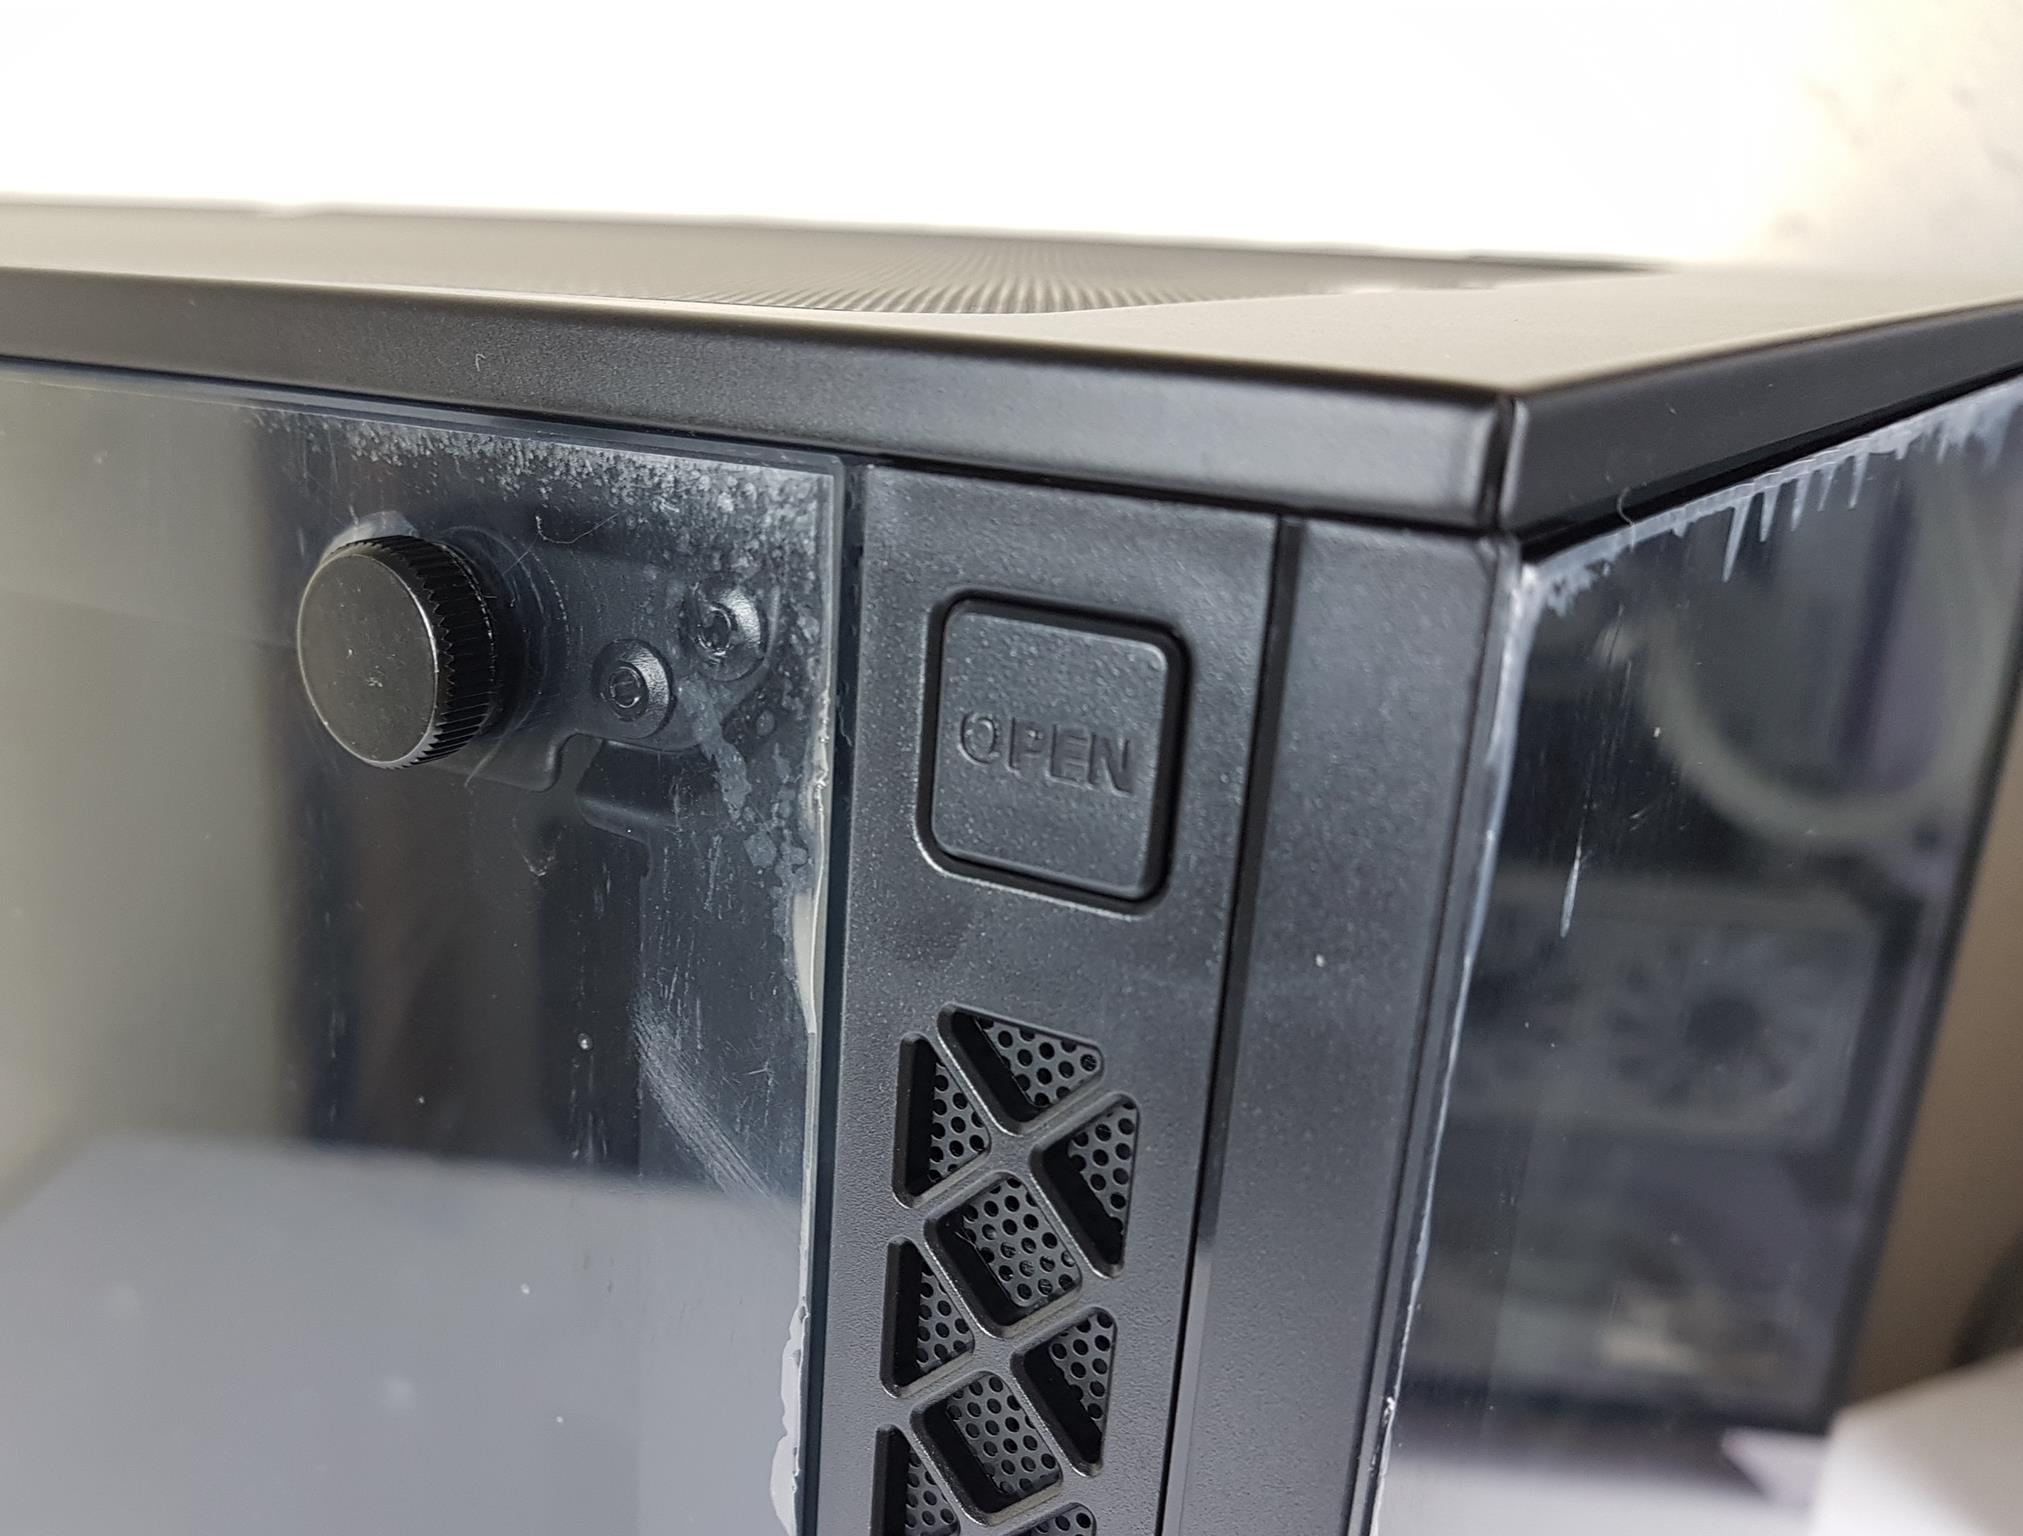
After pressing the button, the front panel is released and held. I appreciate the safety aspect of the design.
The picture reveals the case’s inner front, measuring 228mm in width, smaller than the GAMDIAS APOLLO E2 Elite. The reduced width limits RAM height clearance but increases case height and length.
Looking at the fan/radiator bracket, it lacks a magnetic dust filter, placed instead on the top with two tapes meant to secure it, but they seem ineffective. Quality Control needs improvement.
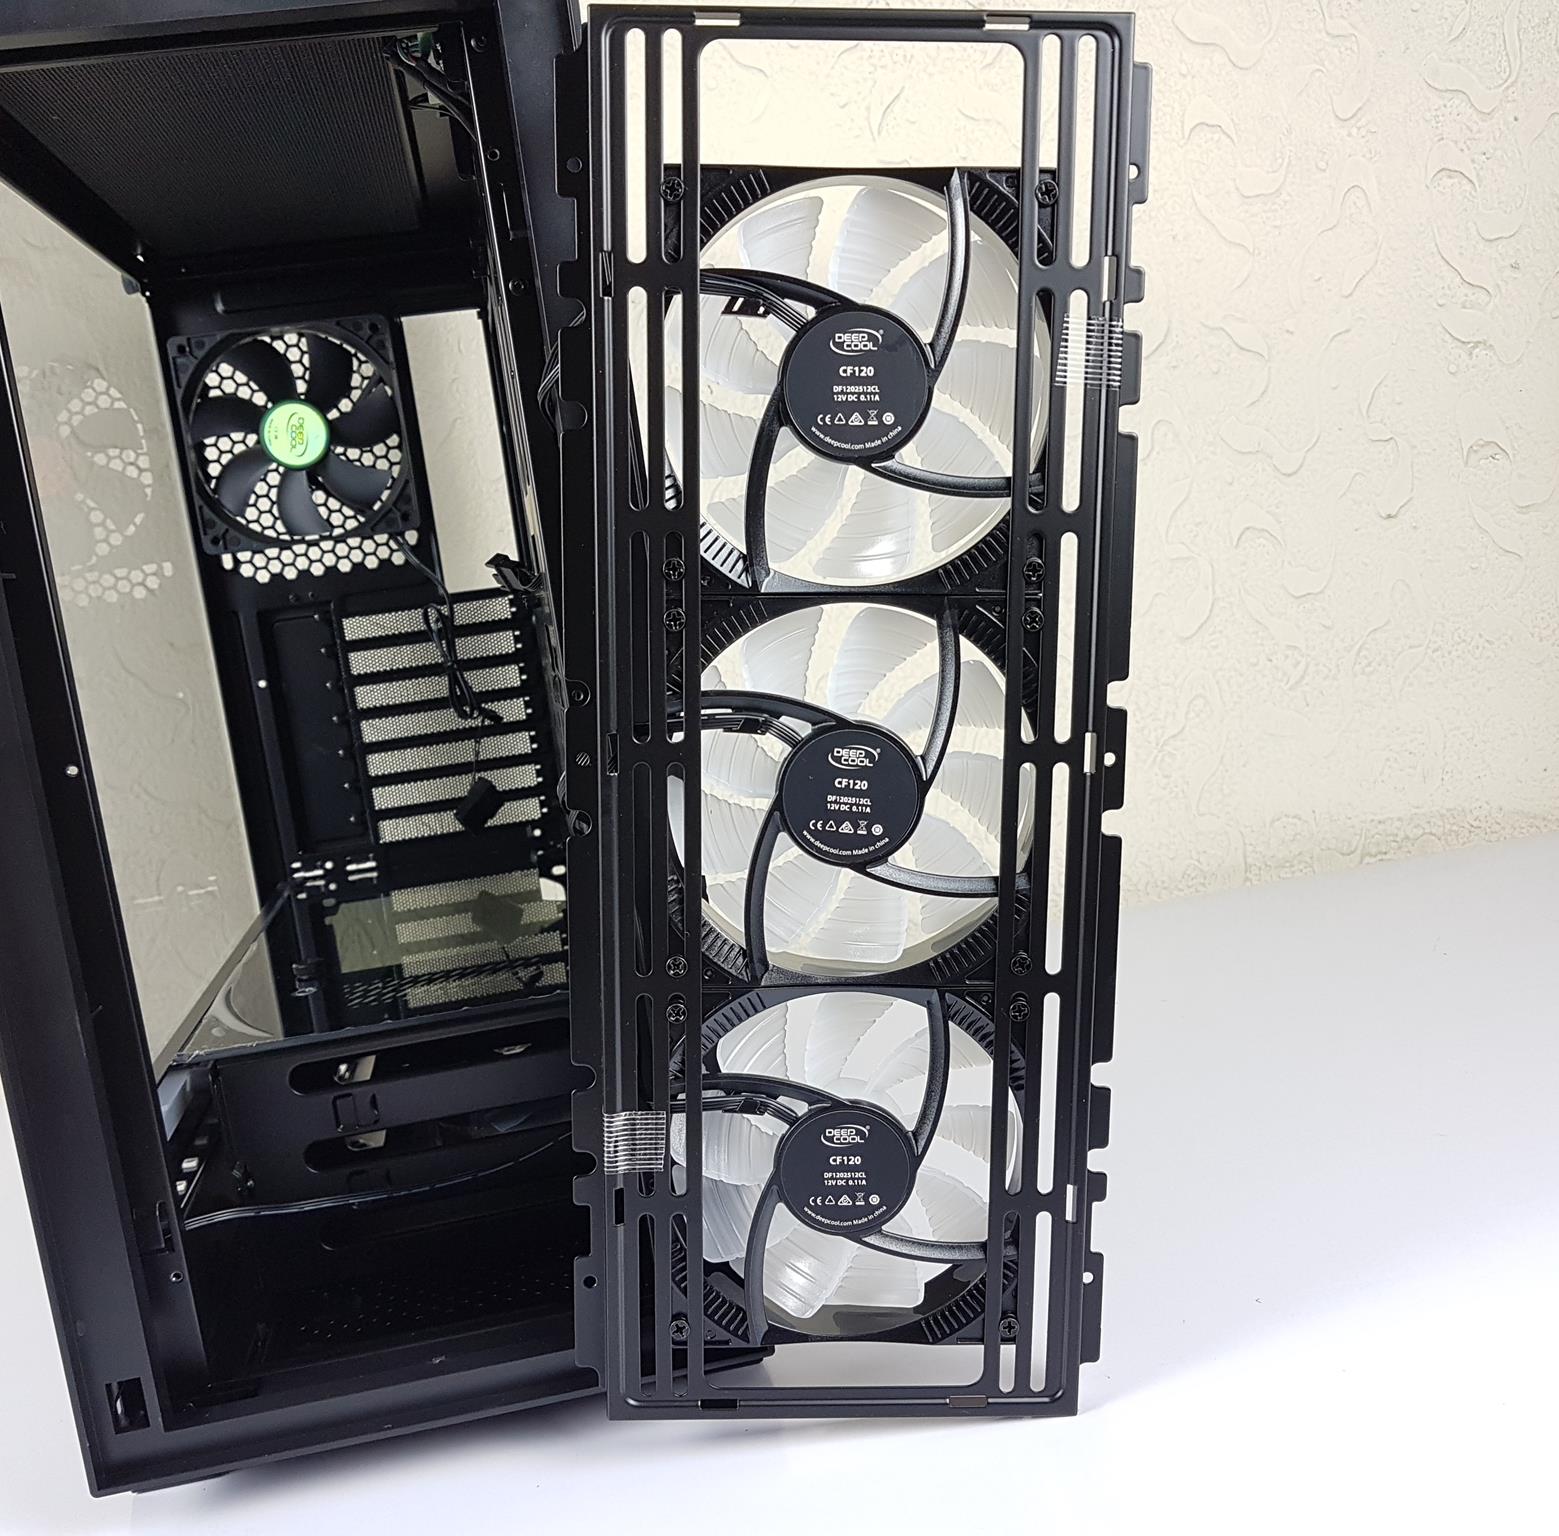
The bracket itself is robust, accommodating up to a 360mm radiator and supporting 3x 120mm or 3x 140mm fans. Note that it comes pre-installed with 3x CF120 A-RGB fans. The bracket’s design allows for easy fan/radiator installation, simplifying the process significantly.
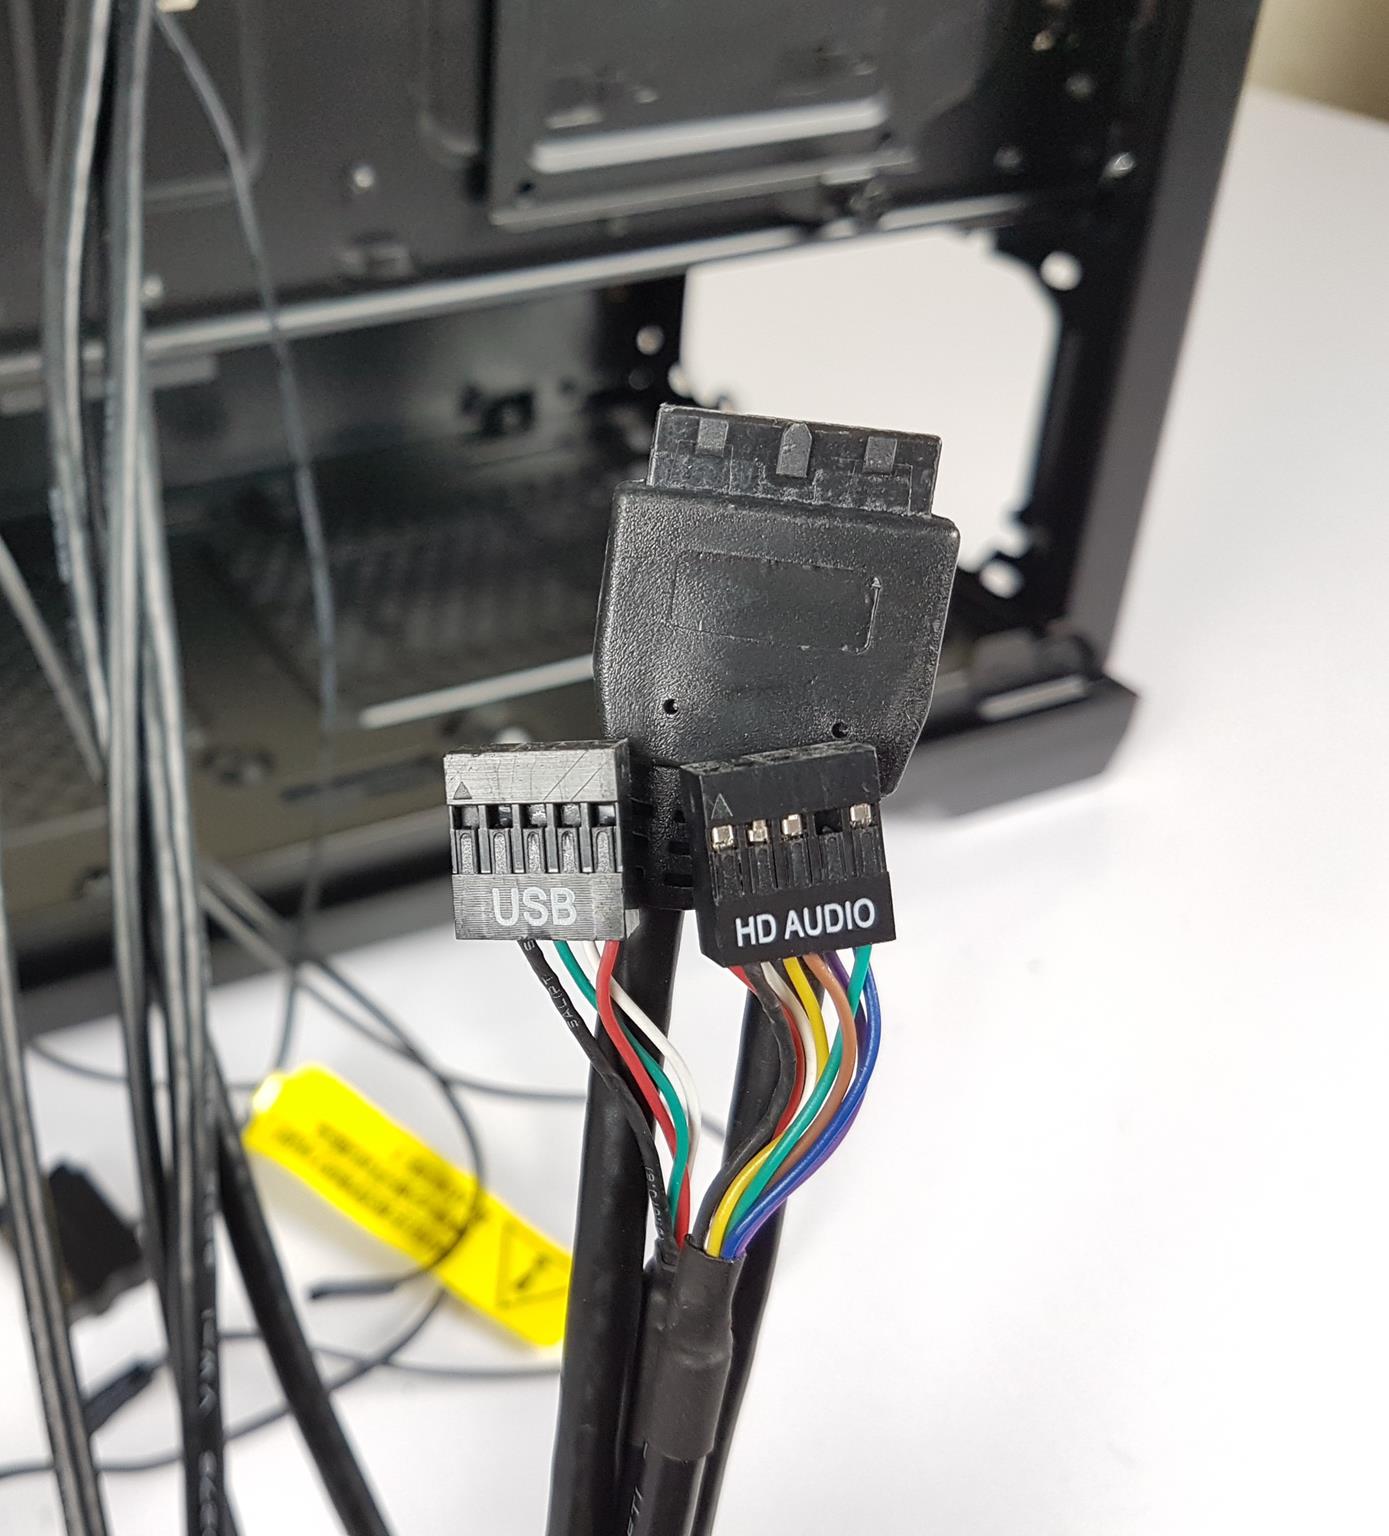
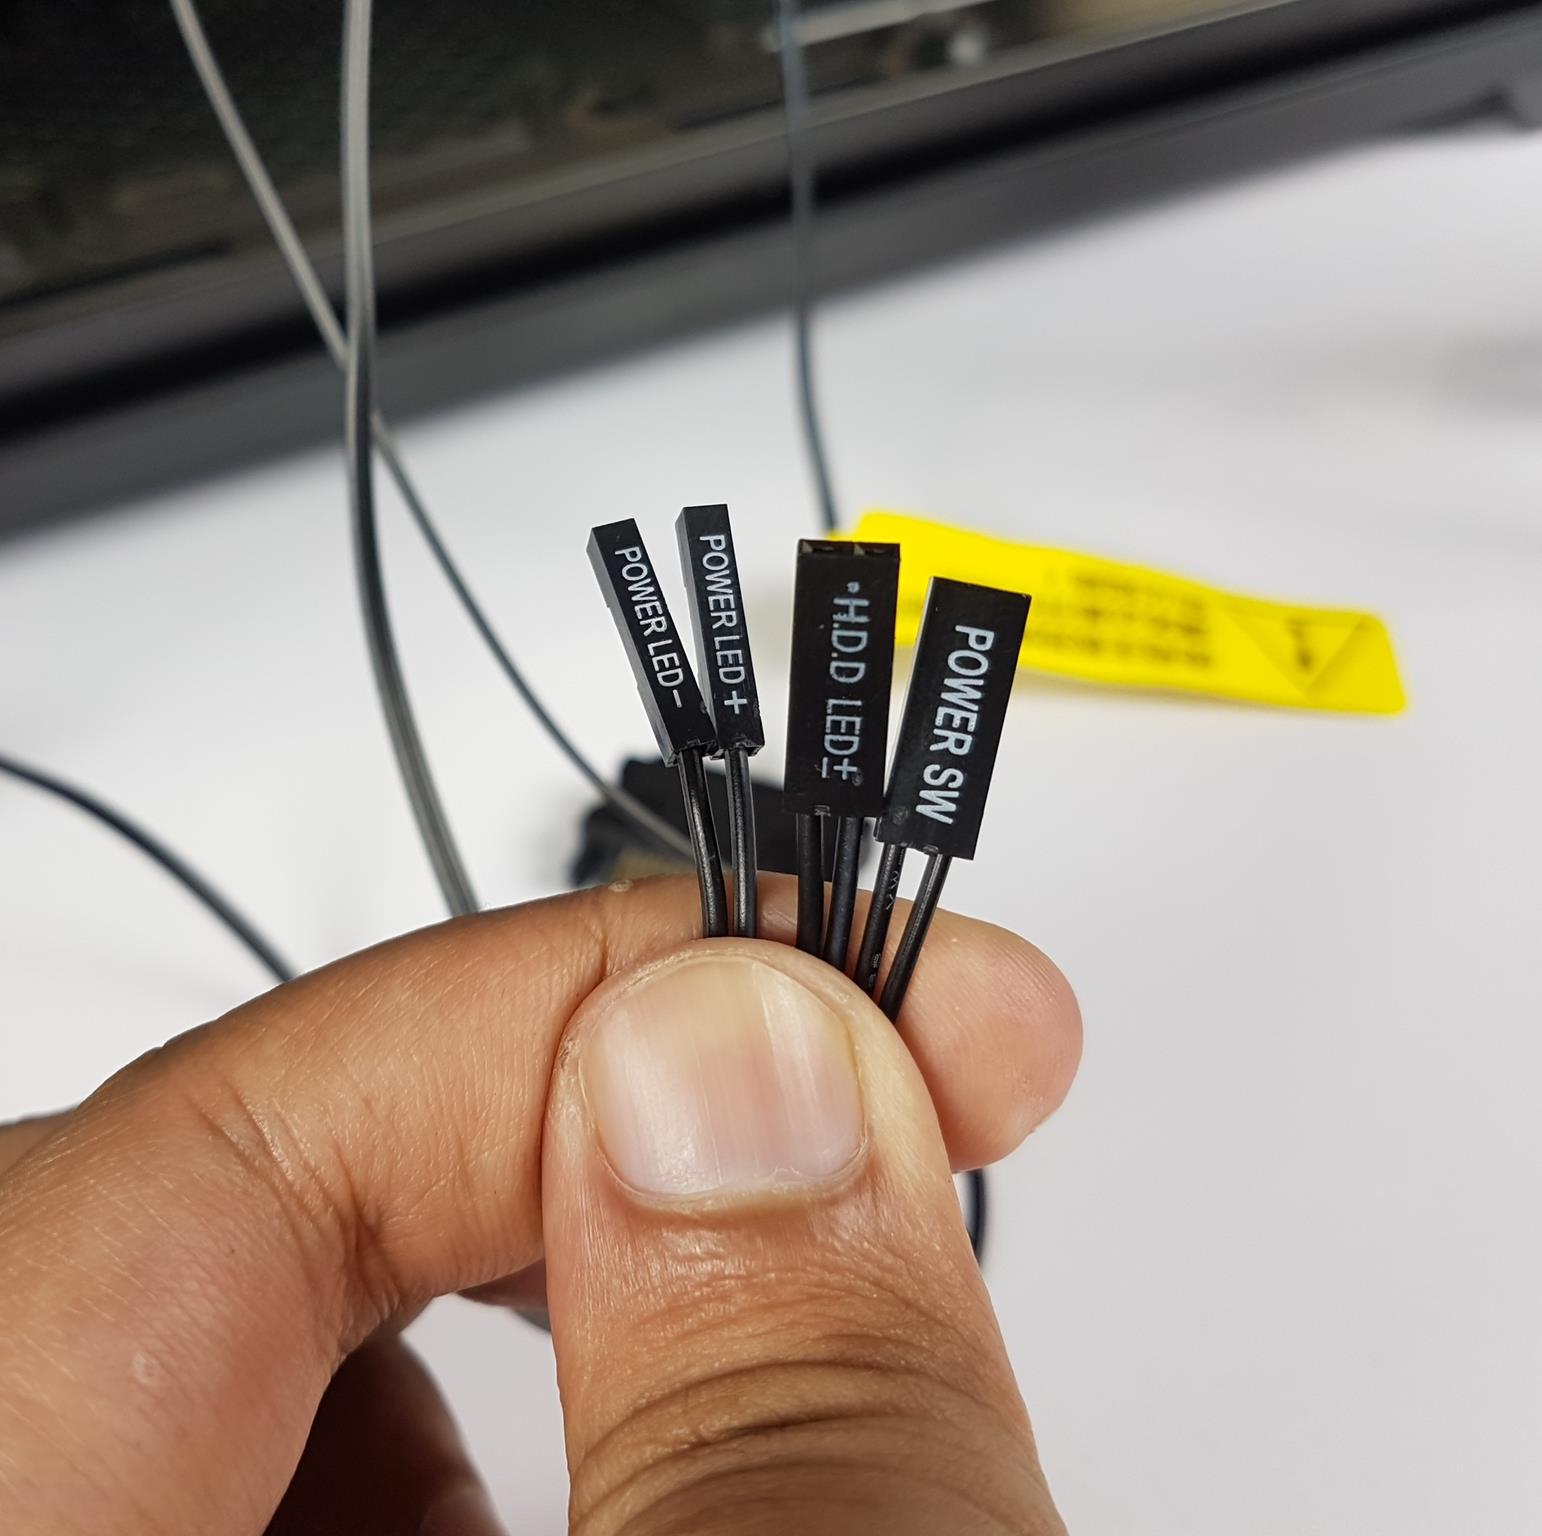
Pictured above are the cables coming out of the front panel. I would note that there is no Reset connector that should have been provided.

The IO panel has an RGB controller which is powered by a SATA connector.
I would also note and appreciate the DeepCool’s effort to focus on their Ecosystem as I was able to connect the DeepCool AS500 cooler with the MATREXX 70 ADD-RGB 3F for synchronization of lighting.
Rear
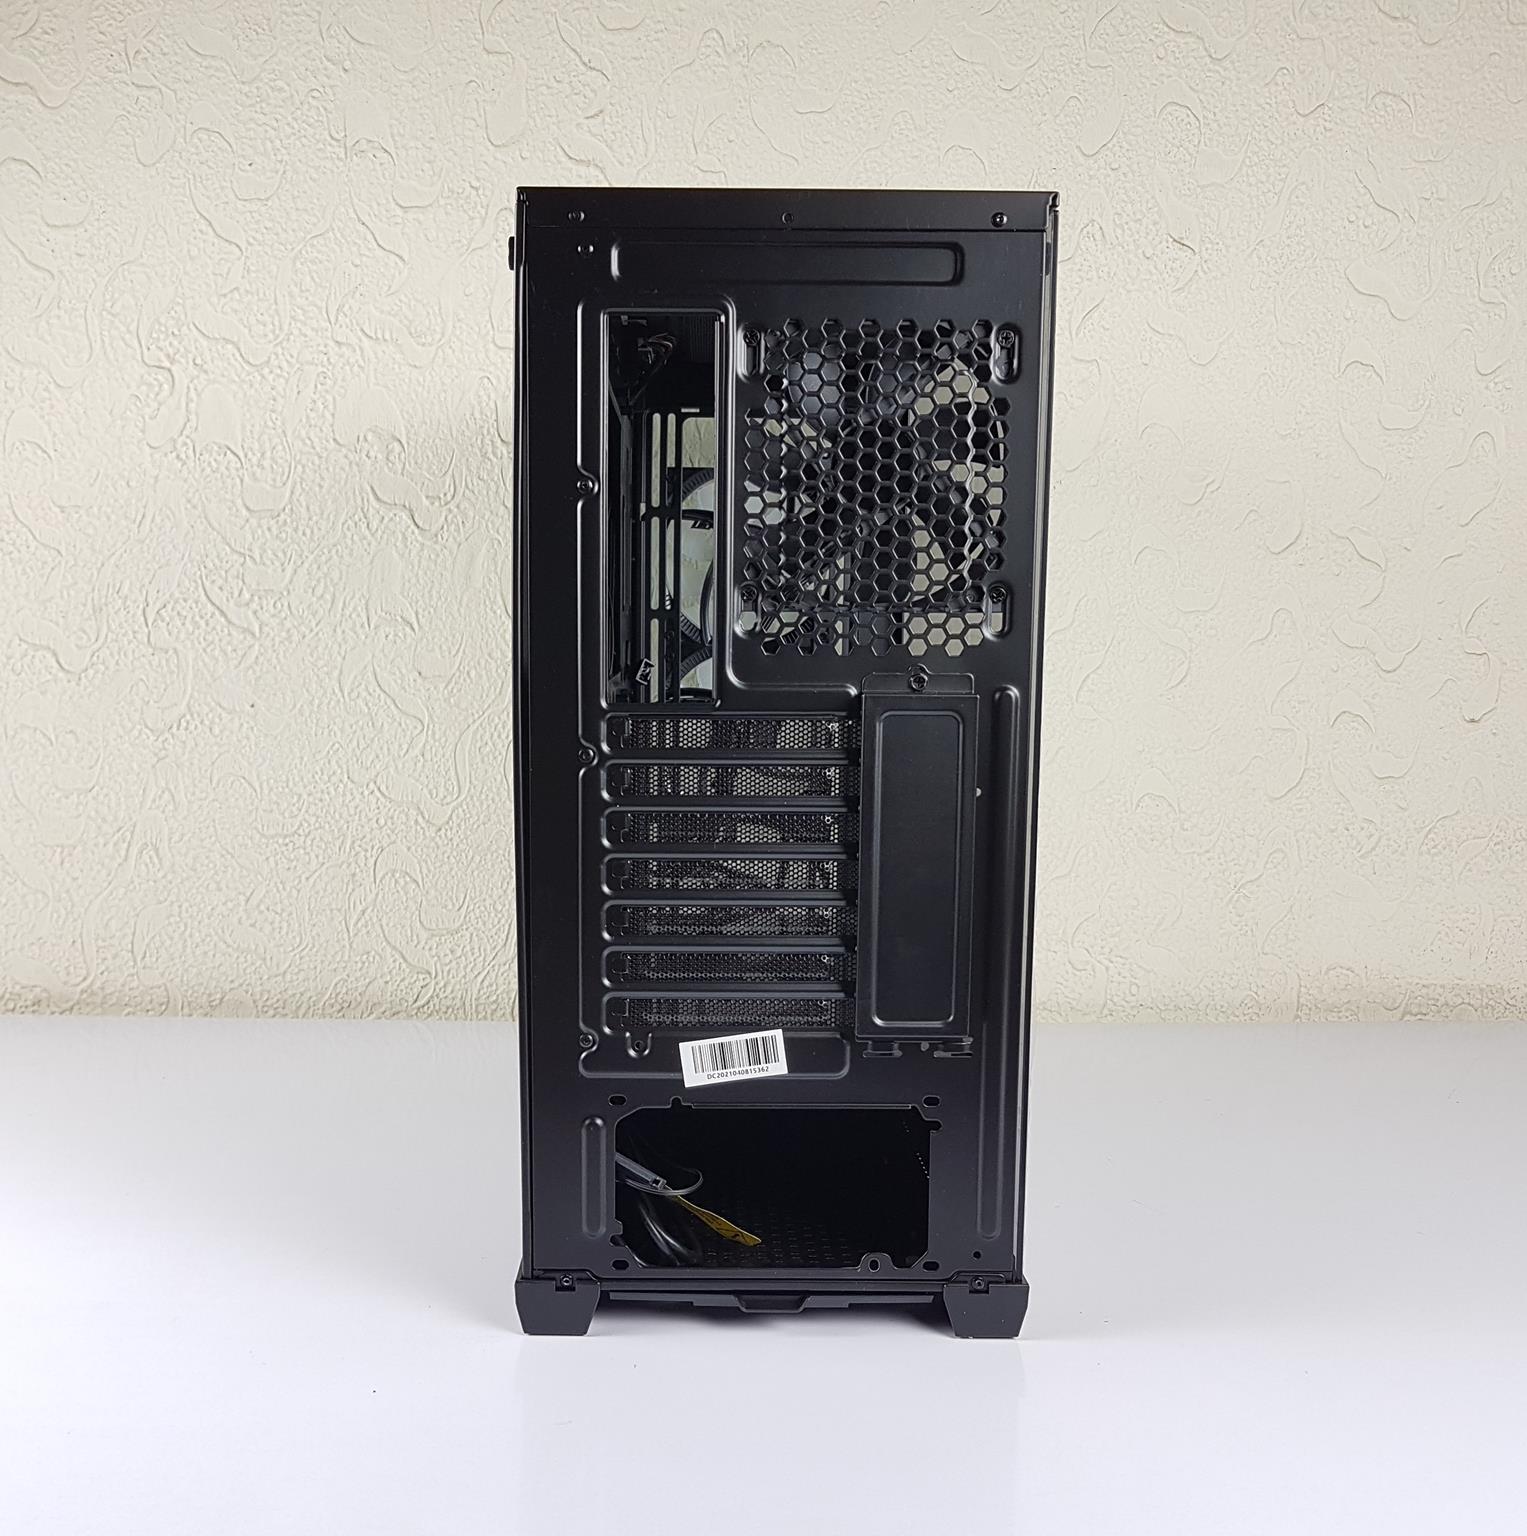

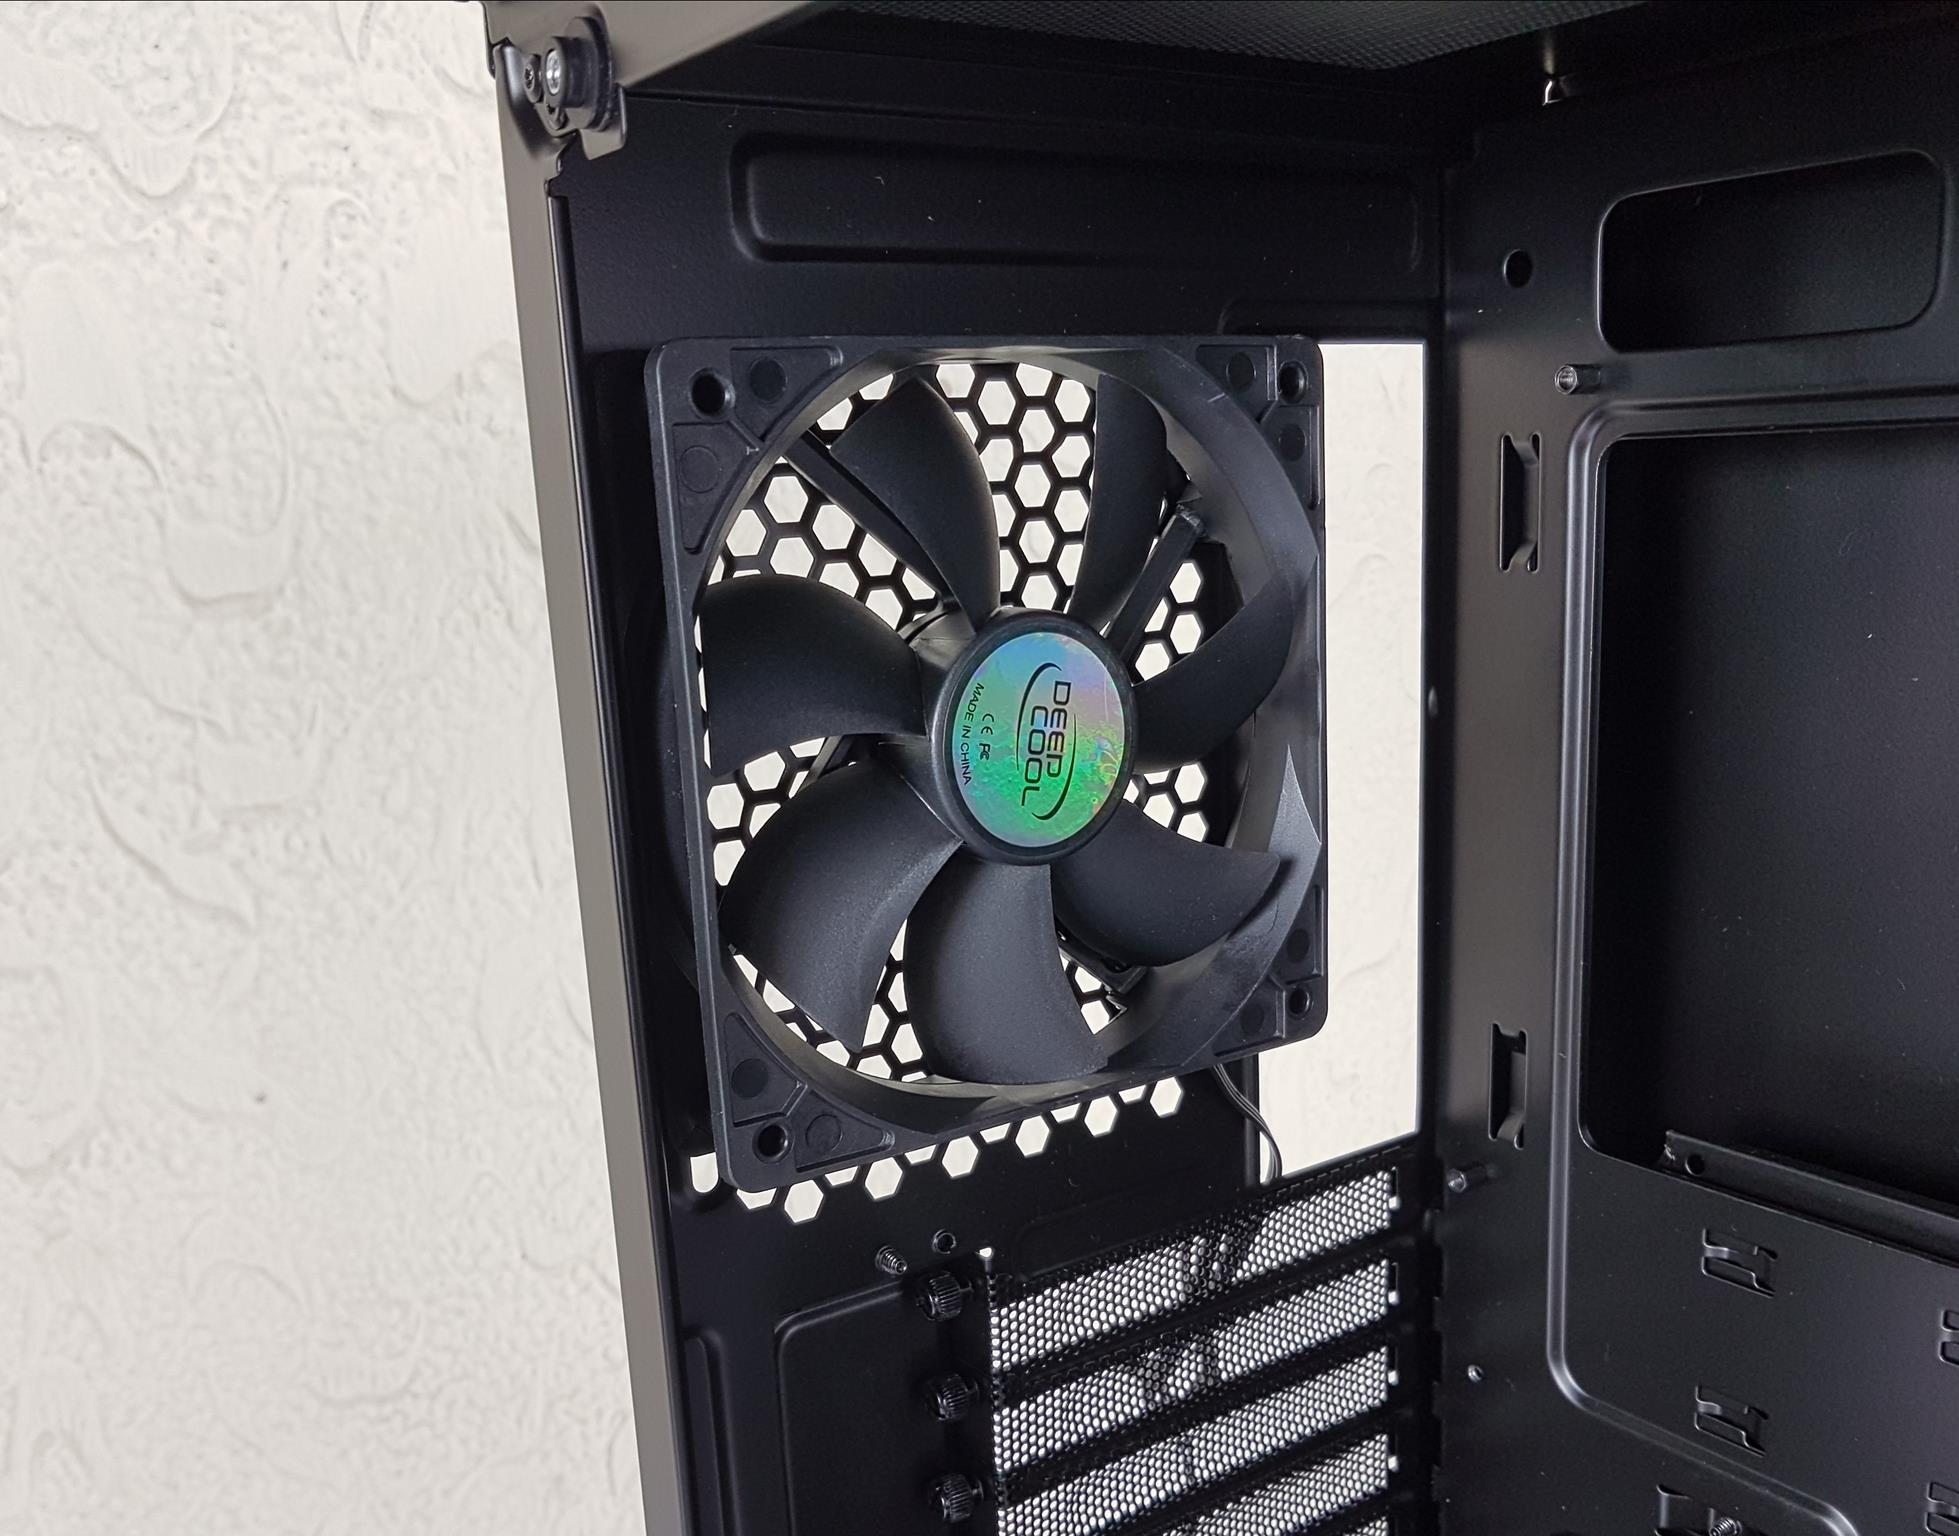
We have a standard layout on the rear. There is a cutout for the IO shield of the motherboard. On its right, there is a vented area for the 120mm fan mount. One non-RGB 120mm fan is preinstalled. The fan’s height is adjustable.
We have 7+2 PCIe slots in the horizontal and vertical layout respectively. The slot covers are reusable. These slots are implemented with raised ends outside of the chassis. There is a PCIe cover secured using a 1x screw. You would need to lose the cover to install/remove the PCIe devices.
There is an ATX PSU mount on the bottom.
The image on the right shows the PCIe slots after removing the cover.
Top
The rail mount is quite sturdy and we have clearance for 120/140/240/280/360mm radiator on the top and up to 3x 120mm or 3x 140mm fans on the top.
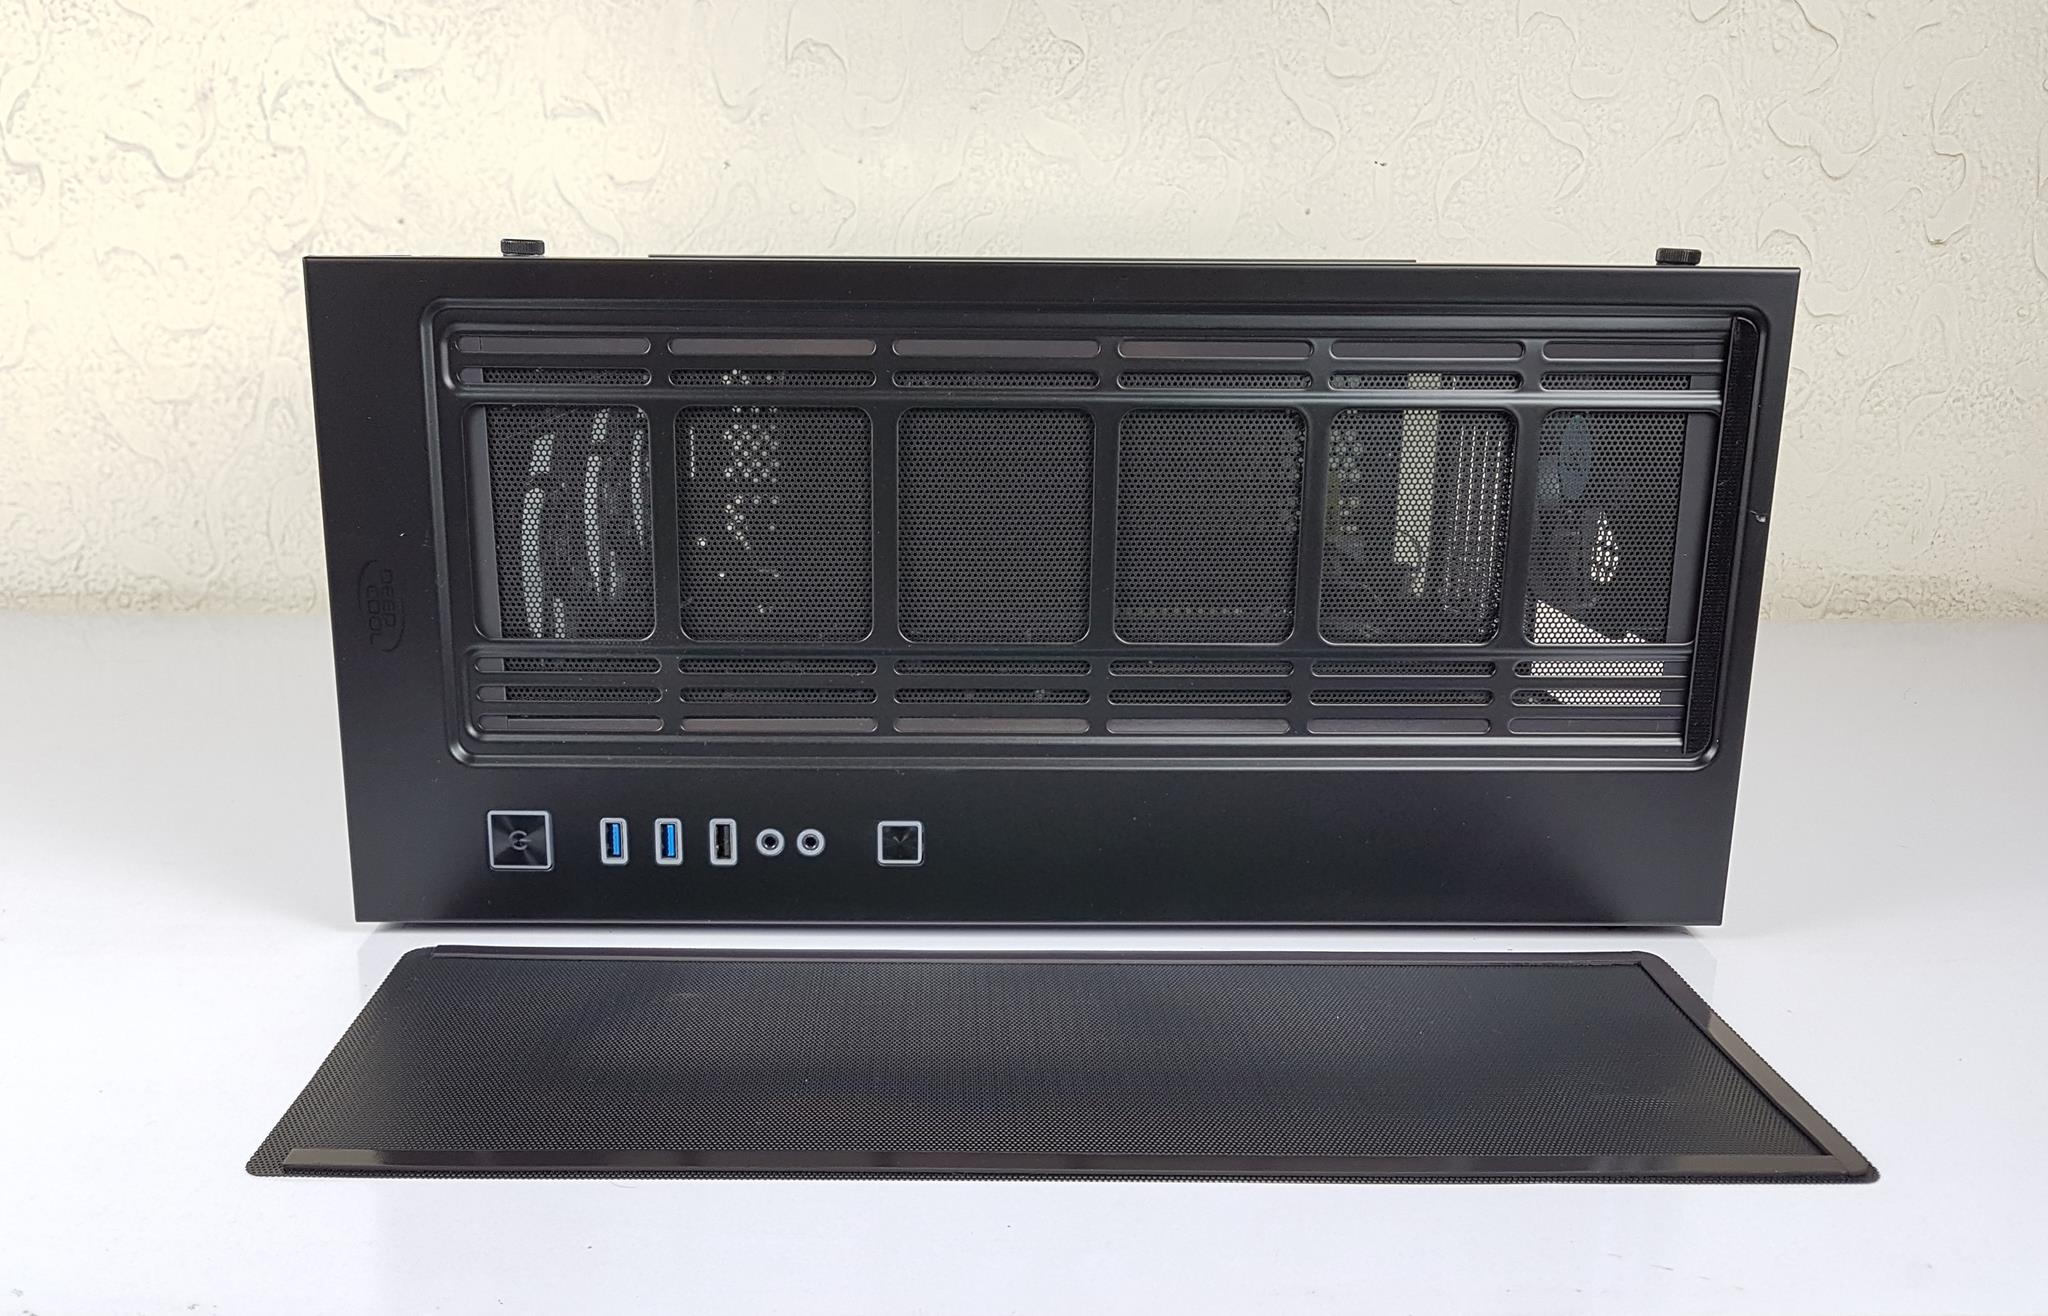
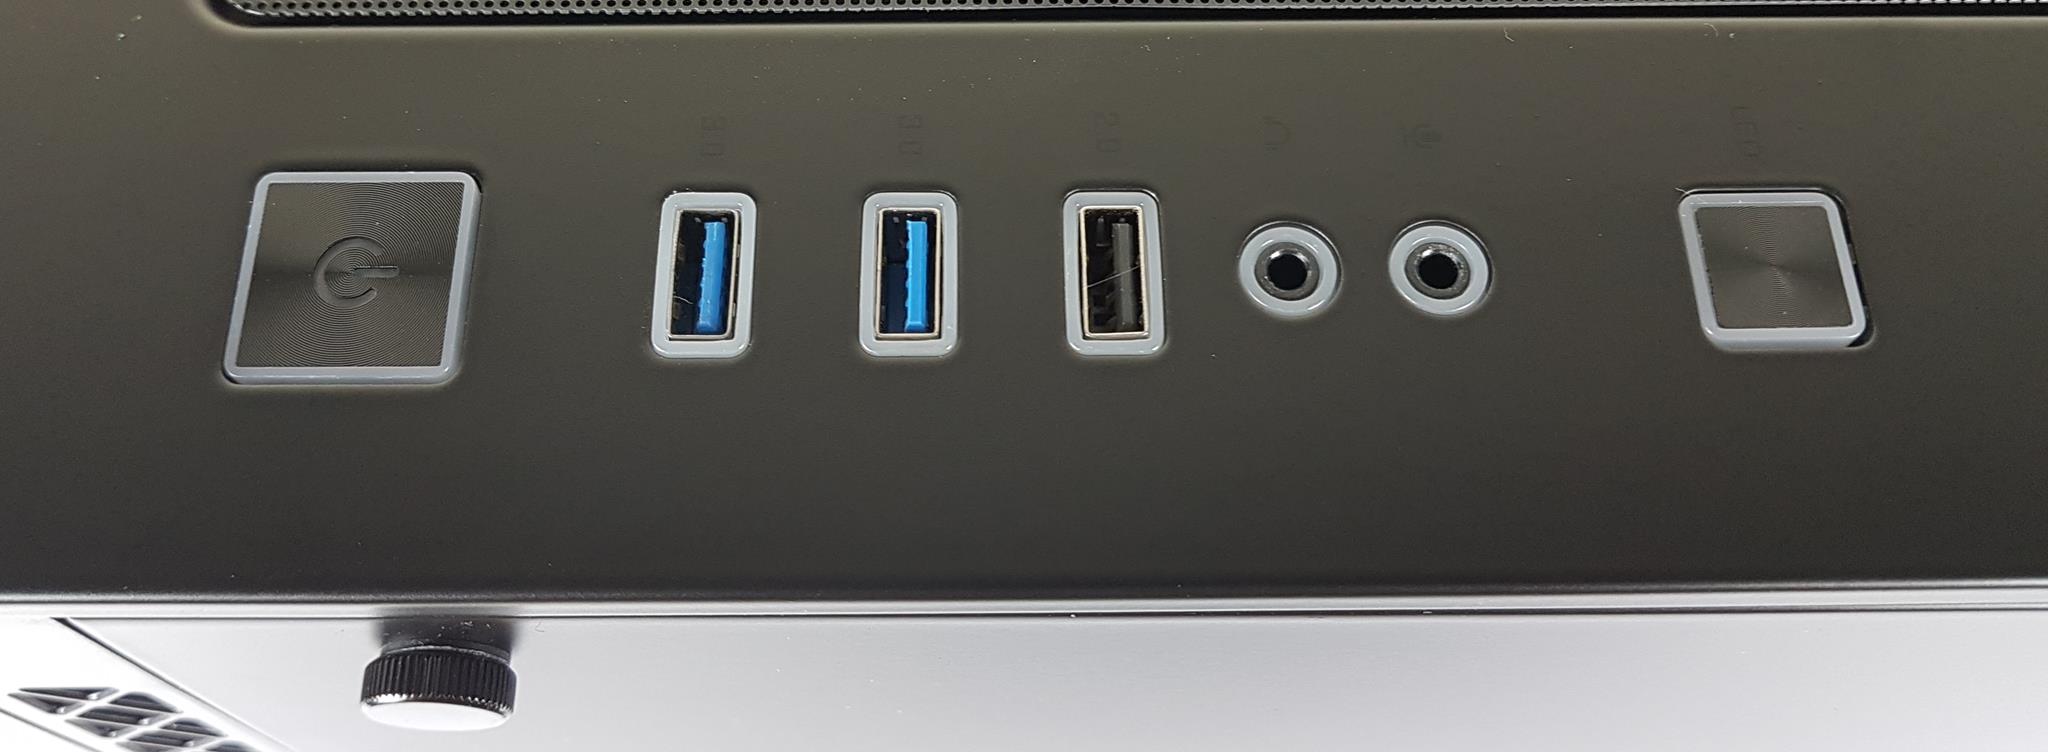
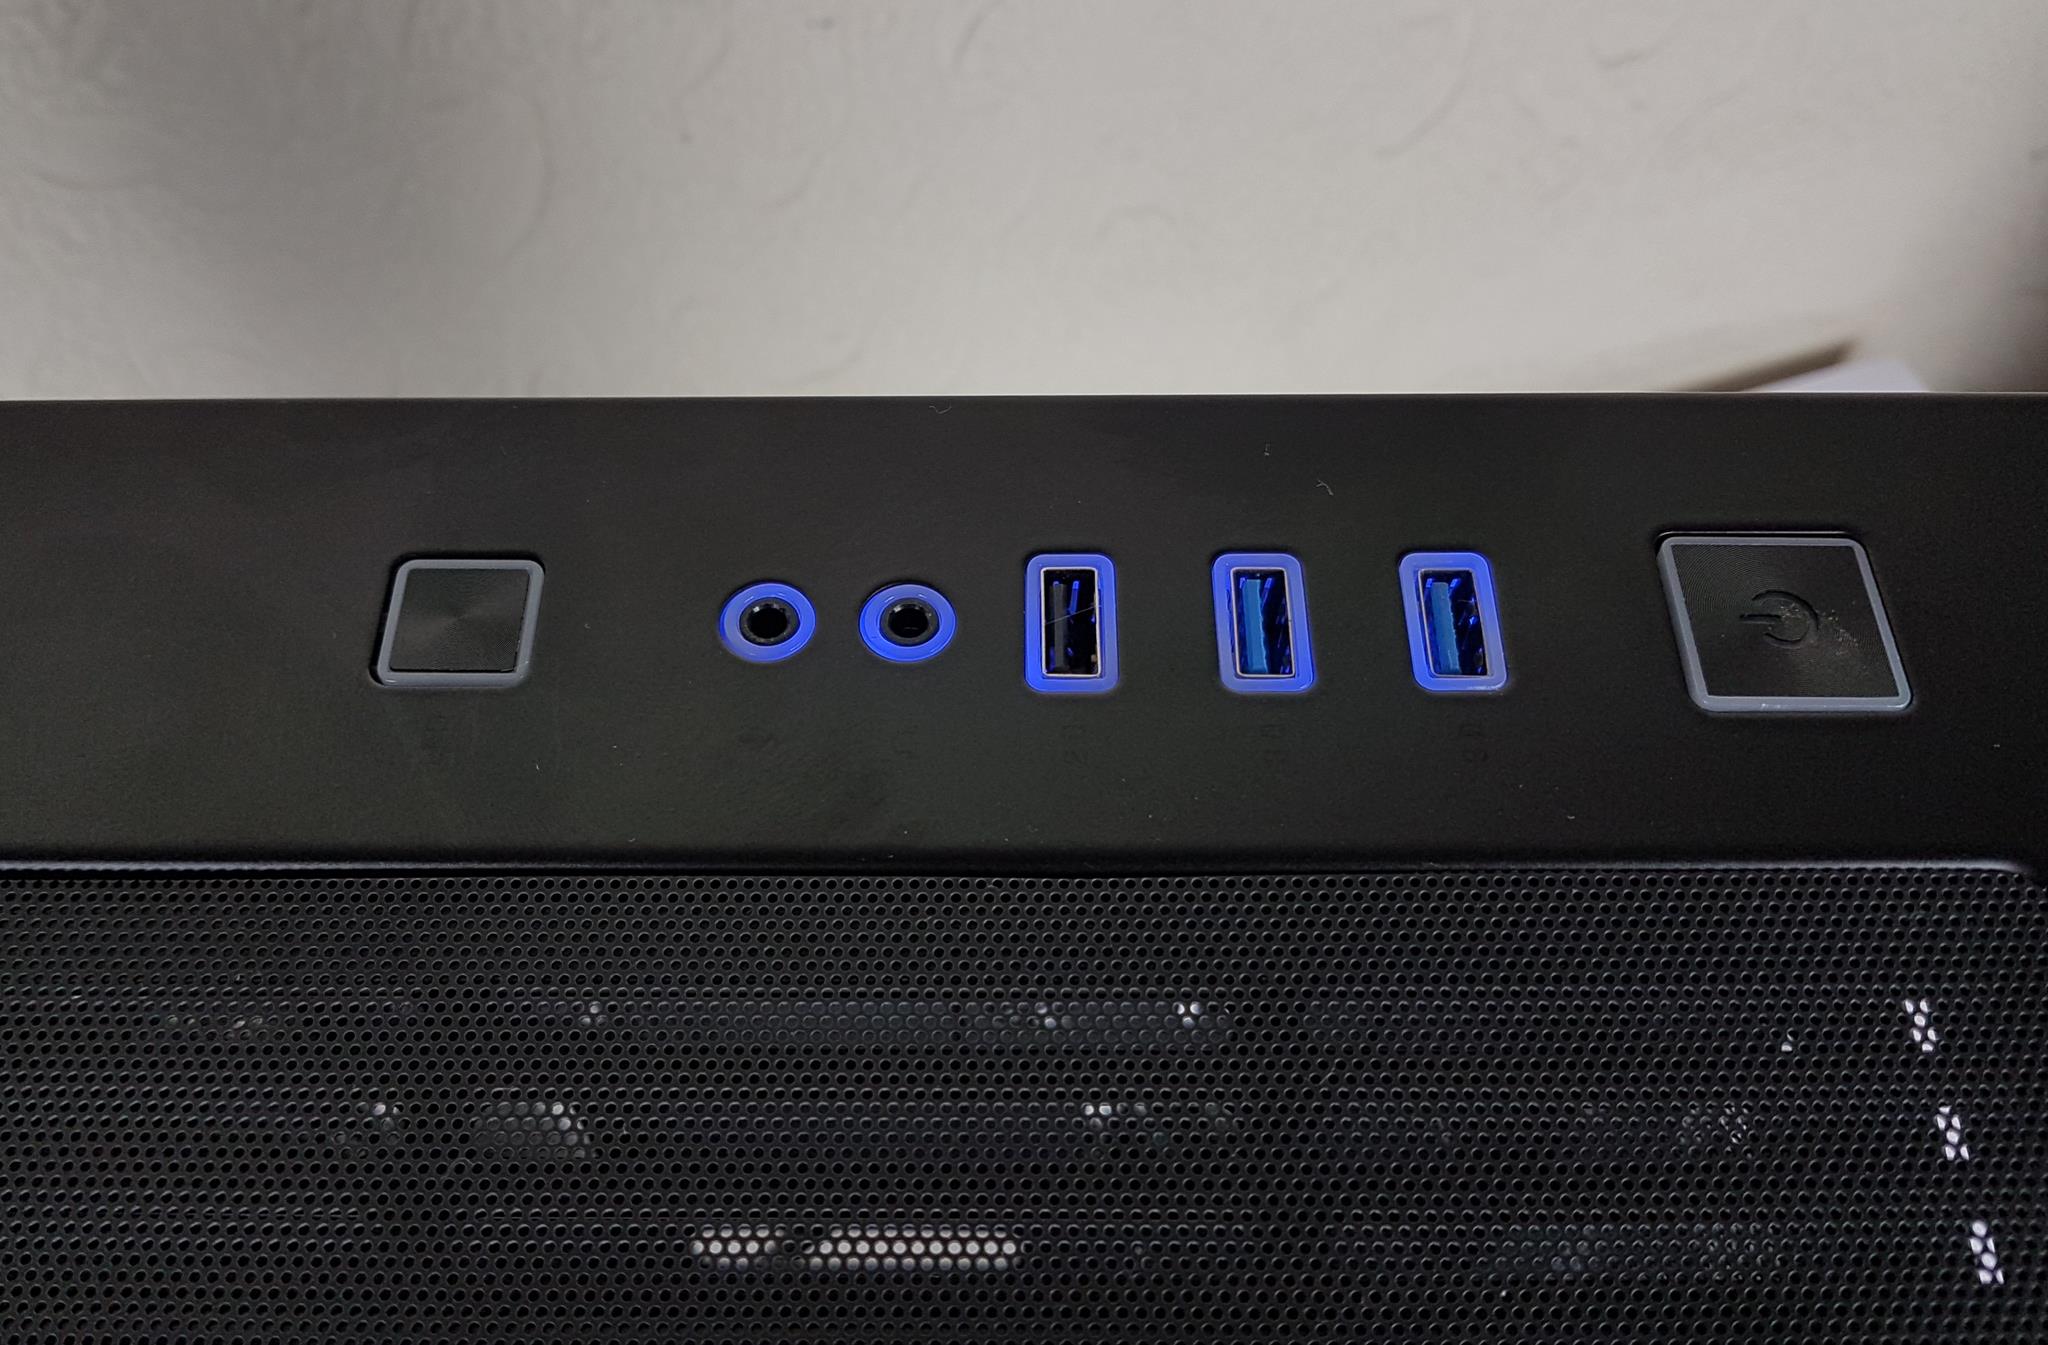
I/O panel is located on the top frame of the chassis on which we have two USB 3.0 ports, one USB 2.0 port, audio jacks, an LED button and the power button.
All these buttons are backlit in blue color. Please note that there is no Reset button as DeepCool has taken out the Reset option in favor of the LED button. In my opinion, this should have been implemented the other way around by adding another button for Reset.
Bottom
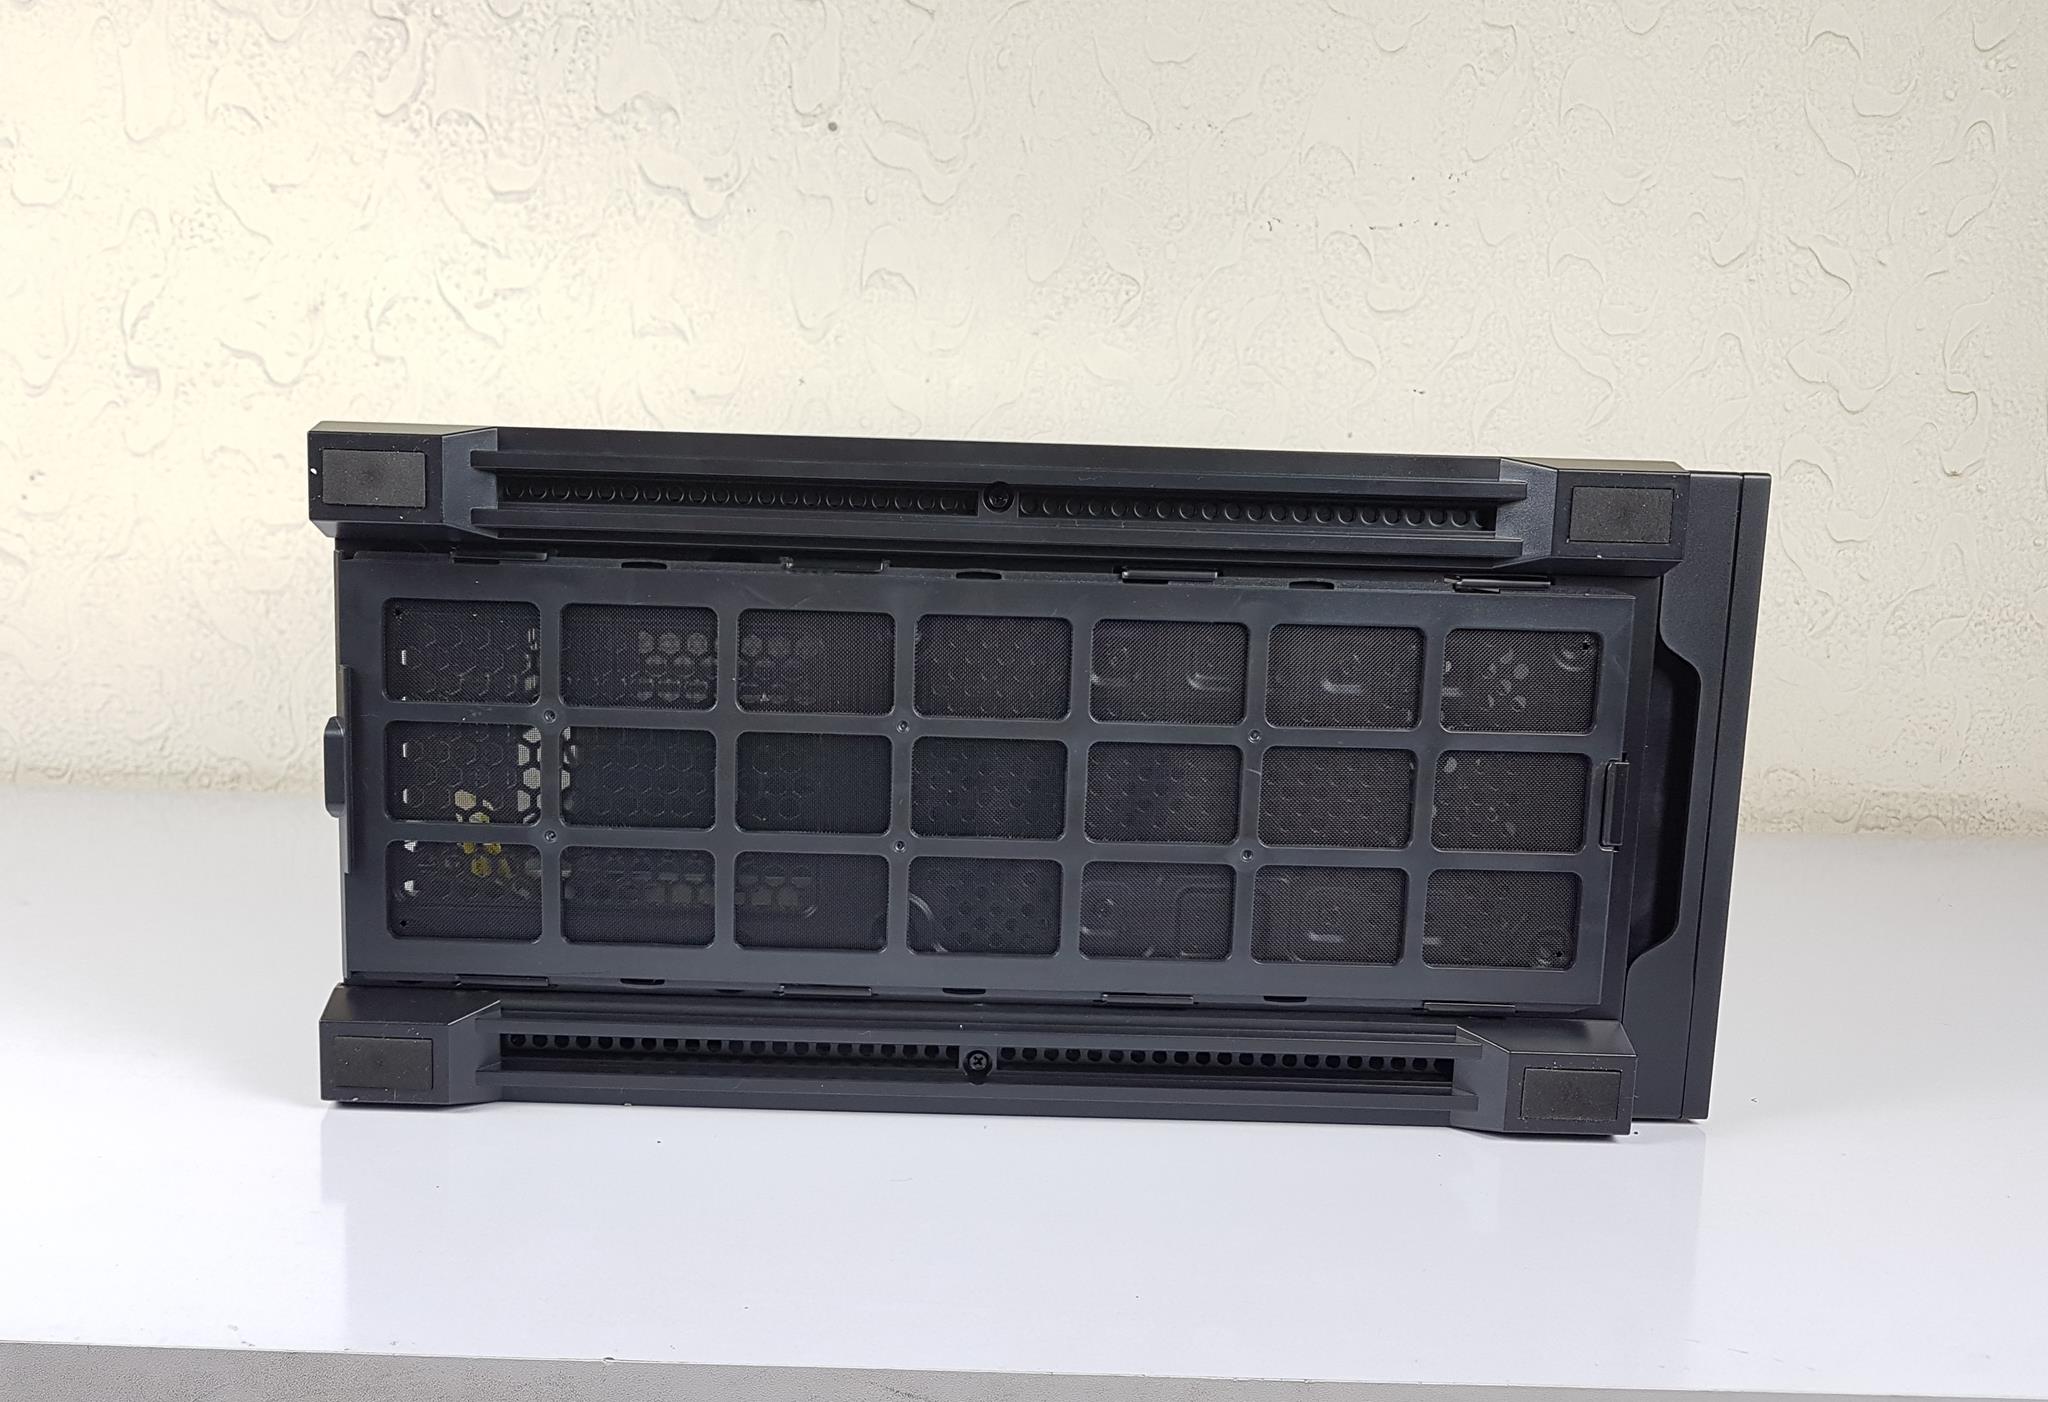
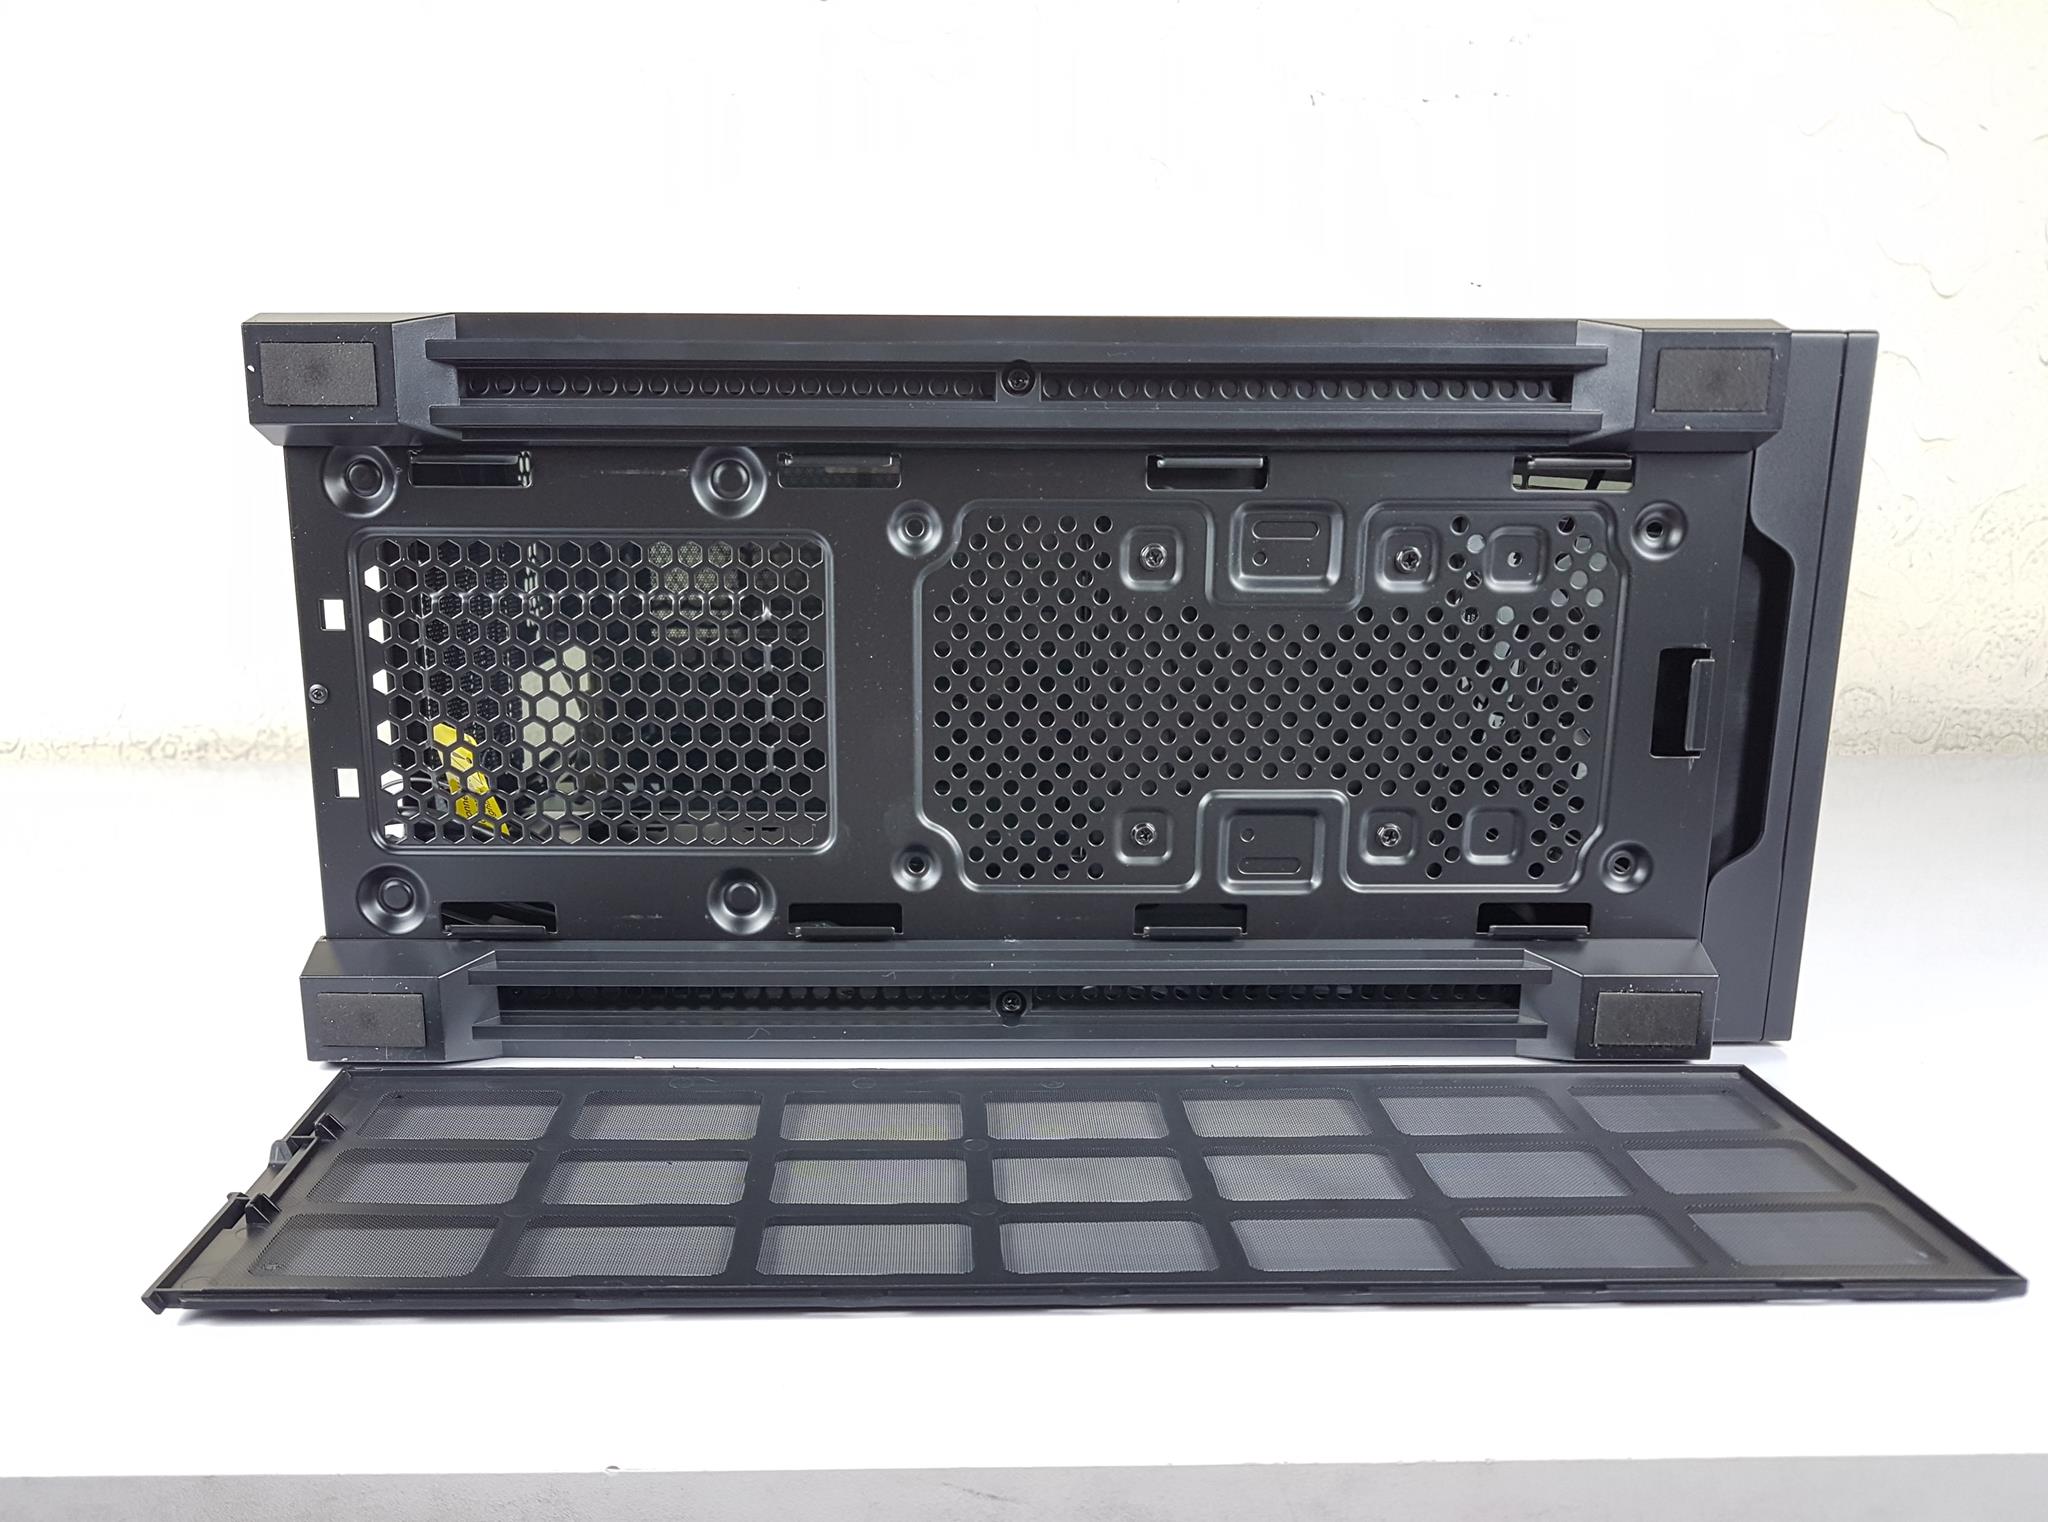
There is a single large-size removable and non-magnetic dust filter covering the entire length of the case. The black color feet give sufficient lift to the chassis from the bottom for better ventilation.
We have a total vented area on the base of the case. Hence the full-length dust filter makes sense. Though I would note that removing the dust filter while the case is placed closer to the wall would be almost impossible without first displacing the case.
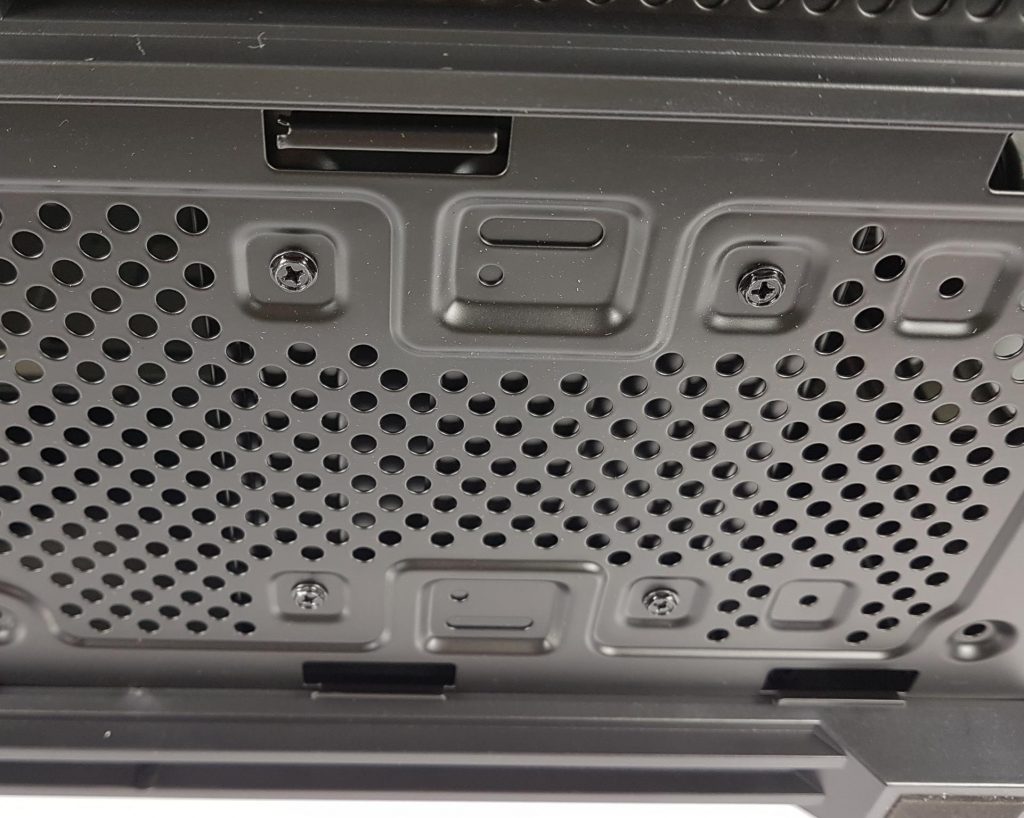
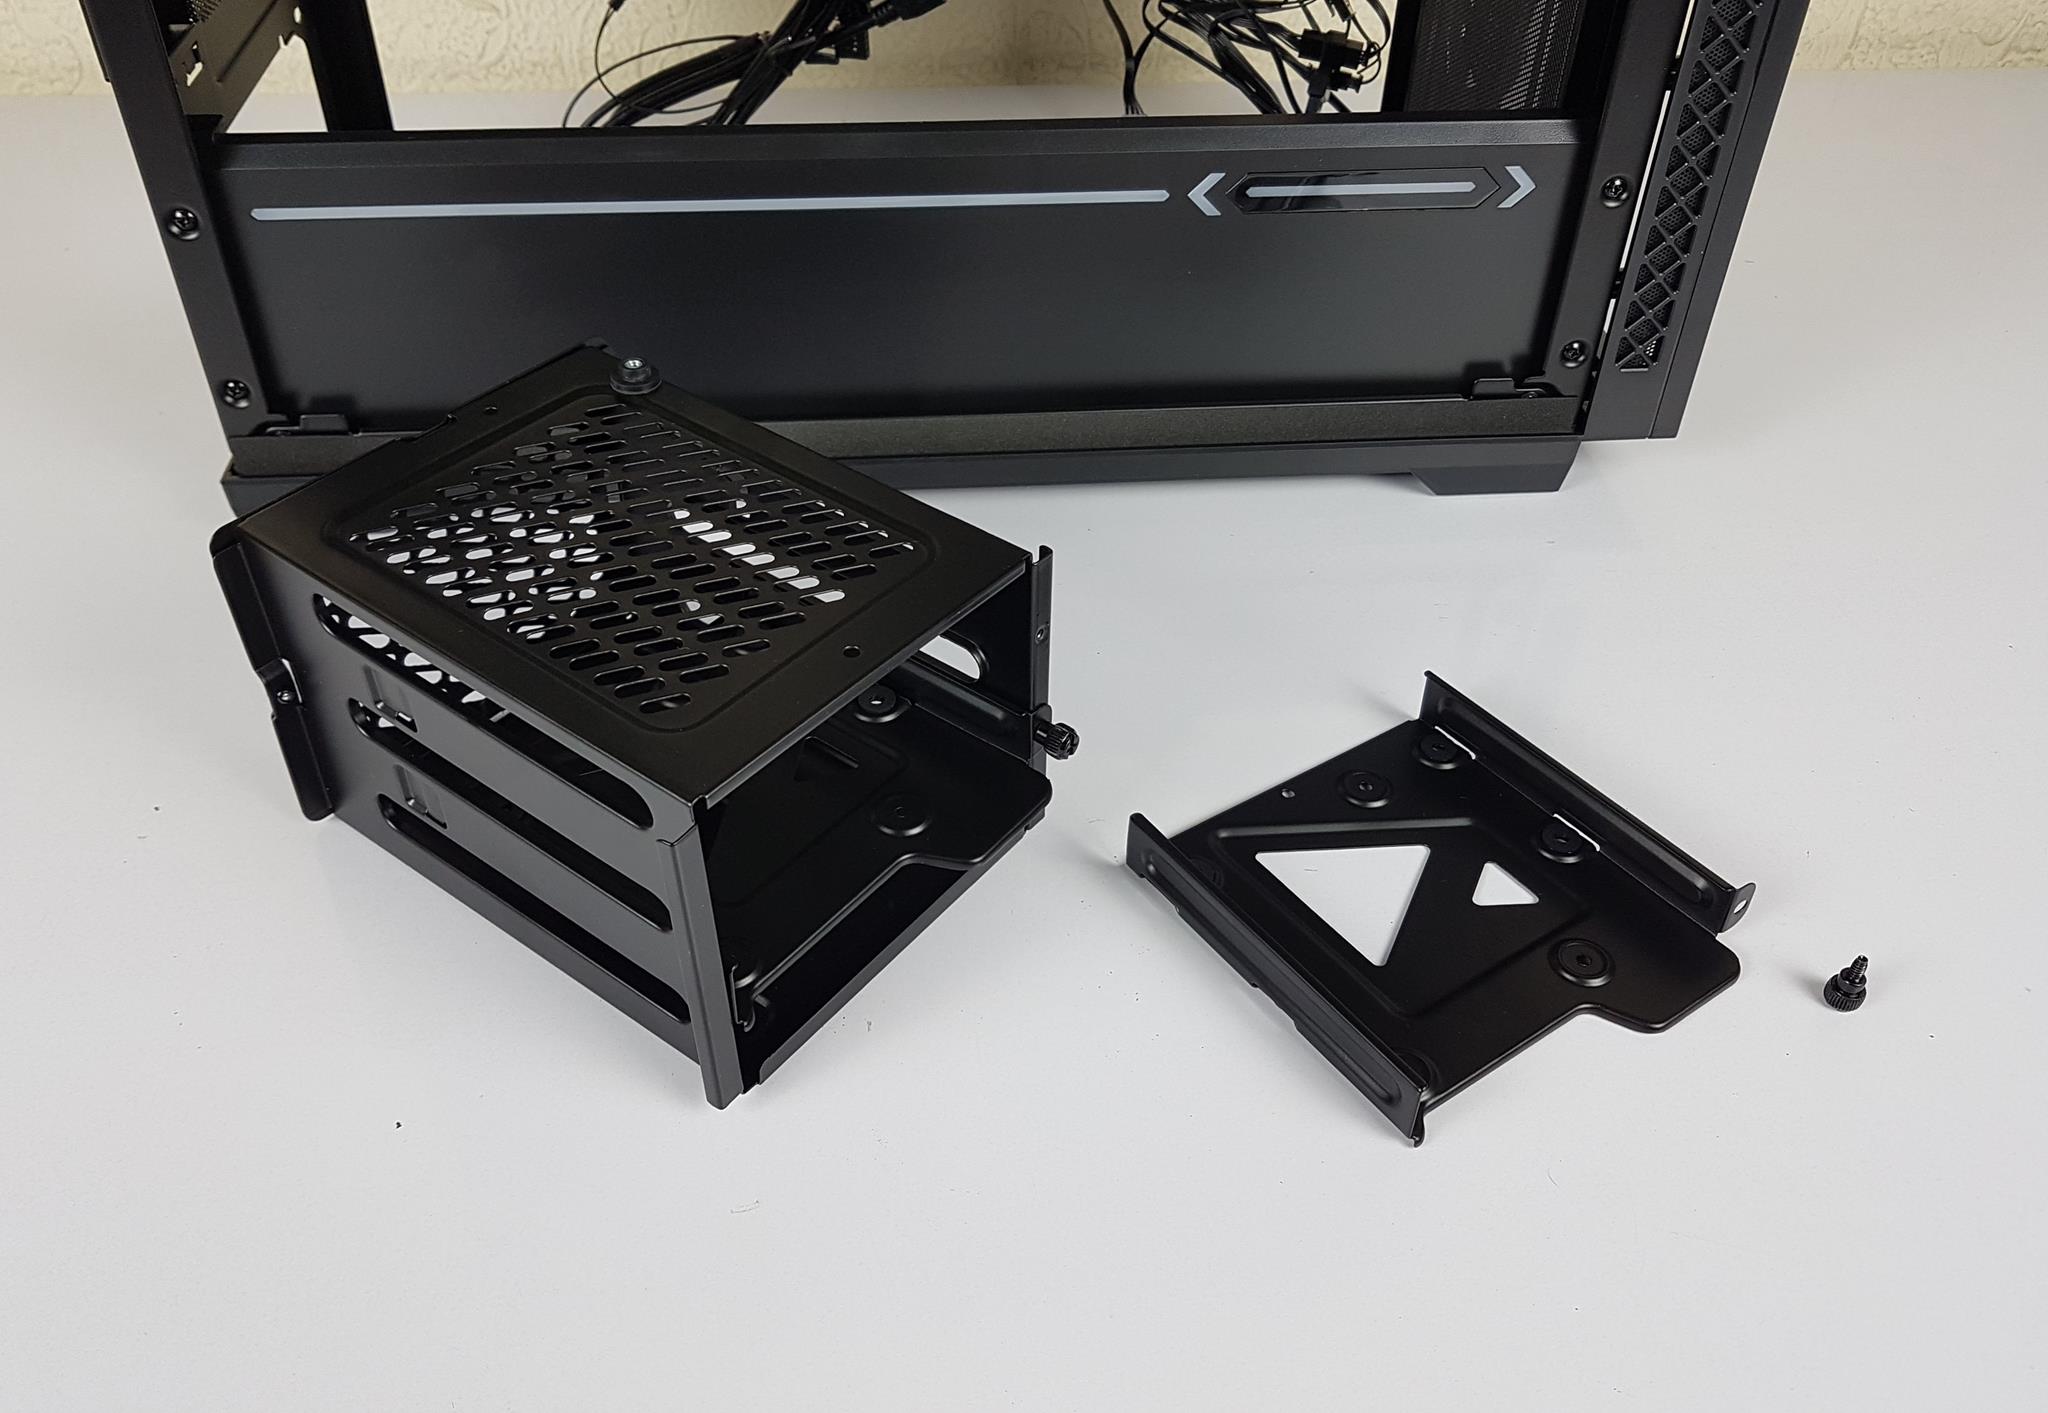
We have 4x button head screws here. These screws are holding the HDD cage. DeepCool has wisely implemented the HDD cage allowing it to be adjustable in two places. One can make more room for the PSU and cables by moving the HDD cage further towards the front or keep the cage in-stock position to have room for front-mounted radiator.
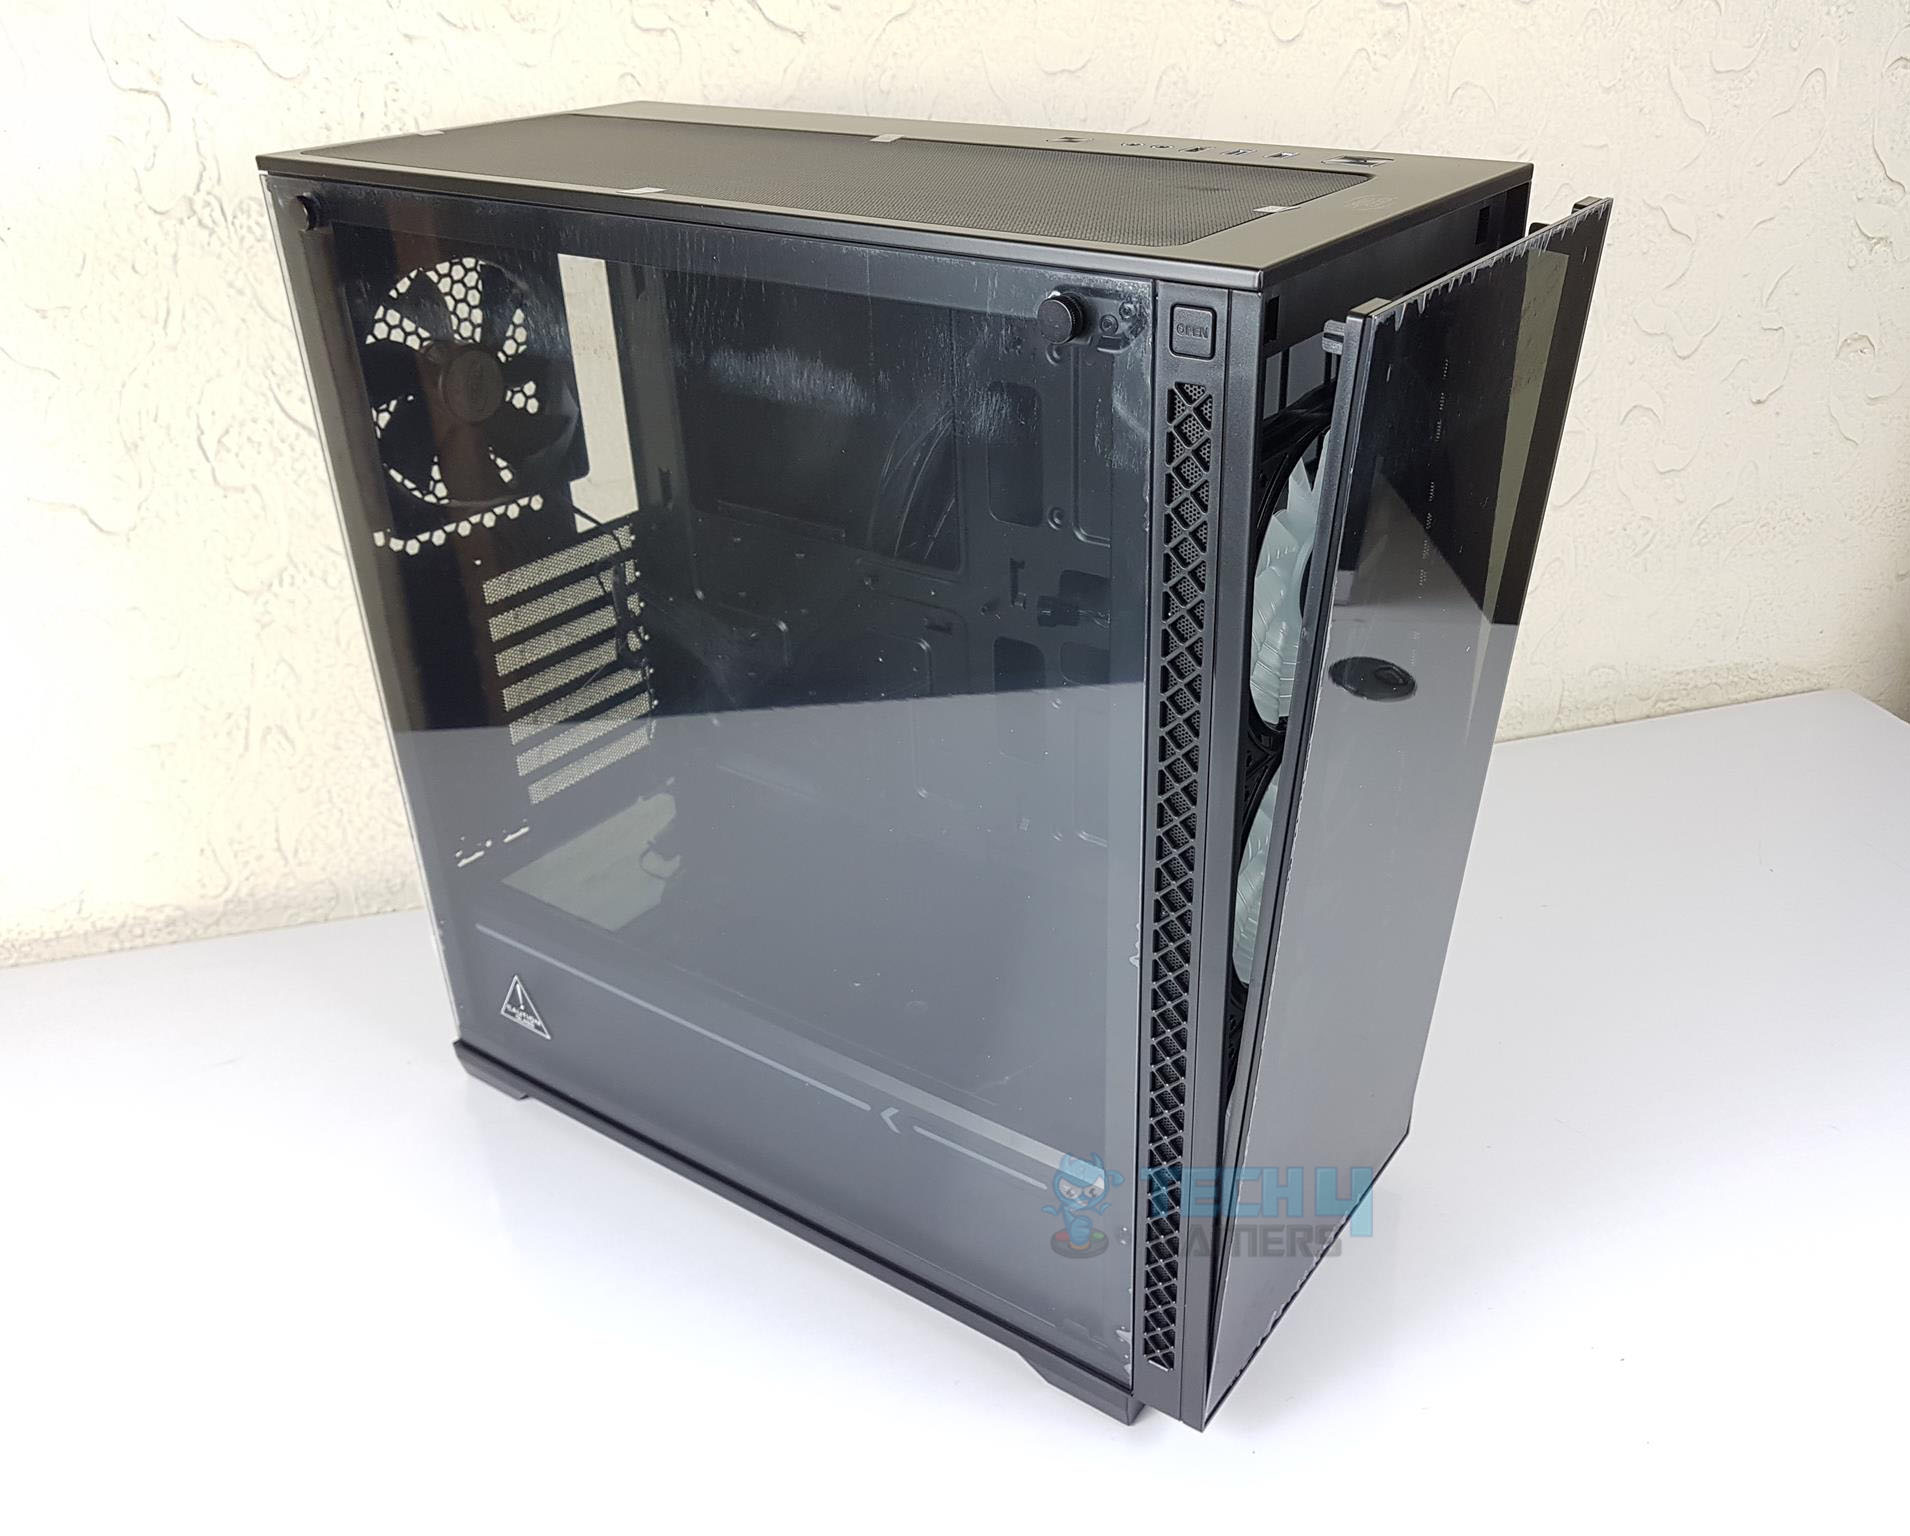
Side – Glass Panel
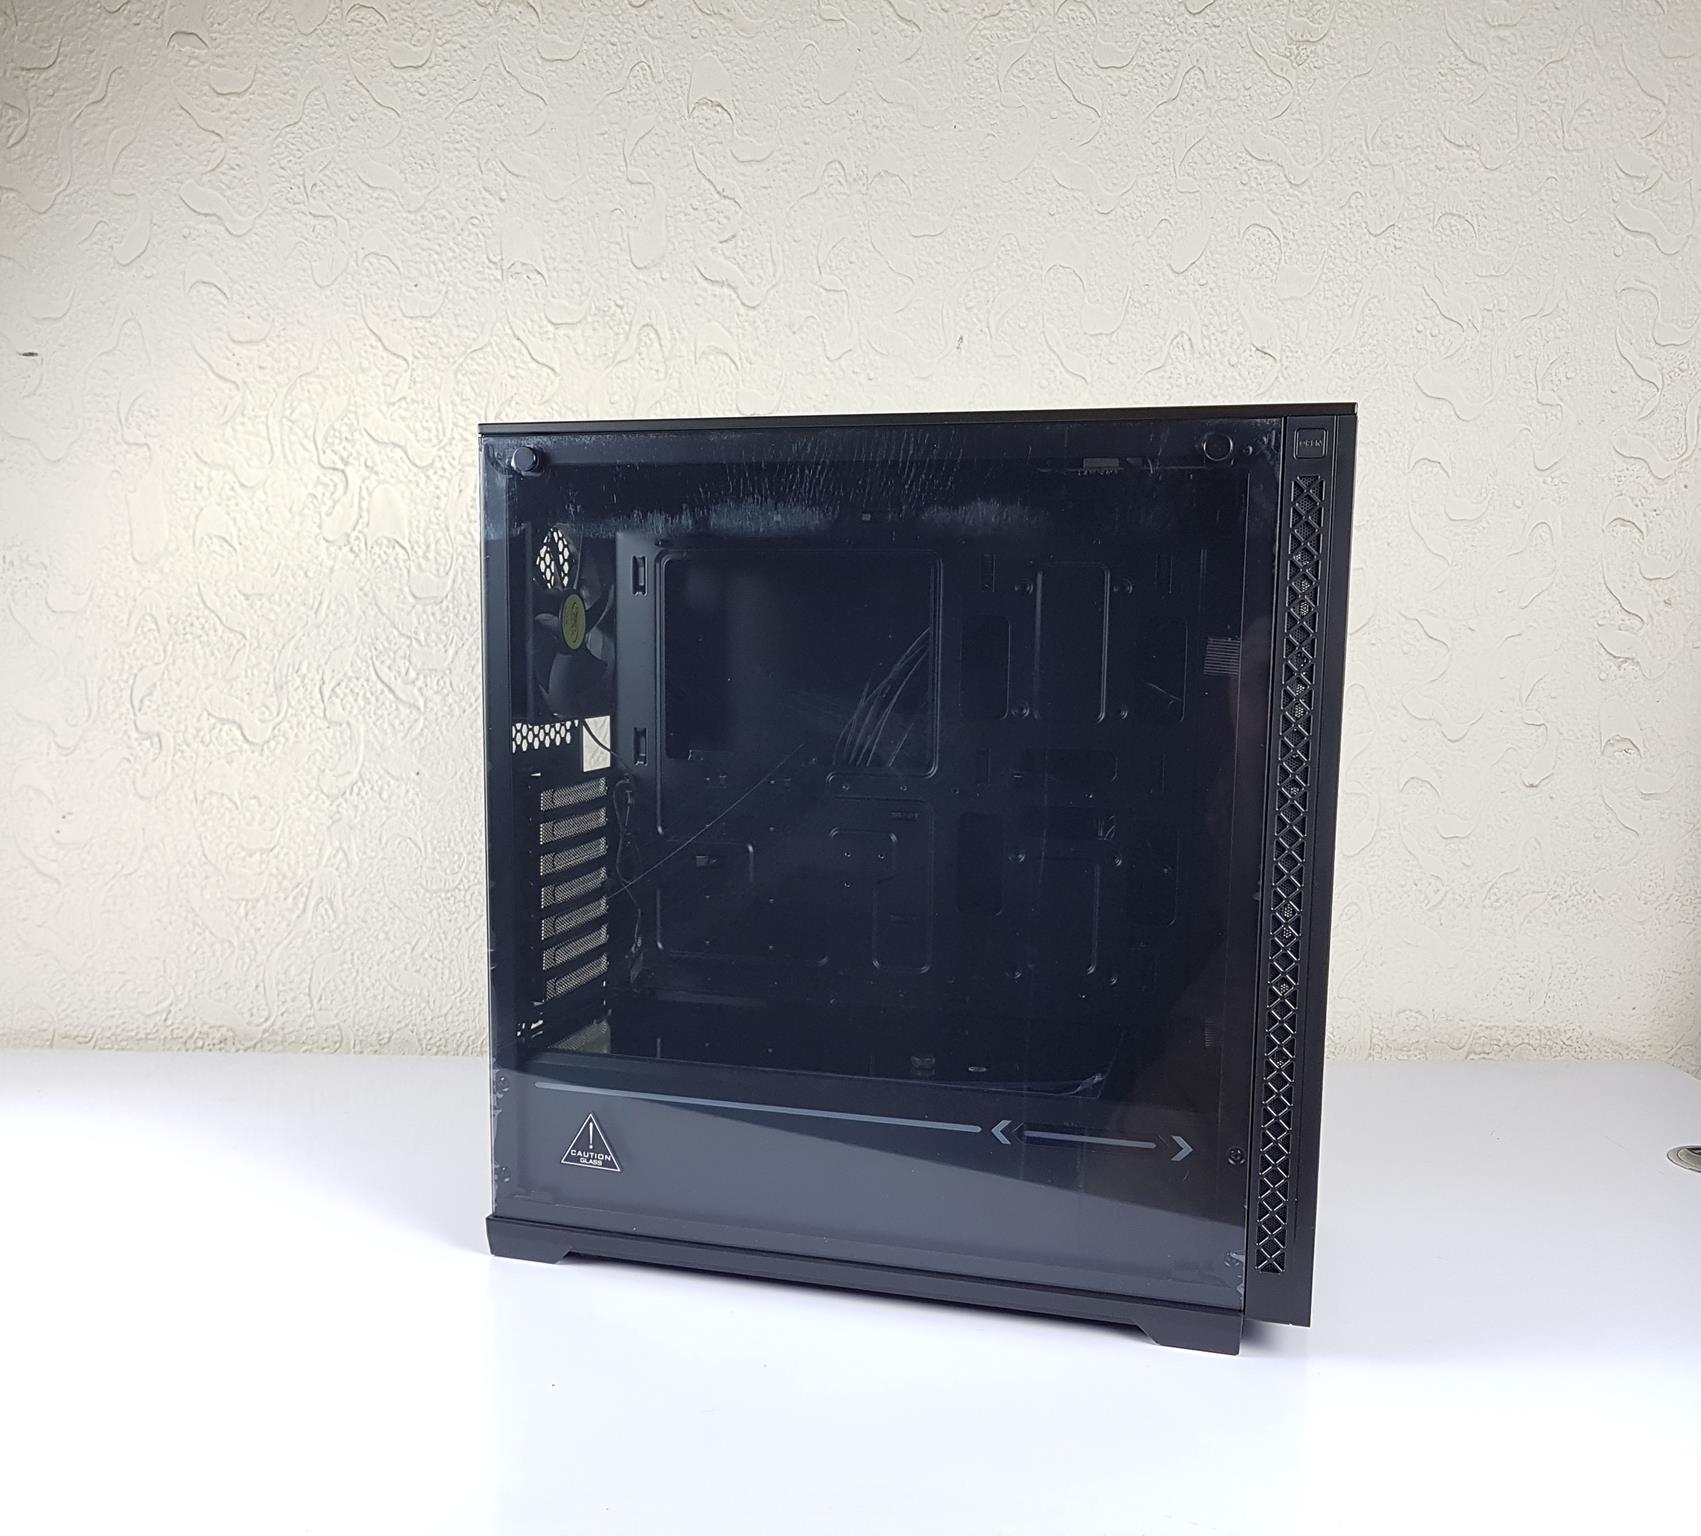
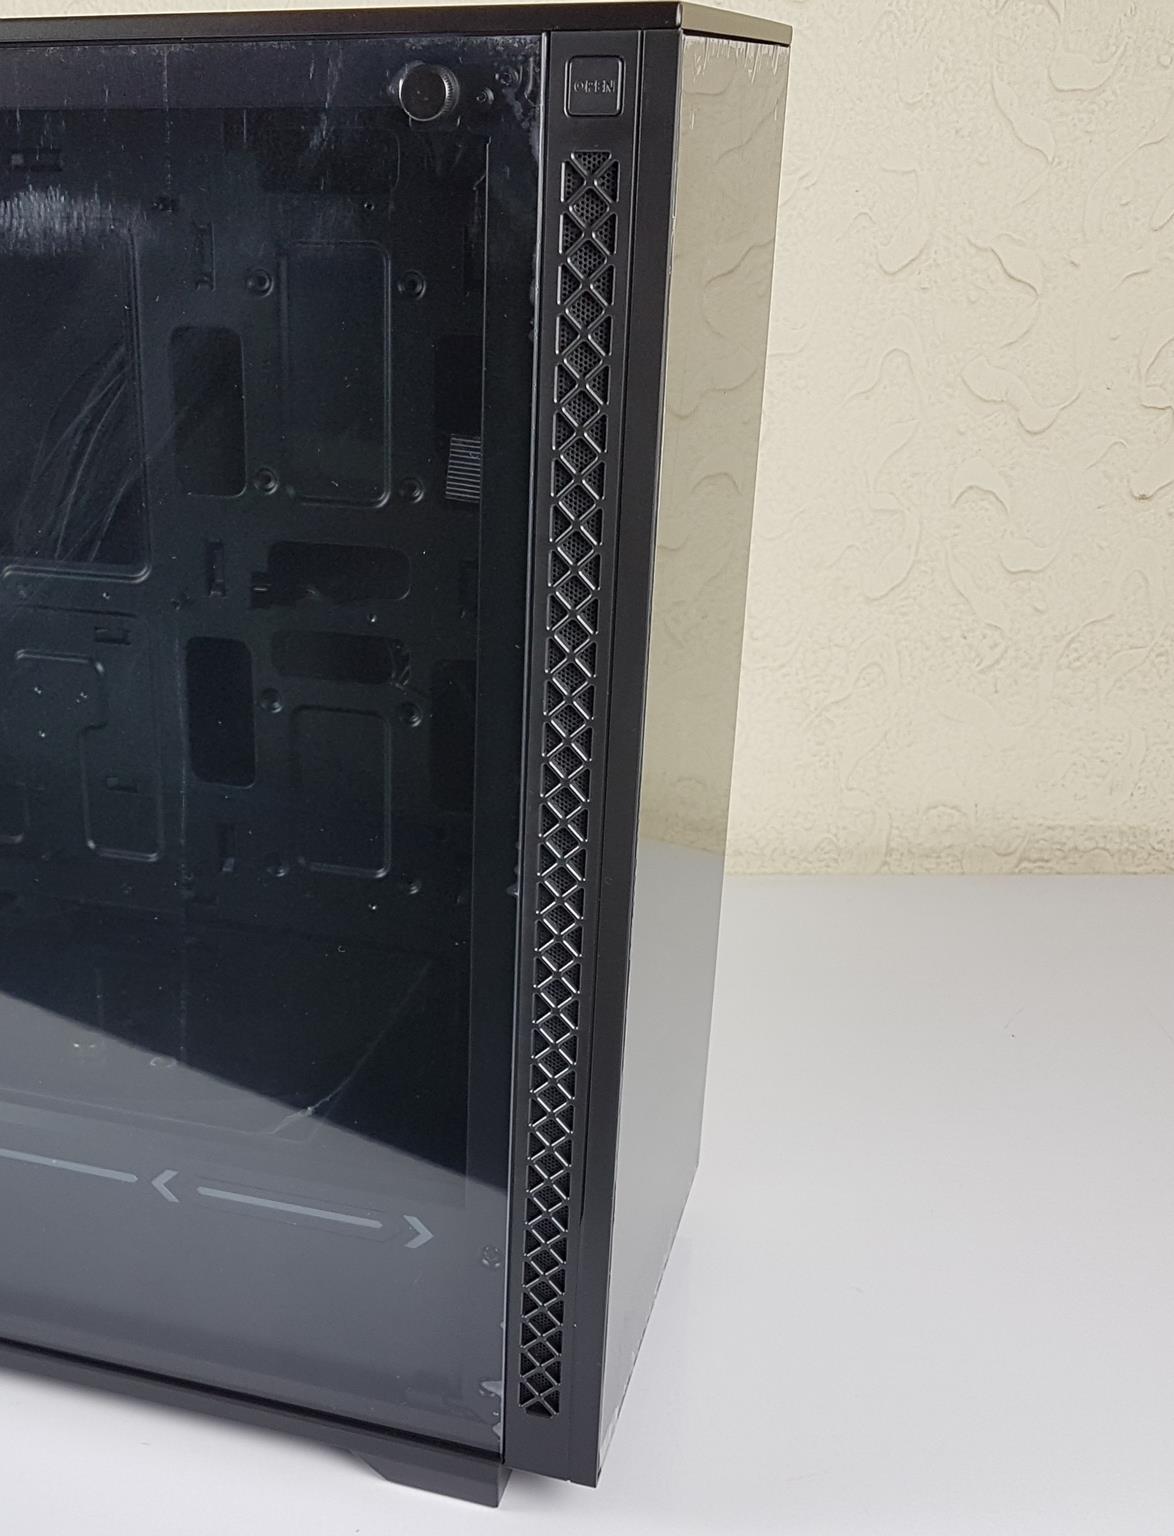
The DeepCool MATREXX 70 ADD-RGB 3F has a tempered glass panel on the side. The thickness of the panel seems to be 3mm so take care during handling. The panel is light-tinted. The panel is not hinged as it is placed on the bottom mount and secured using two screws on the top. I wish DeepCool has gone for a hinged design here!
There is a vented portion on the front panel on both sides. This is the only area for air intake. It has dust filter inserts as well. This design is clearly air restrictive. The front panel seems to be not fully flushed with the frame of the case.
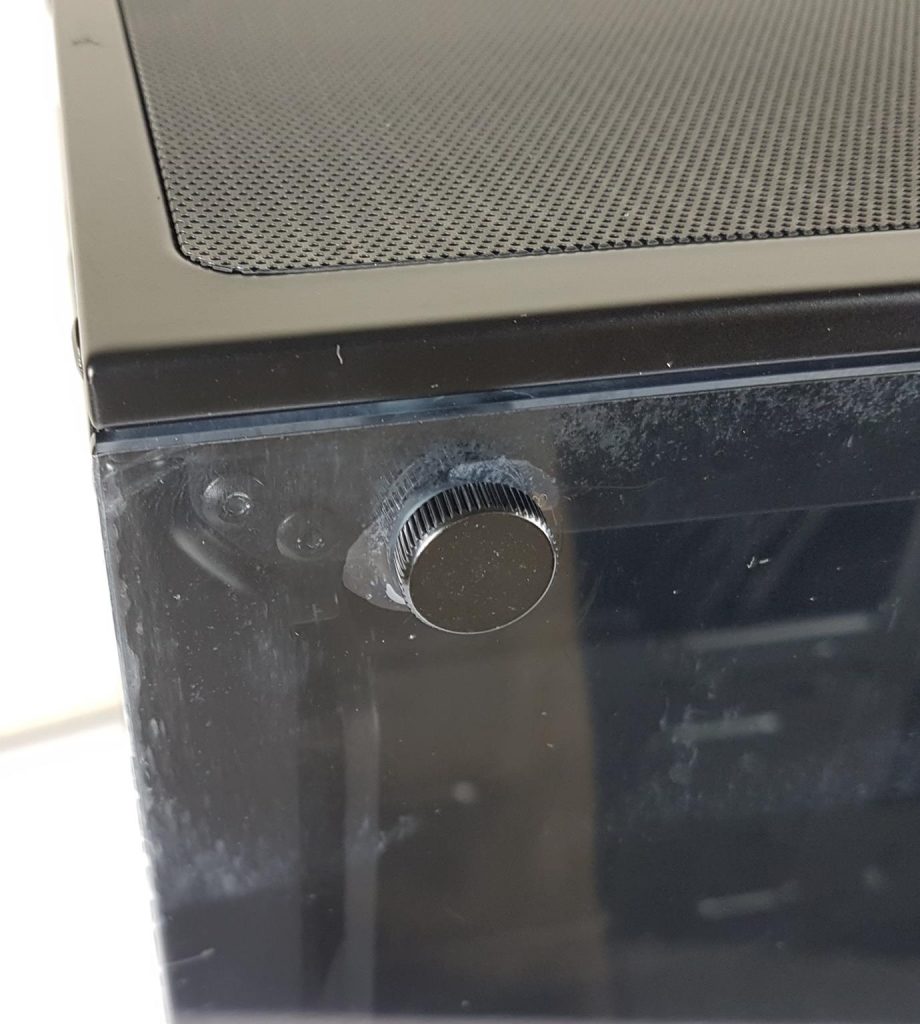
The glass panel is secured using two large head screws which is rather basic tooling.
Let’s take a look at the interior of the chassis.
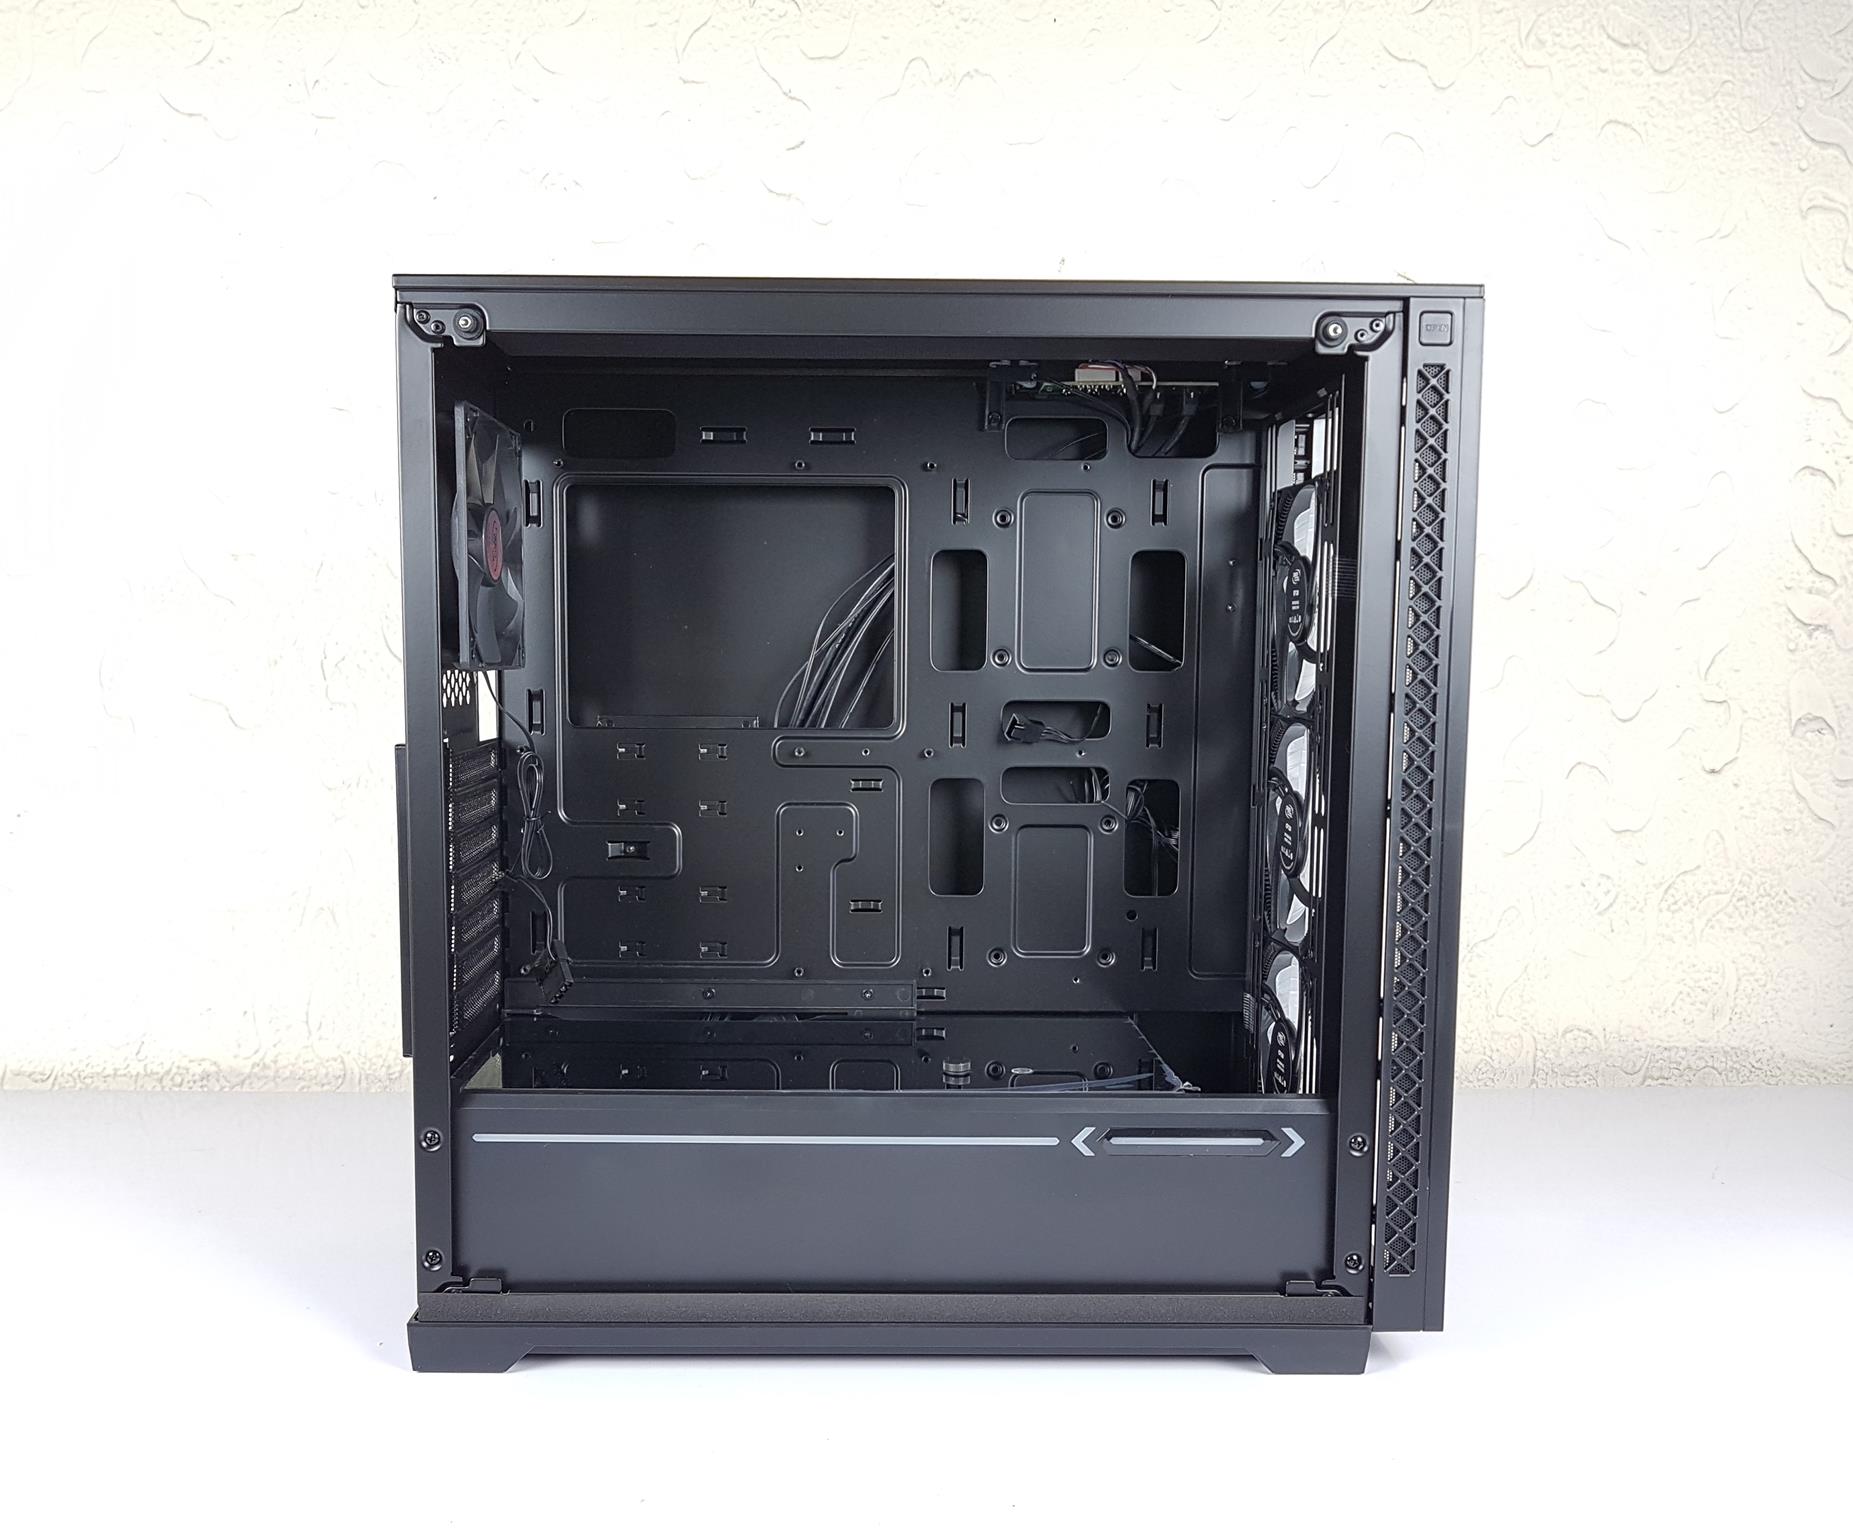
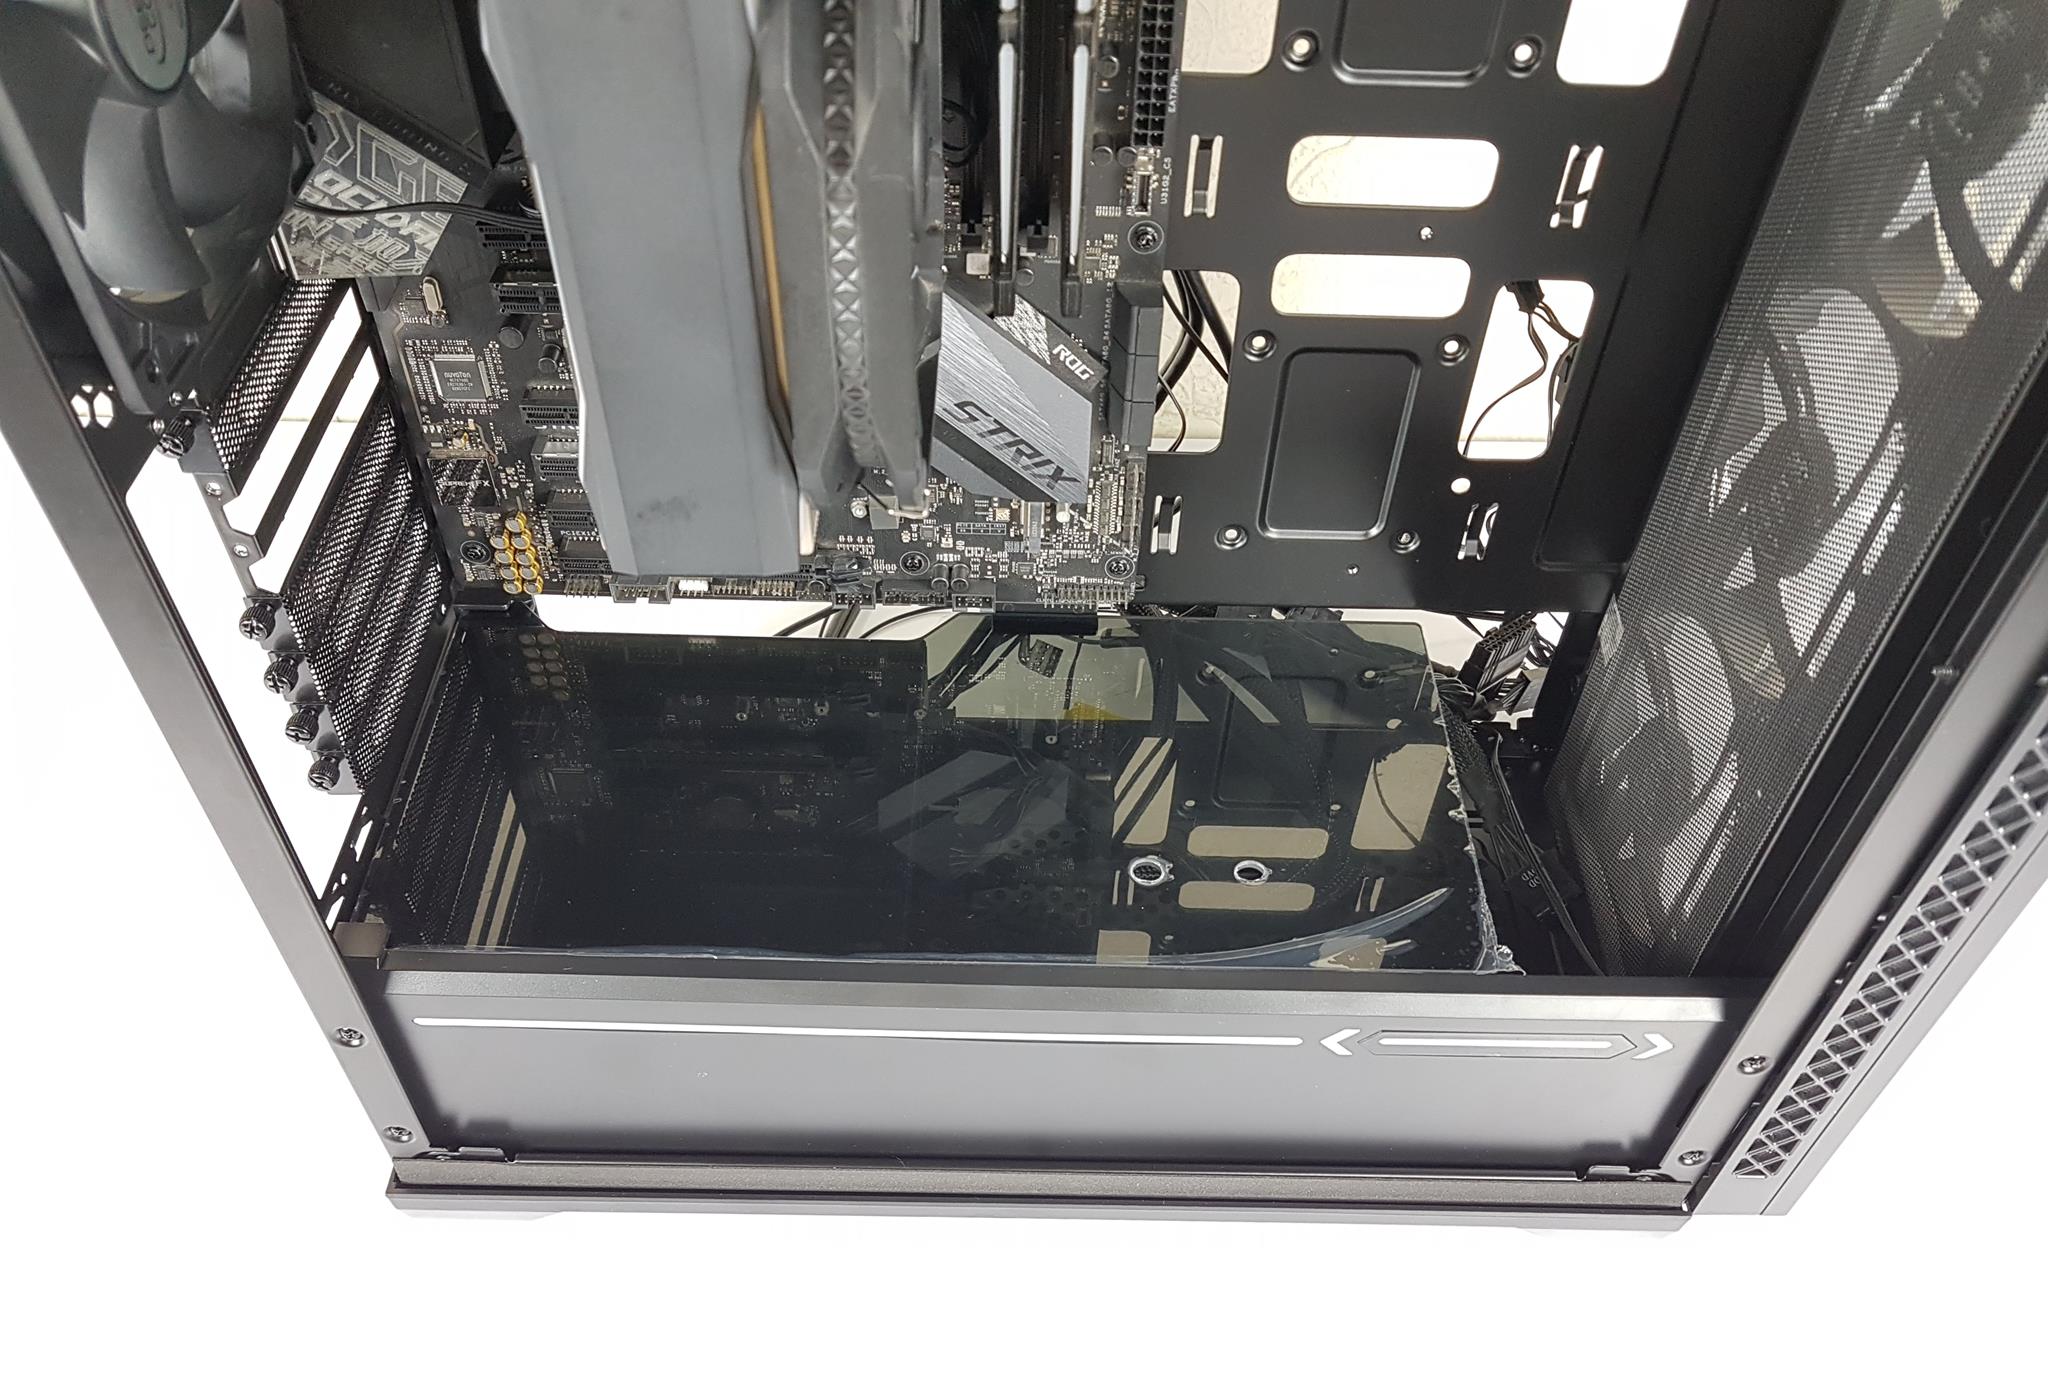
The inner frame measures 350mm in height and 420mm in length, offering ample space to maneuver. A tempered glass cover adorns the PSU shroud, accompanied by an ARGB LED strip underneath for a diffused glow.
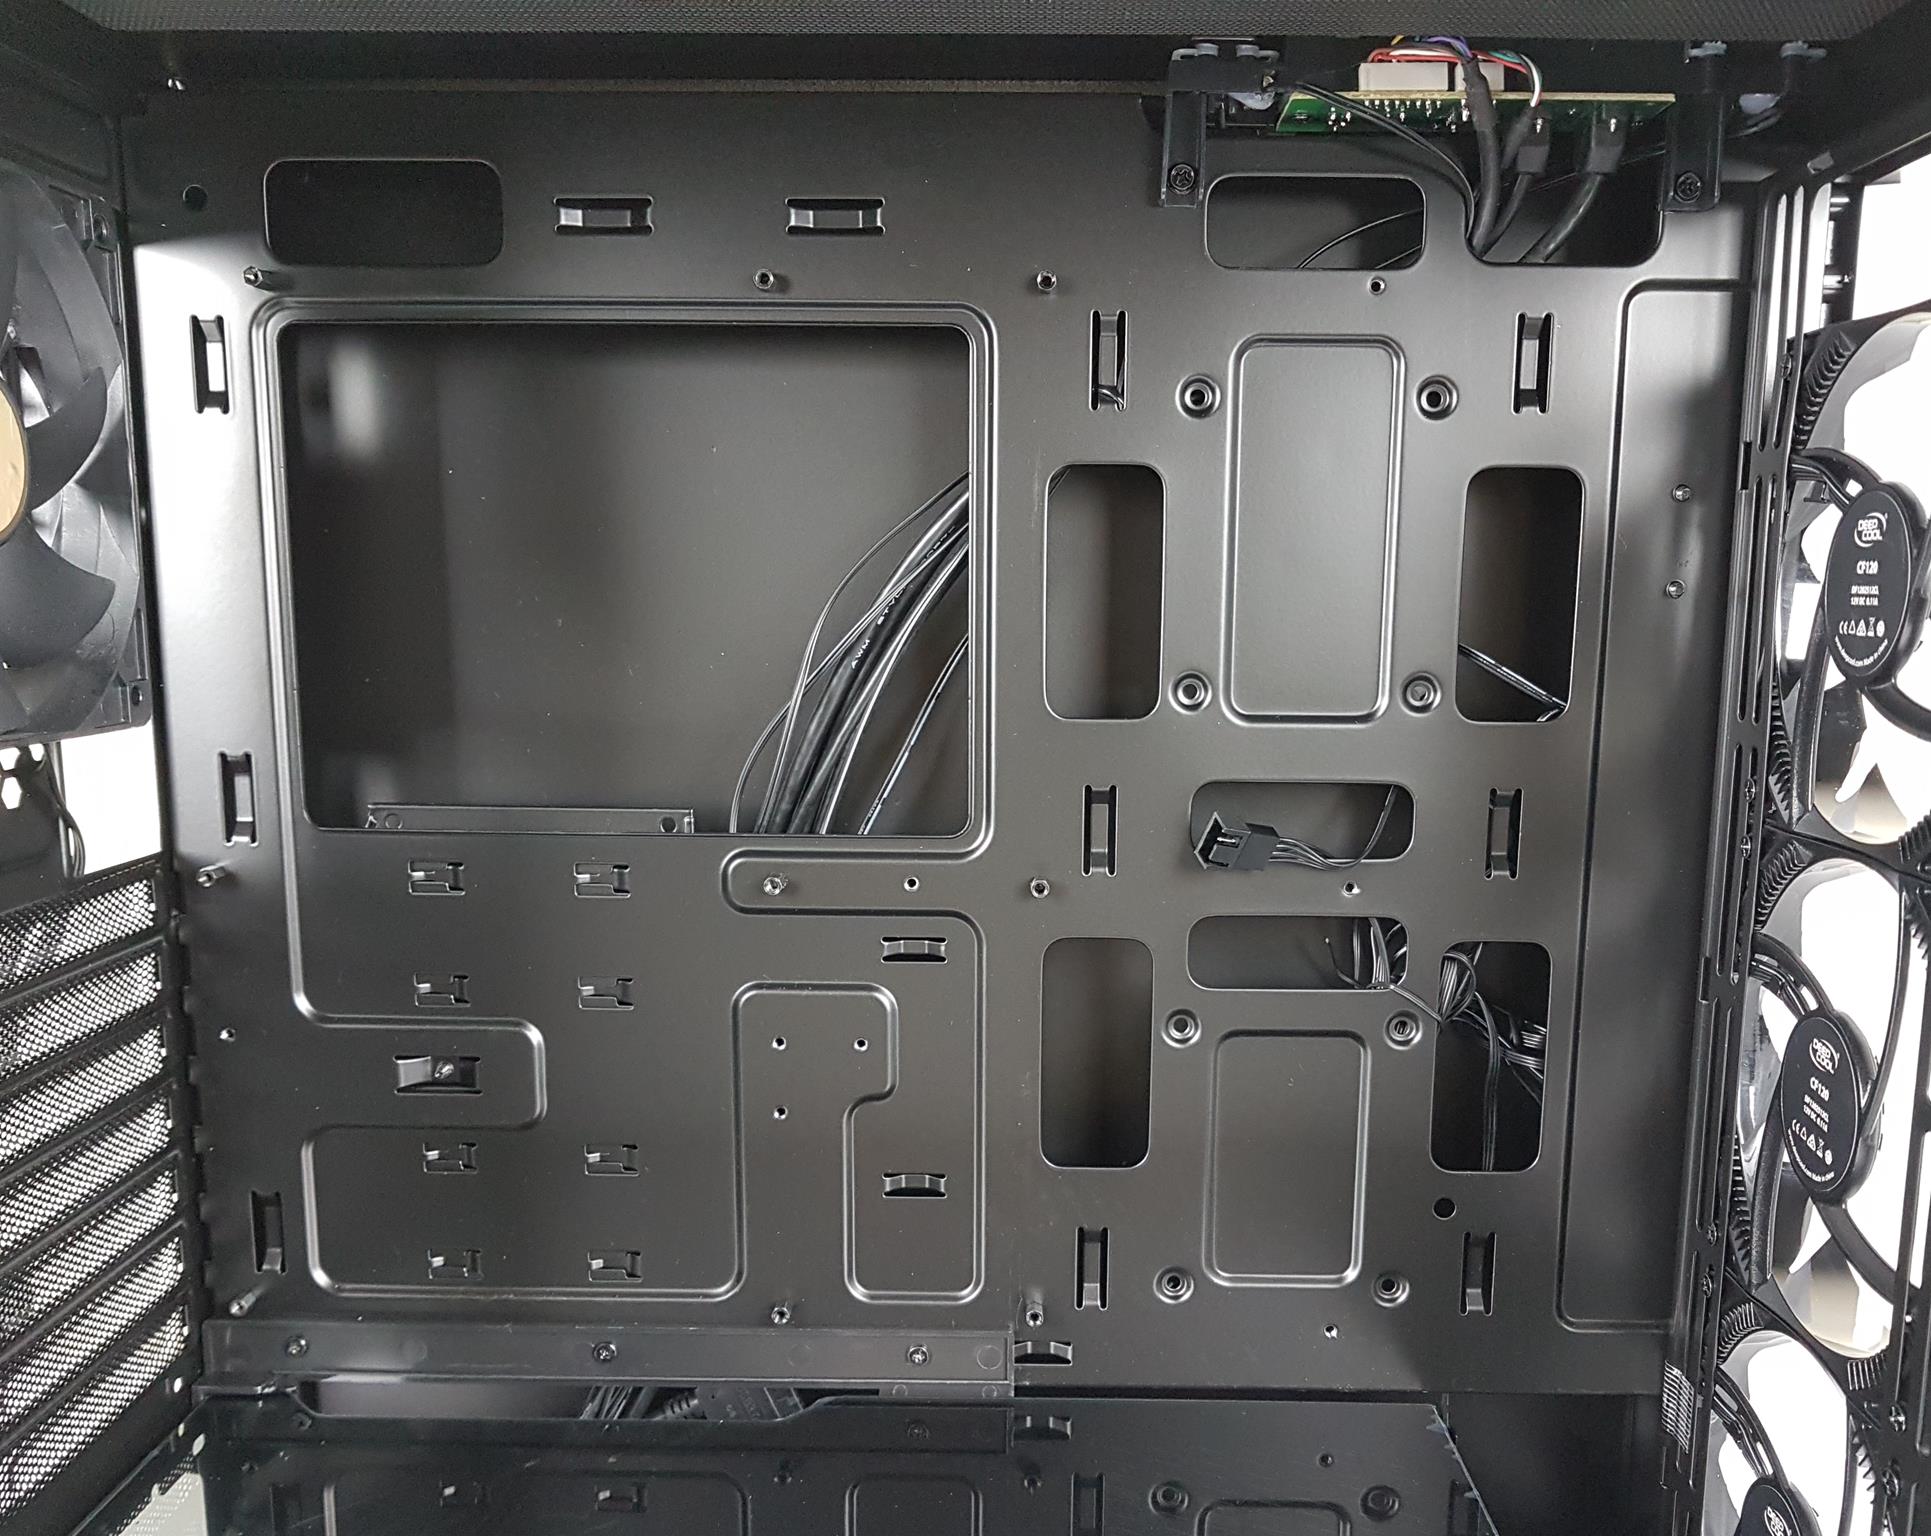
Kudos to DeepCool for their attention to detail—9 standoffs come pre-installed, a refreshing change from cases that often require users to install them separately. Some manufacturers don’t even provide the necessary tools! This case accommodates mini-ITX, micro-ATX, ATX, and E-ATX motherboards.
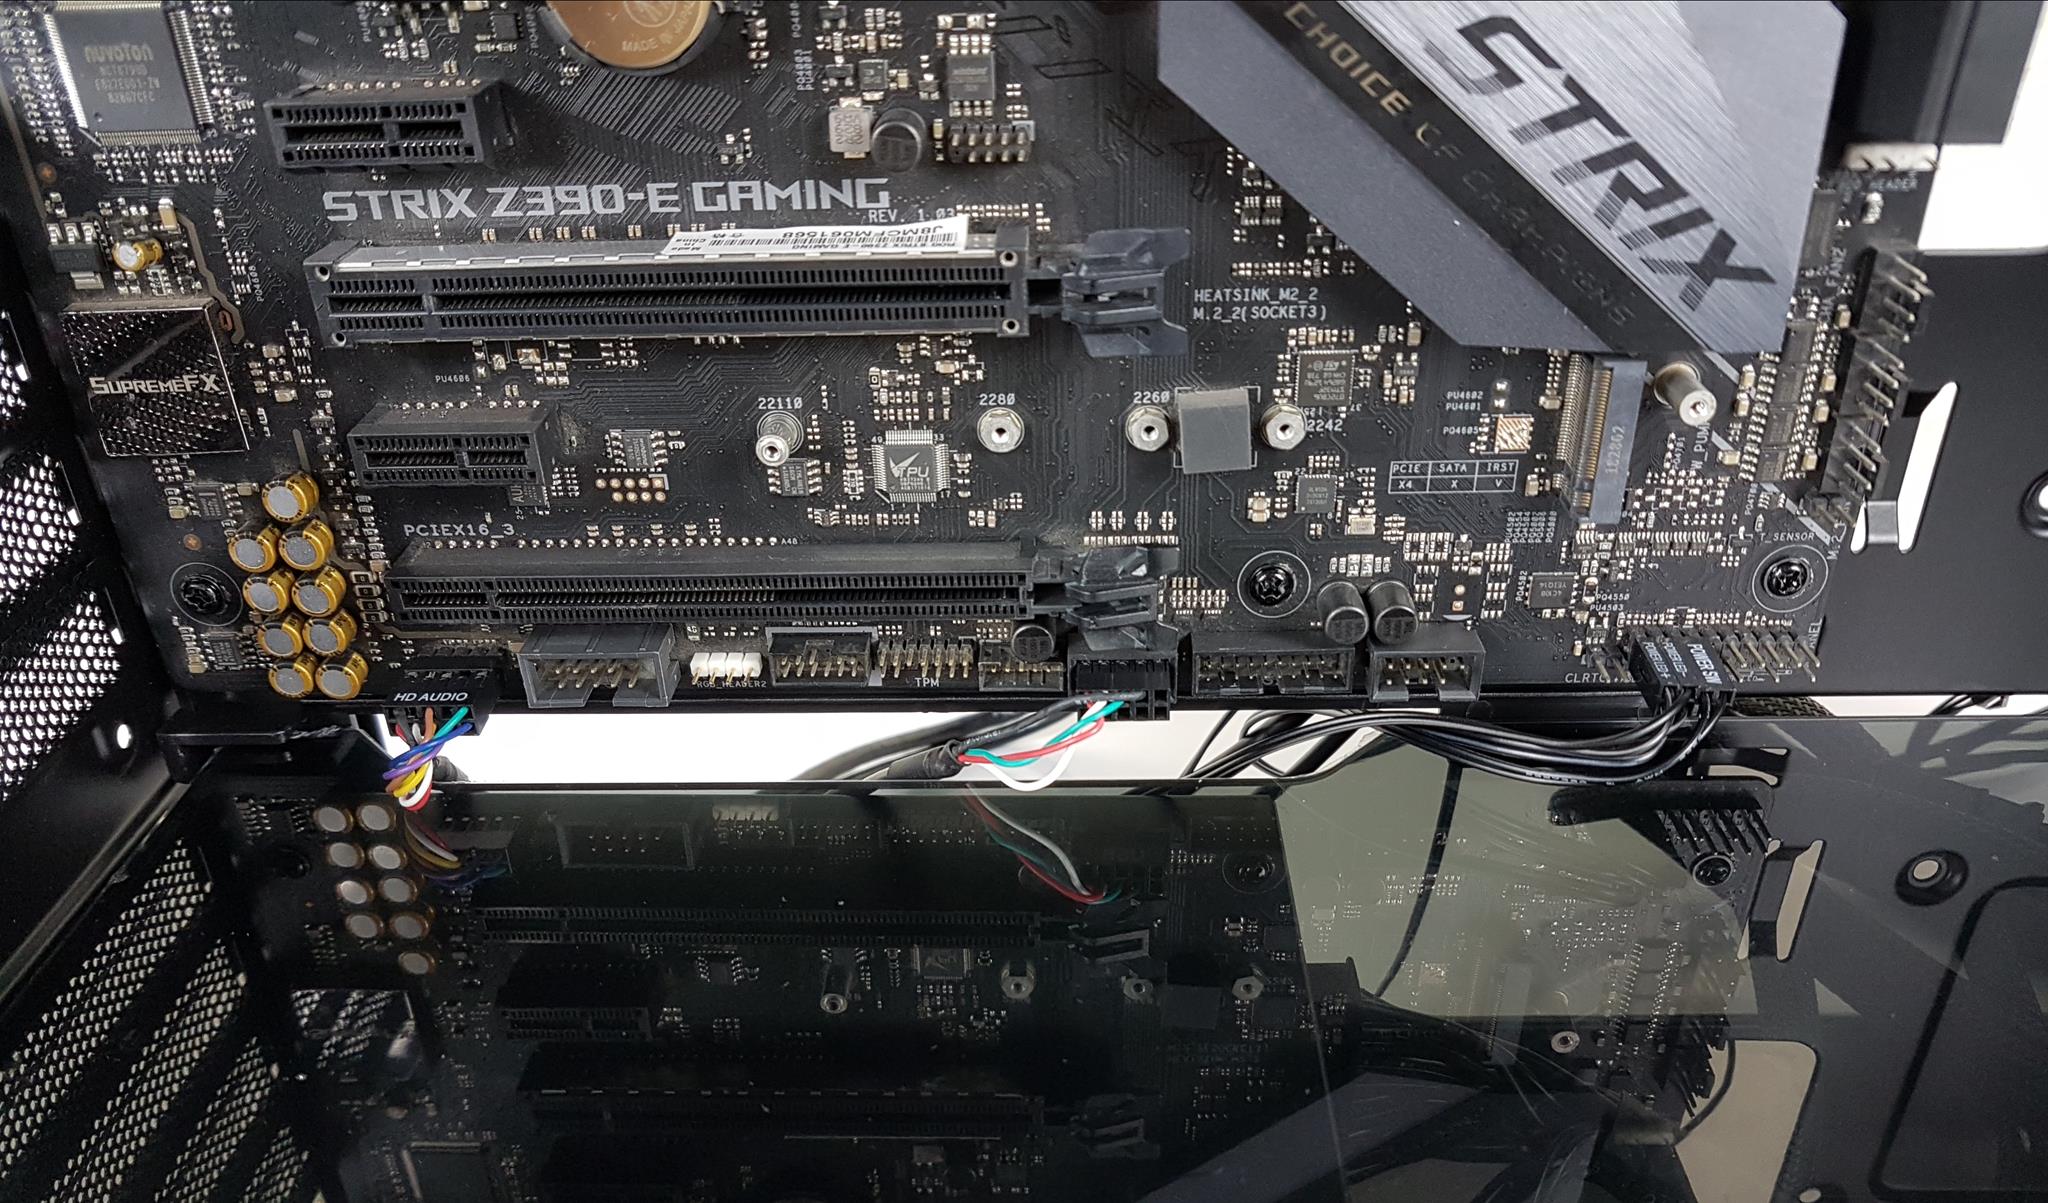
Installing the CPU cooler is a breeze with a generously sized cutout. Cables pass through a large top-left cutout, while two columns on the right side of the motherboard tray feature 2 cutouts each, providing ample space. The IO panel sits on the front left, with its cables routed through another top cutout.
The chassis leaves a 55mm gap above the motherboard and offers a 30mm displacement from the fan/radiator mount, allowing for sufficient clearance for RAM height.
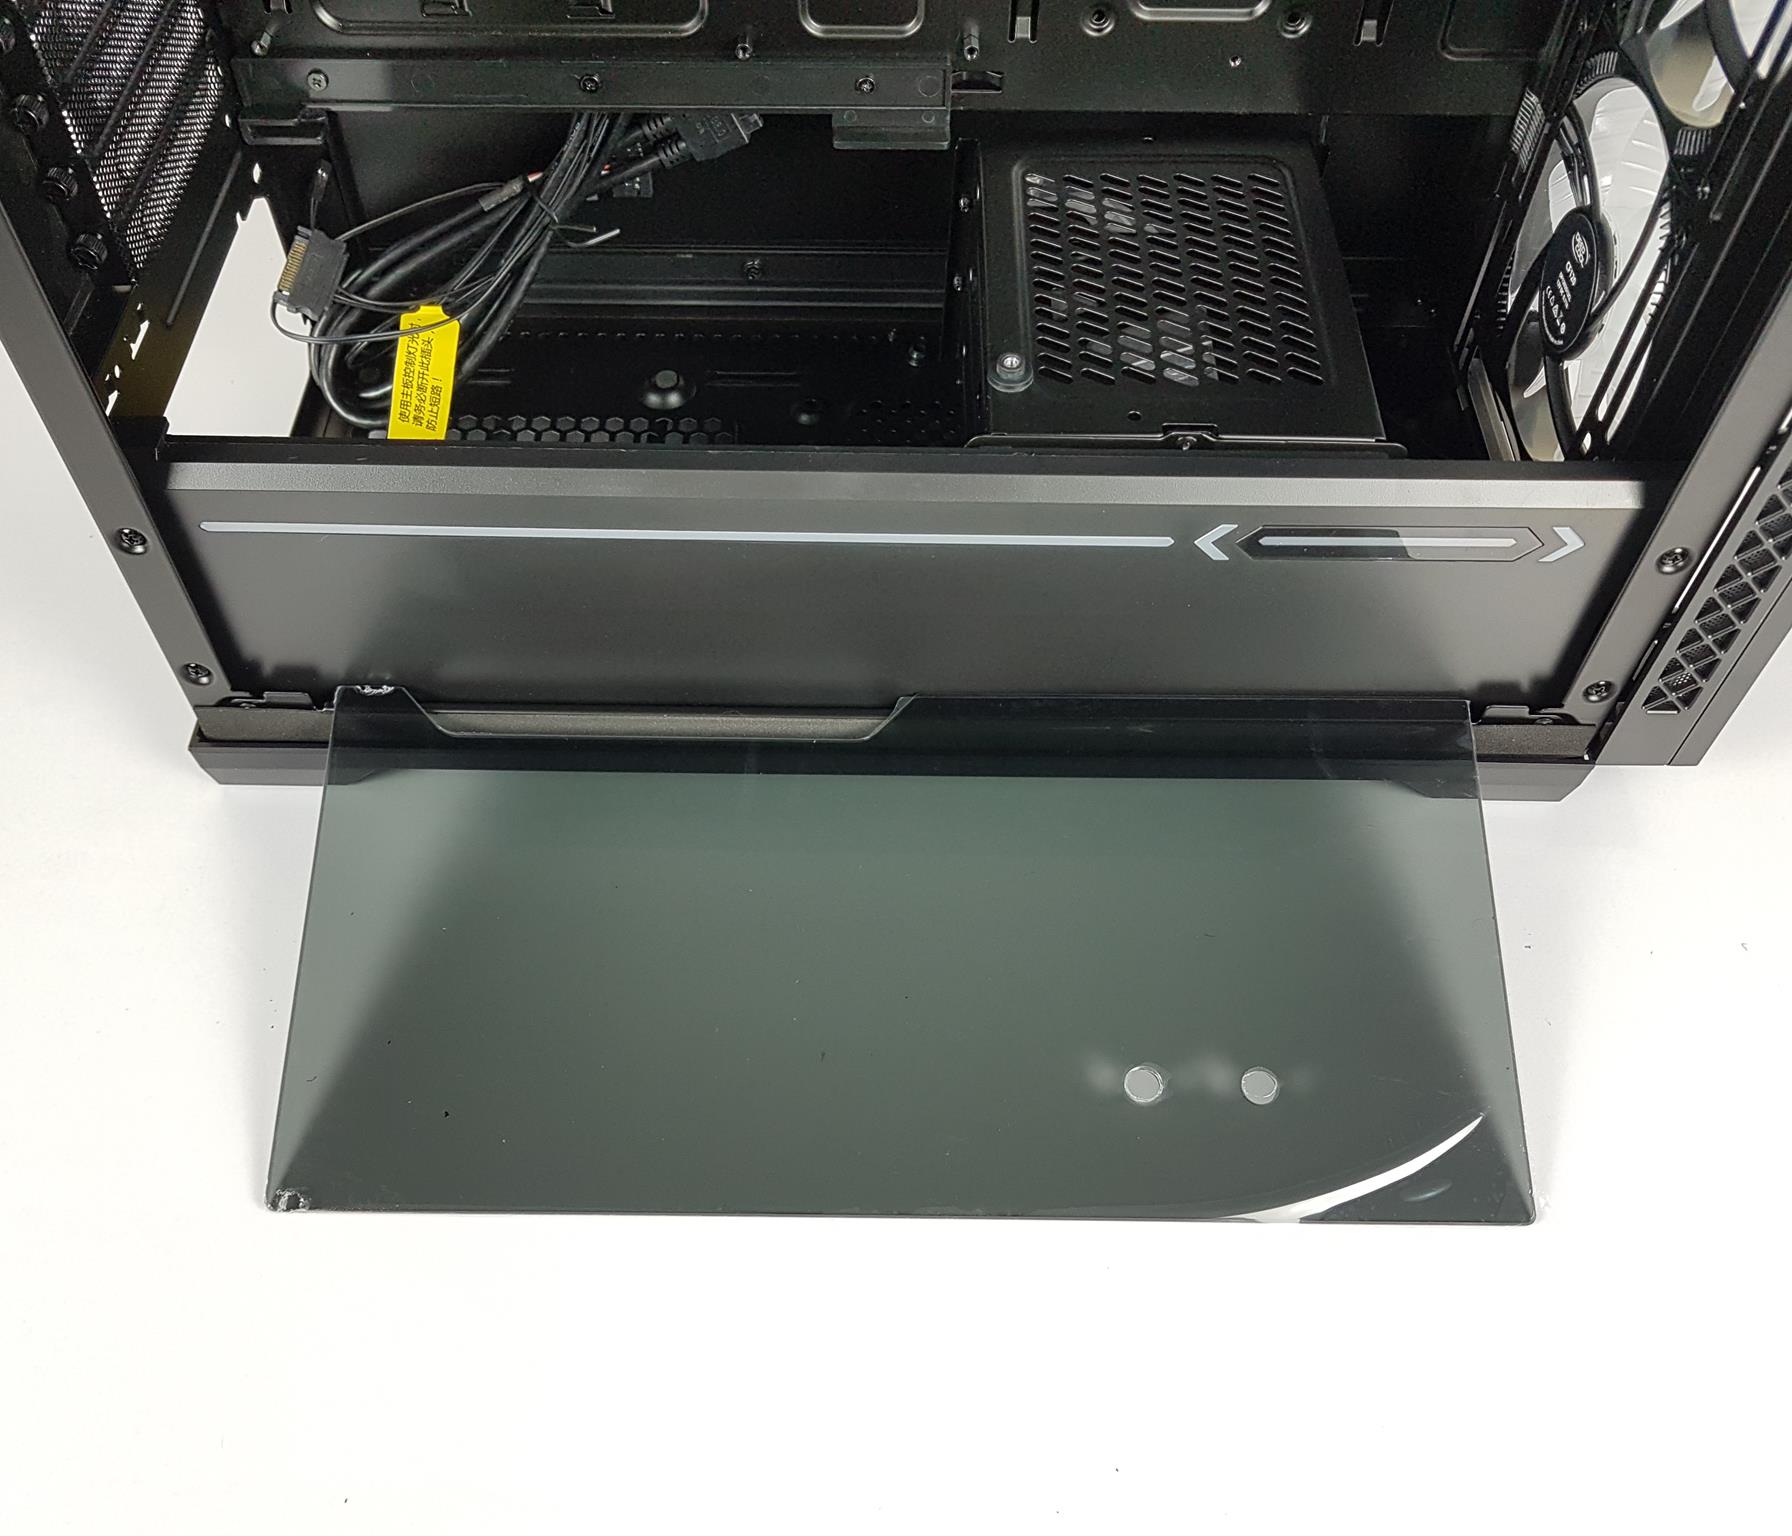
There is no cutout on the motherboard tray at the base since DeepCool has provided that cutout in the glass panel placed on top of the PSU. Smart move!
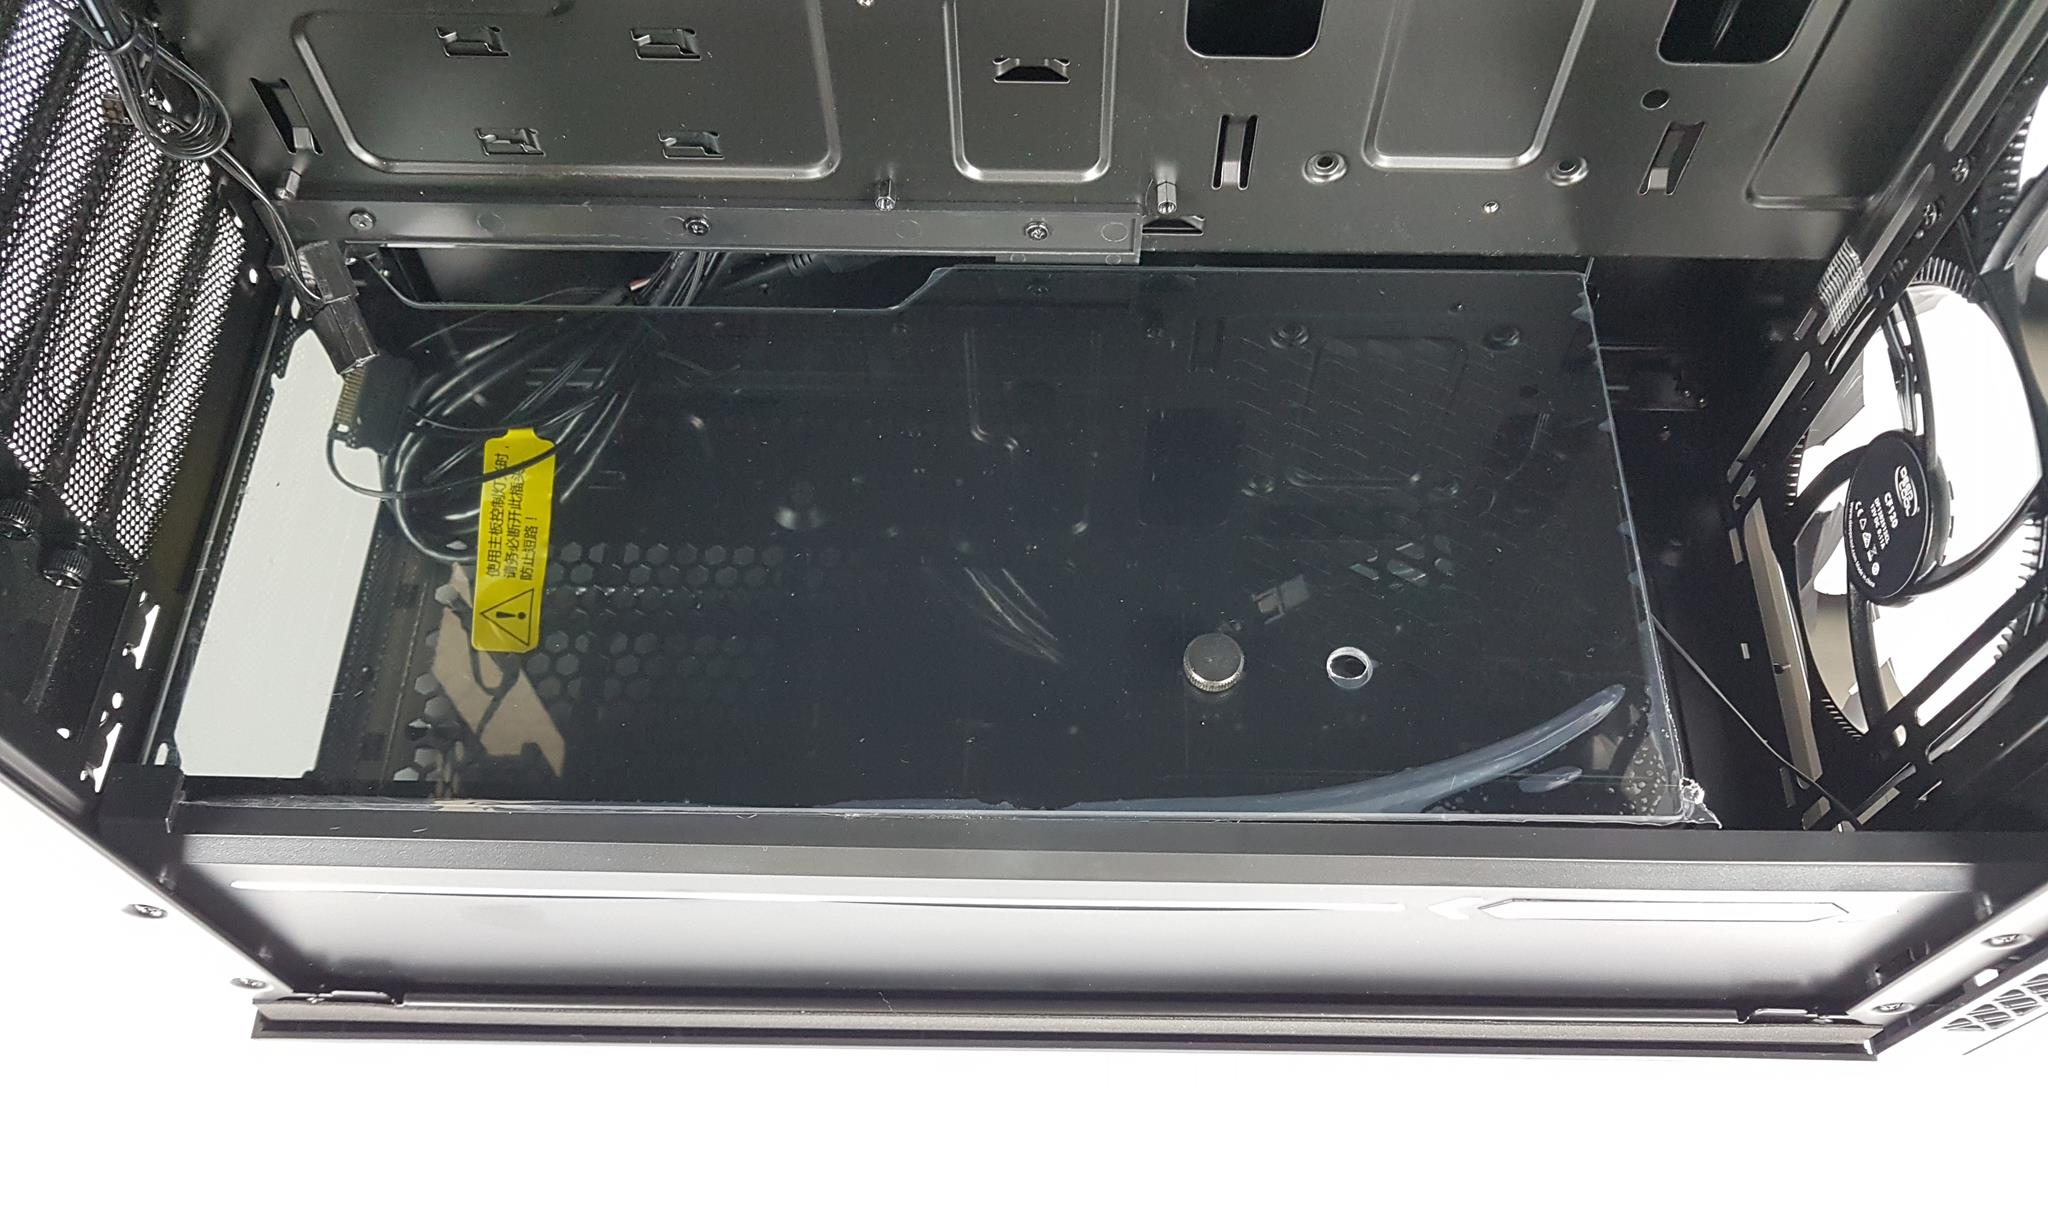
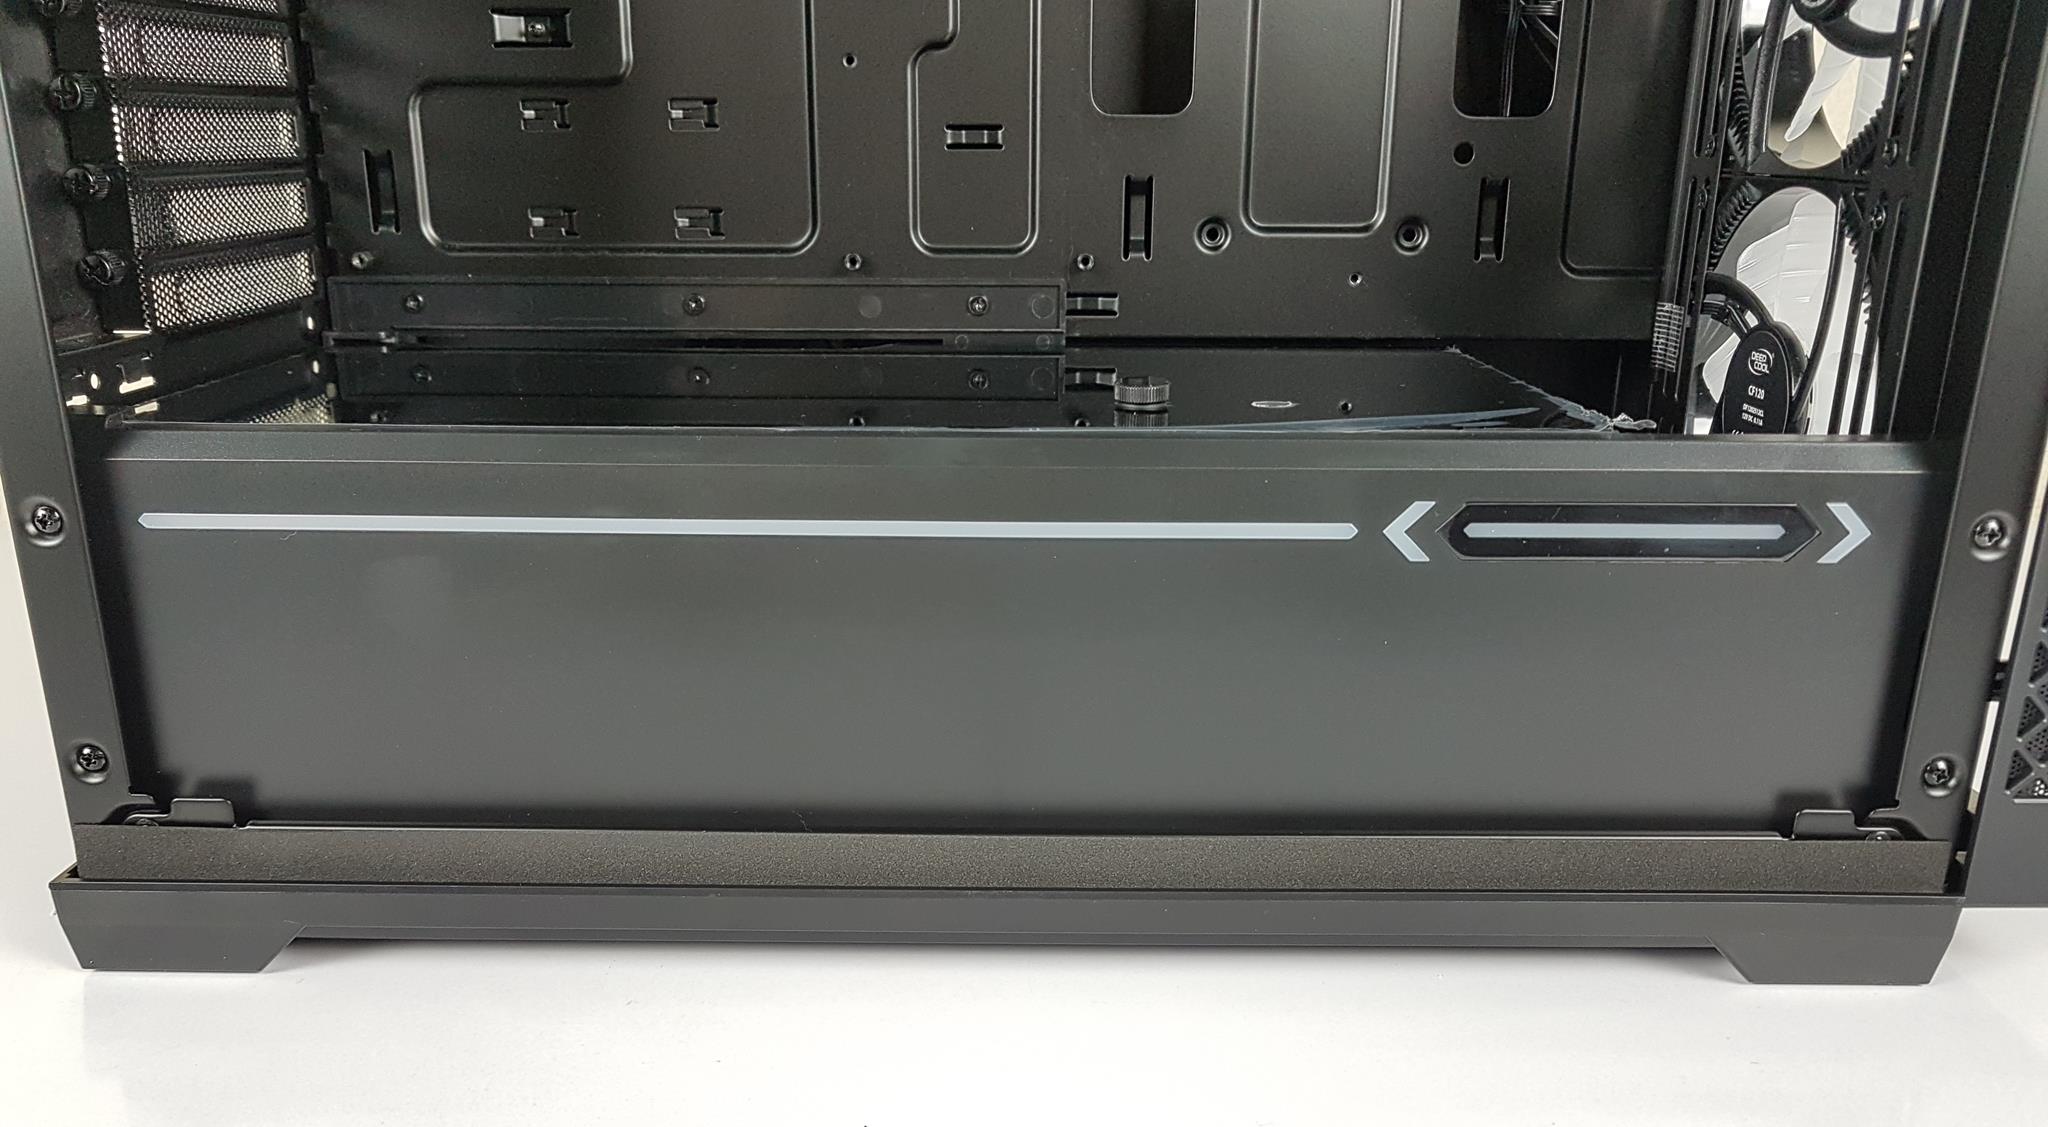
We have a diffuser on the shroud in a beautiful yet simple design to light up the ambiance. It definitely adds a subtle look to the build when powered.

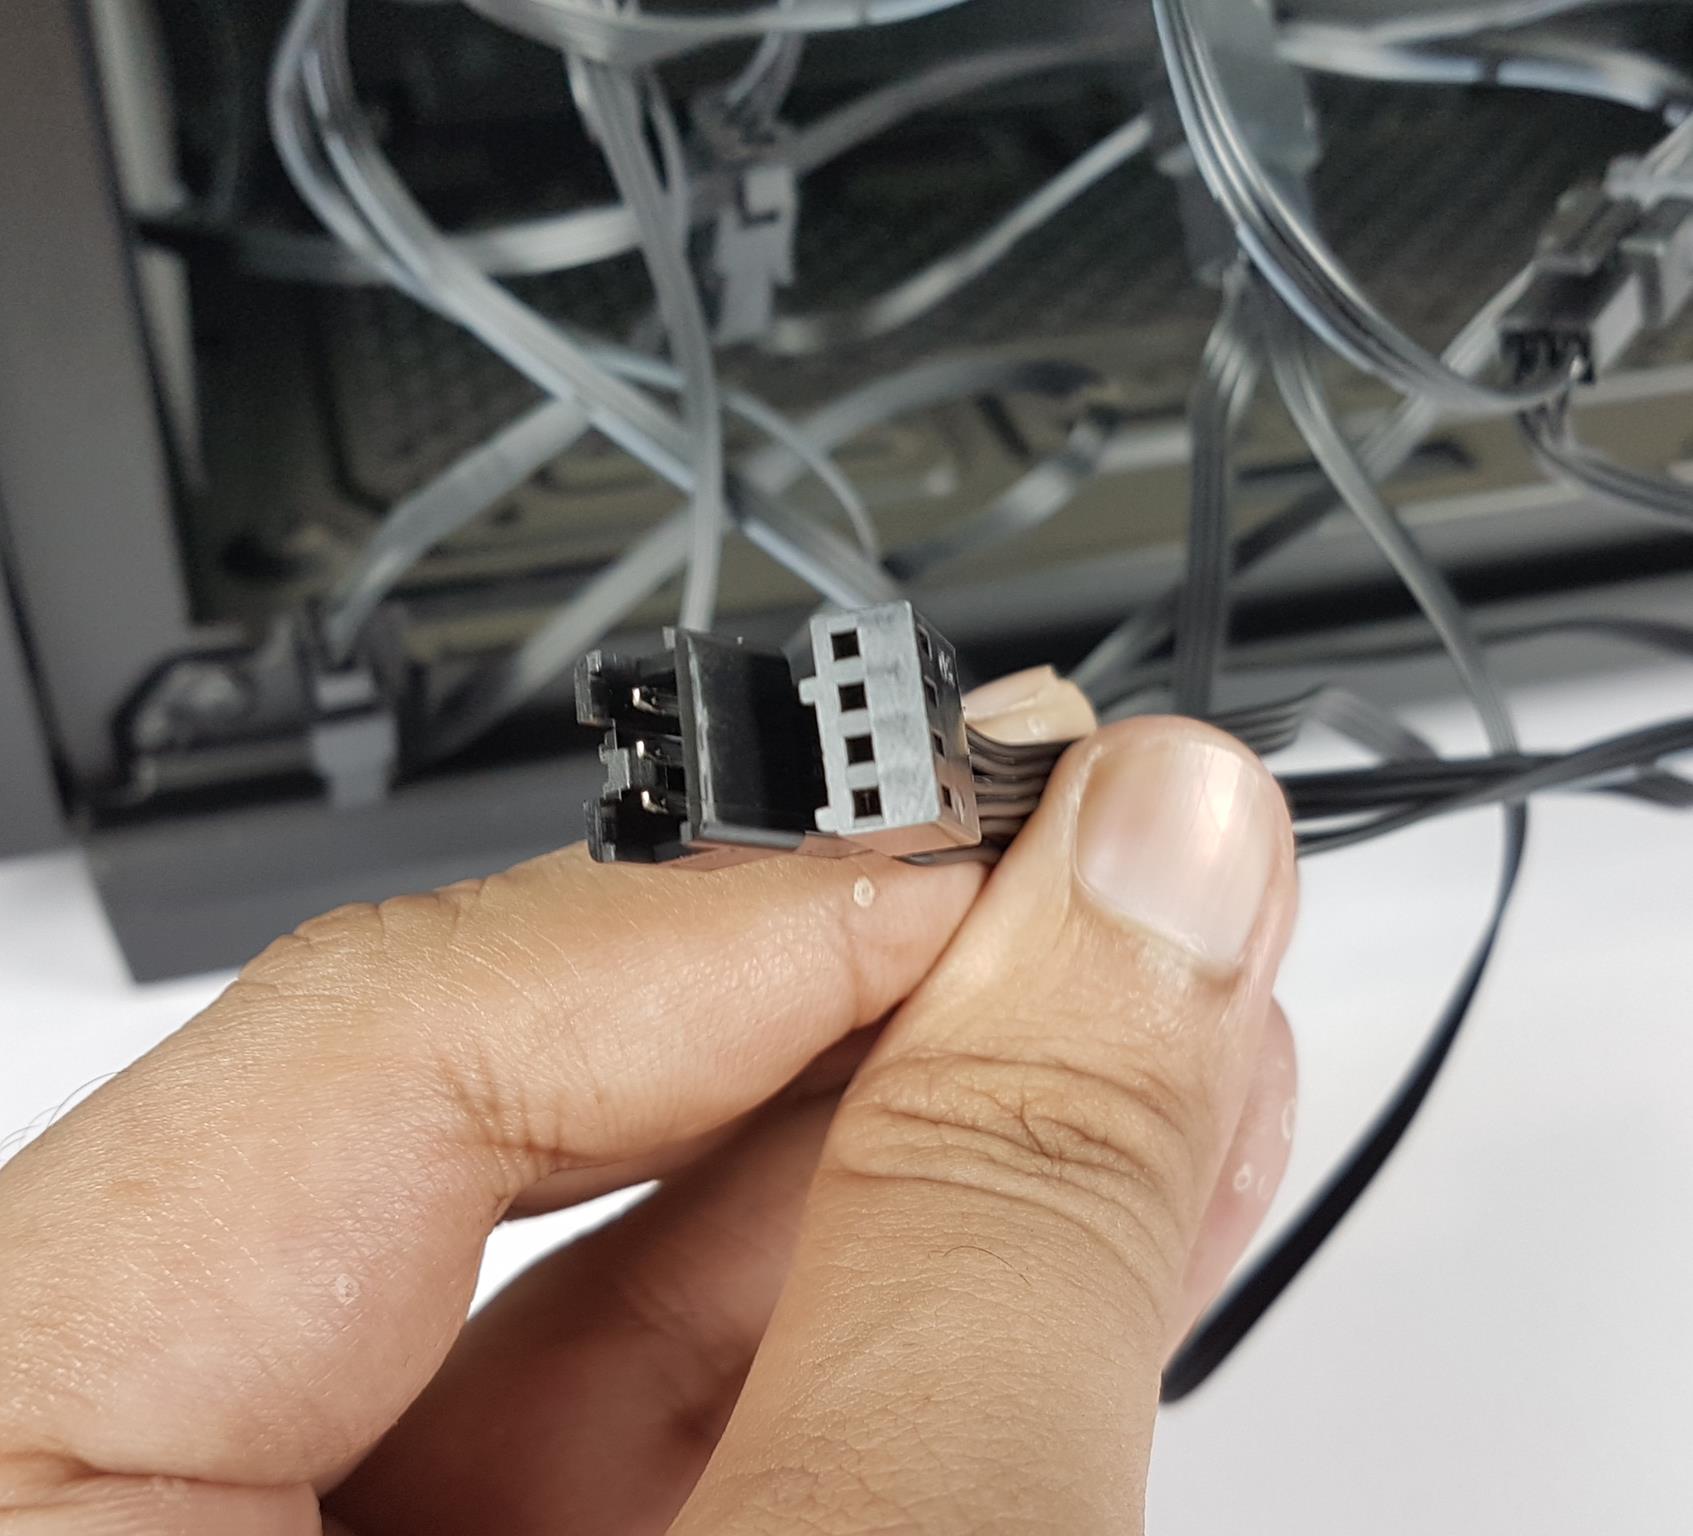
There is a non-RGB black color 120mm fan installed on the rear. To my surprise, it has a MOLEX connector as well as a 3-pin power connector. The way they are designed, the cable management of the rear fan is challenging. DeepCool should consider ditching this MOLEX connector altogether or use a separate cable for this connector.
The case has a 7+2 PCIe slot design. The covers are reusable. The covers are vented for proper ventilation through this area. The 2 vertical slots are near to the side panel. There is no riser cable and riser support bracket bundled in the box.
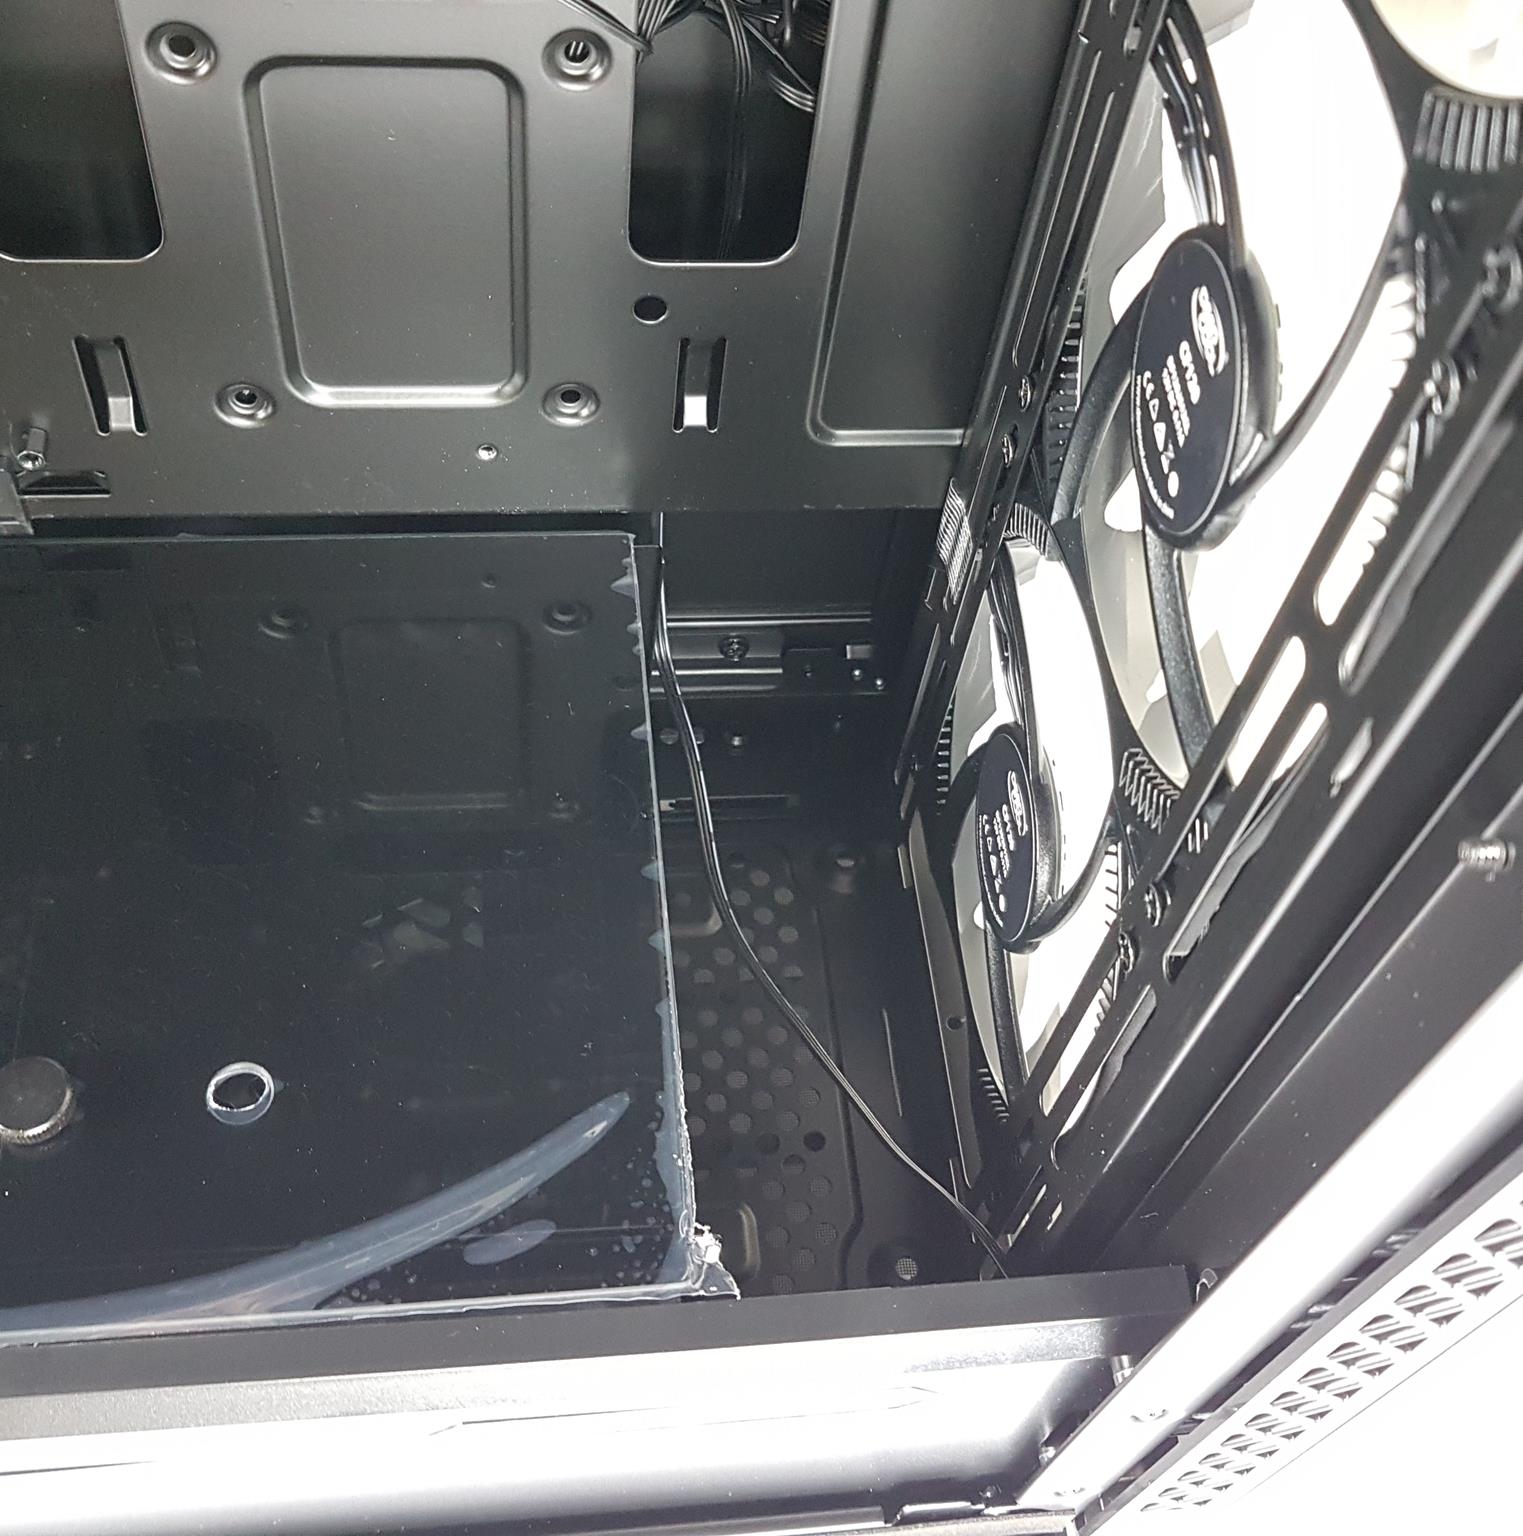
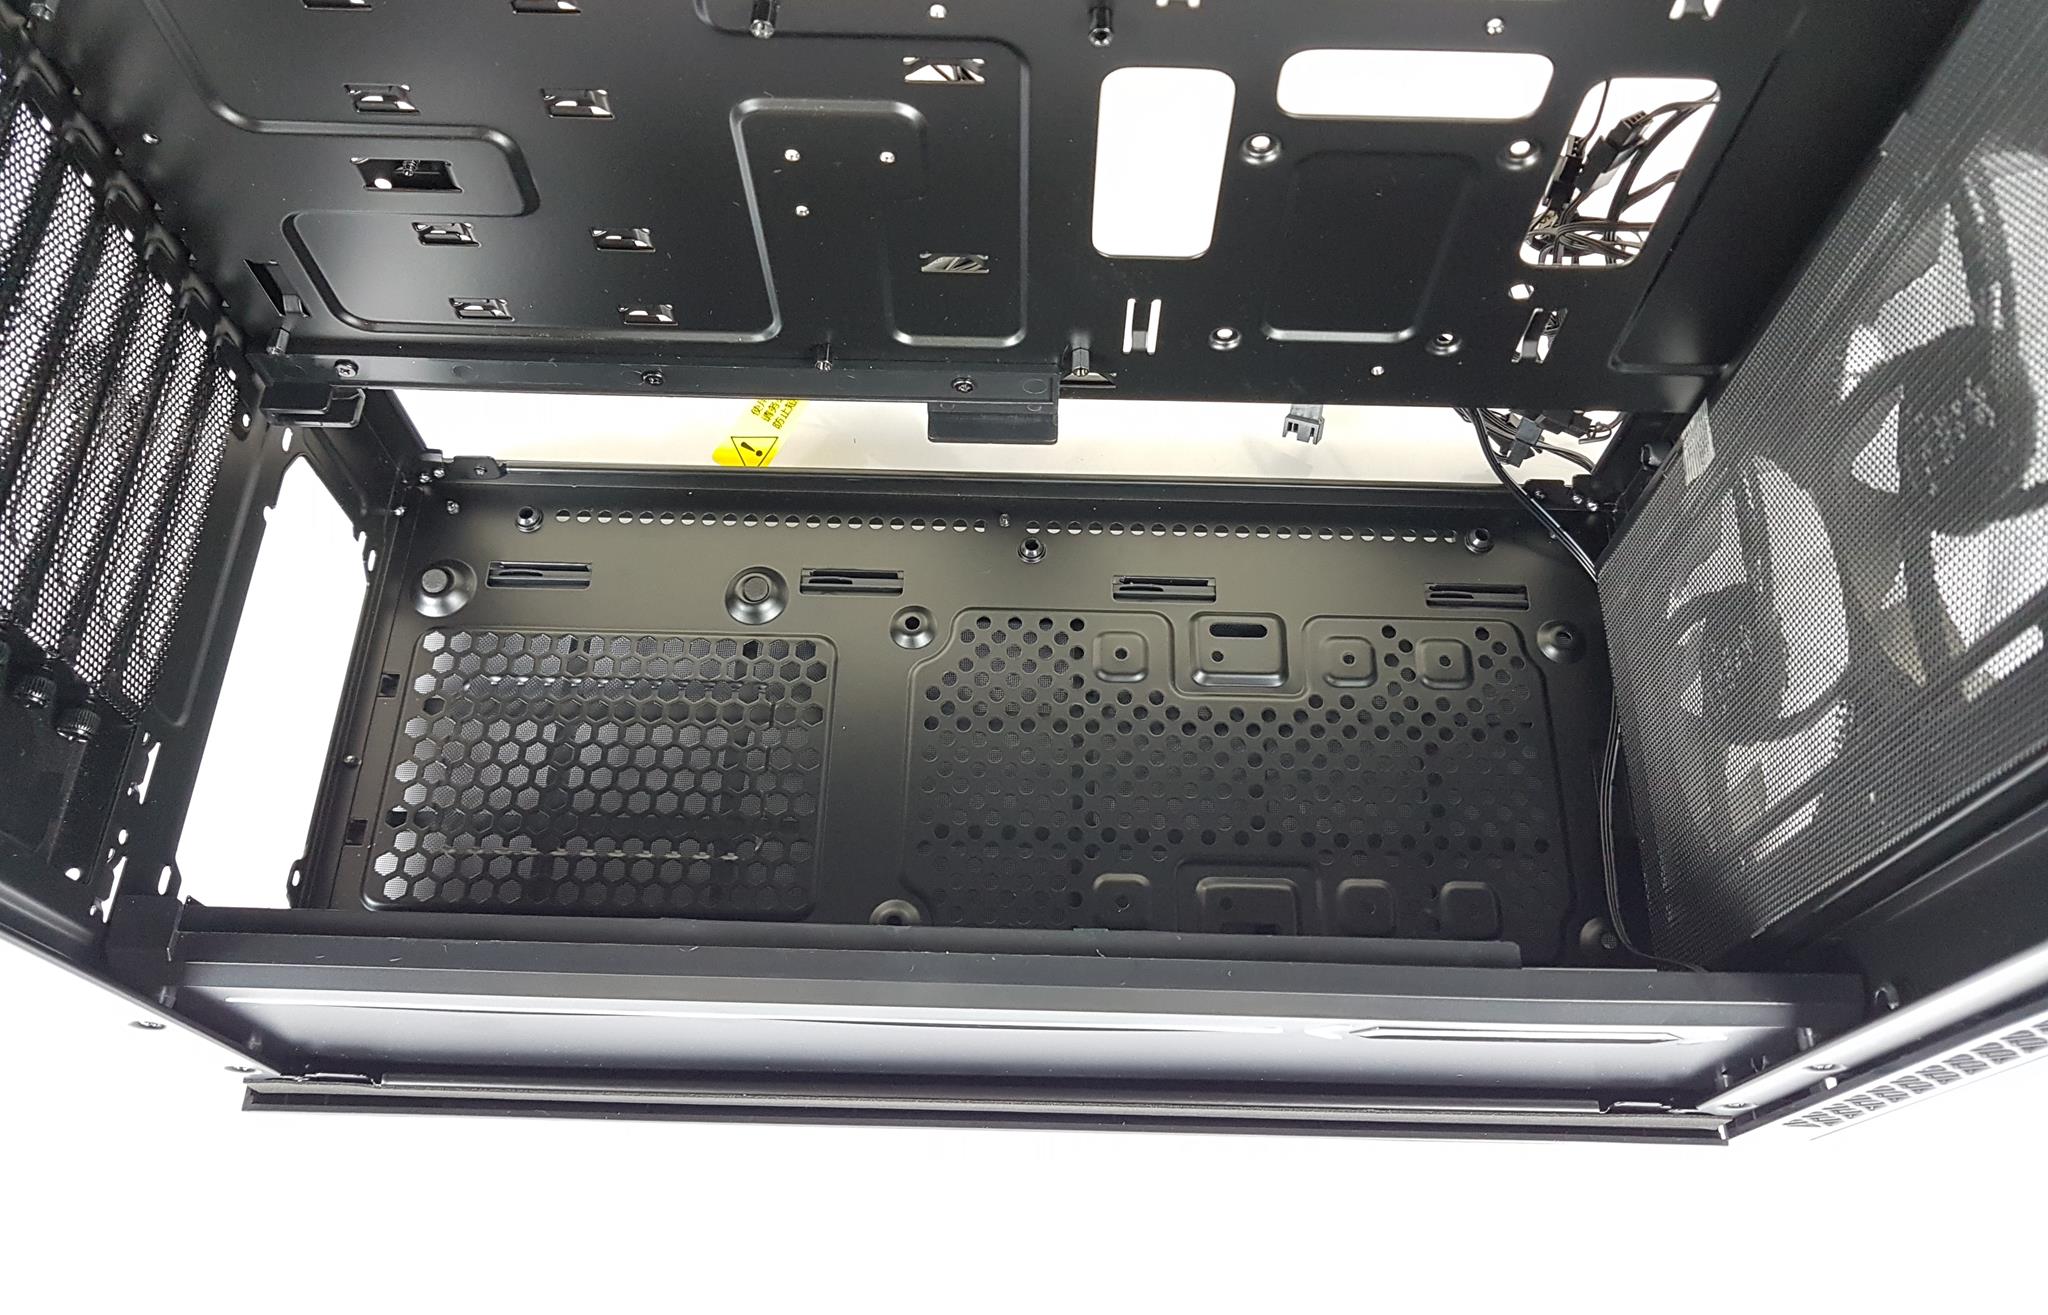
There is roughly a 55mm gap on the PSU shroud upfront. This gap hints at the thickness of the radiator that can be mounted up top. Please note that this gap will reduce should we move the HDD cage upfront.
The picture after that shows the tempered glass cover for the PSU bay.
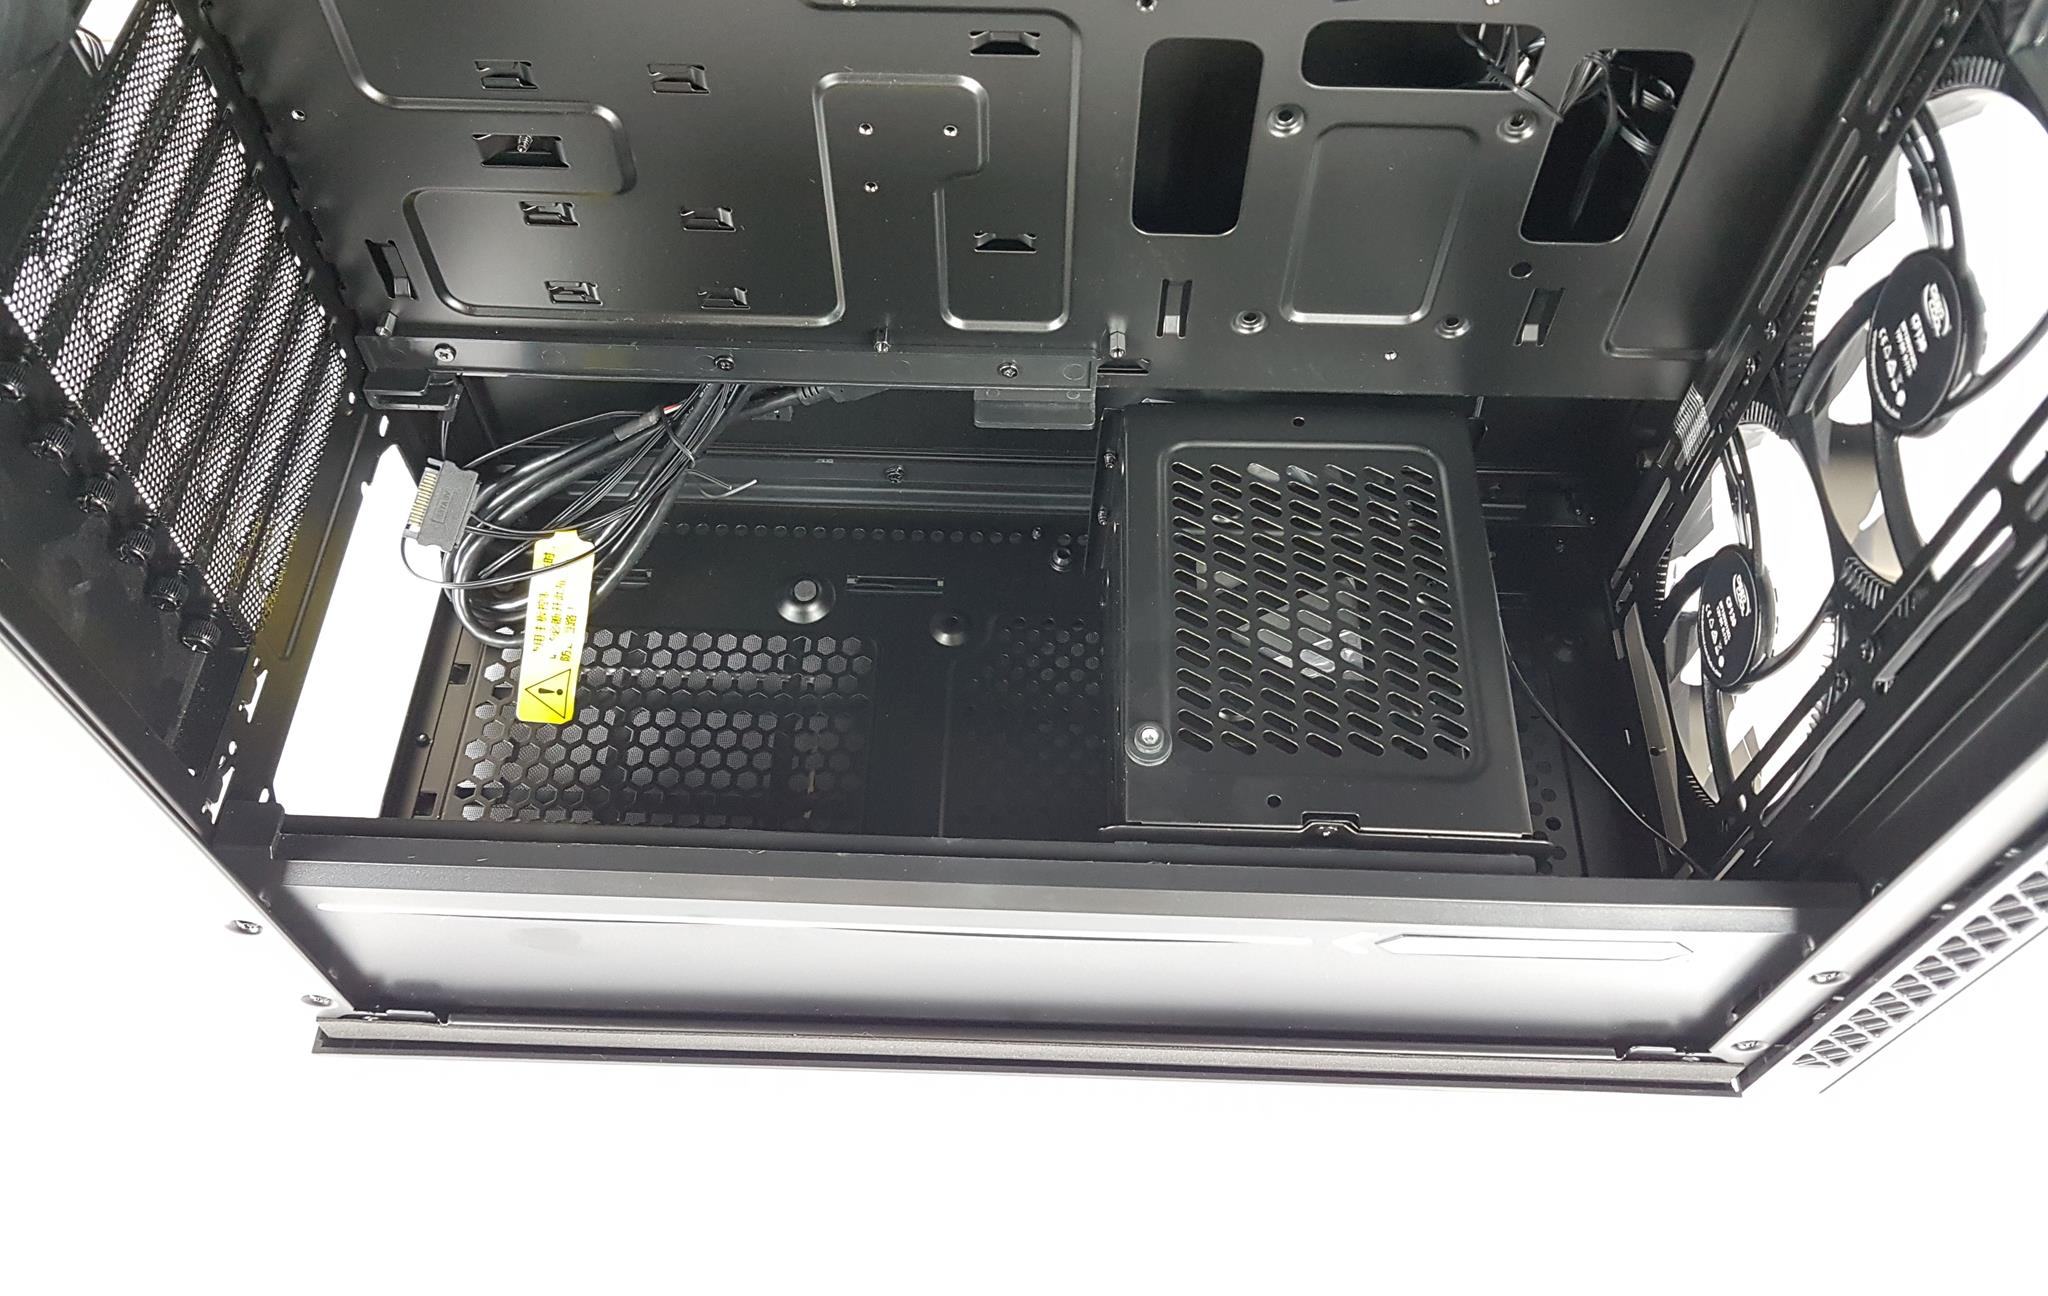
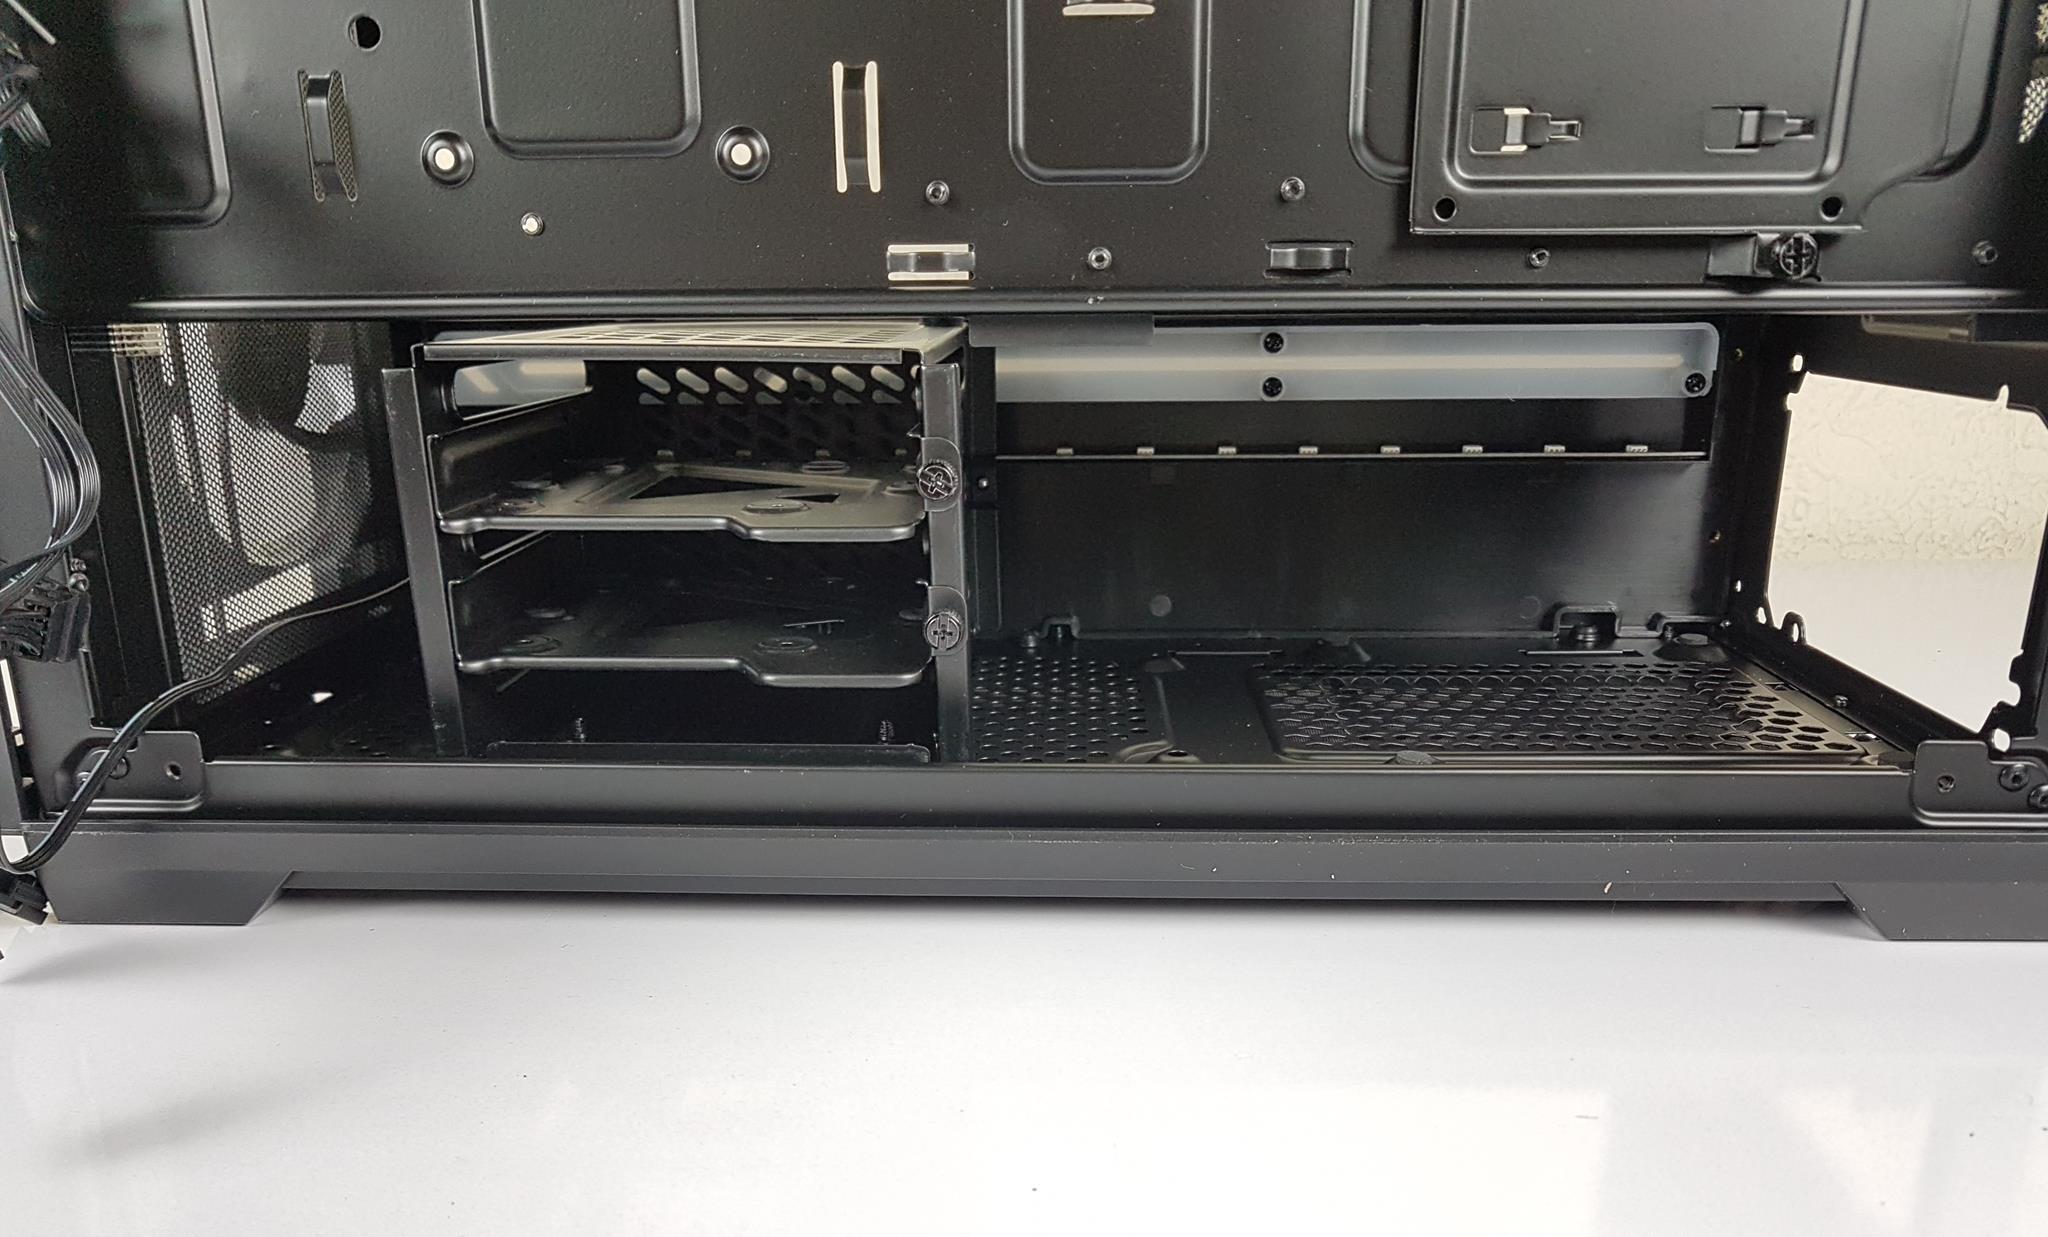
The image on the left shows the PSU and HDD cage bay after removing the tempered glass. We can conveniently place the PSU through this area though this should be done before installing the motherboard. The slide mounts for the tempered glass can be seen as well.
The second picture shows the complete bay area with the HDD cage removed.
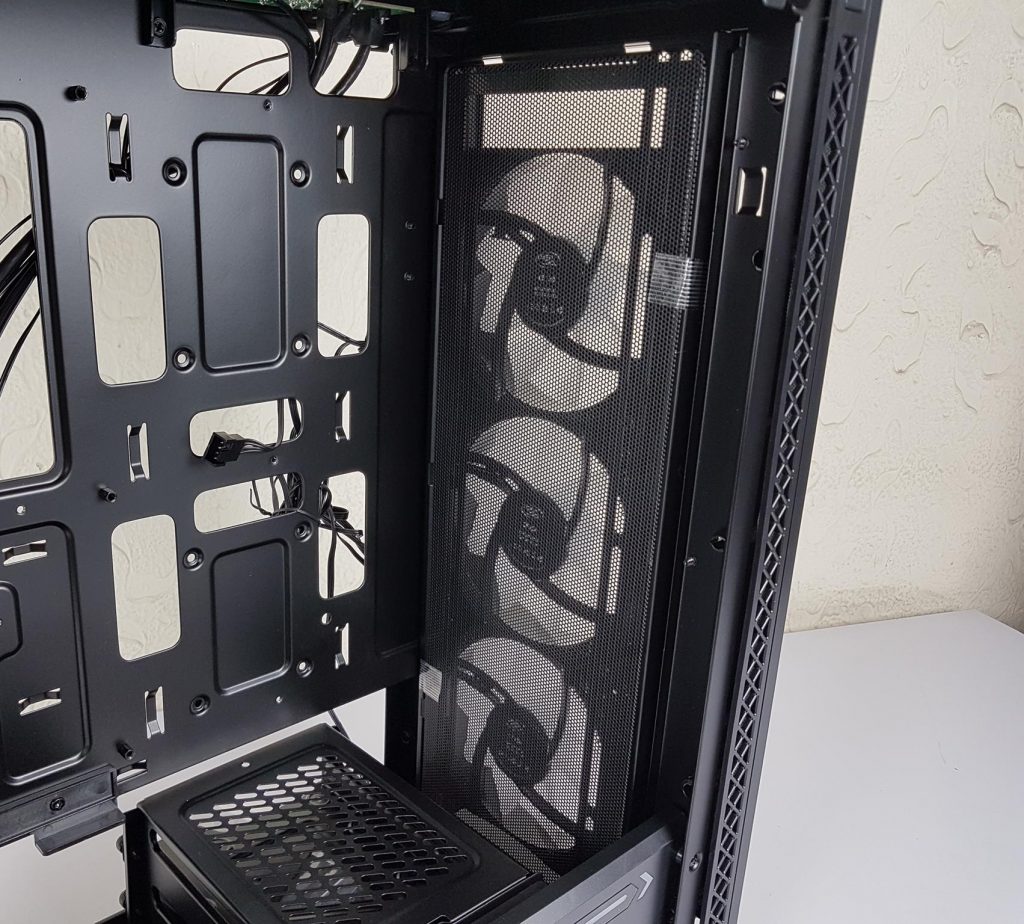
The above picture shows the close-up of the front fan mount provision. We have a rail mount system which is good. The dust filter was not attached here. We put it there before taking the pictures. The complete bracket is removable as mentioned earlier.
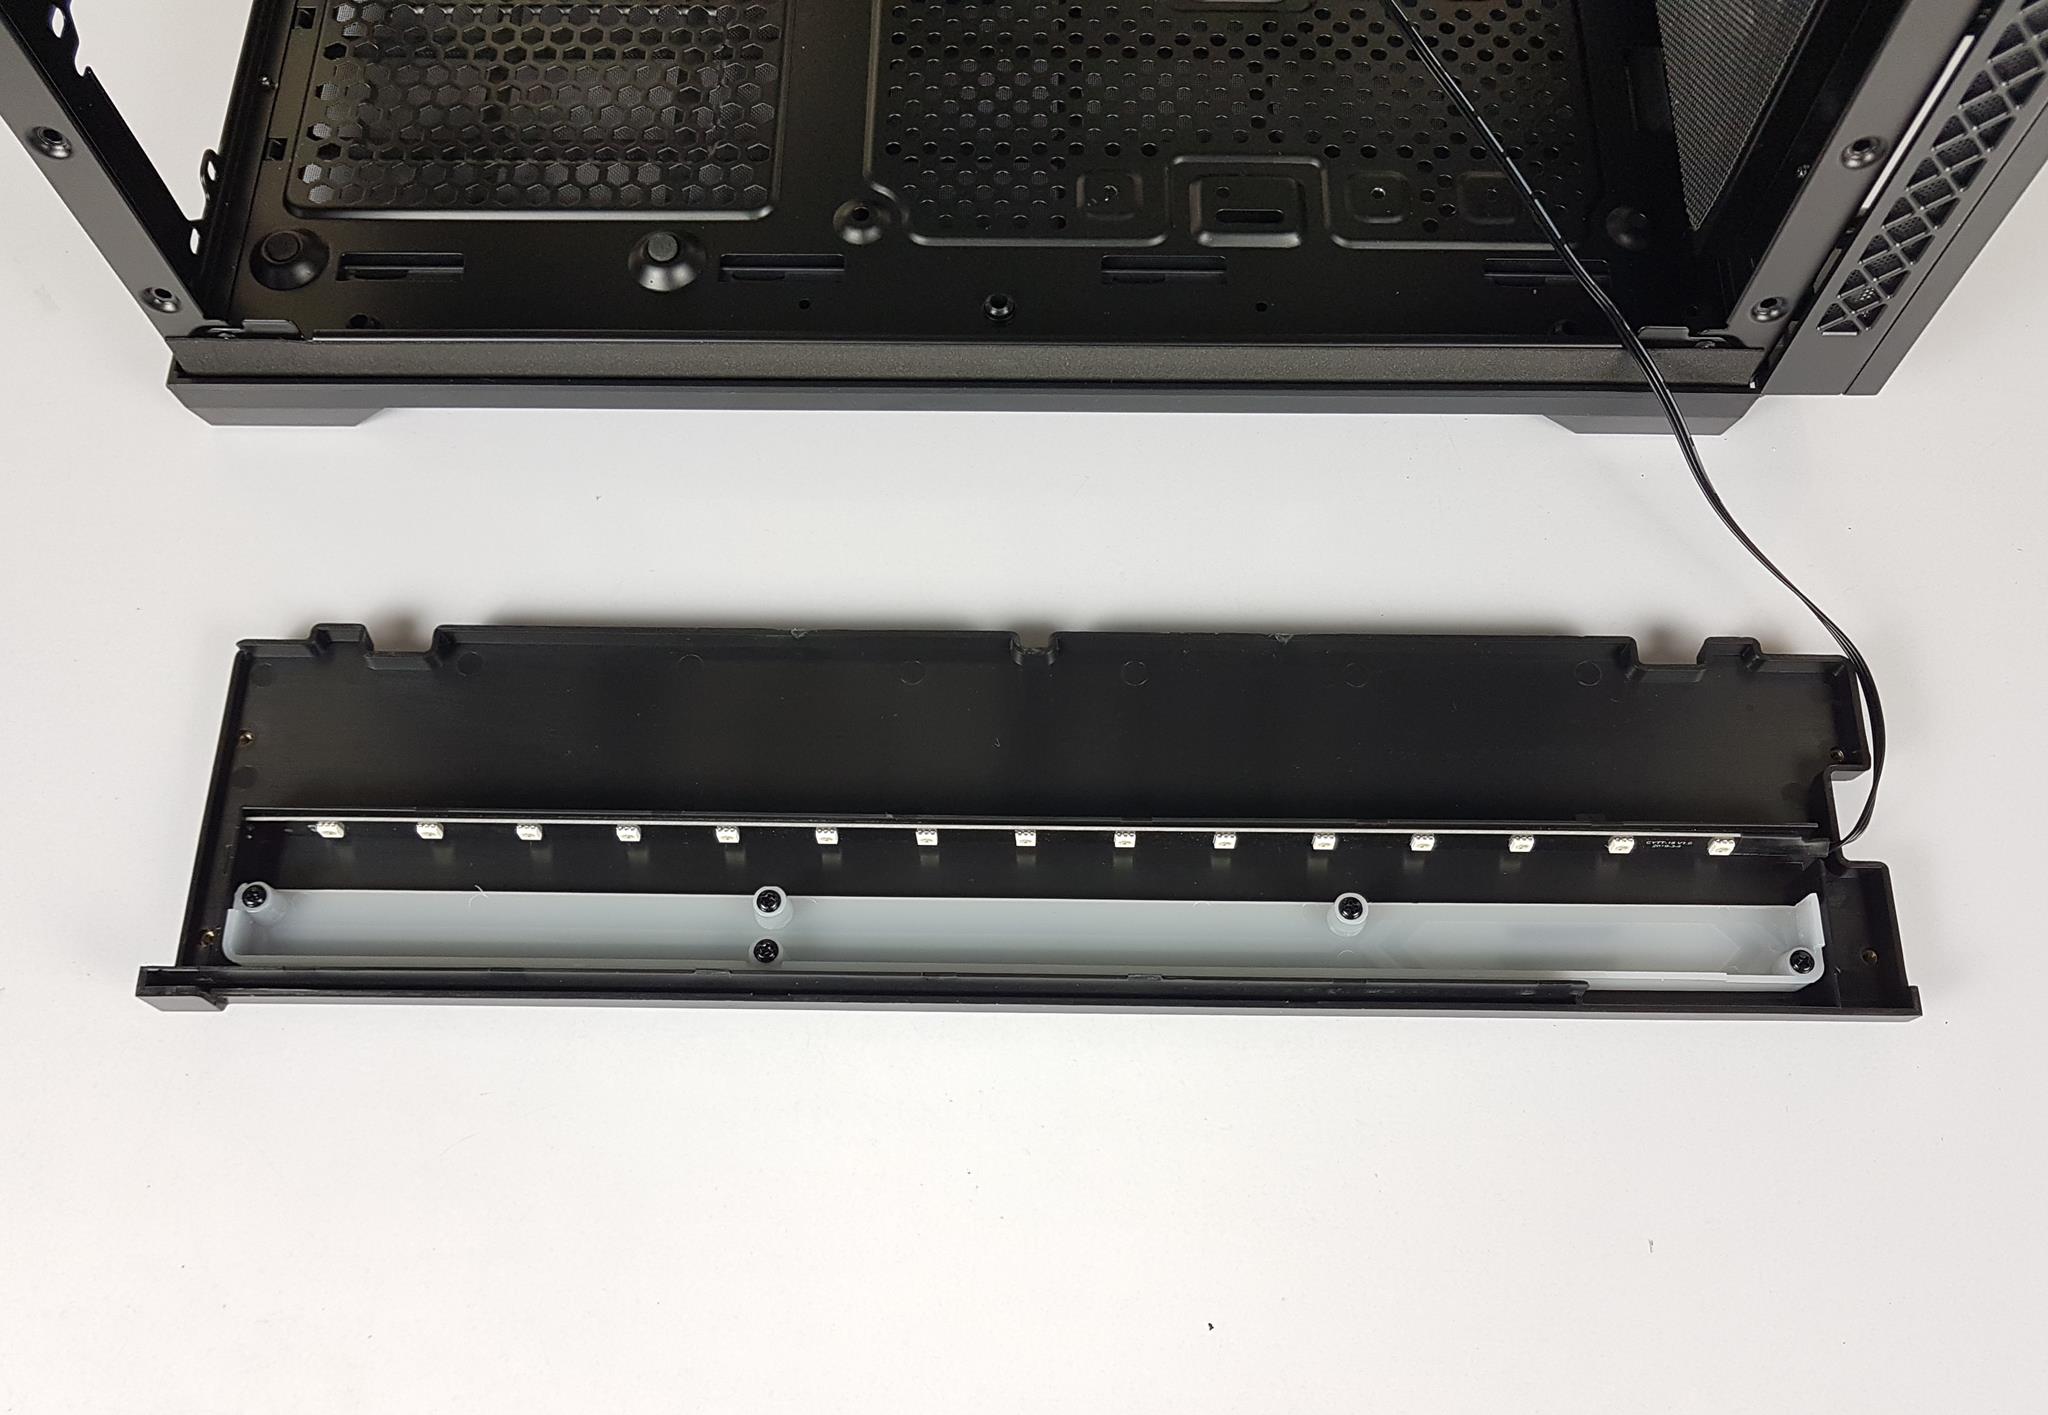
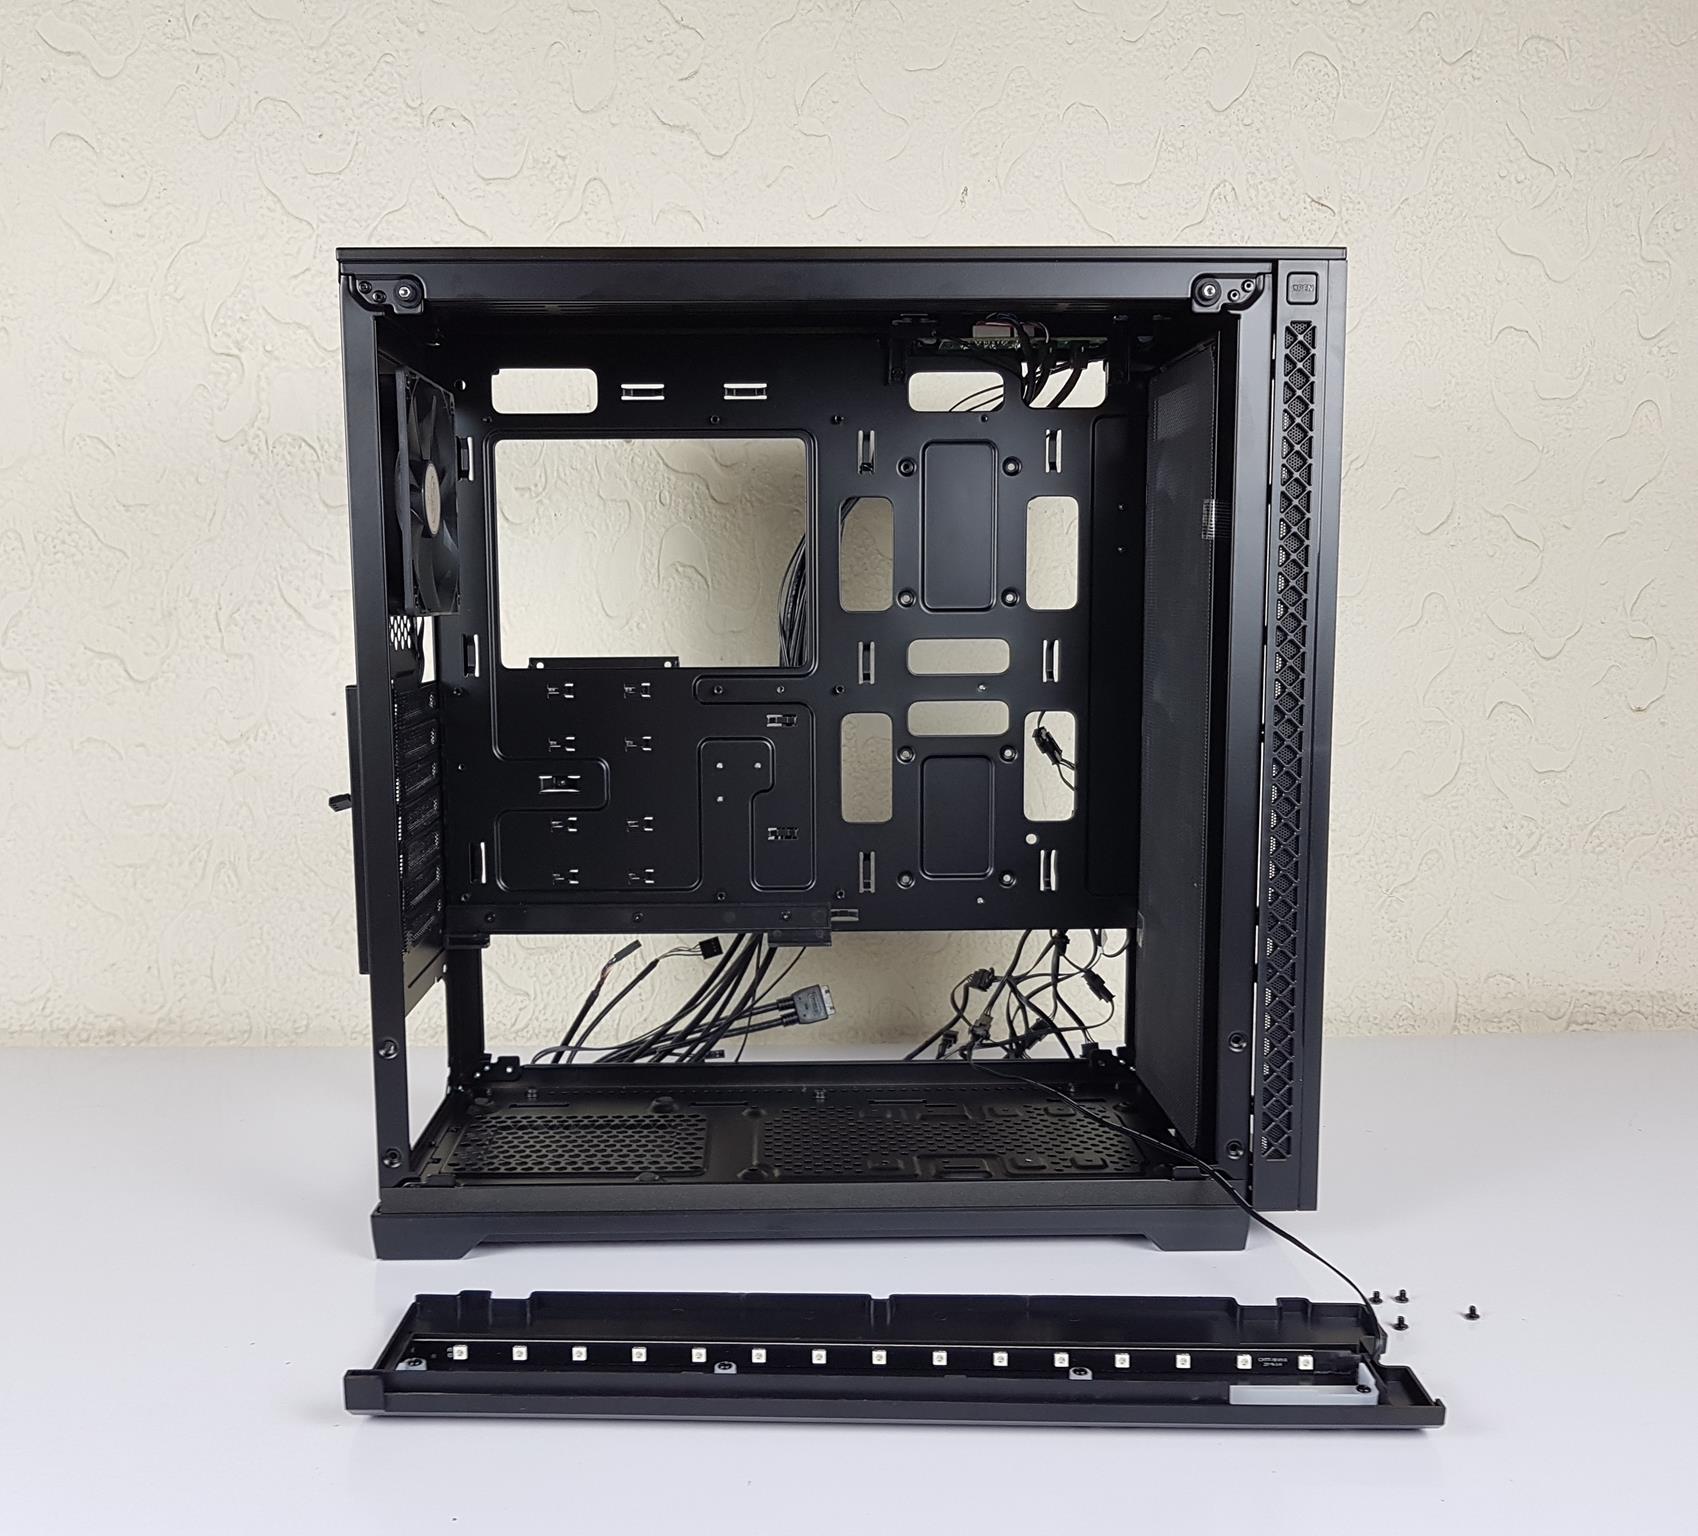
The shroud side cover can be removed as well. The A-RGB LED strip can be seen on the underside of this cover. The strip has 15 LEDs facing the diffuser.
I appreciate the enormous size available to the builder in this case. The modular aspect in this regard is right on the money.
Side – Steel Panel

The side panel is made of steel. It is finished in black color. The panel is heavy and has a solid build quality. It has the same placement implementation as is the tempered glass panel.
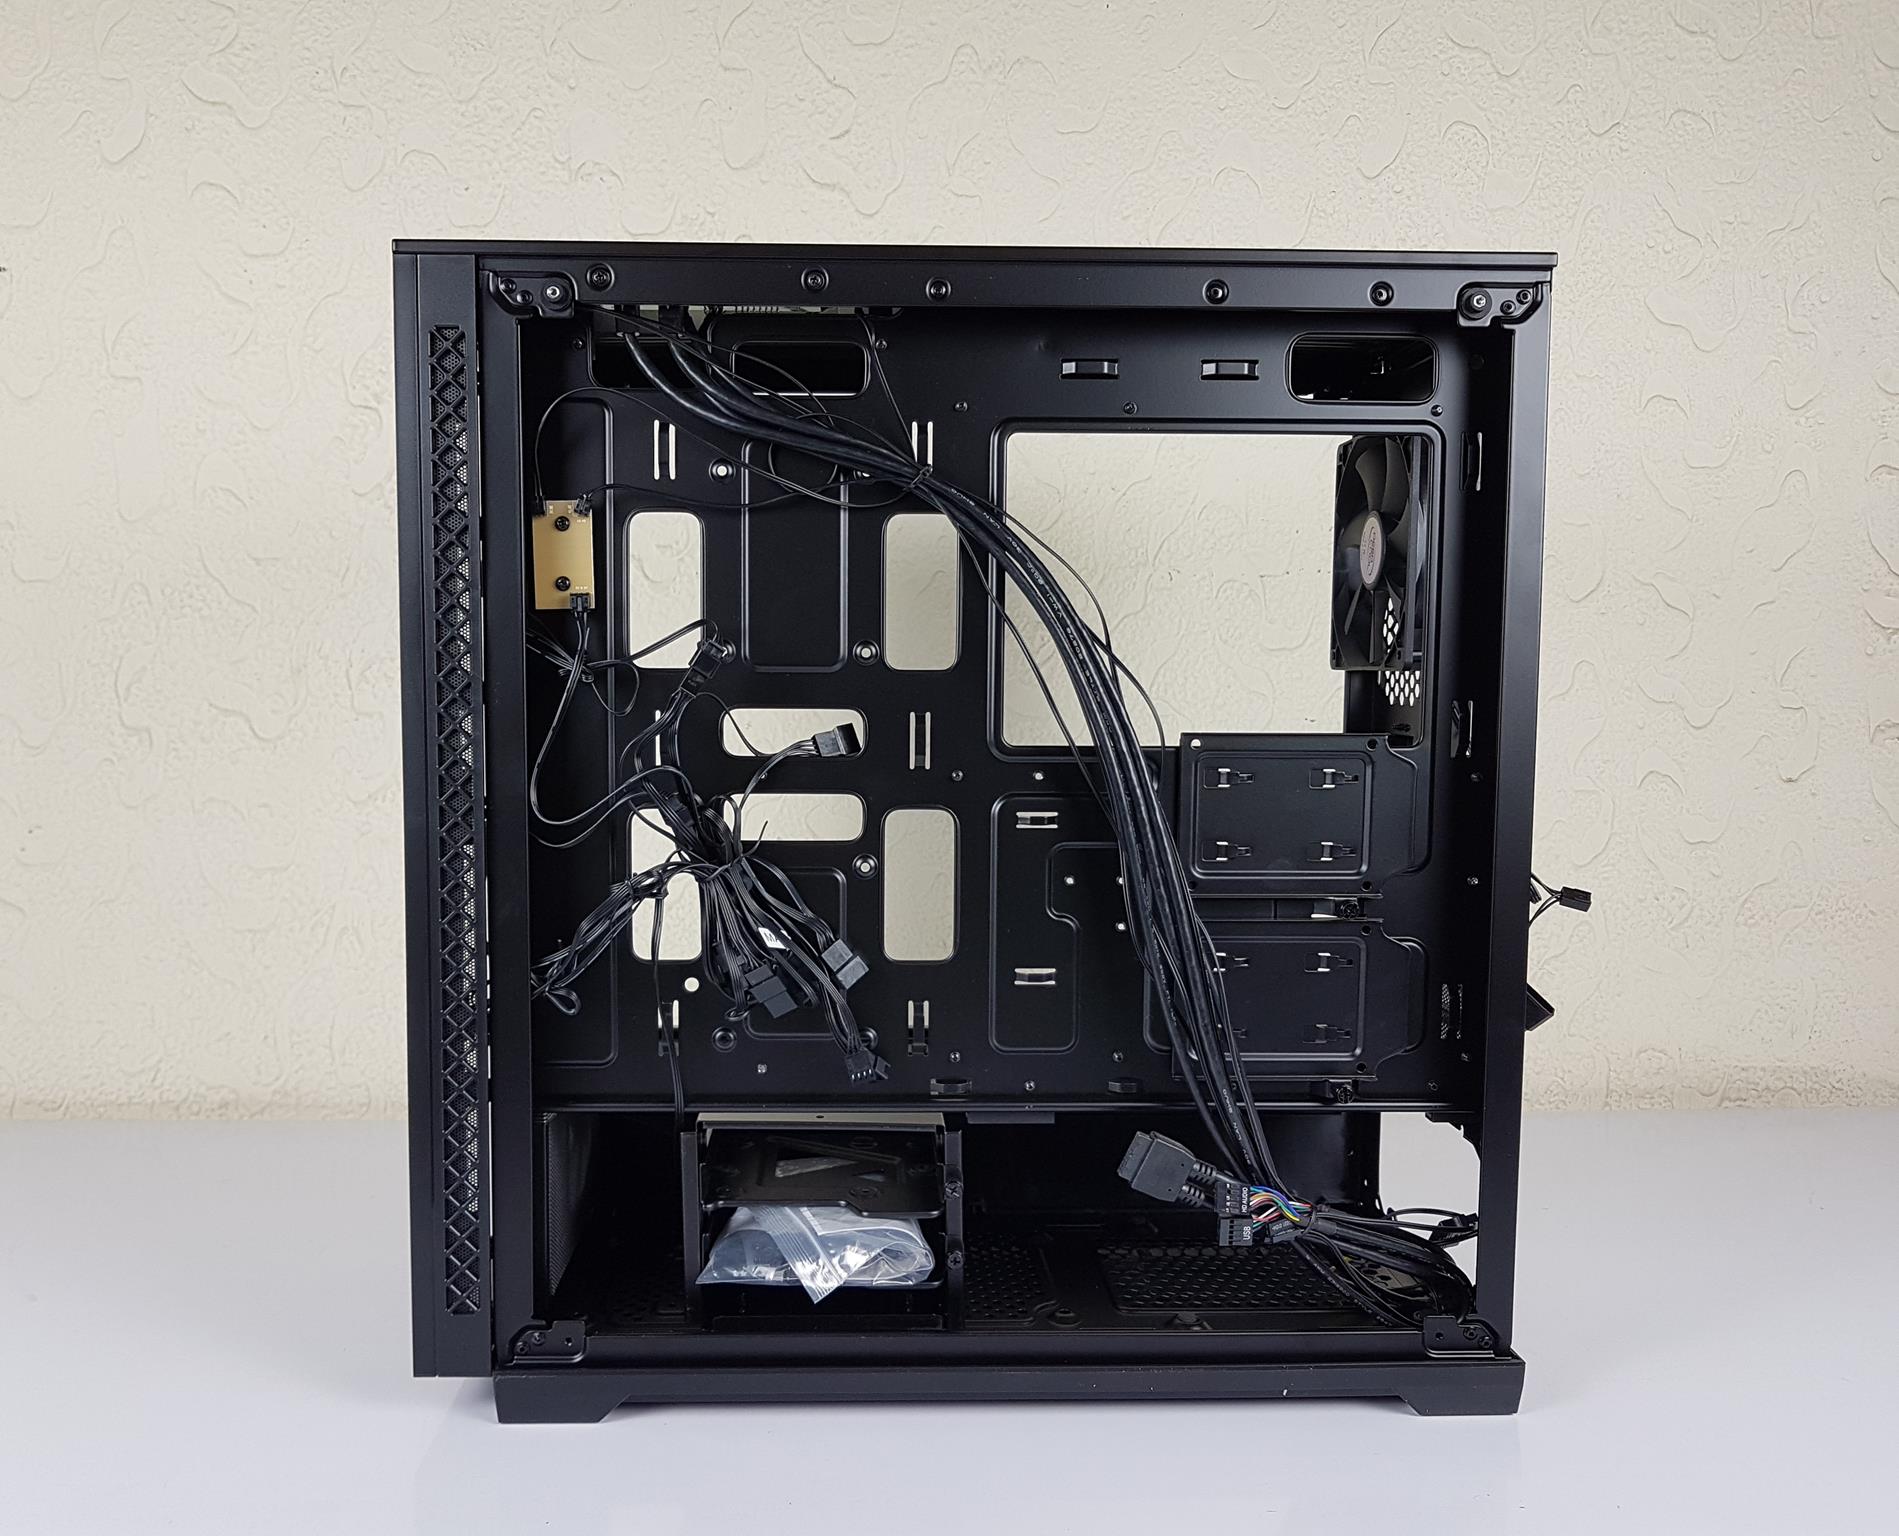
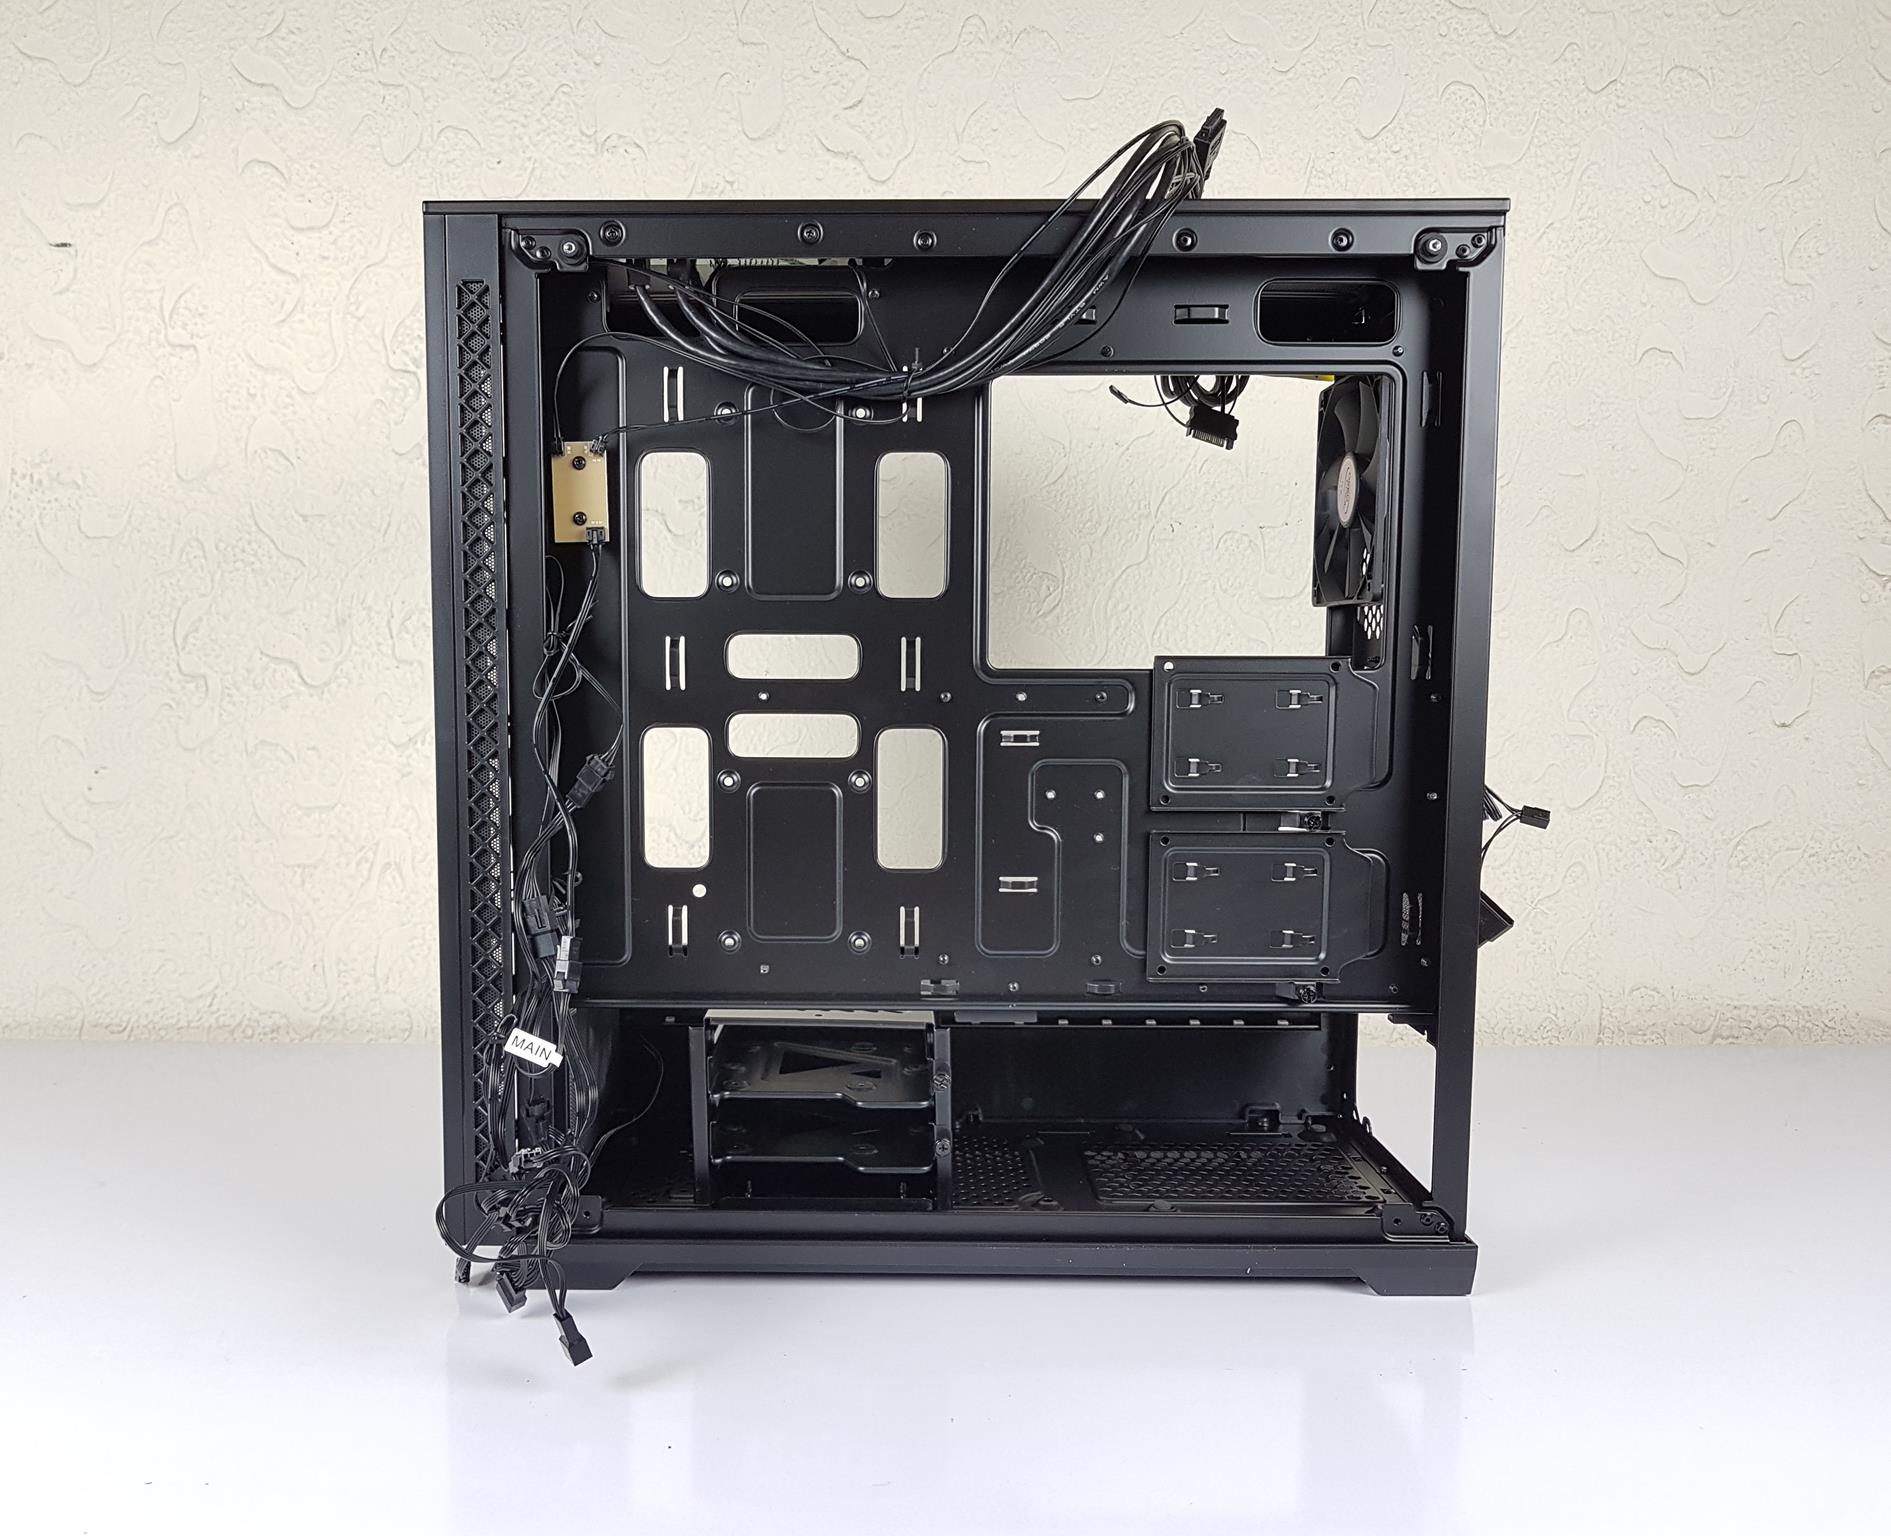
The above picture shows the backside after opening for the first time. The cables are tucked and secured on the cable tie points. We have roughly 25mm cable management space.
The lower section has an HDD cage and a PSU mount.
We have the following clearance for the PSU with the cables: (PSU length limitation is specified as 200mm)
- 240mm in stock configuration
- 270mm with HDD cage moved to its second position
- 415mm without HDD cage
The HDD cage has two caddies that are not tool-less. The user can install 2x 3.5” drives or 2x 2.5” in the HDD cage.
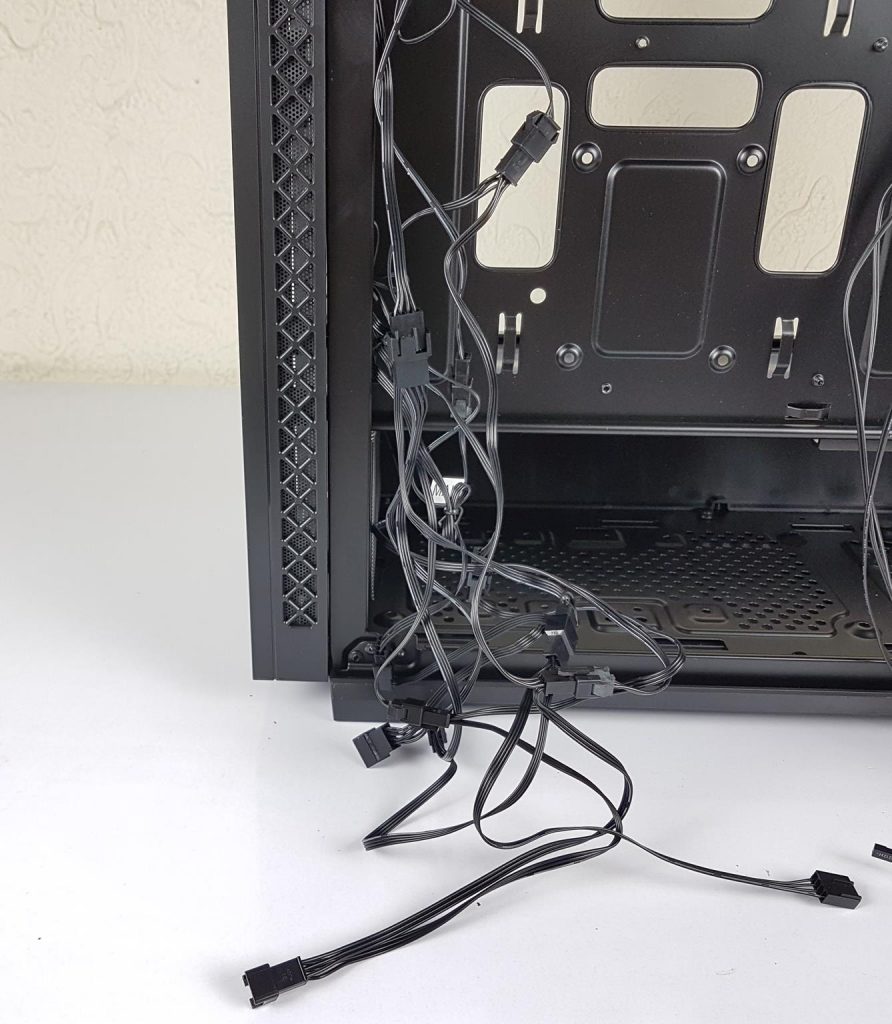
The above picture shows the mess of the front fans cables which the user would need to tie up and manage.
Test Build and Experience
Let’s talk about the building experience.
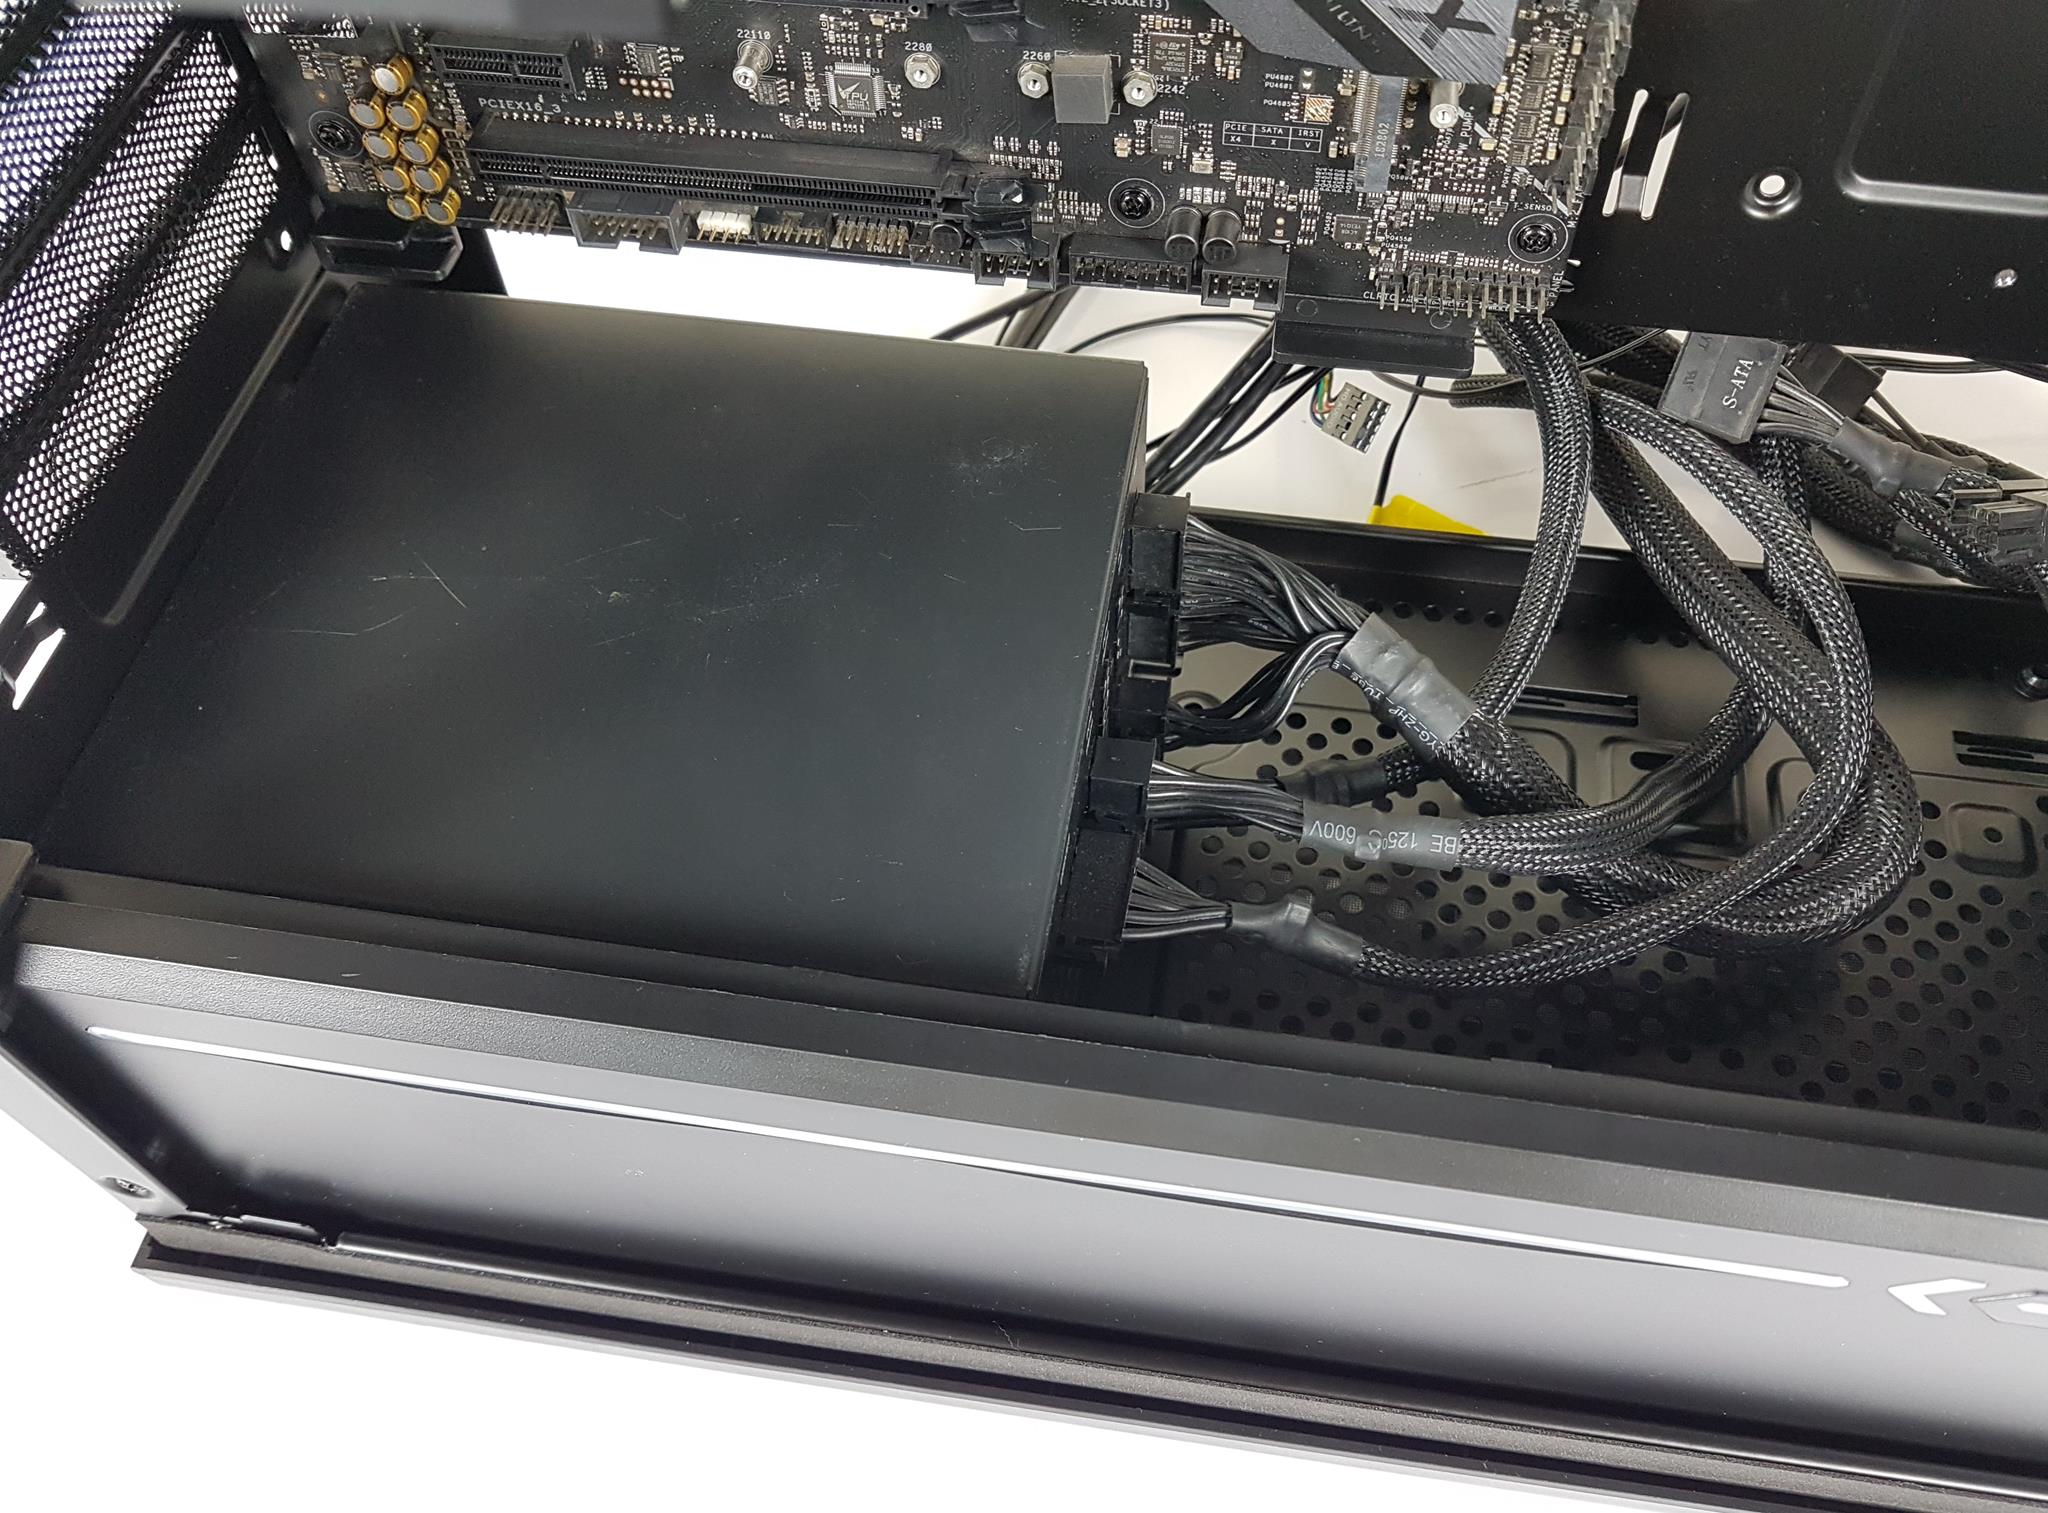
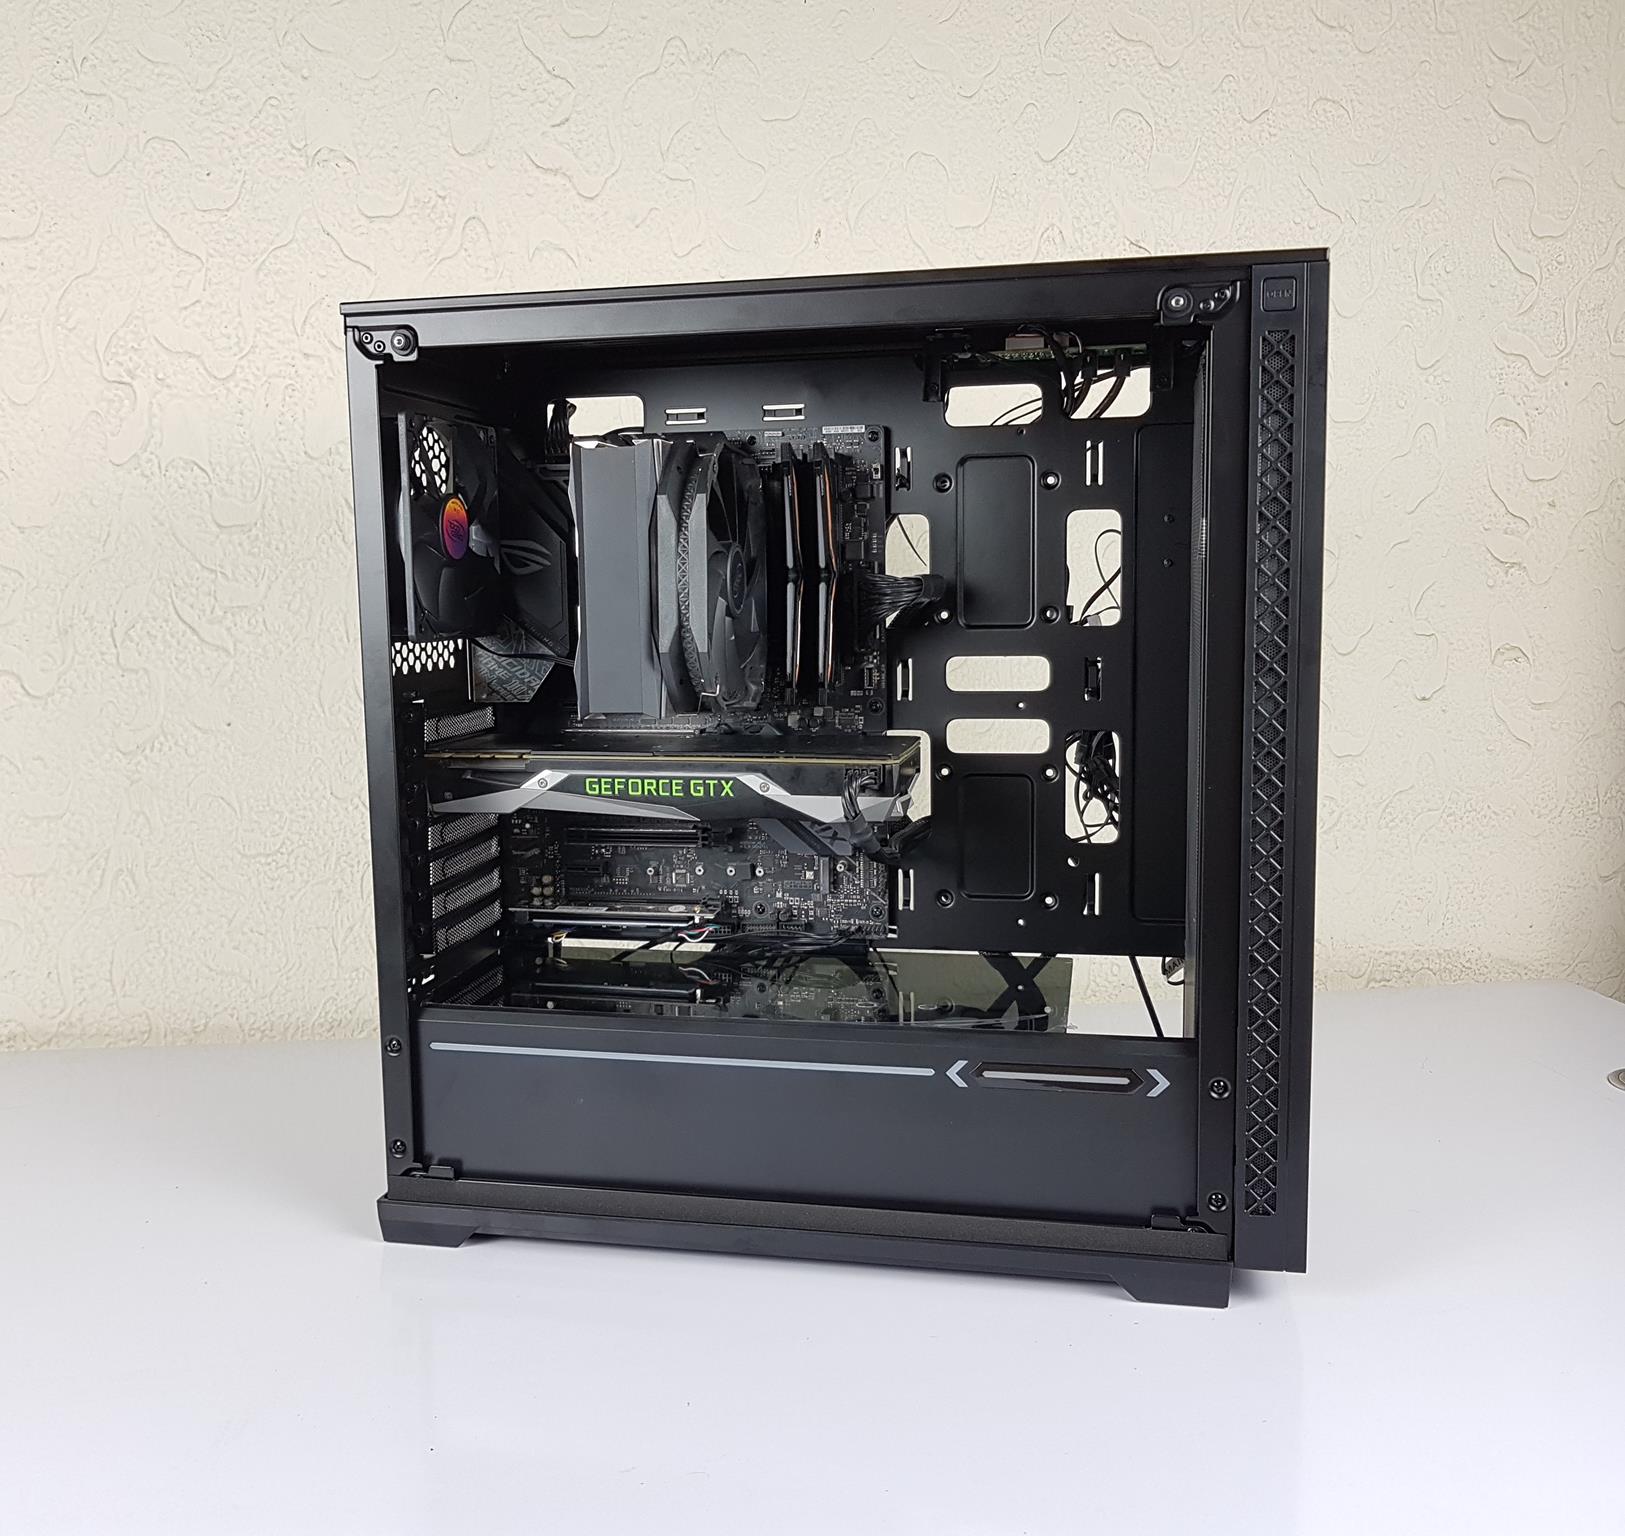
One of the key points is the EPS cable. Since we have installed the cooler out of the case, it restricts the space available to connect the EPS connector. Since we have used a modular PSU, we connected the EPS cable to the motherboard out of the case as well and pass it through the top left cutout during the motherboard’s installation.
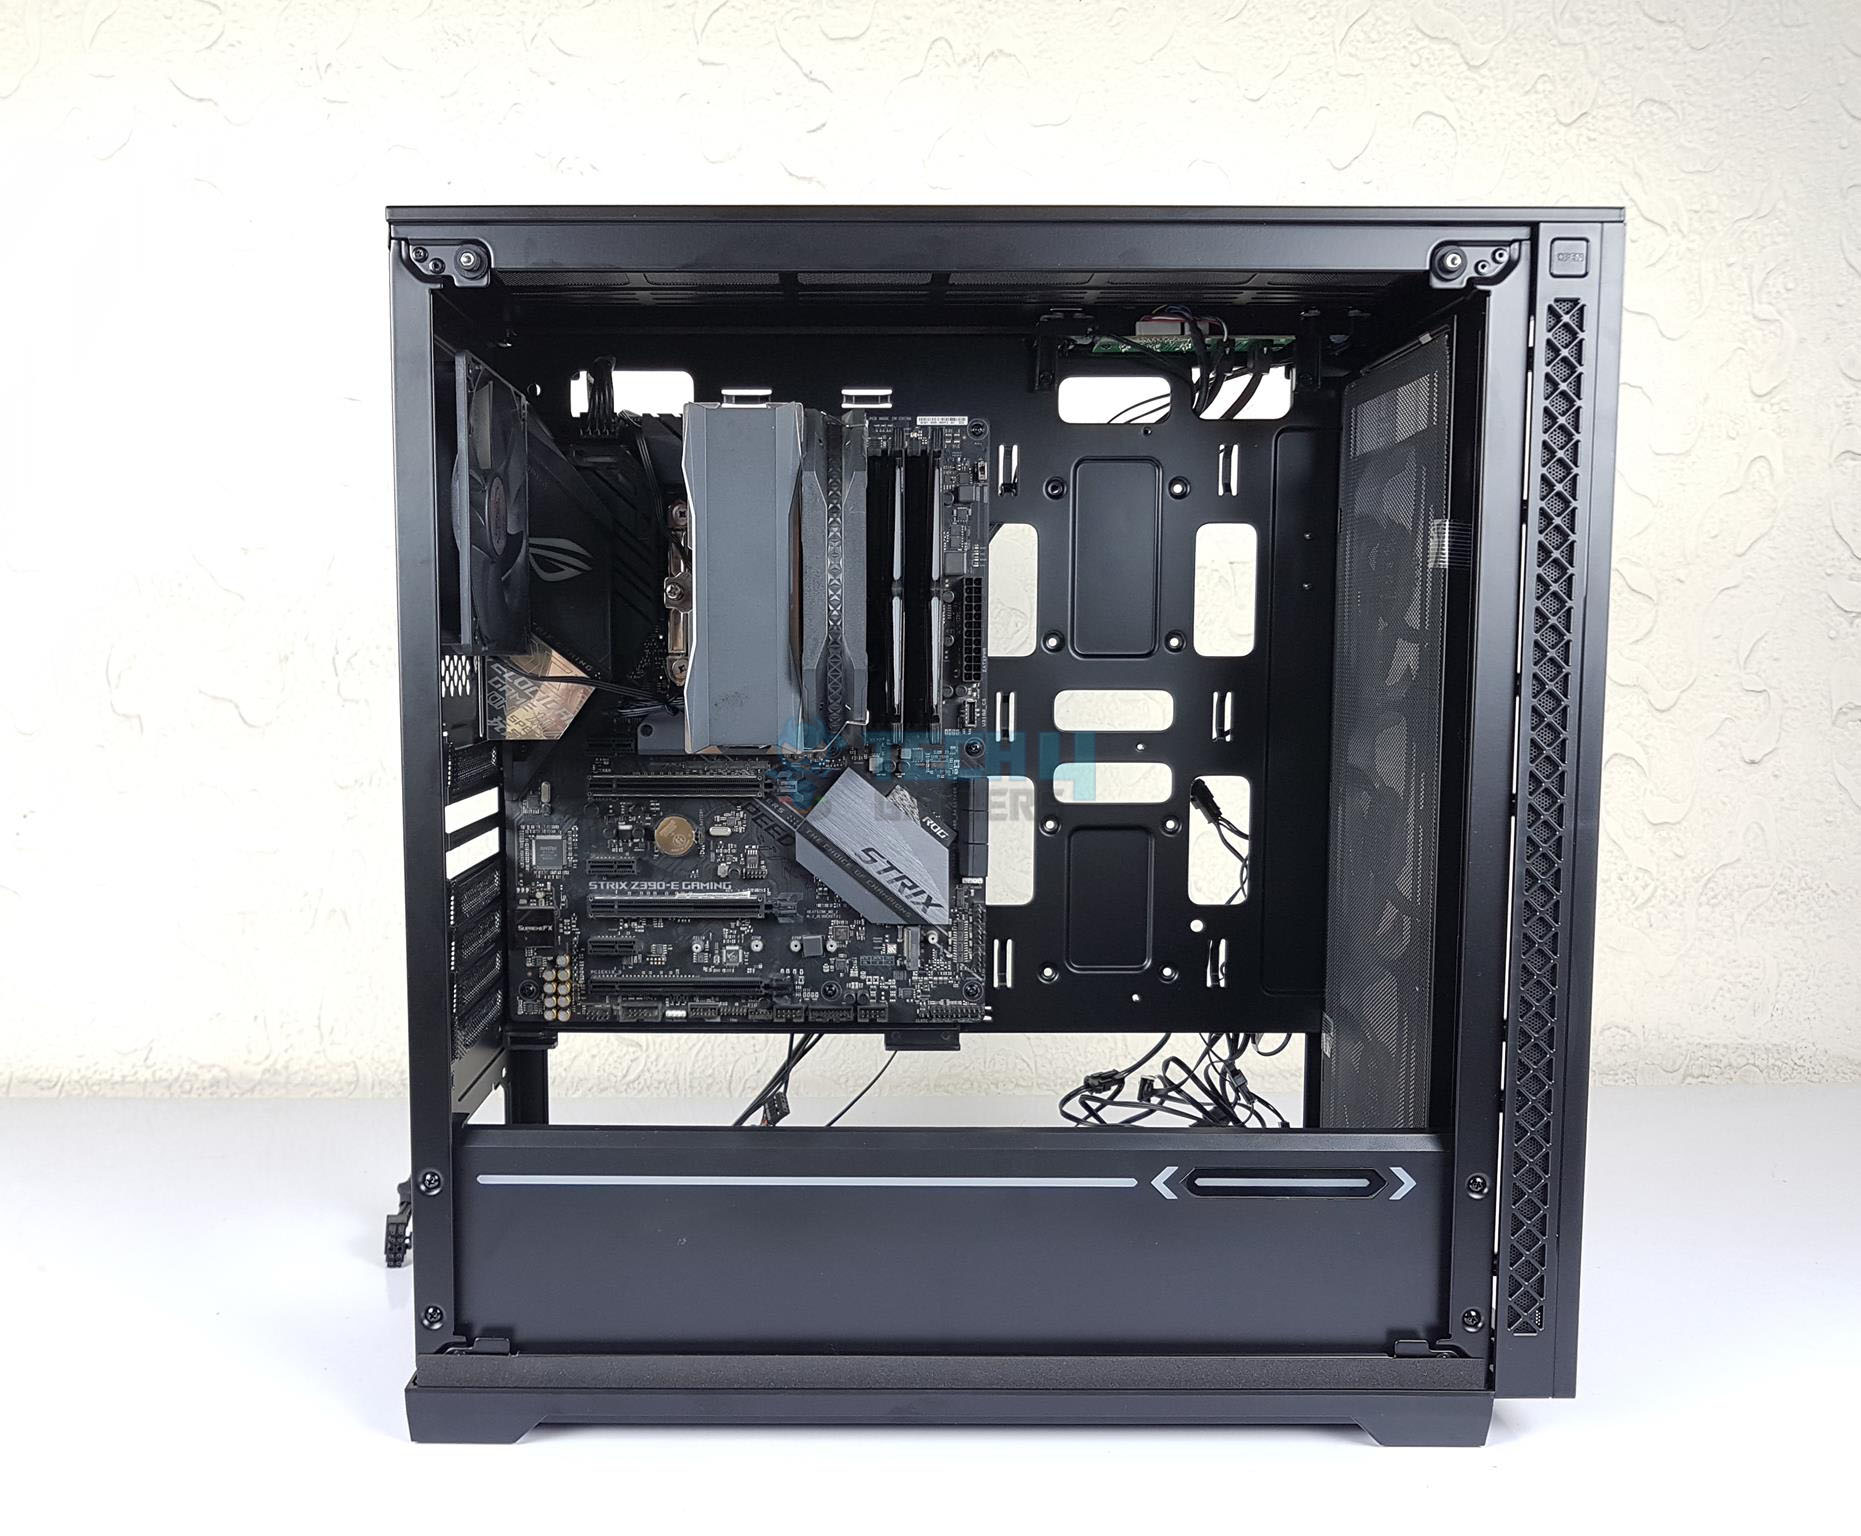
We did not do any cable management as we wanted to see if we can close the side panel as it is. The panel closed without any trouble.
Here are some pictures of the build.


Testing
Following test build has been used for thermal testing:
- ASUS ROG Strix Z390-E Gaming
- Intel i9 9900k [Stock, Auto]
- DeepCool AS500
- T-Force NightHawk RGB 16GB 3200MHz CL16 kit
- NVIDIA GeForce GTX 1080 FE
- Addlink S70 256GB NVMe SSD
- be quiet! Straight Power 11 850W PSU
Noctua NT-H1 thermal paste is used on the CPU IHS. ASUS RealBench 2.56 and MSI KOMBUSTOR 4 are used to stress the CPU and Graphics card, respectively.
Following configurations have been tested and reported in the graph:
- Stock Configuration [Complete Front Panel installed]
- Complete Front Panel removed
Please note that we can’t regulate the speed of the pre-installed fans. The cooler’s fan was set to run at AUTO PWM. The rest of the settings were on Auto, Stock in the UEFI/BIOS. A stress test of 30 minutes was done with an idle time of 10 minutes. System was powered off between all runs for a minimum of 30 minutes as well.
Let’s take a look at the results.
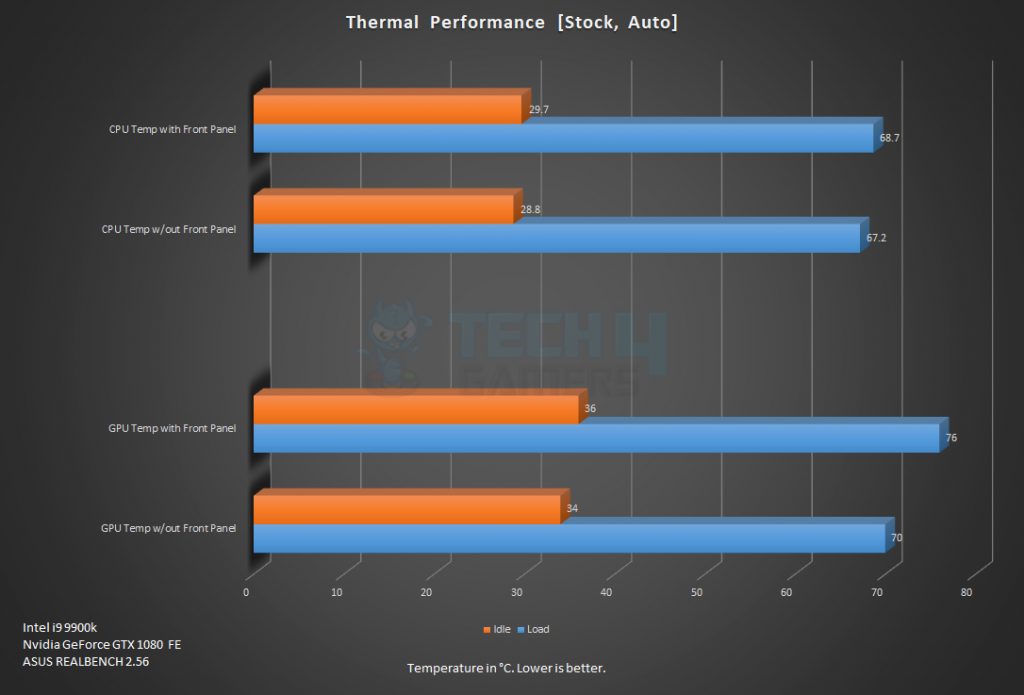
The ambient temperature was 26°C. We have reported absolute temperatures in the graph. The average of the CPU cores temperature values was taken. The difference of the CPU temperature with and without the front panel is 1.5°C which is within the acceptable margin.
So, in terms of the CPU cooling with an air cooler, the airflow restriction is not that aggressive. For graphics card, the result is the opposite. We are seeing a 6°C delta between both configurations which is on the high side. It was kind of expected given the airflow restricted design on the front.
Should You Buy It?
We’ve done all the testing, and will break down who should or shouldn’t buy this case.
Buy It If
✅ You Value Showcase Builds: If displaying your build through tempered glass panels and a sleek, modern design is a priority, this case offers an excellent showcase.
✅ Convenience Matters: For those who appreciate easy accessibility and installation, the one-button press feature for panel release and removable fan/radiator bracket is a standout convenience.
✅ You’re An ARGB Enthusiast: If you’re into customizable RGB lighting and want an ecosystem-compatible chassis, DeepCool’s lighting solutions and compatibility with standard headers on motherboards/controllers could be a compelling reason to buy.
Don’t Buy It If
❌ Airflow Is Top Priority: For users prioritizing maximum airflow for cooling, despite the inclusion of three powerful fans, this case’s design may restrict airflow due to its narrow intake channels and glass front panel. Consider reading our Best Airflow PC Cases guide for more ideal options.
❌ Minimal Cable Clutter is Vital: For those preferring standard connectivity and aiming for less cable clutter, the proprietary connectors for A-RGB lighting might be a drawback, even with the provided support cables.
Wrapping Up
The DeepCool MATREXX 70 ADD-RGB 3F is a sleek mid-tower chassis, available in black and white options. Its standout features include tempered glass panels on the sides and front, showcasing builds vividly, along with 3x CF120 A-RGB fans and an onboard RGB controller. A convenient one-button press easily releases the front panel, simplifying access for installation.
This case boasts effective dust filtration with magnetic filters on the top and front, a full-length non-magnetic filter at the bottom, and filter inserts on the front panel. However, its airflow is restricted due to narrow air intake channels alongside the glass front despite the presence of powerful front fans. The build quality is sturdy, and the flexibility to remove the front bracket for fan and radiator installation is a plus.
DeepCool’s proprietary connectors for A-RGB lighting, although supported by standard 3-pin 5V A-RGB connectors, could benefit from standardization to reduce cable clutter. While the build experience was seamless without major issues, it’s essential to note the restricted airflow within this case. Despite this limitation, the MATREXX 70 ADD-RGB 3F impresses with its overall quality, making it a recommended choice despite its airflow limitations.
We are grateful to DeepCool for the provision of MATREXX 70 ADD-RGB 3F for the review.
Recent Updates
- December 25, 2023: Few text changes to improve readability. Also added image galleries.
Thank you! Please share your positive feedback. 🔋
How could we improve this post? Please Help us. 😔
[CPU Coolers & RAM Expert]
Hayyan Serwer is a tech enthusiast, with a love for PC building and article writing. Hayyan specializes in writing about CPU coolers and RAM kits. Hayyan has been familiar with the tech industry for over half a decade now, and has now stepped into providing quality reviews for the latest and greatest tech.
Get In Touch: hayyan@tech4gamers.com


