 Threads
A Worth Mid-Tower Chassis?
Review Summary
The GAMDIAS APOLLO E2 ELITE is a mid-tower chassis with a sleek design, tempered glass panels, and RGB features. It offers good build quality and ease of installation, though airflow is restricted. Overall, it provides a decent feature set, but certain drawbacks, including fan speed regulation issues and restricted airflow, should be considered. Despite some oversights, it stands out with style and serves its purpose effectively.
Hours Tested: 19

Overall
-
Design - 8/10
8/10
-
Build Quality - 8/10
8/10
-
Features - 7/10
7/10
-
Performance - 7.5/10
7.5/10
-
Value - 7/10
7/10
Pros
- Sleek design with tempered glass panels.
- Onboard RGB controller and Rainbow RGB fans.
- Smooth and easy build experience.
- Good build quality.
- Competitive pricing for the feature set.
Cons
- Restricted airflow design.
- Front fan speed not adjustable.
- Non-reusable PCIe slot covers.


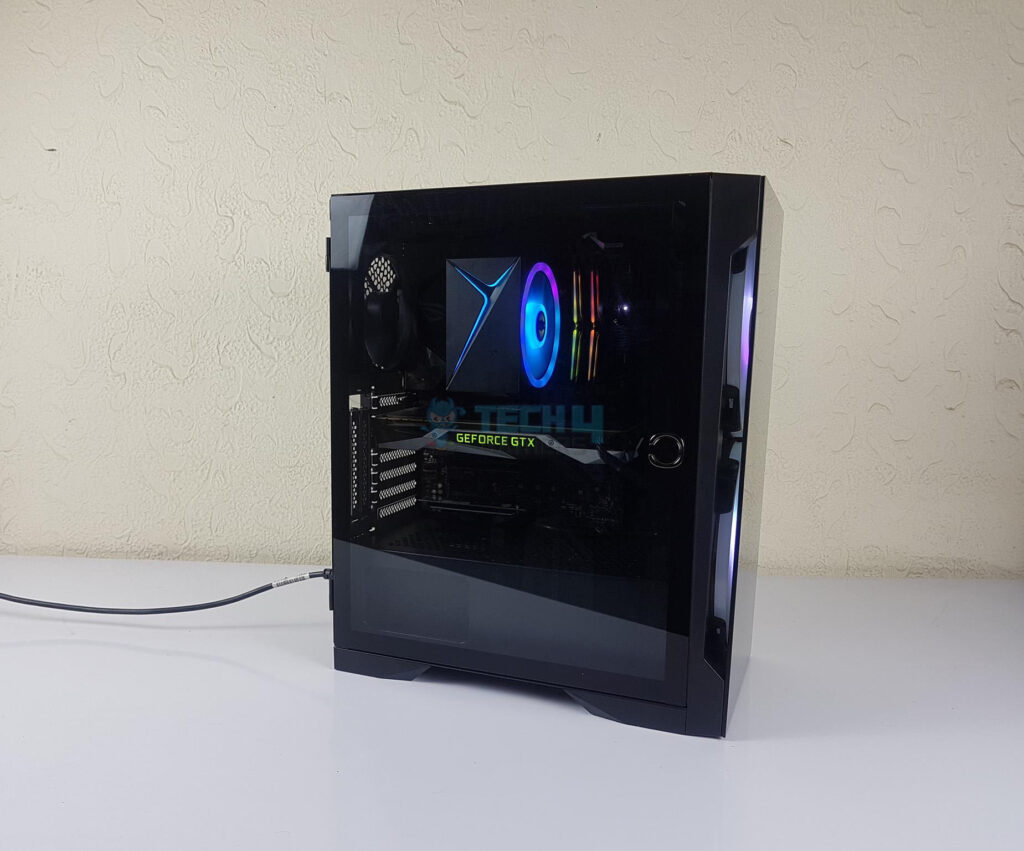
GAMDIAS has sent us the Apollo E2 Elite casing for review. The case has a tempered glass panel case with two built-in 200mm ARGB Fans. Let’s dive in and see what more is in store.
Key Takeaways
- The GAMDIAS Apollo E2 Elite is a mid-tower chassis with a sleek design featuring tempered glass panels, RGB lighting, and ample provisions for cooling and storage.
- You should get the GAMDIAS Apollo E2 Elite if you seek a mid-tower chassis with a stylish aesthetic, tempered glass panels for showcasing your build, RGB lighting with hinged side panels, and versatile cooling options, all at a reasonable price point.
- You should not get this chassis if you prioritize high airflow, as the design includes limited front panel ventilation and non-regulatable front fan speeds, potentially impacting cooling performance, or if you prefer tool-less HDD cage options and reusable PCIe slot covers, as these features are not present in the GAMDIAS Apollo E2 Elite.
- Why you can trust Tech4Gamers: Our reviews are based on dedicated hands-on testing by our team of experienced hardware experts. Find out more about how we test.
Let’s start with the specifications.
| Case Type | Mid-Tower |
| MB Support | ATX, Micro-ATX, Mini-ITX |
| Synchronization | 5V 3-Pin Addressable Header |
| Case Color | Black |
| Expansion Slots | 7+3 |
| Material | SPCC & ABS & Tempered glass |
| Window | Front, Left |
| Radiator Support |
|
| Fan Support |
|
| Pre-installed Fans |
|
| Drive Bays | 2 x 3.5″ or 1 x 2.5″ + 1 x 3.5″ (HDD Cage) / 3 x 2.5″ |
| I/O Port | USB 3.0 x1, USB 2.0 x2, HD Audio x1, LED Control x1 |
| Clearance |
|
| Dimension (L x W x H) | 392 x 230 x 467mm |
| Net Weight | 6.6 kg / 14.55 lb |
Packaging and Unboxing
The chassis is shipped inside a standard brown color cardboard box.
Contents
Following are included in the box:
- 5x Zip Ties
- 1x container of the screws.
There is no user manual provided in the case. The user can download that from their website.
Closer Look
The GAMDIAS APOLLO E2 ELITE is a compact mid-tower case available in black color. It has a dimension of 392x260x467mm. It is made of steel, plastic, and tempered glass. The chassis has a net weight of 6.6Kg.
Let’s start by taking a closer look at the exterior of the chassis.
Exterior

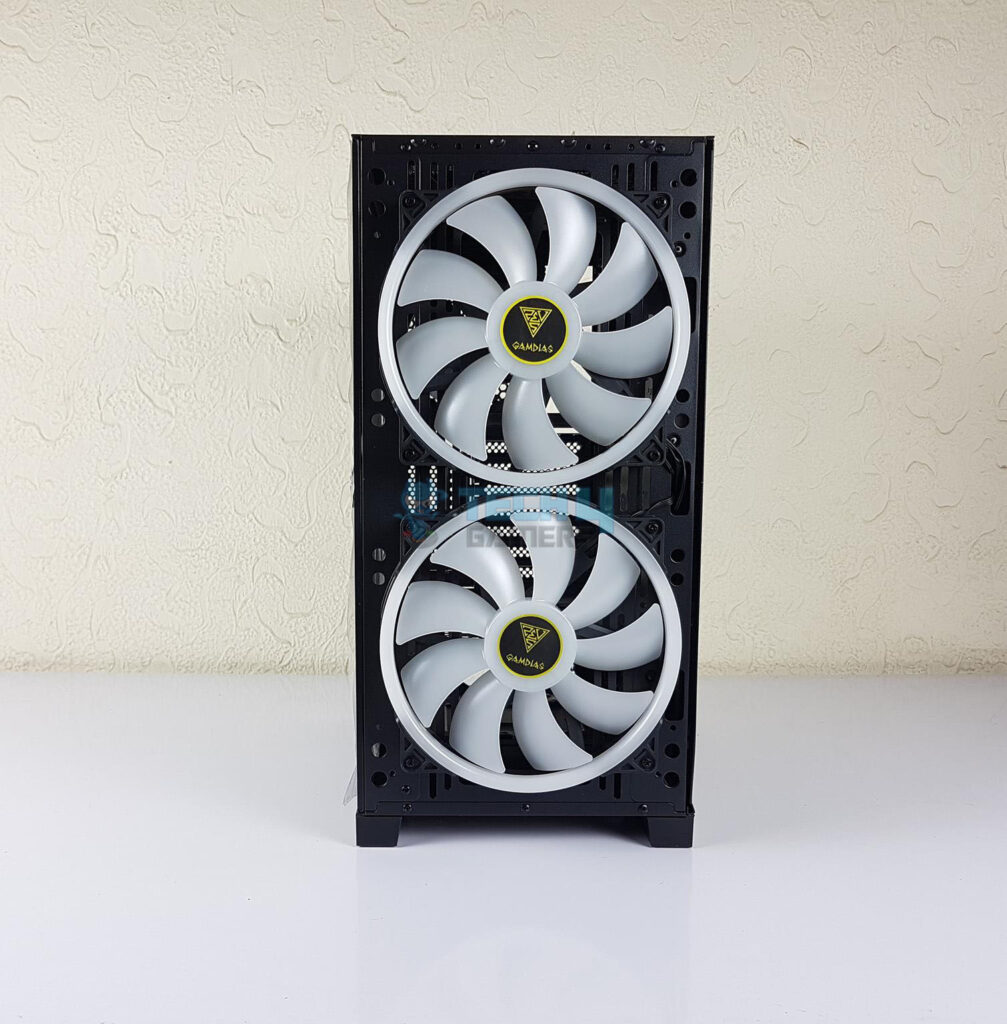
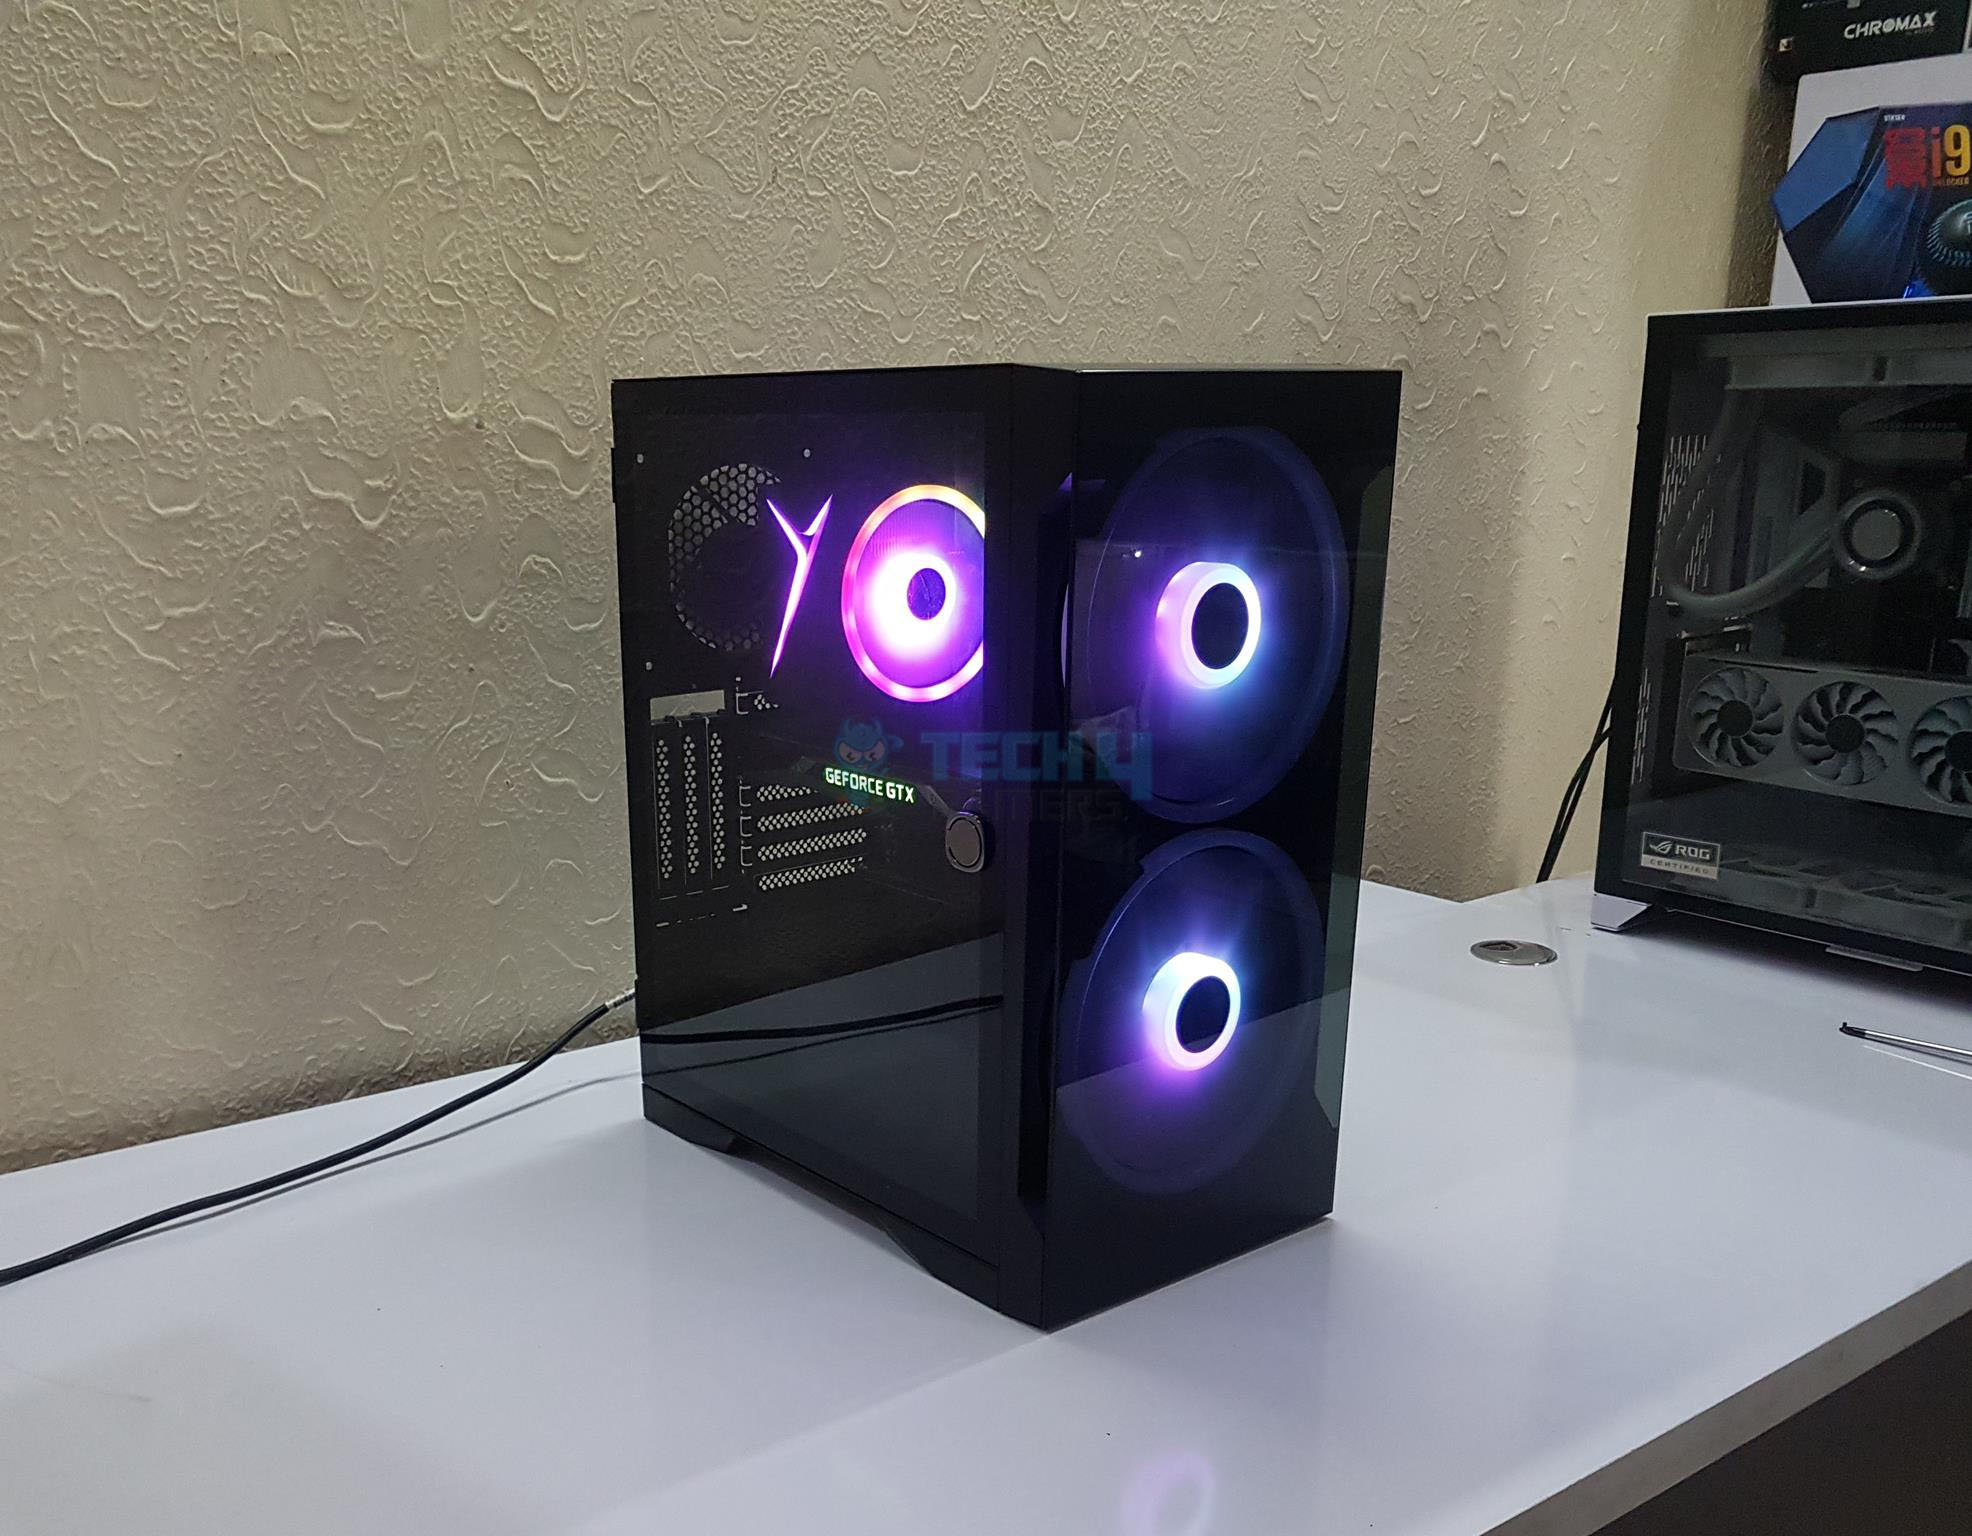
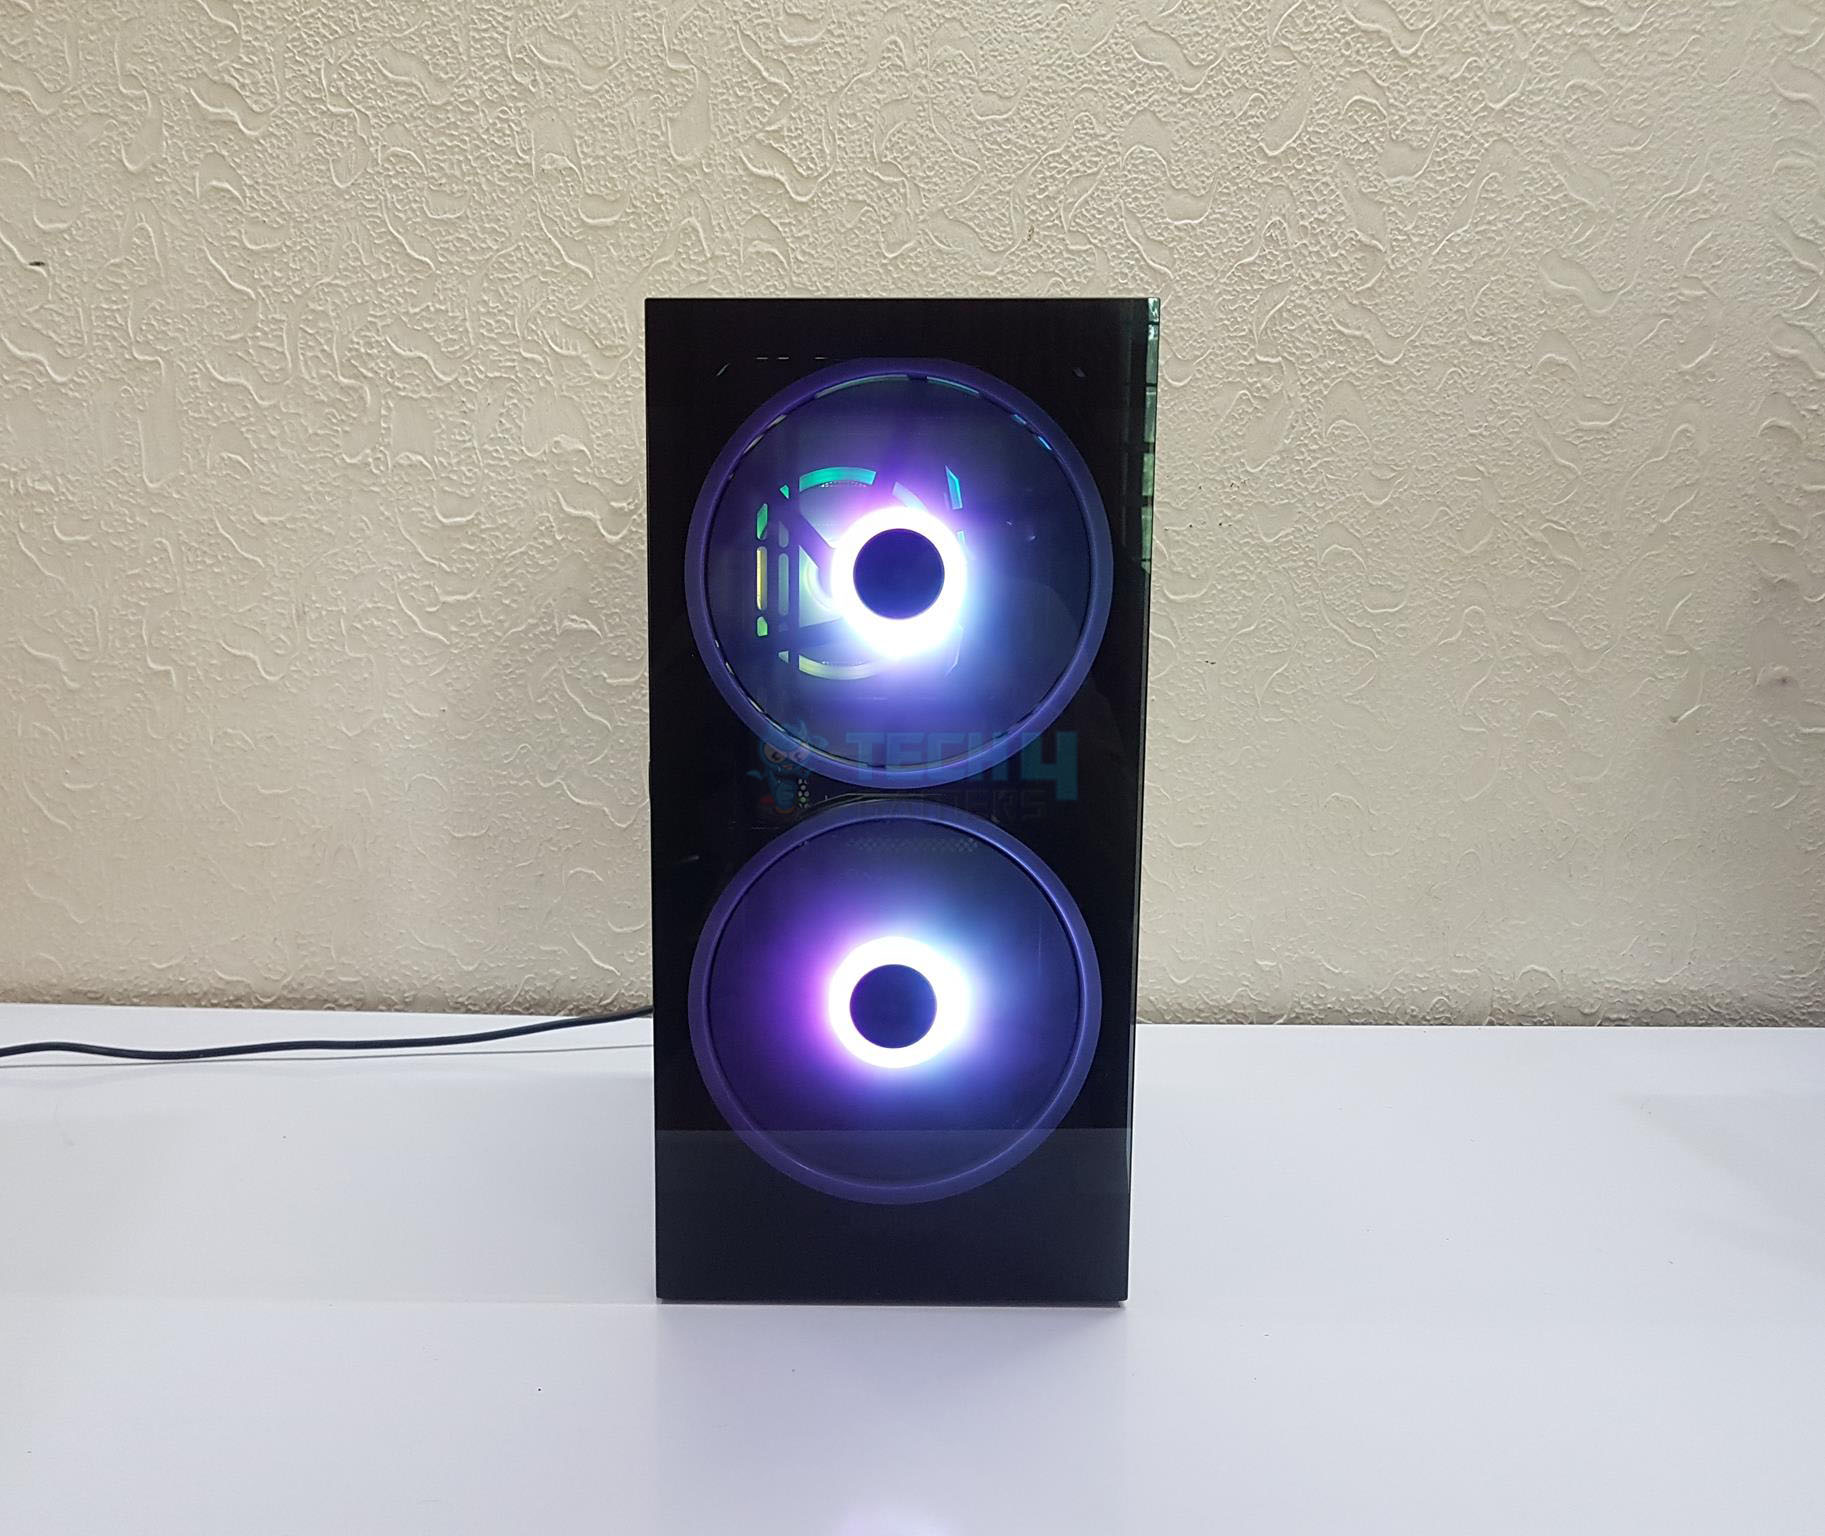
We have a tempered glass panel on the front side which is fixed on the front plastic frame. We can spot the 2x 200mm A-RGB fans behind the tinted glass. The fans have a dual-ring design offering a stunning lighting effect during operation. There is no dust filter on the front.
Put your hand on the underneath section of the front panel and pull to take it off. Be gentle as not to break anything. We can see the rail system behind the 200mm fans for easy installation and height adjustment of the fans. There are three cutouts on the right side. The cables are routed from the middle cutout to the backside of the case.
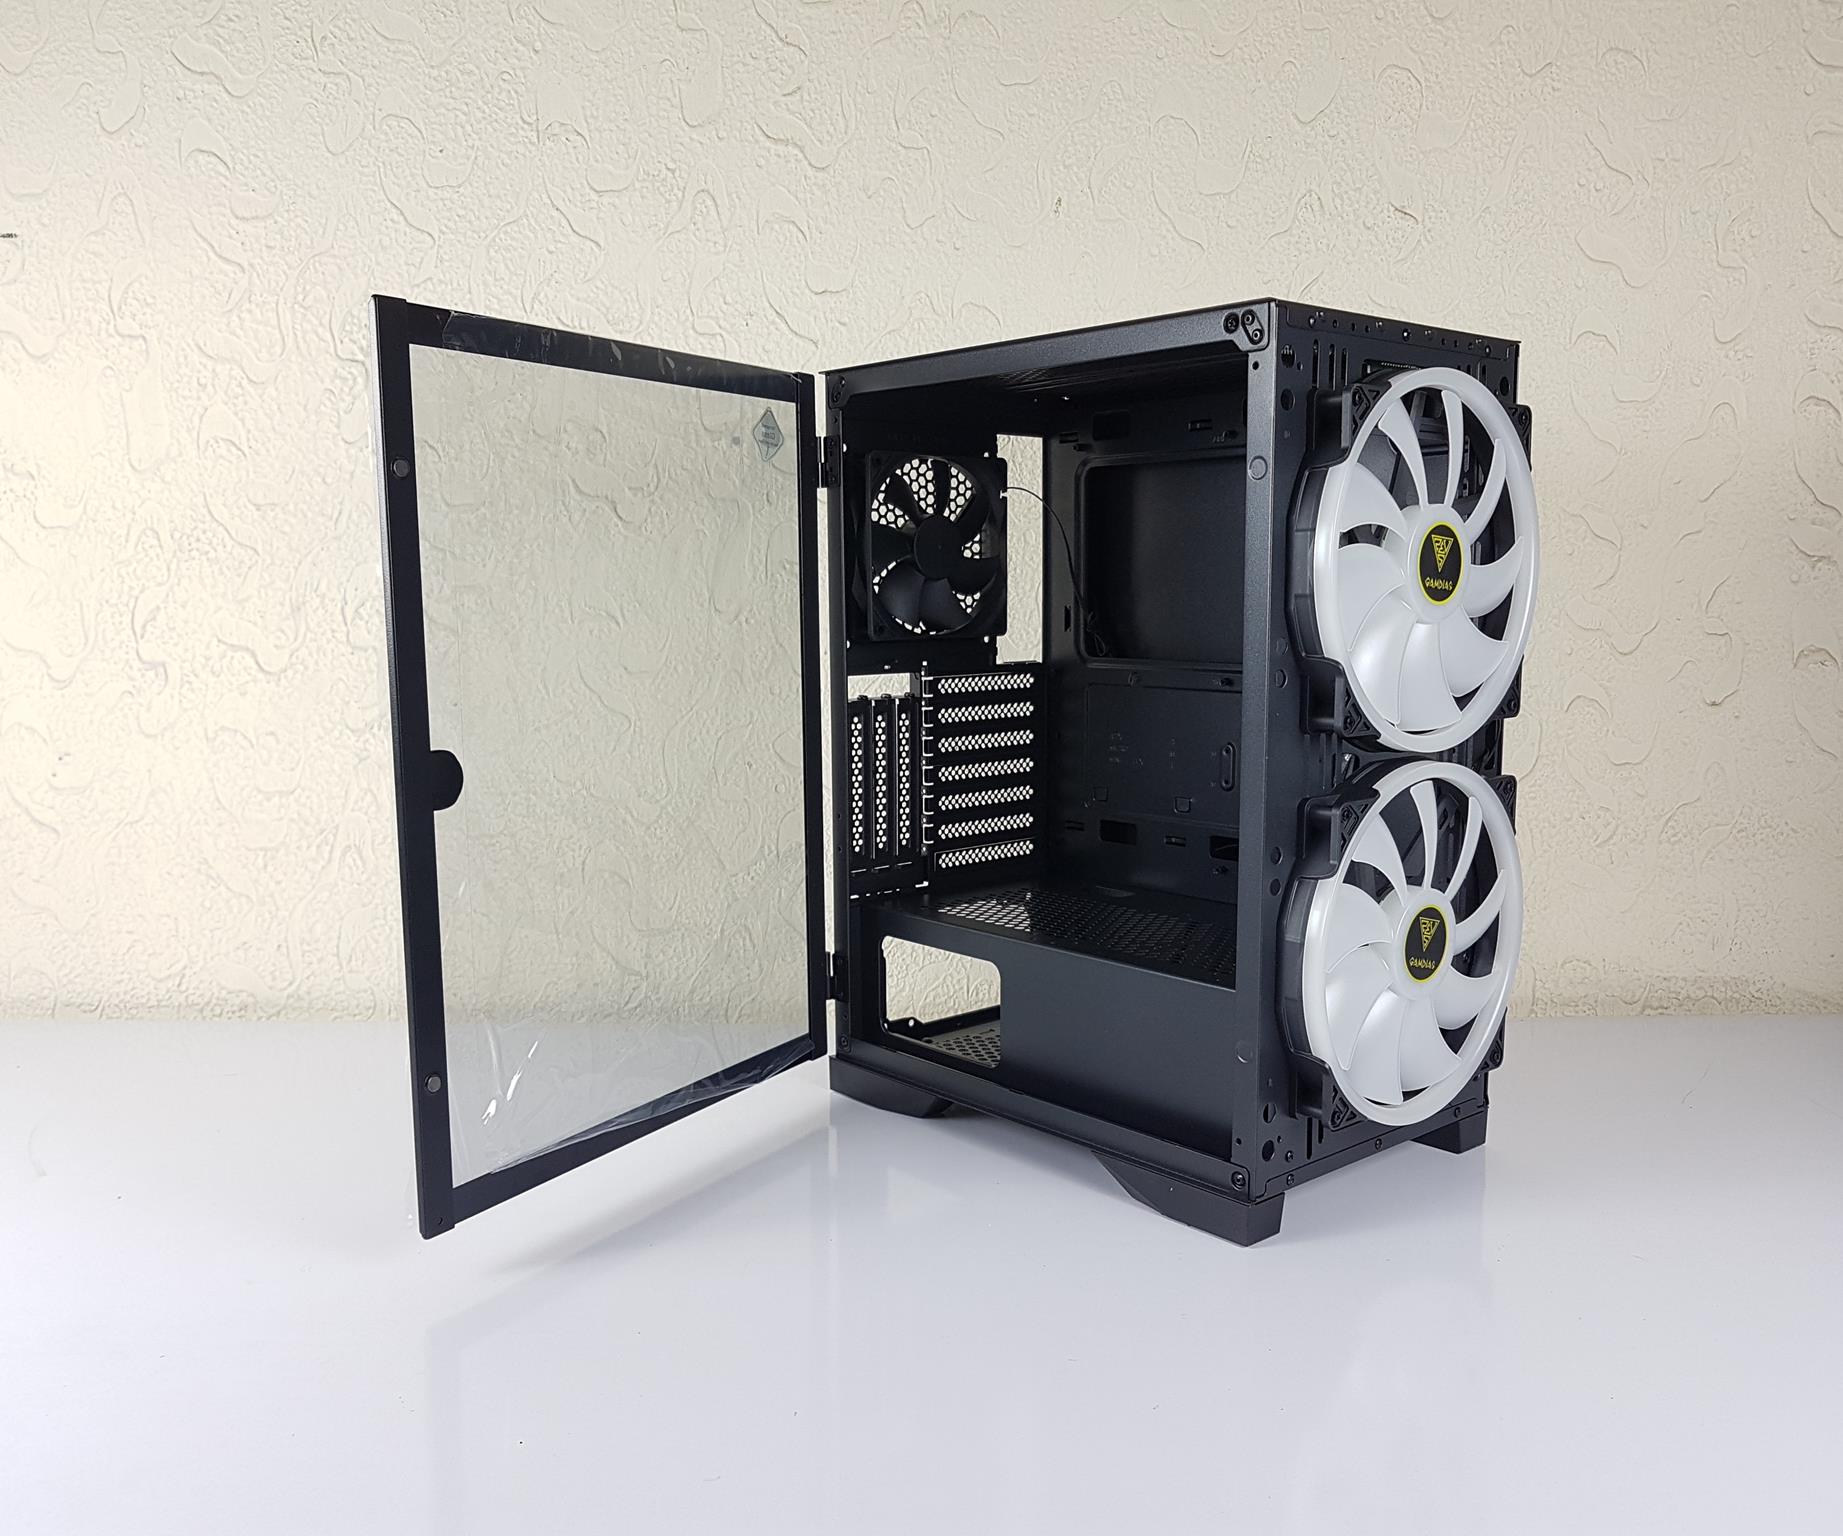
There is a metallic hook door handle on the glass panel. The hook ring can be opened and sit in plain sight with the base of the handle. I appreciate the attention to detail here.
The above picture shows the swing style thanks to hinges on the frame of the case. It makes the life of the user/builder easier. There are two magnets on the front side of the side panel to firmly secure it with the steel frame of the case.

We have a standard layout on the rear. There is a cutout for the IO shield of the motherboard. On its right, there is a vented area for the 120mm/140 fan mount. One non-RGB 120mm fan is preinstalled. There is no height adjustment for the fan.
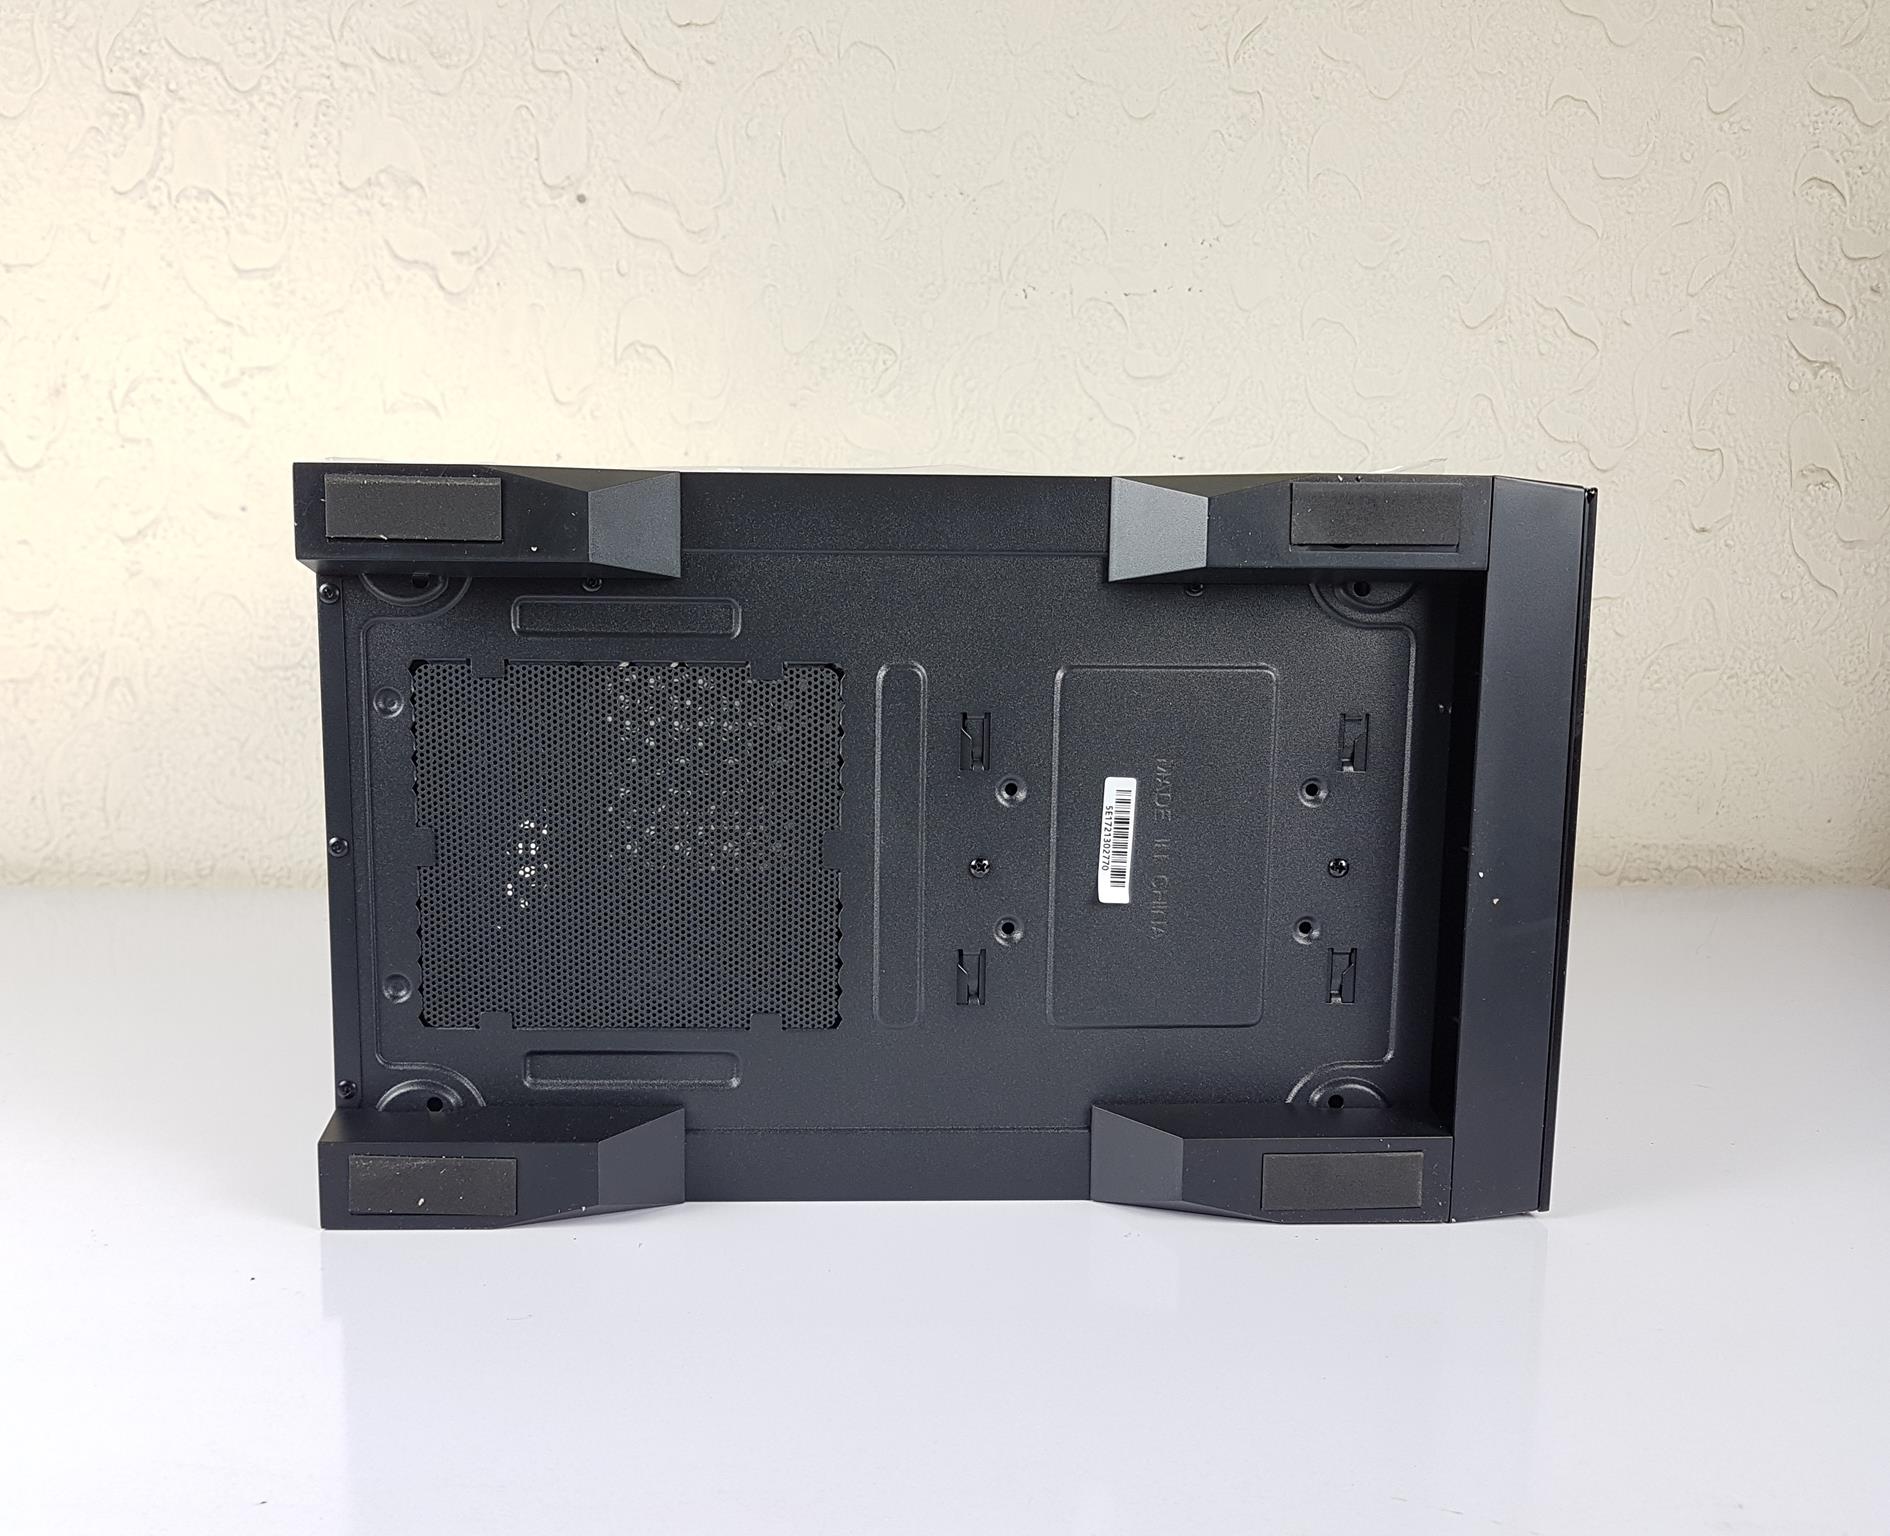
There is an ATX PSU mount on the bottom. There is a removable non-magnetic dust filter under the PSU vented portion. The black color feet give sufficient lift to the chassis from the bottom for better ventilation. There are two button-head screws. These can be removed to take out the HDD cage.
The above picture shows the side of the front panel. We have large cutouts in the frame. This is done to make some room for air-intake. The fans sit closer to the glass. In my opinion, this would not help with the air intake and this is a classy air-restrictive design on the front. Surely, the 2x 200mm fans give us a hint as to why they are there!
Interior
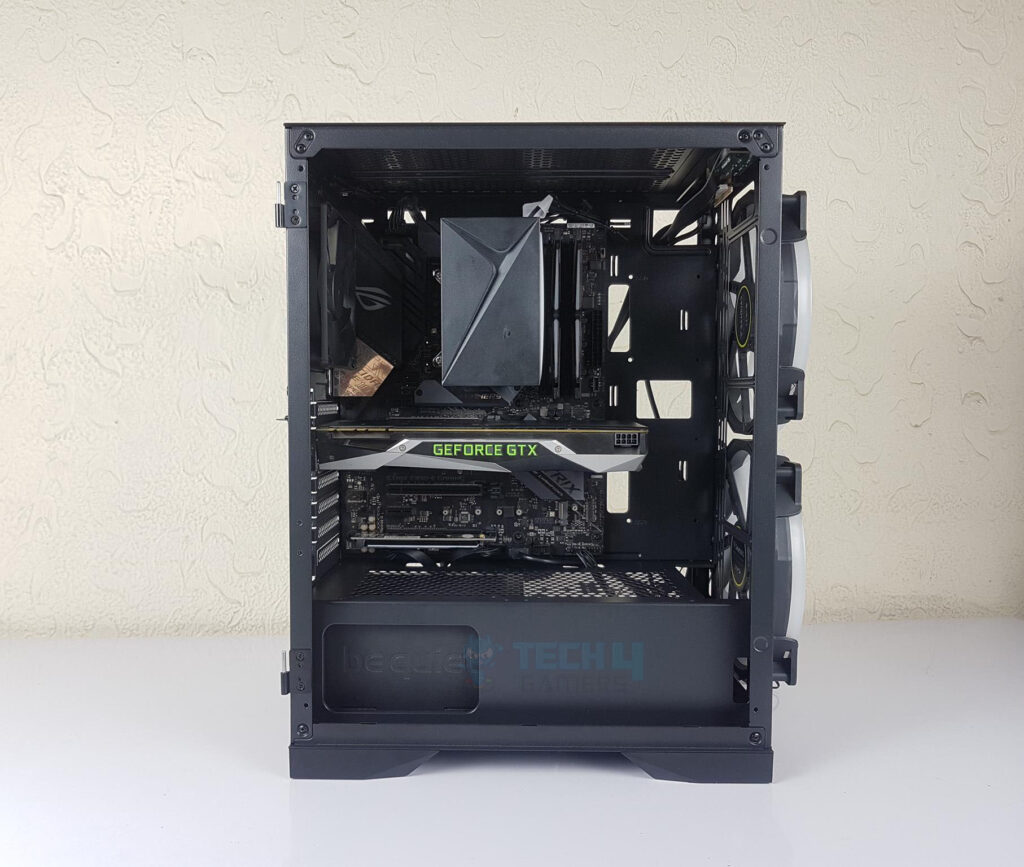
Let’s take a look at the interior of the chassis. The inner frame’s height is 340mm and its length is 350mm. Clearly, we are dealing with a compact design here. Overall tooling is pretty basic and standard. The PSU shroud has a large cutout on the side to show the side of the PSU.
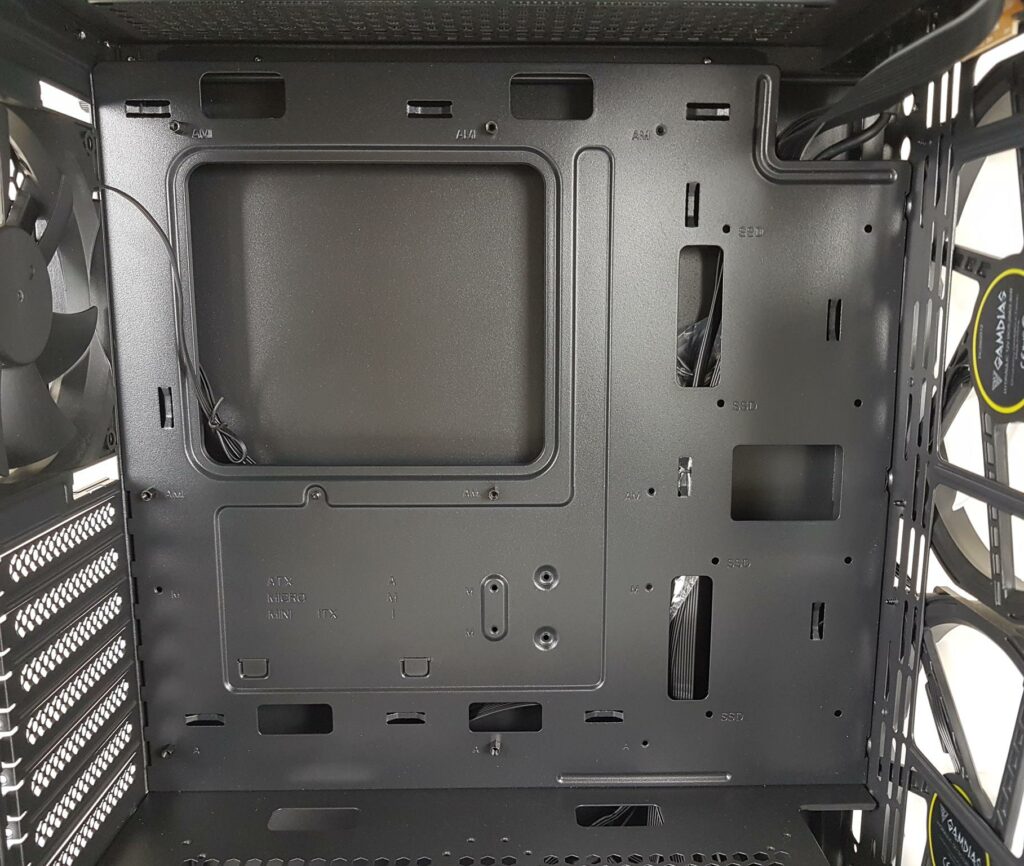
Only 6x standoffs are pre-installed and GAMDIAS has not provided a socket wrench in the accessory box to install the remaining 3x standoffs for ATX size motherboards. We’ve got a spacious cutout for easy CPU cooler installation. Two large cutouts on top handle EPS and other cables. There are two vertical cutouts on the right side of the motherboard tray. Note: the far-right area isn’t accessible from this side, reserved for 2.5” drives from the back.
The PSU shroud sports a vented cover with 120mm and 140mm fan mounting holes. Oddly, GAMDIAS doesn’t clarify fan placement or clearance on the PSU shroud, hinting at a standard design. Two nearby cutouts facilitate cable routing near the motherboard tray. There is a black color non-RGB 120mm fan on the rear. The fan has a 3-pin connector to power it.
The 3x PCIe slots sit closer to the glass panel. This could have thermal implications on the graphics card. Also, note that there is no riser bracket or cable provided with the case.
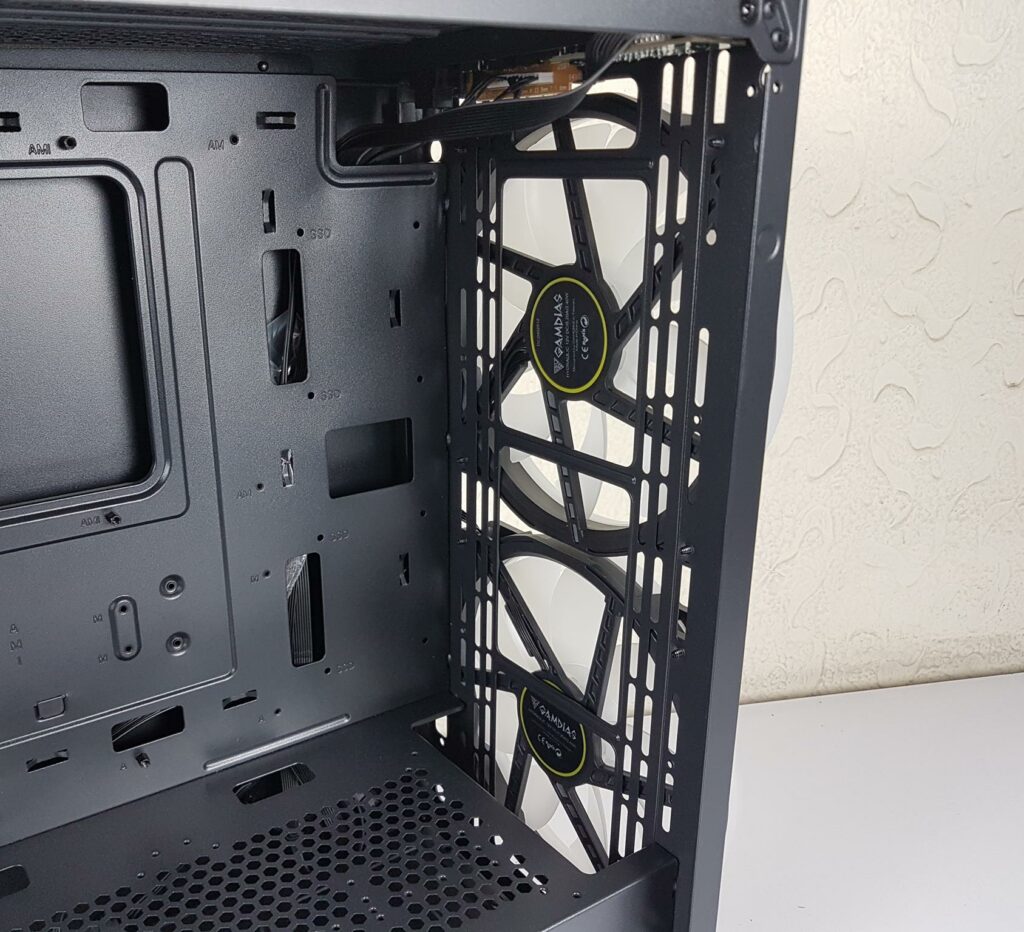
The above picture shows the close-up of the front fan mount provision. We have a rail mount system which is good but this mount is a bit flimsy so take care when installing the radiator/fan there. The pre-installed Rainbow RGB 200mm fans have a dual loop for some brilliant RGB lighting.
There is a 35mm gap between the top of the chassis frame and the motherboard’s top. Similarly, there is a displacement of 45mm from the fan/radiator mount to the side of the chassis. This displacement shows the compatibility with respect to the RAM height.
The pre-installed 200m fans are using Hydraulic bearing and have a current rating of 0.2A with a power rating of 2.4W at 12VDC. This is for the fan’s motor only. There is no A-RGB LEDs power rating mentioned. The fans are designed in Taiwan and manufactured in China.
There is a 38mm gap on the PSU shroud upfront. The 360mm radiator mount would be convenient using this gap. Though we have tight space constraints in the lower chamber where the PSU mount and HDD cage are. Since the cage can’t be relocated so this gap is definitely for the radiator only.
Following is the cooler support:
- Up to 3x 120mm fans on the front
- Up to 2x 140mm fans on the front
- Up to 2x 200mm fans on the front (Pre-Installed)
- Up to 1x 120/140mm fan on the rear (Pre-Installed)
- Up to 2x 120/140mm fans on the top
- Up to 360mm Radiator on the front
- 240/280mm Radiator on the top
Let’s take a look at the other side of the chassis.
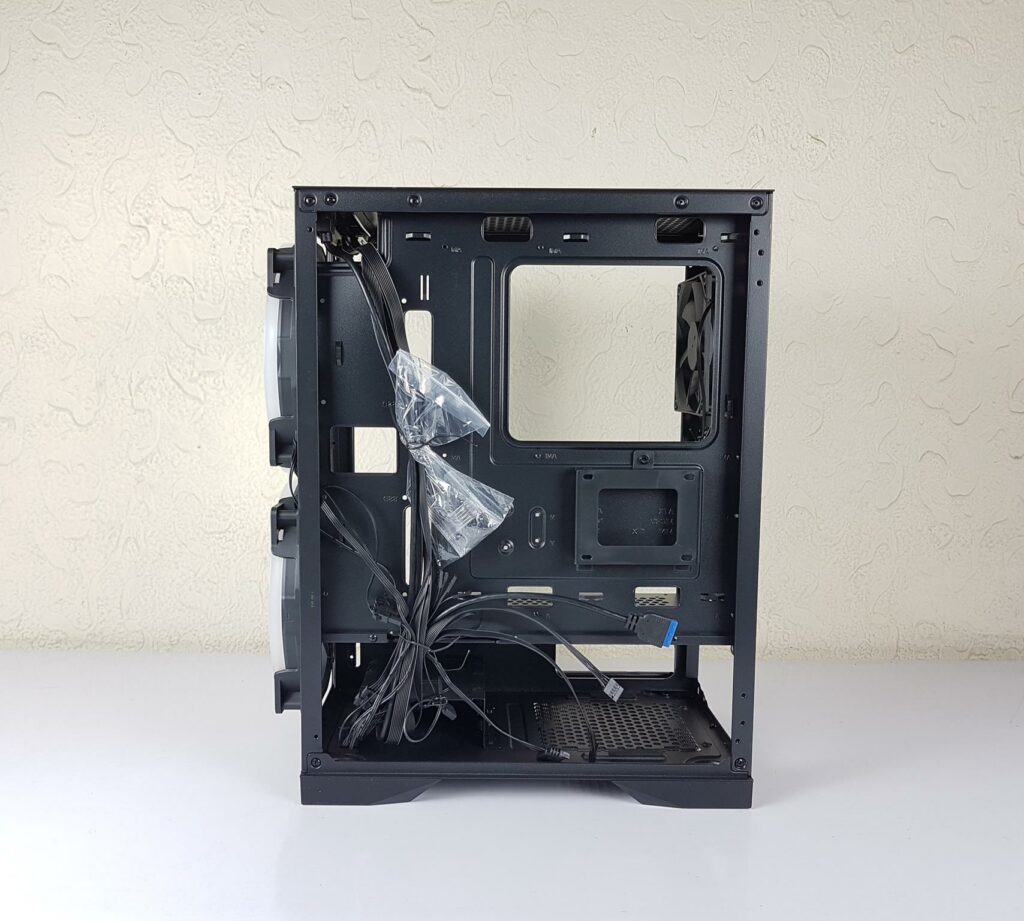
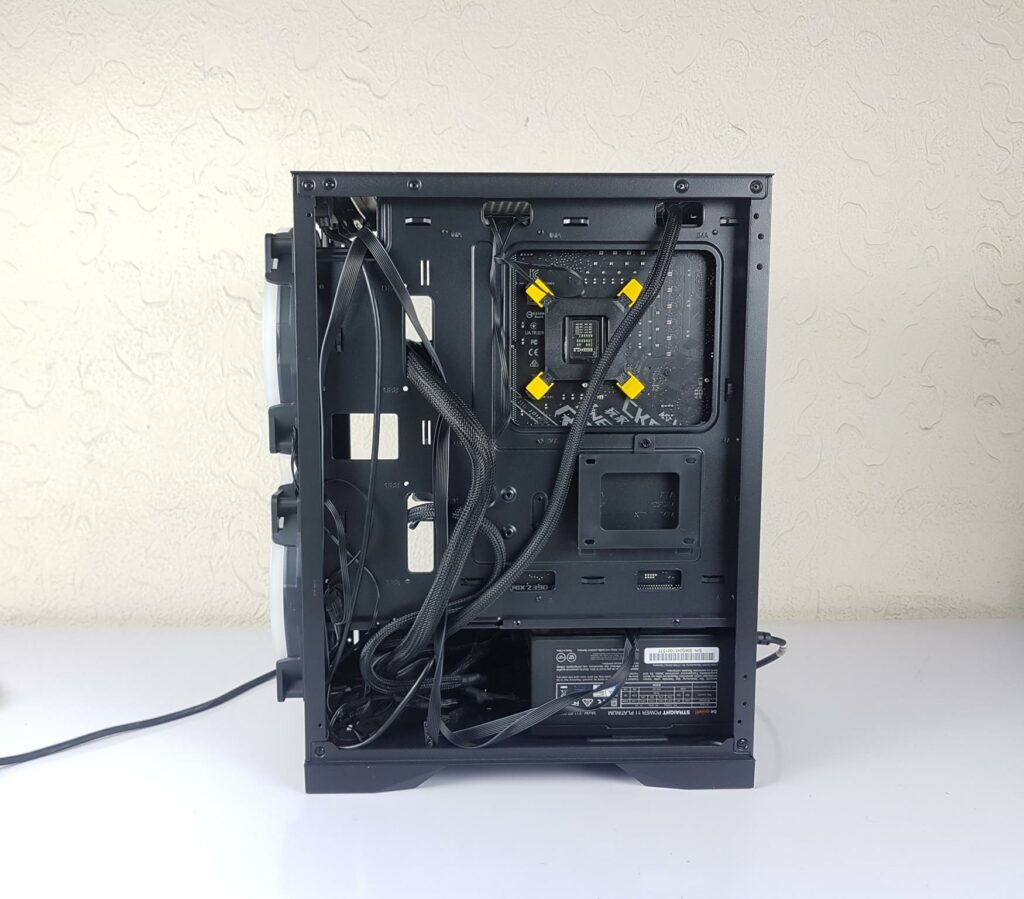
The GAMDIAS APOLLO E2 ELITE is a compact mid-tower chassis. The above picture shows the side after opening for the first time. The cables are tucked and secured on the cable tie points. We have roughly 15mm cable management space and a total of 11 cable tie points. The user can install up to 3x 2.5” drives. There is a 2.5” drive bracket on the back of the motherboard tray. This is a dual-chamber layout.
The lower chamber has an HDD cage and a PSU mount. There is no tool-less mounting in the HDD Cage as there is no caddy provided. The user can install 1x 3.5” drive and 1x 2.5” drive (on top) or 2x 3.5” drives in the HDD cage. PSU length limitation is 180mm.
We have the following clearance for the PSU with the cables:
- 203mm in stock configuration
- 346mm with HDD cage removed
We have the following cables coming out of the front IO panel:
- USB 3.0
- USB 2.0
- HD Audio
The IO panel has an RGB controller which is powered by a SATA connector. The cables of the front-mounted 200mm fans are daisy-chained. The A-RGB cables are using proprietary connectors. GAMDIAS has provided a standard 3-pin A-RGB connector along with the GDV labeled connector. This connector is for older GIGABYTE motherboards.
Test Build and Experience
Let’s talk about the building experience.
- We started with snapping off the number two and third PCIe slot covers. Then, we needed to install 3x standoffs. Thankfully, we are equipped with proper tools. GAMDIAS has not provided any socket wrench for the required standoff installation.
- Then the motherboard was installed. This was an easy task and the rear fan did not obstruct the motherboard’s rear I/O panel’s shroud. We installed the GAMDIAS BOREAS M1 610 coolers and the T-Force NIGHTHAWK RGB 16GB DDR4 RAM out of the case.
- One of the key points is the EPS cable. Since we have installed the cooler out of the case, it restricts the space available to connect the EPS connector. Since we have used a modular PSU, we connected the EPS cable to the motherboard out of the case as well and pass it through the top left cutout during the motherboard’s installation.

Back cable management (Image by Tech4Gamers - PSU was an easy installation. The cables were routed easily as well, though we may run into tight space for the extra cables, particularly when the PSU is not modular. We have a space-constrained area in the lower chamber. If you are not using any HDD and don’t need an HDD cage then we recommend taking it out to make some room for the cables.
- We connected the front panel system cables, as well as USB and HD Audio cables, before installing the graphics card.
- The graphics card was installed. I would suggest connecting the SATA cables to the motherboard before the graphics card’s installation.
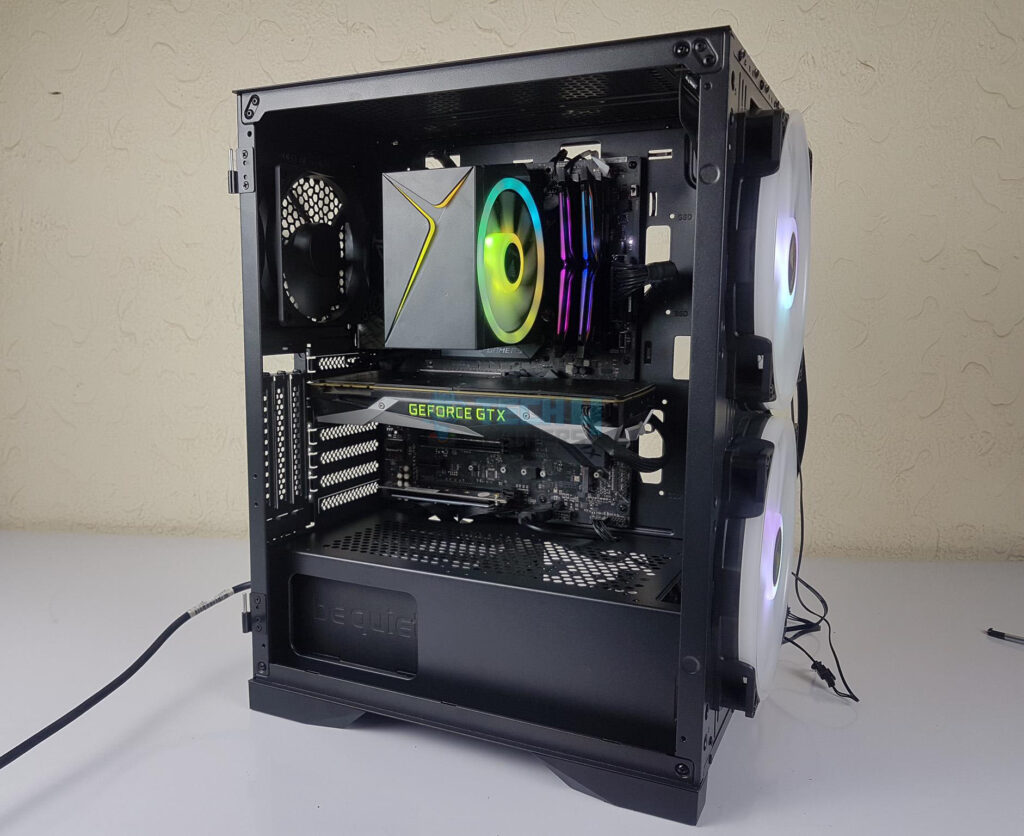
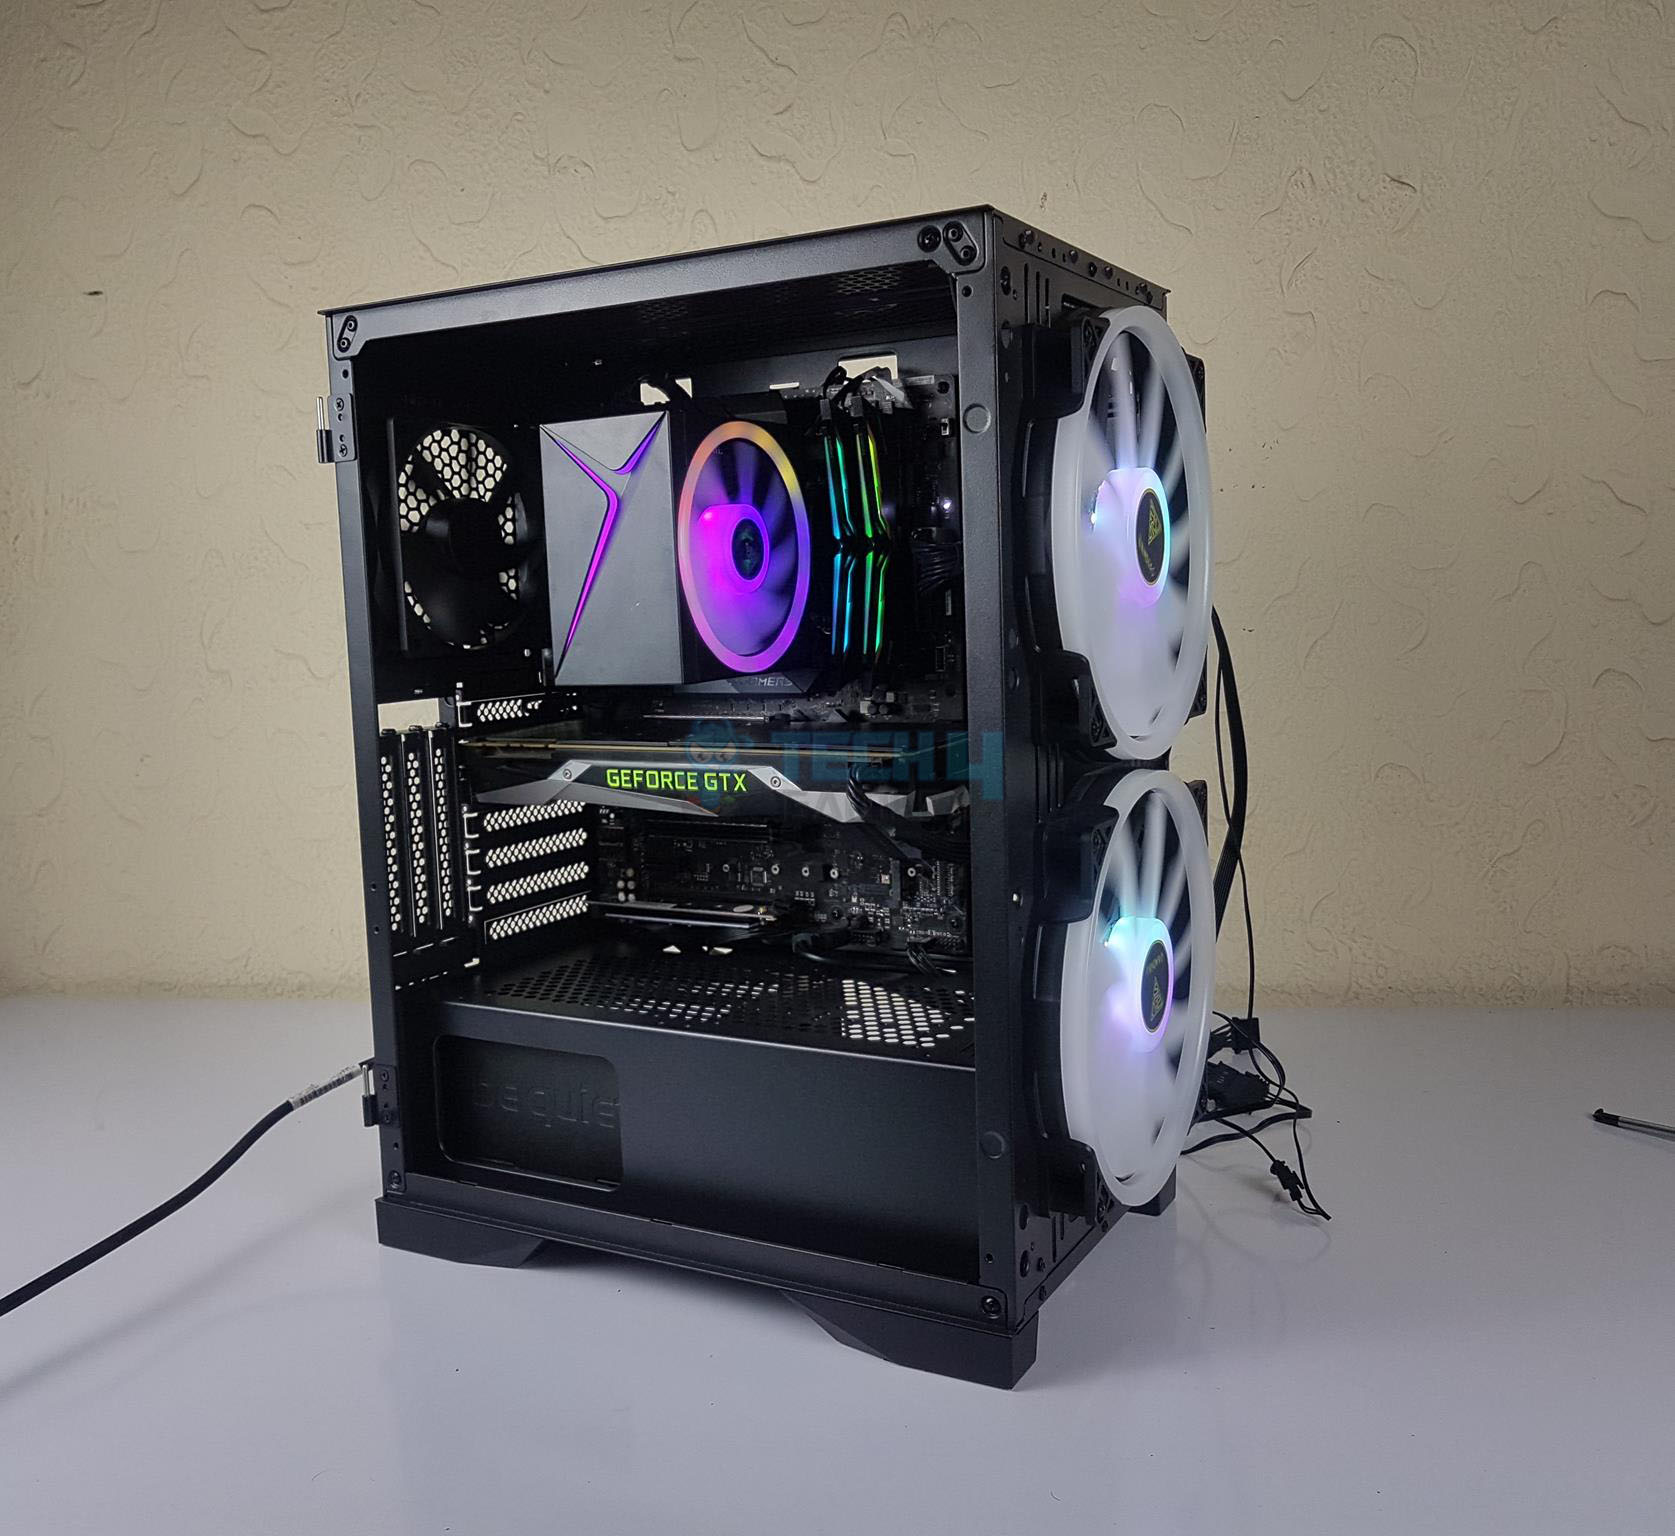
We did not do any cable management as we wanted to see if we can close the side panel as it is. The panel closed without any trouble. Here are some pics of the build.
Testing
Following test build has been used for thermal testing:
- ASUS ROG Strix Z390-E Gaming
- Intel i9 9900k [Stock, Auto]
- Noctua NT-H1 Thermal Paste
- GAMDIAS BOREAS M1 610
- T-Force NightHawk RGB 16GB 3200MHz CL16 kit
- Nvidia GeForce GTX 1080 FE
- Addlink S70 256GB NVMe SSD
- bequiet! Straight Power 11 850W PSU
Testing Software:
- ASUS RealBench 2.56 (CPU)
- MSI KOMBUSTOR 4 (GPU)
Following configurations have been tested and reported in the graph:
- Stock Configuration [Complete Front Panel installed]
- Complete Front Panel removed
Please note that we can’t regulate the speed of the pre-installed fans. The cooler’s fan was set to run at AUTO PWM. The rest of the settings were on Auto, Stock in the UEFI/BIOS. A stress test of 30 minutes was done with an idle time of 10 minutes. The system was powered off between all runs for a minimum of 30 minutes as well.
Results
The ambient temperature was 26°C. We have reported absolute temperature. The average of the CPU cores‘ temperature values was taken. The difference of the CPU temperature with and without the front panel is 2.1°C which is within the acceptable margin.
So, in terms of the CPU cooling with an air cooler, the airflow restriction is not that aggressive. For graphics cards, the result is the opposite. We are seeing a 6°C delta between both configurations. The narrow gap between the front glass and the mesh dust filter is affecting the temperatures overall. Part of it seems to be coming from the low static pressure and low airflow-oriented fans.
The BOREAS M1 610 has performed well, keeping the Intel i9 9900k at 4.7GHz and using 1.27V cool reasonably. The fan was not operating at its full speed either. The fan is very loud at full speed making a 55 dBA sound on an ambient of 32 dBA. At its full speed, it was the only factor contributing to the high noise output of the case.
Should You Buy It?
Is it the right chassis for you?
Final Words
The GAMDIAS APOLLO E2 ELITE is a sleek mid-tower chassis constructed from steel, plastic, and tempered glass. It accommodates standard ATX-sized motherboards and boasts features like front and side tempered glass panels, 2x Rainbow RGB 200mm fans, a hinged side panel with magnetic door closing, and an onboard RGB controller.
For cooling, it supports up to 3x 120mm/2x 140mm/2x 200mm fans at the front, 2x 120mm/140mm on the top, and 1x 120mm/140mm at the rear. Radiator support includes up to 360mm on the front and 240mm/280mm on the top. Storage options comprise 3x 2.5″ drives on the back panel and 2x 3.5″ or 1x 3.5″ and 1x 2.5″ drives in the non-tool-less HDD cage. Clearance allows for a CPU cooler height of up to 190mm, a graphics card length of up to 340mm, and a PSU length of 180mm.
Filtration consists of a magnetic dust filter on top and a non-magnetic filter on the bottom. Despite large cutouts on the front panel, airflow is restricted. The 7+3 PCIe slot configuration lacks reusable covers, and there is no riser support or cable provided. The build quality is commendable, with minor flex in the motherboard tray and durable mounting rails. However, the non-regulatable fan speed is a downside, and the proprietary A-RGB connectors may limit customization. For the price, the APOLLO E2 ELITE is a stylish case with some compromises, notably in airflow and fan noise.
Recent Updates
- February 3, 2024: Few text changes to improve readability. Also added image galleries.
Thank you! Please share your positive feedback. 🔋
How could we improve this post? Please Help us. 😔
[Hardware Reviewer & Editor]
Meet Nauman Siddique, a highly experienced computer science graduate with more than 15 years of knowledge in technology. Nauman is an expert in the field known for his deep understanding of computer hardware.
As a tech tester, insightful reviewer, and skilled hardware editor, Nauman carefully breaks down important parts like motherboards, graphics cards, processors, PC cases, CPU coolers, and more.
- 15+ years of PC Building Experience
- 10+ years of first-hand knowledge of technology
- 7+ years of doing in-depth testing of PC Hardware
- A motivated individual with a keen interest in tech testing from multiple angles.
- I majored in Computer Science with a Masters in Marketing
- Previously worked at eXputer, EnosTech, and Appuals.
- Completed Course in Computer Systems Specialization From Illinois Tech
Get In Touch: nauman@tech4gamers.com


