 Threads
Good Budget Option?
Review Summary
The Aerocool Quartz Revo is a budget-friendly mid-tower chassis that features four ARGB fans and two tempered glass panels. It supports mini-ITX, micro-ATX, and standard ATX-size motherboards, and has a dual-chamber design with provision for up to six storage drives. While the ARGB lighting is brilliant, the front panel restricts airflow, resulting in higher temperatures. Overall, it’s a good option for those on a tight budget.

Overall
-
Build Quality - 8.5/10
8.5/10
-
Value - 9/10
9/10
-
Performance - 8/10
8/10
-
Looks - 9/10
9/10
Pros
- Affordable
- RGB
- Good clearance
- Comes with 4x ARGB Fans
Cons
- Front panel airflow is restricted
- HDD cage is not toolless
- PCIe slot covers are not reusable


In this review, we will be taking a look at Aerocool Quartz Revo. Quartz Revo is a mid-tower packed with 4x ARGB 120mm fans and 2x tempered glass panels serving as the main selling points of this chassis. The chassis is made of steel, glass, and plastic frame. Let’s get into more detail as we dive into the review.
- Why you can trust Tech4Gamers: Our reviews are based on dedicated hands-on testing by our team of experienced hardware experts. Find out more about how we test.
Key Takeaways
- The case is good for budget-conscious users seeking RGB lighting and tempered glass aesthetics but willing to compromise on airflow for the price.
- This chassis is not for users prioritizing strong airflow, especially those aiming for optimal cooling without modifications or alterations.
- Stand-out features include its vibrant ARGB lighting, dual-chamber design with adjustable rear fan placement, and compatibility with multiple ARGB syncing technologies, but it lacks optimal airflow due to a restricted front panel design.
Specifications
Let’s start by looking at the specifications.
| Model | Quartz REVO |
| Case Type | Mid Tower |
| Color | Black |
| Steel Thickness | >0.5mm |
| Motherboards | ATX/micro ATX/mini-ITX |
| Case Dimensions (Internal) | 200 x 440 x 368.95mm (W x H x D) |
| Case Dimensions (Overall) | 206.1 x 455 x 408mm (W x H x D) |
| 5.25” Drive Bays | 0 |
| 3.5” Drive Bay | 2 |
| 2.5” Drive Bay | 4 |
| Expansion Slots | 7 |
| GPU Clearance | Supports GPU up to 341mm/366mm (without front fan) |
| CPU Cooler Clearance | Supports CPU up to 152mm |
| I/O Ports | USB3.0 x 1 | USB2.0 x 2 | HD Audio & Mic |
| Air Cooling Support | Front: 120mm x 3 (Includes Addressable RGB Fan x 3) Top: 120mm x 2 or 140mm x 2 (Optional) Rear: 120mm x 1 (Includes 120mm Fan) |
| Liquid Cooling Support | Front: 240/360mm Radiator (Optional) Top: 240mm Radiator (Optional) |
| Net Weight/Gross Weight | 5.9kg (13 lbs.)/6.6kg (14.55 lbs.) |
| Power Supply | ATX PSU (Including cables, up to 185mm) (Optional) |
Packaging and Unboxing
The chassis is shipped inside a standard brown color cardboard box.
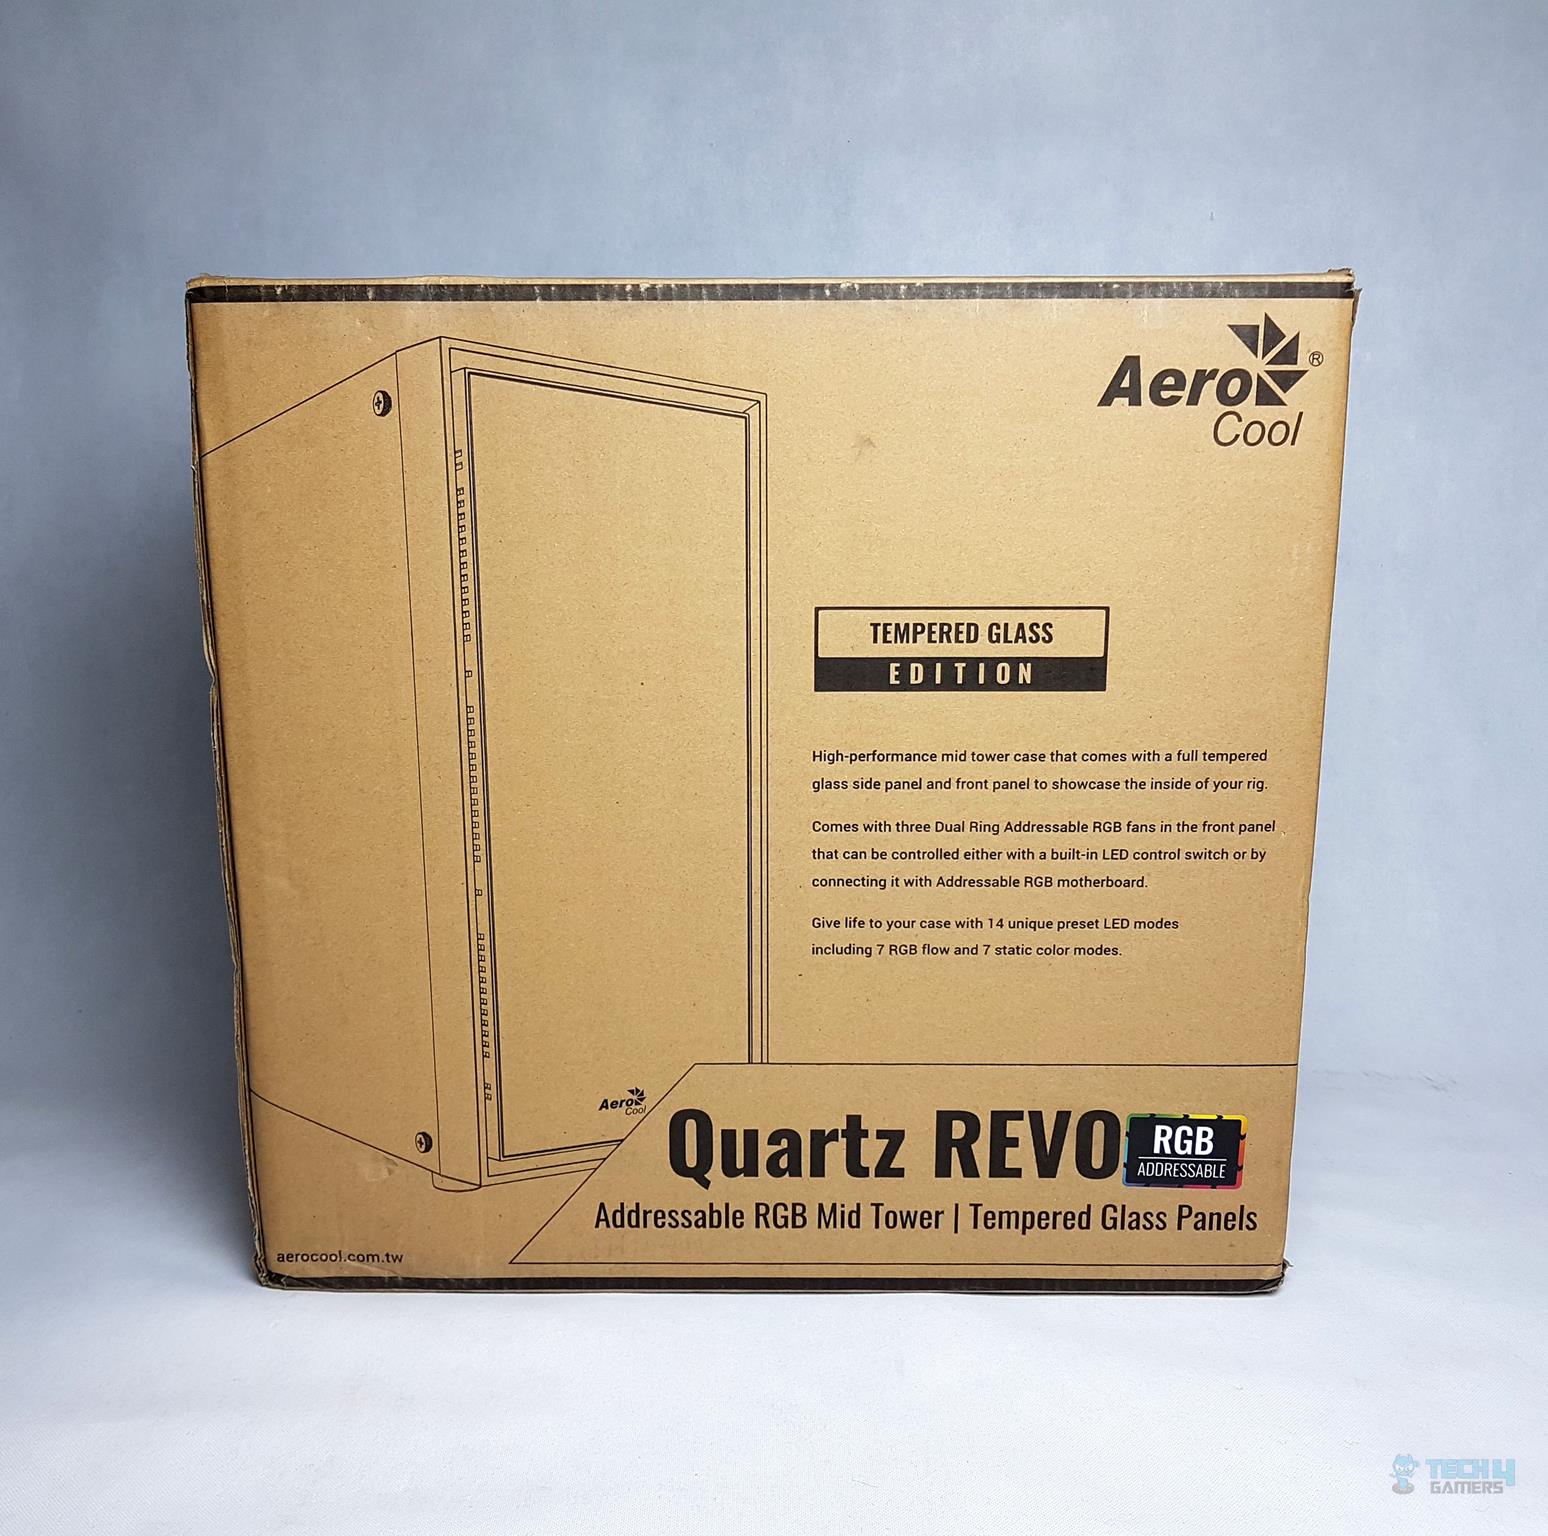
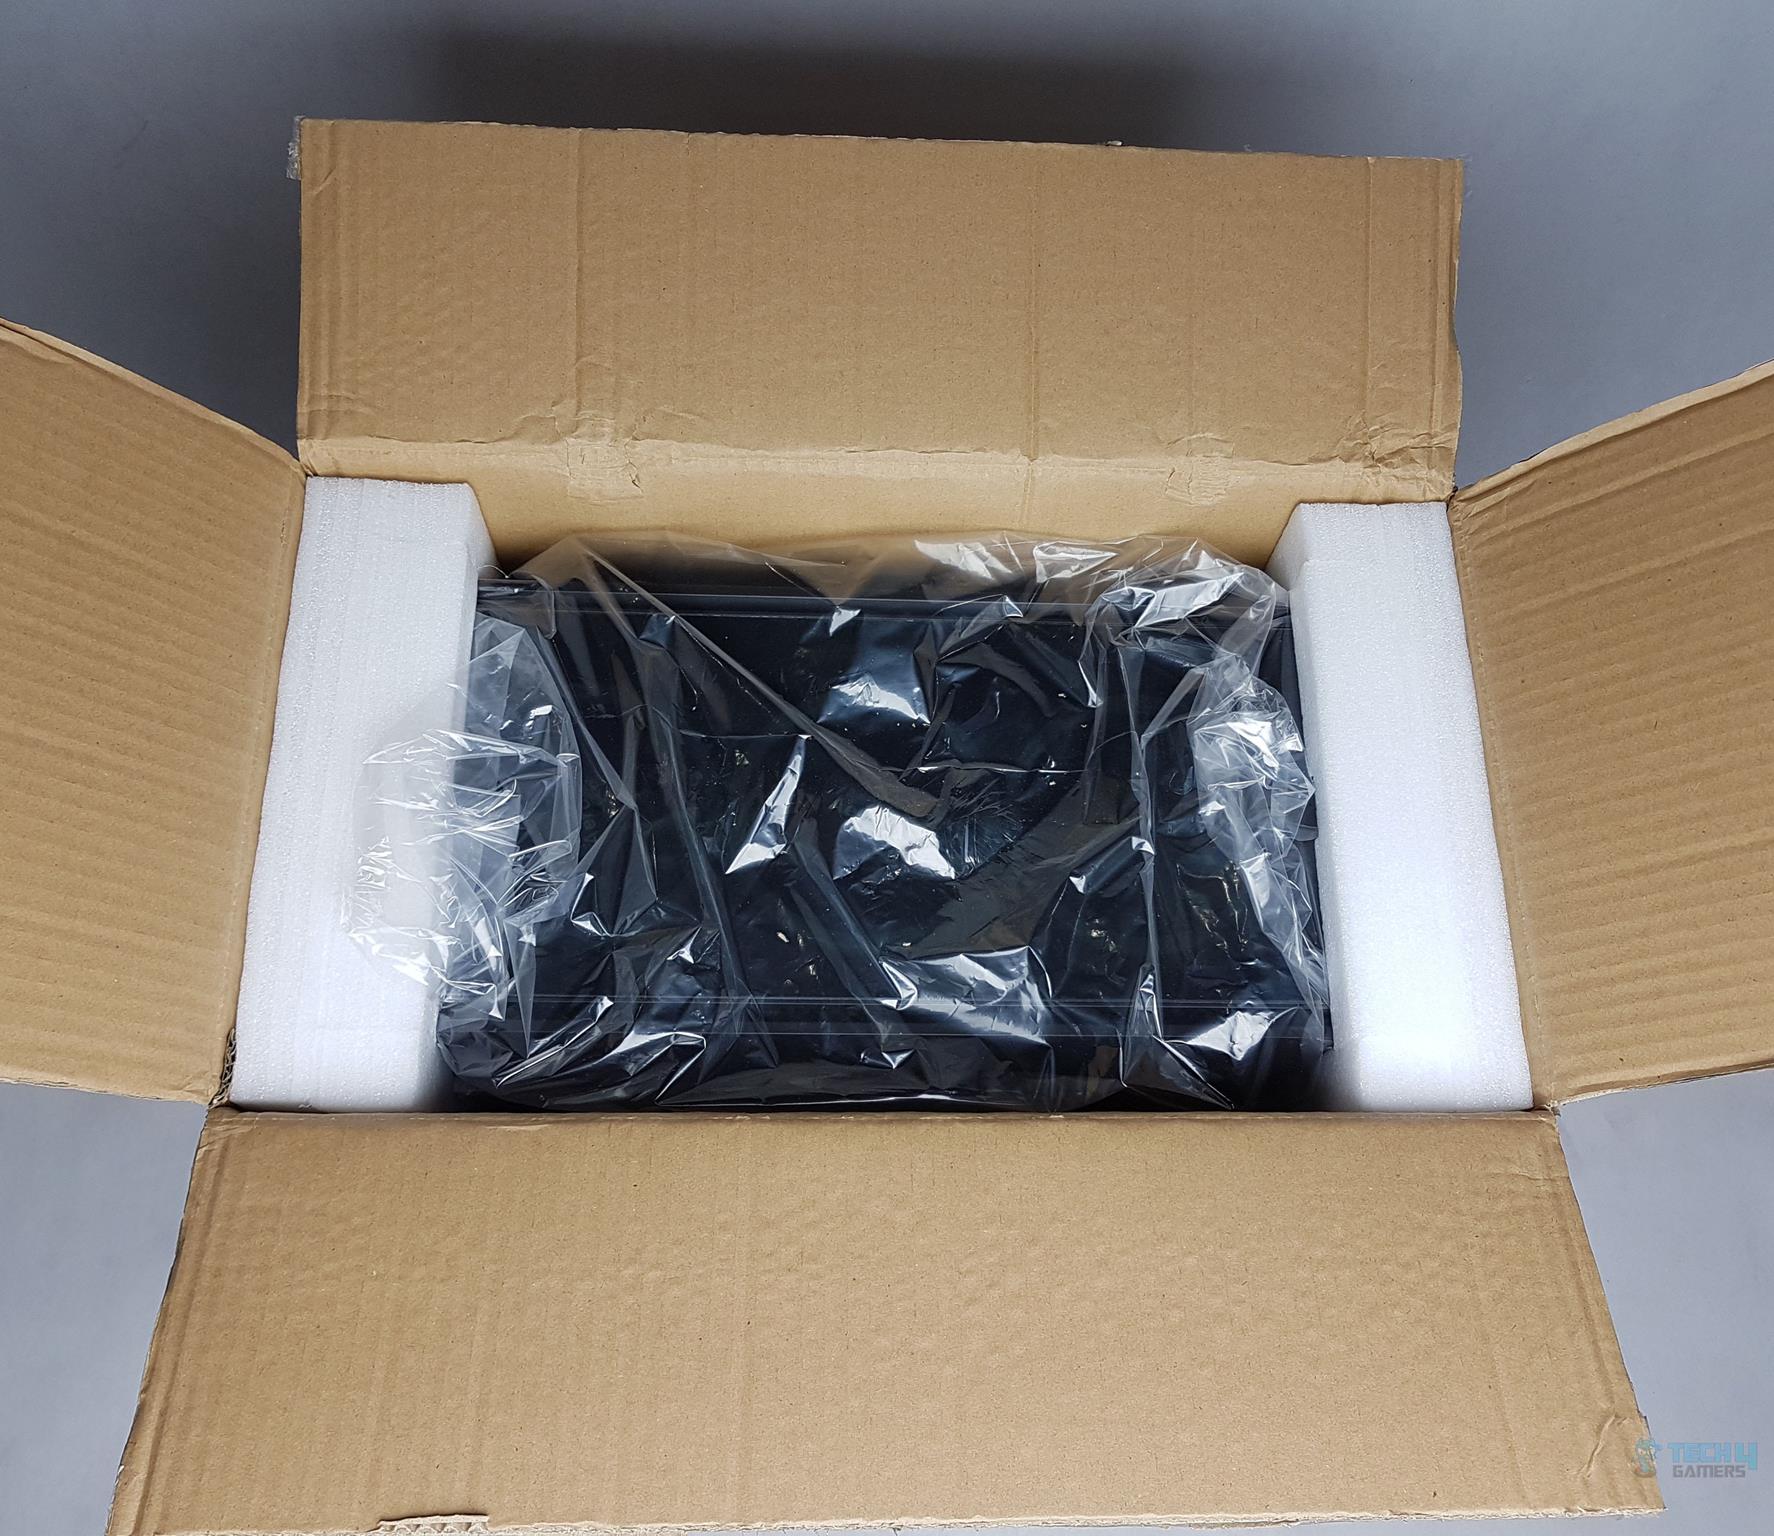
Aerocool branding is printed on the top section of the packing box. This is where the box is to be opened. Opening the box will show that the chassis placed inside two white colors Styrofoam pads. The front side with tempered glass is facing up.
Accessories
The Aerocool has provided a user manual to help in an installation inside this chassis and a bag full of various screws, standoffs, a wrench socket for standoffs, zip-ties, a lighting controller and related cables.

Closer Look
The Aerocool Quartz Revo has a dimension of 206.1x455x408mm (WxHxD). The internal dimensions are 200x440x368.95mm (WxHxD). Steel thickness is >0.5mm. This chassis can accommodate motherboards of size mini-ITX, micro-ATX, and ATX.
It is time to take a closer look at this chassis.
Front Panel
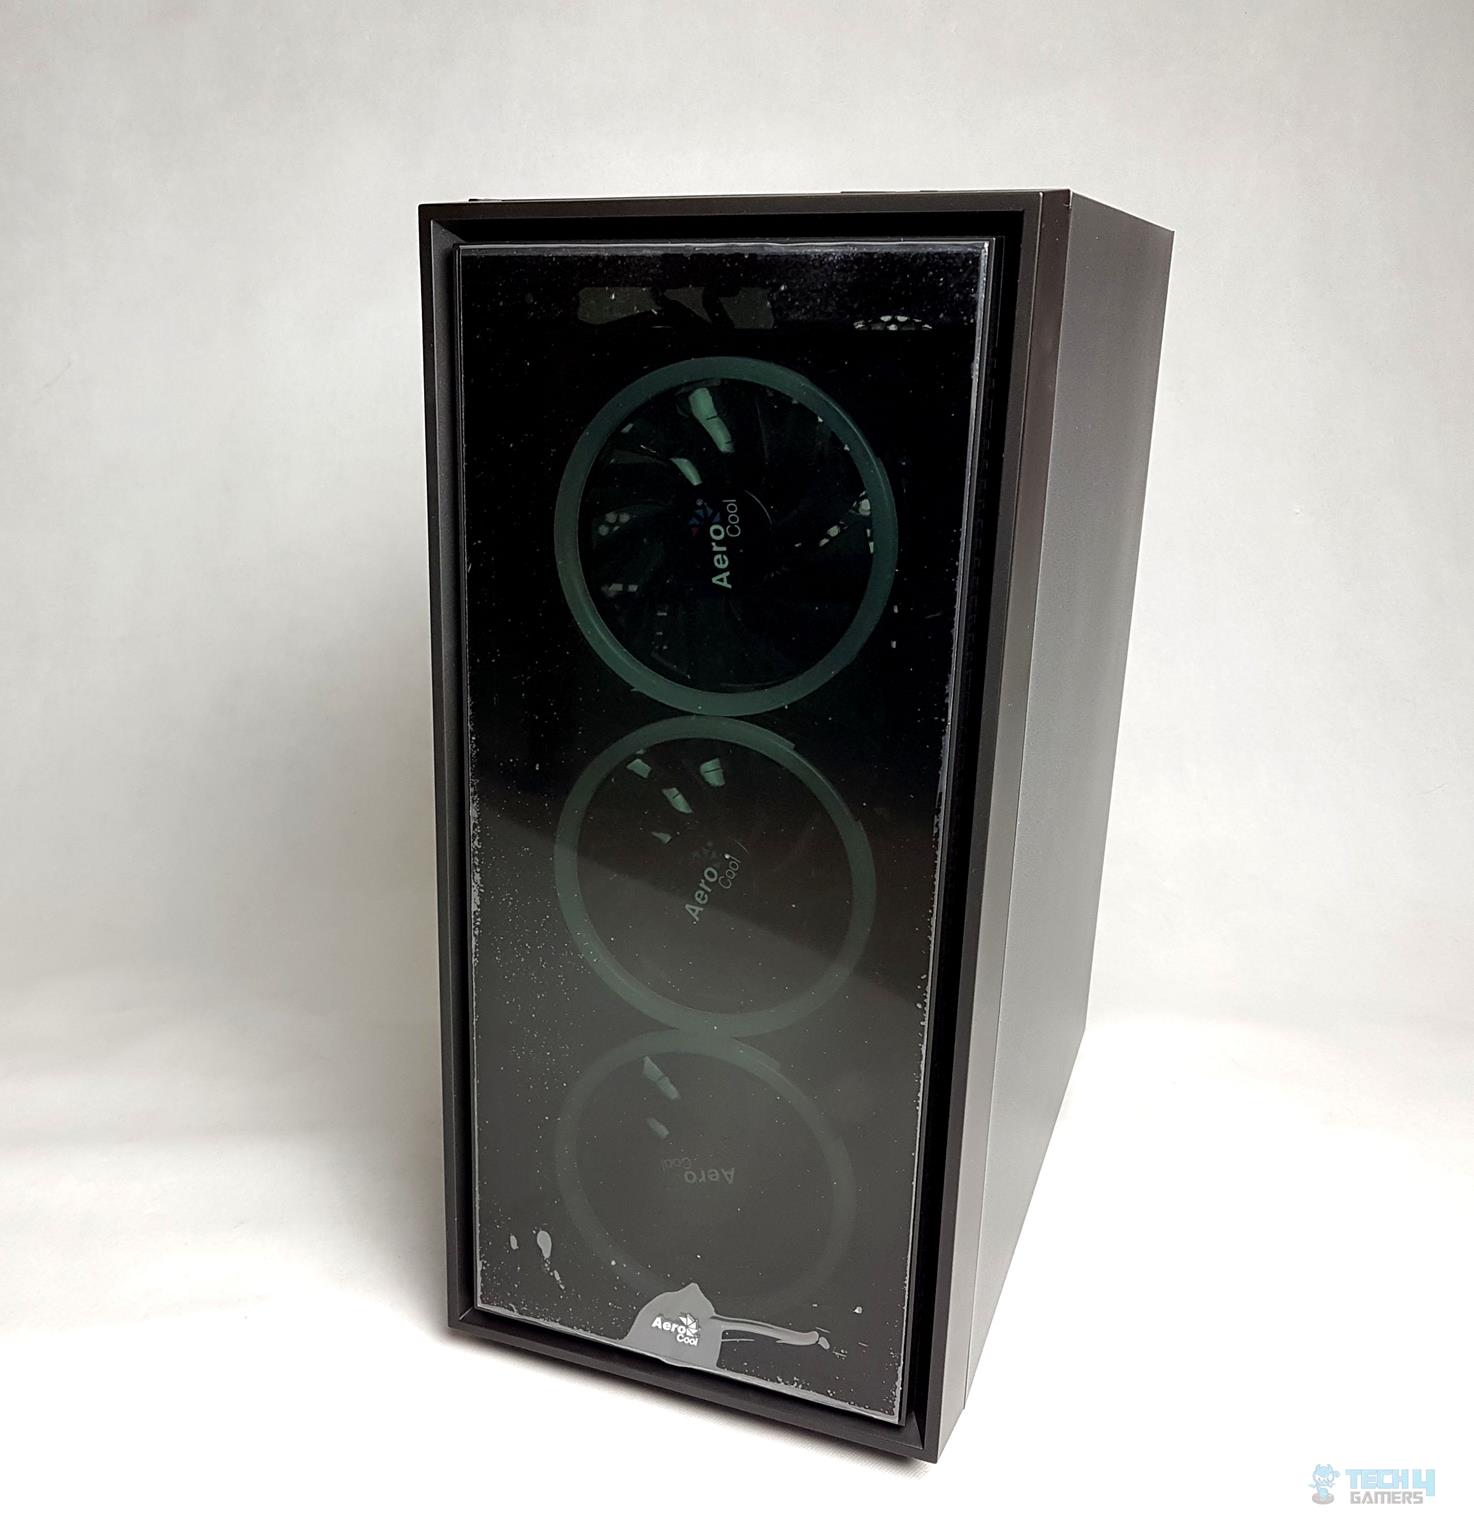
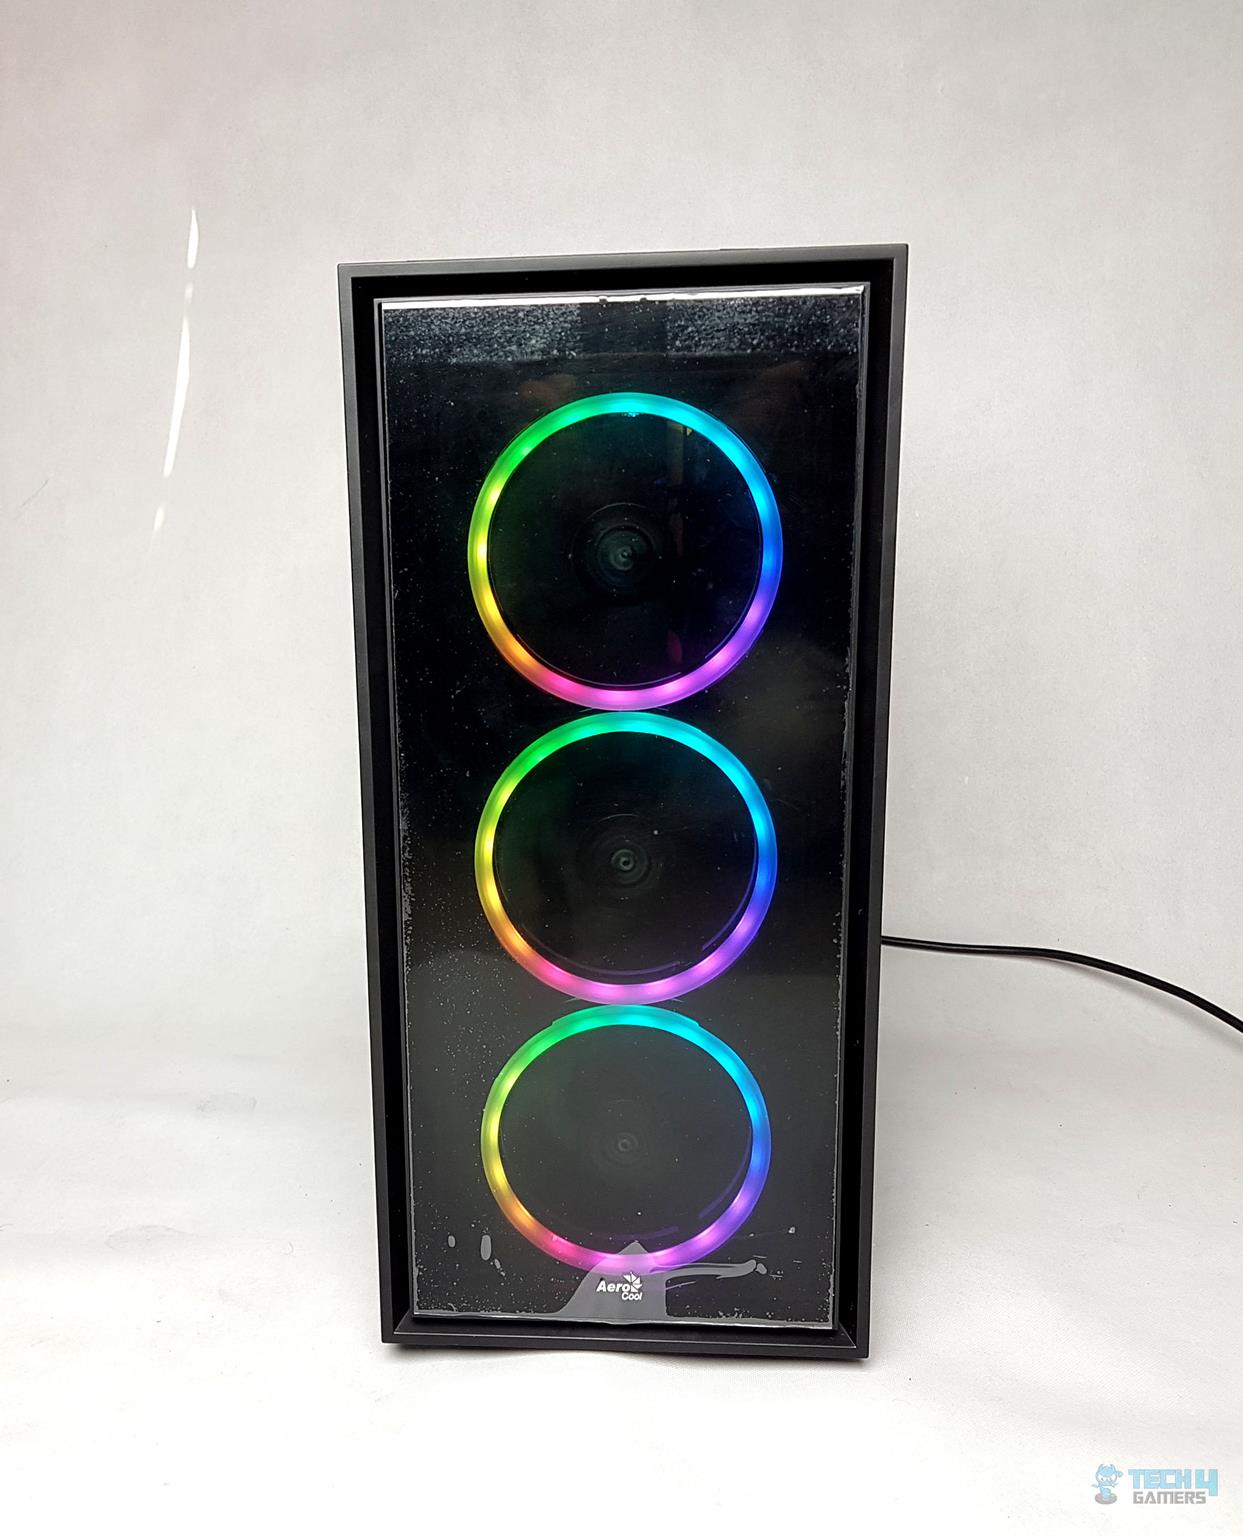
Let’s start with the front panel as it is a show of the day. Featuring an ARGB solution in a budget chassis is a good incentive and encouragement for the budget user. The front panel is entirely made of the plastic body and it has a layered design. The tempered glass is provided in the inner frame. There is a gap of approximately 5mm or so on all the four sides of the inner frame. 3x ARGB fans can be seen as well.
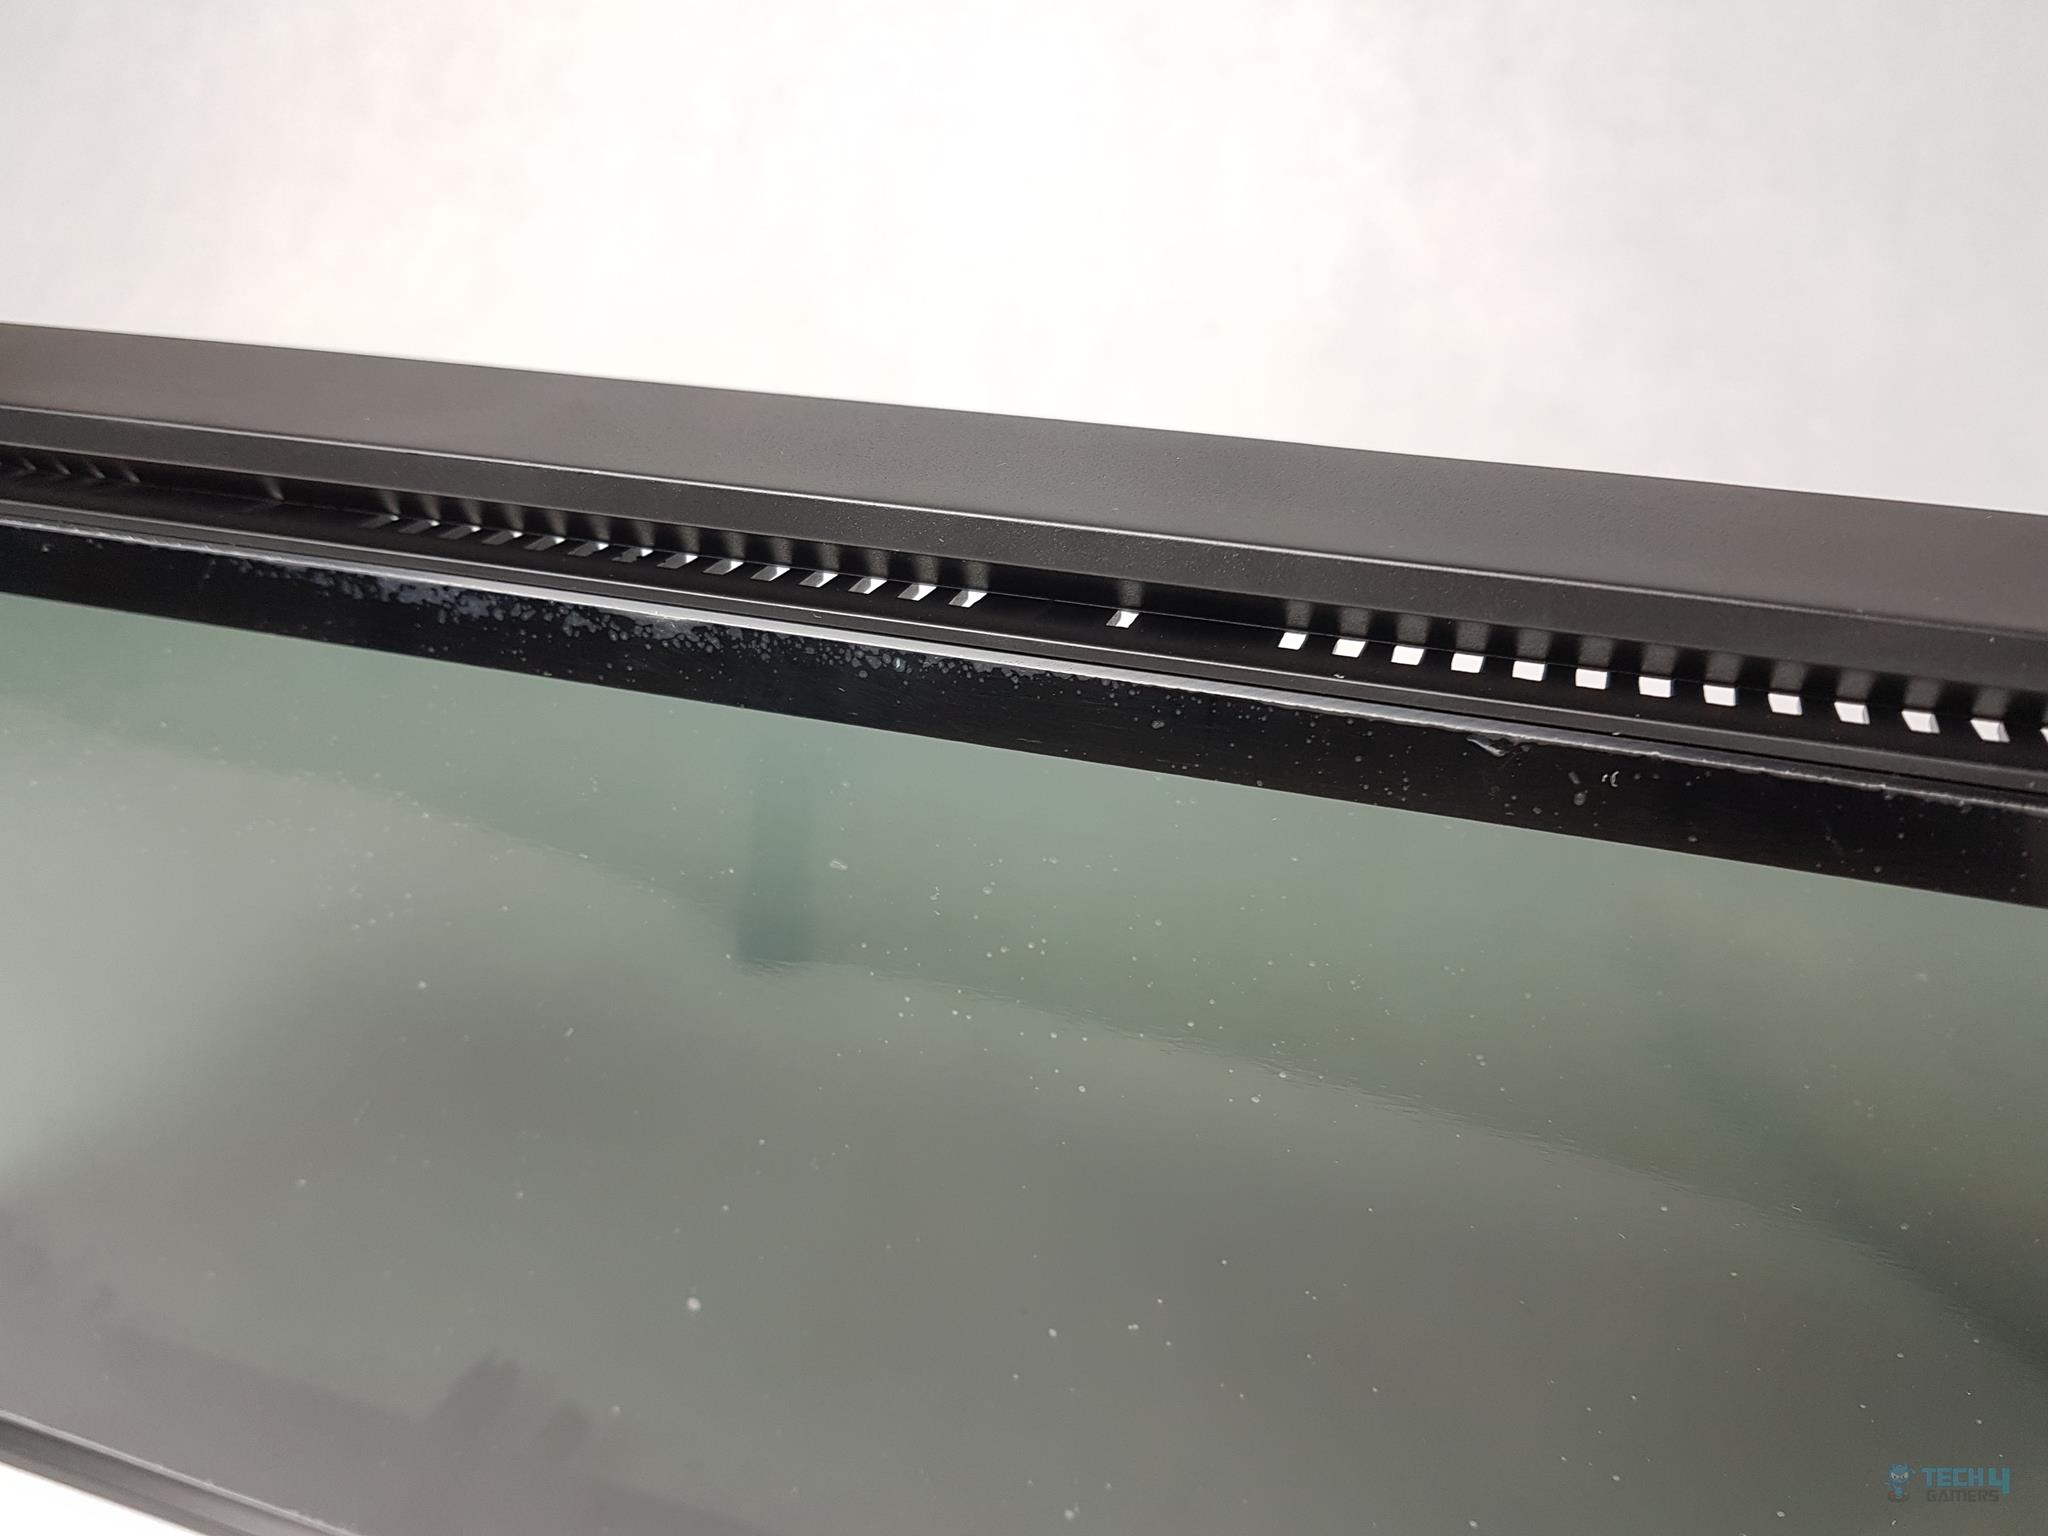
There is an Aerocool logo badge pasted at the bottom of the glass panel. The panel has a protective sheet on it. Though the whole front portion is not covered as there are cutouts on the border of the inner frame for air-intake the airflow is highly restrictive in this chassis. I will come to this aspect in the testing section.
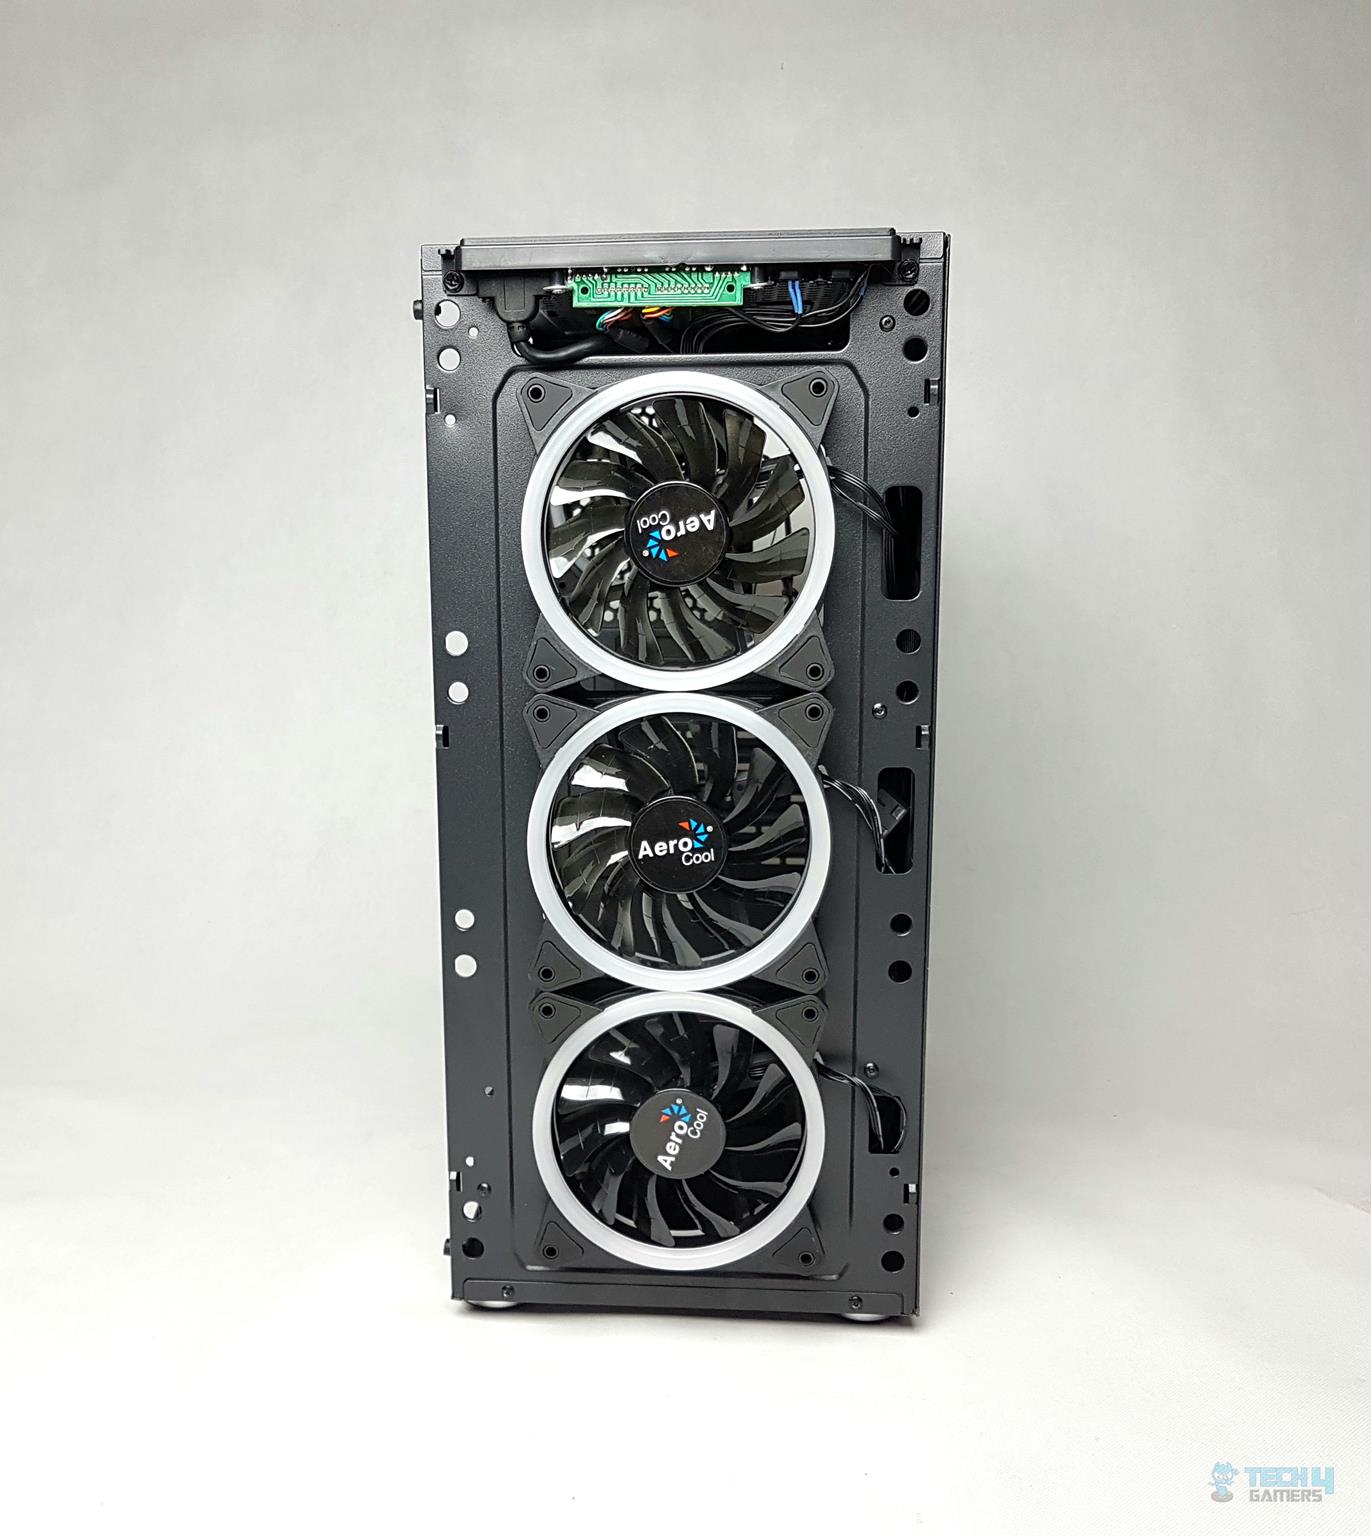
Let’s take off the panel and see what is underneath. Aerocool has provided not two but three ARGB fans in 120mm size. There are 3x cutouts on the right side of the chassis frame. This is where the fans’ cables are routed through towards the back. There is a large cutout on the top under the front panel section. This is where the front panel’s cables are routed.
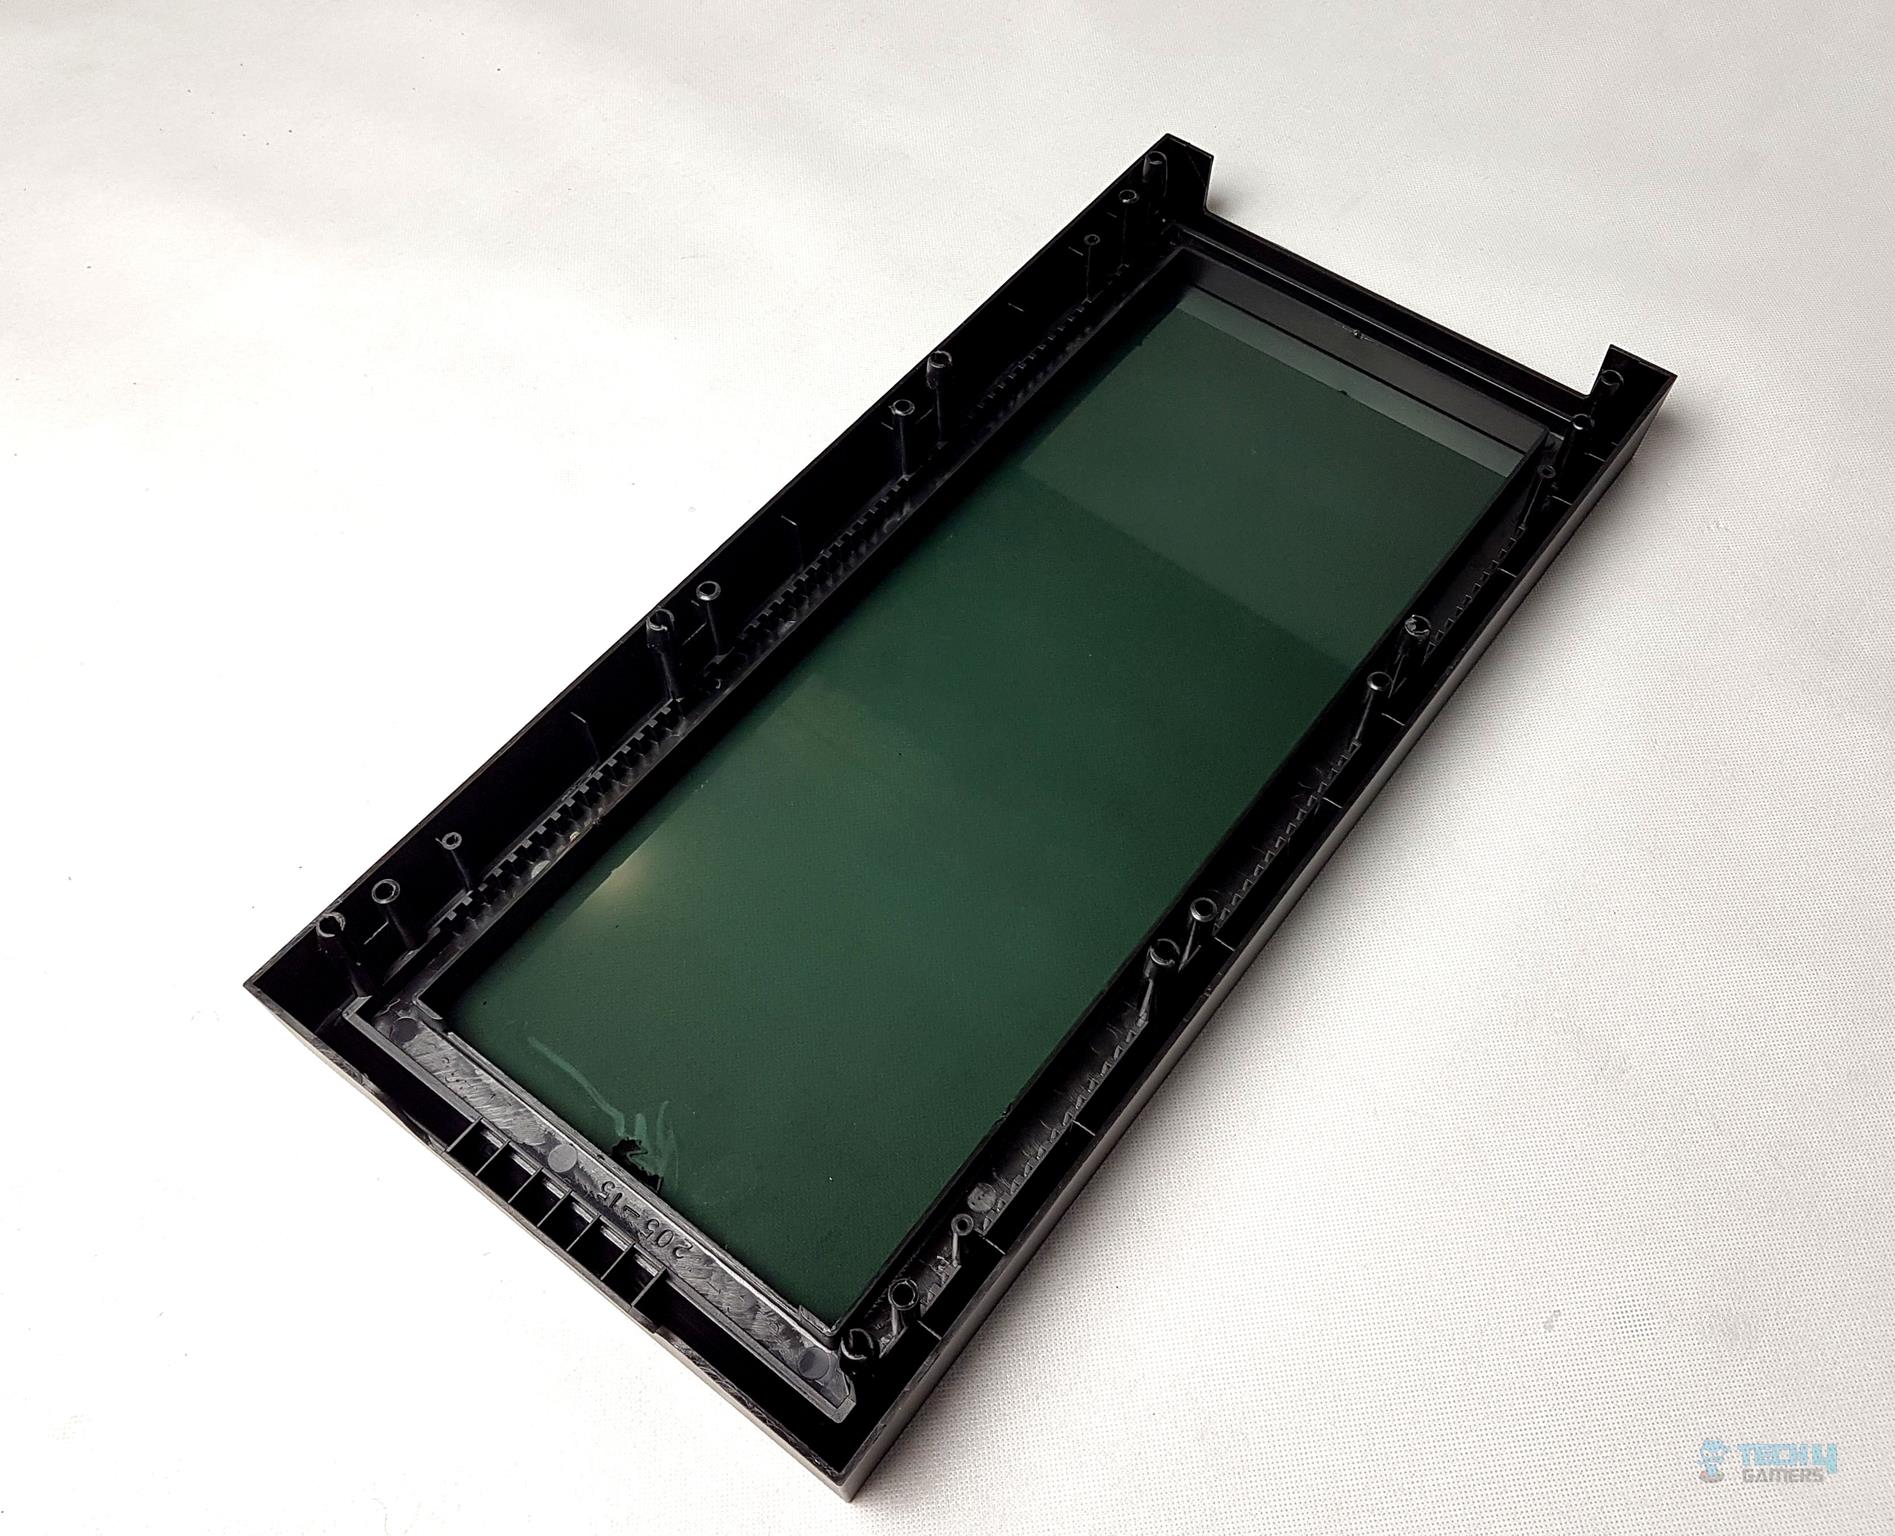
The front panel can be removed by placing the hand on the underside of the panel where there is a large cutout and pulling the panel out. Let’s take a look at the inner side of the panel. Plastic tabs are obvious here as they are used to tuck the panel to the mainframe of the chassis. The cutouts for the air intake are not clearly visible from this angle. The glass is dark tinted.
On the right side, we can the cutouts on the inner frame part. These cutouts run along the entire inner frame side.
Taking the fans off, one gets to see the naked (well almost!) chassis. The cutouts for the fan screws are in rail format. Given the total length of this section, this design is only helpful to adjust two fans’ height. For three fans solution, there is no room for height adjustment. The fan mounting area is a bit fragile particularly the middle-cross sections. The user can install a 120/240/360mm radiator on the front rail. There is no provision for 140mm size mounting.
Back Panel
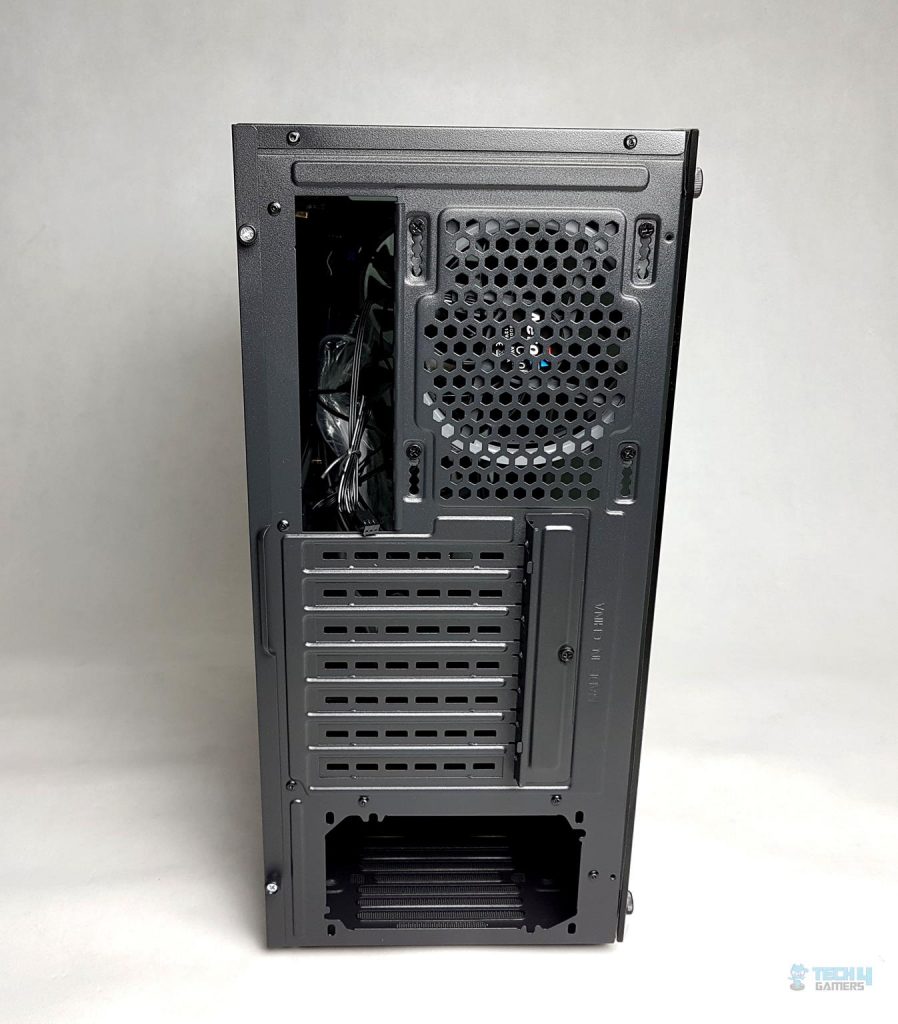
Next, let’s take a look at the back or rear side of the chassis. As can be seen, there are two screws that are used to secure the left side panel to the chassis frame. There is a large cutout on the top left side to provide for the rear I/O of the motherboard. On the right side, there is a provision for a 120mm fan (ARGB fan pre-installed). The middle section has 7x PCIe slot covers. At the bottom, there is a standard ATX PSU mounting area.
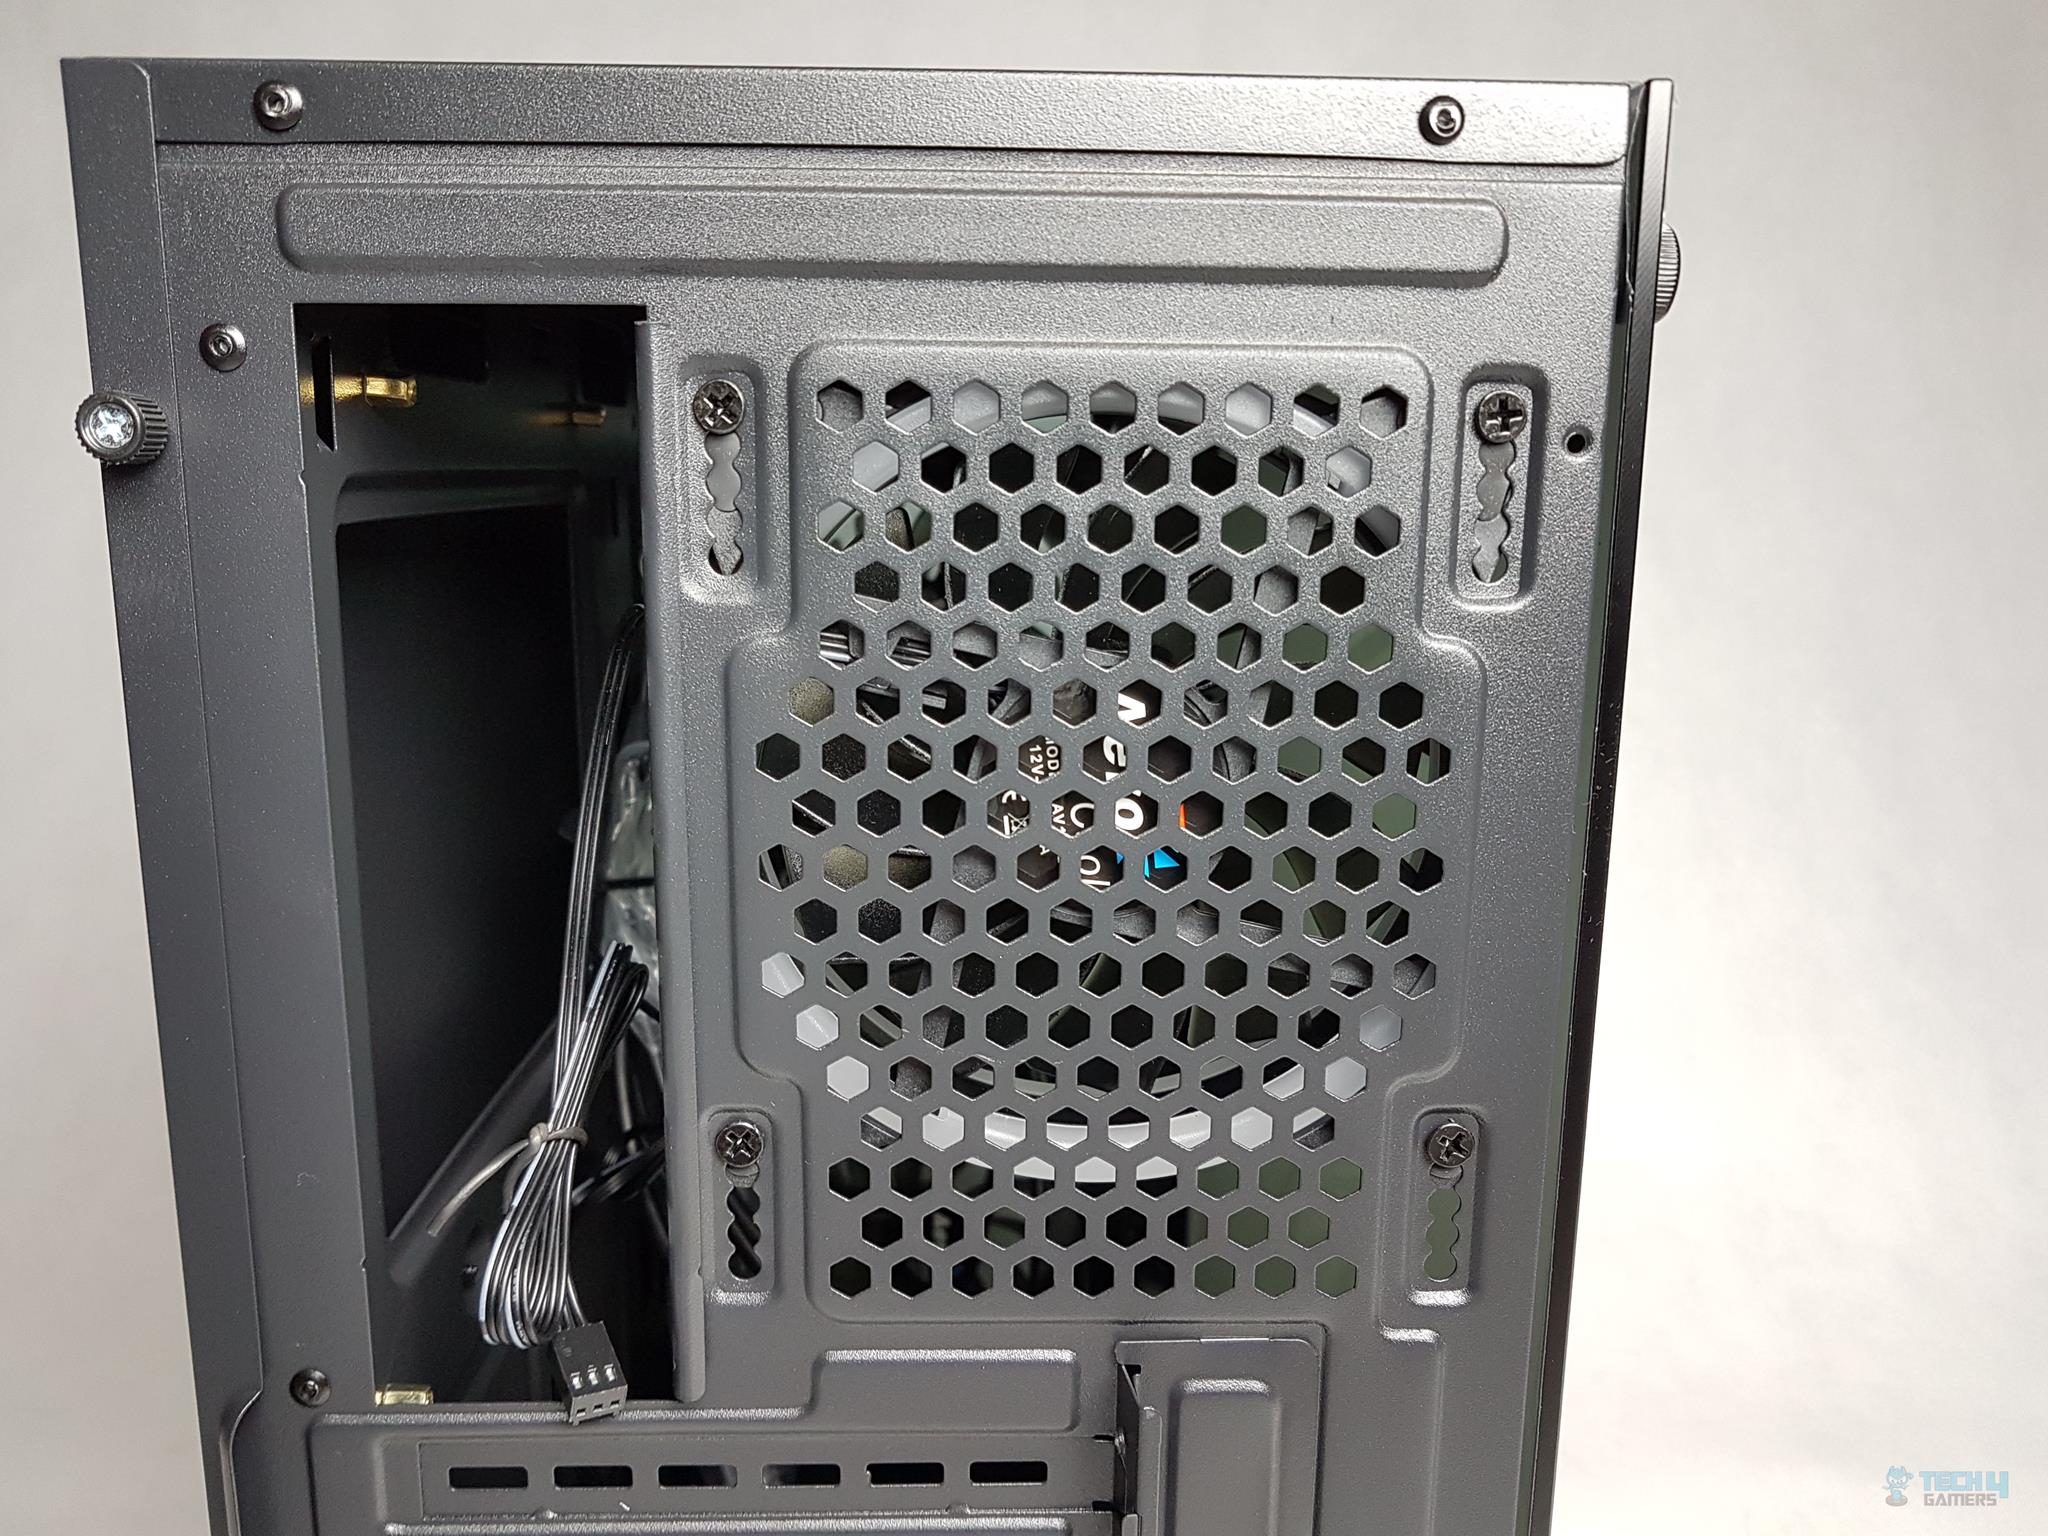

Aerocool was considerate enough to provide the user an option to adjust the height of the 120mm rear fan in 5 positions.
The PCIe slot covers are not reusable which is a thumb down from my side. There is a bracket on the right side that is secured to the mainframe using a screw. The graphics card is secured on the chassis using the screws from the outer side of the chassis hence the PCIe slot area is flat in design as compared to conventional raised design on the inner side.
Bottom Panel
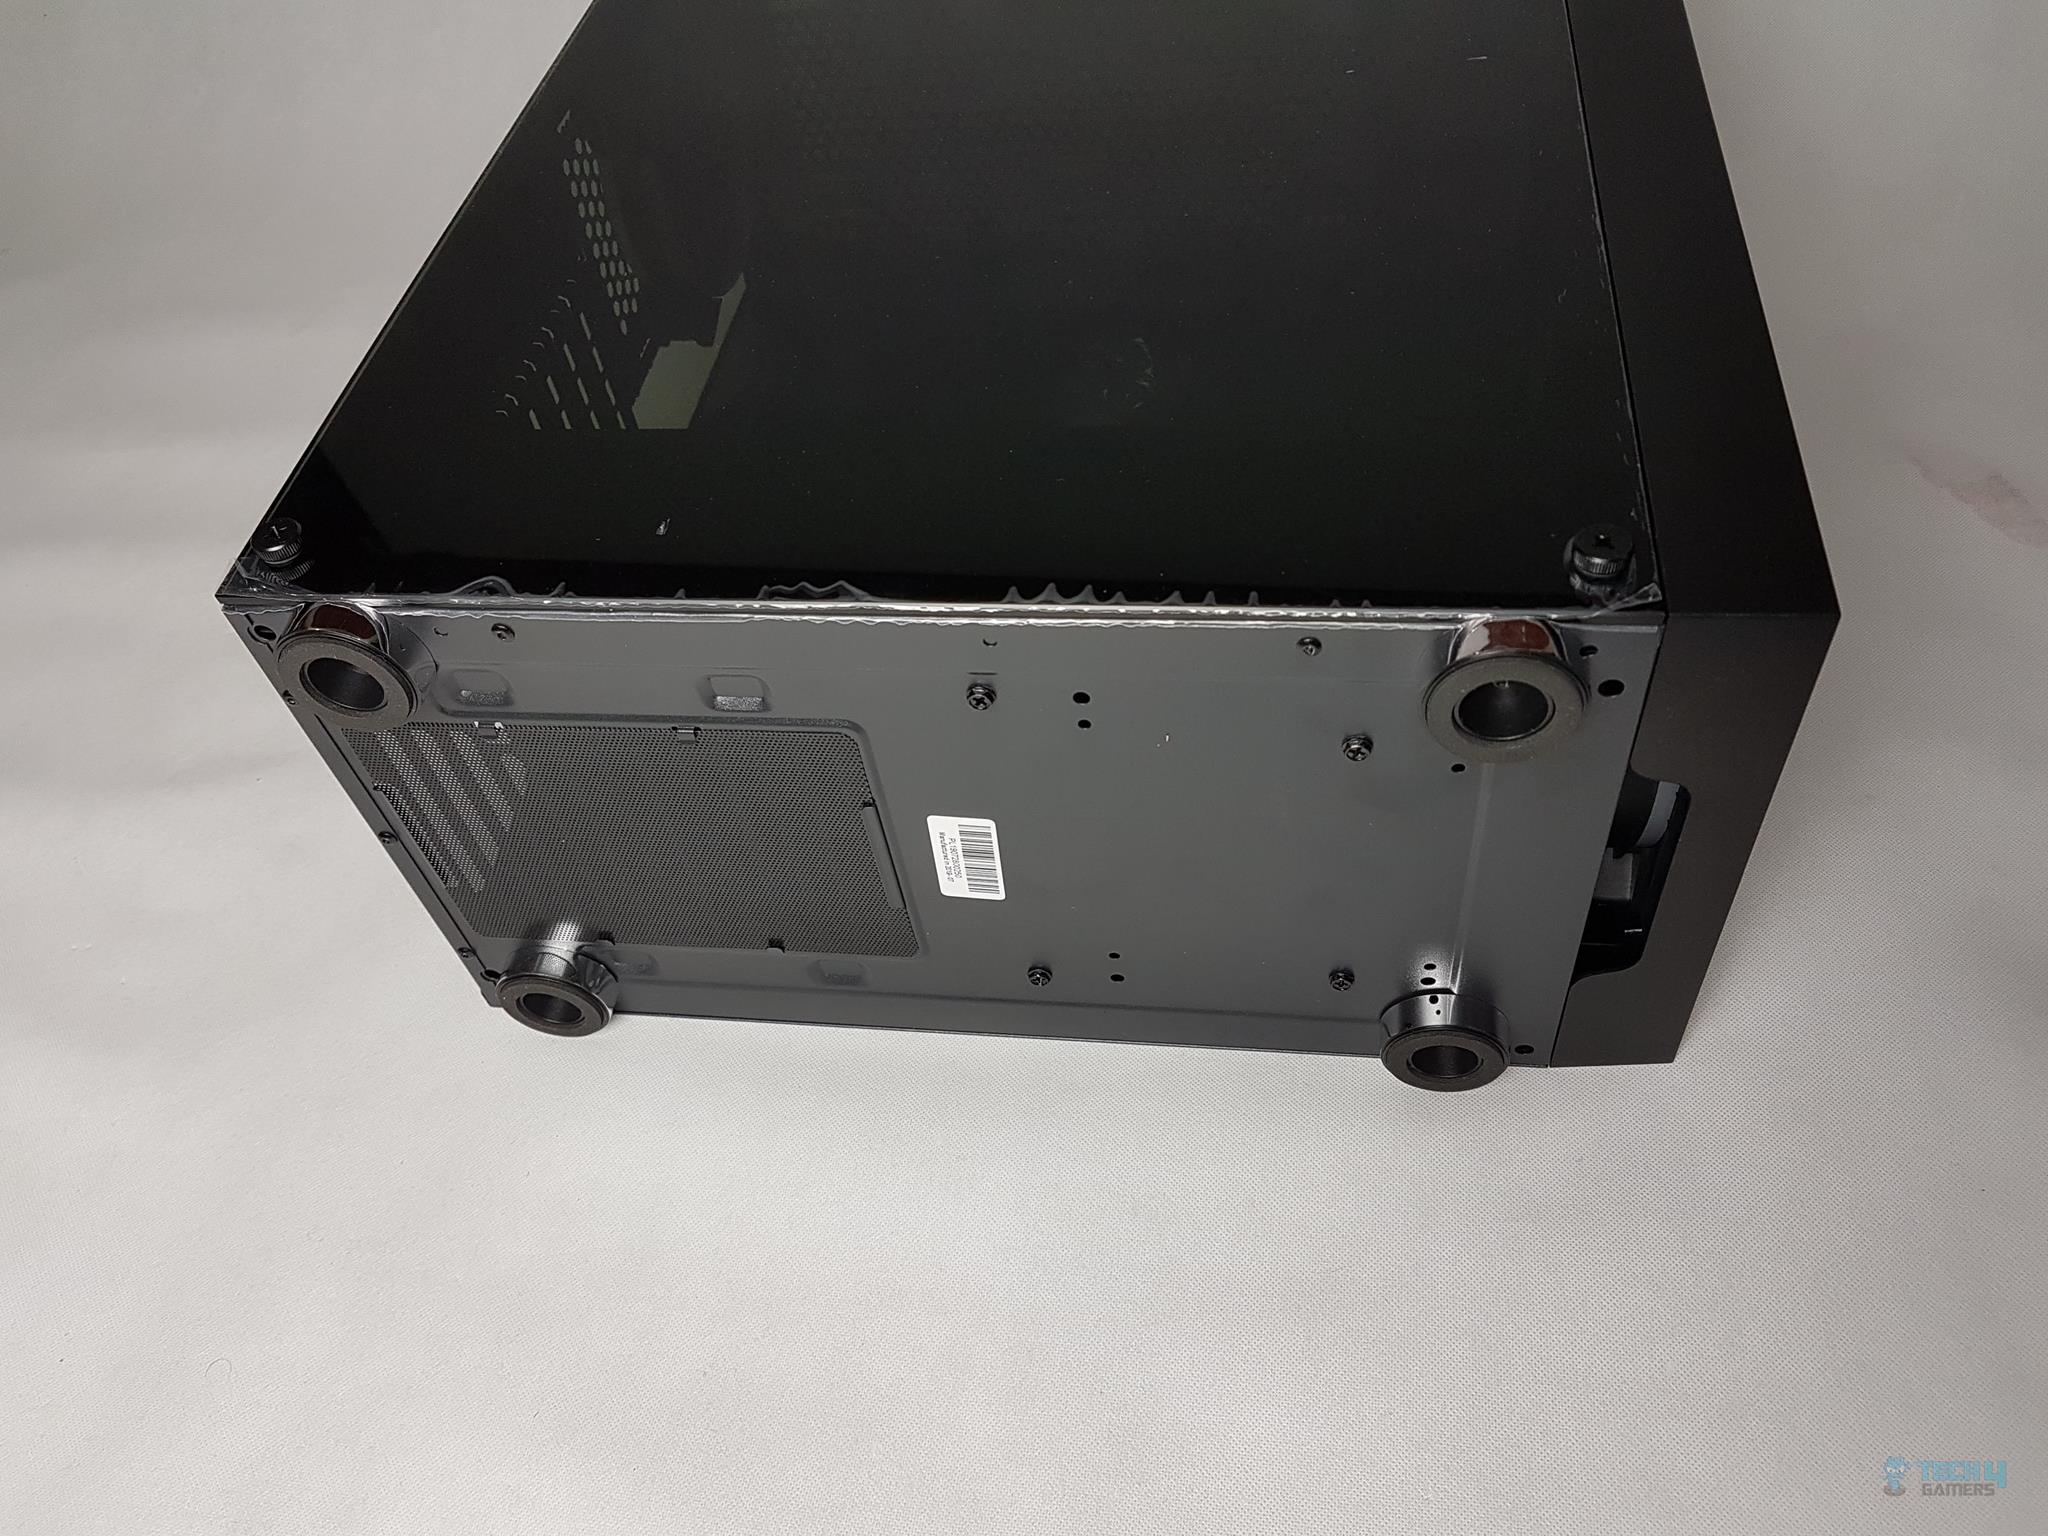
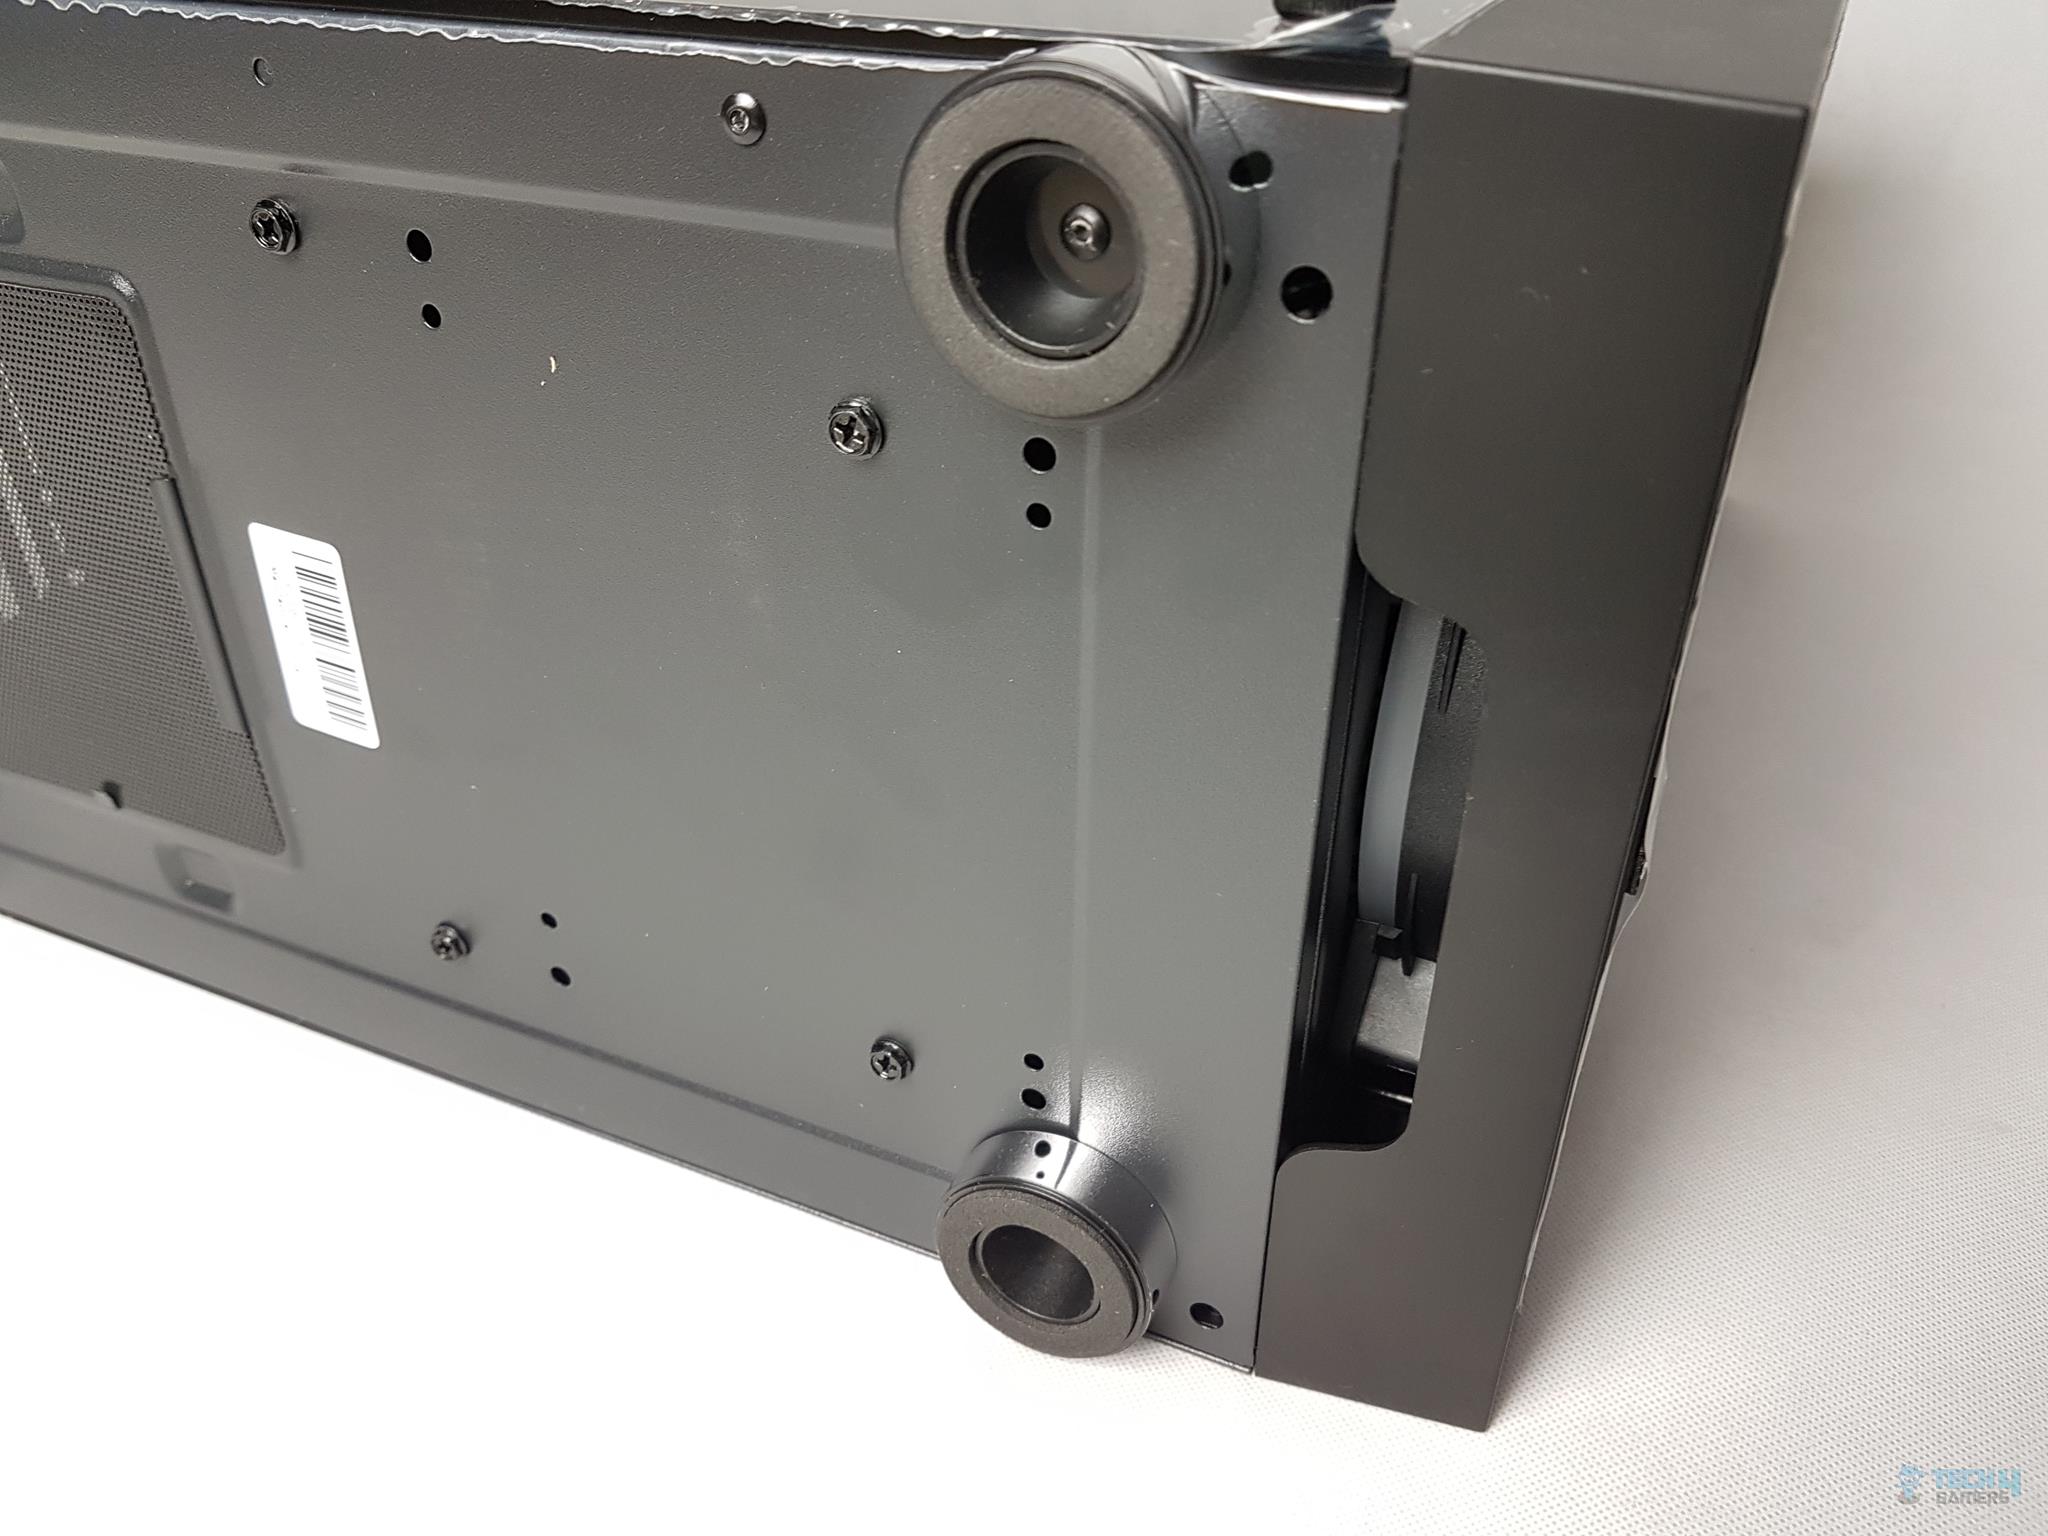
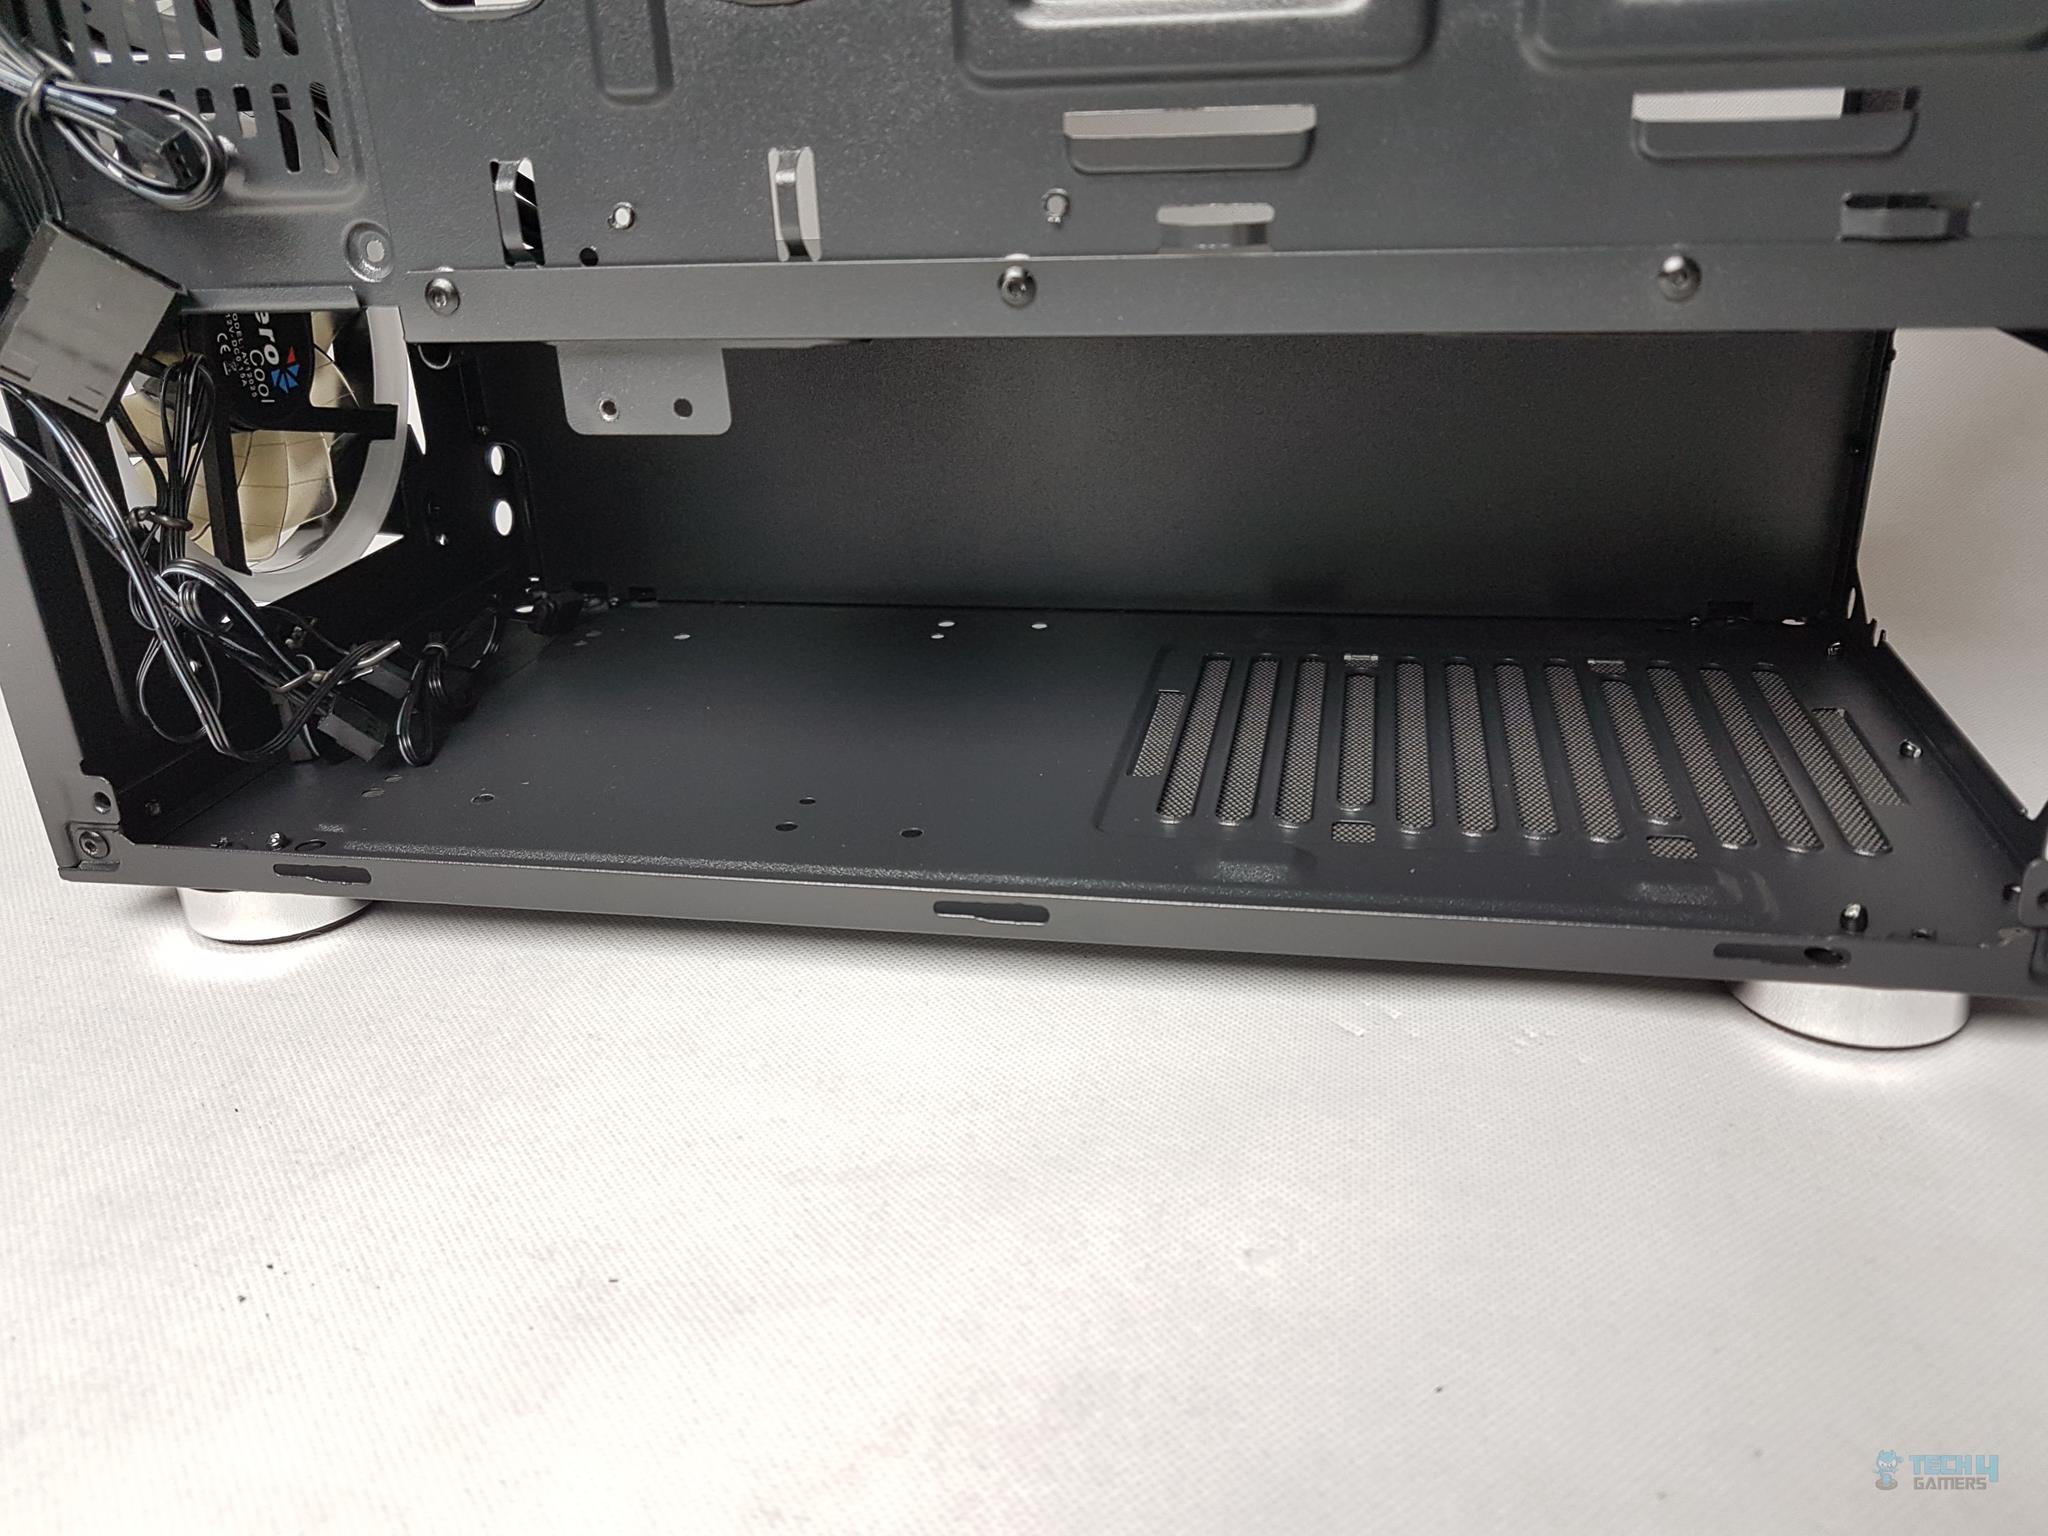
Observing the bottom, there are 4 circular-shaped feet with a shiny chrome finish that looks dope in person. The PSU area has a dust filter which is not magnetic and is tucked inside 5 latches. There are 4 screws on the solid part of the frame. These are holding the HDD cage inside the chassis.
There is a large cutout on the front side. This is the primary area where the air intake is provided to the front side. Clearly, this is not enough for proper airflow.
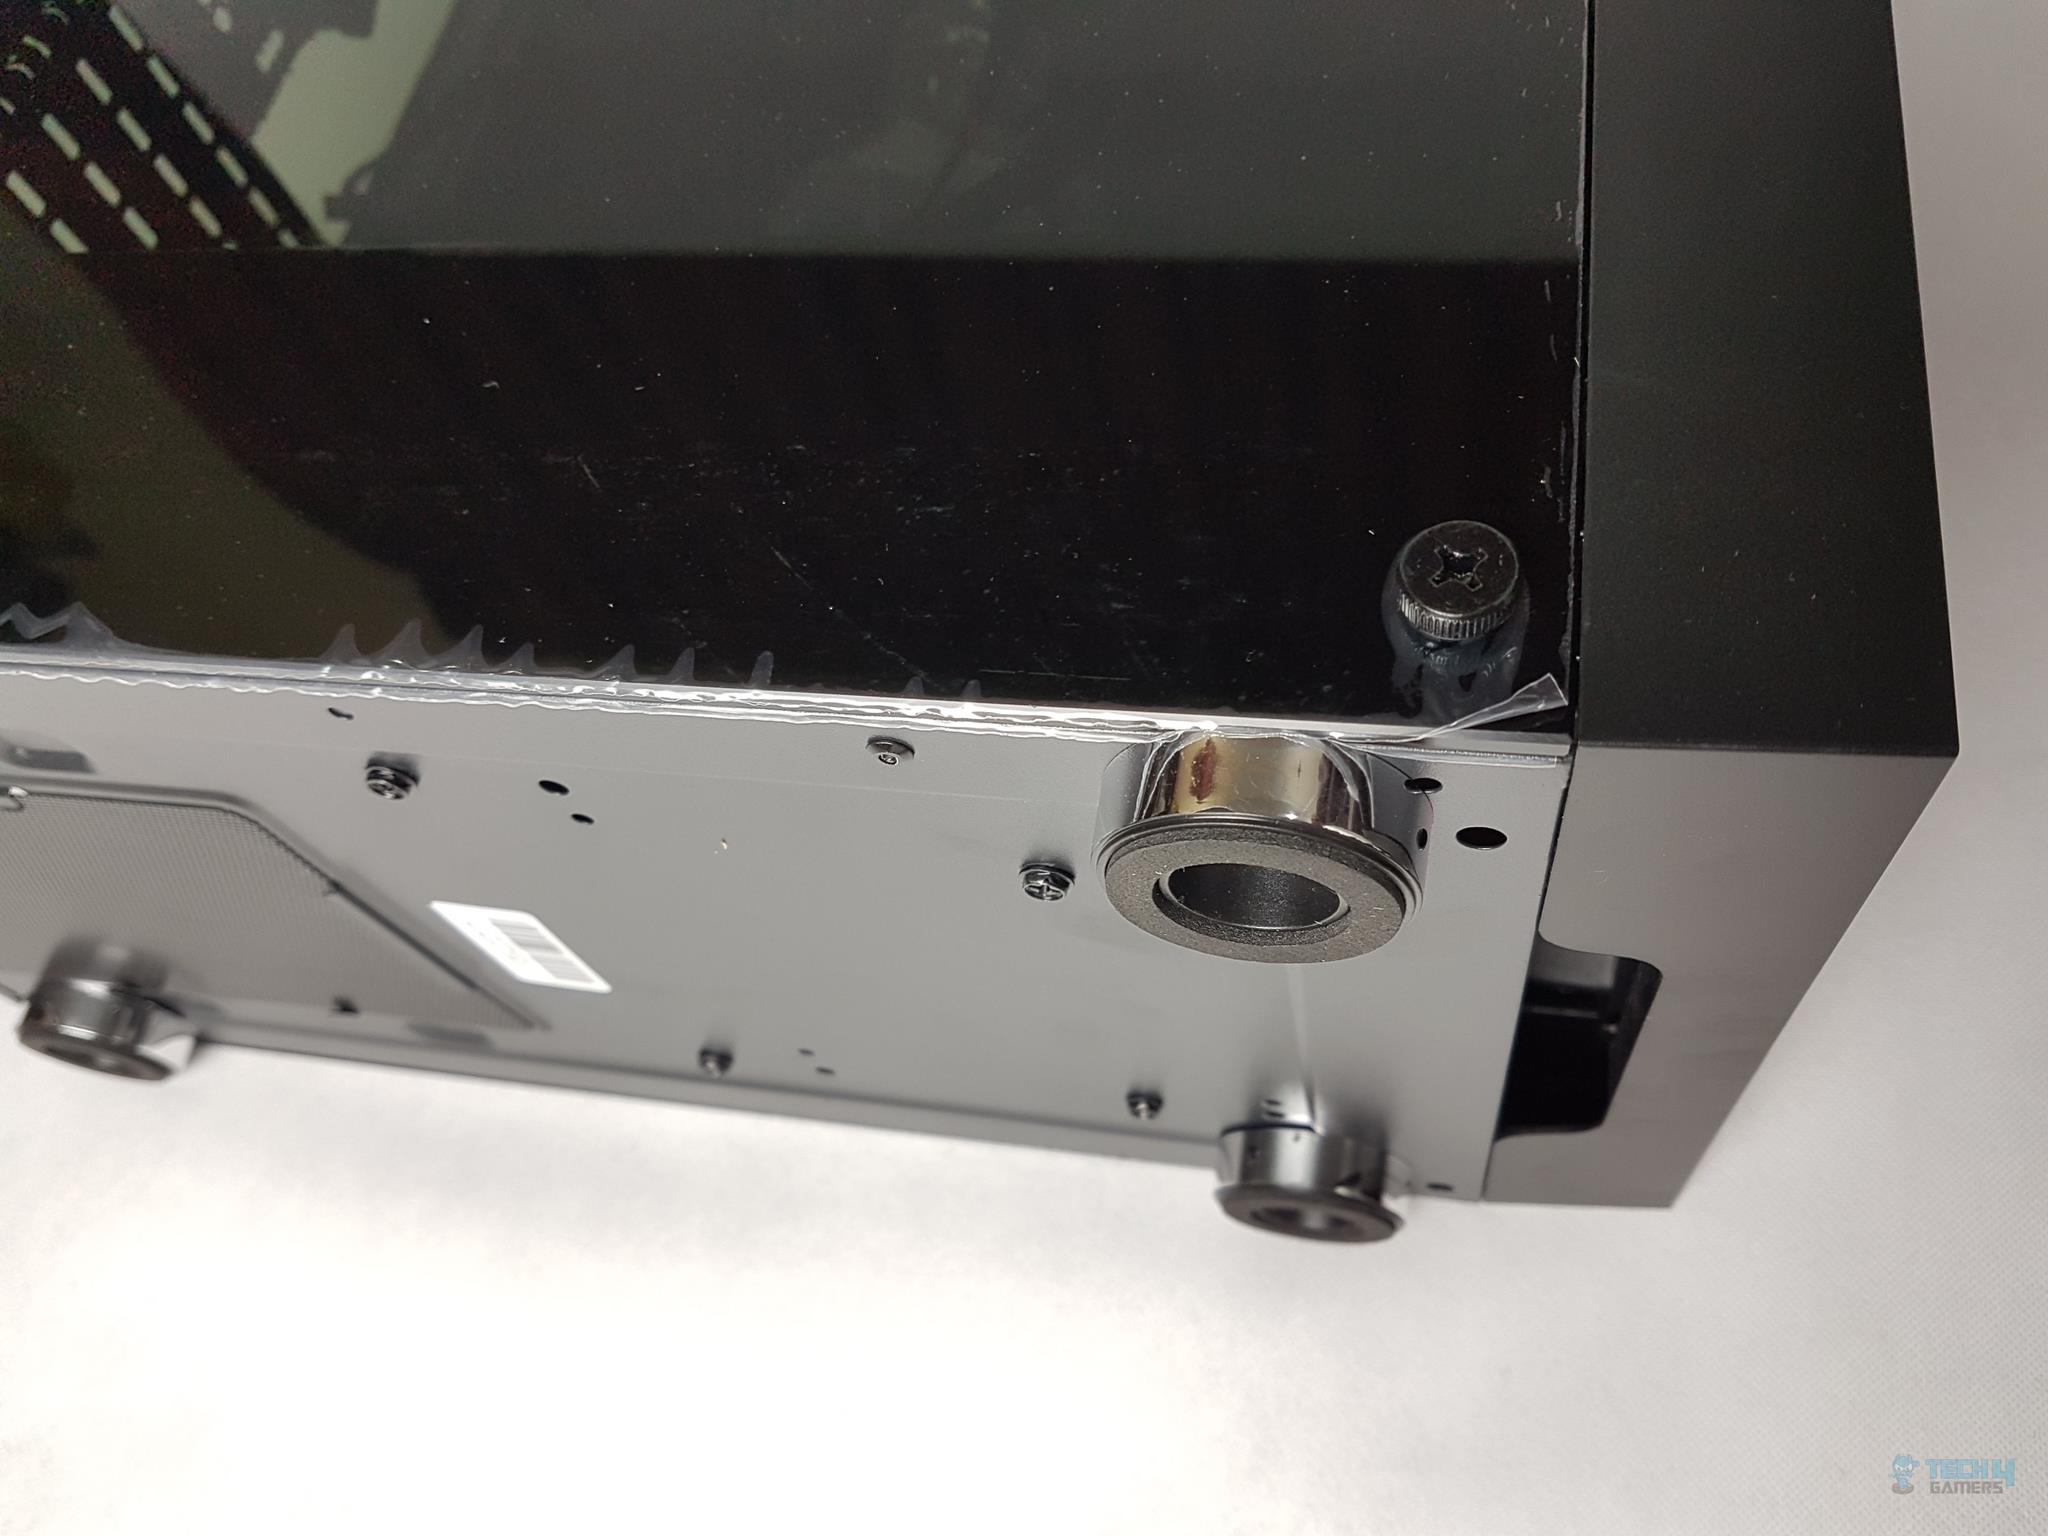
The chrome finish on the feet is quite appealing. It is also highly reflective.
Top Panel
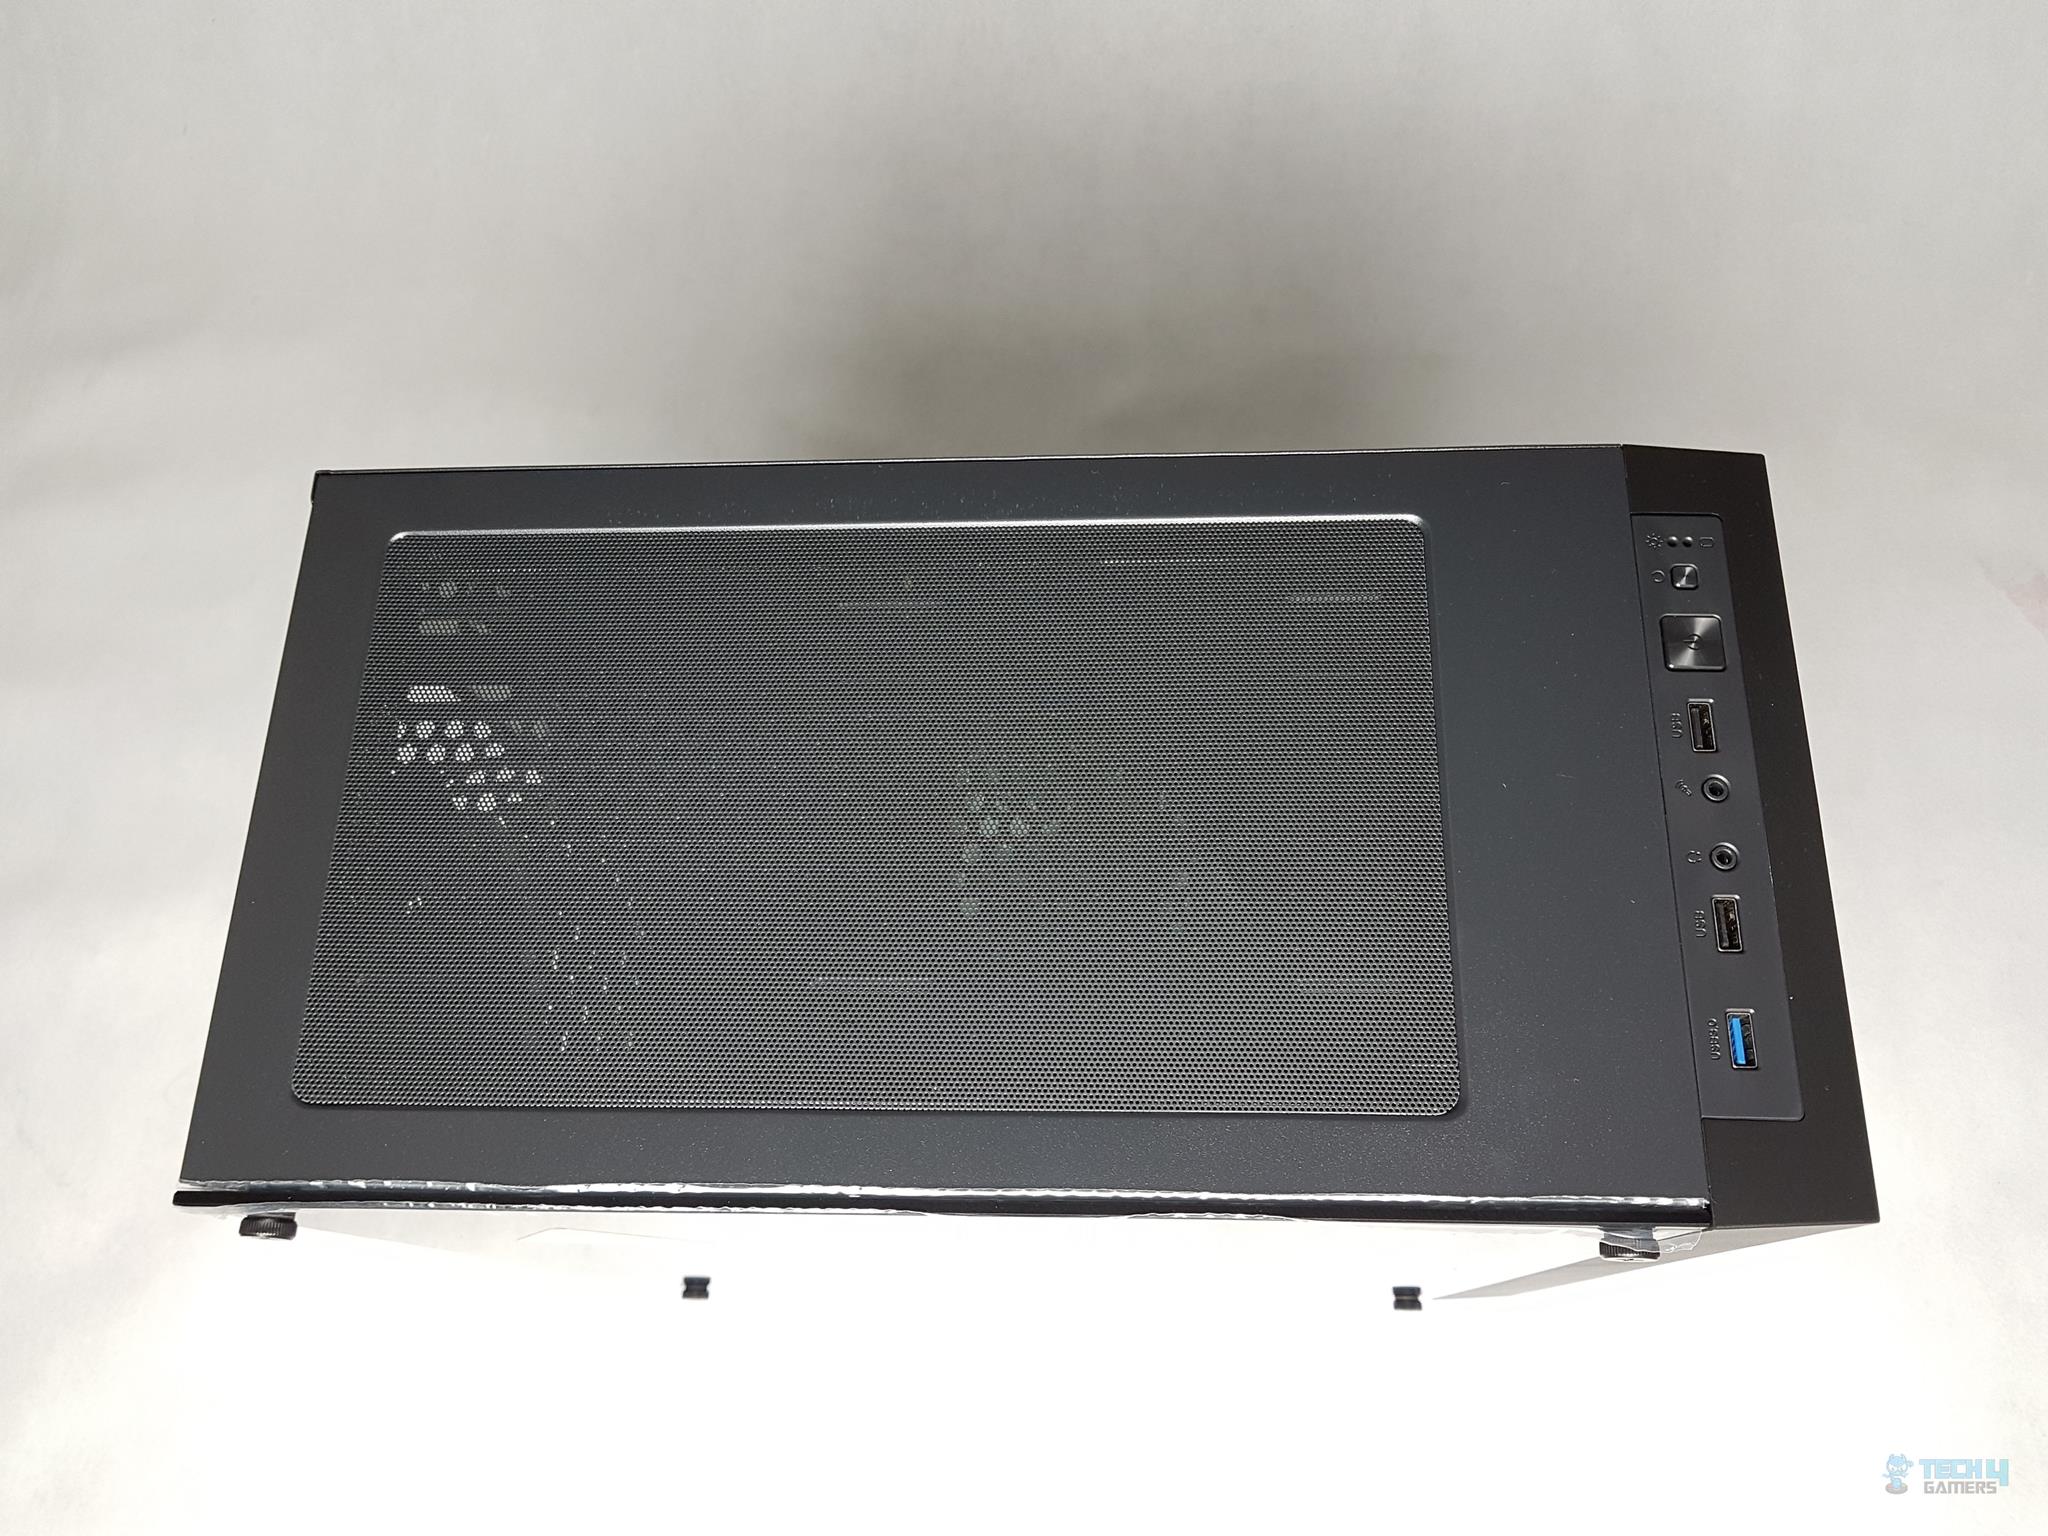
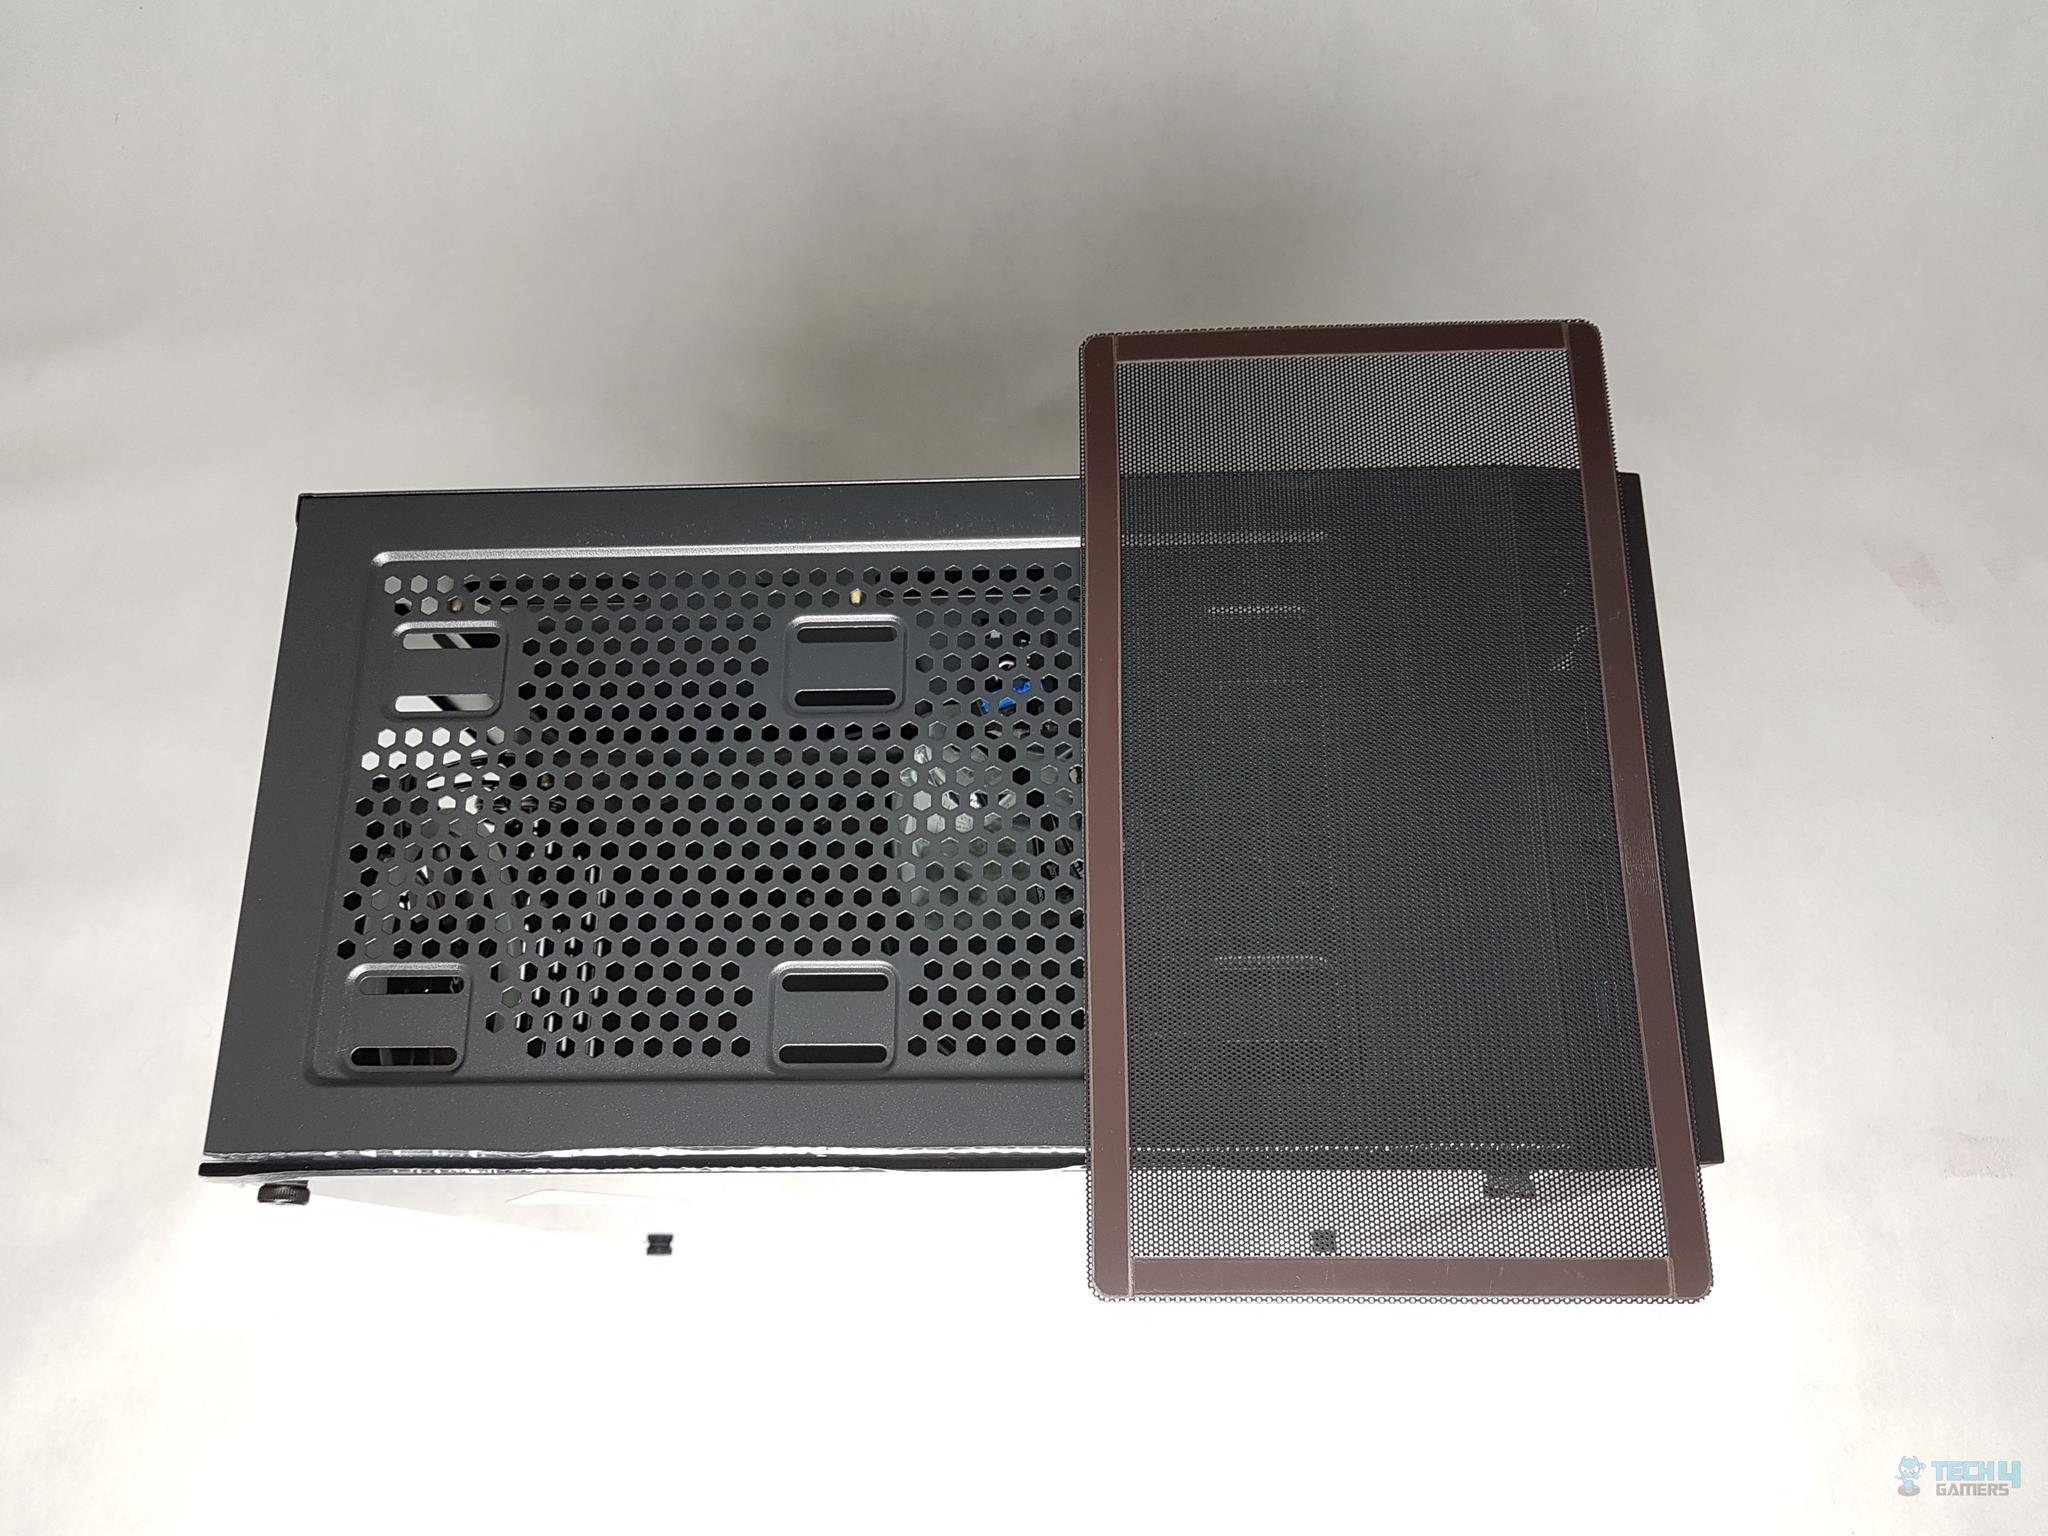
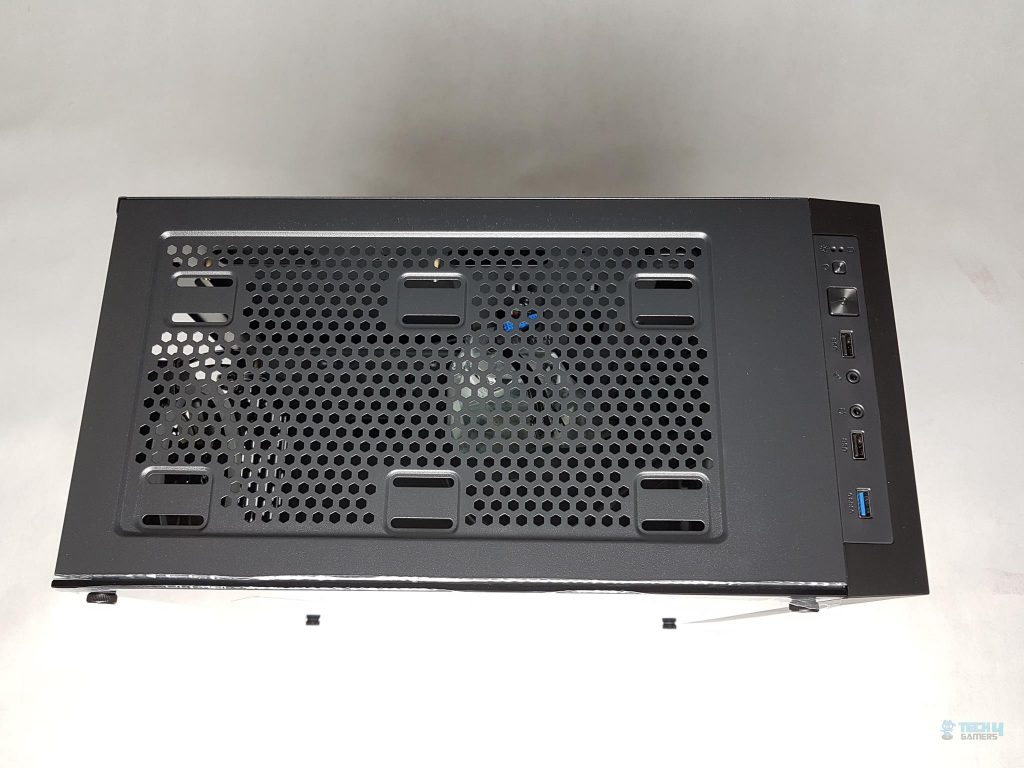
The top side has a simple layout. We have the two-tone design here as the front panel has darker shade as compared to the rest of the area. There is a front I/O panel located here. Other than that there is mounting provision for up to two 120/140mm fans.
The fan mounting area has cutouts for venting. There is a rail design for the fan mounting provision. The magnetic dust filter is a plus.
The true compact nature of the design is quite obvious from this angle.
Top I/O
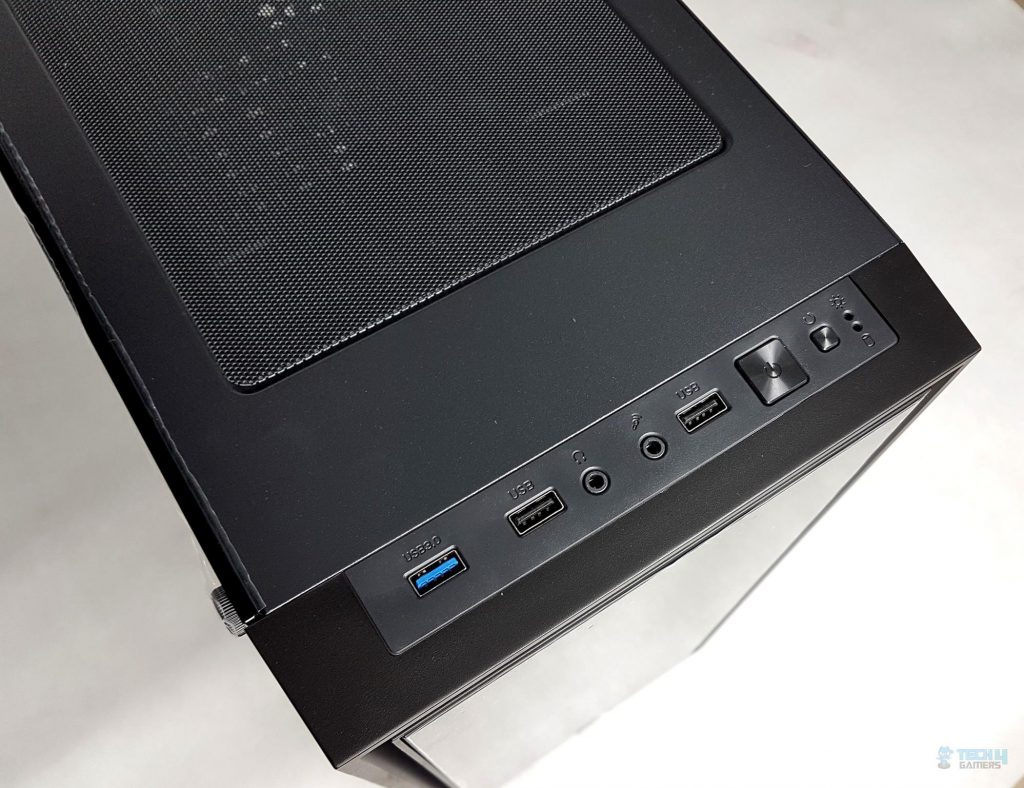
Looking at the I/O panel, we have one USB 3.0, two USB 2.0, along with the regular 3.5mm Microphone and Headphone Jack-combo. Additionally, there is a power button, a reset button and LED indicators.
There is a nice and satisfactory press feel on the power button. The reset button can be set to control the lighting effects on the fans as well.
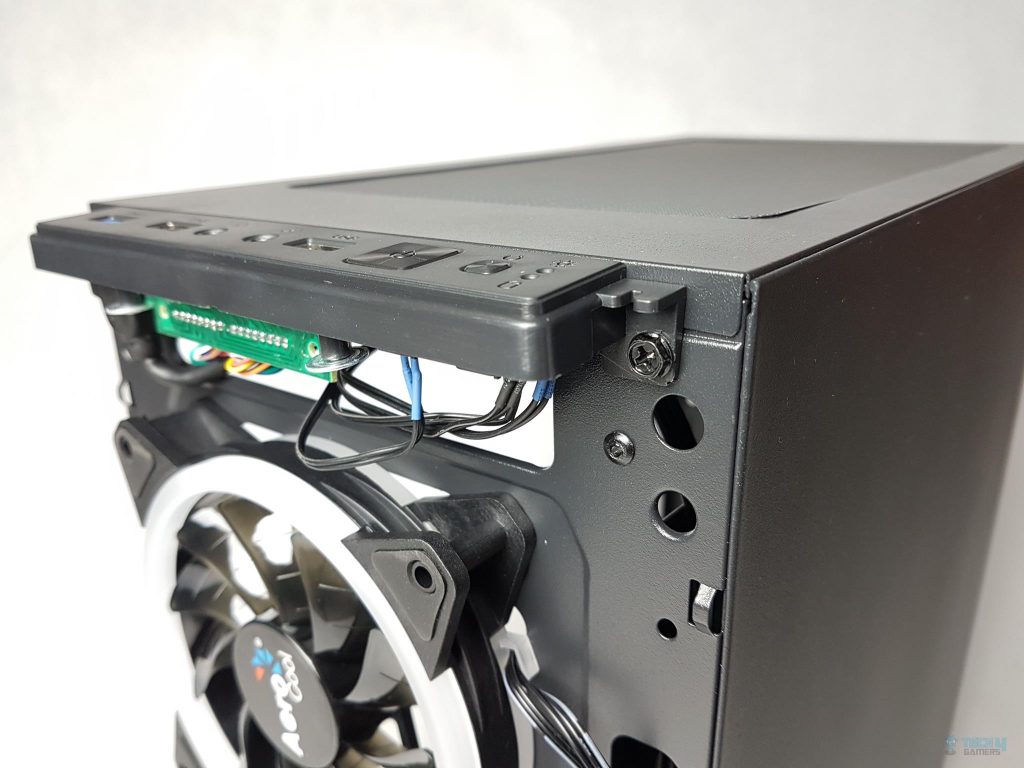
The I/O panel is connected to the mainframe using two screws on the front side. The user can remove the panel by removing these two screws.
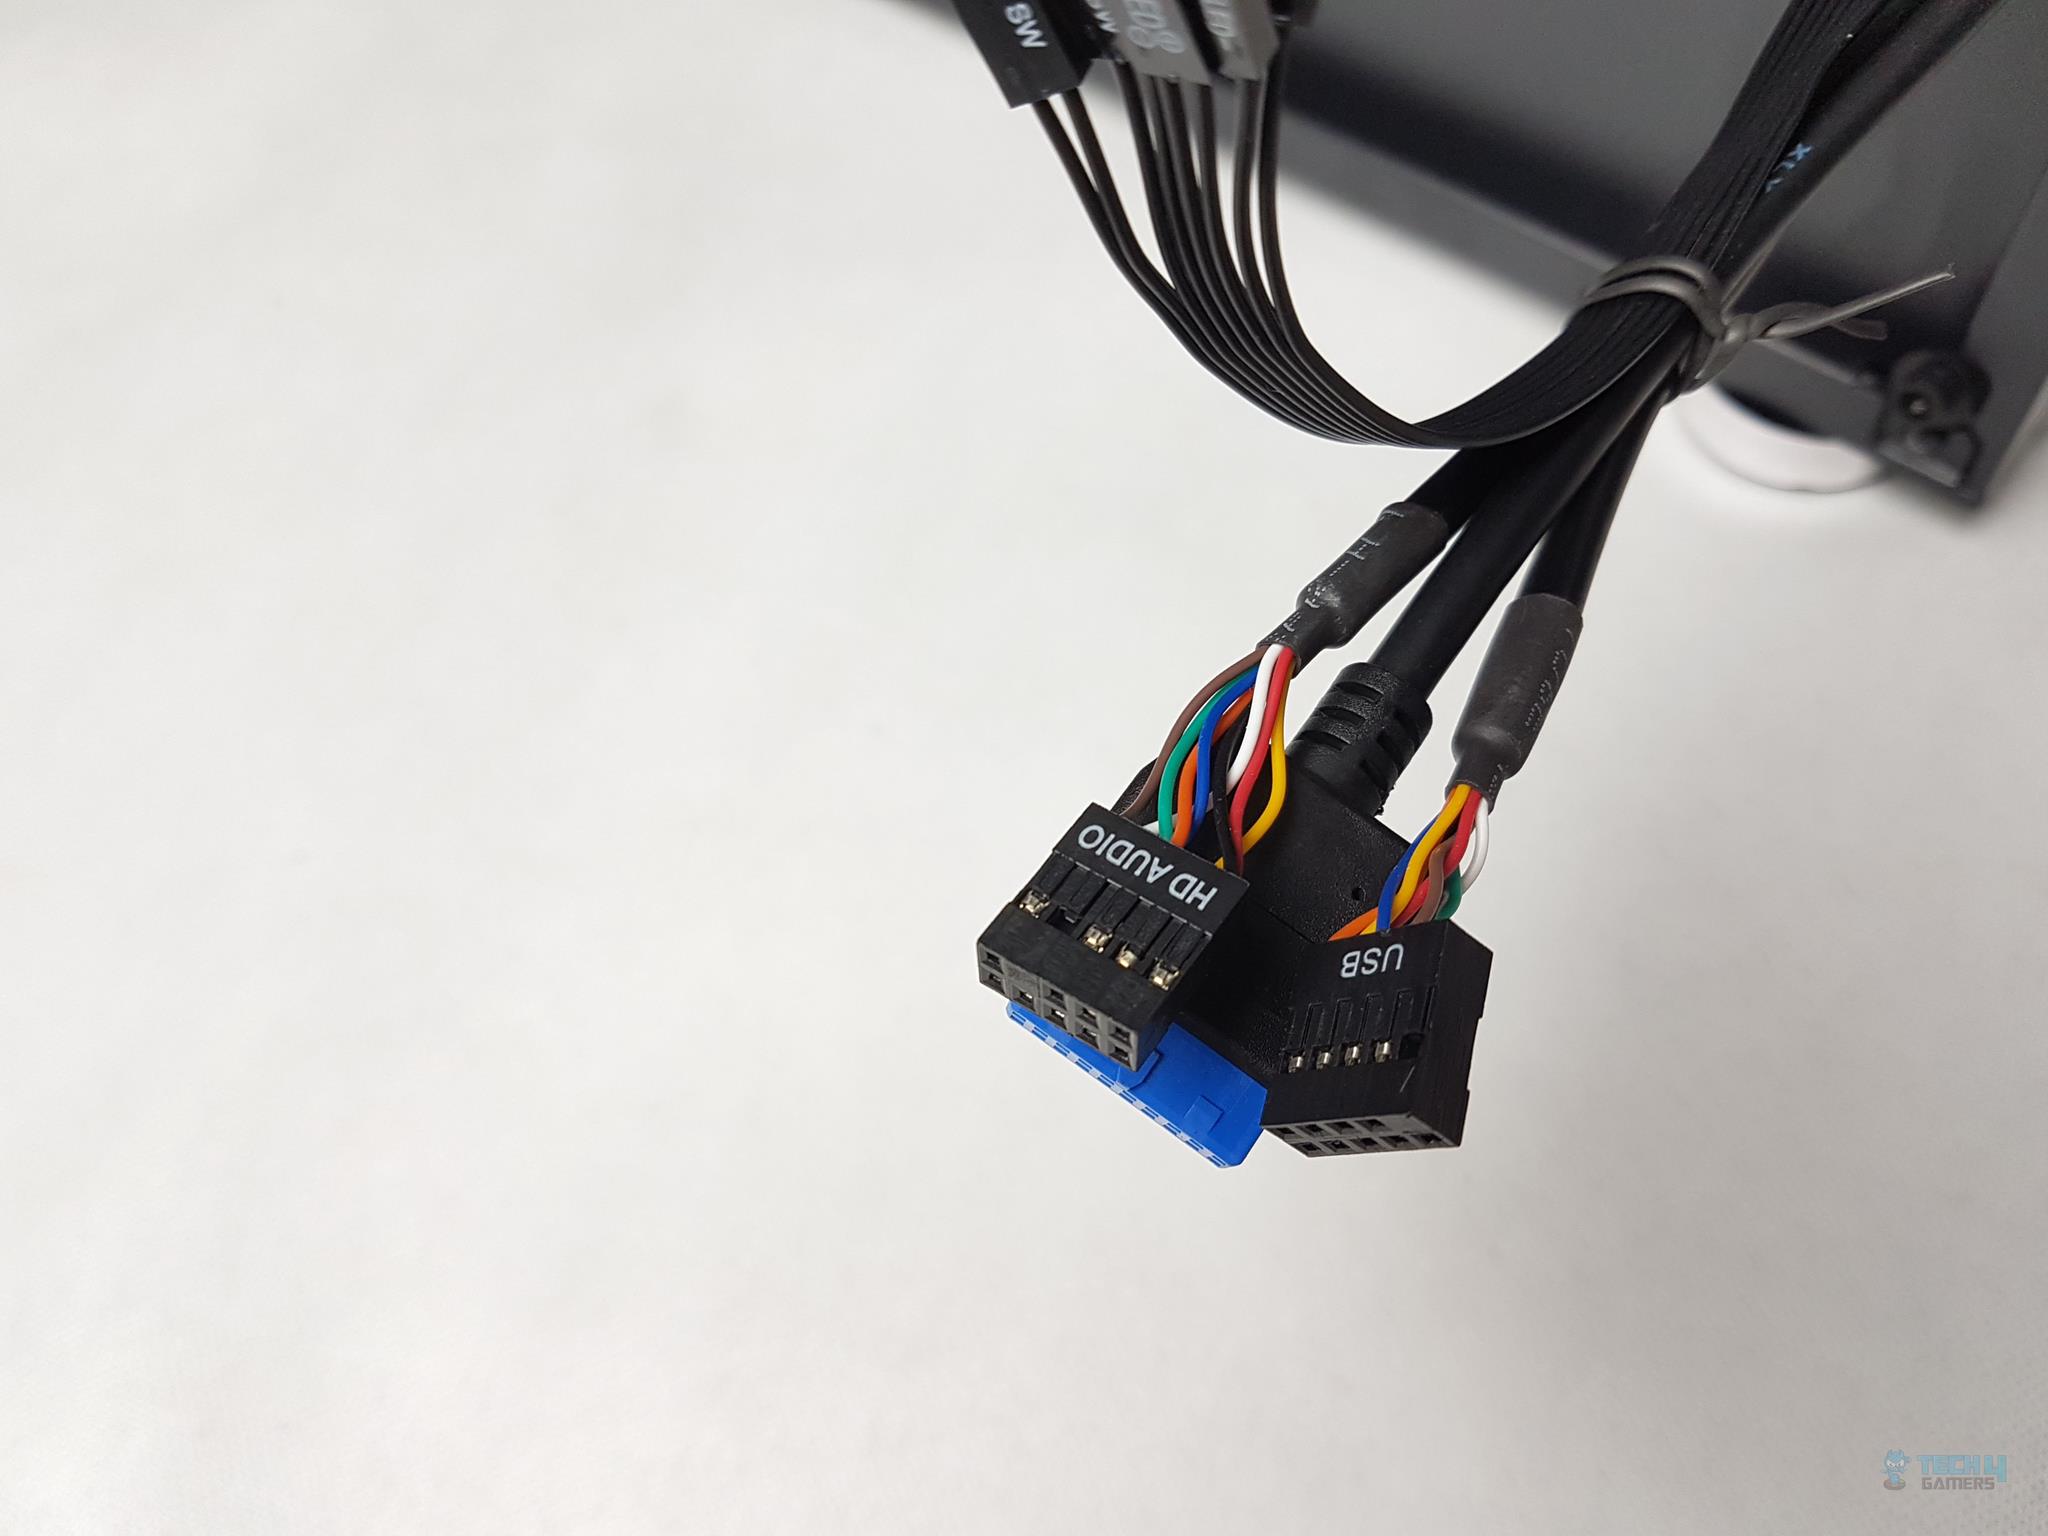
There is a total of 4 cables coming out of the front panel. Here we have. On the left, we can see that there is a USB 3.0 cable, USB 2.0 cable, and an HD Audio cable.
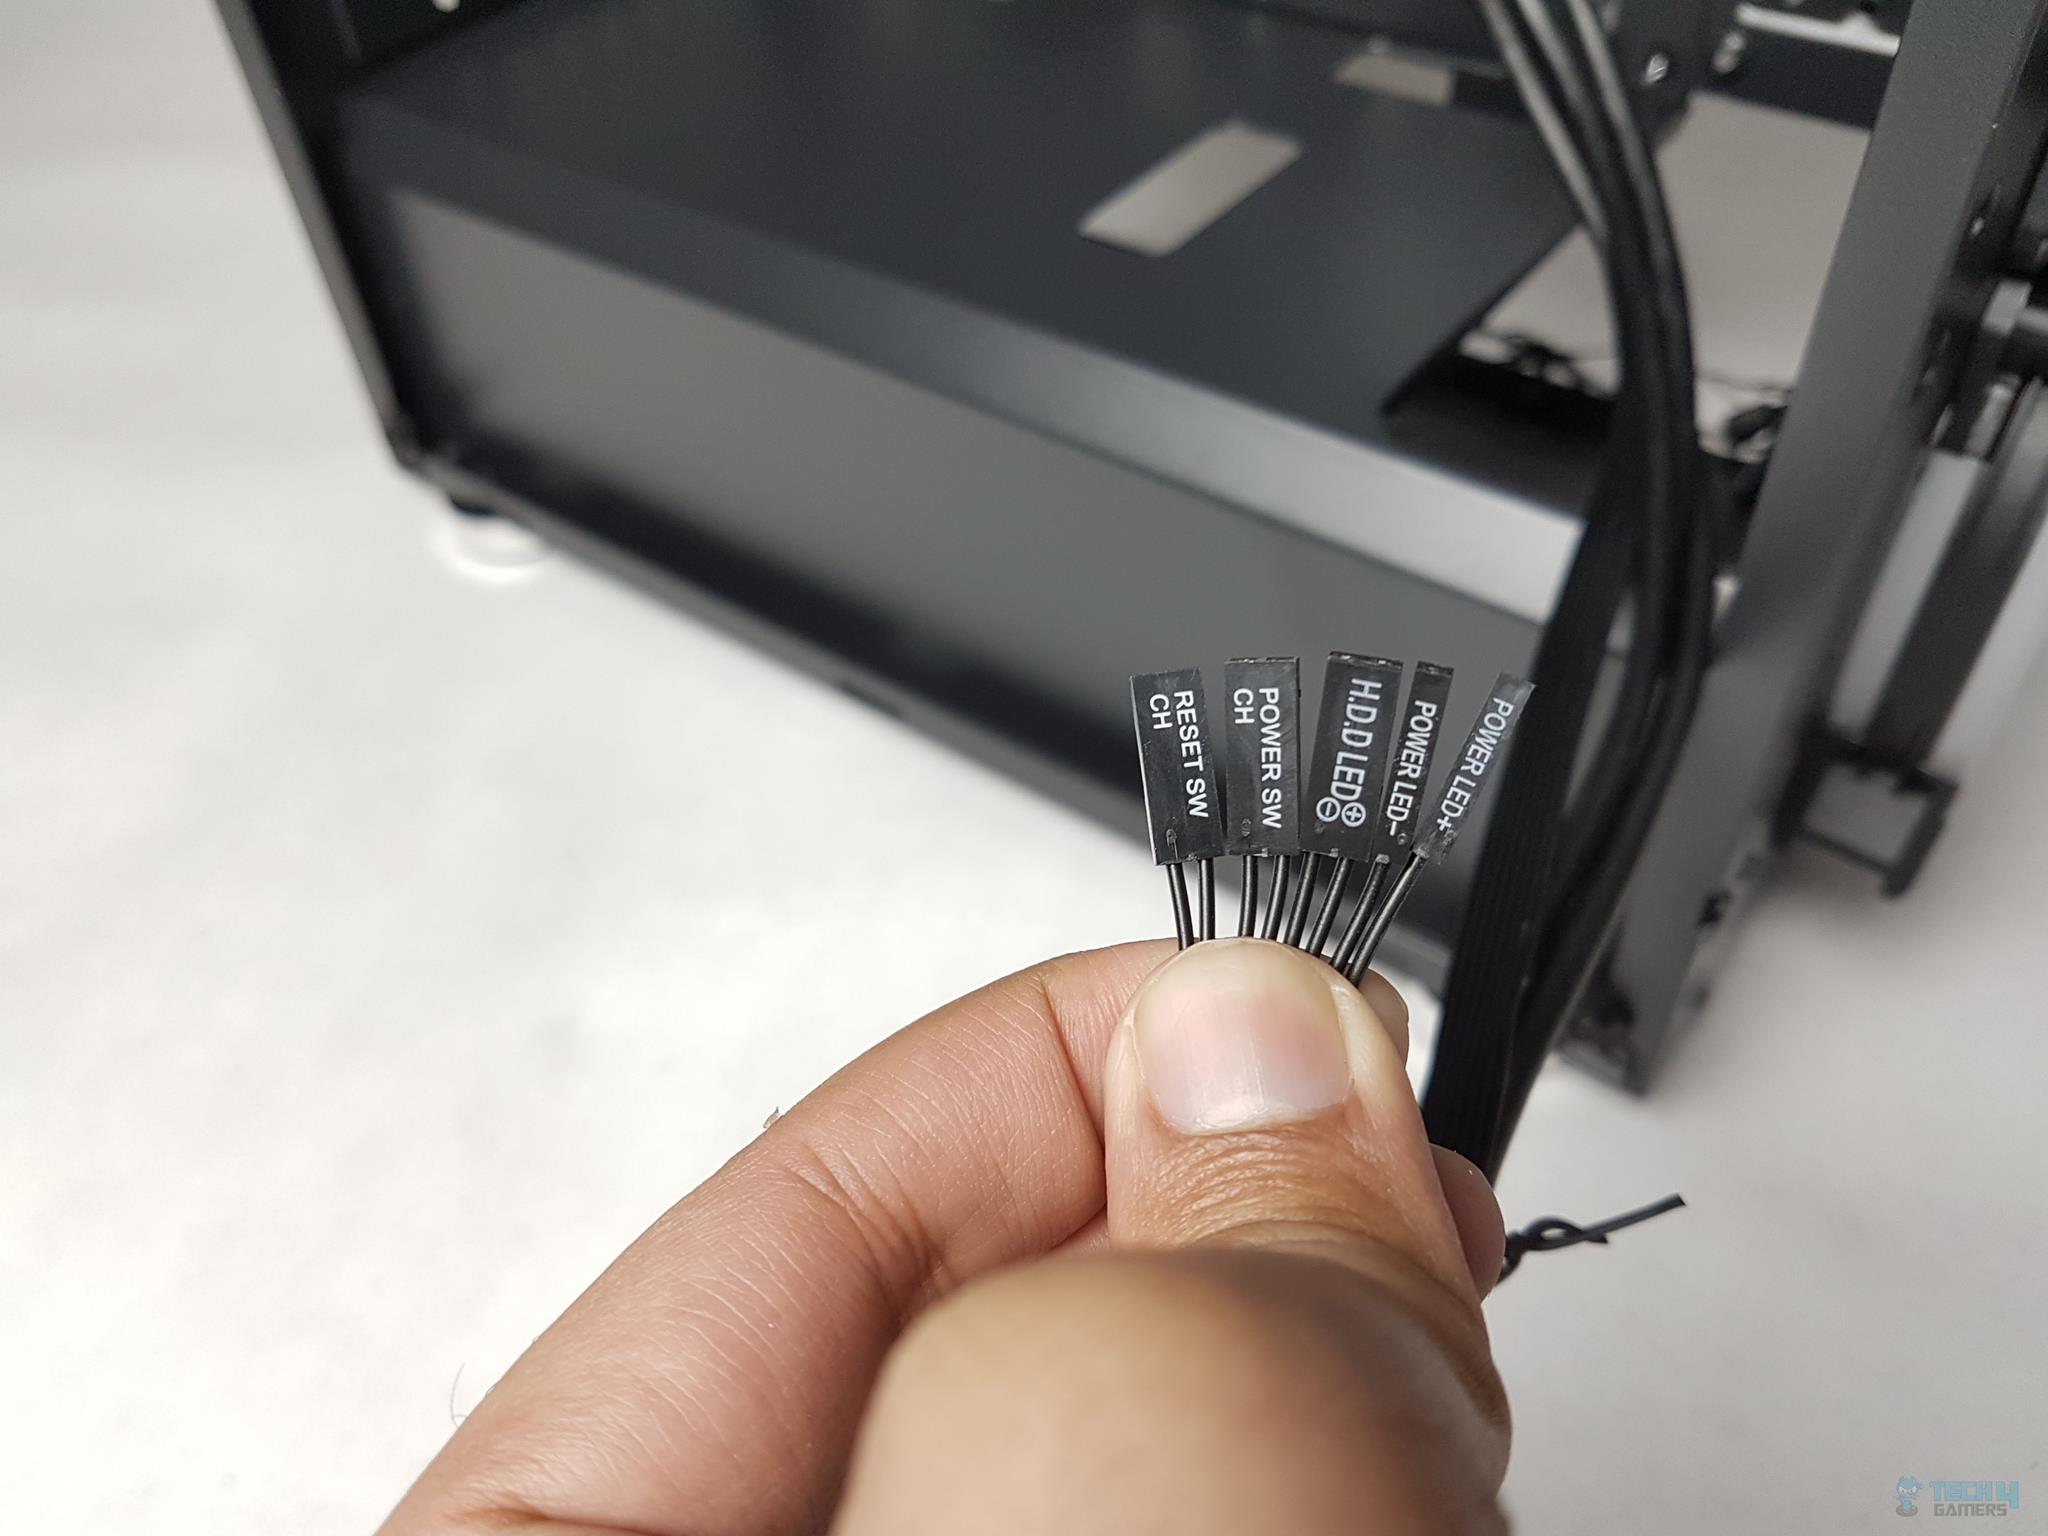
The 4th cable is the System panel connectors with Power and Reset buttons cables as well as LED indicator cables. These are connected to the System Panel header of the motherboard.
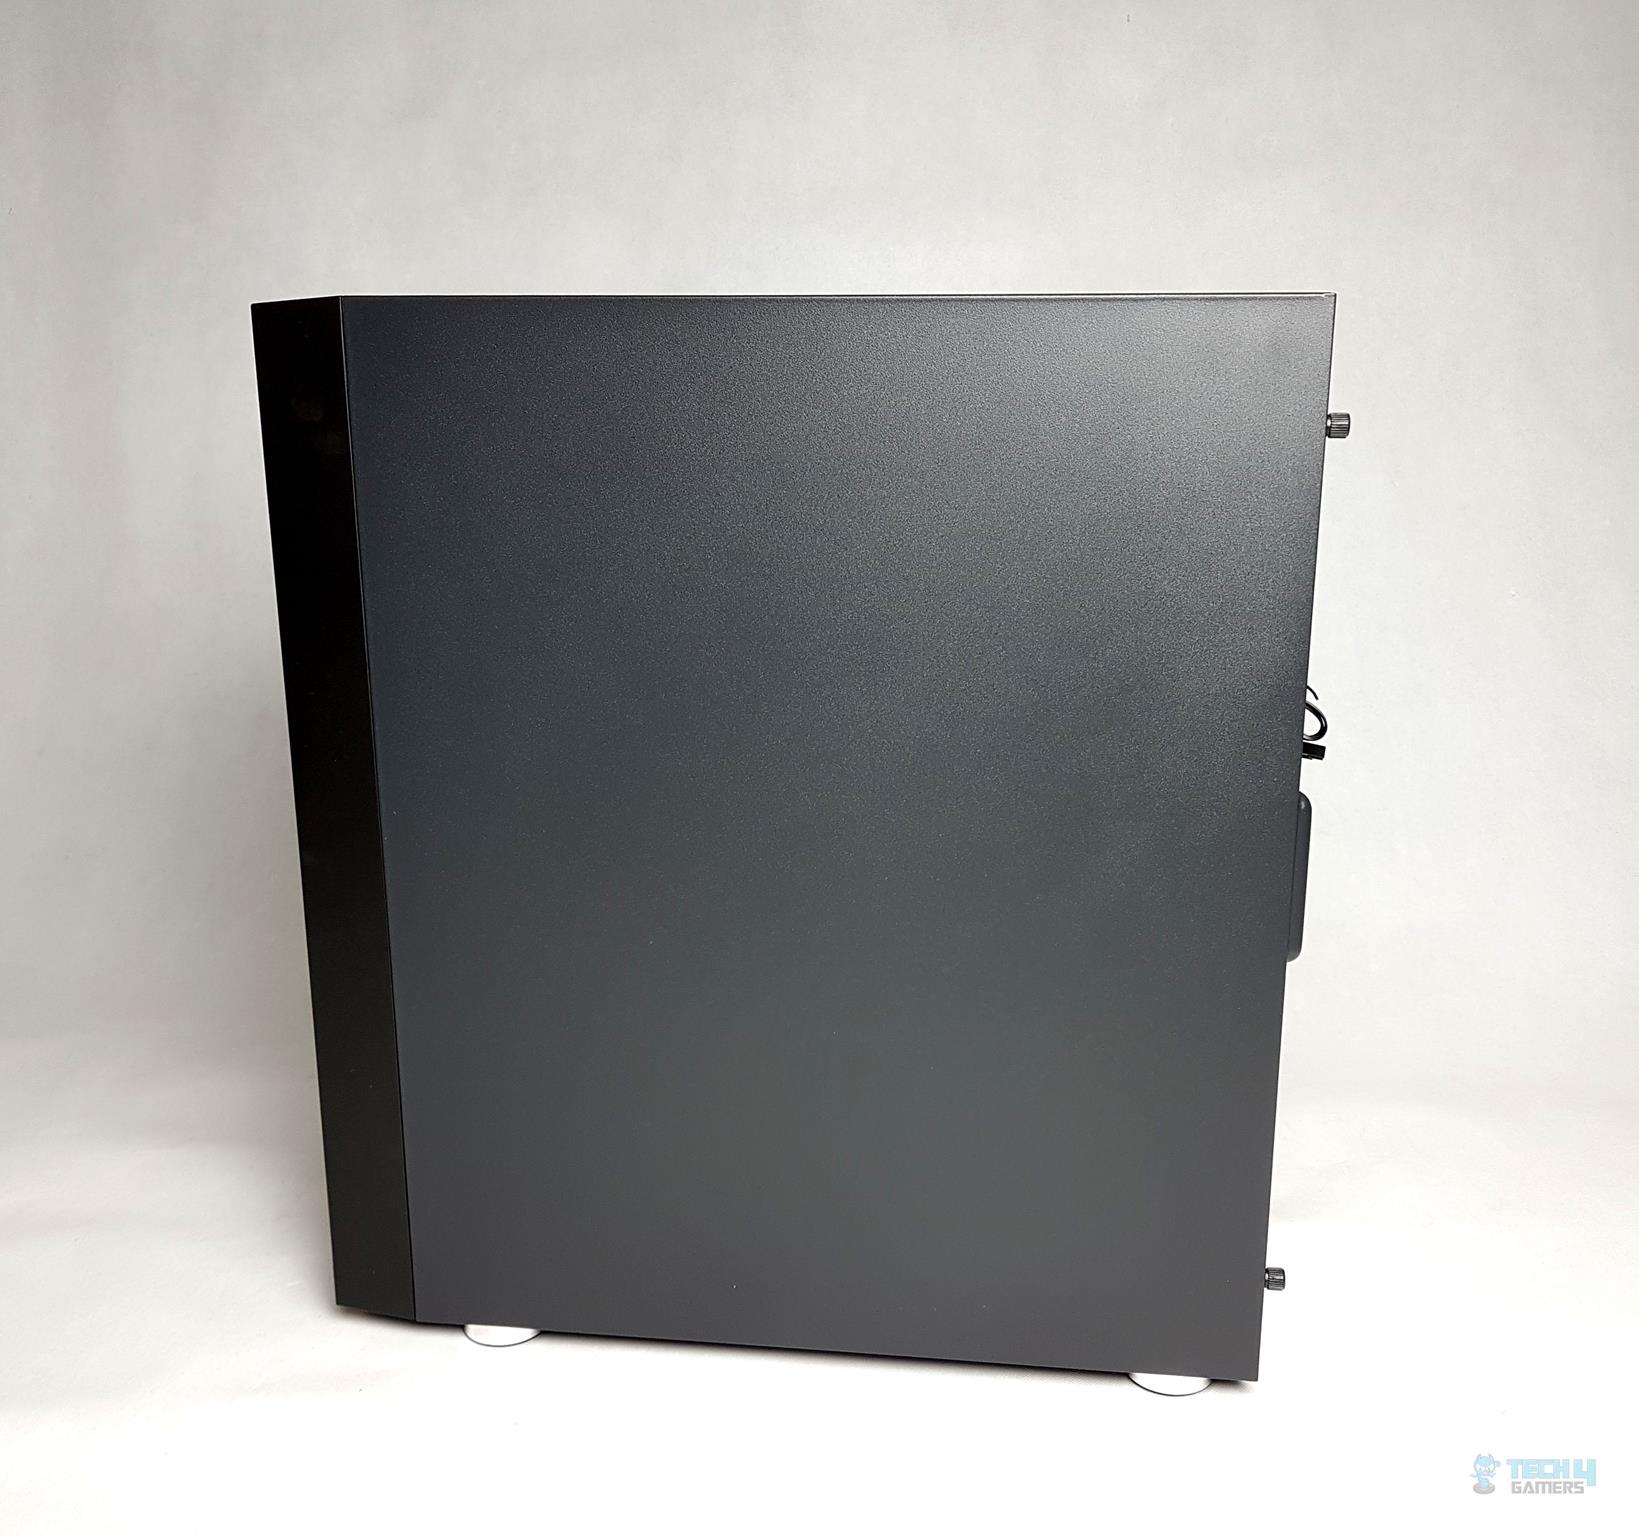
Side Panel
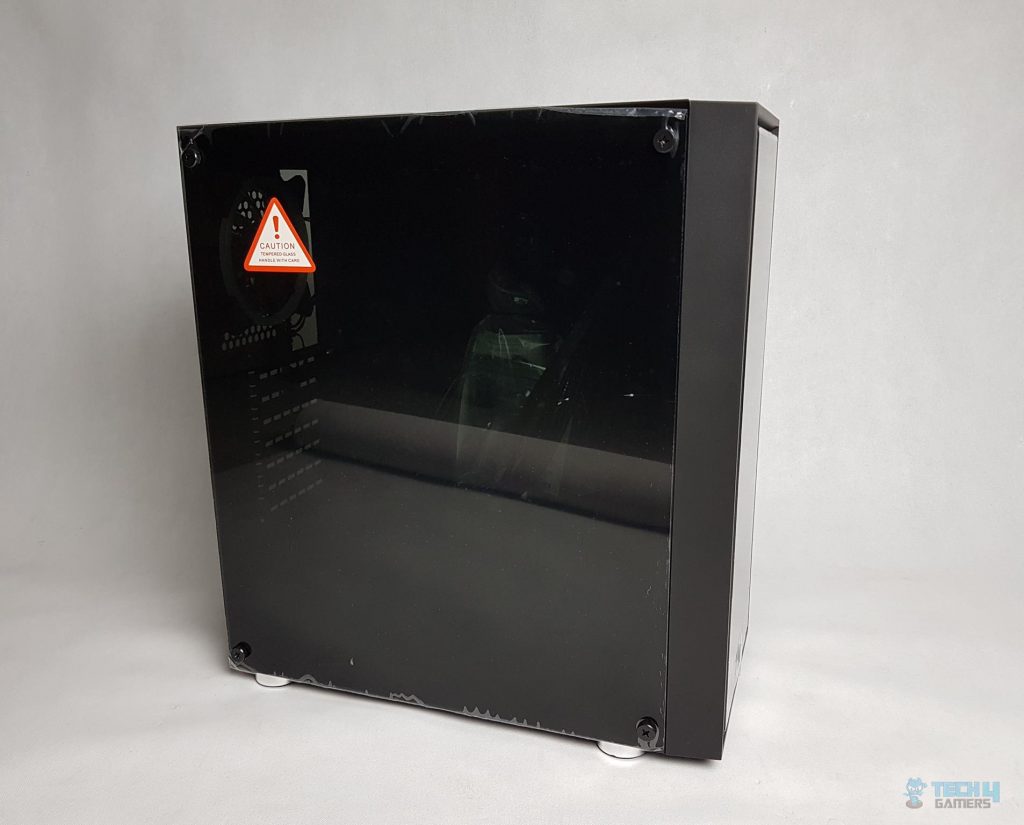
The side panel of the chassis is made of the tempered glass. It is dark tinted and one would need to install LED strips inside in order to showcase the build. The tempered glass is not fully flushed to the chassis frame. It is secured using 4 thumbscrews. One good point is that it is hooked on to the screw adapters and it will not fall off after removing the screws though I would still caution the user to put one hand on the panel just in case when taking it off.
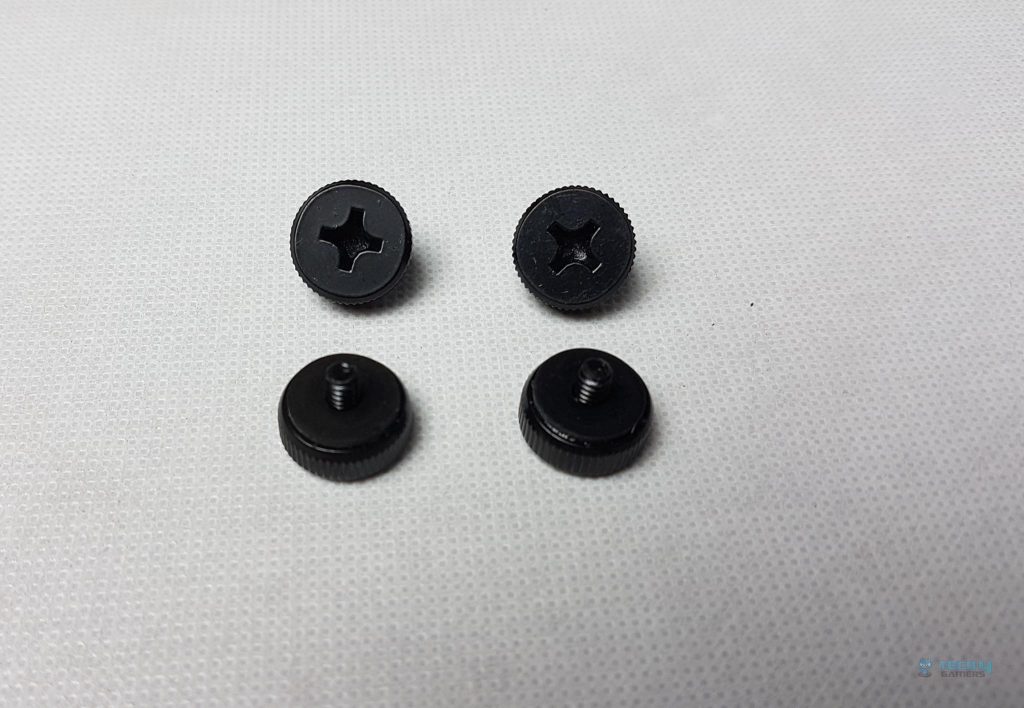
The 4x screws with the larger heads are used to install the tempered glass panel on the chassis. They have washers on the head of the threaded portion to avoid scratching the glass.

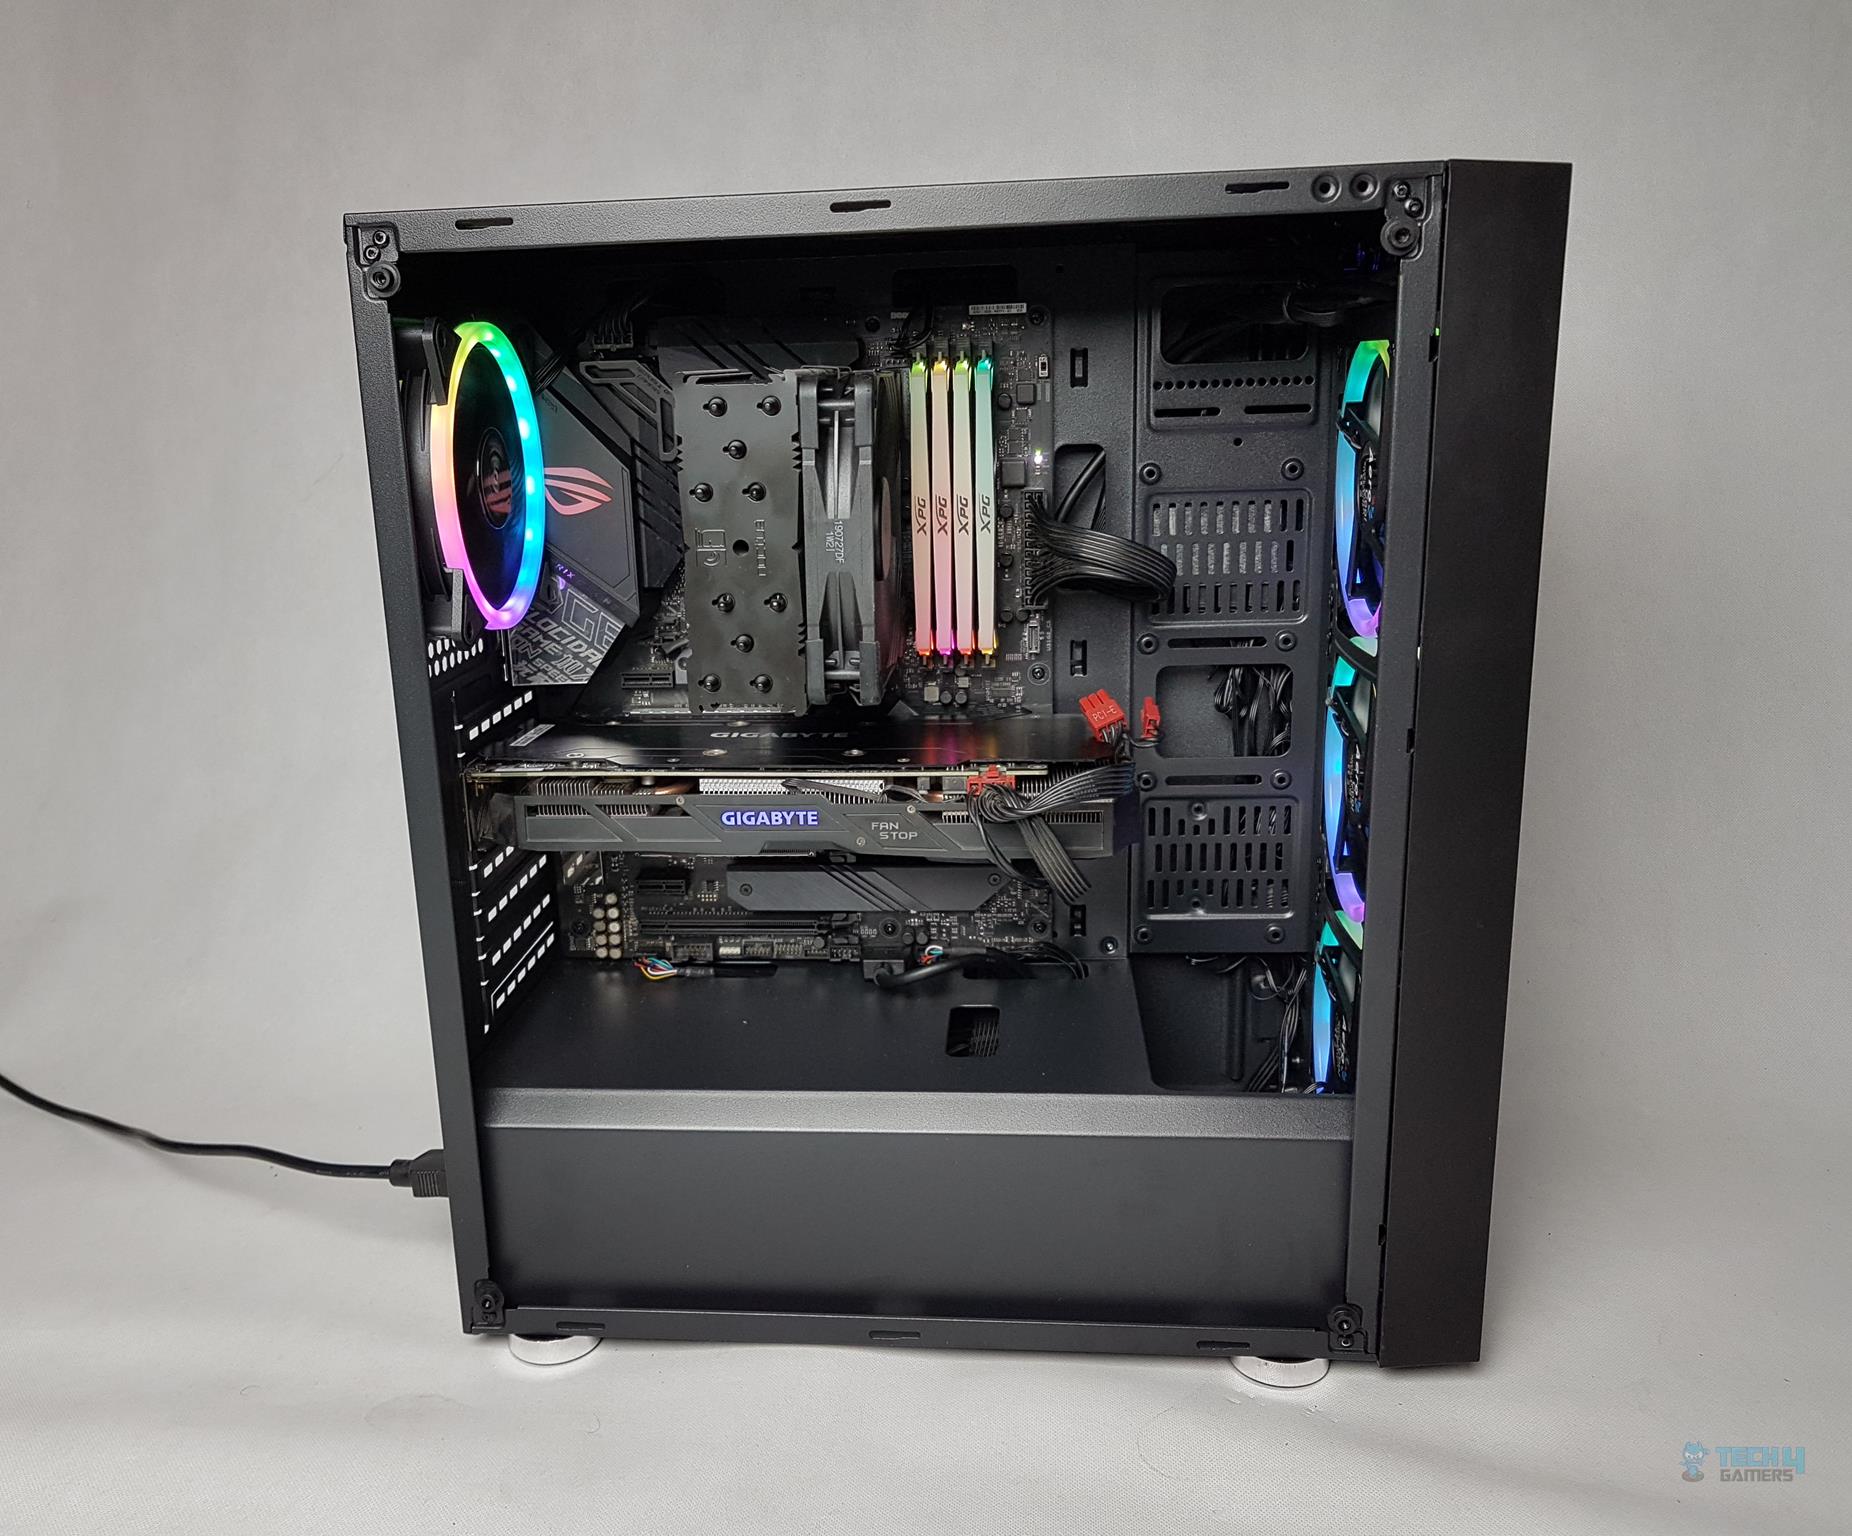
4x pre-installed fans are visible. I have moved the front panel cables to the backside before taking these pictures.
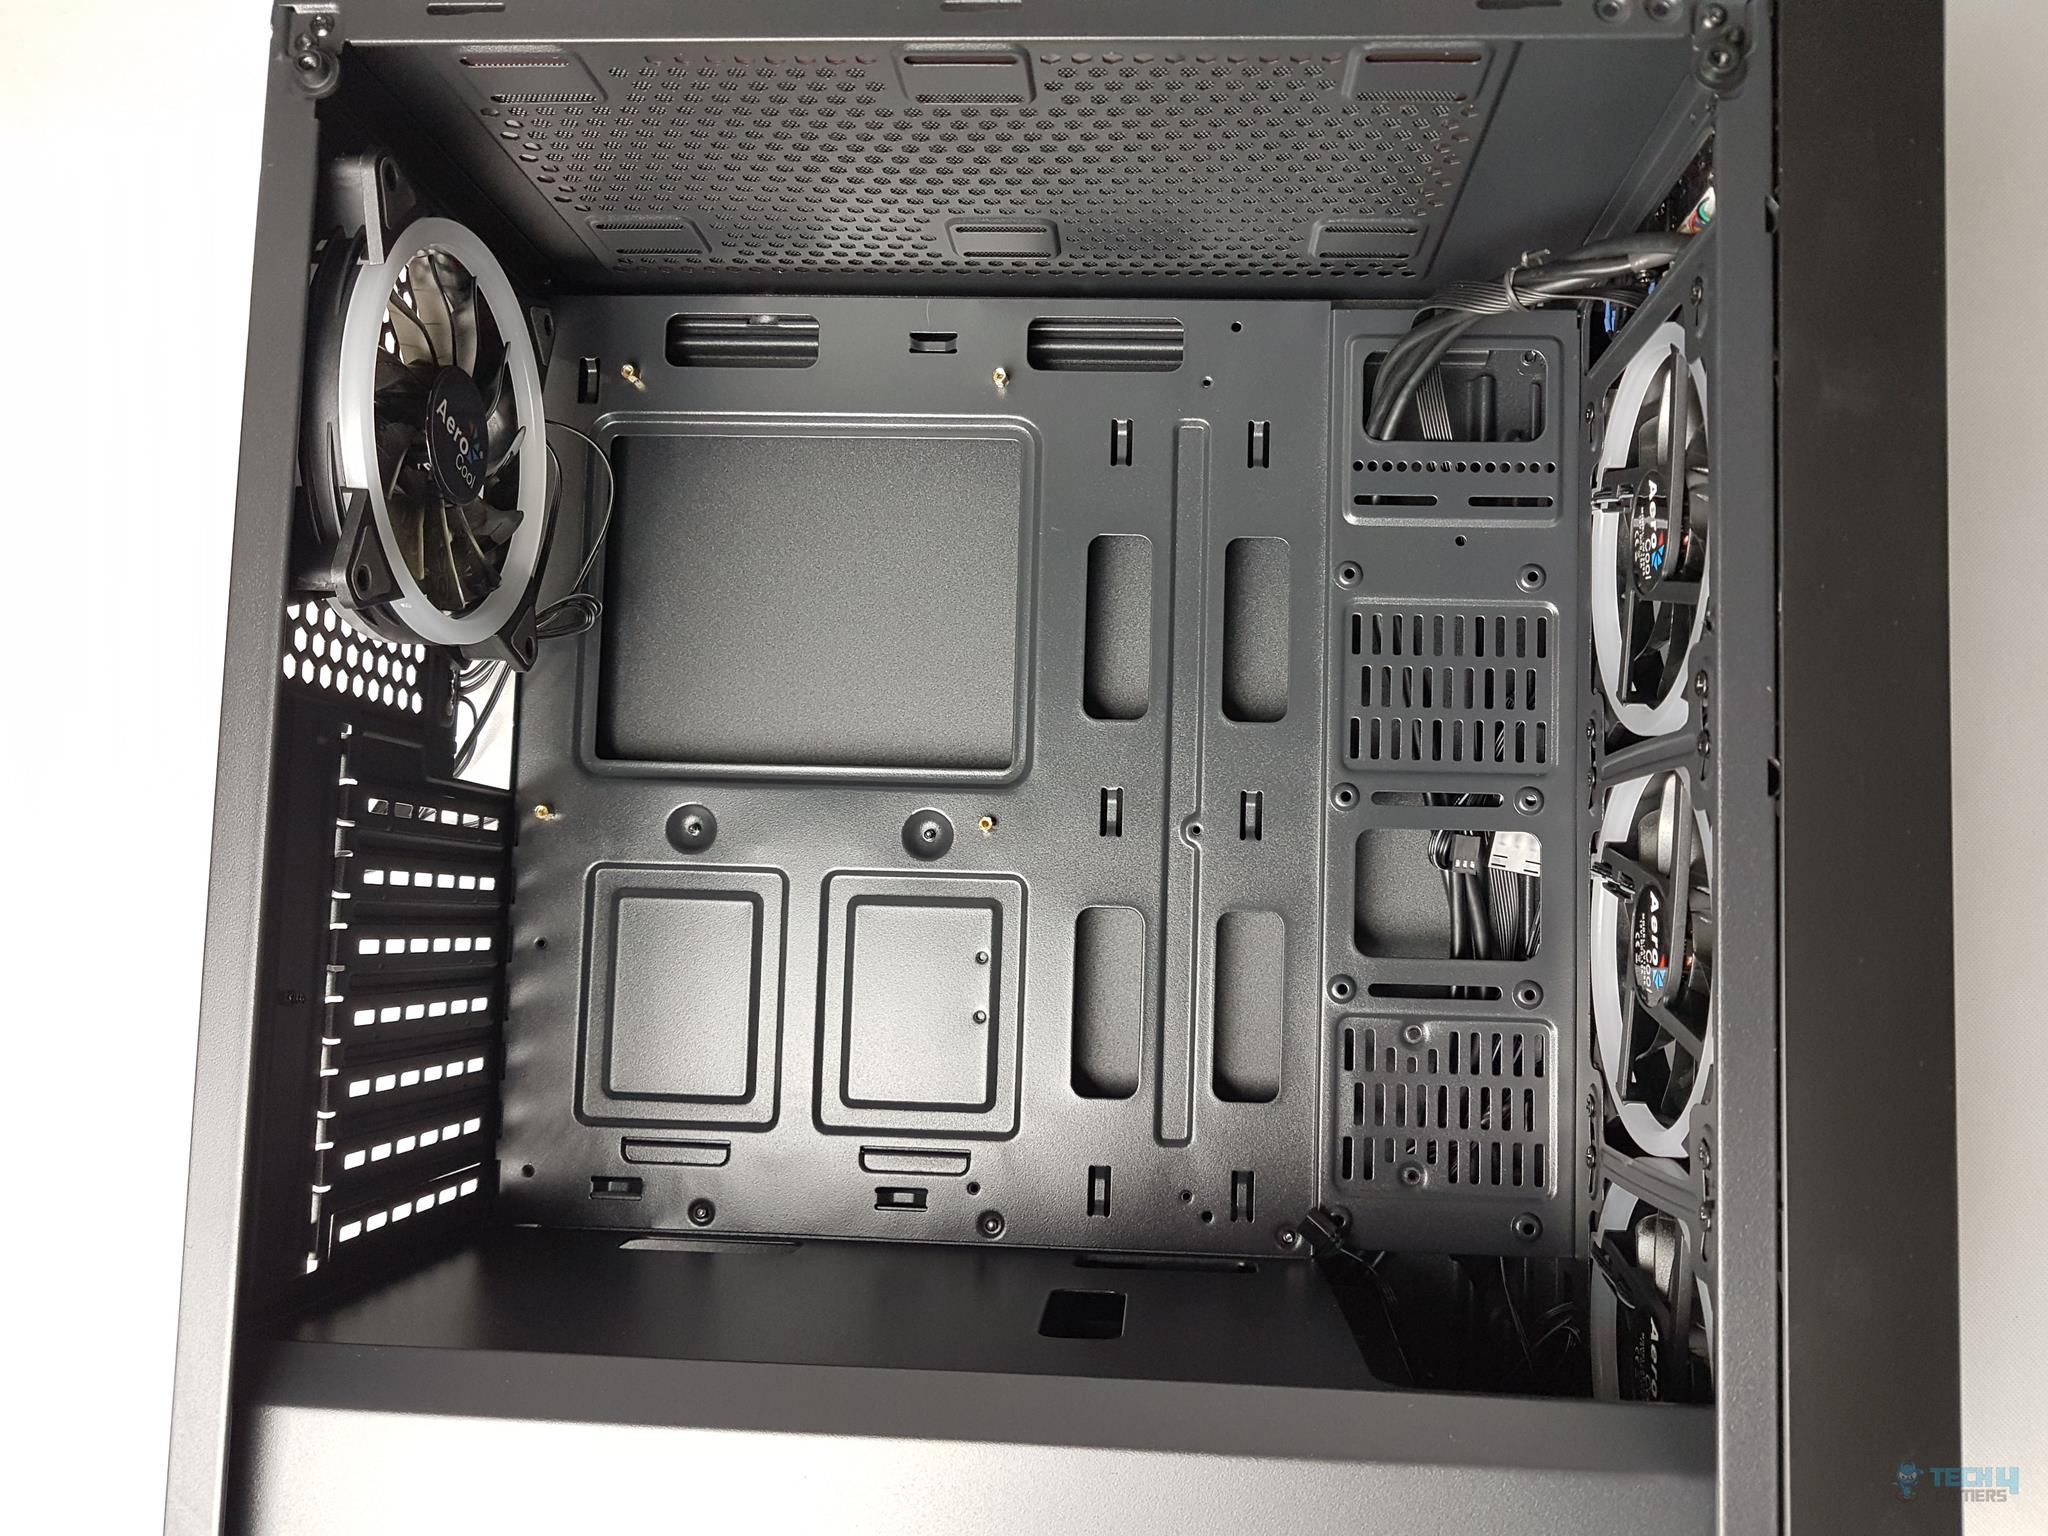
The motherboard tray is sturdy with minimal flex, a plus. Only 4 standoffs come pre-installed, but Aerocool provides extras. The CPU cutout doesn’t fit the Noctua NH-U12S’s backplate. Advice: install the backplate before placing the motherboard. The chassis lacks rubber grommets in cutouts but that’s understandable given the price.
With an ATX motherboard, only the far right side cutouts are usable for up to 2x 2.5” drives. The PCIe slot area is flat, accommodating a 341mm graphics card with front fans or 366mm without, with 30mm space above the motherboard. There’s about 36mm RAM clearance for AIO installation. I was not able to install the Aerocool P7 L240 AIO with ADATA XPG Spectrix D41 RGB RAM.
Front panel cables route in from the top and exit through the rightmost top cutout towards the backside.
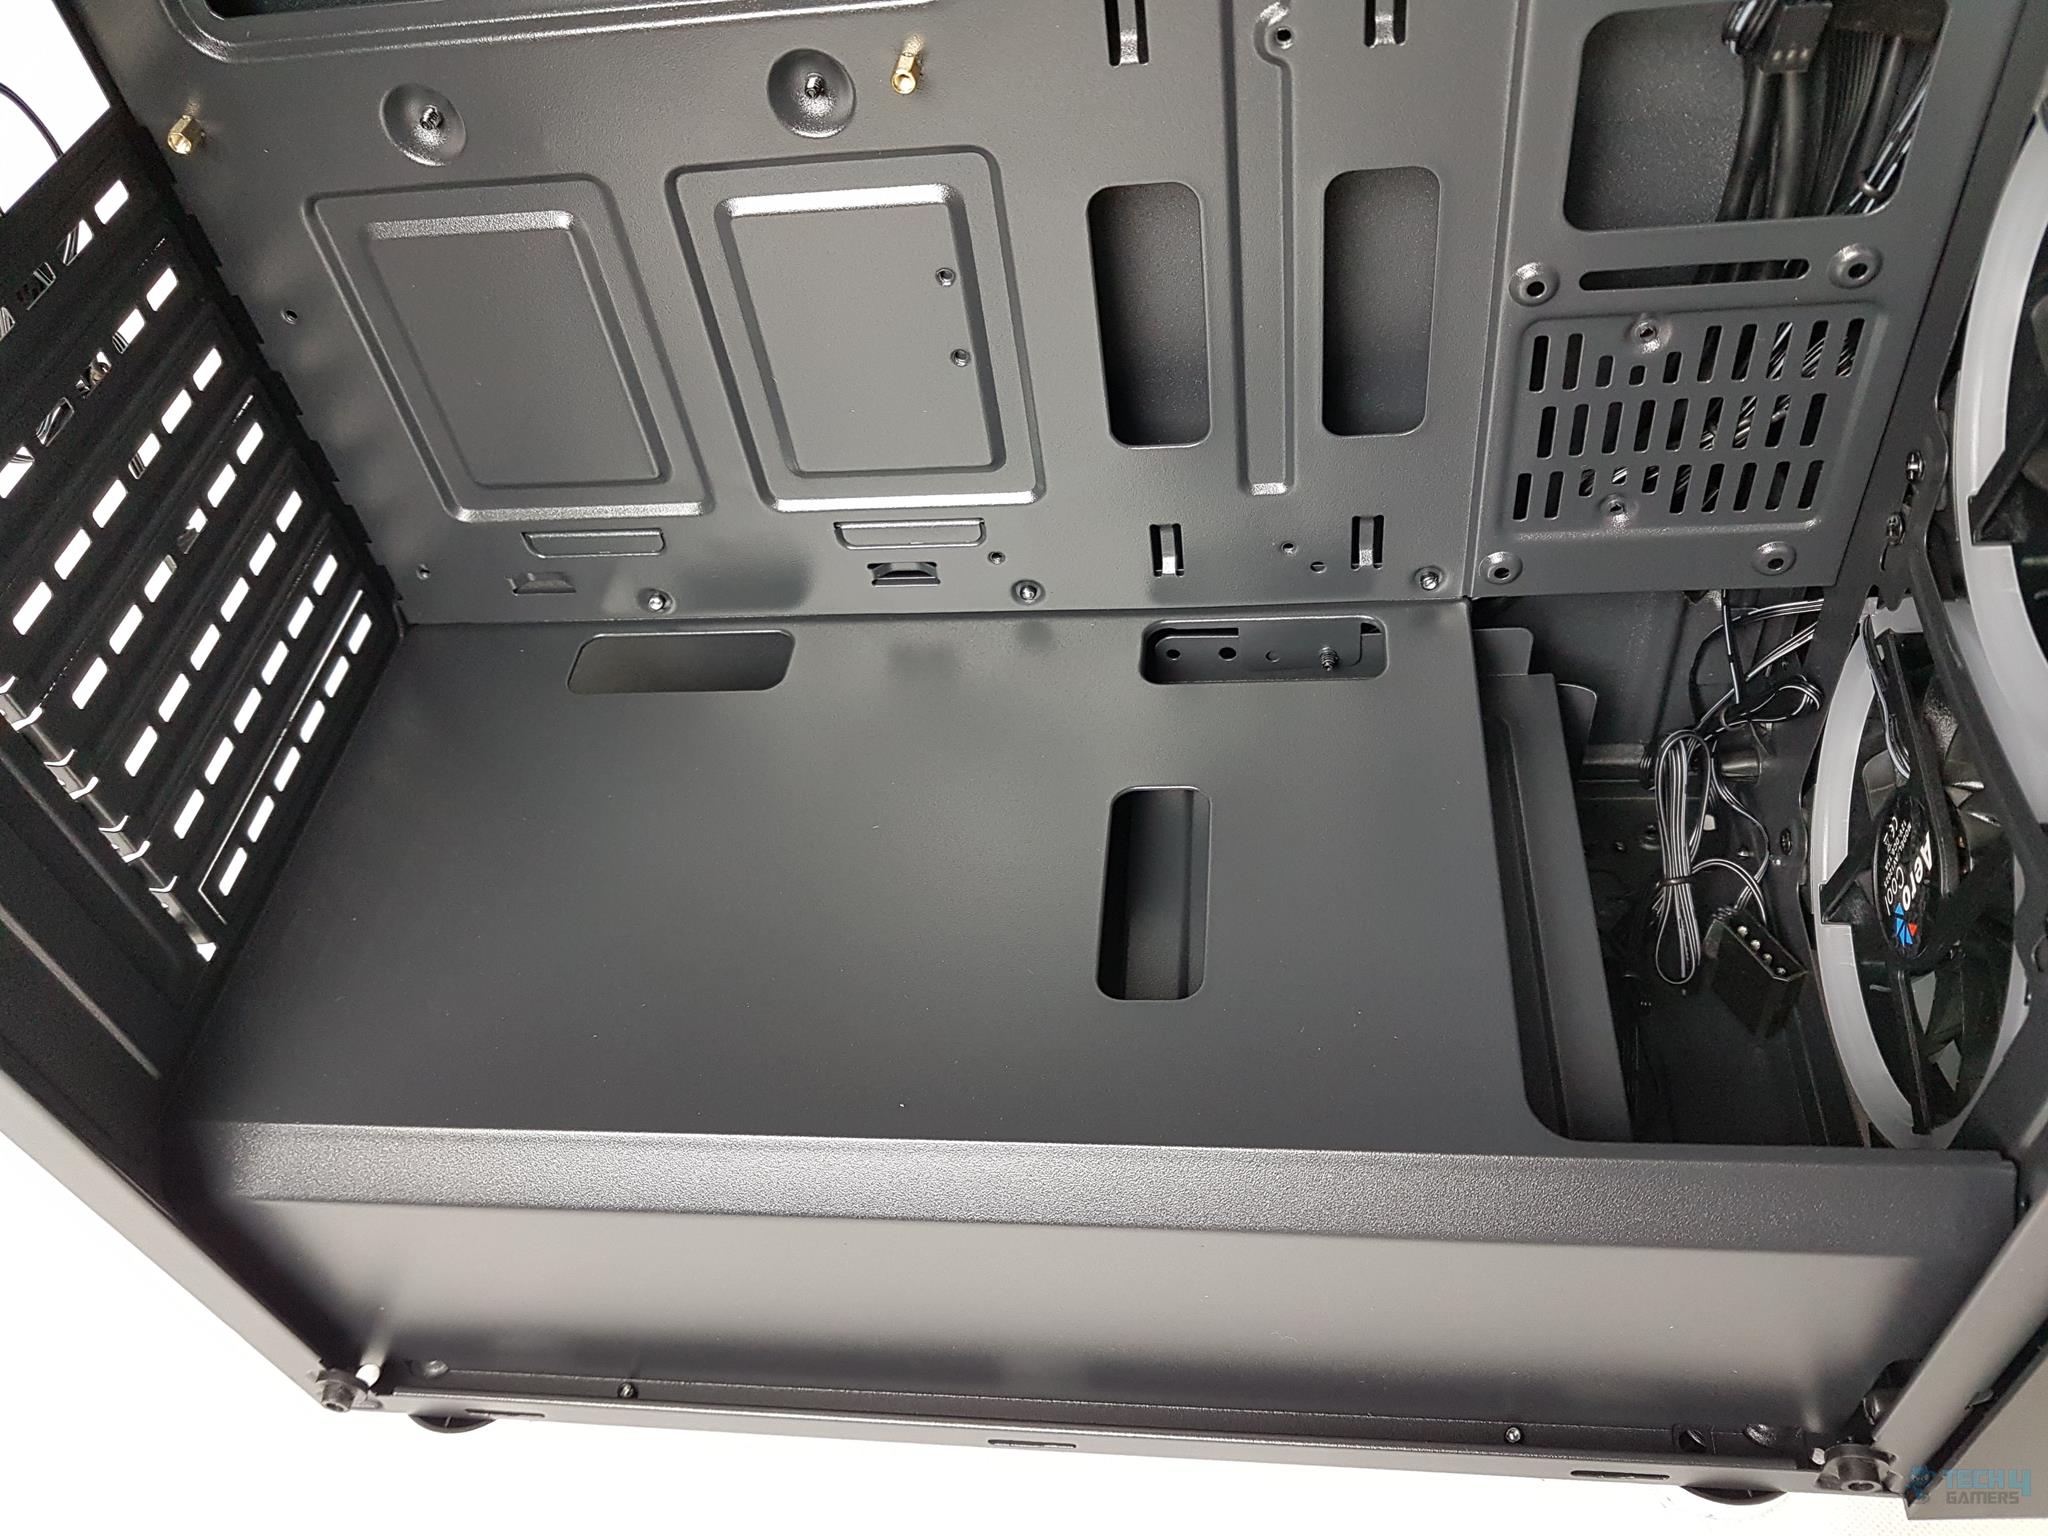
There is a metallic PSU shroud which runs towards the front side. There are two cutouts on the side closer to the motherboard to help pass through the cables for connectivity on the bottom side of the motherboard. One cutout is in the middle to pass the PEG cable for the graphics card(s).
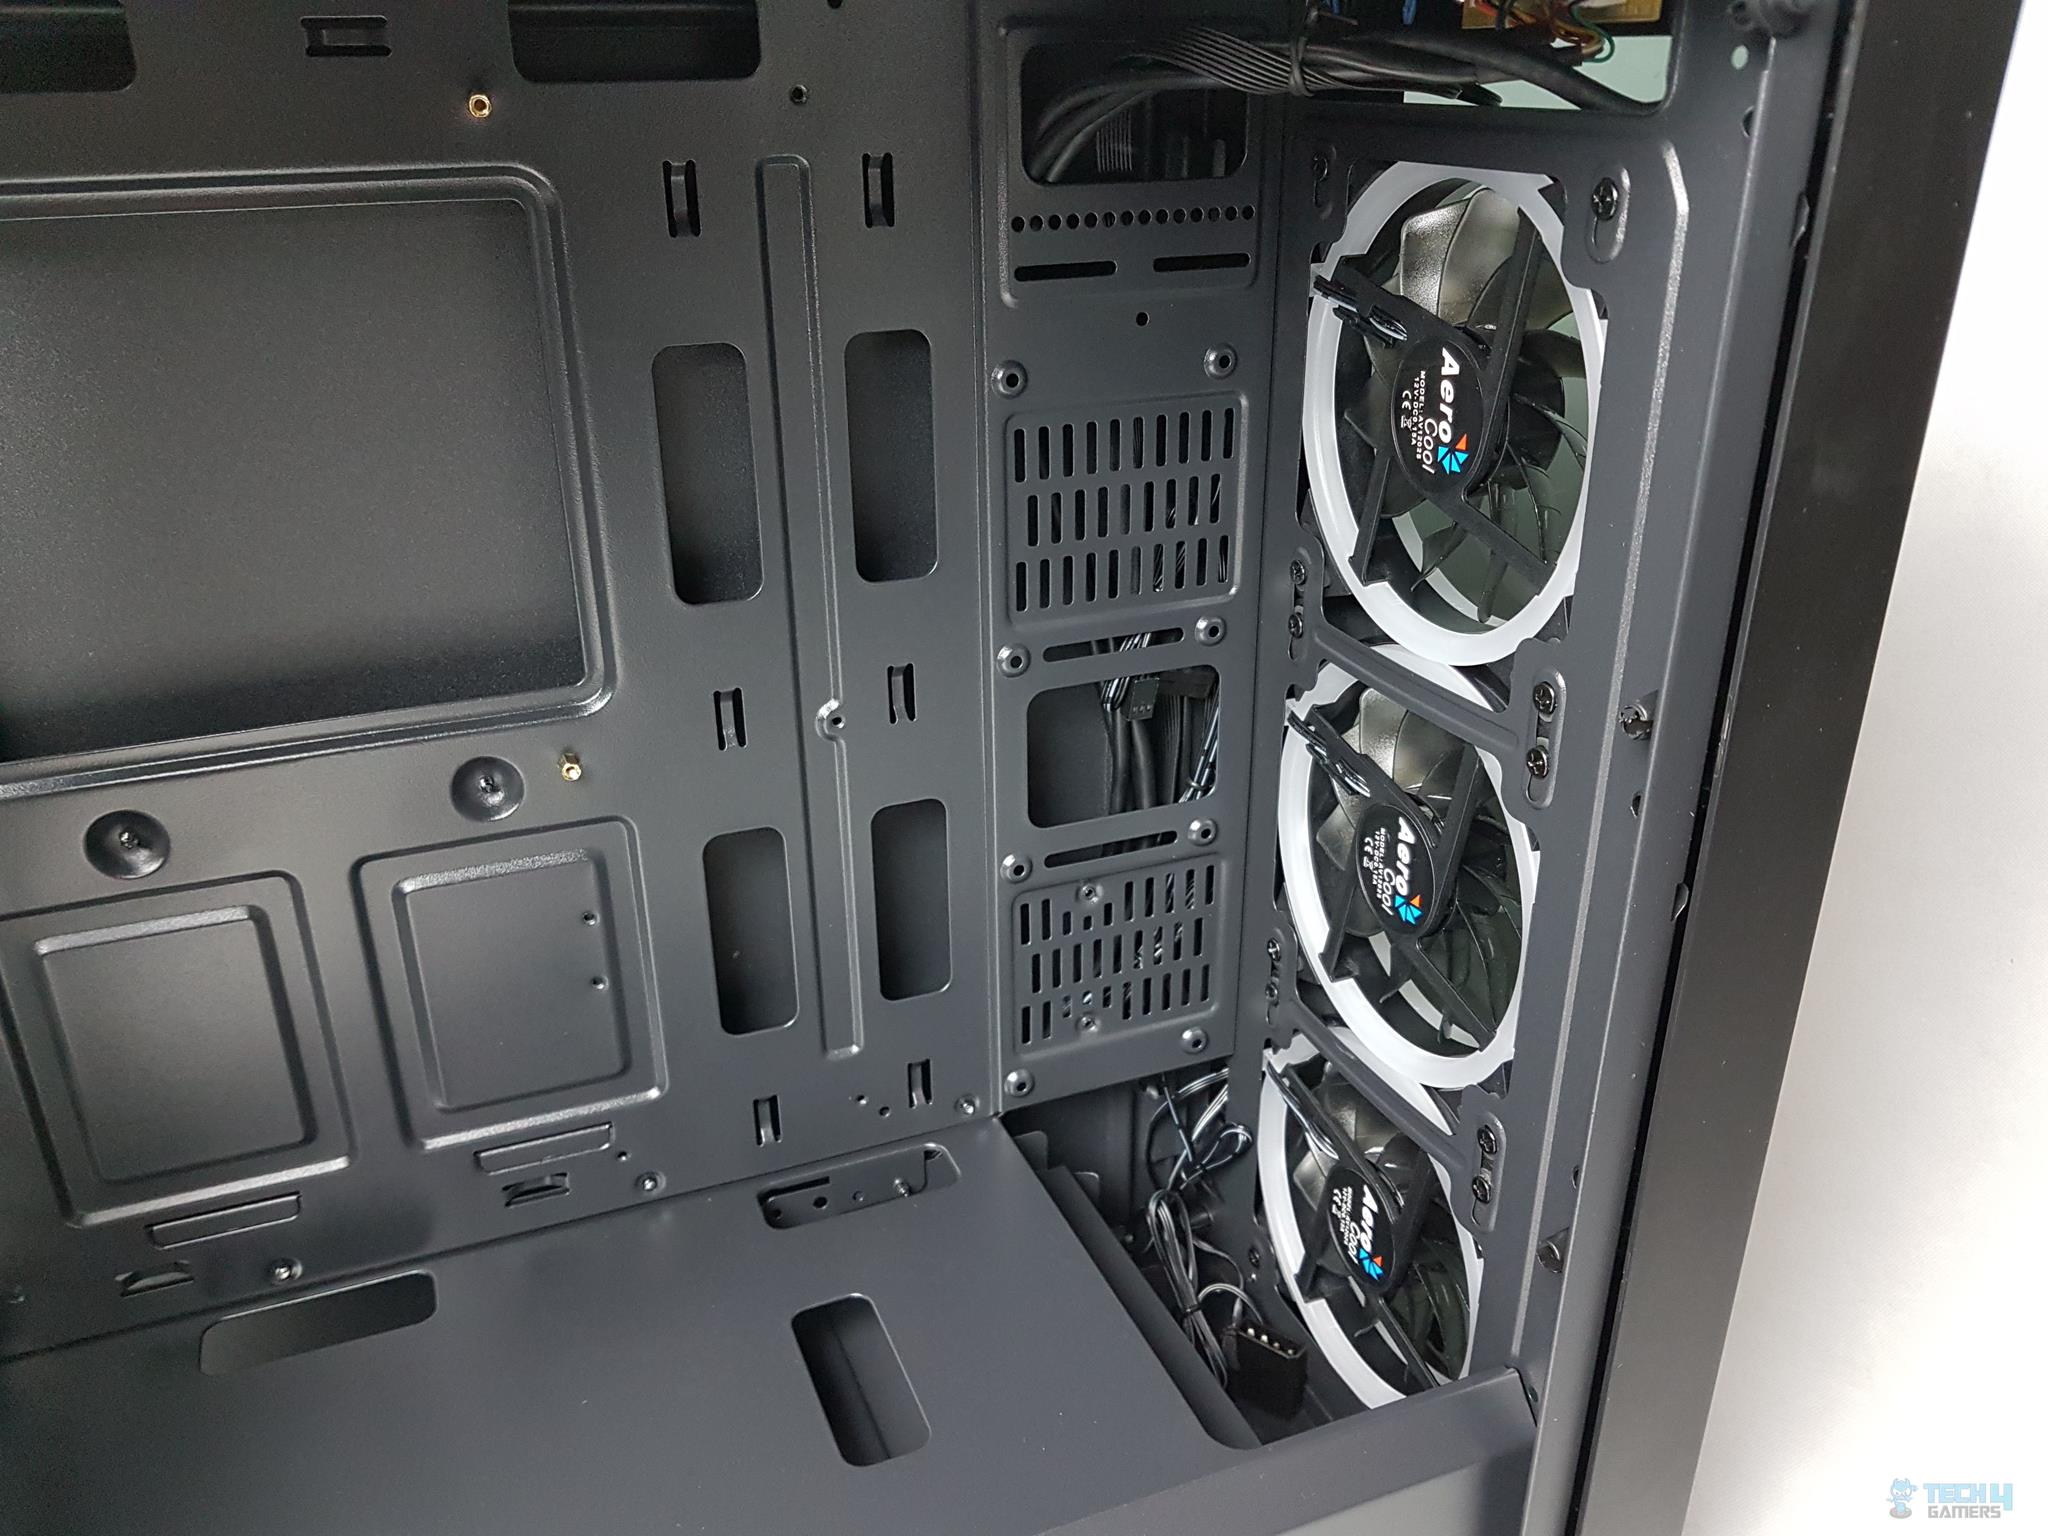
The shroud is riveted and can’t be removed without removing the rivets. There is an opening on the rightmost side of the shroud. This is done to give room for the thick radiators. The user can install up to 60mm thick radiator on the front side. The HDD cage’s edge can be seen from this angle.
The front-mounted fans are installed using screws from the inner side of the chassis. The user will face inconvenience in removing the bottom fan as the HDD cage will need to be removed as well for that.
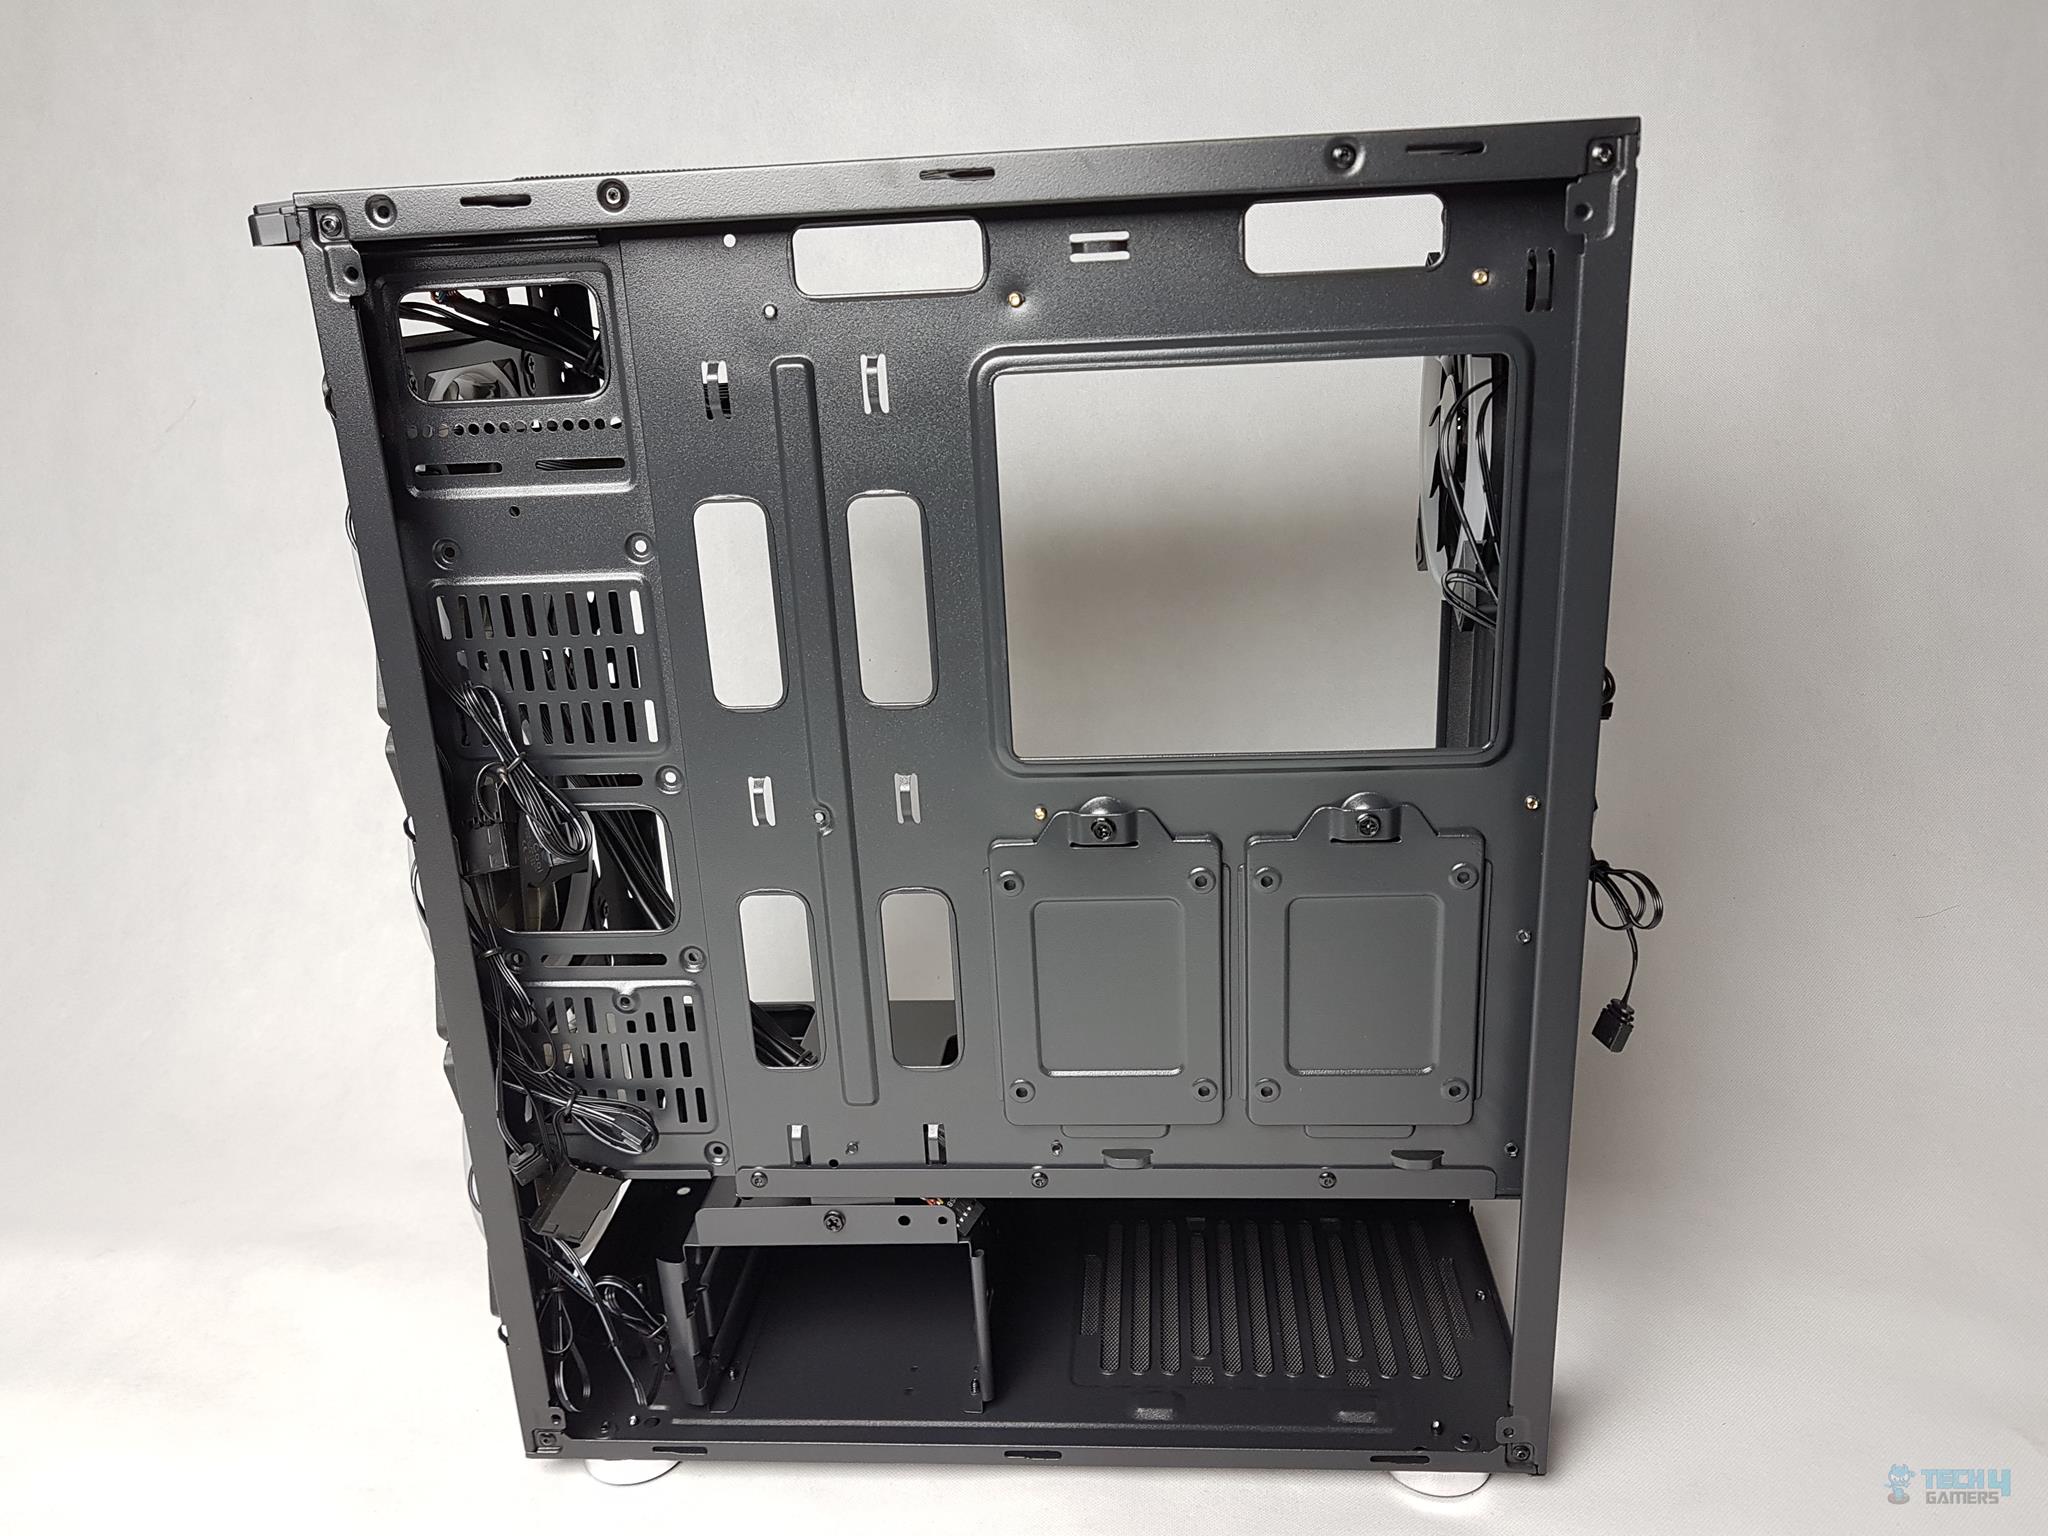
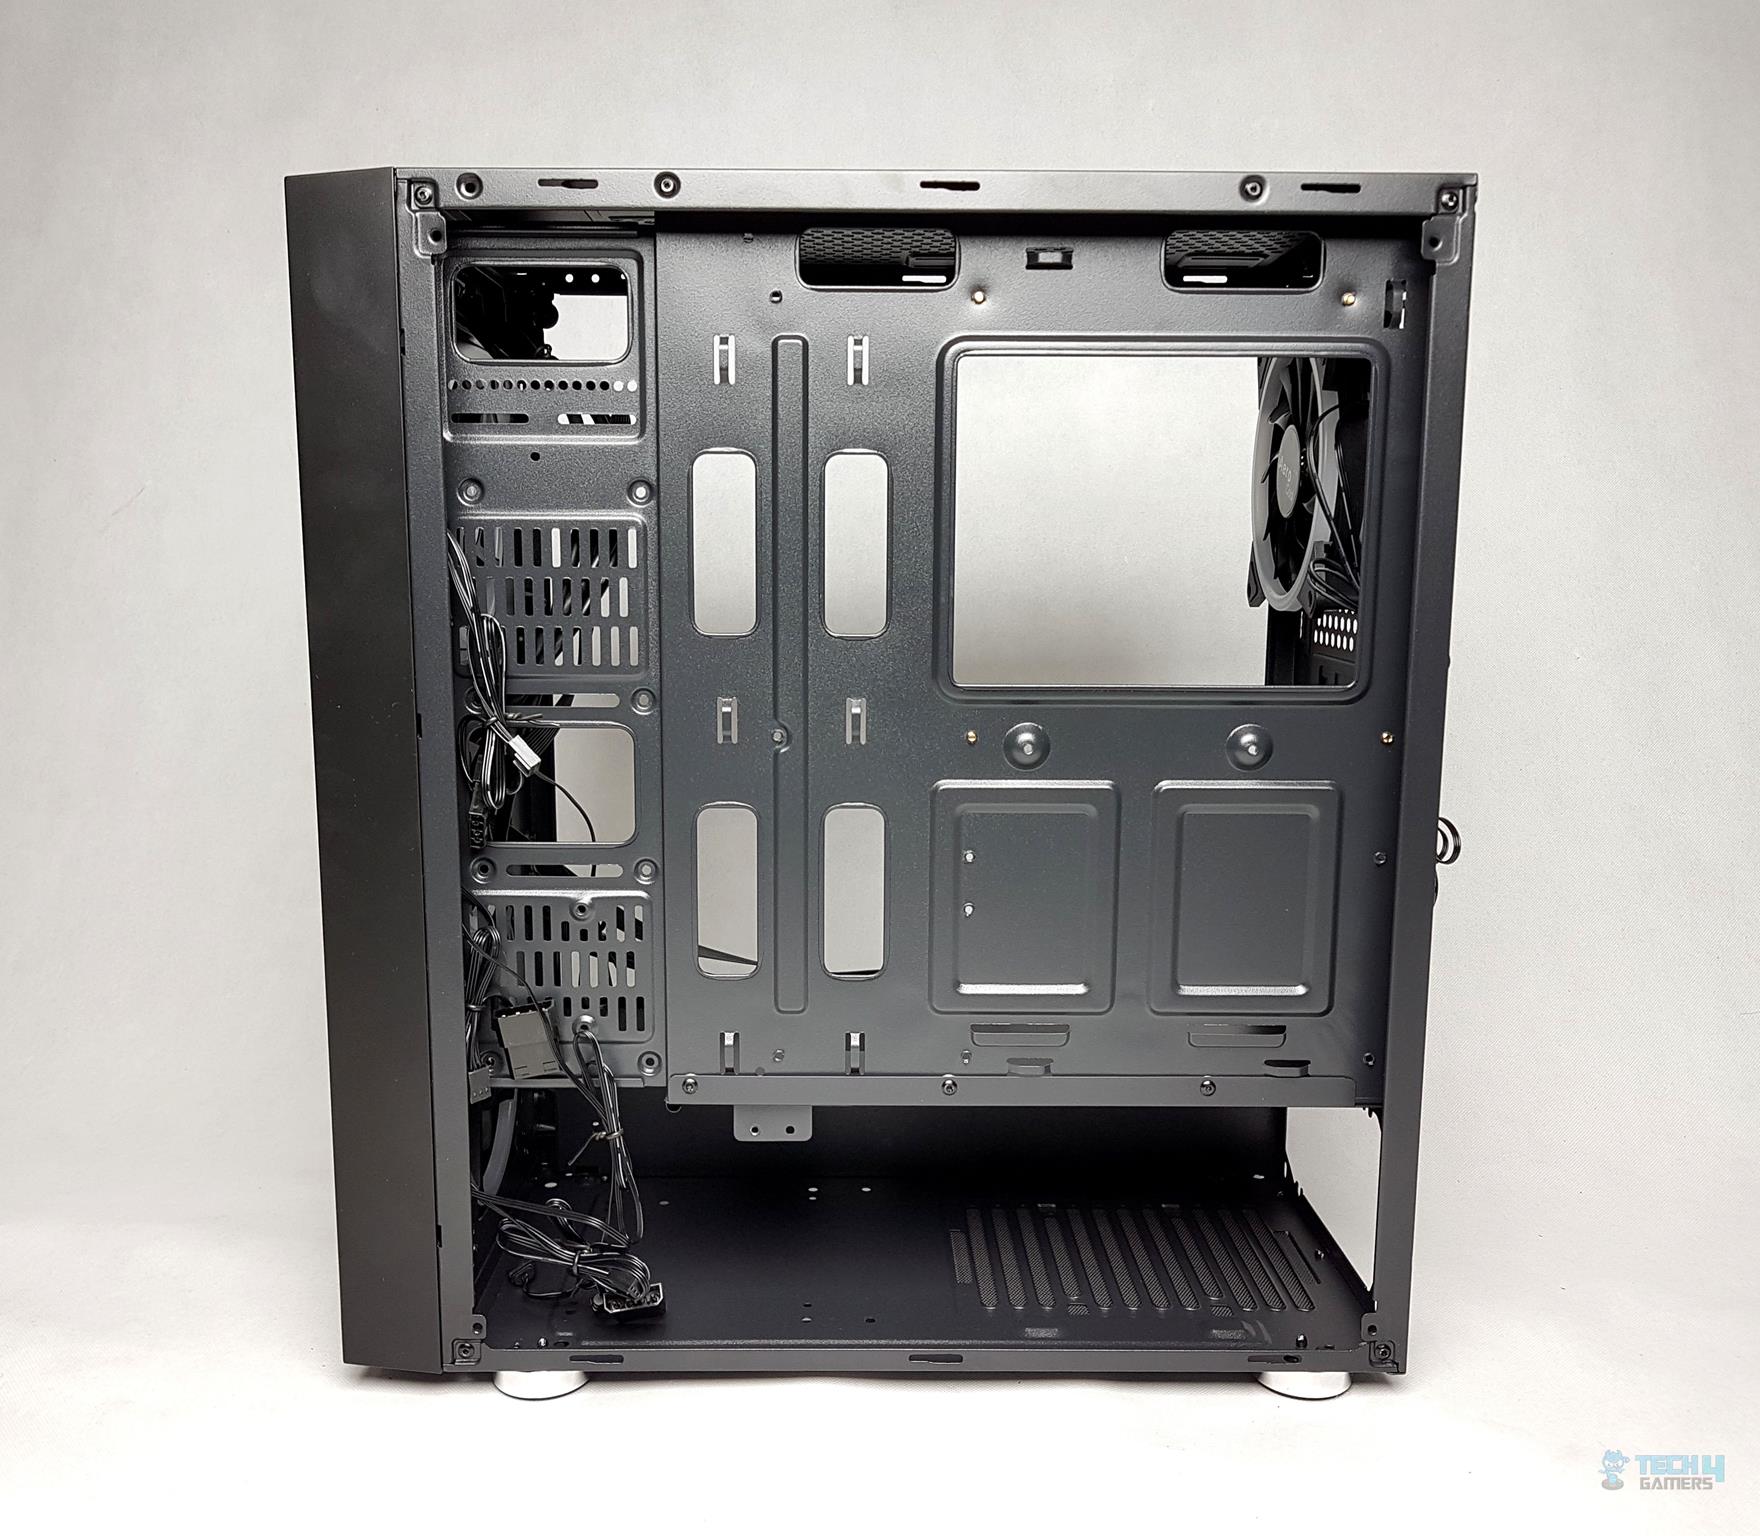
The other side of the chassis has a solid metallic cover which is screwed using two thumb like screws.
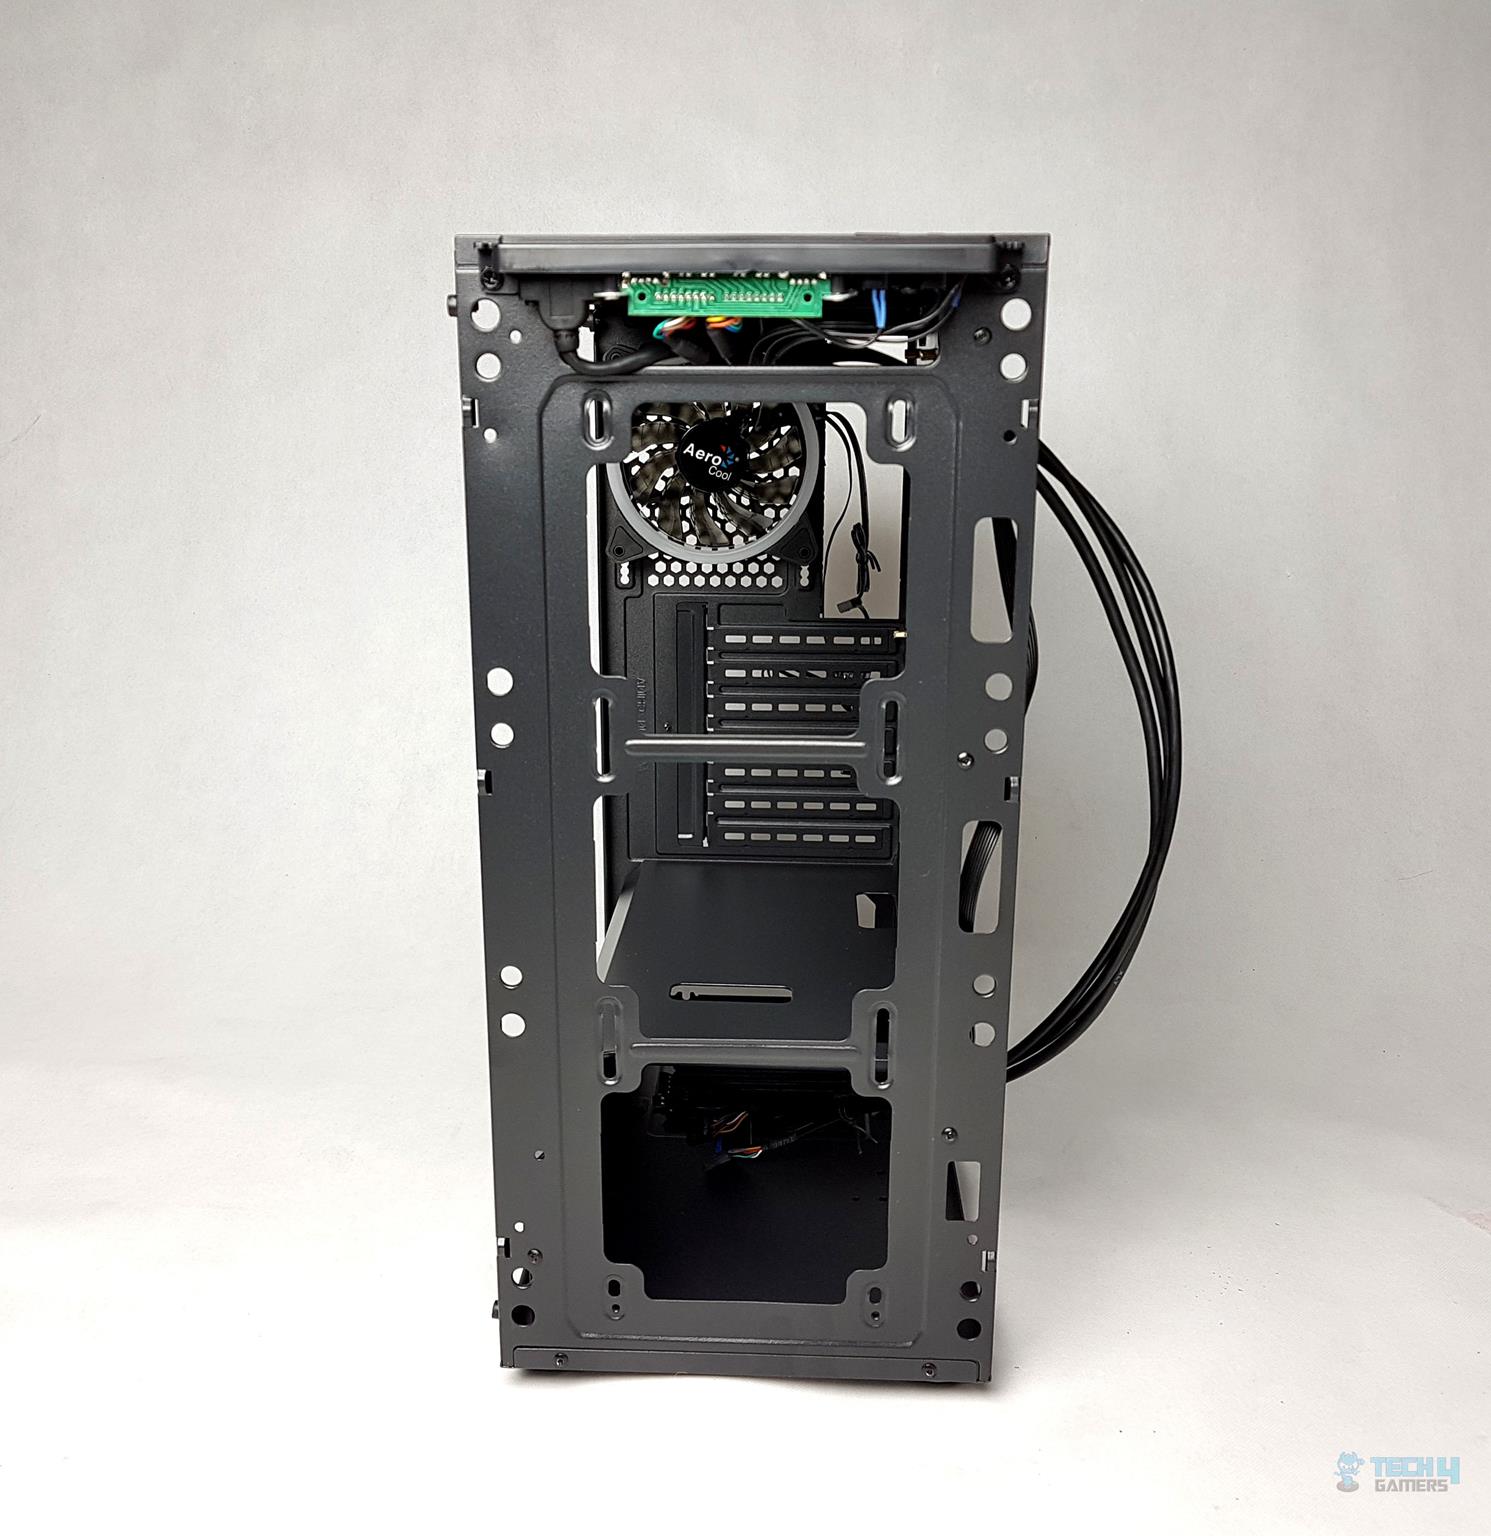
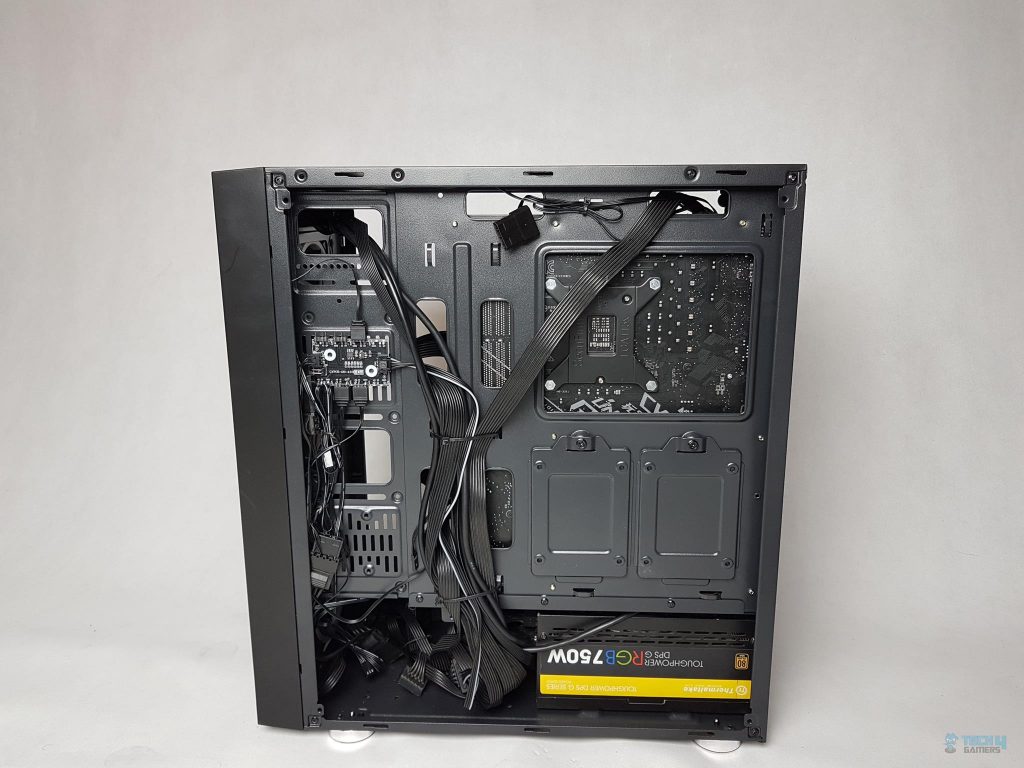
Let’s explore what’s inside this cover: it features 10 cable tie points and two 2.5” storage drive brackets located behind the motherboard tray. For cable management, there’s a 15mm space on the right side and a more spacious 20mm on the left due to its inset design
At the bottom, there’s a pre-installed HDD cage, though it requires tools for installation. Keep in mind, the maximum PSU length allowed is 185mm without the HDD in place.
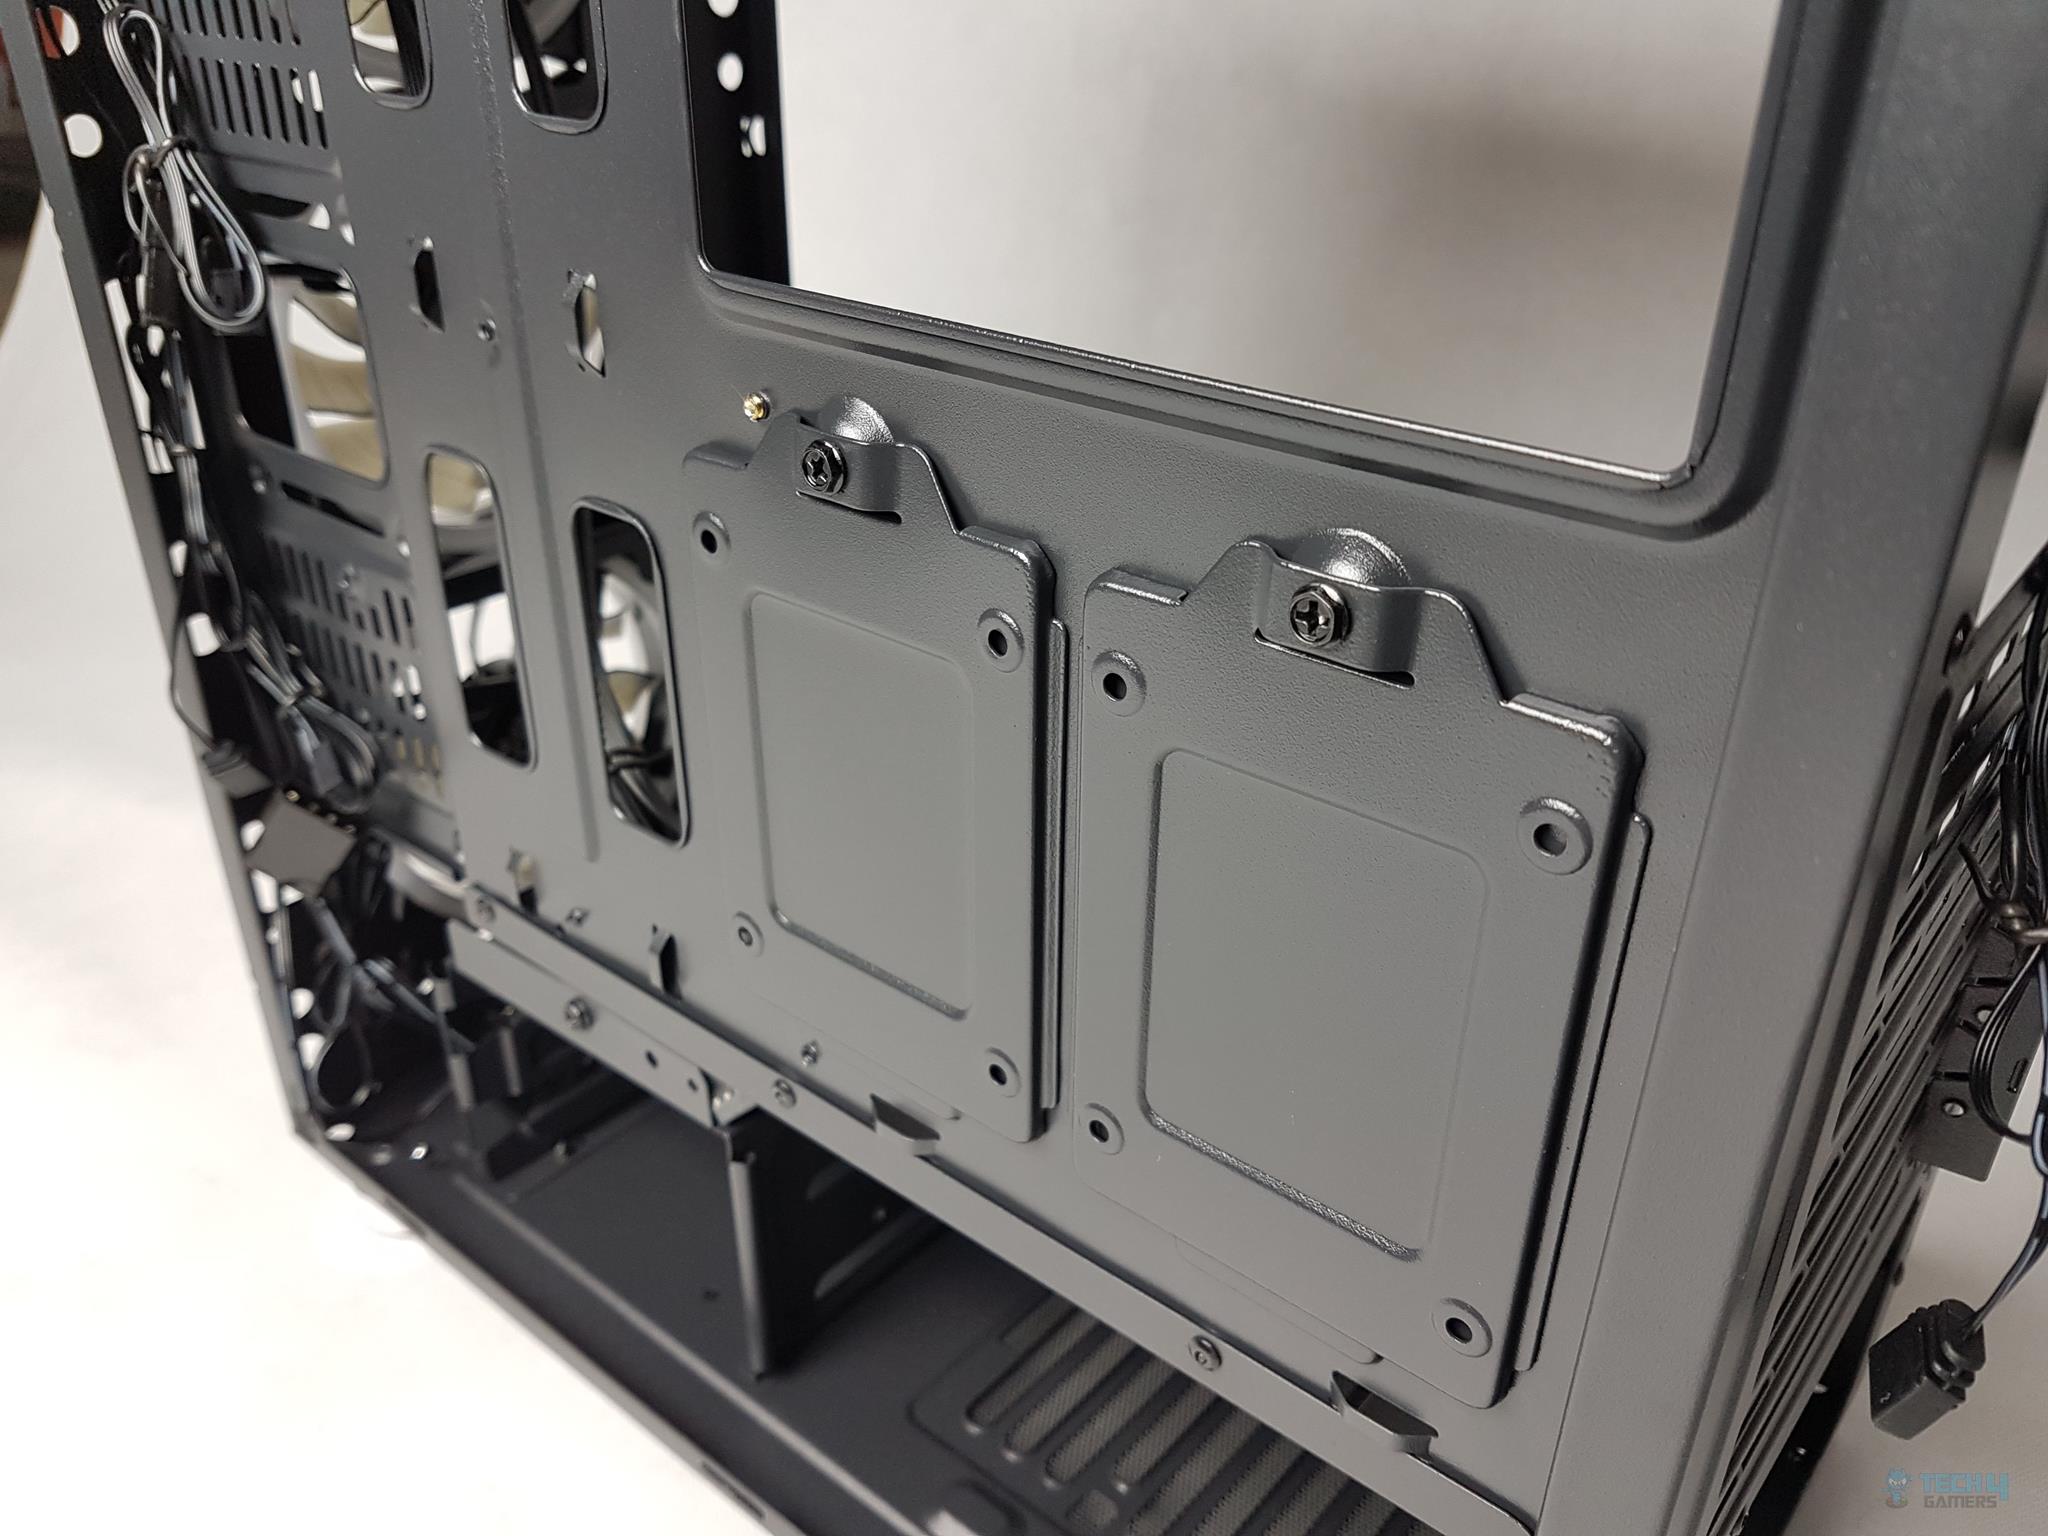
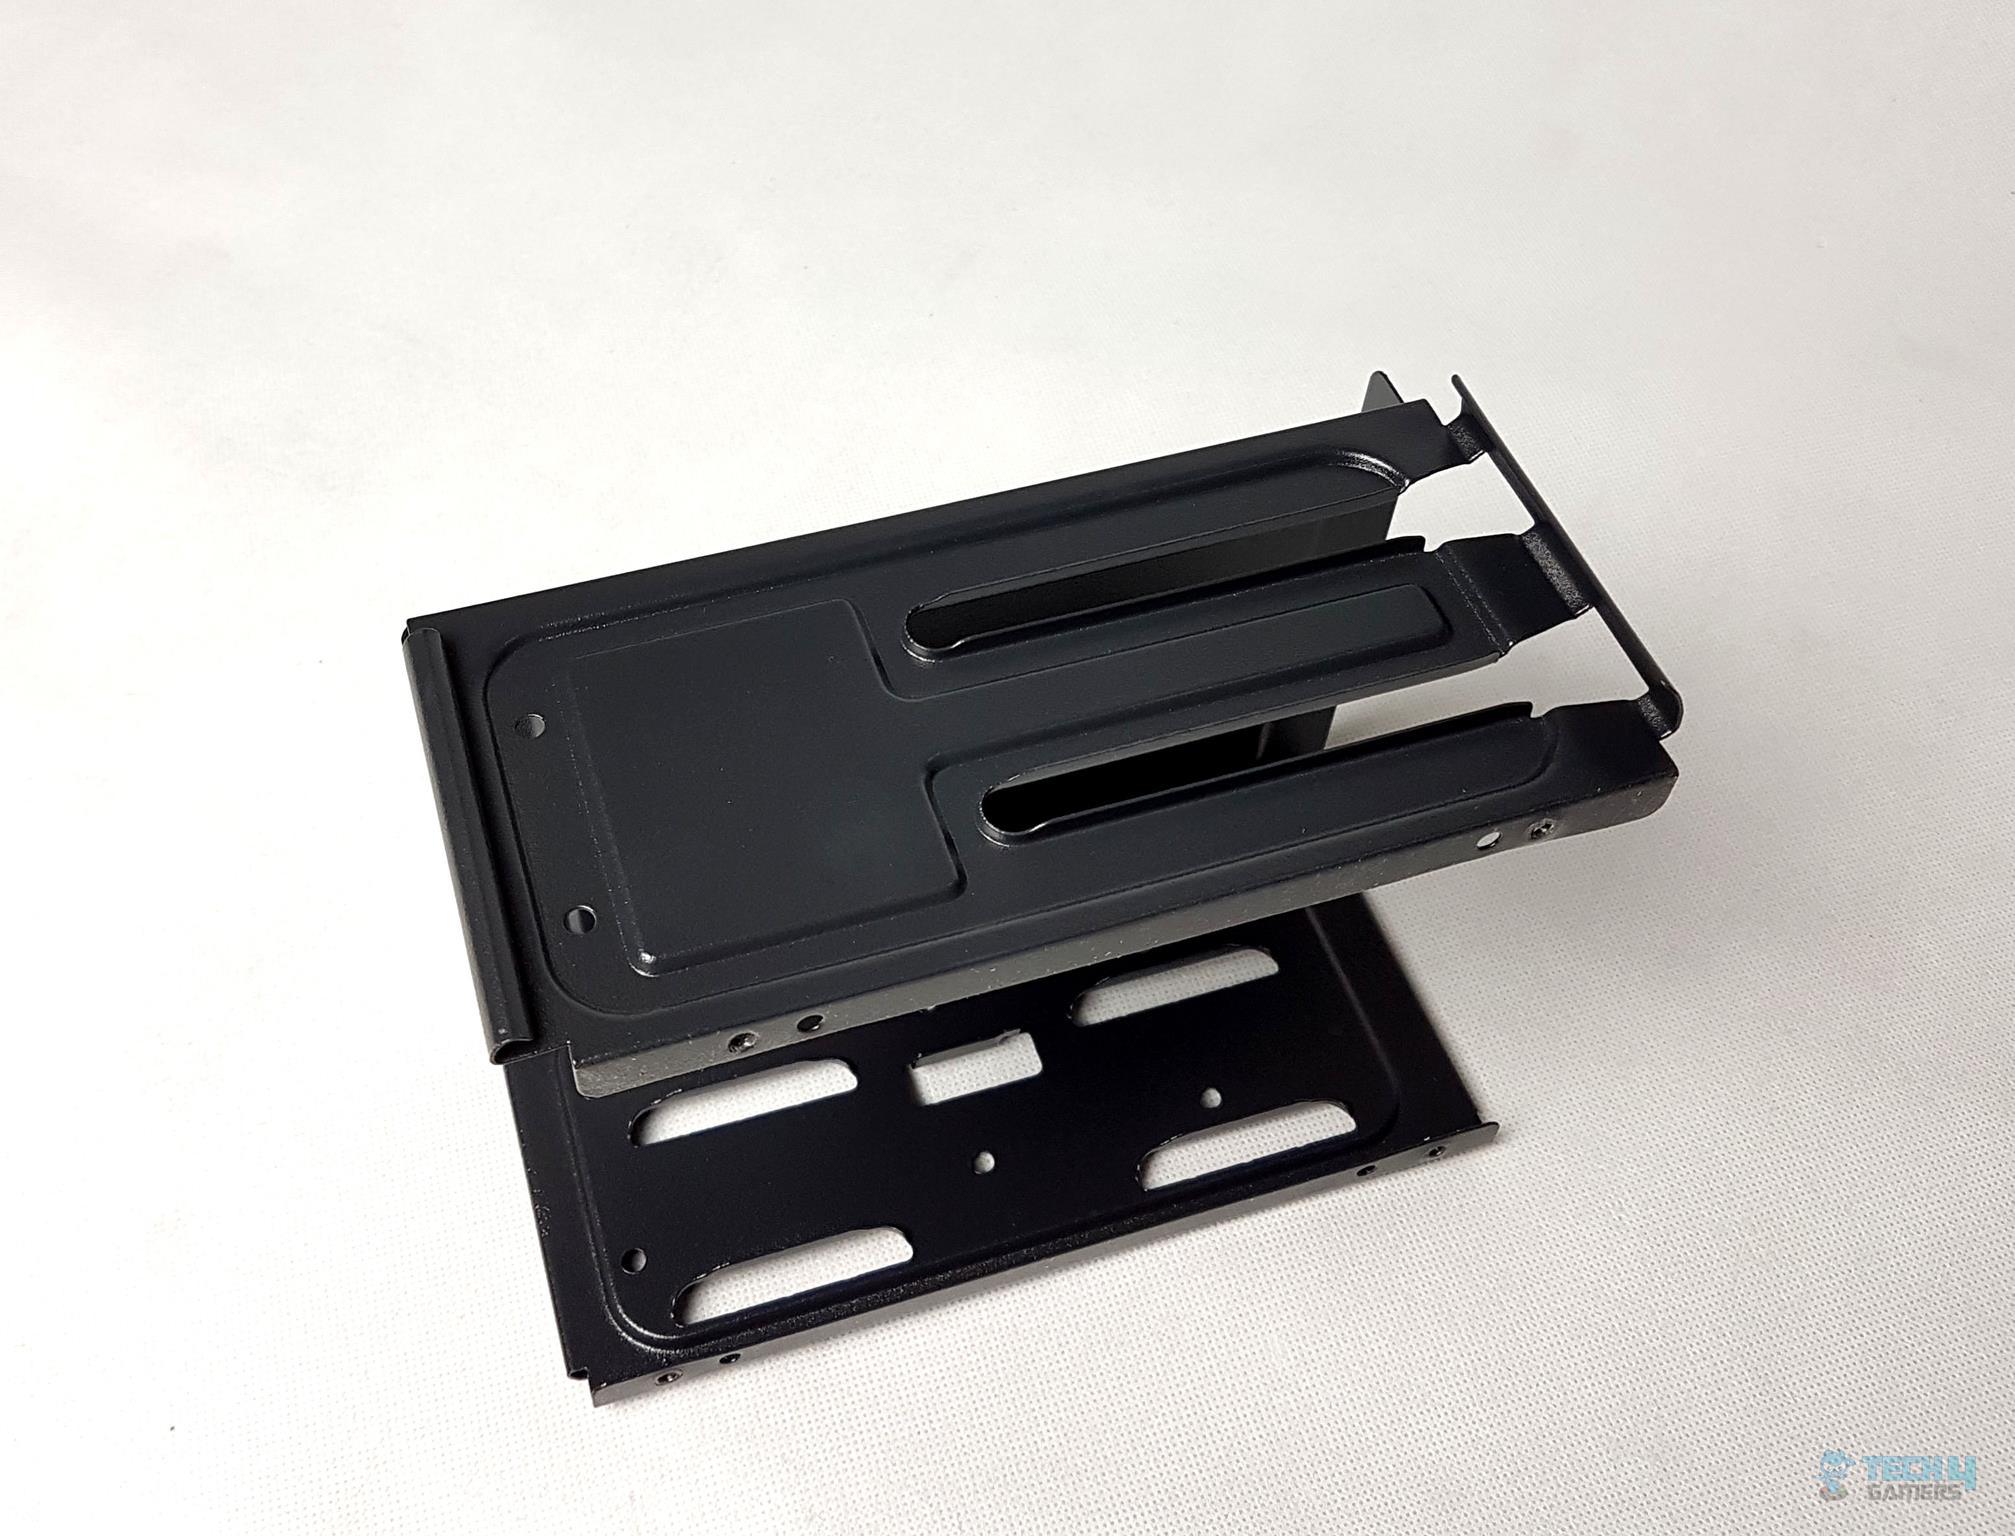
The 2.5” drive brackets are to be removed for the installation of the drives.
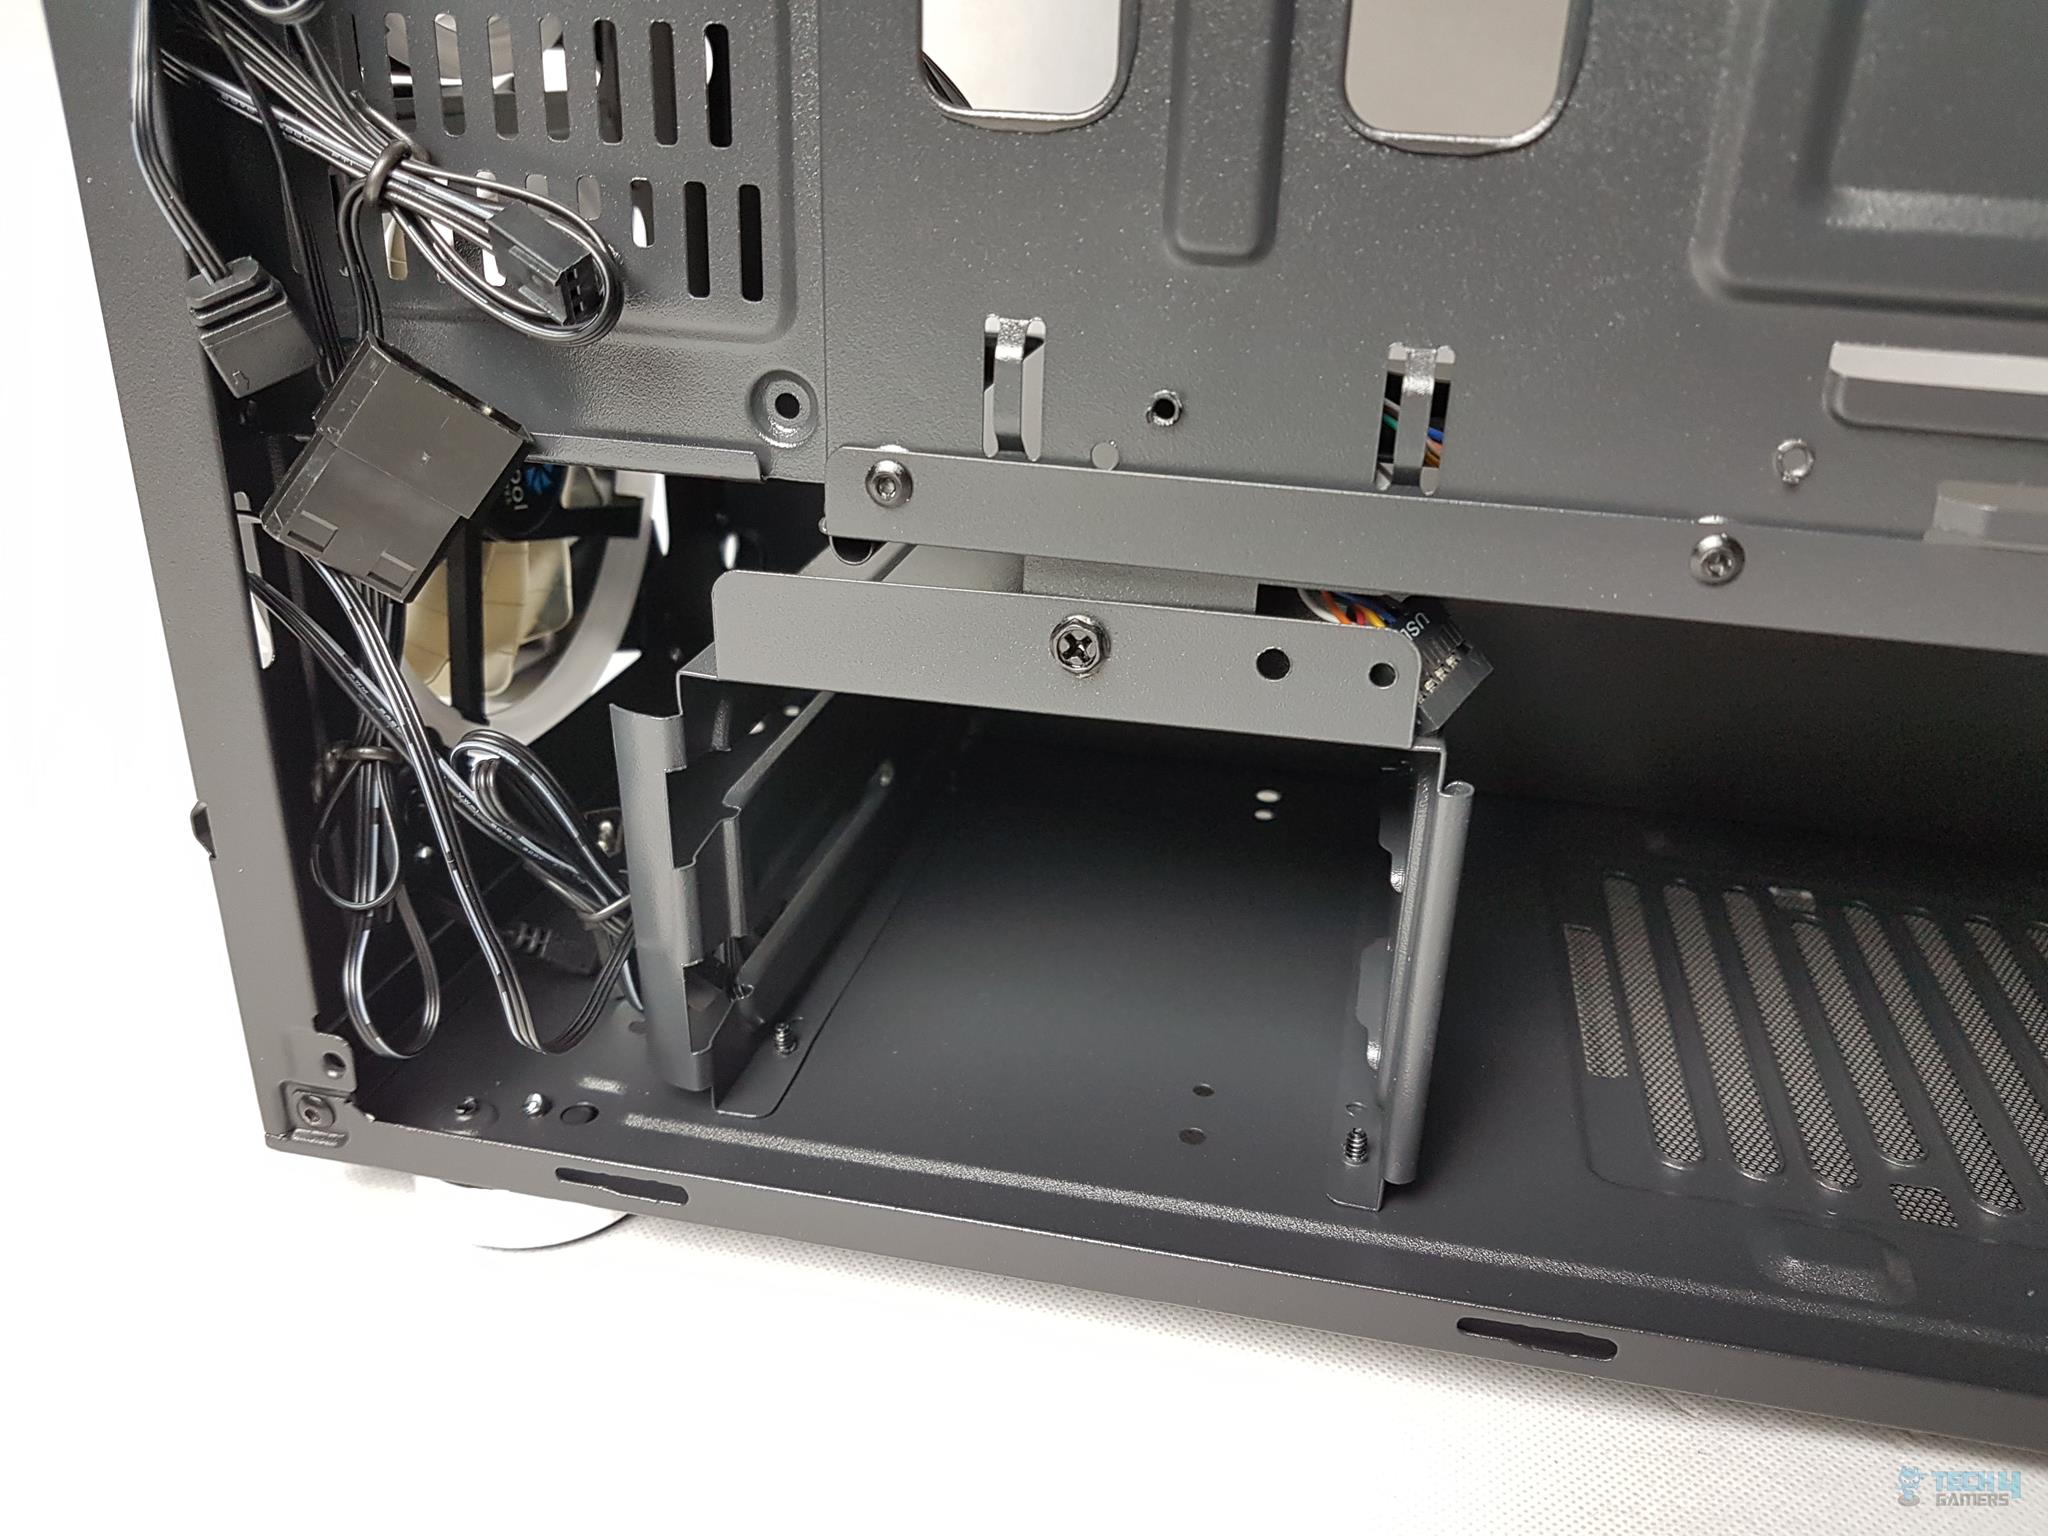
Meanwhile, the HDD cage can be adjusted in two predefined positions. In its default position, it gives clearance of up to 60mm or so for the front-mounted radiator.
With HDD cage removed, we have ample space for PSU and the cables. The PSU area has raised tabs on which the unit is placed. There are no anti-vibration pads on these tabs.
The image on the right shows the backside with the HDD cage AND 2.5” drive brackets removed.
The HDD cage is not tool-less and the user will have to secure the 3.5” drives using screws.
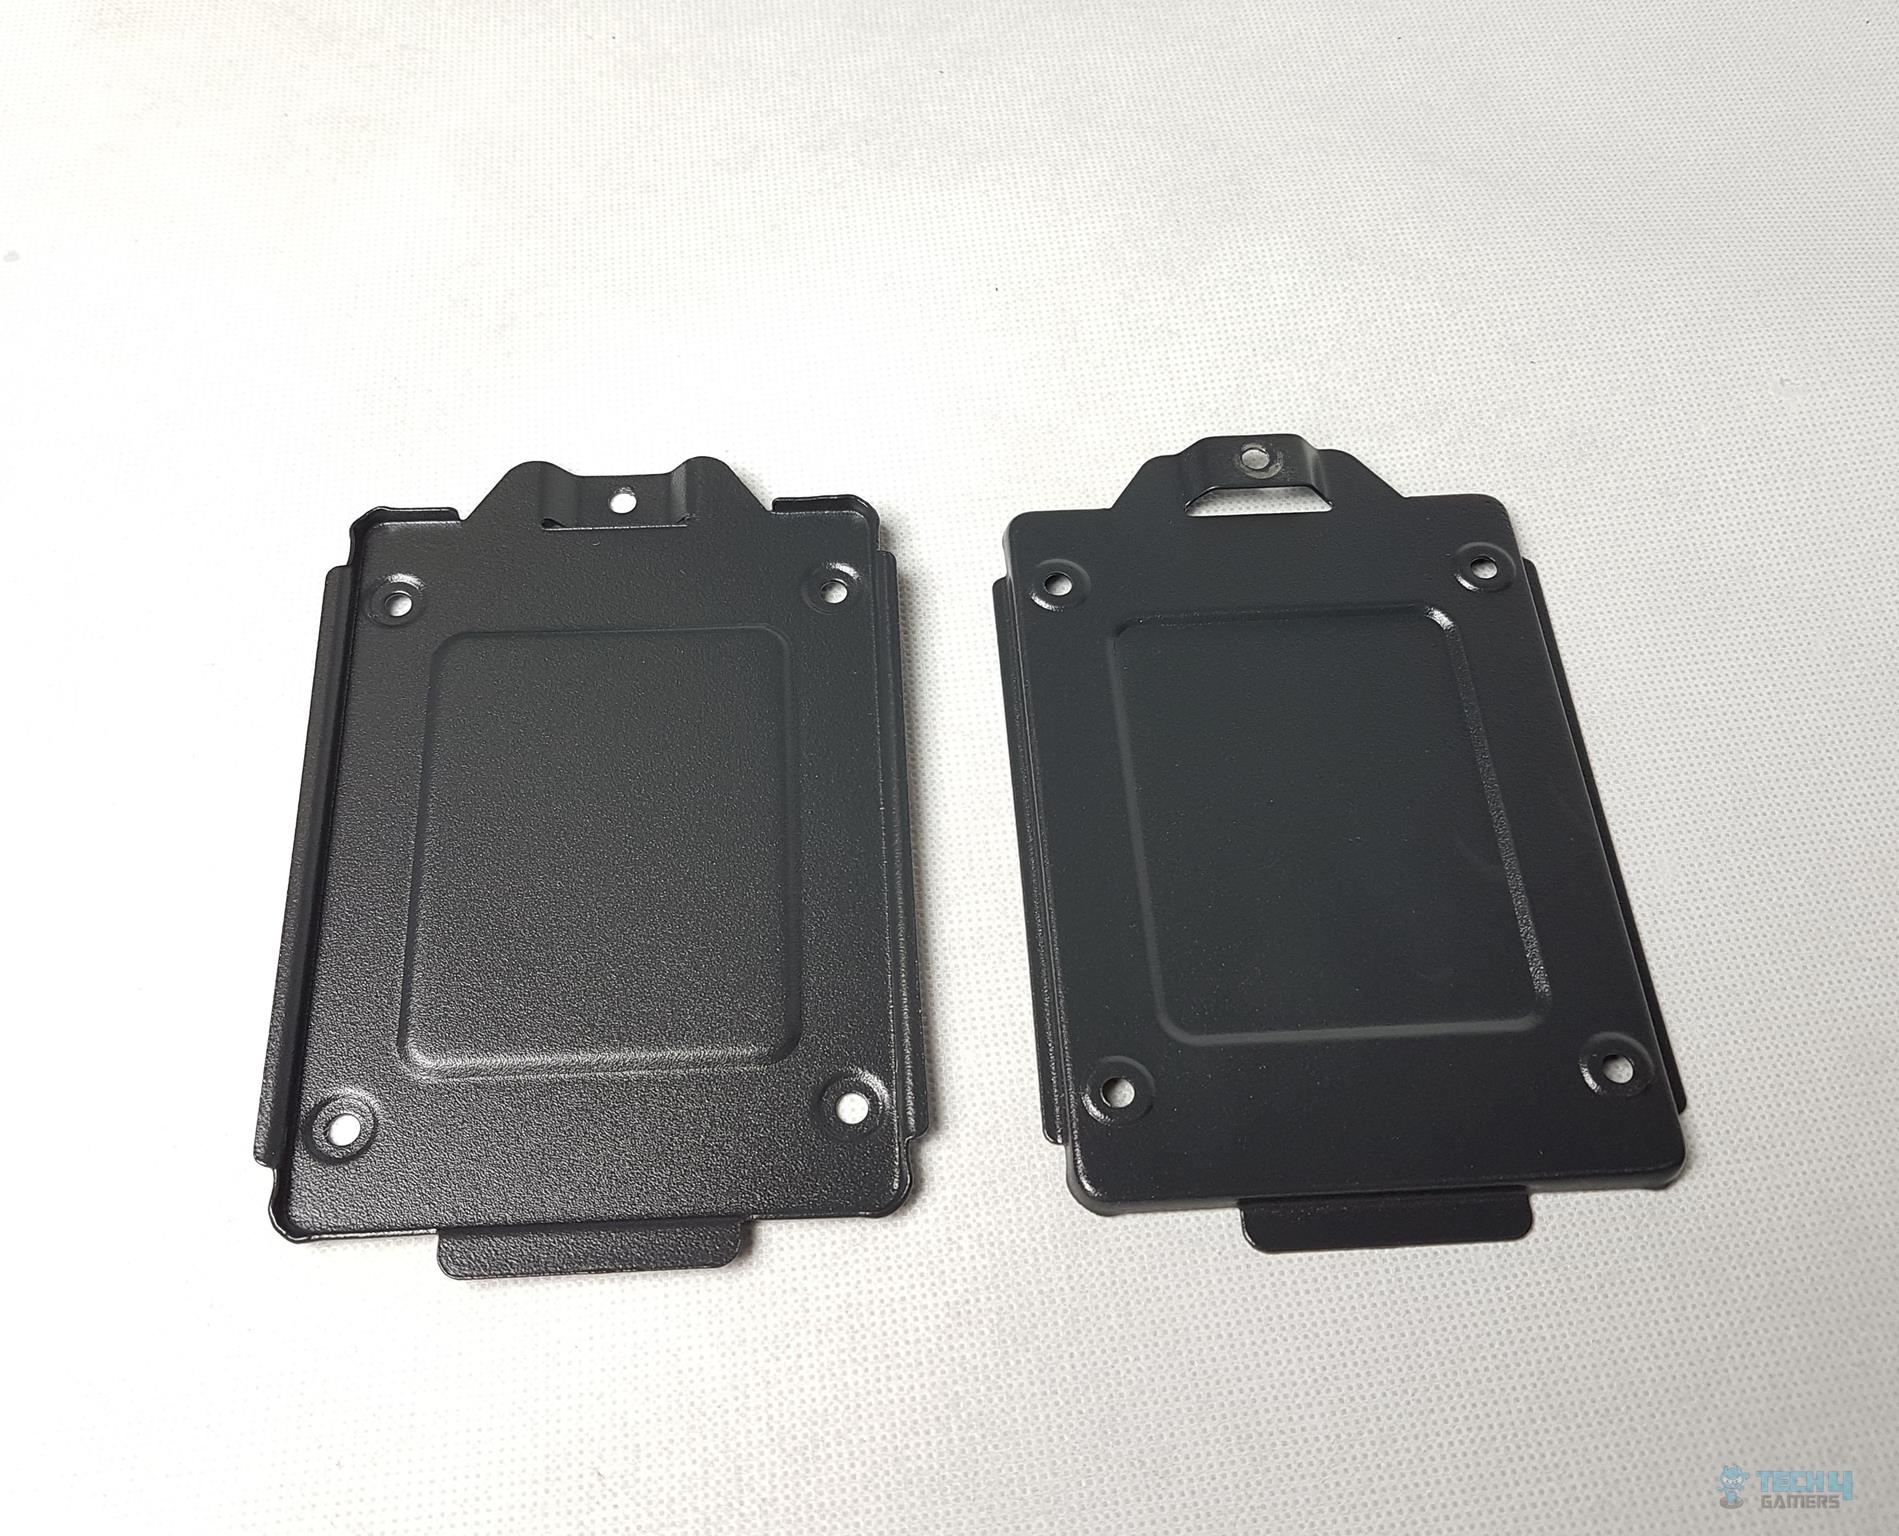
On the right, we can see the 2.5″ drive bays from both sides.
ARGB Lighting and Fans
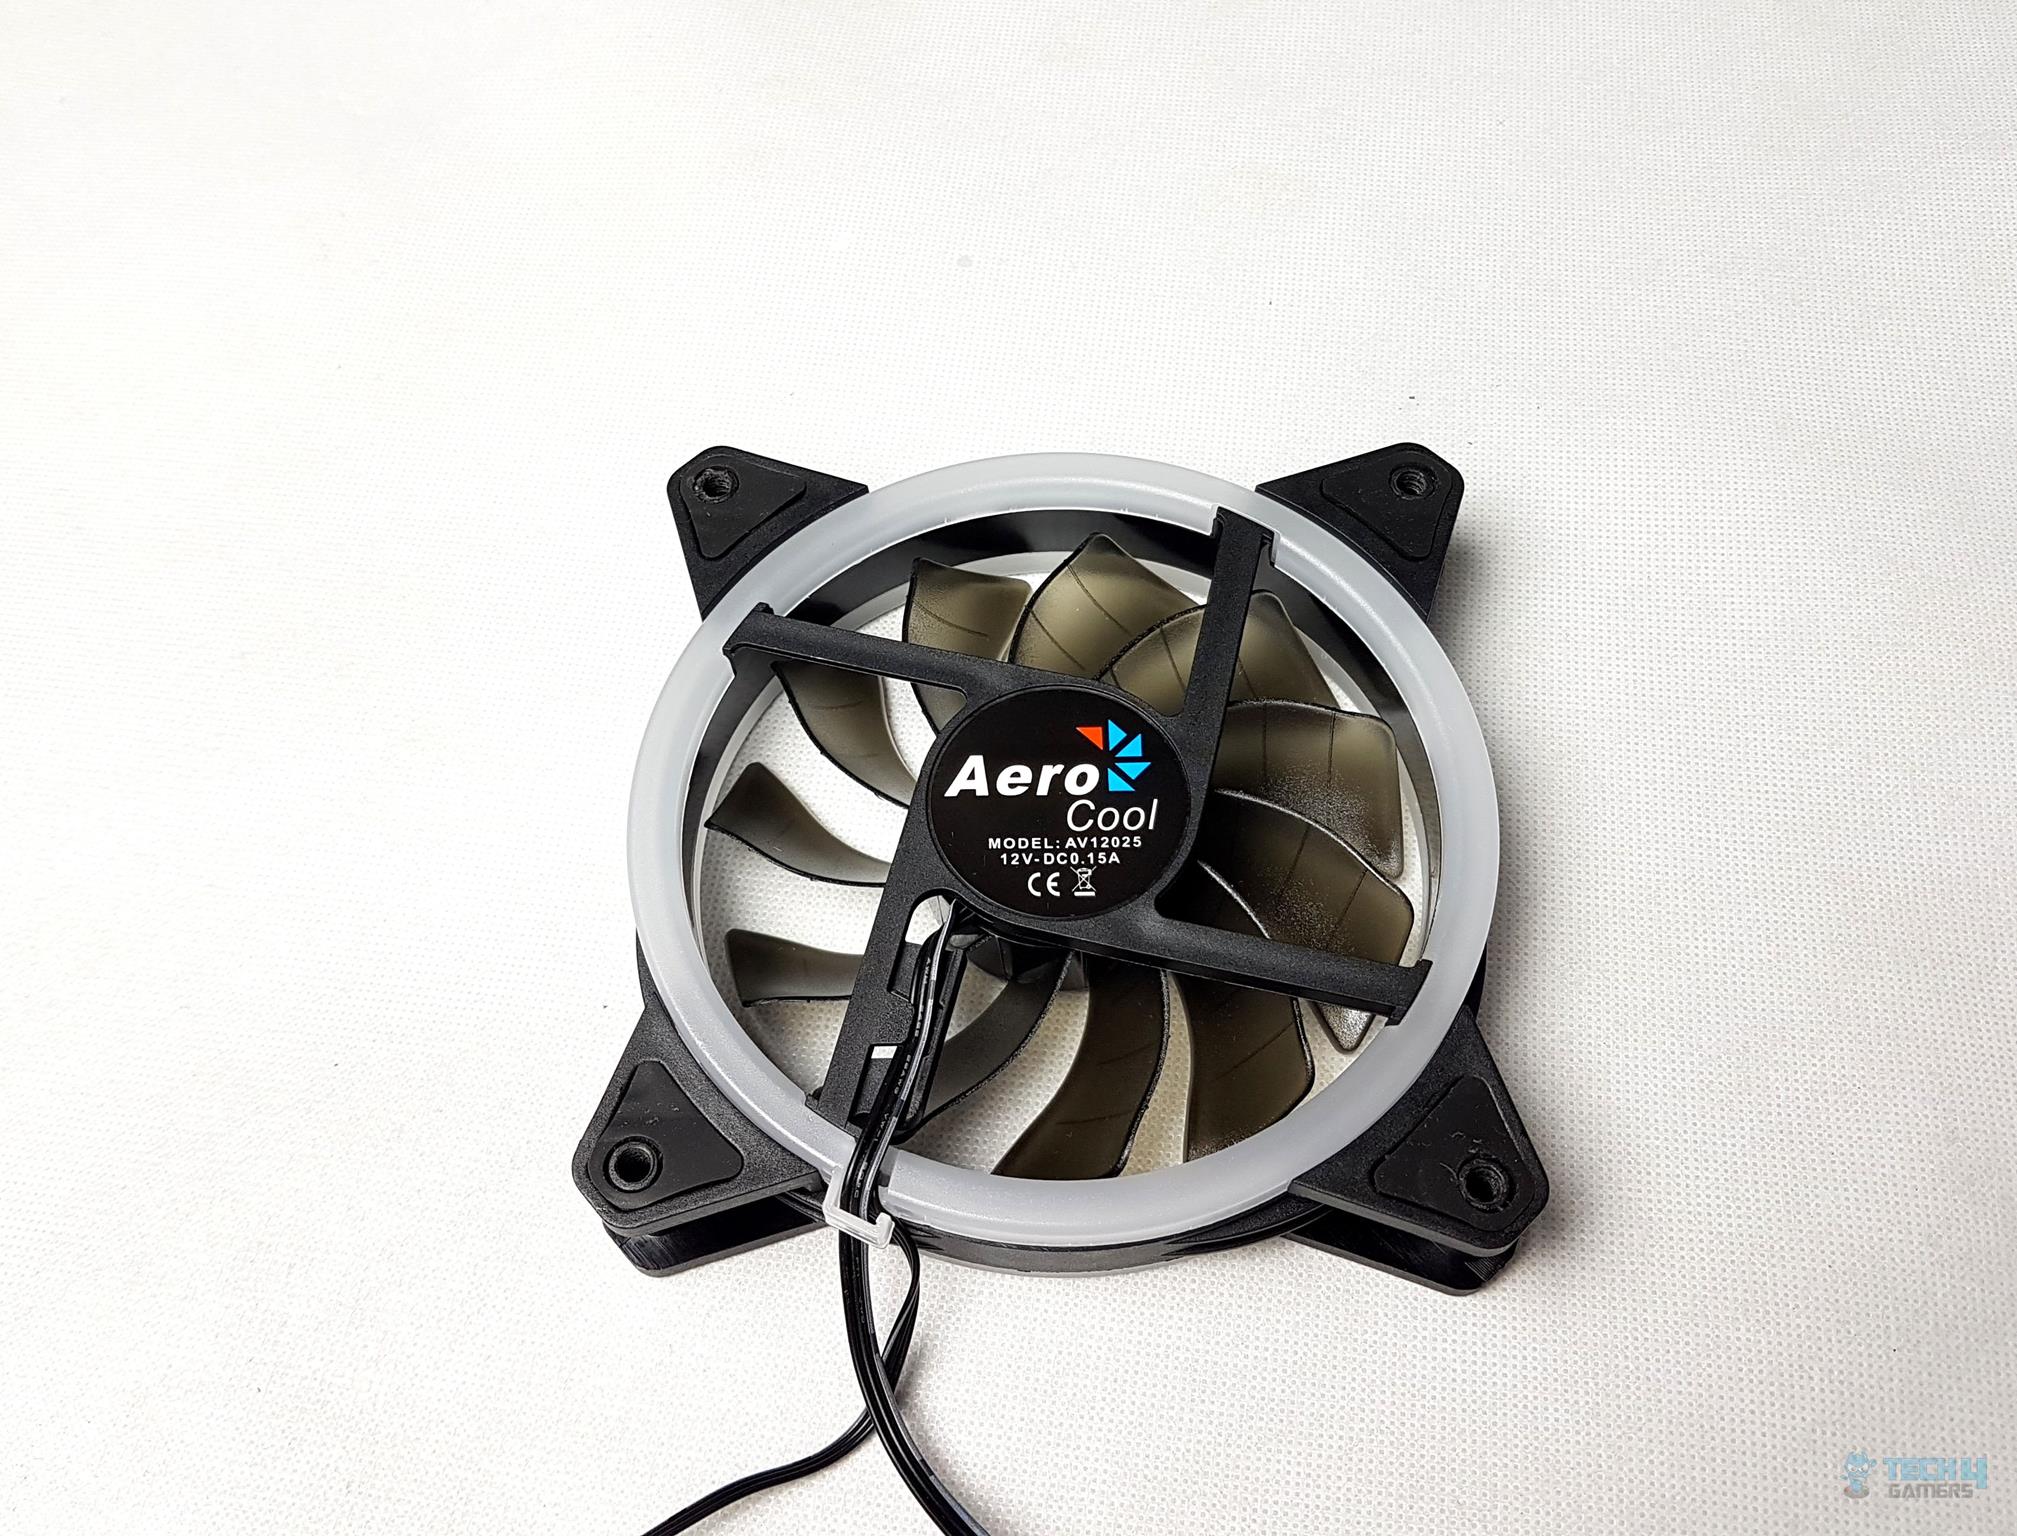
Aerocool has included their REV ARGB version fans in the Quartz Revo. Following are some of the key specifications:
| Maximum Speed | 1200 RPM |
| Maximum Airflow | 41.3 CFM at 0.98 mm H2O |
| MTBF | 60000 |
| Bearings Used | Hydraulic |
Clearly, Aerocool has used fans not suitable for the restricted airflow design. These fans can deliver better performance with airflow restriction removed. We will see this in the testing section.
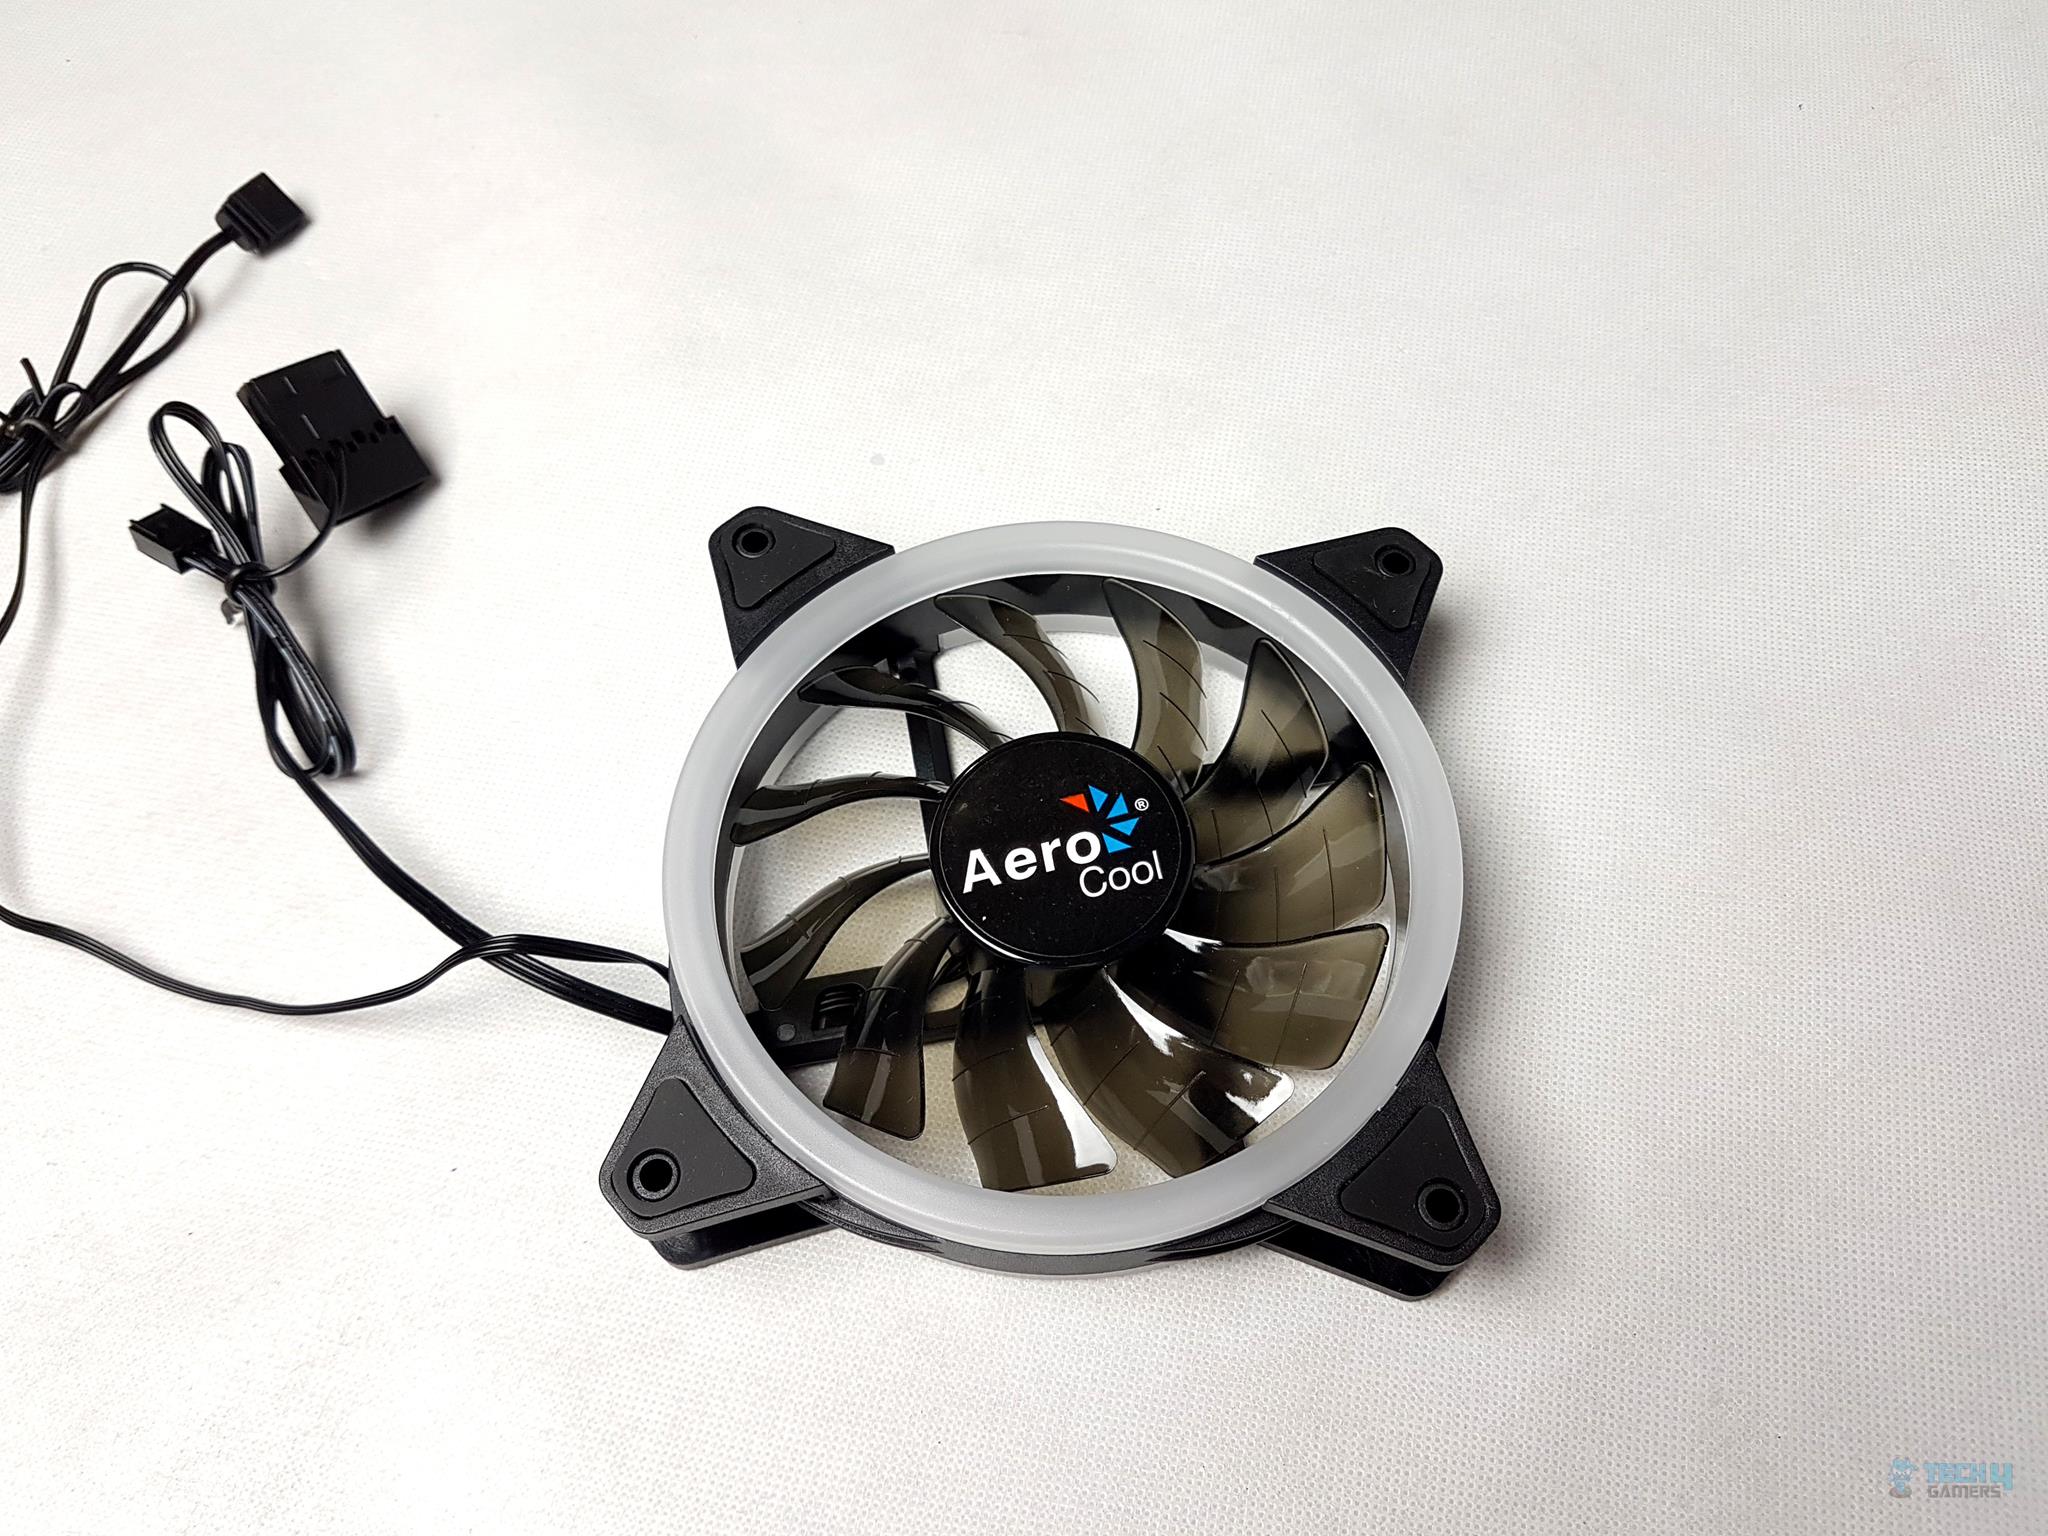
The fans have 11 semi-translucent curved blades with trail edges on each blade to generate enough air pressure by directing the airflow. The killer aspect of these fans is not the performance but the lighting effects. There are anti-vibration pads on the mounting corners.
There is a 4-arm assembly holding the fan to the frame. A sticker is pasted on the center with Aerocool branding on it. The blades are removable for easy maintenance.
The REV fans feature dual ring design for vivid and stunning lighting effects. Regardless of which orientation they are installed, you will get the same effect nevertheless.
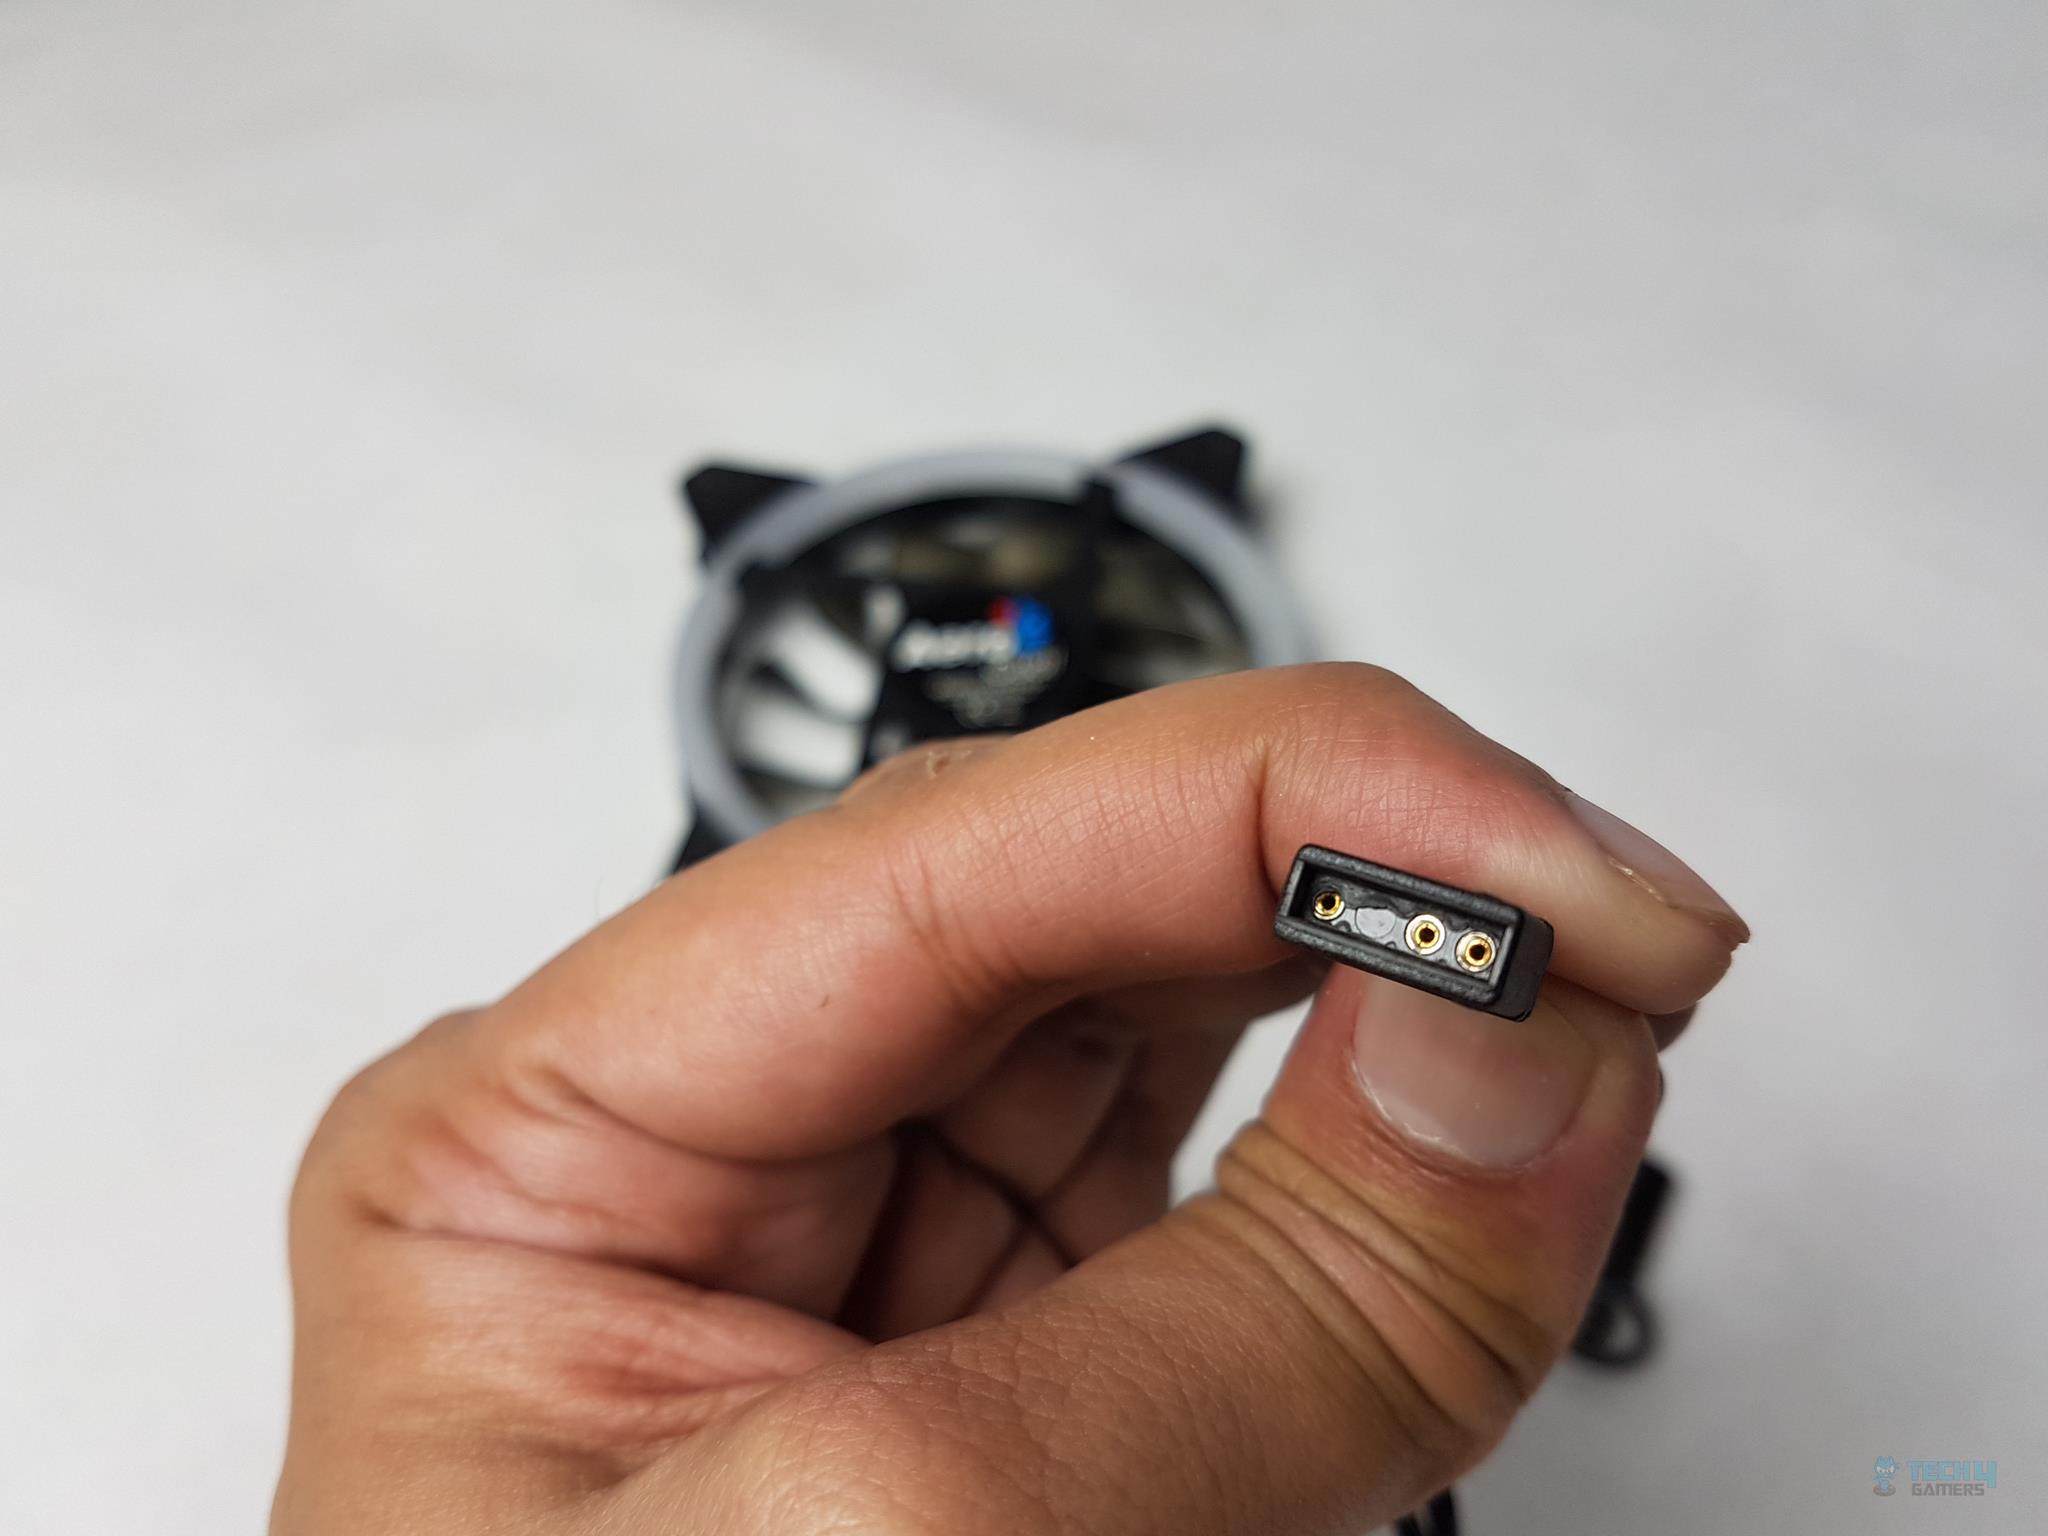
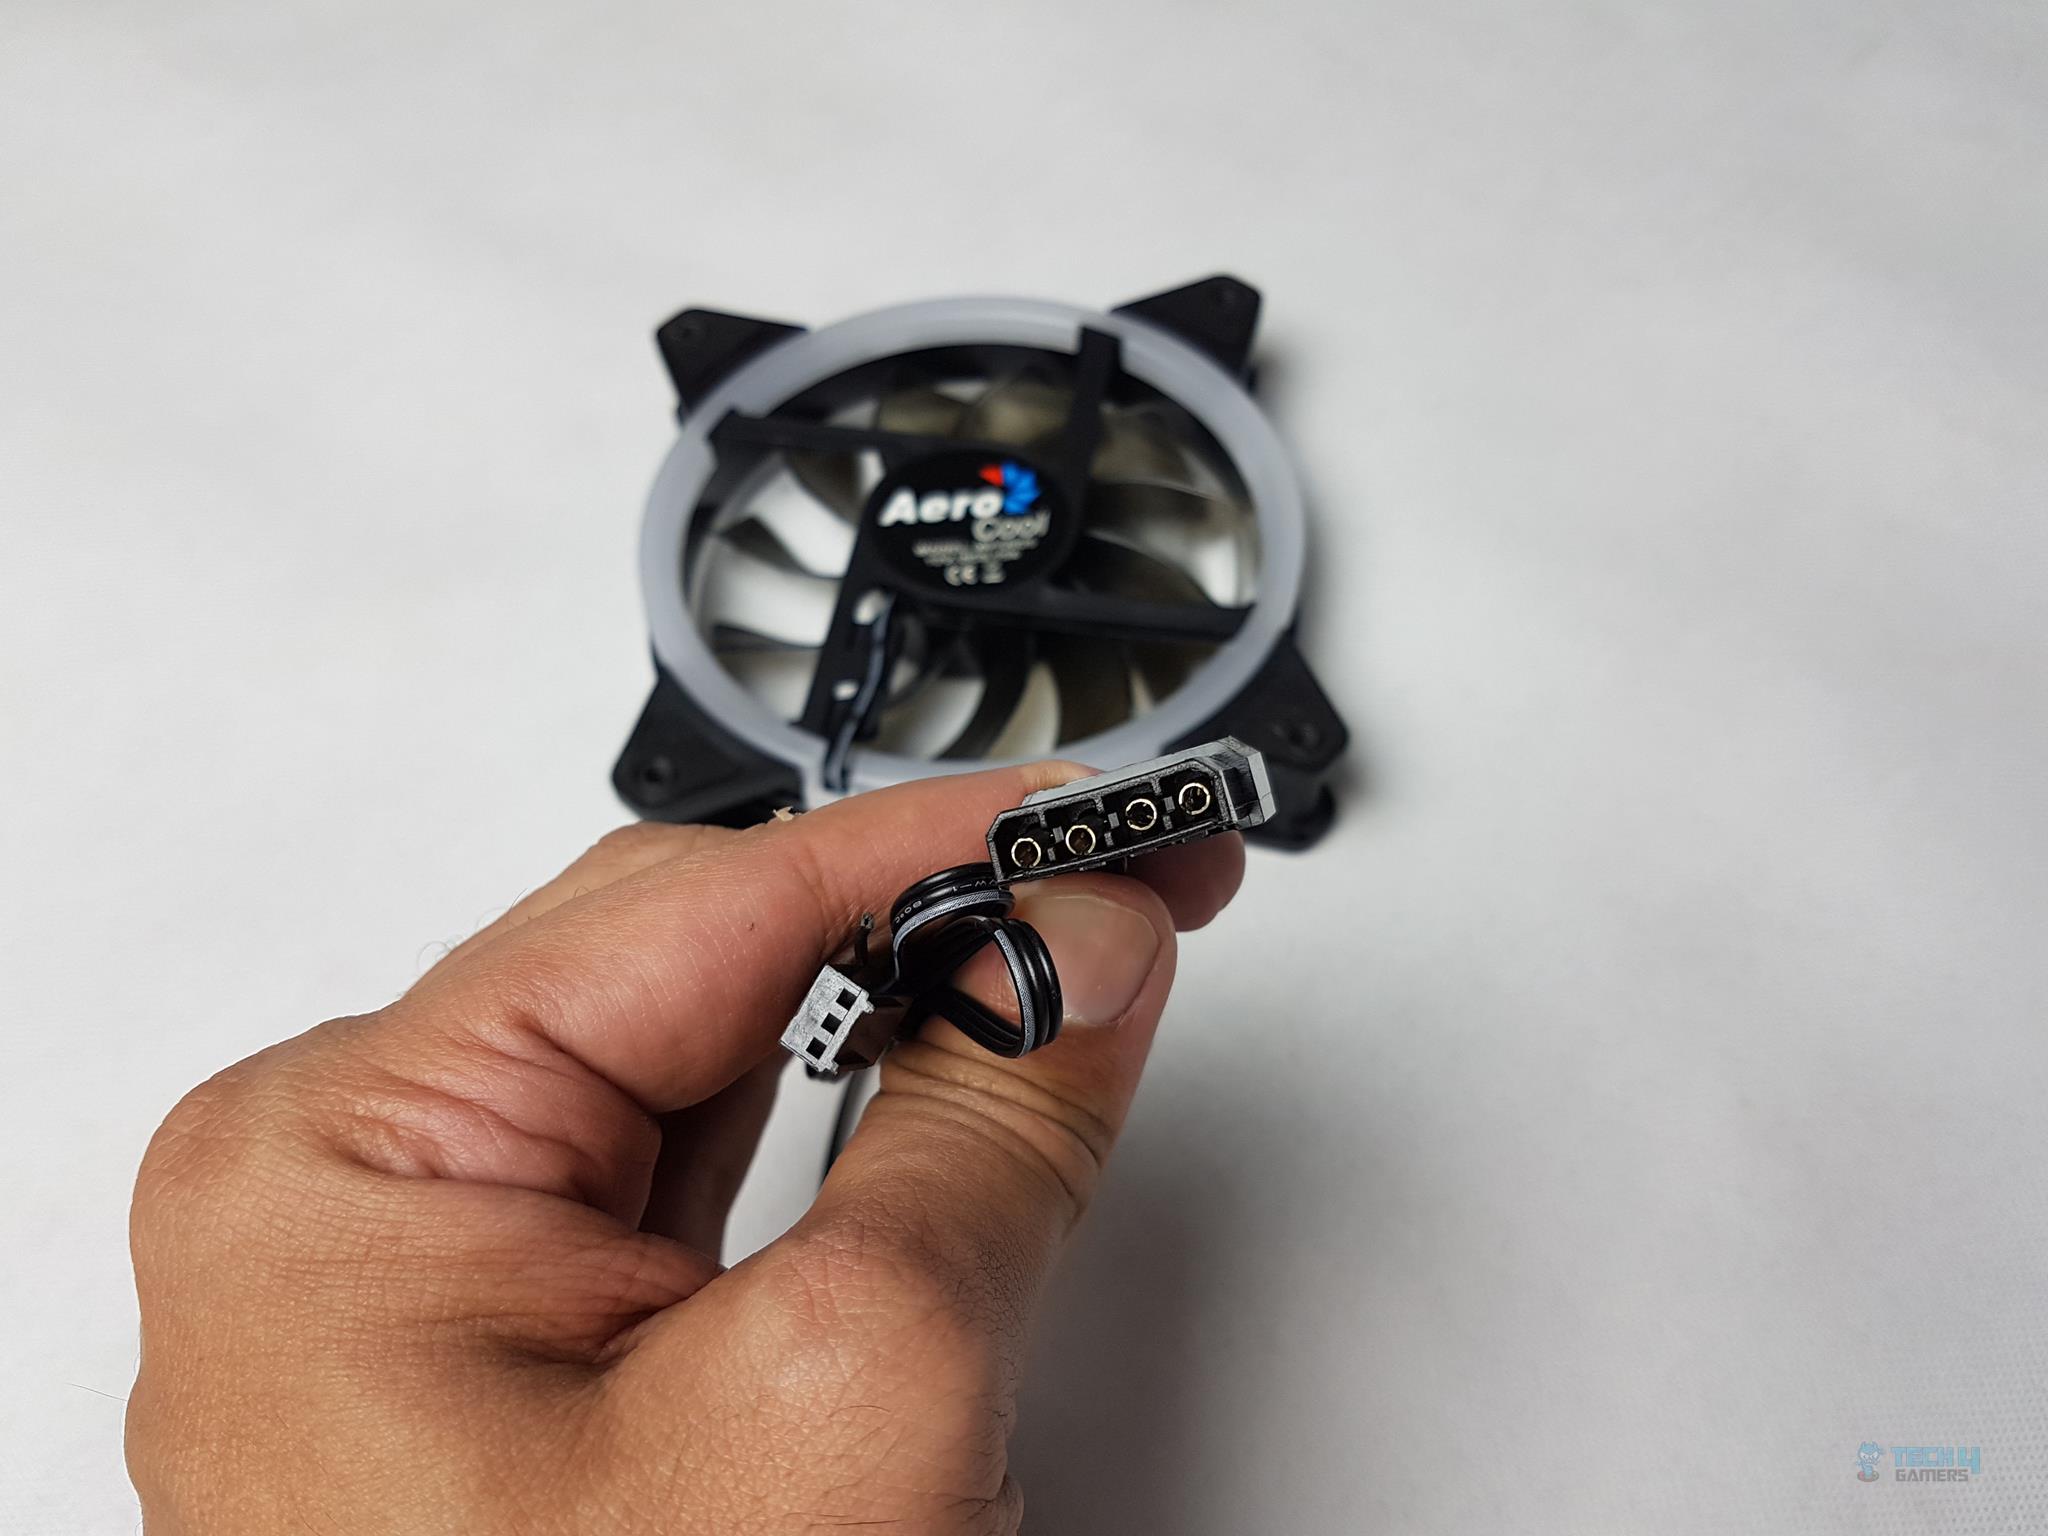
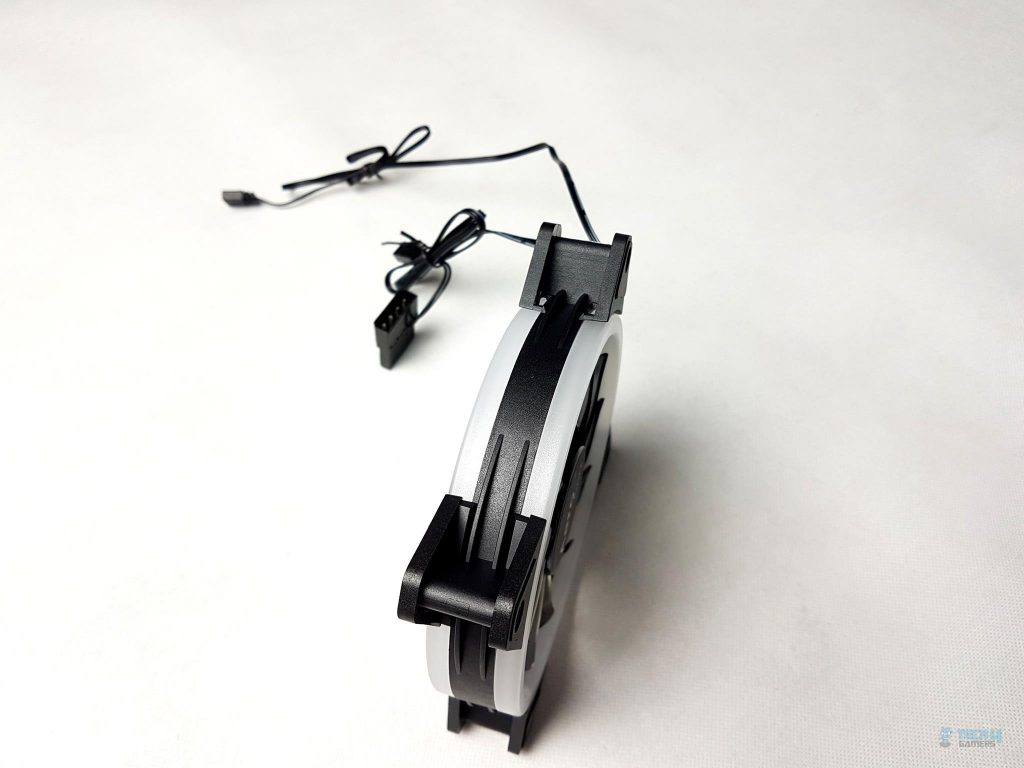
There are two cables coming out of each fan. One is the 4-pin ARGB connector cable. It probably uses the +5V DC pin format. The second cable has two connectors on its end. One is the 3-pin power cable for the fan motor and the other is the Molex connector.
Aerocool’s choice of a dual connector on a single cable isn’t great for cable management. They missed the chance to allow daisy chaining these fans for unified control. Despite being a budget chassis, they were doing reasonably well until this point, but the inconvenience of requiring 4 x Molex connectors from the PSU or hunting for 4x headers on the motherboard is a hassle.
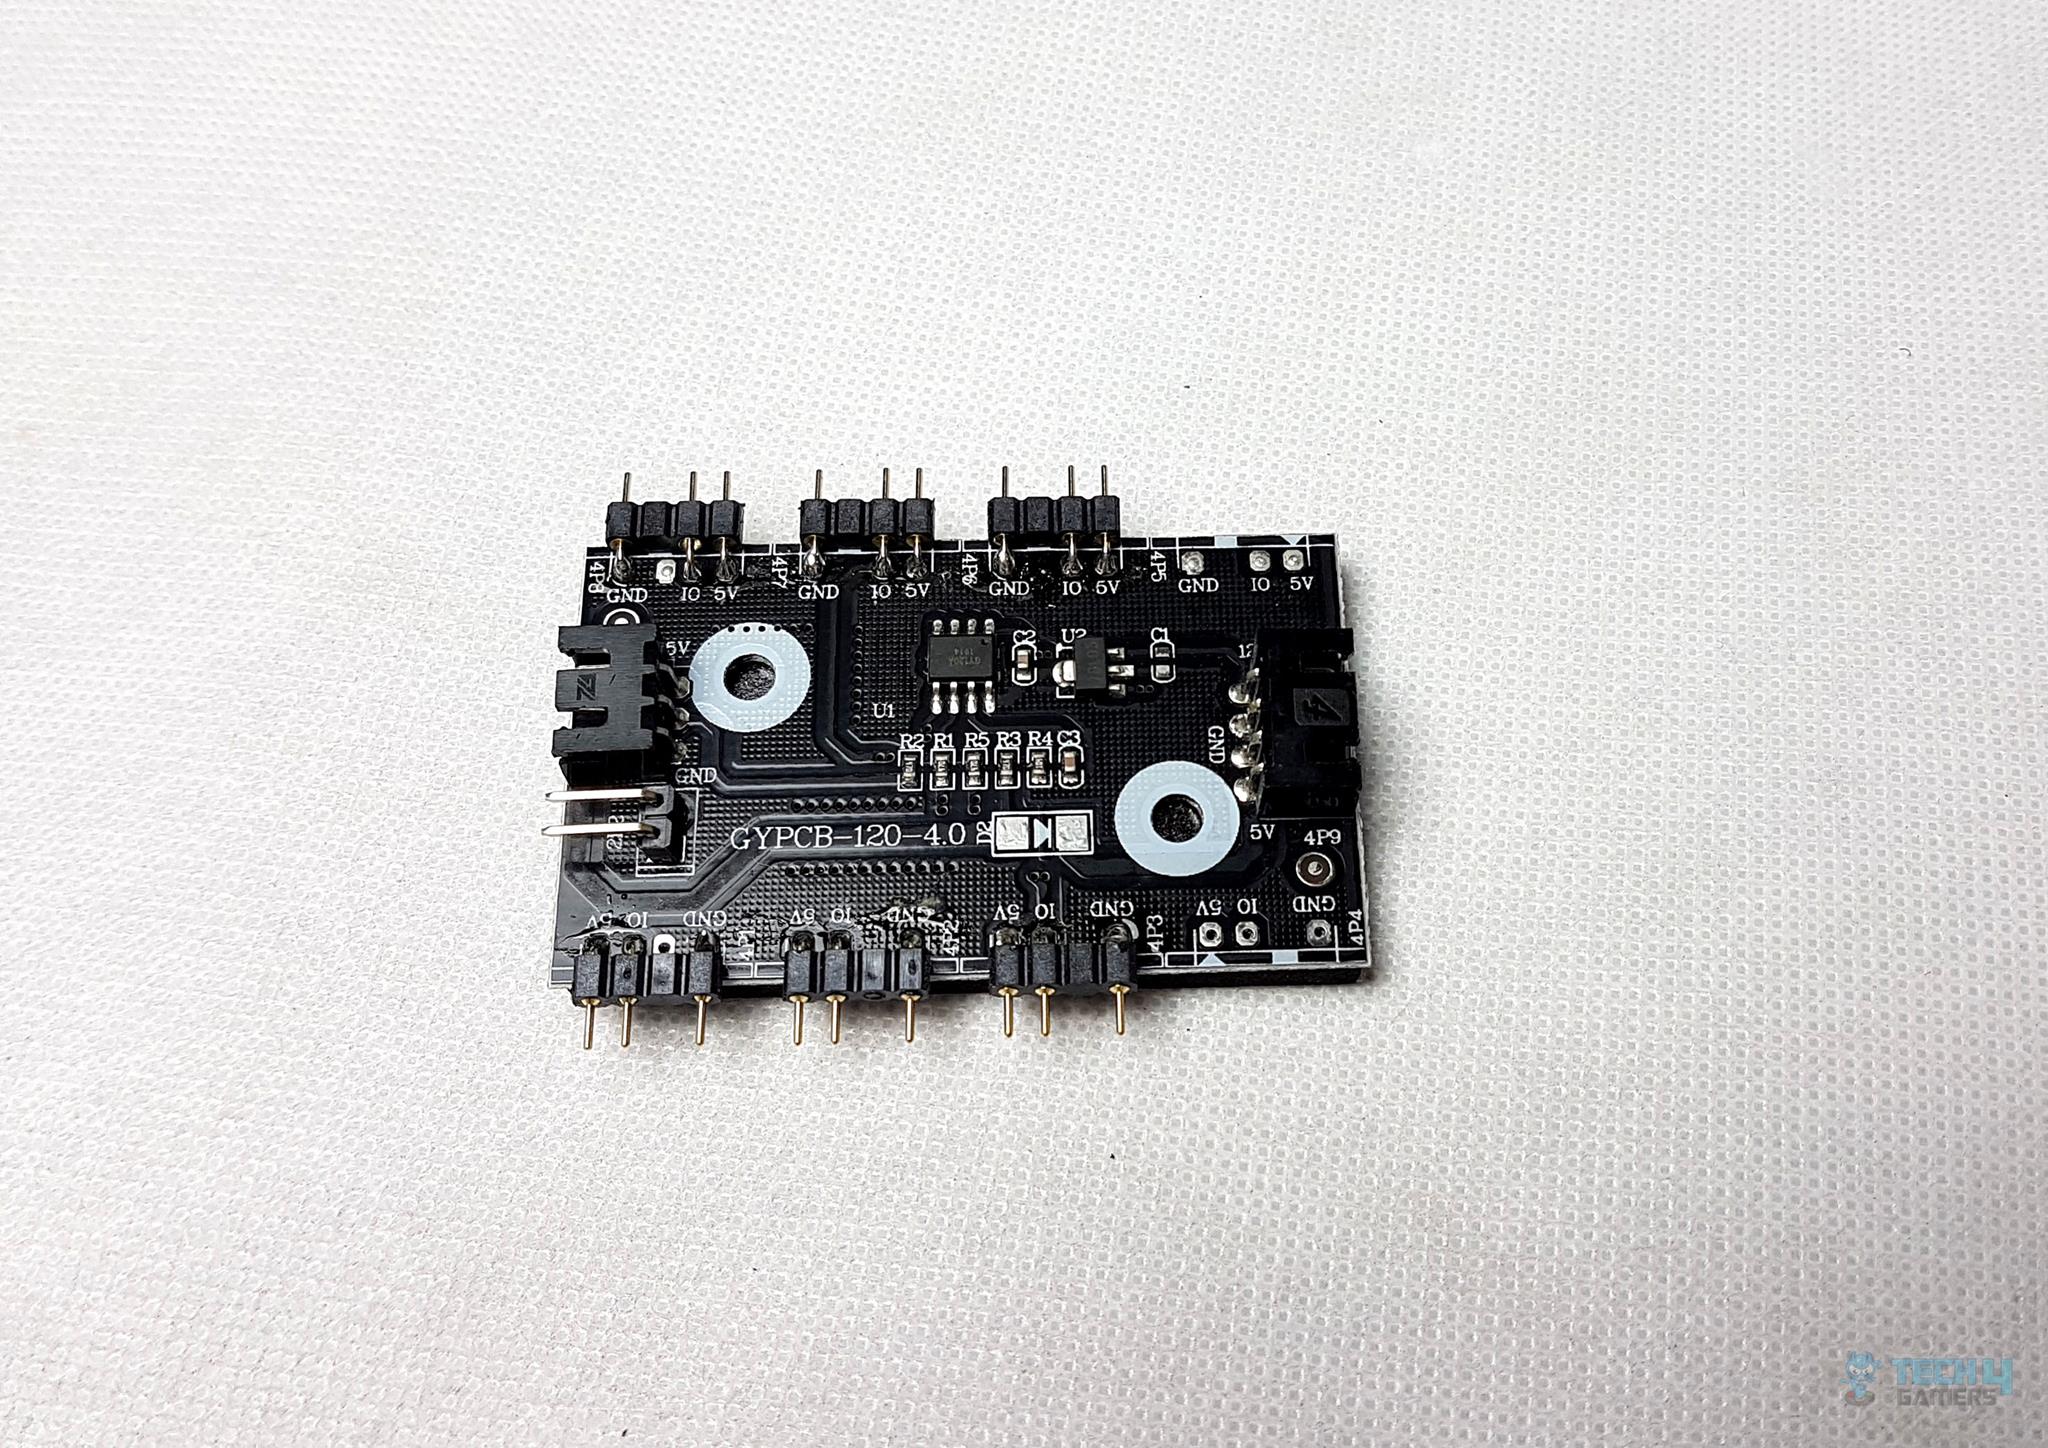
Aerocool provides a dedicated lighting control box with 6x 5V lighting headers. Connecting the 4x pre-installed fans leaves space for 2 more 5V fans using the same pin format. However, using the 2-pin header for the front panel’s Reset button cable sacrifices the reset function for controlling lighting effects through the panel.
Note that this setup disables the reset function. The controller needs a 4-pin header for power and a 3-pin header for the motherboard sync cable, linking it to the motherboard’s 5V lighting header. It supports ASUS AURA SYNC, GIGABYTE RGB FUSION 2, and MSI MYSTIC LIGHTING.
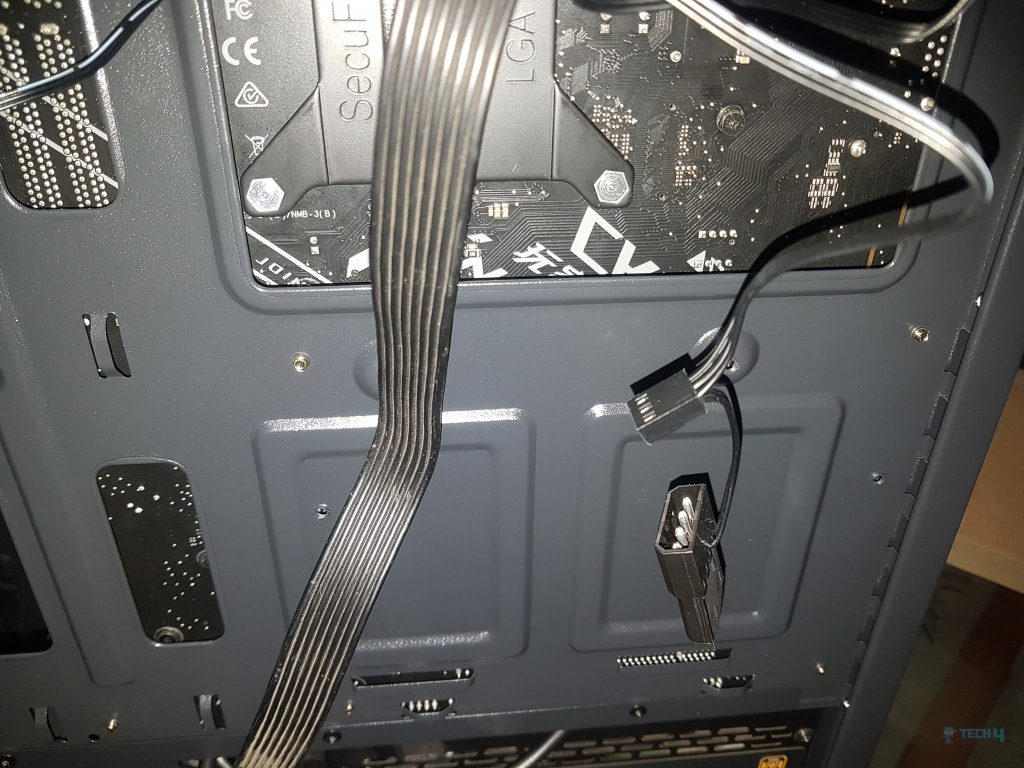
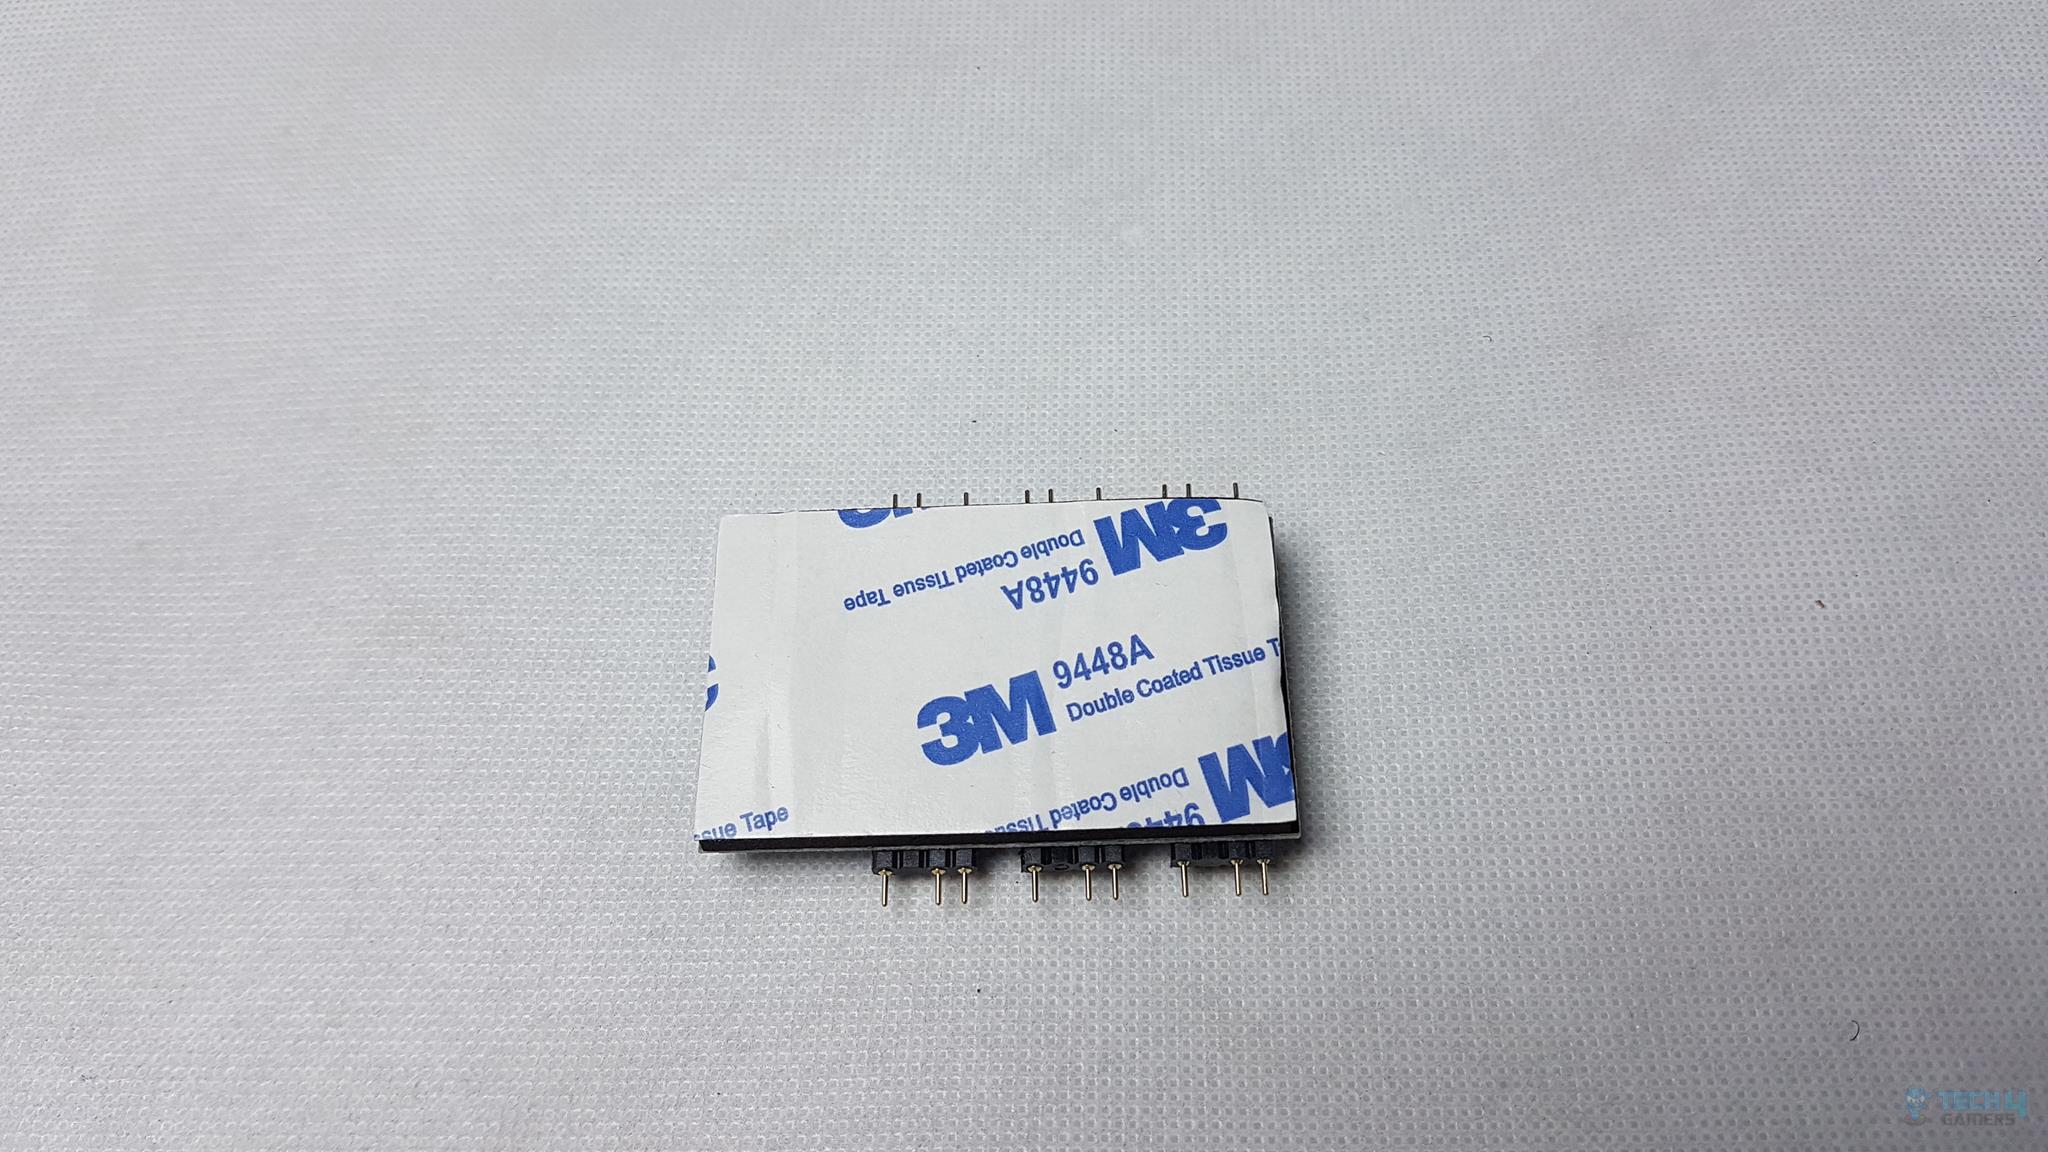
The backside of the controller has a 3M adhesive. The user has to decide upon the location in the chassis and paste the controller there.
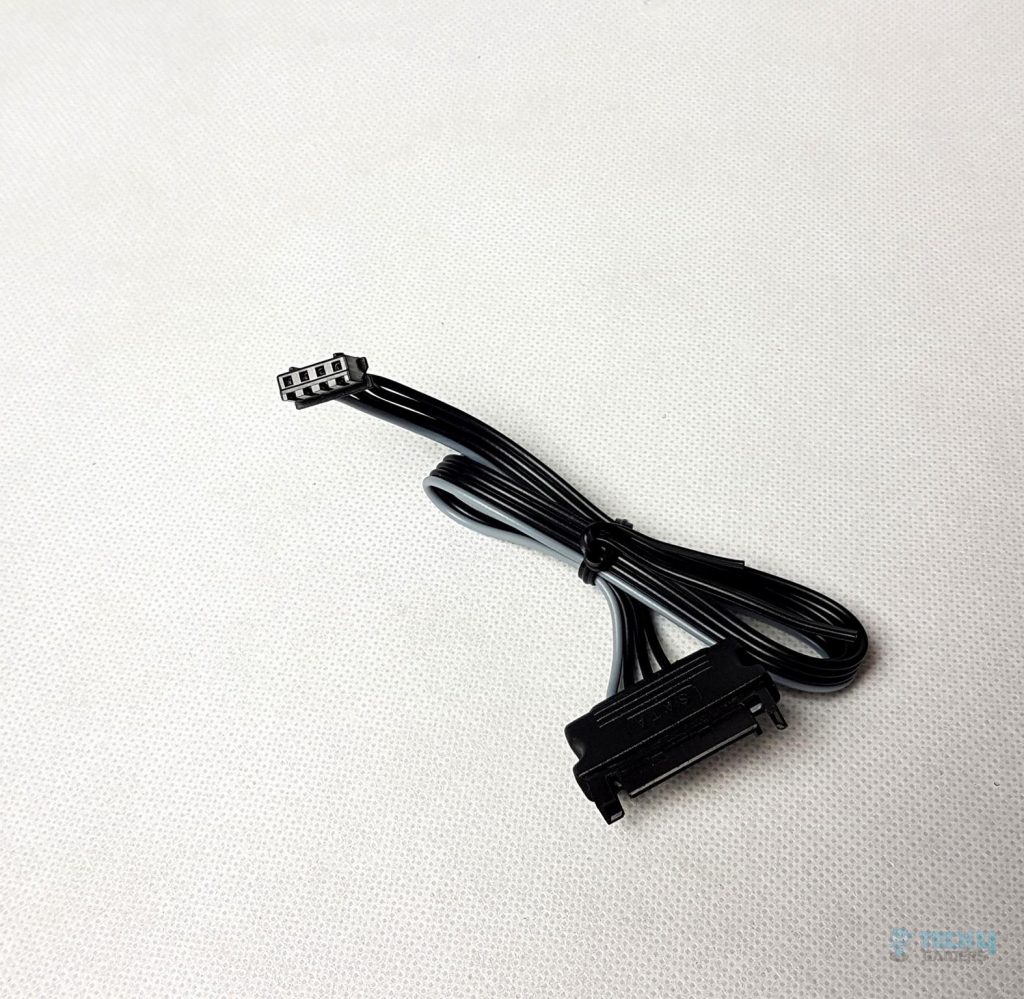
The controller is powered by the SATA cable and the 4-pin connector is attached to the controller.
We have a motherboard sync cable, which has a 5V lighting connector that connects to the motherboard.
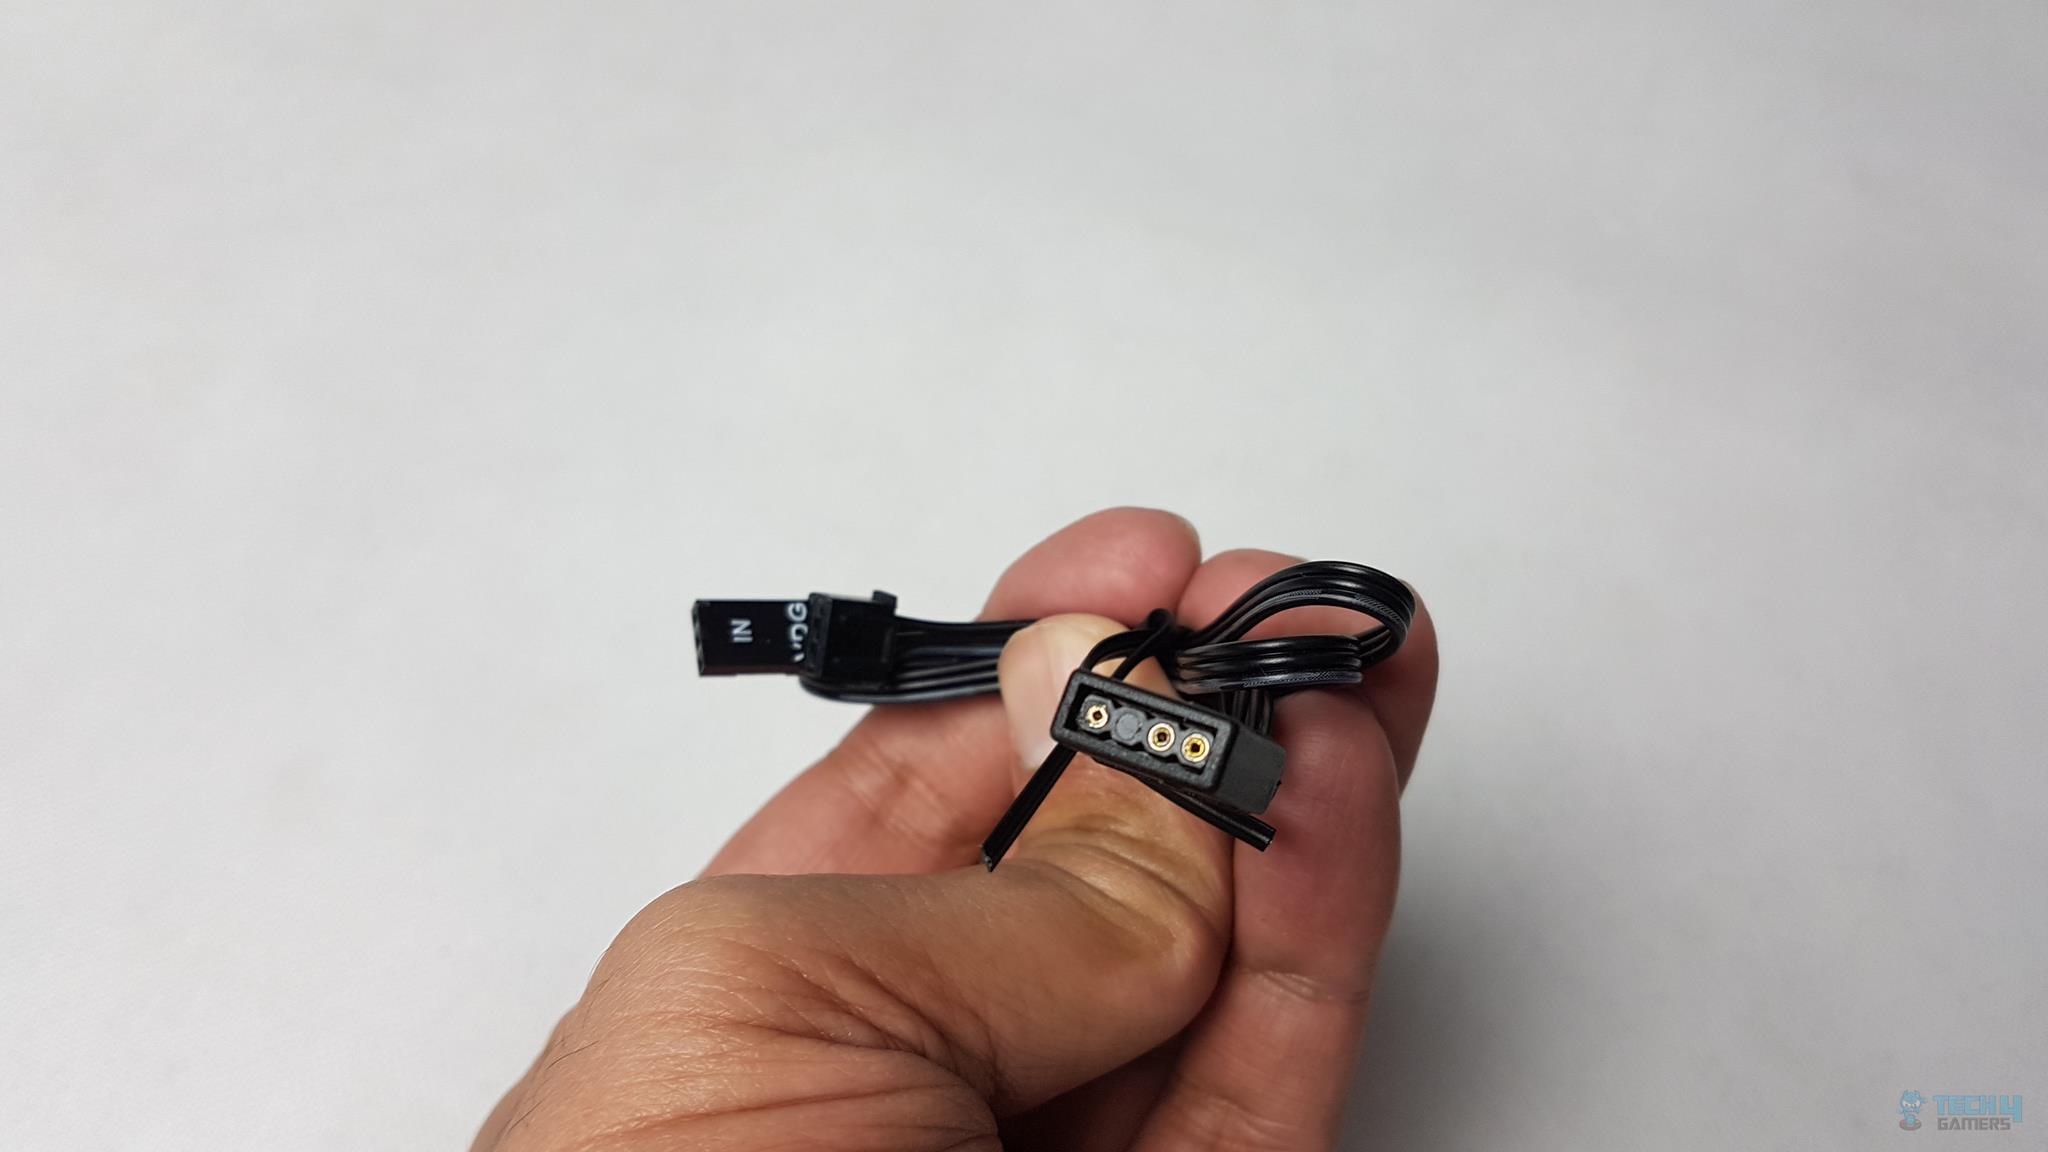
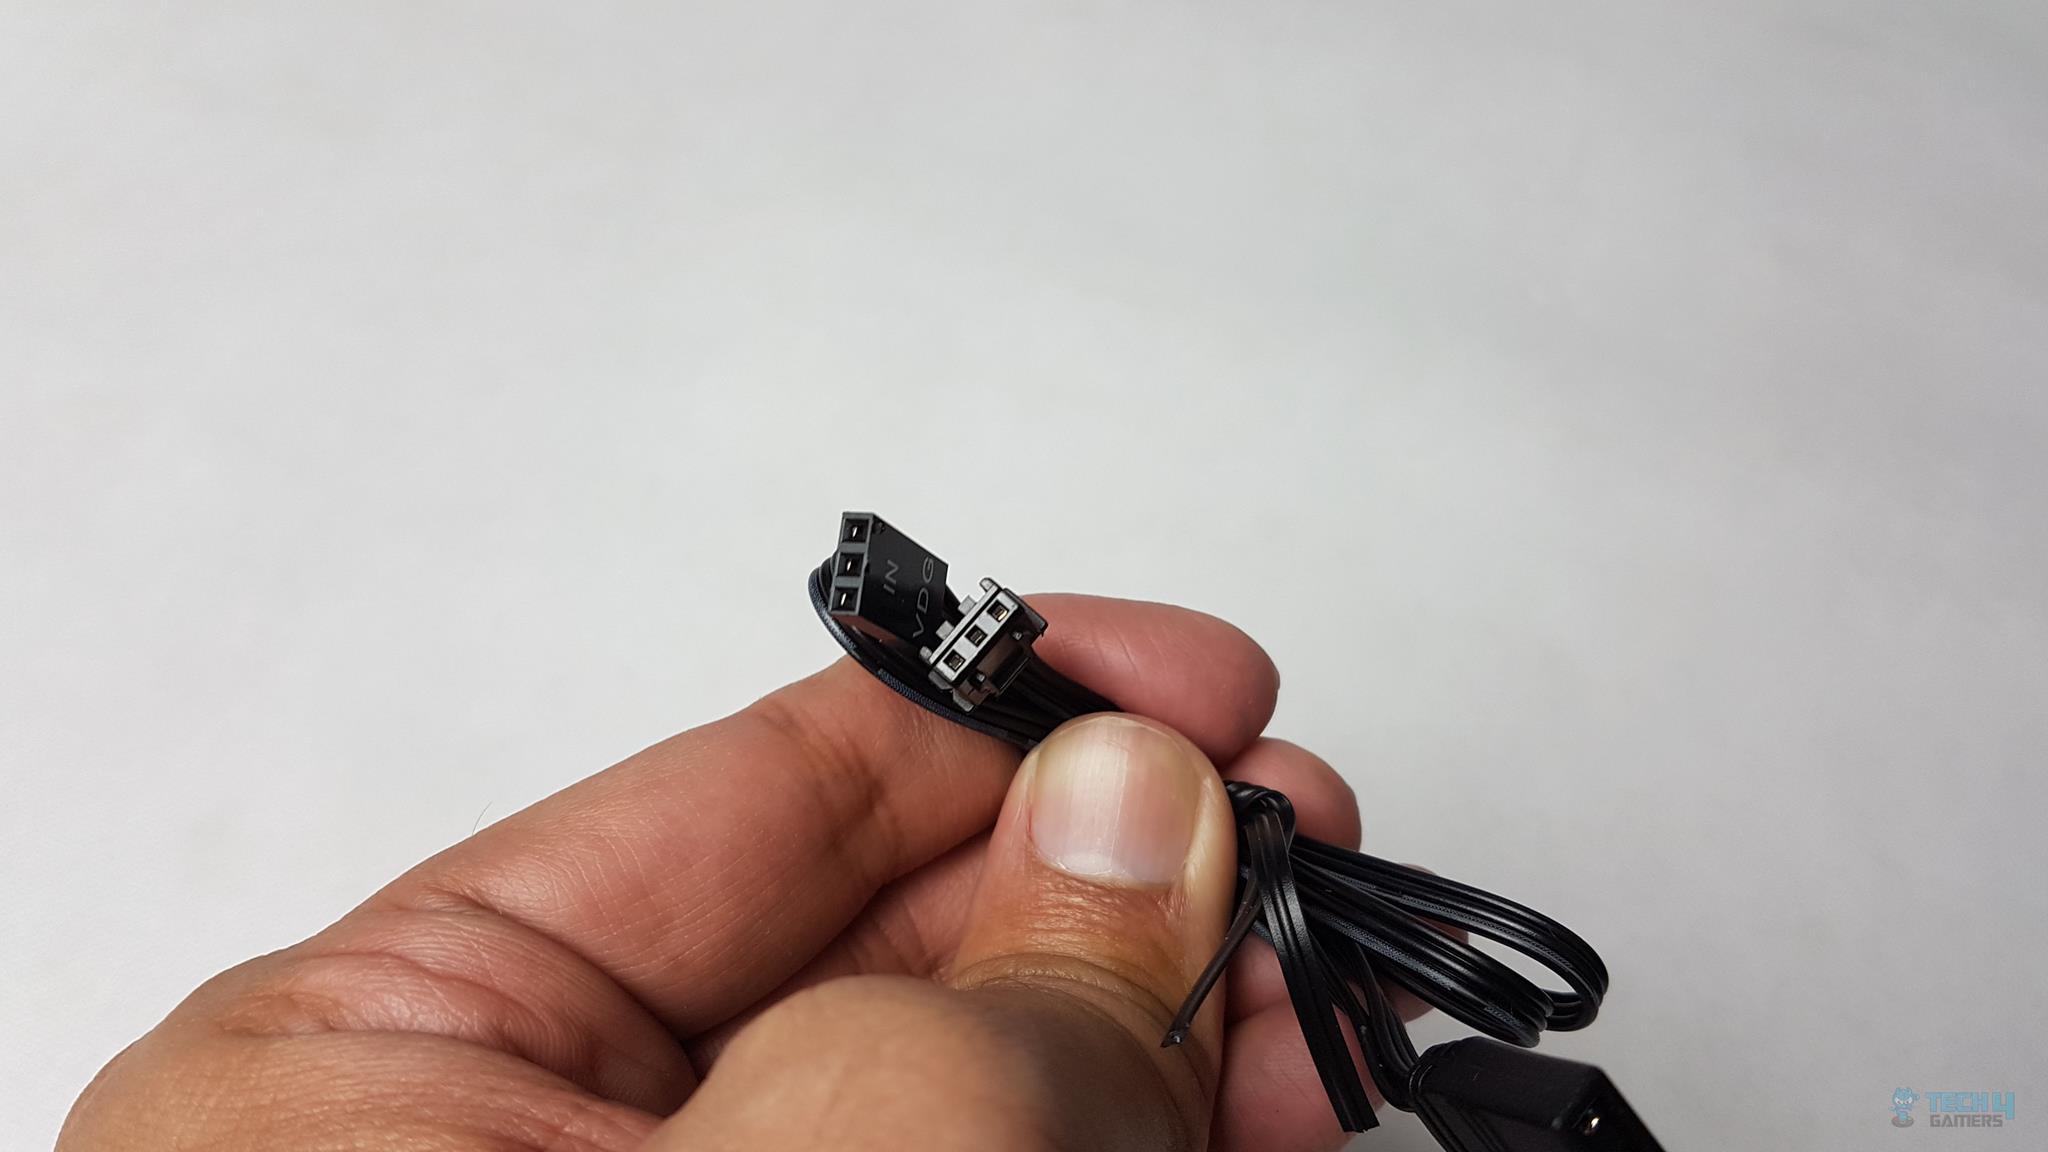
The other end of the sync cable has two cables. One connector is for the ASUS and MSI motherboards, whereas the connector with IN VDG marking is for the GIGABYTE motherboard.
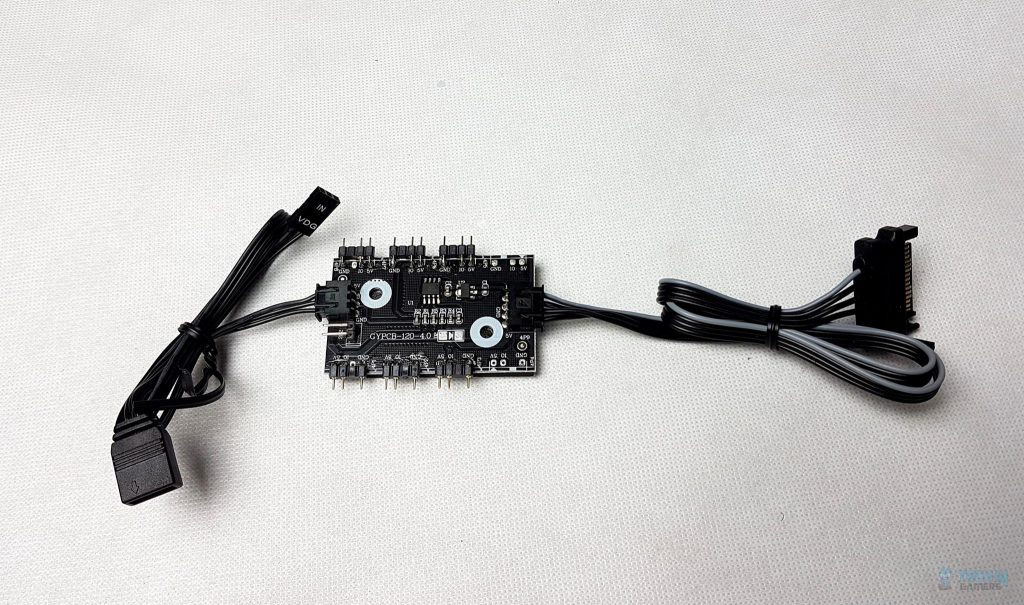
The above picture shows the assembled controller with both connectivity cables attached to it.
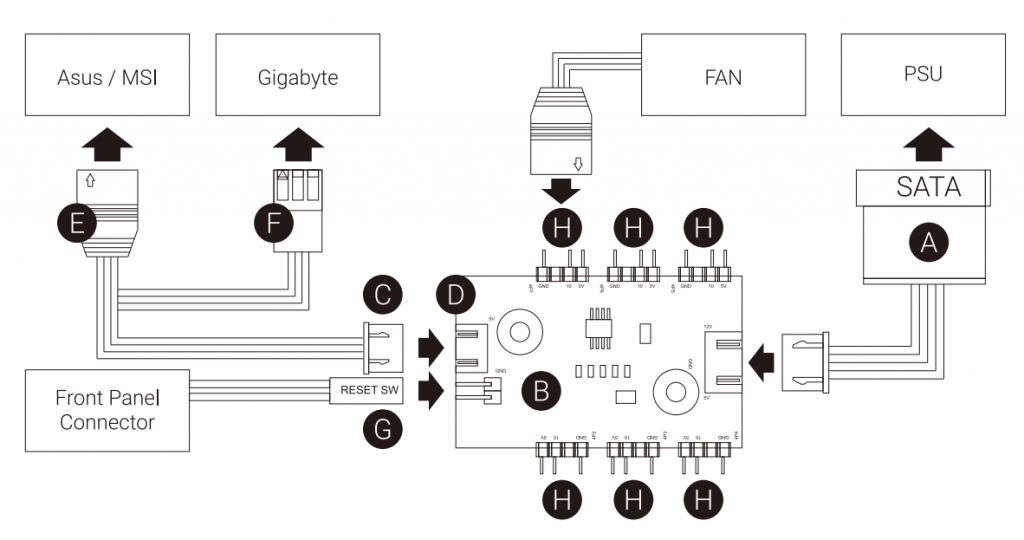
The above picture illustrates how to set up the controller. It is a walk in a park to set it up.
Test Build and Experience
The following components were used for the test build:
- Intel i7 8700k CPU
- Asus ROG Strix Z390-E Gaming Motherboard
- Noctua NH-U12S chromax.black CPU Cooler
- GIGABYTE GeForce GTX 1060 6G Gaming Graphics Card
- ADATA XPG D41 Spectrix 32GB @ 2666MHz RAM
- Lexar NM610 250GB NVMe SSD
- Thermaltake TP 750W Gold PSU
My overall build experience was fine in the Aerocool Quarz Revo though there were some issues that I will highlight here. I would suggest removing the PCIe slot covers before installing the motherboard inside the chassis. Since these covers are not reusable, they will not be of any use once removed.
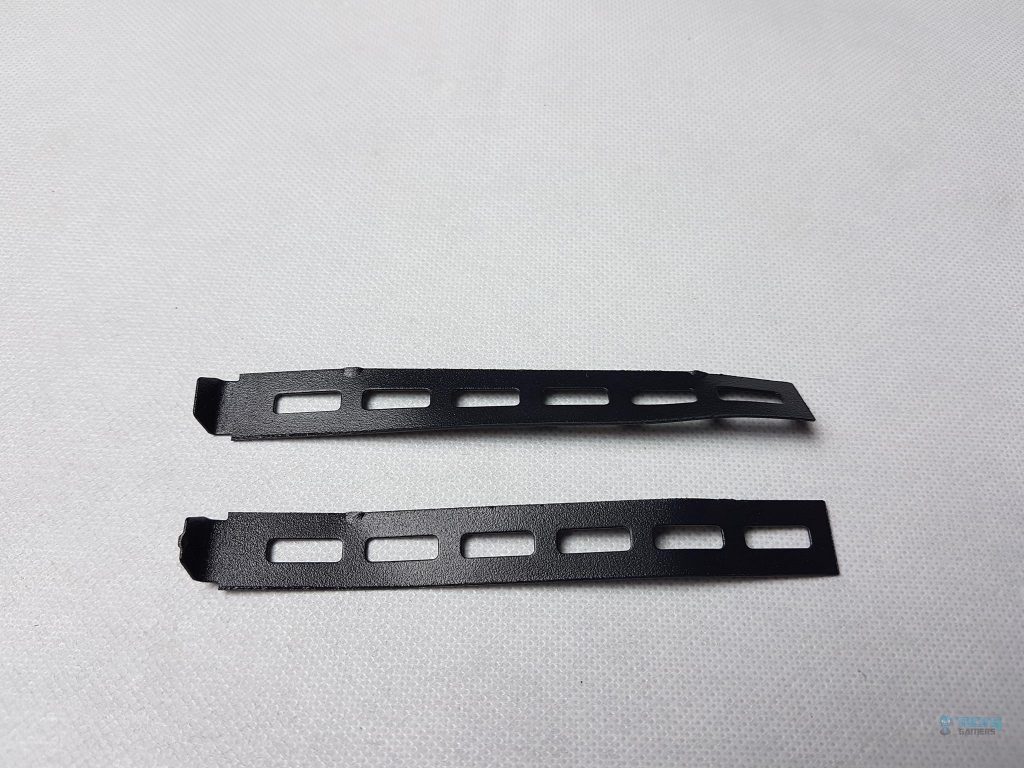
The picture displays the removed covers, requiring force for detachment. Prior removal benefits installation. For micro-ATX and ATX boards, additional standoffs are necessary.
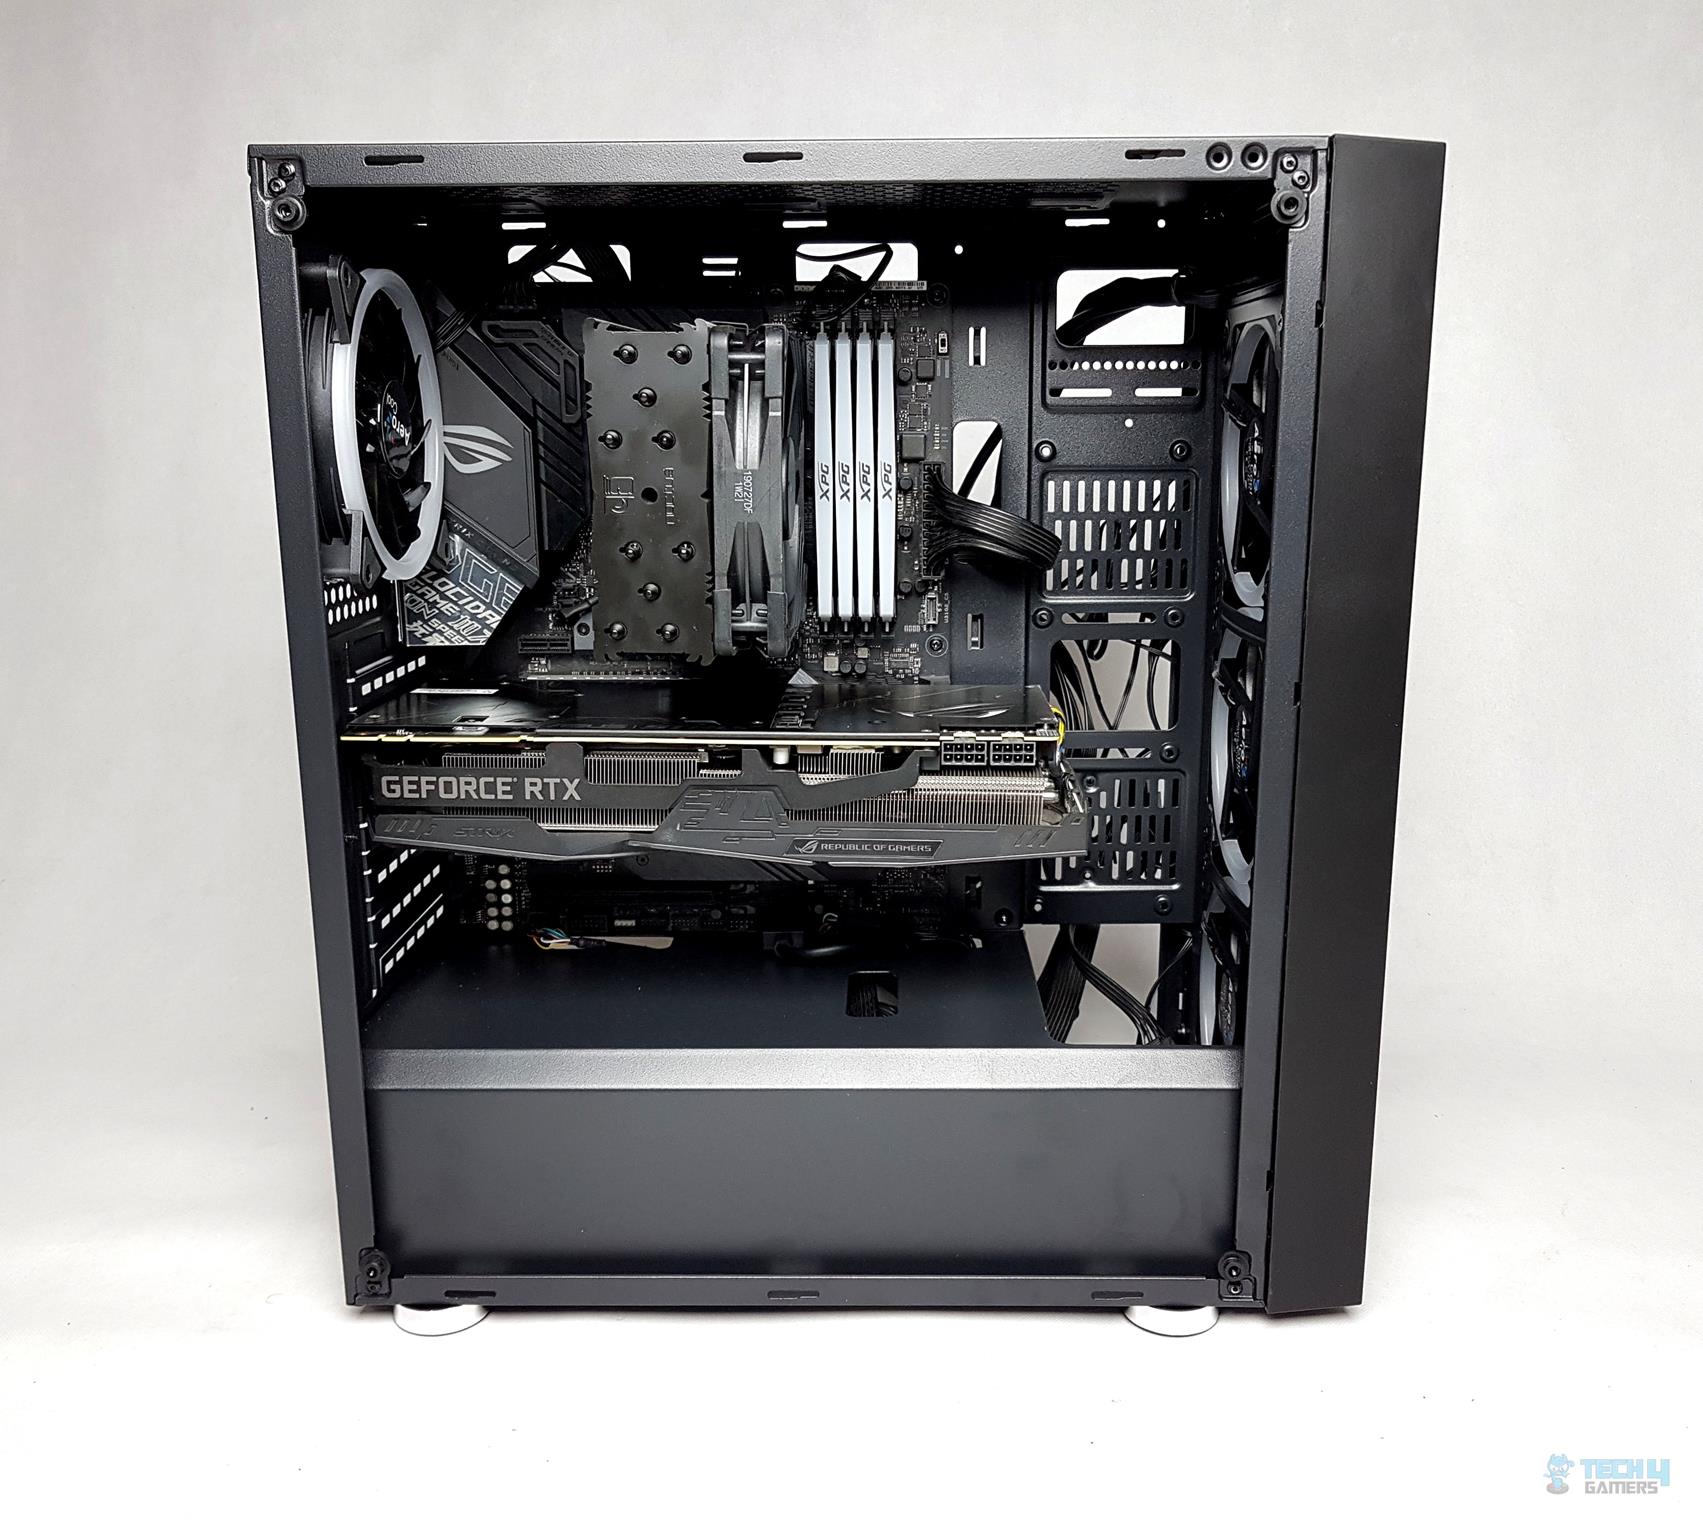
Only 4 standoffs come pre-installed. Use the provided socket for installation. I began with standoffs before fitting the motherboard. The Asus ROG Strix Z390-E Gaming’s I/O cover is bulky, hindering by the rear fan’s cables. I had to remove the fan to install the motherboard. My choice for this test build was the Noctua NH-U12S chromax.black cooler.
The CPU Cutout blocked the cooler’s backplate, and the lack of clearance from the motherboard’s tray sheet prevented its installation. Cable management is easy with numerous cutouts in the chassis, but the absence of a 3-way splitter cable in the accessories is a drawback.
Installing the Aerocool P7 L240 AIO cooler on top wasn’t possible due to limited space caused by the ADATA XPG Spectrix D41 RGB RAM. Opting for low-profile RAM allows top installation, or it can be placed in the front. Keep in mind, this chassis doesn’t support a 280mm radiator.
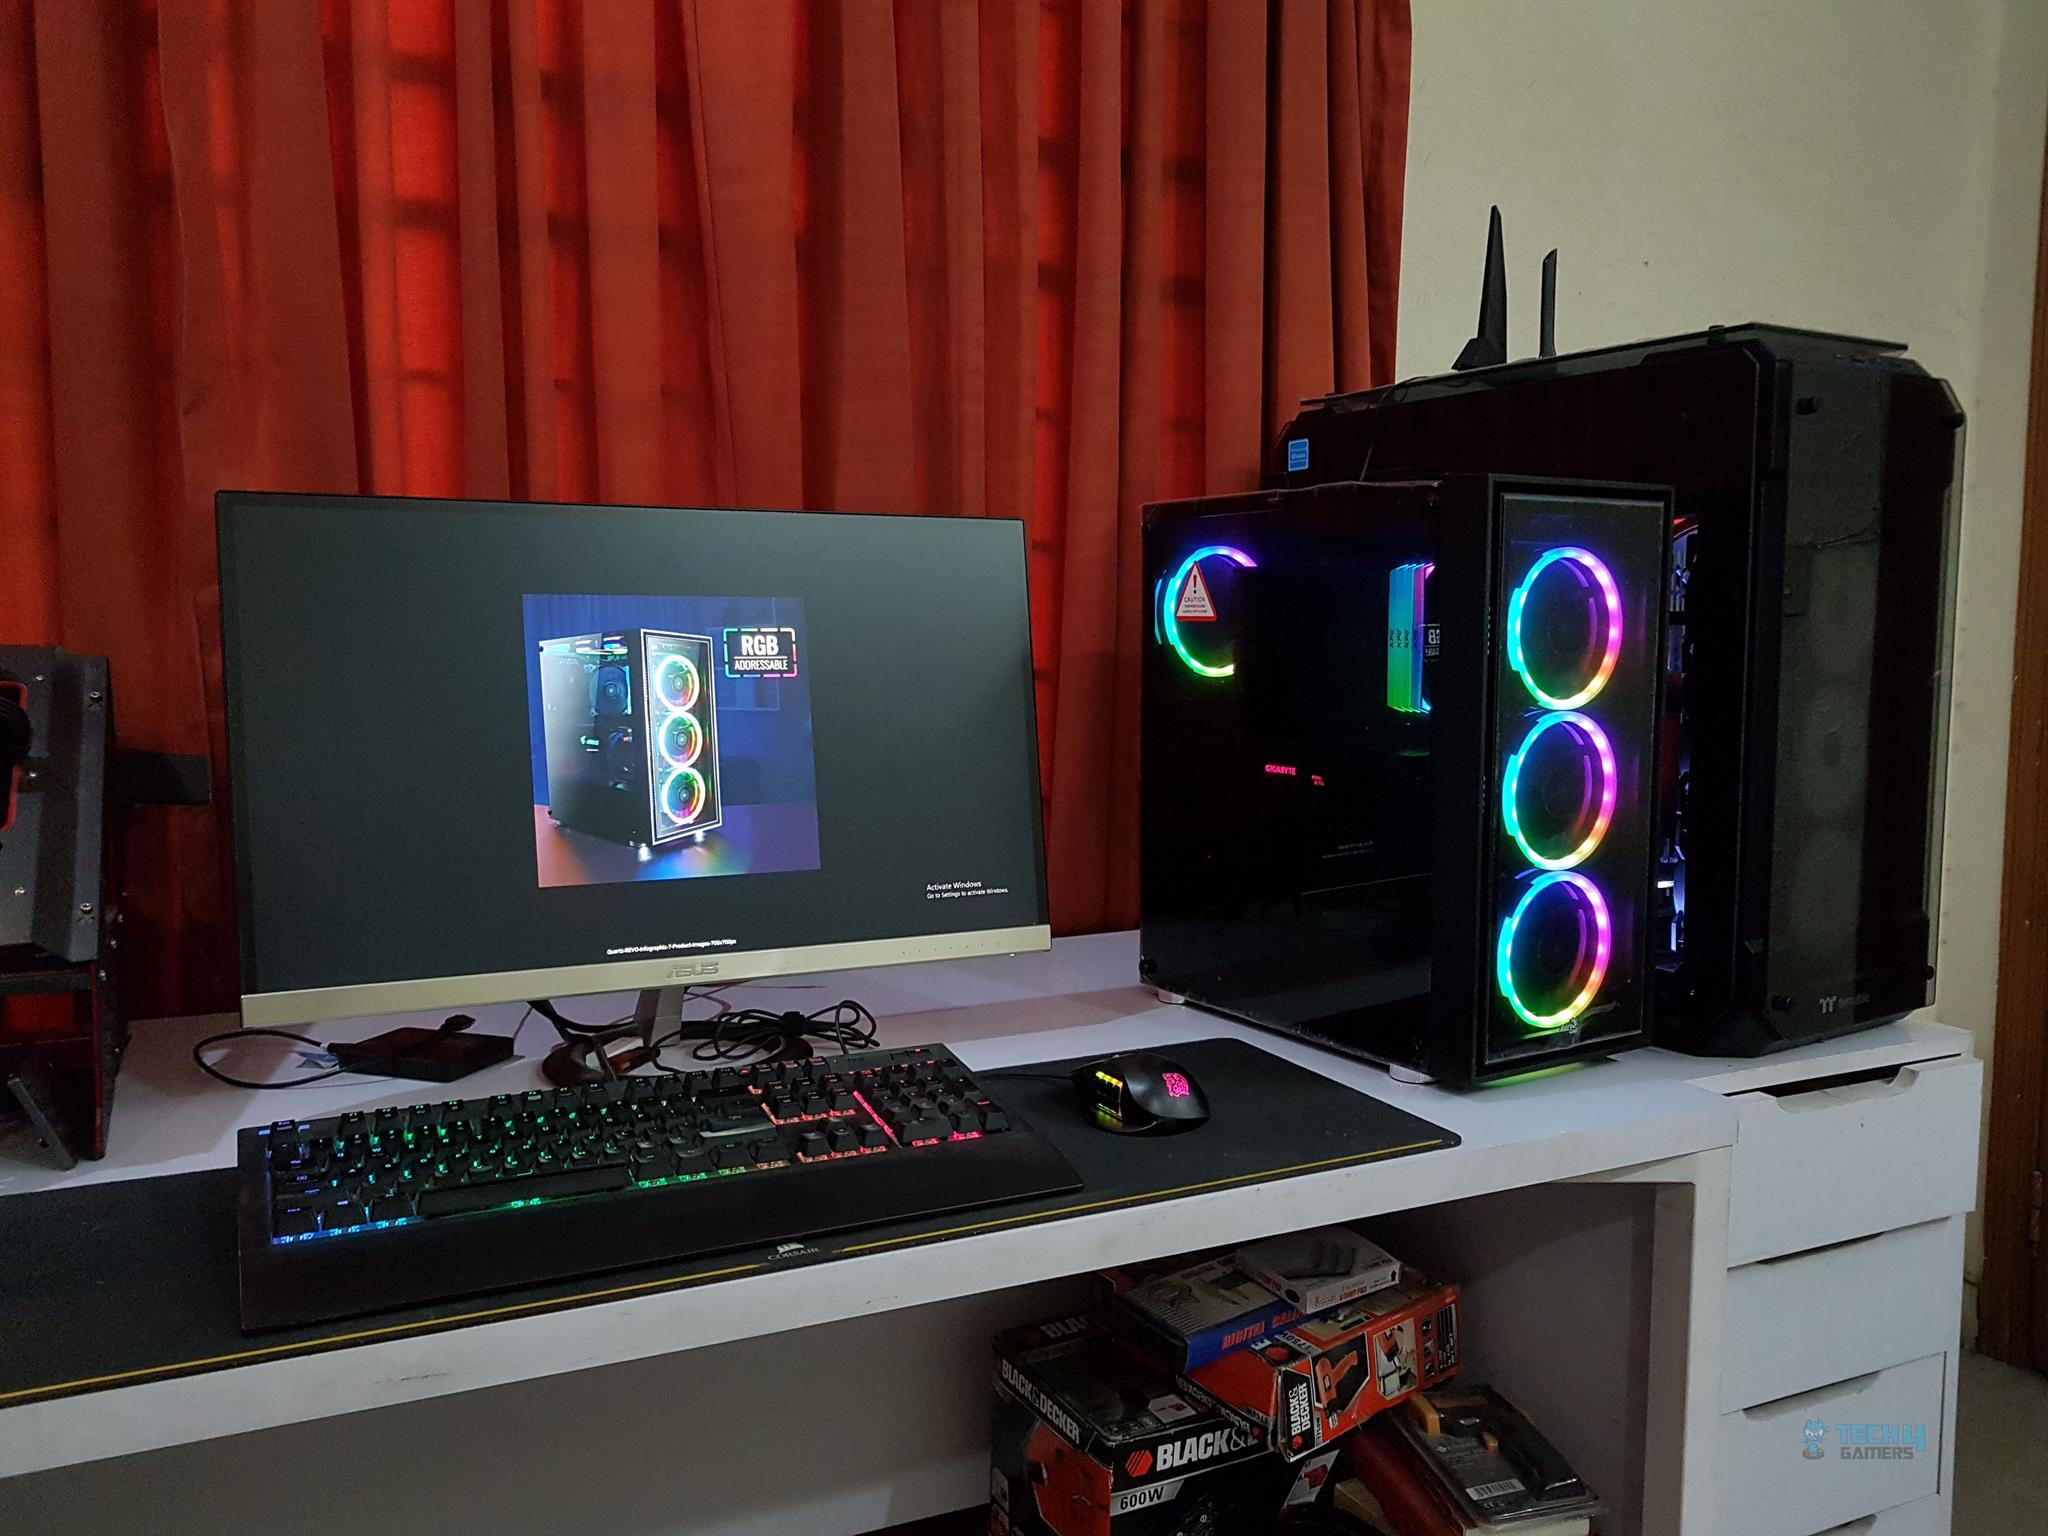
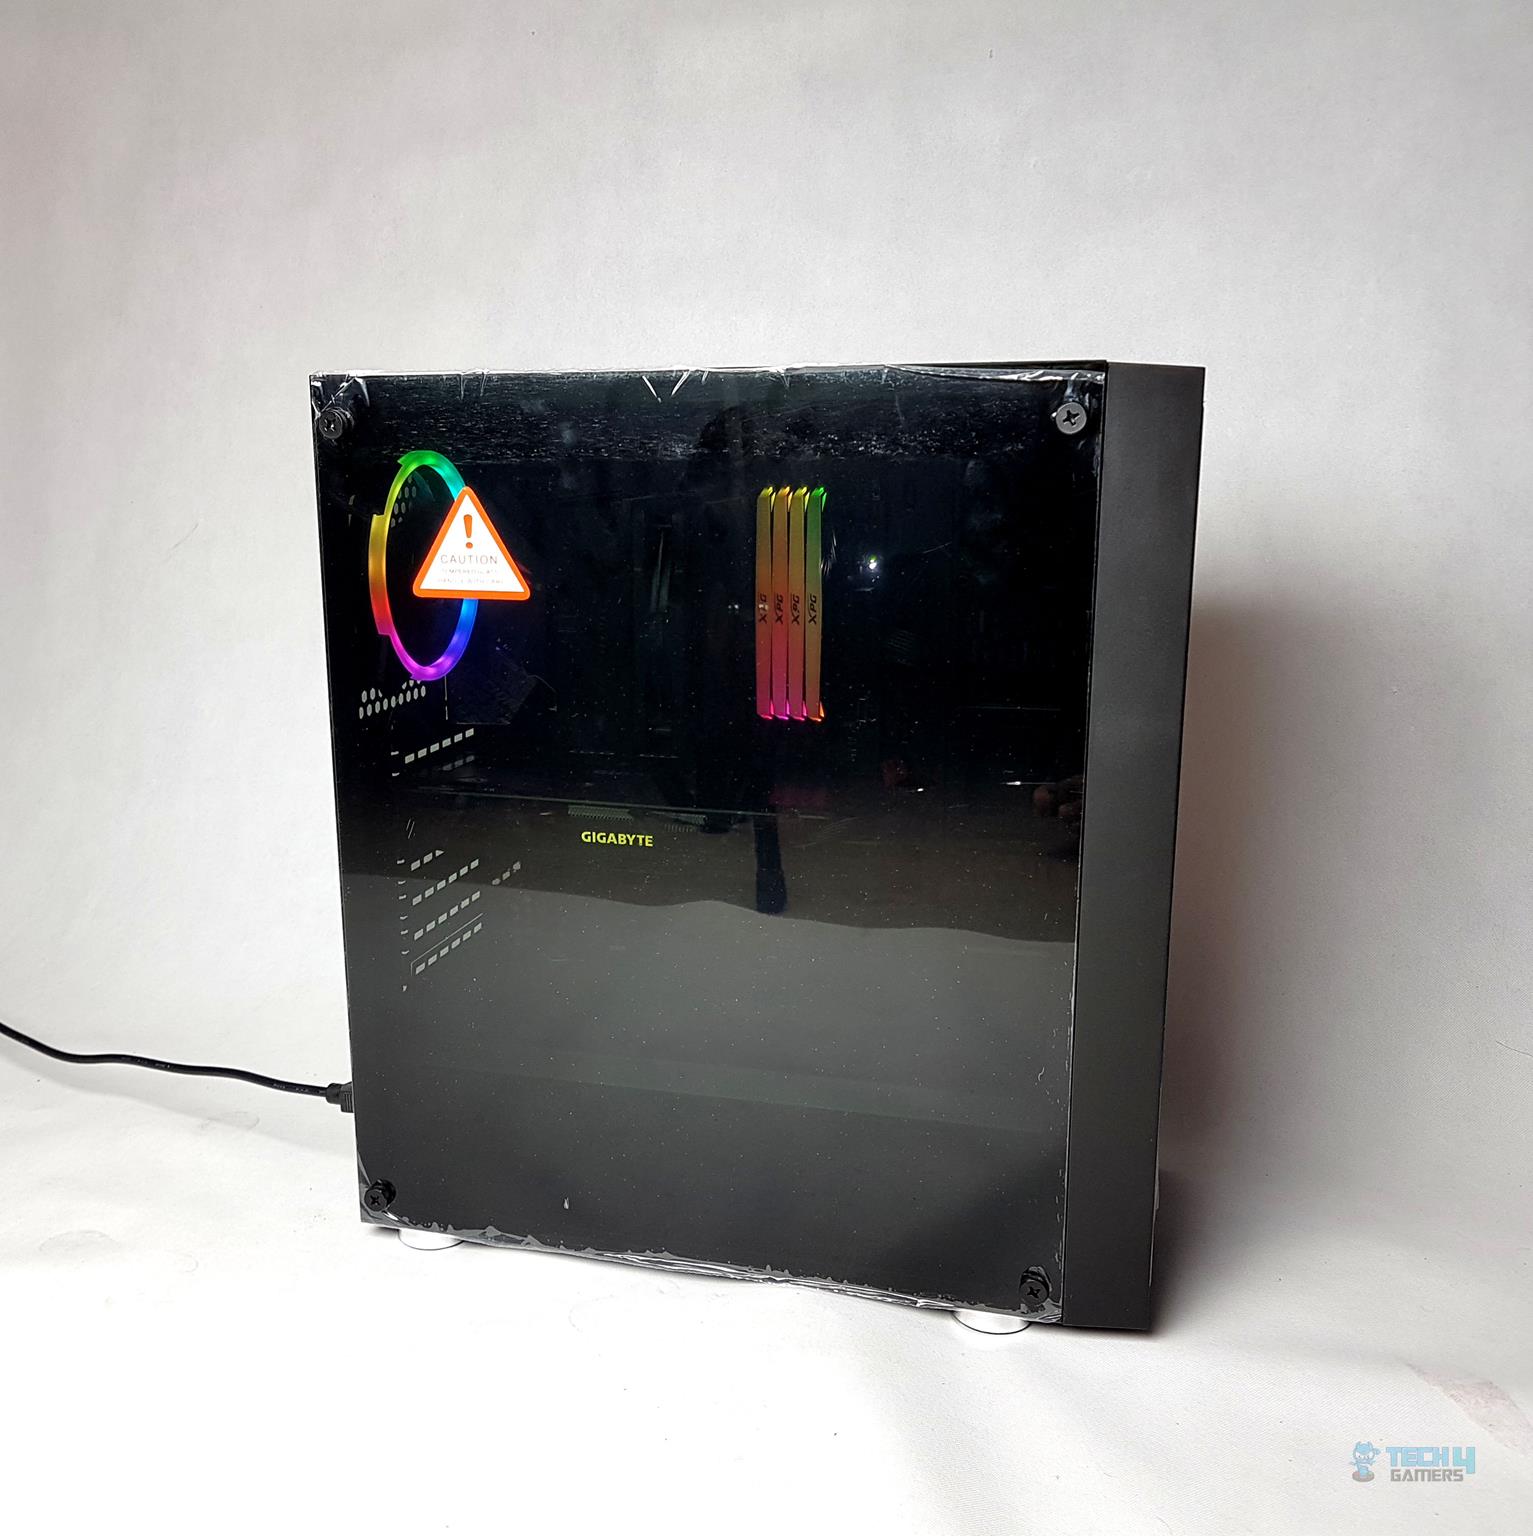
Here are some pictures of the test build:
Thermal Testing
We ran two tests to gauge the chassis performance: one focusing on thermal performance and airflow, the other mimicking real-life usage. Each test was conducted twice—once with the front panel off and once with it on—to measure airflow restrictions. The CPU was set on stock and auto settings with a turbo boost of 4.7GHz.
The Noctua NH-U12s chromax.black fan operated on PWM regulation, while the pre-installed REV fans ran at maximum speed. To stress the system, we used AIDA64 Extreme version 6.0.0 for CPU load and MSI Kombuster for the graphics card, running each test for 30 minutes followed by at least 15 minutes of idling.
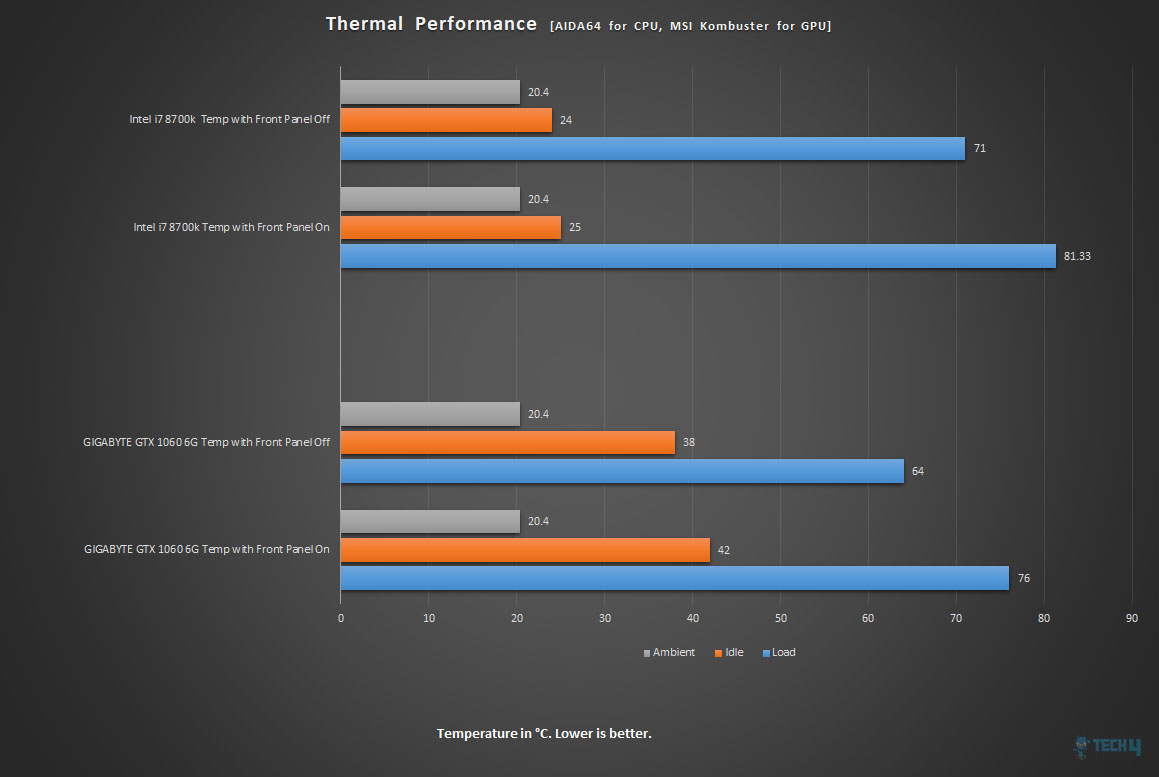
A massive difference of 10°C is observed between using the front panel and taking it off. Any difference above 3-4°C shows the relative restrictive airflow design and this chassis is clearly showing that airflow is highly restricted on the front panel.
Thermal Performance – The Witcher 3: Wild Hunt
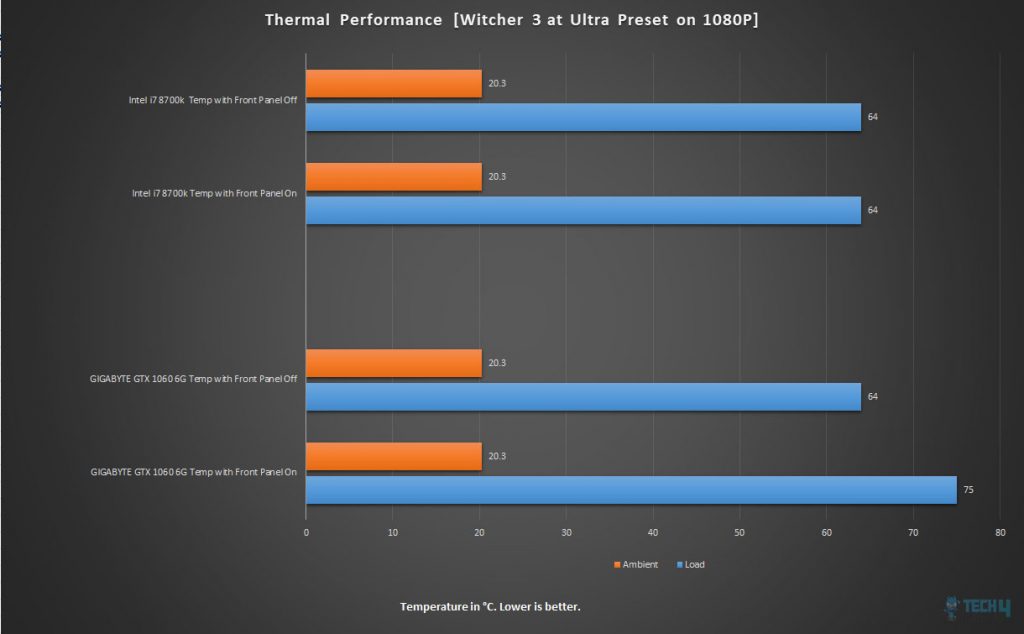
A similar result is observed in the GPU department but the CPU temperatures remained the same.
With an ambient sound level of 37 dB(A), the overall sound level of the Aerocool Quartz Revo was approximately 49-50 dB(A) under load which is impressive.
Should You Buy It?
With the Aerocool Quartz Revo put through rigorous tests, do we find it worthy of recommendation?
Buy It If
✅ You’re a Fan of RGB: If you adore vibrant RGB lighting and love showcasing it through tempered glass, especially within a budget, this chassis offers a splendid visual show.
✅ Looking for a Budget Showcase: For budget-conscious users desiring a chassis with a sleek appearance, tempered glass panels, and ARGB fans, this offers an affordable yet stylish option.
✅ Preference for Flexibility: If you seek flexibility in fan and radiator configurations, appreciate a dual-chamber design, and require accommodation for multiple storage drives, this chassis could suit your needs.
Don’t Buy It If
❌Airflow is a Priority: If optimal airflow is a critical factor for your build, especially for high-performance components, the restricted airflow in this chassis might not meet your requirements. Consider reading our Best Airflow PC Cases guide for more optimal choices.
❌ Planning High-End Cooling: For those aiming for larger radiator sizes or planning elaborate cooling setups, limitations on radiator placements and space constraints might restrict your options.
❌ Ease of Installation Matters: If hassle-free installations, such as backplate mounting for certain coolers or dealing with pre-installed connectors, are a priority, potential installation issues might be a concern in this chassis.
Conclusion
The Aerocool Quartz Revo flaunts a mid-tower chassis featuring addressable RGB fans and dual tempered glass panels. Made from steel, plastic, and tempered glass, it houses 4x 120mm ARGB fans – three at the front and one at the rear. It accommodates mini-ITX, micro-ATX, and standard ATX motherboards, featuring a dual-chamber design with a fixed PSU shroud.
A dedicated lighting controller enables synchronization of up to 6 ARGB fans, offering 7 dynamic and 7 static lighting modes, compatible with popular motherboard lighting software.
Mounting certain cooler backplates may pose challenges, and the non-reusable PCIe slot covers and bundled Molex connectors for fans can be inconvenient. The limited airflow, especially with the front panel on, resulted in a significant temperature difference of over 10°C during tests. So, while competitive in its price range, the absence of a meshed front panel hampers its potential against other offerings in the market.
We are thankful to Texon-Ware for giving us the opportunity to review the Aerocool Quartz Revo.
Recent Updates
- December 19, 2023: Few text changes to improve readability. Also added image galleries.
Thank you! Please share your positive feedback. 🔋
How could we improve this post? Please Help us. 😔
I am Wajih Hyder Chohan – a PC Hardware Nerd who always analyzes the latest products and reviews them. Usually, people call me boring, but I can’t limit my love for Hardware!


