 Threads
Elegance Incarnate!
Review Summary
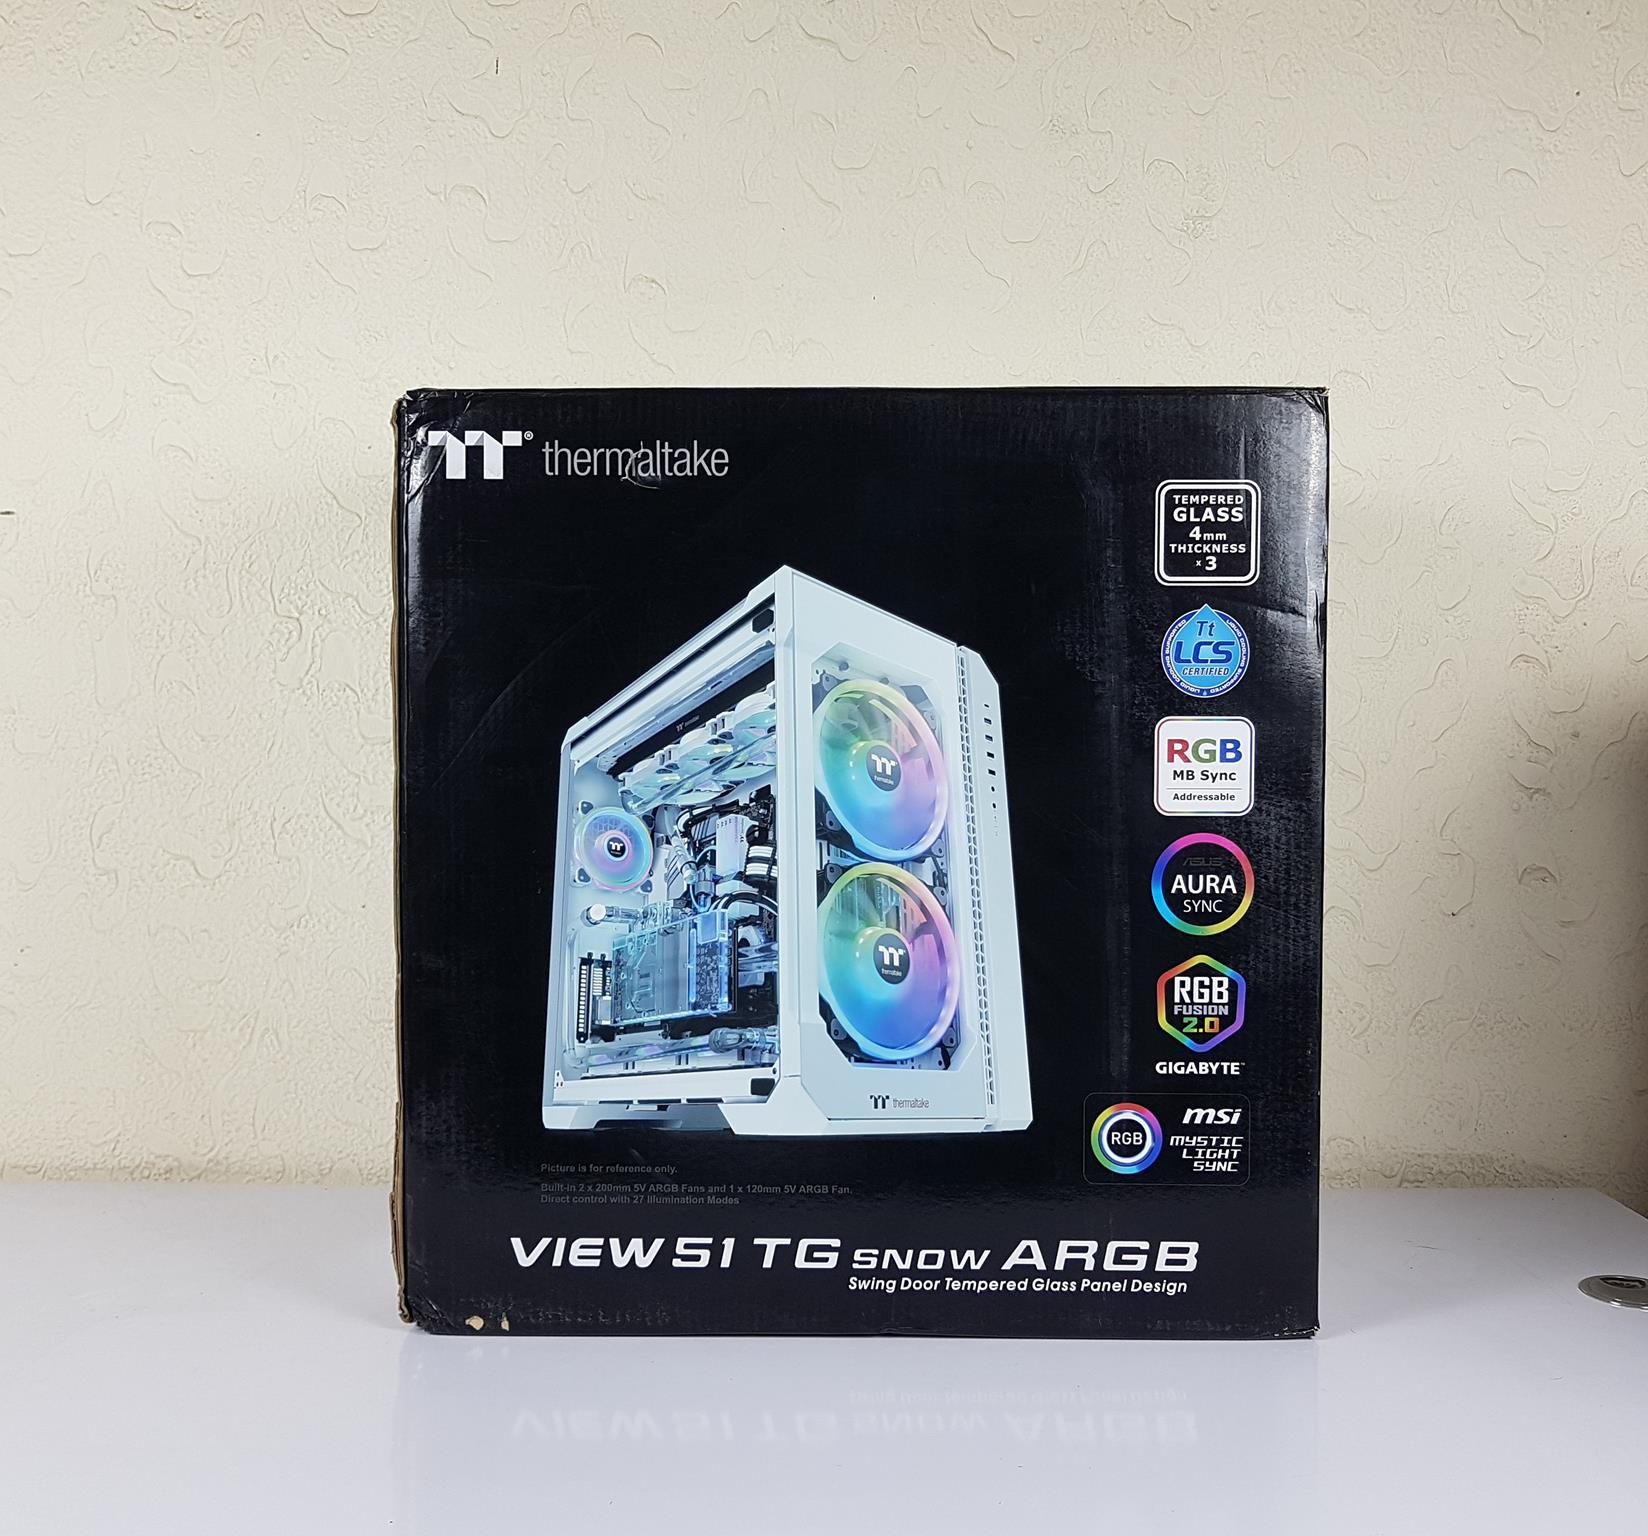
The Thermaltake View 51 TG SNOW ARGB Edition is a spacious full-tower PC case with a sleek white design featuring ARGB lighting, ample cooling options, and a modular layout.
Hours Tested: 11

Overall
-
Design - 9.5/10
9.5/10
-
Versatility - 8/10
8/10
-
Build Quality - 9/10
9/10
-
Value - 8.5/10
8.5/10
Pros
- Spacious Design
- ARGB Lighting
- Modular Layout
- Aesthetic Design
- Customization
- Glass Sides
Cons
- Tower Size
- Bold Aesthetics
- Limited Storage


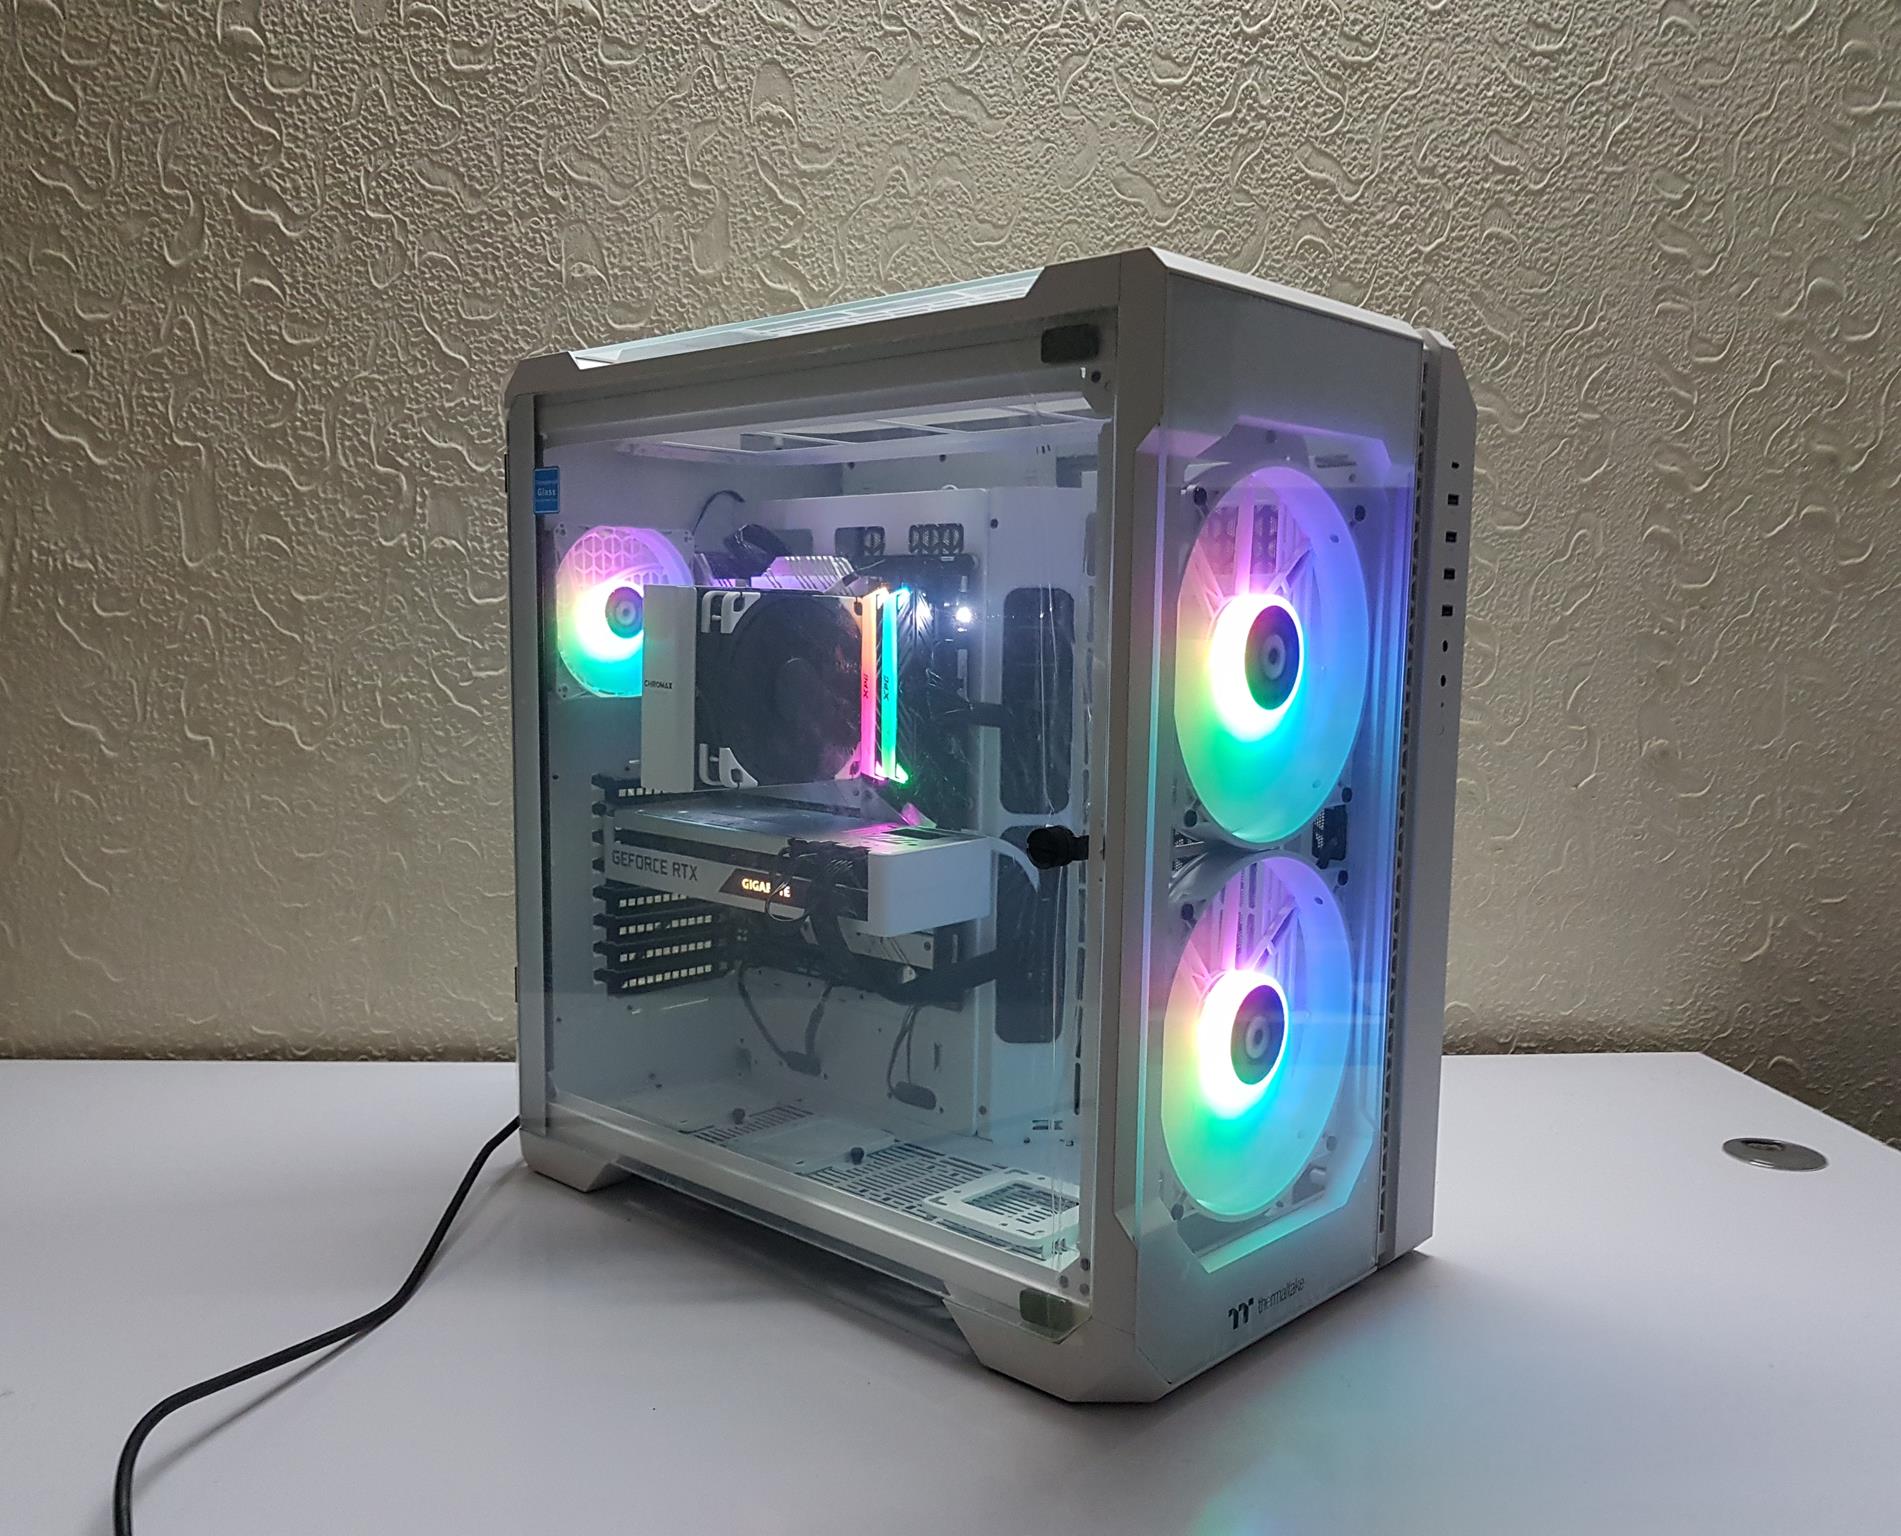
Delving into the world of PC cases, the Thermaltake View 51 caught my eye as a stellar addition to the View series. Its robust build and generous interior space immediately set it apart. Personally, I’m captivated by the SNOW edition, flaunting an elegant white aesthetic that adds a touch of sophistication. With the inclusion of 2x 200mm ARGB fans upfront and a 120mm ARGB fan at the rear, it embraces Thermaltake’s Dismantlable Modular Design (DMD). The features resonate with the allure of the impressive Lian Li O11 Dynamic, making it a compelling choice for enthusiasts who crave a perfect blend of style and functionality.
Key Takeaways
- Thermaltake View 51 is a full tower PC case with ARGB lighting, a spacious interior, and a modular design.
- Thermaltake View 51 is ideal for PC enthusiasts and builders seeking a visually appealing, high-performance case with ample space for customizations.
- Thermaltake View 51 may not be liked by users who prioritize compactness or minimalistic designs, as they may find the size and bold aesthetics less appealing.
- Why you can trust Tech4Gamers: Our reviews are based on dedicated hands-on testing by our team of experienced hardware experts. Find out more about how we test.
The specs are as below:
| P/N | CA-106-00M6WN-00 |
| Series | View |
| Model | View 51 TG Snow |
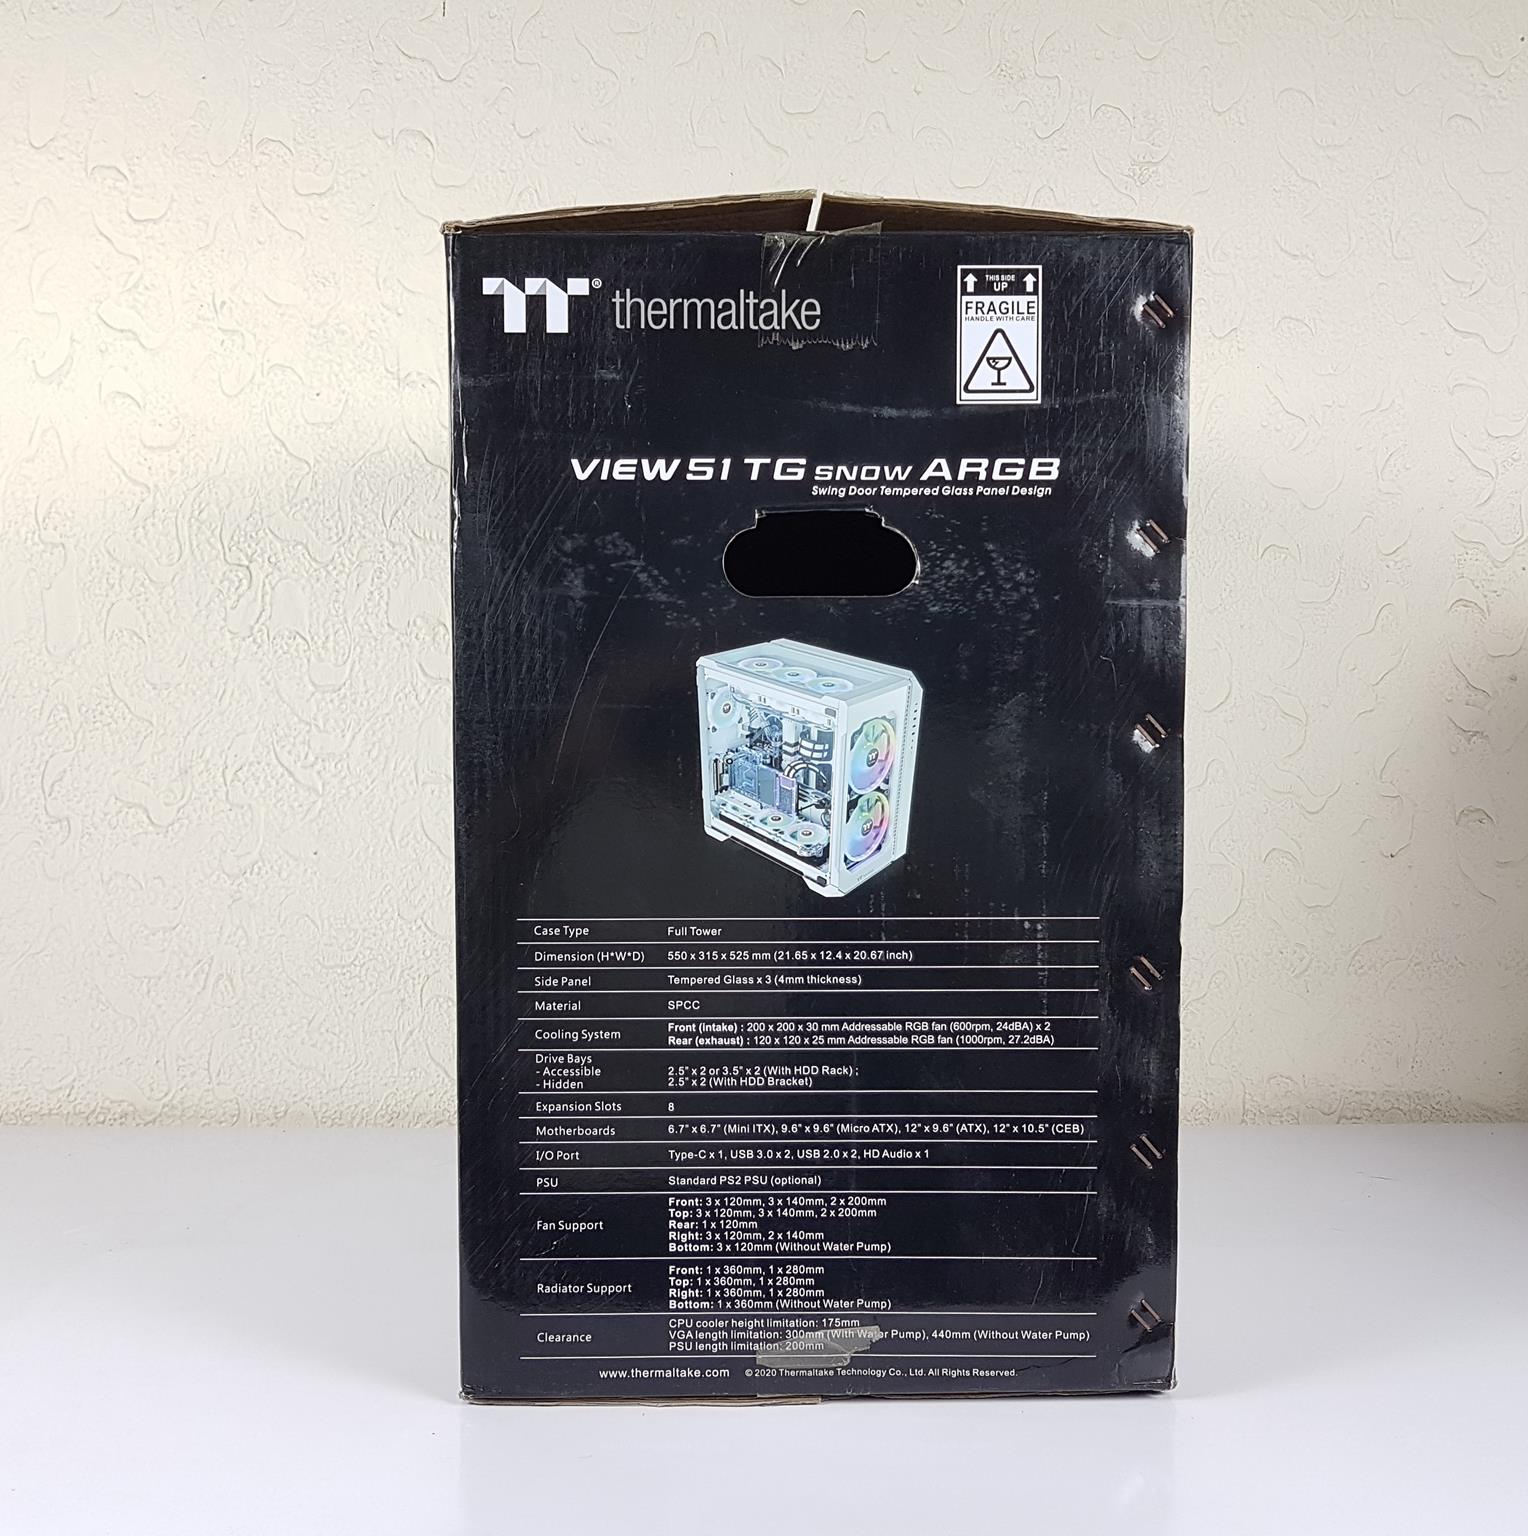
| Case Type | Full Tower |
| Dimensions (HxWxD) | 550 x 315 x 525 mm (21.65 x 124 x 20.67 inch) |
| Net Weight | 14.95 kg |
| Side Panel | 3 x Tempered Glass (4mm thickness) |
| Color | Exterior & Interior: White |
| Material | SPCC |
| Cooling System | Front (intake): 2 x 200 x 200 x 30mm Addressable RGB Fan (600rpm, 24dBA) Rear (exhaust): 1 x 120 x 120 x 25mm Addressable RGB Fan (1000rpm, 27.2 dBA) |
| Drive Bays | 2 x 2.5″ (With HDD Bracket) 2 x 3.5″ or 2 x 2.5″ (With HDD Cage) |
| Expansion Slots | 7 |
| Motherboards | 6.7″ x 6.7″ (Mini ITX), 9.6″ x 9.6″ (Micro ATX), 12″ x 9.6″ (ATX), 12″ x 10.5″ (E-ATX) |
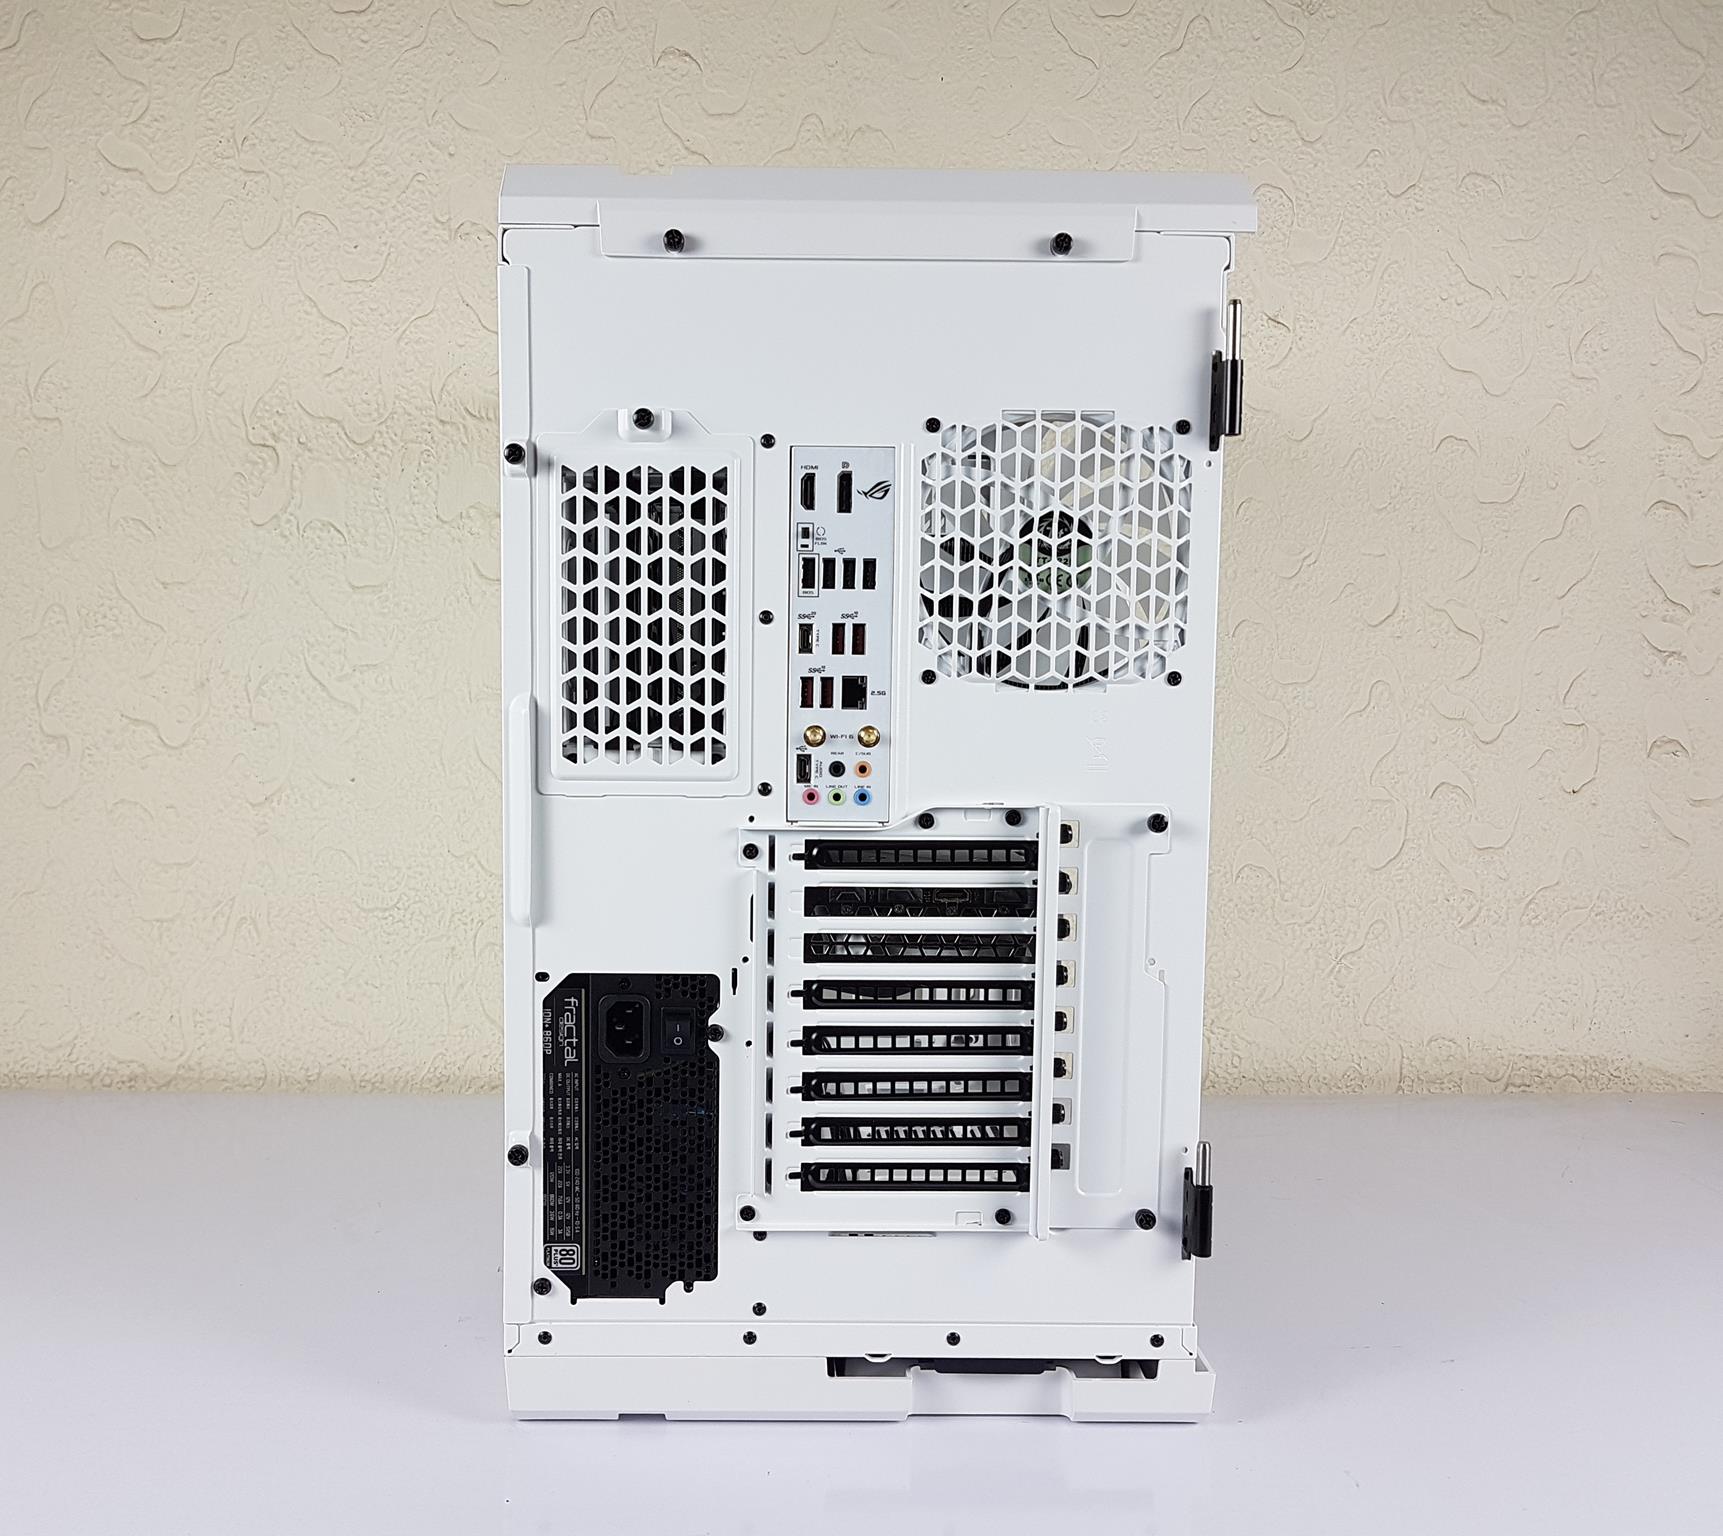
| I/O Port | 1 x USB 3.1 (Gen 2) Type C, 2 x USB 2.0, 2 x USB 3.0, 1 x HD Audio, 1 x RGB Button |
| PSU | Standard ATX PSU (optional) |
| Fan Support | Front: 2 x 200mm or 1 x 200mm + 3 x 140mm or 2 x 140mm + 1 x 140mm or 3 x 120mm or 2 x 120mm or 1 x 120mm |
| Radiator Support | Front: 1 x 360mm or 1 x 240mm or 1 x 120mm; Top: 1 x 280mm or 1 x 140mm; Bottom: 1 x 360mm or 1 x 240mm or 1 x 120mm |
| Clearance | Right: 1 x 360mm or 1 x 240mm or 1 x 120mm; Top: 1 x 260mm or 1 x 140mm |
| CPU Cooler Height Limitation | 175mm |
| VGA Length Limitation | 300mm (With Water Pump), 440mm (Without Water Pump) |
| PSU Length Limitation | 200mm |
Unboxing
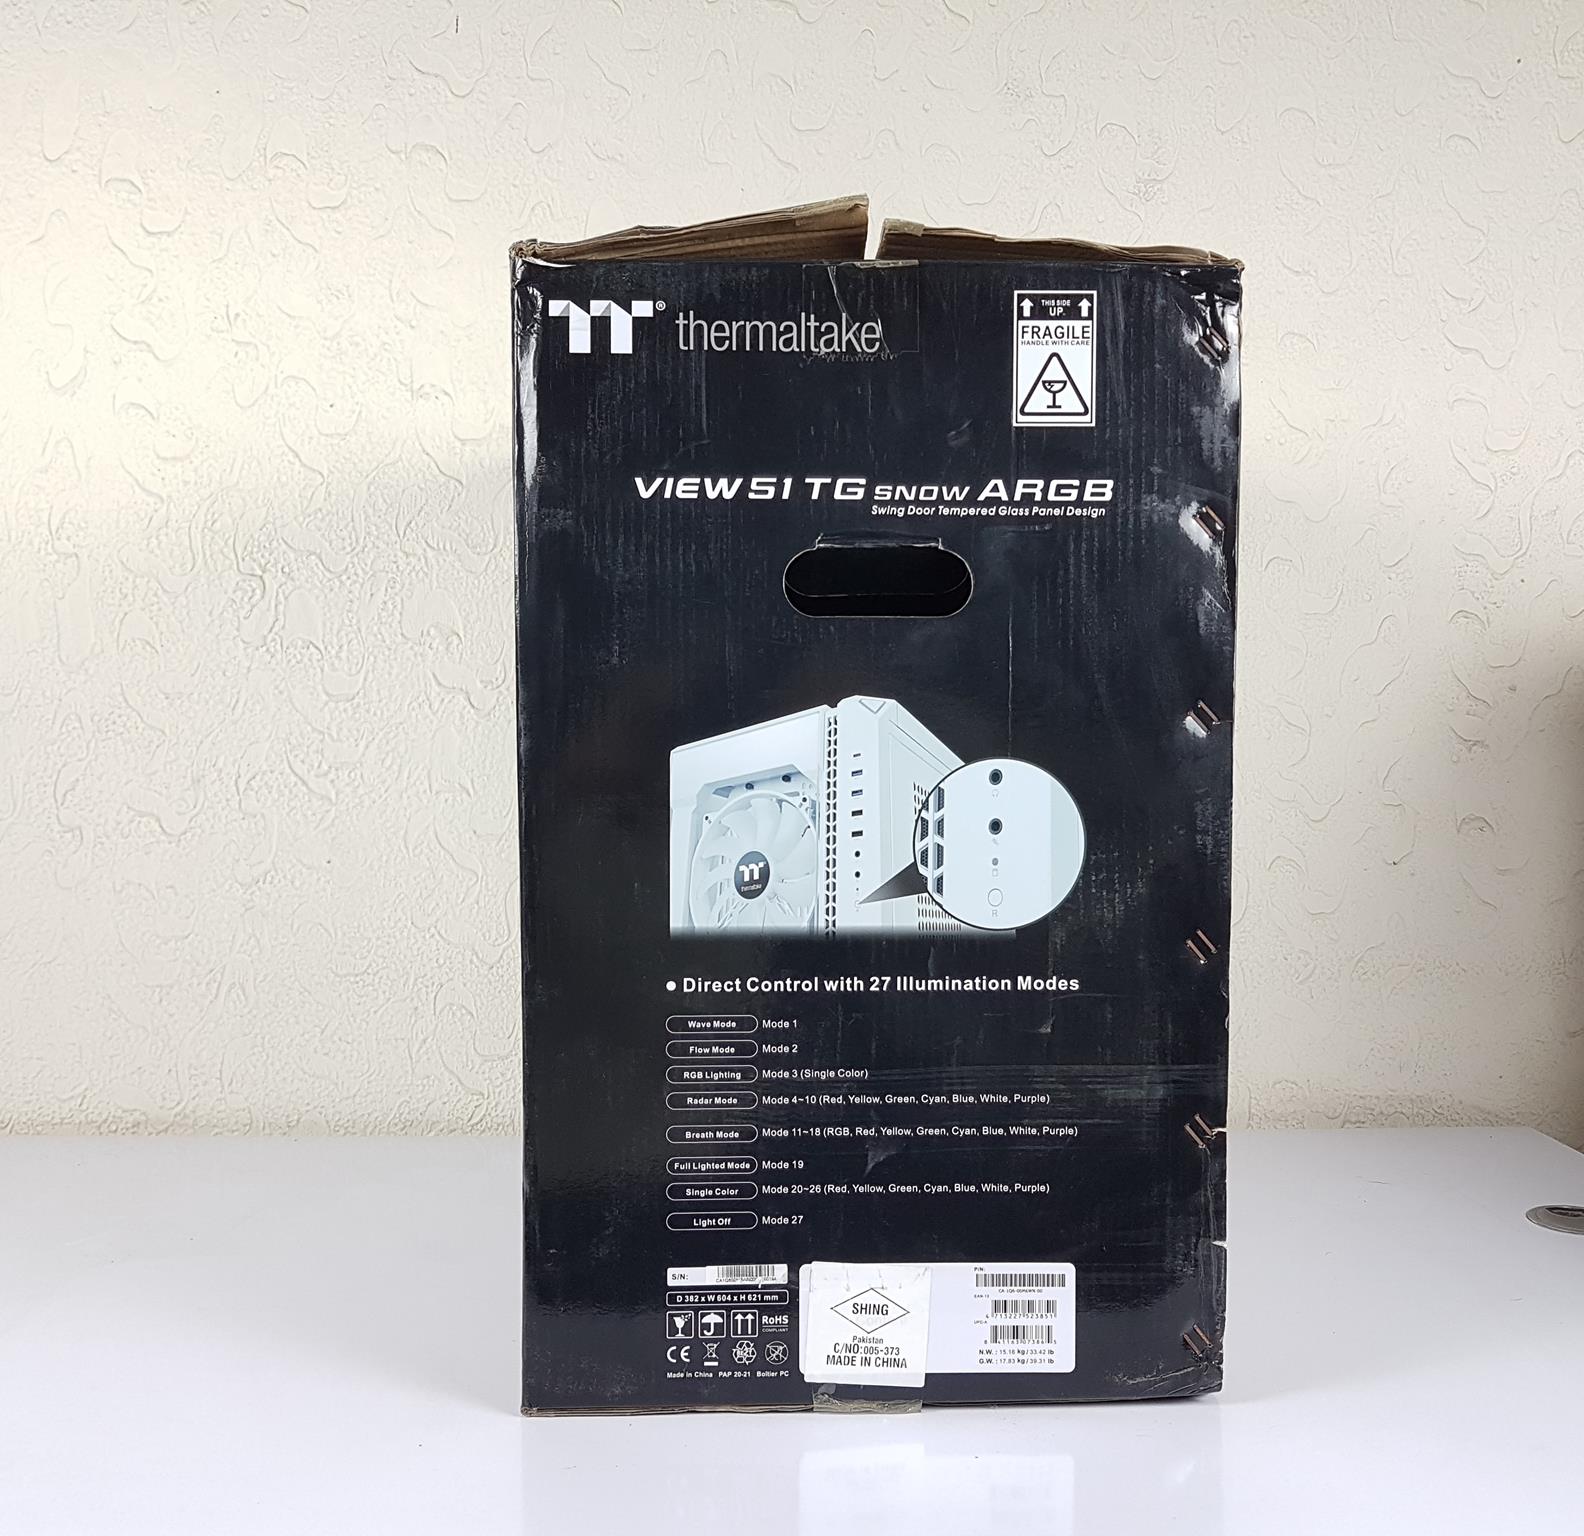
The PC Case is shipped inside a large size cardboard box finished in a black color. This is a premium PC case bearing TT Premium from the Thermaltake hence the packing box has that touch as well. This is a heavy box weighing. Keep that in mind when handling.

Contents
There is a black color box provided in the main packing box. It has all the accessories inside.

Accessories include:
- Various Screws
- Long M3 screws for 200mm Fans
- The user manual
- Cable ties
- MB Signal Bridge Cable
- 8x Pads
- Speaker
- Hook and Loop
Closer Look
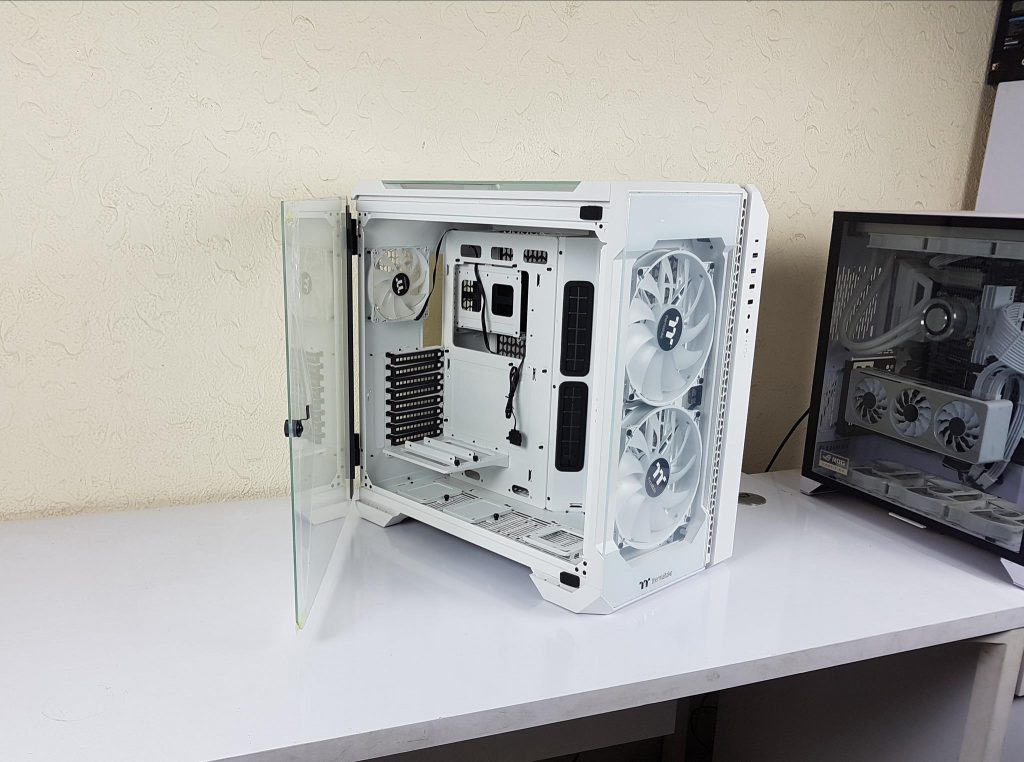
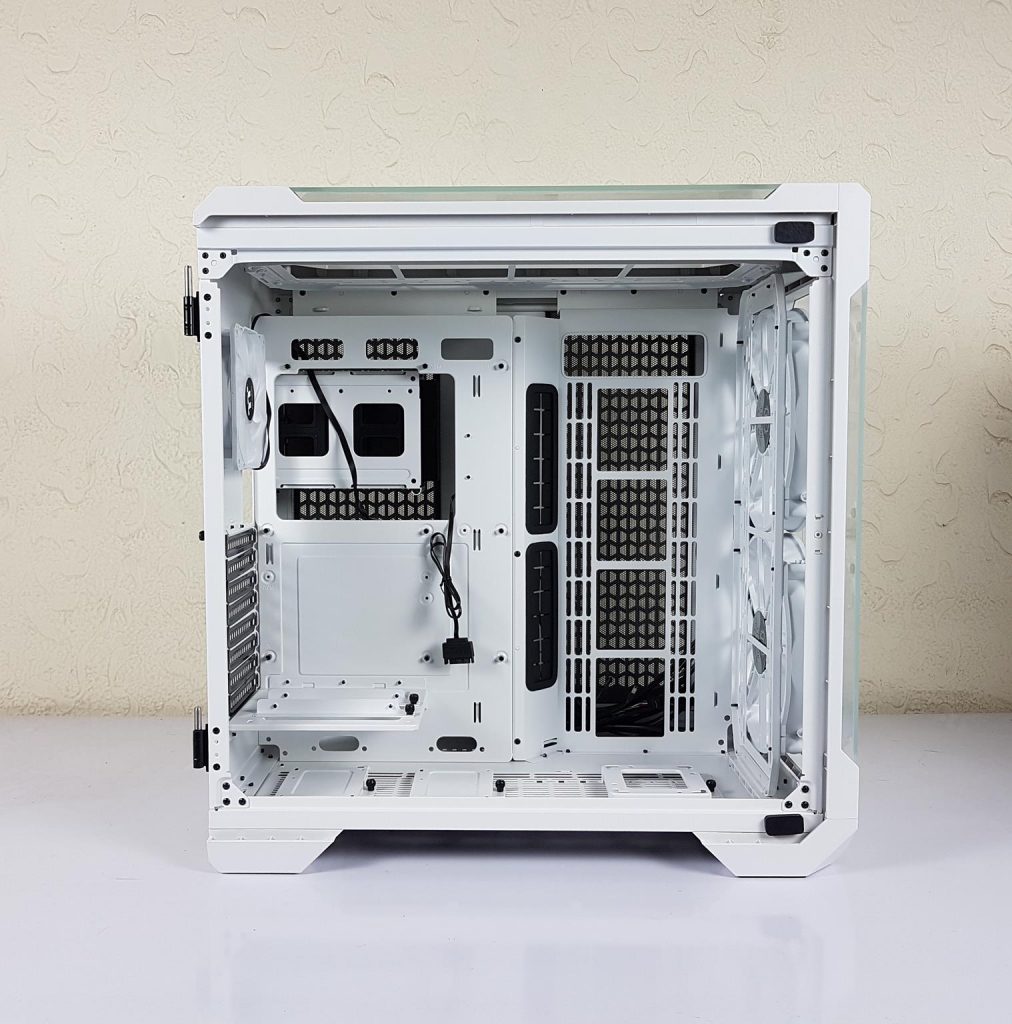
The Thermaltake View 51 is like a canvas for DIY enthusiasts, featuring swing-out glass panels that let you proudly showcase your PC craftsmanship. Its unique design includes 4mm tempered glass on three sides, highlighting your internal components. The I/O ports, situated vertically on the right side, add a touch of modernity.
Setting it apart from other View Series cases, the View 51 can accommodate two 200mm fans at both the front and top, offering endless possibilities for cooling configurations. This Snow ARGB Edition, clad in white, not only captivates with its appearance but also provides ample space for the latest PC hardware.
Measuring 550Hx325Wx525Dmm, this full ATX case is crafted from SPCC, glass, and plastic materials, weighing 14.95KG. It’s more than just a case; it’s a canvas for your PC dreams, ready to turn heads with its stunning aesthetics and versatility.
Provisions
Following are the fan mounting possibilities:
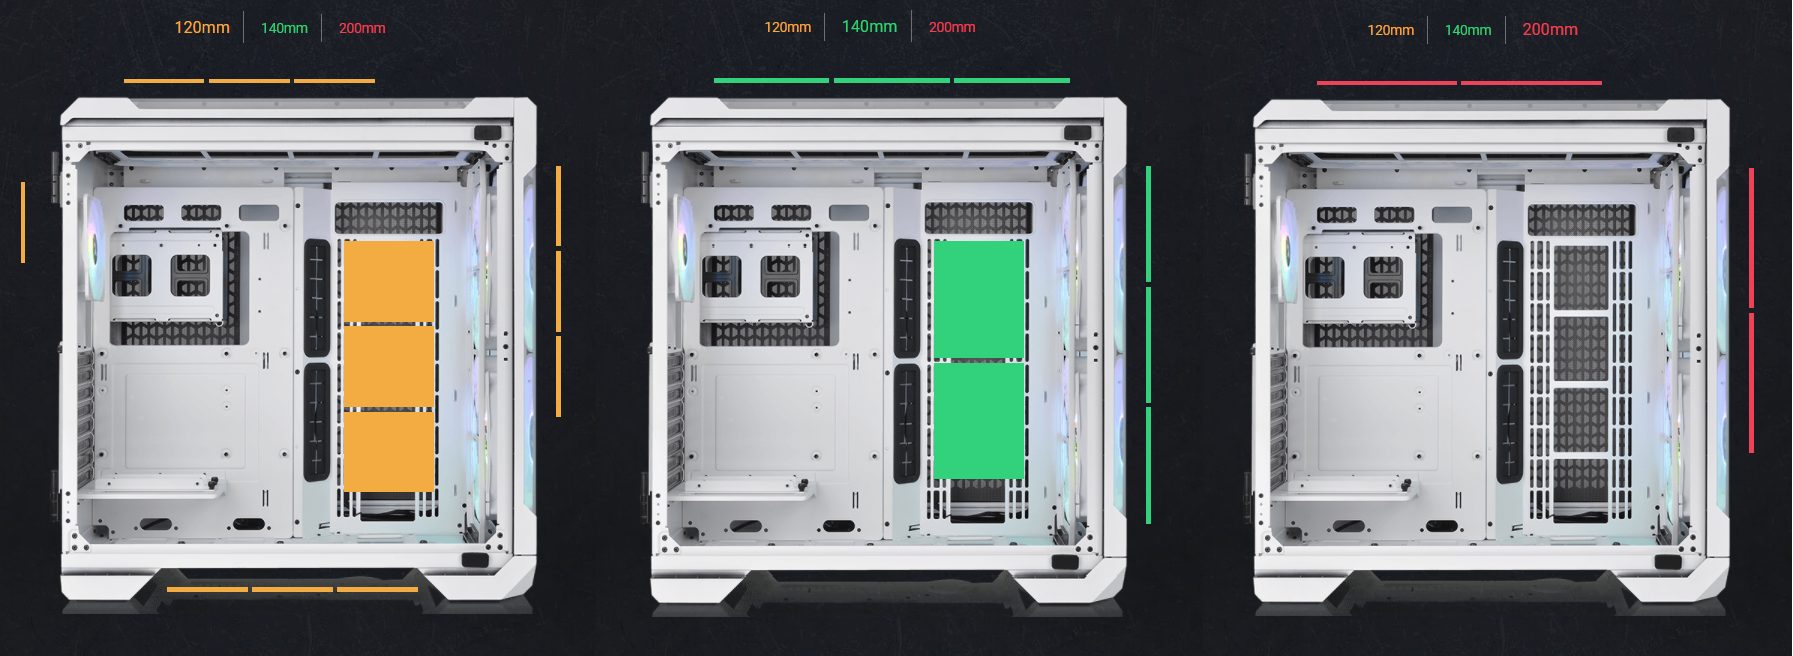
- Up to 3x 120/140mm or 2x 200mm fans on the front [2x 200mm ARGB White fans pre-installed]
- 1x 120mm fan on the rear (Pre-Installed)
- Up to 3x 120/140mm or 2x 200mm fans on the top
- Up to 3x 120mm fans on the base.
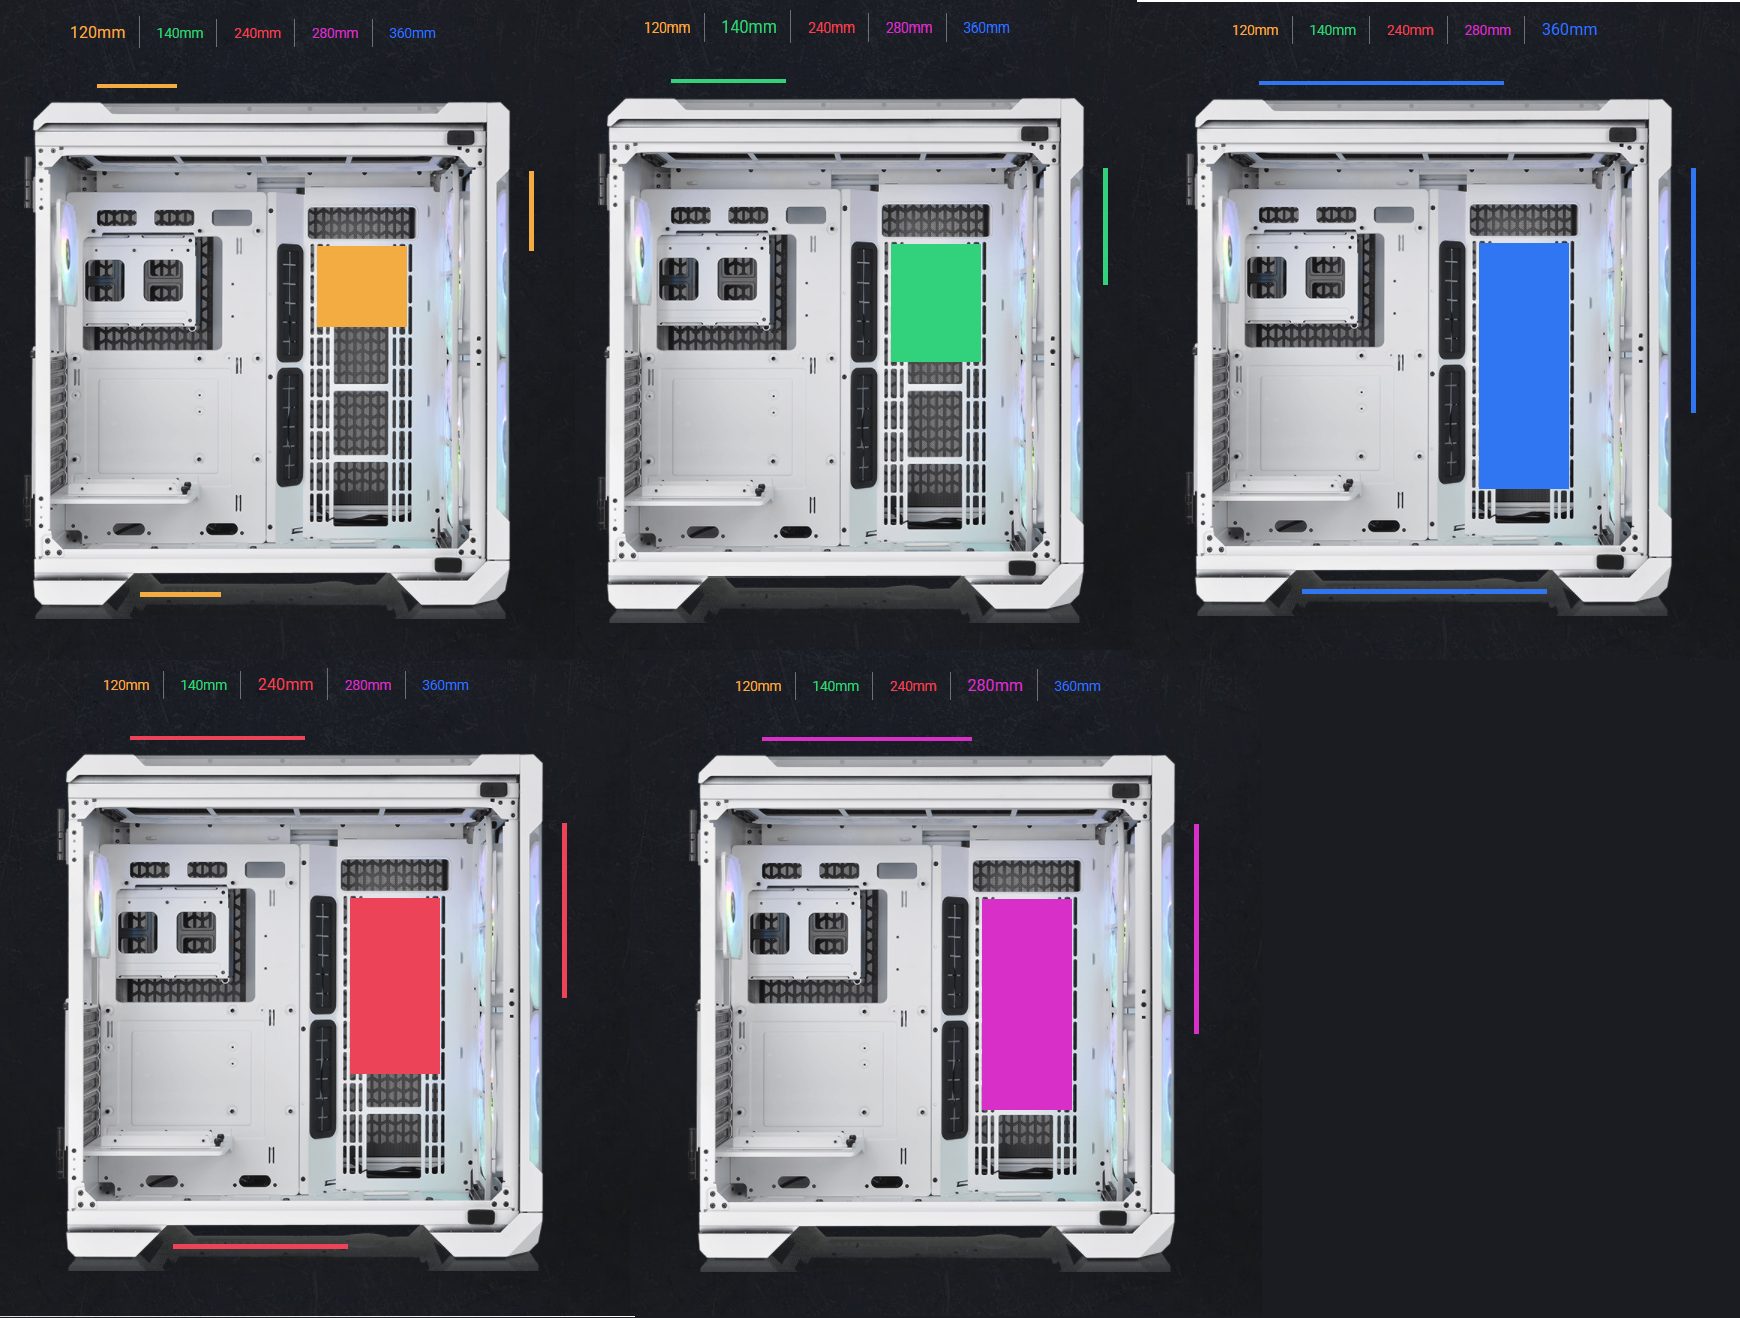
Following is the radiator mounting support:
- Up to 360mm Radiator on the front
- Up to 360mm Radiator on the top
- Up to 360mm Radiator on the side
- Up to 360mm Radiator on the base [No provision of 140mm mounts on the base]
Storage provision is:
- Up to 4x 2.5” Drives
- Up to 2x 3.5” Drives in combination with the 2.5” drives
The case has a support for up to 4x drives in total which is a mediocre provision given the full tower case.
The clearance is as below:
- CPU Cooler of up to 175mm height is possible
- Graphics Card of up to 440mm length without water pump and 300mm with the water pump on the front.
- PSU length of 200mm
Exterior
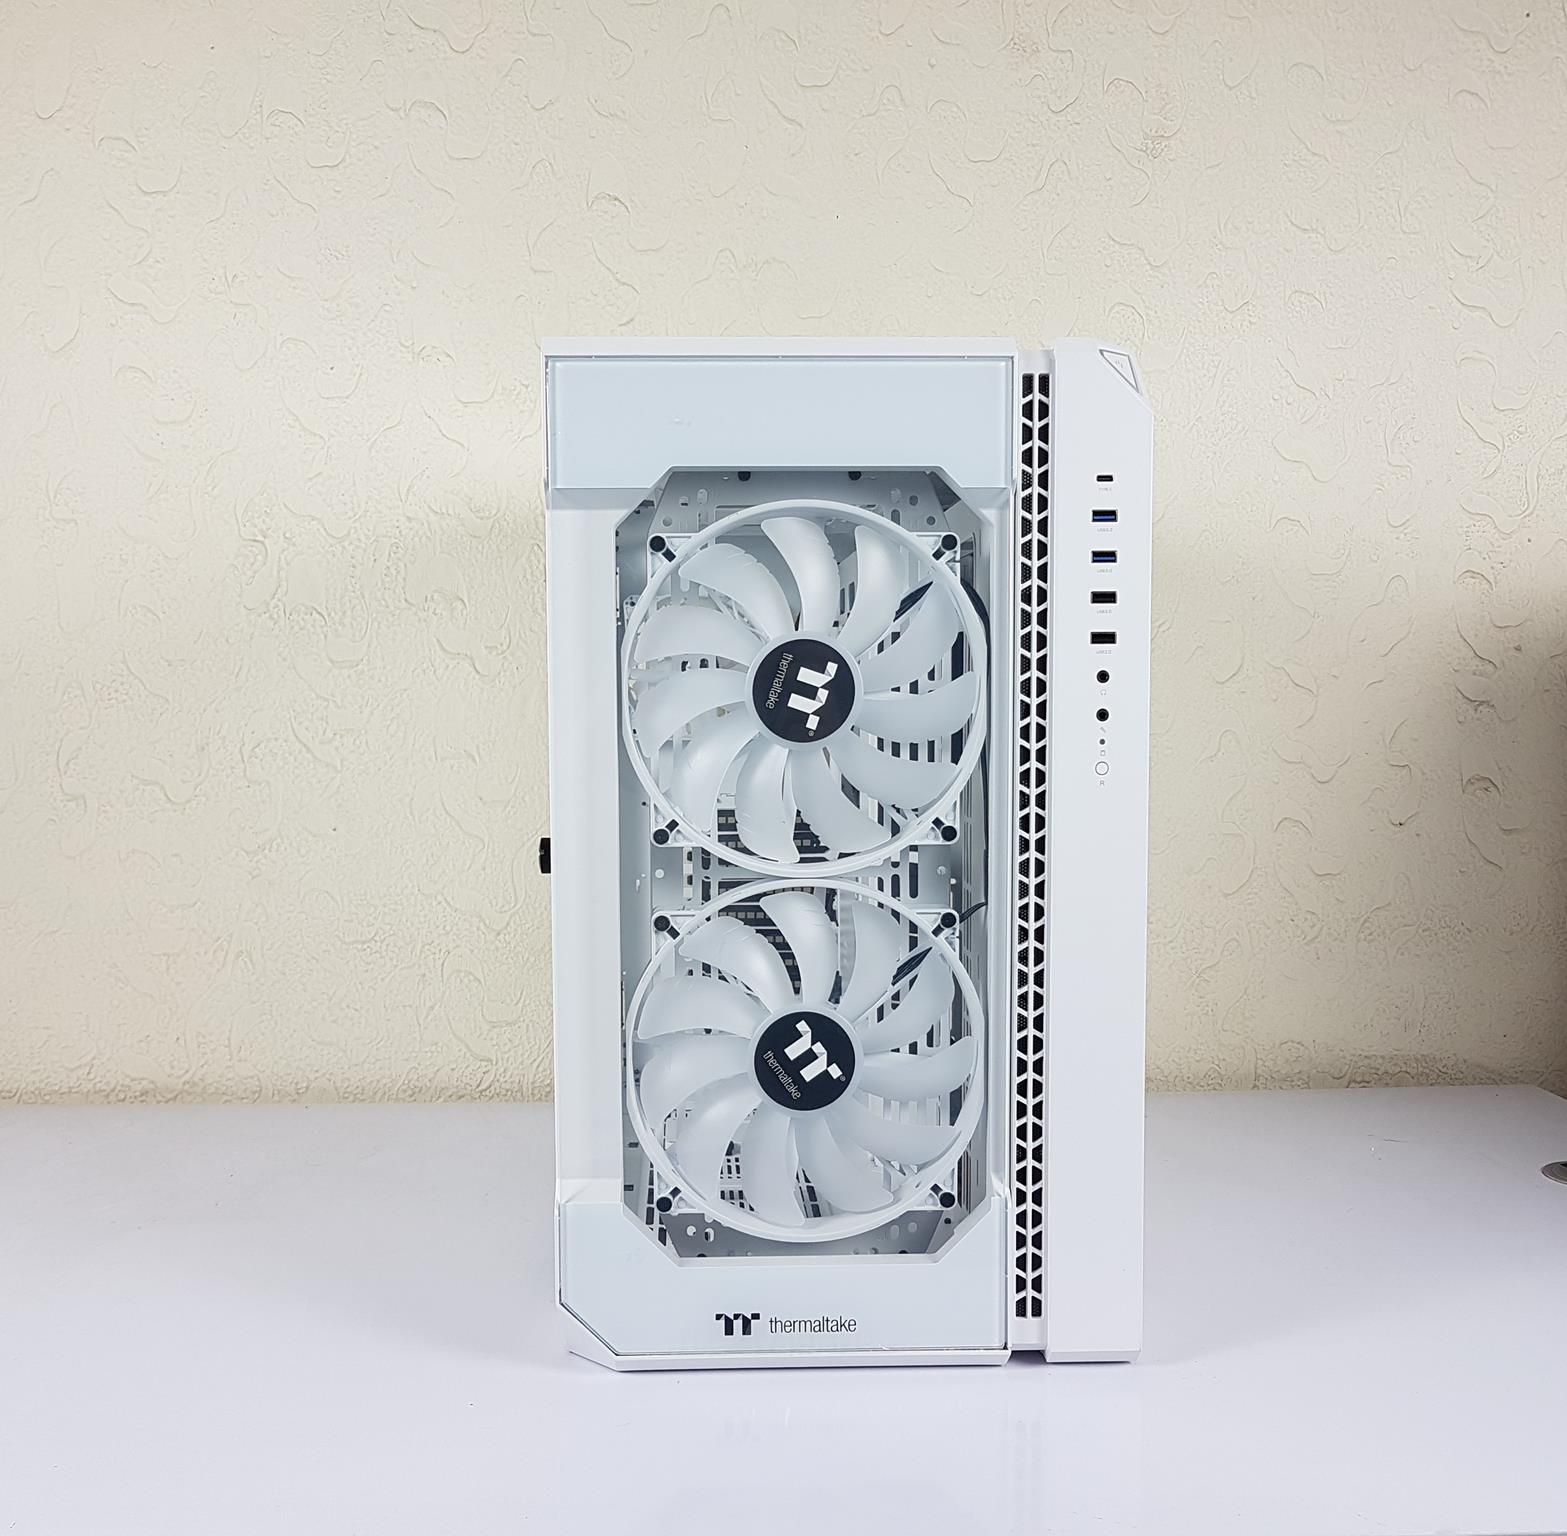
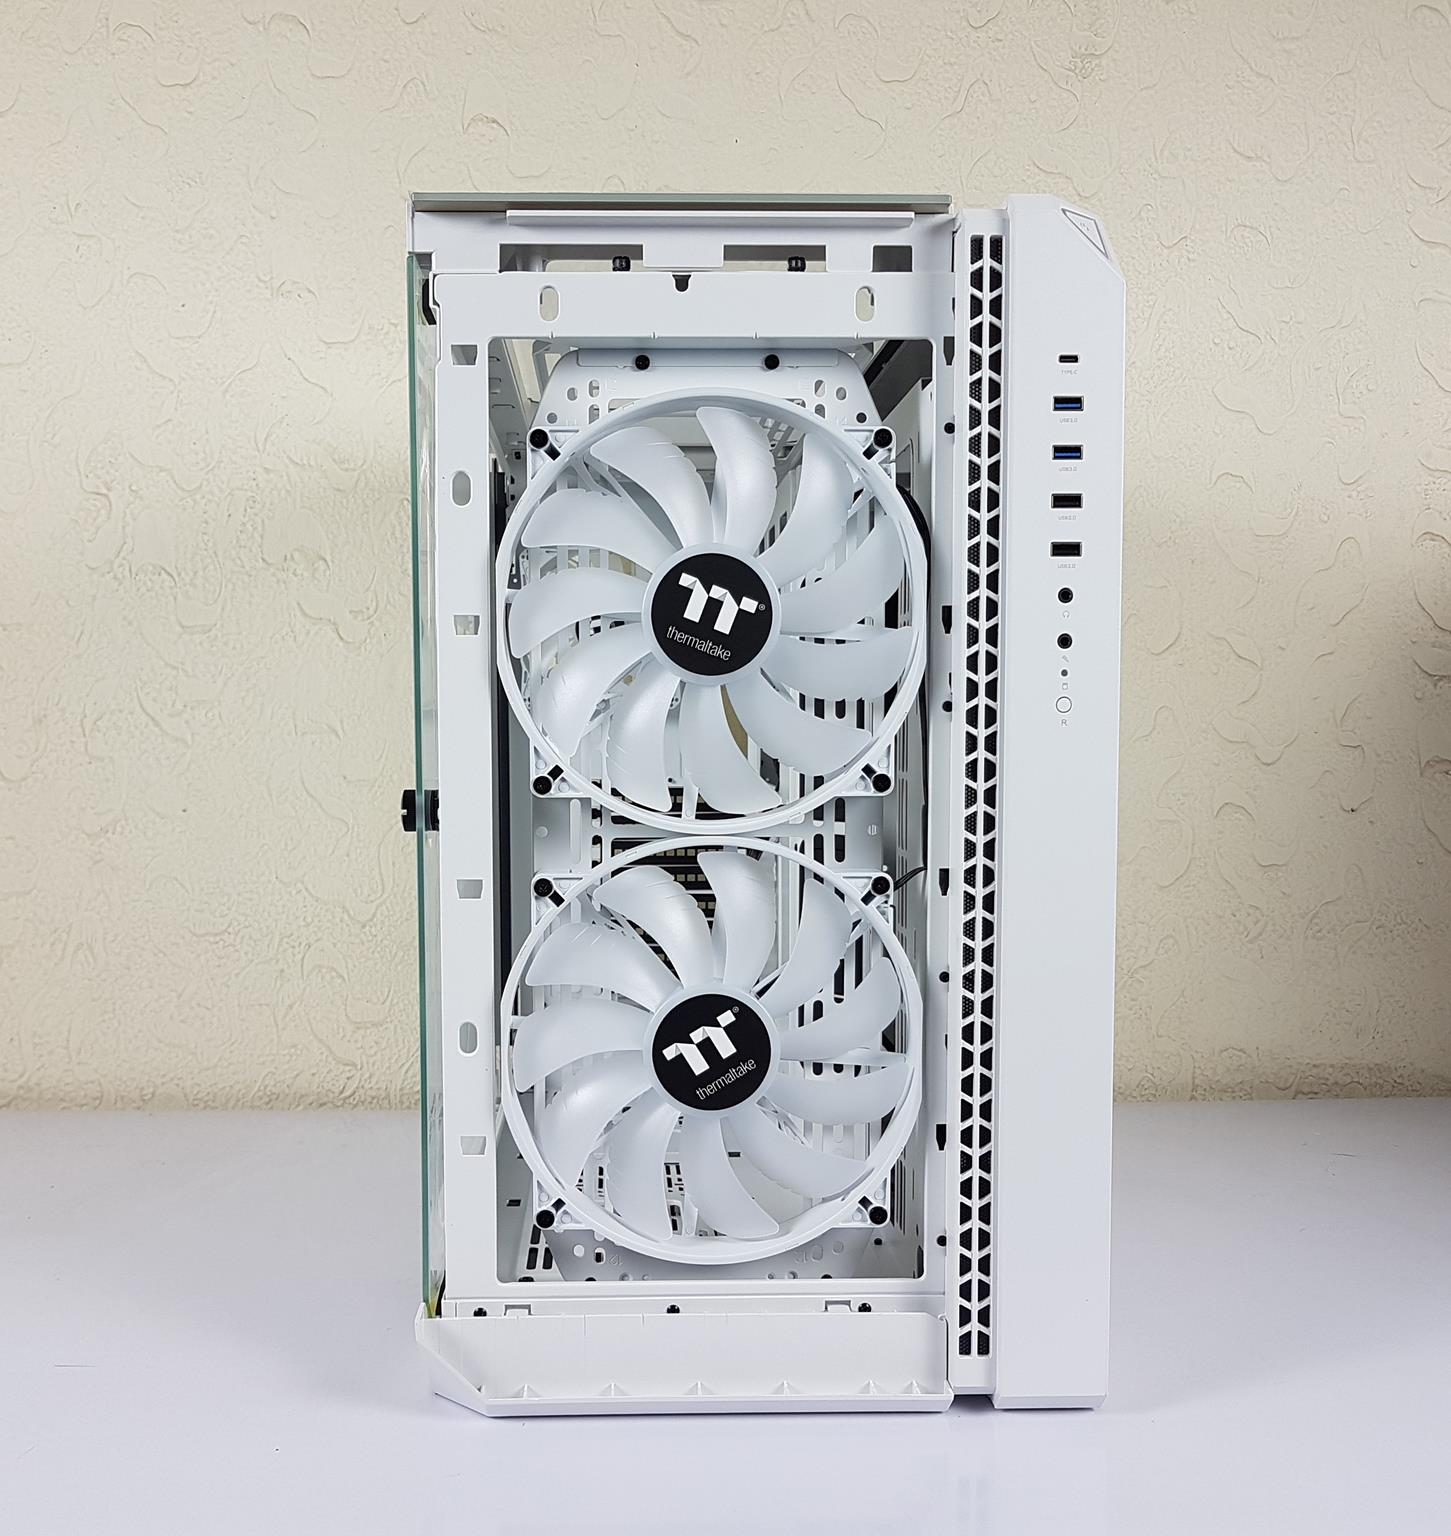
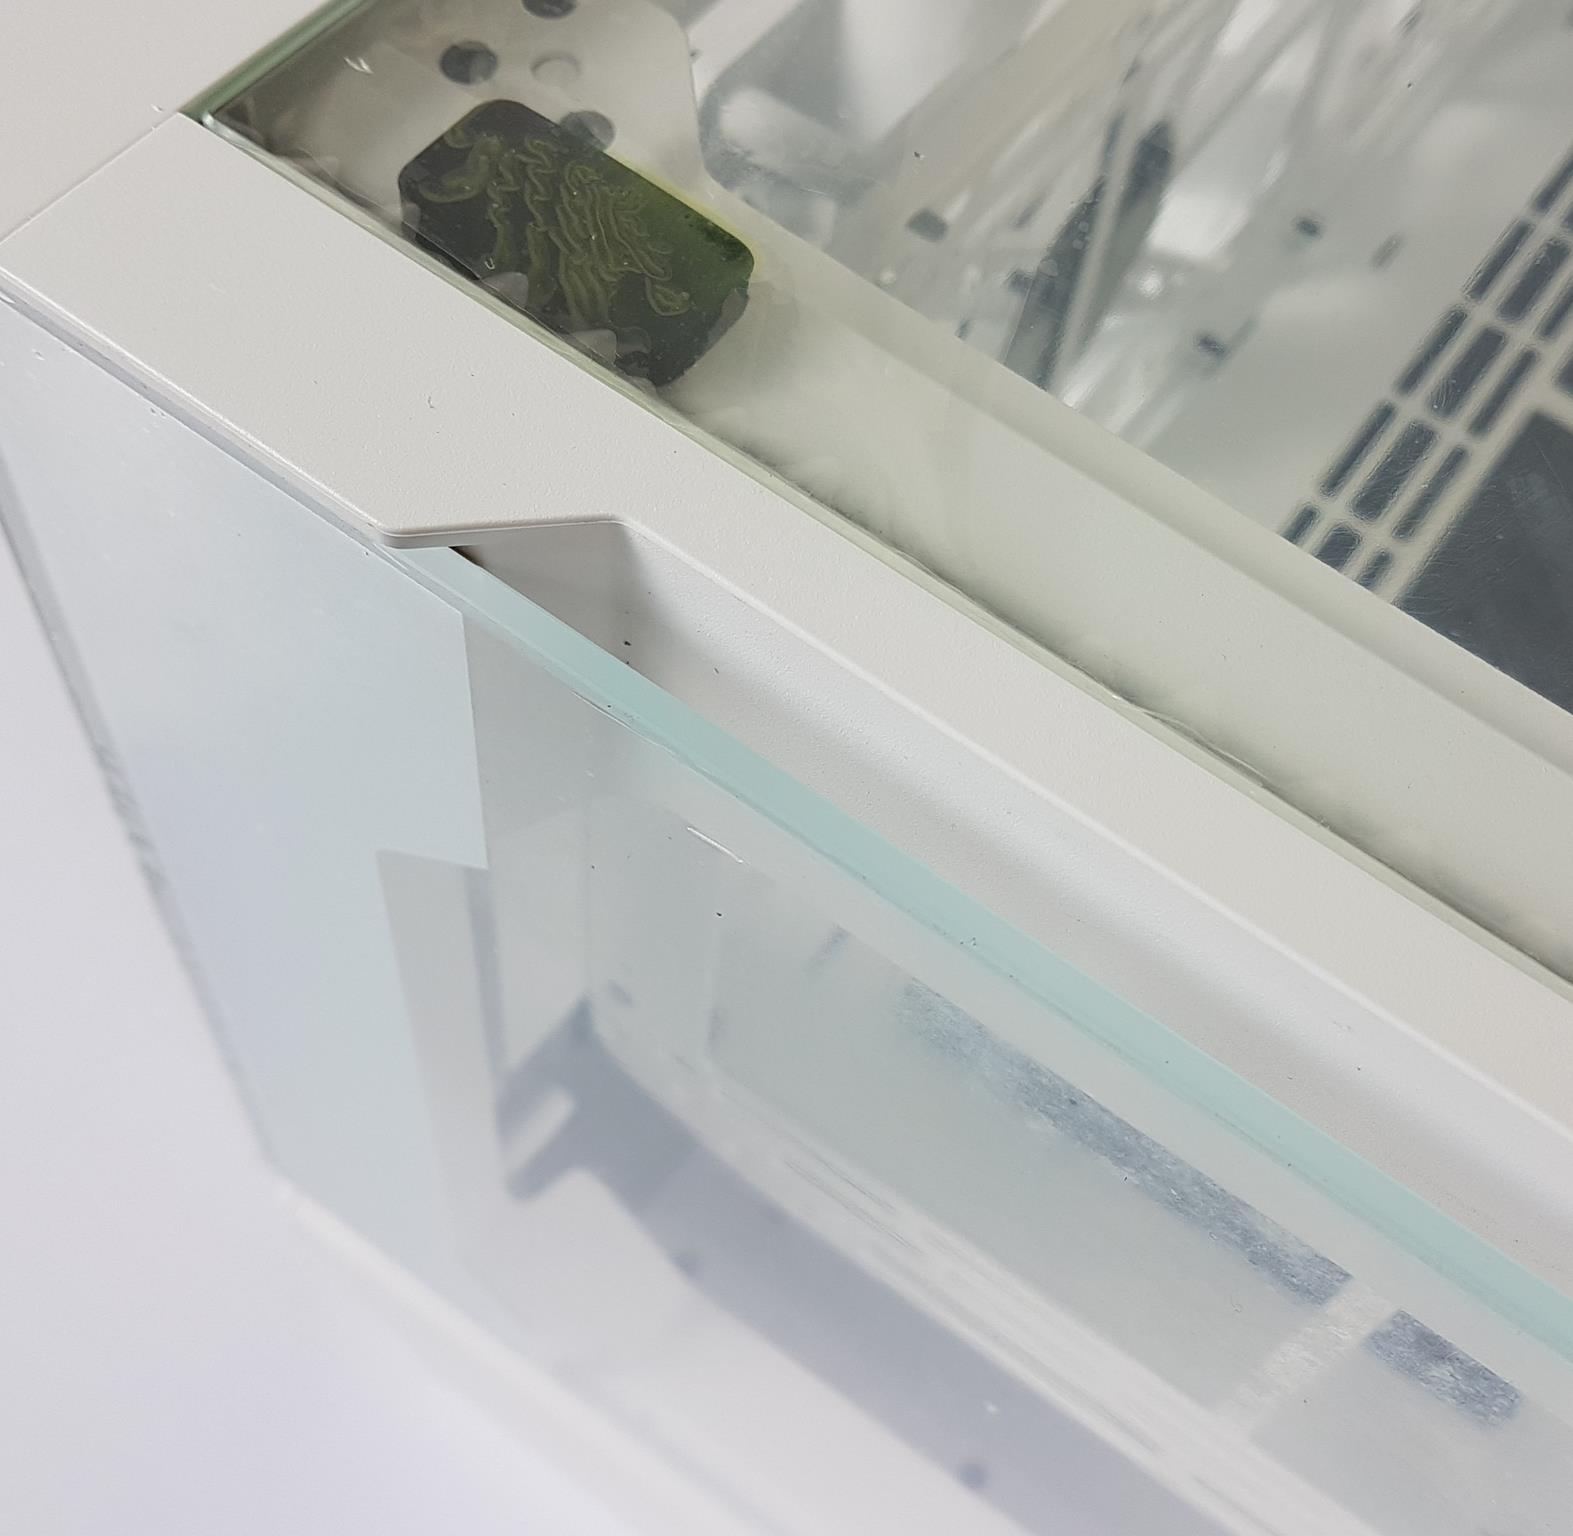
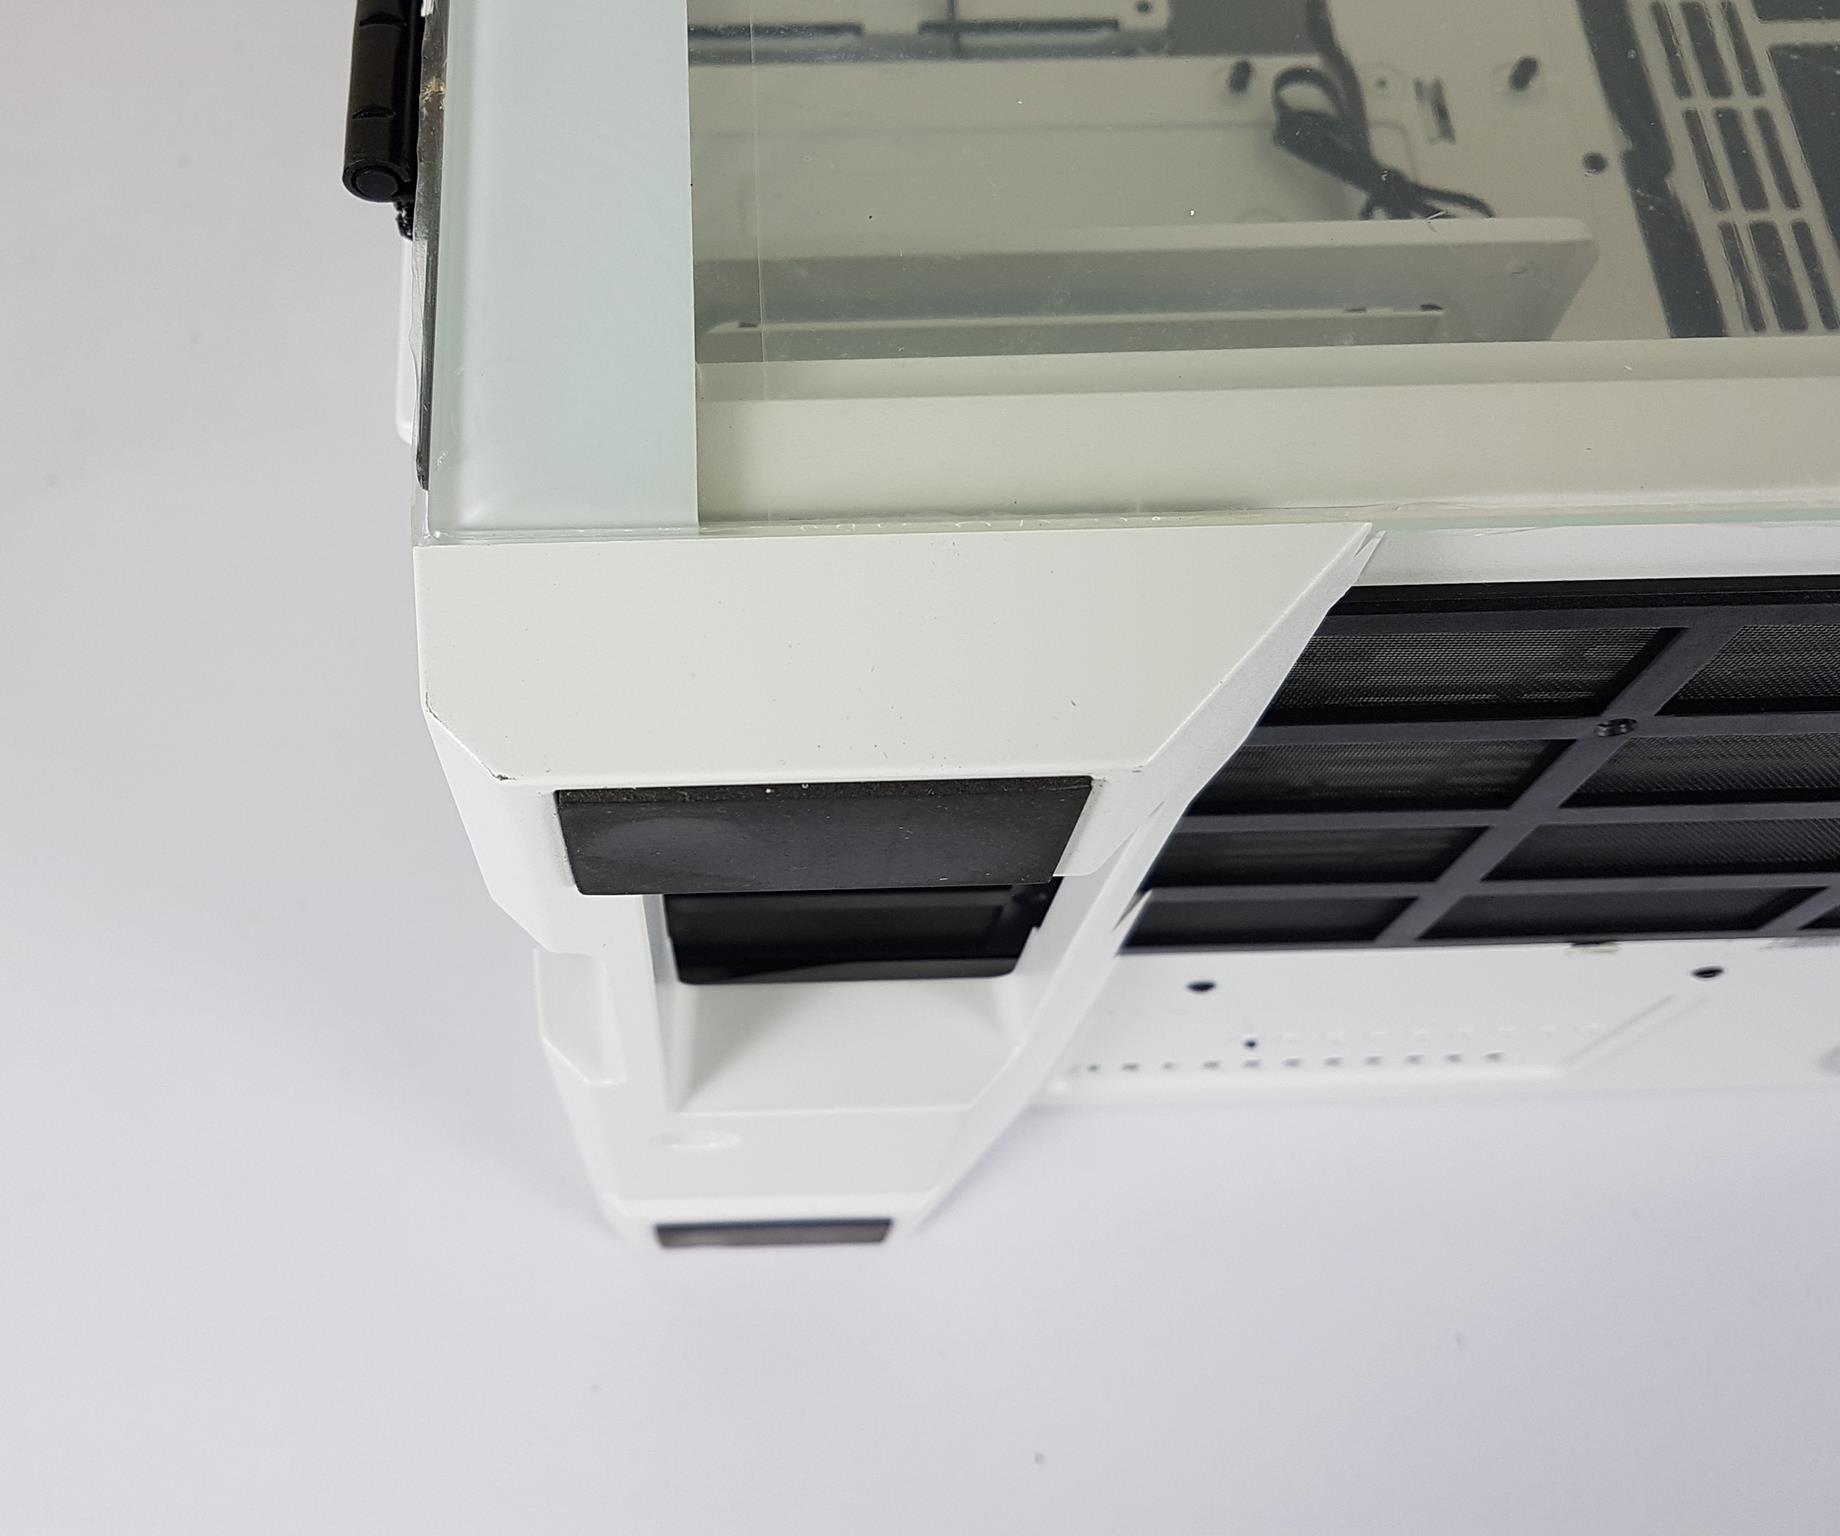
The front side of the Thermaltake View 51 TG SNOW ARGB Edition features a 4mm tempered glass panel with Thermaltake branding at the bottom. We have rounded edges on the top right and bottom left. The 2x 200mm ARGB fans can be seen behind the glass panel.
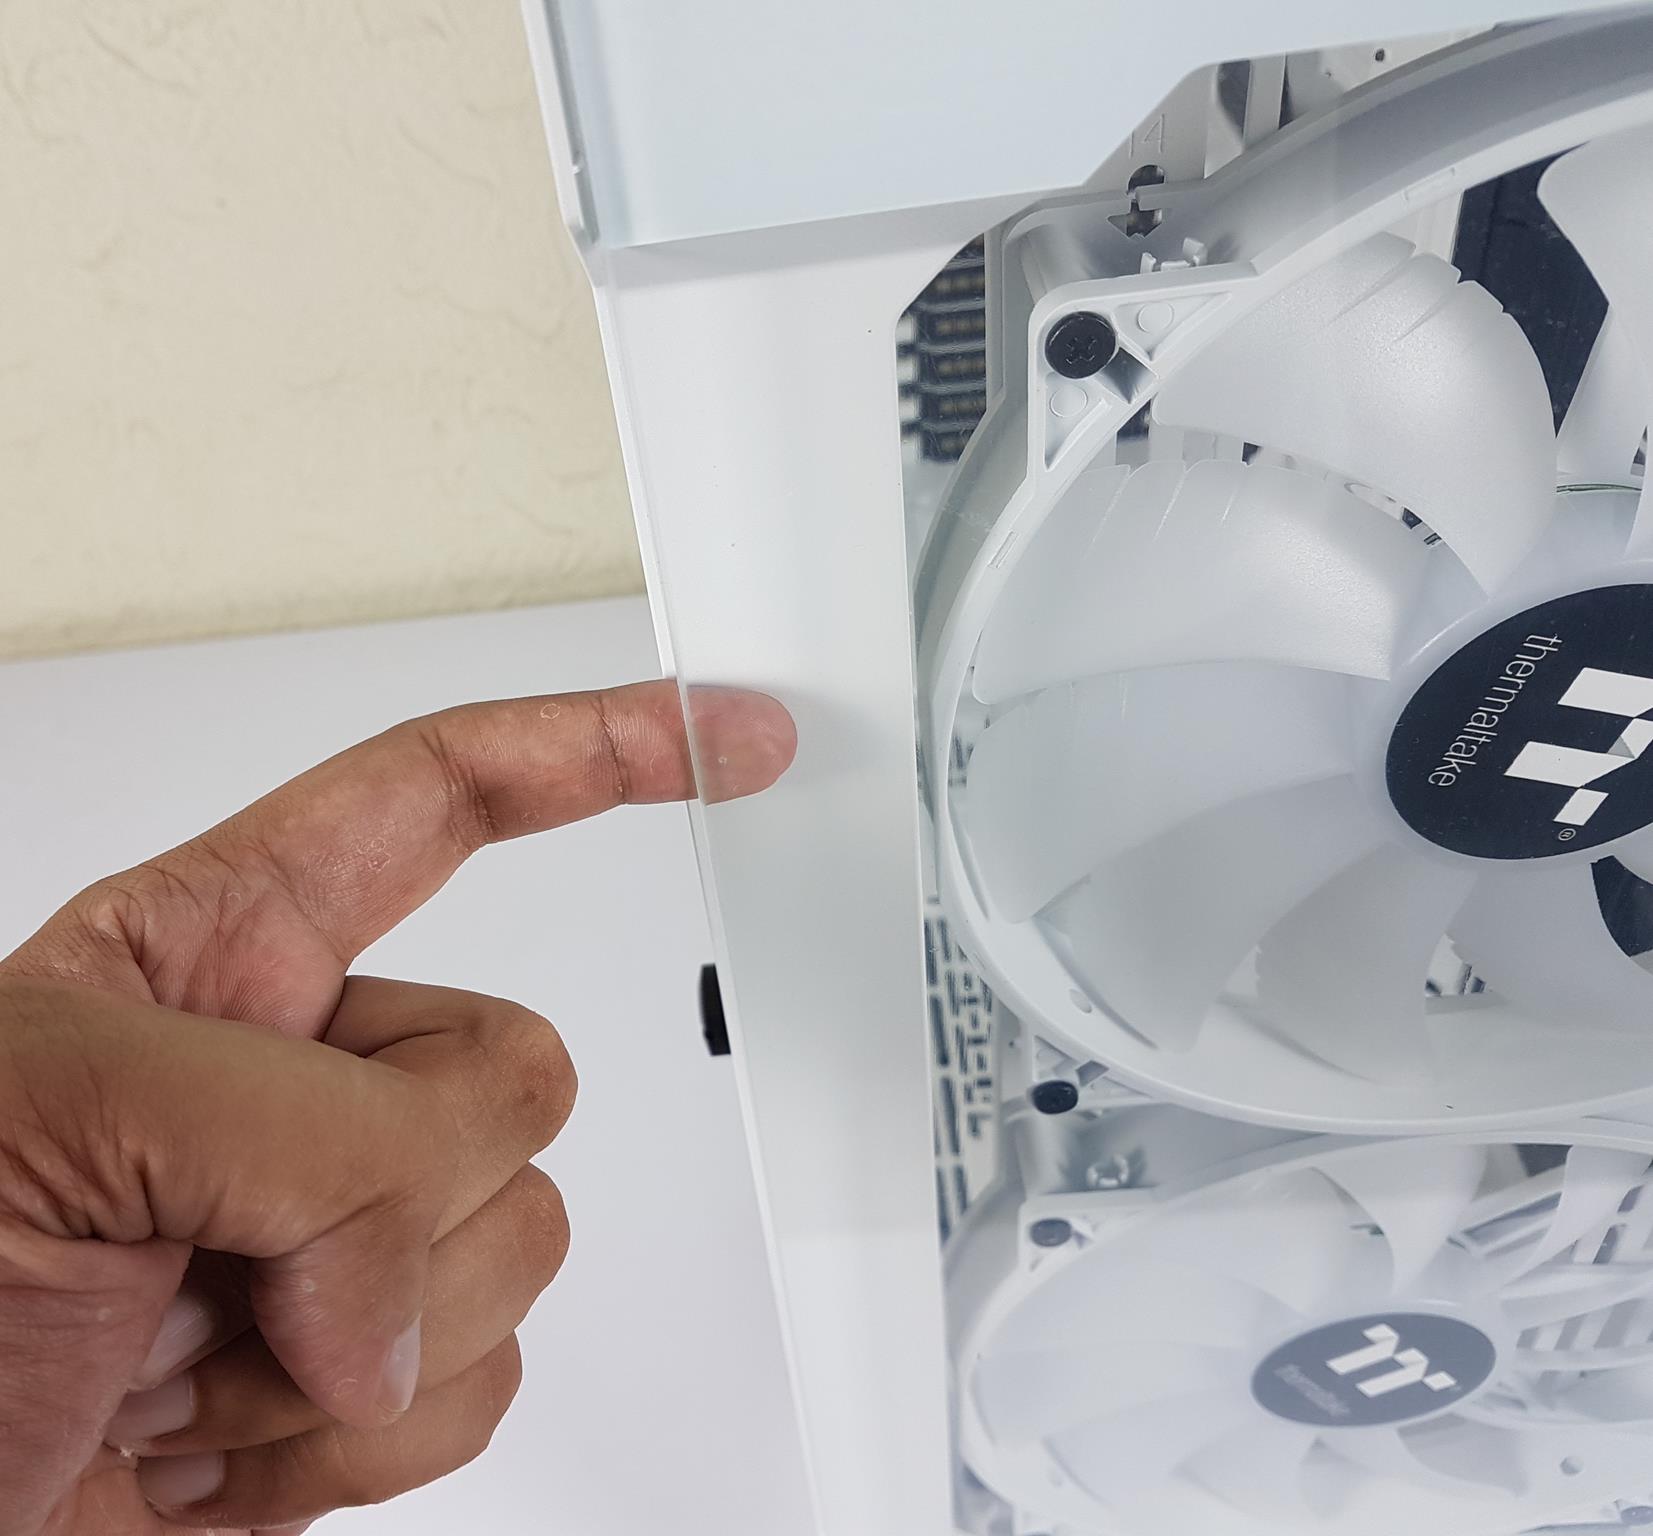
For those with experience of View 71, the front and top panels have sufficient gaps between the panel and the glass providing enough air intake provision. This is not the case with the View 51 TG though. One can spot a small size vertical cutout line which is for ventilation.
Since this case is following the dual chamber in side-by-side design, we have more width to it.
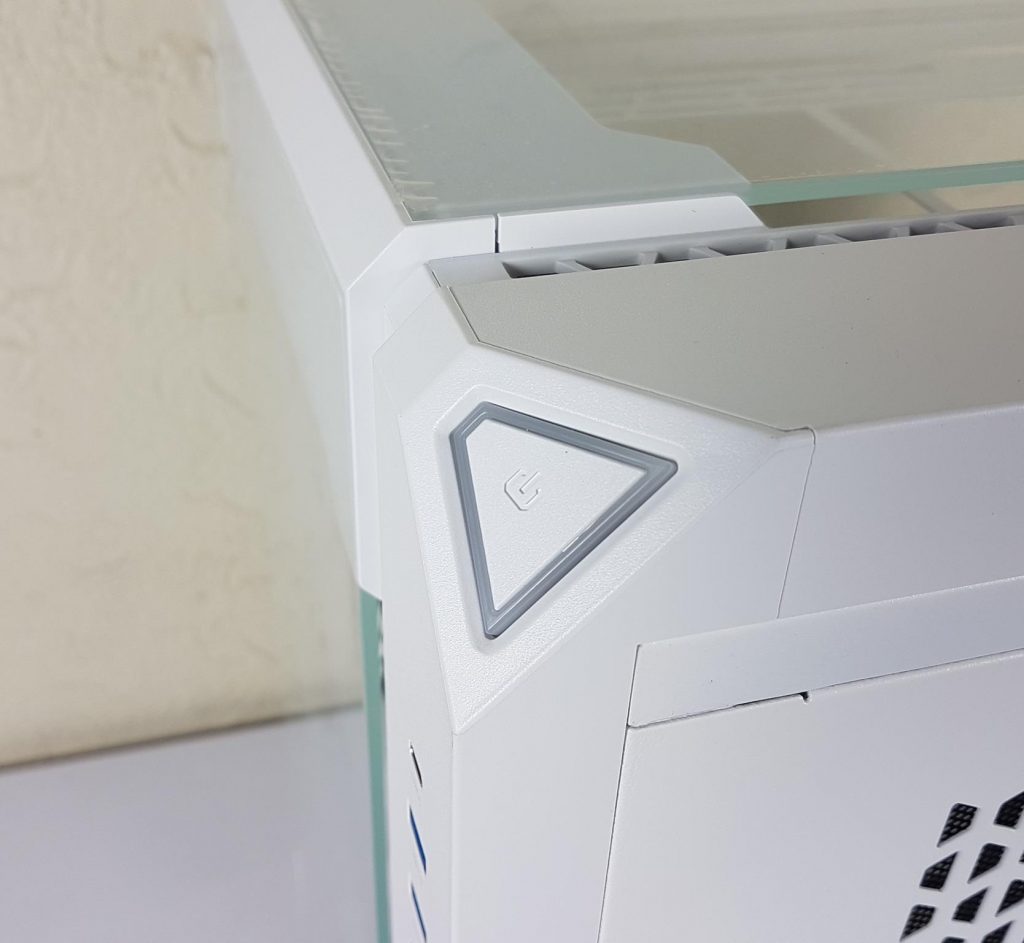
Thermaltake View 51 retains the same power button design as is on the View 71 TG.
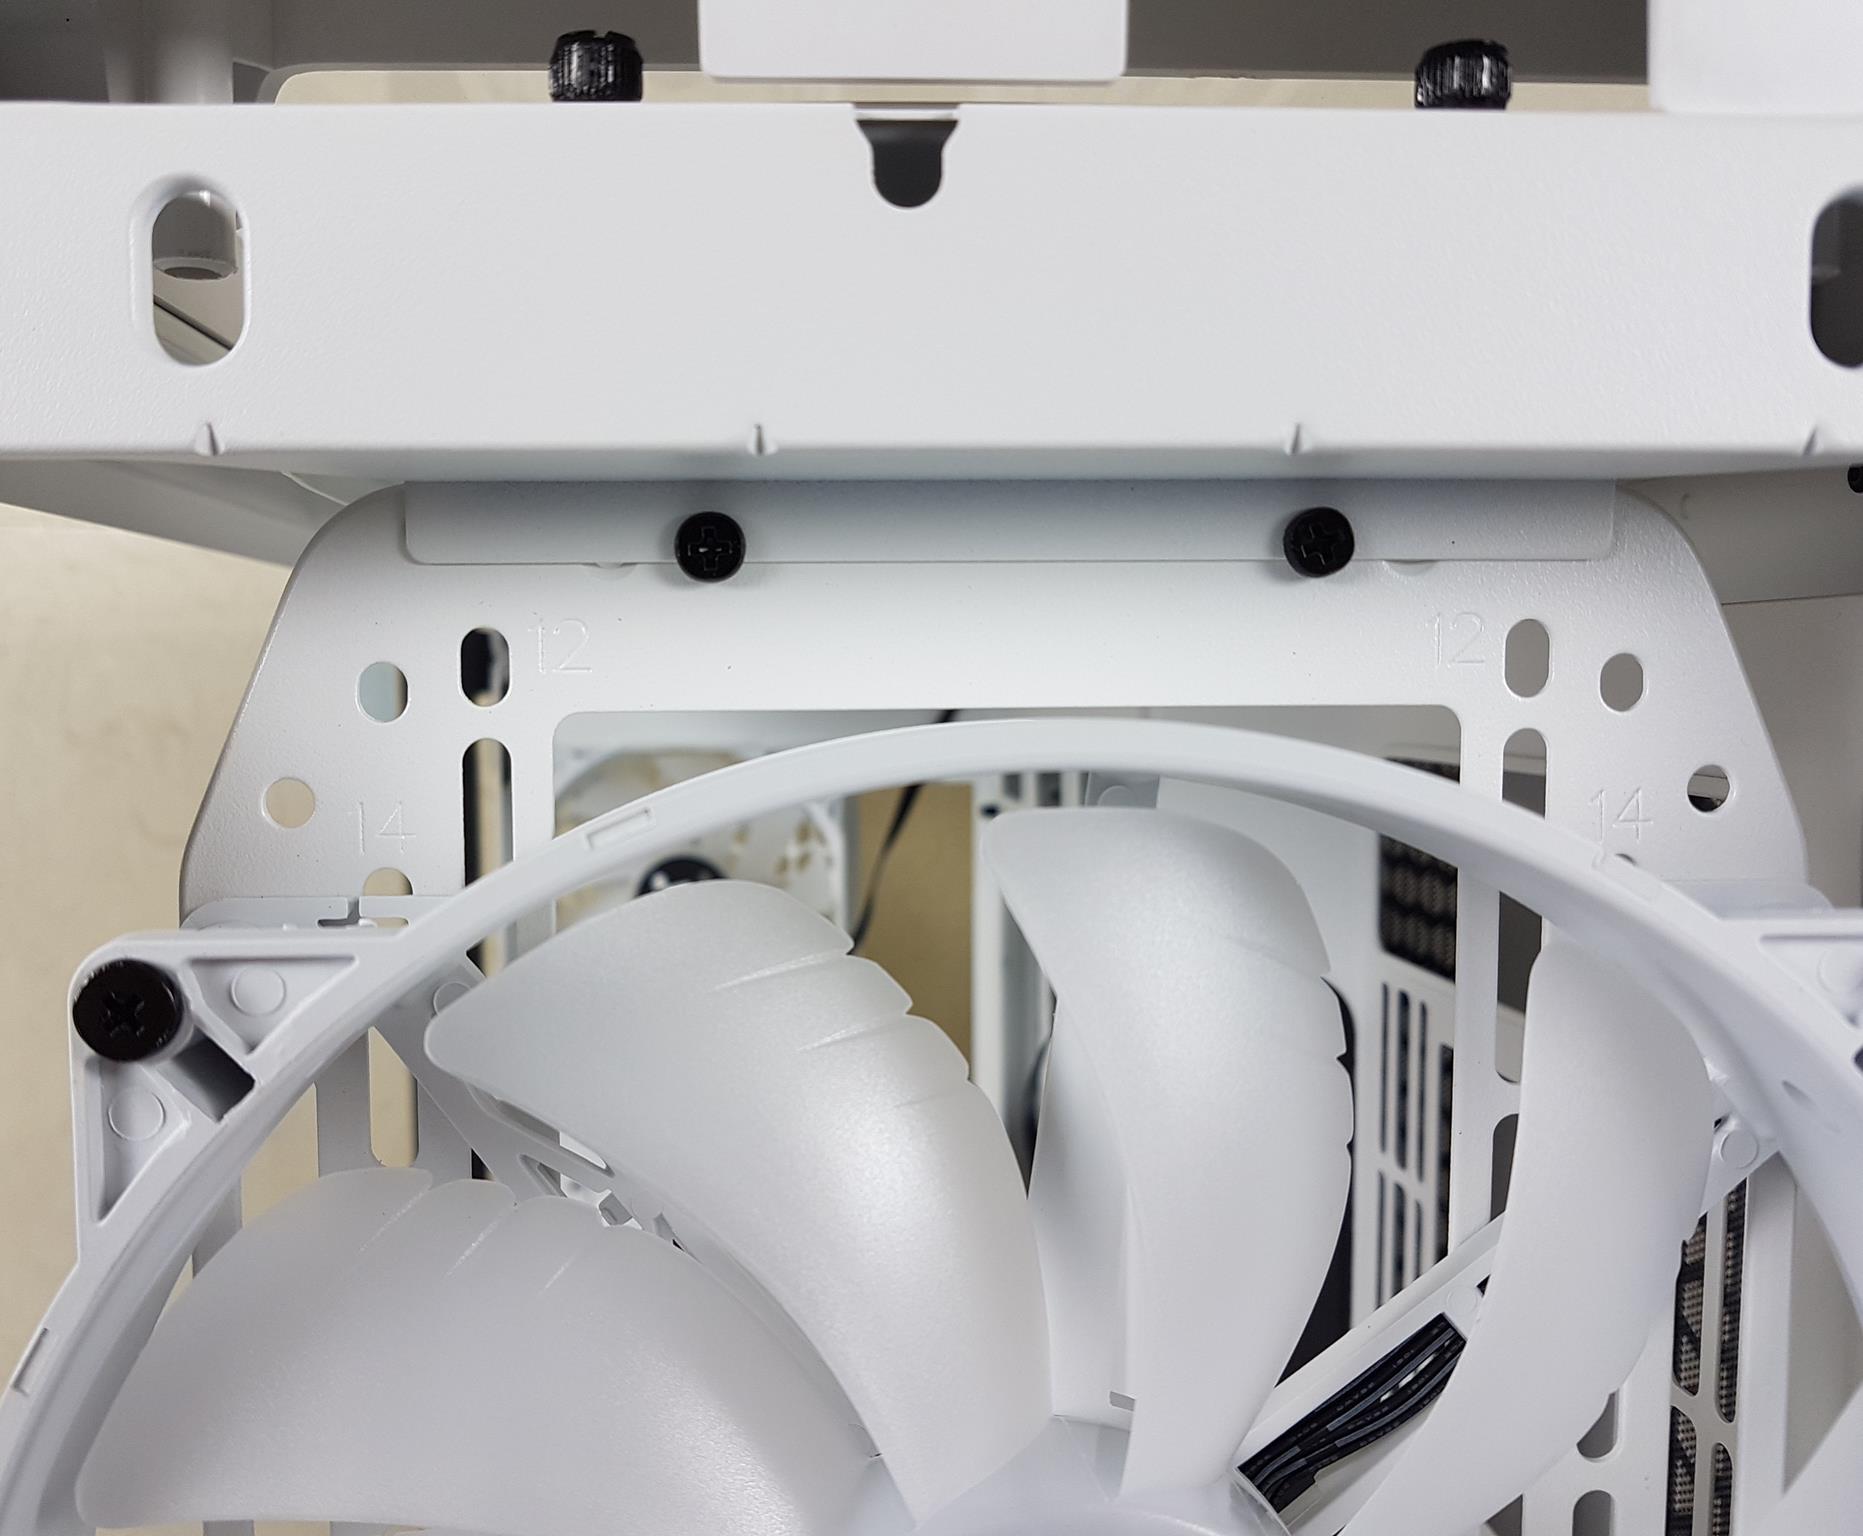
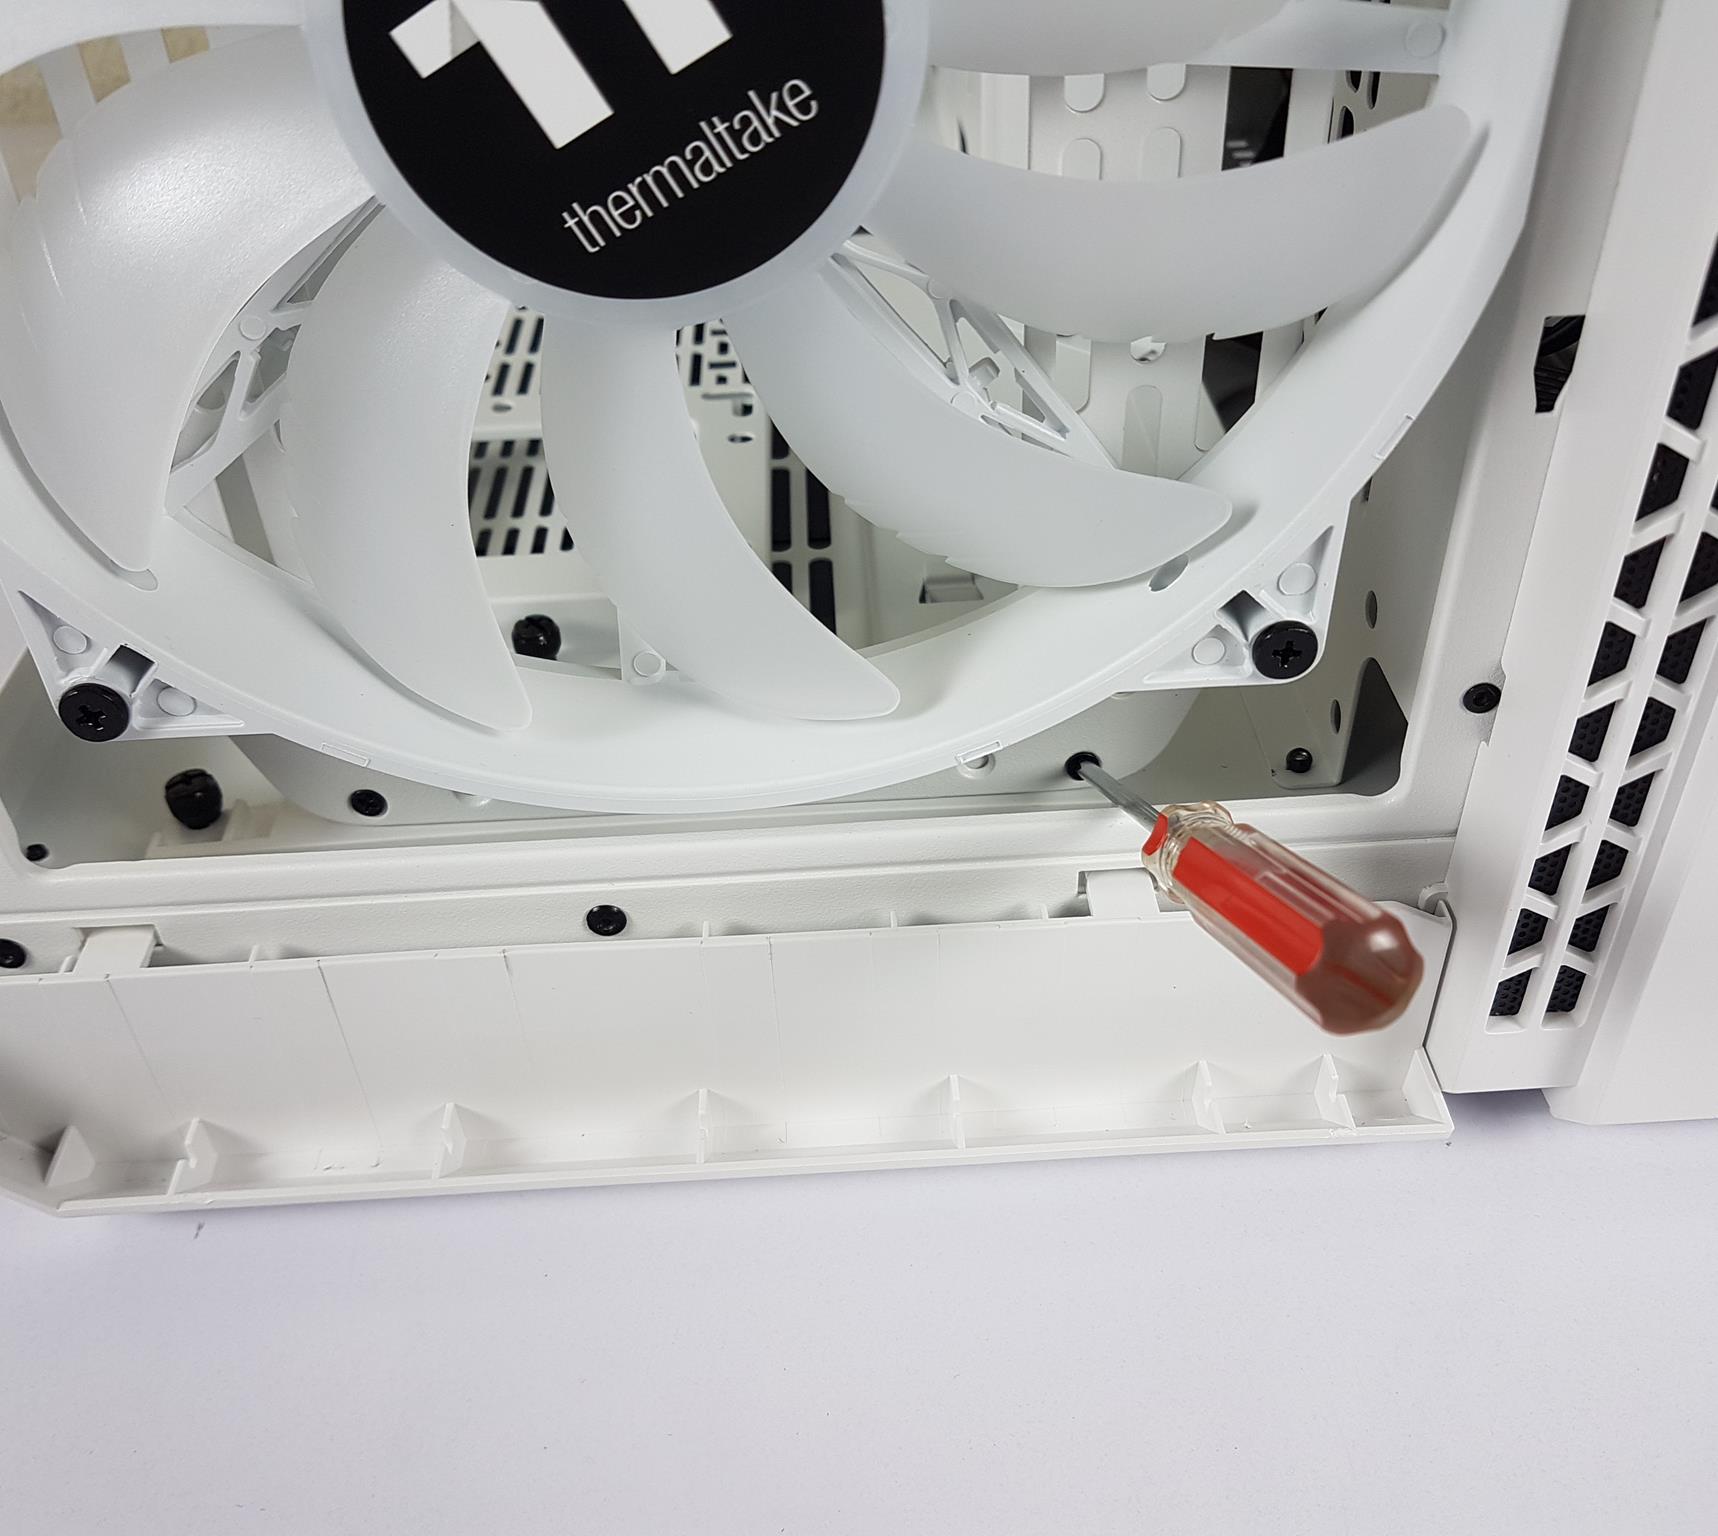
It features a convenient single mounting bracket on the front, housing pre-installed 200mm fans. Simply remove the top two screws to detach the bracket, and Thermaltake has streamlined the process by eliminating the need to remove the bottom screws for added efficiency.
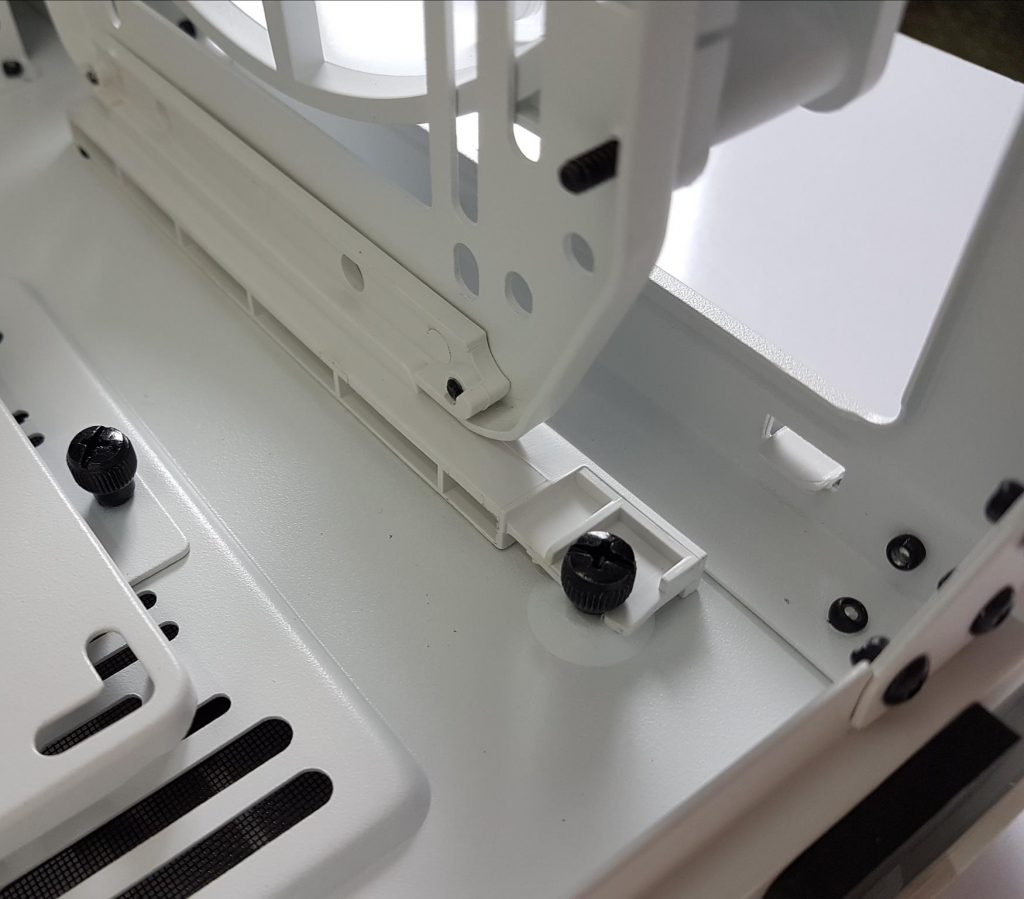
There is a screw on the base inside the case. Remove this along with the two screws mentioned previous and take out the bracket. Here the caveat is opening the side panel to access this screw. The hinged design of the side panel helps with that.

The above picture shows the front view of the case with the bracket removed. Despite having a steel frame with plastic all around, the design team executed the paint job quite well and provided almost a same color finish.
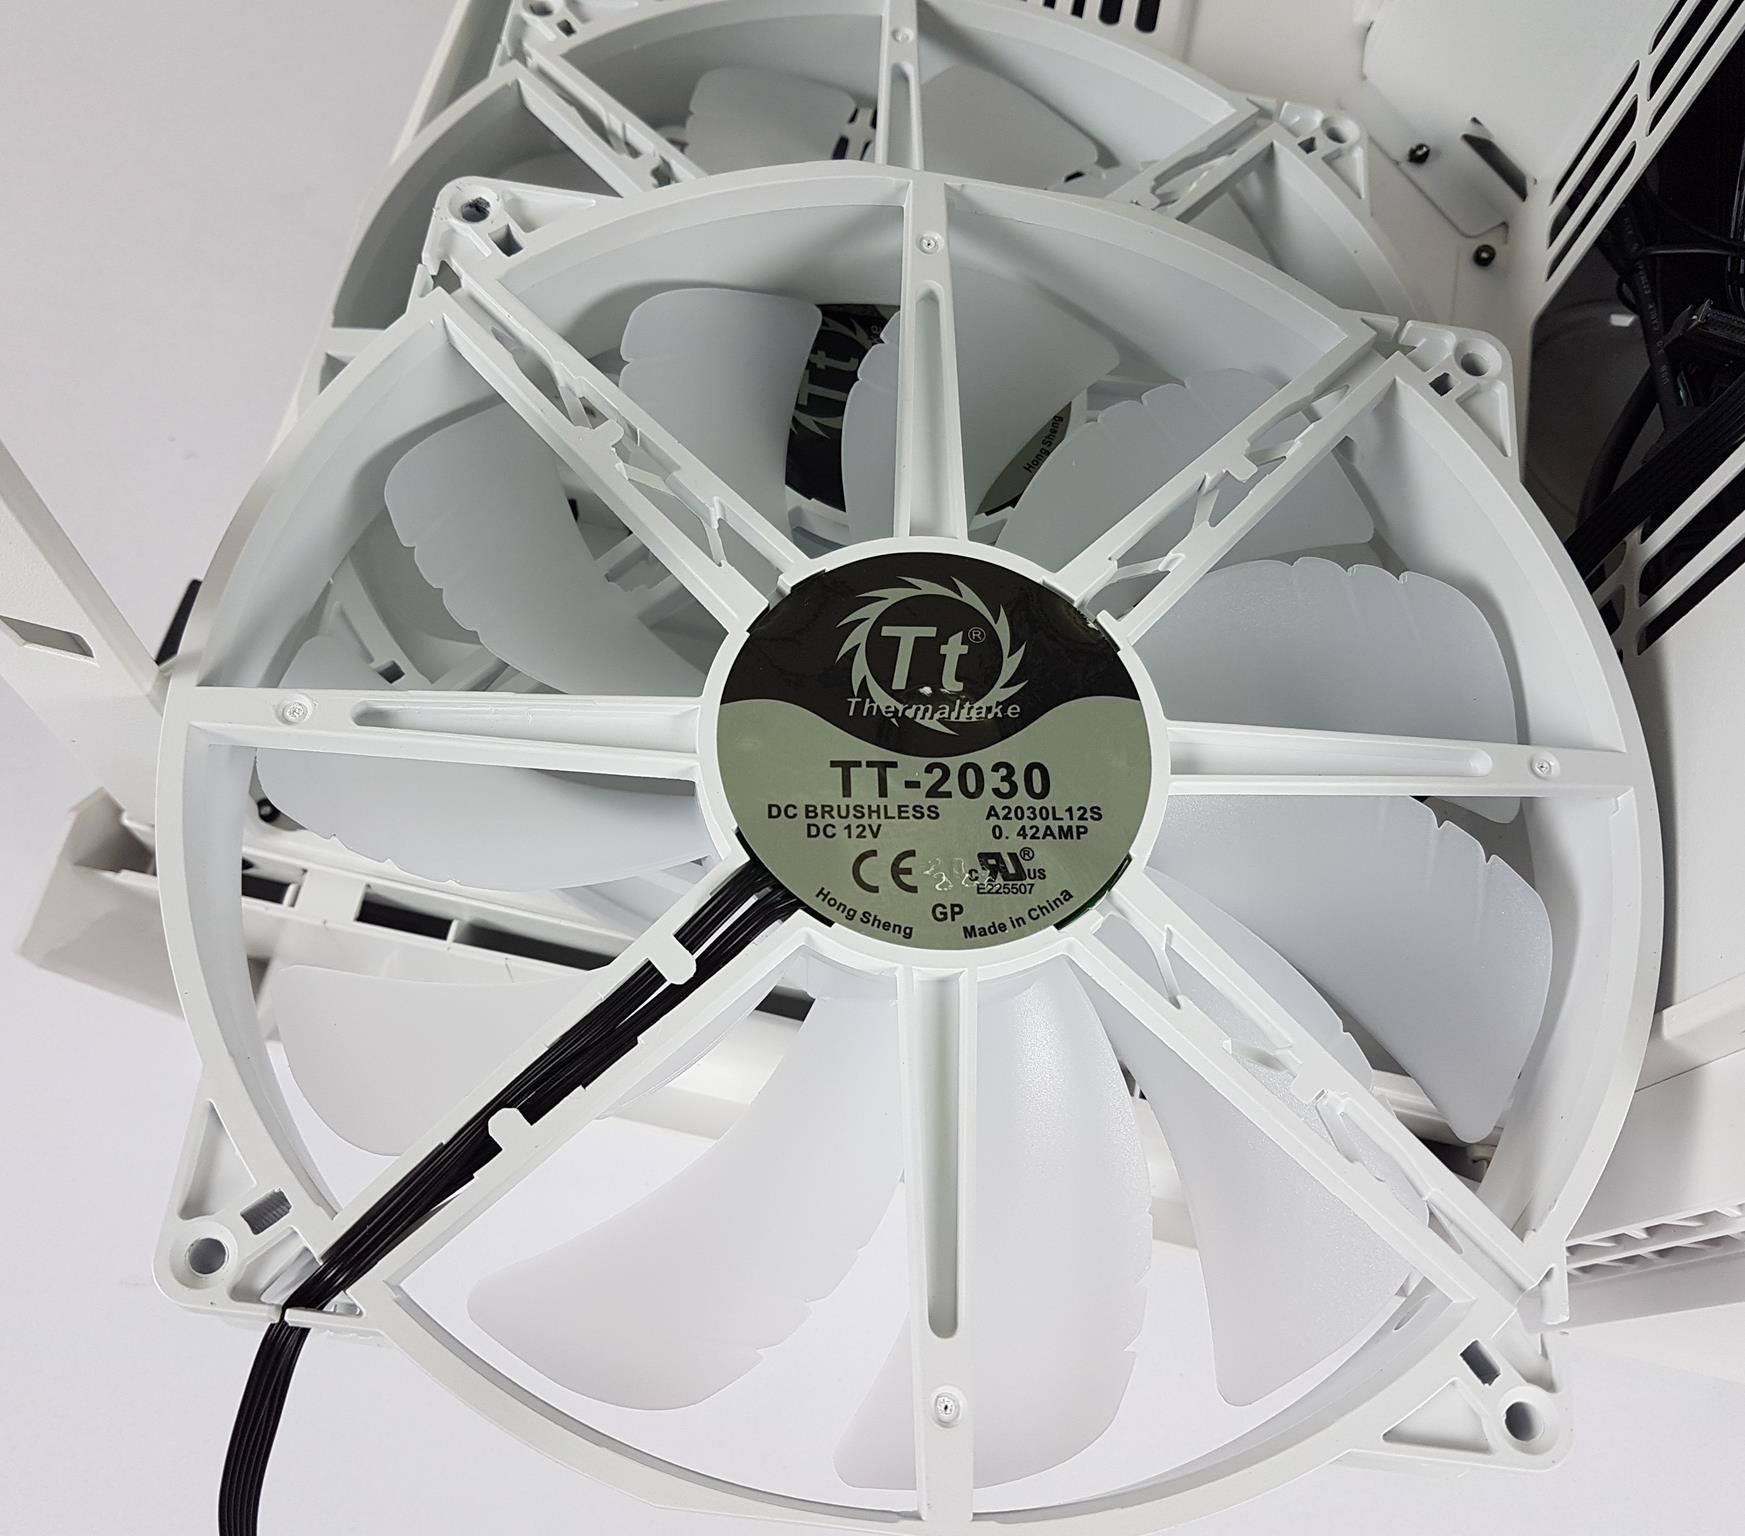
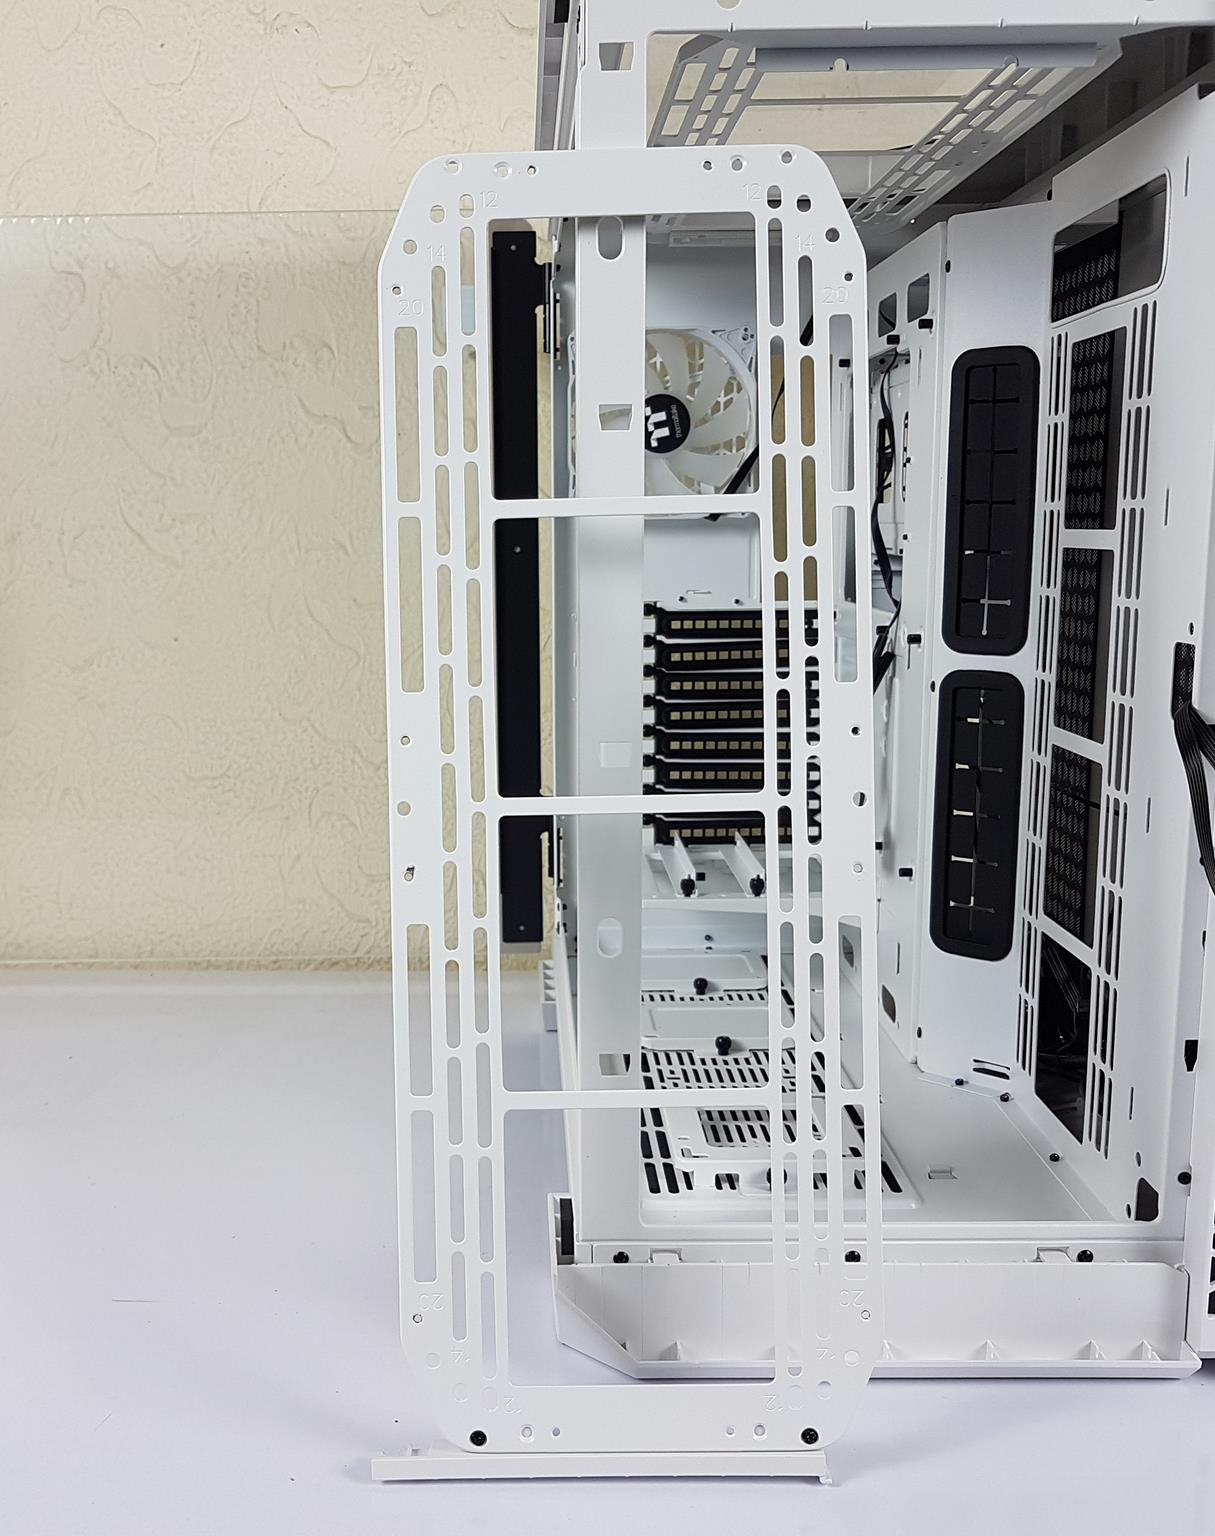
The mounting bracket can house up to 3x 120mm fans, 3x 140mm fans, and 2x 200mm fans. The 200mm fans are using 9x 5V A-RGB LEDs and use hydraulic bearings. You can imagine the radiator support accordingly except the 420mm, which isn’t possible.
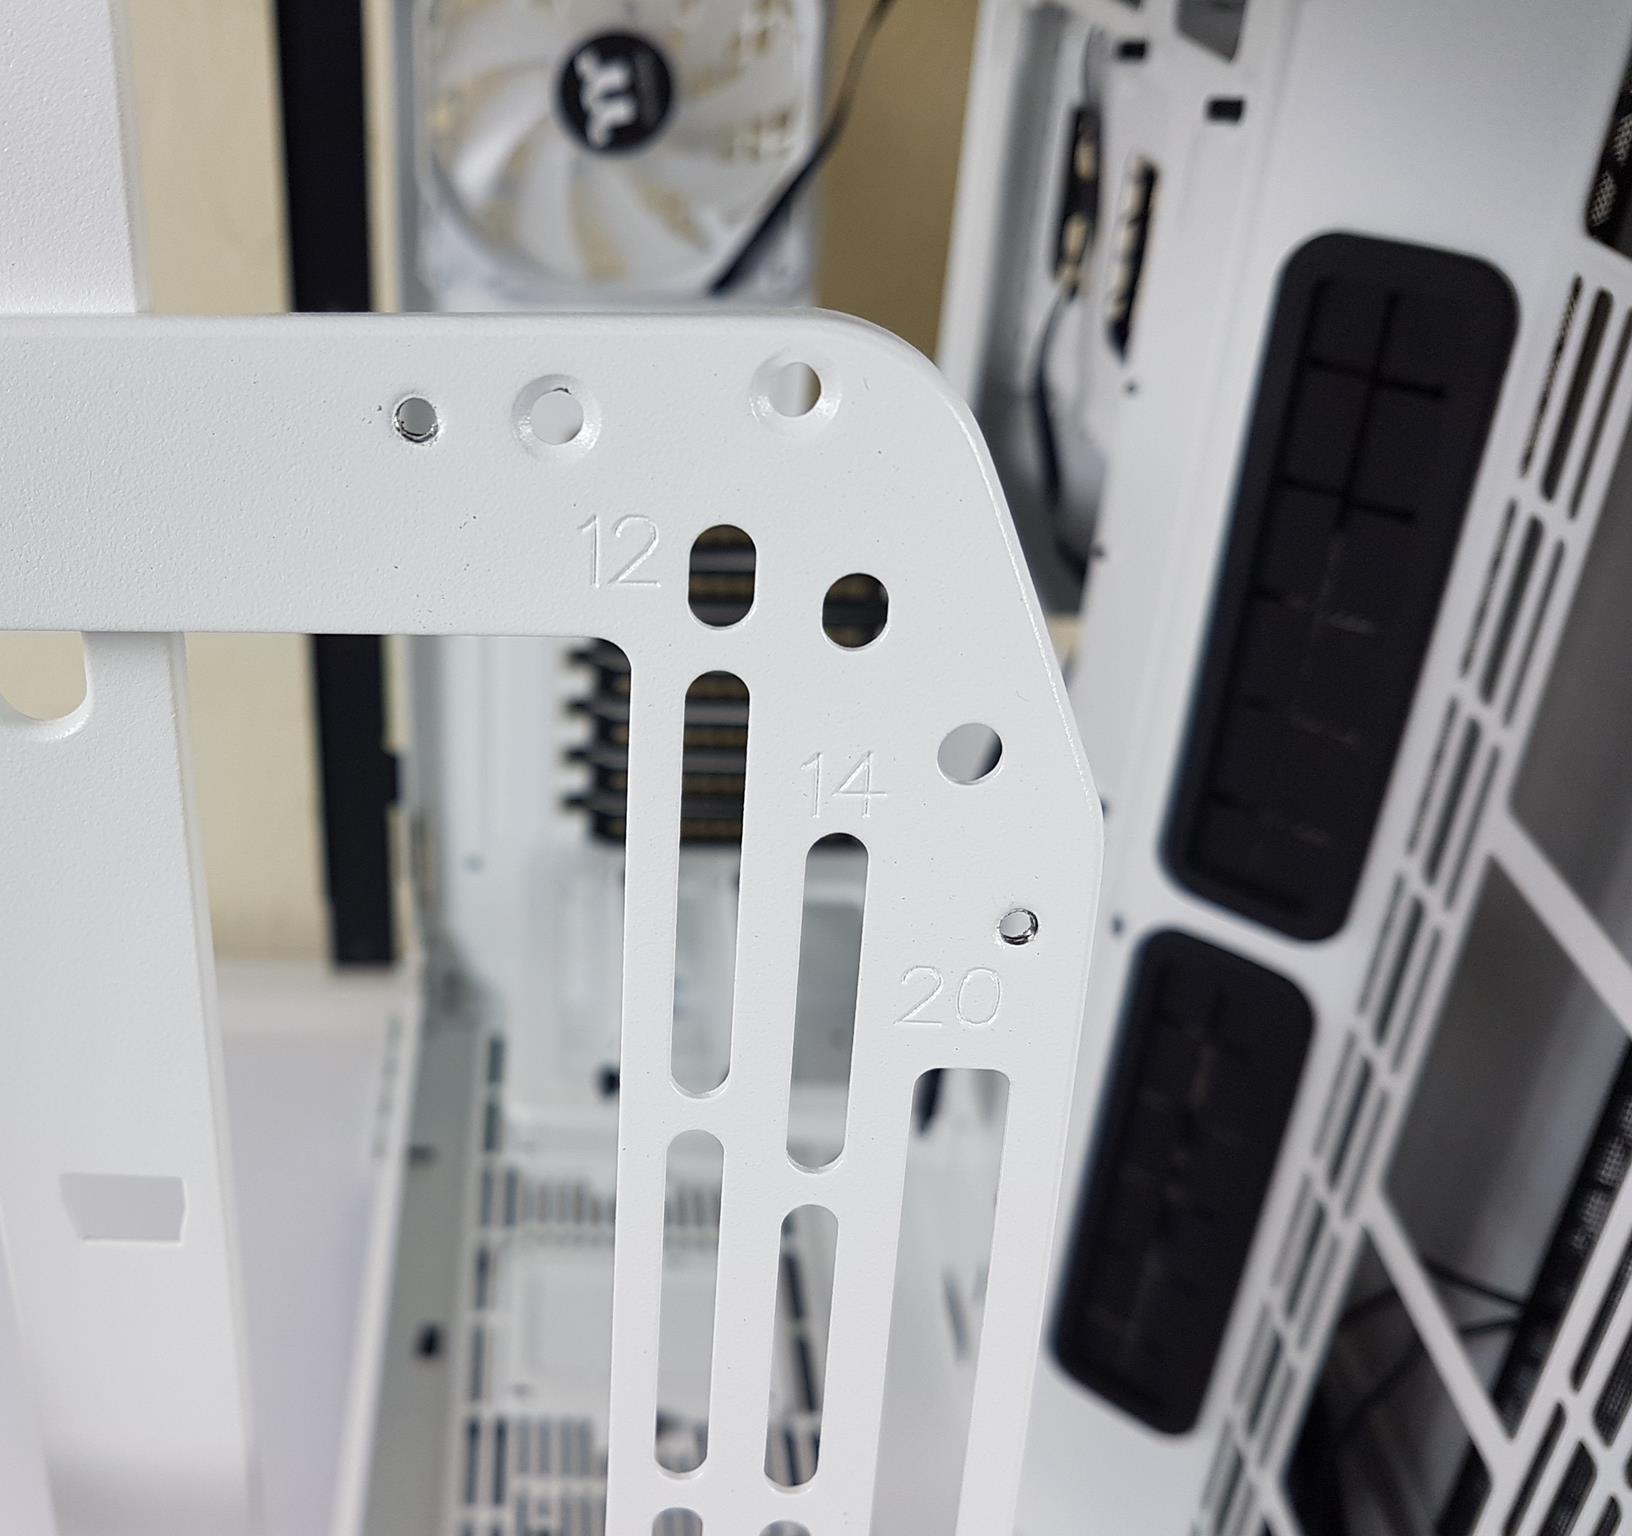
The radiator has mounting holes properly labeled to identify the holes according to the size. 12 here refers to 120mm mount and so on.
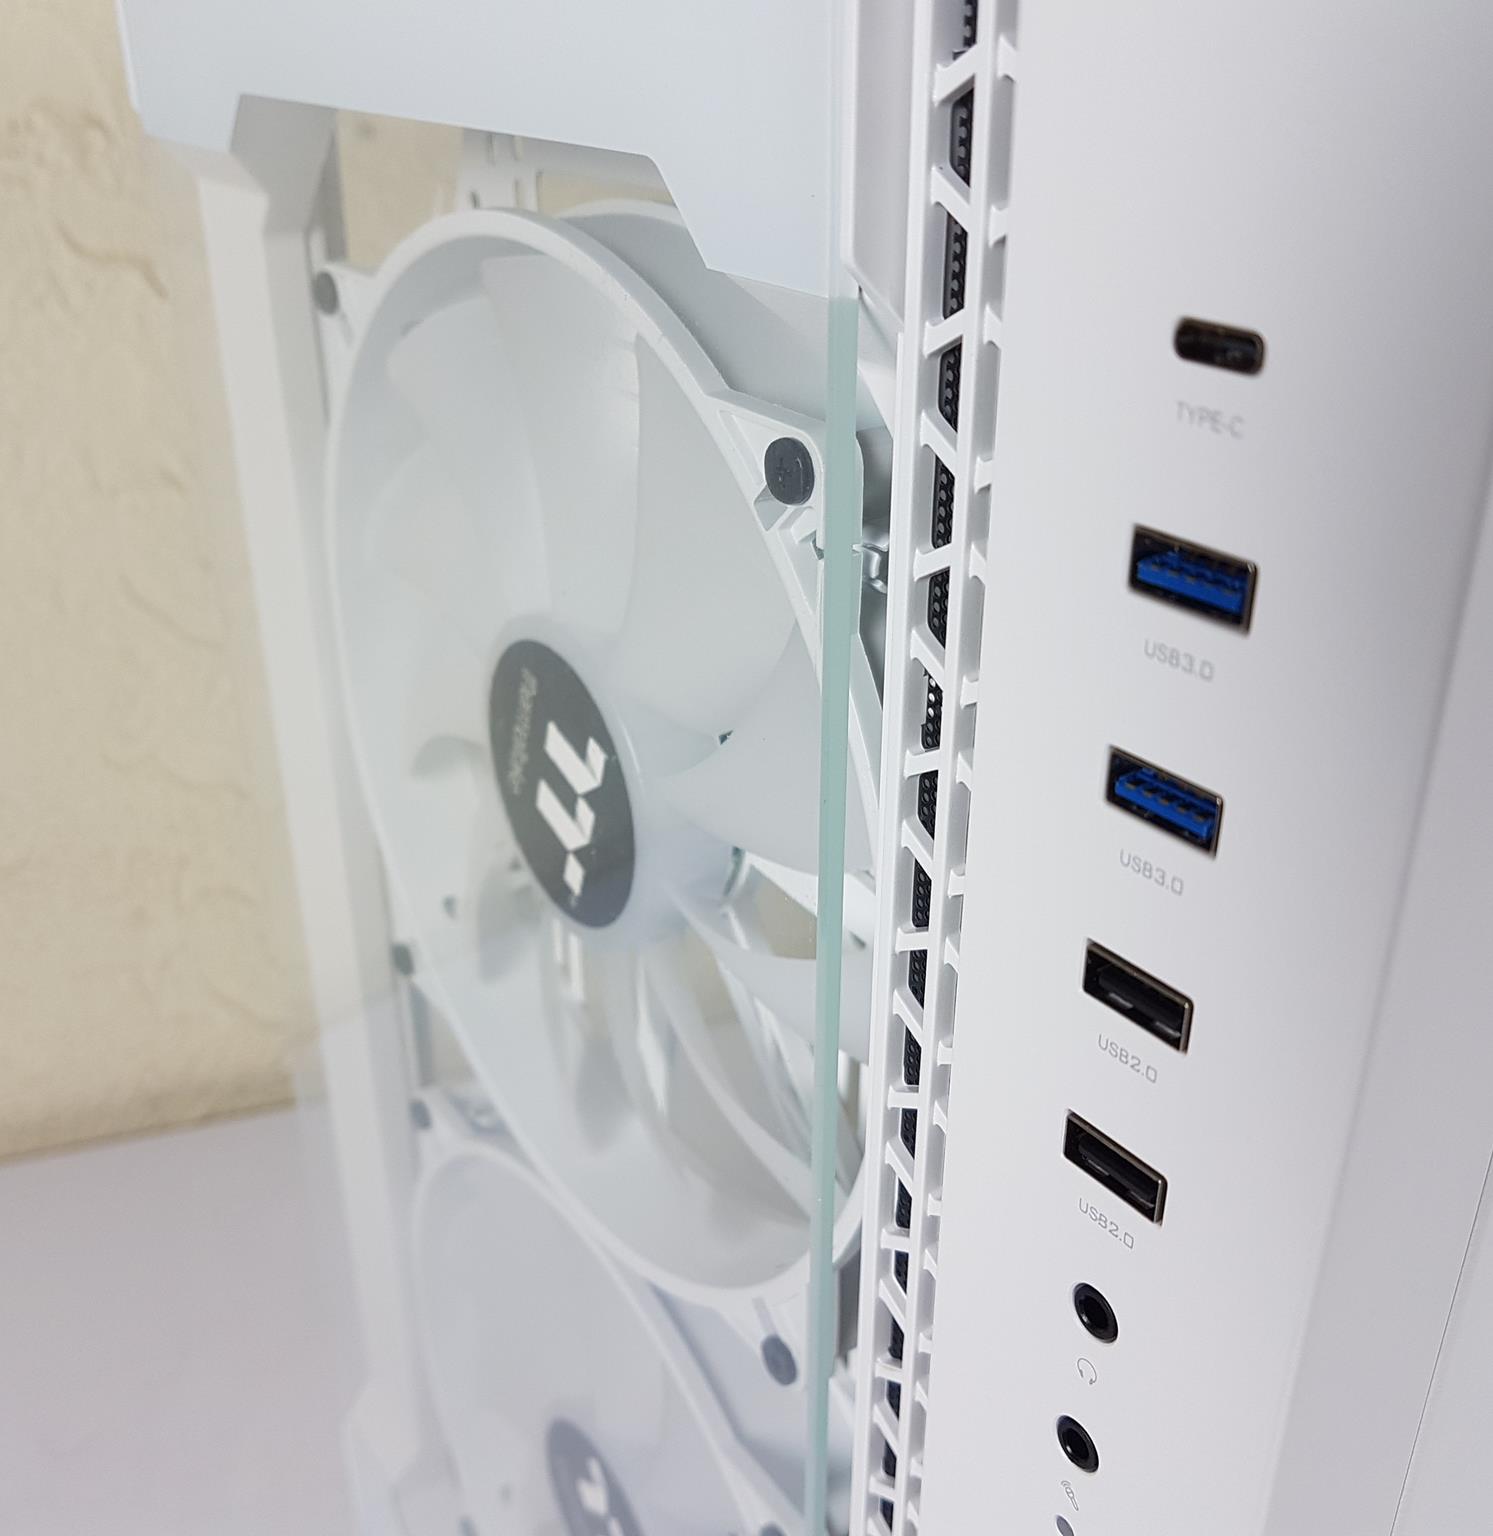
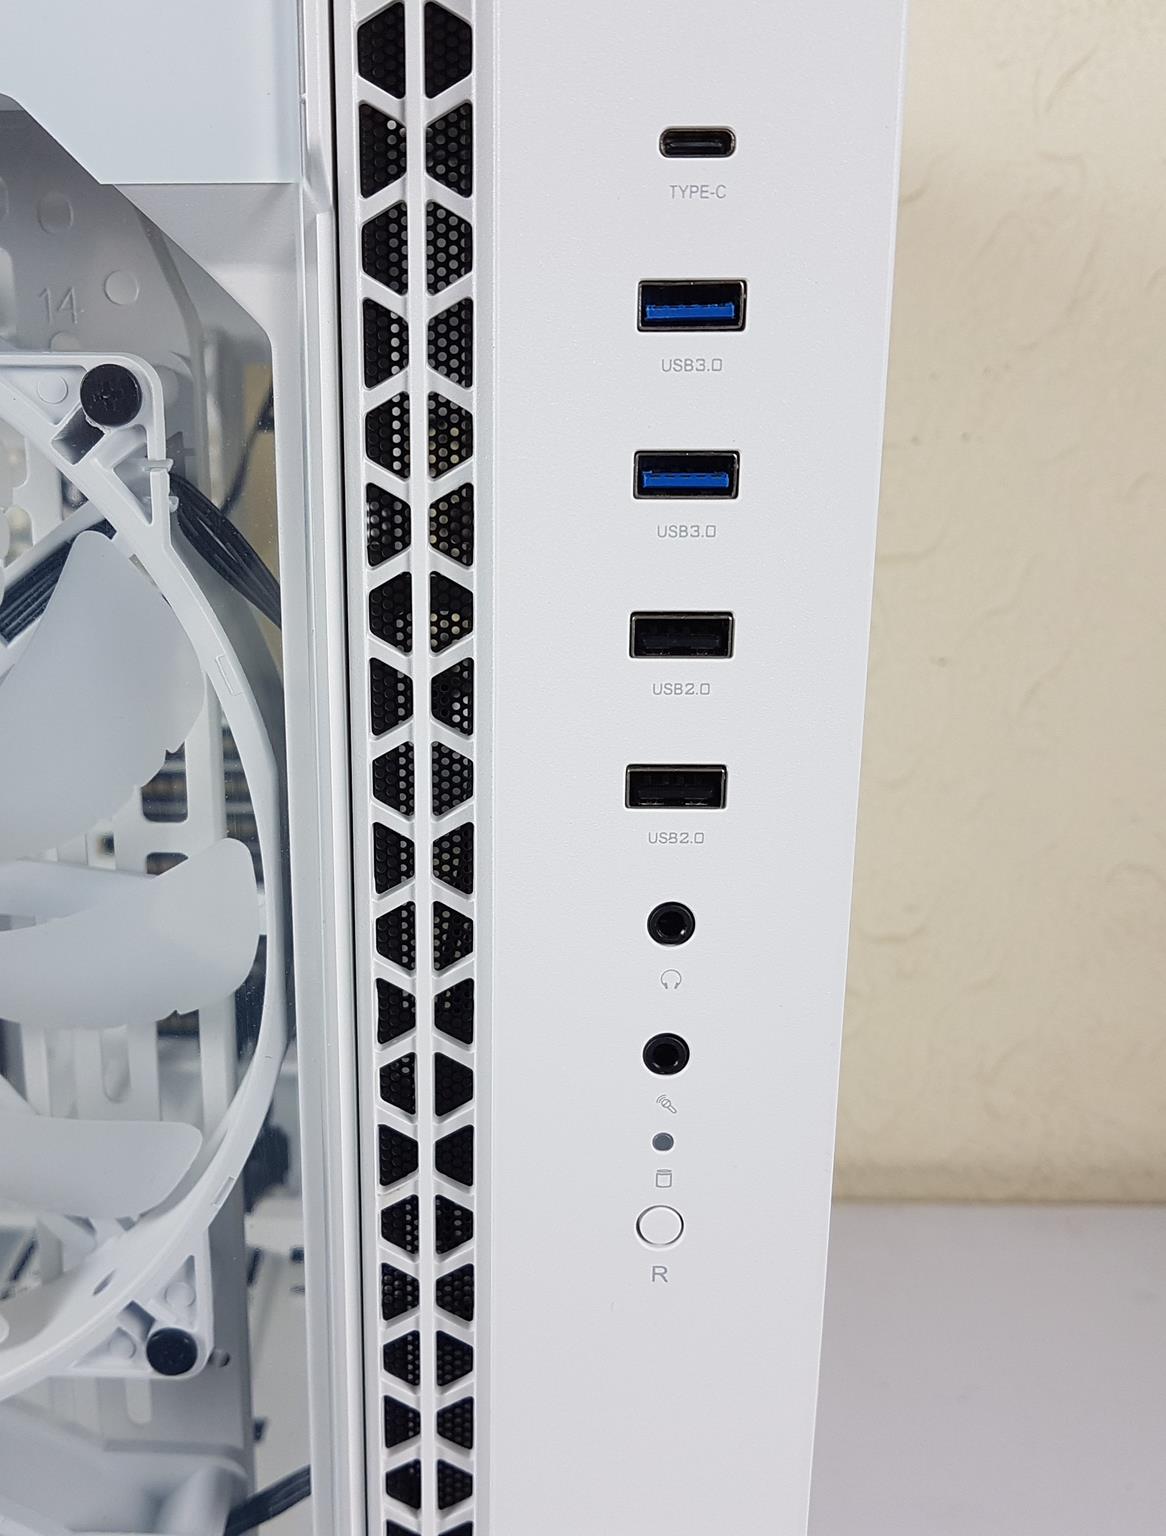
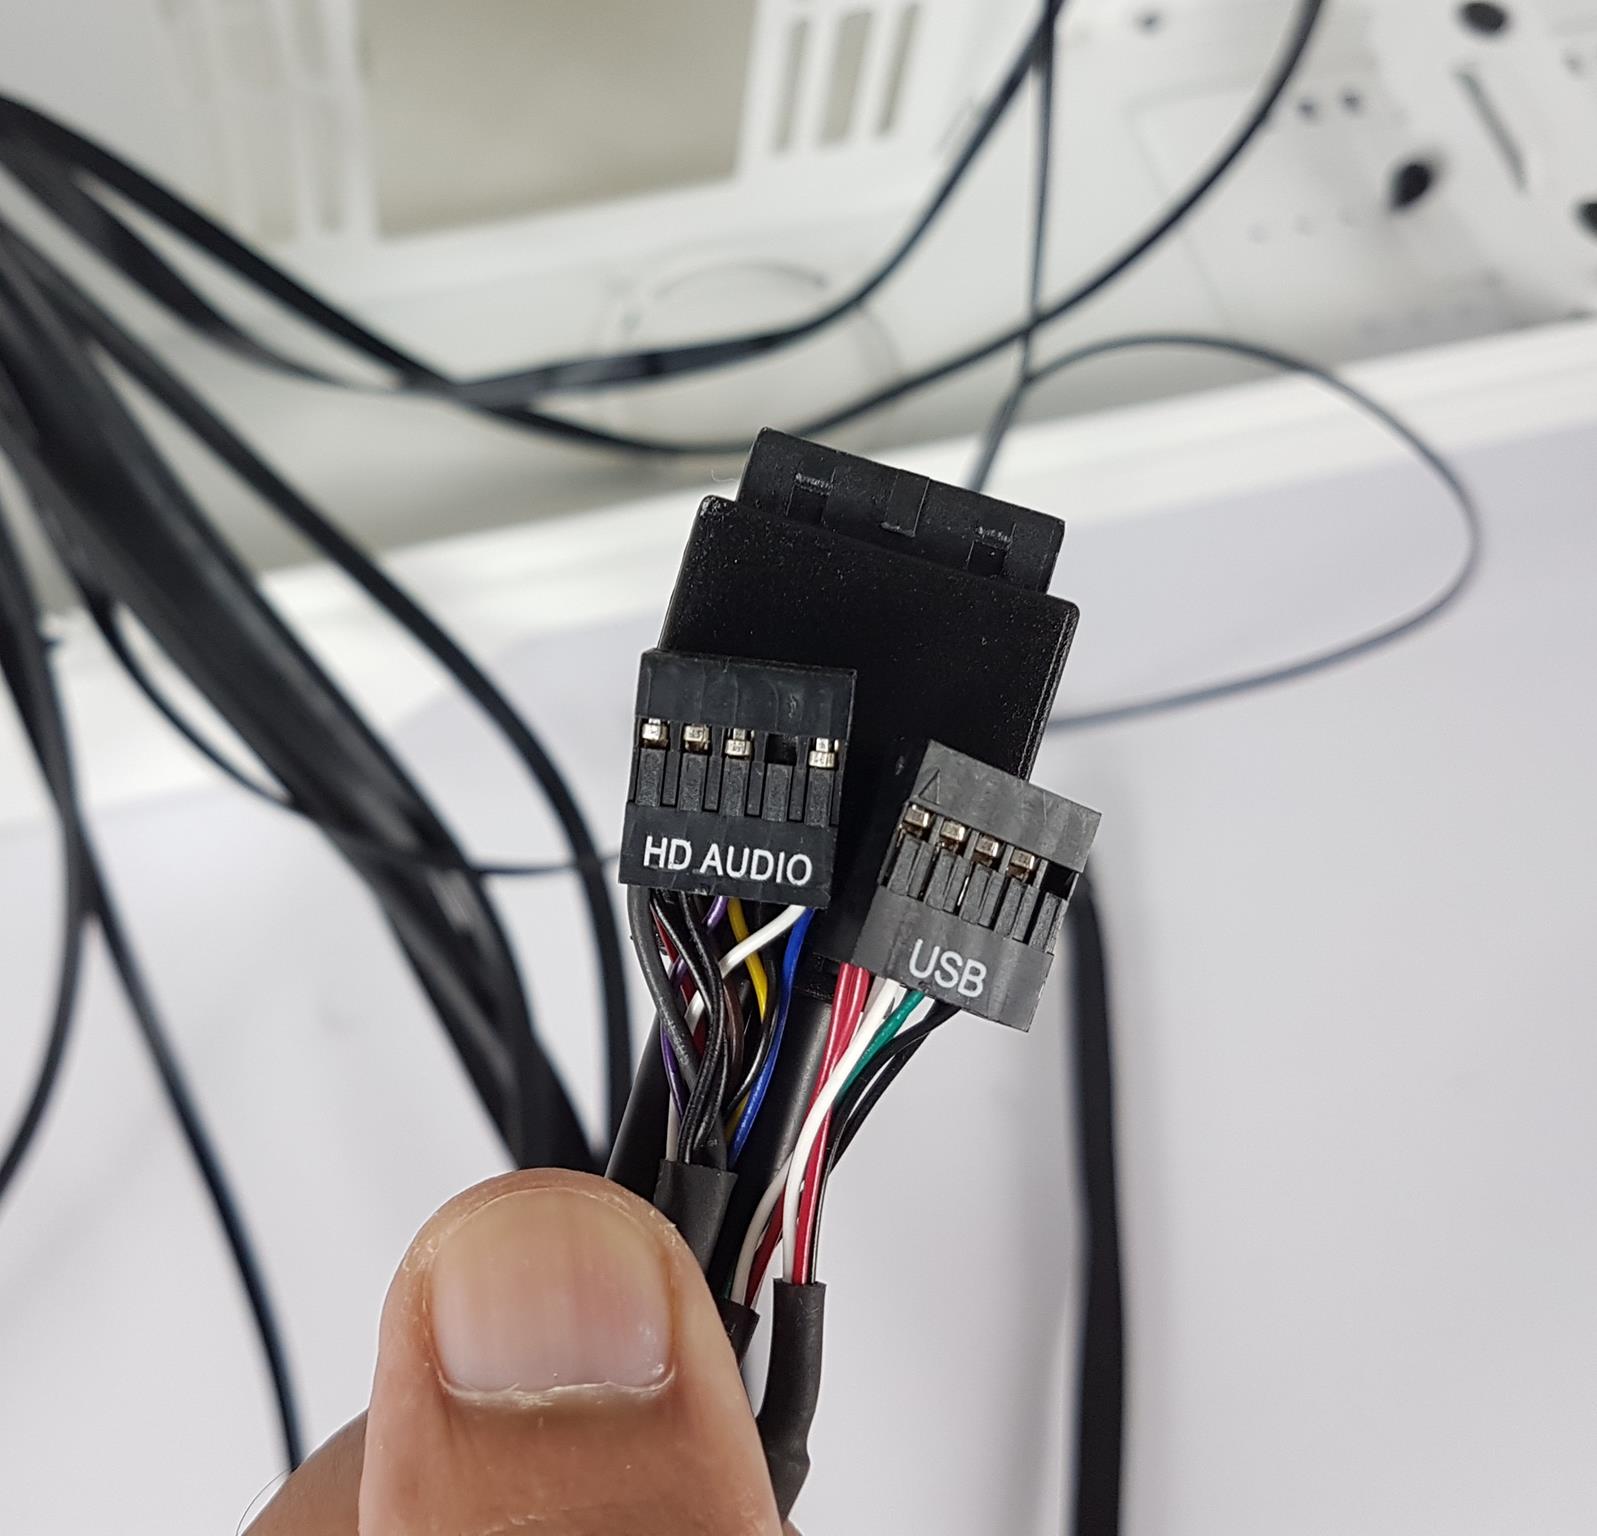
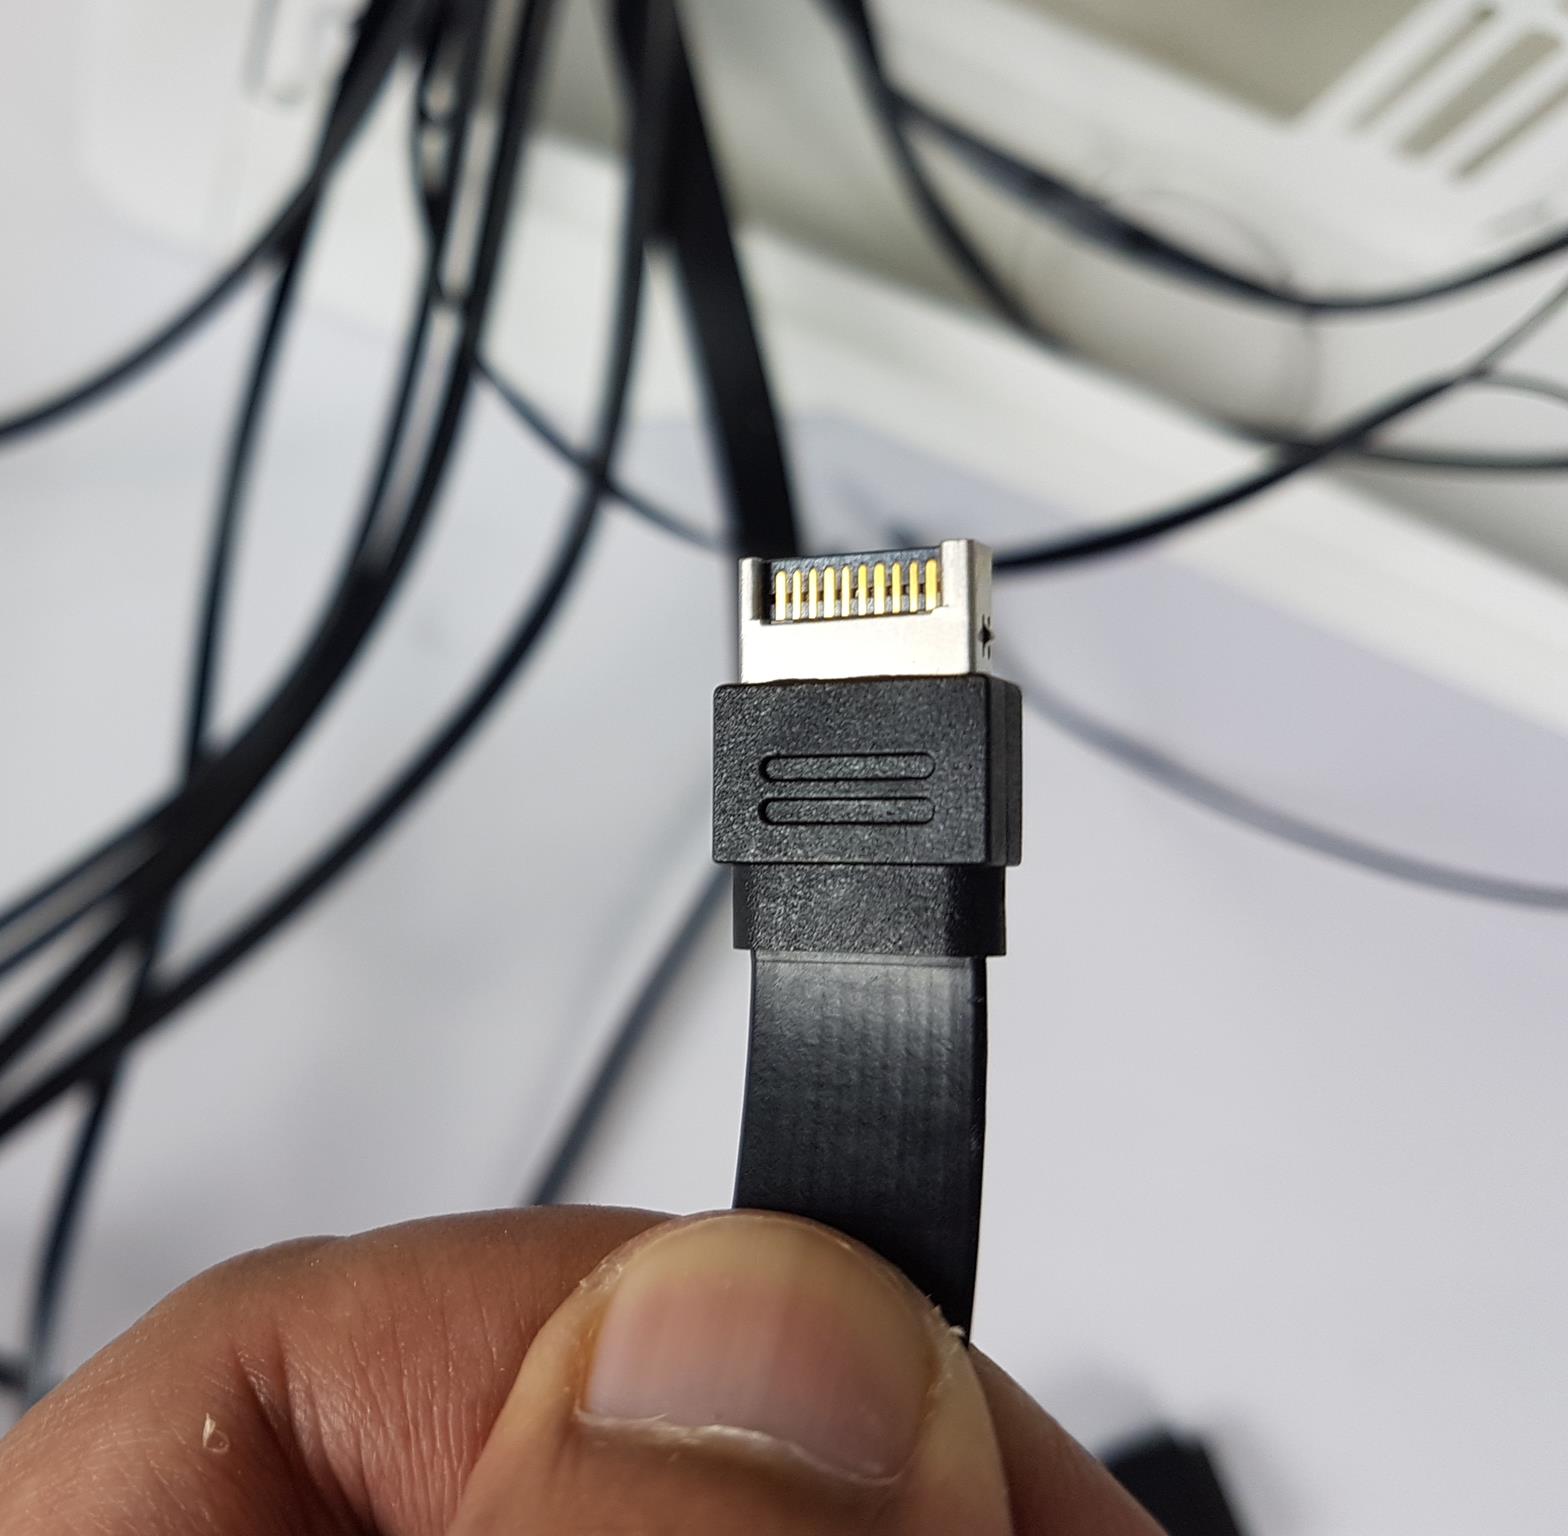
These are the ports:
- 1x USB 3.1 Gen2 Type-C
- 2x USB 2.0
- 2x USB 3.0
- 1x HD Audio
- 1x RGB Button
- LED Indicator
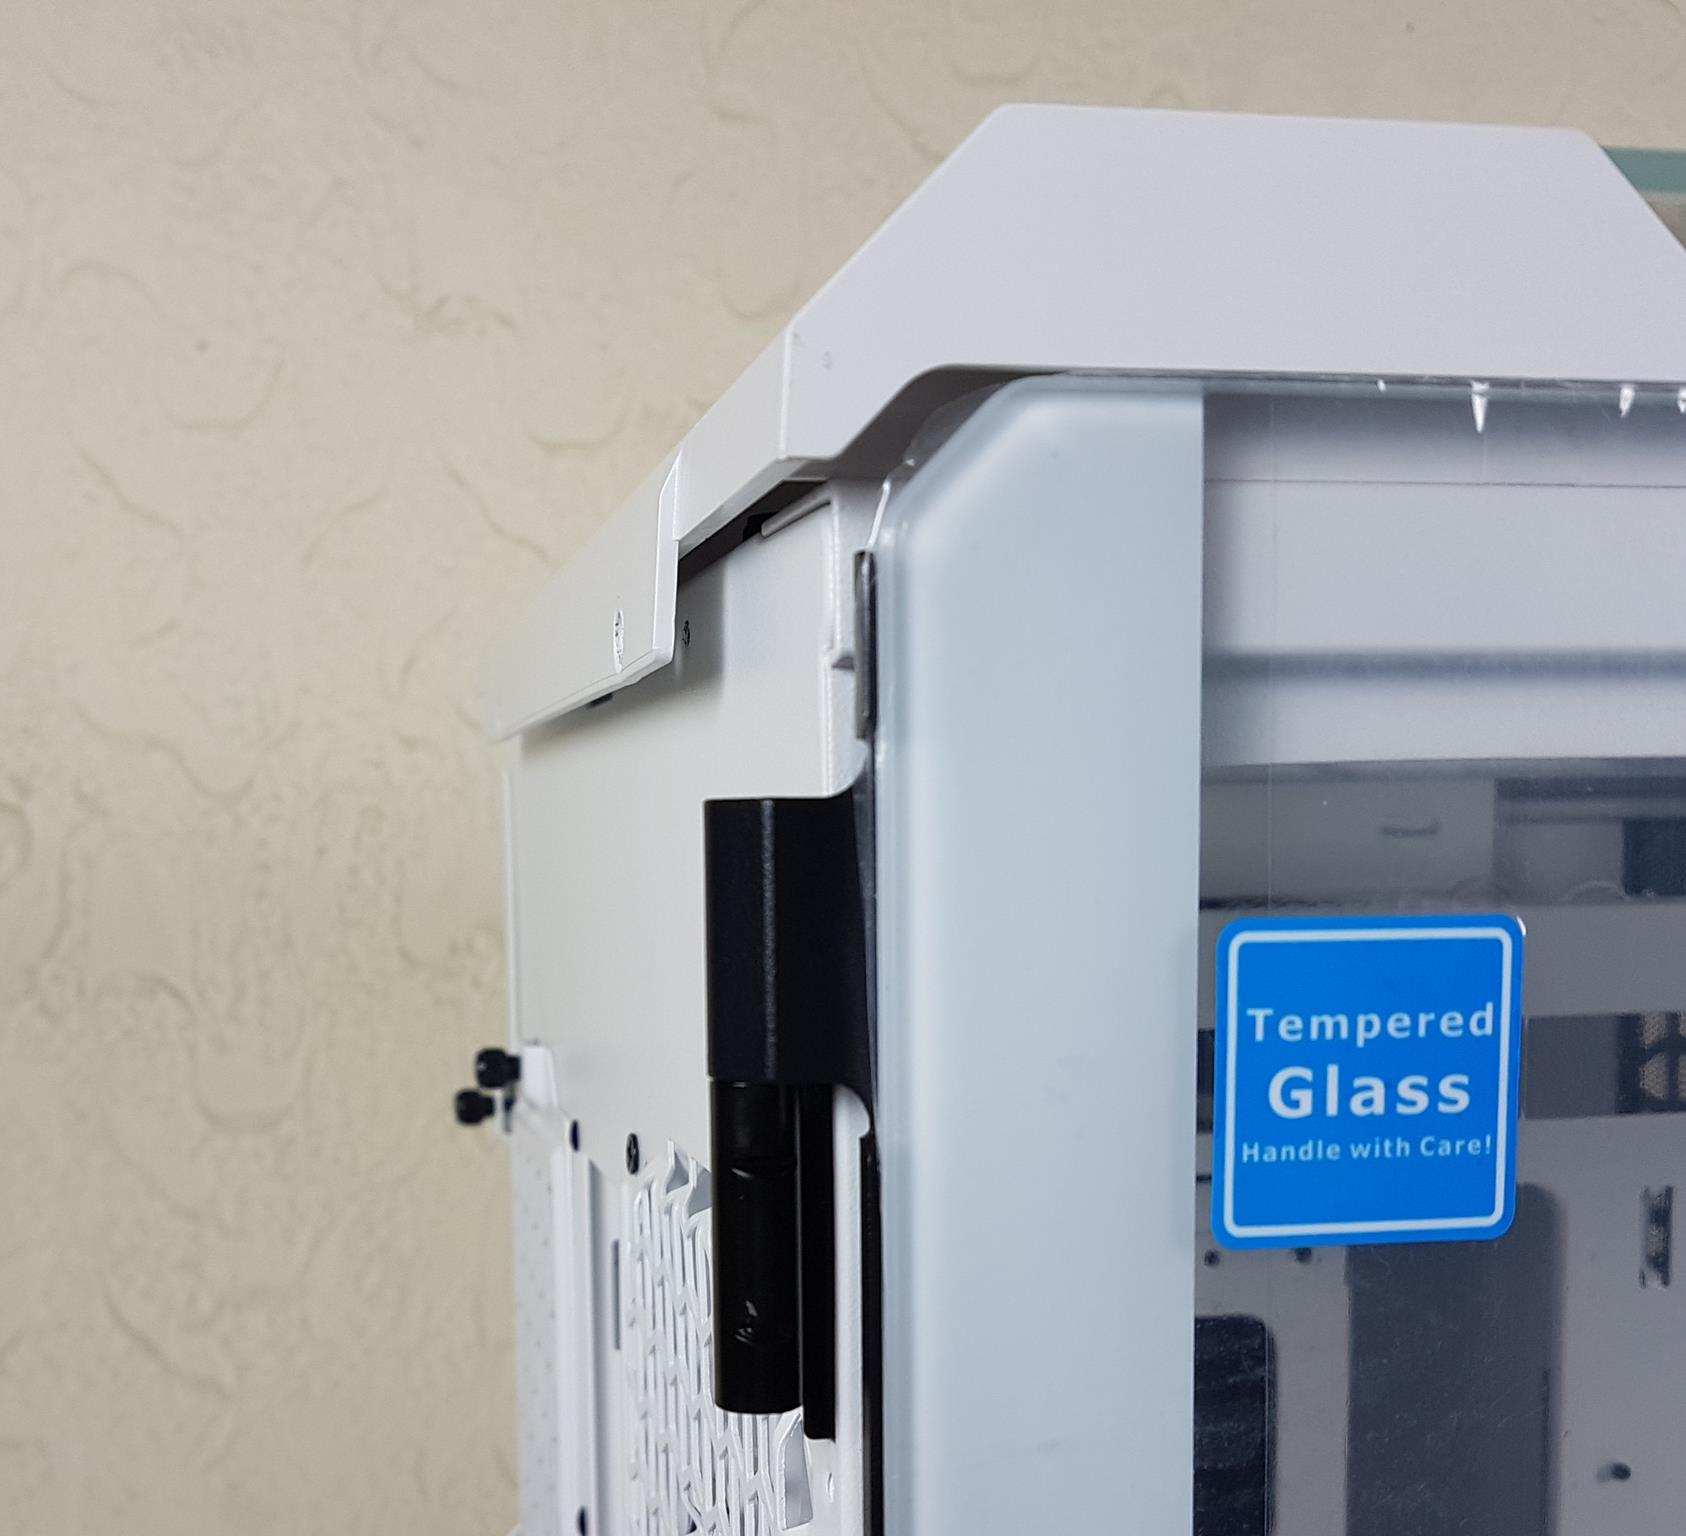
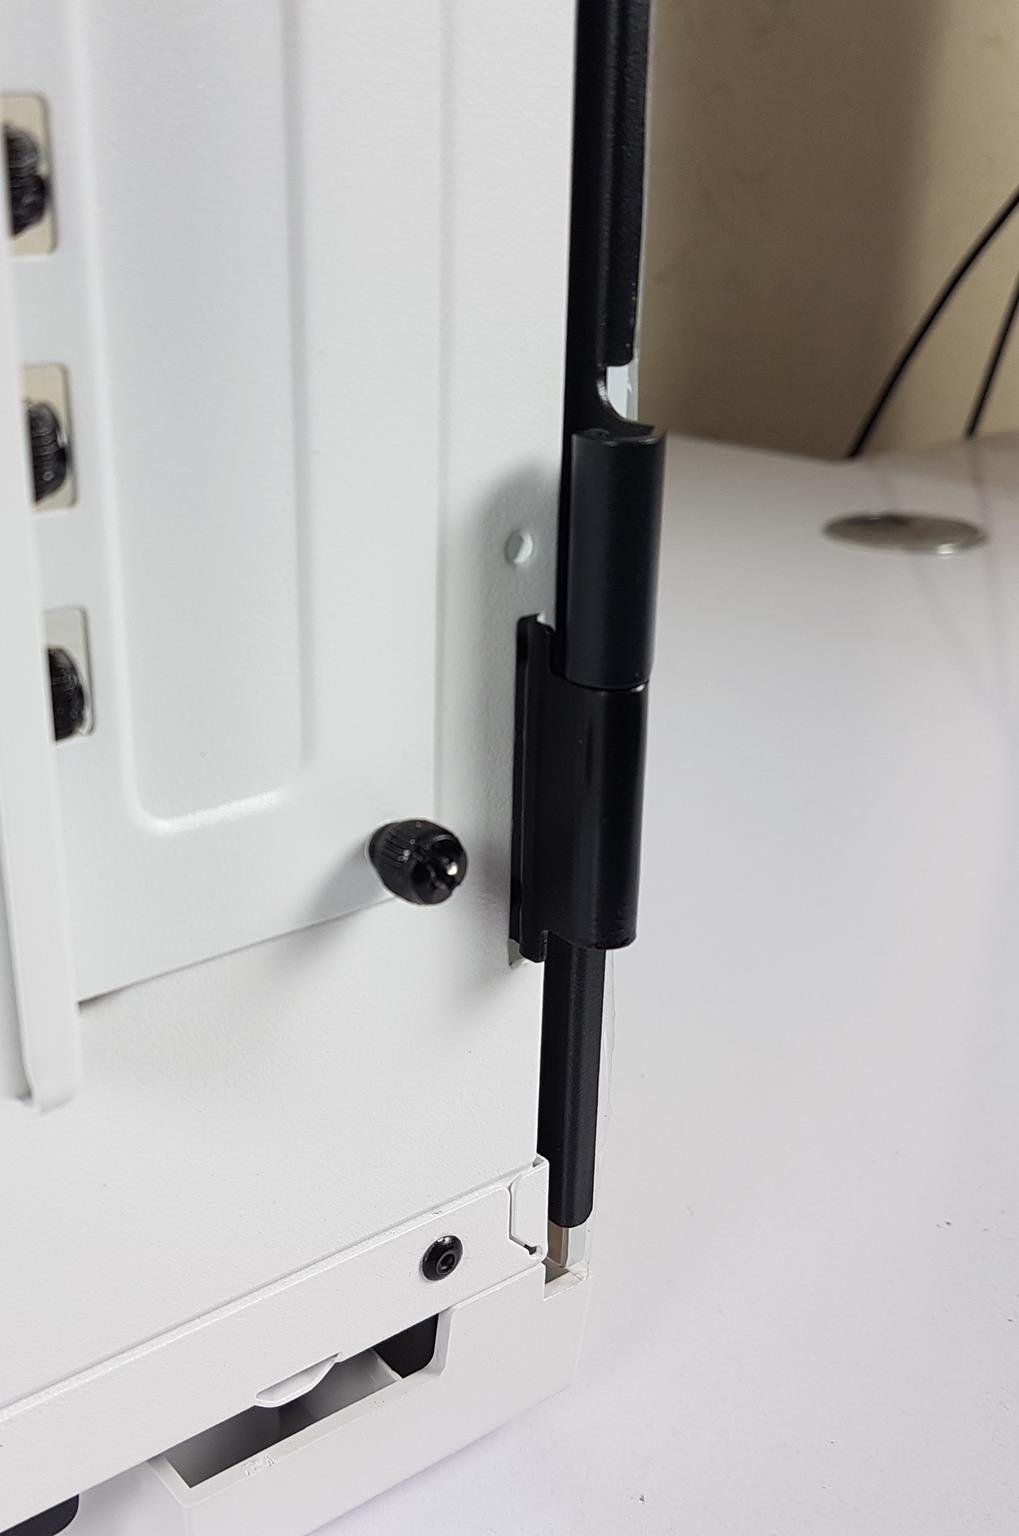
There is a 4mm tempered glass side panel which is not tinted. This is a wise move to properly show case the build. The panel is hinged on the frame which is a brilliant implementation as is on the View 71 TG.
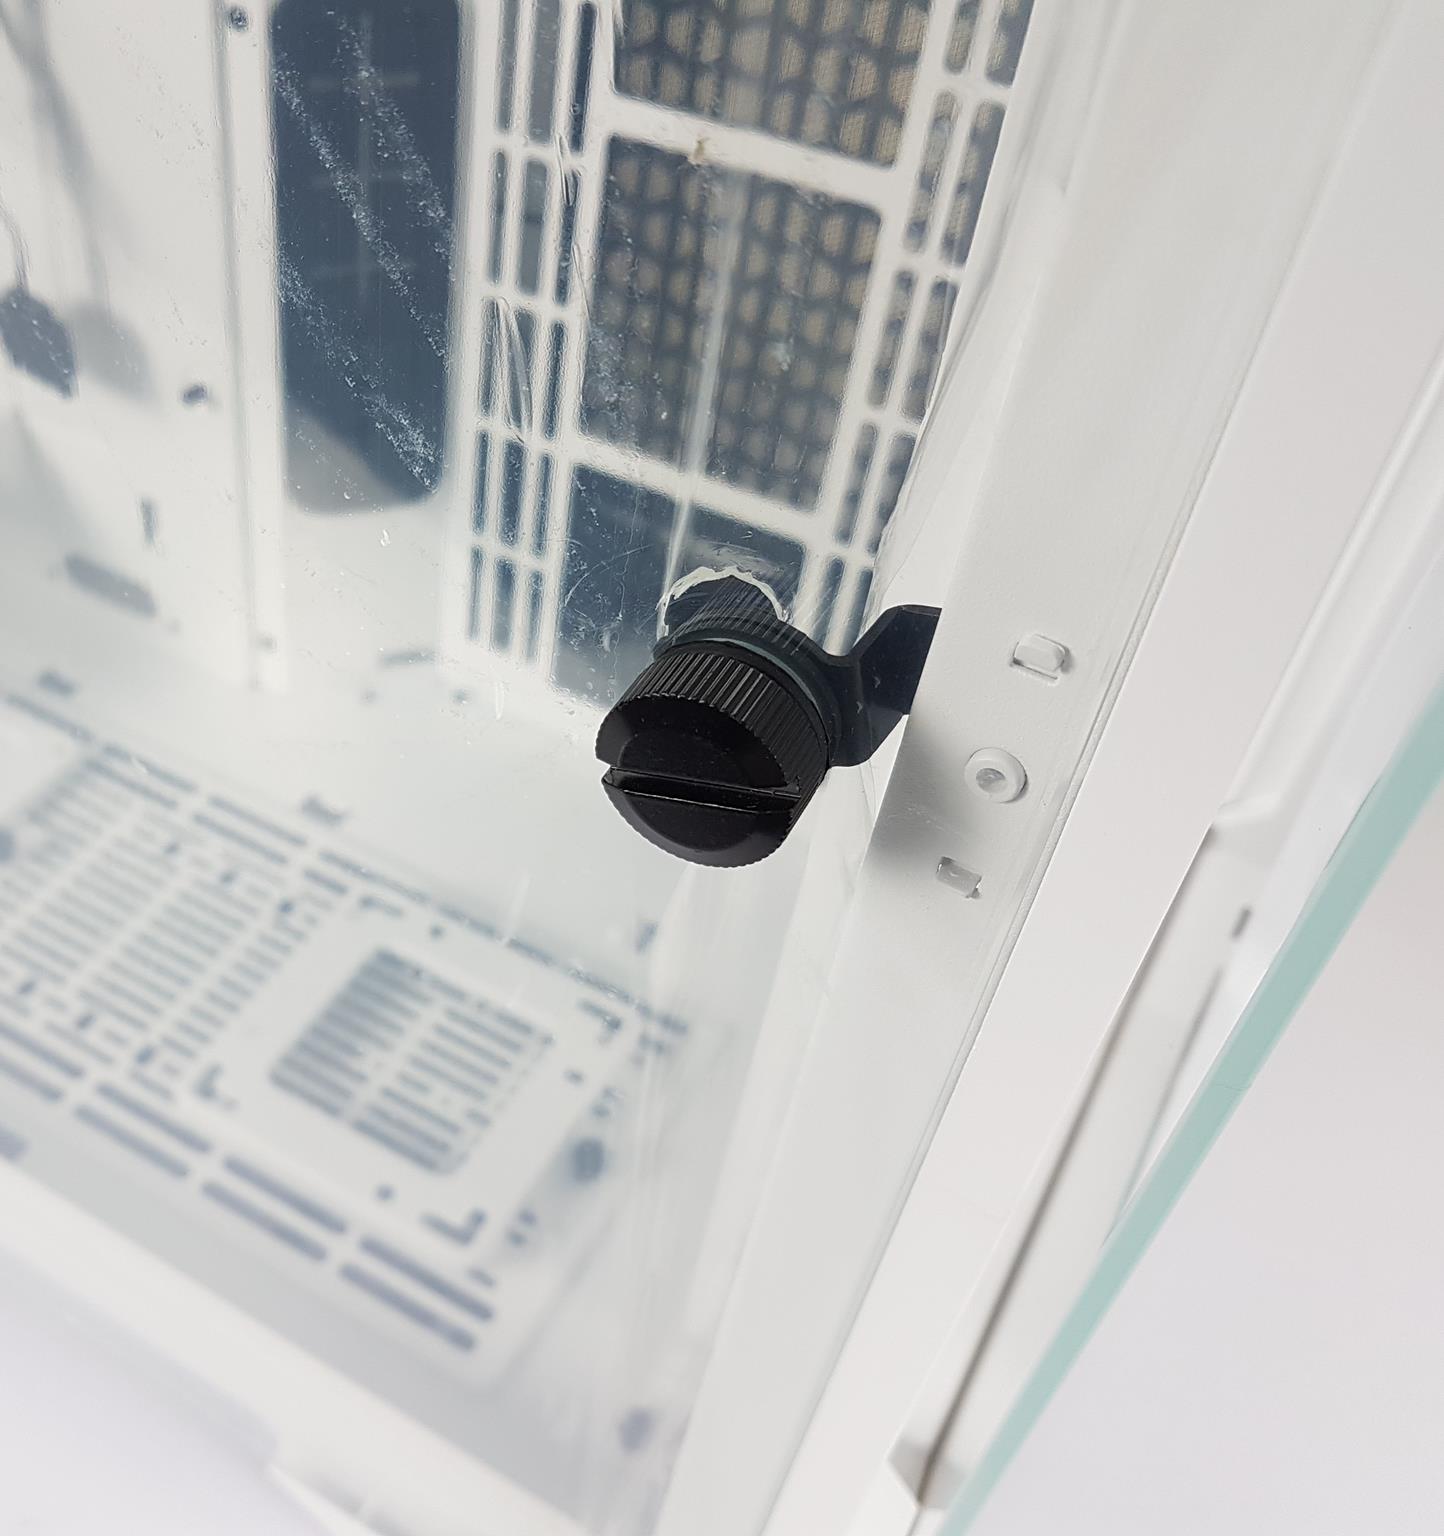
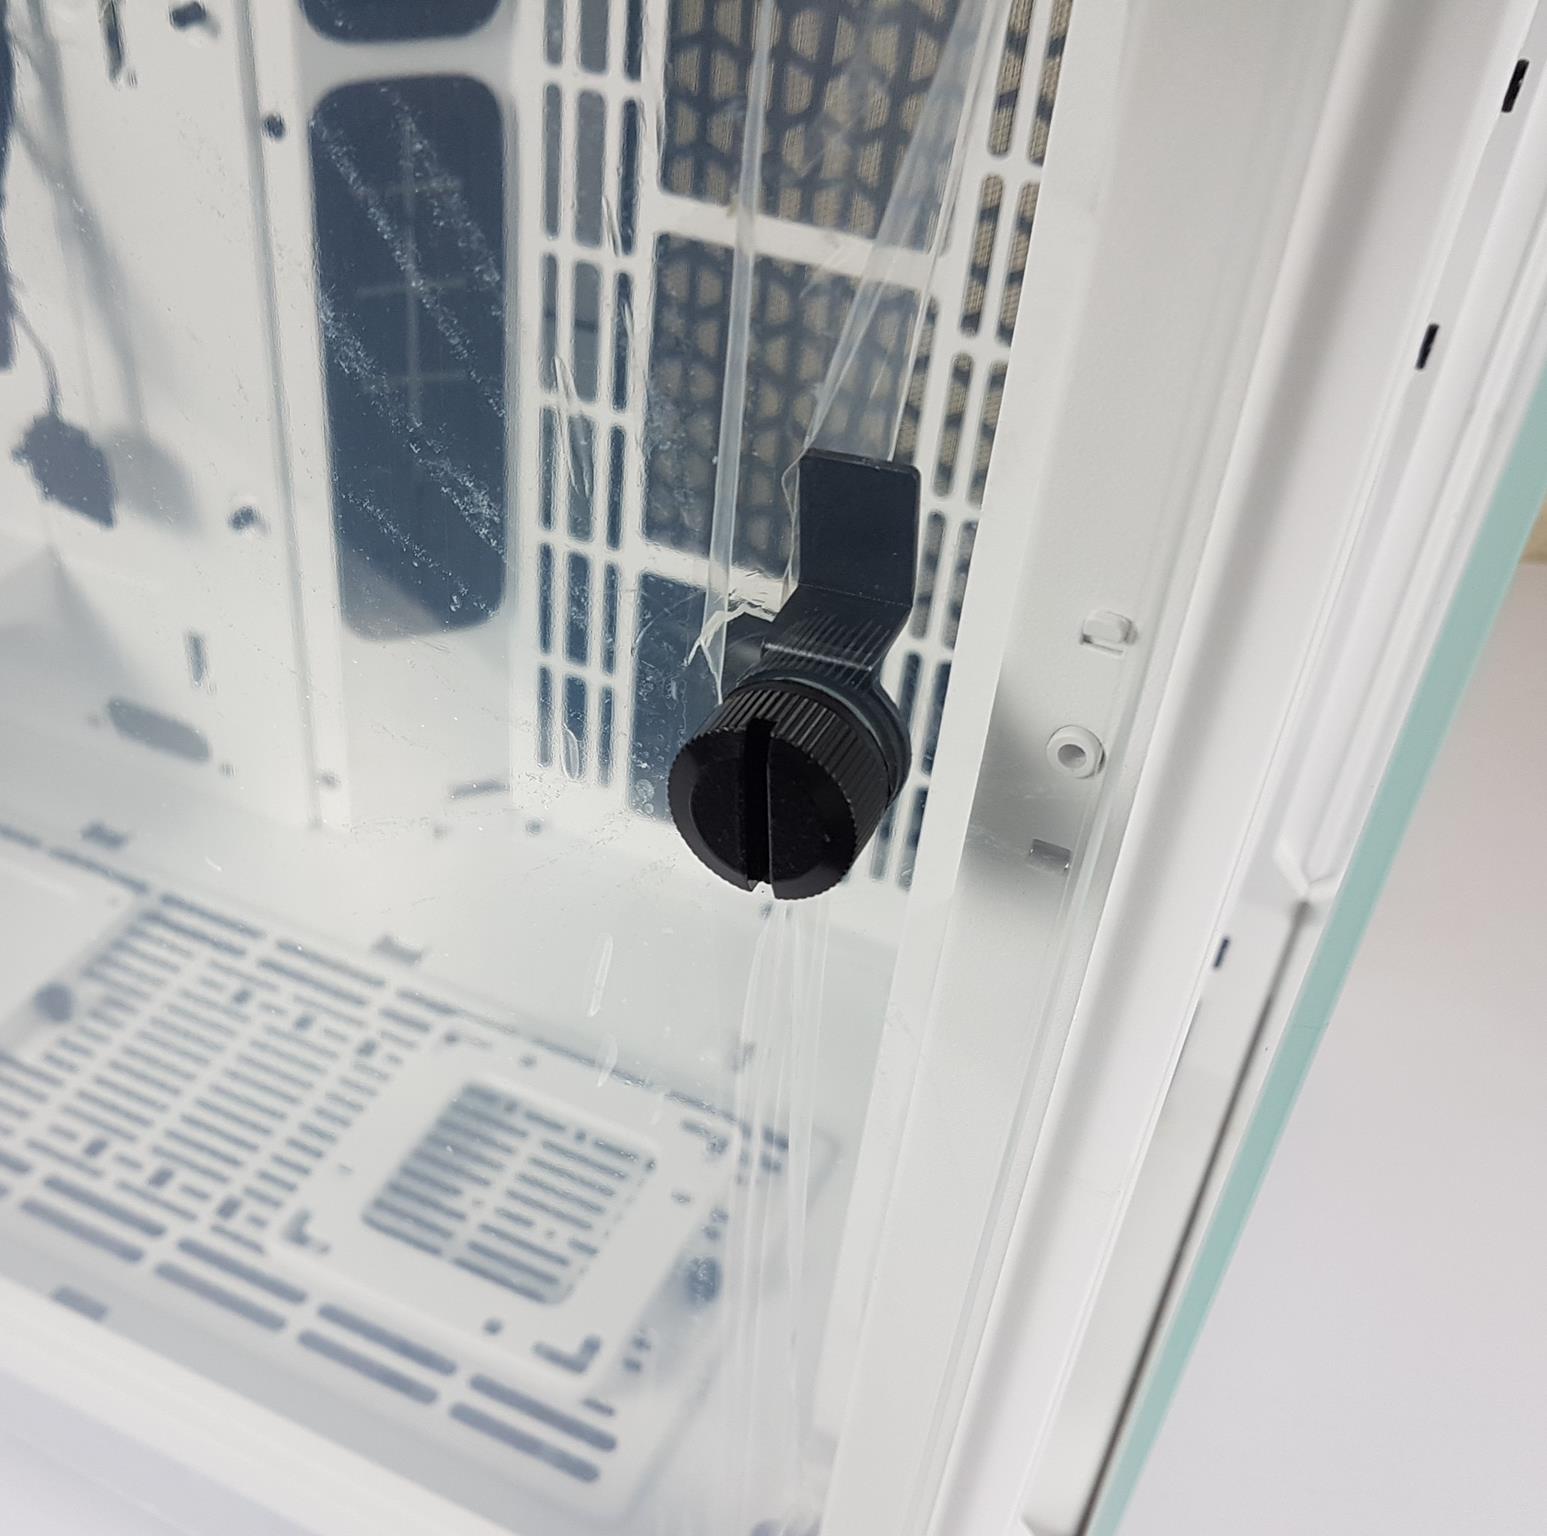
There is a circular shape handle on the side panel which is in the large thumb screw design. Rotating it counter clockwise would release the panel from the frame and rotating it clockwise would do the opposite.
There is a hinged panel on the frame which makes the handling of the panel quite convenient.
The above picture shows the top side of the PC Case. The glass is the same with 4mm thickness. Looking closely, the complete panel can be released to access the entire top of the case. We have a narrow gap between the glass and the panel itself for ventilation.
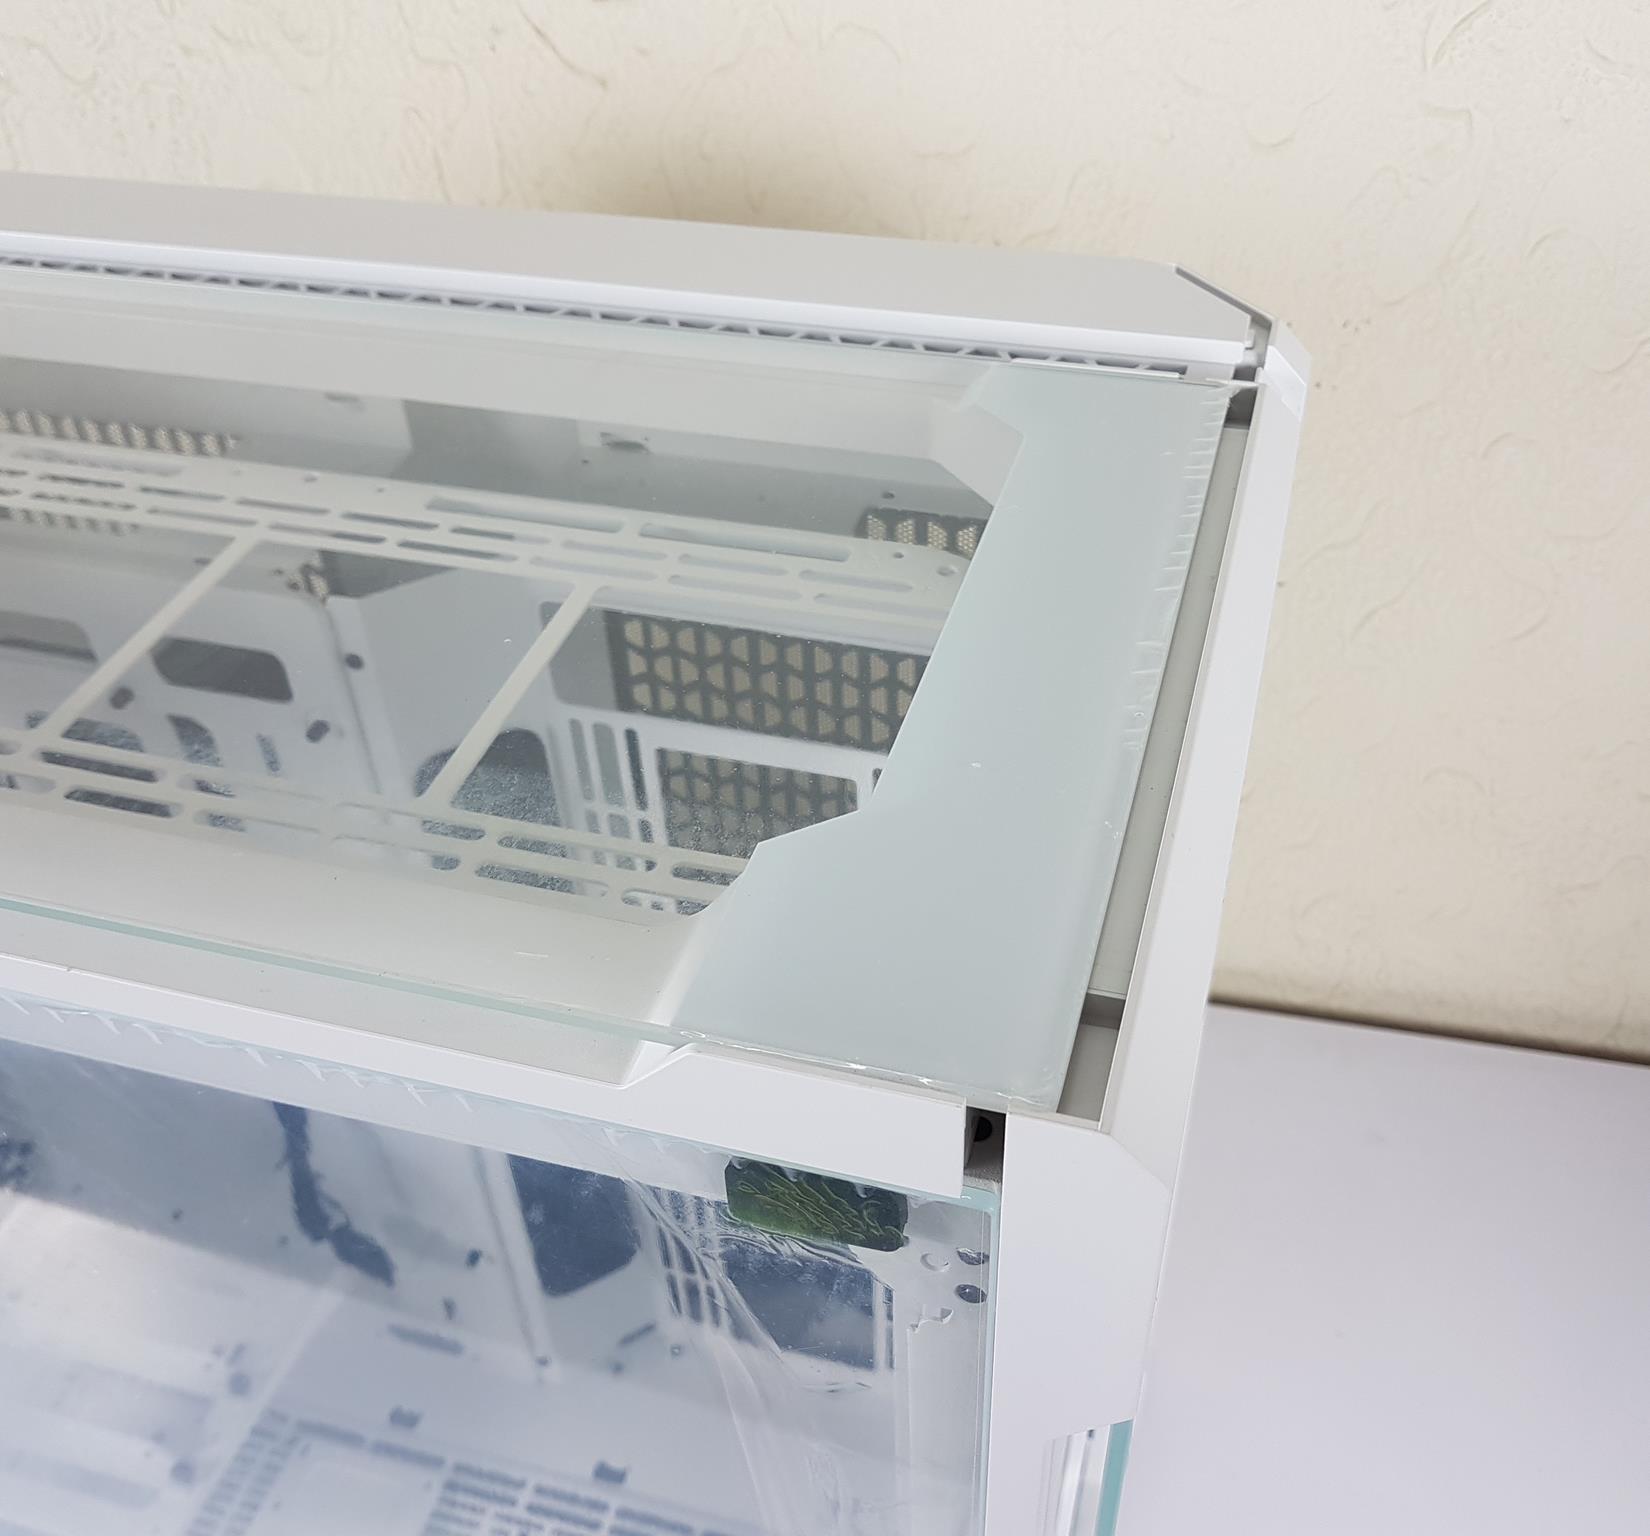
To remove the top panel, remove the two screws on the rear side of the panel and slide it out towards the rear.
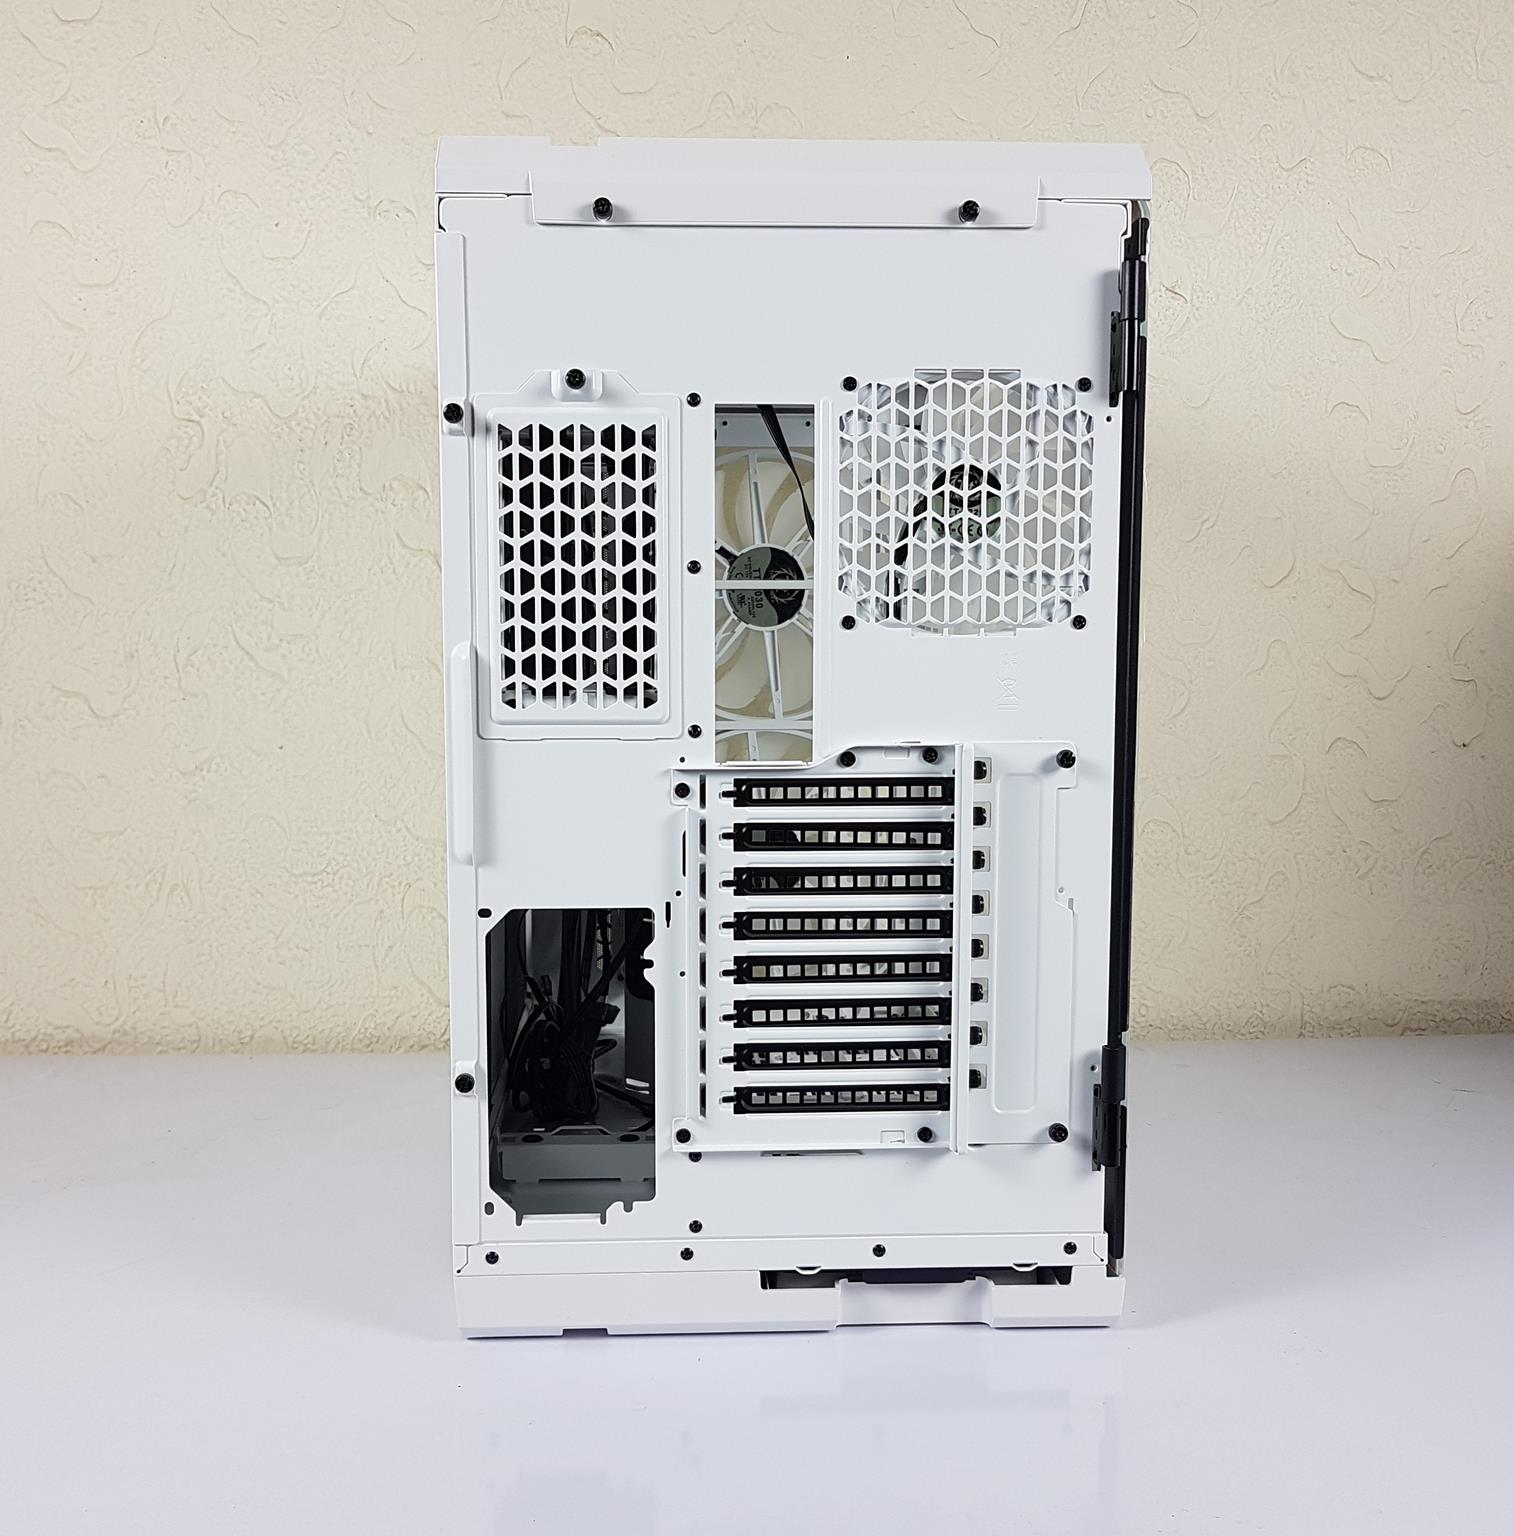
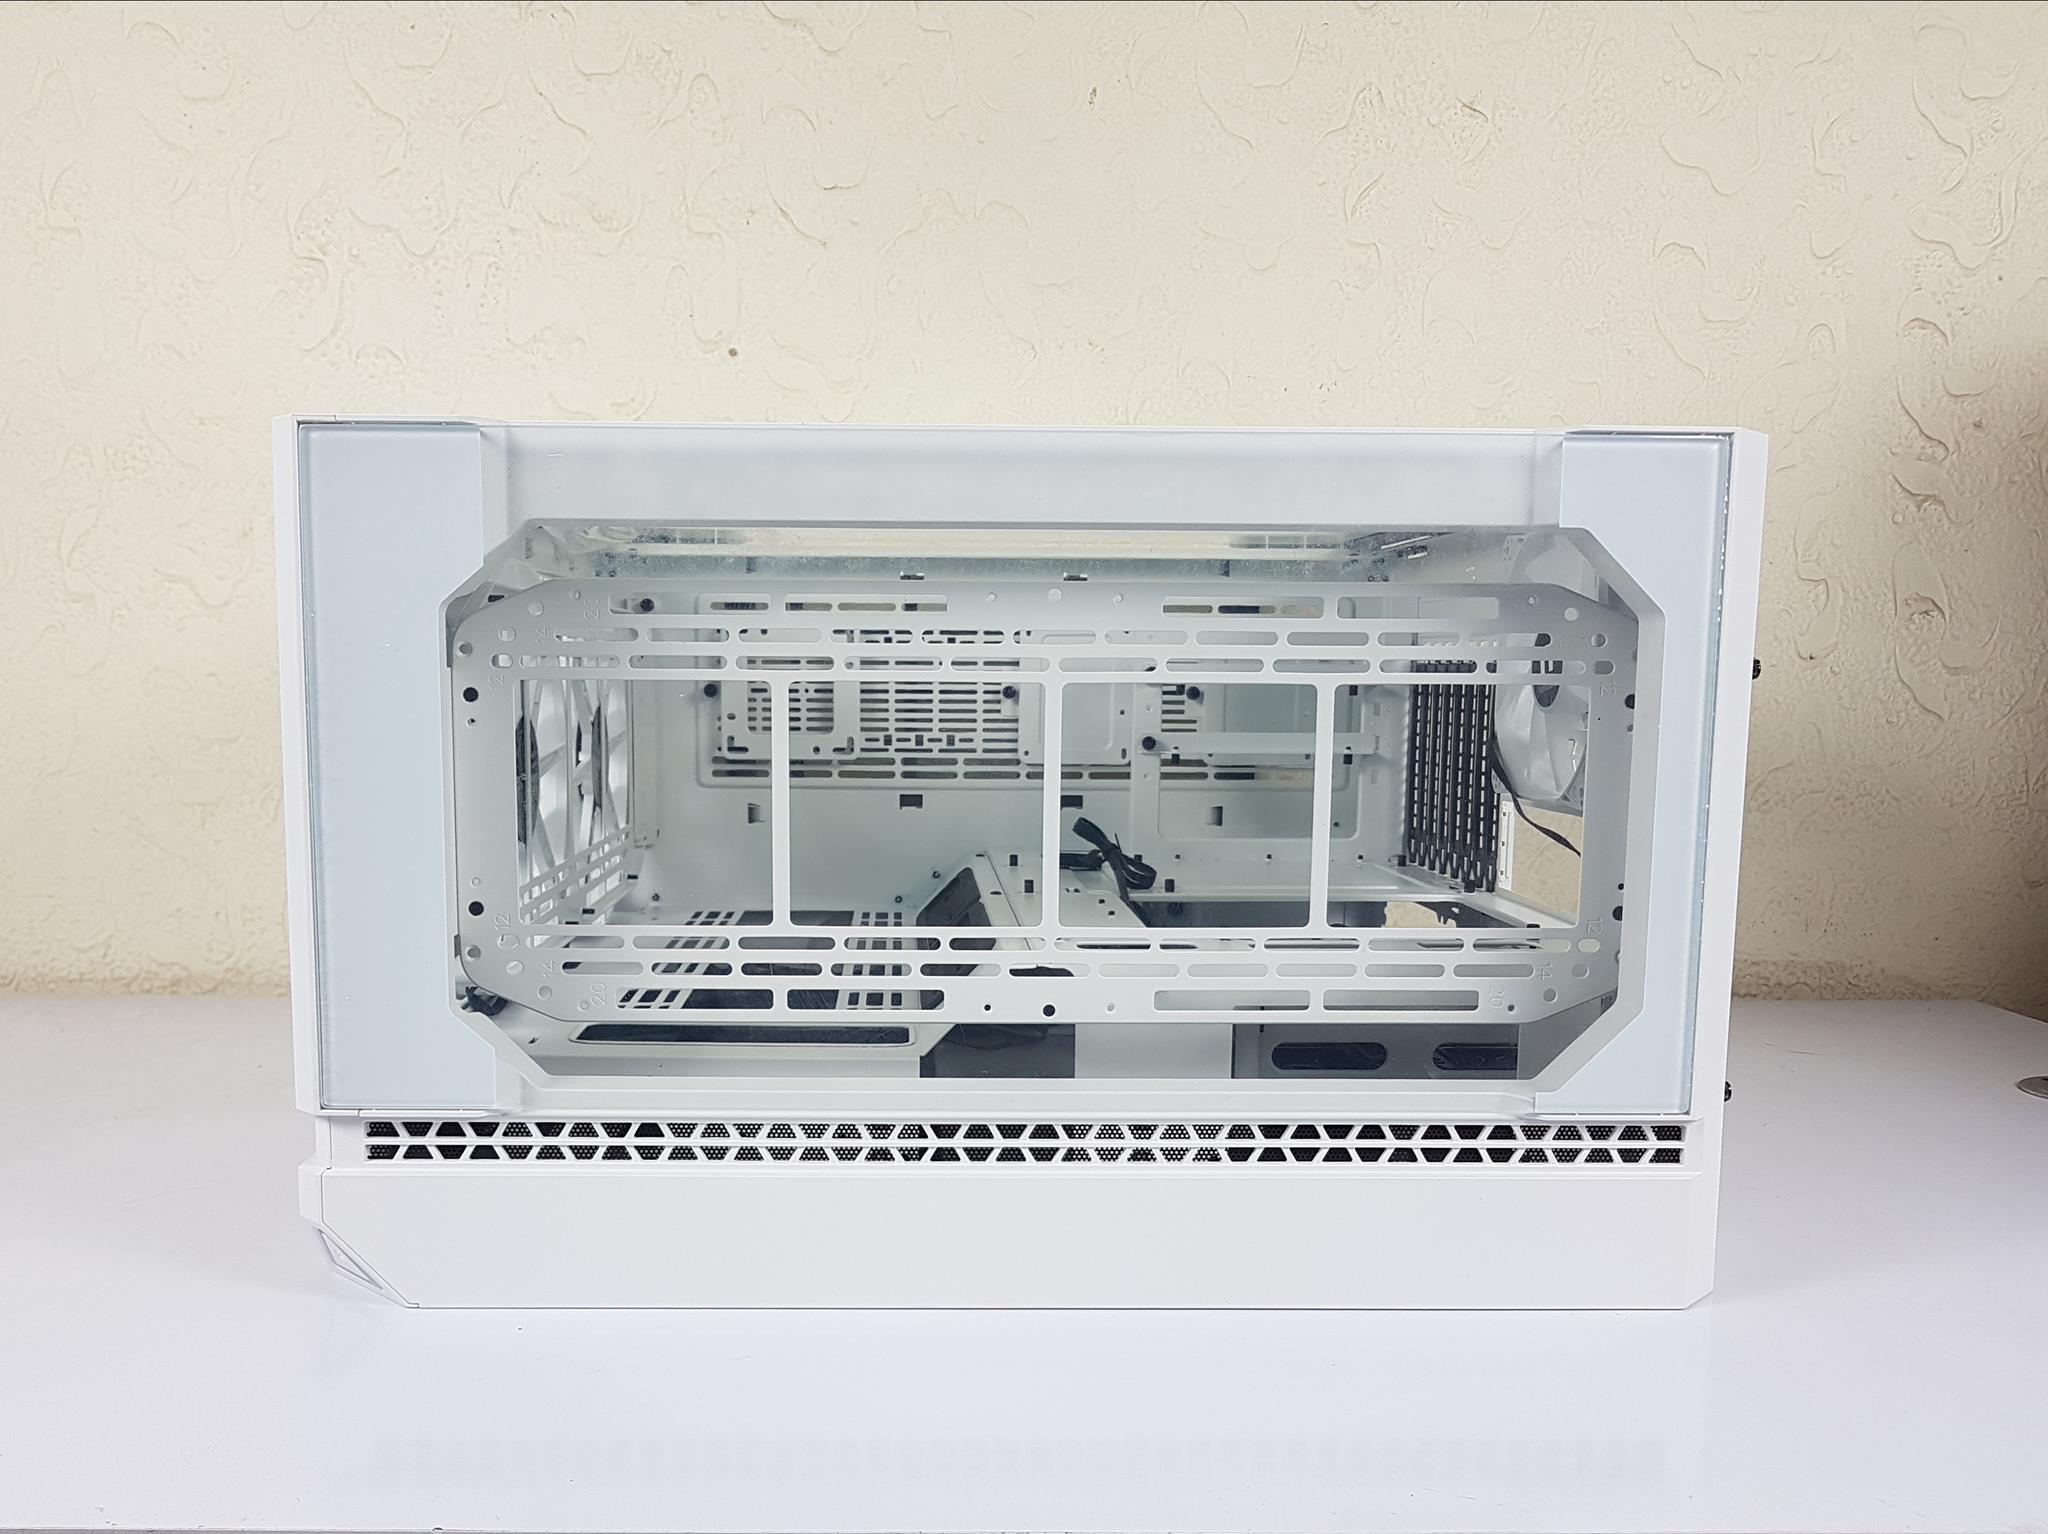
The Thermaltake View 51 TG SNOW ARGB Edition boasts a spacious 325mm width and a noticeable gap between the PC case top and motherboard. A convenient cutout is present for easy access to the motherboard’s IO shield. On the right, a mesh area accommodates a 120mm fan, with a fixed rear fan height due to design constraints.
The left side features a removable vented cover, concealing the HDD cage. The central 8x PCIe slot design is adjustable for vertical GPU installation. A PCIe slot cover is found on the right, while standard ATX PSU mounting is positioned vertically at the bottom left.
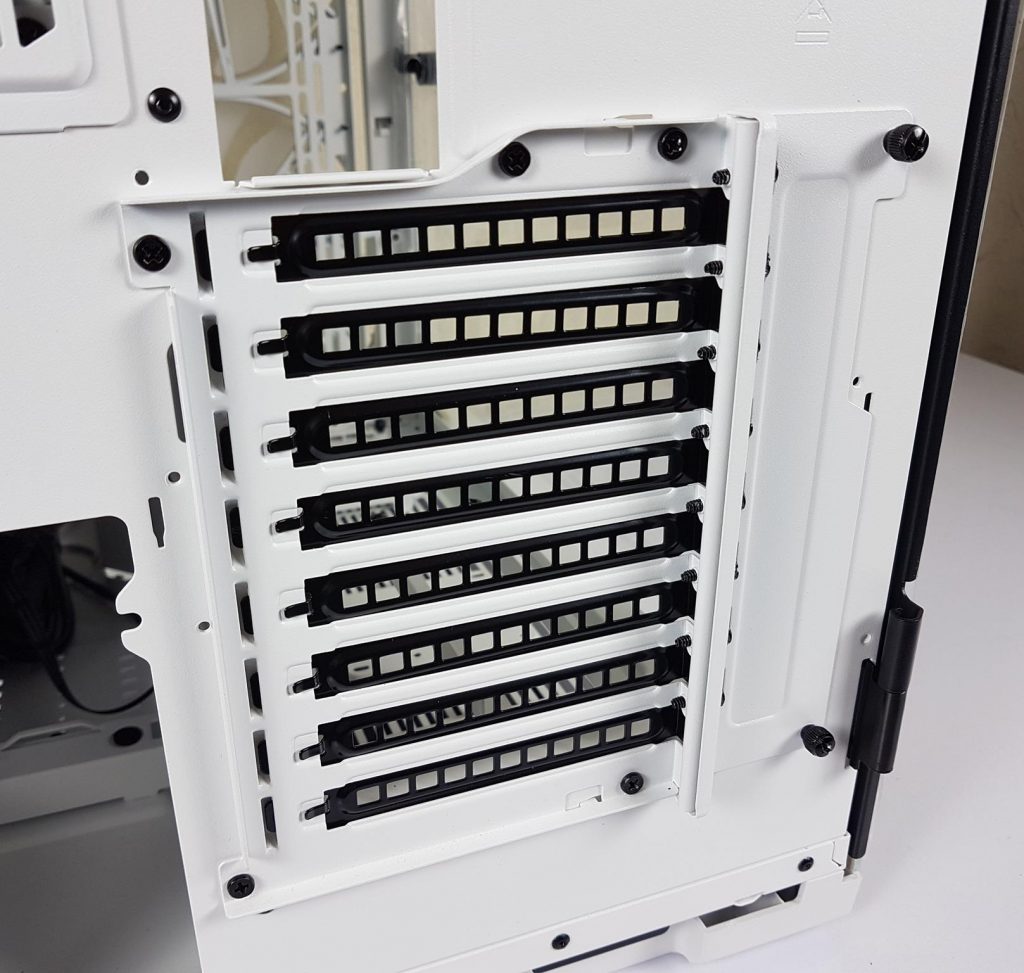
As I have mentioned above, Thermaltake has implemented a patented rotational design for the PCIe 8x slots. The complete PCIe 8x slots bracket is removable. It is secured using 5x small size screws. Before taking it out, you would need to remove the PCIe slot cover bracket.
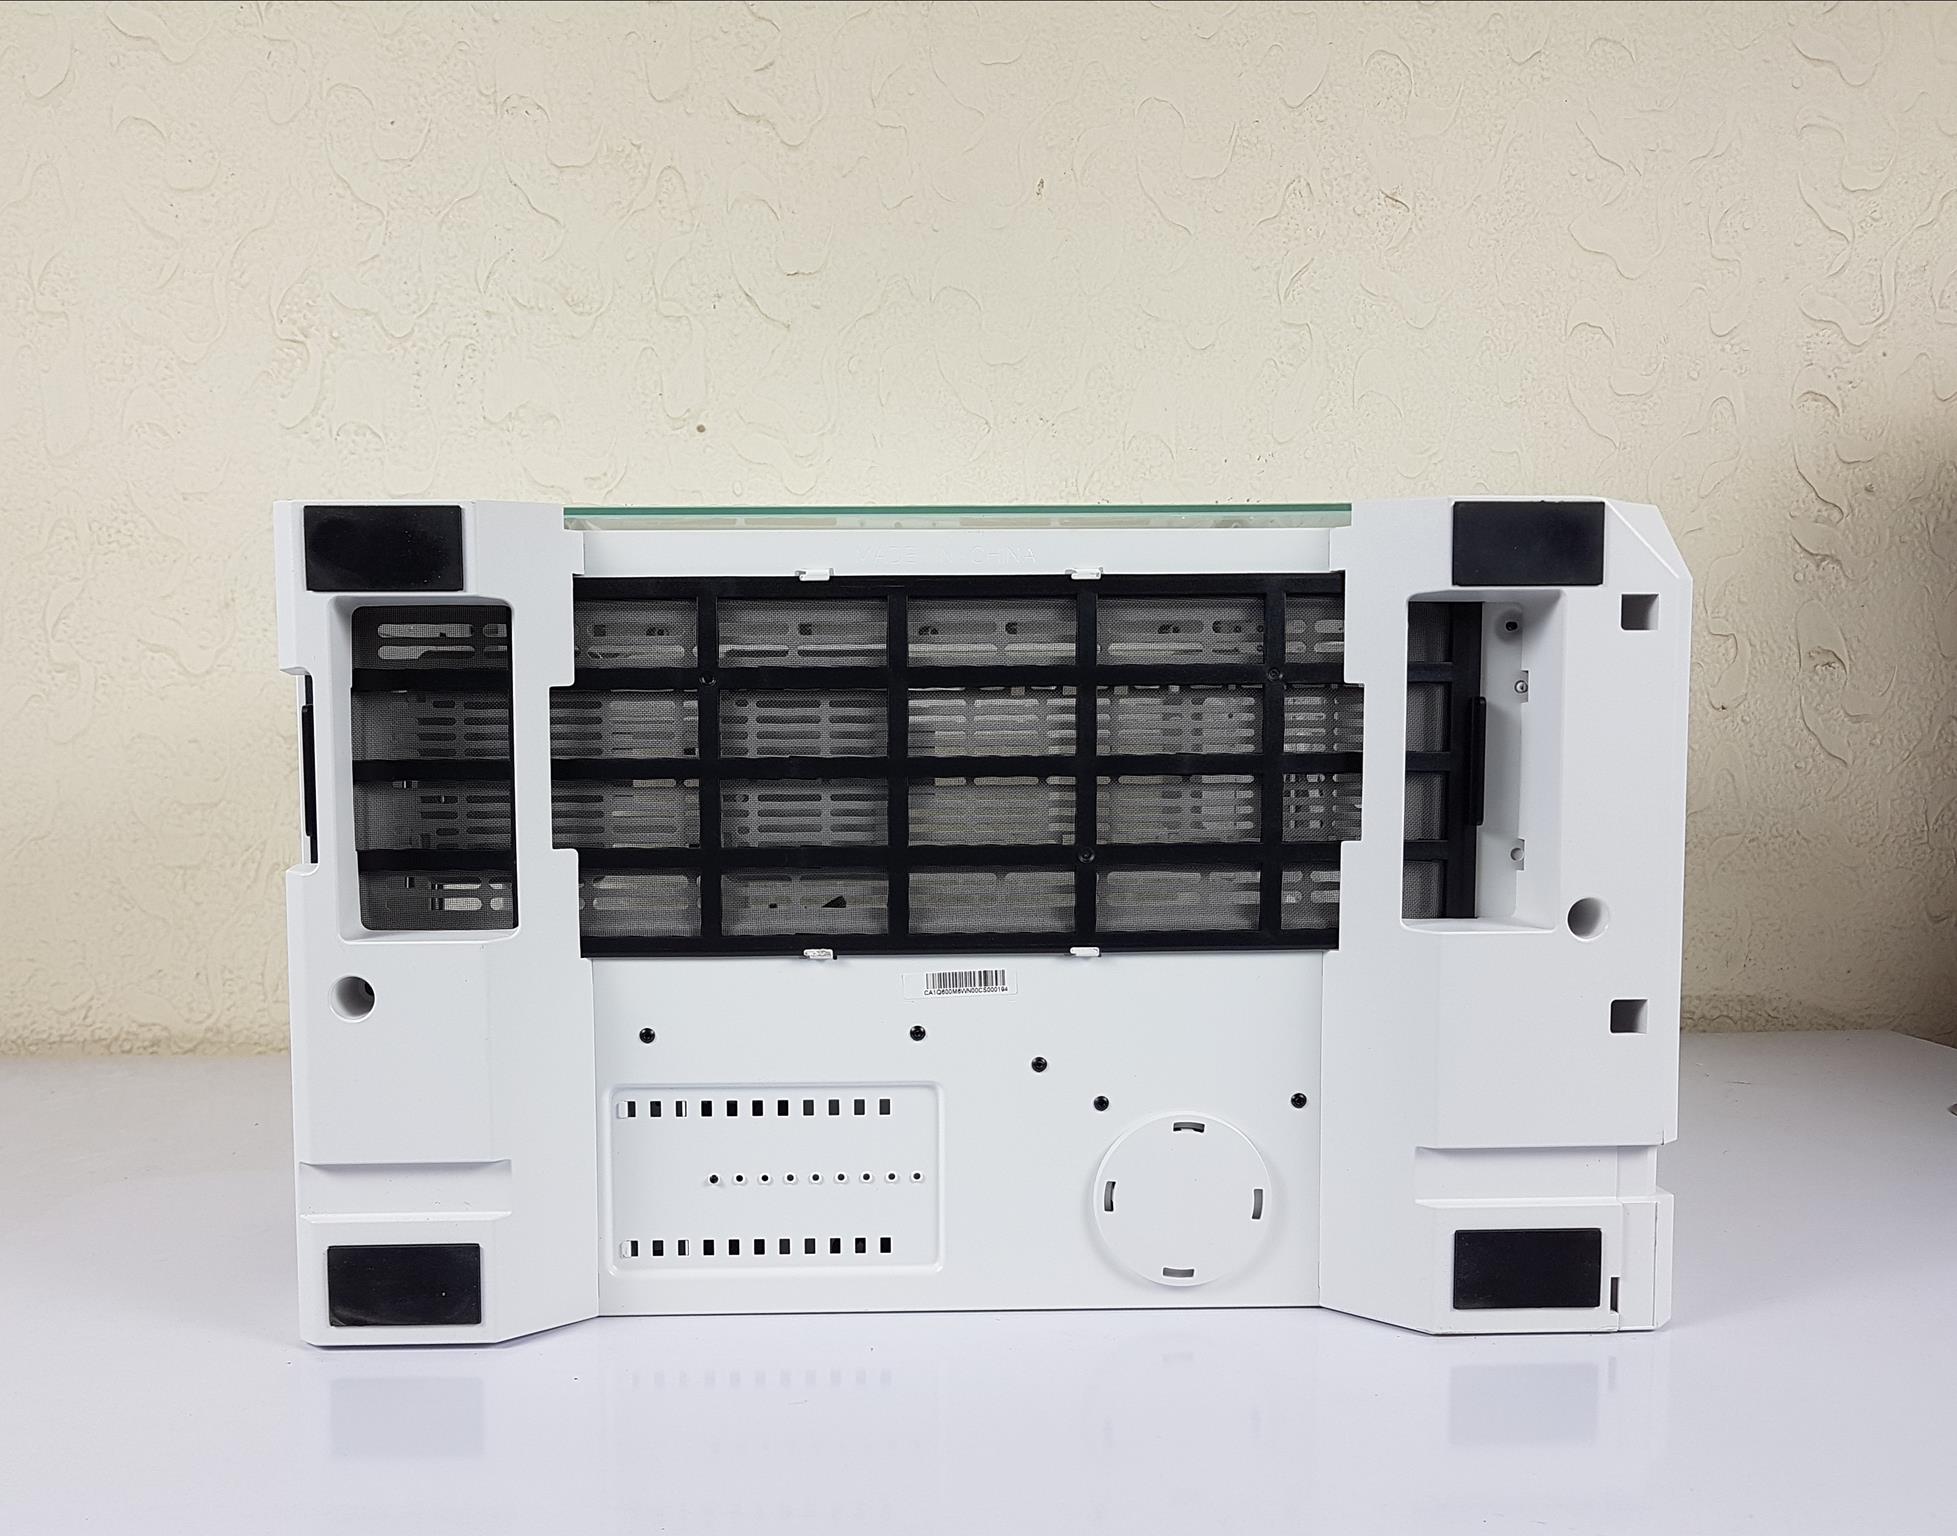
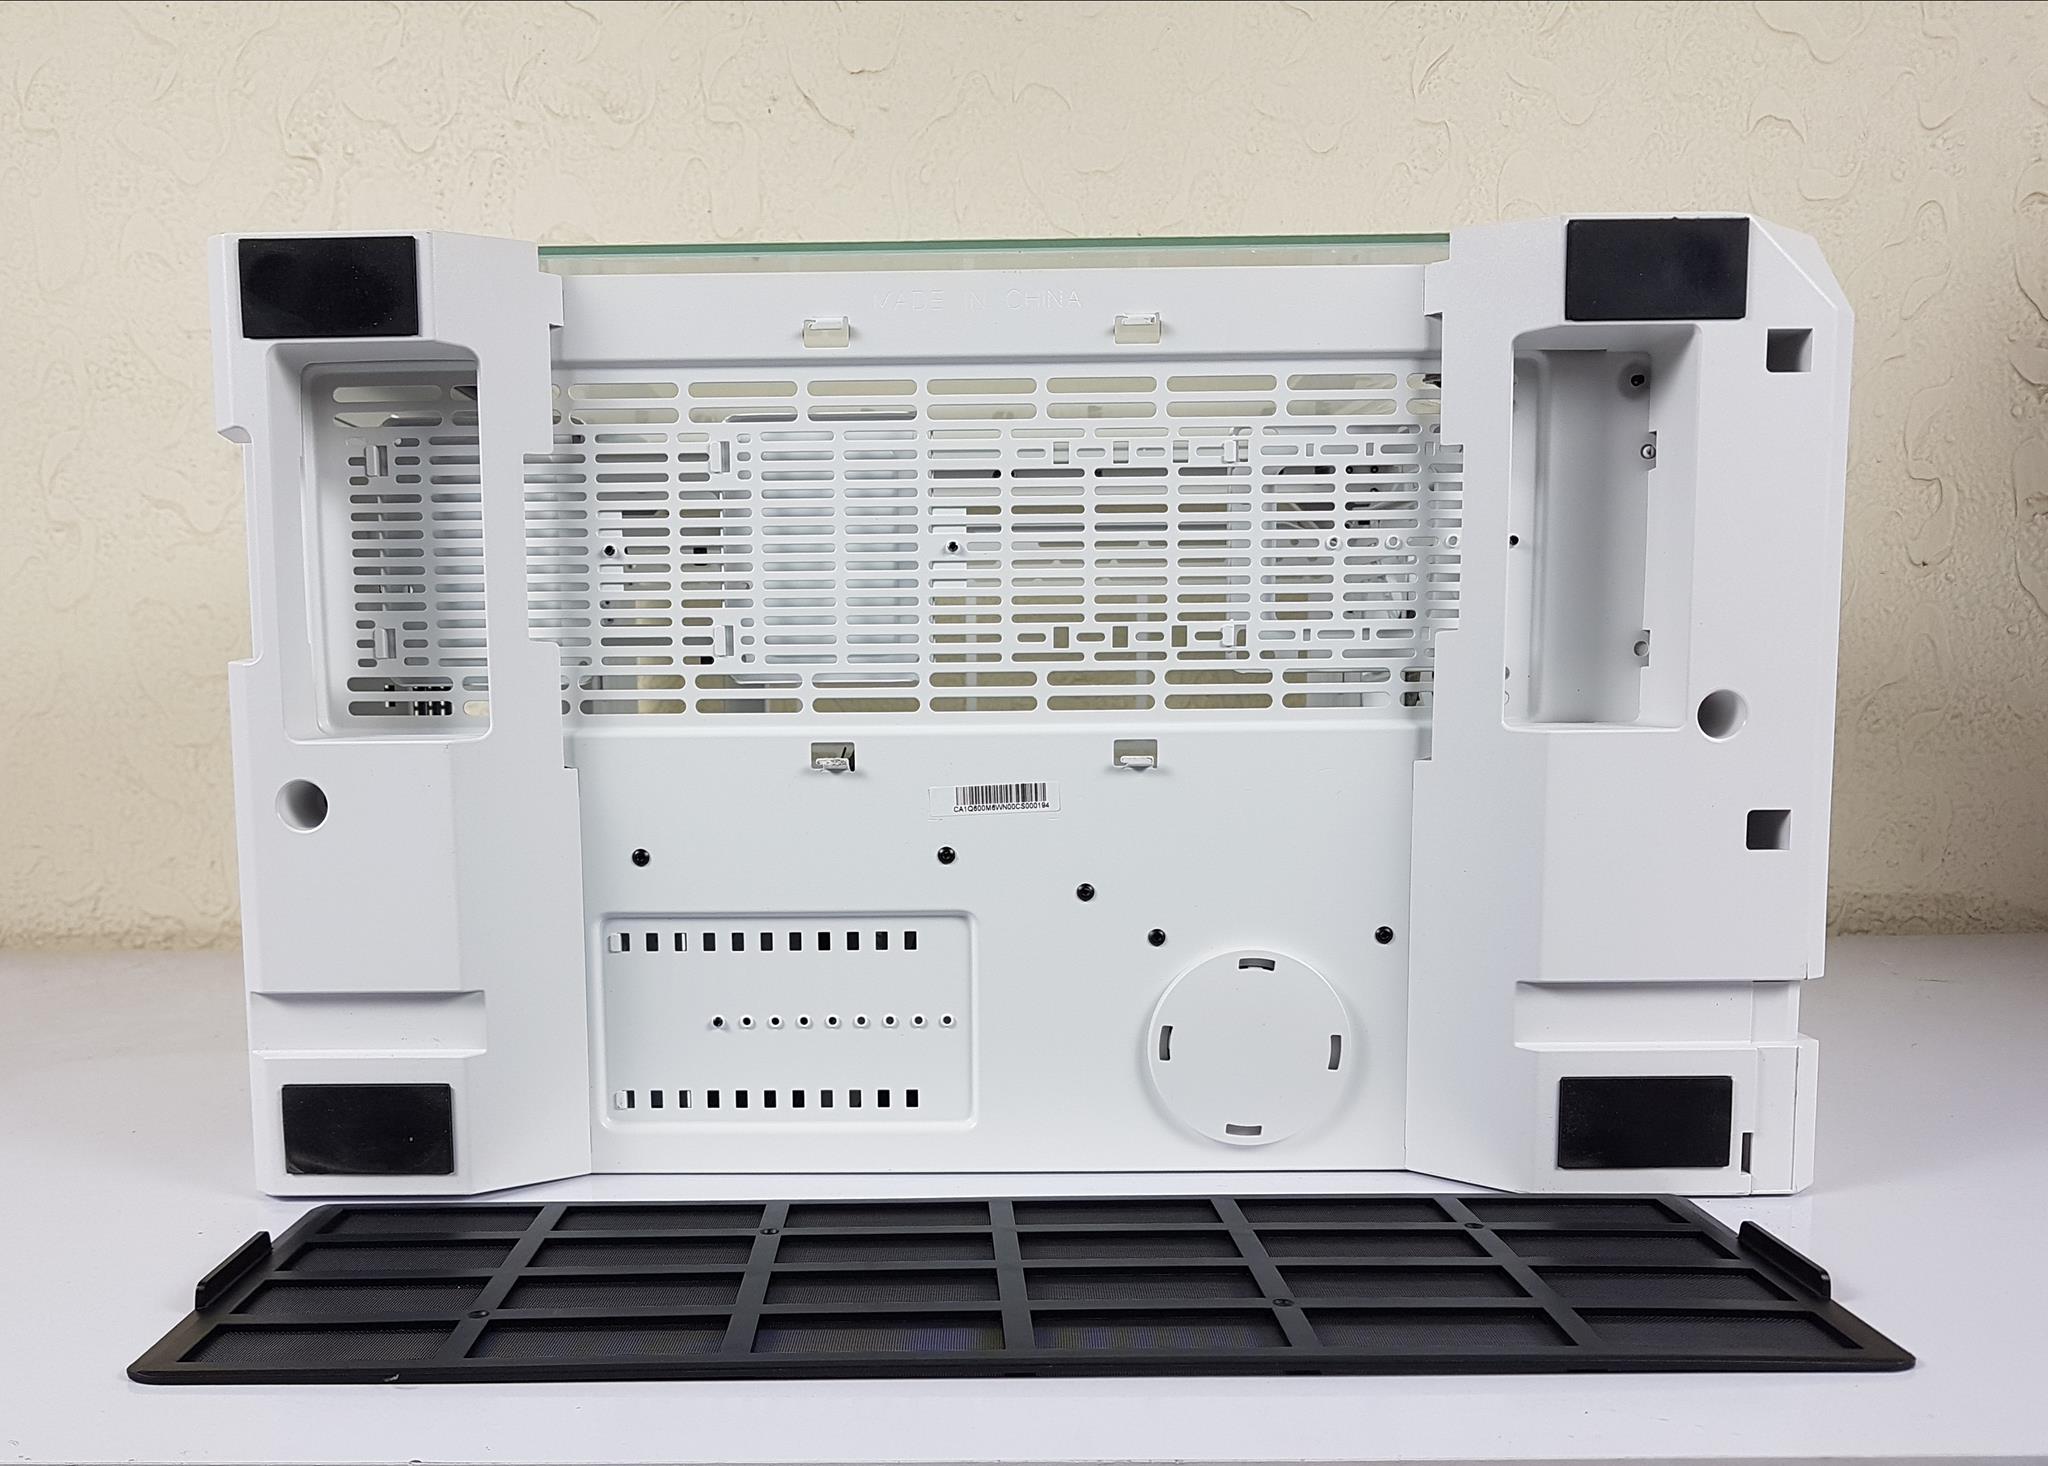
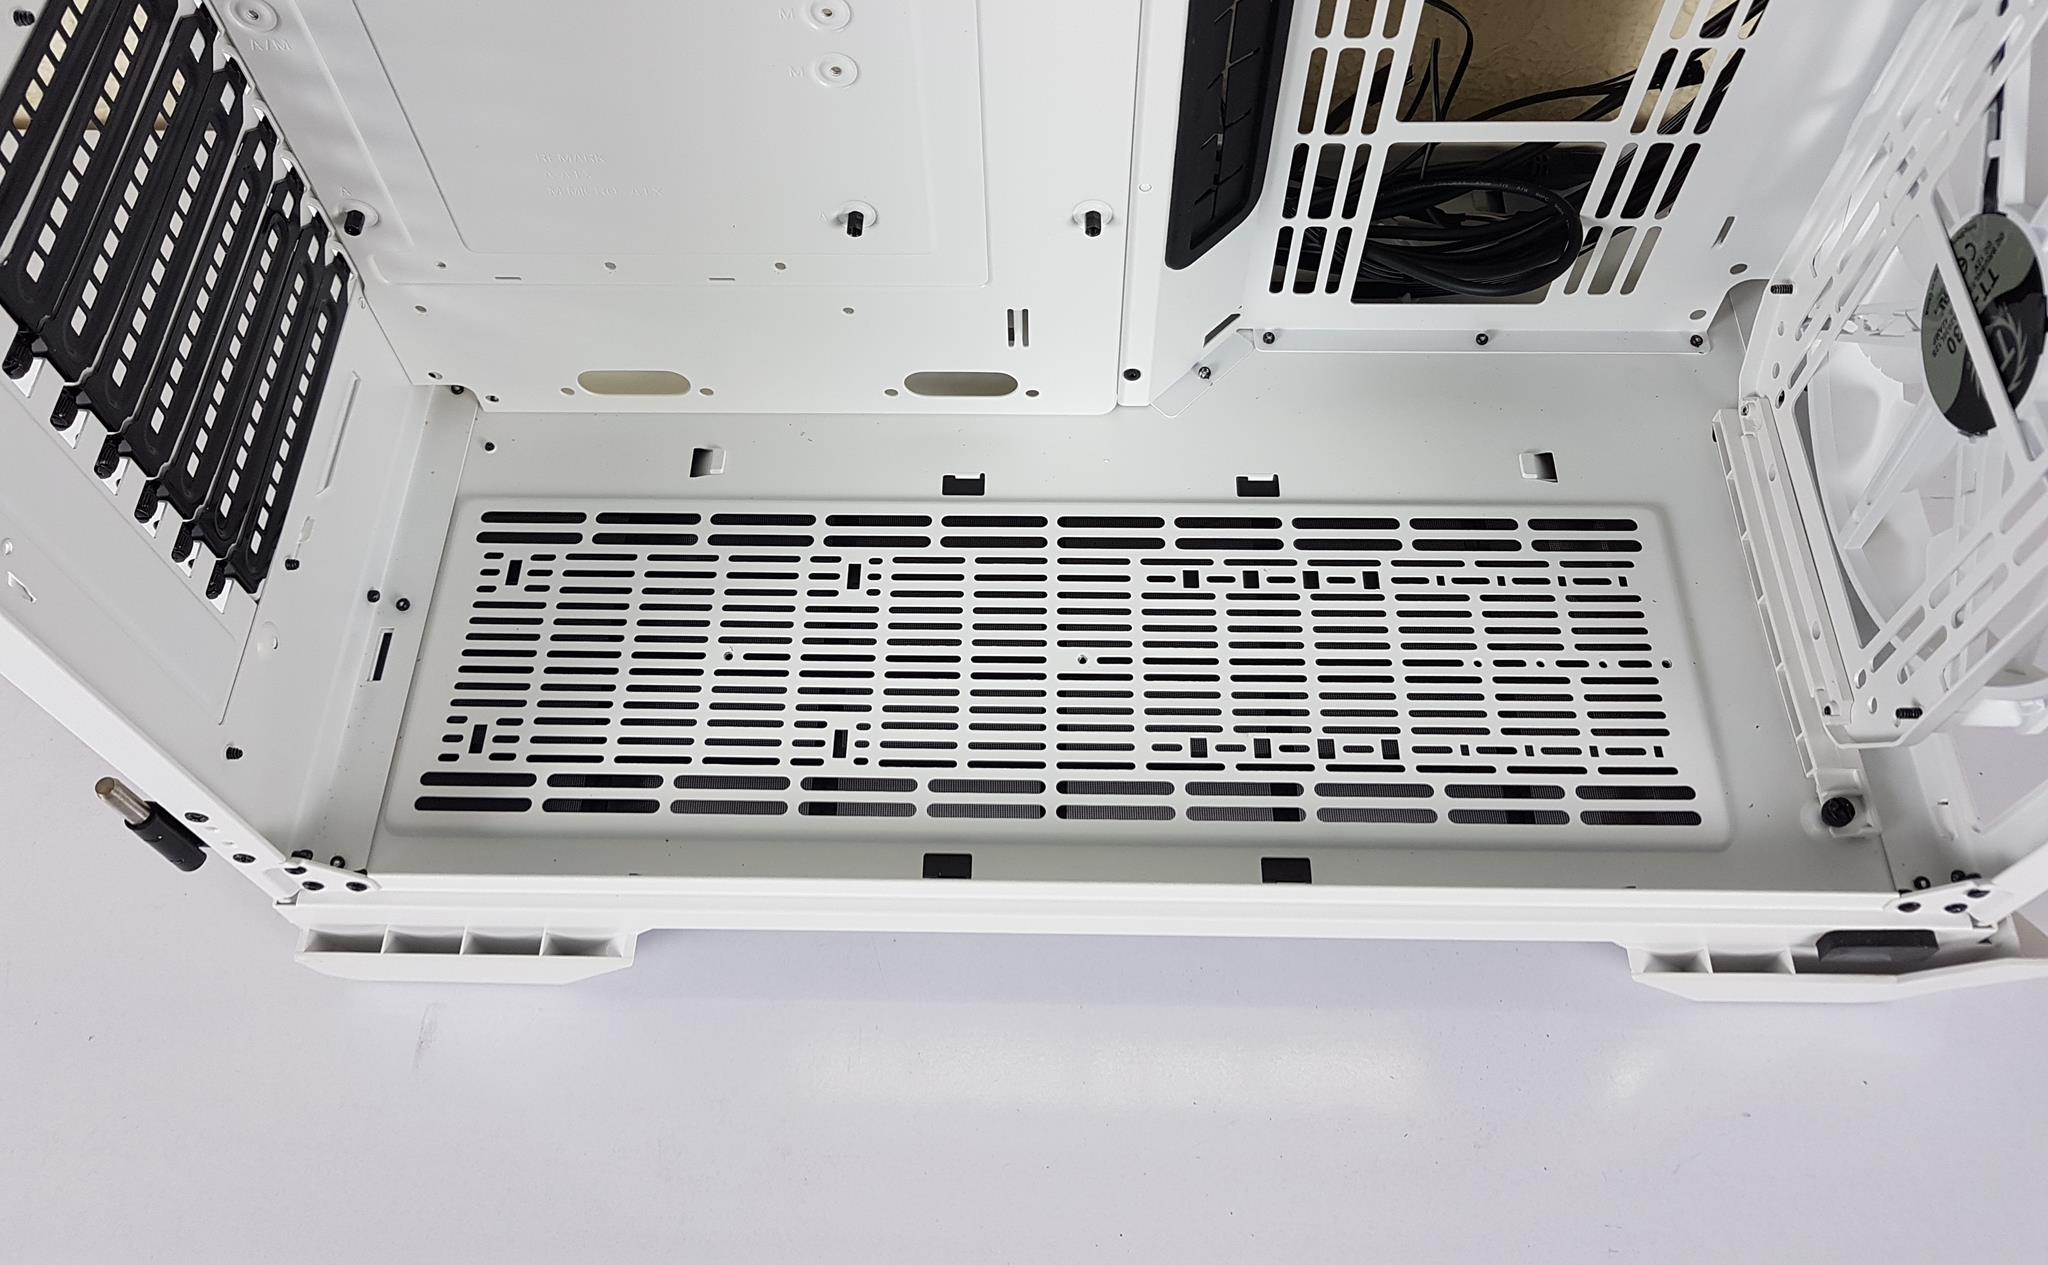
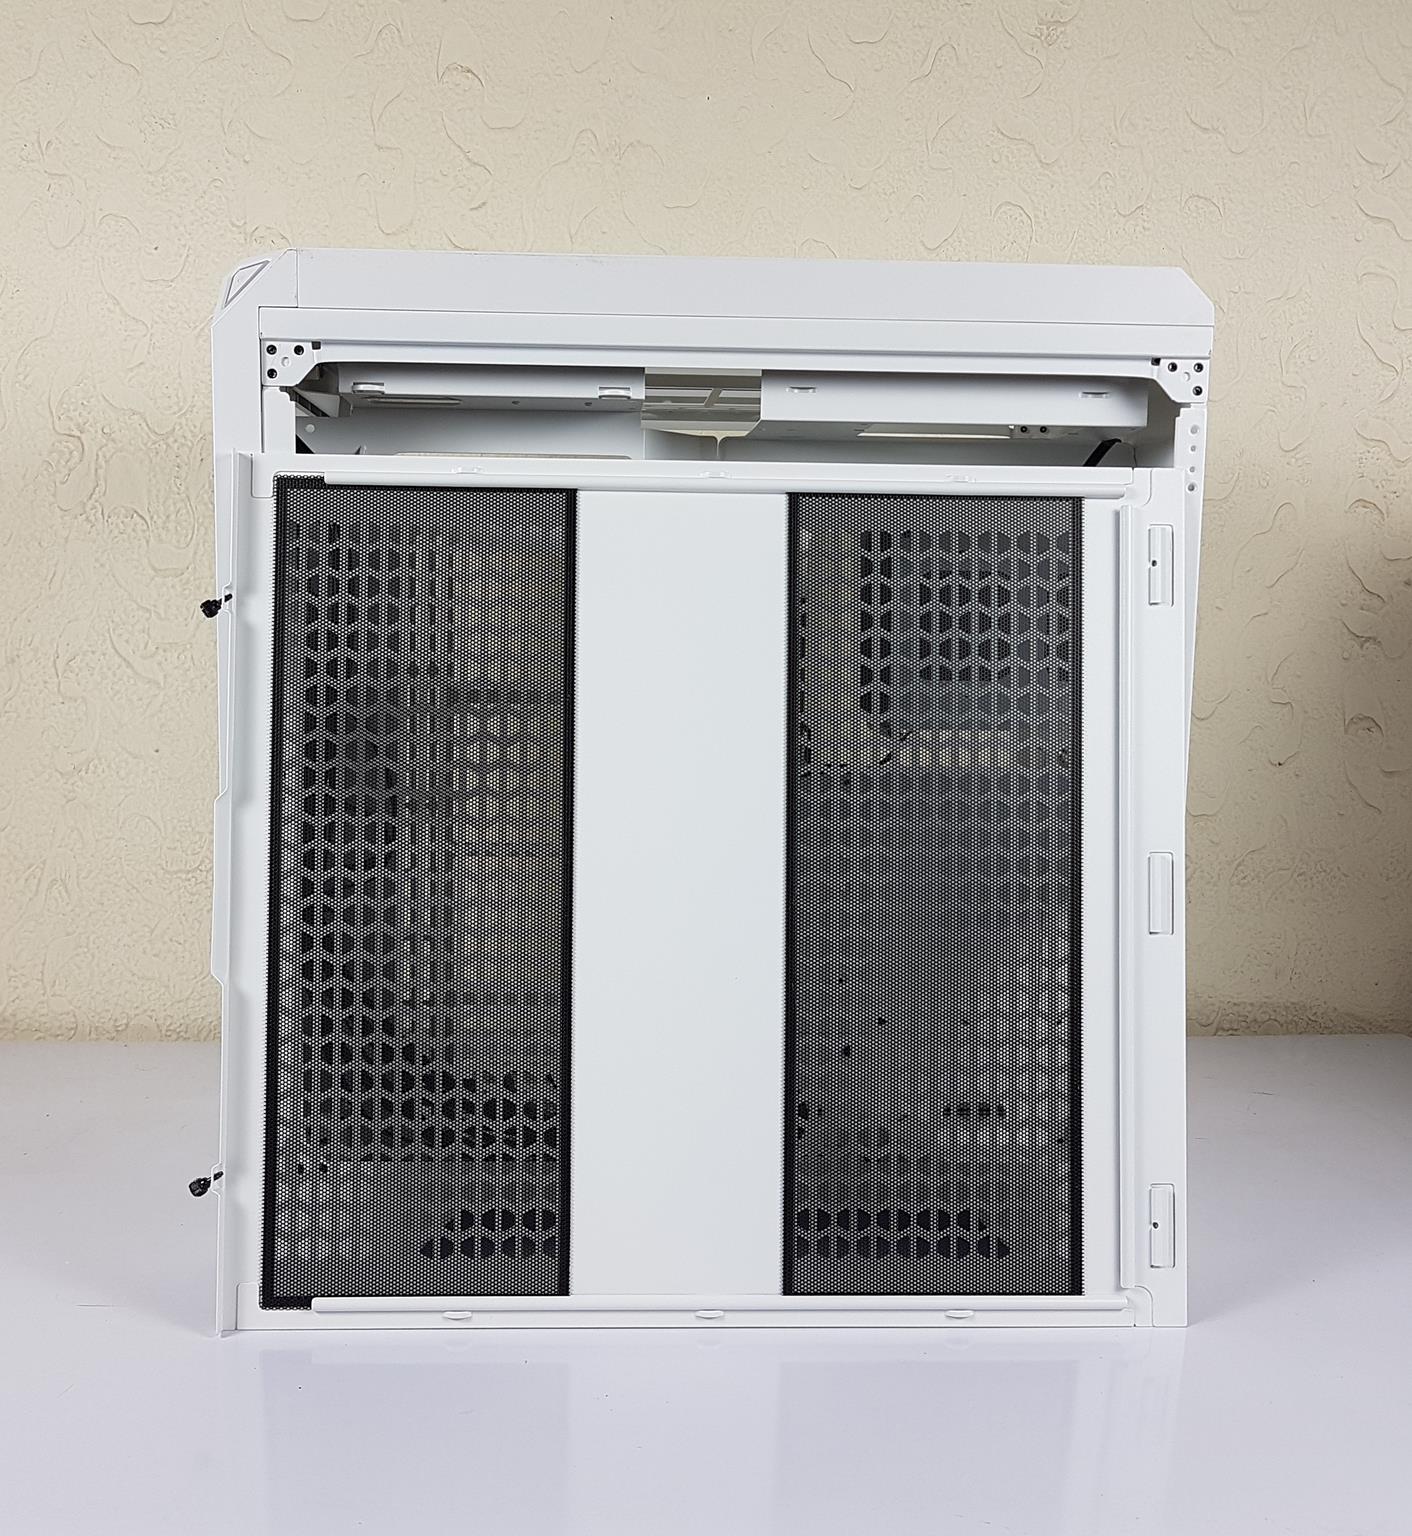
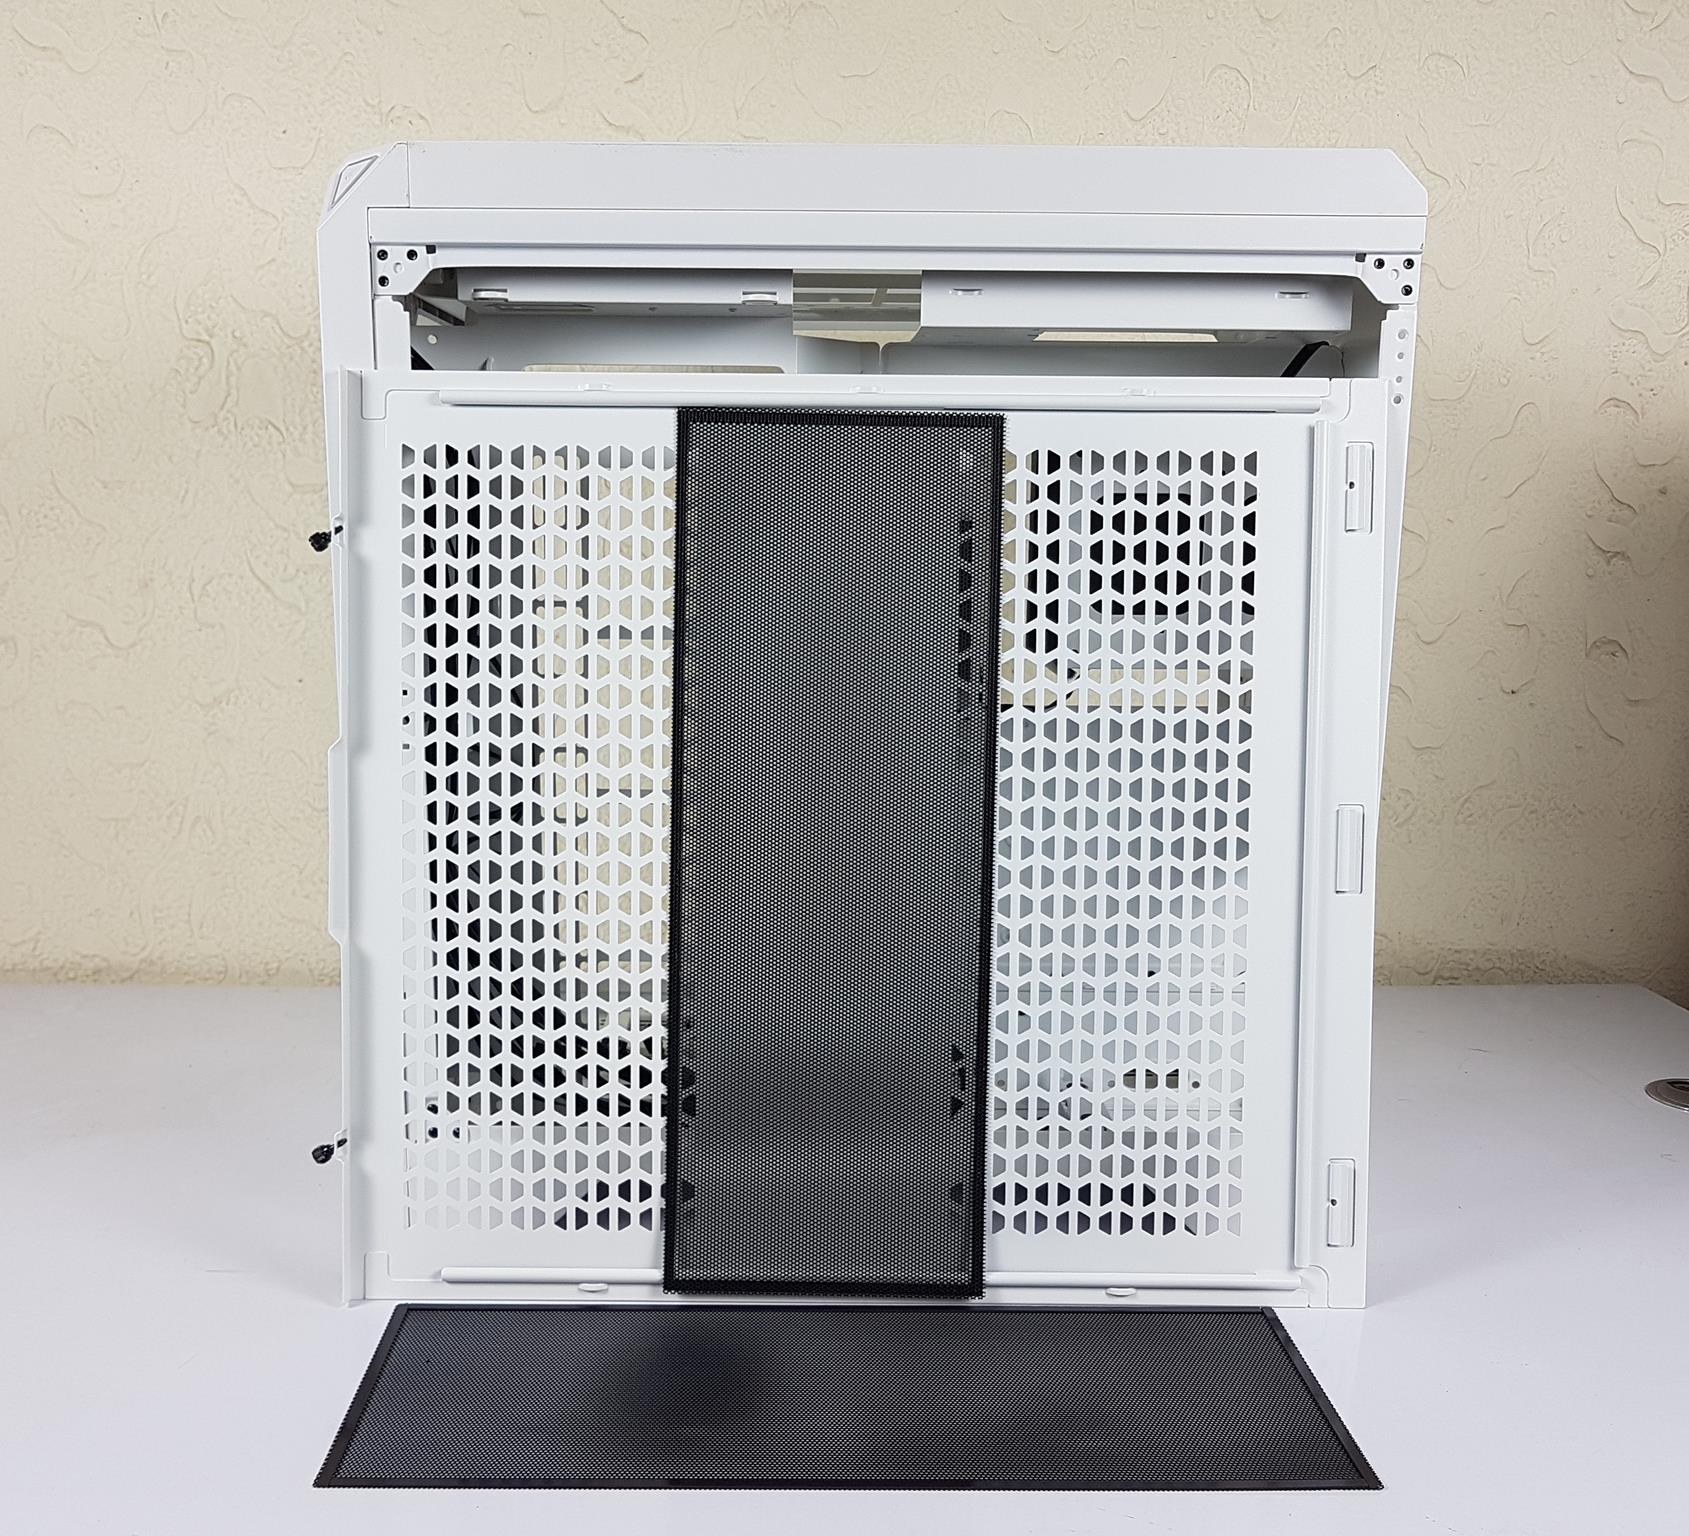
We have a large non-magnetic dust filter which runs to the entire length of the meshed portion on the bottom. The removal of dust filer could be problematic if the case is placed closed to the wall.
The case has enough lift off from the base where it will be placed on. This would give enough room for ventilation. Each corner has rubber pad on it to avoid scratching the surface and slippery.
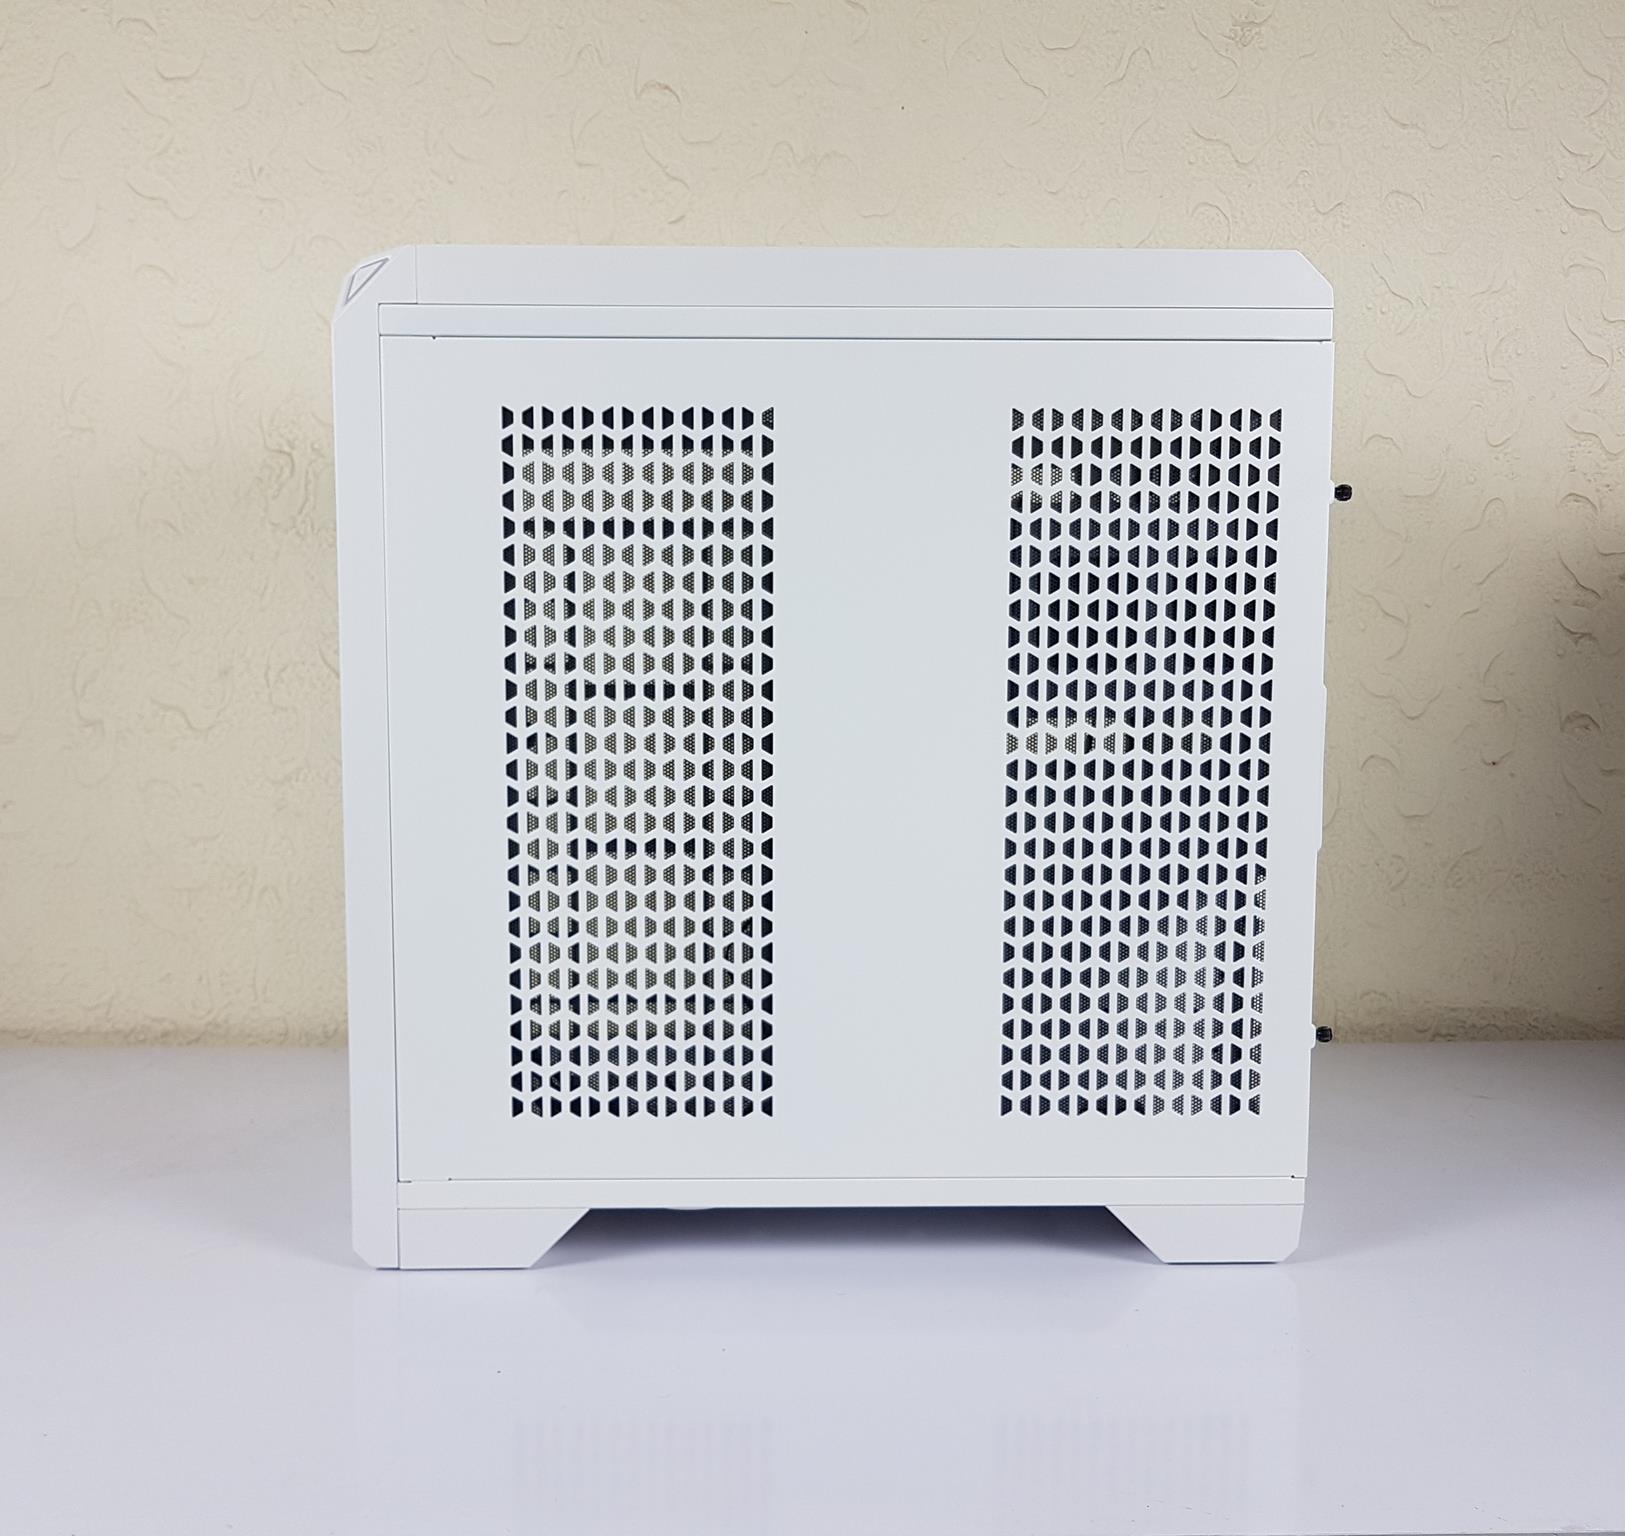
The other side panel is made of SPCC steel and has two vented columns. The build quality of the panel is good. It is secured using two captive thumb screws.
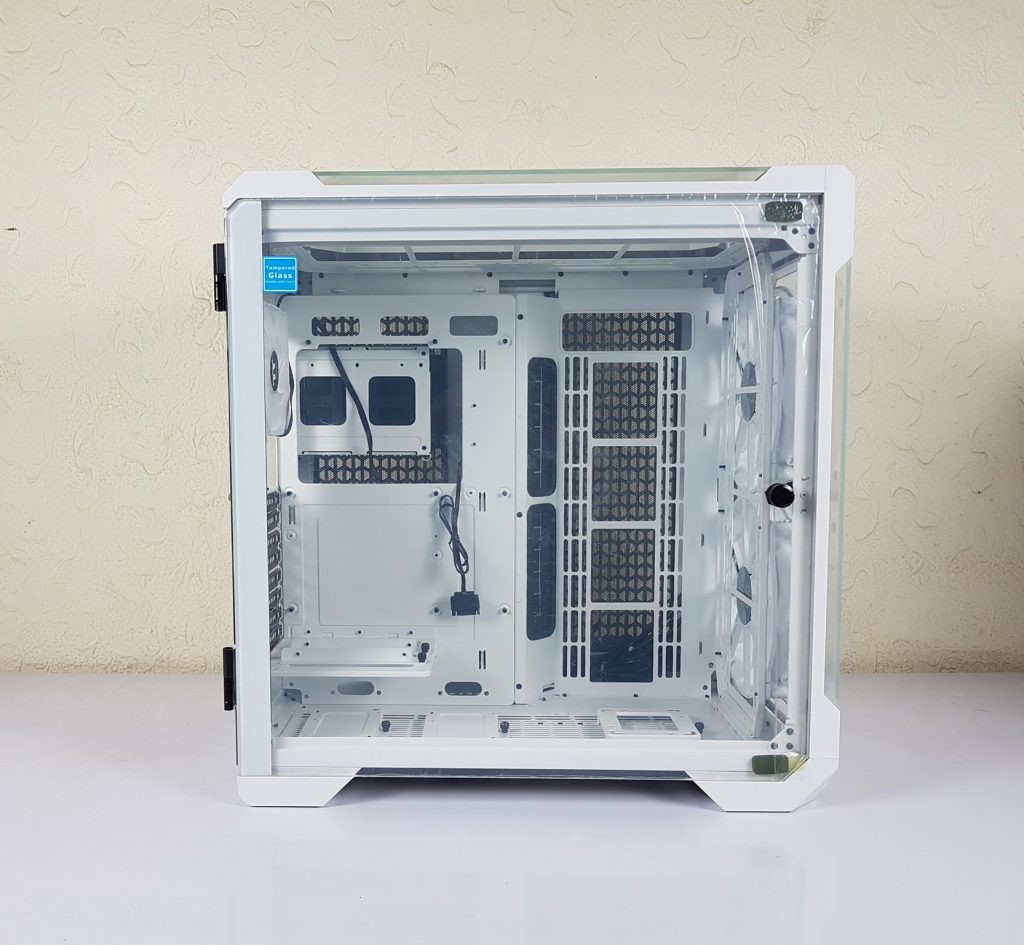
Interior
It is time to take a look at the interior of the PC Case.
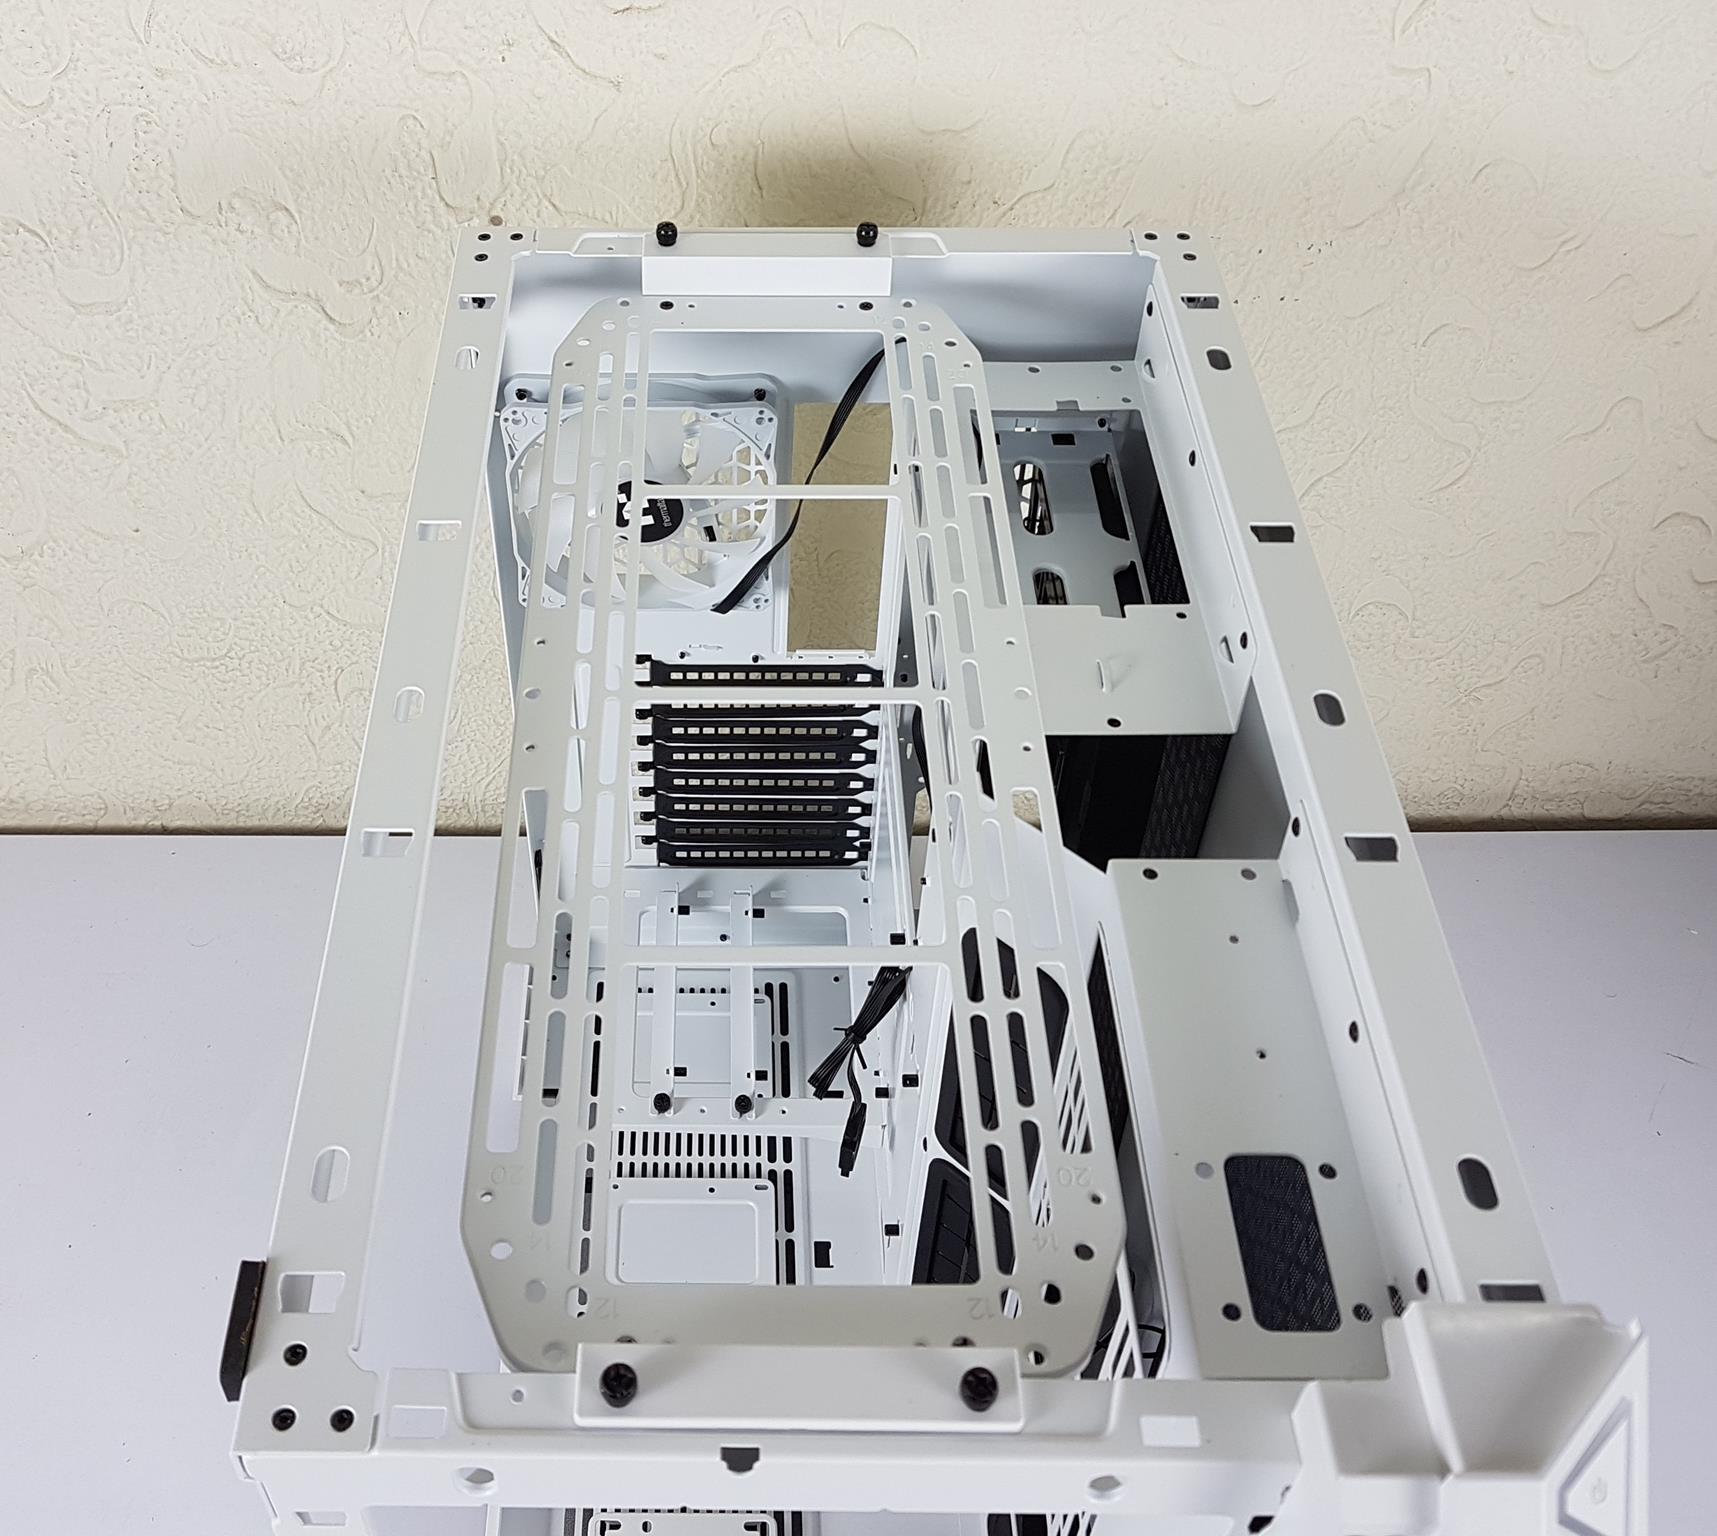
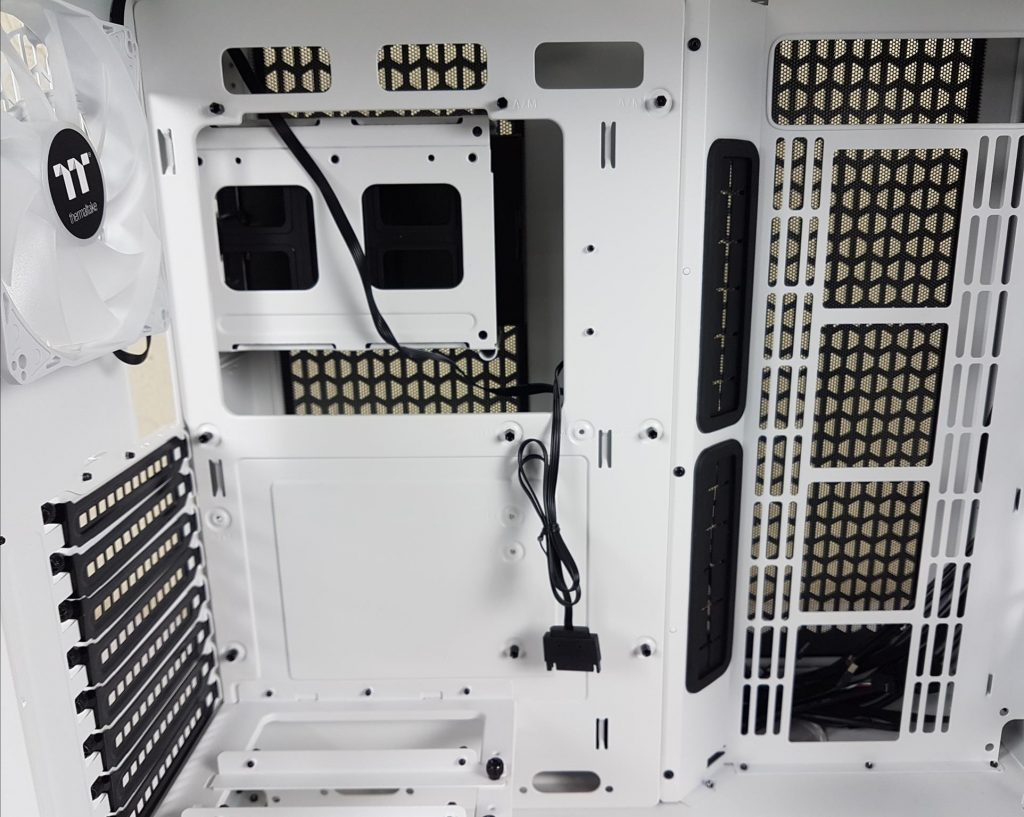
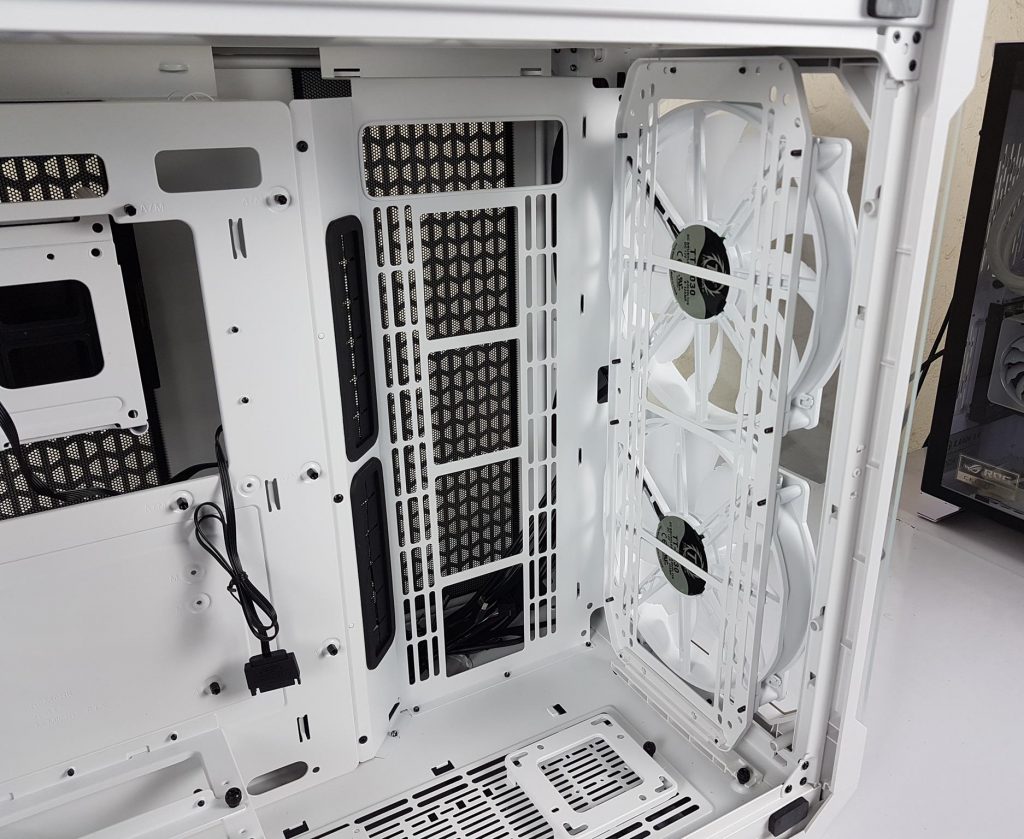
There is another fan/radiator bracket on the top as is on the front side. We have a cutout on the top front. It faces the top of the side bracket inside the case where the user can mount the radiator/fans.
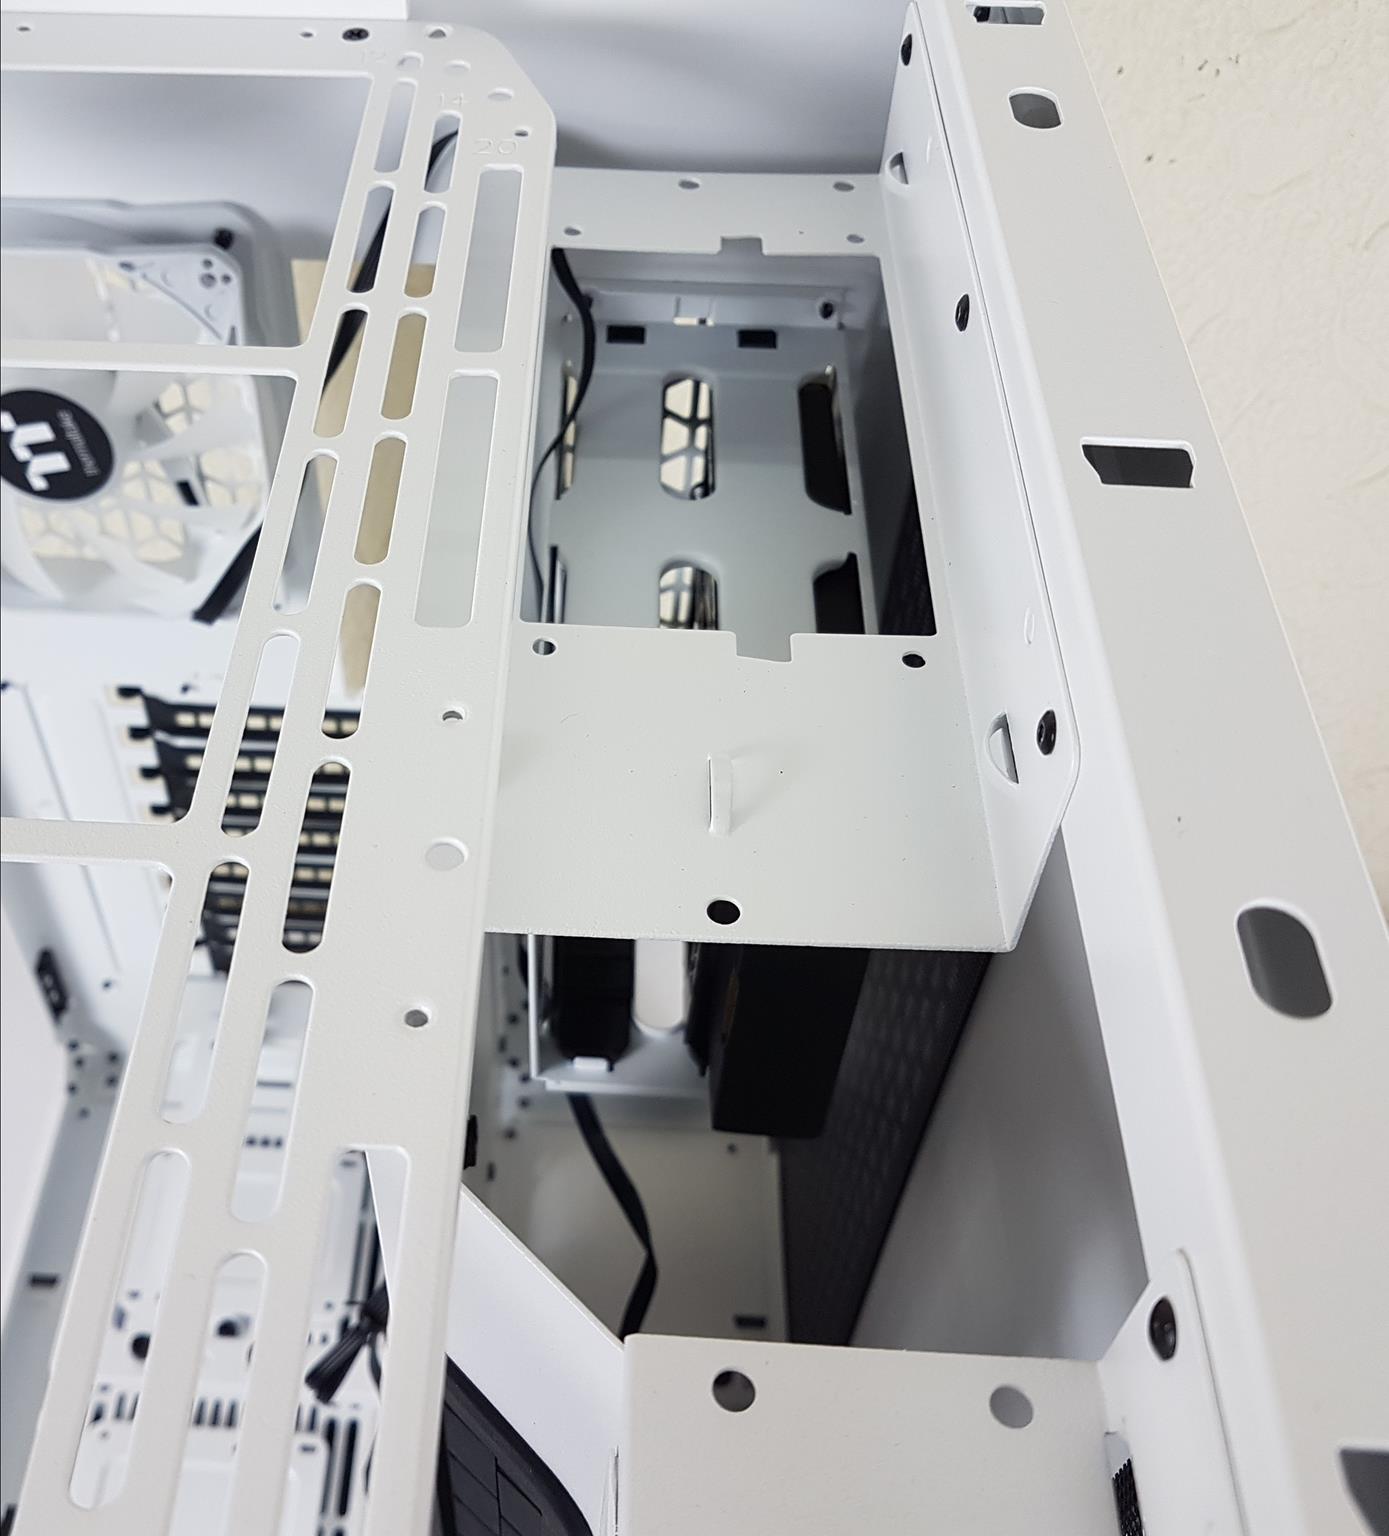
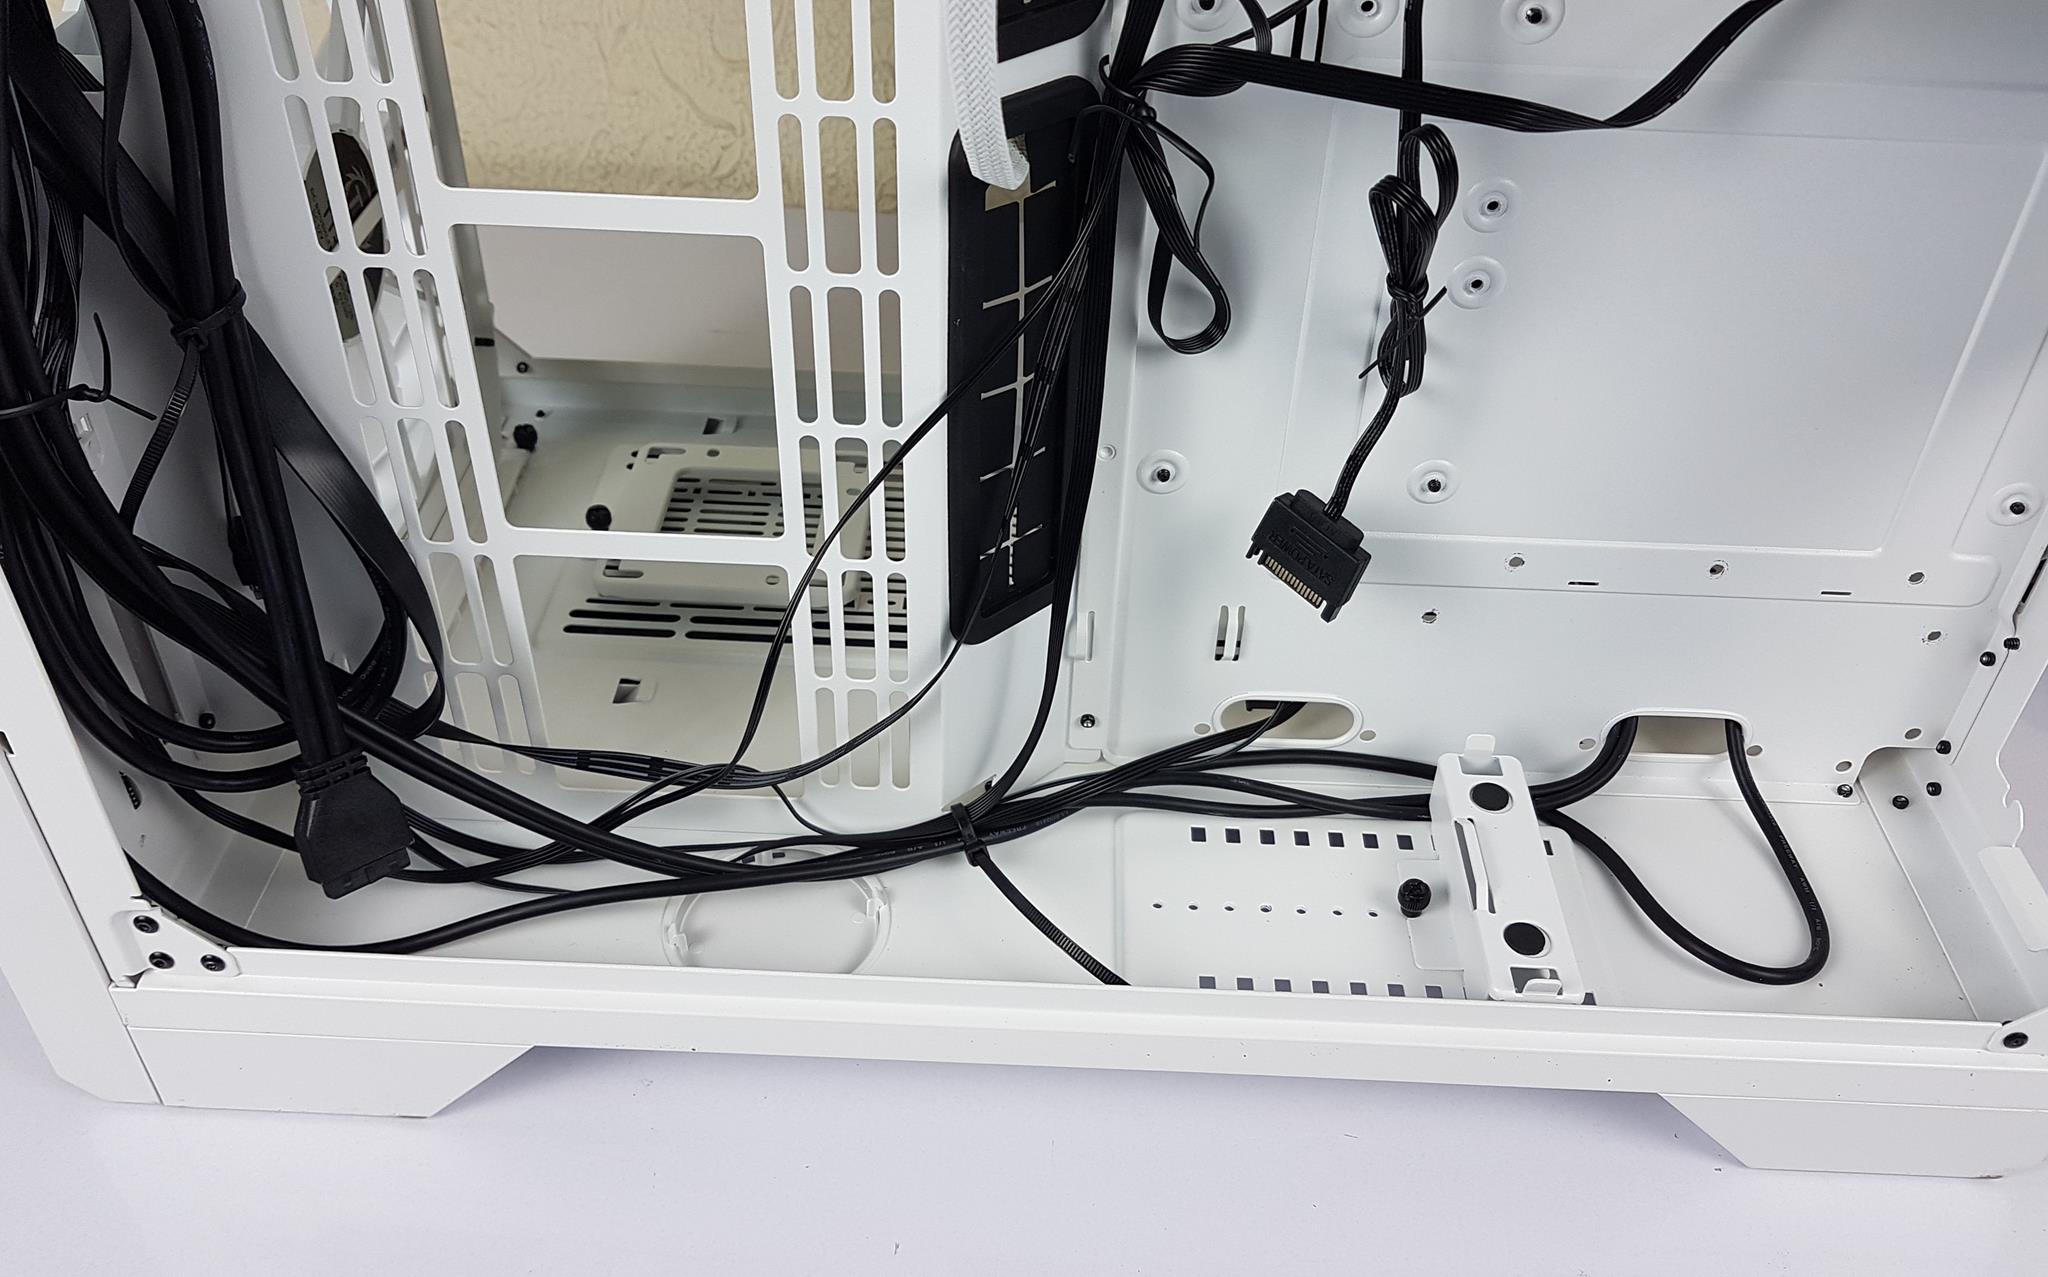
There is a large size cutout on the top of the HDD cage. Looking closely, we can spot cable tie points on around the cutout. The attention to the detail is admirable.
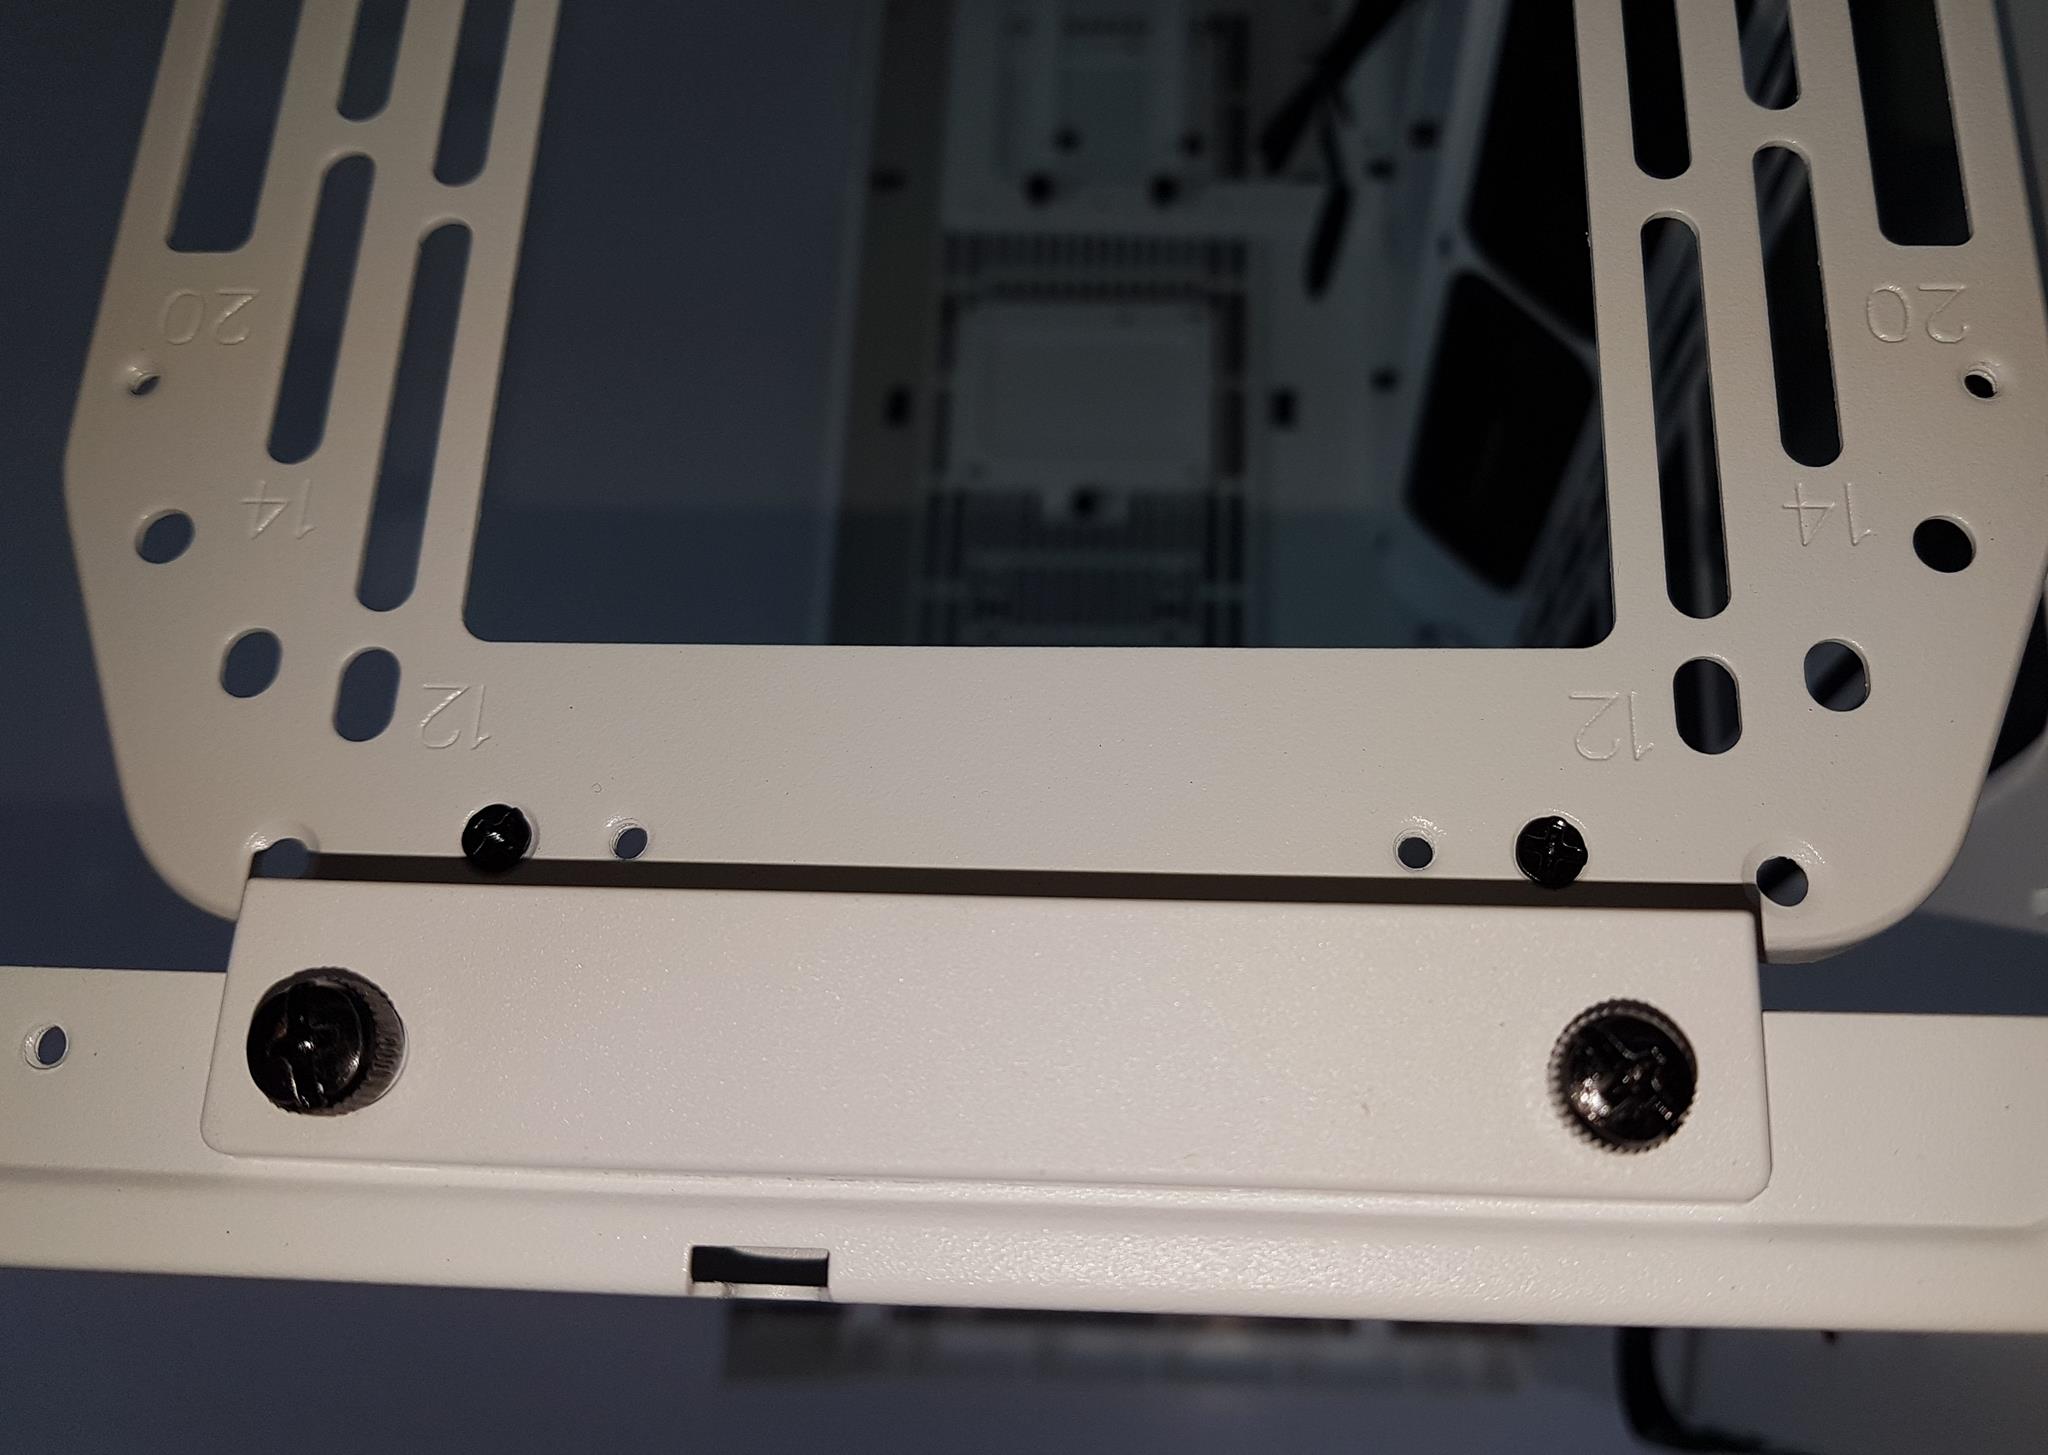
The bracket can be taken out by removing the 4x thumb screws on both sides. This will release the bracket from the frame.
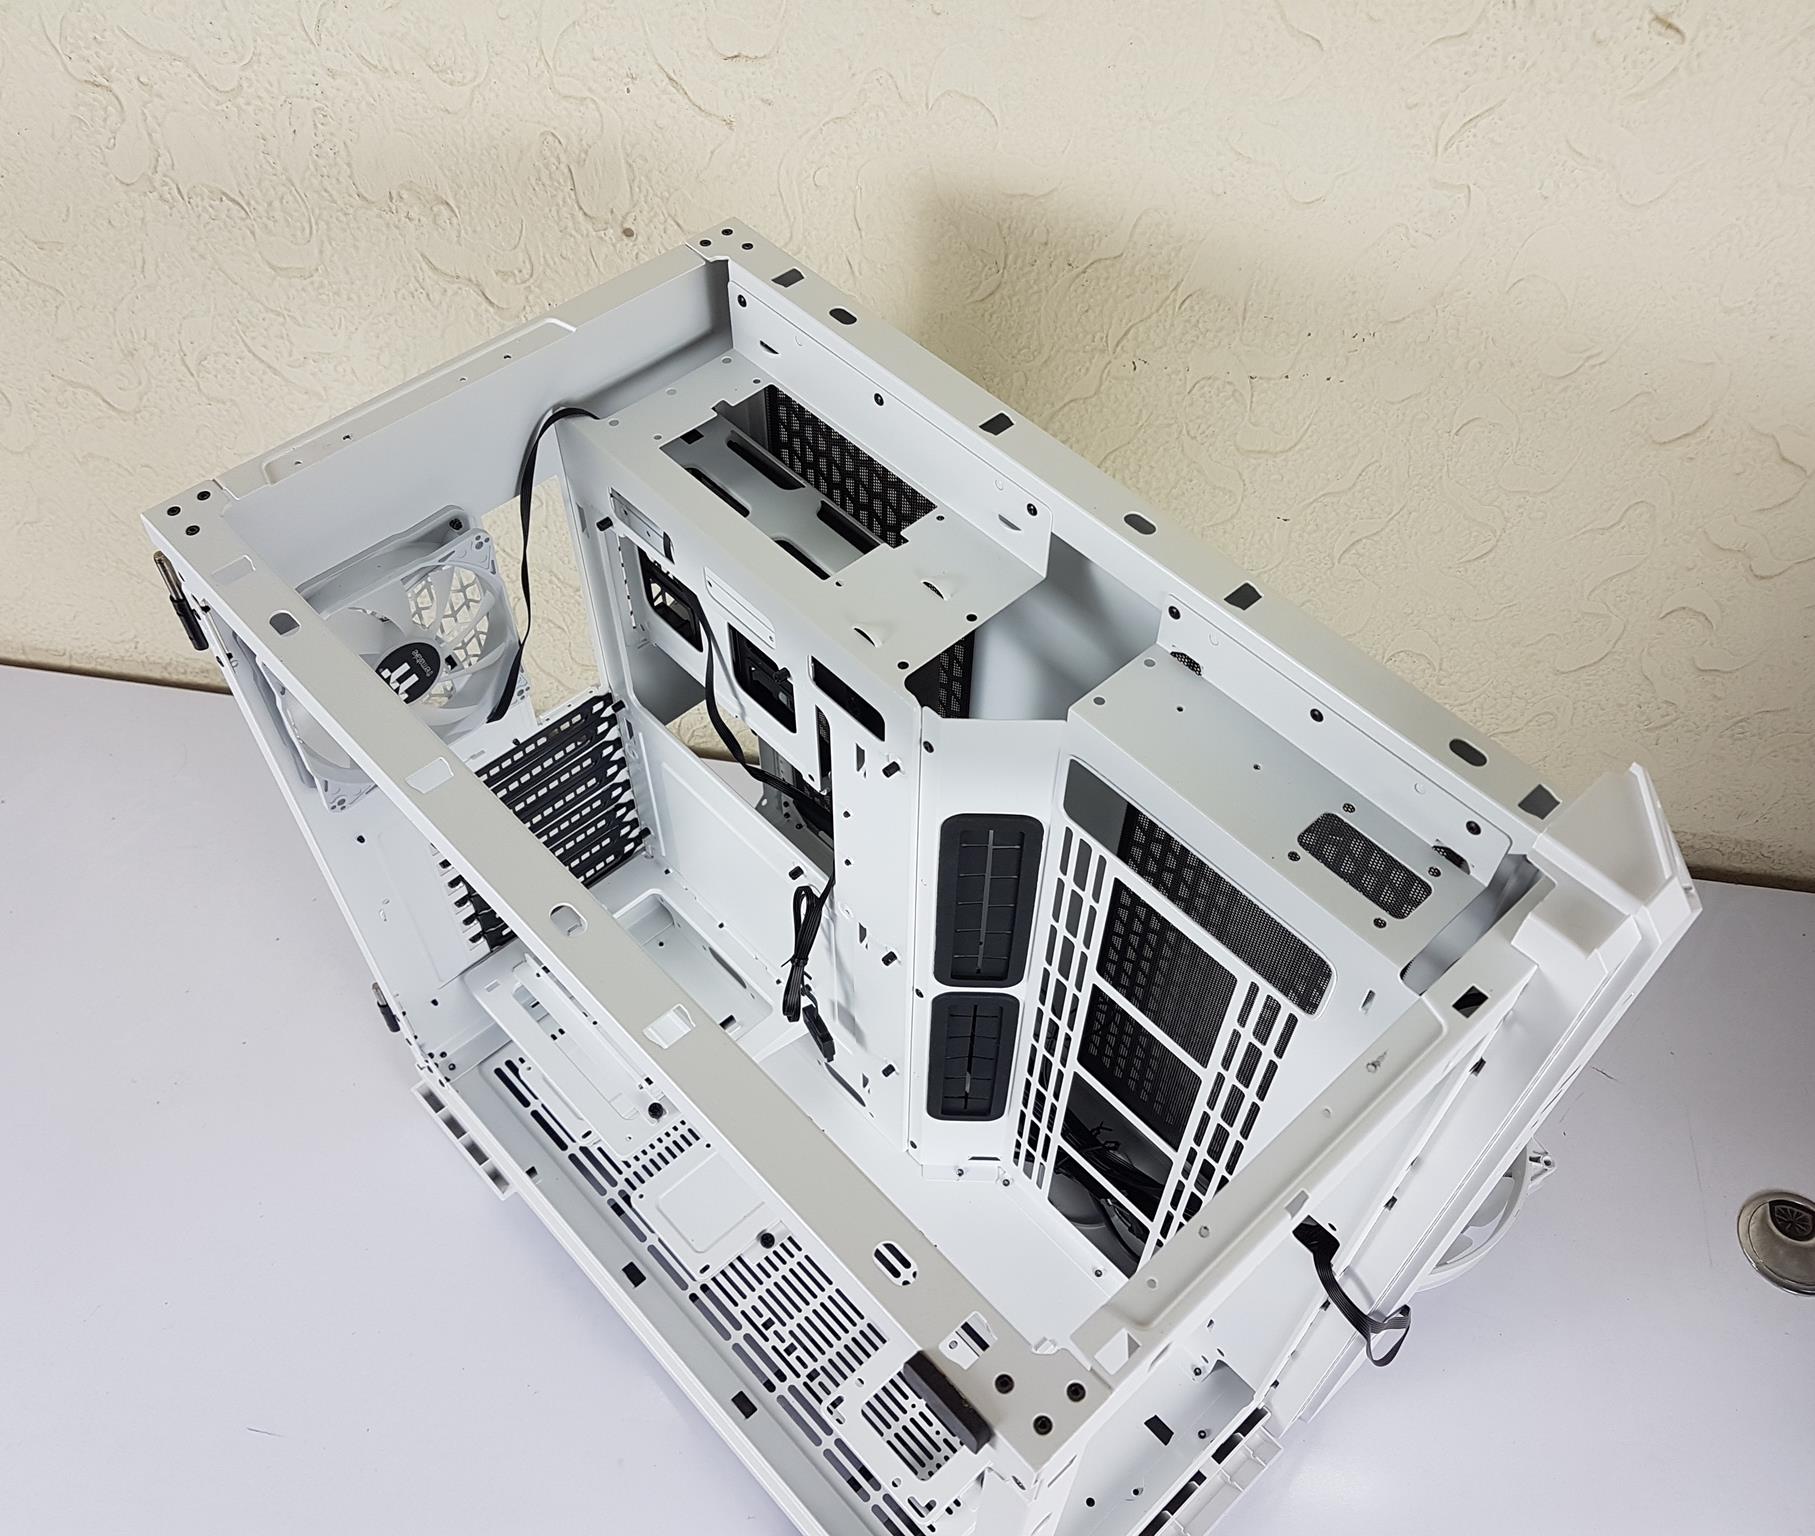
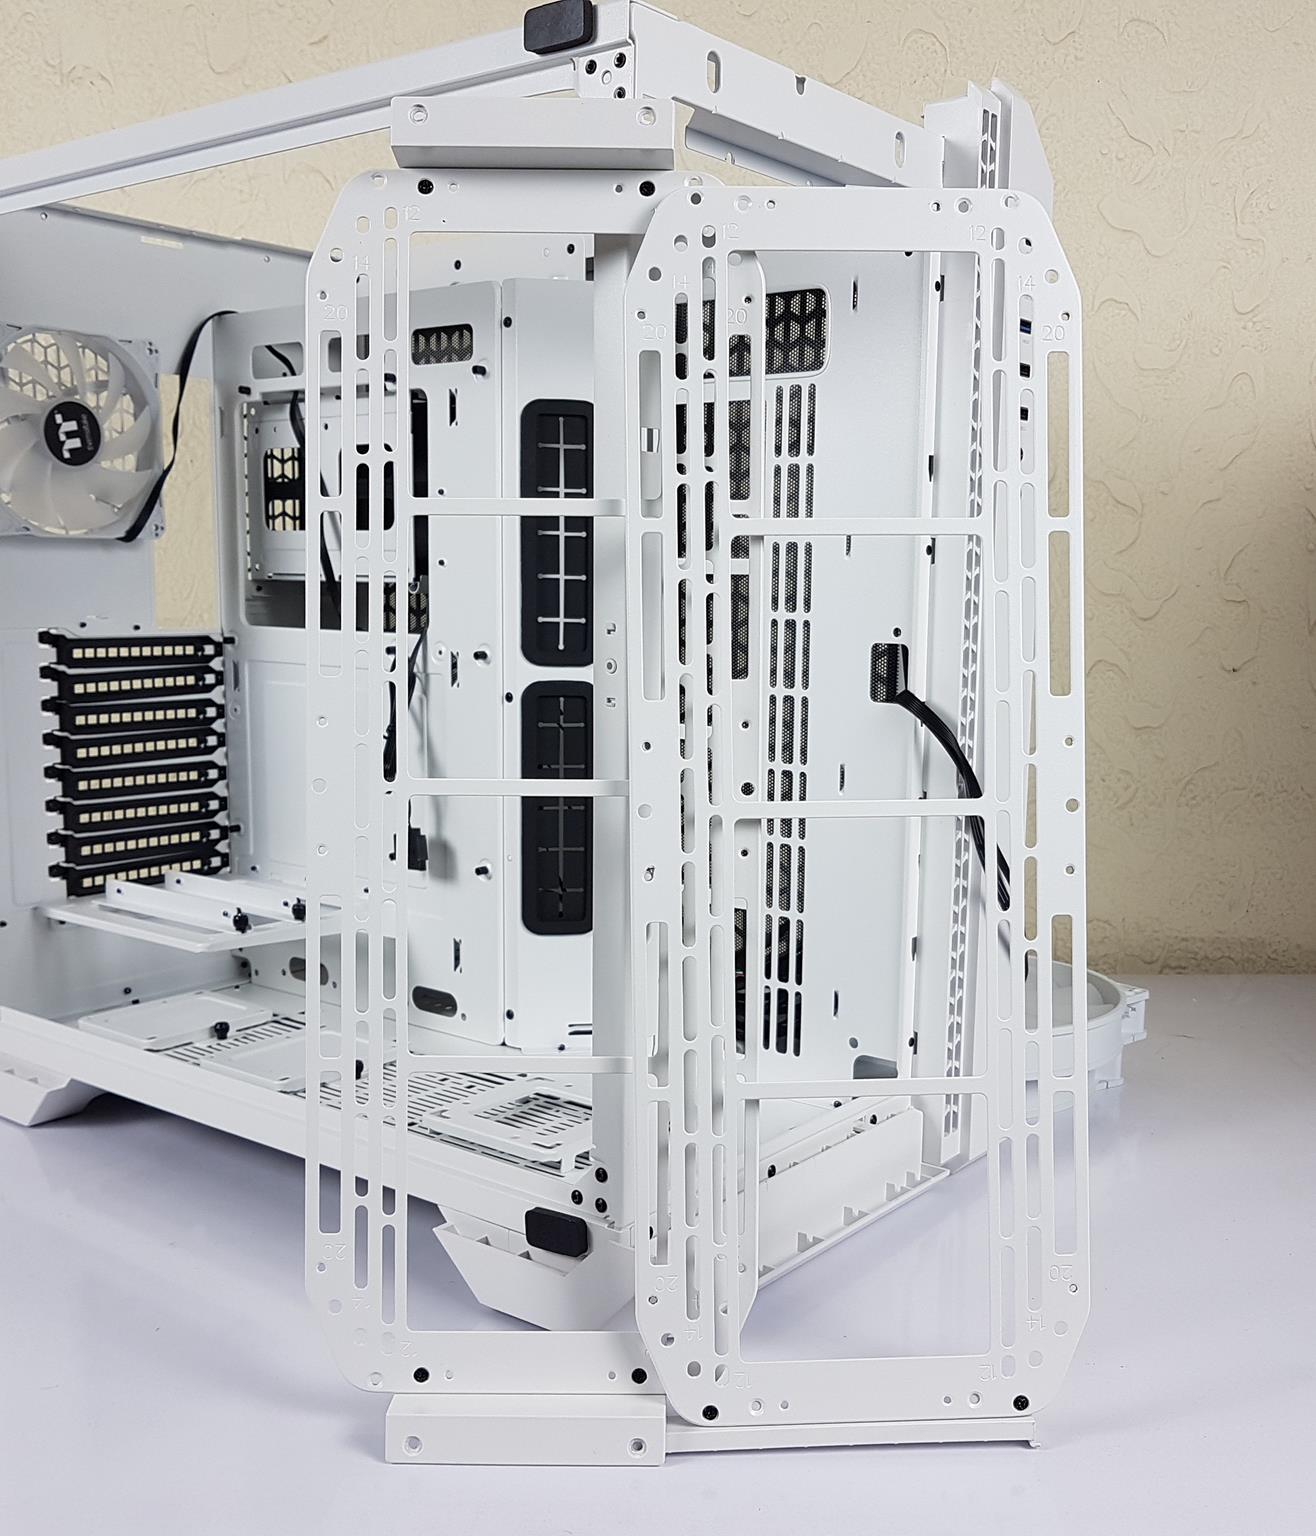
Here is another view at the top of the case. We have enough room to work around which is convenient. The fan/radiator bracket on the top and front are identical and can be interchanged.
The View 51 TG boasts a truly expansive layout, providing ample space for any build. Its interior, distinct from the View 71 TG, features a protruded motherboard tray with angled cutouts for cable routing. The absence of dual HDD cages seen in the View 71 TG contributes to the spacious design. Supporting up to E-ATX motherboards, the View 51 TG ensures versatility, although larger motherboards may cover the angled section. With approximately 55mm of space from the top bracket to the motherboard’s top, the inner dimensions offer flexibility, measuring 478x465mm (LxH).
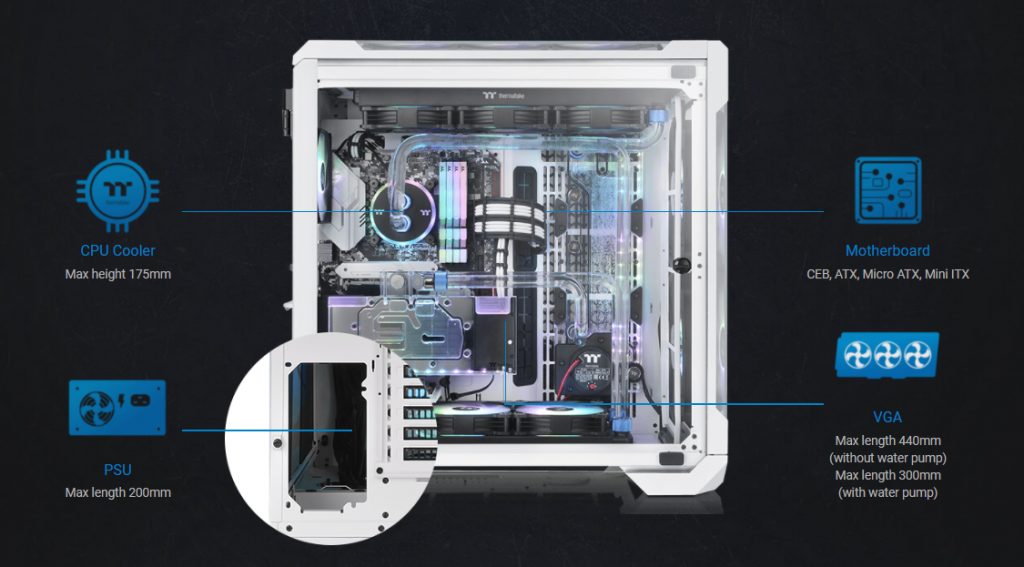
The permissible height of the CPU cooler is 175mm. The maximum length of the graphics card is 440mm without pump whereas it is 300mm with the pump. 175mm height seems on a lower side of the CPU cooler given the spacious outlook.
Here are some helpful visuals:
The motherboard tray supports standard ATX size motherboard by default. All 9x standoffs are pre-installed. They have provided a few more with the socket wrench as well making it easier to remove or install the standoffs.
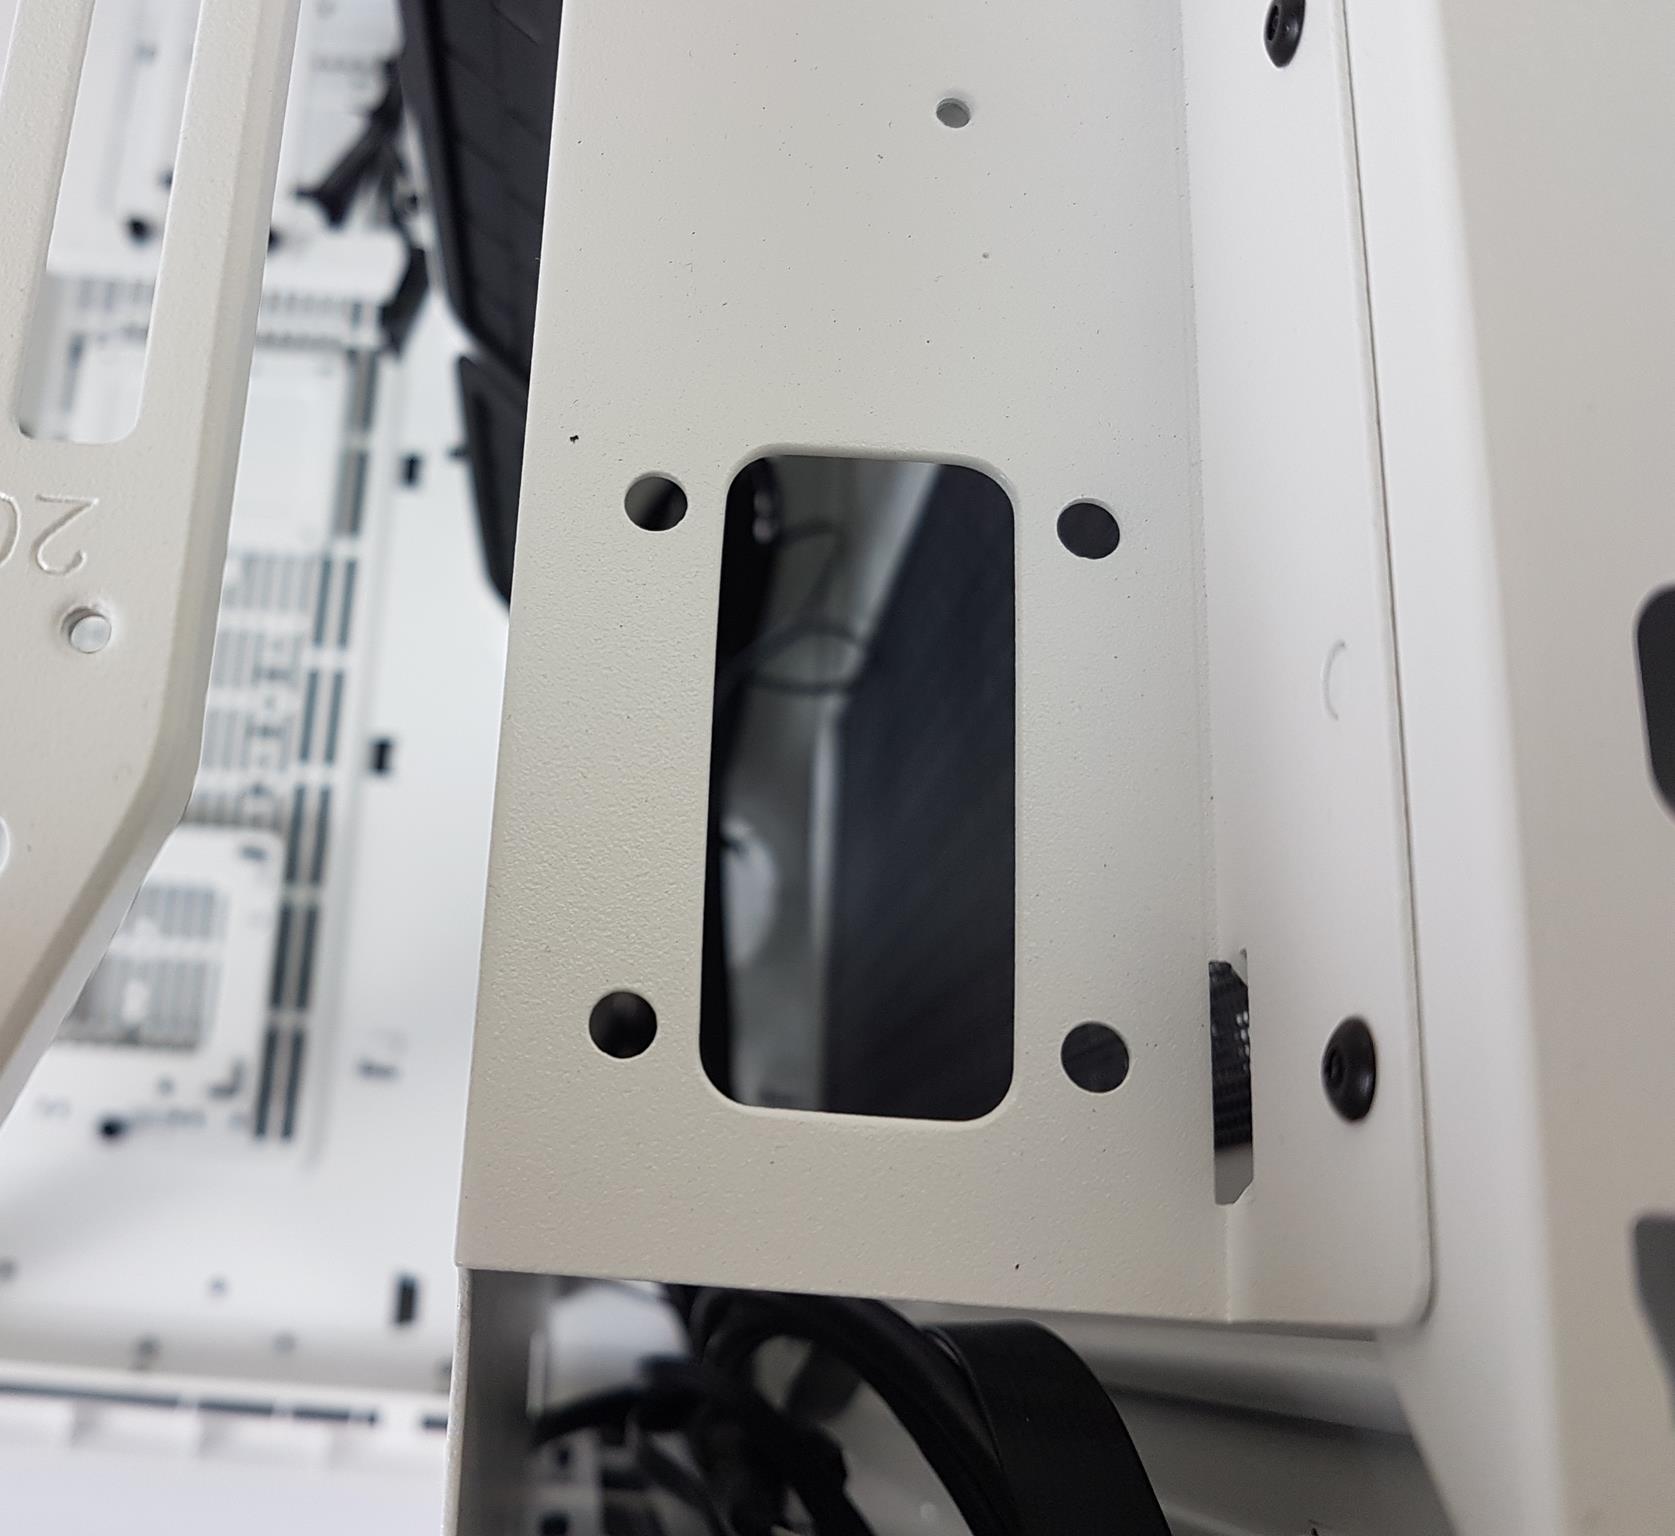
We have three cutouts on the top for cable routing and two large size cutouts on the right in an angle. These have rubber grommets as well. The CPU cutout is large enough to install the cooler’s mounting hardware inside the case.

There is a support bracket for vertical mount of the graphics card. It can house 2x graphics cards in the vertical layout. It also features patented rotatable PCIe slots. The user can easily rotate the entire slot area in either vertical or horizontal layout. Similarly, the support bracket can be removed. There is no riser cable provided with the case. The screws of the slot covers are accessed outside of the case and the covers are reusable.
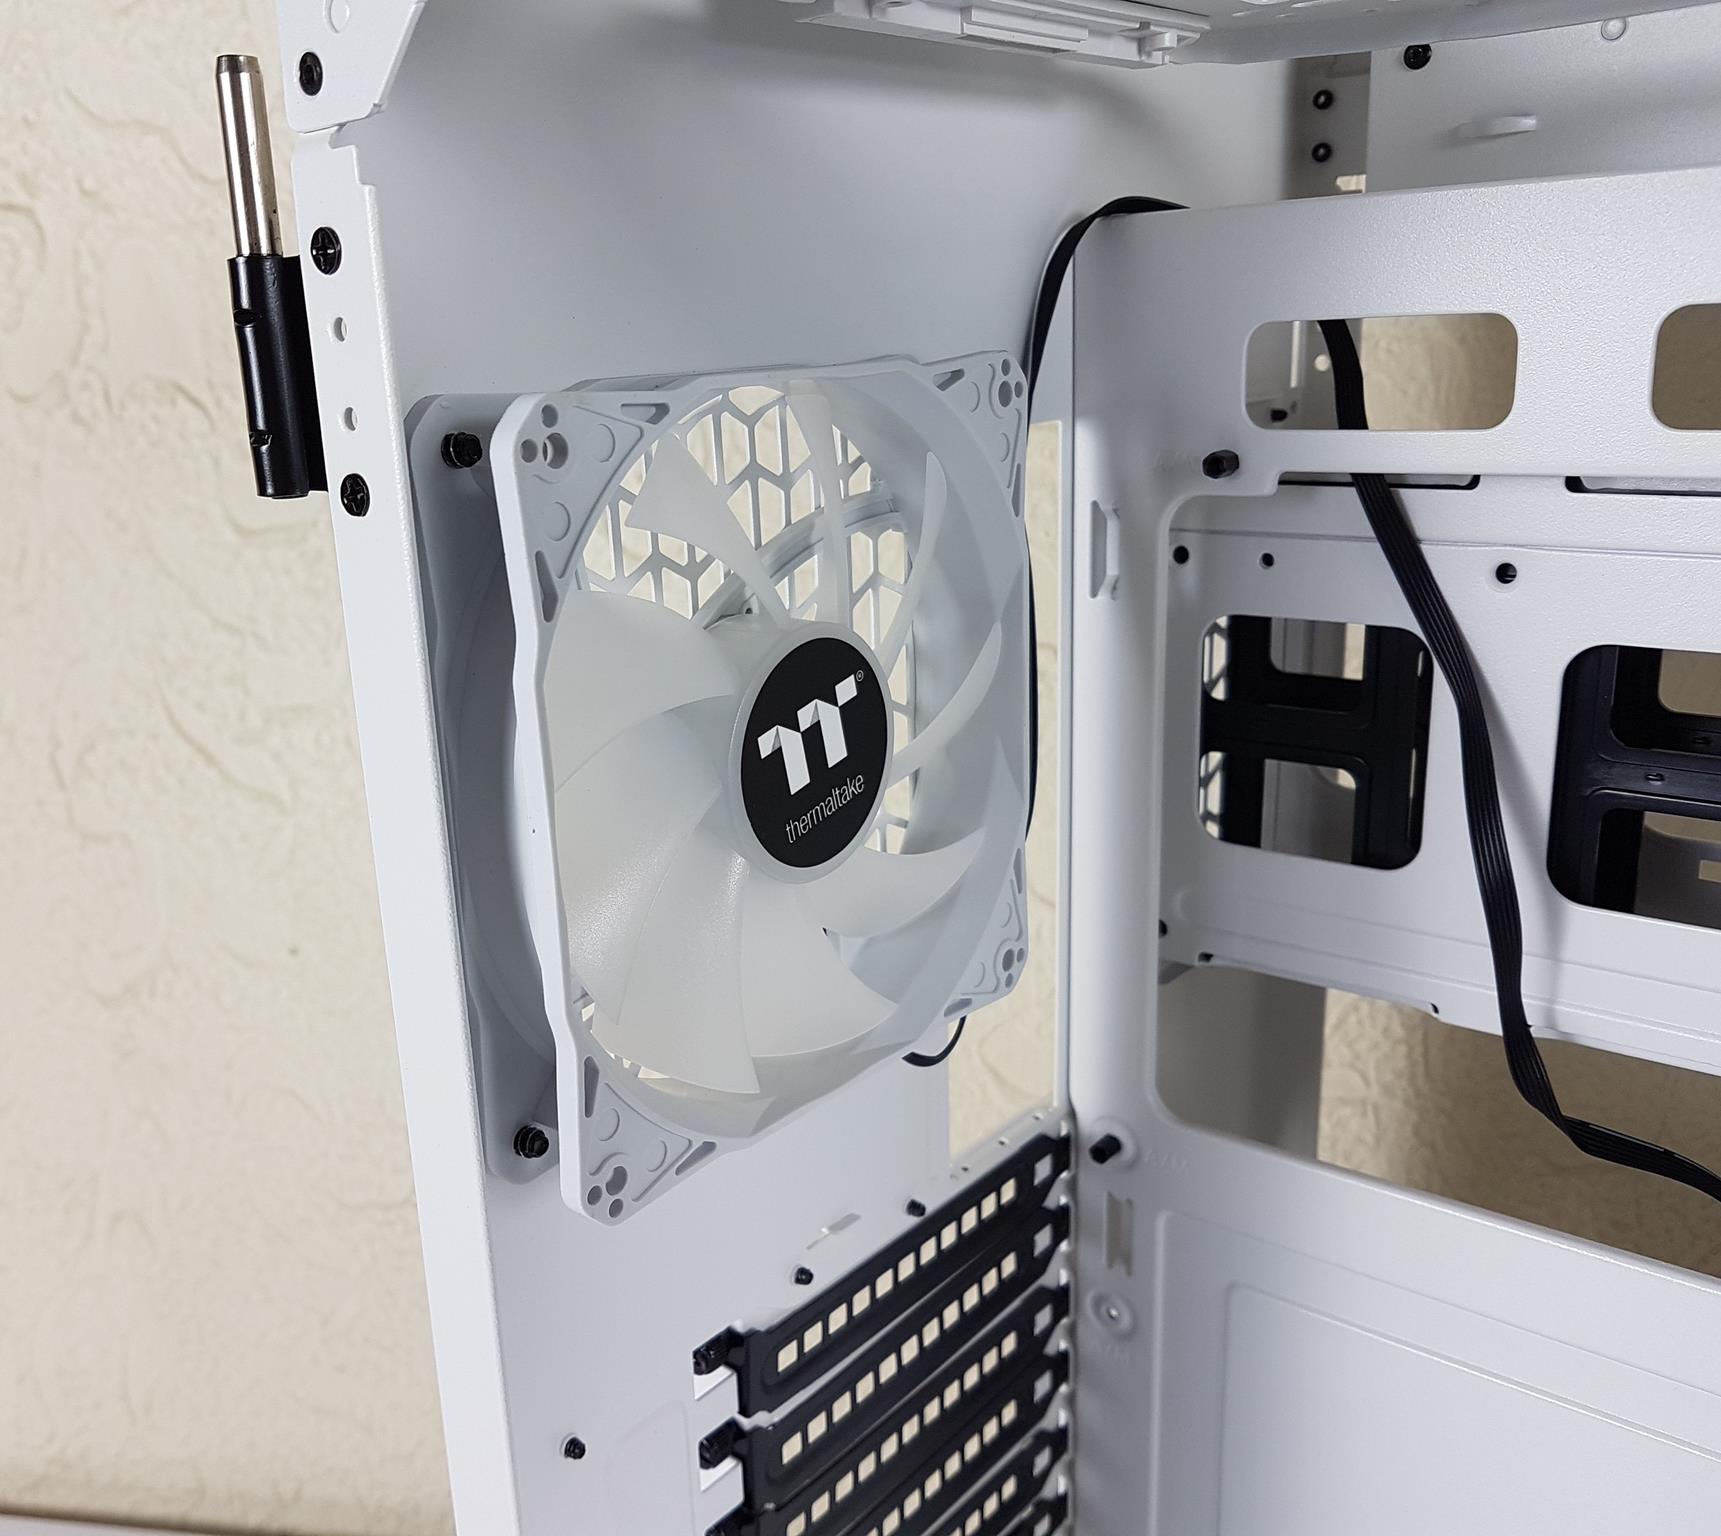
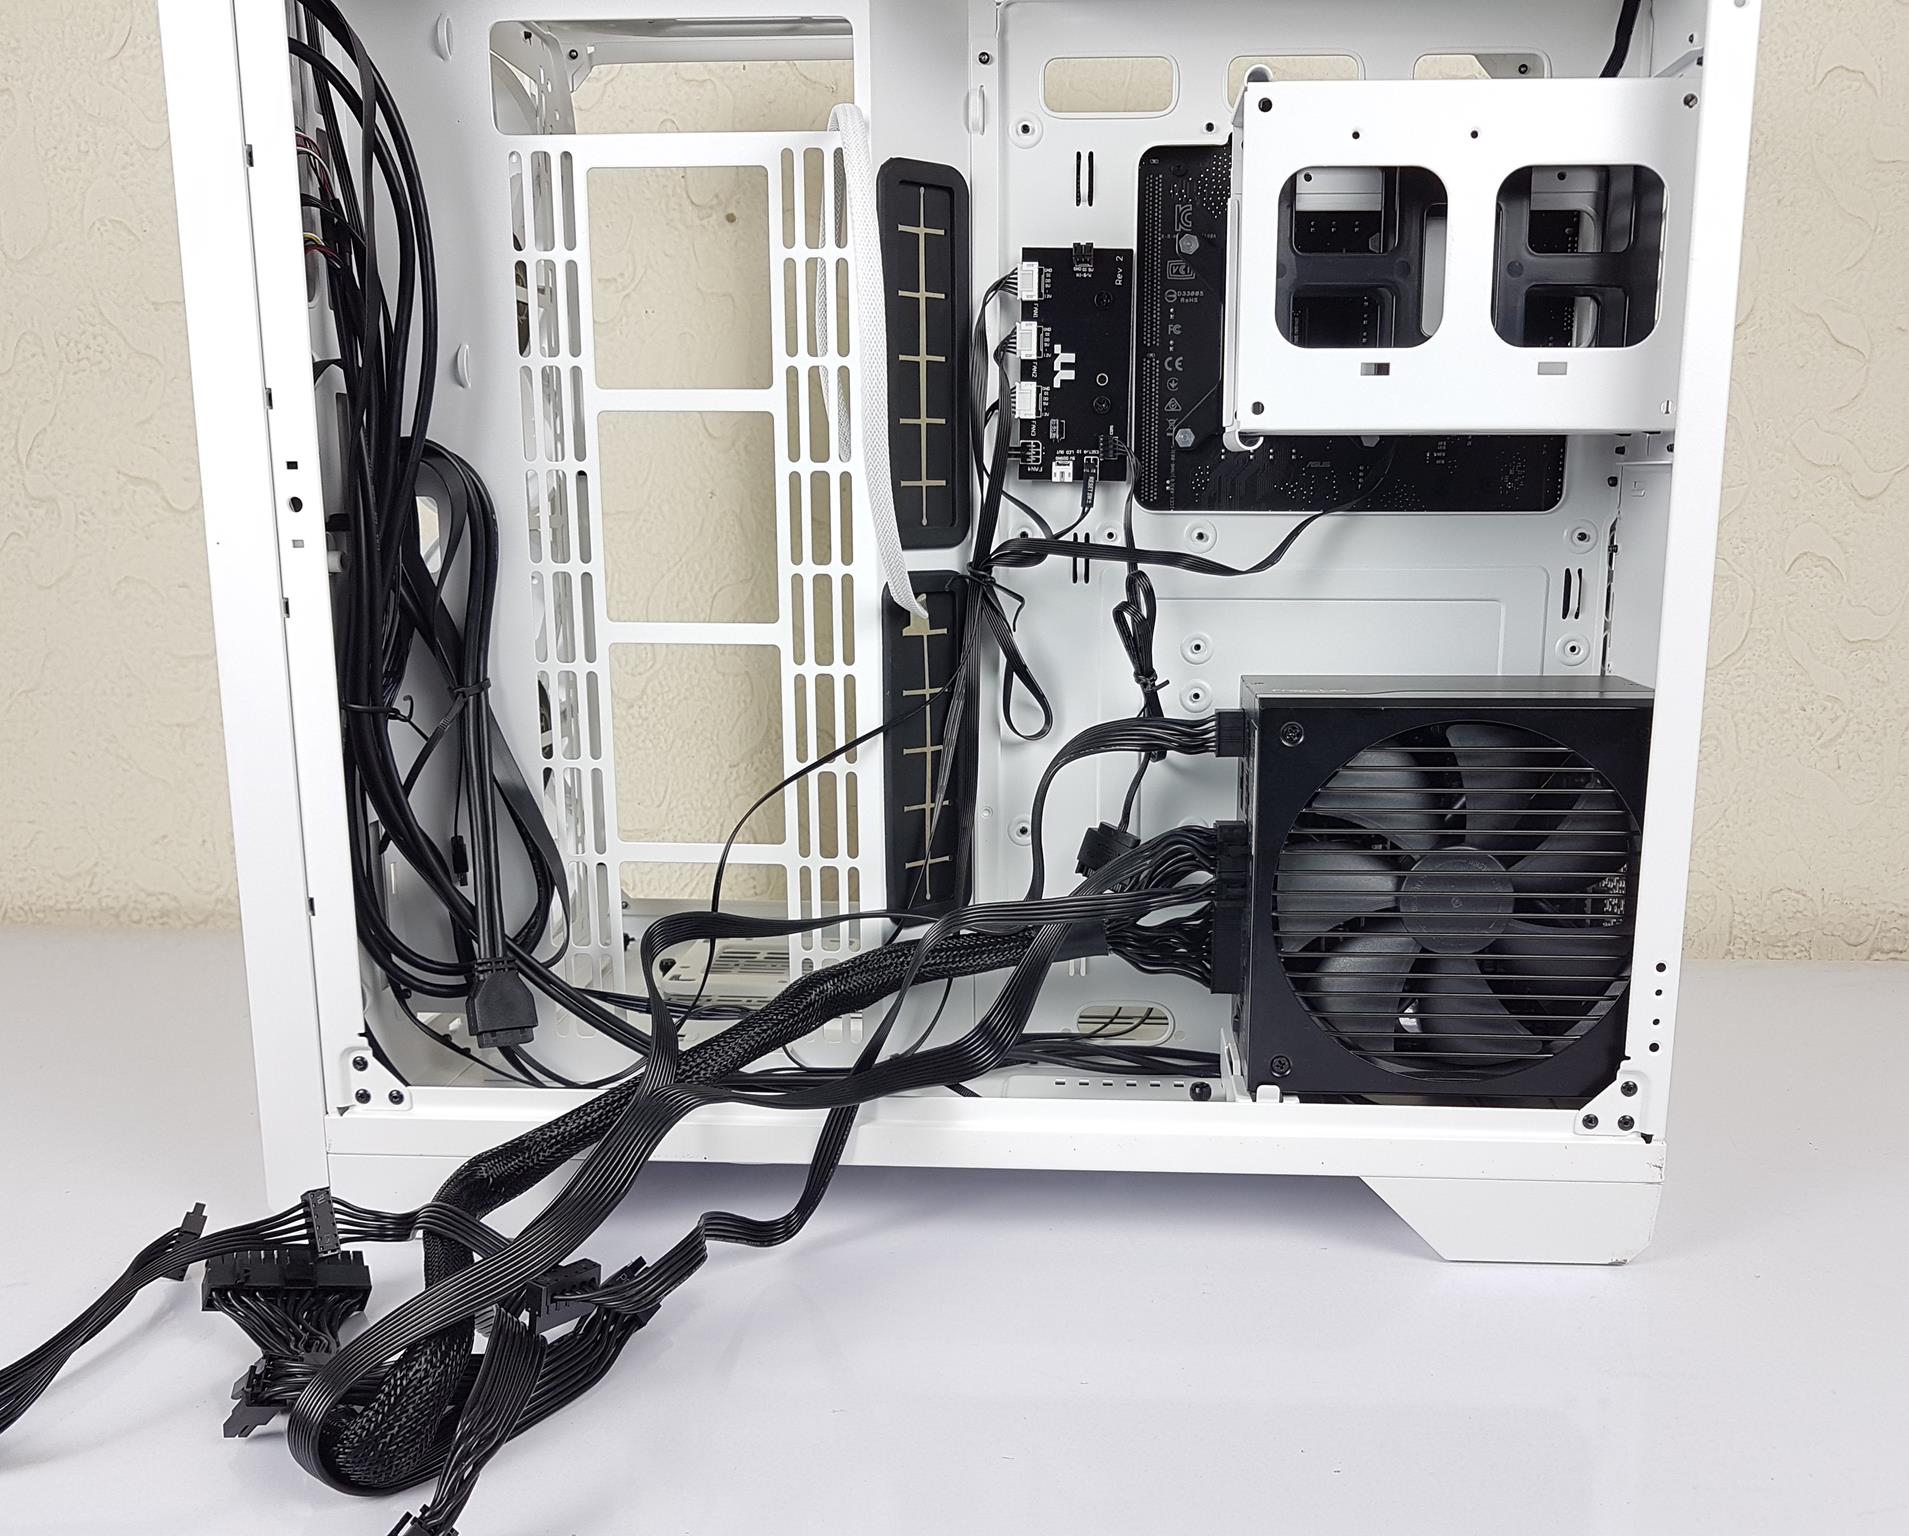
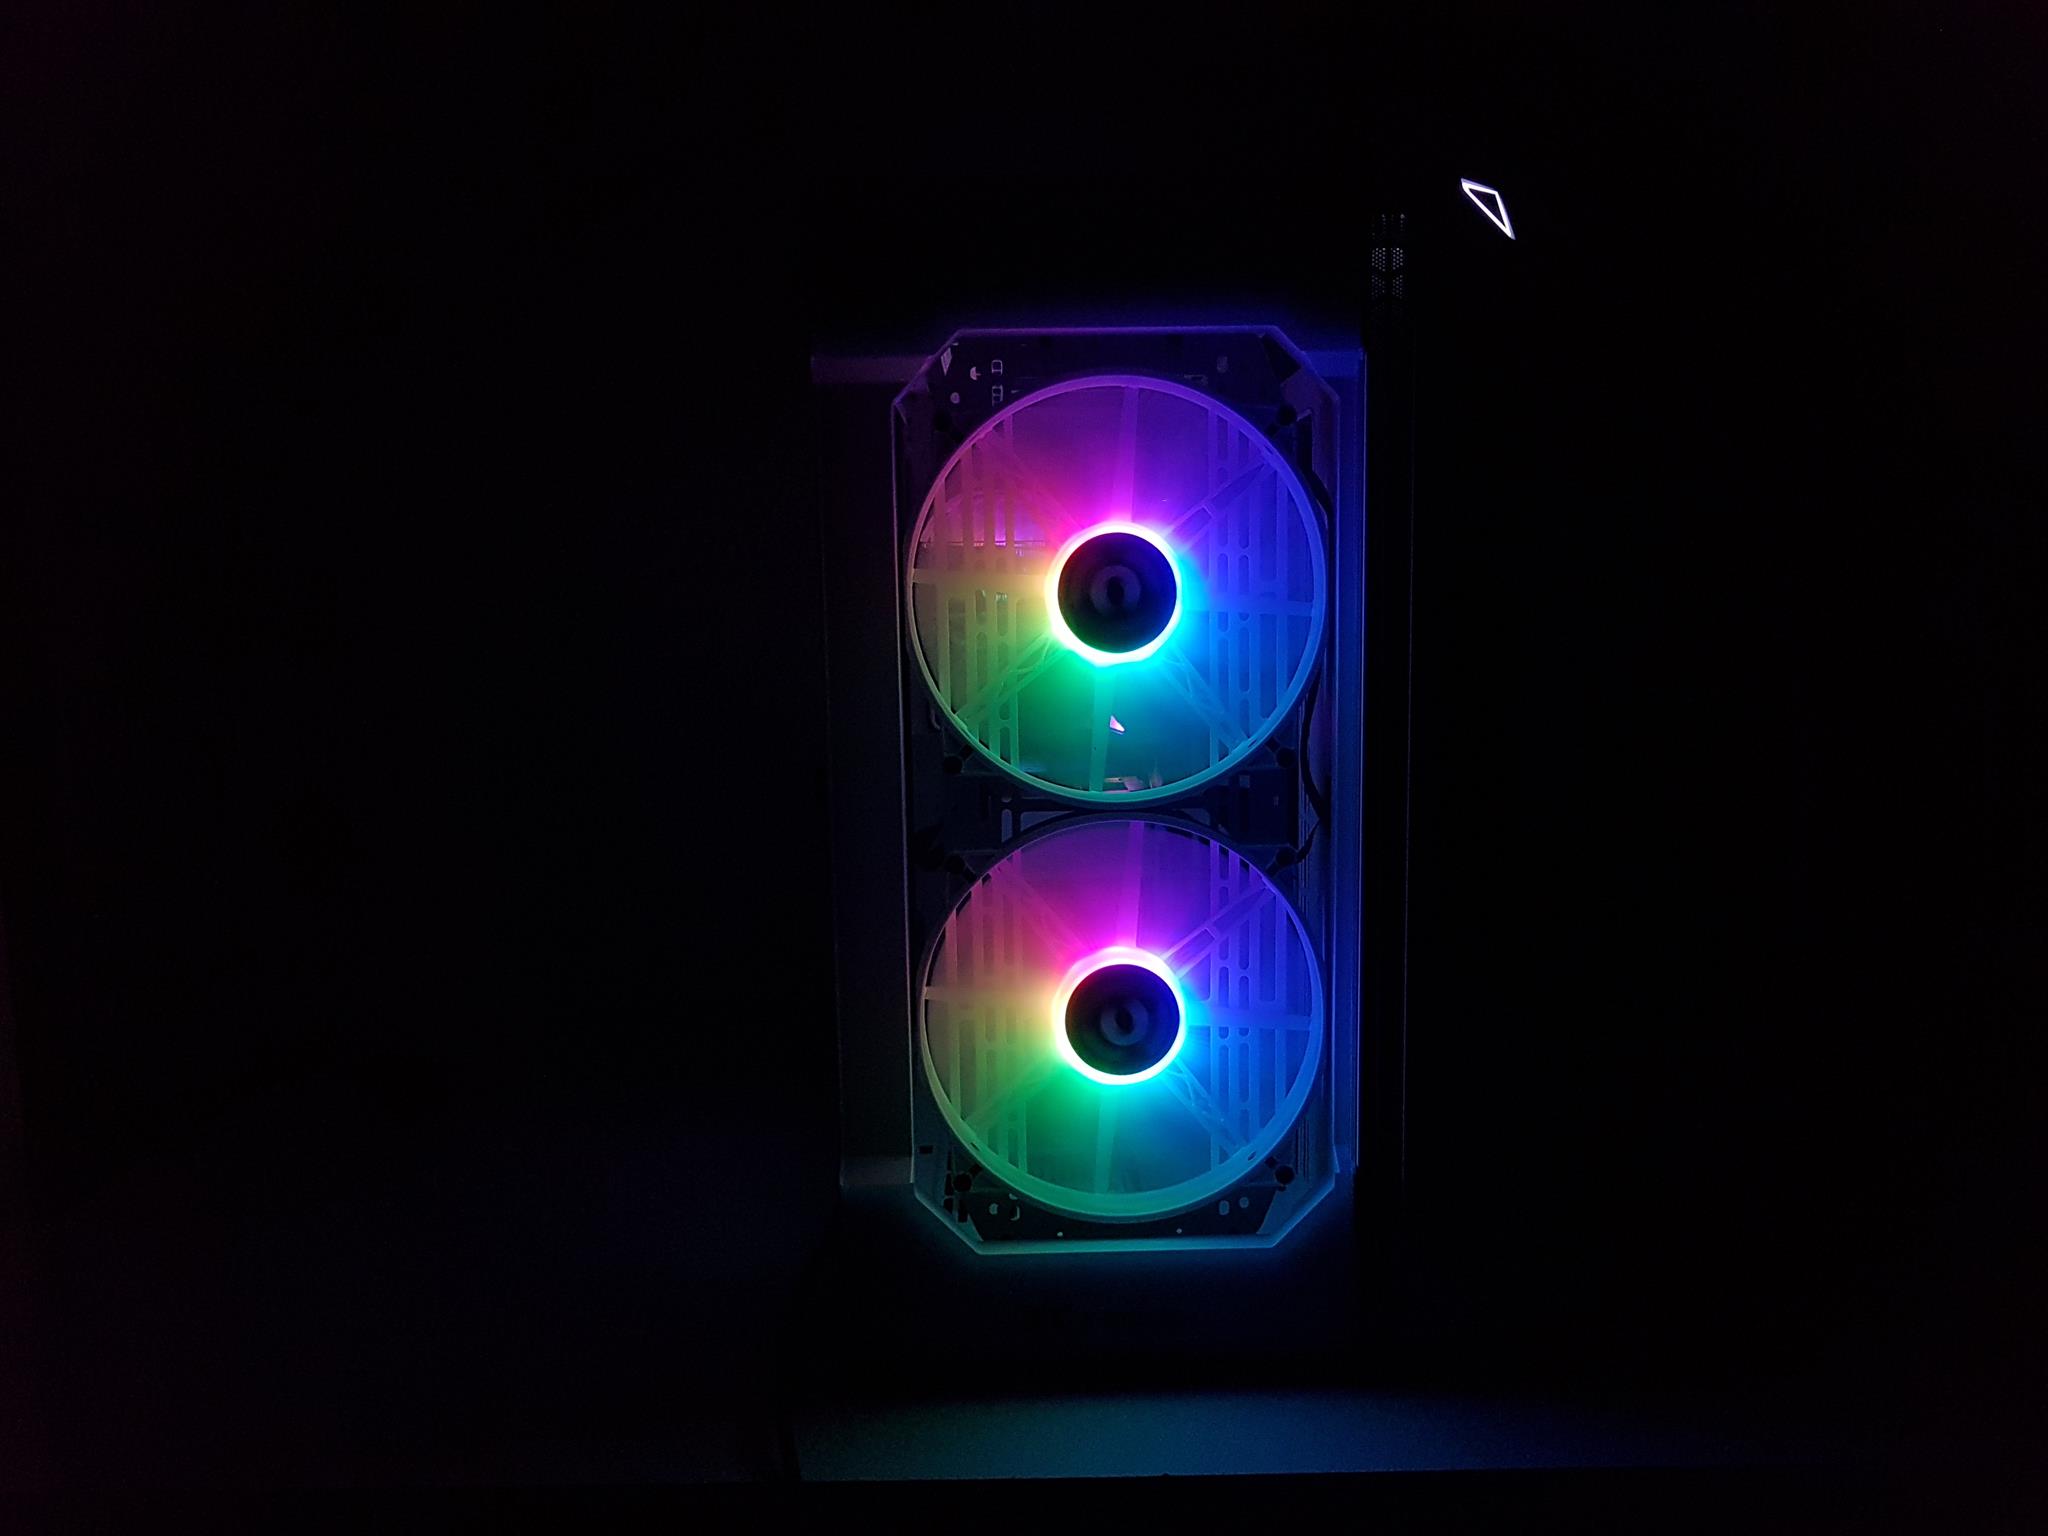
There is a 120mm ARGB white fan at the rear. It has 9 ARGB LEDs and is using hydraulic bearings. The side bracket area is recessed as compared to the motherboard tray. There is a limitation in terms of the thickness of the radiator in case the user is installing a radiator on the front as well on the side bracket.
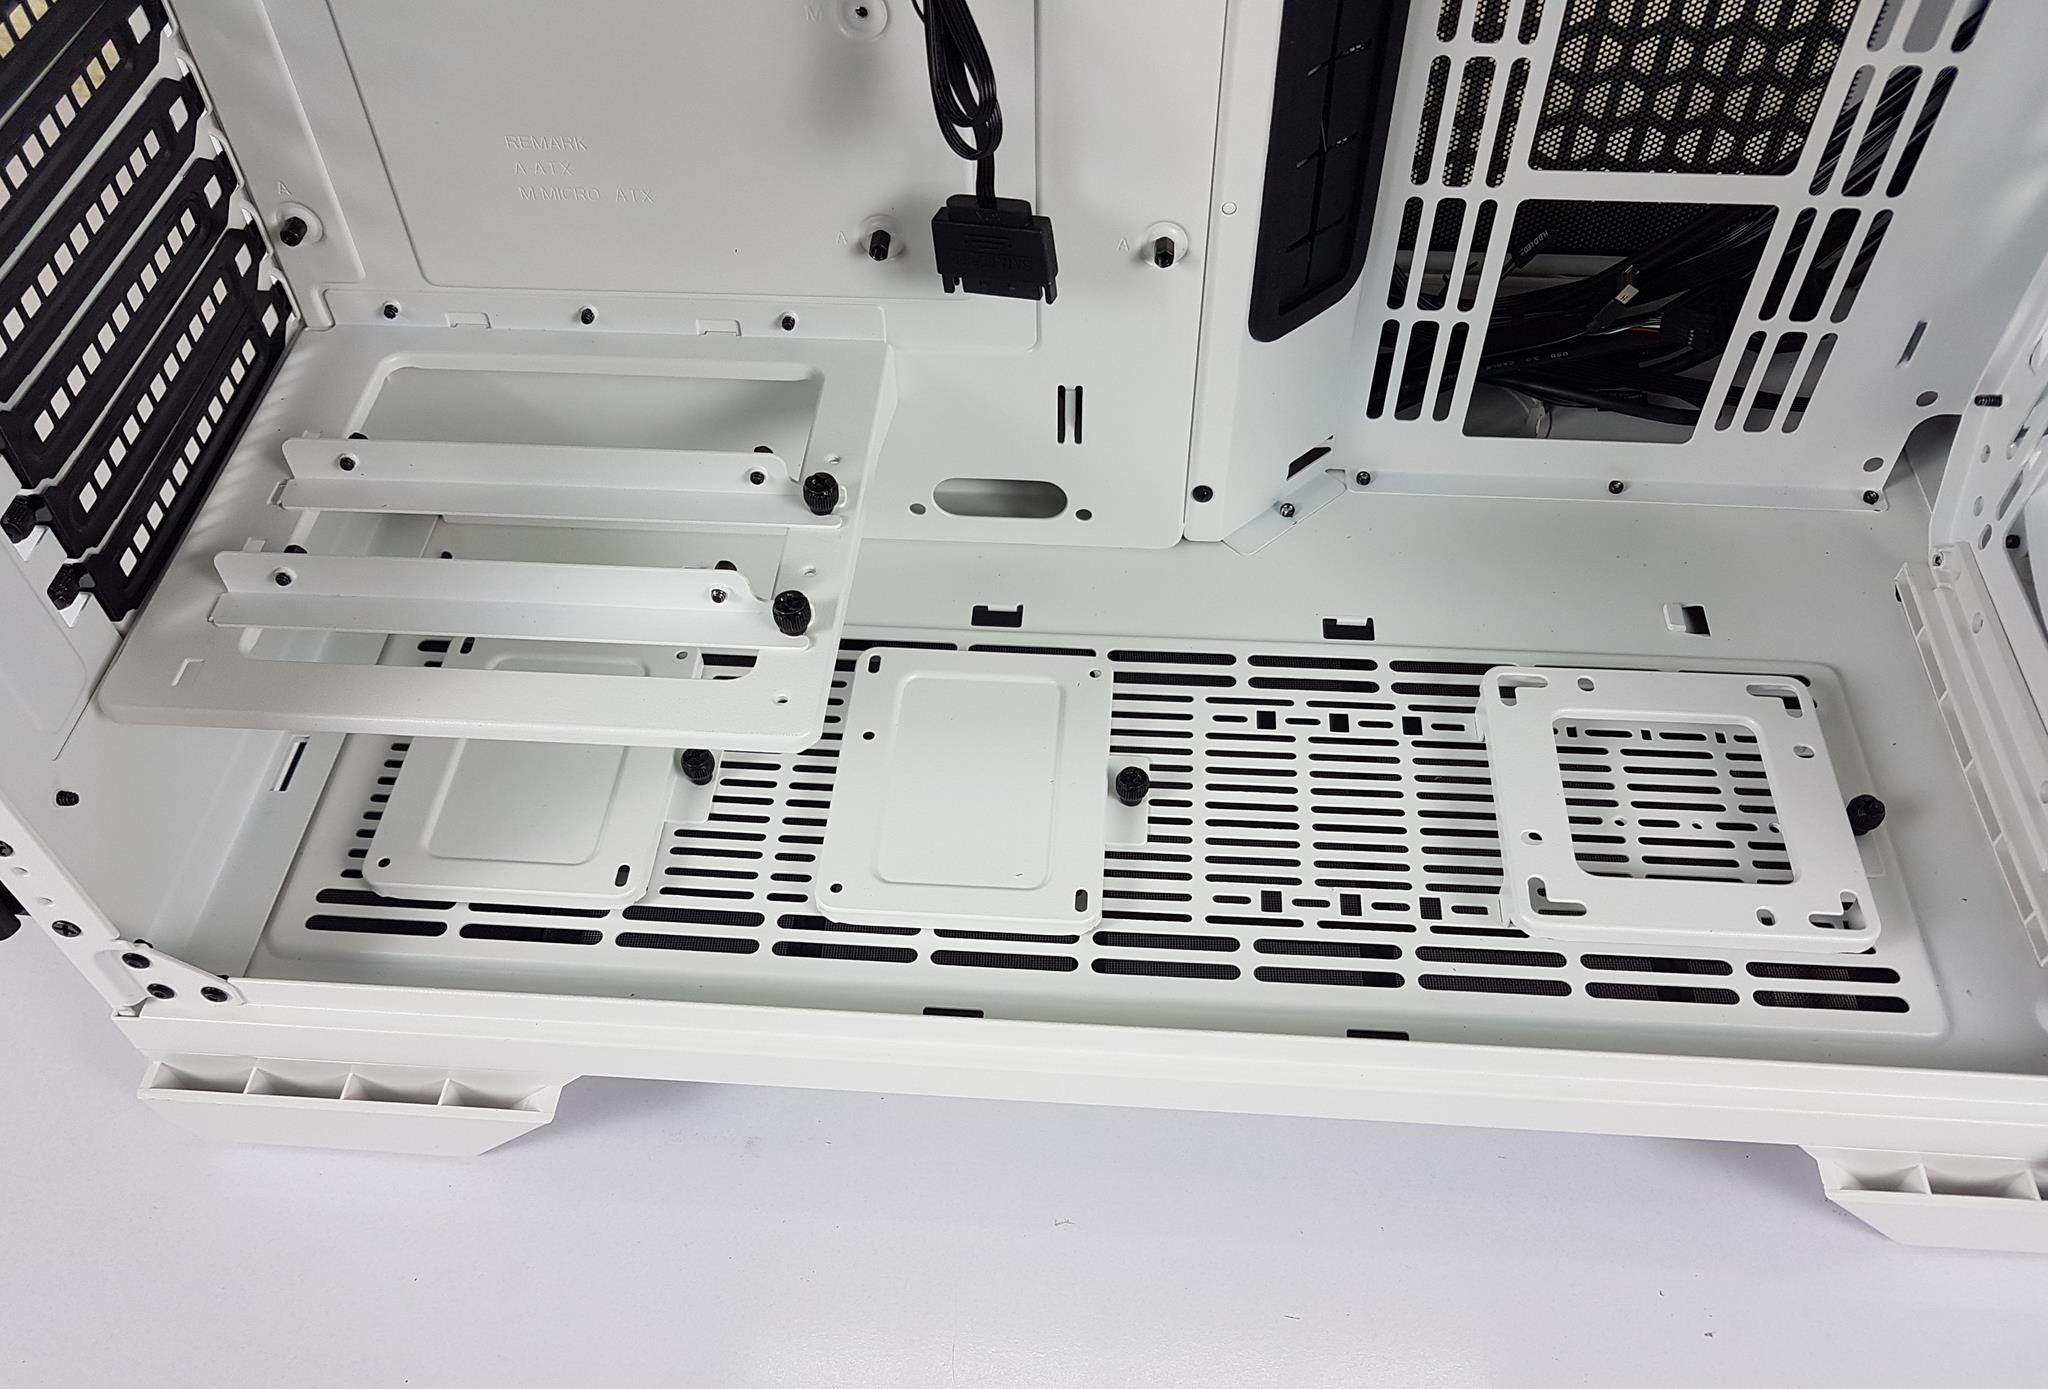
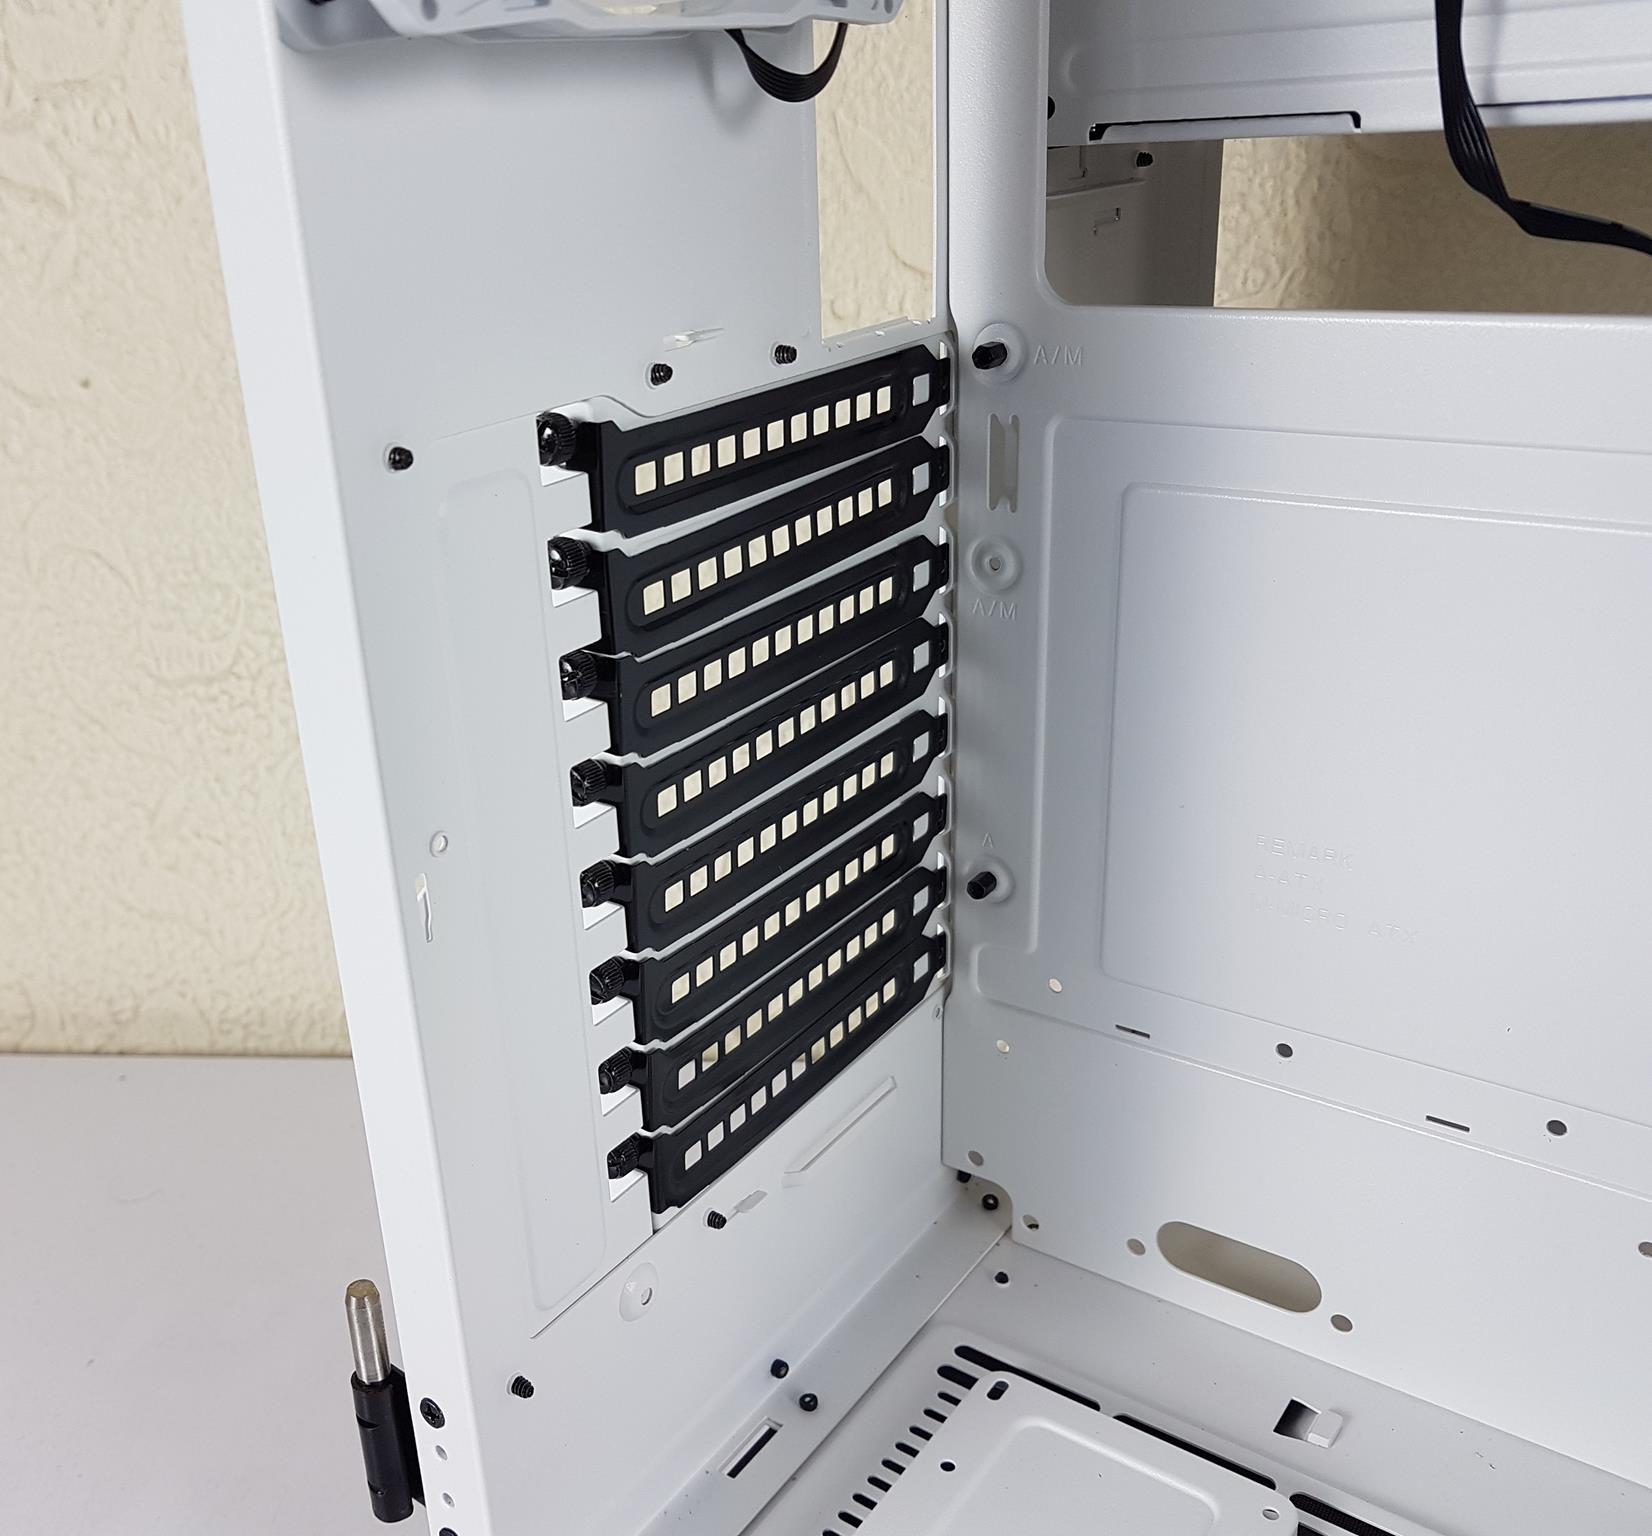
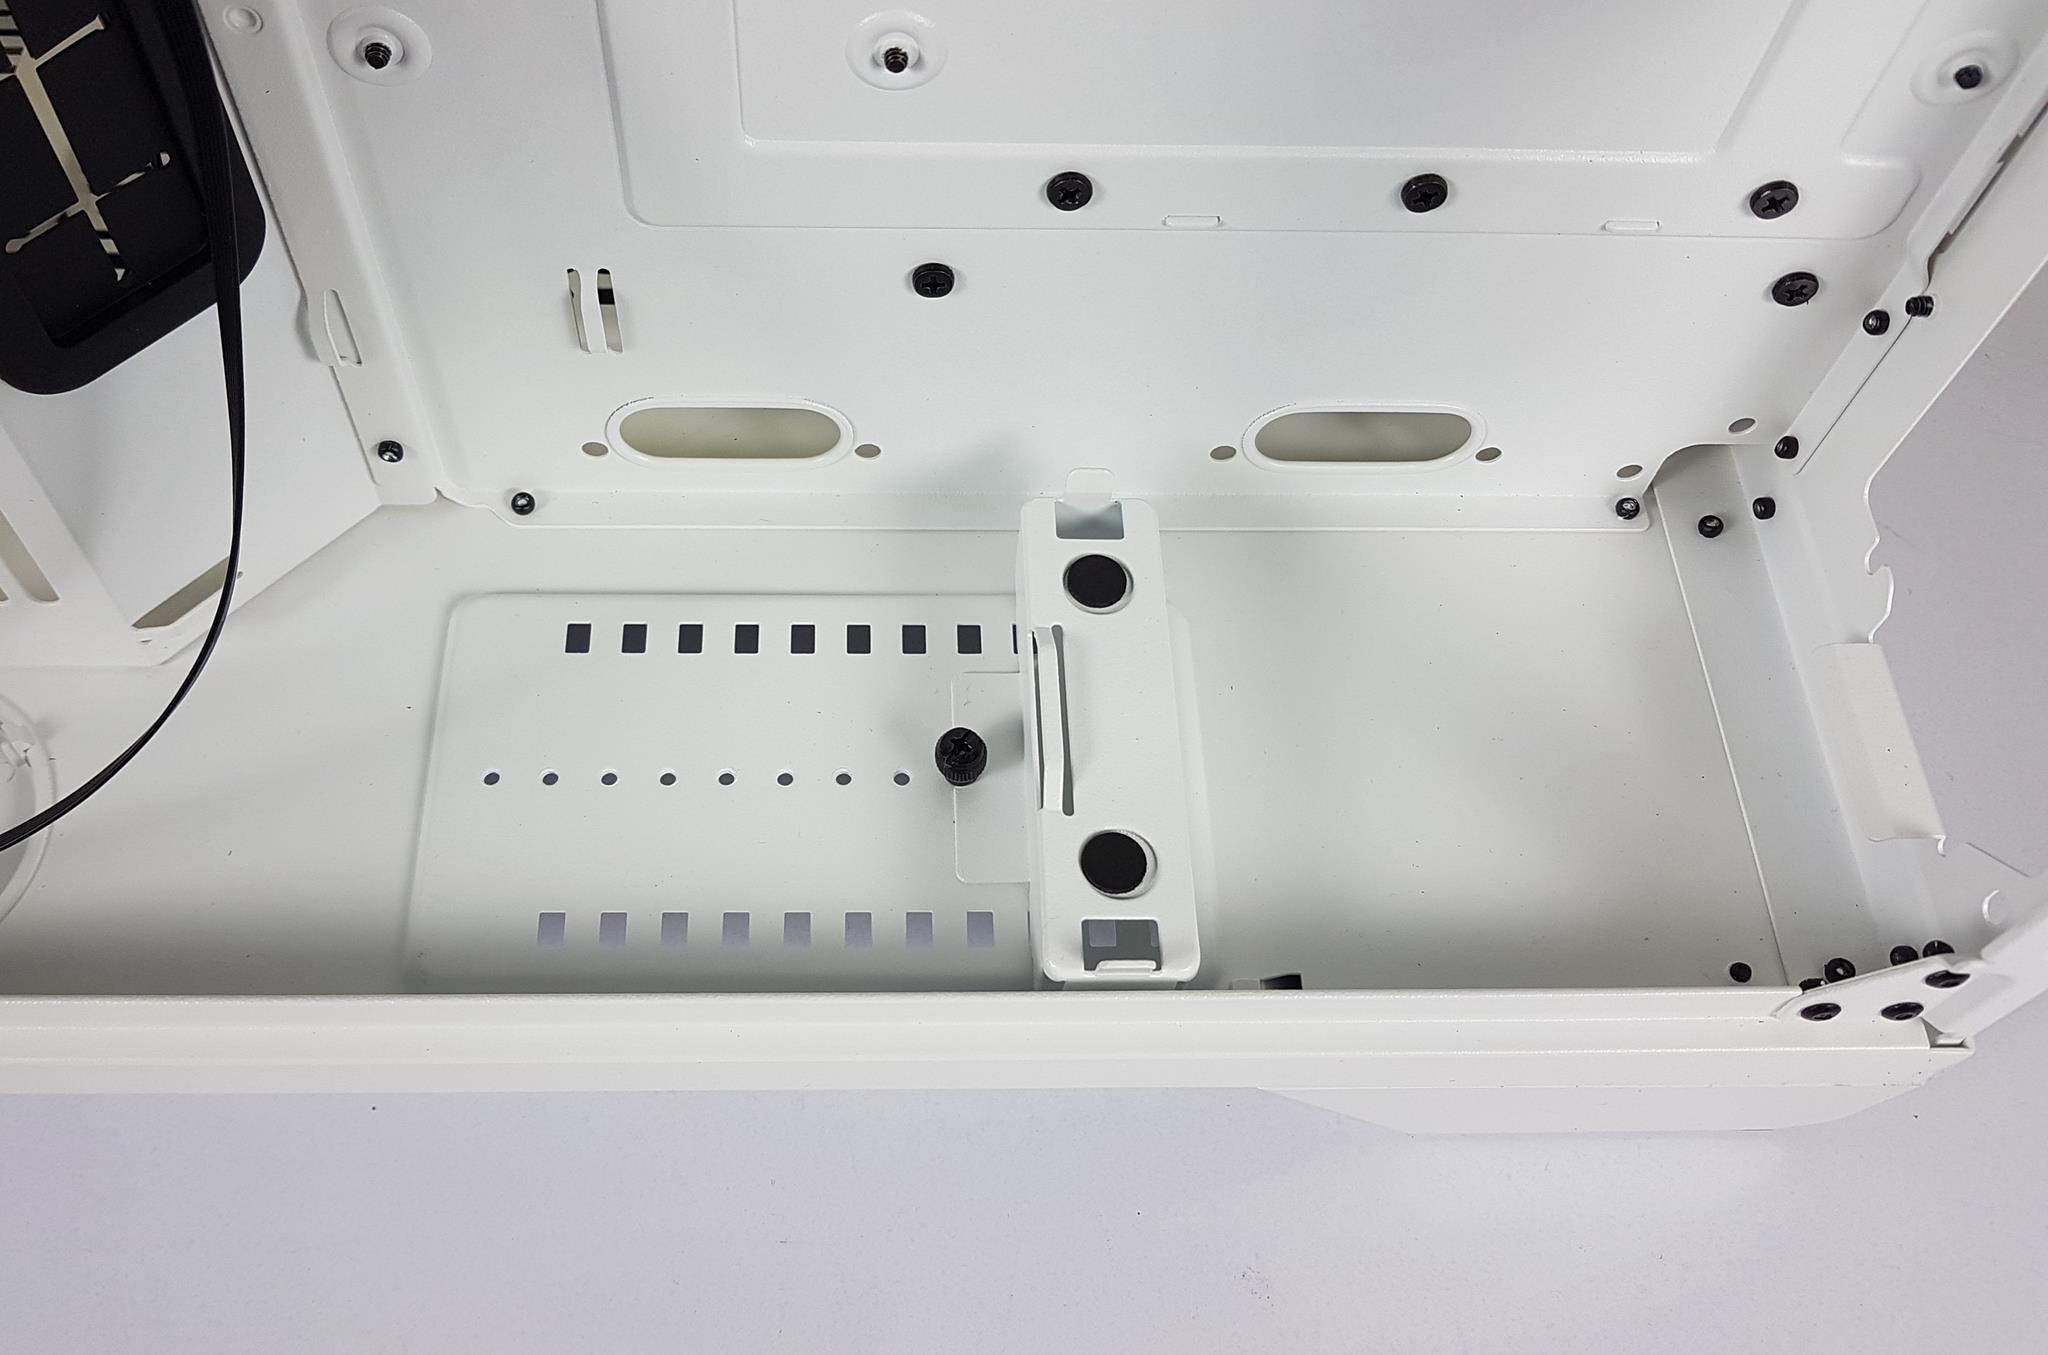
The above picture shows the support bracket for the vertical mount of the graphics card closely. The bottom of the case has two 2.5” drive brackets and there is a pump bracket towards the near. In terms of the storage capability, this thermaltalk support bracket case has a limited option.
Another key observation is the two cutouts on the base of the motherboard tray. They are far away from the base of the motherboard implying we the cables would be promptly visible on the base. I would have preferred these cutouts closer to the base of case.
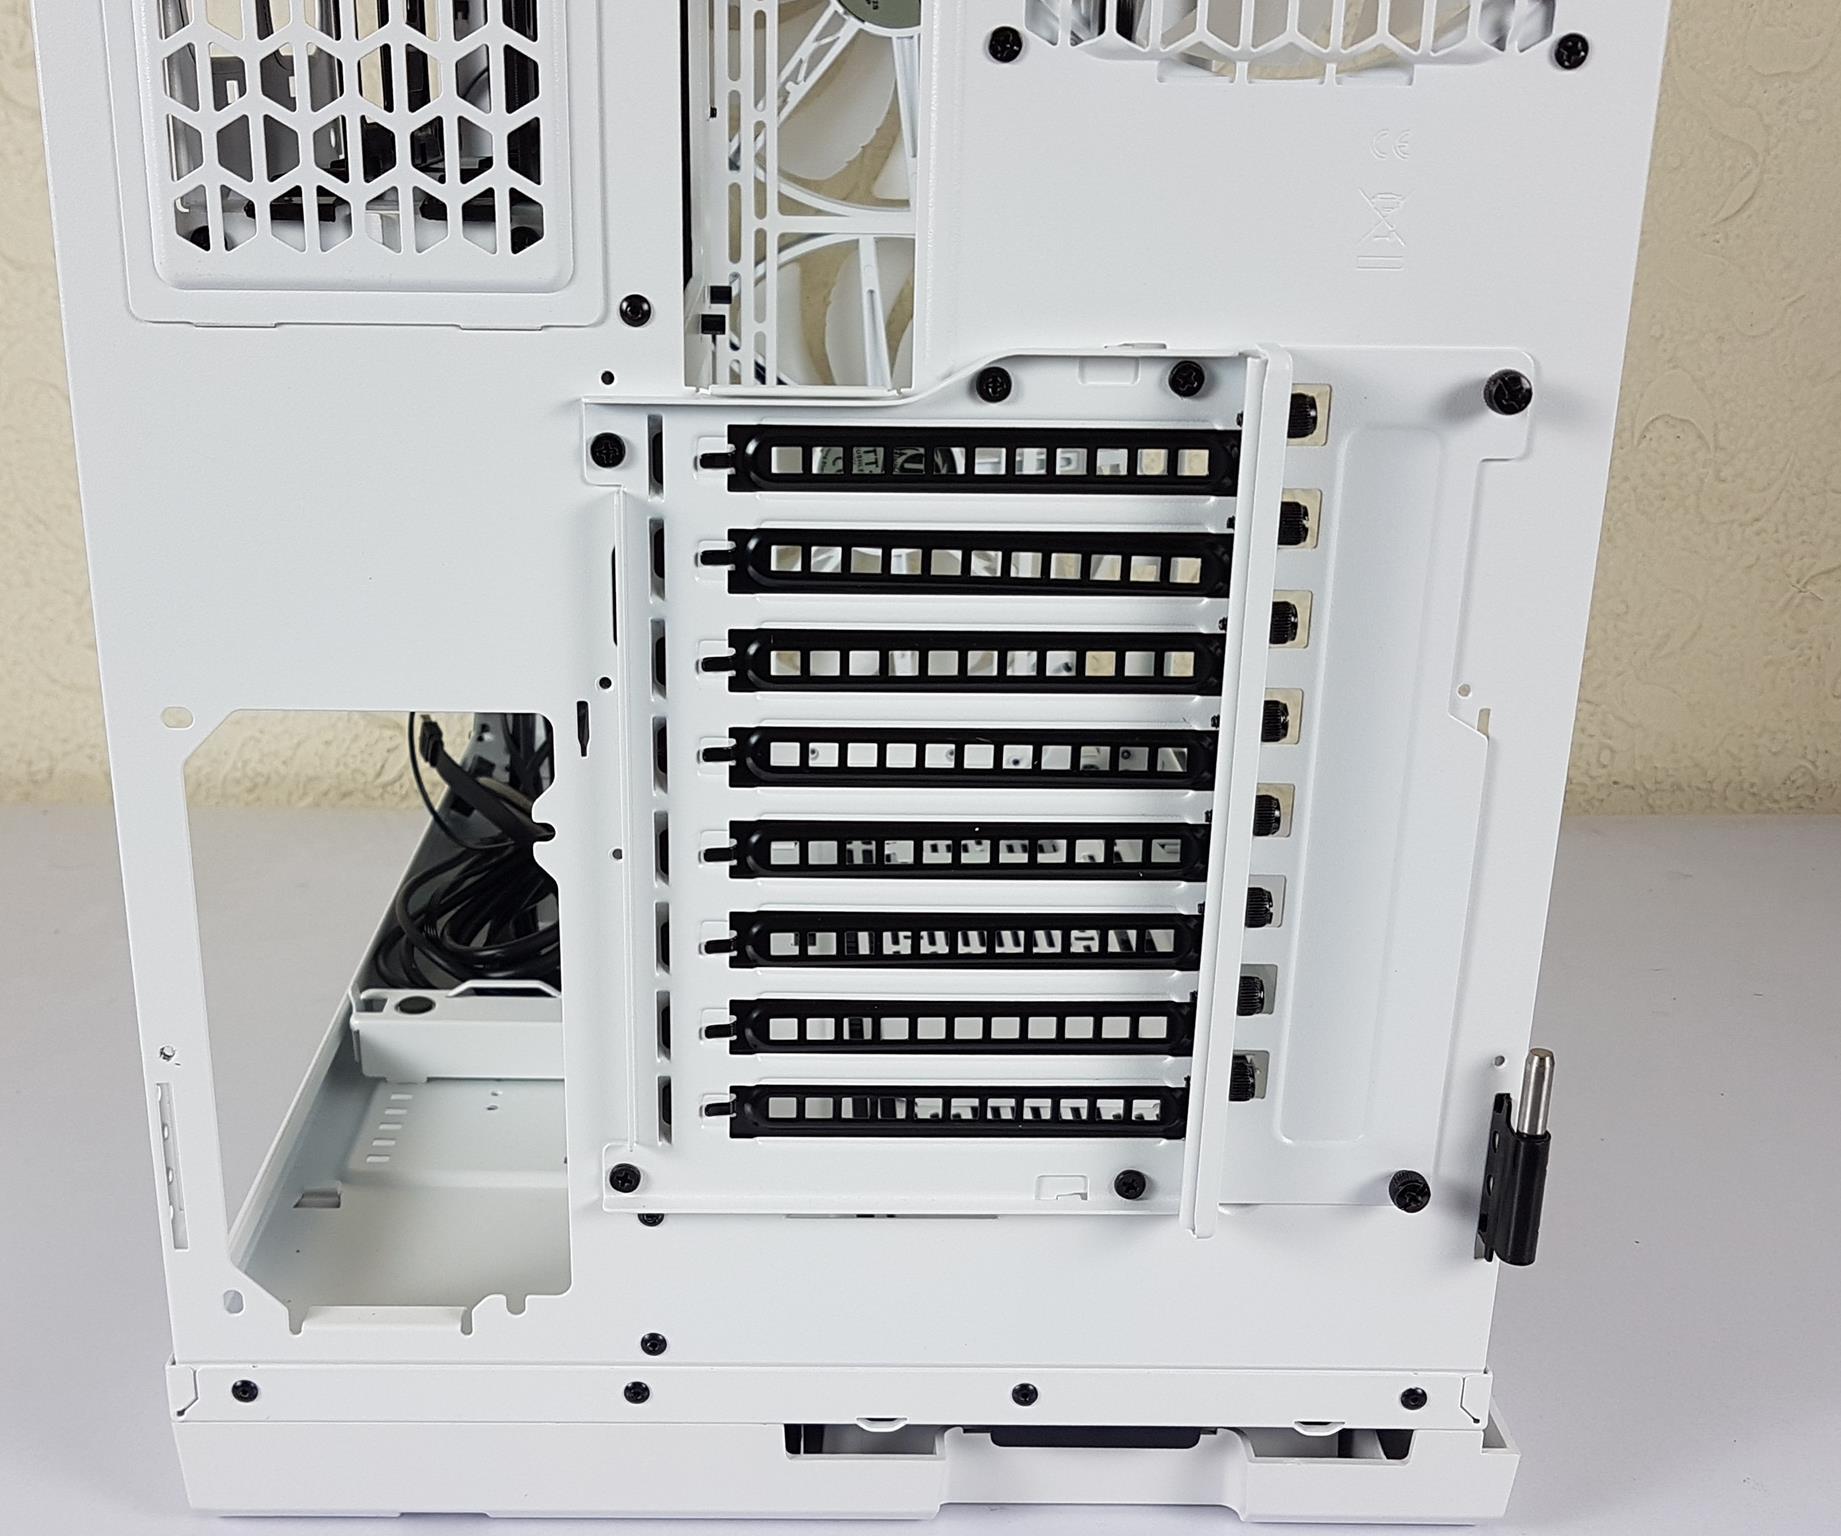
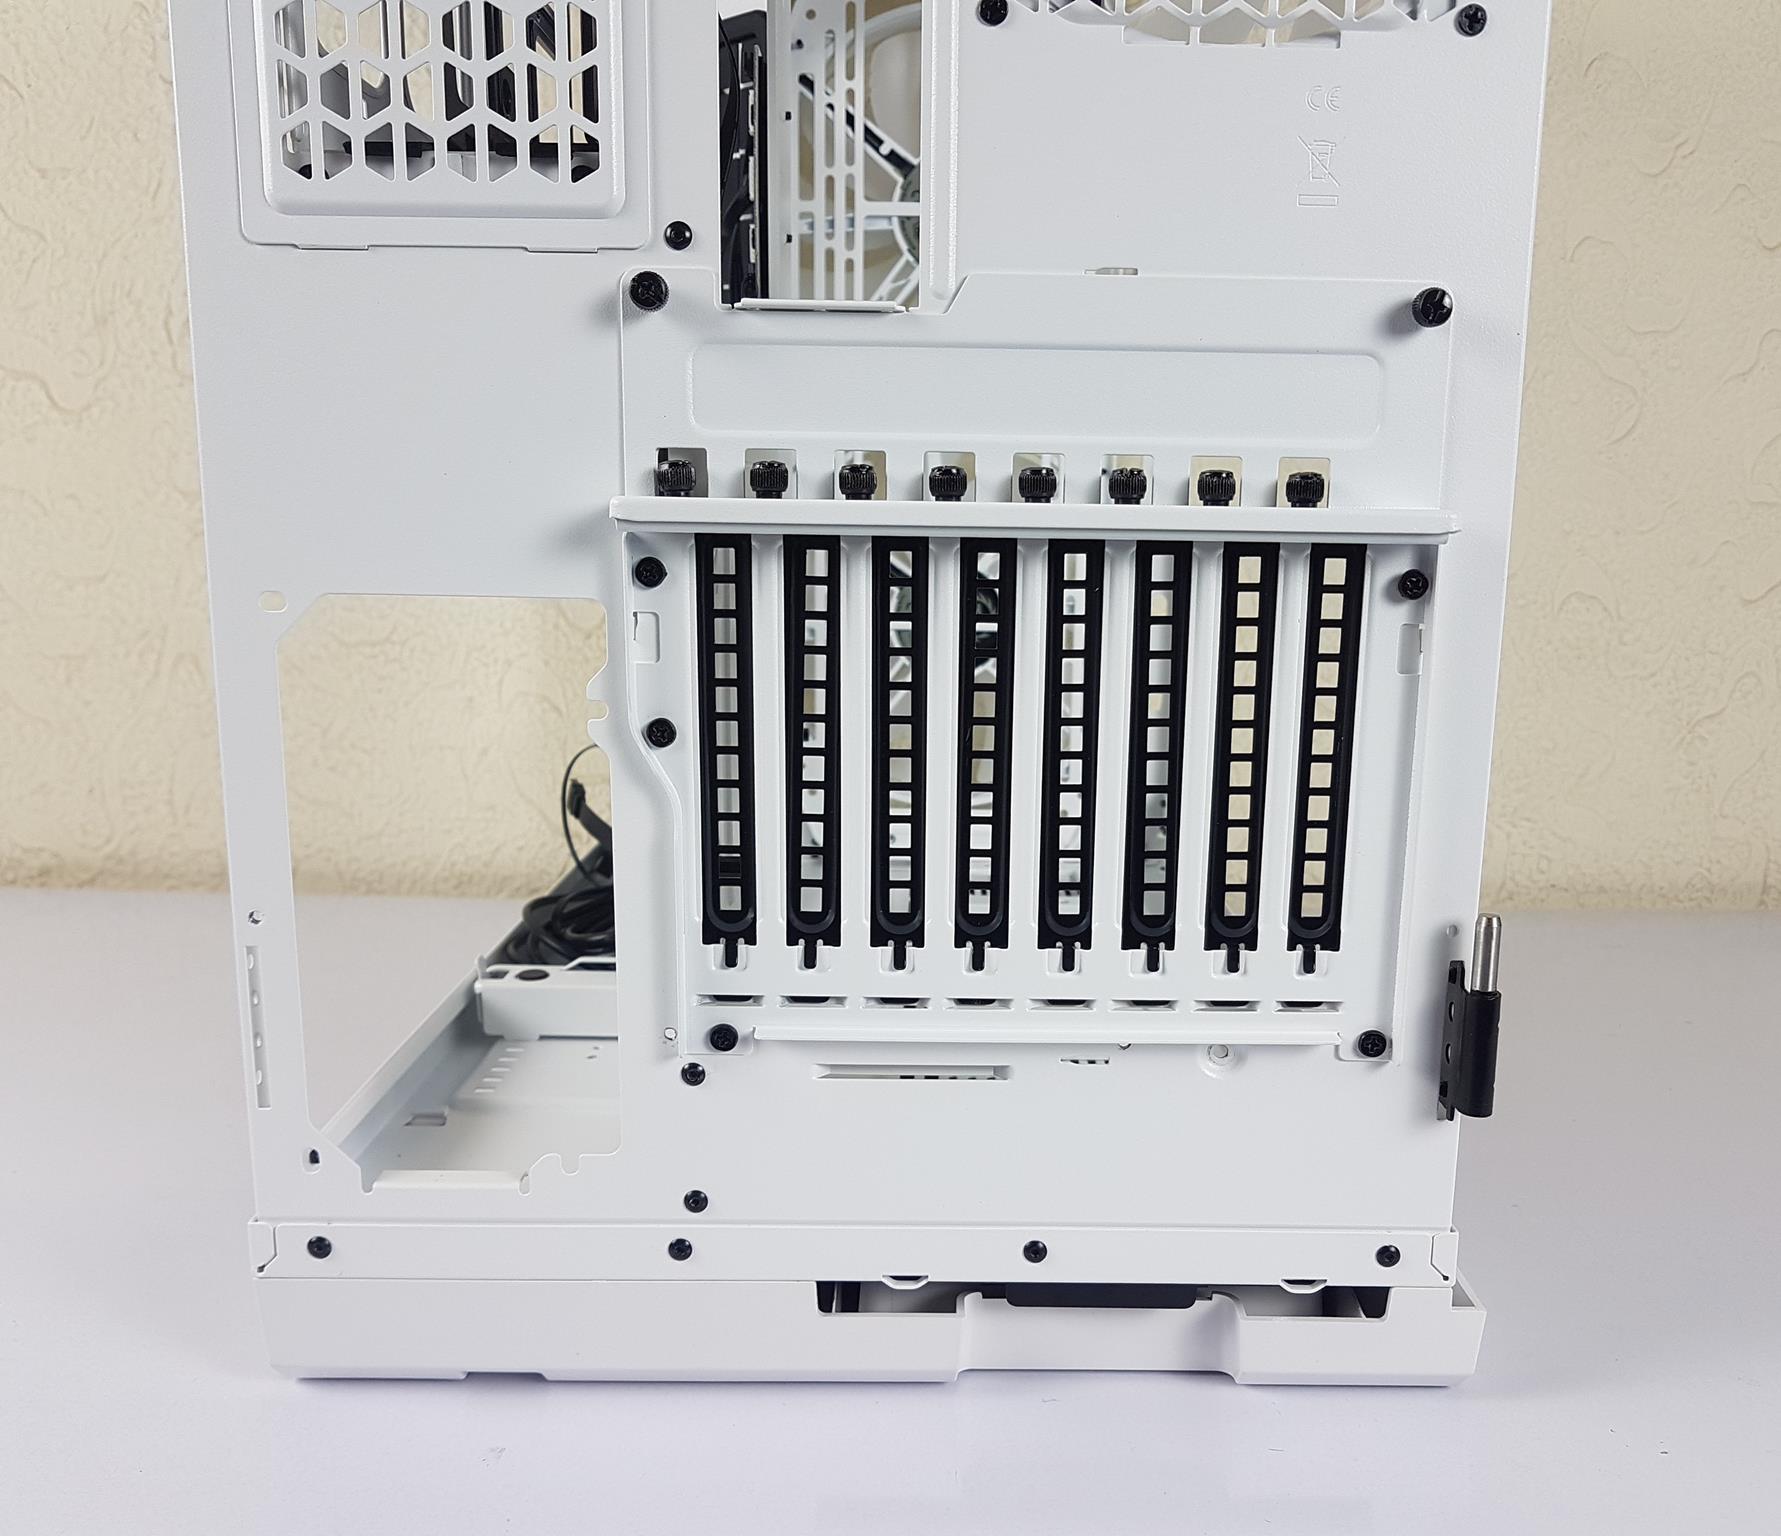
The above picture shows the PCIe slot area closely. The complete bracket is secured using 5x screws. The bracket cover is secured using 2x thumb screws. All 7 screws would need to be removed to take out the bracket.
The support bracket inside the case is secured using 6x screws. One screw is located on the rear as shown in the picture. The other five are on the motherboard tray.
The above picture shows the front side fan/radiator bracket from its rear. This angle gives a better understanding of the radiator thickness limitation for the front and side.
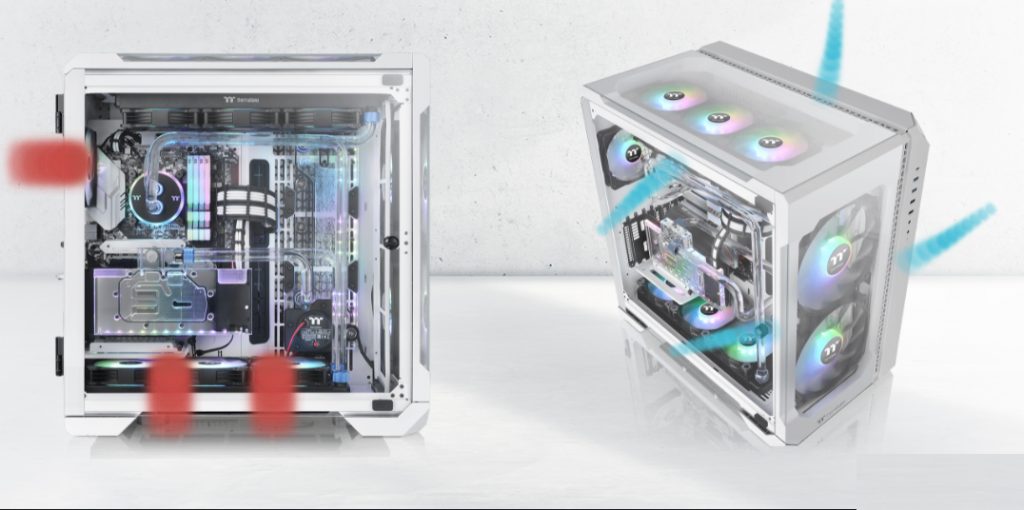
Picture on the product’s webpage suggests the direction to be top and front intake with rear and bottom exhausting. We did not test that as we are testing the case with stock cooling.
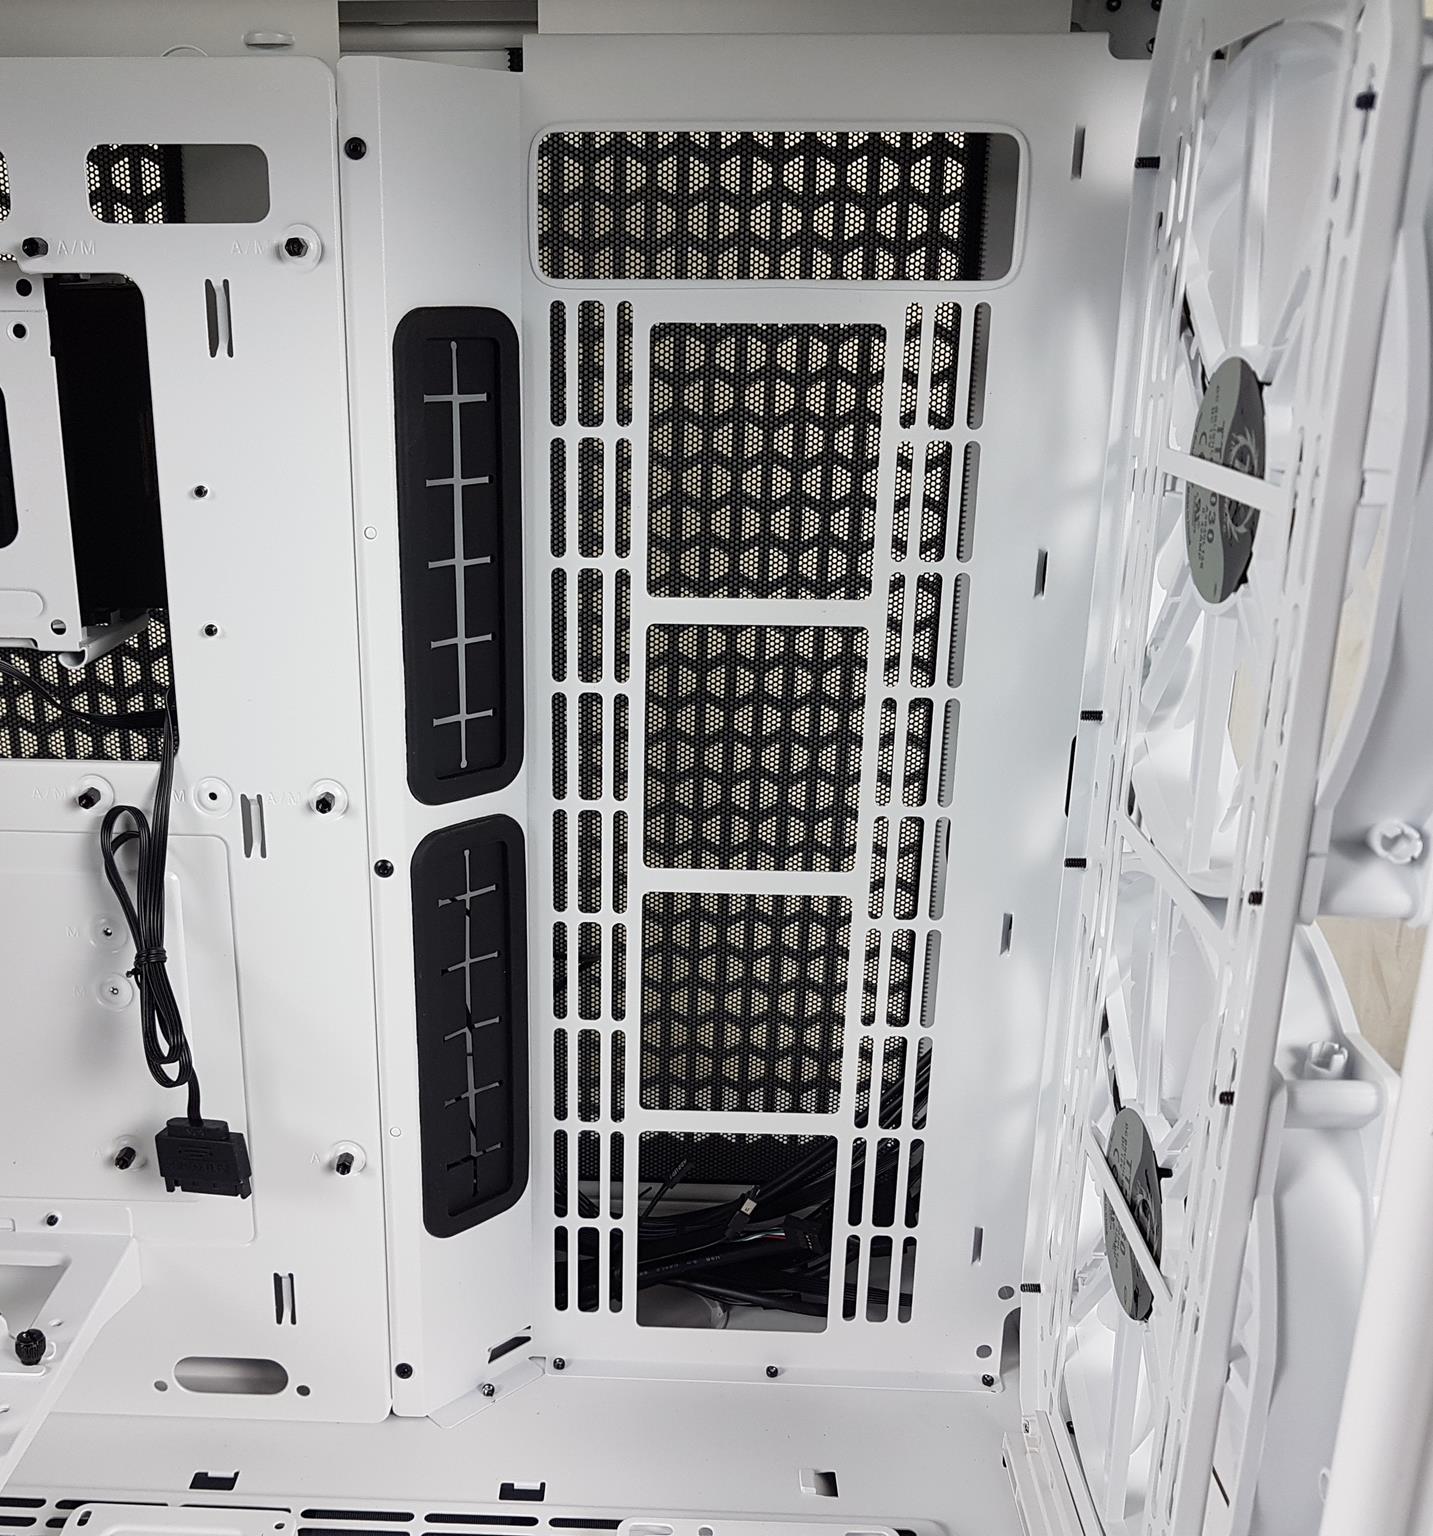
Taking a look at the inner side of the panel, we can spot two magnetic dust filters covering the vented areas.
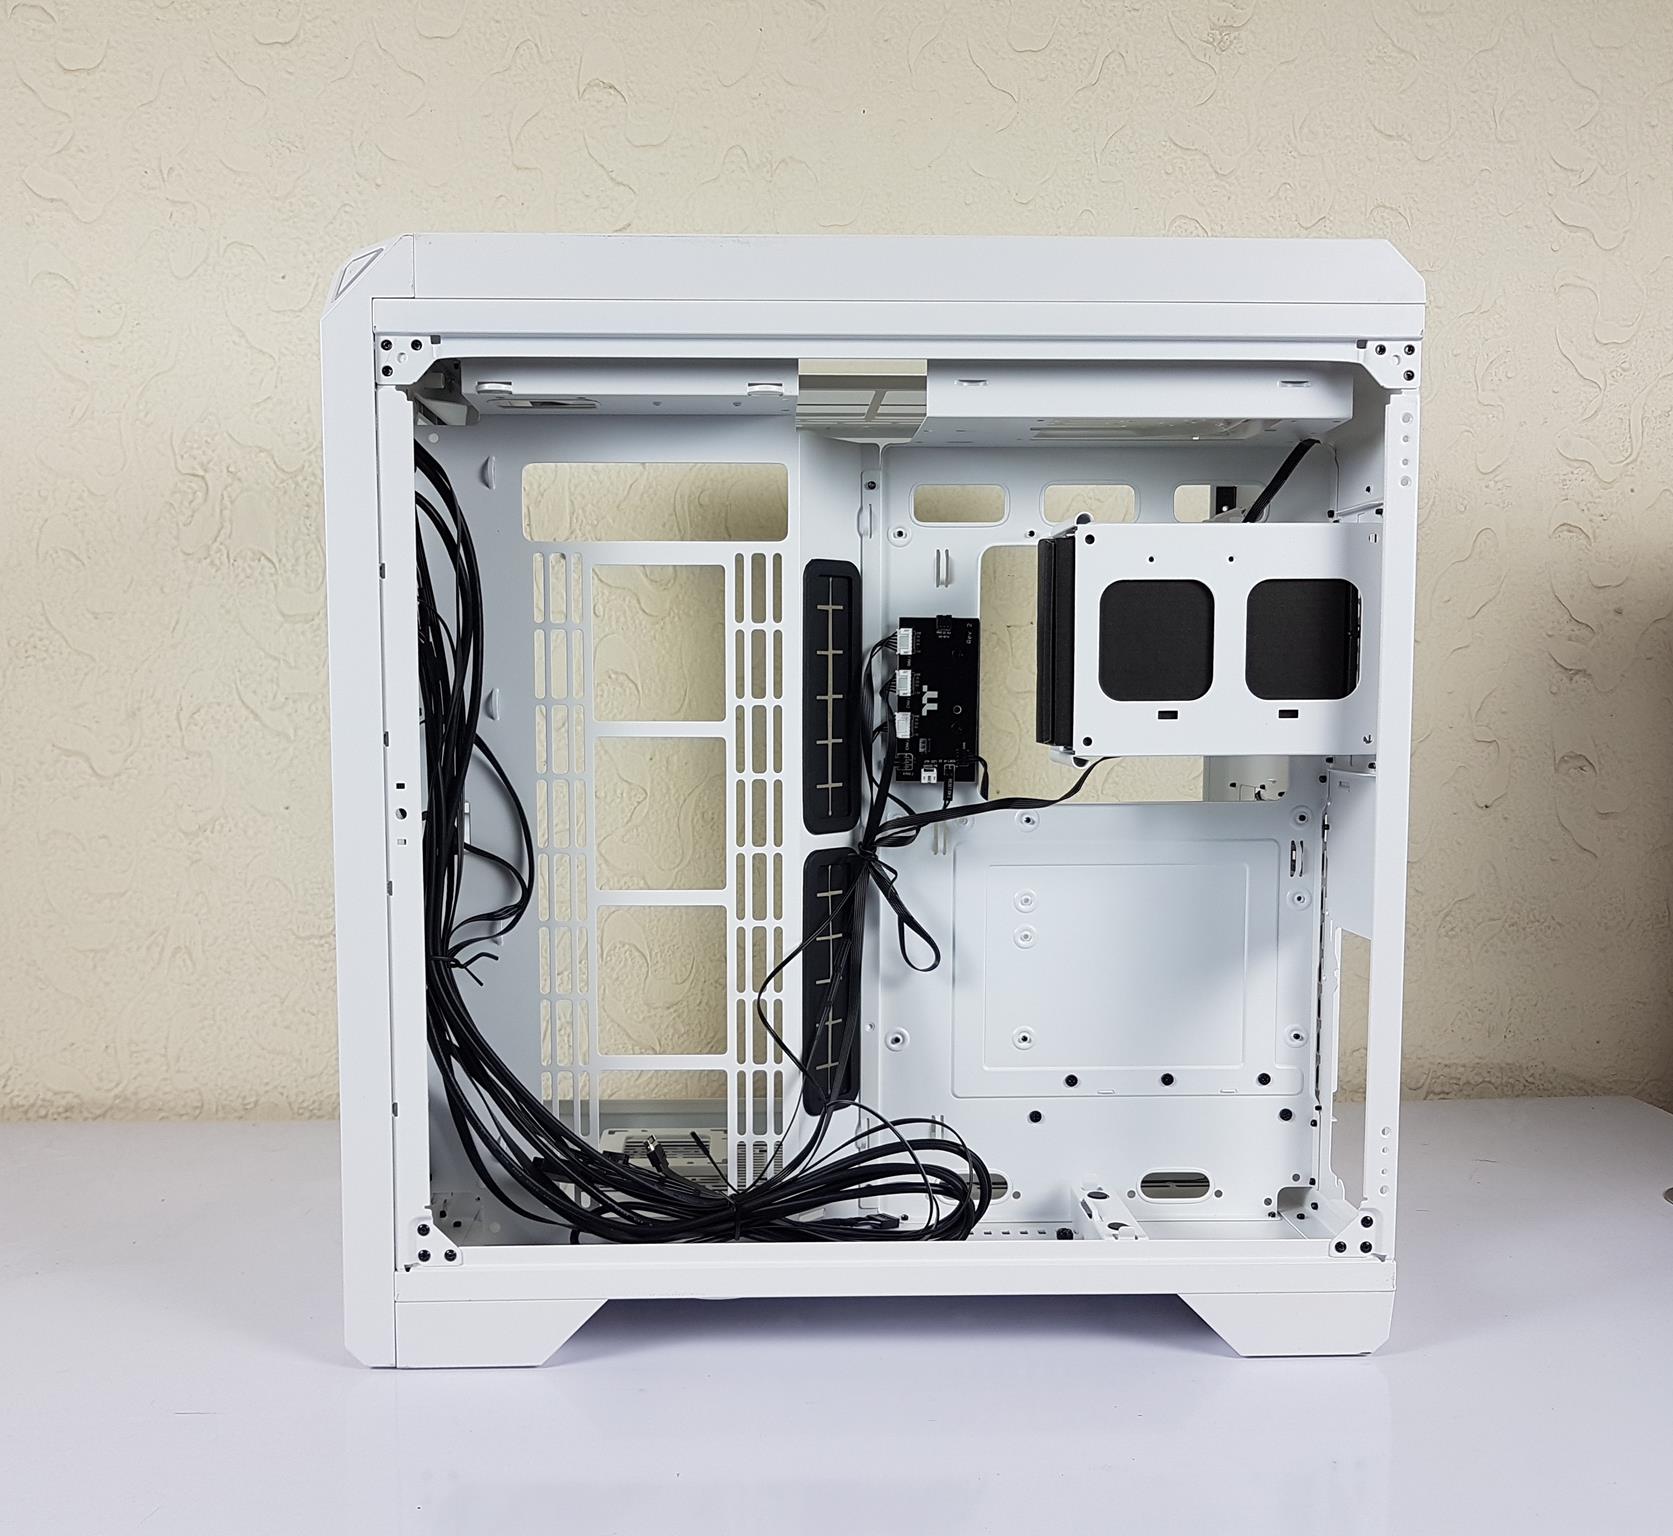
The design here has a familiar touch, reminiscent of the Lian Li O11 Dynamic. IO panel cables neatly traverse from the left to the right. Behind the motherboard tray, the HDD cage aligns with a cutout, presenting a choice: either mount the cooler’s hardware outside the case or remove the HDD cage during installation. Ample cable tie points streamline organization.
Opting for a vertical PSU layout is advised, positioning the fan side toward the panel for efficient air intake and rear exhaust. The PSU mounting bracket features an adjustable arm, allowing customization based on the PSU length.

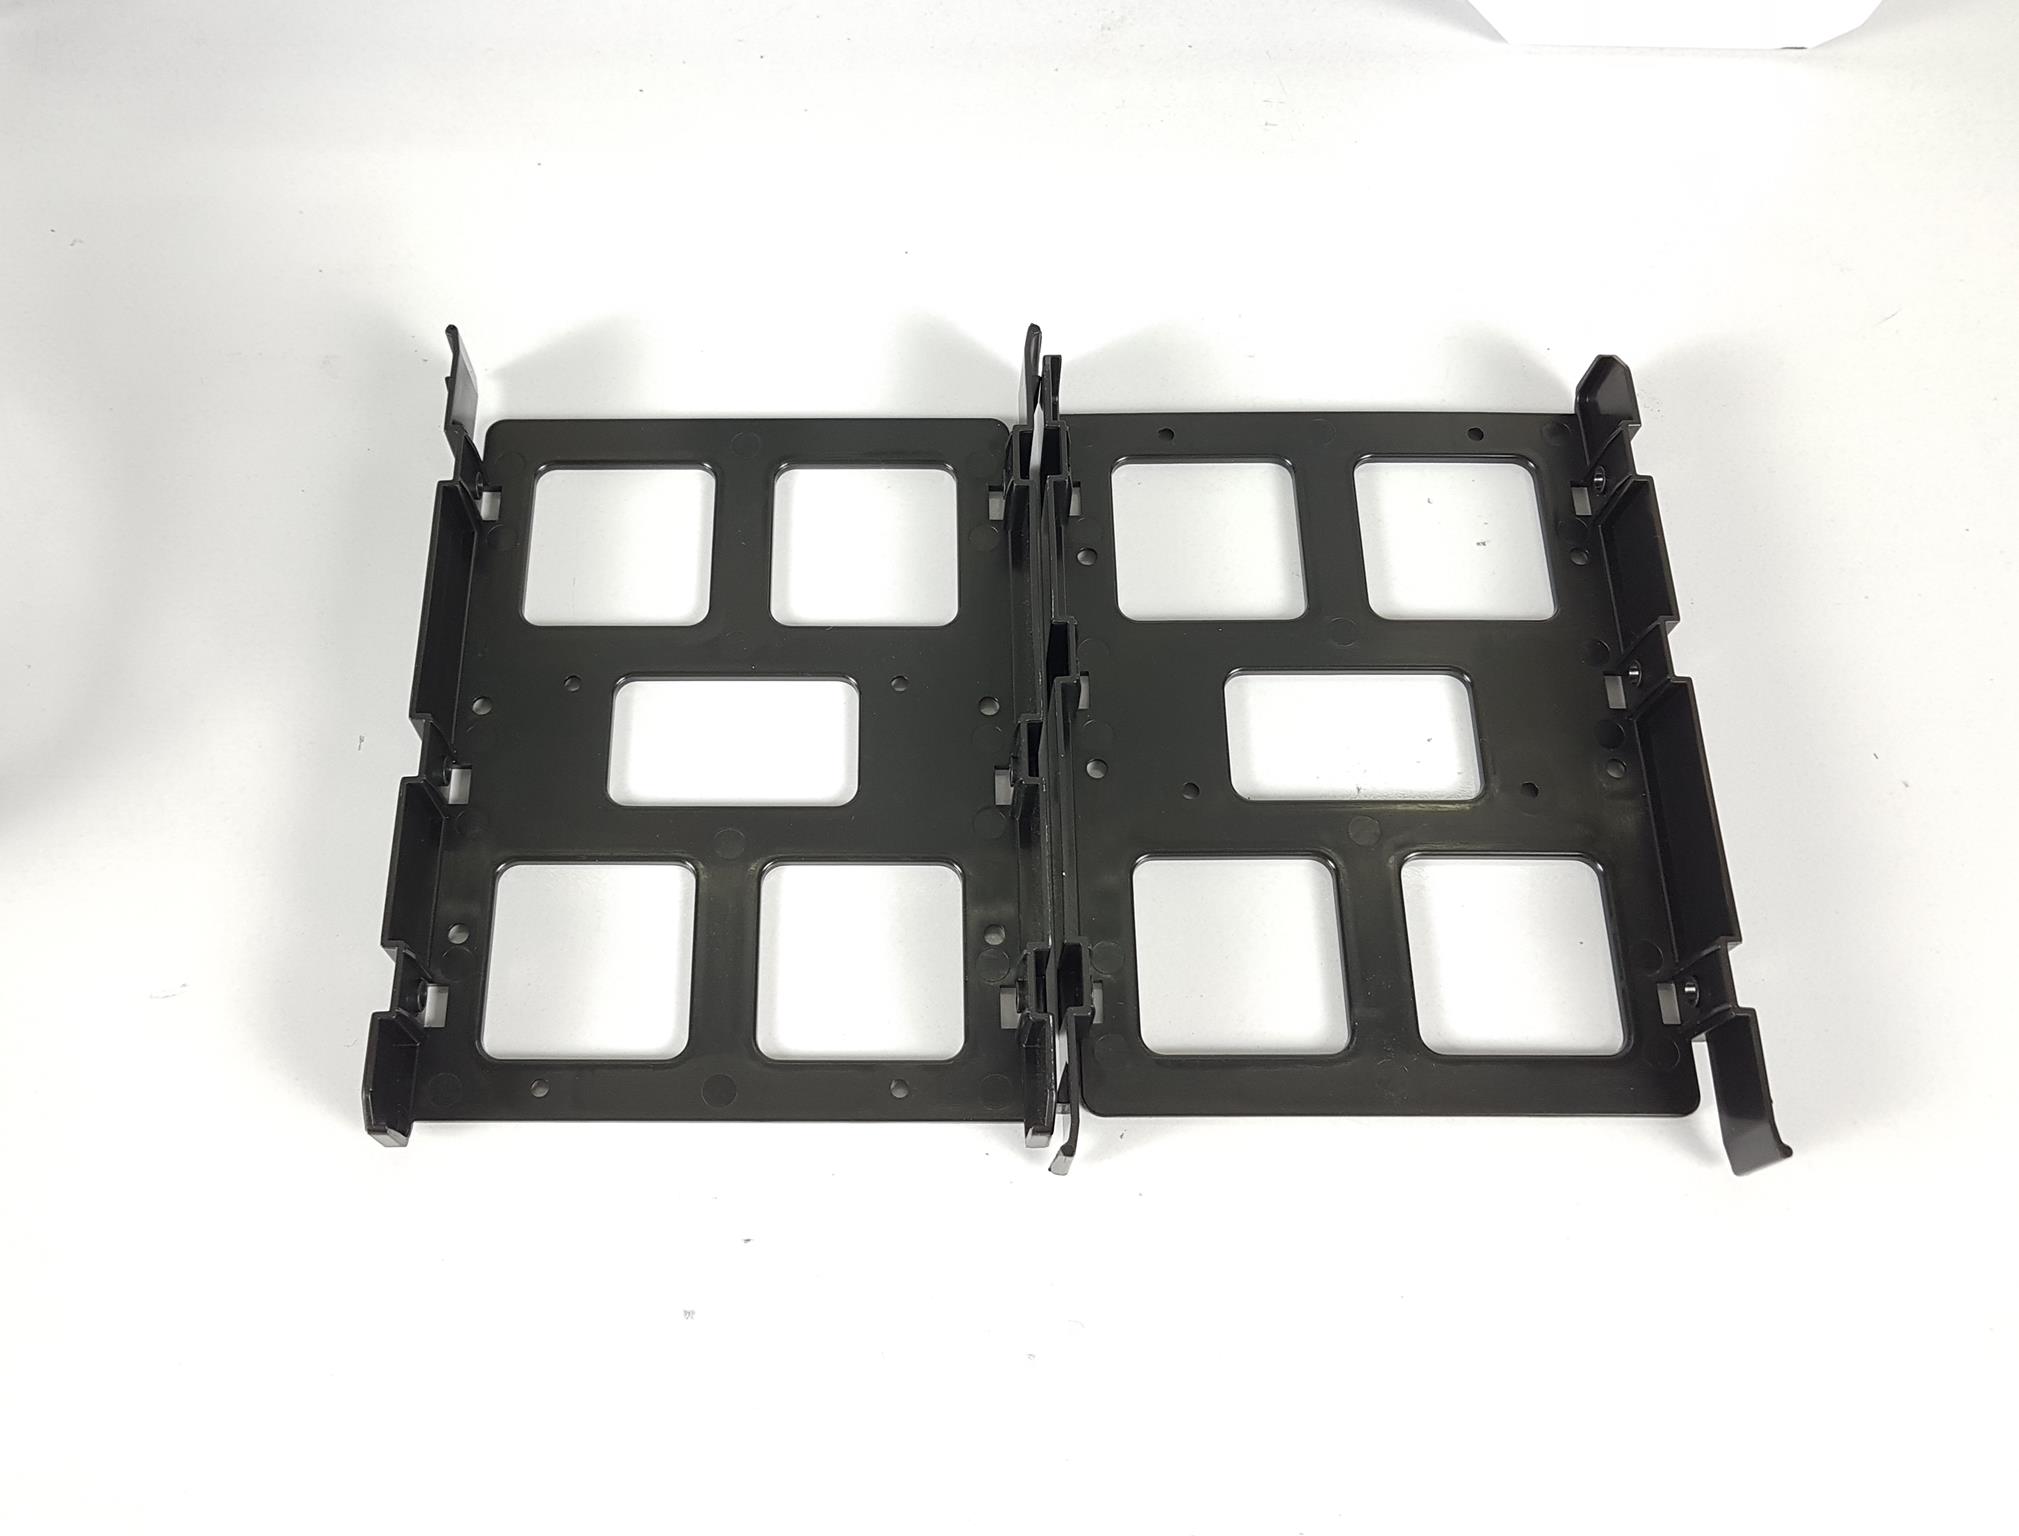
The HDD cage has 2 caddies. They can be accessed from the rear of the cage. Following storage options are available in this case:
- 2x 2.5” or 3.5” drives in the HDD cage
- 2x 2.5” drives on the brackets
View 51 Thermaltake case is designed more towards the cooling gear than the storage.
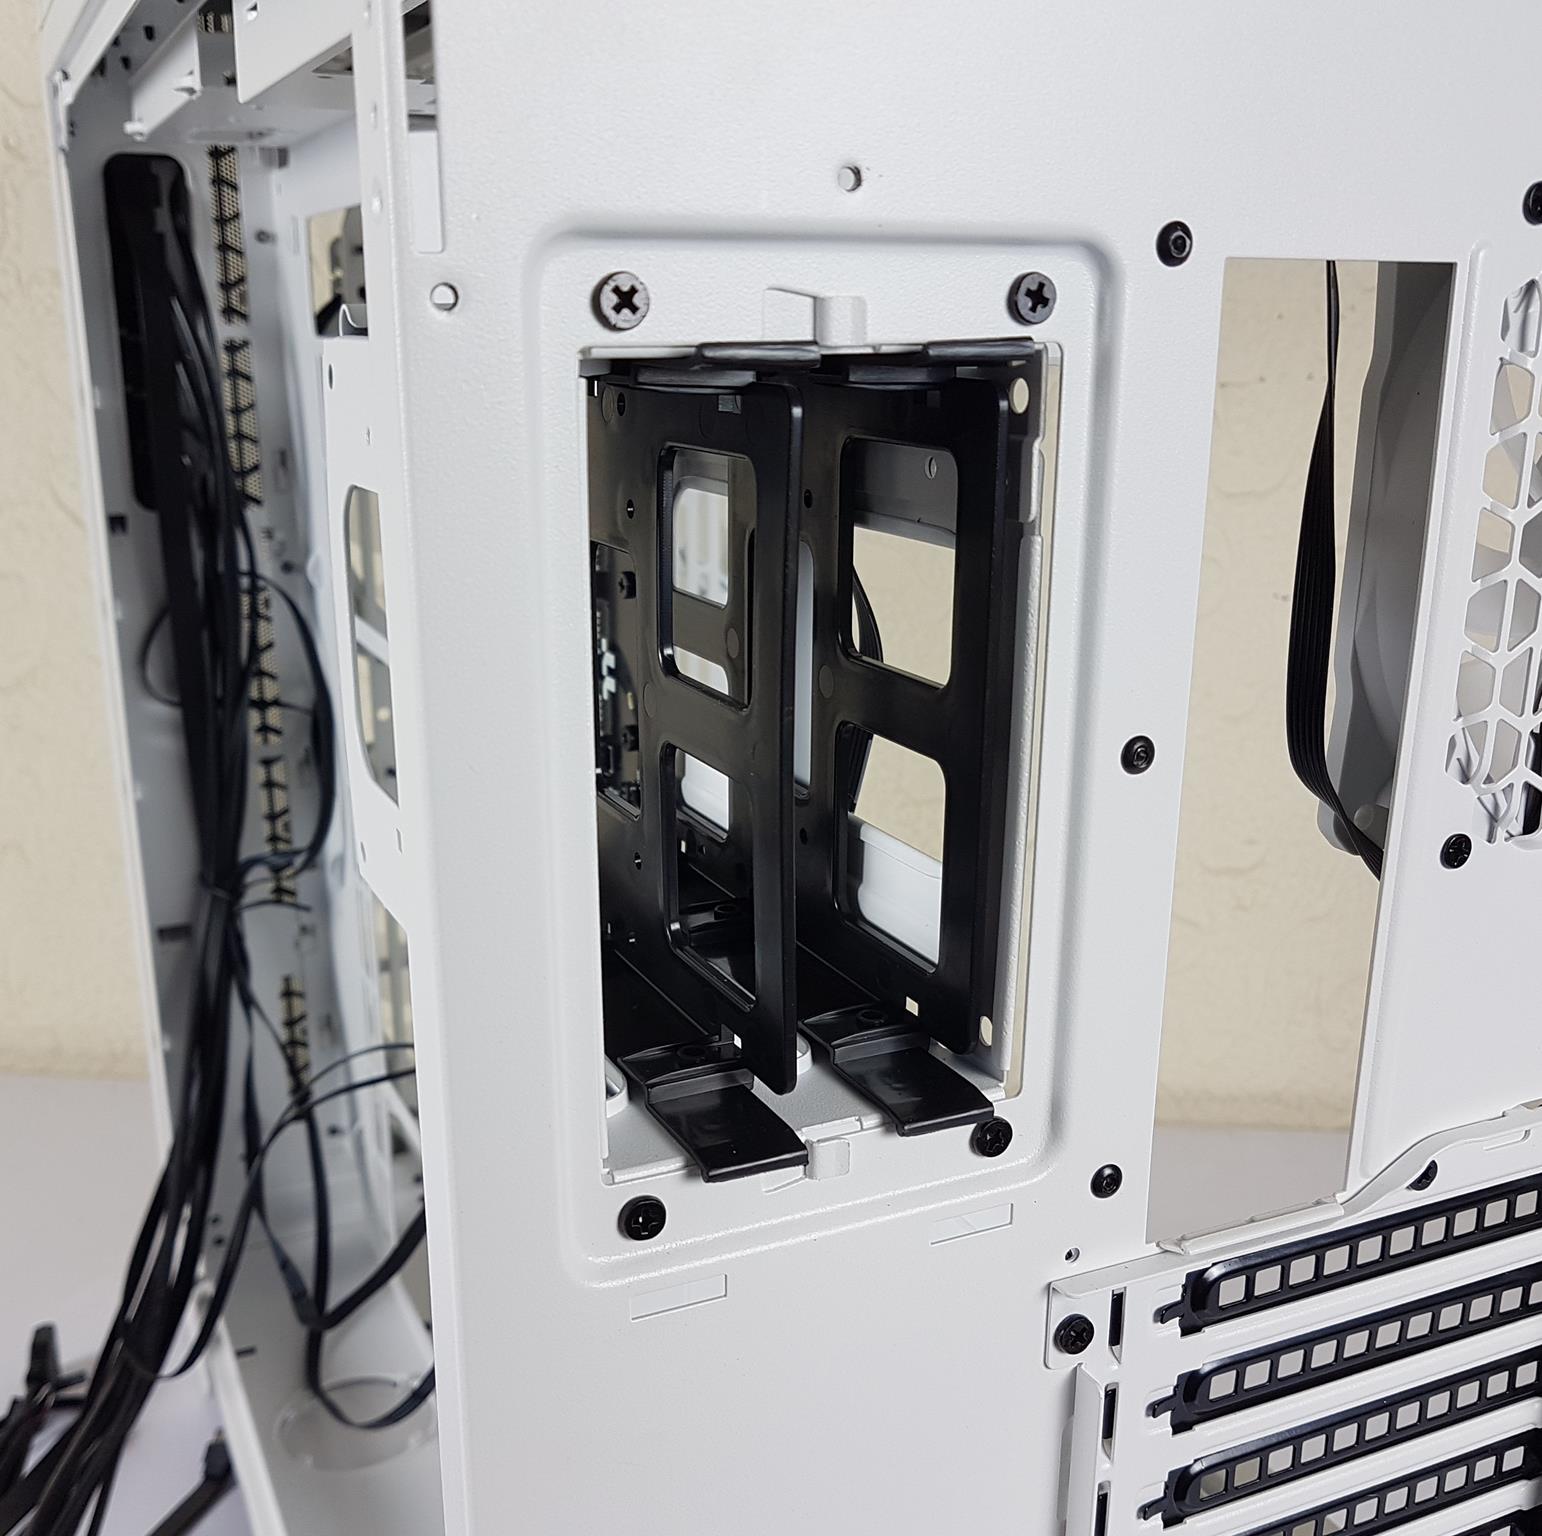
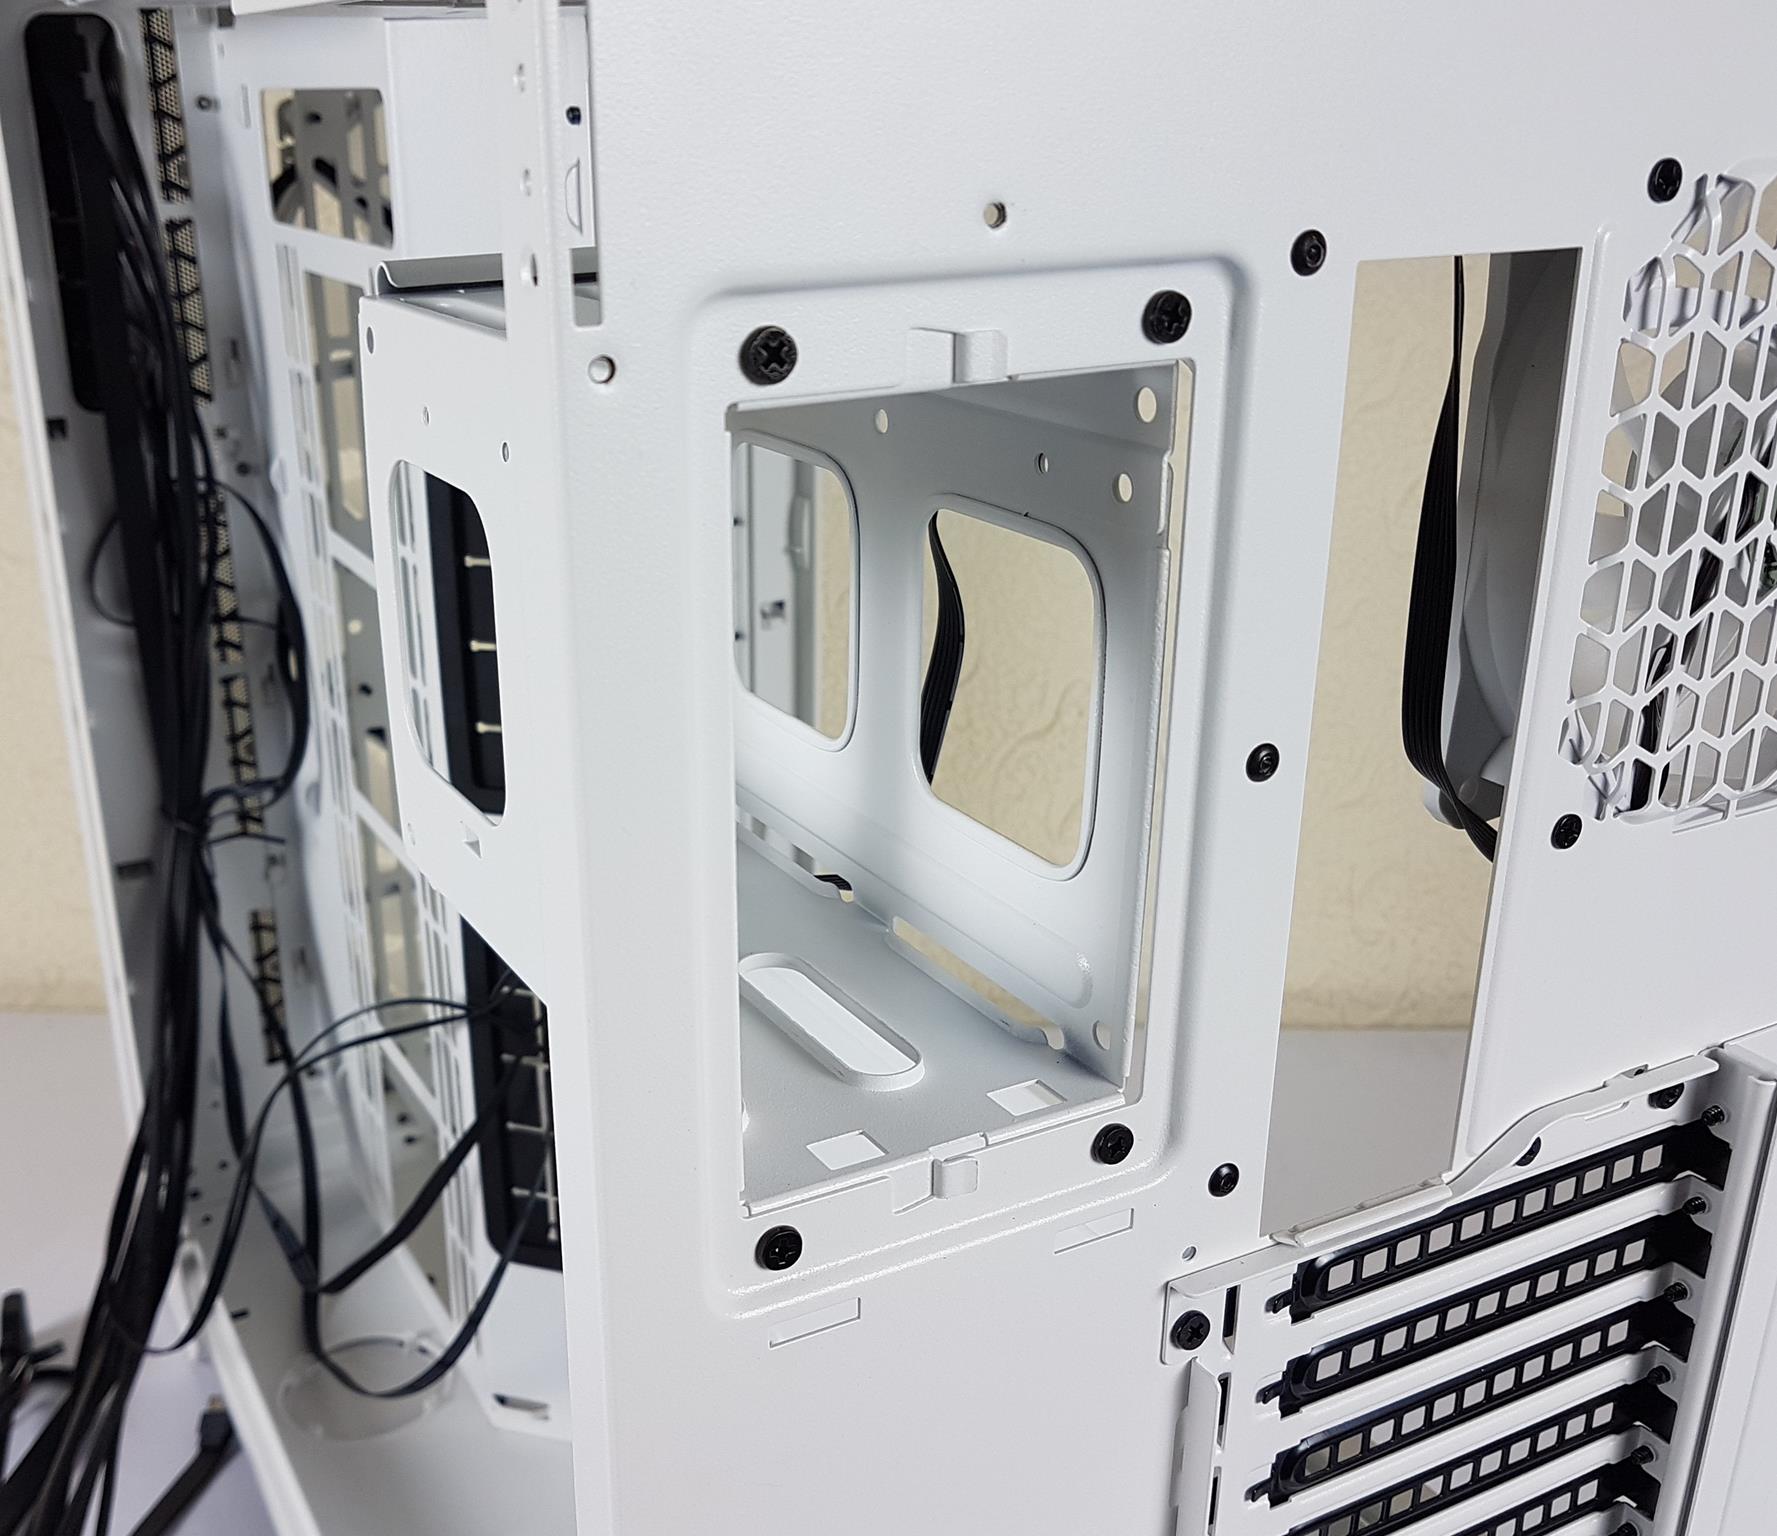
The HDD cage is secured using 4x screws and it is removable.
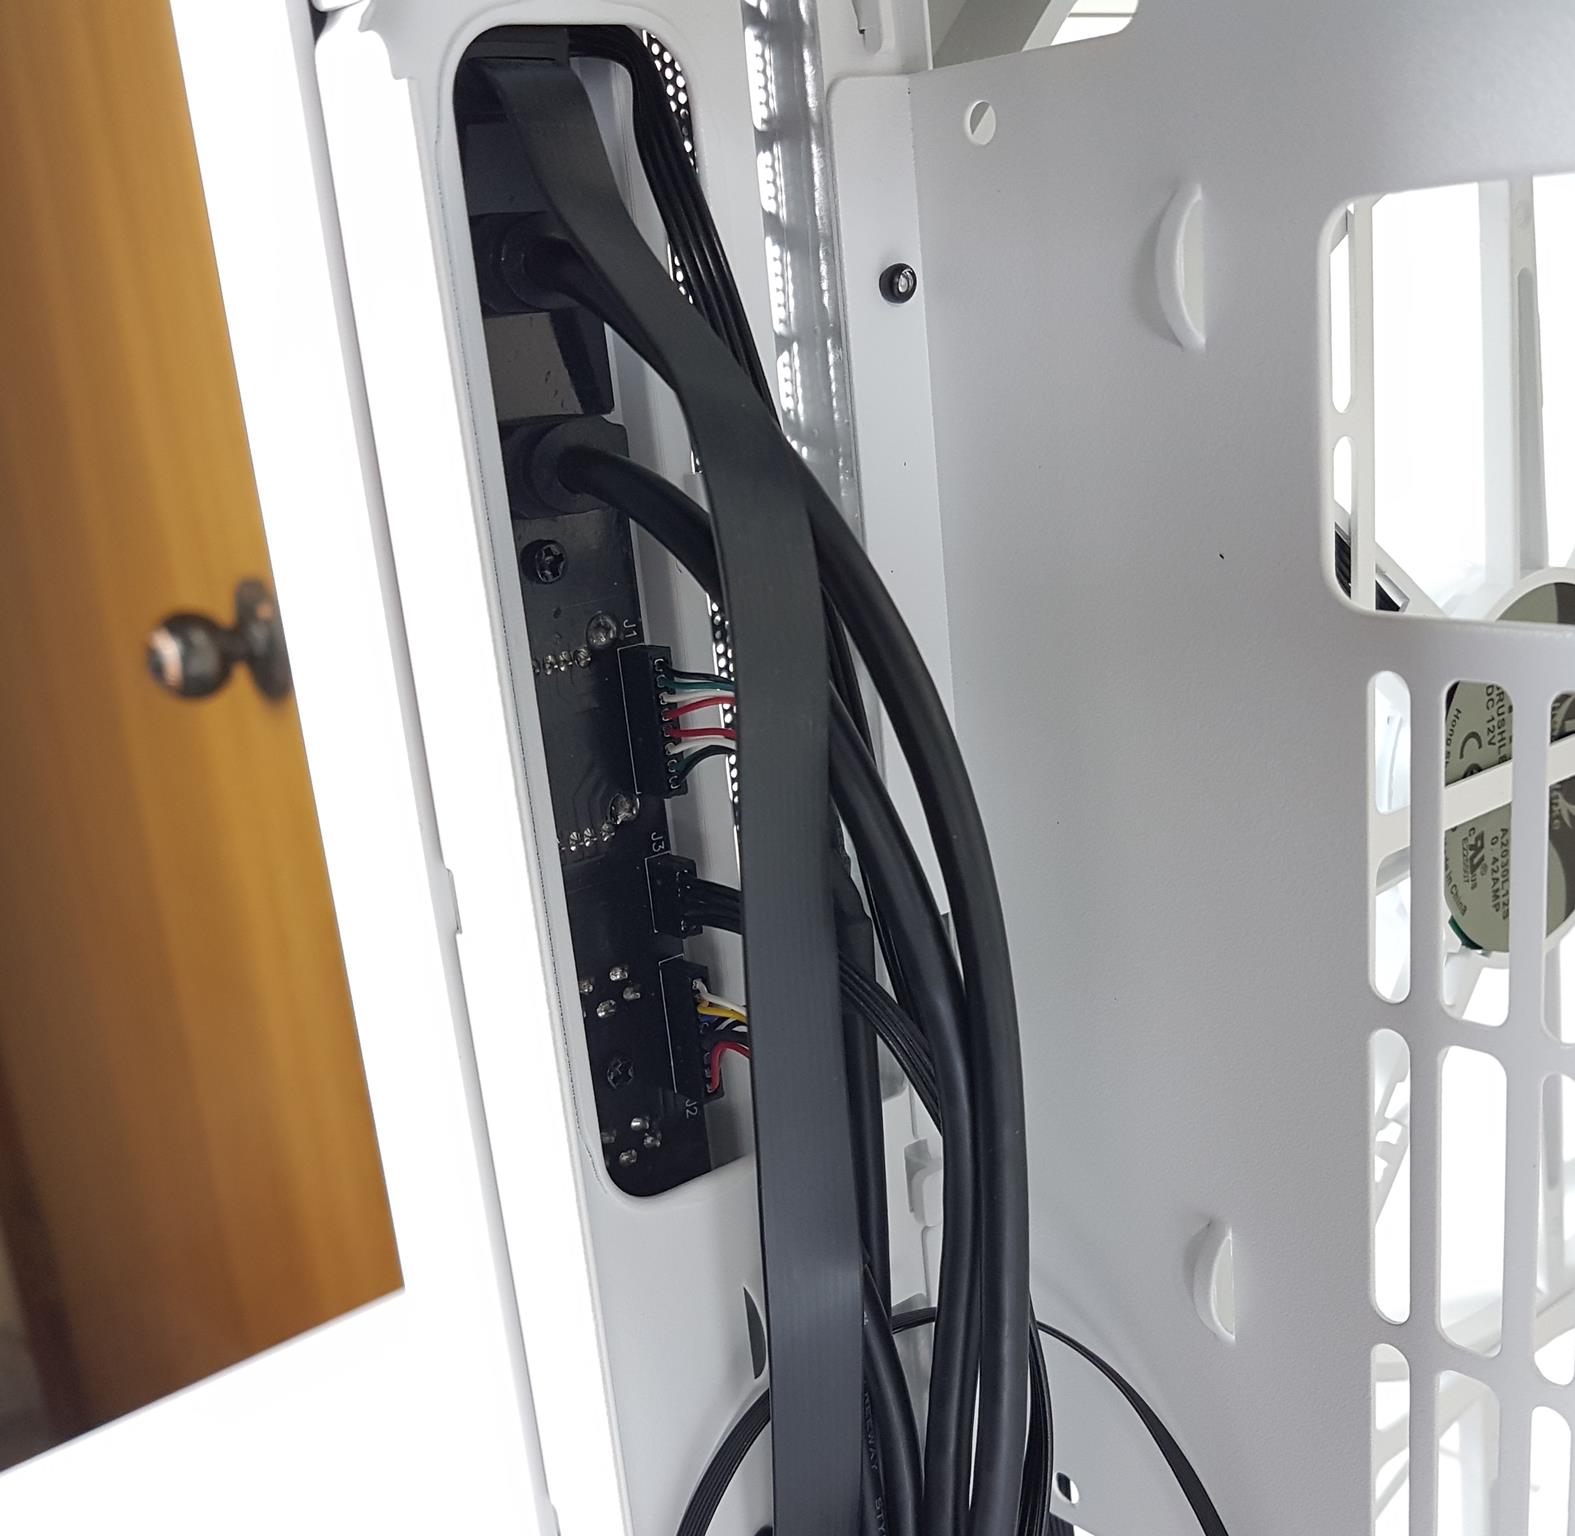
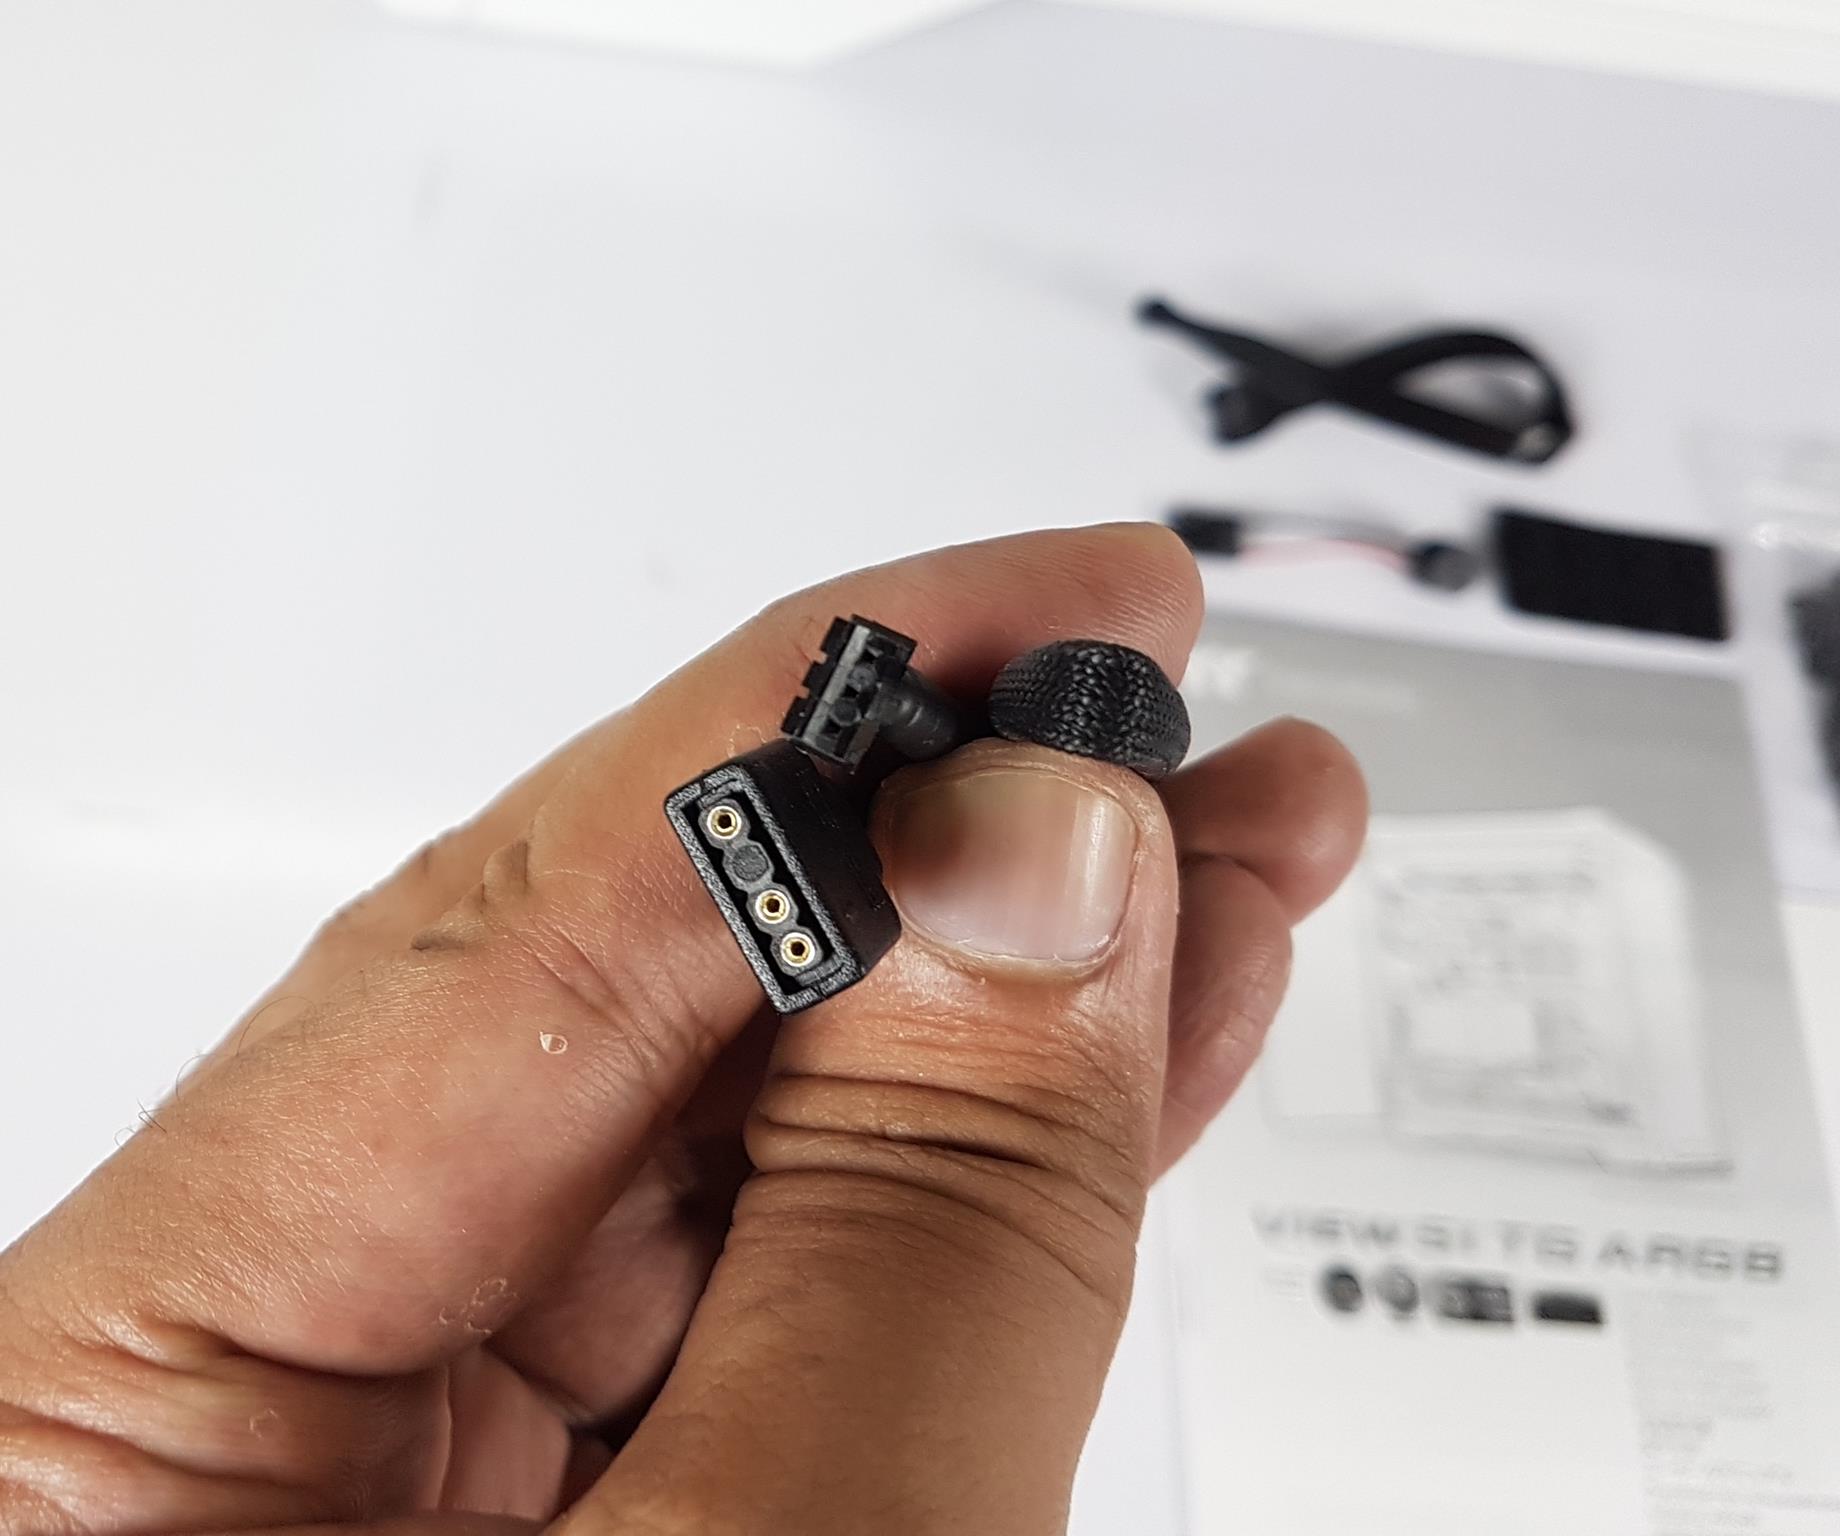
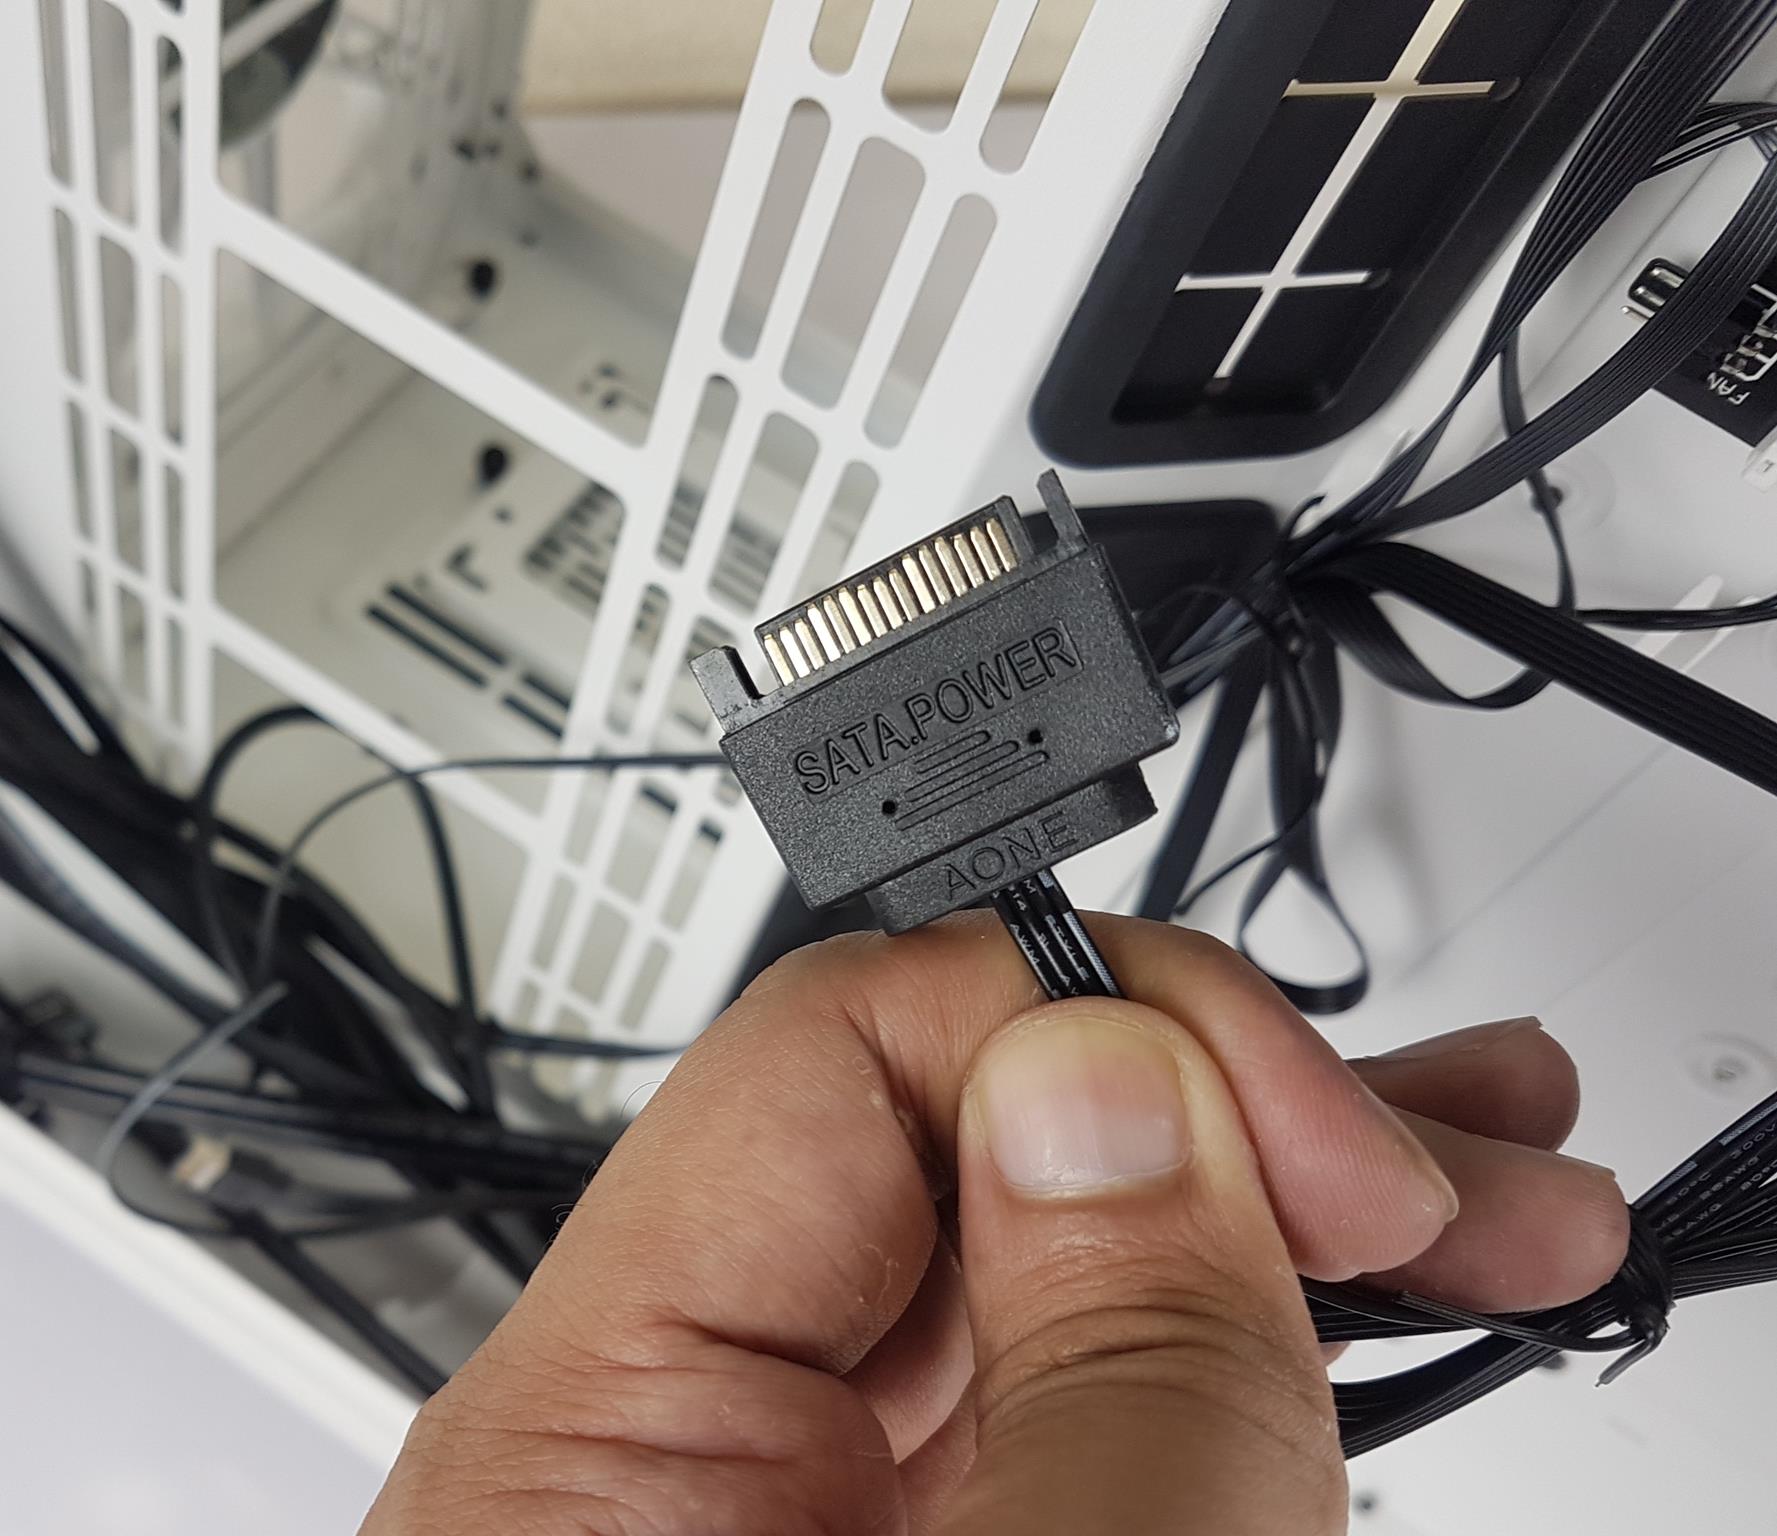
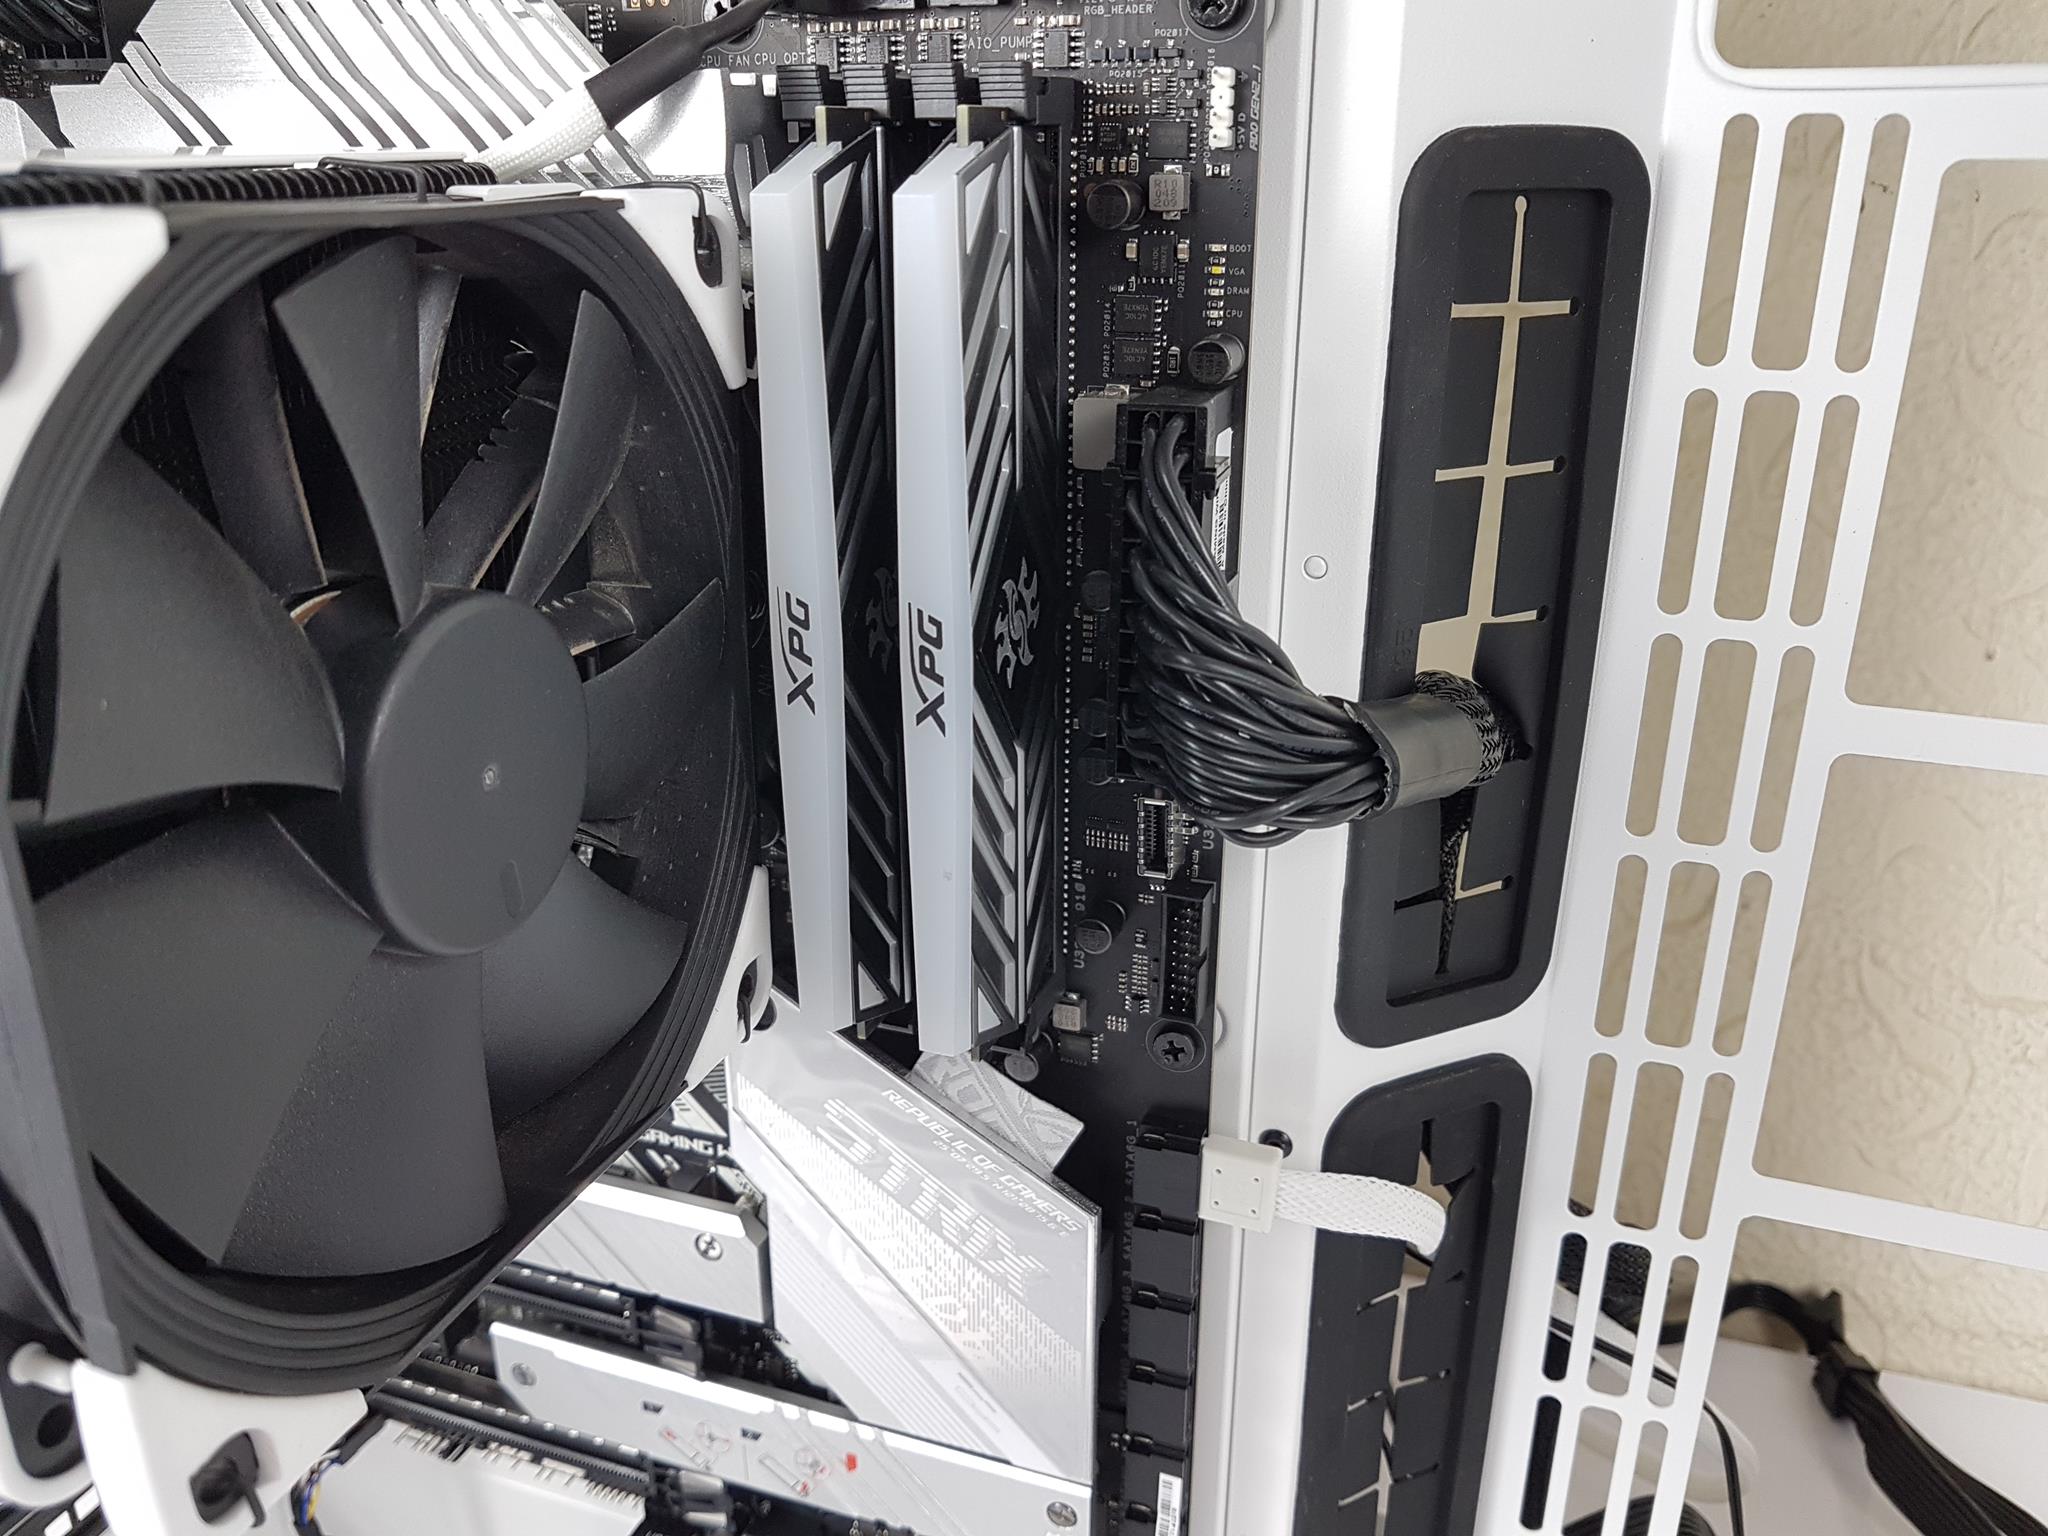
side connector to be installed on the standard 5V ARGB header on the motherboard.
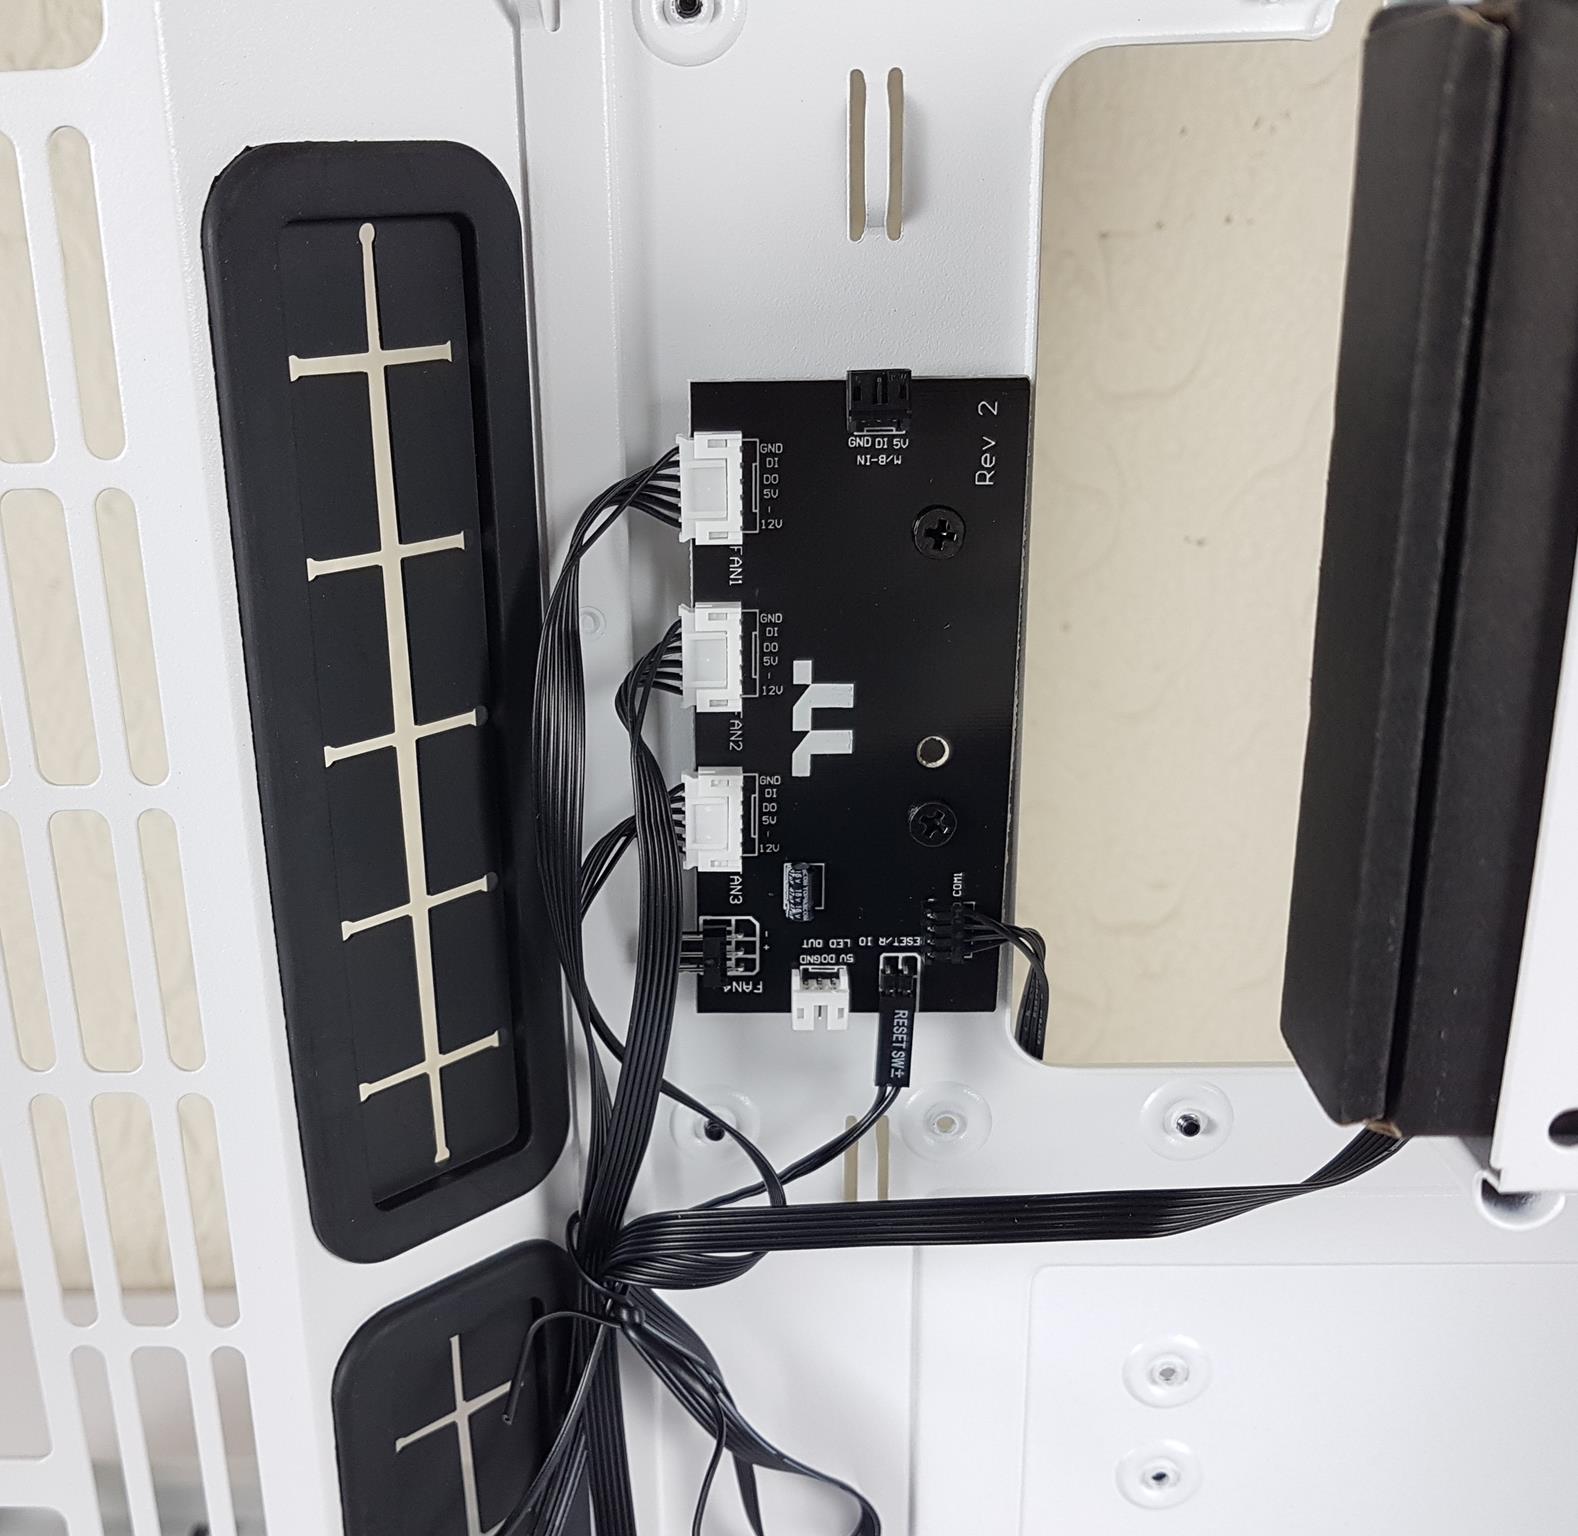
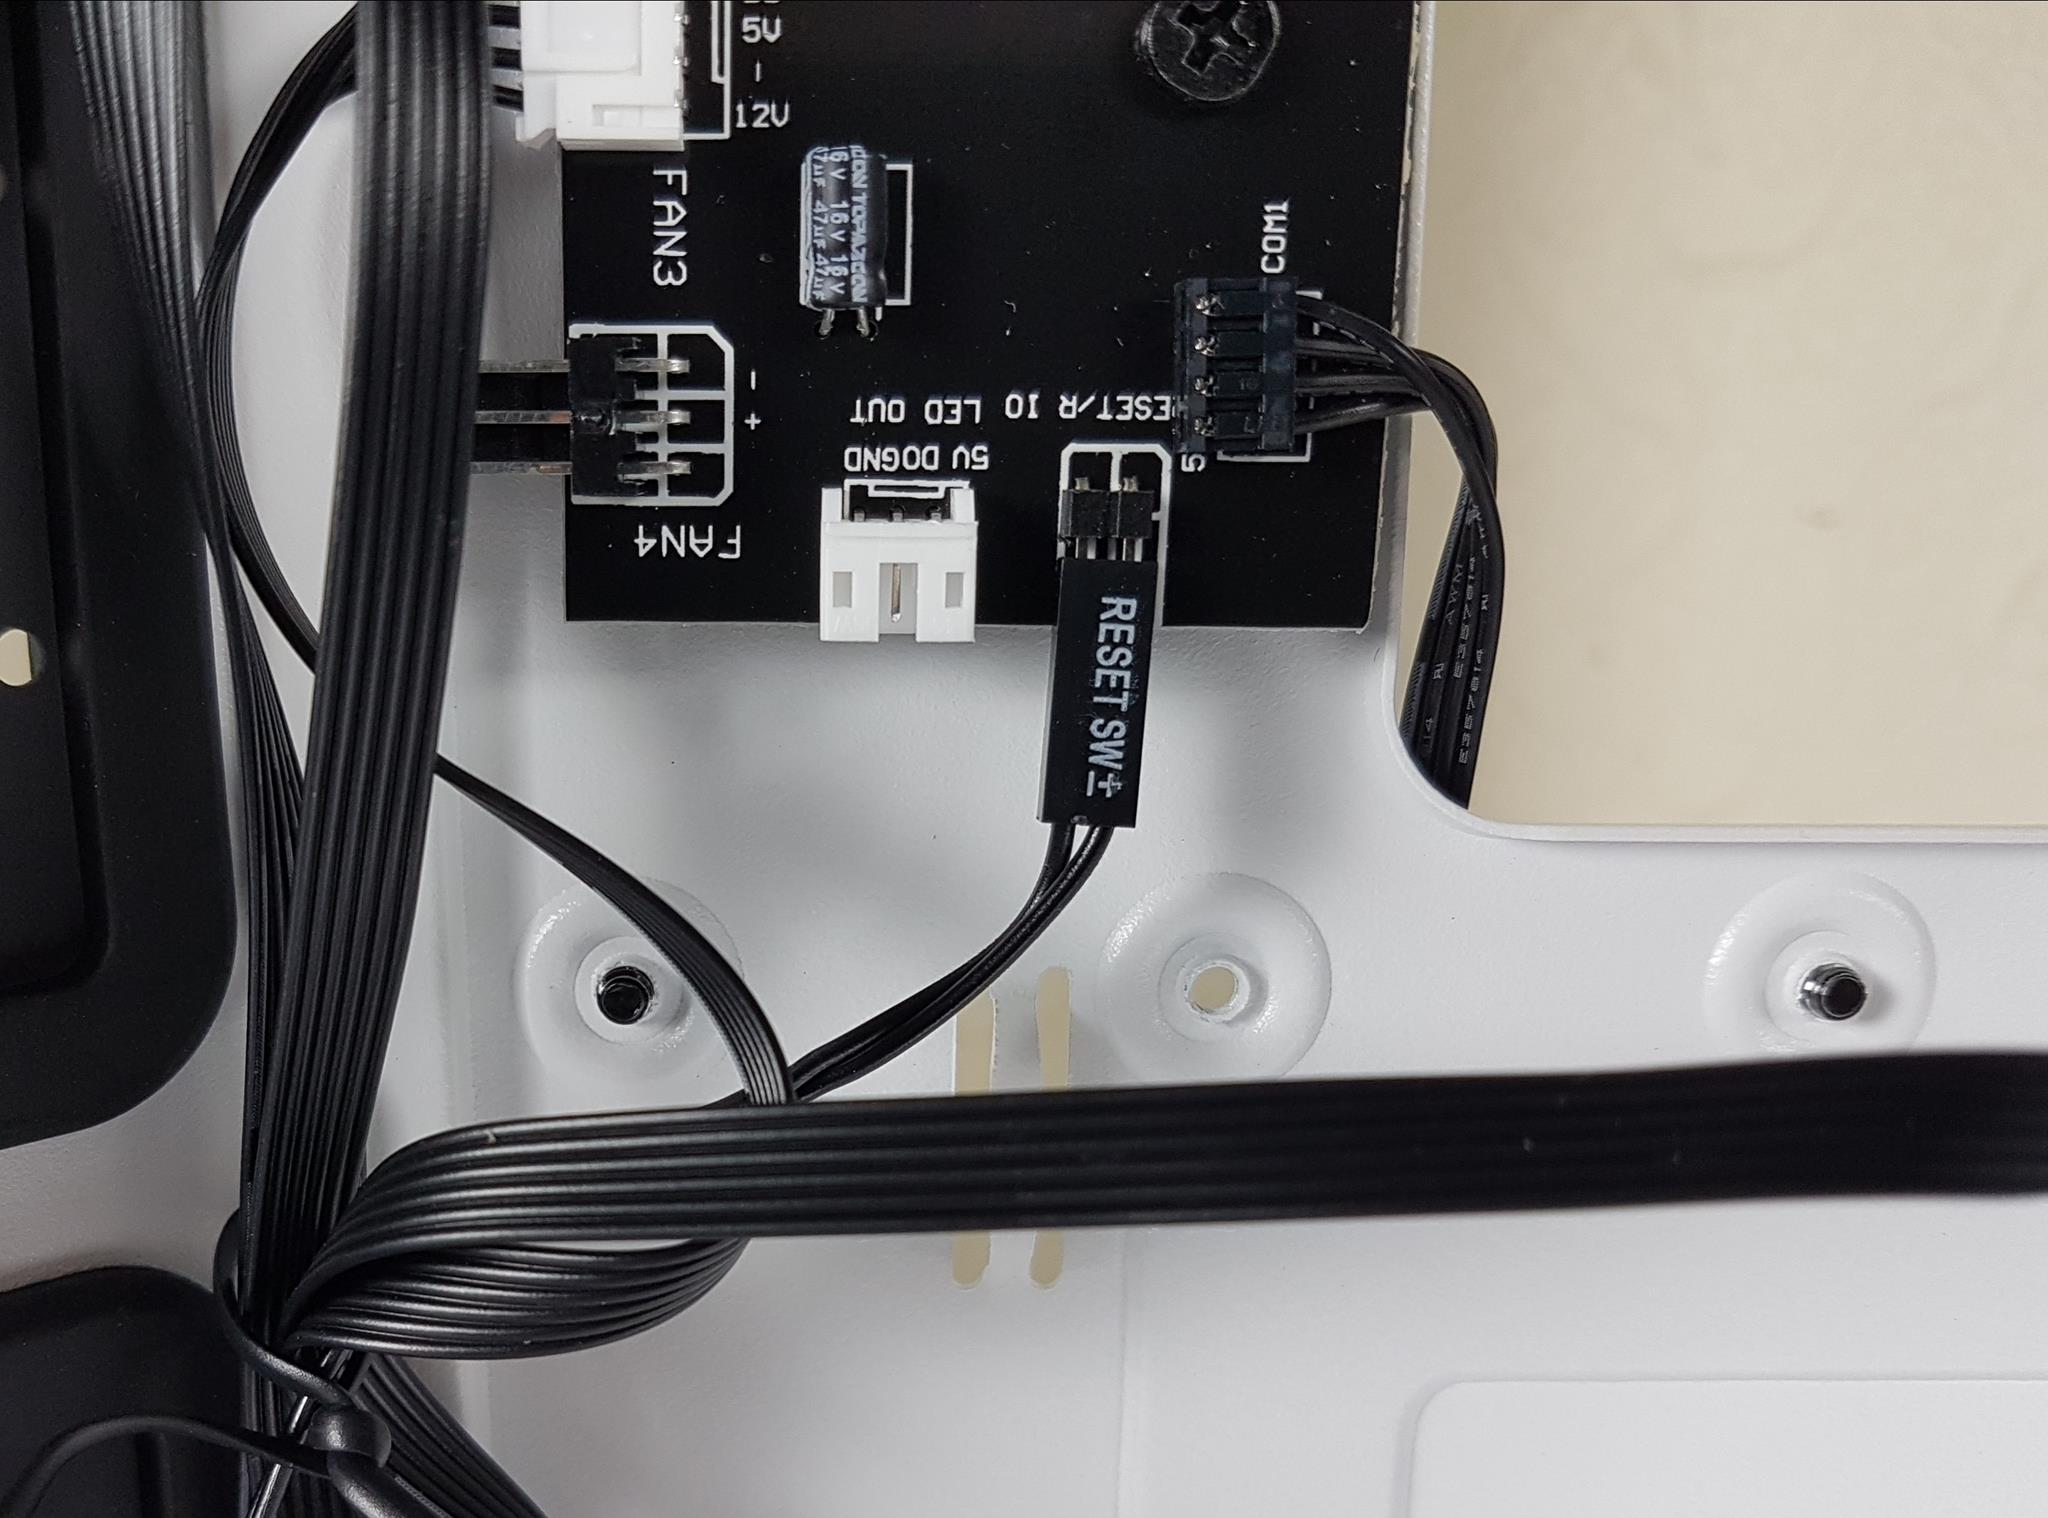
Thermaltake employs proprietary connectors for the 3x ARGB fans, linking them to the SATA-powered RGB hub. This hub offers motherboard connectivity, facilitated by the provided Motherboard Sync cable. The cable connects to the top header of the hub, with the other end attaching to the standard 5V ARGB header on the motherboard. Worth noting is the Reset connector on the RGB hub, although it doesn’t have a reset function out of the box.
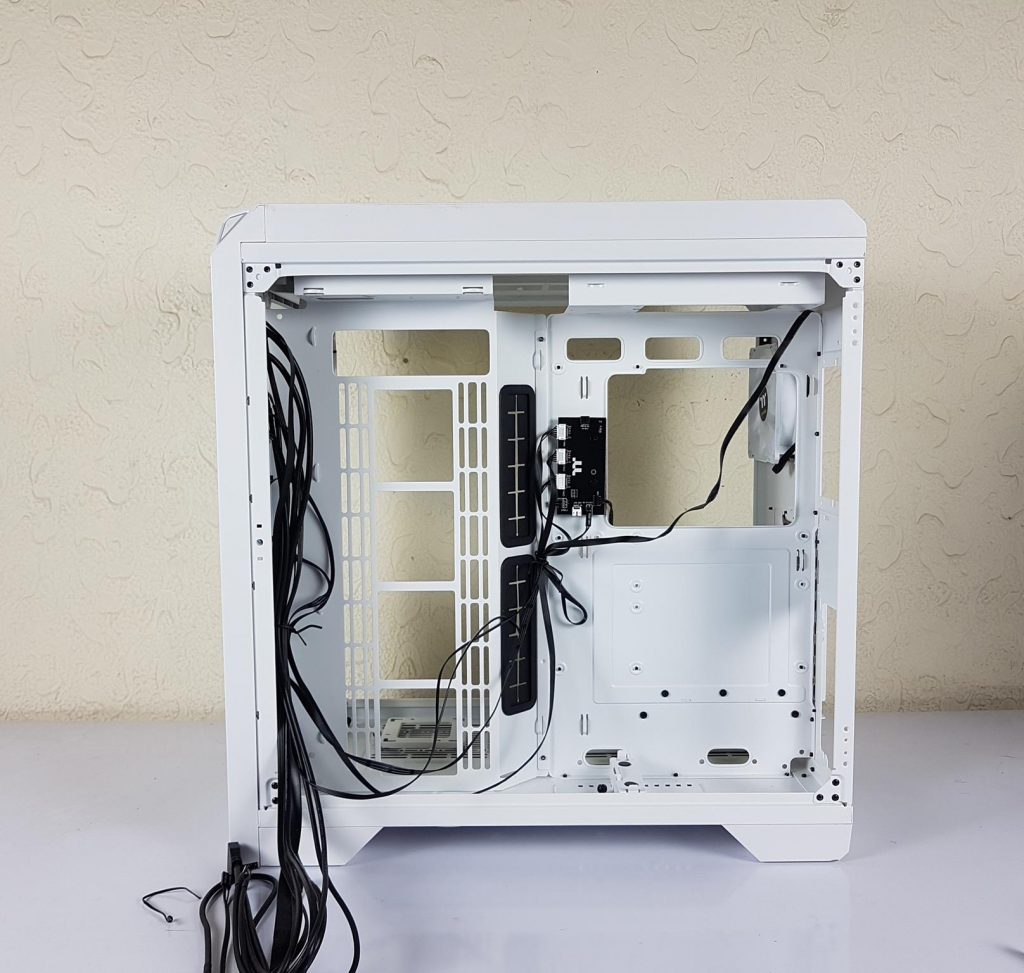
The above picture shows the back side with the HDD cage removed. We have ample cable management space here.
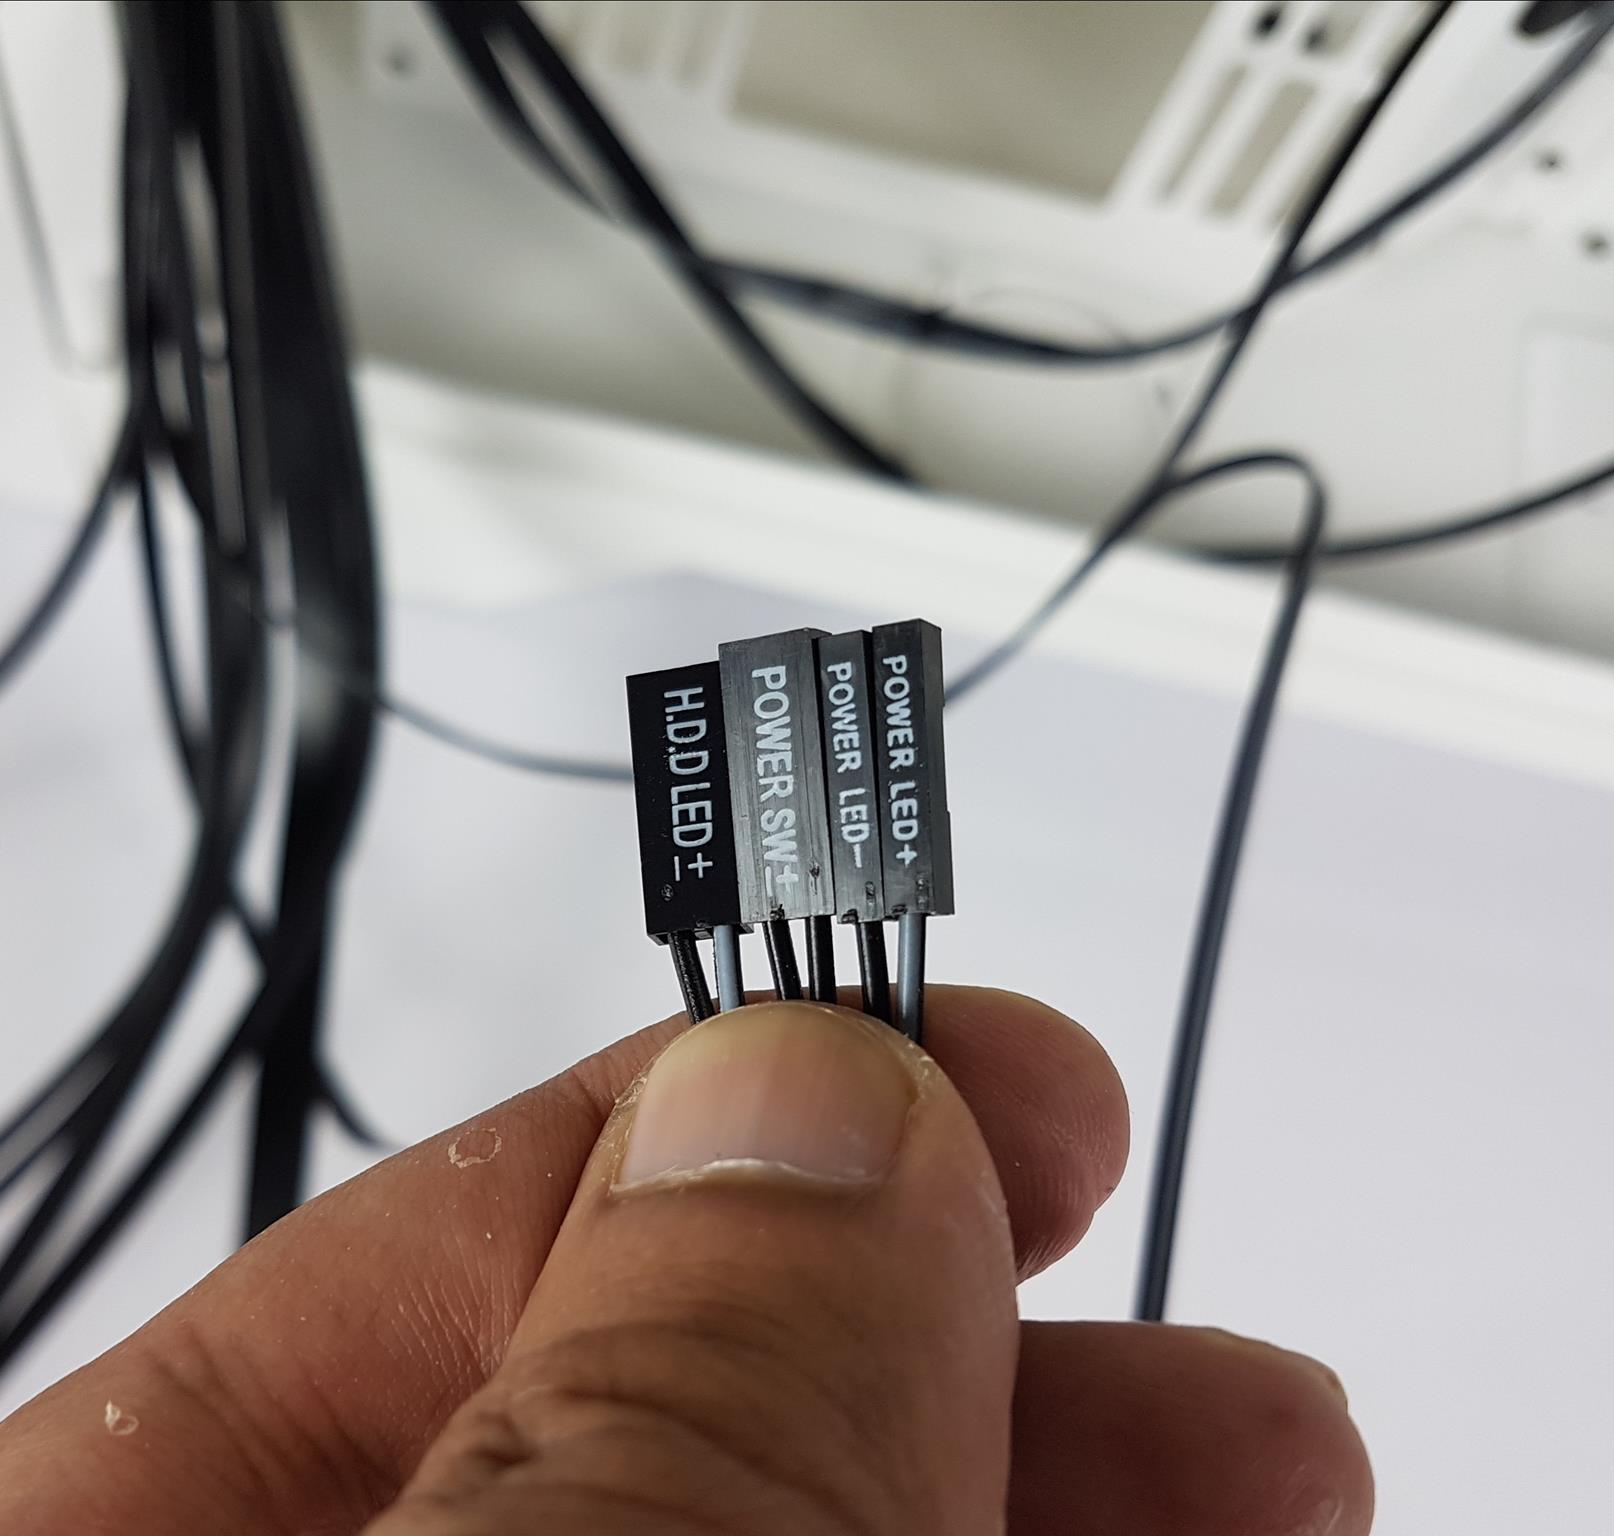
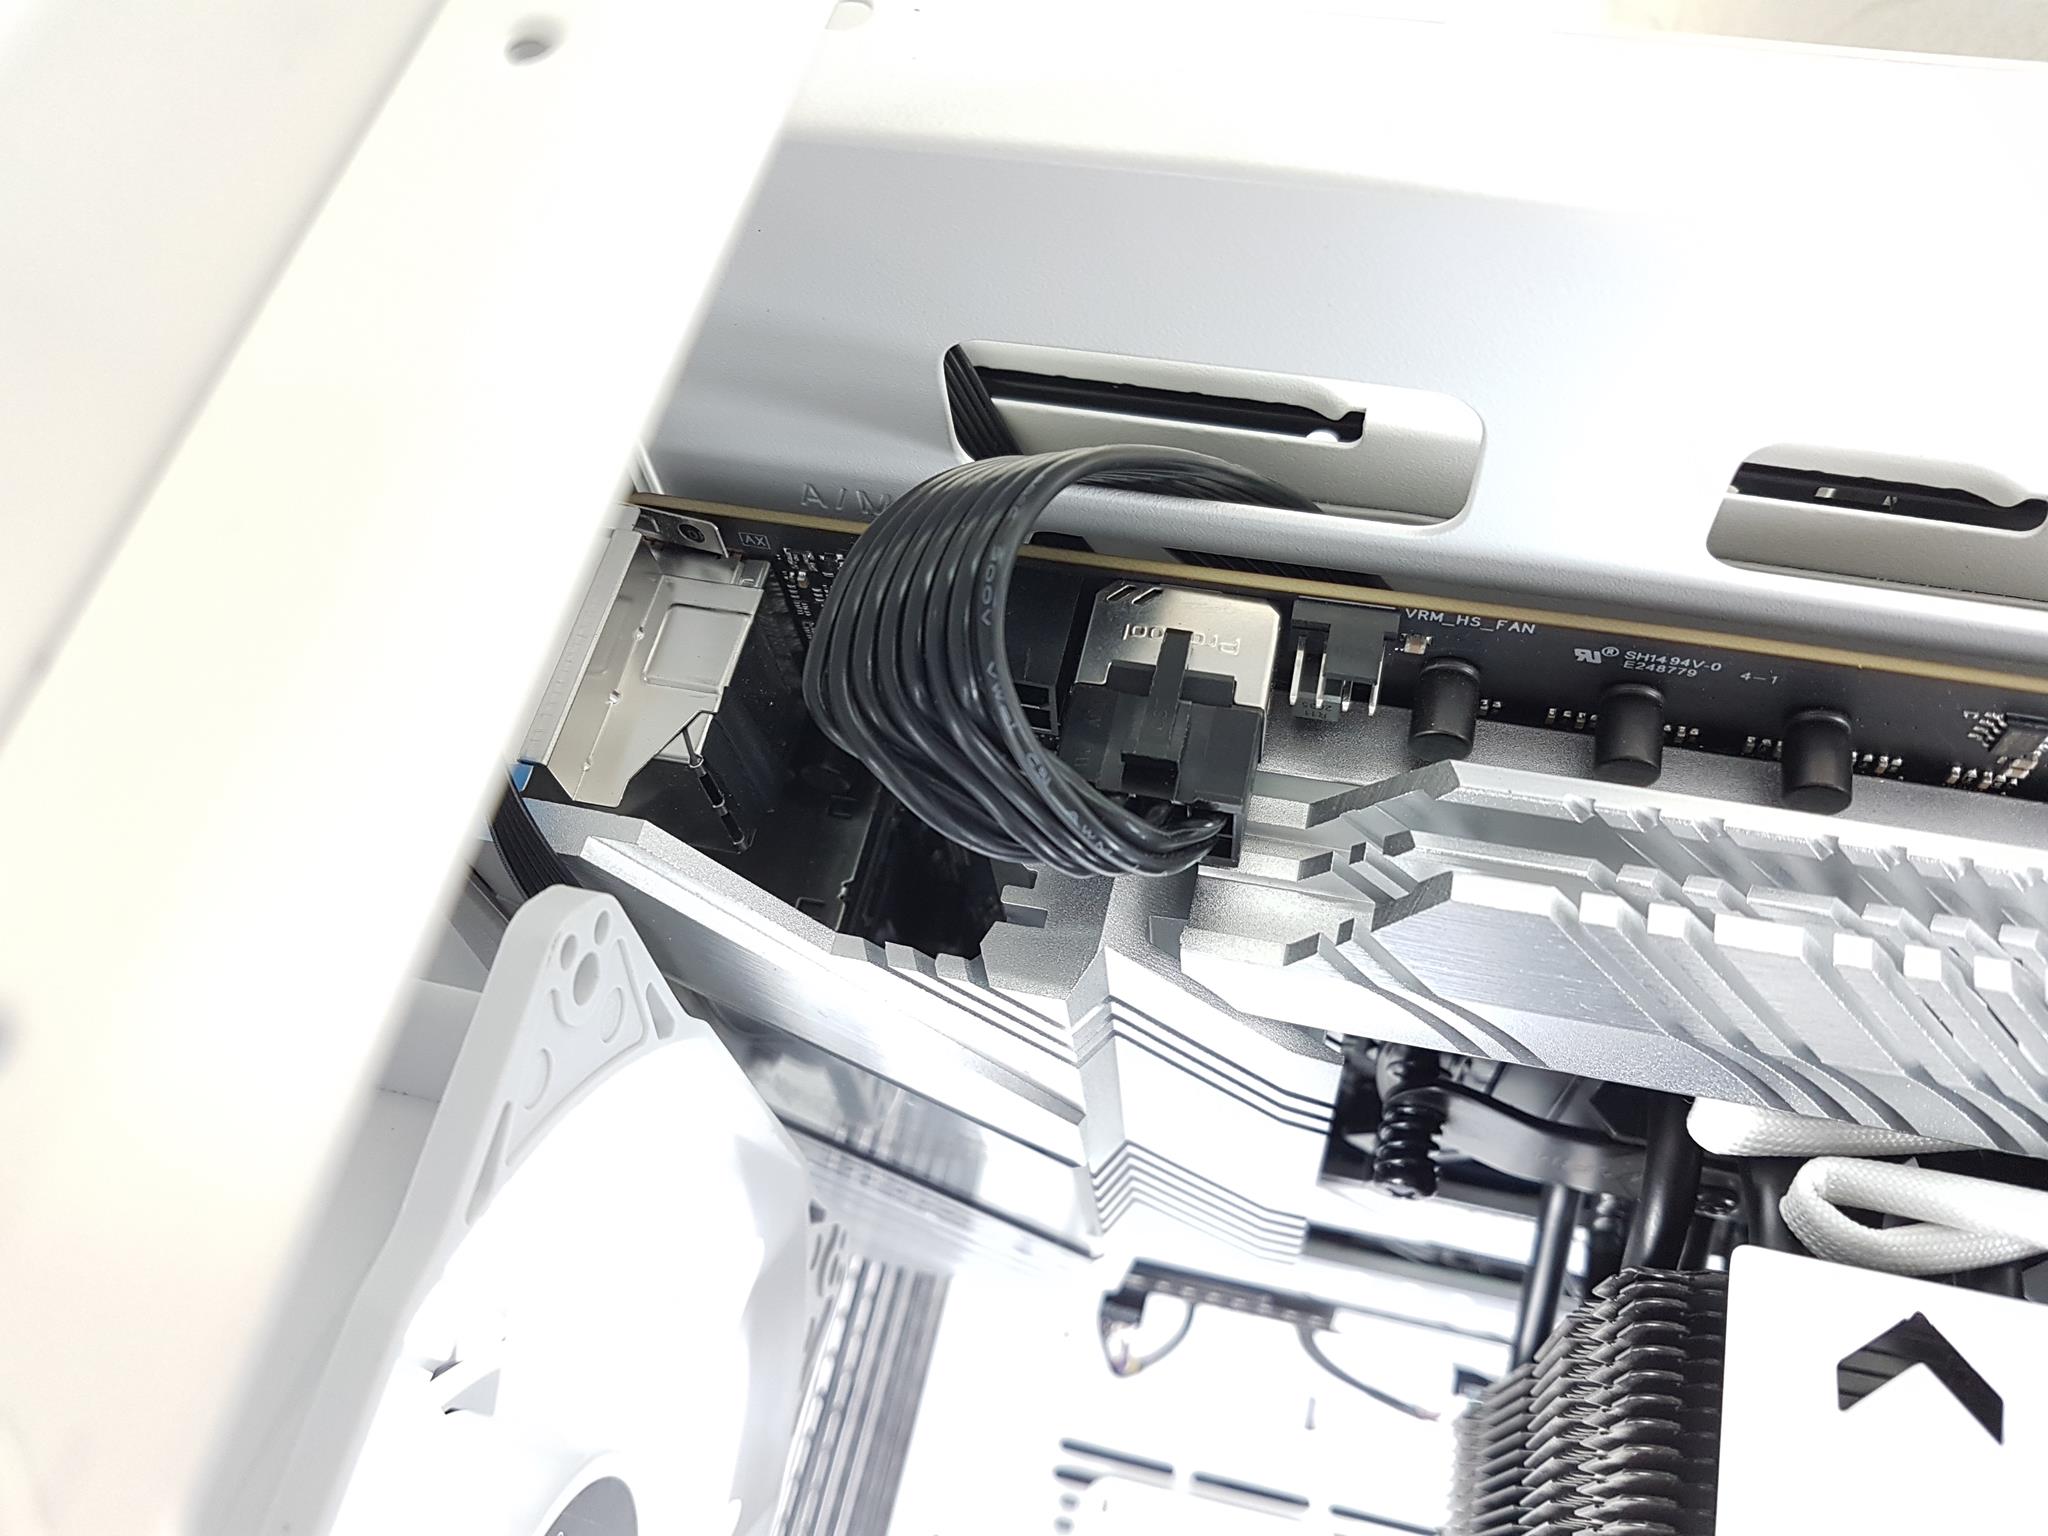
You can see the visuals of the connectors below:
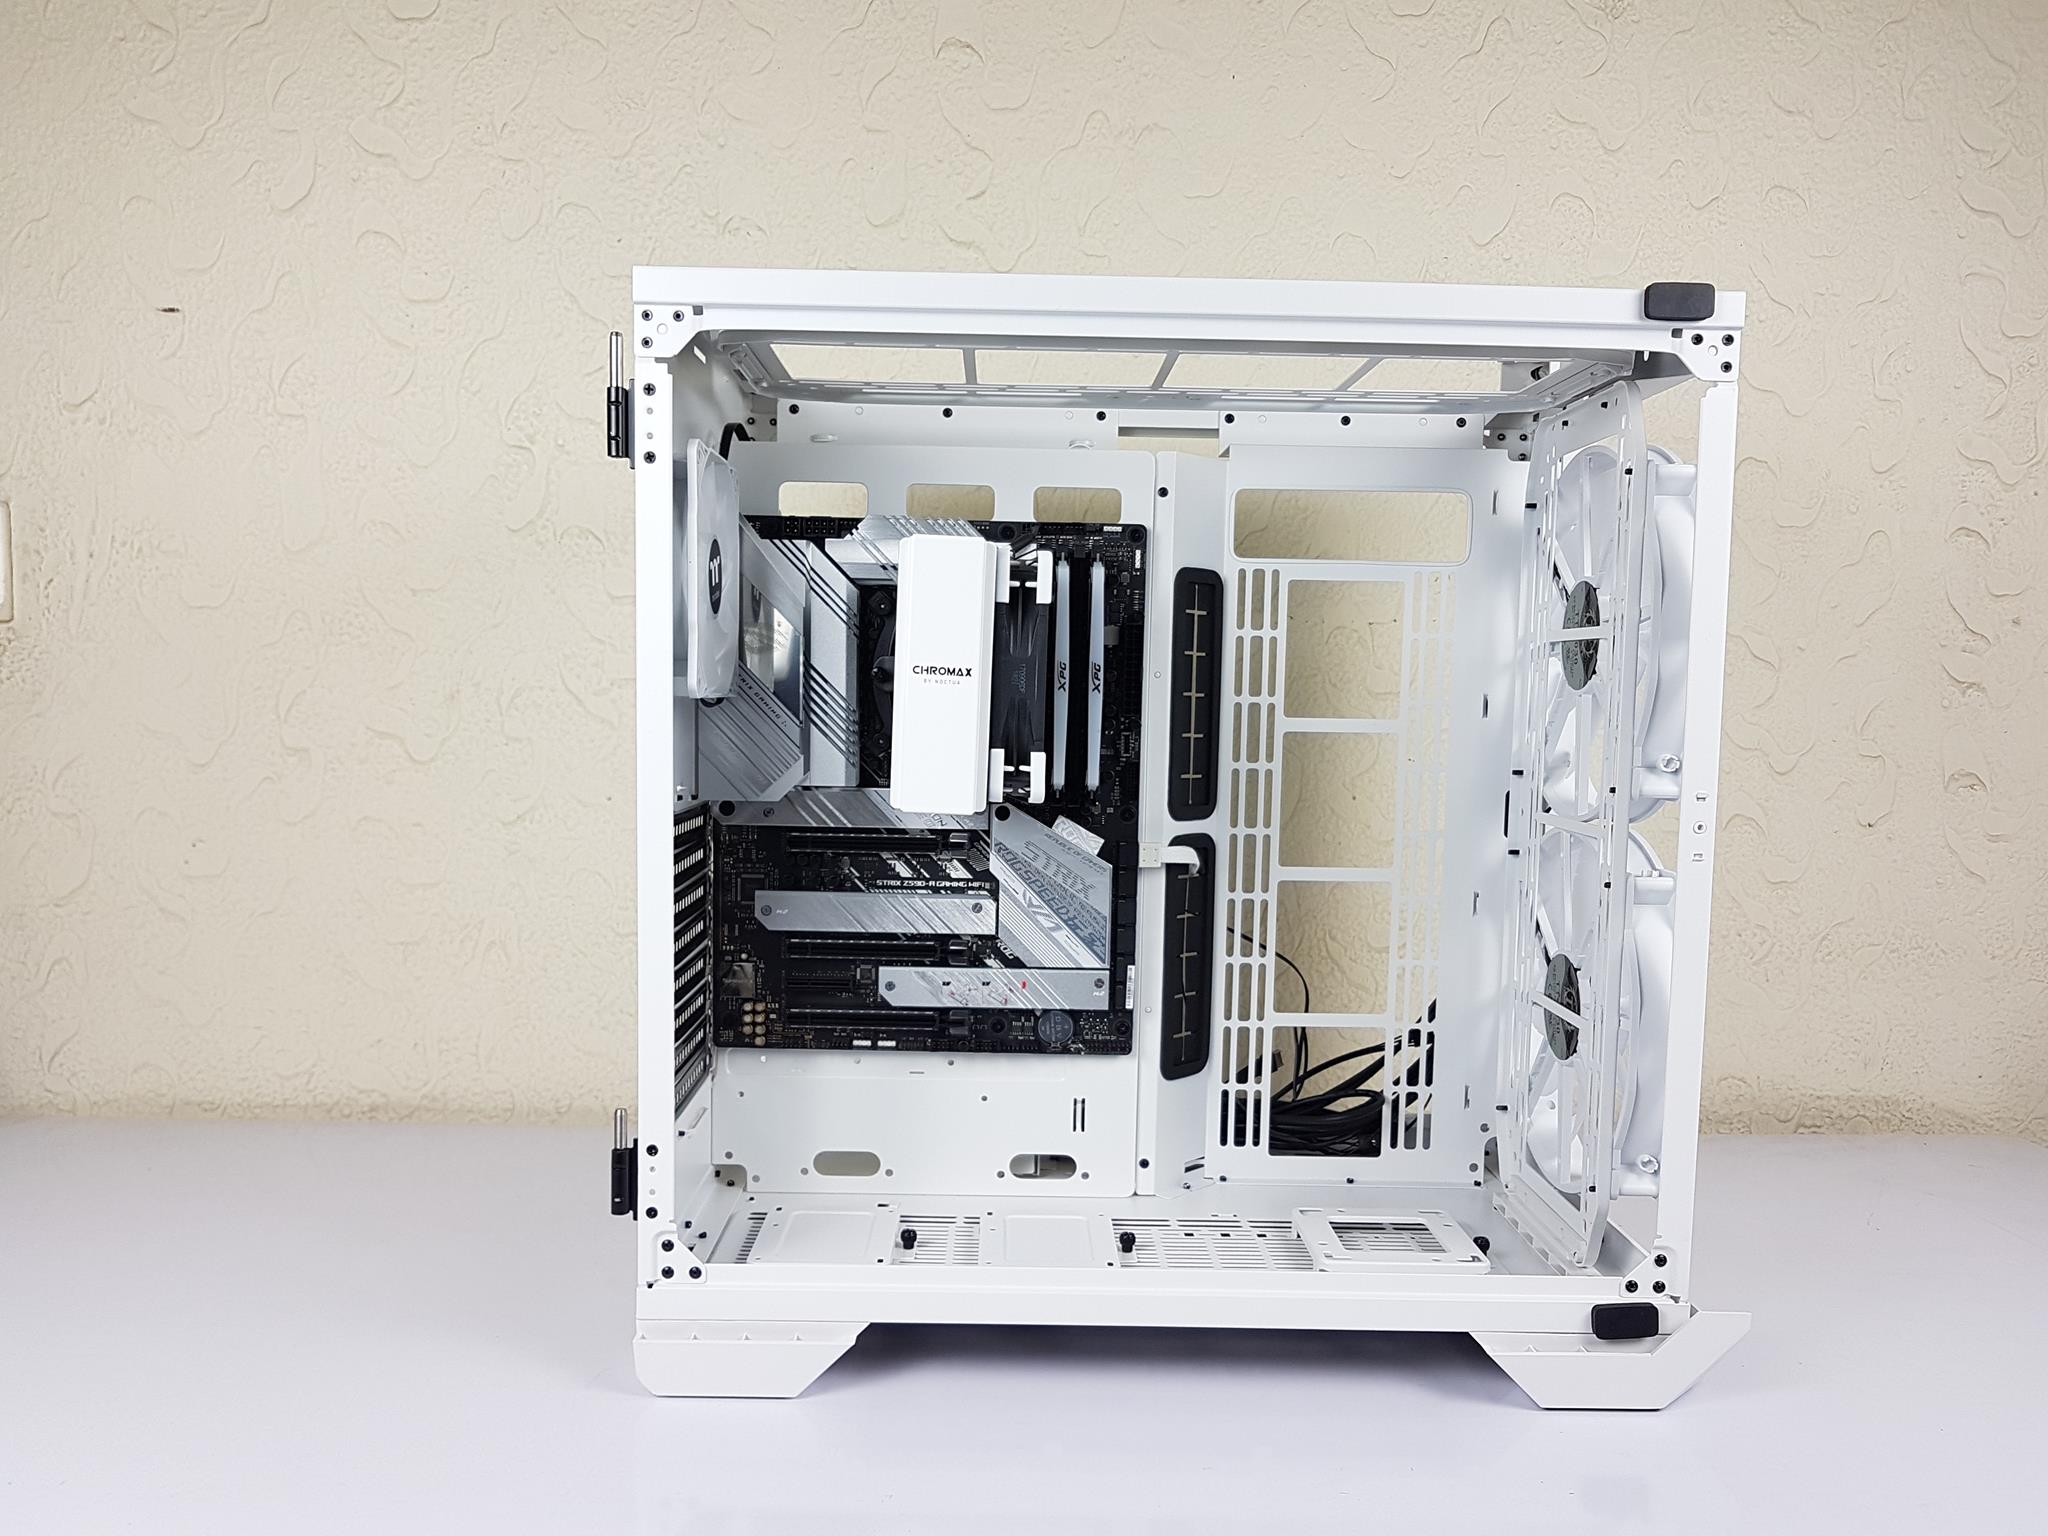
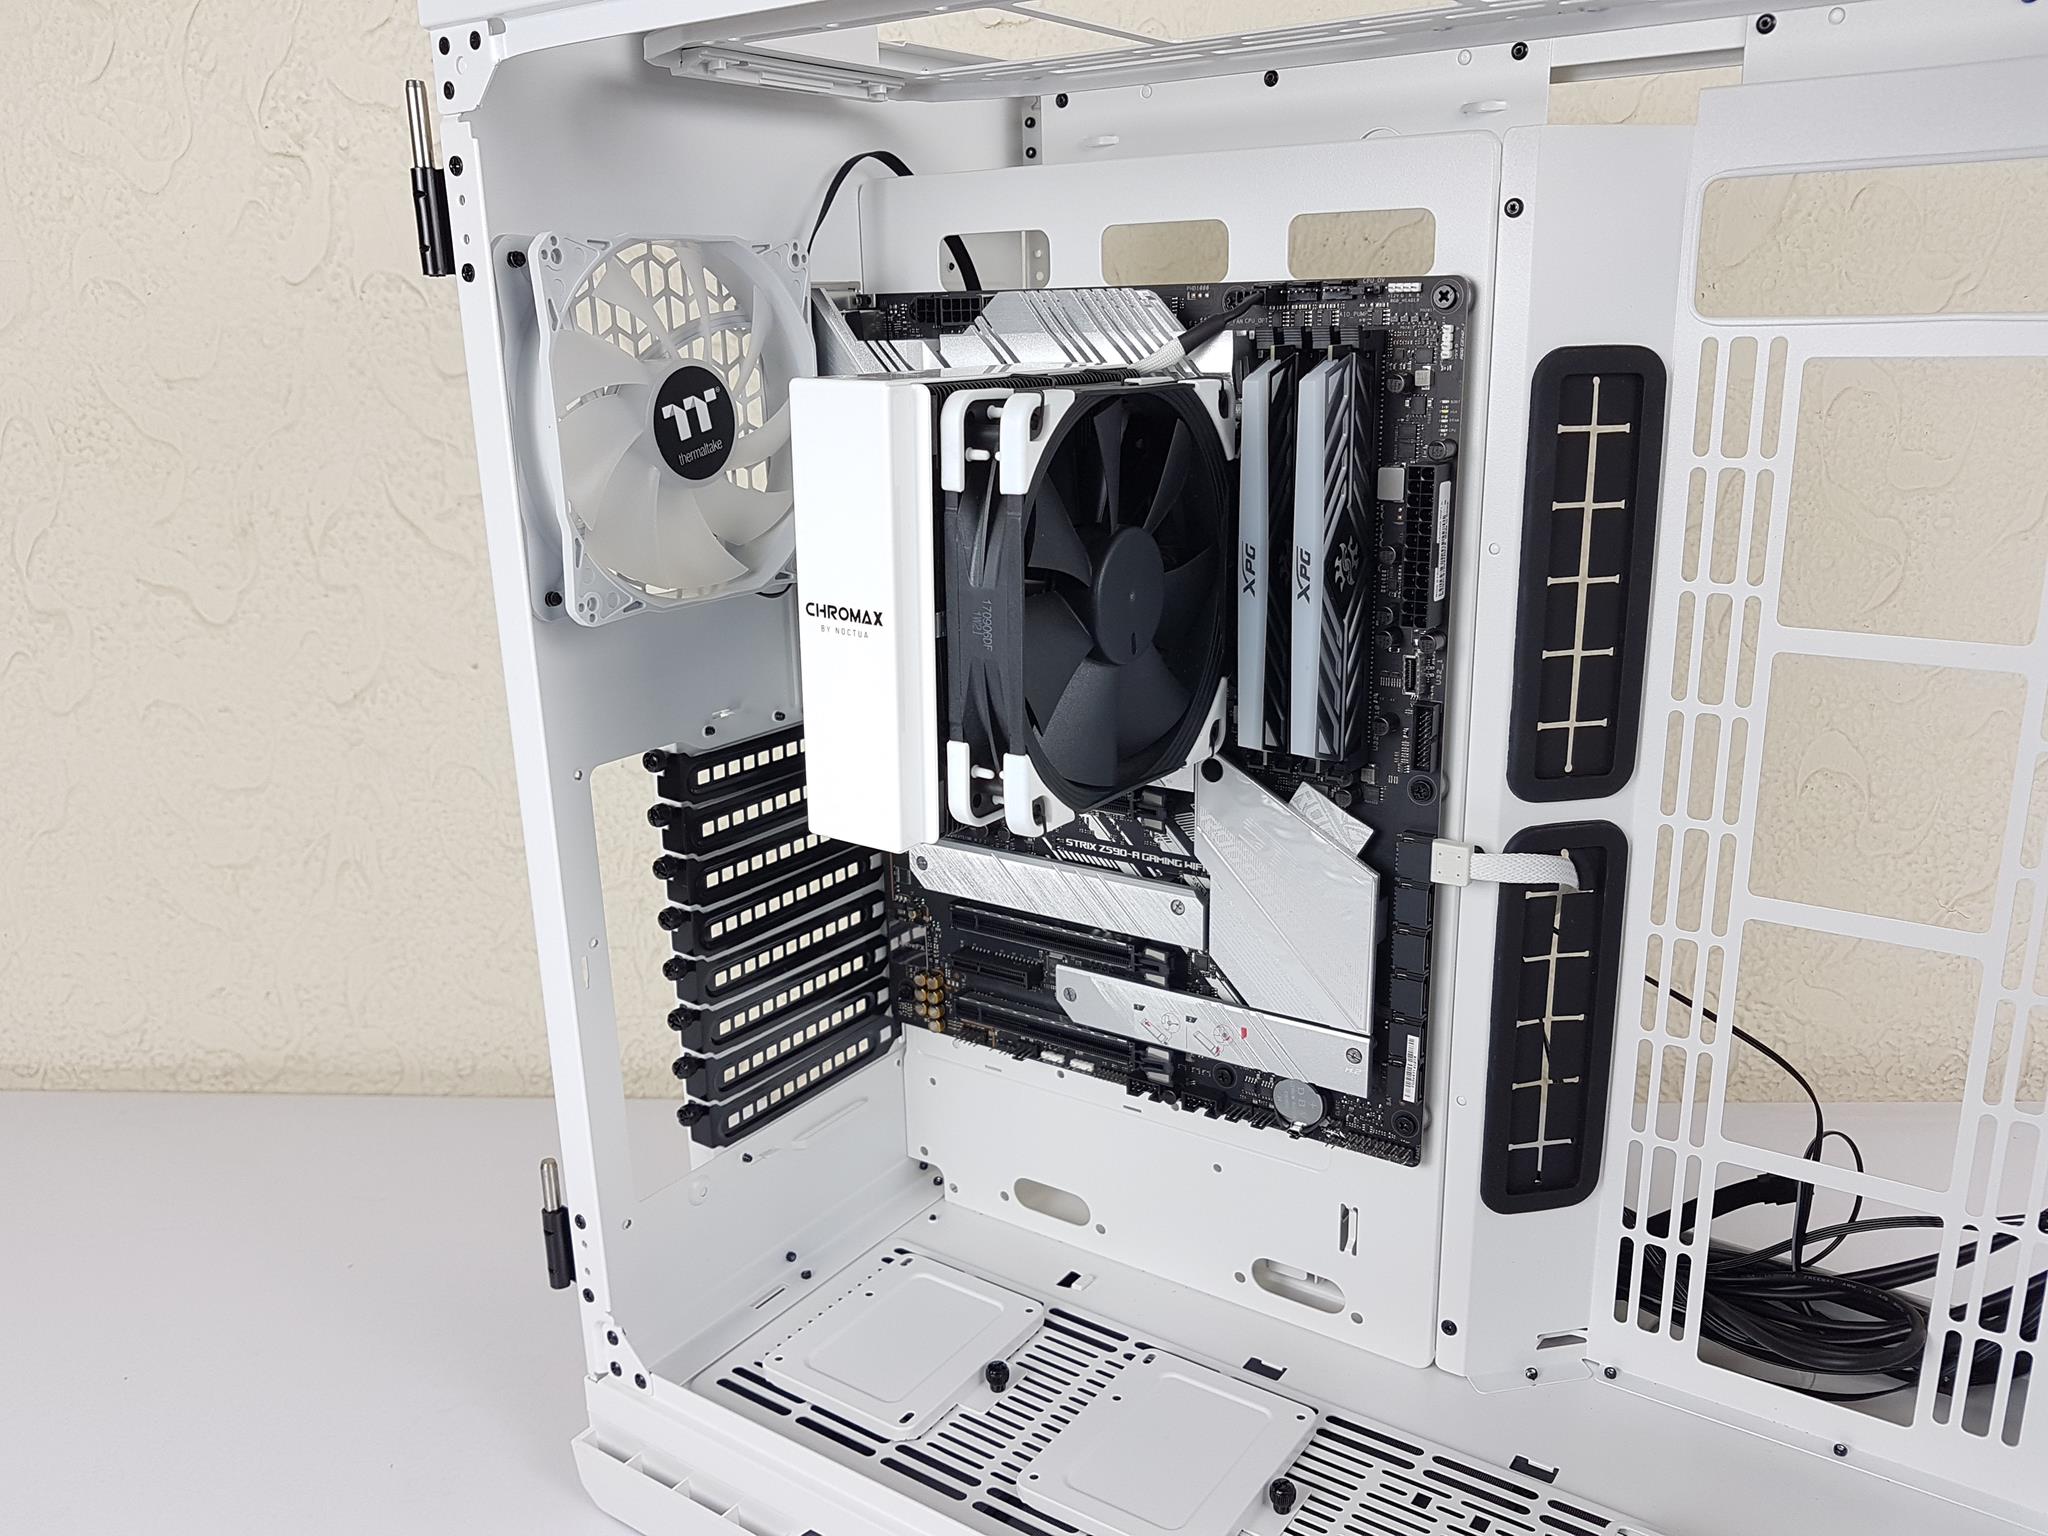
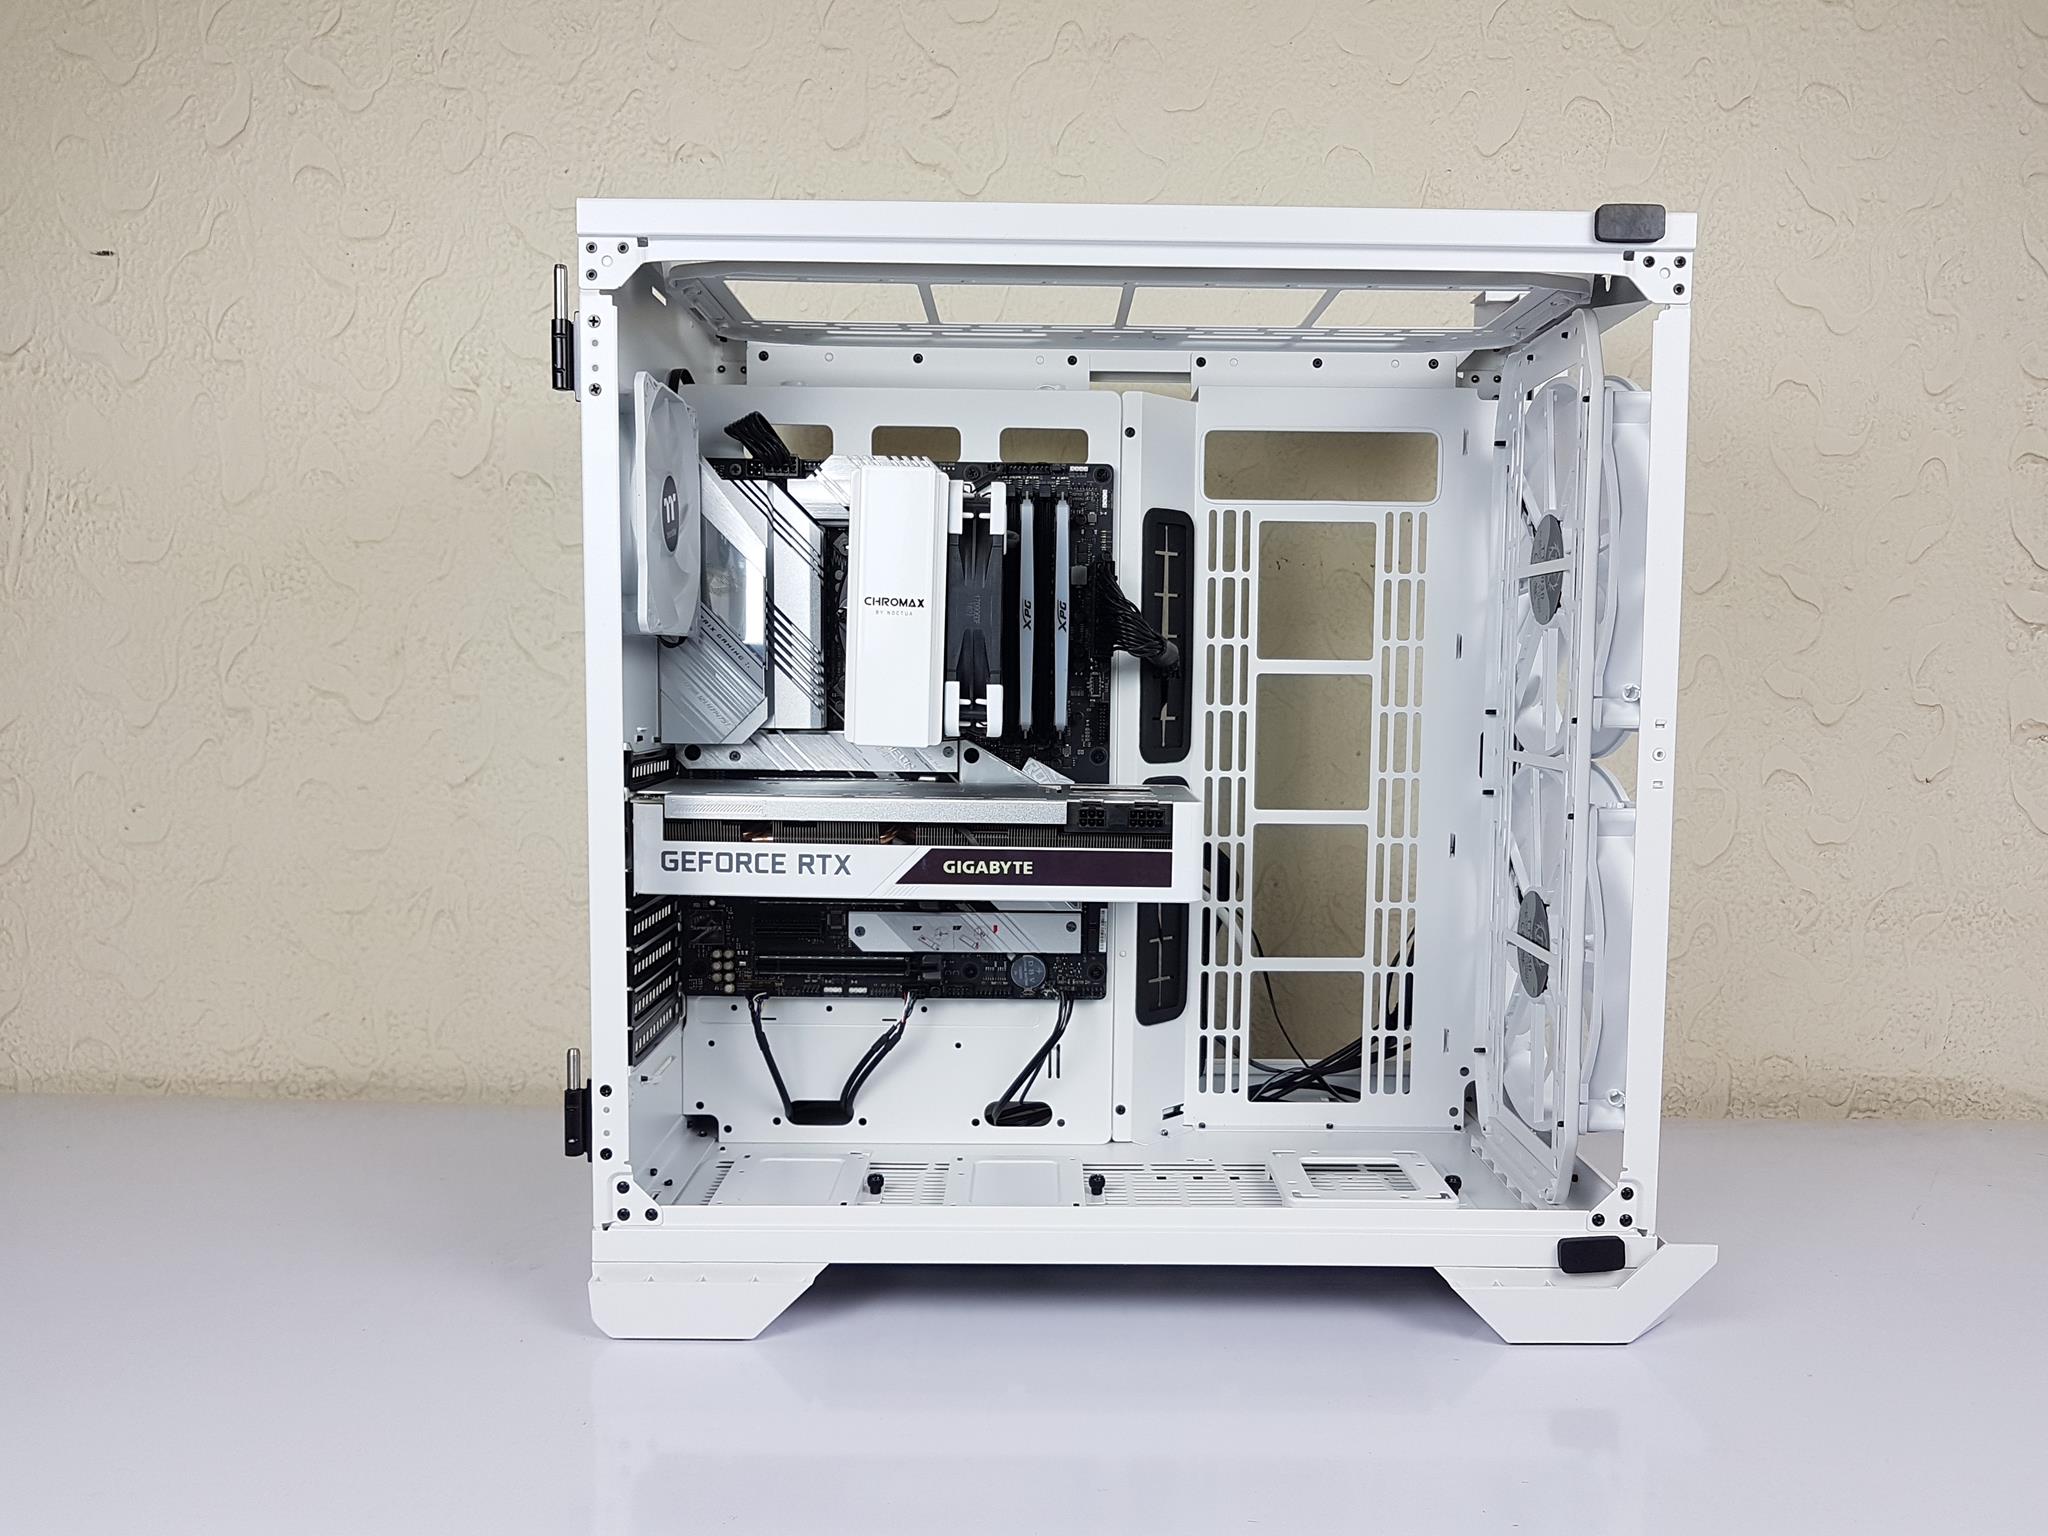
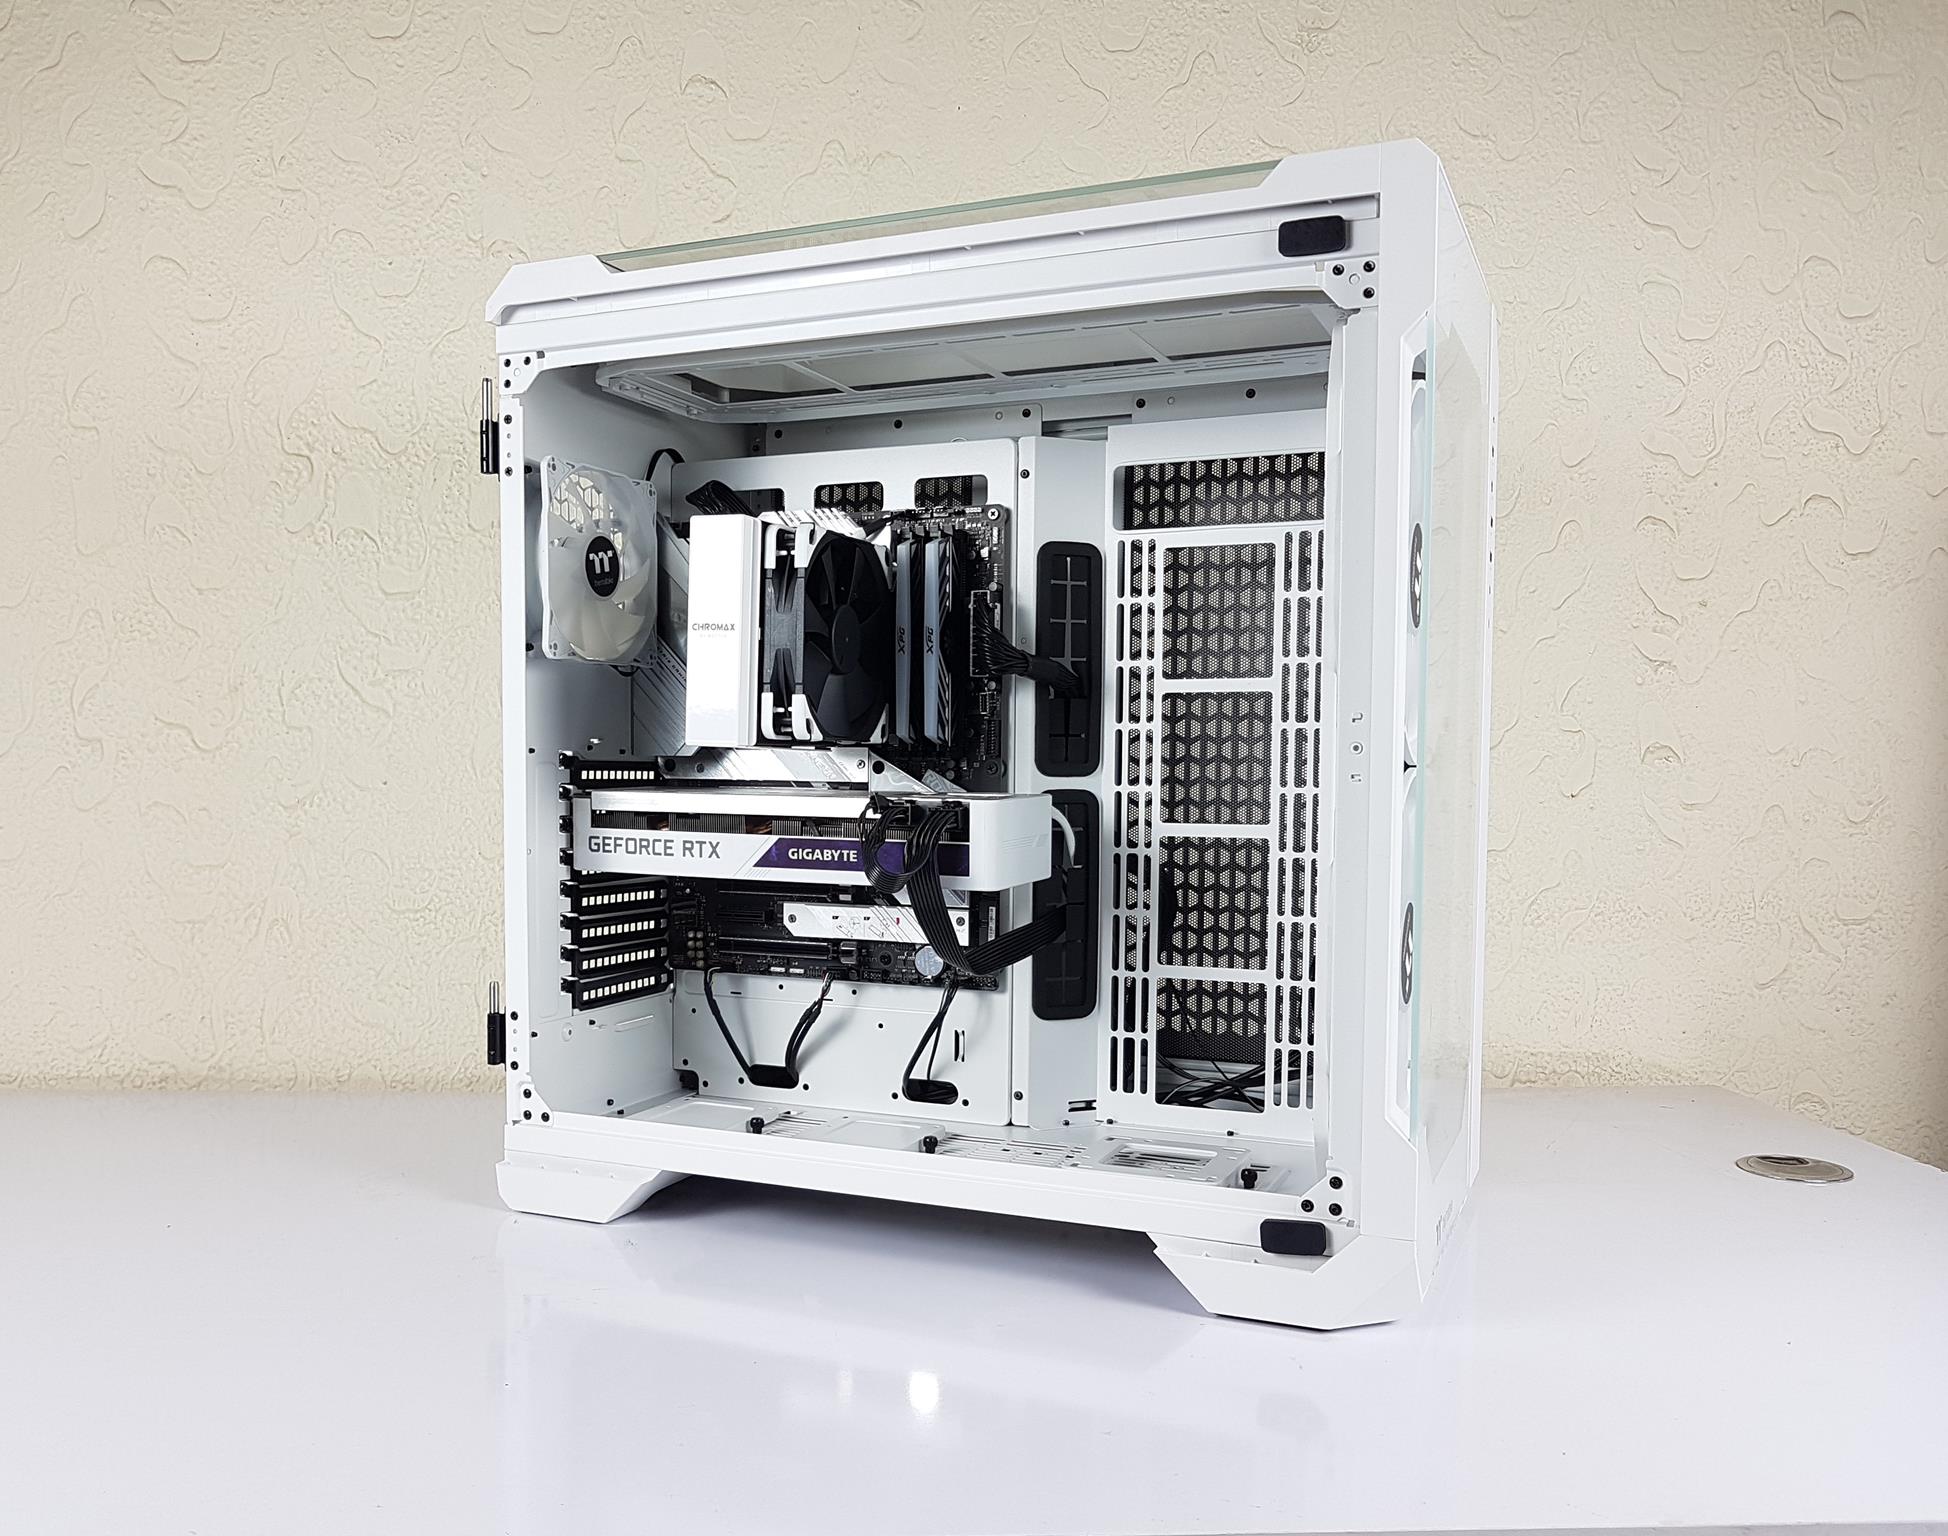
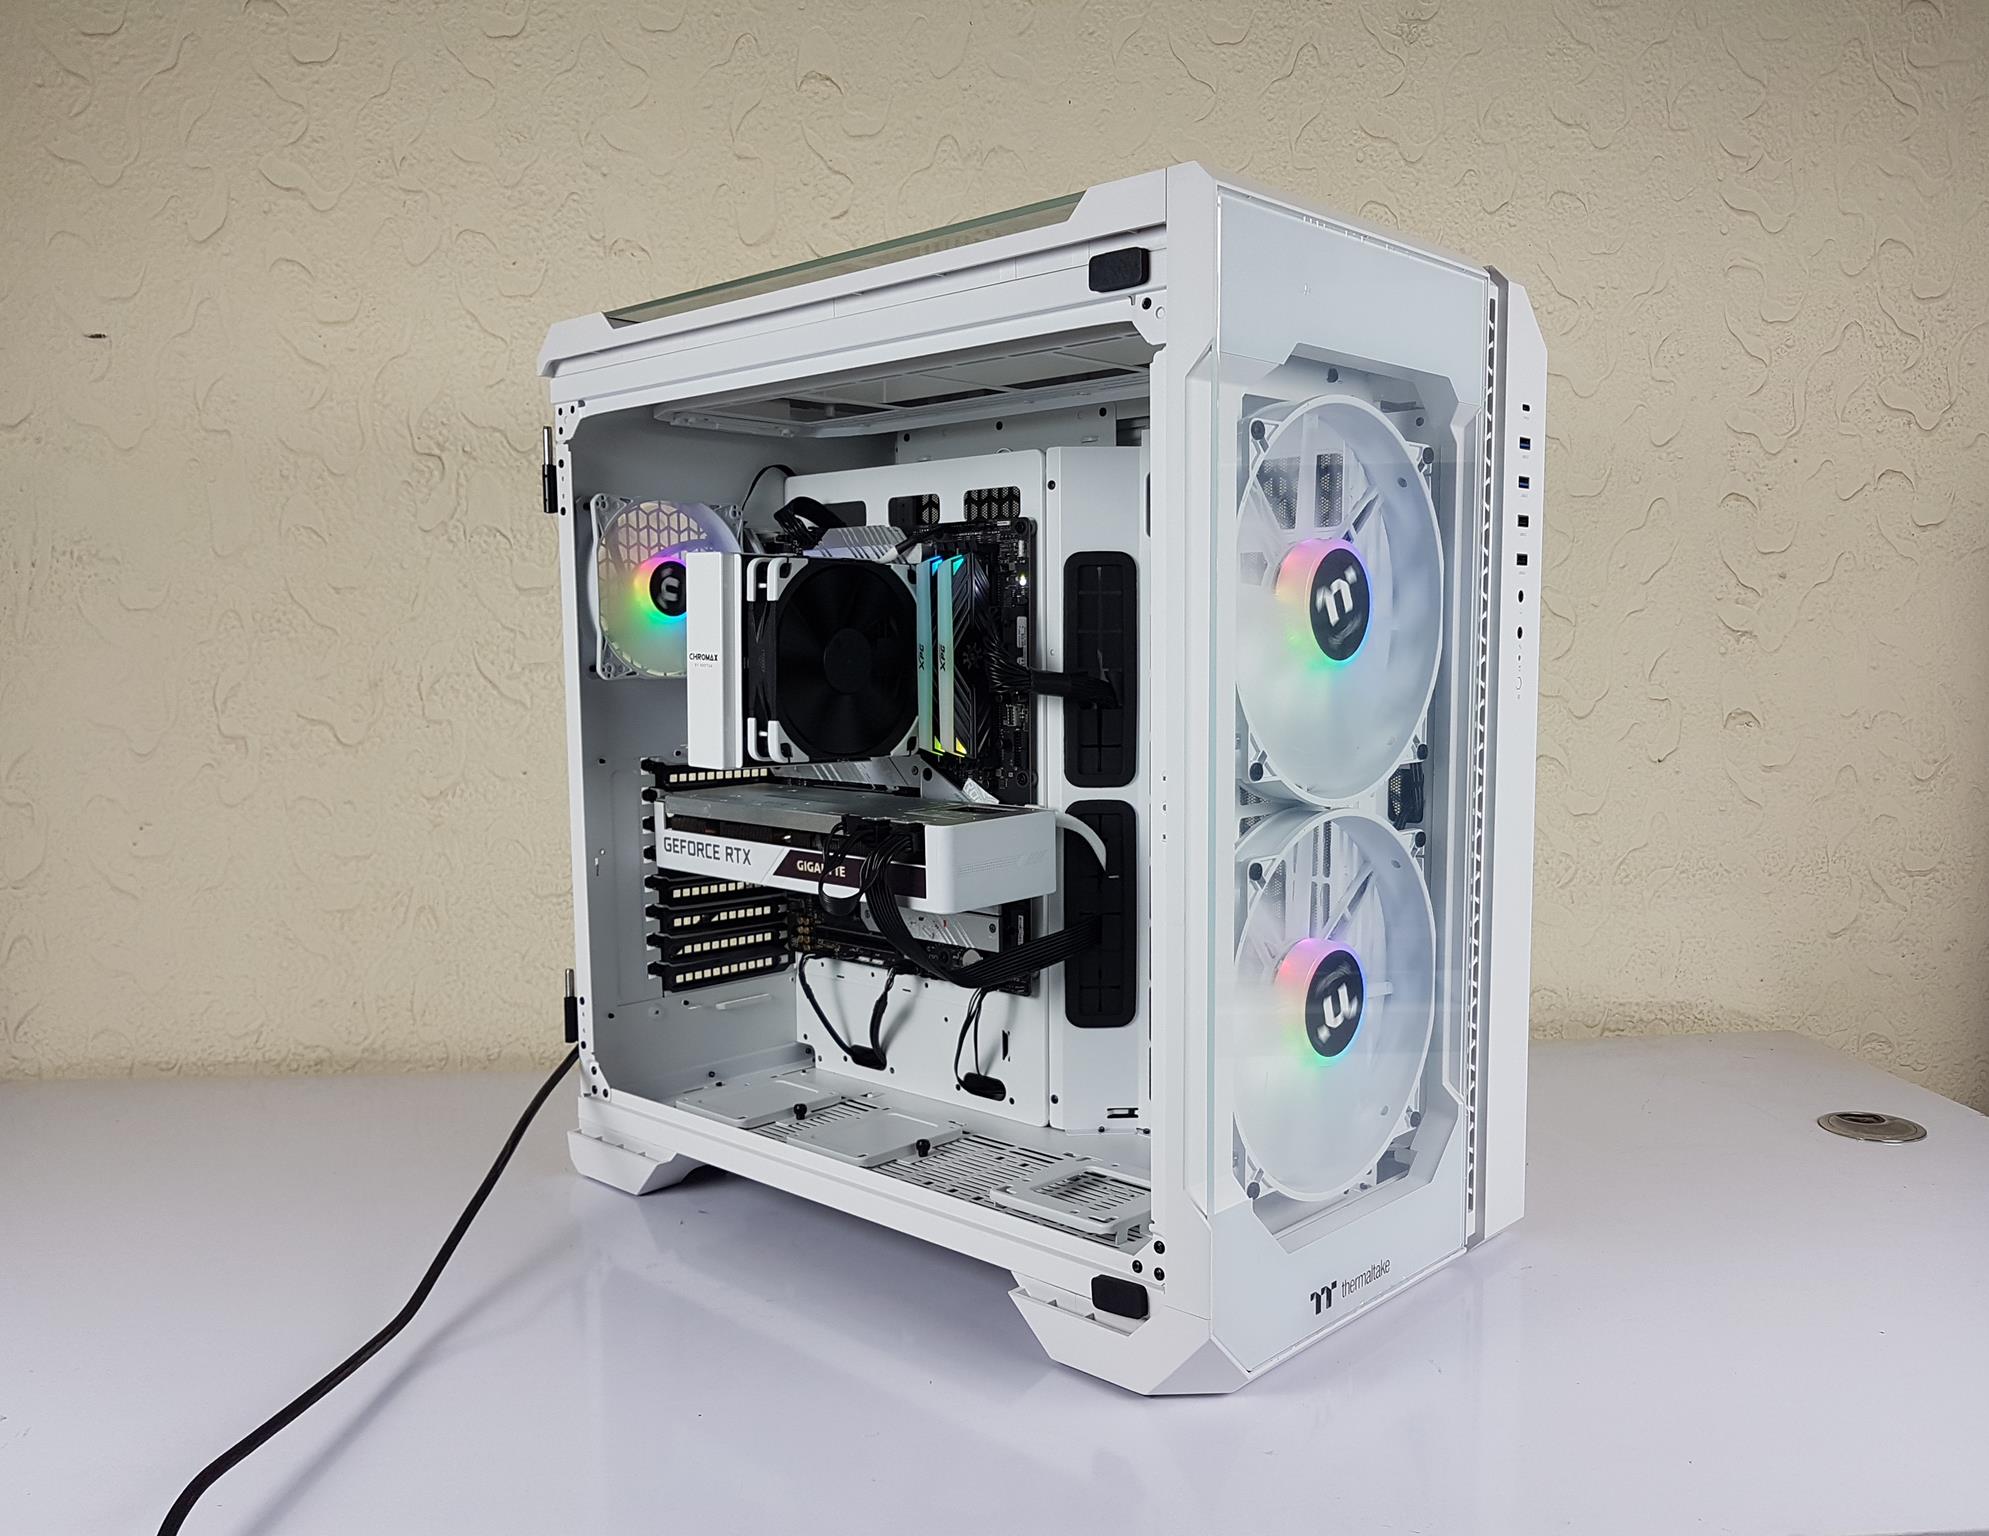
Test Build
The following configuration has been used for the test build:
- Intel i5 11600k
- Asus Strix Z590-A WIFI
- XPG Spectrix D41 16GB
- XPG 240GB SATA SSD
- Noctua NH-U12S chromax.black
- GIGABYTE GeForce RTX 3070 VISION
- Fractal Design ION+ 860P
Building
Here’s the complete process of setting up the build!

Testing
Noctua NT-H1 is used on the CPU IHS. ASUS RealBench 2.56 and MSI KOMBUSTOR 4 are used to stress the CPU and Graphics card. Following configurations have been tested and reported in the graph:
- Stock Configuration [Complete Front Panel installed]
- Complete Front Panel removed
Please note that we can’t regulate the speed of the pre-installed fans. The cooler’s fan was set to run at full speed. Rest of the settings were on Auto, Stock in the UEFI/BIOS. A stress test of 30 minutes was done with an idle time of 10 minutes. System was powered off between all runs for a minimum of 30 minutes as well. Let’s take a look at the results.
Results
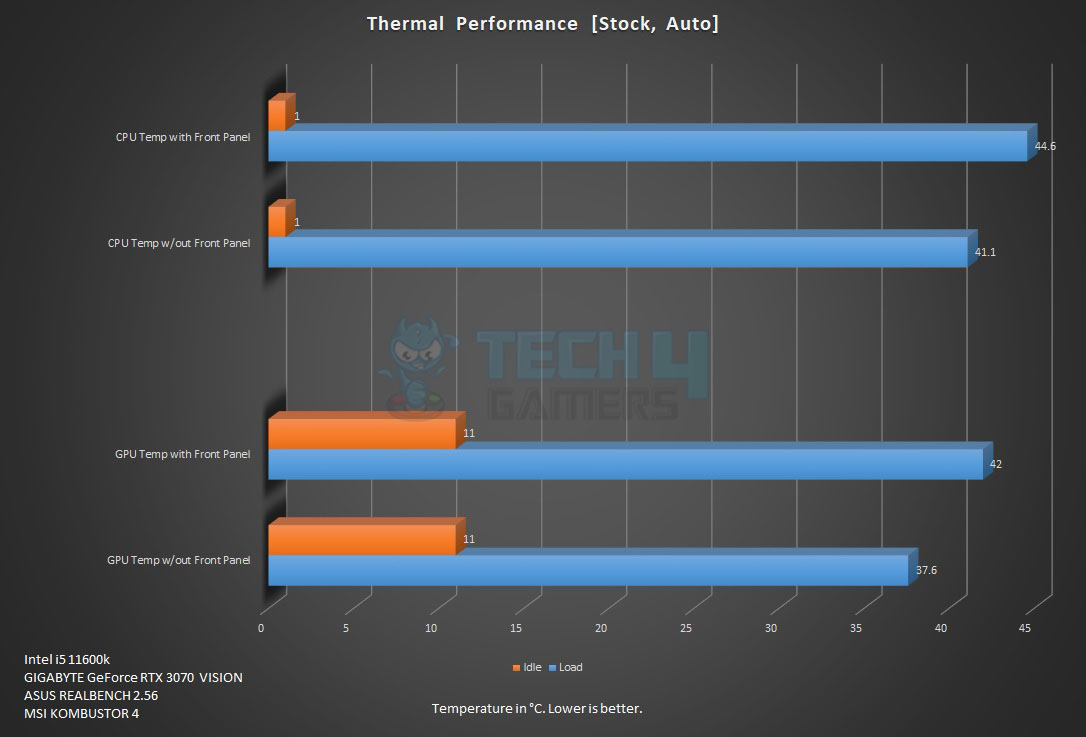
The ambient temperature was around 31~32°C. Hence we are reporting delta temperatures calculated by subtracting the ambient temperature from average of the cores temperature values and GPU Diode value. The difference of the CPU temperature with and without front panel is 3.5°C which is on the high side.
For the graphics card, we are seeing a 4.4°C delta between both configurations which is not that bad. It was kind of expected given the airflow restricted design on the front.
RGB


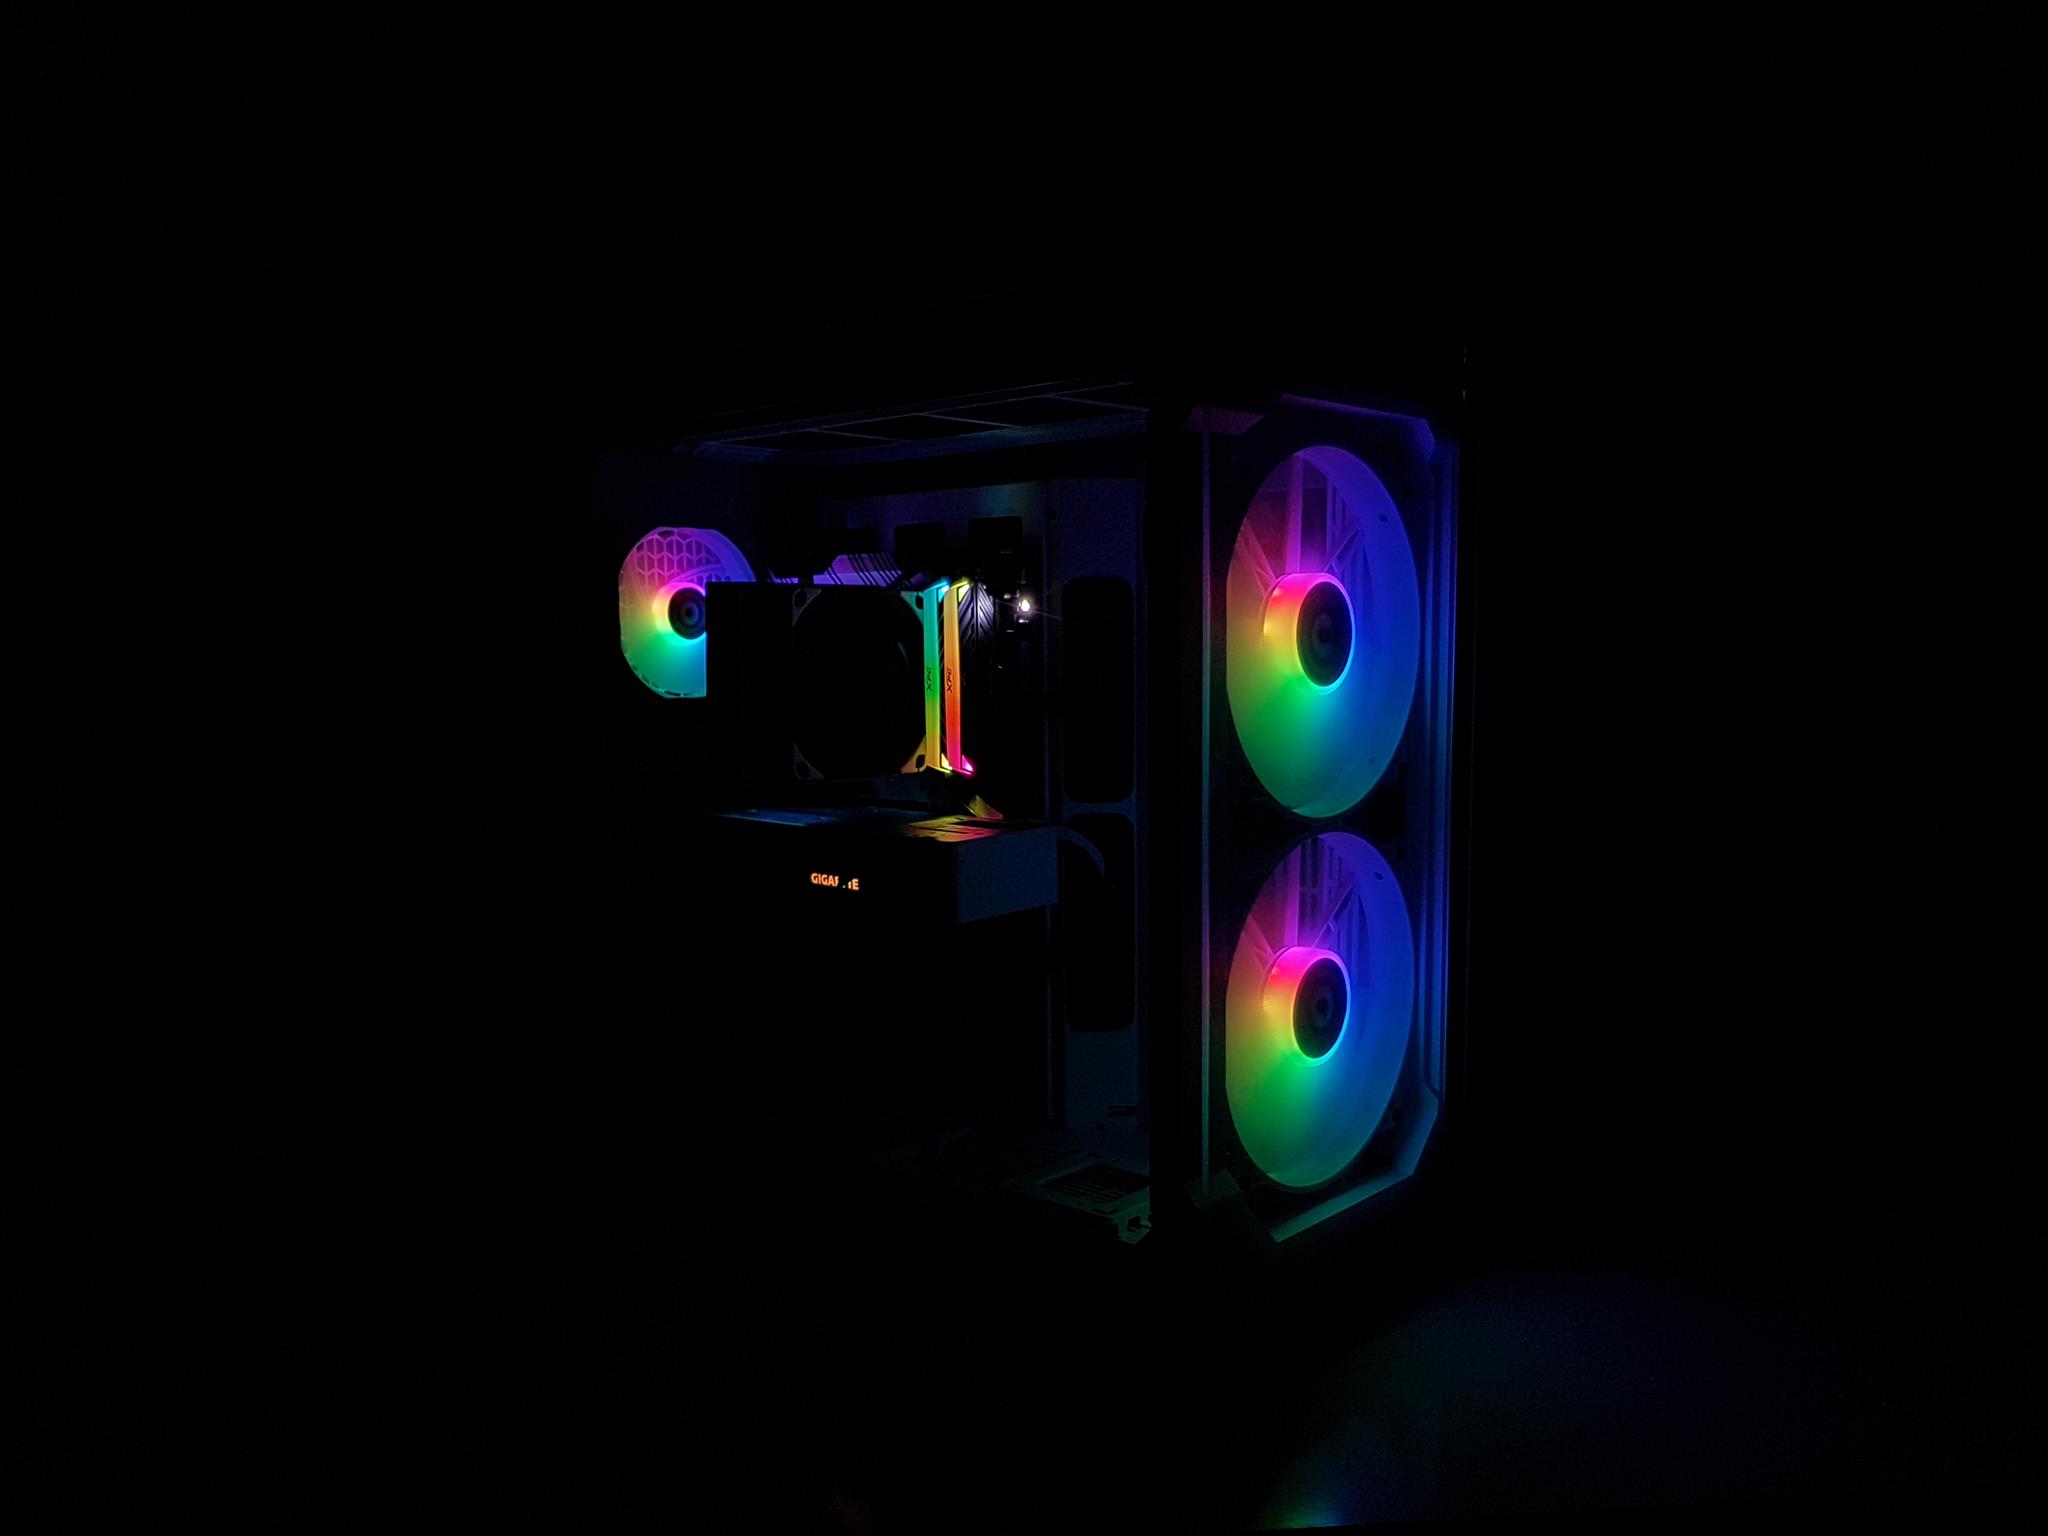

In order to control the lighting effects of the 2x 200mm ARGB fans on the front, we have a RGB button on the I/O panel. It is pertinent to mention that the lighting can be turned off all-together, which is actually one of the modes now. We have total 24 illumination modes on these fans:
| 1 | Wave Mode |
| 2 | Flow Mode |
| 3 | RGB Lighting Single Color |
| 4~10 | Radar Mode (Red, Yellow, Green, Cyan, Blue, White, Purple) |
| 11~18 | Breathe Mode (Red, Yellow, Green, Cyan, Blue, White, Purple) |
| 19 | Full Lighted Mode |
| 20~26 | Single Color (Red, Yellow, Green, Cyan, Blue, White, Purple) |
| 27 | Light Off |
Should You Buy It?
Is this case something worth investing into?
Buy It If:
✅ You seek a visually stunning PC case: This case is ideal for users who prioritize exceptional aesthetics in their PC builds.
✅ You require a high-performance workstation: Professionals needing a robust case for high-performance workstations with powerful hardware configurations would not want to skip past this!
Don’t Buy It If:
❌ You’re a small form factor enthusiast: Users looking for compact cases rather than full towers might want to look into a smaller build.
Conclusion
The Thermaltake View 51 TG Snow ARGB Edition impresses with its spacious full tower design, reminiscent of the Lian Li O11 Dynamic. The case features a striking white exterior with three tempered glass panels, showcasing a well-thought-out interior layout. With Dismantlable Modular Design (DMD) and a plethora of cooling options, it caters to PC enthusiasts. The inclusion of 2x 200mm ARGB fans on the front and a 120mm ARGB fan on the rear enhances the visual appeal. However, the proprietary connectors for fan speed control might limit customization. The case offers ample support for liquid cooling radiators, multiple storage drives, and vertical GPU installation.
Recent Updates
- January 19, 2024: Few text changes to improve readability.
Thank you! Please share your positive feedback. 🔋
How could we improve this post? Please Help us. 😔
[Hardware Reviewer & Editor]
Meet Nauman Siddique, a highly experienced computer science graduate with more than 15 years of knowledge in technology. Nauman is an expert in the field known for his deep understanding of computer hardware.
As a tech tester, insightful reviewer, and skilled hardware editor, Nauman carefully breaks down important parts like motherboards, graphics cards, processors, PC cases, CPU coolers, and more.
- 15+ years of PC Building Experience
- 10+ years of first-hand knowledge of technology
- 7+ years of doing in-depth testing of PC Hardware
- A motivated individual with a keen interest in tech testing from multiple angles.
- I majored in Computer Science with a Masters in Marketing
- Previously worked at eXputer, EnosTech, and Appuals.
- Completed Course in Computer Systems Specialization From Illinois Tech
Get In Touch: nauman@tech4gamers.com


