 Threads
Innovation or Pricey Proposition?
Summary
The Corsair 6500X is a premium dual-chamber PC case that emphasizes customization, flexibility, and innovative design, catering to users looking to personalize their cooling solutions. At a price of $199.99, its solid build quality, support for backplug motherboards, and unique aesthetic options make it stand out. Although its high price and lack of included fans may deter some, the case compensates with extensive cooling options and a spacious layout. Overall, it’s ideal for gamers who demand a high-quality, customizable PC case capable of accommodating extensive cooling setups.
Hours Tested: 17

Overall
-
Design - 9/10
9/10
-
Build Quality - 9/10
9/10
-
Features - 9/10
9/10
-
Performance - 9/10
9/10
Pros
- Panoramic View Design
- 3mm Tempered Glass Panel
- Provision for up to 3x 360mm radiators
- Good Dust Filtration
- Rail Mount System for fans and radiators
- Good Airflow with fans
- Customizable Steel Panels
- Expansion using Additional Accessories
- Backplug motherboard support
- Spacious Layout
- E-ATX motherboard support
- Flexible Side Fan Bracket
- Hinged Glass Panel
Cons
- Price
- No 140mm support on the side bracket
- No removable top and bottom fan brackets
- No USB 3.2 Gen2x2 Type-C Port
- 4x USB 3.2 Gen1 Type-A ports rely on the motherboard’s support for 2x USB 3.2 headers
- Backplug motherboard’s EPS connector obstructs the HDD Cage
- PSU presses on the mATX backplug bottom connectors


Corsair is back in a dual-chamber PC Case with its 6500 series PC Cases building on the DNA of Air 540 and 680X but flexing the muscles to introduce an all-new concept and design that speaks of the flexibility and customization at a time. Say hello to the new 6500X. This lineup has three cases: 6500D, 6500X, and 6500X RGB.
I will focus on 6500X since I have got it for testing. This case comes as a barebone unit since it does not have fans. Corsair has left it to the user to customize the case per the requirement. It has dual-tinted glass panels and customizable steel panels with wooden accessories. There is a plethora of space on the front side for any build, and the backside houses the PSU, HDD Cage, and cable routing mechanism. This is Corsair’s first take on supporting backplug motherboards.
The Corsair 6500X is listed at USD 199.99 excl tax. This is a steep price, particularly when the competition from Lian Li is stiff, and there are better options at a better price.
- Why you can trust Tech4Gamers: Our reviews are based on dedicated hands-on testing by our team of experienced hardware experts. Find out more about how we test.
Key Takeaways
- The Corsair 6500X is a versatile and customizable dual-chamber PC case that merges innovative design with ample space for cooling and hardware, though it comes at a premium price without included fans.
- You should buy the Corsair 6500X if you want a backplug-supported case that delivers exceptional cooling with a dual-chamber and panoramic design.
- You should not buy the Corsair 6500X if you are going to use a mATX backplug motherboard or if you’re on a budget.
The key specifications are:
| Dimension | 481x328x496mm |
| Materials | Steel, Tempered Glass |
| Cooling Layout |
|
| Expansion Slots | 8x |
| Storage | 2x 2.5” and 2×3.5” Drives |
| Clearance: |
|
| Power Supply | ATX (Not Included) |
| Warranty | 2-Year |
Packaging And Unboxing
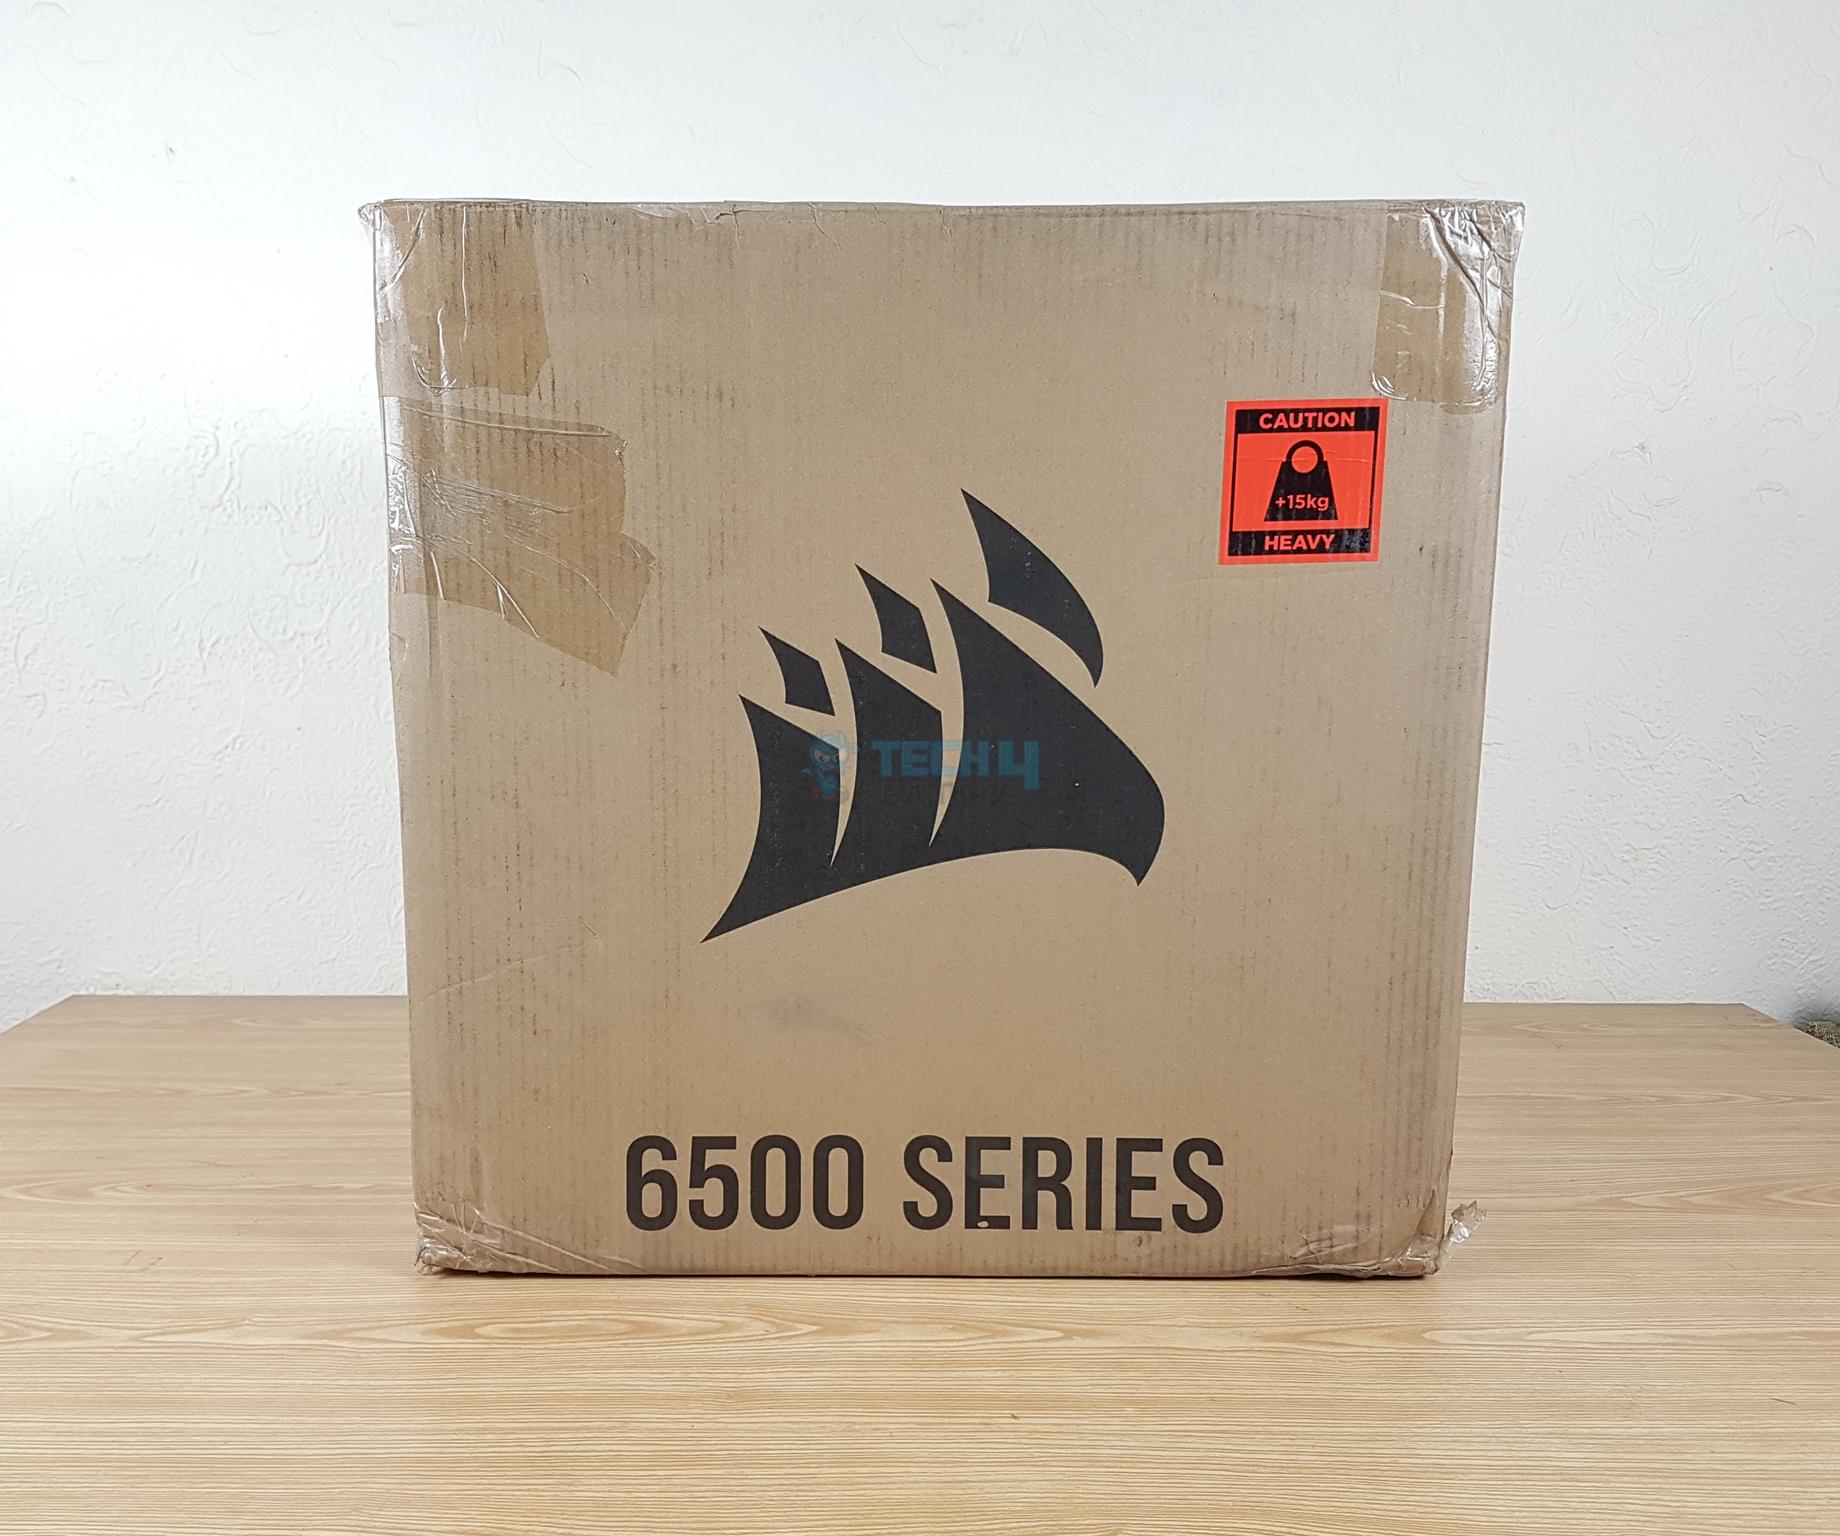
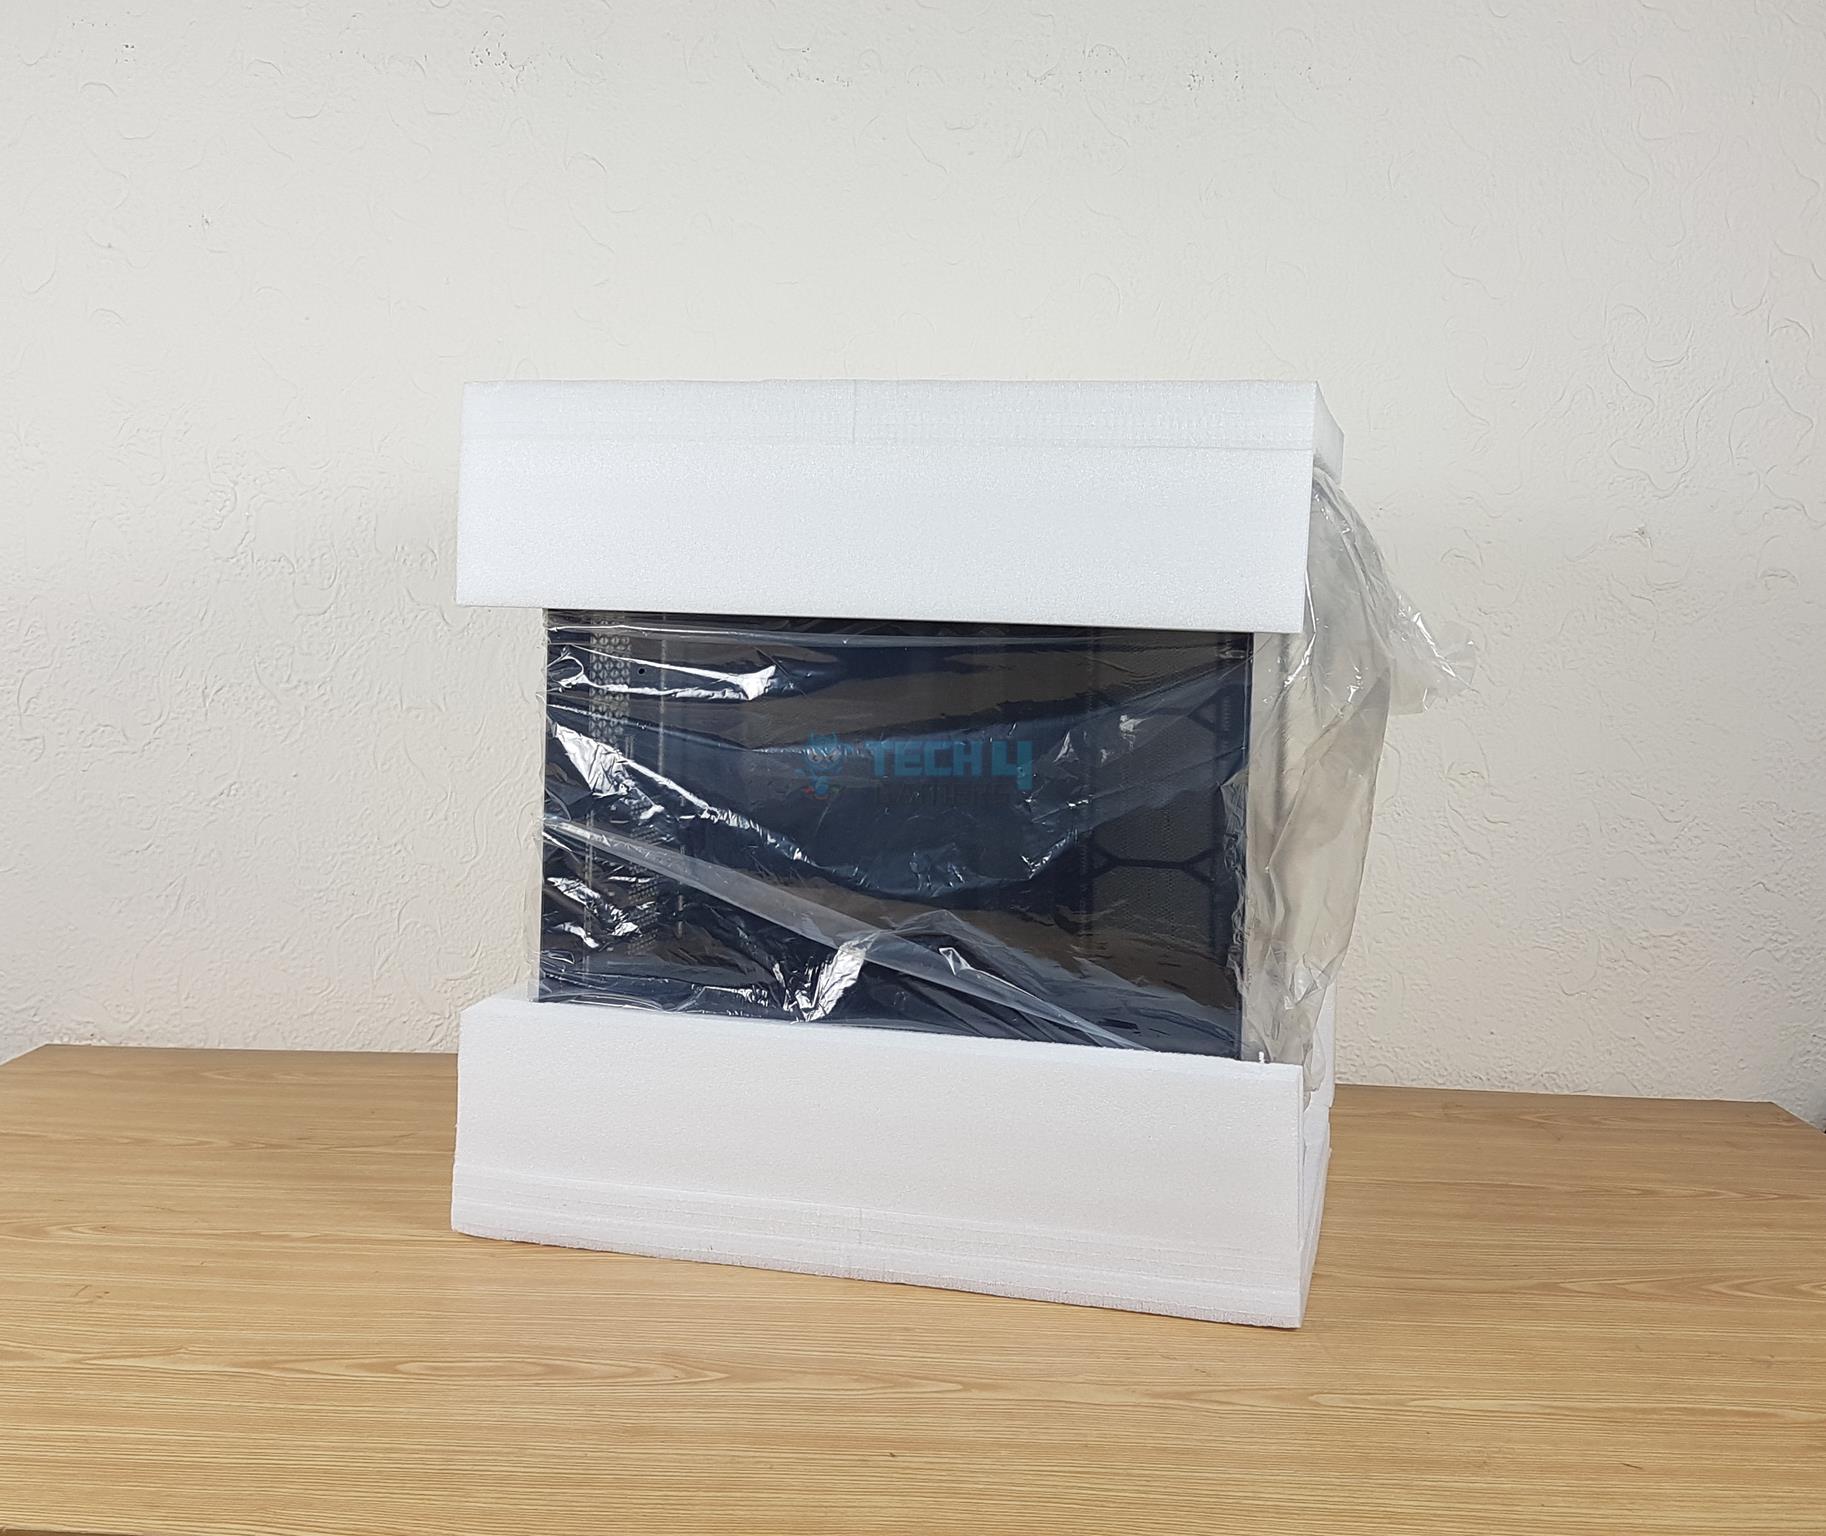
The case is shipped inside a standard brown color cardboard box. The case is tucked between two thick Styrofoam pads.

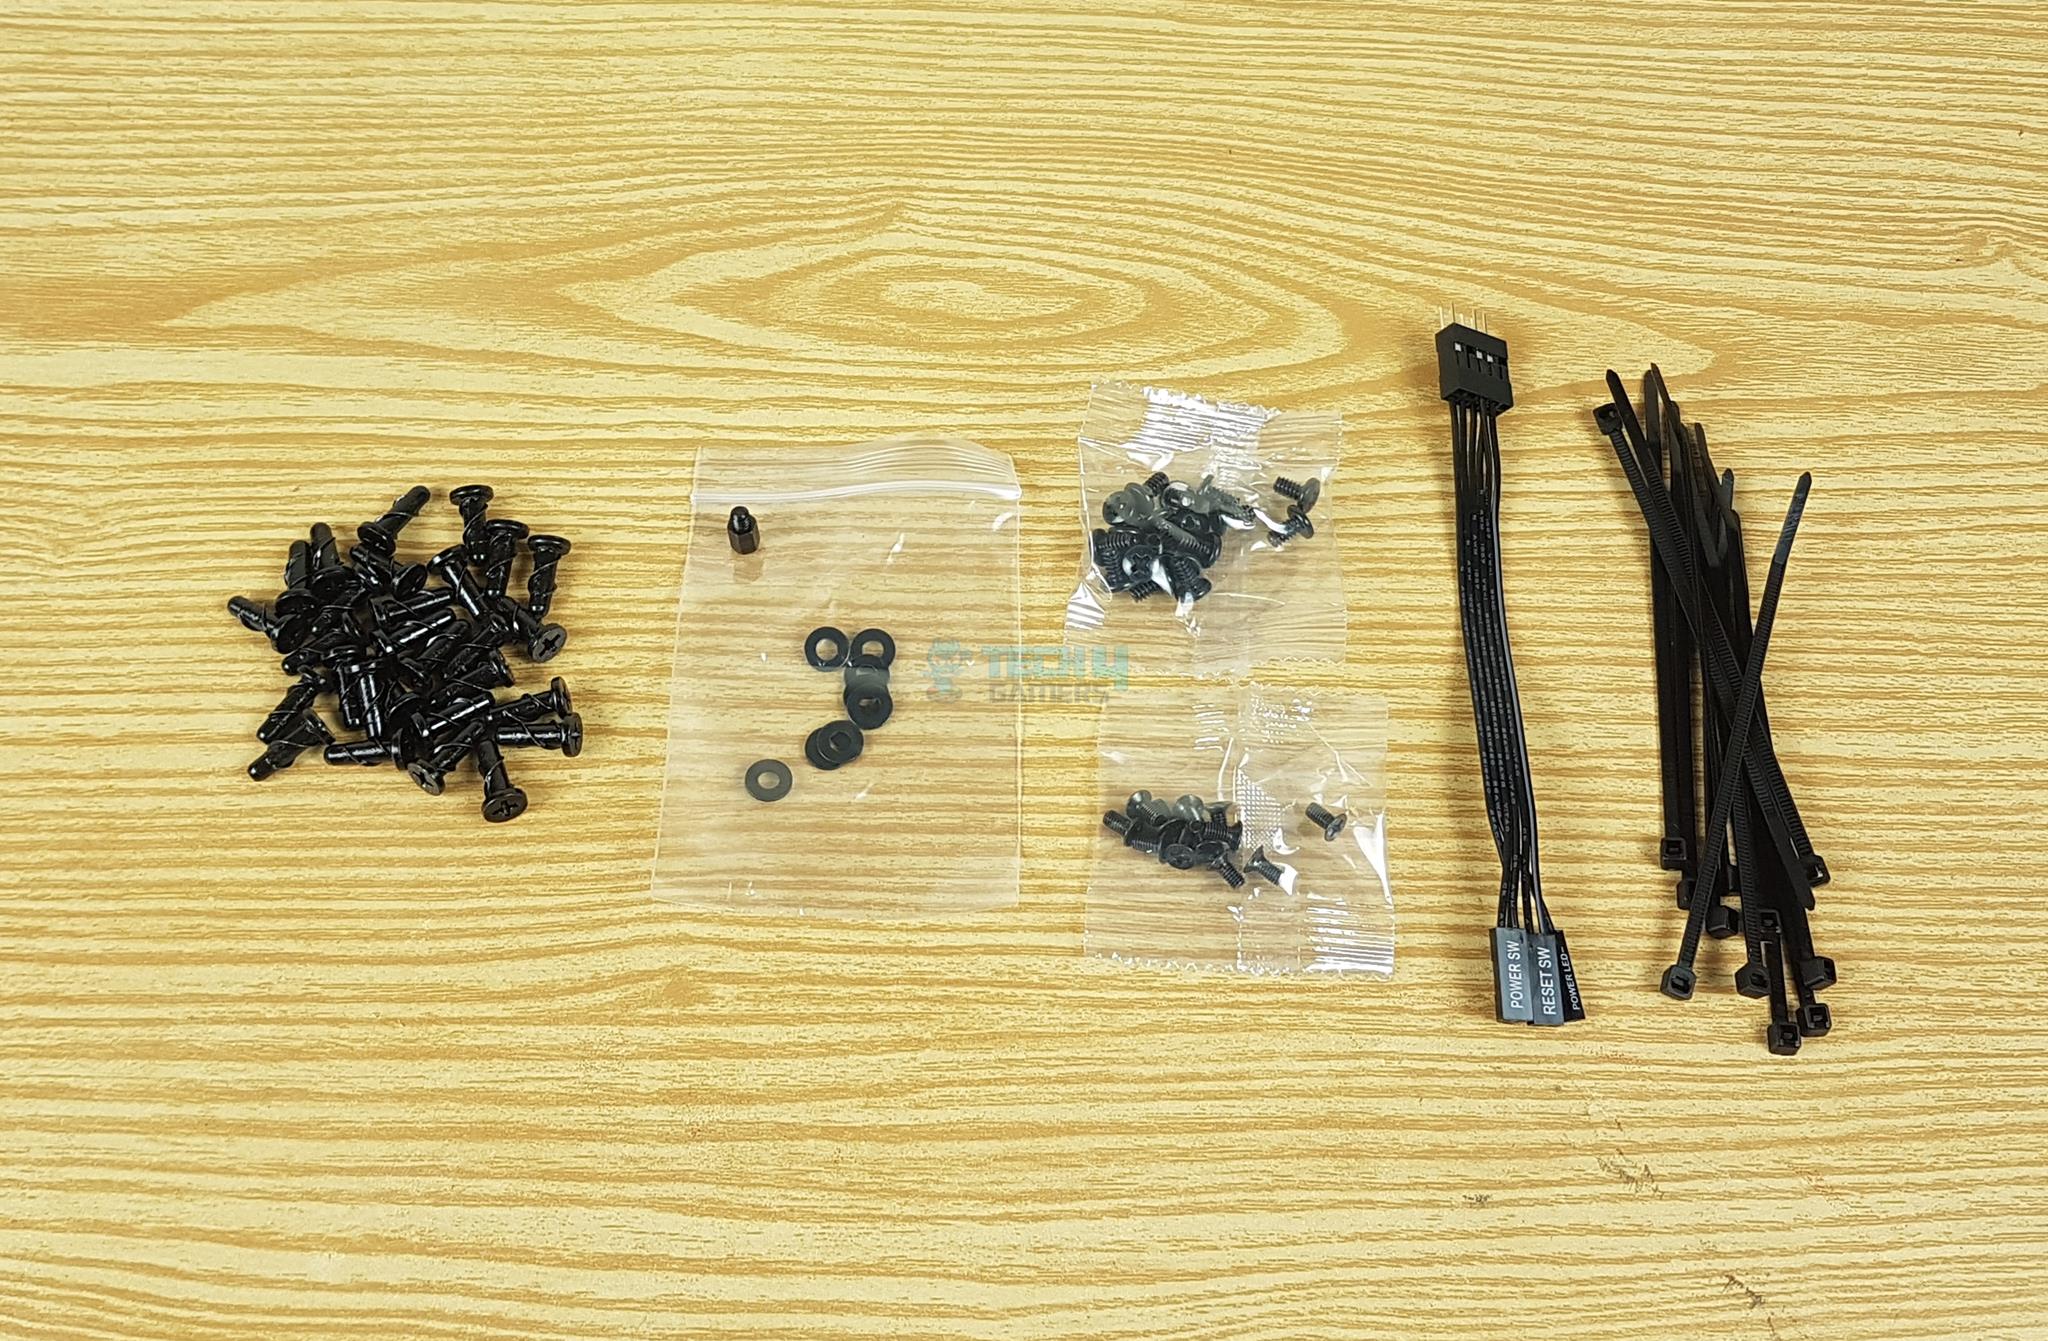
The following is provided:
- Accessory Container
- Zip Ties
- Quick-Turn Screws
- Front Panel Extension Cable
- Motherboard Screws
- Washers
- Standoff
- Various other screws
Design
The Corsair 6500X is a mid-tower range PC Case following a dual-chamber layout. It has a dimension of 481x328x496mm, and it weighs around 16 kg. It is primarily made of steel and tempered glass panels. The build quality is solid, and Corsair has done a good job overall.
Exterior Design
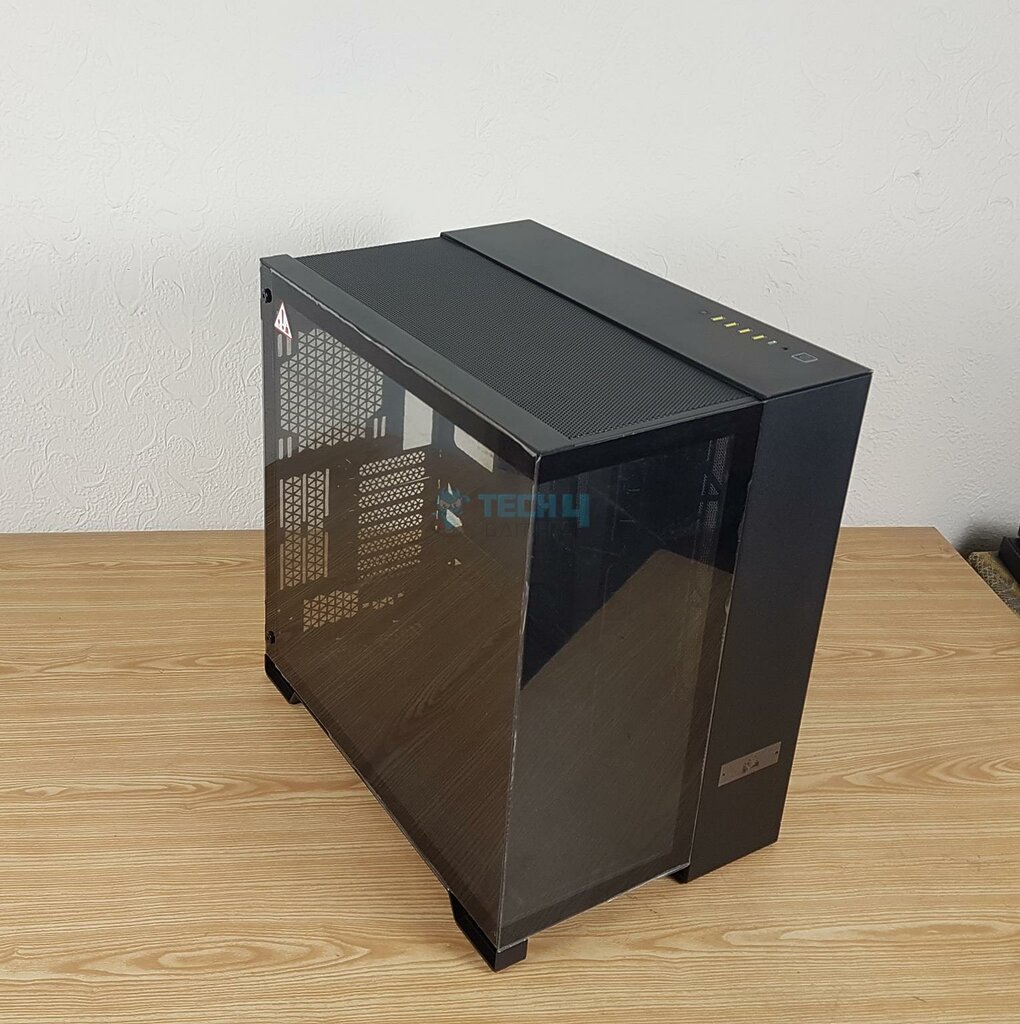
This is a dual-chamber design. There is a glass panel on the front and the side. The main steel frames on the sides can be customized using wooden color panels that you can buy from their website. The top has a removable mesh cover that is somewhat thick and may restrict the airflow.
Front Panel
There is a removable 3mm thick tempered glass panel on the front. However, to remove it, you need to undo the side glass panel and then remove the 2 screws. There is a Corsair branding on the side steel panel.
The side steel panel is a solid layout and there is no IO Panel here. This may not be good news for the desk users who would want easy access to the IO panel.
I have removed the side glass panel to take out the front glass panel. Behold the somewhat naked Corsair 6500X showing the main component side.
Top Panel
I am showing a top view of the Corsair 6500X. There is a mesh cover on the main section whereas we have a solid steel panel over the side chamber. You can remove this steel panel and replace it with a wooden panel. This gives me Fractal vibes!
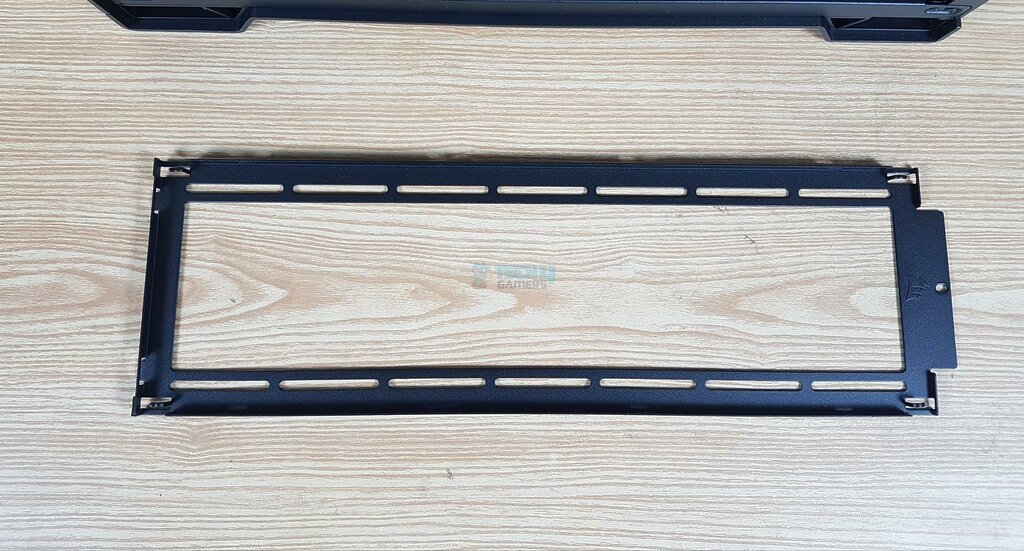
There is a fixed fan bracket under the mesh cover. It can house up to 3x 120mm or 3x140mm fans but up to 360mm radiator. One thing I see in this case is the general lack of 140mm size radiators, whereas we have a spacious layout. Anyhow, I would want a removable fan bracket.
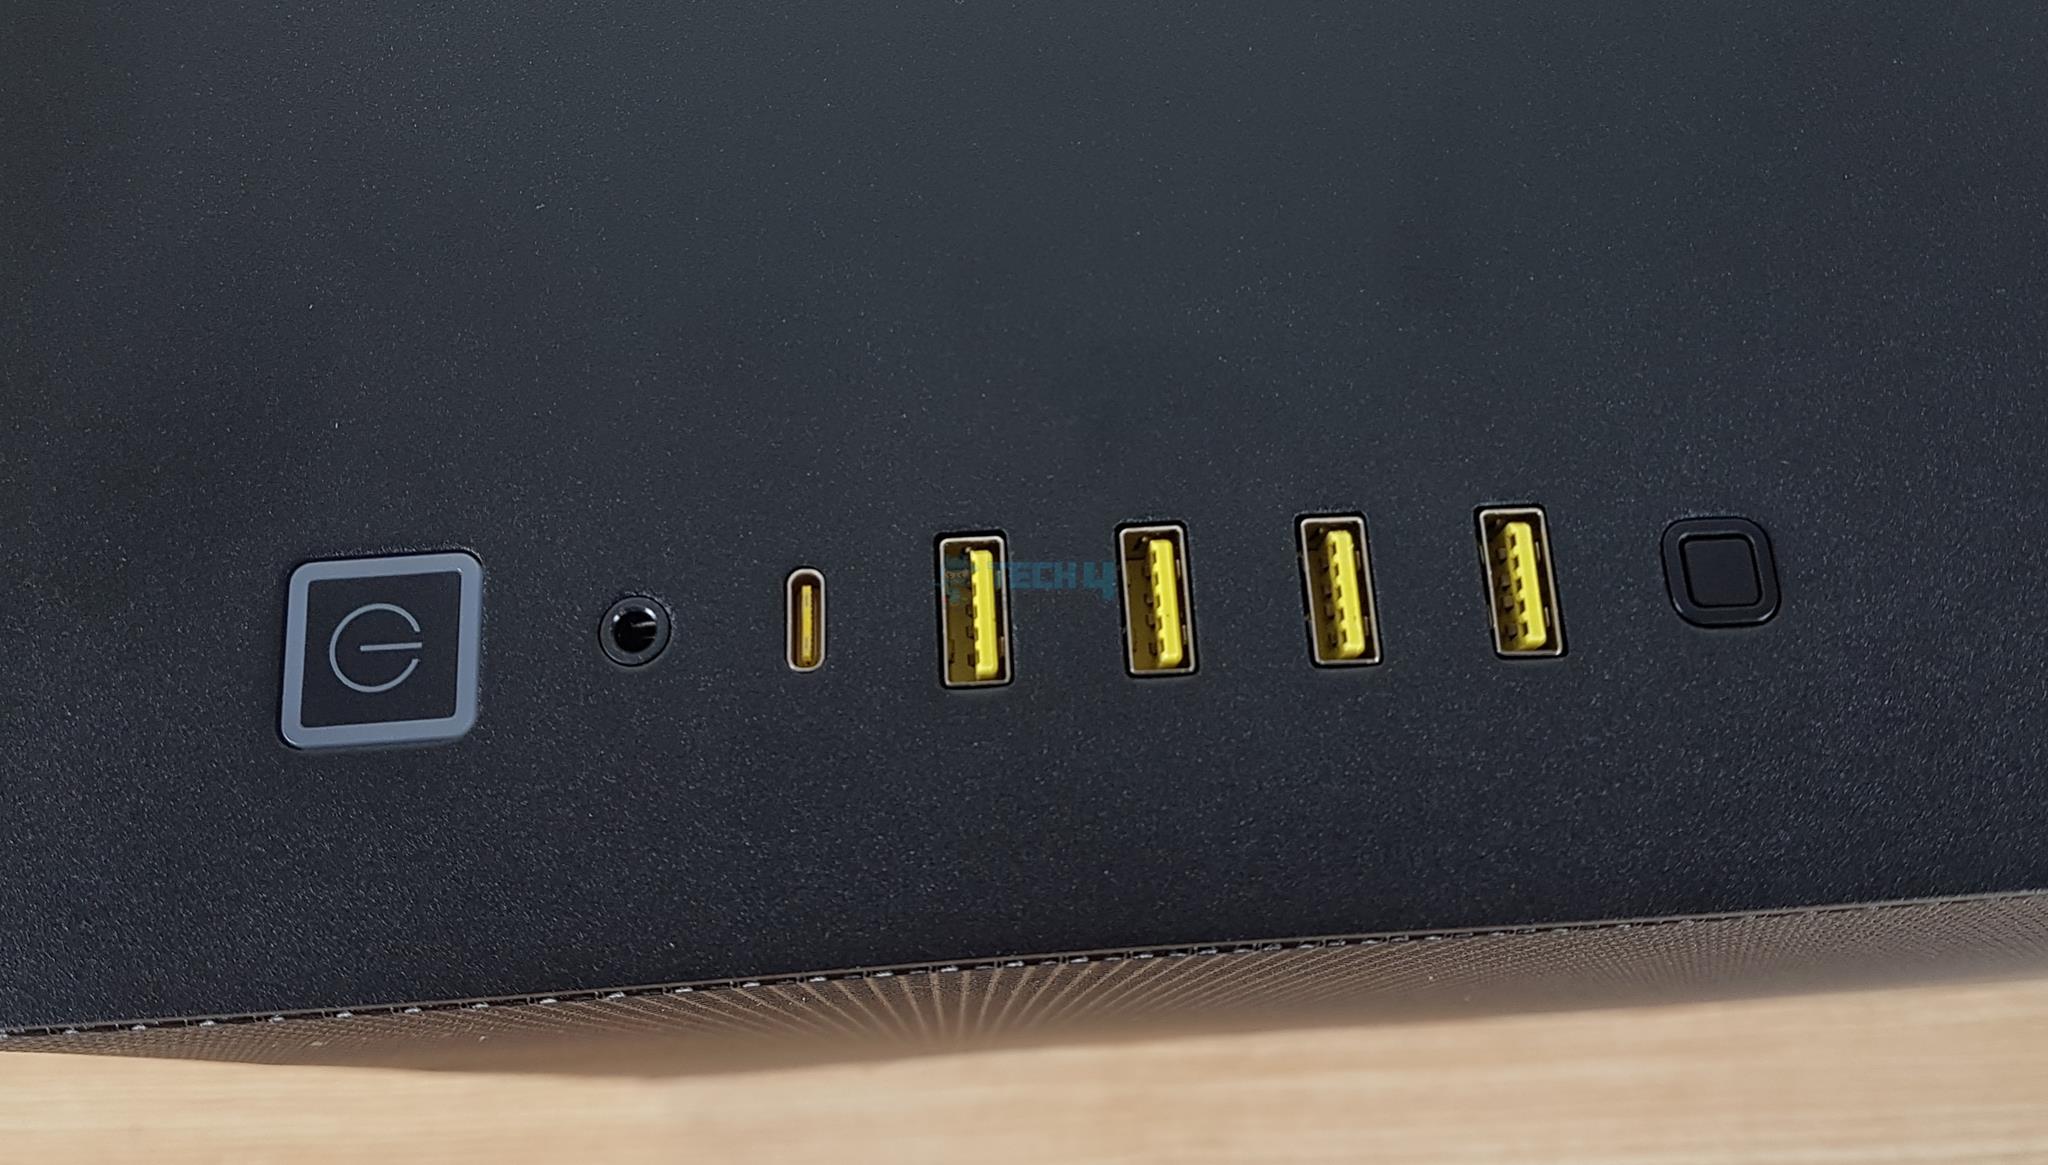
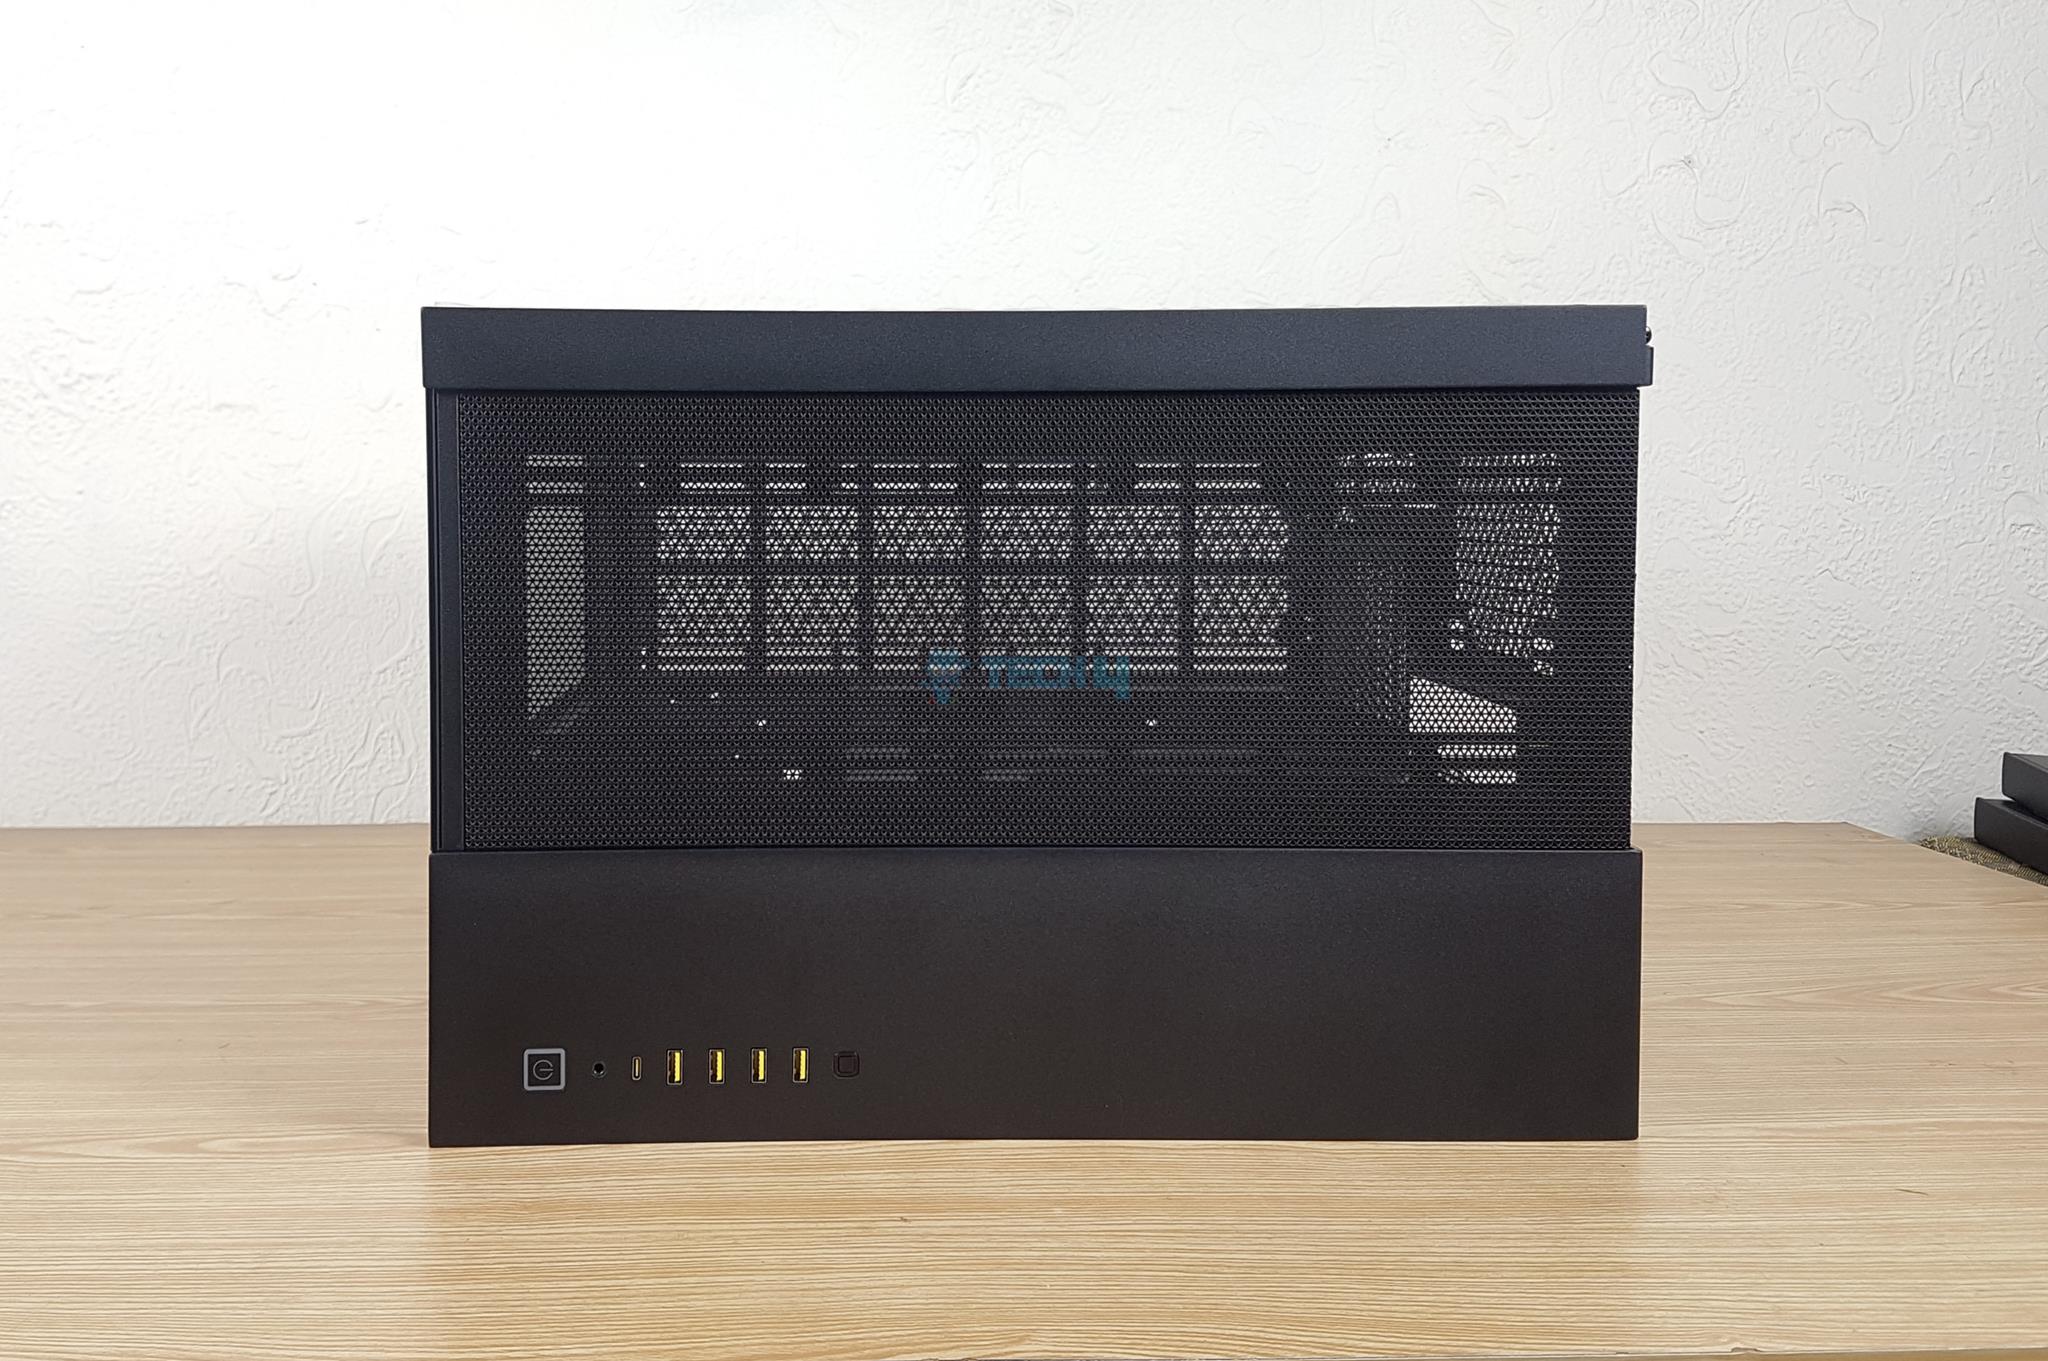
Corsair uses a Fabric pull tab on the mesh cover, which is a nice touch, and it has 6500 printed. The top I/O has:
- 4x USB 3.2 Gen 1 Type-A ports
- 1x USB 3.2 Gen 2 Type C port
- 1x Headphone/Microphone Port
- 1x Power Button
- 1x Reset Button
The power button has a nice click and tack to it without wobbling. It has white color illumination.
Rear Panel
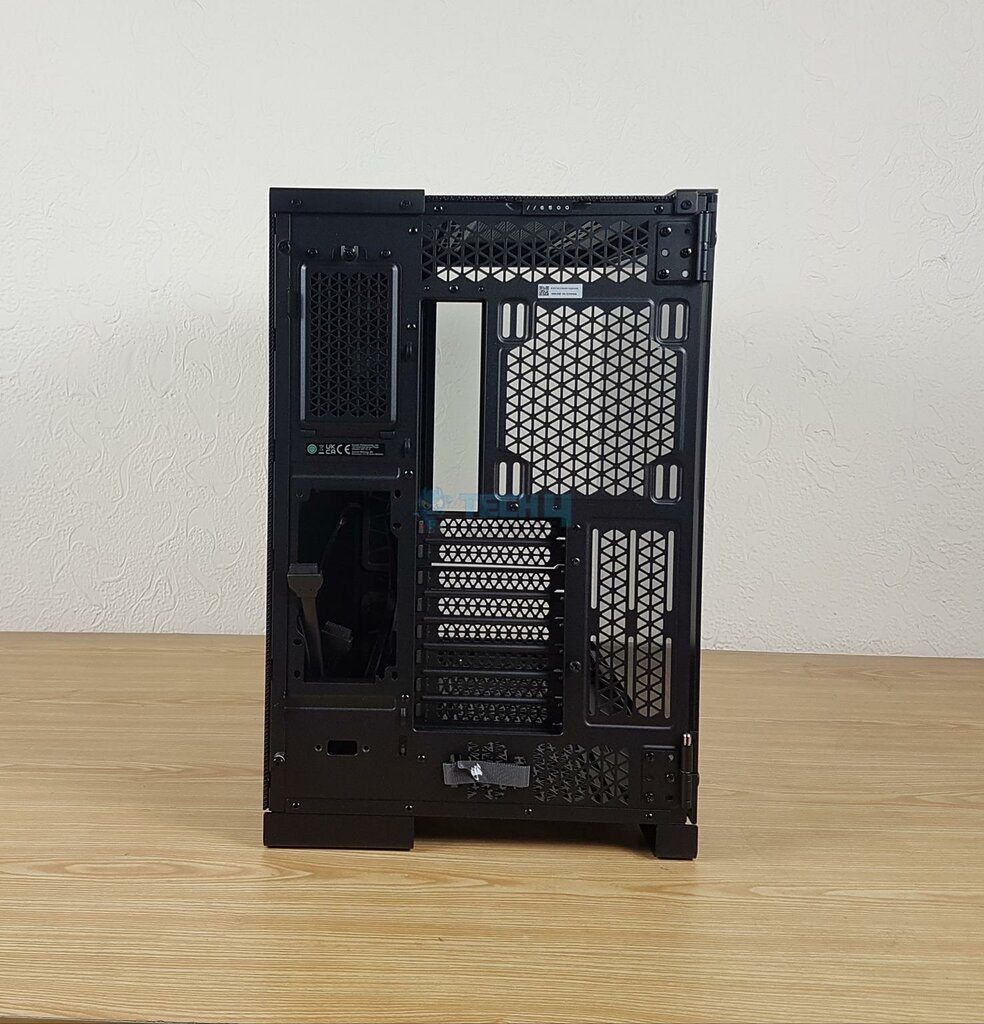
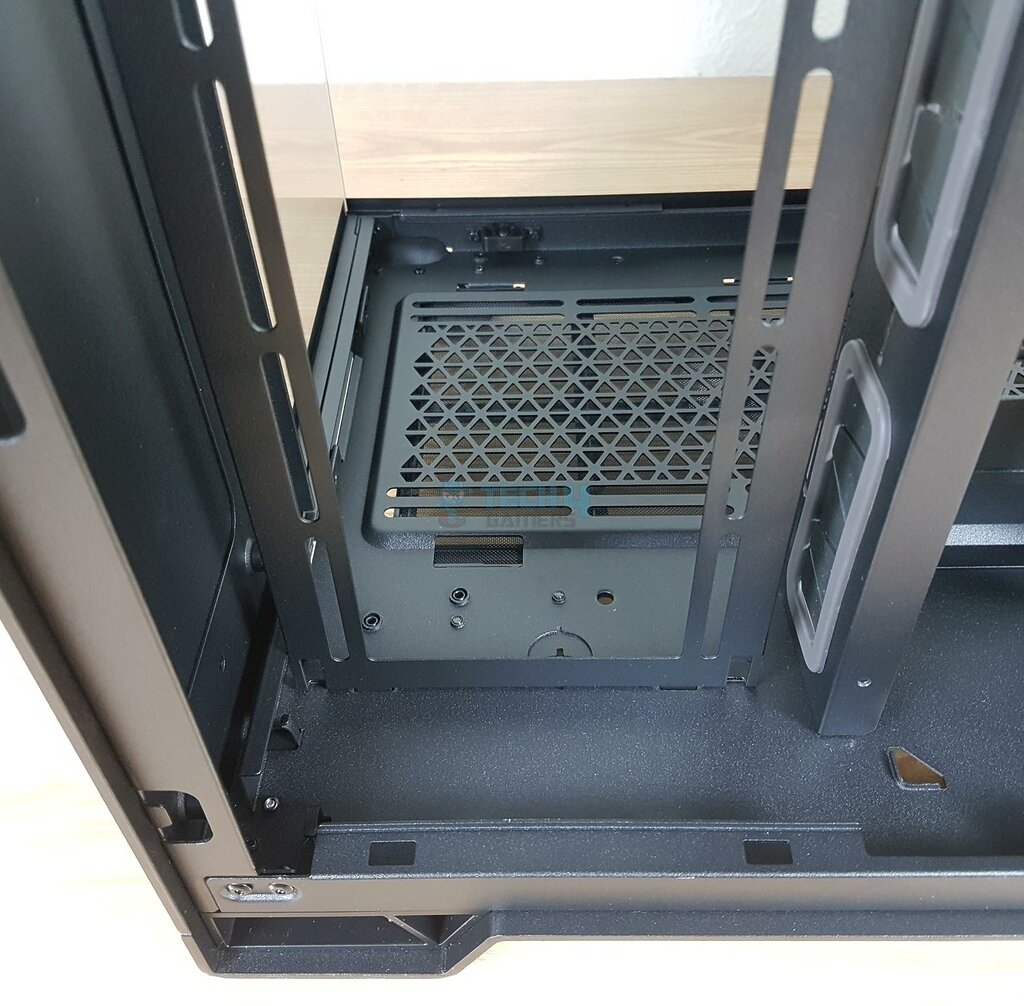
This is all about ventilation! The side chamber has a removable cover from where you can access the 2x drive caddies. Then there is a standard ATX PSU mount in the center. At the bottom, you can see a cutout. This is probably to route the iCUE link cable for external iCUE Link components for synchronization.
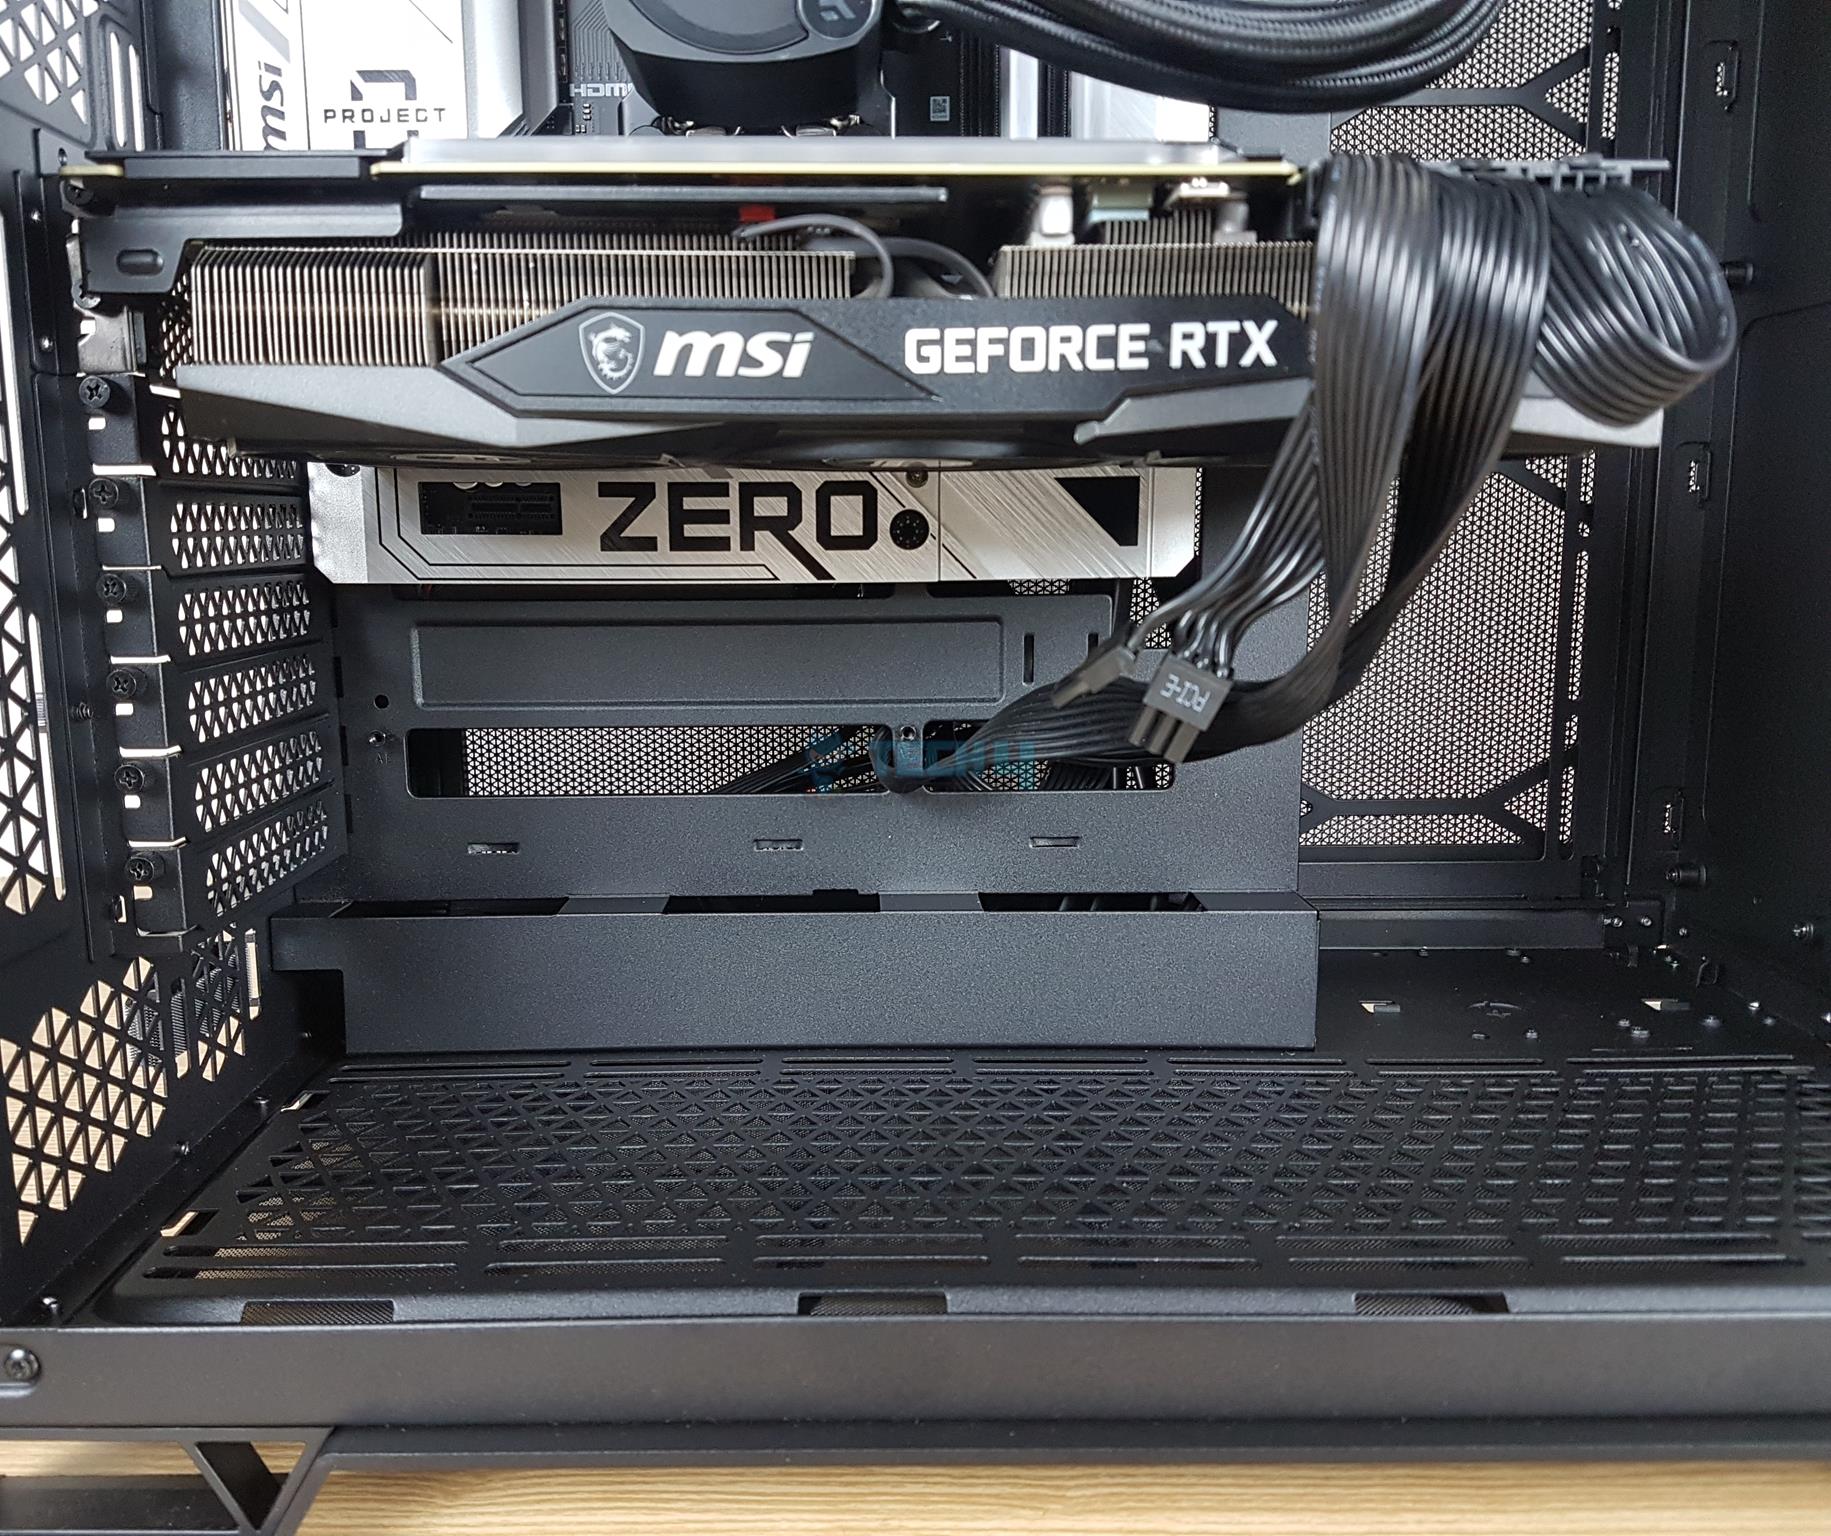
There is a vented area on the top of the right chamber. We have a rail-mounted fan mount. There is a cutout for the motherboard rear IO panel. Then we have 8x PCIe reusable, vented slots. There is what seems to be a dual vertical slot. However, you would need to buy a vertical bracket from Corsair.
The bottom area has vents for air ventilation. There is a Velcro strip there to catch the cables.
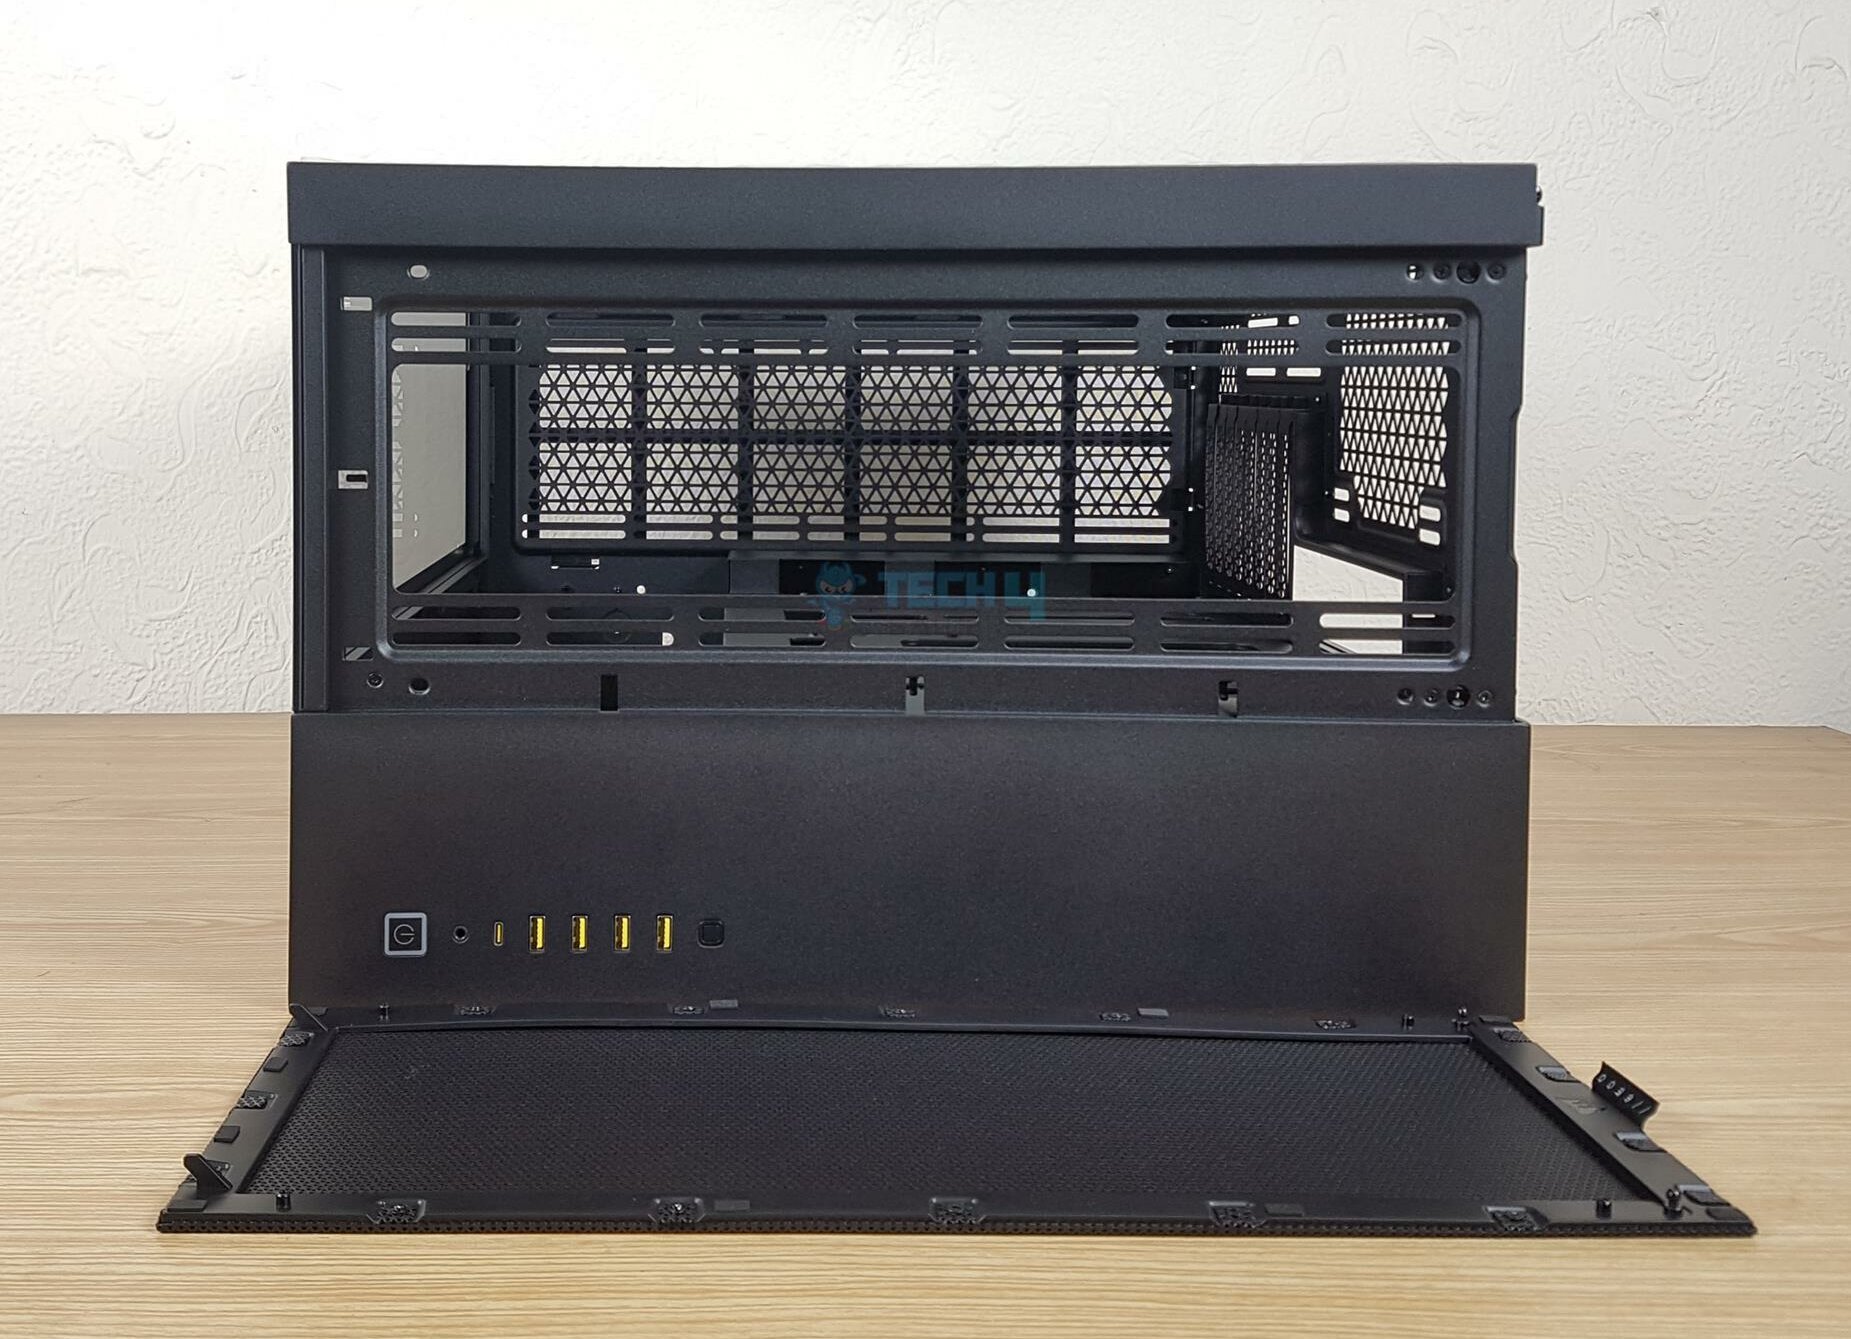
Bottom Panel
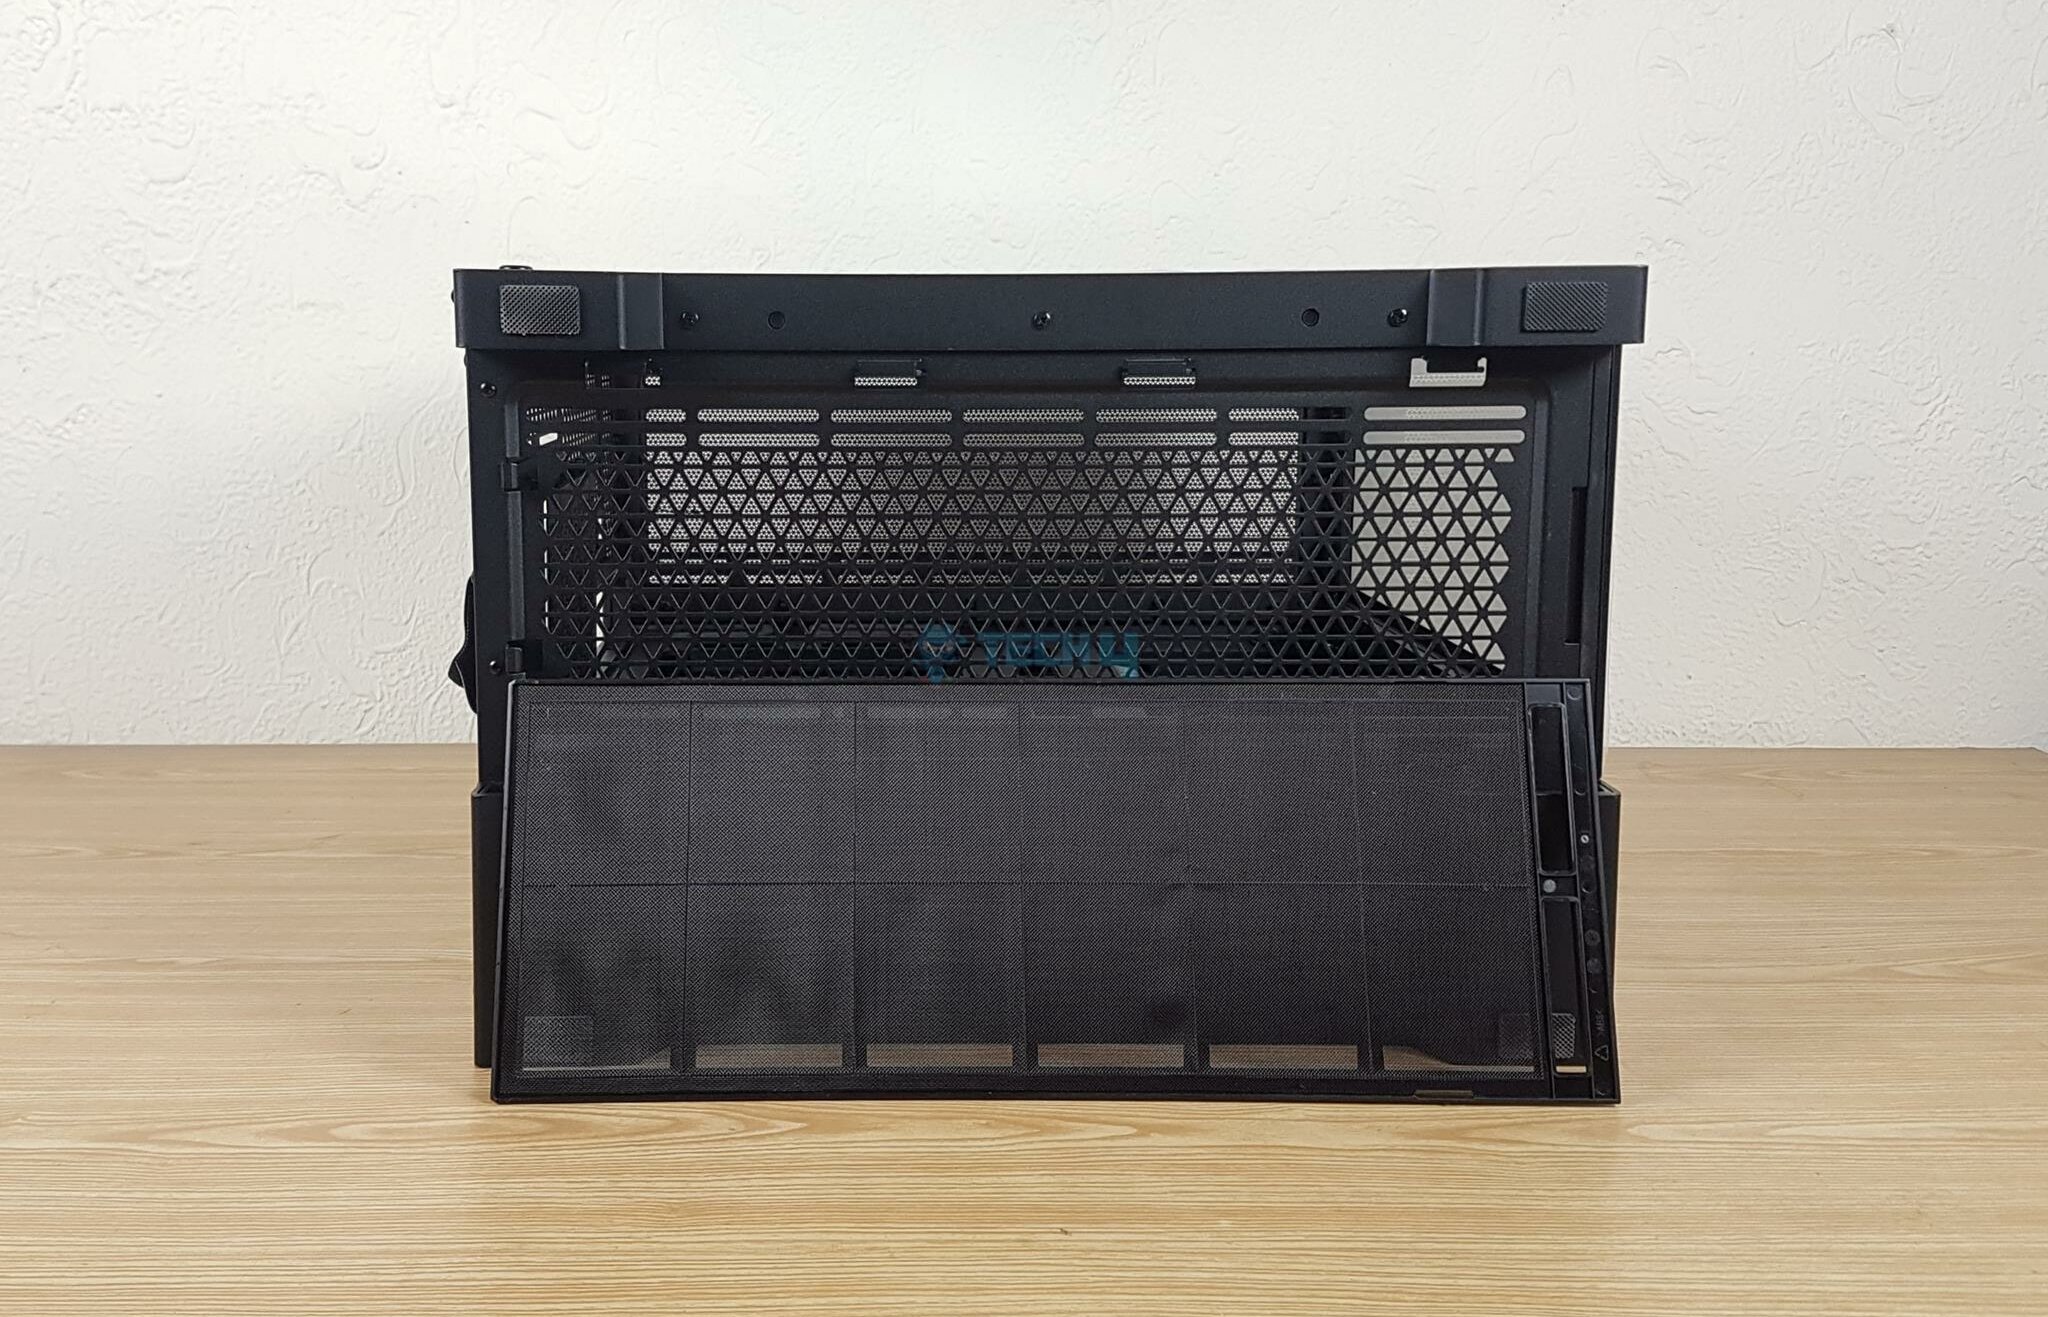
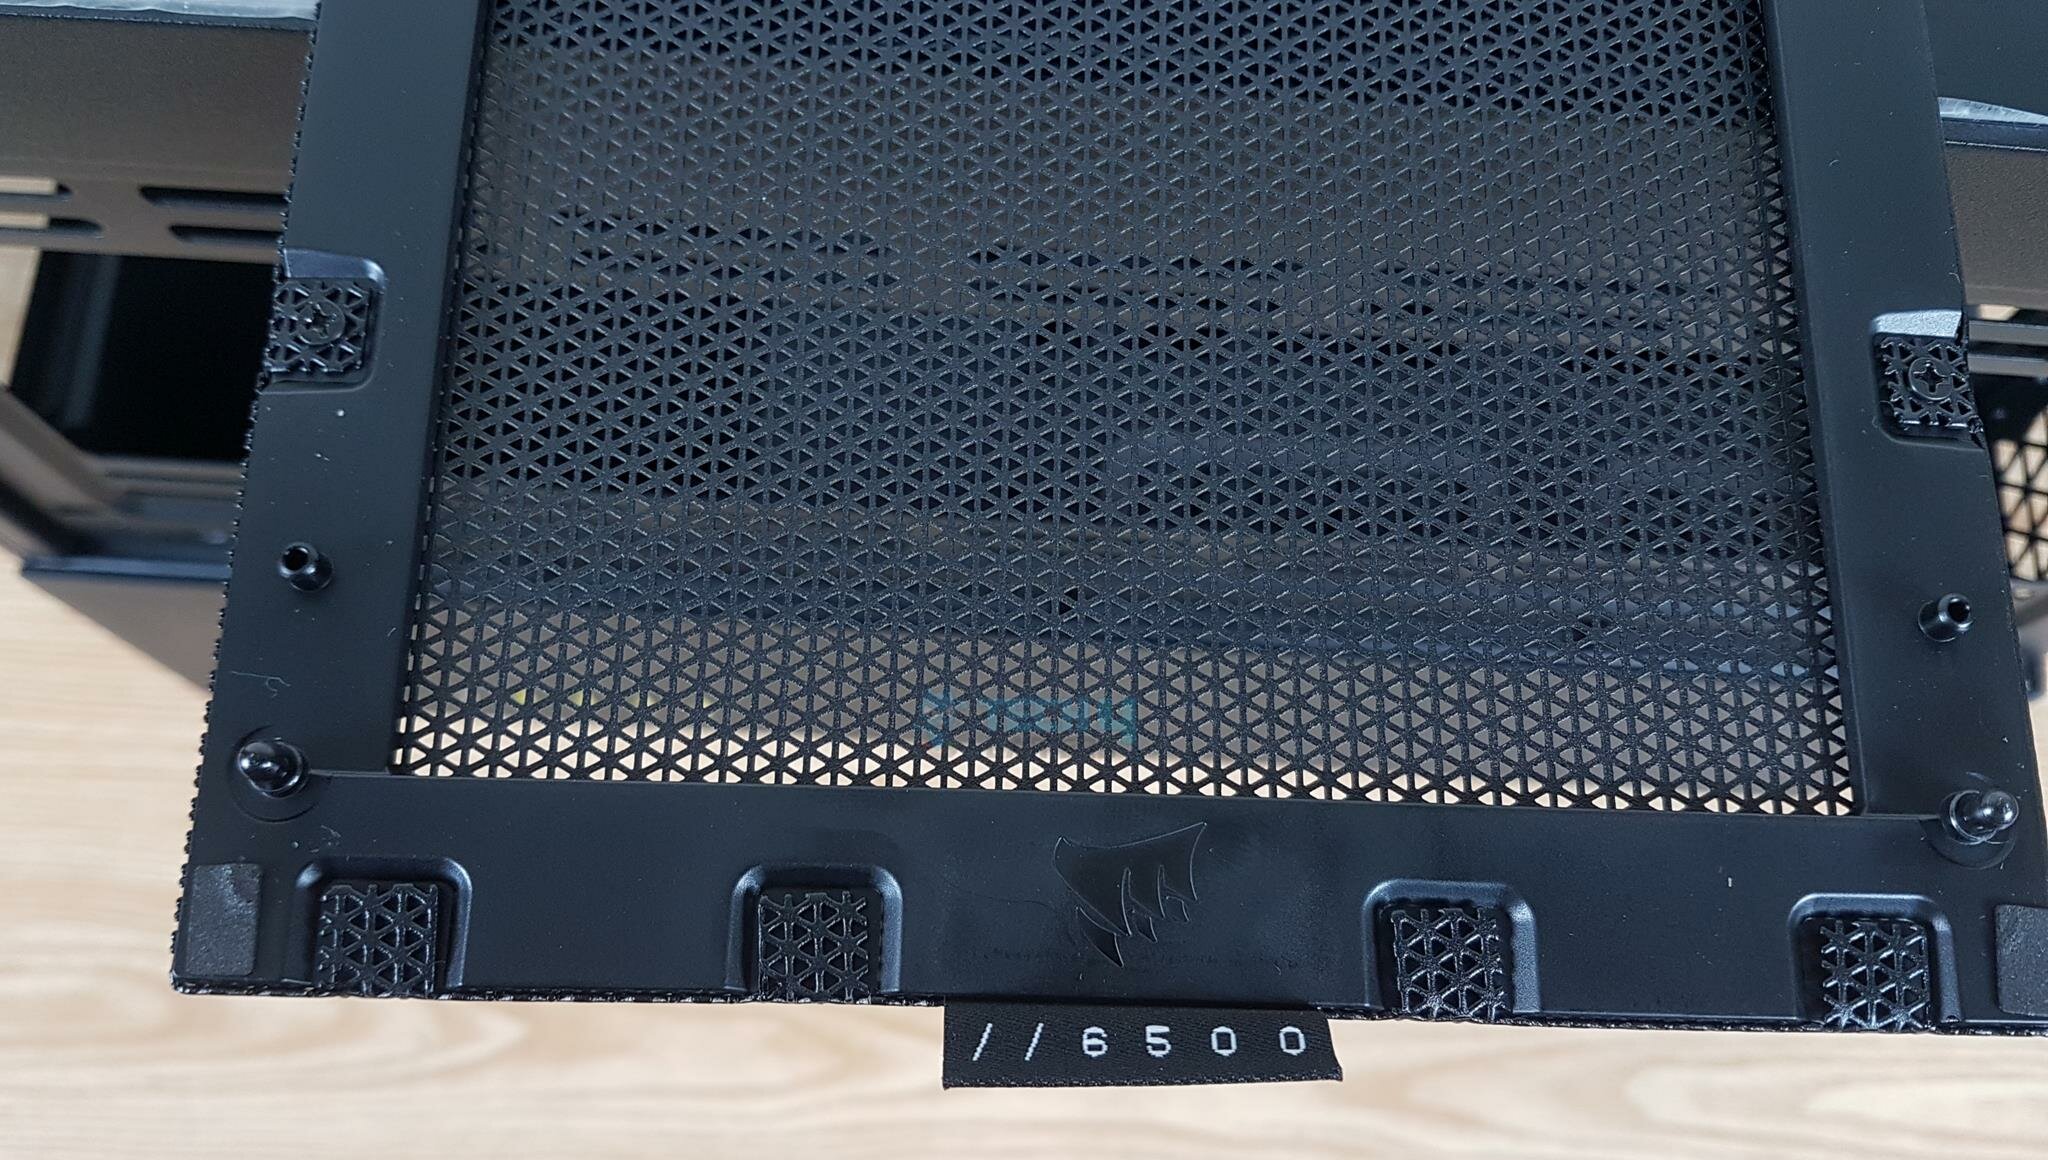
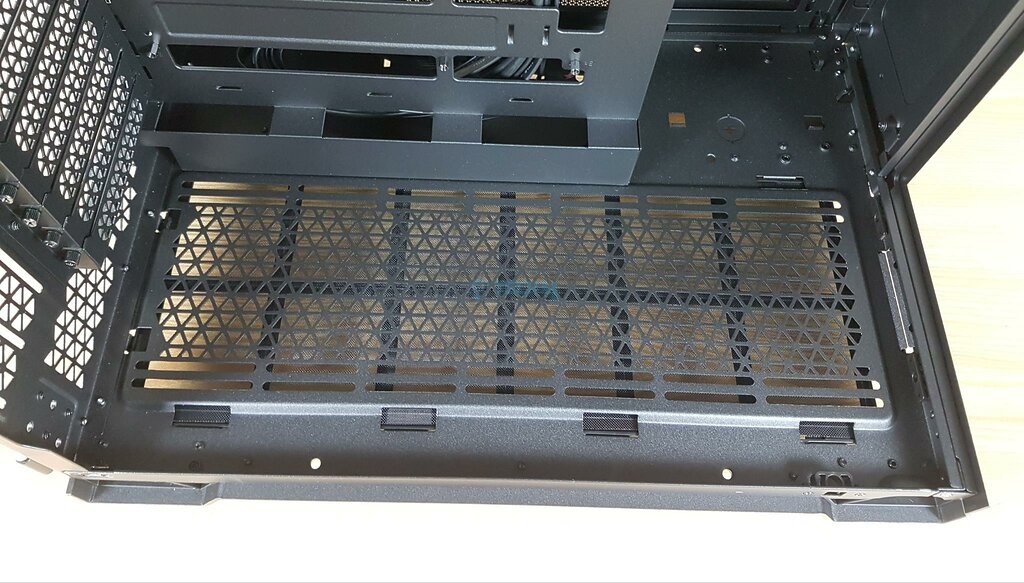
Looking at the bottom, 4x large size feet are part of the steel frames. There is a single large-size dust filter that can be removed from the front side, which is a wise design.
Removing the filter, you can see a fan bracket that can house up to 3x 120mm/140mm fans or up to a 360mm radiator. This bracket is fixed and needs to be changed. Corsair should make it a removable fan bracket for convenient installation without tipping the case over.
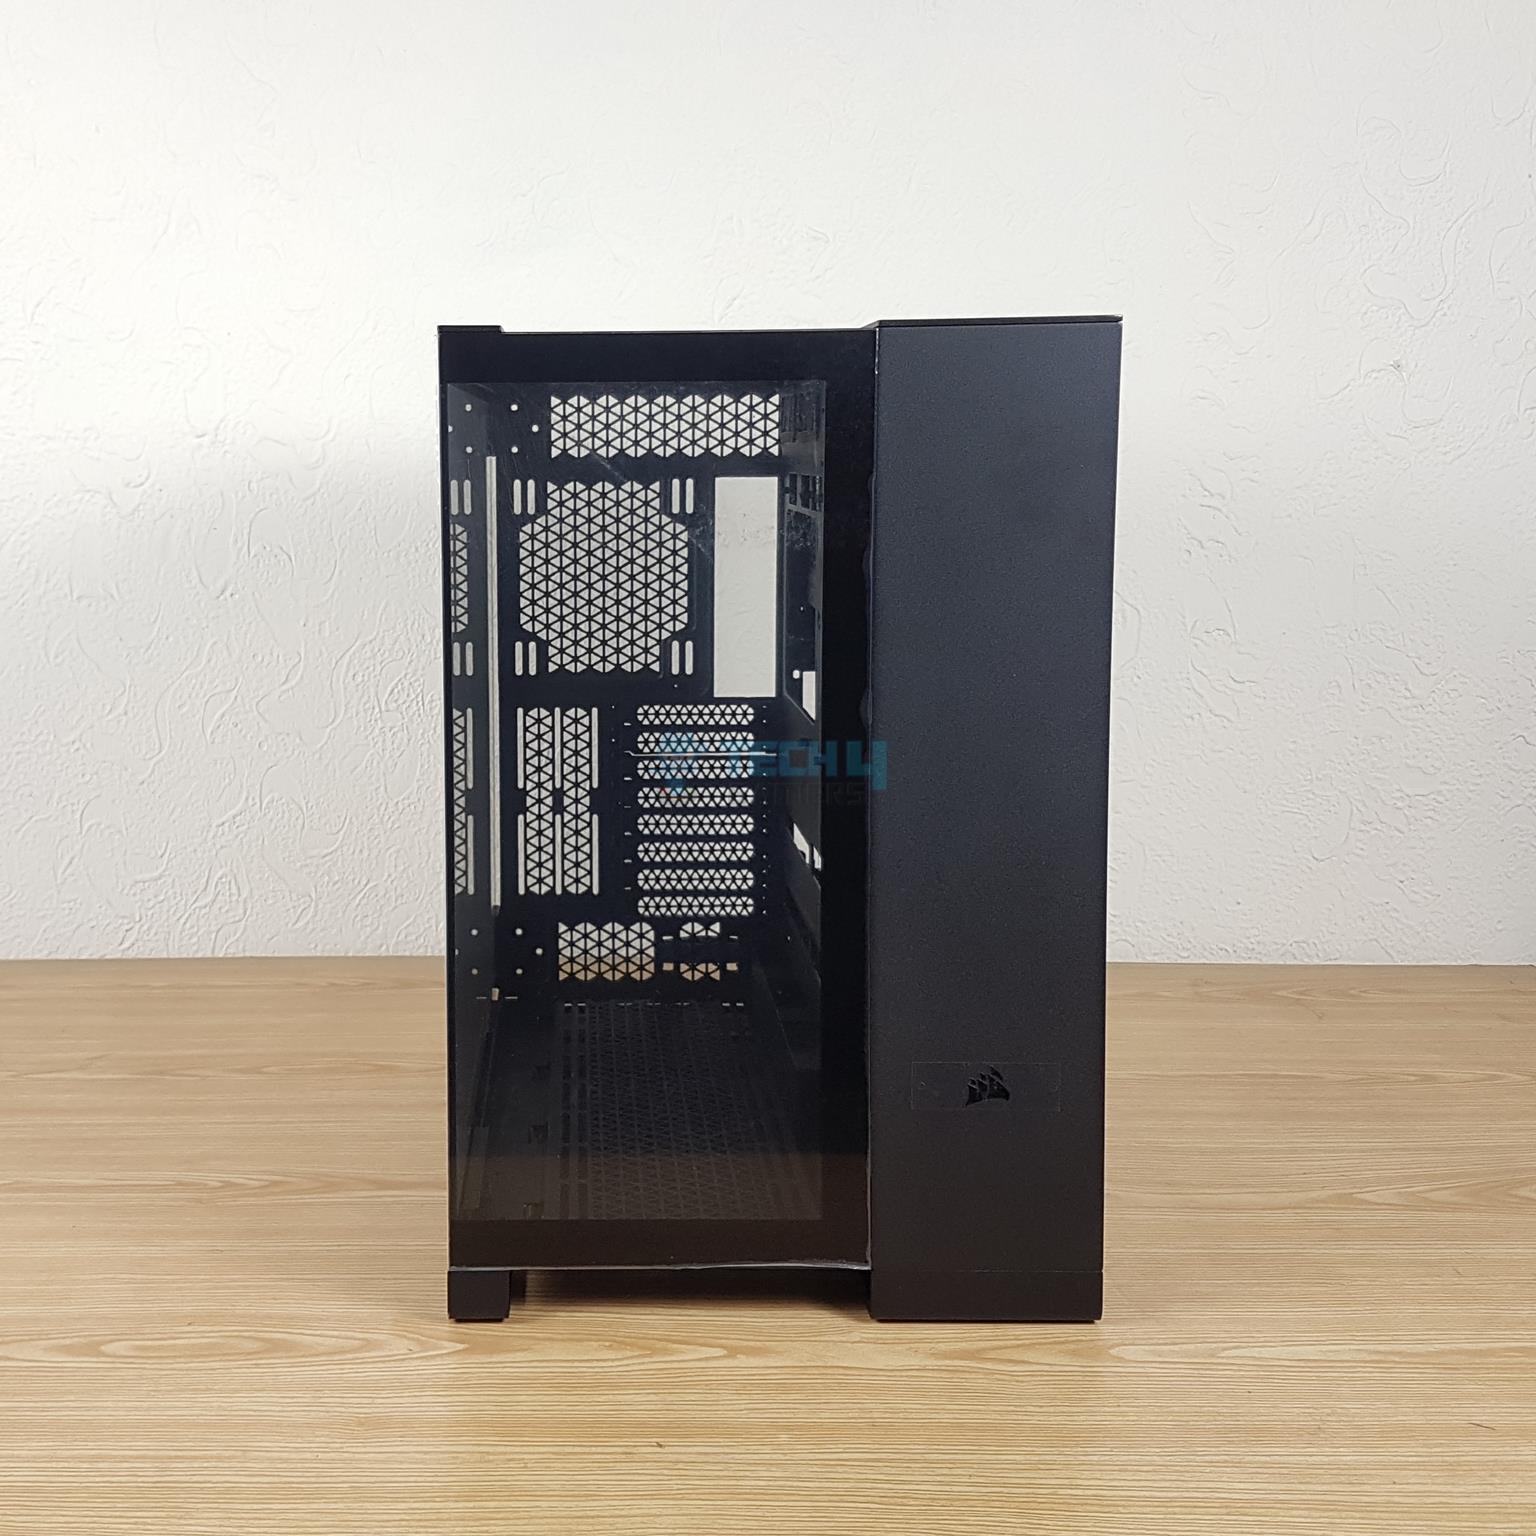
Side Panel
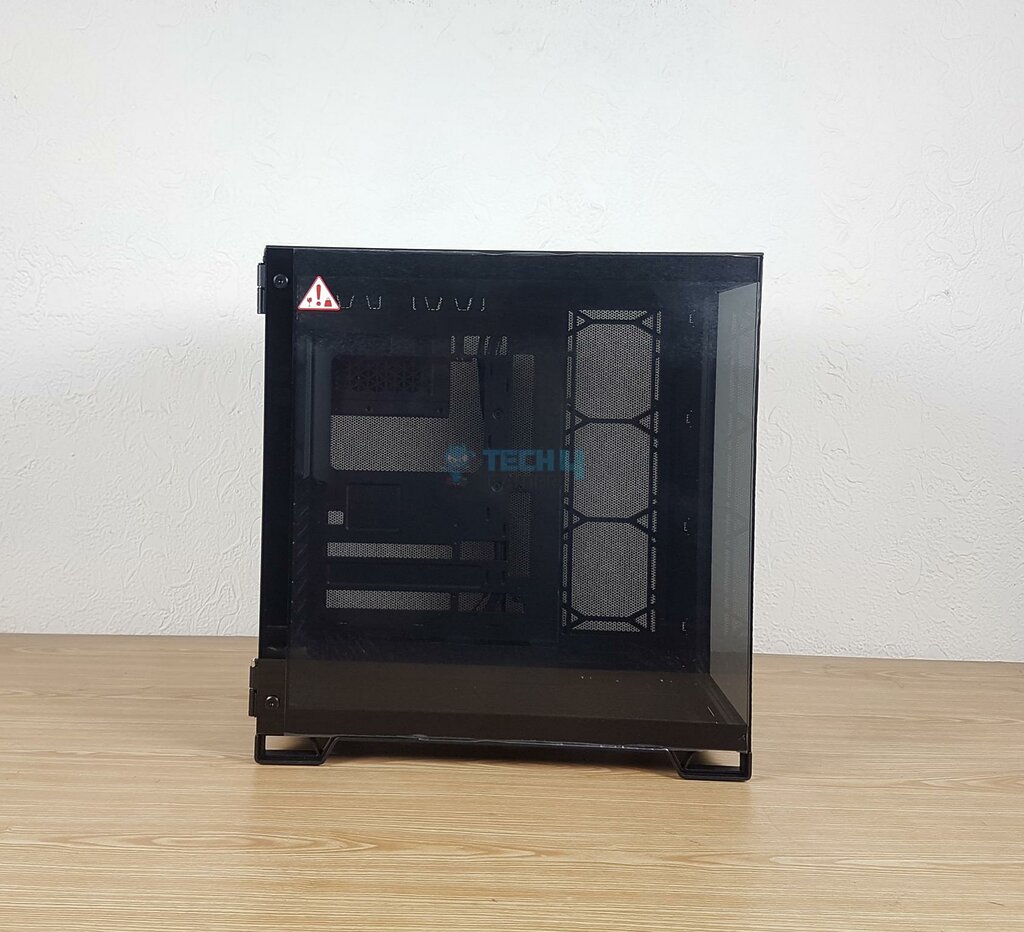
There is a 3mm tempered glass on the side panel. It is tinted. It is not a bezel-less design. You can still see the inside build in this case though for a clear view, you would need lighting setup.
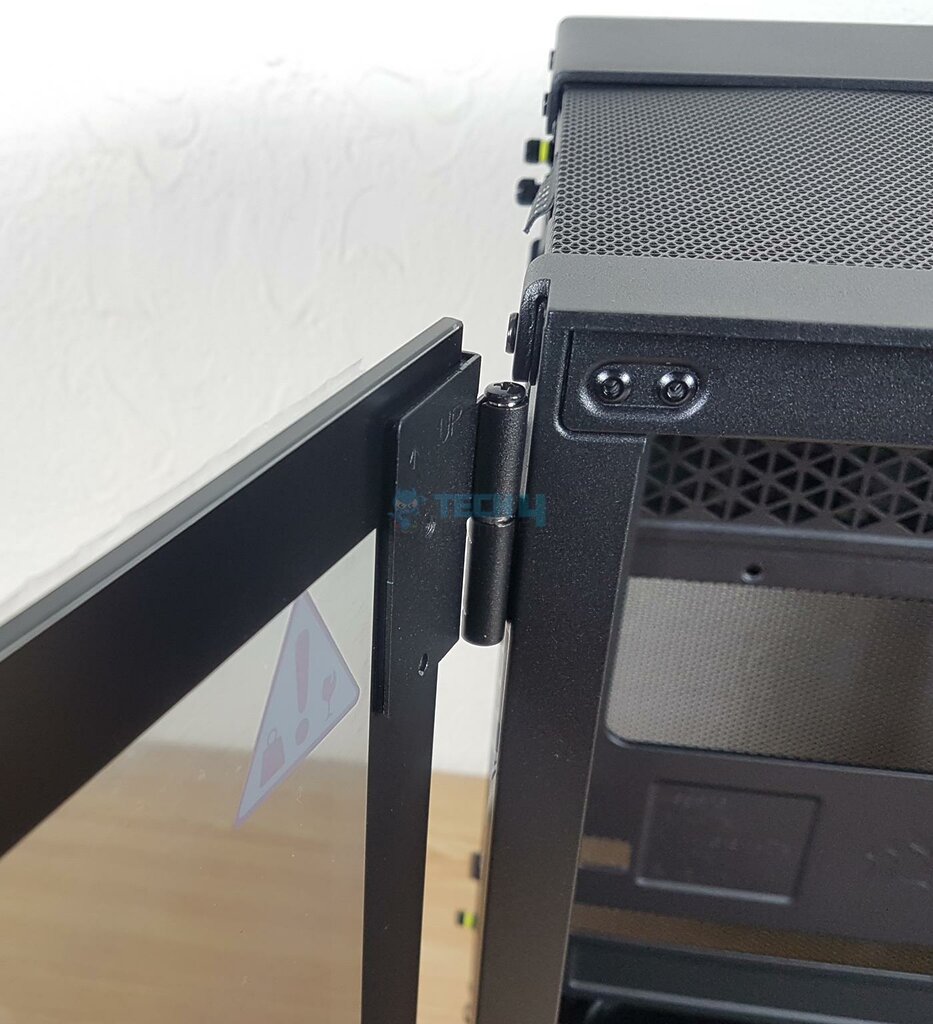
The glass panel is hinged. There is a label with the text “Up” and arrow direction. There is a screw on the top hinge. Undo it and lift the glass panel off. Other than that, this panel uses a bolt and latch on the opposite end. You would need to place your hand under the panel and pull it out, which is strange.
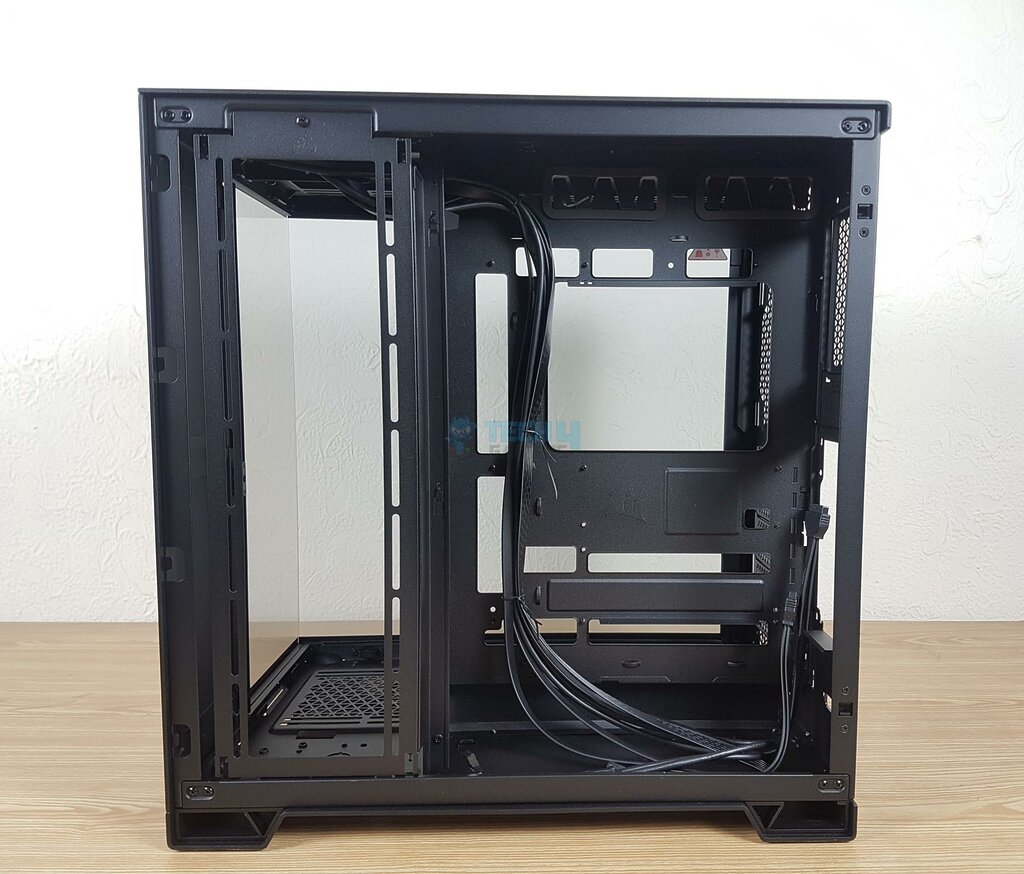
Interior Design
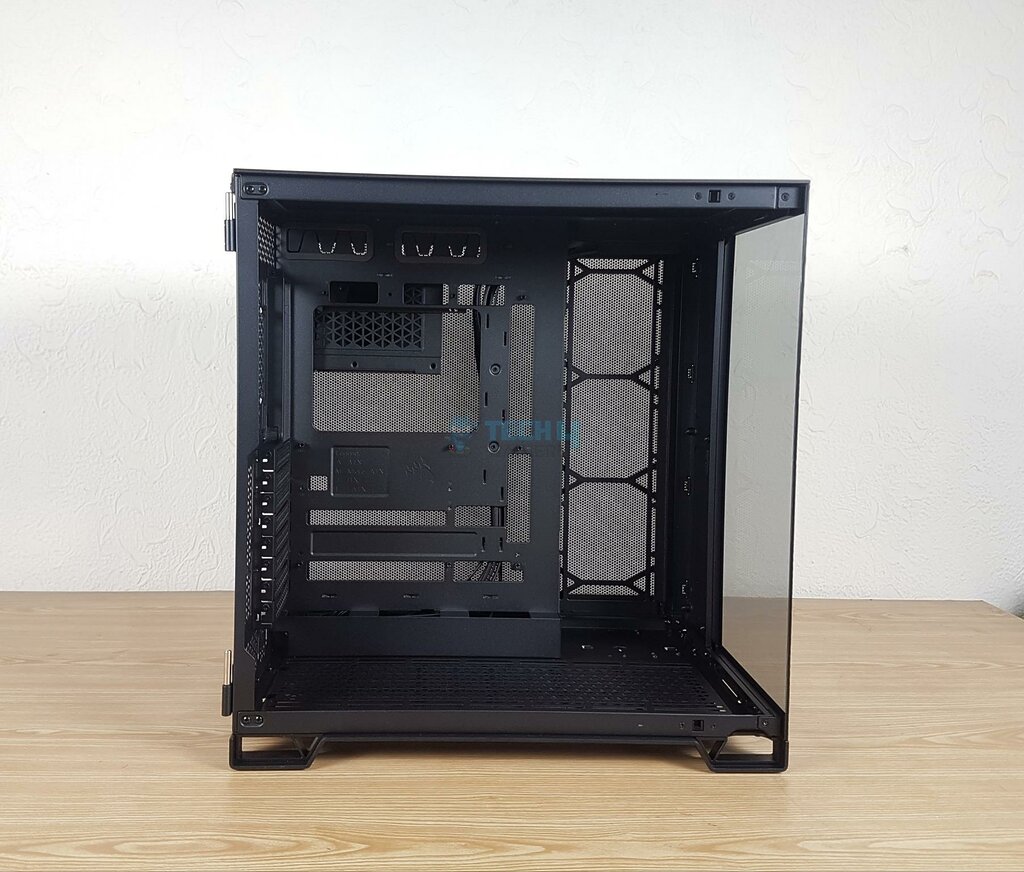
I have removed the glass panel and shown the main inside view. You can see that the front glass panel is screwed using two screws on top and bottom. This is a spacious layout. Take the word from one who has done a build in this case.
This case supports motherboards up to E-ATX size. However, an E-ATX motherboard that extends over the recessed area facing the side fan bracket would look odd. There are sizes even in E-ATX, so do your homework properly.
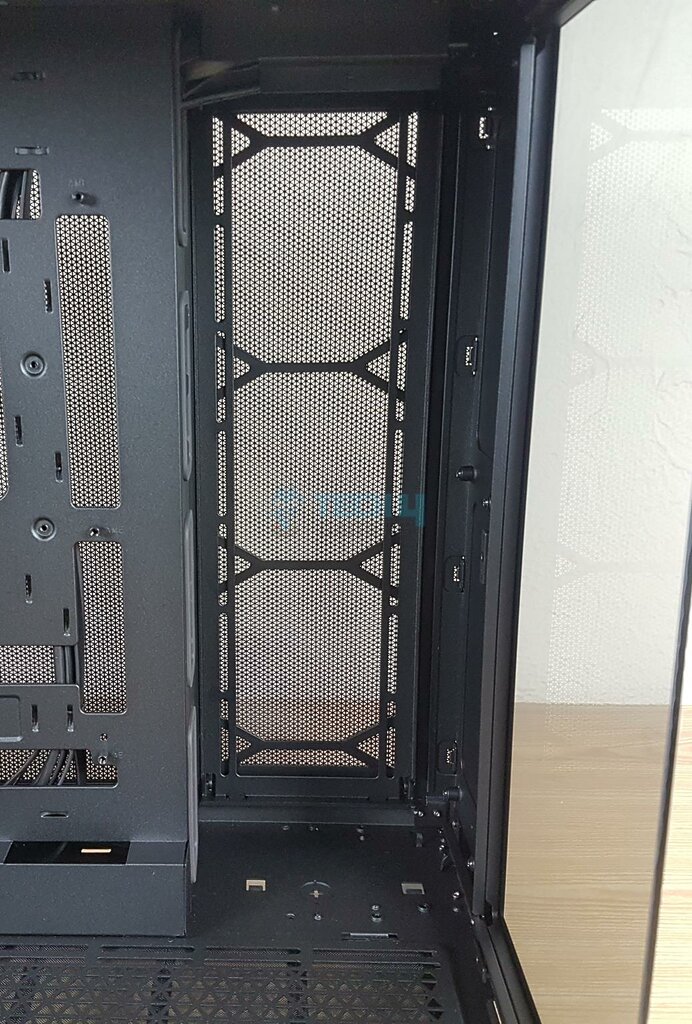
I am showing a side fan bracket. This bracket can house up to 3x120mmm fans and up to a 360mm radiator in 120mm size only. This, in my opinion, should have been worked out for 140mm size for better compatibility.
There is a ginormous space available in front of the bracket. It is approximately 115mm, as per my measurements. You can install any thickness radiator here and can still work out your way. Kudos for this thinking, Corsair!
I am showing the fan mounting on the base of this case. You can install up to 3x 120mm/140mm fans here, but the maximum radiator support is 360mm. My complaint here is that this is not a removable fan bracket. You would need to tip the case over to secure the fans from the bottom of the case. Come on now, Corsair! Charging USD 199.99 for this?
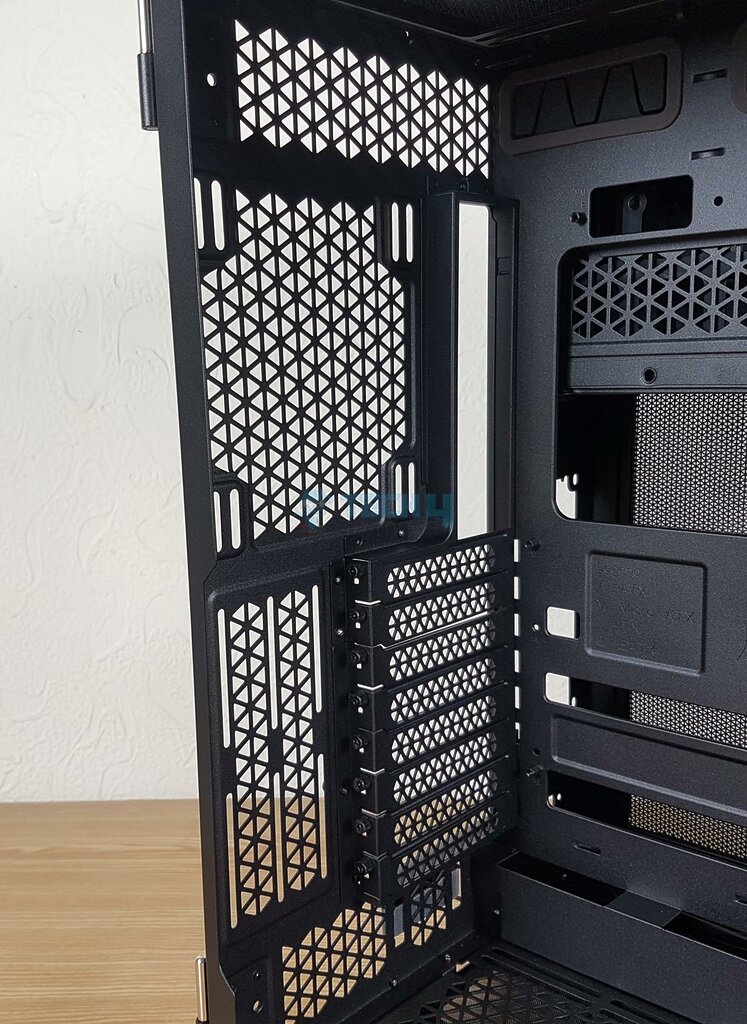
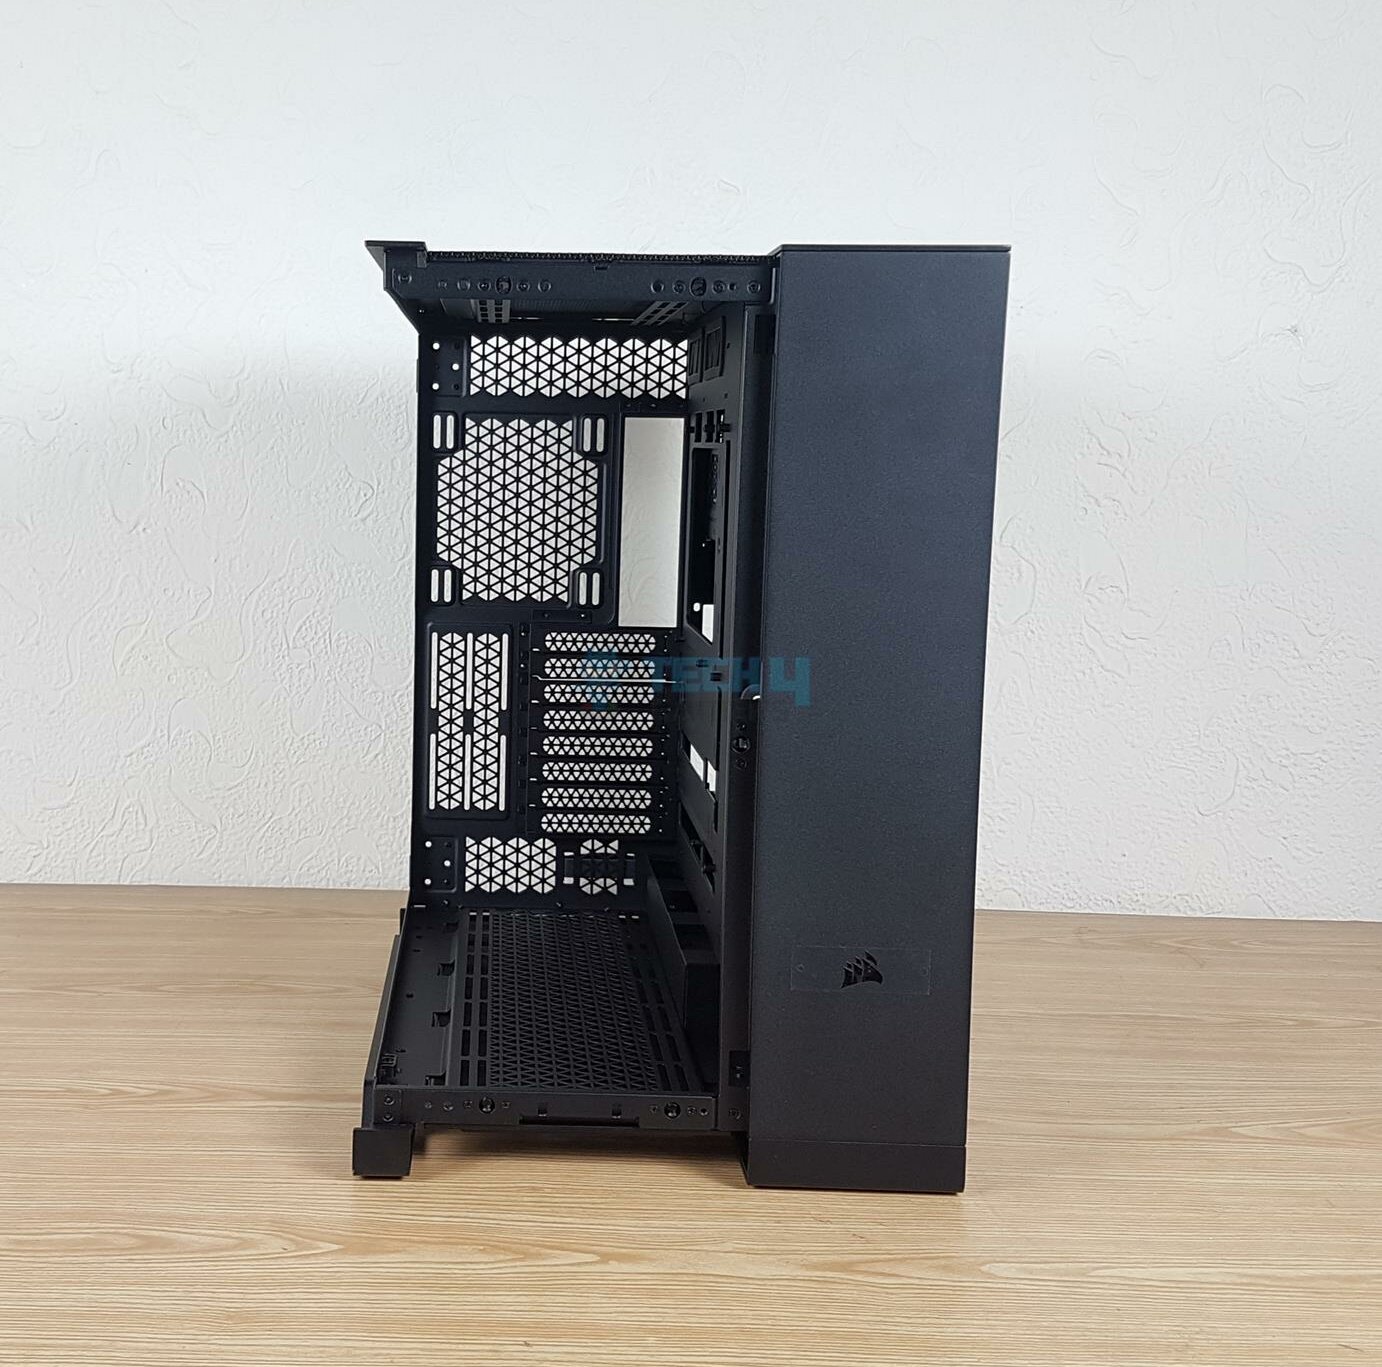
Looking at the left side area, you can see a large size vented slot on the top for air ventilation. There is a rail-mount system for a 120mm or 140mm fan/radiator. There are 8x PCIe slot covers that are reusable and vented. This is not a bridgeless design.
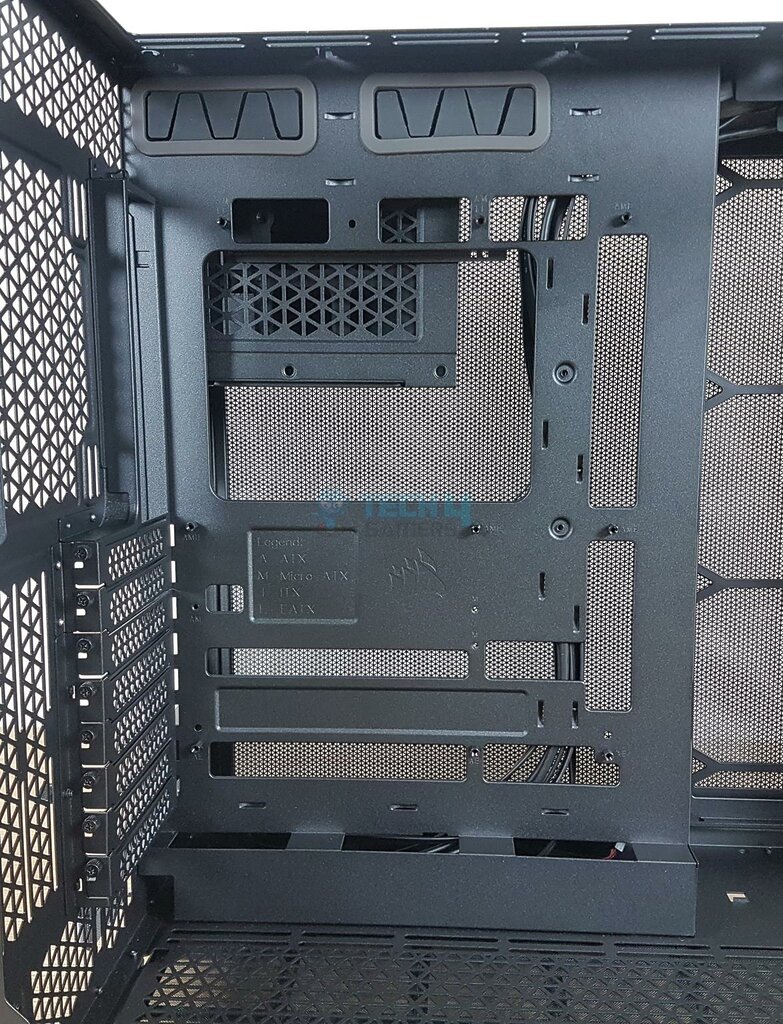
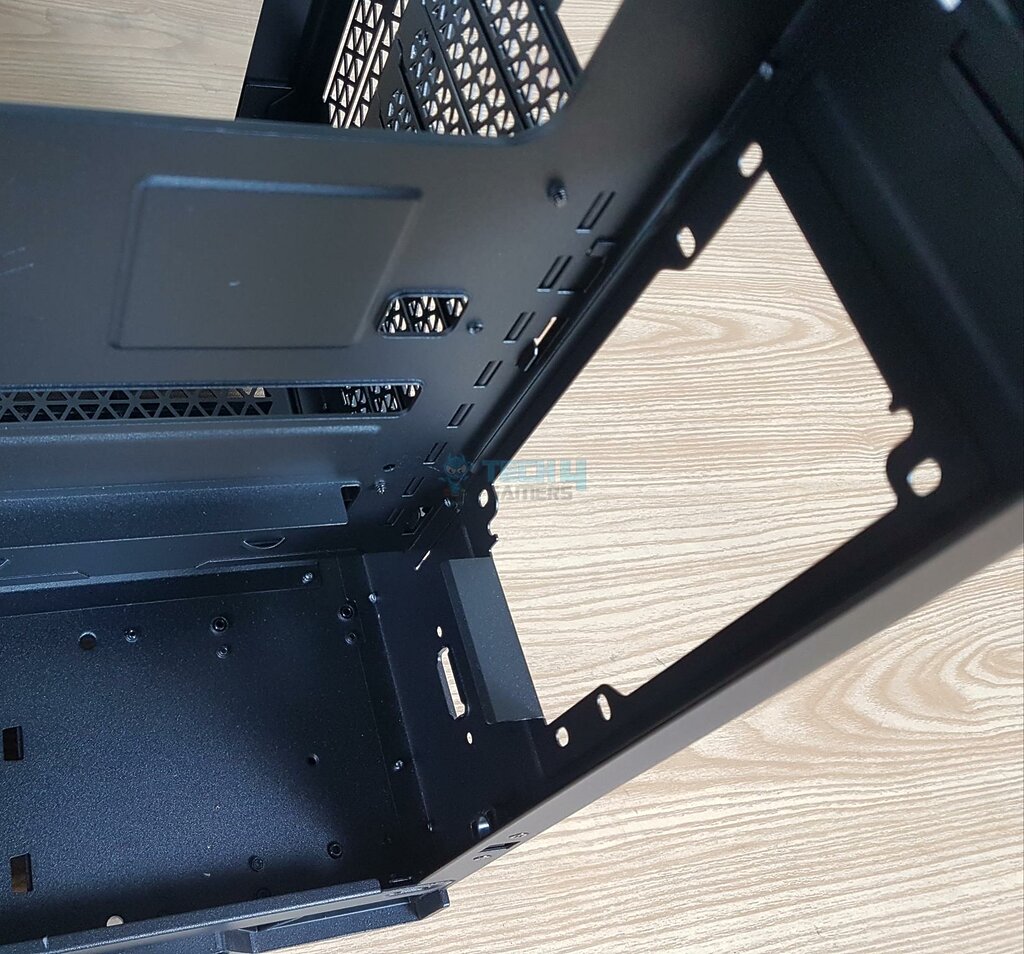
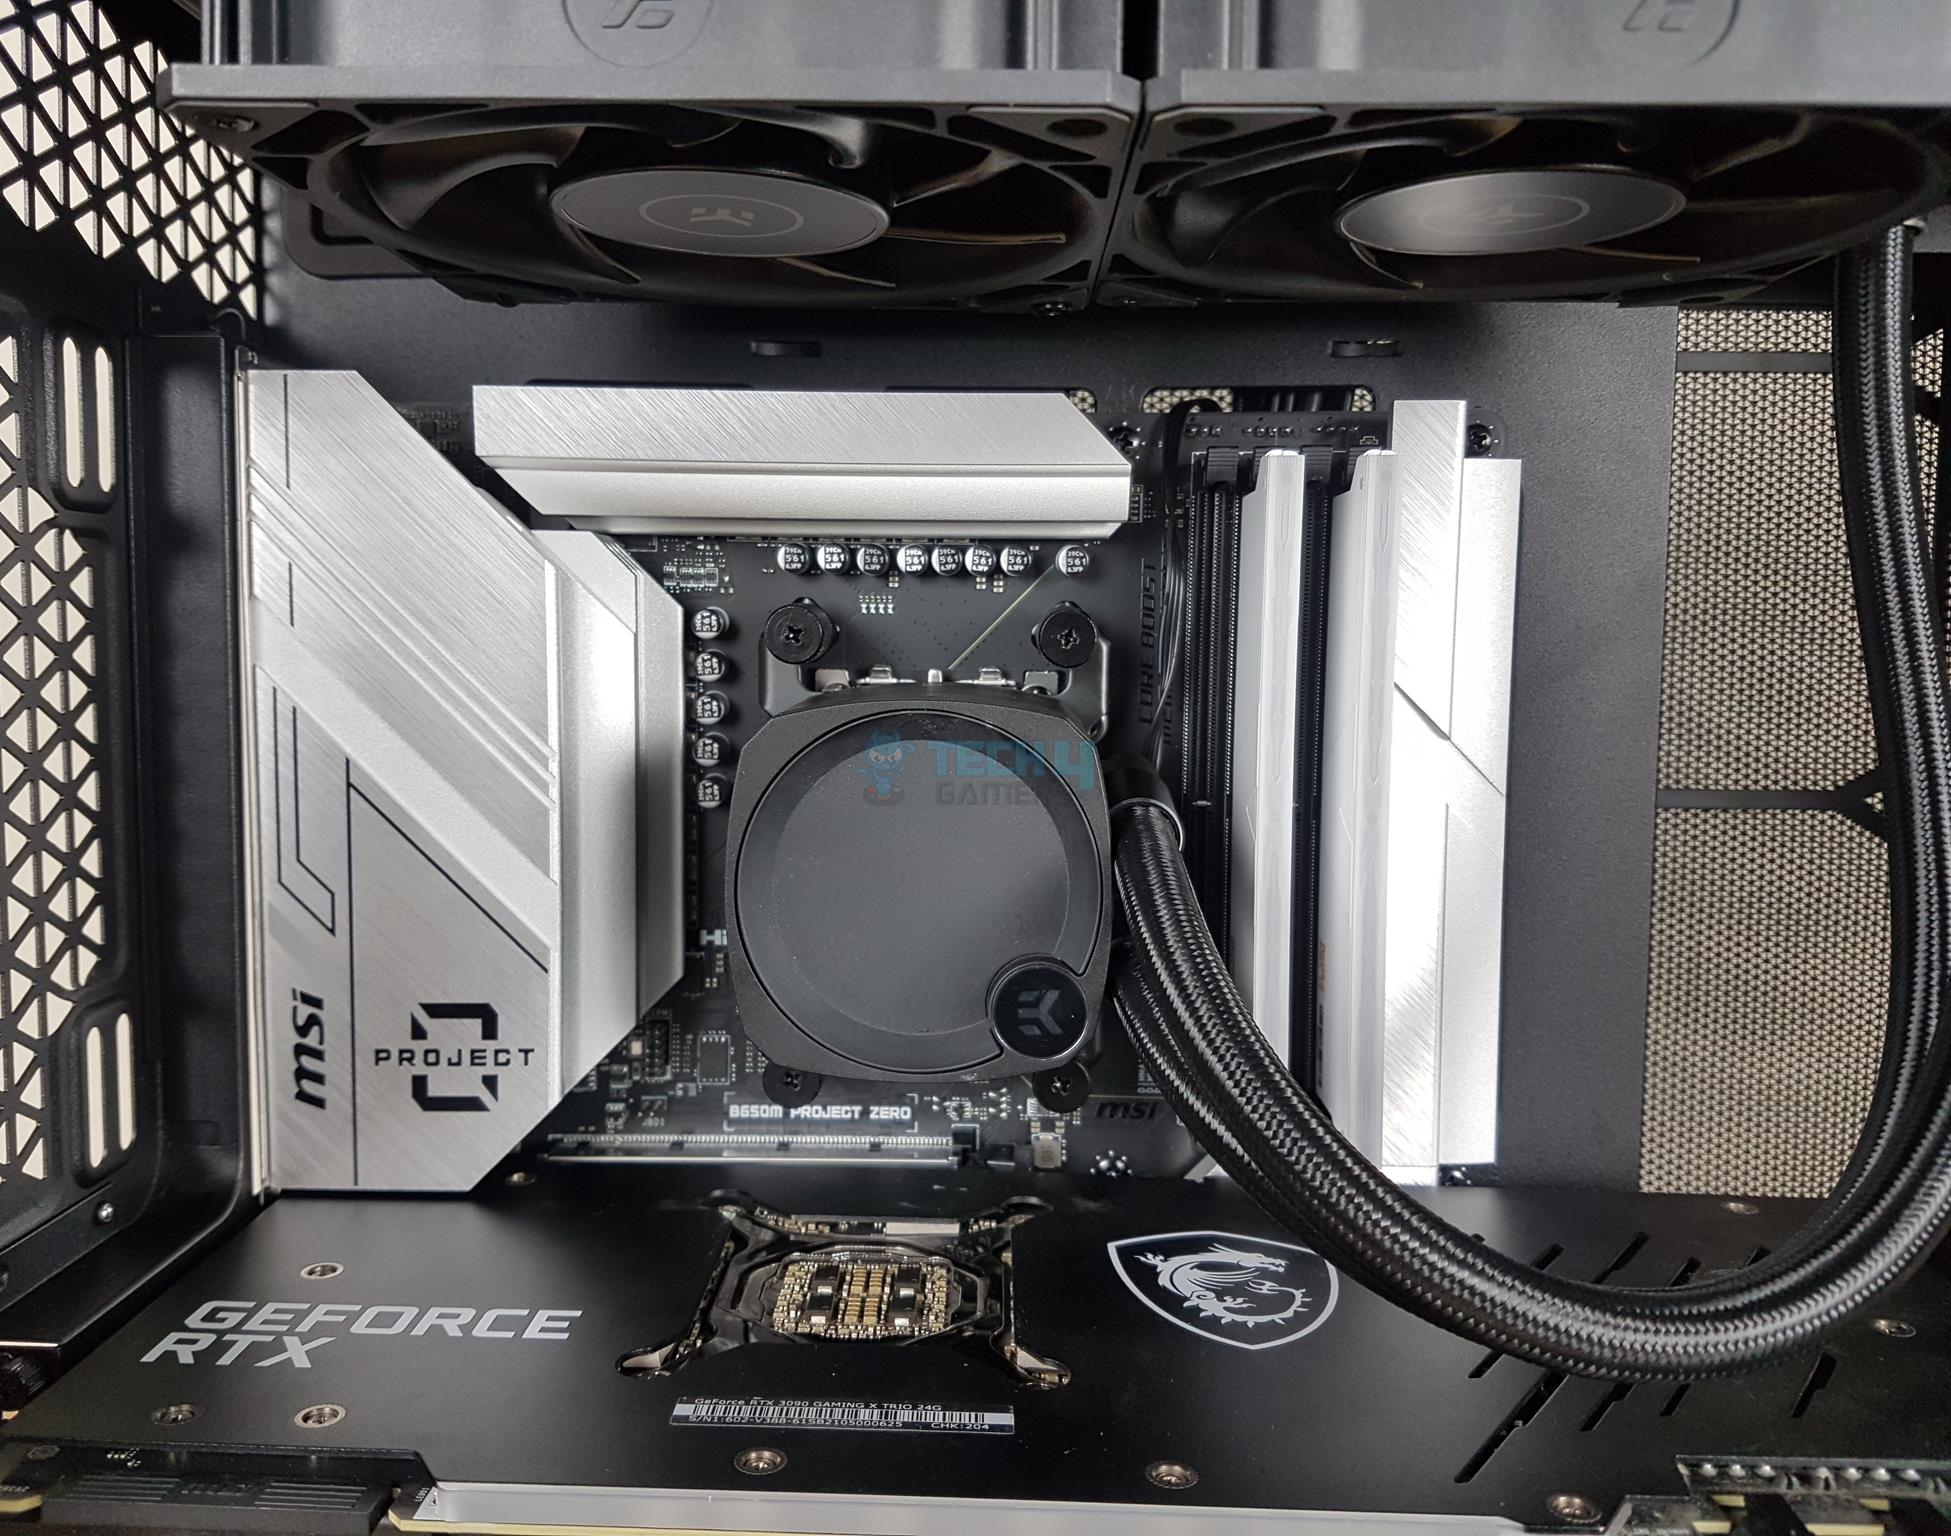
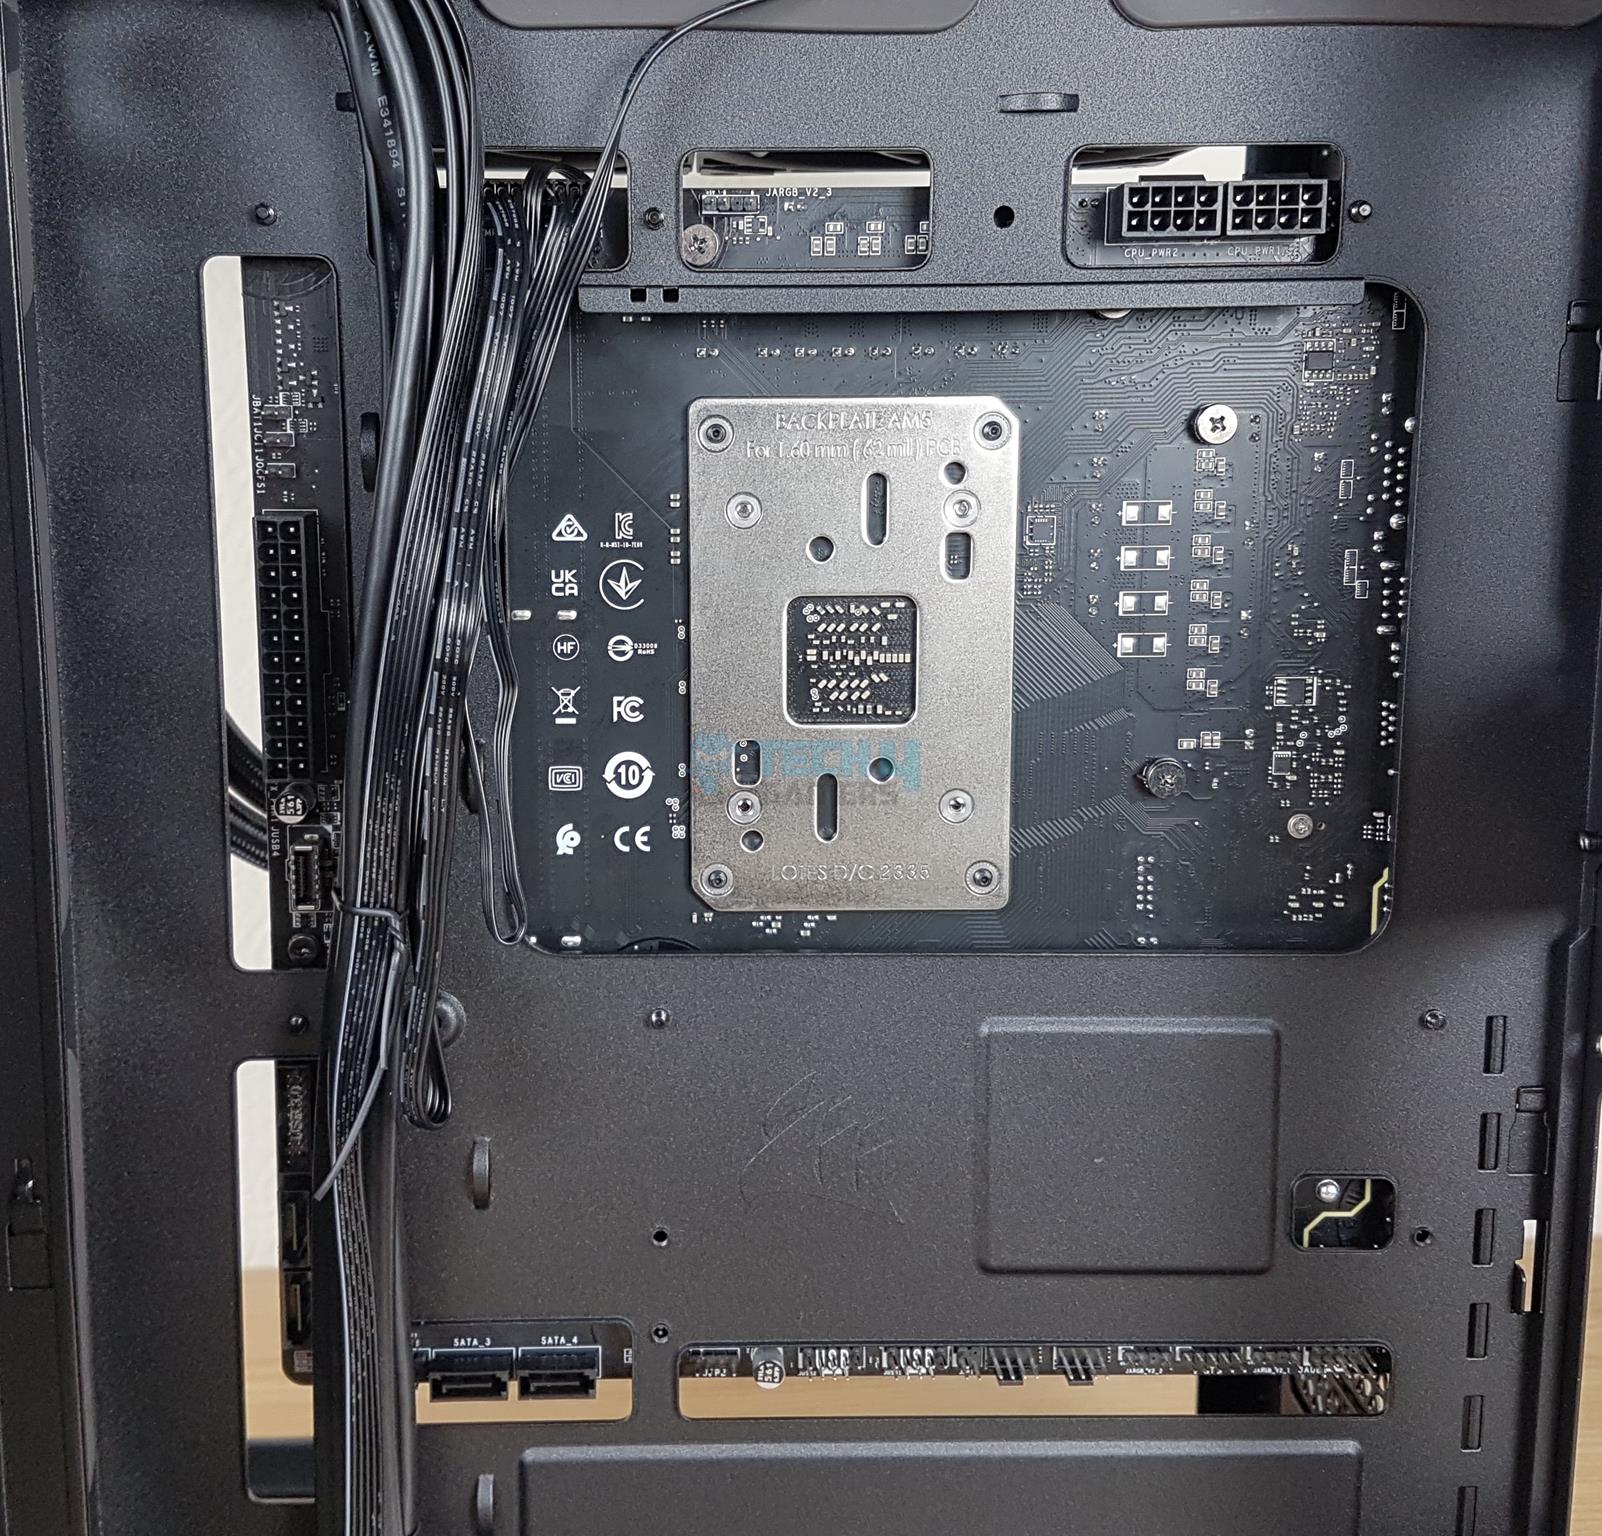
Now, I am showing the main area of interest here, which is the motherboard tray. On top, there are double-shot rubber grommets covering the cutouts. Take a look at the large-size cutouts around the tray. These are there so that you can install a full ATX backplug motherboard. 9x standoffs are pre-installed.
There is a displacement of 75mm from the top of the fan bracket to the motherboard’s top, giving you enough room for a thicker radiator on the top. The tray has a length of 282mm and 410mm in height.
There is a large CPU cutout on the tray. If you wonder if this case supports regular motherboards, then take relief in knowing it does.
A protruded steel frame over the base gives space between the base fan bracket and the motherboard tray, ensuring that radiators/fans would not obstruct the motherboard and its components.
This frame has cutouts as well, which are for the regular motherboards.
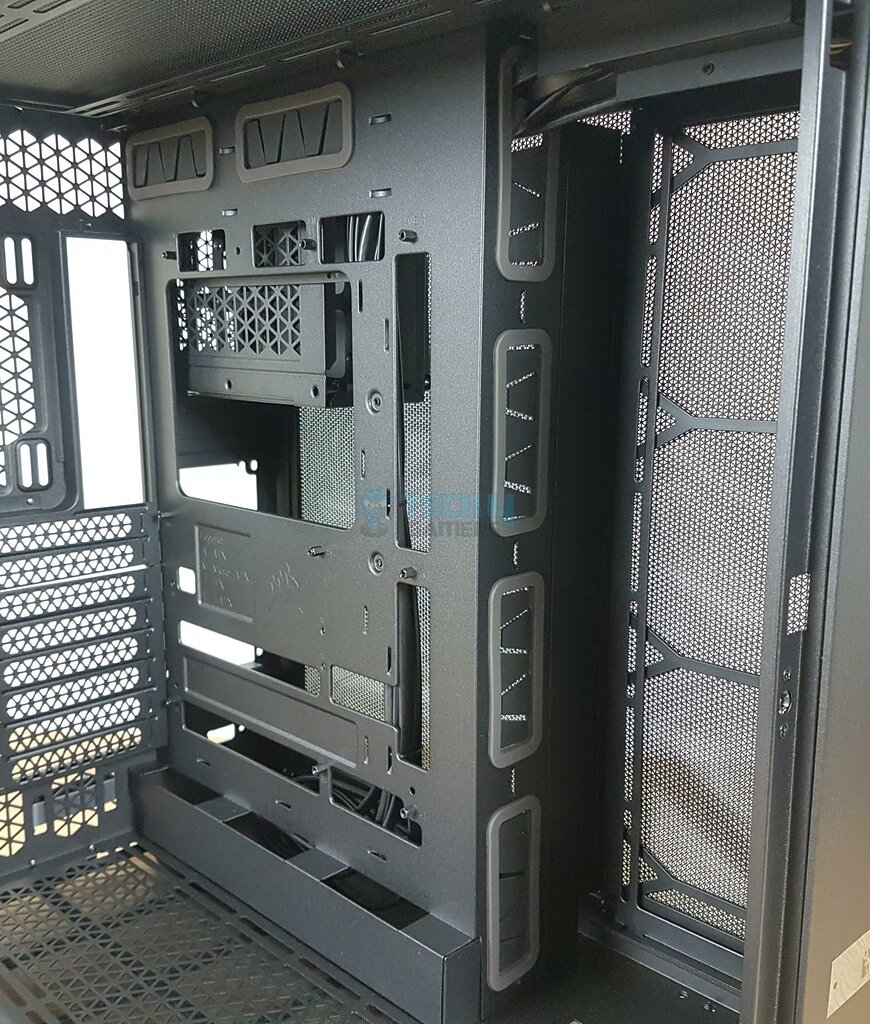
Double-shot rubber grommets on the 4x cutouts towards the right of the motherboard tray cover the cutouts. These are for the regular motherboards (non-backplug). If you route cables through these cutouts, then the clearance for the radiator and the fan may be affected.
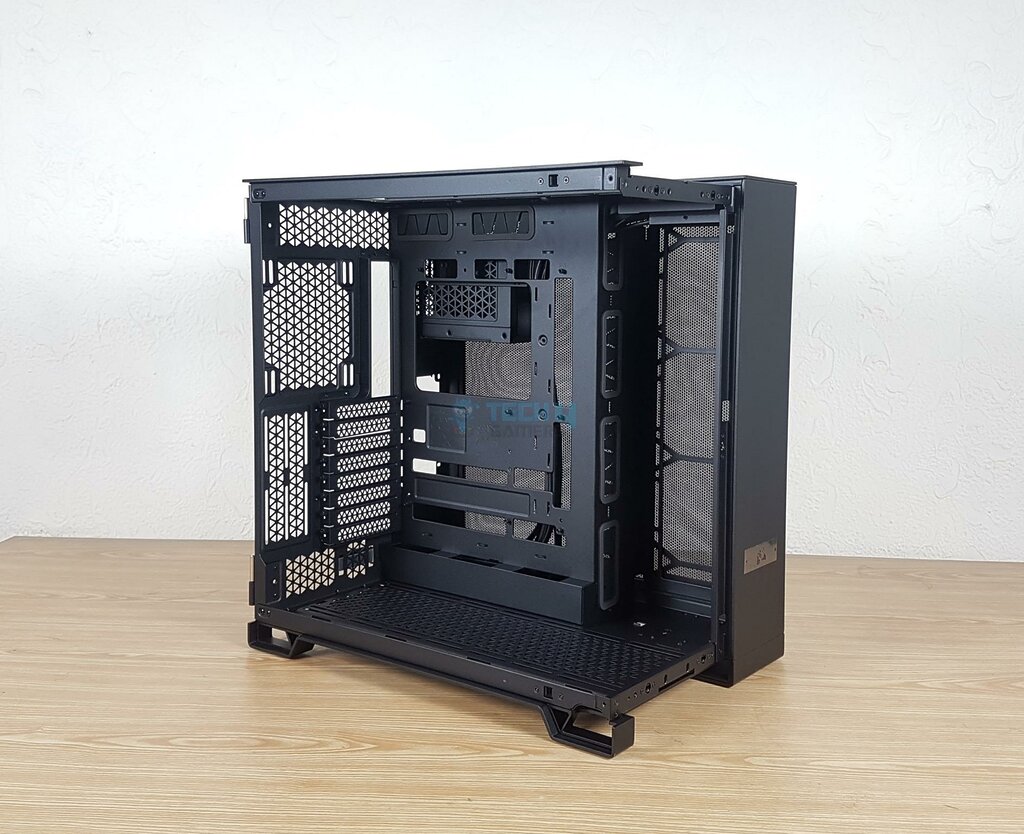
Take a glimpse of the 6500X with both glass panels removed.
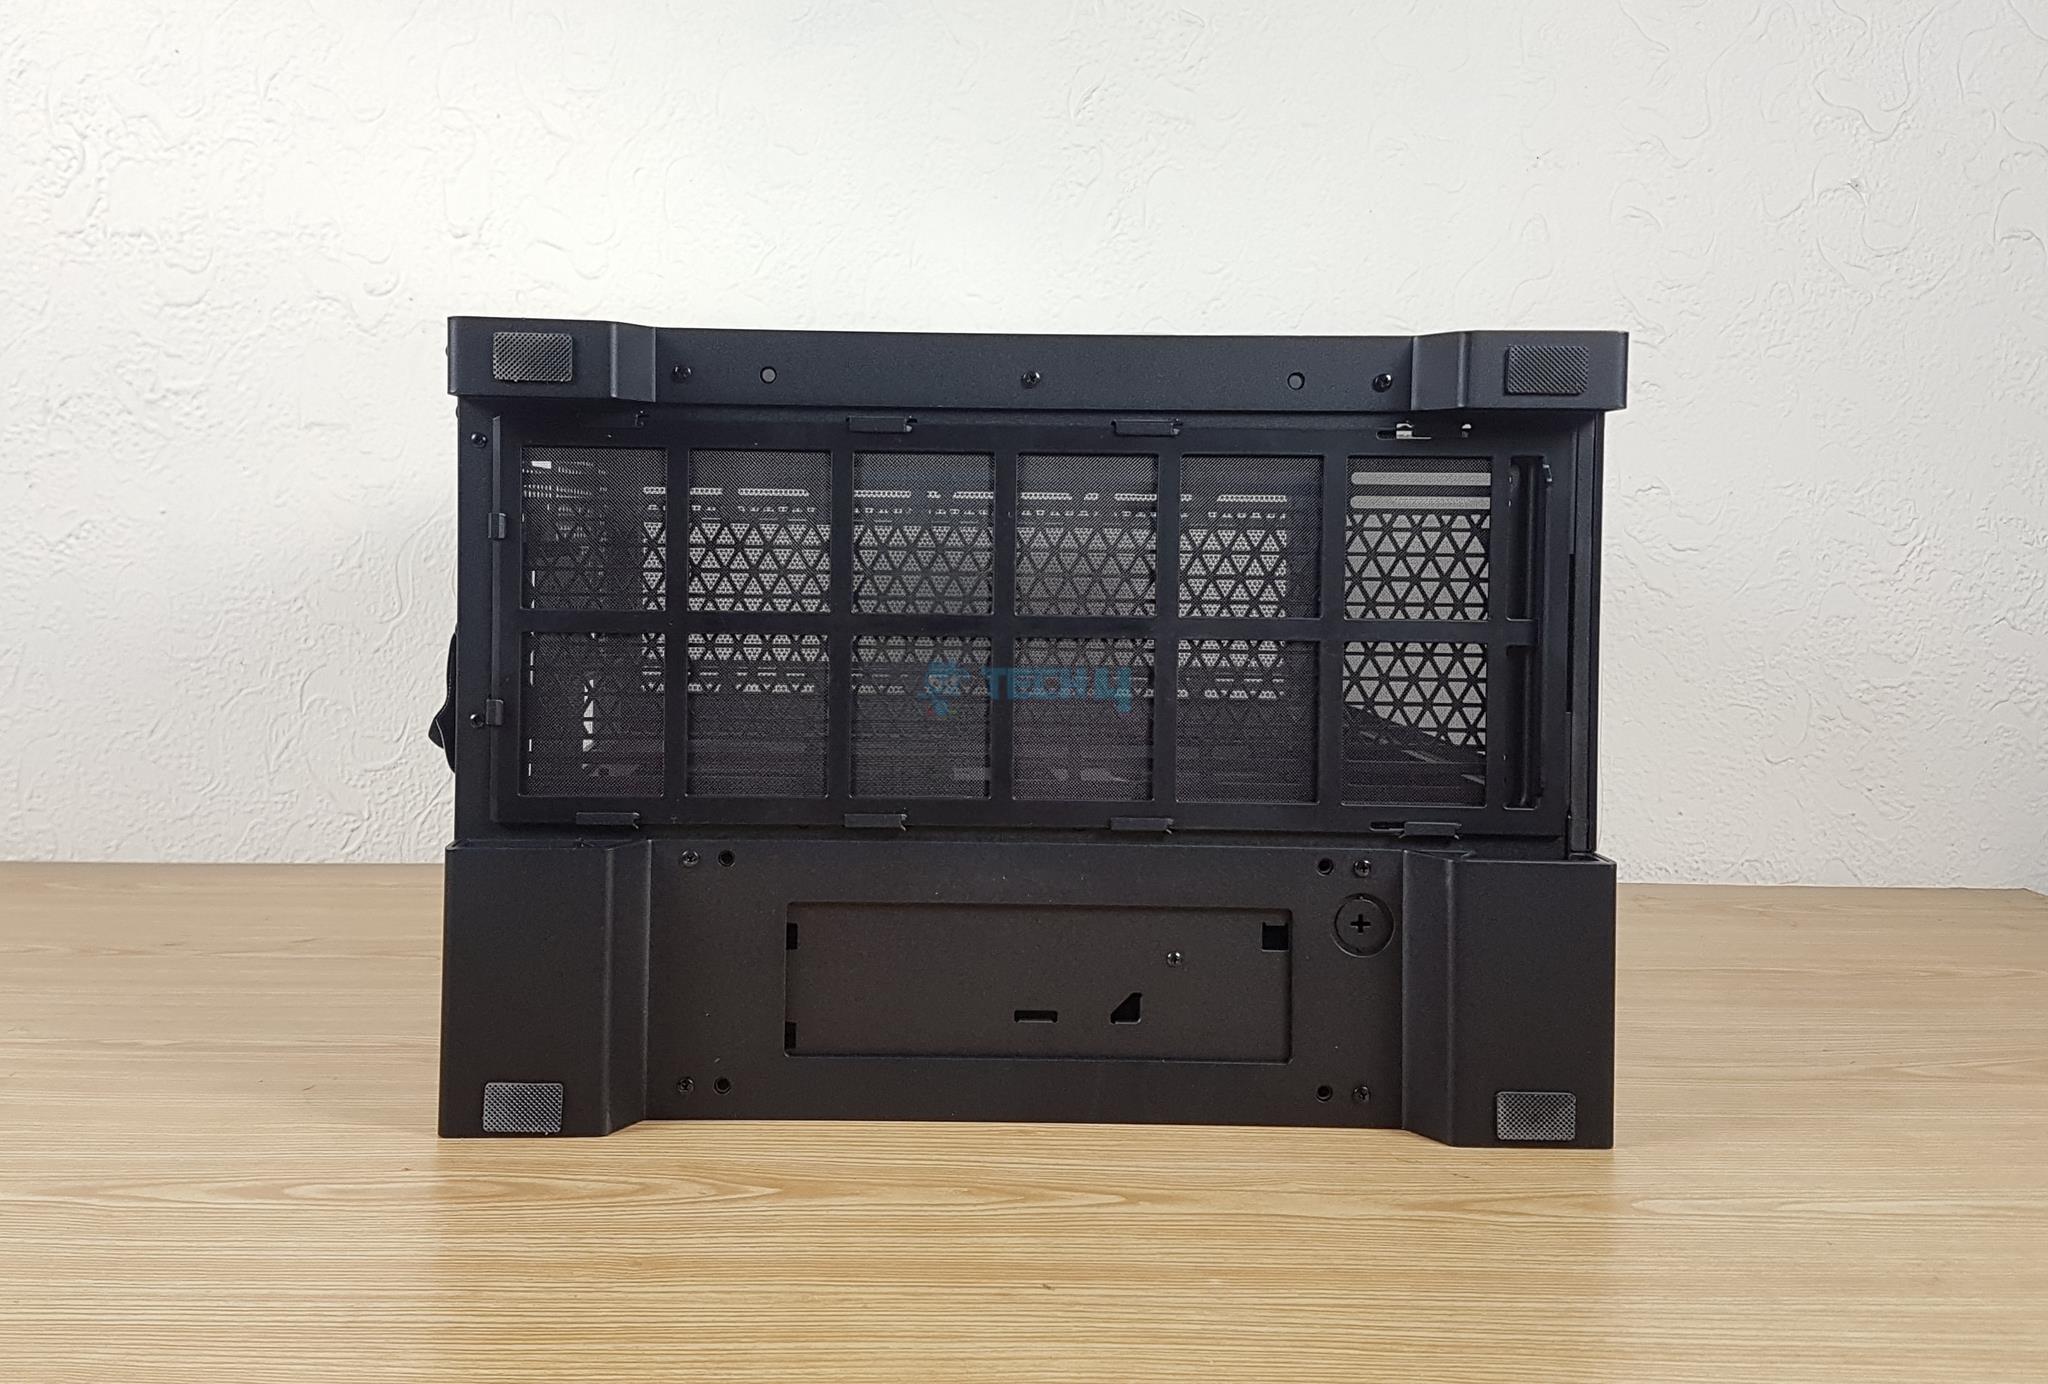
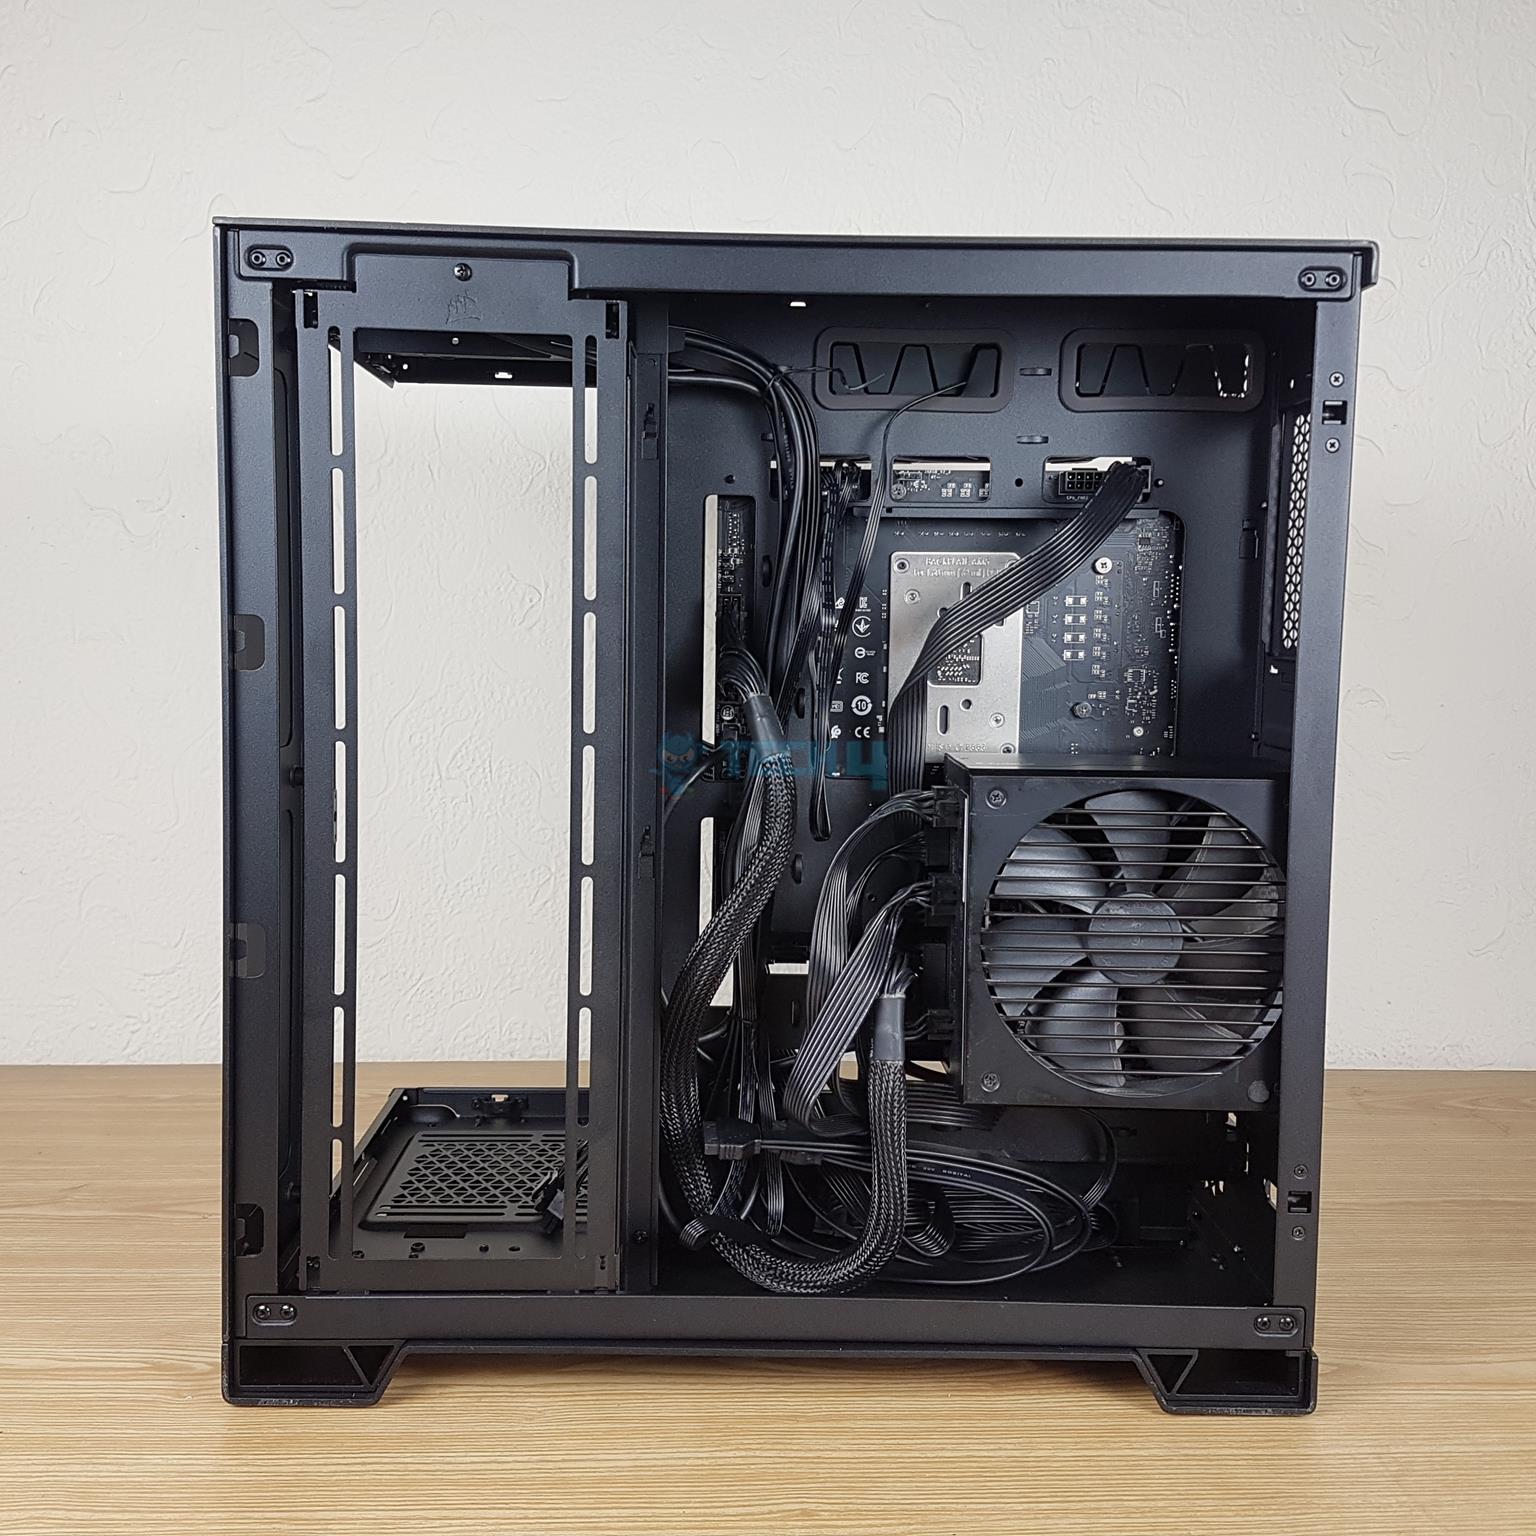
Backside Design

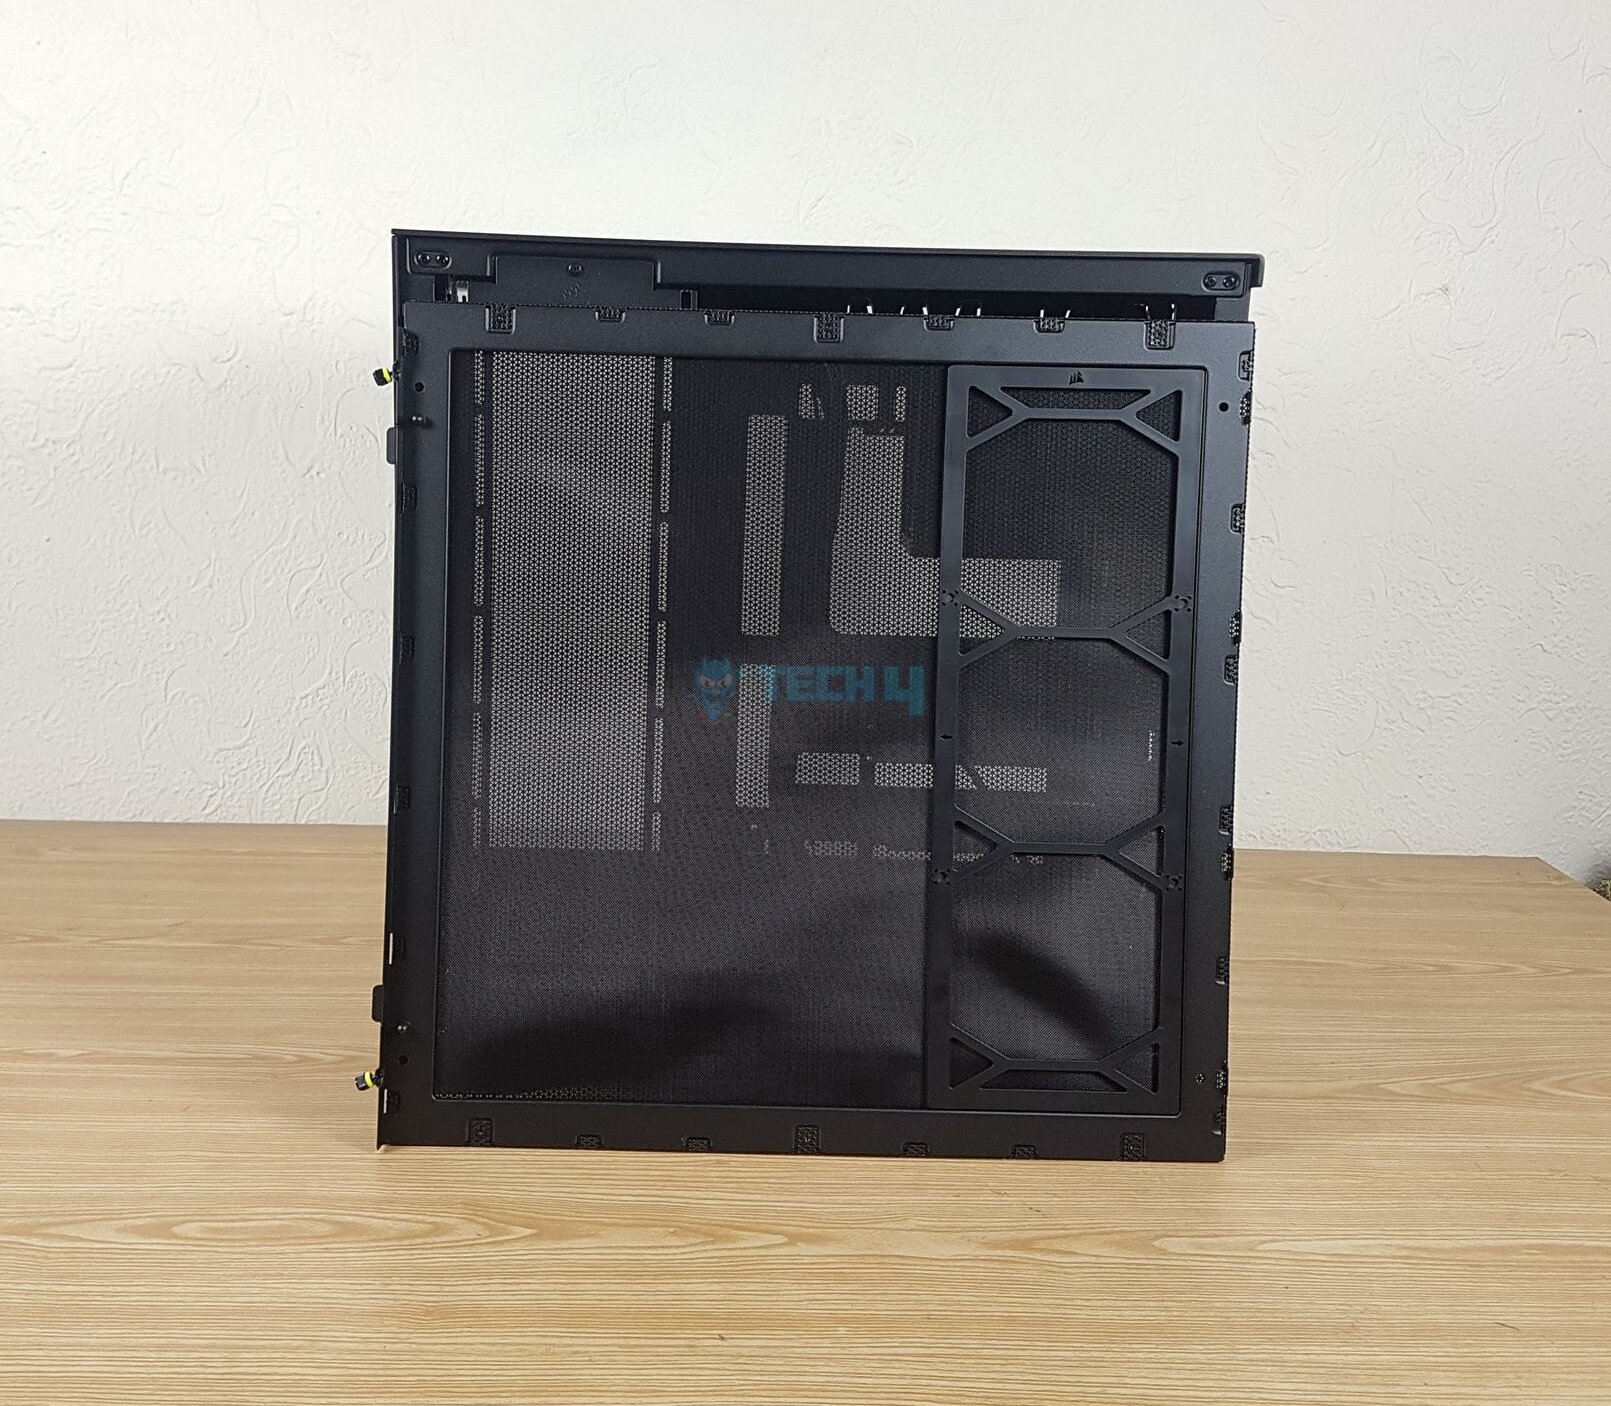
There is a large mesh panel on the side, as can be seen. This is done for air ventilation on the backside. Take a look at the inner view of the side panel. You will find a fine mesh on the panel and covers for the fan bracket on the side.
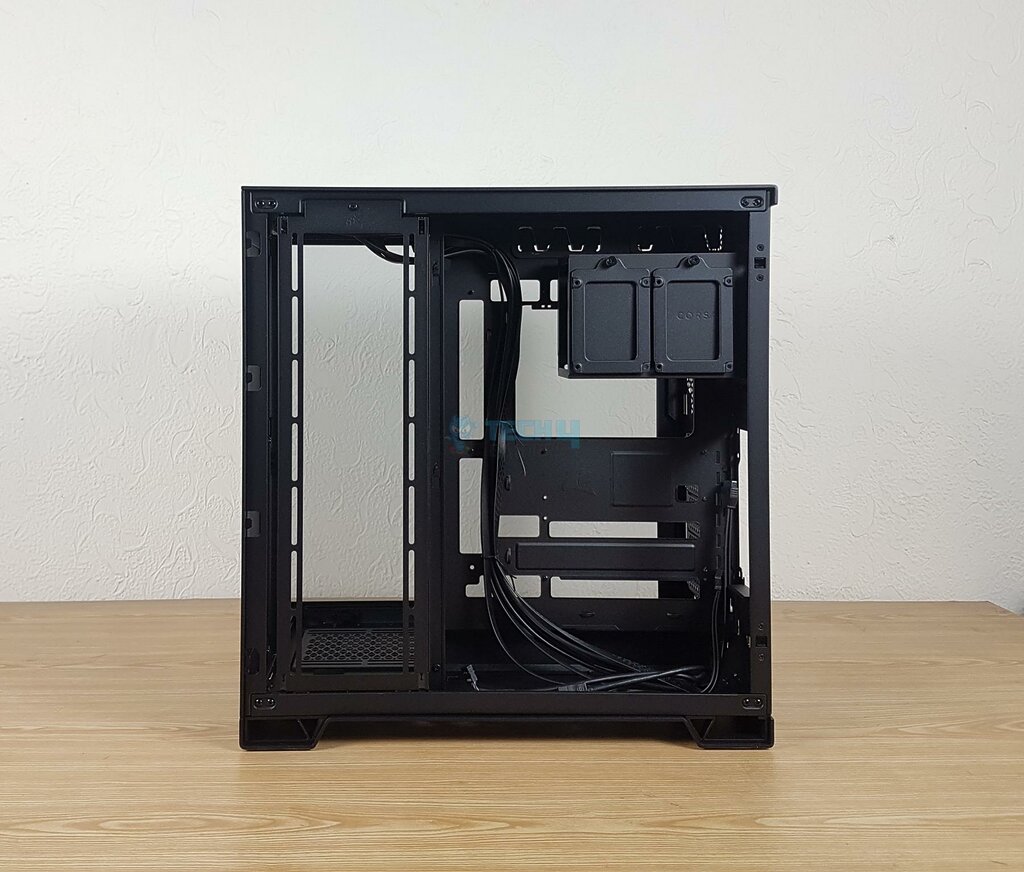
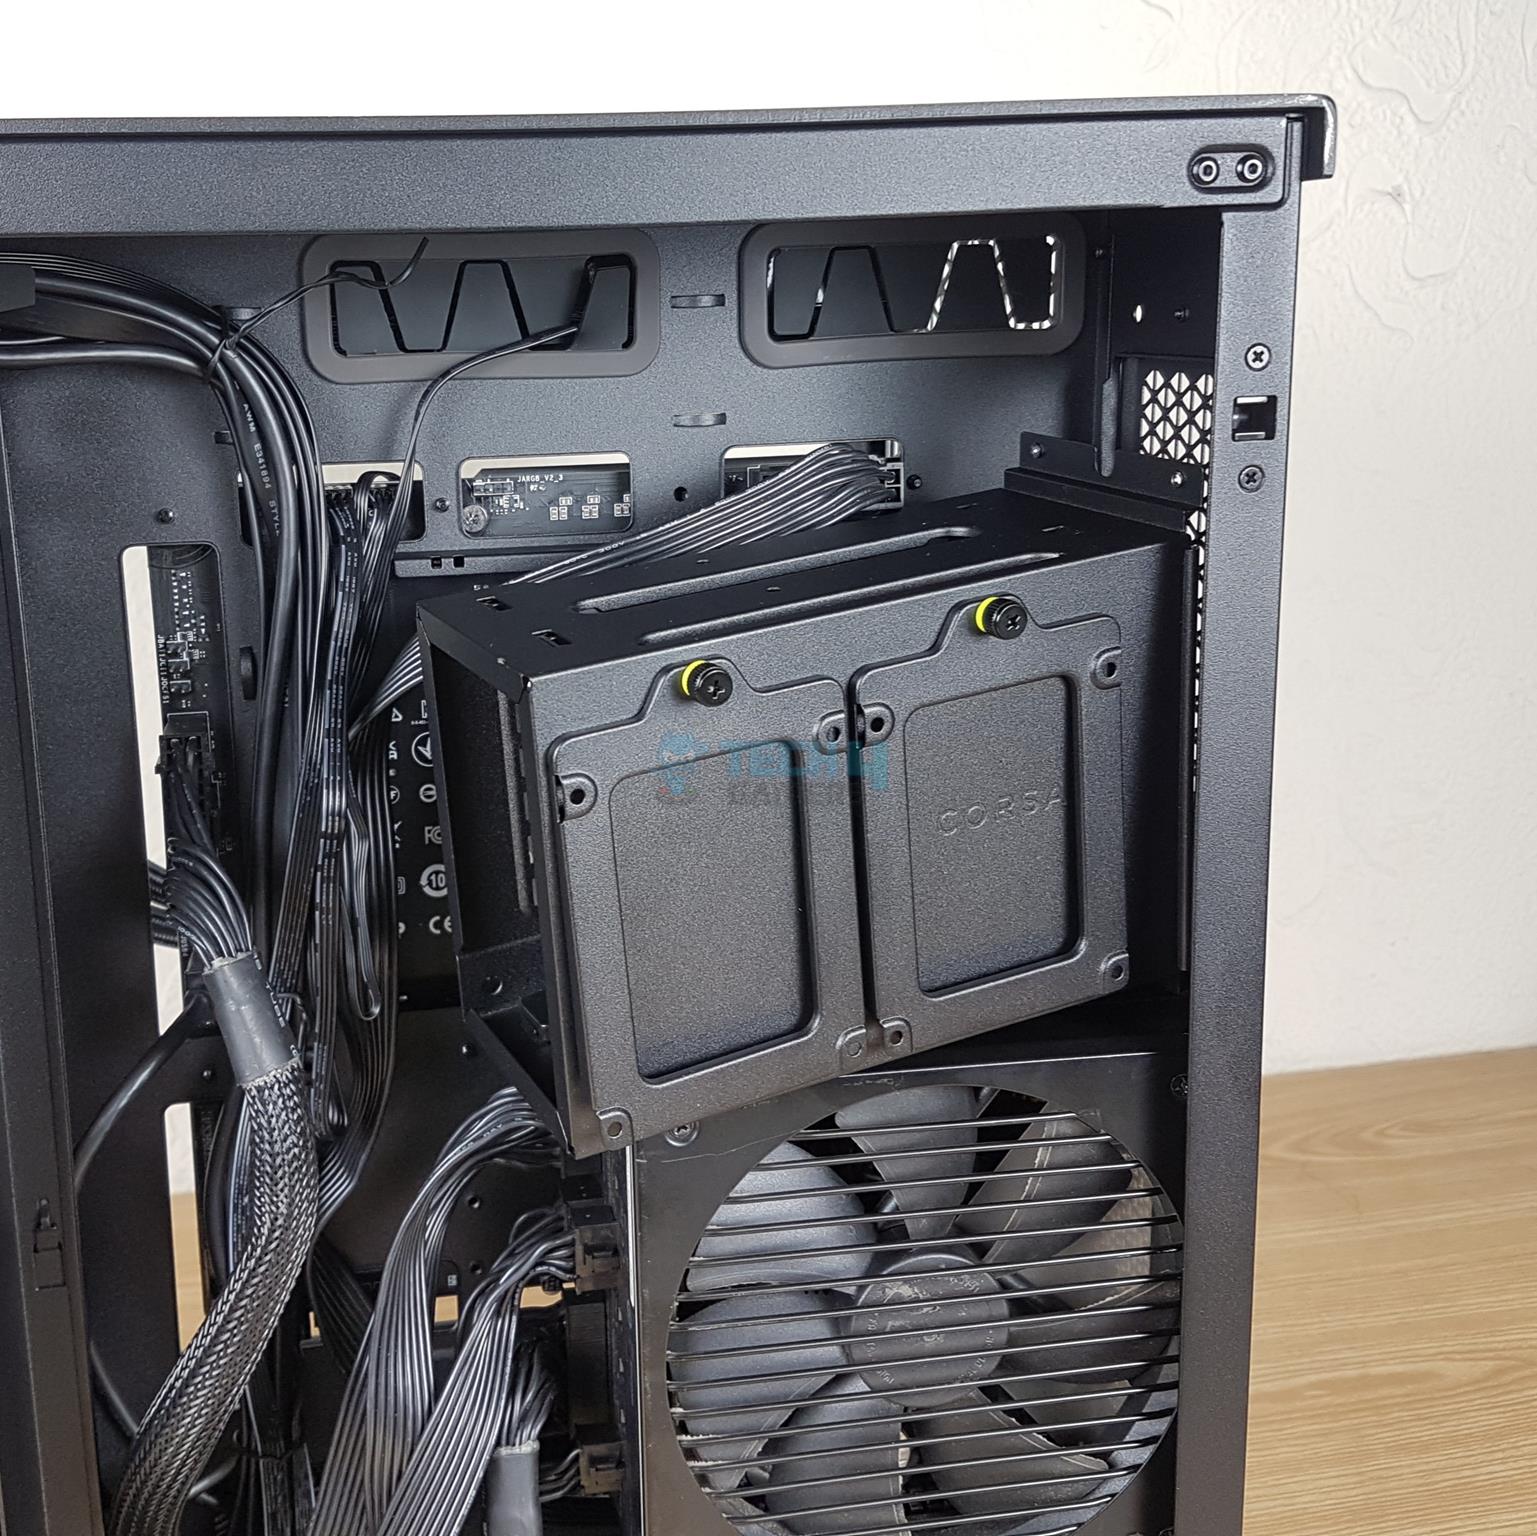
Take a look at the backside of Corsair 6500X. Starting from the left, there is a removable fan bracket. This bracket is removed from the backside. Then, there is a cable management divider. You can spot the HDD cage on the top.
There are not enough cable tie points or cable management clips. Corsair is selling these separately as RapidRoute RetroFit Kit to simplify cable routing. These should have been included in this price range.
The IO panel cables are nicely tucked and routed using one-side cable tie points.
The fan bracket is removable, and it only supports 120mm size fans and radiators.
The fan bracket can also be repositioned to another location, as shown in the picture. There is much flexibility in terms of placement and provision for thicker radiators.
I have removed the HDD cage and shown the bare view of the backside.
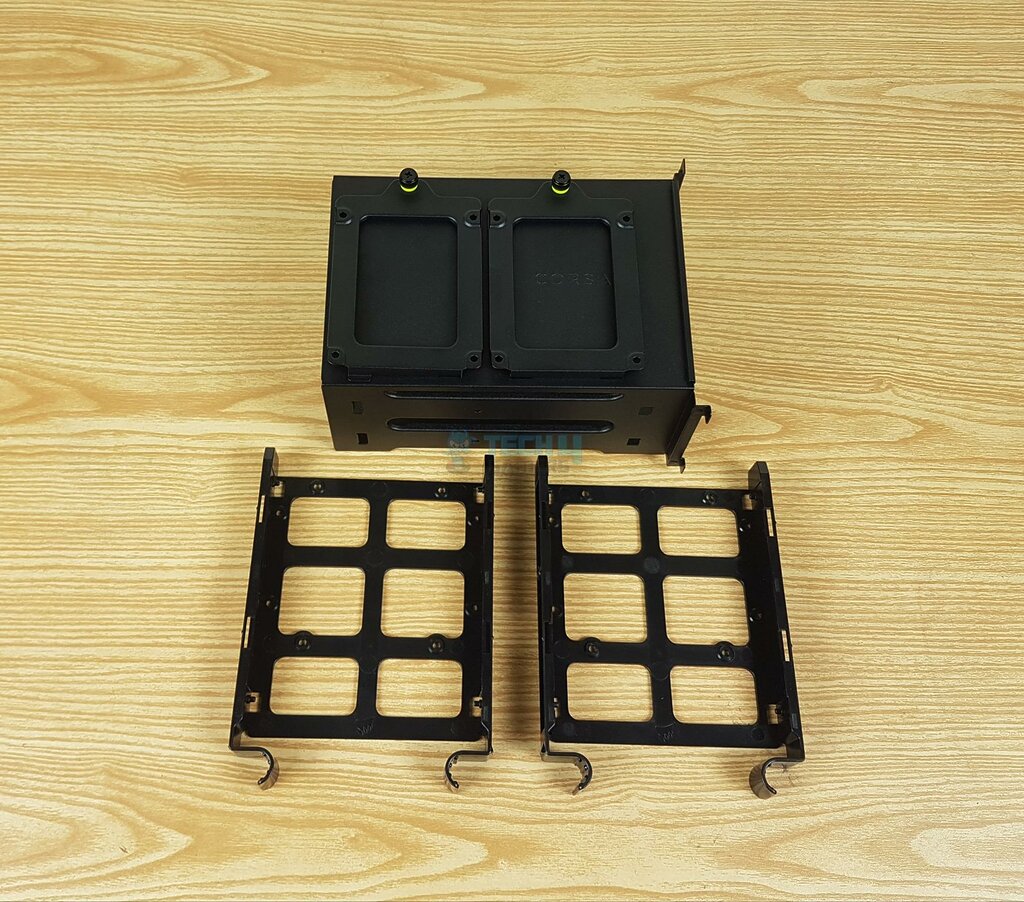
Corsair has provided an HDD cage that has two caddies, and there are two 2.5” drive brackets provided on the exterior of this cage. This way, you can install up to a total of 4x 2.5” drives or a combination of 2x 2.5” and 2x 3.5” drives. These caddies are operated from the rear of the case.
I am showing a bay for the PSU mount. PSU is rested on the metal frame and then secured with screws from the backside of the case. This is a standard design. Note the gap between the PSU bay and the motherboard tray. I will cover that in the Installation section.
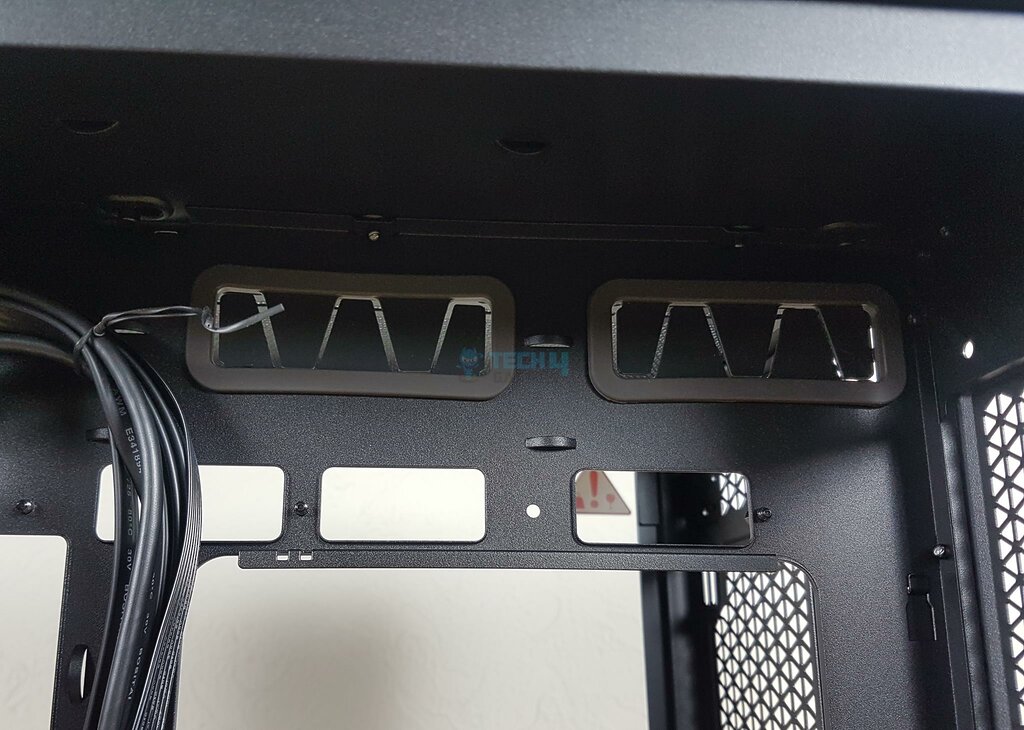
There are two double-shot rubber grommets on the top cutouts. There are three cutouts for the backplug motherboards.
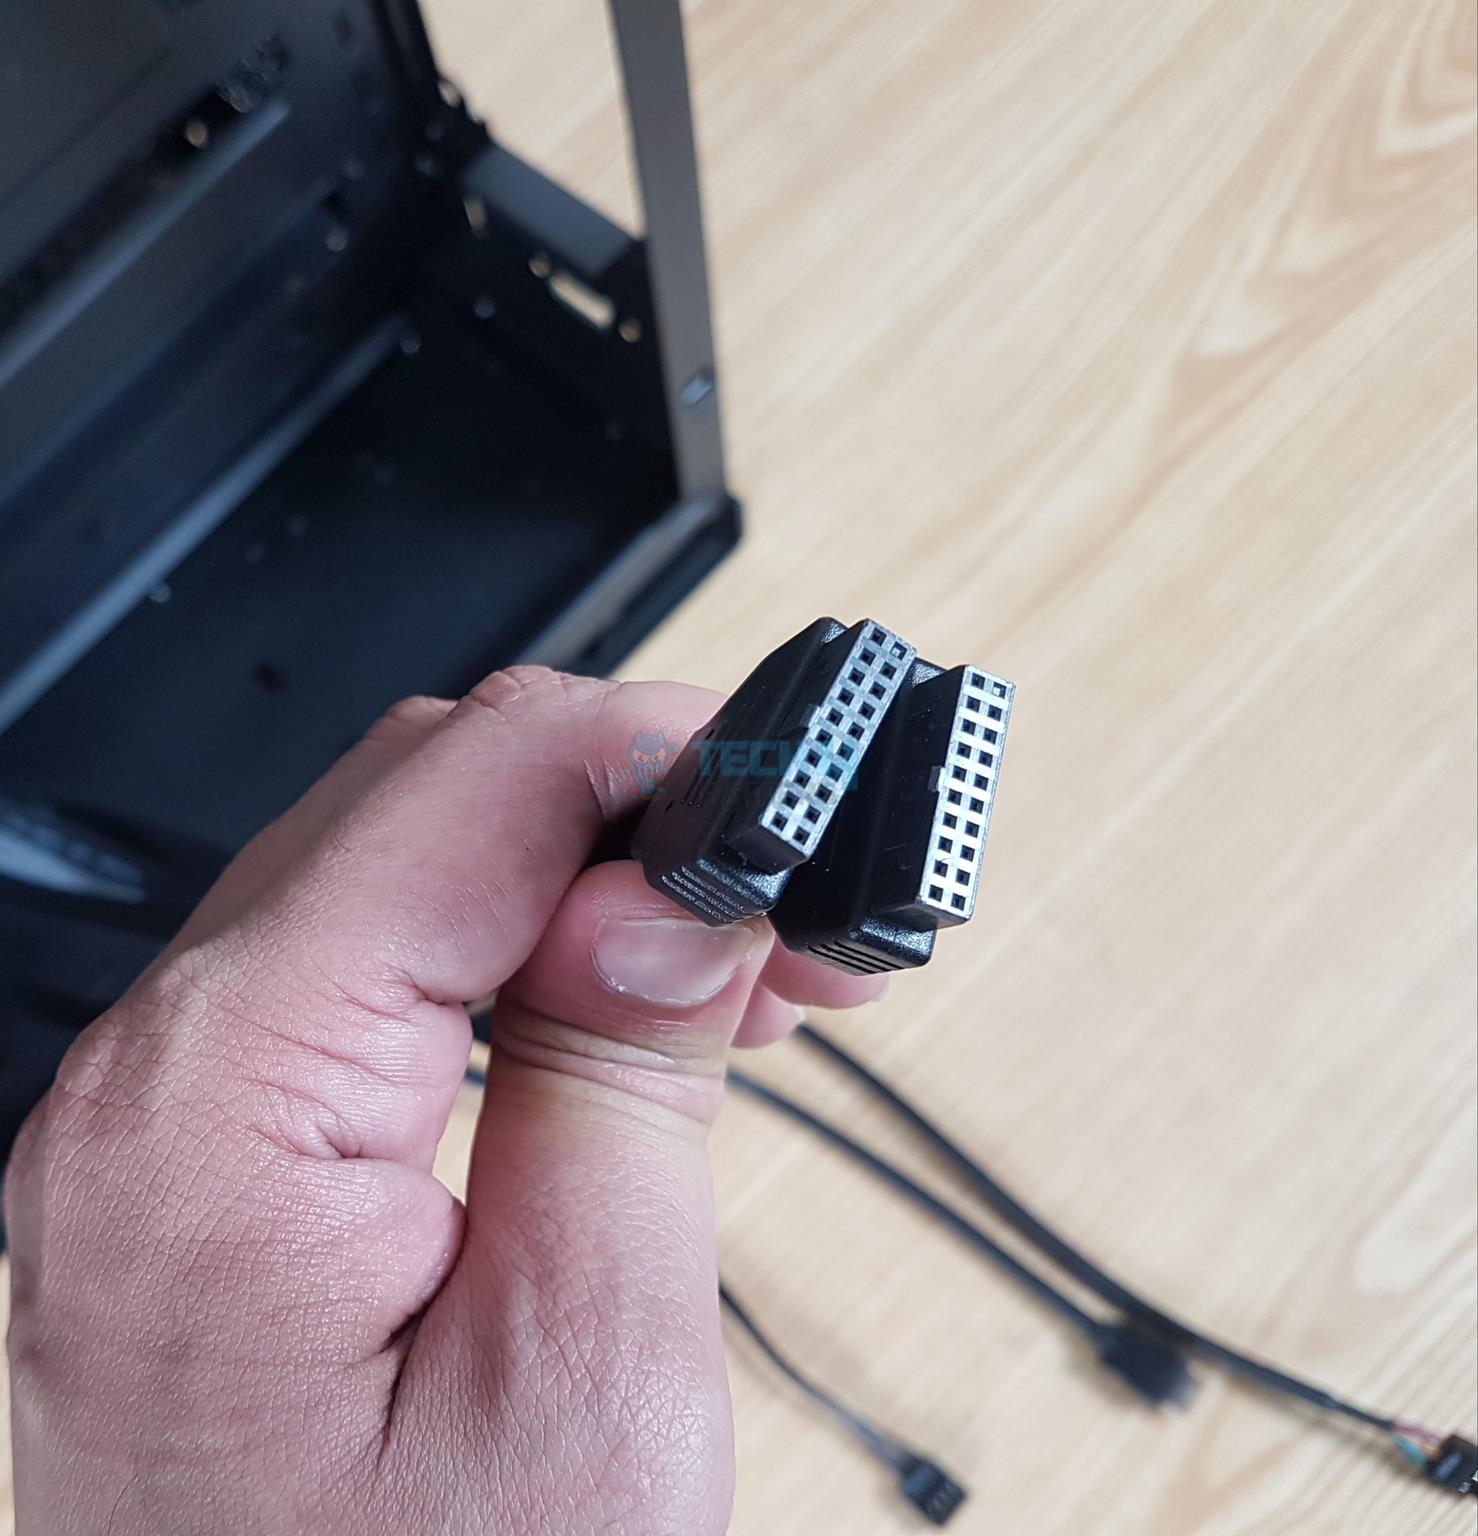
There are two USB 3.2 Gen 1 connectors coming from the IO panel. If your motherboard has only one such header, then you can use only 2x ports on the top IO panel.
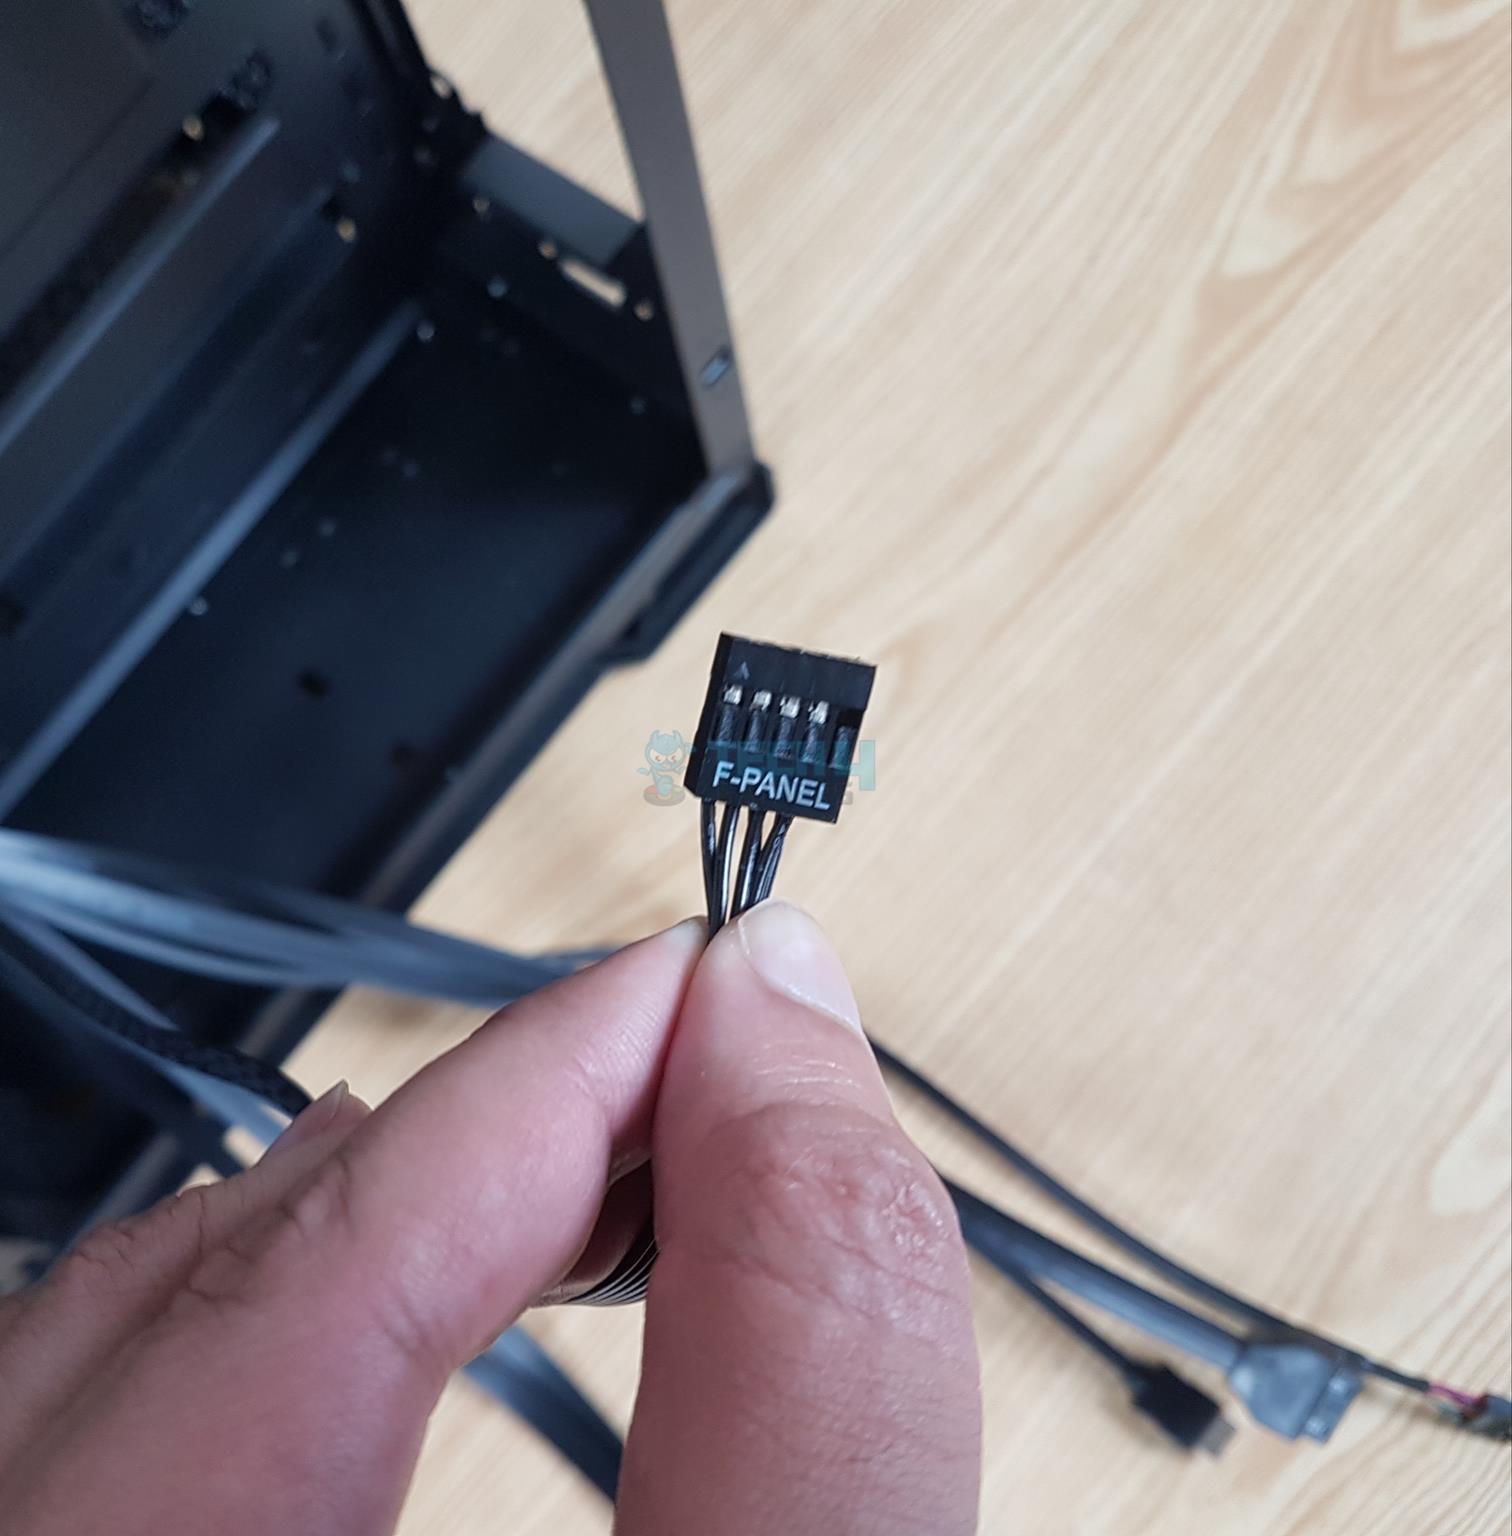
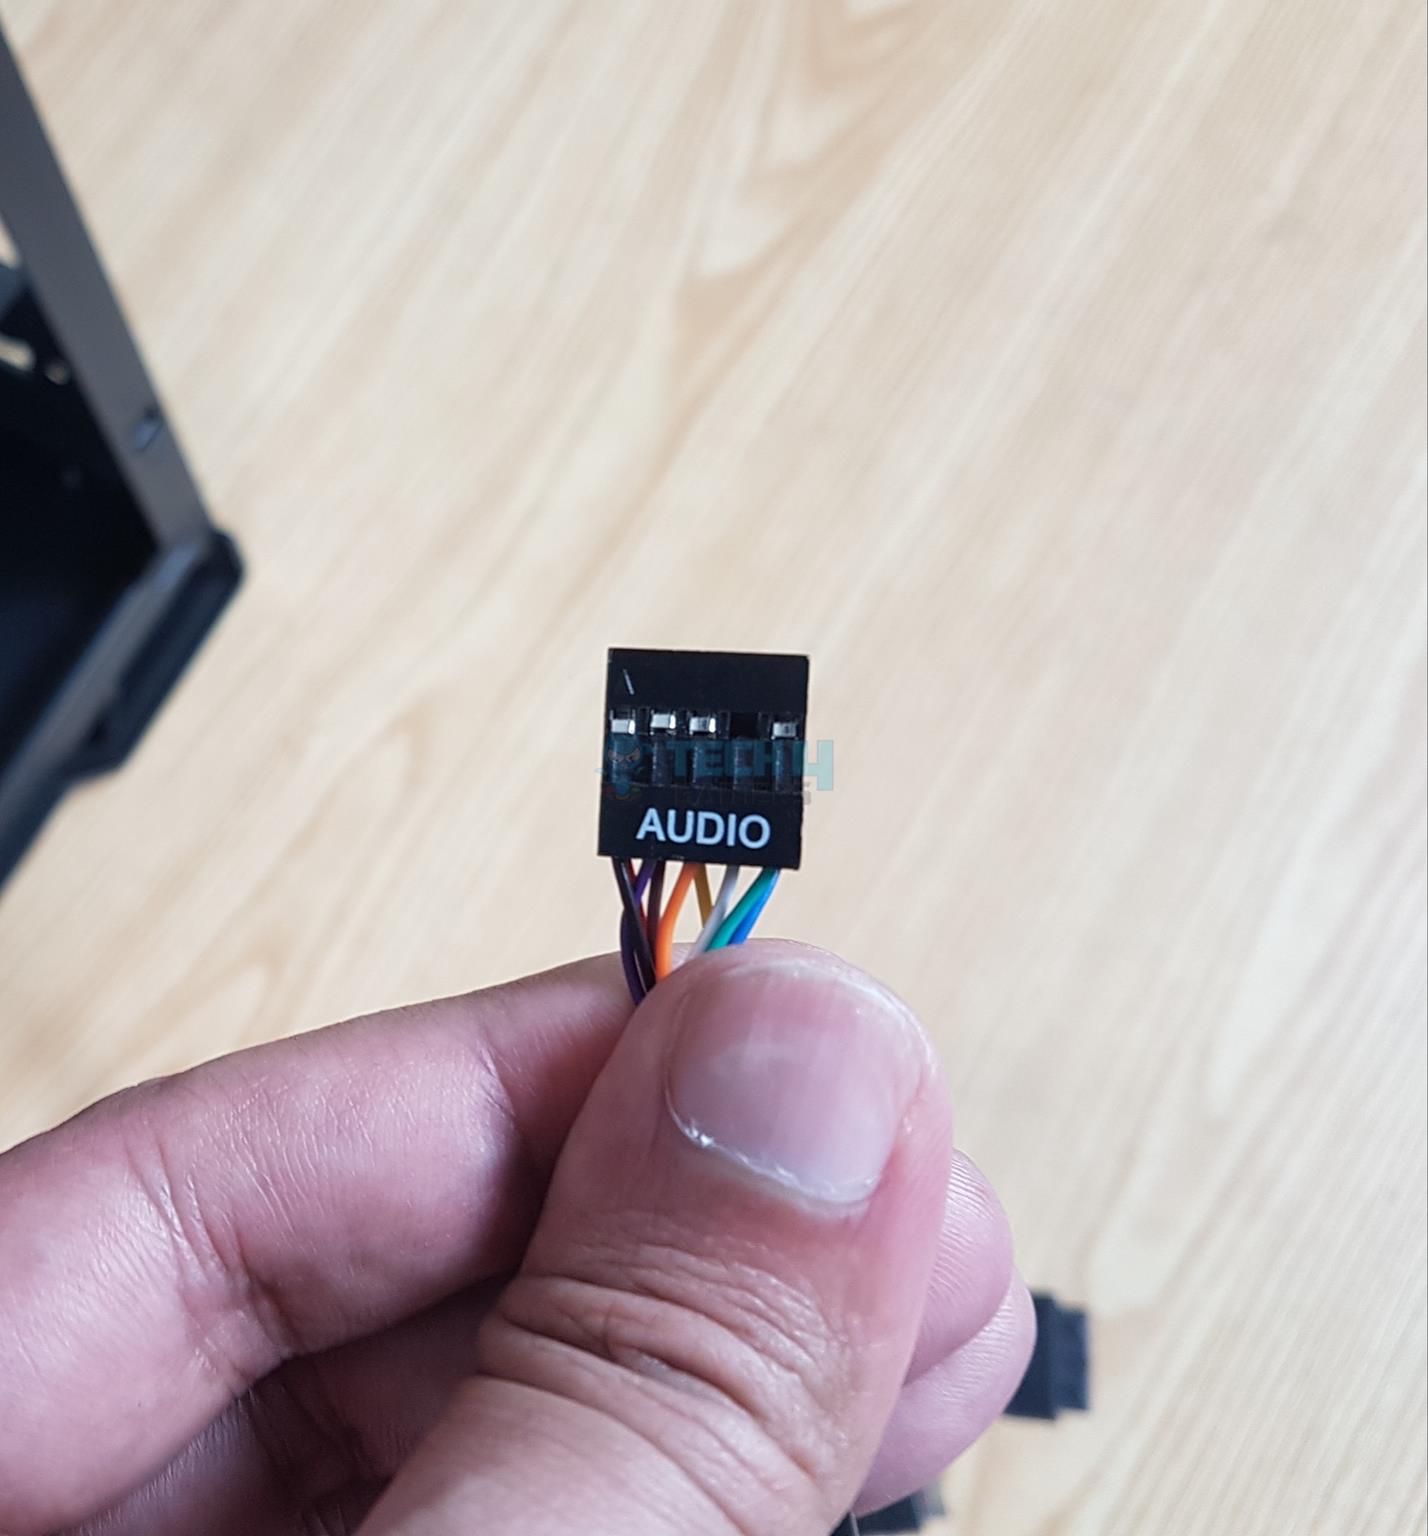
There is a Front Panel connector that makes life easier. It is a standard design that can be used on any motherboard unless otherwise stated.

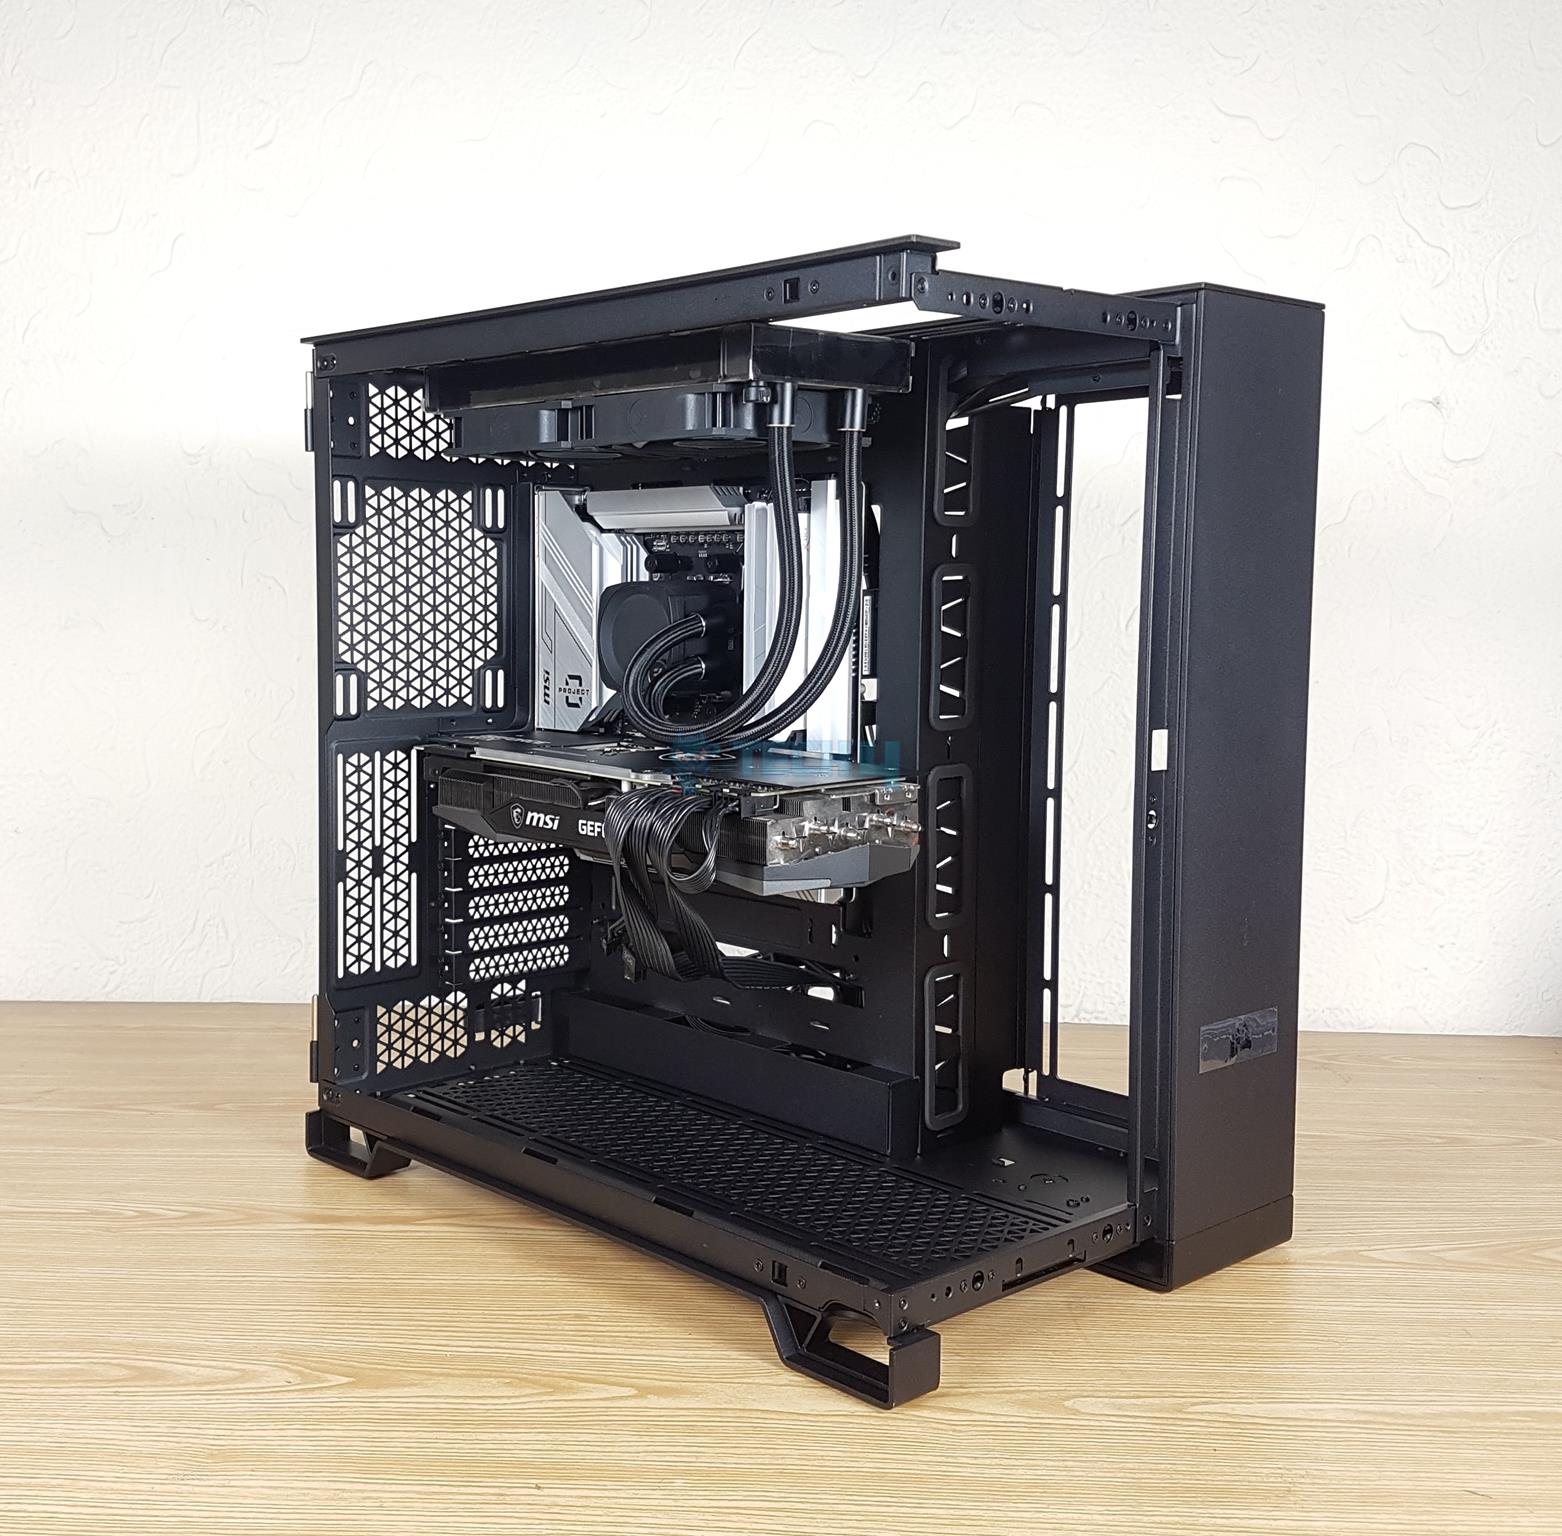
Test Build And Experience
Here is the test configuration:
- Ryzen 7 7700X [Stock, Auto]
- MSI Project Zero B650M
- EK-AIO Nucleus CR240 DARK
- V-Color Manta Sky RGB 32GB 5600MHz CL26 DDR5 Kit
- MSI GeForce RTX 3090 Gaming X Trio 24G [Stock]
- WD Black SN850 500GB NVMe SSD [OS]
- Sabrent Rocket 4 Plus 4TB NVMe SSD [Game]
- Fractal Design ION+ 2 Platinum 860W PSU
- Corsair 6500X

I have no complaint on the front side of this case. It was easy to do overall. I started with the motherboard and installed the CPU cooler. RAM was already installed.
Since this is a micro-ATX motherboard, I have used cutouts for the backplug ATX motherboard to route the PEG cables. We have a clean look.
The EPS connector of the backplug motherboard obstructed the HDD cage. You can see that in the picture. The Fractal PSU has flexible cables that you won’t find on others. You can try and push the HDD cage and screw it in, but I would not recommend it at all.
I should have shown this picture earlier. You can see all the connectors on the motherboard exposed through the cutouts on the motherboard tray. Cable connection is an easy job.
Another observation is that the PSU presses on the bottom connectors on the micro-ATX motherboards. This would not be the case with the ATX motherboard. This should have been covered before the release.
I did not do cable management and left the cable mess as I did not want to empty my pocket for retrofit accessories.
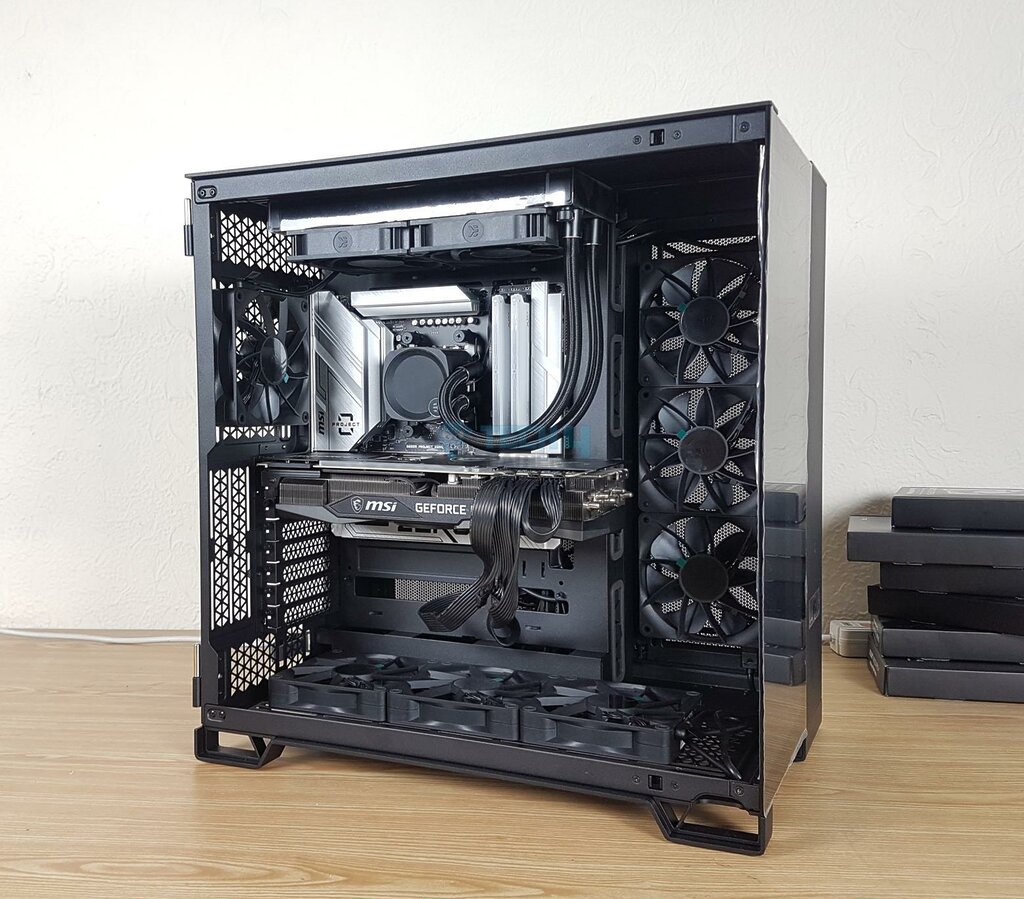
Action! The test build is up and ready for the first run of the test. I tested the case using stock configuration and Corsair iCUE Link RX120 fans. This would give us a good idea of the airflow inside the case.
Thermal Testing
I have used the Control game using High graphics settings at 1080P to check the thermals of the CPU and the graphics card inside the Corsair 6500X. HWIno64 is used to record the sensors. The system was left idle for 10 minutes to record the idle temperatures. The CPU Cooler’s fans and pump were running at full speed.
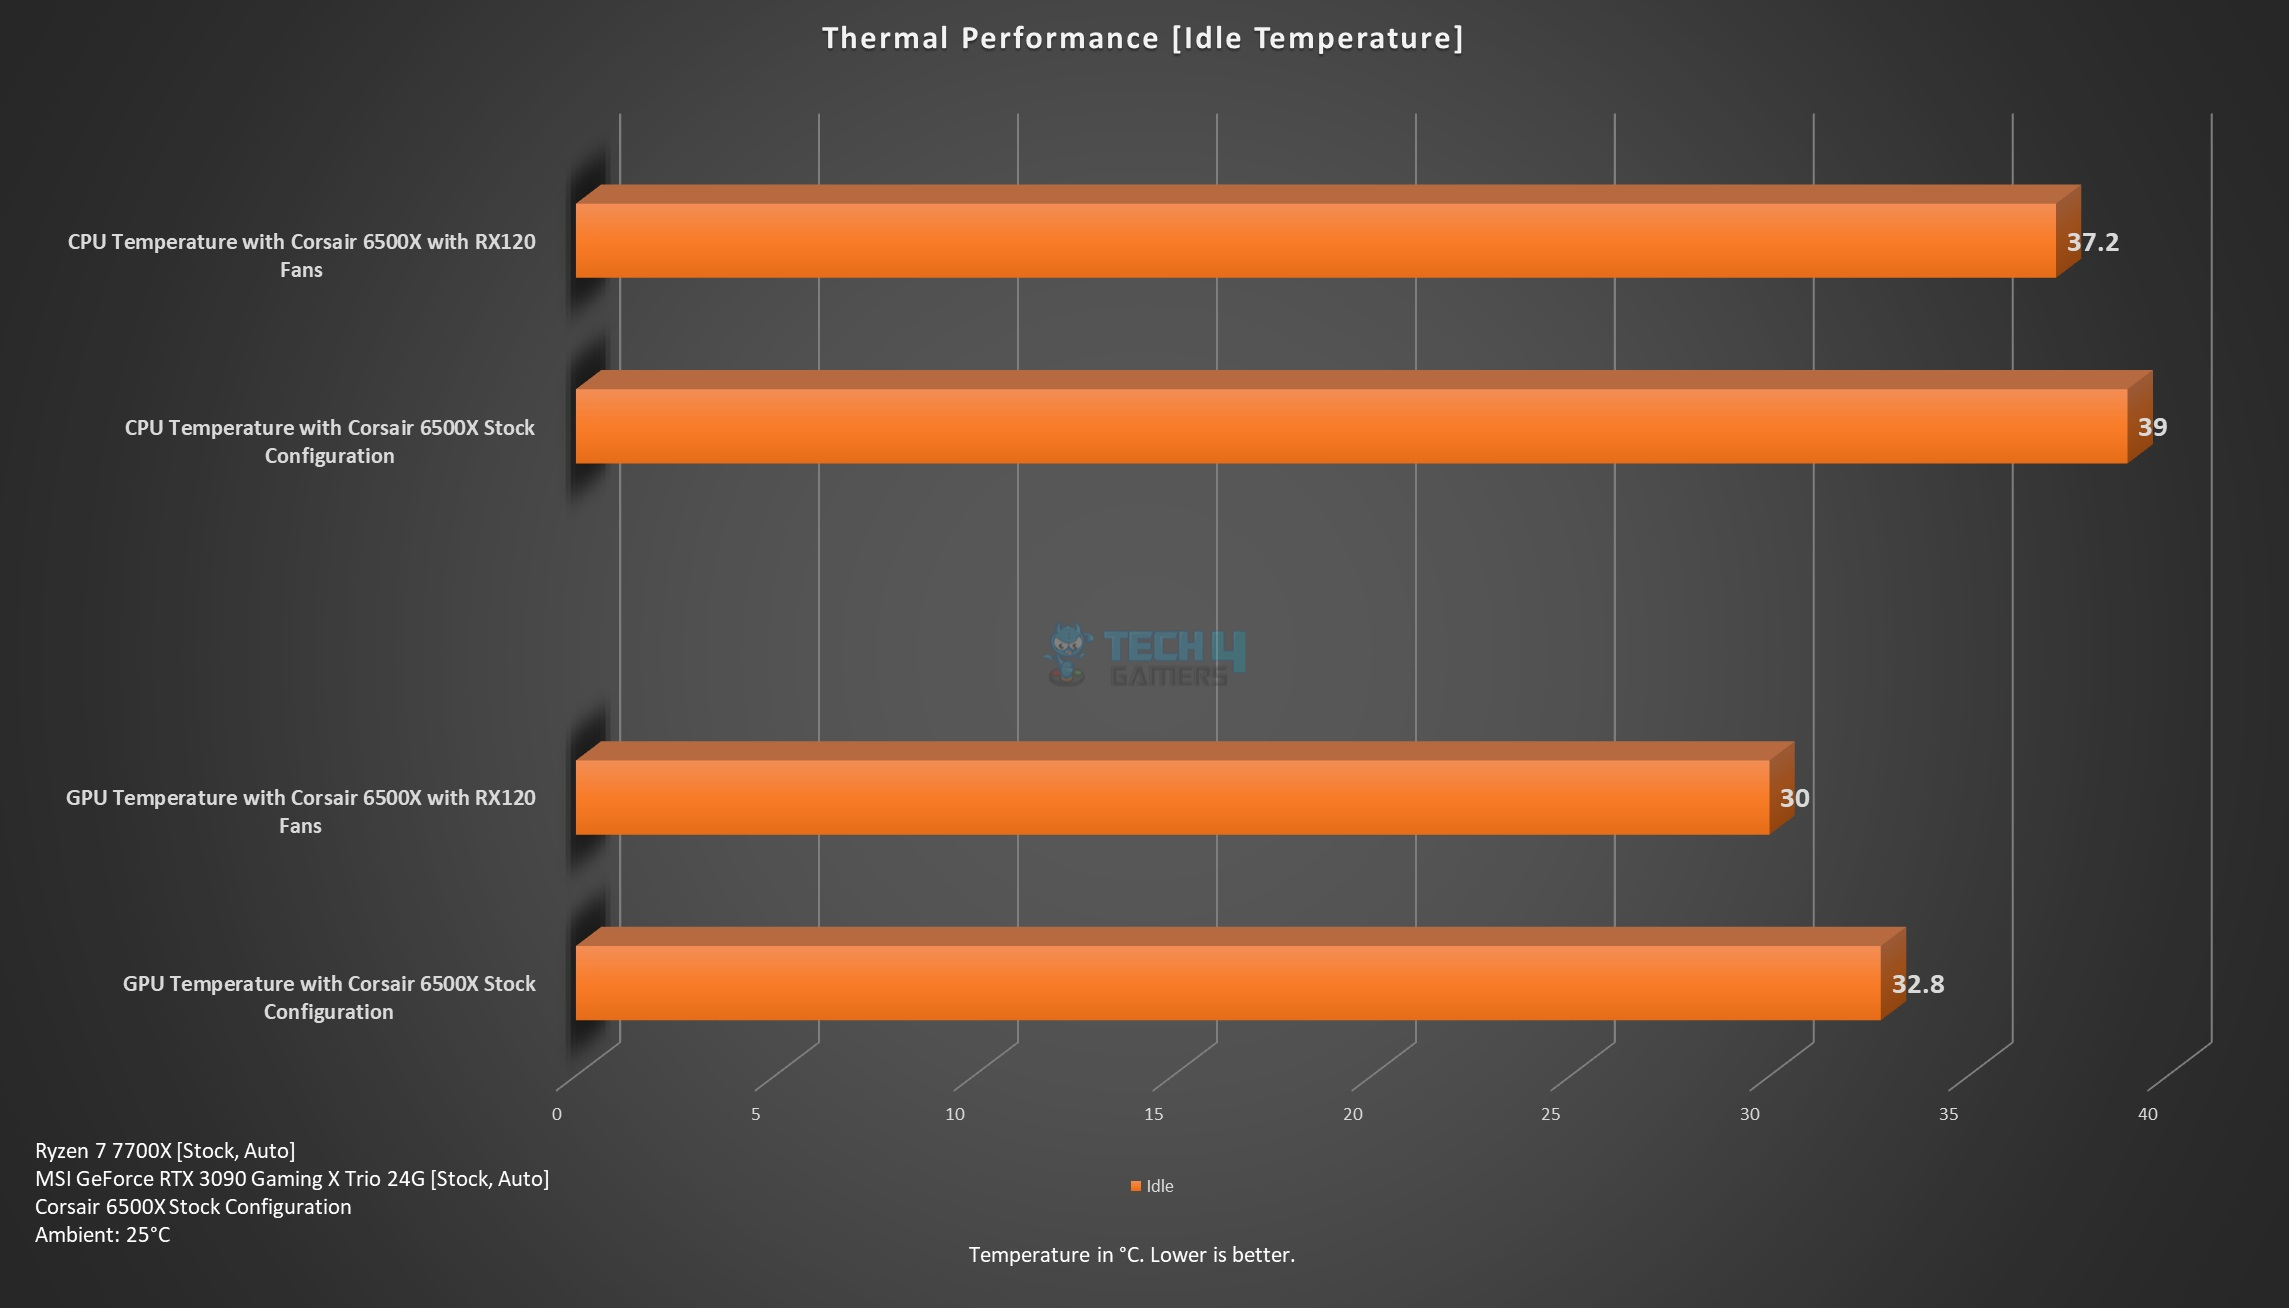
You can see that idle temperatures have improved a bit with active airflow inside, though the difference is not that huge to say it would make an impact.
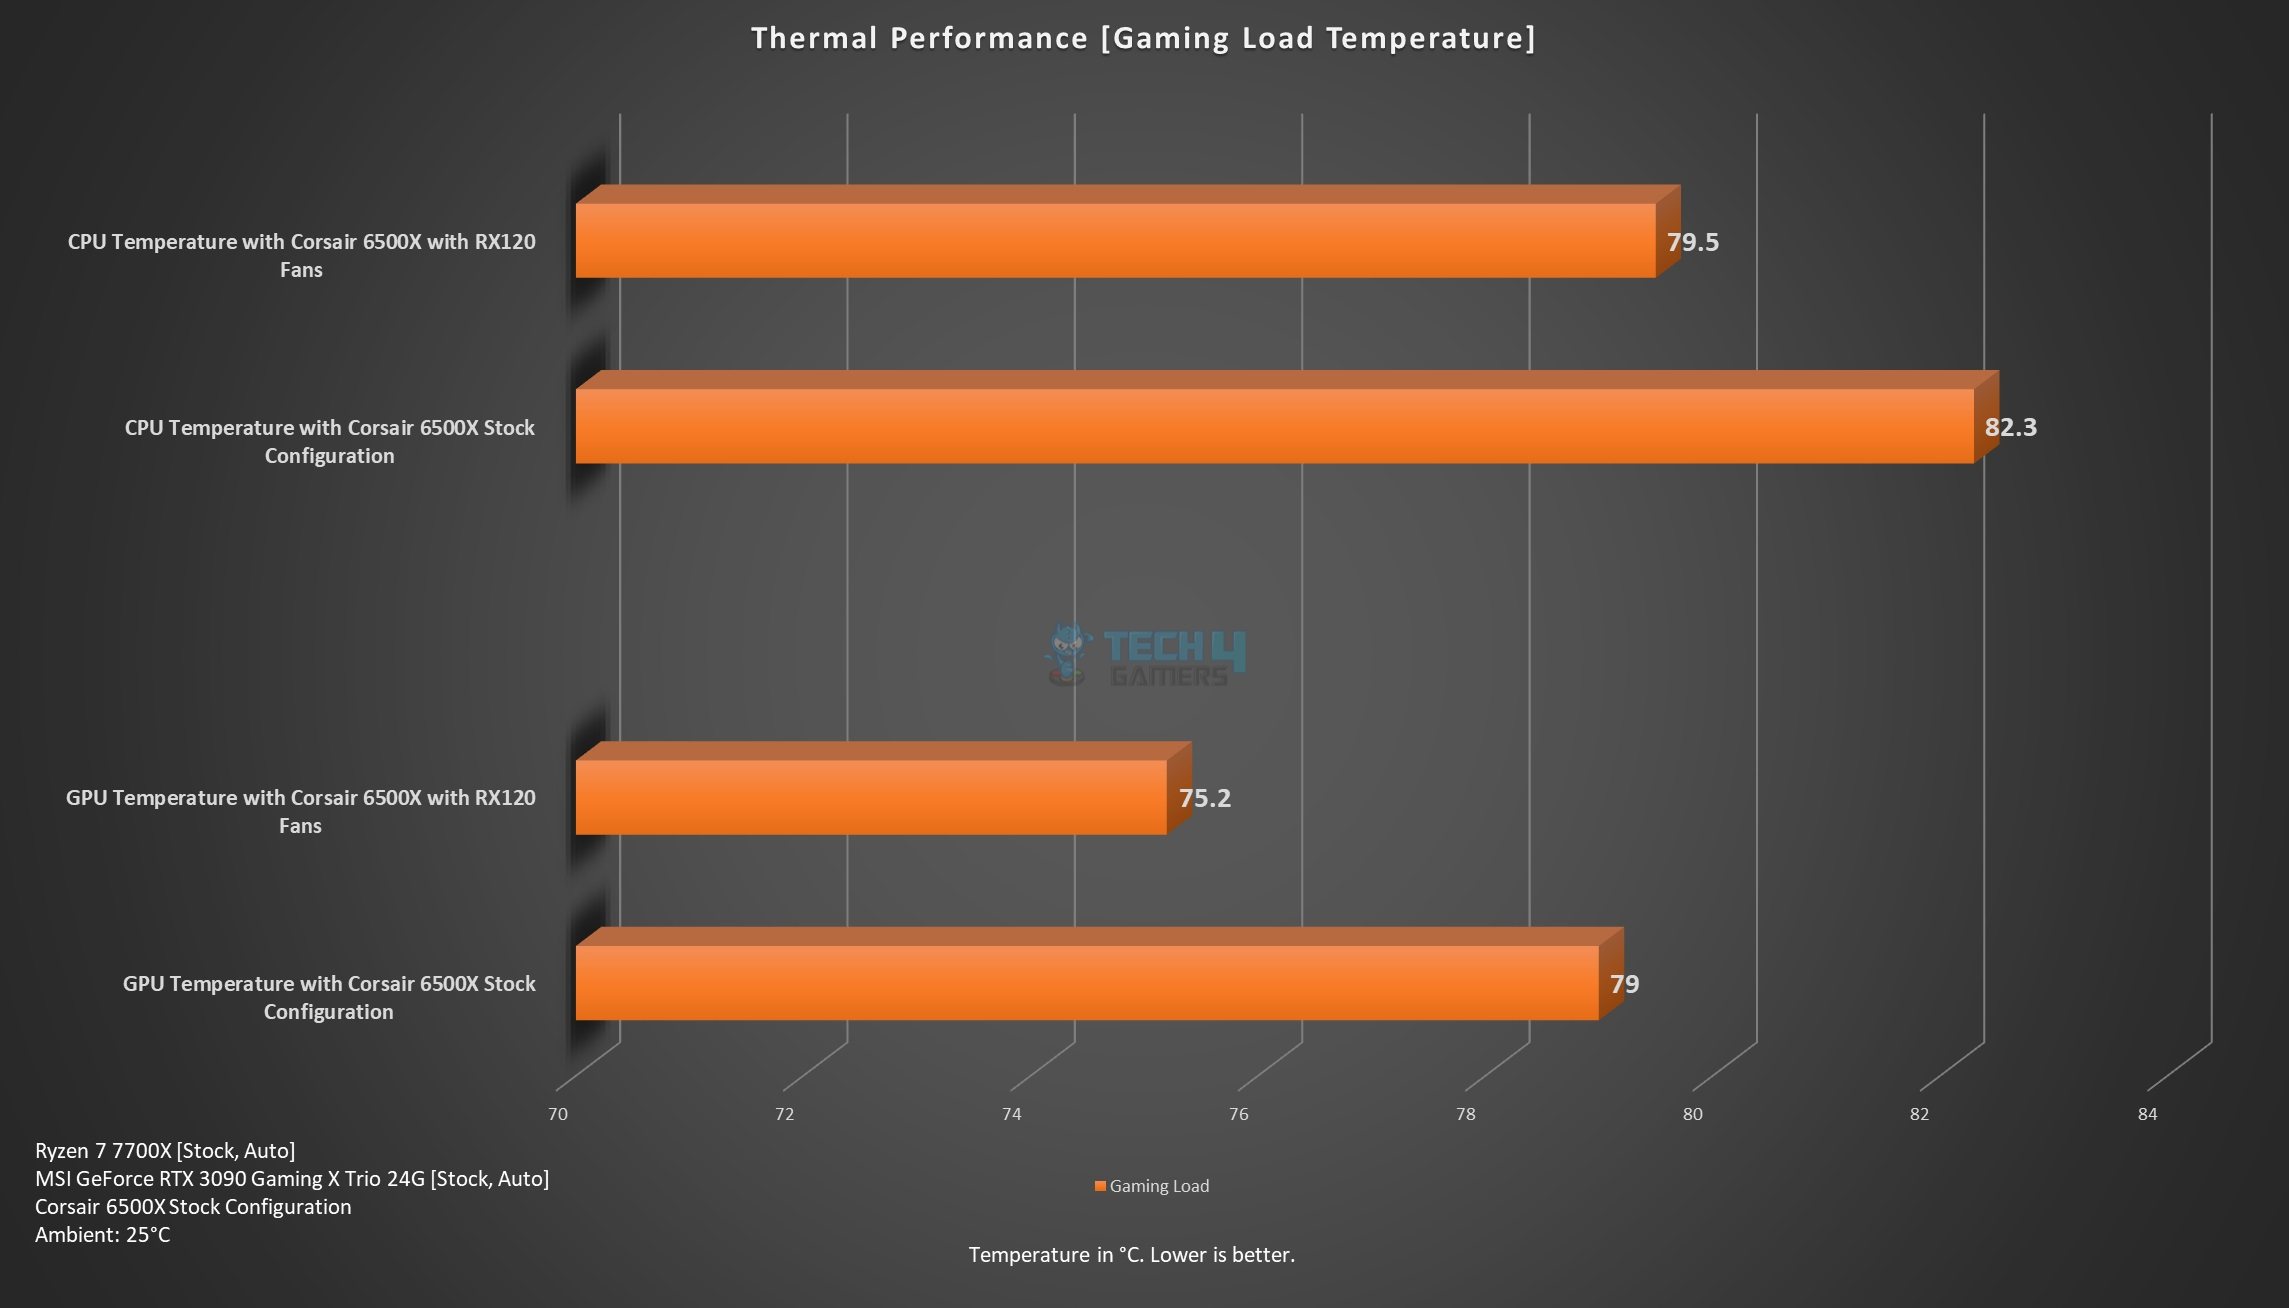
Now, the table is turning. You can see a 3.8ᵒC drop in graphics card temperature when I used RX120 fans. The CPU temperature dropped by 2.8ᵒC. This shows that without fans, this case would run with high thermals.
The catch here is that Corsair has provided a barebone unit so that you can use your cooling gear as per your requirements. Keeping this in view, I have no complaint except that this steep price should have something for cooling.
Should You Buy It
Buy It If
✅You are in the market for a backplug-supported case: If you are looking to upgrade to a backplug motherboard, then Corsair 6500X is among the candidates for your buck.
✅You want ample cooling in a case: If cooling is your thing, then Corsair 6500X gives you ample lift with up to 3x 360mm radiators and up to 10x 120mm fans or 7x 140mm fans.
✅Dual-Chamber is your thing with Corsair level of customization: If you are into Corsair signature series and would want to have a Dual-Chamber design with lots of customizations, including panel kits for different looks, vertical bracket for vertically mounted graphics cards and whatnot, 6500X is for you.
✅You need a panoramic view case: The Corsair 6500X has two tinted 3mm glass panels for a panoramic view.
Don’t Buy It If
❌You are on budget: This case will set you back USD 199.99. If you are on a budget, look for something else.
❌You plan to use a mATX backplug motherboard in this case: The HDD cage is a no-go with backplug motherboards in this case. The PSU presses on the motherboard’s bottom connectors. I am not confident with either.
Final Words
Corsair is back into the world of dual-chamber design, but this time, they are doing it in quite some form with function. I have tested the Corsair 6500X black version. This is a mid-tower PC Case having a dimension of 81x328x496mm. It weighs 16 Kg and has two 3mm tempered glass panels for a panoramic view of the build. The front glass is also removable.
This case can house up to an E-ATX-size motherboard. However, an E-ATX motherboard that extends over the recessed area toward the side fan mount would look strange. The salient feature of this case is its support for backplug motherboards (BTF from Asus and Project Zero from MSI). You can use regular motherboards as well.
It has ample cooling provision with up to 10x 120mm fans or 7x140mm fans and up to 3x 360mm radiators at a time without any limitation. Corsair has done a marvelous job in designing a spacious layout for the front chamber.
However, the lack of proper 140mm size radiators, particularly on the side bracket, is apparent. On the other hand, users of 120mm size will be happy using this case. I wish Corsair had used a fan bracket on the base instead. It would have given a convenient installation. The rear can house a 120mm or 140mm fan/radiator. The top bracket is fixed as well.
The PSU is installed vertically on the backside. There is a gap below the PSU bay, which is probably for the iCUE Link system – 6500X RGB will tell the tale. Corsair has provided customization for these cases. There are panel kits available in multiple wood colors. You can remove the stock steel frames and install wood design panels. Corsair also sells the vertical bracket separately, and then there are RapidRoute retrofit kits for cable routing. Corsair is doing the Corsair thing! Hey Corsair, start doing the customer thing at such a steep price of USD 199.99!
Overall build quality is top-notch, and those Quick-Turn screws are my favorite part from Corsair lately. With just two torques, your fan is installed instead of so many torques on the standard screws.
I have used the MSI Project Zero B650M motherboard for the test build. This is a micro-ATX motherboard, and I have observed that you can’t install an HDD cage with this motherboard or, in fact, for any backplug motherboard, regardless of the size, because the EPS connector on the top obstructs the HDD cage.
Also, the PSU presses on the bottom connectors of the micro-ATX backplug motherboards. This may not be the case for an ATX backplug motherboard. These are design time considerations that should have been taken care of. Also, there is a small gap between the PSU/HDD Cage and the case frame to pass any cable. You are better off routing the cables first and then installing these two items.
There is plenty of space for cables but not enough cable management provision. Oh, and did I mention that you can adjust the side fan bracket in two locations? Flexibility is there. The IO panel is on the top, which may not be good news for desktop users since they may have to stand up and do the connectivity. Also, the provision of 4x USB 3.2 Gen 1 Type-A ports on the IO panel is nice, but what if the motherboard has only one header for USB 3.2? There are considerations. I would have chosen two USB 3.2 Gen2 ports and one USB 3.2 Gen2x2 Type-C port in this price range.
I have tested this case in its stock configuration (no fan) with RX120 fans. Airflow with the fans is adequate in this case. Corsair offers a 2-year warranty on this, and this case will set you back a USD199.99 bucks.
Awards Received By Corsair 6500X
Given its excellent performance and beautiful looks, we decided to give it the following Tech4Gamers Awards:
Community Poll
Thank you! Please share your positive feedback. 🔋
How could we improve this post? Please Help us. 😔
Feedback By:
Mike Roadster
[Hardware Reviewer & Editor]
Meet Nauman Siddique, a highly experienced computer science graduate with more than 15 years of knowledge in technology. Nauman is an expert in the field known for his deep understanding of computer hardware.
As a tech tester, insightful reviewer, and skilled hardware editor, Nauman carefully breaks down important parts like motherboards, graphics cards, processors, PC cases, CPU coolers, and more.
- 15+ years of PC Building Experience
- 10+ years of first-hand knowledge of technology
- 7+ years of doing in-depth testing of PC Hardware
- A motivated individual with a keen interest in tech testing from multiple angles.
- I majored in Computer Science with a Masters in Marketing
- Previously worked at eXputer, EnosTech, and Appuals.
- Completed Course in Computer Systems Specialization From Illinois Tech
Get In Touch: nauman@tech4gamers.com


