How good is this case?
Review Summary
The GAMEMAX M909 VEGA is a “full-tower” chassis. It has 3x RGB lighting zones but no provision for the air intake at the solid front panel. The chassis has limited water cooling support, a fixed hard drive cage, and lacks a 5.25” drive bay. However, it looks rather sleek due to its metallic design and has a great GPU clearance. Not only that, but its top and bottom dust filters are removable for easy maintenance. For the price, it is not a good value for money compared to other options in the same price bracket.
Overall
-
Build Quality - 8/10
8/10
-
Value For Money - 6/10
6/10
-
Design - 6/10
6/10
-
Features - 6.5/10
6.5/10
Pros
- RGB
- Looks
- Removable Dust Filters
- Good GPU Clearance
- Dedicated GPU Support Bracket
Cons
- Lack of front air intake
- Not a full-tower case
- Poor Value For Money


“Be Ready, Be Gamer” is a tagline or motto of GameMax. They are not new in the PC market, and with over 17 years of experience in PC Chassis, peripherals, and products, they are trying to bring the best possible products to gamers without breaking their bucks.
They believe in the concept of “a good product based on environmental technology” to design the products. Their main product lines include PC Chassis, PSUs, Cooling solutions, curved Monitors, Peripherals, and accessories.
Today, I will be taking a look at their quite pleasing-looking chassis M909 VEGA. Their chassis bears quite unique and bold outlooks, and they have RGB goodness to complement the looks making them quite stunning-looking products – from the outside view.
Also Read: Fractal Design Torrent White TG Clear Tint PC Case Review
Vega is no exception to the ingenuity of GameMax. It has a bold design and some nice features like an RGB fan, RGB LED strip on the PSU shroud, and included GPU support bracket, PSU Shroud is quite elaborate, but this does not mean that the chassis is perfect by all means.
Surprisingly, GameMax is marketing this chassis as Full Tower, which it ain’t, as it is sitting between the mid-tower and the full-tower. This chassis supports motherboards up to E-ATX sizing and has 7 PCIe expansion slots. In terms of cooling, it can house 2x 120mm fans on the front and 3x 120/140mm fans up top.
The front is completely covered and has no space for air intake. To make up for this, there is a vented area at the bottom on the front side, and it seems like they are heavily relying on convection to do their job. The rear can house a 1x 120mm fan. The graphics card of a maximum of 455m length is supported without front fans.
The supported CPU cooler’s height is 170mm. it can house a maximum of 5x 3.5” or 4x 2.5” drives. It comes in two variants; Perspex and Tempered Glass side panels. This chassis has both side panels finished in either Tempered Glass or Perspex finish.
I am reviewing the Perspex. There is an onboard RGB-PWM hub to control the lighting of the chassis elements and the speed of the fans. Let’s dive in and see what this chassis has to offer to the gamer and the builder.
Specifications
| Product | GAMEMAX M909 VEGA Black Perspex ATX Gaming Chassis |
|---|---|
| Form Factor: | Full Tower |
| Motherboard Support: | ATX, Micro ATX, Extended ATX, Mini ITX |
| PSU Support: | Standard ATX |
| PSU Location: | Bottom |
| Gaming Case: | Yes |
| Side panel type: | Fully Perspex Side Windows |
| Front Logo type: | RGB lighting method |
| Supported Radiator Size: | 240mm |
| Supported Radiator Positions: | Front , Top |
| Body Material: | 1.2mm SGCC |
| Front Bezel Material: | Metal |
| Side Panel: | Window |
| Internal Cable Management Depth: | 34mm |
| Expansion Slots: | 7 x Full Size |
| Cooling Front: | Space for 2 x 120mm Fans (Not Inc.) |
| Cooling top: | Space for 3 x 120mm or 140mm Fans (Not Inc.) |
| Cooling Rear: | Space for 1 x 120mm RGB Fan inc. |
| Cooling side: | None (RGB strip on cover of PSU inc.) |
| Cooling Bottom: | Filtered Vent For PSU |
| IO Ports: | 2x USB2.0 +2x USB3.0, 1 x HD Audio, 2x Microphone |
| GPU Max Length: | 455mm |
| GPU Support: | Incuded |
| CPU Cooler Maximum Height: | 170mm |
| Front Bezel Colour: | Black |
| Body Colour: | Black |
Unboxing And Packaging

The chassis is shipped inside a cardboard box of brown and green colors. The front side of the box has a GAMEMAX brand logo and name printed on the top. VEGA ATX Gaming chassis is printed at the center. Salient features are highlighted on both sides in a single line.
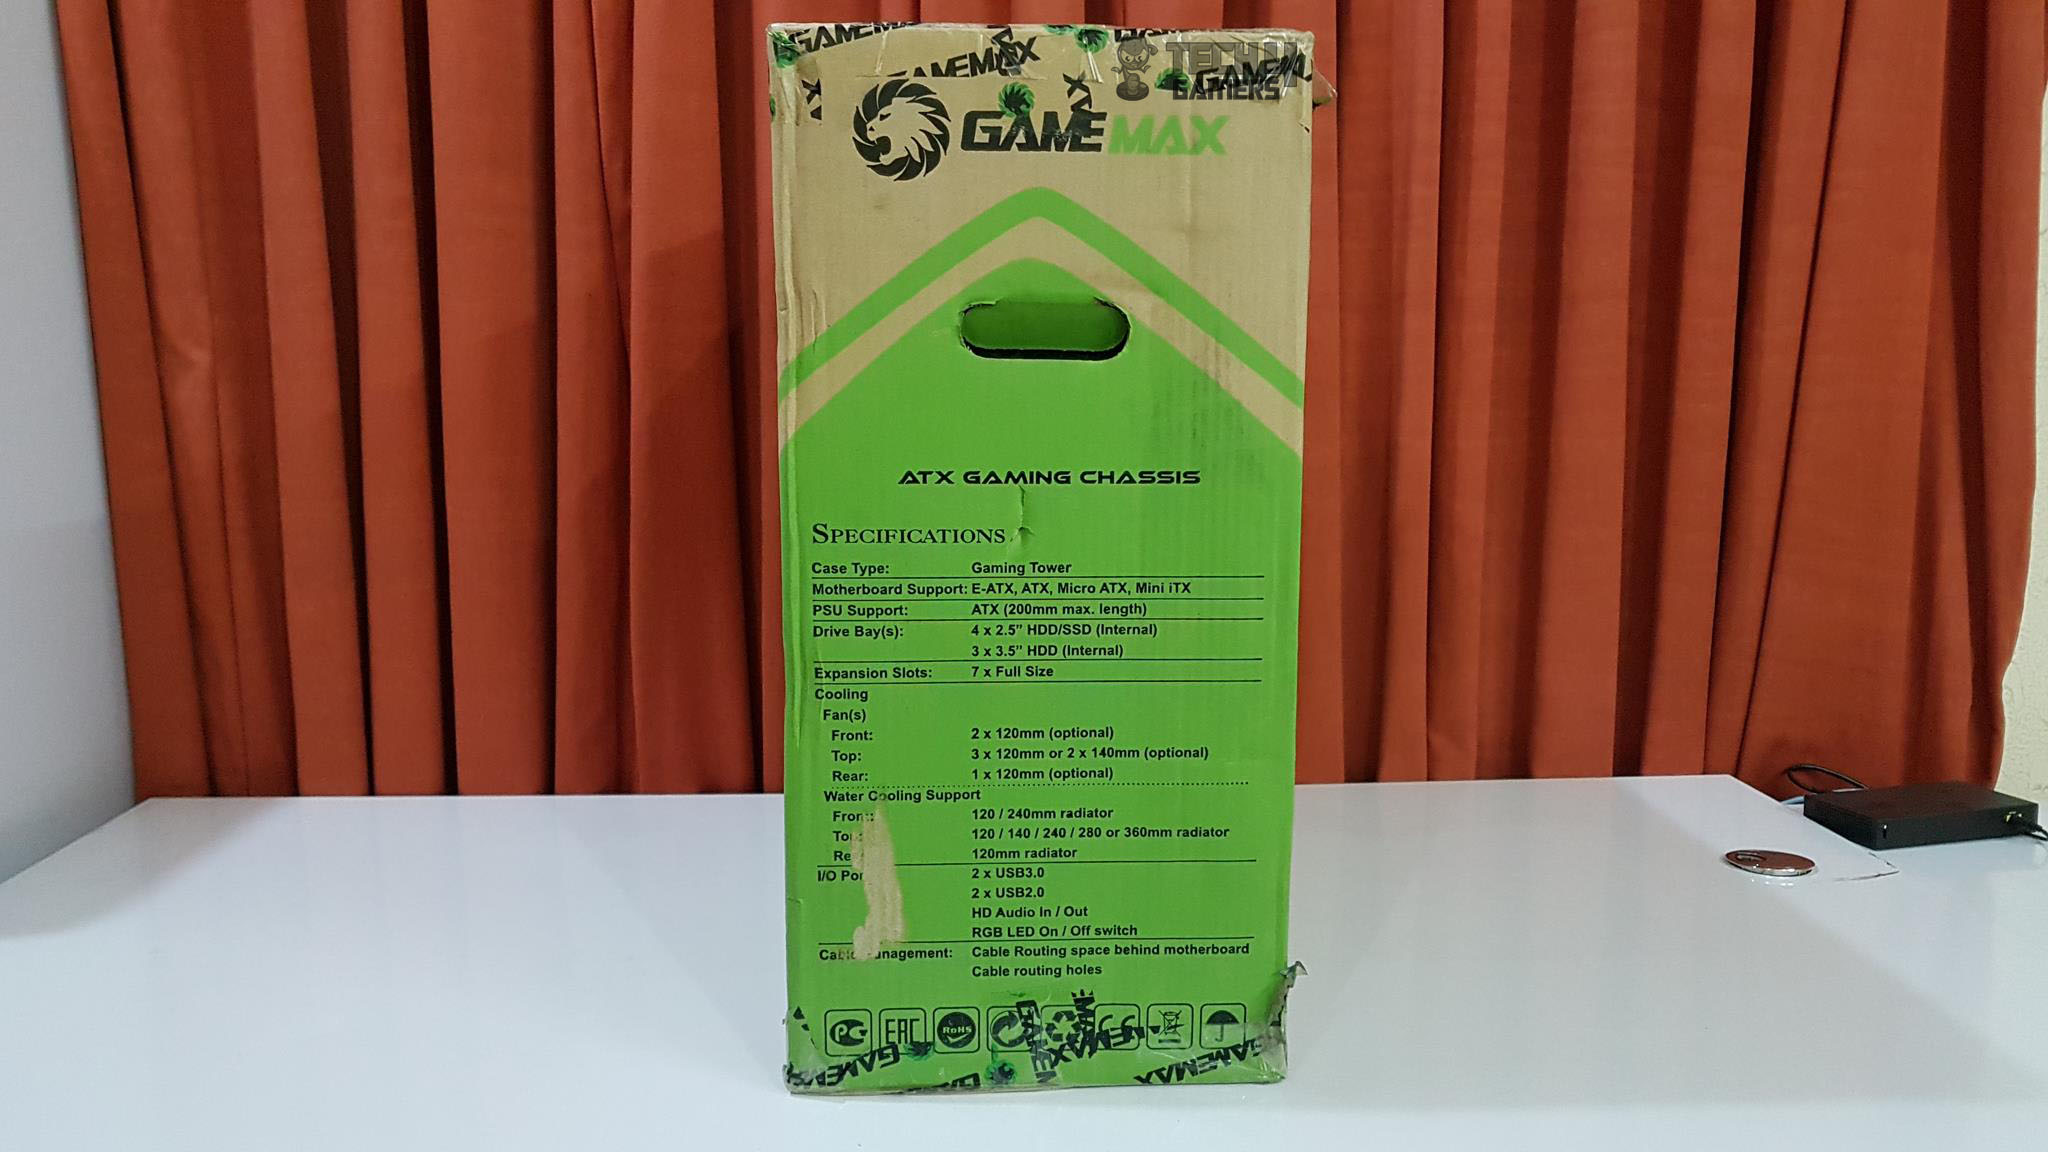
This side has the specifications of the chassis printed on the main section. GAMEMAX brand name and logo are printed on the top.

Opening the box will show the chassis placed between the two thick white color Styrofoam pads.
Accessories
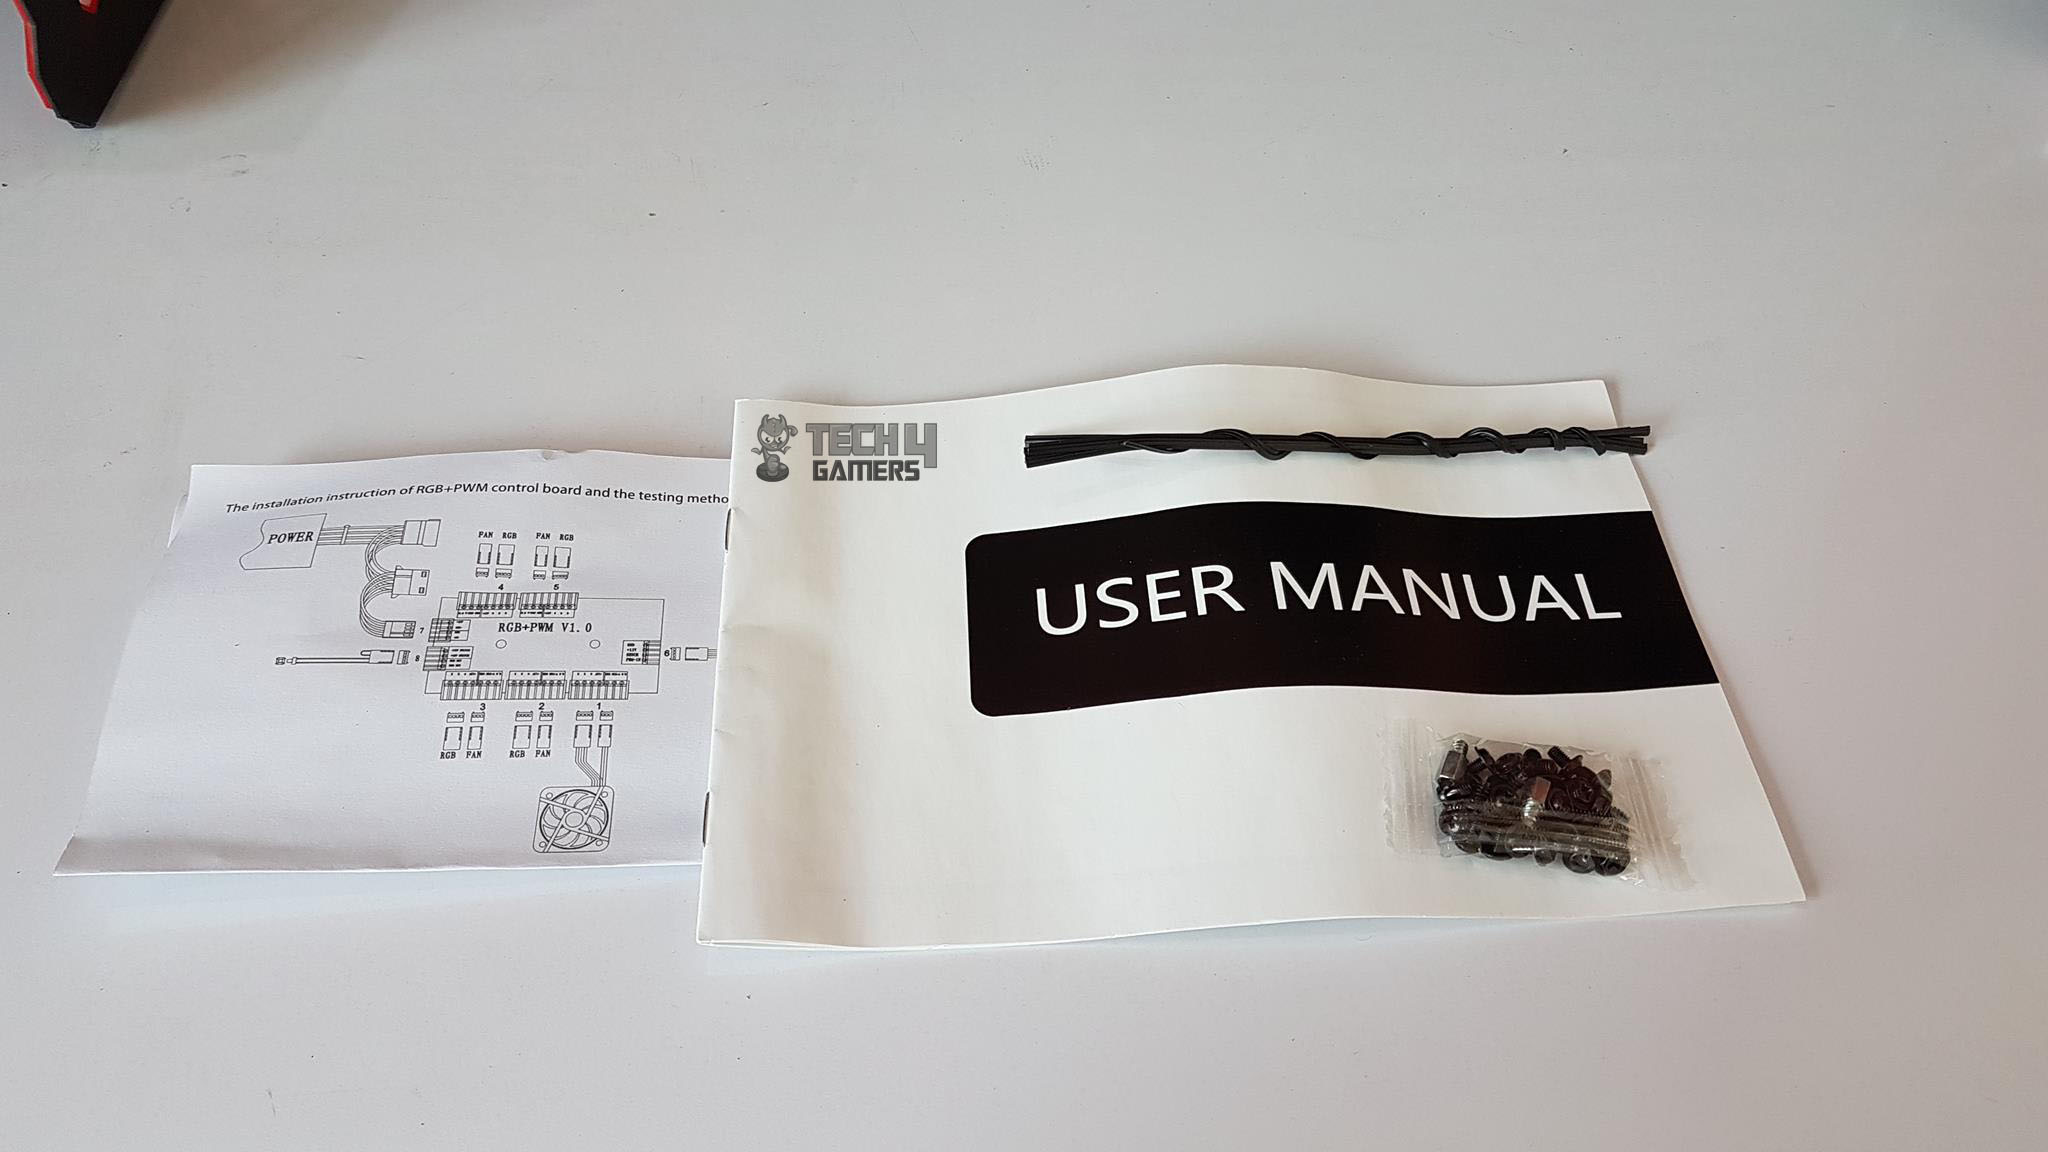
The following are provided in the box:
- User Manual
- Info page on the RGB+PWM hub
- Various screws
- Cable wraps
- GPU Support Bracket
Closer Look
The GAMEMAX VEGA Gaming Chassis offers a direct view inside the chassis letting the user to gaze upon their beautiful builds and to do that this chassis comes in both Tempered Glass and Perspex variants.
In case you are wondering what Perspex is, it is plexiglass. The dimension of this chassis is 210mm X 516mm X 491mm (WxHxD). It is made of 1.2mm SGCC and the front panel is fully metallic. There is no 5.25” bay drive.
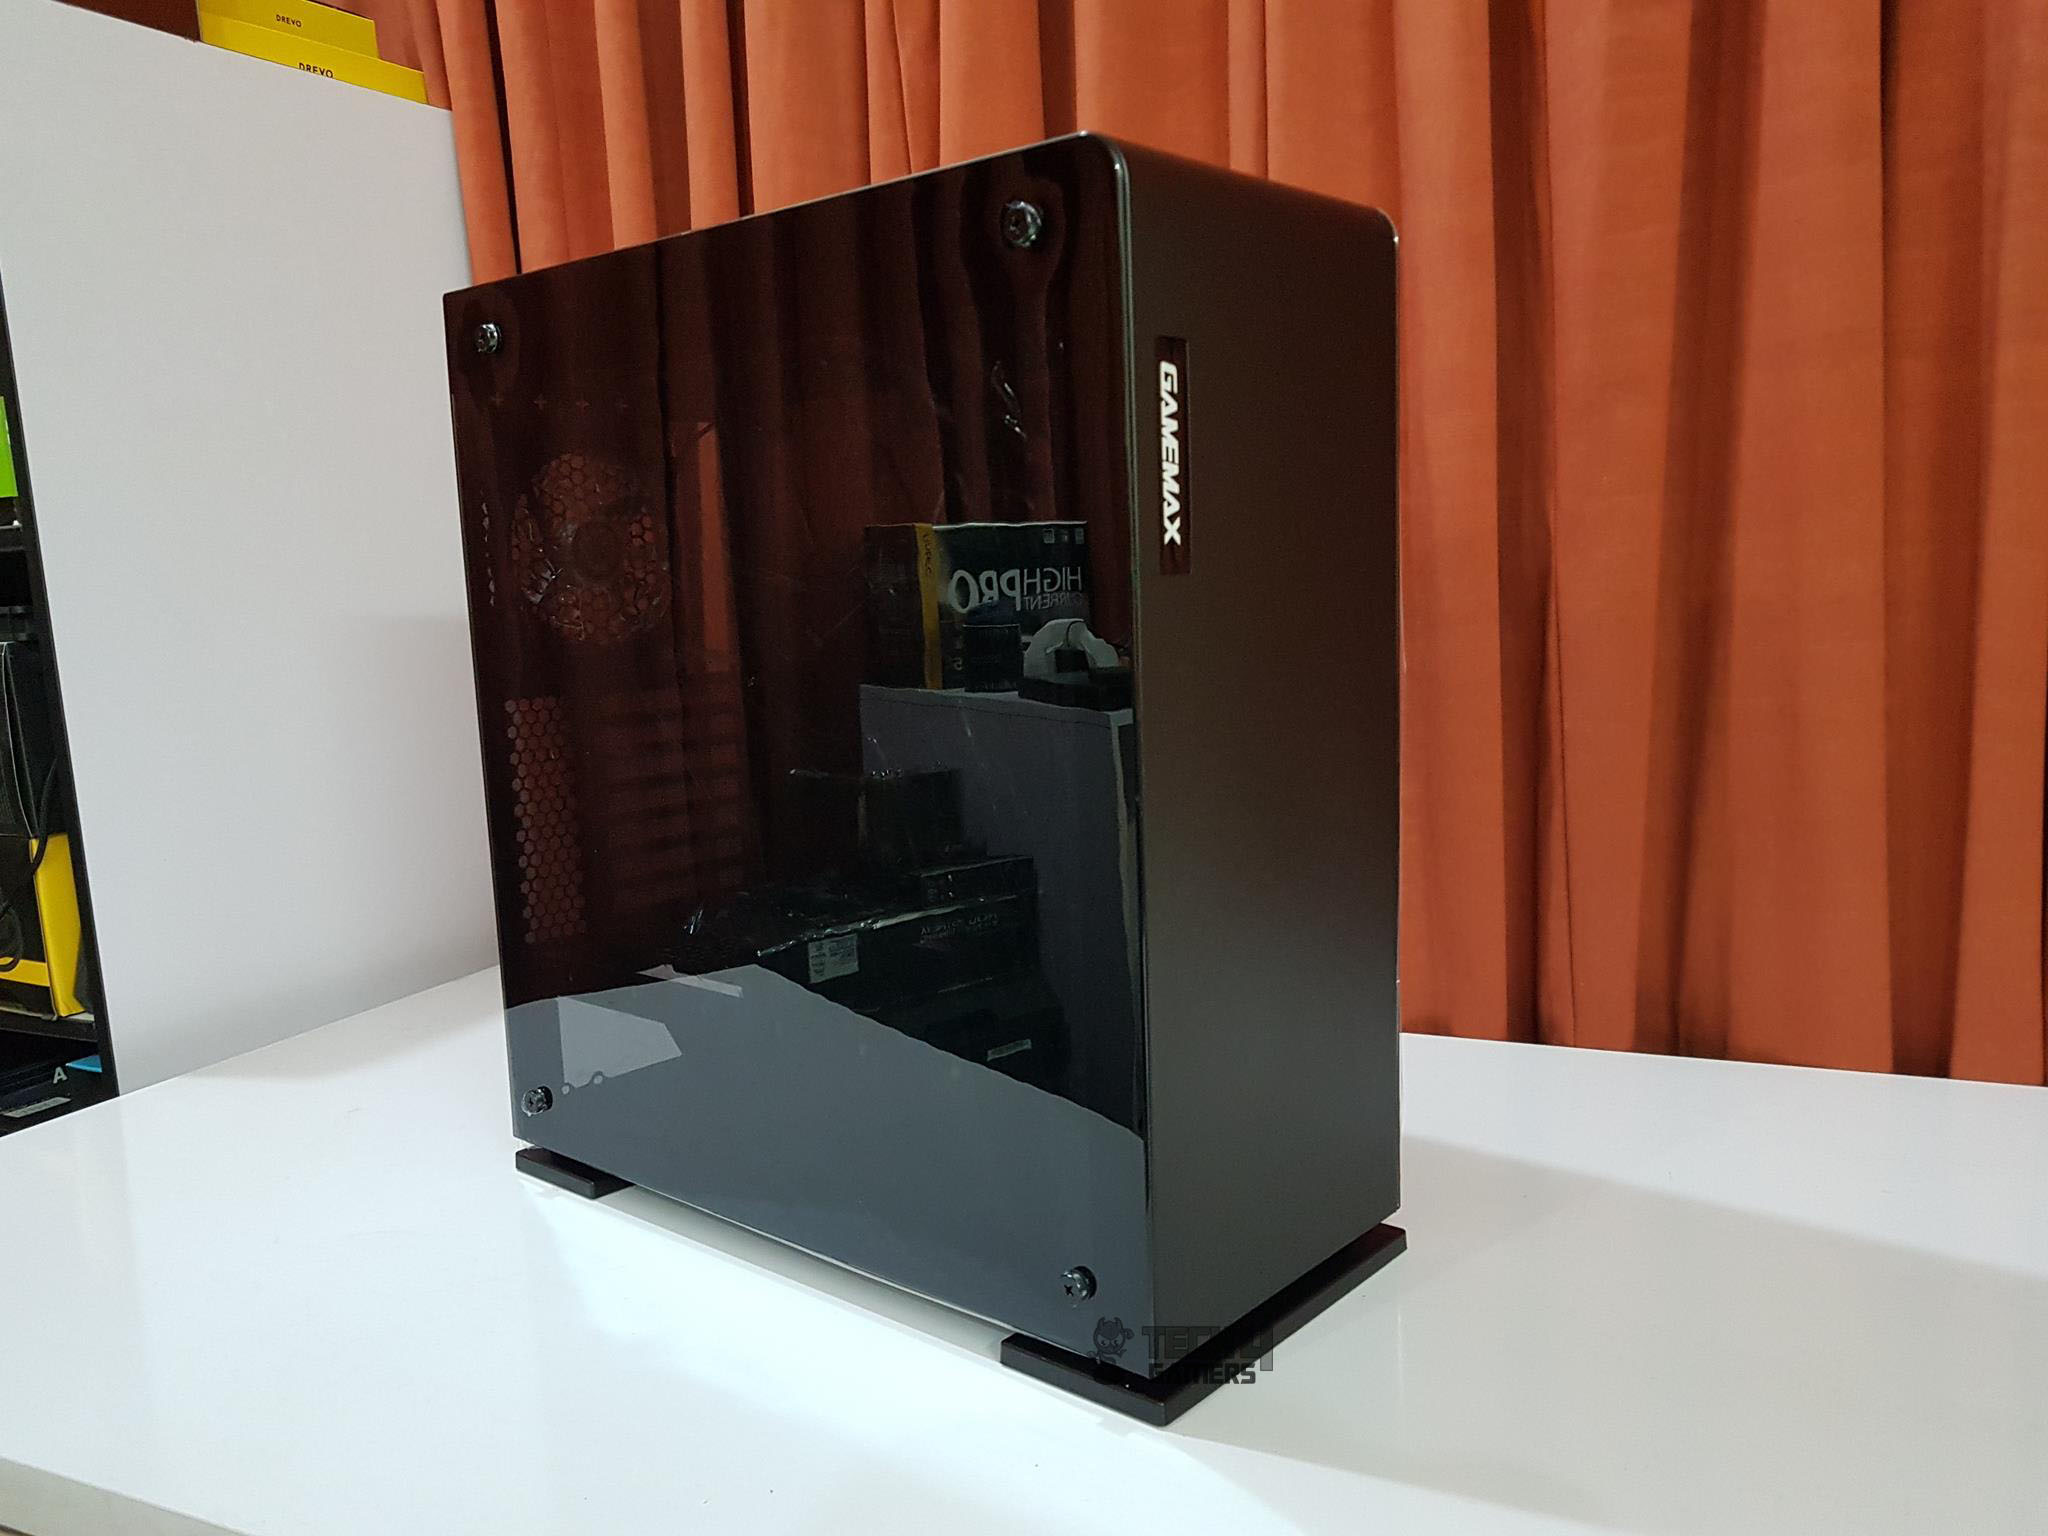
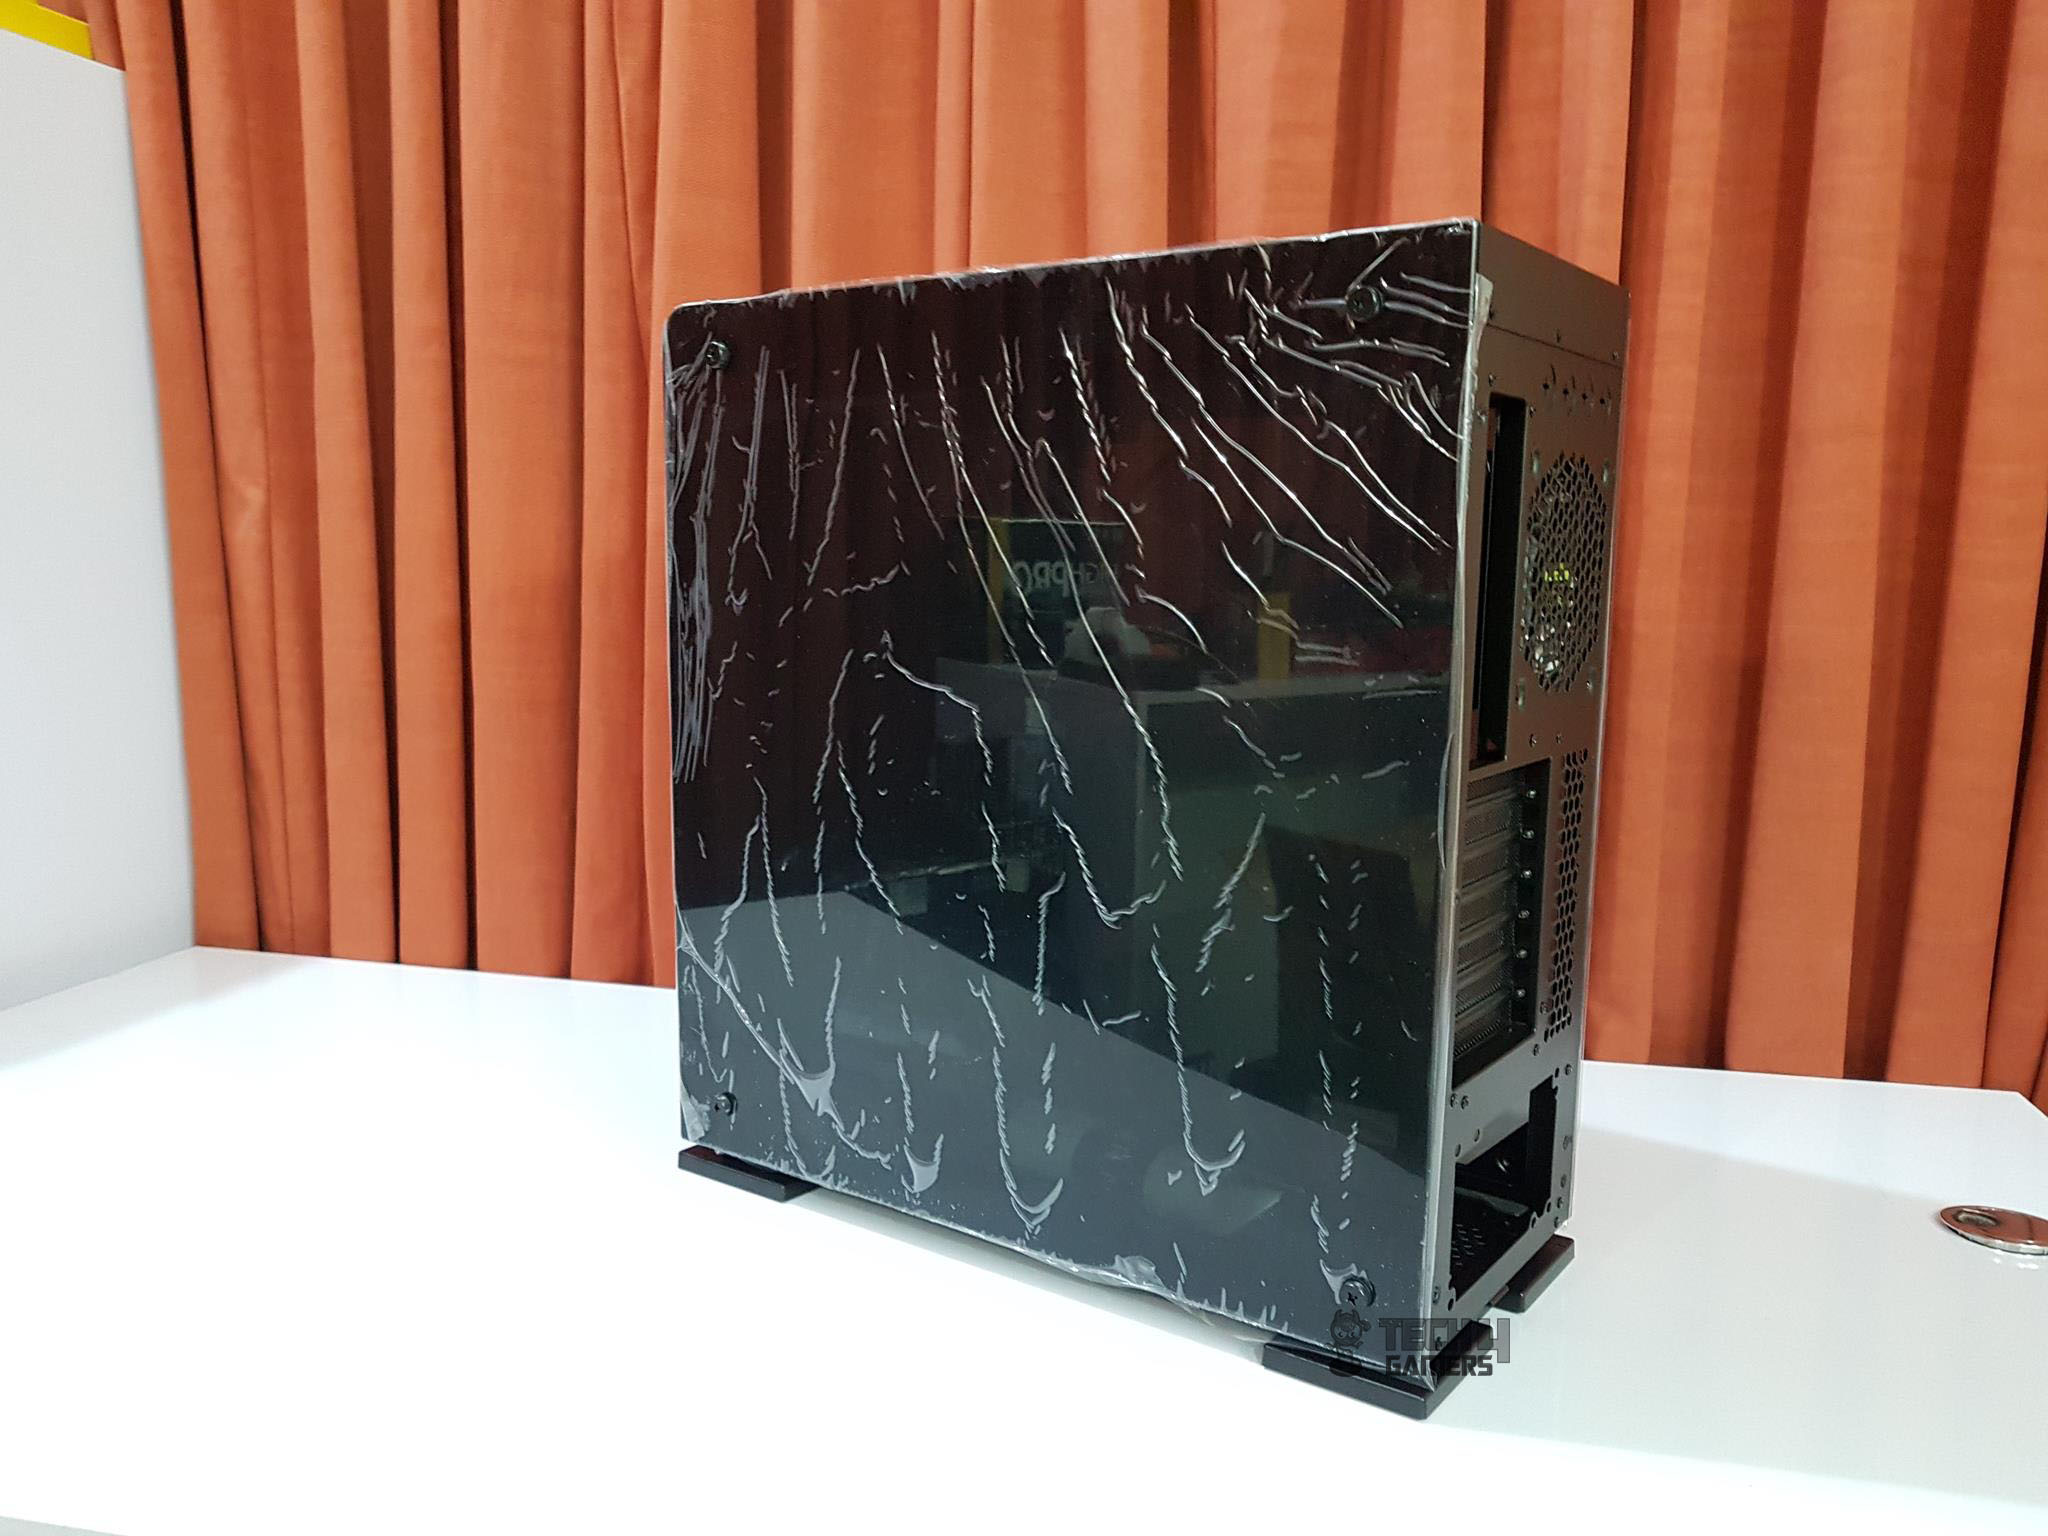
Let’s start with the exterior of the case. Our variant is Perspex one. It is still a transparent windows side panels on both. The panels are finished in dark black tint and interior lighting is a must to give you a view of what is inside.
The panel flushes with the chassis frame but not completely as the certain gap was visible and it is secured using 4x thumb screws.
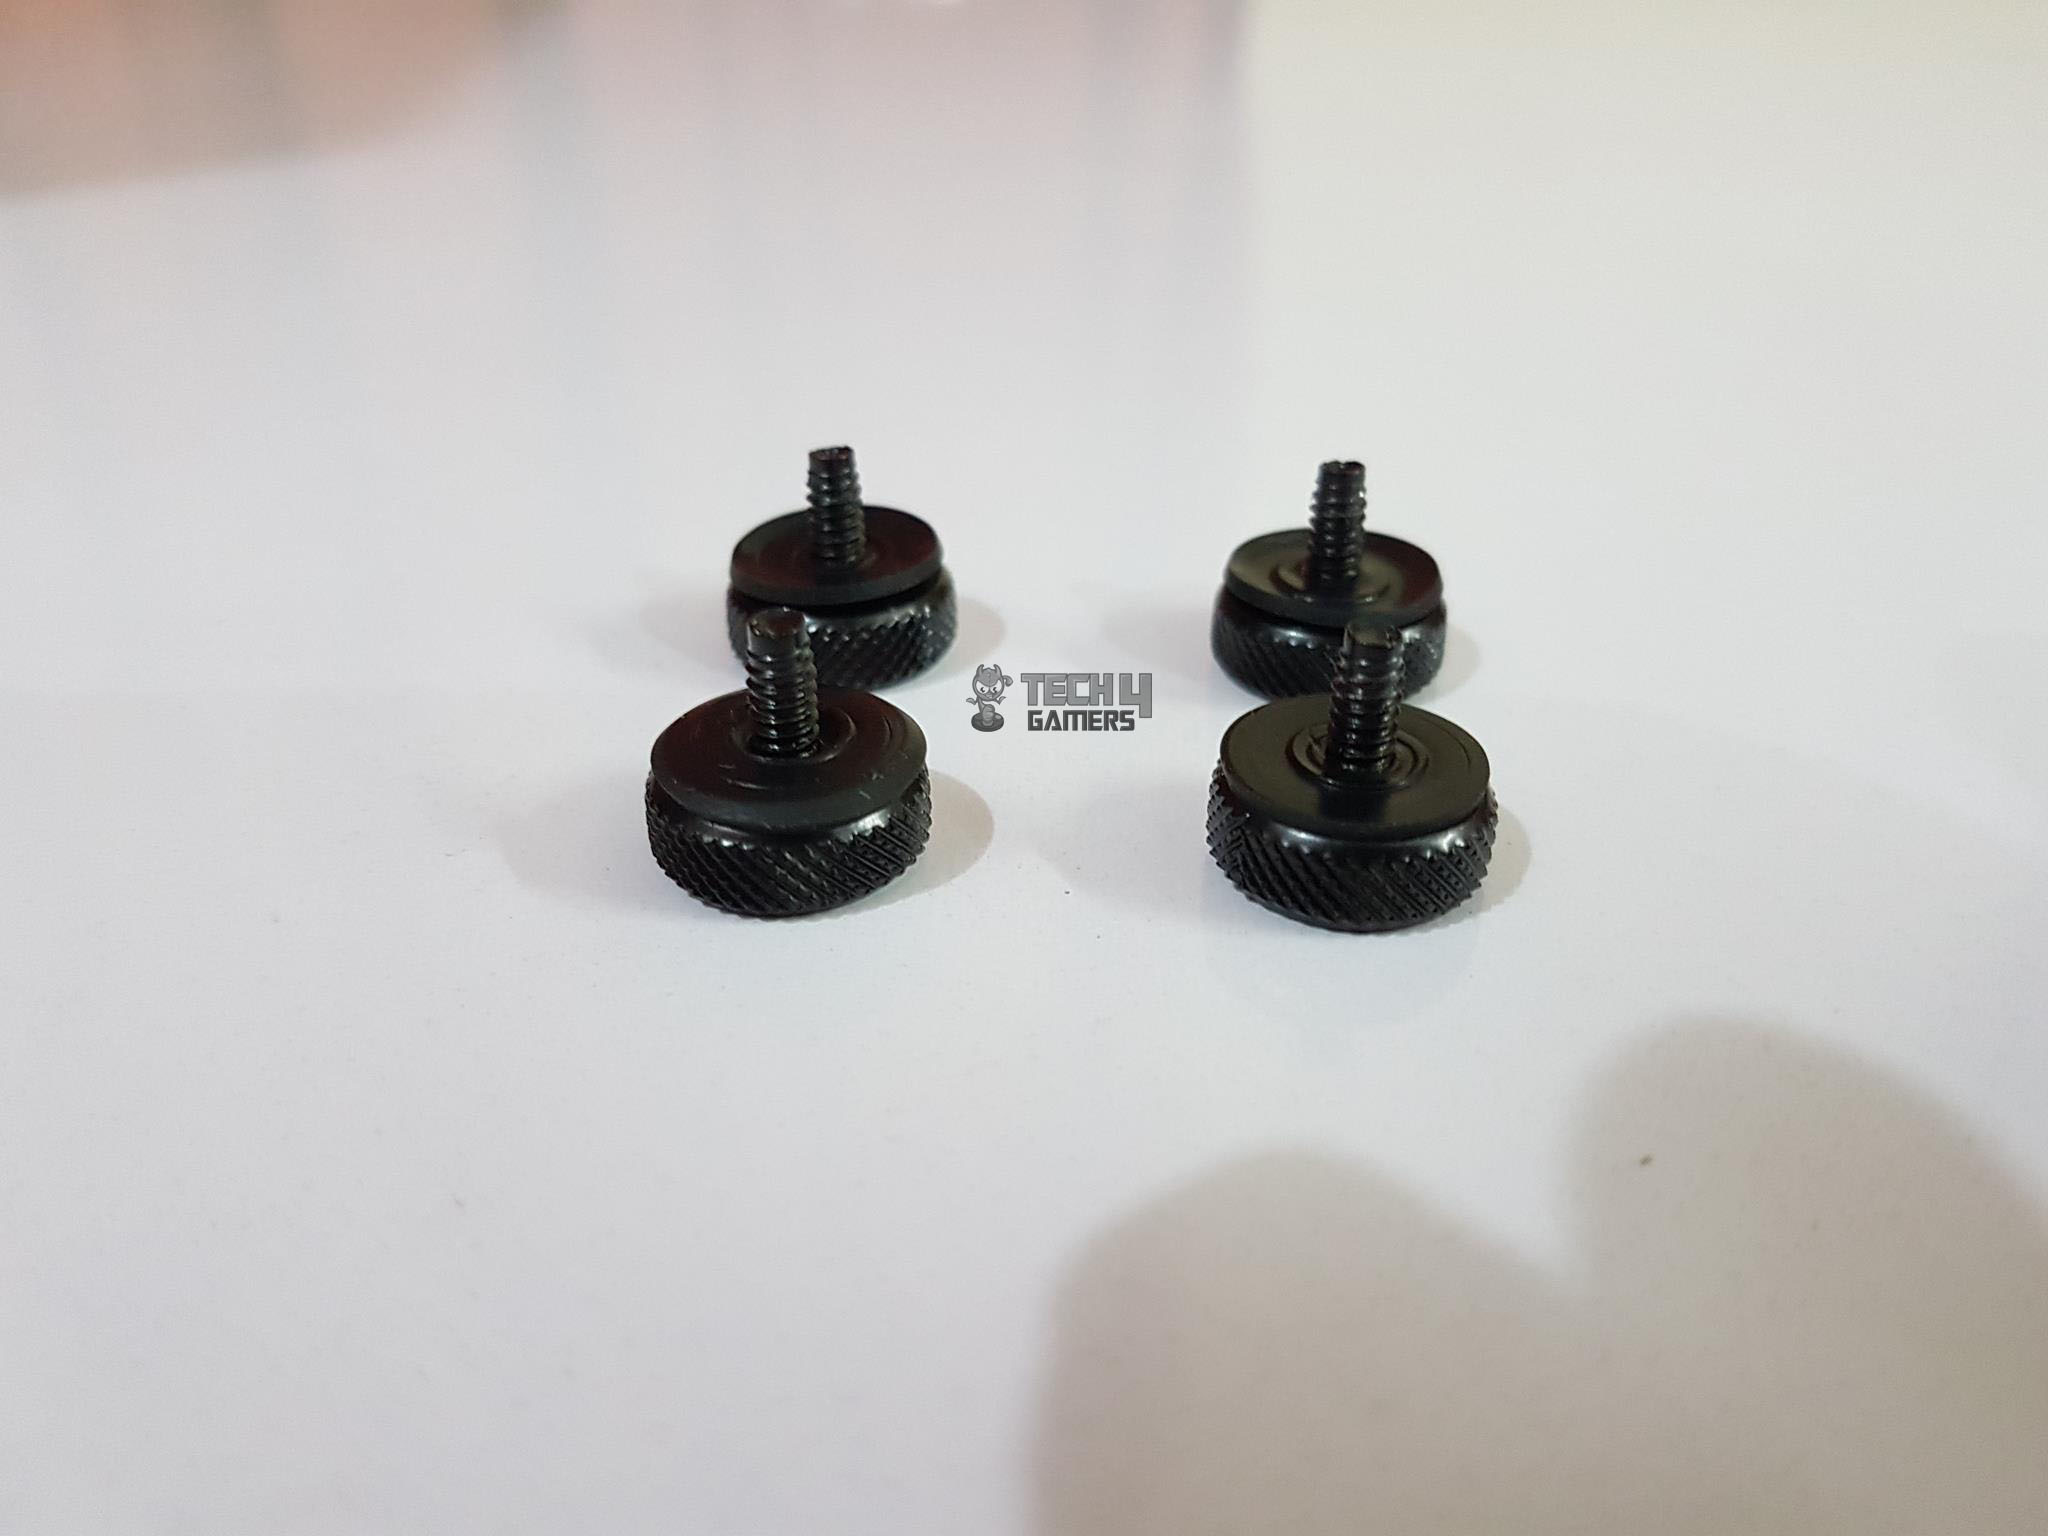
Each screw has a rubber insert to avoid scratching on the panel. Take care while taking off the panels as they may fall accidentally as there is no catching mechanism on the frame to retain the panels even if the screws are removed.
Being acrylic or plexiglass, these panels are scratch prone and can easily get scratched. Take care while handling. I would suggest peeling the protective sheet off only when the system is fully assembled and tested.
I did not remove the protective sheet off the back side panel. It is a replica of what we have seen on the main side panel. It is using the same screw types to secure the installation of the panel with the frame.
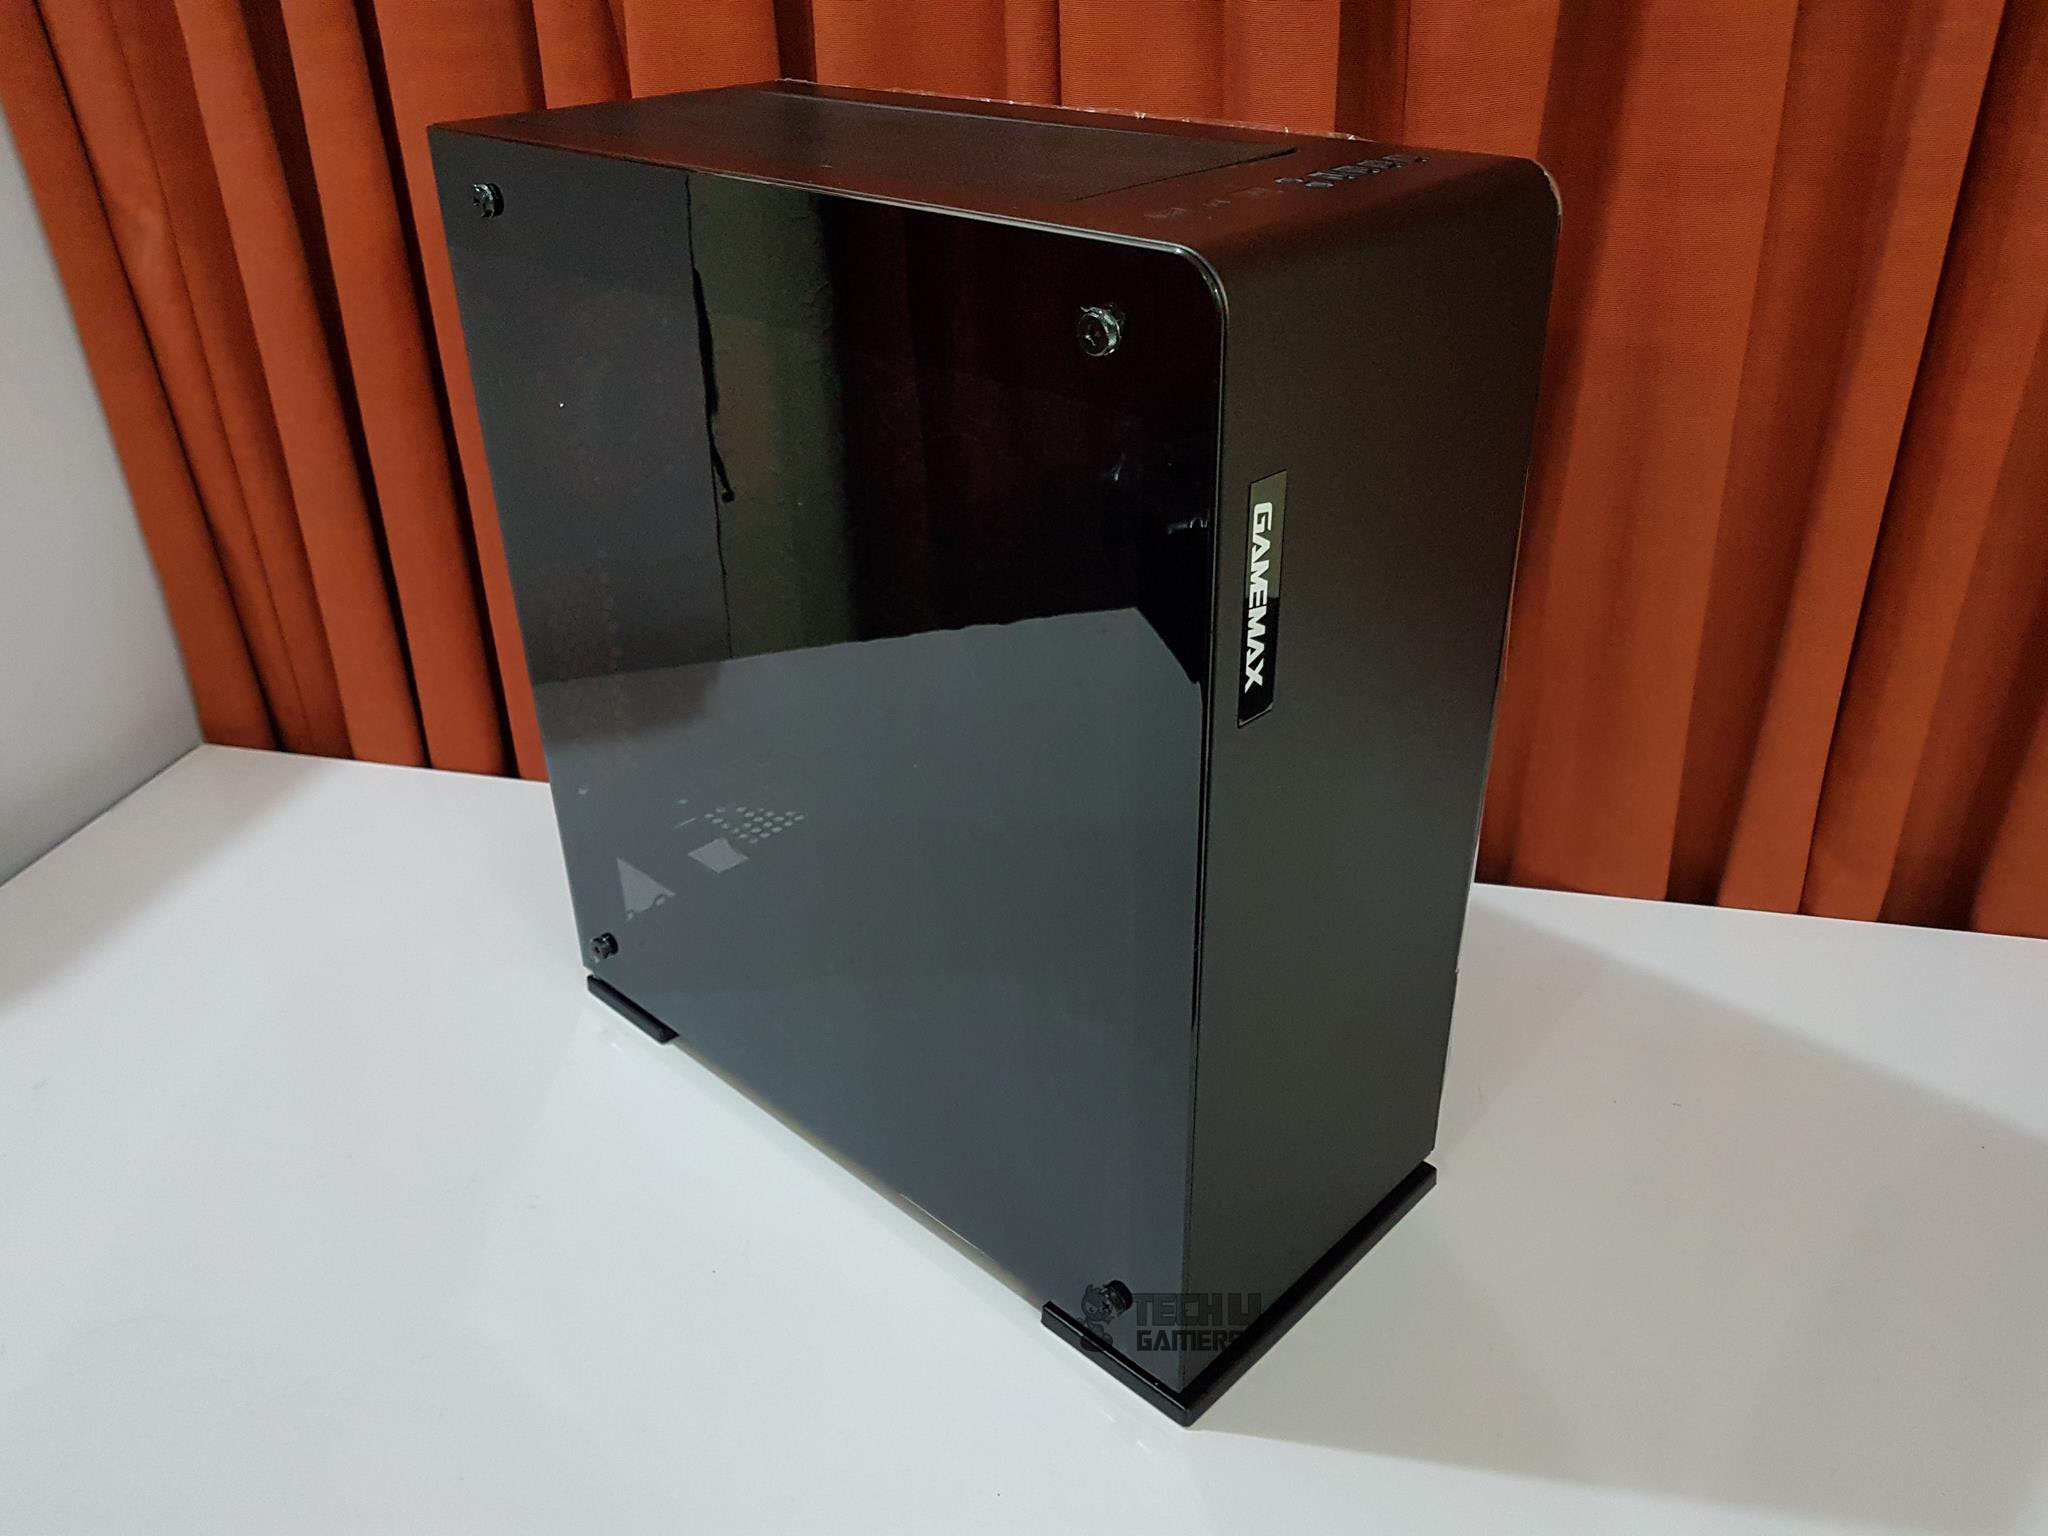
This picture was taken to show the beautifully curved design on the top front of the chassis.
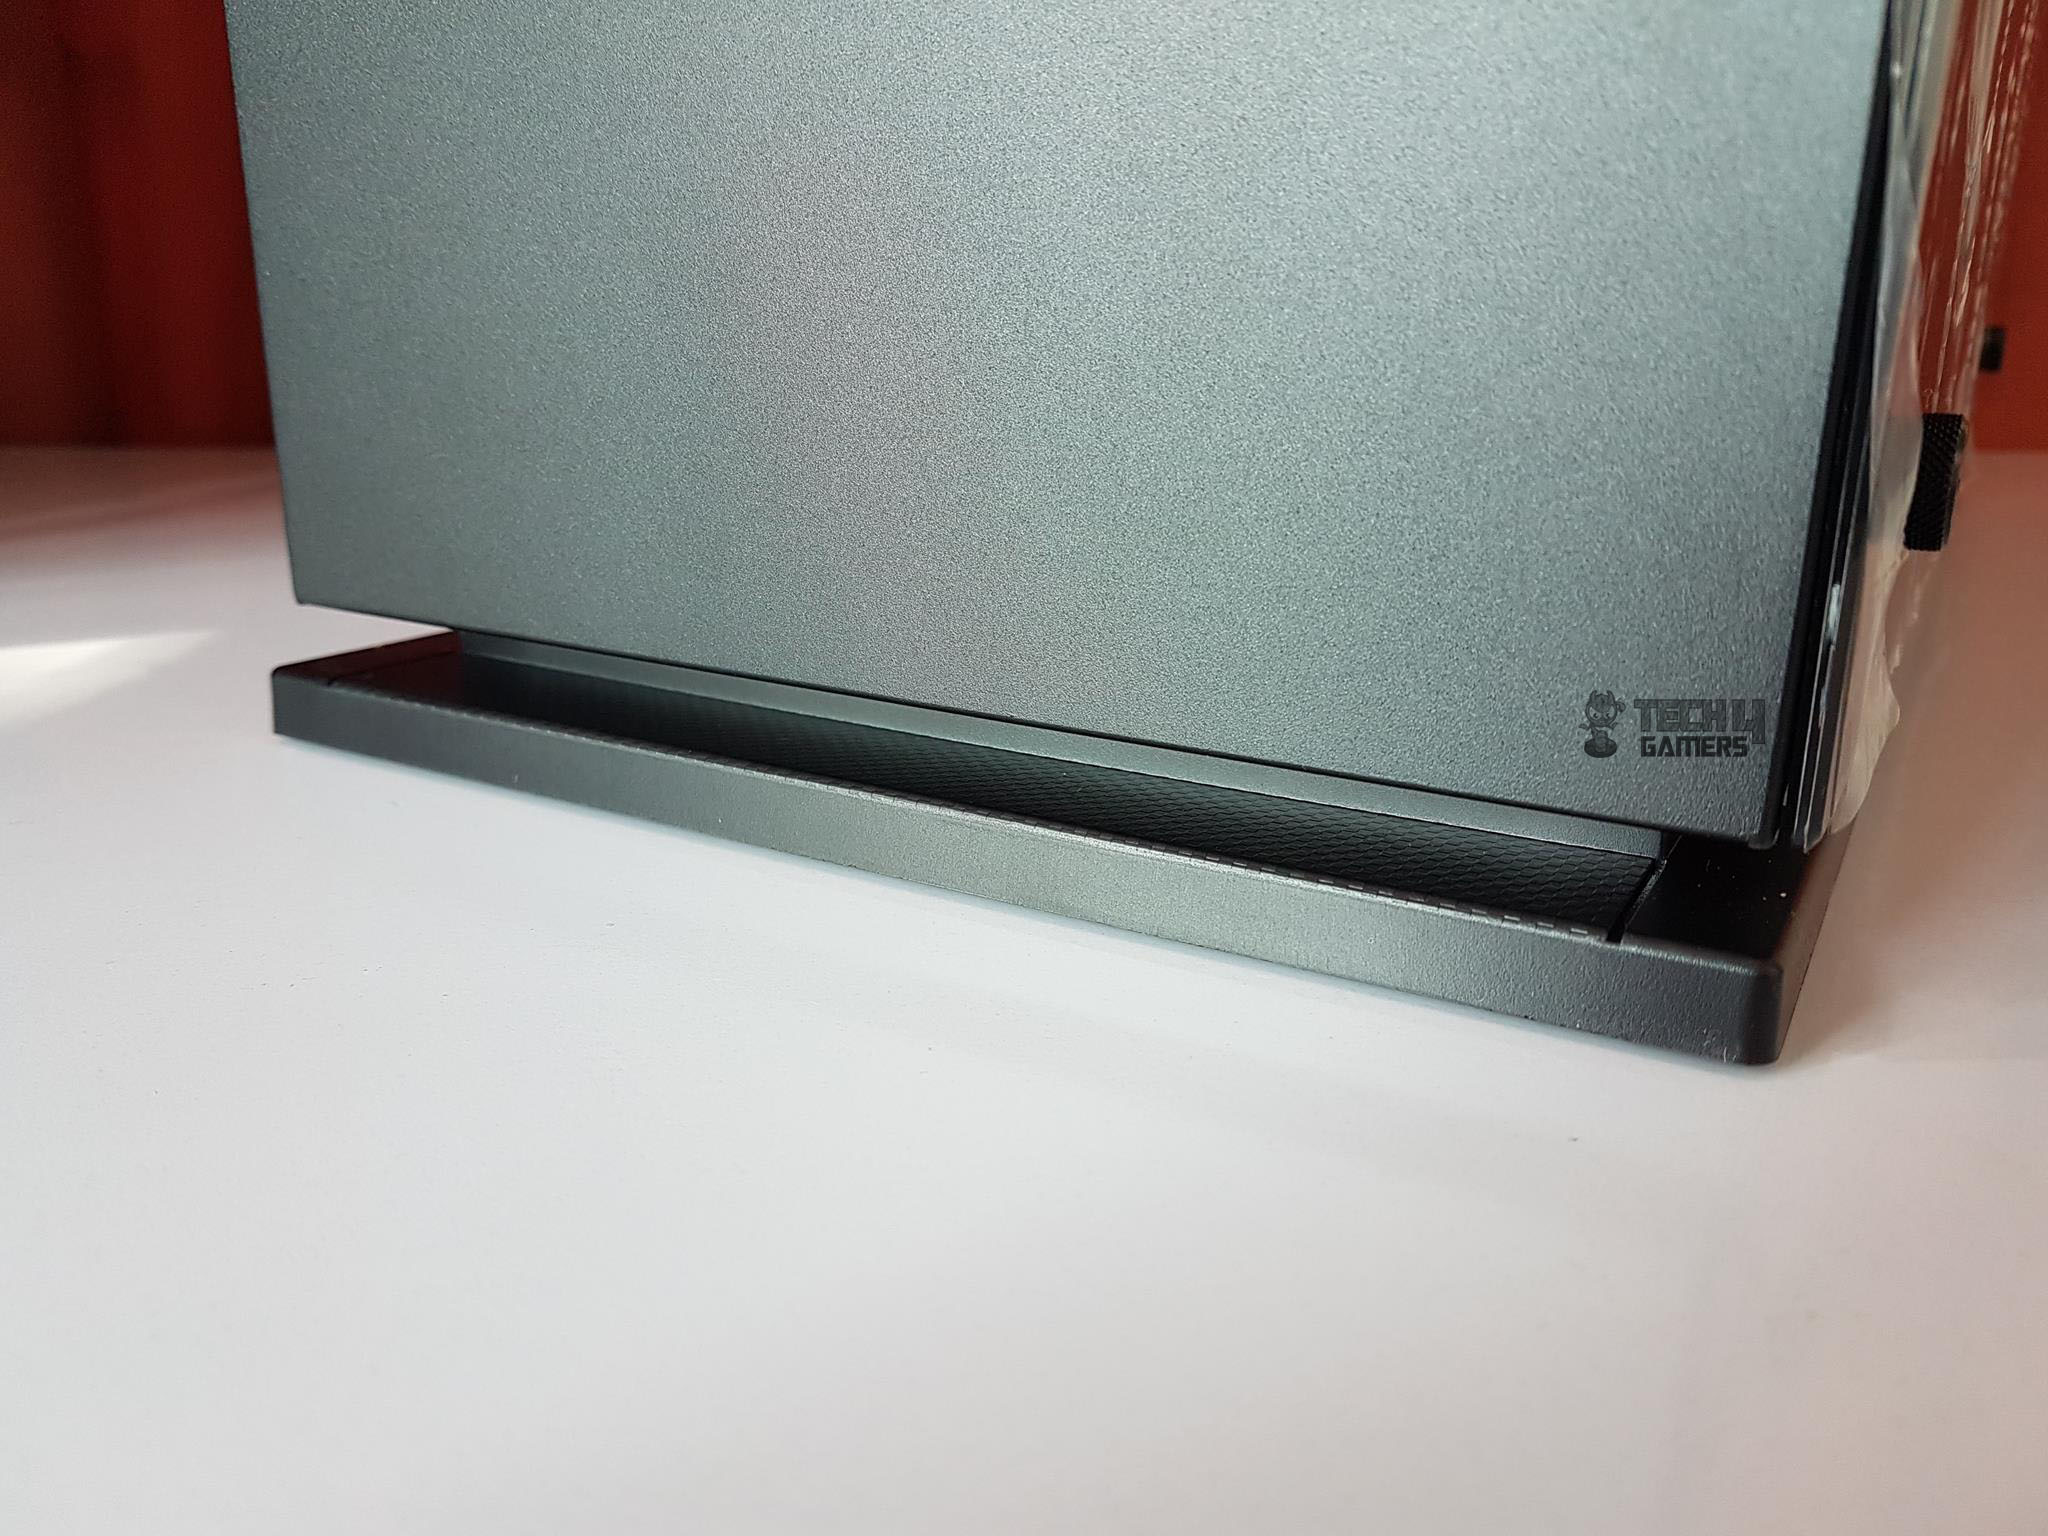
The bottom side of the front panel has another nice touch. The base has carbon fiber wrap on it and it does look that good in person though it is not apparent given its less obvious location.
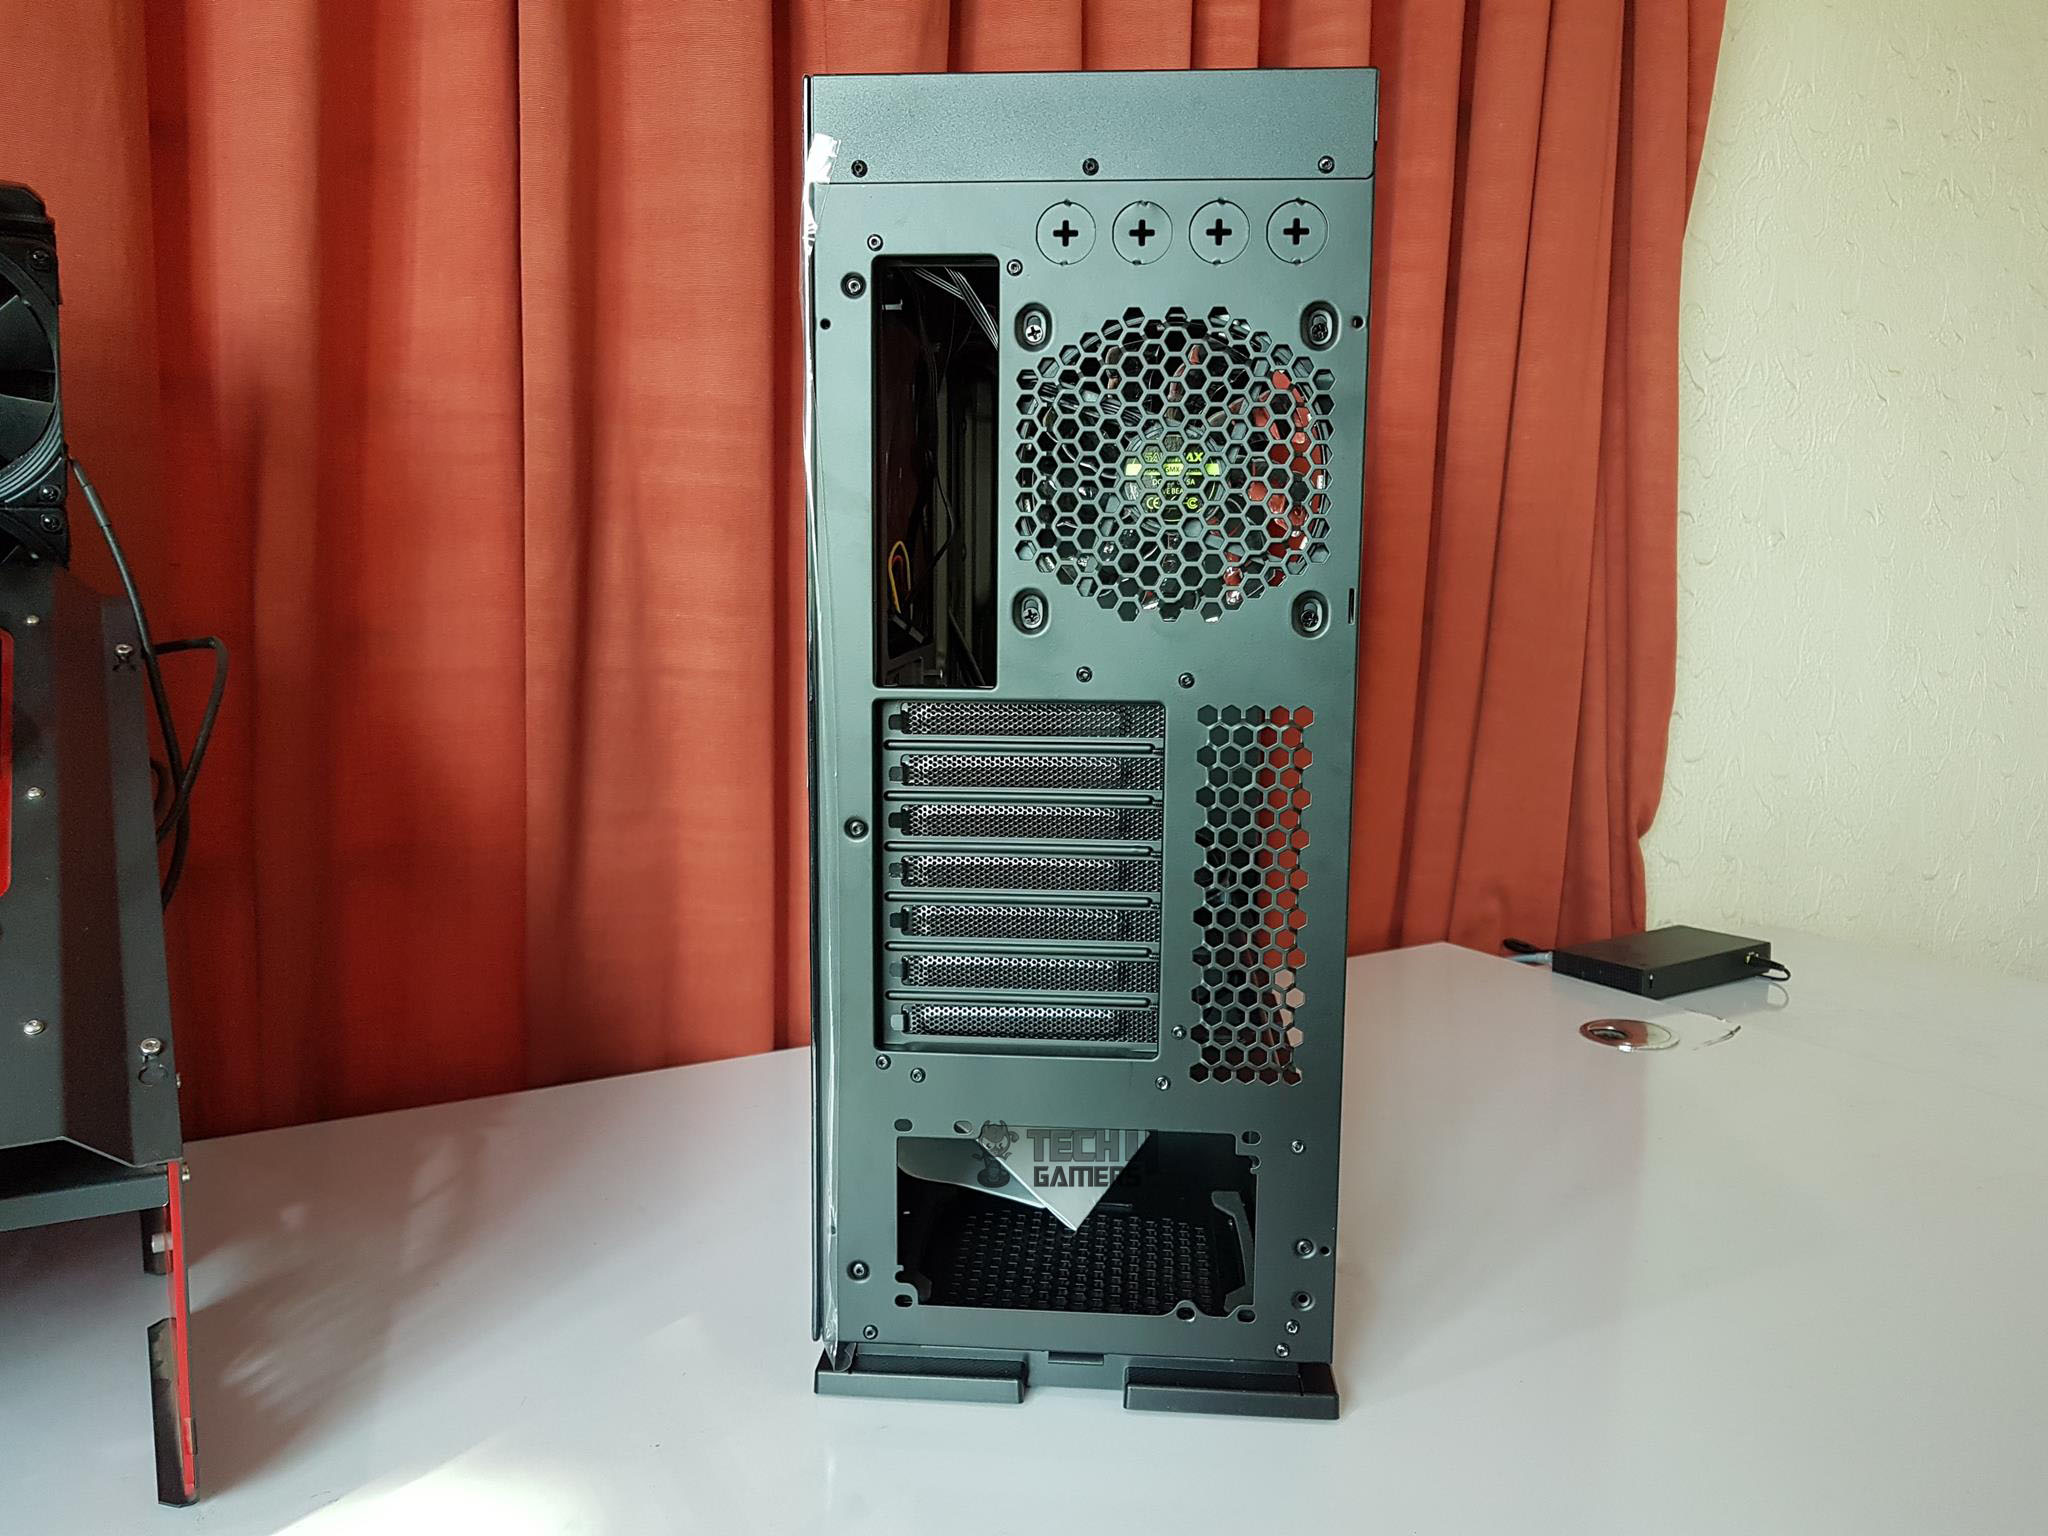
Let’s take a look at the rear side from behind the chassis. On top we have 4 solid pass-throughs that would need to be cut should you want to route the hose through these cutouts. Below them, is a mount for a 120mm fan.
The fan can only be installed on pre-fixed mounts as there is no slider provision. On its left, we have a large cutout for I/O shield of the motherboard. Below that we have 7 meshed PCIe slot covers. On its right, there is a vented portion for air ventilation. At bottom, we have a standard ATX PSU mounting area.
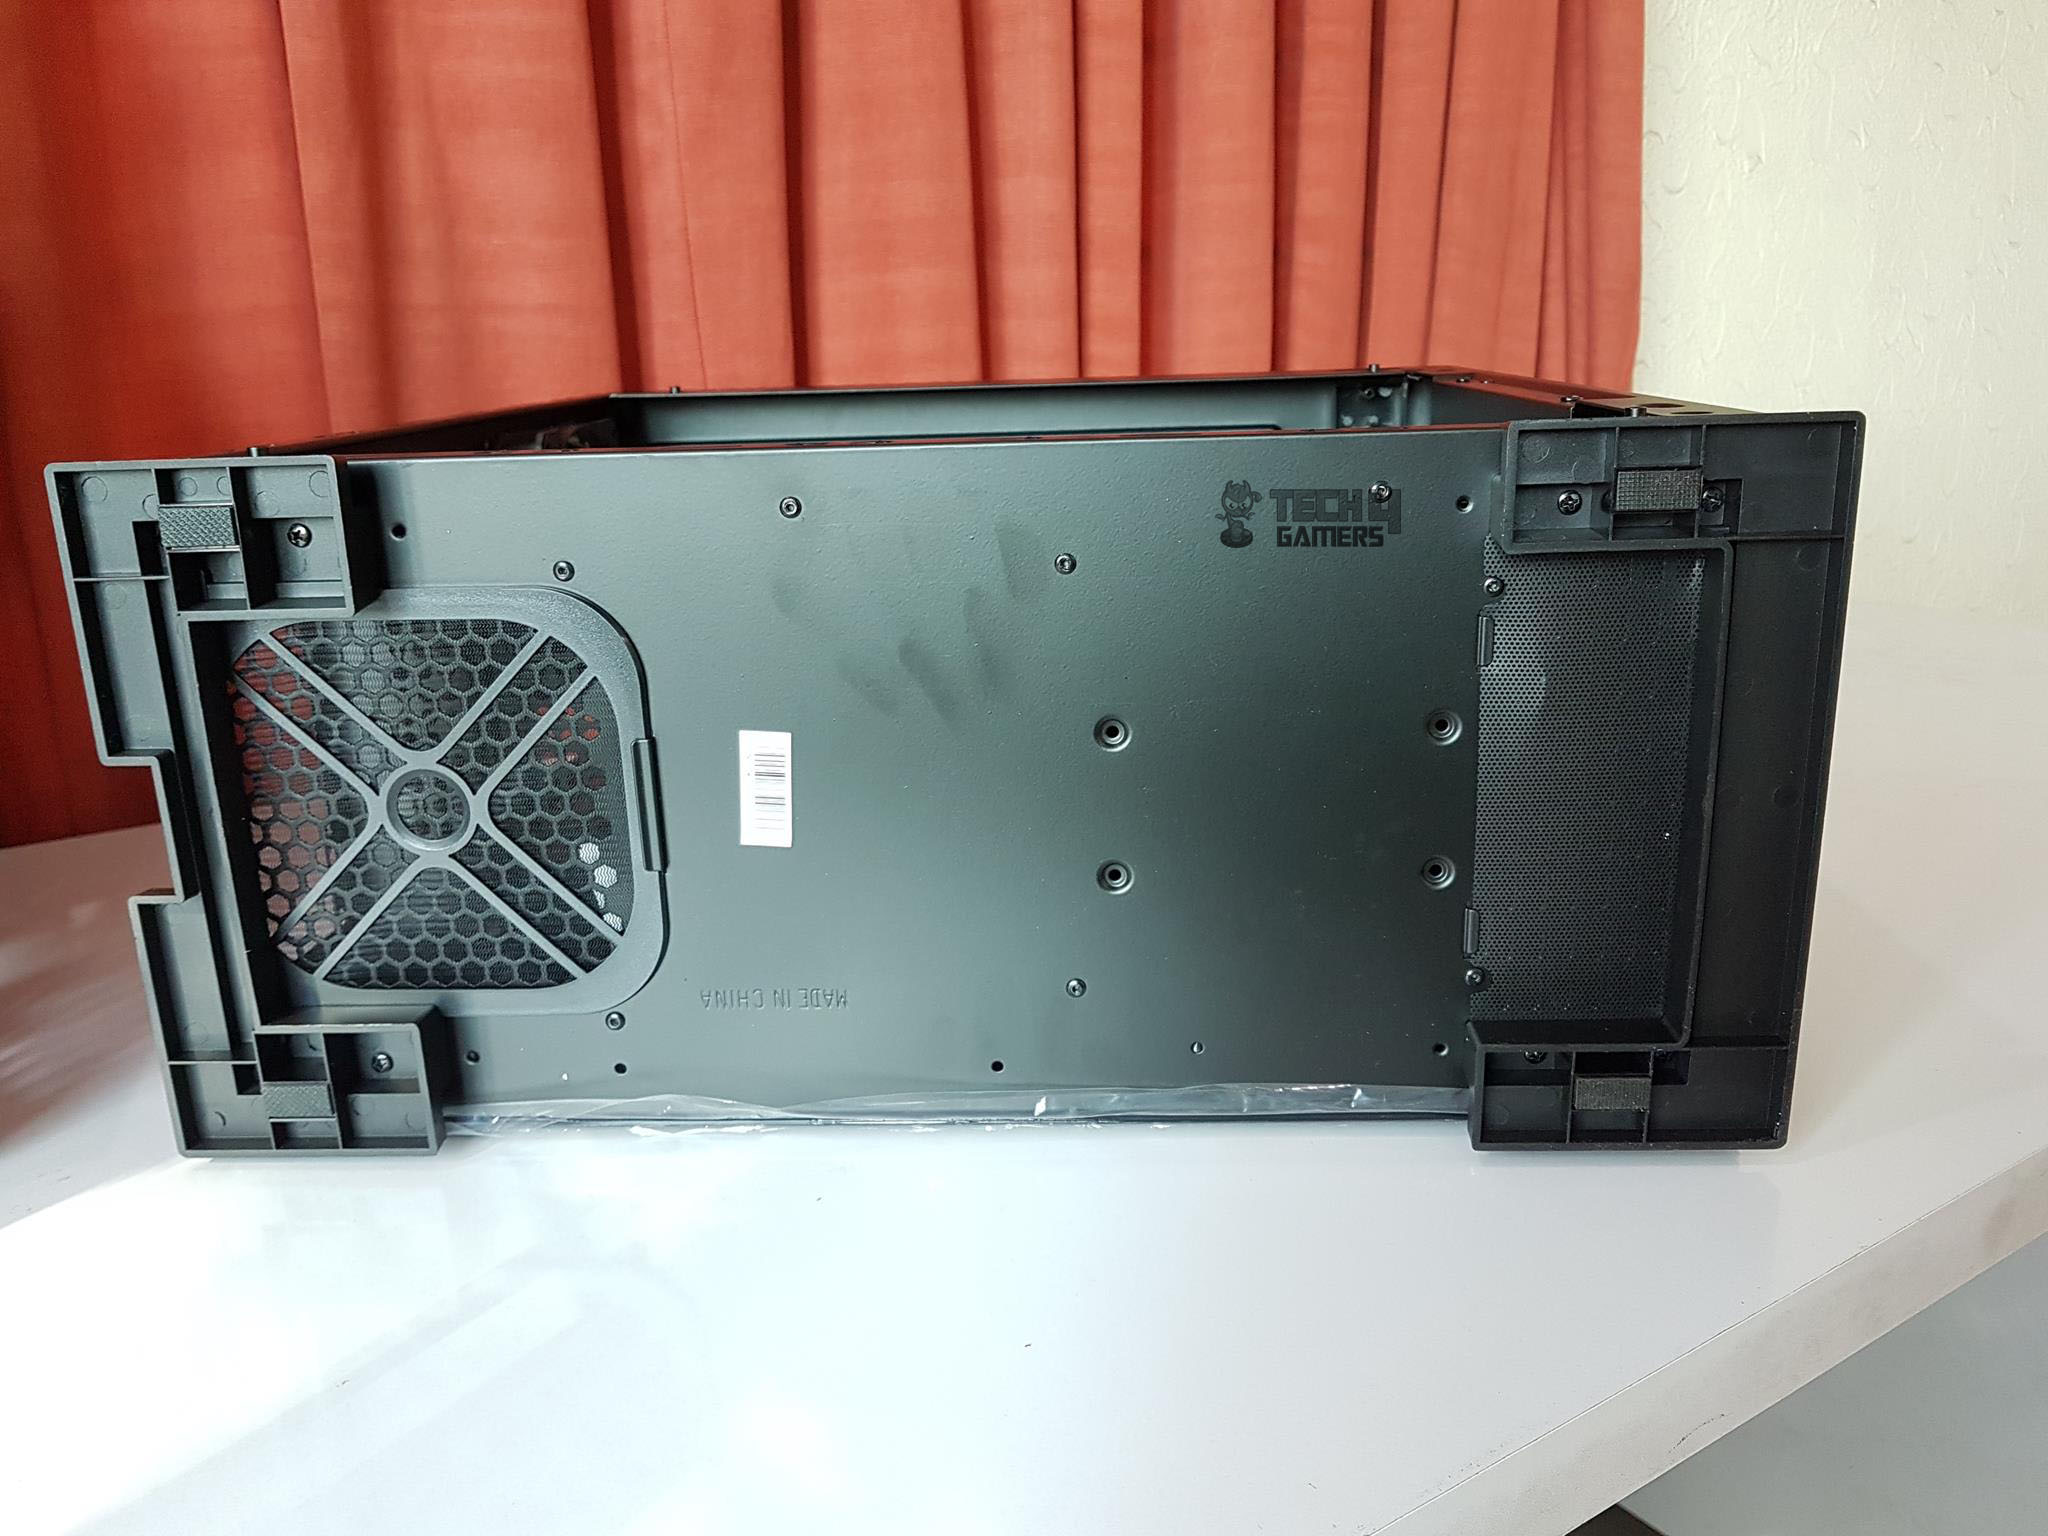
Taking a peek at the bottom of the chassis, we have two large size plastic made feet that raise the height of the chassis from the base to like 10mm approximately. These are removable.
Both feet have rubber inserts on each side to avoid scratching on the surface where the chassis will be set up. There is a removable and washable dust filter on the PSU mount. Just slide it out from the rear side. The front side also has a removable dust filter.
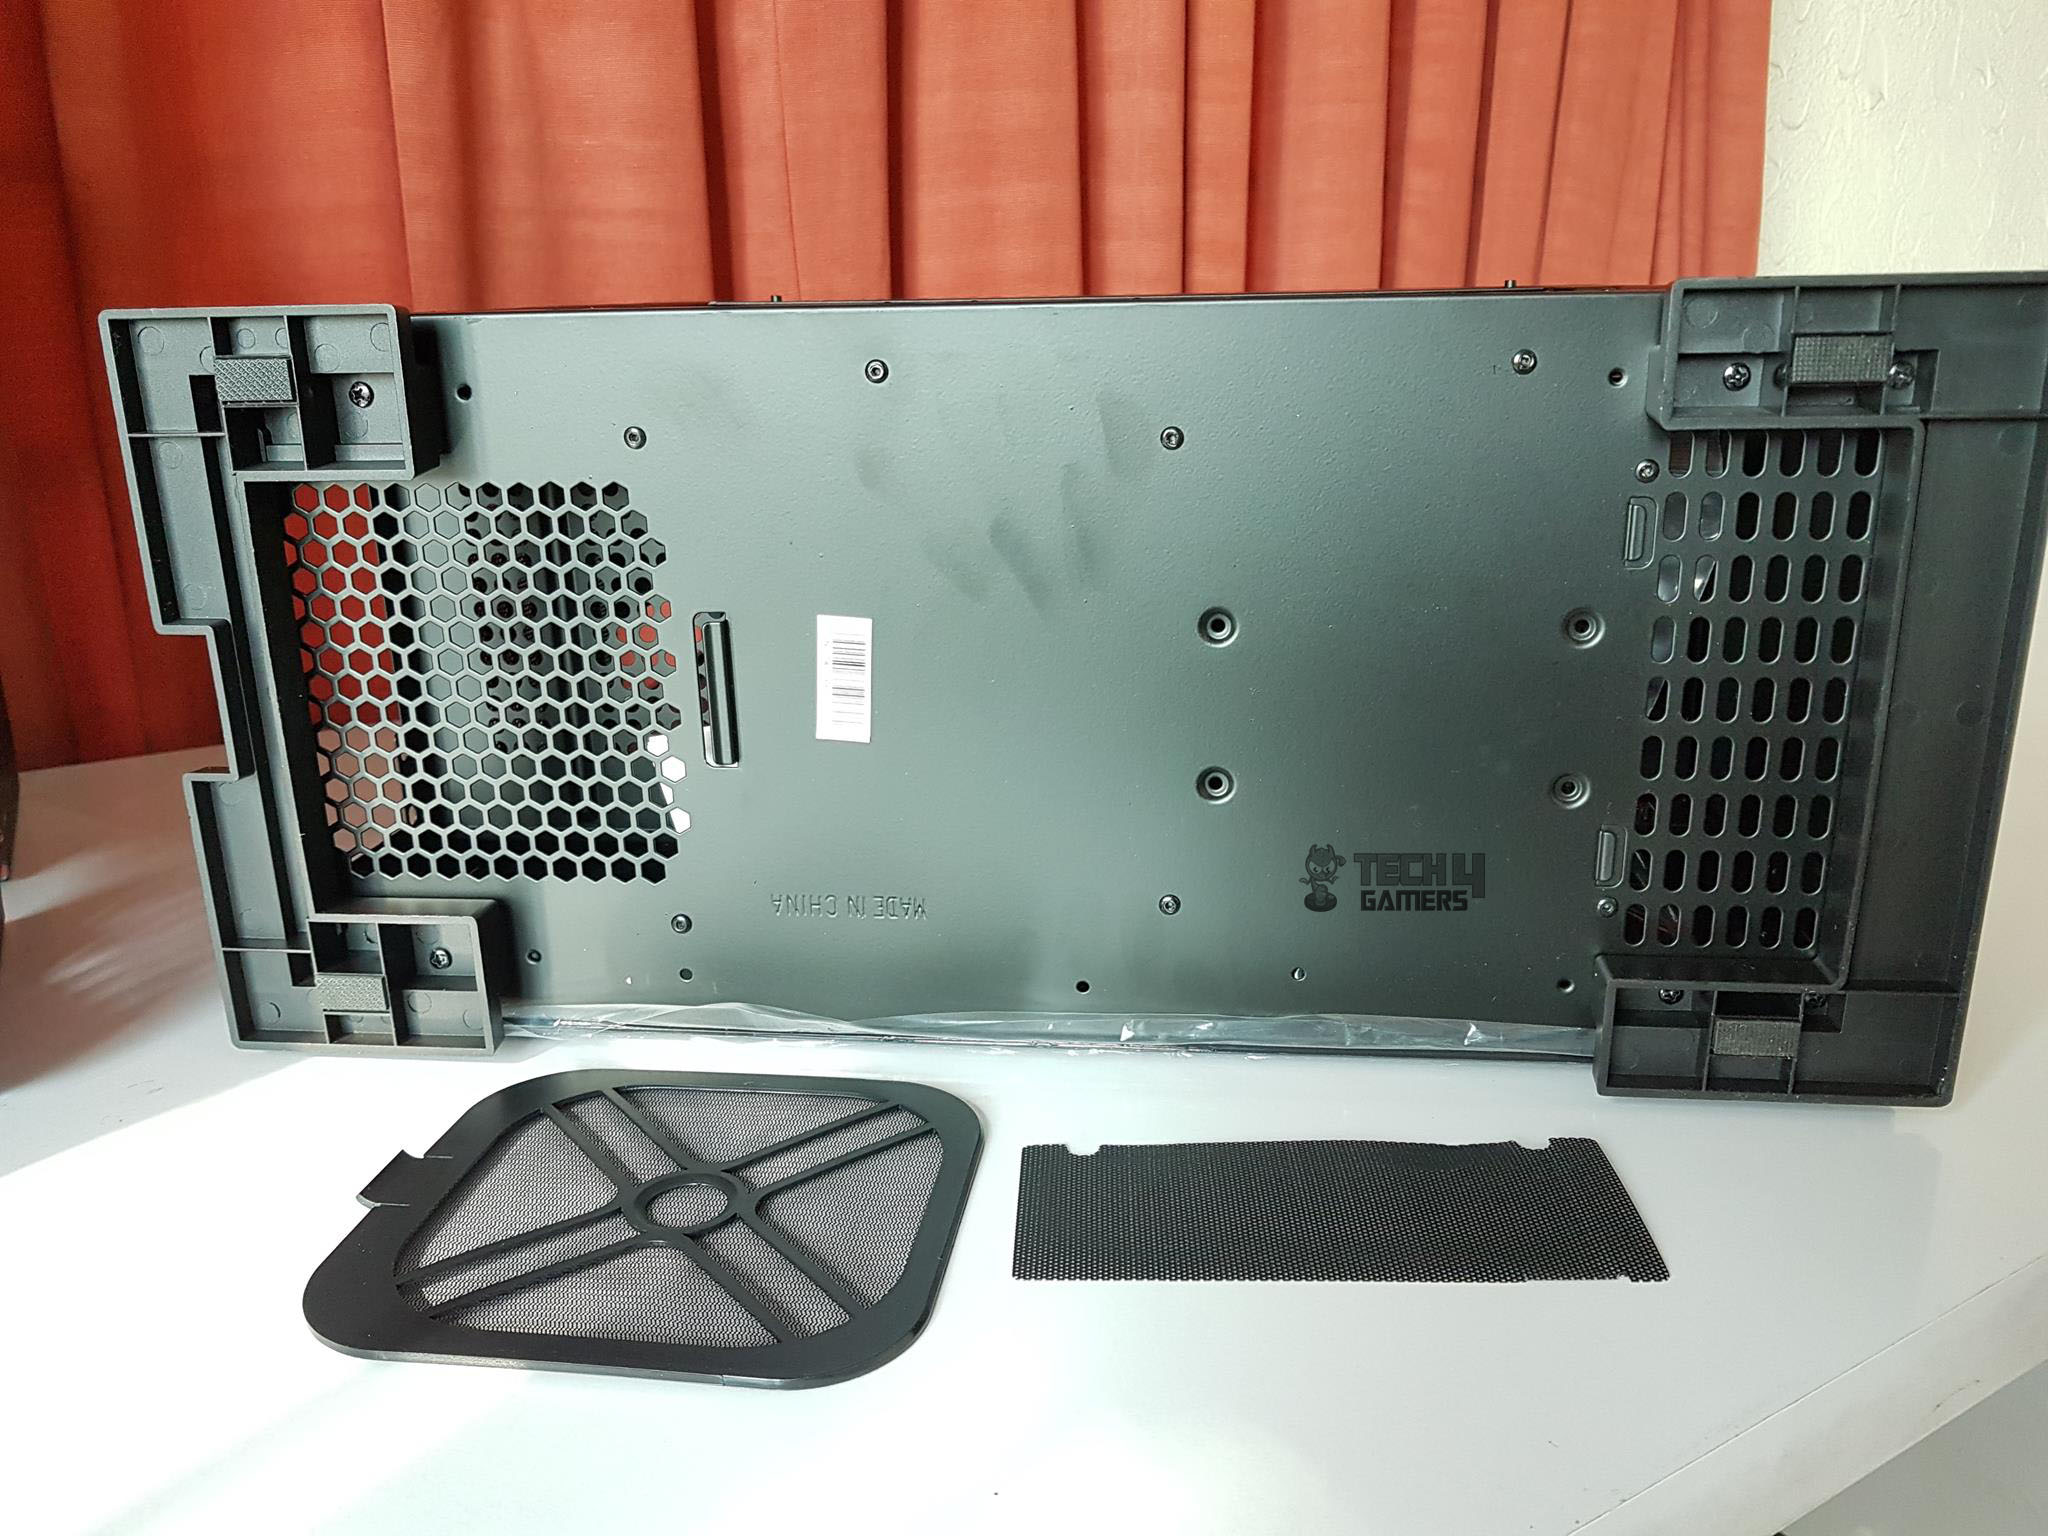
Removing the front side’s dust filter will show a large size vented area. This is the only location from where the air could be taken inside of the chassis from the front side. This approach is totally beyond me as the front is completely blocked off leaving the front mounted fans no choice but to draw air through this vented portion only.
Also, putting the dust cover back on is a quite hectic activity. A sliding design could have been much better.
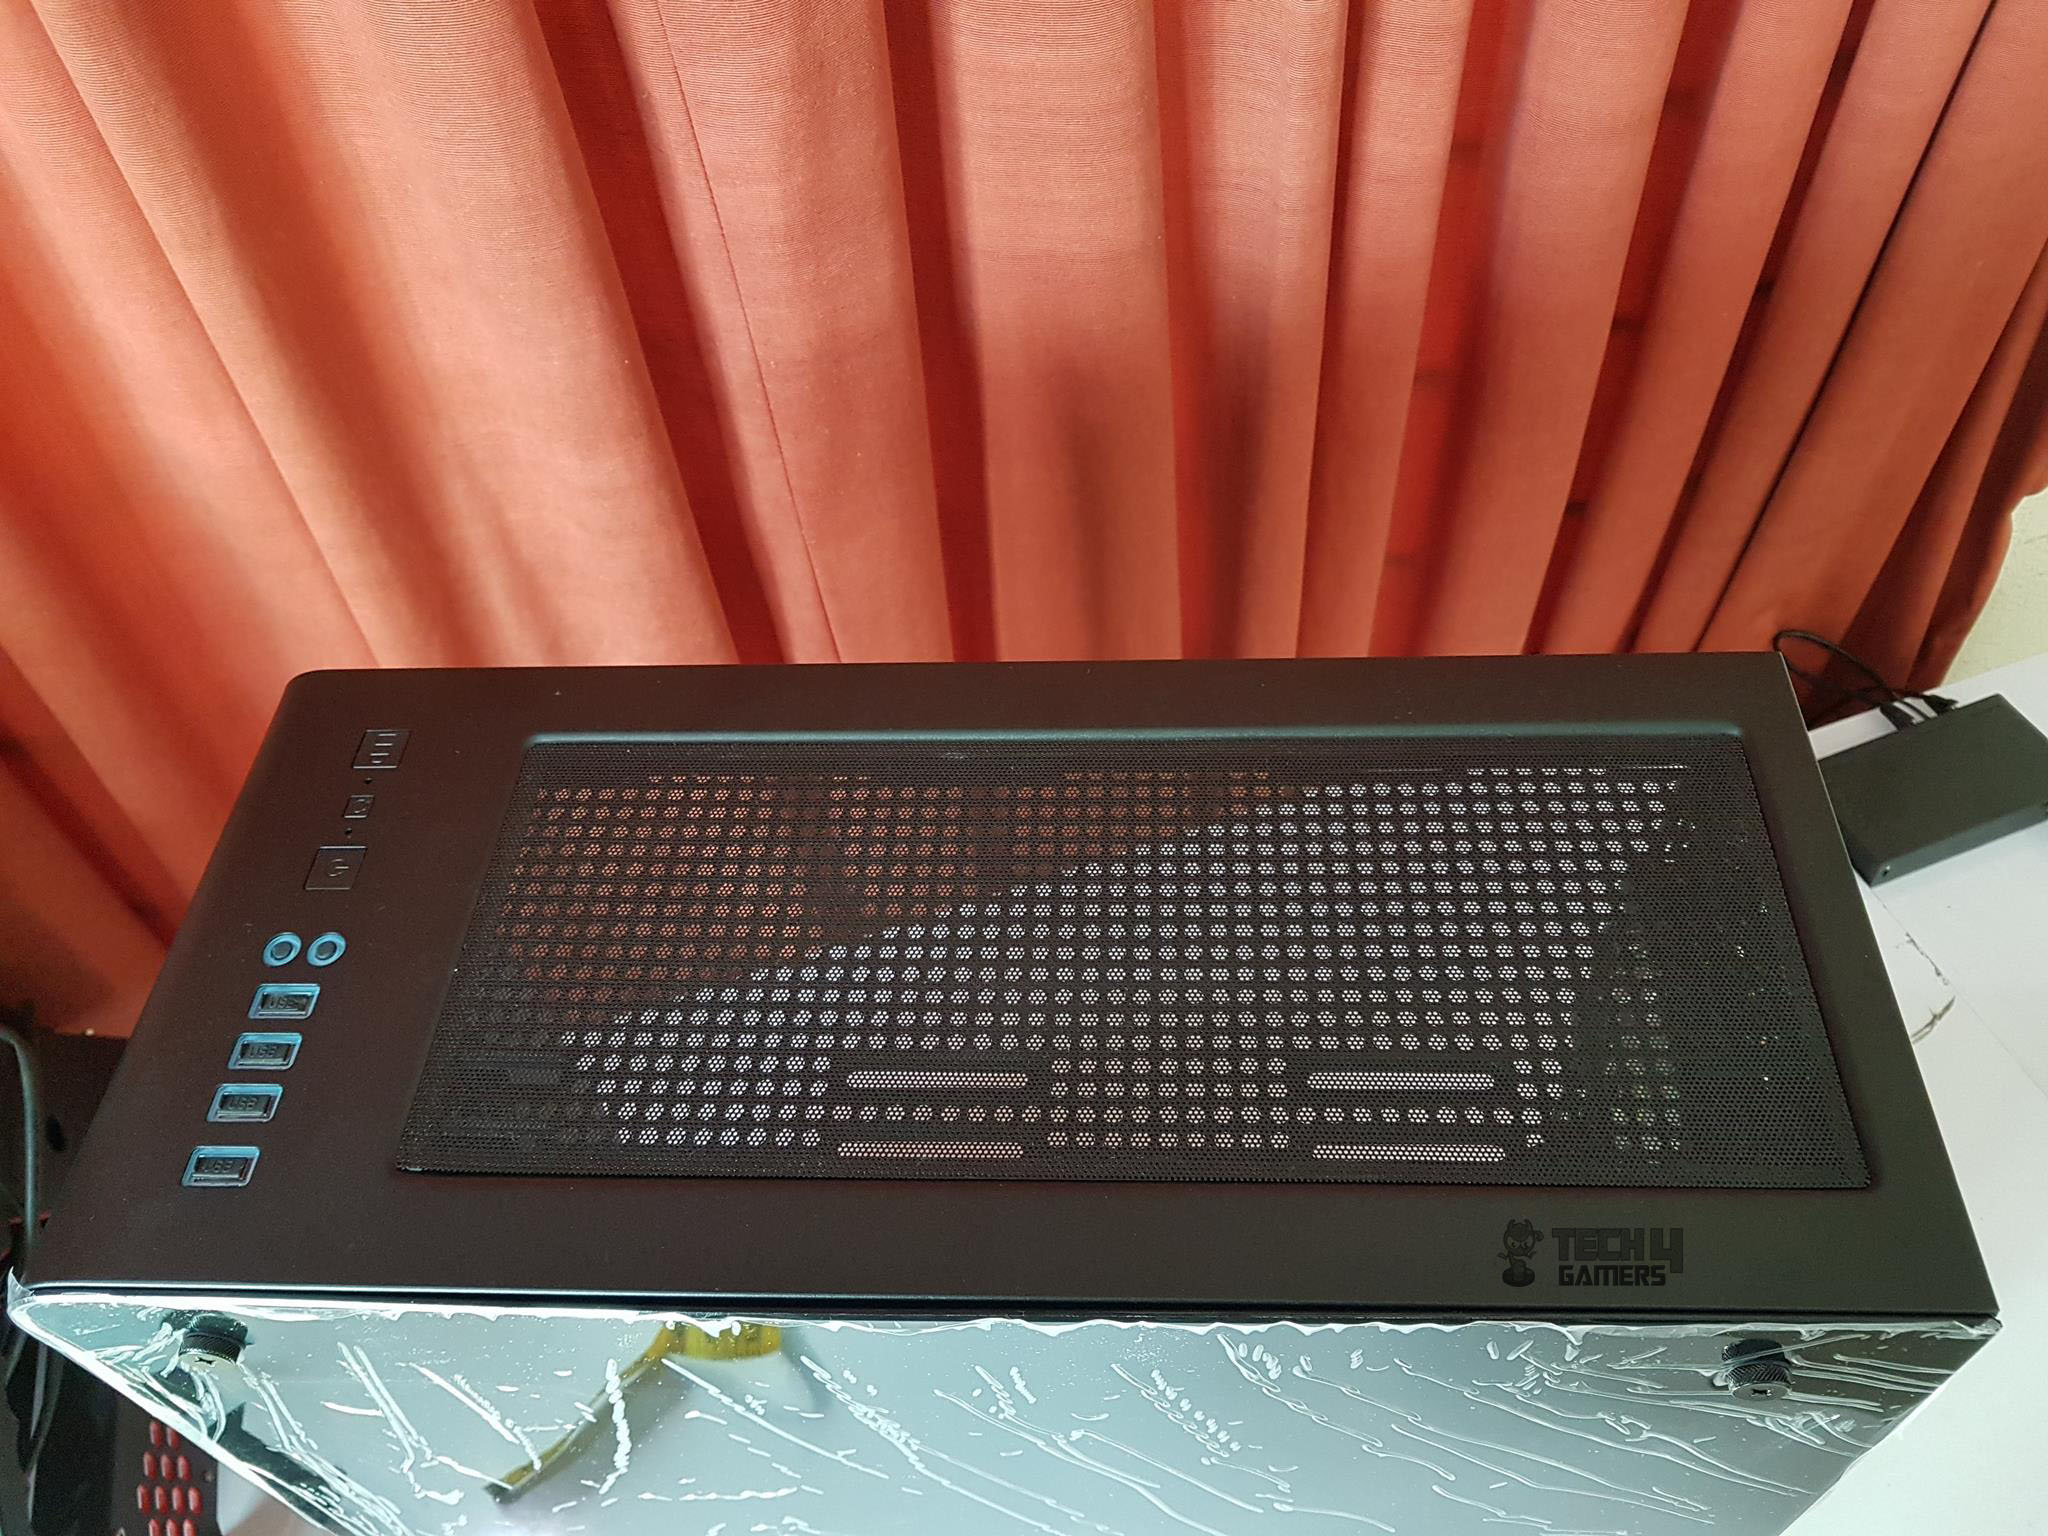
Let’s take a look at the top side of the chassis. There is a large size magnetic dust filter covering the top vented area. It is quite easy to handle.
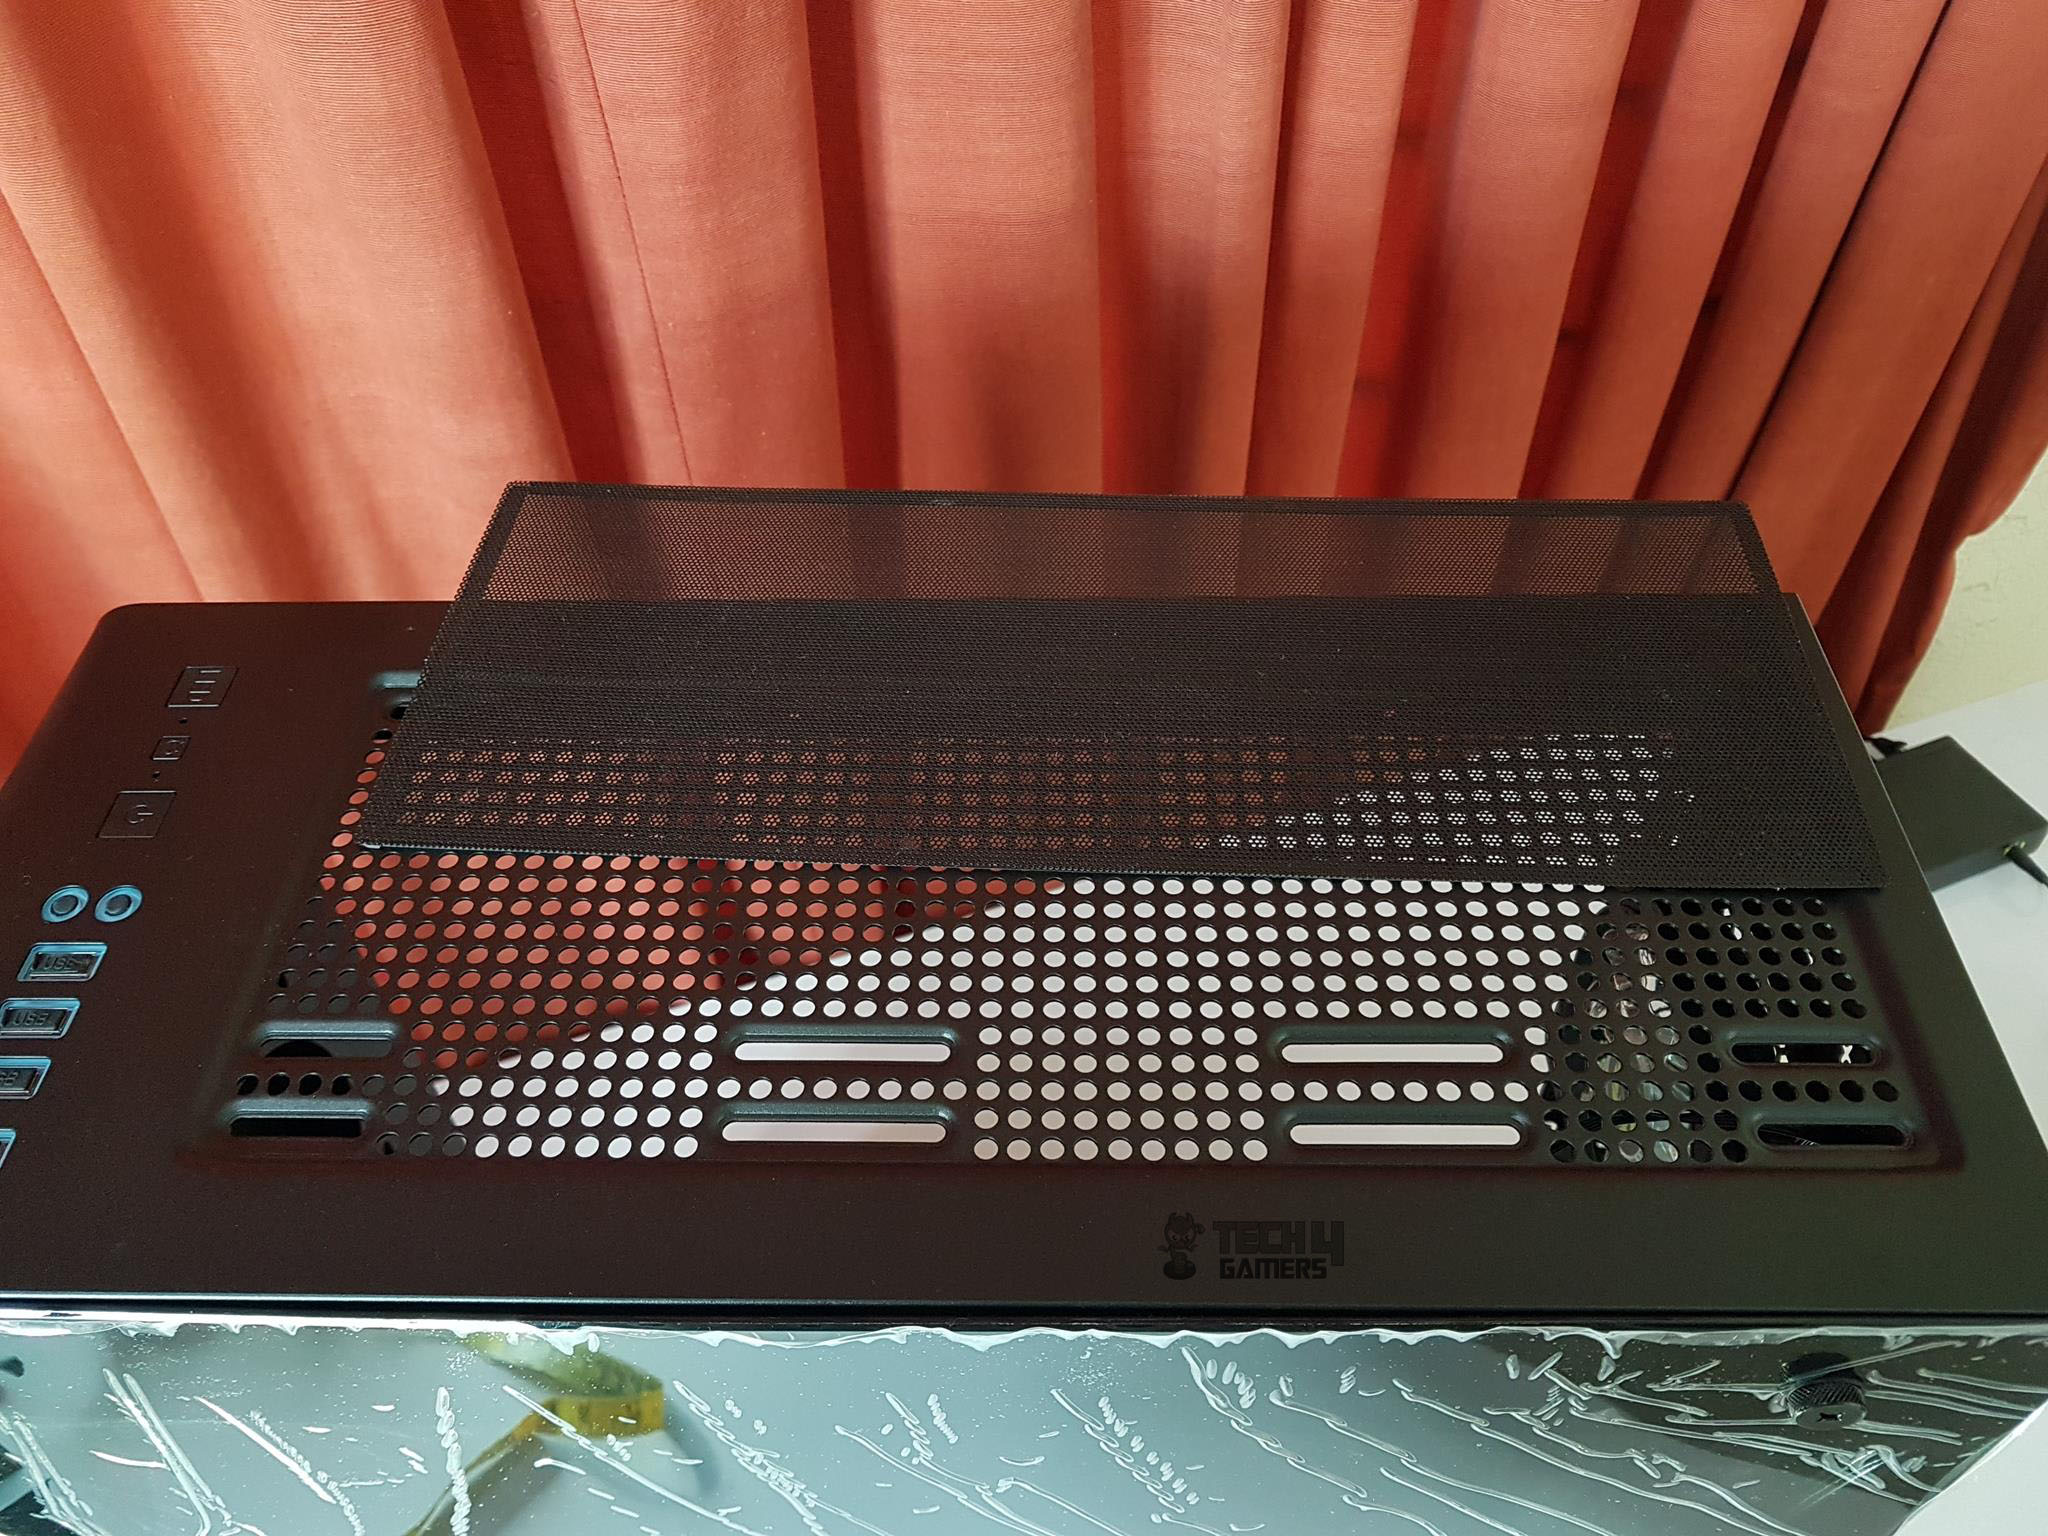
The above picture shows the top with the filter removed. We have slide mounts for the fans there. Either 3x 120mm or 3x 140mm fans can be installed on the top which is a handy feature.
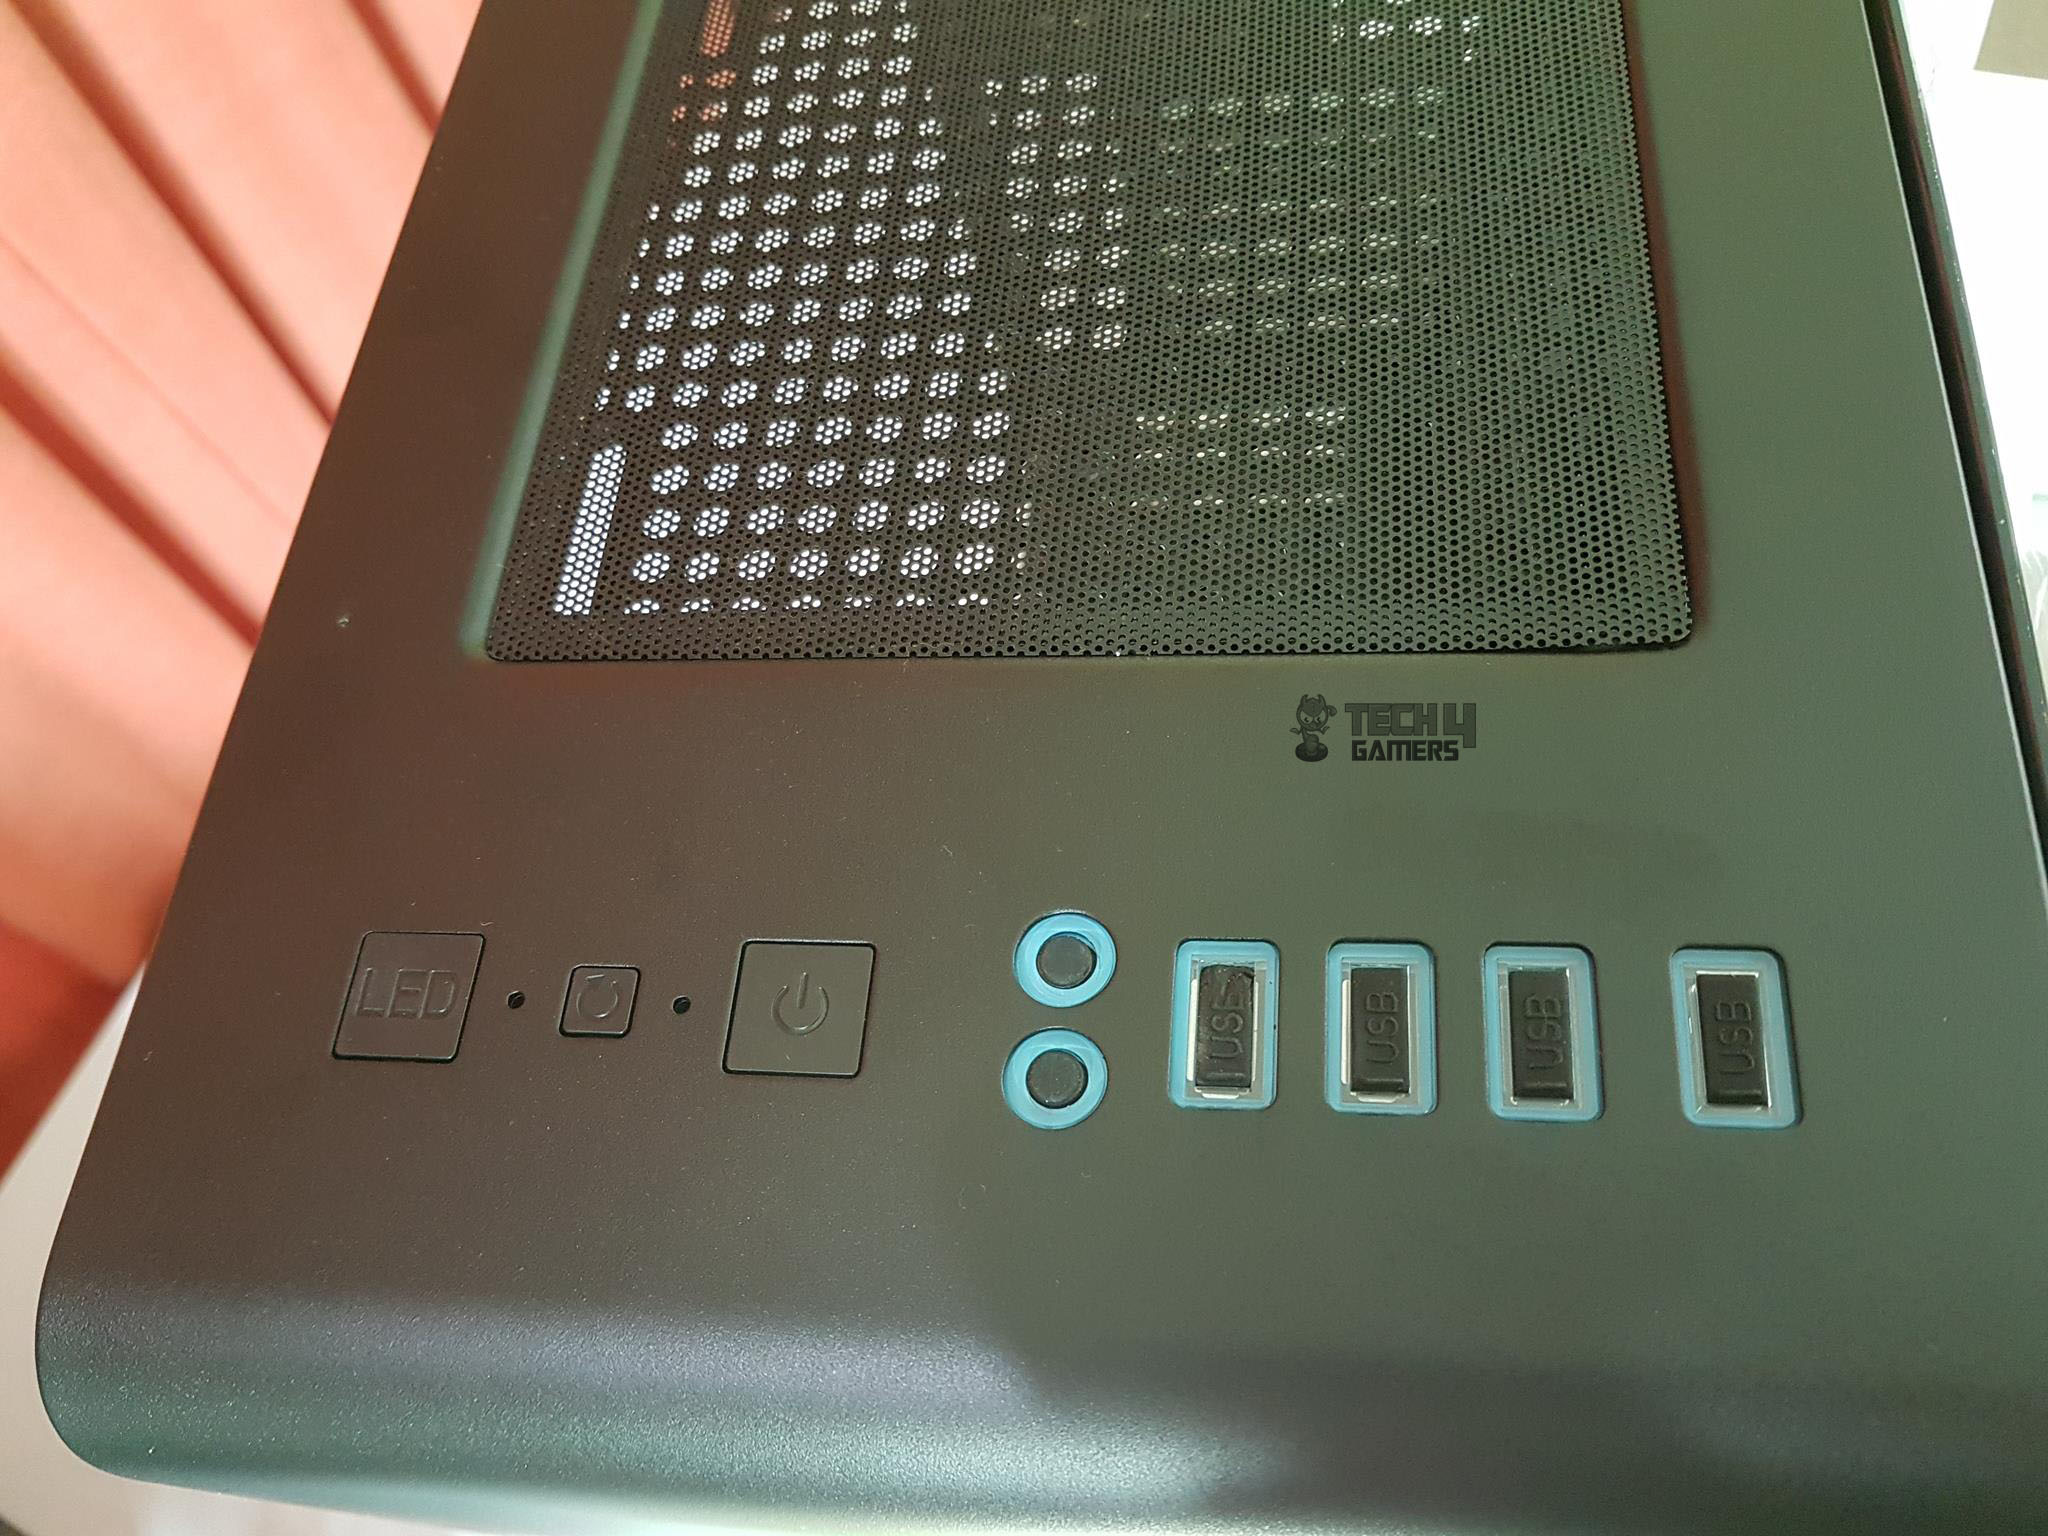
The front side of the top panel has I/O ports. We have:
- 2x USB 3.0 ports
- 2x USB 2.0 ports
- 2x Audio Jacks
- 1x Power Button
- 1x Reset Button
- 1x LED button
The LED button controls the lighting effect of the RGB zones of this chassis.
It is time to take a look inside the chassis.
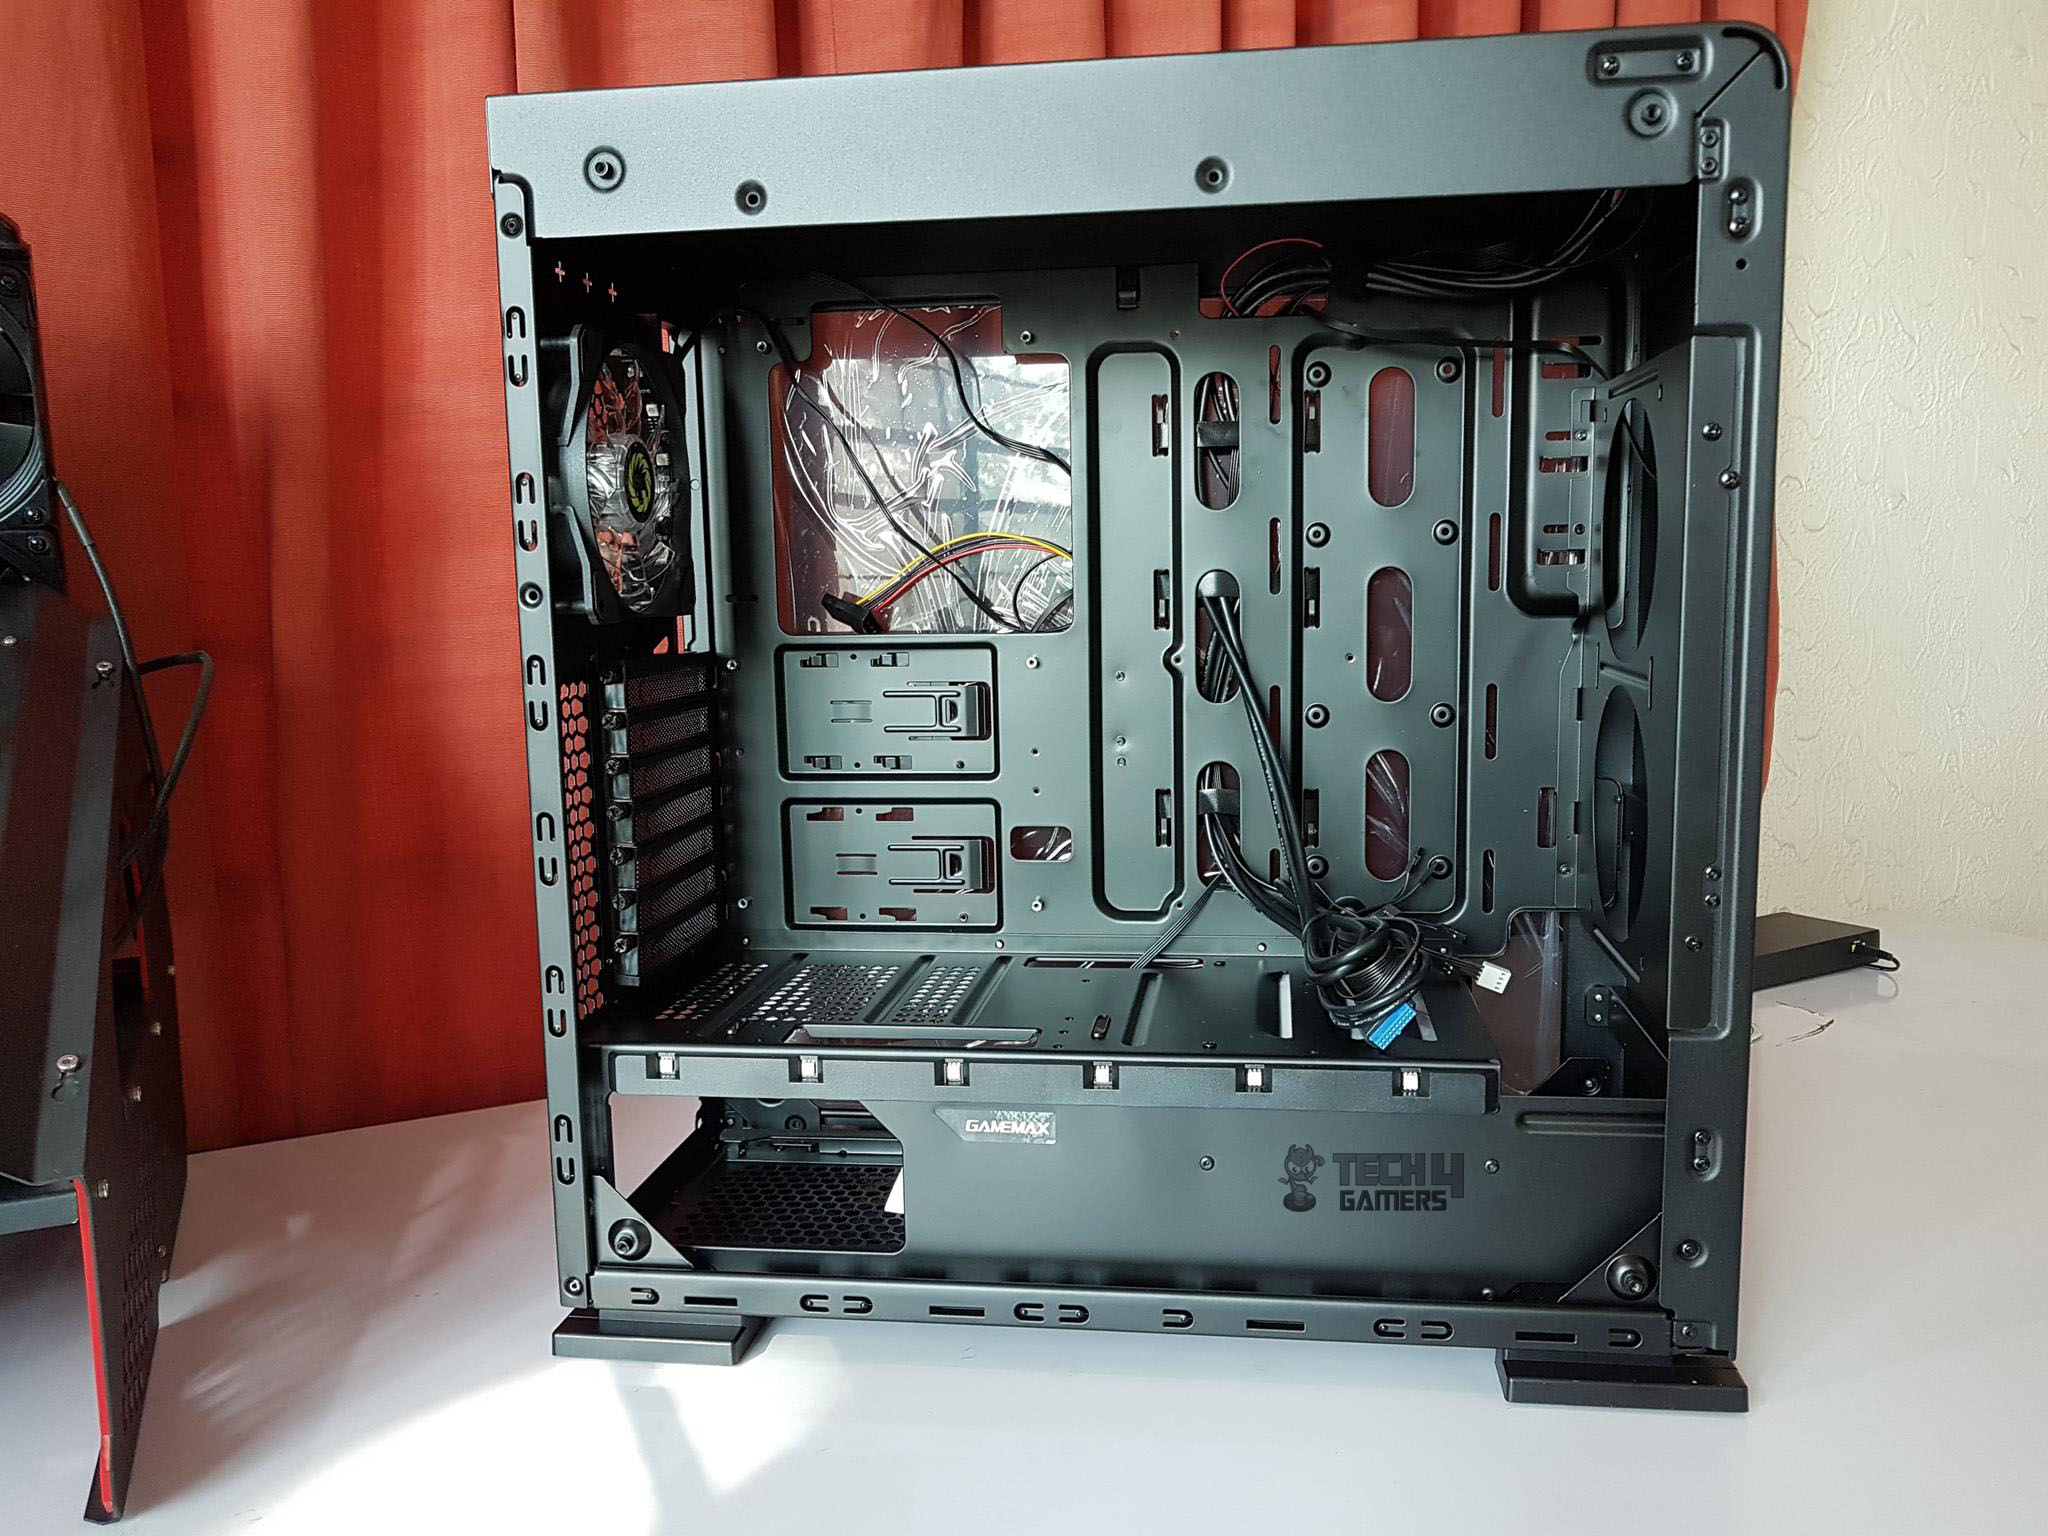
Taking a peek of the chassis with the side panel removed, it is quite obvious that this chassis is spacious. Another quite apparent observation is the lack of rubber grommets on the cutouts.
The panels are placed on the stud like small size bars but they are not large enough to hold the panel on their own. Looking closely, we spot only 6 standoffs pre-installed. This is again beyond me why these companies don’t install 9 standoffs in their standard mounting and leave the rest of the configuration up to the user.
To make things tough, they did not include the wrench to install the remaining 3 standoffs in the accessories. I wonder if everyone has the right tool to do the job!
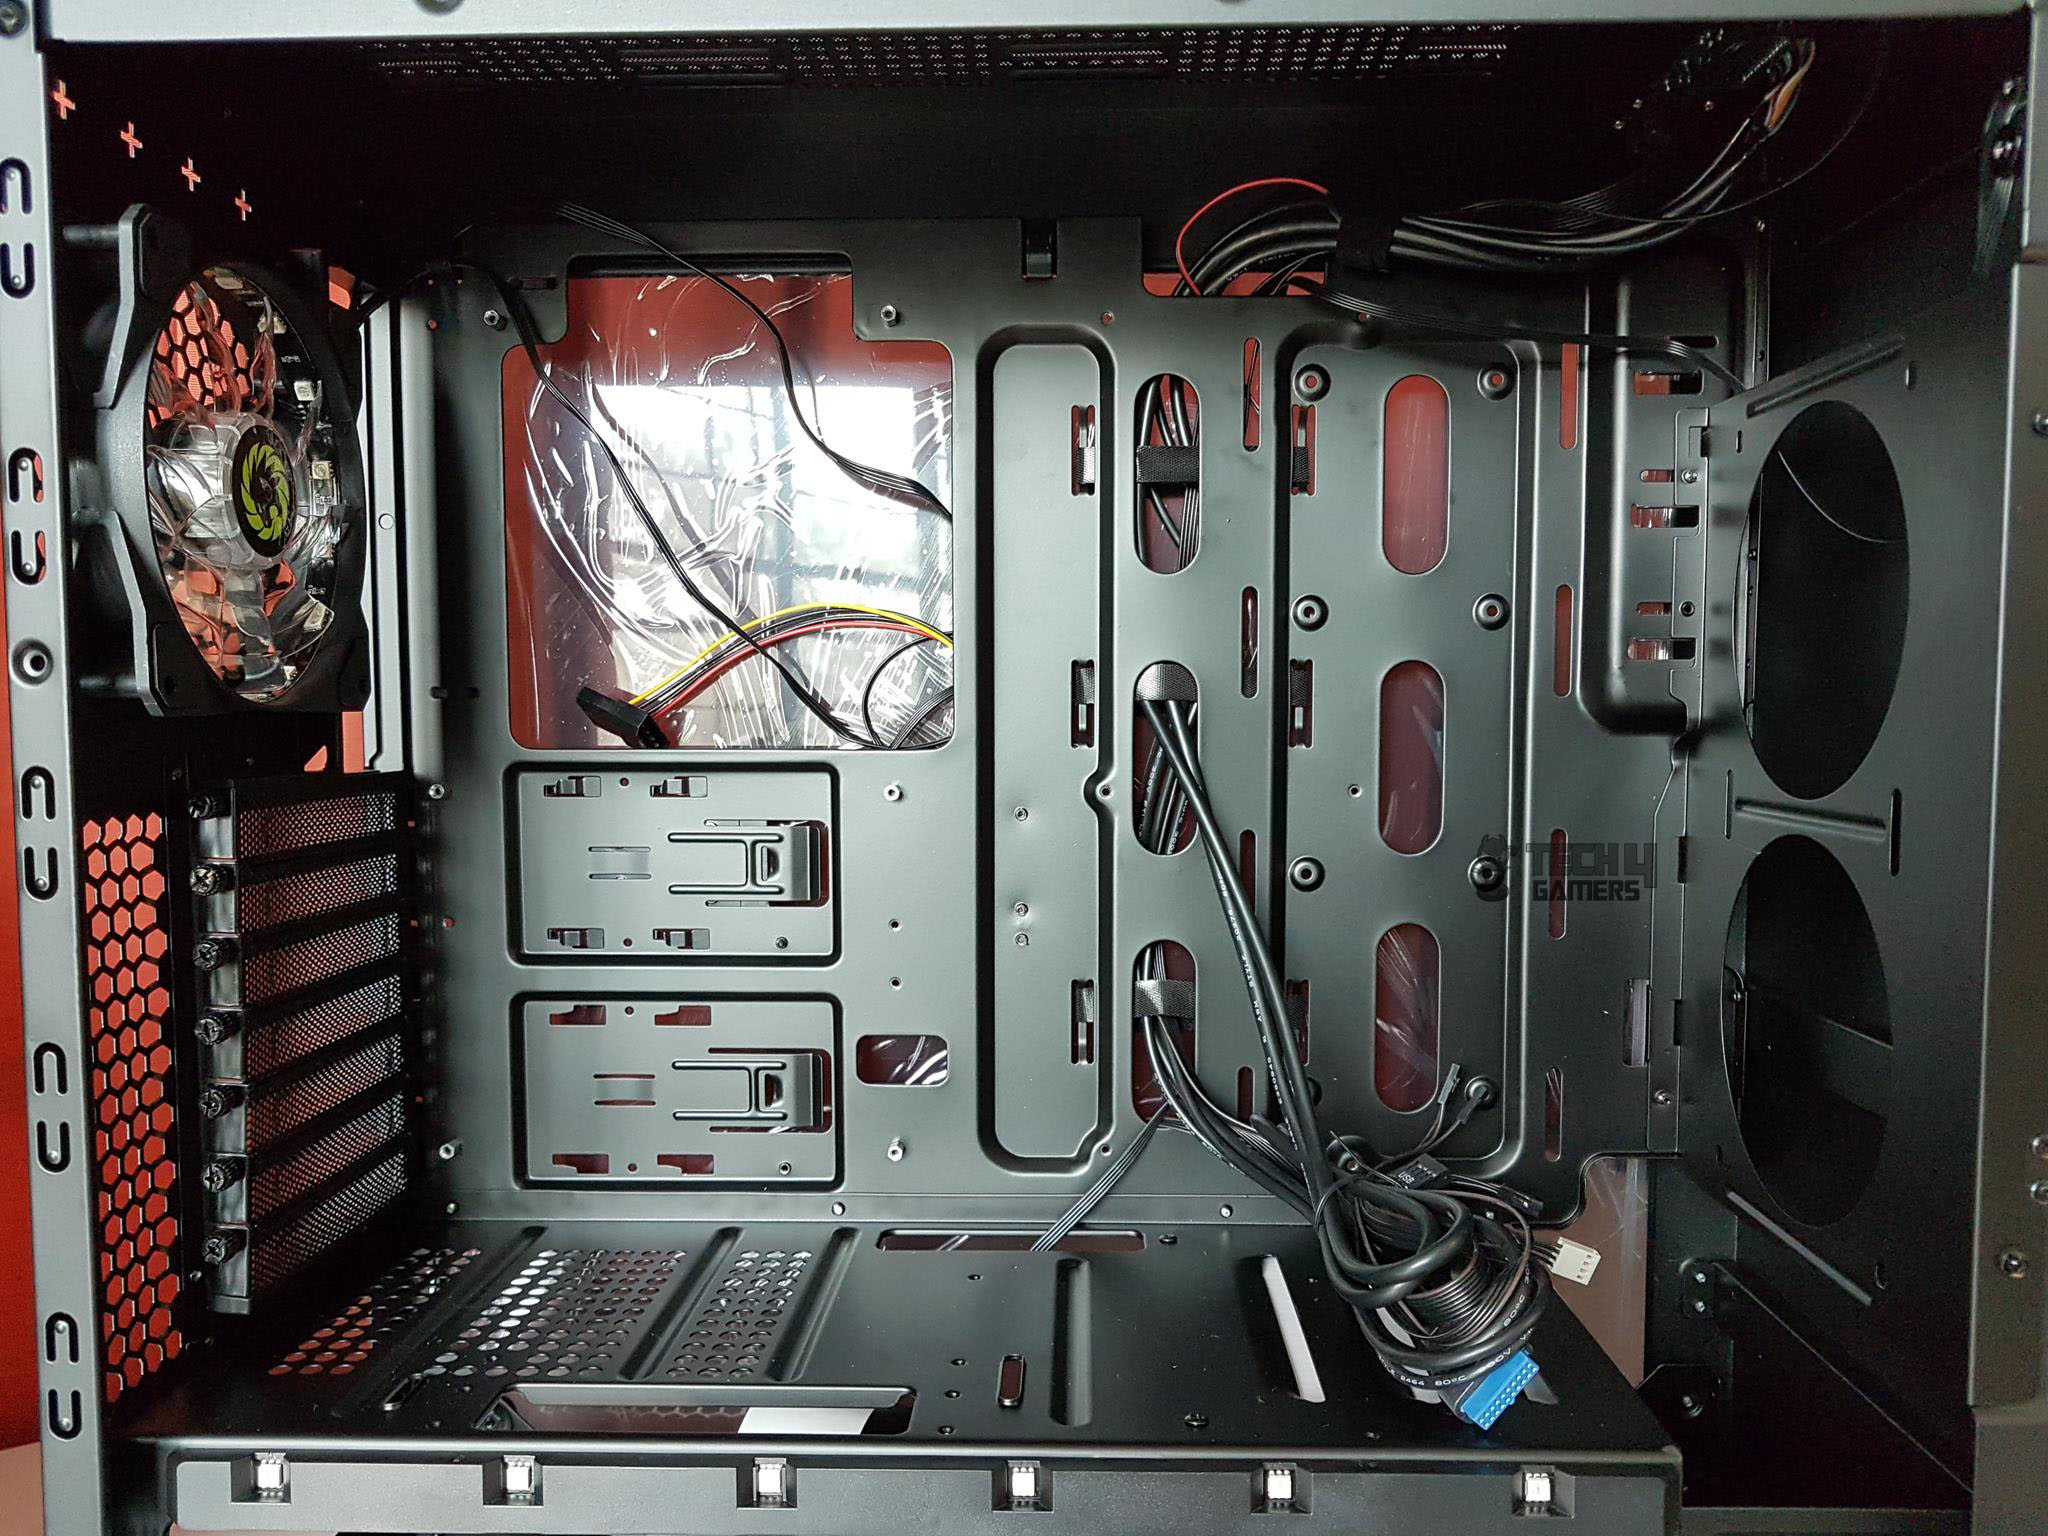
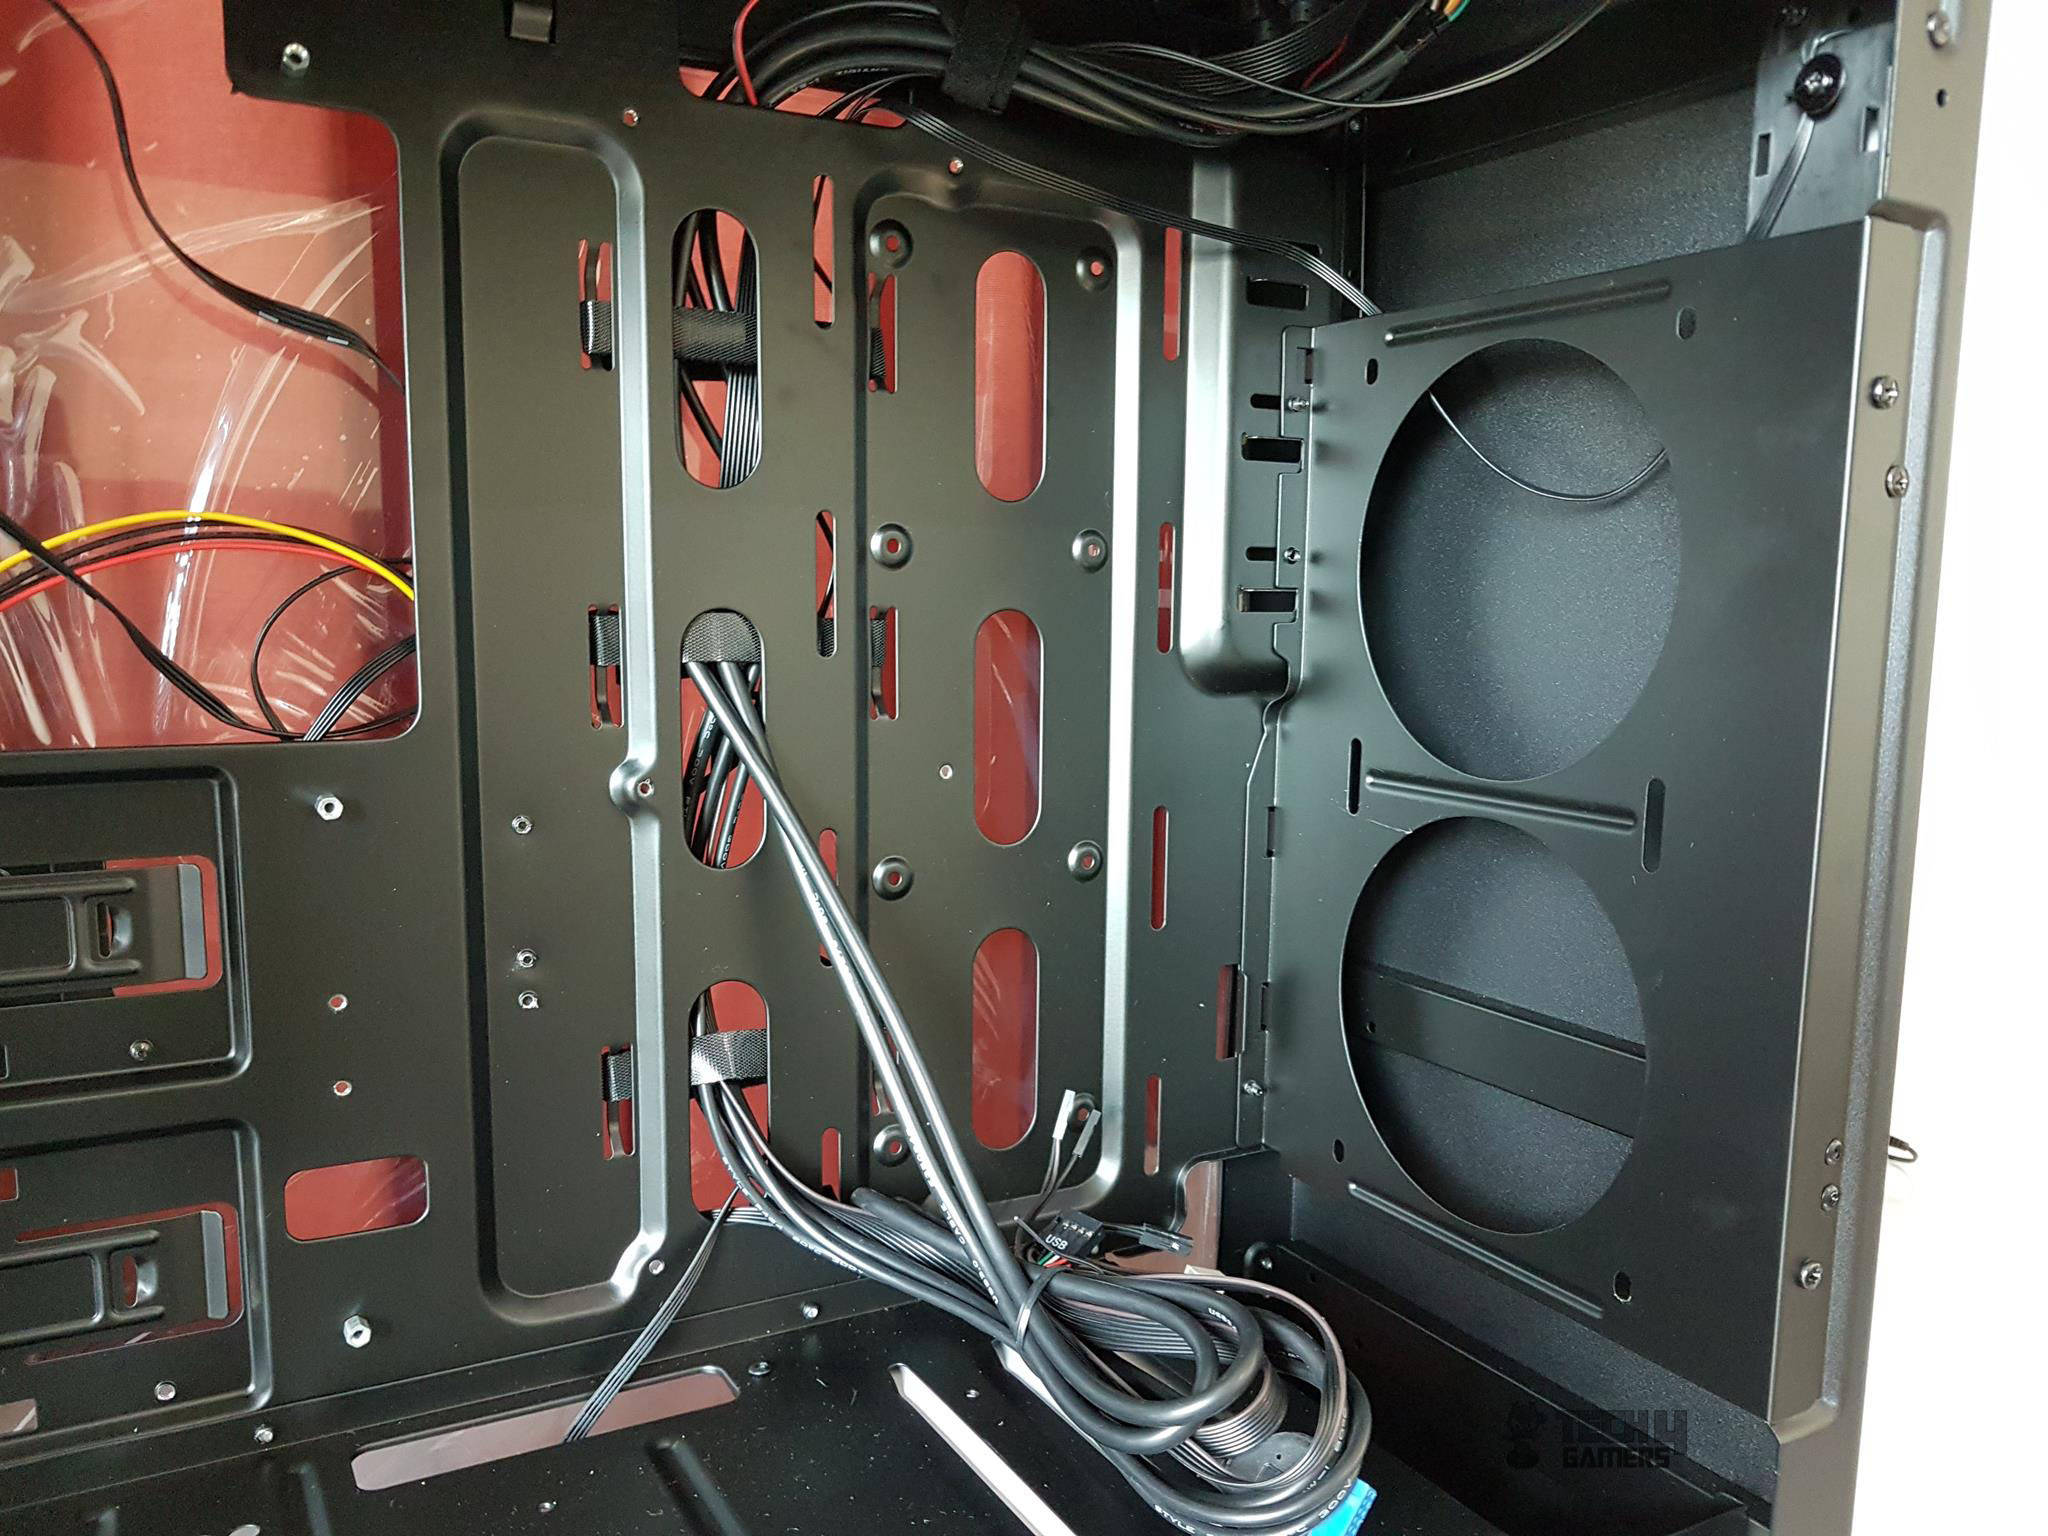
There are two columns of the cutouts on the right side of the motherboard tray. Each column has three cutouts. These cutouts are without rubber grommets. There is a large size CPU tray cutout to ease the installation of the CPU cooler once the motherboard is installed.
There are two cutouts on the motherboard tray up top from where the CPU power cable and system panel cables are routed respectively. The tray itself is sturdy and I did not observe flex.
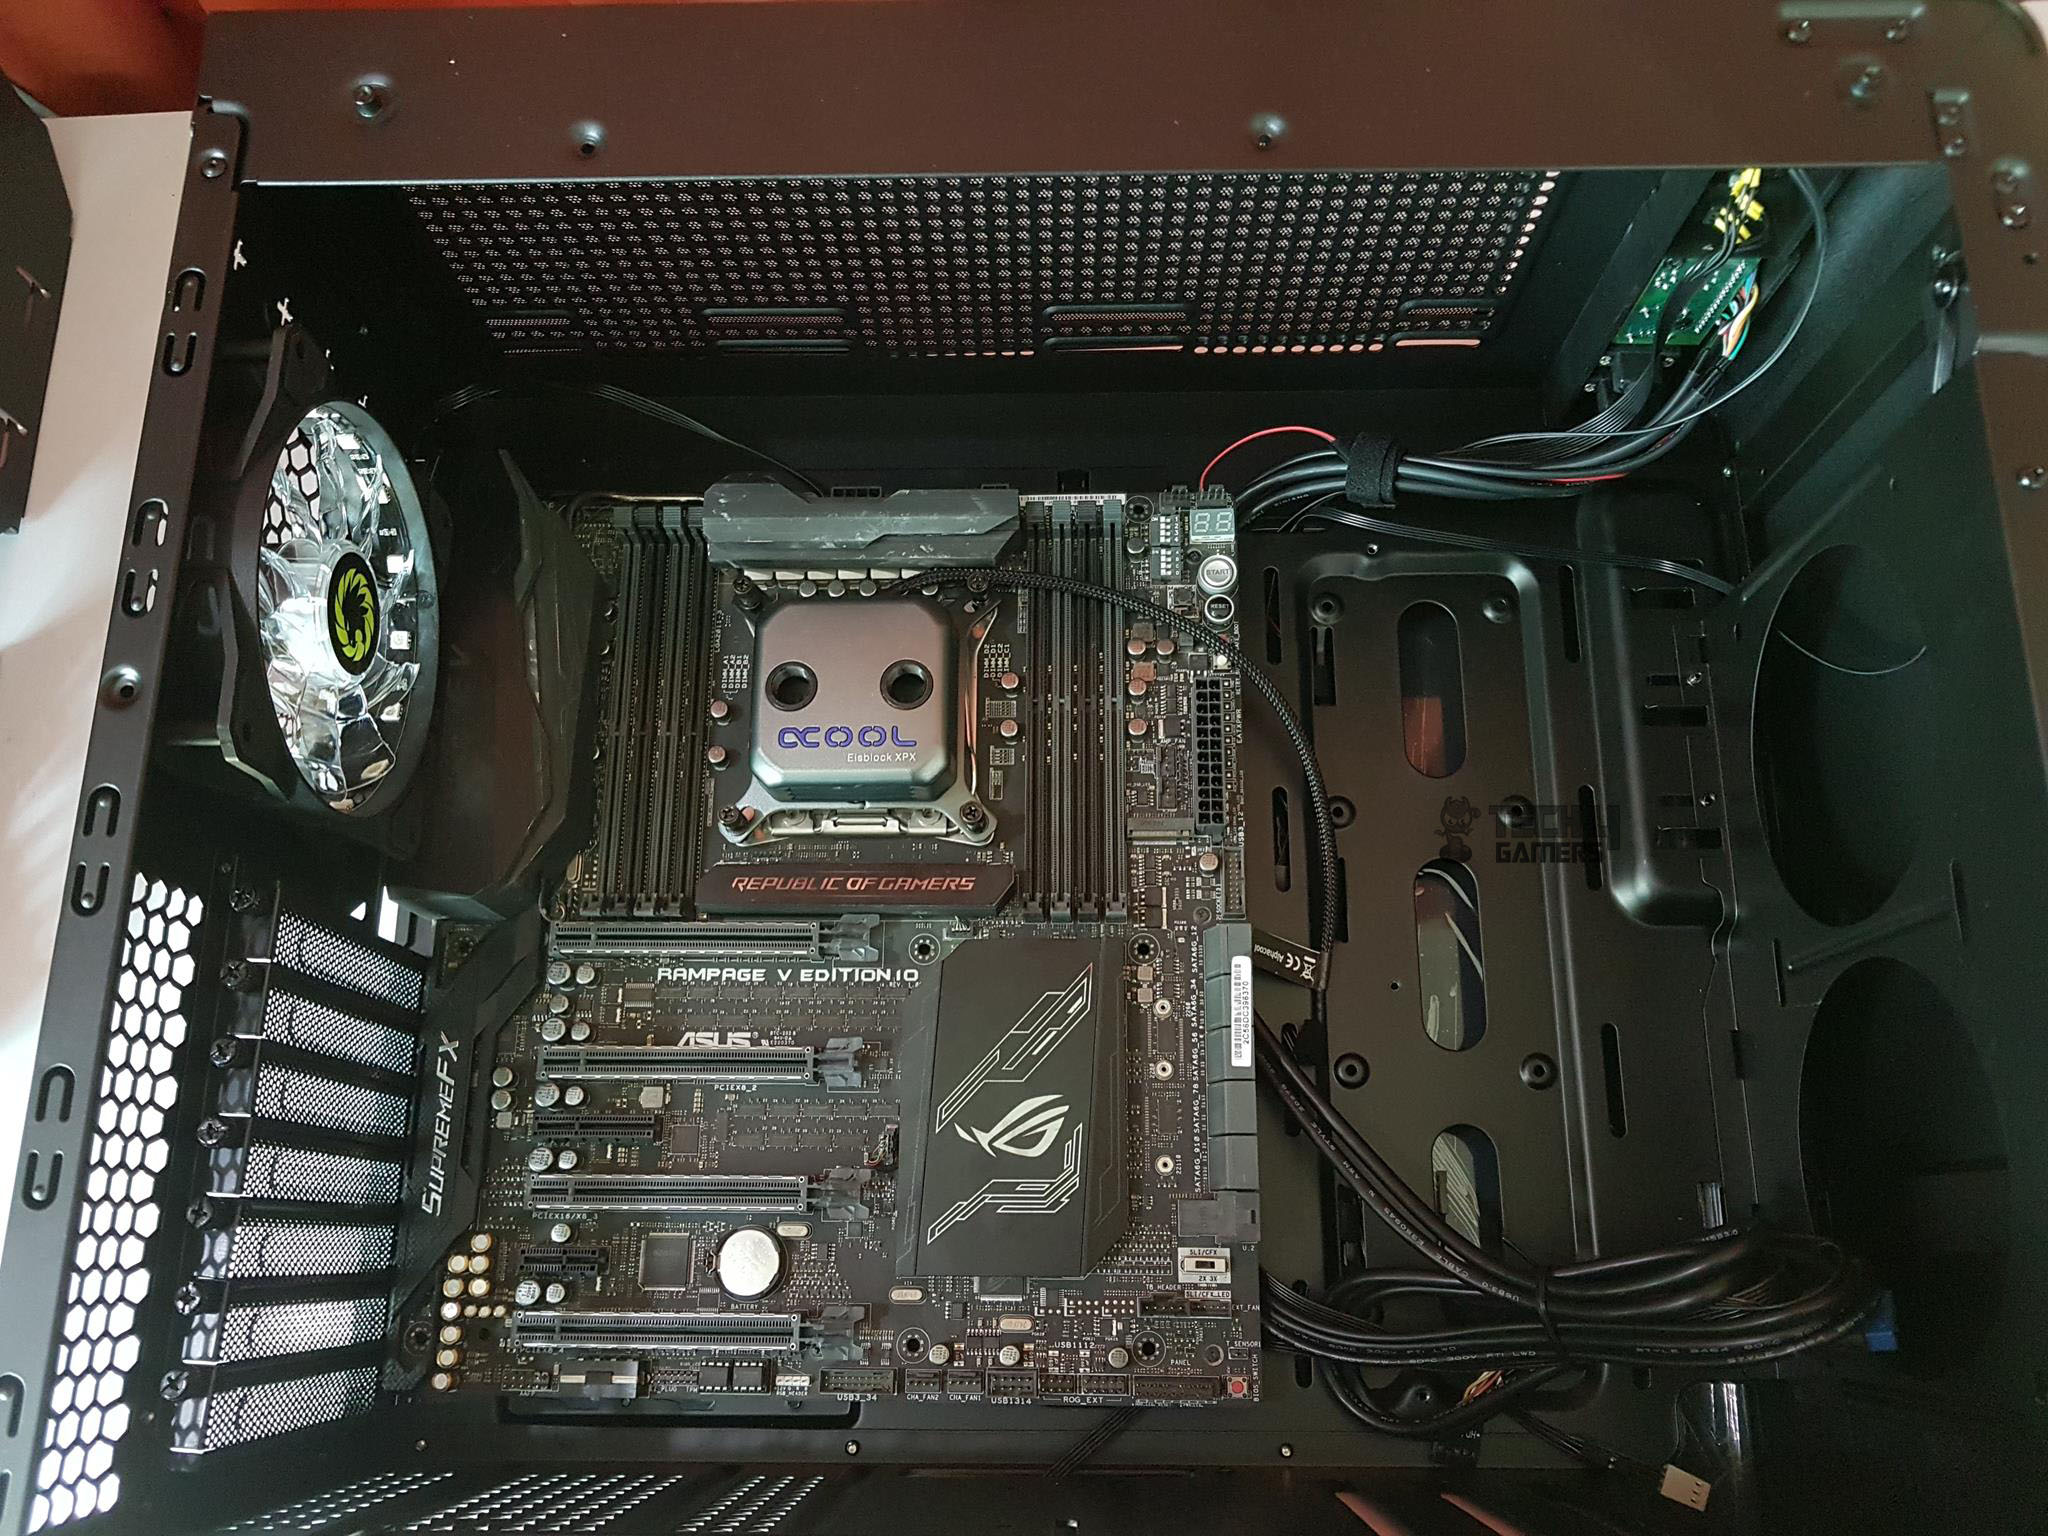
This chassis has support for up to E-ATX size motherboards. I placed Asus Rampage V Edition 10 motherboard on the tray to just show that.
Installing the E-ATX size motherboard would cover or hide the first column of the cutouts and the user would be left only with one column of the cutouts to use which is actually far away from the motherboard and will not help in good looking cable management unless the user work around the solution by routing the cables from underneath the motherboard.

There is an RGB fan pre-installed in the chassis at the rear. Its functions can be controlled using the LED button on the top I/O panel of the chassis.
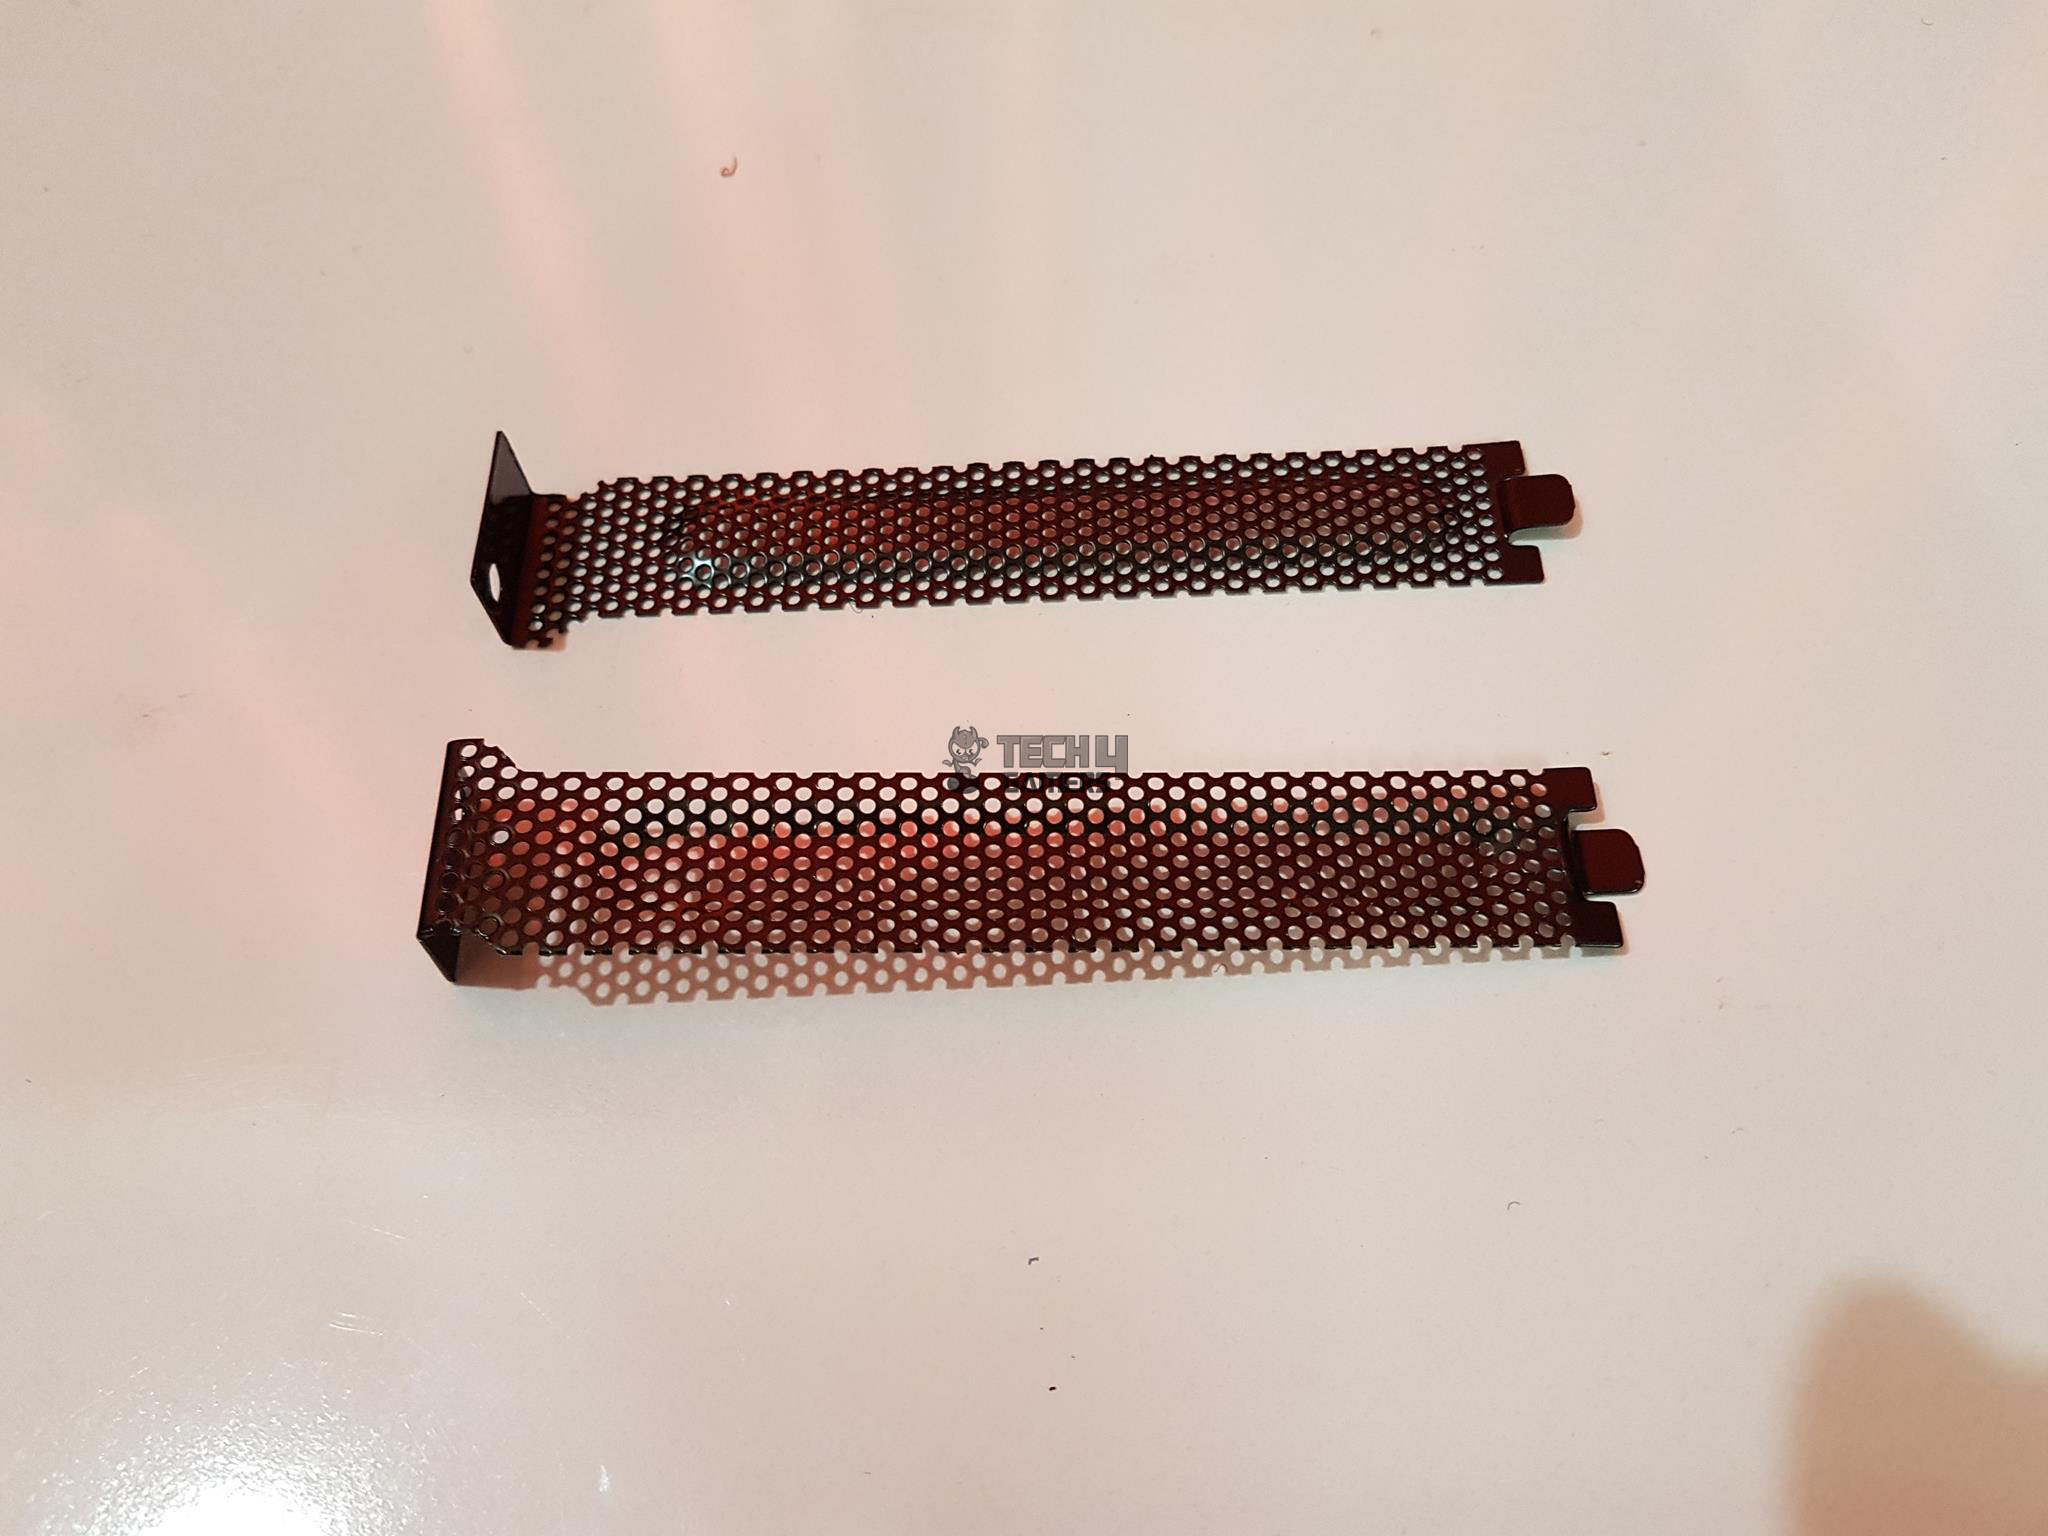
We have 7 PCIe slot covers. These are meshed and are removable and reusable. I did not like the finishing quality of these covers as they felt cheap while handling. Still, no biggy as the user is supposed to remove them and place them somewhere safe till the time graphics card is installed but in this price range, I would expect a better quality finish.
Let’s take a look at the front side of the chassis from inside. I have already shown my concerns with the complete solid front panel and no room for air intake except on the bottom. There is a metallic bracket installed on the front using 4 screws.
Here comes another complaint. One of the screws was tightly screwed in and was in bad shape. Upon using force it becomes more coerced instead of coming out. It has two cutouts in the circular design where the user can install two 120mm fans or even a 240mm radiator. Keep in mind that air intake is highly restricted.
The only good thing is that this bracket is removable to easily install the fans/radiator and then install the bracket again.
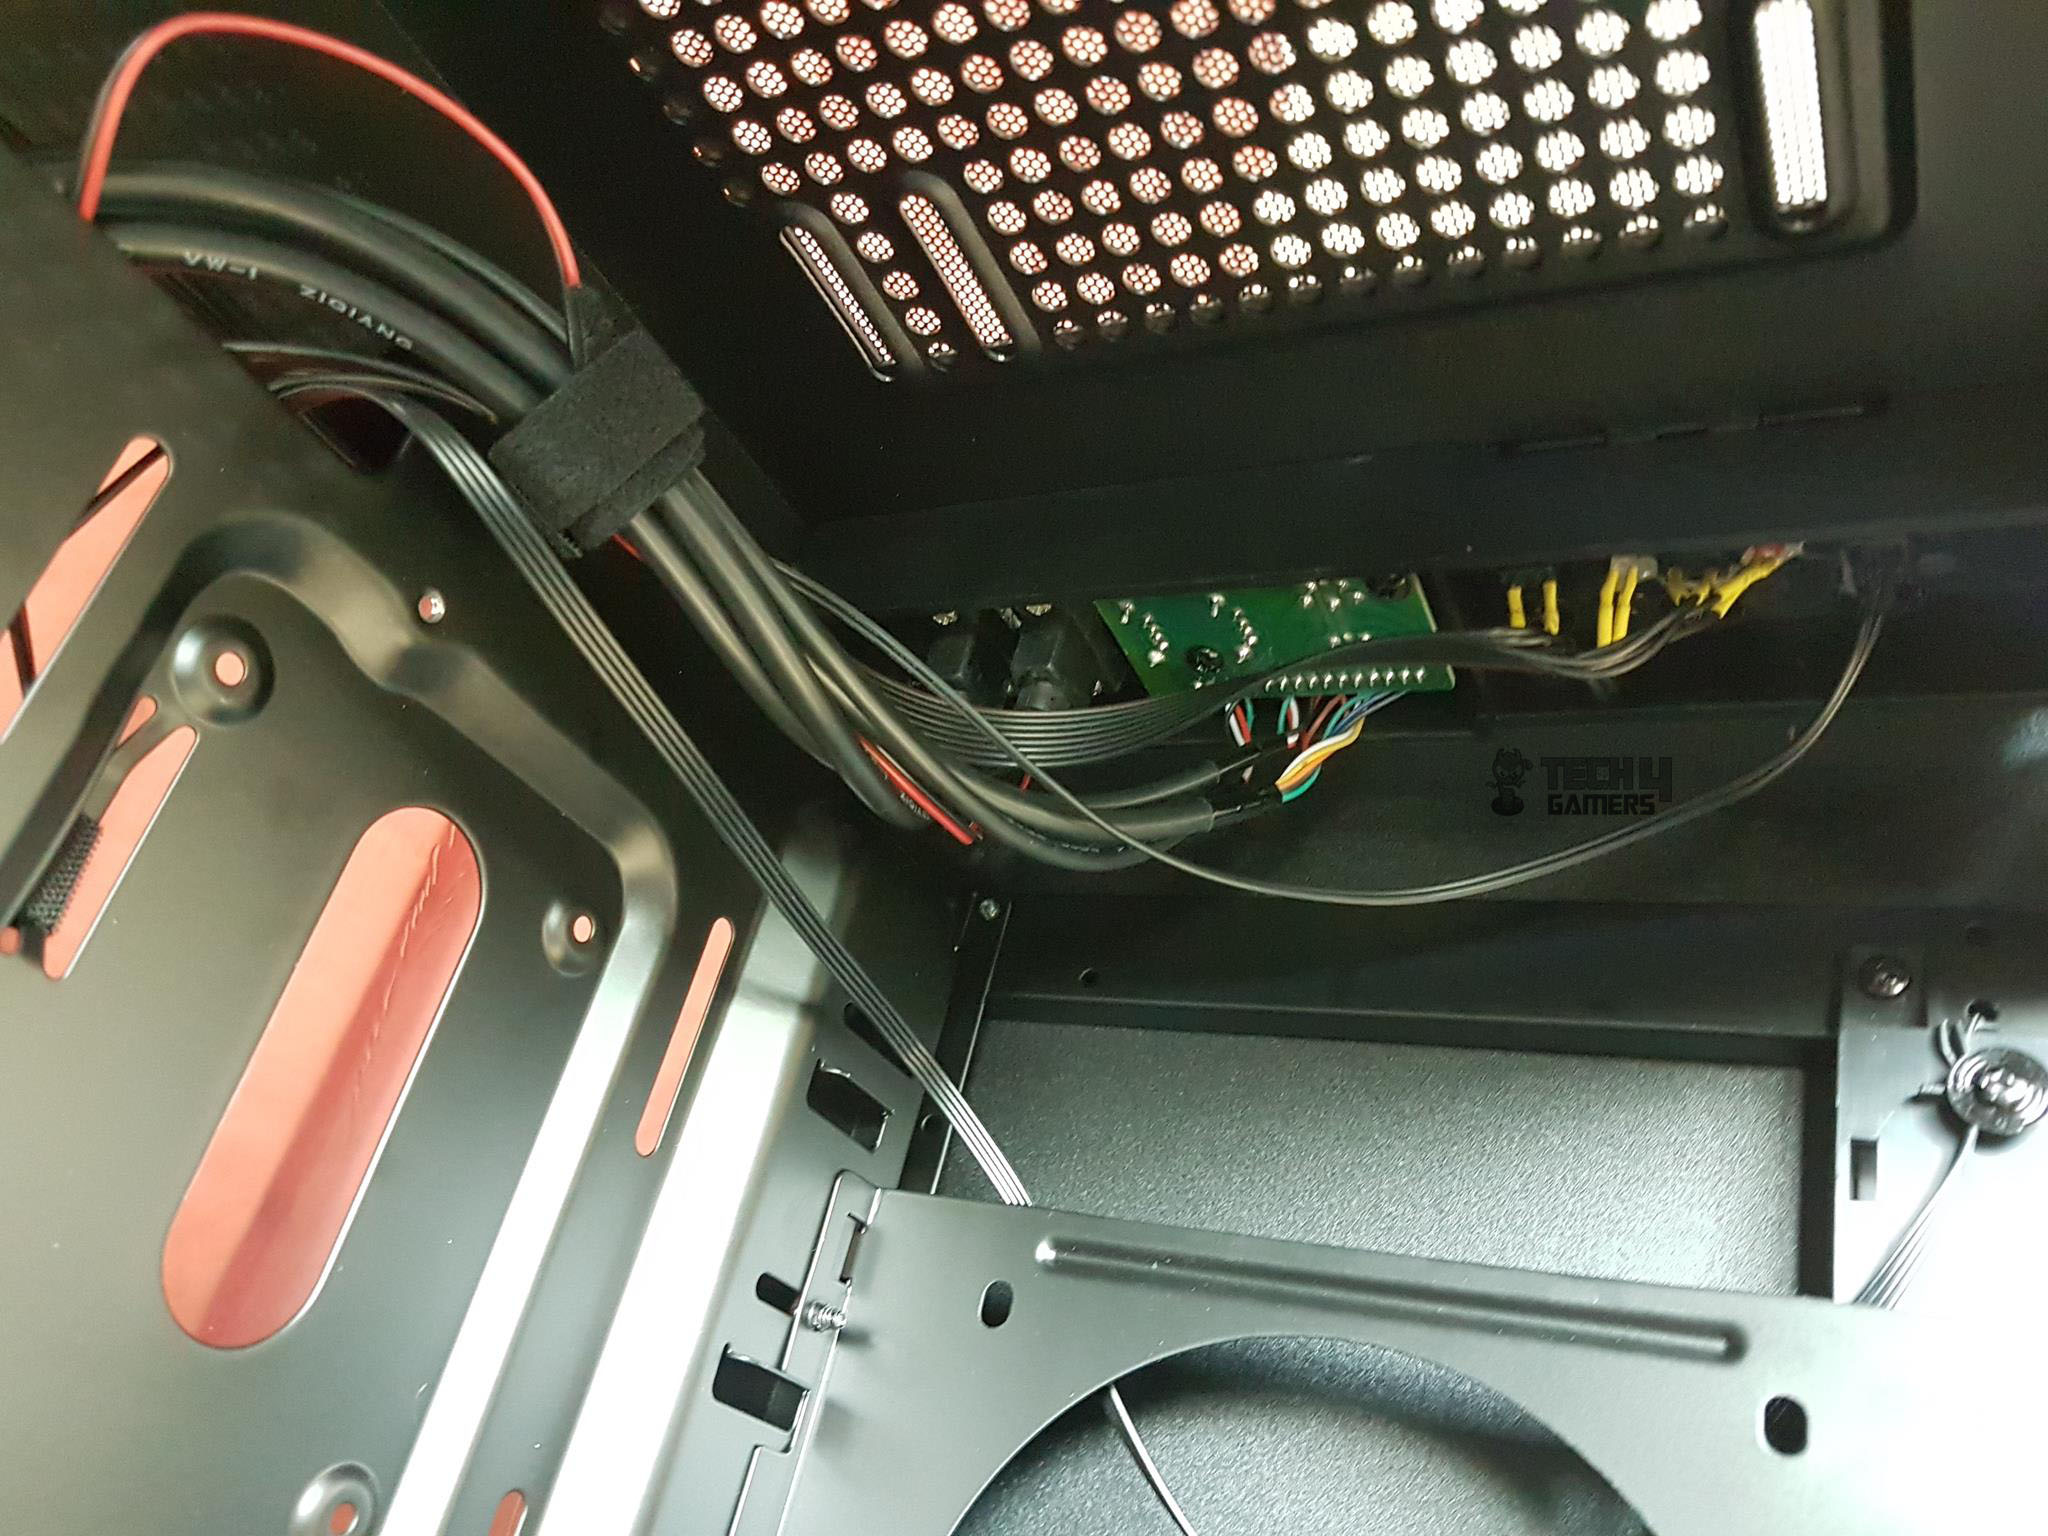
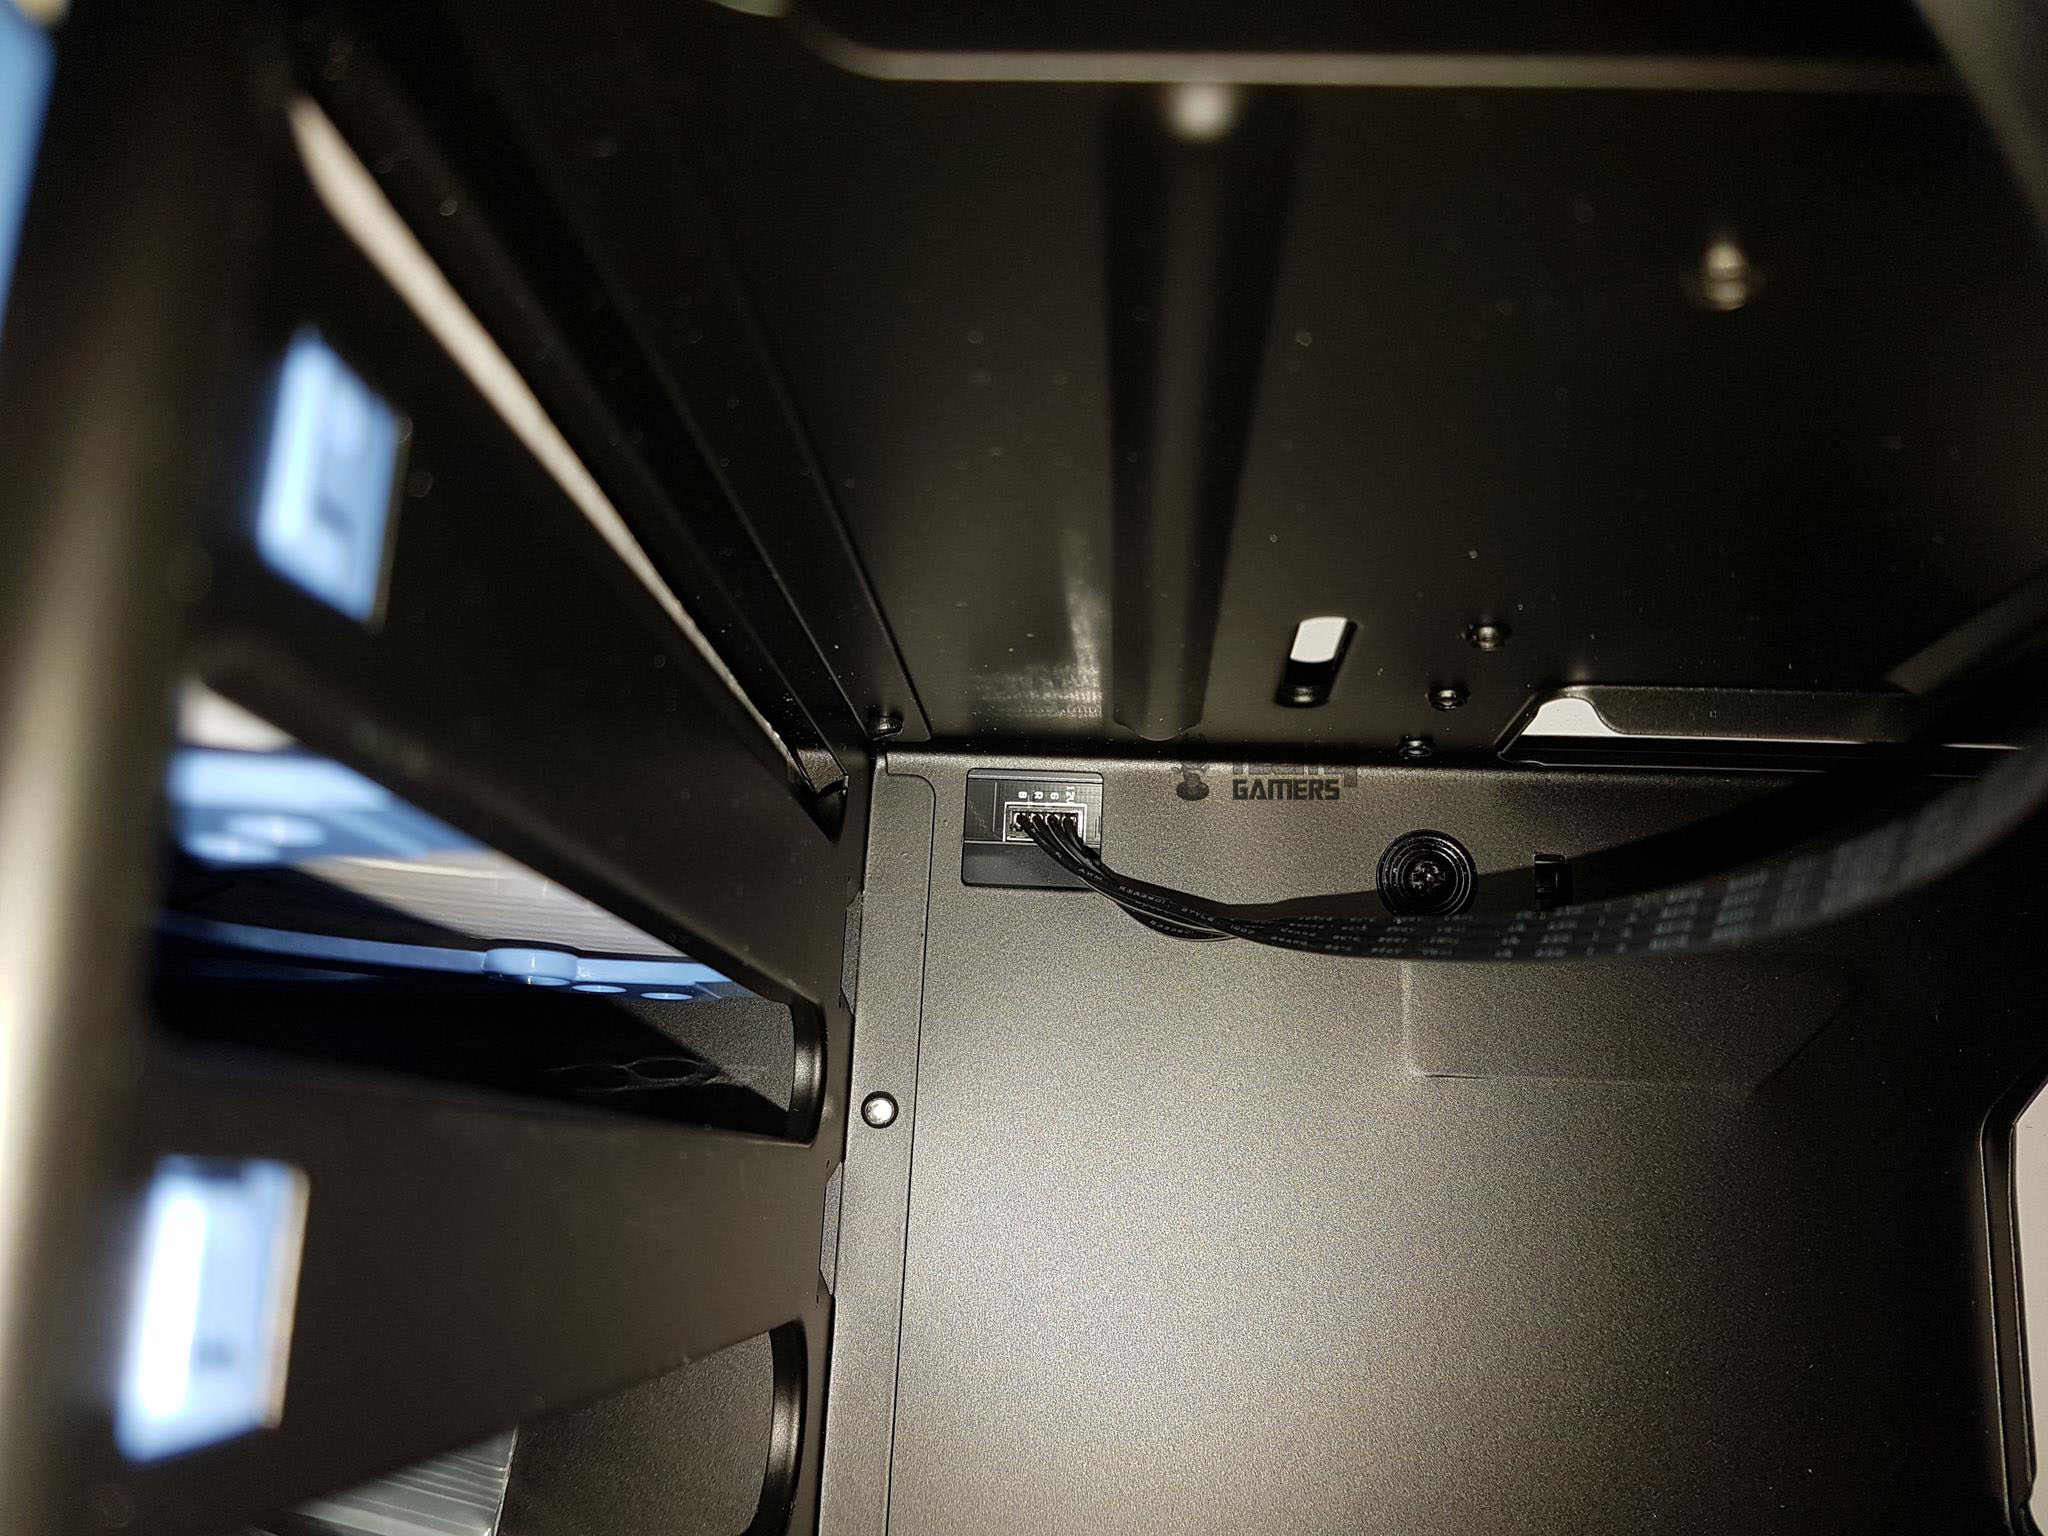
The above picture shows the PCB side of the front I/O panel from inside the chassis. One cable is making contact with the upper right side of the frame. This is the LED power cable for the front RGB zone.
Let’s take a look at the top side from inside the chassis. Total length for any radiator on the top is 408mm. Up to 360mm radiator is supported on the top. In my books, this is the only area of the chassis with properly vented fan mounts. However, there is a limitation.
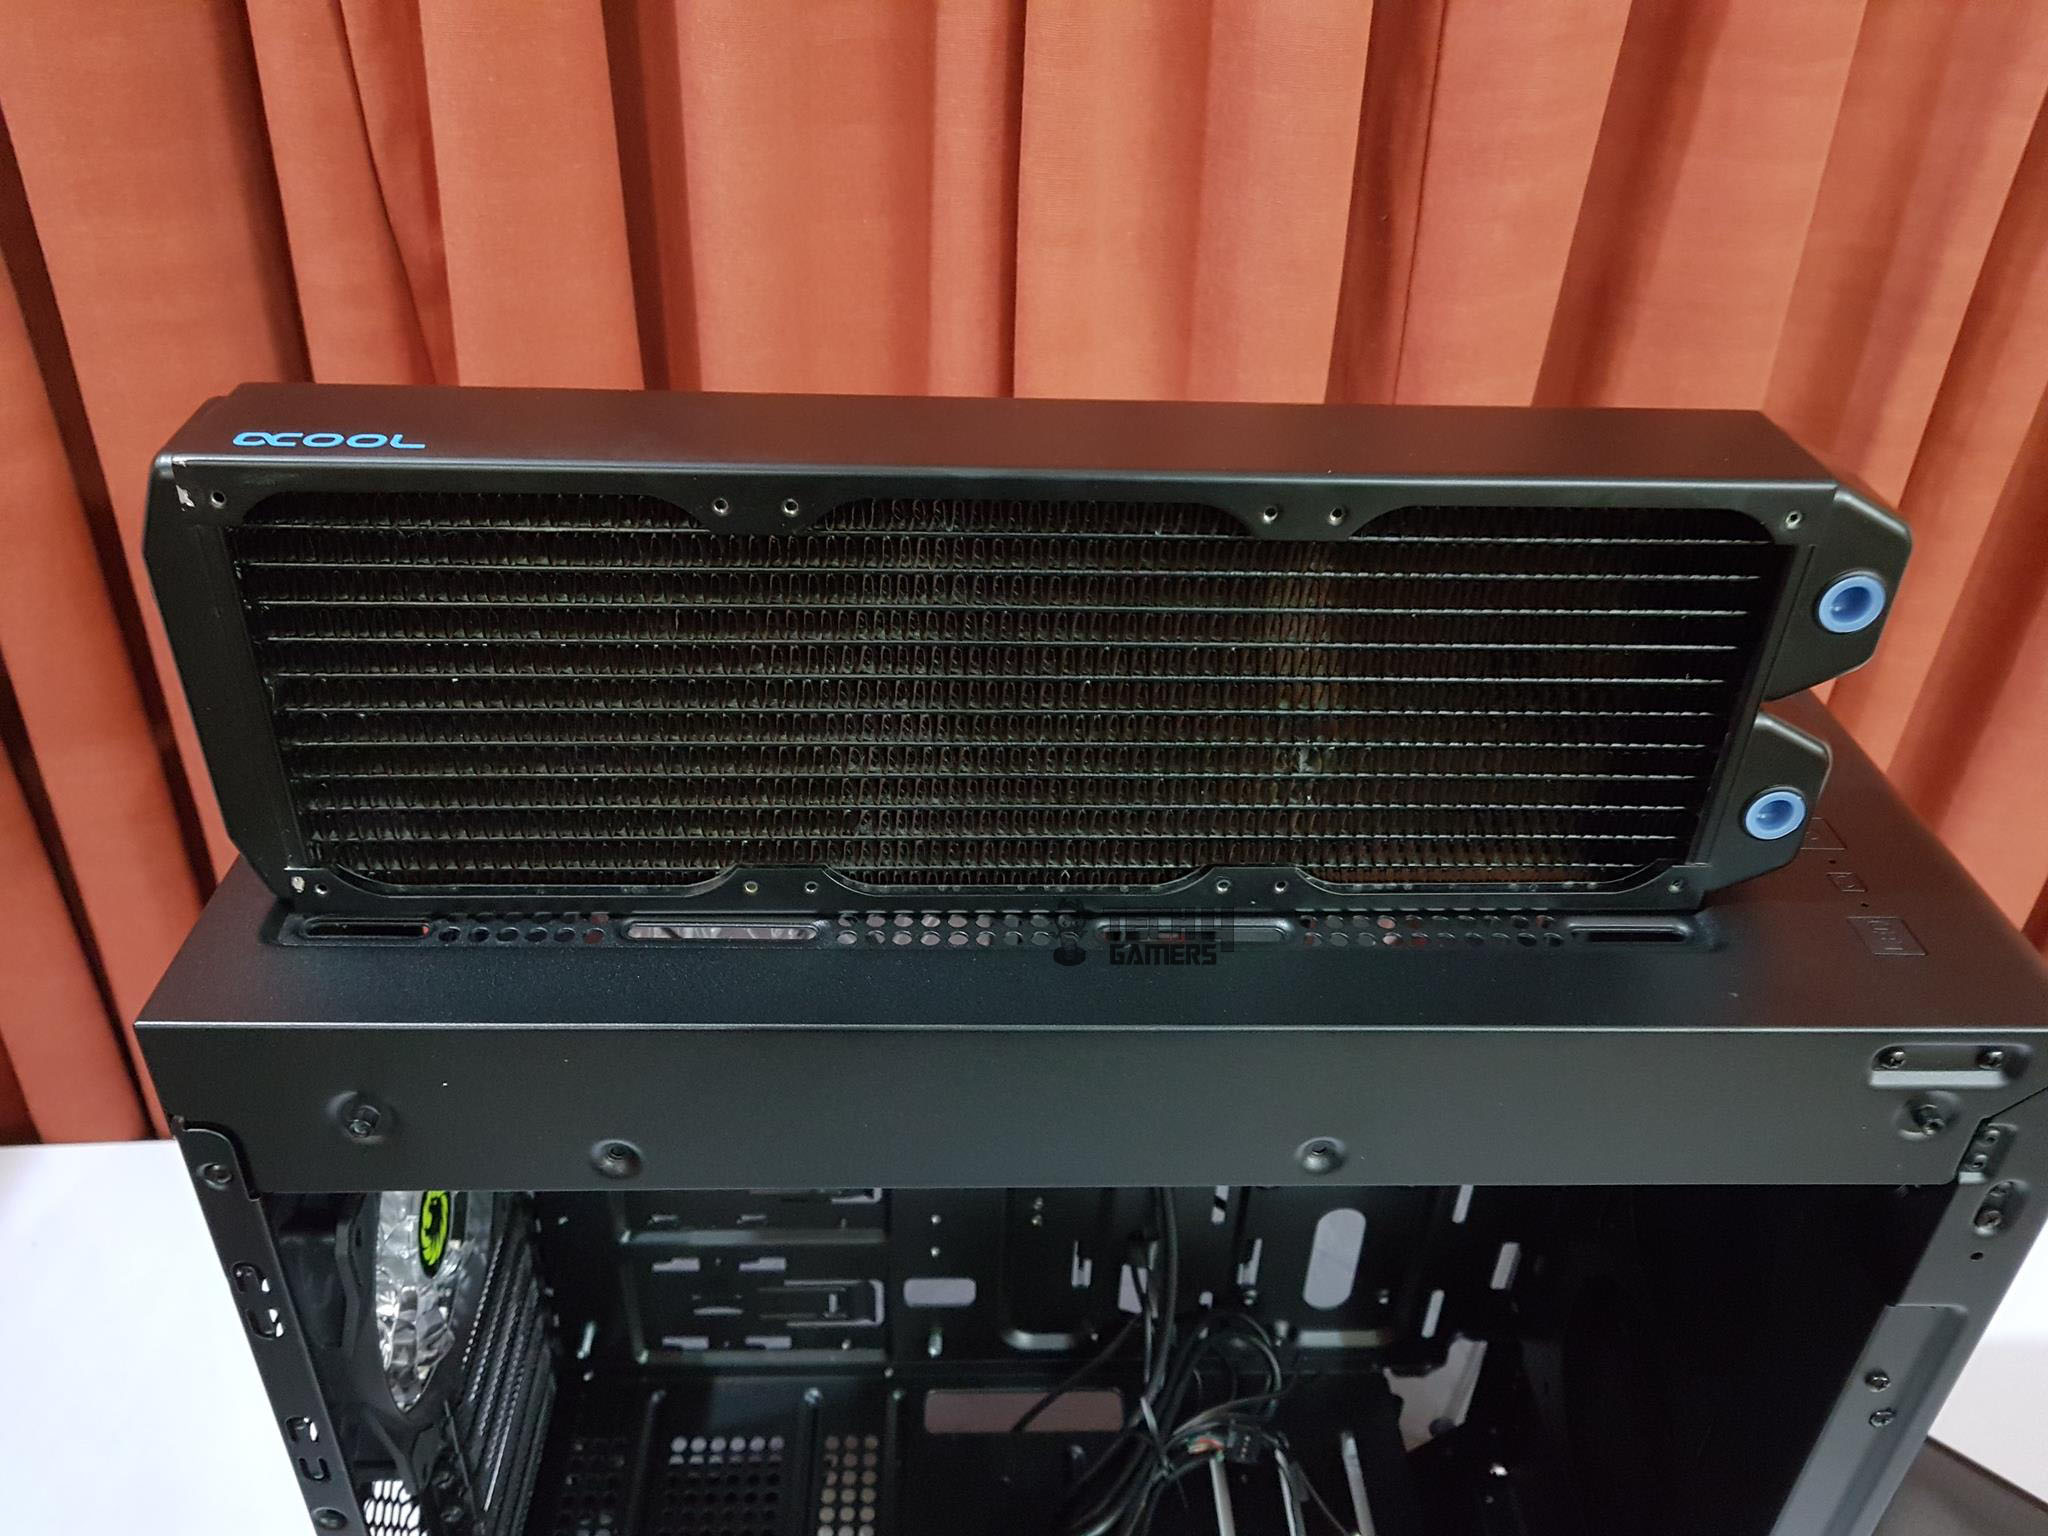
I tried installing the Alphacool XT45 radiator on the top as I was planning to do a custom loop for the test build but I could not install the radiator on the top as it was not fitting in well. Turned out the plugs on the radiator were obstructing the installation.
Since this is a multiport radiator, this is a design time overlook from GAMEMAX. Not only that but this chassis could accommodate the Alphacool Eisbecher D5 250mm reservoir/pump combo.
This was only for the custom loop radiators. I did not note any restriction when it comes to installation of the AIO coolers or two-port radiators. Needless to say, the 45mm thick radiator was a fit.
There is a displacement of 58mm approximately from the top of the chassis to the top side of the motherboard. We have 70mm of clearance for the RAM from the top which is good enough for high profile RAMs.
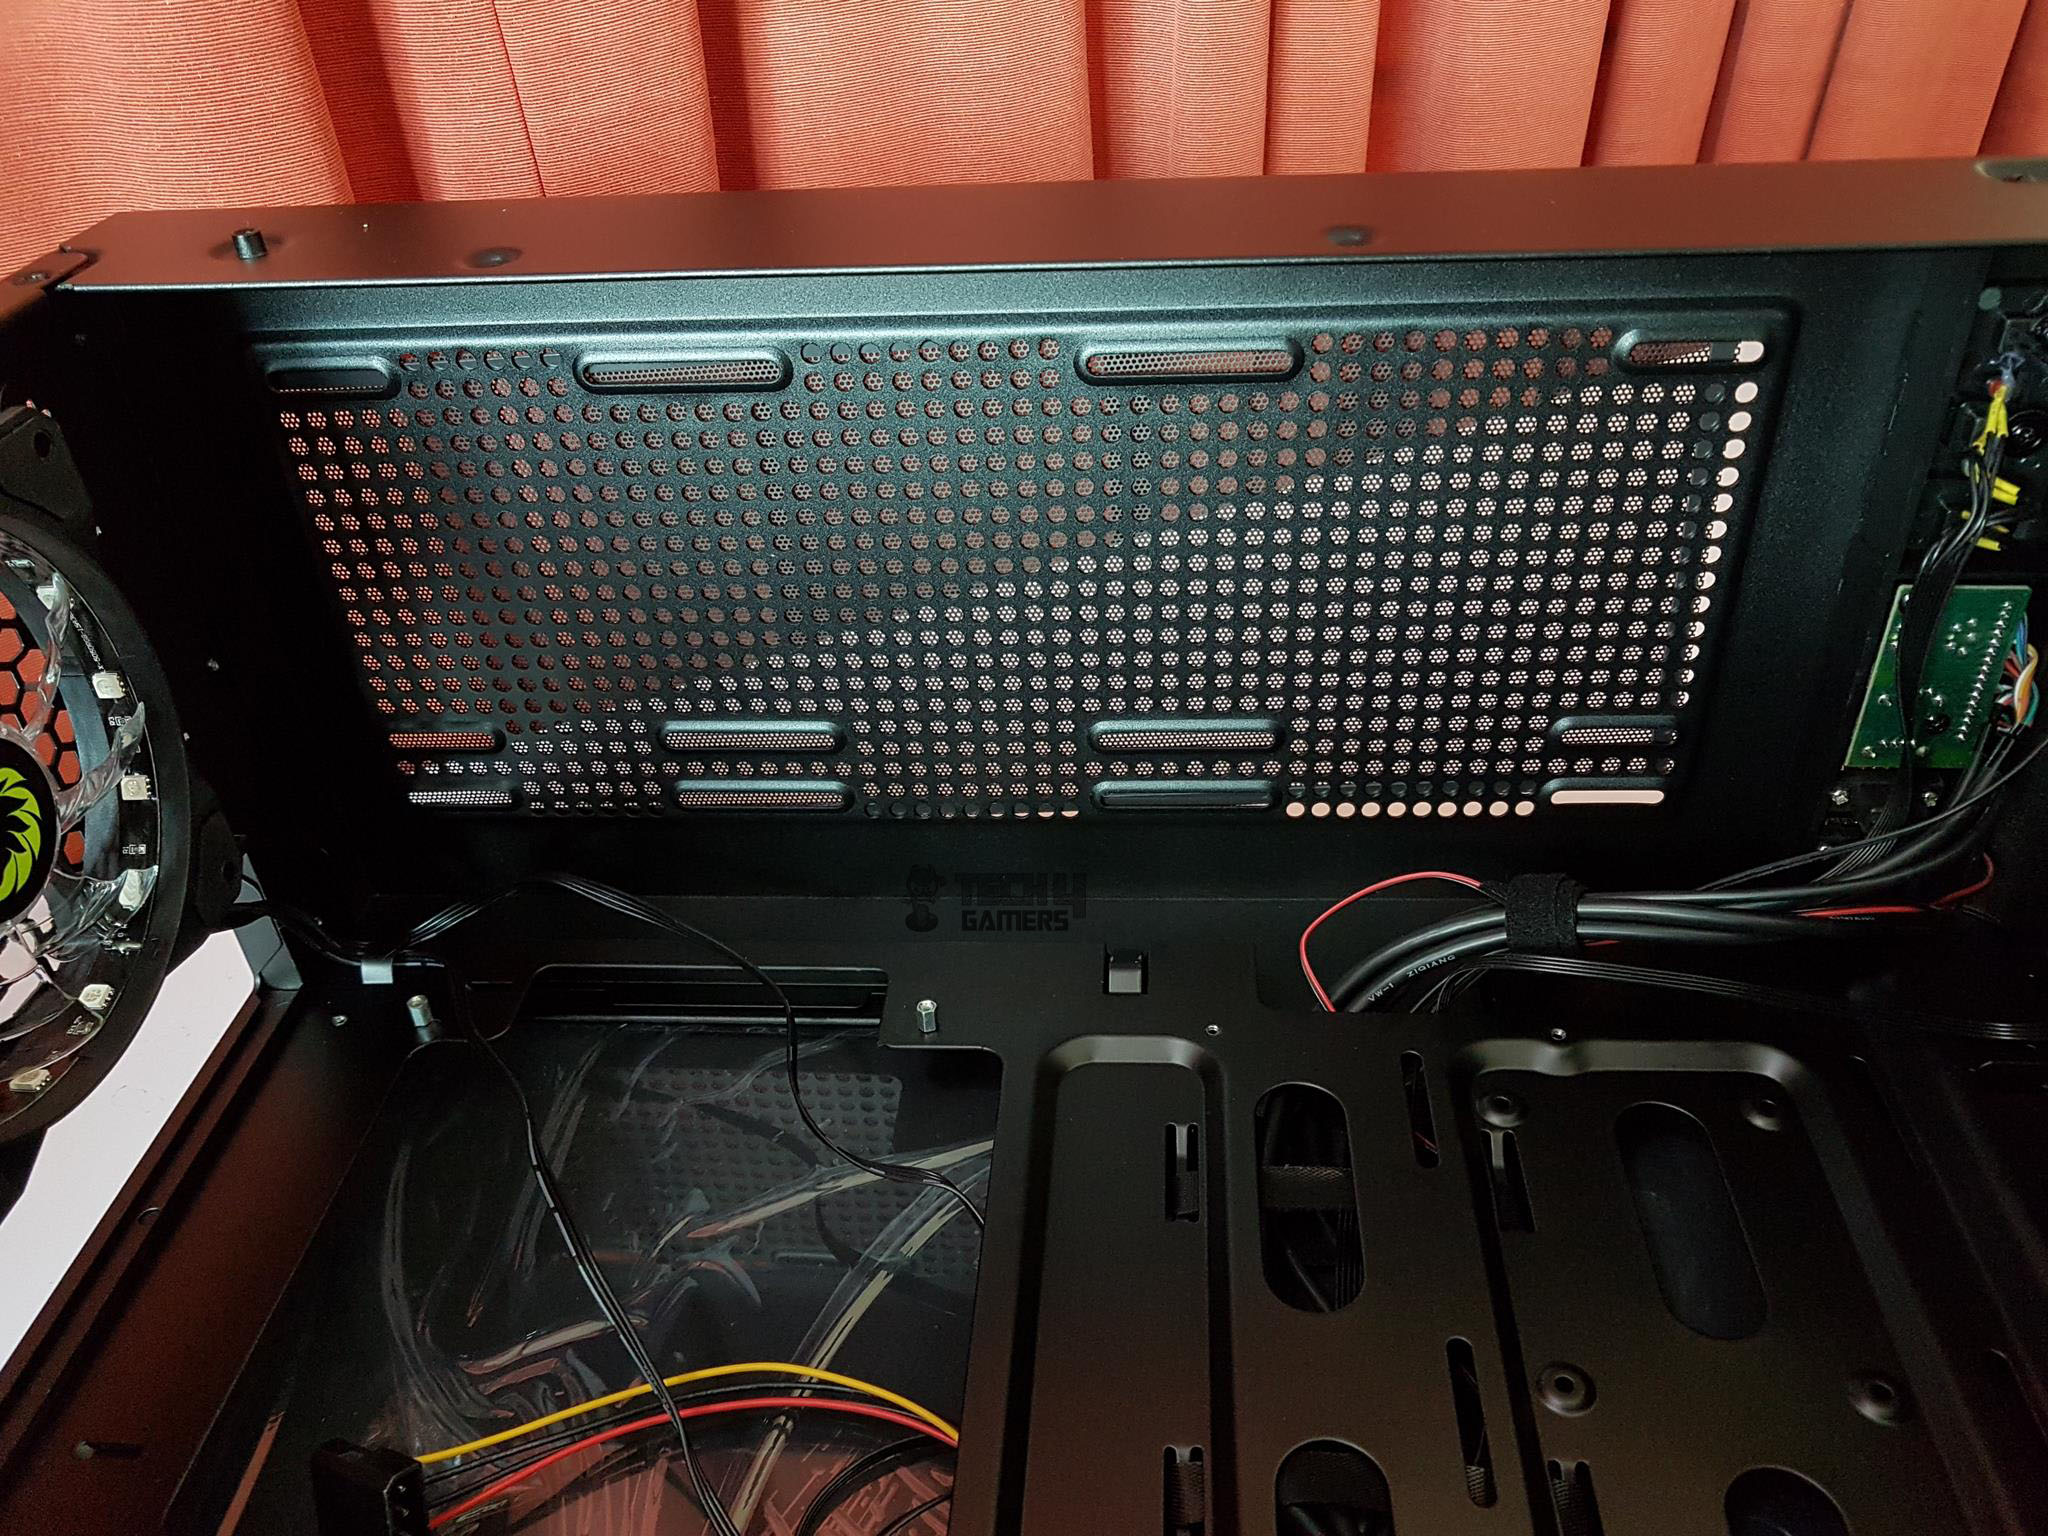
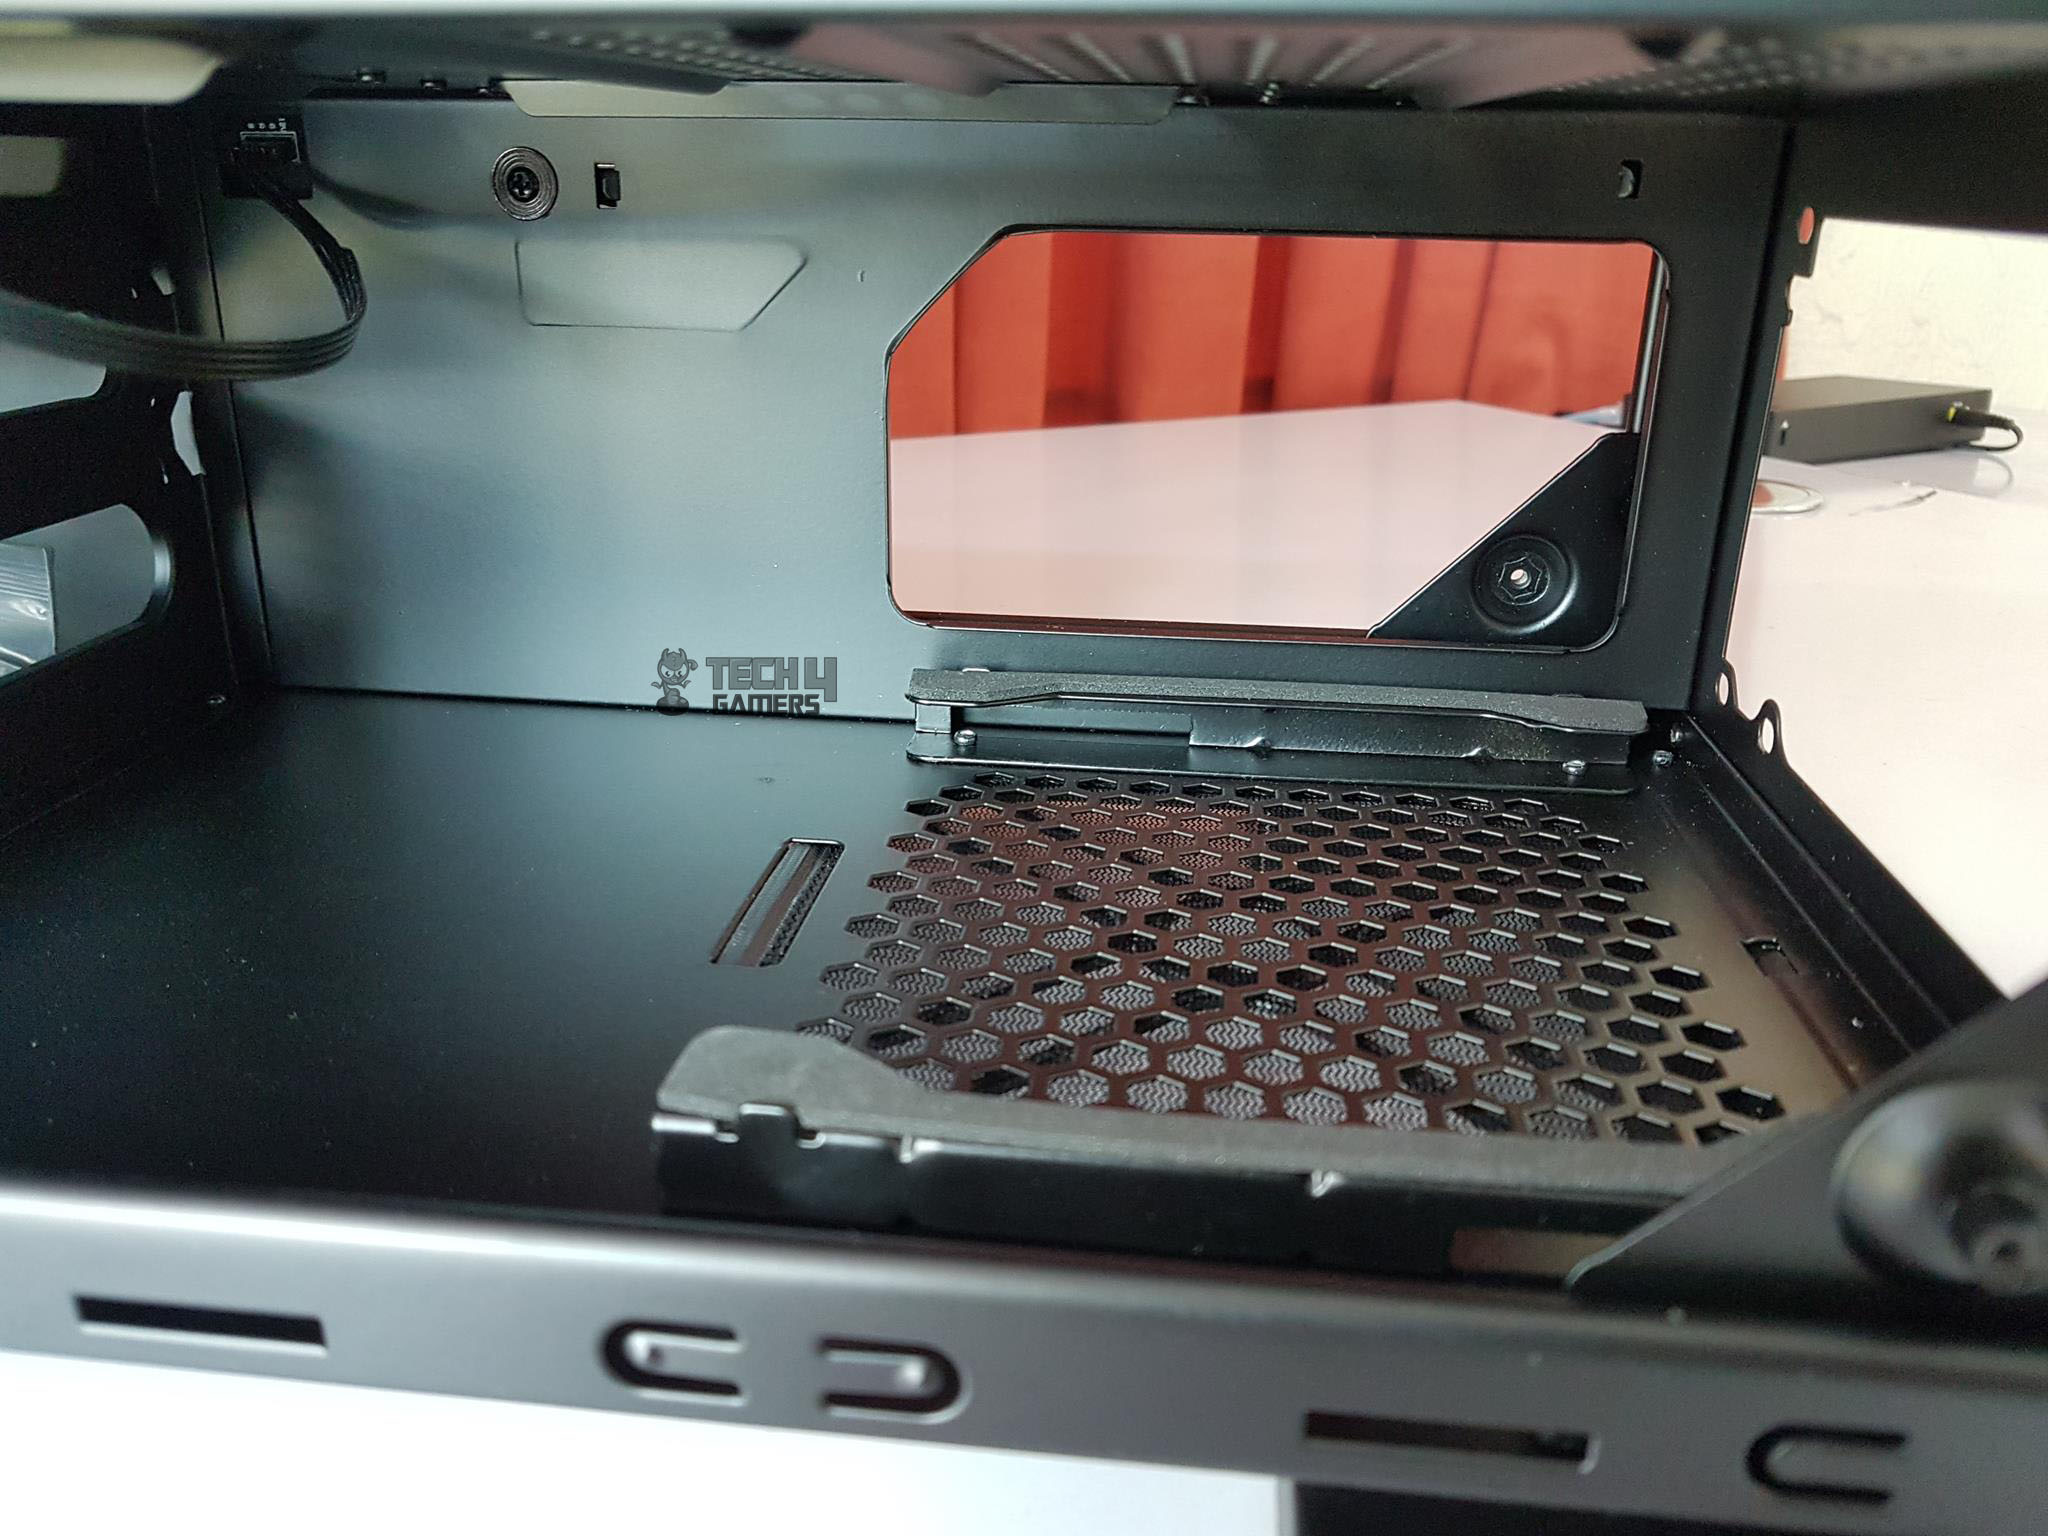
Like I mentioned earlier this chassis has metallic PSU shroud in it. This shroud is not covering the entire length of the chassis on the bottom. There is a gap of approximately 85mm from the front panel to the end of the PSU shroud (excluding the fan bracket) and if fan bracket is included then this gap is 58mm.
That is how they have wasted a space that could well have been used for a 360mm radiator on the front.
The area of the shroud right above the PSU mount has vents for airflow. It has one large size cutout facing directly the motherboard tray while there is another large size cutout on the exterior boundary of the shroud.
This is not for cable routing but this is actually a channel for the GPU support bracket. The rightmost sides of the shroud have angular cutouts which seem to be for ventilation as they are right on the top of the hard drive cage.
Another striking feature is the RGB LED strip pre-installed on the shroud and connected to the RGB+PWM hub of the chassis.
There is a stylish cutout on the side of the shroud showcasing the PSU side. There is approximately 17mm of spacing between the shroud and the chassis wall.
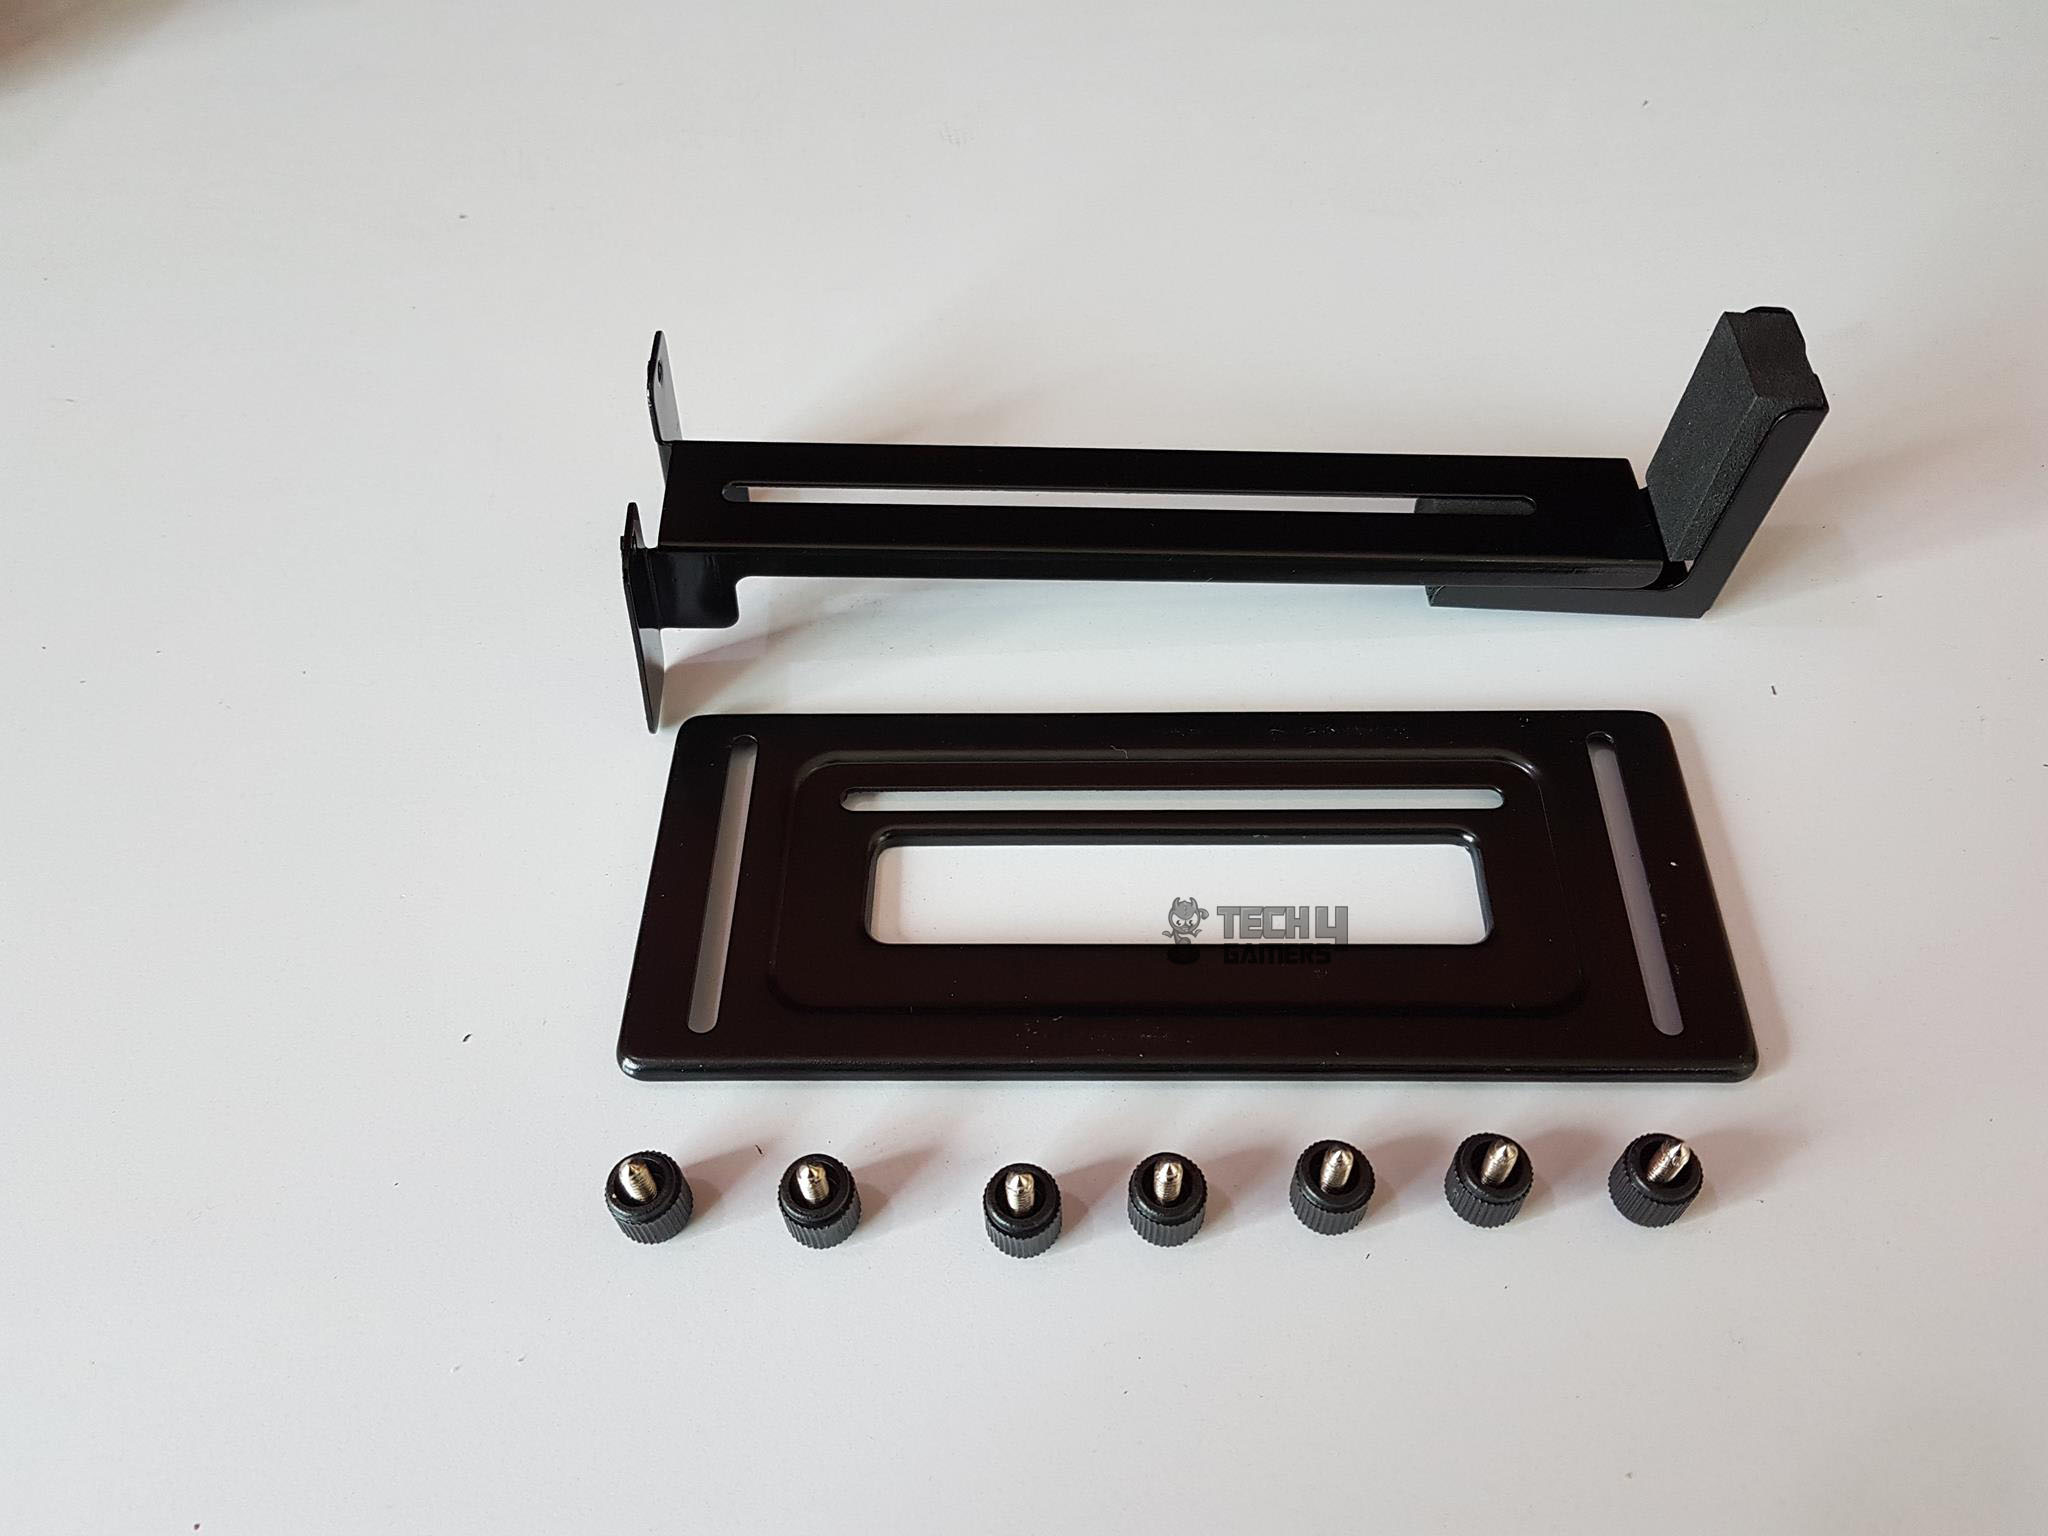
Since we are at it, let’s discuss the GPU support bracket. It is comprised of three metallic pieces and 7 thumb screws. The flat surface metallic piece with cutouts is the base which is to be installed on the shroud surface.
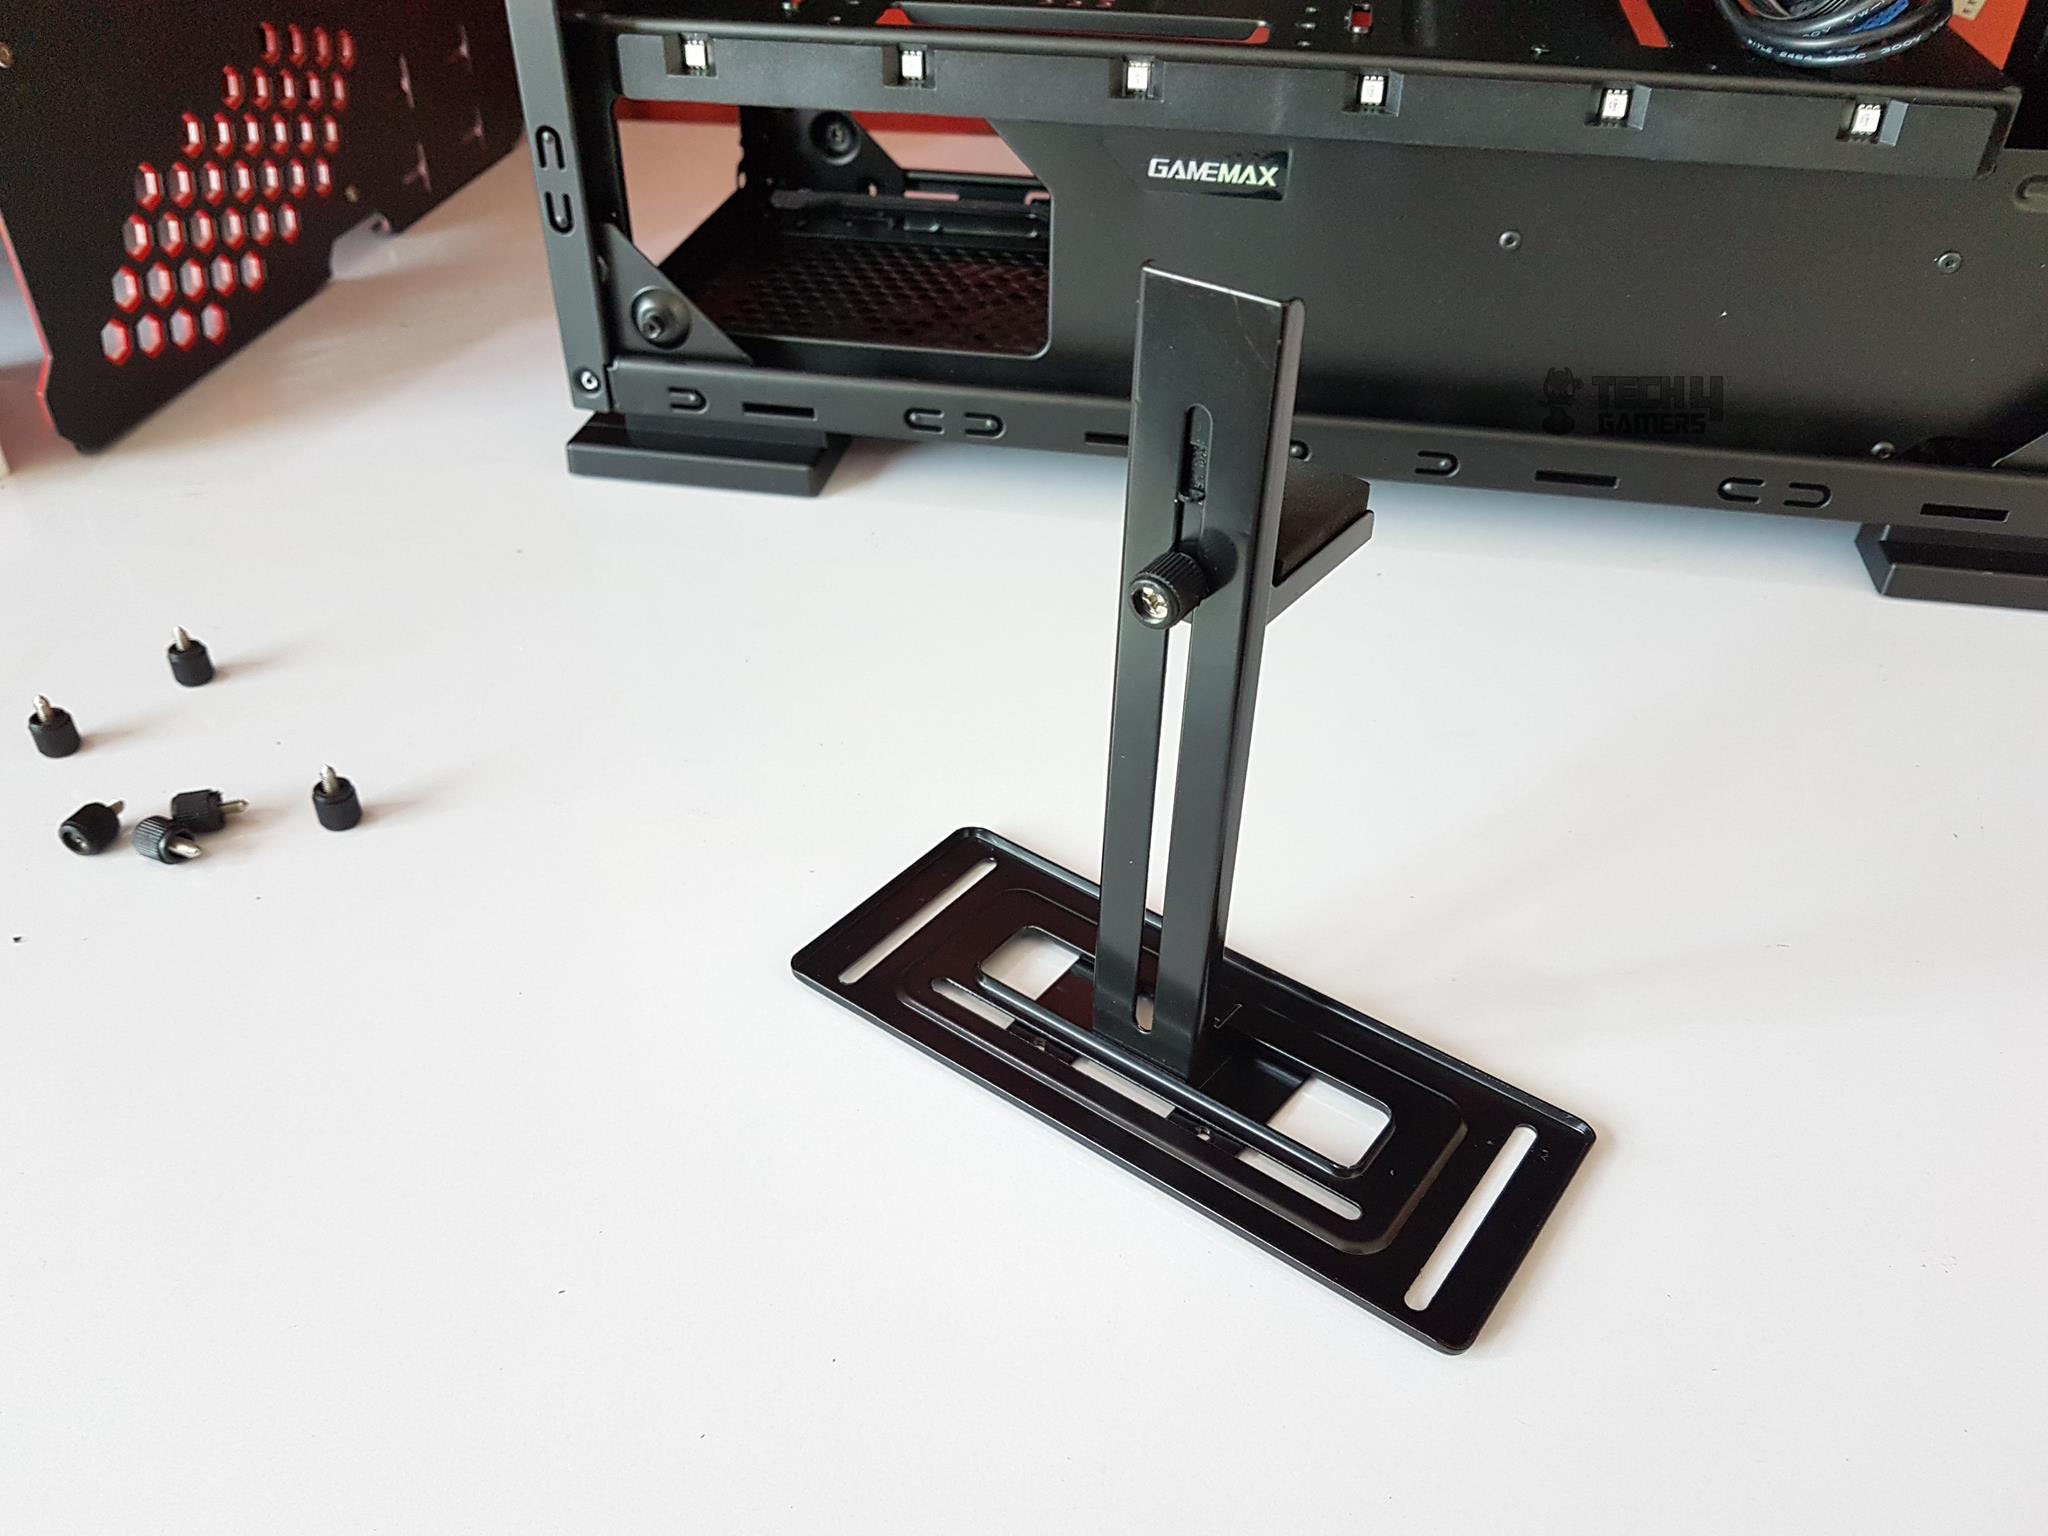
To set up the GPU Support bracket, pass the stand through the base. Then secure the right-angled piece with black color foams to the stand using a simple thumb screw. You can adjust the height of the resting platform according to the overall width of the graphics card.
Now, place the assembled unit on the shroud and adjust the position of the suspended platform according to the visually pleasing aesthetic and secure the base with the 6 thumb screws. I did not use all 6 screws.
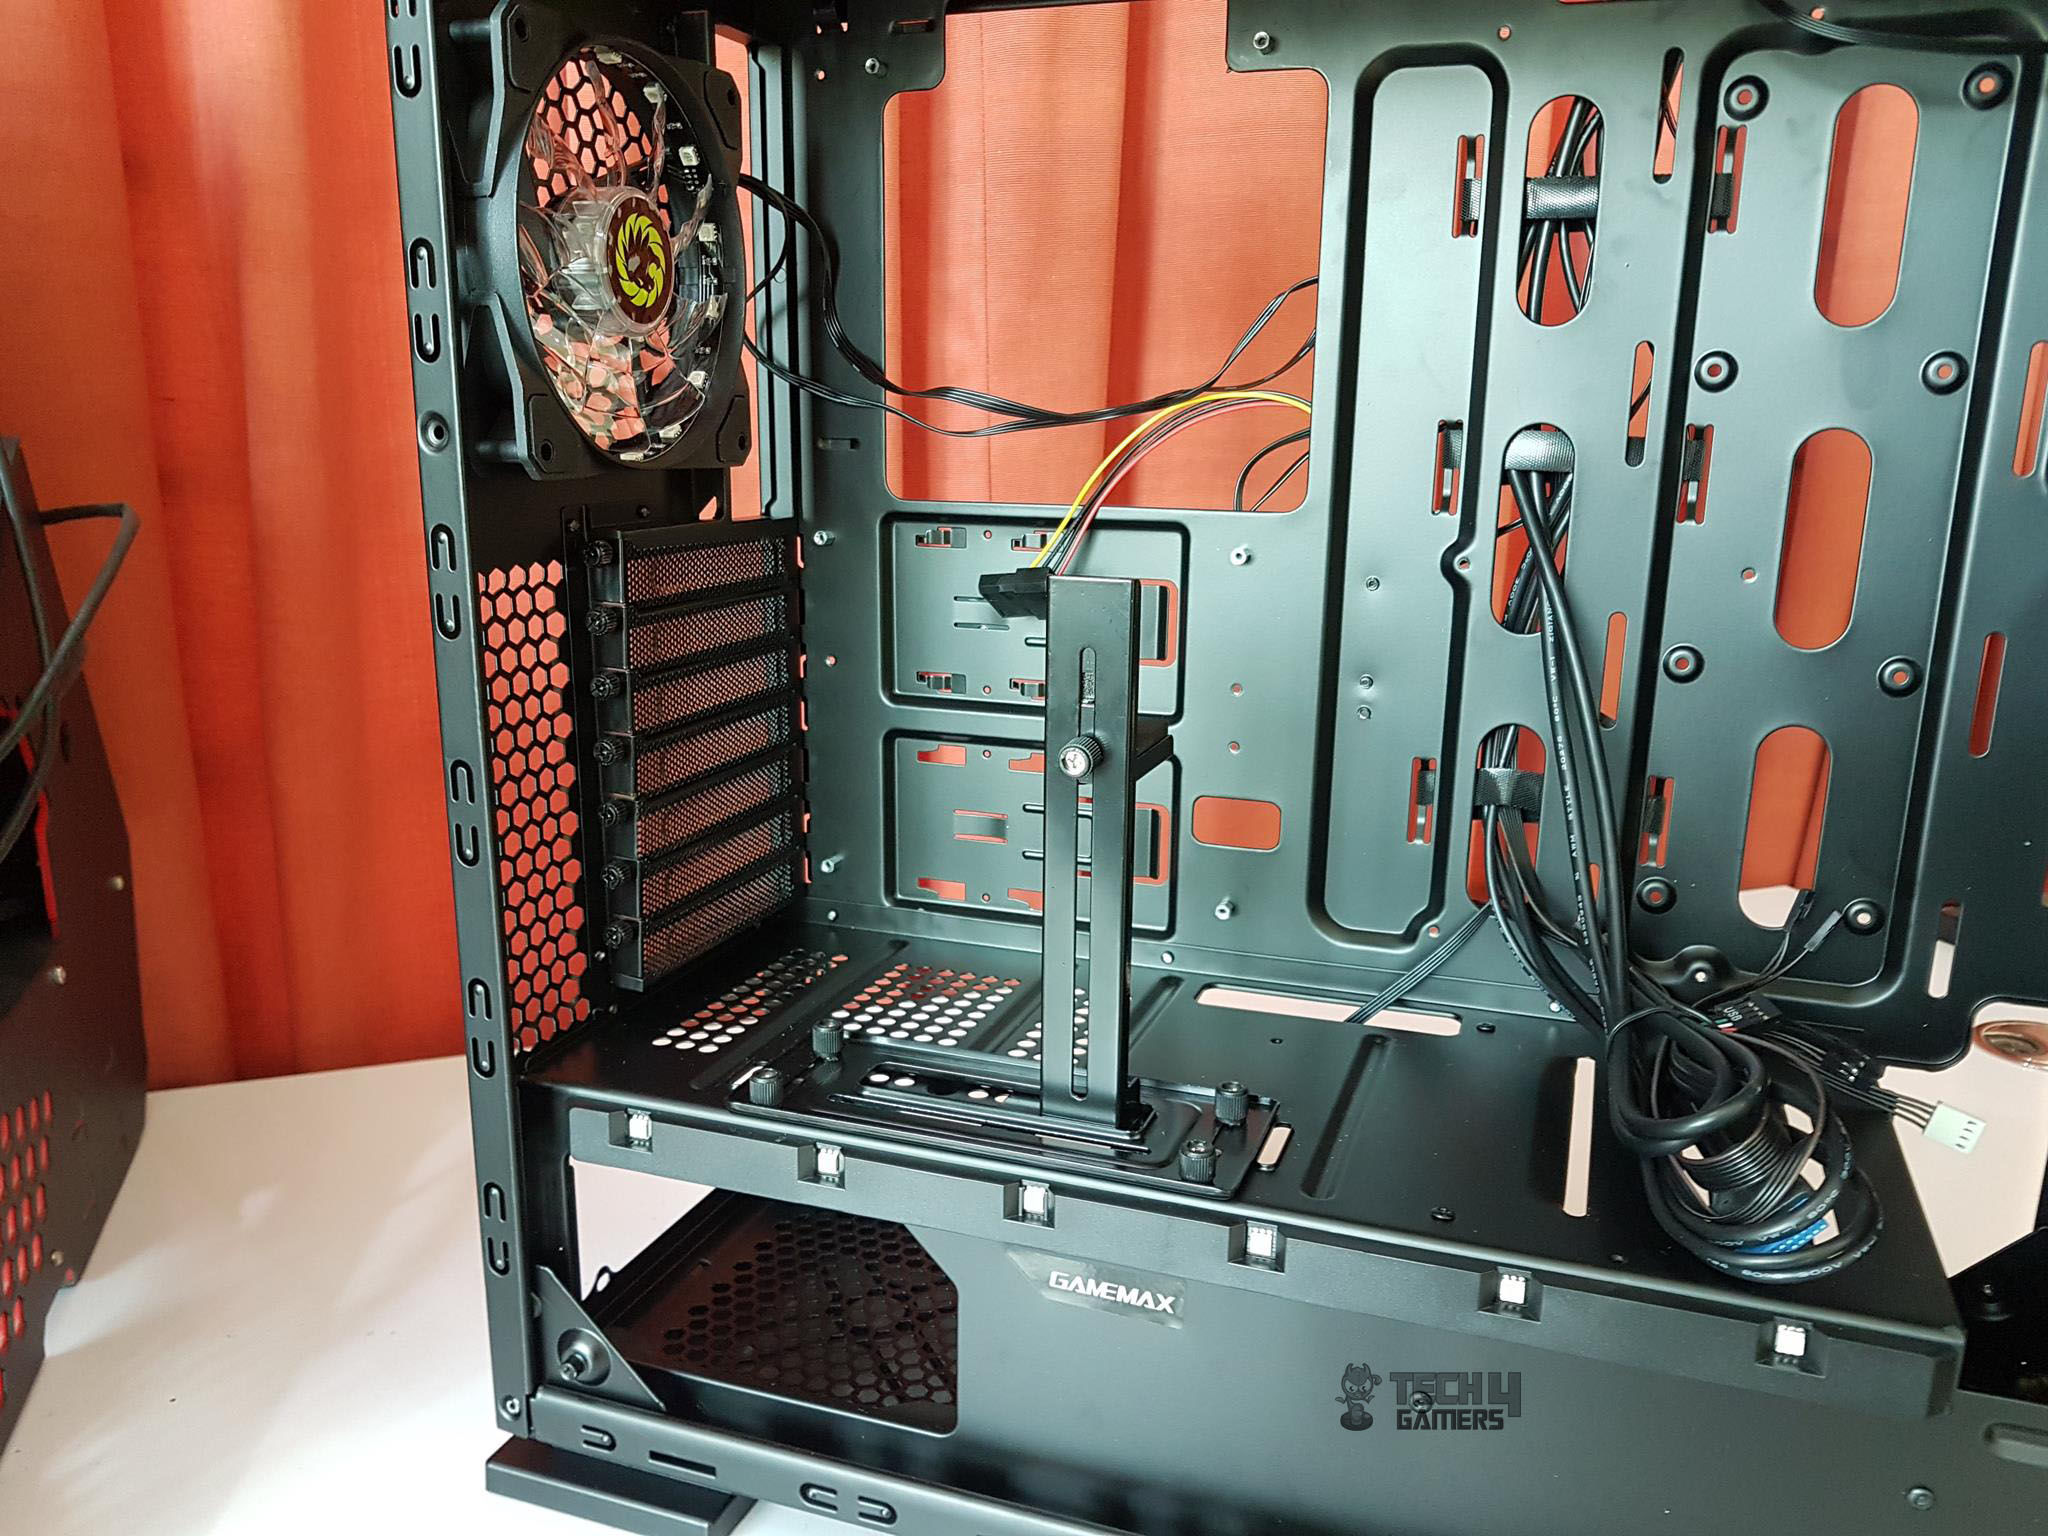
This is how the installed GPU support bracket would look like. It is time to take a look at the backside of the chassis.
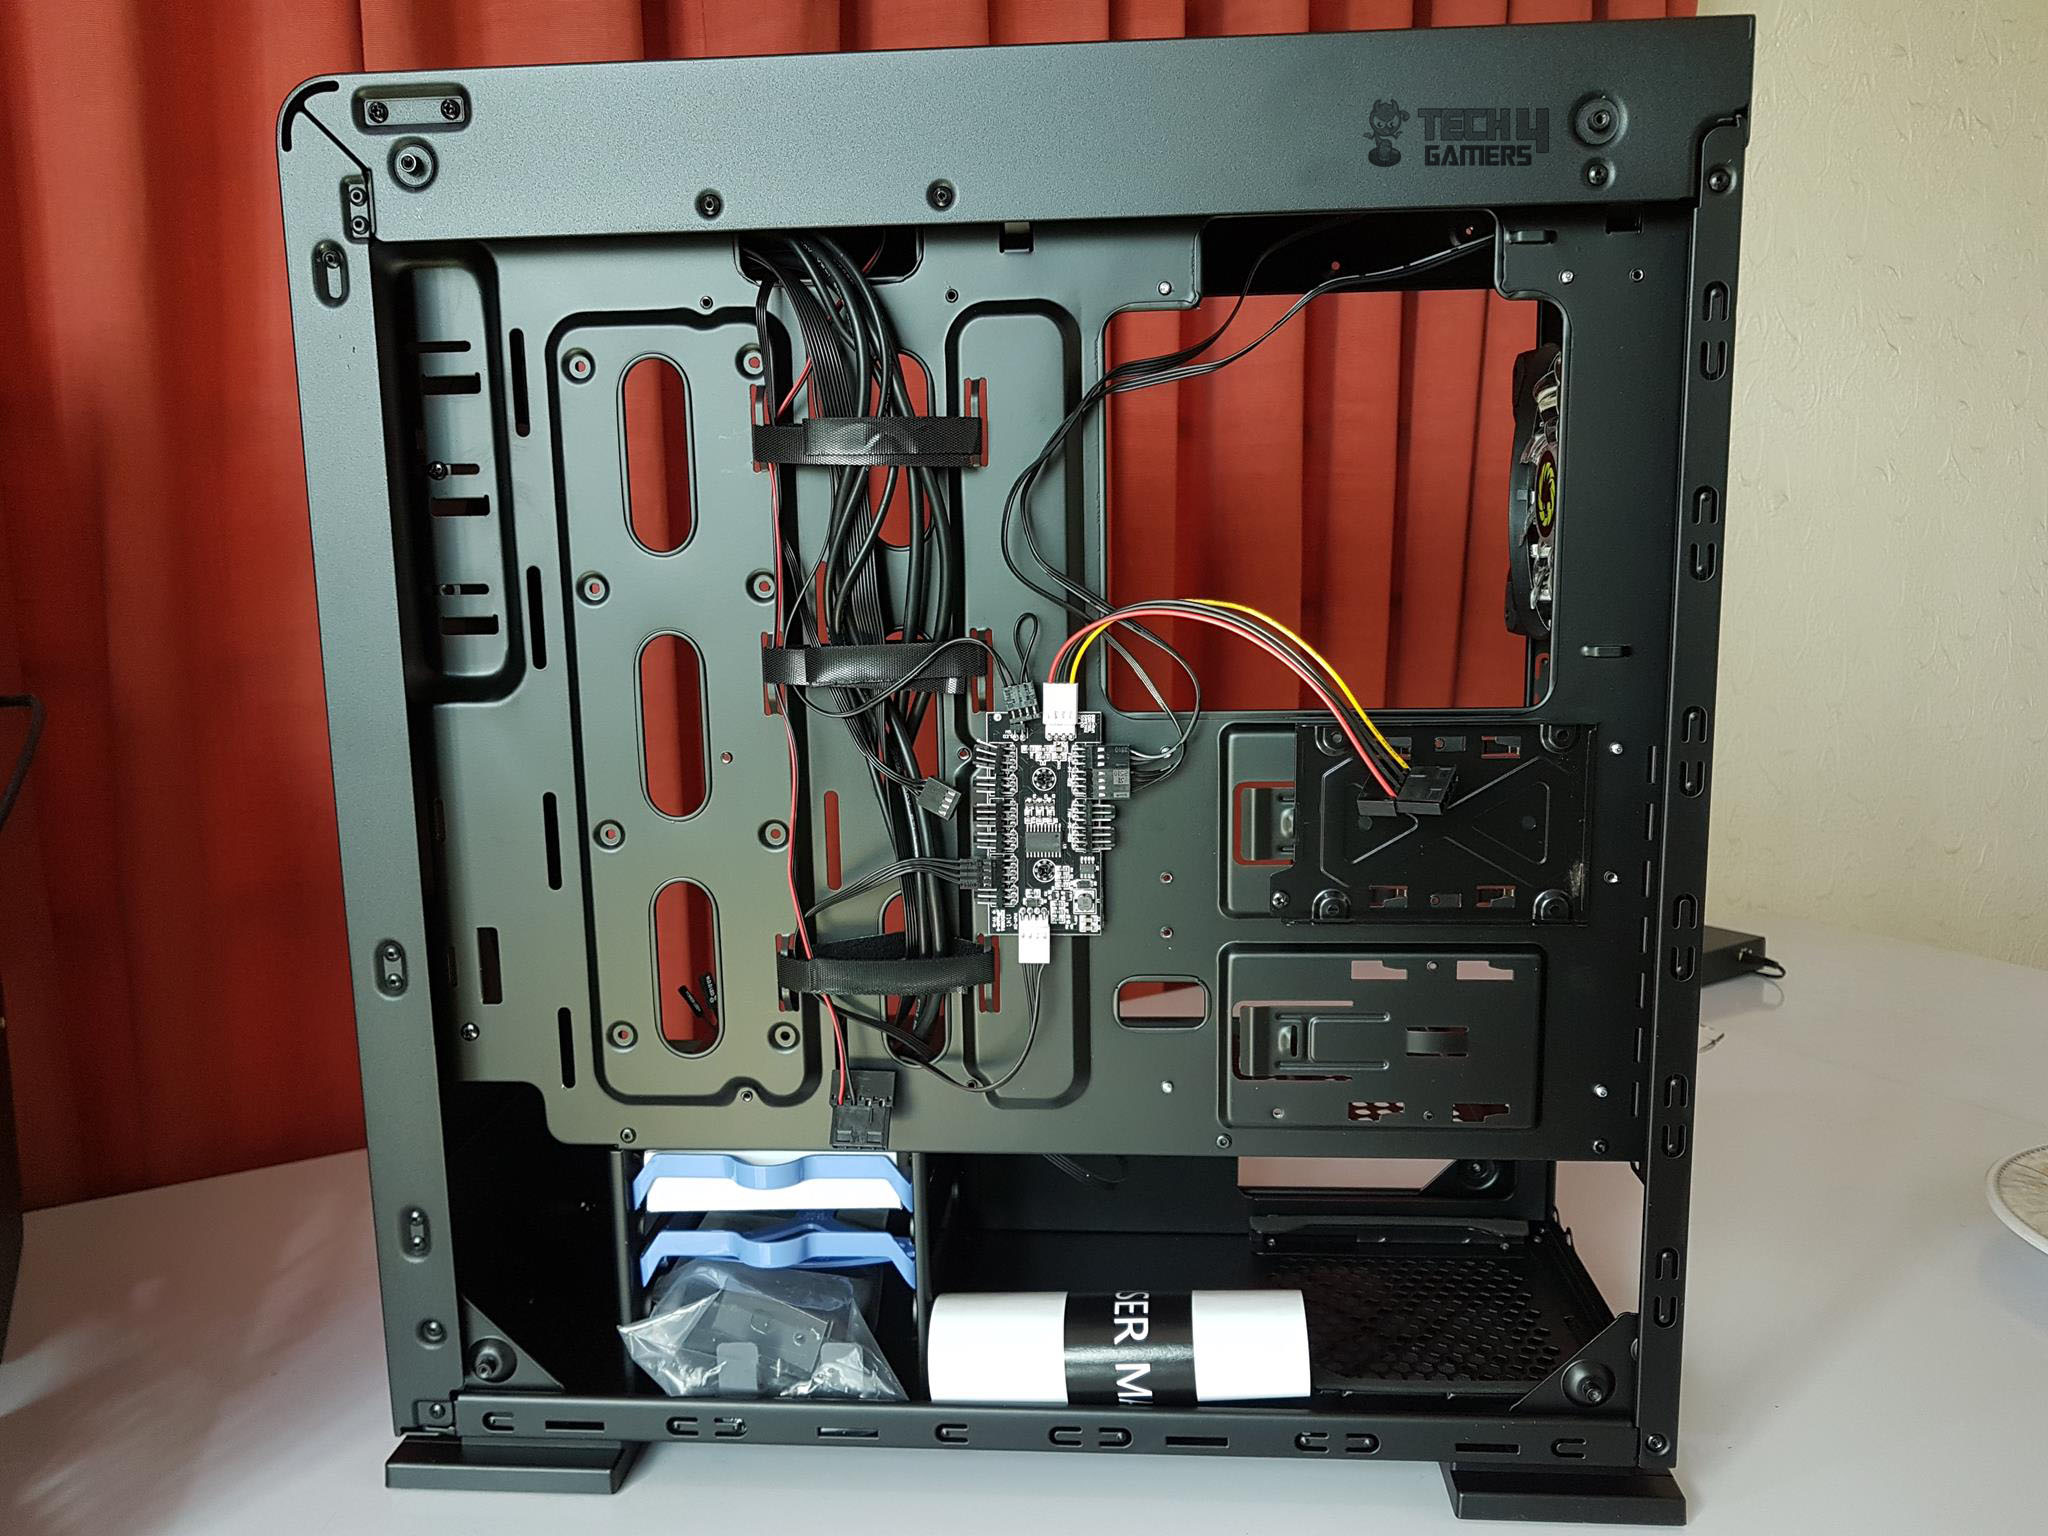
Looking at the backside of the case, the RGB+PWM, we can see three Velcro strips catching the front panel’s cables. This is a nice addition as having something like Velcro strips really help. We have only a few cable tie points which should have been more.
There are two 2.5” drive mounts right behind the motherboard tray but only one bracket is provided. Strange! There is approximately 24mm of spacing for cable management depending upon the location. Upper two cutouts are clearly visible. One is actually a part of the CPU cutout.
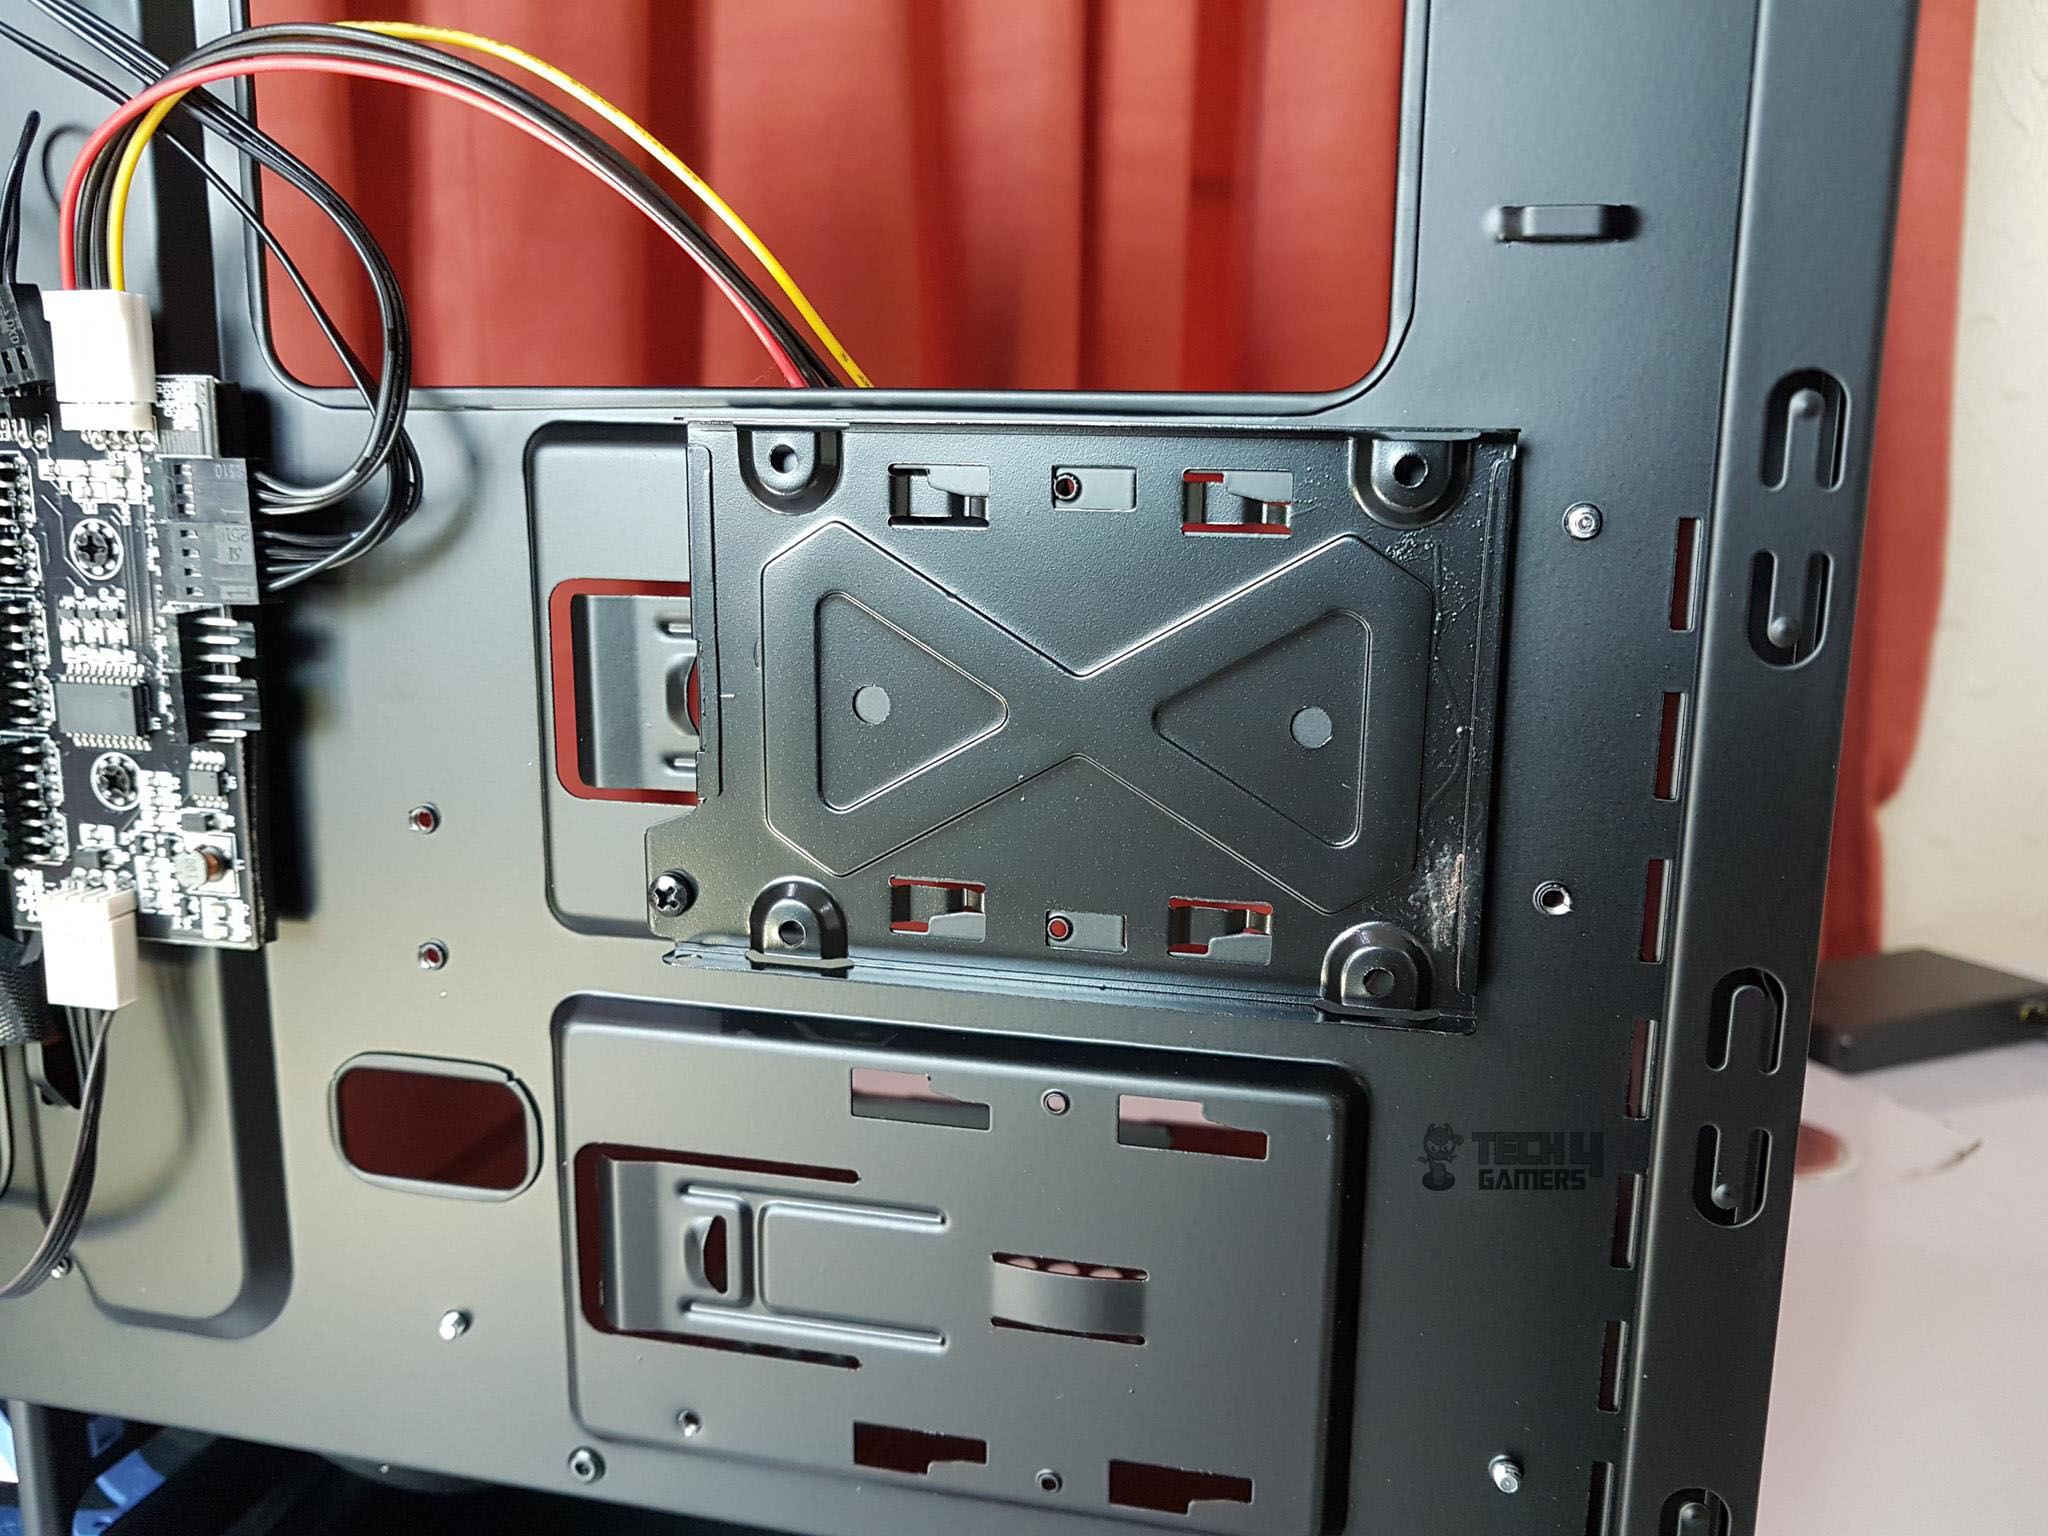
The quality of the 2.5” drive’s bracket is self-explanatory. Seems like someone was in rush.
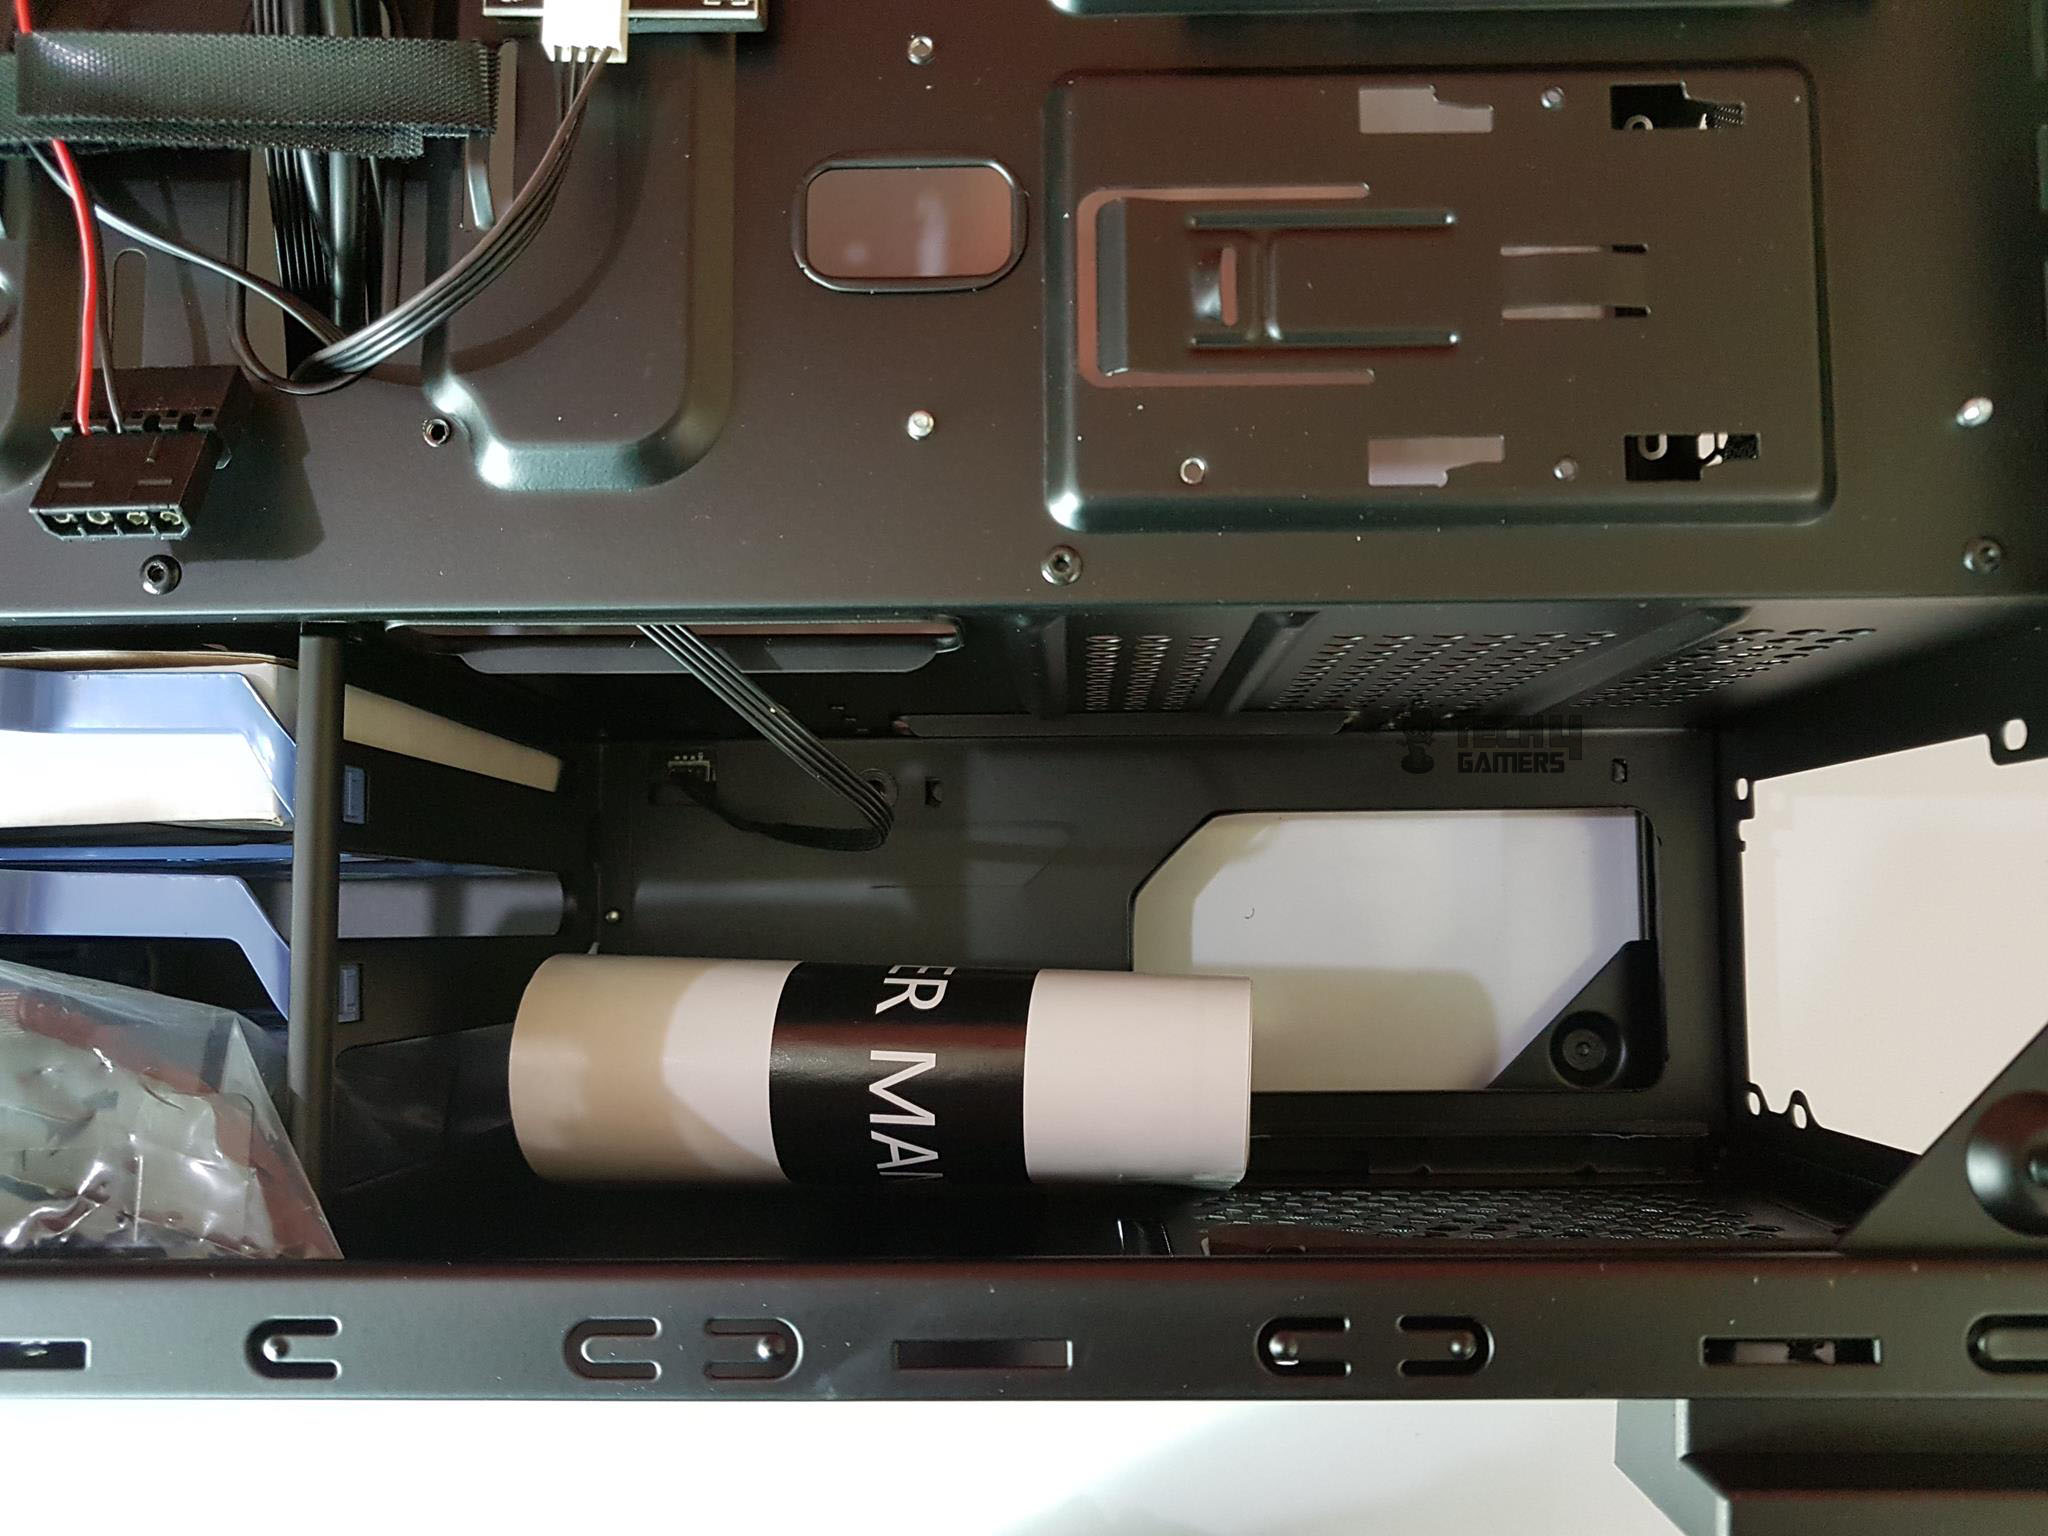
The PSU mounting area has a total length of 265mm. keep that in mind as for more length PSUs, there will be less space for the cables. You will have to slide the PSU from the main opening on the left side to install it.
The above picture shows the two rails with anti-vibration rubber pads on top of them. This is where the PSU will be rested upon. The bottom section has vents for ventilation. The dust filter is visible below the vented area.
This is the connector of the RGB LED strip that has been installed on the PSU shroud. It is using 12VGRB interface.
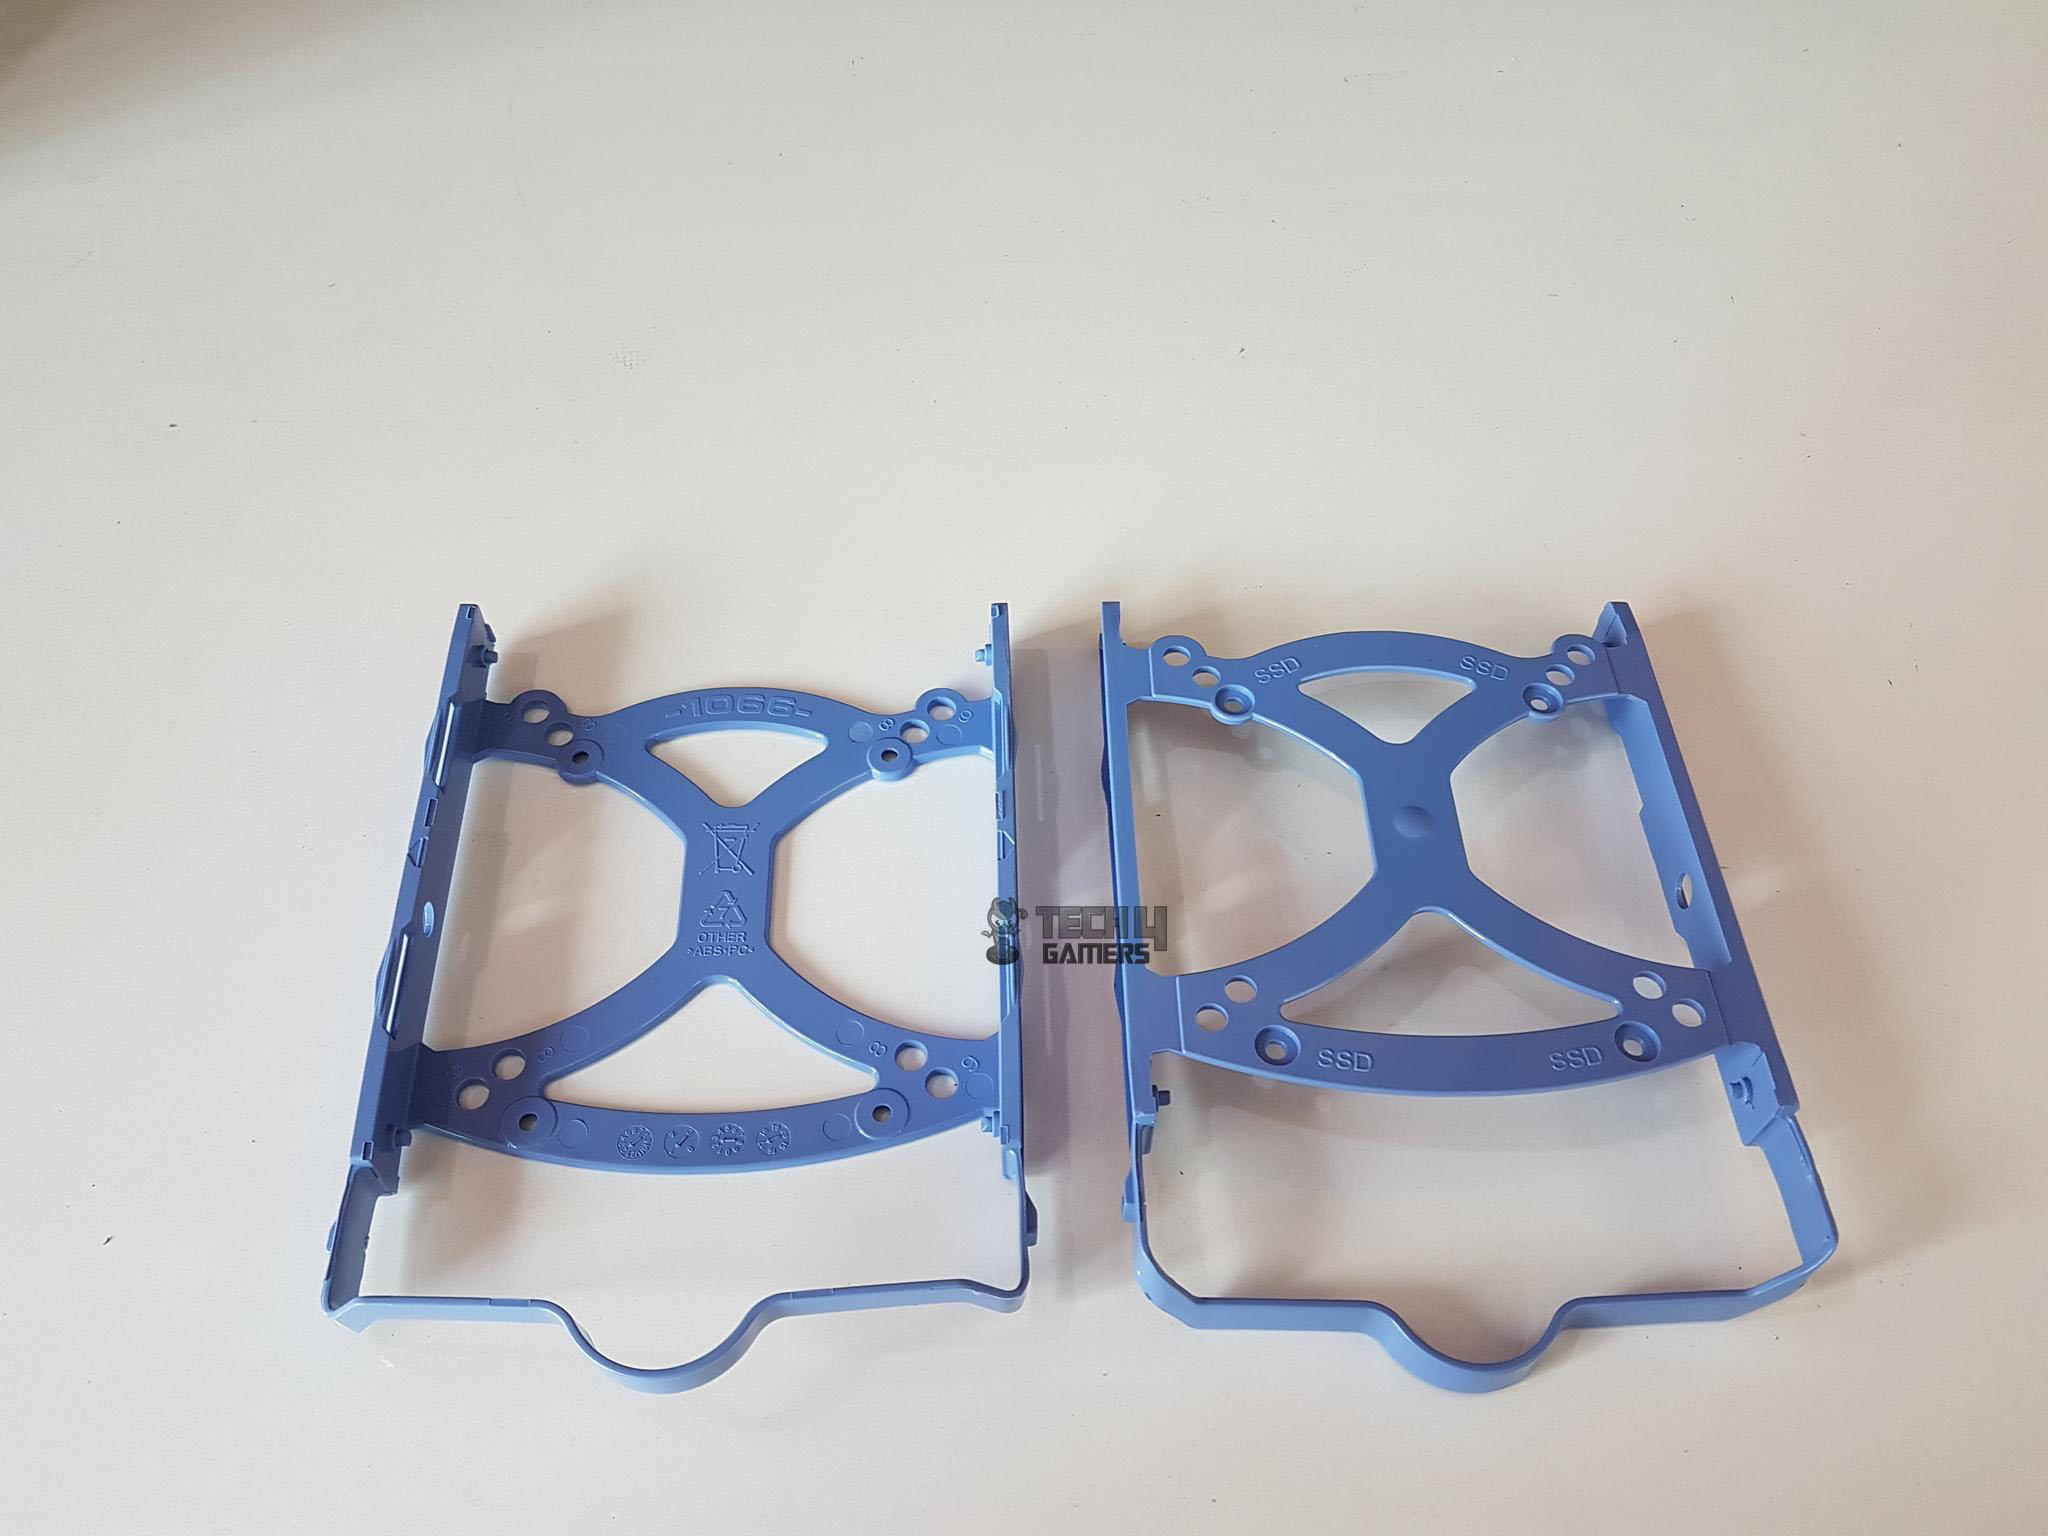
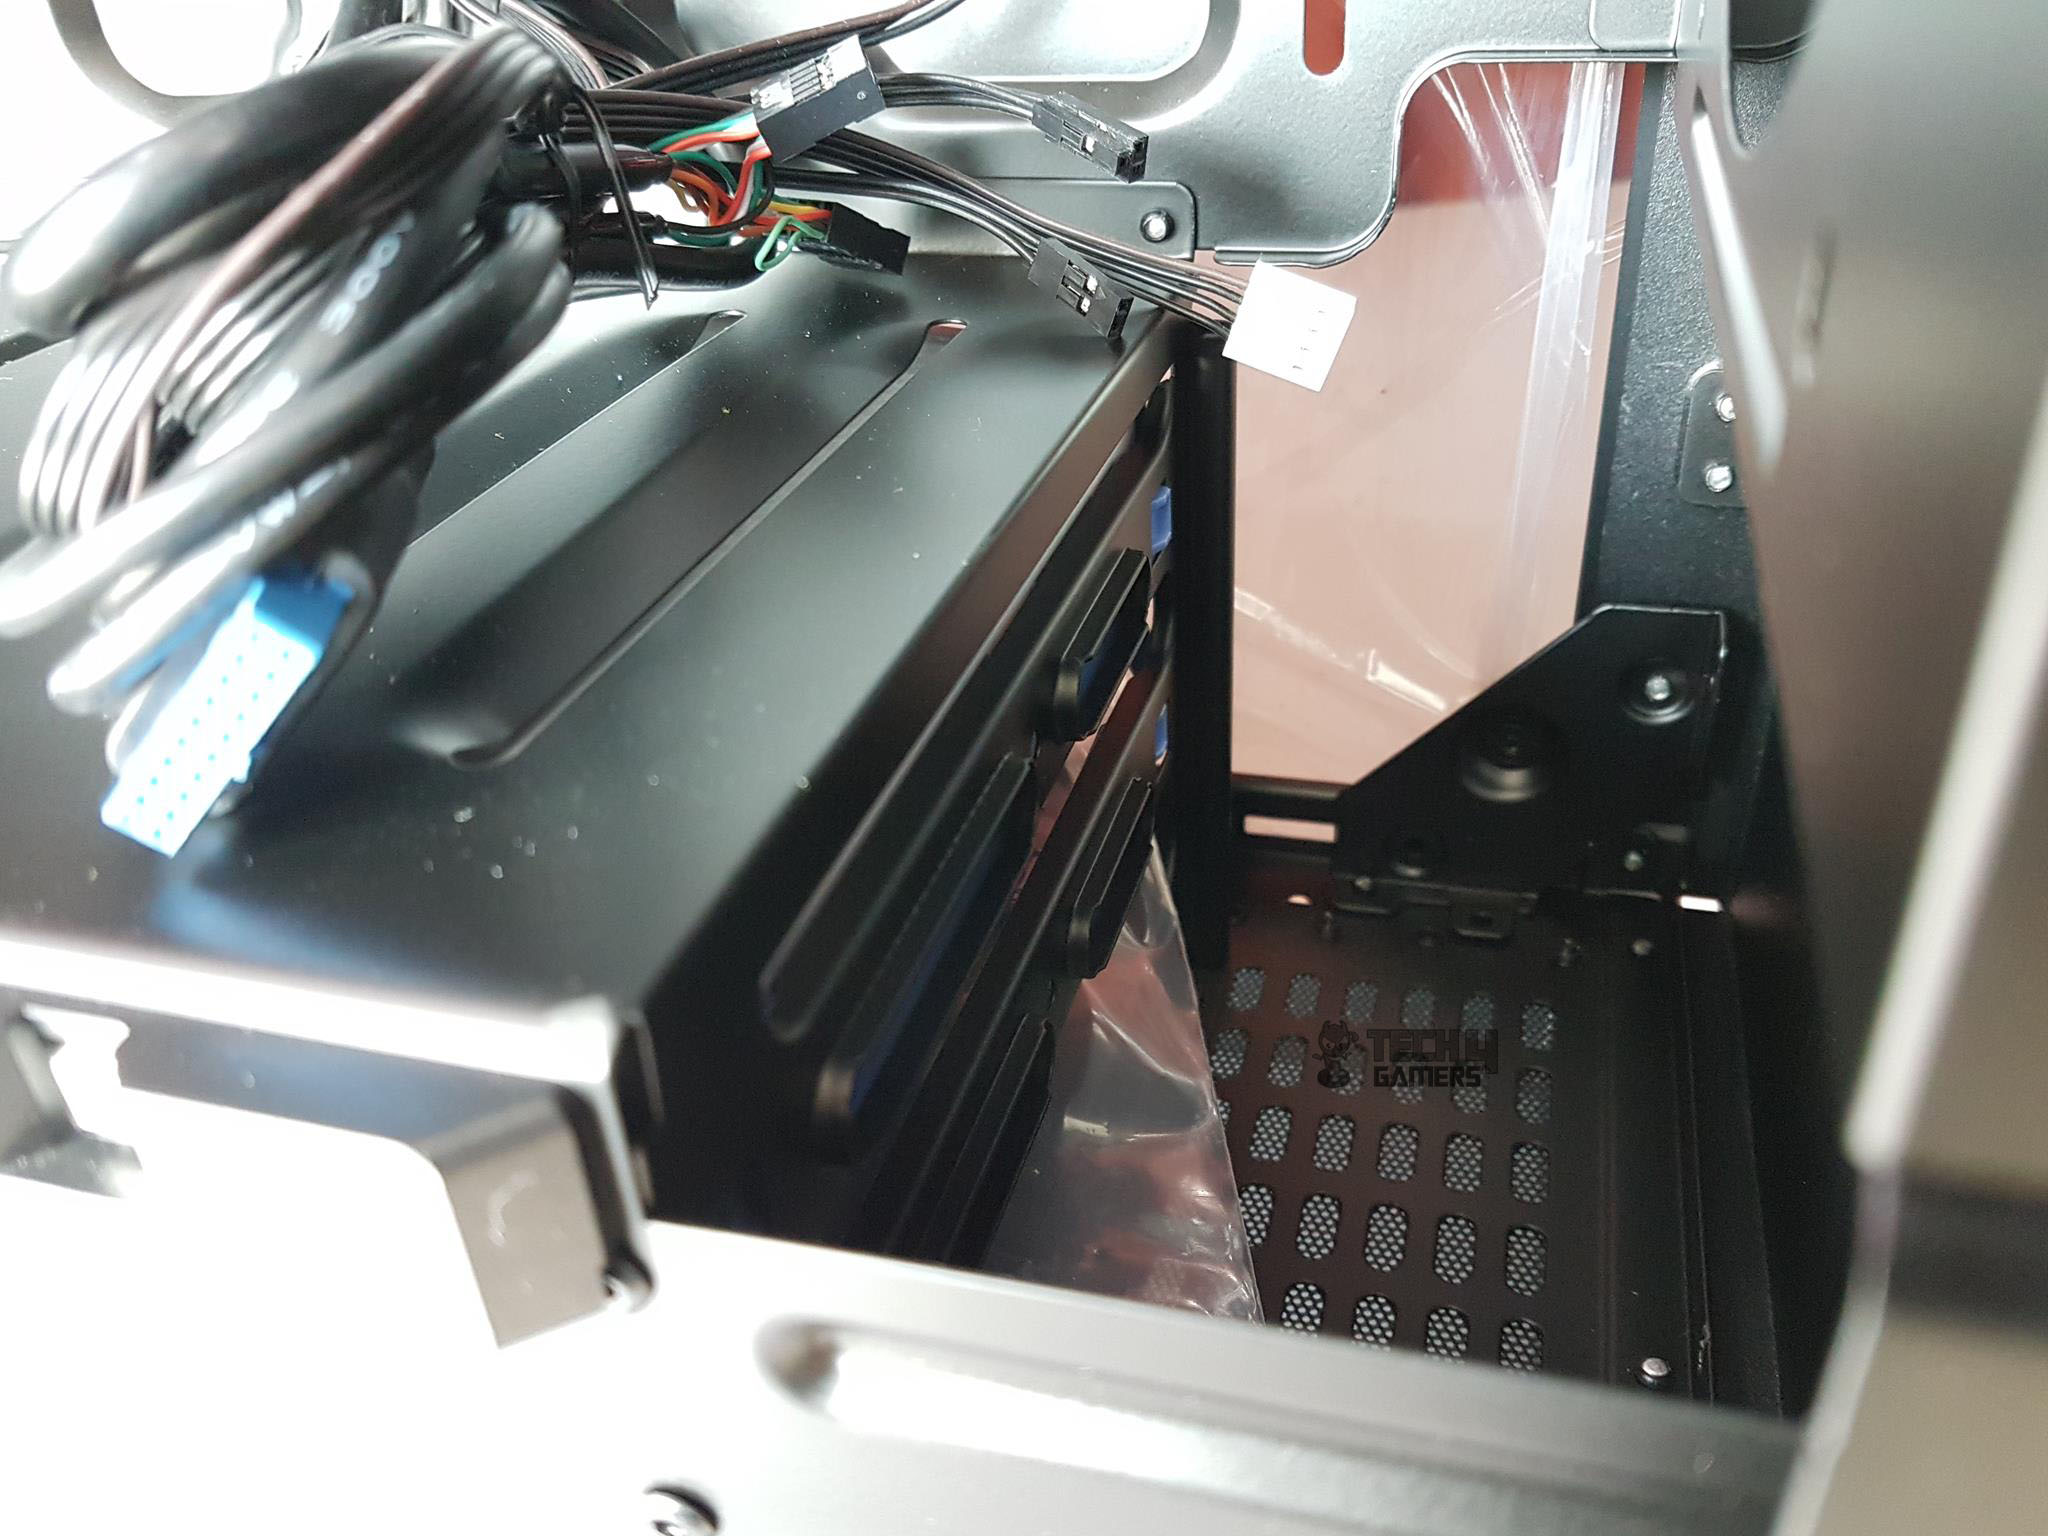
The hard drive cage is riveted to the chassis hence can’t be taken out. There are two blue color plastic-made caddies or trays. A 2.5” or 3.5” drive can be installed in these trays. These are flexible.
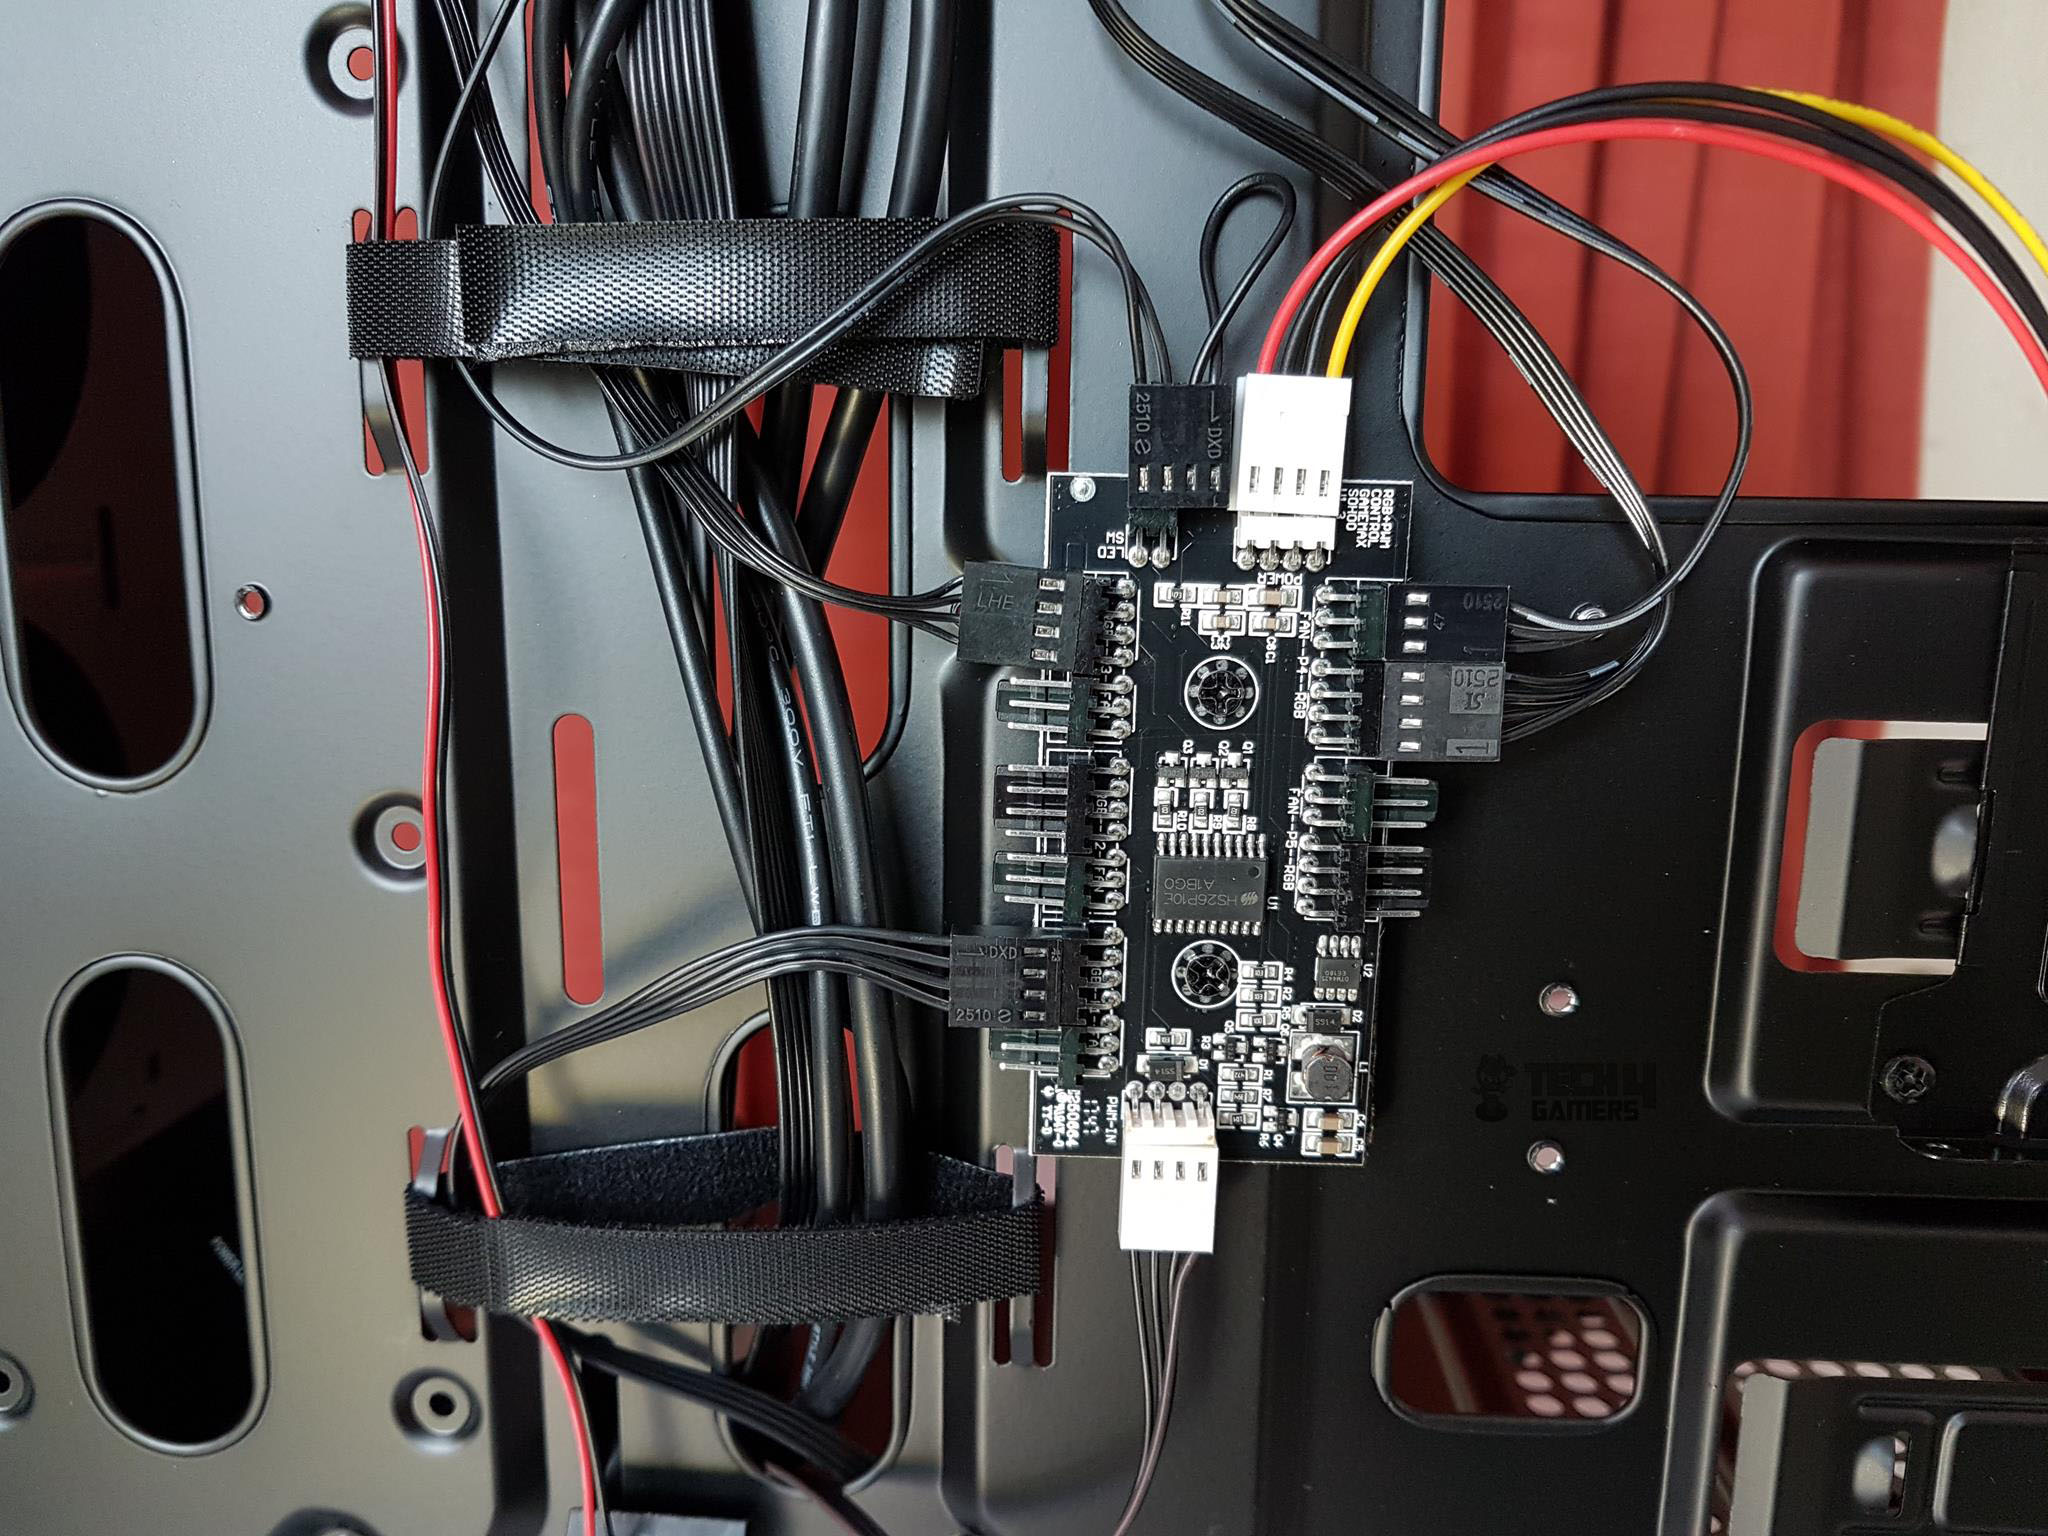
Let’s take a look at the main showcase of the chassis which the RGB+PWM hub feature or function. Up to 5x 3-pin fans and 4-pin RGB devices can be connected to this hub. On the top, the white color connector is the power one.
It is using a Molex connector to take power from the PSU directly. I wish it was SATA interfaced. On its left, there is a 2-pin black color connector. It is connected to the LED button of the front I/O panel.
The top connector on the left side of the PCB is for the front panel’s RGB zone. The bottom connector on the PCB is for the PSU Shroud’s RGB LED strip. The right side of the PCB has one 3-pin black color connector and one 4-pin black color connectors.
The 3-pin is to power up the fan and the 4-pin is the RGB LED connector for the fan’s lighting. The bottom 4-pin cream color connector is the PWM connector which has other end in the 4-pin connector that the user can connect to the motherboard’s CPU fan header or any other 4-pin header for PWM signal.
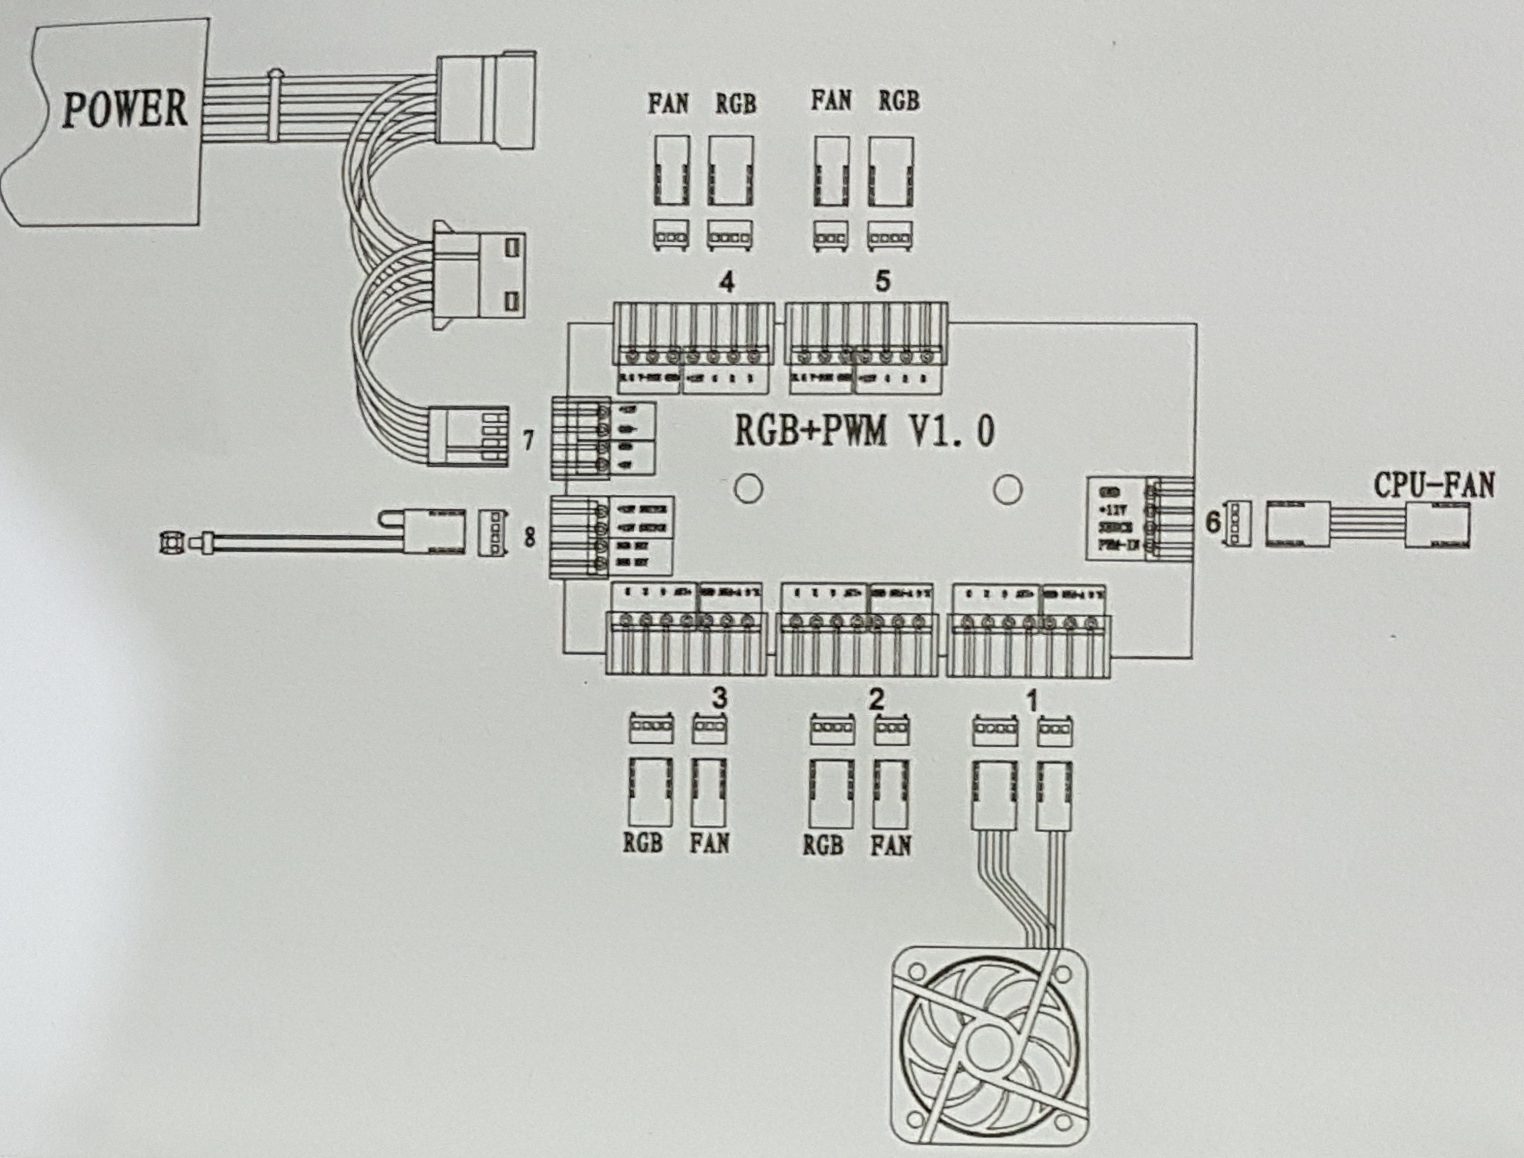
The above picture is the block diagram of the hub and its connectivity options.
RGB Lighting
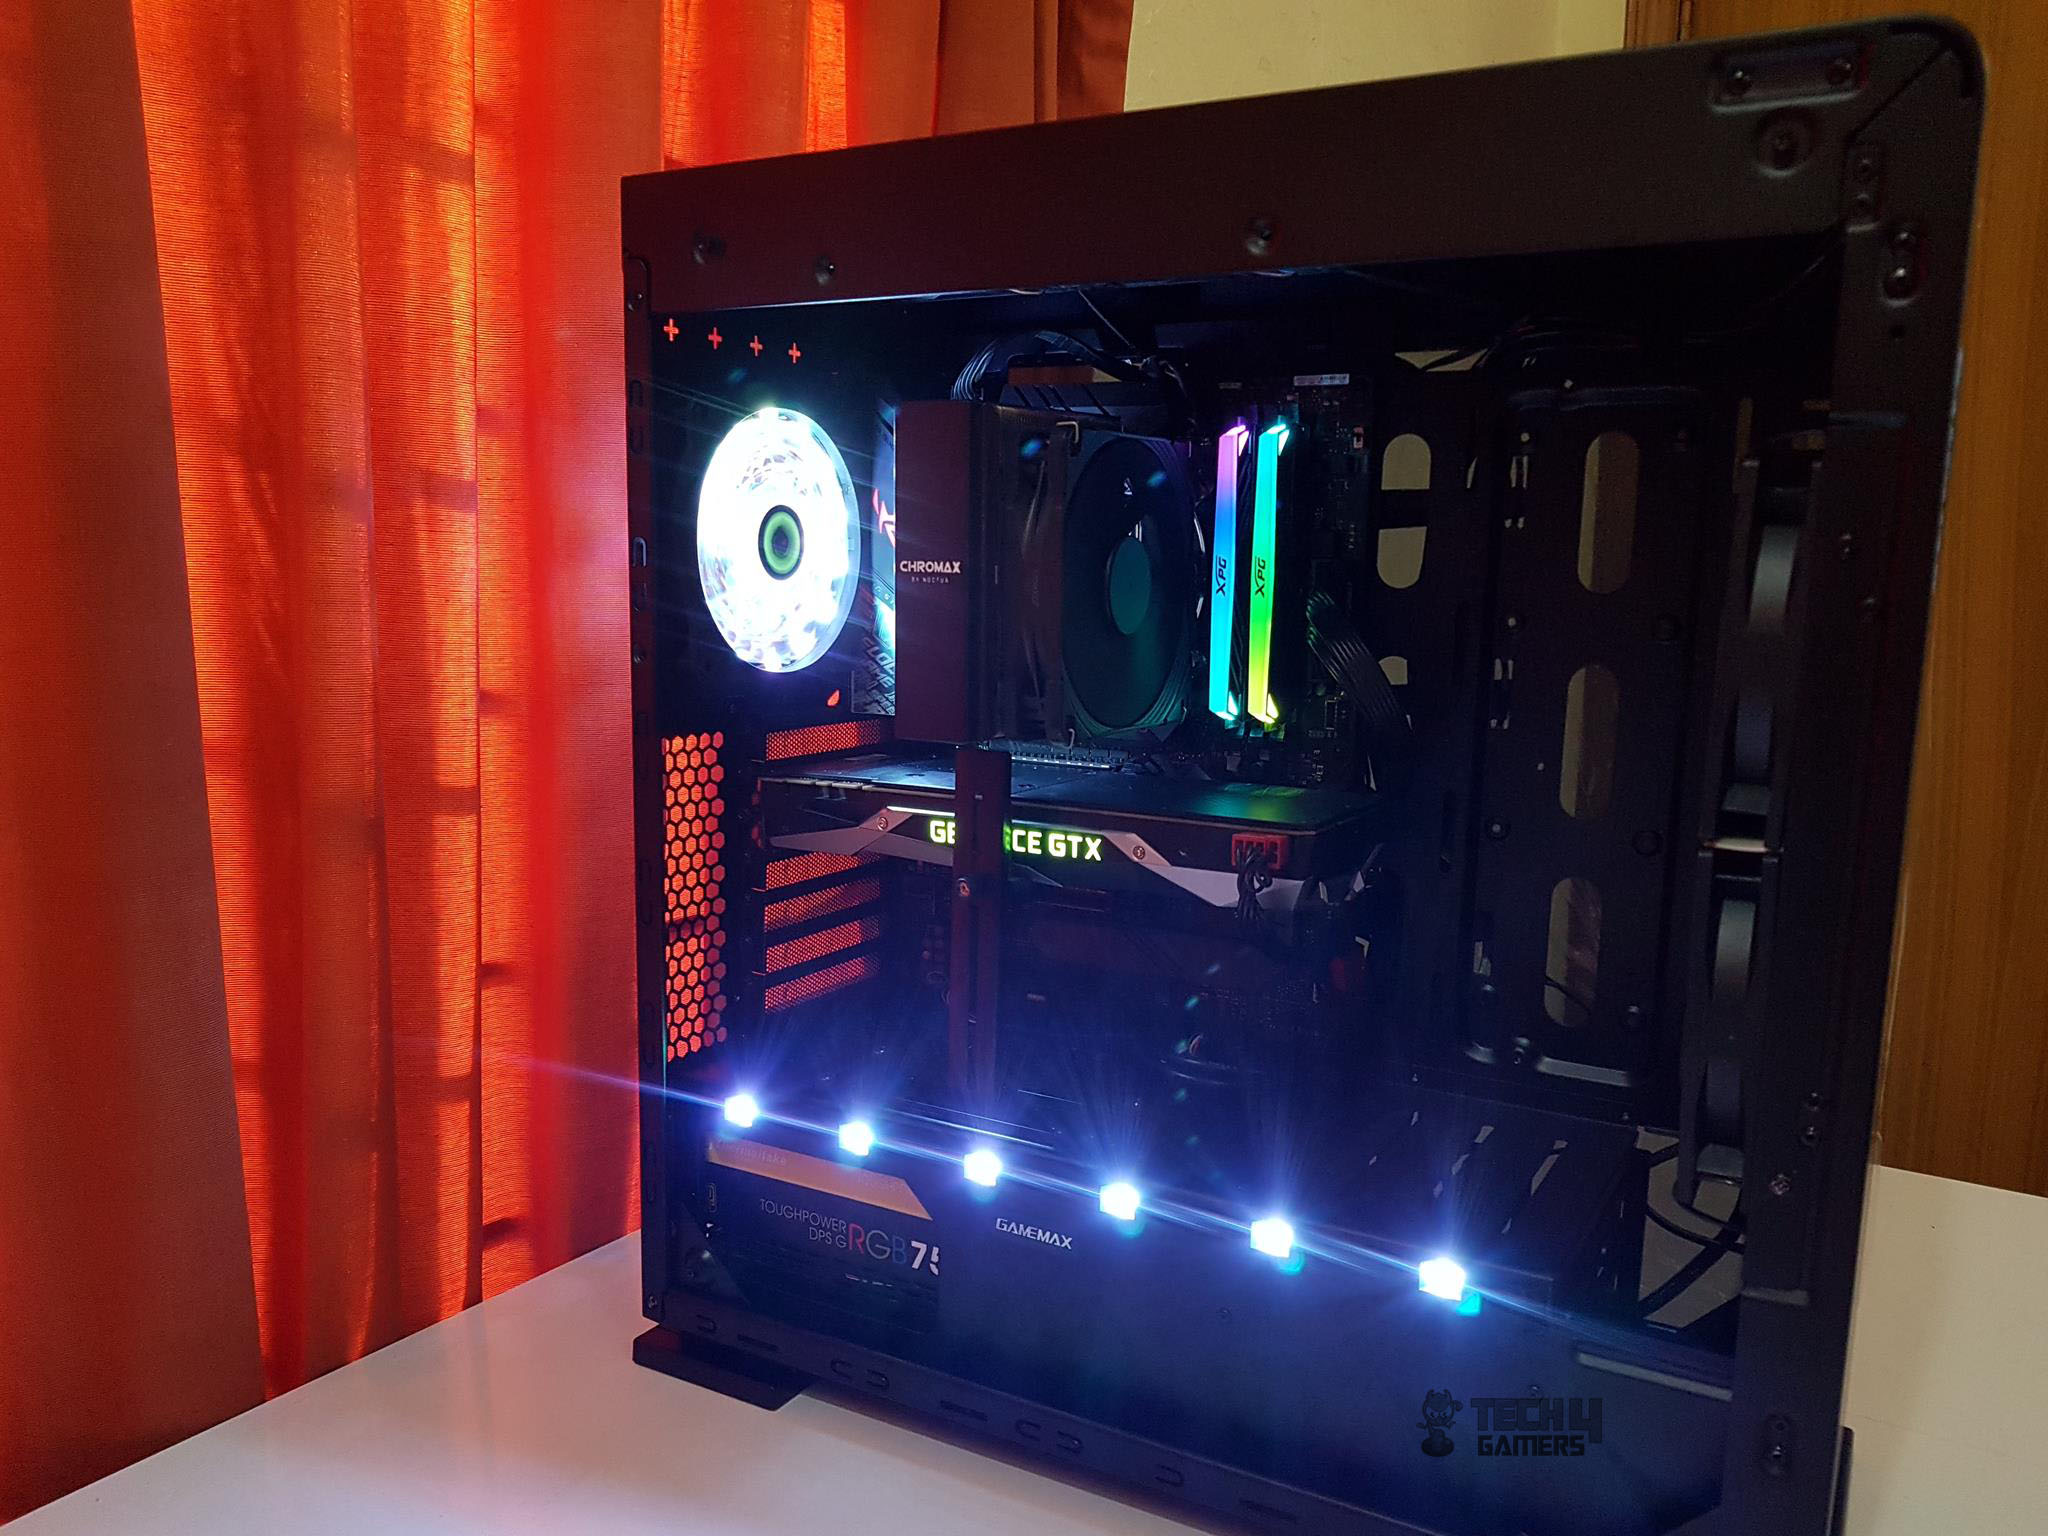
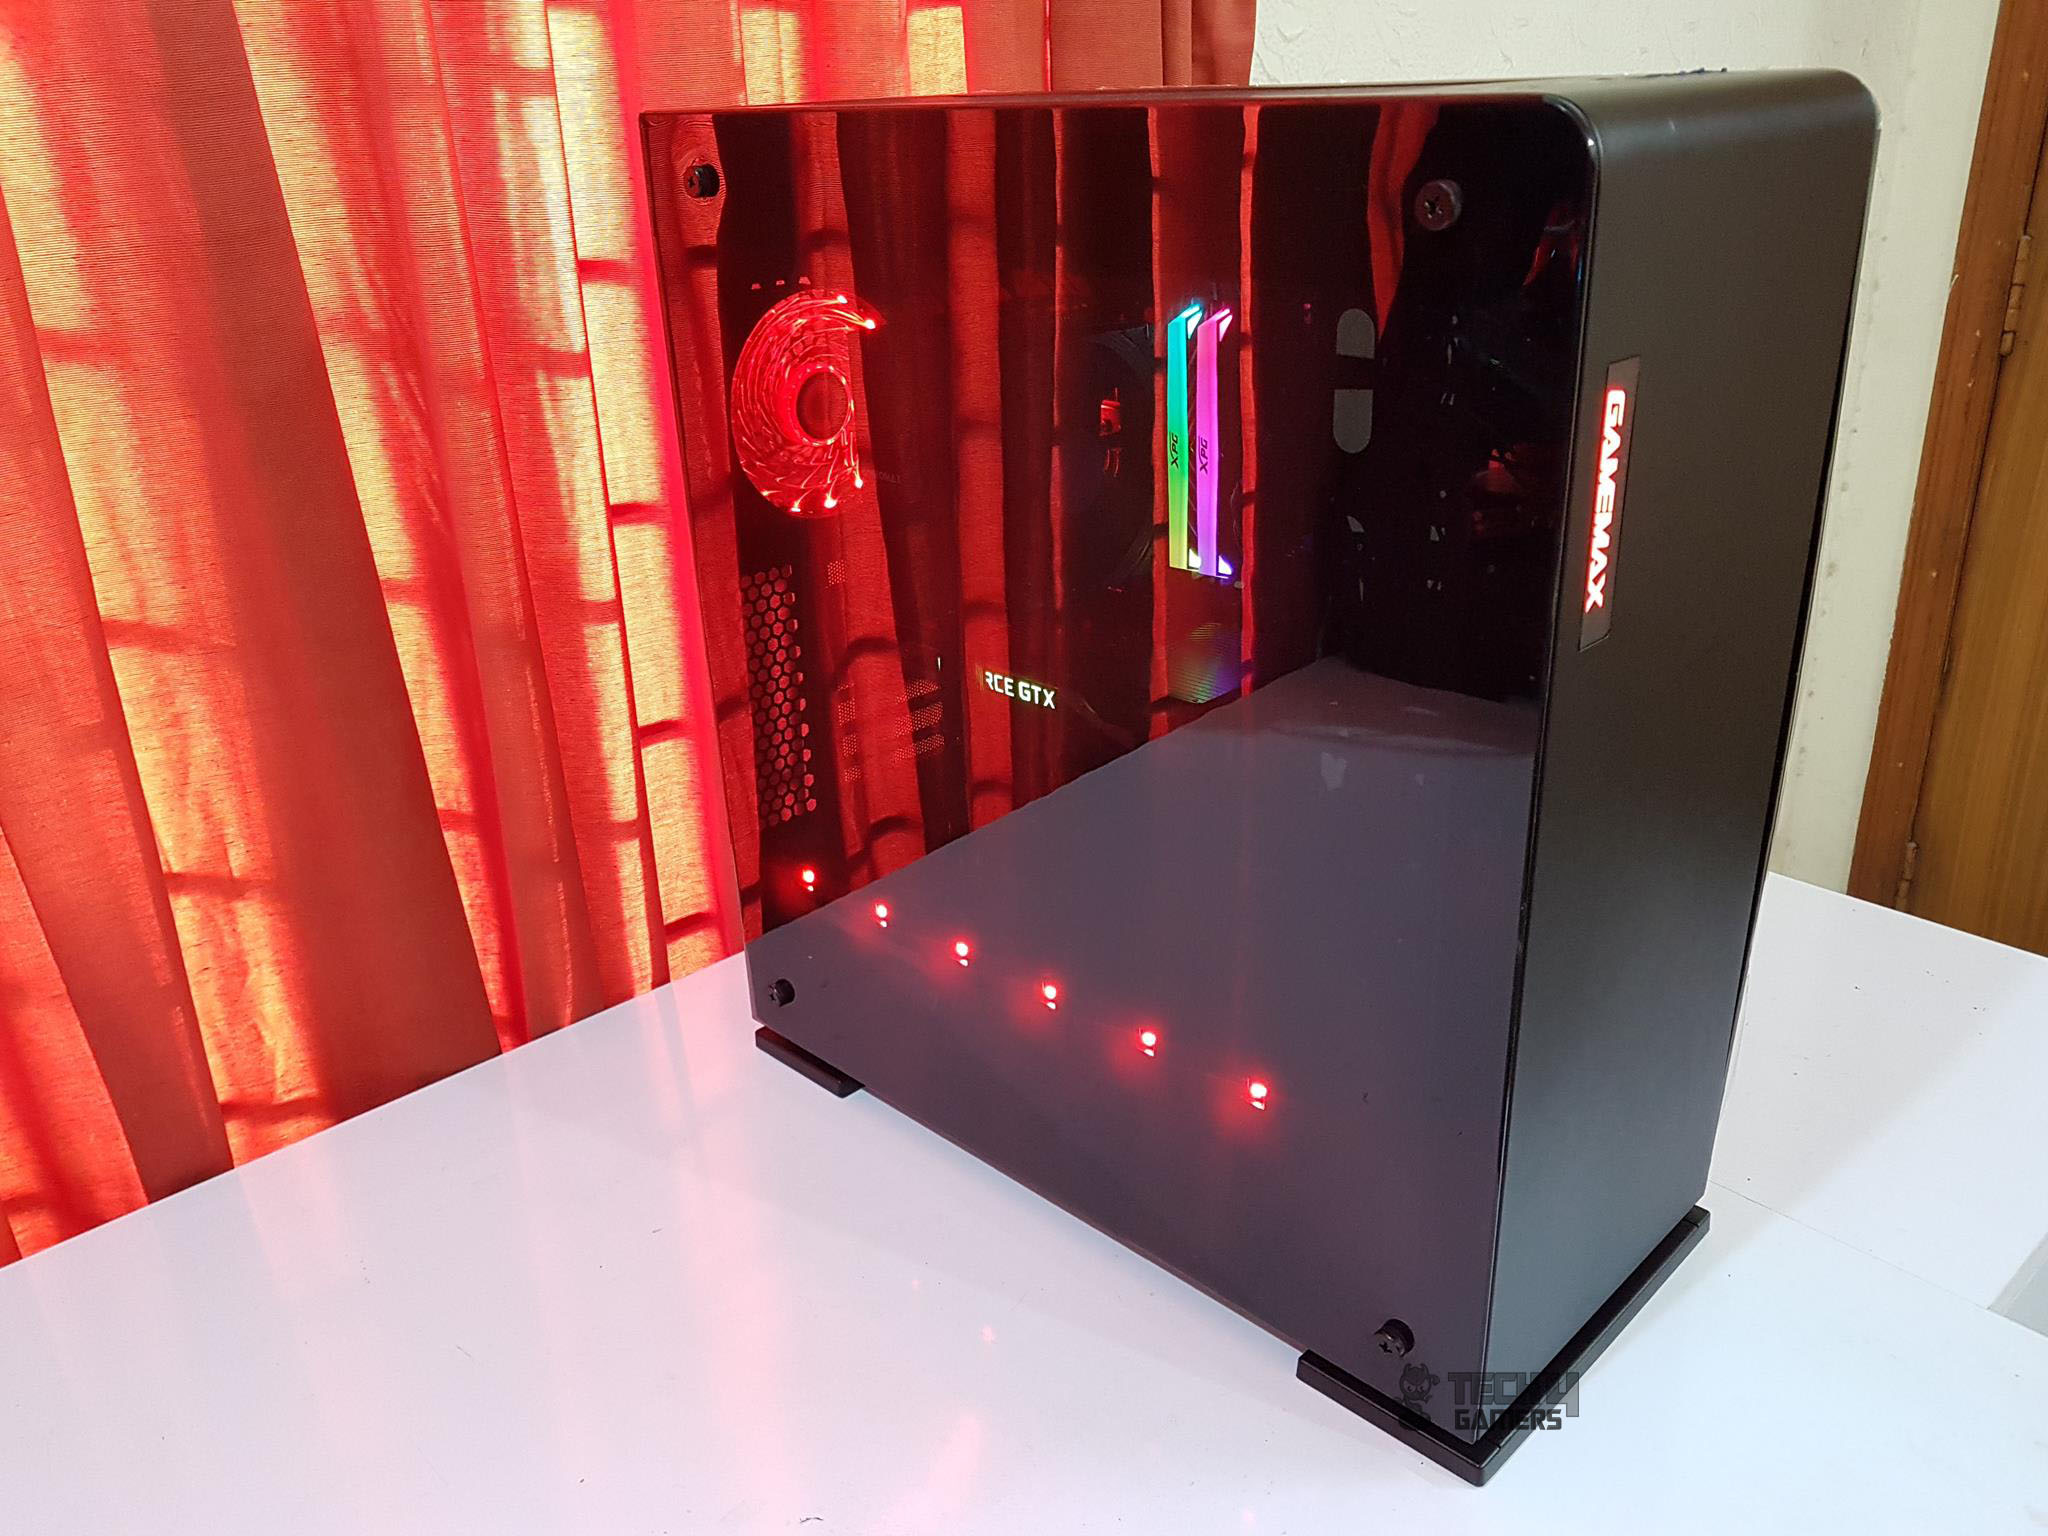
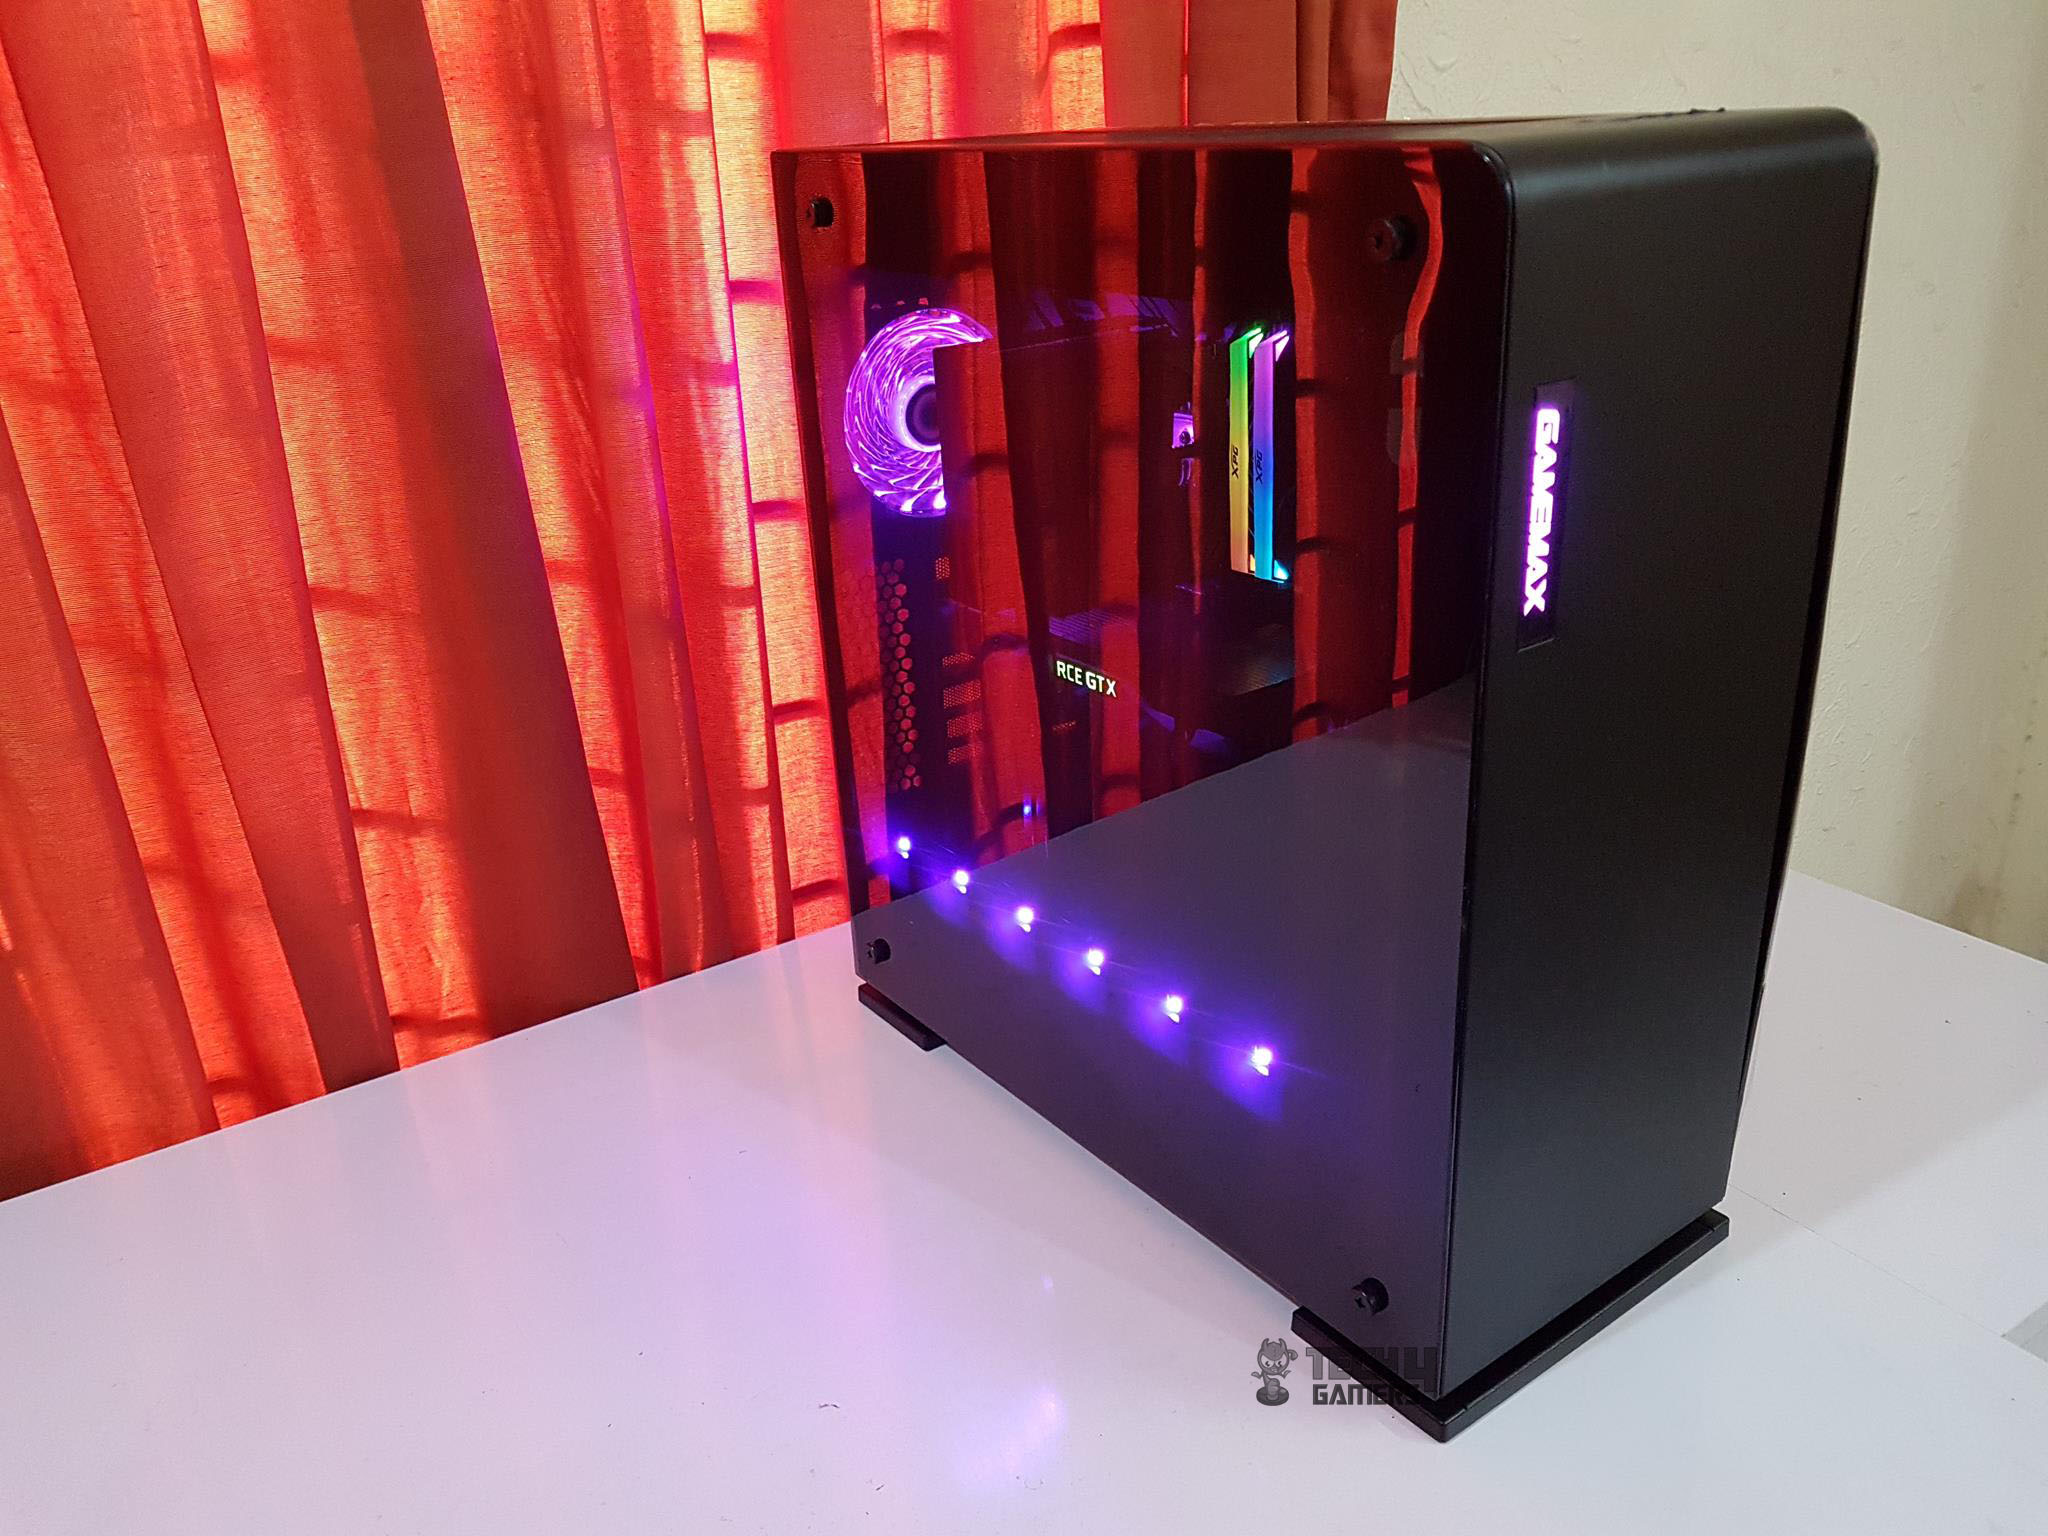
Pressing the LED button on the front I/O panel will control the lighting effects on this chassis. Initially, the lighting will be off so don’t panic. Short press the LED button and it will light up the RGB devices. Pressing the button each time will switch the modes which are in order of:
- Static (White, Blue, Yellow, Red, Green, Orange, Purple)
- Breathing mode
- Flashing mode
In any mode pressing and holding the button for 3 seconds will resort to the default static white color mode. Here are some pictures showing the RGB lighting effects:


Here are some precautions to avoid any damage:
- Don’t connect the 4-pin PWM connector to the 4-pin RGB header as it would reset the PC.
- Don’t connect the 4-pin PWM connector to the on/off header as it would damage the IC.
- The black color 2-pin connector is connected to the 4-pin PWM header it won’t light up the RGB zones though it won’t damage anything.
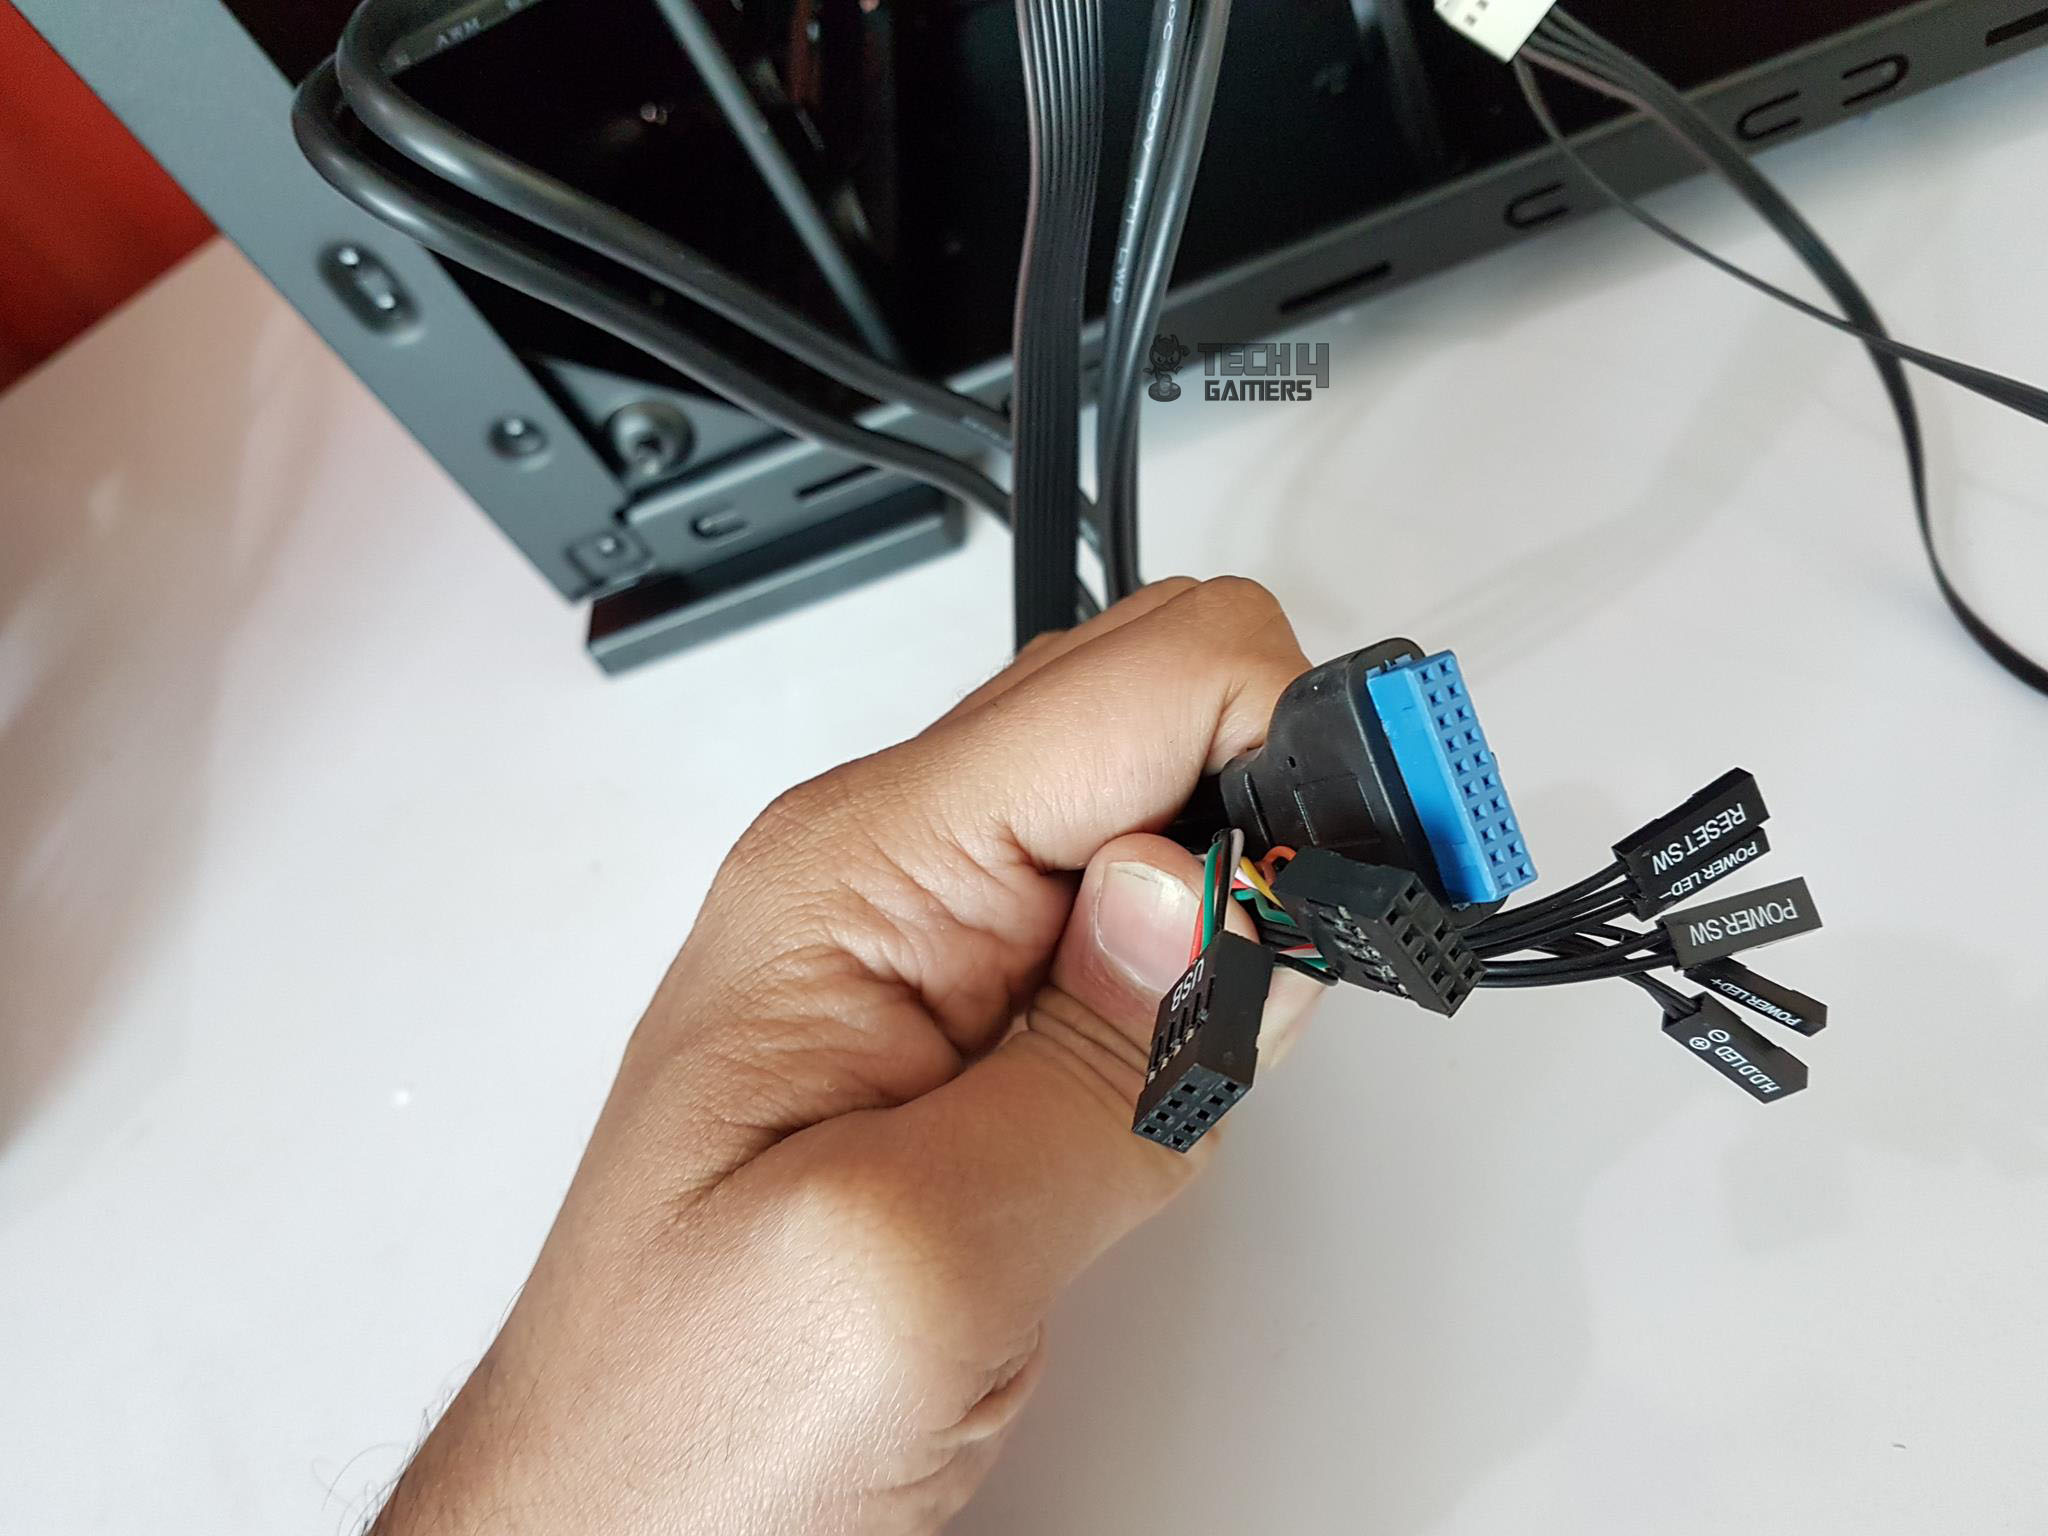
In the last, above is a picture of the front panel’s cables. These include:
- USB 3.0 Connector
- USB 2.0 Connector
- Front Panel HD Audio Connector
- System Panel connectors
Test Build And Observations
Following configuration has been used in the test build:
- Intel i7 8700k
- Asus Strix Z390E Gaming
- Noctua NH-U12S with Chromax Fan and cover
- Adata XPG D41 16GB Spectrix
- Nvidia GeForce GTX 1080 FE
- Adata XPG SX950U 240GB
- Thermaltake TP RGB 750W PSU
I started with the motherboard soon to realize that CPU power cable (EPS) should have been passed before installing the motherboard. Other than that, there is nothing peculiar about installing the hardware in this chassis.
The installation was smooth except that the fans mounted on the front could not be secured using the screws due to one coerced screw of the fan bracket. I ended up using the cable ties to install both fans.
The two 120mm fans were mounted on the front and the preinstalled RGB fan was at the rear. As the airflow is totally restricted from the front, I installed two more 120mm fans as intake on the top.
With this configuration, the CPU was doing 60.5°C under stress test on stock clocks and with overclocked 4.8GHz it was doing 76.5°C. Temperatures are certainly very healthy with proper airflow inside the chassis. The ambient was 20°C. The graphics card was at 85°C under stress test. This is clearly showing that front fans are choked.

Conclusion
The GAMEMAX M909 VEGA is an ATX Gaming chassis that the company is marketing as a full-tower chassis, though, in my opinion, it is not a full-tower chassis. It is somewhere sitting between a regular mid-tower and the full tower.
The dimension of this chassis is 210mm X 516mm X 491mm (WxHxD). It is made of 1.2mm SGCC, and the front panel is fully metallic. The chassis has transparent side panels on both sides, for which two variants are available in the market, namely Tempered Glass and Perspex.
The panels are finished in a dark black tint, and in order to see the building, one needs to have enough interior lighting.
The chassis has three RGB lighting zones. The front panel has one where the vertically printed GAMEMAX text lights up, an RGB 120mm fan at the rear, and the integrated RGB LED strip on the PSU shroud.
All these devices use the +12VGRB pin format for the RGB lighting. There is an RGB+PWM hub installed on the backside of the chassis which allows up to 5x RGB devices and 3x 3-pin fans to be connected.
For the PWM signal, there is a dedicated PWM in the header, which obviously is in a 4-pin format. All the integrated RGB zones are synced and controlled using the dedicated LED button located on the top panel’s front side.
The chassis has a solid front panel with no provision for any air intake. The front panel is made of metal. The base of the case from the front side has carbon fiber wrap to give it one exquisite touch, but it is done in an almost not-so-apparent location.
The top panel has a magnetic dust filter for easy cleaning. The user can install two 120mm fans on the front side using the fan bracket. The user can install up to three 120/140mm fans on the top. The rear could house only a 120mm fan.
The user can install a 240mm radiator on the front fan bracket though I see no point in doing that as fans mounted in this location would be completely choked off any air. There is a vented portion on the bottom side which is the only area where the air can be intake.
There is a possibility of installing up to 360mm radiator on the top. I could not install the Alphacool NexXxos XT45 radiator as it is a multi-port radiator, and its port plugs were obstructing the installation on the top. GAMEMAX should have considered all sorts of possibilities before putting a claim of water cooling support on this chassis.
Similarly, I was not able to install the Alphacool Eisbecher 250mm reservoir/pump combo unit simply because of its sheer size. Tell me again, is this a full tower I was dealing with? AIOs should not be an issue inside this chassis whatsoever.
This chassis has 7 PCIe slot covers. The chassis has a dedicated PSU shroud that does not run on the entire length of the chassis. It has a vented portion on top of the PSU mount and cutouts on top of the drive cage.
Thankfully, there was a proper cutout near the motherboard to route the cables for connectivity on the bottom of the motherboard. Another distinct feature of this chassis is the GPU support bracket. In terms of the storage area, this chassis does not have a 5.25” drive bay.
It can house up to 4x 2.5” drives or 3.5” drives, or a combination. The hard drive cage is fixed and can’t be removed. They have only provided one 2.5” mounting bracket, and it has poor finishing. The total length of the PSU area is 265mm.
The graphics card of length up to 455mm can be installed as long as there are no 120mm fans on the front. The supported height for the CPU Cooler is 170mm. The front panel has two USB 3.0 and two USB 2.0 ports, along with two audio jacks, a power, a reset button, and an LED button.
As much as I love the RGB lighting, particularly on the rear fan, at this price point, this chassis is not giving true value for your bucks as there are other competitive offerings like The Thermaltake View 32 TG RGB that come in the same price range and has a much better balance between the aesthetics and performance features plus it is with tempered glass panels on all four sides.
I am not advocating any other brand here, but this price is steep for this chassis for what it offers. This chassis could have made sense if this was the price for the Tempered Glass version and with a couple of more RGB fans.
We are thankful to PCFanatics for giving us the opportunity to review the GAMEMAX M909 VEGA ATX Gaming Chassis.

Thank you! Please share your positive feedback. 🔋
How could we improve this post? Please Help us. 😔
I am Wajih Hyder Chohan – a PC Hardware Nerd who always analyzes the latest products and reviews them. Usually, people call me boring, but I can’t limit my love for Hardware!


