 Threads
White Design!
Review Summary
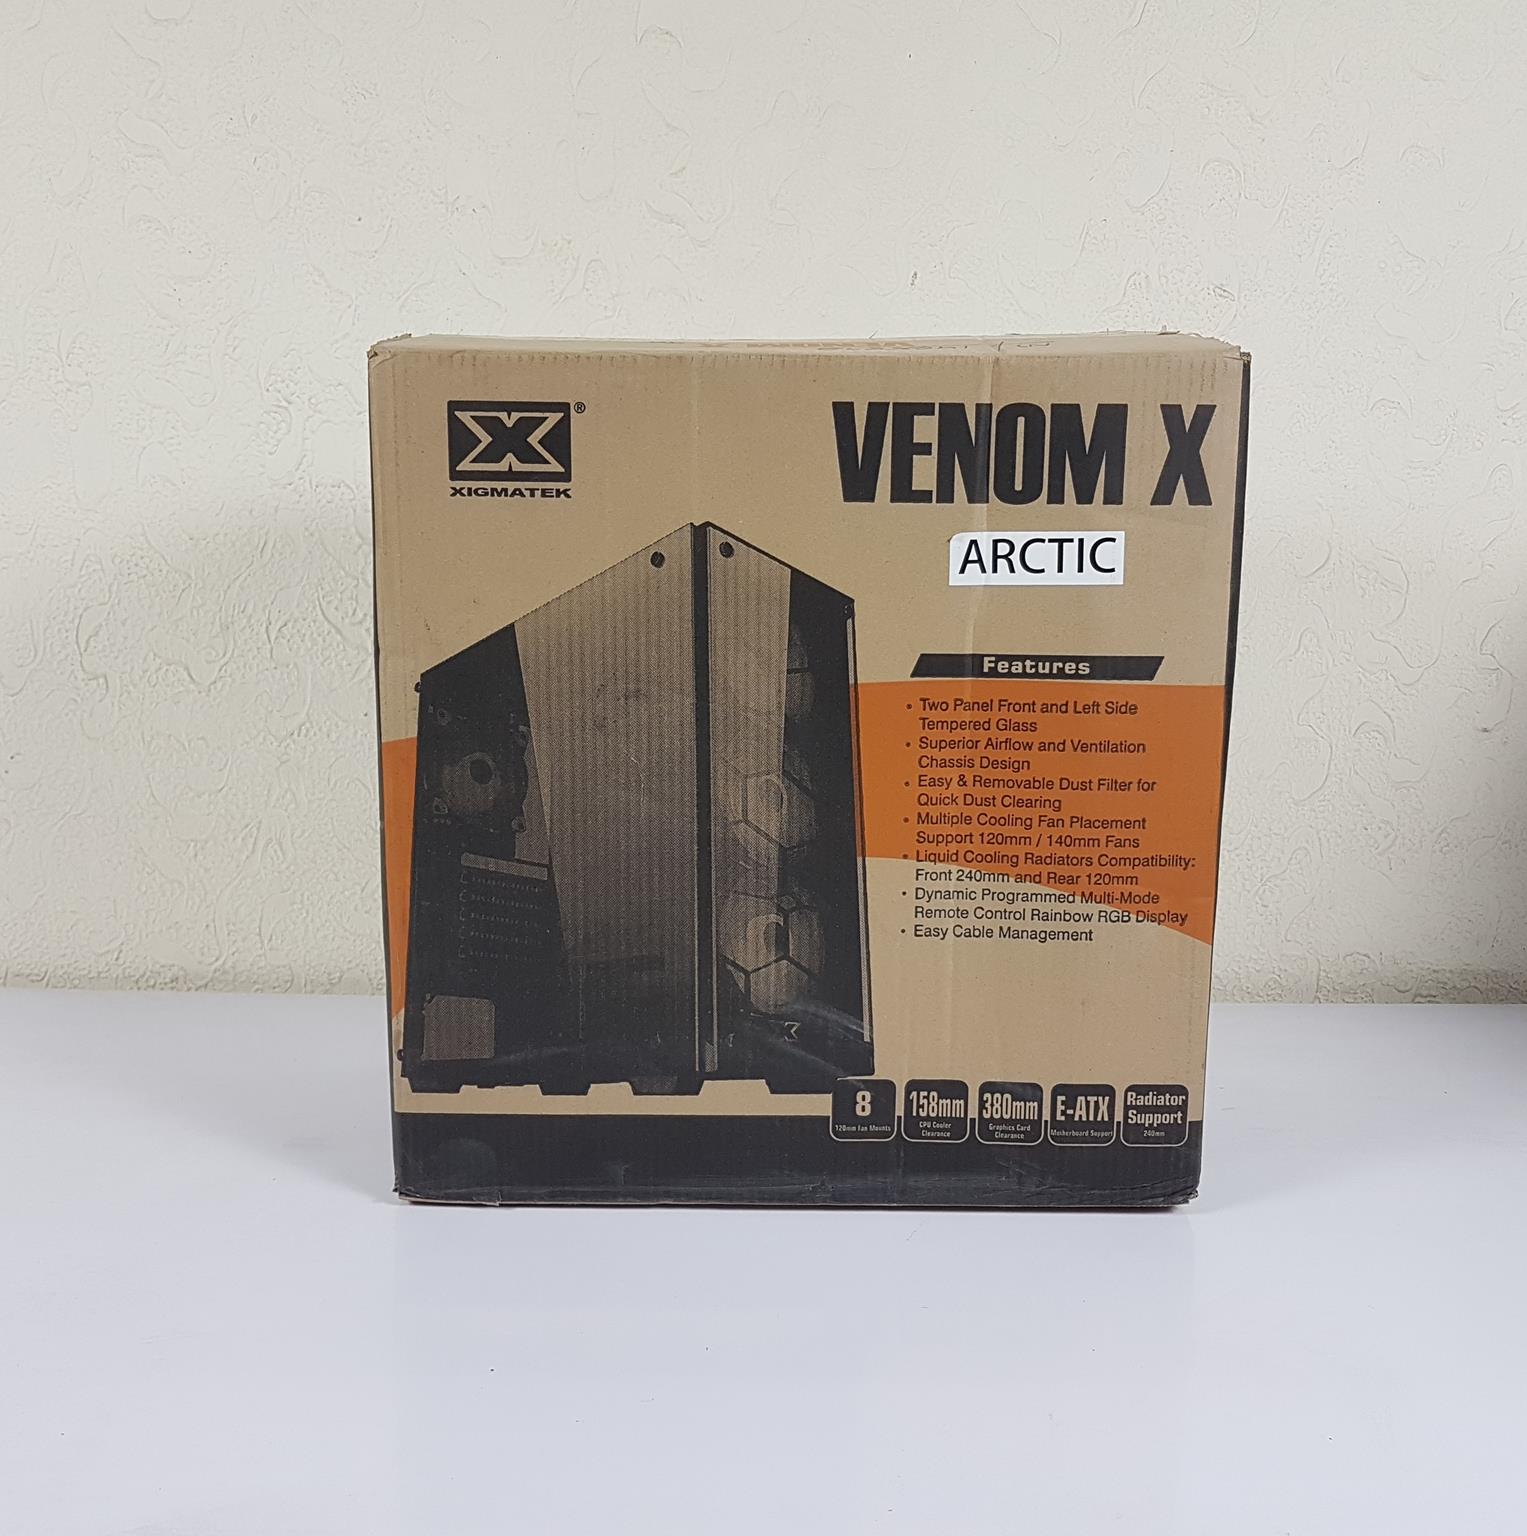
The XIGMATEK Venom X ARCTIC is a mid-tower PC case with a stylish design, RGB lighting, and support for E-ATX motherboards. It features tempered glass panels, showcasing a sleek build with 4 Rainbow RGB 120mm fans. While the case is compact and visually appealing, potential drawbacks include airflow restrictions affecting cooling performance, a non-functional RGB button, and some rough finishing on the chassis.
Hours Tested: 17

Overall
-
Performance - 7/10
7/10
-
Design - 8/10
8/10
-
Features - 7/10
7/10
-
Value - 7/10
7/10
Pros
- Supports E-ATX motherboards.
- 4 A-RGB fans included.
- Dual tempered glass panels.
- Easy cable management.
- Liquid cooling compatible.
- Compact design.
- Good storage capacity.
Cons
- Restricted airflow.
- Non-functional RGB button.
- Quality control issues.
- Proprietary fan connectors.
- No tool-less HDD installation.
- Standoff installation issues.


Texon-Ware unveiled XIGMATEK, showcasing a diverse lineup of products, from coolers to cases, PSUs, and Gaming Chairs. We got our hands on the Xigmatek Venom X —a mid-tower PC case supporting up to E-ATX motherboards. Packed with 4x A-RGB fans, two-panel tempered glass, and easy cable management, this chassis is a game-changer. Explore the ARCTIC variant in white and experience superior airflow, liquid cooling compatibility, and hassle-free dust clearing. It’s not just a case; it’s a statement.
Key Takeaways
- XIGMATEK Venom X is a mid-tower PC case with tempered glass panels, Rainbow RGB fans, and E-ATX motherboard support.
- It is suitable for users seeking a stylish mid-tower case to showcase their build with RGB lighting and support for high-end components.
- It is not recommended for users prioritizing optimal airflow, as the case may have restrictions, and the RGB button on the top panel is non-functional.
- Why you can trust Tech4Gamers: Our reviews are based on dedicated hands-on testing by our team of experienced hardware experts. Find out more about how we test.
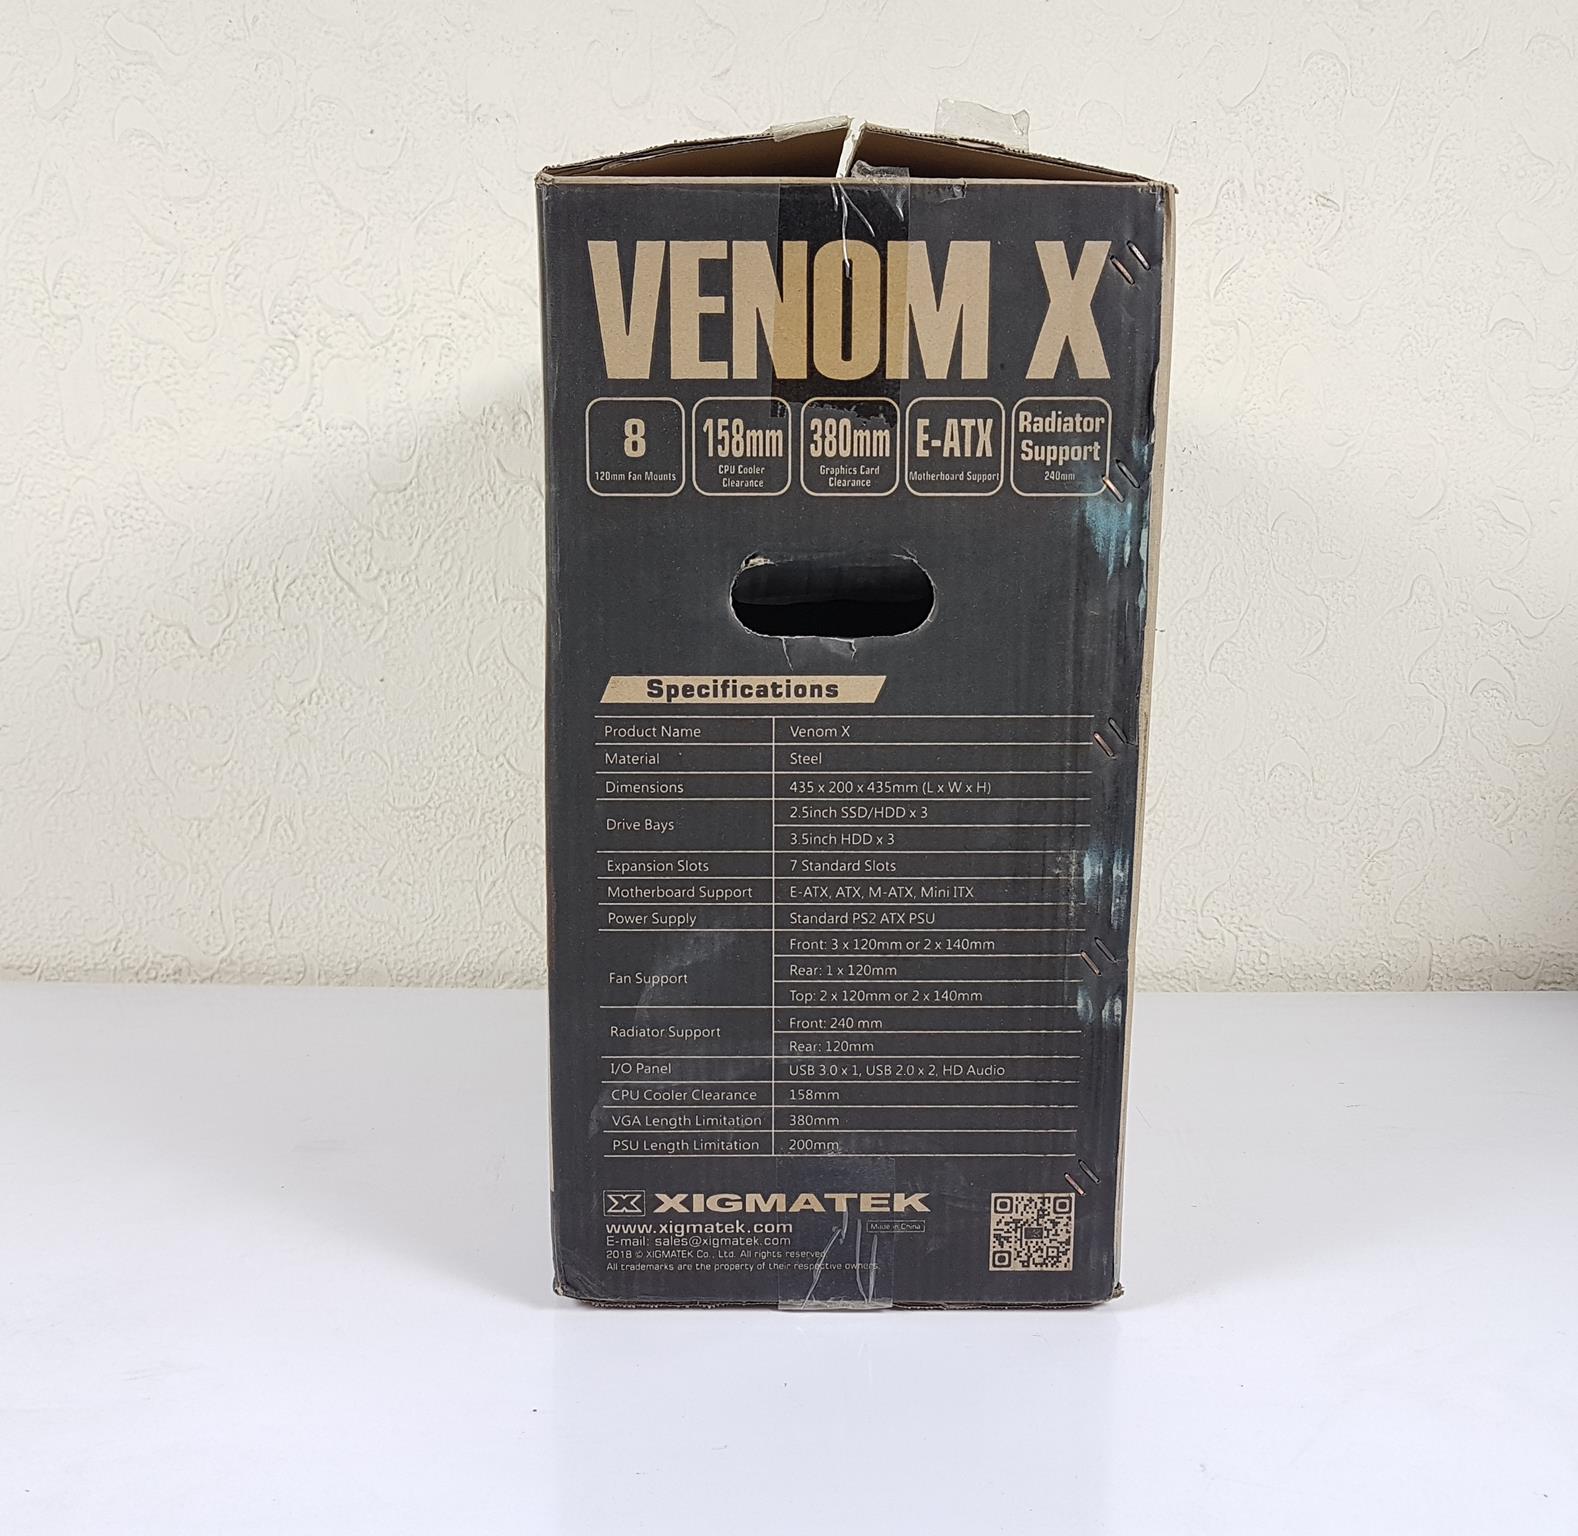
Here are the specifications of the Xigmatek Venom X PC Case.
| Property | Specifications |
|---|---|
| Product Name | Venom X |
| Product Number | EN41756 |
| Material | Steel |
| Dimensions | 435 x 200 x 435mm (L x W x H) |
| Drive Bays | 2.5inch SSD/HDD x 3 – 3.5inch HDD x 3 |
| Expansion Slots | 7 Standard Slots |
| Motherboard Support | E-ATX, ATX, M-ATX, Mini ITX |
| Power Supply | Standard PS2 ATX PSU |
| Fan Support | Front: 3 x 120mm or 2 x 140mm – Rear: 1 x 120mm -Top: 2 x 120mm or 2 x 140mm |
| Radiator Support | Front: 240mm, Rear: 120mm |
| I/O | USB 3.0 x 1, USB 2.0 x 2, HD Audio |
| CPU Cooler Clearance | 158mm |
| VGA Length Limitation | 380mm |
| PSU Length Limitation | 200mm |
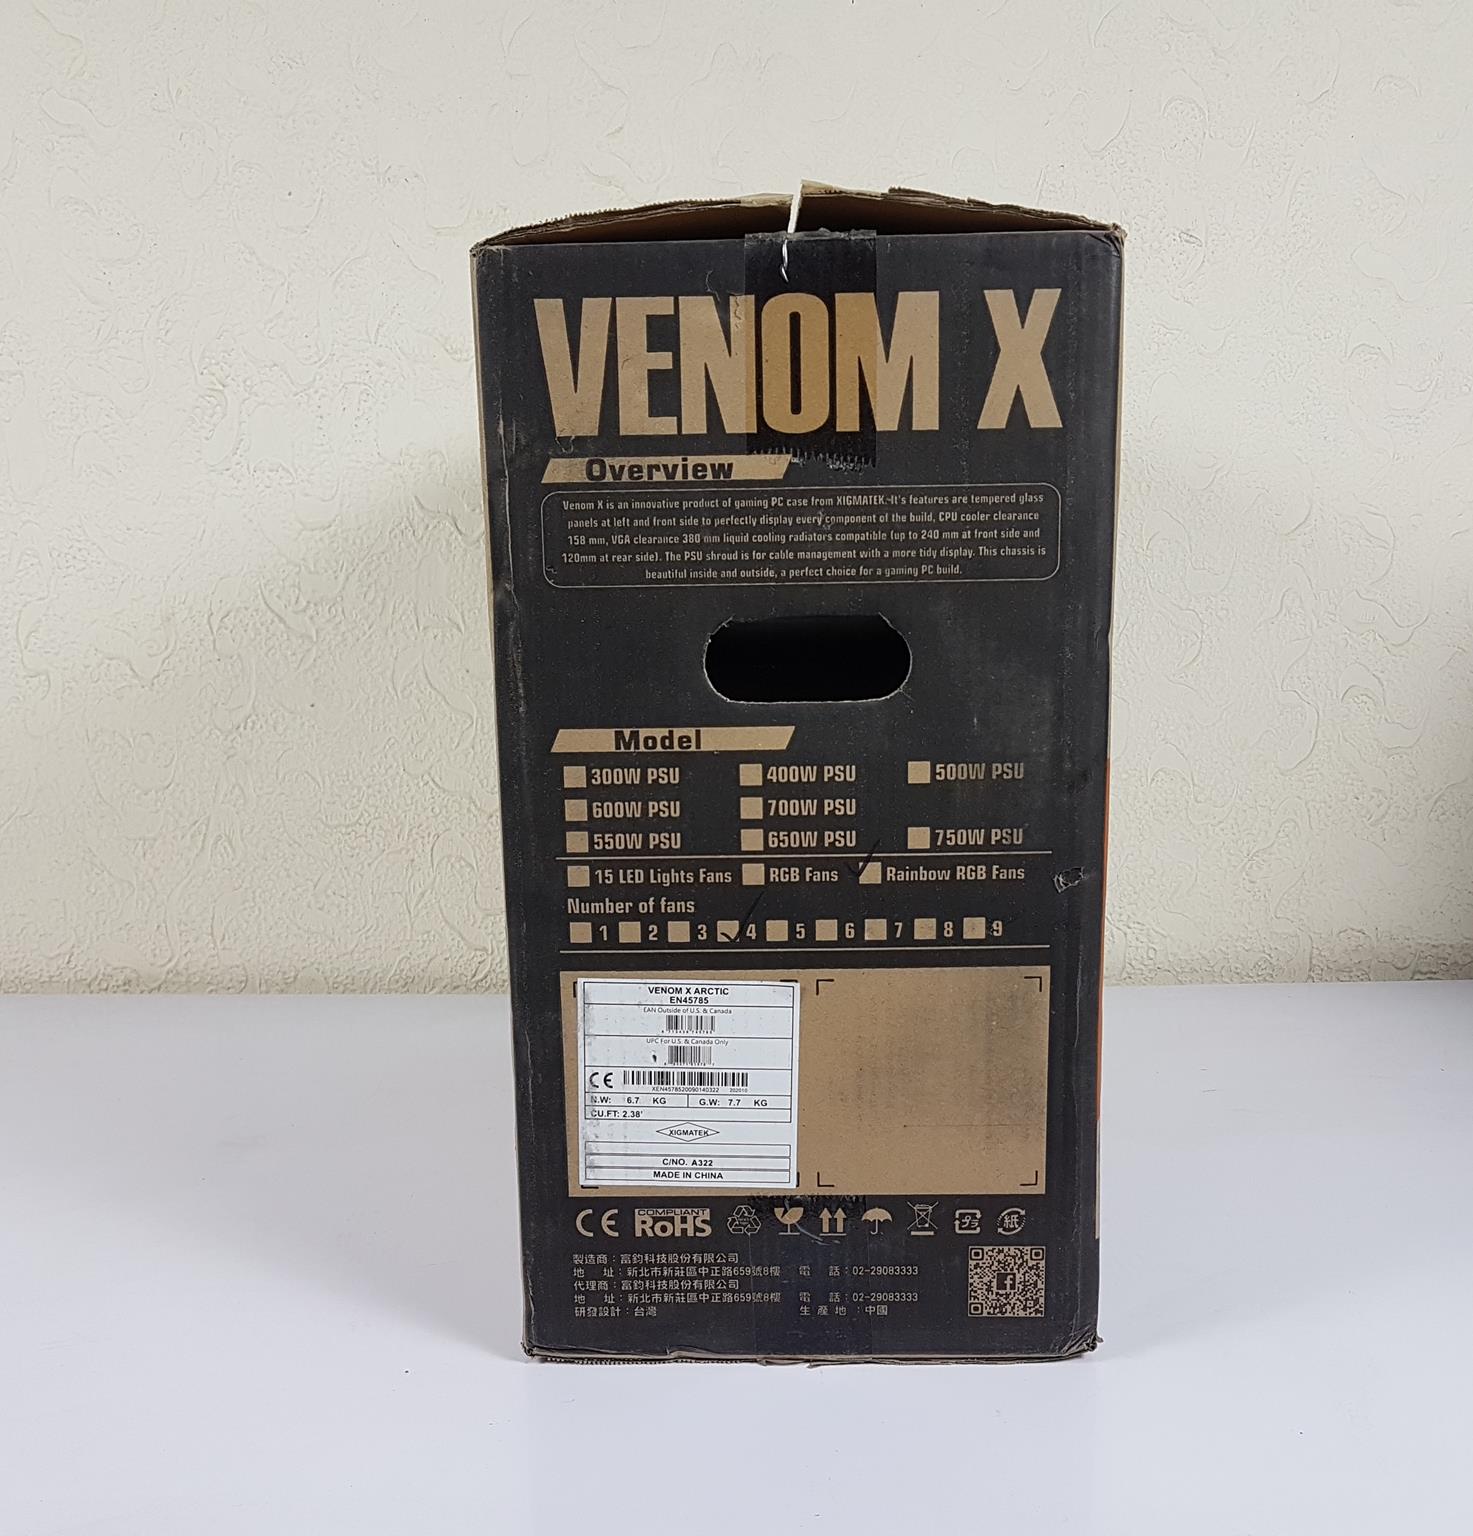
Packaging and Unboxing
The chassis is shipped inside a standard brown color cardboard box. The clearance aspect is highlighted as well, which is:
- 158mm clearance for the CPU Cooler’s height
- 380mm clearance for the graphics card’s length
- Motherboard support is up to E-ATX
- Radiator support is up to 240mm
- Up to 8x fan mounts (for 120mm size)
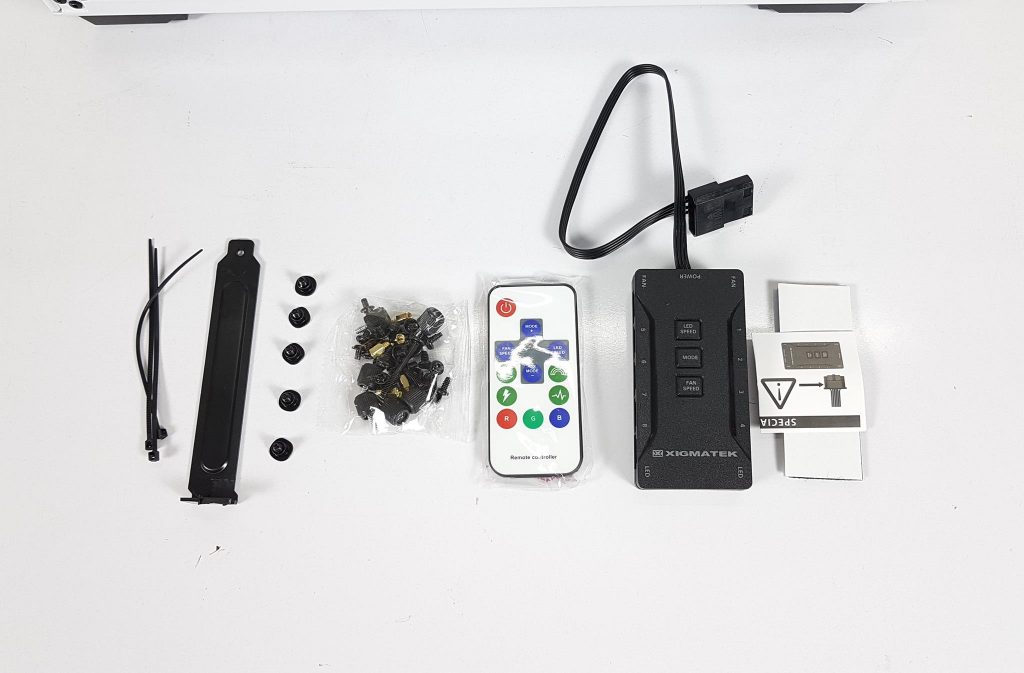
Box Contents
The following accessories are included in the box:
- 1x Plastic PCIe slot cover in black color
- 3x Zip Ties
- 1x Remote Control
- 1x Controller Hub
- 1x set of self-adhesive mount
- 1x container of the screws
Design
Let’s start with the exterior.
External Look
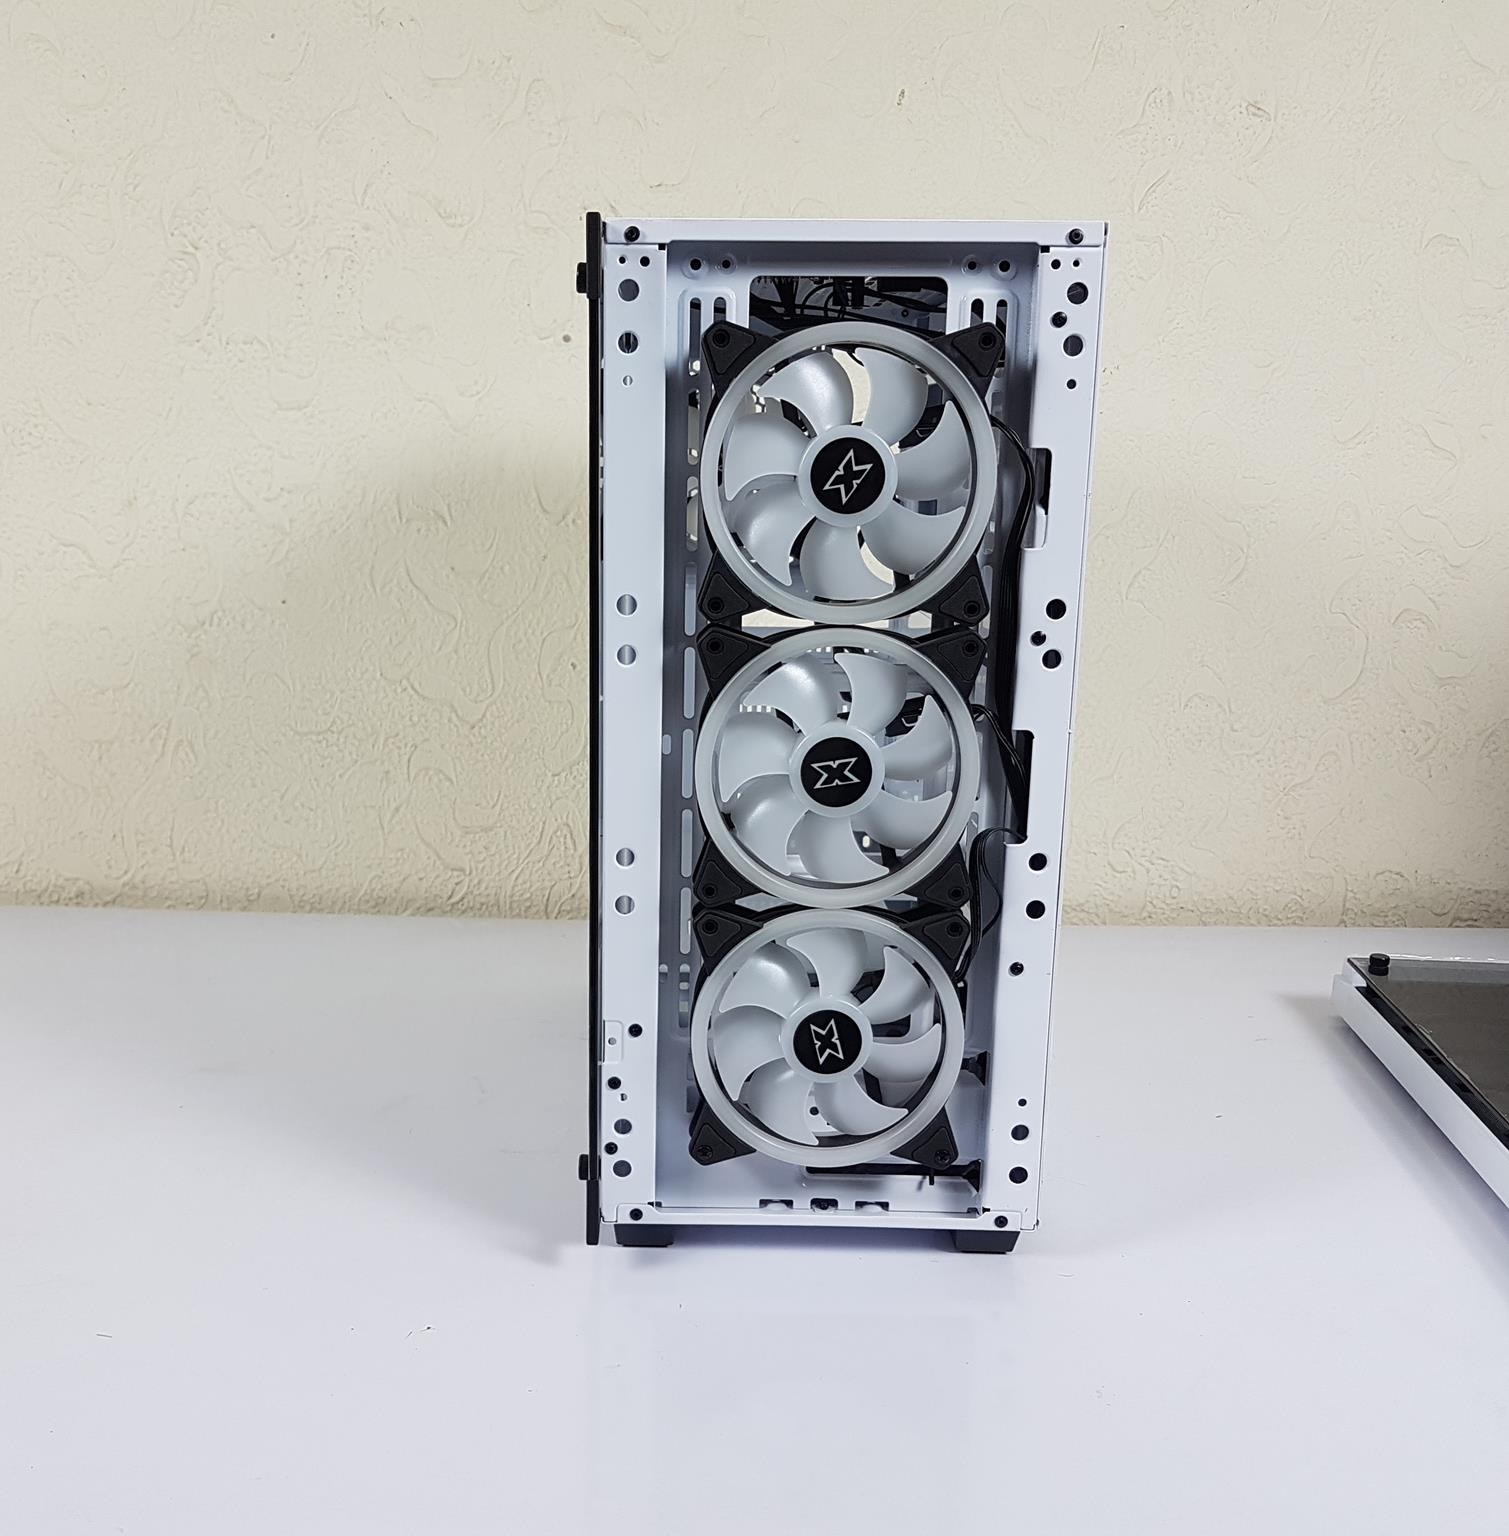
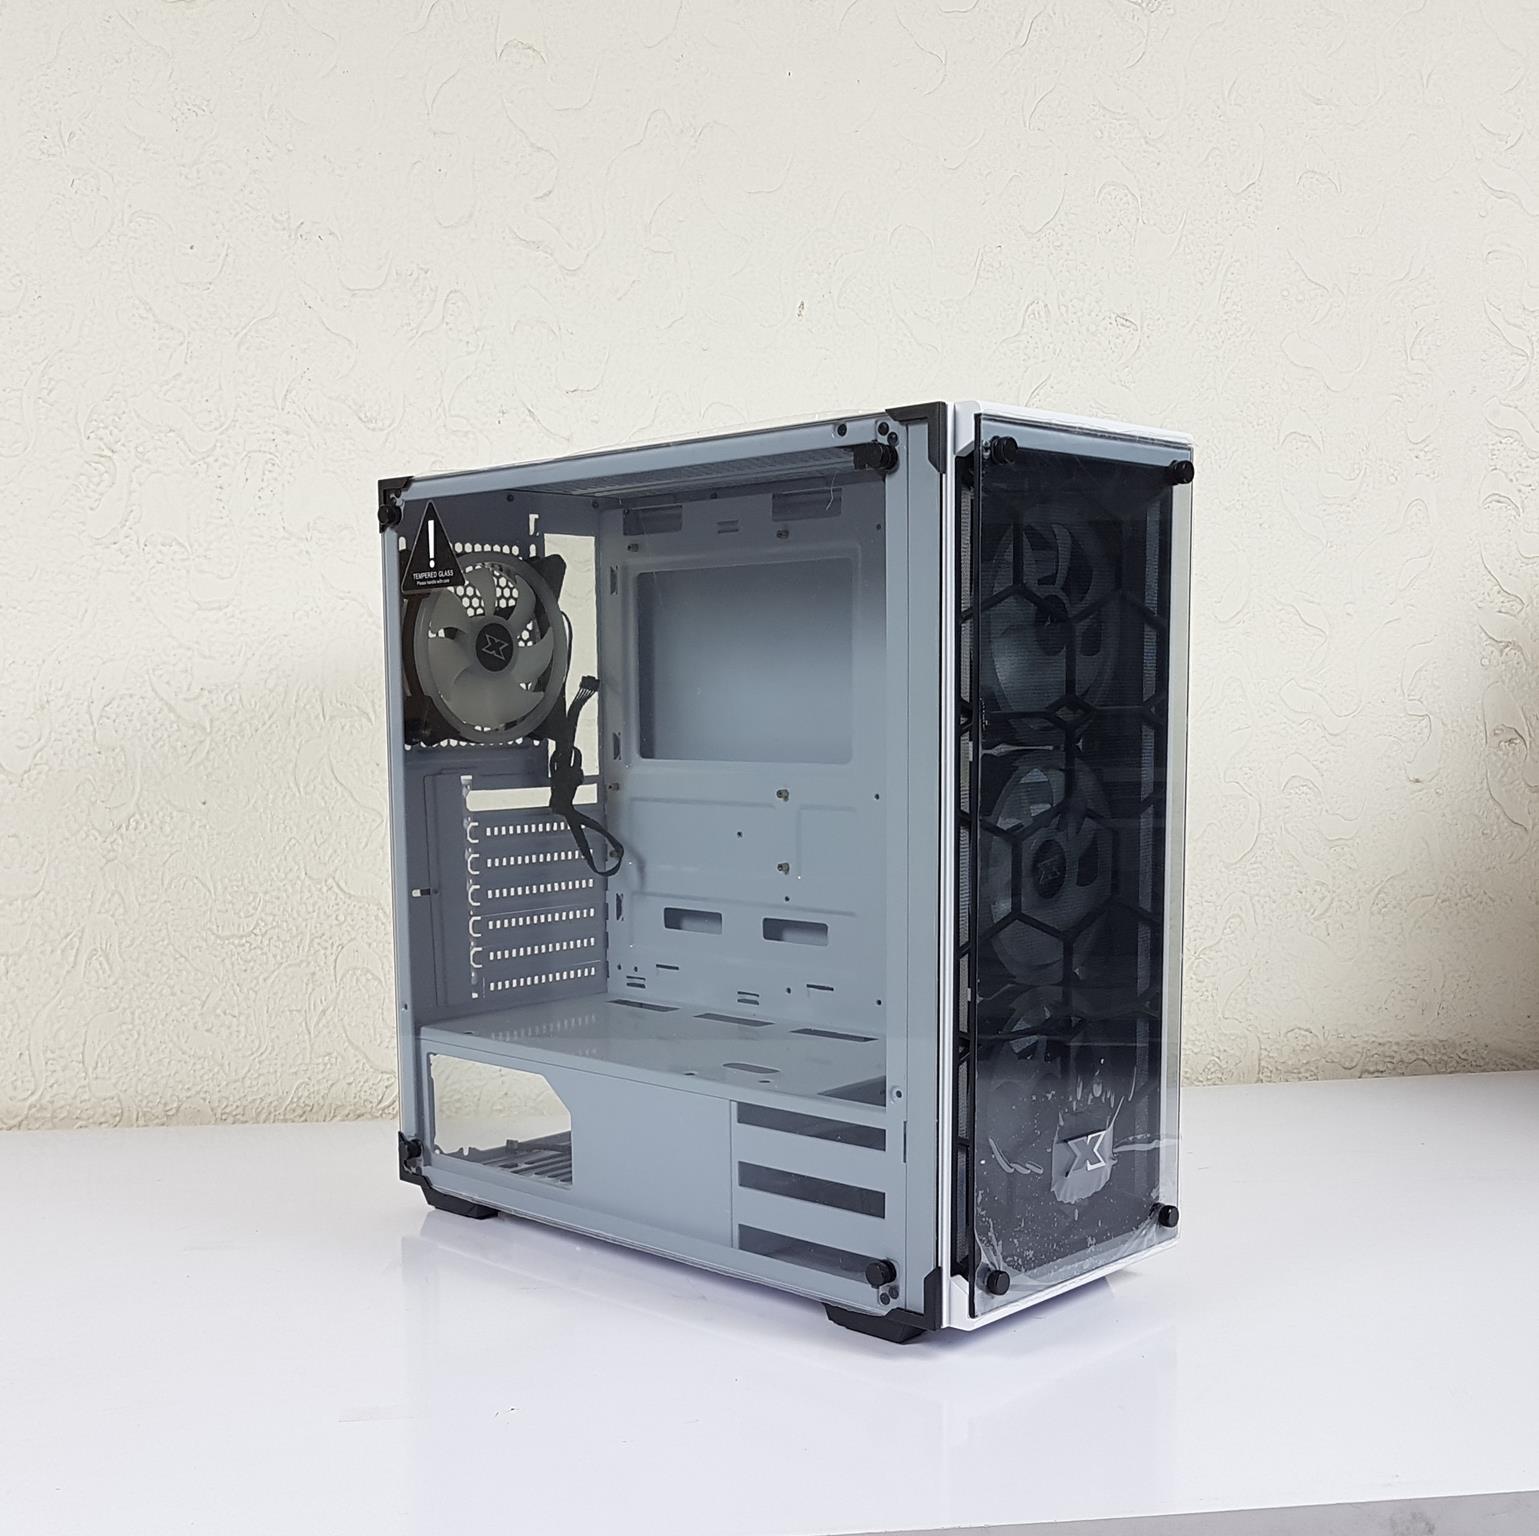
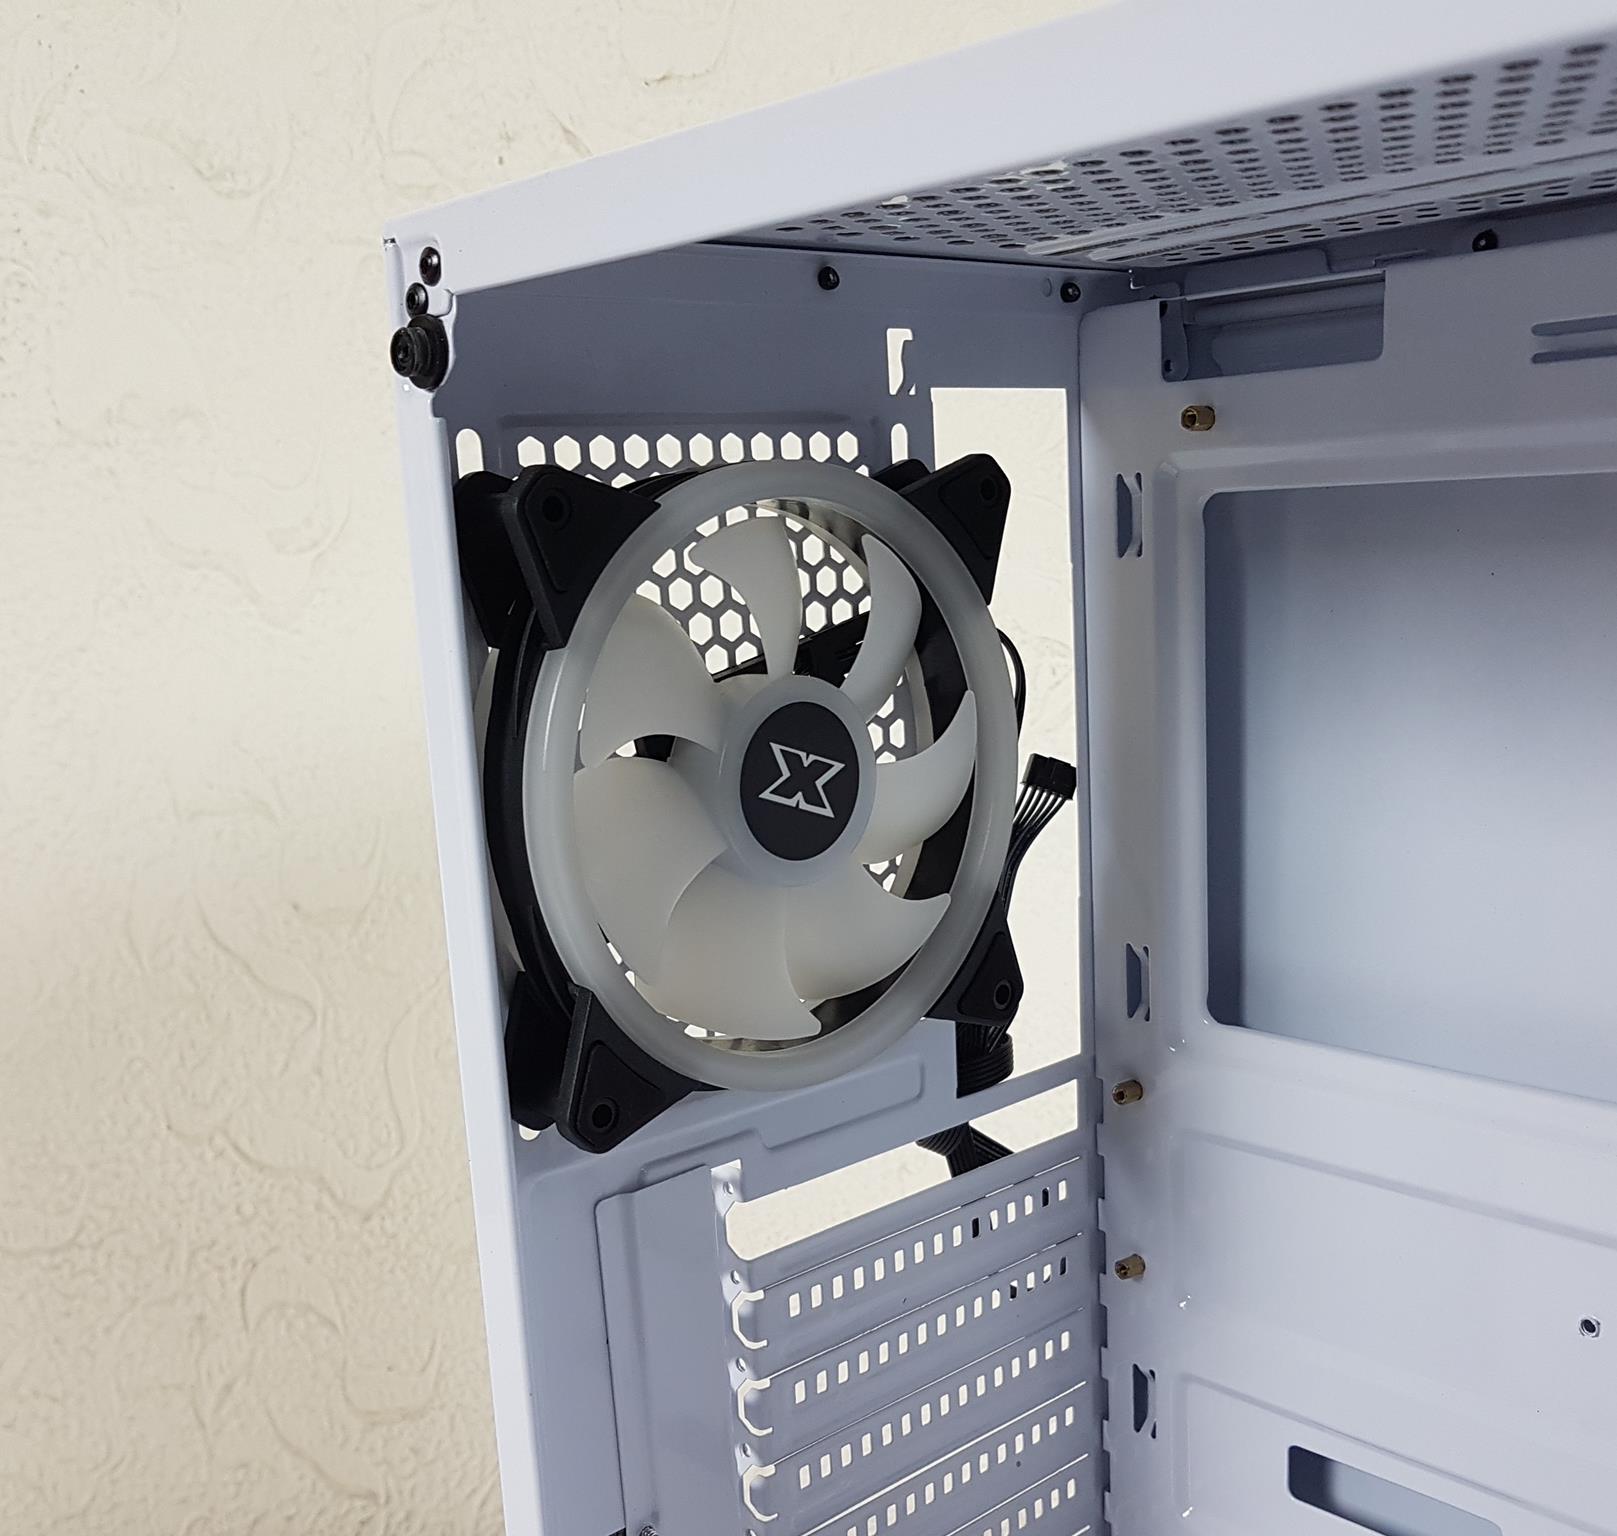
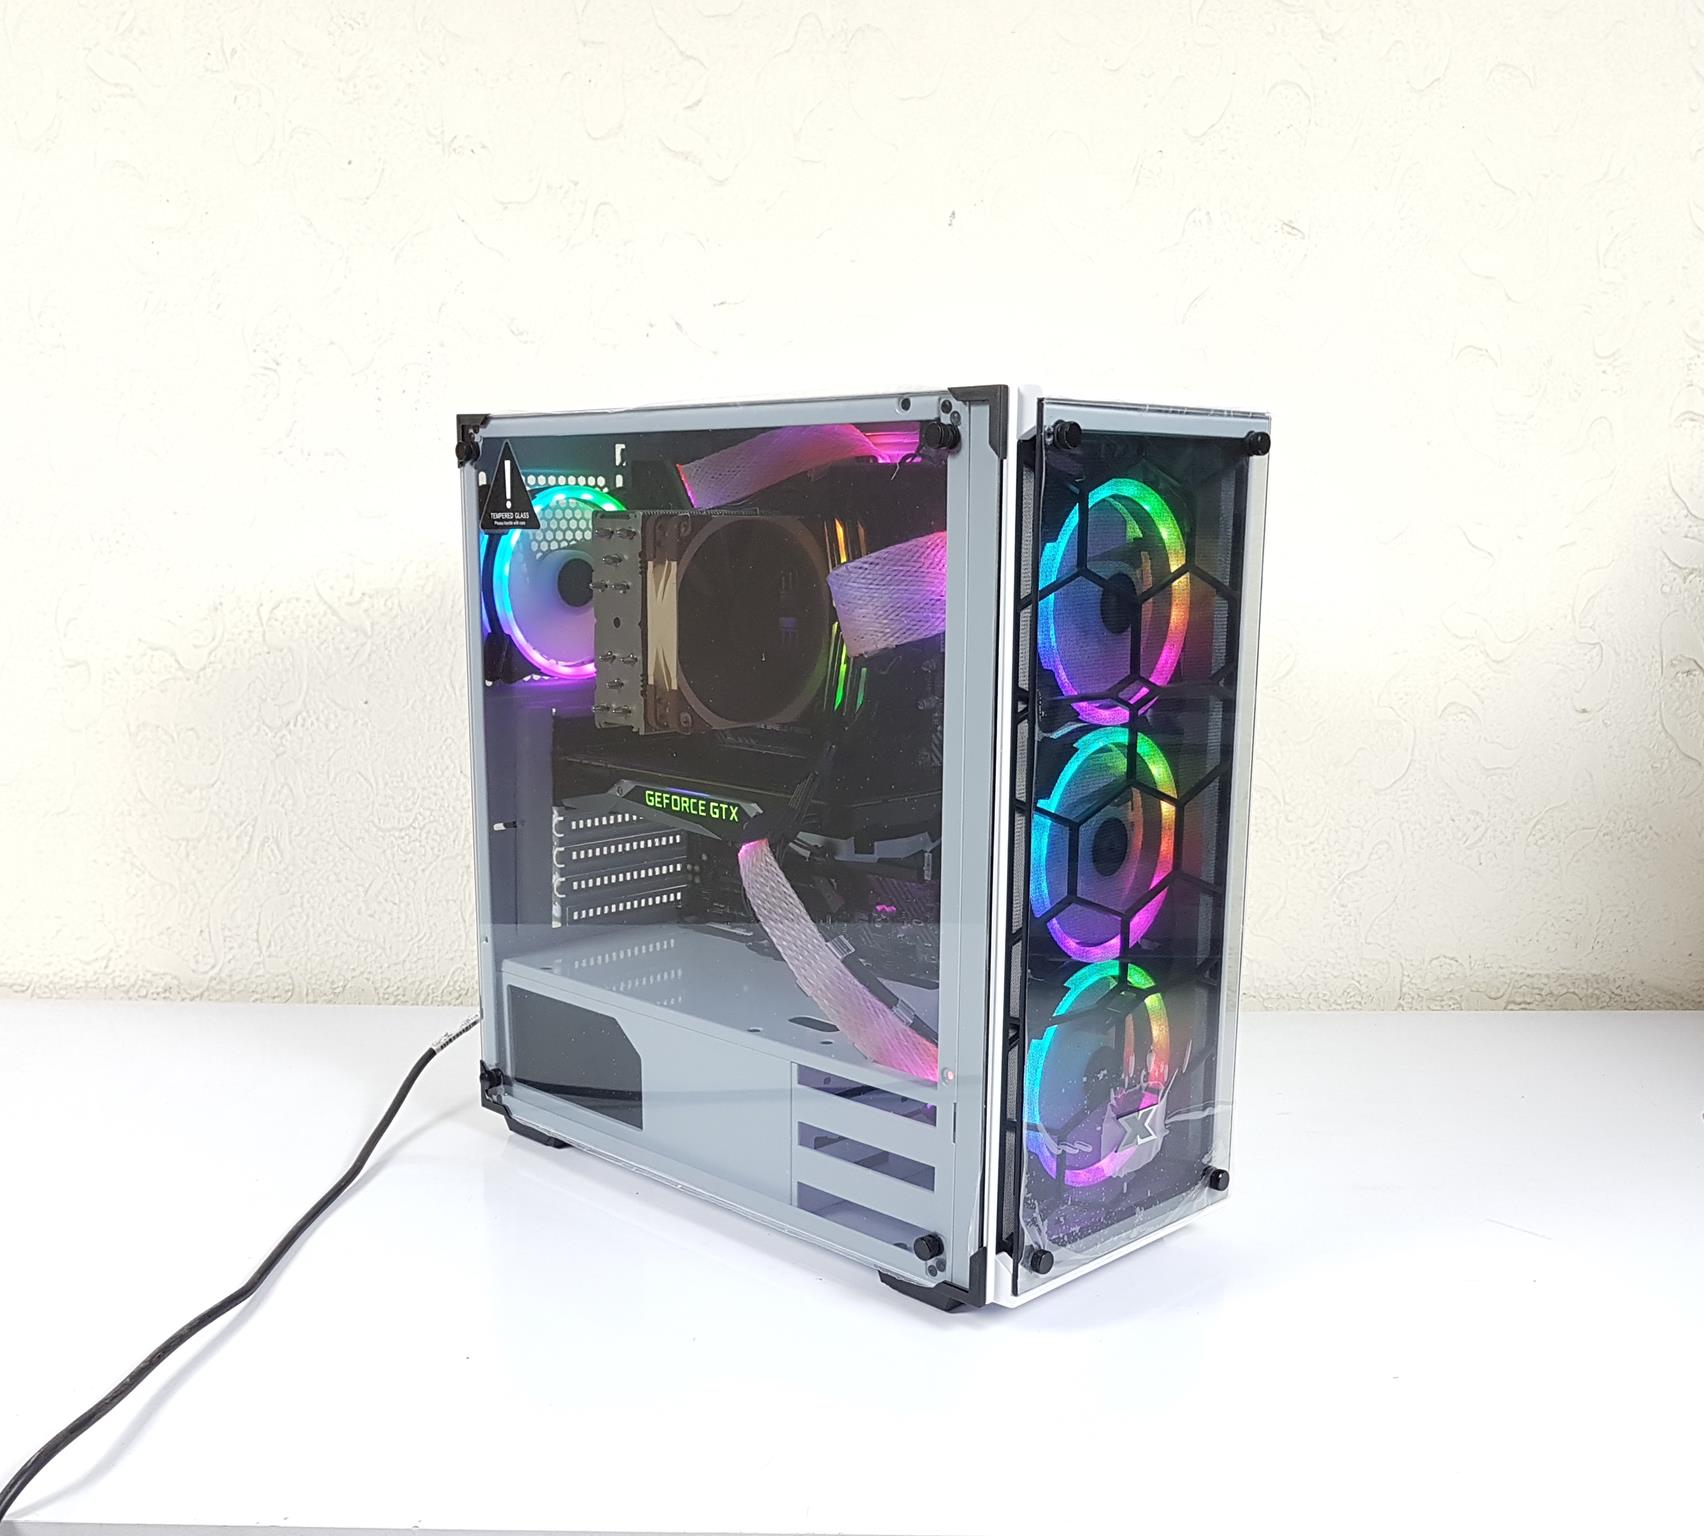
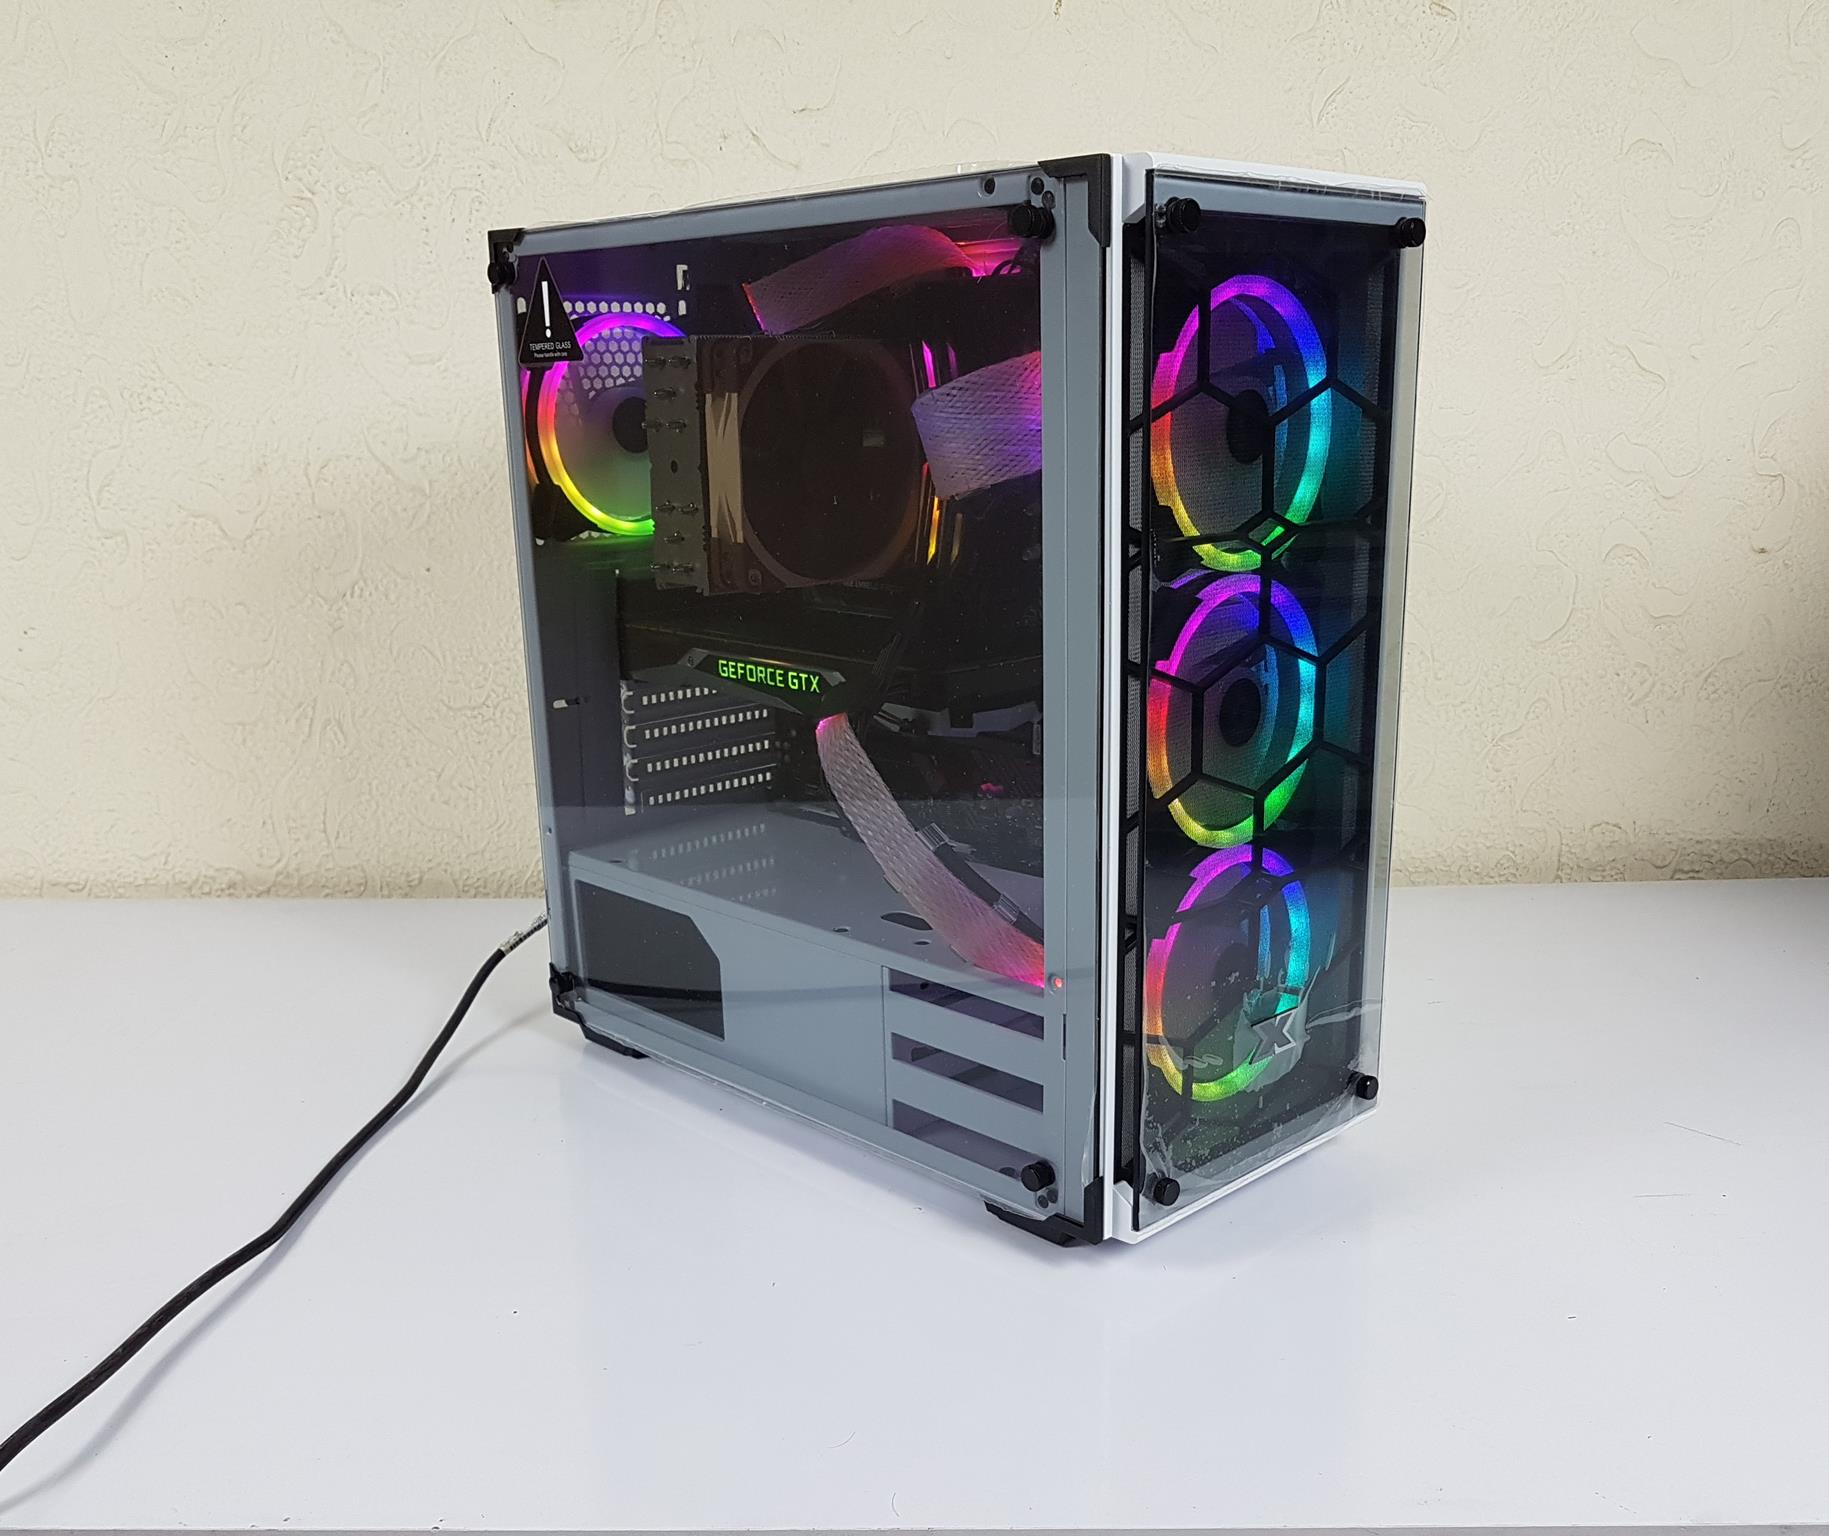
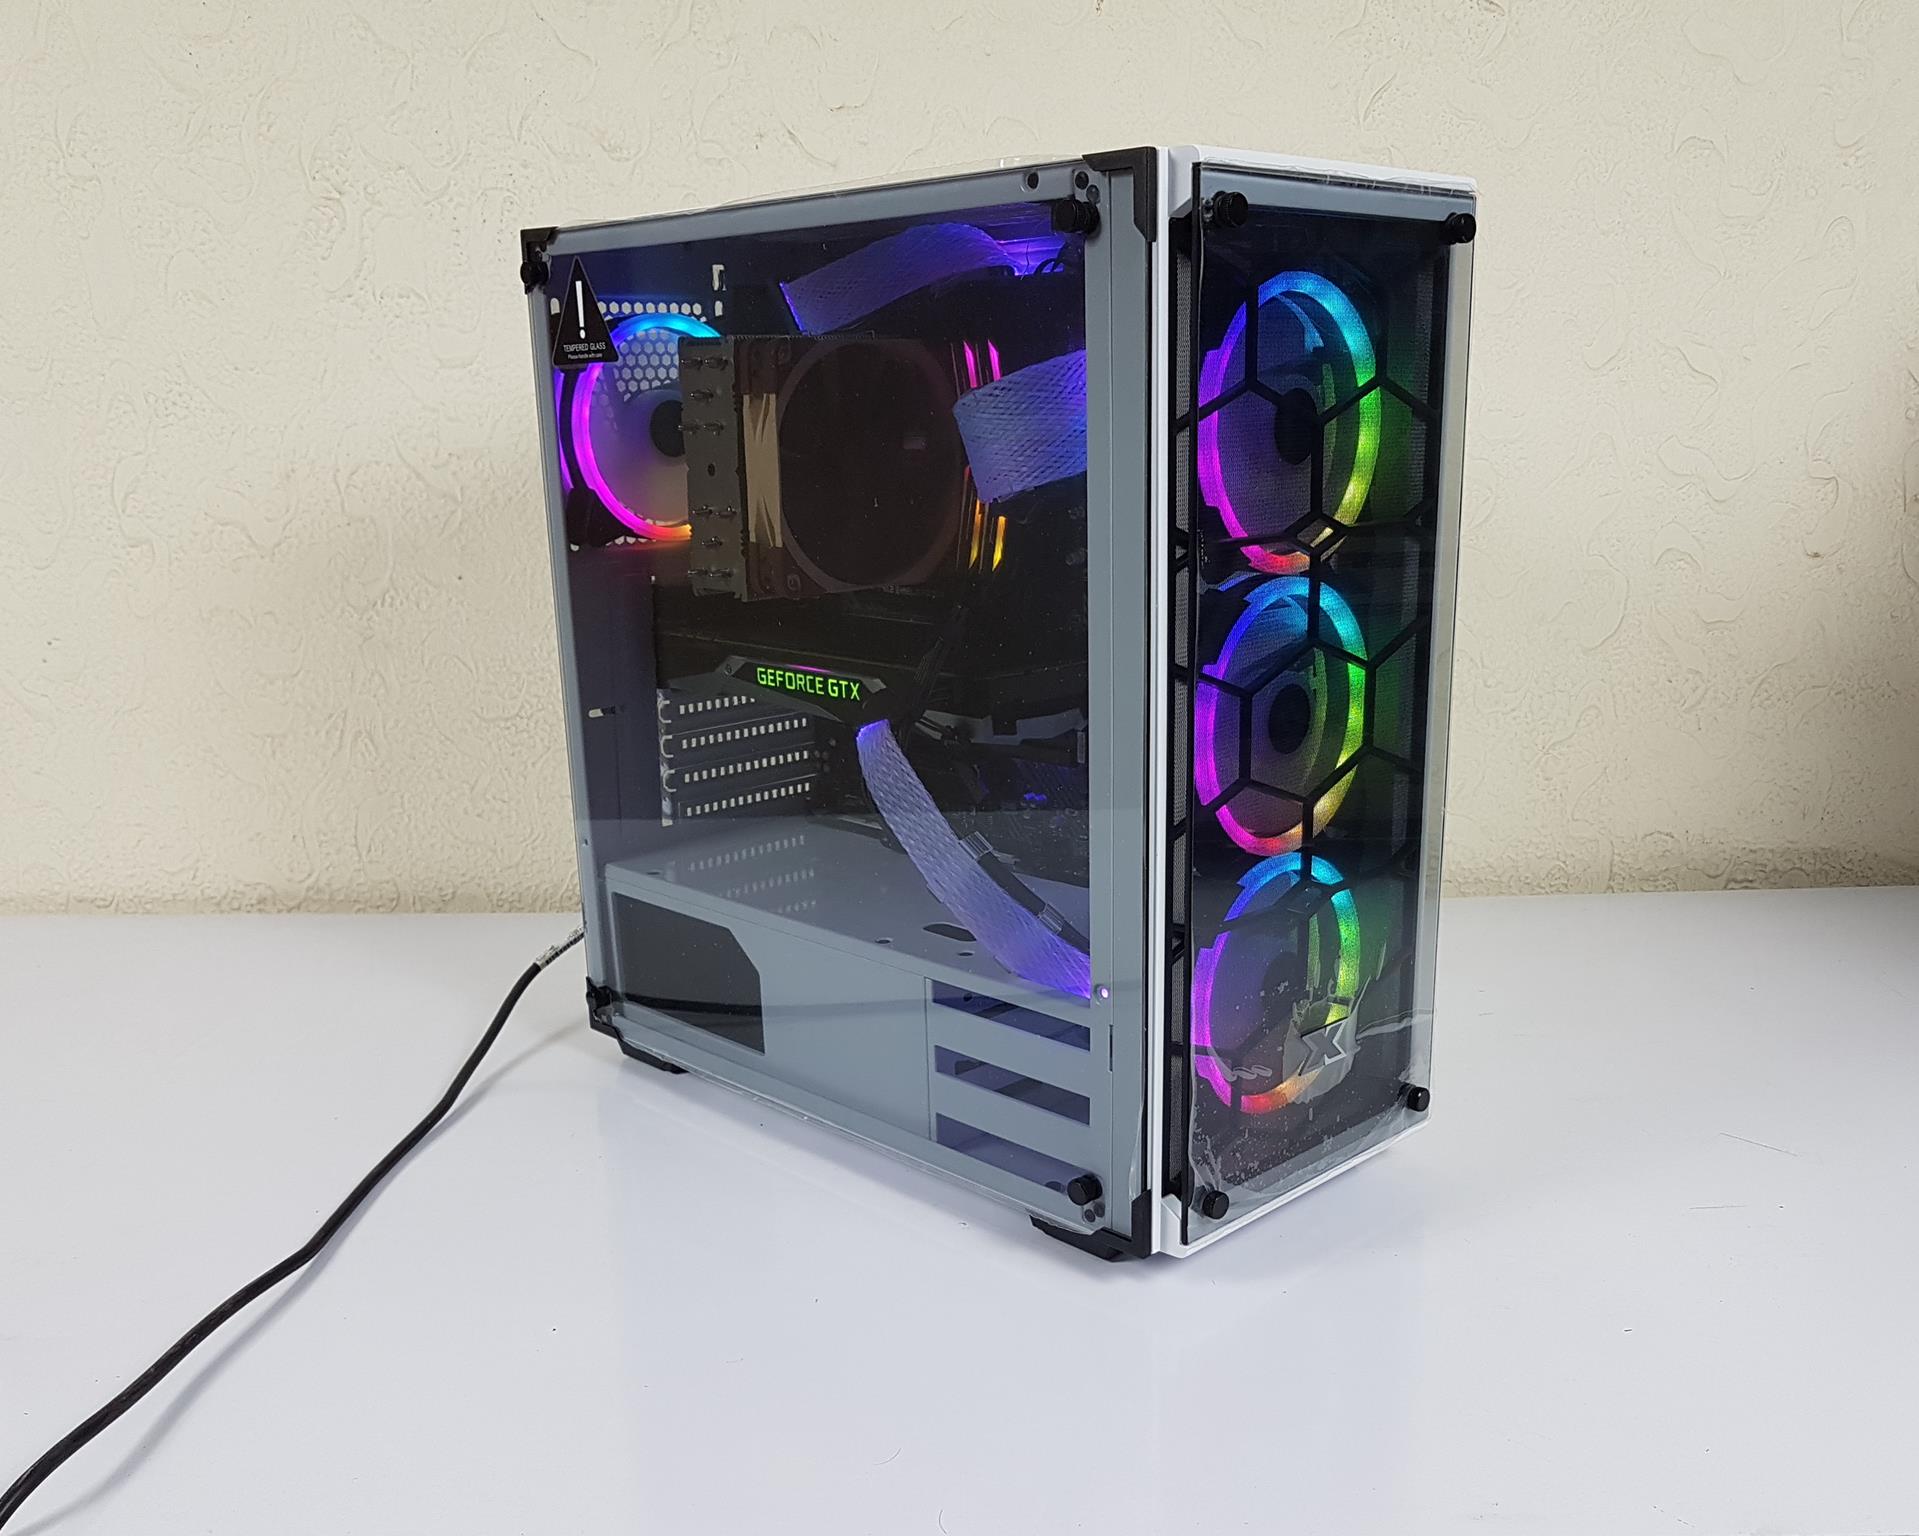
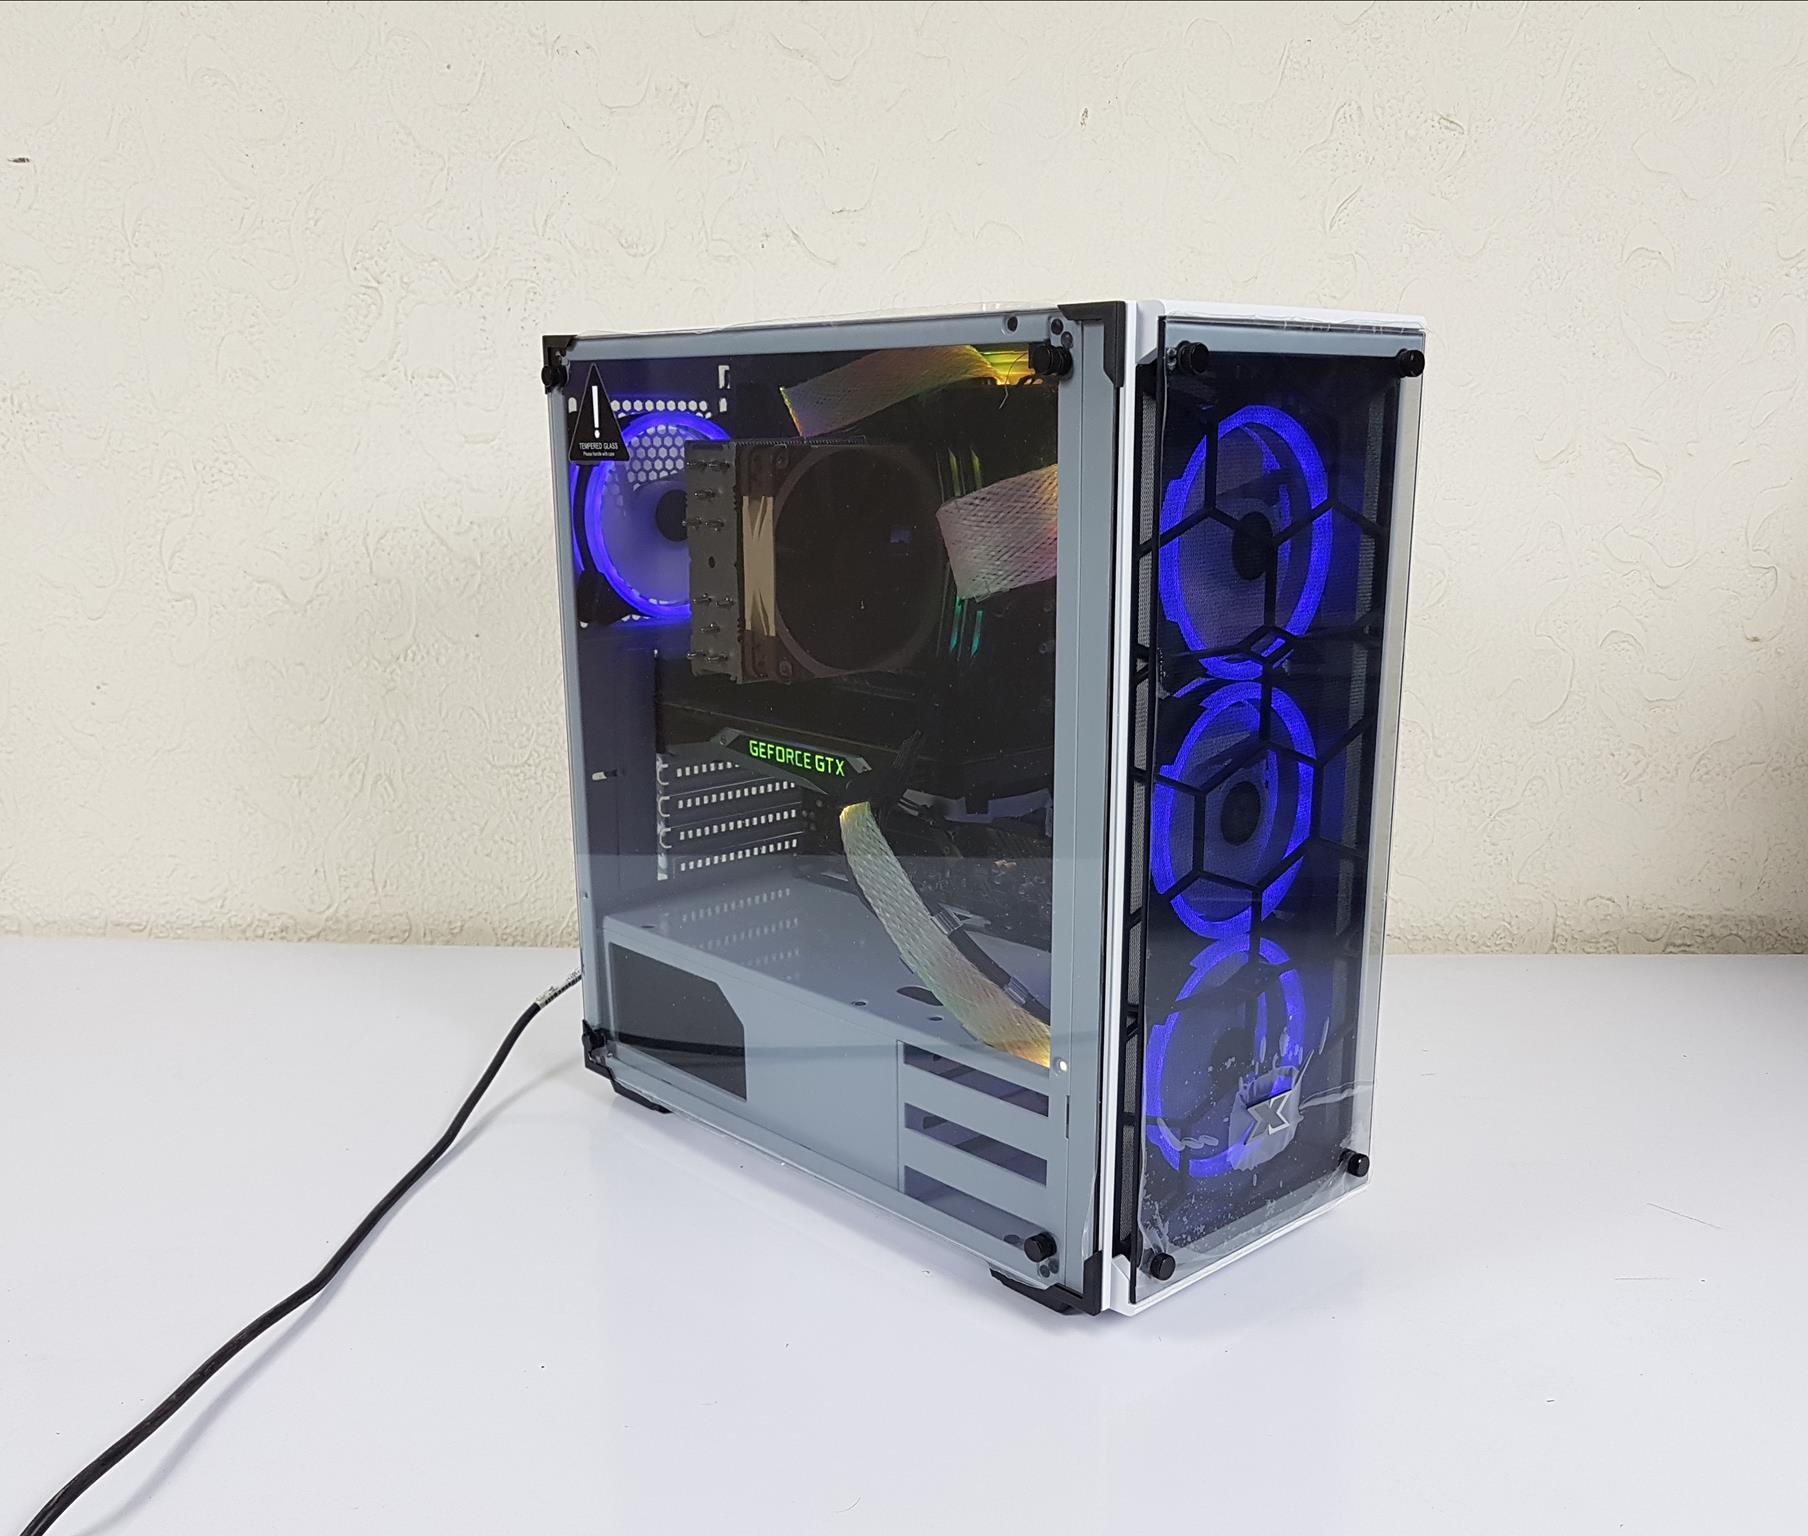
We’ve got a front tempered glass panel held in place by 4 black screws. Behind it, you’ll spot a dust filter and 3 A-RGB fans. The X on the bottom marks our Xigmatek branding. There’s about a 7mm gap between the glass and the front dust filter, serving as the air intake. The pic reveals a non-magnetic, large dust cover held by 4 studs and catchers on each side. The side panel is made of steel. It is finished in glossy white paint.
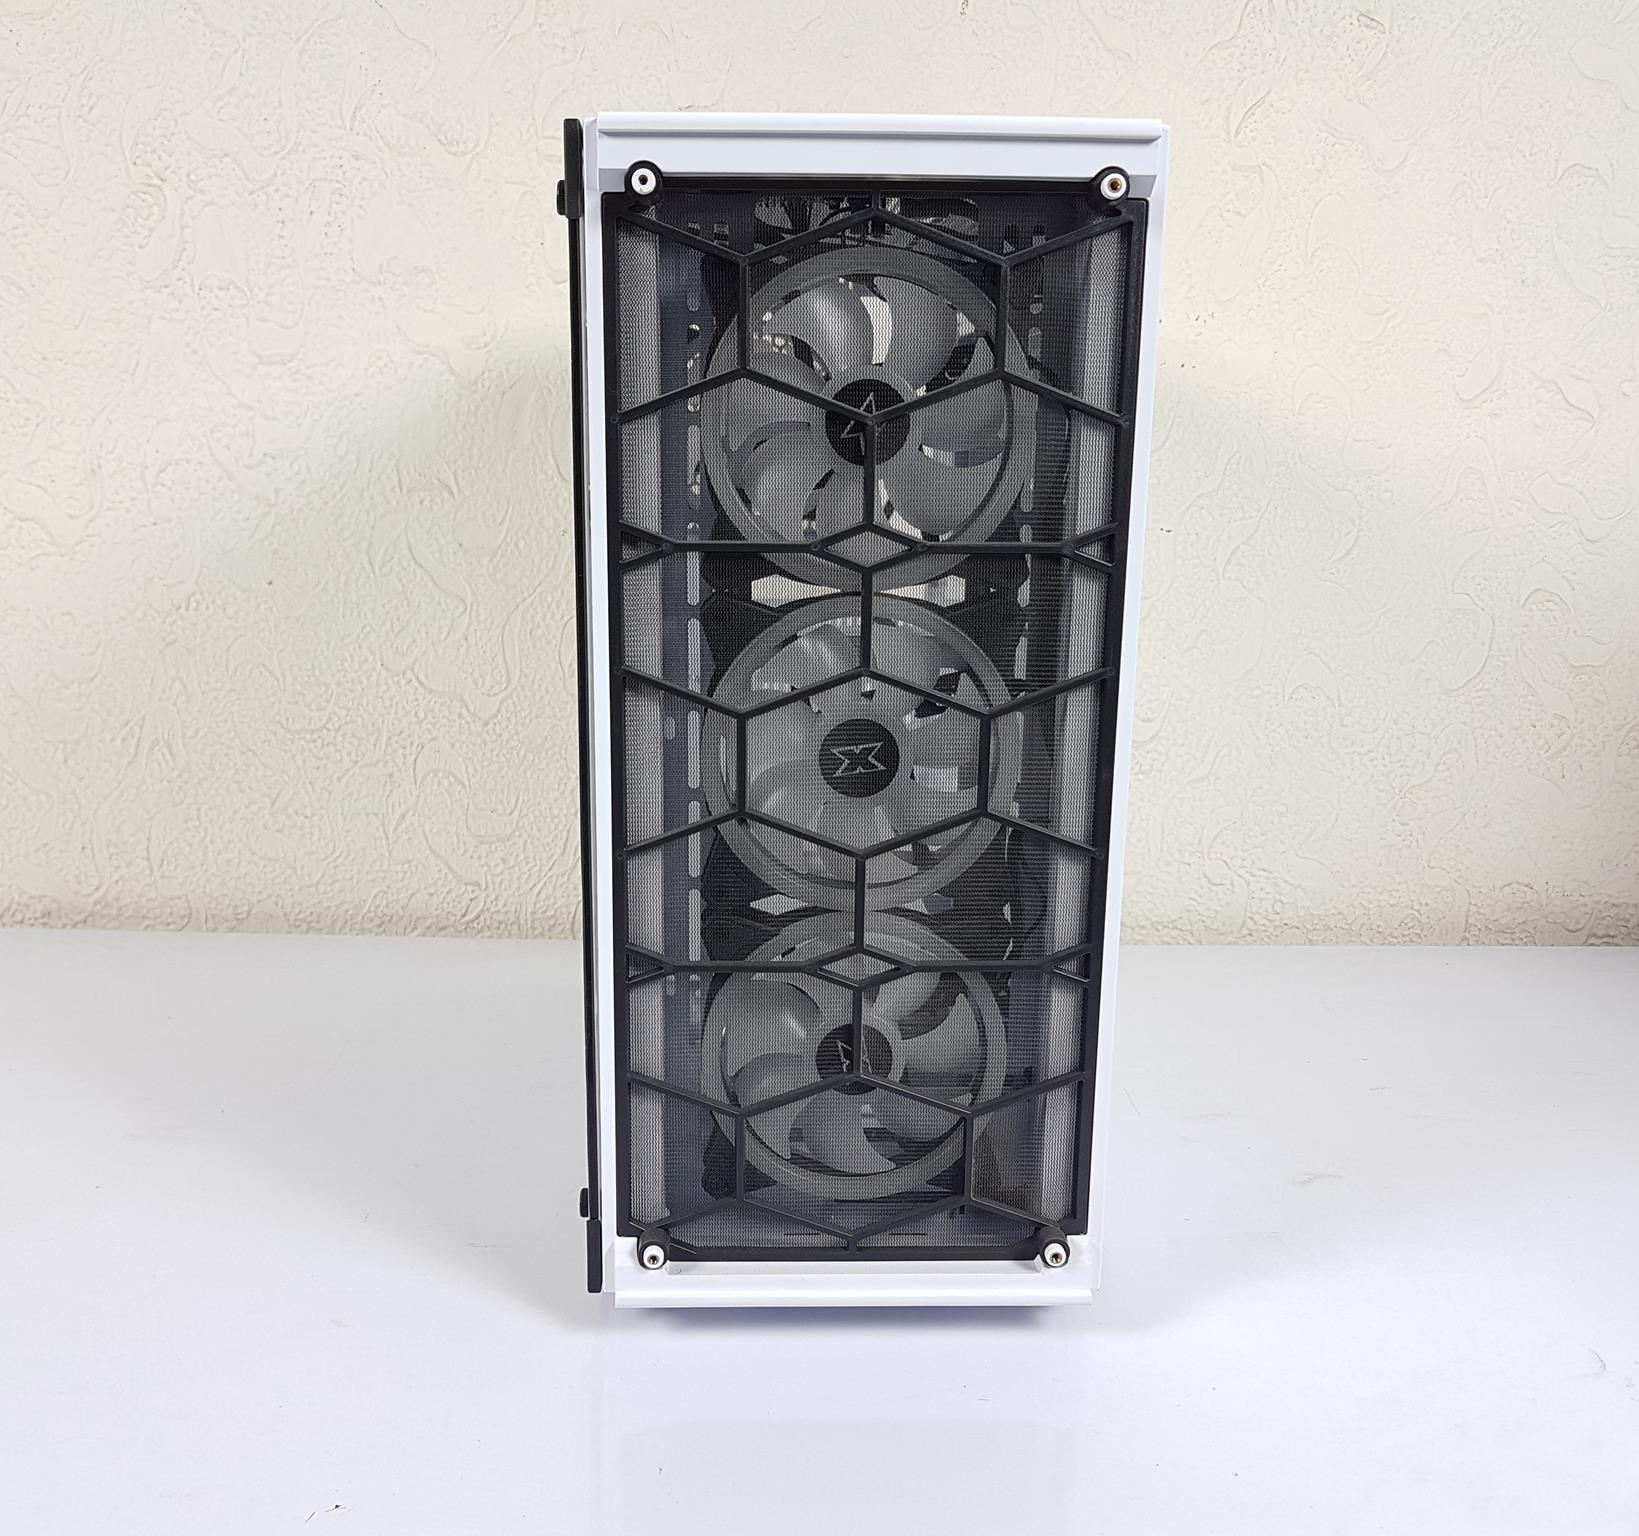
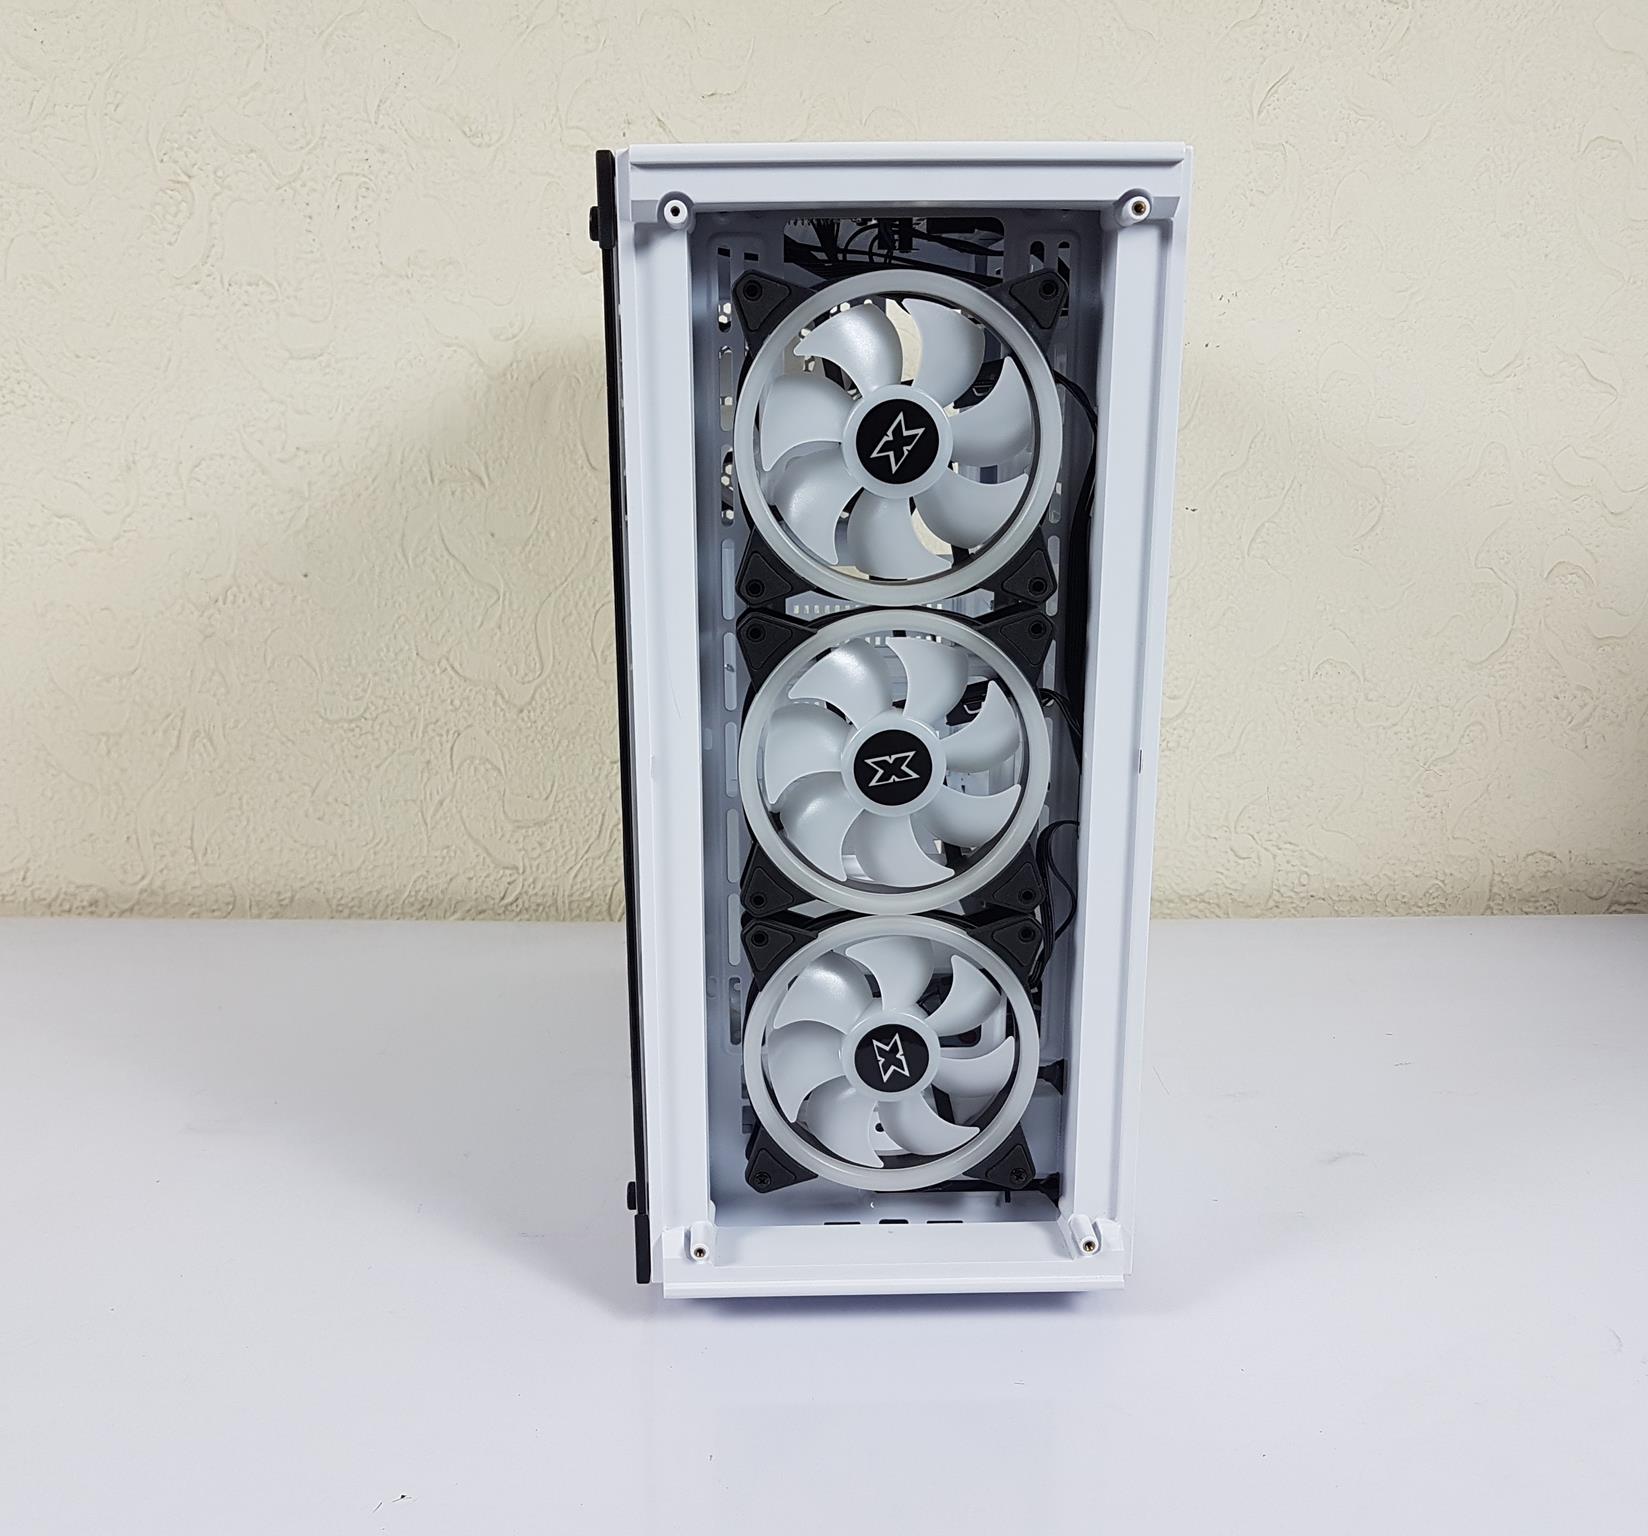
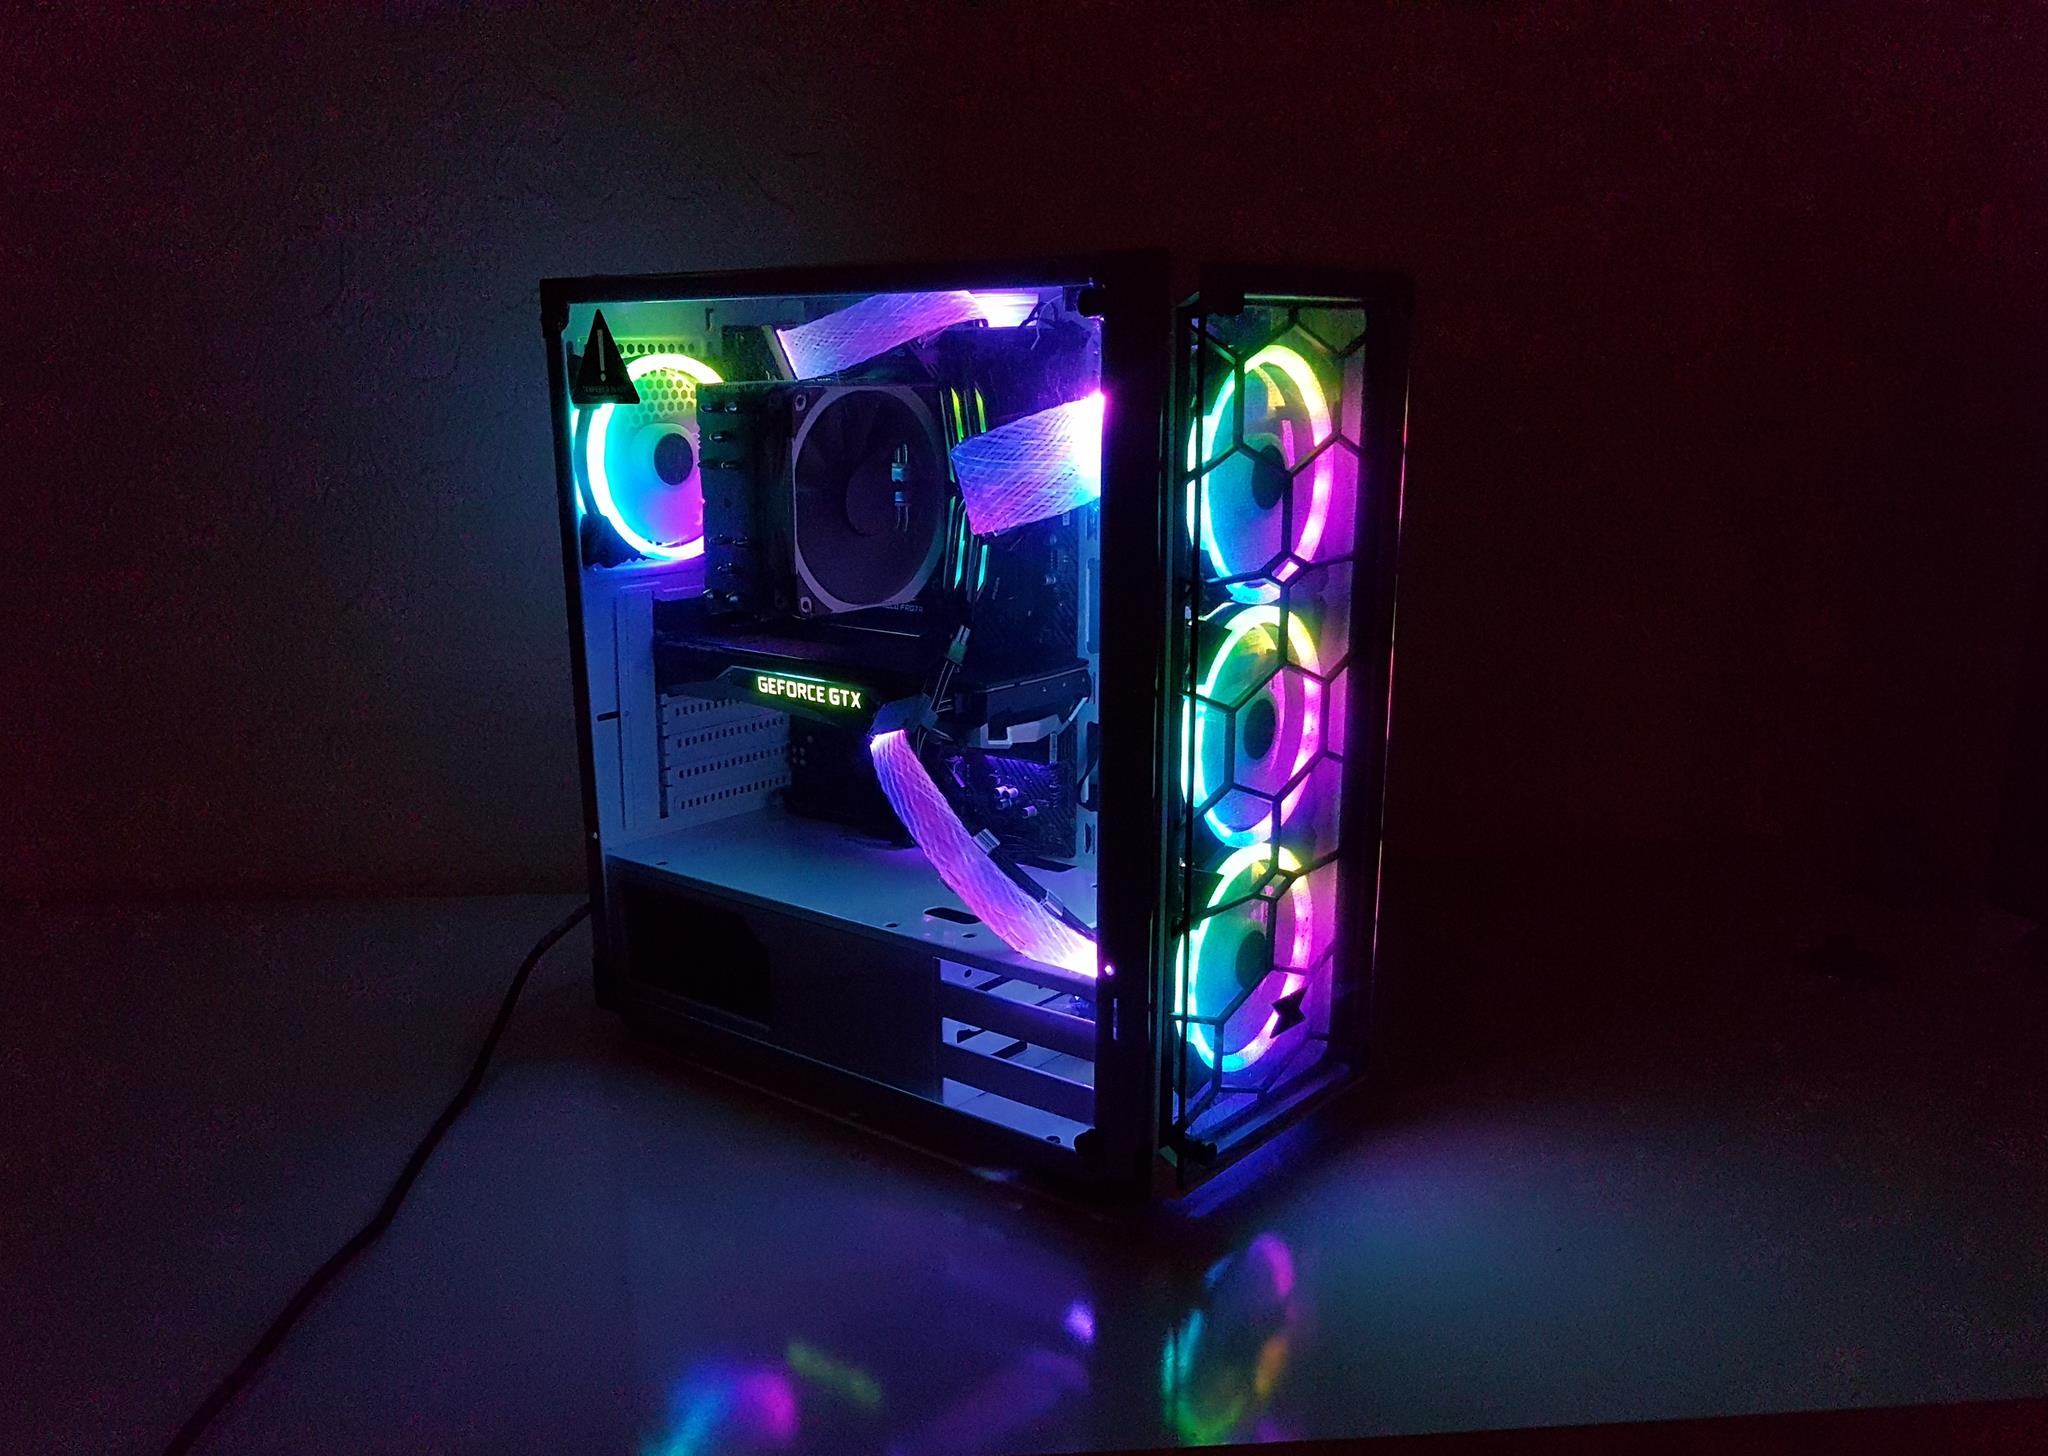
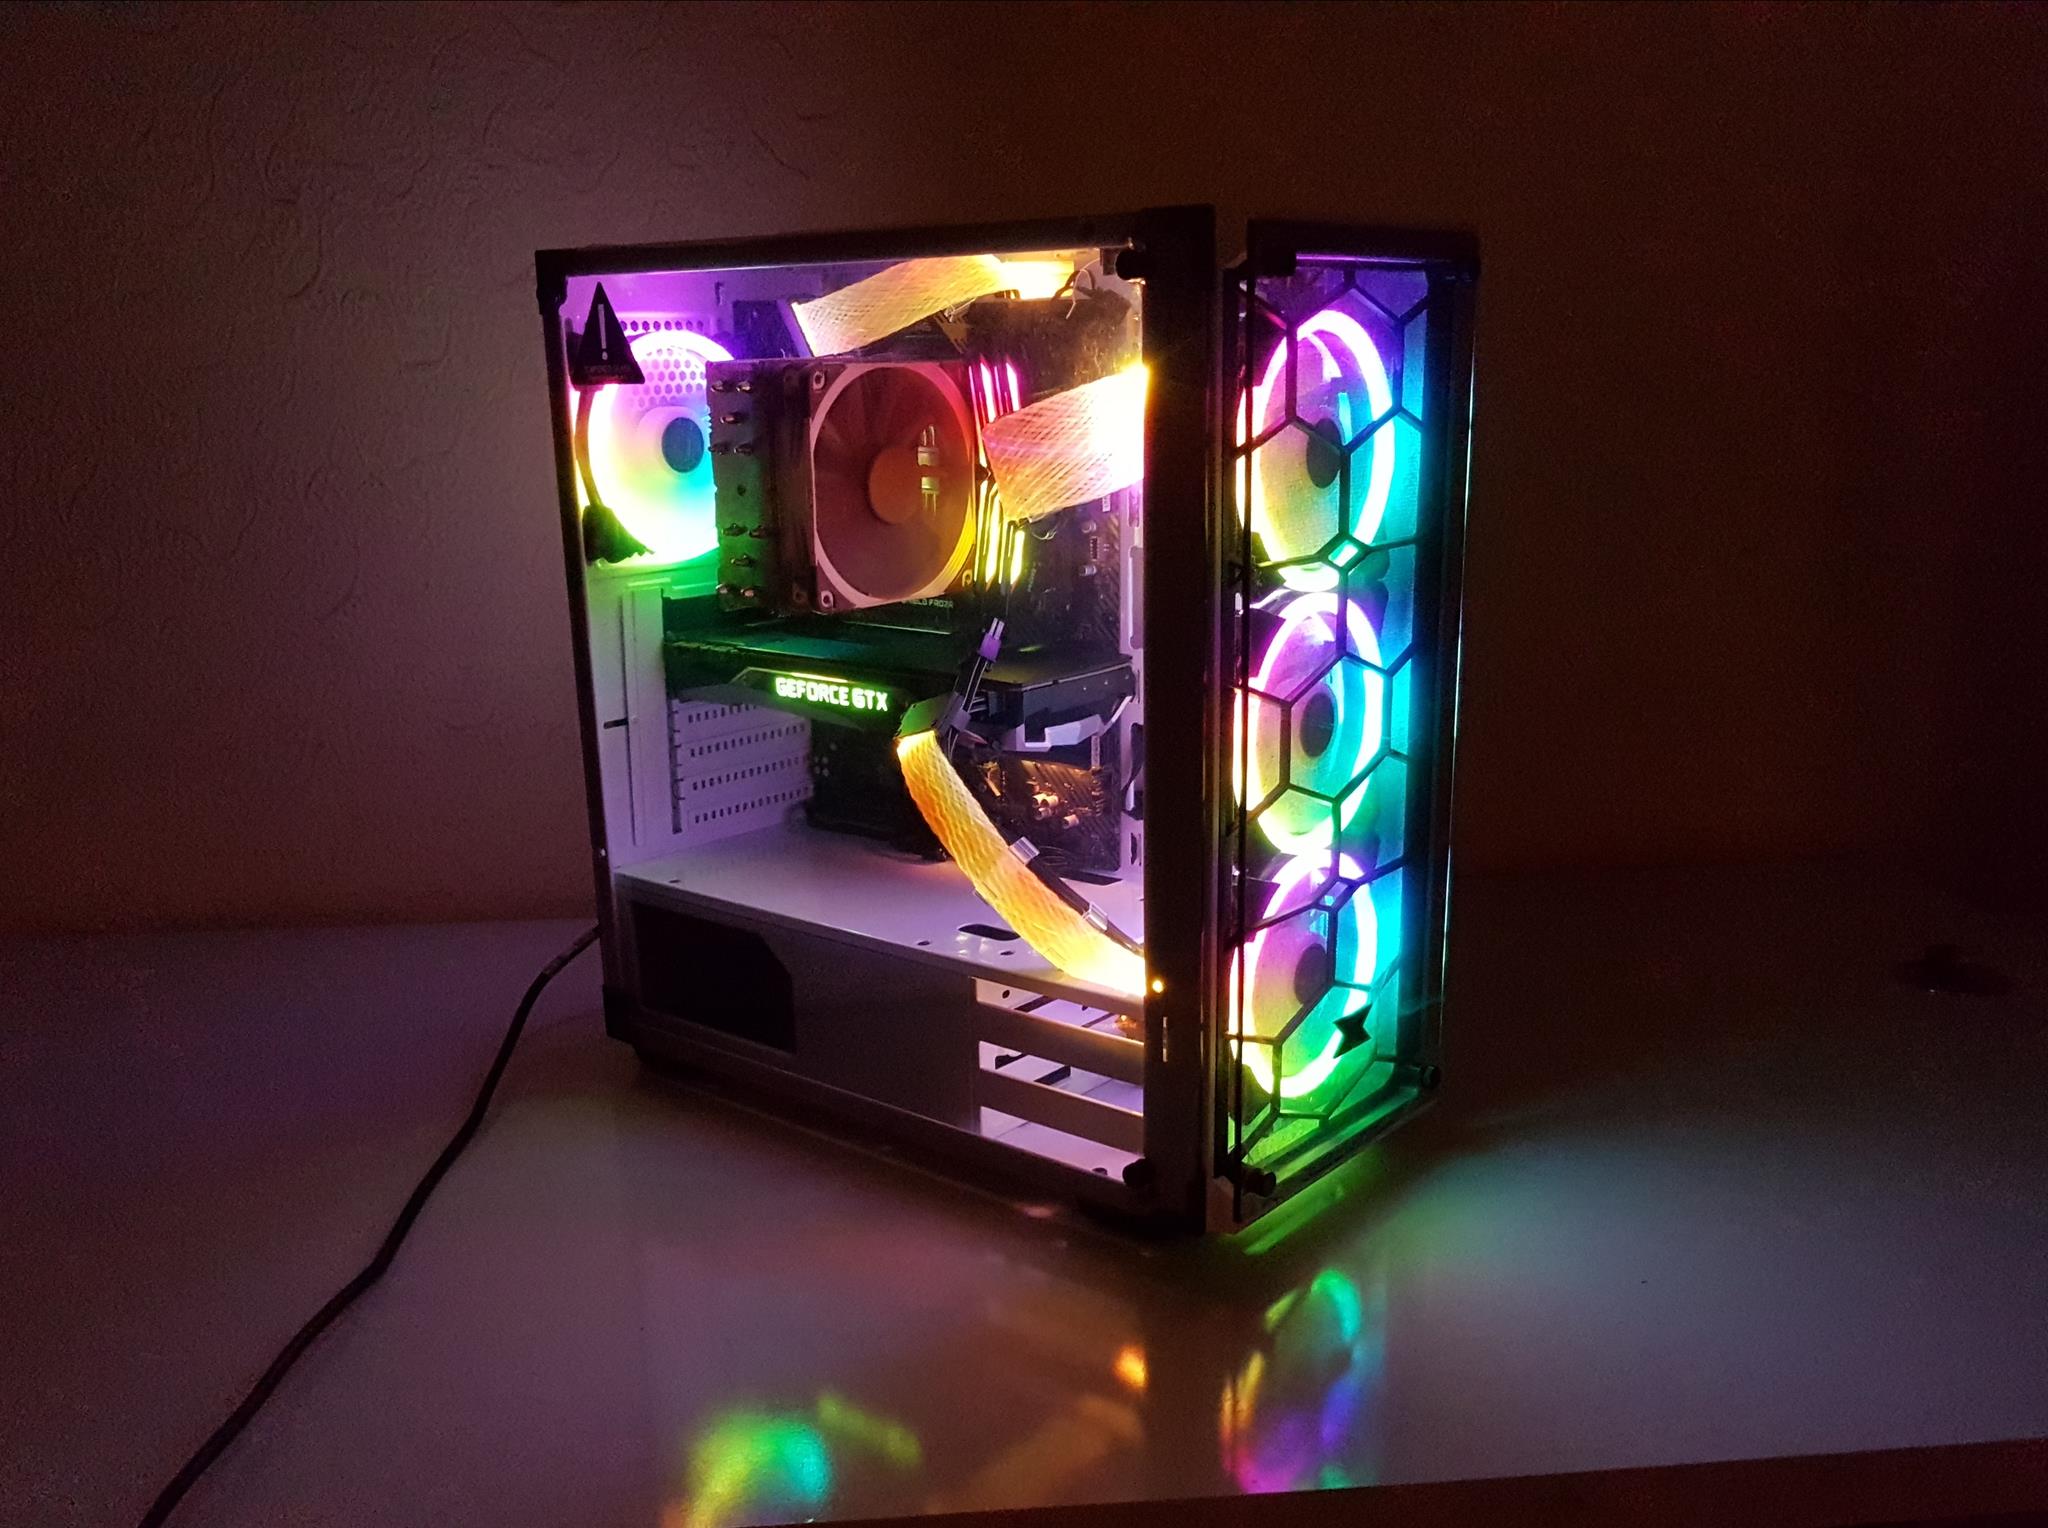
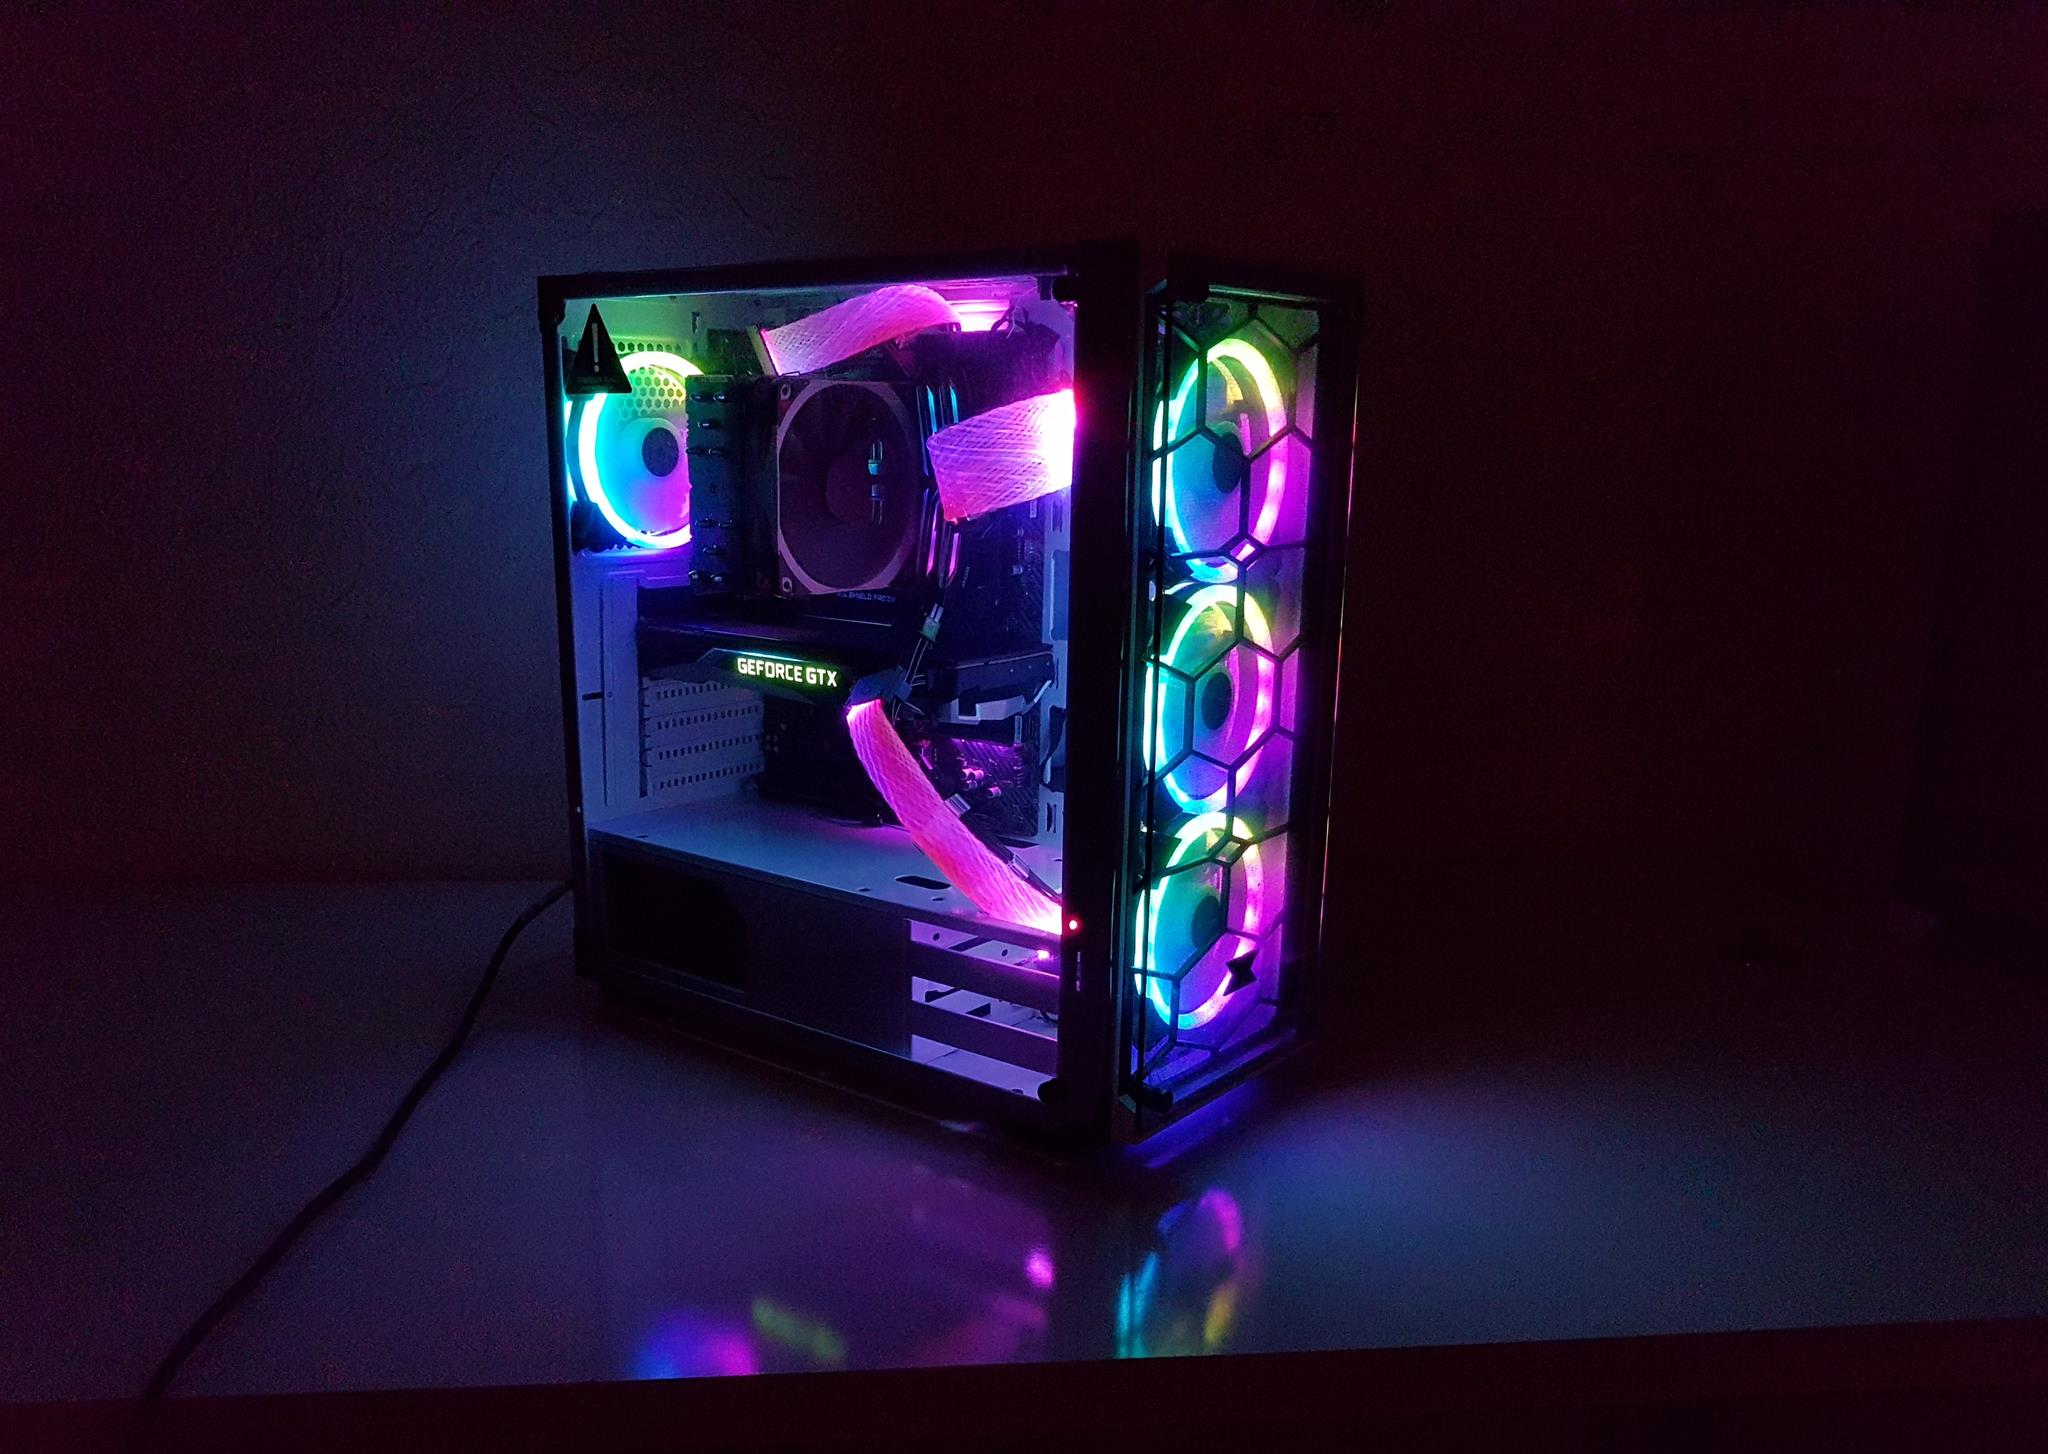
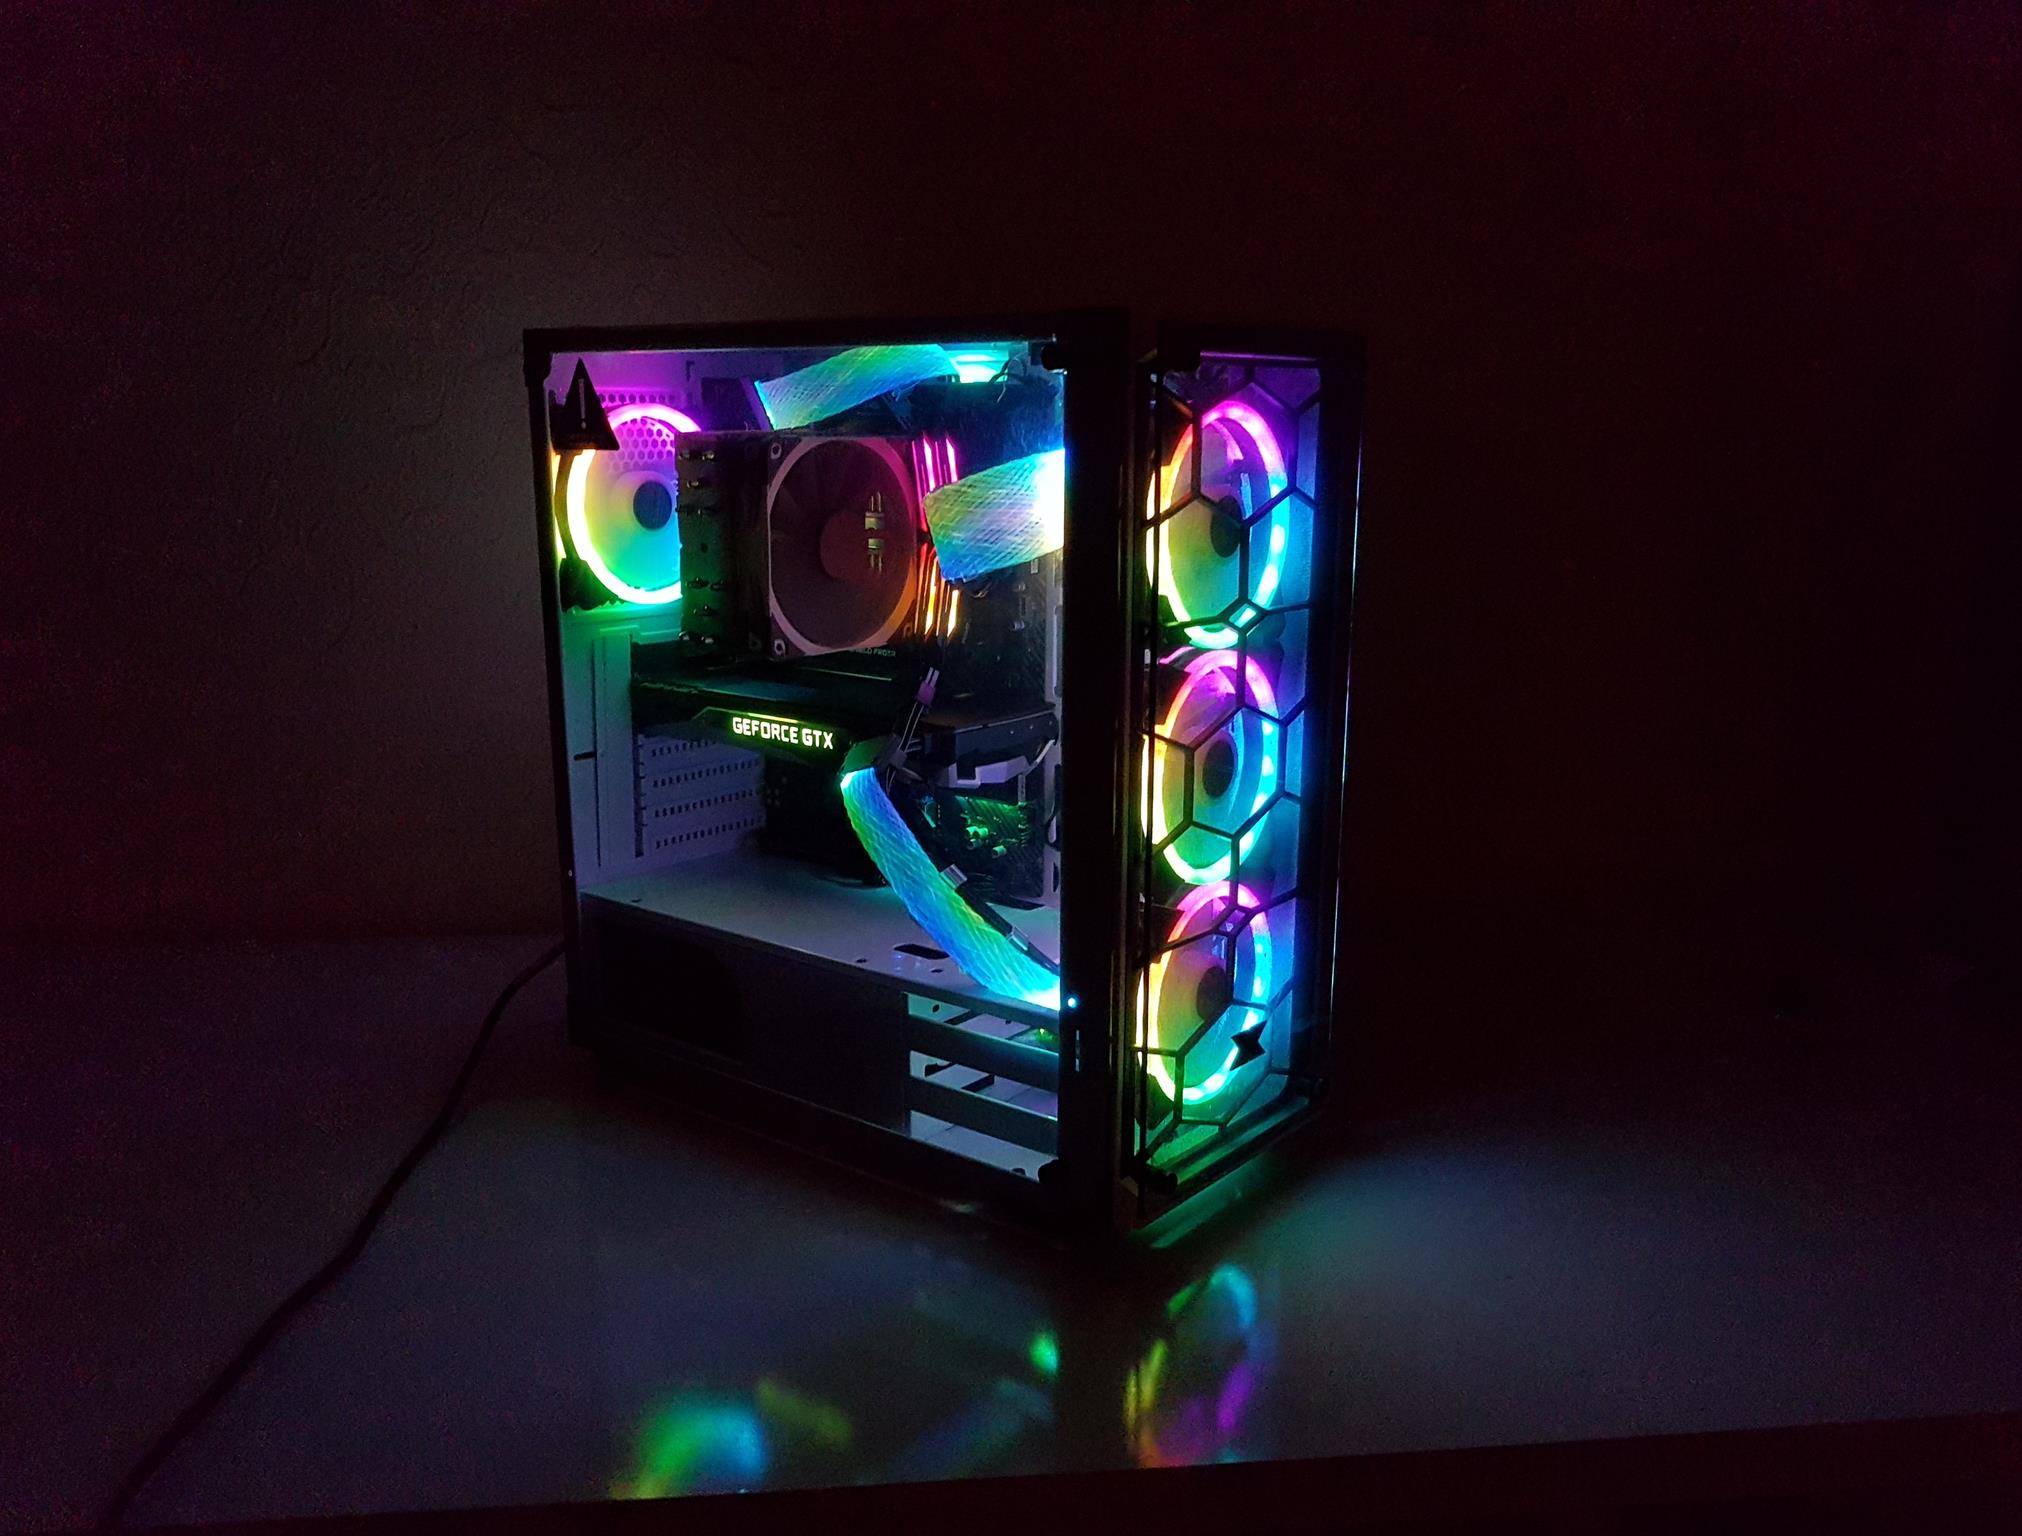
Check out the pic – dust filter removed! XIGMATEK Venom X Review rocks 3 Rainbow RGB fans (120mm) up front. Haven’t peeled off the front panel yet, just a heads up!
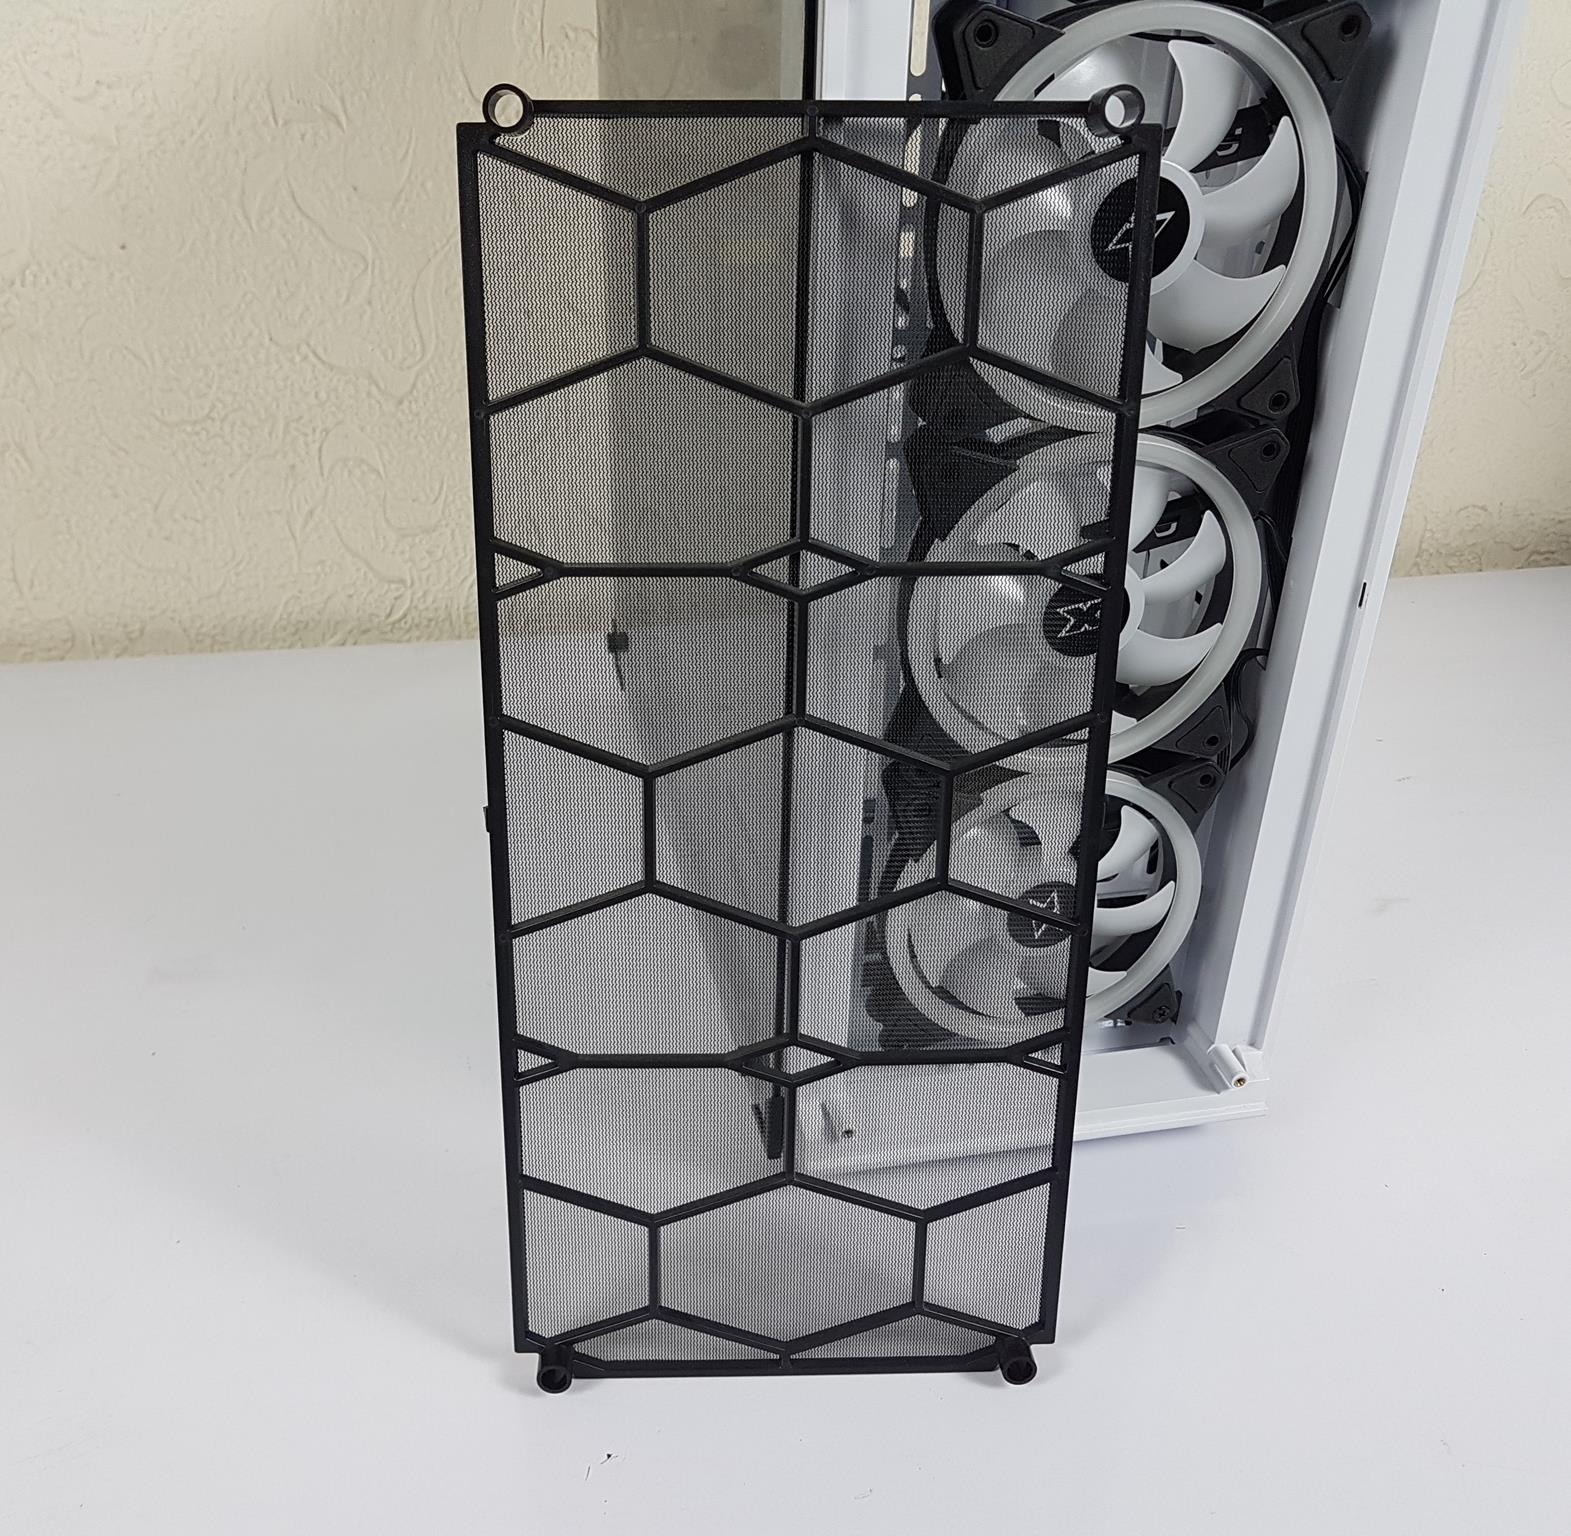
The picture shows the front of the chassis with the complete front panel removed. Place your hand on the cutout at the bottom of the panel and pull it gently to take it off.
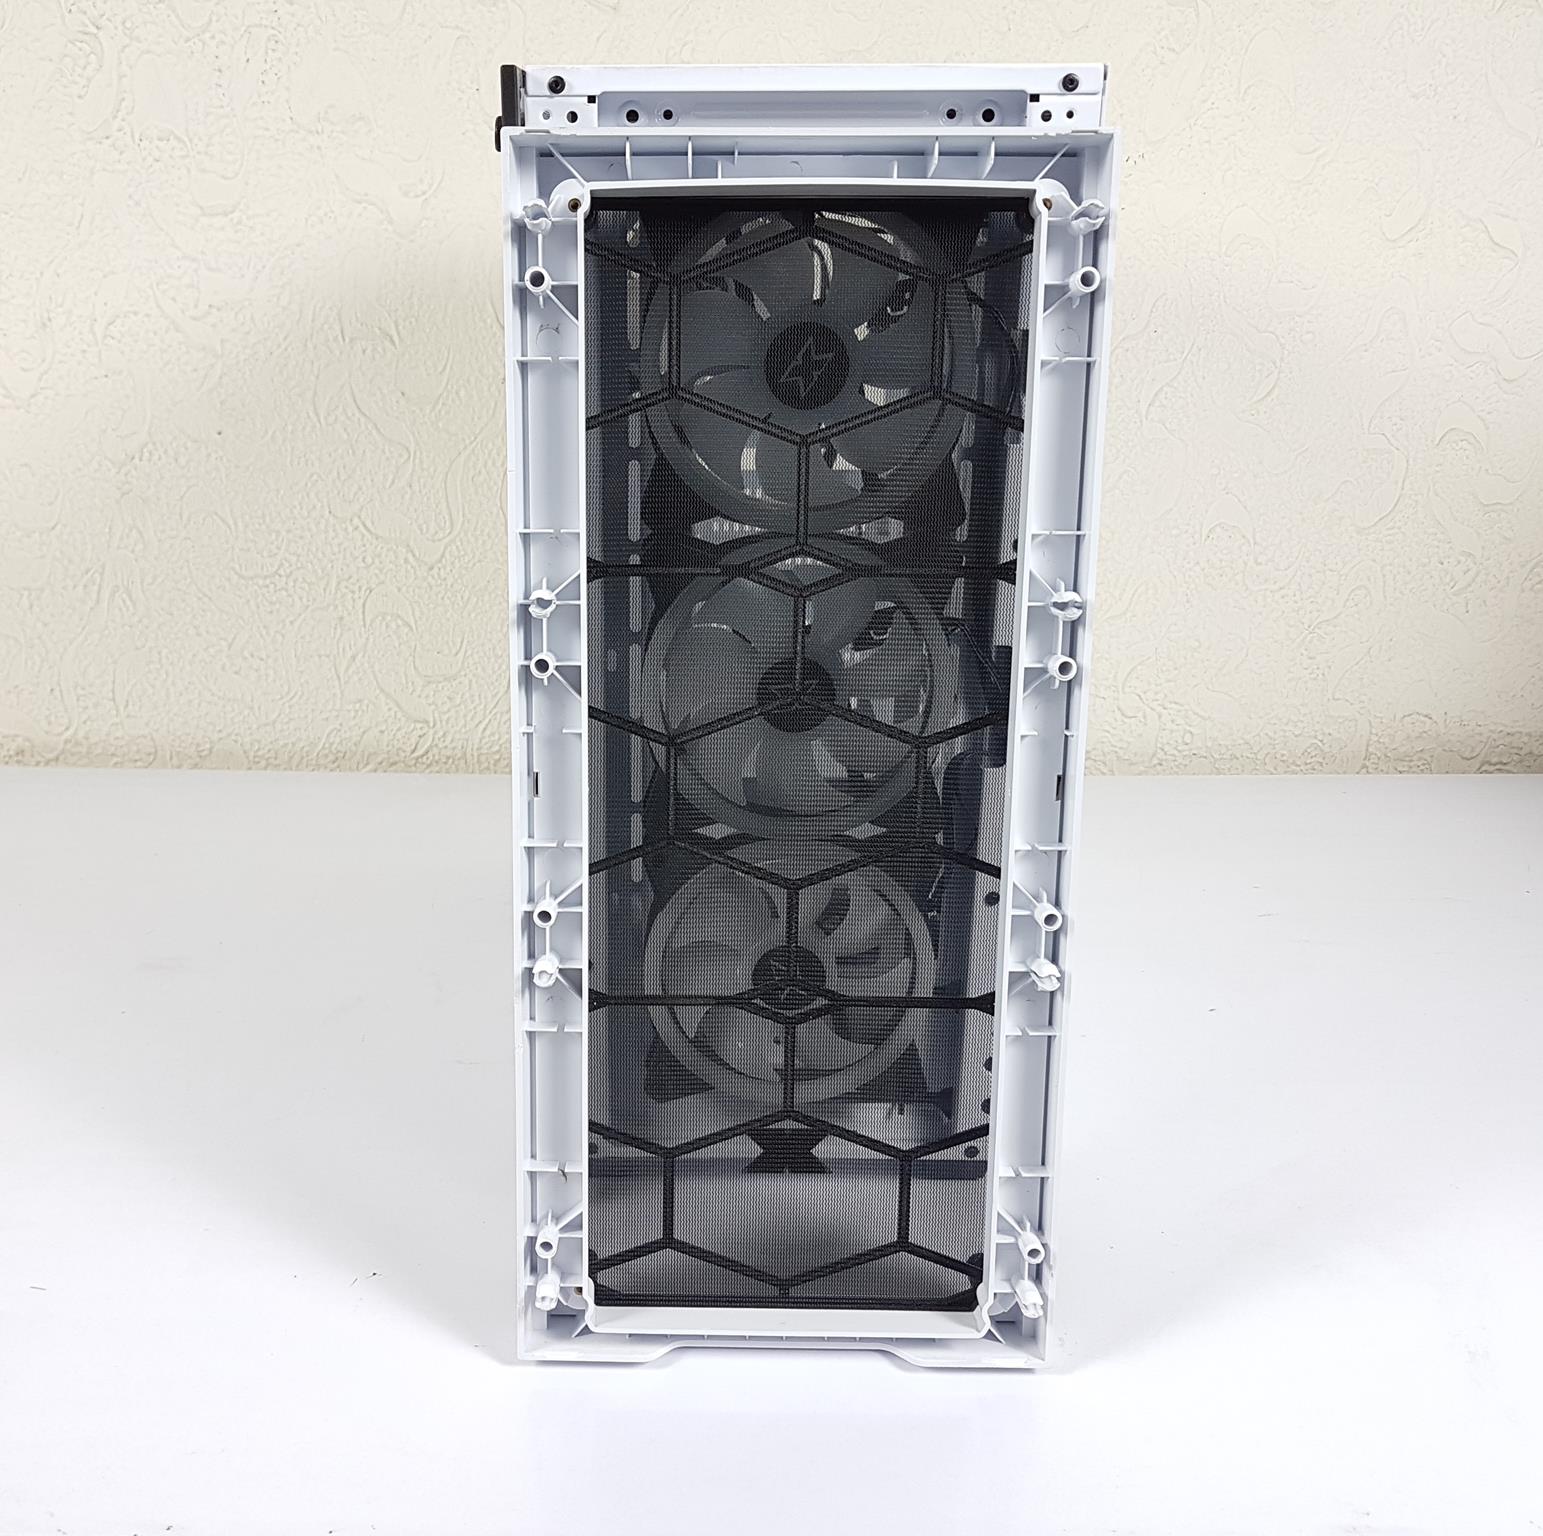
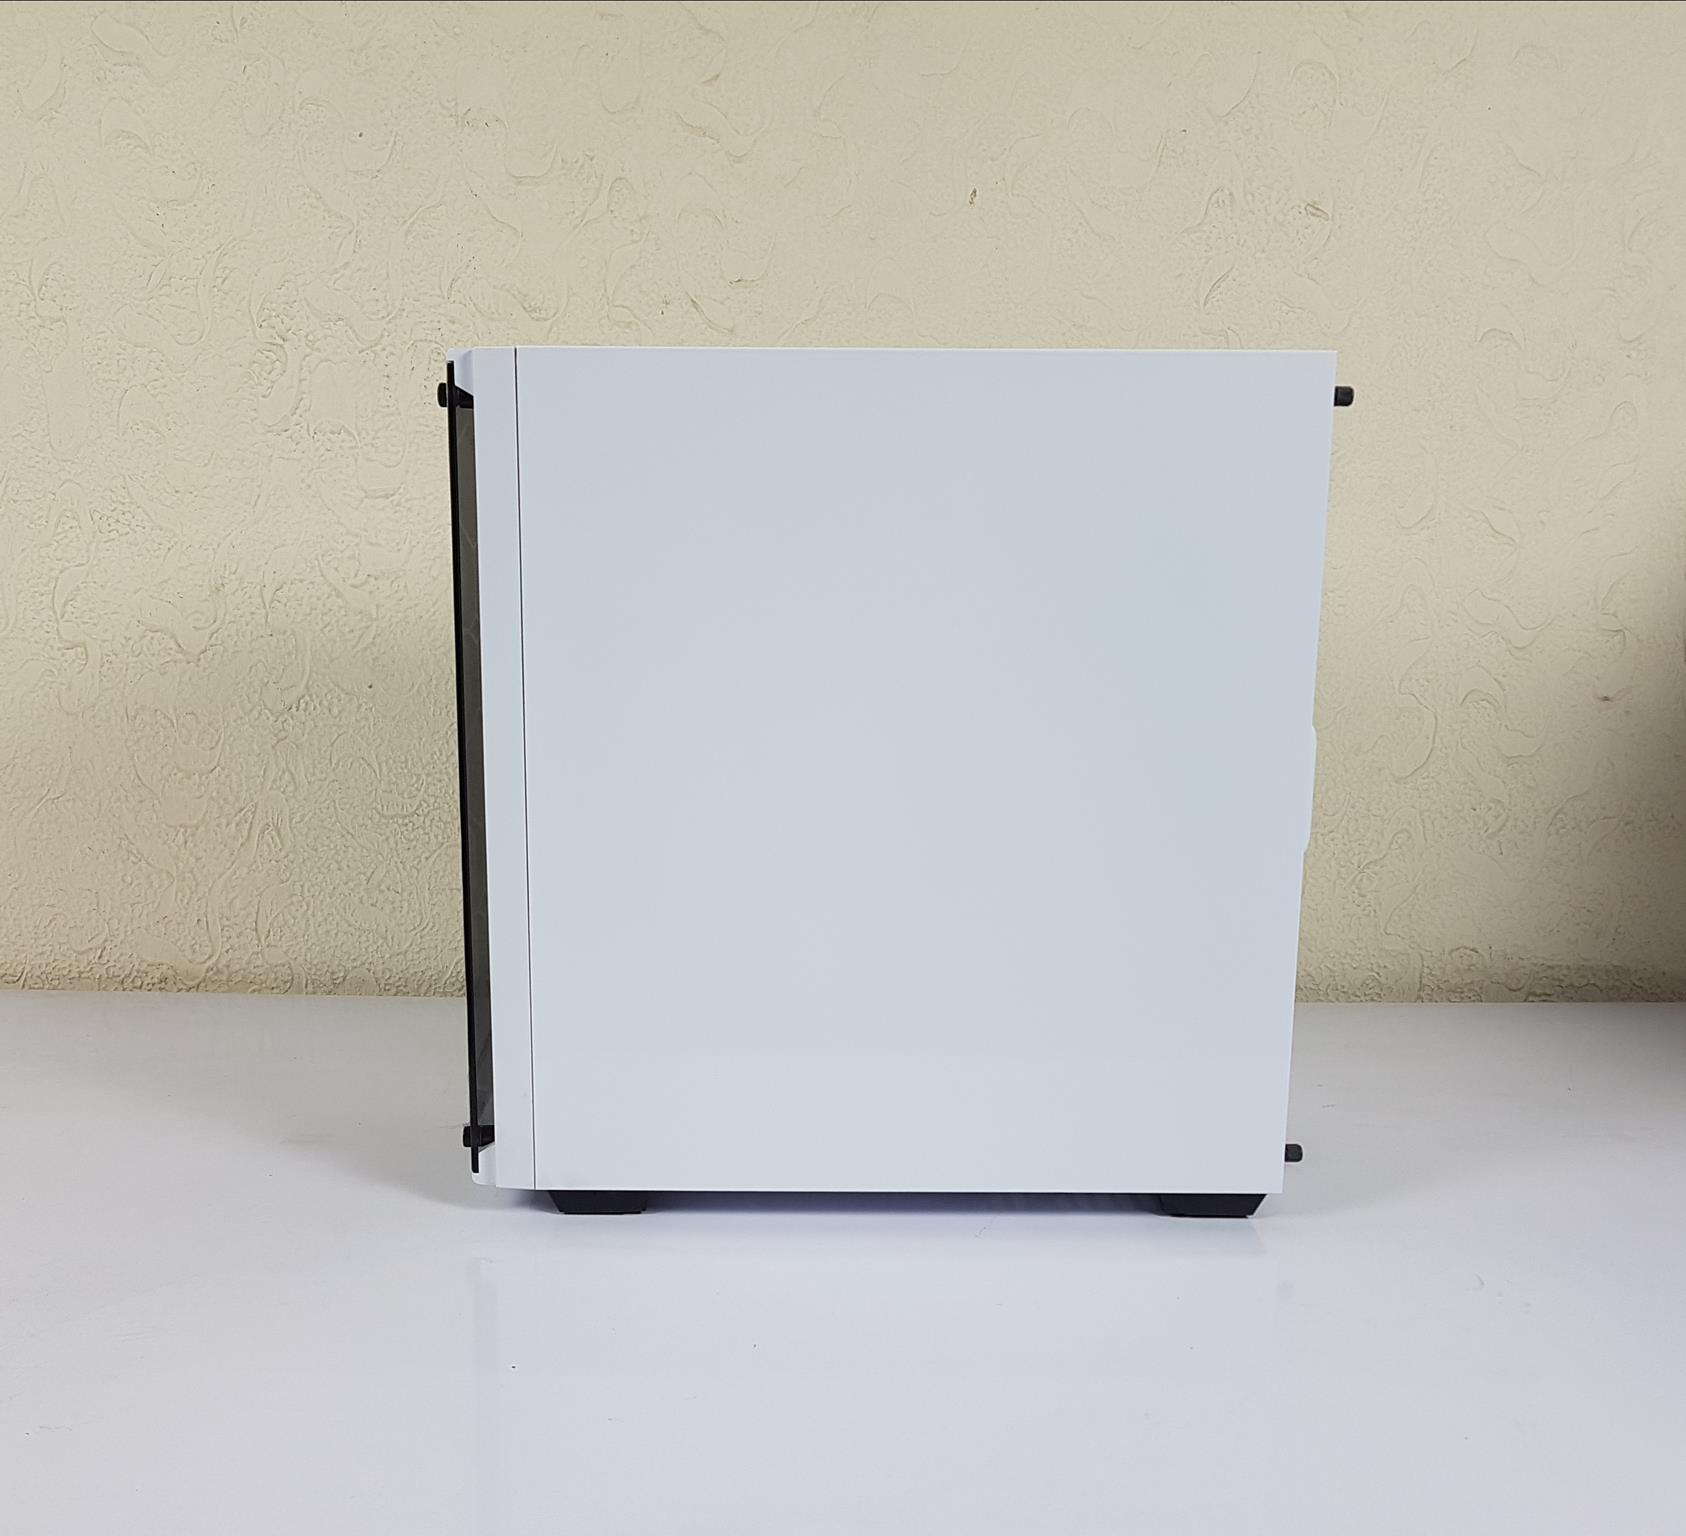
We observe several rough surfaces, and scratches on the plastic body of the chassis. Some of the rivets are not properly done. The ARCTIC edition is a white color chassis. XIGMATEK has done a glossy white paint on the steel. The plastic part of the frame is not in a glossy finish and two-tone is visible.
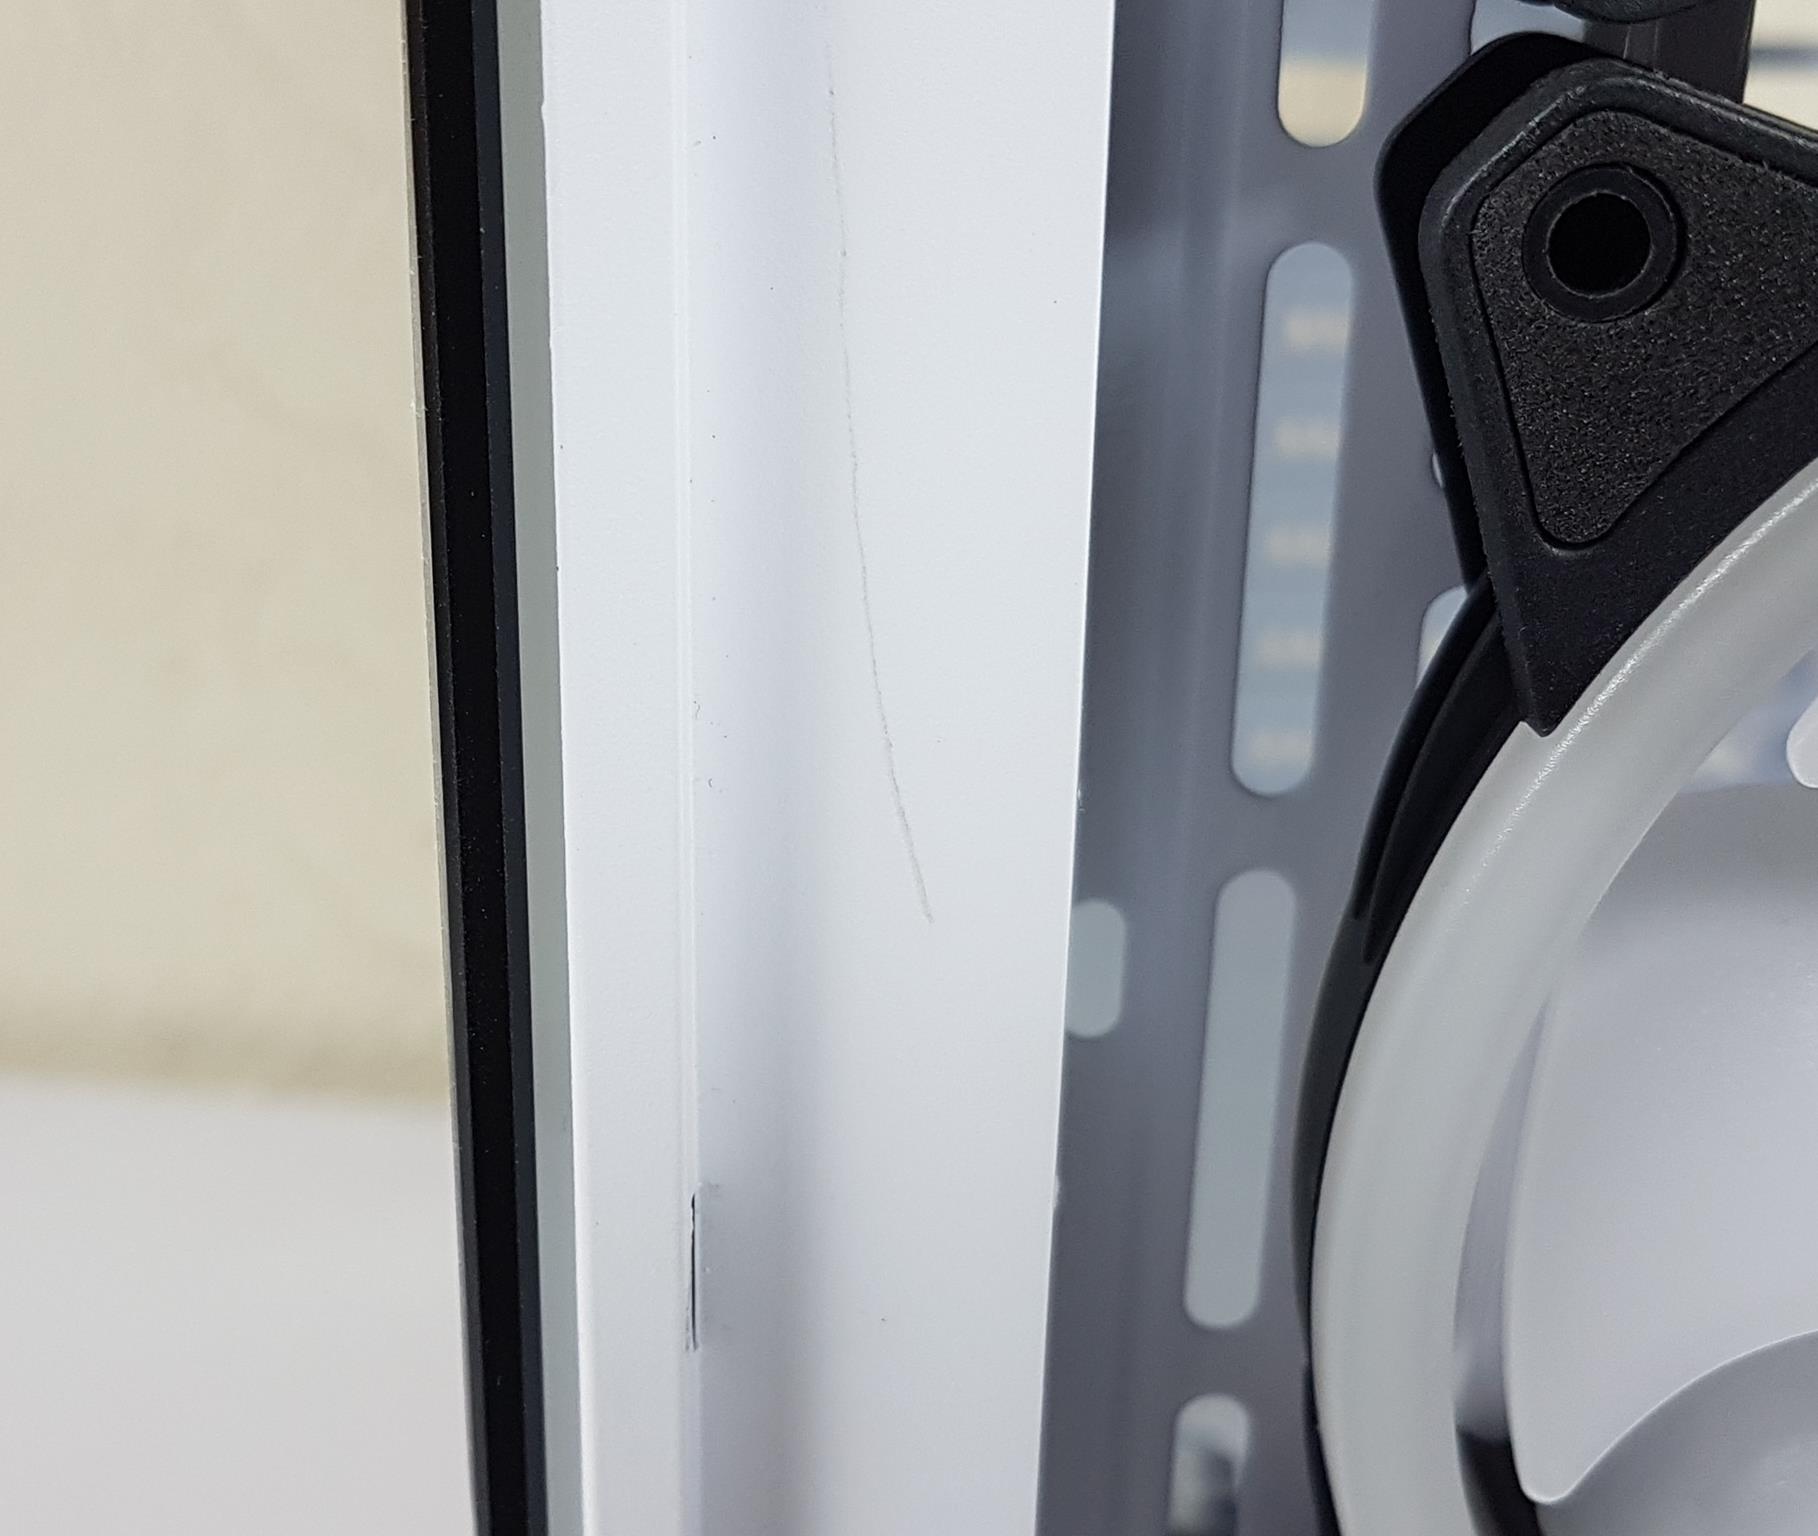
The XIGMATEK VENOM X features a 4mm thick, untinted tempered glass panel on the side secured by 4 black thumb screws/nuts. Surprisingly, the corner inserts are plastic, not rubber, providing a buffer against glass scratching. Although the XIGMATEK VENOM X ARCTIC showcases impressive craftsmanship, its design resembles others from brands like CORSAIR and KOLINK, lacking a distinctive freshness.
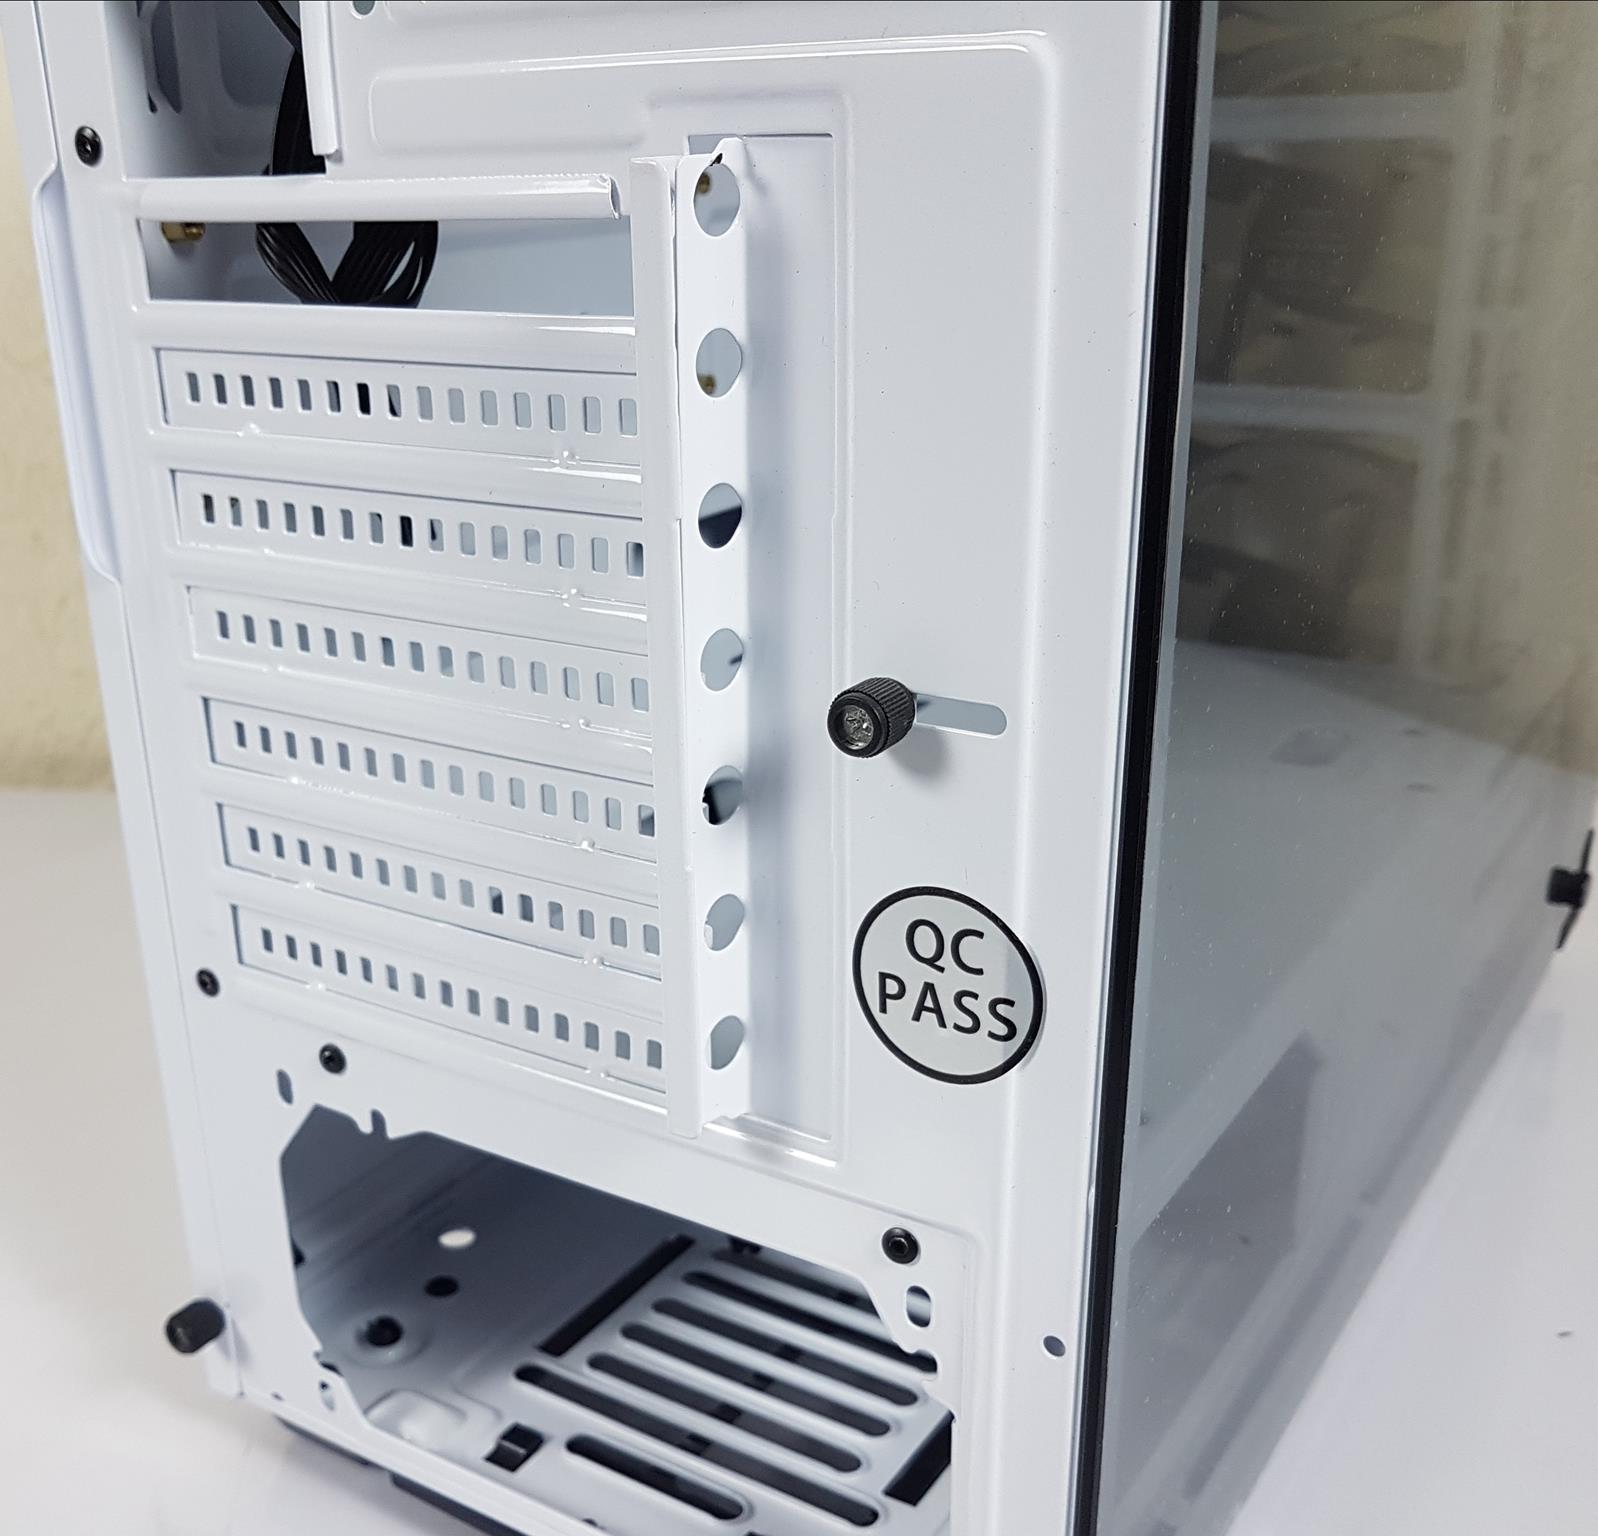
Our back layout has a motherboard IO shield cutout and a 120mm fan mount with a preinstalled Rainbow RGB fan. You can adjust the rear fan’s height. The center features 7 PCIe slots; the first slot lacks a cover. Remove non-reusable slot covers before installing the graphics card. Slots have raised ends outside the chassis. Secure the PCIe cover with 1 thumb screw, and the non-glass side panel with 2 non-captive thumb screws. The bottom PSU mount lacks standard provisions.
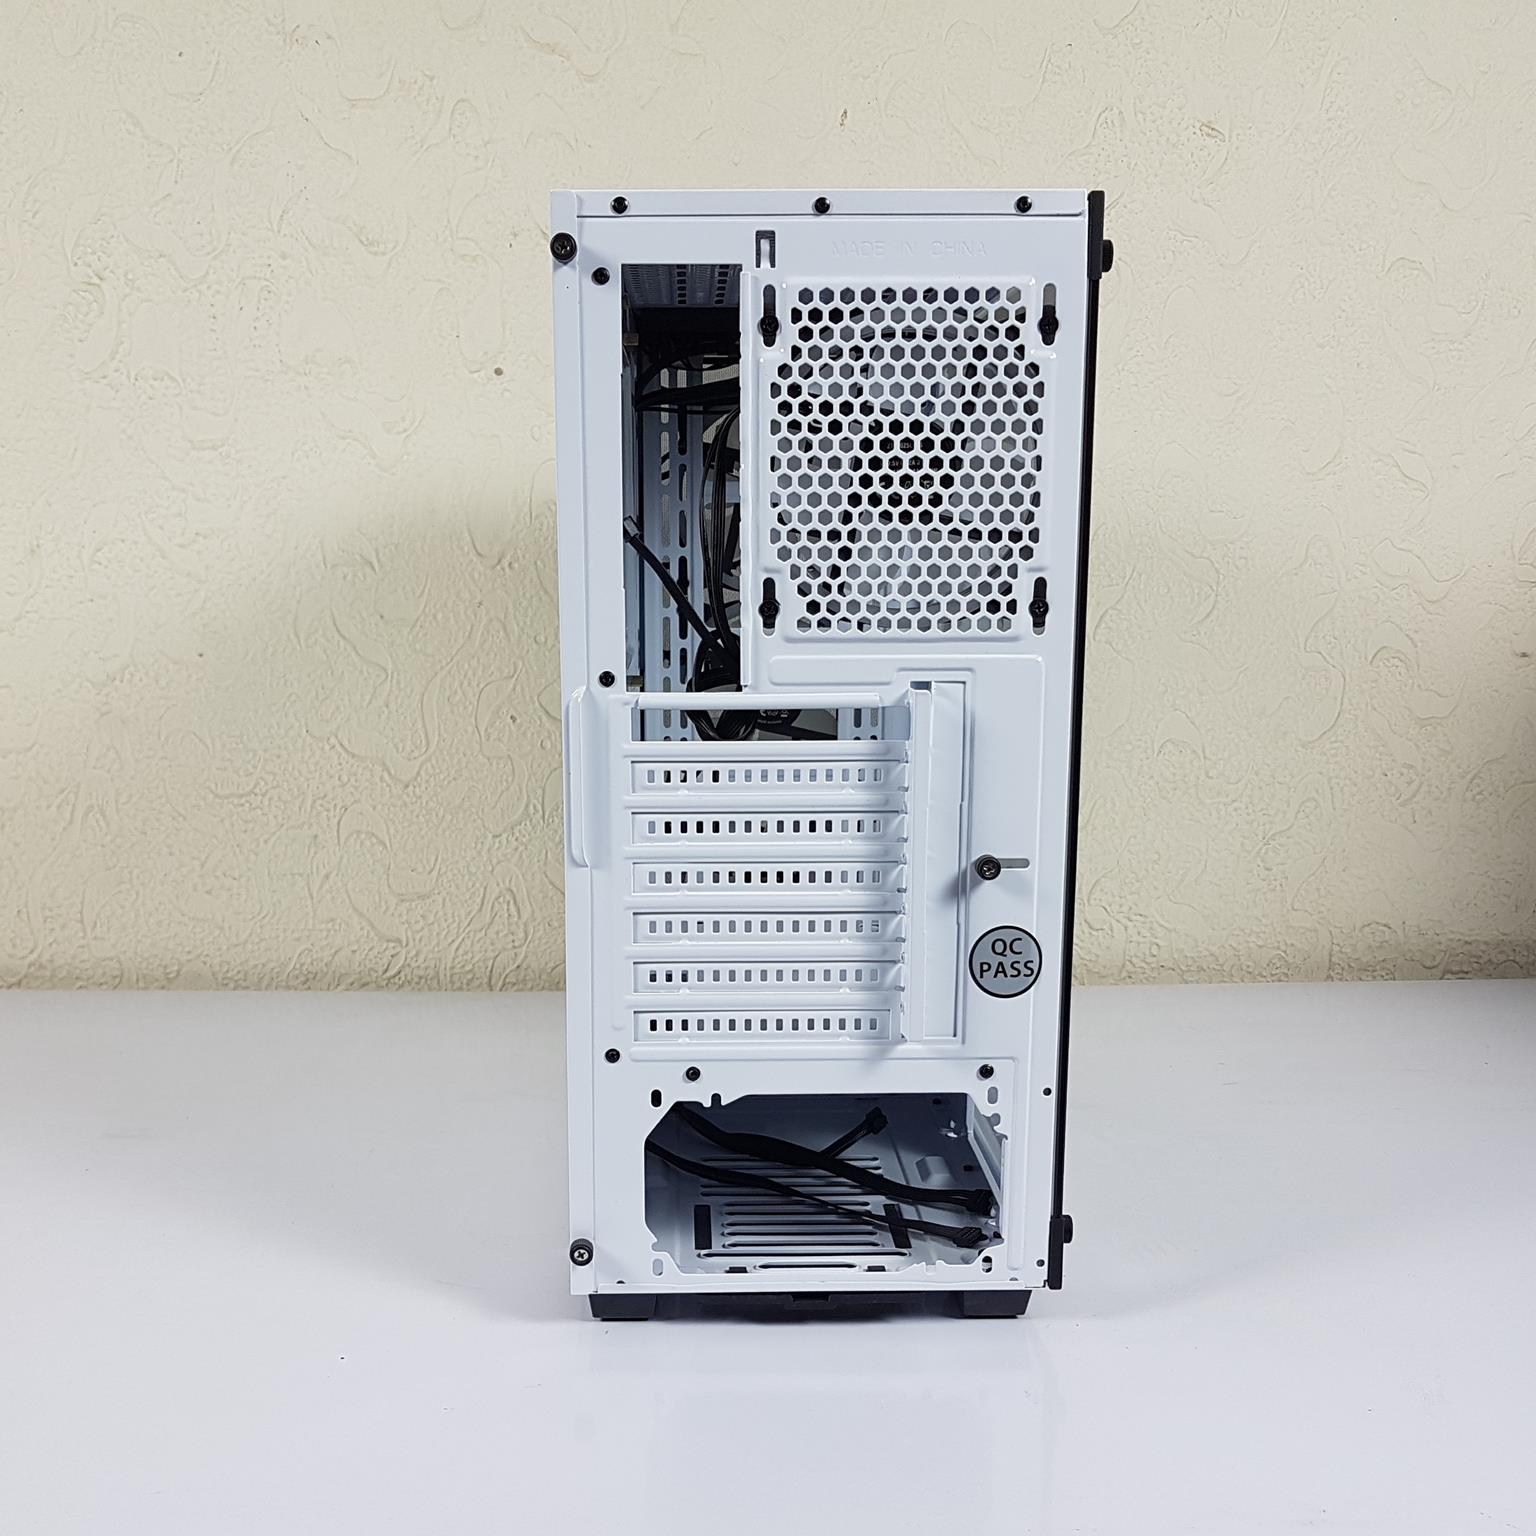
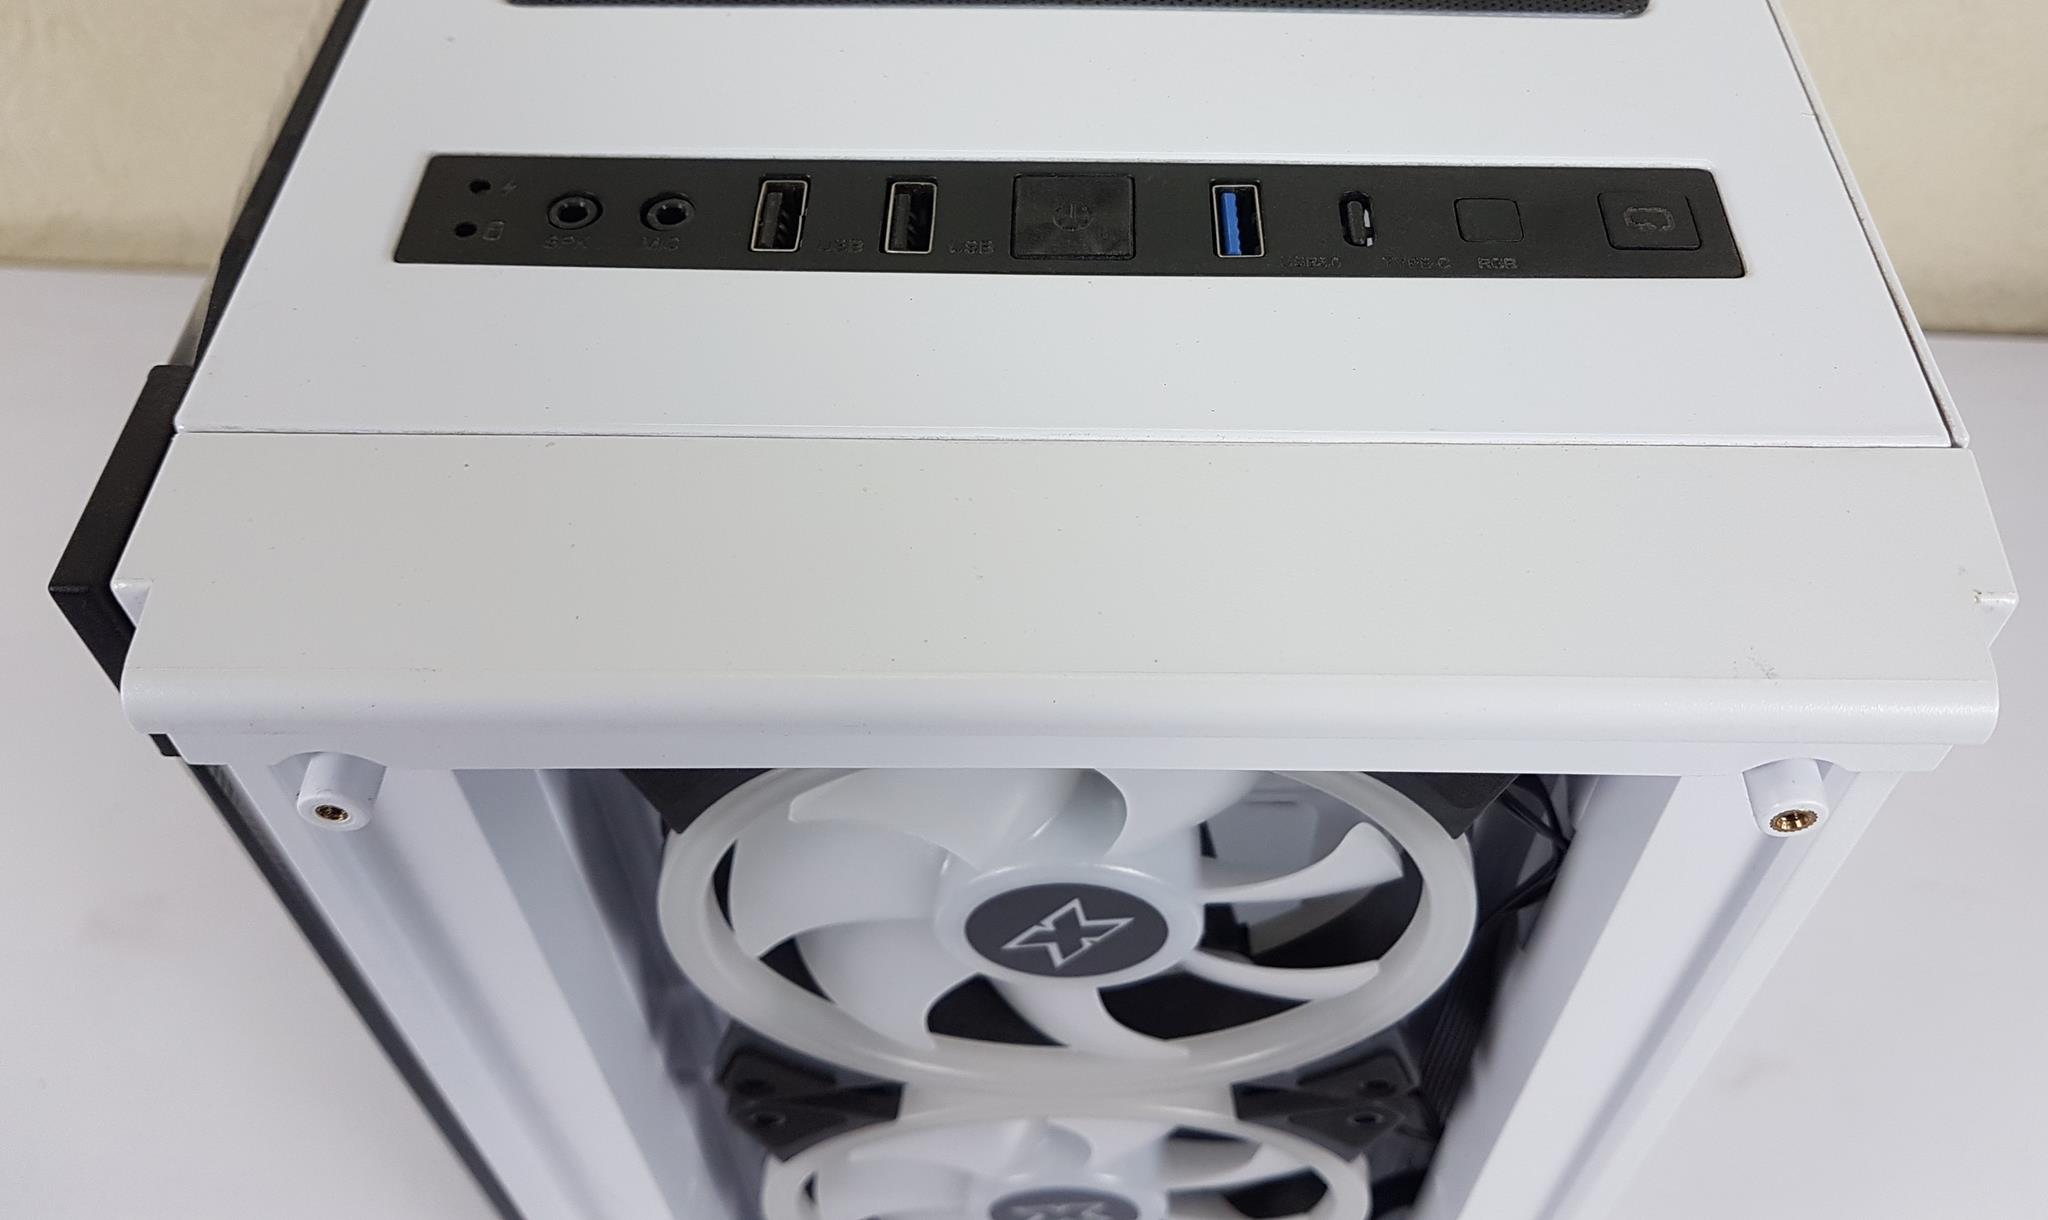
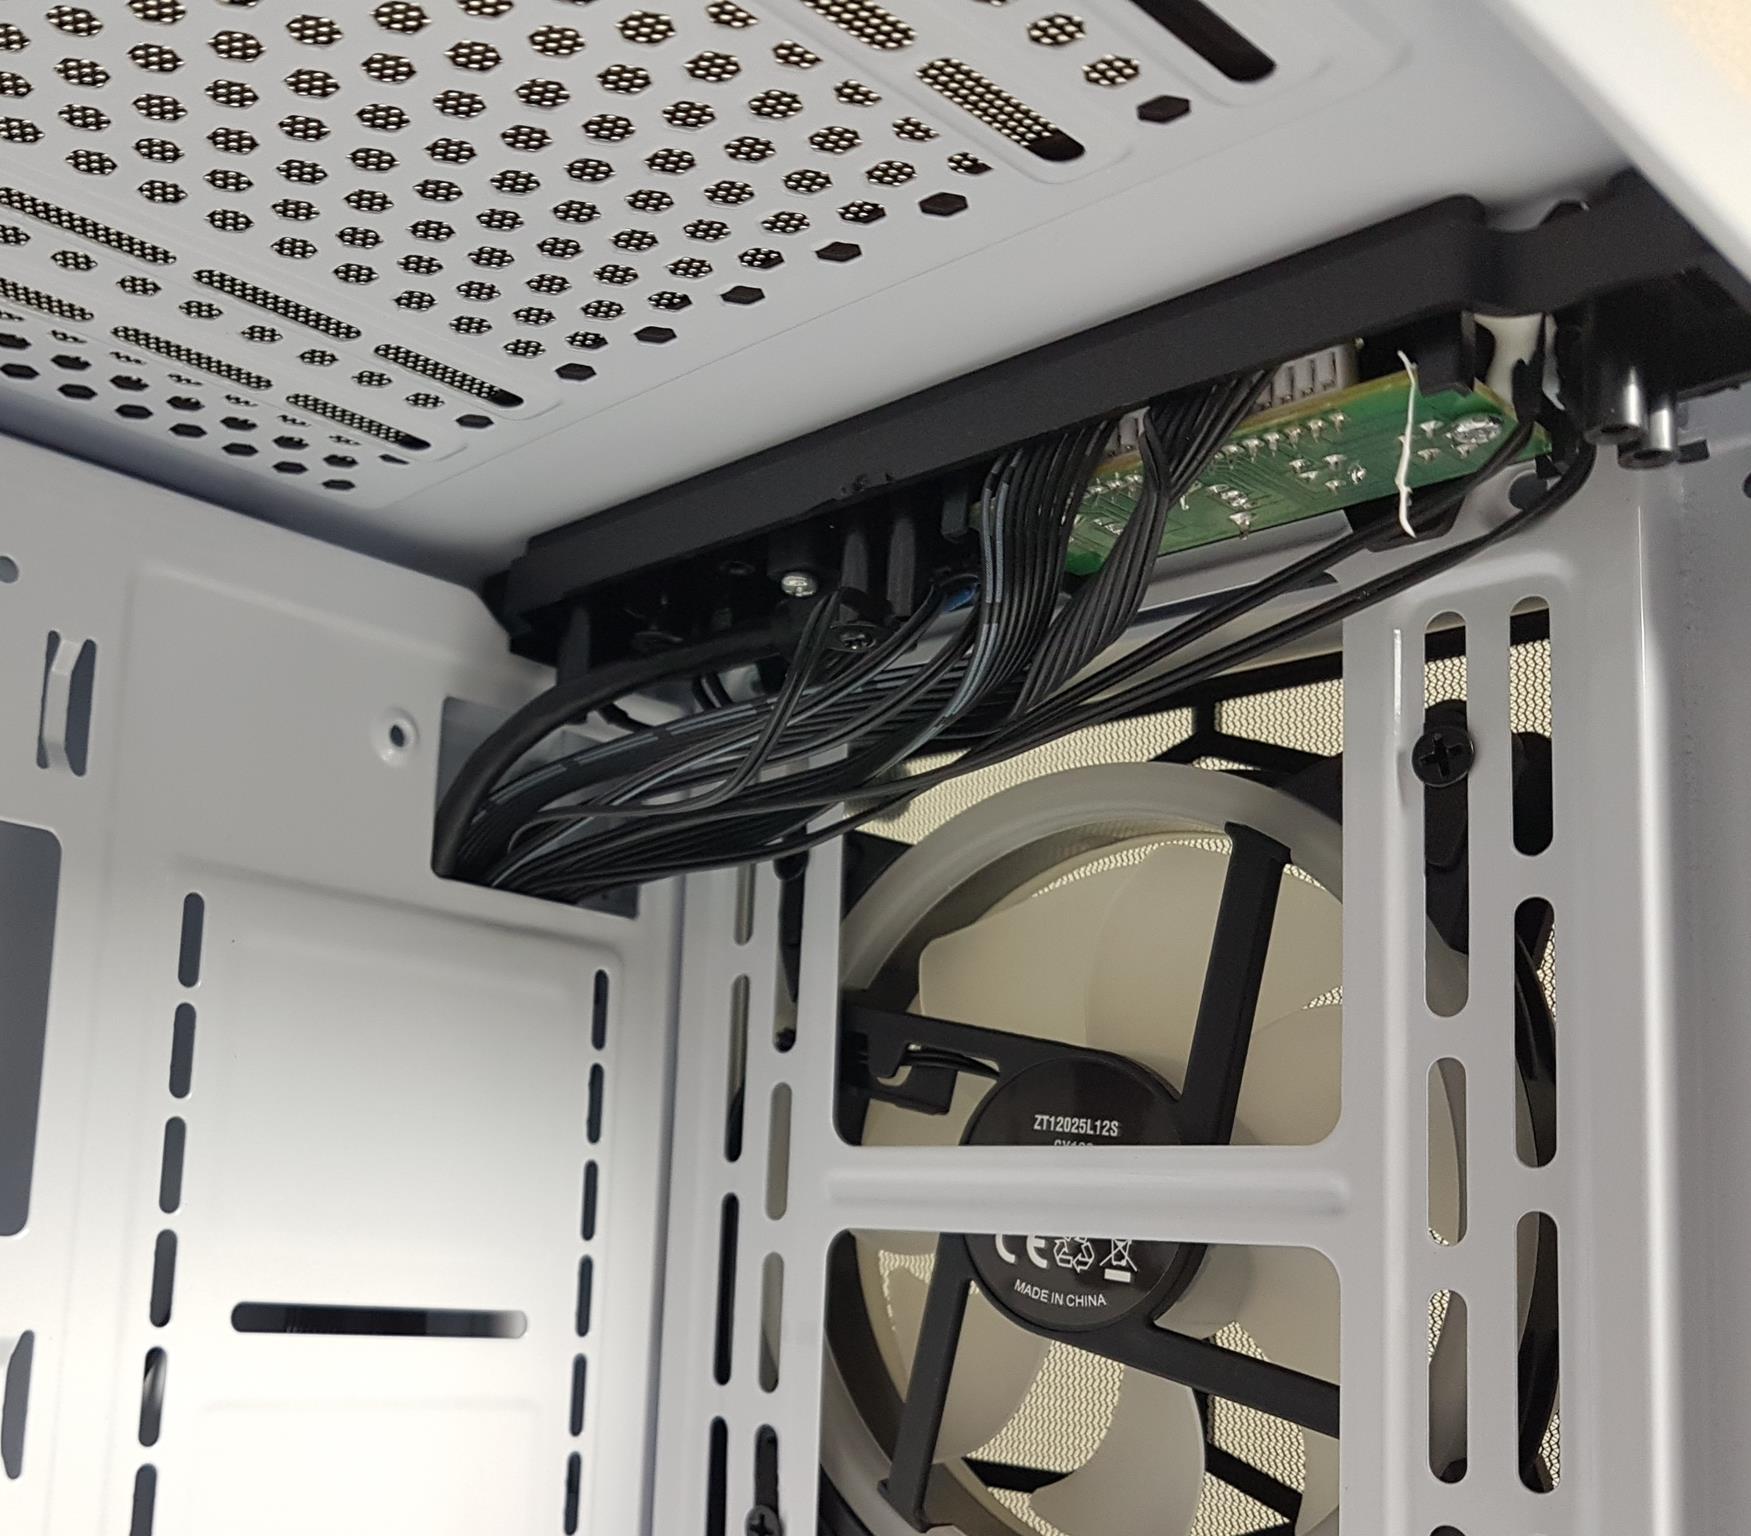
There is a removable non-magnetic dust filter under the PSU vented portion. The cutout on the front panel is visible here. The black colour feet give a sufficient lift to the chassis from the bottom for better ventilation. Looking at the top side, there is a vented portion on the right side with a magnetic dust filter. We have 120mm/140mm fan mounts here. The front IO panel is also provided on the mainframe.

We have a rail mount system that gives the users flexibility to adjust the position of the fans. The I/O panel is located on the top frame of the chassis.
The following connectivity options are on the I/O panel:
- LED Indicators
- Audio Jacks
- 2x USB 2.0 Ports
- Power Button
- 1x USB 3.0 Port
- 1x Non-Functional USB Type C Port
- RGB Button
- Reset Button
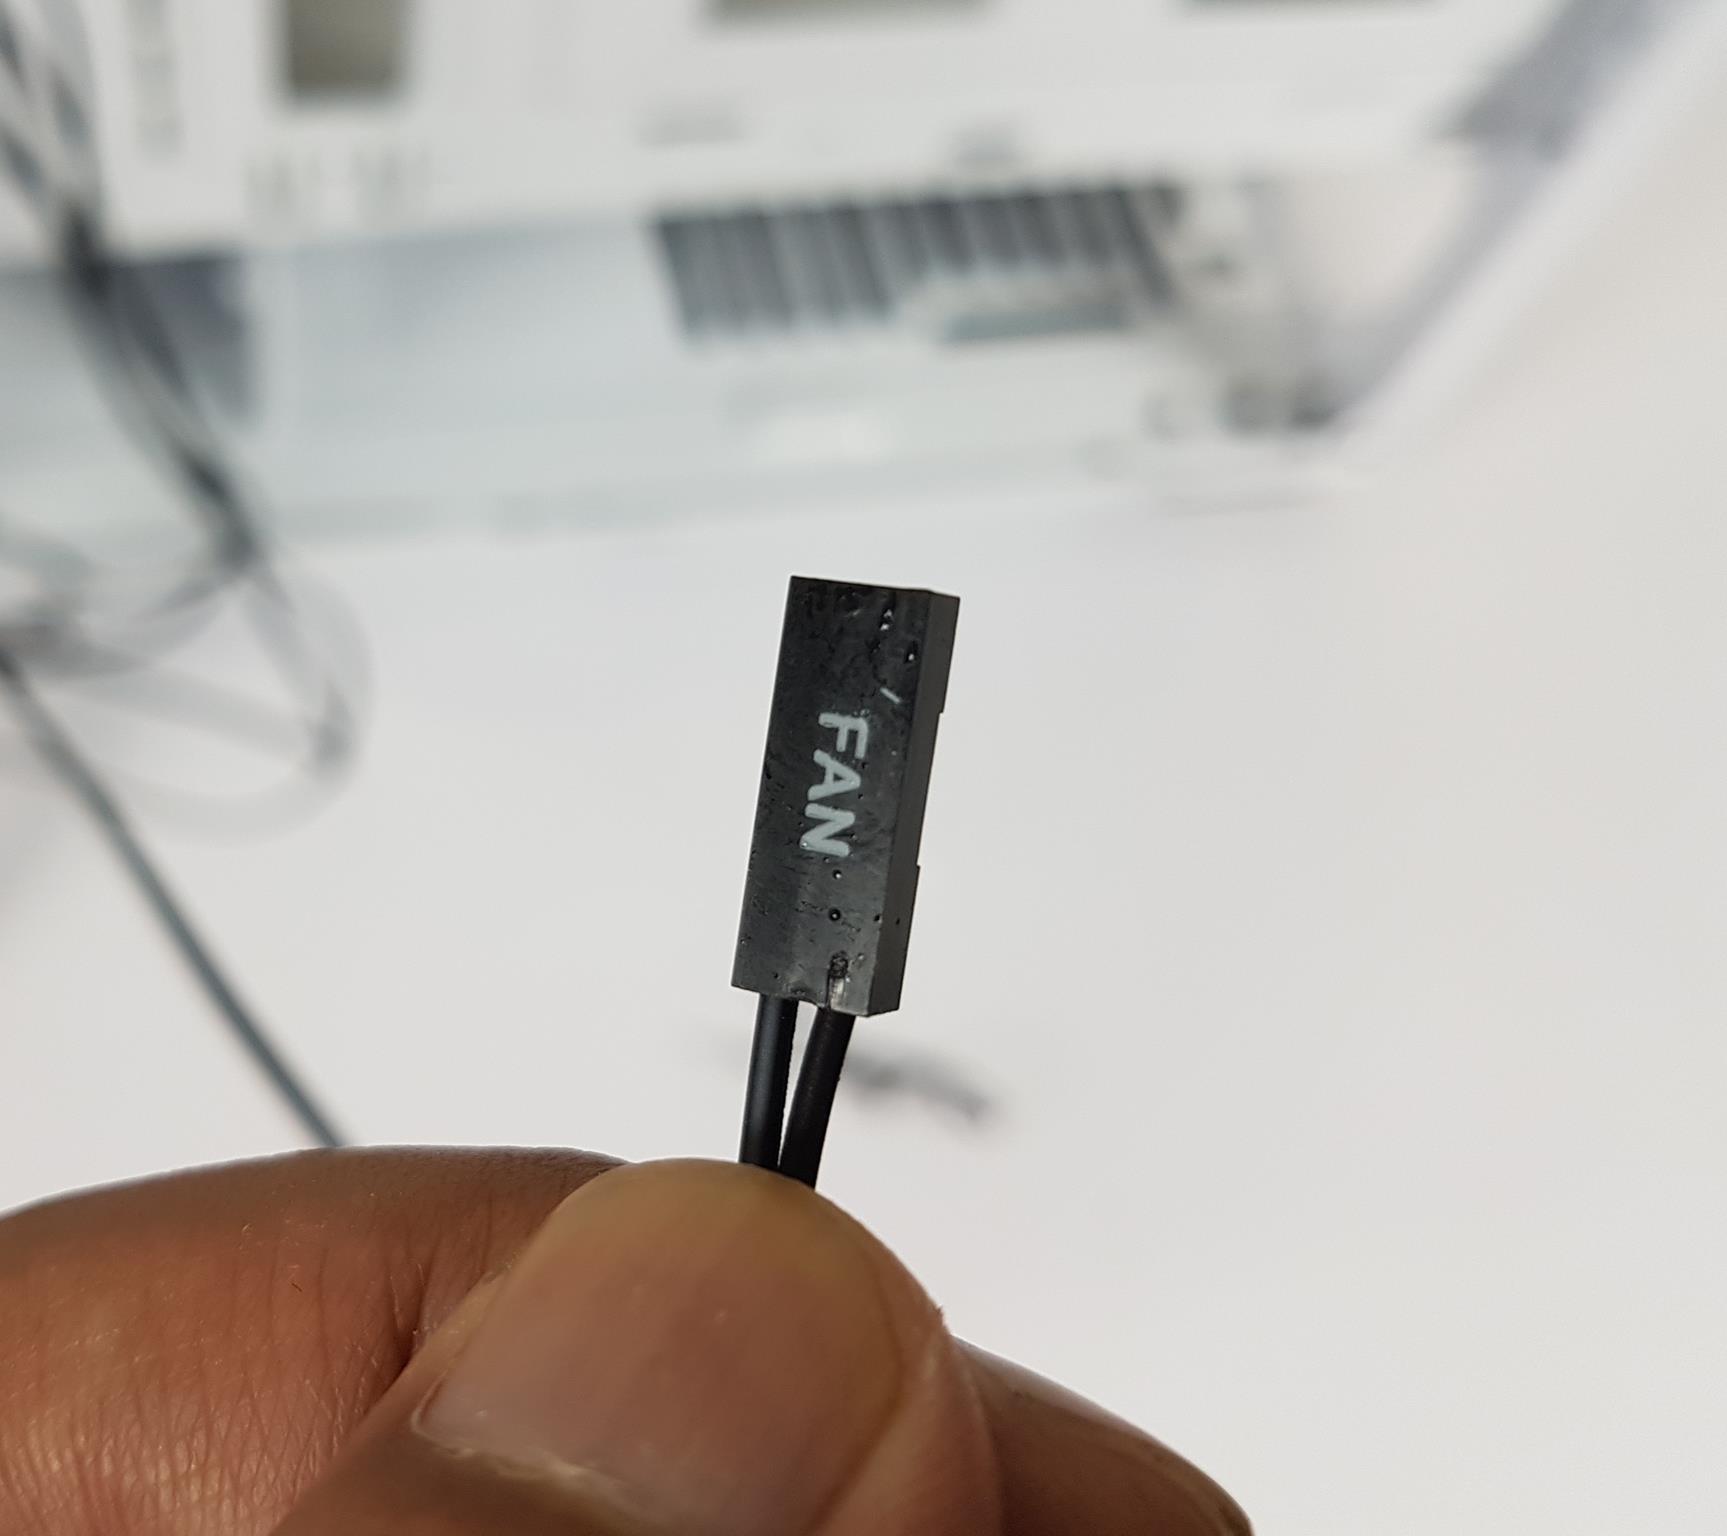
RGB button does not do anything as its 2-pin connector can’t be connected to the provided hub/controller. This is an oddly strange implementation.
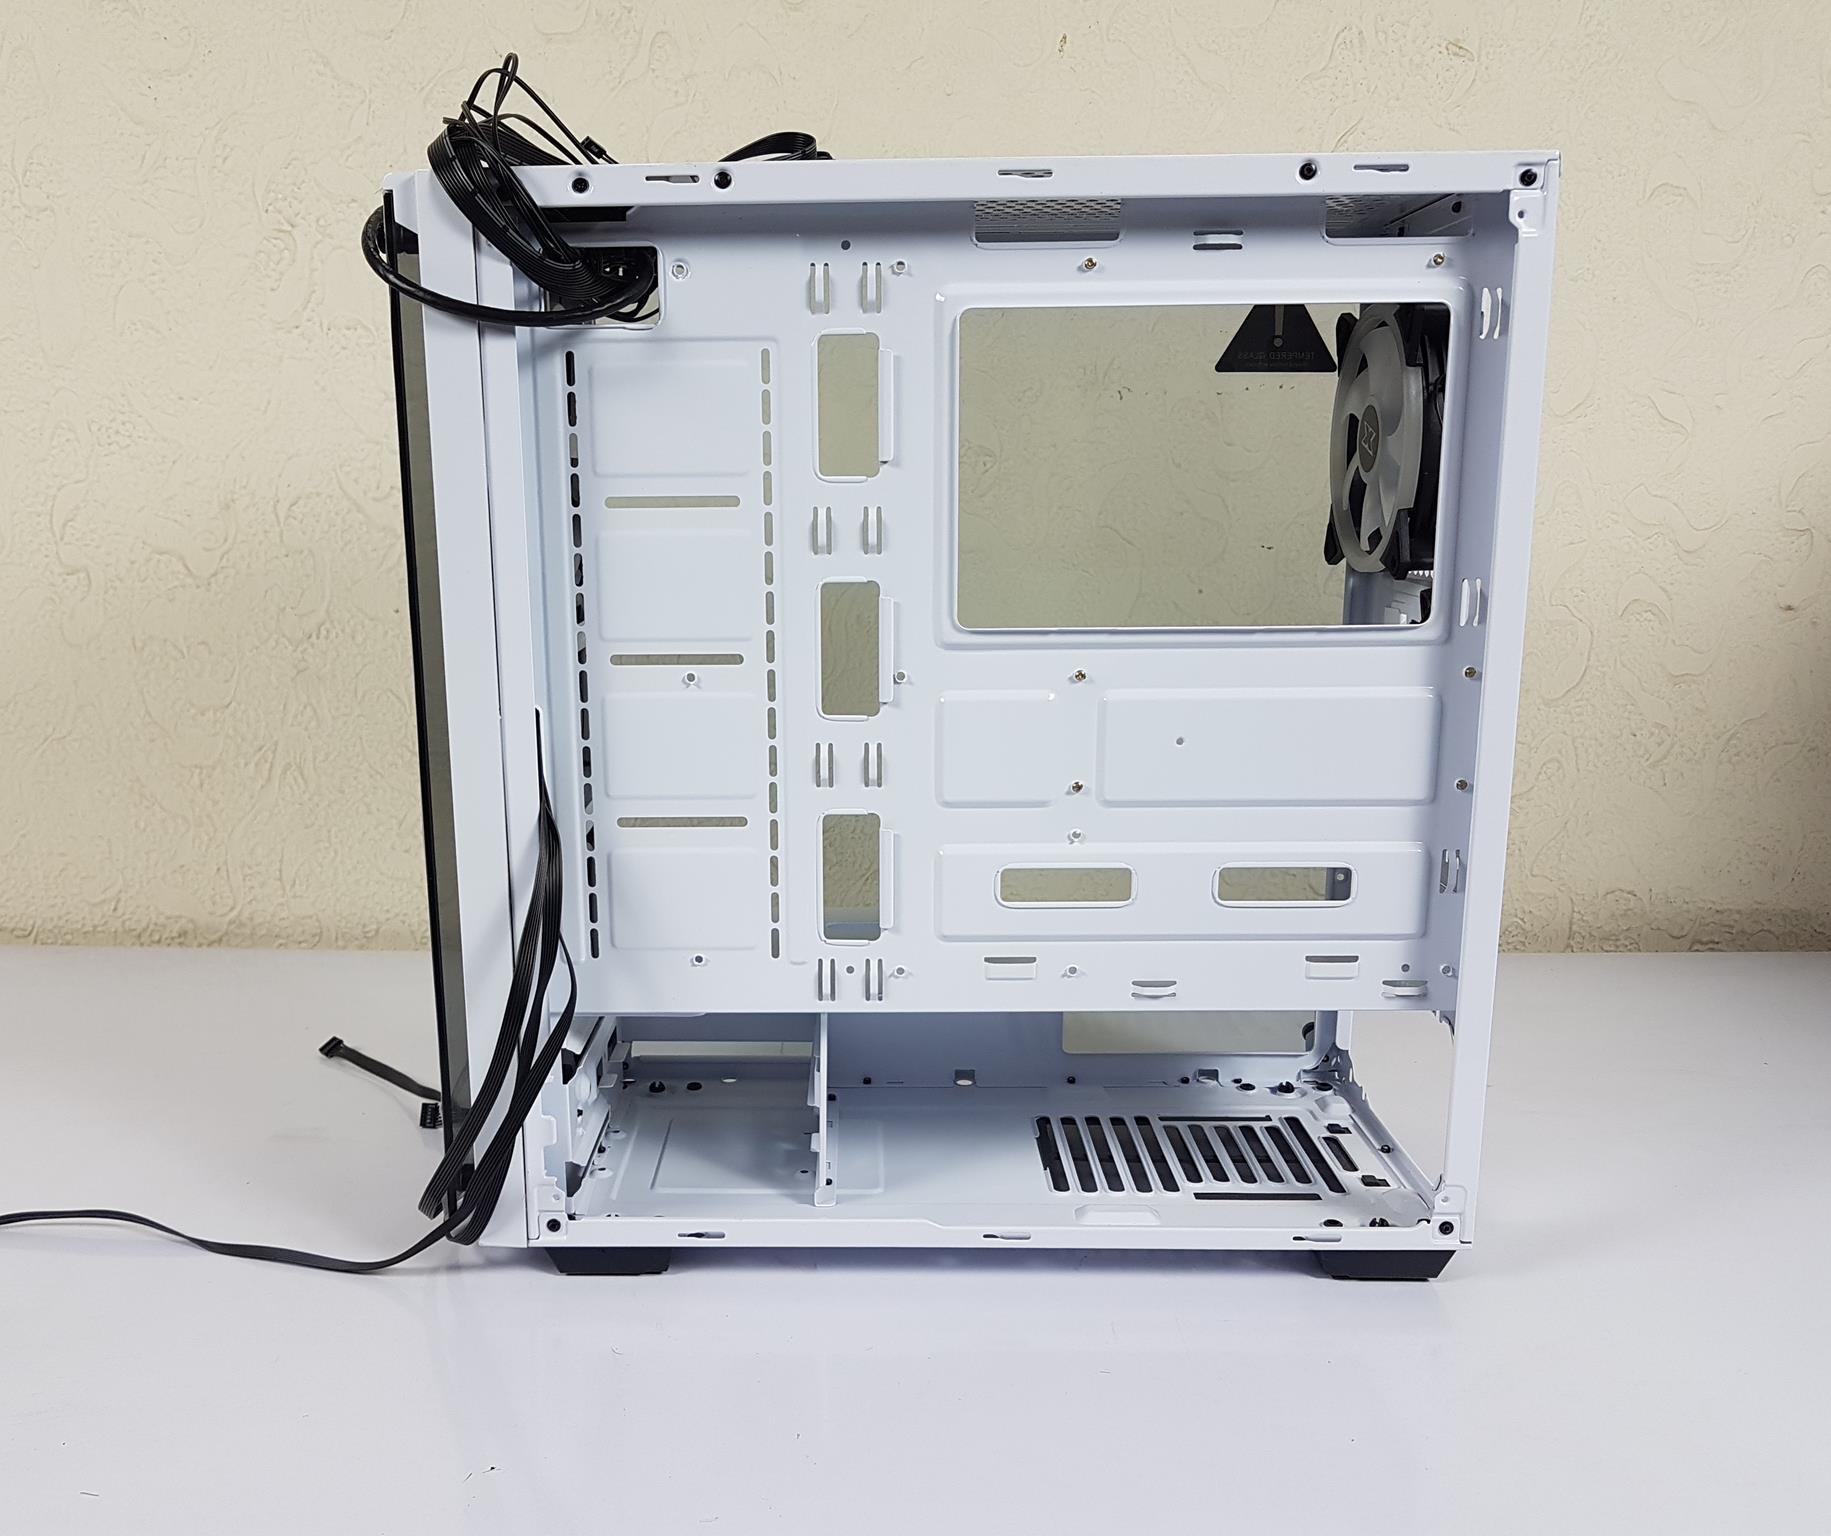
Internal Look
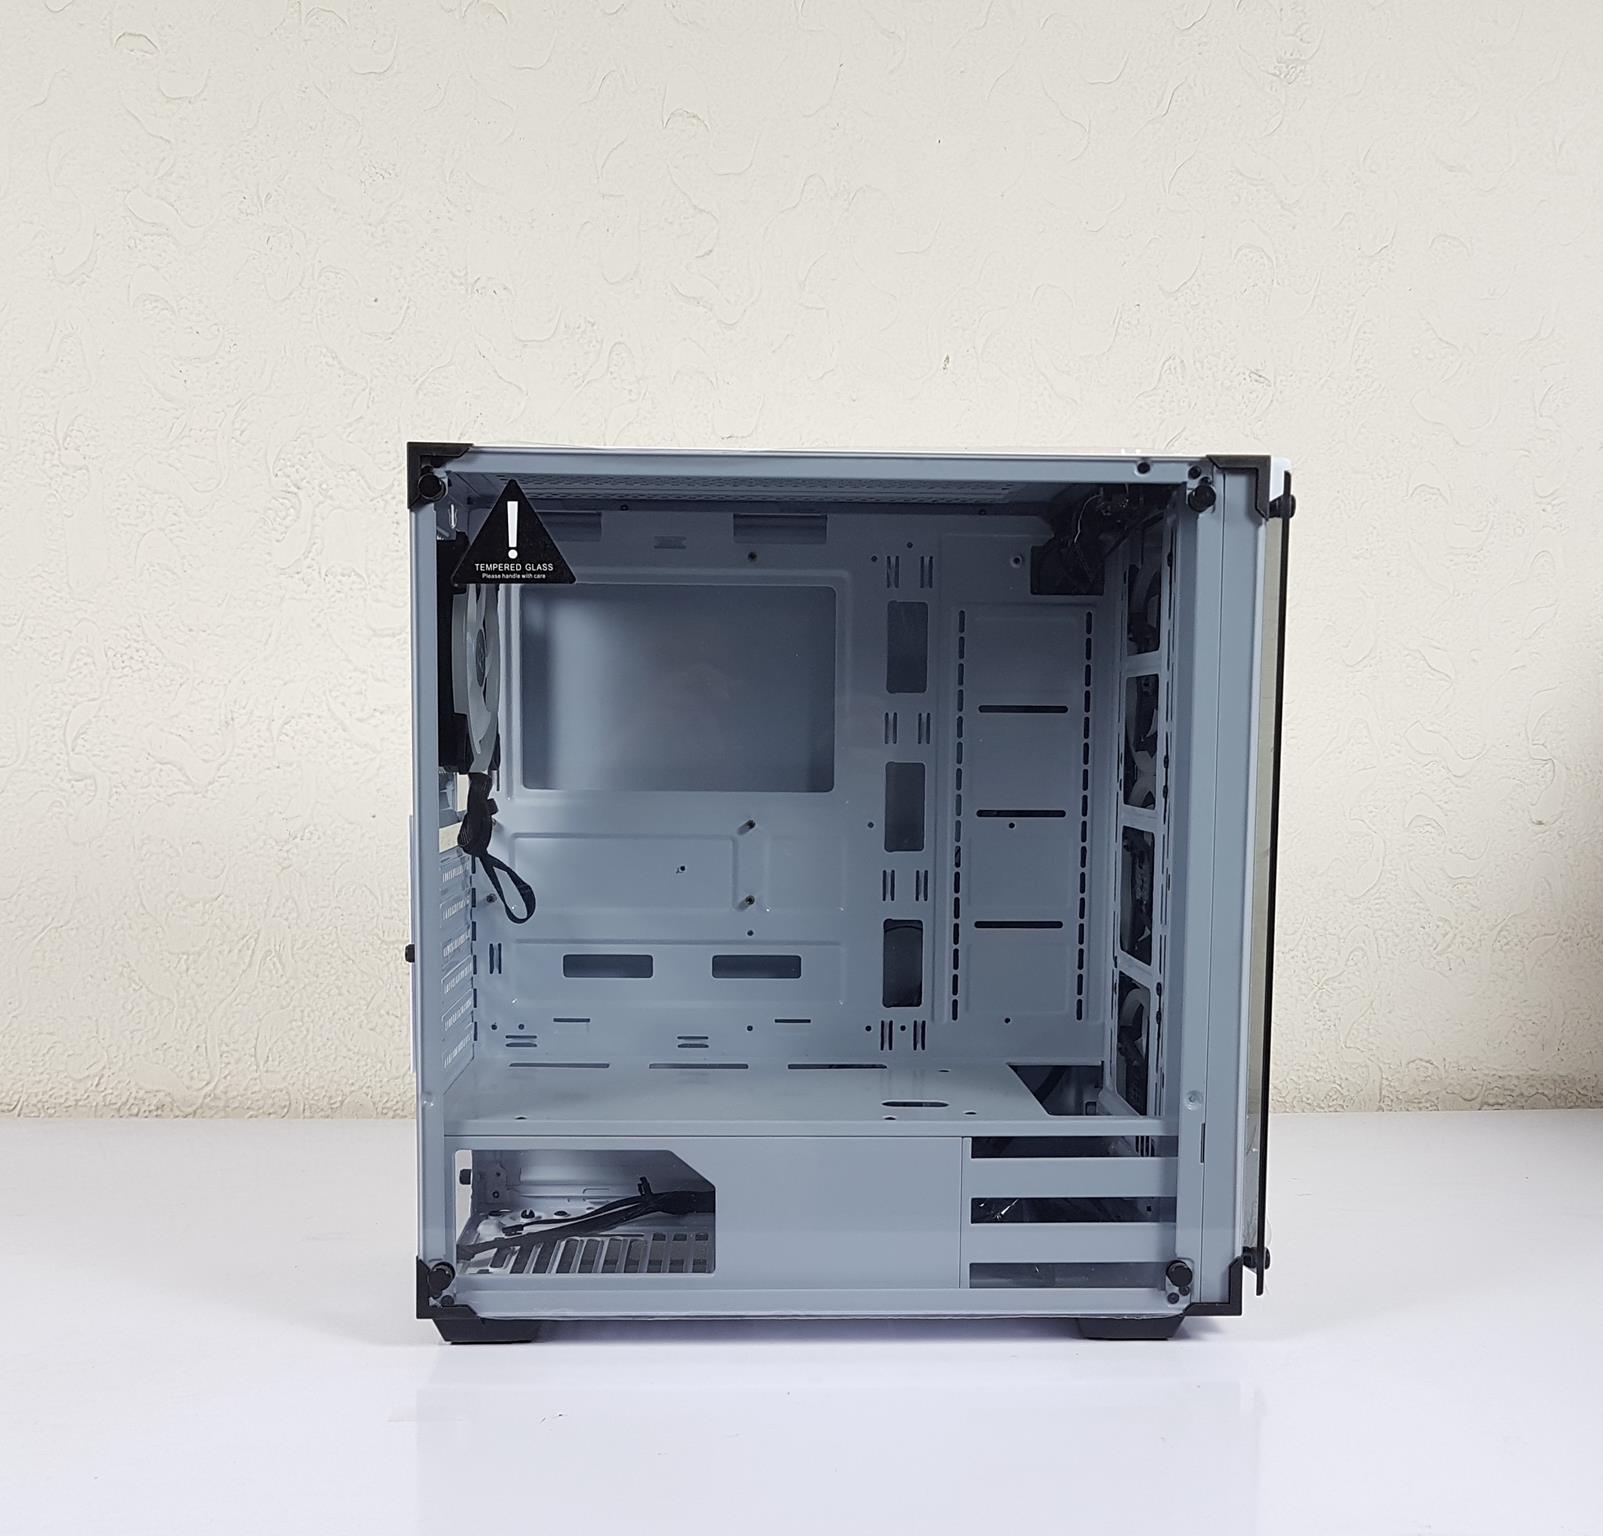
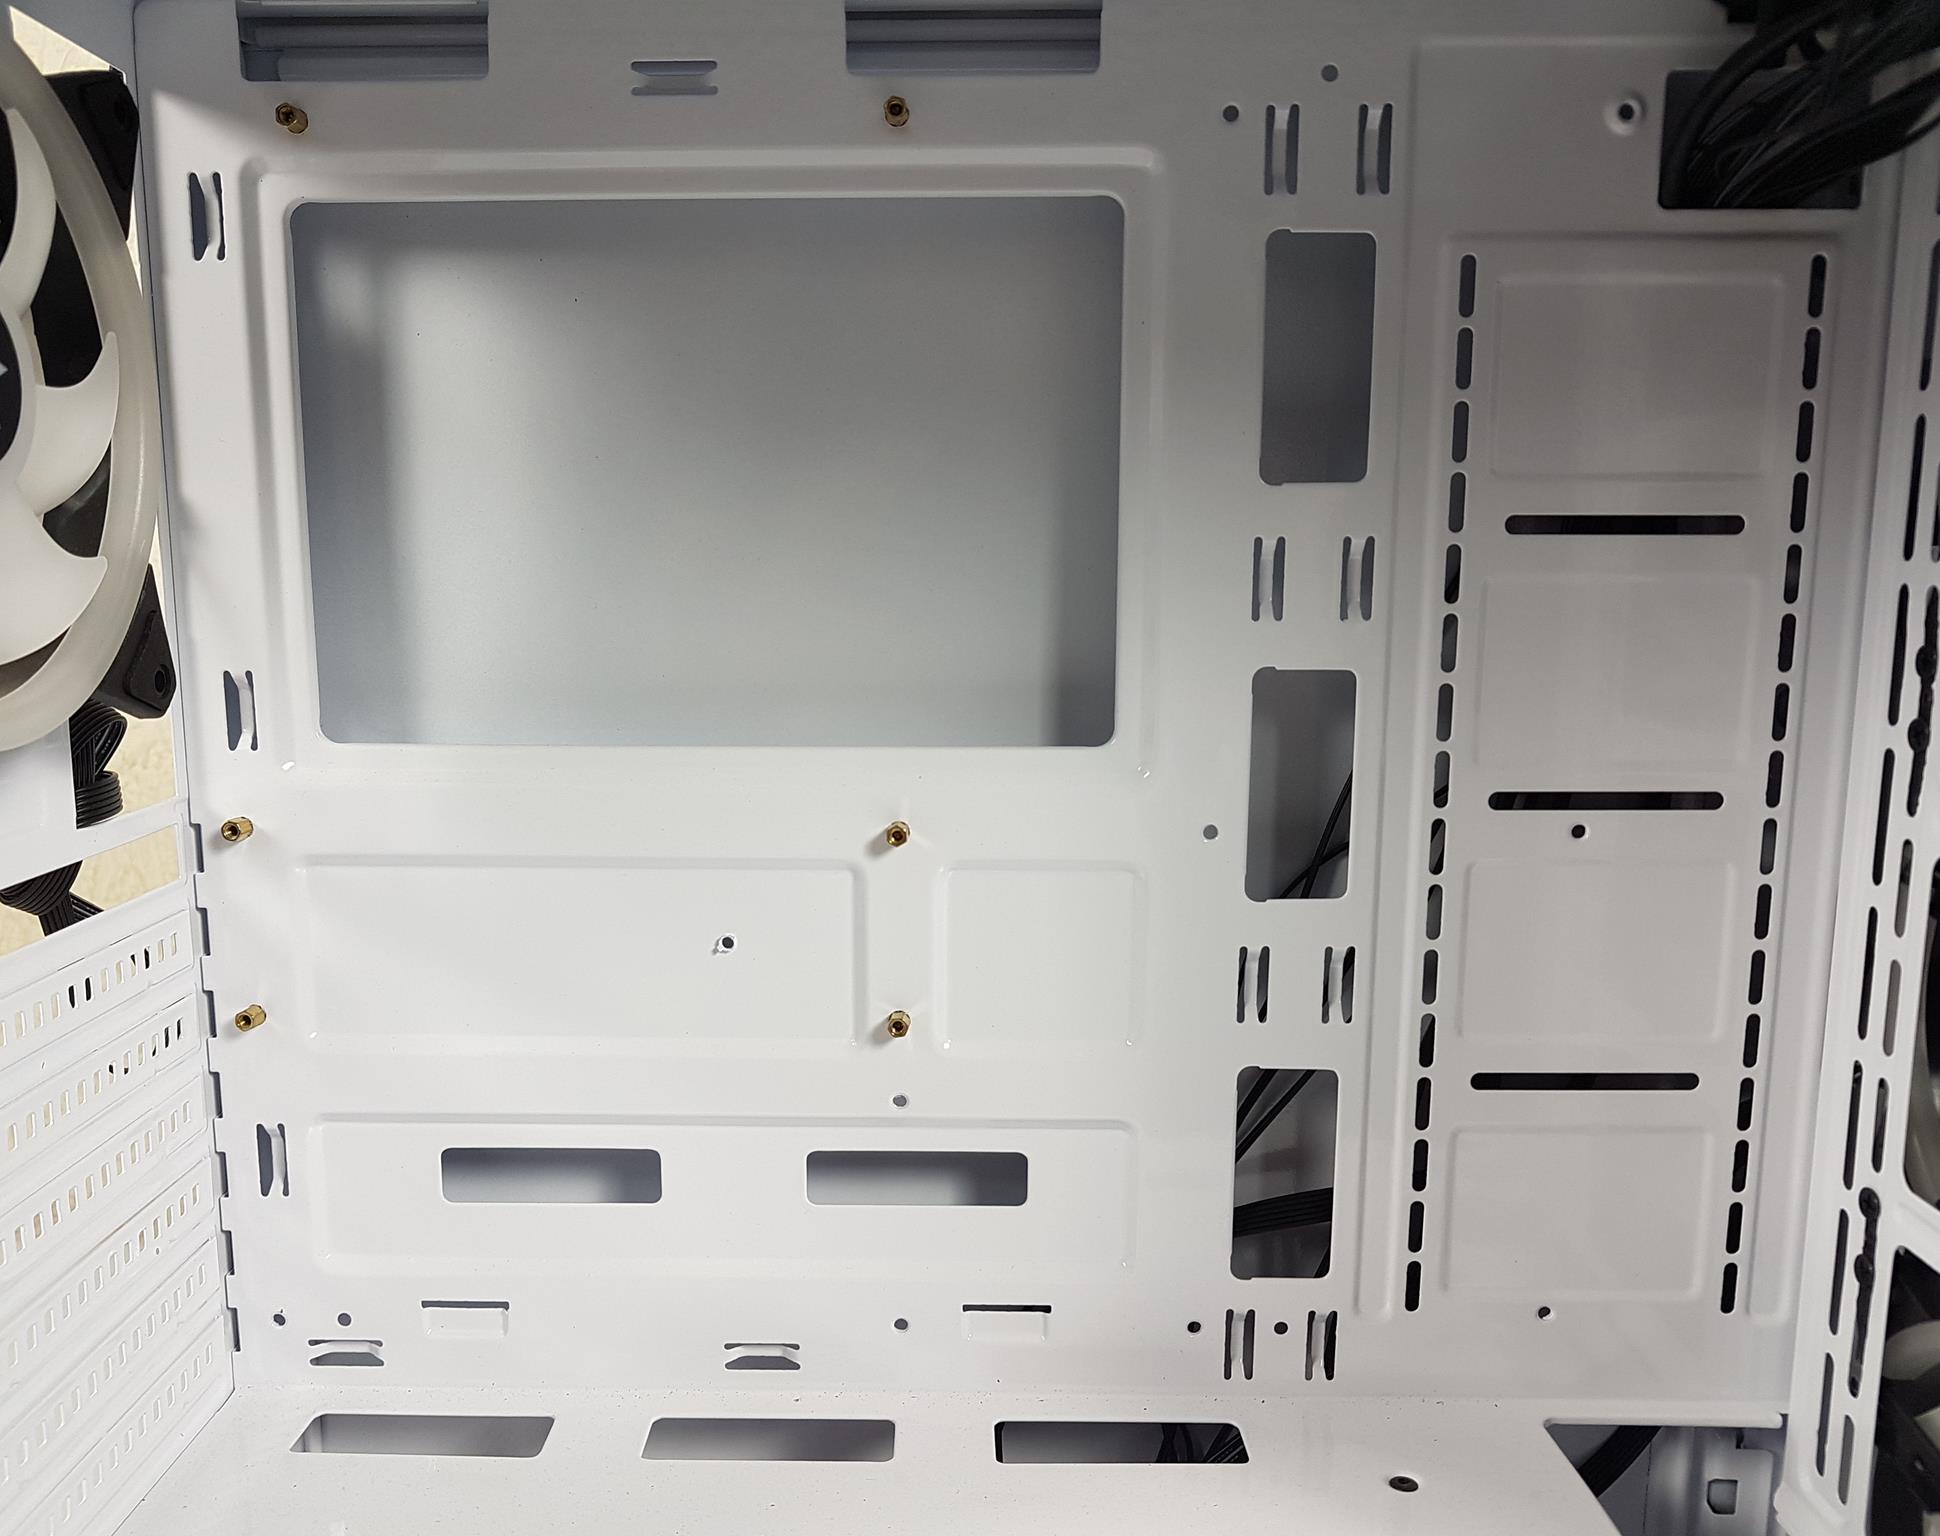
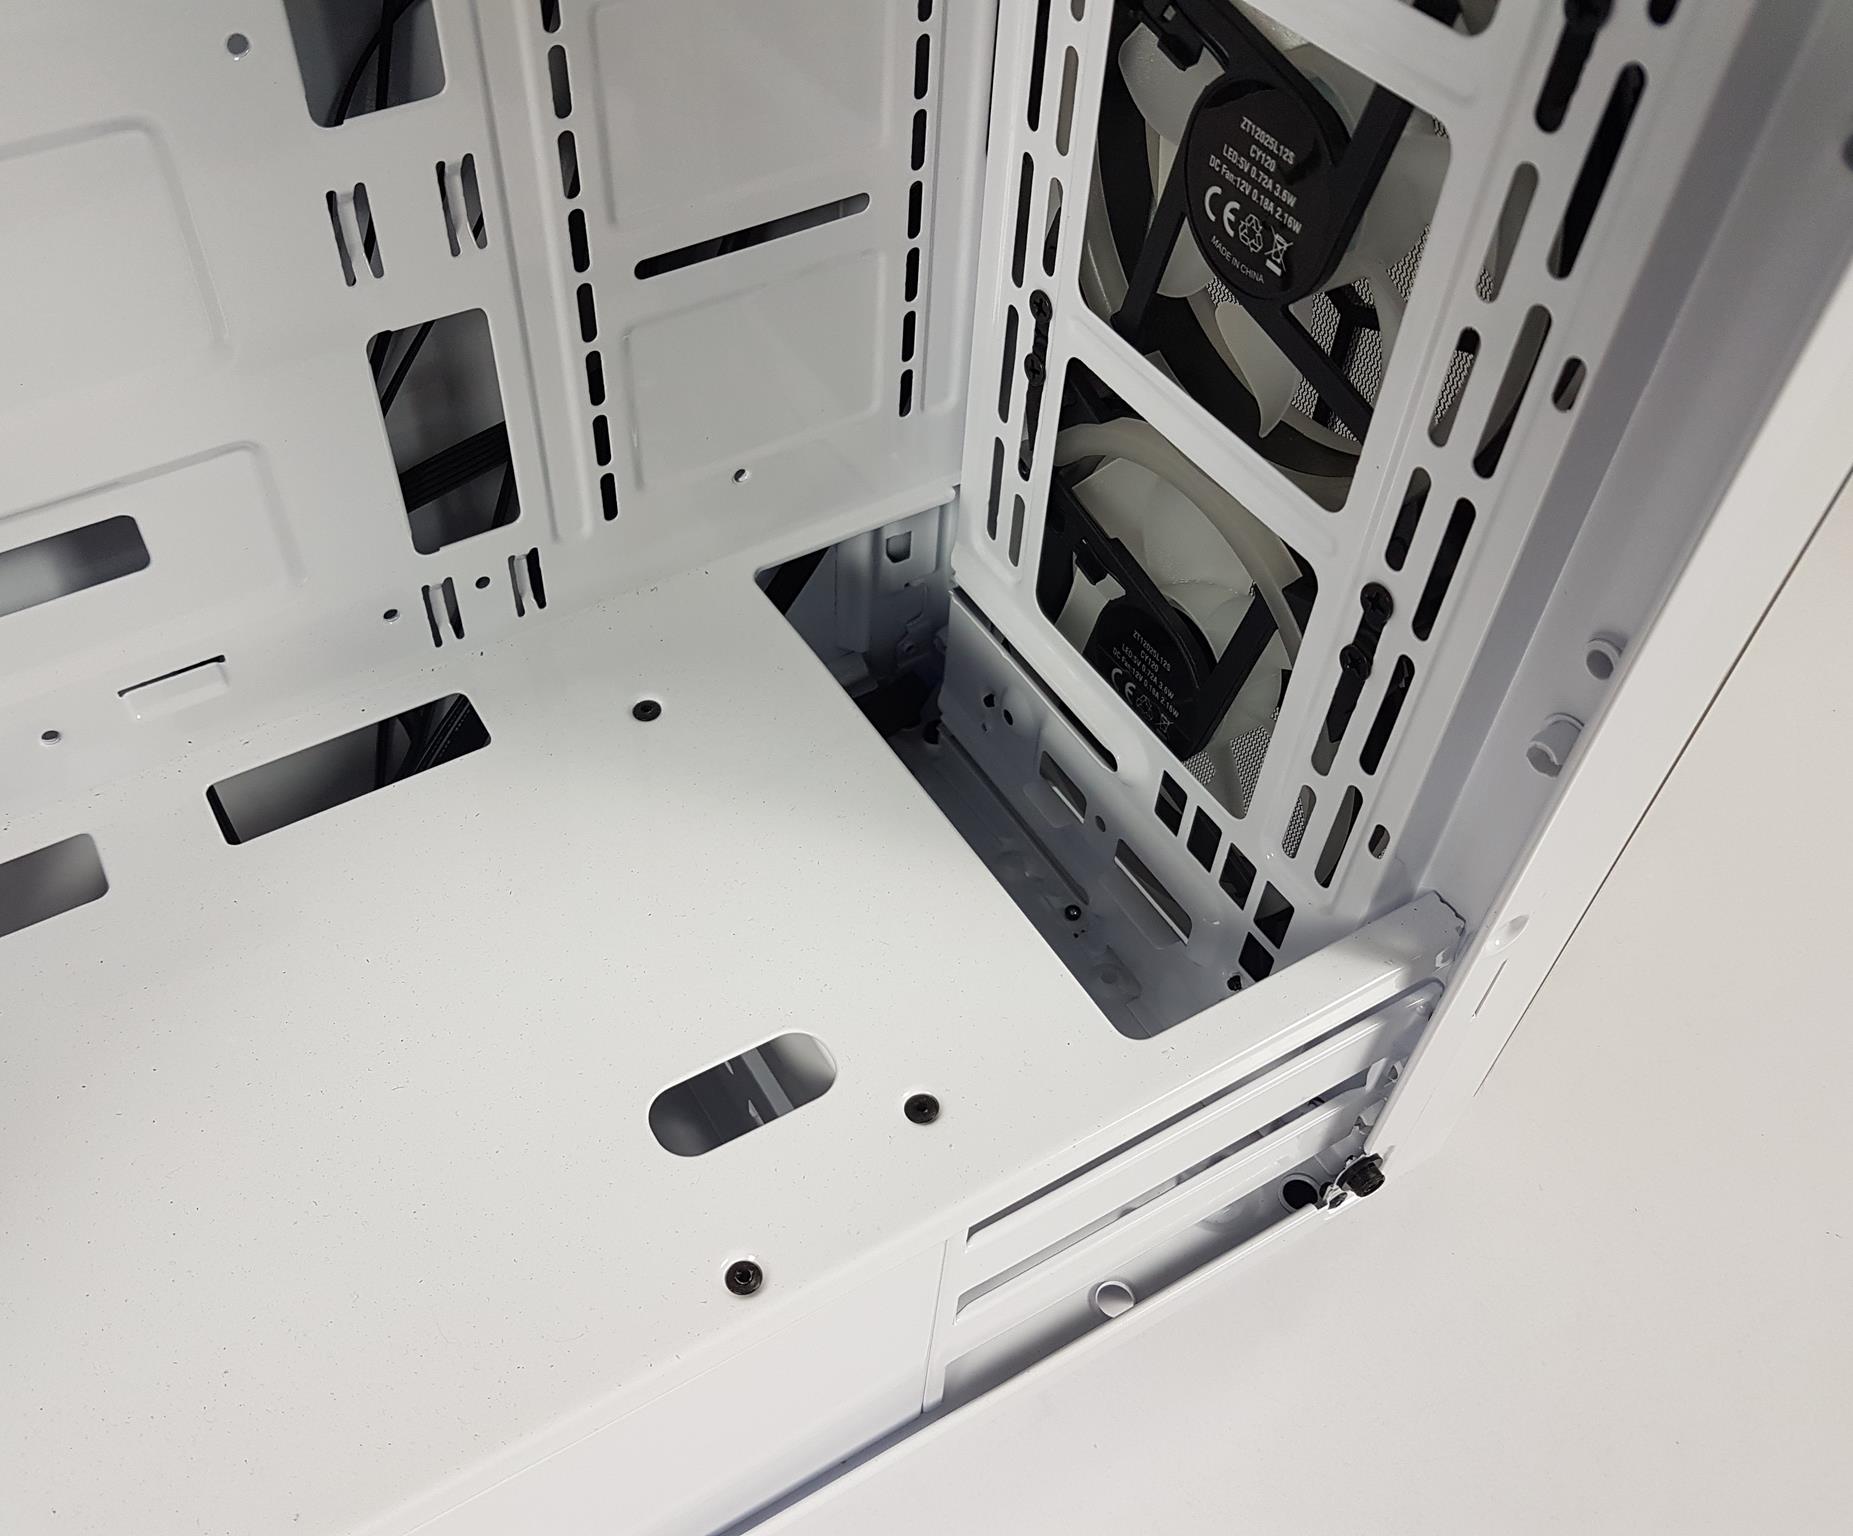
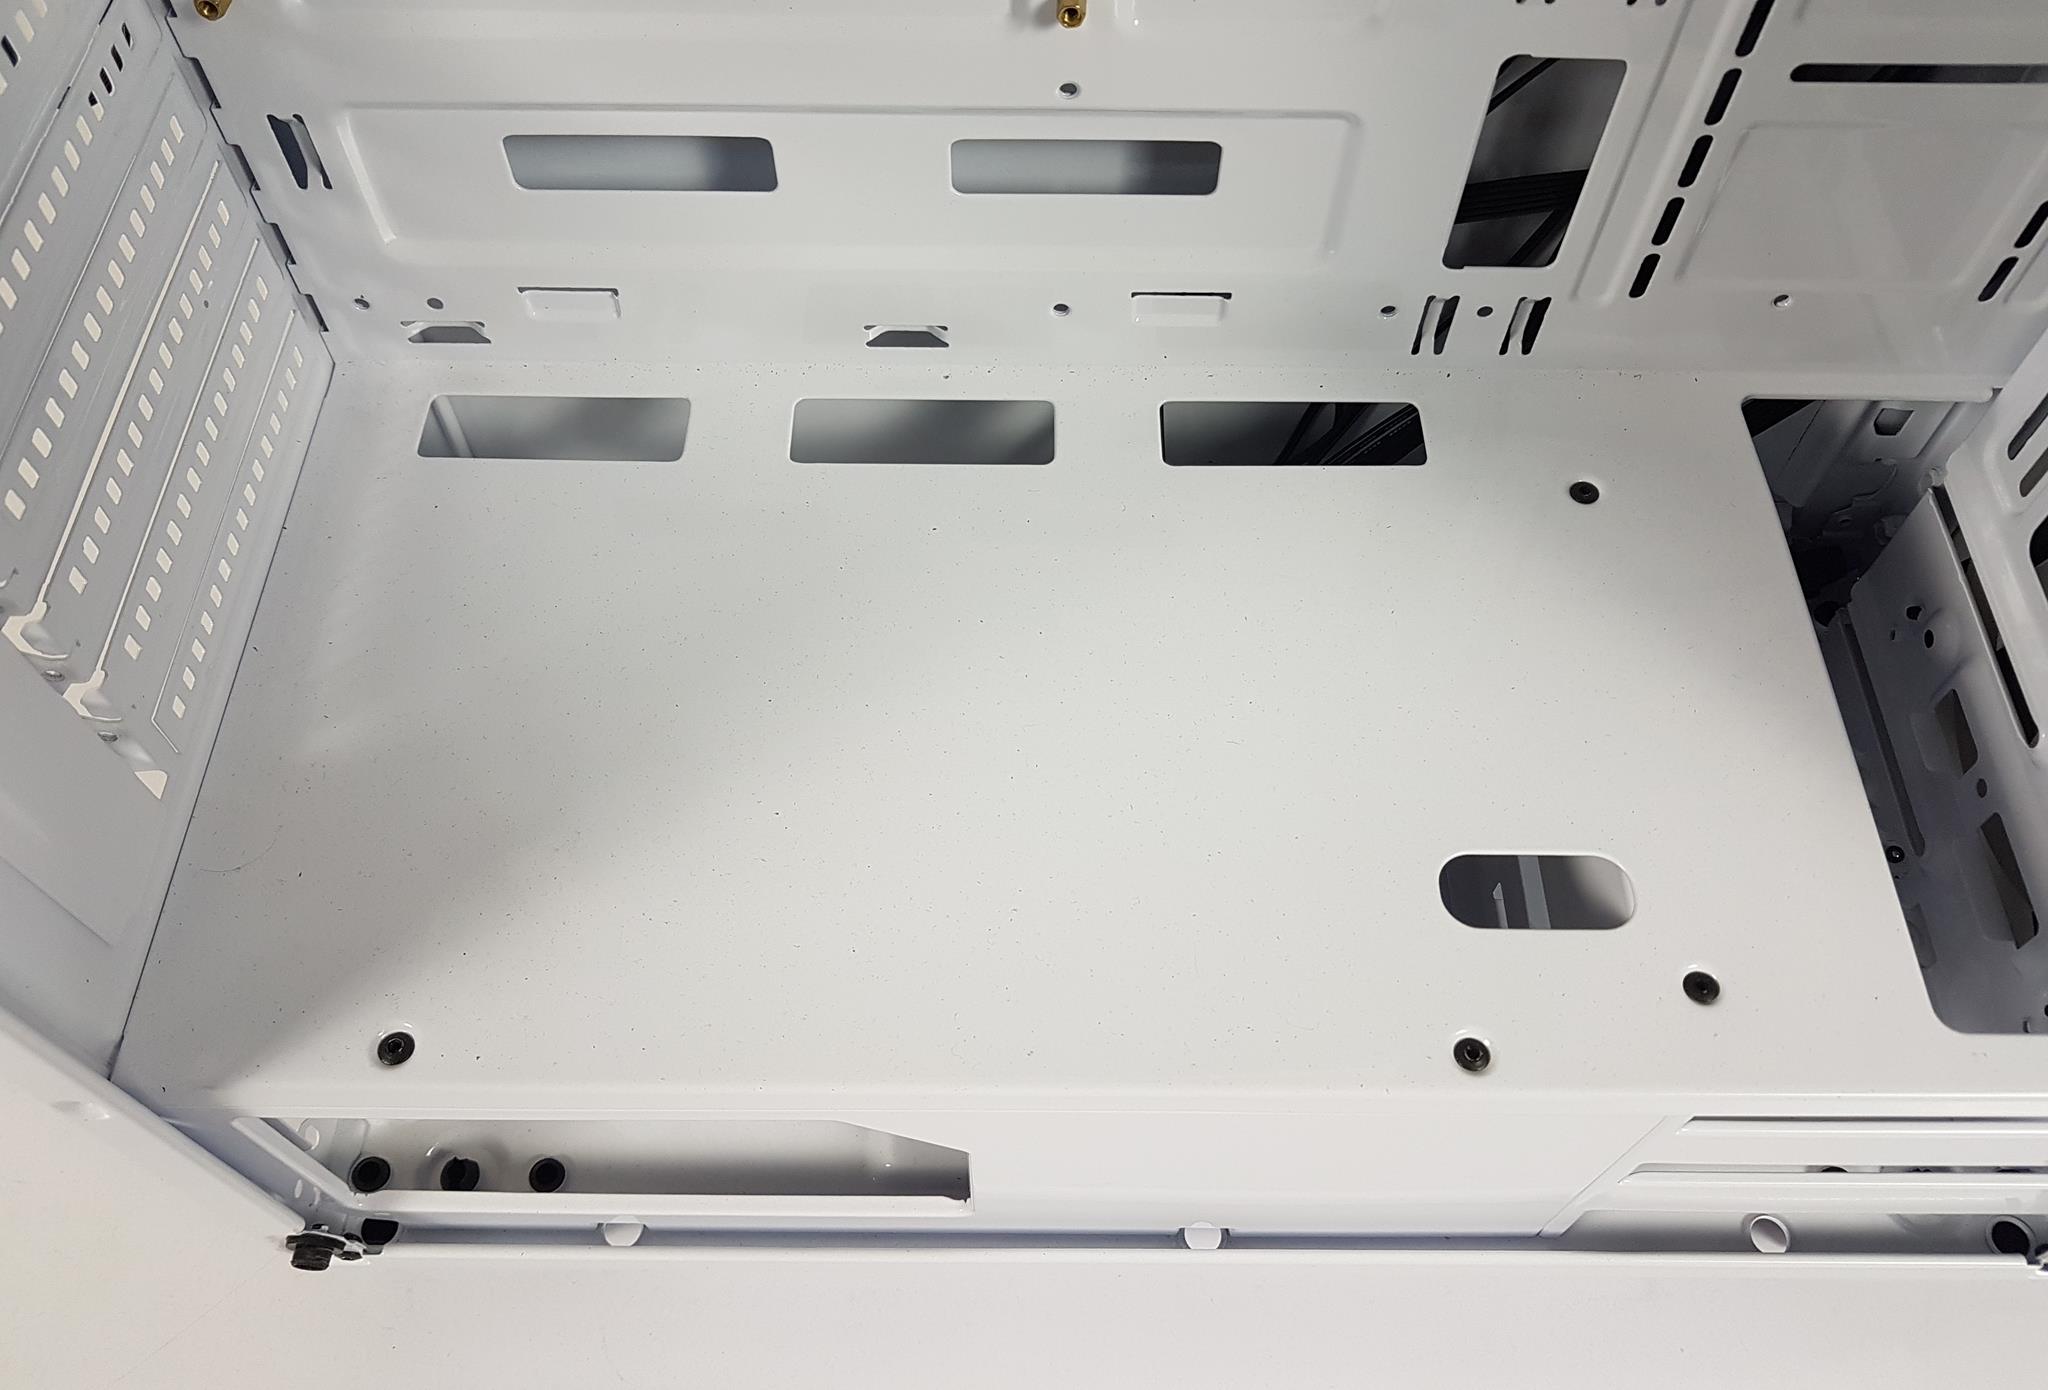
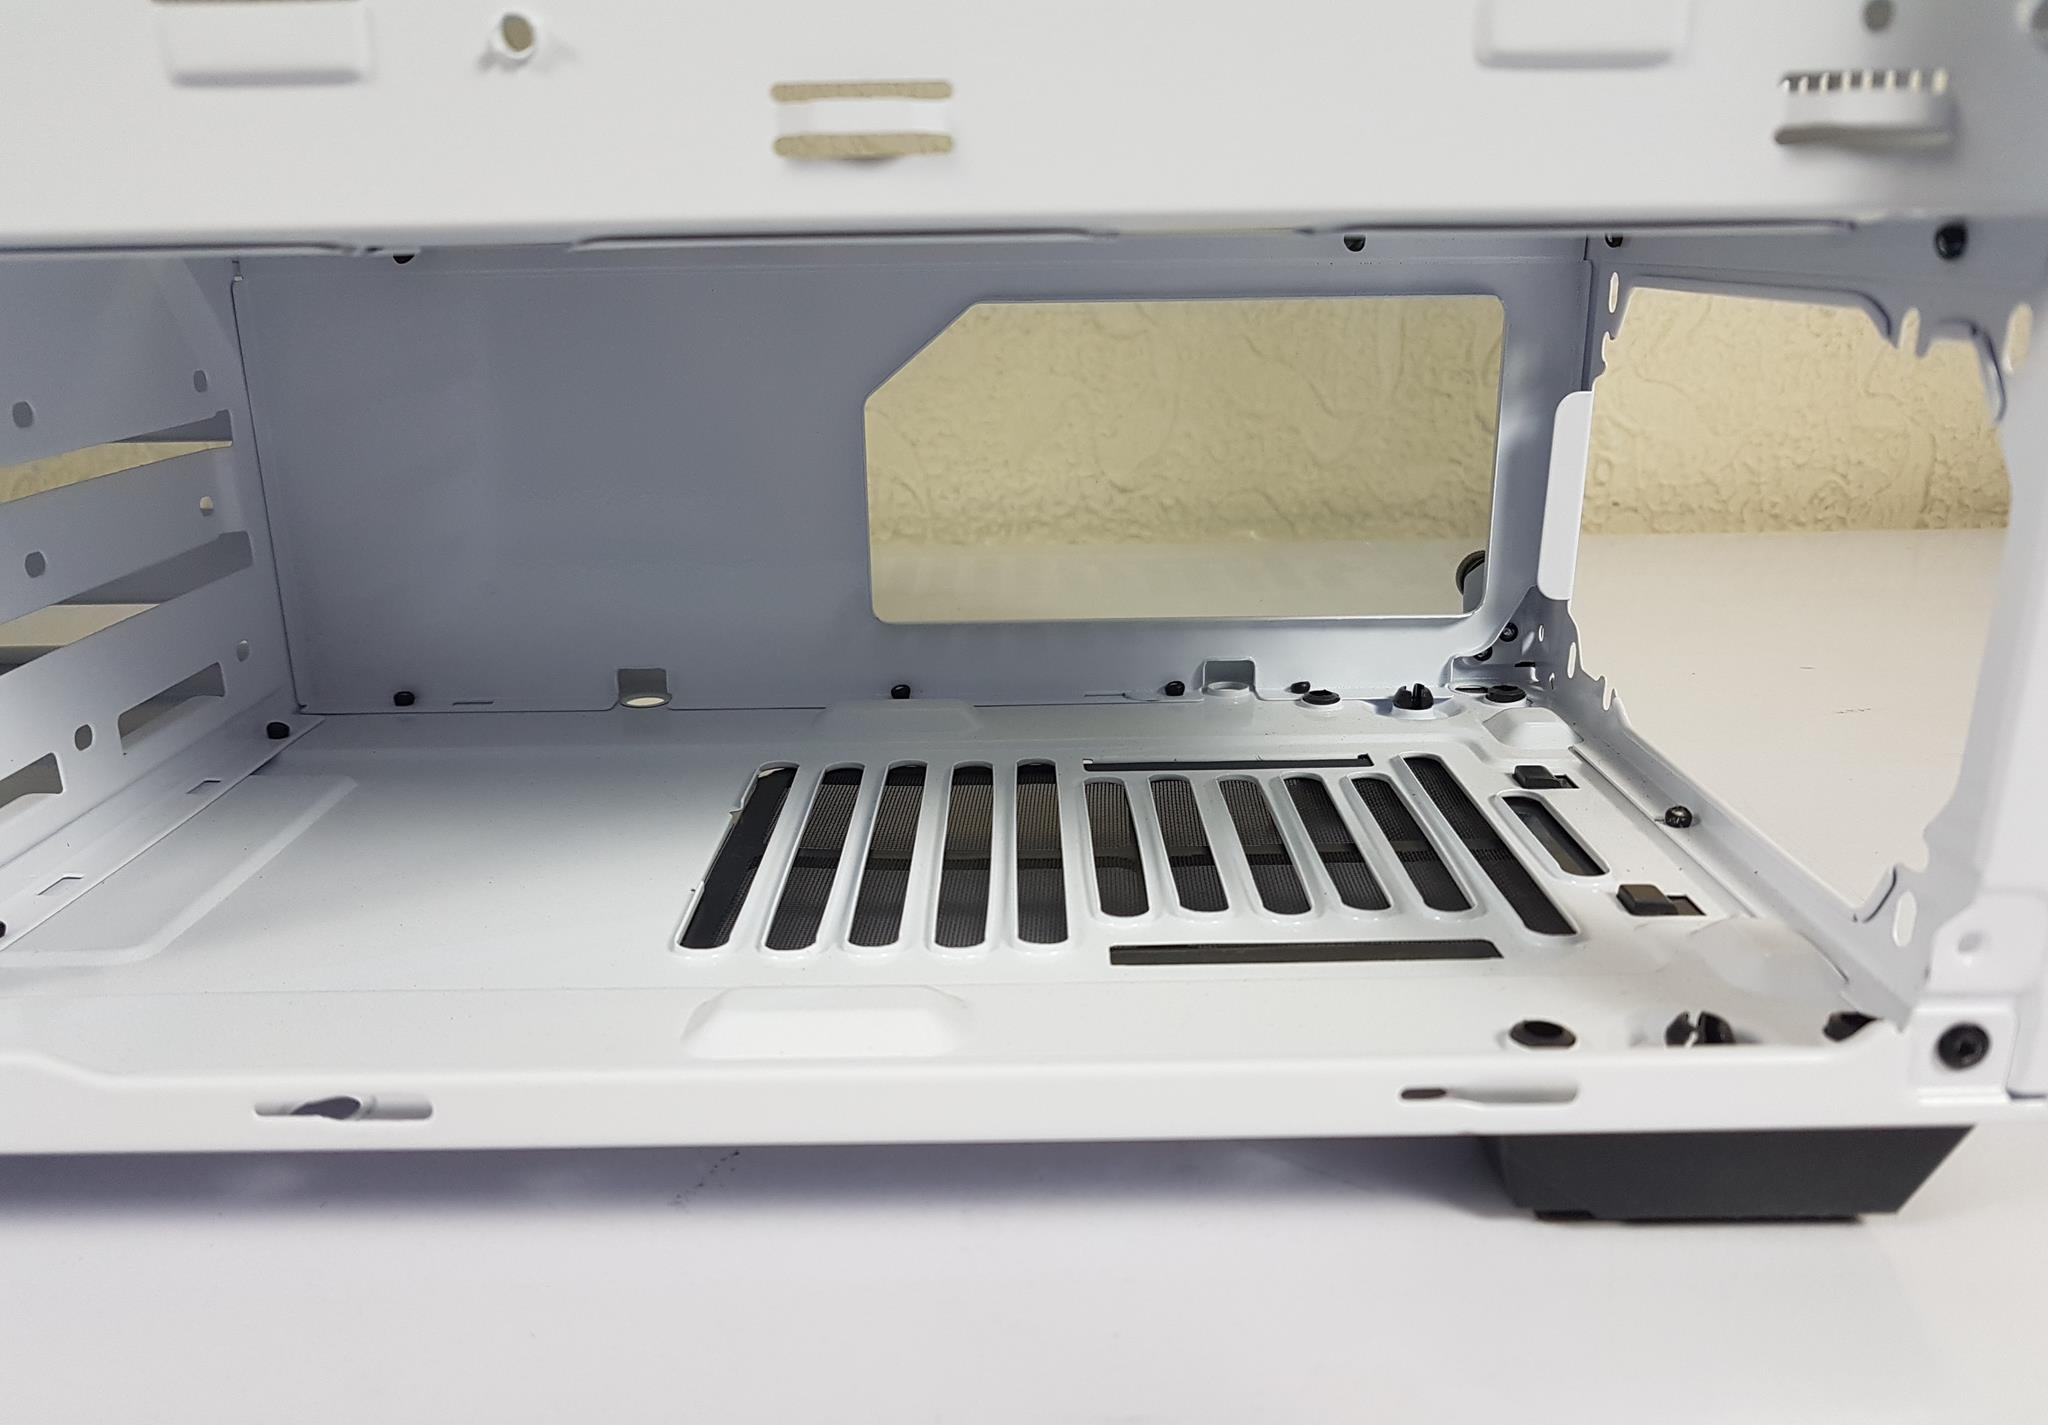
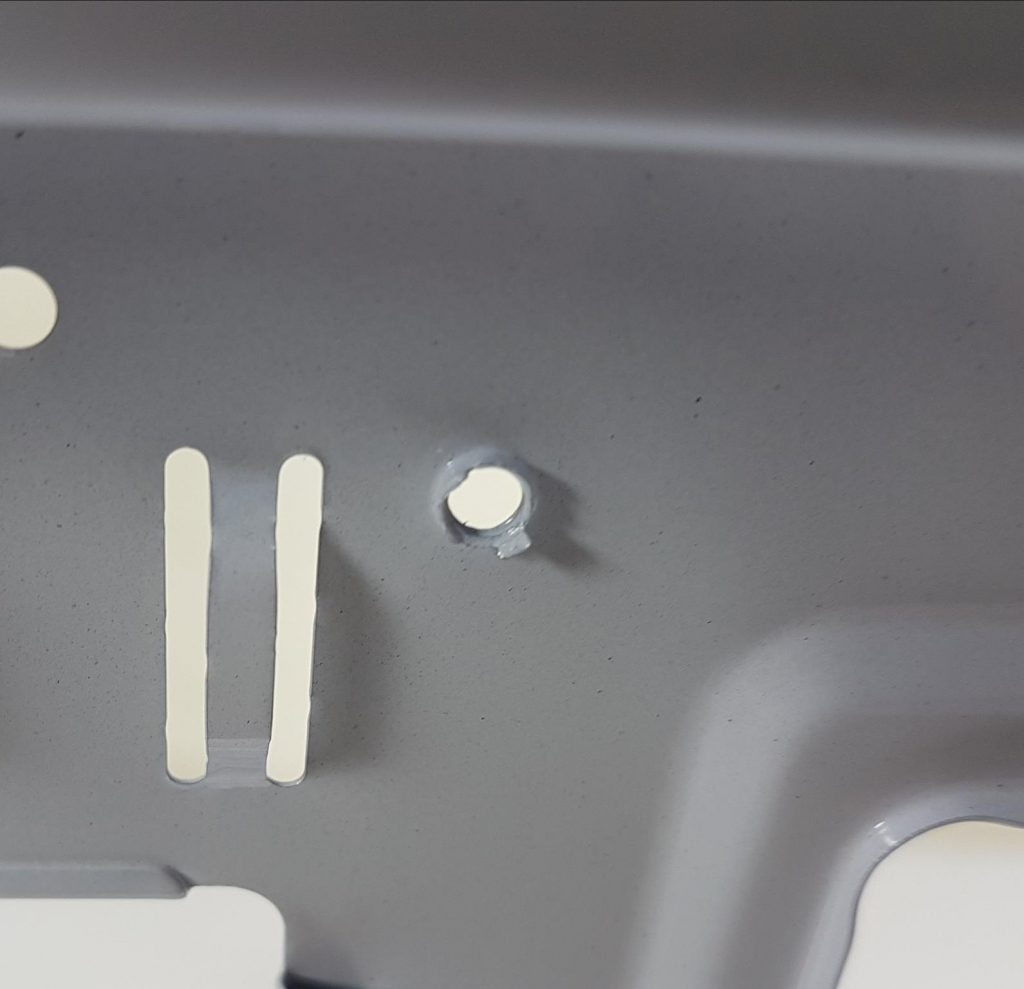
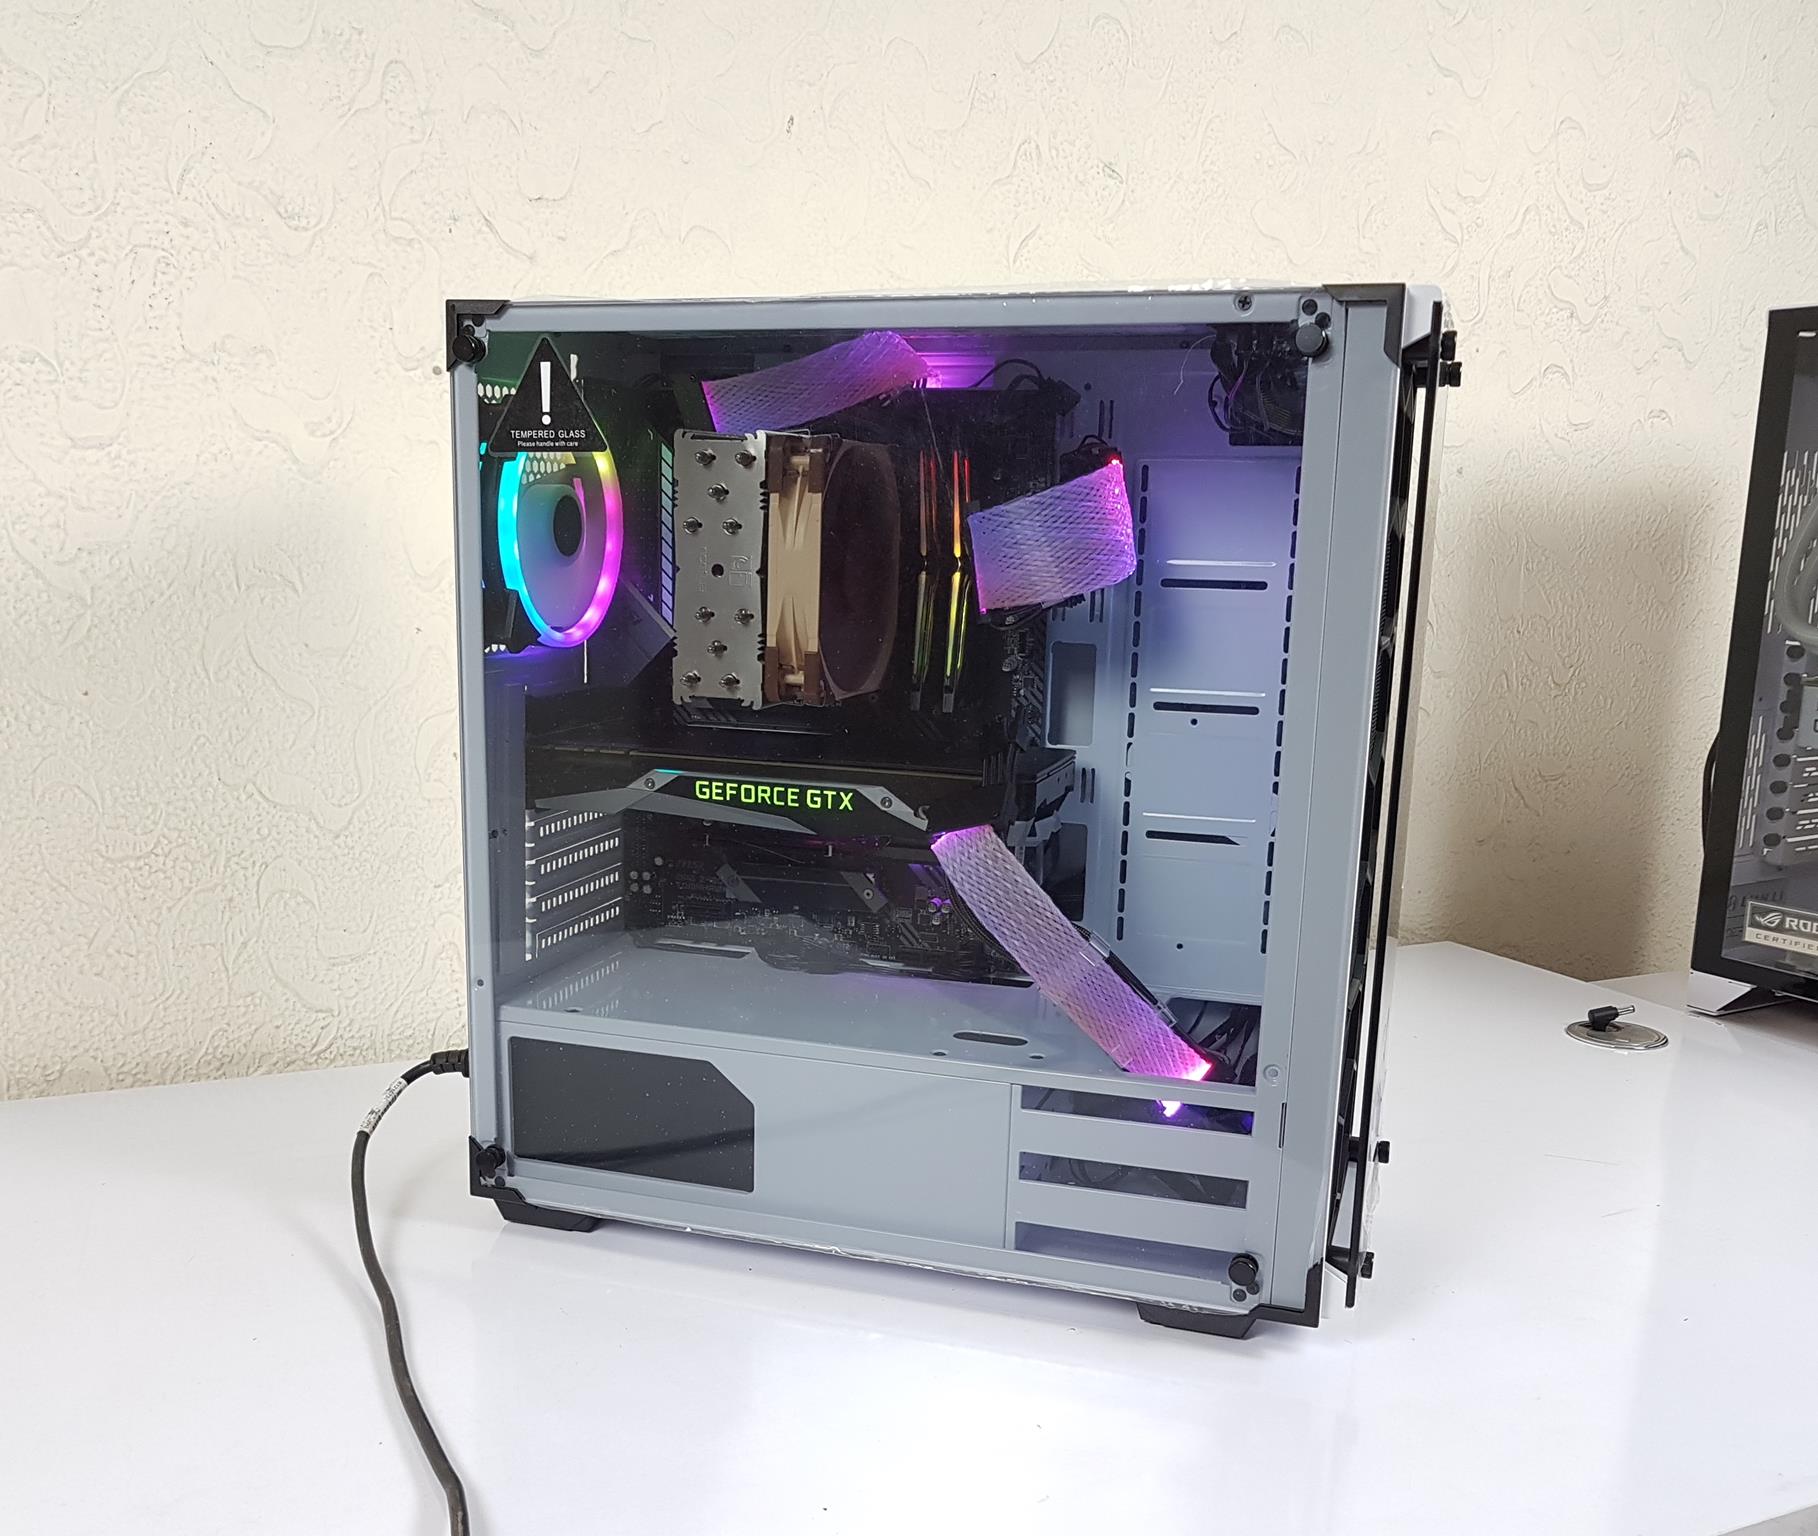
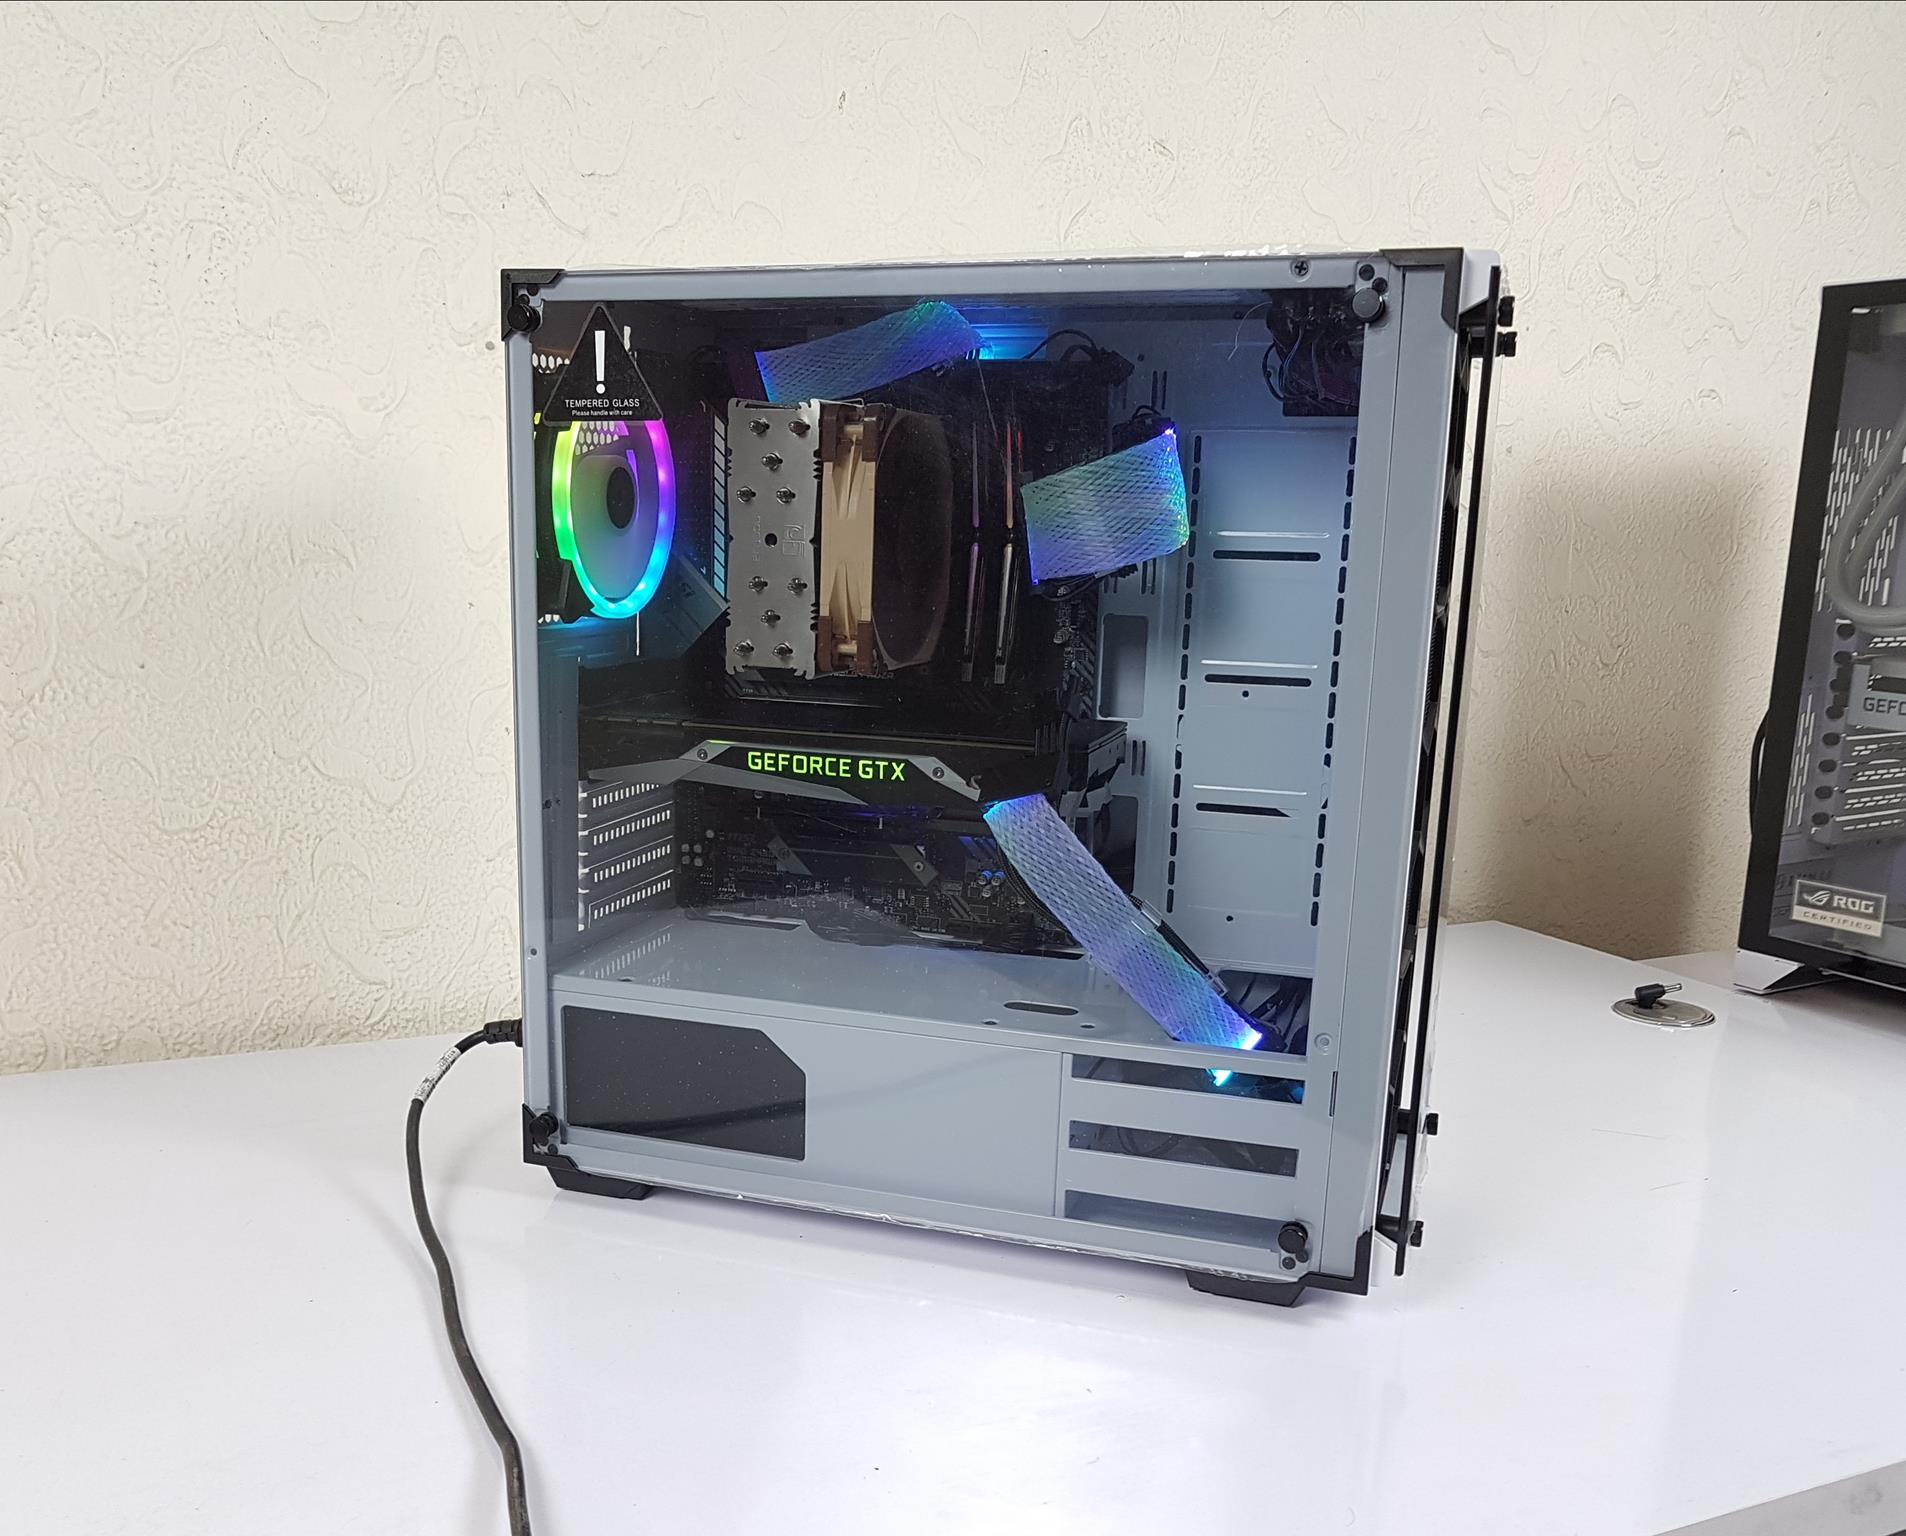
Check out the white interior of this compact mid-tower chassis. The motherboard tray, with 9 golden standoffs for microATX, may need adjustments for standard ATX. XIGMATEK’s choice seems odd, possibly favoring micro-ATX builds. Note that E-ATX motherboards cover cutouts near the tray. Installing a large motherboard may limit cable pass-through options.
You can easily install the CPU cooler with a large cutout, and there are cutouts on top for cables. The right side has 3 vertical cutouts, but the far right is only accessible from the back for 2.5″ drives. The top has a 30mm gap for the motherboard and 20mm displacement from the radiator mount, limiting top radiator support to 2x 120mm or 140mm fans.
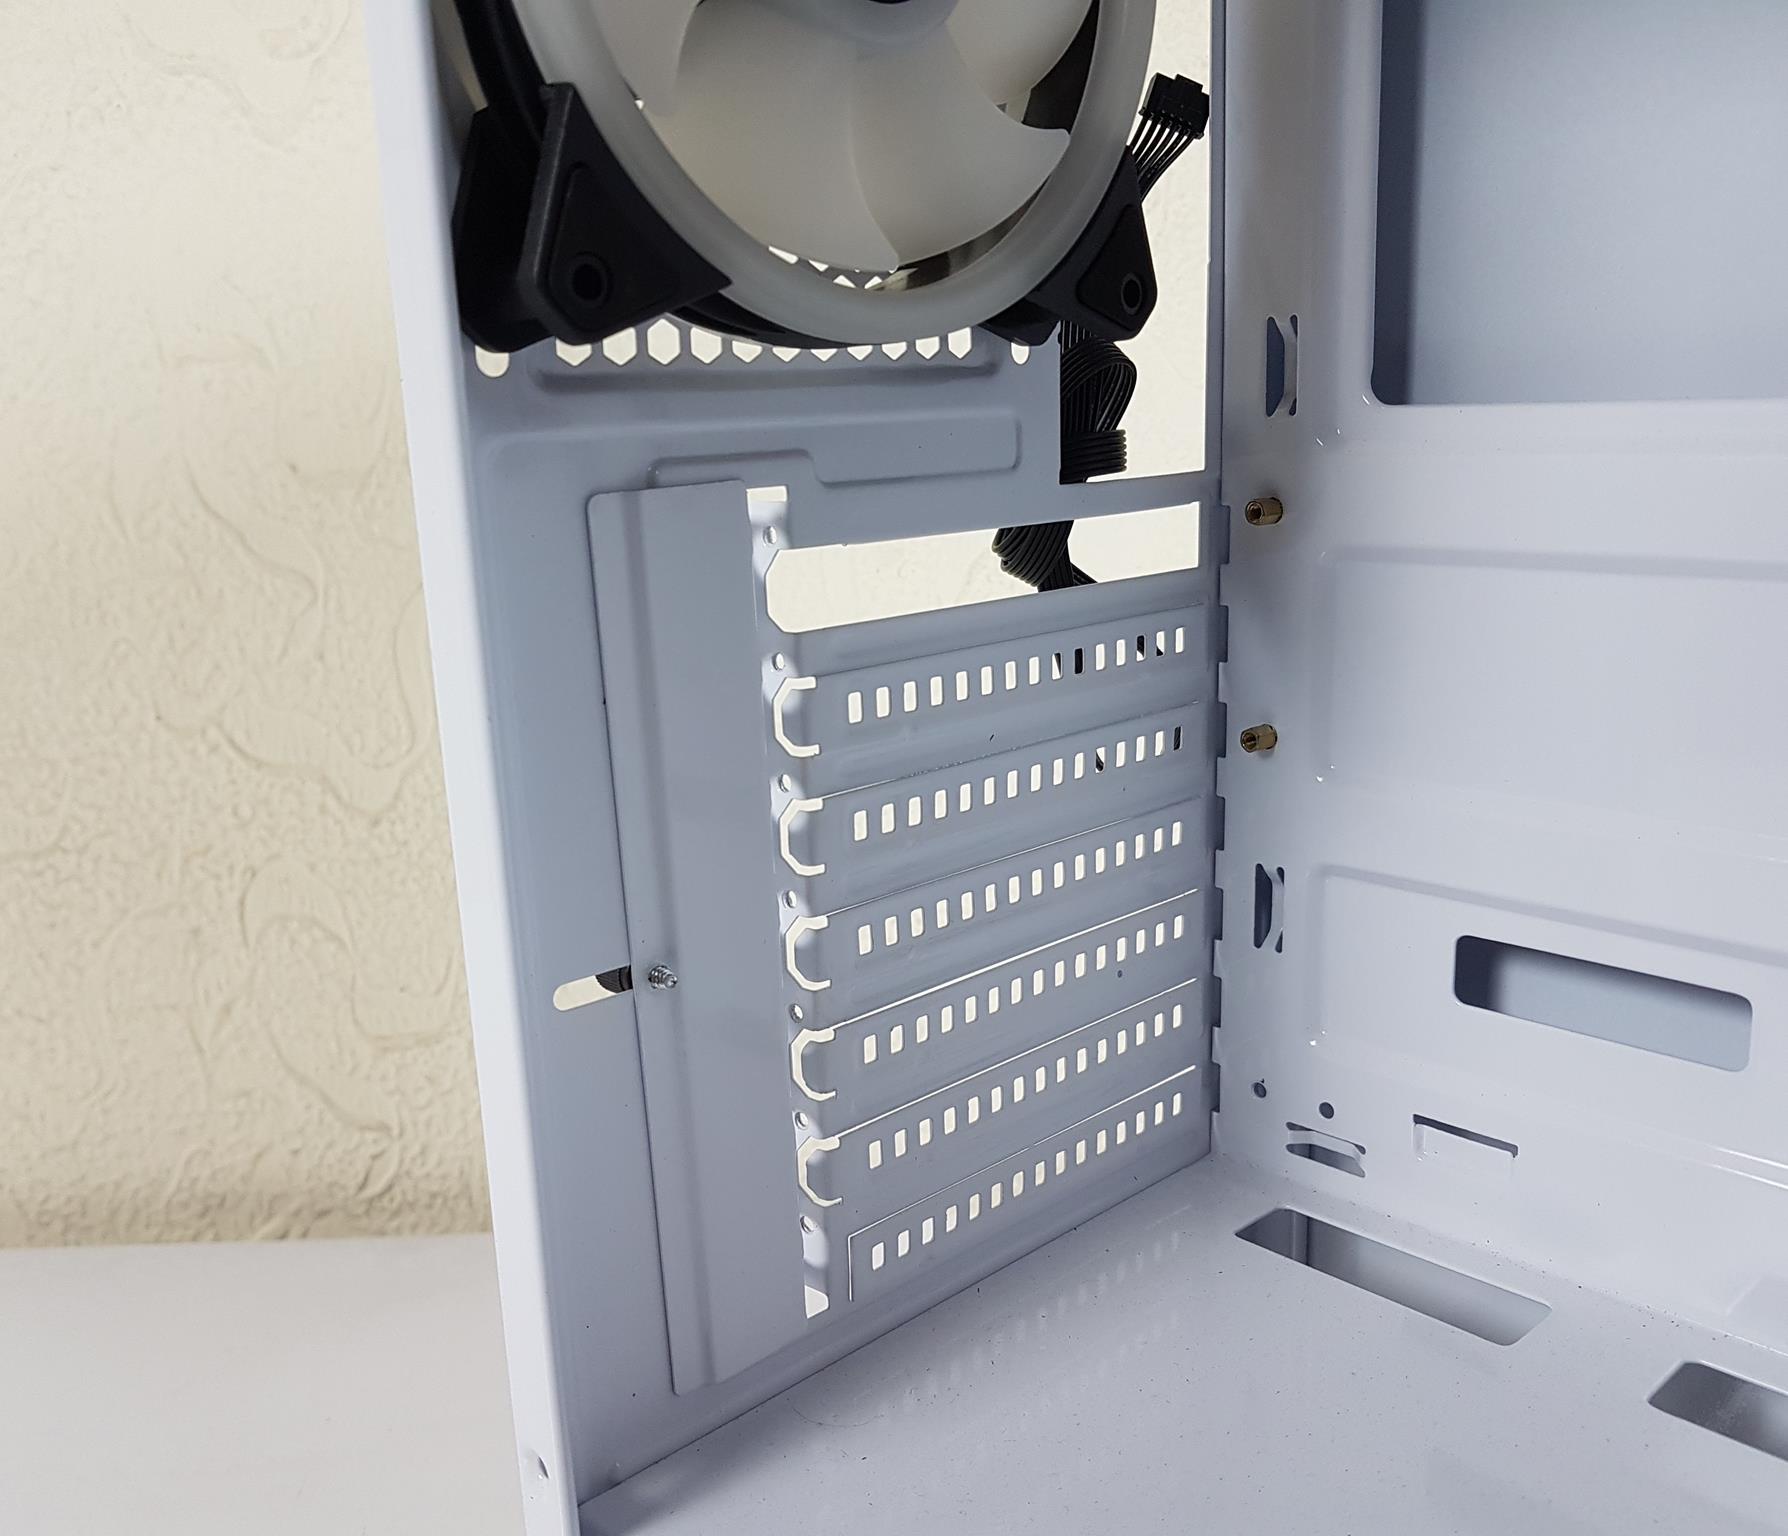
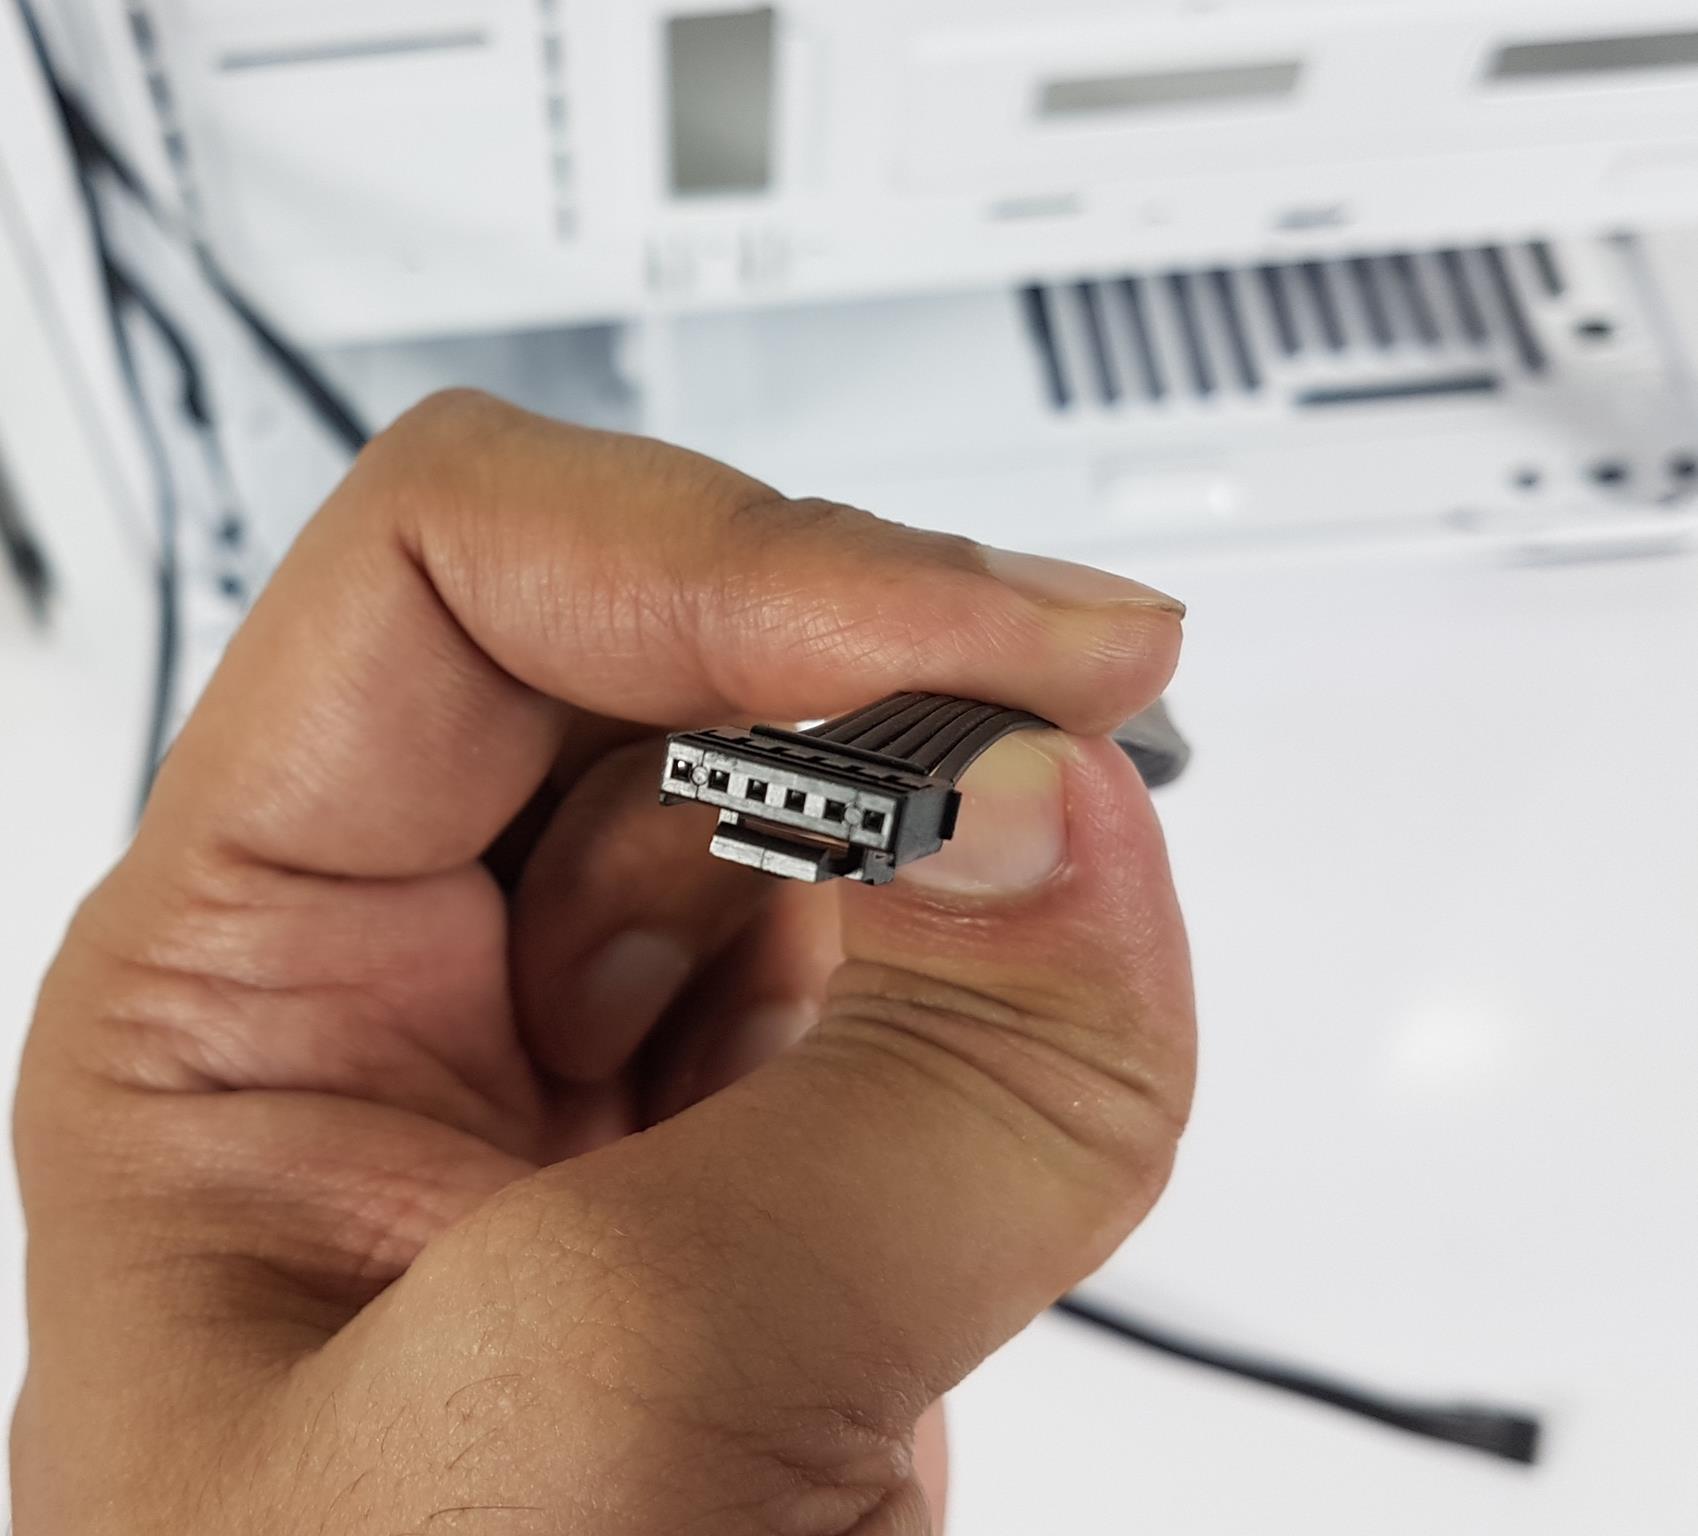
There is a Rainbow RGB 120mm fan on the rear. These fans have a proprietary 6-pin connector that can only be used using the provided hub. The PCIe slots are in the same plane of the chassis frame. The covers are not reusable. XIGMATEK has provided a plastic-made black colour slot cover in the accessory pouch. This could be a cost-saving measure as other than that, it does not make any sense.
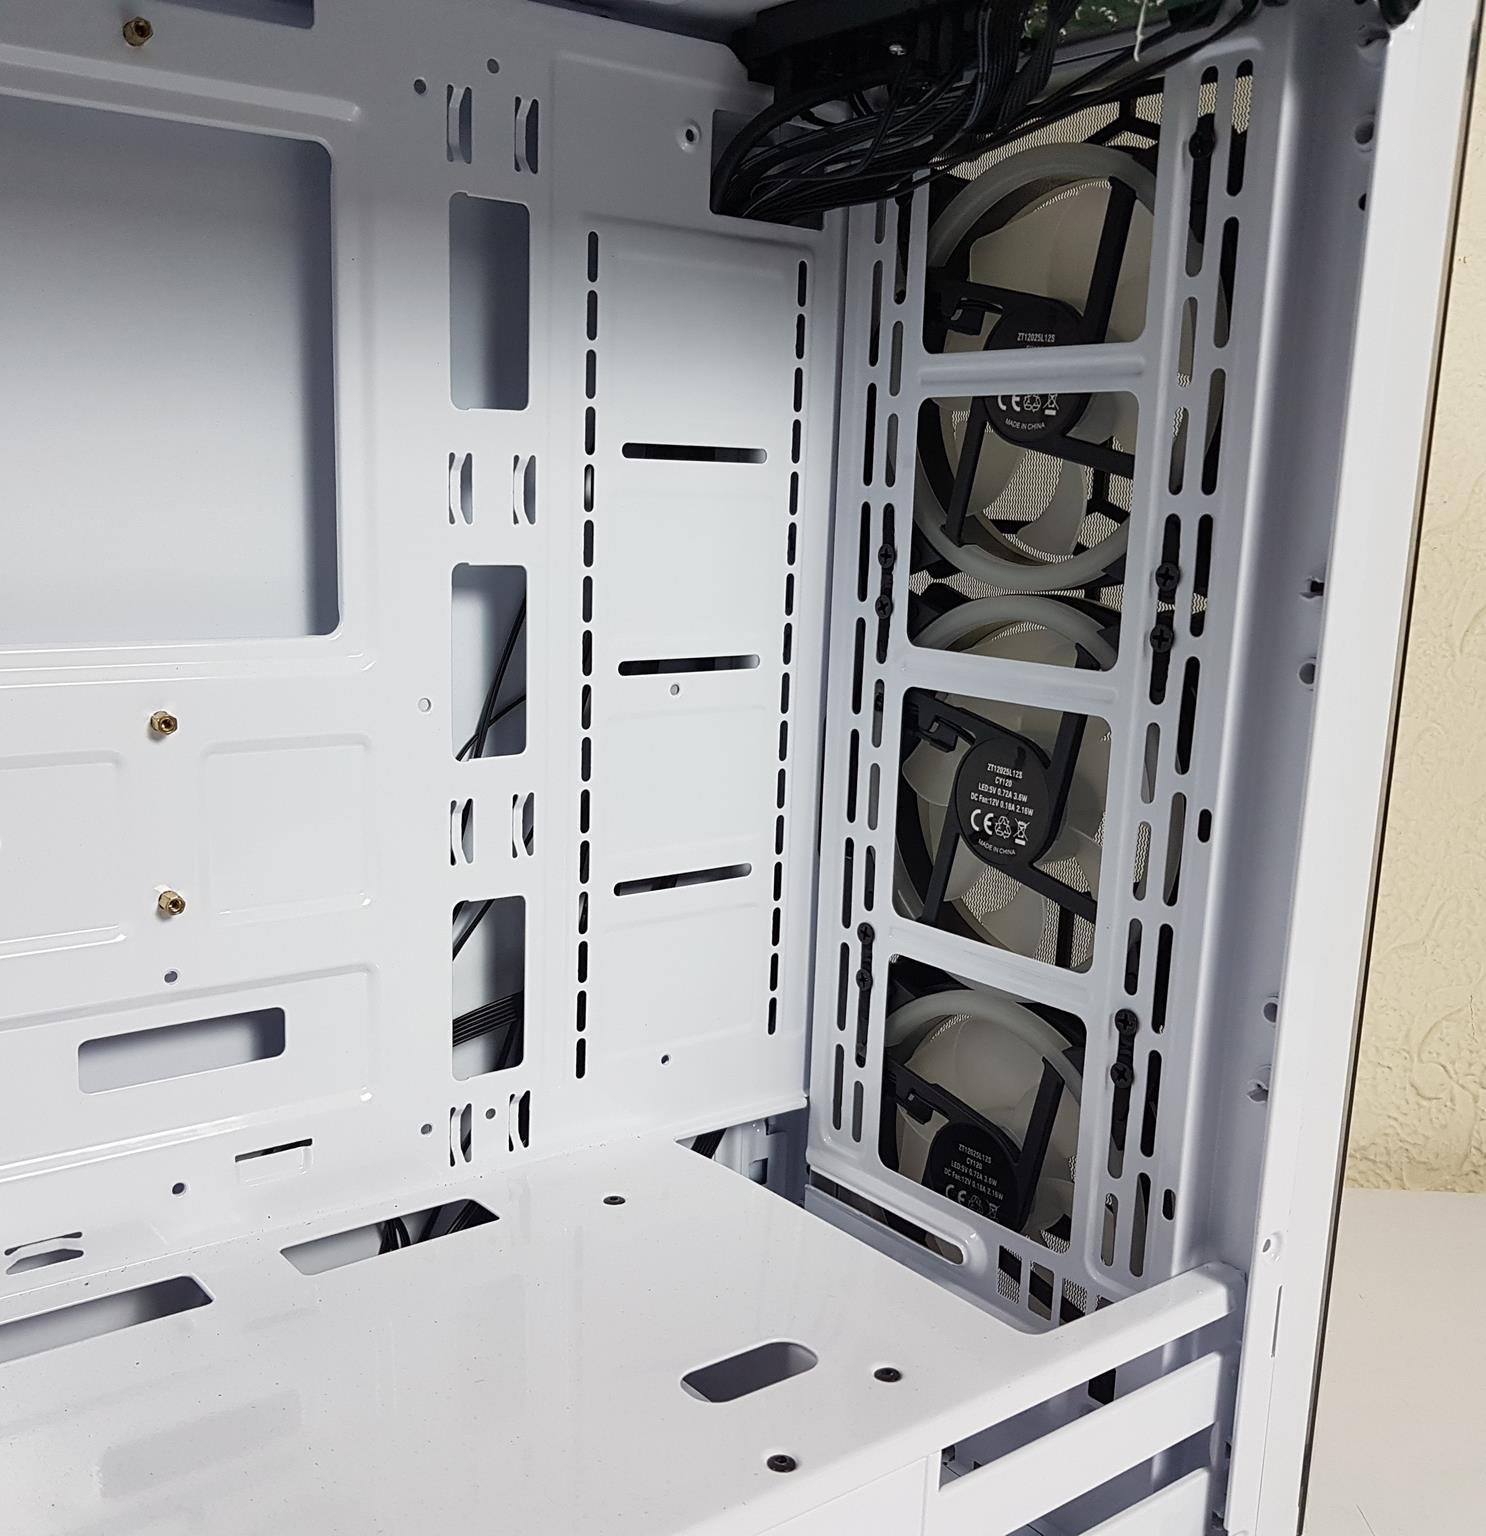
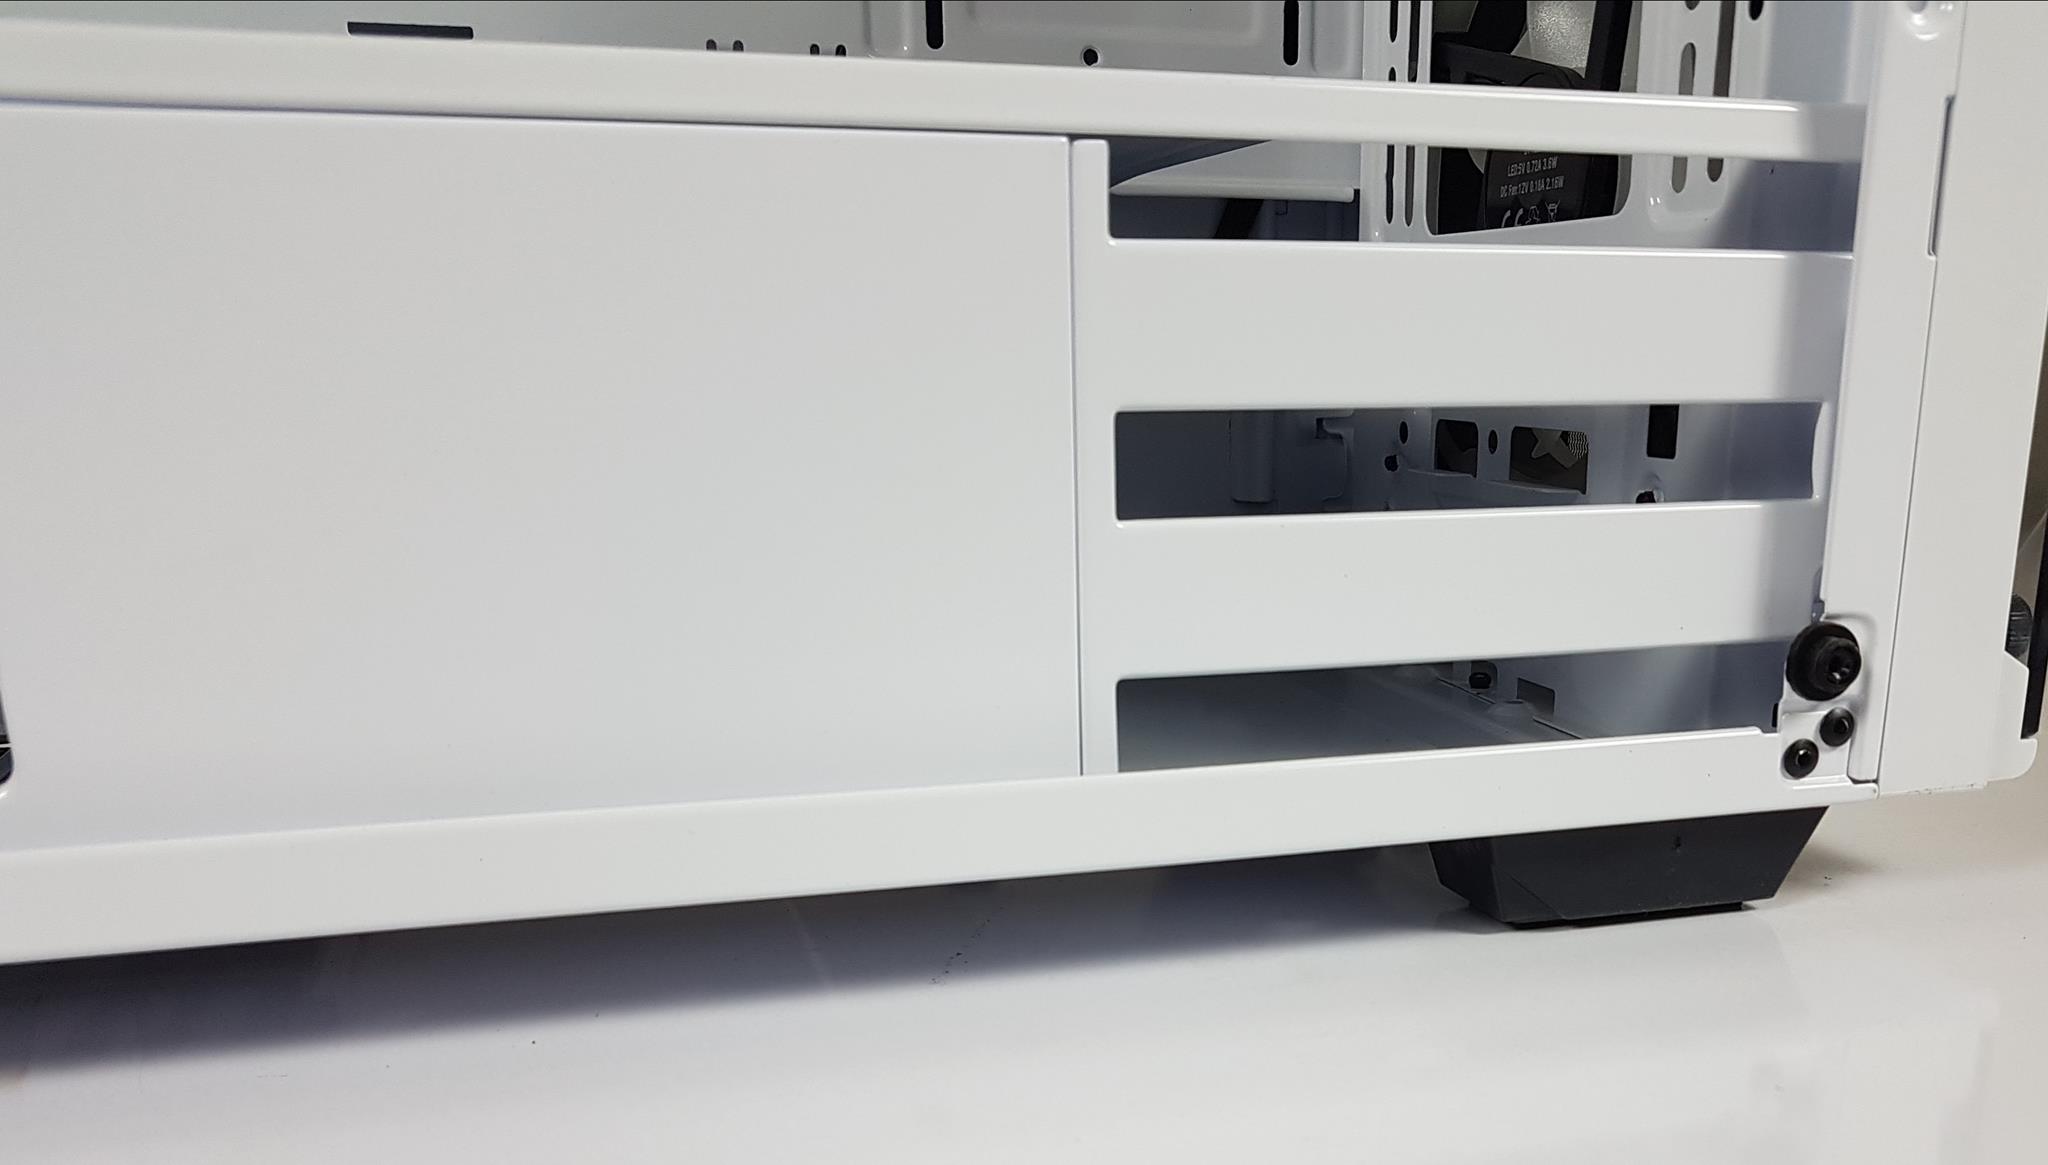
The picture below shows the close-up of the front fan mount provision. We have a rail mount system which is good but this mount is a bit flimsy so take care when installing the radiator there. The pre-installed Rainbow RGB 120mm fans have a dual loop for some brilliant RGB lighting. There is a 60mm gap on the PSU shroud upfront. I am not sure about the probable use of this cutout since the HDD cage is fixed and the user can only install a 120mm or 240mm radiator on the front. Seems like it is for ventilation purposes!
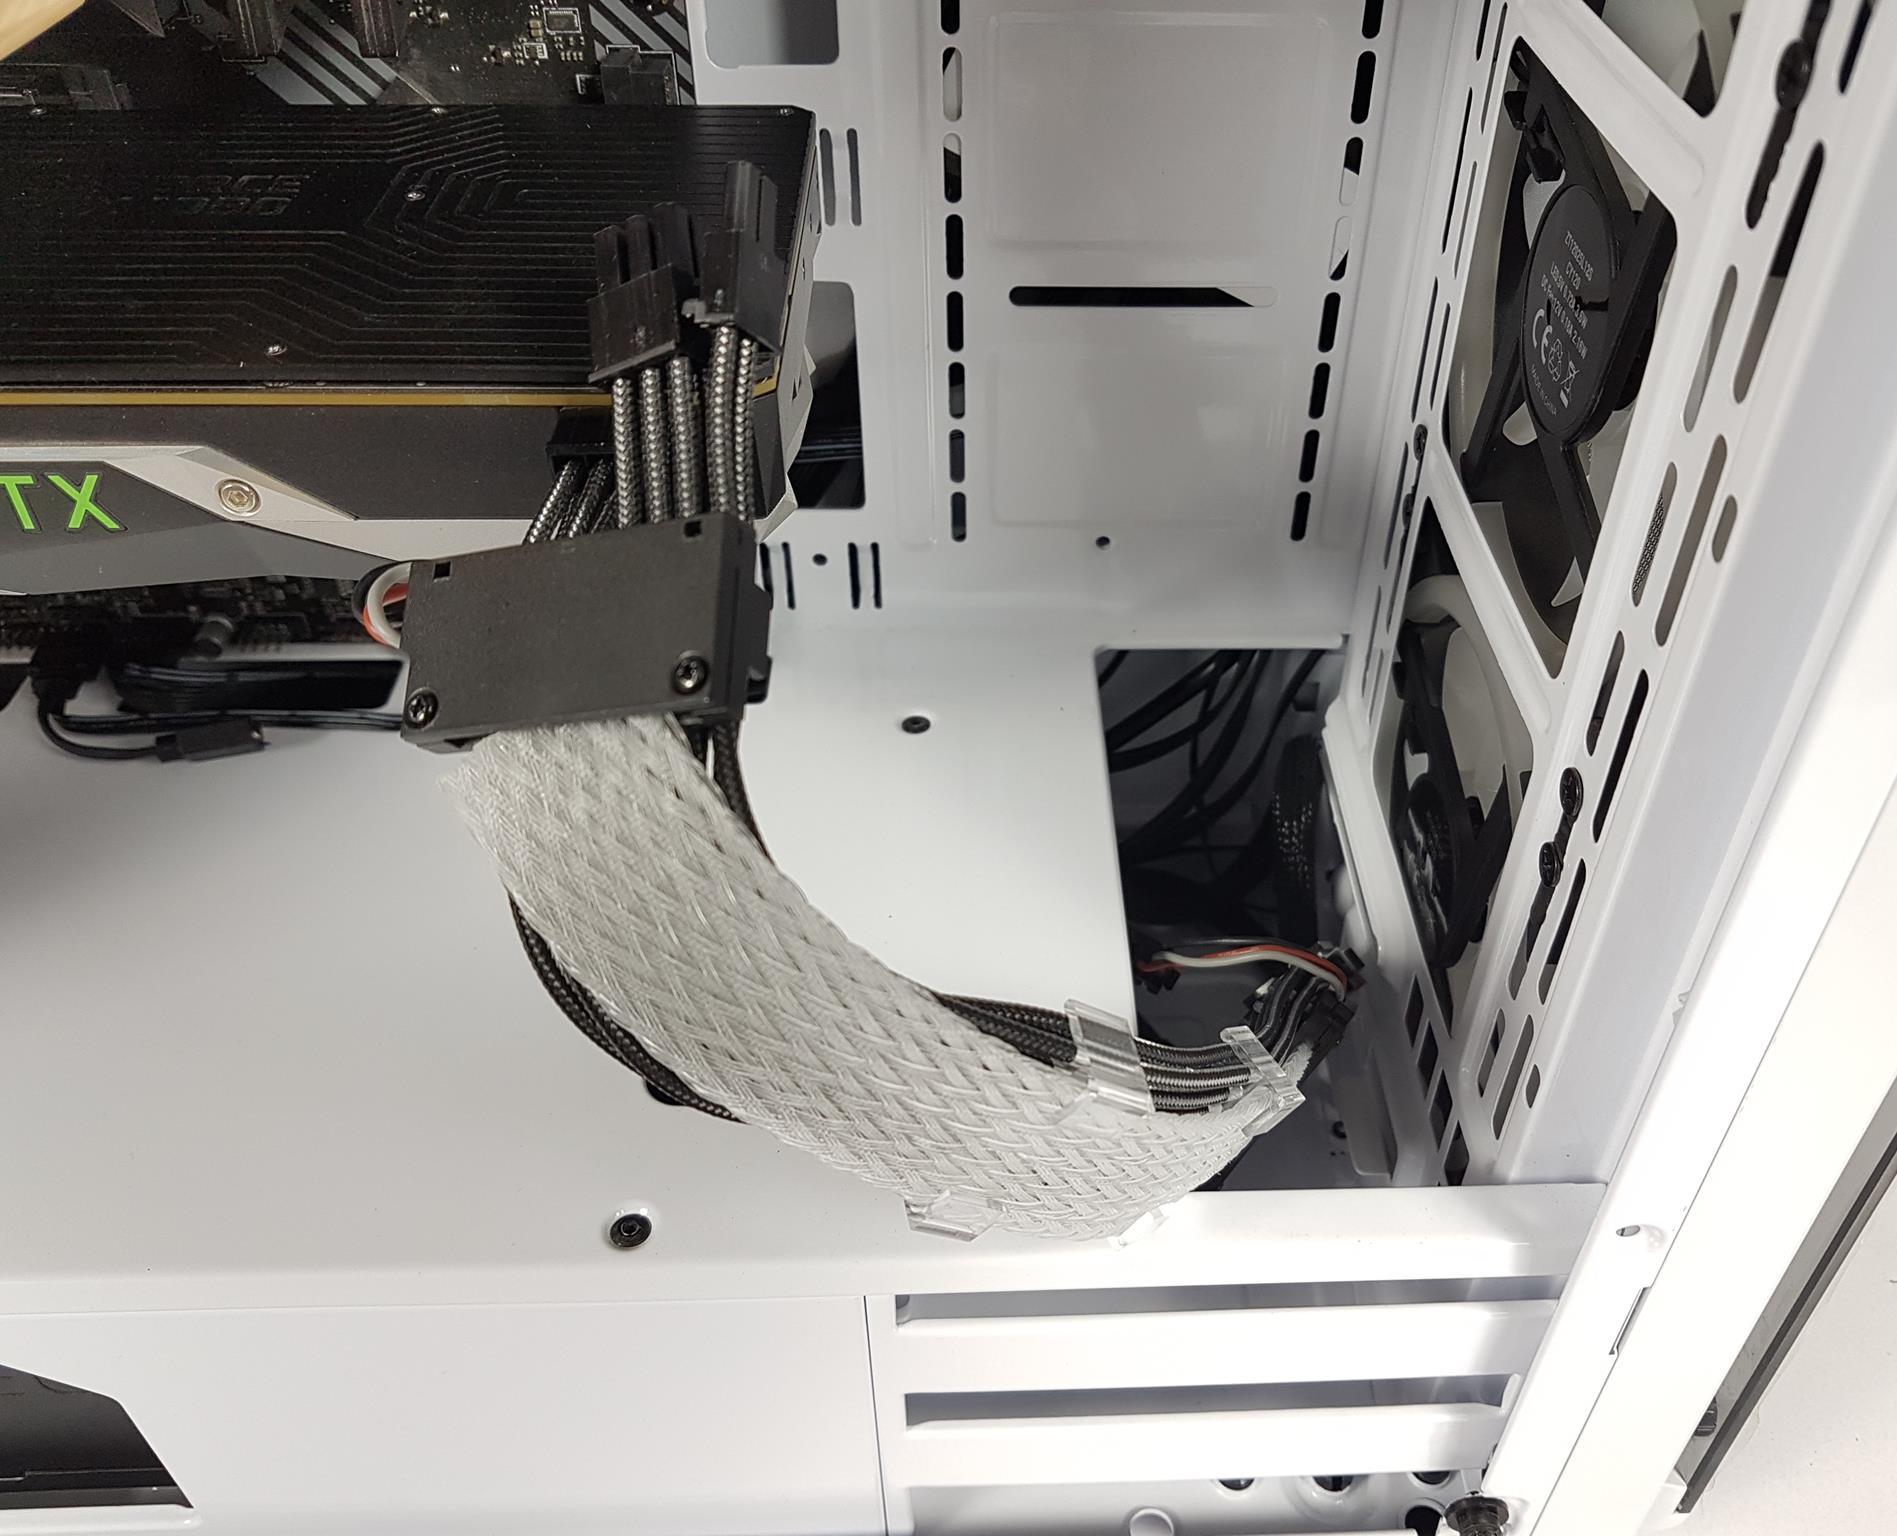
PSU cover almost fully extends but leaves HDD cage exposed on front. Four cutouts on the PSU cover, three towards the motherboard, and one towards the glass panel – use for optional PEG cable pass-through. A narrow cutout may pose difficulty for two 8-pin PEG cables. Install PSU fan side down due to lack of top vent. I/O panel PCB, green, on the upper right side of the chassis.
The side of the PSU shroud has an angular cutout from which the label or branding of the PSU can be seen. There are vented areas on the HDD cage. Let’s take a look at the other side of the chassis.
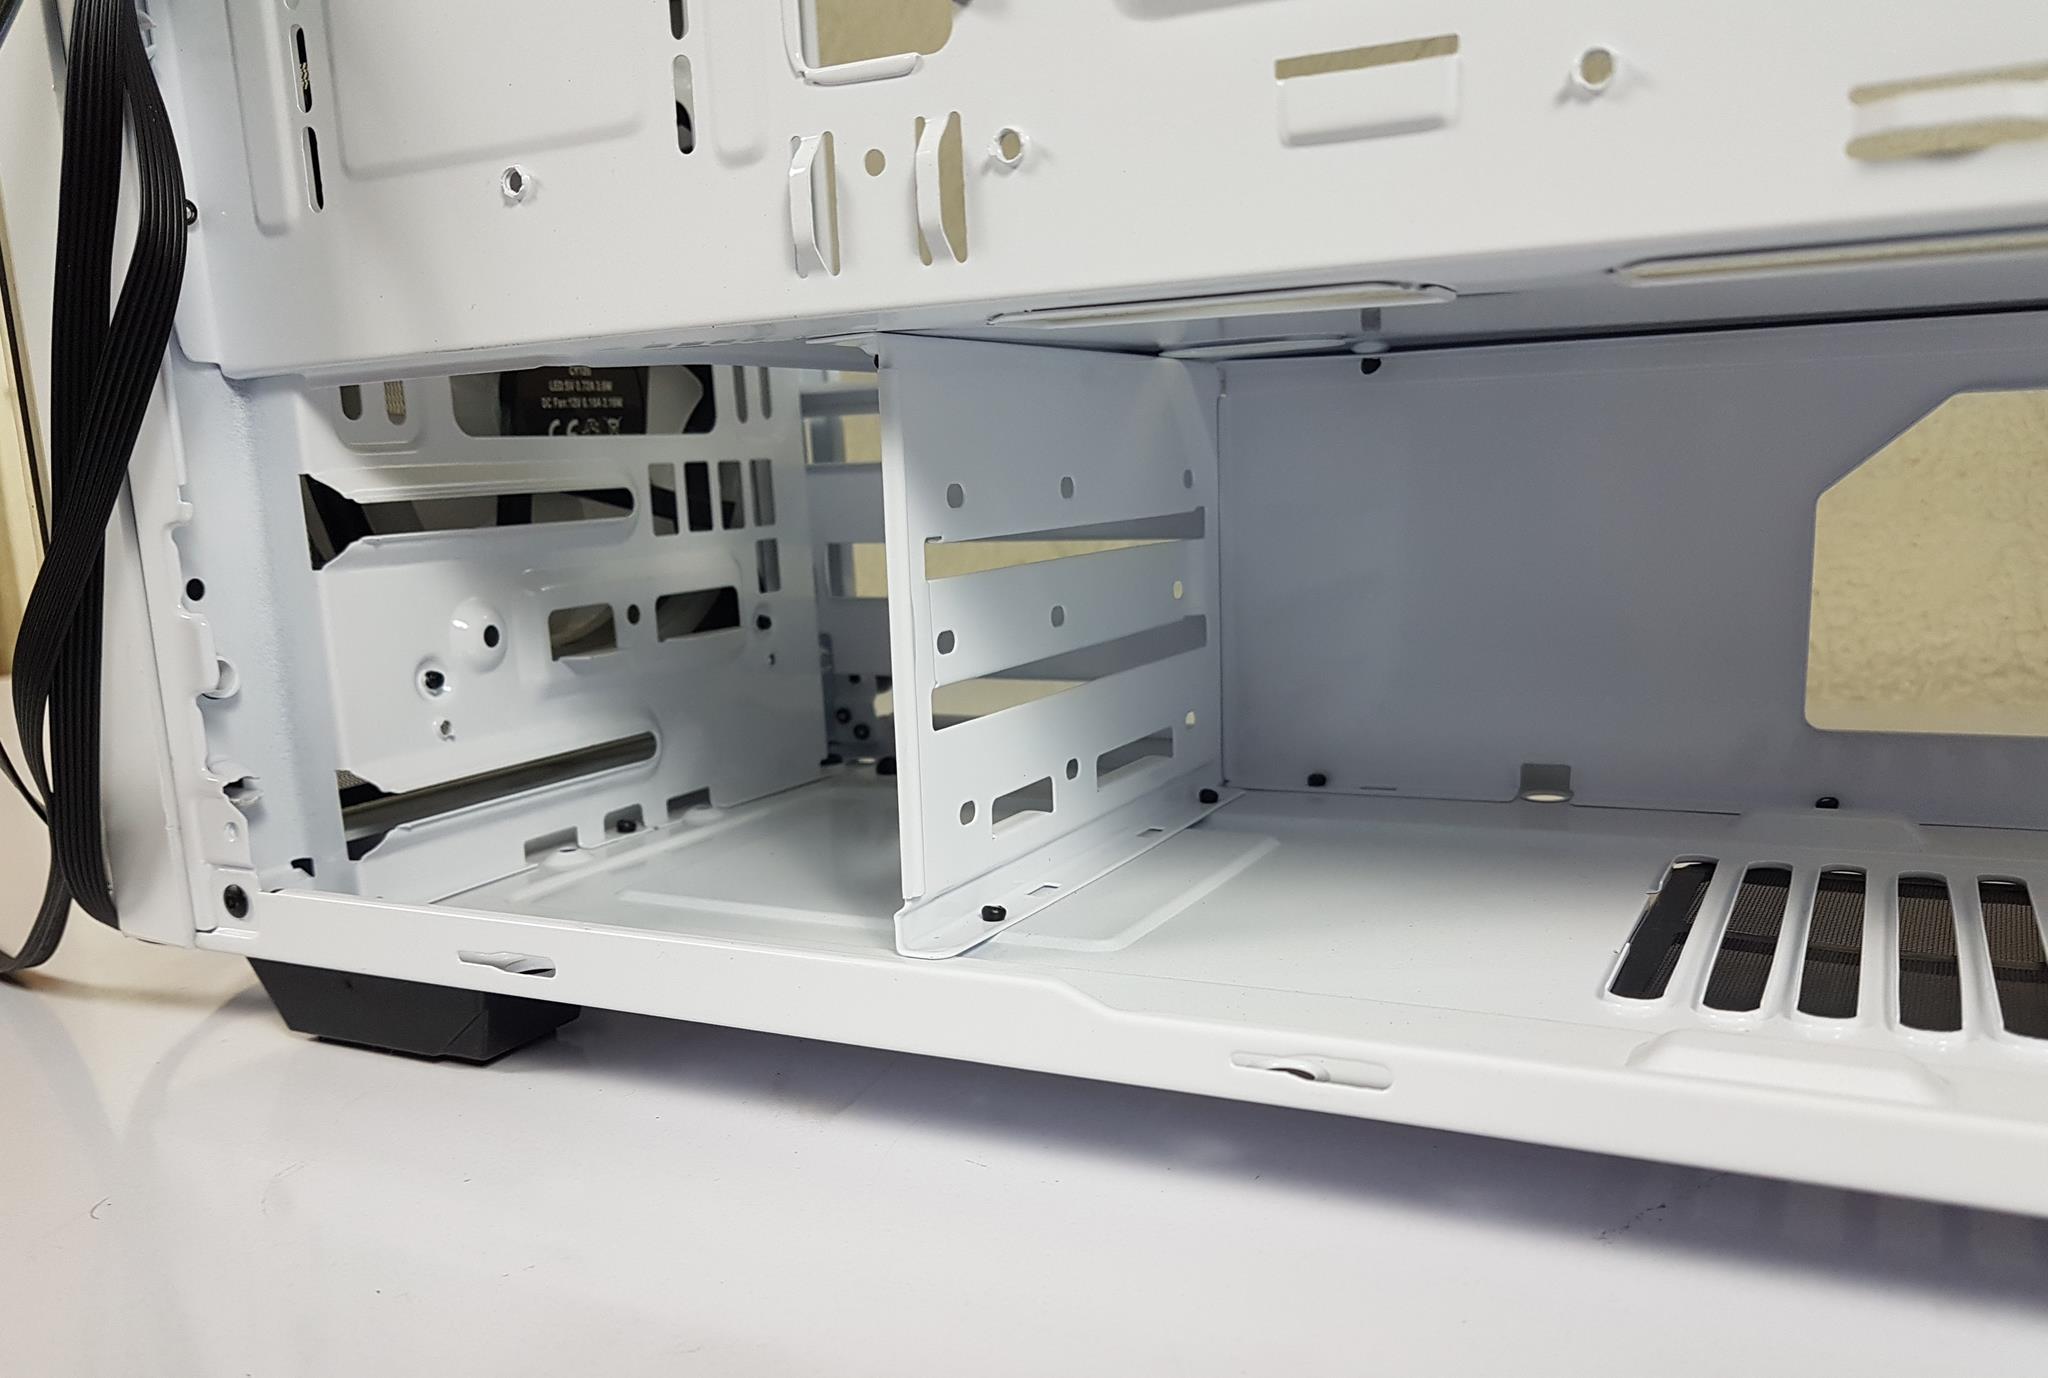
The back side is also finished in glossy white colour paint. We have a total of 14 cable tie points. The user can install up to 3x 2.5” drives on the left side area. There is no mounting provision on the backside of the motherboard tray. This is a dual-chamber layout. The lower chamber has a provision for an HDD cage and PSU mount.
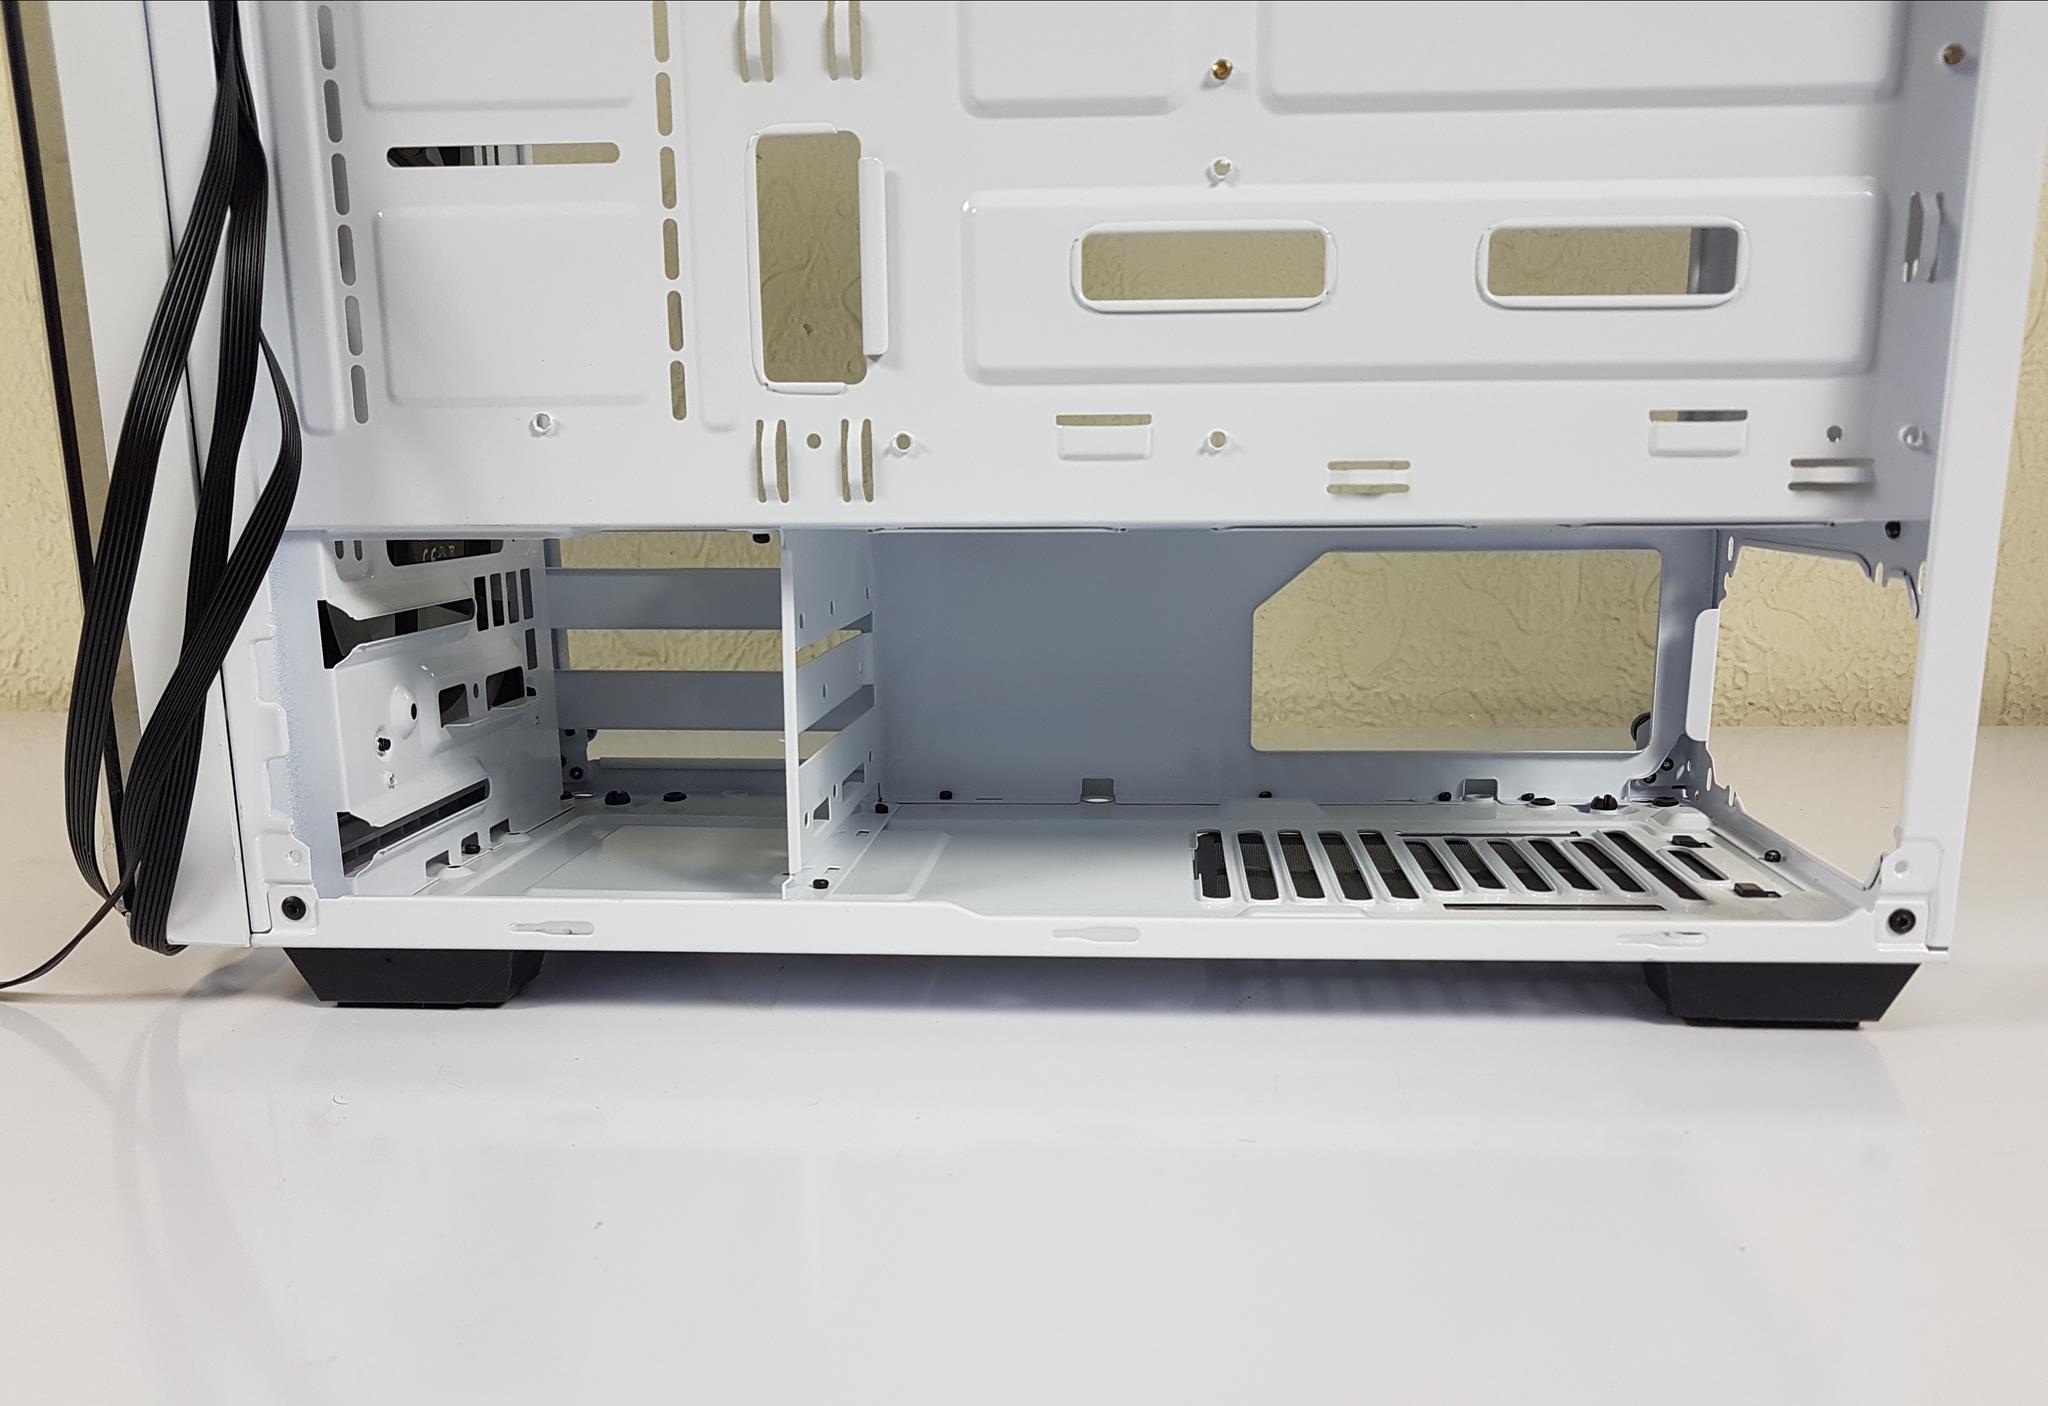
The HDD Cage is permanently installed using rivets in the chassis. The user can install up to 3x 3.5” drives there. This is no tool-less mounting as there is no caddy in the cage. The PSU mounting area has 4 feet on which the PSU is rested when slid from the rear. The PSU length is mentioned to be a maximum of 200mm which does not seem possible. We would recommend a 160mm or so length PSU since cables would also need to be placed before the HDD cage.
We have spotted rough finishing on the backside as well.
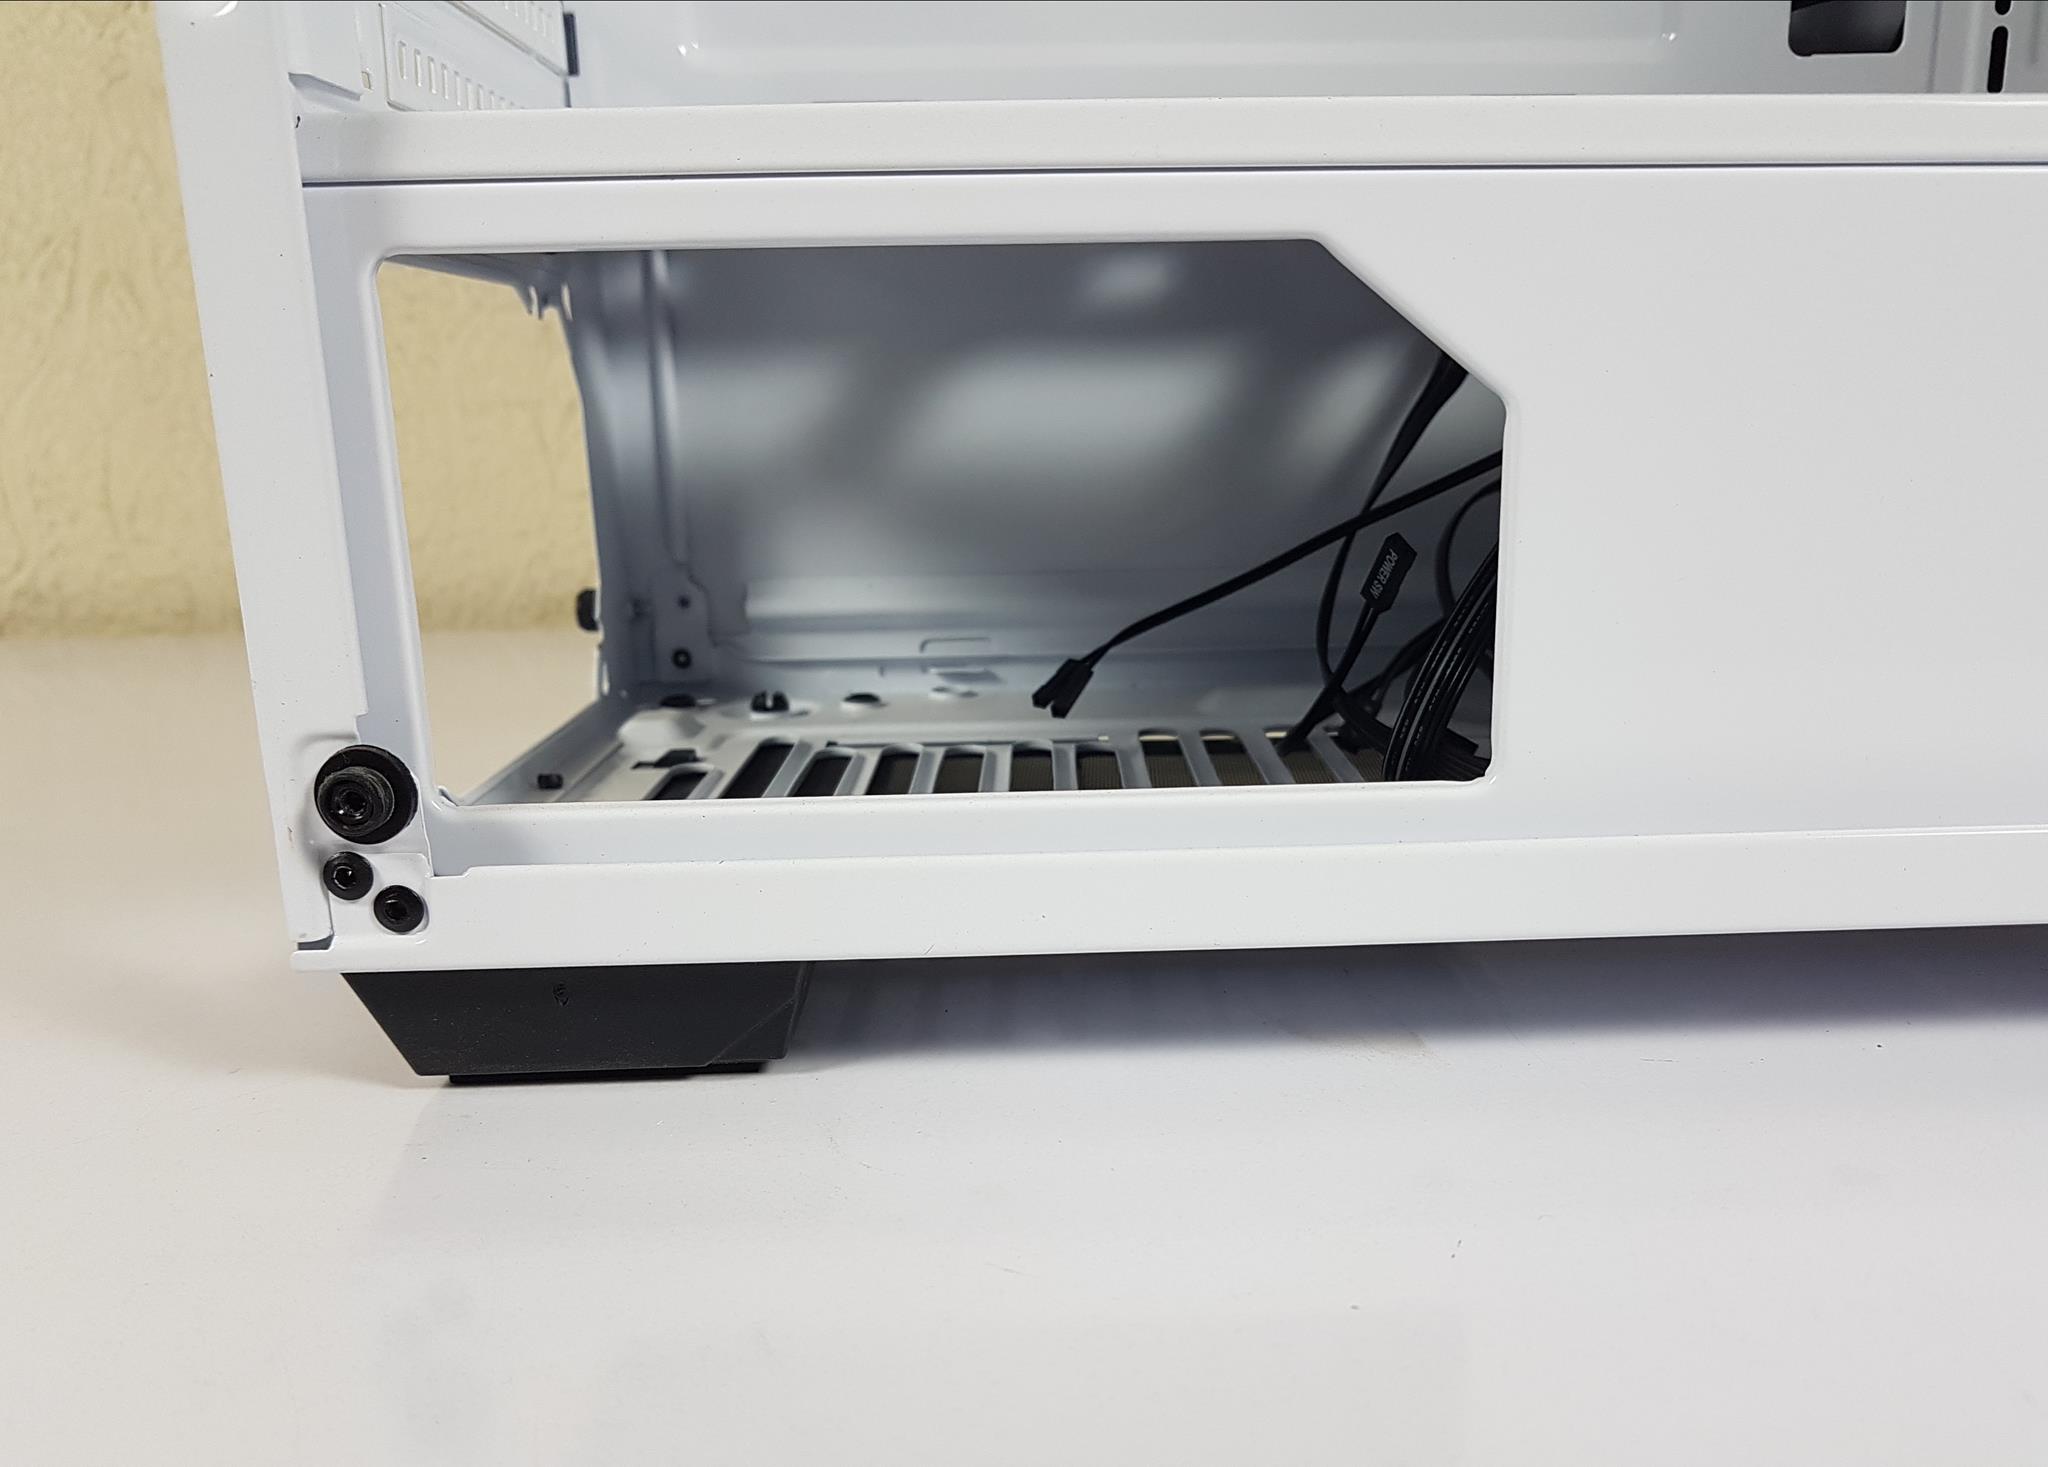
We have the following cables coming out of the front IO panel:
- USB 3.0
- USB 2.0
- HD Audio
- System panel connectors
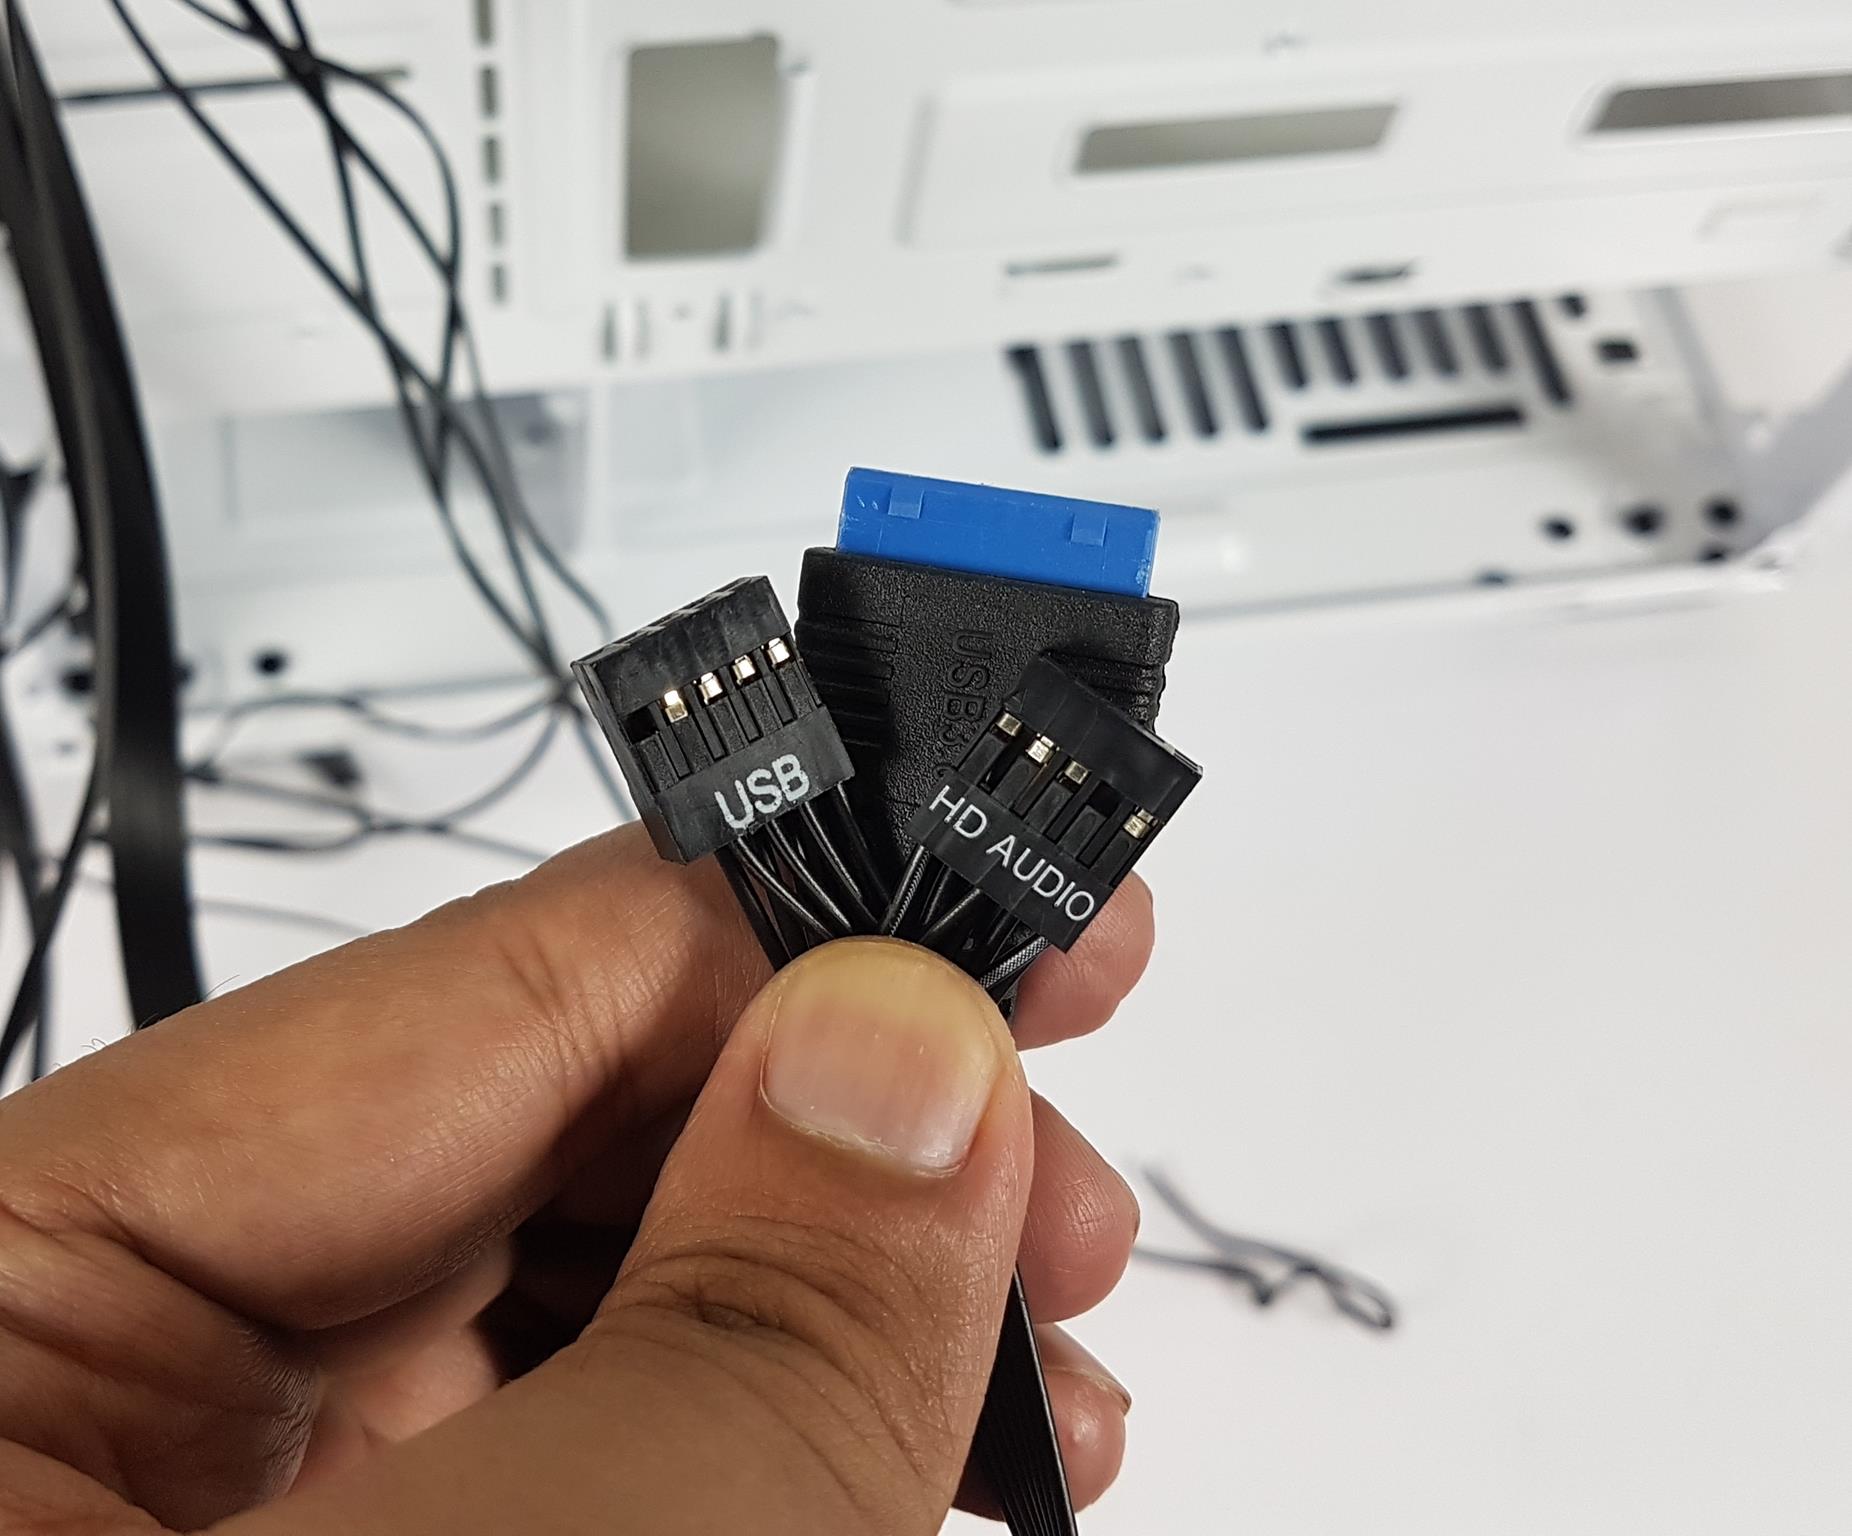
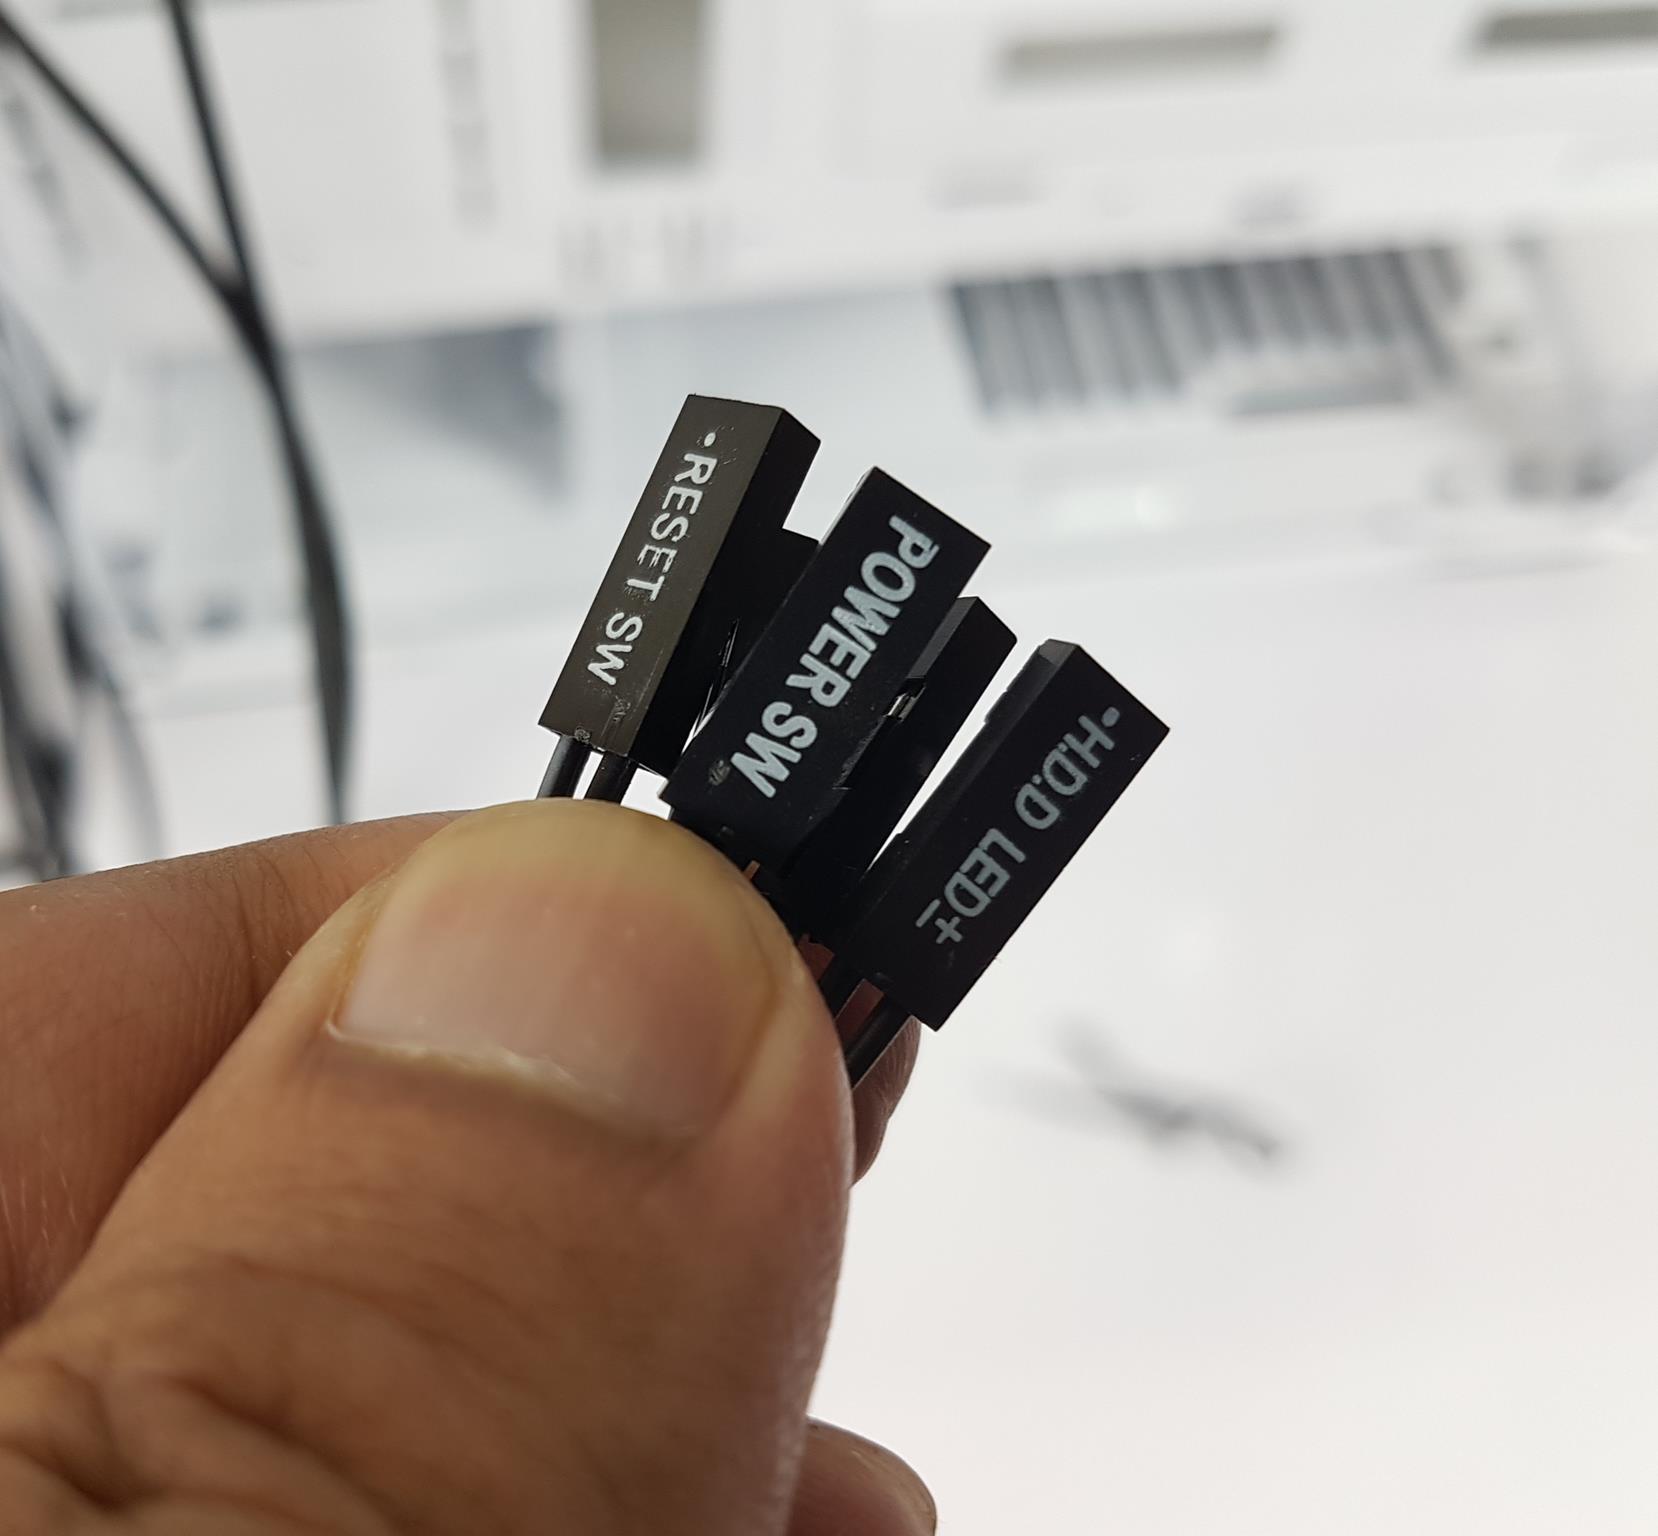
You can connect the FAN-labeled 2-pin connector from the RGB button on the IO panel to the A-RGB fan hub/controller. Note that the 2-pin header on the hub is unwired, rendering the cable unusable. The AIO’s hub is fully functional, but the chassis hub has limited functionality. See the picture for the proprietary connector of the pre-installed fans.
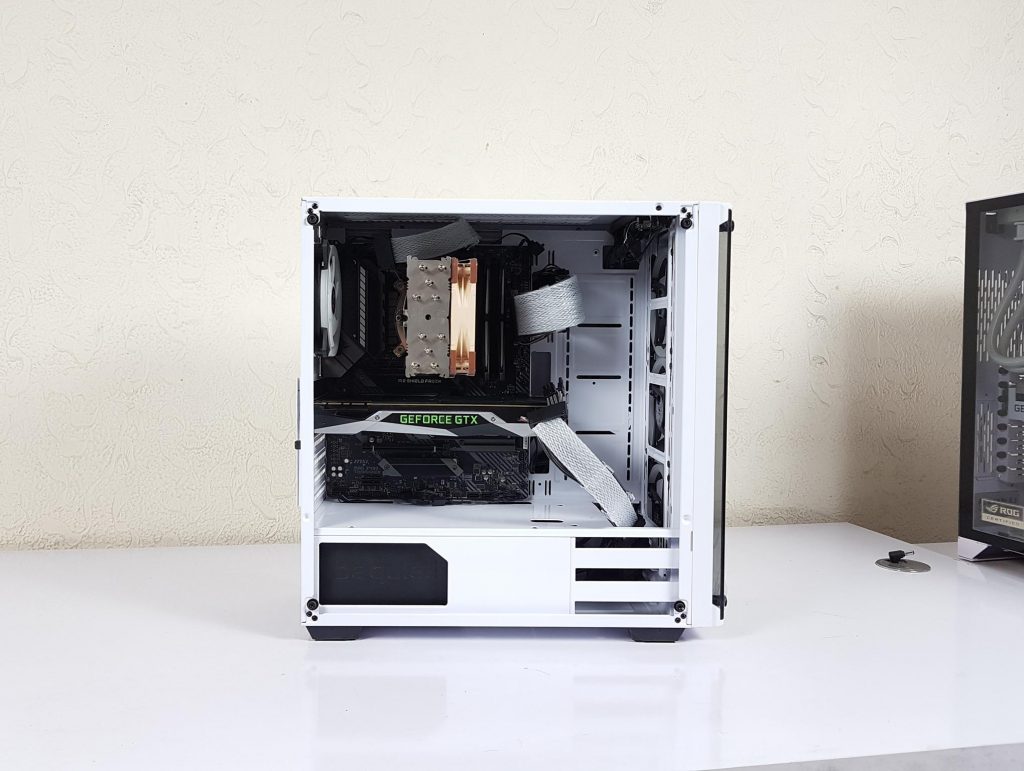
Test Build
First, remember to snap the PCIe slot cover before installing the motherboard to avoid removing it later. Install the standoffs for the motherboard; some may be tricky due to angles. Then, easily install the motherboard, ensuring the rear fan doesn’t obstruct the I/O panel’s shroud. Note that a socket wrench for standoffs is not provided. PSU installation is straightforward, but be mindful of tight spaces for extra cables, especially with a non-modular PSU.
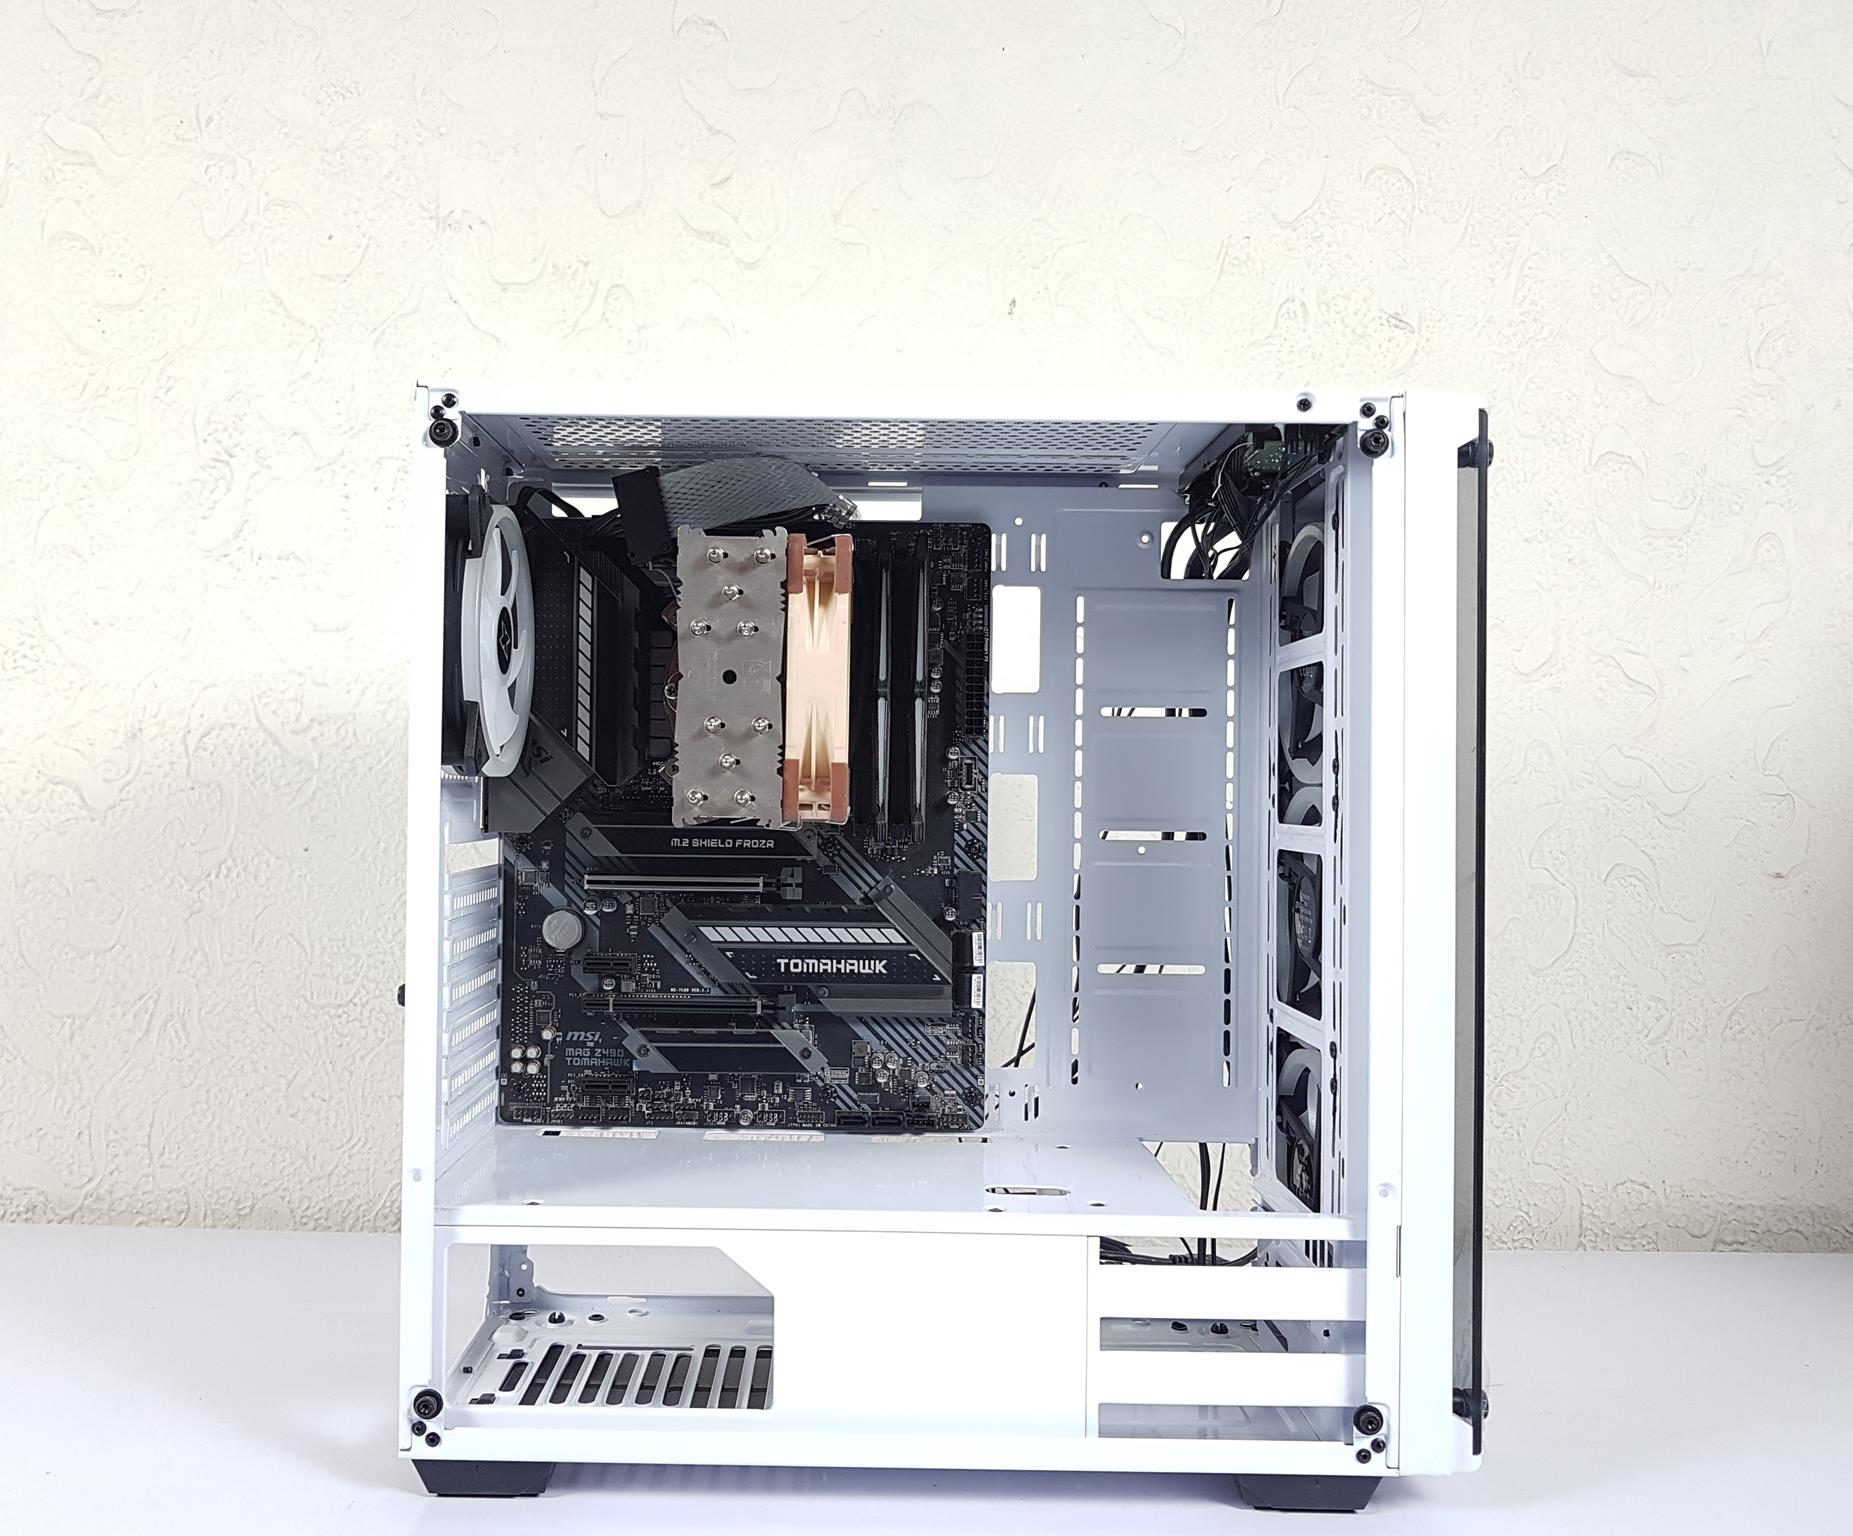

Connect the EPS connector to the motherboard first, then install the CPU air cooler. Attach the 4-pin PWM cable to the CPU_Fan header before putting the fan on the heatsink. Install the graphics card, connecting SATA cables to the motherboard beforehand. If the PSU shroud cutout is too small, run the GELID ASTRA RGB Sleeved extension cable through the 60mm gap on the front side. The bottom connectivity has no issue and one can easily route the cables through the cutouts as per requirement.
Below is a picture of the test build with a quick power-on test for the POST. The 120mm or 240mm AIO can be installed on the front and a 120mm AIO can be installed on the rear. AIO on the top would be a hard fit due to short displacement concerning the RAM height.
Cooling Provision
Following are the fan mounting possibilities:
- Up to 3x 120mm on the front [3x Pre-Installed]
- Up to 2x 120mm/140mm fans on the top
- 1x 120mm on the Rear [1x Pre-Installed]
Following is the radiator mounting support:
- 120mm / 240mm on the front
- 120mm on the rear
Storage Provision
Storage provision is:
- Up to 3x 2.5” Drives on the back panel
- Up to 3x 3.5” Drives in the HDD cage which is not tool-less
Clearance
- CPU Cooler of up to 158mm in height is possible
- Graphics Card of up to 380mm in length is possible
- PSU length of 200mm with the HDD cage though we would recommend 160mm length PSU
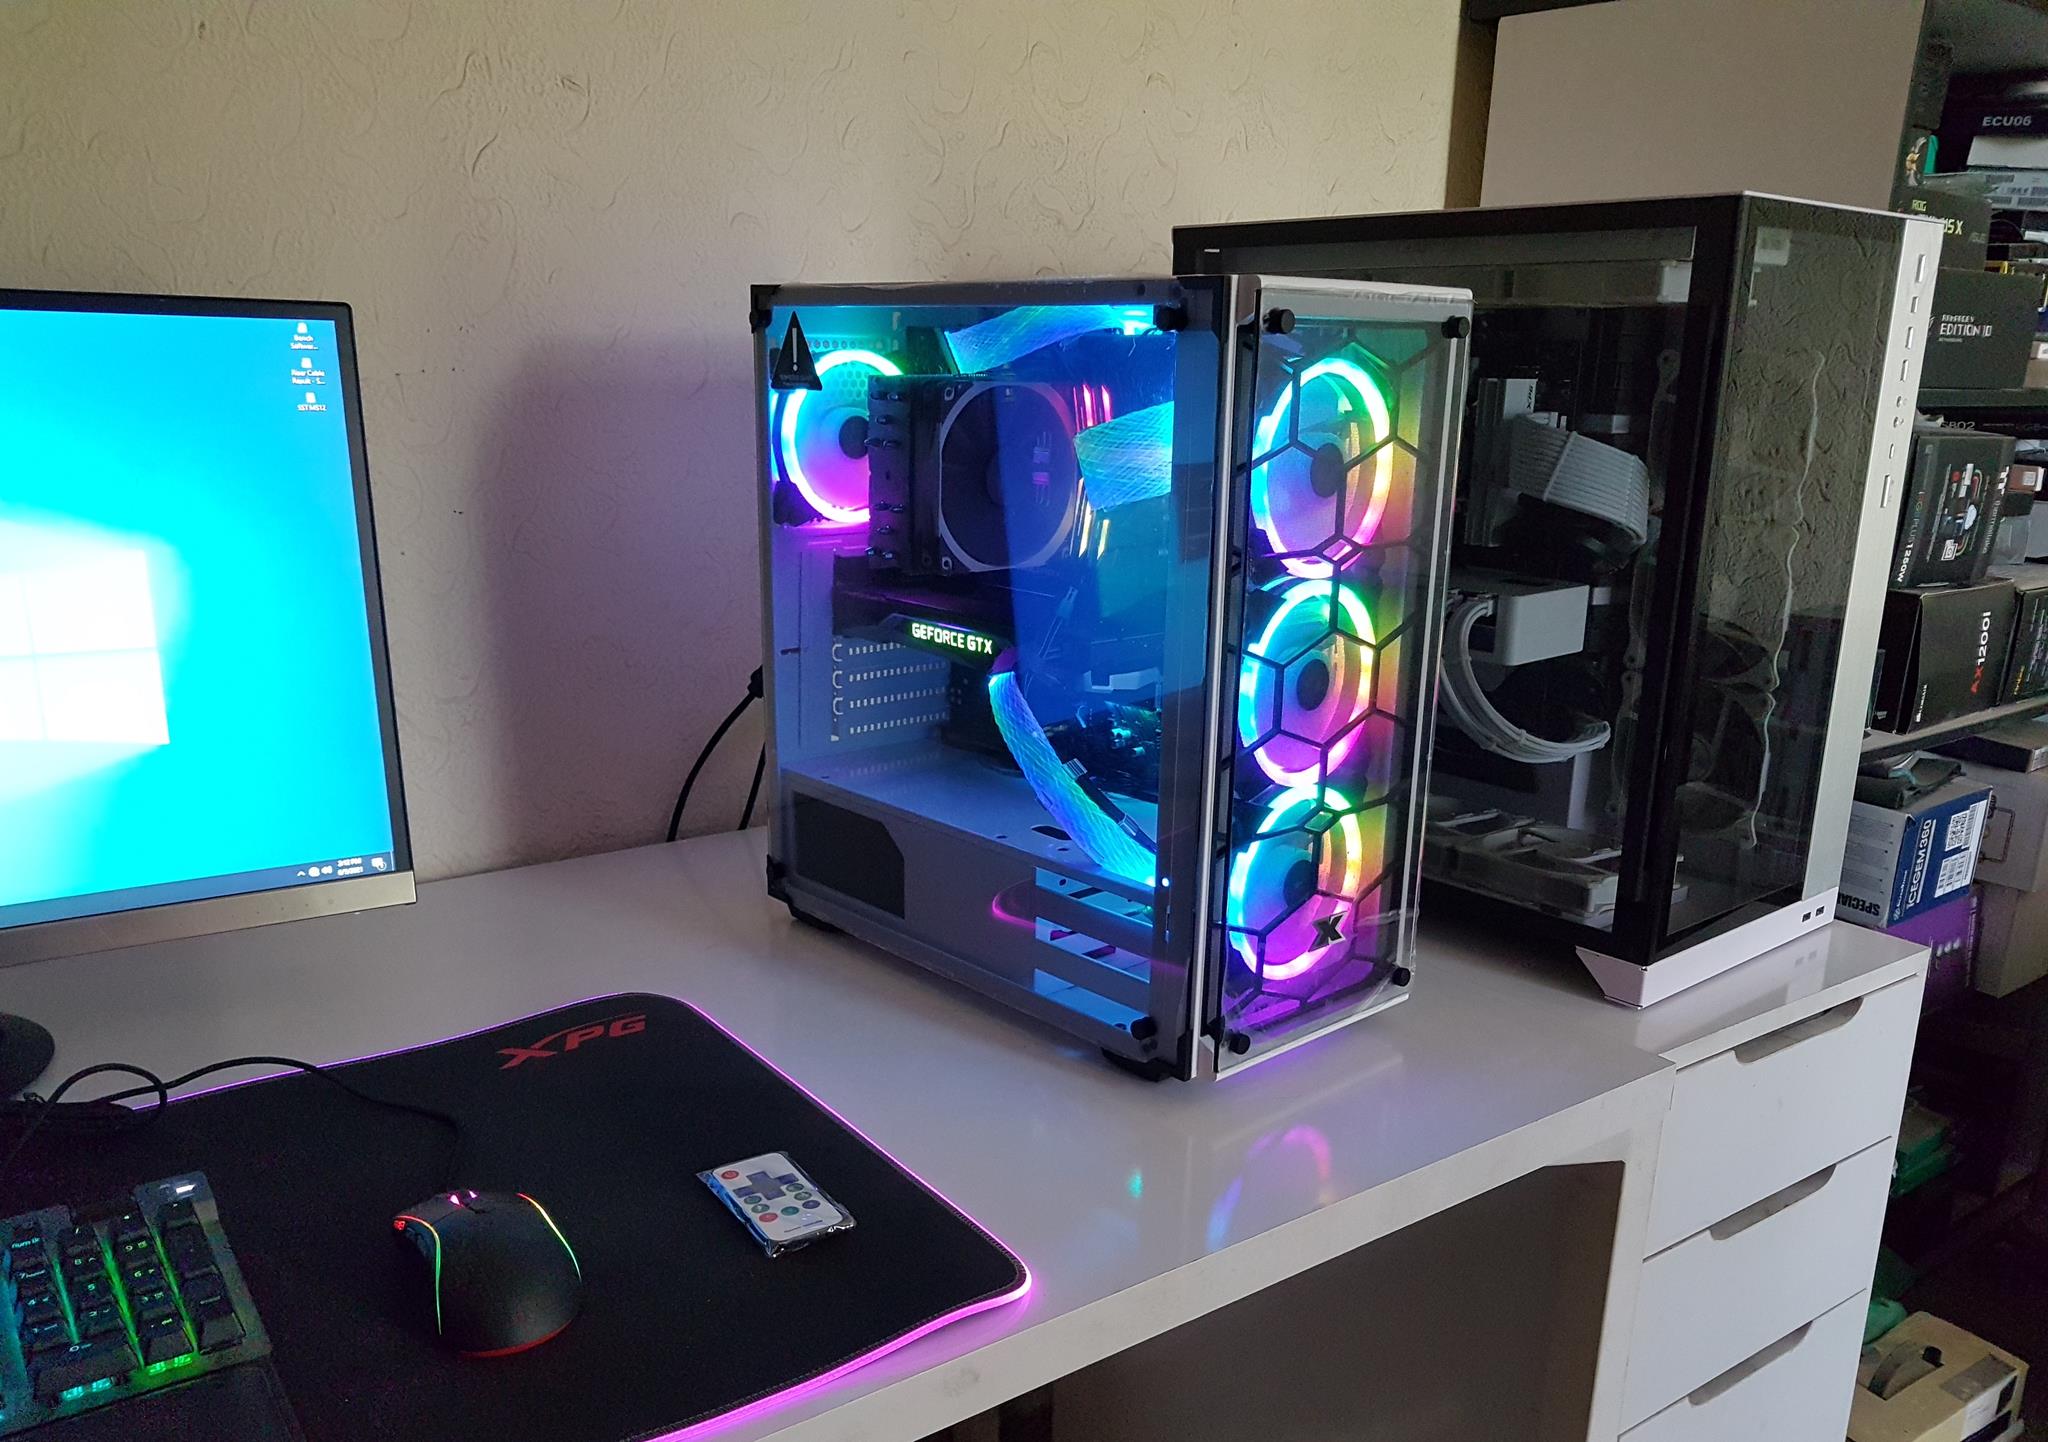
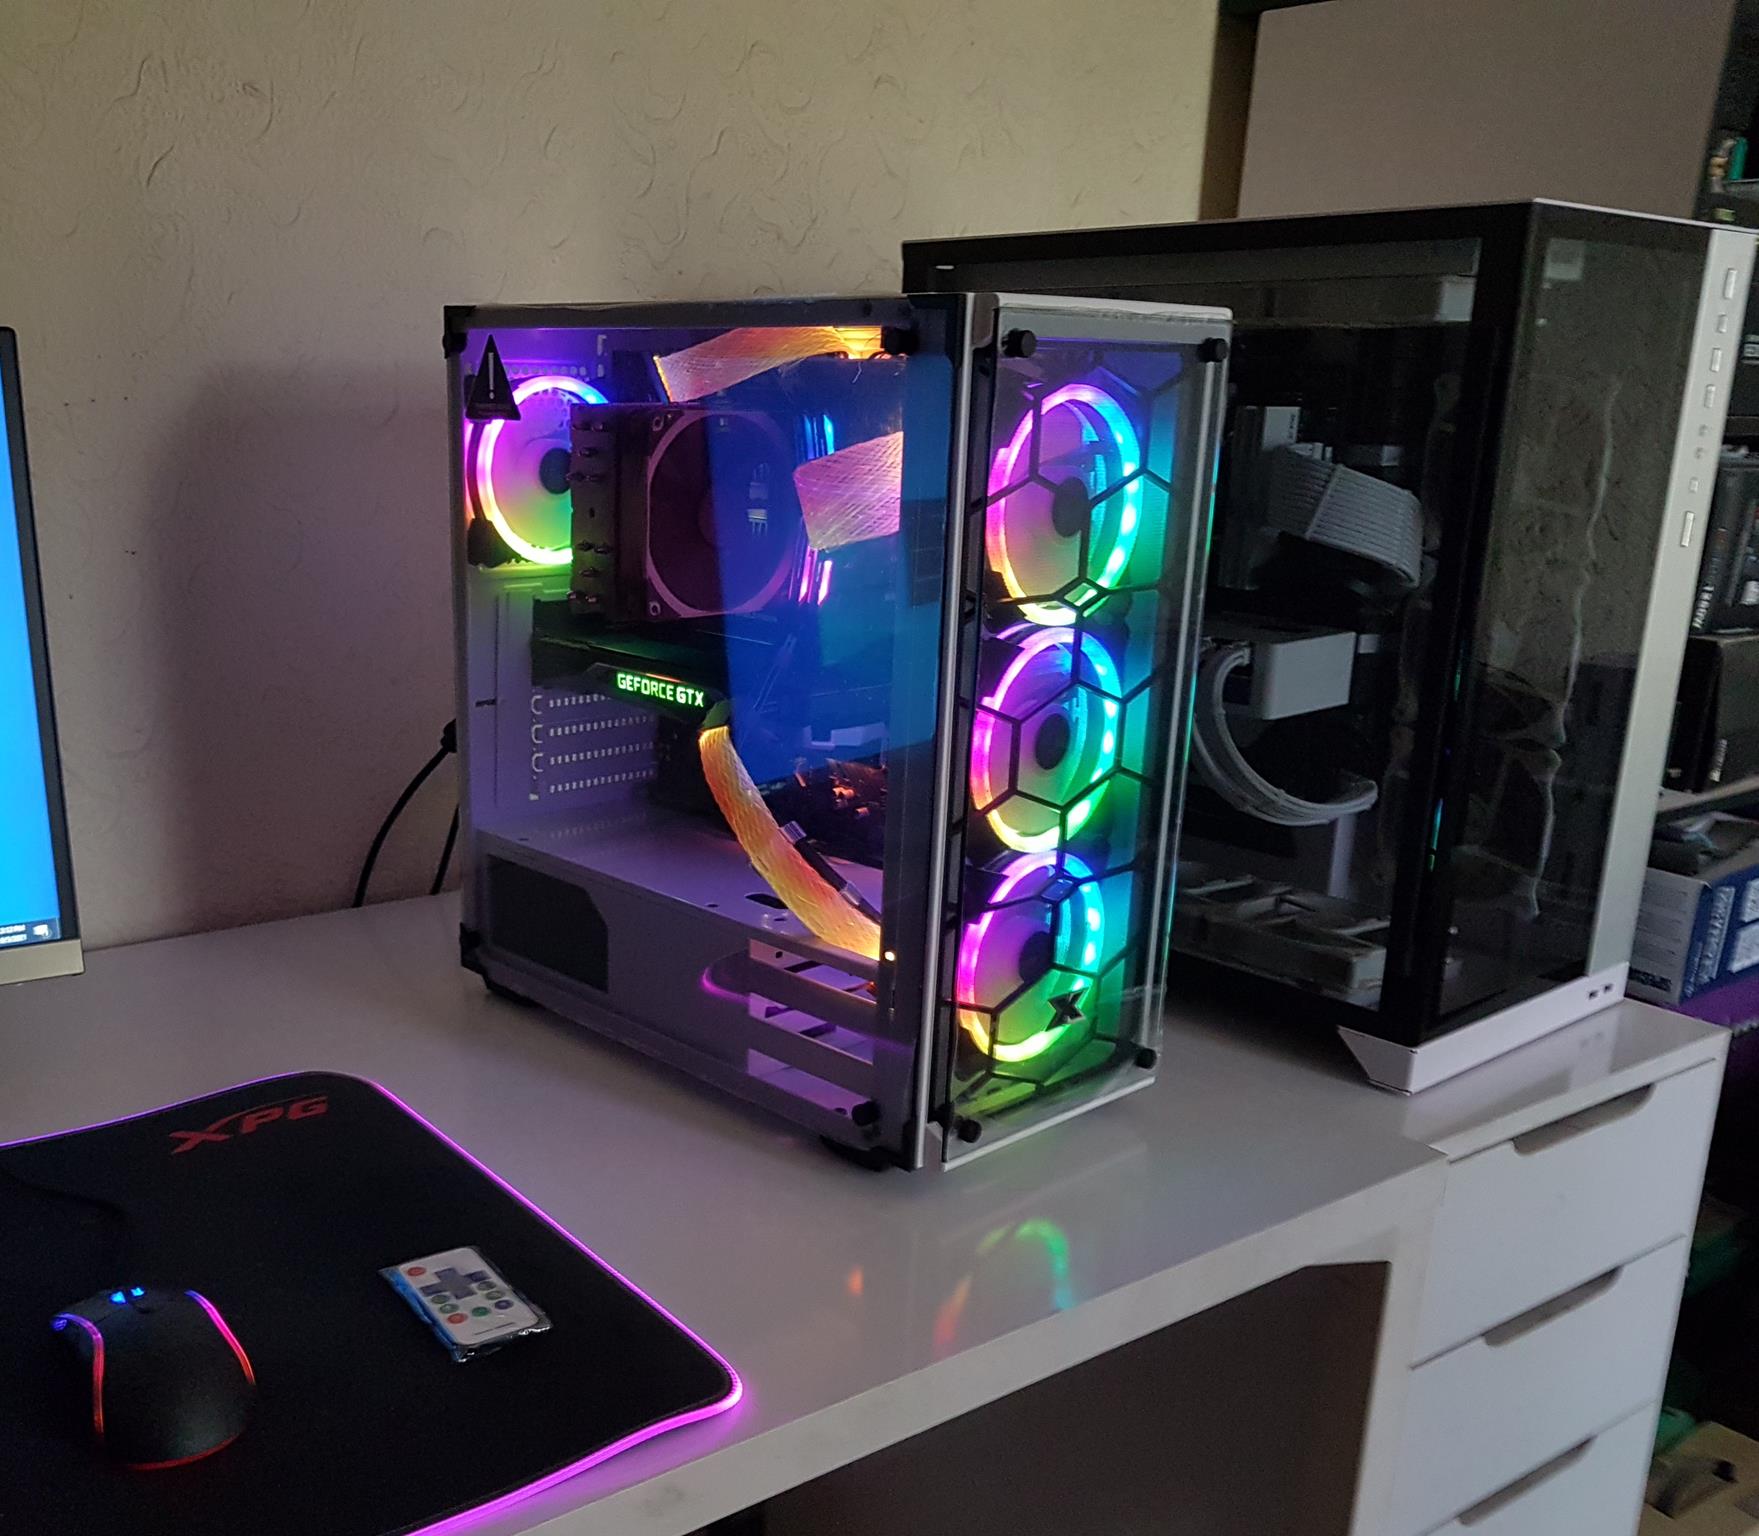
Here are some pics of the build:


Testing
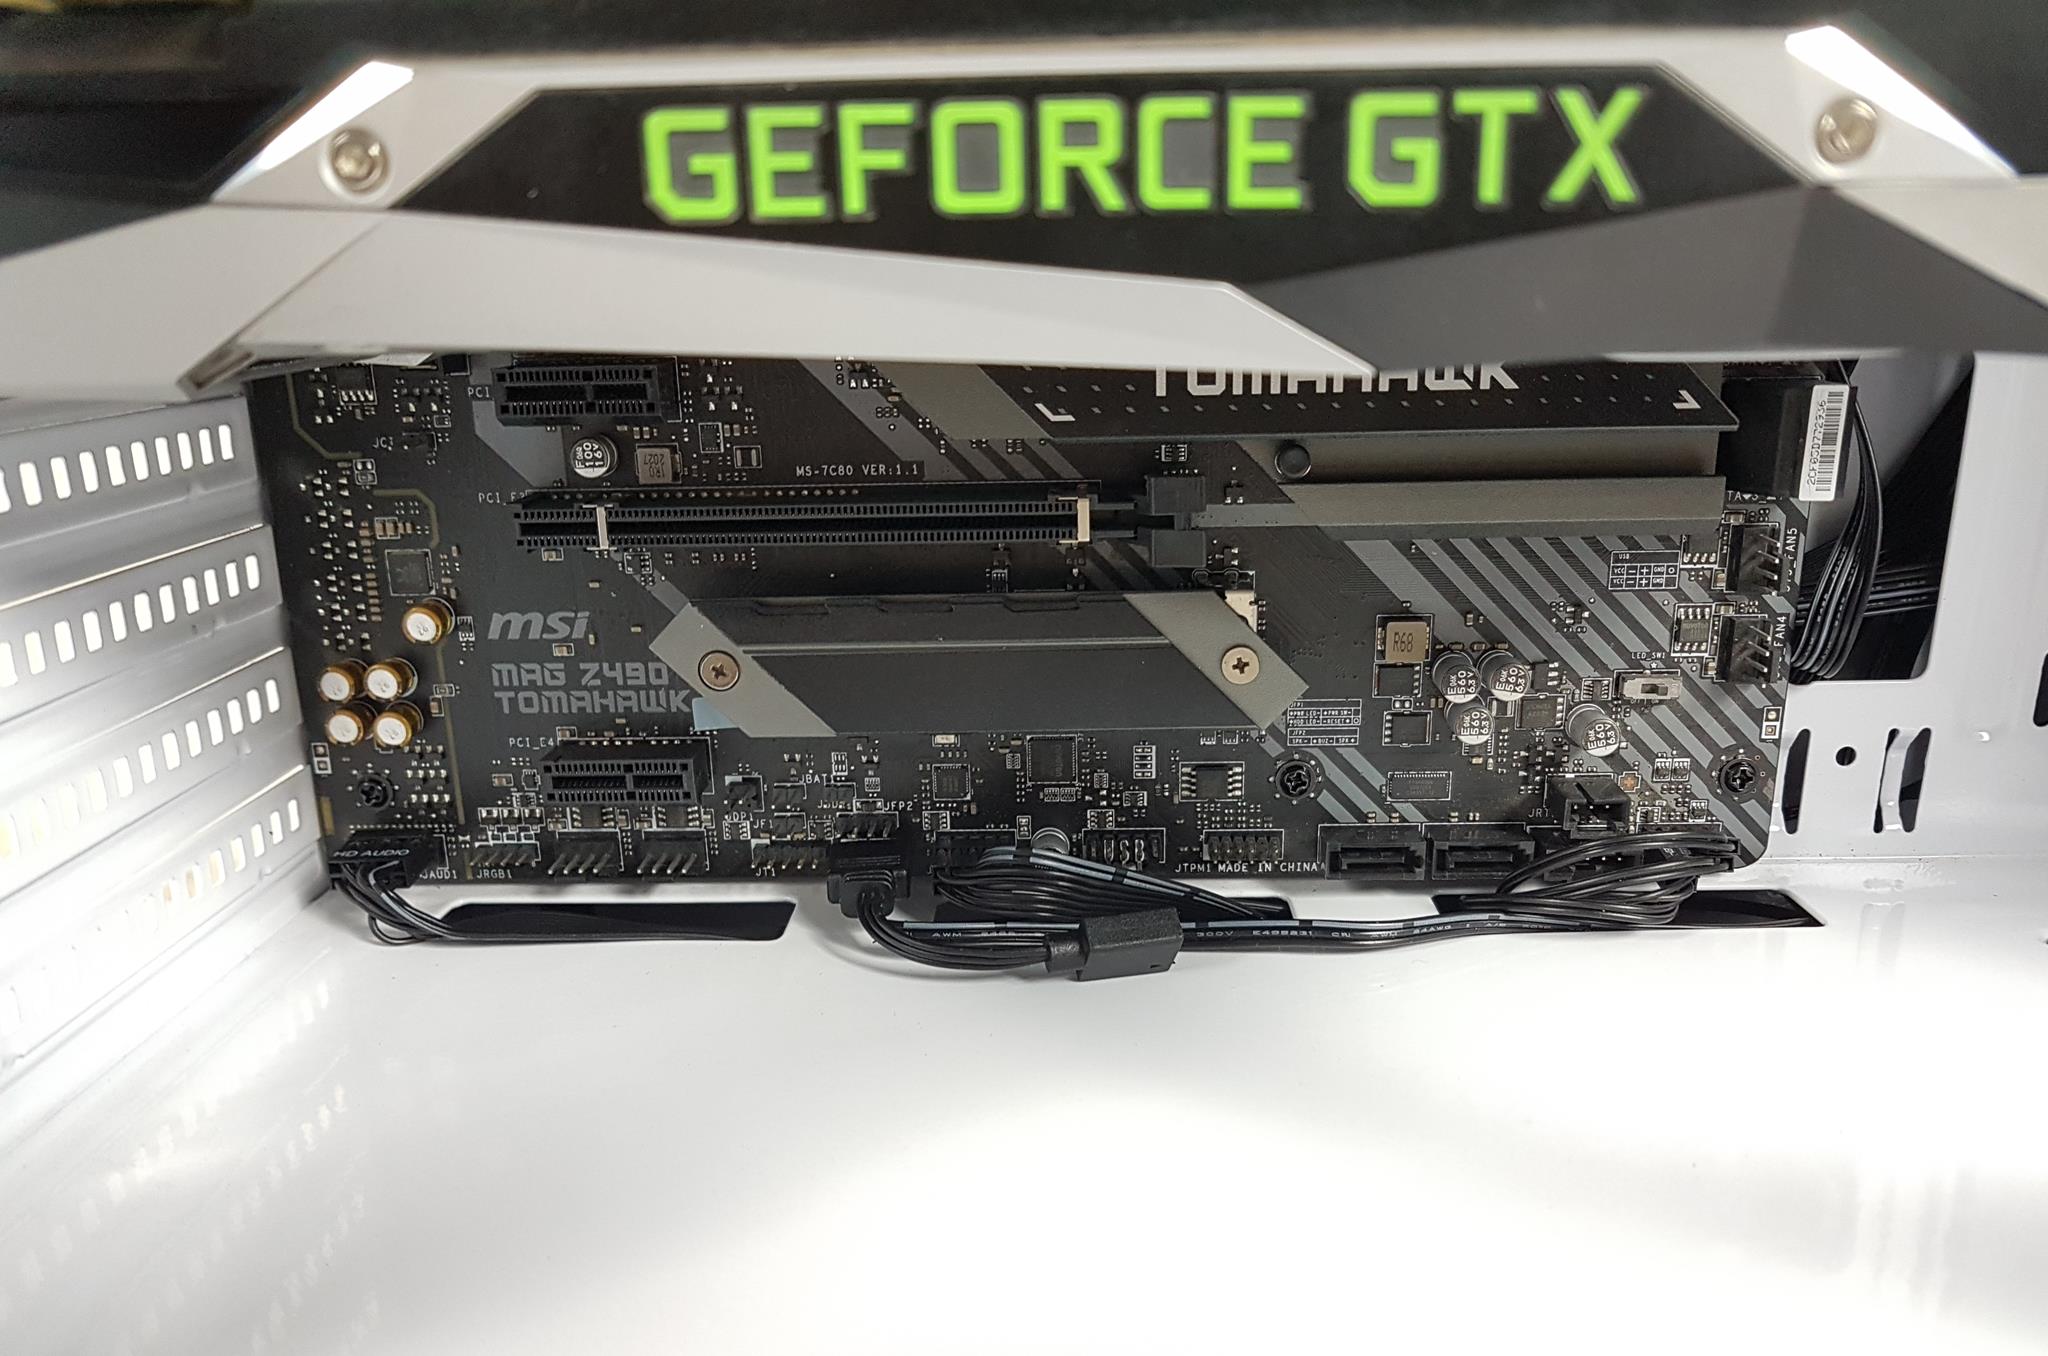
The following test build has been used for thermal testing:
- MSI MAG Z490 TOMAHAWK
- Intel i7 10700k [Stock, Auto]
- Noctua NH-U12S
- T-Force NightHawk RGB 16GB 3200MHz CL16 kit
- Nvidia GeForce GTX 1080 FE
- Addlink S70 256GB NVMe SSD
- bequiet! Straight Power 11 850W PSU
Noctua NT-H1 is used on the CPU IHS. AIDA64 Extreme 6.30 is used for thermal testing using FPU and GPU at a time.
The following configurations have been tested and reported in the graph:
- Stock Configuration [Complete Front Panel installed]
- Complete Front Panel removed
Can’t adjust the fan speed, it’s either low or full blast via remote. Ran cooler’s fan at max PWM cycle, other settings on Auto/Stock in UEFI/BIOS. Stress tested with AIDA64 Extreme 6.30 for 30 mins (FPU and GPU), 10 mins idle. Powered off for 30 mins between runs. Now, check out the results!
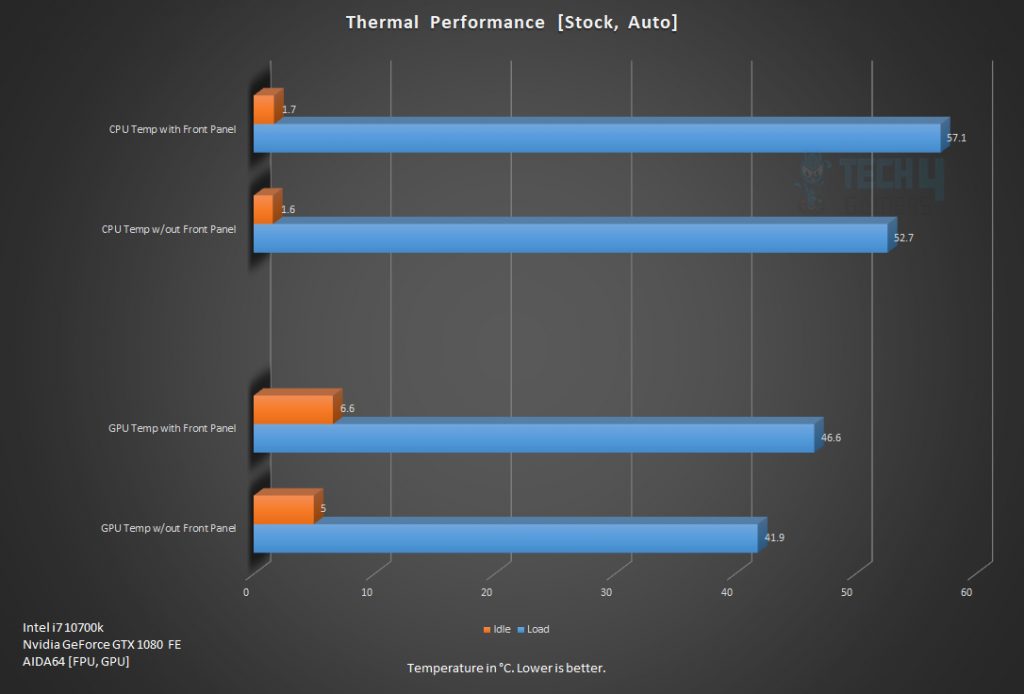
The room was 32.4°C and 32.2°C. I’ve plotted the temperature difference on the graph, averaging the core temperatures. The CPU temperature rises by 4.4°C with the Front Panel, exceeding the acceptable range. Airflow restriction is impacting CPU cooling. Graphics cards show a 4.7°C difference due to the narrow gap between the front glass and mesh filter affecting overall temperatures. Low static pressure and airflow-oriented fans contribute to this.
Should You Buy It?
Upon carefully analyzing and testing the XIGMATEK VENOM X ARCTIC PC Case, I concluded that:
Buy It If
✅ You prefer sleek design: If you are looking for a mid-tower PC case with a sleek design and tempered glass panels.
✅ You prioritize RGB build: If you want to showcase your build with RGB lighting, as the XIGMATEK VENOM X ARCTIC comes with 4 Rainbow RGB 120mm fans.
✅ You want a compact size for E-ATX motherboards: If you prefer a compact chassis that supports up to E-ATX motherboards and offers good storage options for both 2.5″ and 3.5″ drives.
Don’t Buy It If
❌ You prefer optimal airflow: If you prioritize optimal airflow, the thermal testing indicates that the front panel design may restrict airflow and impact cooling performance.
❌ You want fully functional RGB buttons: If you are looking for a case with a fully functional RGB button, as the one on the XIGMATEK VENOM X ARCTIC is non-functional due to the 2-pin connector being unwired.
❌ You want a smooth build: If you are sensitive to potential issues such as rough spots and scratches on the chassis, as mentioned in the review.
Final Words
The XIGMATEK VENOM X ARCTIC is a sleek mid-tower chassis in glossy white, priced attractively for its feature set. Compact at 435x200x435mm, it supports up to E-ATX motherboards. Made of steel, plastic, and tempered glass, it weighs 6.7 kg. The chassis boasts tempered glass panels, showcasing your build, and includes 4 Rainbow RGB 120mm fans. However, the glossy finish has rough spots, especially near PCIe slots.
Filtration is good with magnetic dust filters on top and non-magnetic ones on the front and bottom. The pre-installed fans use 6-pin connectors but can only connect to the provided hub, rendering the RGB button useless. The building inside is smooth, but standoffs may not install straight, impacting motherboard installation. Despite these issues, the VENOM X ARCTIC offers a decent feature set with a stylish design and satisfactory build quality.
Recent Updates
- January 23, 2024: A few text changes to improve readability. Improved image galleries.
Thank you! Please share your positive feedback. 🔋
How could we improve this post? Please Help us. 😔
[Hardware Reviewer & Editor]
Meet Nauman Siddique, a highly experienced computer science graduate with more than 15 years of knowledge in technology. Nauman is an expert in the field known for his deep understanding of computer hardware.
As a tech tester, insightful reviewer, and skilled hardware editor, Nauman carefully breaks down important parts like motherboards, graphics cards, processors, PC cases, CPU coolers, and more.
- 15+ years of PC Building Experience
- 10+ years of first-hand knowledge of technology
- 7+ years of doing in-depth testing of PC Hardware
- A motivated individual with a keen interest in tech testing from multiple angles.
- I majored in Computer Science with a Masters in Marketing
- Previously worked at eXputer, EnosTech, and Appuals.
- Completed Course in Computer Systems Specialization From Illinois Tech
Get In Touch: nauman@tech4gamers.com


