 Threads
Thermaltake Versa C23
Review Summary
The Thermaltake Versa C23 TG RGB mid-tower chassis impresses with its budget-friendly offering that blends striking design and RGB lighting. Key features include a tempered glass side panel, brushed aluminum finish on the front and top panels, and support for liquid cooling configurations. Despite lacking traditional airflow inputs, the chassis maintains ventilation through vented sides with dust filters. The RGB LED controller on the front-top panel supports 11 lighting modes, enhancing the overall visual appeal.
Hours Tested: 8-10

Overall
-
Build Quality - 8/10
8/10
-
Design - 9/10
9/10
-
Performance - 8/10
8/10
-
Value - 8/10
8/10
Pros
- Aesthetic Design
- RGB Lighting Solutions
- Spacious Interior
- Budget-Friendly
- Support for High-End Configurations
- Ease of Installation
Cons
- Weight
- Limited Front Panel Ventilation
- No Support for 5.25” Bay Drives


Thermaltake has sent us Thermaltake Versa C23 for Review. This is their mid-tower category chassis from the Versa lineup. The chassis has two main attractions to it. These are Tempered Glass side panels and RGB lighting solutions on the chassis with provision to hook up supported RGB fans with the built-in light controller to sync the total lighting of the case.
- Why you can trust Tech4Gamers: We understand the importance of making informed decisions. That’s why our team spends significant time testing every product we review. Find out more about how we test.
Key Takeaways
- The Thermaltake Versa C23 TG RGB impresses with its brushed aluminum finish, tempered glass side panel, and RGB lighting, offering an aesthetically pleasing chassis.
- Priced attractively, this mid-tower chassis provides budget users with a compelling combination of style and functionality, making it a cost-effective choice.
- While visually appealing, the chassis opts for vented sides over traditional front panel ventilation, and potential buyers should be aware of this if airflow is a top priority.
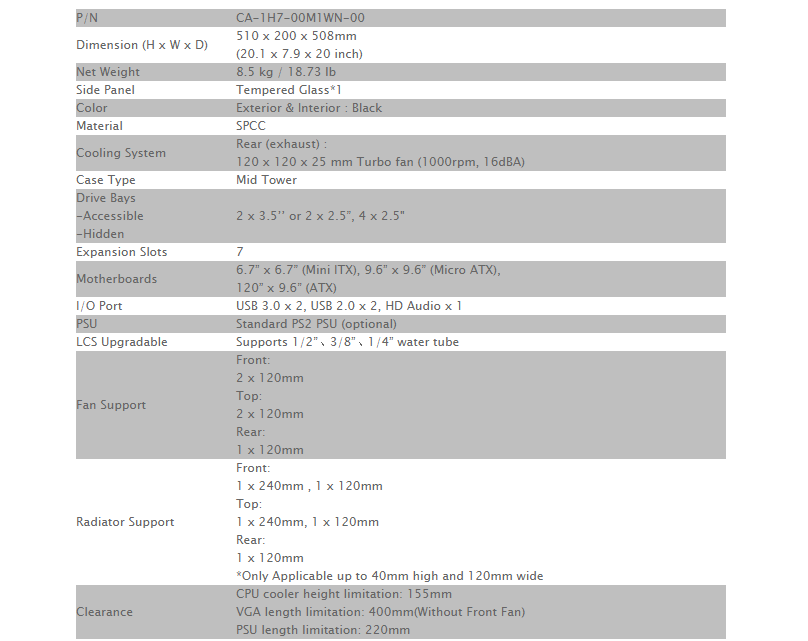
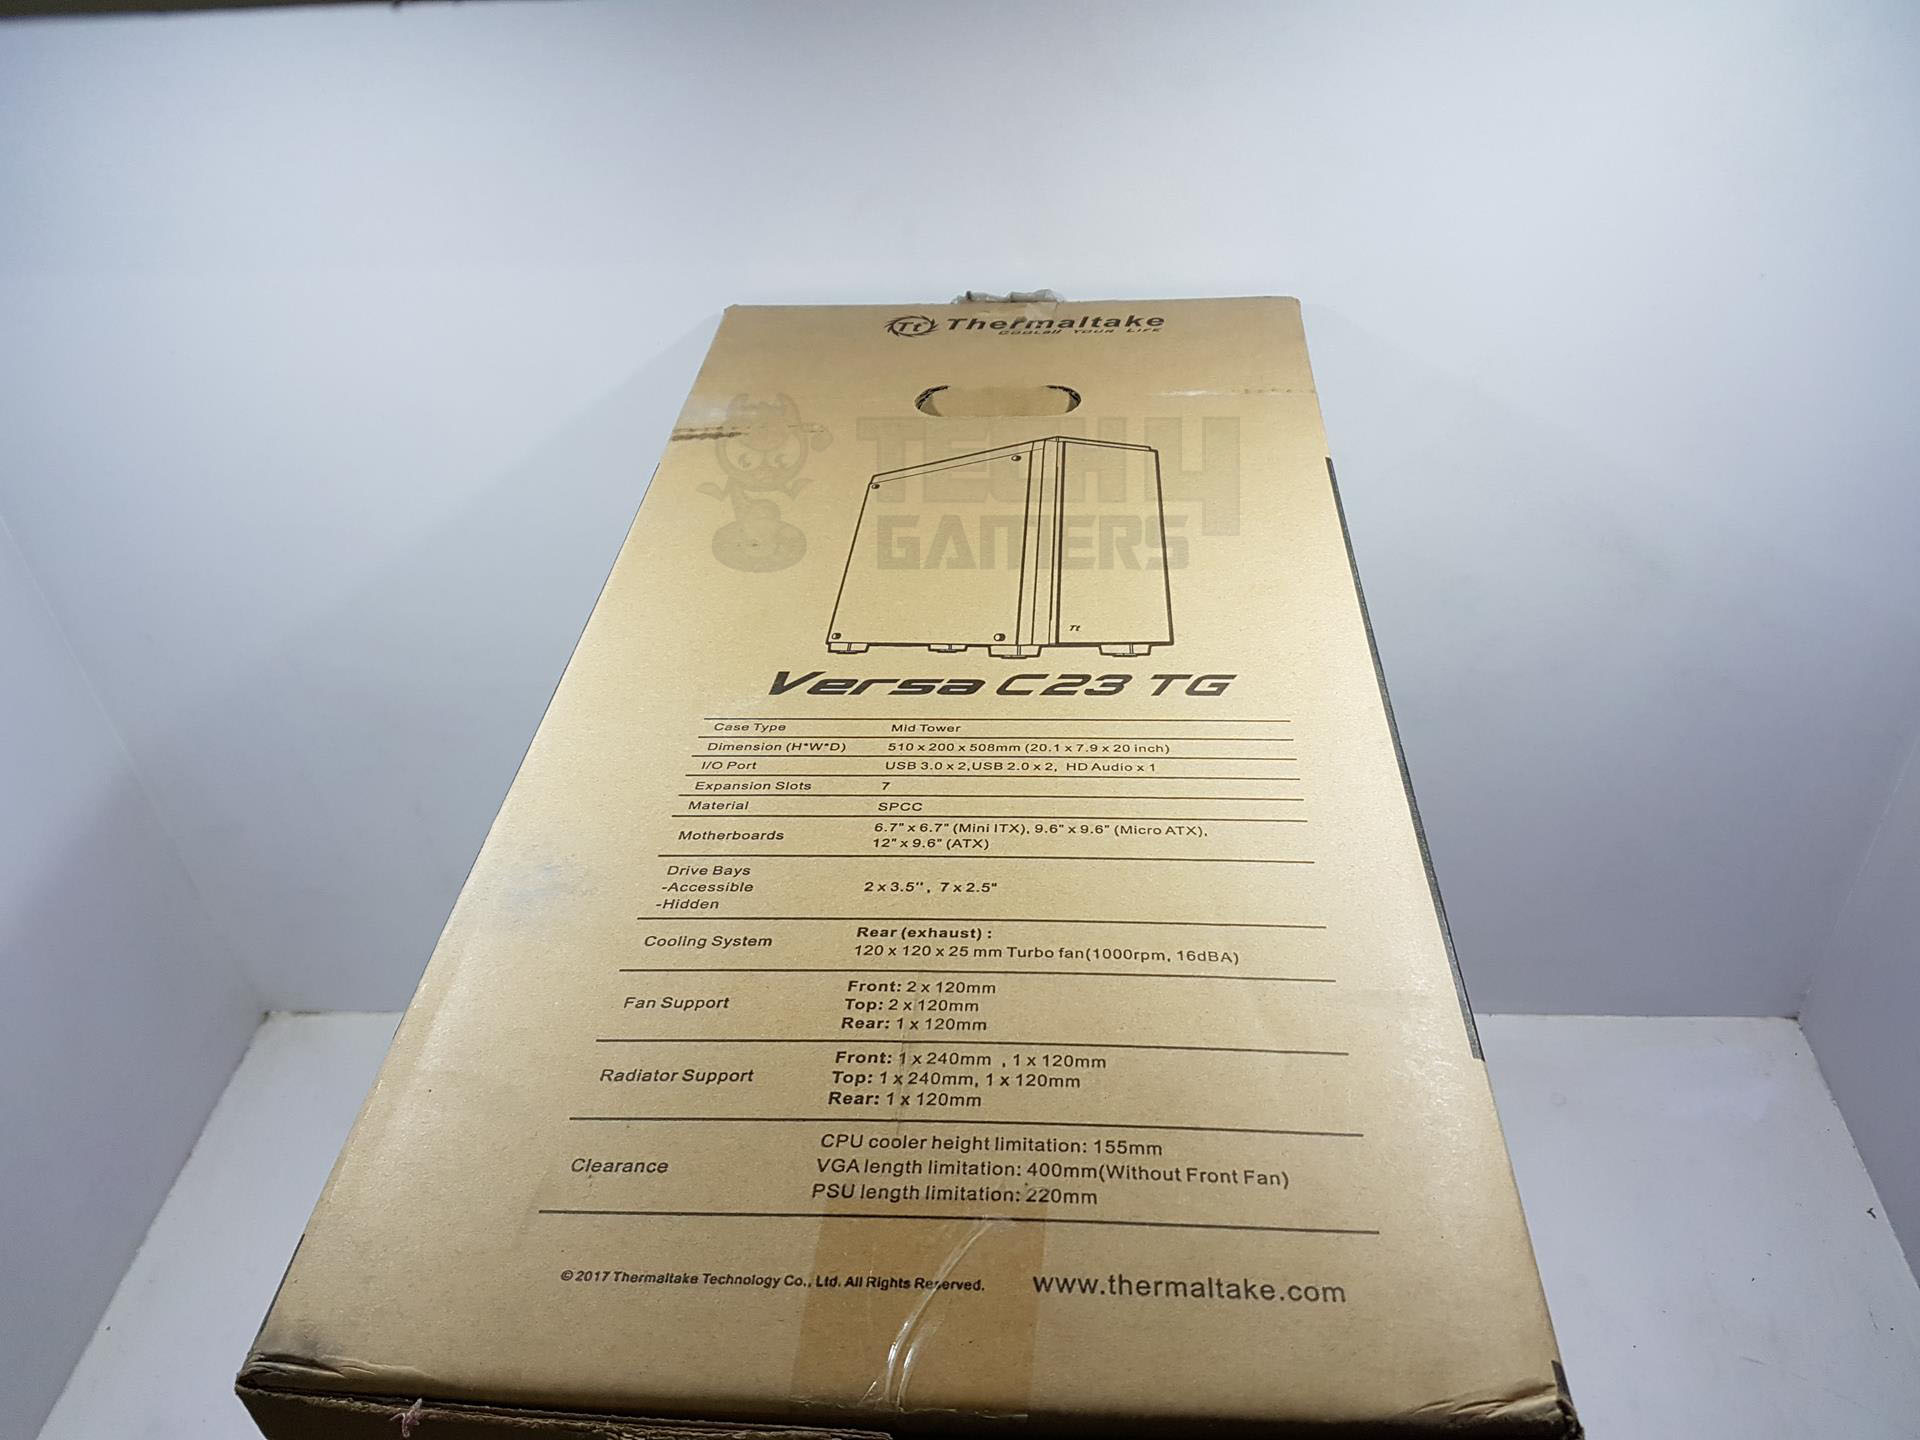
Let’s get started by seeing the specifications of this product:
Packaging And Unboxing
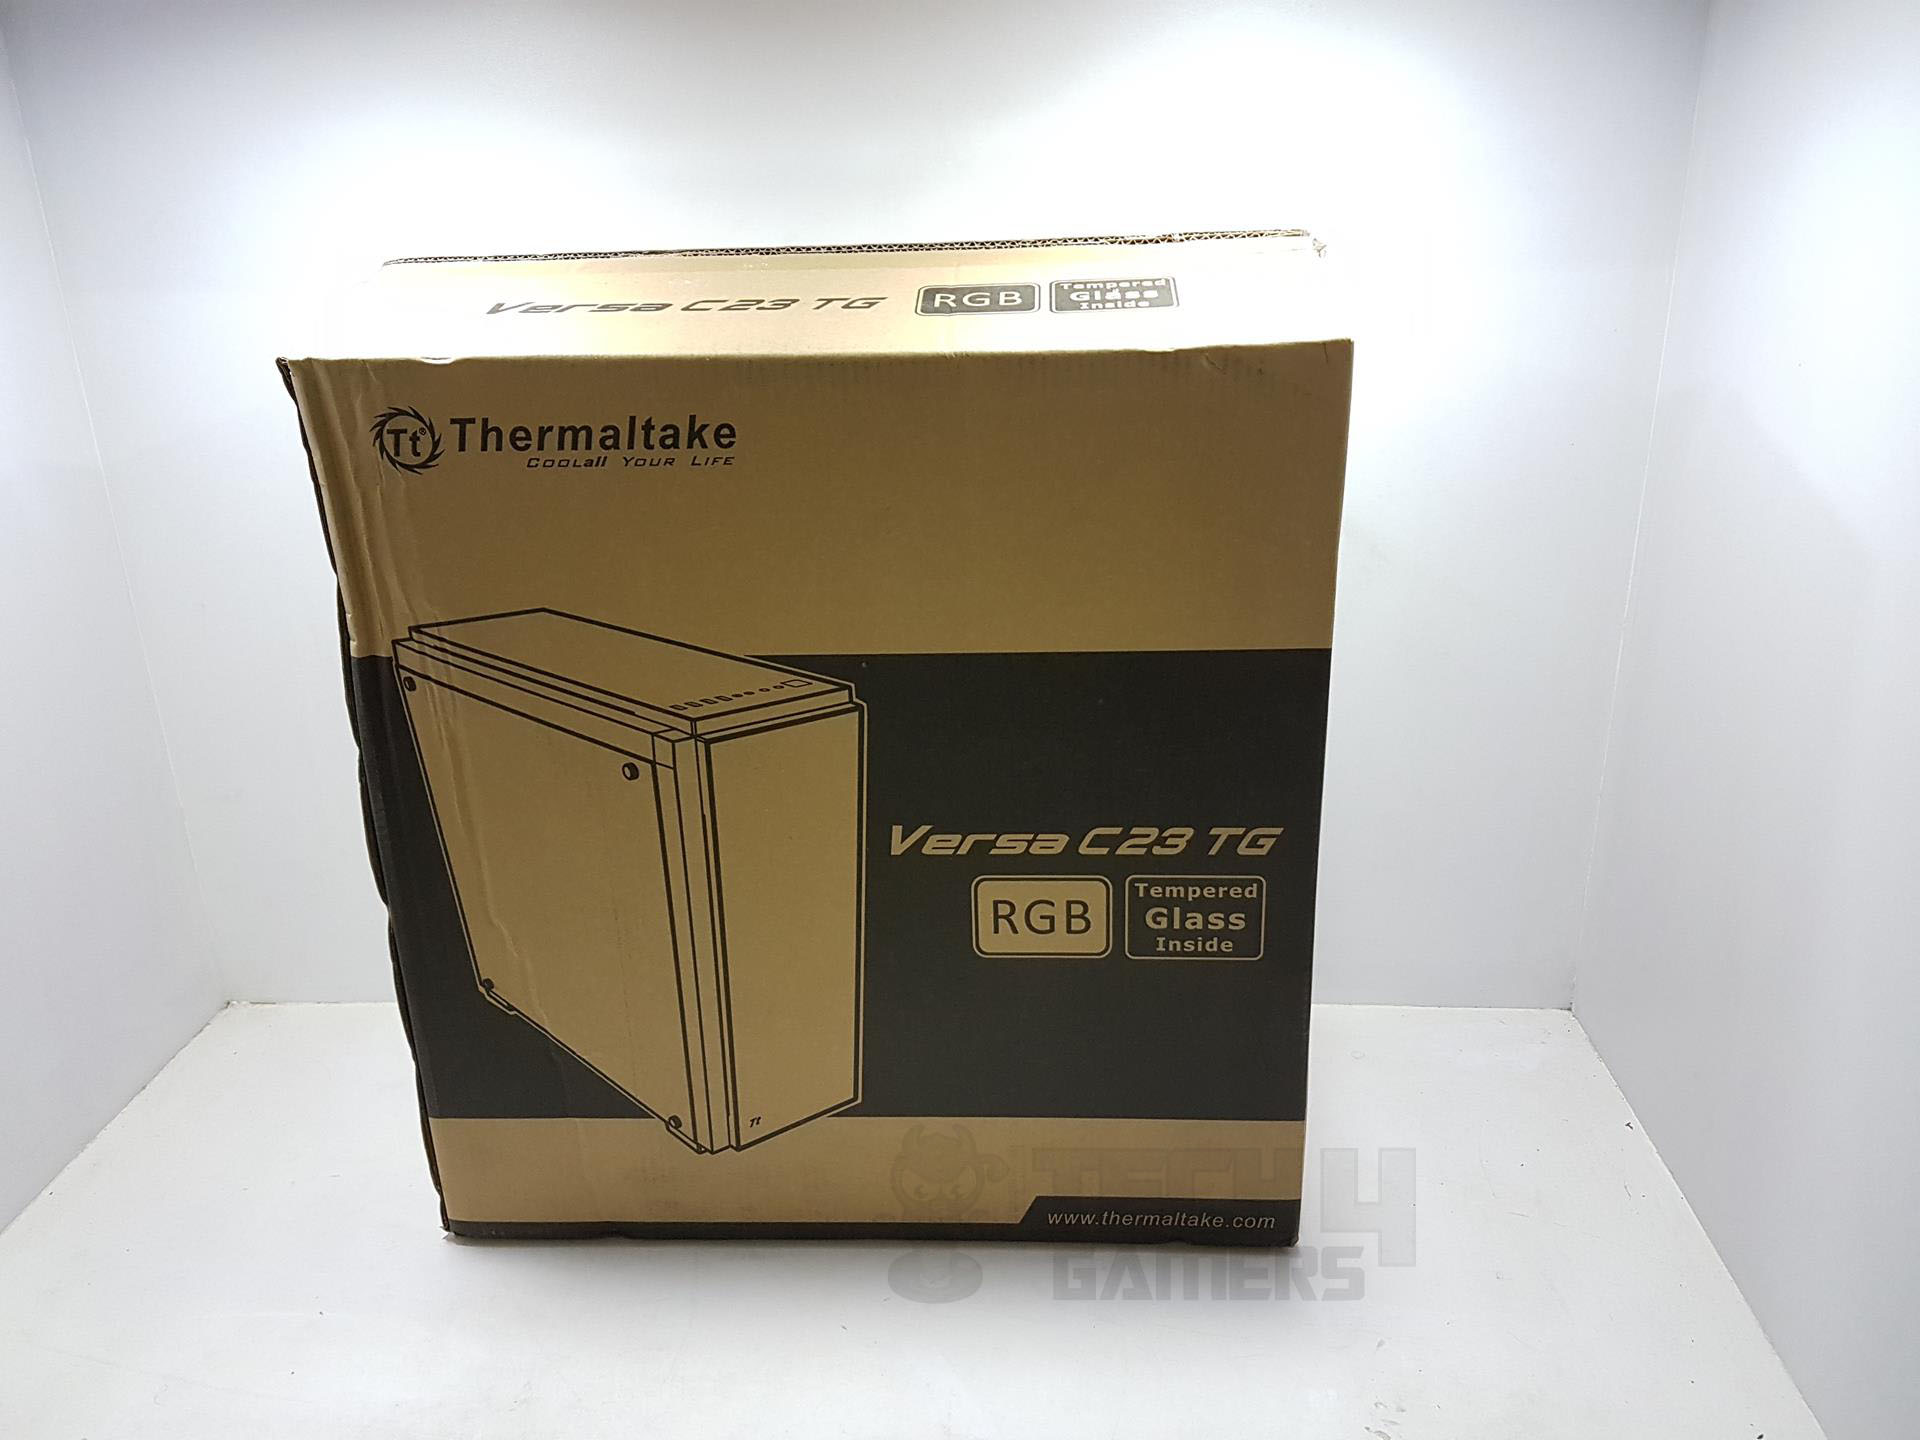
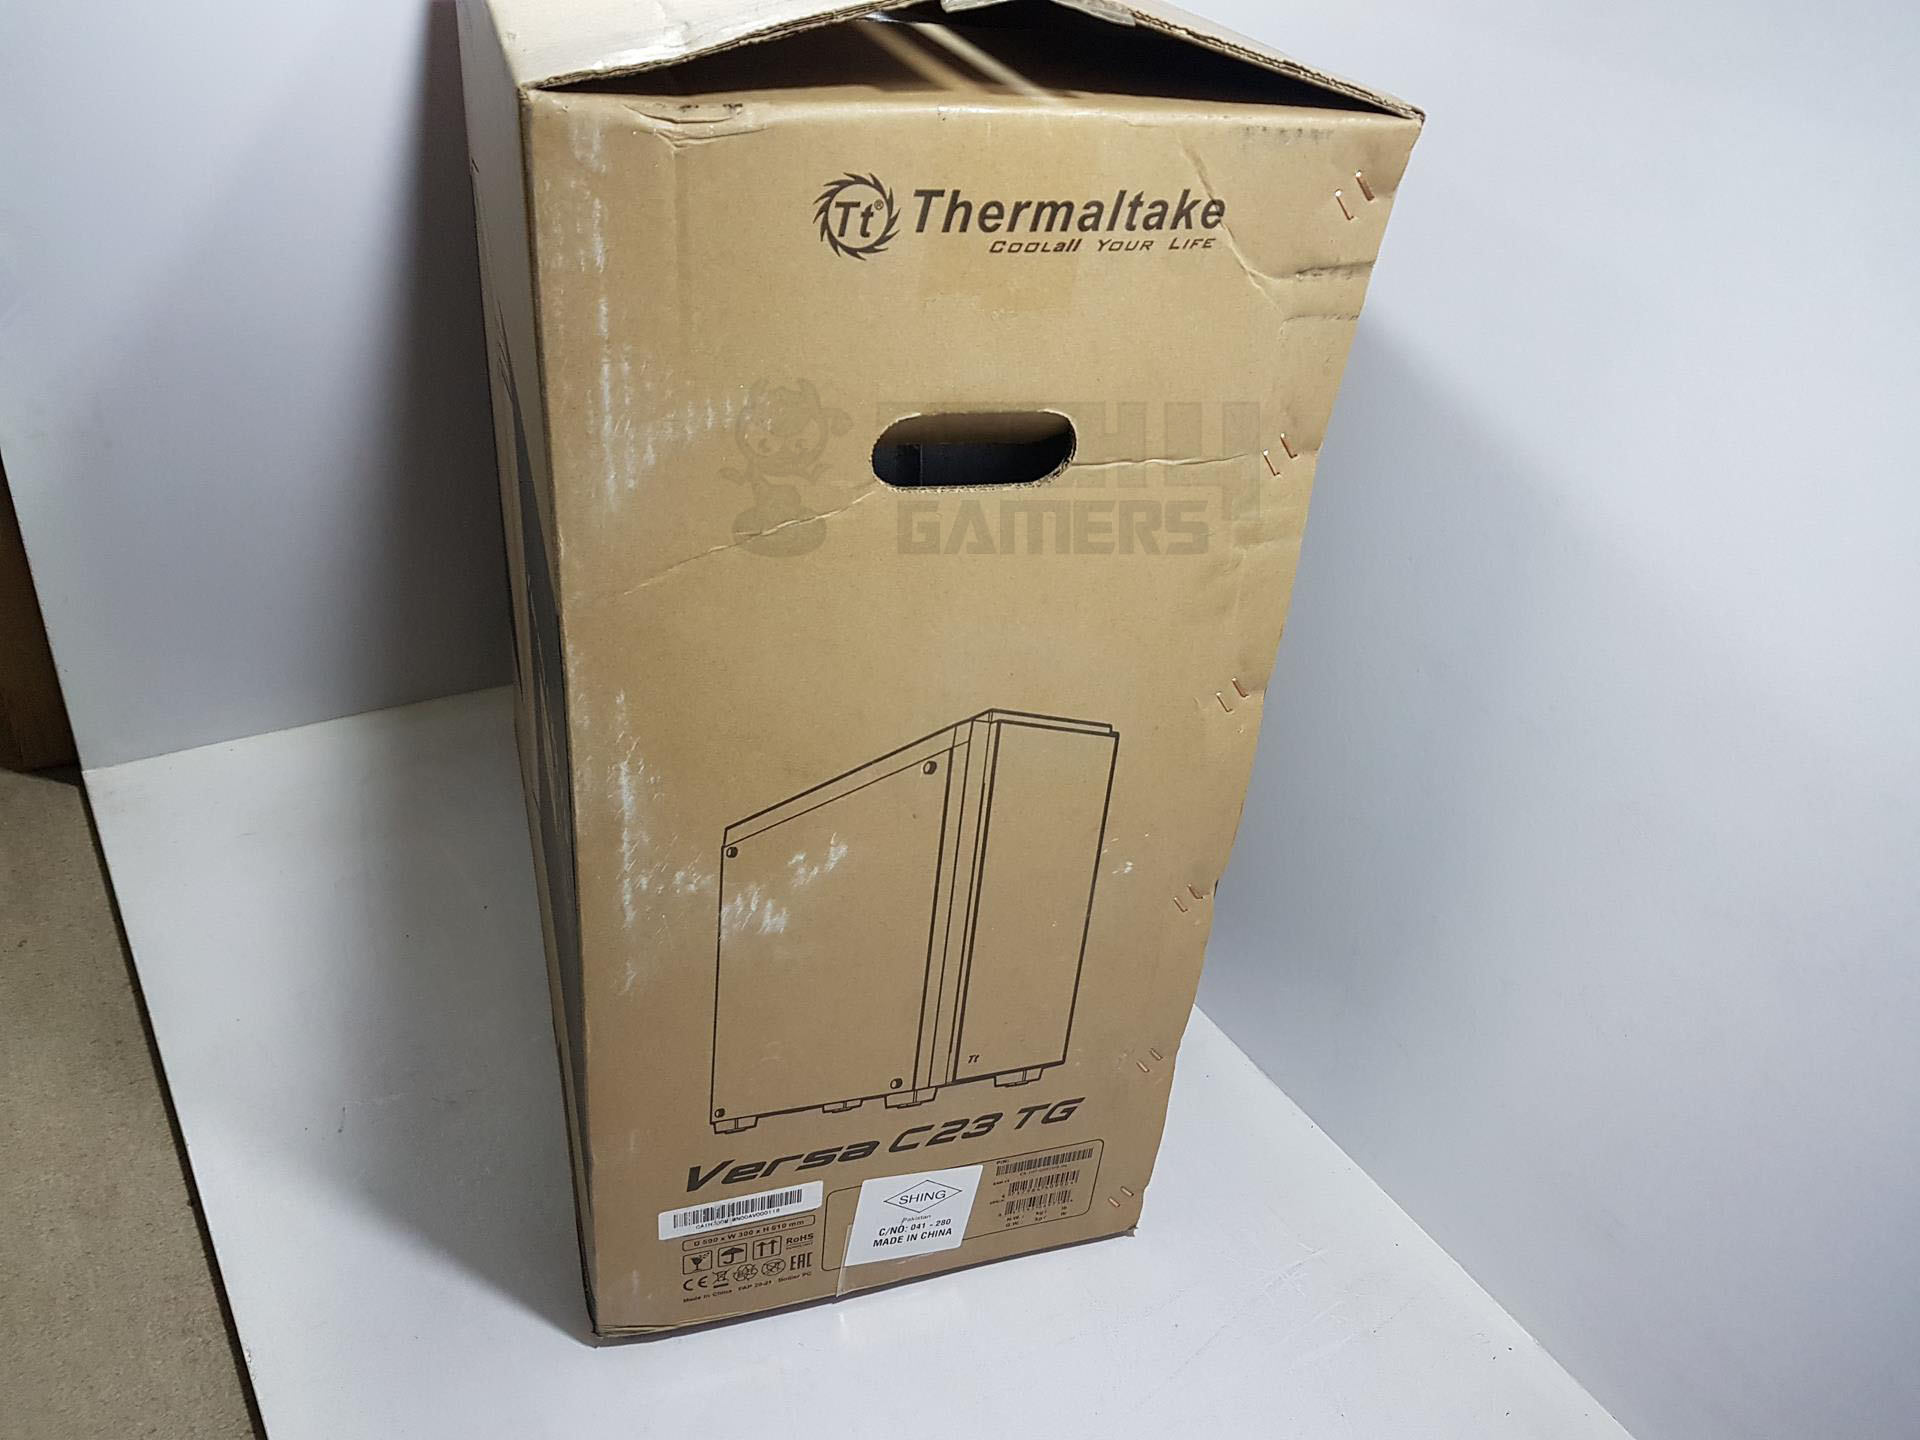
The chassis comes in a standard brown color recycled cardboard box packing.
Accessories
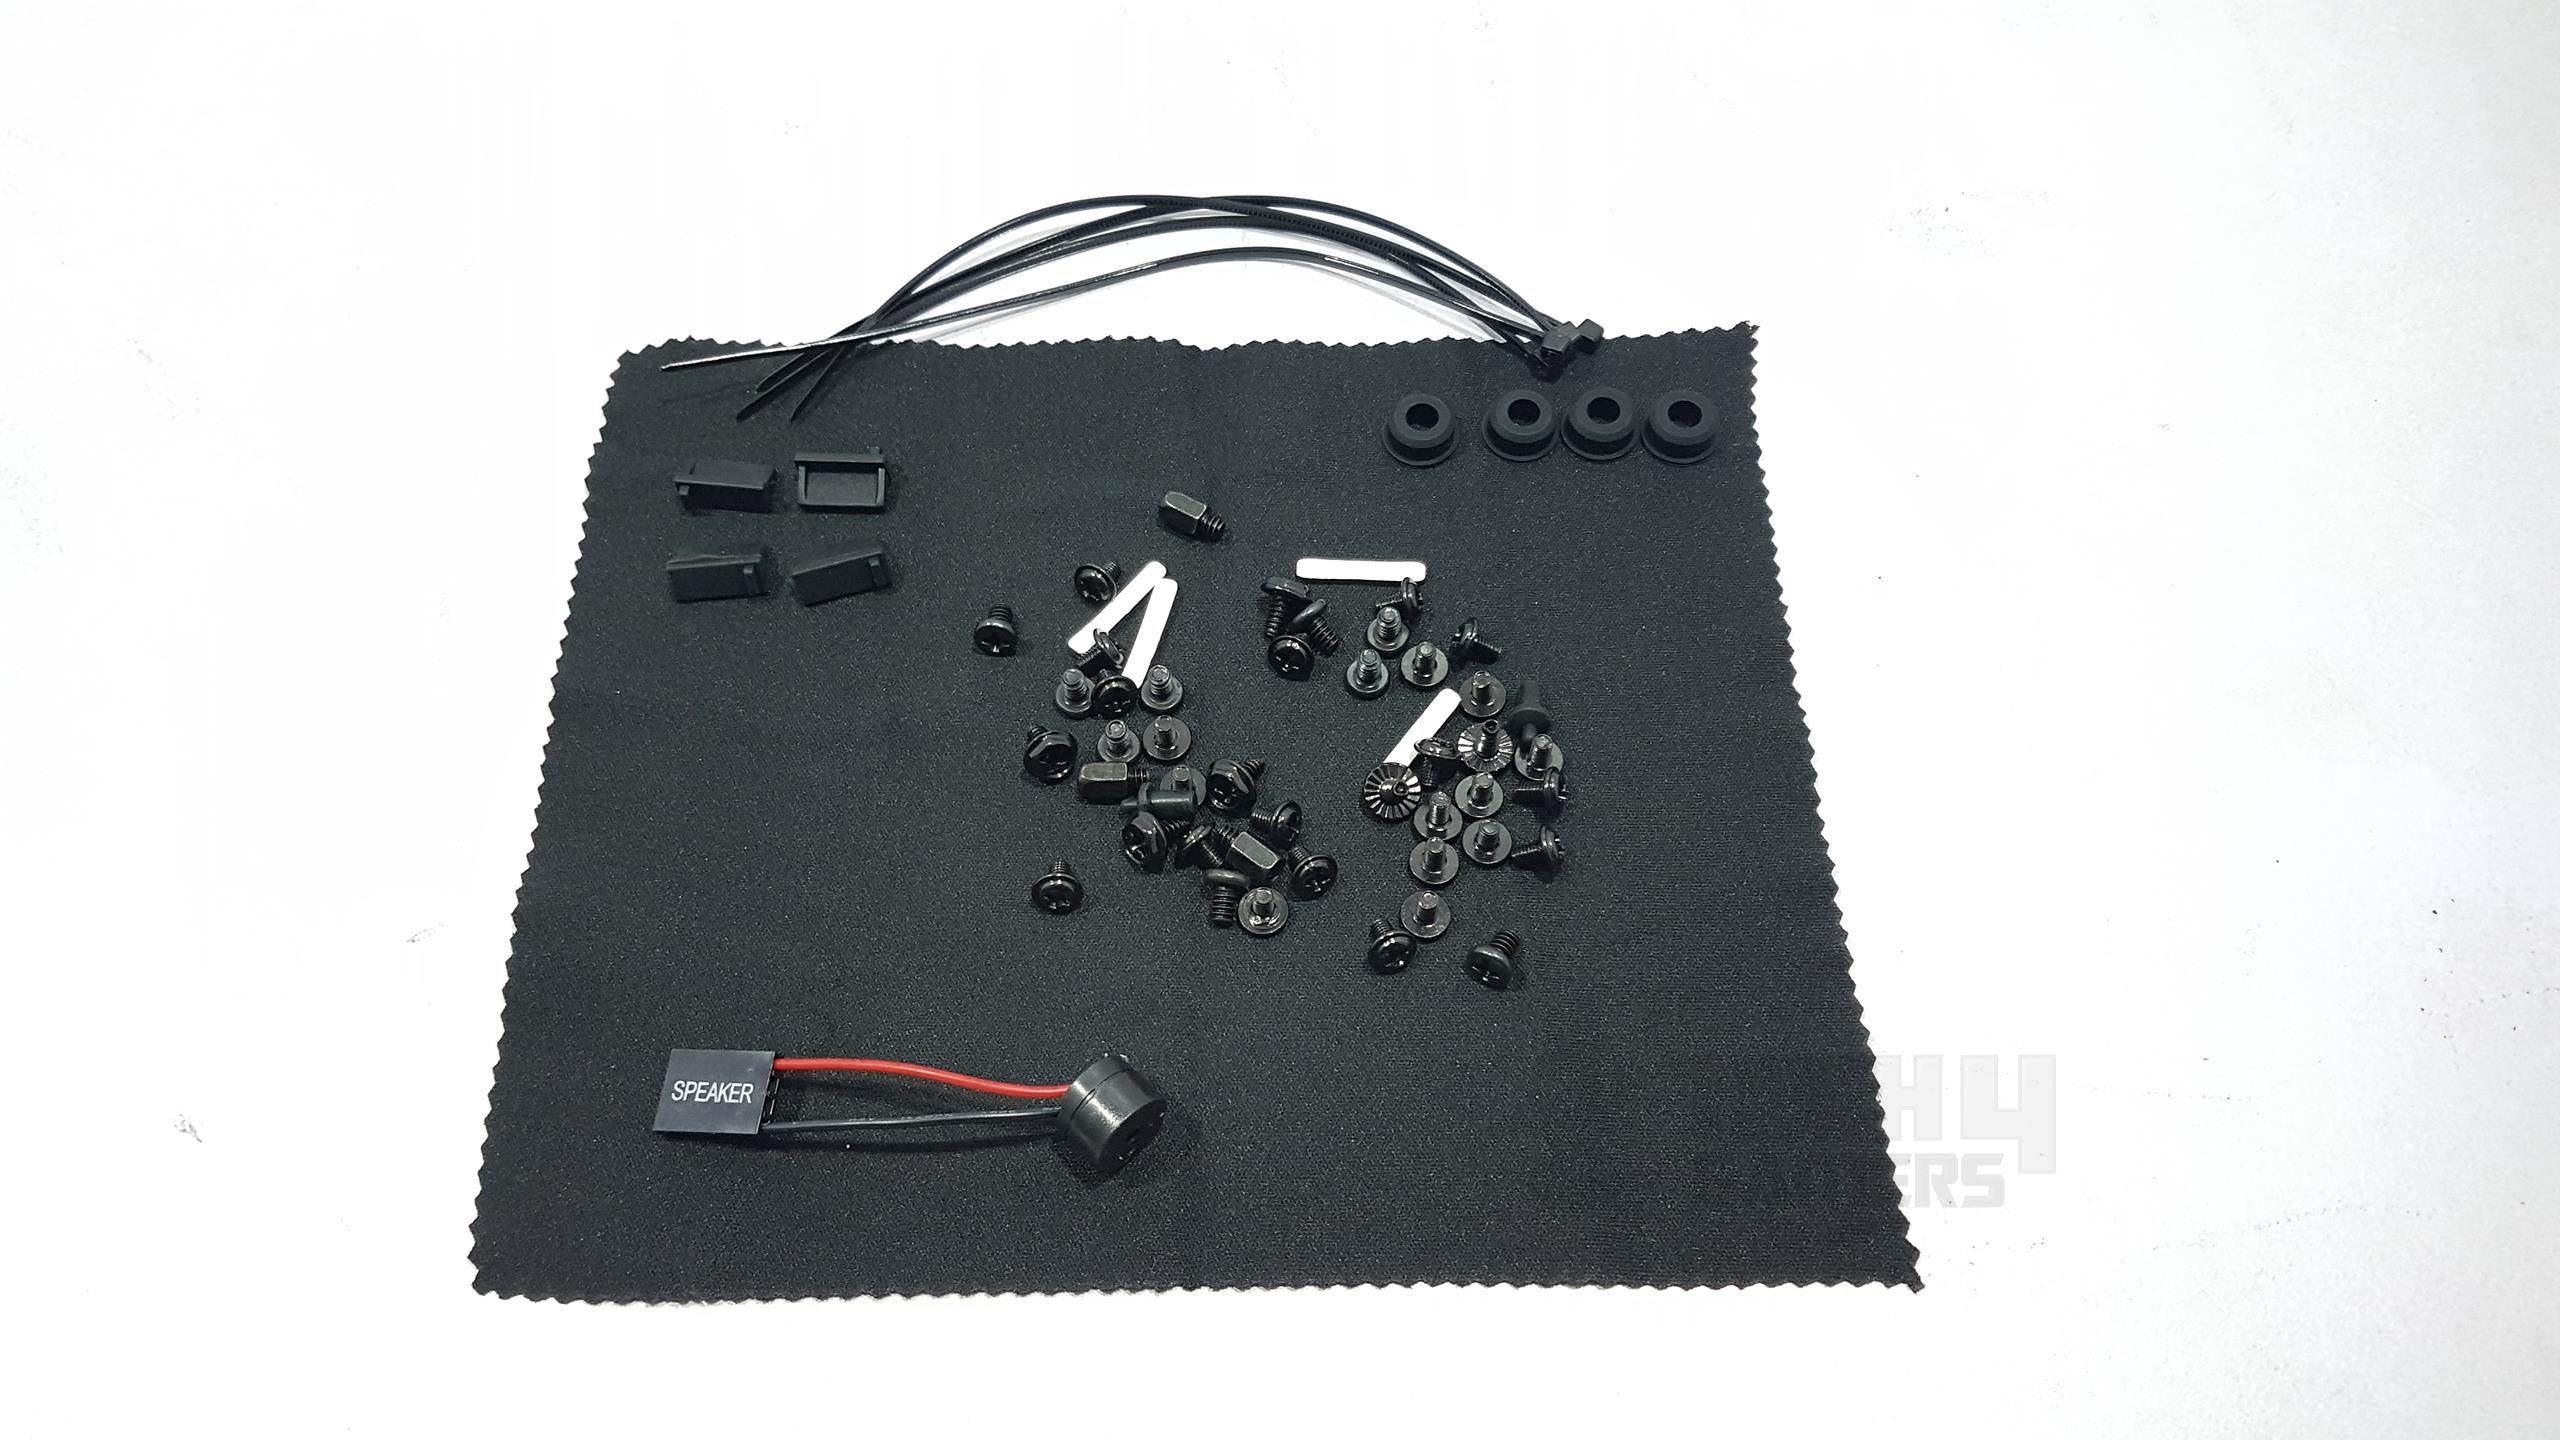
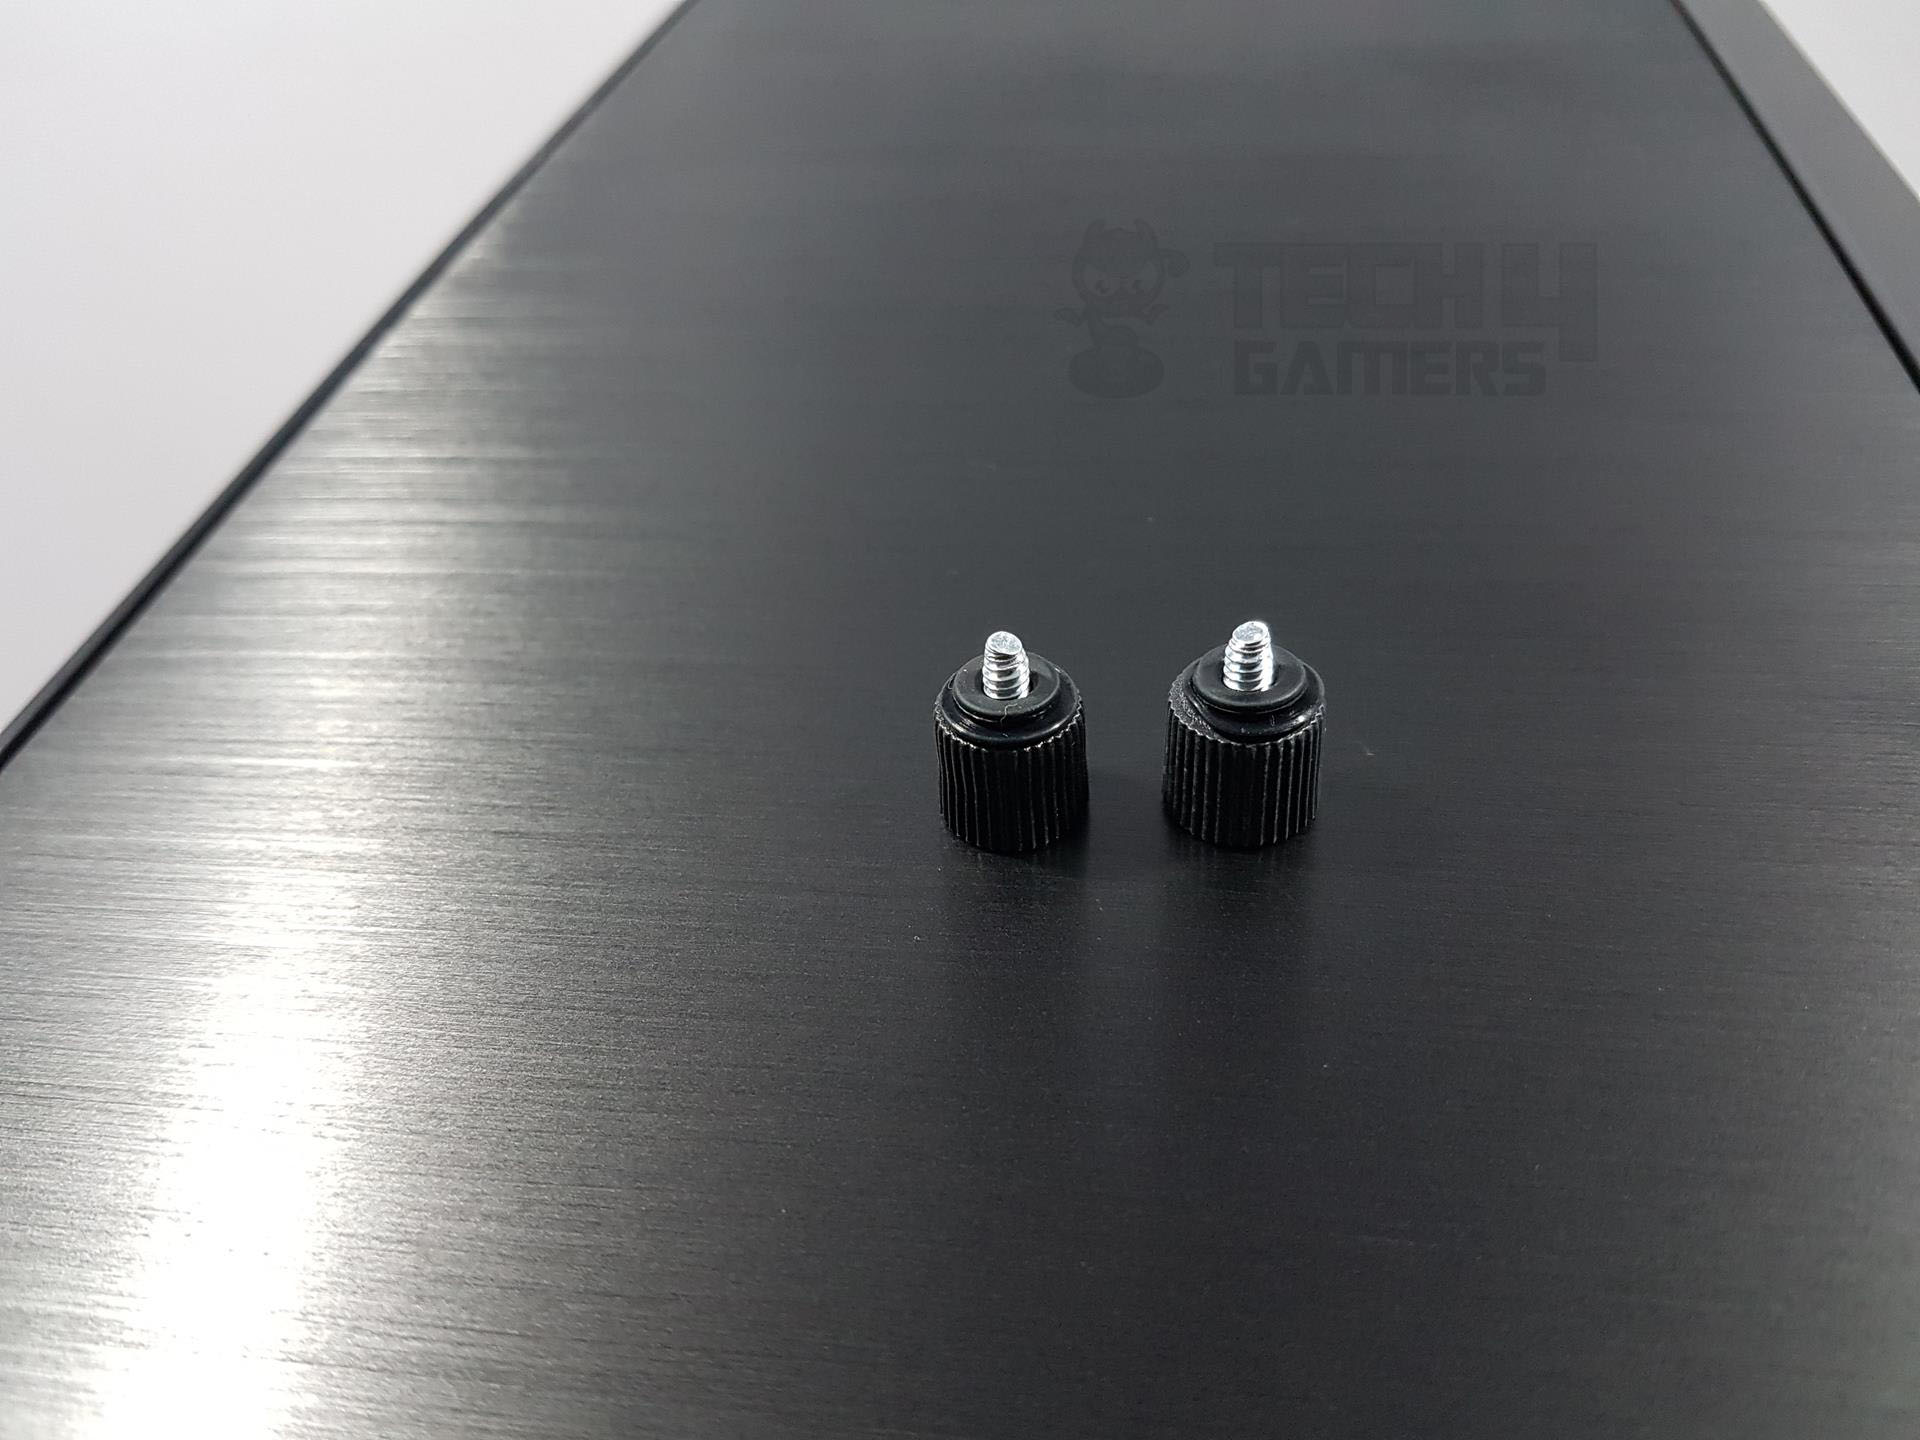
Thermaltake Versa C23 TG RGB has provided multiple screws for ease of installation of the hardware inside the chassis. There is a microfiber cloth as well to clean the tempered glass. Warranty guide and user manual are also included in addition to the cable ties.
Closer Look
The Thermaltake Versa C23 TG RGB Edition supports the latest PC hardware and all high-end GPU solutions, guarantees unparalleled expandability for high-end configurations, and liquid cooling systems to satisfy the market where users have opted for stylish PC chassis with advanced features and aesthetic appeal. It is time to take a closer look at the chassis and see what it offers to the user and how good is the build quality.
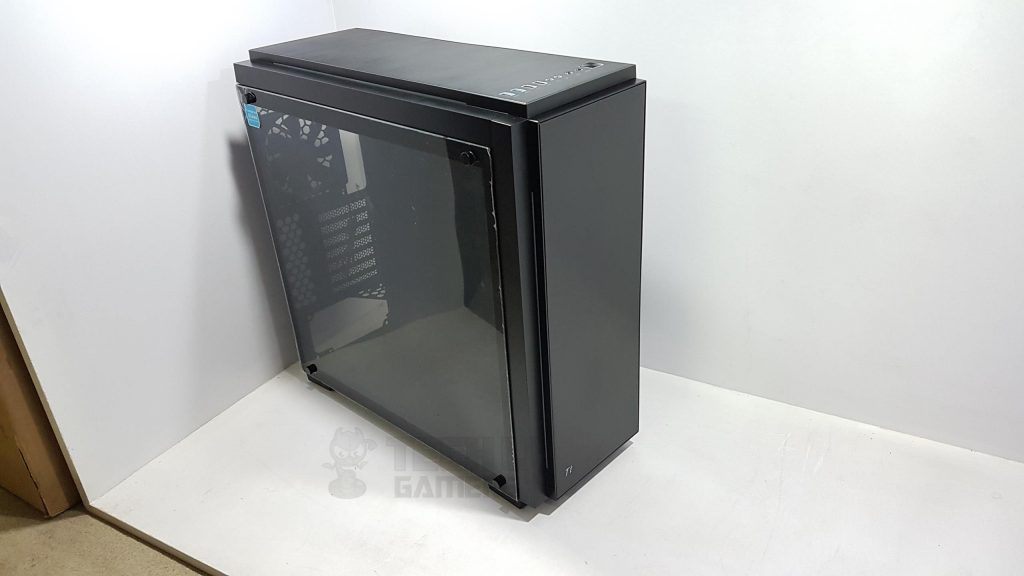
Front
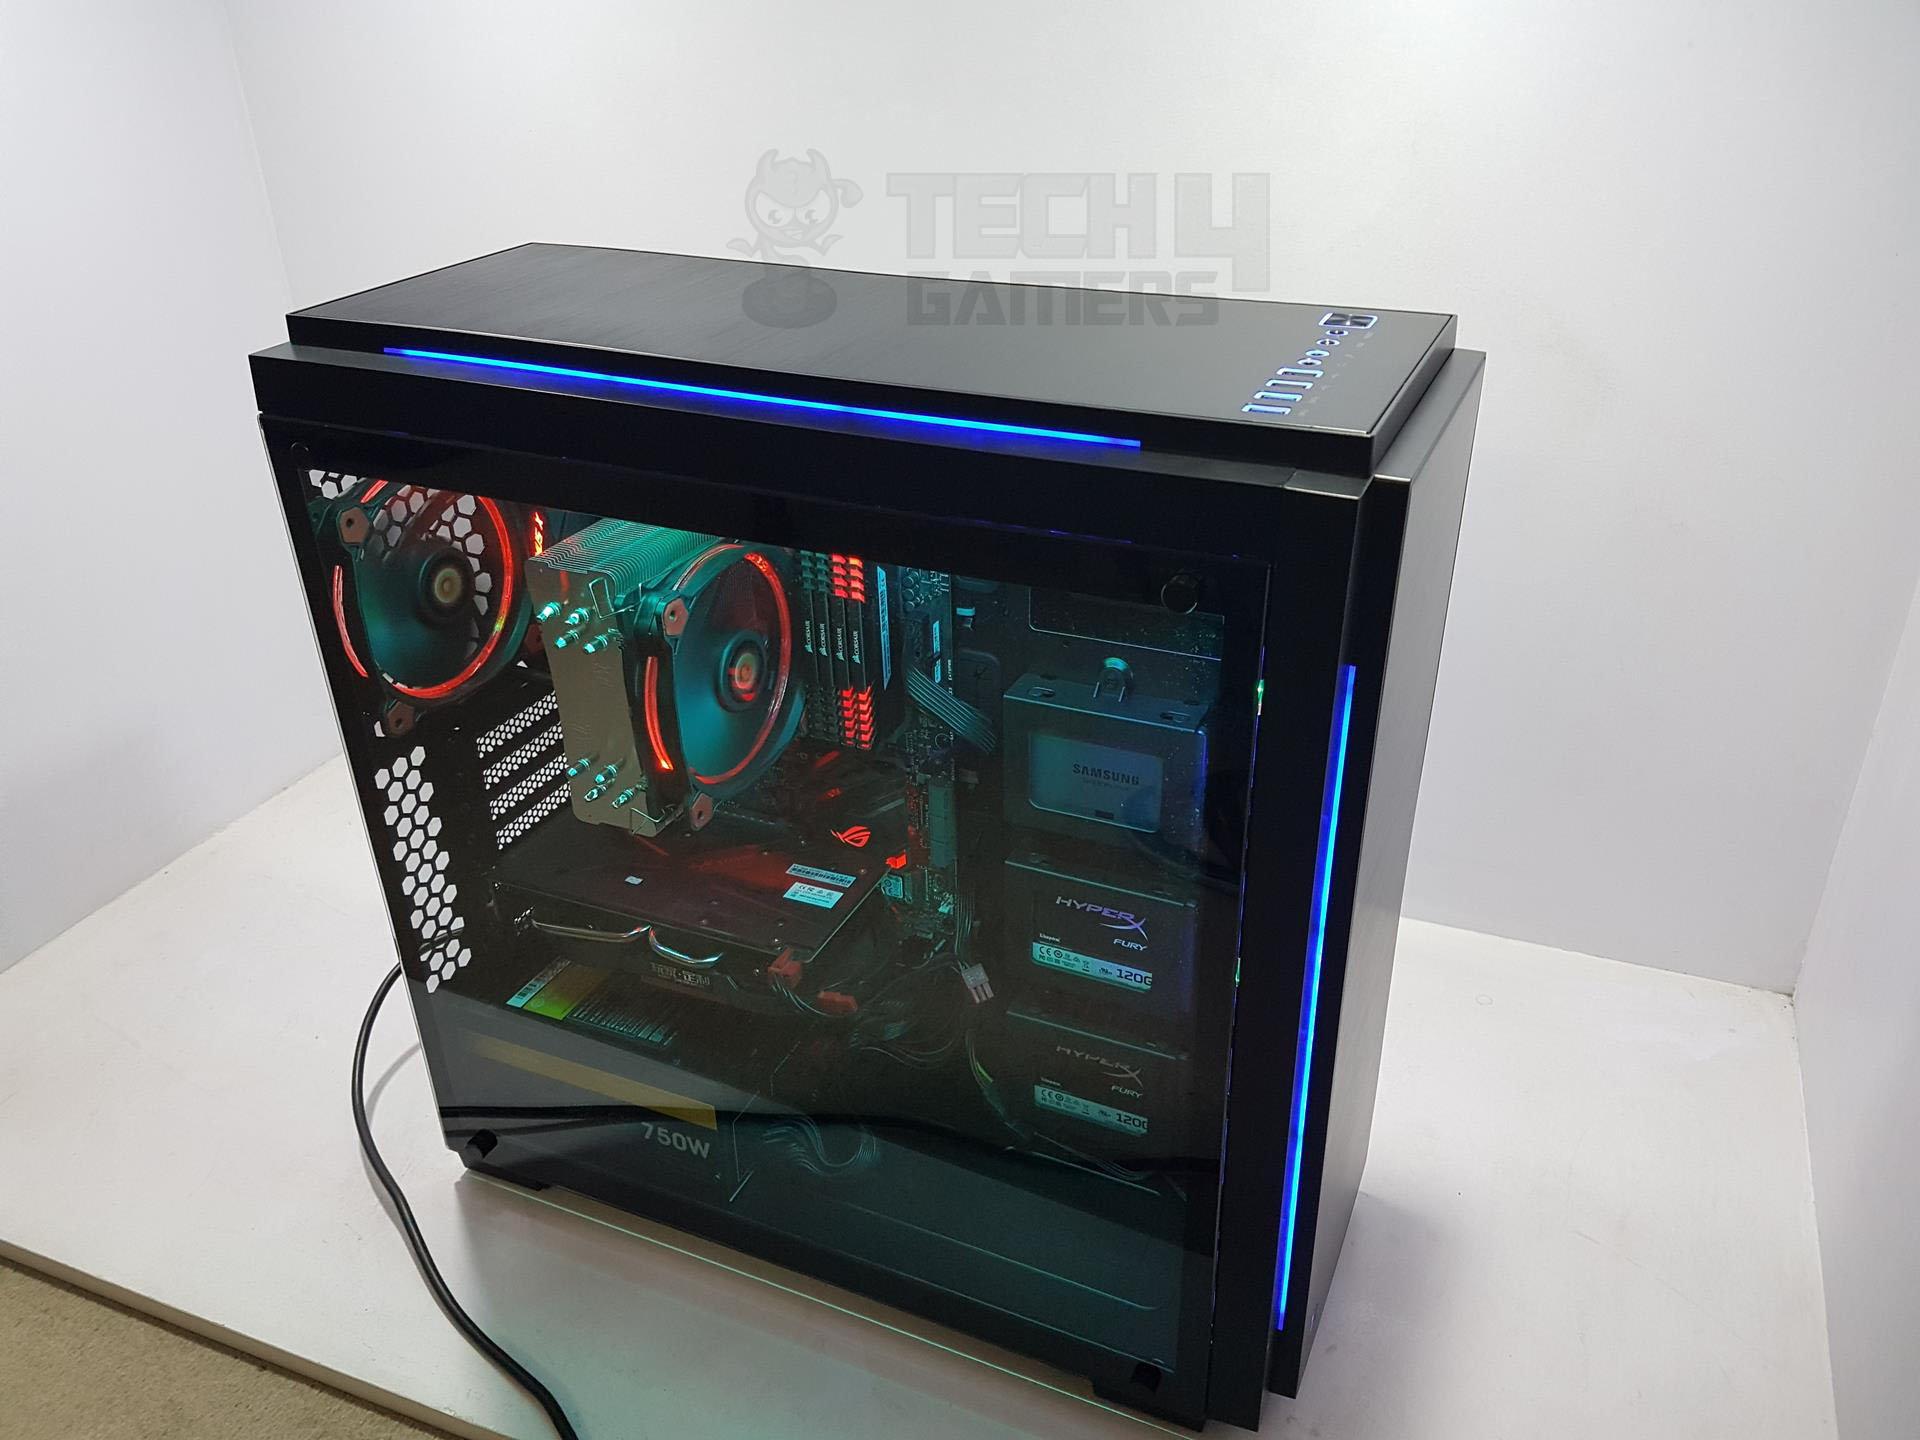
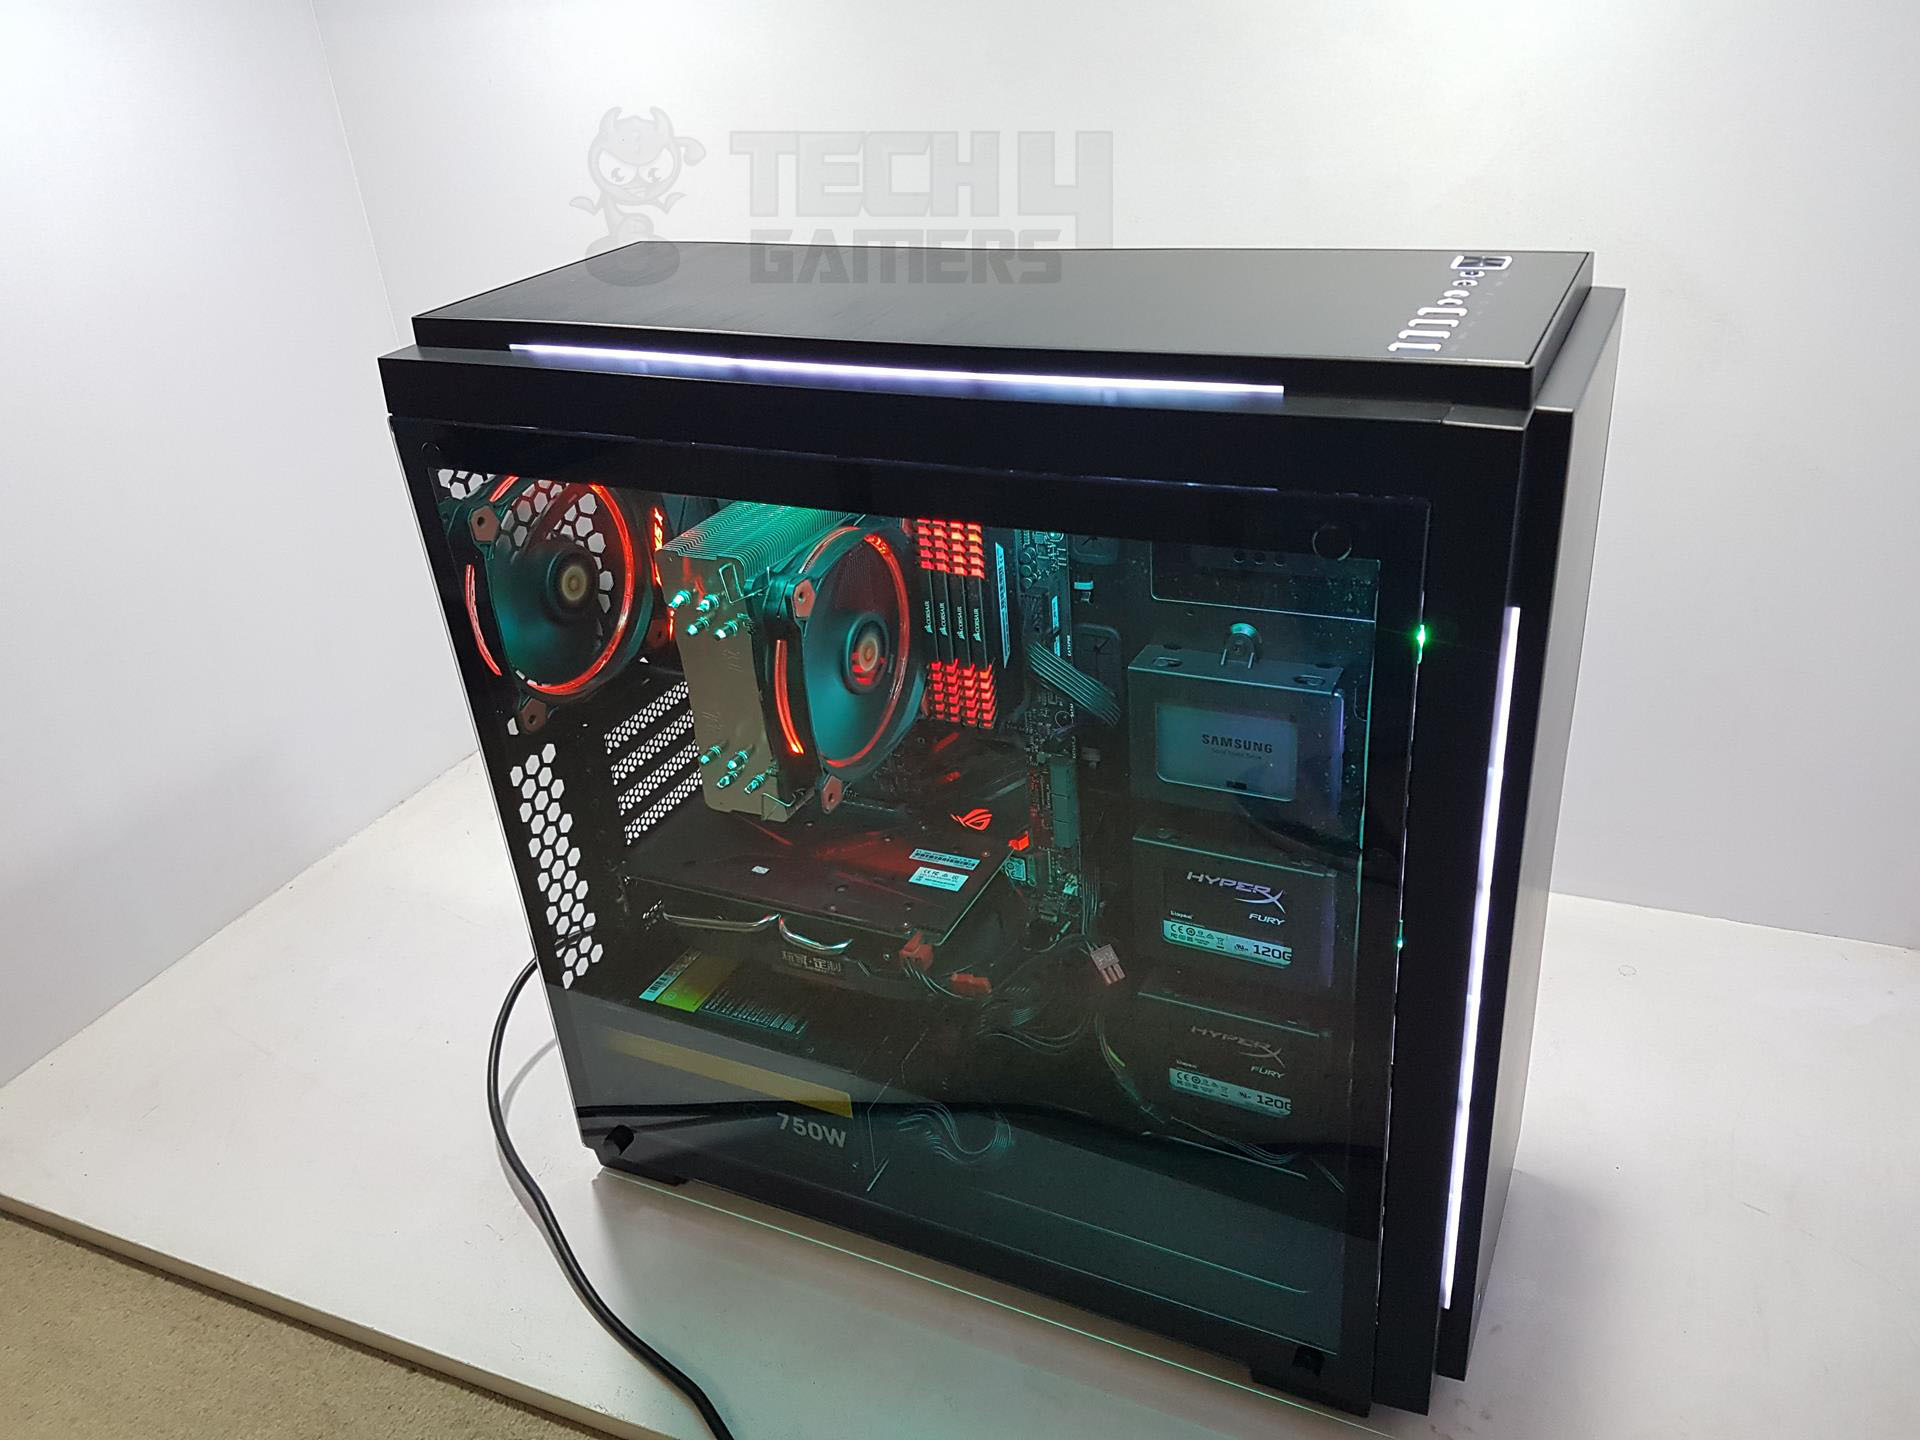
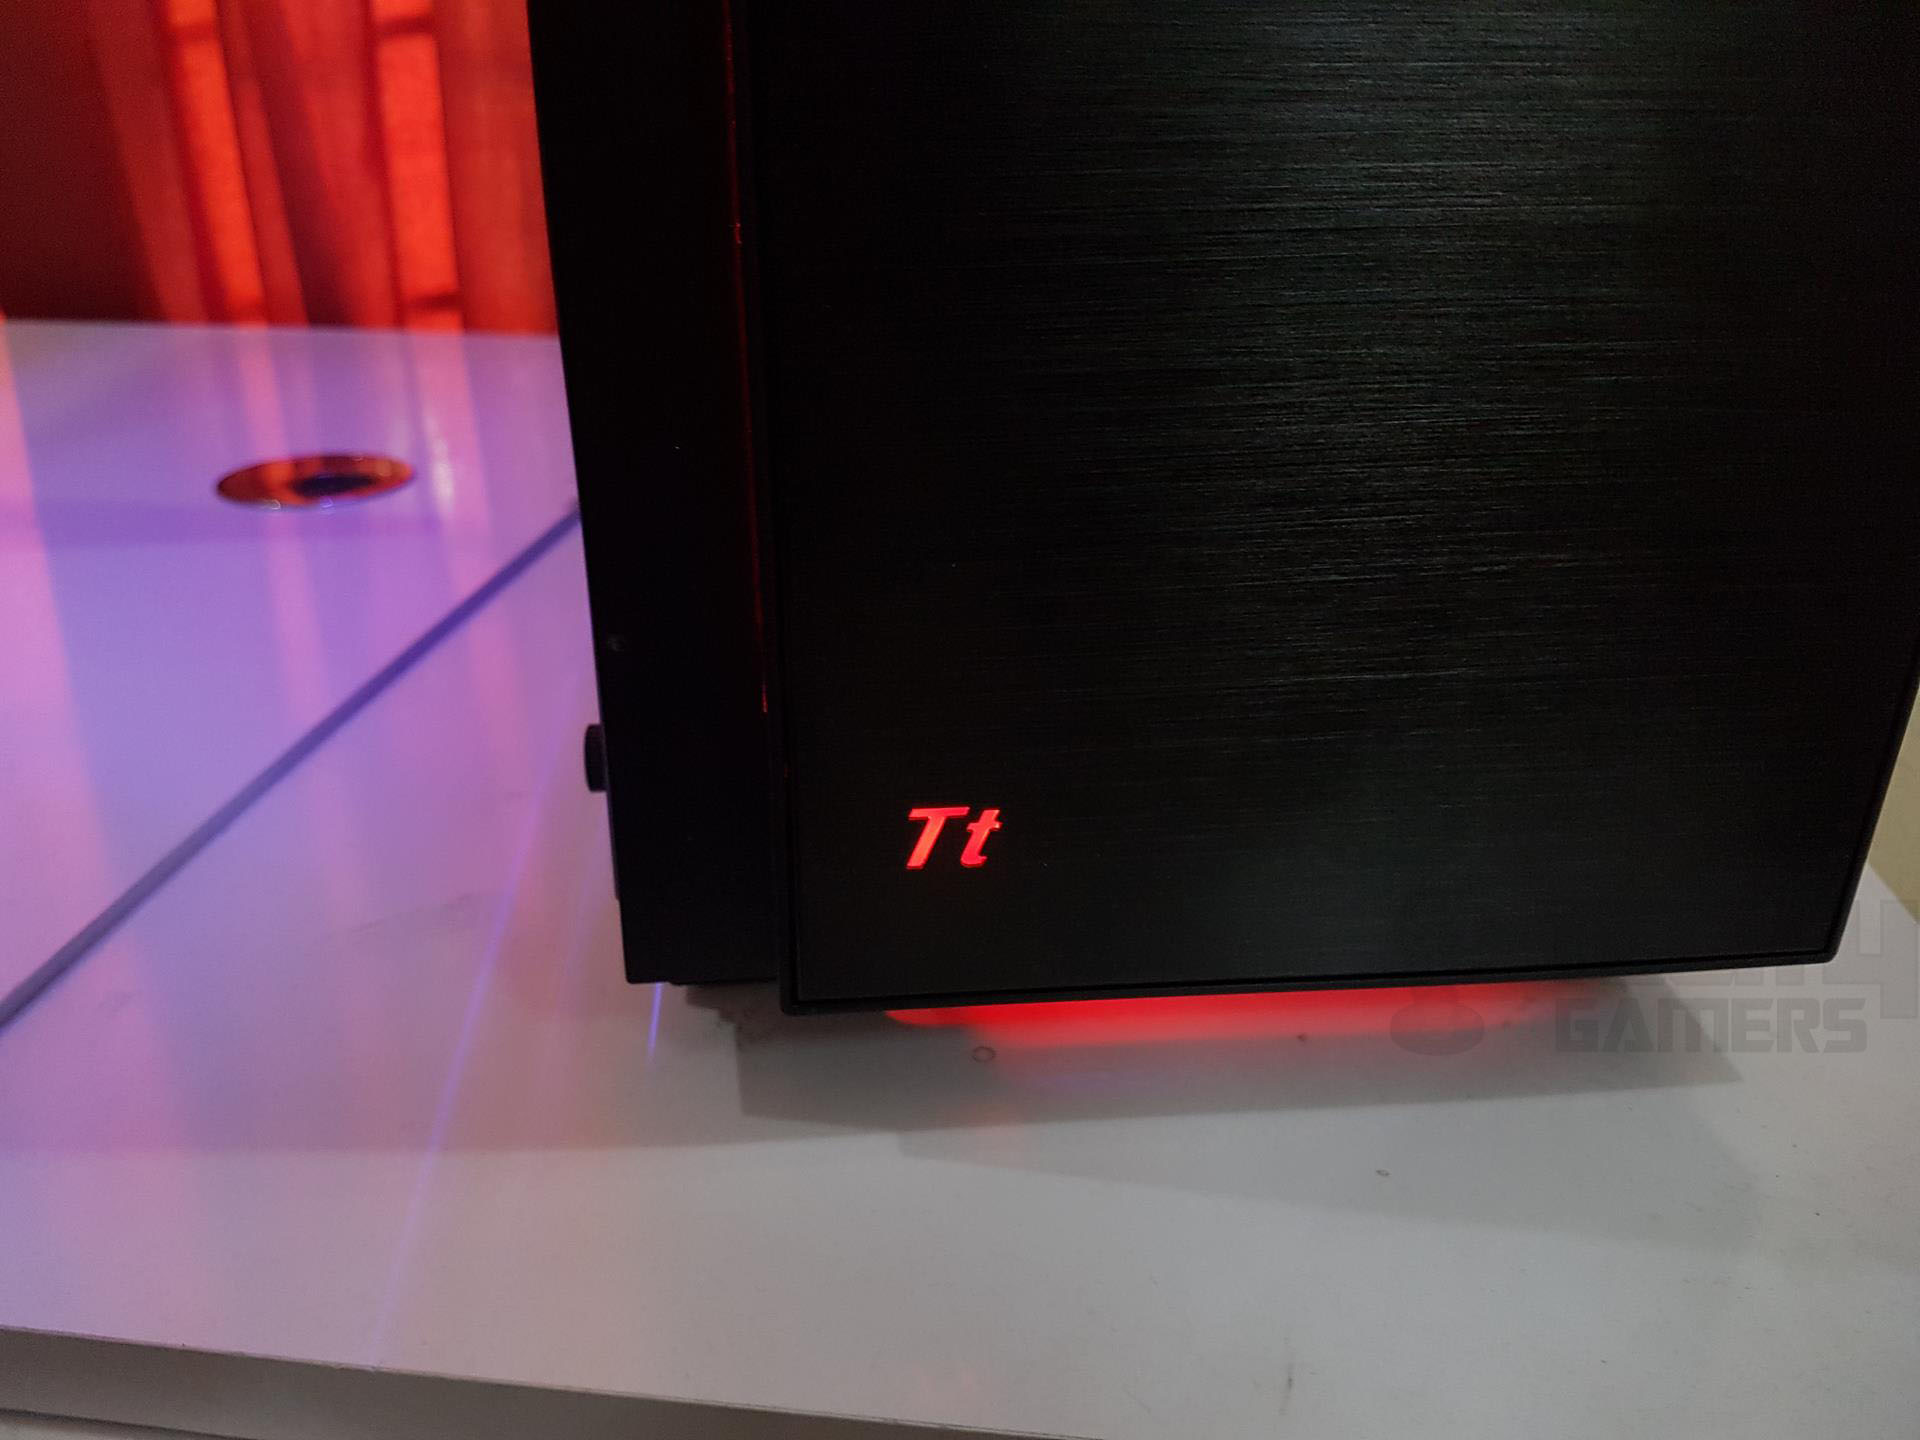
As I dive into the front side, I’m immediately captivated by the stunning brushed aluminum finish that greets me. The Tt logo, sitting proudly at the bottom left, catches my eye. When the power flows through, the RGB illumination kicks in, casting a subtle yet captivating glow that elevates the chassis’s aesthetic. It’s those little details that make this one a winner in my book.
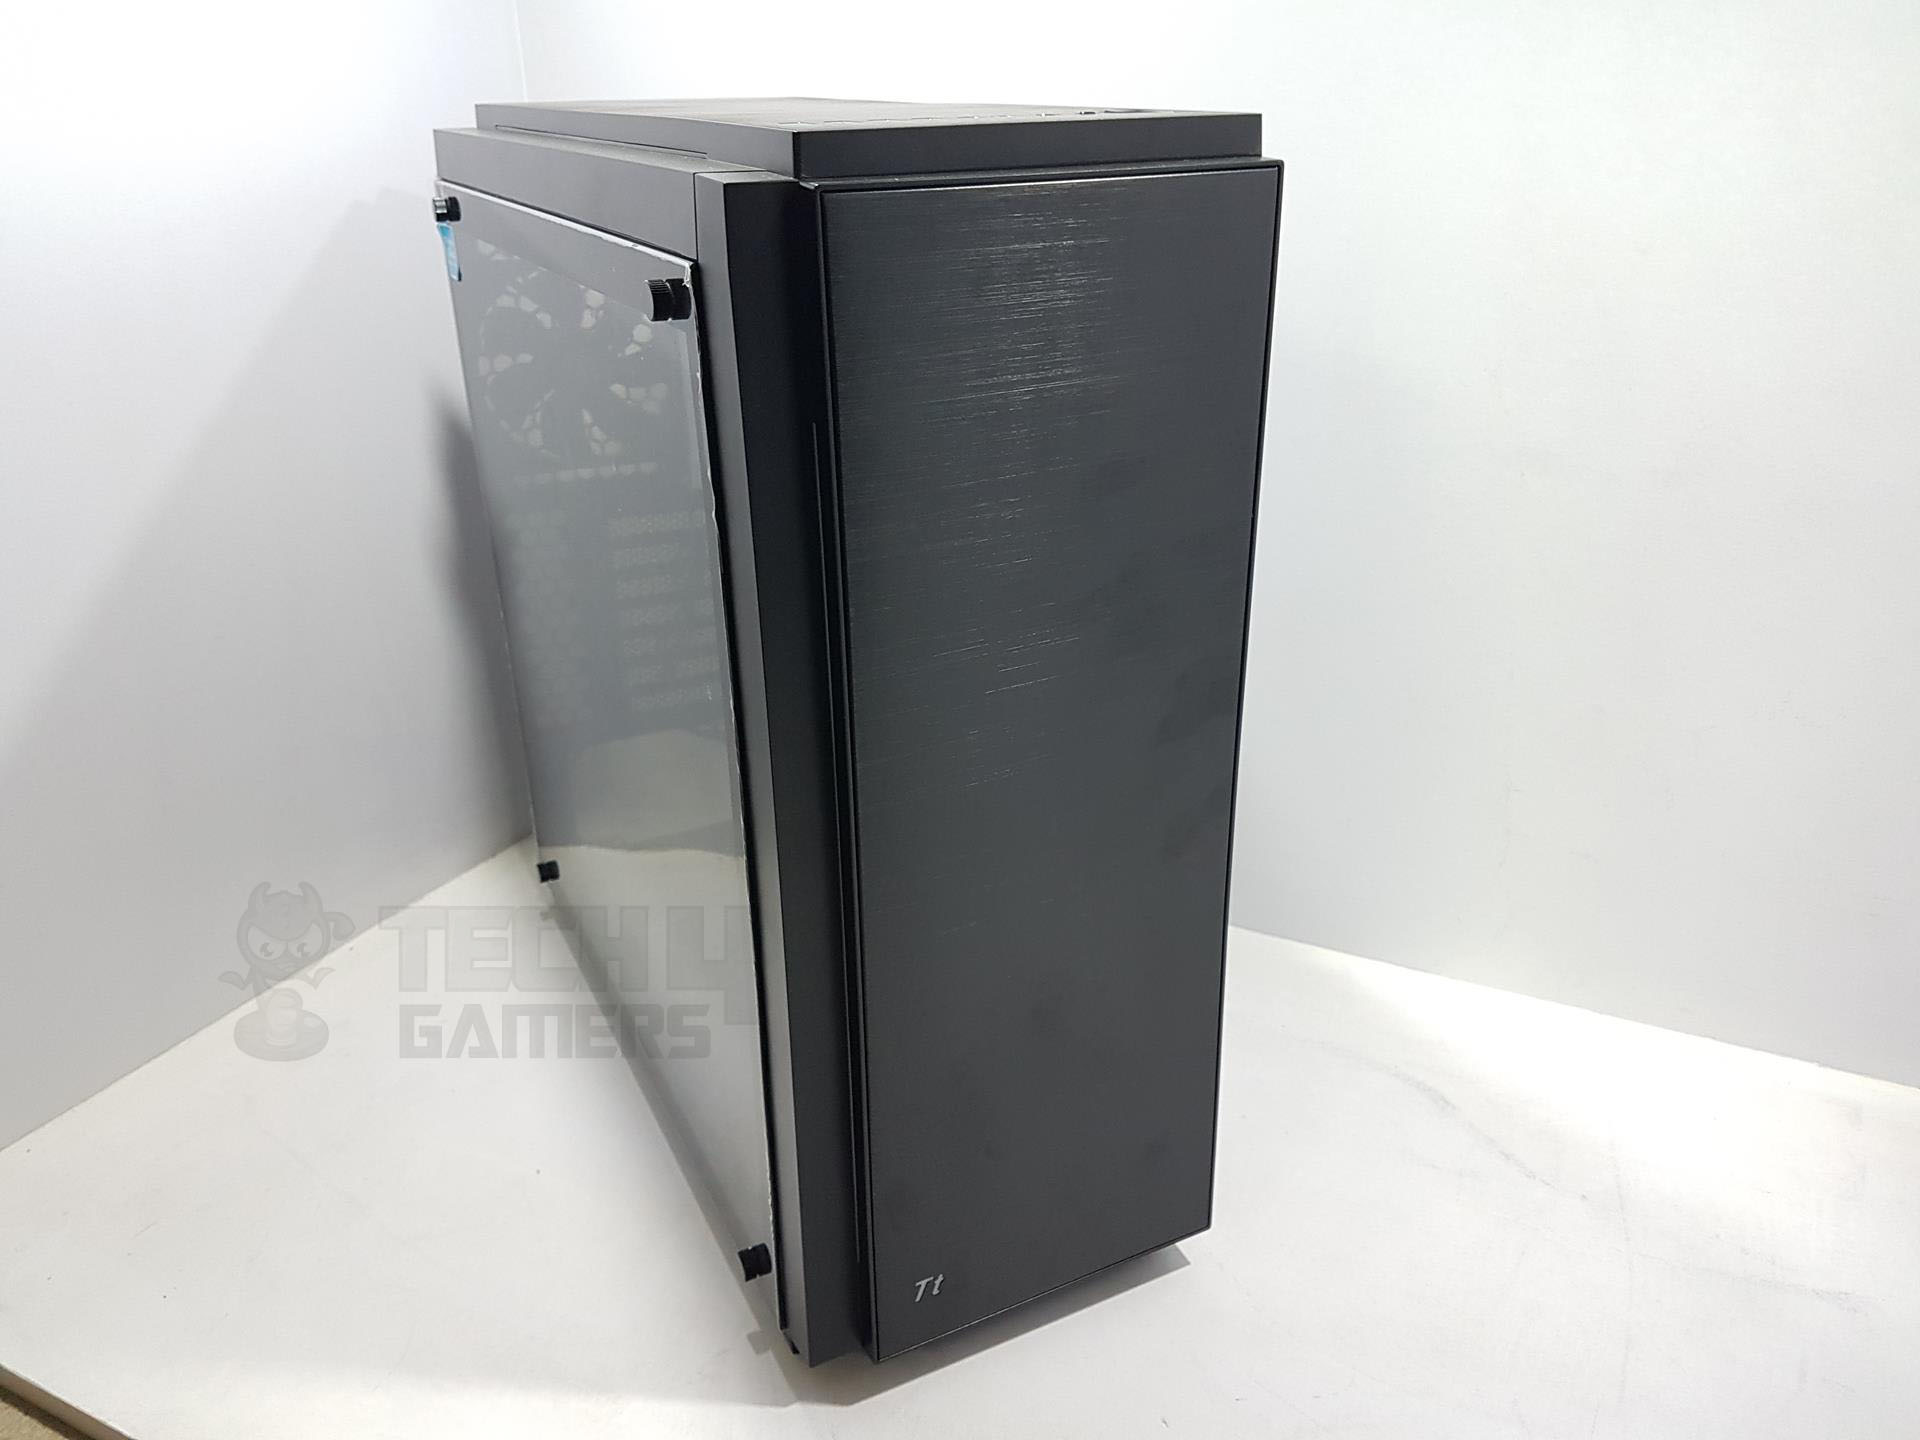
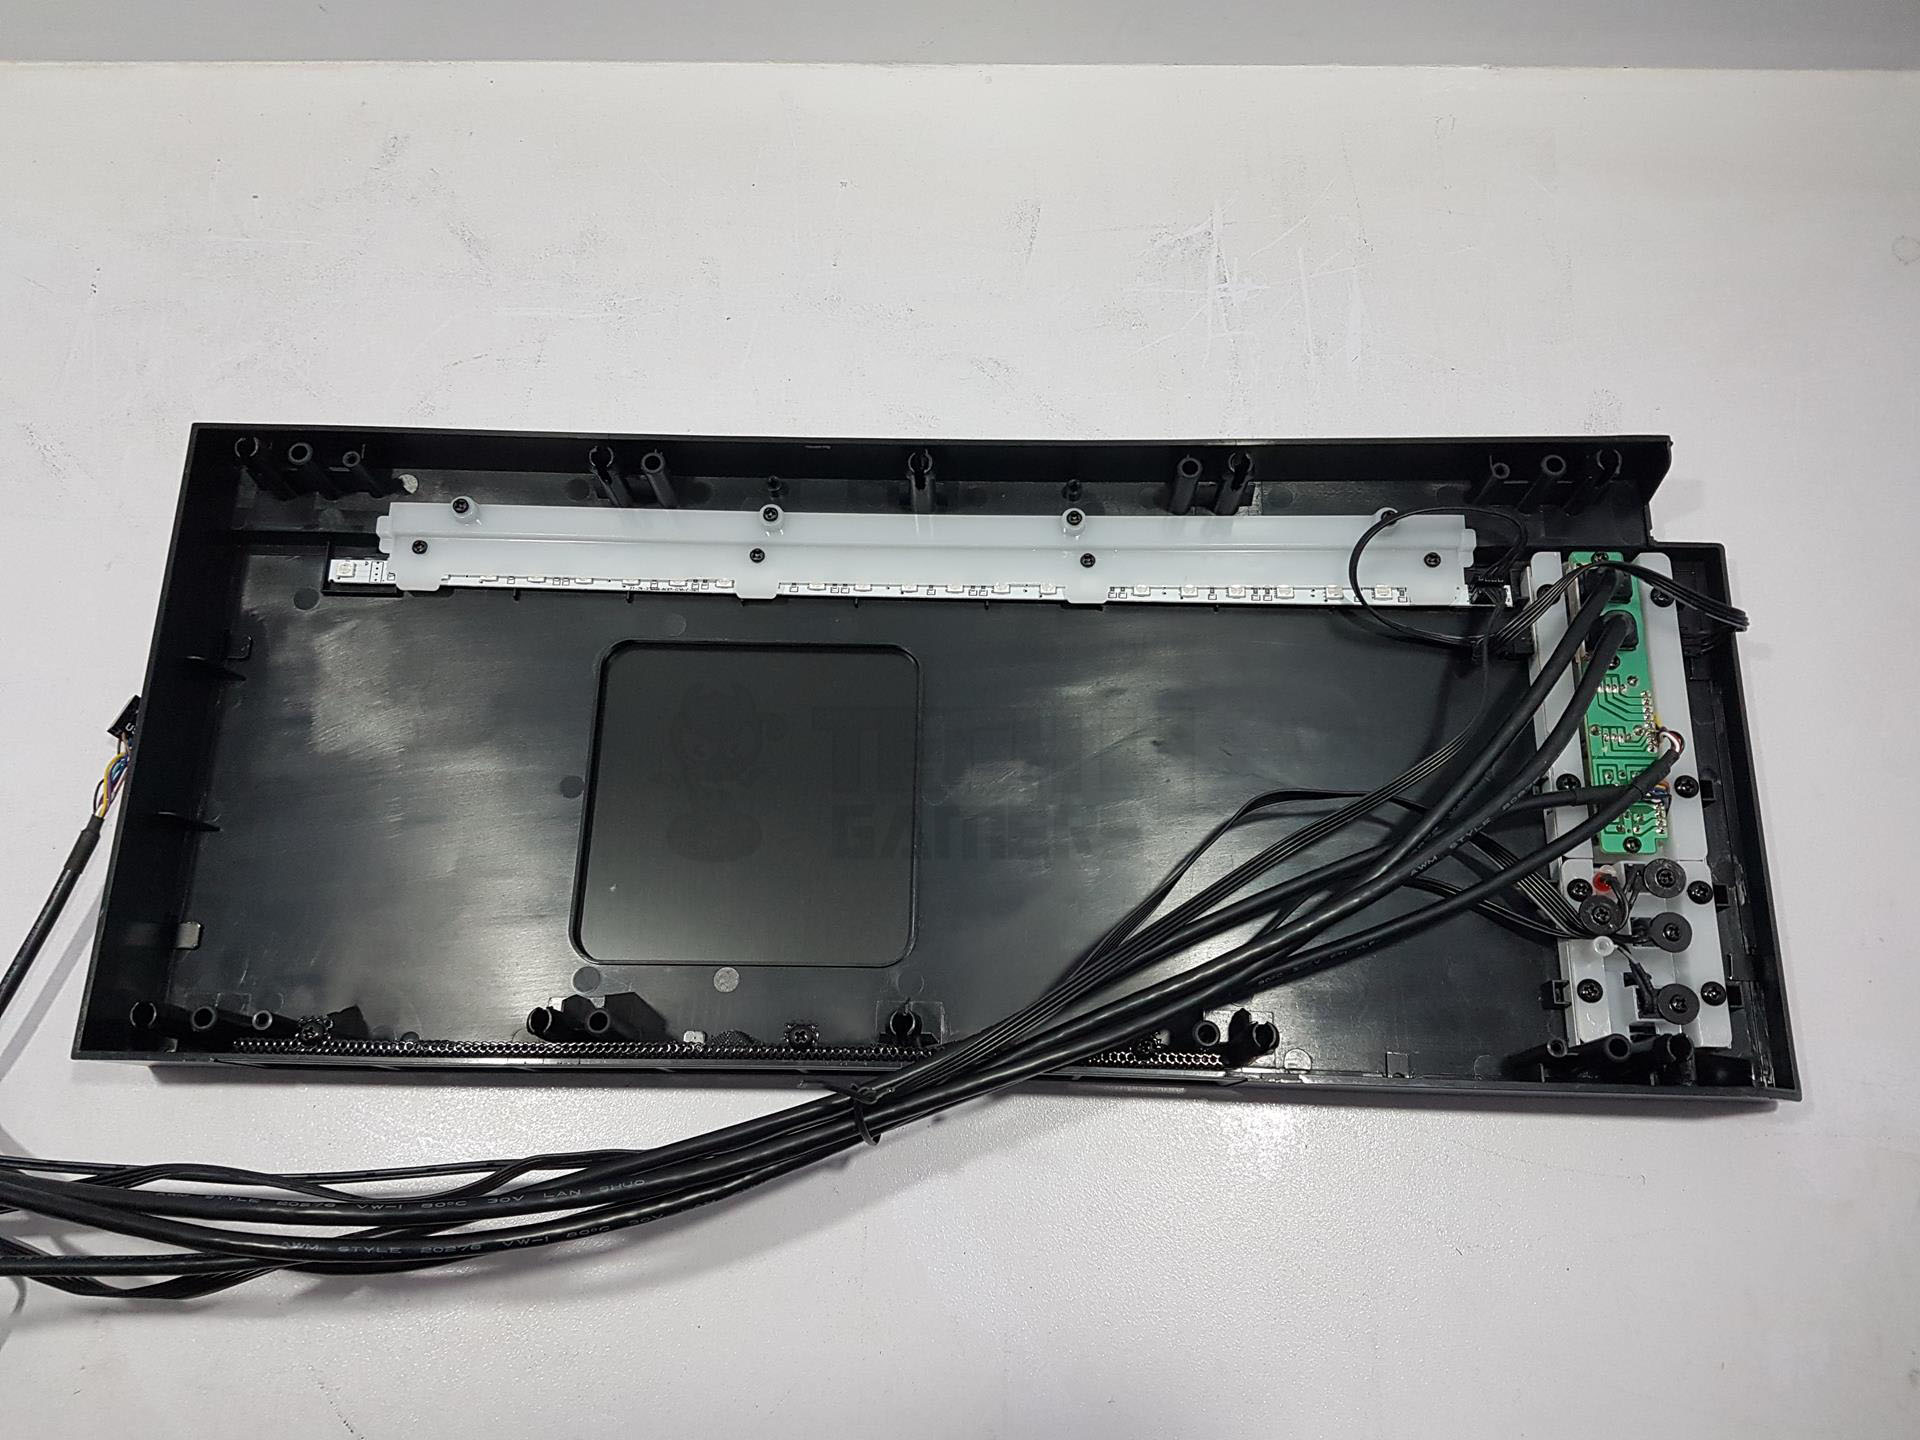
I noticed a stepped design on the front and top panels with inset left sides compared to the main sections. This is intentional to showcase RGB LEDs underneath. The translucent panel between the inset and raised sections gets illuminated by these LEDs.

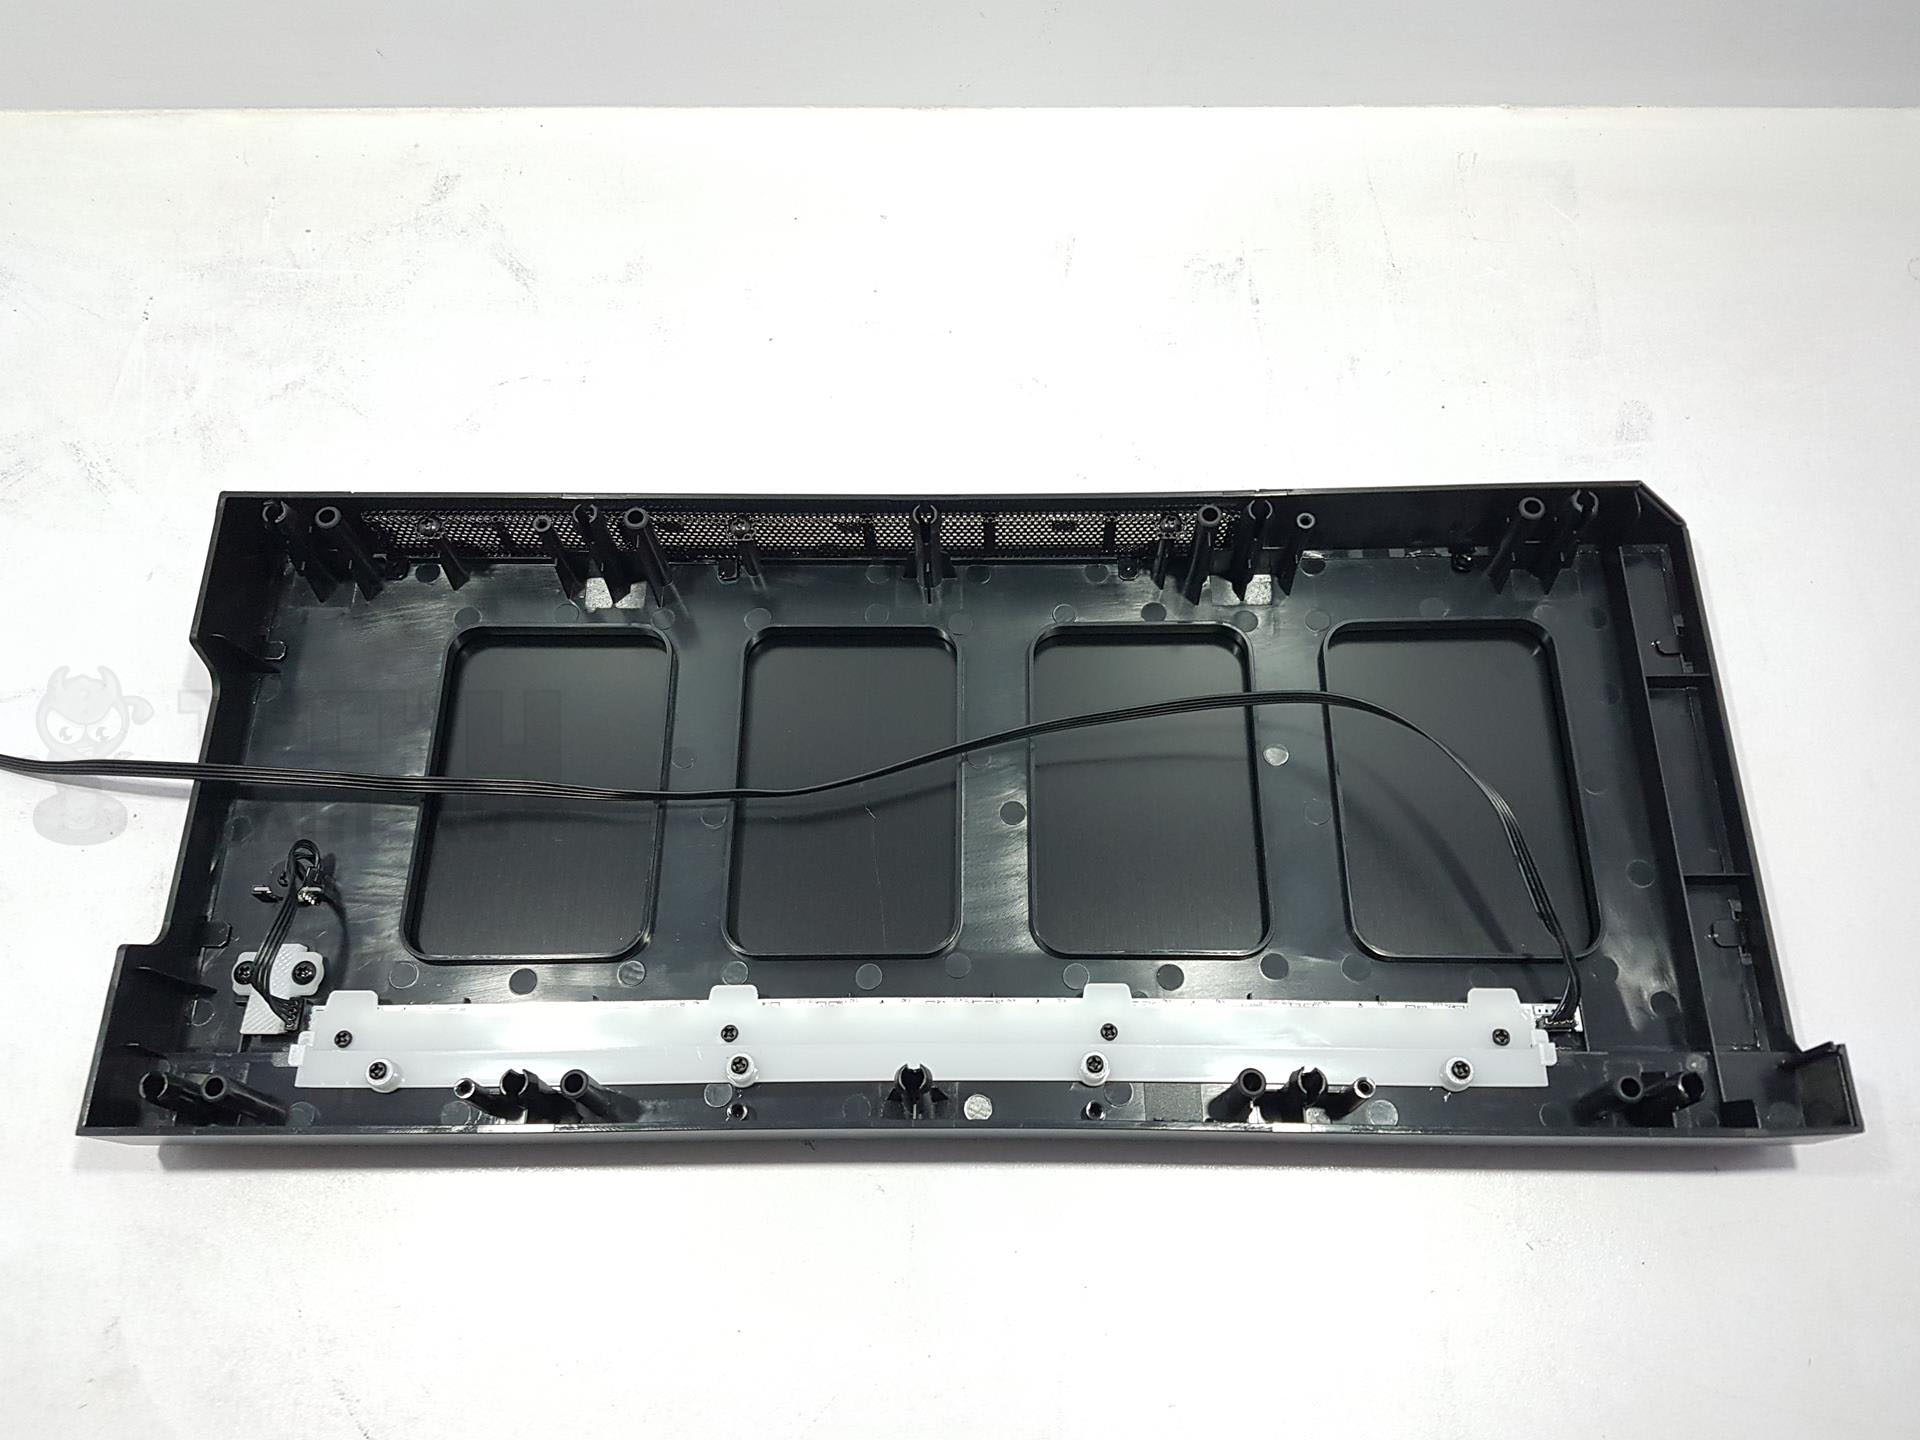
The front panel is a sleek, solid piece without a 5.25” drive bay opening. Removing it is a breeze – just apply some force from underneath. Lift it up, and you’ll find a white panel with 8 screws, housing vivid RGB LEDs powered by a 4-pin connector. At the bottom, a small panel features the eye-catching RGB LED Tt logo. Love these thoughtful details!
The power cable connects to the onboard RGB LED controller at the chassis’s back. This translucent white panel subtly diffuses colors, creating a pleasant visual effect. On the opposite side, a mesh panel, secured with three screws, faces the front fan mount area, allowing ample air intake.
Inspecting the chassis with the panel off, I noticed two main cutouts on the right and another on top for the RGB LED power connector. Disappointingly, beneath the top cutout, two covers hint at a 5.25” mounting area that’s off-limits without some serious cutting. It’s evident that this chassis doesn’t support 5.25” bay drives due to the single-piece front panel.
A missed opportunity arises – the front could support up to three 120mm fans or a 360mm radiator if the mesh extended along the panel’s full length. To illustrate, I personally mounted three 120mm Riing Red LED fans on the front.
Below the front panel covers, there’s a vented area with large holes and fan mounts for up to two 120mm fans. Despite the manufacturer’s recommendation for two fans, it easily accommodates three, with adjustable fan height. The vent’s height exceeds 240mm.
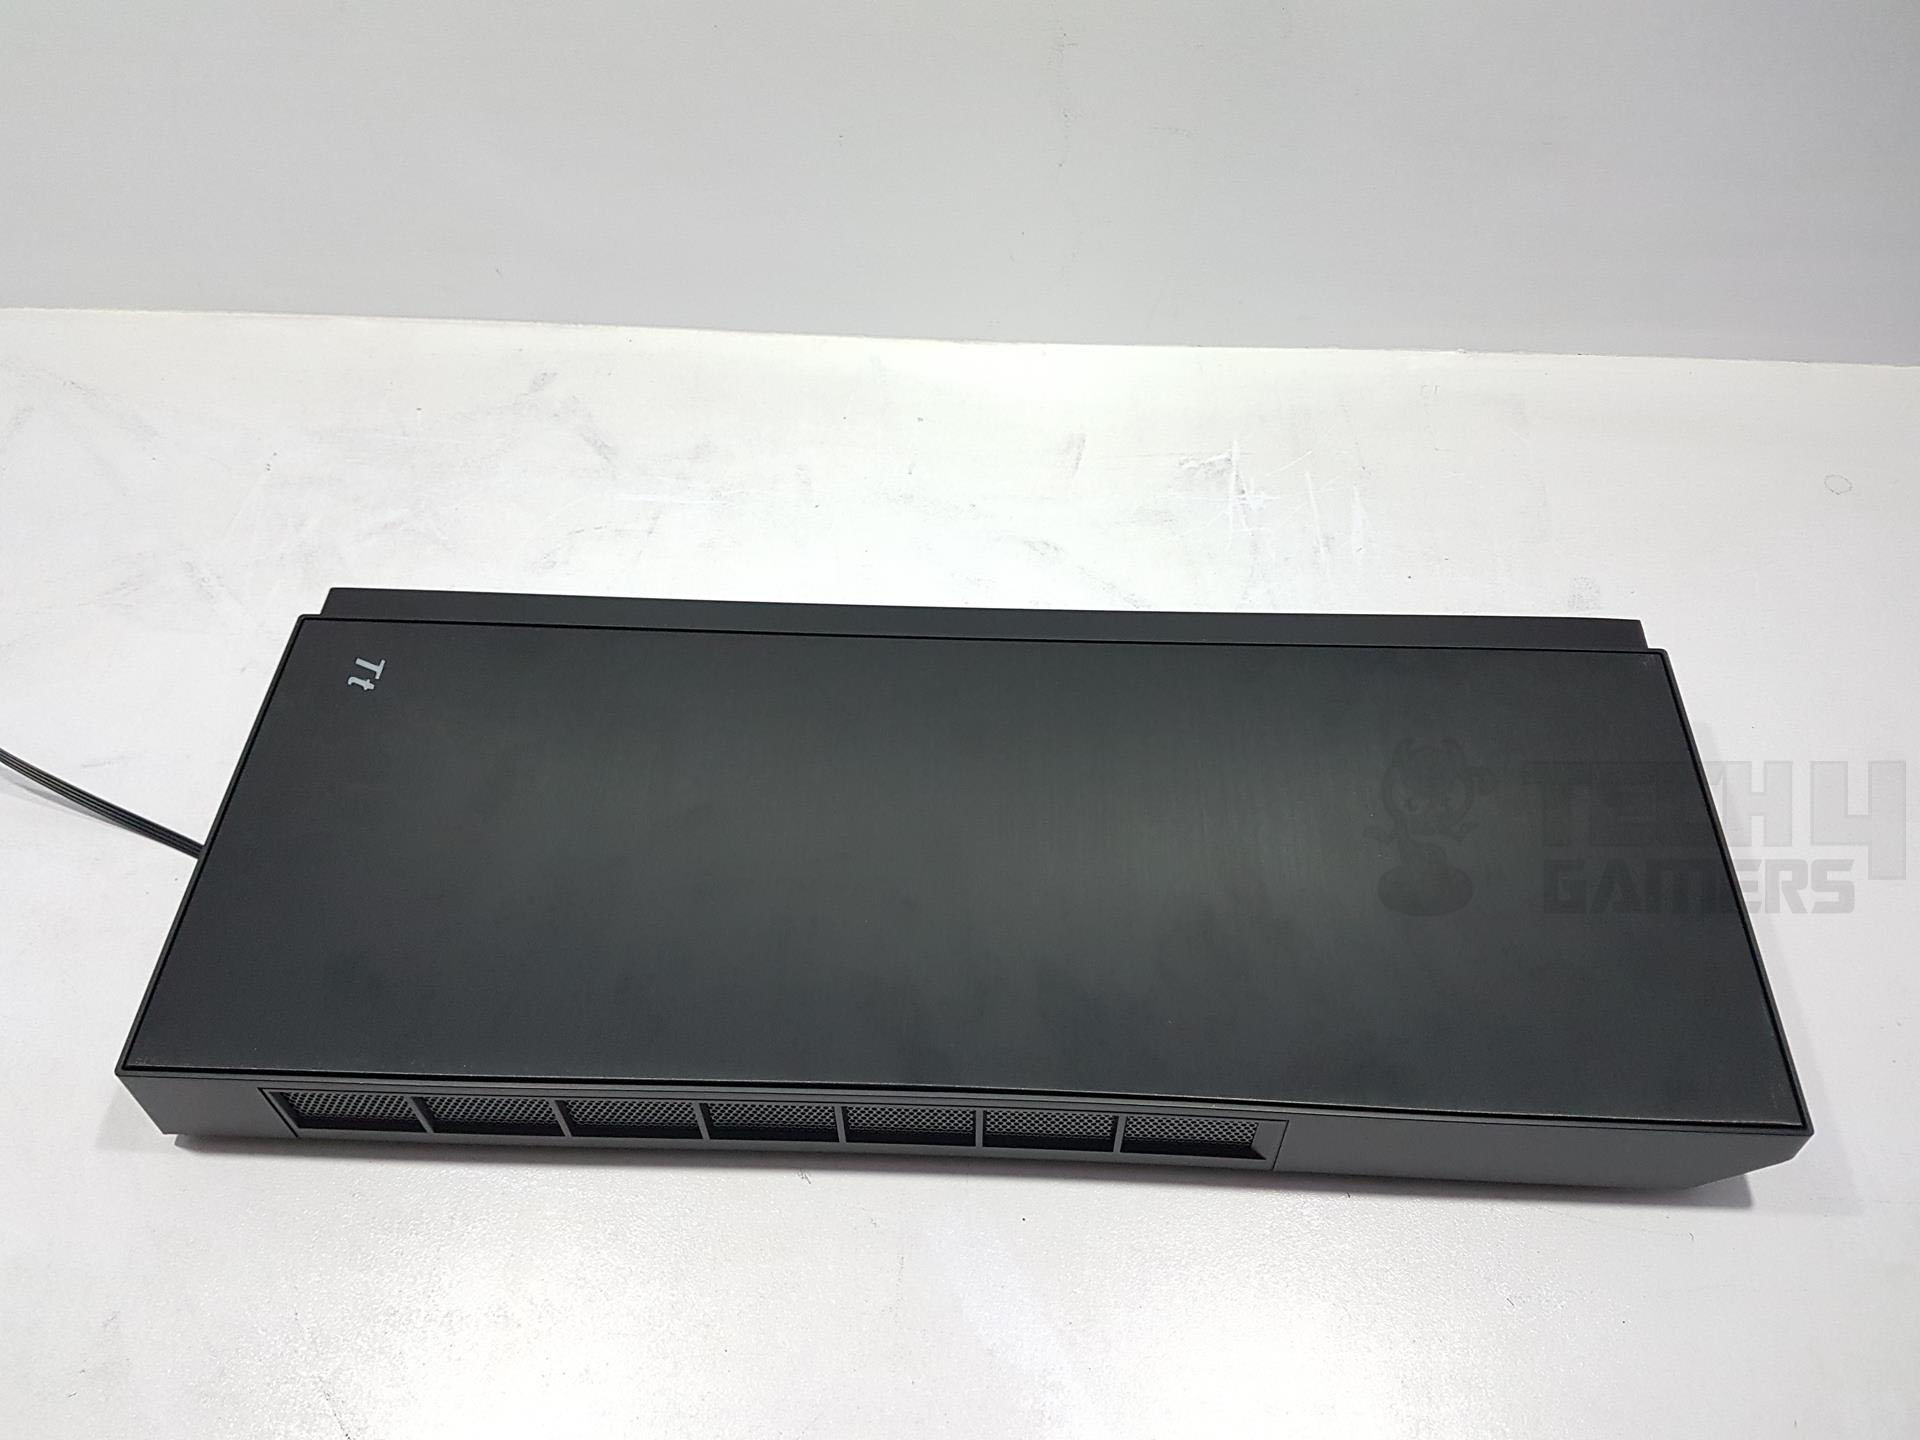
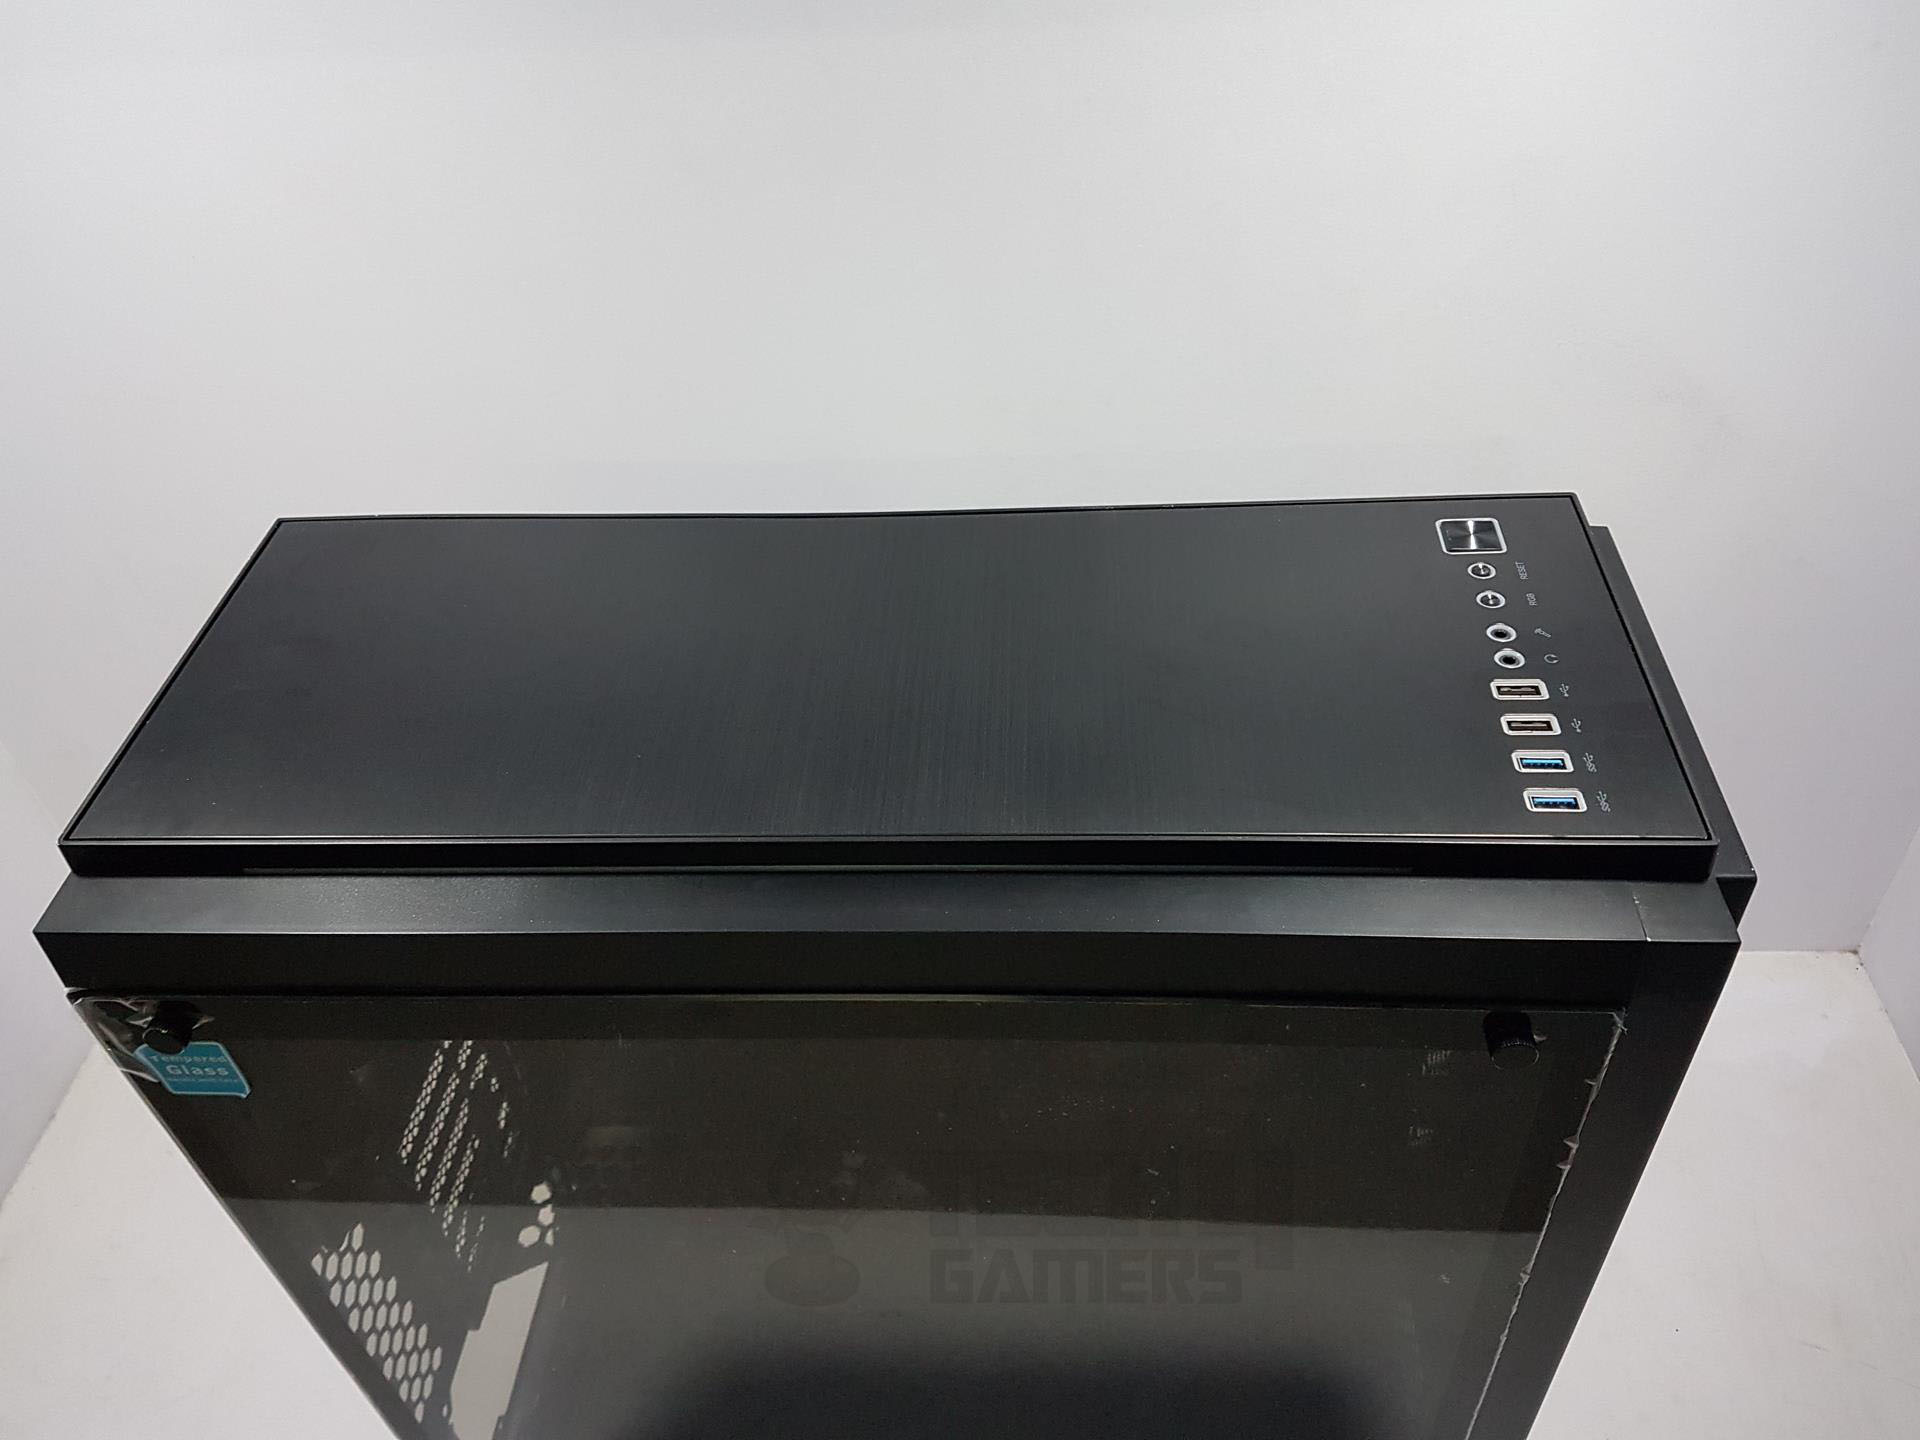
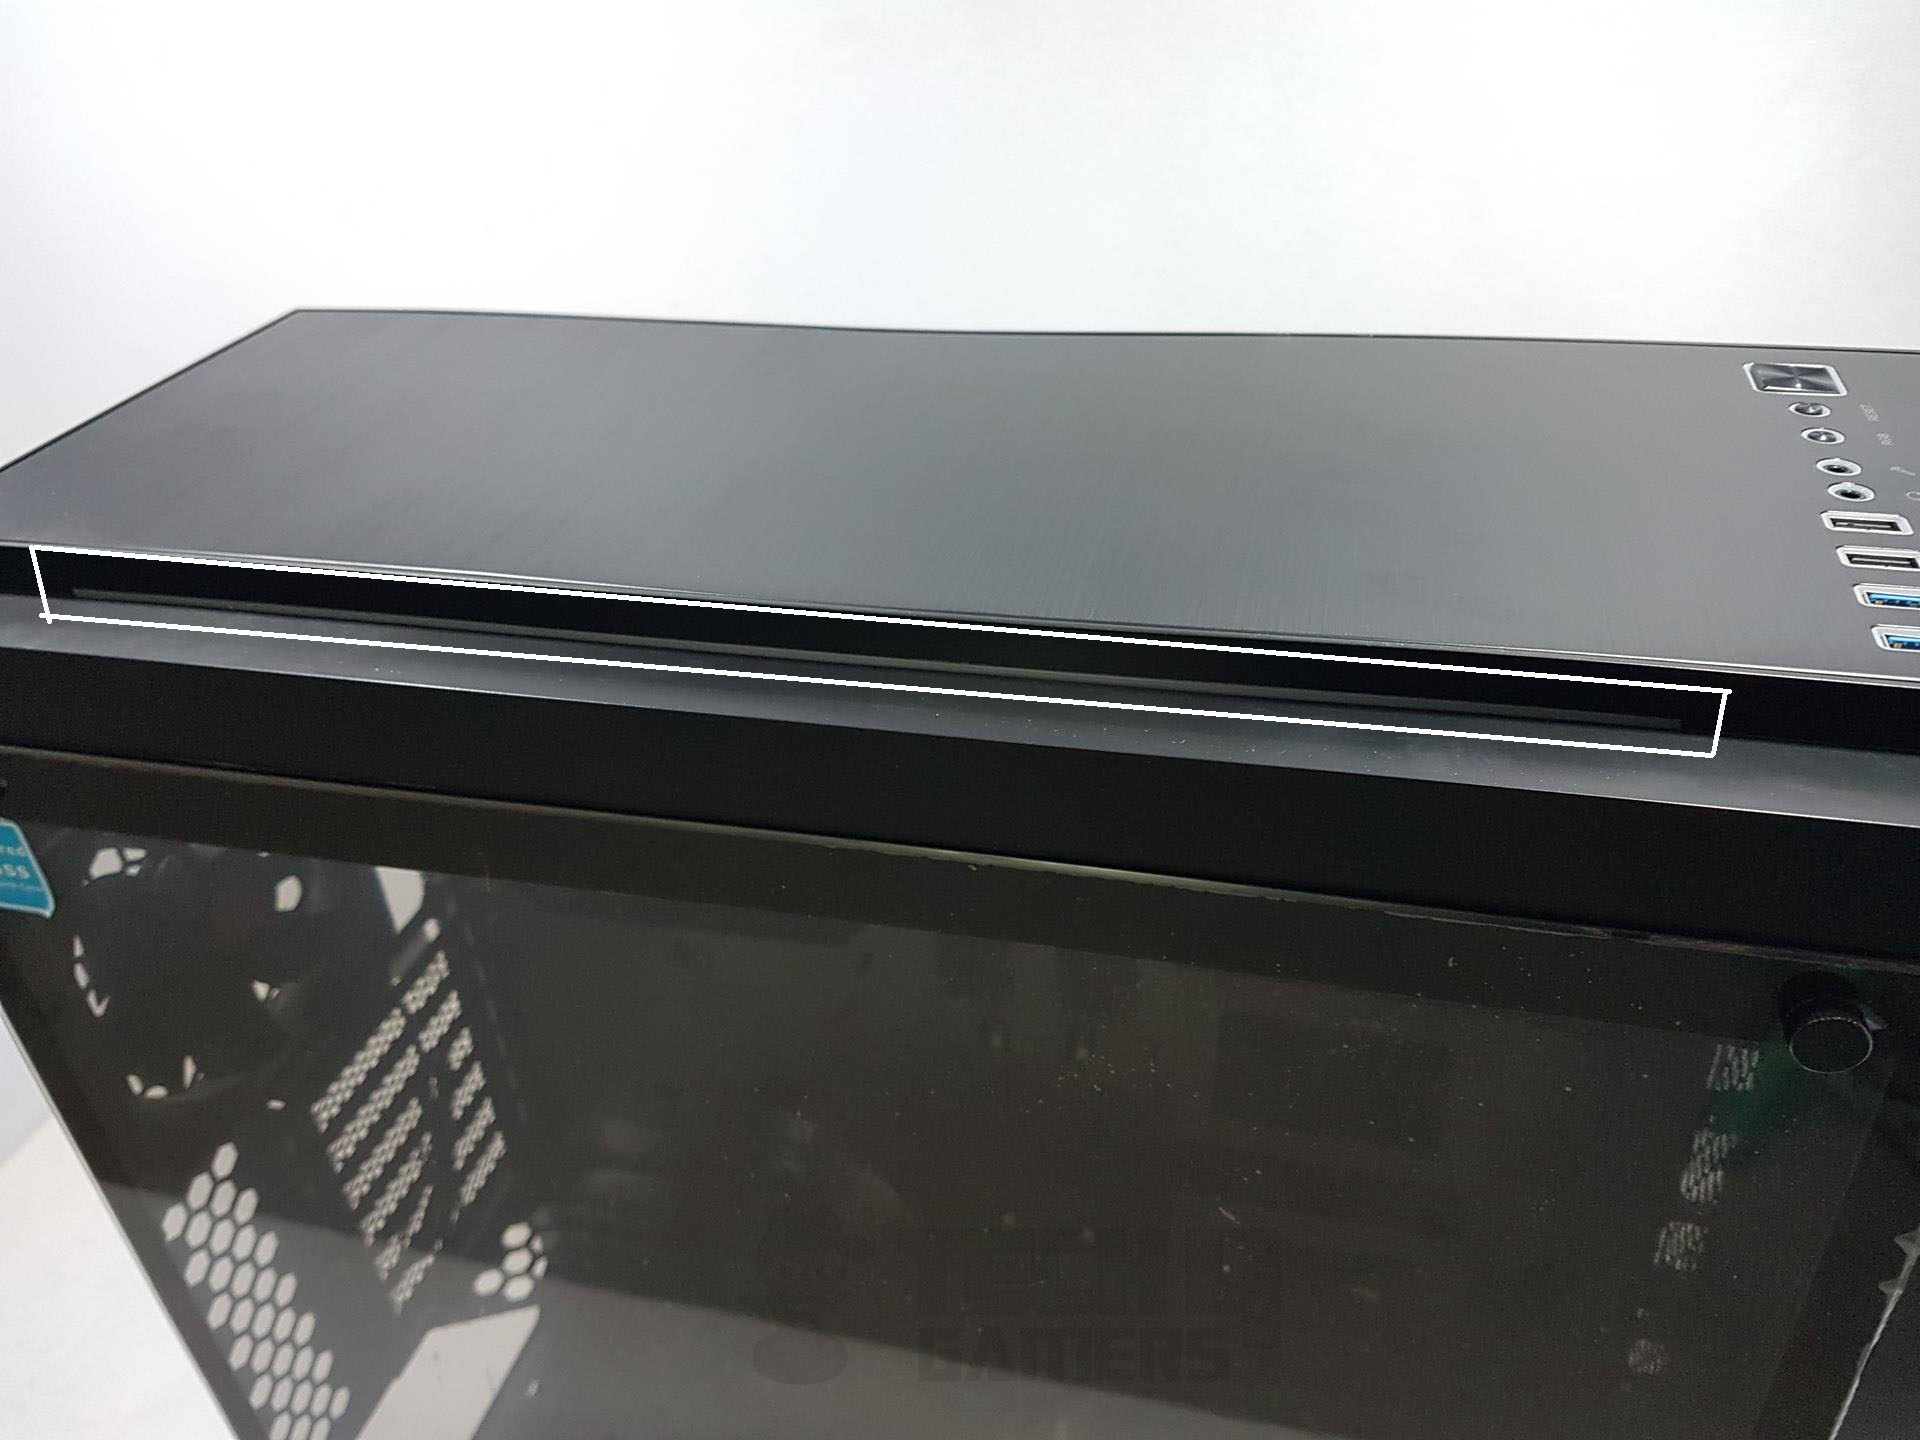
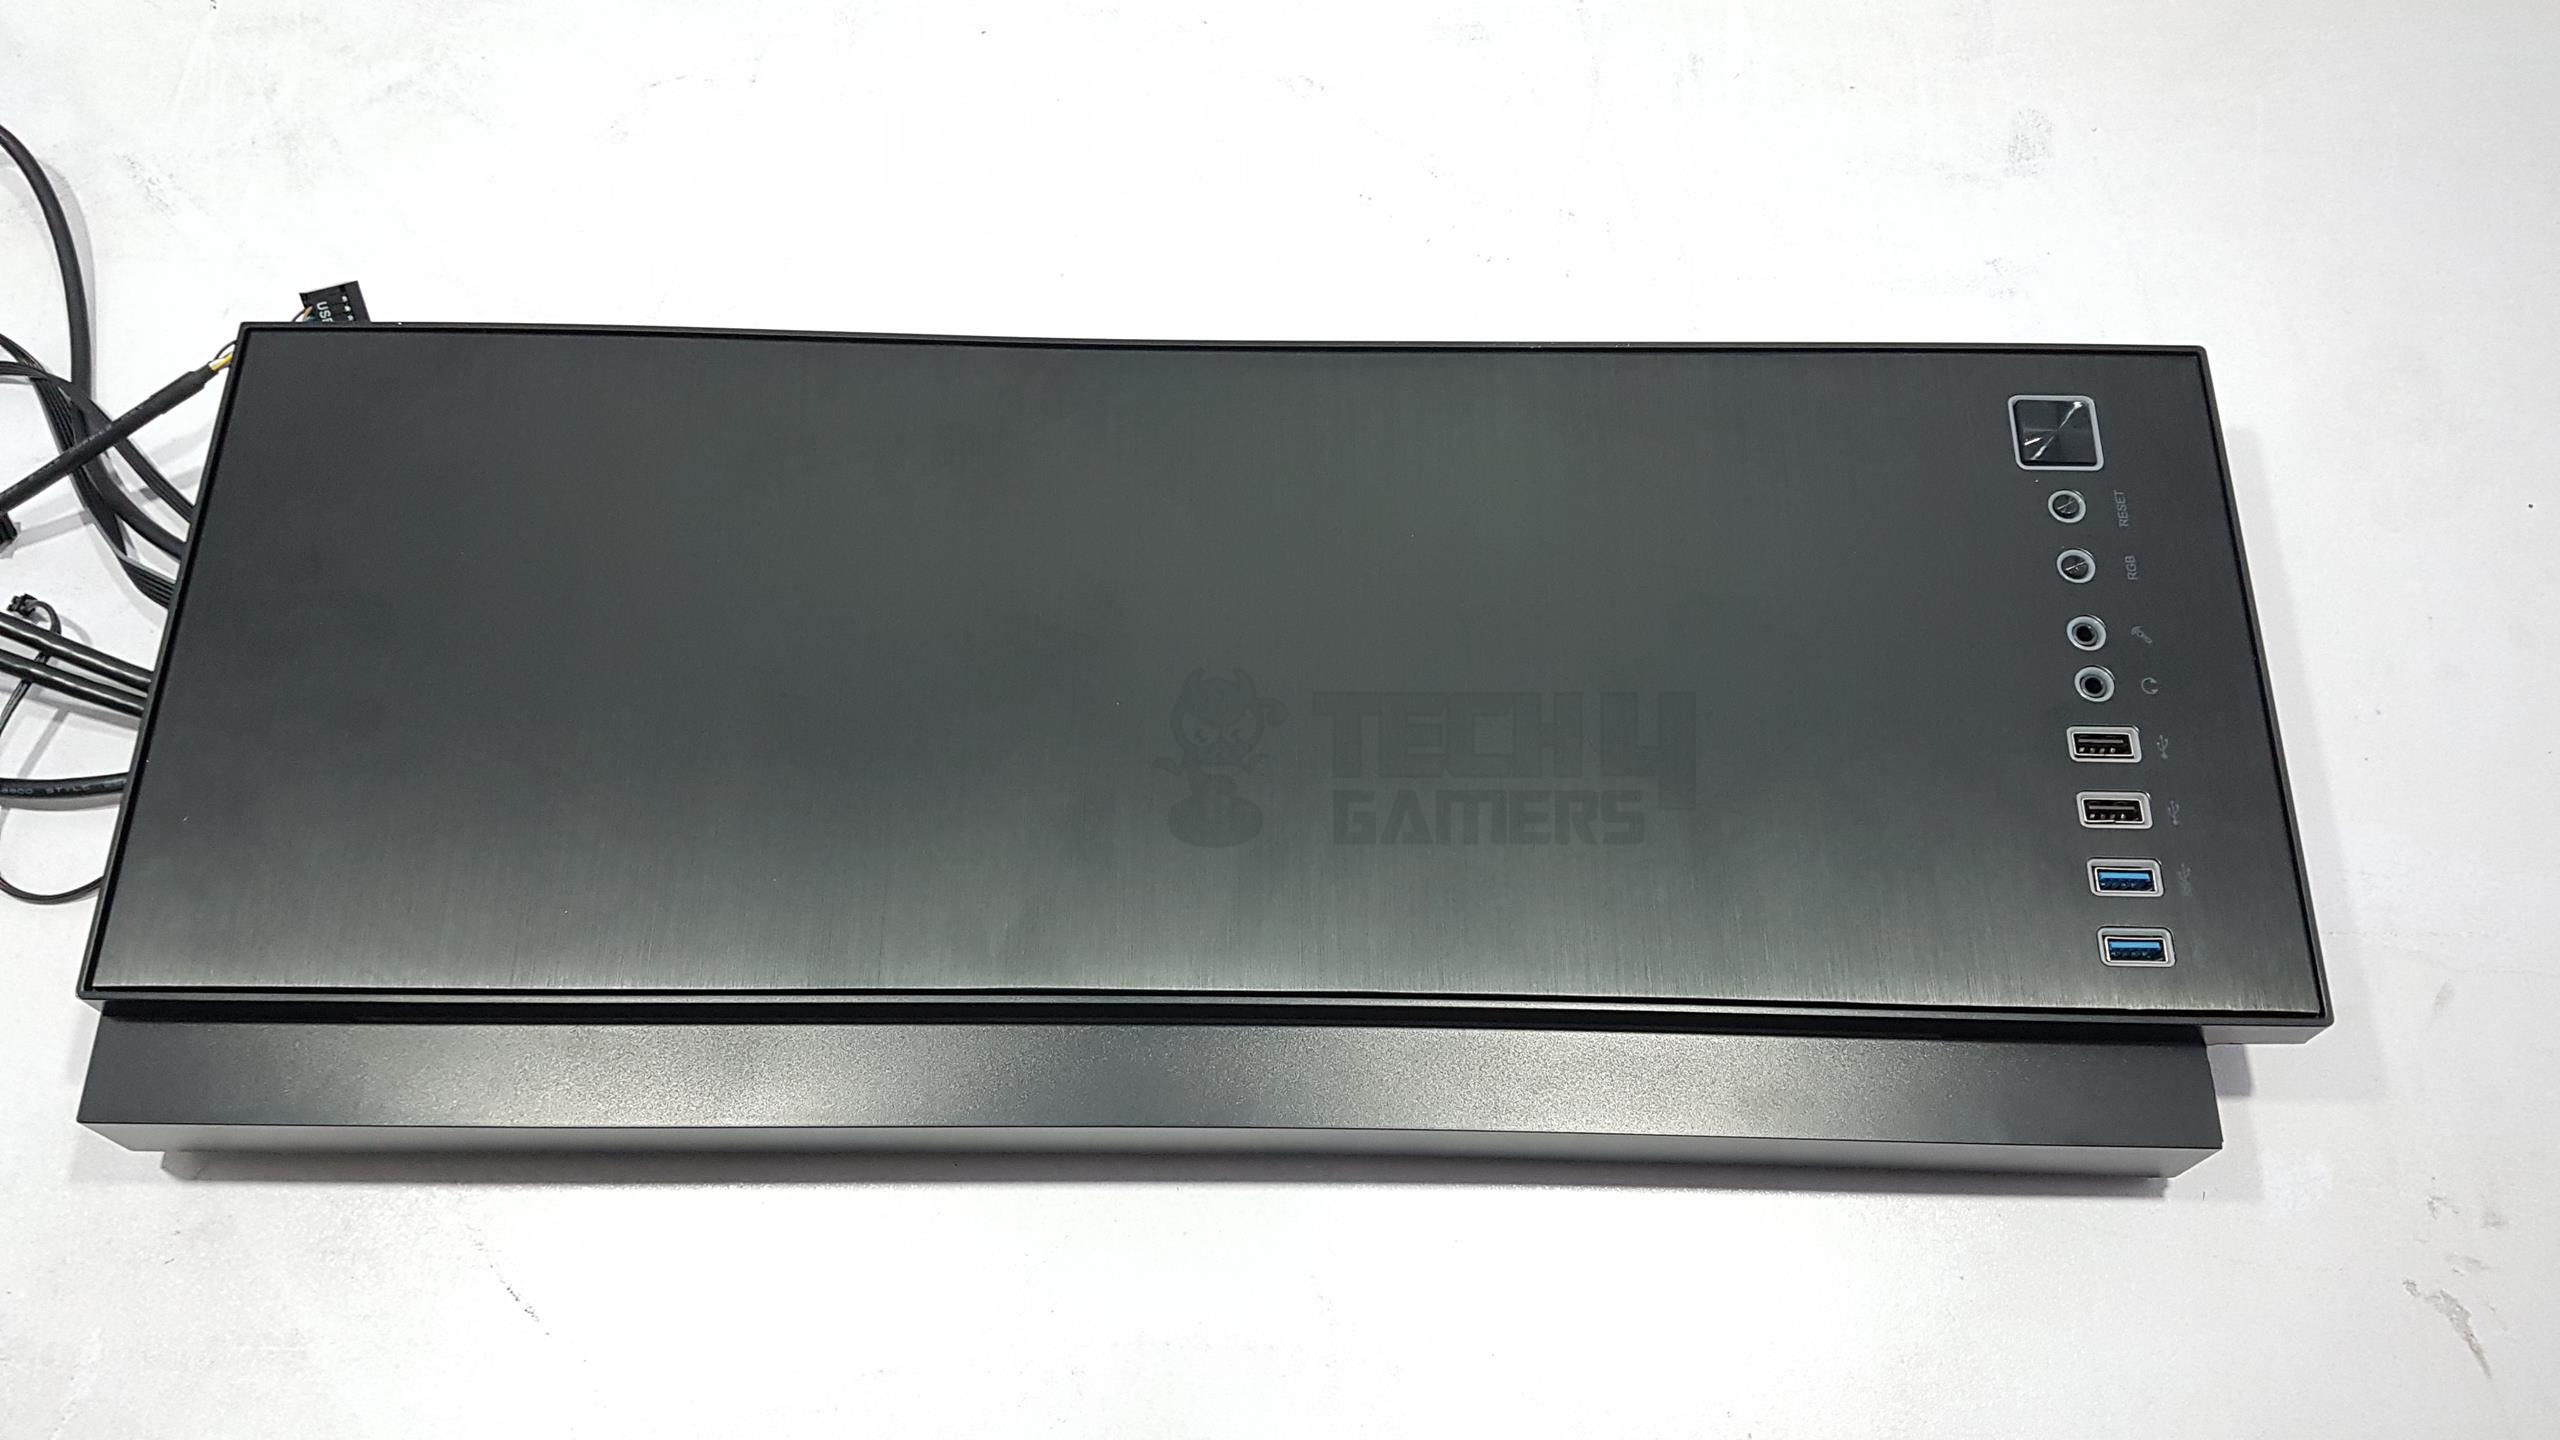
Top
Taking a close look, I was immediately struck by the sophisticated brushed aluminum finish on the chassis’s top side. The front’s got an I/O panel with cool illumination for that extra flair. Plus, both top and front panels sport a slick stepped design, revealing a translucent white layer with vibrant RGB LEDs. It’s all about style and functionality in one sleek package.
When powered up, the side panel and front I/O panel glow, enhancing the chassis’s aesthetic. To access the top panel, remove the front panel, ensuring the loosening of cables connected to the integrated front I/O panel.
A vented area on the right, mirroring the front panel, facilitates airflow for top fan mounts. Whether expelling hot air or drawing in fresh air, this area plays a pivotal role.
Taking a look with the panel off, there’s a sizable cutout for front I/O panel cables on the front. A smaller cutout is found on the right side. The main section features a raised surface with two 120mm fan mounts, offering a 25mm height.
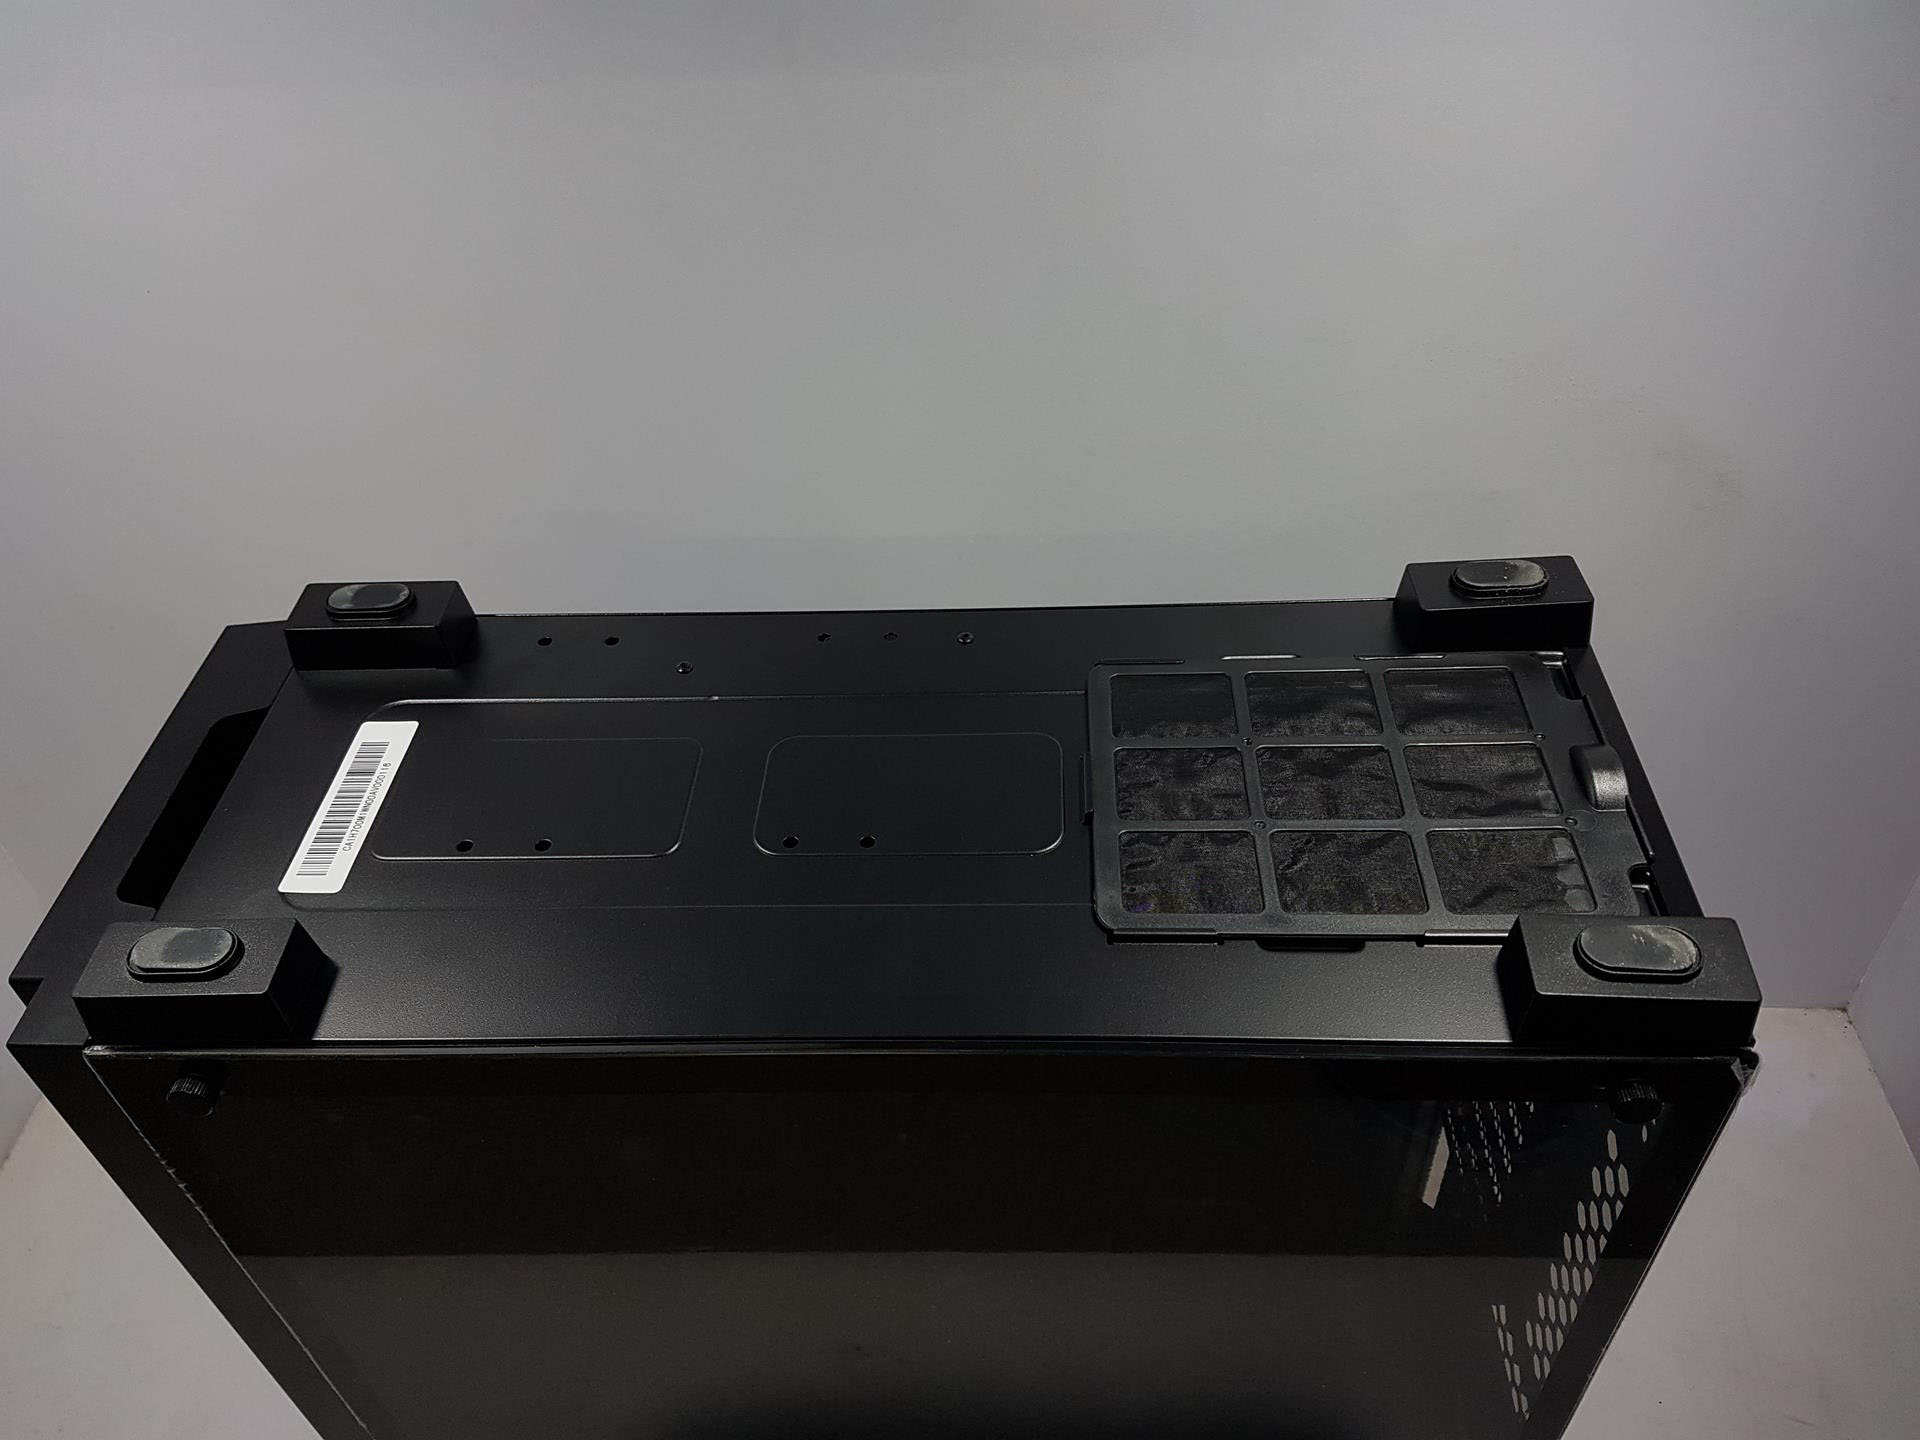
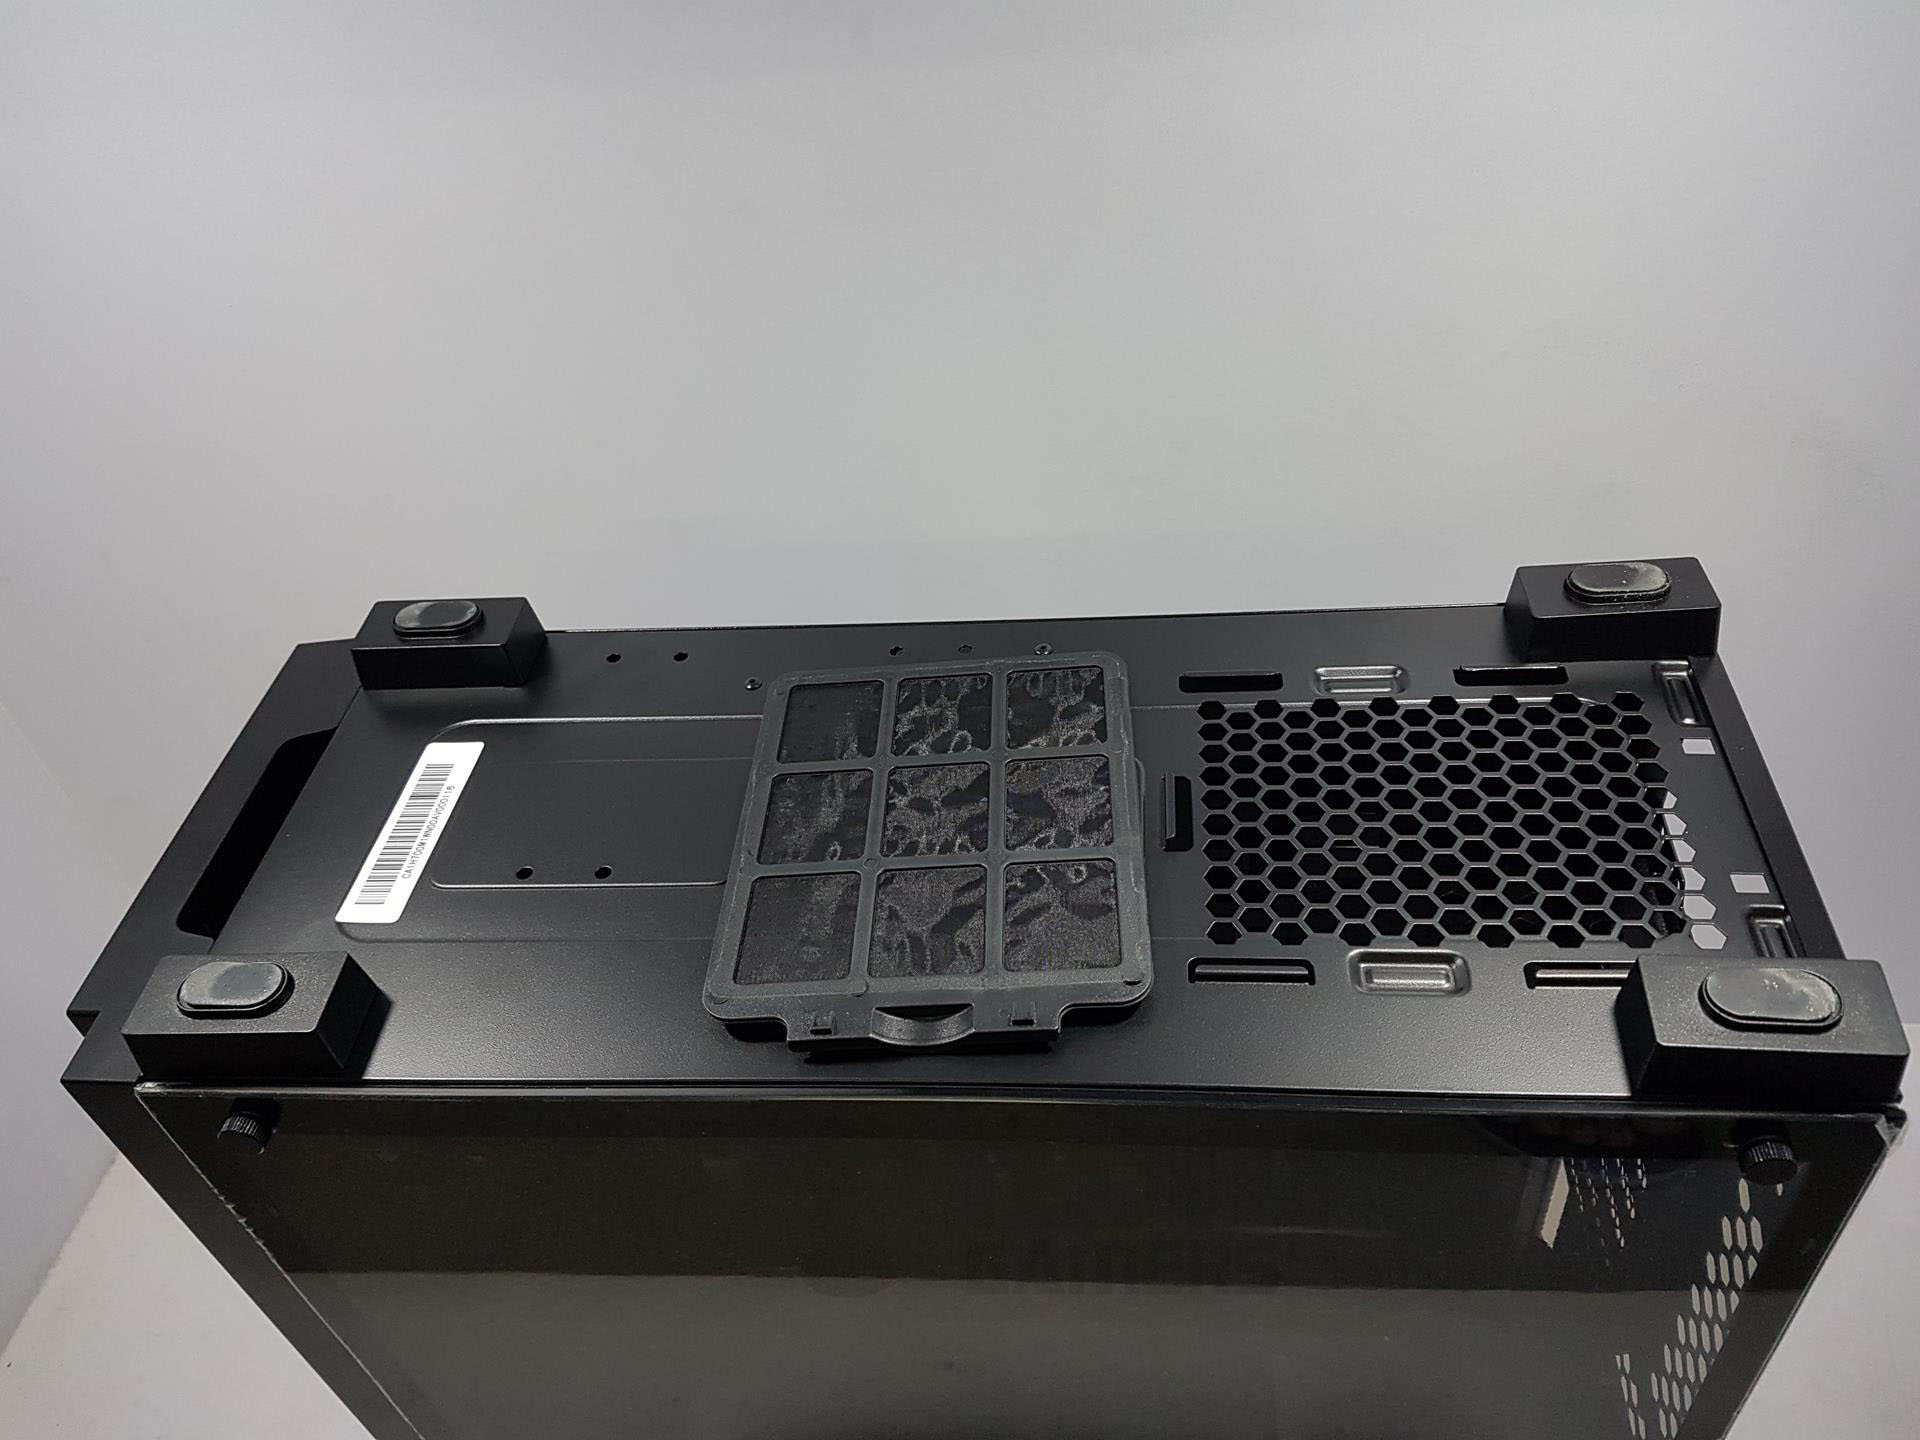
Bottom
The bottom side of the chassis has four feet that give 14mm of height from the ground. The PSU area has a removable dust filter that can be removed for cleaning purposes. It is not magnetic but that is not a complaint given the price factor of the chassis. Feet have rubber mounts on their bottom side to avoid scratches on the surface where the chassis would be placed.
Rear
As I explored the rear side of this product, I couldn’t help but appreciate the well-thought-out design. On the top right, there’s a handy 120mm fan mount ready to keep things cool. The left opening for the motherboard’s I/O panel adds a convenient touch.
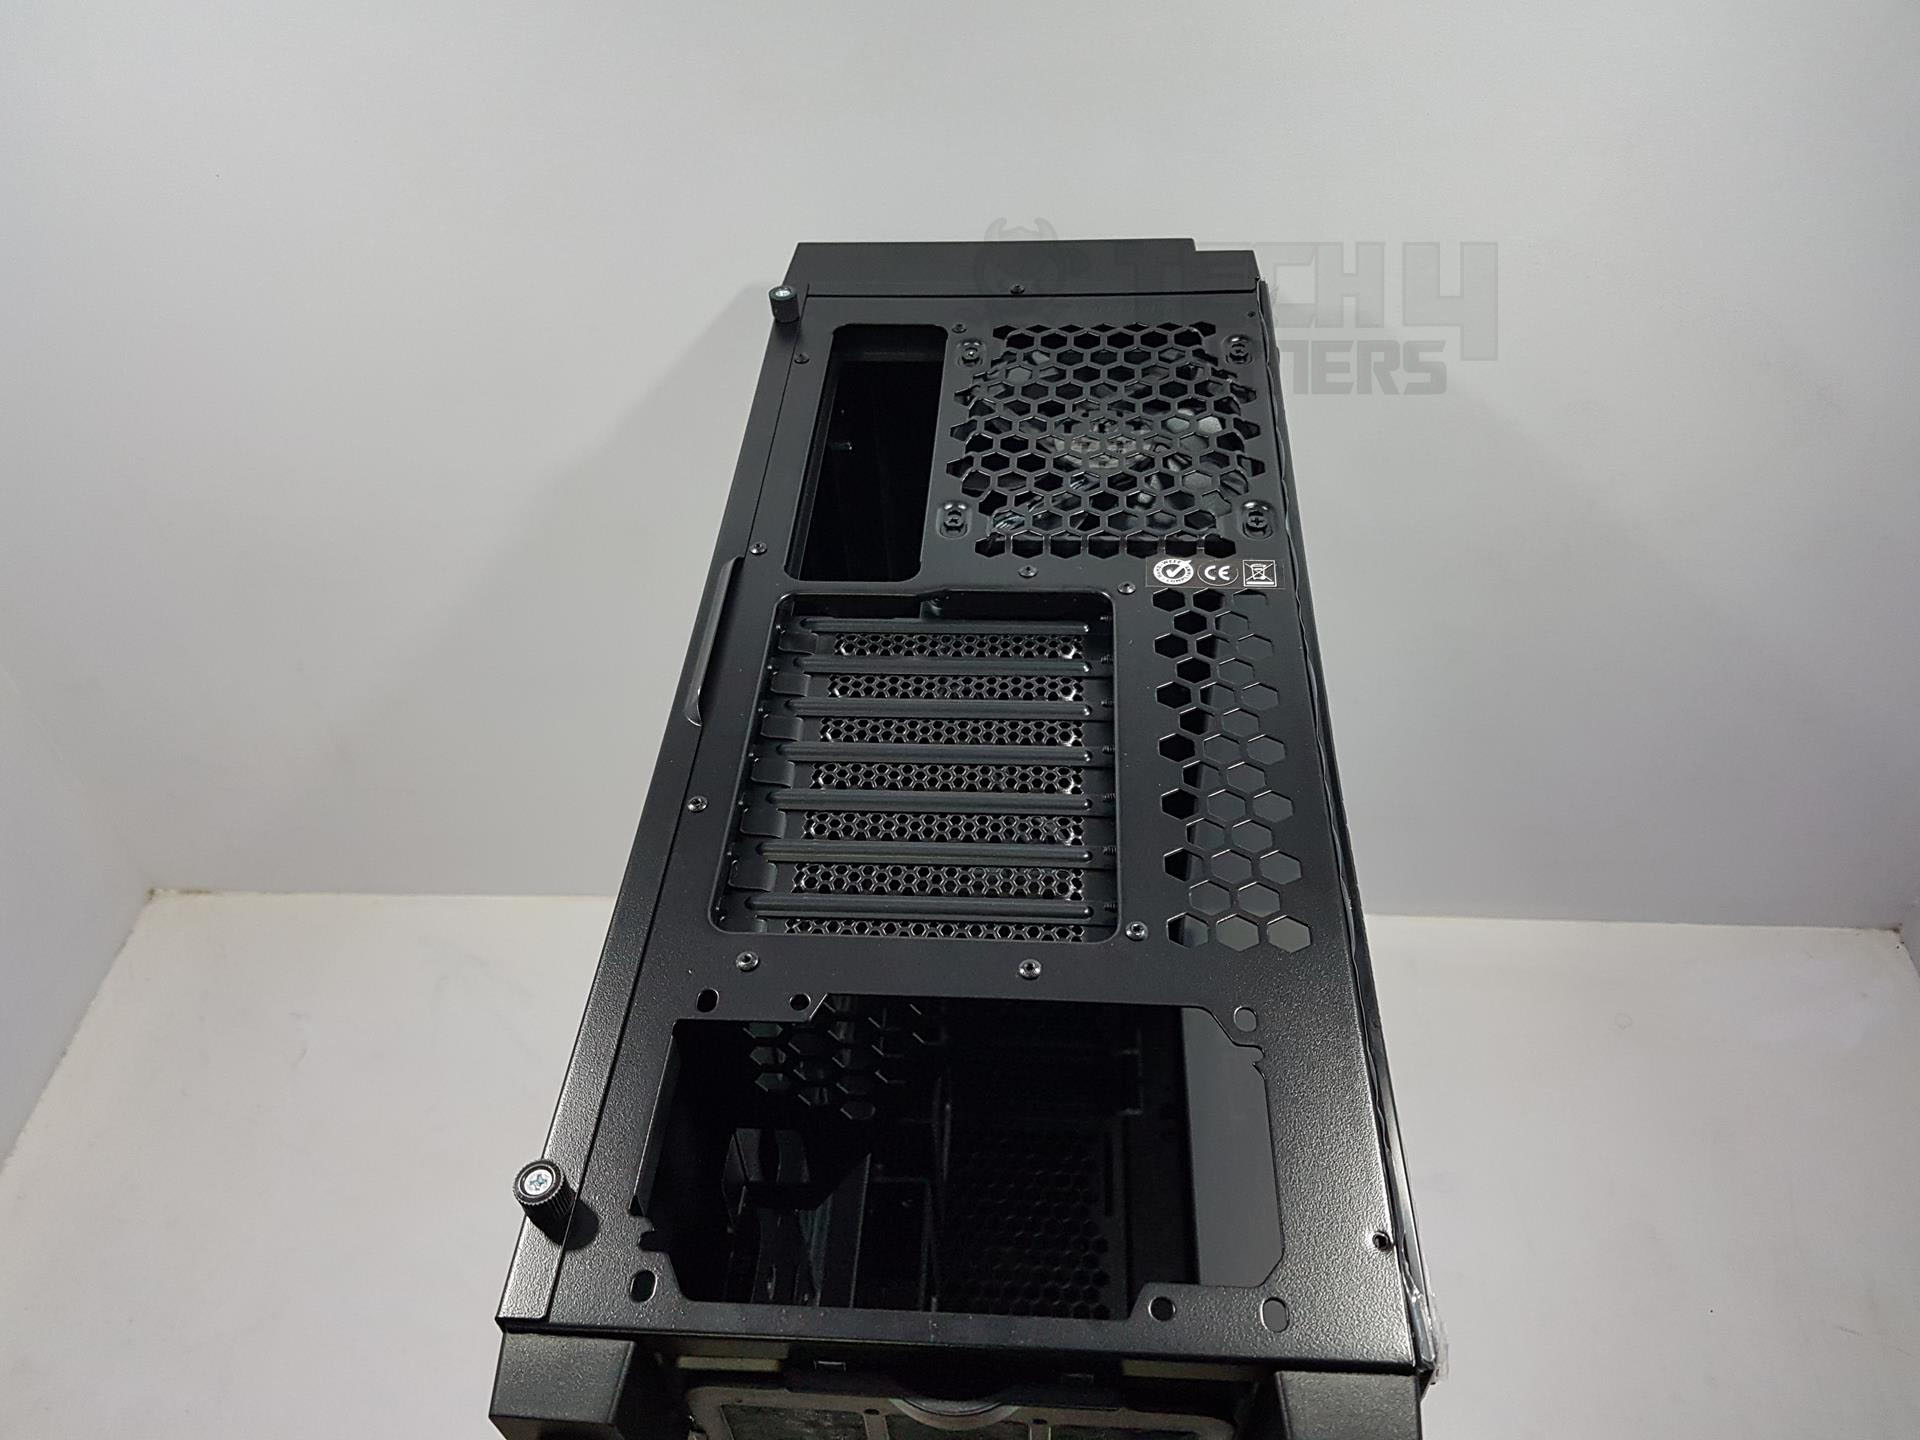
Moving to the center, I noticed 7 PCIe slot covers, each with a vented section on the right to ensure optimal airflow. At the bottom, a standard ATX PSU mounting provision makes the setup process a breeze. It’s these thoughtful details that make this product stand out for me.
For height adjustment, install a 120mm fan on three pre-defined mounts. Secure the right-side panel using 4 front screws; the left panel is fastened with two screws and rubber inserts.
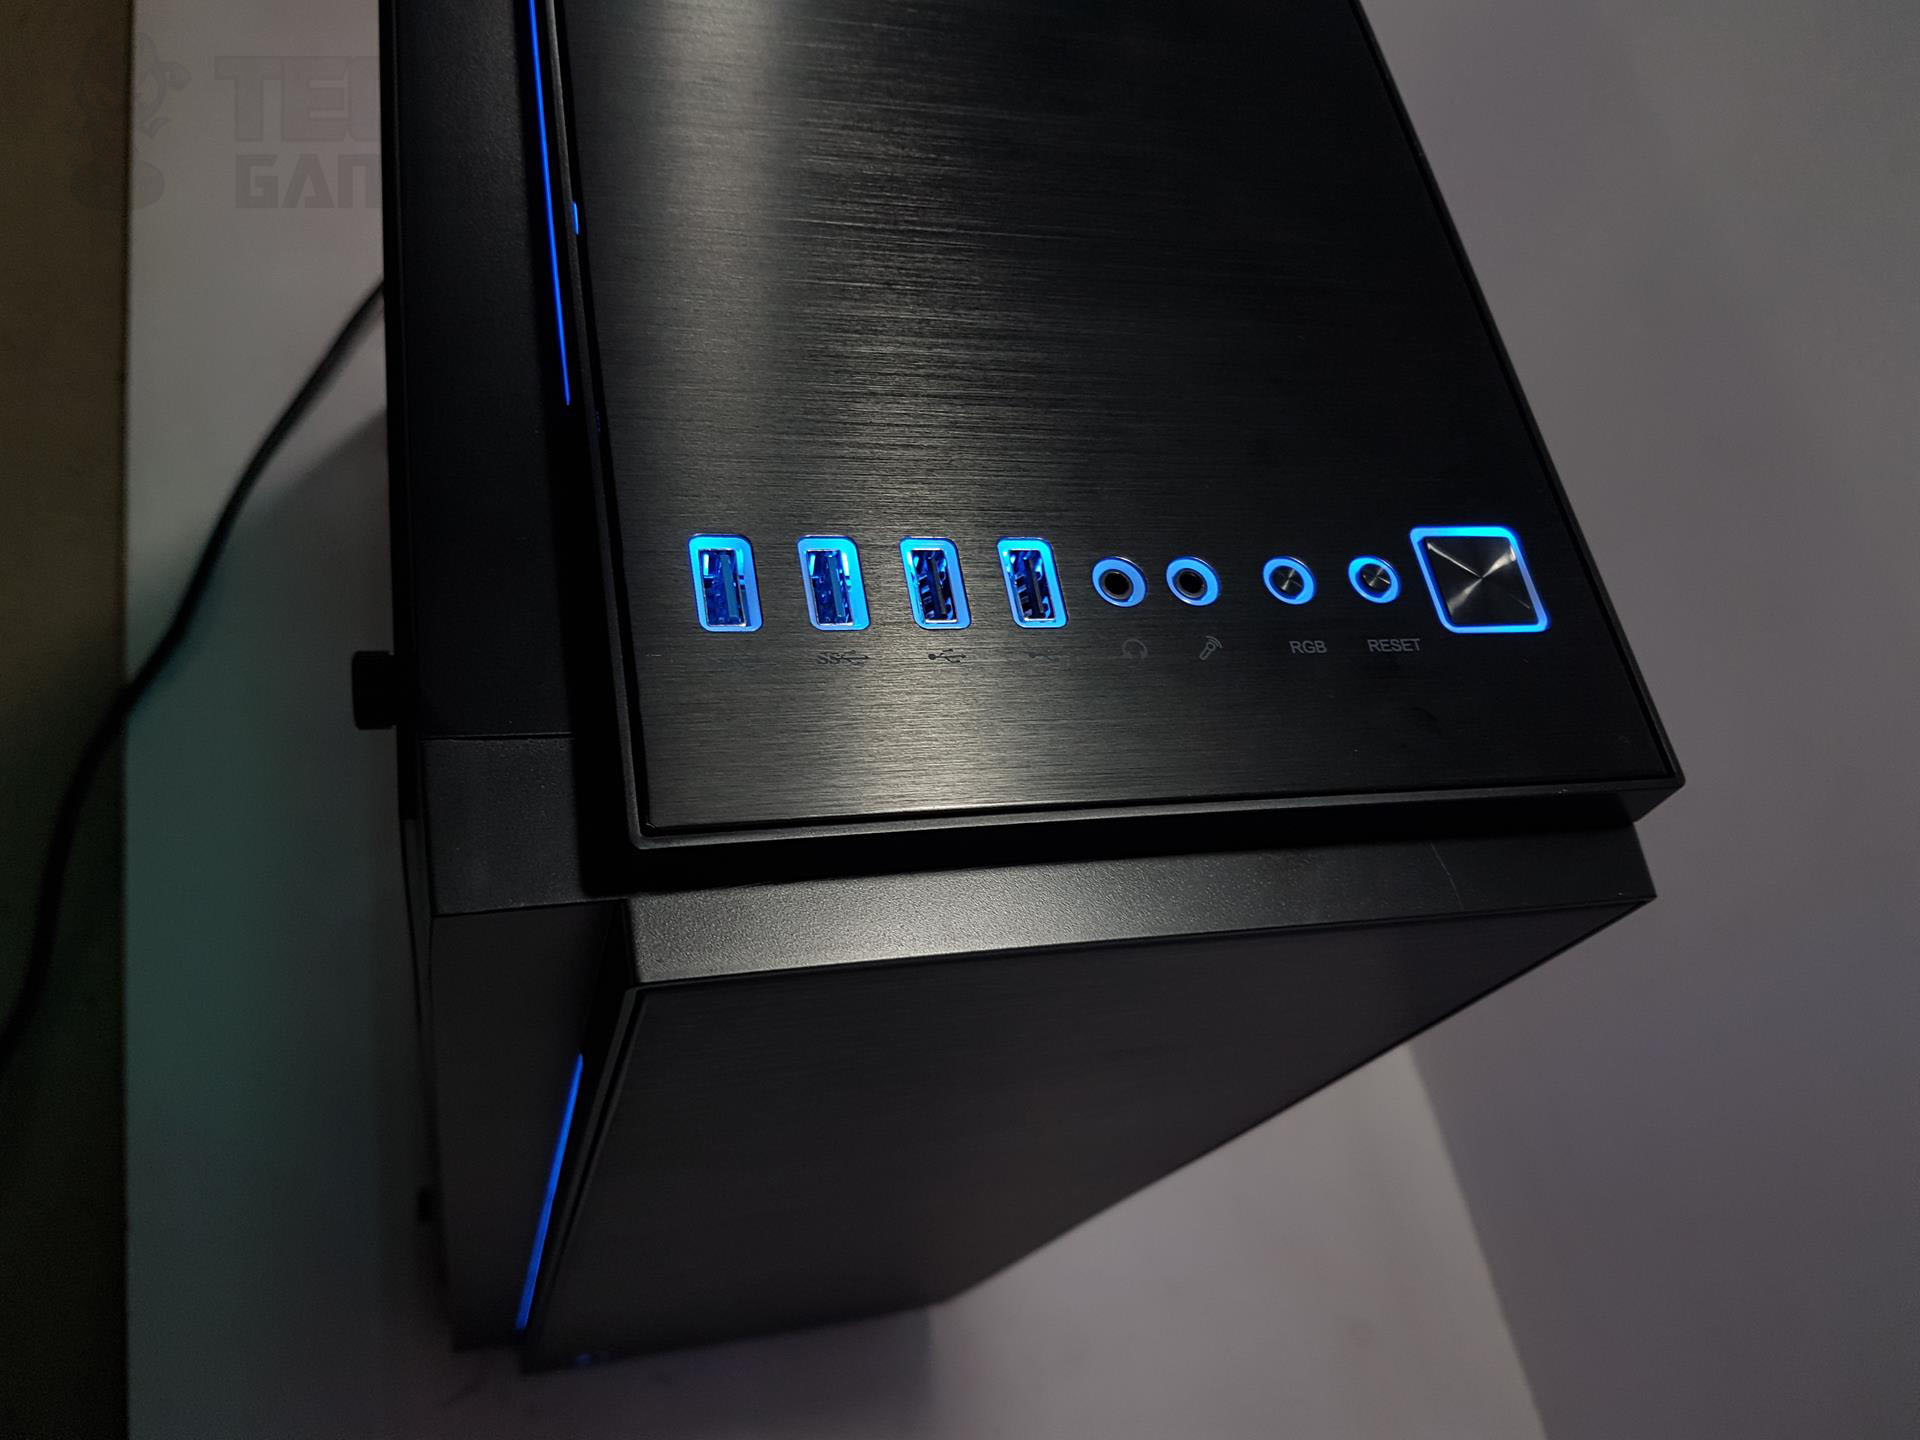
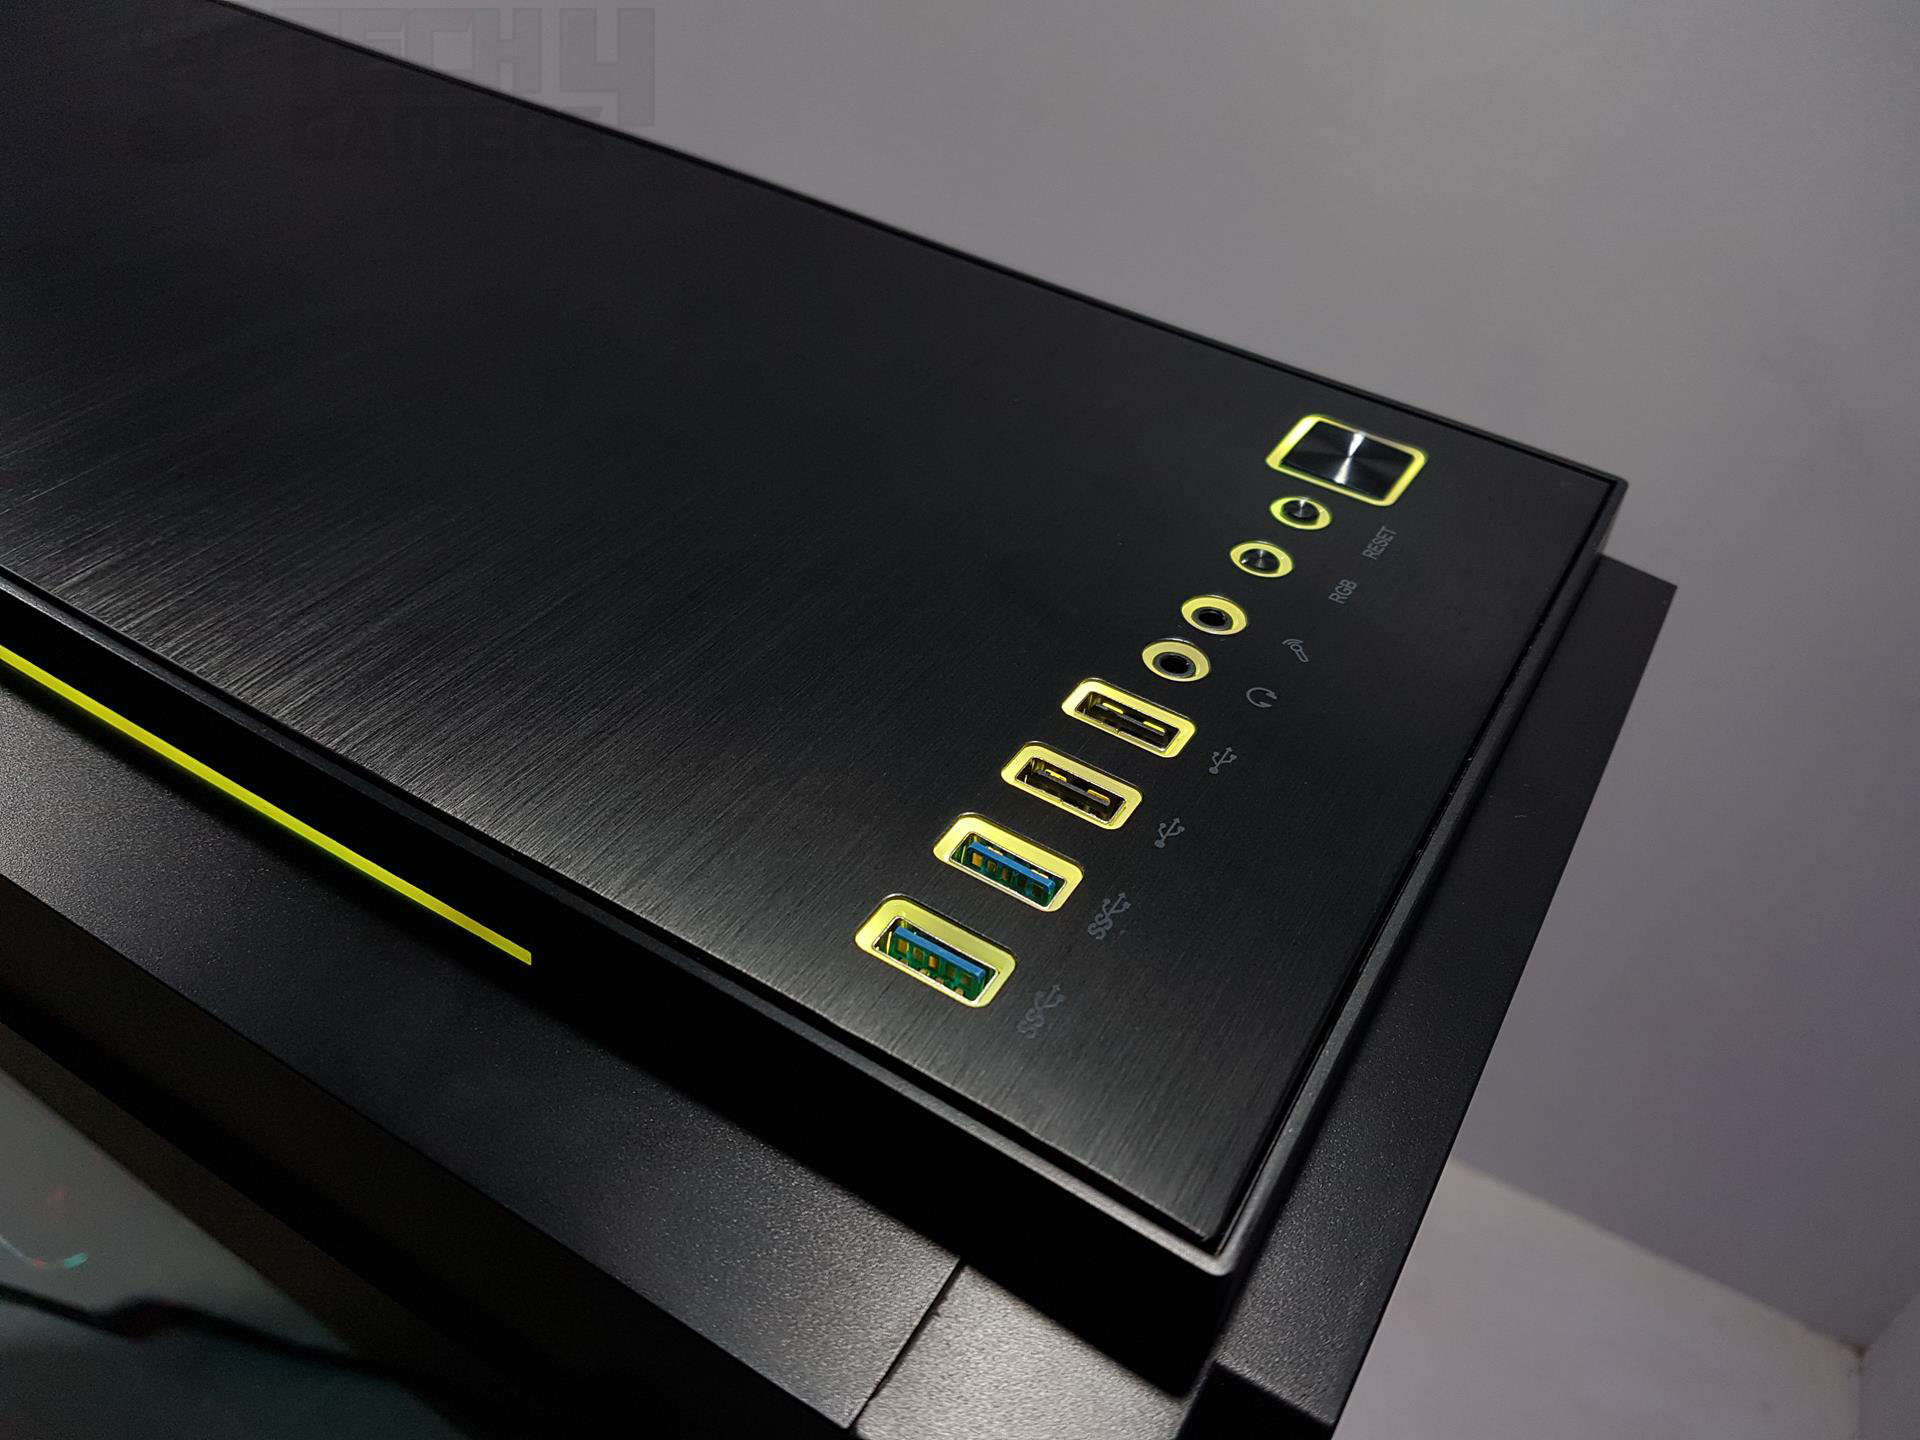
Front I/O panel
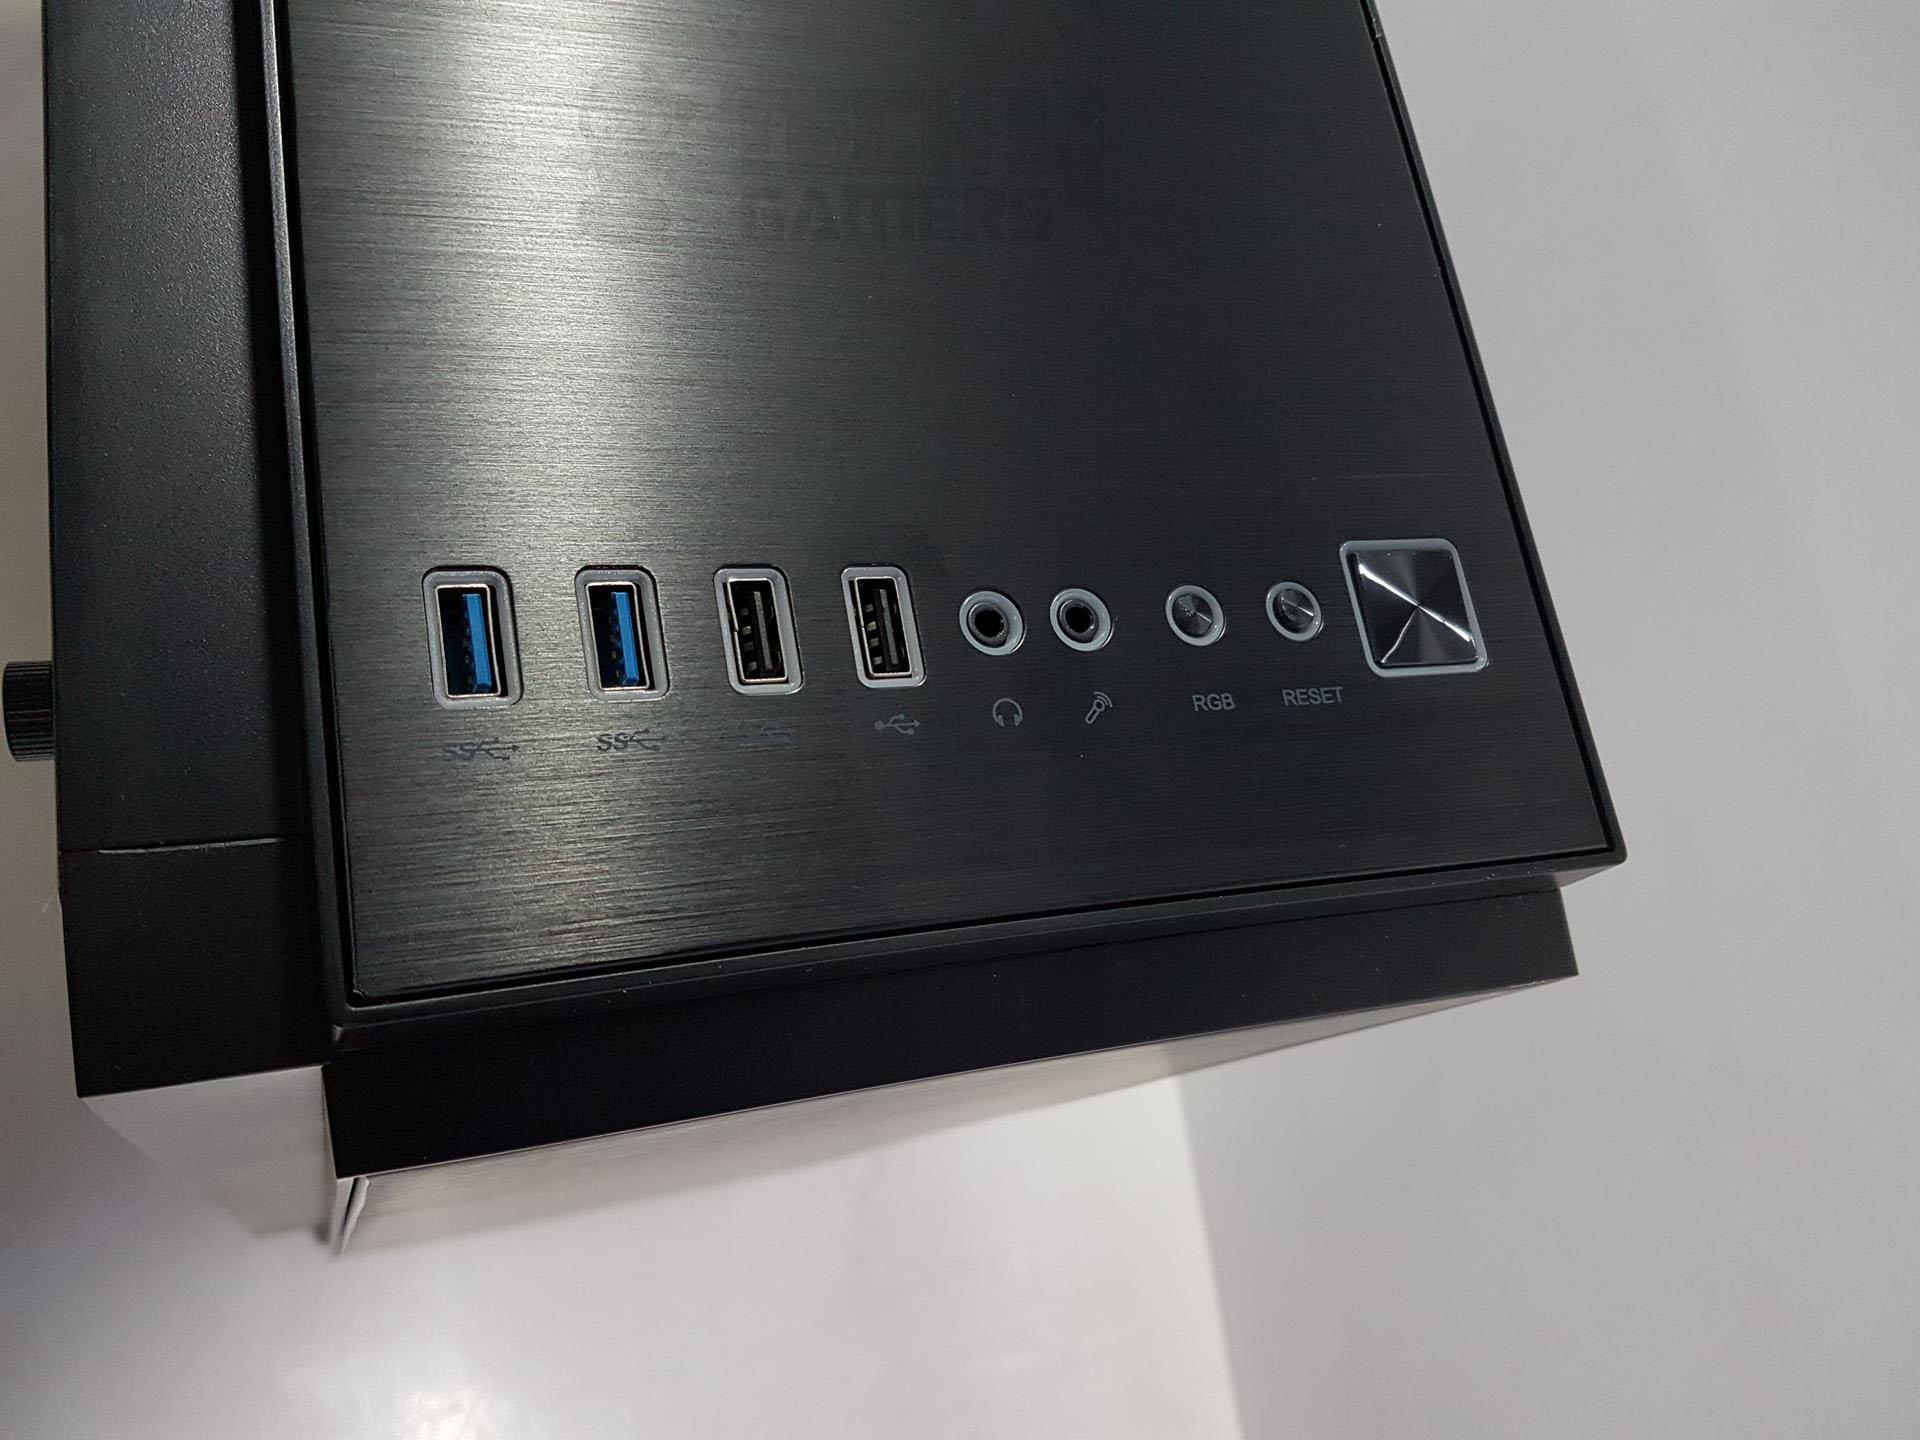
The front I/O panel is located on the top side of the chassis. We have:-
- 2x USB 3.0 ports
- 2x USB 2.0 ports
- 1x Headphone jack
- 1x Microphone jack
- 1x RGB control button
- 1x Reset button
- 1x Power button
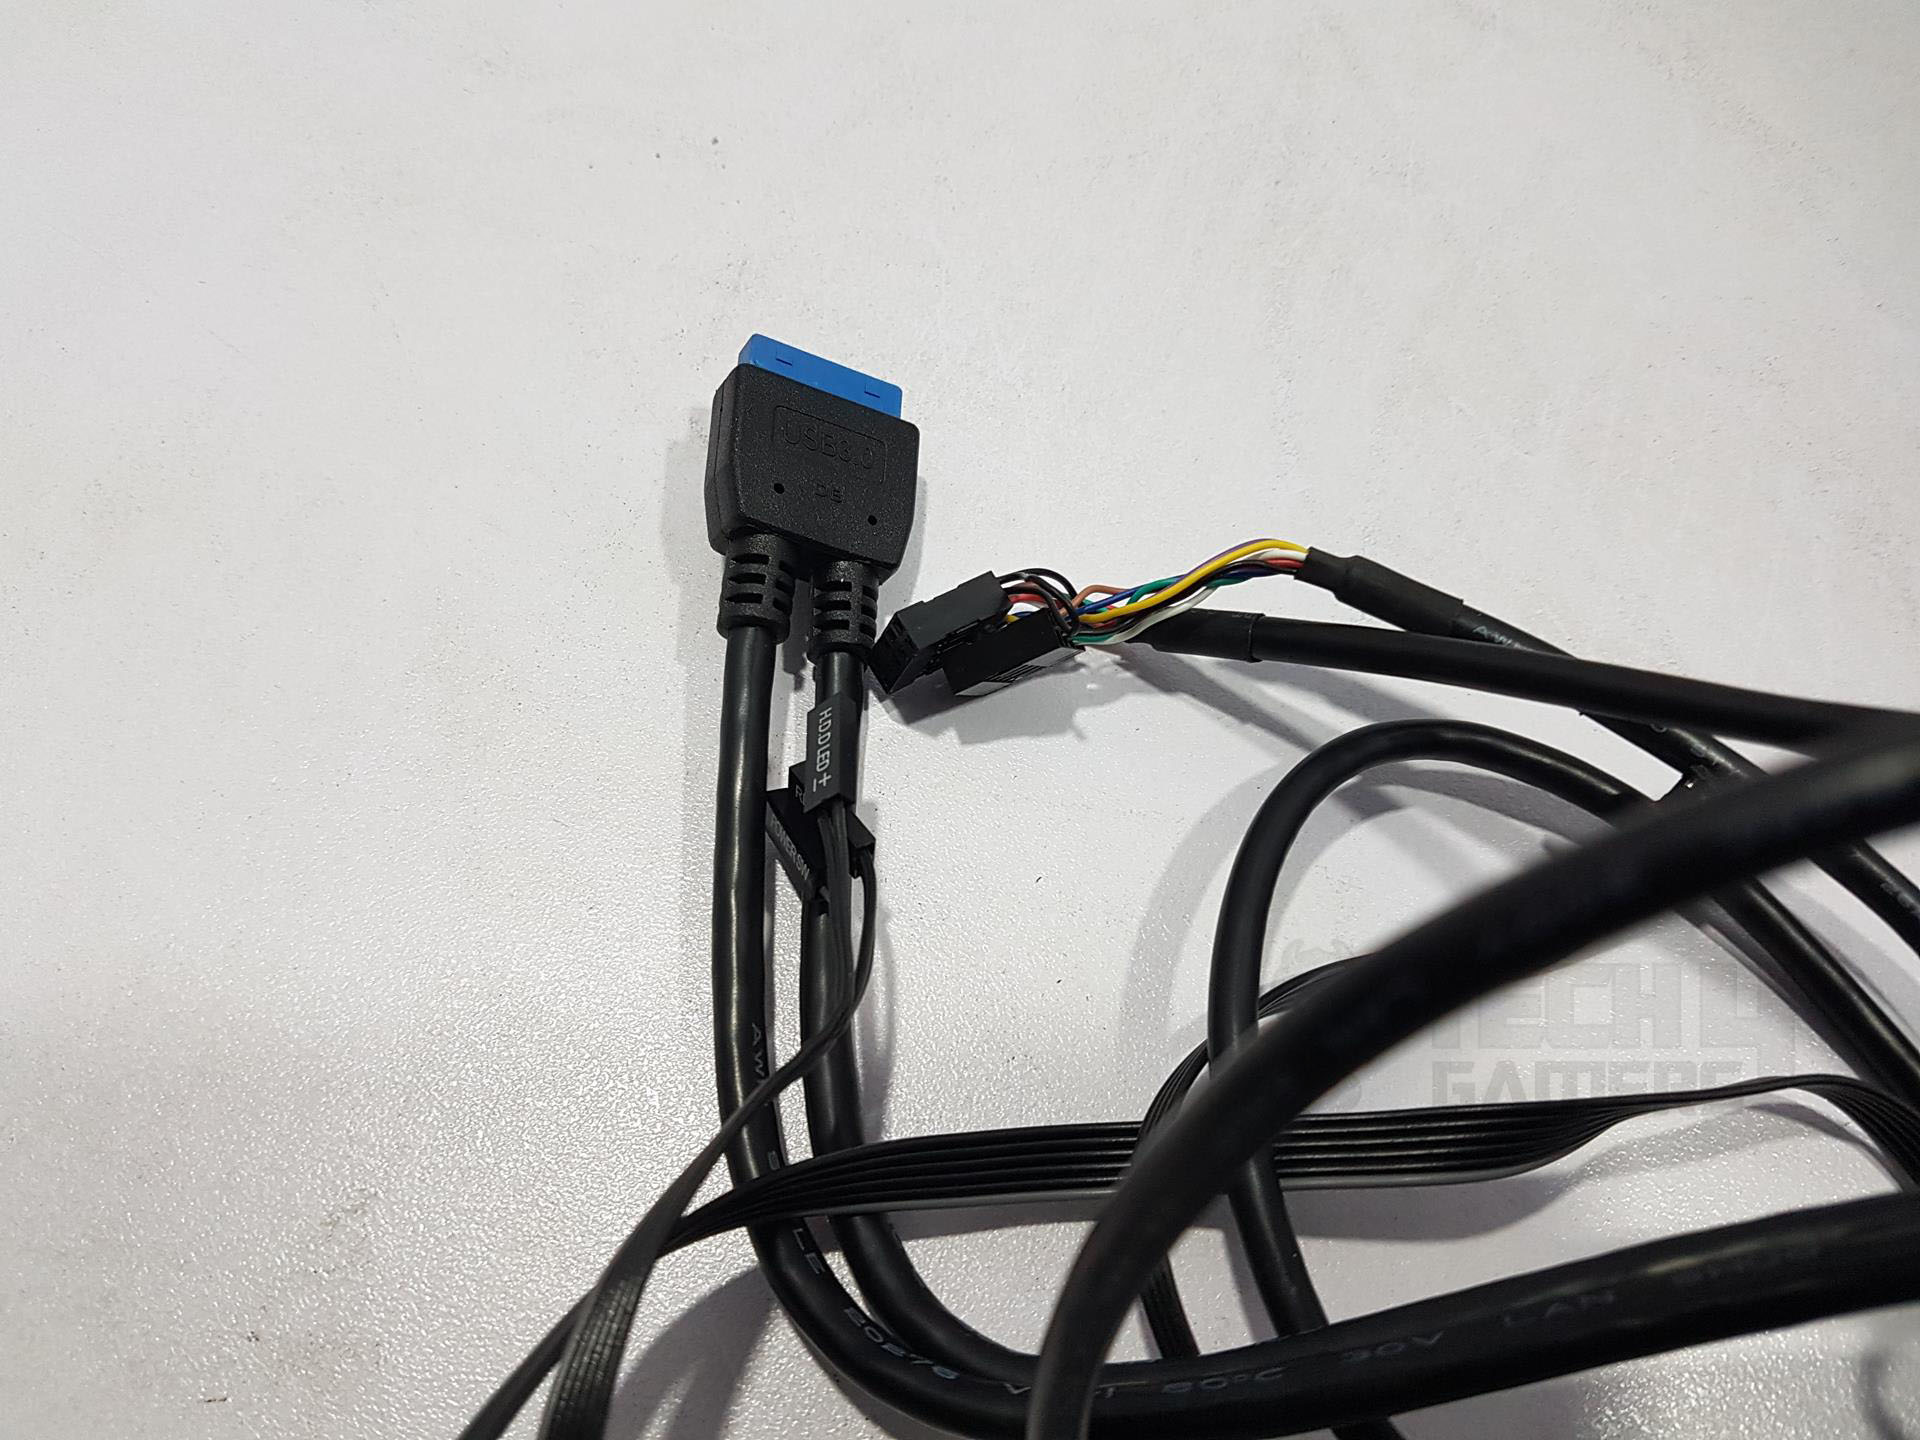
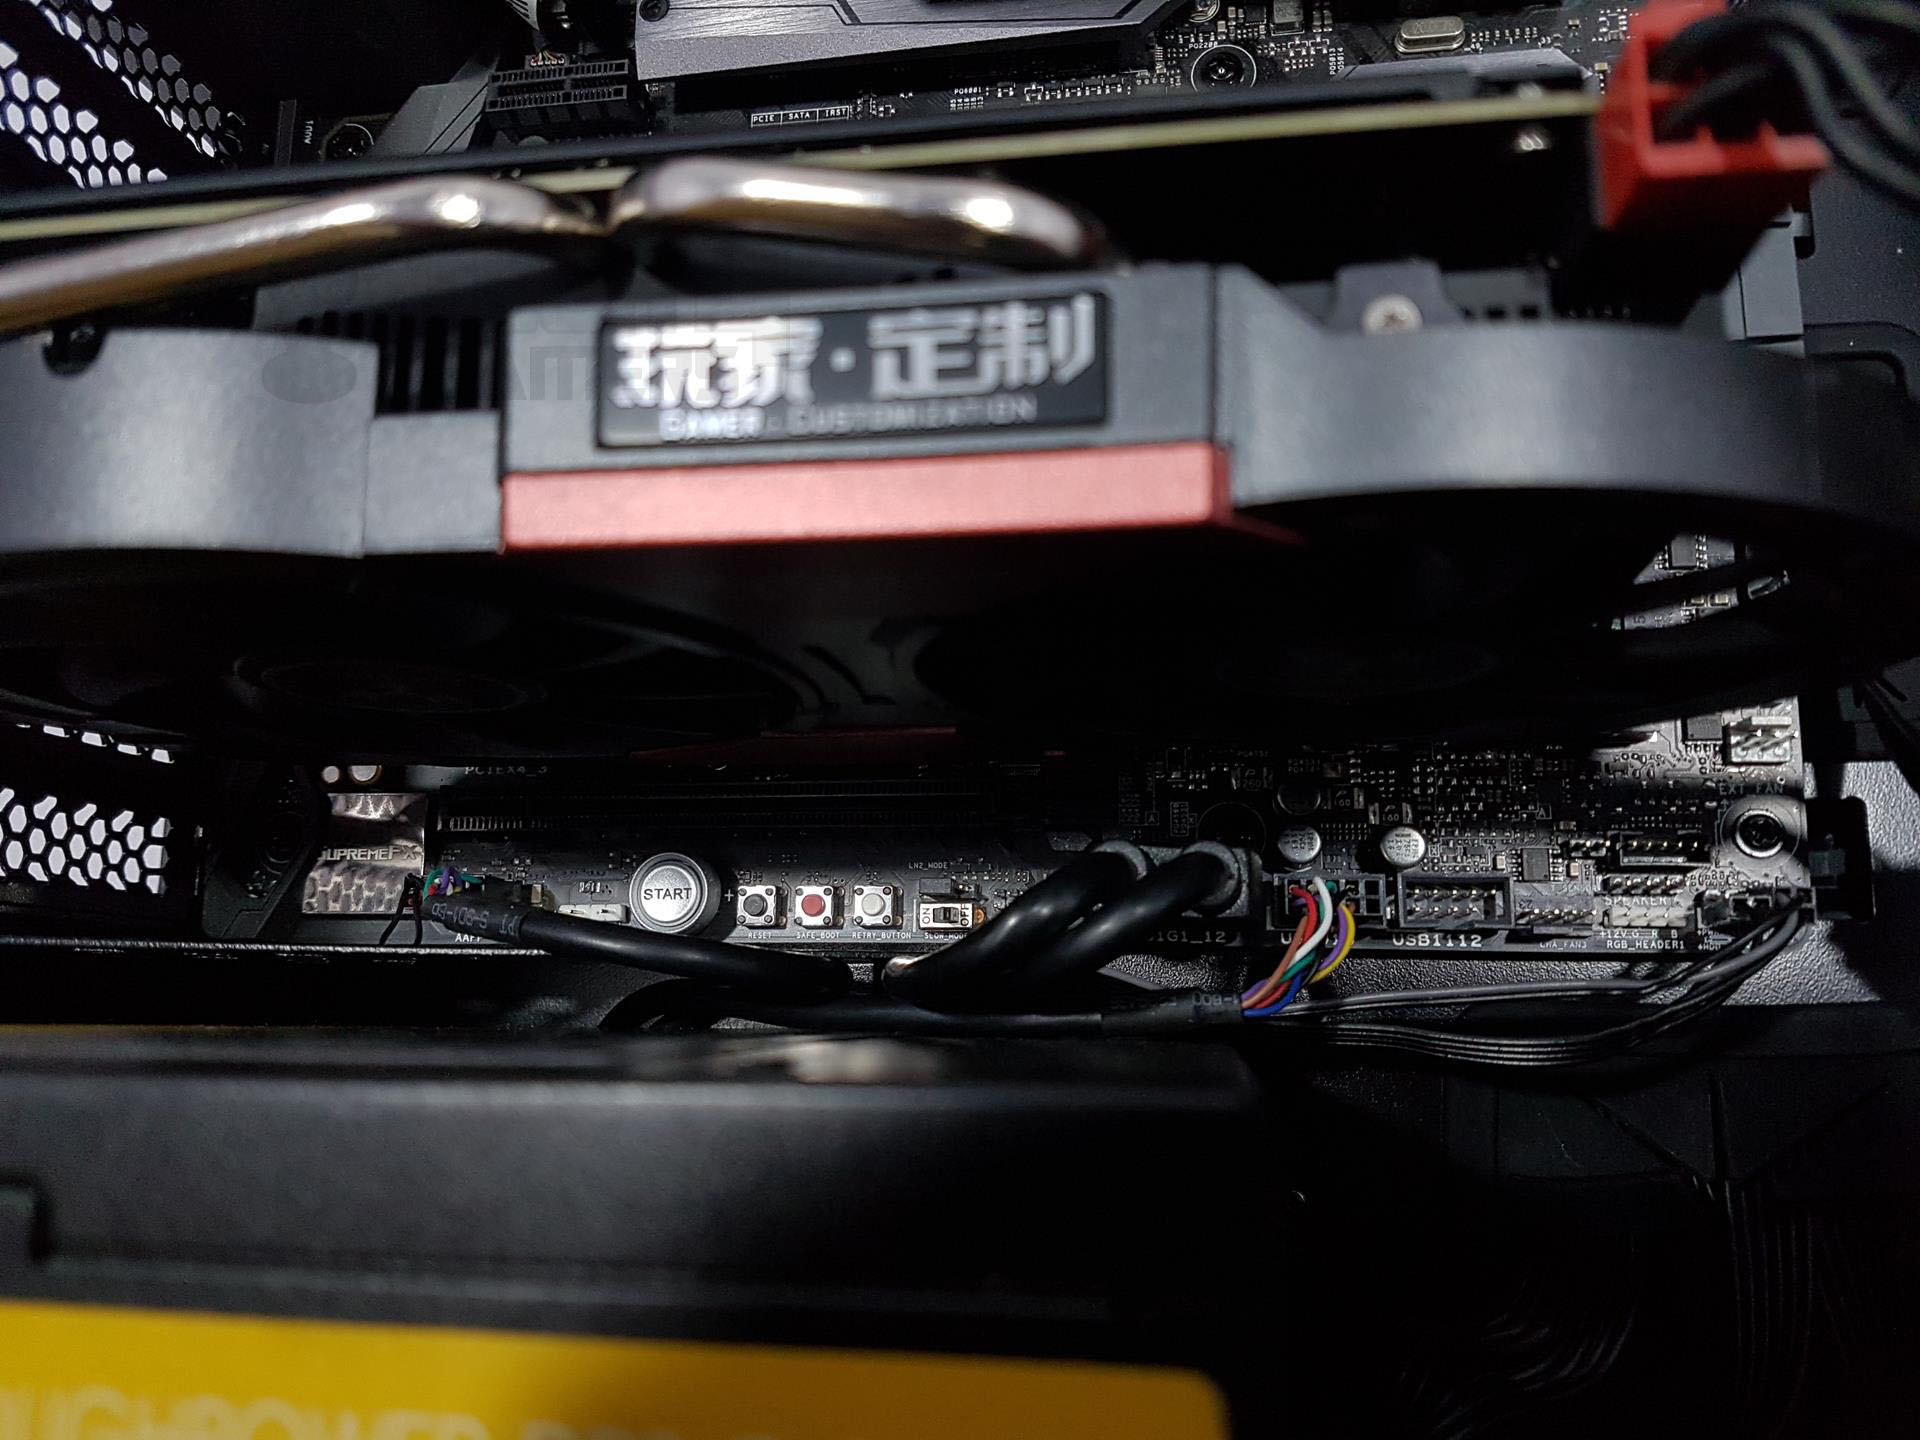
I love how I can personally tweak the RGB effects on the chassis with just a press of the RGB button conveniently located on the I/O panel. Setting it up is a breeze, thanks to the generously long front panel cables that effortlessly reach the motherboard. And let me tell you, discovering the RGB LED Controller tucked under the top-front panel was a delightful surprise!
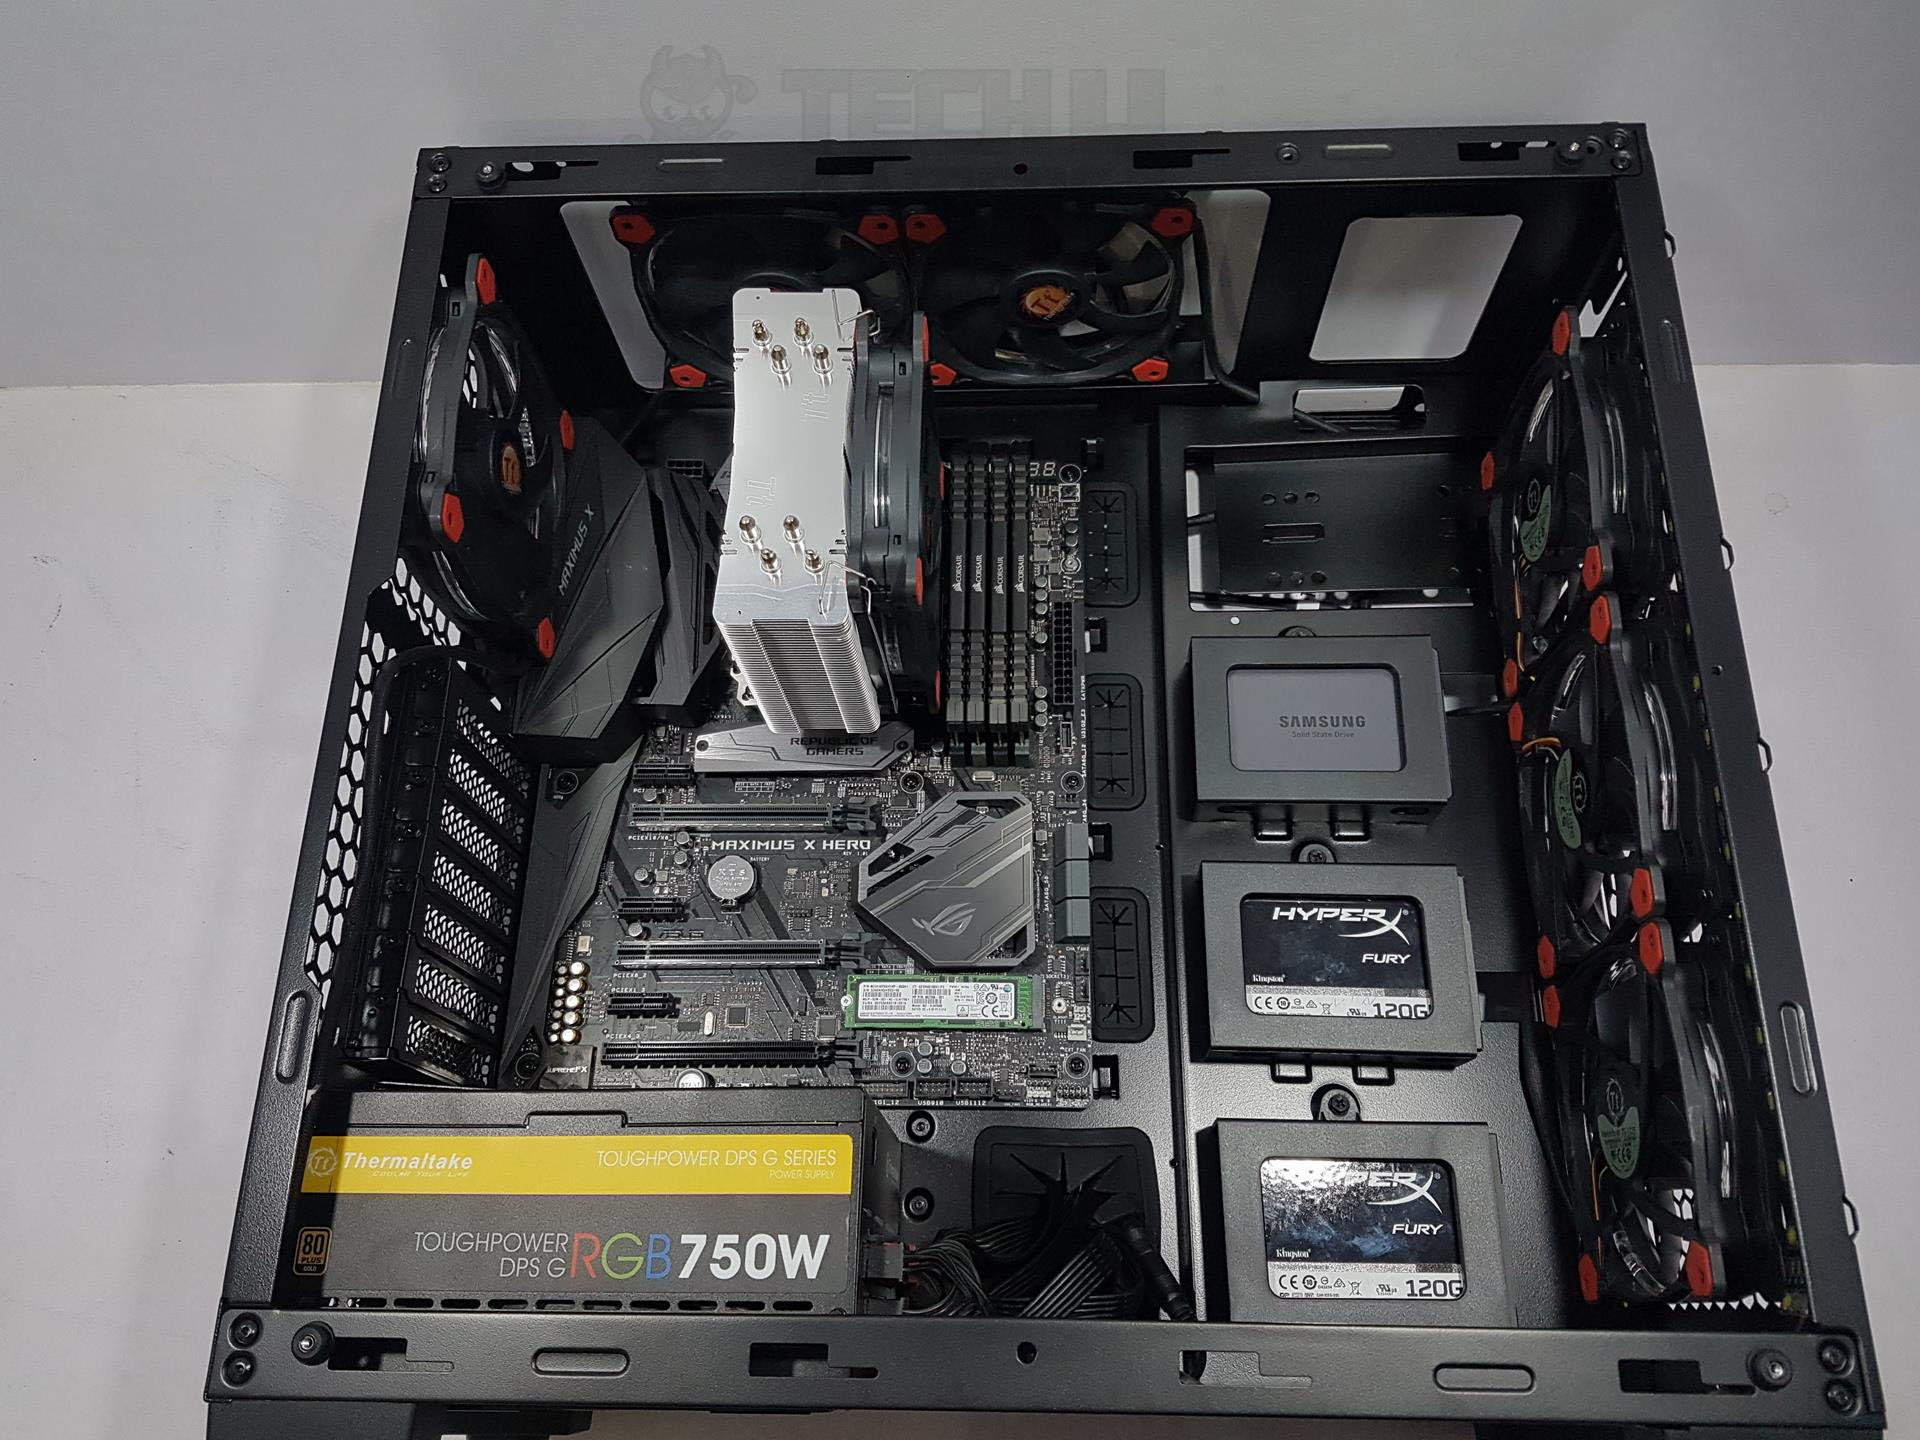
Inside View
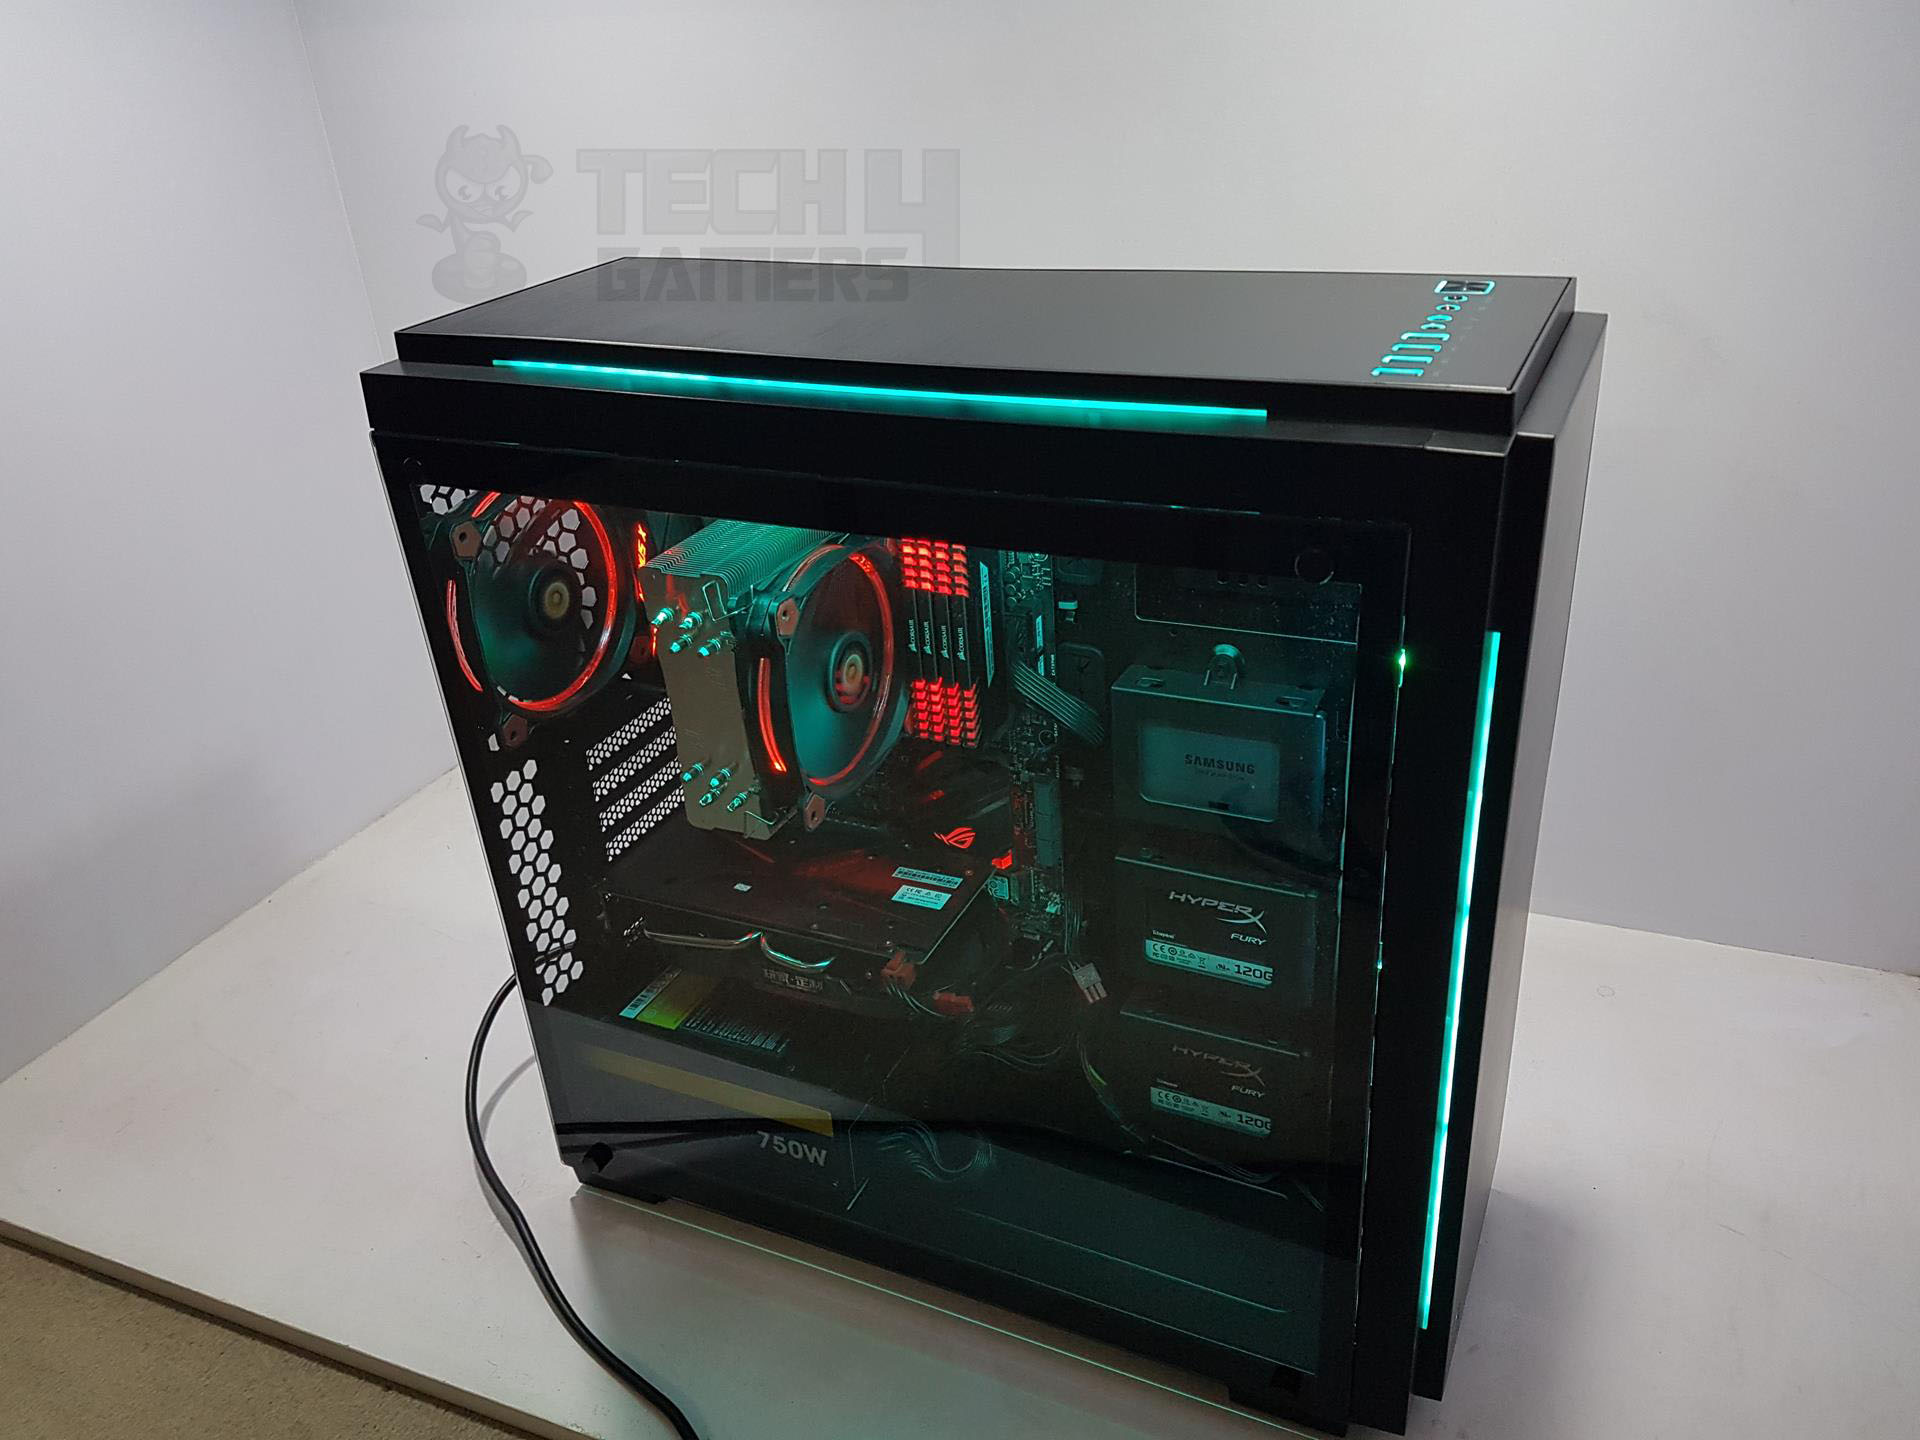
It is time to take a look inside the chassis. There is a 4mm thick tempered glass side panel on this chassis on its left side only.


The other side has a solid side panel as we will see shortly. The tempered glass is black tinted and is secured using 4 screws. There are holder standoffs on the chassis mainframe with rubber inserts.
This is to avoid the scratching on the glass. Once we remove the screws, the panel remains in its position which is a nice touch and the user can lift the panel off easily. Still, take special care while handling the tempered glass panel, particularly when removing and putting it back.
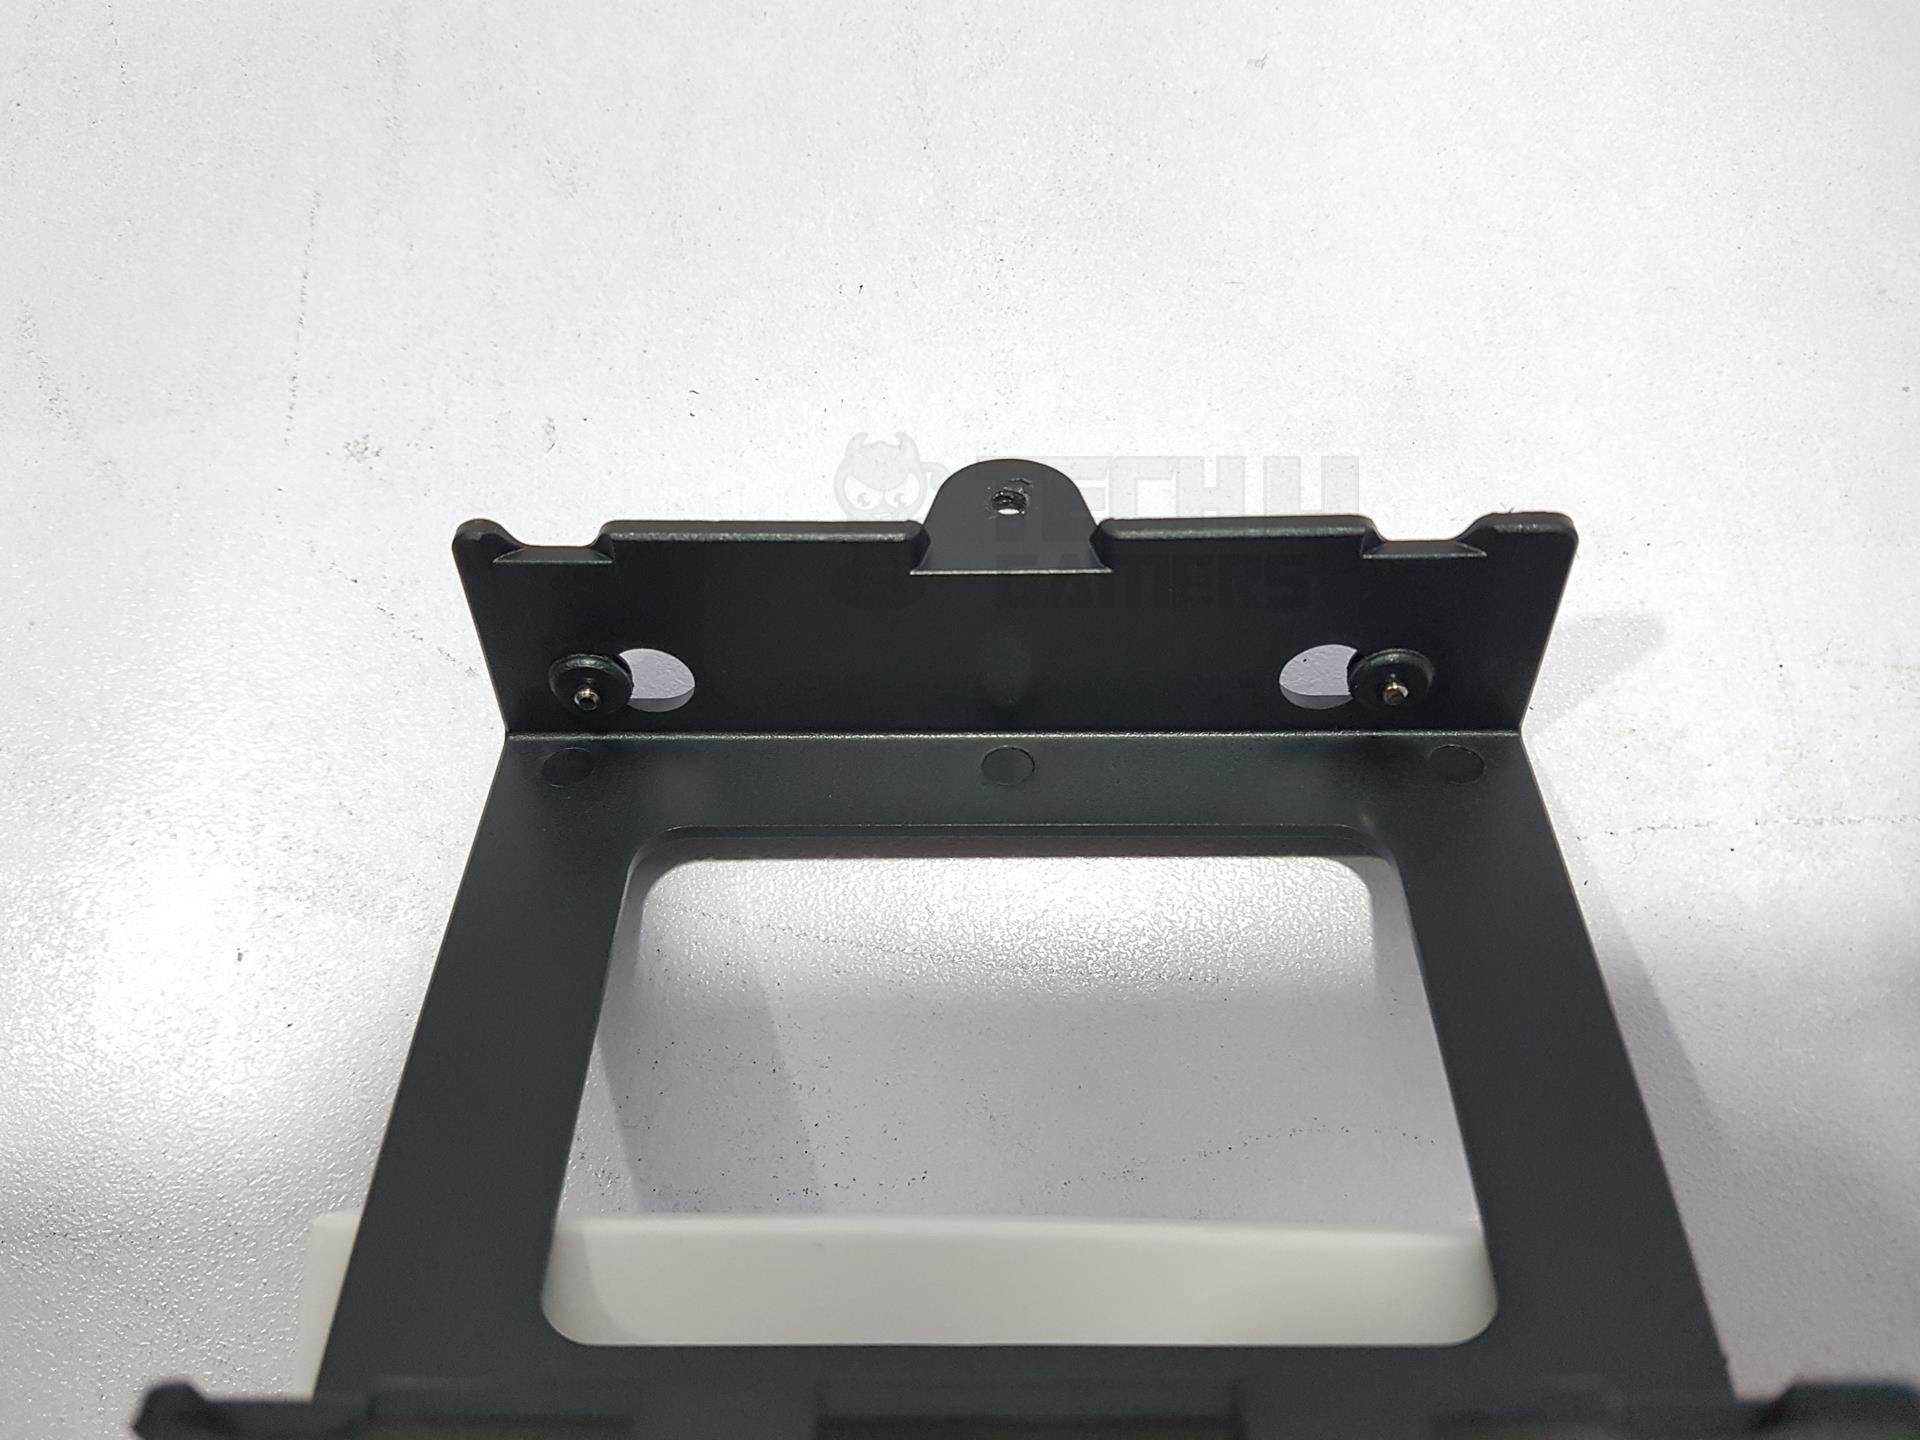
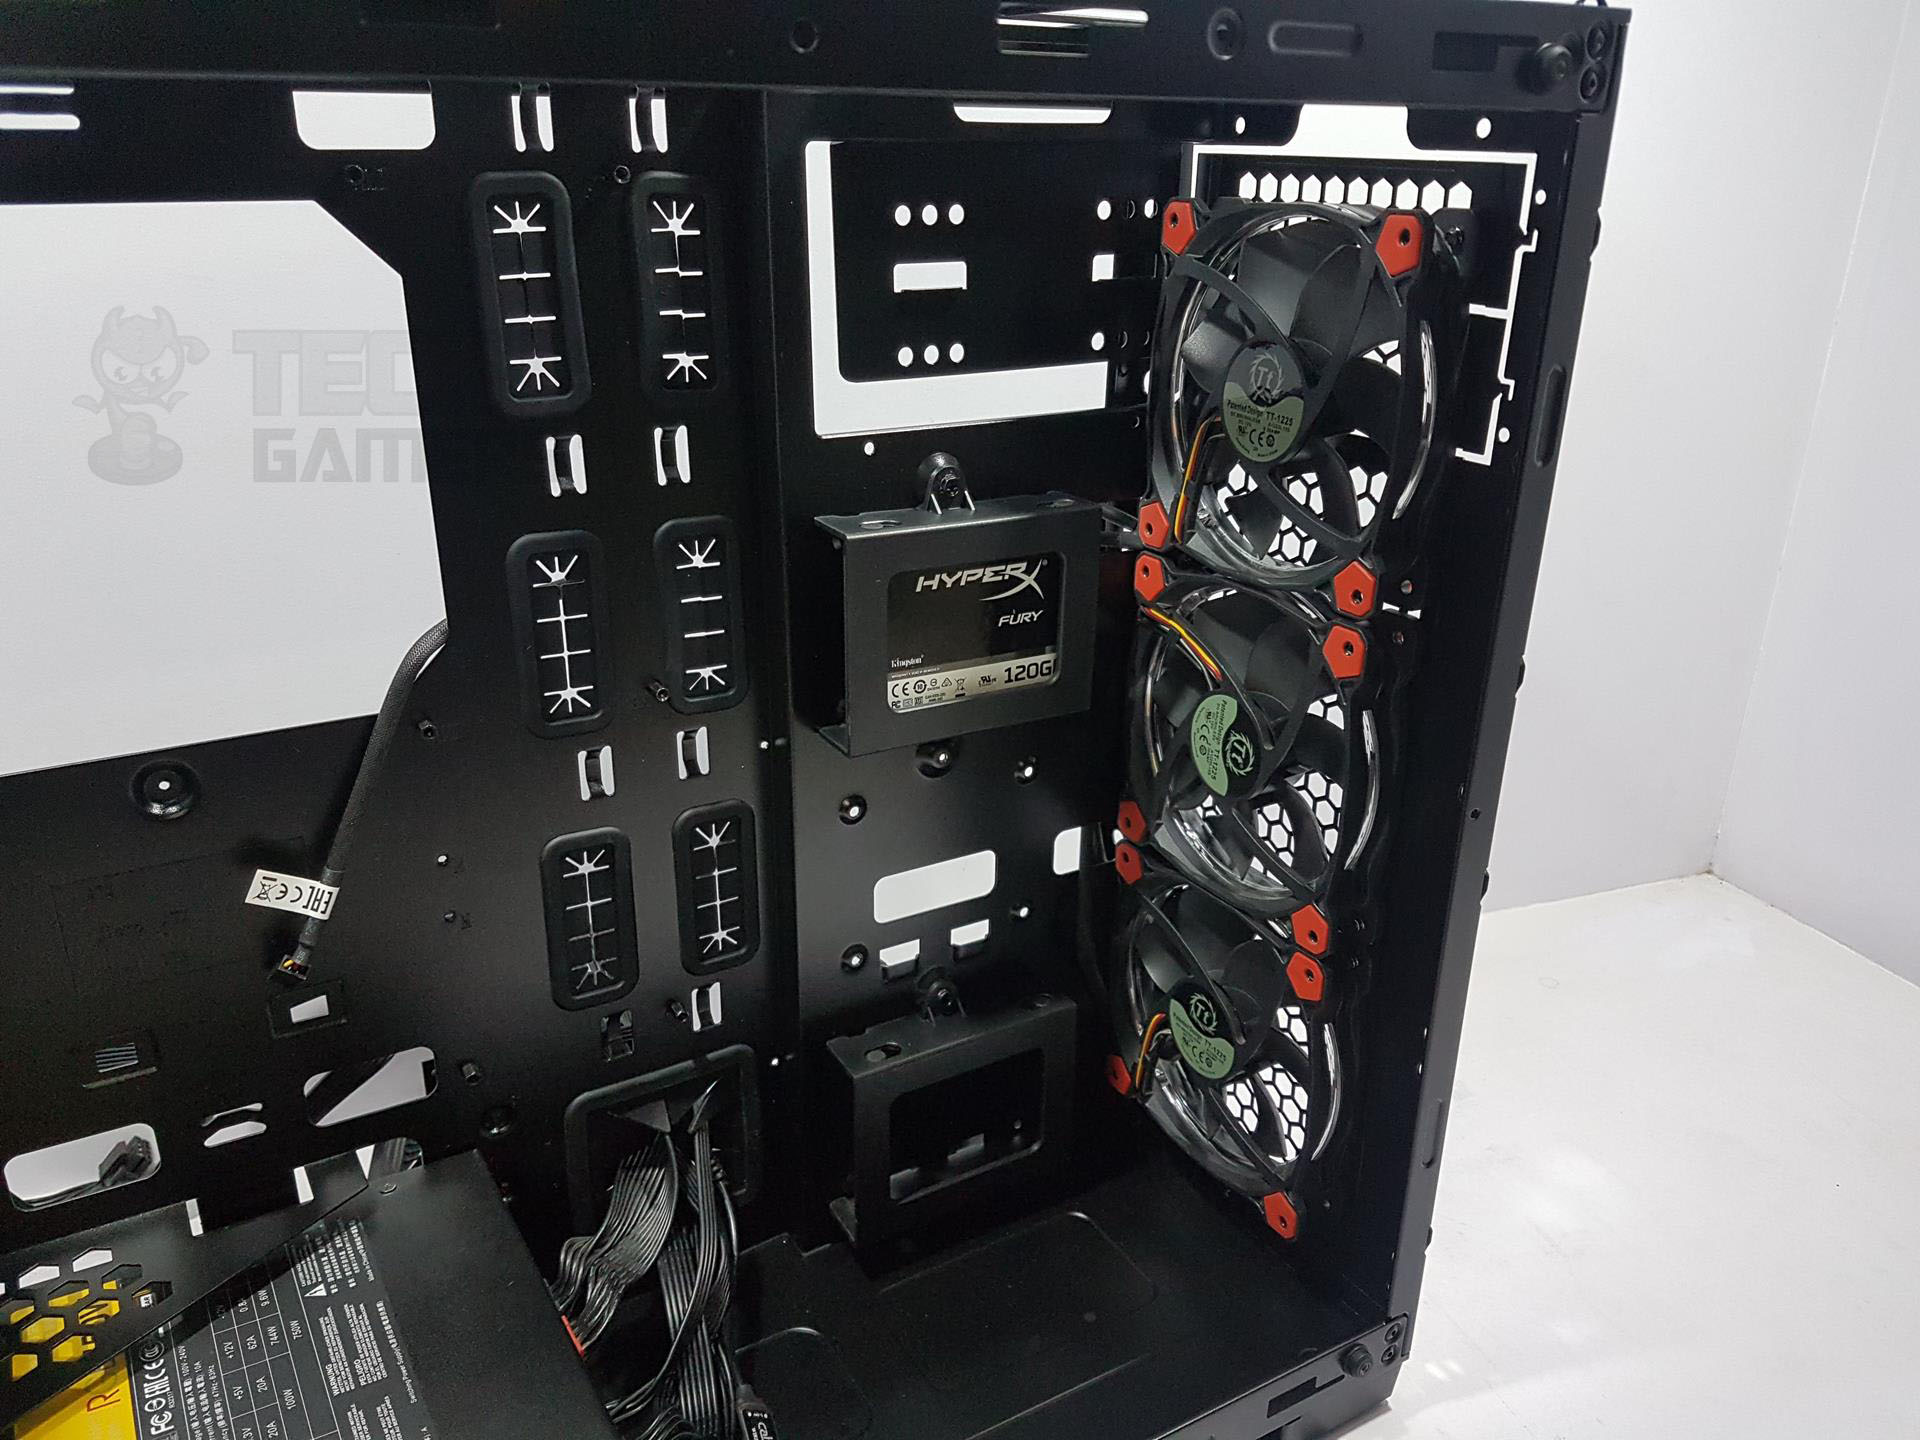
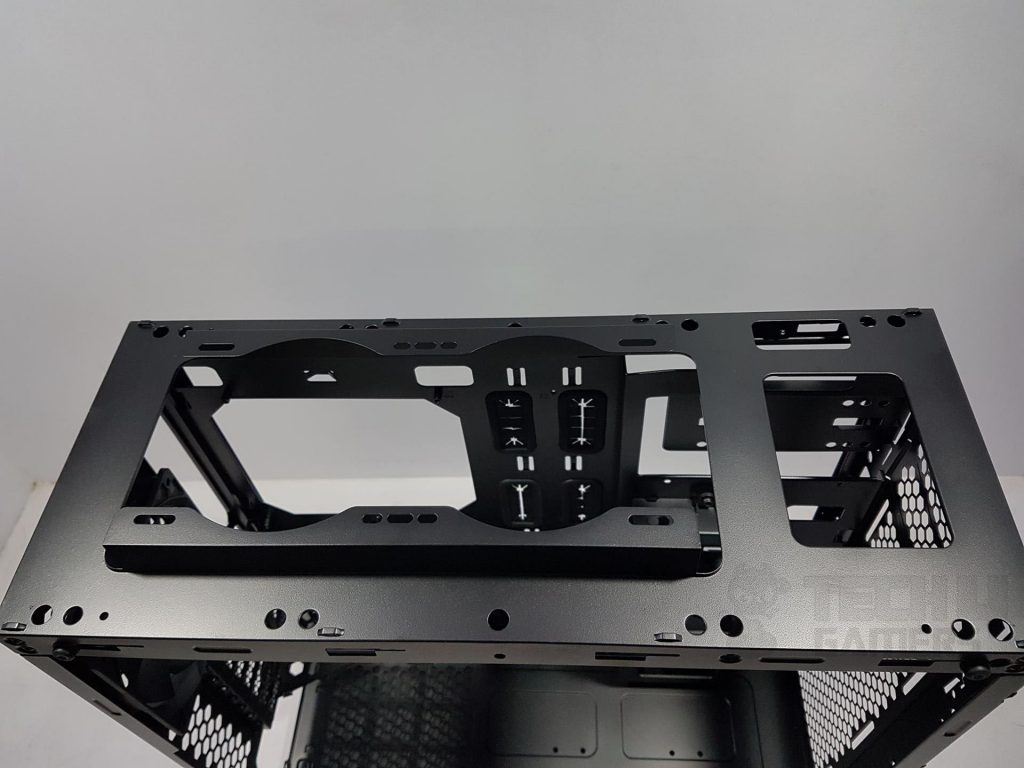
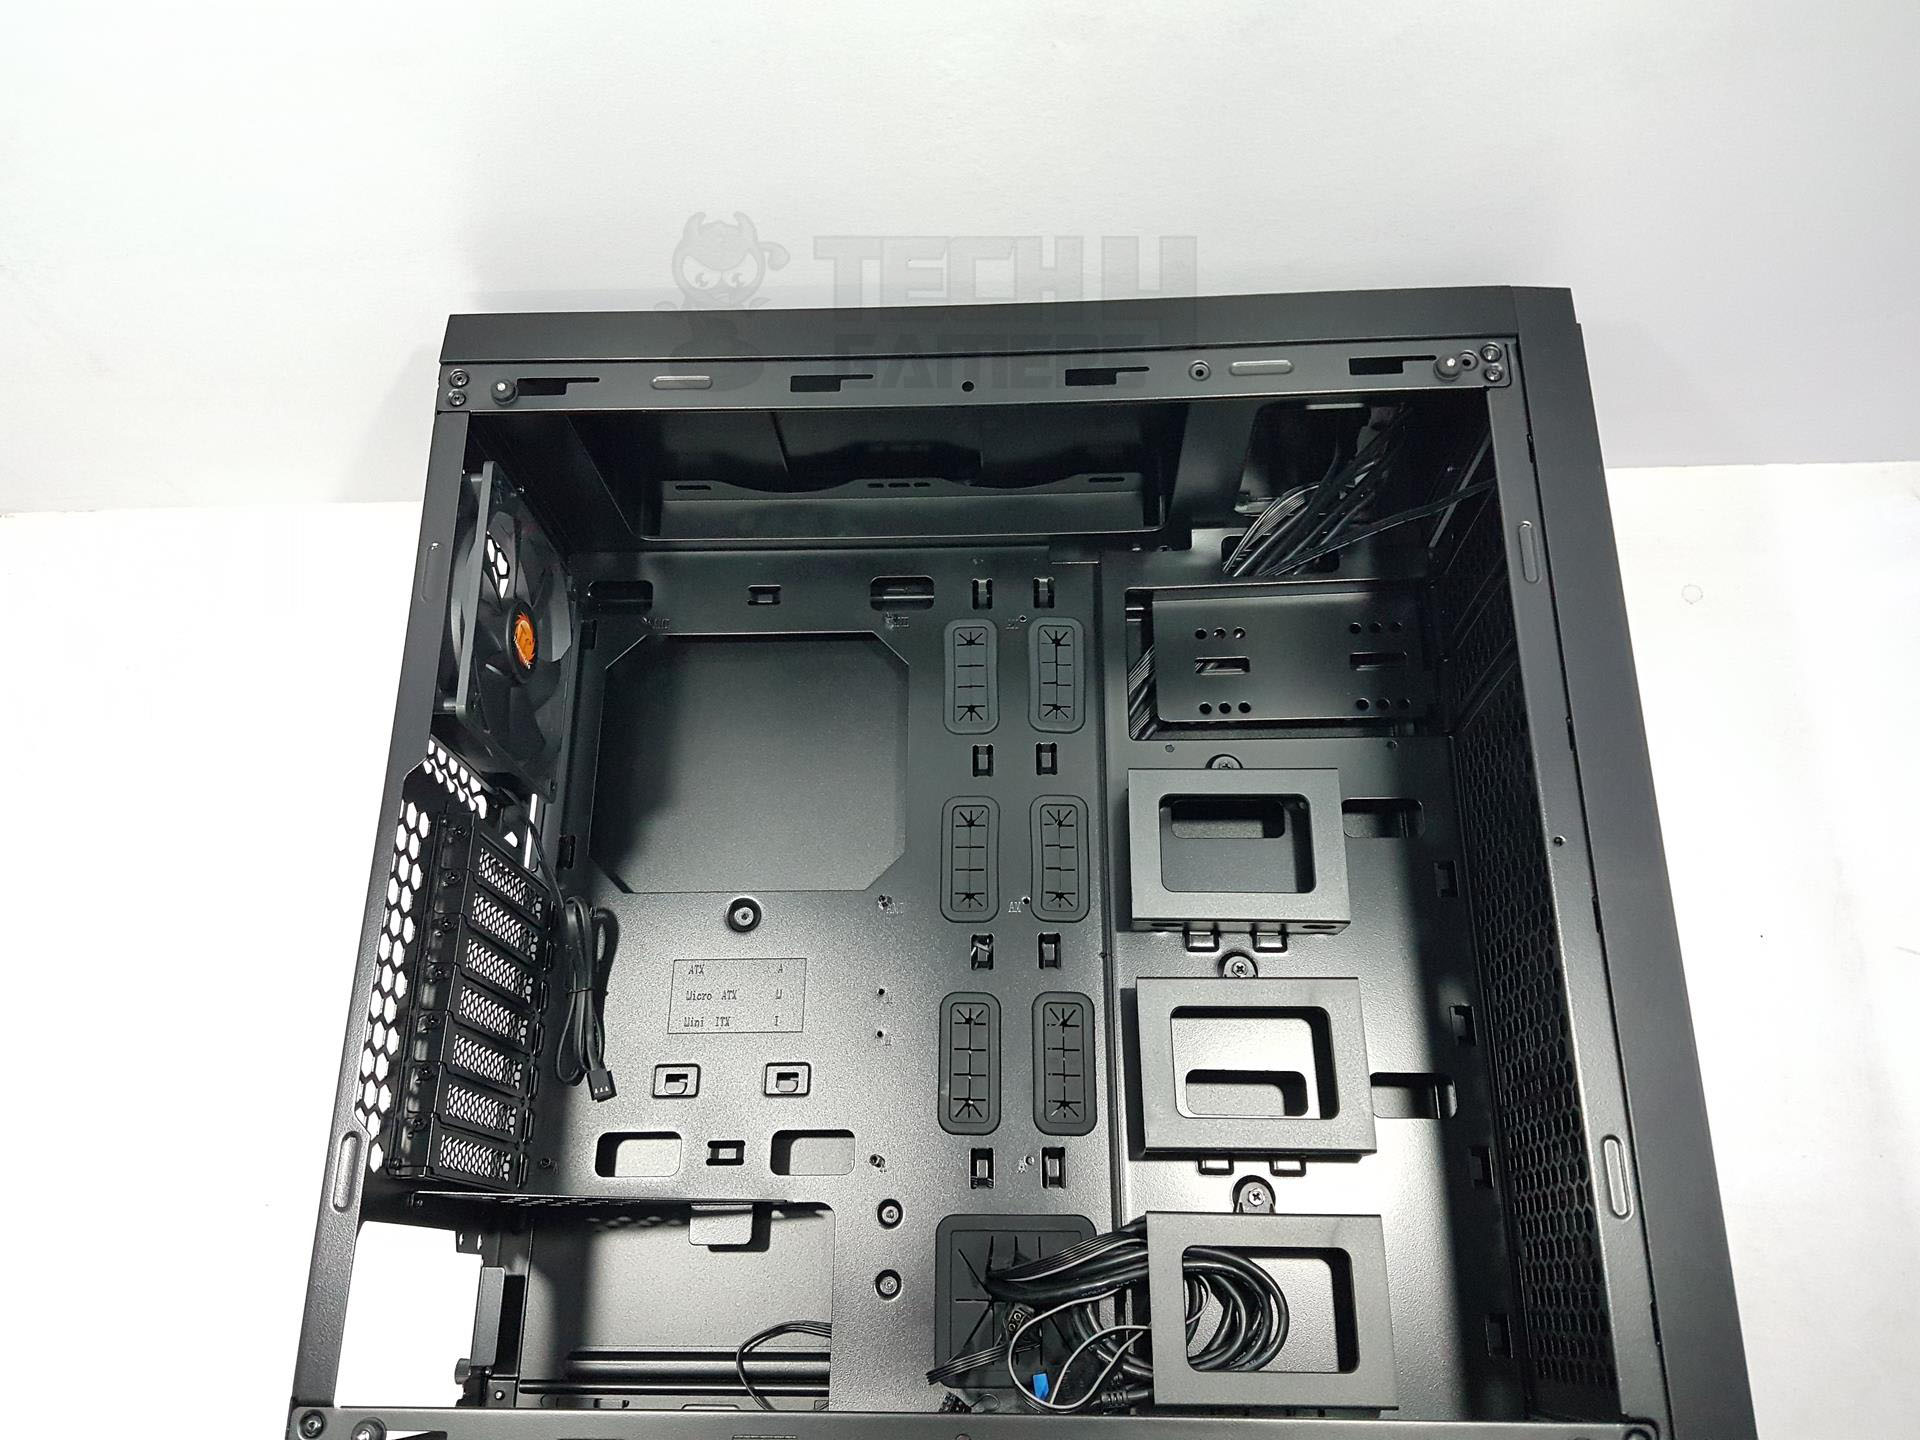
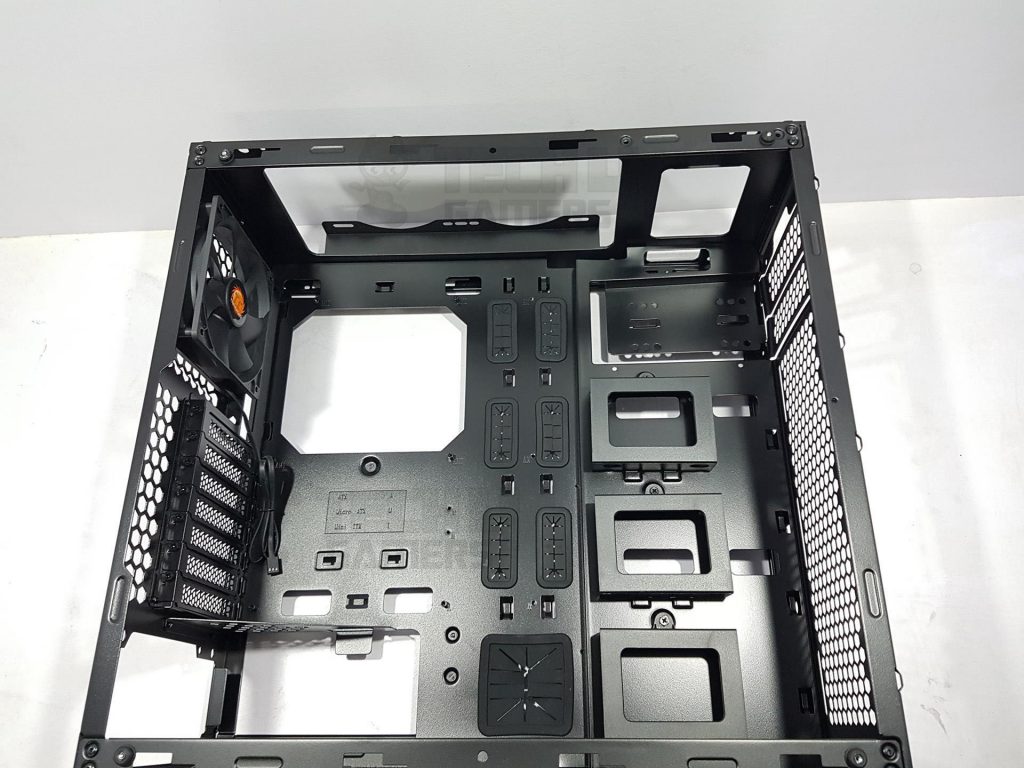
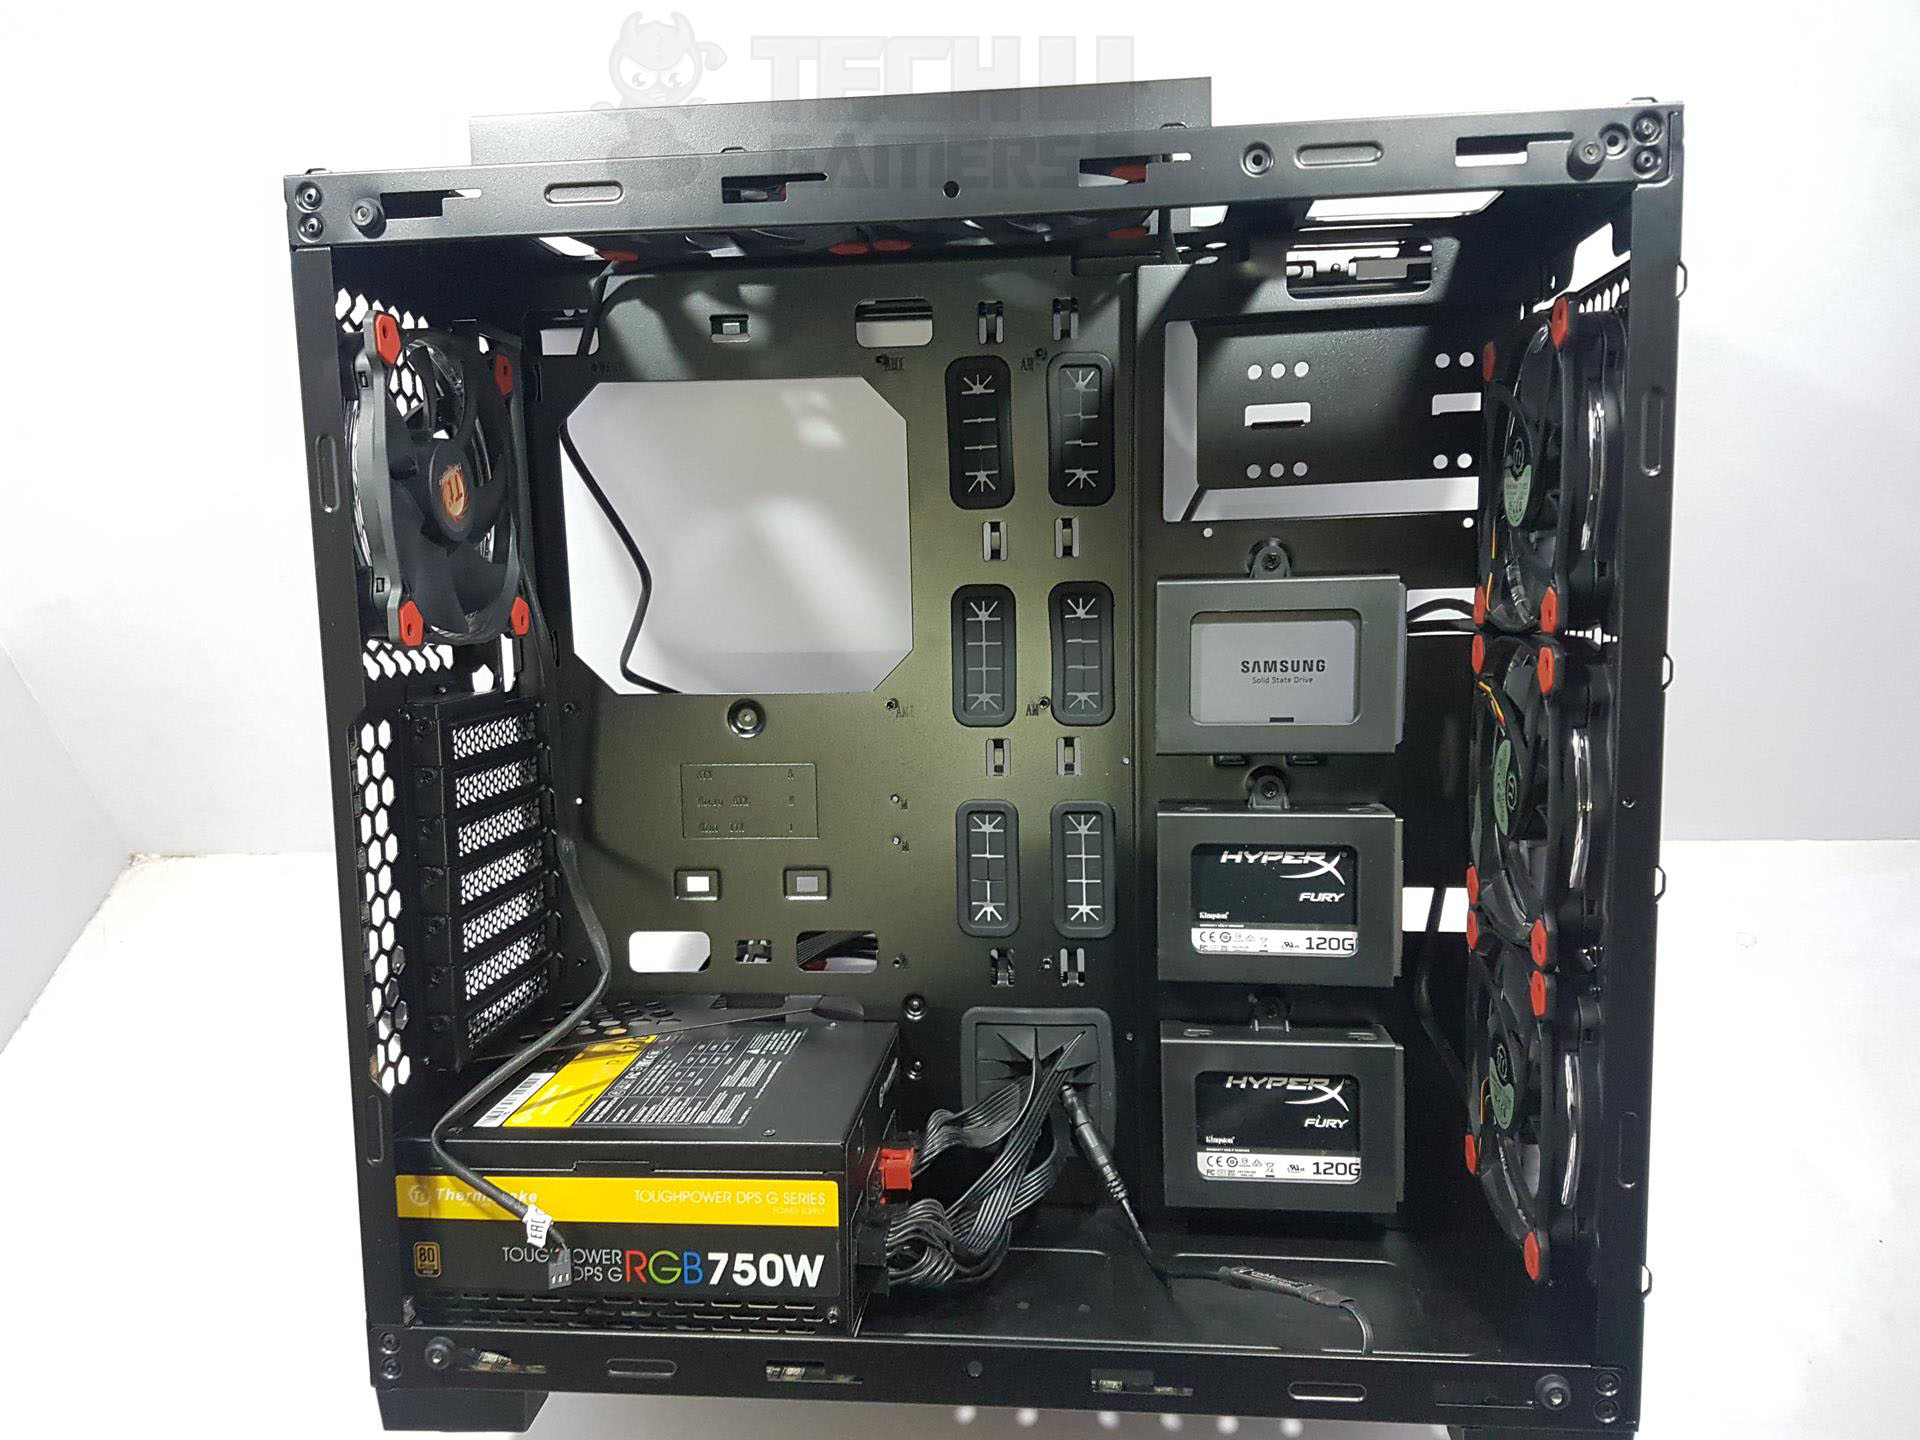
I recently tried out this motherboard tray, and it’s a winner. With large CPU cutouts and top cable-routing cutouts, it effortlessly supports ATX, micro-ATX, and mini-ITX boards. The right side features six cutouts with rubber grommets and a bottom cutout for PSU cables. It’s practical and well-designed – a definite thumbs-up
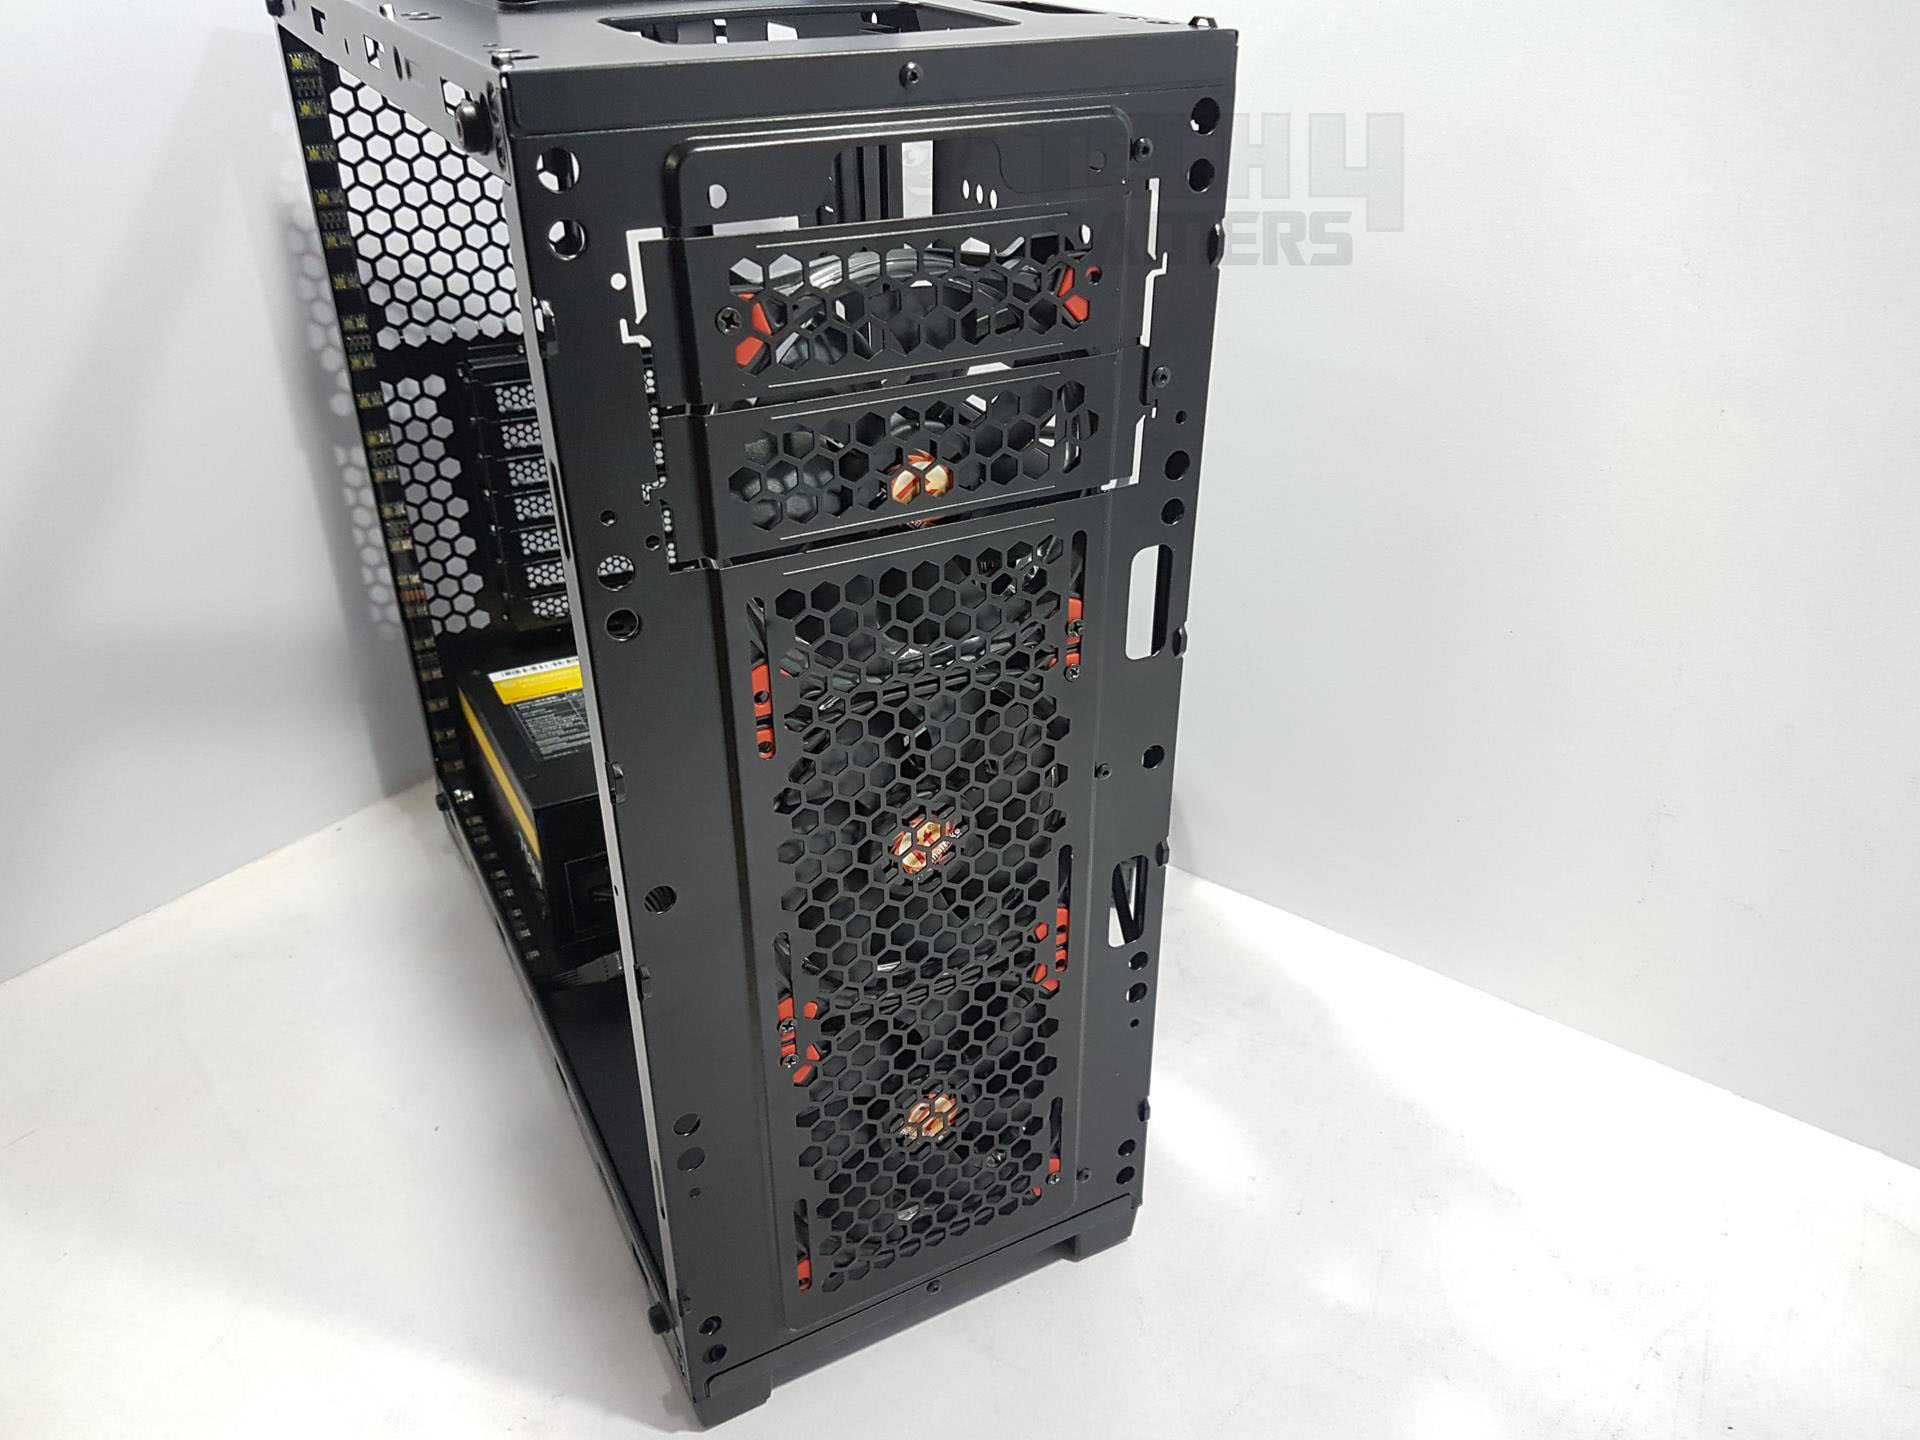
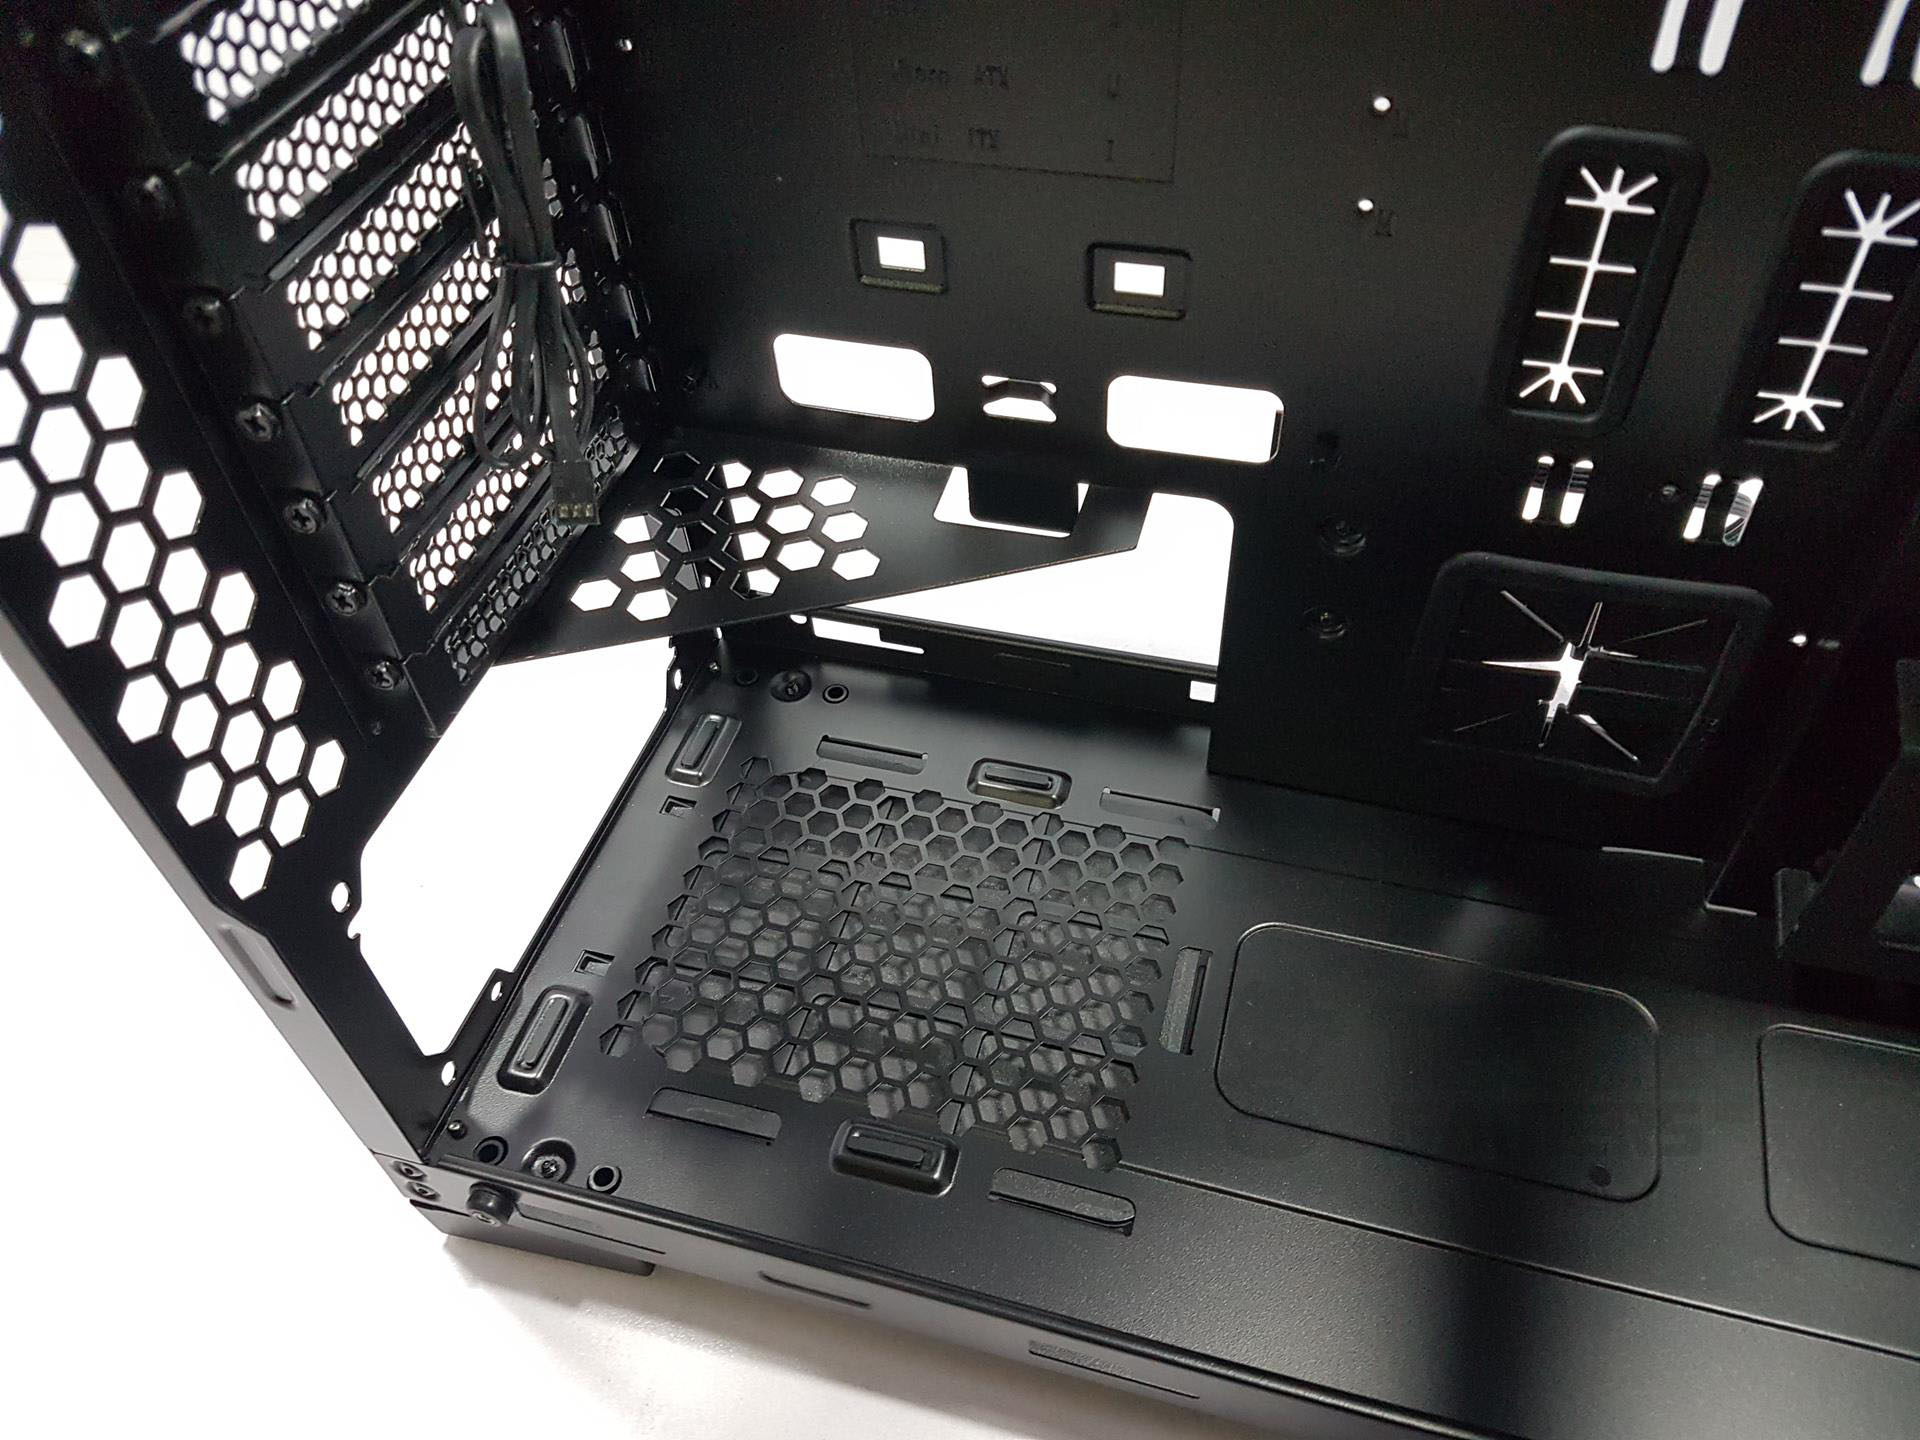
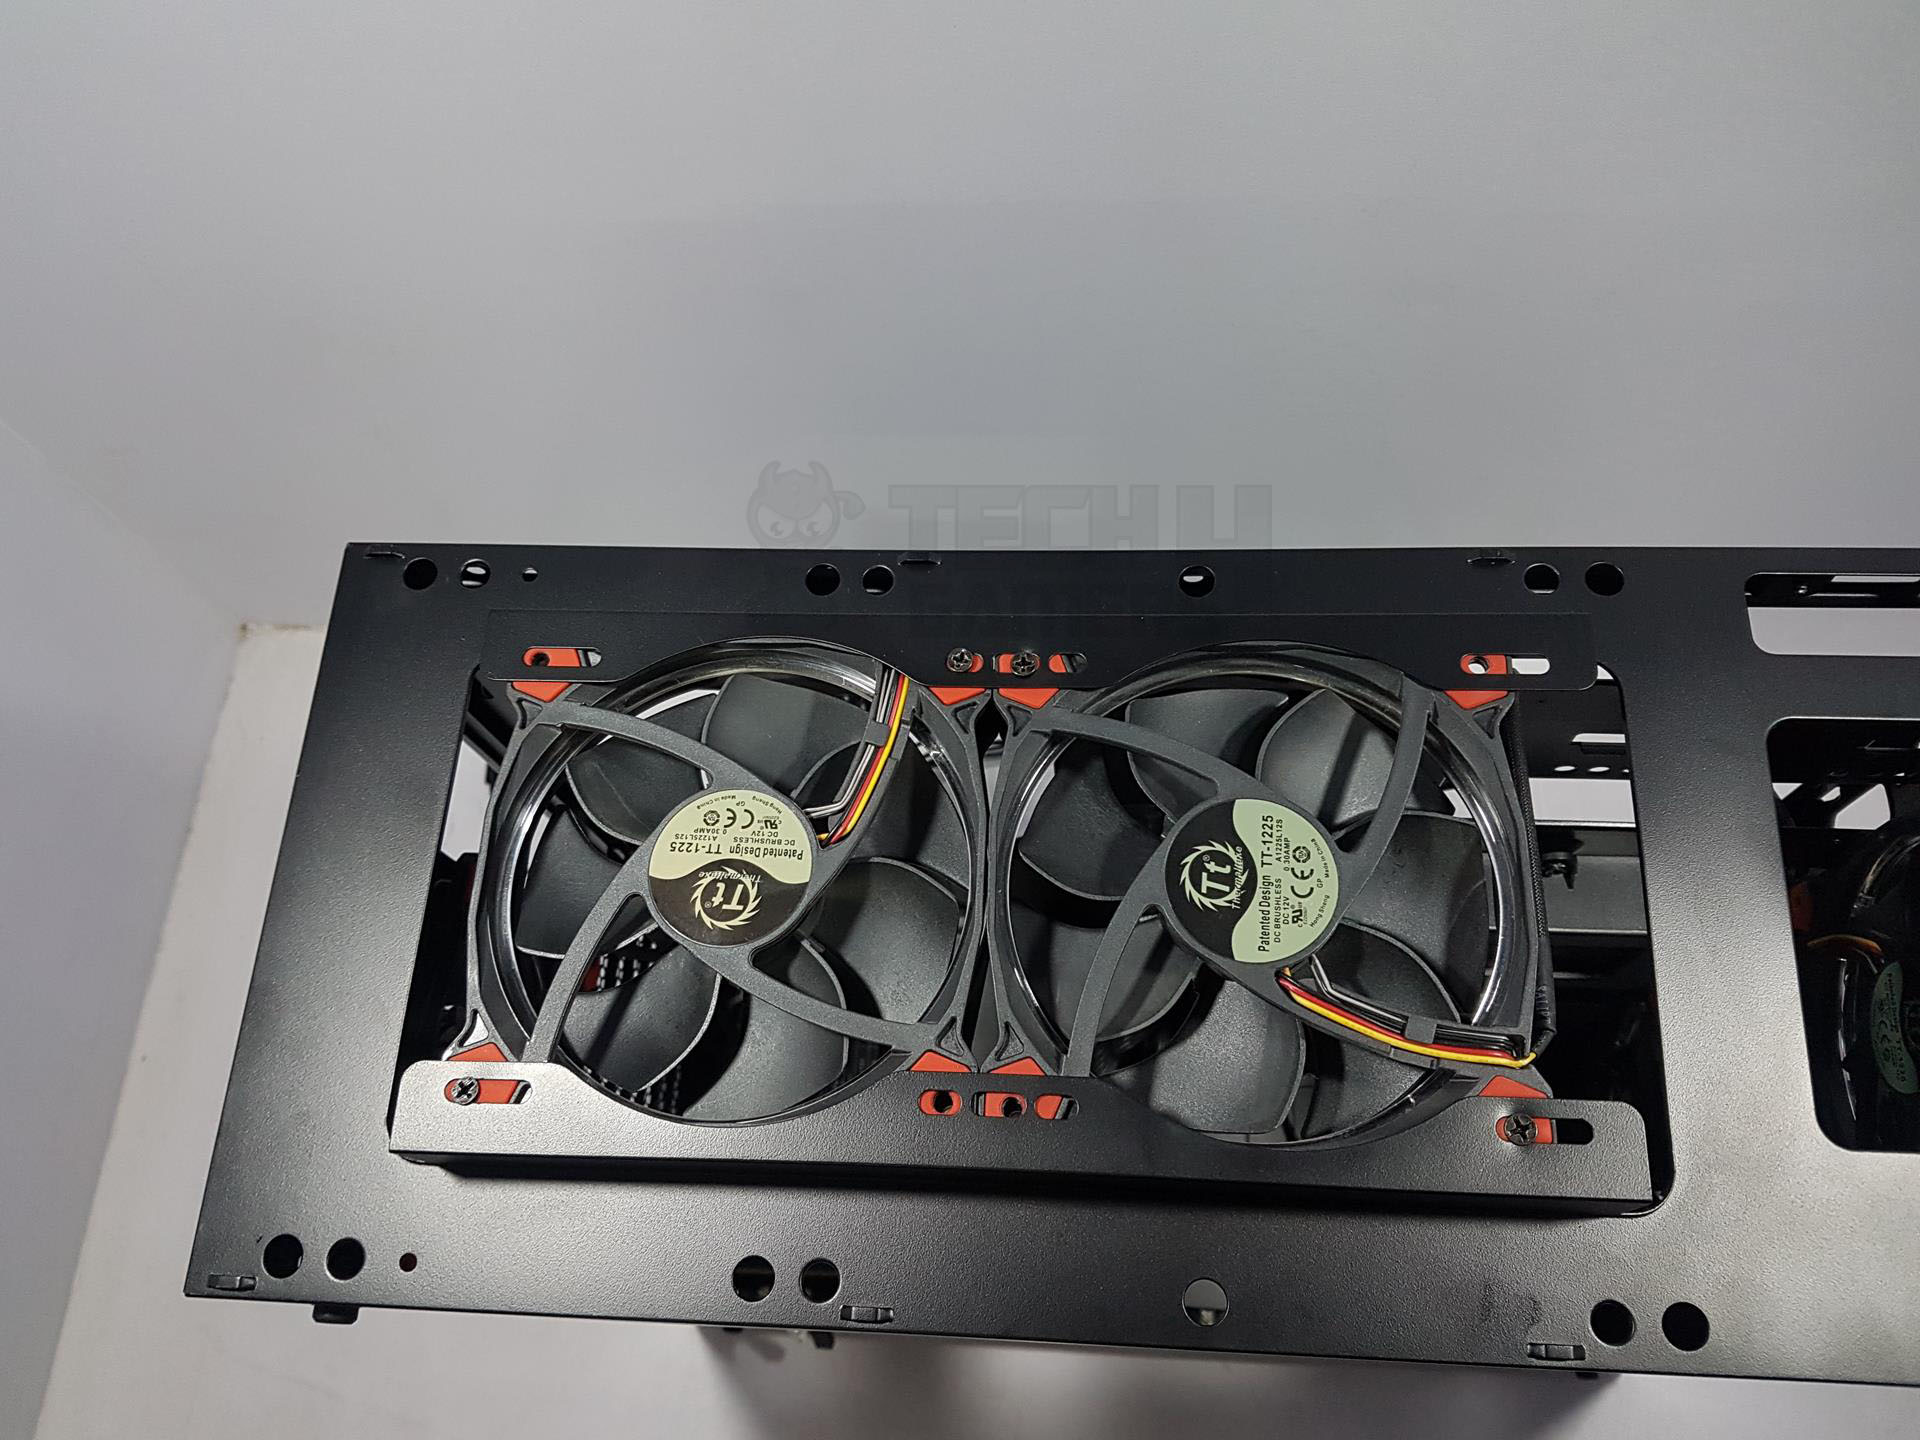
The top left features a pre-installed 120mm fan; additional fans would be ideal. The chassis includes 7 PCIe slot covers with M3 screws. Under the last slot cover, a vented annular shroud with cable cutout exists. Full-length PSU shroud and rubber pads on the bottom enhance the unit.
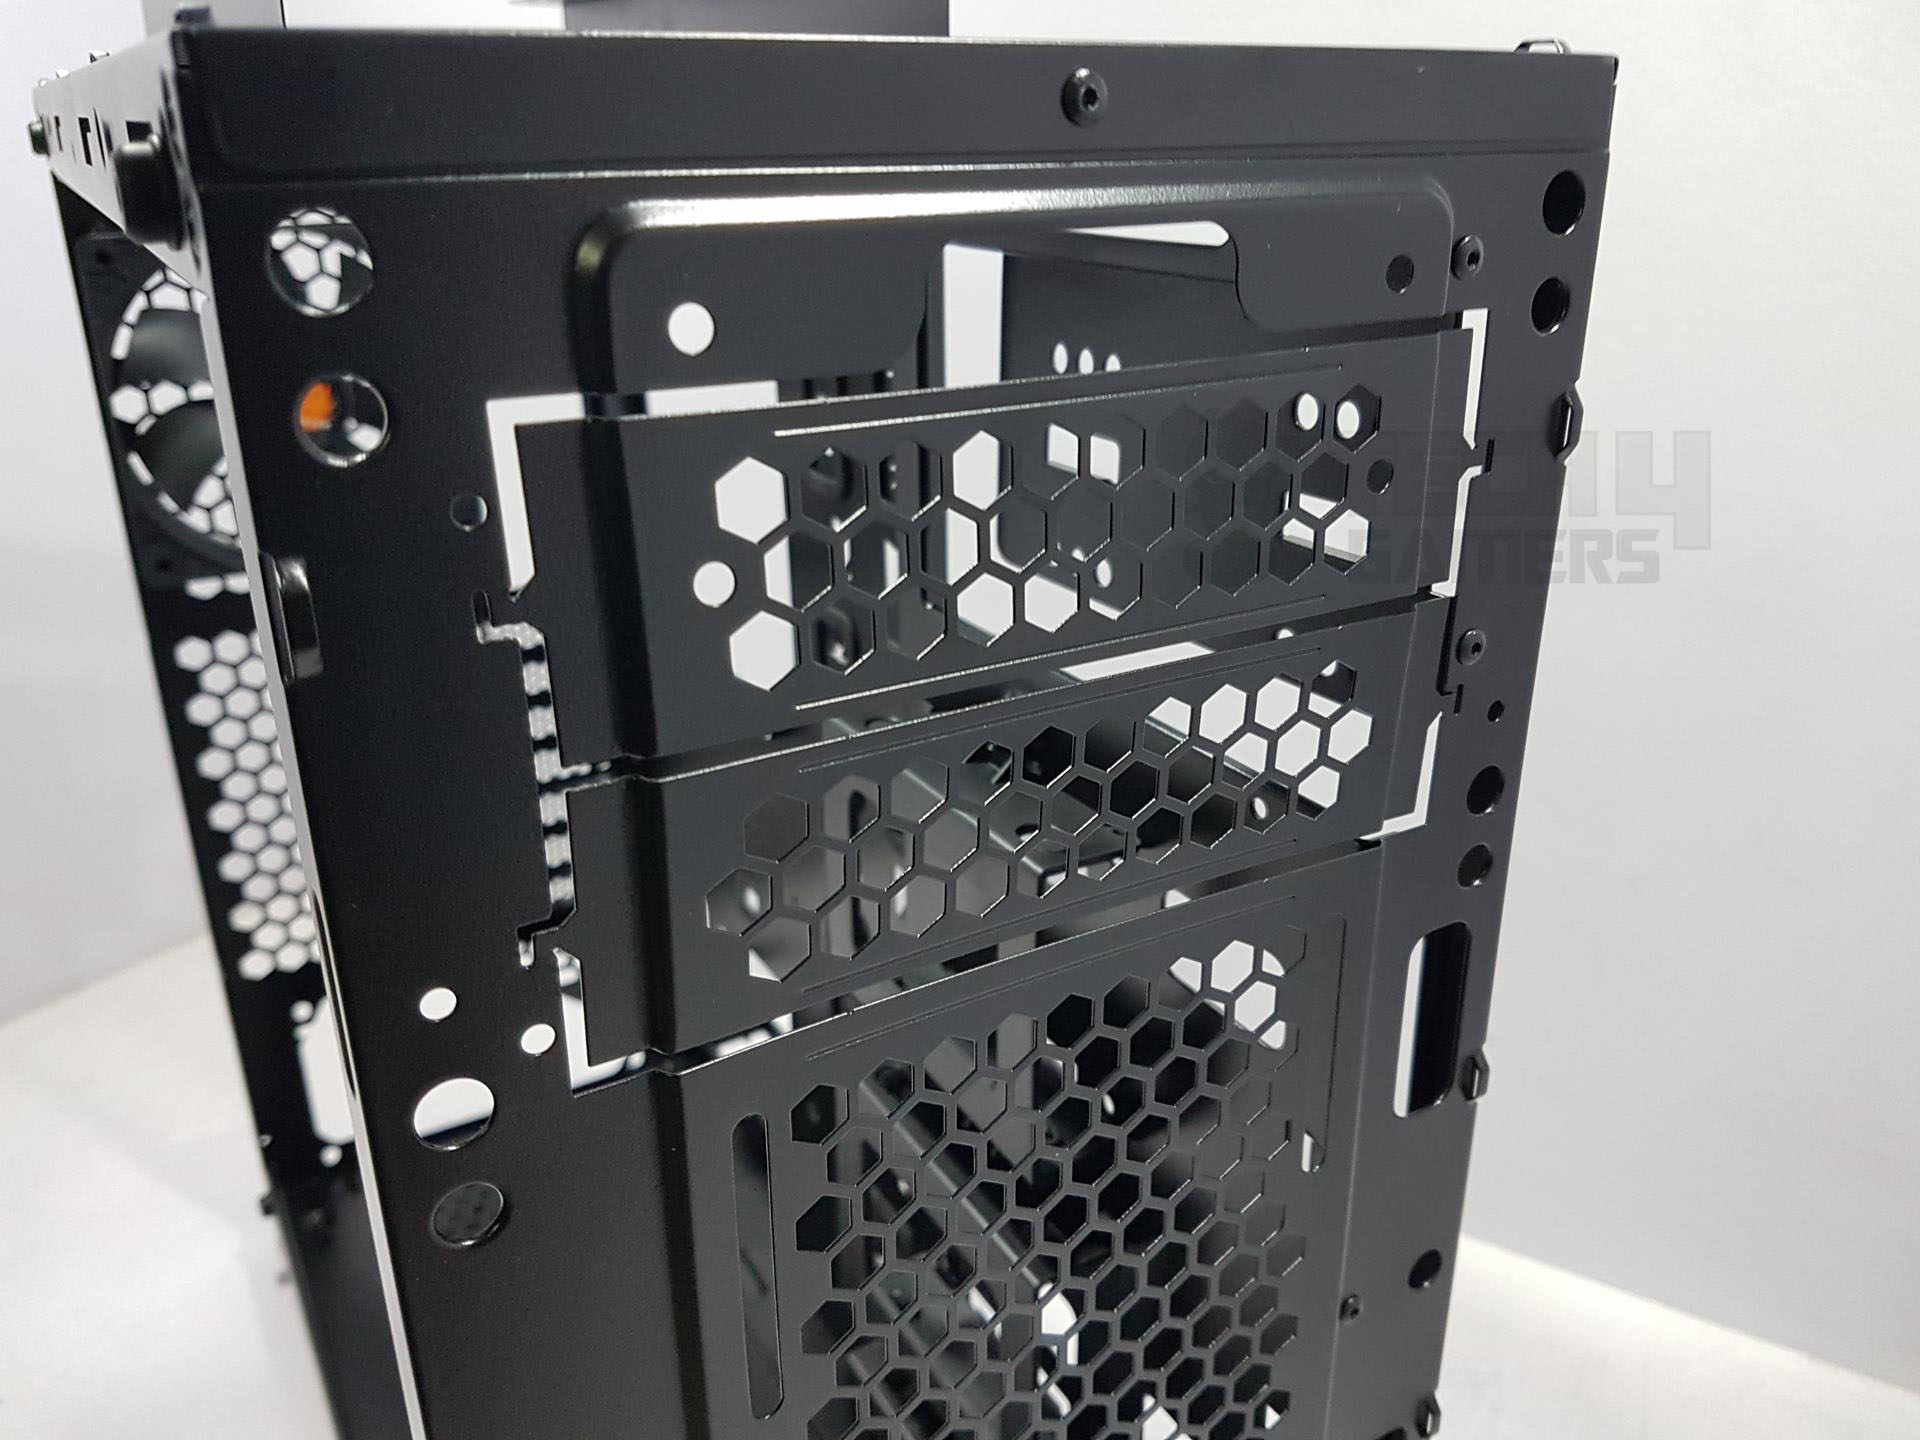
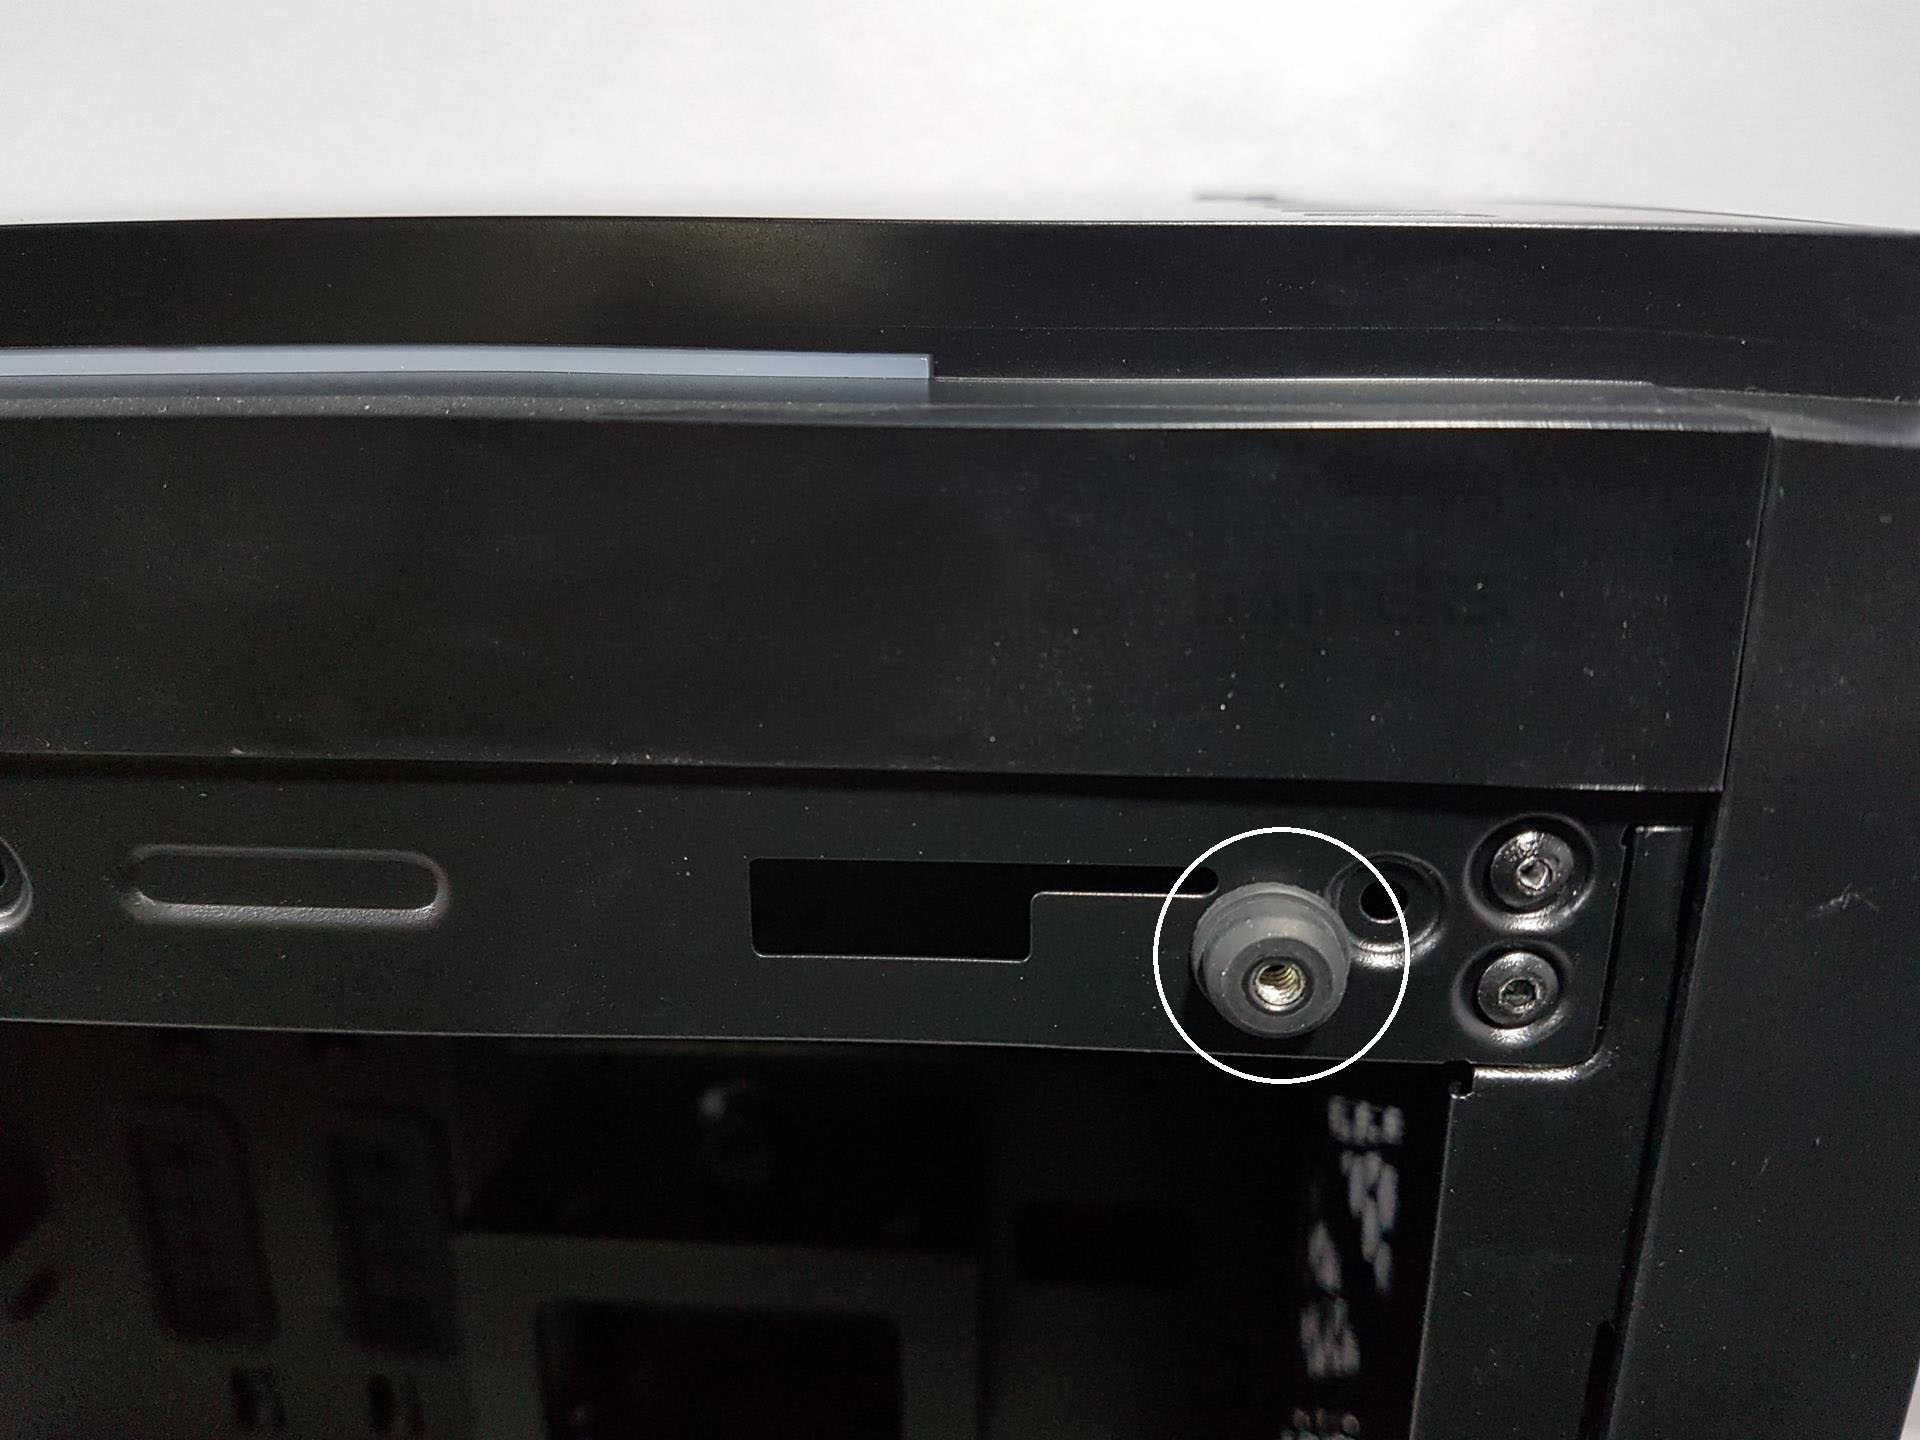
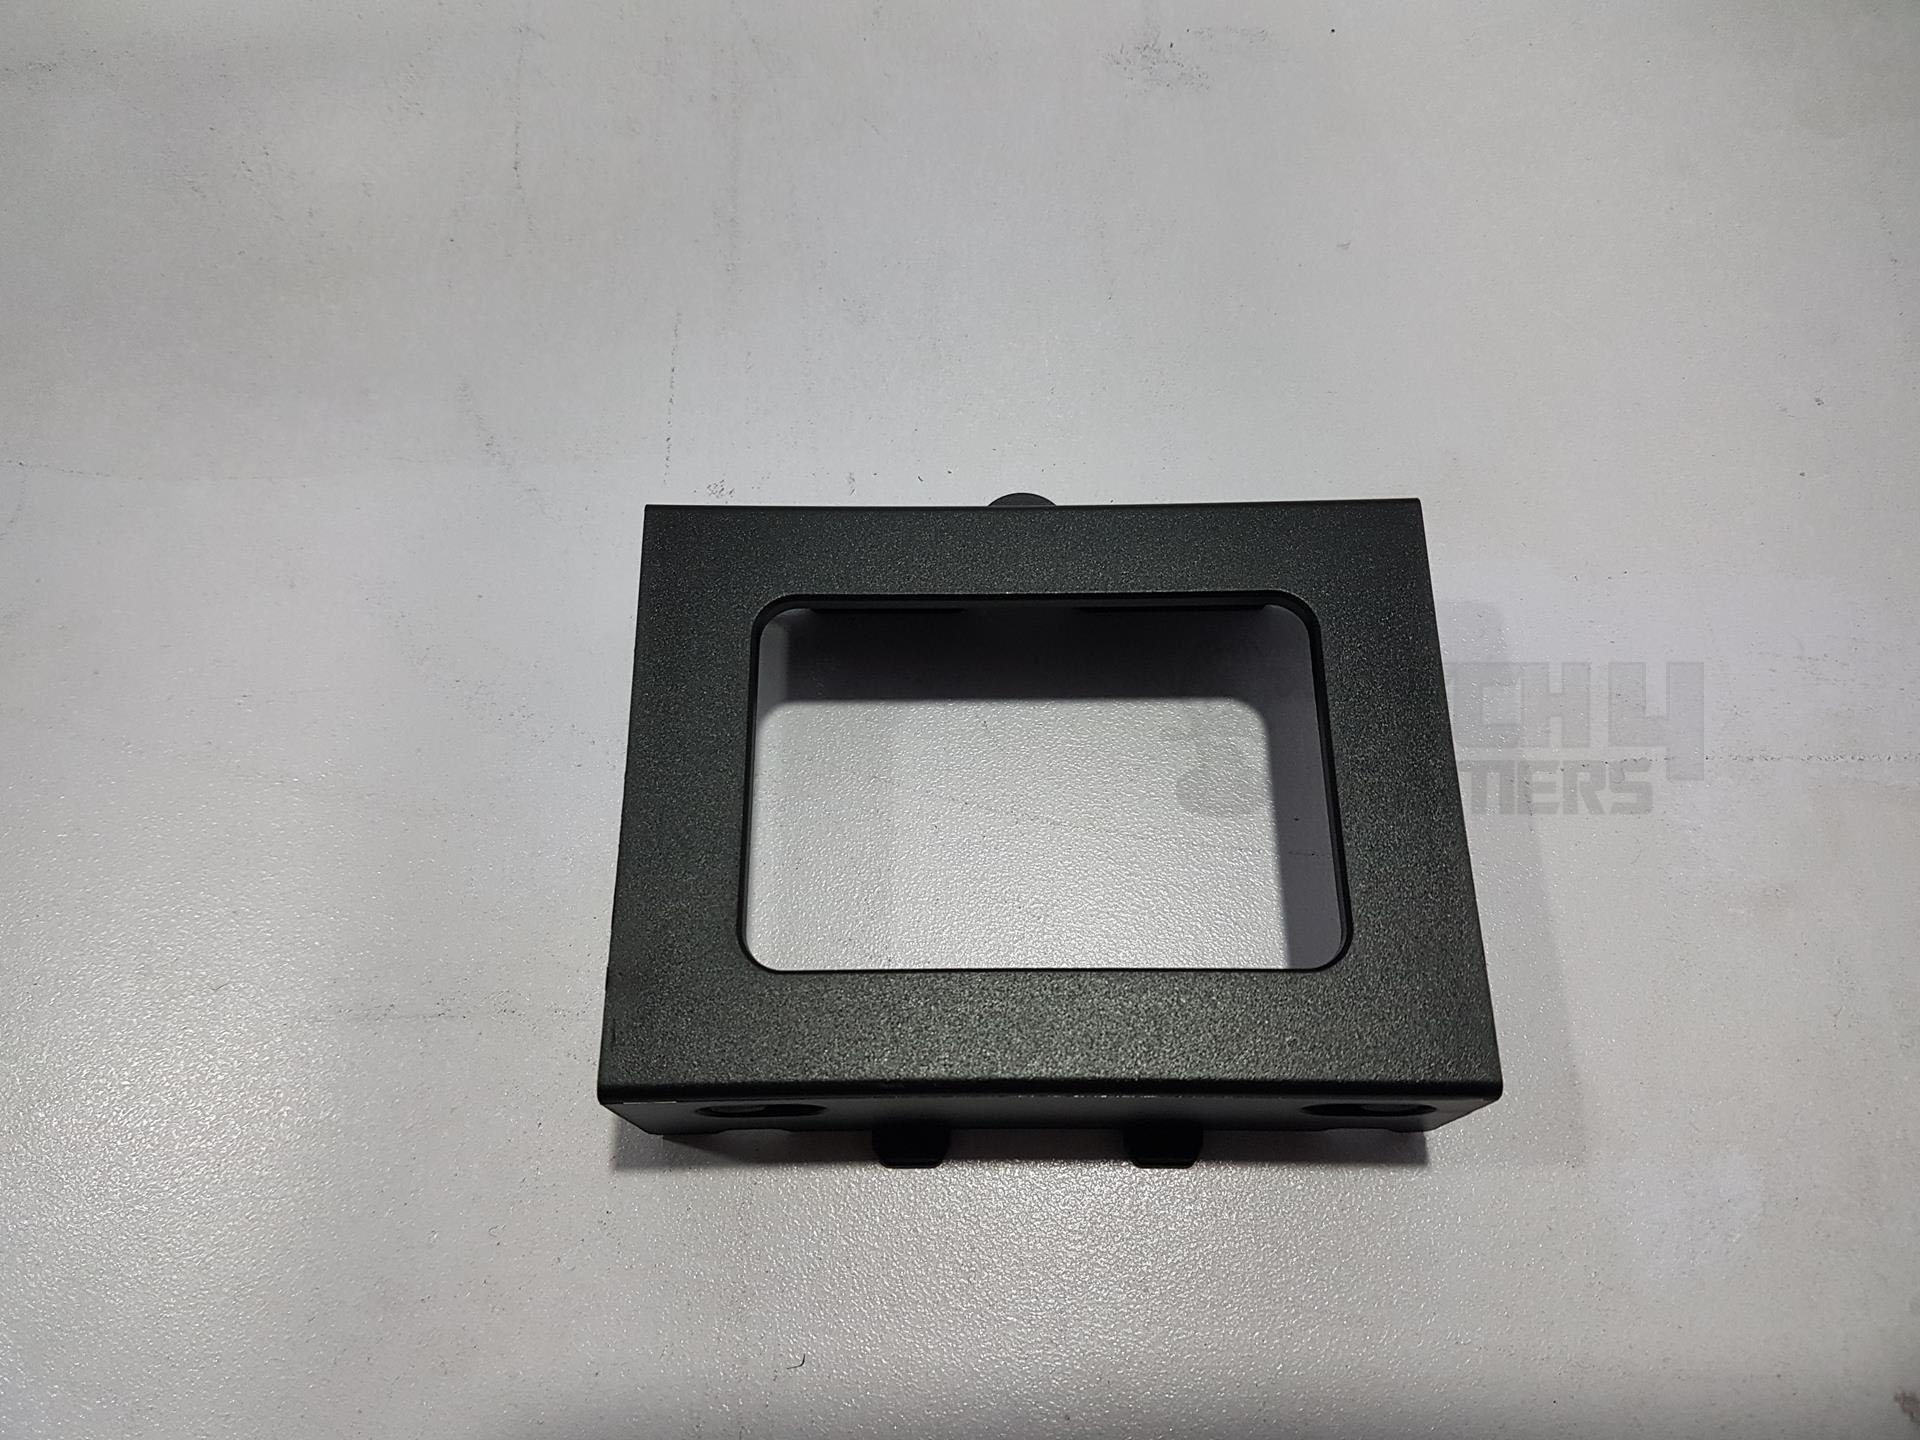
The PSU mount area has a large left cutout and two small ones above the shroud. The top right has a 5.25″ drive mounting plate; users can cut the chassis frame for it, but this requires leaving the front panel off.
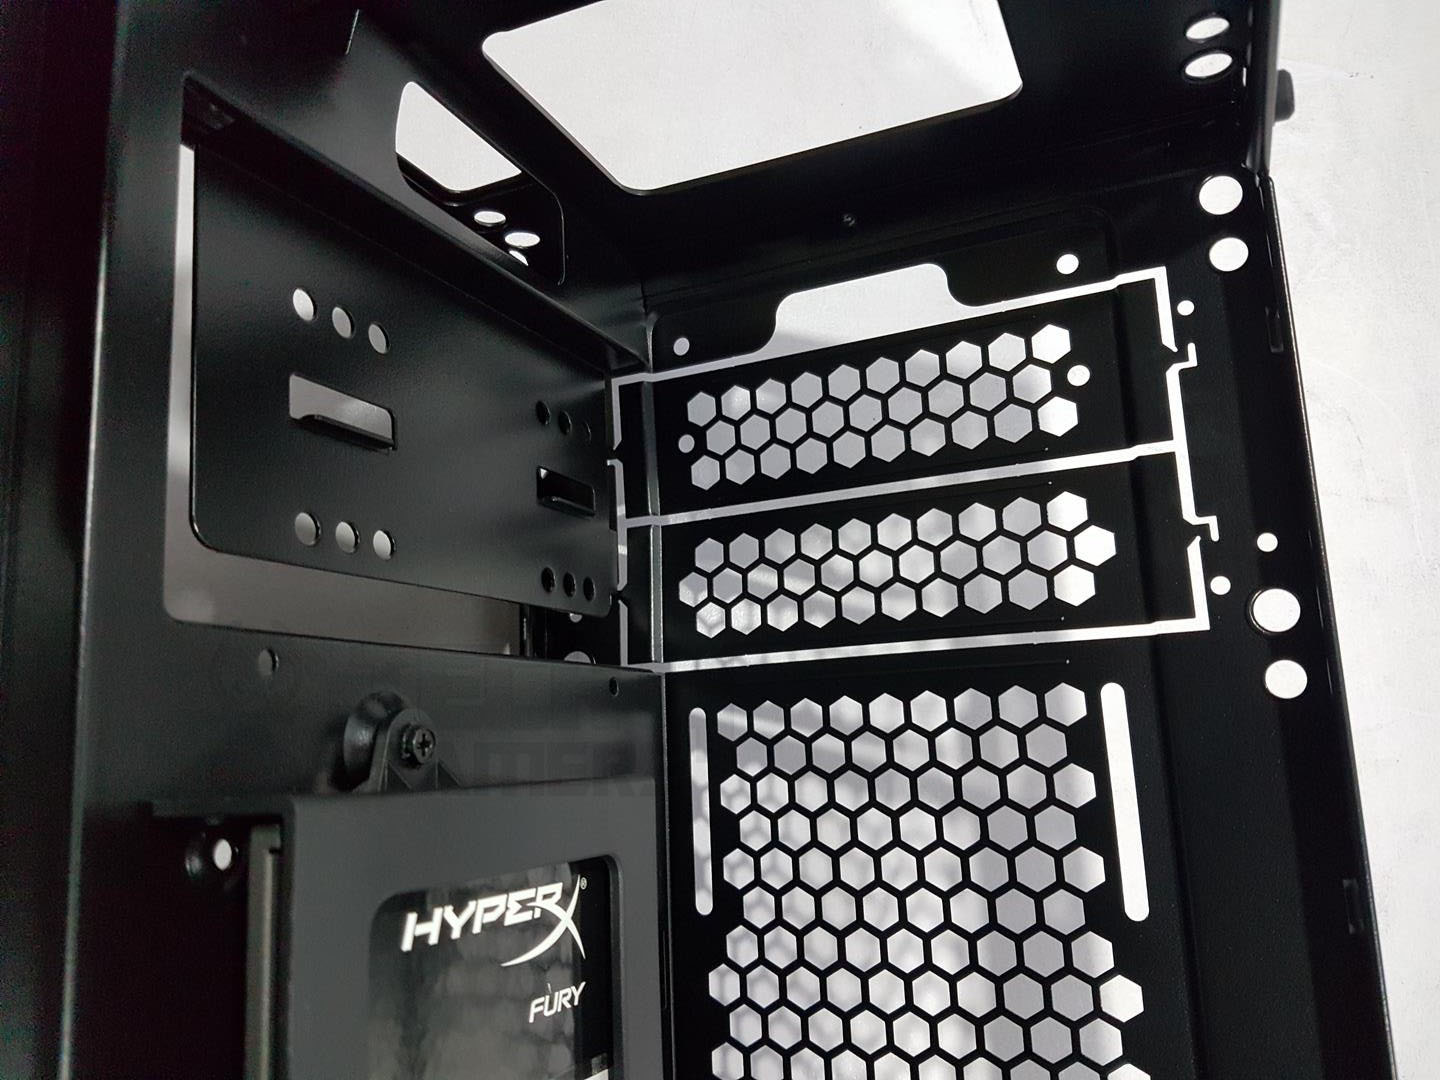
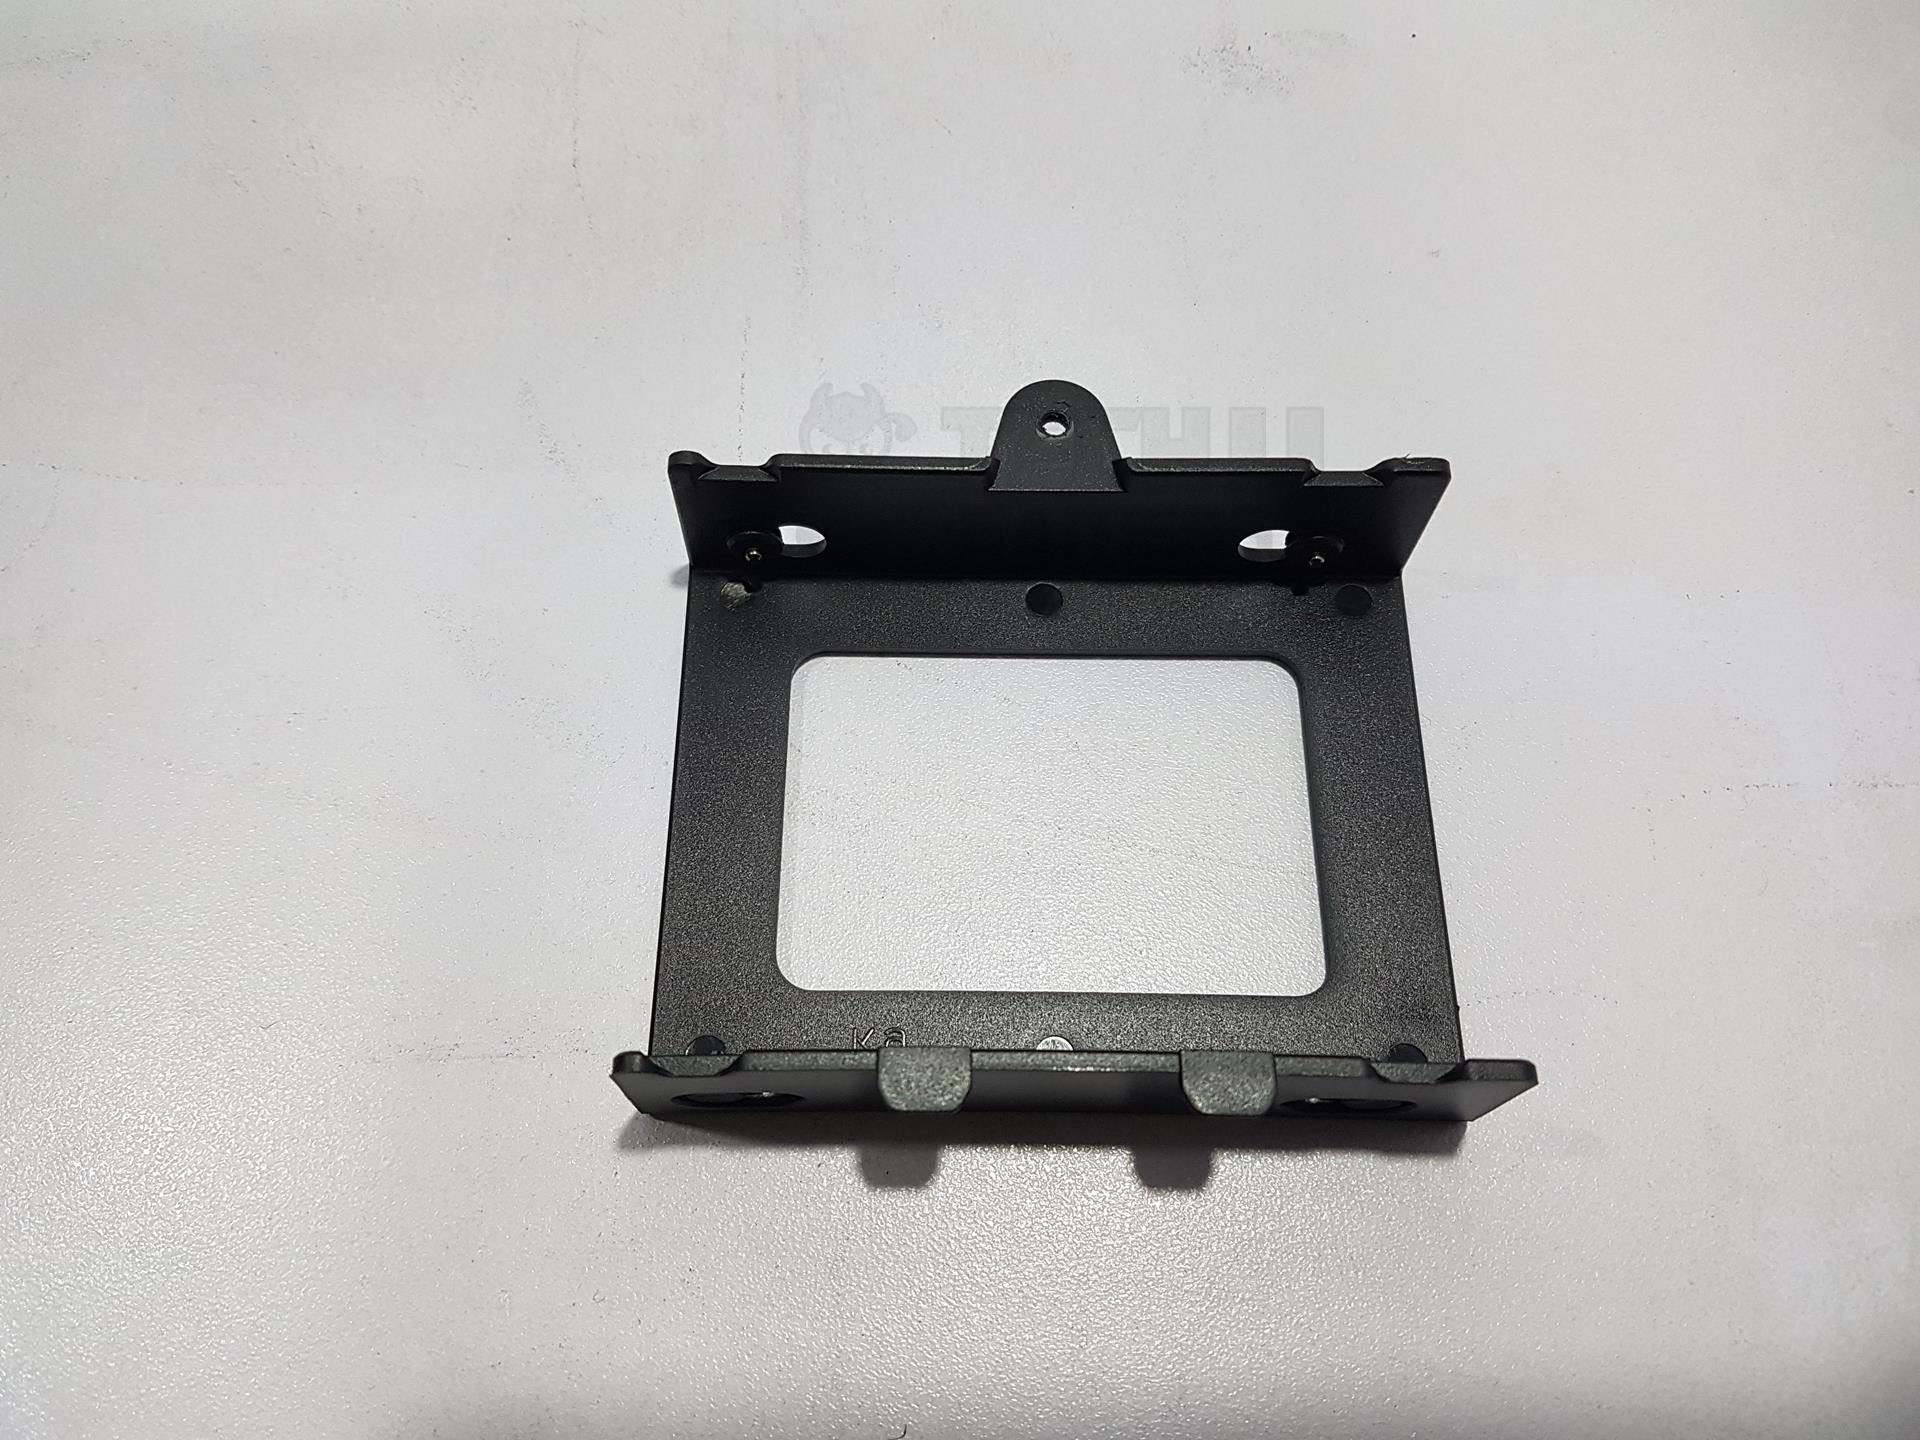
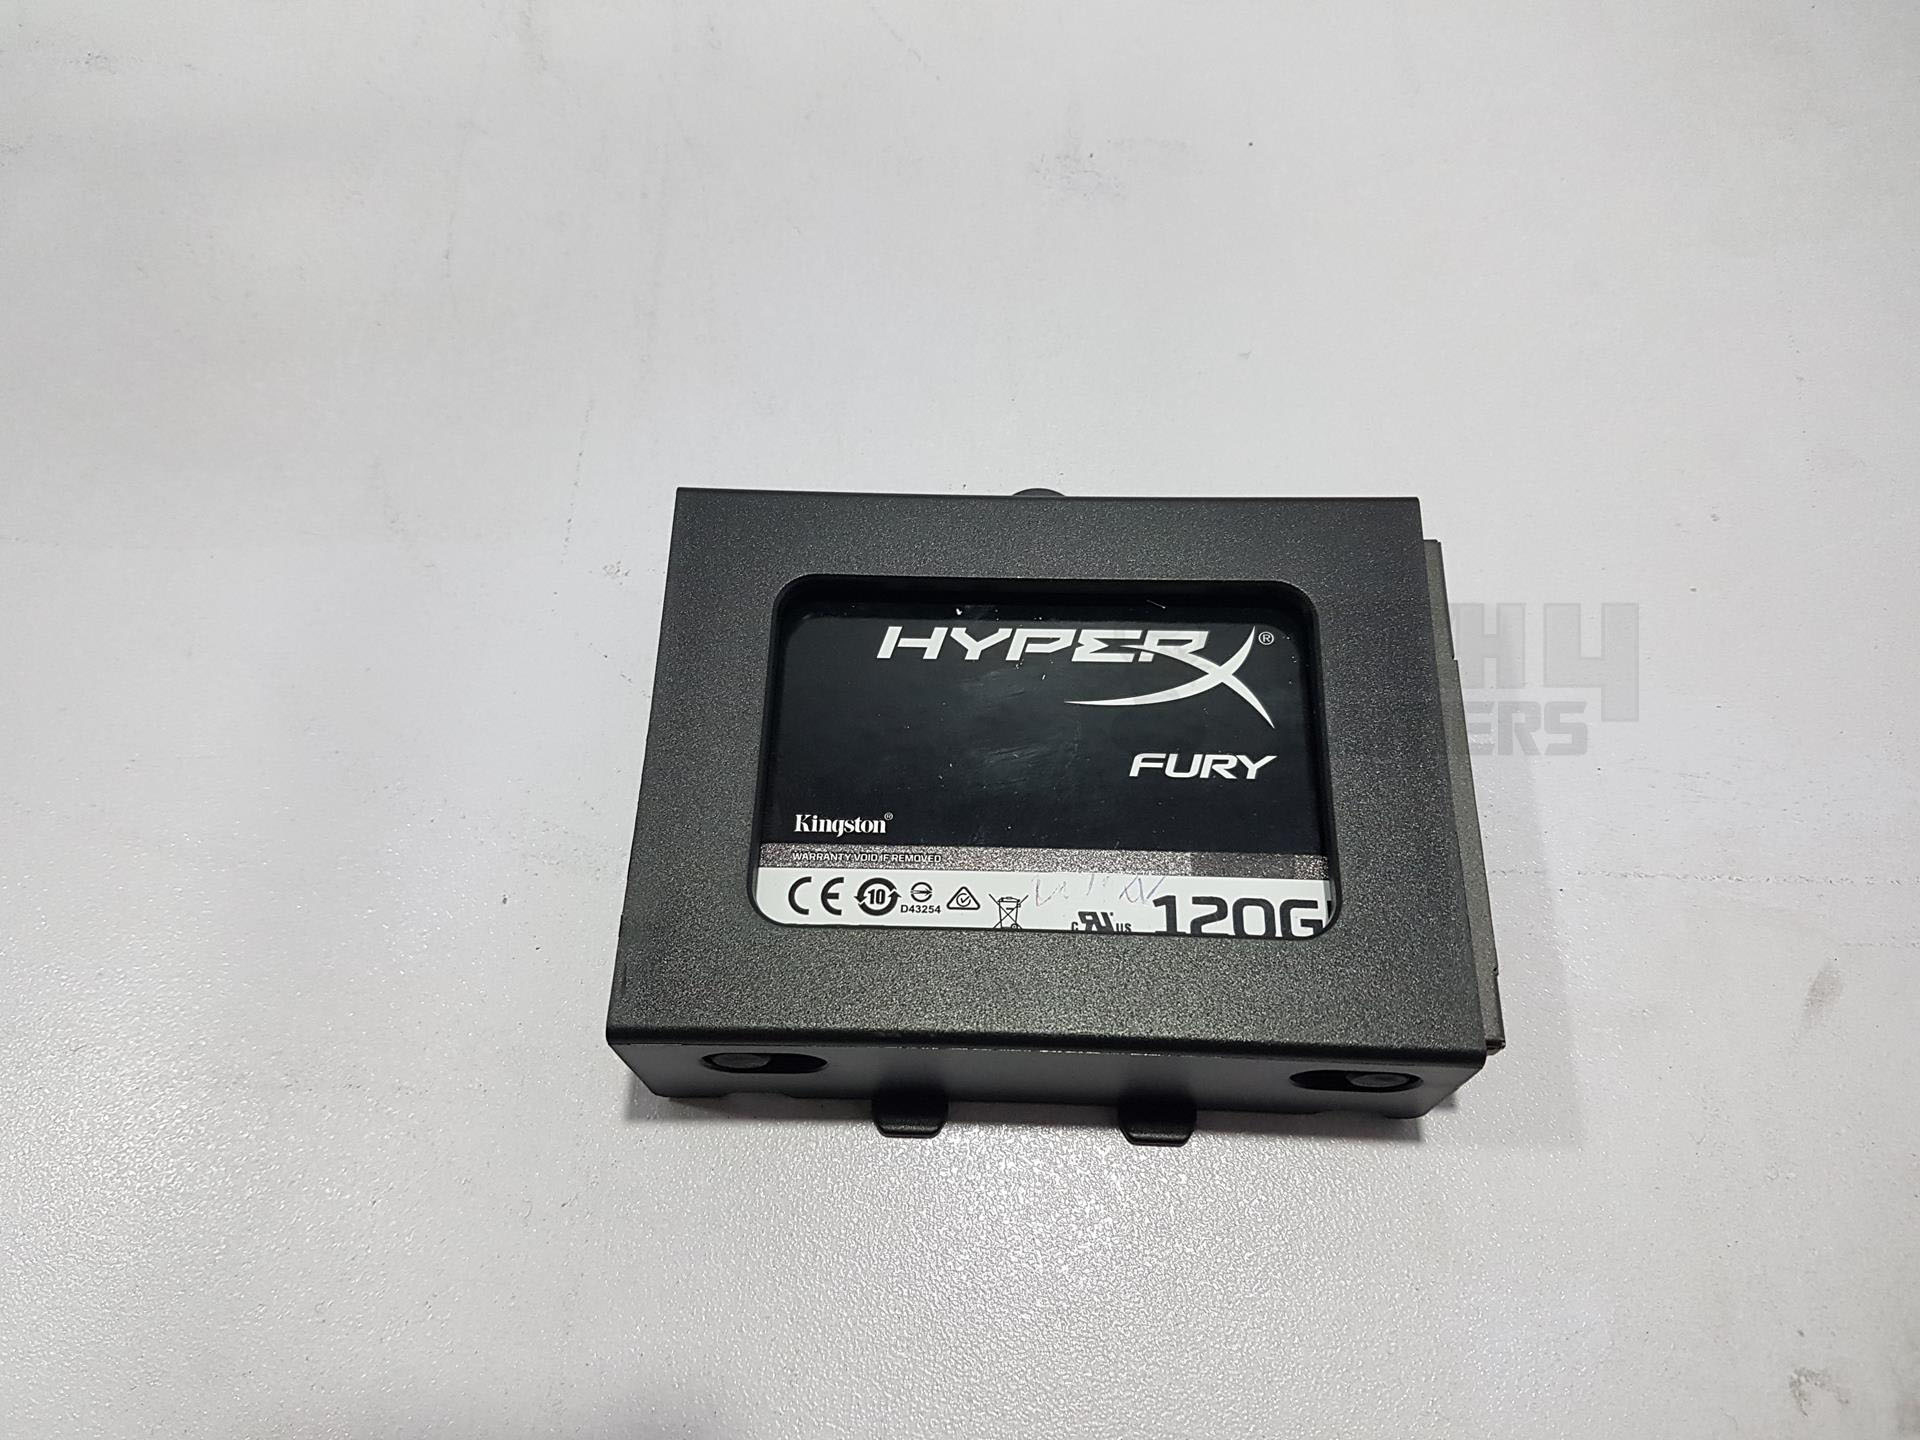
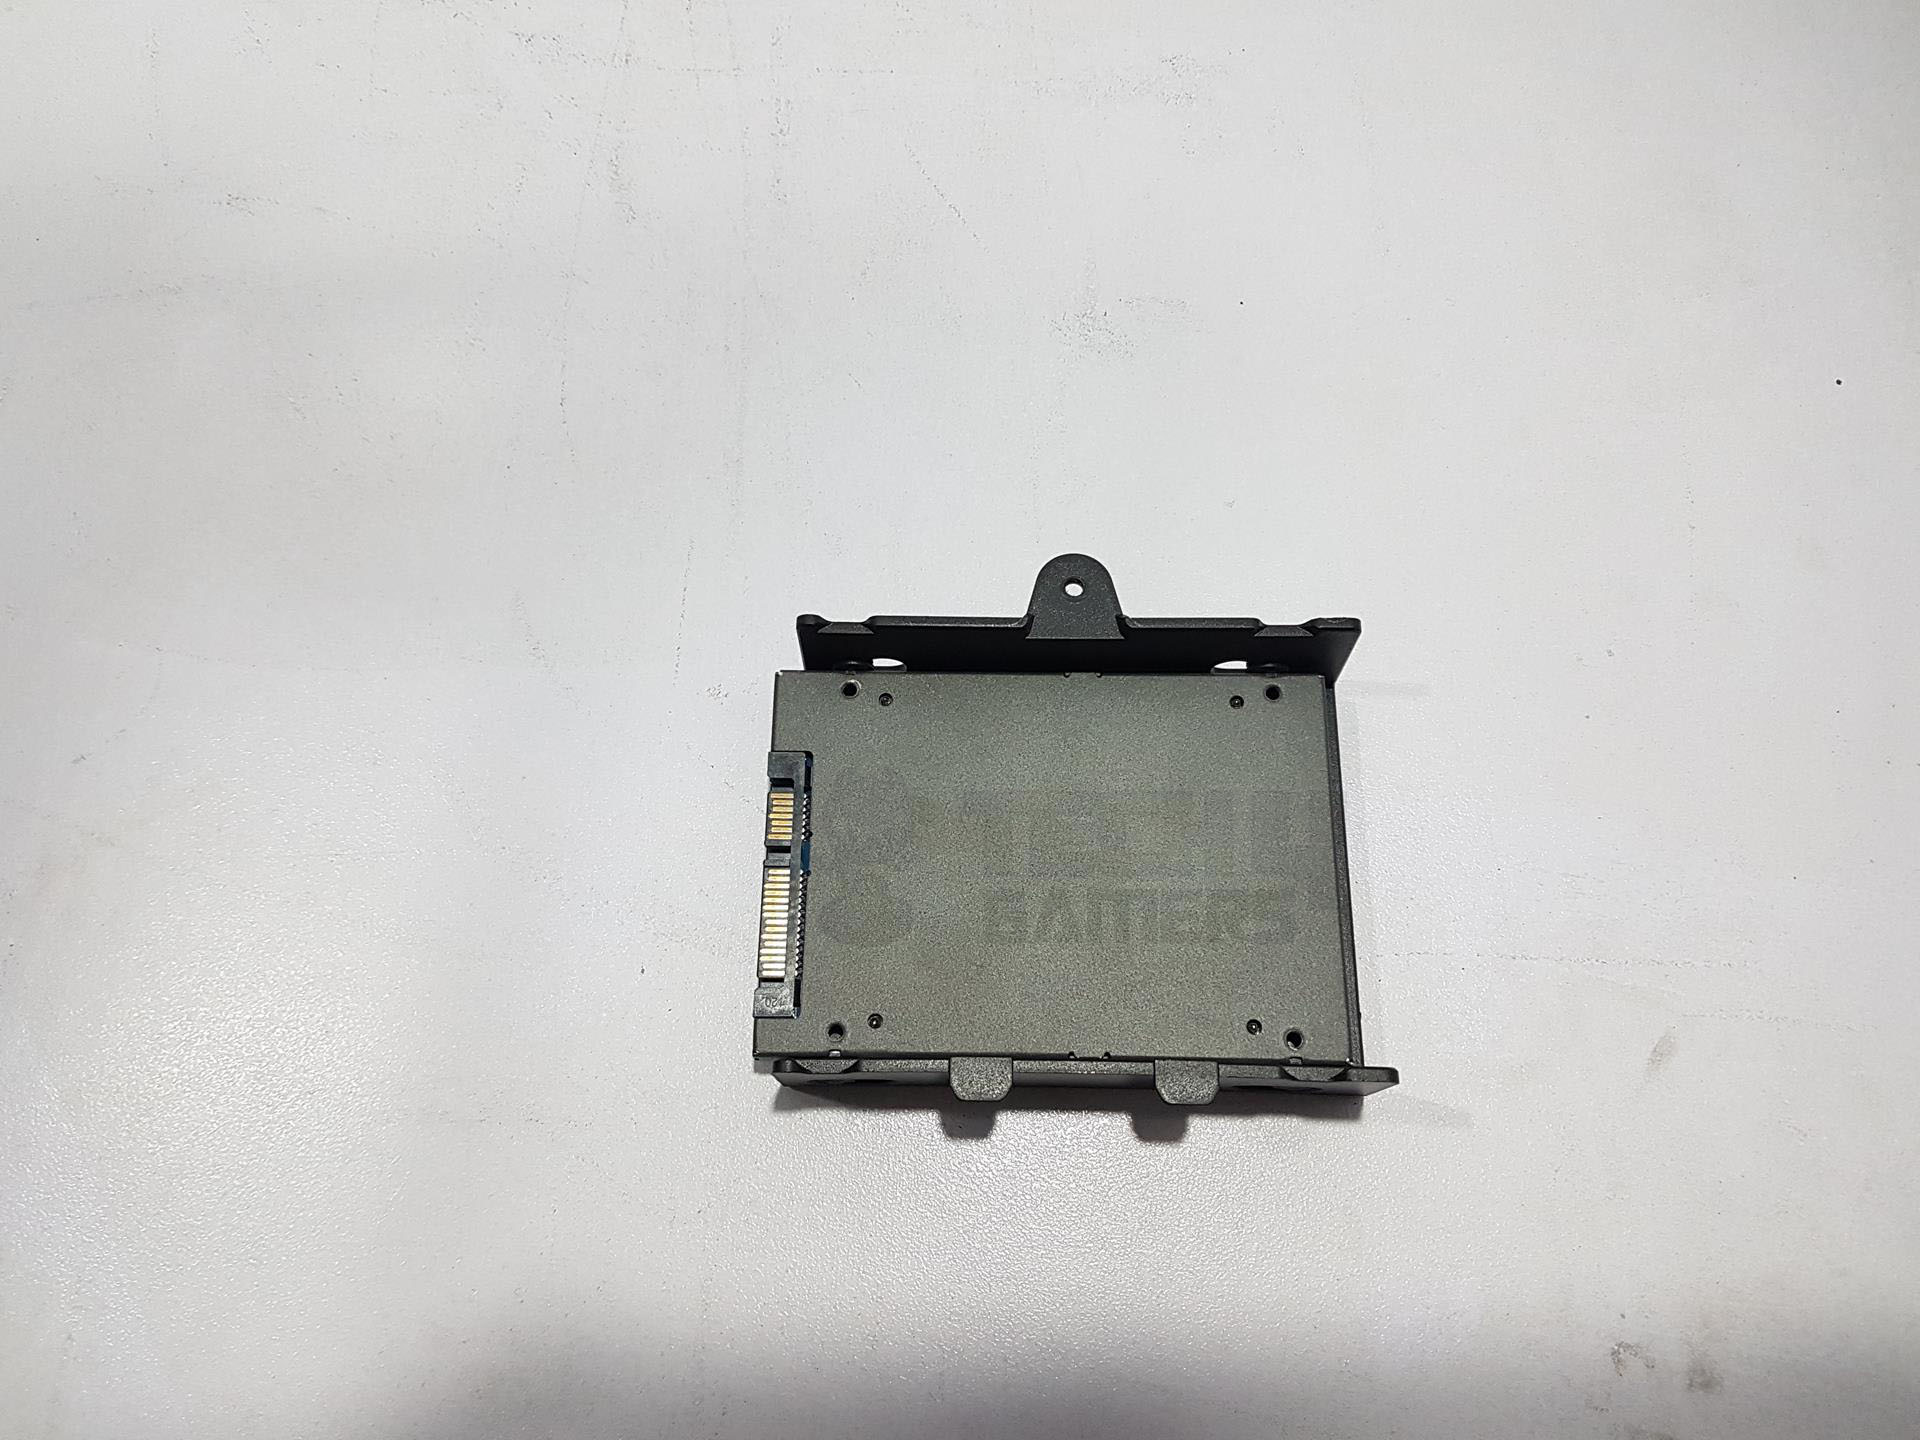
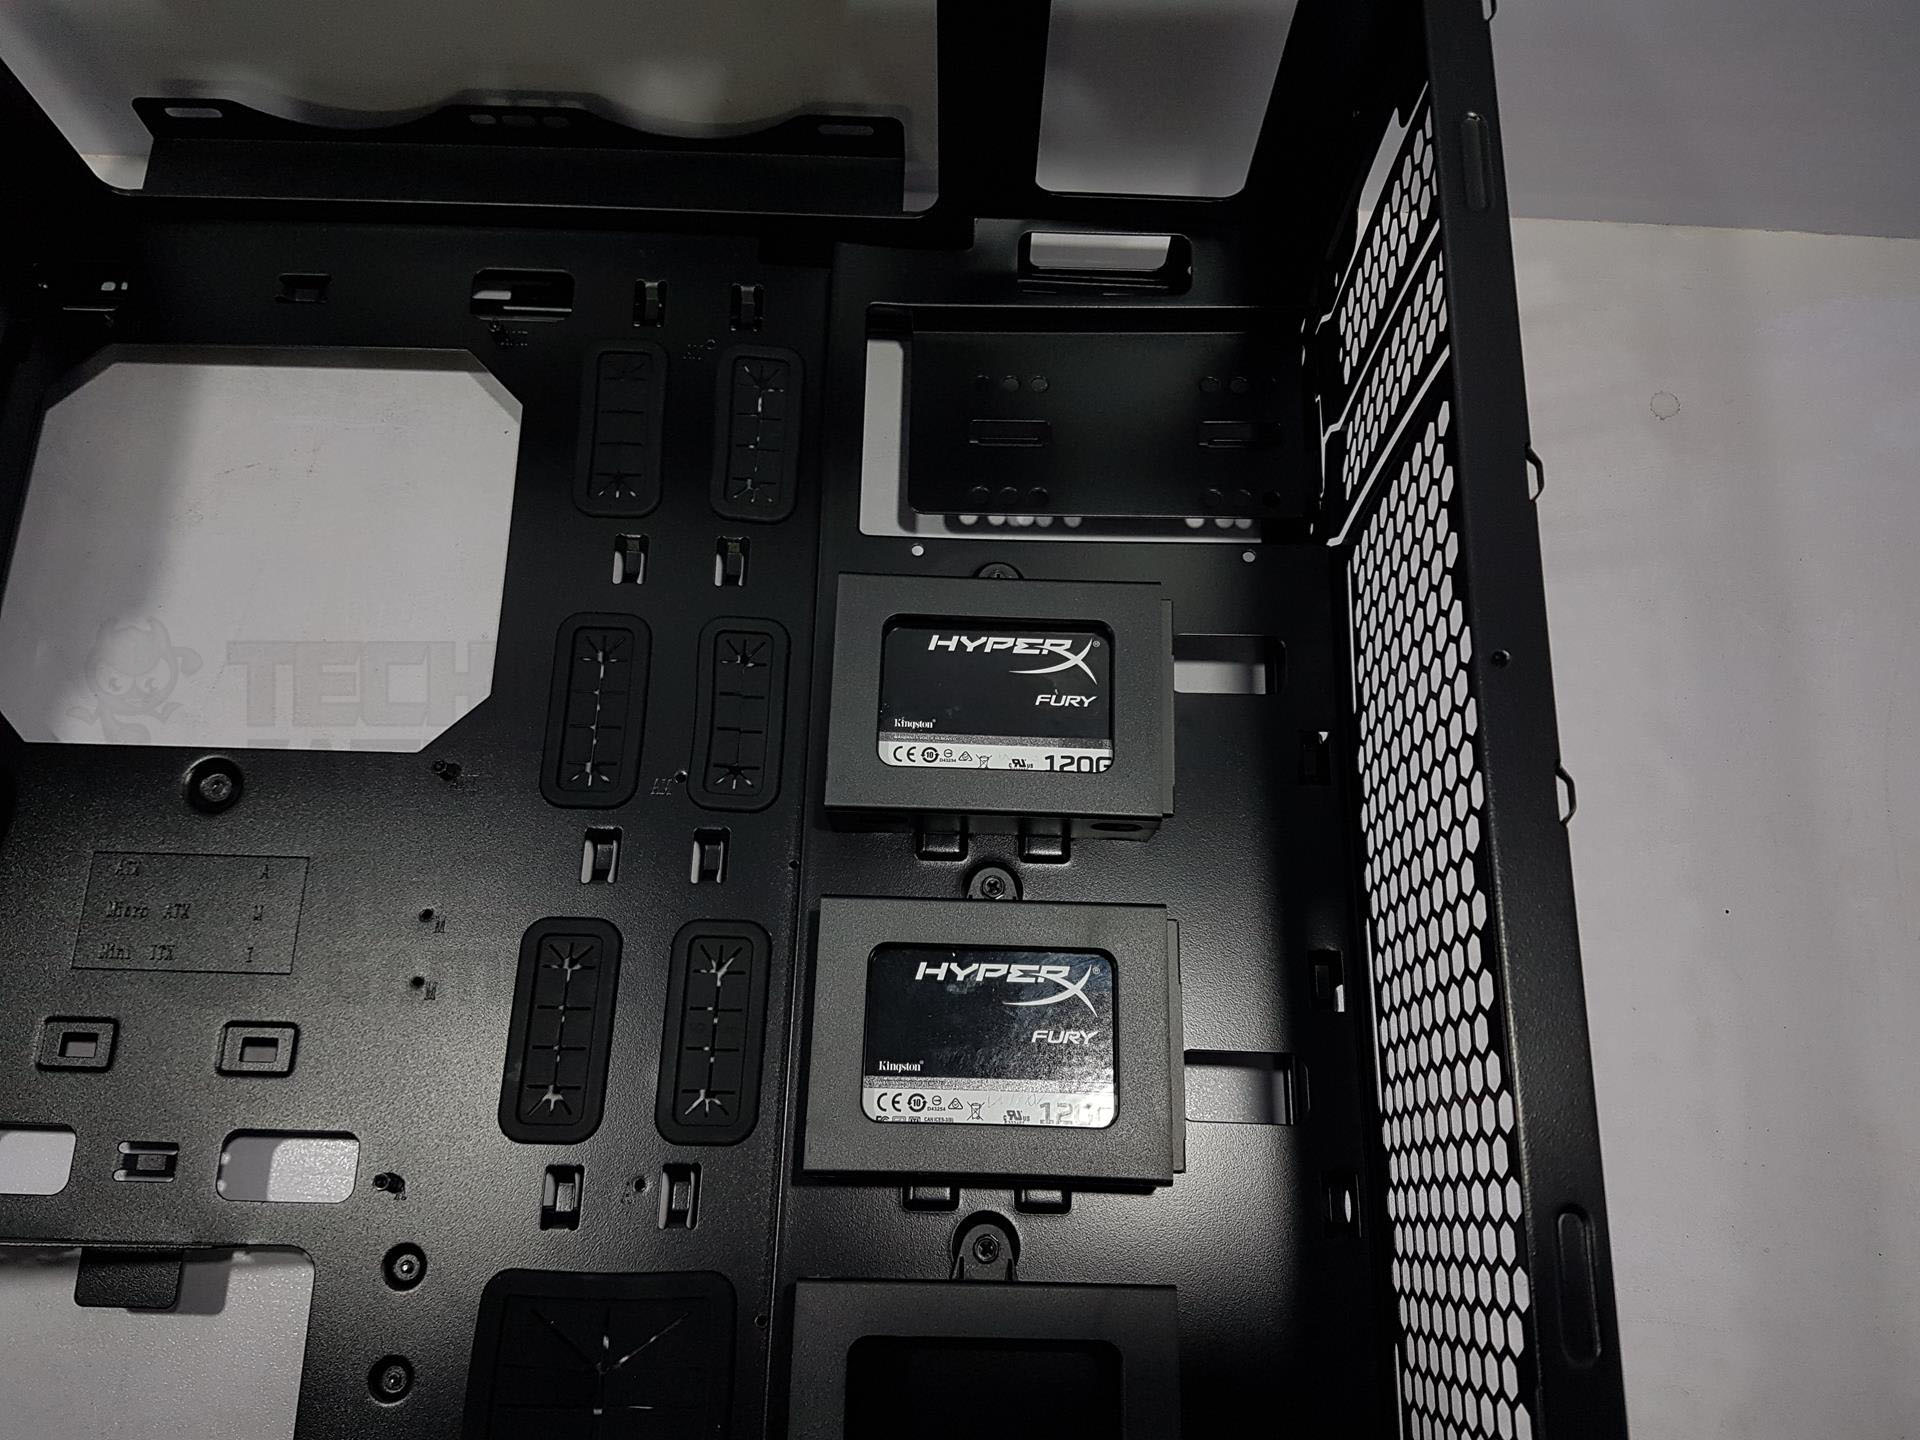
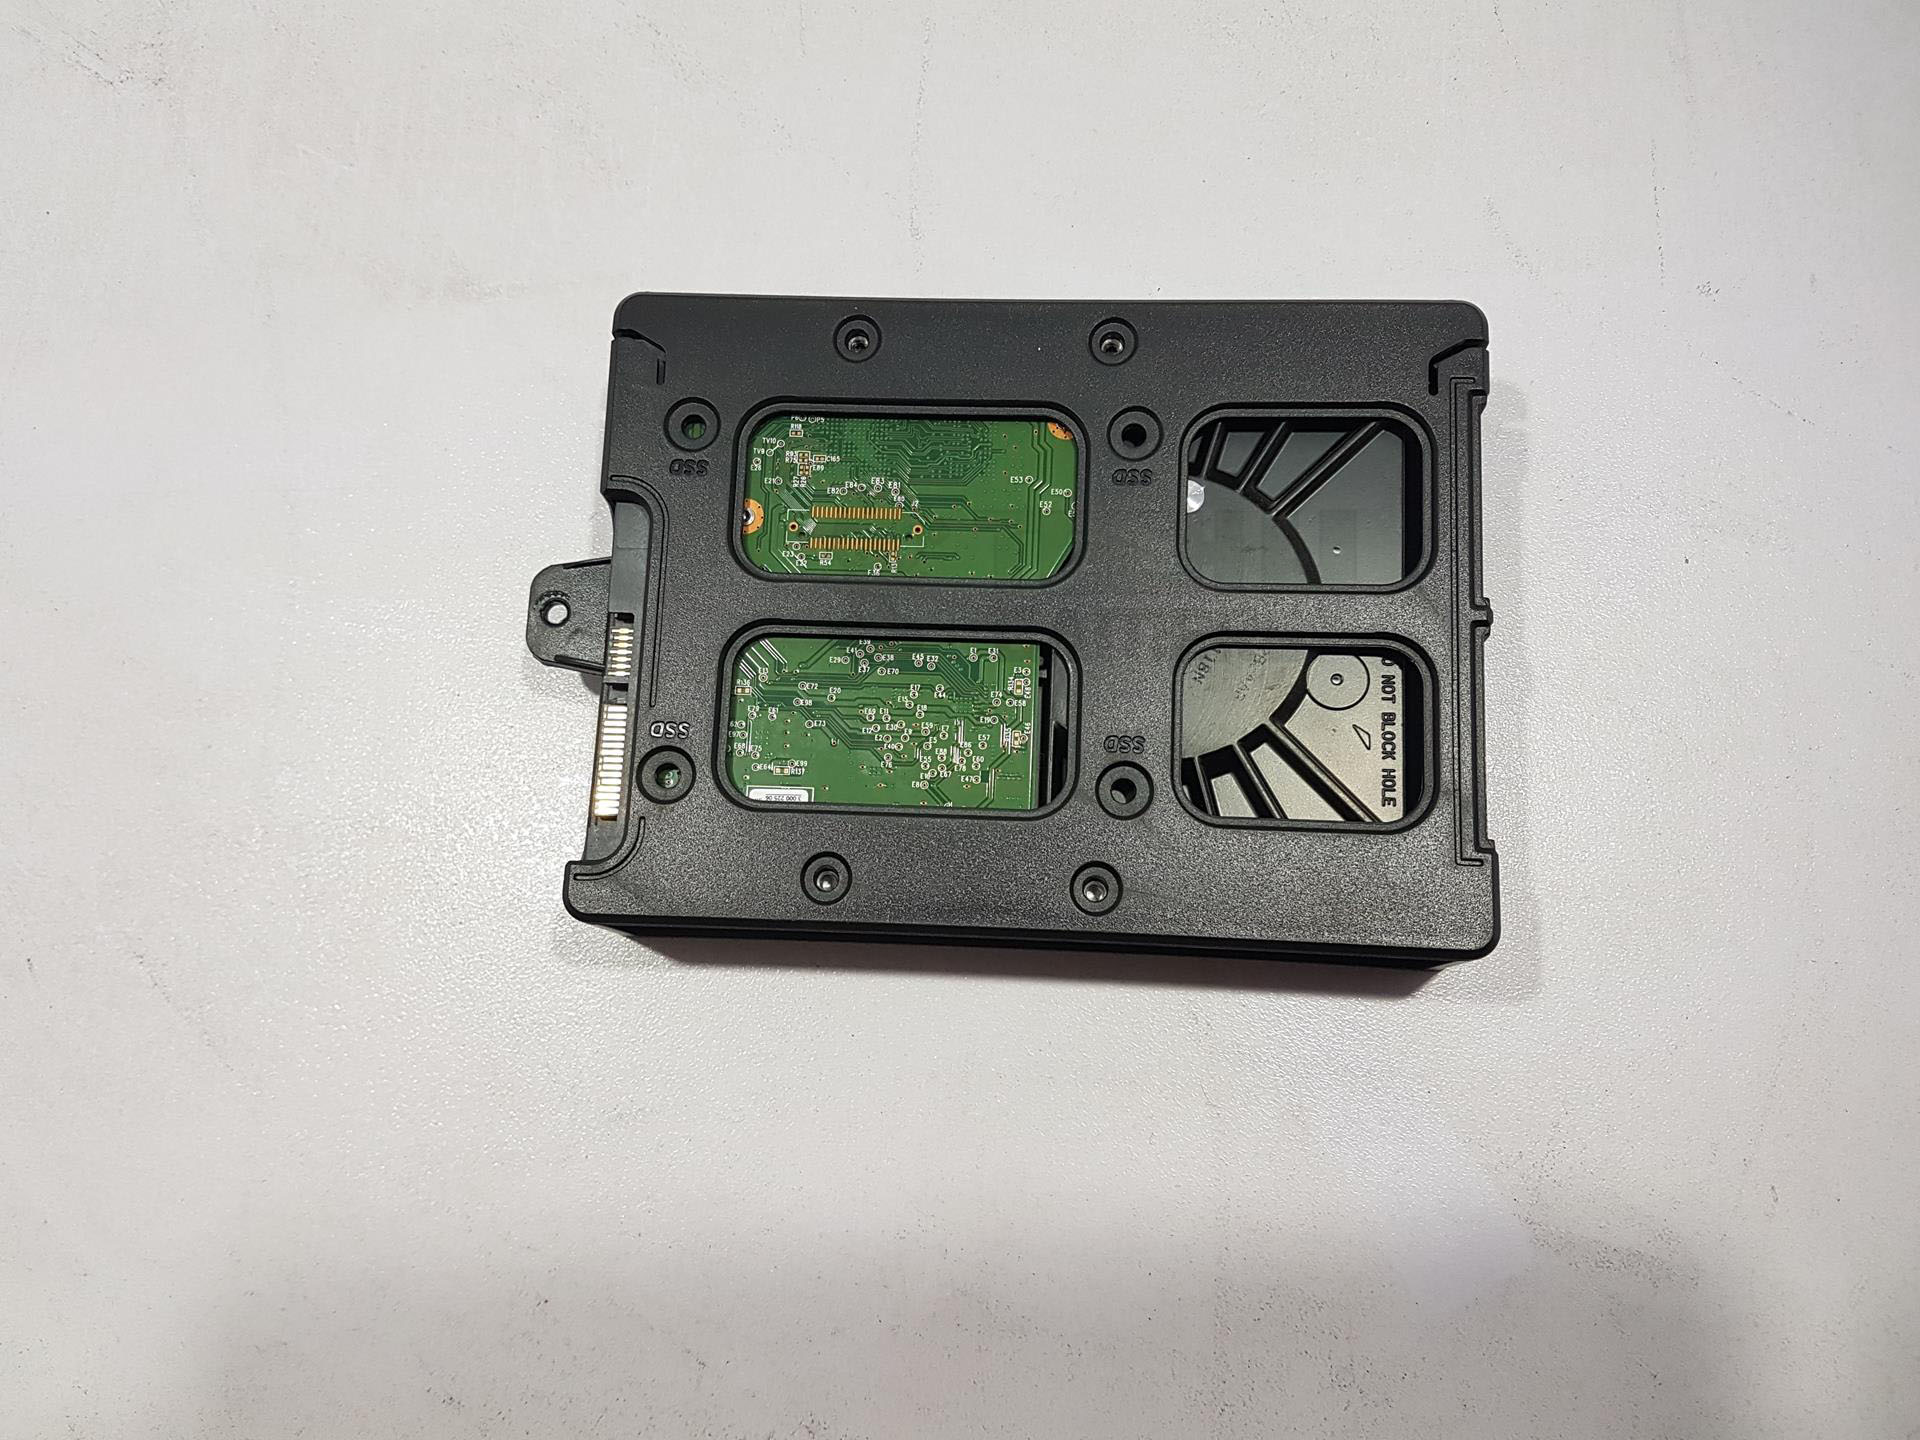
5.25″ area also has three removable 2.5″ SSD brackets with a tool-less design. The spacious layout allows easy PC assembly, with approximately 55mm spacing between SSD brackets and the front fan mount area. Custom water loop possibilities are ample in this chassis.
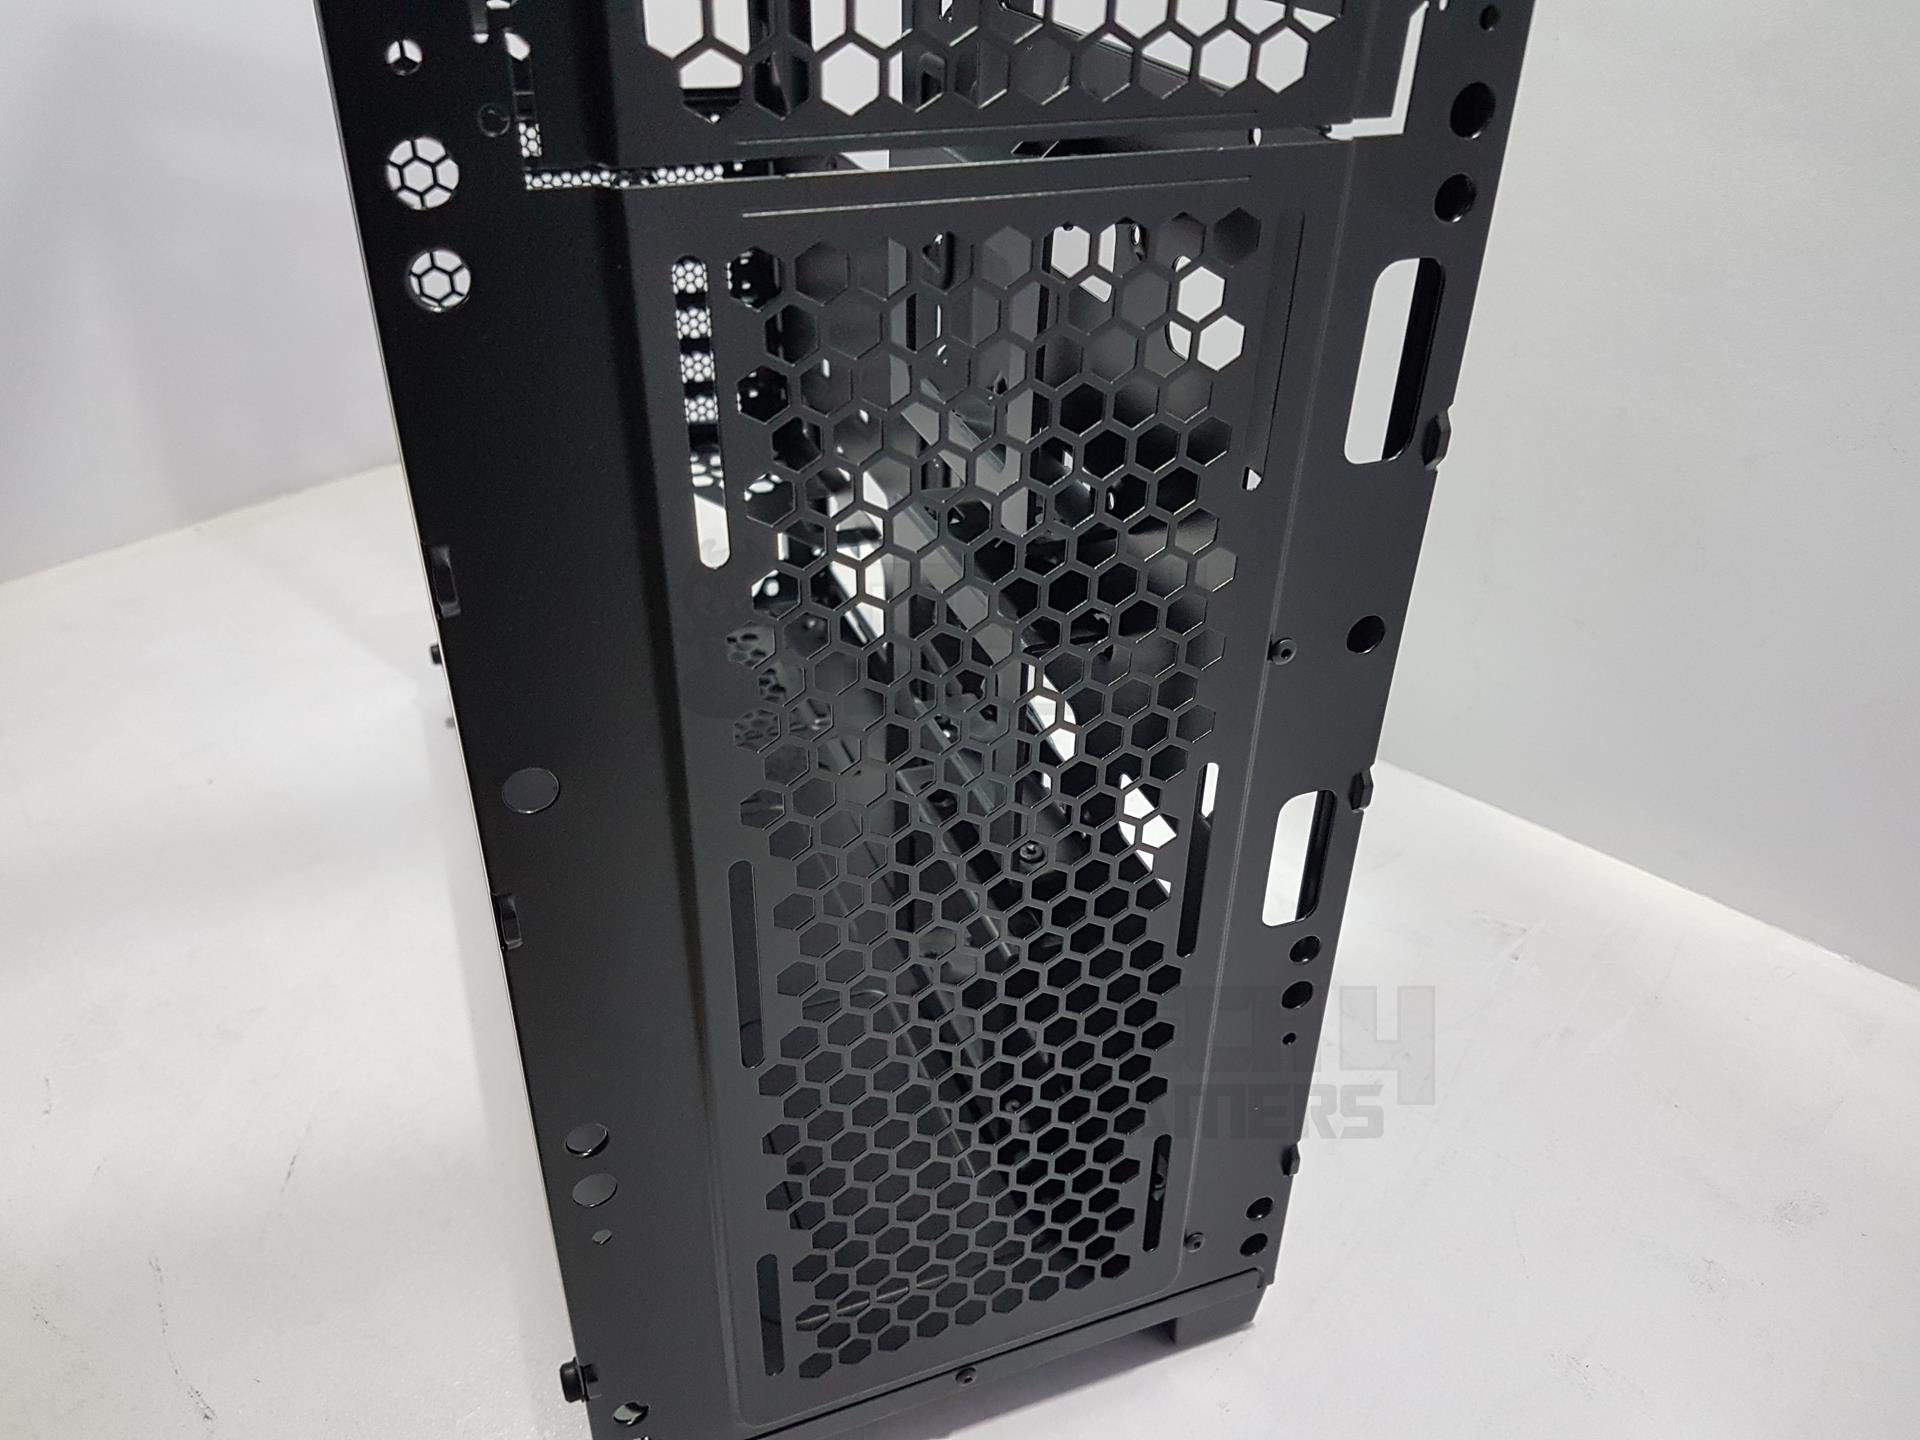
Left Side
Let’s dive into the left side of the chassis. It has a solid panel secured with two thumb screws. Seven vents with dust filters on the front and top panels serve as intake/exhaust areas. The side panel is robust with no flex.


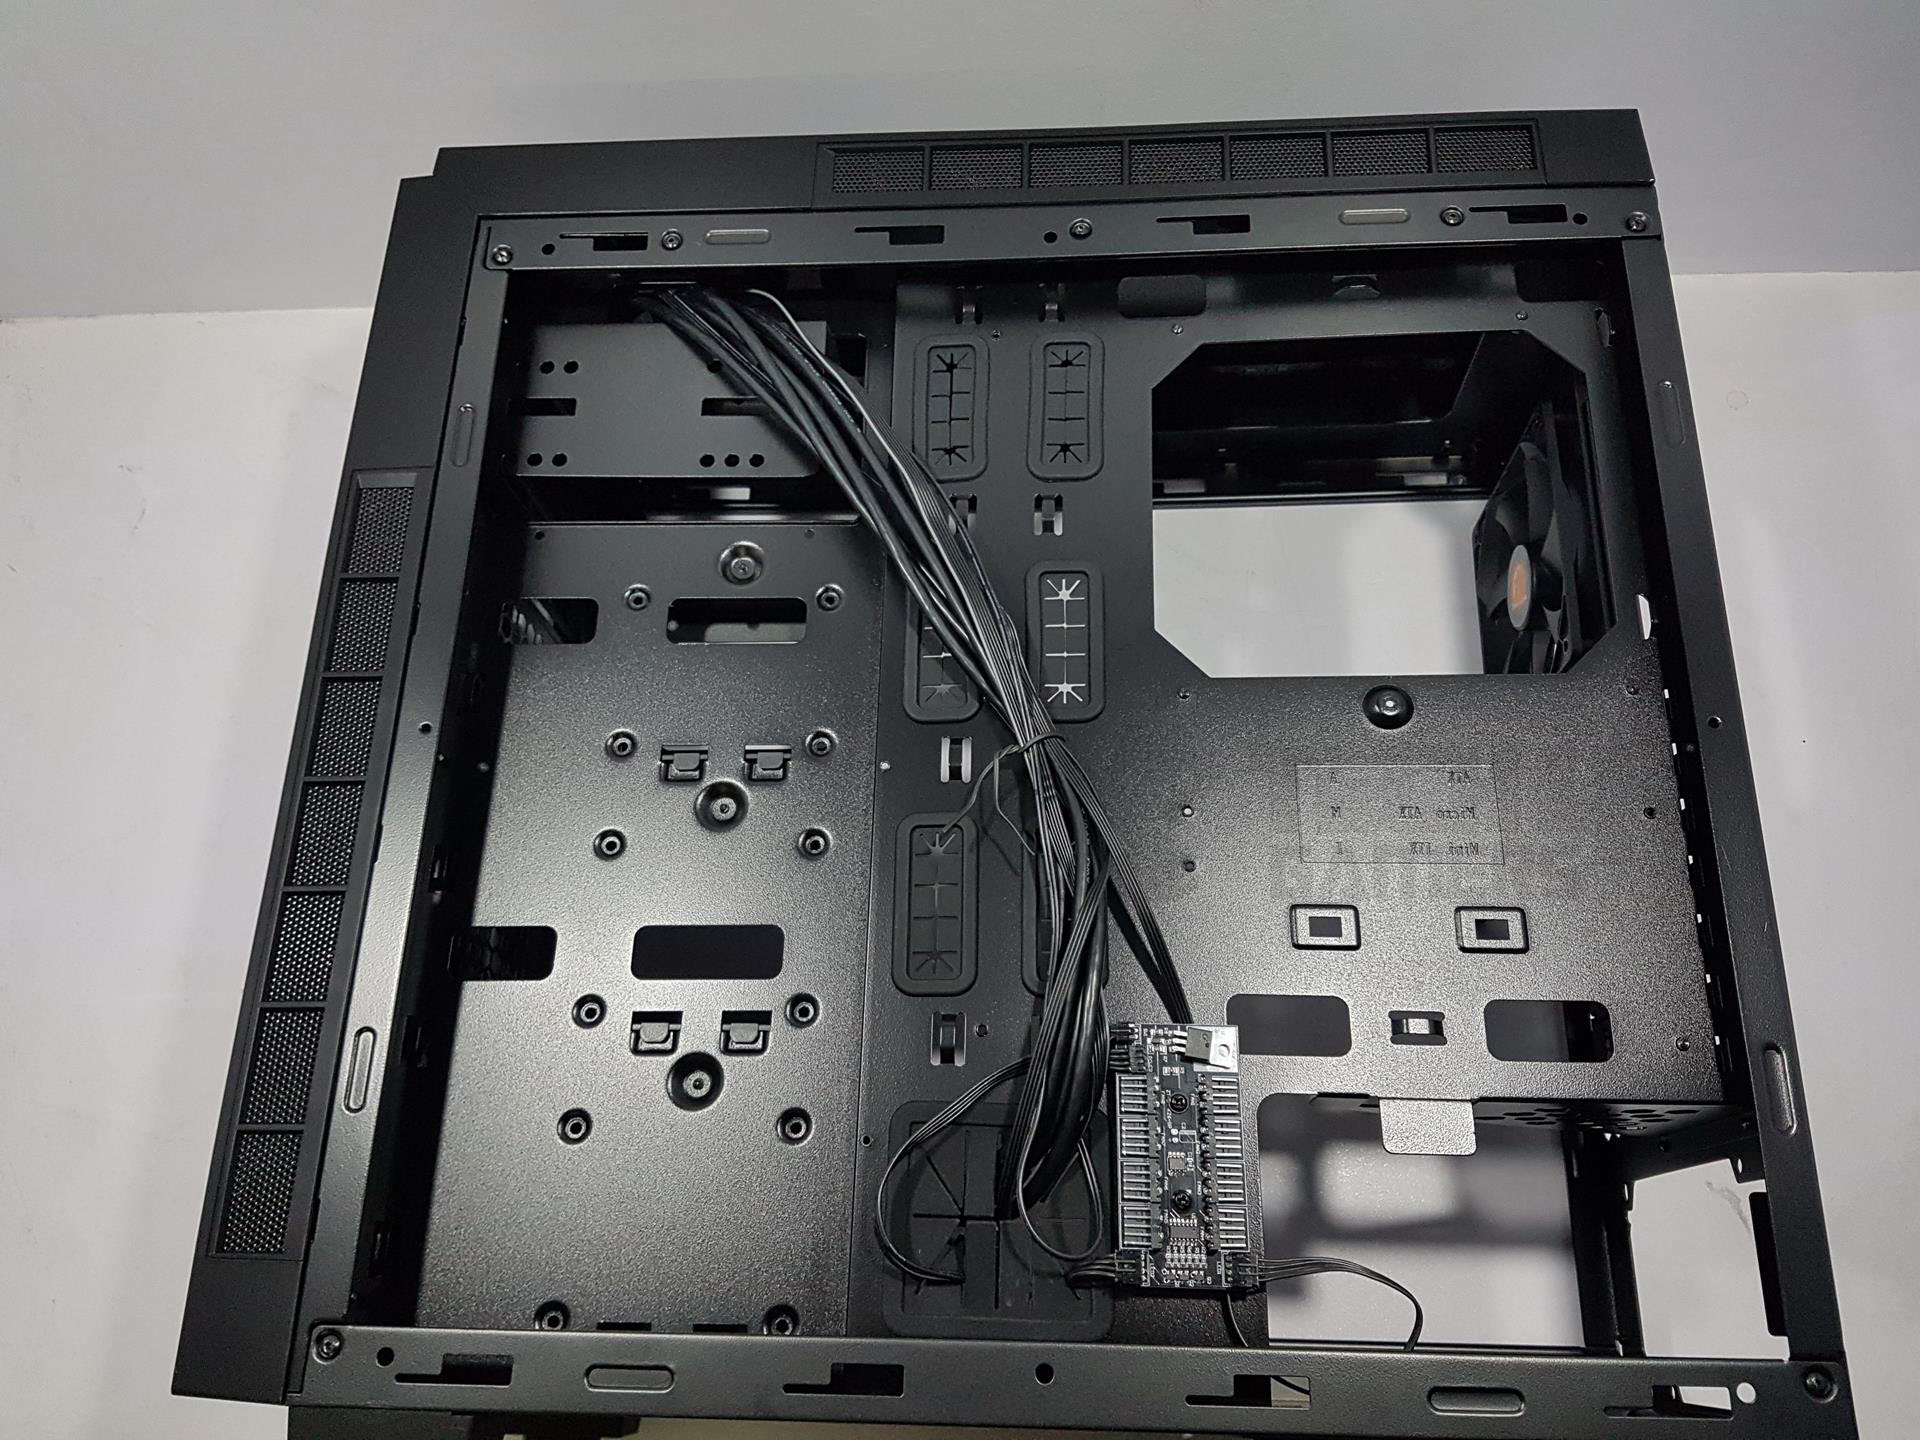

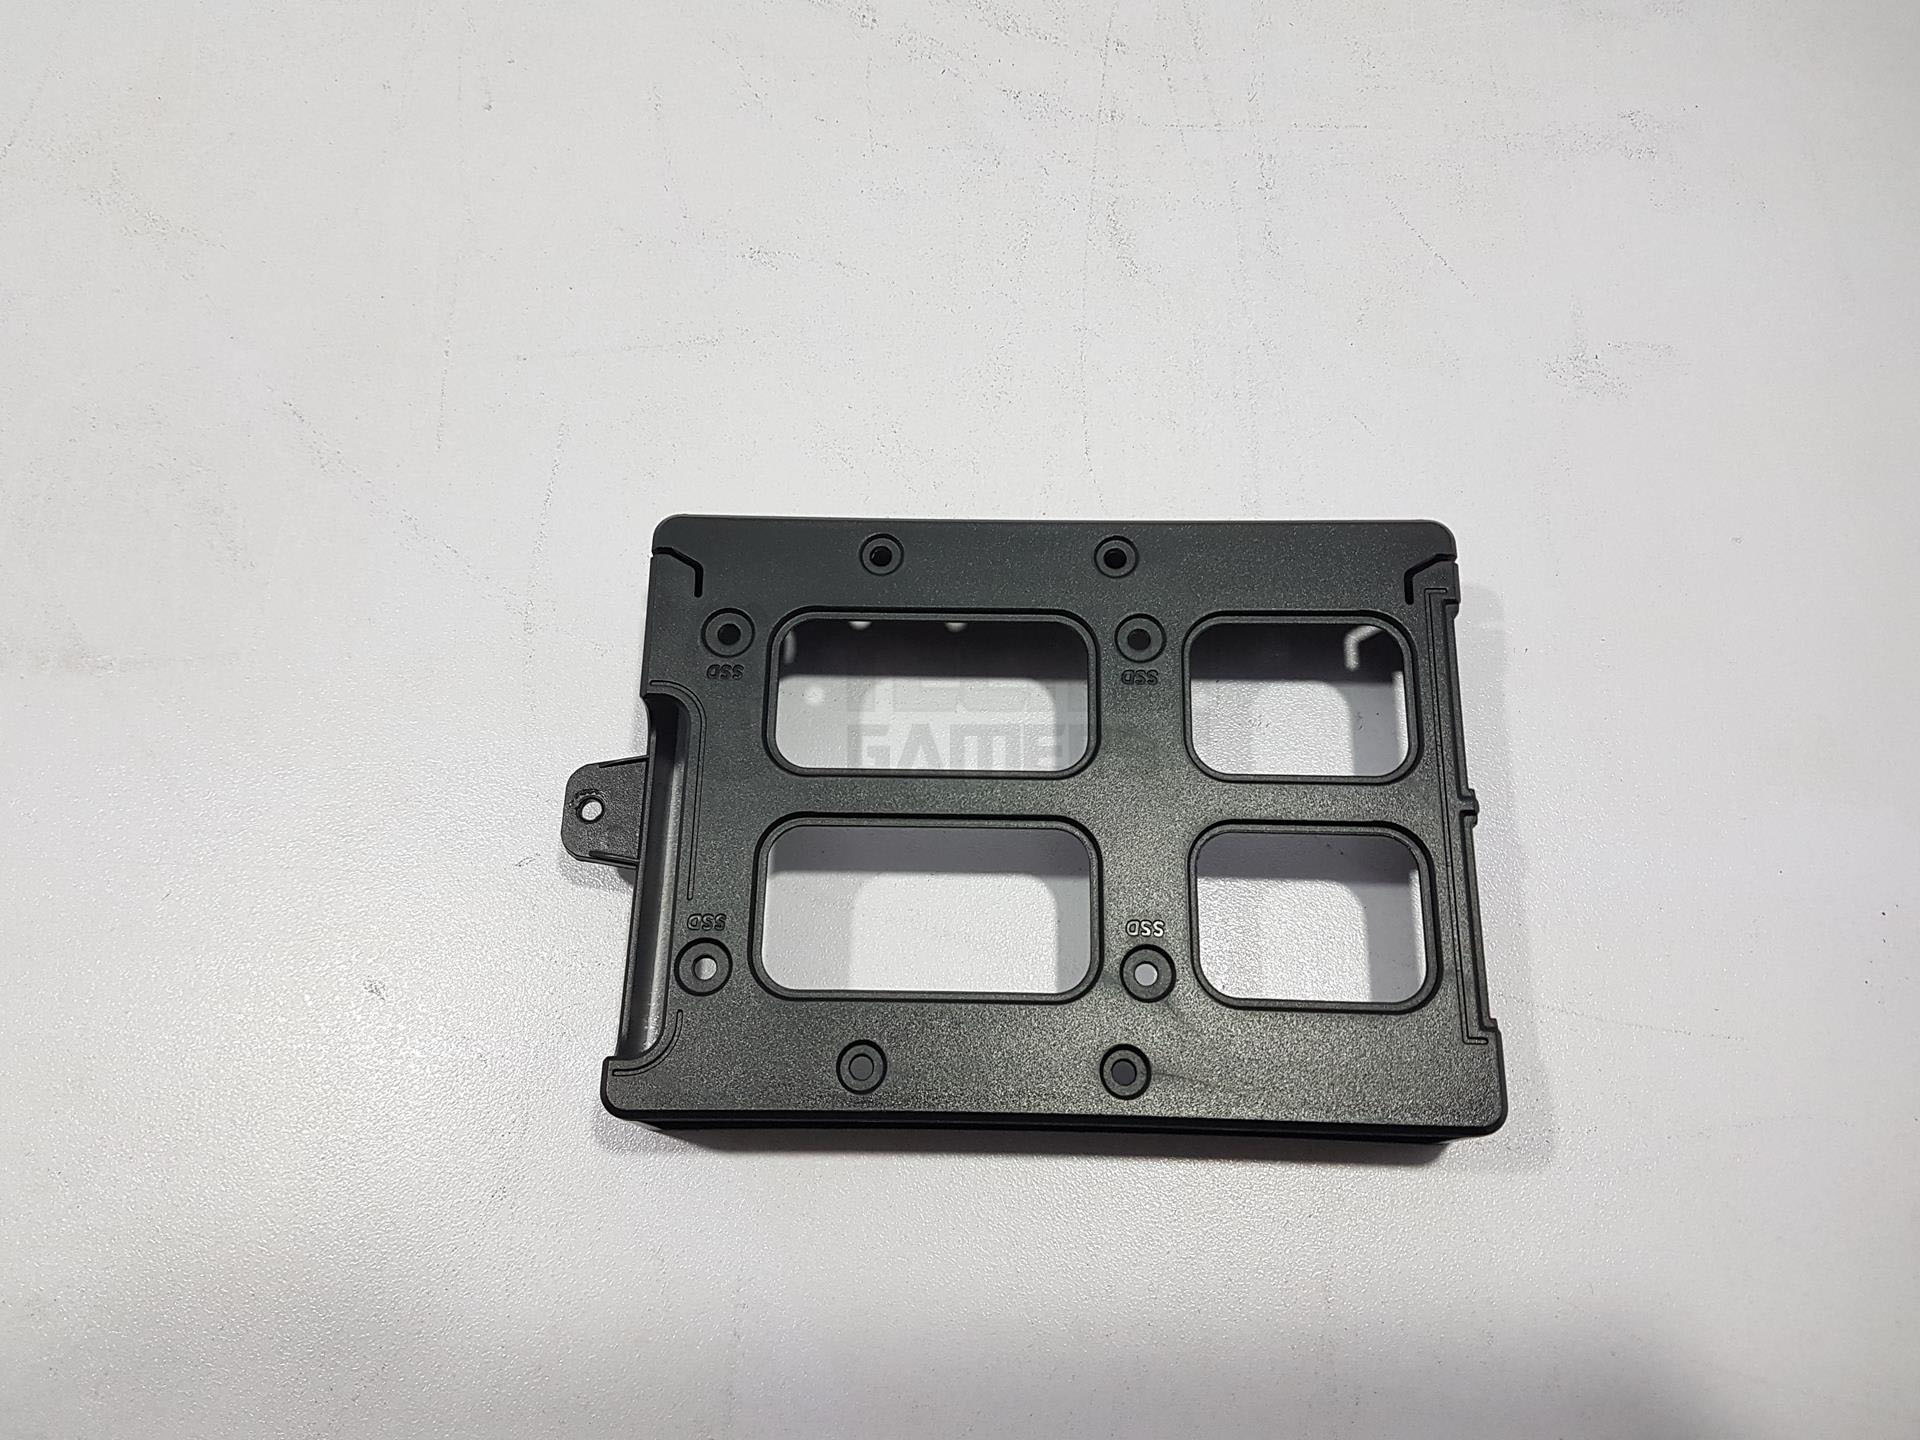
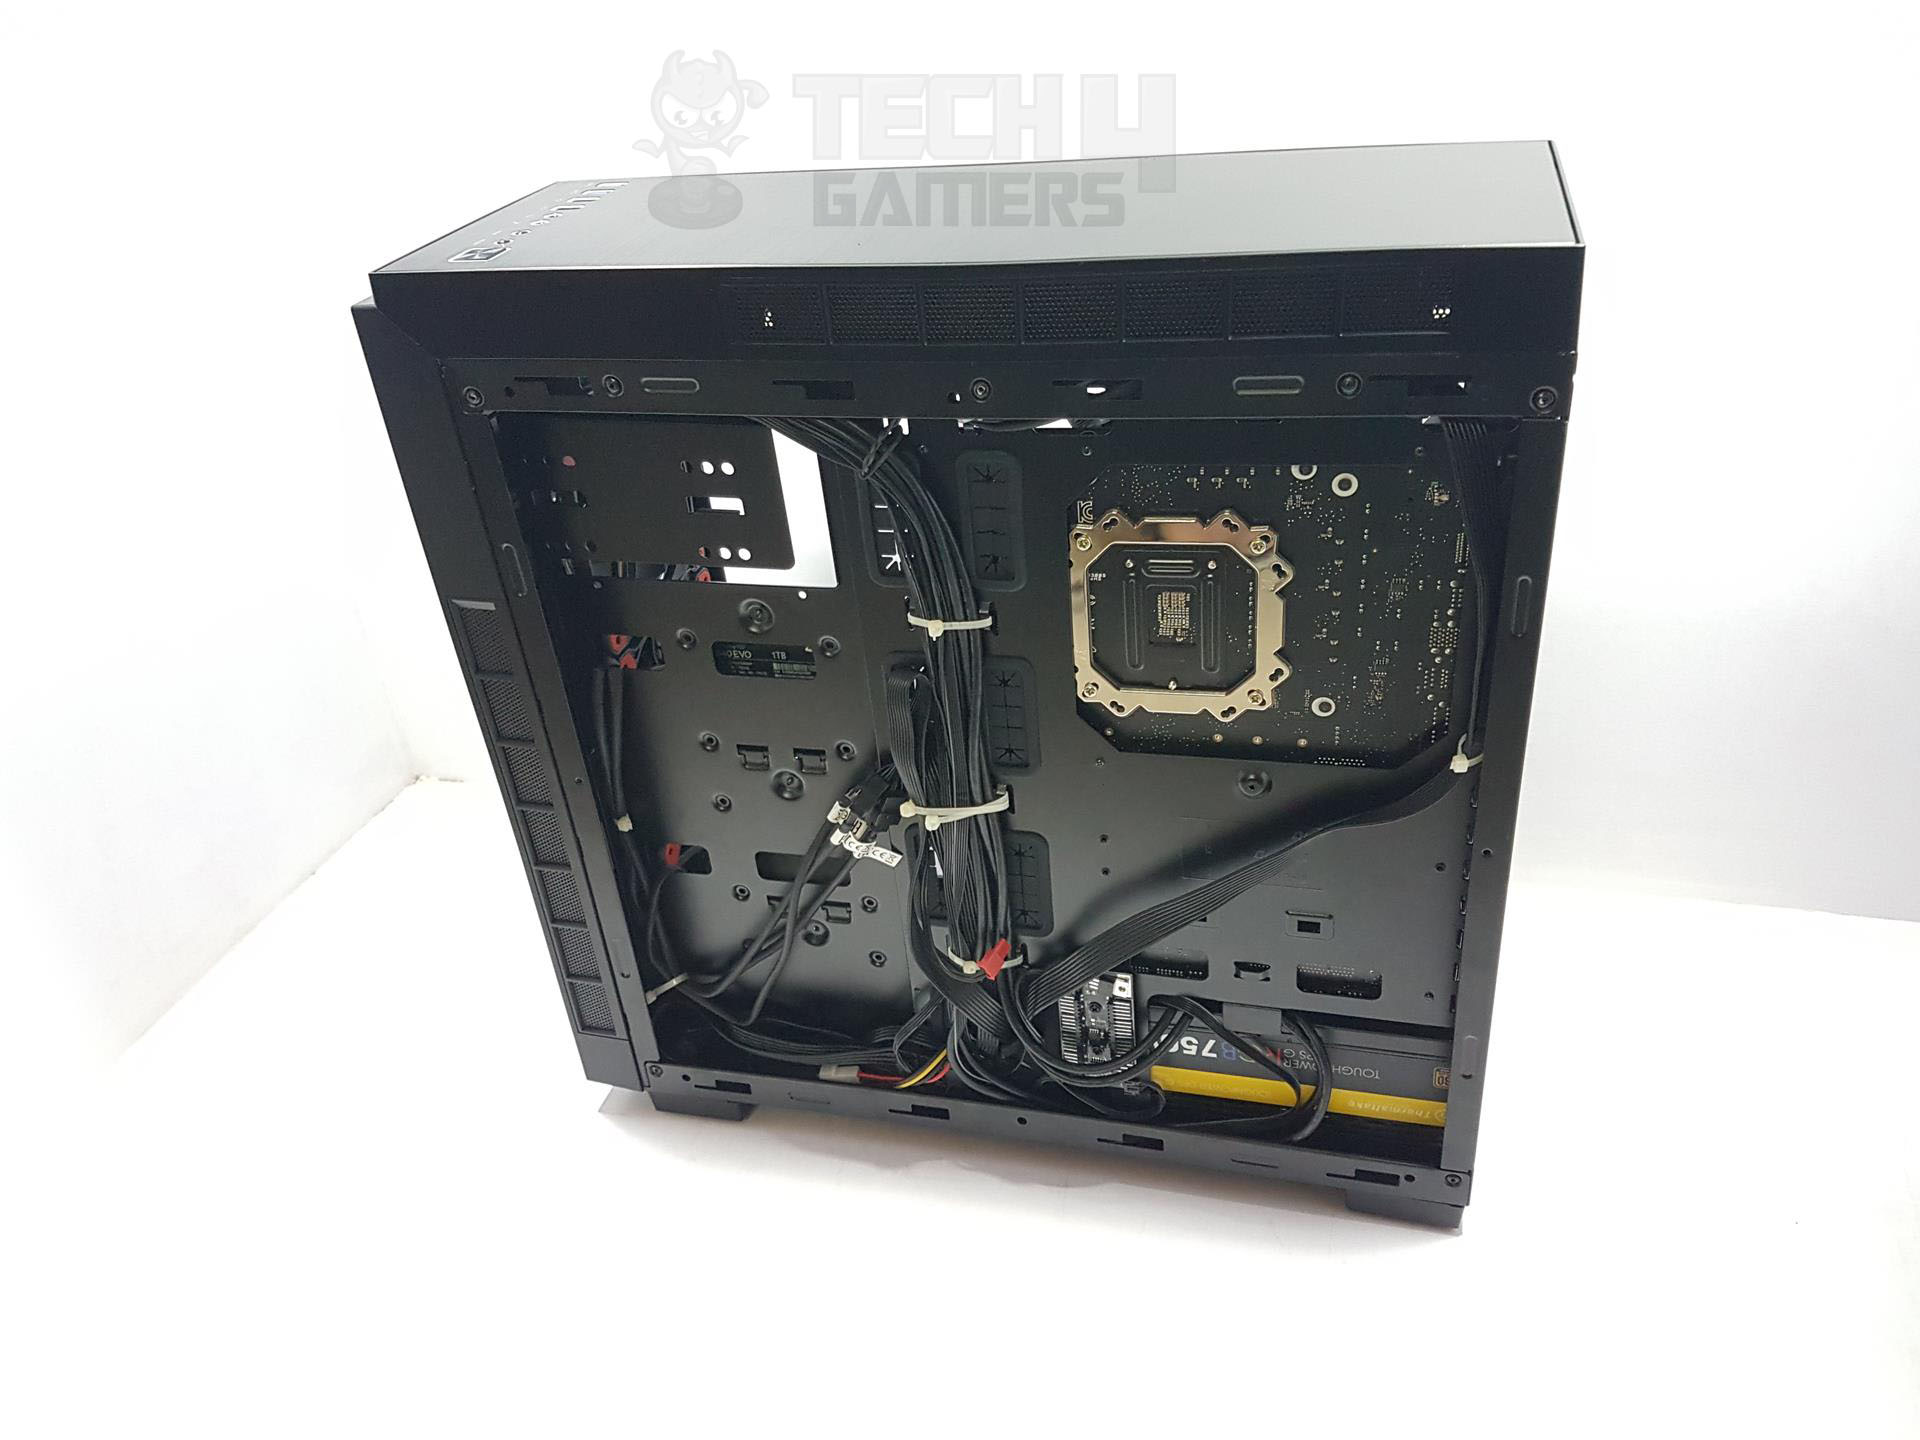
Removing it reveals a spacious CPU cutout on the top right and a removable SSD bracket at the back of the motherboard tray. There’s around 14mm of spacing behind the motherboard. Neatly grouped front panel cables with 16 cable tie spots are found along the chassis backside.
Two brackets support up to two 3.5″ and four 2.5″ drives simultaneously. On the left side of the PSU cutout, there’s a removable RGB LED controller hub with a Molex power connector.
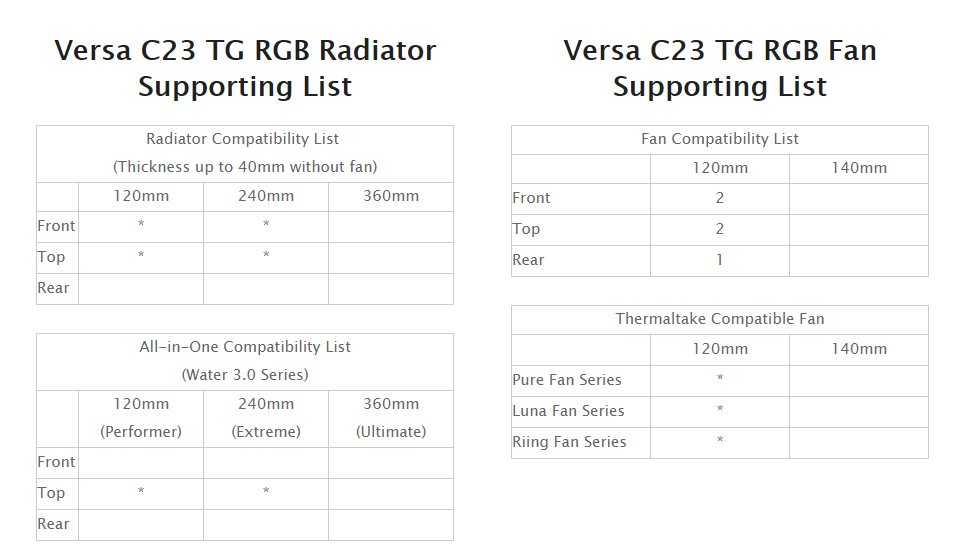
The picture below shows the radiator and fan compatibility with this chassis.
RGB LED Lighting
Thermaltake’s Versa C23 TG RGB elevates its chassis with captivating RGB LED lighting, ideal for those who want a stylish showcase. The front-top panel’s RGB LED controller provides 11 dynamic lighting modes, including static colors (red, blue, white, green), RGB spectrum, and breathing effects.
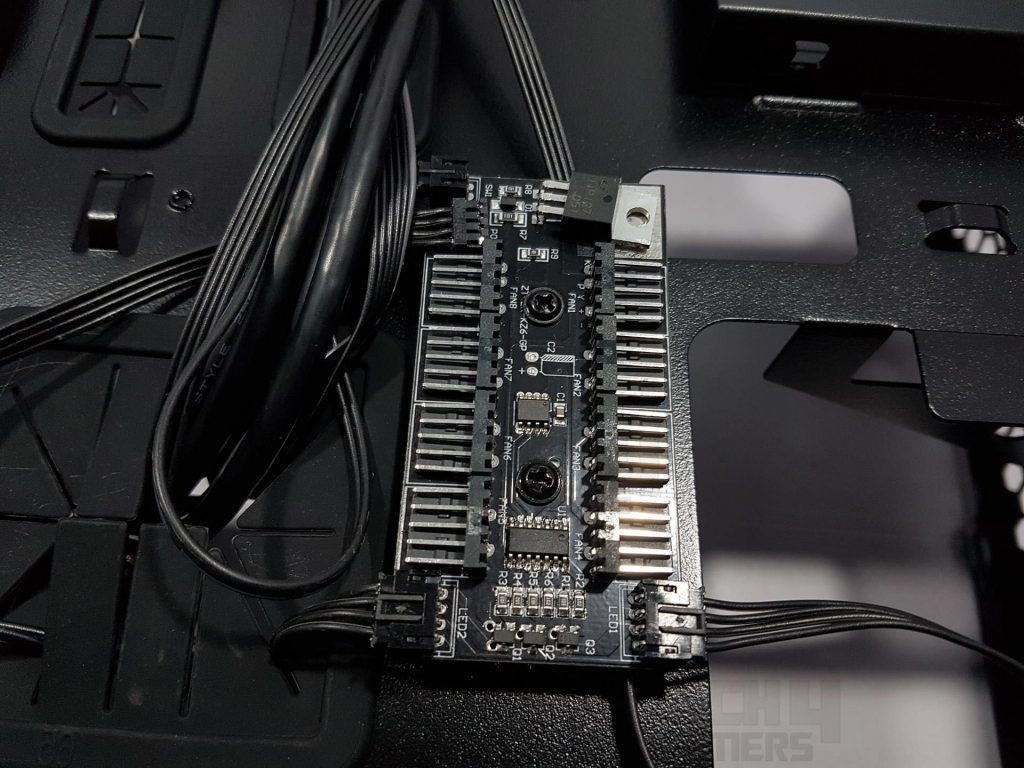
The Controller hub, situated at the bottom back, supports two LED strips and up to 8 RGB fans. LED headers are occupied: one on the front panel, the other on the top panel. Four illuminated areas include the front I/O Panel, the Tt logo at the front panel bottom, the left side bottom of the top panel, and the front panel left side bottom.
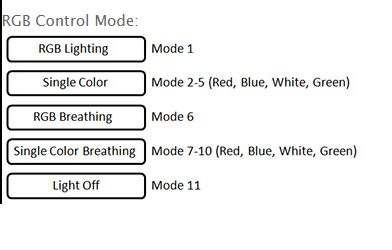
Turn off lighting by long-pressing the RGB button; a single press brings it back on. Connect Riing 12 RGB fans to sync chassis and fan lighting. In this mode, fans light up in static red.
Here are some pics for your eye pleasure.


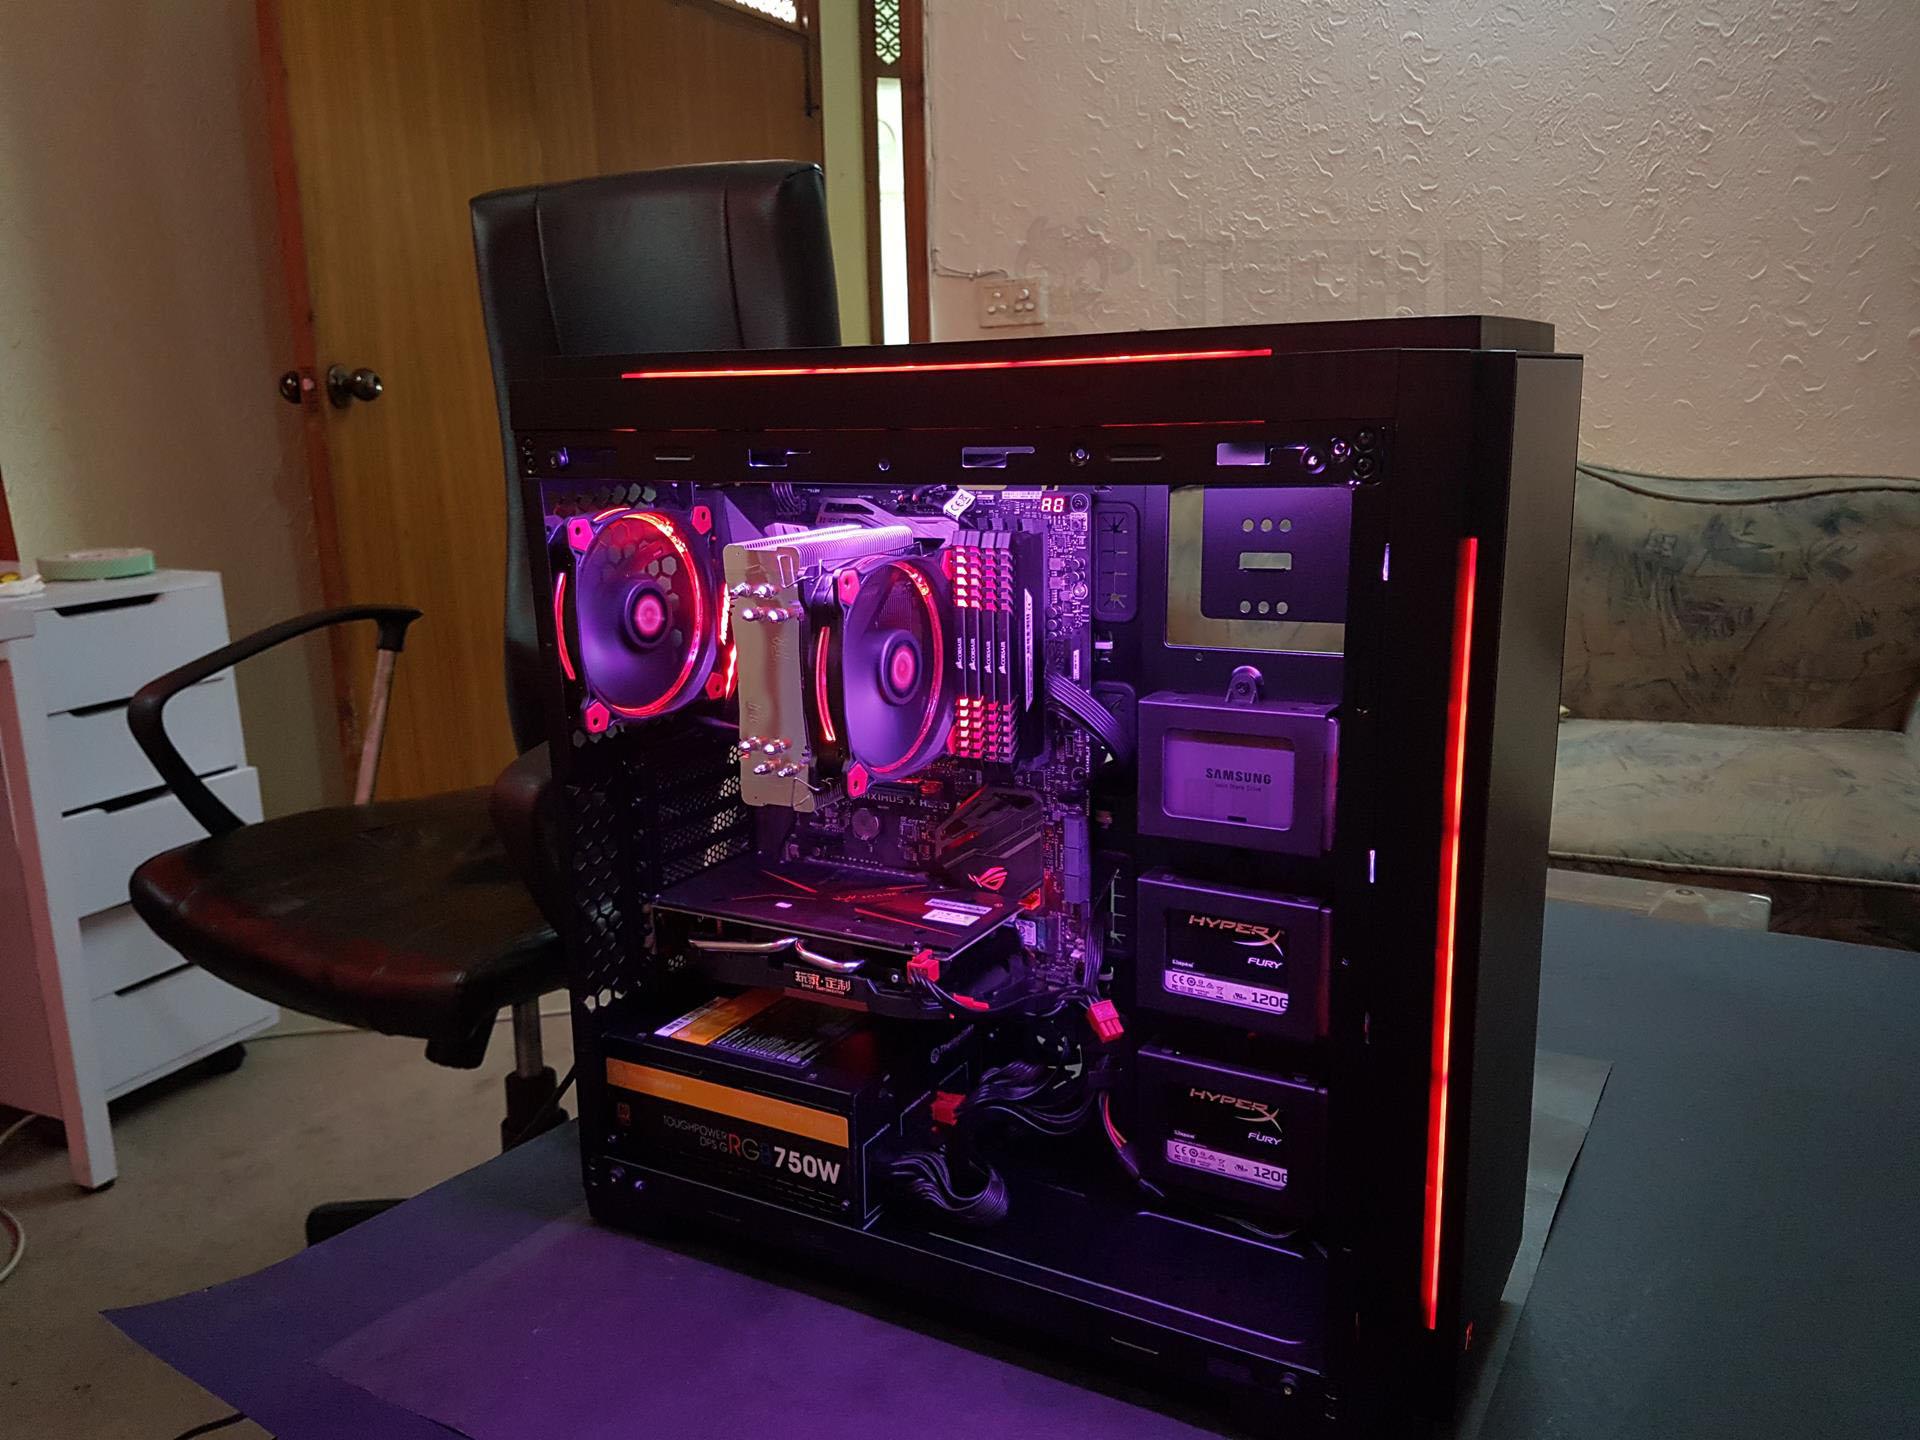
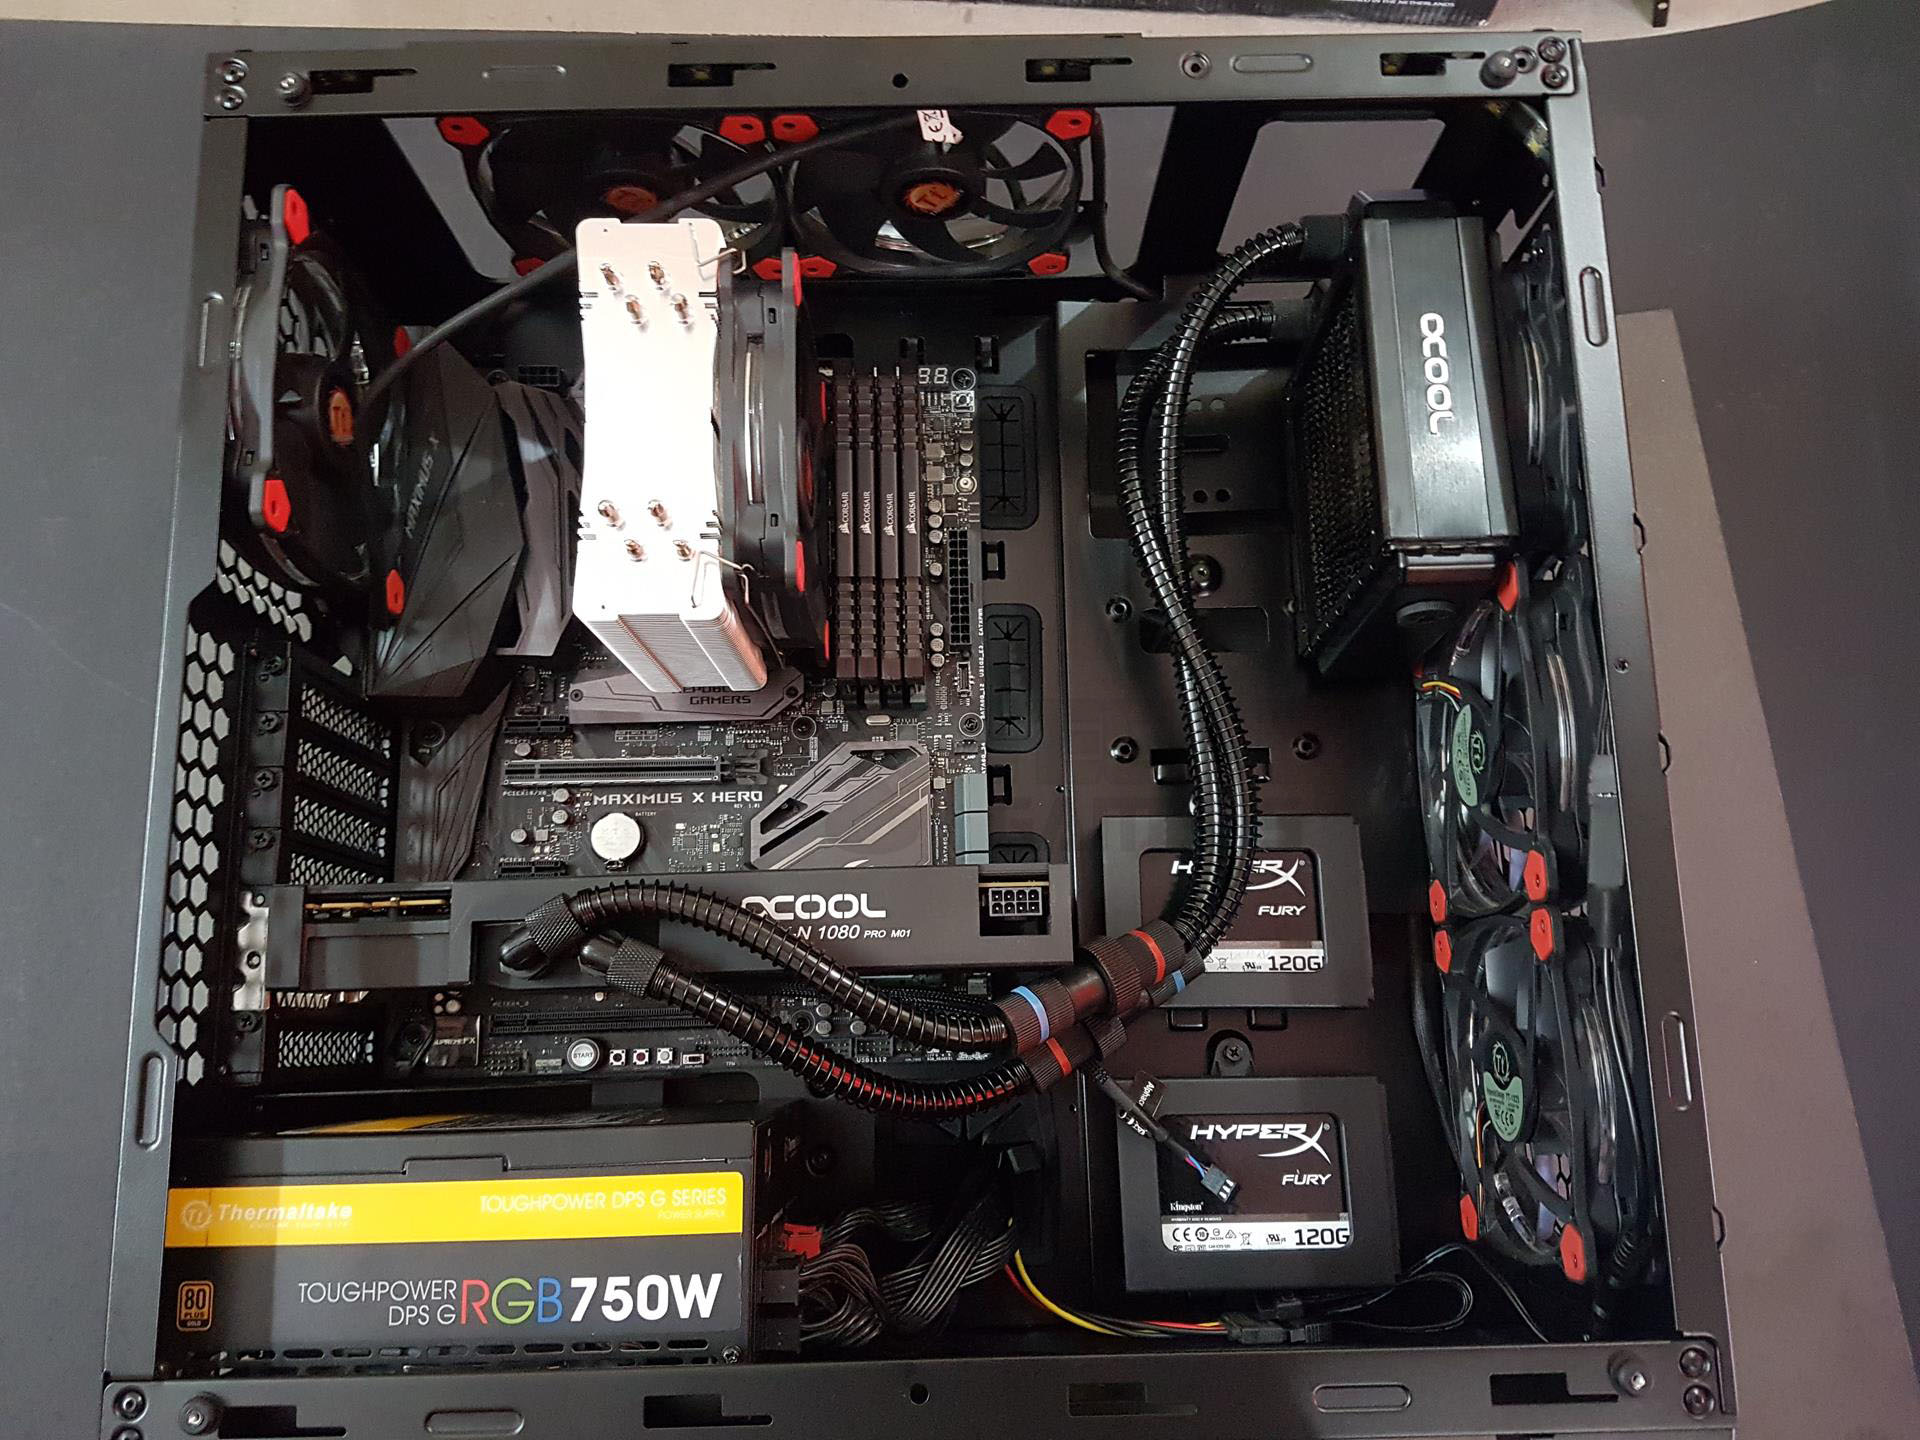
Building/Installation
Following is the configuration of the test build:
- Intel i7 8700k
- Thermaltake Riing Silent 12 Red CPU Cooler
- Corsair Vengeance Red 4x8GB @ 2666MHz
- Colorful iGame GTX 1050Ti Vulcan U 4G EC
- Samsung 256GB PM961 SSD
- Thermaltake TP DPS G RGB 750W PSU
I wanted to use the Nvidia GTX 1080 FE with an Alphacool Eiswolf GPX Pro cooler, featuring a thicker 120mm radiator. Unfortunately, due to its size, the radiator couldn’t be installed on the rear or properly fixed on the front, preventing setup in the test build.
Here’s a pic with the cooler:

Building in this chassis was enjoyable, thanks to its spacious layout and easy cable routing. Mounting three 120mm fans on the front was a breeze, though I wished for meshed vents running the full height of the front panel. Starting with the PSU, I utilized the large-size cutout for cable passage, making cable management straightforward.
The shroud’s vent on the PSU allowed convenient routing of various cables from the underside of the motherboard. Despite a minor discrepancy, the Thermaltake Riing Silent 12 Red CPU cooler (159mm height) fit well in the chassis specified for a maximum of 155mm.

Thermaltake Testing
I tested the build’s thermal and acoustical performance using the Perfect Prime WD9819 anemometer and the Fonseo Digital Sound Meter, both factory-calibrated. Reported temperatures are delta values.
CPU thermals were assessed with a 30-minute AIDA64 stress test, stressing the CPU, FPU, and RAM. Graphics card performance was evaluated during actual gameplay.
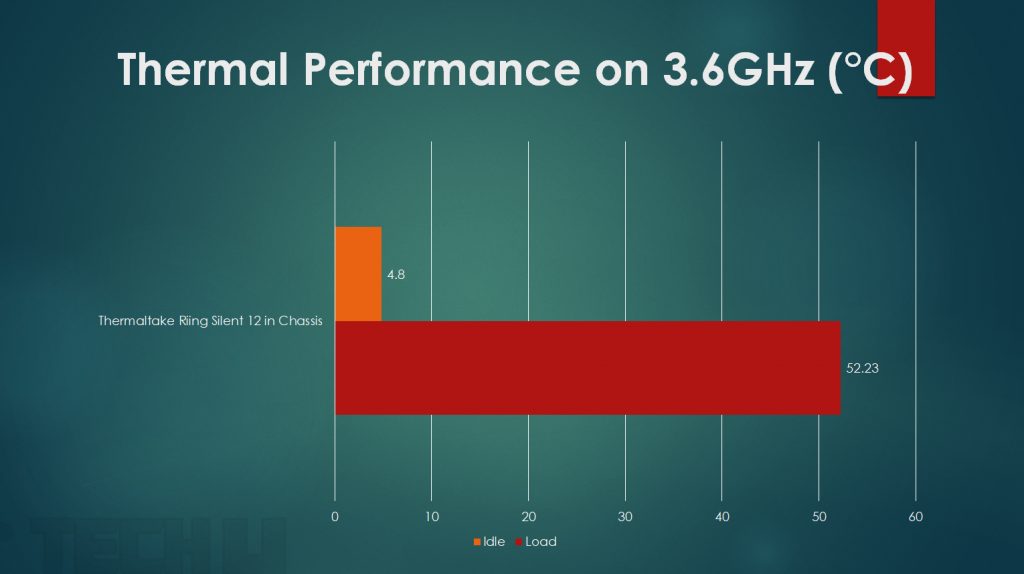
My chip is doing 4.8GHz out of the box on Auto and in doing so the voltages are spiking to 1.300V VCore. Temps are fine overall. The maximum temperature on the GTX 1050 Ti was 70°C which is still fine.
Acoustical Performance
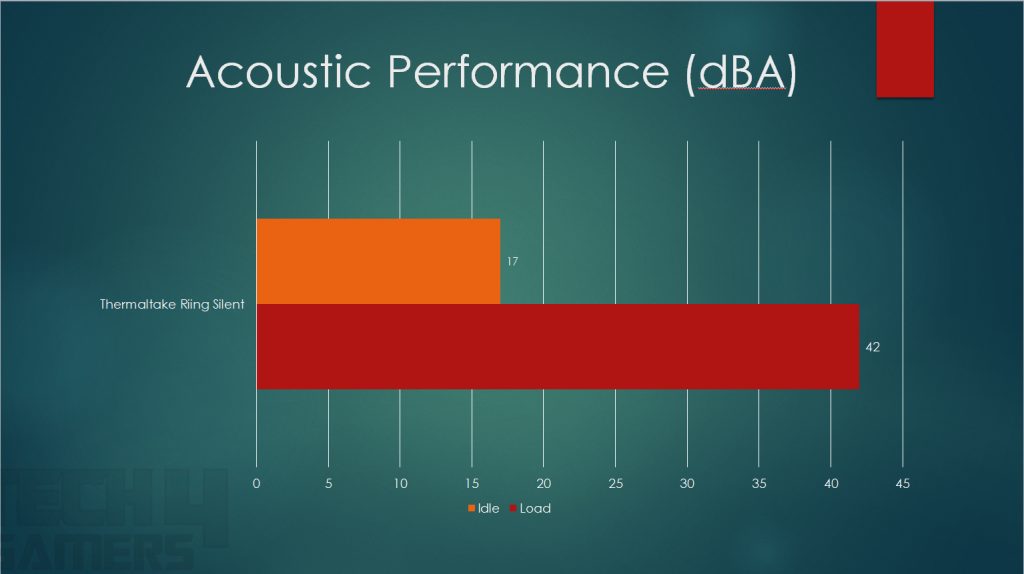
The system was left idle for some time to measure the acoustical performance. Keep in mind that this is the system’s overall noise level not just for any fan. 17 dB(A) was sound level when it was idling and 42 dB(A) when under load.
Should You Buy It or Not?
Having conducted thorough testing on the Thermaltake Versa C23, I have concluded that:
Buy It If:
✅You want a Budget-Friendly Option: Priced attractively, this mid-tower chassis provides budget users with a compelling combination of style and functionality.
✅You are an RGB Enthusiast: The chassis comes with RGB lighting solutions and the ability to sync the total lighting of the case, making it a good fit for those who appreciate customizable RGB setups.
✅You prefer Spacious and Functional Design: With a spacious layout and easy cable routing, building inside this chassis was enjoyable.
Don’t Buy It If:
❌Airflow is a Top Priority: The chassis opts for vented sides over traditional front panel ventilation. If optimal airflow is a critical factor for your build, especially for high-performance components, this might not be the ideal choice.
❌You Prefer Lightweight Design: The chassis may not be suitable for gamers who prioritize lightweight designs, as it doesn’t fall into the lightweight category.
Conclusion
Wrapping it up, the Thermaltake Versa C23 TG RGB stands out with its sleek brushed aluminum finish, tempered glass side panel, and eye-catching RGB lighting – a great pick for budget-conscious users after both style and functionality in a mid-tower chassis.
The roomy interior and hassle-free cable routing contribute to a smooth building experience. However, it’s essential to note that the chassis leans towards vented sides rather than traditional front panel ventilation, impacting airflow. If your priority is optimal cooling for high-performance components, especially in a lightweight design, this may not be the most suitable choice.
All in all, the Versa C23 TG RGB delivers an enticing blend of flair and practicality for those with budget constraints, especially catering to RGB enthusiasts.
Recent Updates
- December 26, 2023: A few text changes to improve readability.
Thank you! Please share your positive feedback. 🔋
How could we improve this post? Please Help us. 😔
[Hardware Reviewer & Editor]
Meet Nauman Siddique, a highly experienced computer science graduate with more than 15 years of knowledge in technology. Nauman is an expert in the field known for his deep understanding of computer hardware.
As a tech tester, insightful reviewer, and skilled hardware editor, Nauman carefully breaks down important parts like motherboards, graphics cards, processors, PC cases, CPU coolers, and more.
- 15+ years of PC Building Experience
- 10+ years of first-hand knowledge of technology
- 7+ years of doing in-depth testing of PC Hardware
- A motivated individual with a keen interest in tech testing from multiple angles.
- I majored in Computer Science with a Masters in Marketing
- Previously worked at eXputer, EnosTech, and Appuals.
- Completed Course in Computer Systems Specialization From Illinois Tech
Get In Touch: nauman@tech4gamers.com


