 Threads
Best 120mm AIO?
Review Summary
The Thermaltake Water 3.0 120 ARGB Sync CPU Liquid Cooler offers compact ARGB cooling with vivid lighting and competitive performance for its size. Ideal for those seeking efficient cooling in tight spaces with synchronized lighting. However, it might be less appealing for users prioritizing simpler setups or facing cable management challenges due to its lengthy LED cables.
Hours Tested: 5

Overall
-
Performance - 8/10
8/10
-
Design - 8/10
8/10
-
Features - 7/10
7/10
-
Value - 7/10
7/10
Pros
- Compact ARGB cooling
- Effective performance
- Visually striking design
- Seamless synchronization with compatible motherboards
Cons
- Lengthy LED cables
- Installation nuances


Today, we will be taking a look at one of the premium CPU Liquid Coolers from the Thermaltake which is the Thermaltake Water 3.0, a 120mm cooling solution. It is based on Asetek design. This is like all in one complete solution, taking care of everything a user might need. The cooler supports almost all Intel and AMD sockets including the LGA20xx and AMD AM4. Let’s get into the review!
Key Takeaways
- Stand-out features of this cooler include its slim and lightweight aluminum radiator, Pure 12 ARGB Sync Radiator fan with 16.8M colors, and a pump with ARGB LED lighting.
- The Thermaltake Water 3.0 120 ARGB Sync CPU Liquid Cooler is good for users looking for a slim 120mm AIO liquid CPU cooler with a stylish ARGB design and optimized radiator cooling.
- This cooler is not for users who prioritize easy cable management, as the extraordinary length of the LED cables can pose a challenge in that regard.
- Why you can trust Tech4Gamers: Our reviews are based on dedicated hands-on testing by our team of experienced hardware experts. Find out more about how we test.
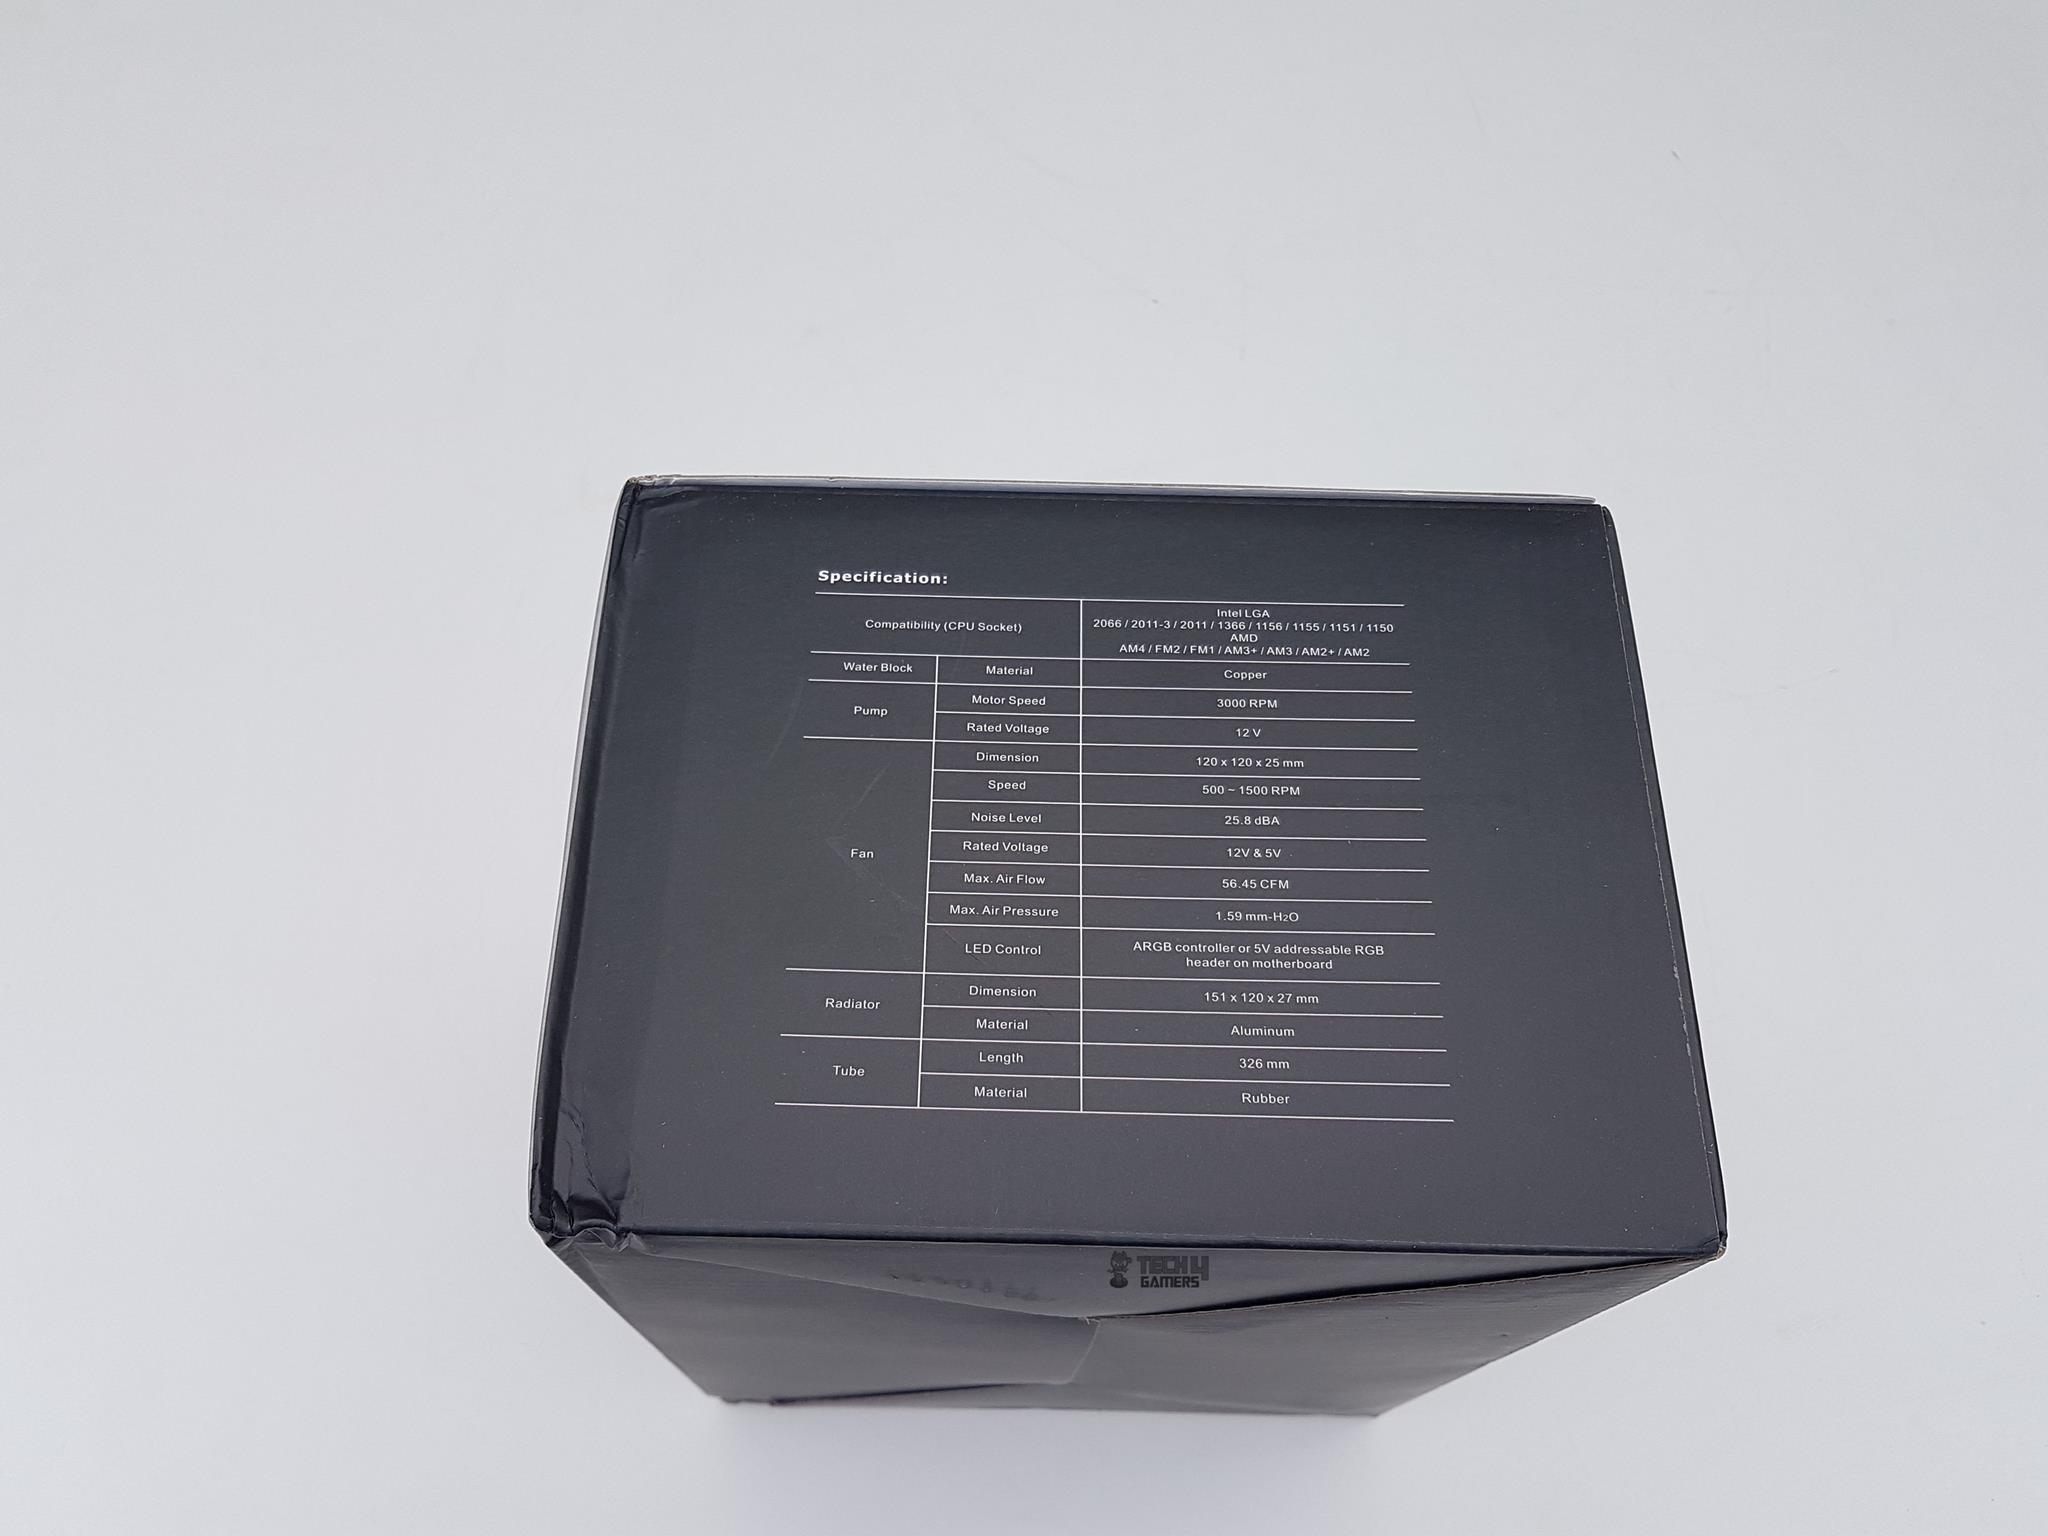
Let’s check out the cooler specifications before getting into this review.
Packaging and Unboxing
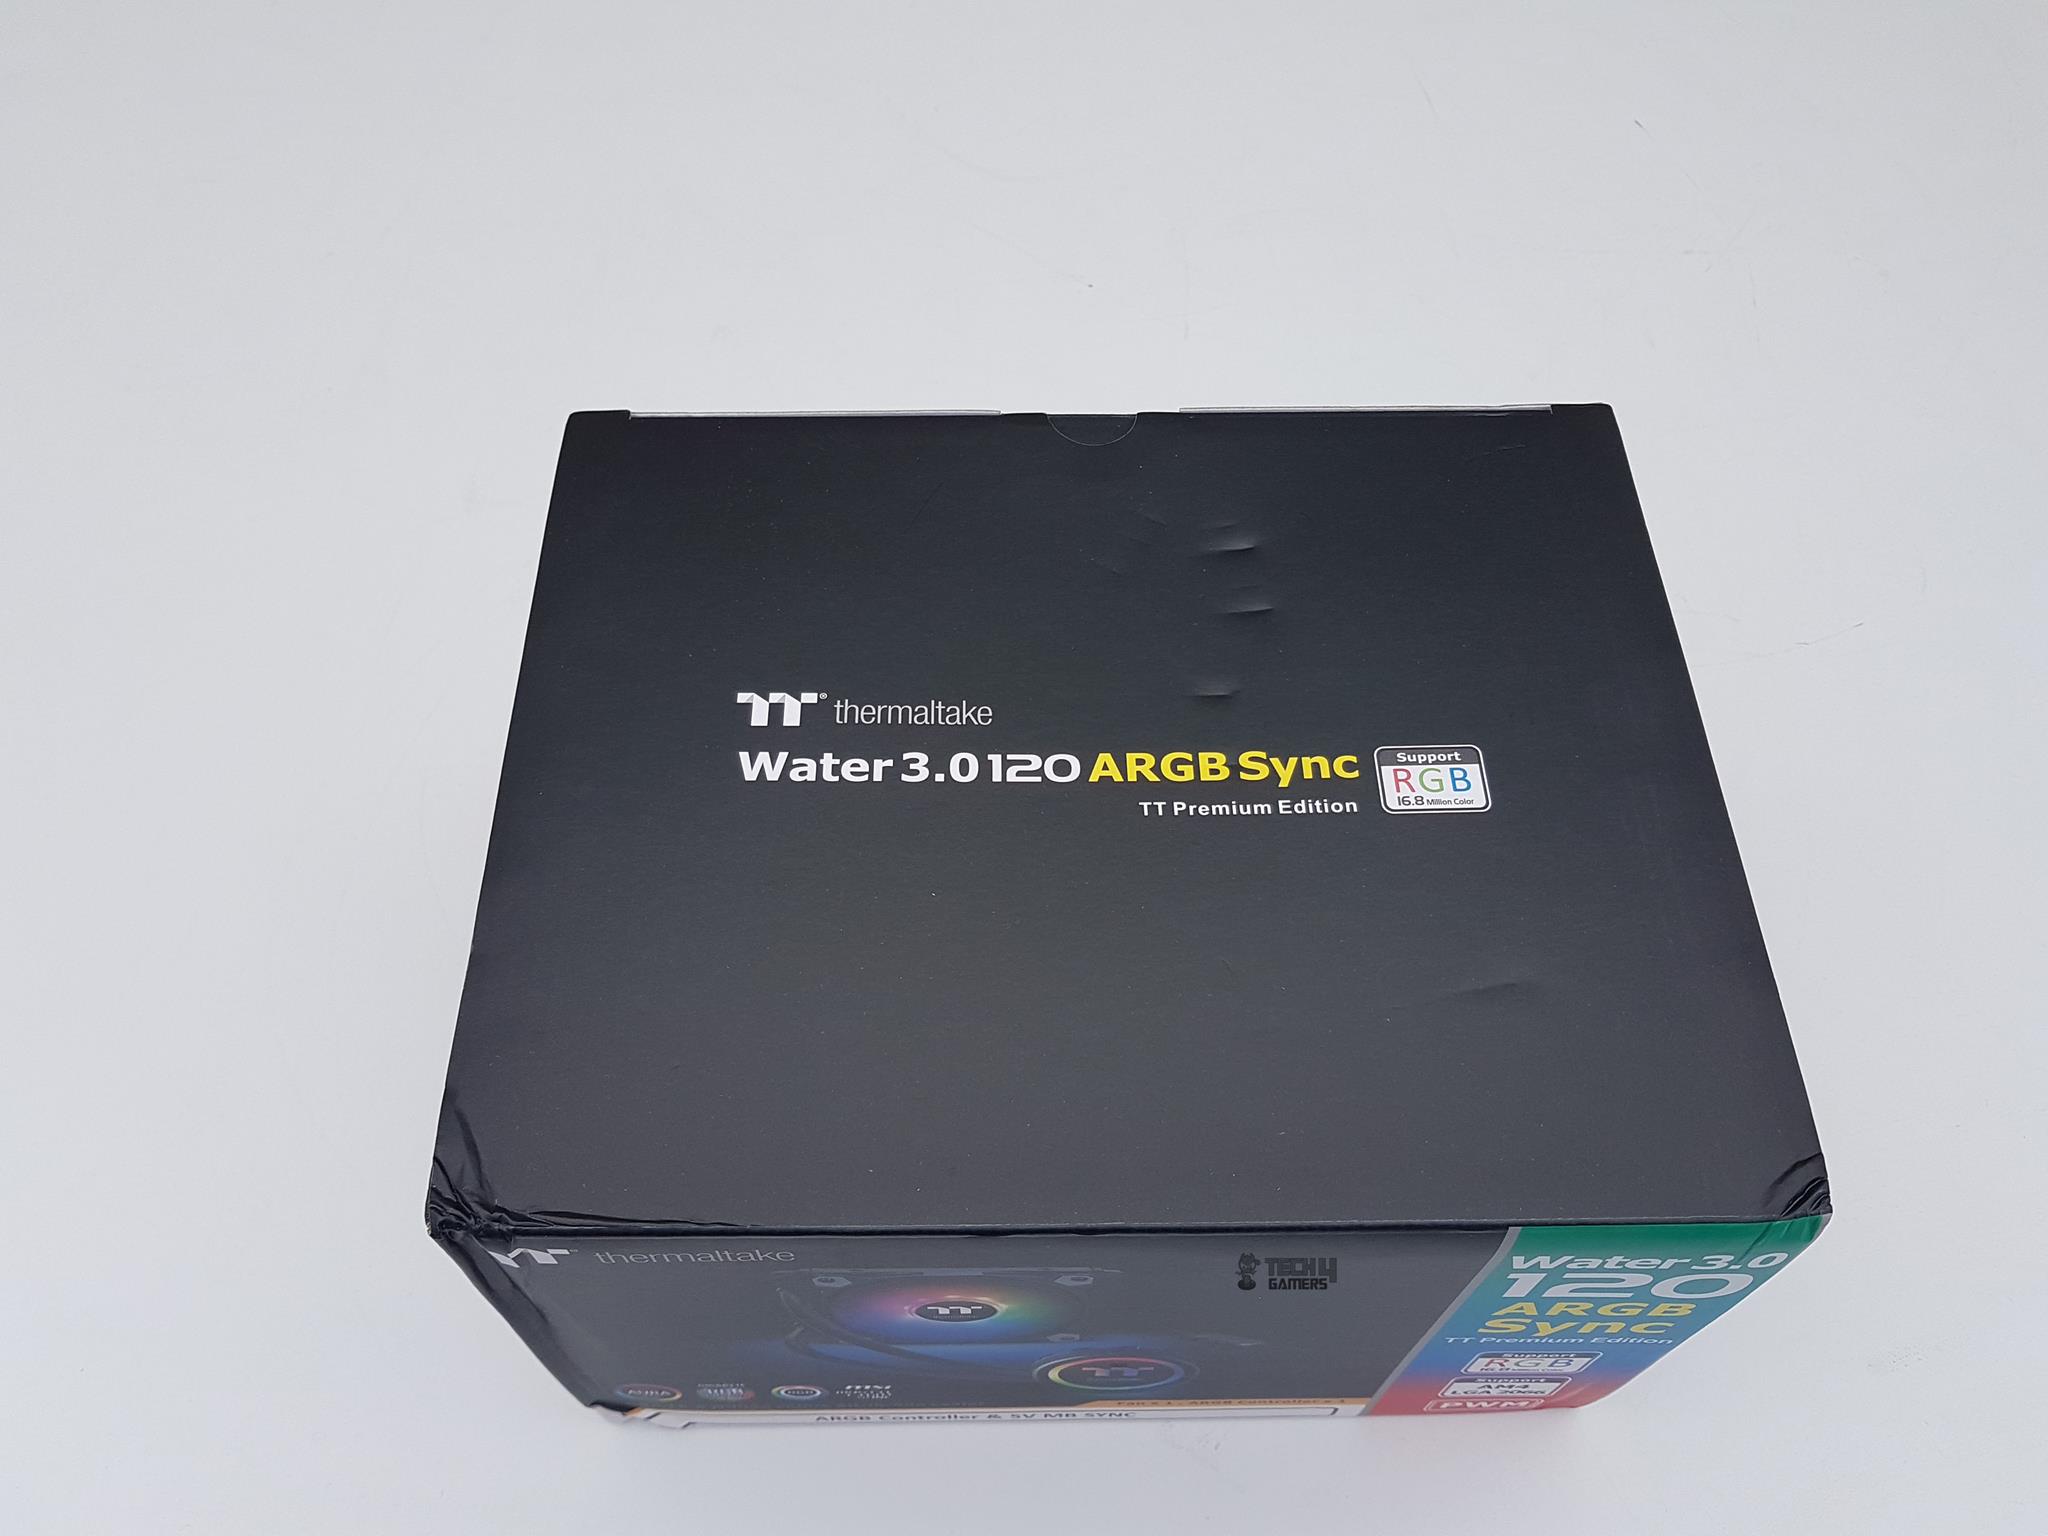
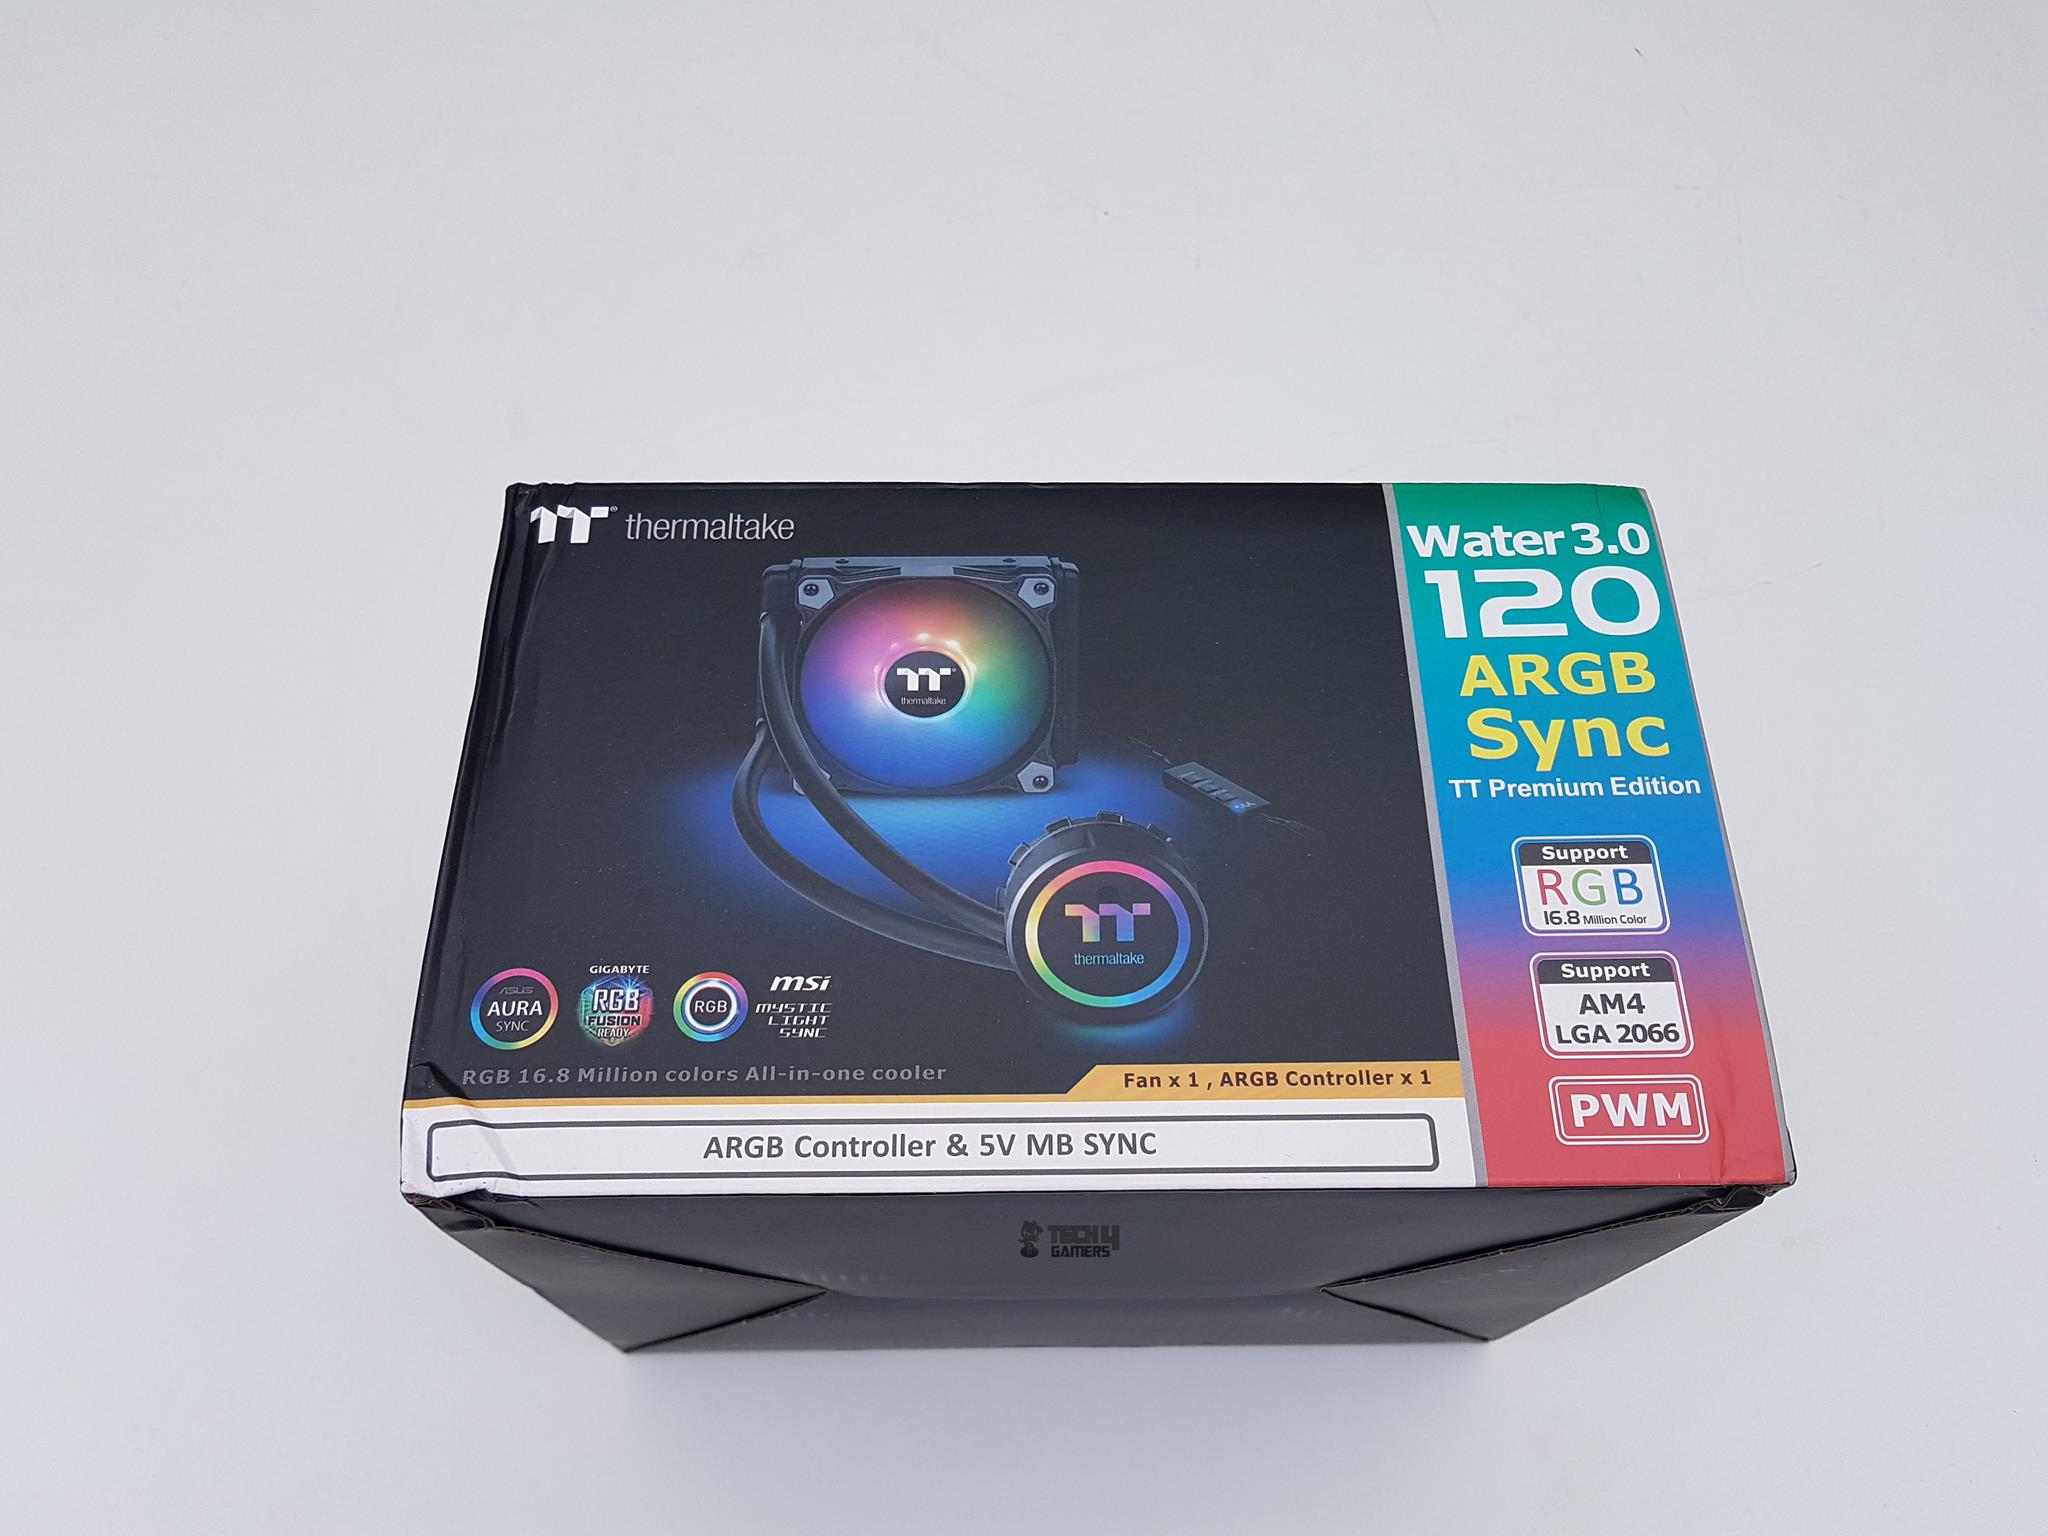
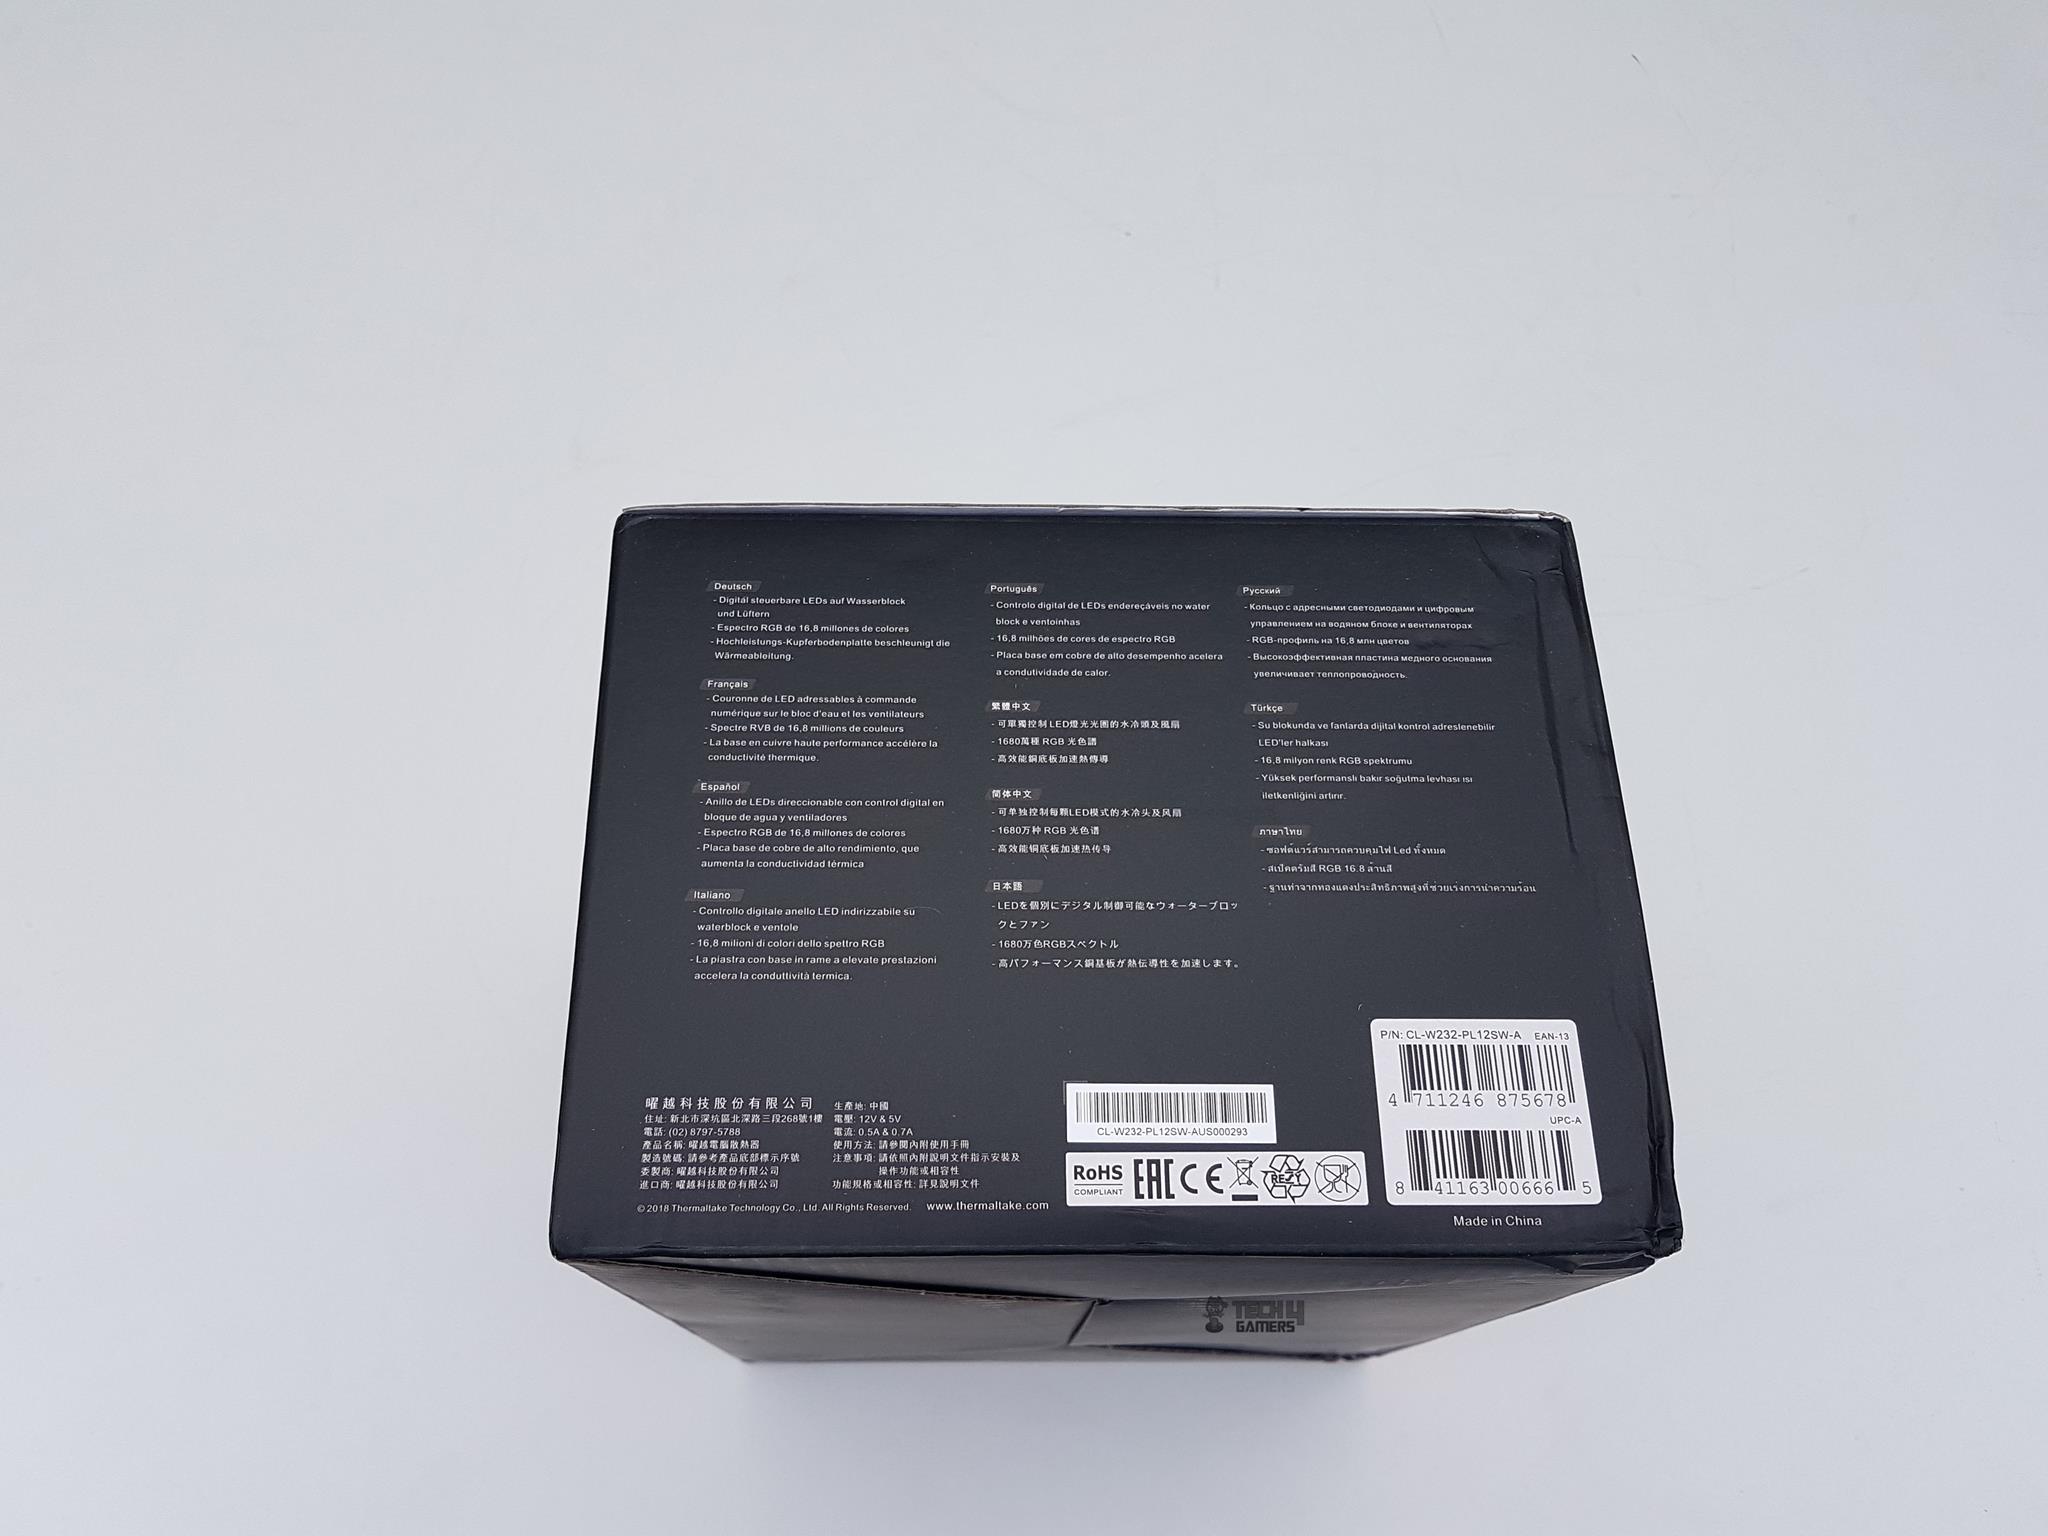
The cooler comes inside a cardboard box. The contents of the box are placed inside the egged carton for maximum protection during the shipping.
Accessories
Let’s see what’s provided in the box.

Closer Look
It is time to take a closer look at the cooler.
Radiator
The radiator measures 151x120x27mm, with the 27mm representing its slim profile. When paired with 25mm fans, its total height reaches 52mm. Fully assembled, it measures approximately 53.50mm due to the fan screws’ thick heads. Constructed from lightweight aluminum, it features an angular edge design.
The radiator boasts a 20 FPI count, ideal for fans with high airflow and air pressure. Its thinner far chamber, typical in AIO coolers, maintains 105mm spacing between mounting holes. The fins area spans around 120mm, while the radiator’s length reaches 151mm.
Notably, there’s no protective plating beneath the mounting holes. Be cautious when installing fans to avoid damaging the fins, which could impact performance or even cause radiator leakage.
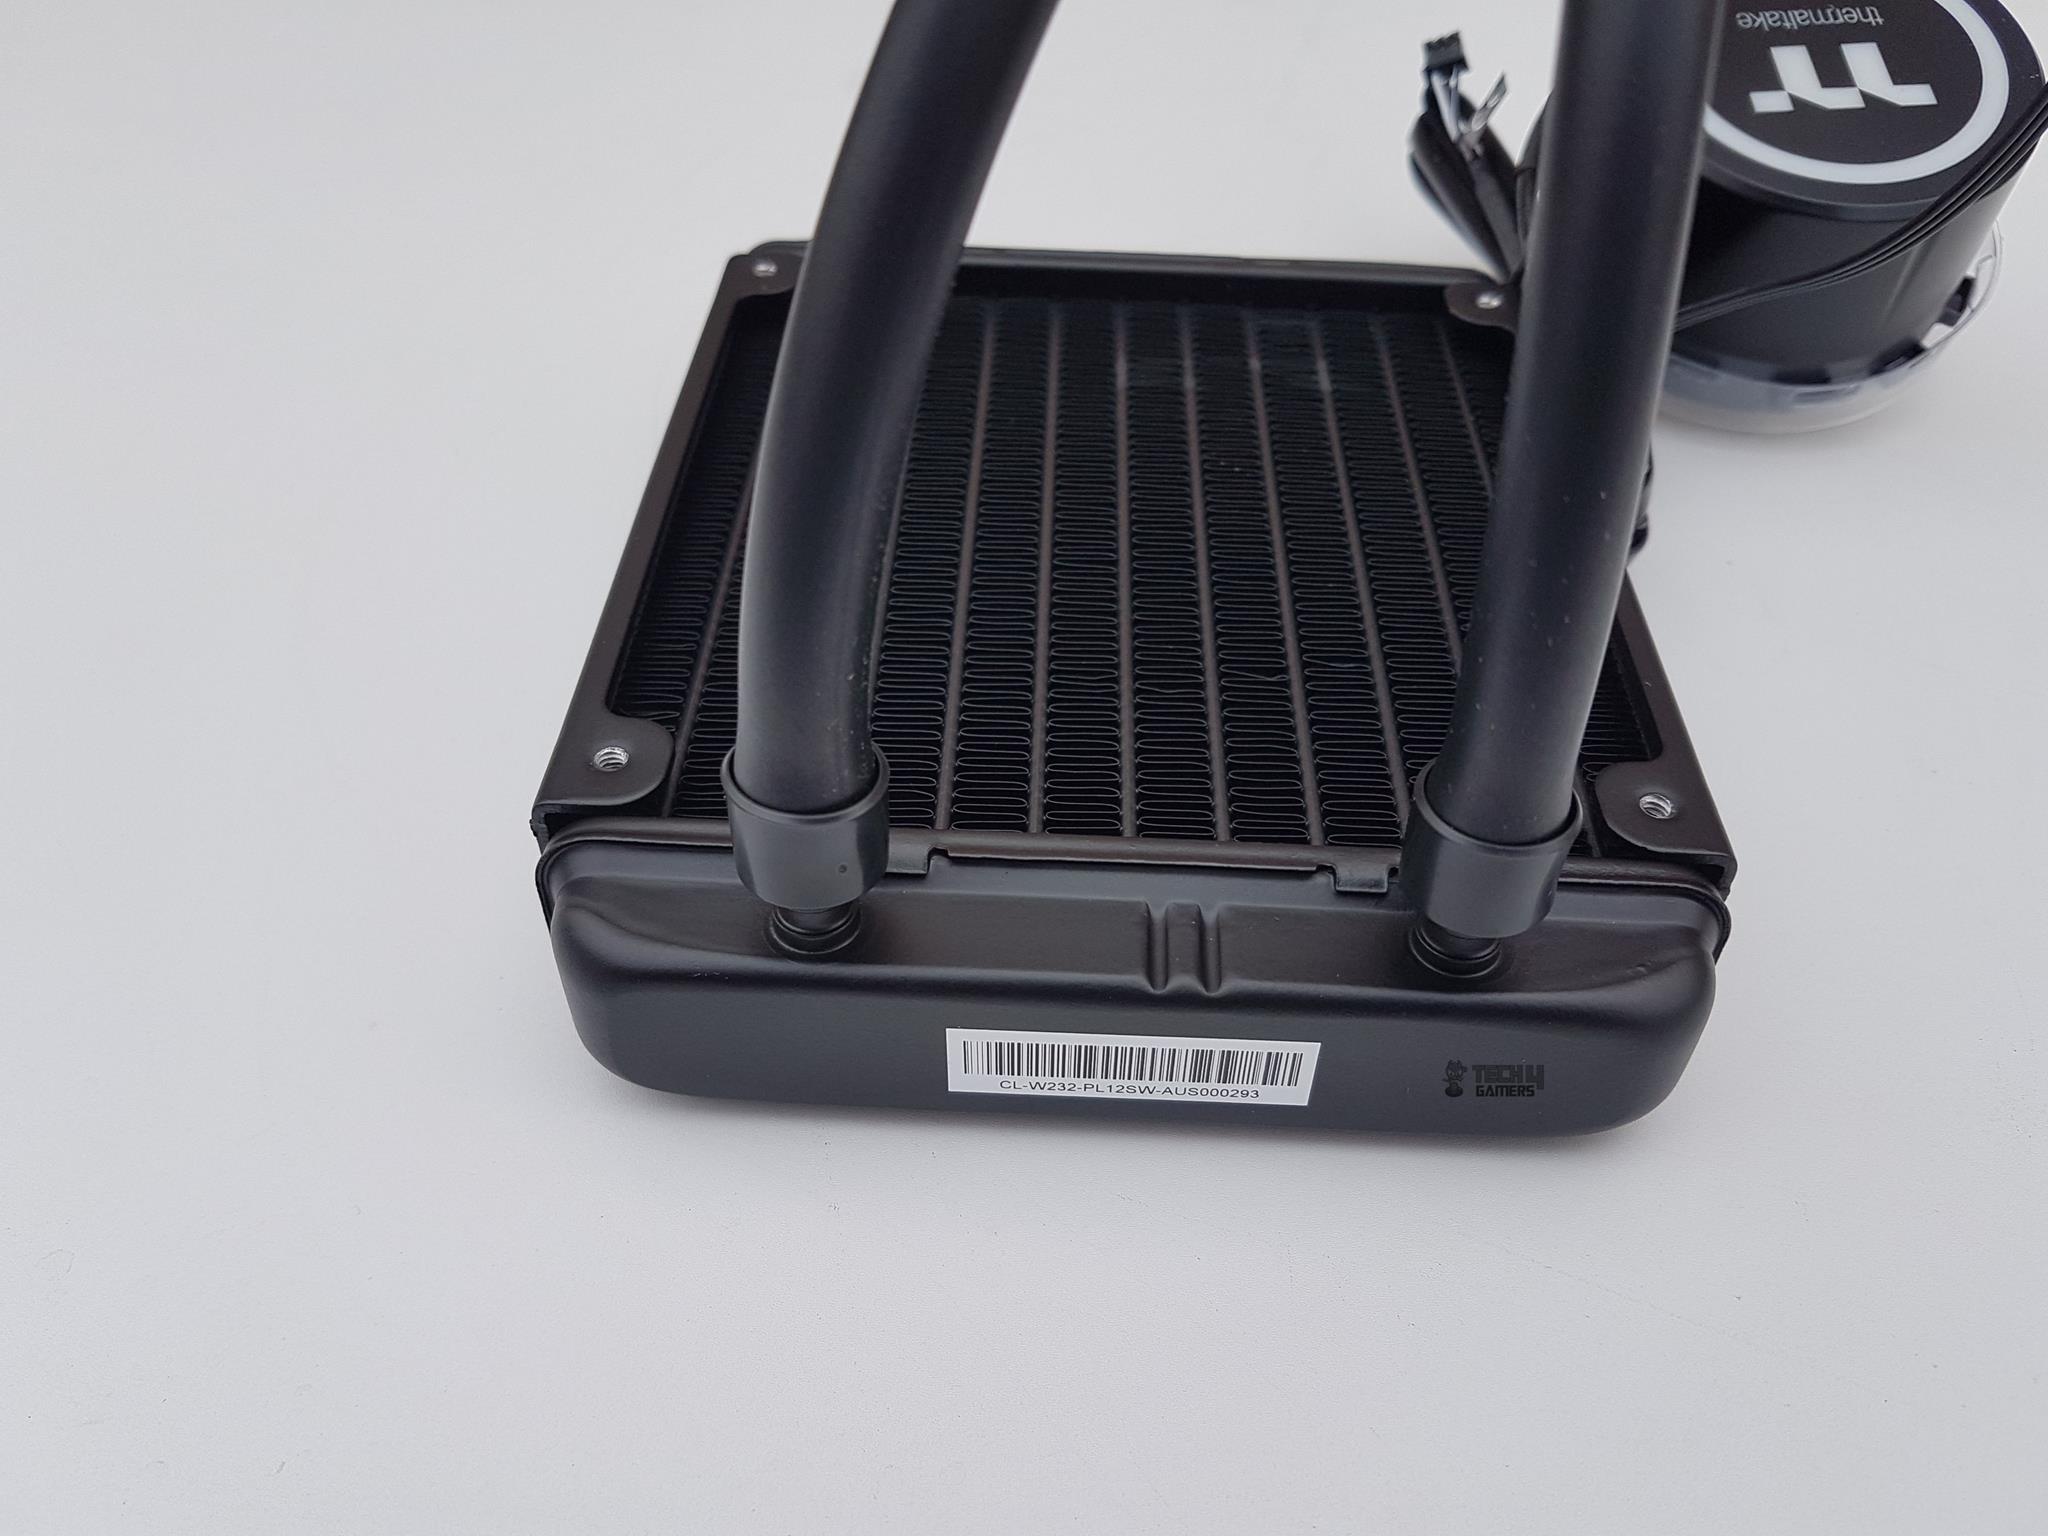
This cooler is using flexible rubber tubing with no sleeve. The length of the tube is 326mm. The tubes have OD of 9.72mm as measured with a digital caliper. Barbed fittings can be seen from the above picture.
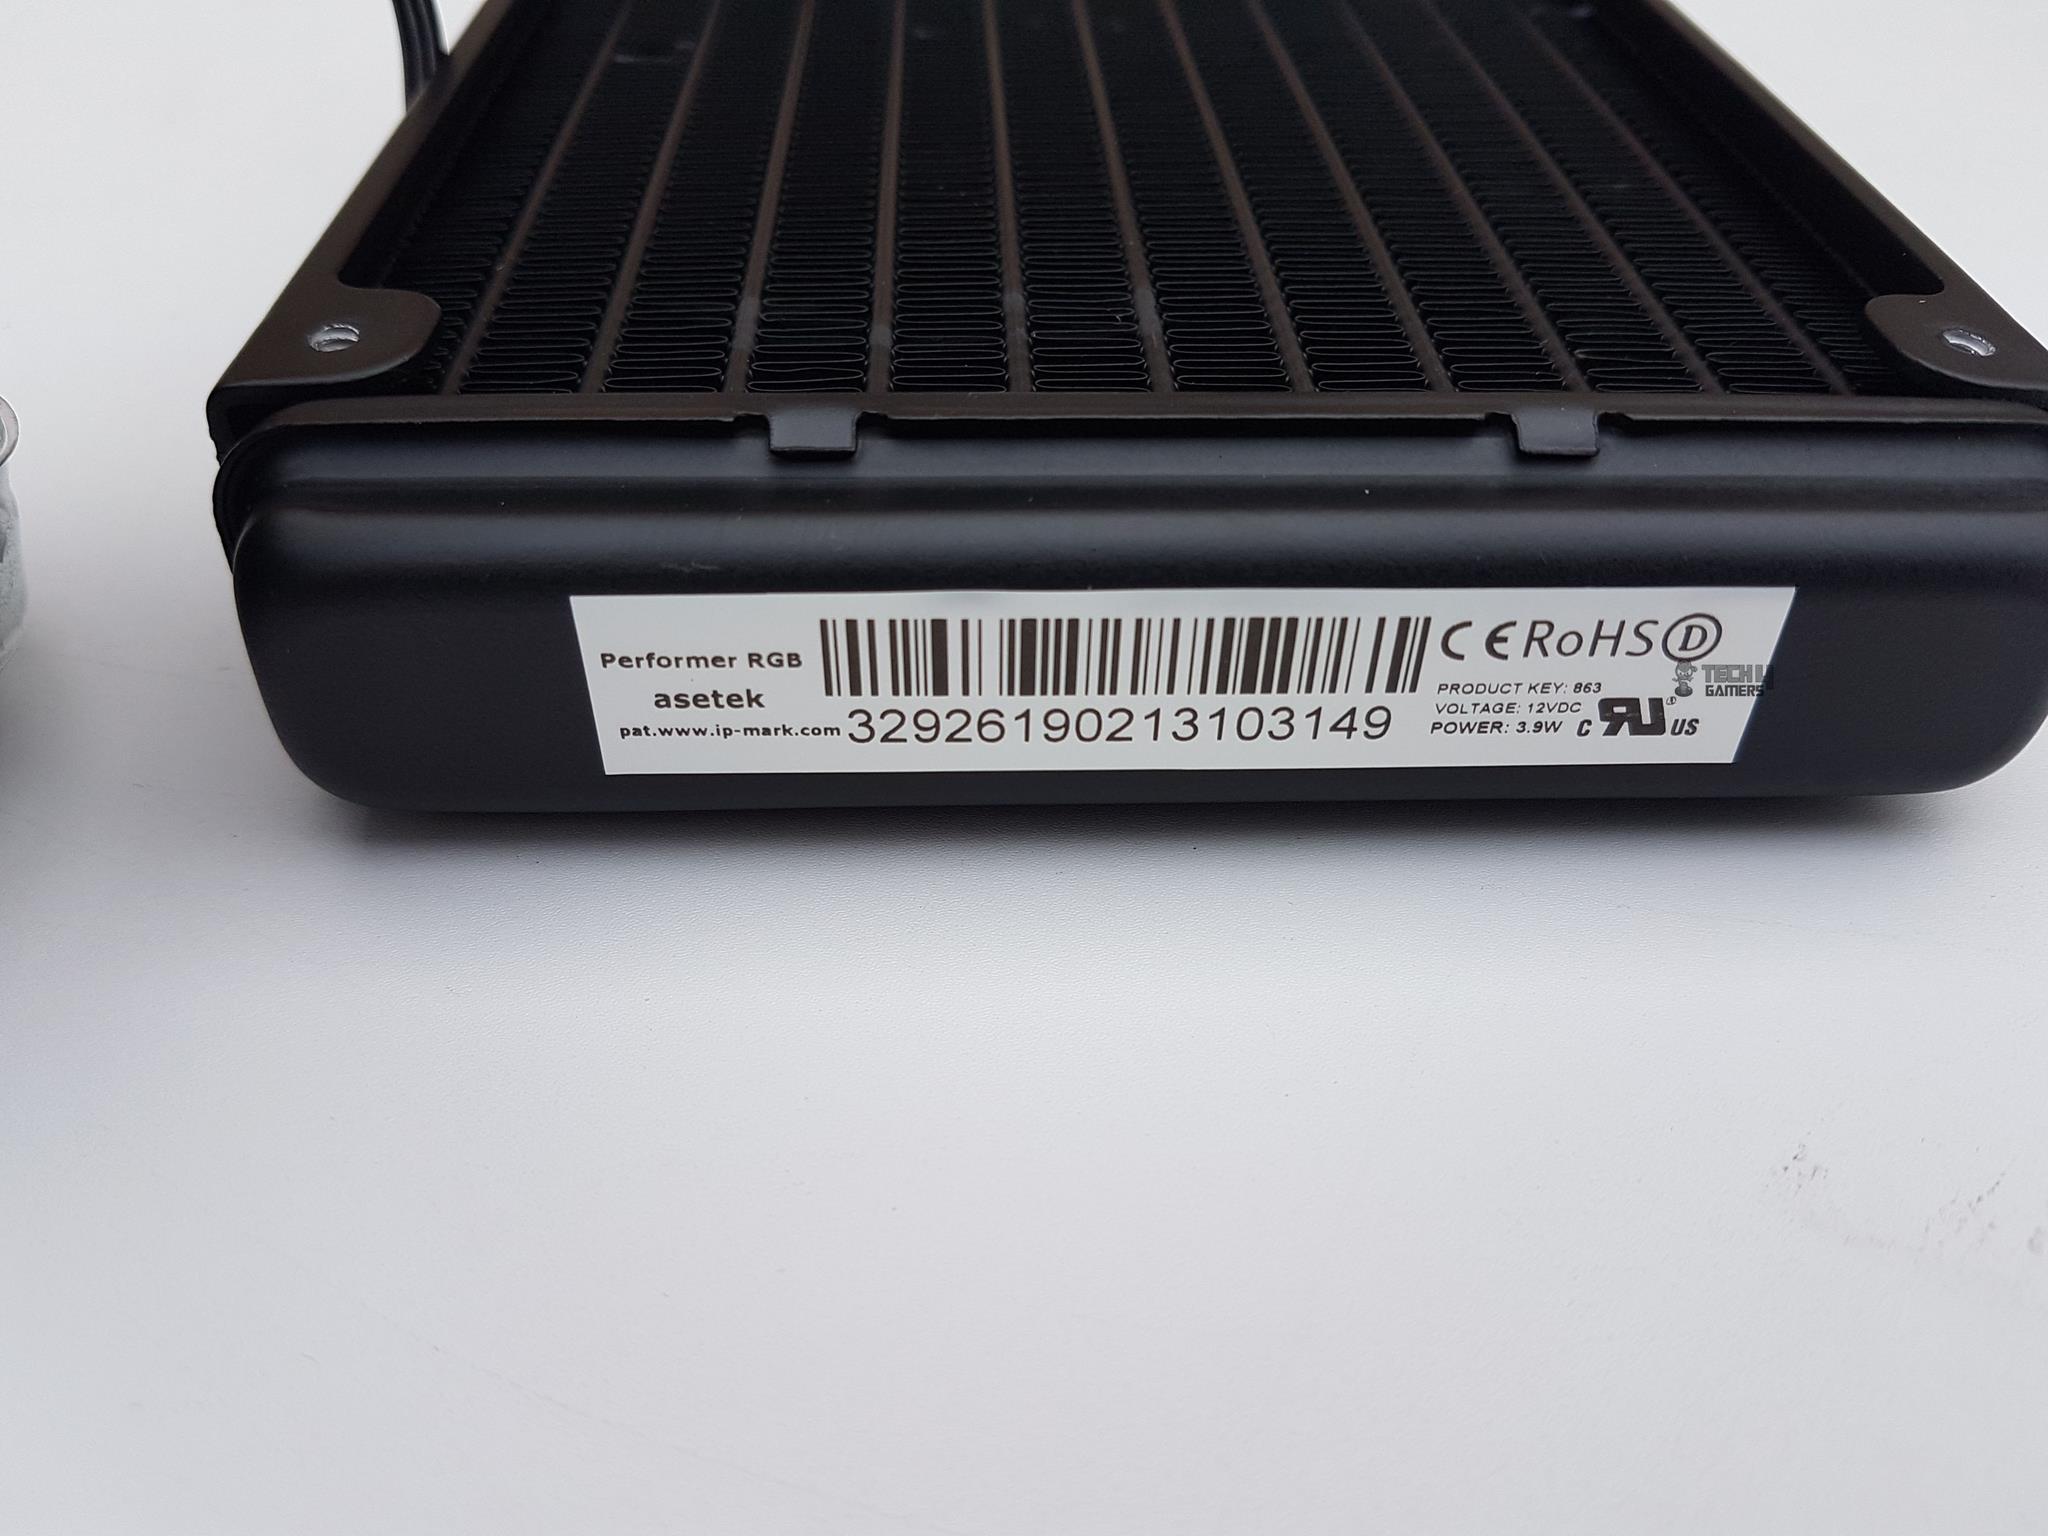
There is a sticker pasted on the side confirming that the Asetek is an OEM of this unit.
Water Block
Let’s take a look at the water block of this cooler.
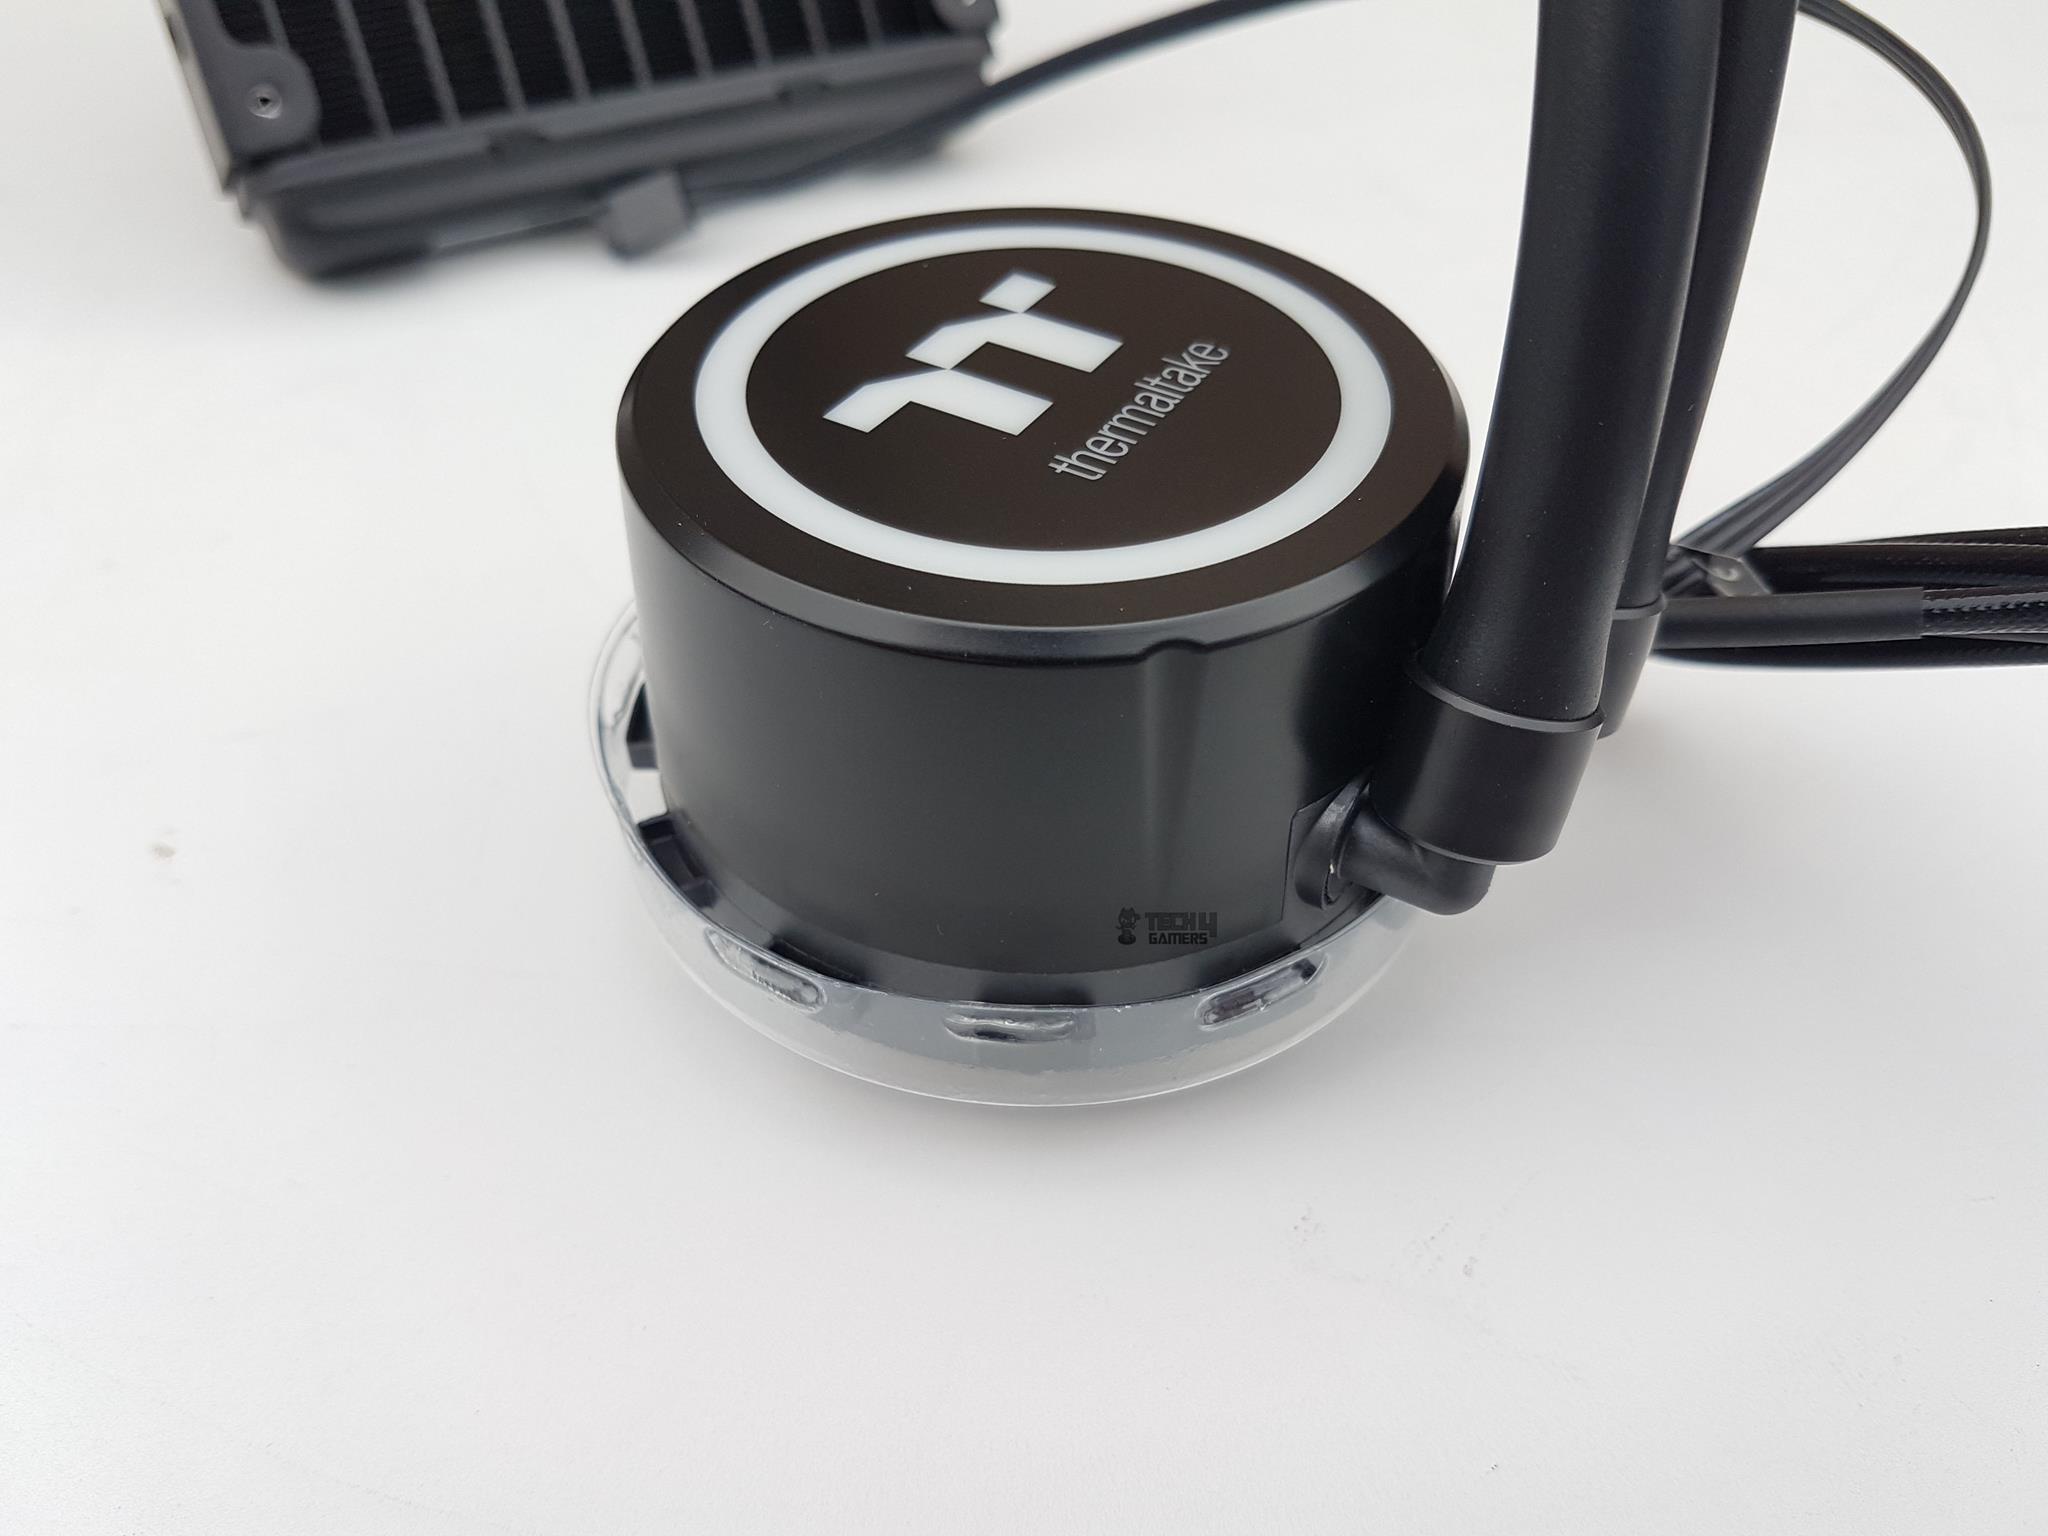
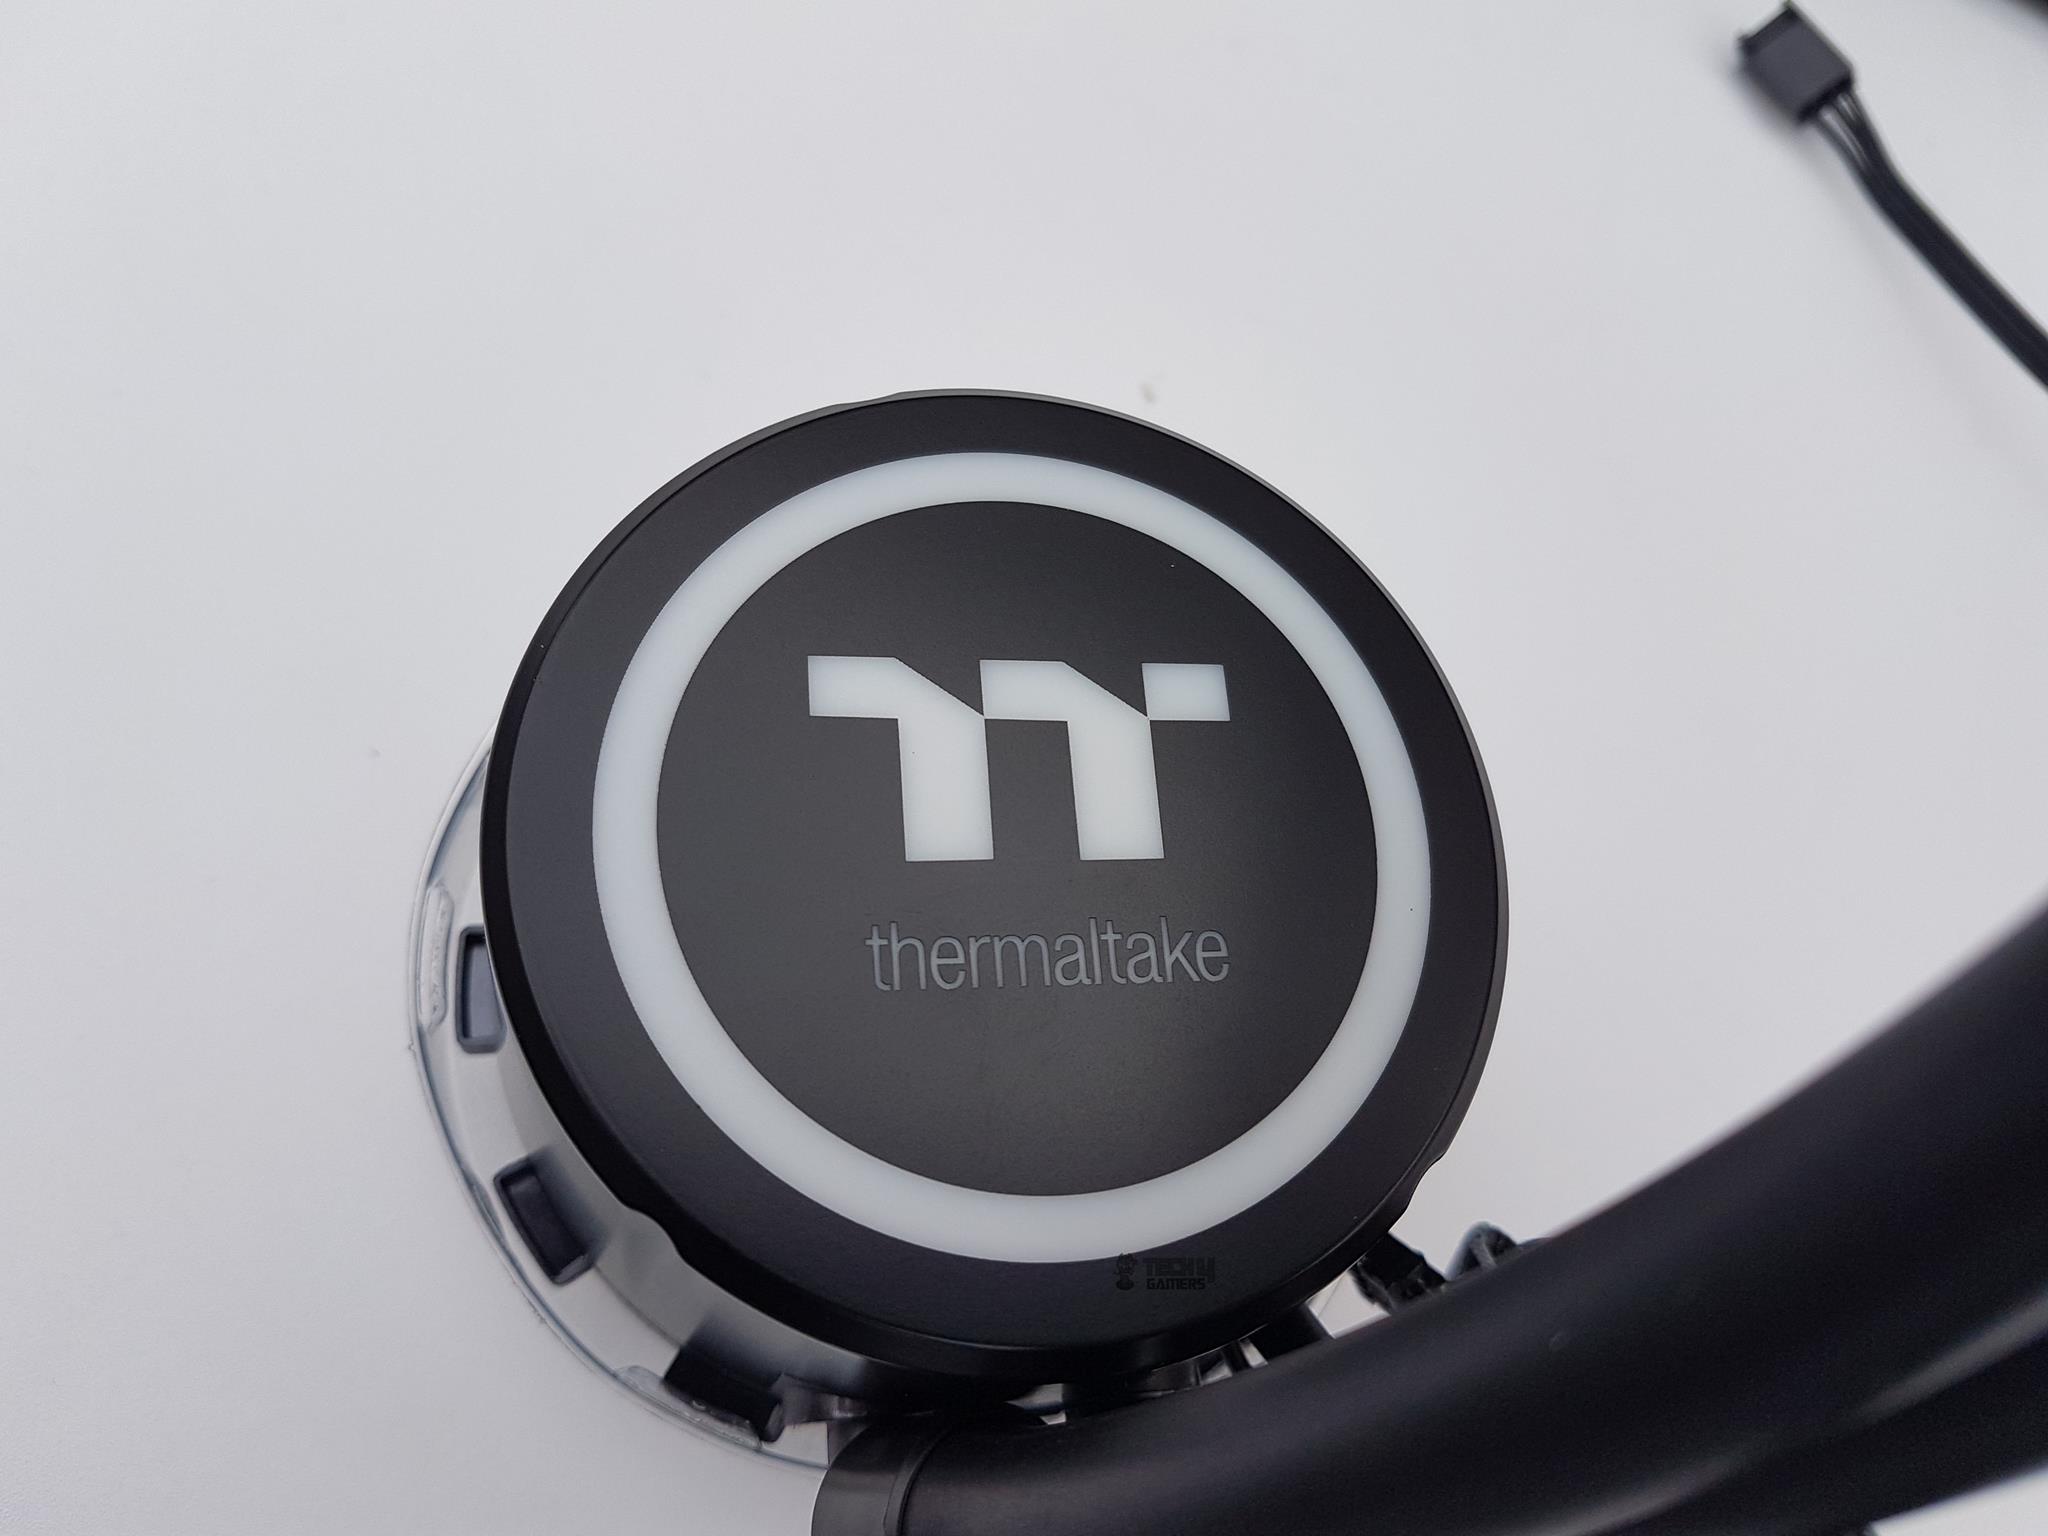
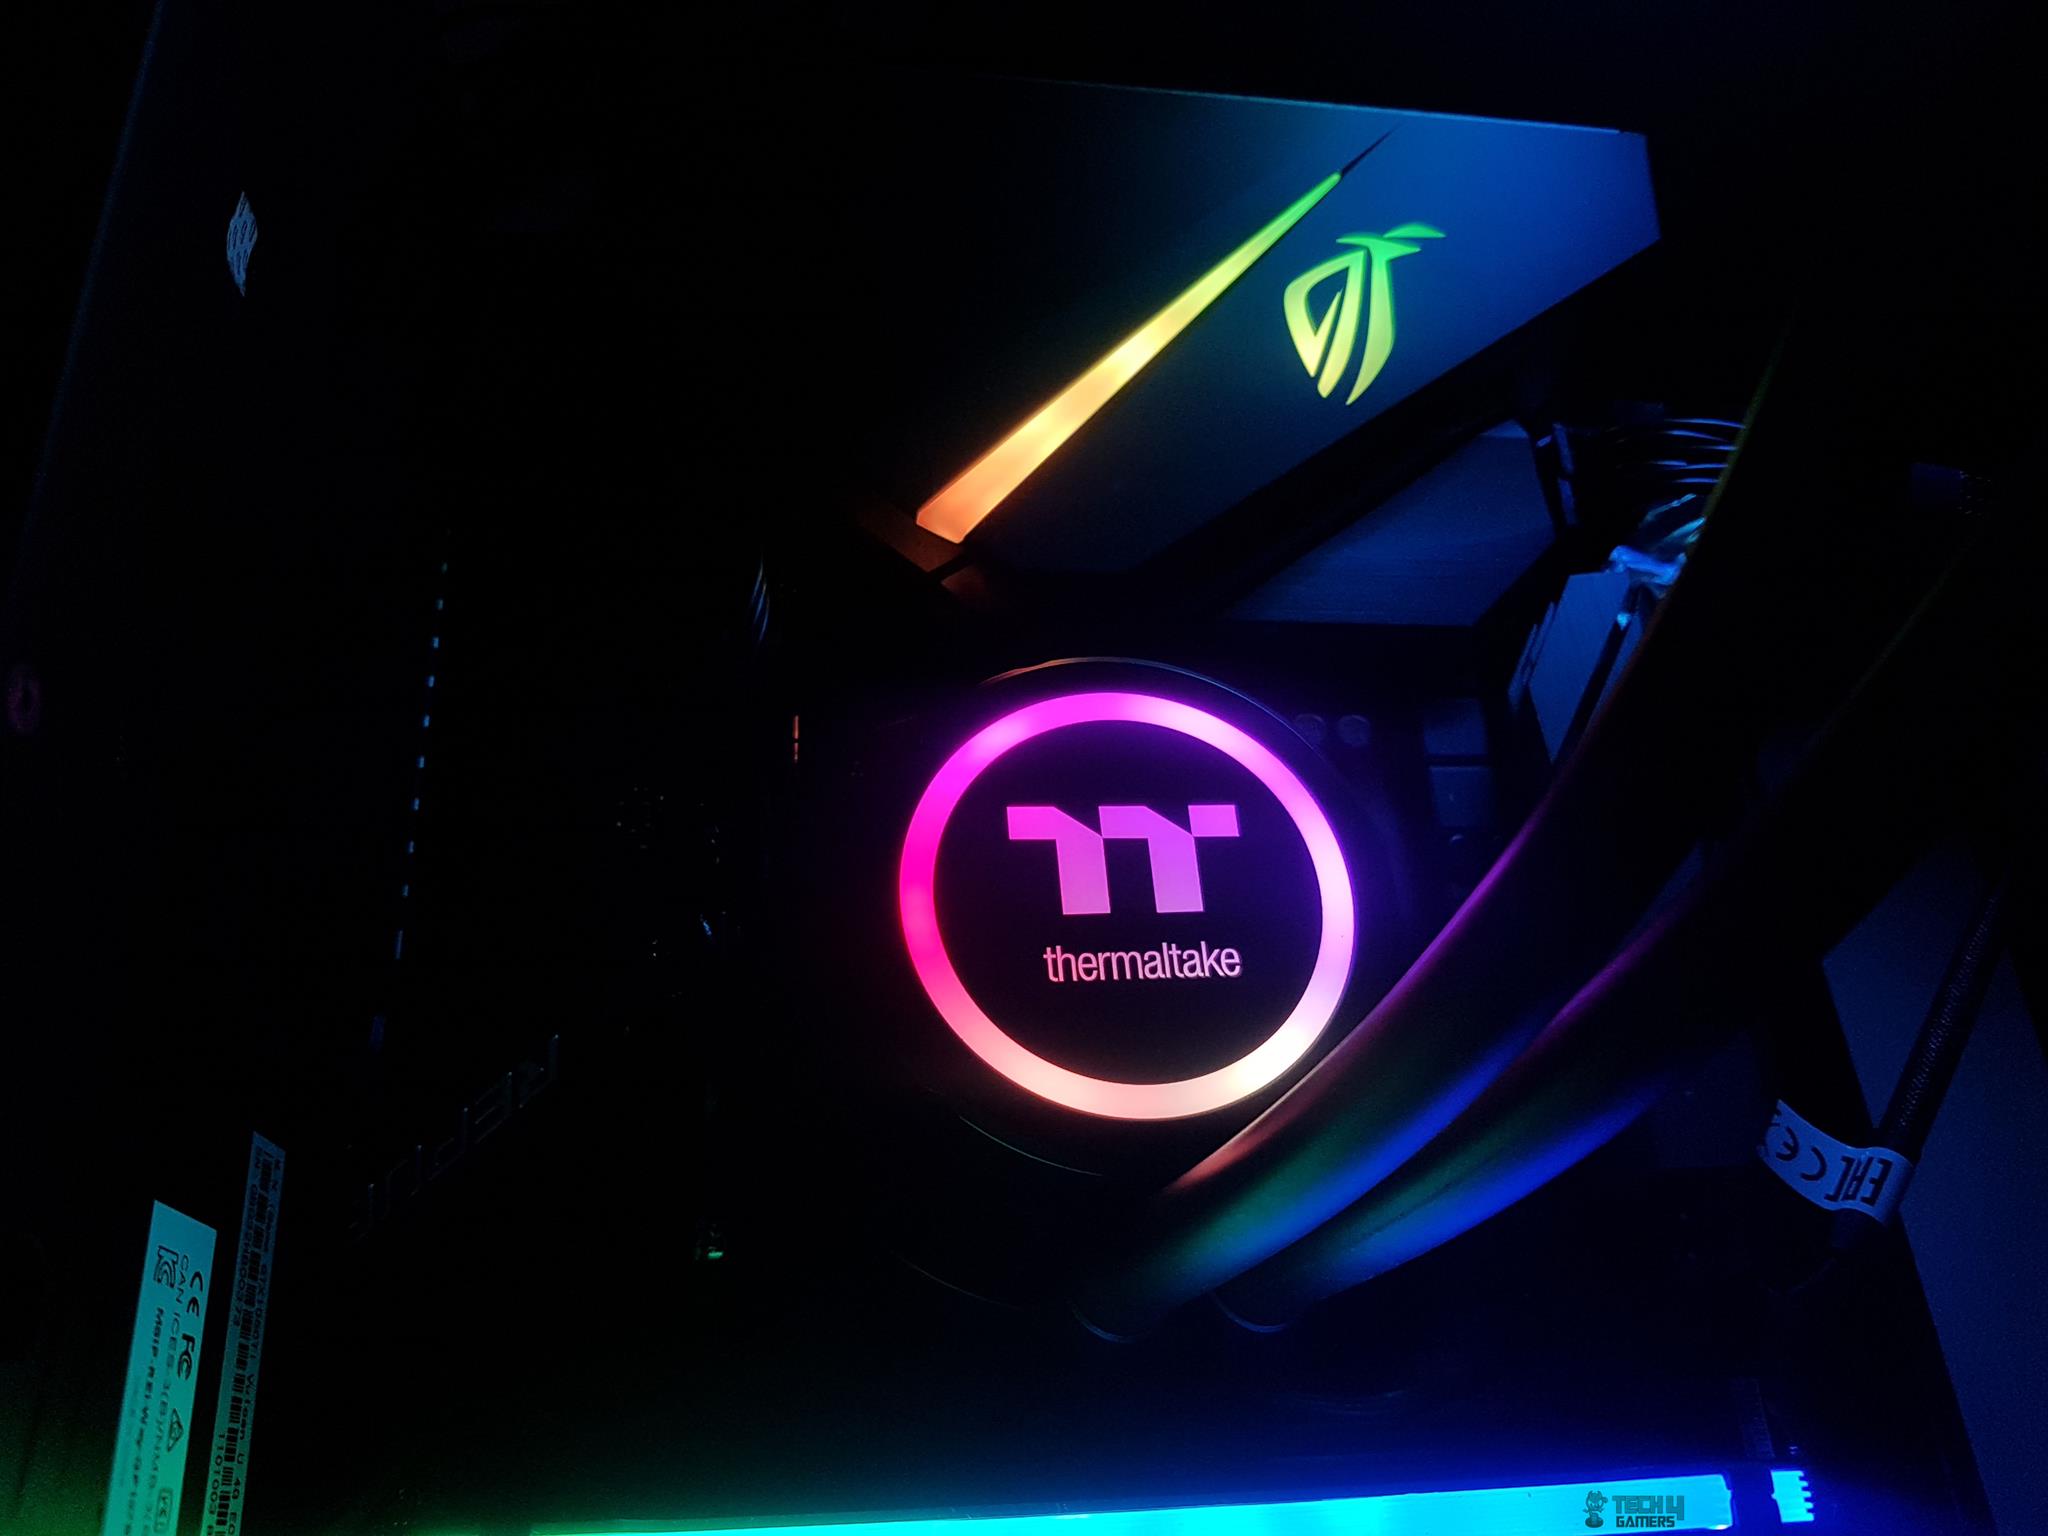
The pump housing is made of the plastic. There is a lid on the top of the block with a white diffuser in a circular design.
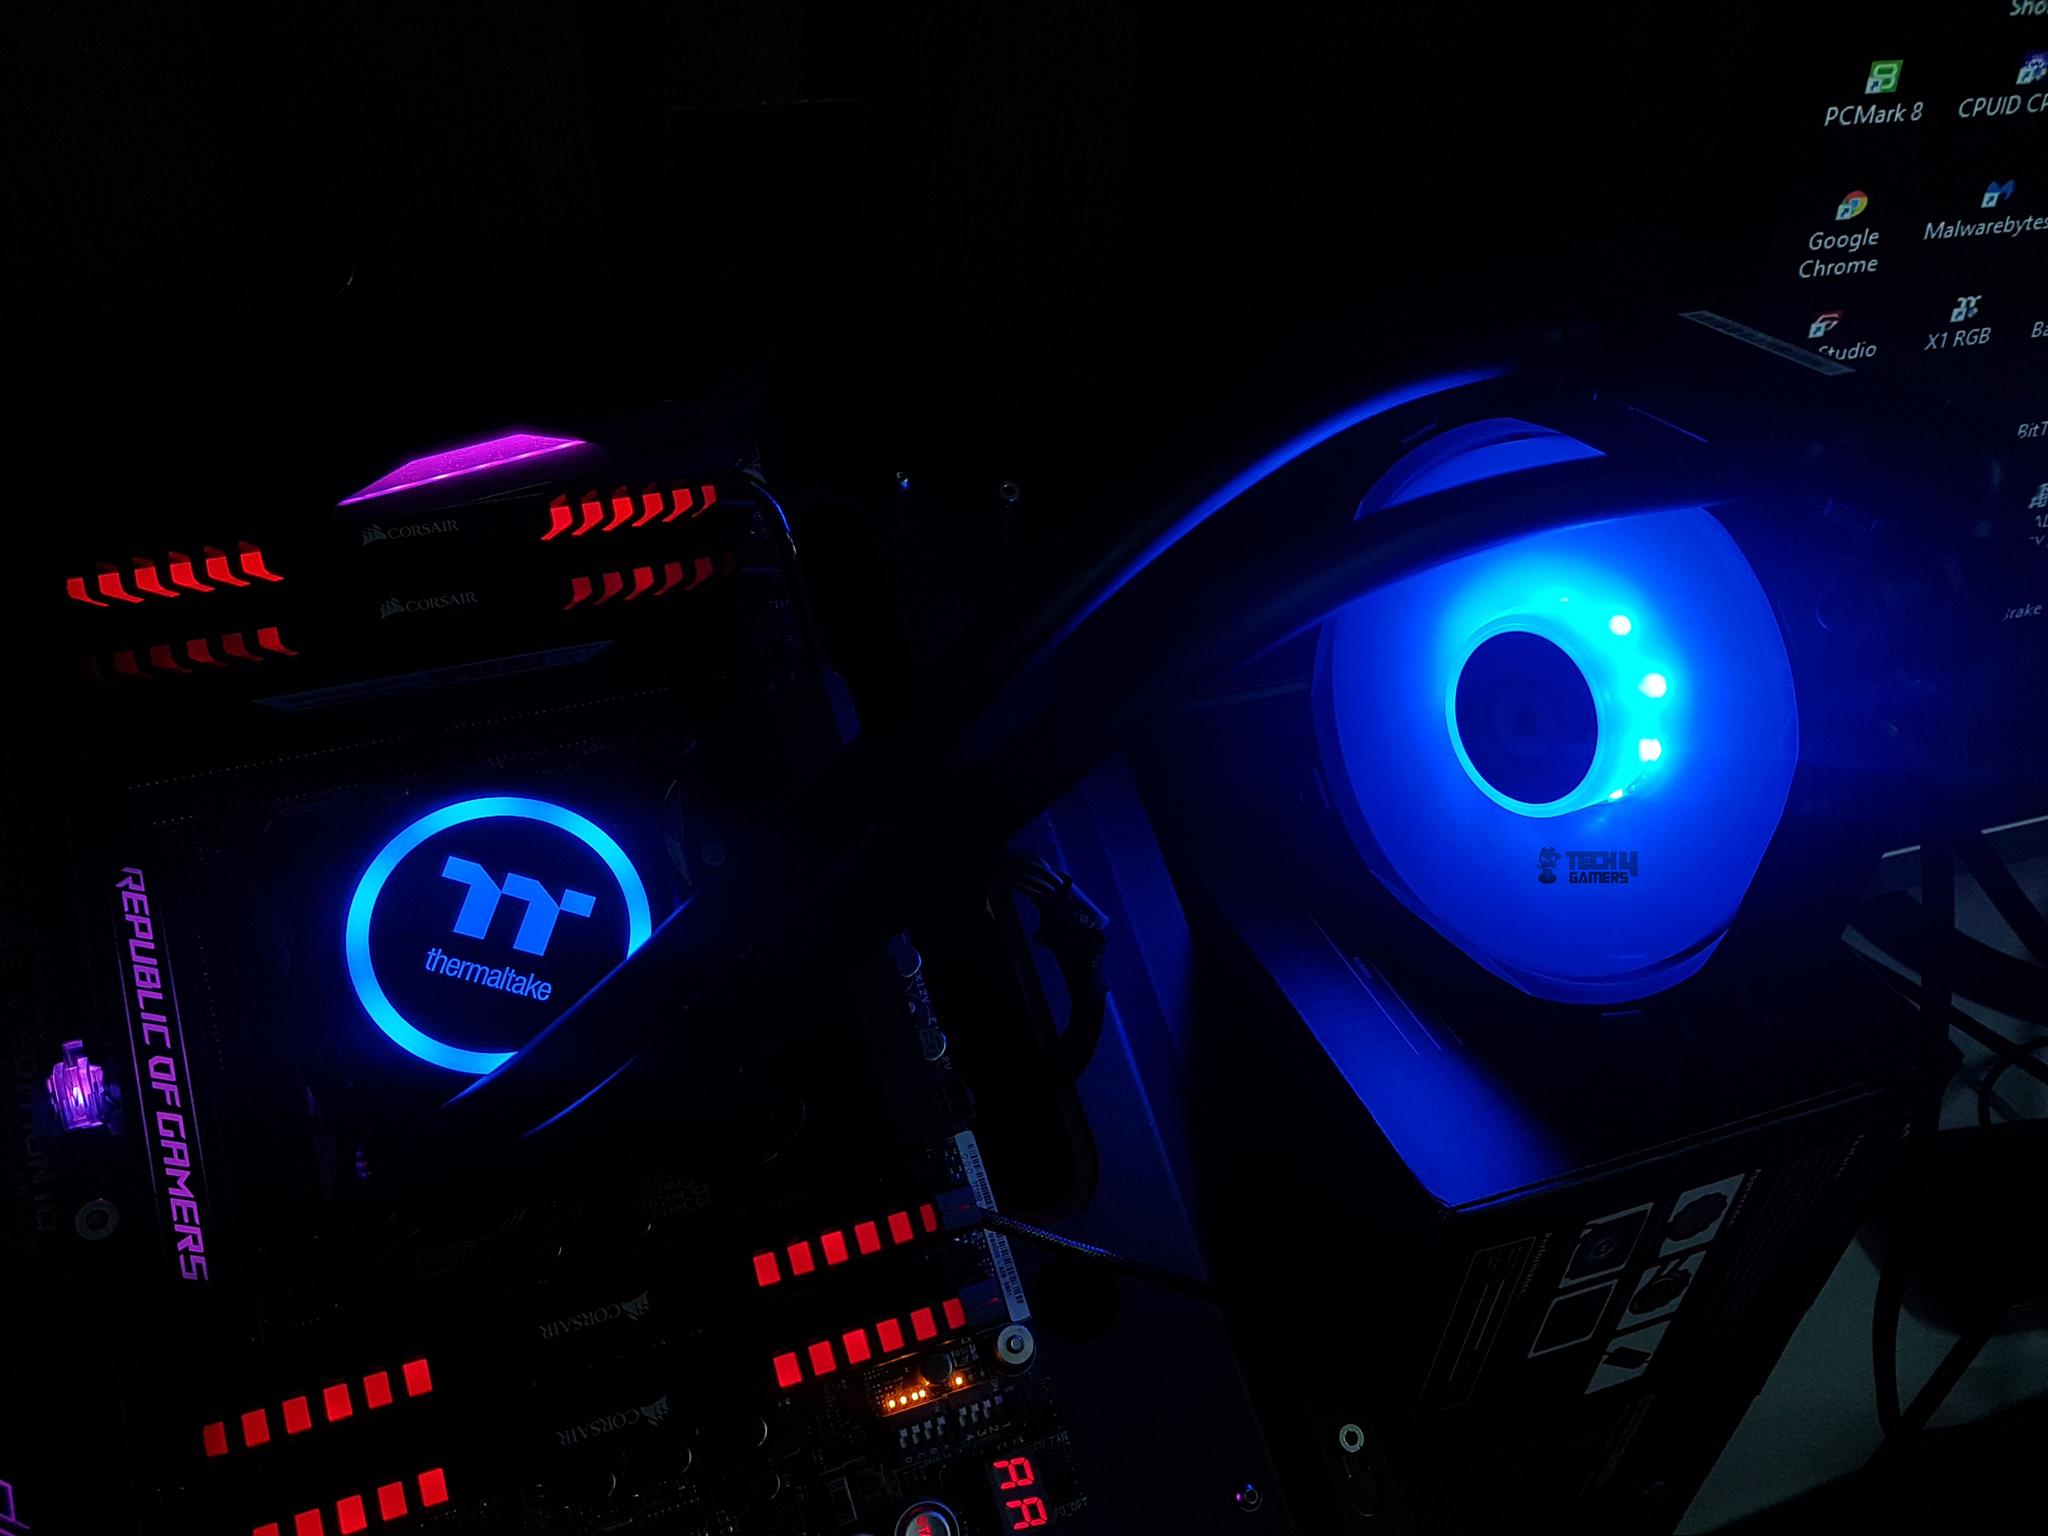
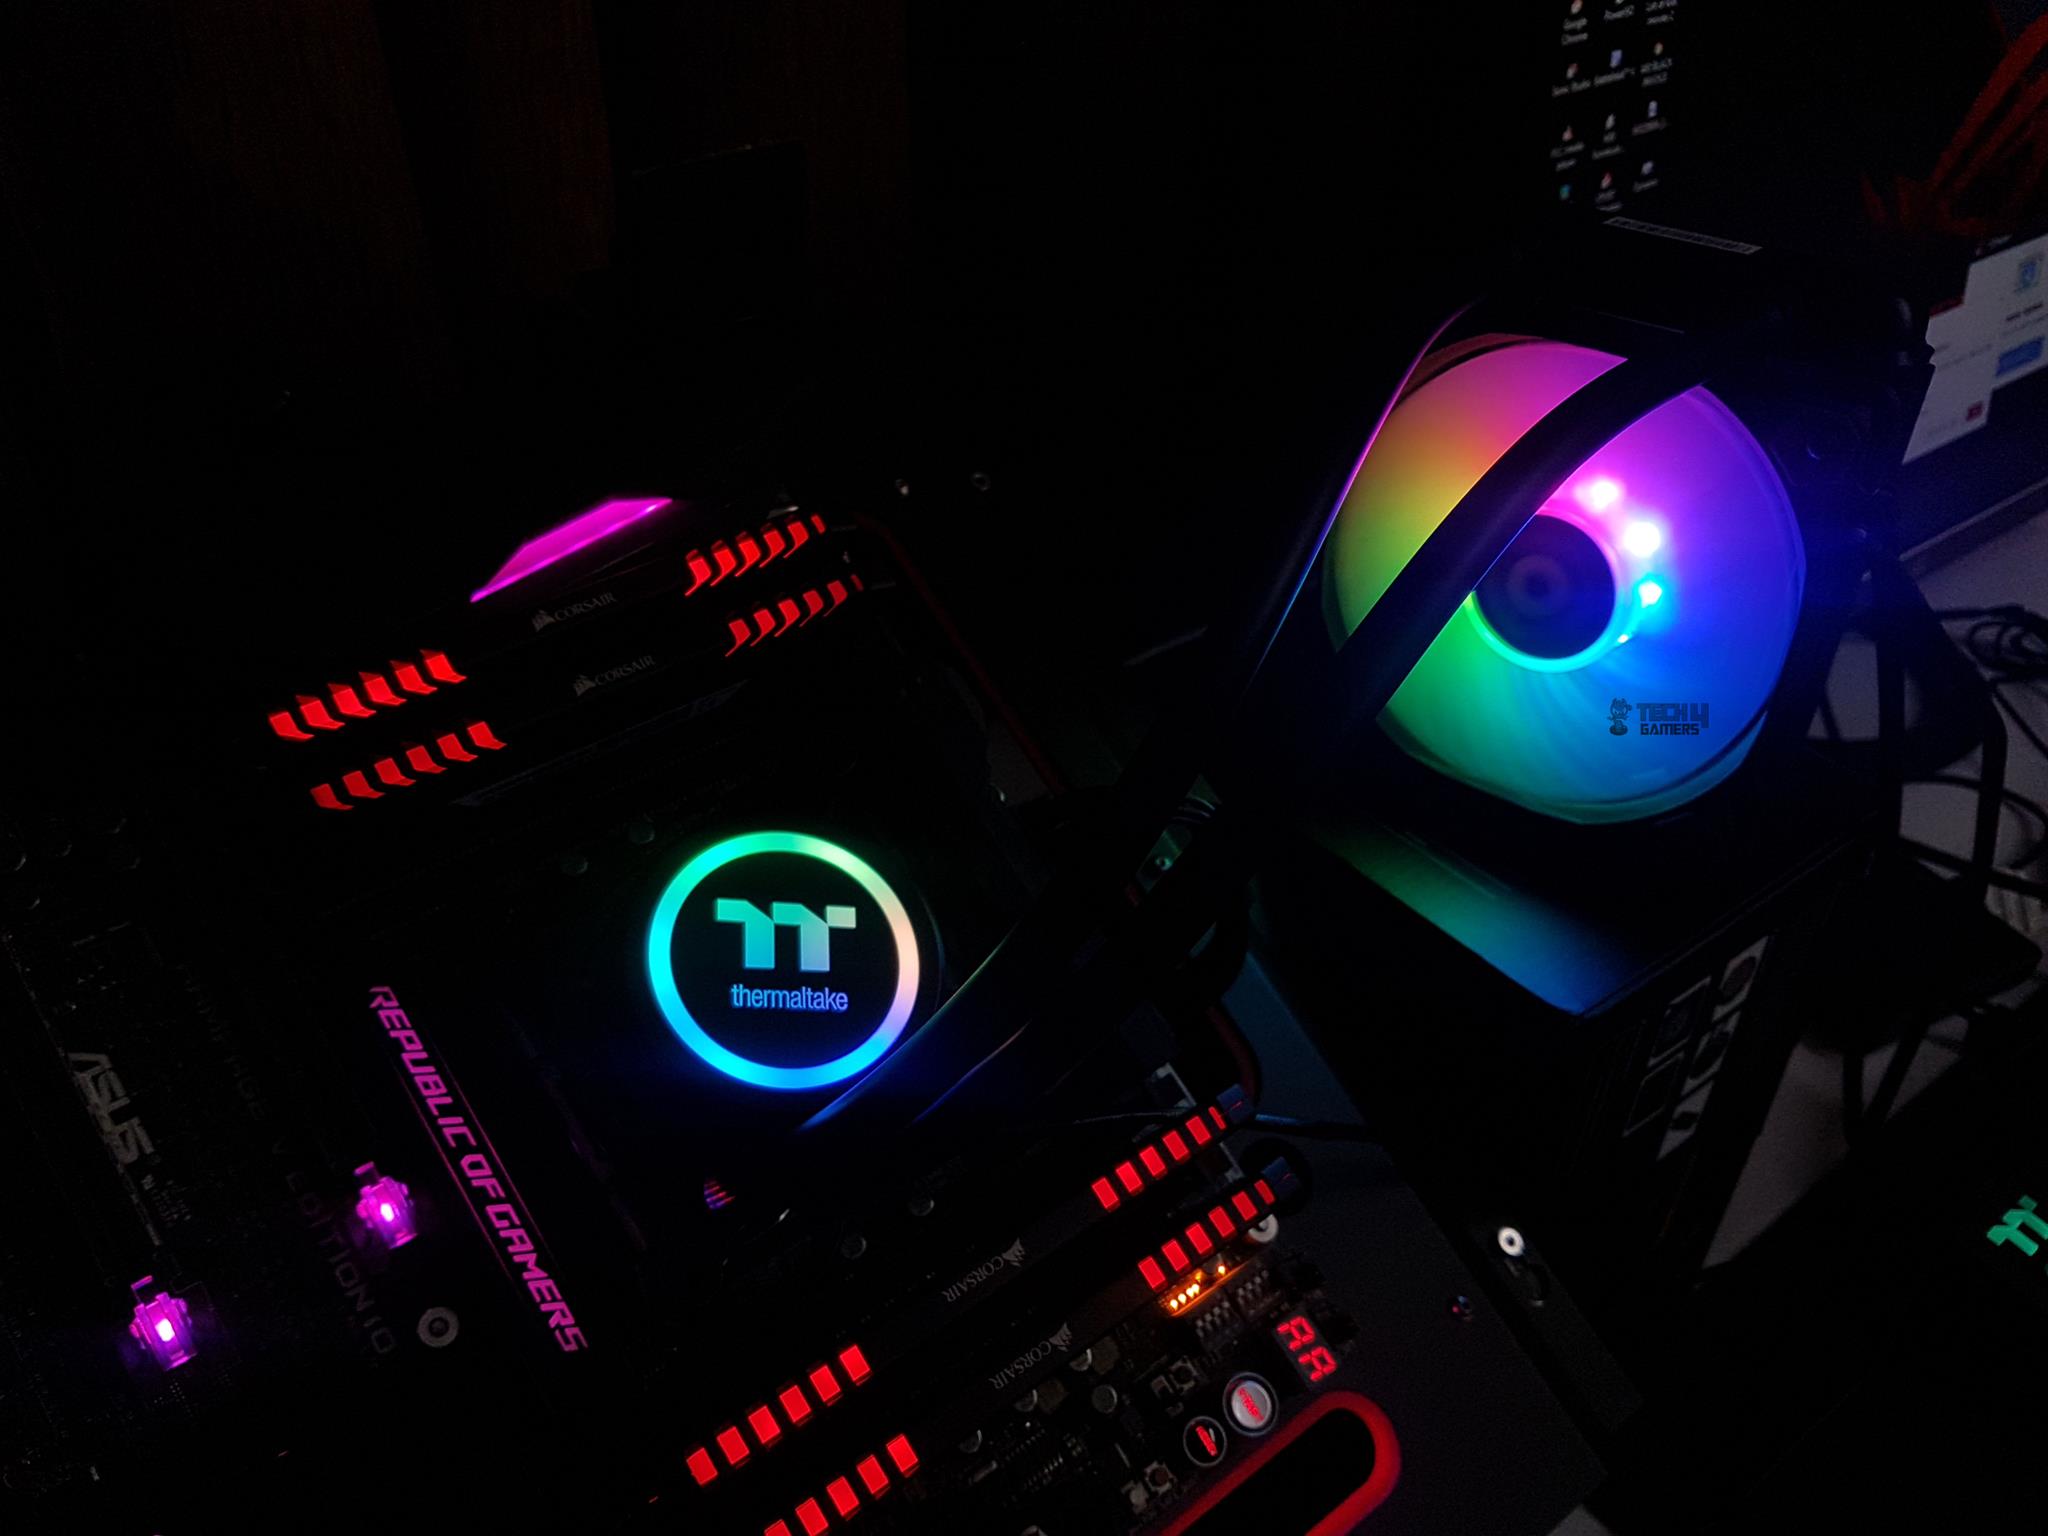
In the circle’s center, the TT premium brand logo stands out, accompanied by the Thermaltake text. These feature frosted white diffusers beneath, illuminating when activated. The entire block sports a circular matte black finish.
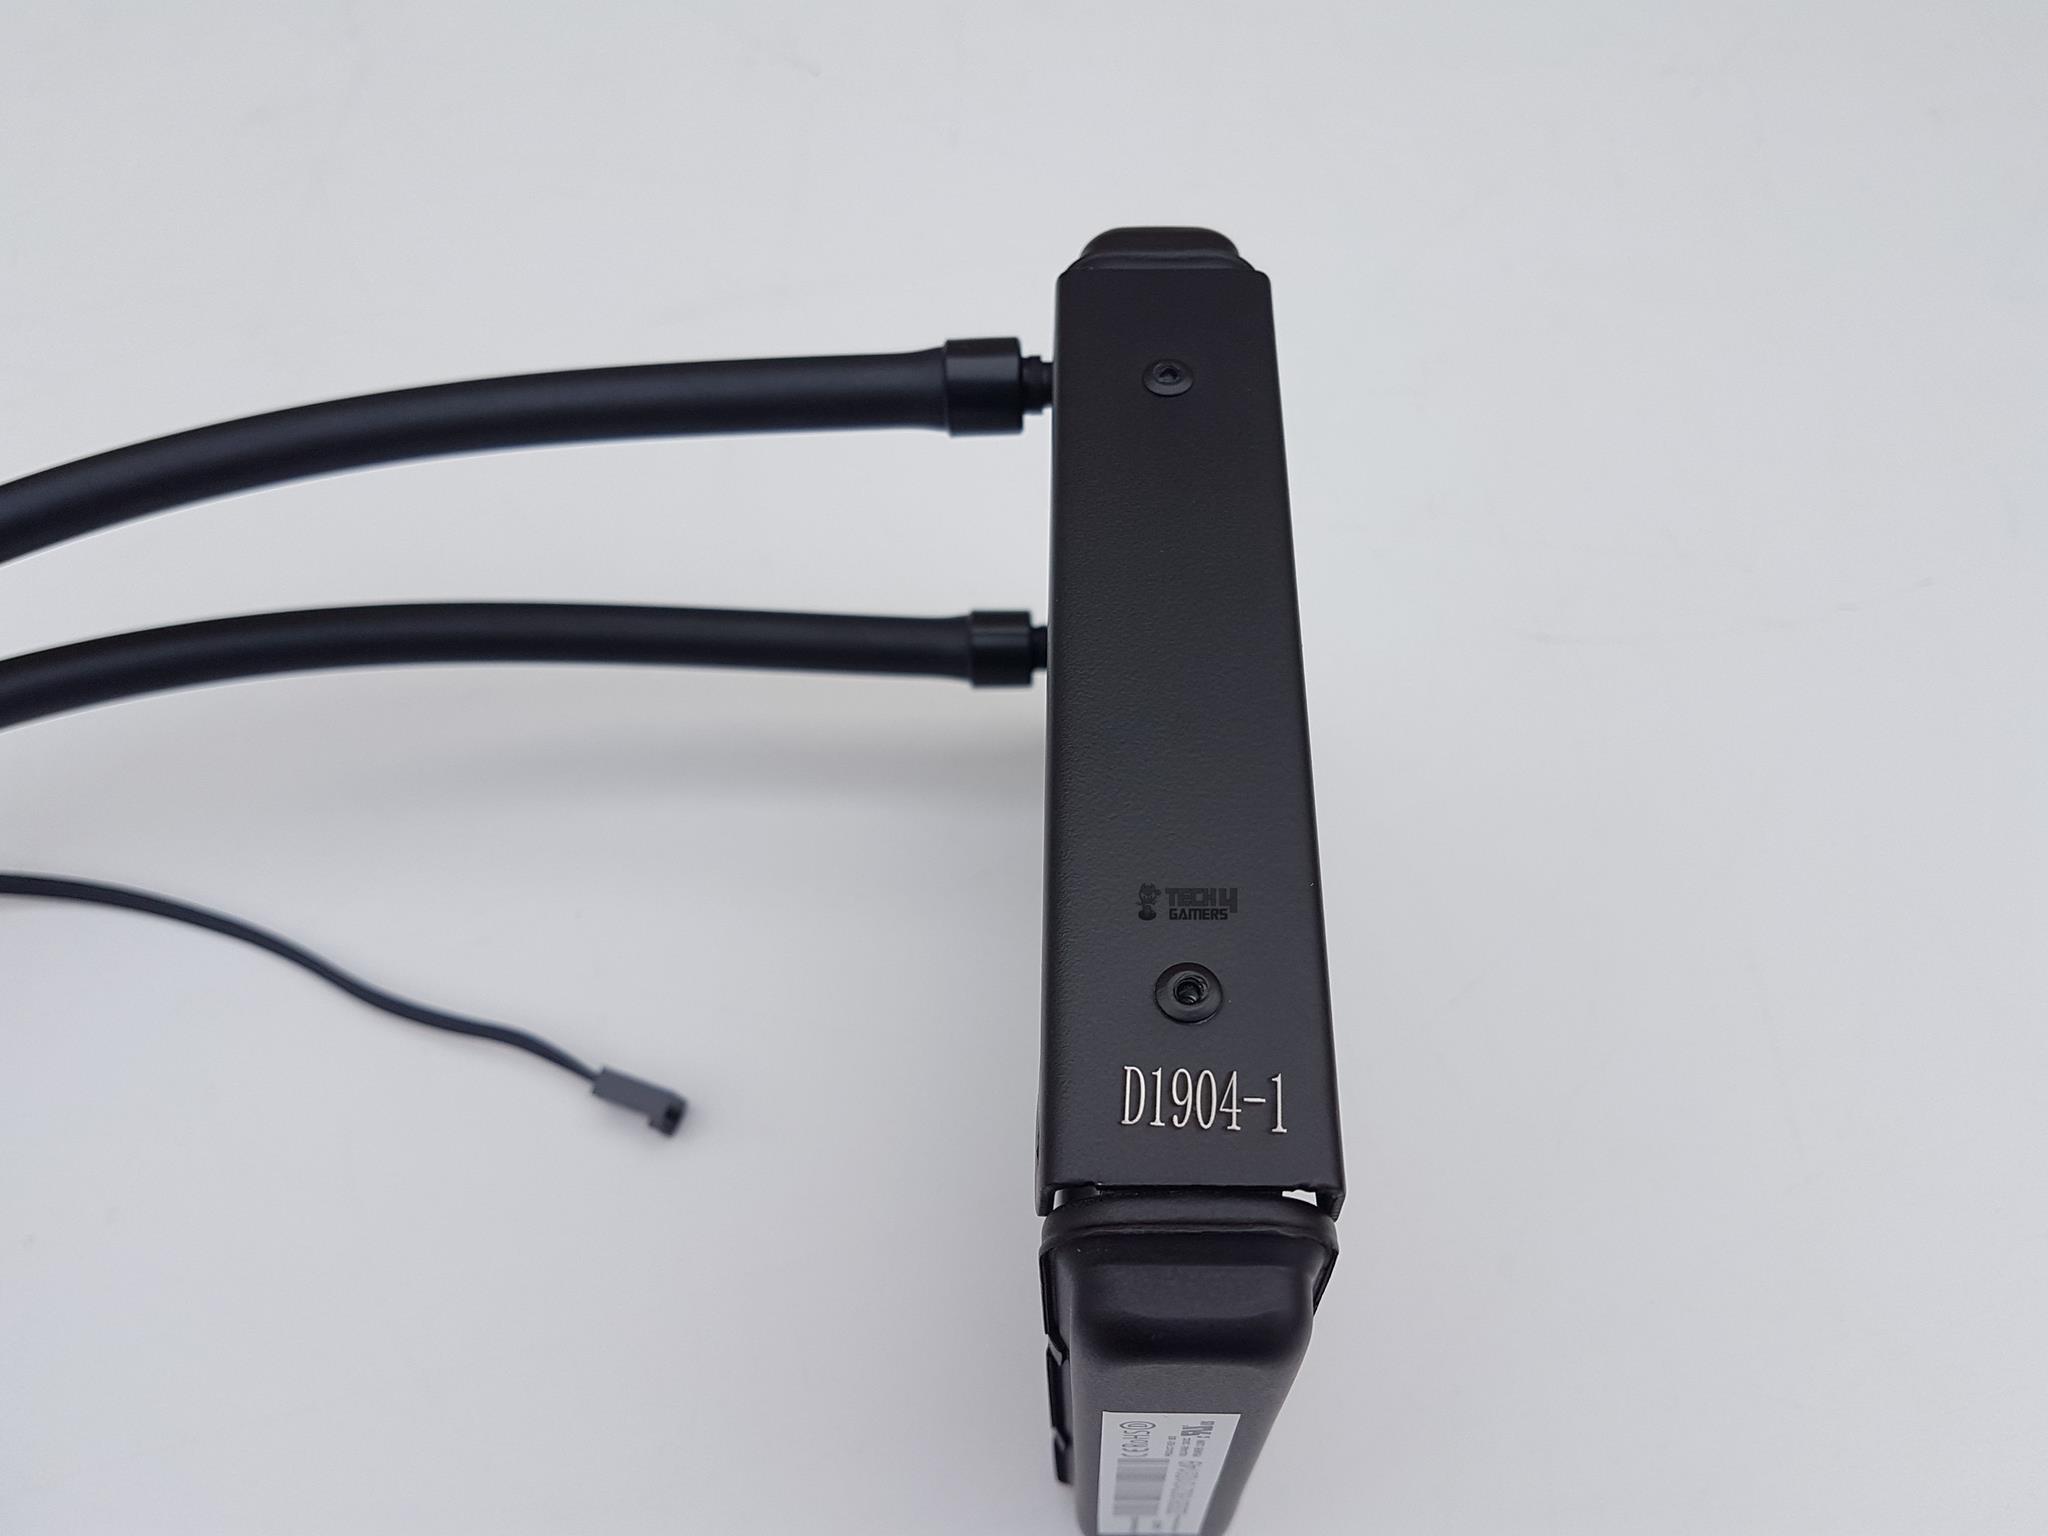
On the pump housing’s front, left, and right sides, no branding appears – they’re sleek, solid surfaces. Two cables emerge from the block’s left side: a 3-pin power cable and an LED cable.
The pump’s power cable is flat while the LED cables are braided. One thing that I have observed is the extra-ordinary length of the LED cables on this cooler which makes the cable management task more challenging.
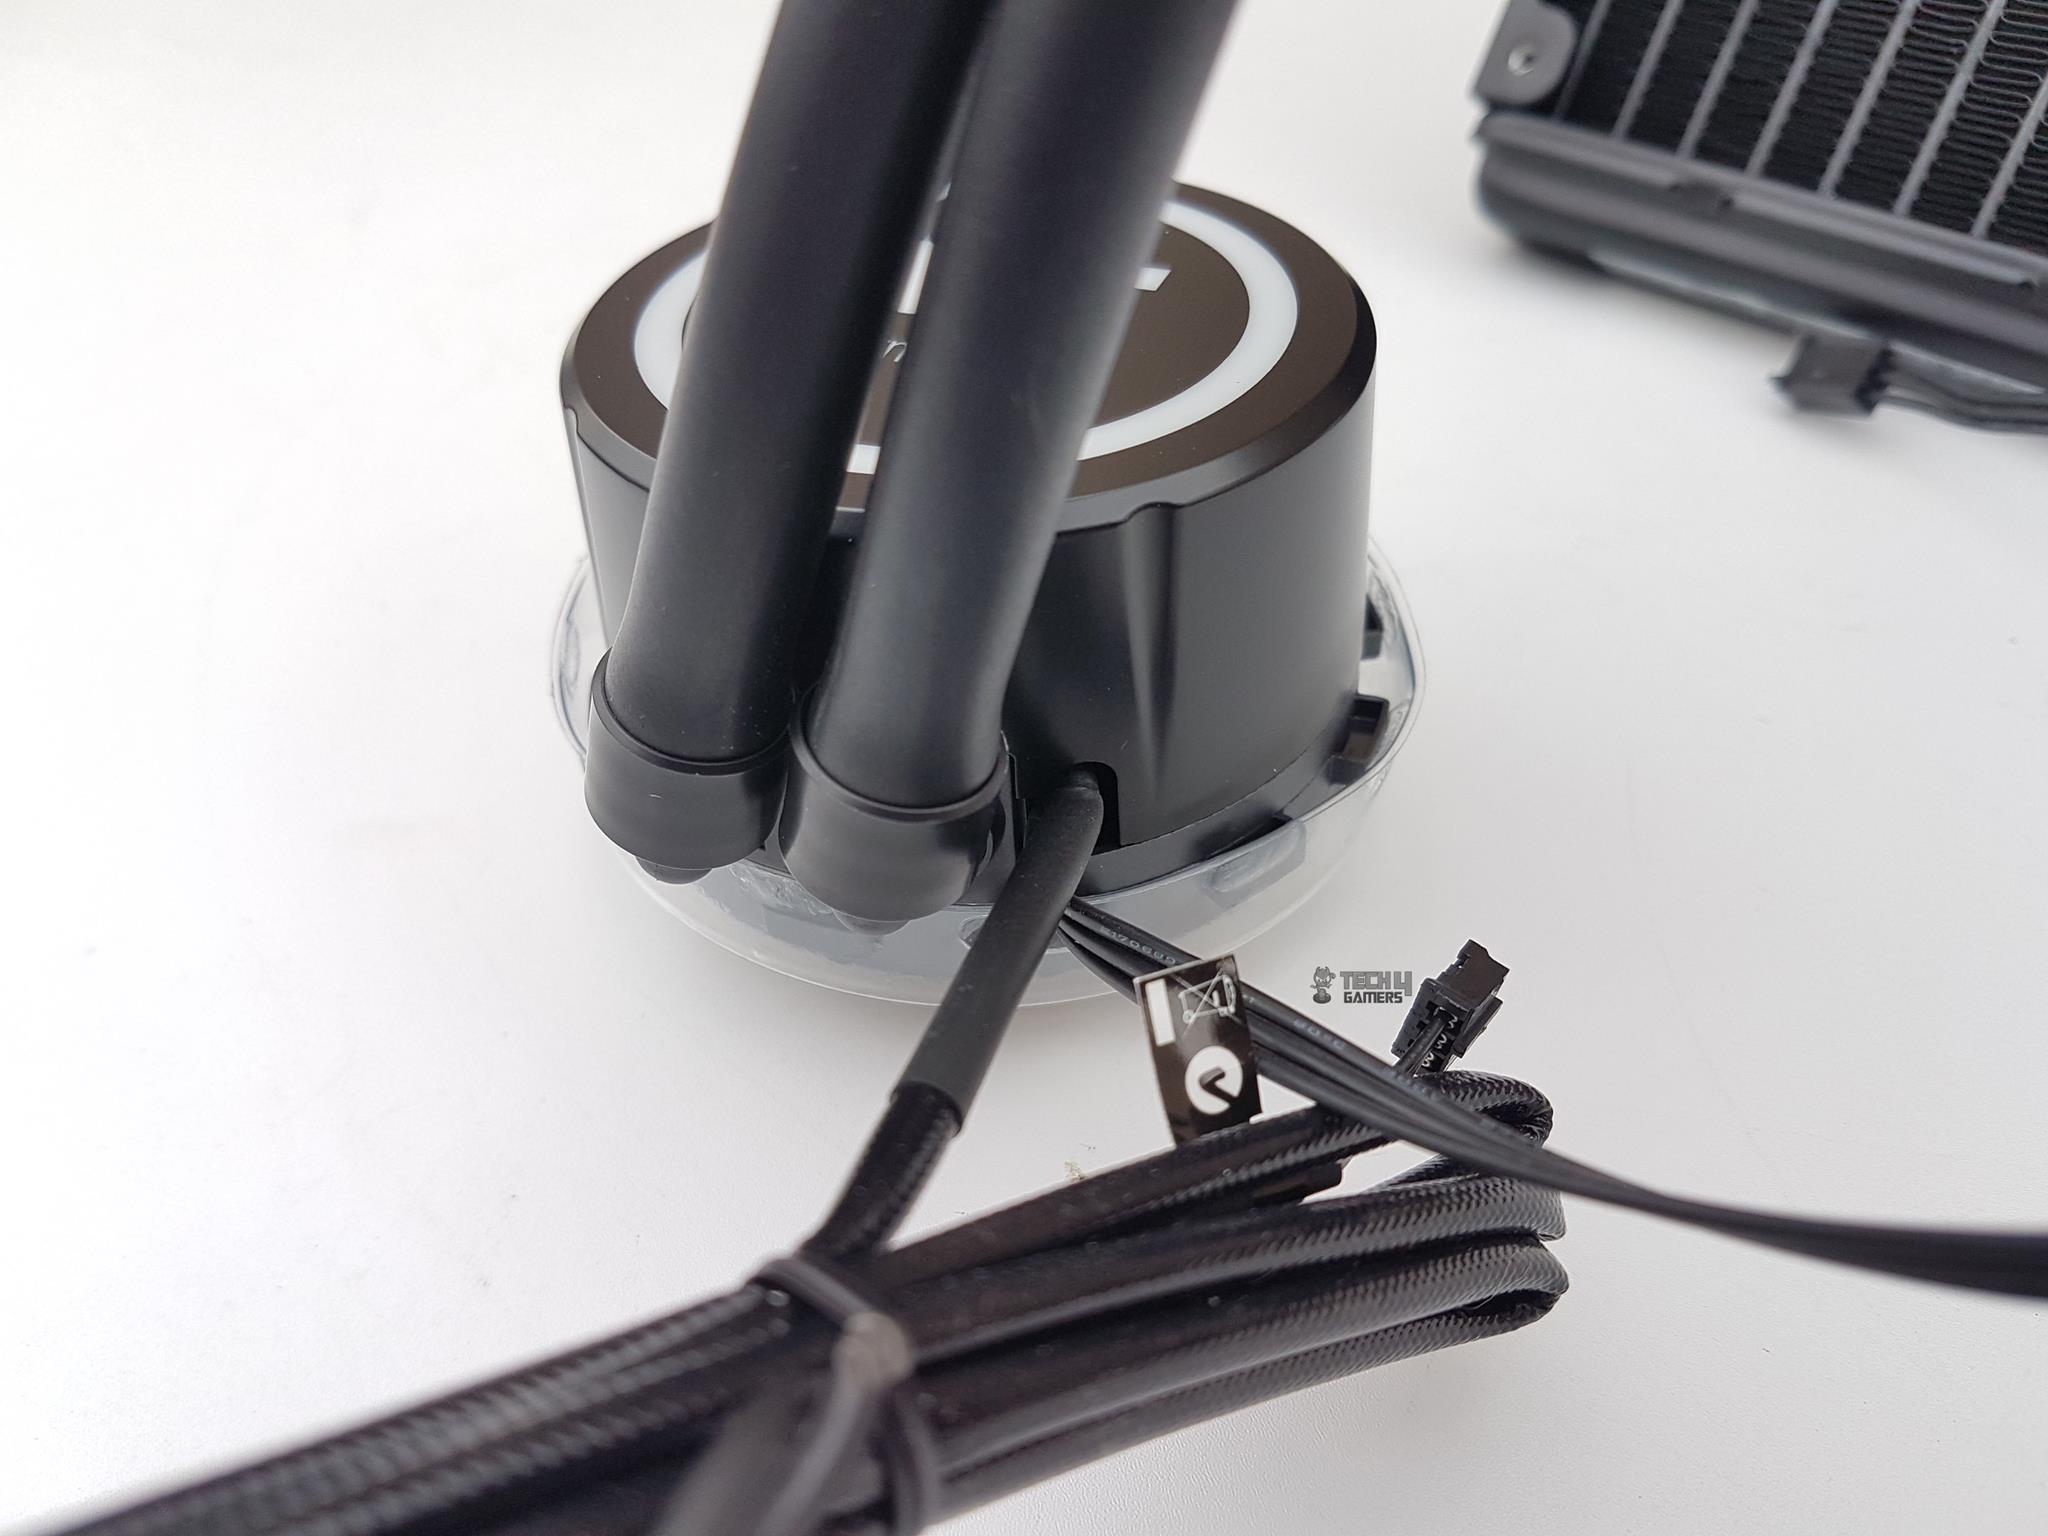
We’ve got two 90° barb fittings on the pump housing’s backside. These fittings allow flexible tube rotation to suit your needs. Notice the groove on three sides of the pump housing, between the upper and lower chambers. This spot is where the housing clamping happens, accommodating the Intel and AMD mounting rings.

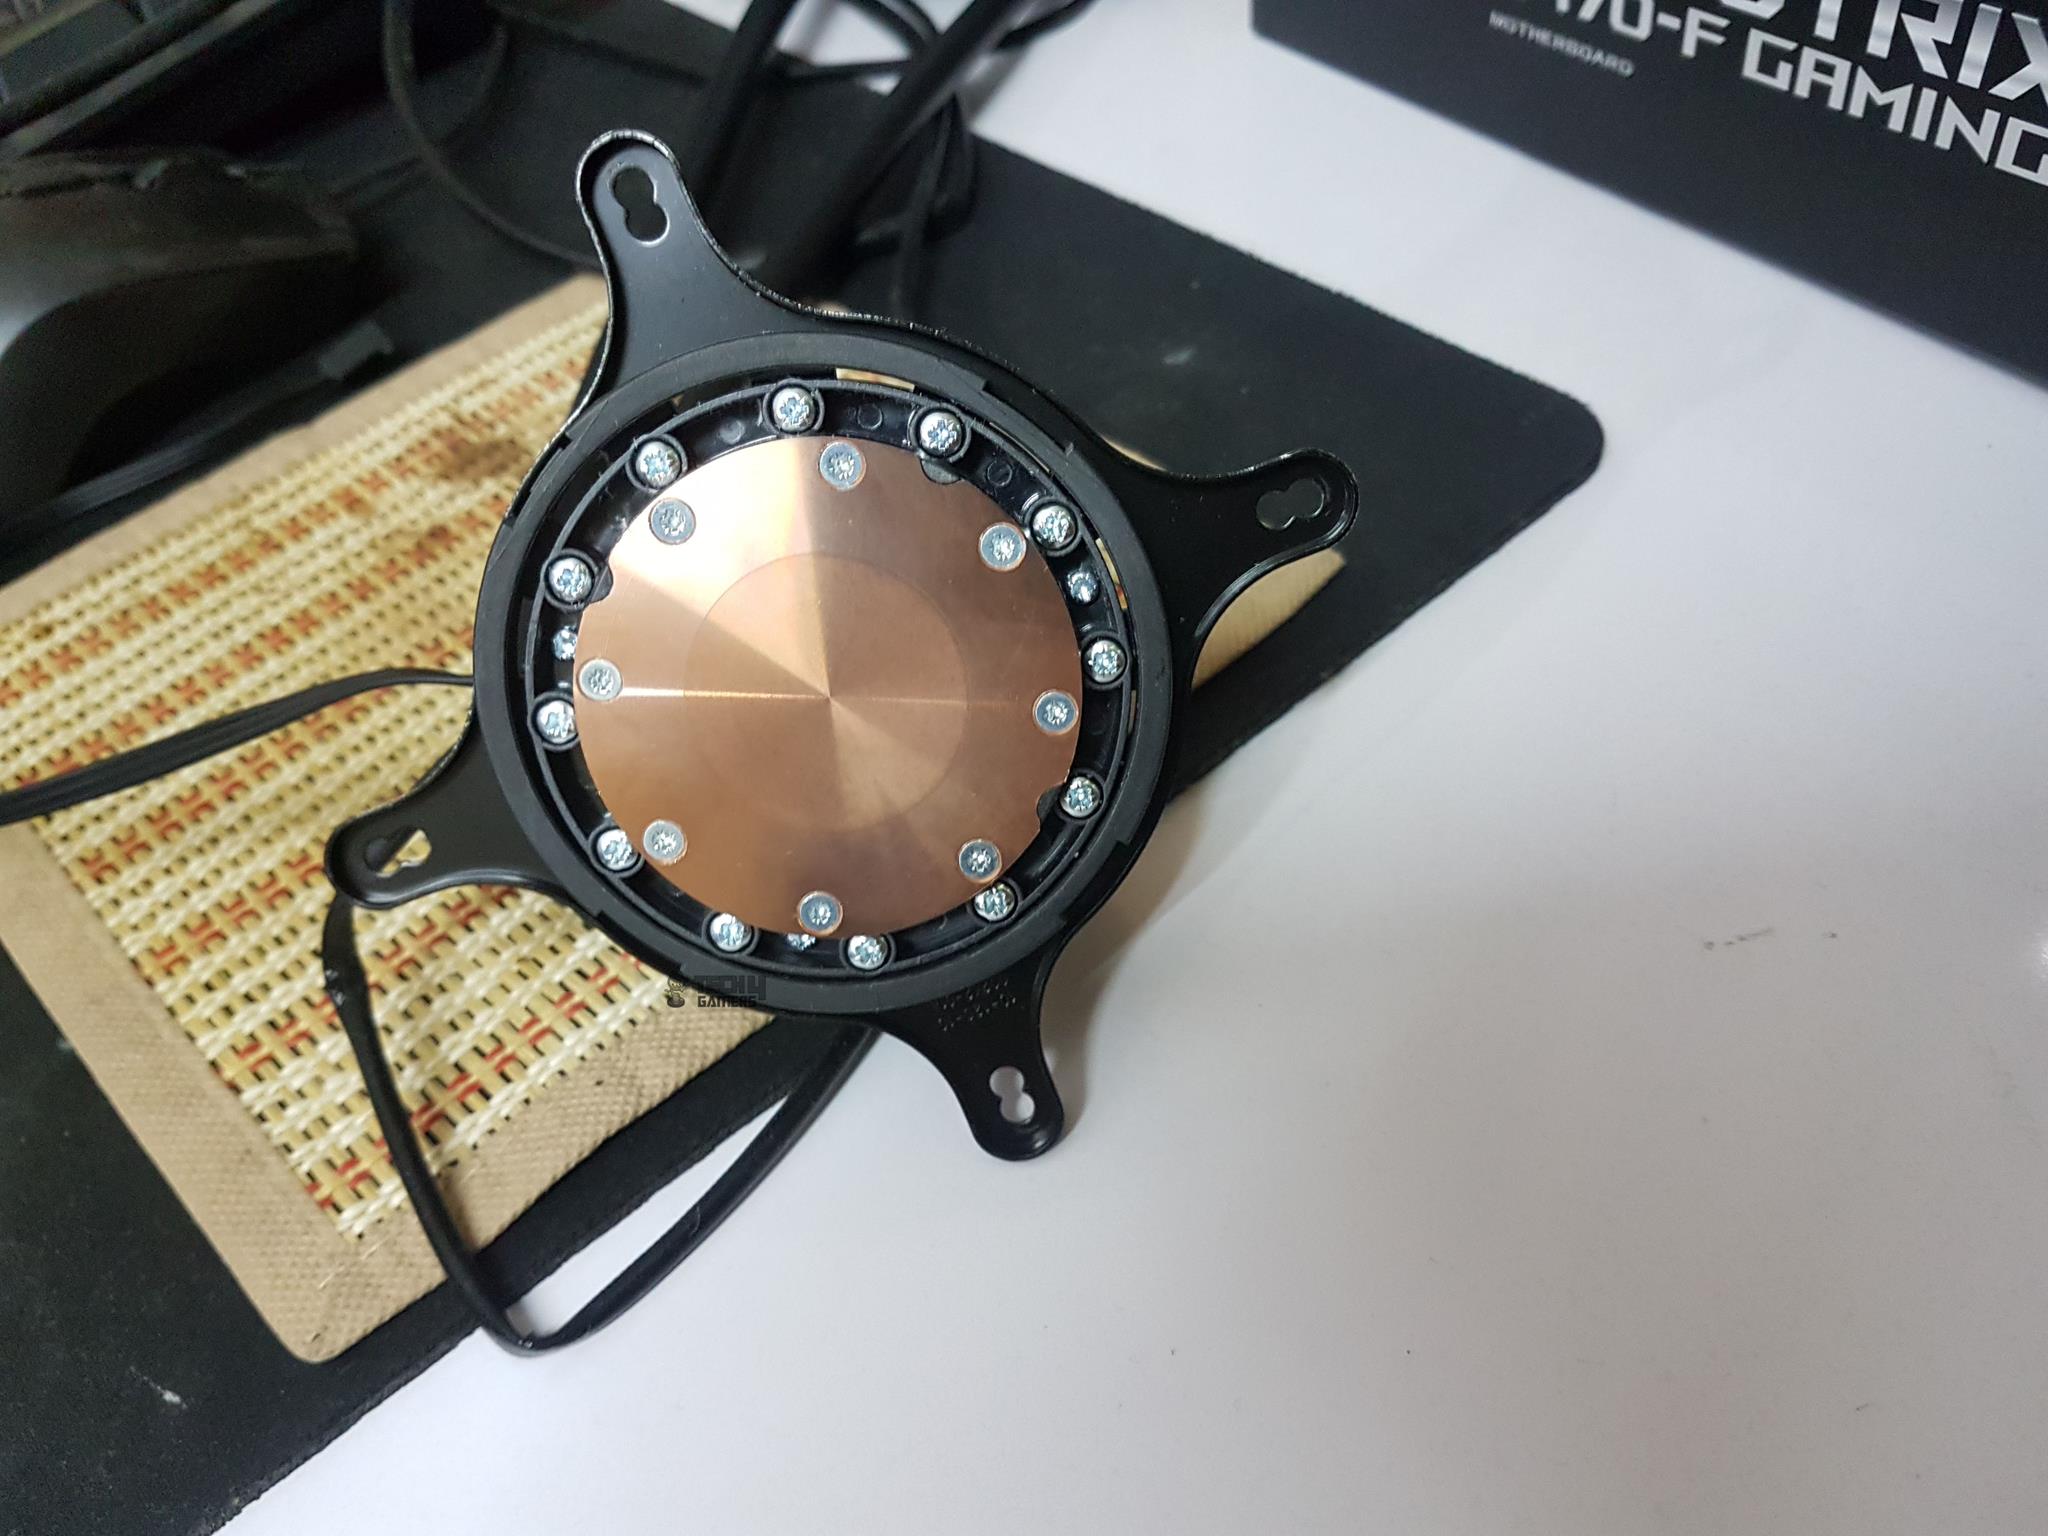
The cooler comes with pre-applied thermal paste. Lately, Asetek OEM coolers have significantly enhanced their thermal pastes. The performance difference between the stock paste and Noctua NT-H1 is now minimal. A transparent cover protects the pre-applied paste. The copper base is around 52mm in diameter and held in place by 8 screws on the pump housing.
I have had one complaint with this design which is there was no way for the user to lock the mounting ring/bracket on the block on its own and it makes the installation process tedious as the user has to hold the ring mounted block so as to ensure that ring does not displace.
Thermaltake sent us a new plastic bracket with four edges. We’ll place the ring on the block and secure it by attaching the plastic bracket underneath. This makes installing the mounting ring/bracket easy and secure. Props to Thermaltake for this clever, straightforward fix!
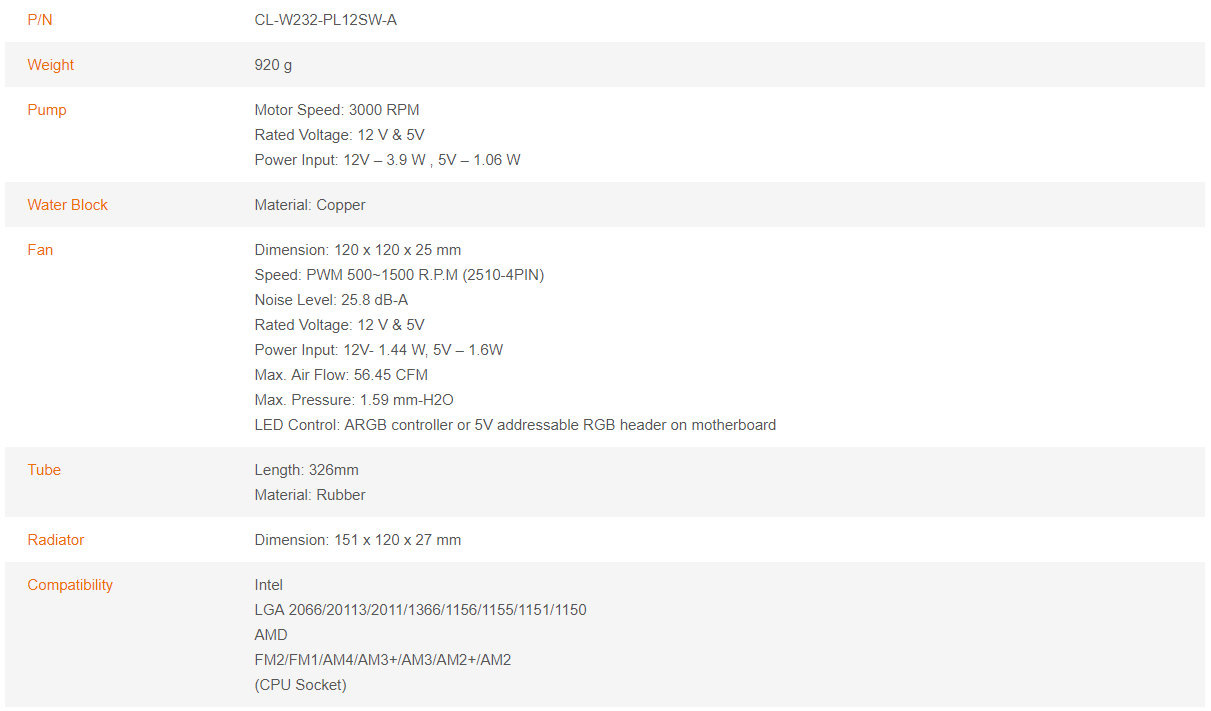
Here is a quick look at the pump specifications:
| Pump speed | 3000 RPM |
| Pump power rating | 12VDC (3.9W at 12V) |
| ARGB LED power rating | 1.06W at 5V |
Note: You would need to multiply the RPM reported in the UEFI/BIOS with 2 to get the effective or true speed due to the bipolar motor.
Fans
Thermaltake has provided their popular Pure 120mm fan with this cooler.
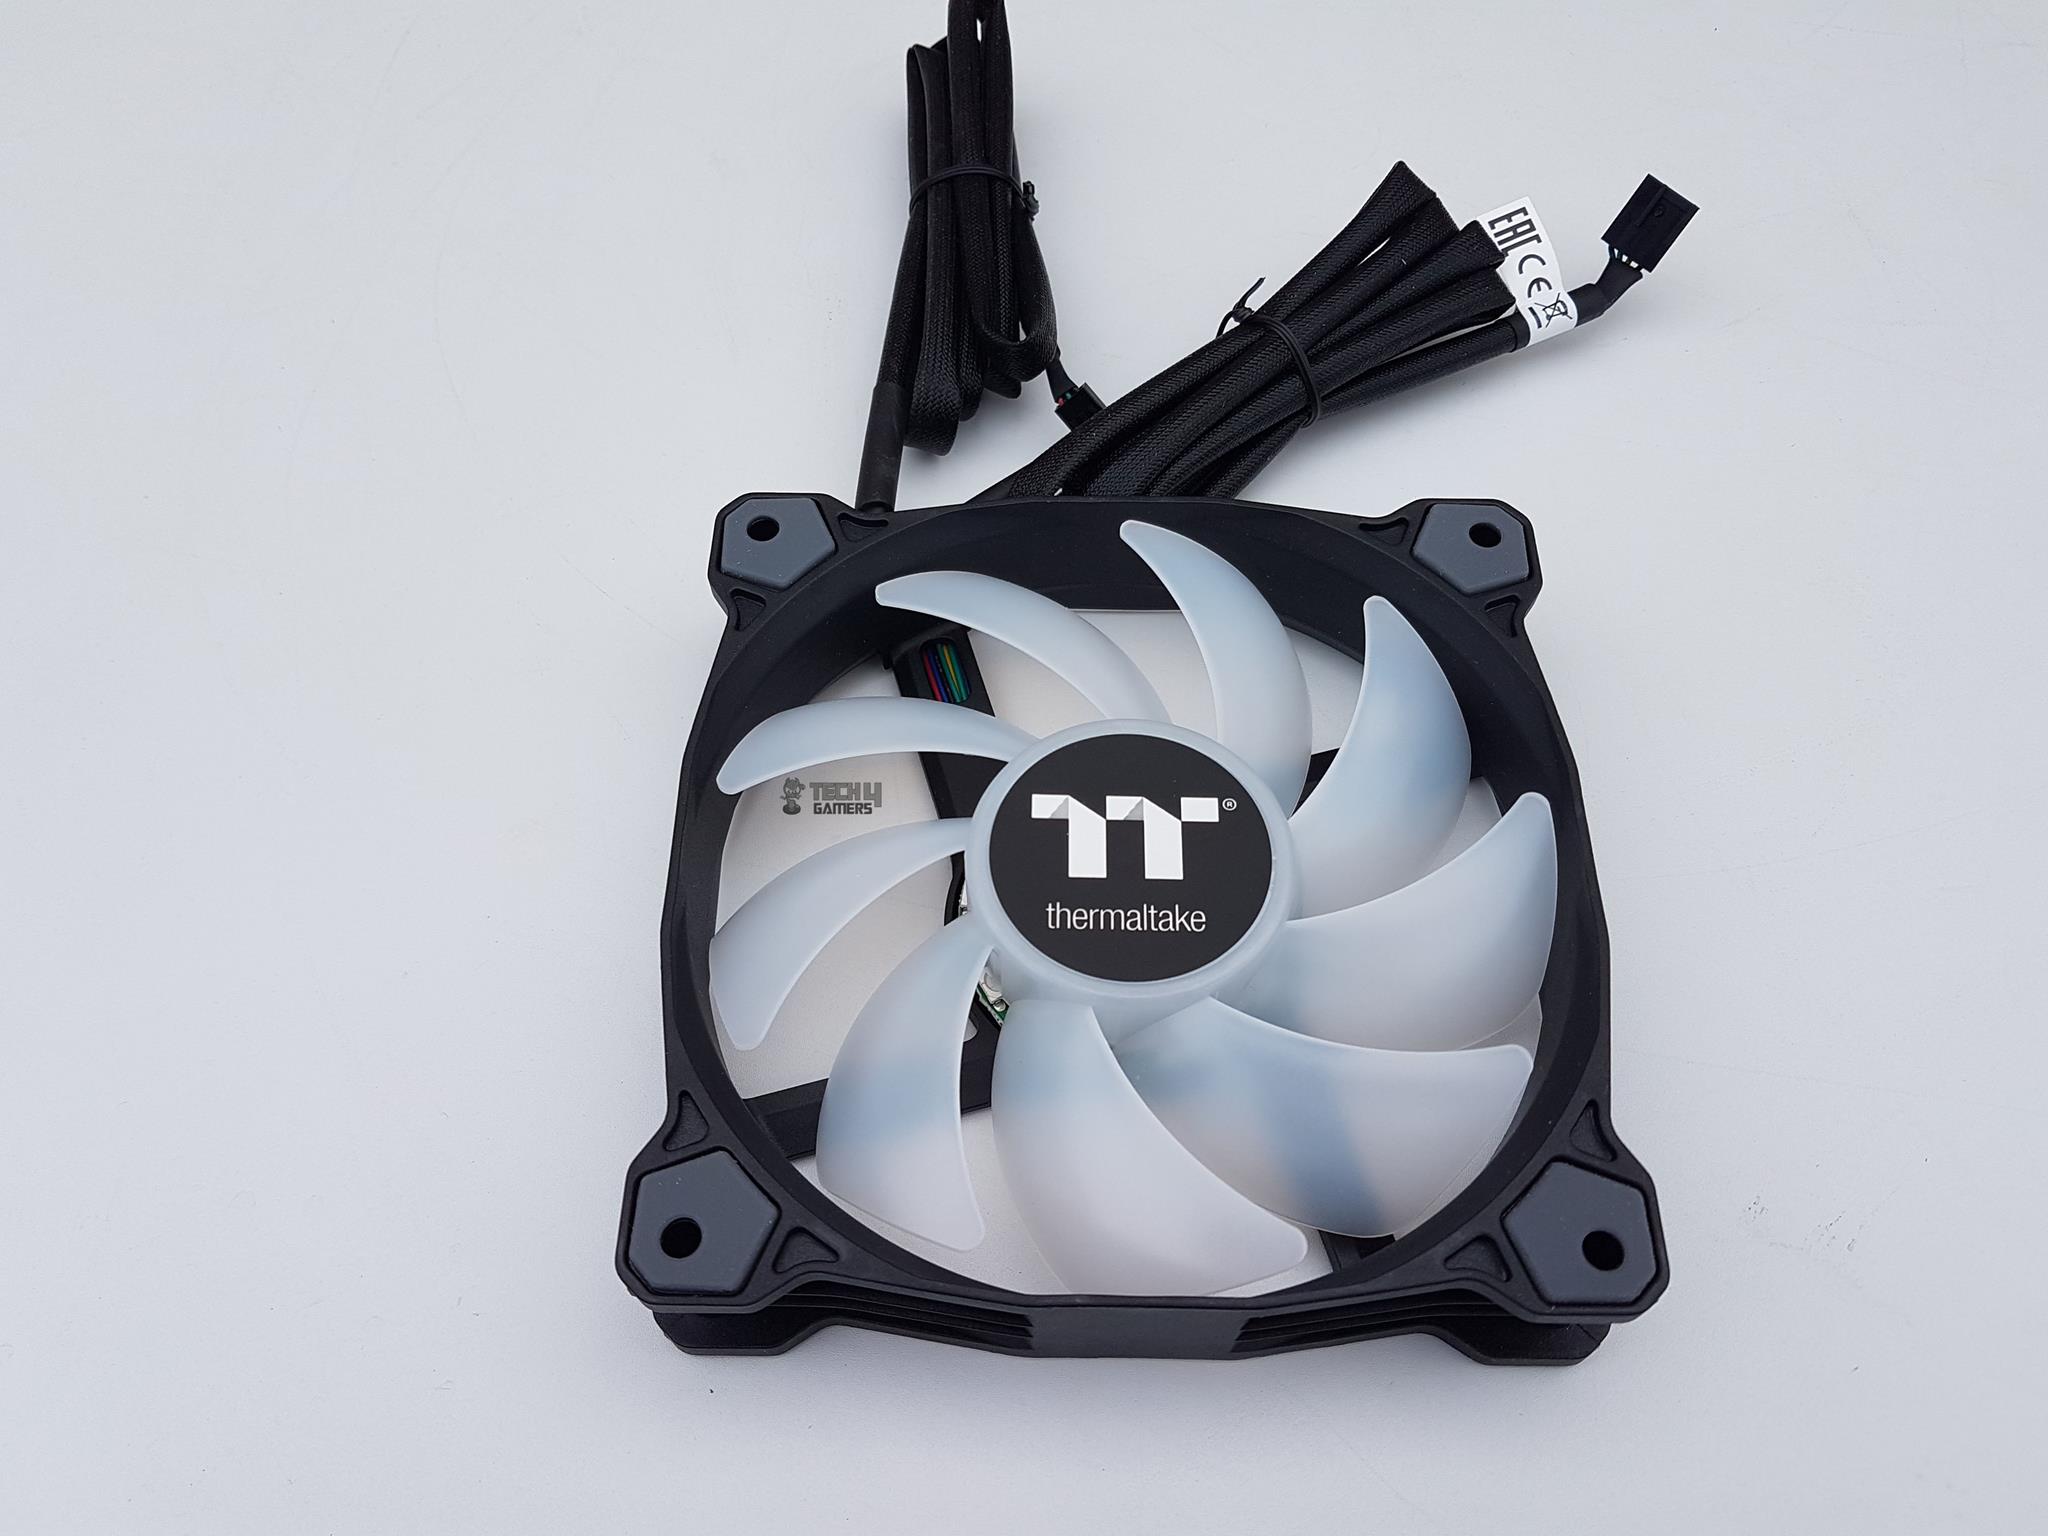
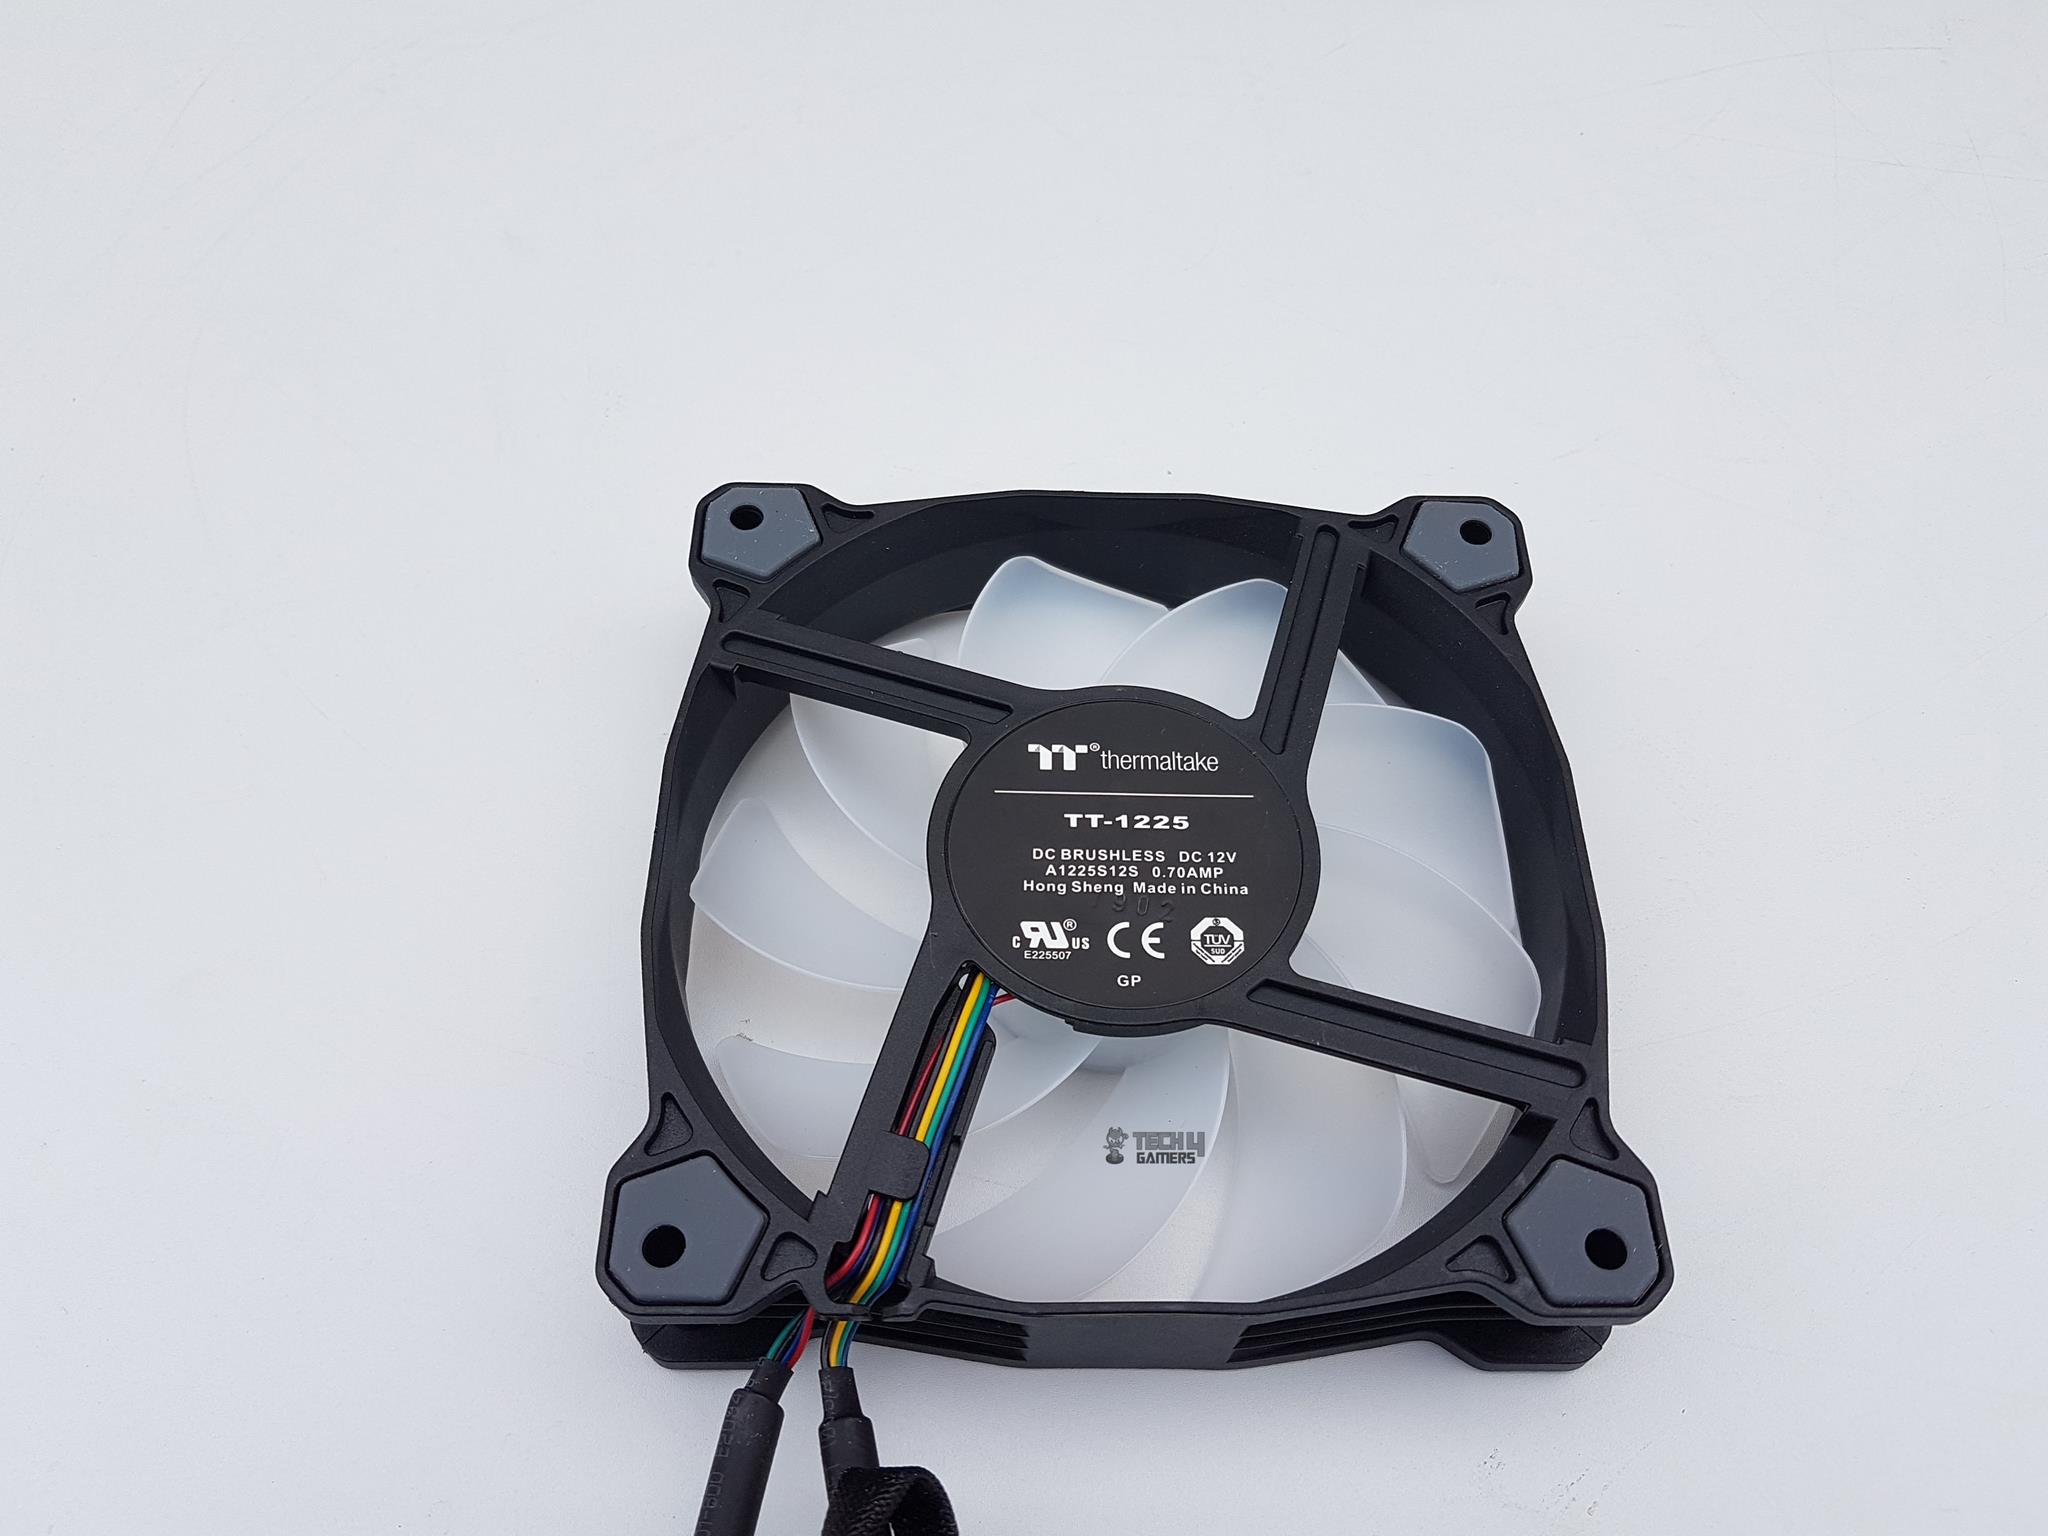
The Pure 12 features compression blades, hydraulic bearing, and a 16.8 million colors LED ring with 9 addressable LEDs that is ready to sync with 5V RGB capable motherboards from Asus, Gigabyte, MSI, and AsRock. It has a black color frame.
The mounting holes feature gray rubber pads to minimize vibration. Nine lightly frosted blades compose the fan, with a black sticker on the hub sporting the TT premium logo. The frame’s corners slope downward, and one side bears arrows indicating airflow direction and blade spin.
On the fan’s back, a sticker on the motor hub showcases the Thermaltake brand and TT premium logo at the top. This fan operates with a DC Brushless motor and is manufactured in China.
A 4-arm structure connects the motor hub and blades to the frame, with a widened arm housing a clamp to secure power and LED cables. The frame boasts an identical design on both sides. The fan draws a current of 0.70A.
Here are the fan specifications:
| Variable | Value |
| Dimension (mm) | 120x120x25 |
| Speed (RPM) | 500~1500 |
| Static Pressure (mmH₂O) | 1.59 |
| Air Flow (CFM) | 56.45 |
| Noise dB(A) | 25.8 |
| Voltage (VDC) | 12 |
| Power (W) | 1.44 |
| Connector Type | 4-Pin PWM |
| Power Cable Length (mm) | 930 (approx.) |
| LED Cable Length (mm) | 900+100 (approx.) |
| LED Cable Power | 5V, 1.60W |
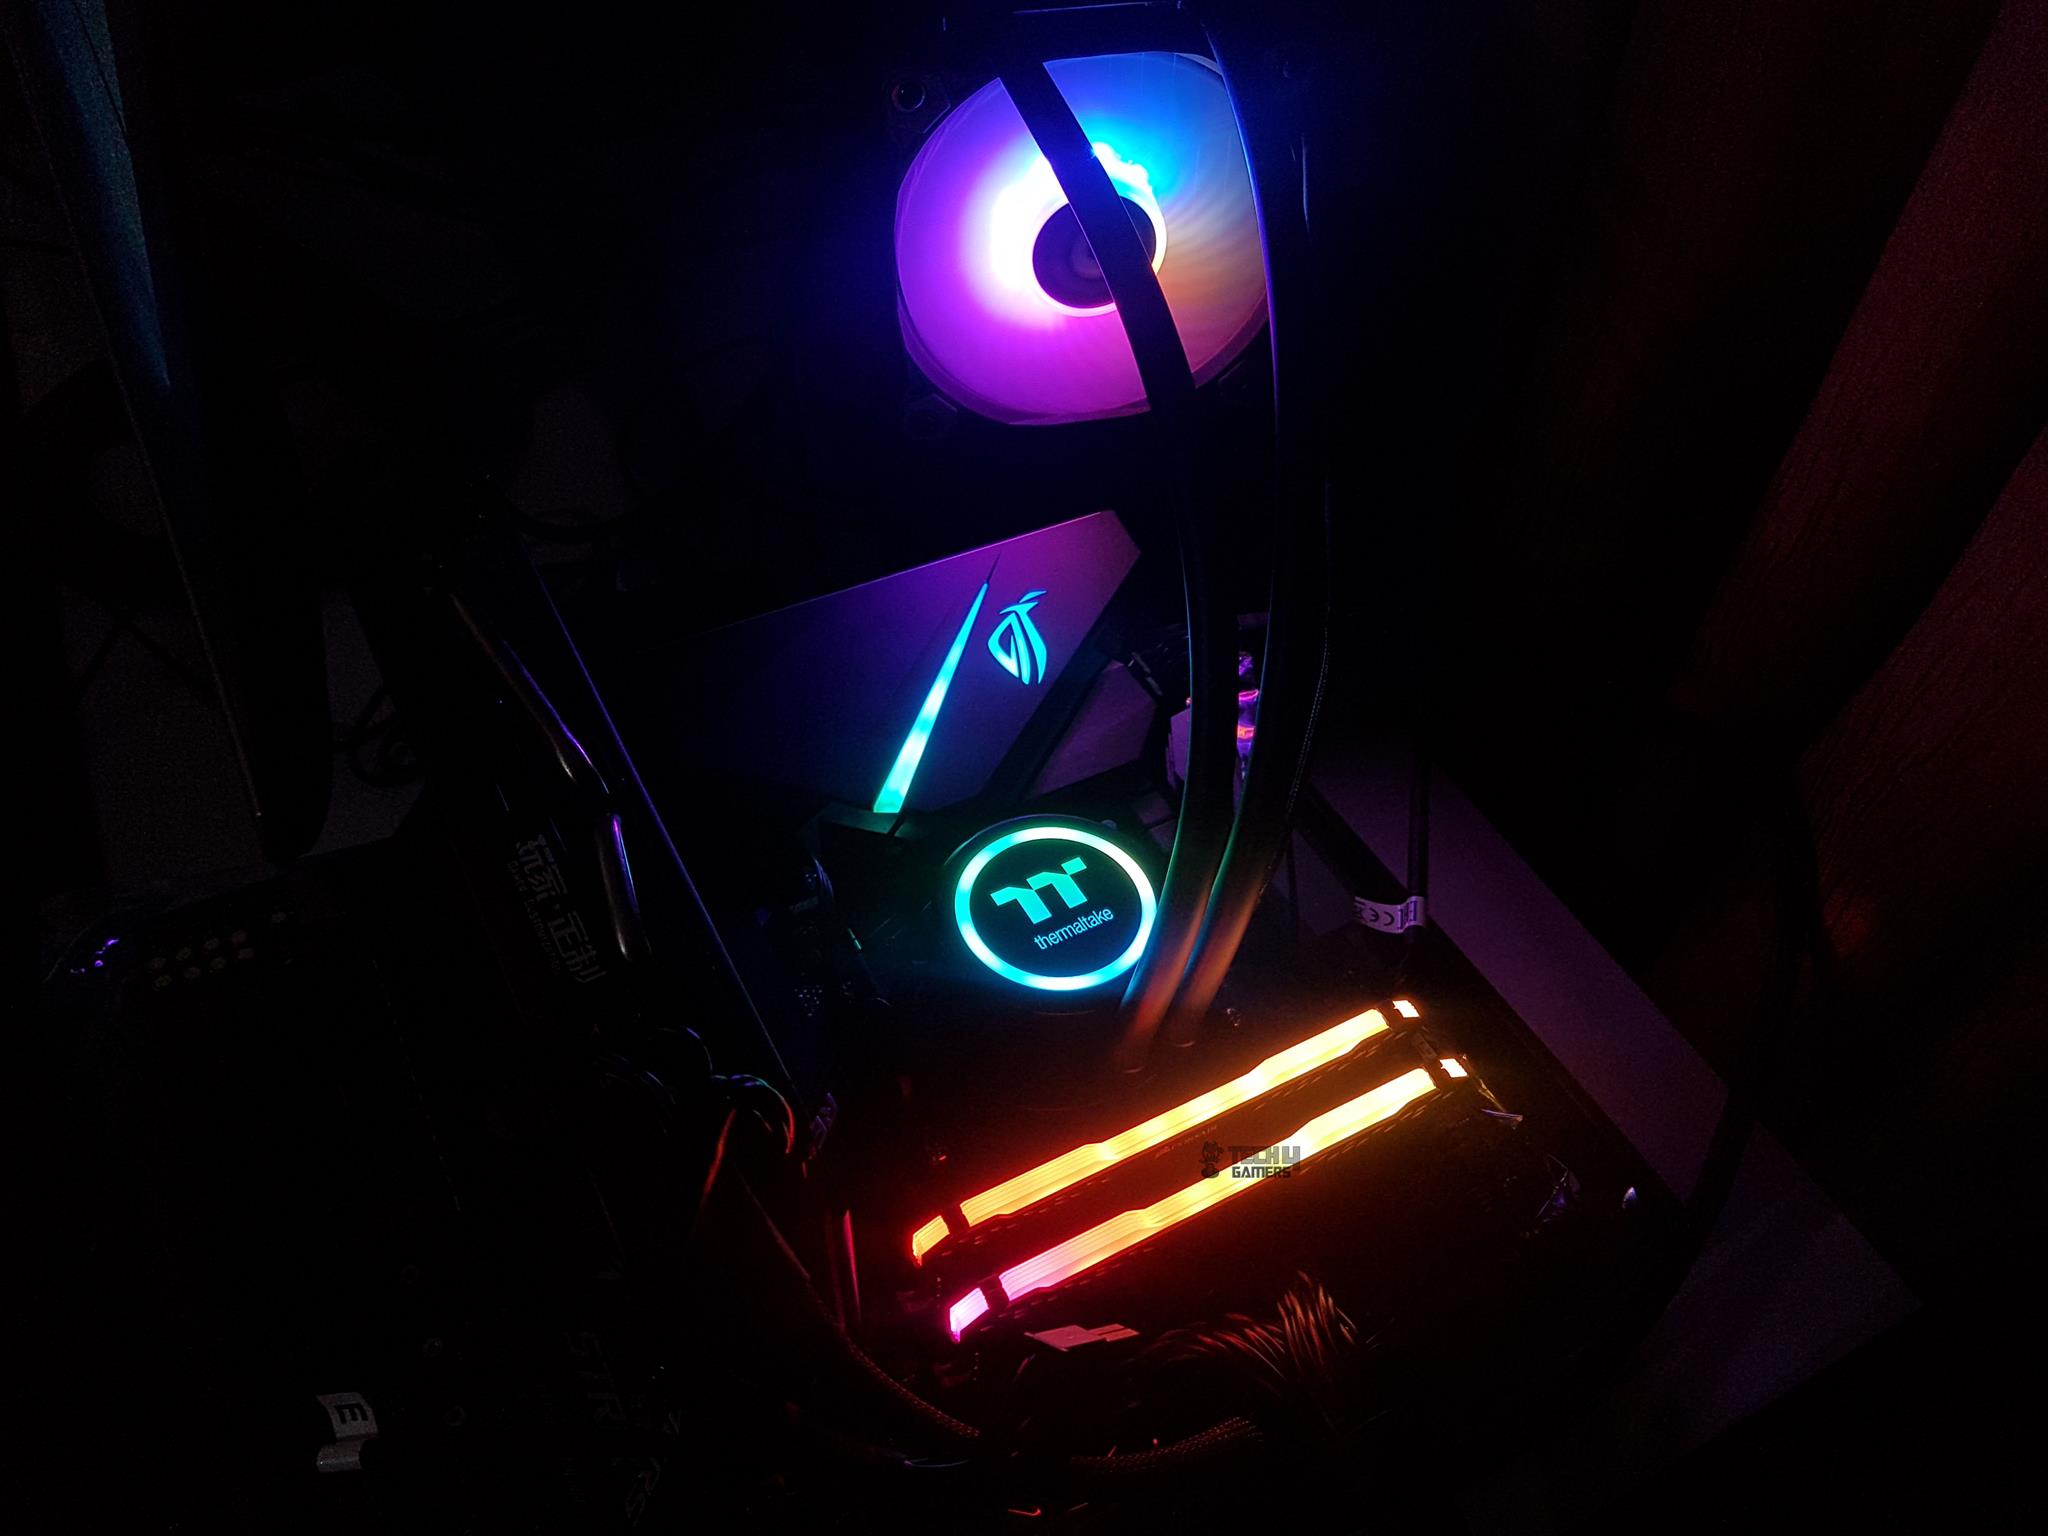
RGB Lighting
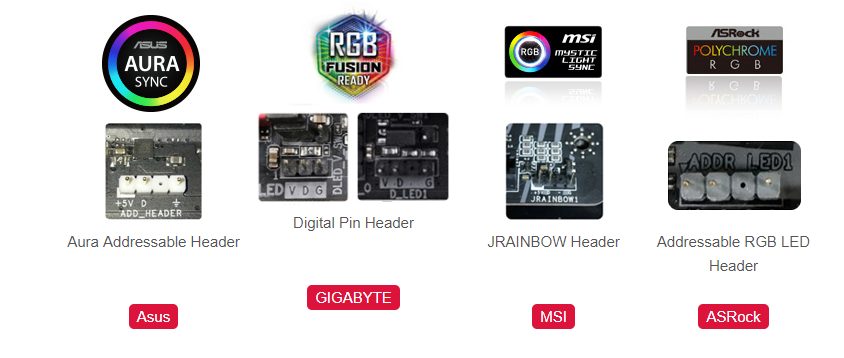
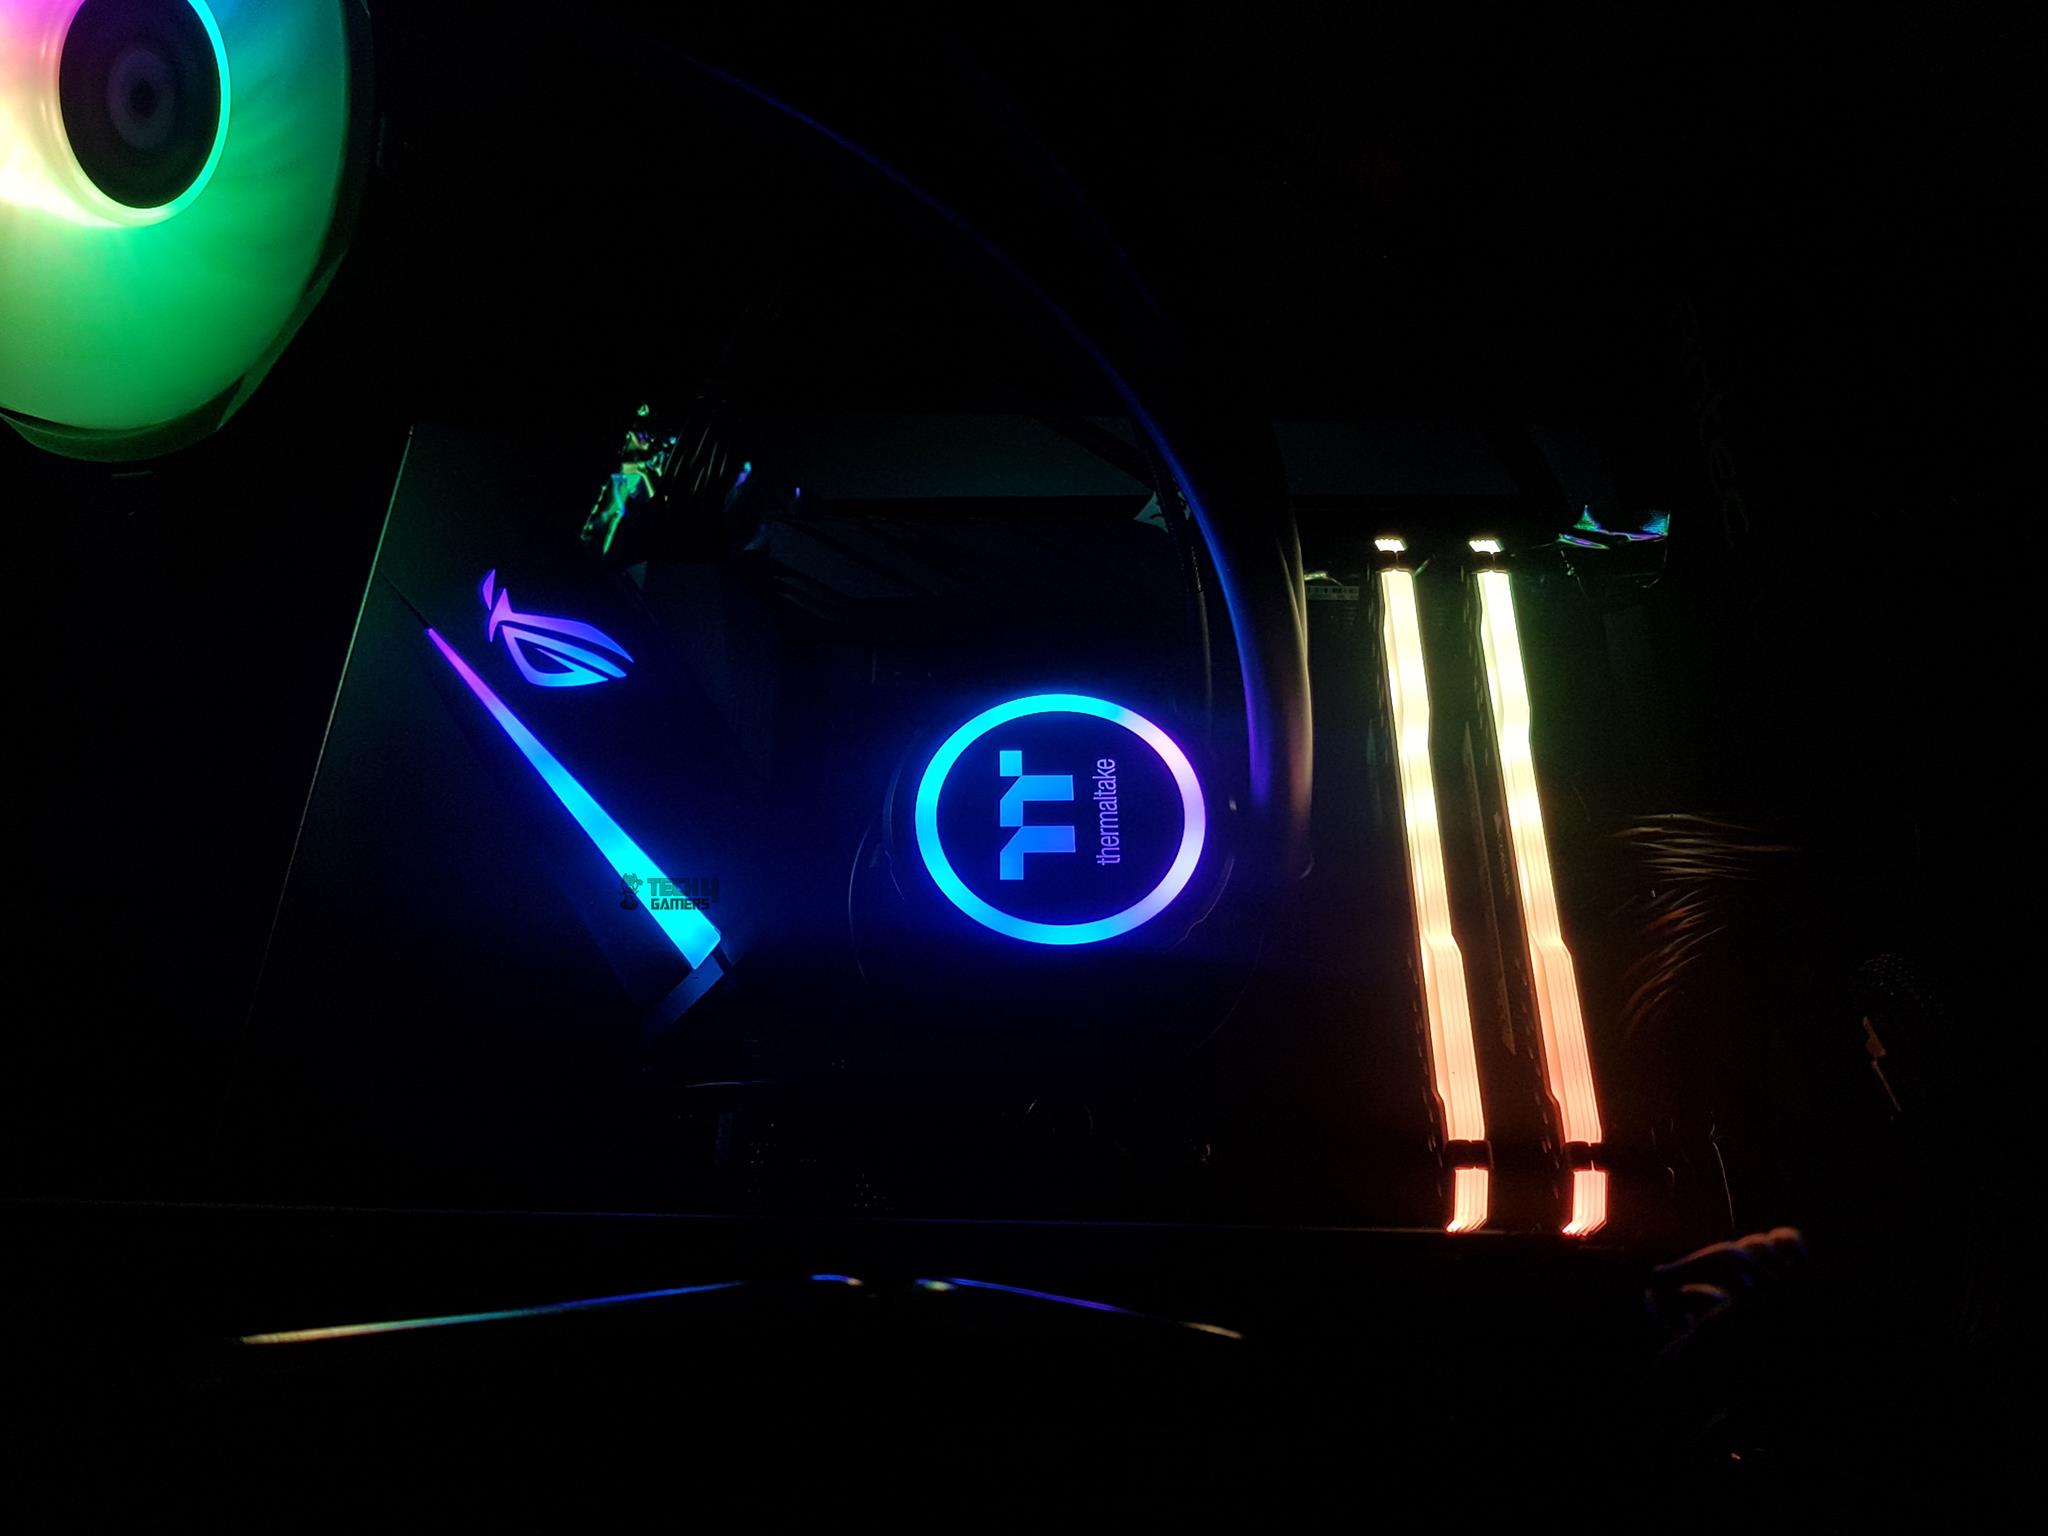
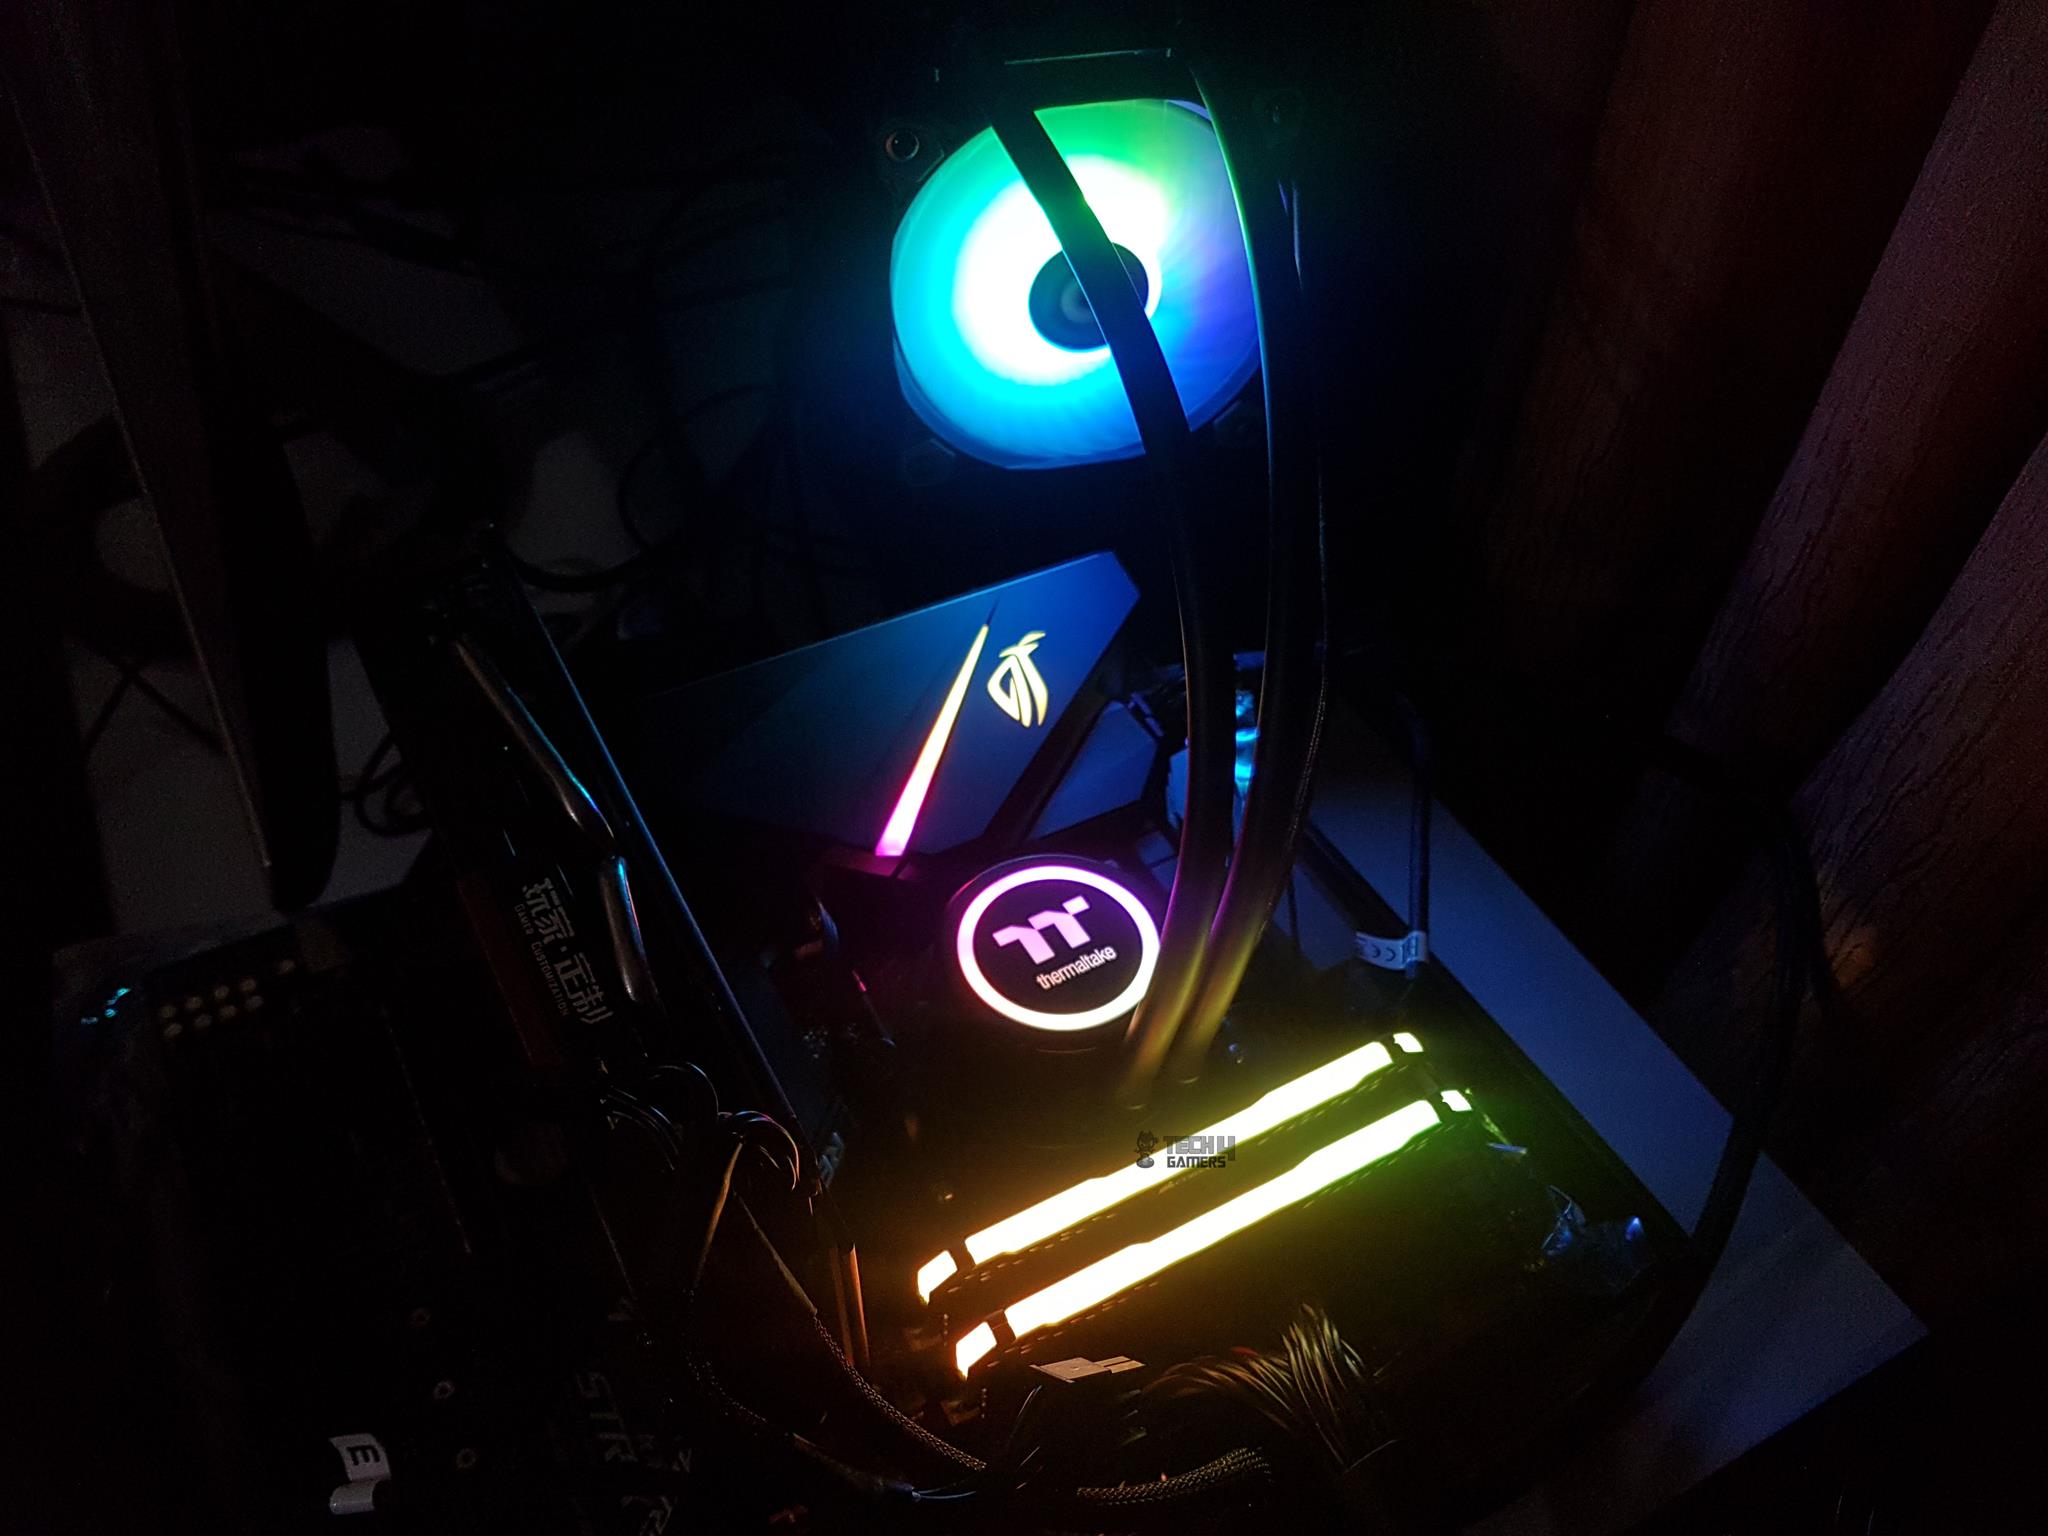
This ARGB Sync Edition fully syncs with Asus AURA Sync, Gigabyte RGB Fusion 2.0, MSI Mystic Lighting, and ASRock RGB LED solutions. I tested it on the Asus Strix X470-F, and the cooler synced seamlessly with the motherboard’s lighting. If your motherboard doesn’t support this, Thermaltake includes a dedicated lighting controller for you.
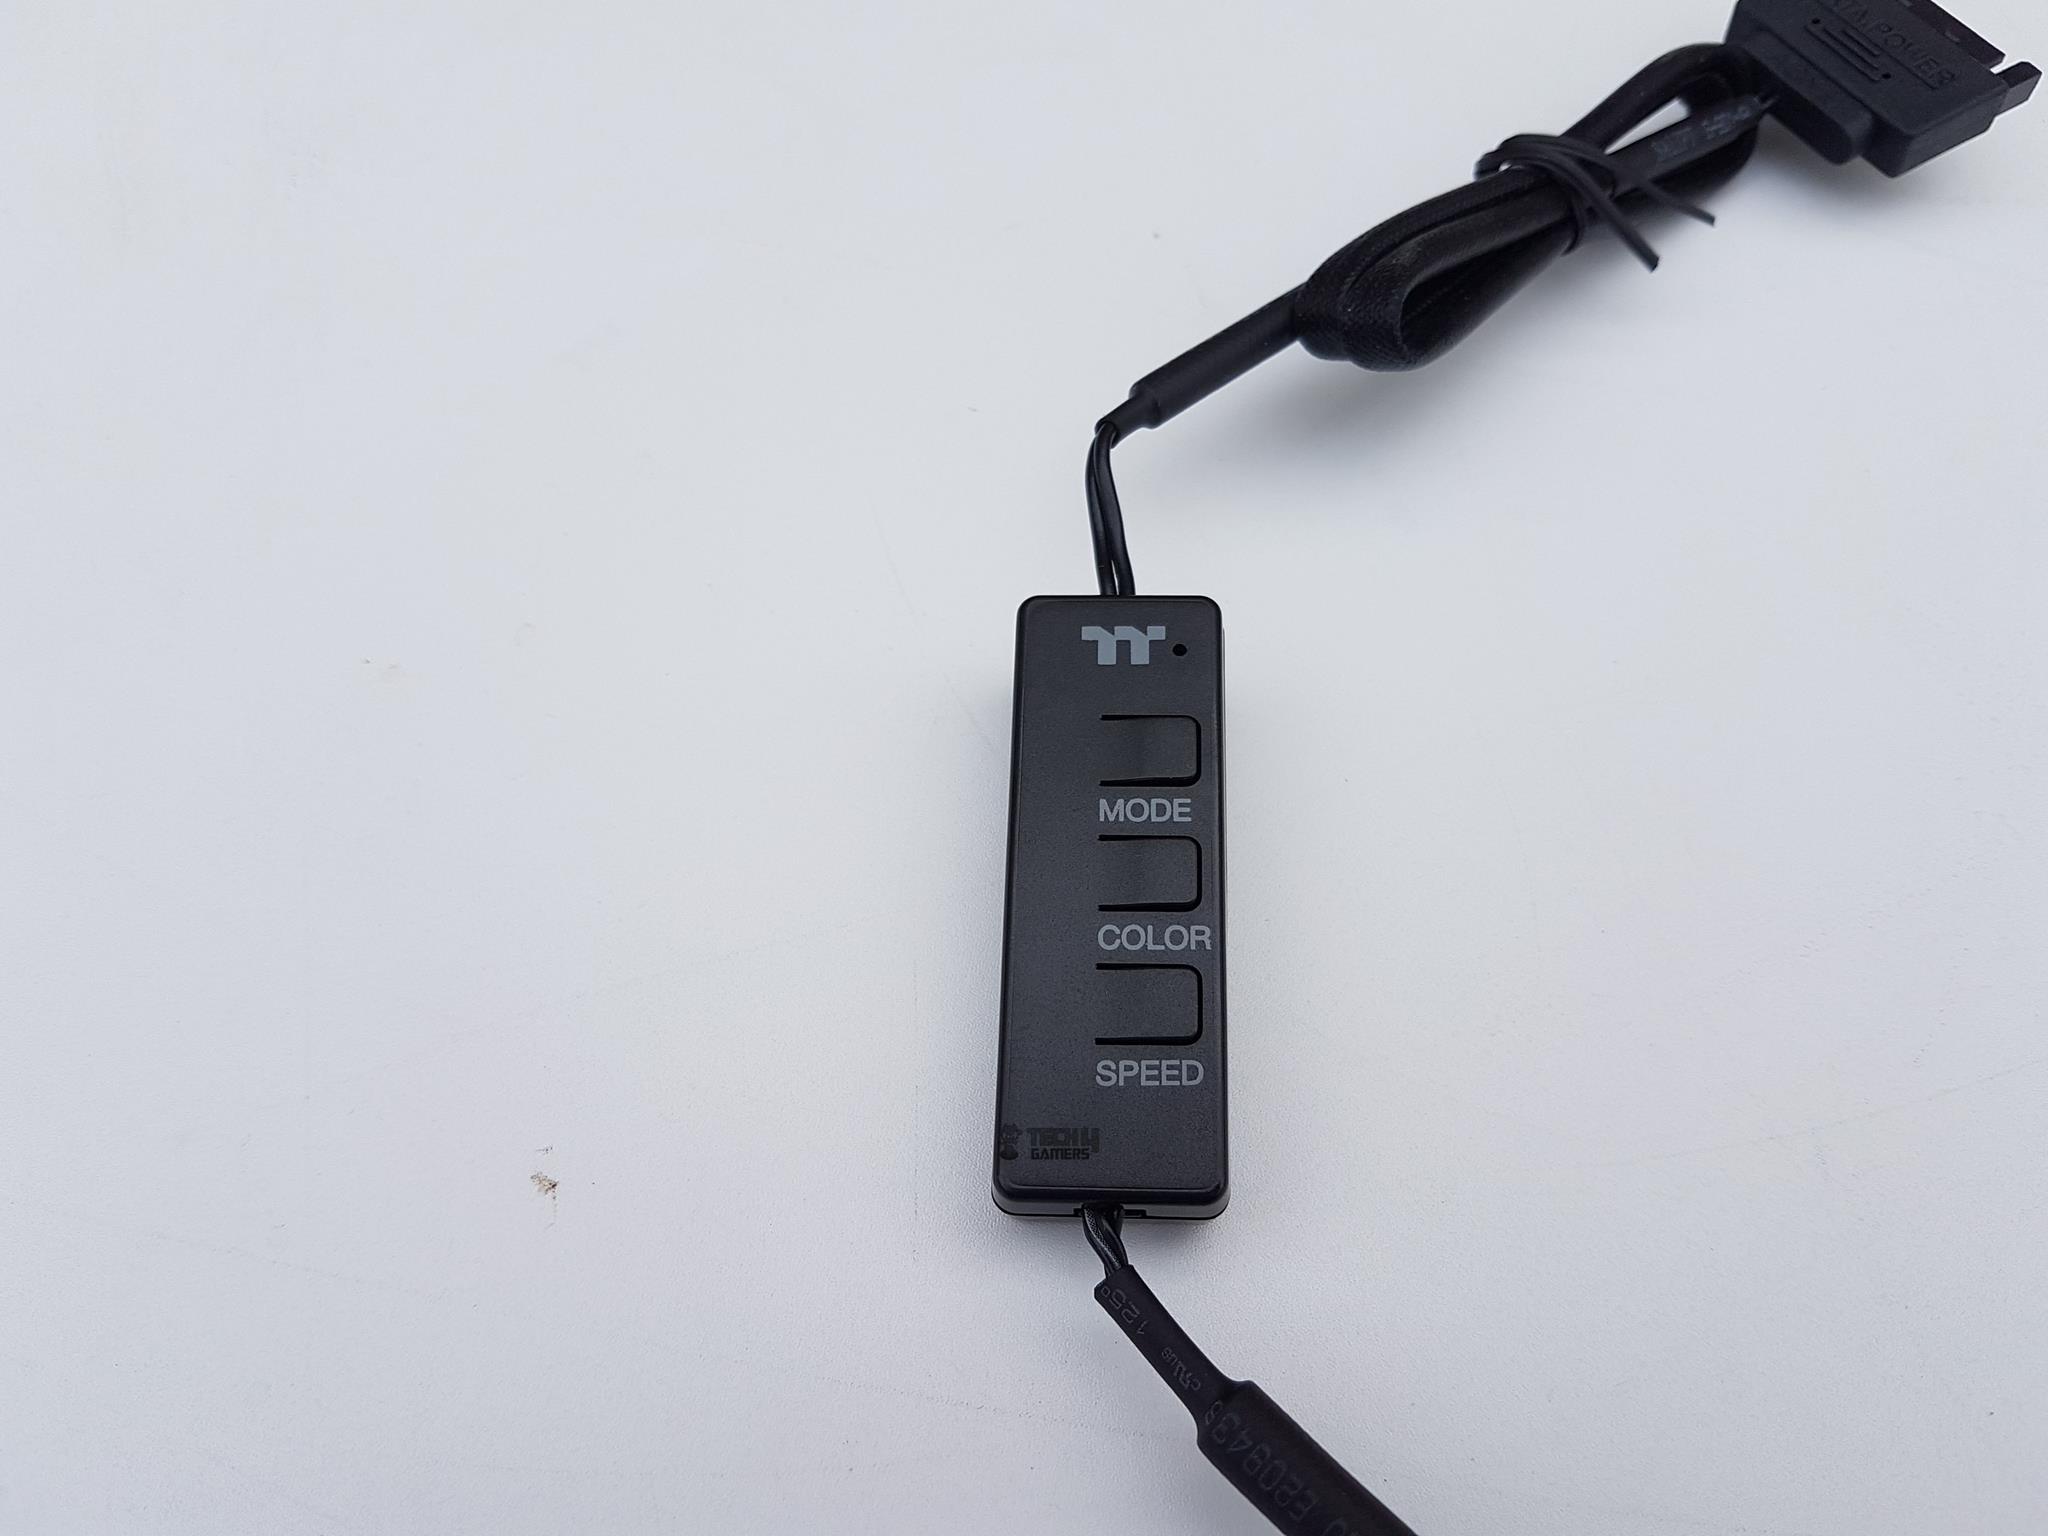
The controller is in black color. It has a TT premium logo printed on the top. There is a blue LED indicator right next to the TT logo. There are three buttons on the controller:
- Mode
- Color
- Speed
Here are the different options we have with these options:
| LED Modes | Off, Wave, Full Light, RGB Spectrum, Flow, Ripple, Pulse, Blink |
| Colors | Red, Yellow, Green, Teal, Blue, White, Purple |
| Speed Levels | Slow, Normal, Fast, Extreme |
Note: The RGB color is only available in certain modes which are Full Light, Pulse, and Blink.
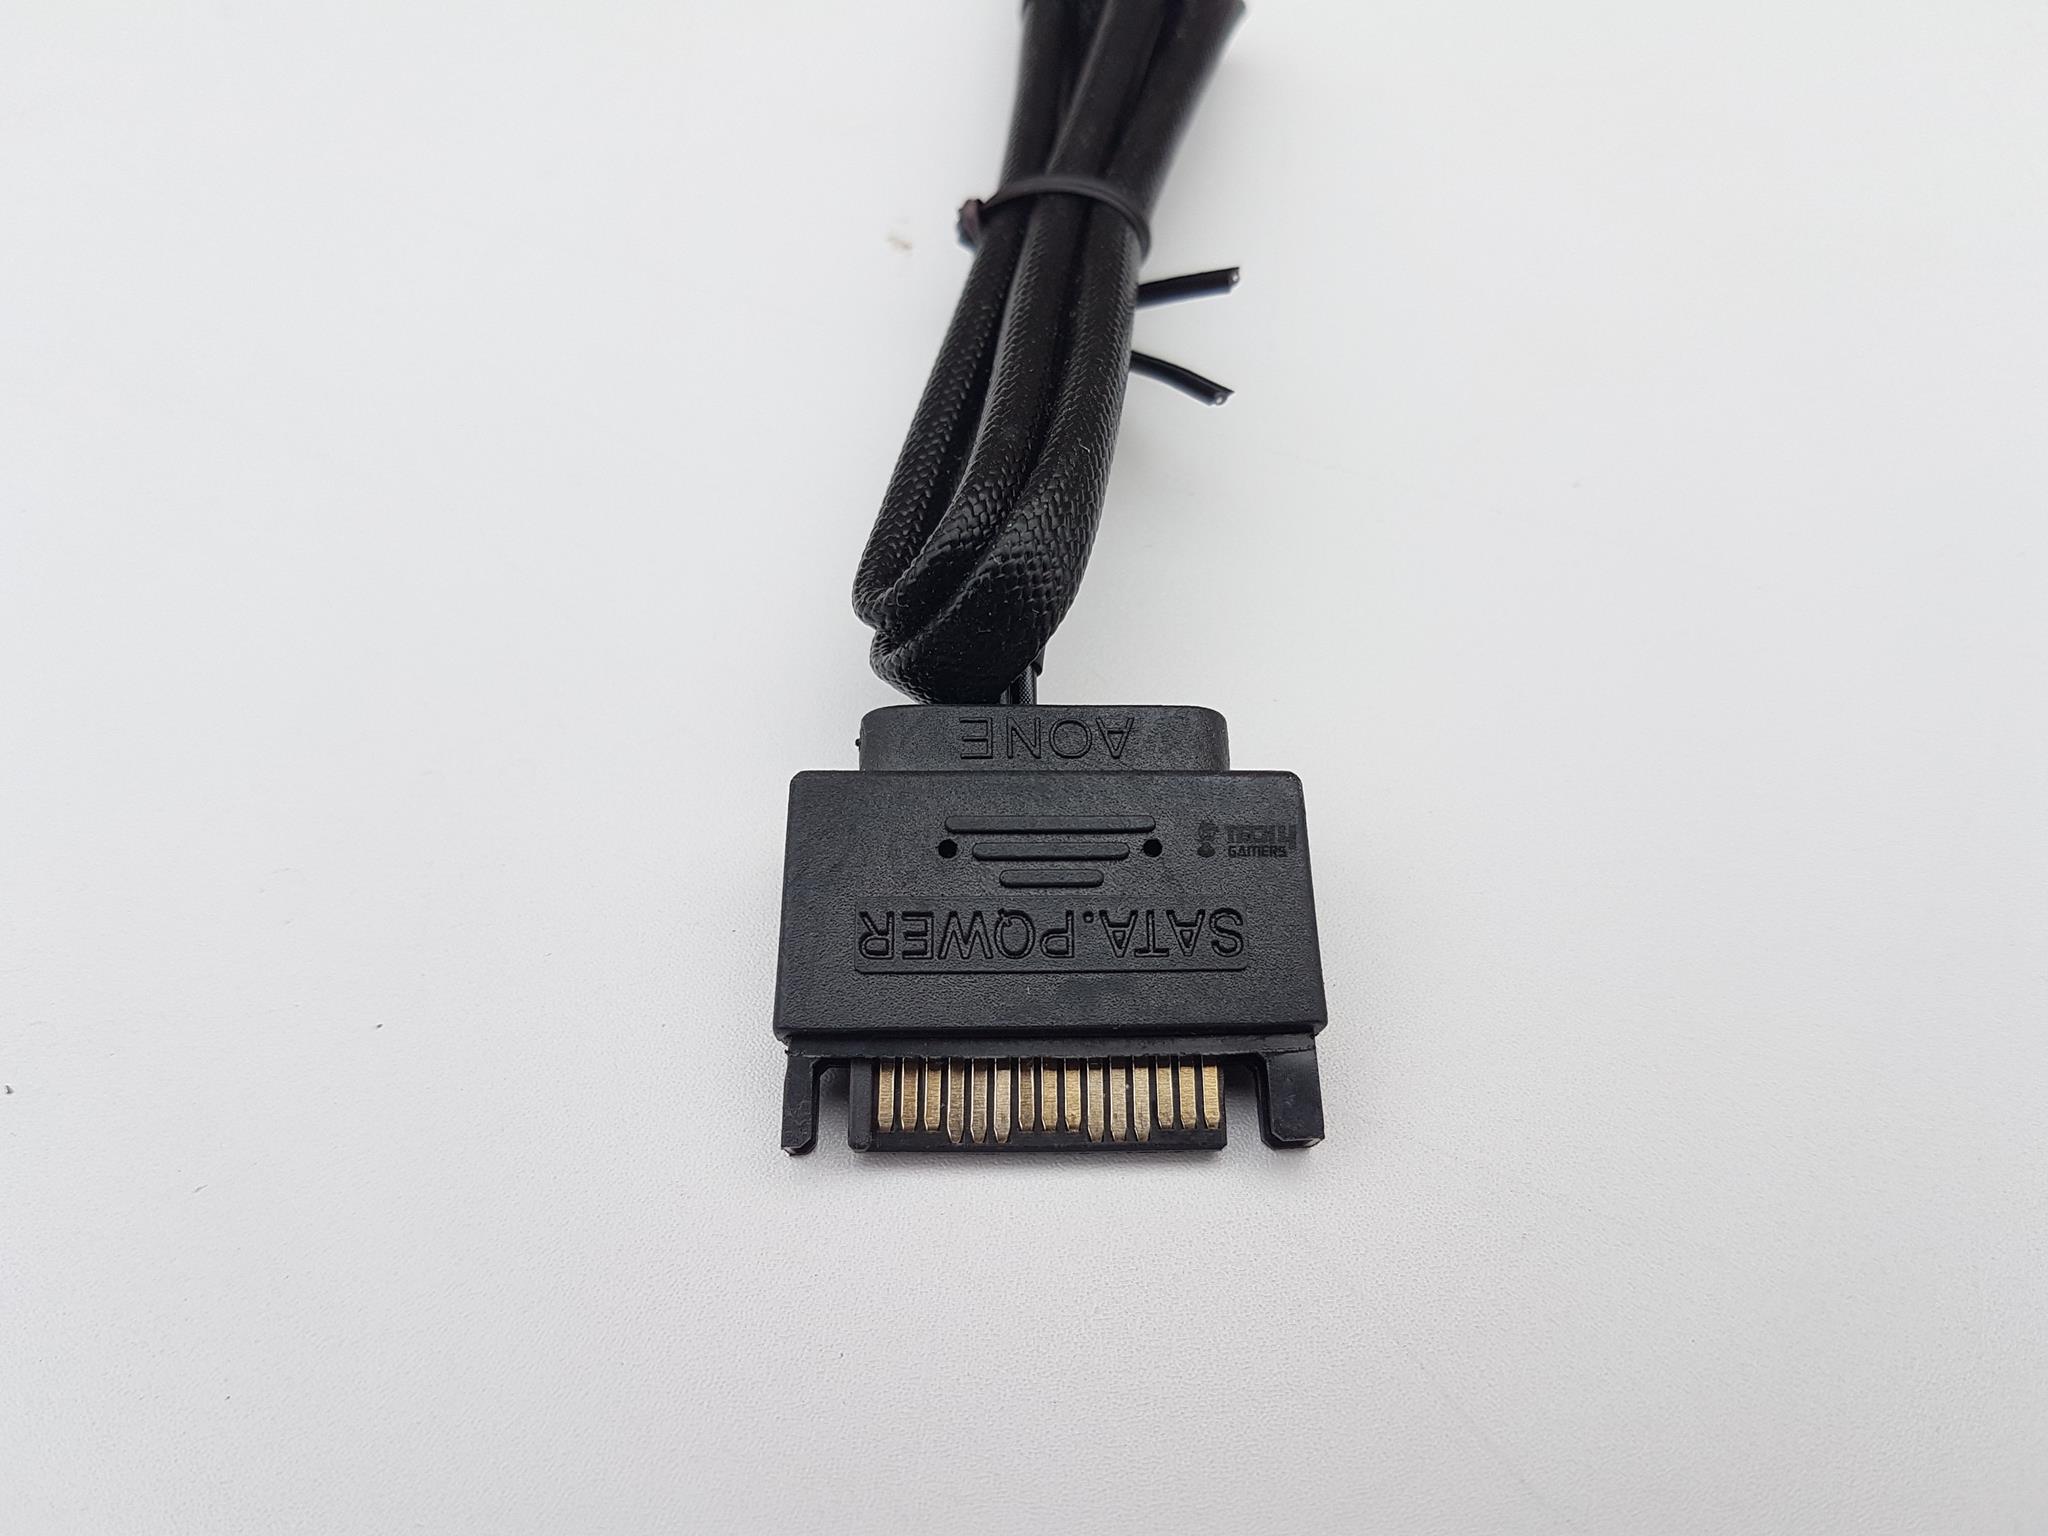
The controller is powered by 5V SATA connector. The length of this cable is 460mm and it is braided as well.
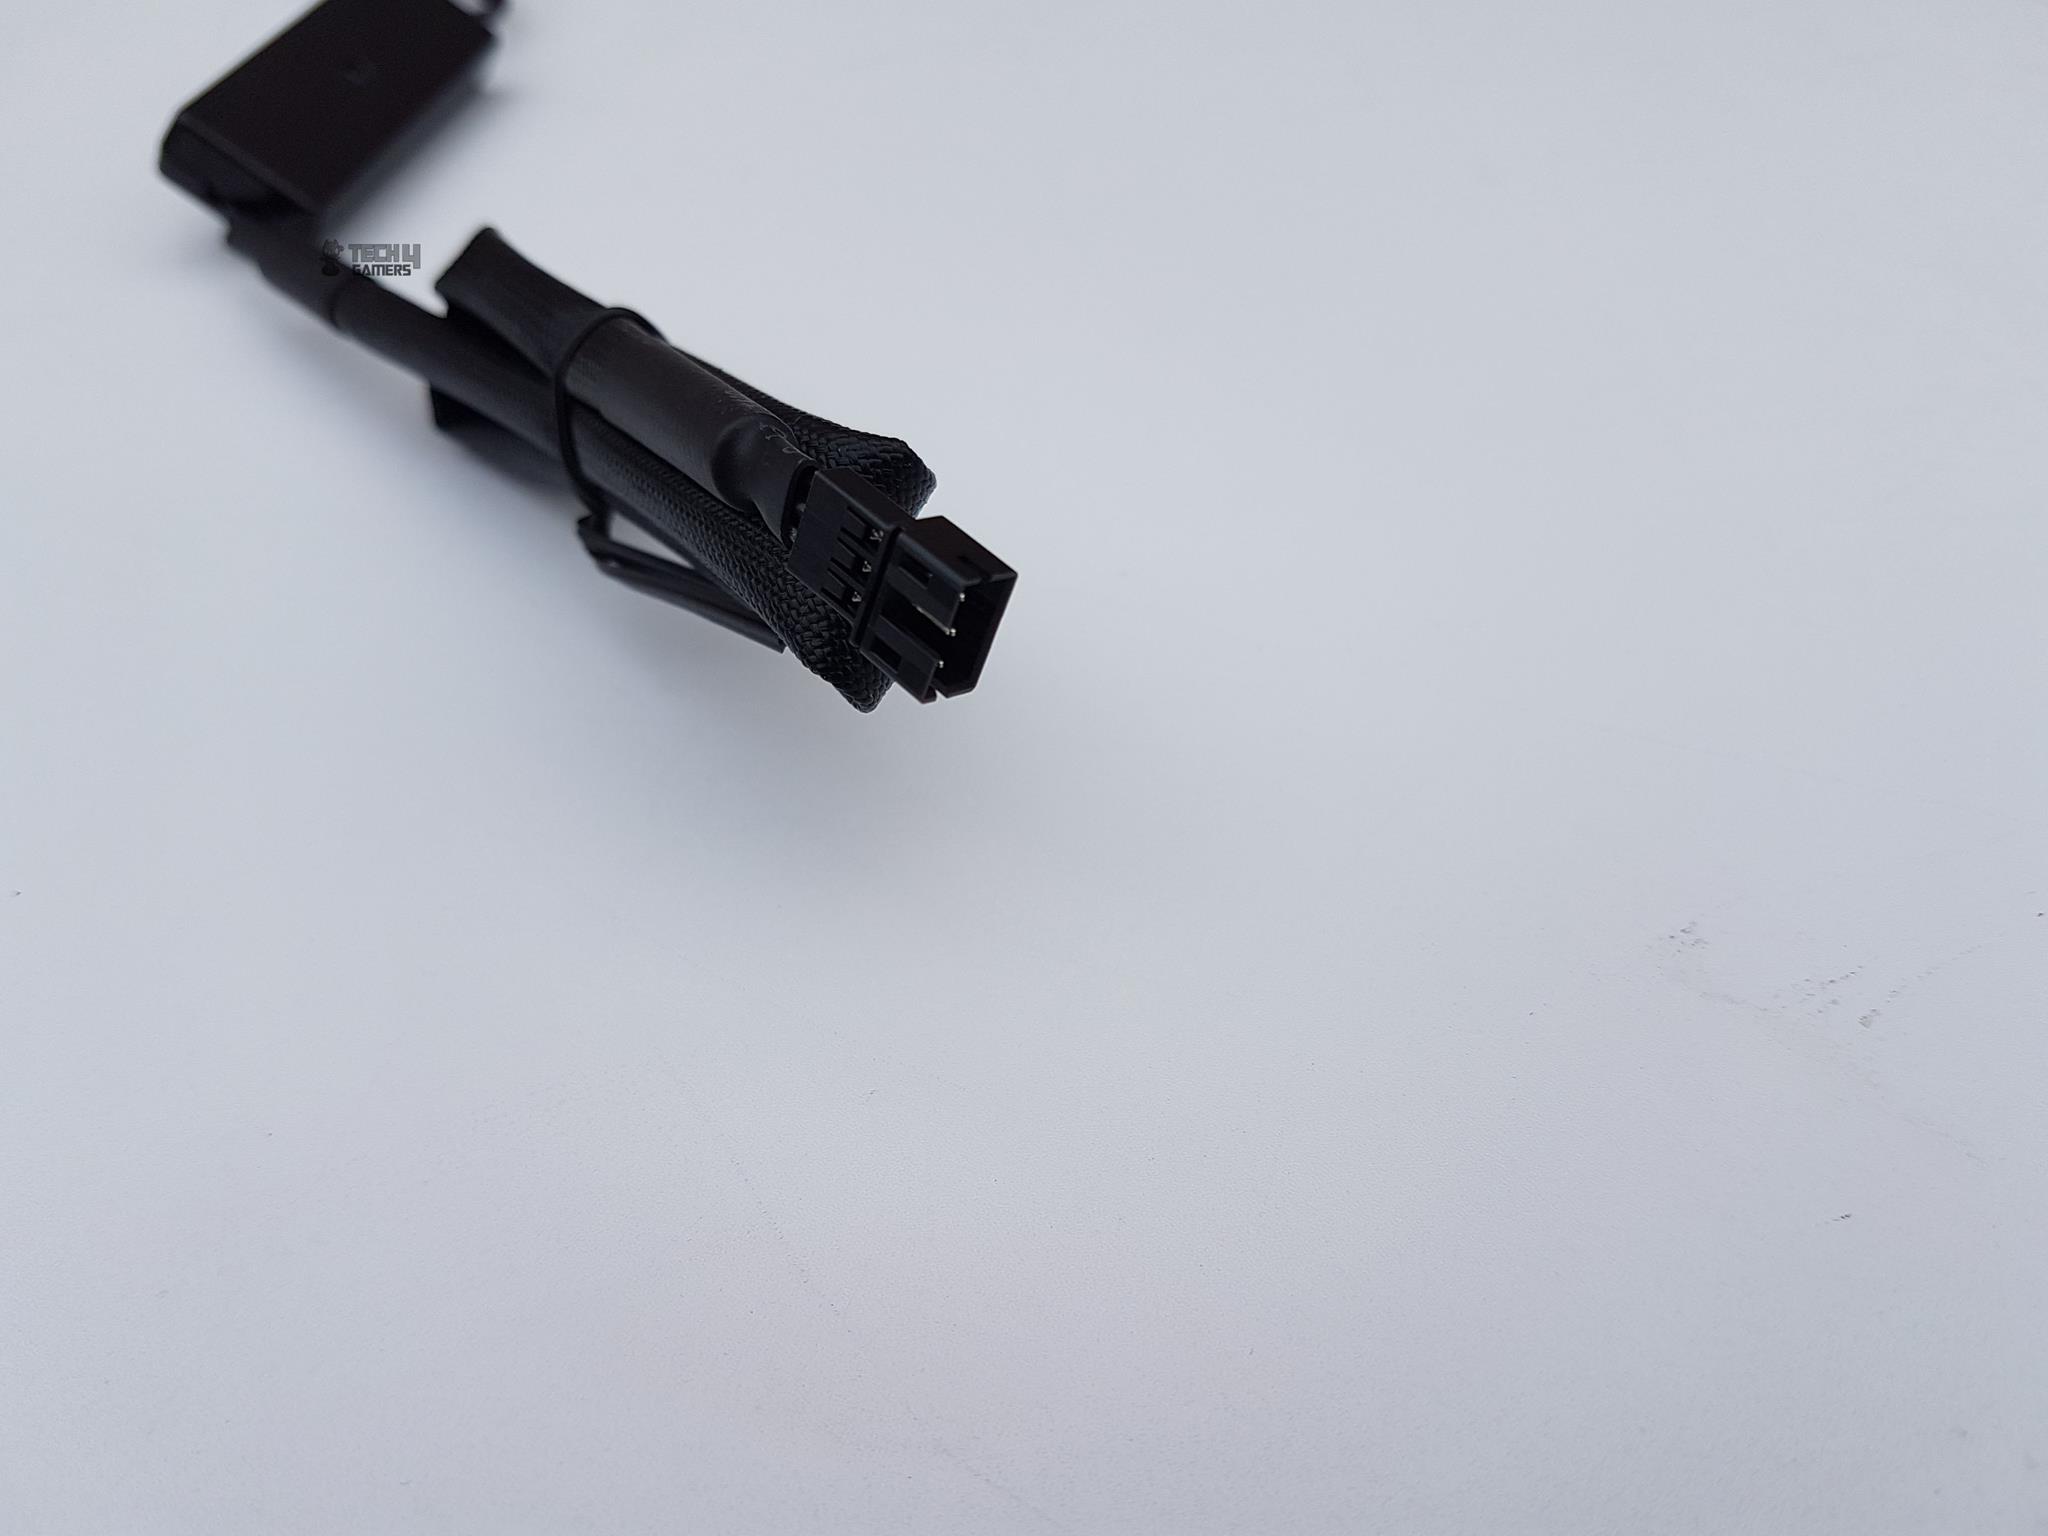
The controller’s other cable is an LED connector, about 441mm long and braided. Here’s the deal: hook up all your ARGB devices in a series, linking them to the controller through its LED cable. Just so you know, one controller can handle up to 90 ARGB LEDs at most.
Motherboard Sync
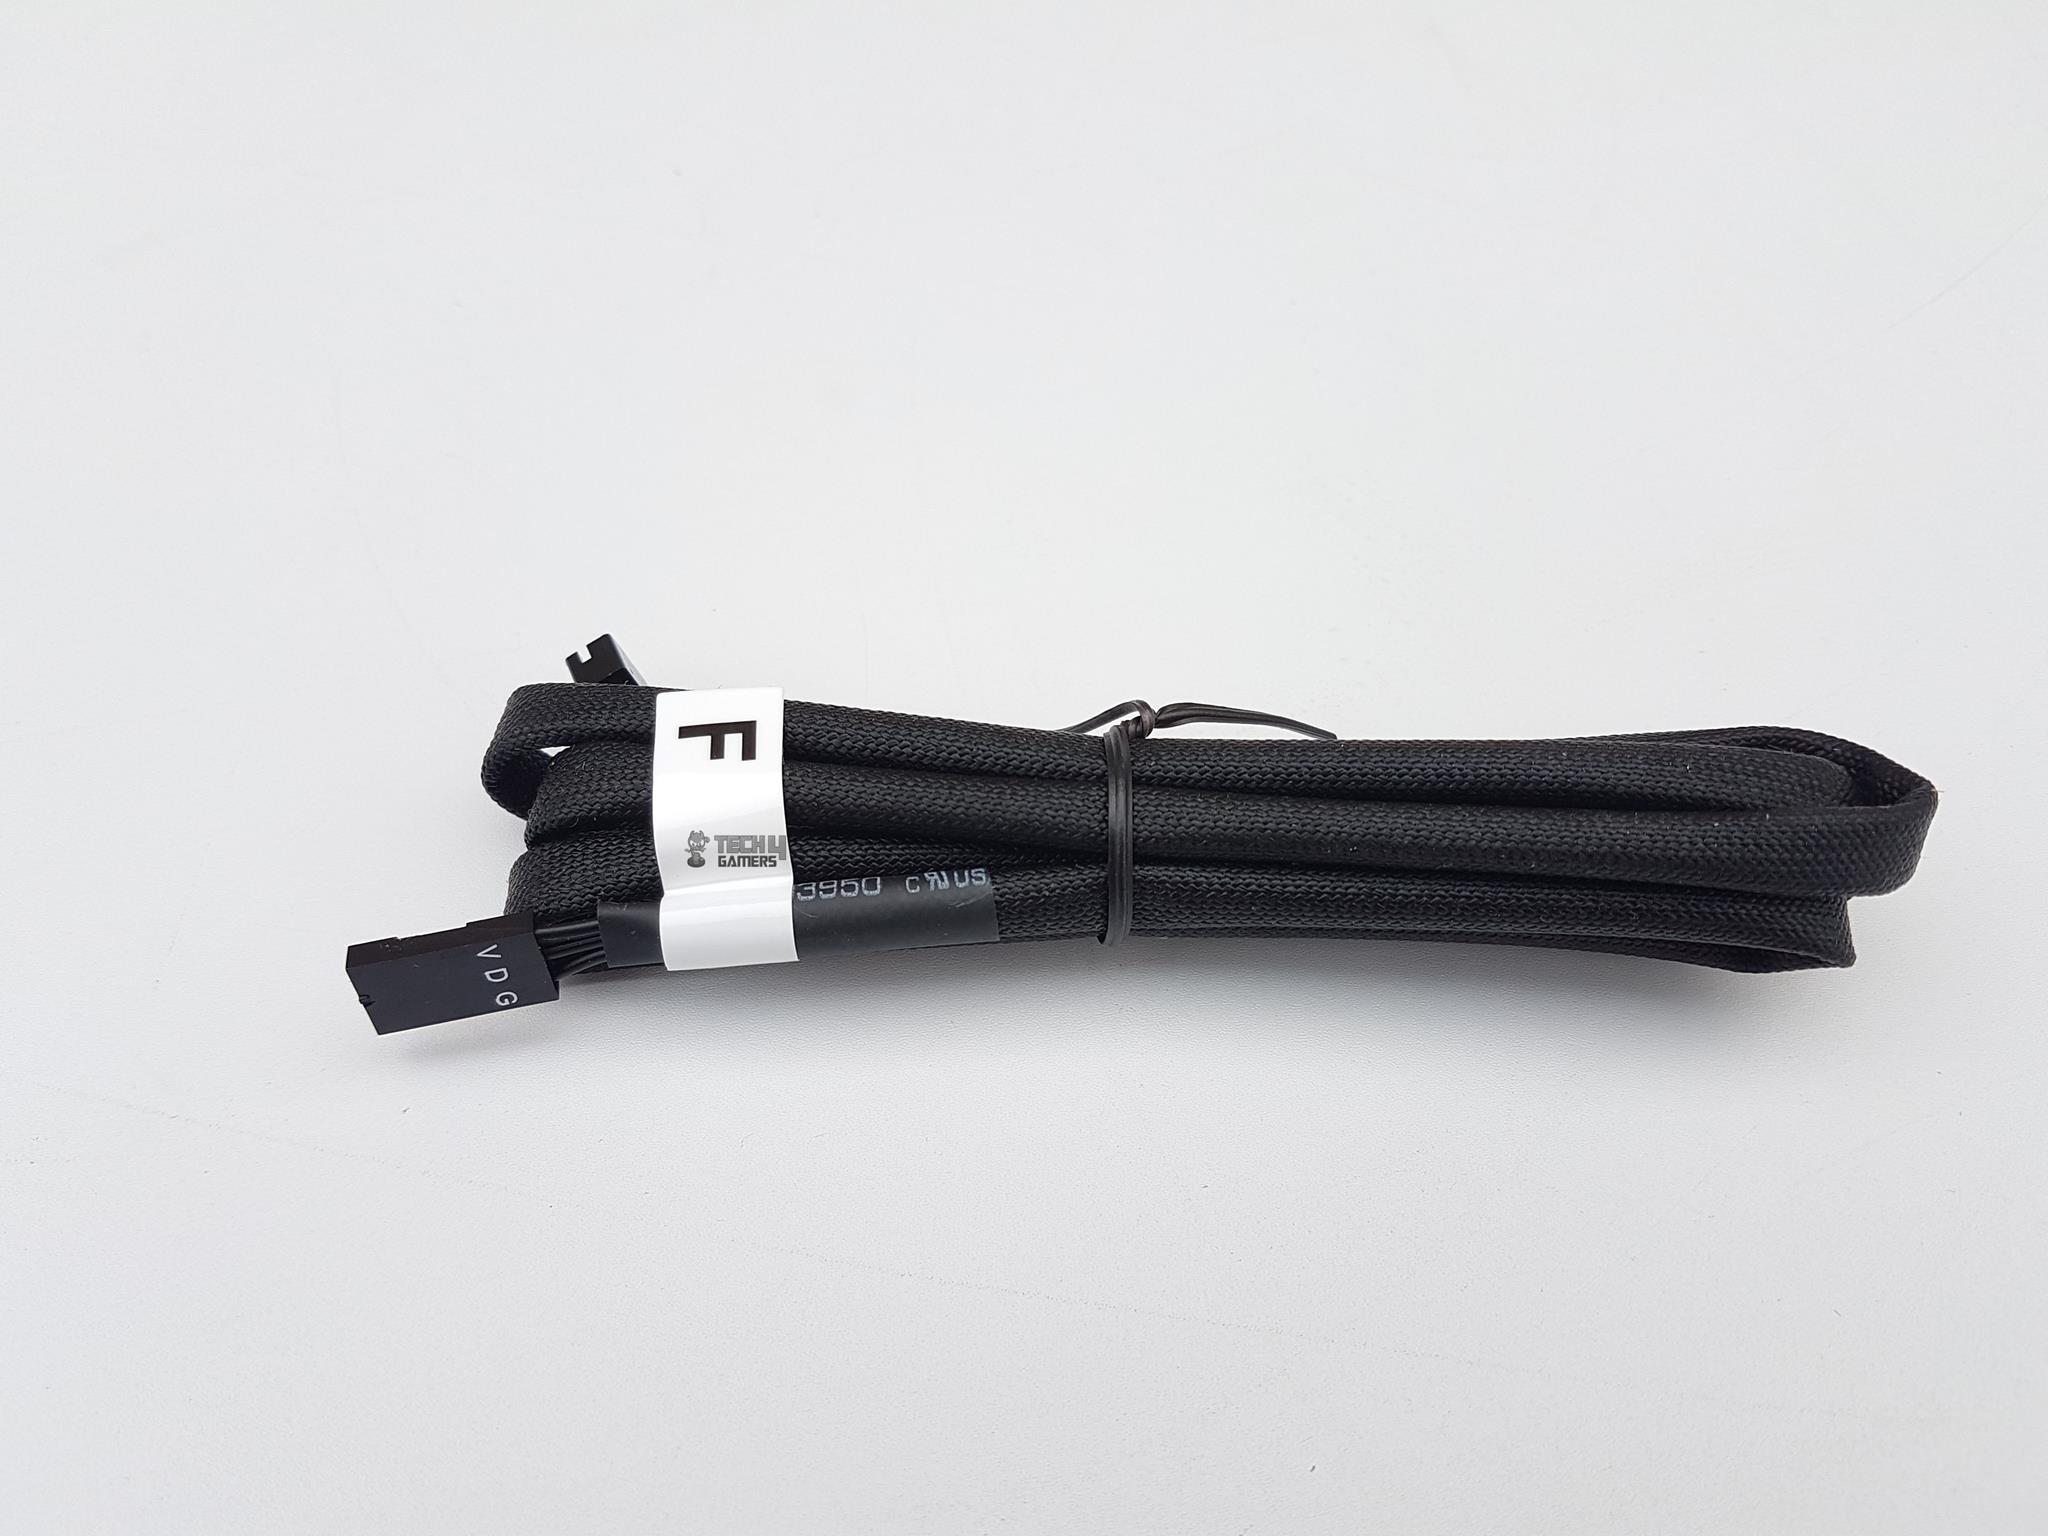
If you wish to connect the ARGB devices to the motherboards’ ARGB lighting headers using 5V then there are two MB Sync cables included in the accessories. They are labeled as E and F.
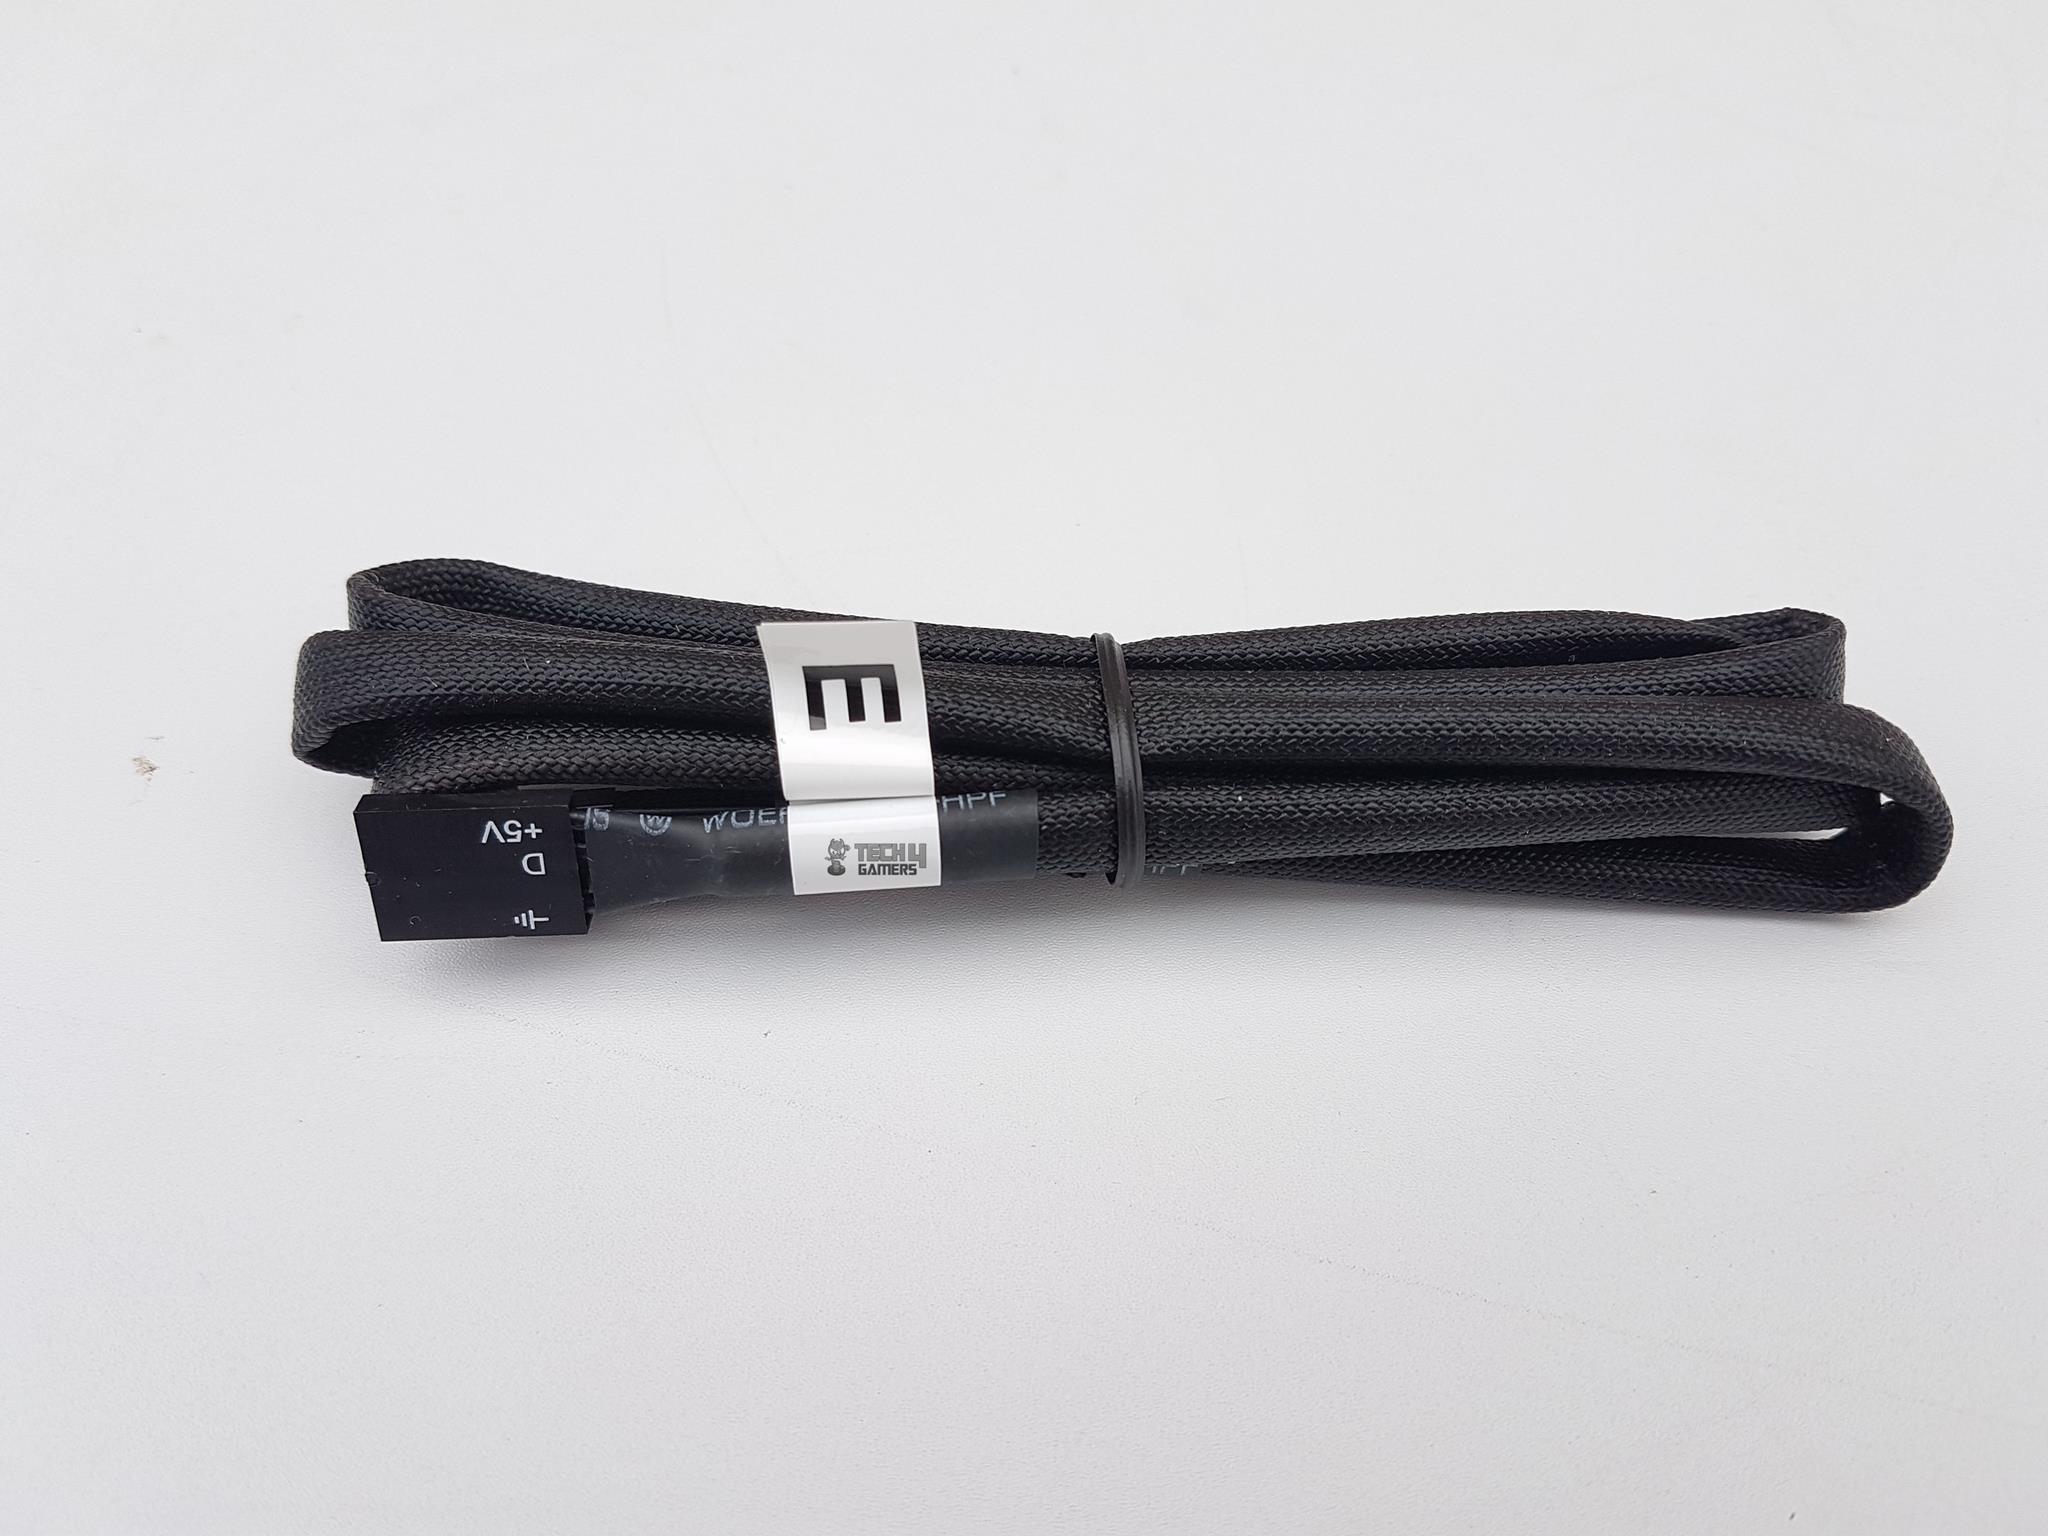
The E labeled MB Sync cable is to be used for Asus, ASRock, and MSI motherboards as these motherboards are using 4-pin design for 5V lighting headers. The length of this cable is 900mm approximately and it is braided.
The F labeled MB sync cable is to be used for the Gigabyte motherboards as these boards are using 3-pin design for 5V lighting headers. The length of this cable is 900mm approximately and it is braided.
Simply connect the fan and the pump LED cables to the respective MB Sync cable and connect the MB Sync cable to the motherboard’s 5V lighting header. You will have to use the motherboard’s respective lighting controlling software.
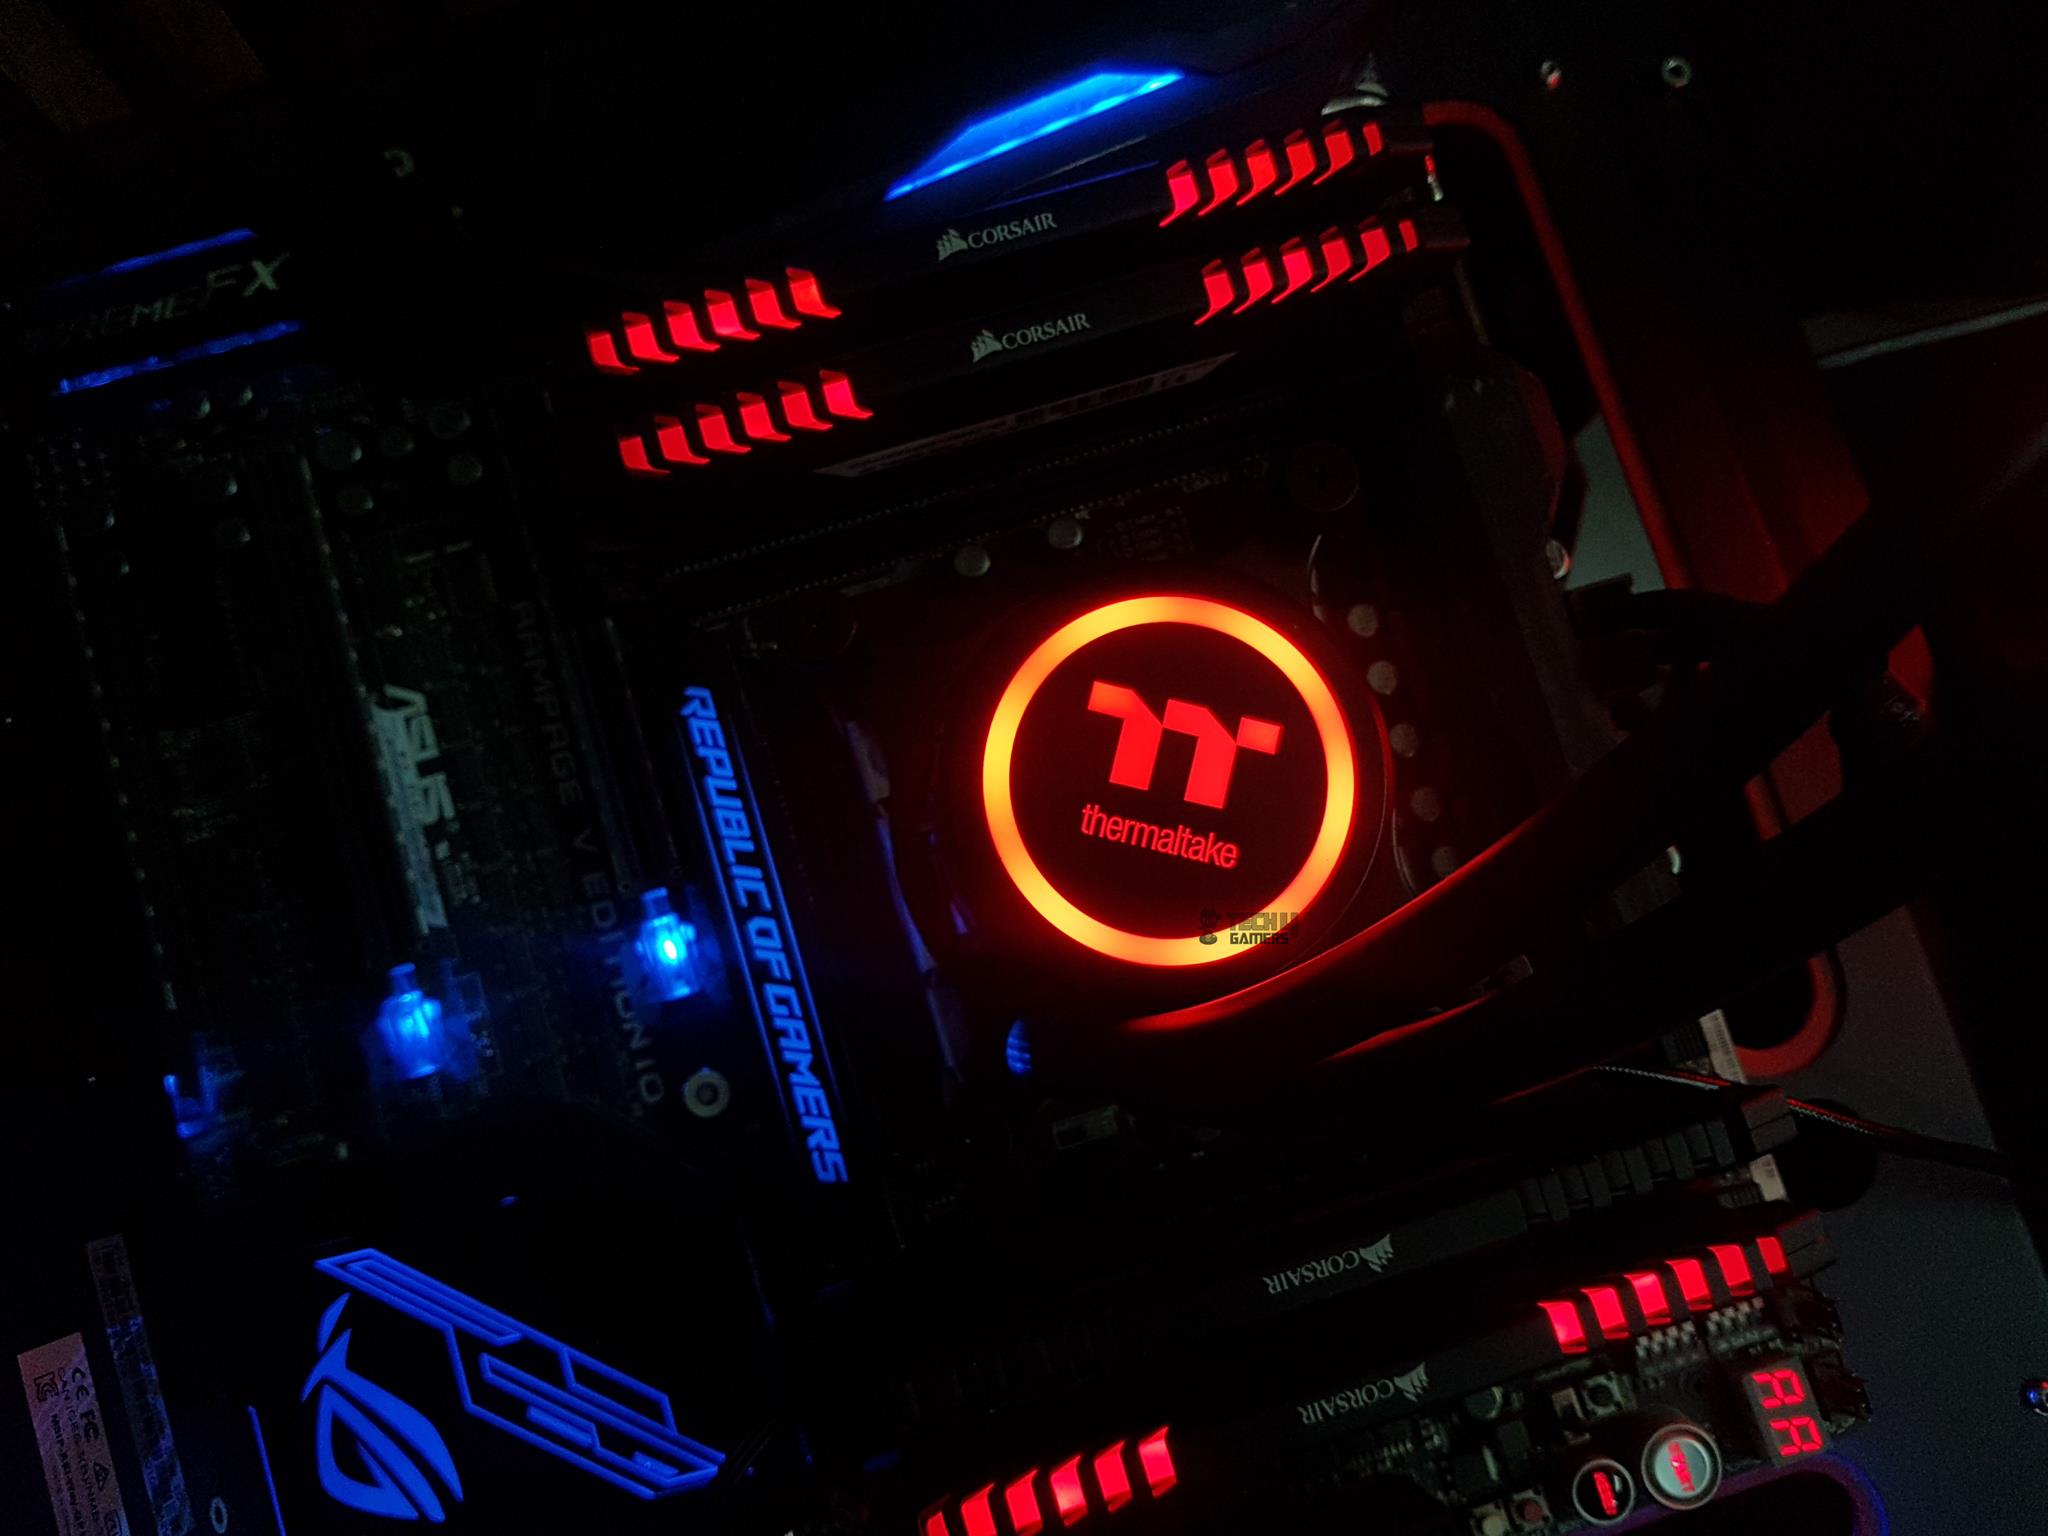
The pure 12 ARGB Sync Radiator Fan and the Pump pack stunning 16.8M colors light spectrum with some vivid lighting modes to make your day and to color coordinate the build to its full effect. The overall lighting effects are sublime and evenly diffused. They are not overly done which is a plus. Here are some pictures of the lighting on this cooler.

Installation
Here are the Installation guides for the Intel LGA-20XX and AMD AM4 sockets.
LGA-20XX
- Install the LGA-20XX standoffs screws on the mounting holes around the CPU Socket.
- Install the fans on the radiator using the supplied fan screws.
- Place the Intel mounting ring on the block by aligning the notches of the ring to the catchers on the block’s housing. Slide it to secure it.
- Now, place the plastic 4 edged ring from the bottom side of the block. Push it till you hear the clicks.
- Place the water block on the CPU by aligning the mounting holes on the mounting bracket with the LGA 20XX standoff screws.
- Secure the block using the thumb screws. Use a screwdriver for this job and go diagonally for even pressure.
- Connect the 3-pin cable to the CPU fan header or any of your desire fan header.
- Connect the fan power cables to your desire fan header on the motherboard.
- Daisy chain the fan and the block using the LED cables and connect them to the motherboard sync cable or to the controller. Connect the Sync cable to the lighting header on the motherboard, and you’re done!
AMD AM4
- Take out the AMD mounting ring.
- Take out the AMD mounting pin and the thumb screw.
- Pass the pin from either side. Use the thumb screw to secure holds the pin to the mounting ring. Make sure not to tighten the screw to its full torques. Just screw it in so that the pin is secured unlike the one shown in the below picture. The pin holder will be a bit flexible. We need that.
- Place the AMD mounting ring on the block by aligning the notches of the ring to the catchers on the block’s housing. Slide it to secure it.
- Now, place the plastic 4 edged ring from the bottom side of the block. Push it till you hear the clicks.
- Place the block on the CPU such as one side of the mounting bracket snuggles to the hook of the AMD stock backplate.
- Press the other side of the mounting ring so that the pin holder catches the hook of the AMD stock backplate.
- Start screwing in the thumb screw till the thread runs out.
- Connect the 3-pin cable to the CPU fan header or any of your desire fan header.
- Connect the fan power cables to your desire fan header on the motherboard.
- Daisy chain the fan and the block using the LED cables and connect them to the motherboard sync cable or to the controller. Connect the Sync cable to the lighting header on the motherboard. This would complete the installation.
Clearance
The best thing about AIOs is the maximum clearance and compatibility with respect to the chassis, DIMM slots, PCIe slot. This cooler has no such clearance issue. The tubes are not blocking any DIMM slot and RAM modules of any height can be used. Similarly, the block is not obstructing the first PCIe x16 3.0 slot. Make sure that chassis has provision for a 120mm radiator mounting and you are good to go.
Testing
Following test benches have been used for testing this cooler:
Intel Test Bench
- Asus Rampage V Edition 10
- Intel i7 6850k
- Corsair Vengeance RED LED 16GB @ 2666MHz
- Colorful GeForce GTX 1050Ti Vulkan
- Samsung 840 EVO 250GB SSD
- Seagate Barracuda 2TB
- Corsair AX1200i
- PrimoChill Praxis WetBench
AMD Test Bench
- Asus Strix X470-F Gaming
- AMD Ryzen 2700X
- Corsair Vengeance Pro RGB 16GB @ 3200MHz
- HyperX 120GB SSD
- Antec HCP 1300W
Software and Testing Methodology
- Asus Real Bench v 2.44 for Intel
- Real Temp GT v 3.70 for Intel
- AIDA64 6.0 for AMD
Here is the settings table for testing:
| Platform | Intel |
| Stock Voltage (V) | 1.130 |
| Stock Clock (MHz) | 3600 |
| OC Voltage (V) | 1.350 |
| OC Clock (MHz) | 4300 |
| Turbo Boost | Disabled |
| Voltage Control | Manual |
| Platform | AMD |
| Stock Voltage (V) | 1.1125 |
| Stock Clock (MHz) | 3700 |
| OC Voltage (V) | 1.3250 |
| OC Clock (MHz) | 4100 |
| Turbo Boost | Disabled |
| Voltage Control | Manual |
| General | Settings |
| Thermal Paste | Noctua NT-H1 |
| Test Run Time | 60 minutes |
| Idling Time | 15 minutes |
| Fan Speed | Manually set to run at 100% speed |
| Pump Speed | Connected to the AIO Pump header to run at 100% speed |
We’re using Noctua NT-H1 thermal paste on the test bench for consistency across all coolers. This standardization helps avoid potential performance differences caused by using different pastes.
Graphs display delta temperatures. Testing occurs on an open-air bench, but expect temperatures to increase inside a chassis, influenced by airflow. For optimal results, consider airflow in your setup.
Let’s take a look at the results.
Thermal Performance – Intel
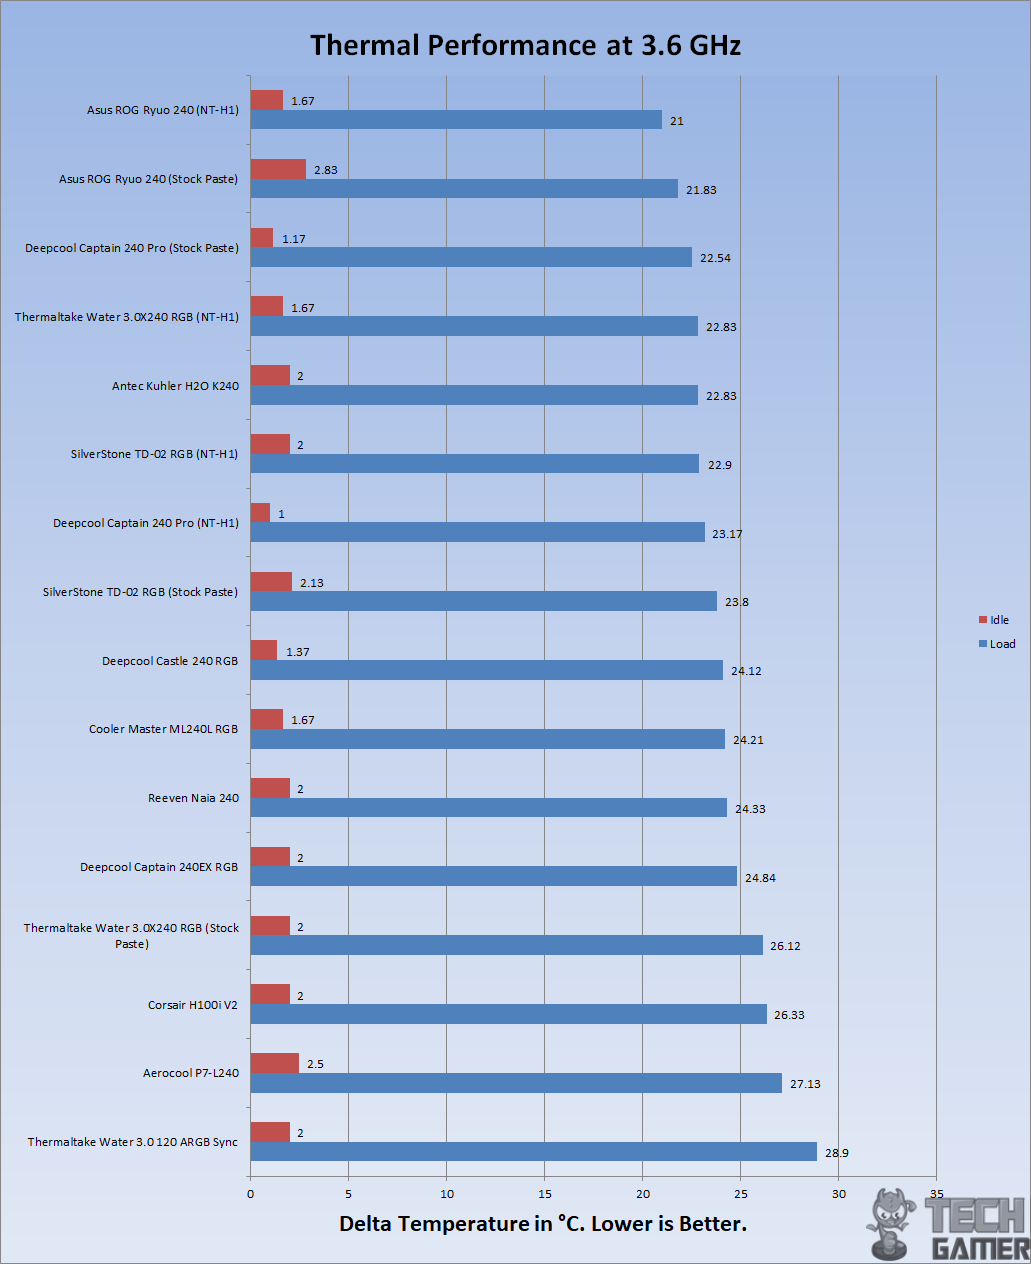
On stock clocks i.e 3.6GHz at 1.13V the chip was idling at 2°C. Under stress test the cooler was doing a delta of 28.9°C. This is a good performance as the cooler is closer to the 240mm AIO.
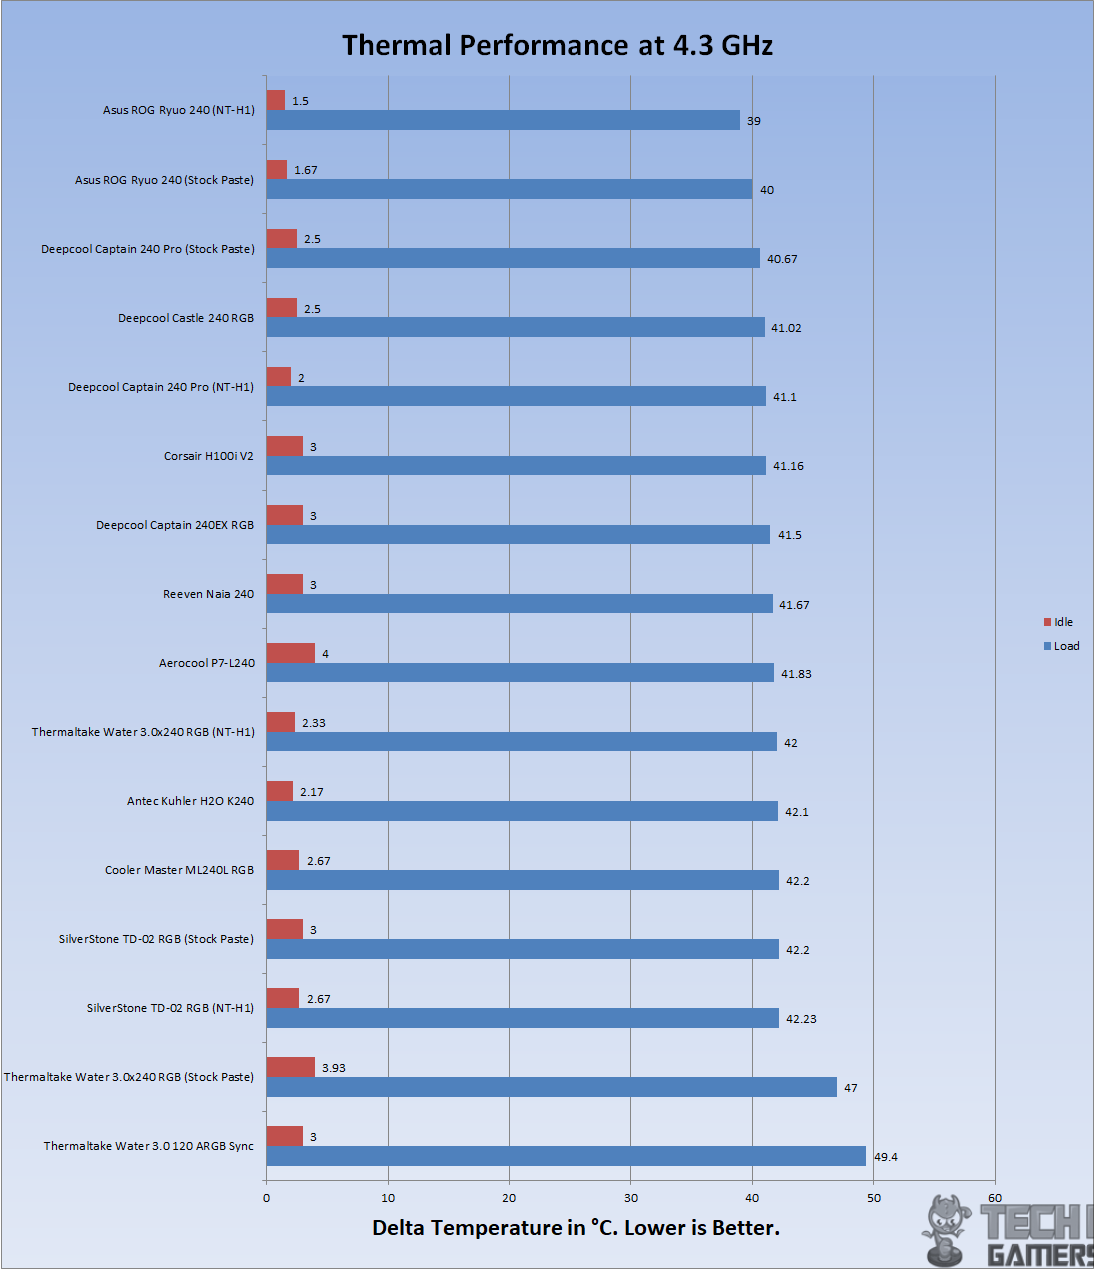
With overclocked chip at 4.3GHz using 1.350V the chip was doing 49.4°C under load. The cooler has again performed well for being a 120mm AIO.
AMD Thermal Performance
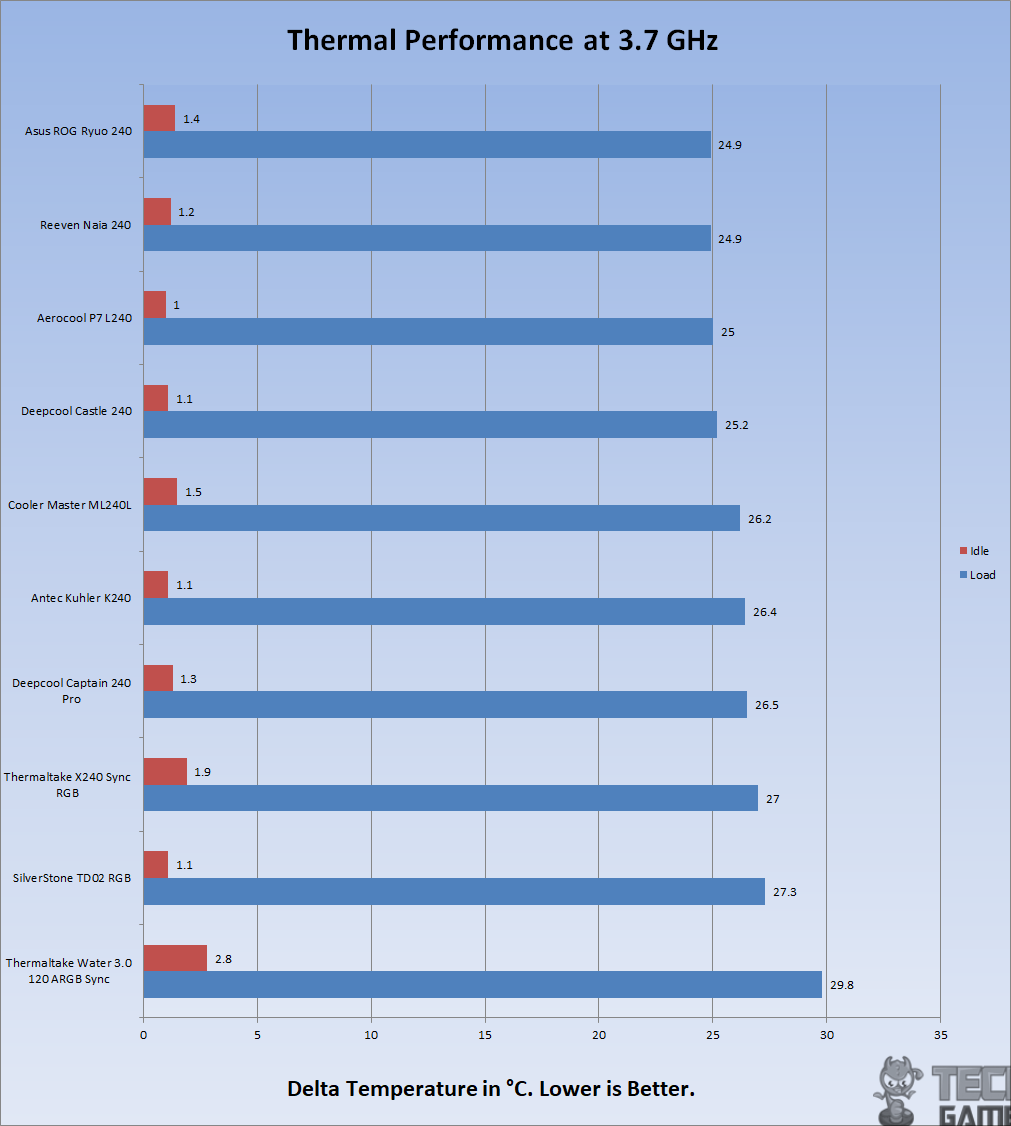
On stock clocks i.e 3.7GHz the chip was idling at 2.8°C. Under stress test the cooler was doing a delta of 29.8°C. This is a good performance.
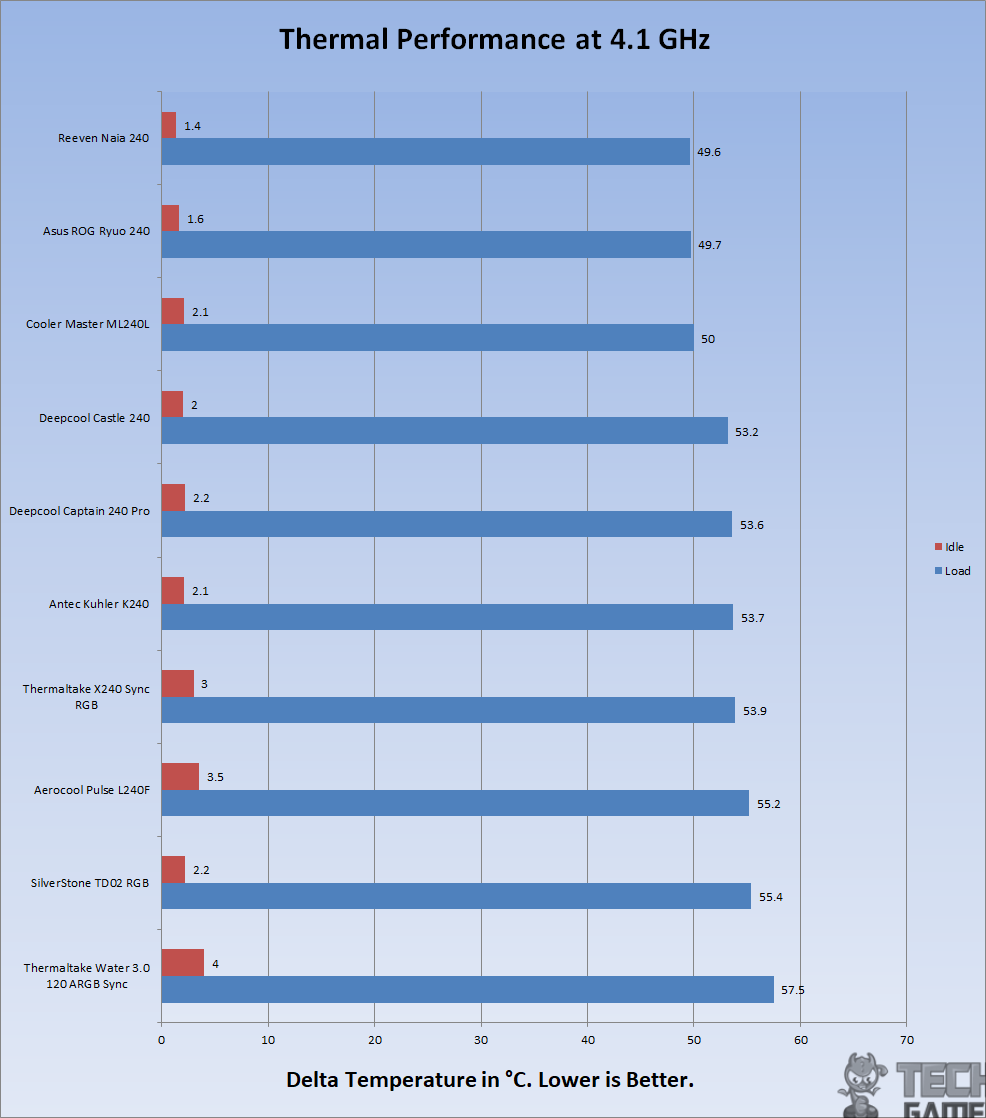
On stock clocks i.e 4.1GHz the chip was idling at 4°C. Under stress test the cooler was doing a delta of 57.5°C.
Acoustics
I could not measure the sound level of the unit due to certain environmental noises that would invalidate the actual sound level reading from the sound meter. Based on my experience with the fans and coolers testing so far, the fan and the pump are near silent. Still, it’s important to note that:
Should You Buy It?
Is this cooler the right investment for your build?
Buy It If
✅ You Want Compact ARGB Cooling: Opt for this cooler if you’re seeking efficient cooling with ARGB aesthetics in a tight space, as it provides effective 120mm liquid cooling with vivid lighting options.
✅ You’re Seeking Synchronization and Compatibility: If motherboard synchronization with ARGB is a priority, especially with brands like Asus, Gigabyte, MSI, or ASRock, this cooler syncs seamlessly with their 5V RGB setups.
✅ You Want Balanced Performance on a Budget: Despite its size, it performs impressively close to budget-friendly 240mm AIOs, making it an ideal choice if you prioritize performance without sacrificing space or budget.
Don’t Buy It If
❌ You Desire Simpler, Cheaper Alternatives: If ARGB lighting isn’t a priority and you’re focused solely on performance, cheaper non-ARGB 240mm AIOs in the market could offer better value without the lighting features.
❌ Ease of Cable Management Matters: The exceptionally long LED cables might pose challenges in cable management, so if simplified setup and cable management are crucial, consider alternatives with shorter cables.
Final Words
The Thermaltake Water 3.0 120 ARGB Sync CPU Liquid Cooler stands out as a compact, visually striking cooler from the Performer RGB series. Its TT Premium edition delivers a 120mm AIO liquid cooling experience with a Pure 12 ARGB Sync Radiator fan, boasting 16.8M colors and 7 lighting modes optimized for efficient radiator cooling.
The cooler consists of a slim, lightweight aluminum radiator with a 20 FPI count. The ARGB lid atop the water block adds a visually appealing touch, accompanied by a plastic pump housing equipped with a 3000 RPM motor.
With a focus on compatibility, the Pure 12 ARGB Sync Radiator fan includes 9 addressable LEDs. However, its competitive edge might be challenged by more affordable non-ARGB 240mm AIO coolers in the market. Yet, in testing on Intel and AMD platforms, this 120mm AIO performed impressively, rivaling some budget 240mm AIOs, marking a commendable improvement by Thermaltake in the premium cooling solutions realm.
We are thankful to Thermaltake for sending us Thermaltake Water 3.0.
Recent Updates
- December 26, 2023: Few text changes to improve readability. Also added image galleries.
Thank you! Please share your positive feedback. 🔋
How could we improve this post? Please Help us. 😔
[Editor-in-Chief]
Sajjad Hussain is the Founder and Editor-in-Chief of Tech4Gamers.com. Apart from the Tech and Gaming scene, Sajjad is a Seasonal banker who has delivered multi-million dollar projects as an IT Project Manager and works as a freelancer to provide professional services to corporate giants and emerging startups in the IT space.
Majored in Computer Science
13+ years of Experience as a PC Hardware Reviewer.
8+ years of Experience as an IT Project Manager in the Corporate Sector.
Certified in Google IT Support Specialization.
Admin of PPG, the largest local Community of gamers with 130k+ members.
Sajjad is a passionate and knowledgeable individual with many skills and experience in the tech industry and the gaming community. He is committed to providing honest, in-depth product reviews and analysis and building and maintaining a strong gaming community.


