 Threads
Best Budget Cooler?
Review Summary
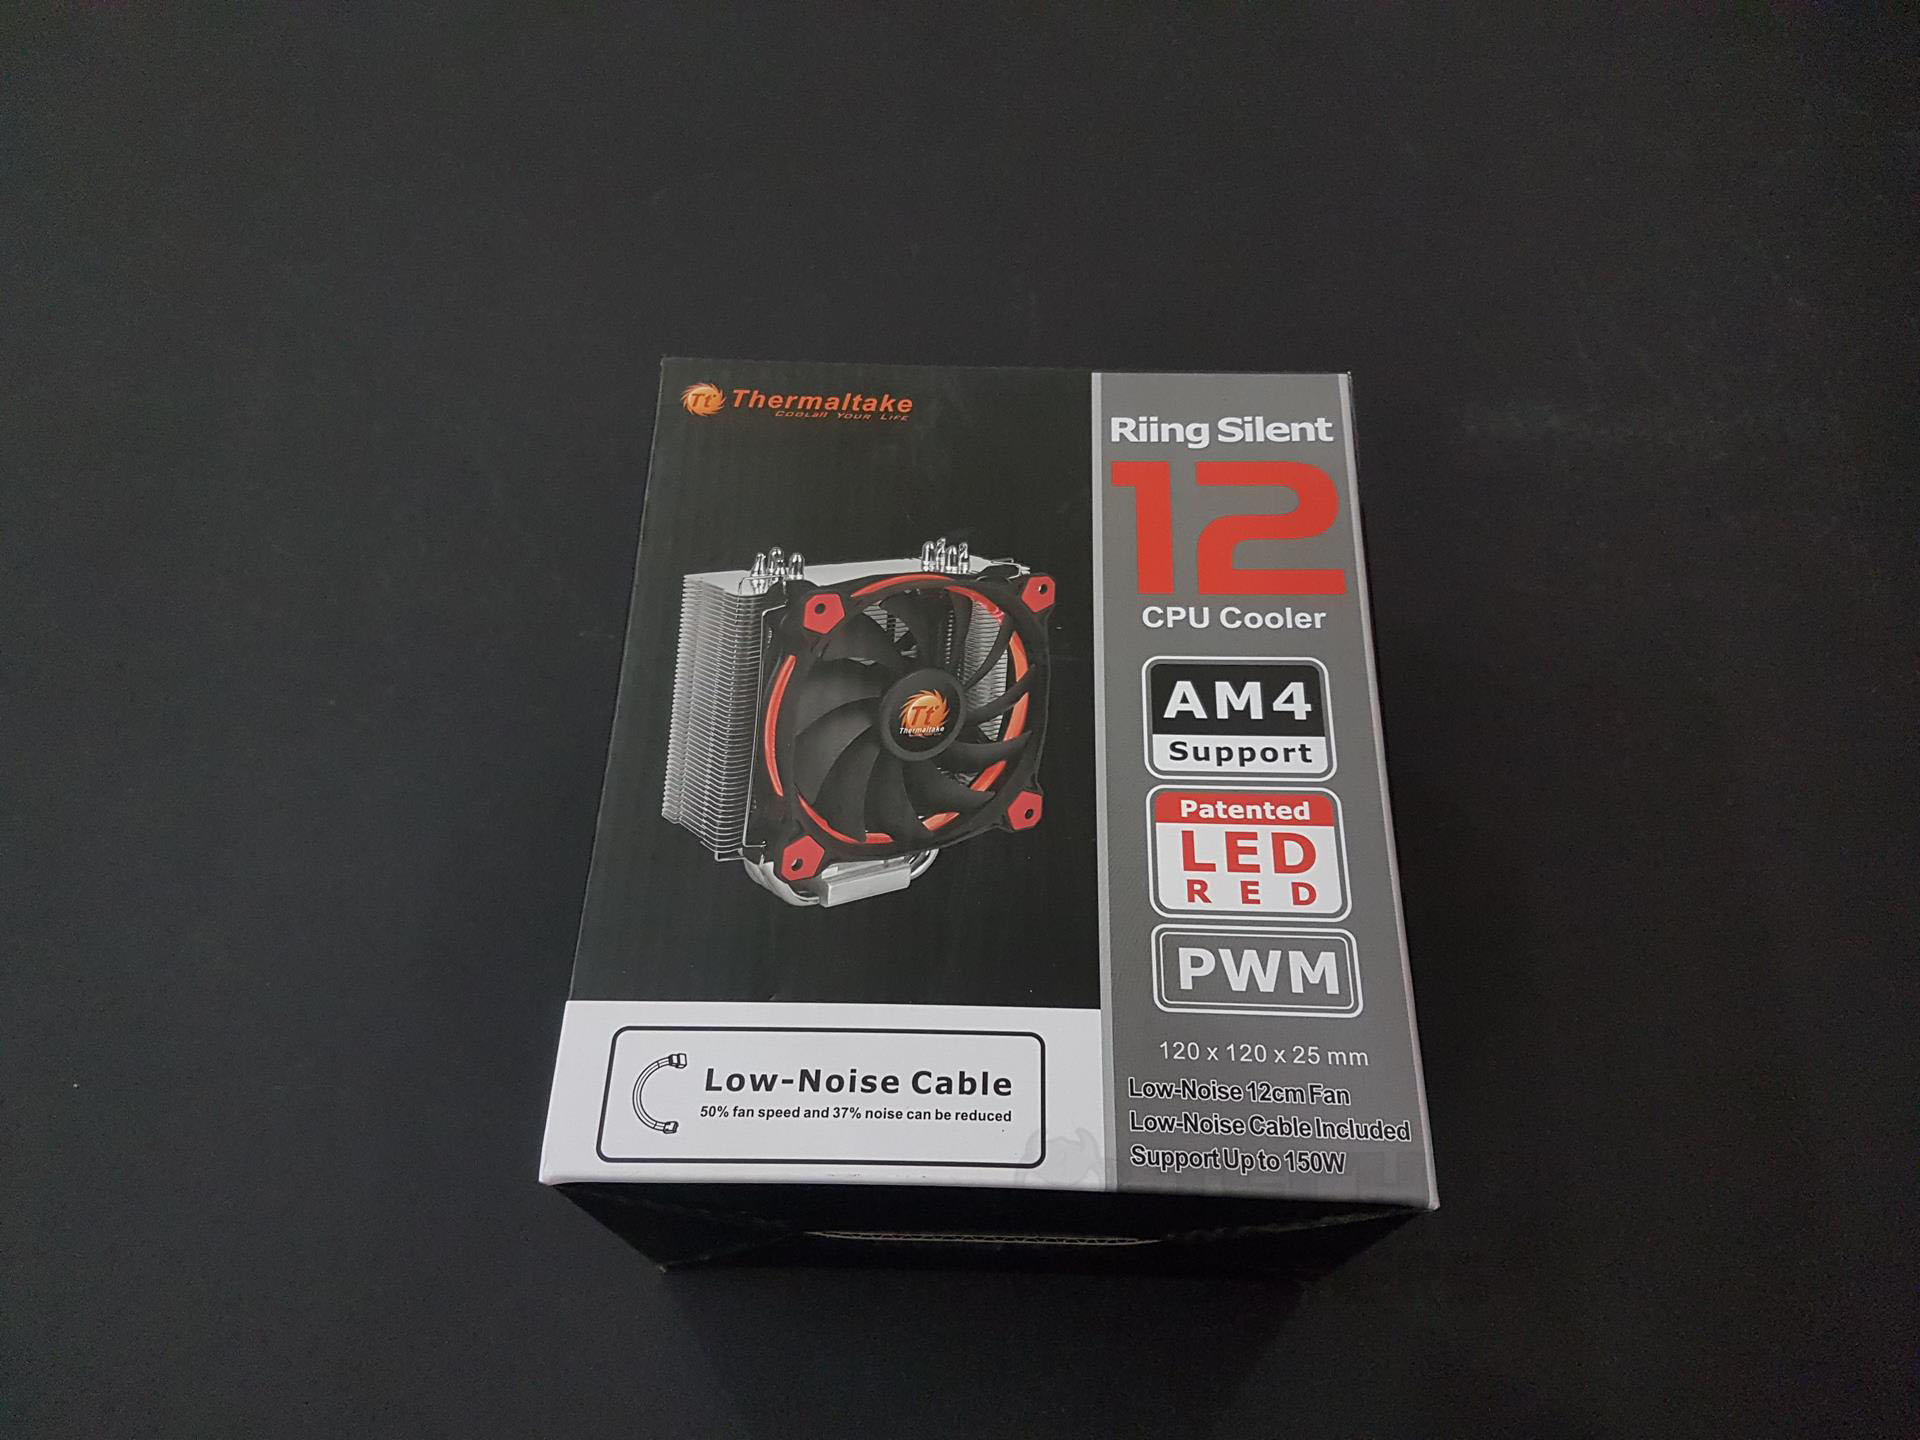
The Thermaltake Riing Silent 12 Pro is a slim and affordable CPU cooler with a 120mm Riing LED PWM fan. It features 58 aluminum fins, four nickel-plated copper heat pipes, and a CPU Direct Contact design for effective heat dissipation. It is compatible with most sockets, including AM4, and has a padded backplate for motherboard safety. It provides good performance under regular loads but has limited high-end overclocking capability.

Overall
-
Performance - 8/10
8/10
-
Value - 9/10
9/10
-
Features - 7/10
7/10
-
Build Quality - 8/10
8/10
Pros
- Efficient Cooling Performance
- Quiet Operation
- Slim Design
- Good Build Quality
- Wide Compatibility
- Additional Padding on Backplate
Cons


Thermaltake has sent me the Thermaltake Riing Silent 12 Pro for Review. This is a slim profile, single tower cooler that comes with their ever-popular Riing 120mm fan. This is a budget cooler that is capable of driving cooling needs without extreme overclocking. The cooler is rated to handle the thermal dissipation of 150W and we’ll be testing it on our new Coffee-Lake-based test bench.
Key Takeaways
- The Thermaltake Riing Silent 12 Pro is an ideal option for those looking for a capable CPU cooler that provides a reasonable noise output.
- The Thermaltake Riing Silent 12 Pro is not for anyone interested in performing extreme overclocking.
- The Thermaltake Riing Silent 12 Pro is a solid performer, managing to maintain a temperature of 67.3°C on an i7-8700k at 4.3 GHz.
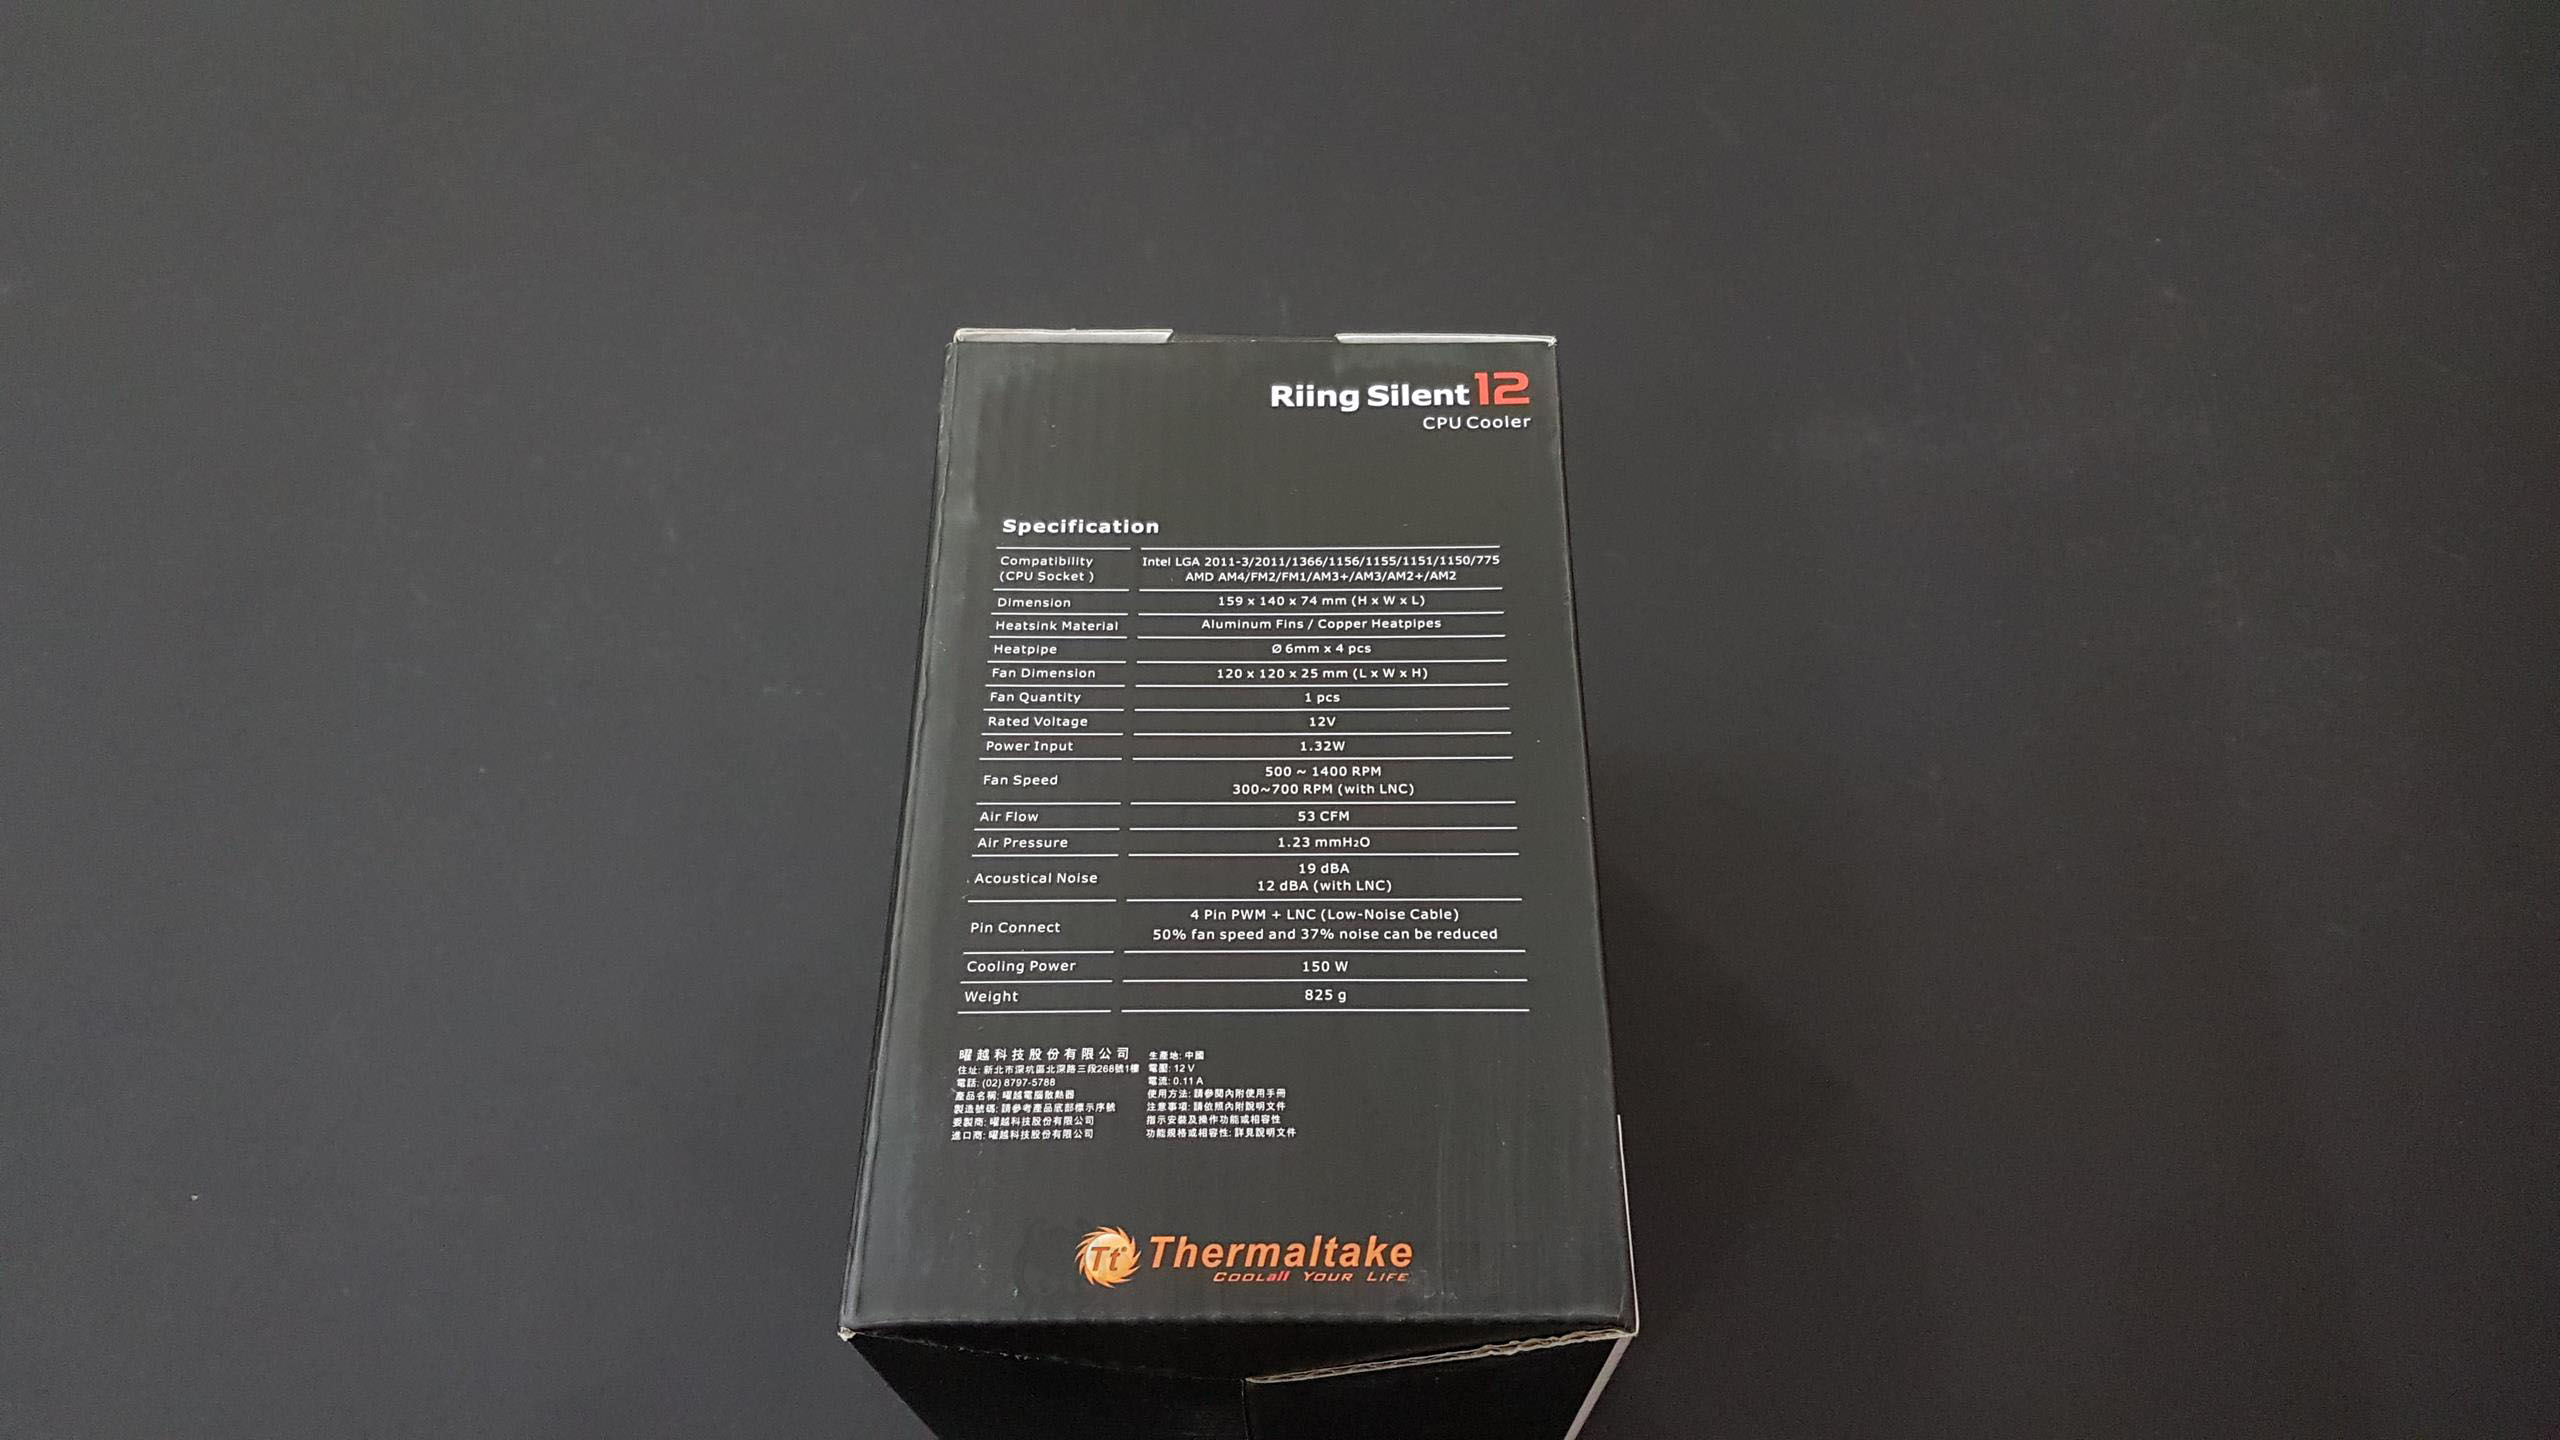
Let’s go over the specifications:

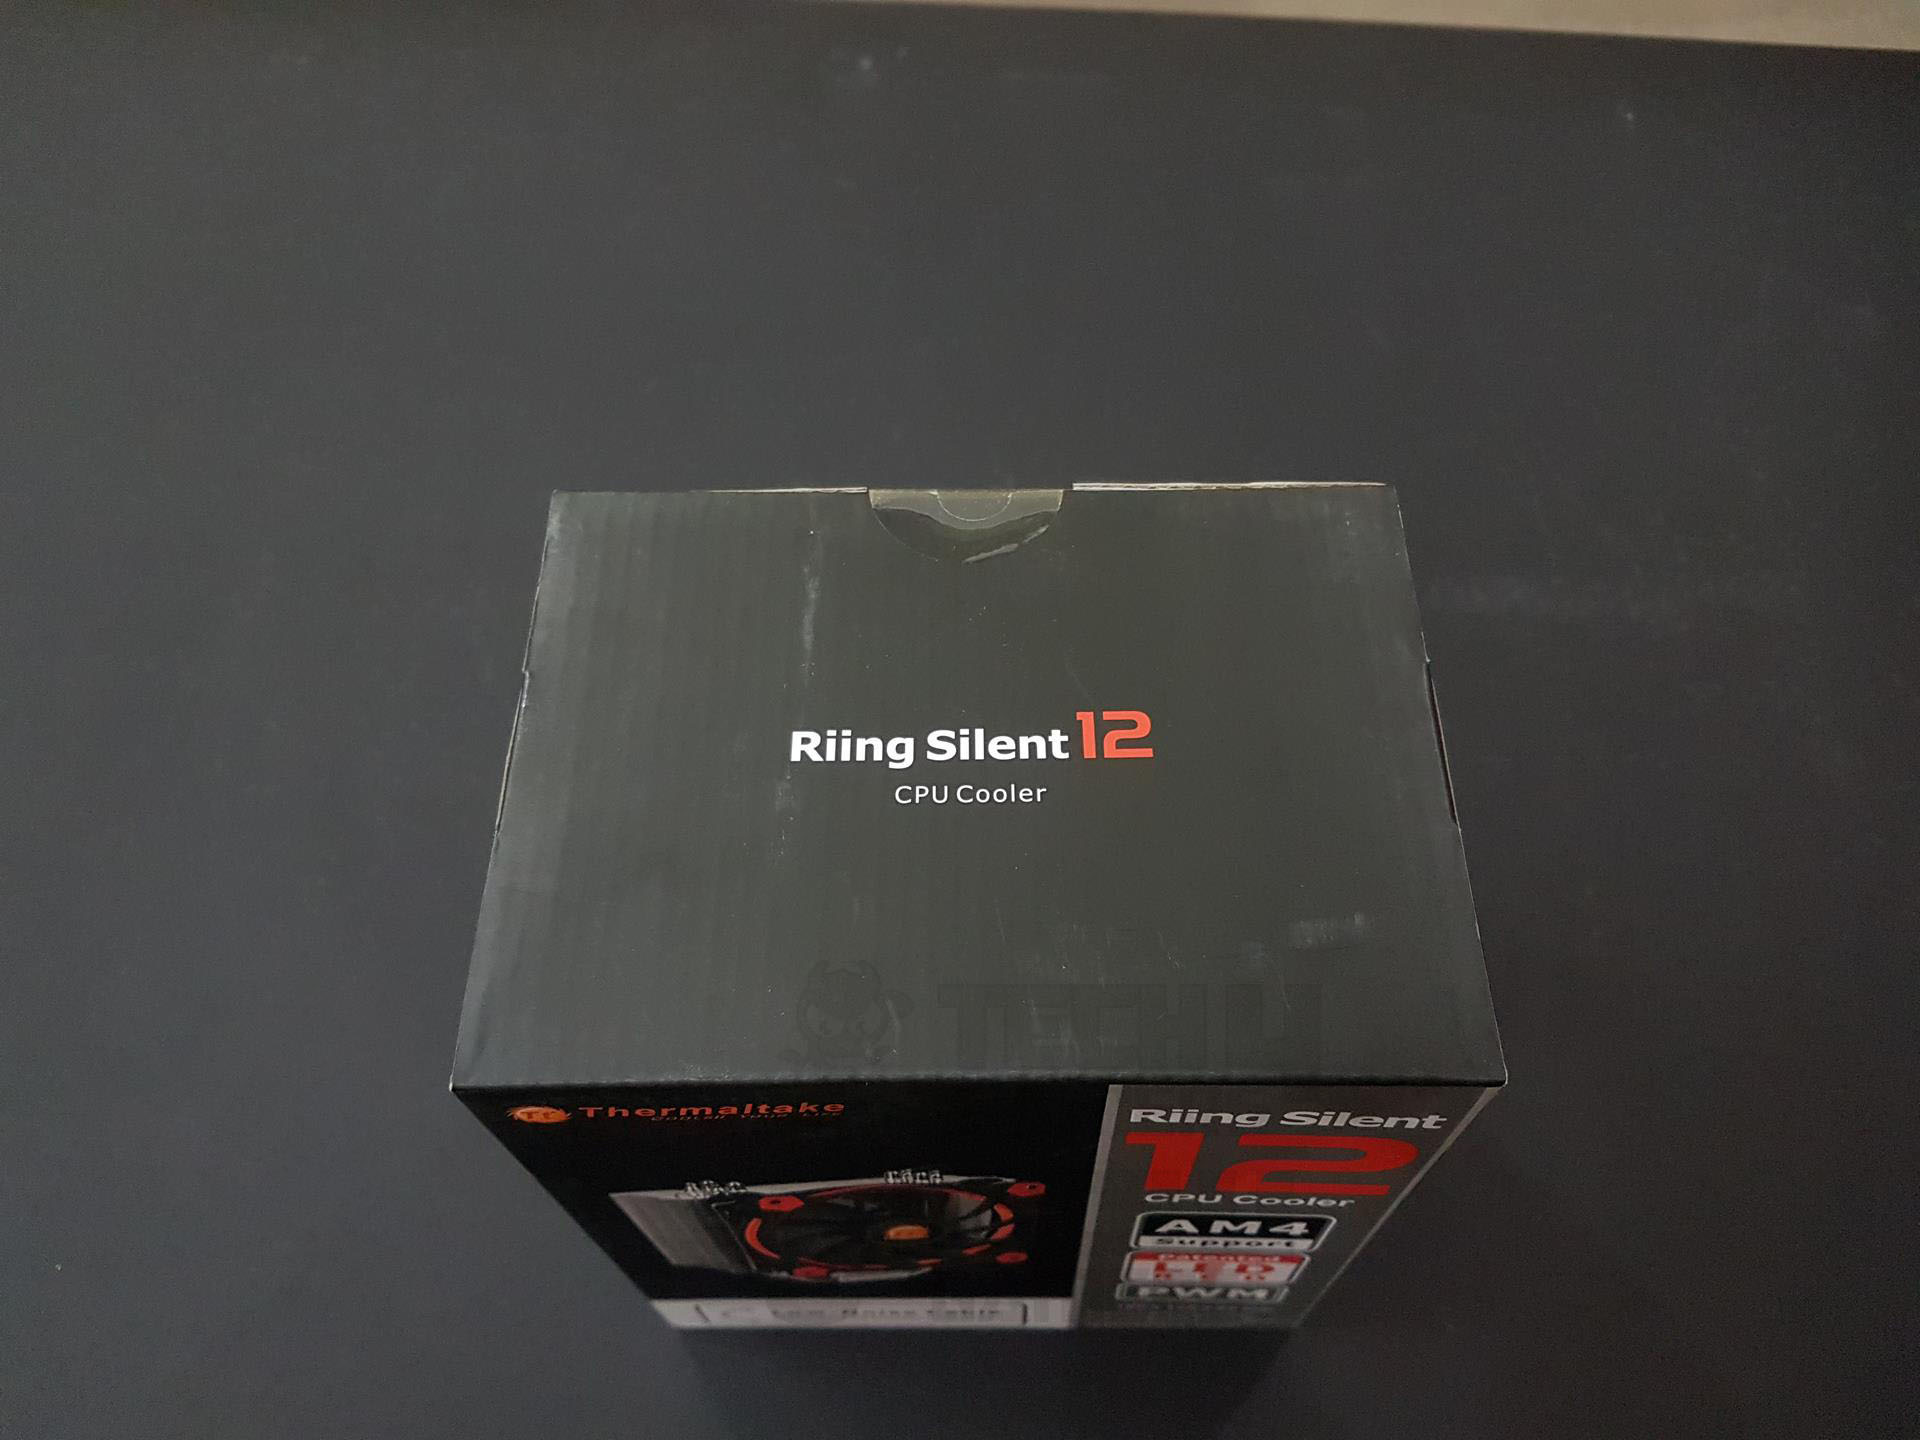
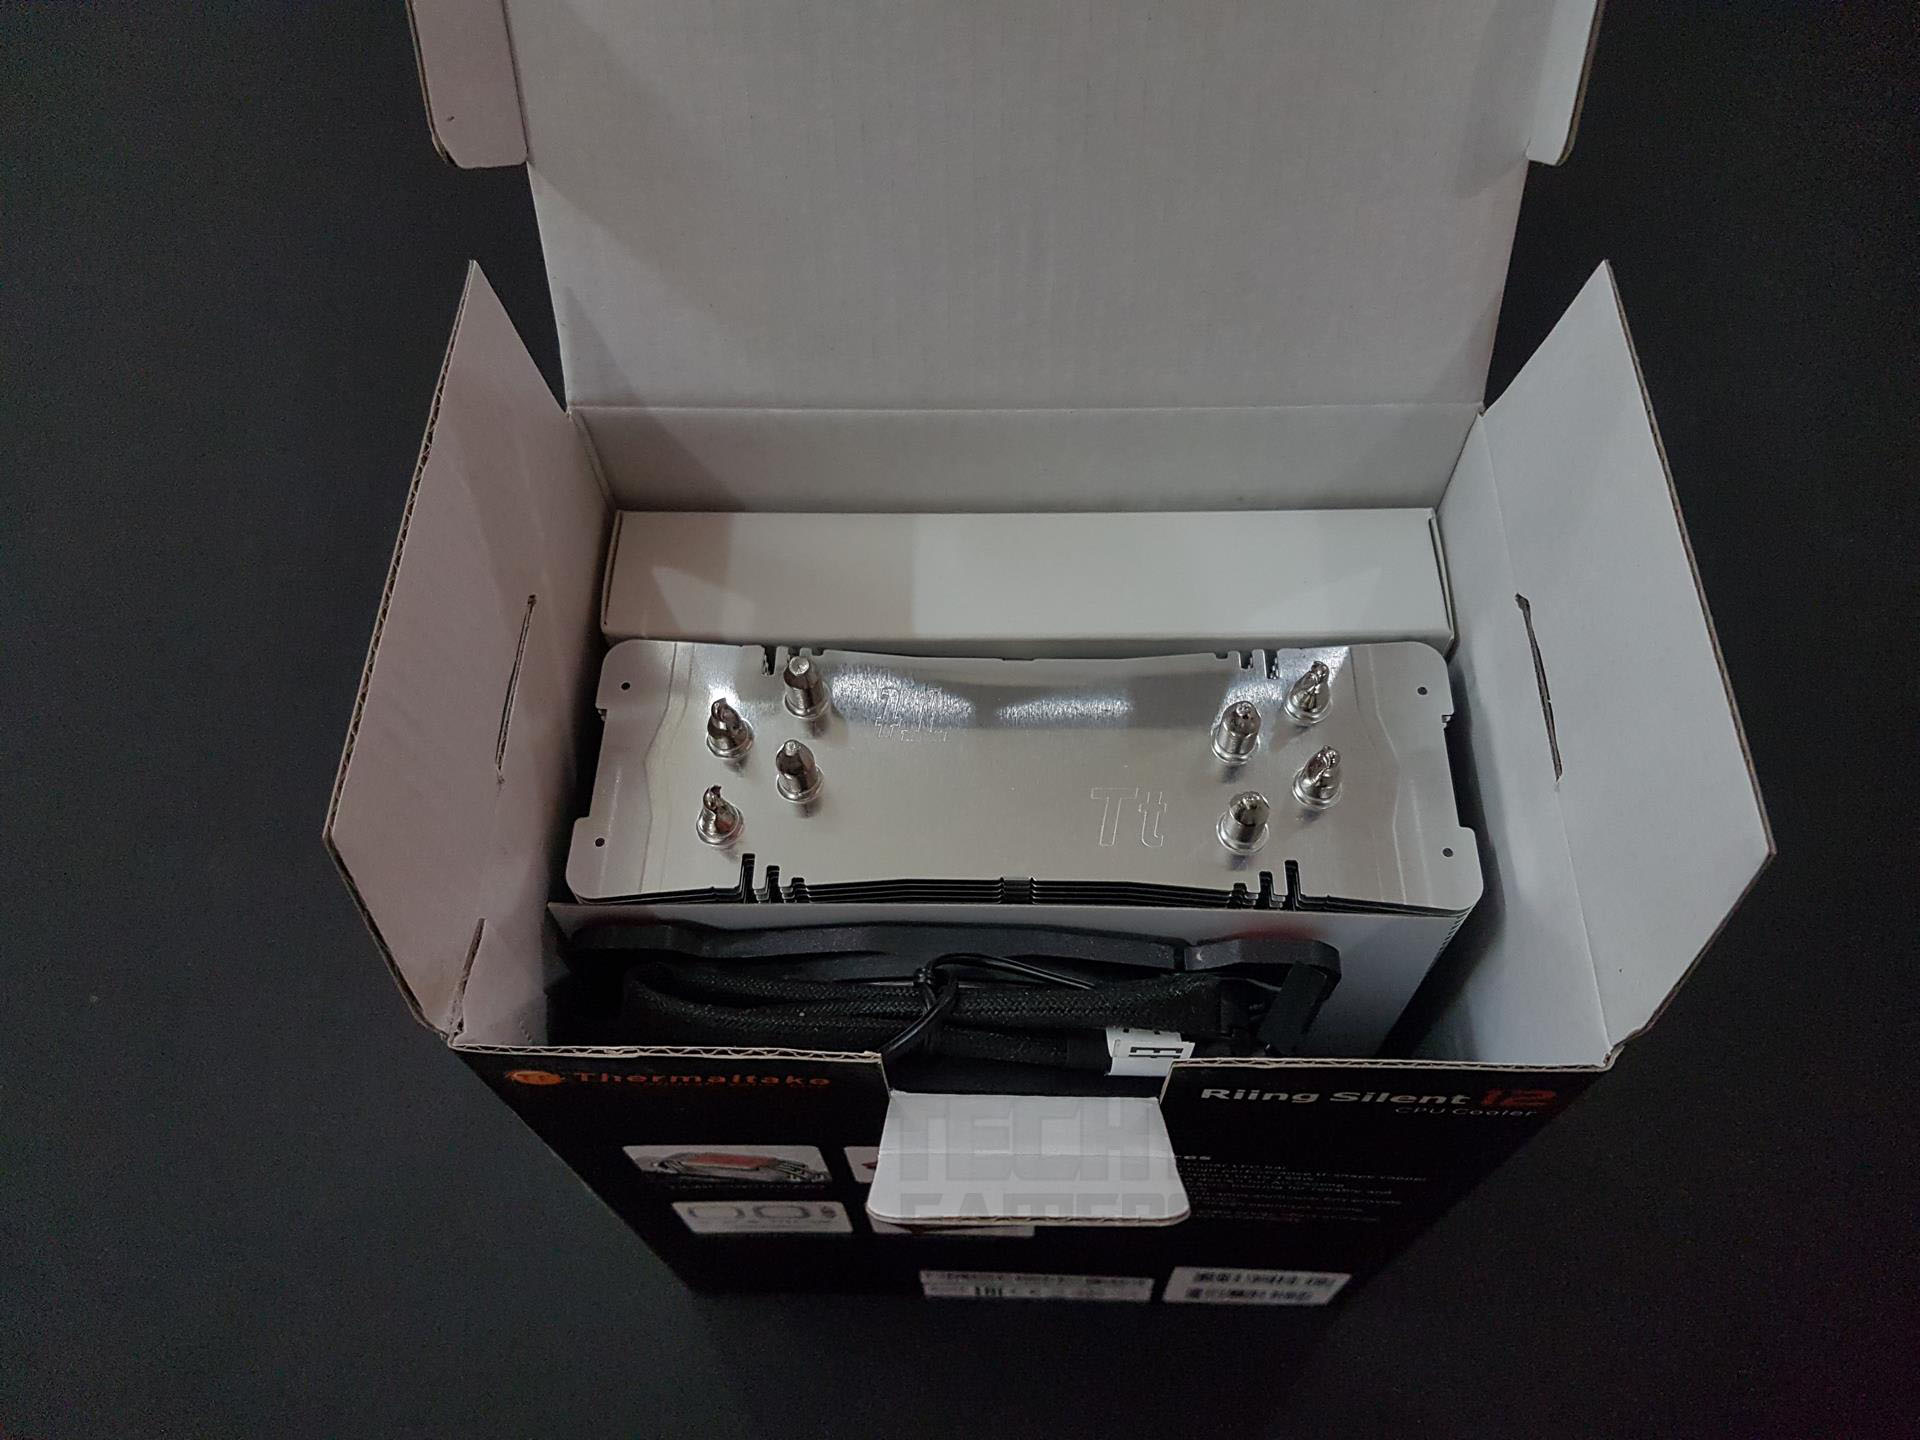
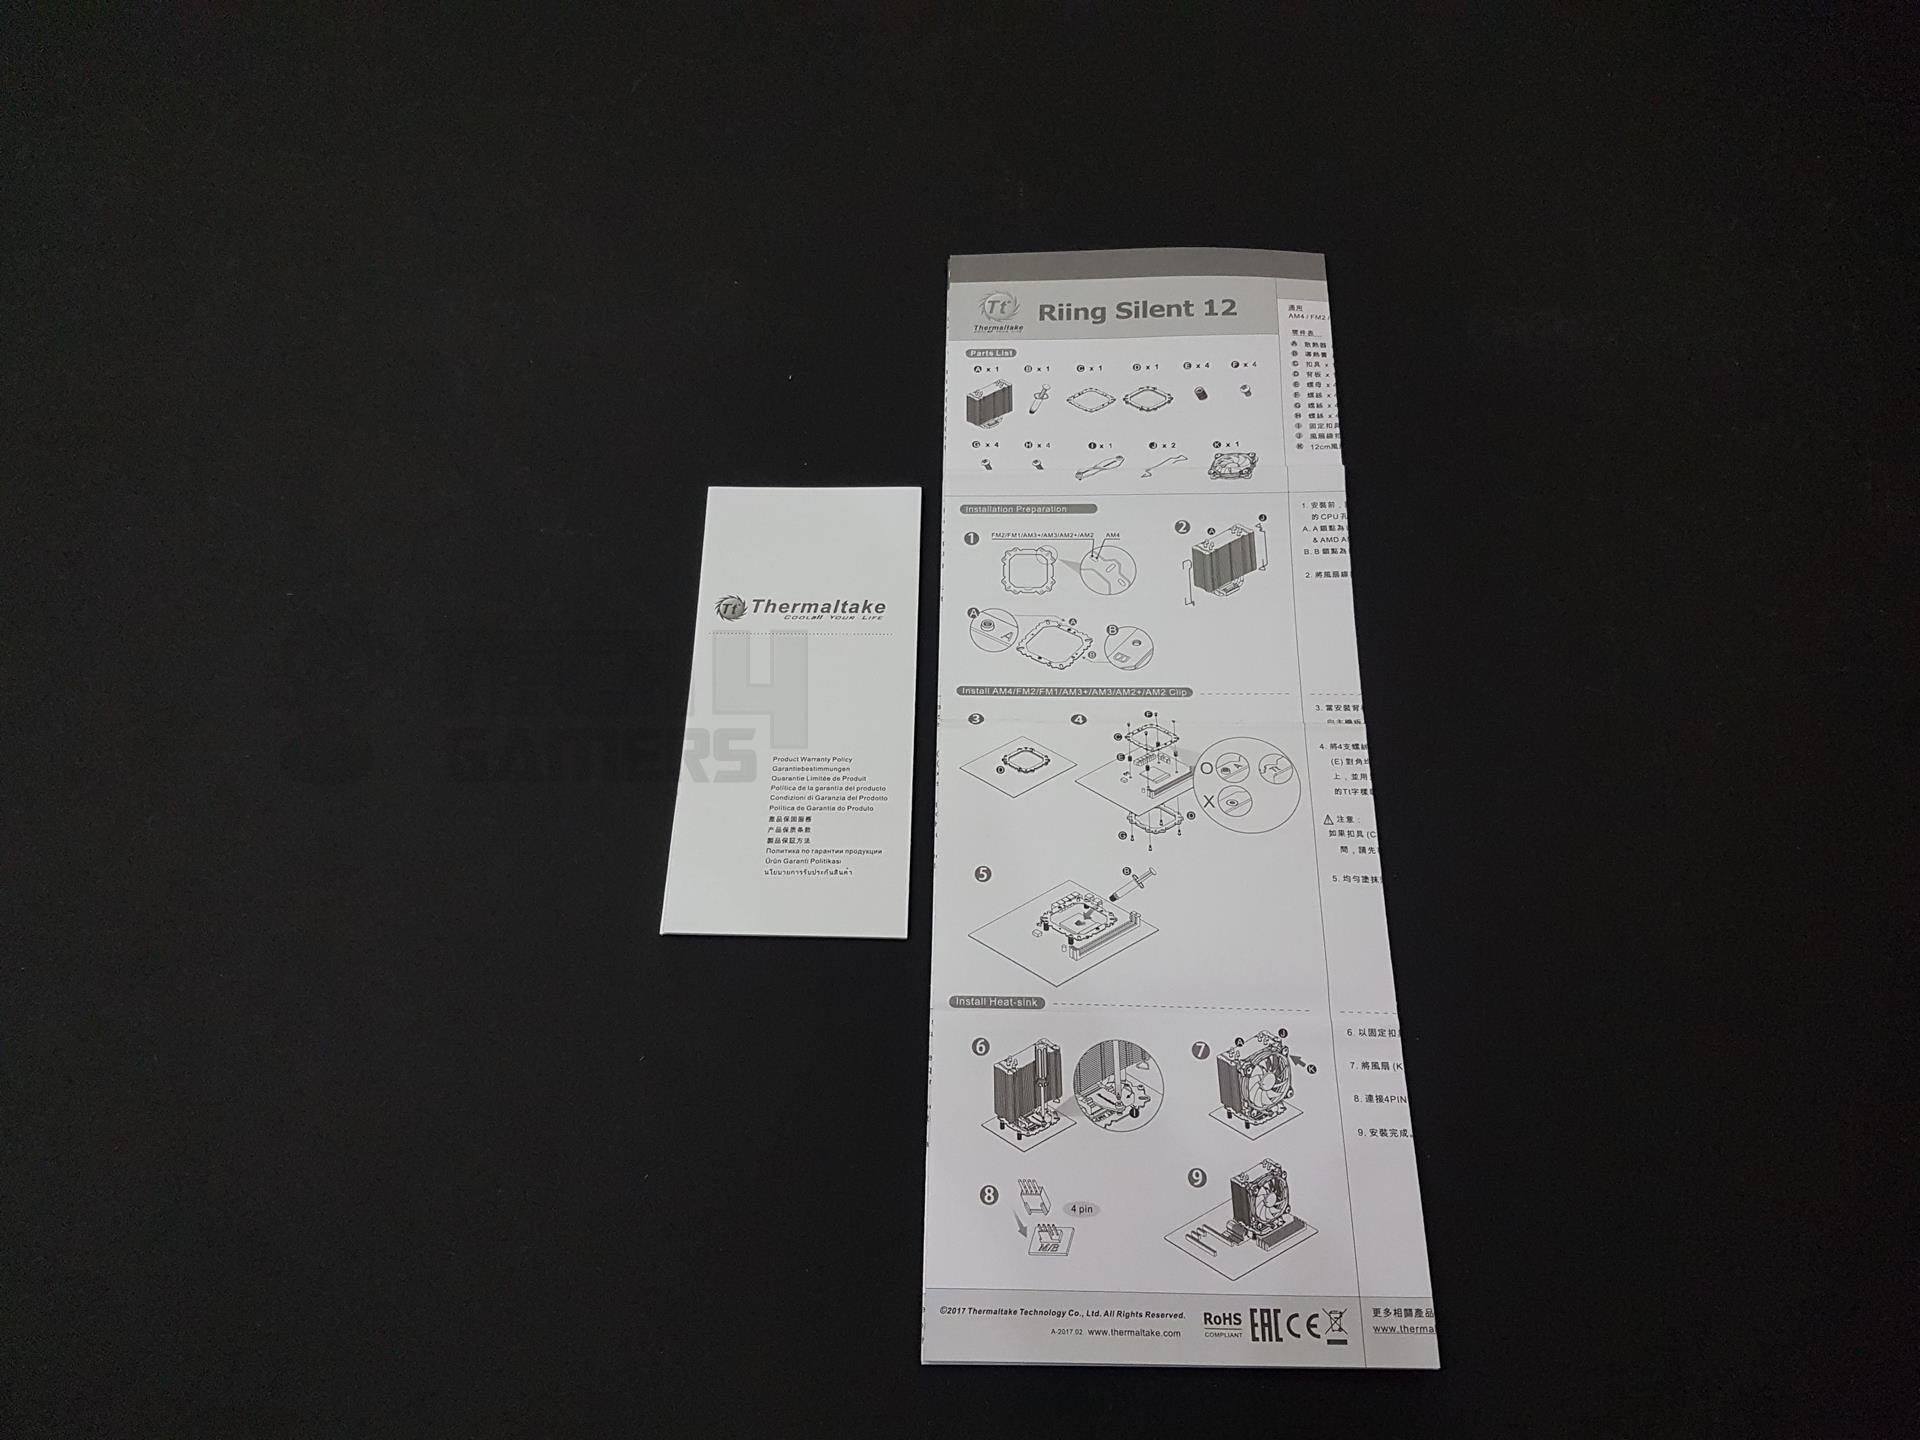
Packaging and Unboxing
Complete unboxing of the Thermaltake Riing Silent 12.
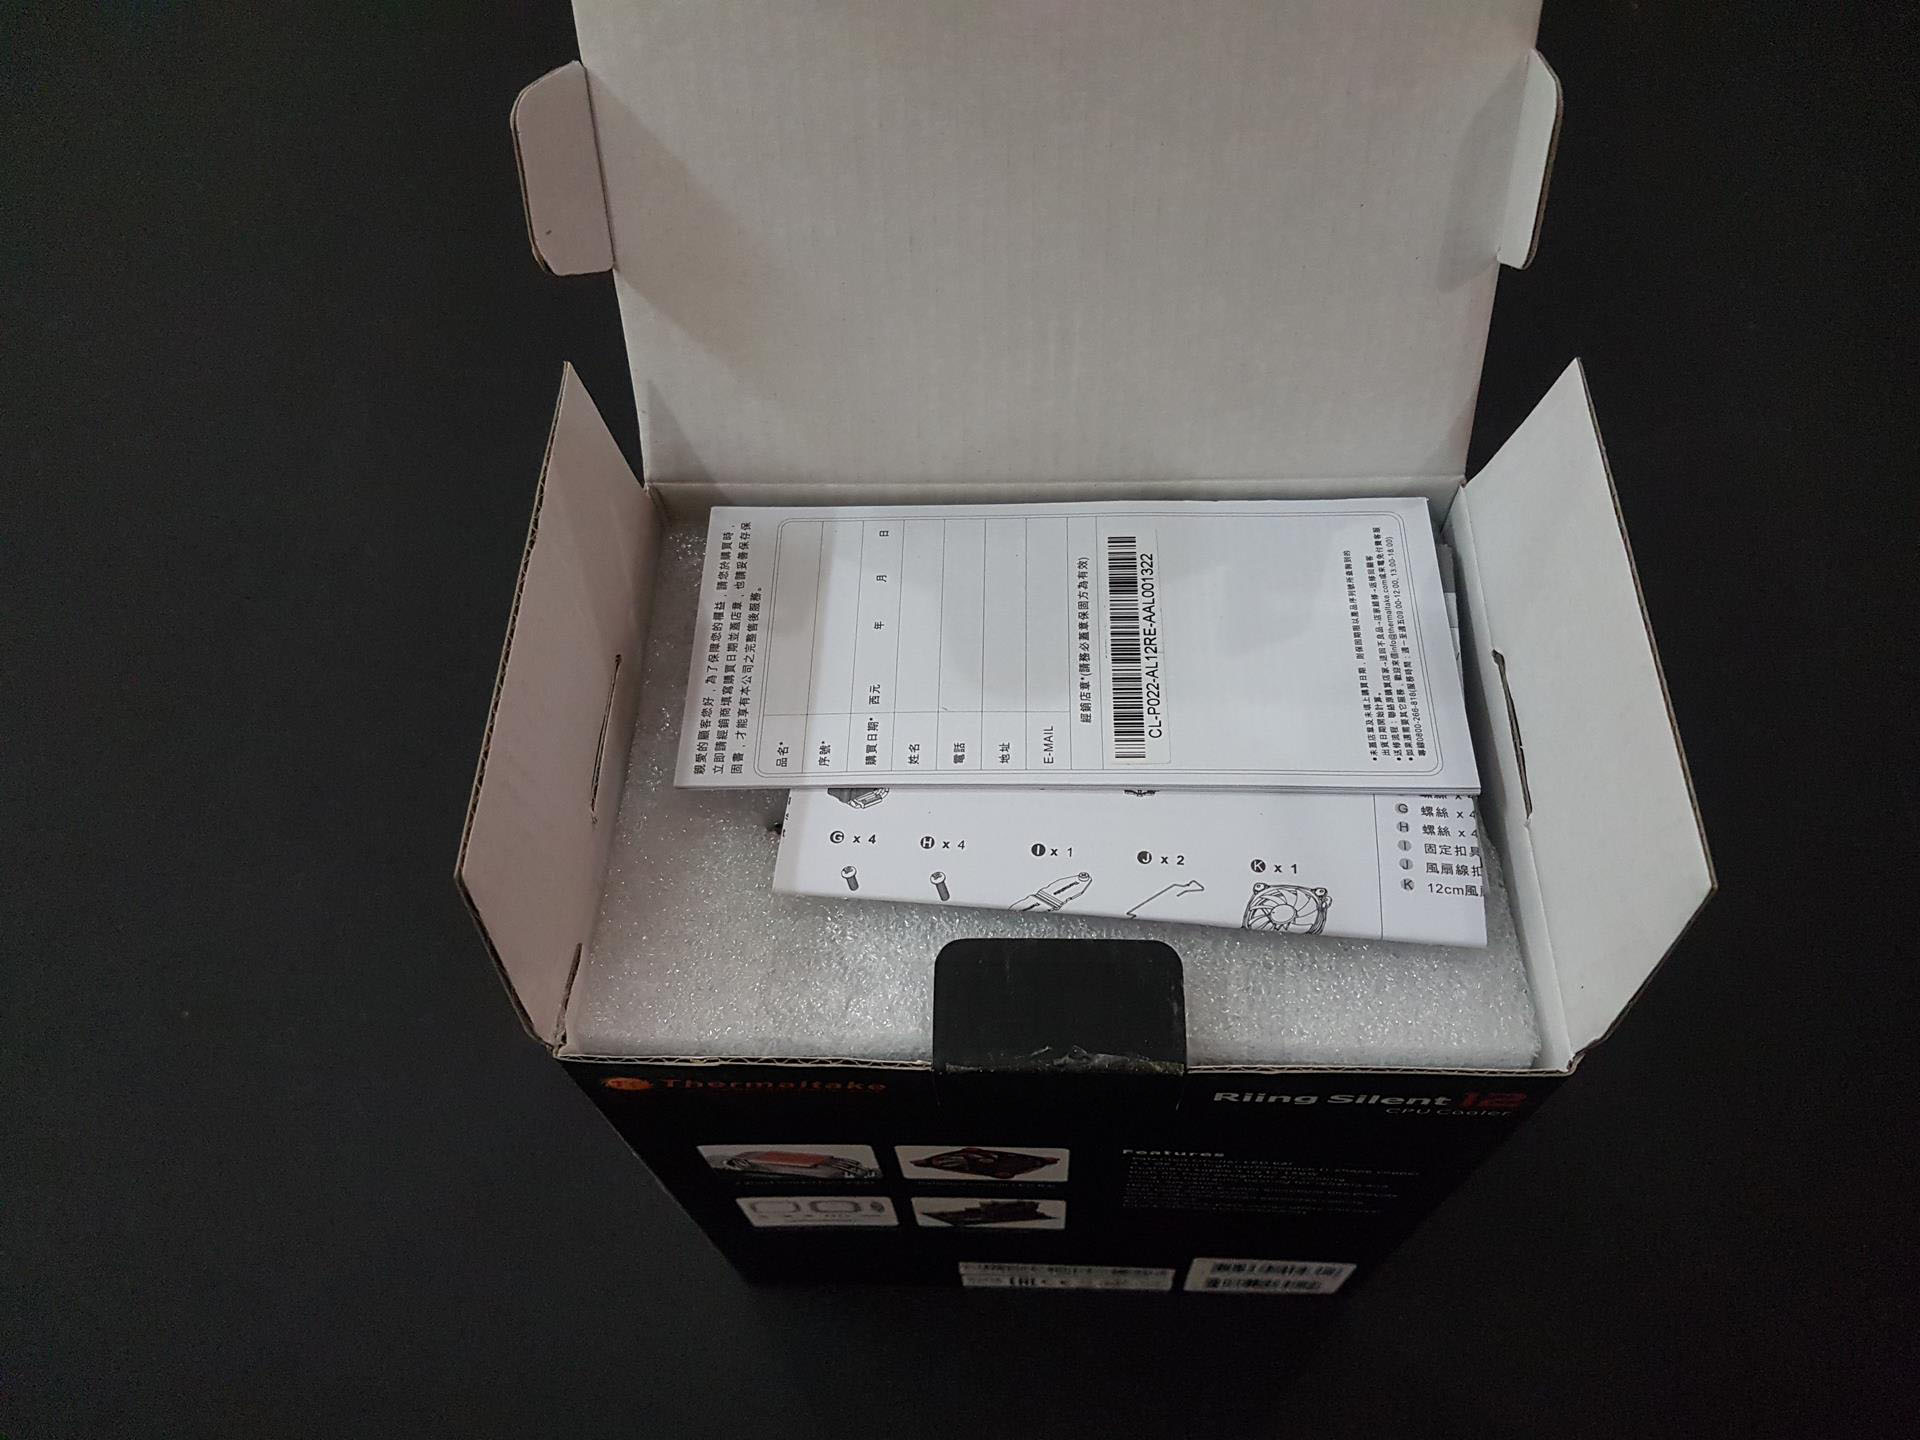
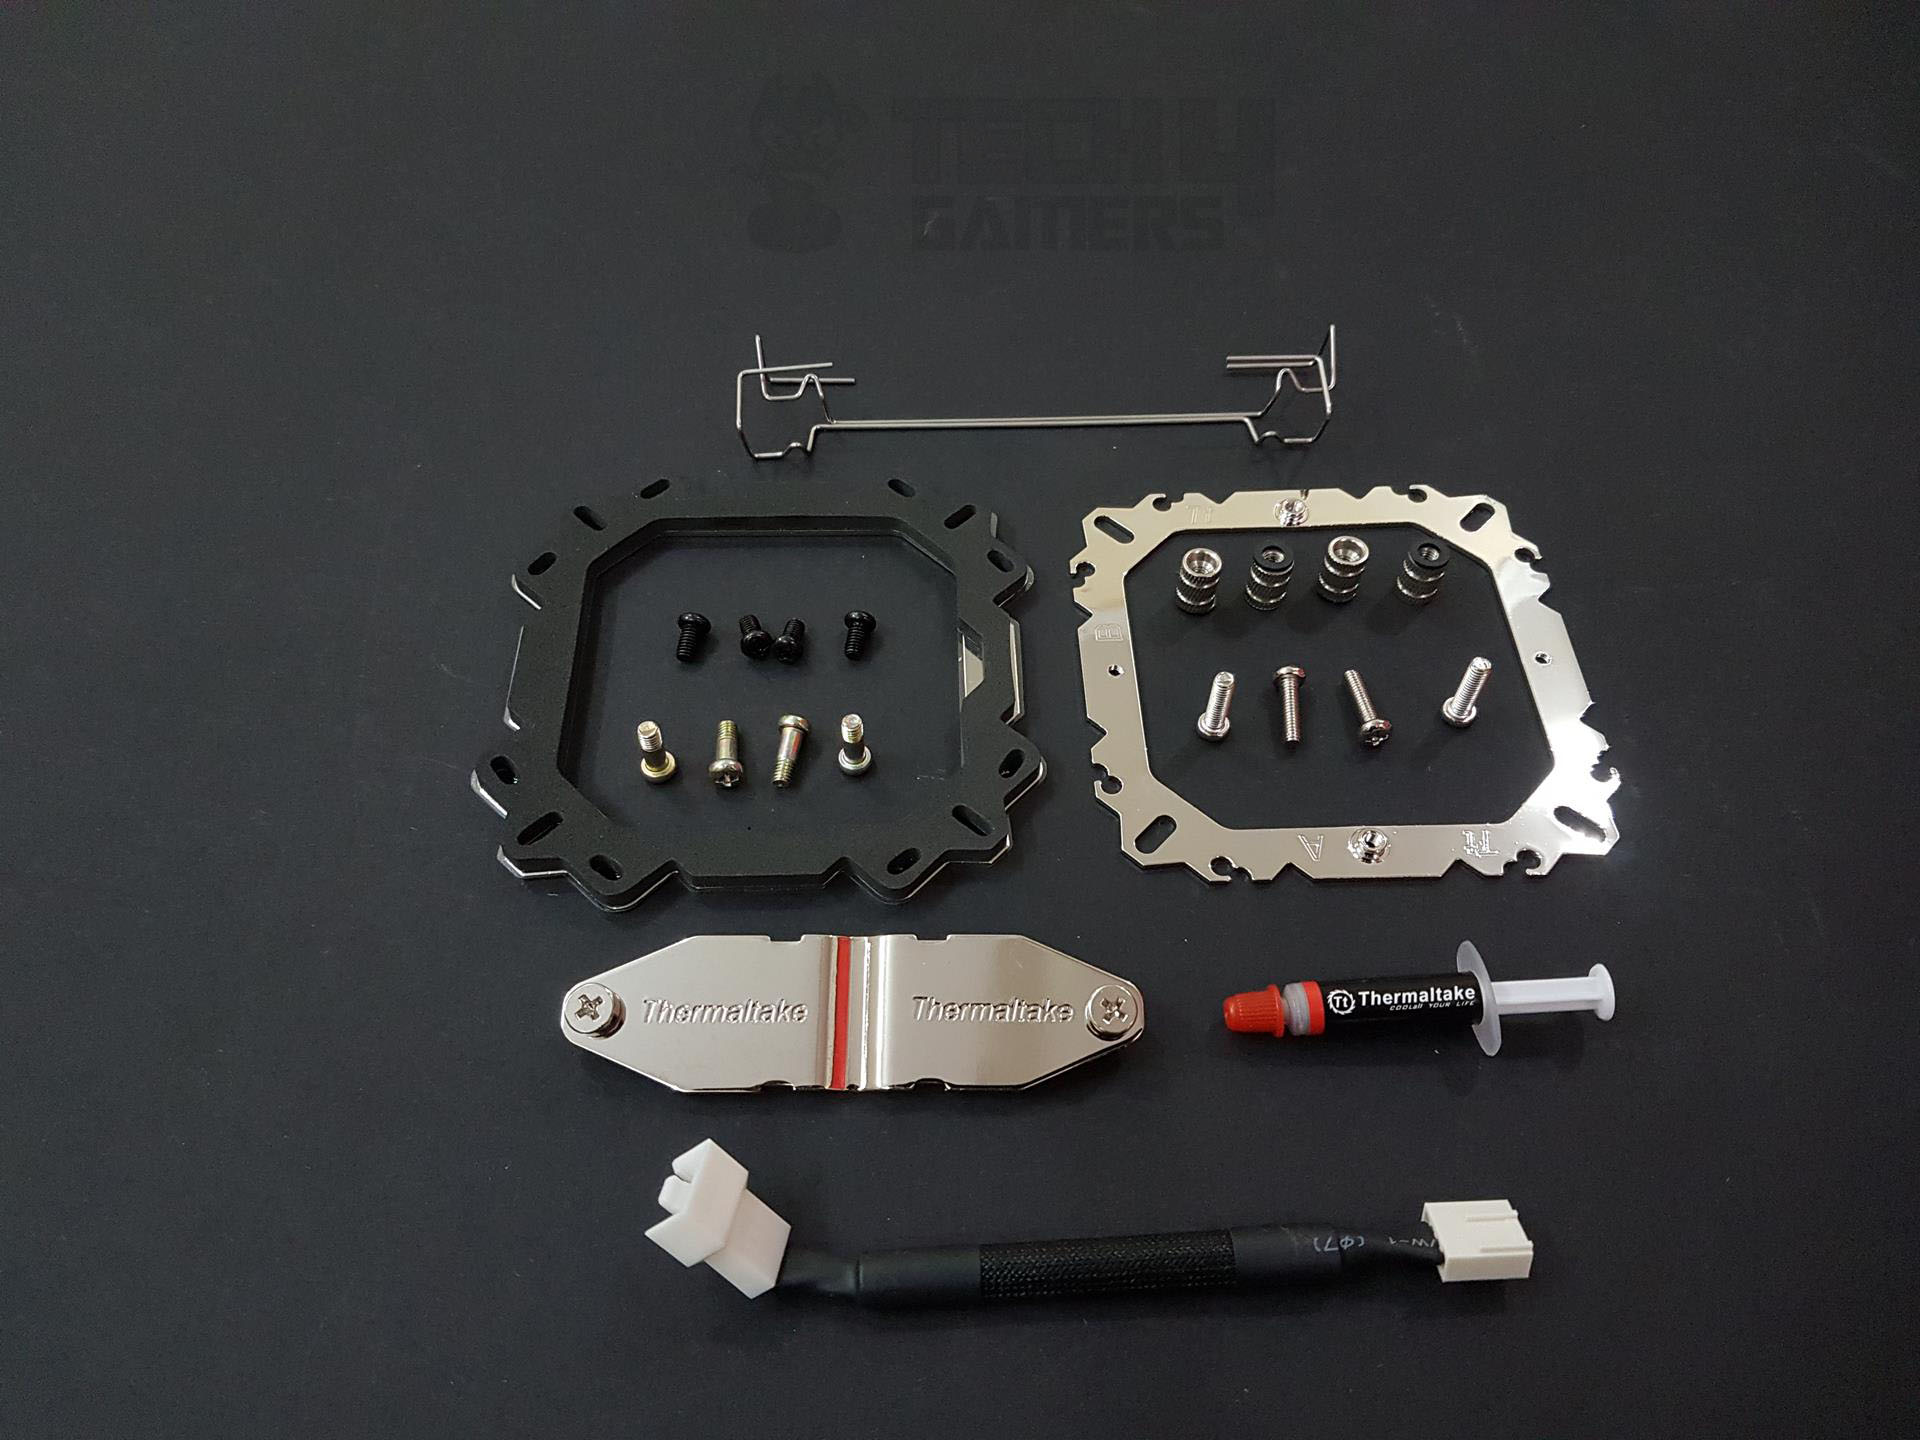
Accessories
Here are the accessories provided.
Closer Look
Let’s take a closer look at the cooler.
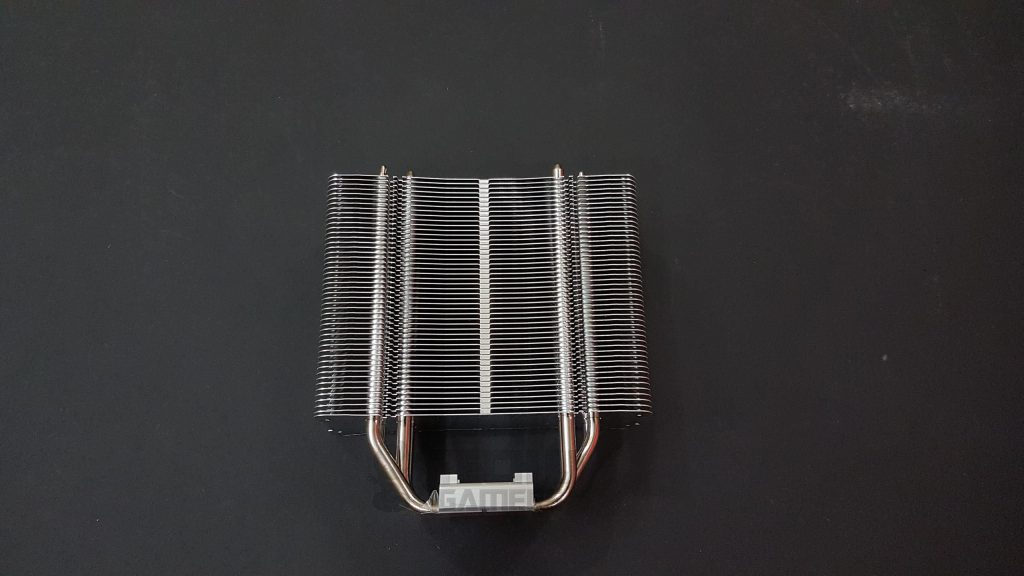
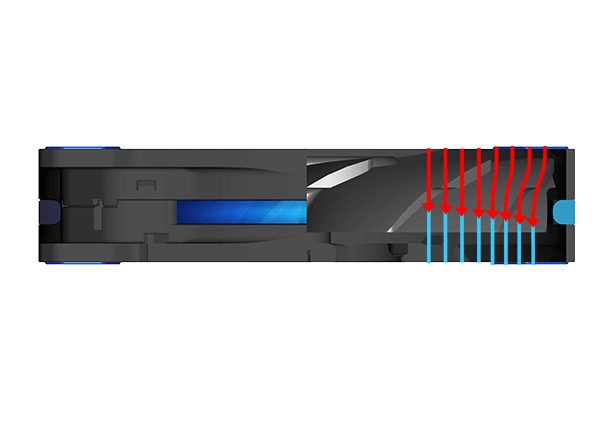
The cooler measures 159x140x74mm (HxWxL) and weighs 825g. Featuring a heatsink with 4 heat pipes, the less dense fin stack on the front side measures 140x108x48mm. The 58 aluminum fins are spaced wider at 0.4mm thickness with a 2.4mm air gap. This design allows fans to operate at low speeds while effectively meeting cooling requirements.
The fins’ joint assembly point is positioned in the middle of the front side. Note the displacement of the heat pipes inside the heatsink. They are in a U shape and cover maximum surface for effective heat dissipation.
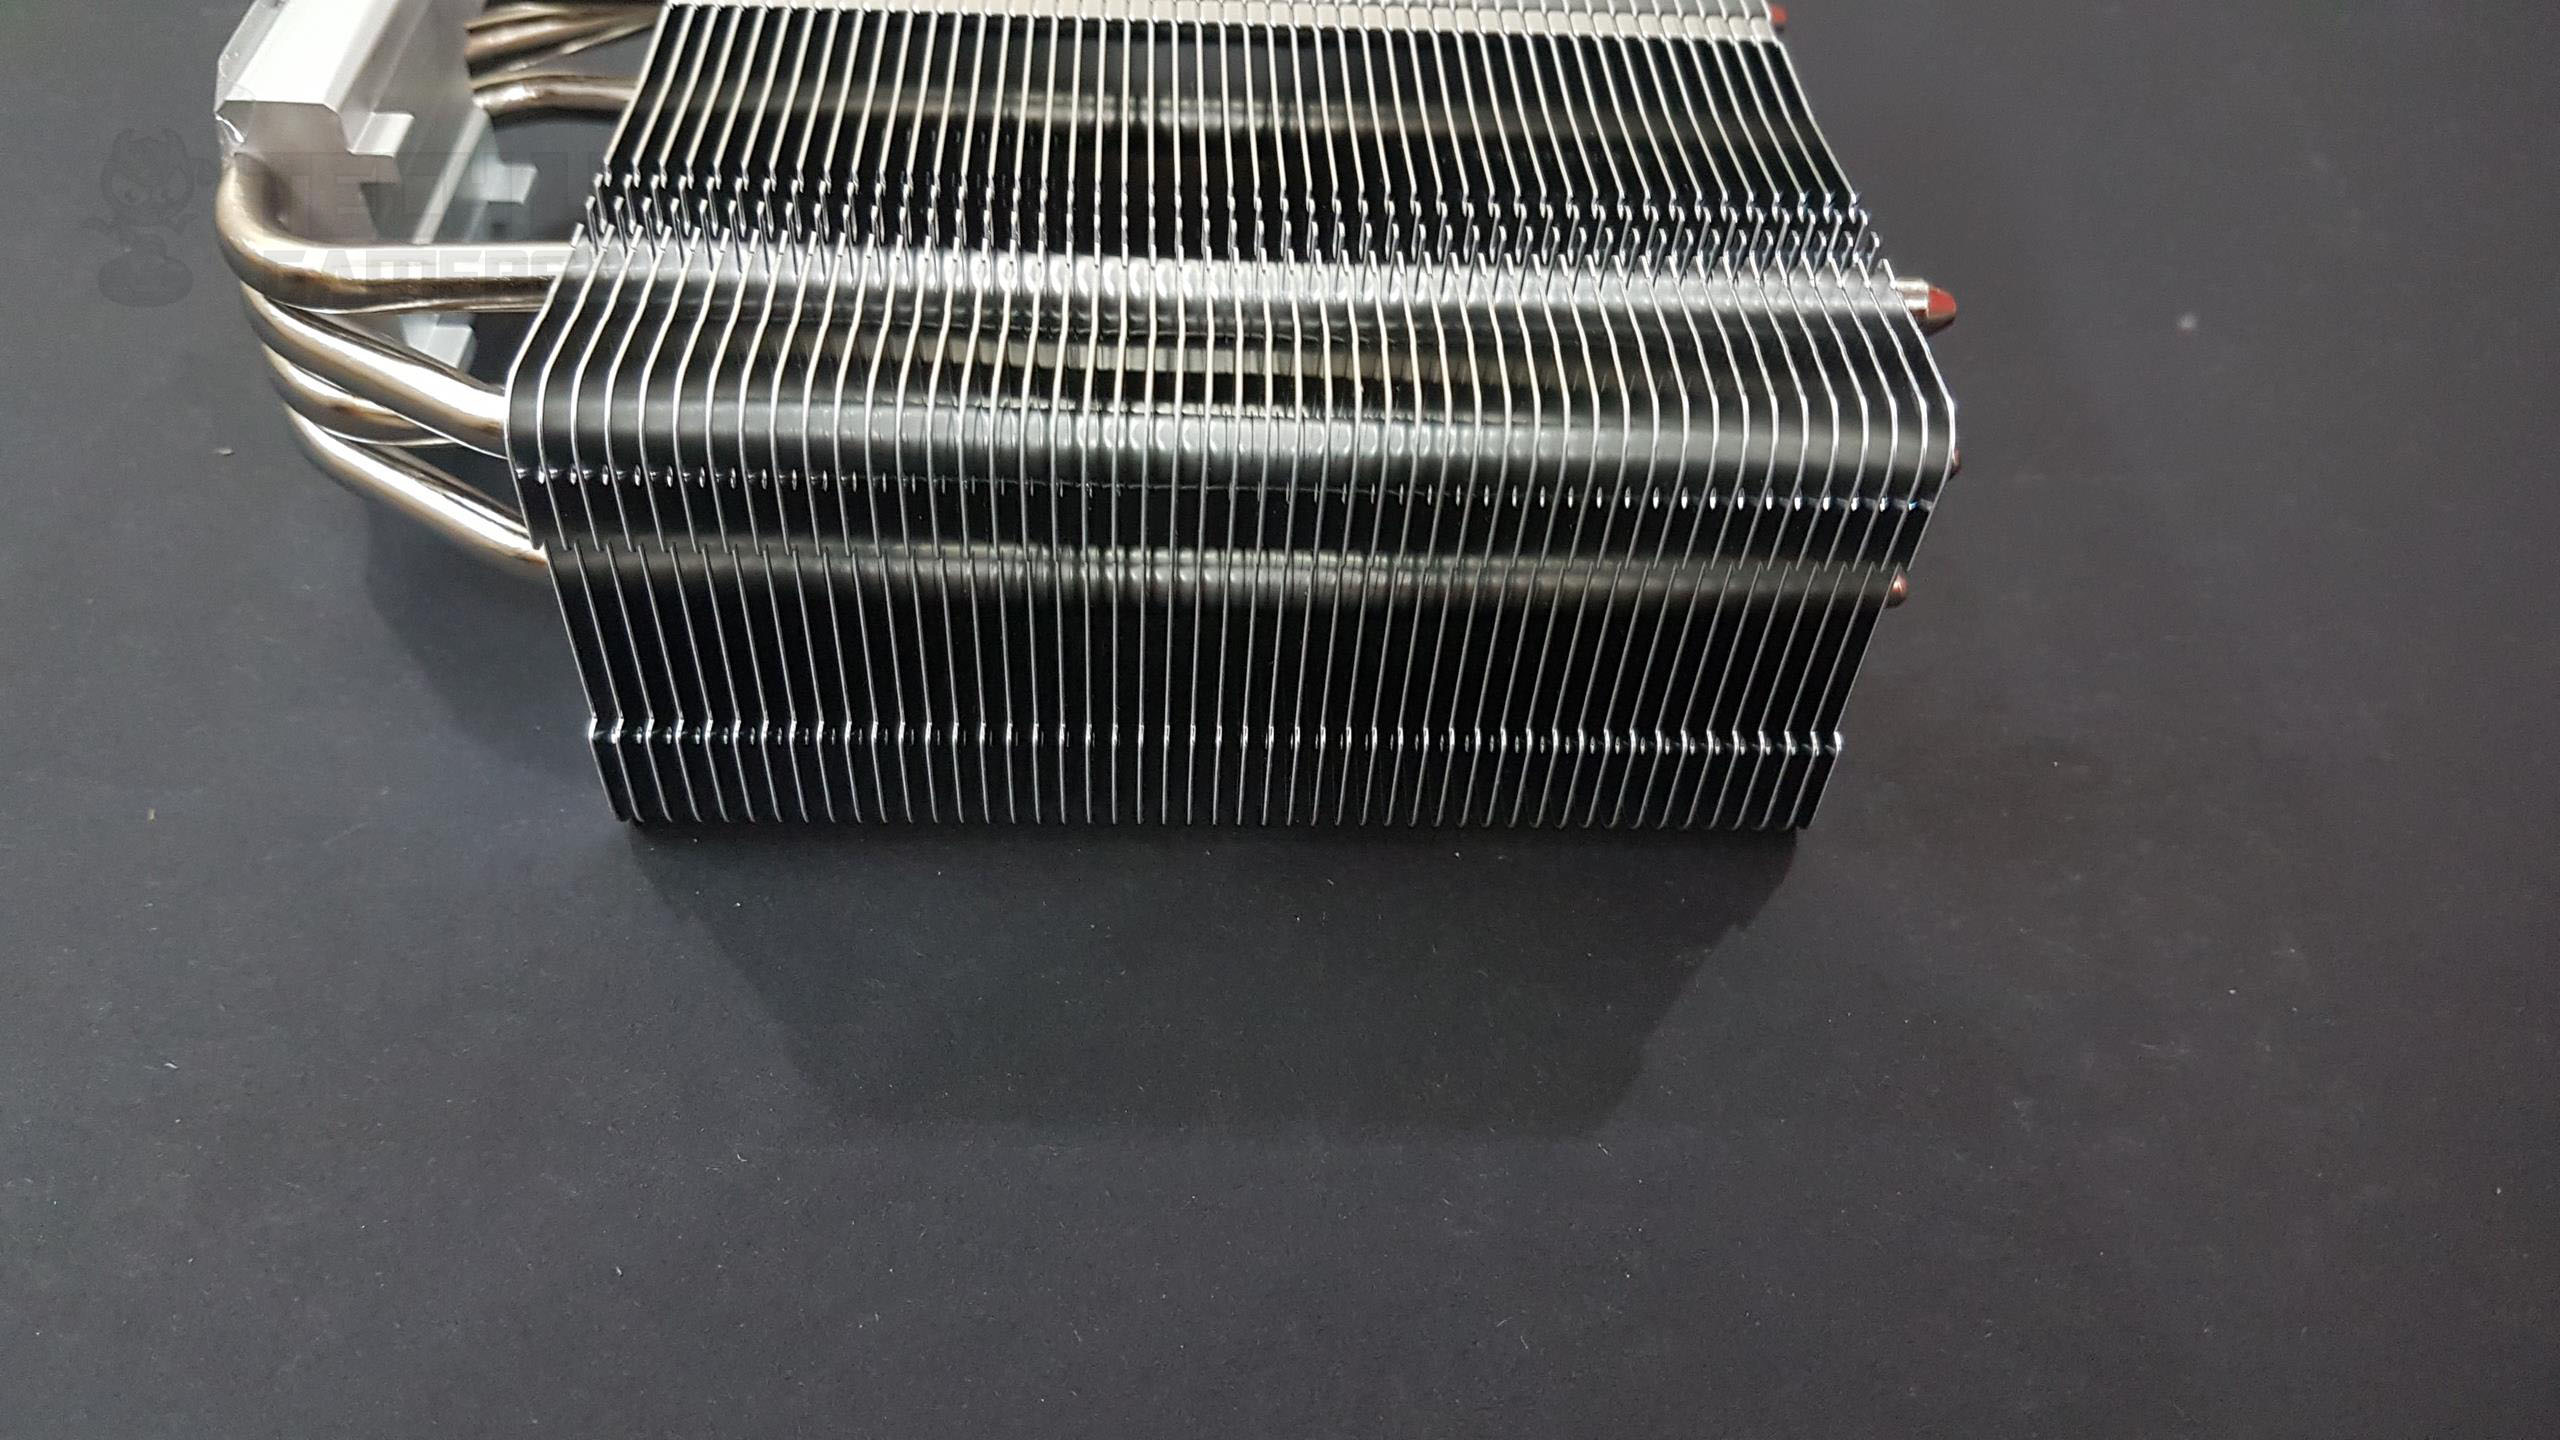
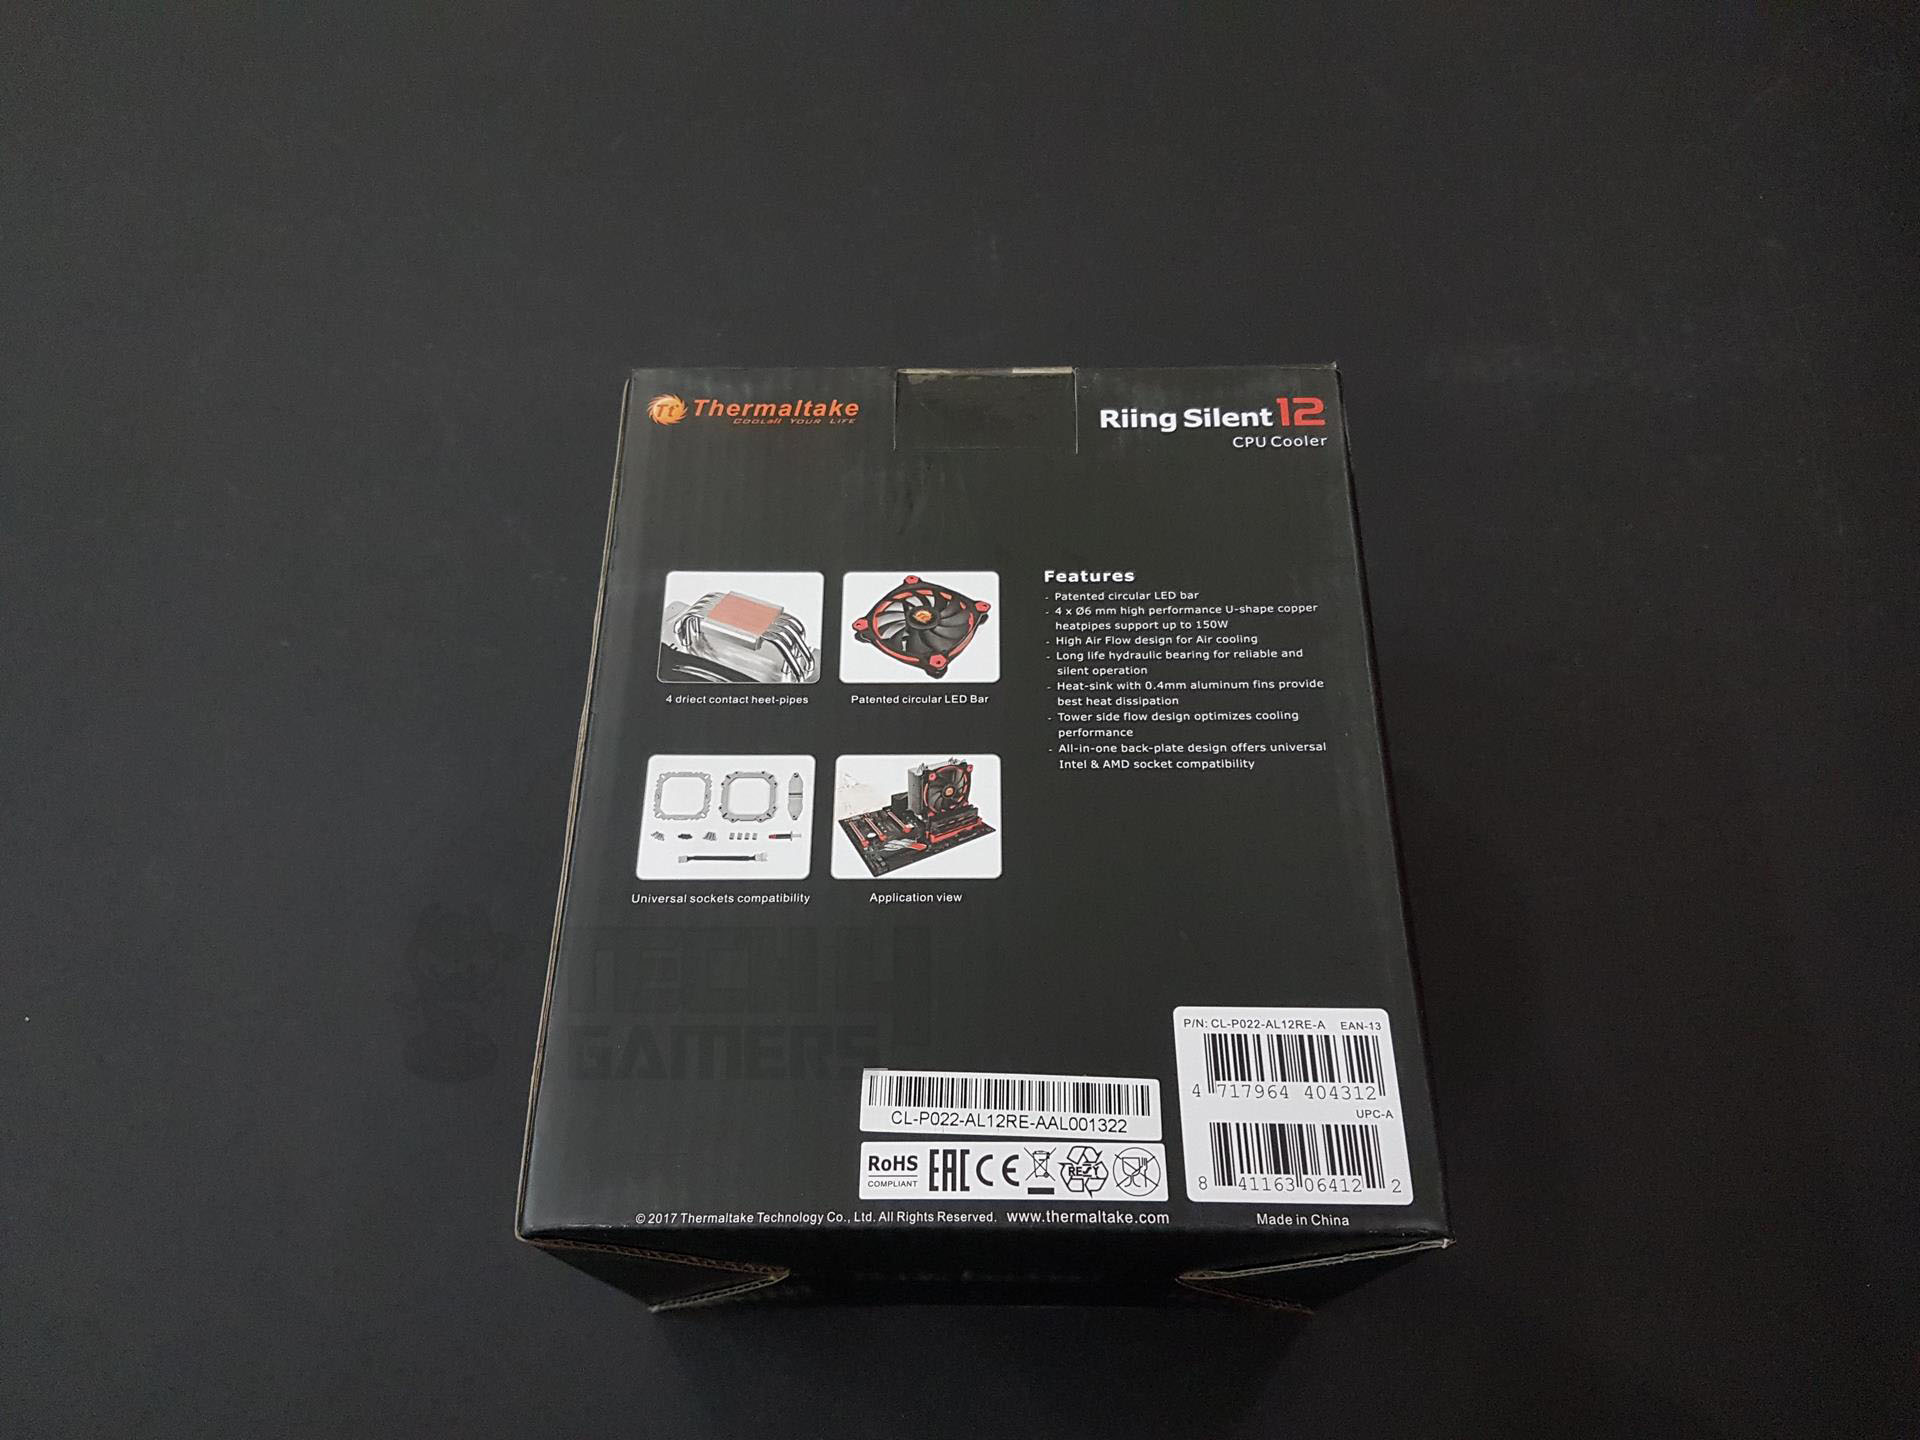
Both the left and right sides of the cooler are identical, featuring raised edges with an inset middle portion. Thermaltake’s thoughtful design ensures safety, as the rounded finish of the fins eliminates any risk of cutting hands. The fan mounting on this cooler differs from the usual, with holes in the fins for clip insertion rather than relying on raised sides as latches. This side measures only 108x48mm.


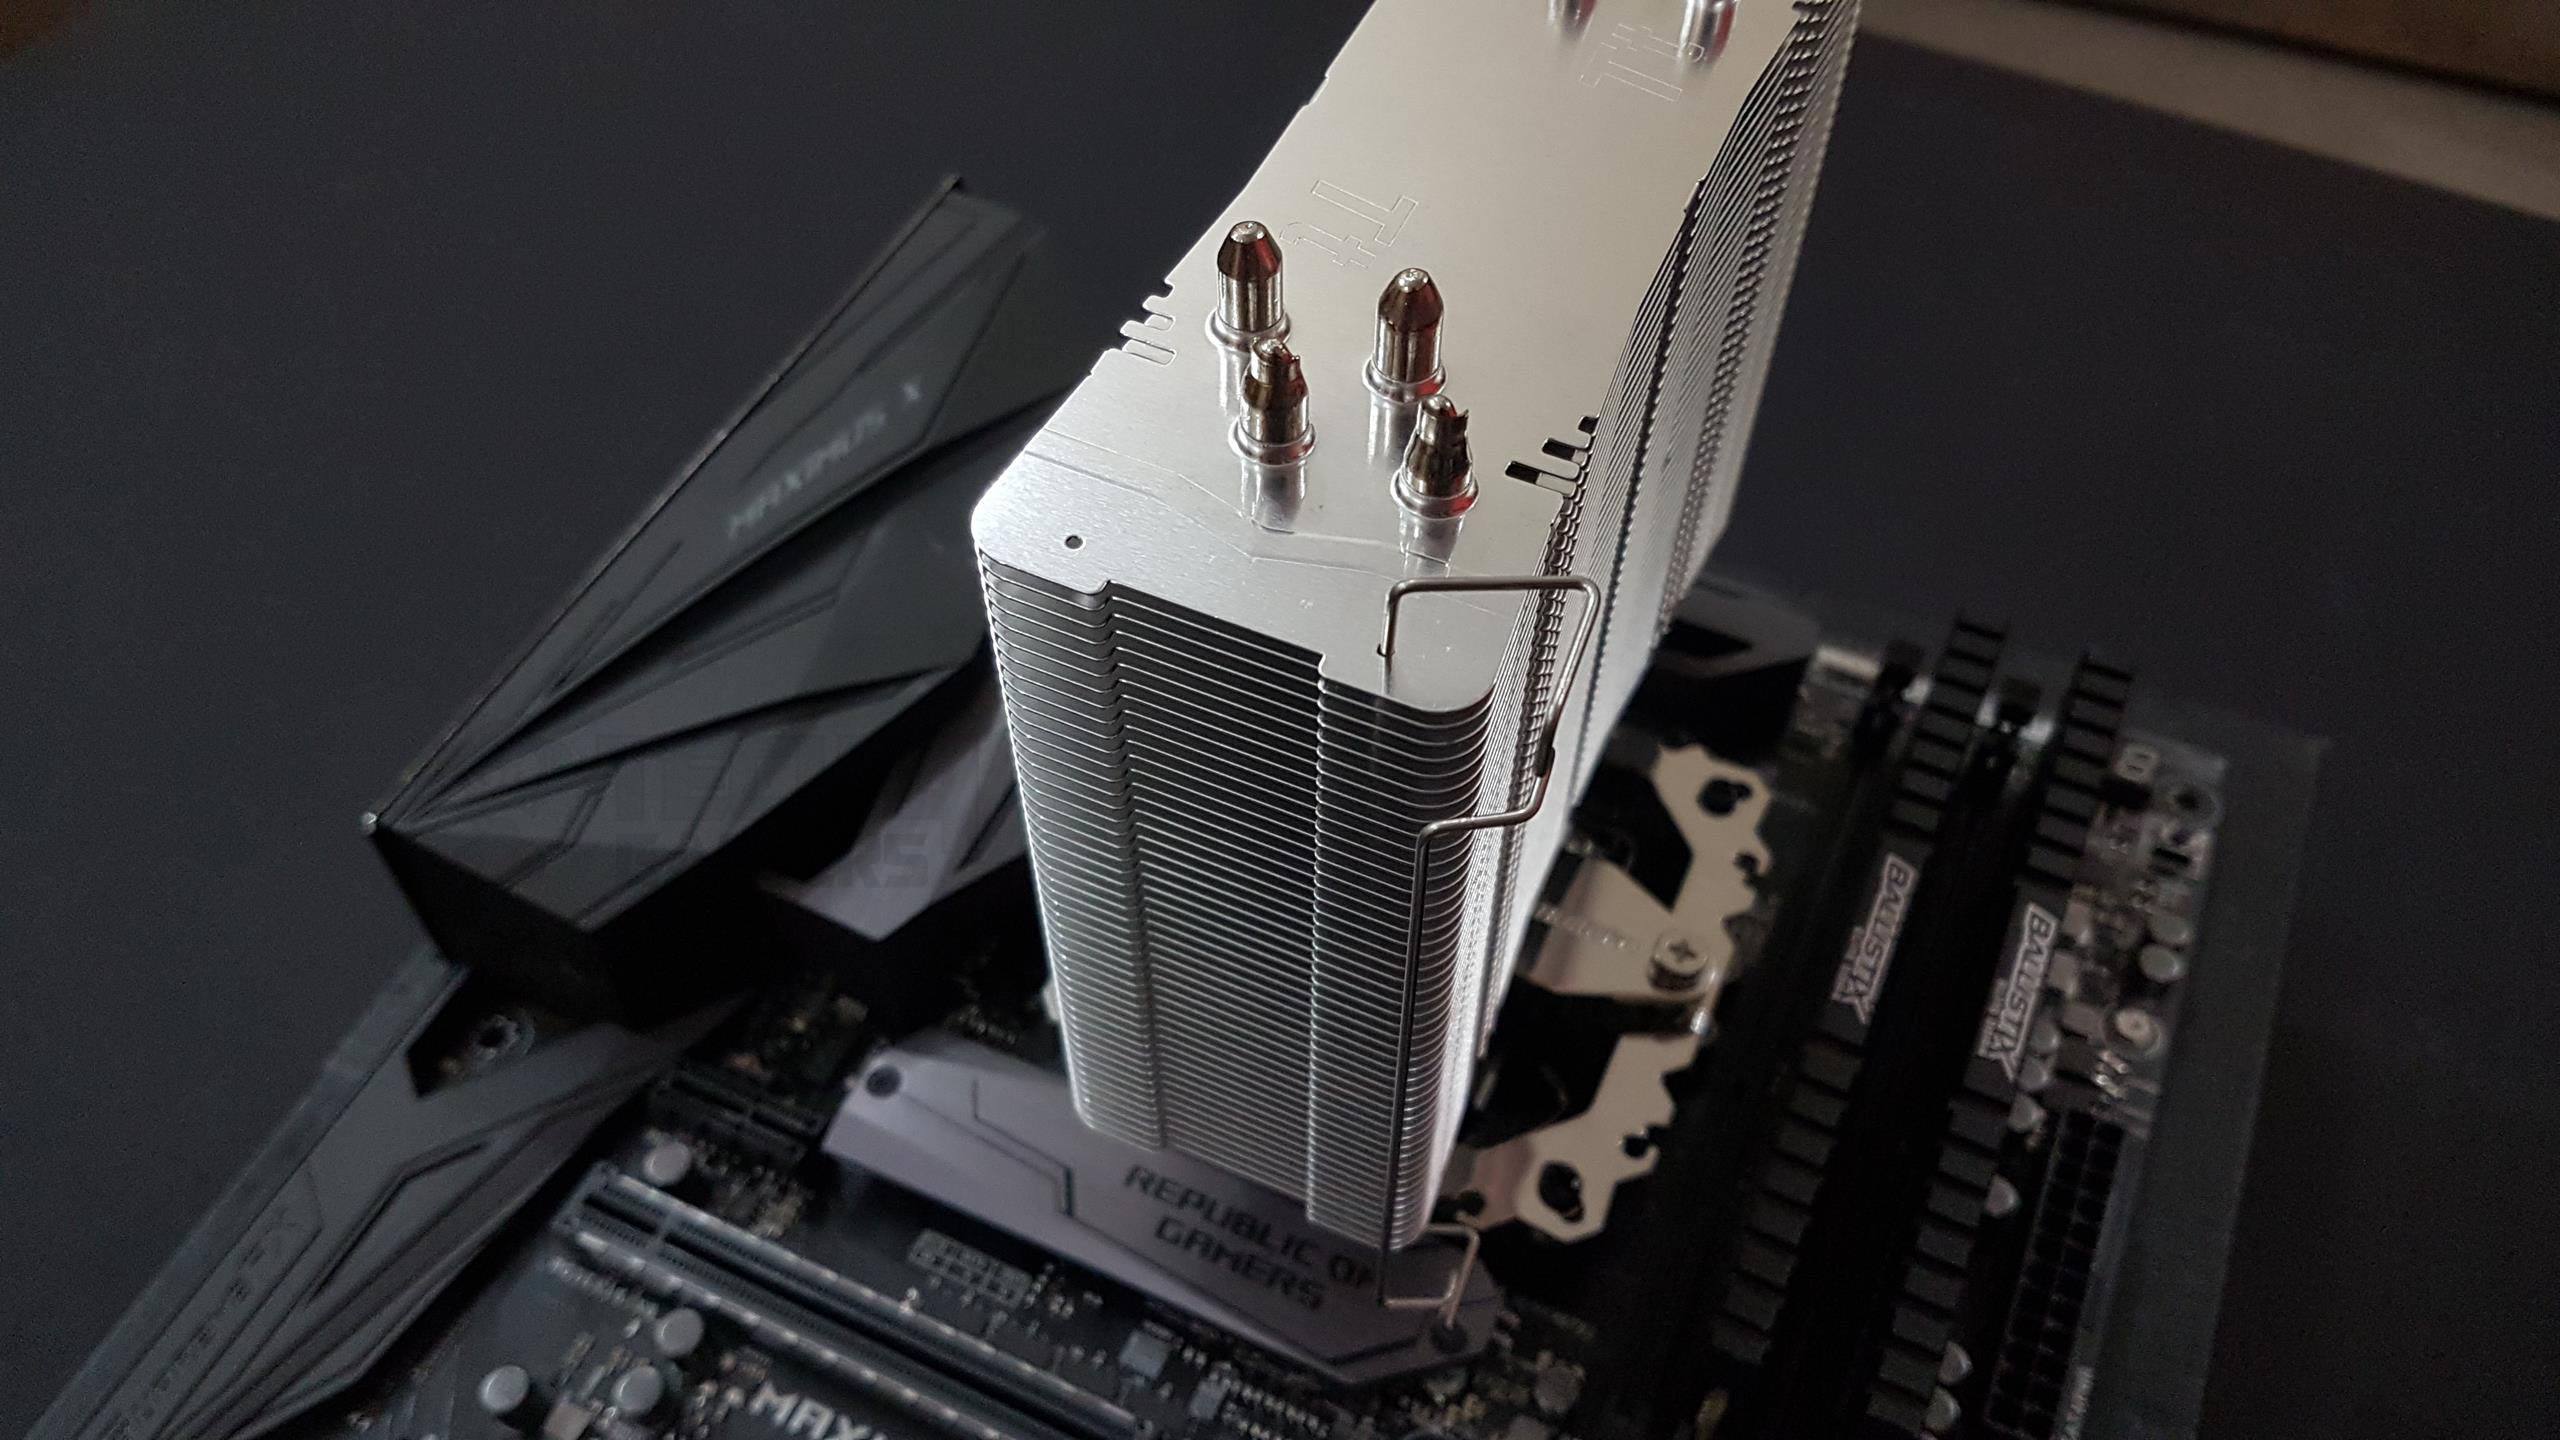
Examining the top side of the cooler, the symmetrical design allows for mounting in either direction, with the Tt embossed on the top fin. Heat pipes emerge from this fin and terminate there. Four small holes, two on each side, accommodate fan clips, although Thermaltake provides only two clips.
The option for a second fan is available, but extra clips for a Push/Pull setup would have been appreciated. This side measures only 140x48mm, excluding protruding heat pipes. Turning attention to the top side of the base, raised bars on both sides create a channel for the mounting bracket/crossbar, also finished in aluminum.
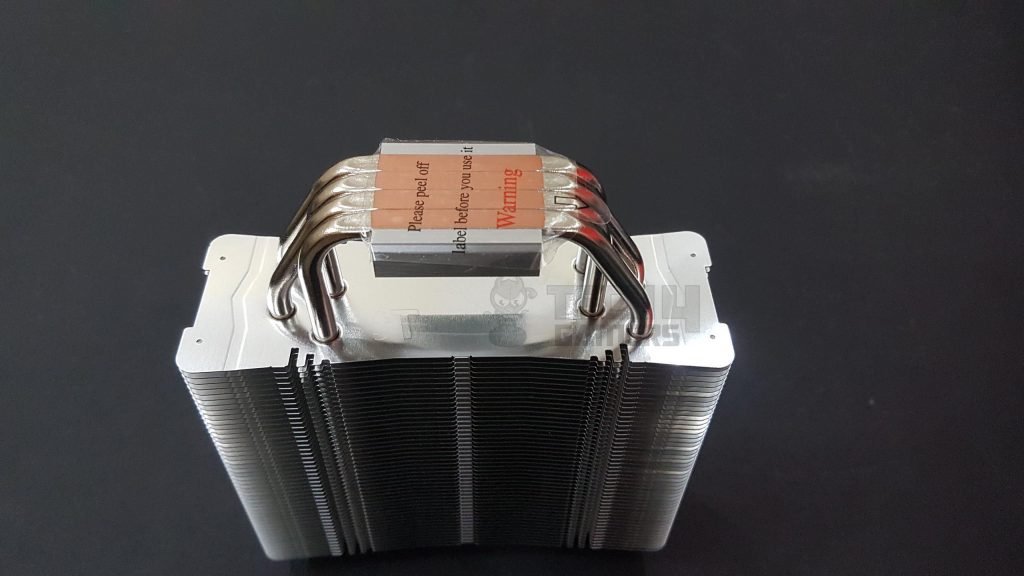
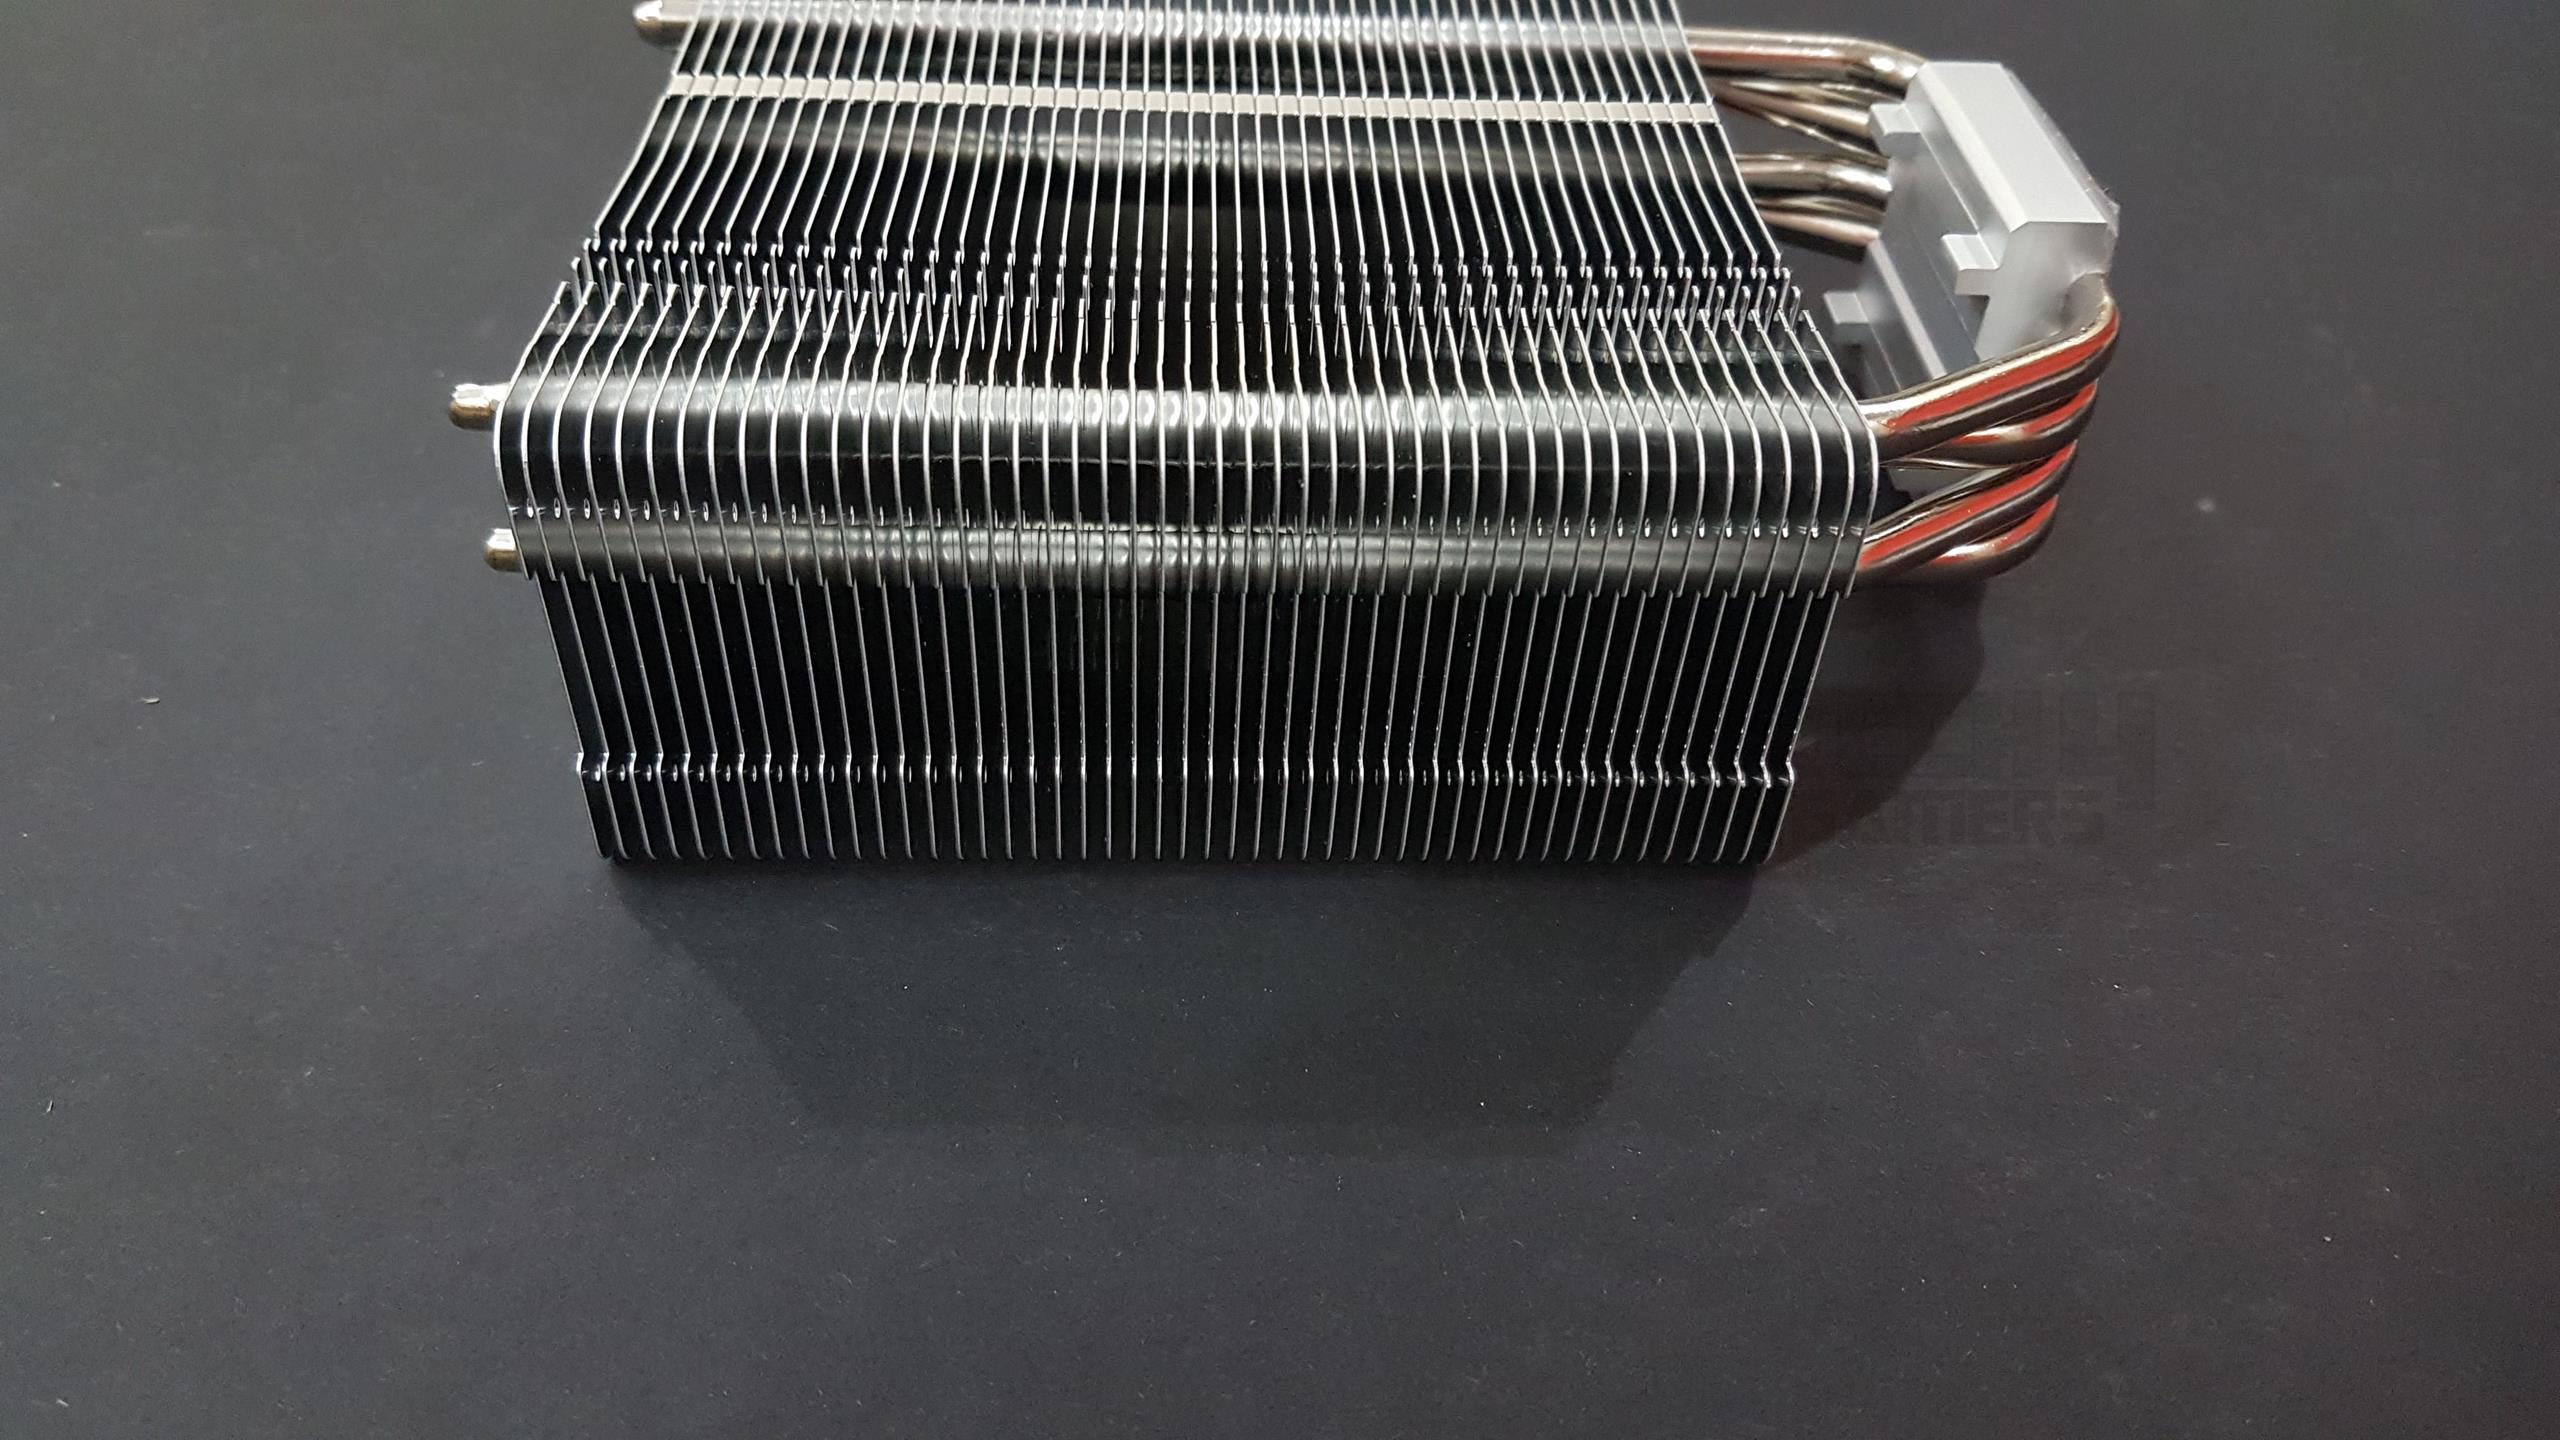
Examining the bottom side, four 6mm-thick heat pipes enter the heatsink at varying angles, forming a U-shaped pattern in pairs. These copper-based pipes are finished with a nickel coating. The cooler employs a CPU Direct Contact (C.D.C) design, ensuring direct contact between the heat pipes and the heat source. Specifically, it adopts the Continuous C.D.C approach, eliminating gaps between heat pipes during contact. The base measures 37x35mm, with a safety sticker cautioning users to peel it off before mounting the cooler.
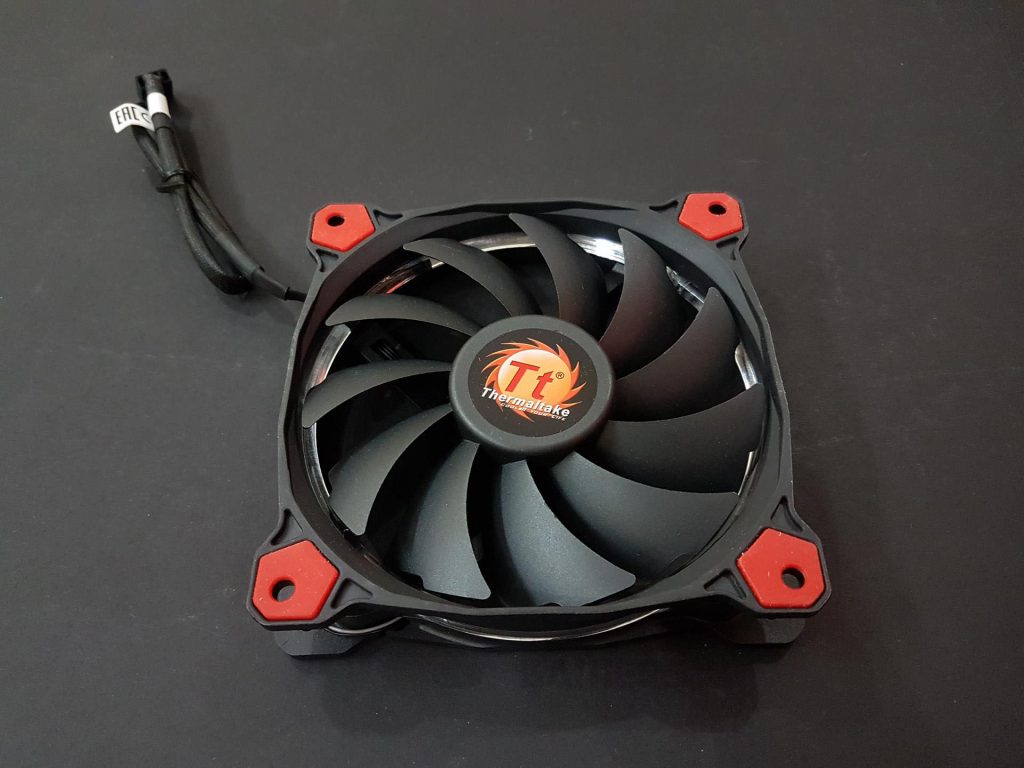
Thermaltake has provided their popular Riing 120mm fan with this cooler. Our variant has a red LED Riing fan. The fan has rubber pads on its mounting holes to reduce vibrations and noise. The motor hub proudly displays the Thermaltake brand name and logo with a sticker. Towards the backside of the fan’s frame, there’s a transparent ring that showcases the LEDs.

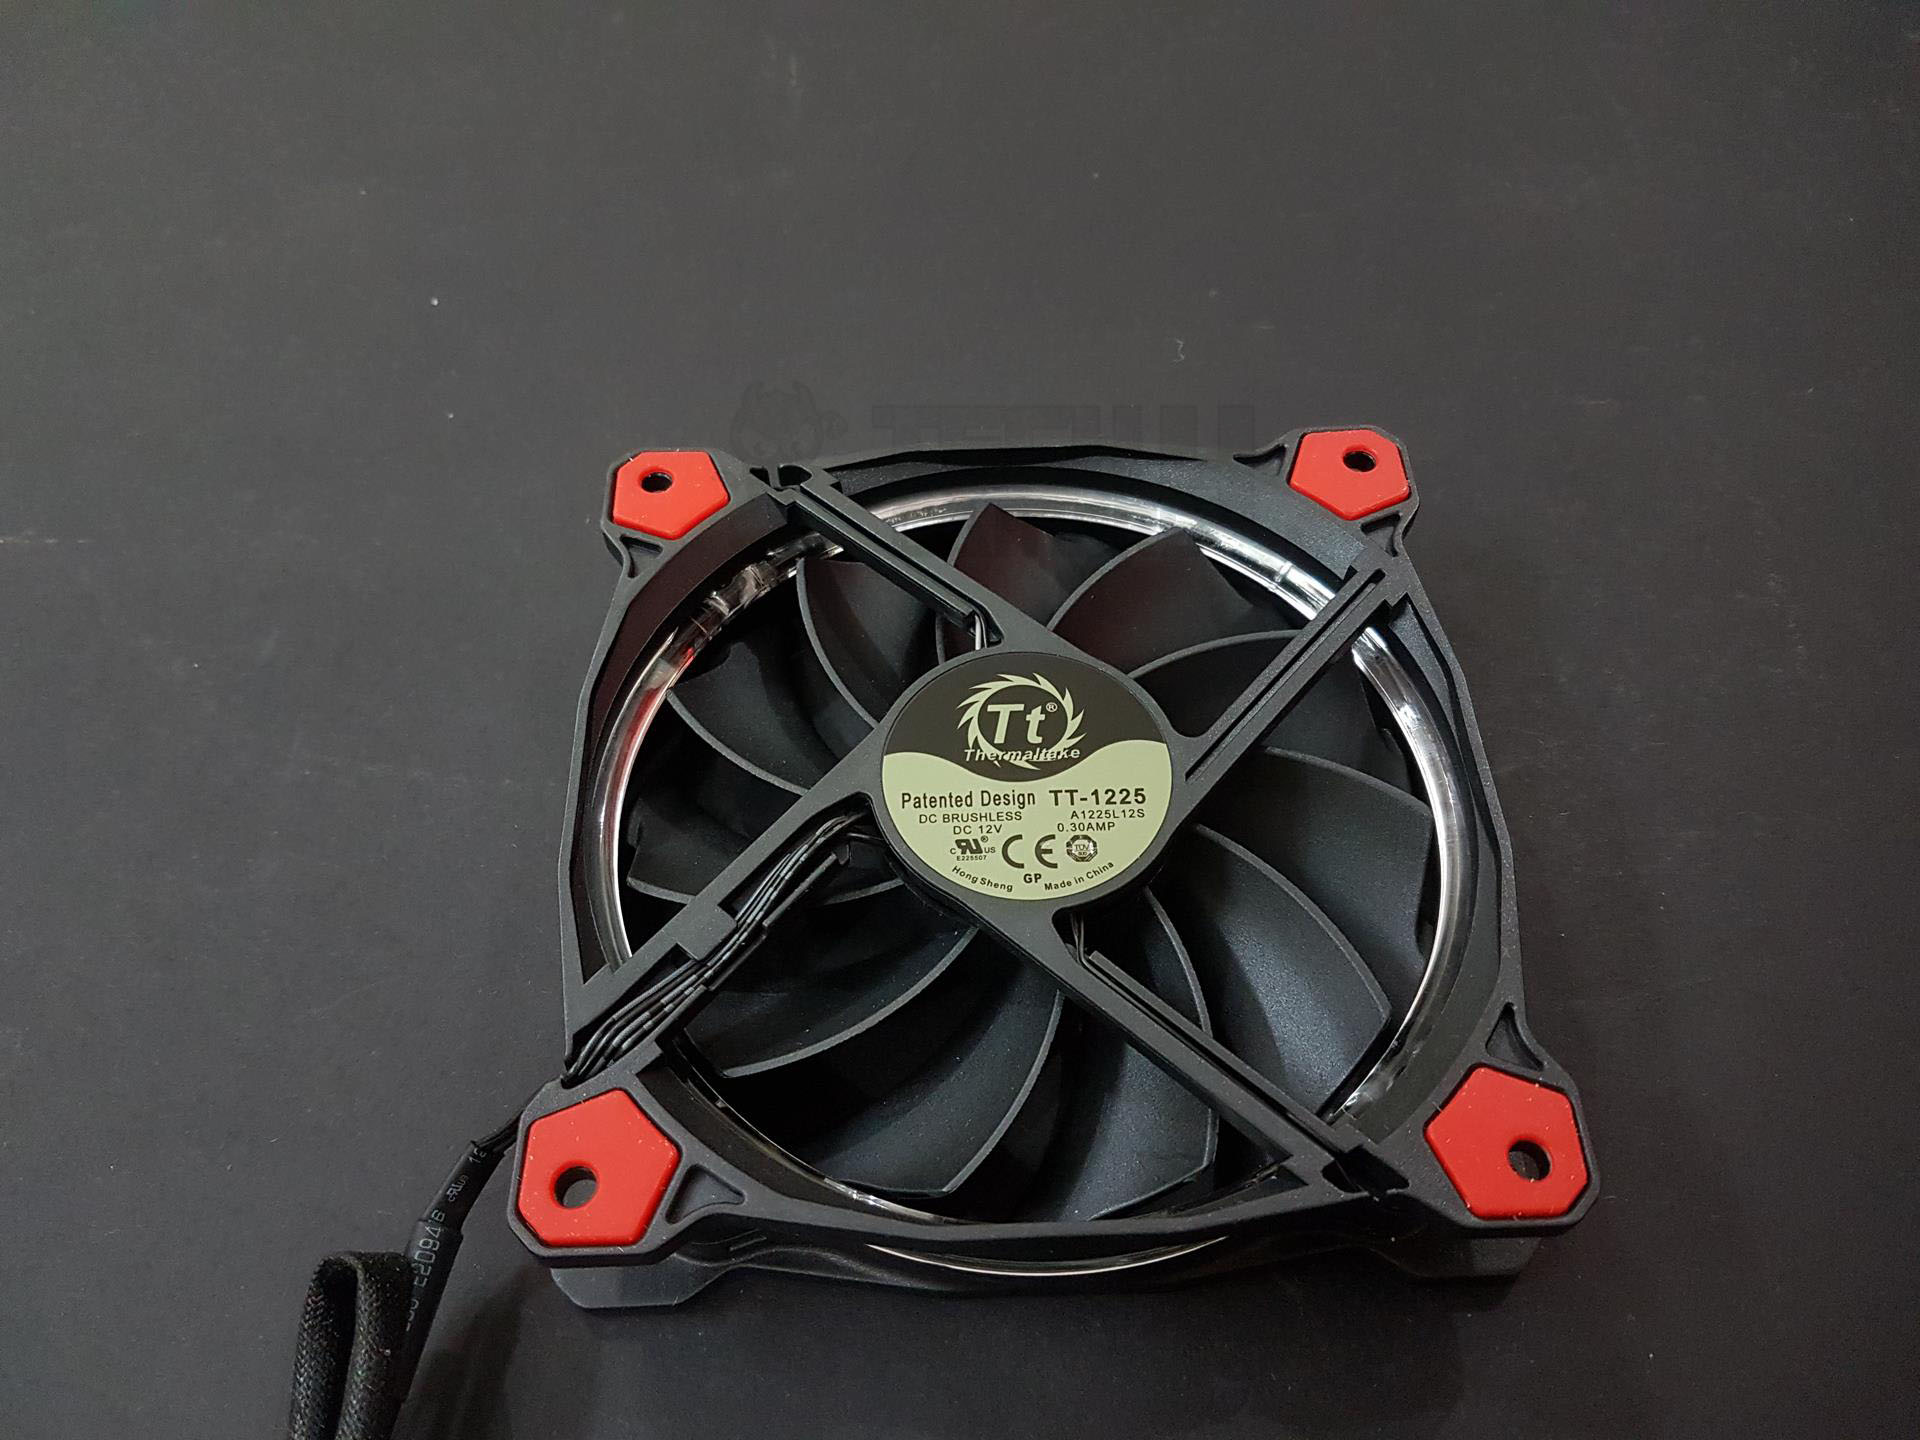
Eleven fan blades are engineered to create a large volume of air passing through the heatsink at any angle and provide the best balance between noise and performance.
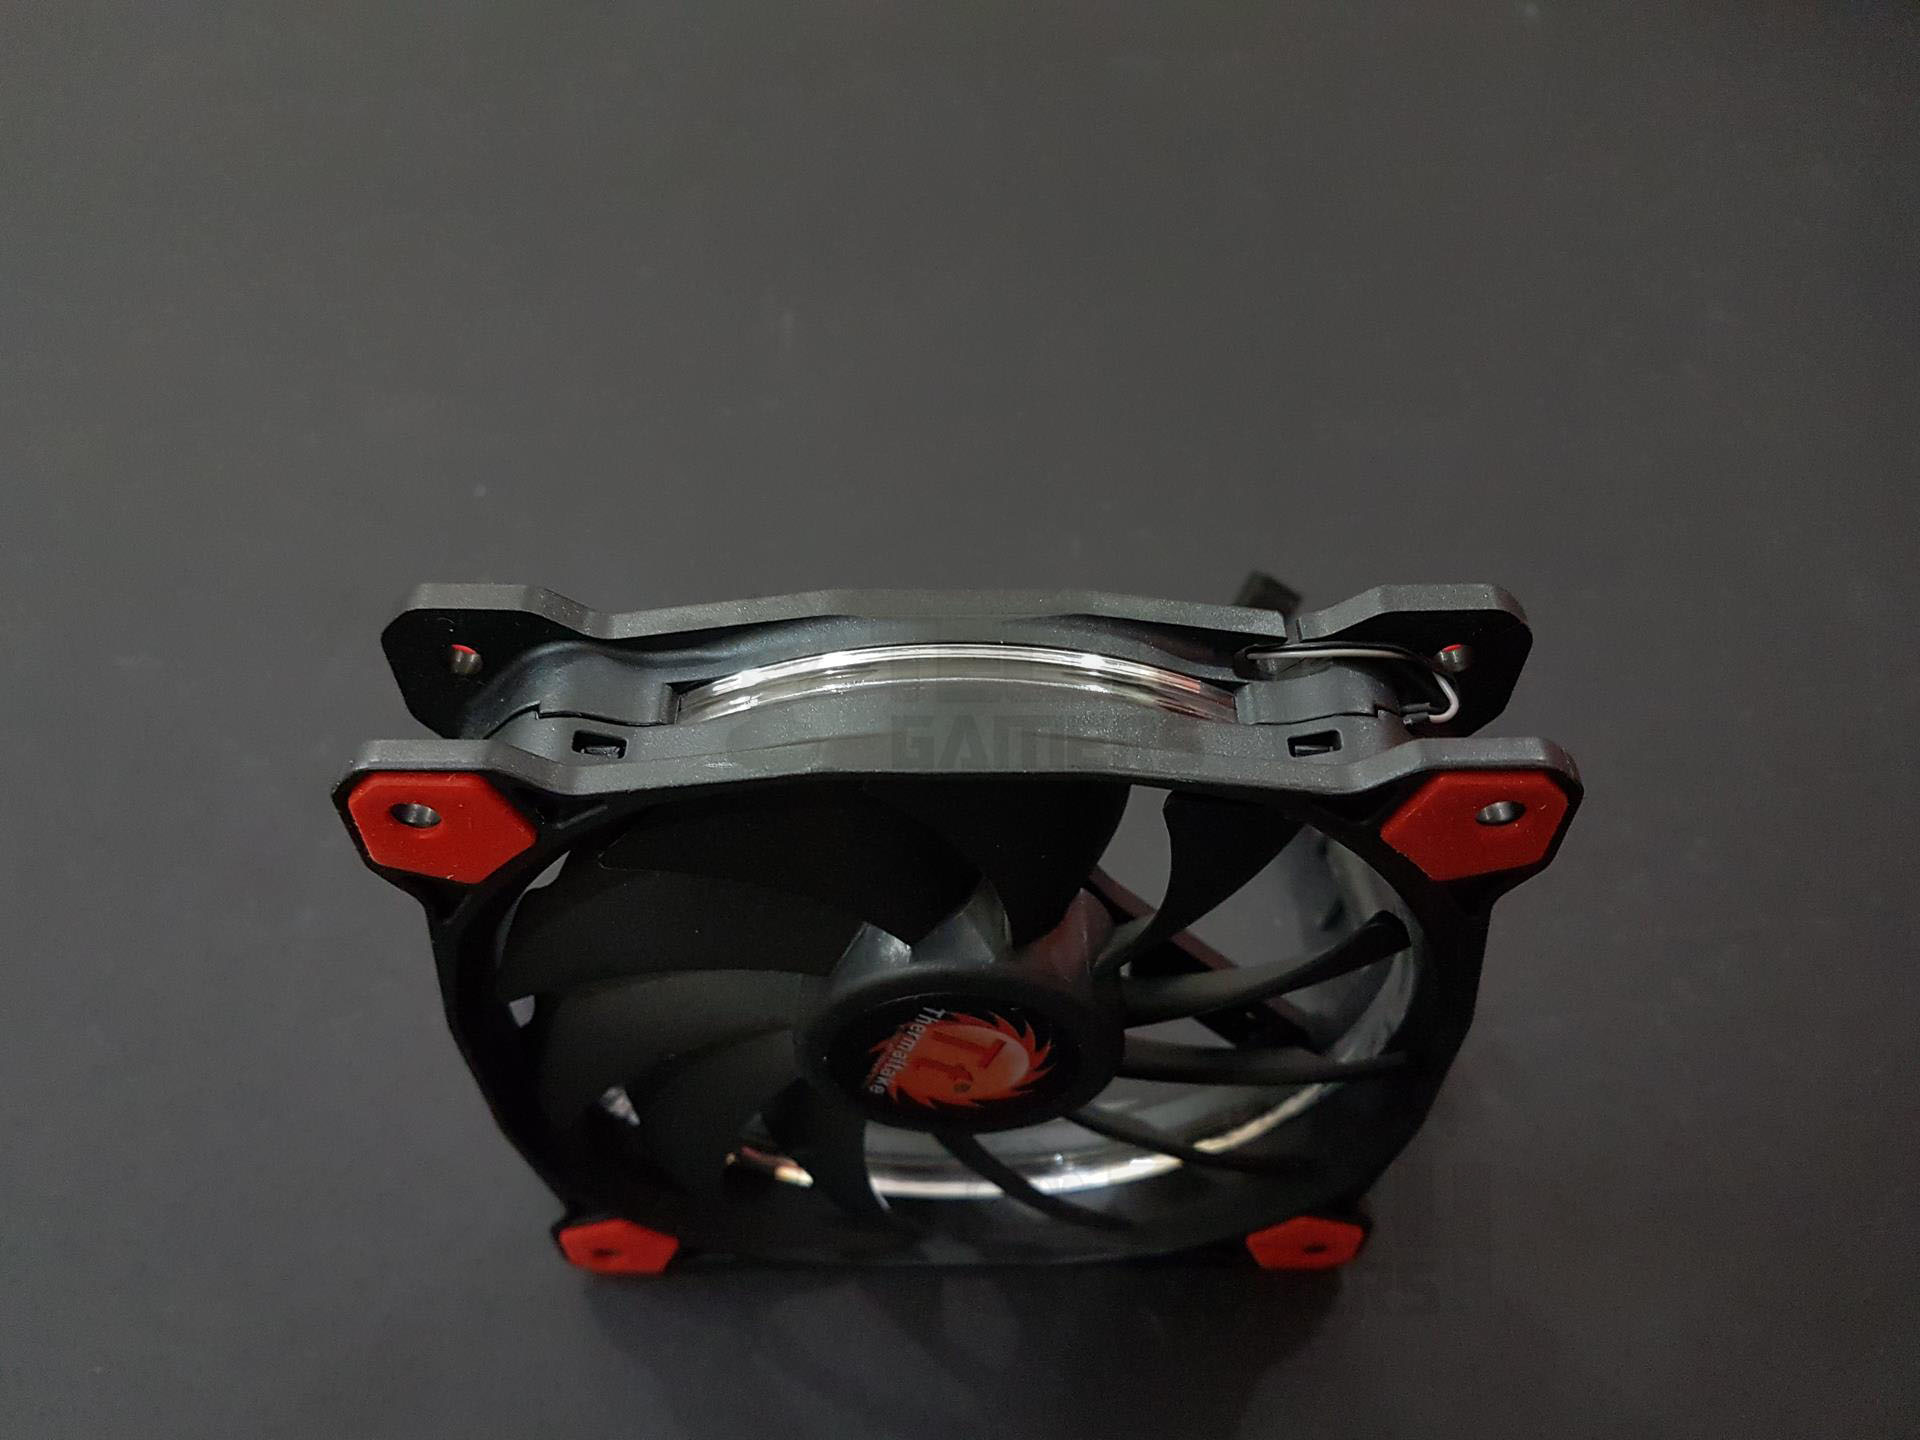
The wind blocker frame optimizes cooling by directing airflow to the blade’s center, creating a compression effect and minimizing noise and vibration. The DC Brushless motor, manufactured in China, powers the fan at 12V DC, drawing 3.2W at 0.30A. With a 4-arm design connecting the motor hub and blades to the frame, the fan operates at 500-1400 RPM, adjustable to 300-700 RPM with the LNC.
It boasts an airflow of 53 CFM at full speed, generating 1.23mmH₂O air pressure. The acoustical noise is rated at 19 dBA, reduced to 12 dBA with the LNC. The fan’s 4-pin PWM connector and 300mm cable offer versatile connectivity for optimized performance. The Thermaltake brand and logo adorn the motor hub sticker on the fan’s backside.
Utilizing hydraulic bearings, this fan incorporates a self-lubricating mechanism with a premium, friction-reducing substance. This not only diminishes operating noise but also enhances overall efficiency. The inclusion of a seal cap further safeguards against lubricant leakage, contributing to an extended lifespan for the unit.

Installation
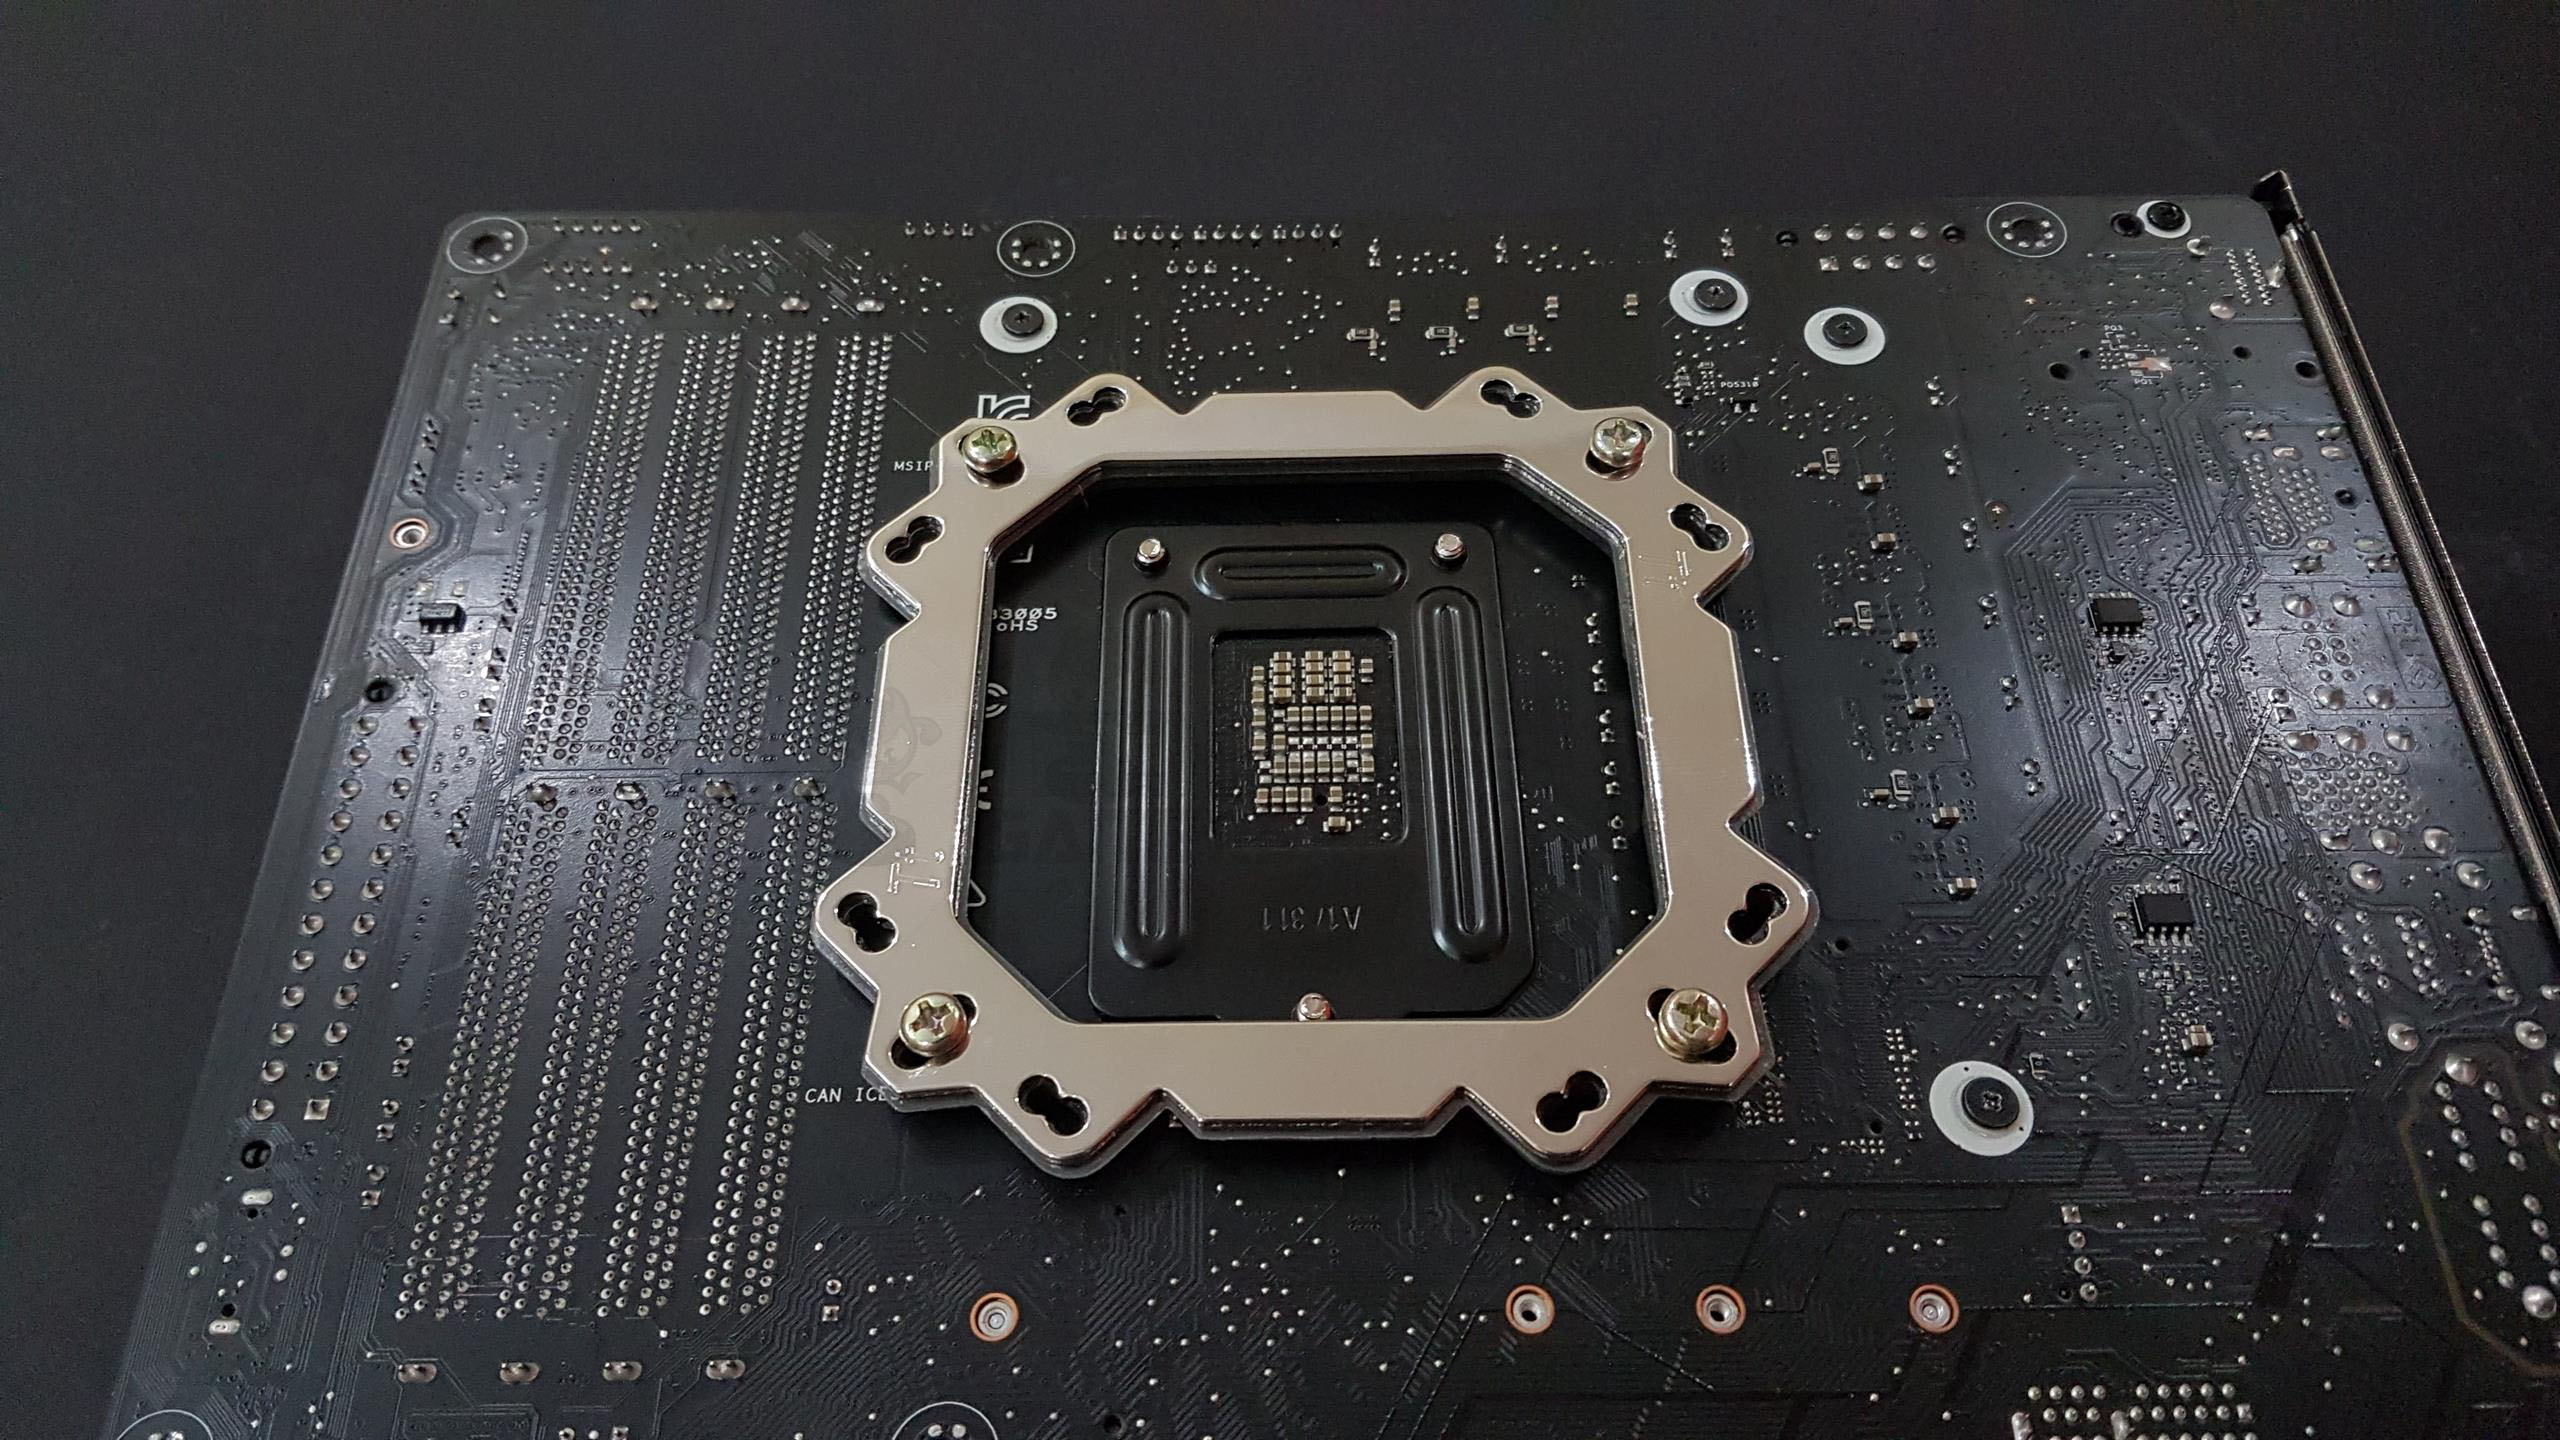
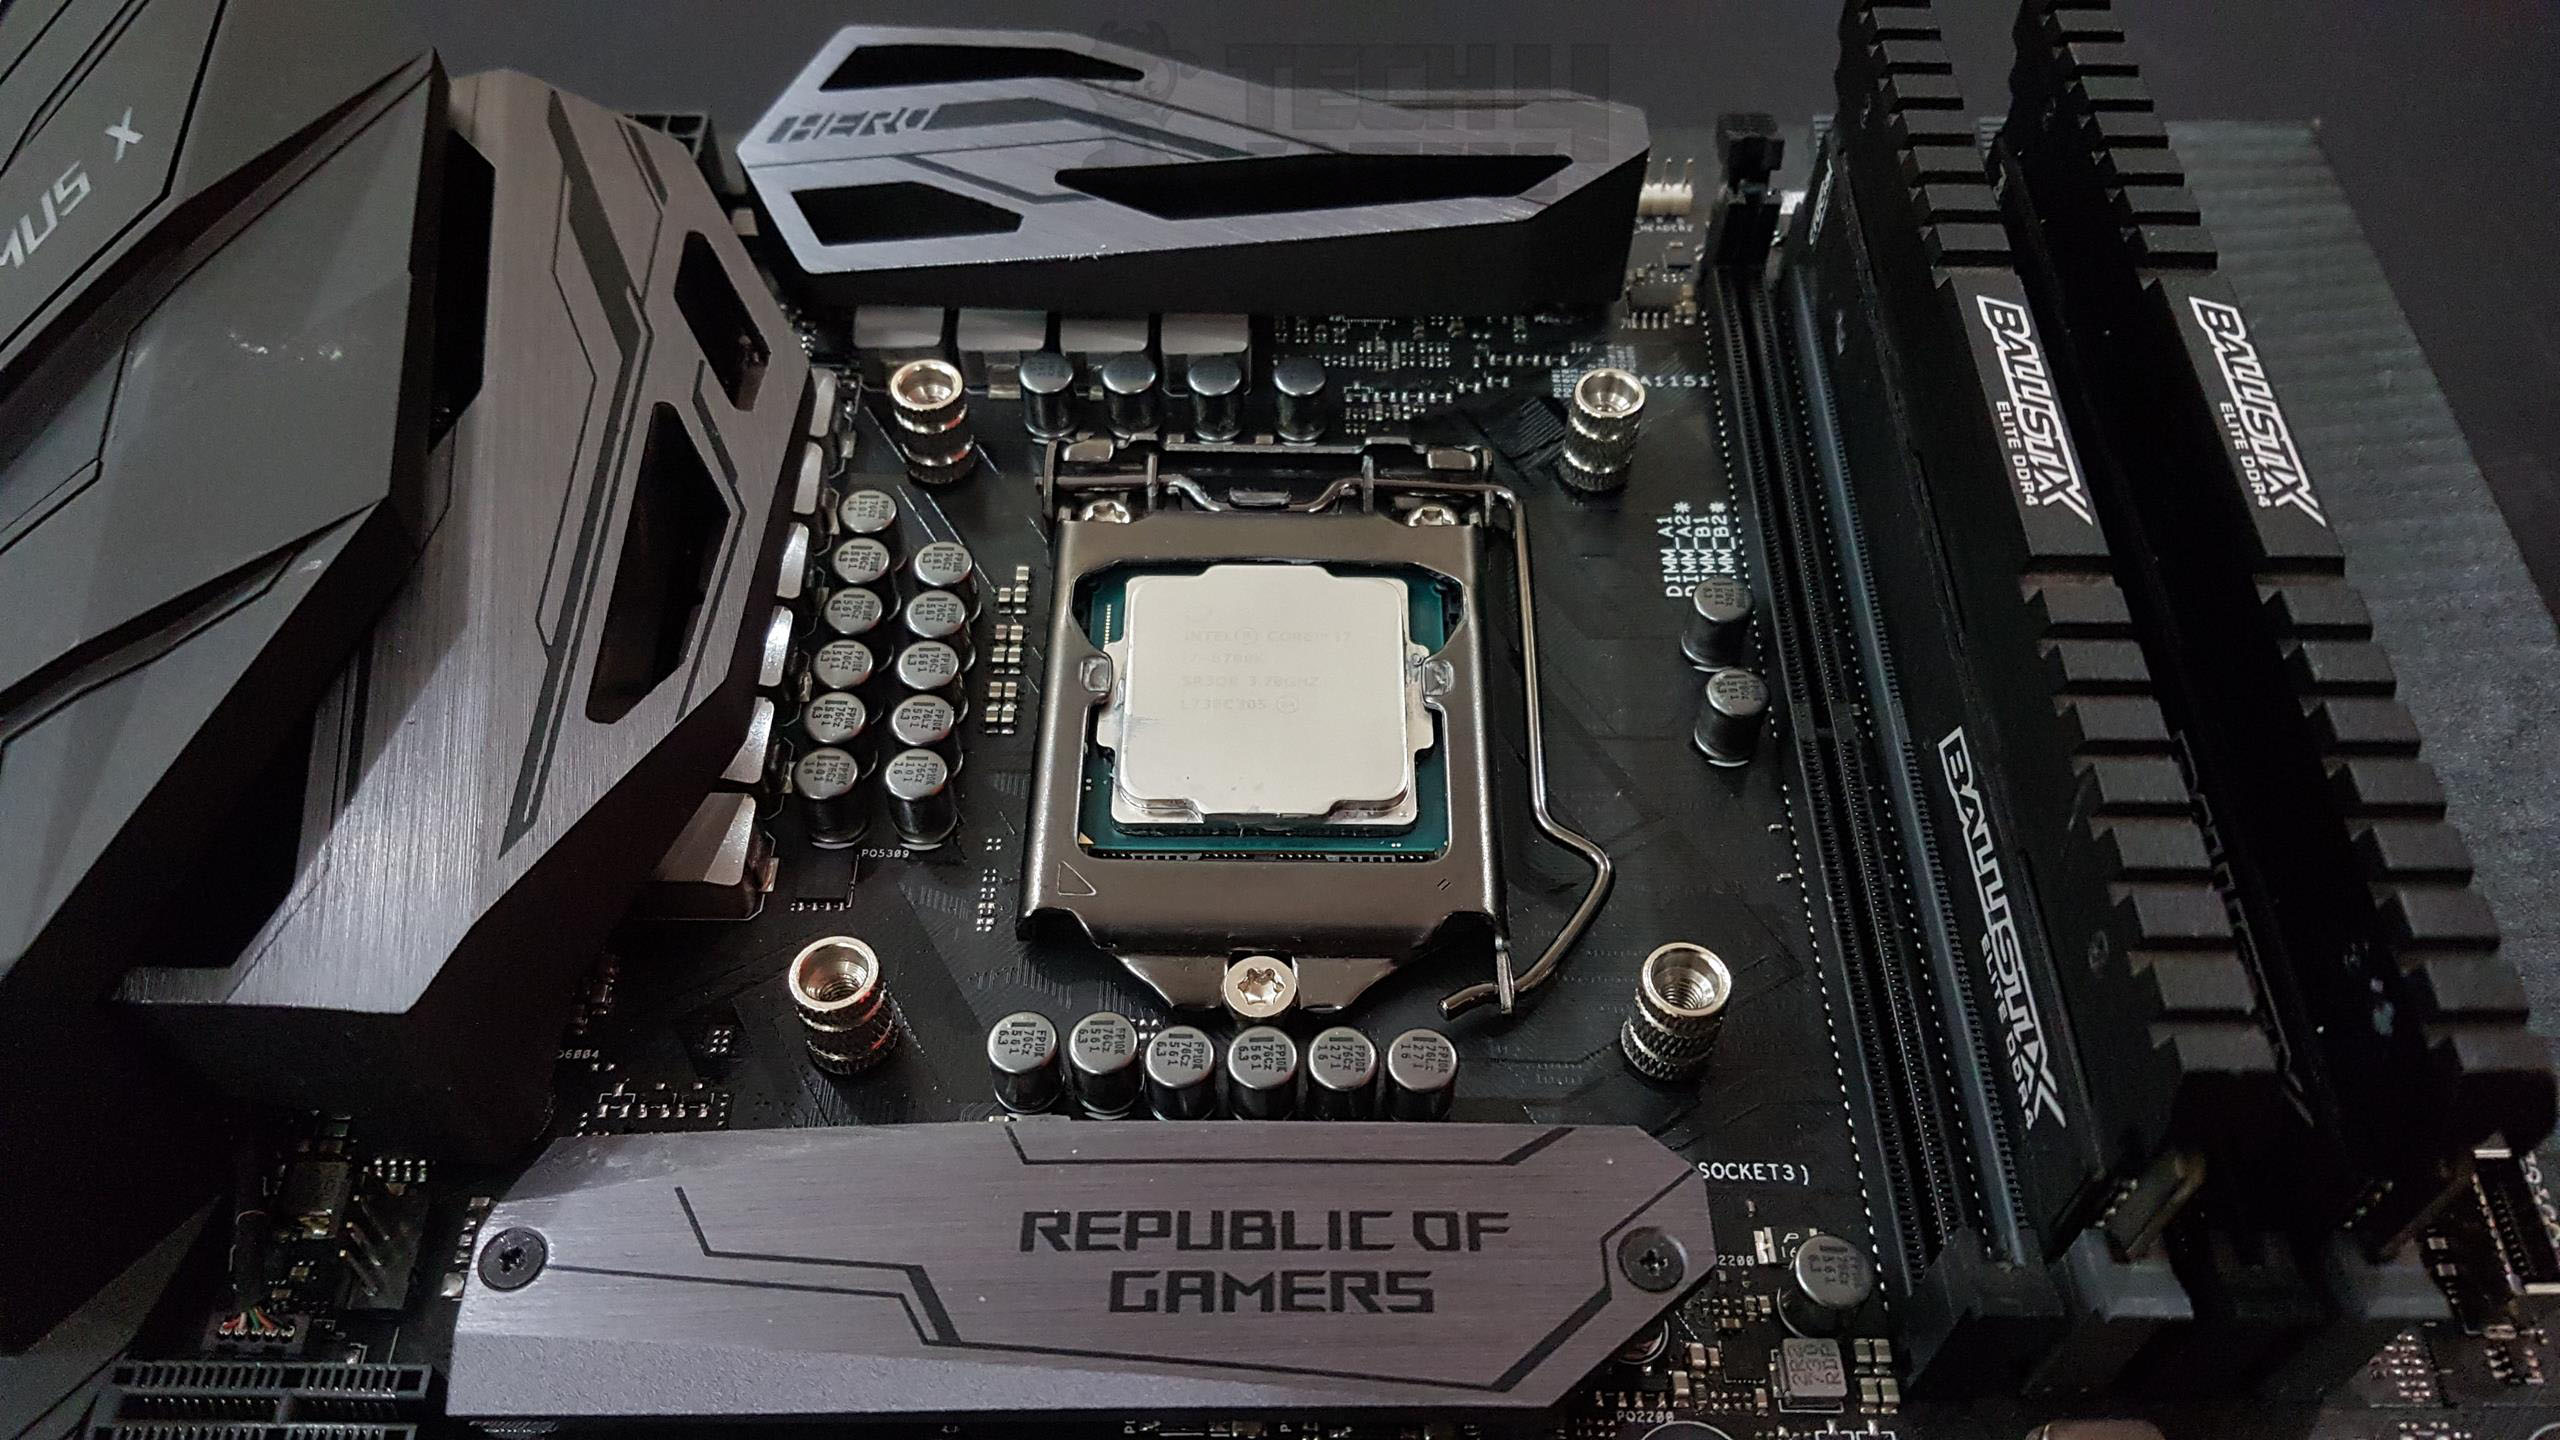
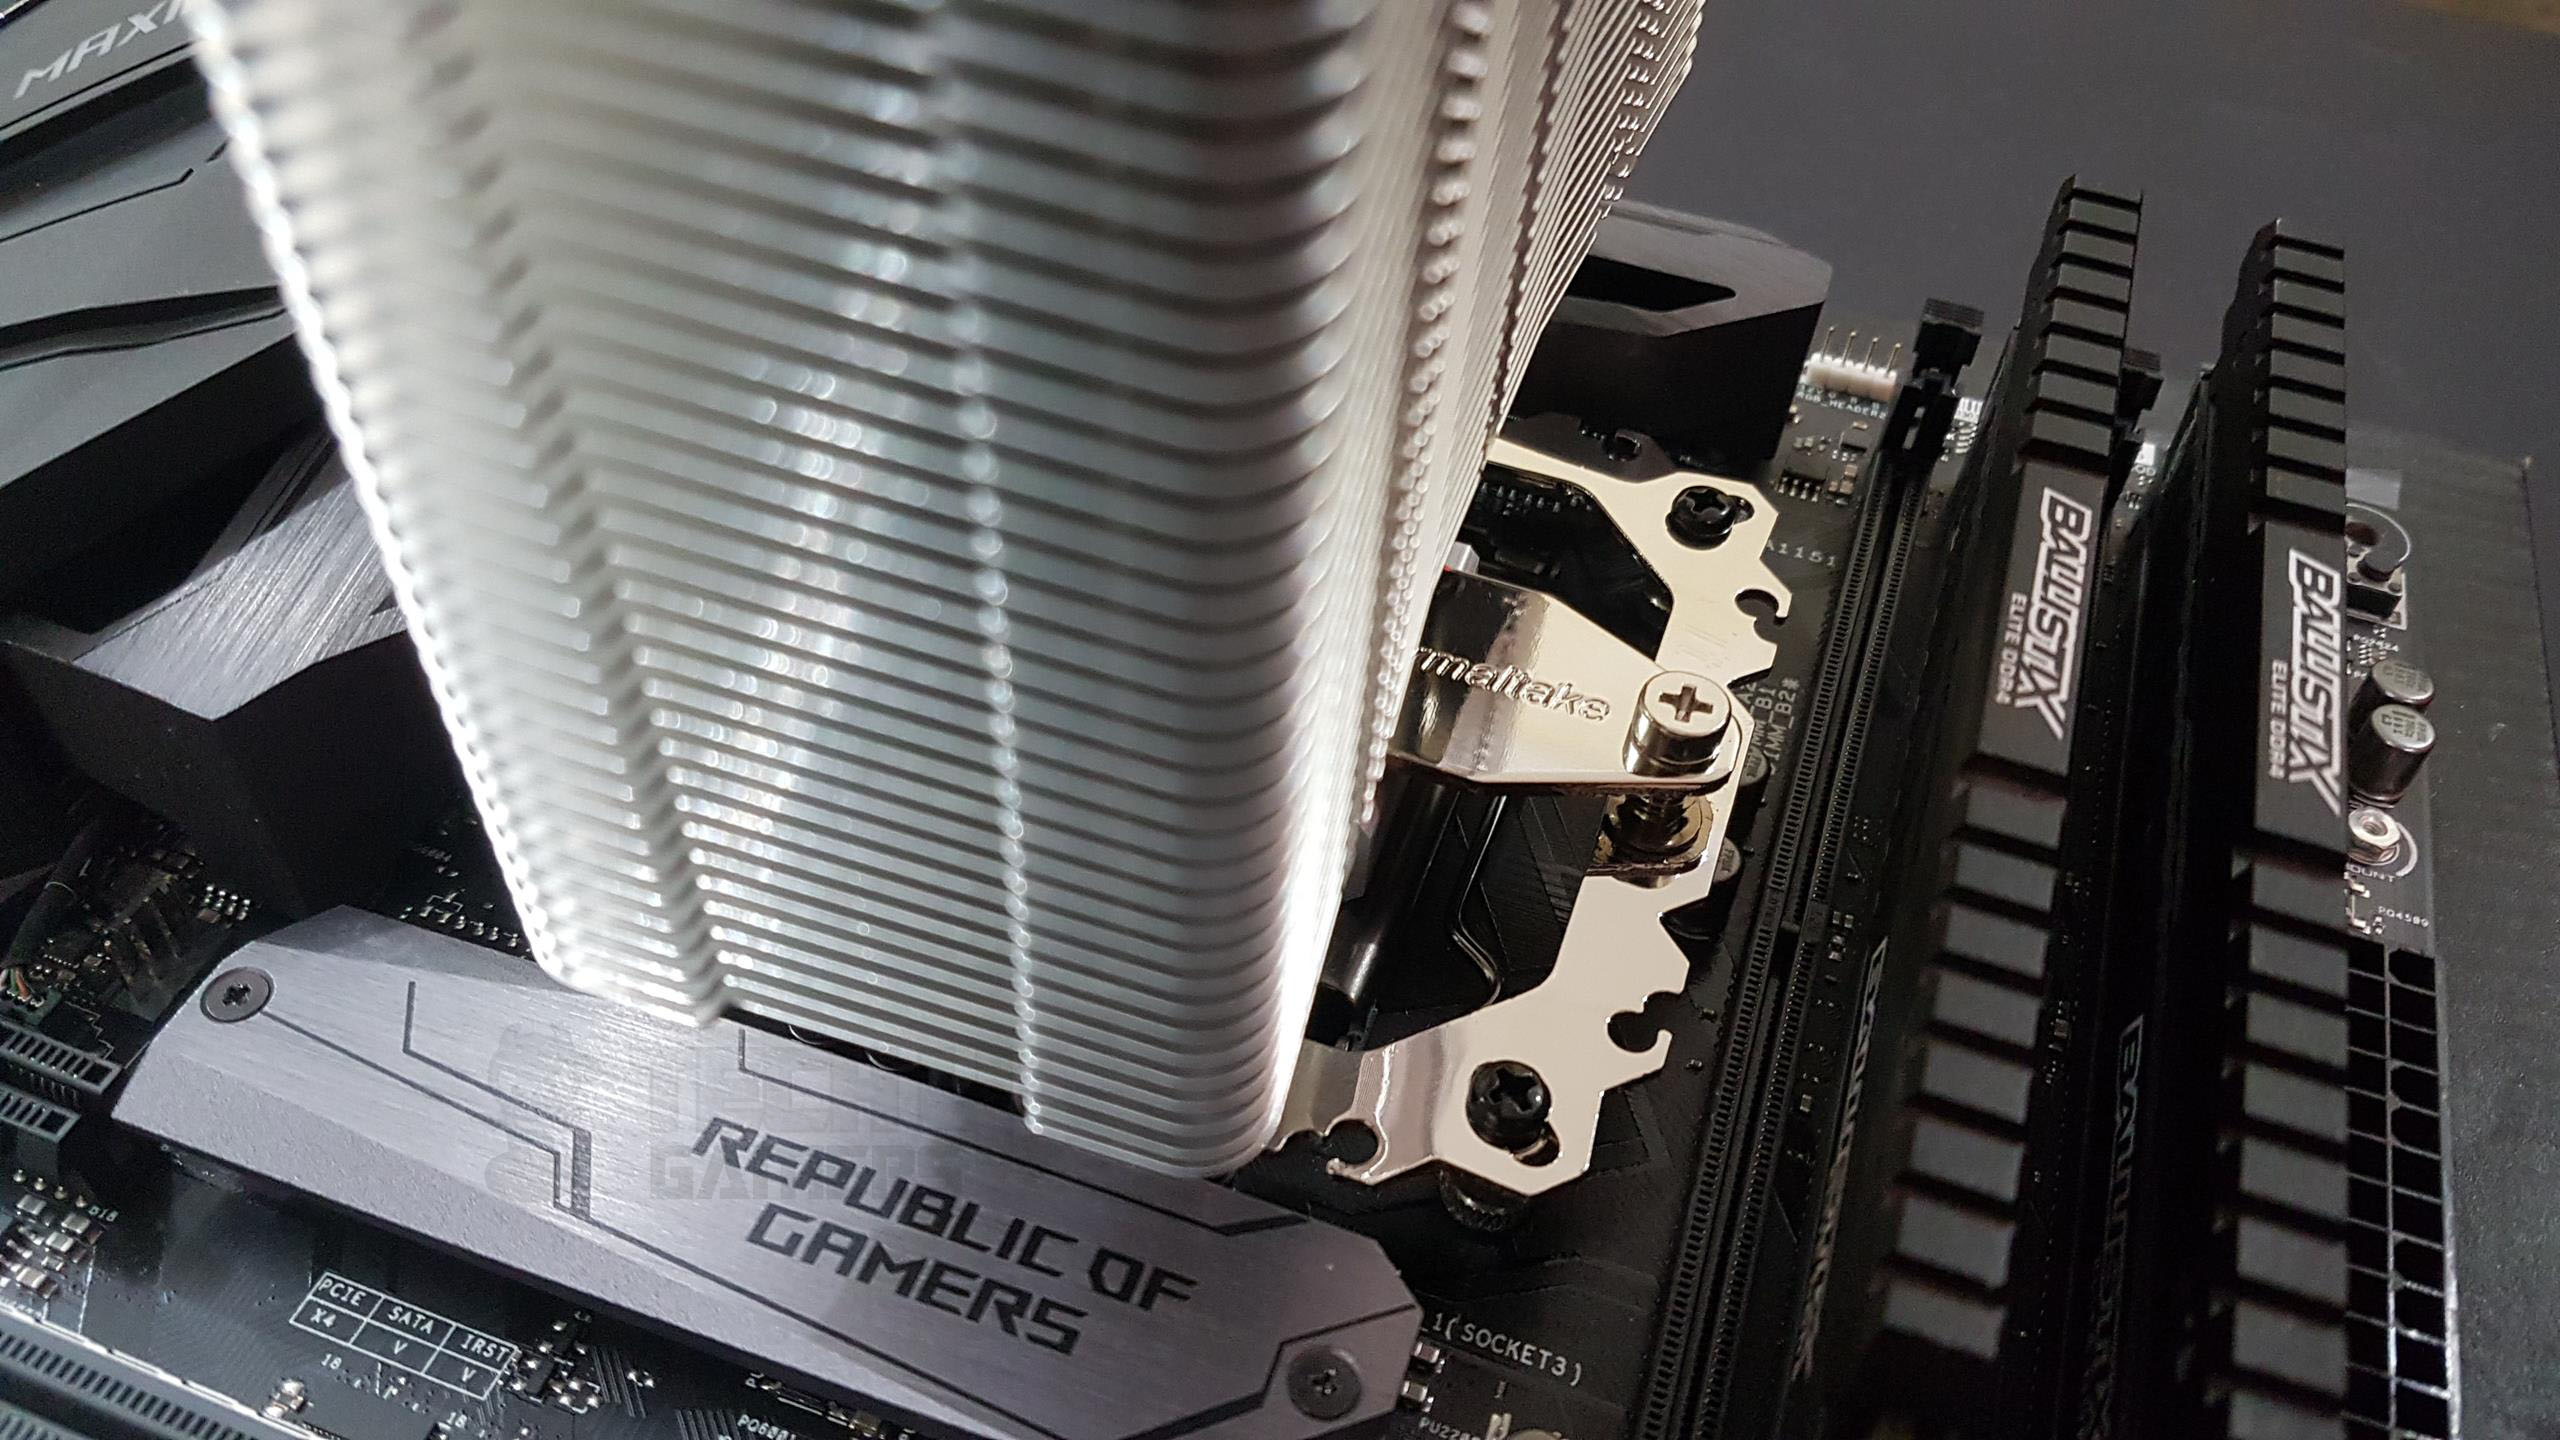
The cooler was installed on the Asus ROG Maximus X Hero. Before proceeding I would like to share few words on the improved mountings with this cooler. Thermaltake has used foam padding on the metallic backplate. So, there is no more hard plastic material backplate. There is no plastic washer either but metal nuts that hold the backplate onto the motherboard’s PCB.
Let’s take a look at the installation procedure for this cooler.
- Place the backplate on the backside of the motherboard in such a way that the foam padding faces the PCB of the motherboard. The same backplate will be used for the AMD socket and this cooler is out-of-the-box AM4 compatible.
- Make sure that Tt printed side is facing up. Now, pass the 4x 16.6mm screws (the longest of all) through the mounting holes of the backplate and the motherboard.
- Use the 4x metal nuts and thread them on the screws from the front side of the motherboard. Note that these nuts have one plain side and black washers on the other side. Make sure to use the washer side on the motherboard’s PCB.
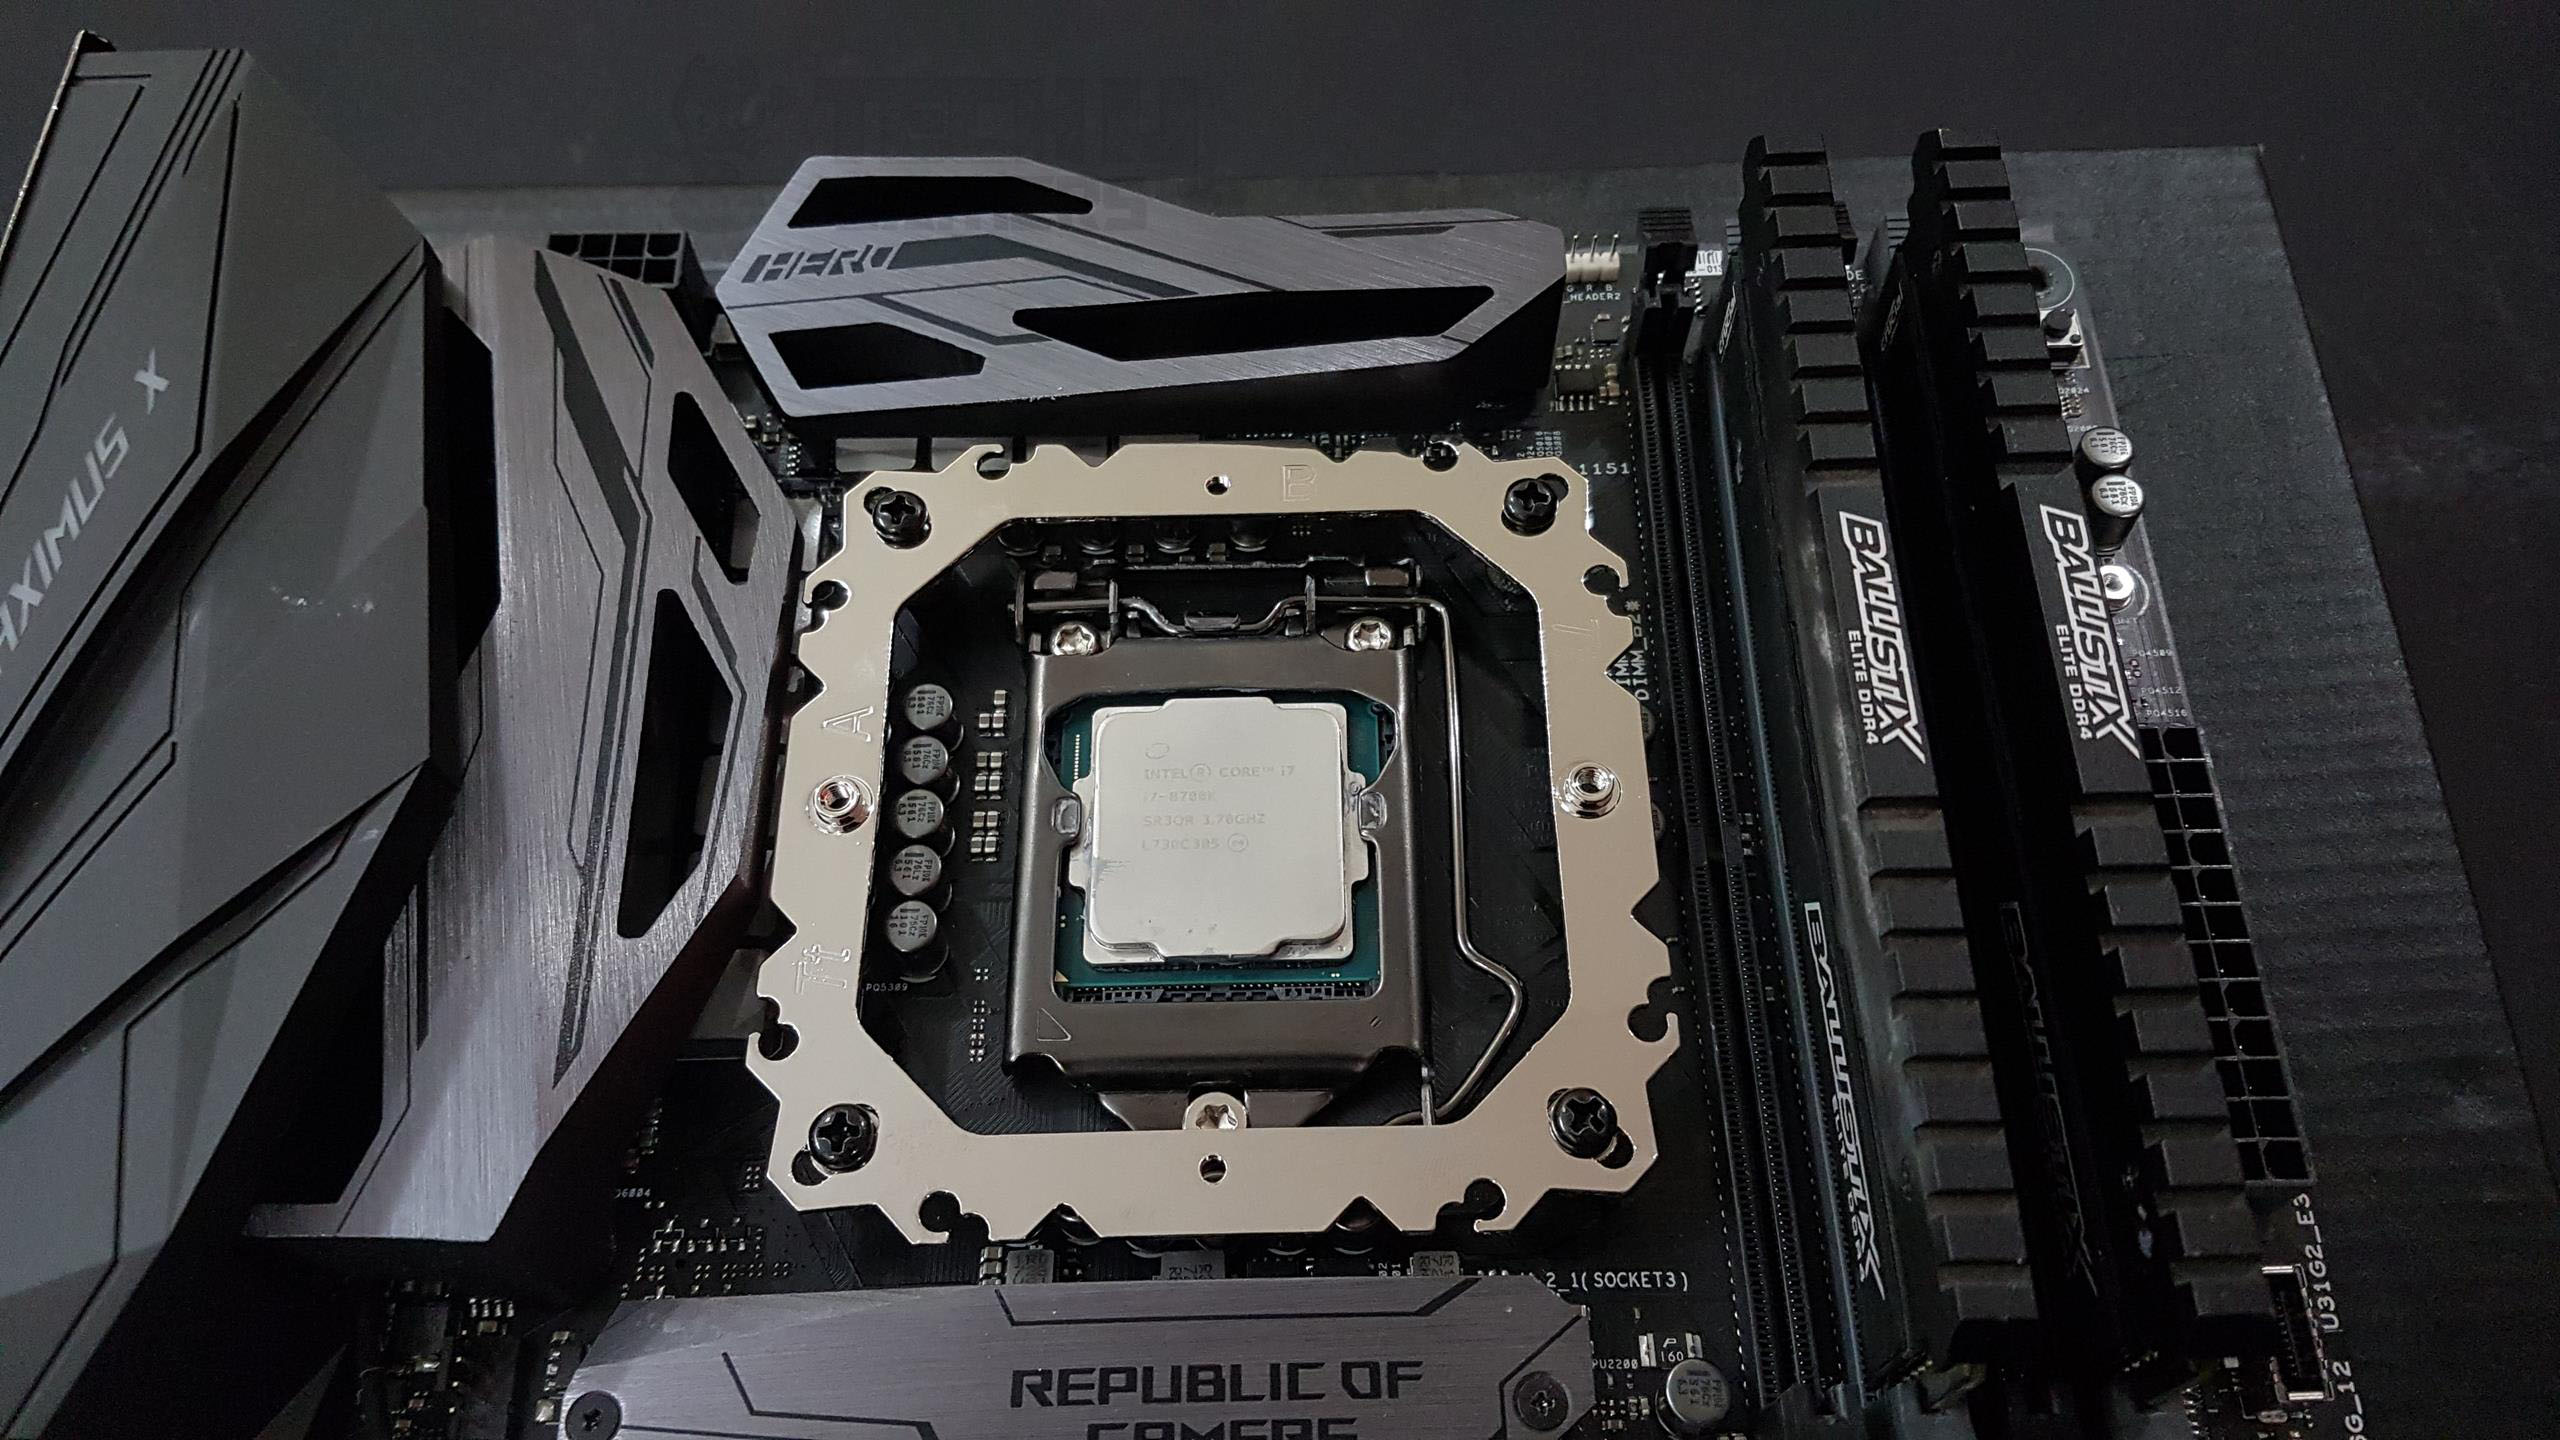
- Now, place the bracket on top of the metal nuts. Make sure that the Tt printed side is facing up. One side is labeled with A and the other with B. B side holes are for Intel LGA-2011 socket only. A side is used for the rest of the Intel sockets and the AMD sockets.
- Use the 4x 9.6mm black color screws and secure the bracket onto the metal nuts.
- Take out the fan’s clips. Place the short side of the clips from the top and the bottom of the heatsink through the small holes. This will hold the clips on to the heatsink.
- Apply the thermal paste. Place the mounting plate with Thermaltake printed on both sides on the top side of the base. Place the heatsink on the CPU by aligning the screws on the mounting plate with the raised holes on the bracket. Tighten the screws till the thread runs out.
- Place the fan on the front side of the heatsink and secure it with the already placed clips. The raised corner of the clip should fit in the holes of the fan. Connect the 4-pin PWM connector on the desired motherboard’s fan header. This would complete the installation.
Compatibility and Clearance
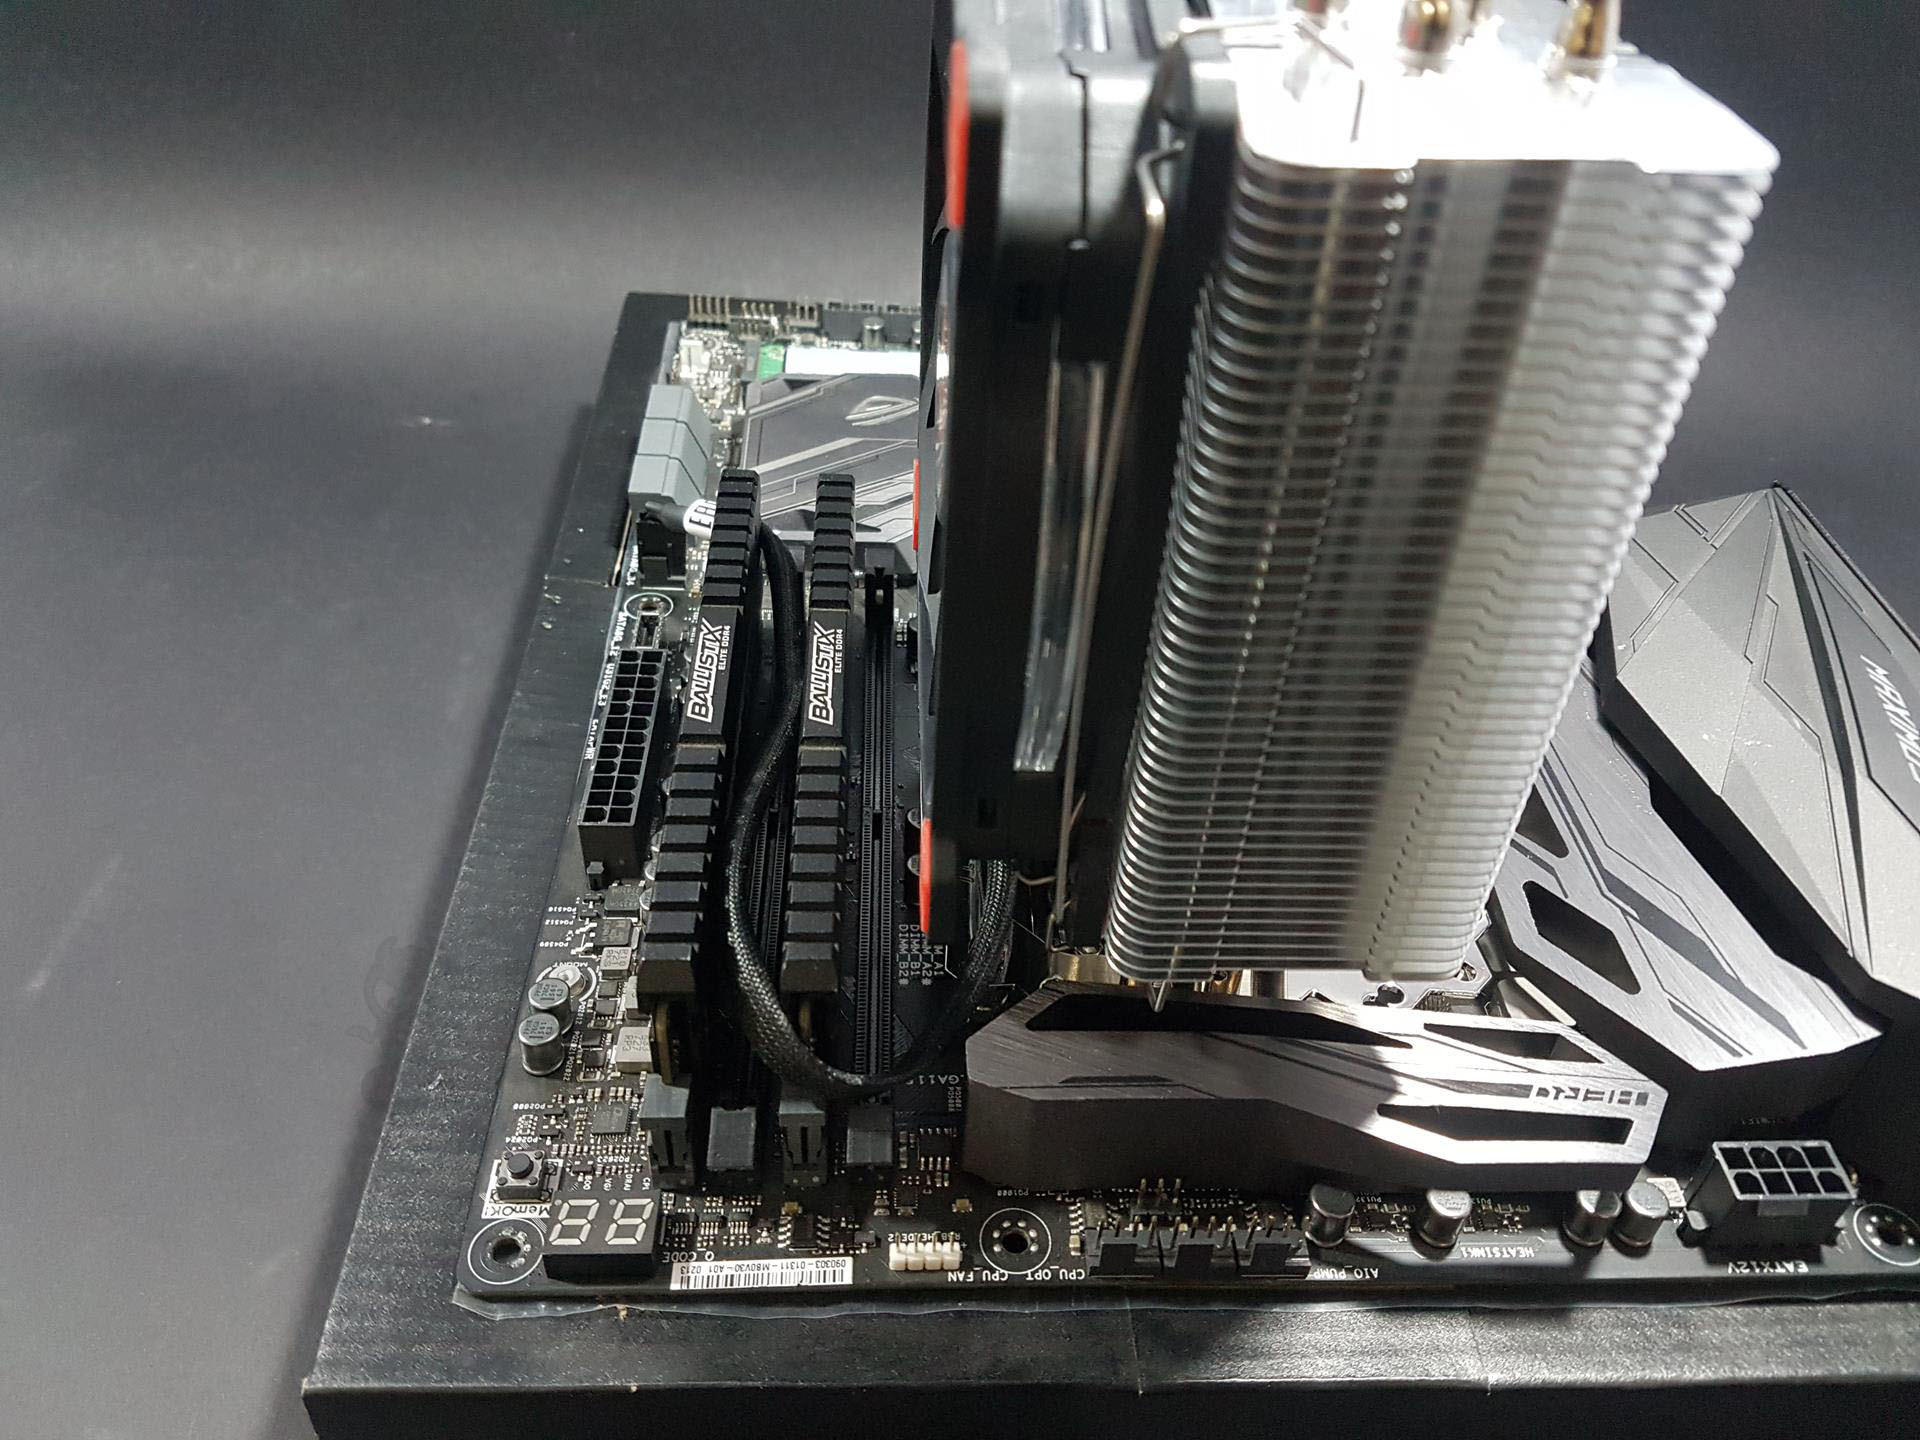
Before discussing the performance of the cooler, let’s take a peek at the compatibility and clearance of this cooler with respect to the PCIe slot, RAMs’ height Motherboard’s I/O cover, and PC Chassis. This cooler has no clearance issue whatsoever with respect to the top PCIe slots.
This cooler has no restriction on the RAMs’ height. RAM of any height can be used, though the high profile RAMs may cover the front of the 120mm fan. We are also happy to report that we found absolutely no clearance issue with respect to the motherboard’s IO. Adding on to that, the height of the cooler with the fans is 159mm, which makes it important to check out the chassis manufacturer’s website for the maximum cooler height possibility before buying.


Testing
We have recently upgraded our second test bench to the Coffee Lake platform. We were able to test a few coolers on this platform; hence, there are just three coolers on the graph. Here is the test build configuration:
- Intel i7 8700k
- Asus ROG Maximus X Hero
- Ballistix Elite 2x4GB @ 3000MHz DDR4
- HyperX 120GB SSD
- Thermaltake TP DPS-G 750W PSU
- Colorful GTX 1050 Ti Vulcan U 4G EC
Each cooler was tested on stock clocks at 1.140V with turbo boost. Asus Real Bench 2.4 was used to stress the CPU. RealTemp was used to monitor the temperatures during the testing. A single run of RealBench was run on stock clocks and an average of max temperatures on all cores was recorded. We are using delta temperature to counter the uncontrolled environment. The average figure is subtracted from the recorded ambient temperature to obtain the delta temperature.
CPU was overclocked to 4.8GHz at 1.28V. This i7 8700k runs way hot and due to the warranty concern, we have not yet delided the chip. 3 runs of RealBench were made with overclocked chip each of 60 minutes duration with the interval of 15 minutes to let the CPU cool down before the next run. The average of each run is obtained and the maximum value is mentioned on the graph as a worst-case possible scenario. Fans were made to run at 100% of their rated speeds across all tests.
We are using Noctua NT-H1 to test all coolers. This helps to ensure the standardization of the testing by mitigating any possible performance effect that can be had with the bundled thermal paste with the cooler. Microsoft Windows 10 x64 is used. Let’s take a look at the performance graphs.
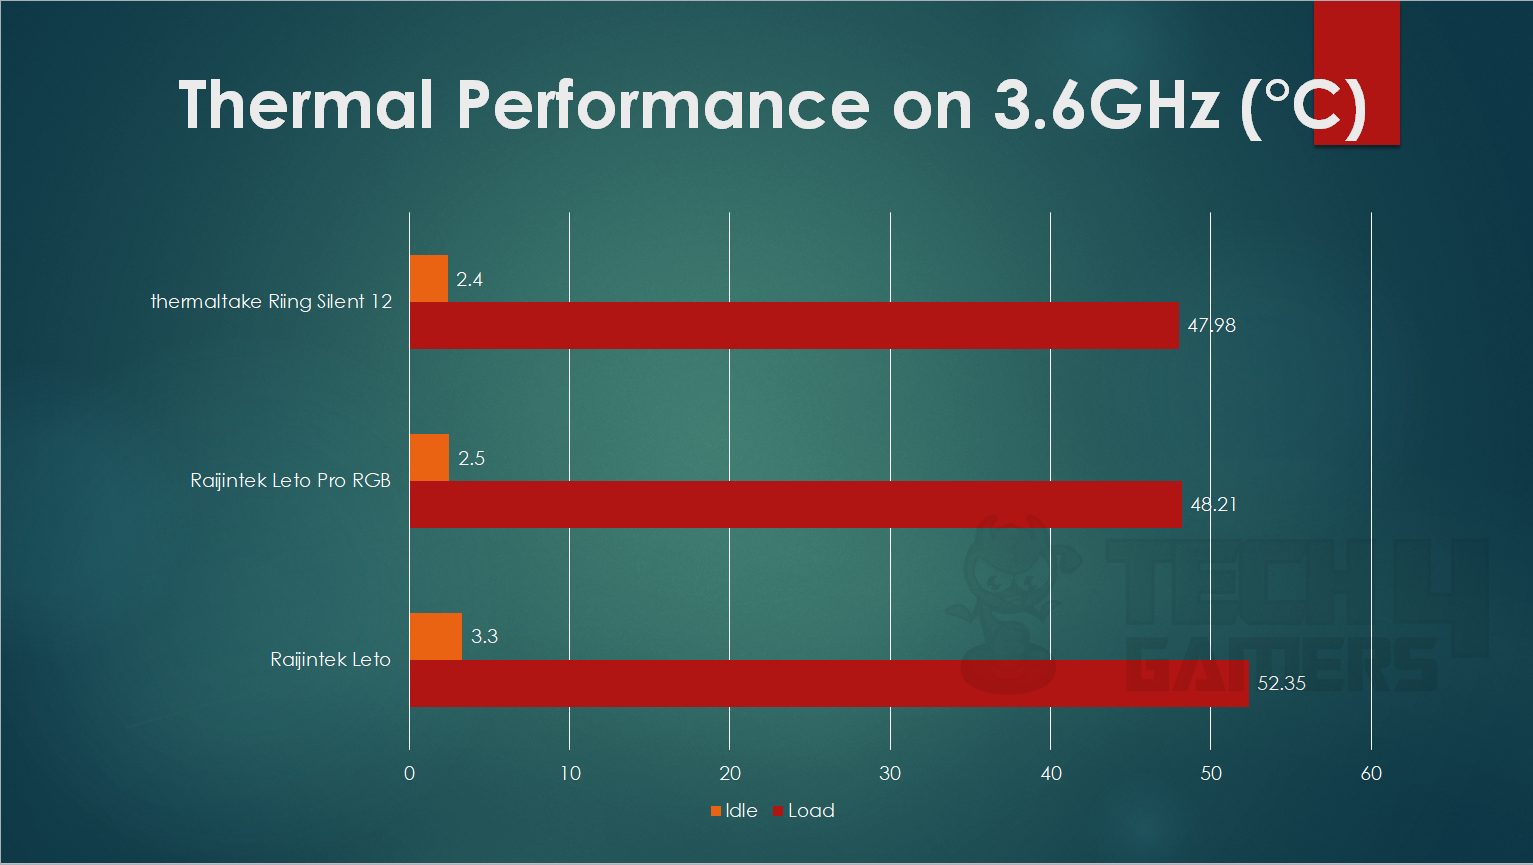
The Thermaltake Riing Silent 12 Pro Review did a maximum of 47.98°C which is below the Raijintek Leto Pro RGB. This seems a promising performance from this cooler with one fan as compared to the two fans solution on the Leto Pro RGB.
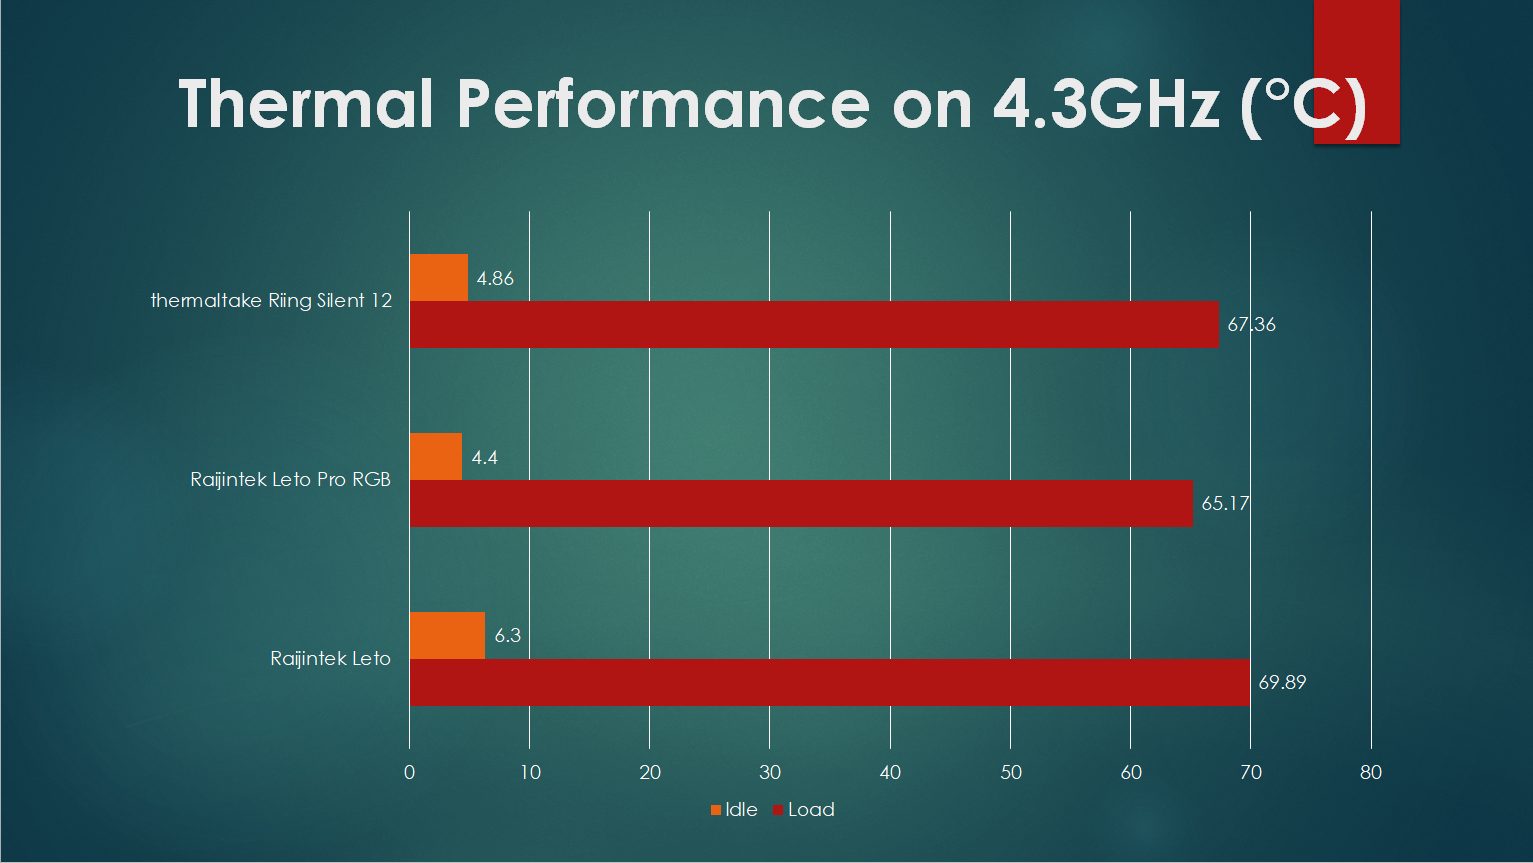
With overclocked 8700k the results were other way around. The Raijintek Leto Pro RGB is leading by 2.19°C.
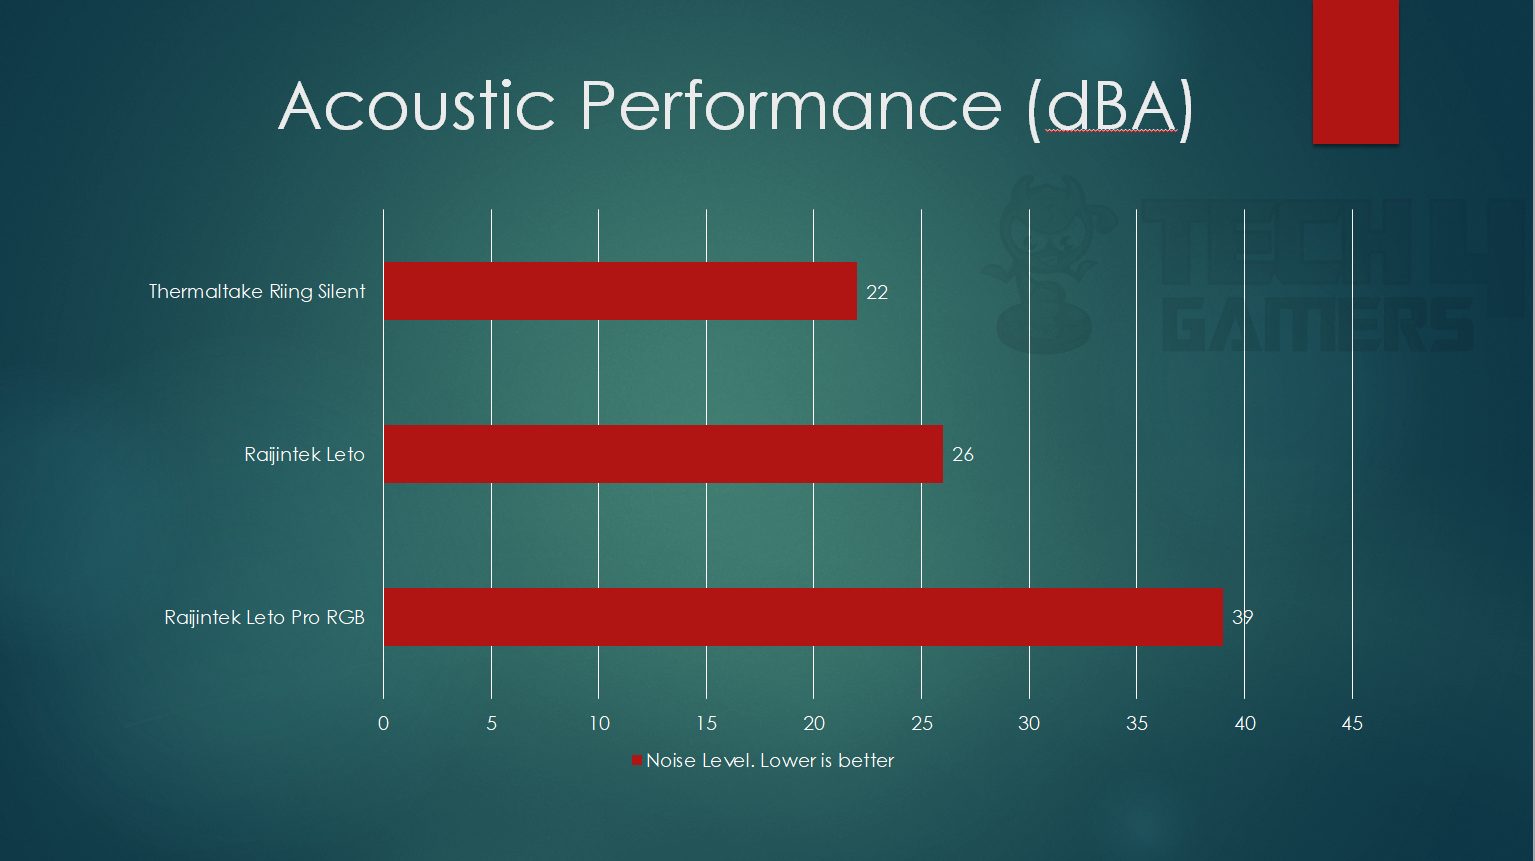
With just 22 dBA on our Fonseo Digital Sound Meter, this is truly a good overall performance.
Should You Buy It?
Buy It If:
You want solid cooling performance: The Thermaltake Riing Silent 12 Pro showcased remarkable performance in our tests.
You want a widely compatible air cooler: The Thermaltake Riing Silent 12 Pro provides excellent clearance thanks to its slim structure.
You prefer a near-silent air cooler: In our testing, the Thermaltake Riing Silent 12 Pro proved to be extremely silent for an air cooler.
Don’t Buy It If:
You want to overclock your processor: Overclocking higher-end processors might not be possible with the Thermaltake Riing Silent 12 Pro.
Conclusion
The Thermaltake Riing Silent 12 Pro is a slim, versatile CPU cooler compatible with most sockets, including AM4. It features a 120mm Riing LED PWM fan and a solidly built heatsink with 58 widely spaced aluminum fins and 4 effective nickel-plated copper heat pipes. Its CPU Direct Contact (C.D.C) design enhances heat dissipation by eliminating gaps between the heat pipes and CPU surface.
The cooler also includes padding on the backplate for motherboard protection. While it offers a one-year warranty and is priced affordably, it’s more suited for standard or mild overclocking rather than extreme conditions. Despite its budget-friendly nature, it performs well in keeping CPUs like the 8700k cool under regular loads.
We are thankful to the Thermaltake for sending us their Riing Silent 12 cooler for the review.
Recent Updates
- November 15, 2023: Few text changes to improve readability. No products were changed.
Thank you! Please share your positive feedback. 🔋
How could we improve this post? Please Help us. 😔
[Hardware Reviewer & Editor]
Meet Nauman Siddique, a highly experienced computer science graduate with more than 15 years of knowledge in technology. Nauman is an expert in the field known for his deep understanding of computer hardware.
As a tech tester, insightful reviewer, and skilled hardware editor, Nauman carefully breaks down important parts like motherboards, graphics cards, processors, PC cases, CPU coolers, and more.
- 15+ years of PC Building Experience
- 10+ years of first-hand knowledge of technology
- 7+ years of doing in-depth testing of PC Hardware
- A motivated individual with a keen interest in tech testing from multiple angles.
- I majored in Computer Science with a Masters in Marketing
- Previously worked at eXputer, EnosTech, and Appuals.
- Completed Course in Computer Systems Specialization From Illinois Tech
Get In Touch: nauman@tech4gamers.com


