 Threads
Excellent Options For Modders!
Review Summary
The Xigmatek X7 offers a unique proposition for gamers and modders with its distinctive design and ample space. Positioned between mid-tower and full-tower closures, it boasts a robust build, but it falls short on cable management and dust protection. Despite limitations, it impresses with a visually striking layout, pre-installed A-RGB fans, and a dismantlable design, catering to enthusiasts who prioritize customization and cooling over conventional features.
Hours Tested: 8-10

Overall
-
Design - 8.5/10
8.5/10
-
Build Quality - 9/10
9/10
-
Features - 8/10
8/10
-
Value - 7/10
7/10
Pros
- Bold and Stylish Outlook
- Rugged Build
- Spacious Interior
- 7x Pre-included A-RGB 120mm Fans:
Cons
- Pricey
- Lack of Cable Management Support
- Limited PSU Installation options


Xigmatek has sent us an X7 PC case for review and a custom loop test build. The X7 is the premium PC case from the manufacturer providing an interesting perspective for the gamers and the modders alike. The case has been listed as a Super Tower which in my opinion is not the case as this case sits somewhere between the mid-tower and the full tower closures. Let’s look deeper as we we get into the review.
Key Takeaways
- The cooler is good for gamers, professionals, and modding enthusiasts due to its distinctive design, ample space, and 7x A-RGB 120mm pre-installed fans.
- This cooler is not for those who prioritize cable management or need extensive dust protection, and it may not suit individuals seeking easy vertical GPU mounting or intricate water cooling setups.
- Stand-out features include a rugged build, dismantlable design, spacious layout, 2x 4mm thick tempered glass panels, and excellent cooling provision with 7x A-RGB 120mm fans.
- Why you can trust Tech4Gamers: Our reviews are based on dedicated hands-on testing by our team of experienced hardware experts. Find out more about how we test.
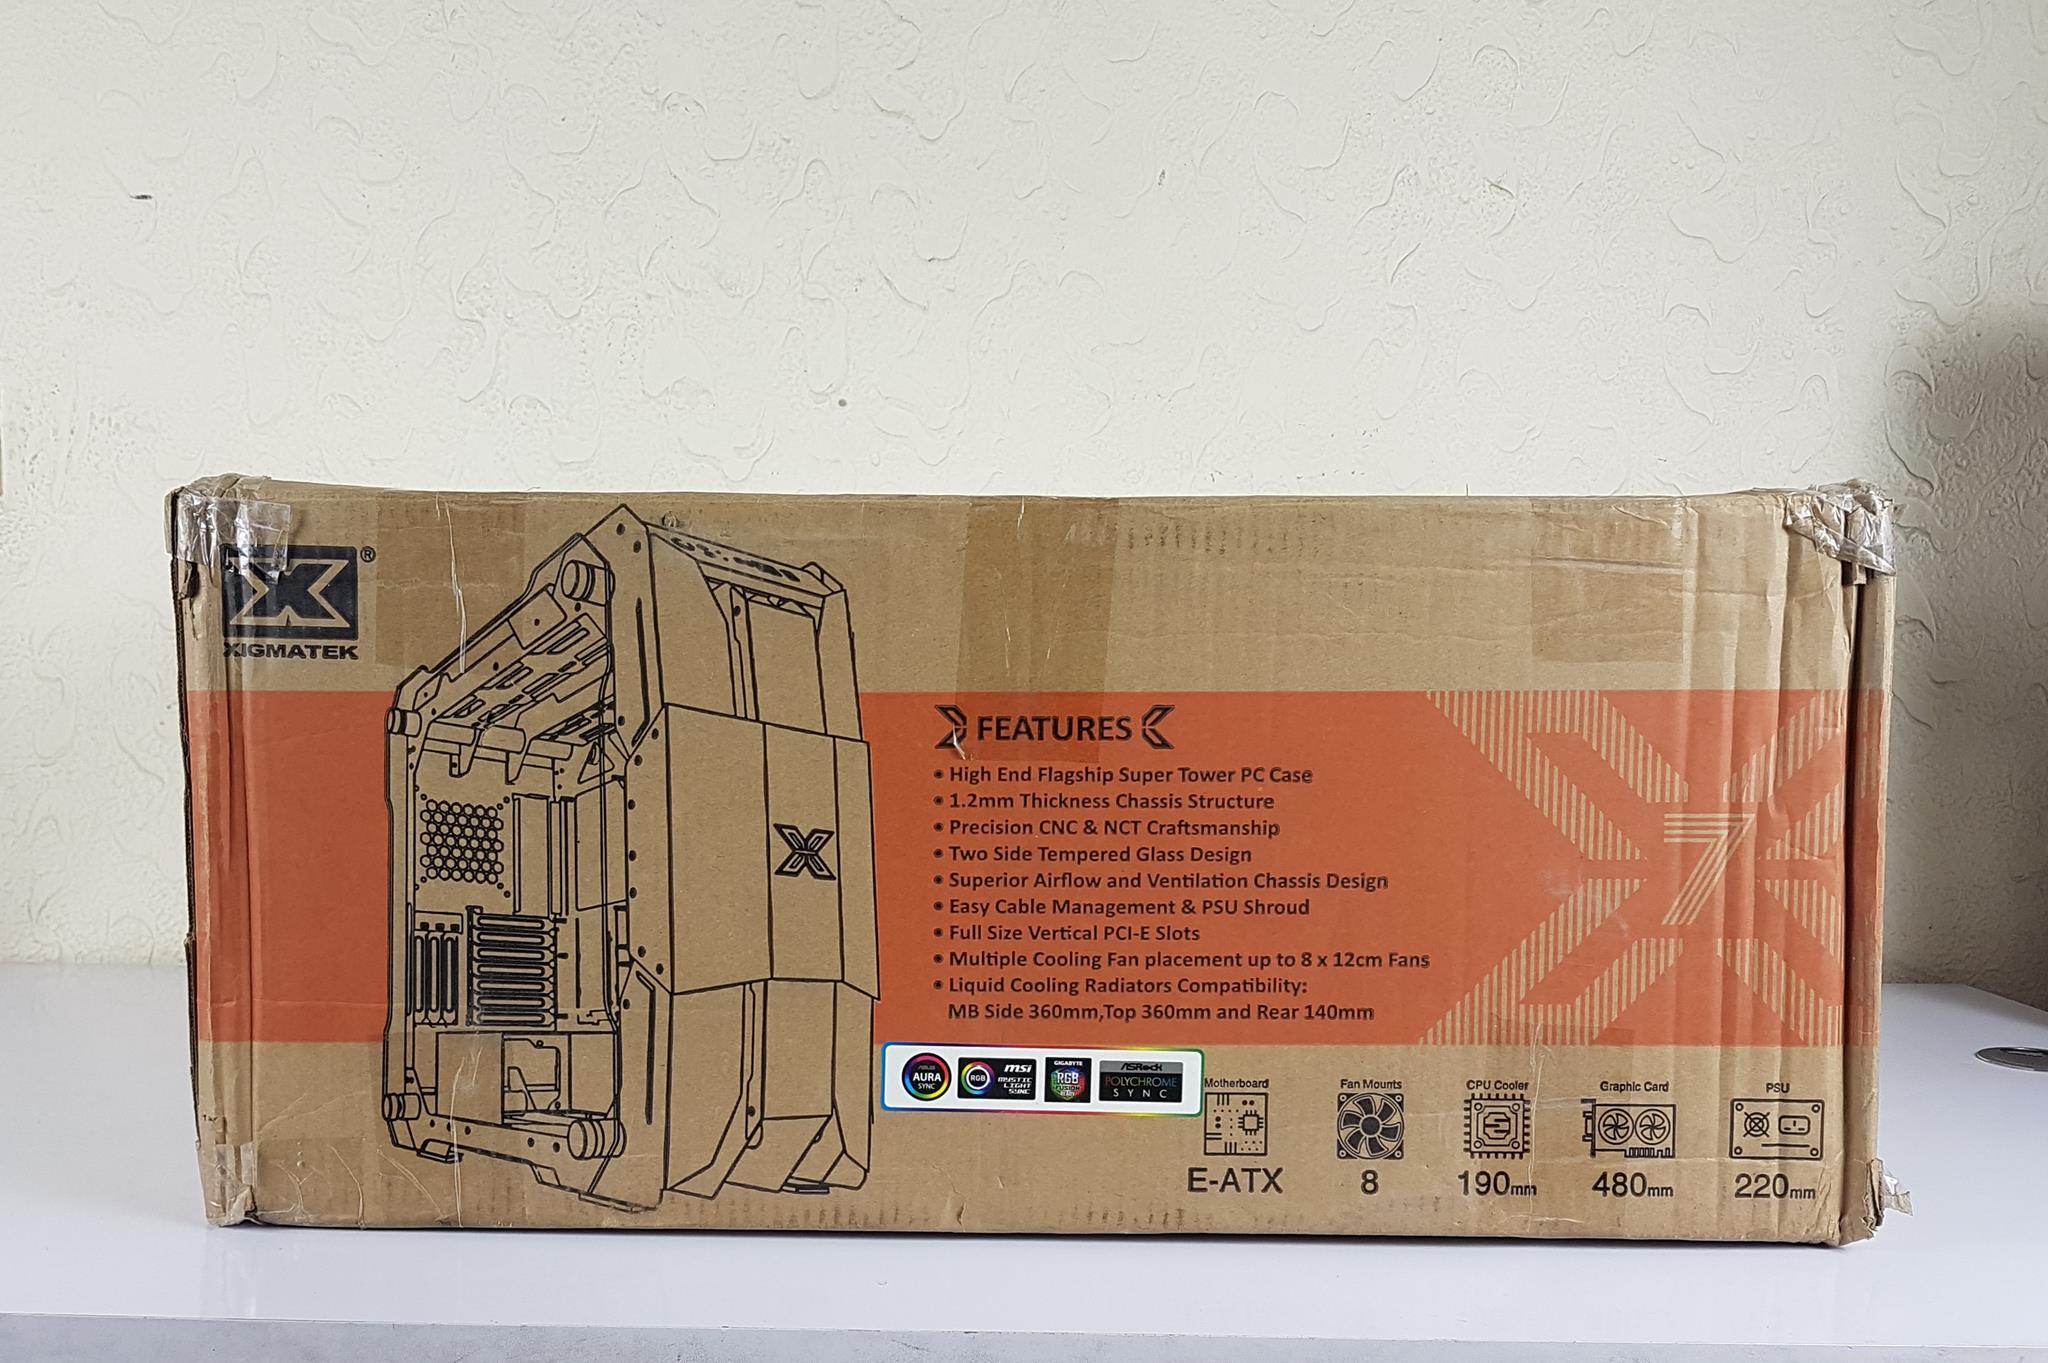
Check out the chassis’ specifications before we start.
| Material | 1.2mm Steel (Precision NCT & CNC) |
| Dimensions | 626x288x580mm (LxWxH) |
| SSD / HDD (MB Panel) | 2.5″ SSD x 2 or 3.5″ HDD x 2 |
| SSD / HDD (Central Bay) | 2.5″ SSD x 2 or 3.5″ HDD x 2 |
| PCIe Slot | 7 Standard Slots + 3 Vertical Slots |
| Motherboard Support | EATX/ATX/MATX/Mini-ITX |
| Power Supply | Standard PS2 ATX PSU |
| Fan Support | 3x120mm MB Side: 3x120mm Rear: 1x120mm or 1x140mm Bottom: 1x120mm |
| Liquid Cooling Support | Front: 360mm Top: 360mm Rear: 120mm or 140mm |
| I/O Panel | USB3.0 x 1, USB 2.0 x 2, HD Audio |
| CPU Cooler Maximum Height | 190mm |
| GPU Length | 480mm (without MB Side Liquid Cooler) 340mm (with MB Side Liquid Cooler) |
| PSU Length | 220mm |
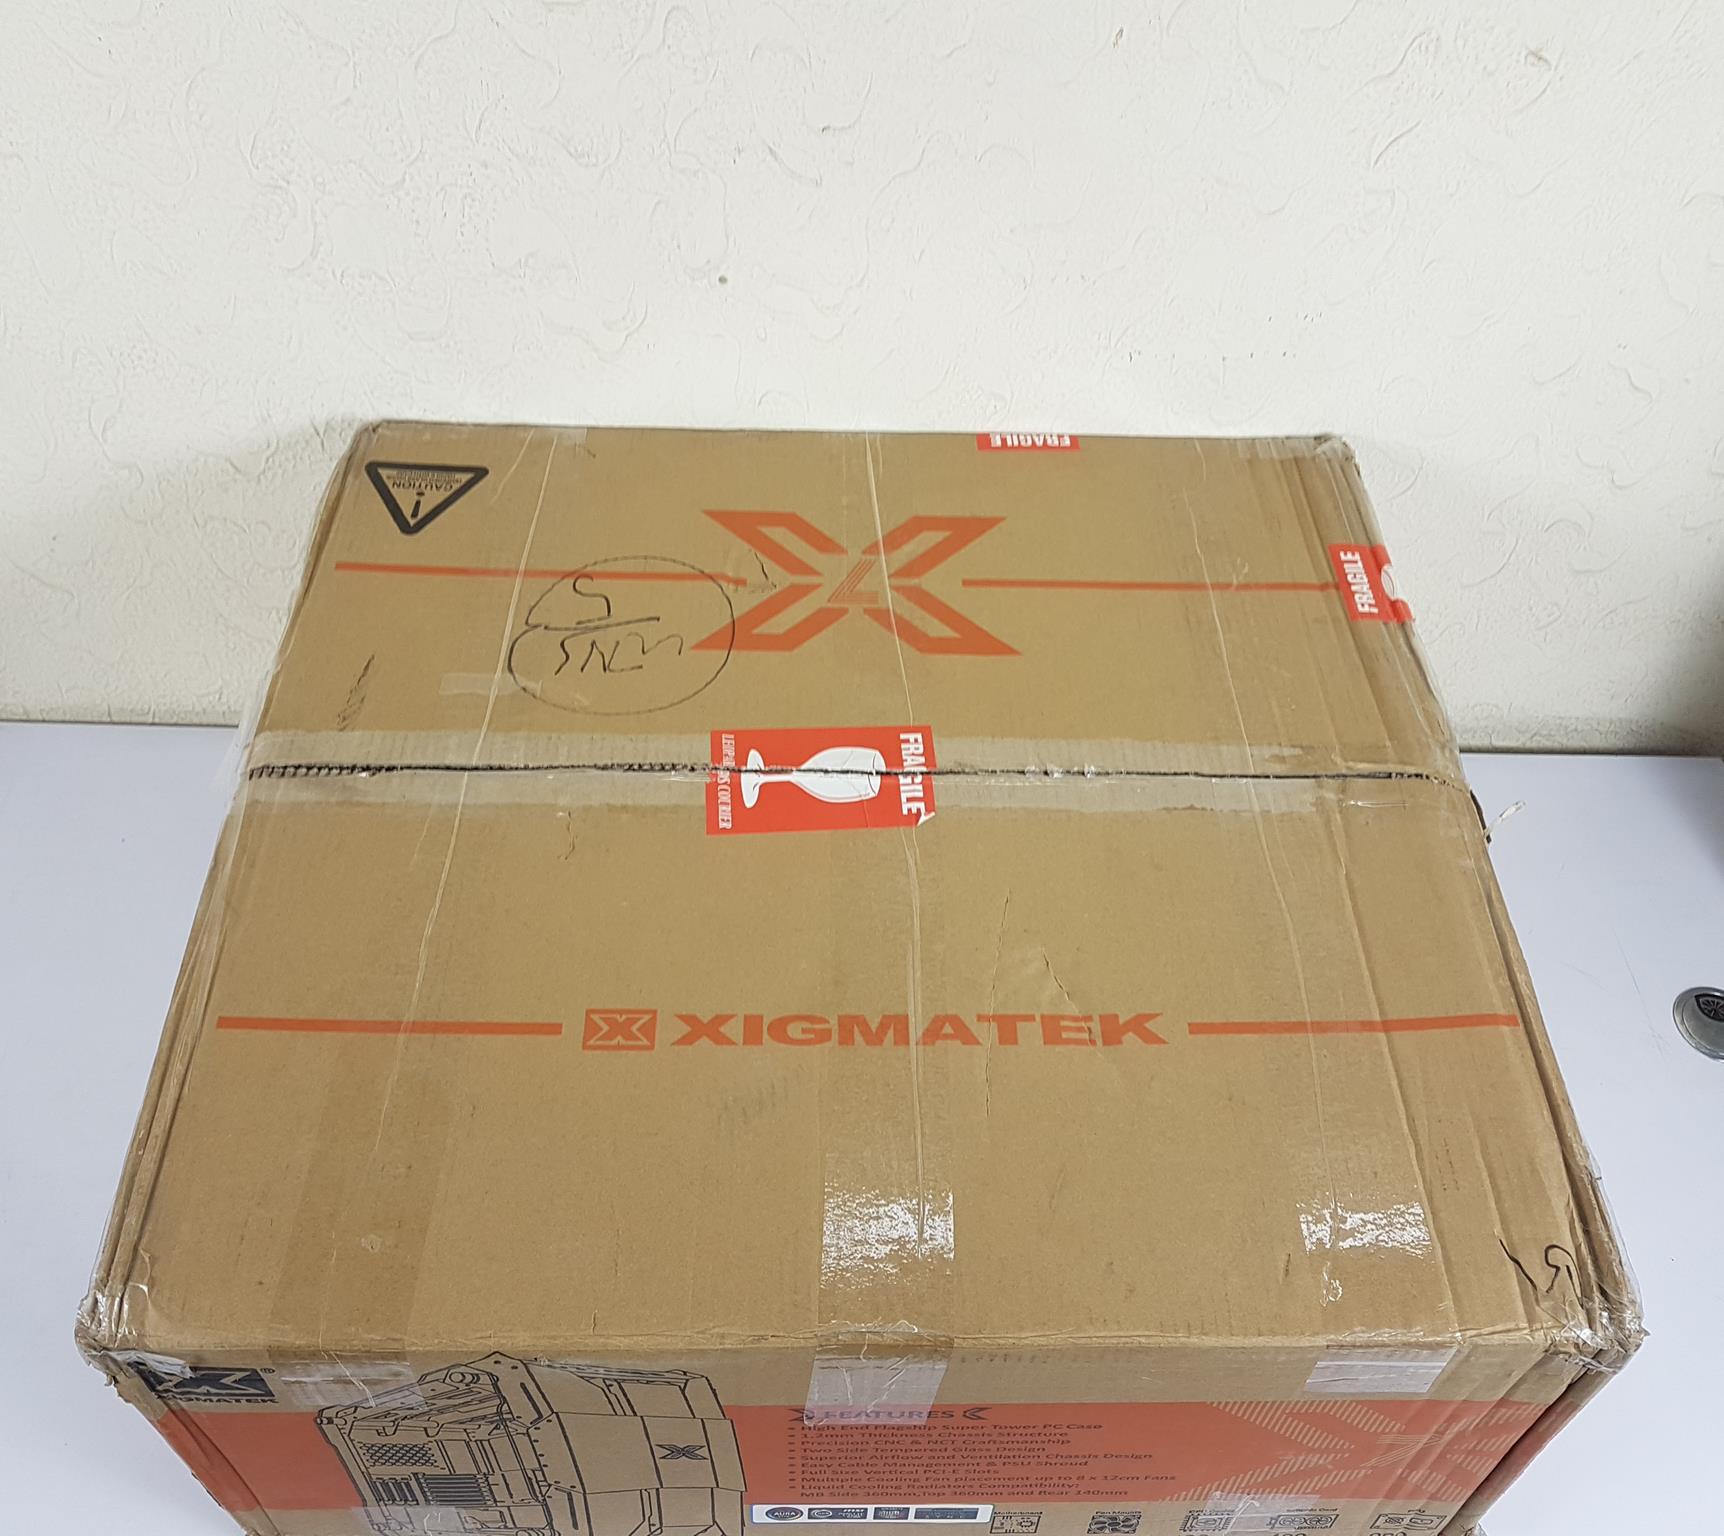
Packaging and Unboxing
The chassis is shipped inside a standard brown color cardboard box. This is a large size case and it comes in a flatbed style packaging box.
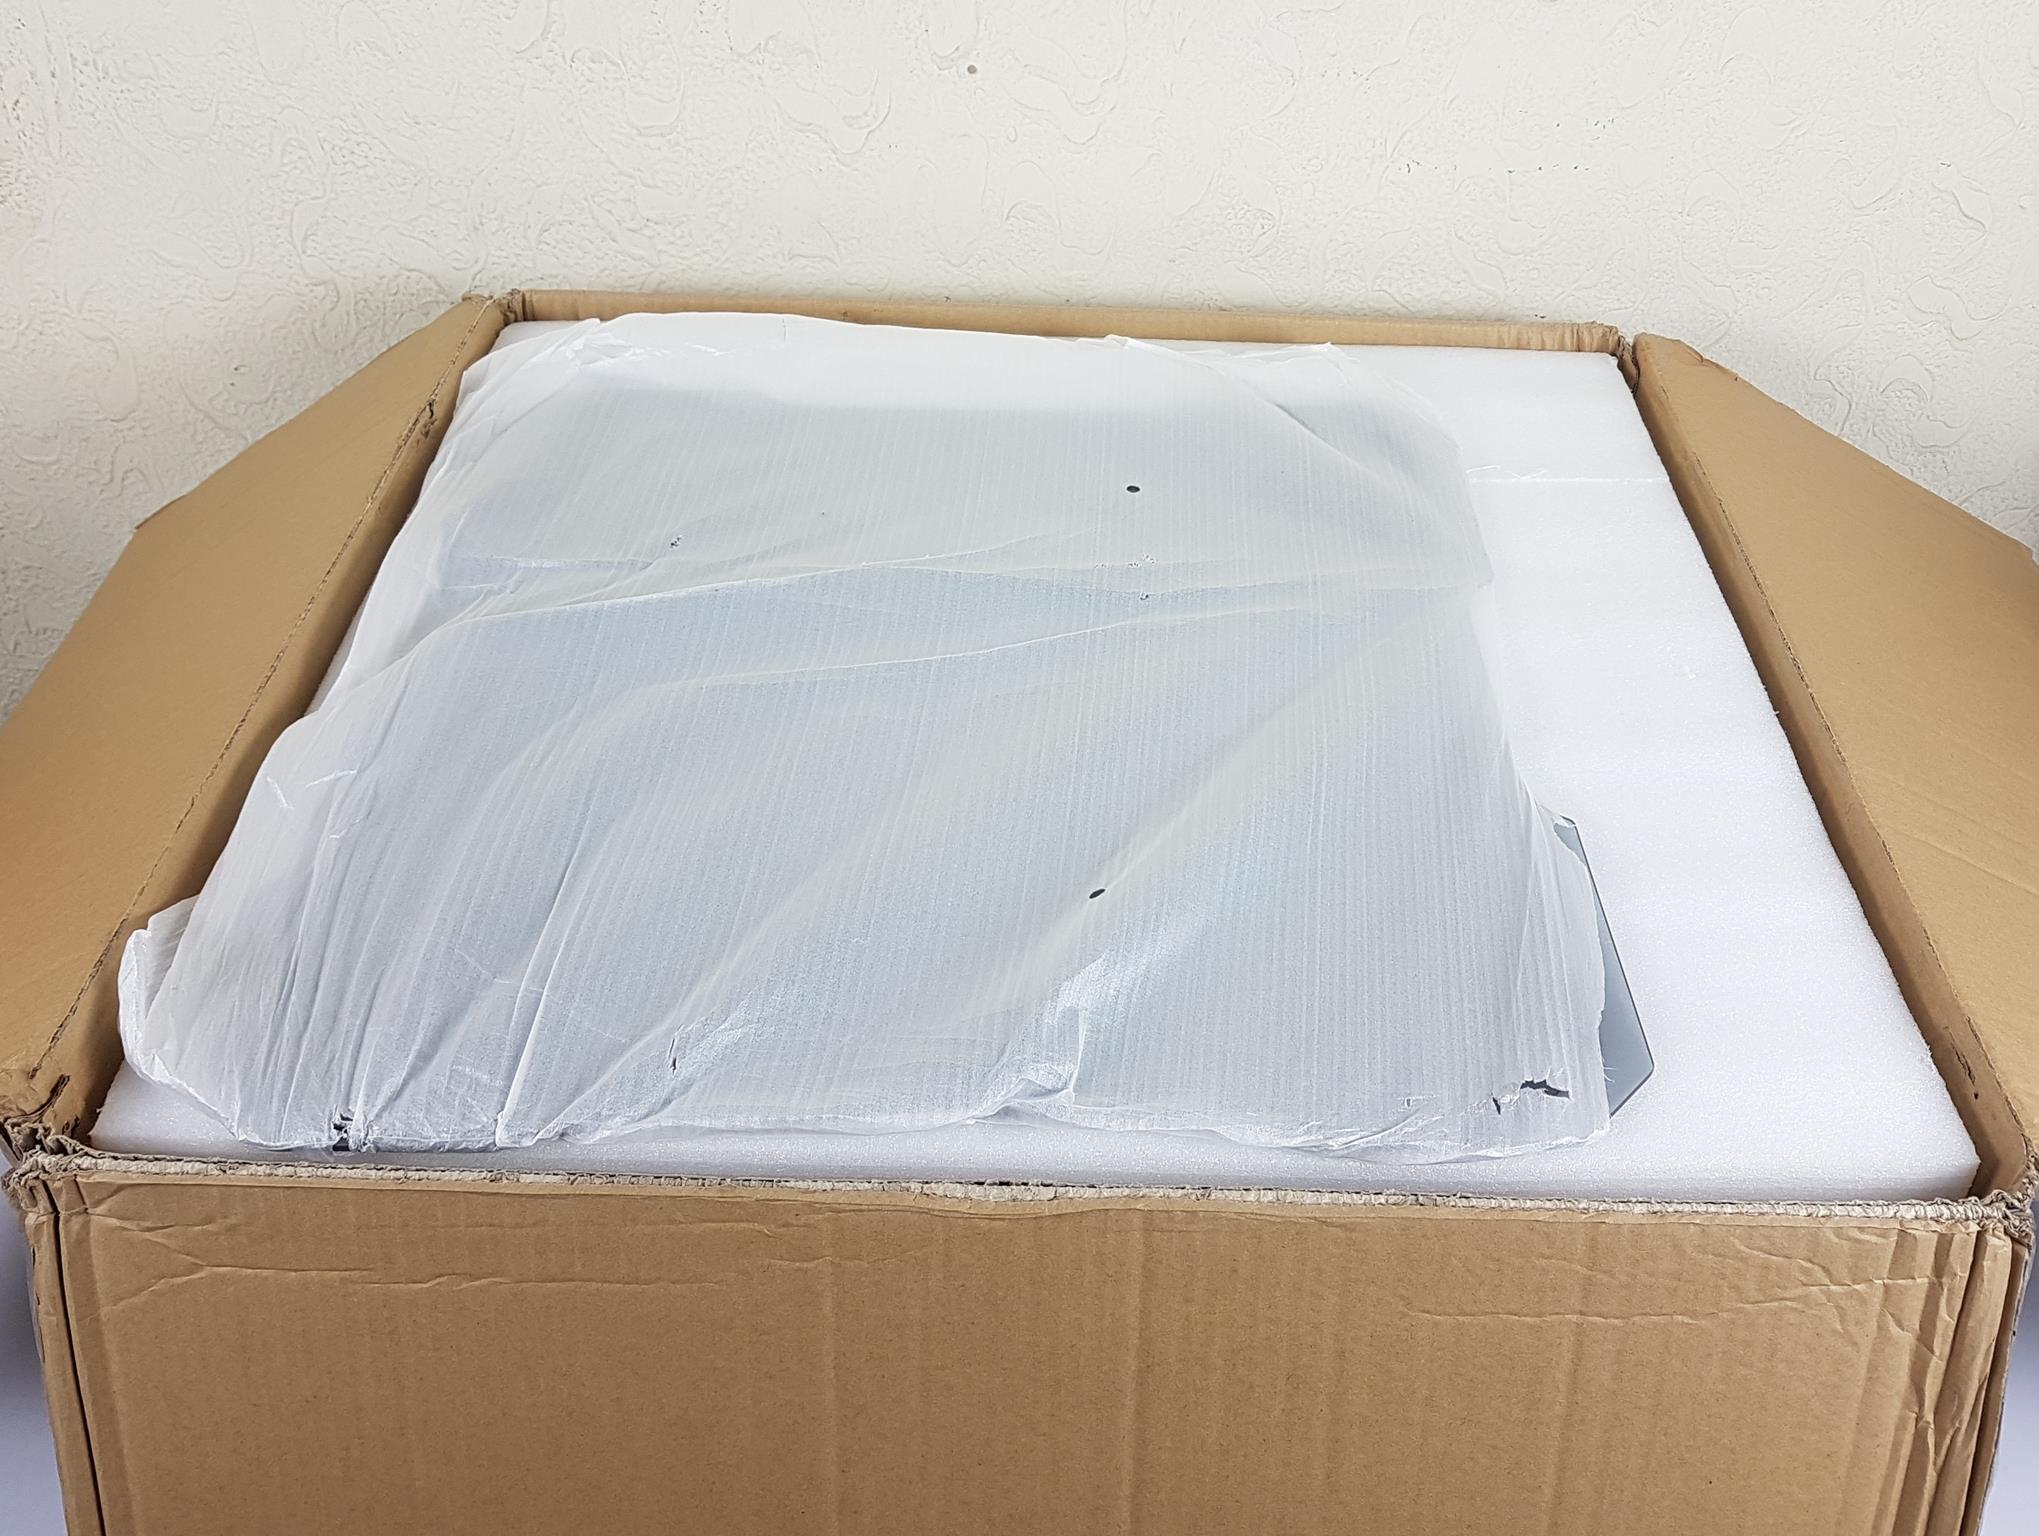
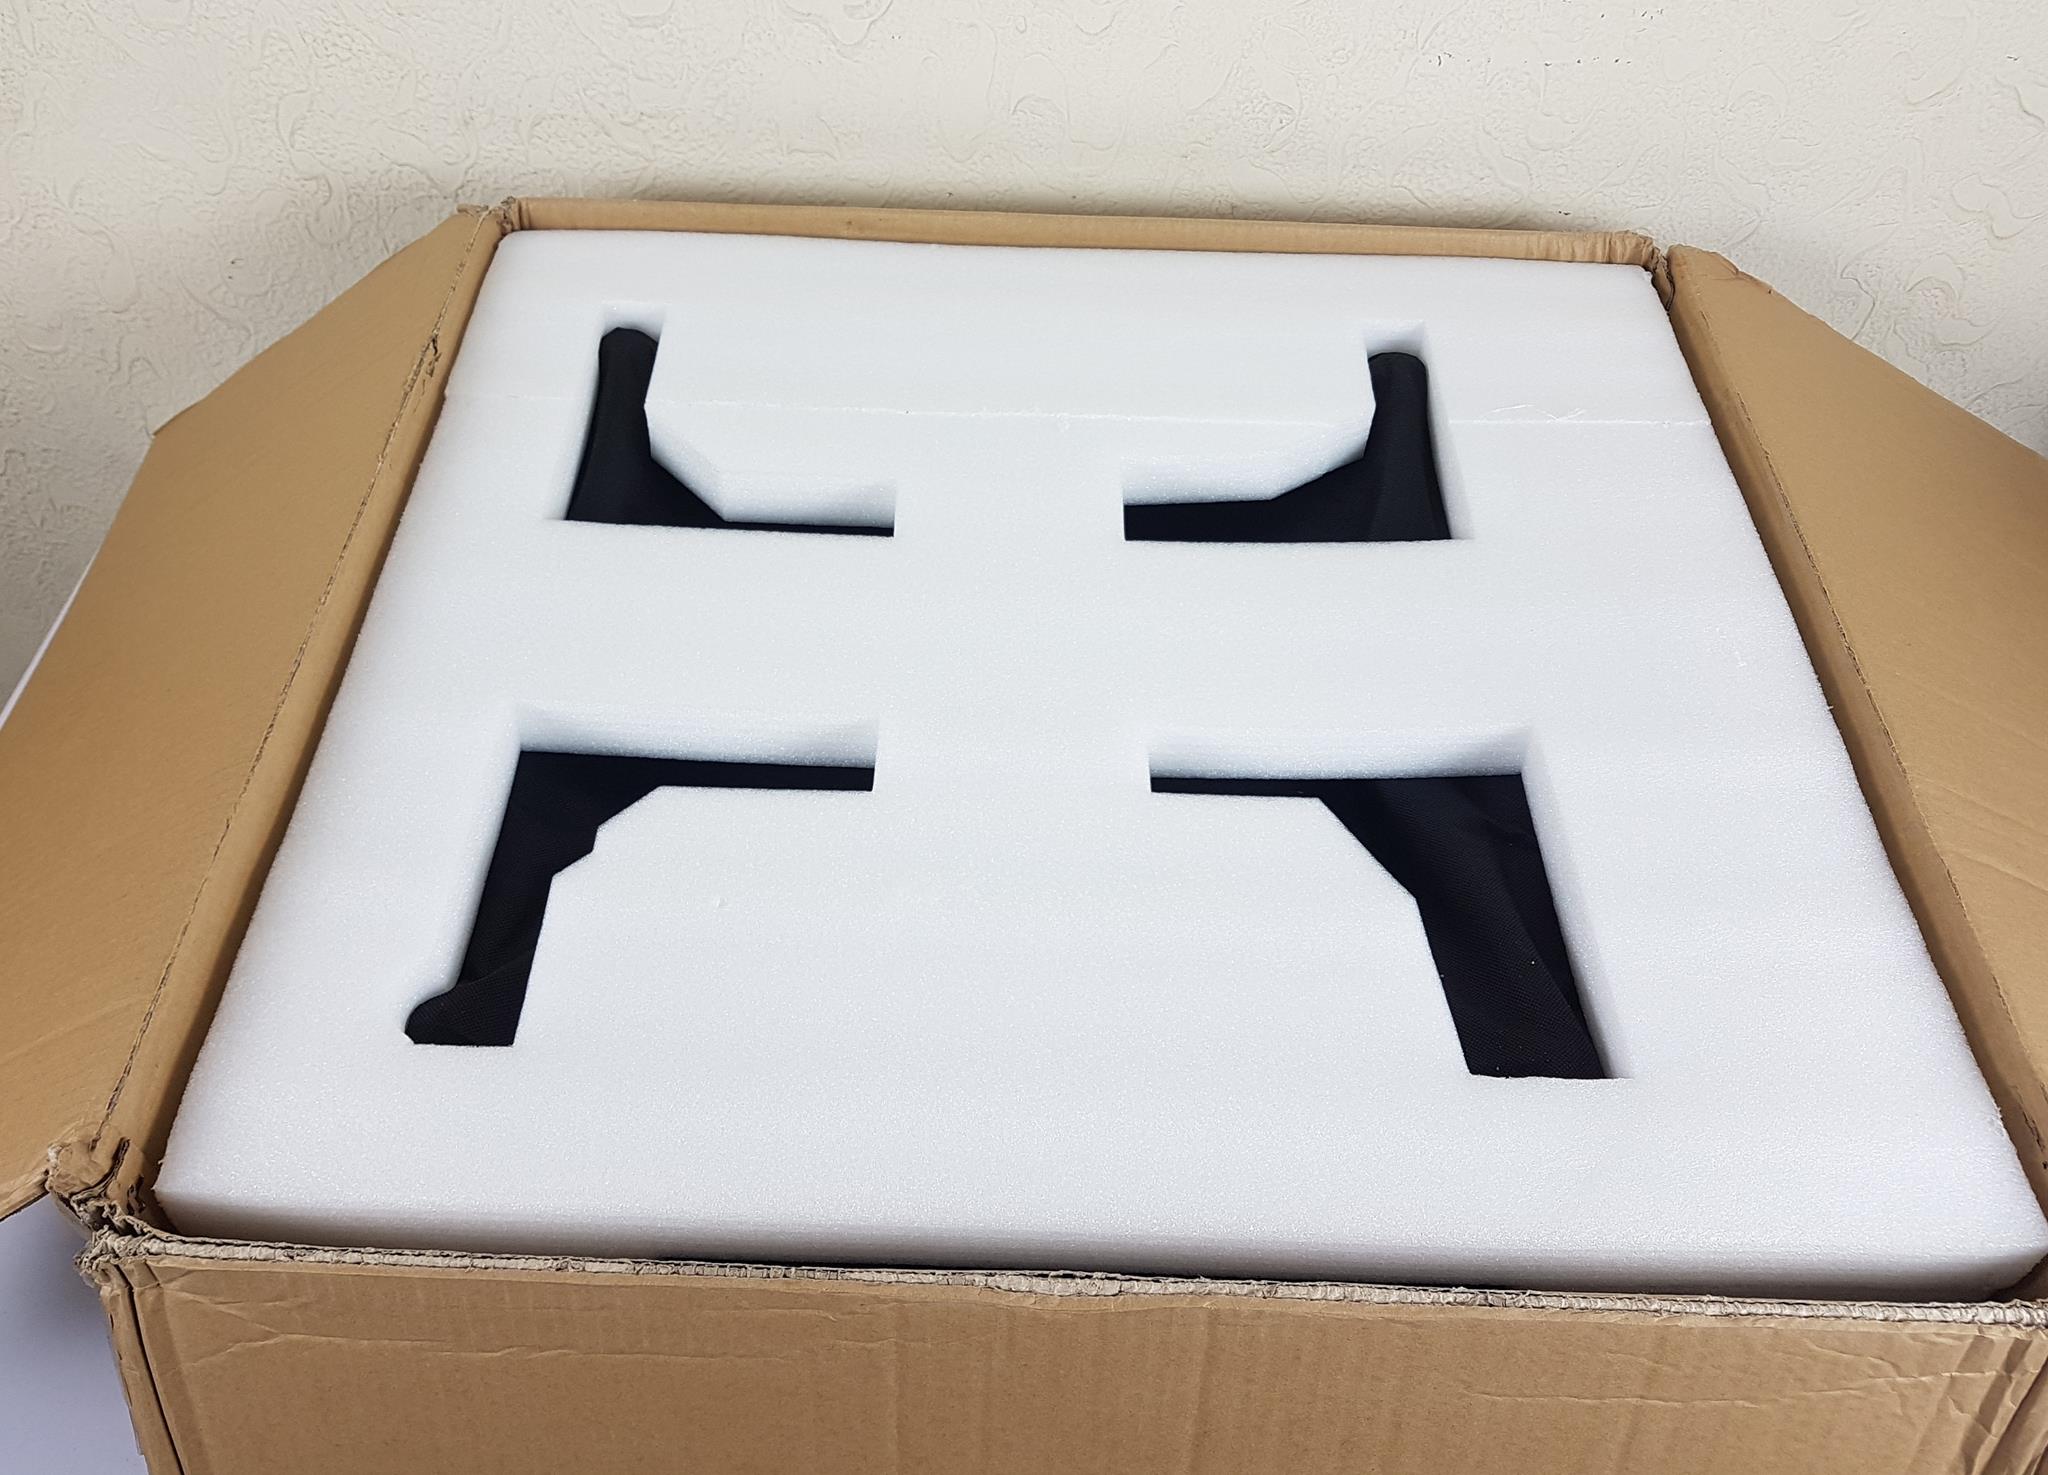

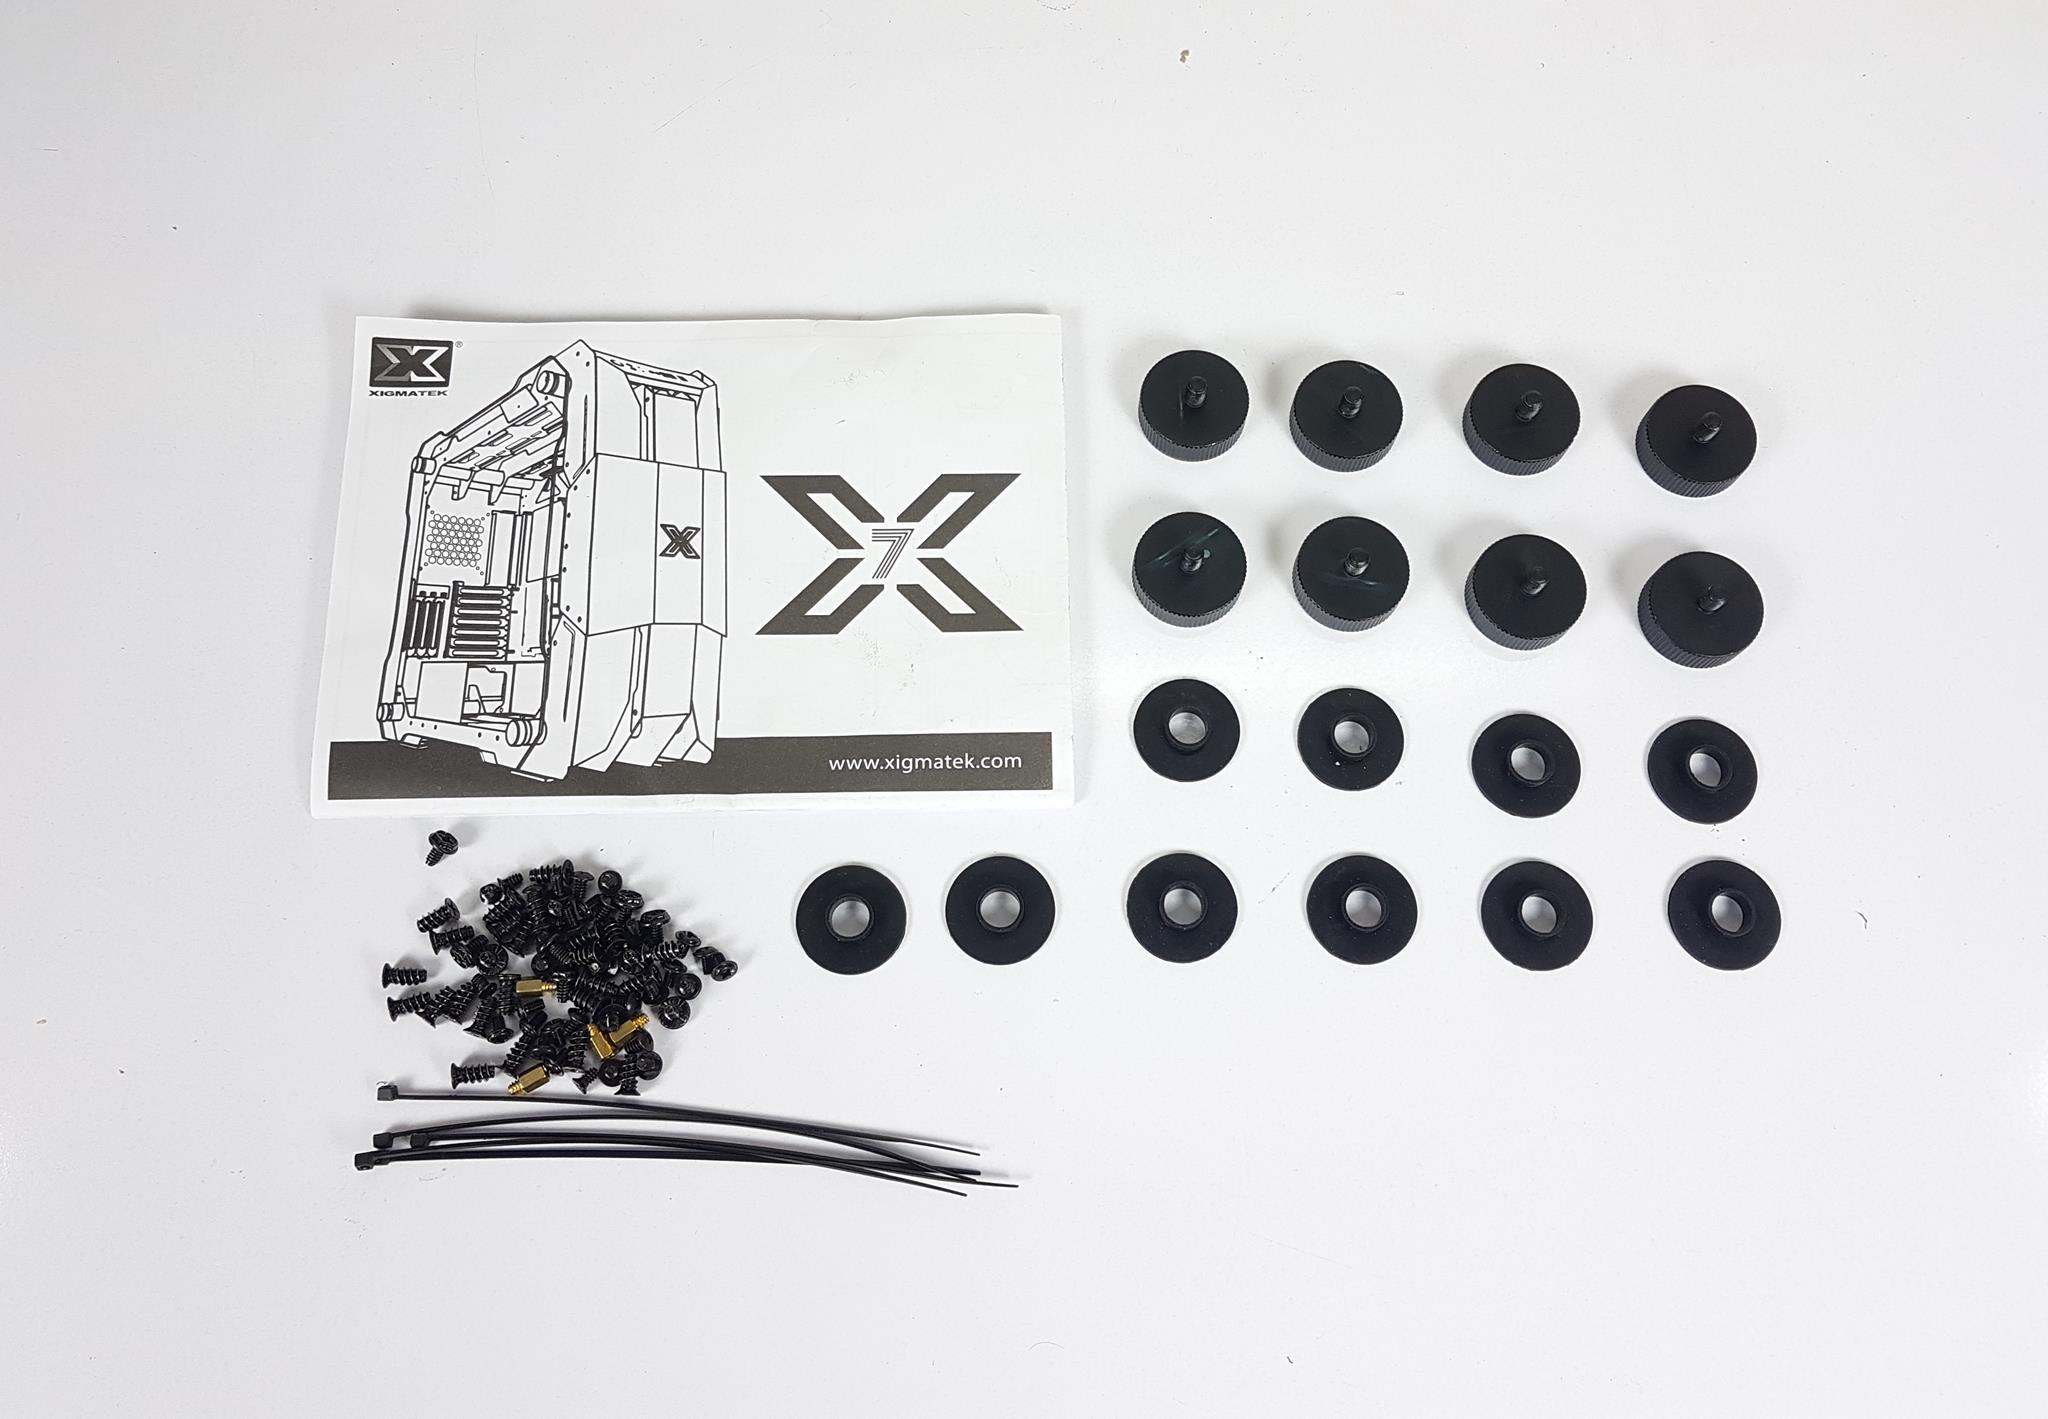
Contents
Let’s dig into the accessories.

Closer Look
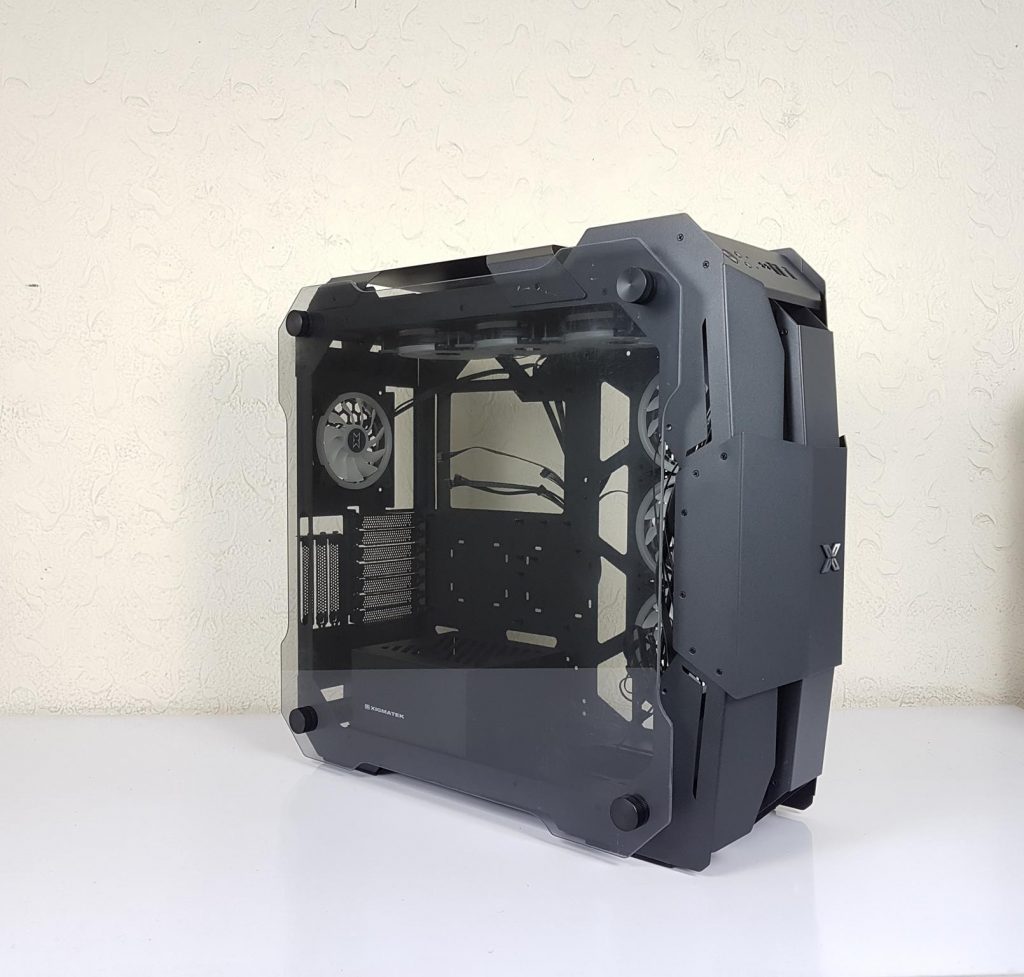
The Xigmatek X7 has a dimension of 626x288x580mm (LxWxH). It is made of 1.2mm steel cut on Precision NCT and CNC machines for perfection. It is time to dive in deep and see what the XIGMATEK X7 case is all about.
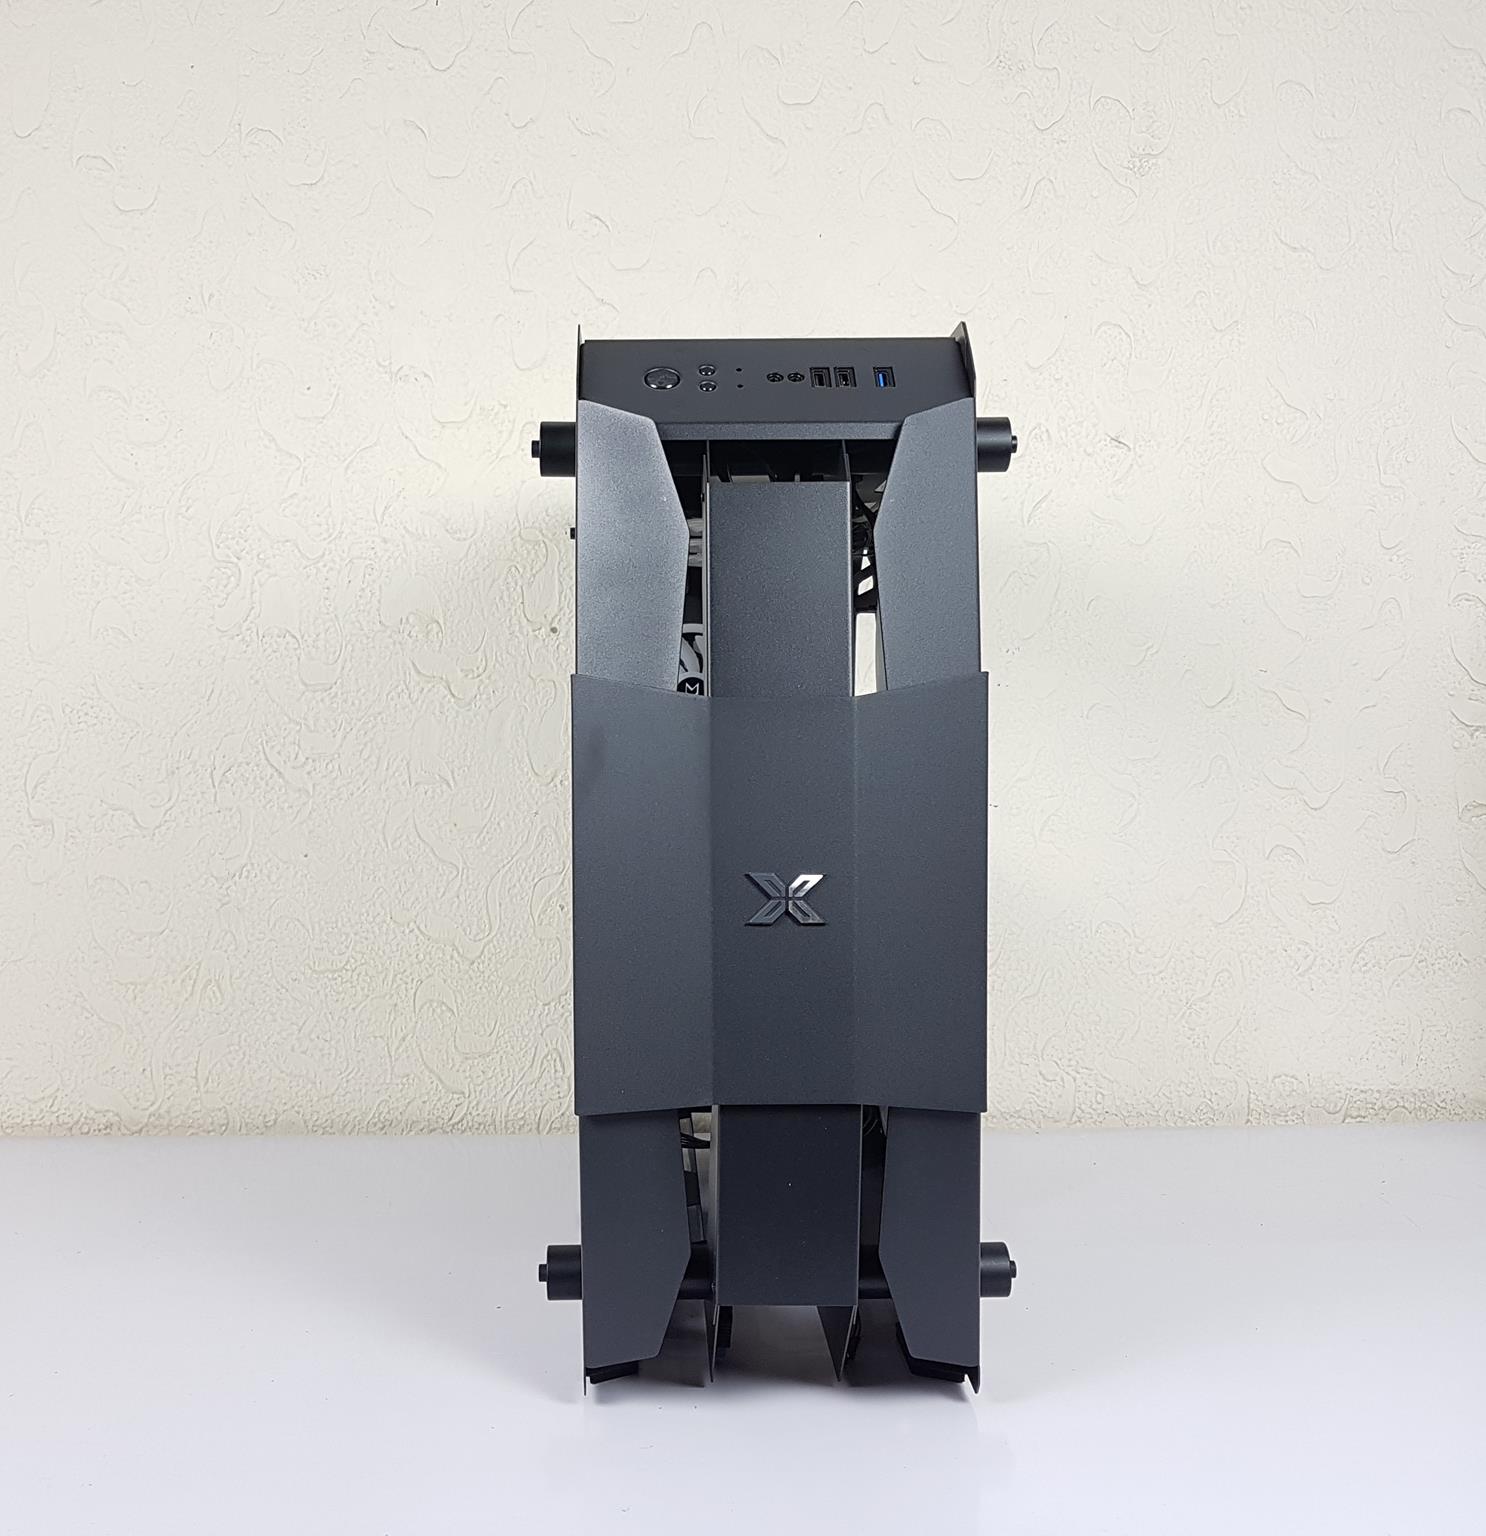
Front
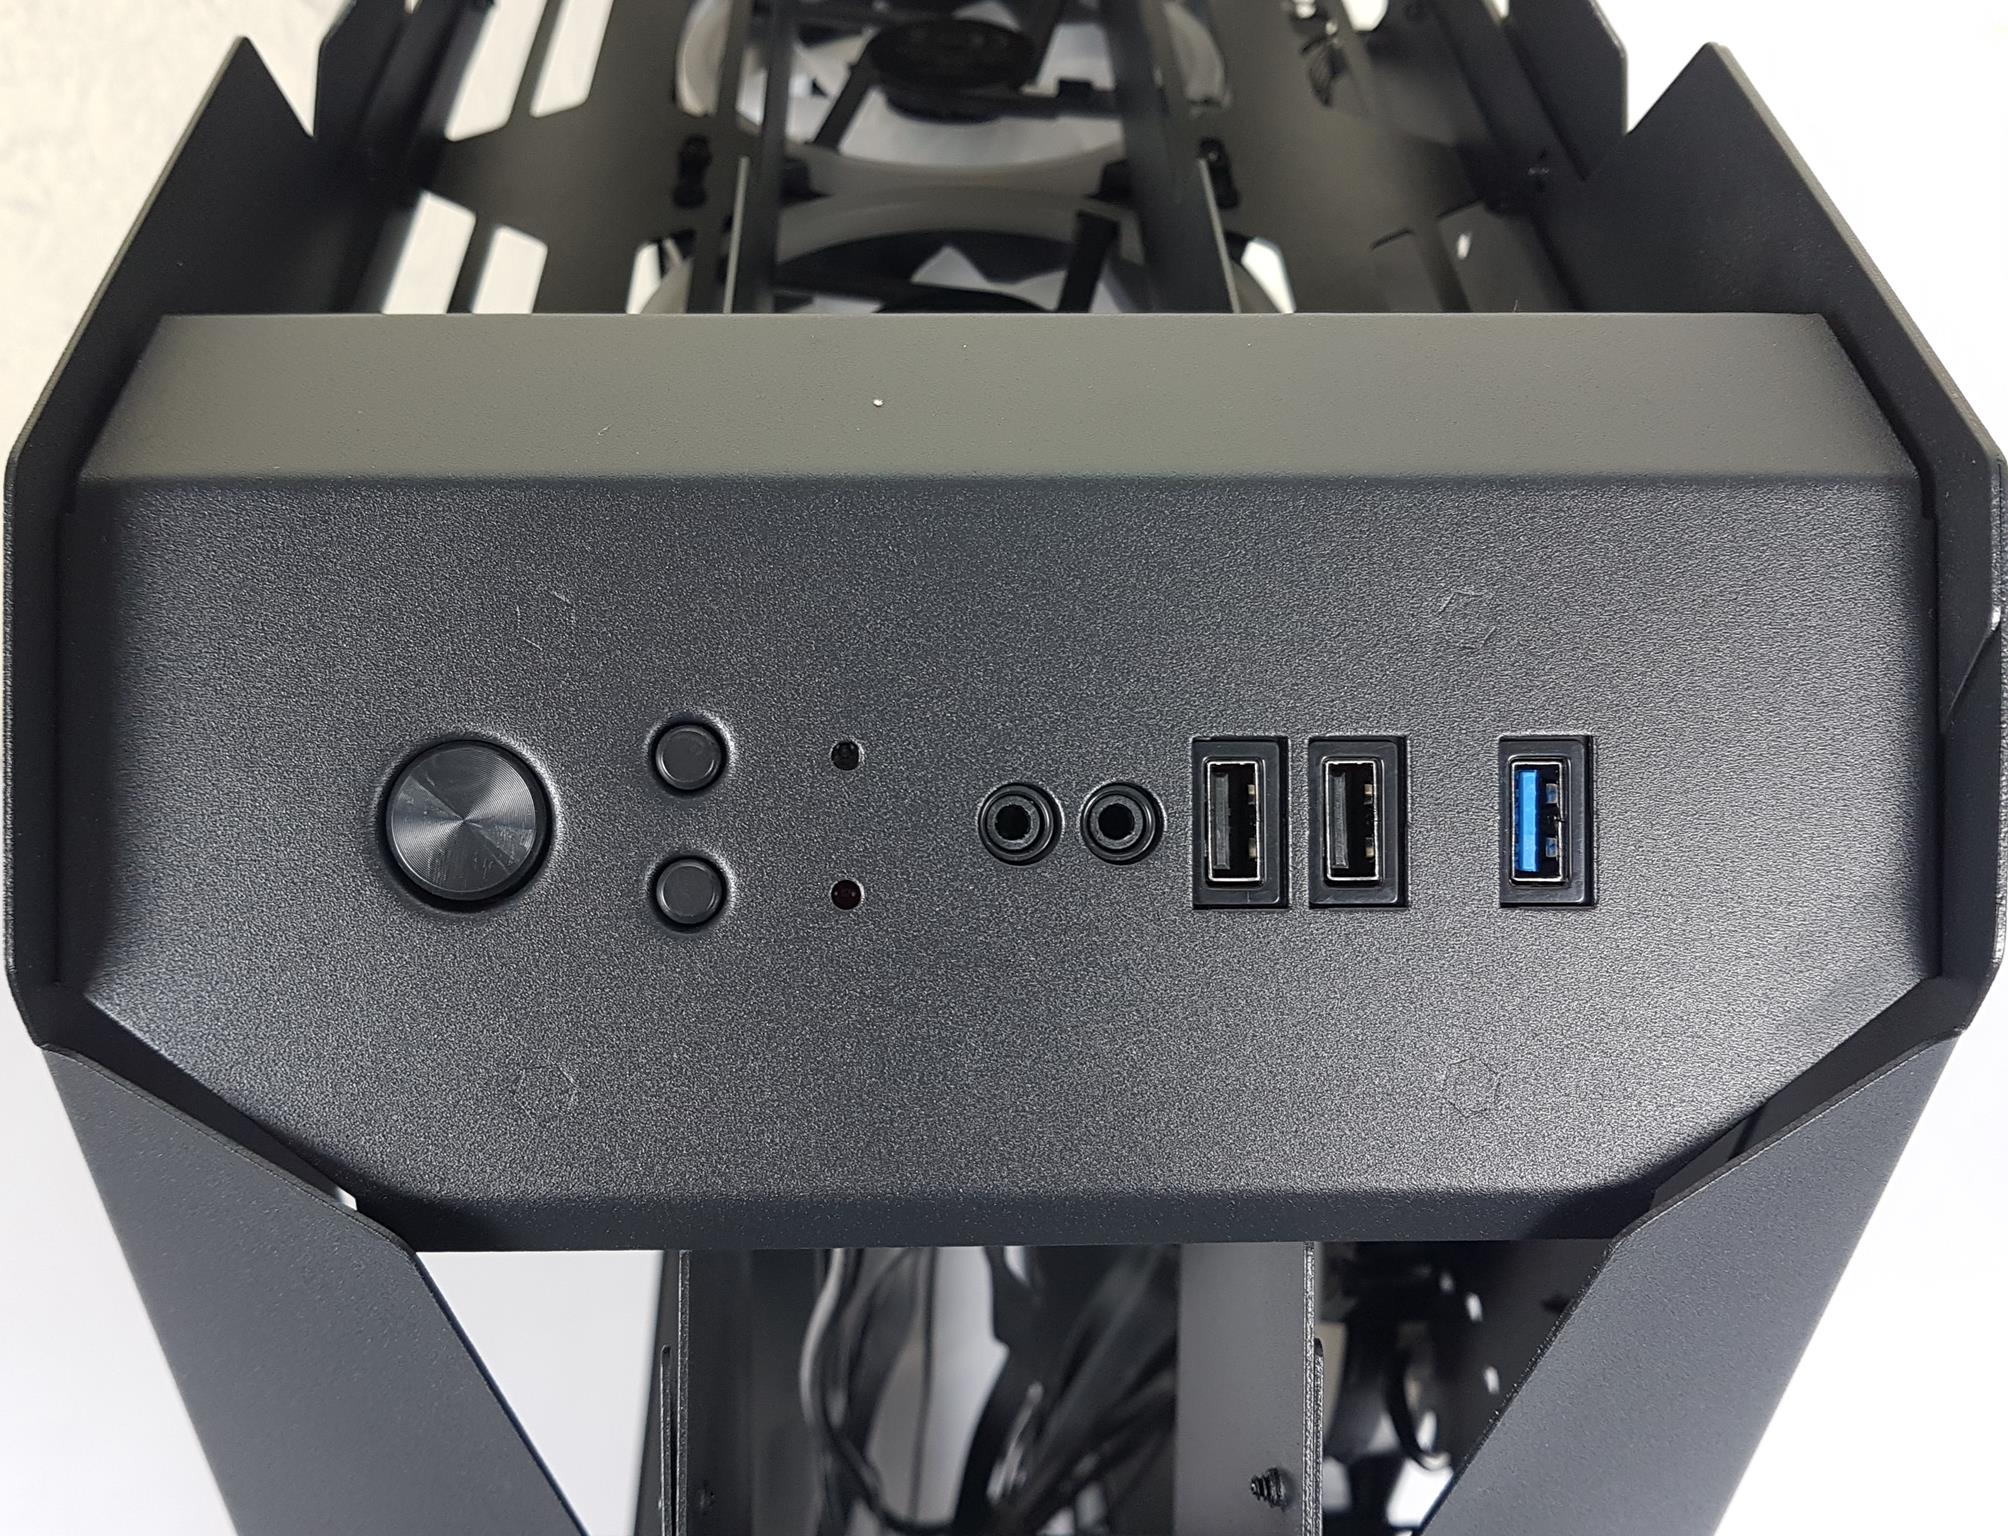
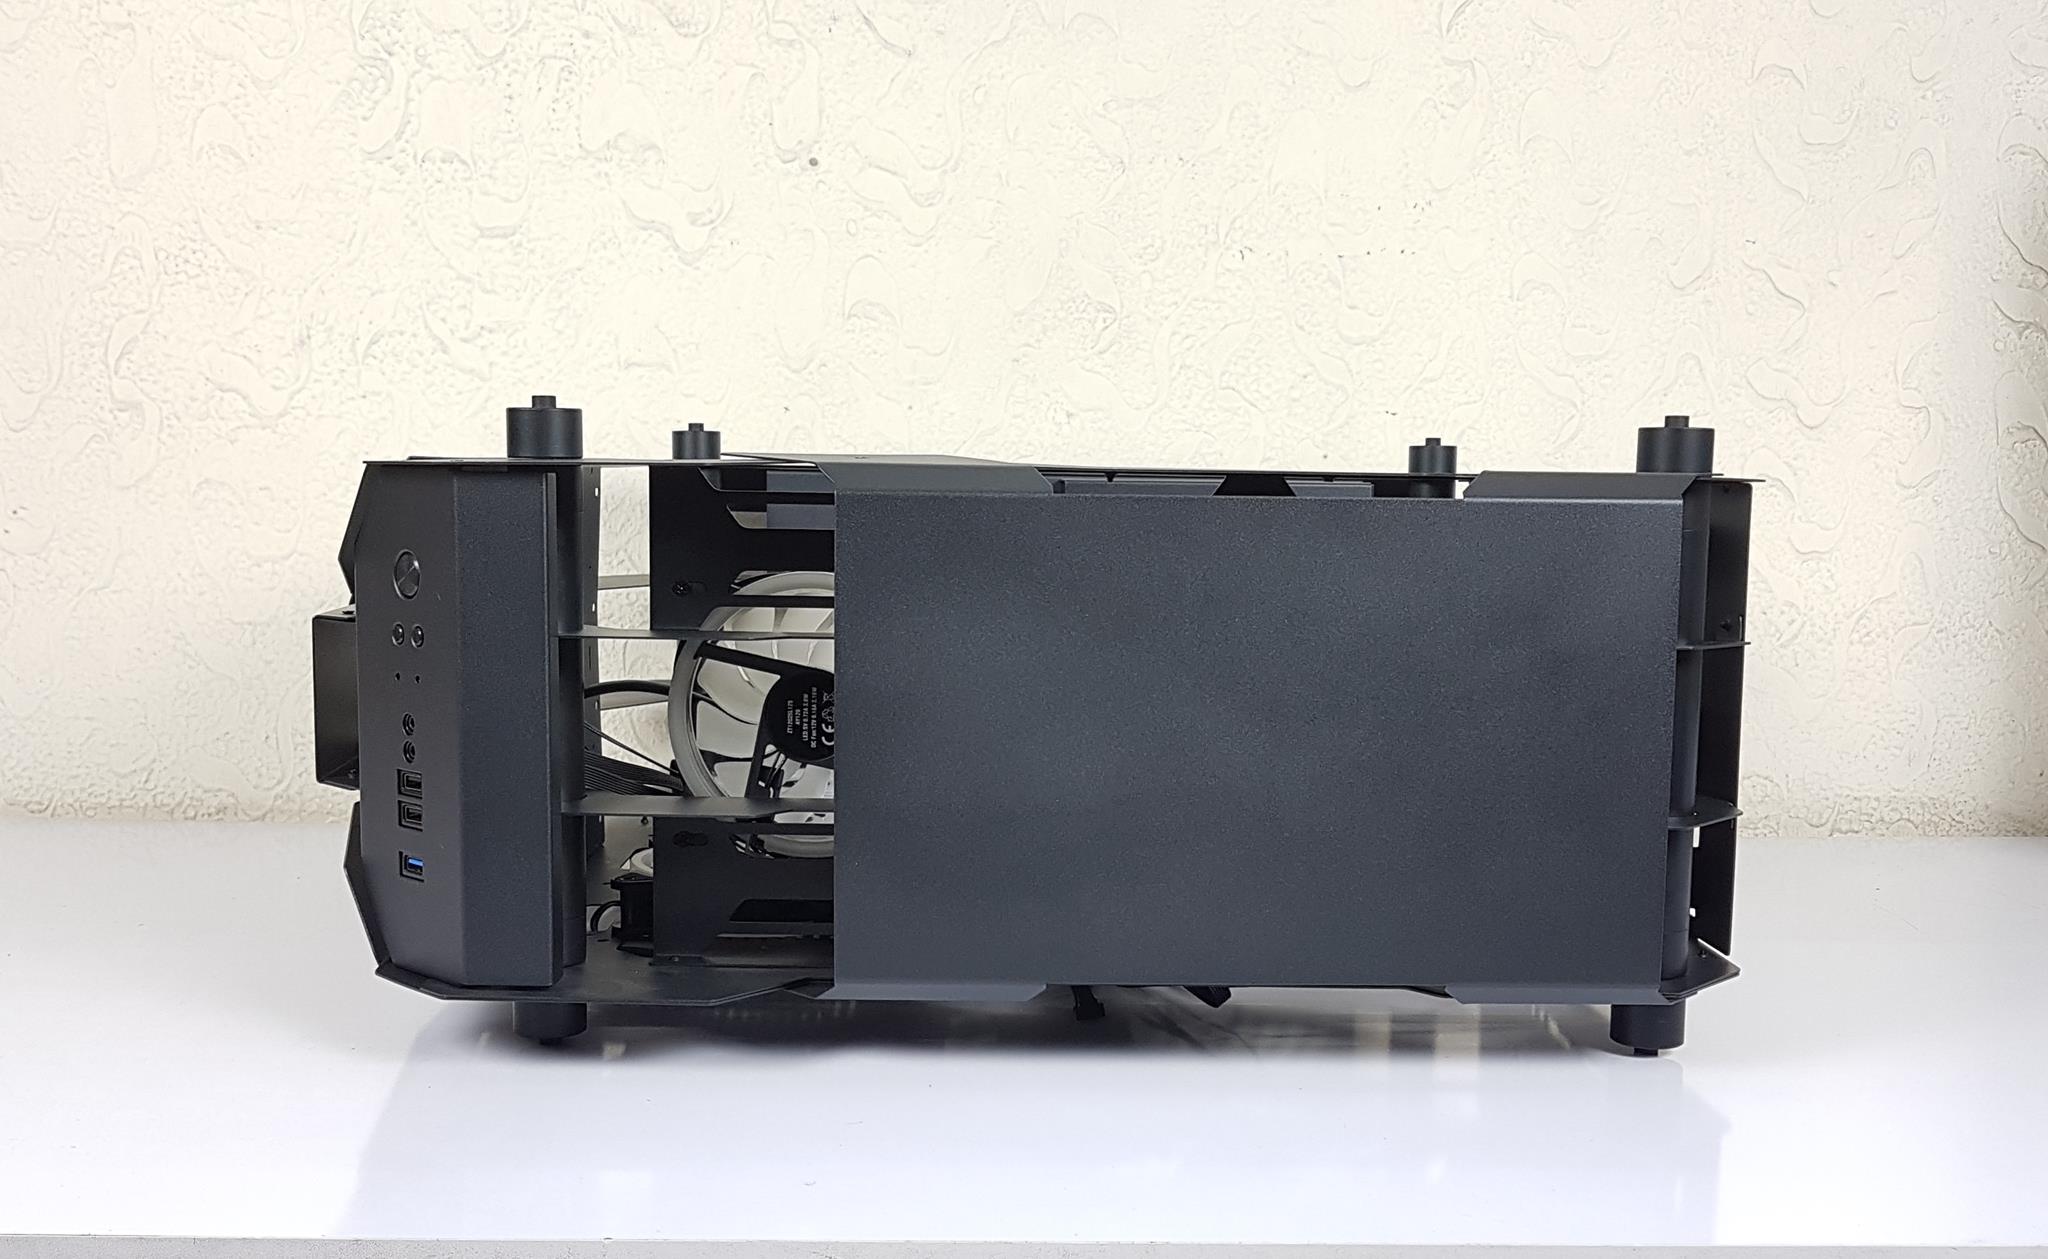
The IO panel is on the top of the front side. We have a power button, reset button, LED button, two audio jacks, two USB 2.0 ports and a single USB 3.0 port. The power button has a nice feel to it upon pressing.
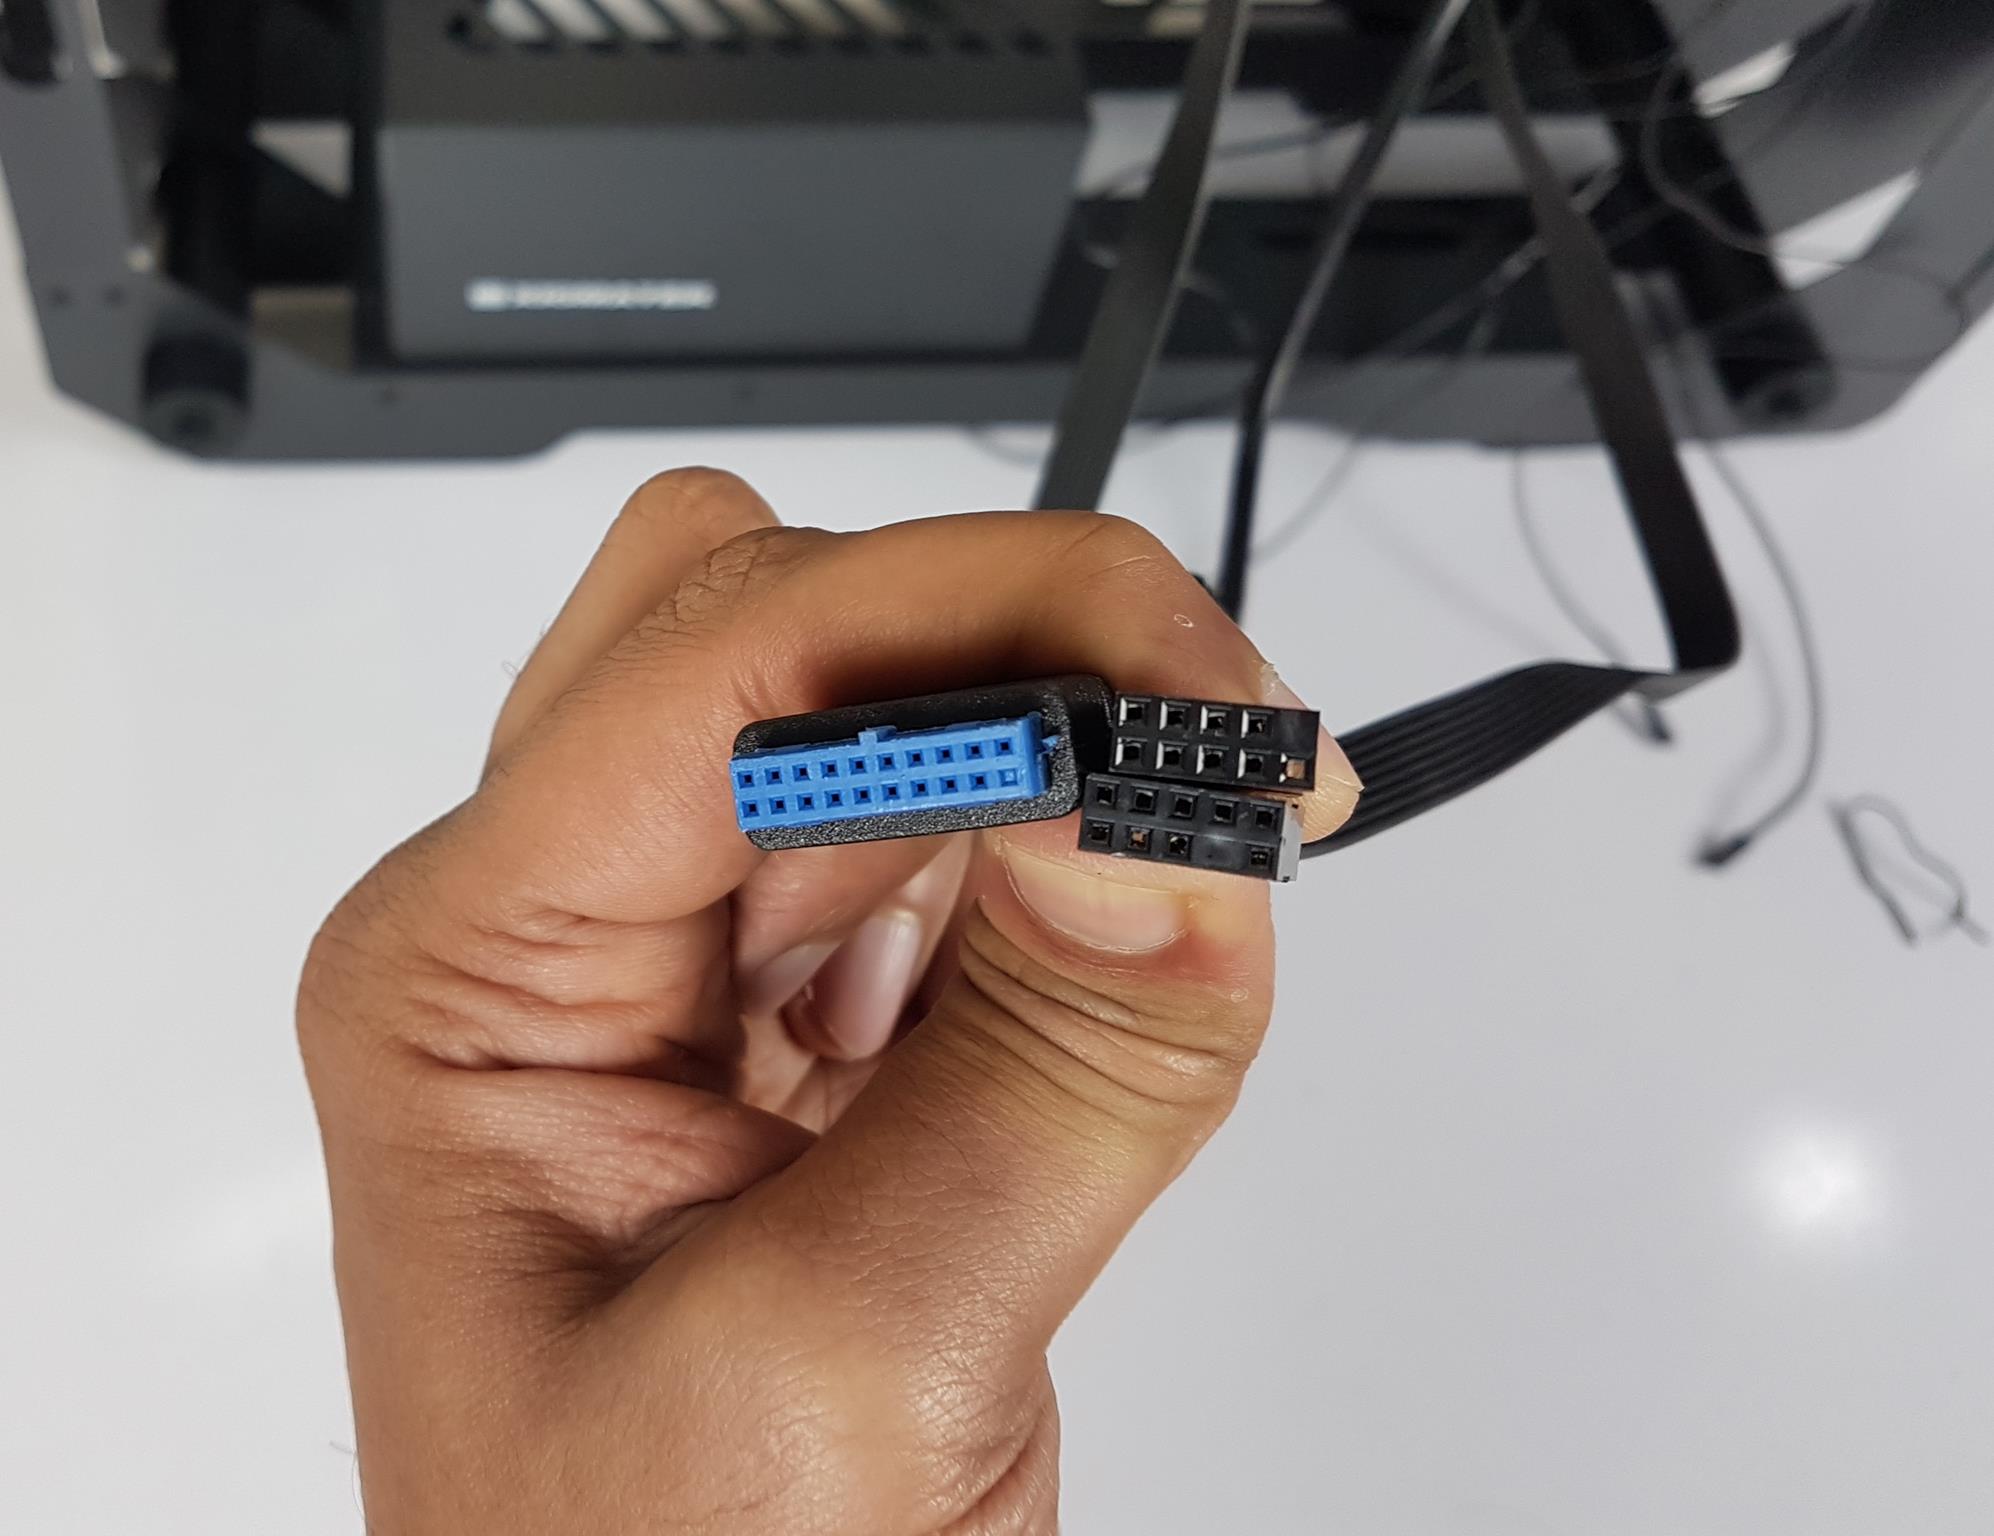
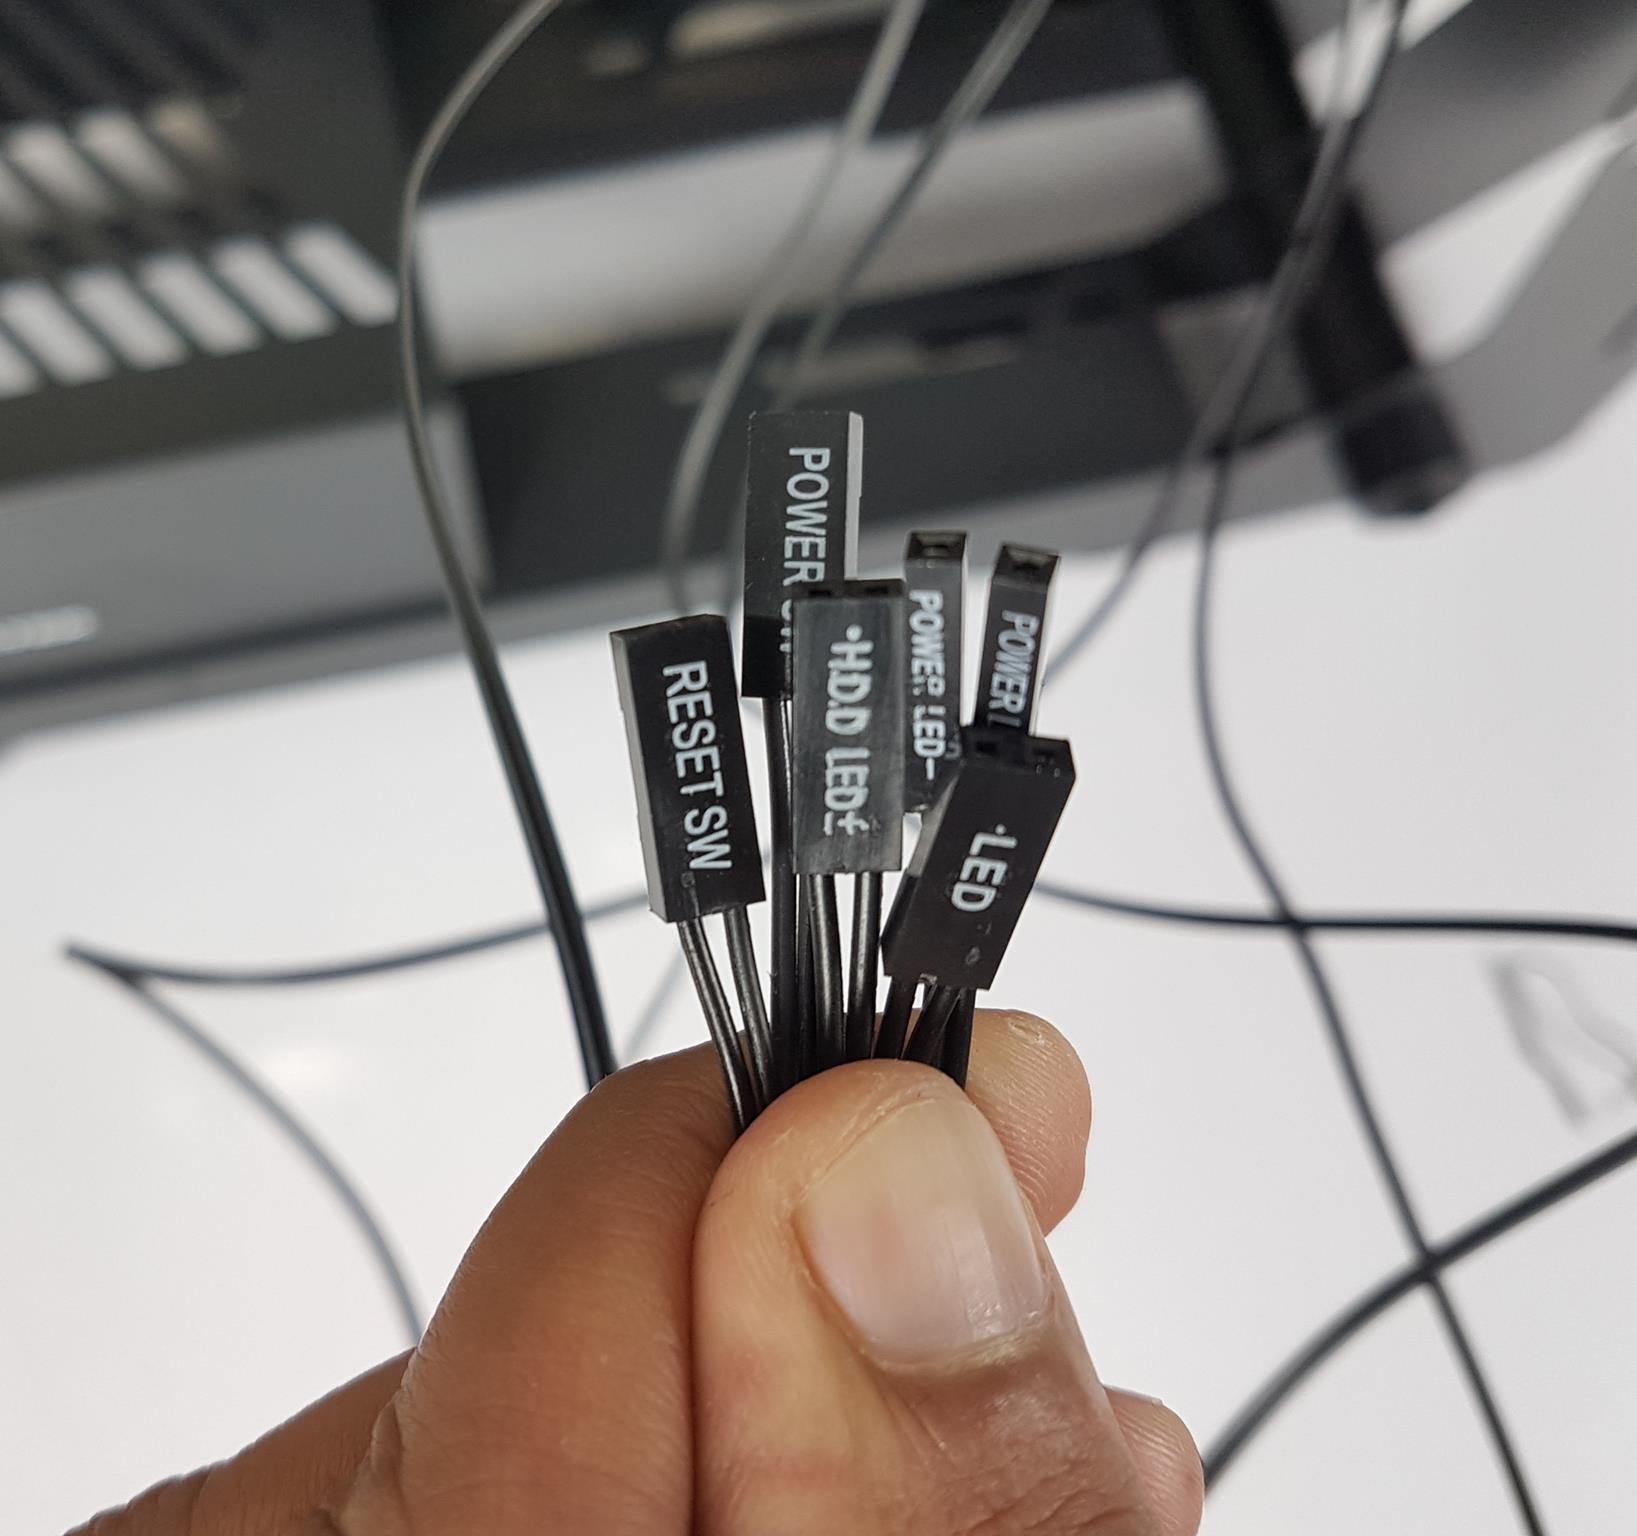
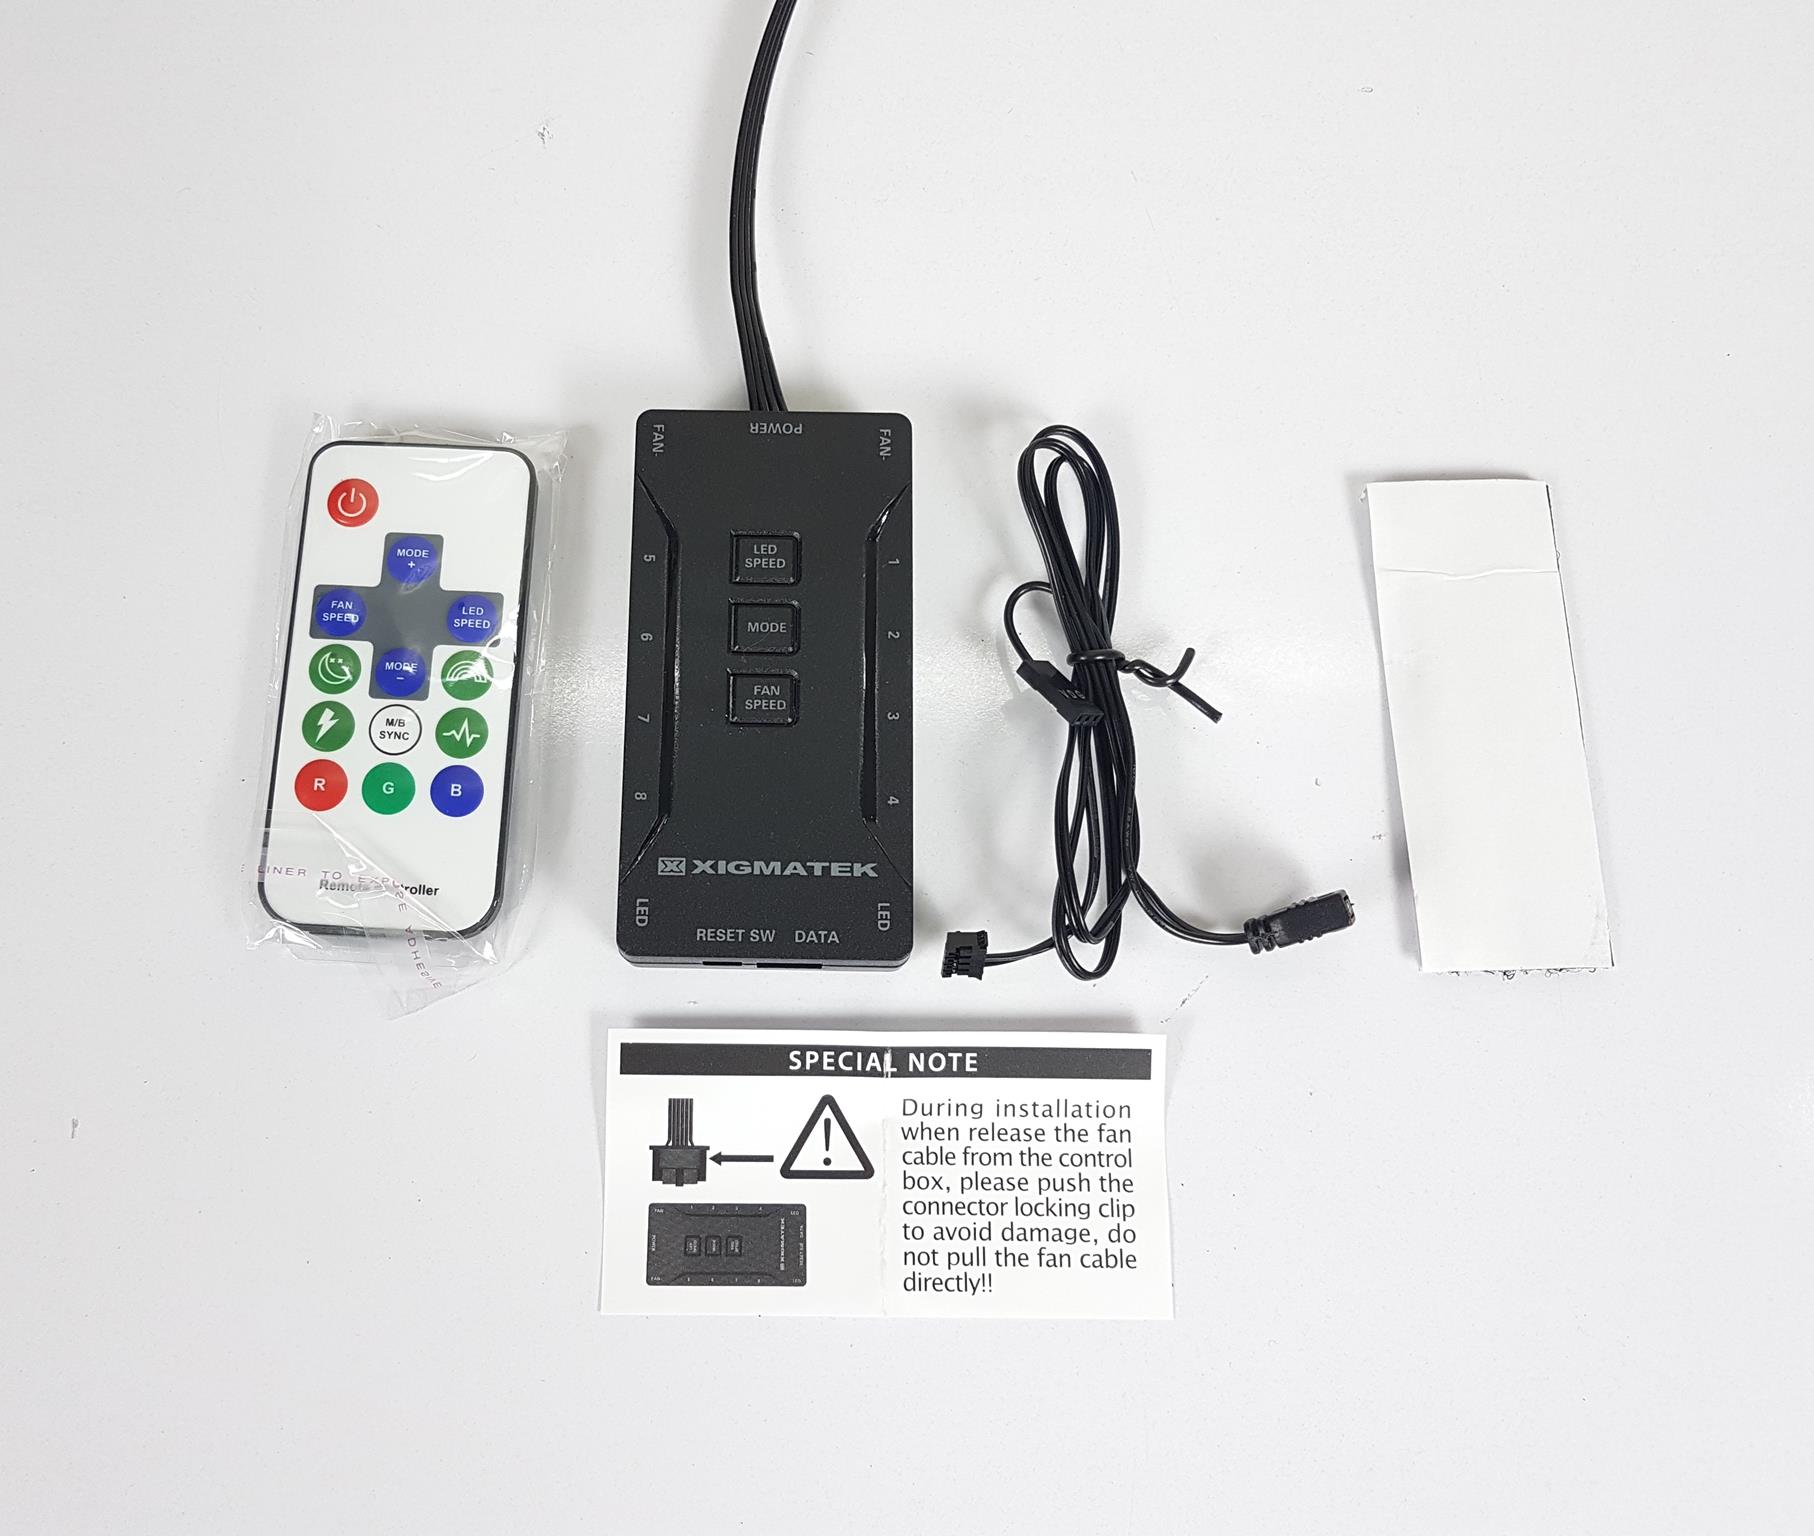
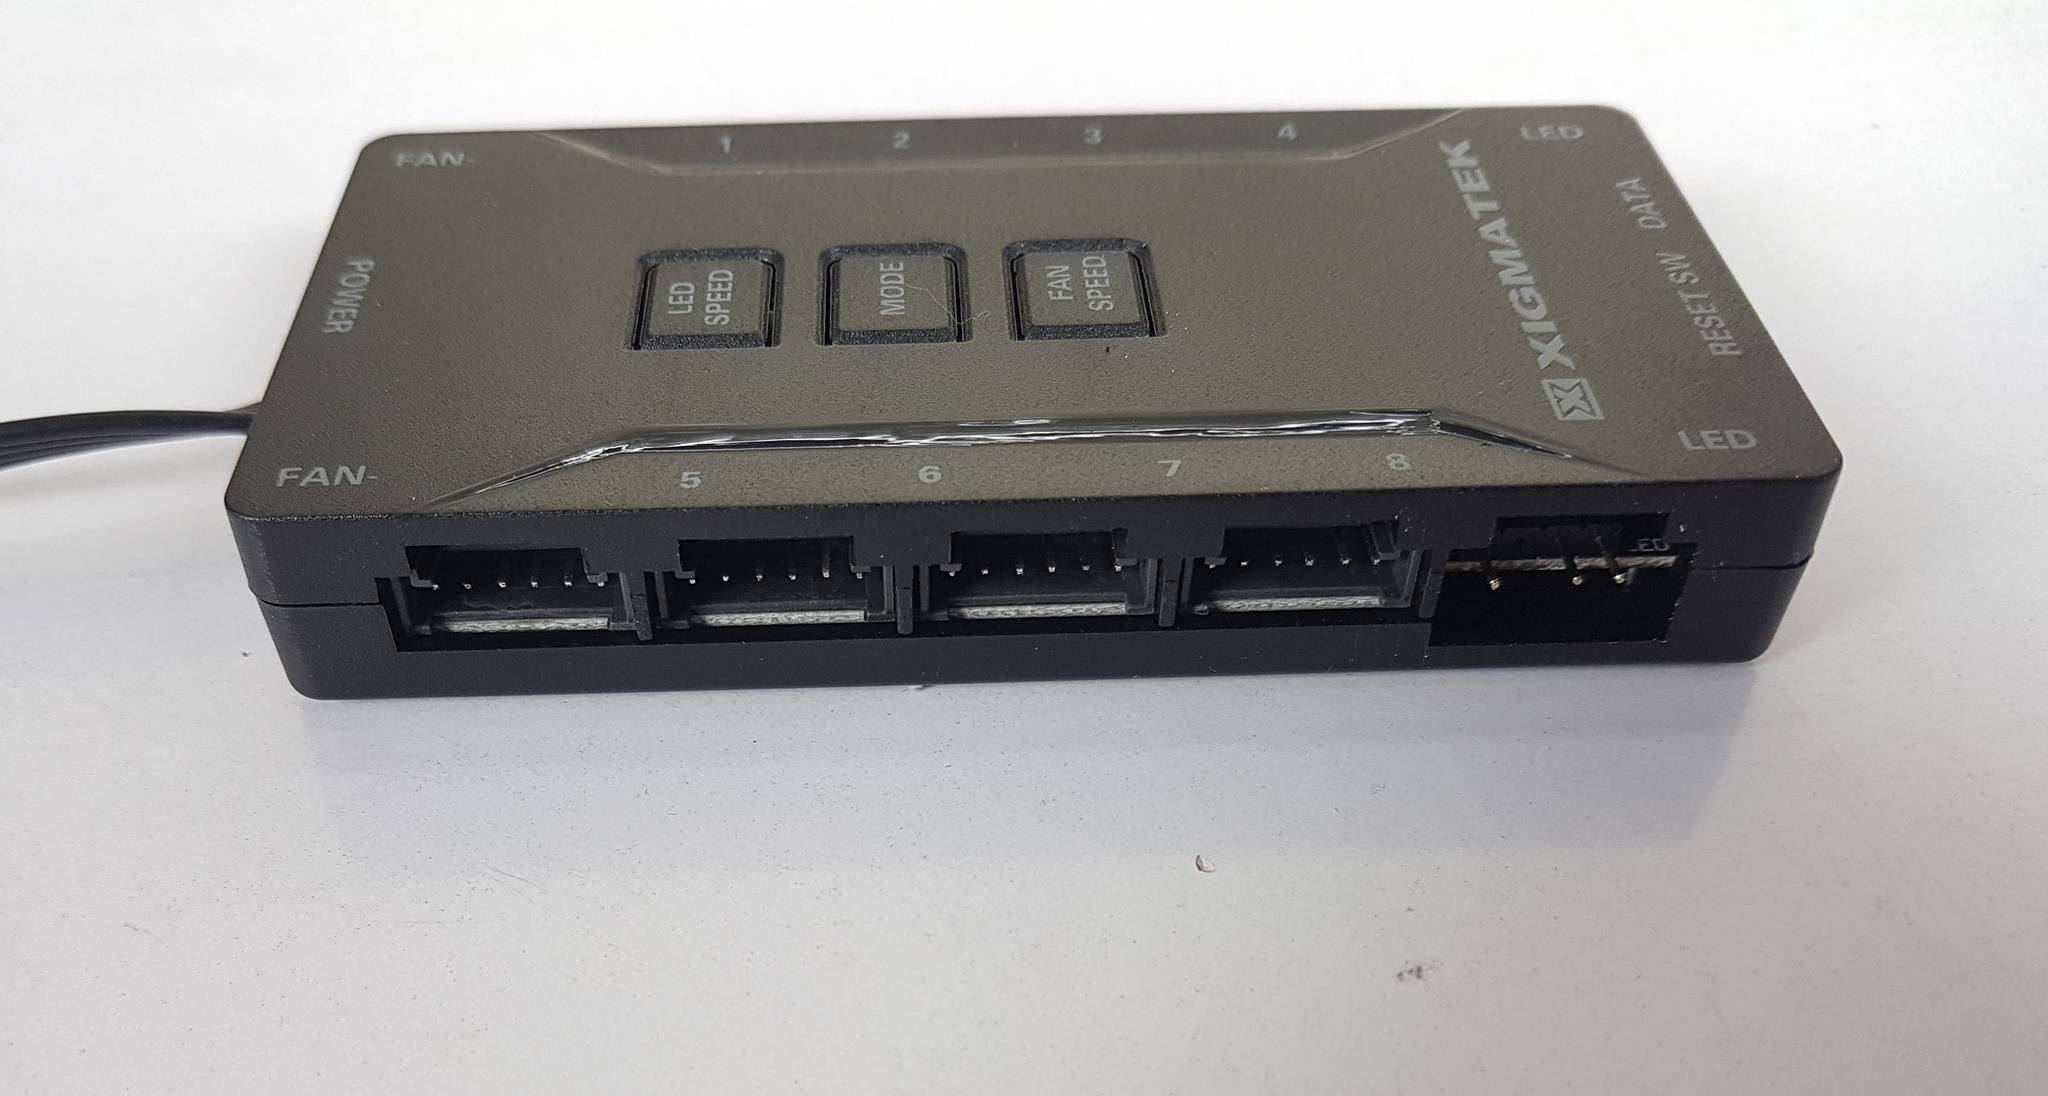
We have USB 3.0, 2.0, and HD Audio connector cables along with the system panel connector cables. The LED connector is to be connected to the RESET SW port of the hub. This would allow the user to control the lighting using the LED button on the front IO panel.
Rear
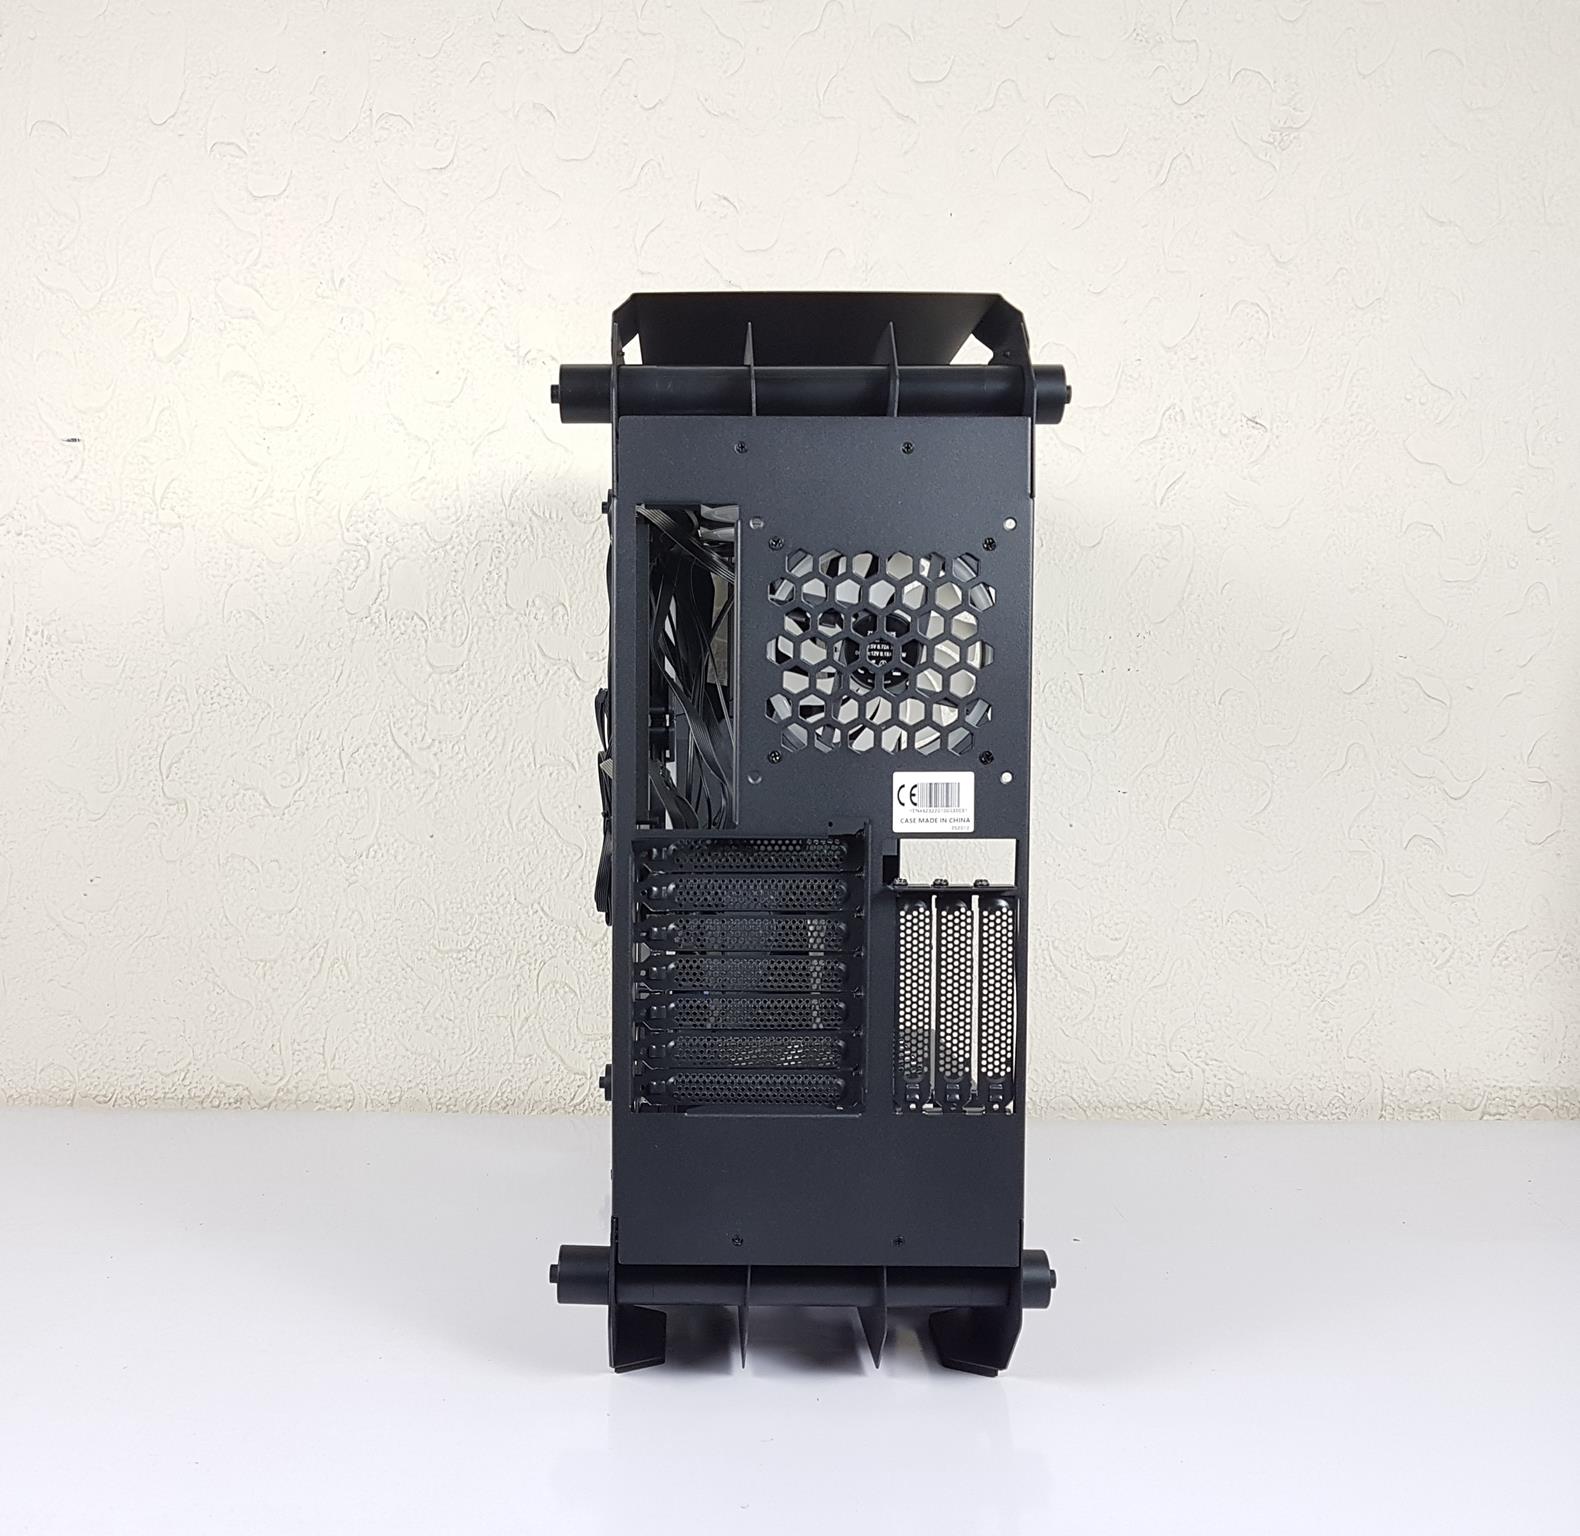
The rear of the case also shows the different design and layout. The complete case is interconnected using 4x black color rods. These rods are going through the frame of the interconnected plates or panels.
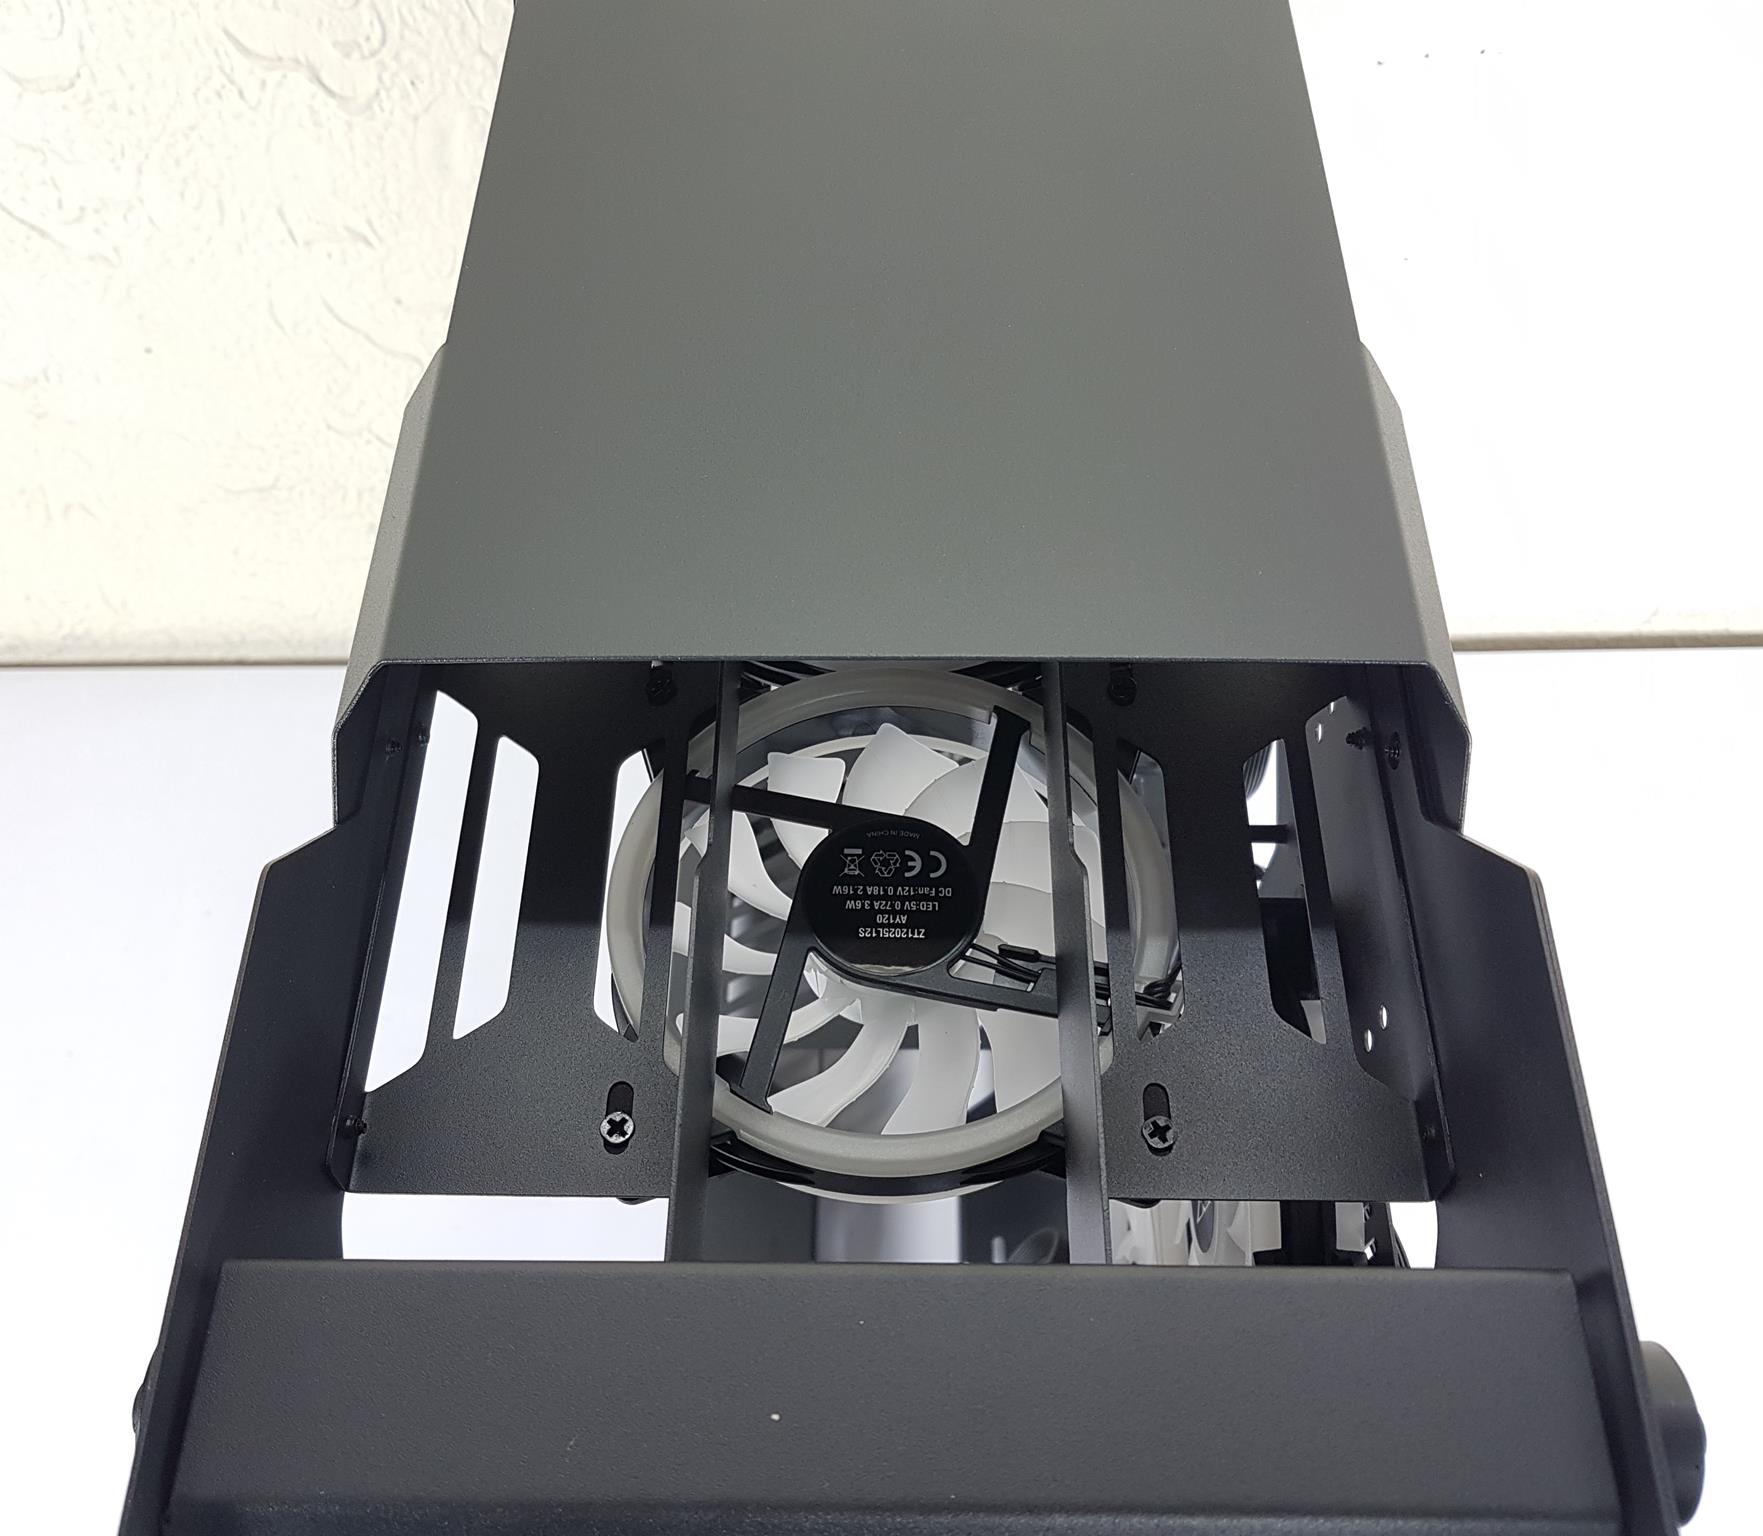
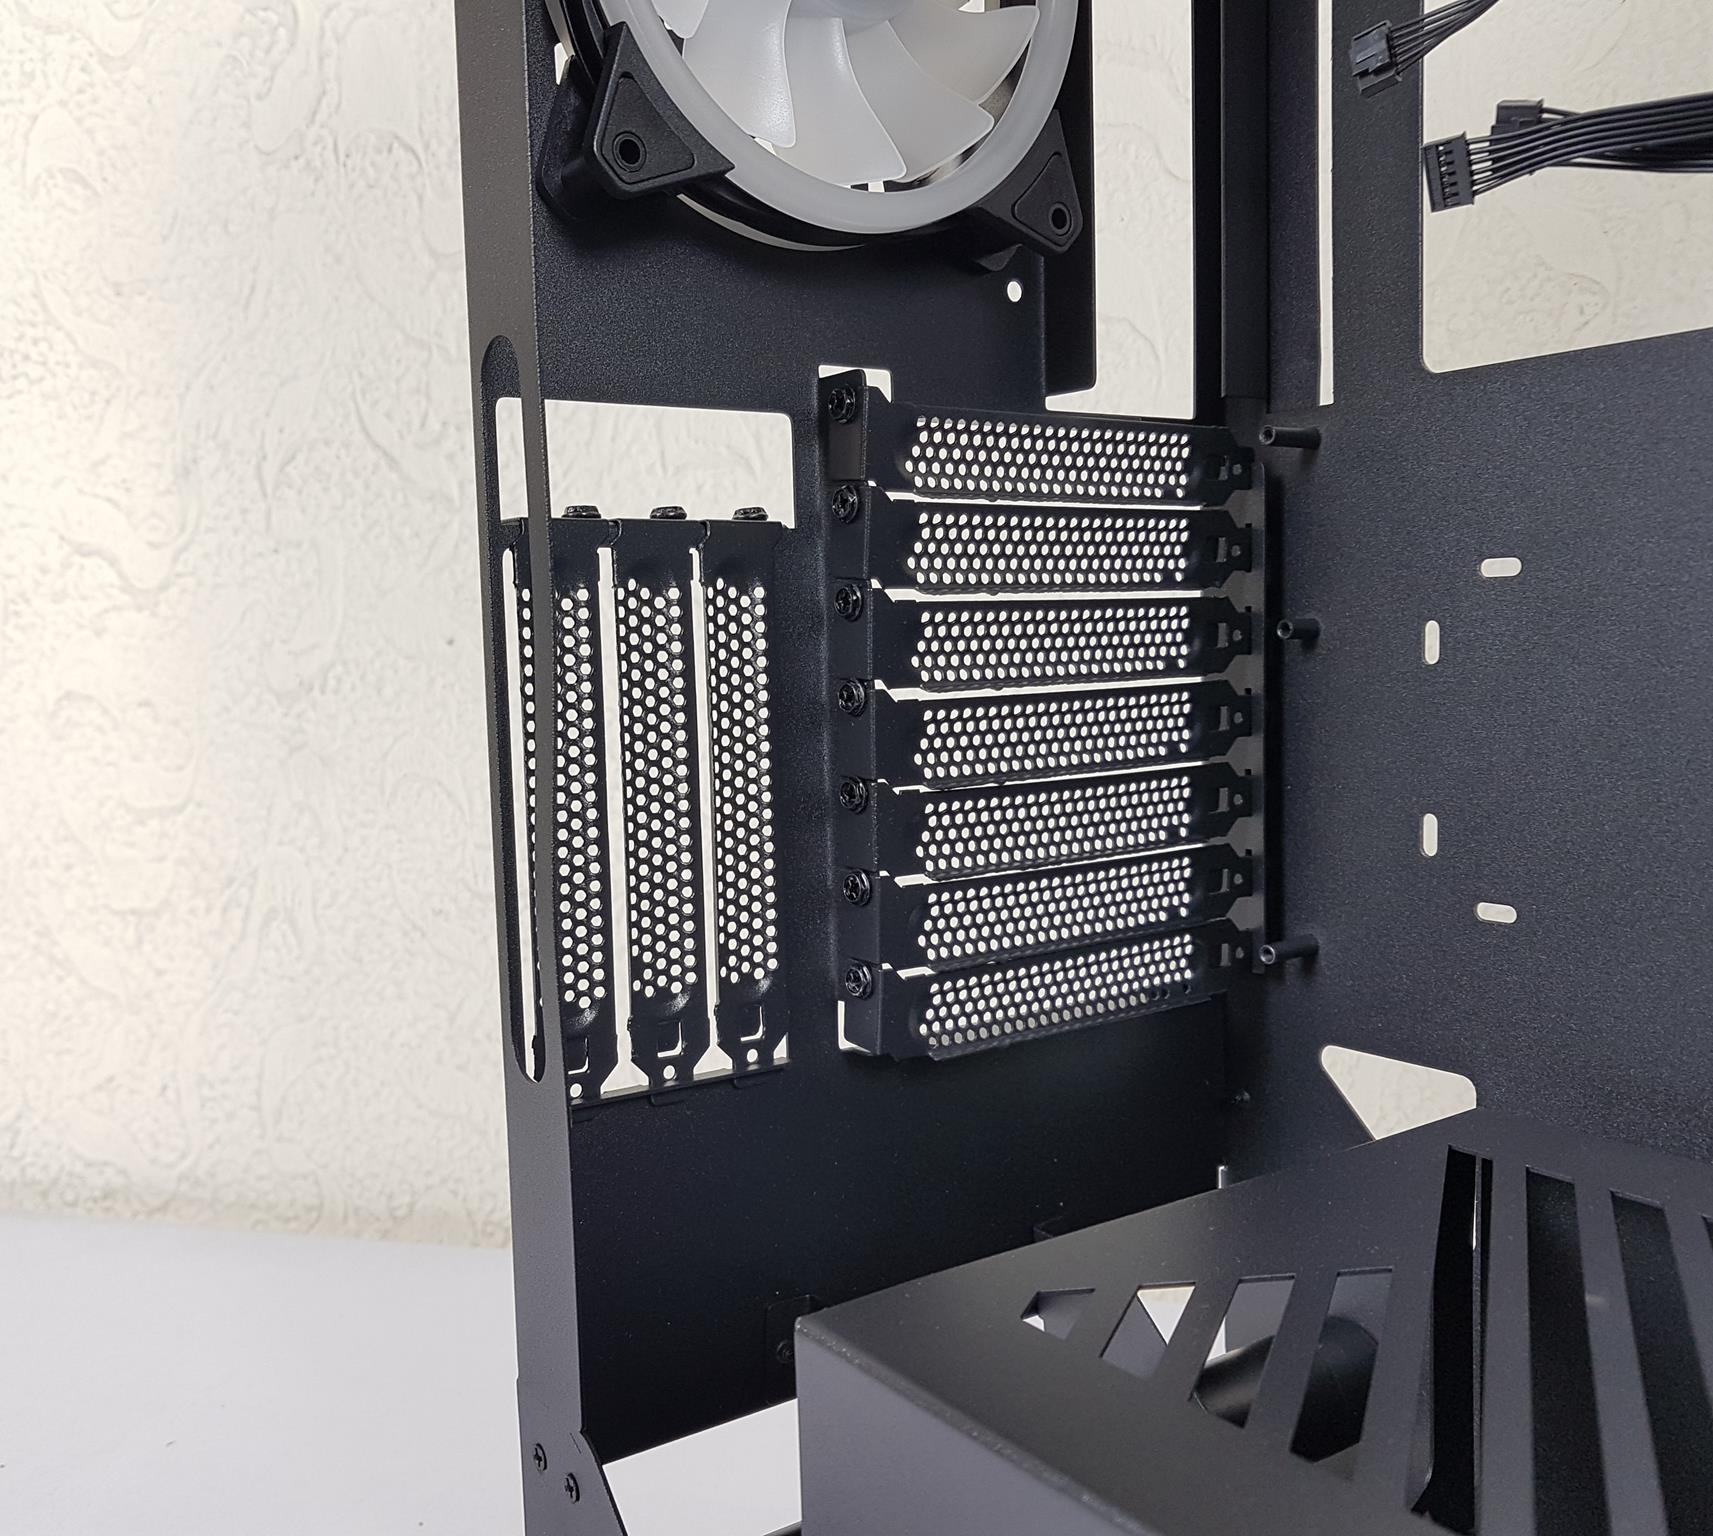
We have an opening for the motherboard’s IO shroud. There is a vented portion with a 120mm and 140mm fan mount in a fixed location. This would mean we can’t adjust the height of the fan on the rear.
Moreover, we have 7x PCIe slot covers in horizontal and 3x in the vertical layout. They all are reusable and removable covers with vents.
Oh, wait! Where is the PSU mount? We have a fully blocked solid panel on the base here. The PSU is mounted on the base of the case and the power cable has to be routed from the cutout layout at the base of the case on the rear. Strange but it is part of the layout. There is a large gap between the PSU shroud and the rear of the case.
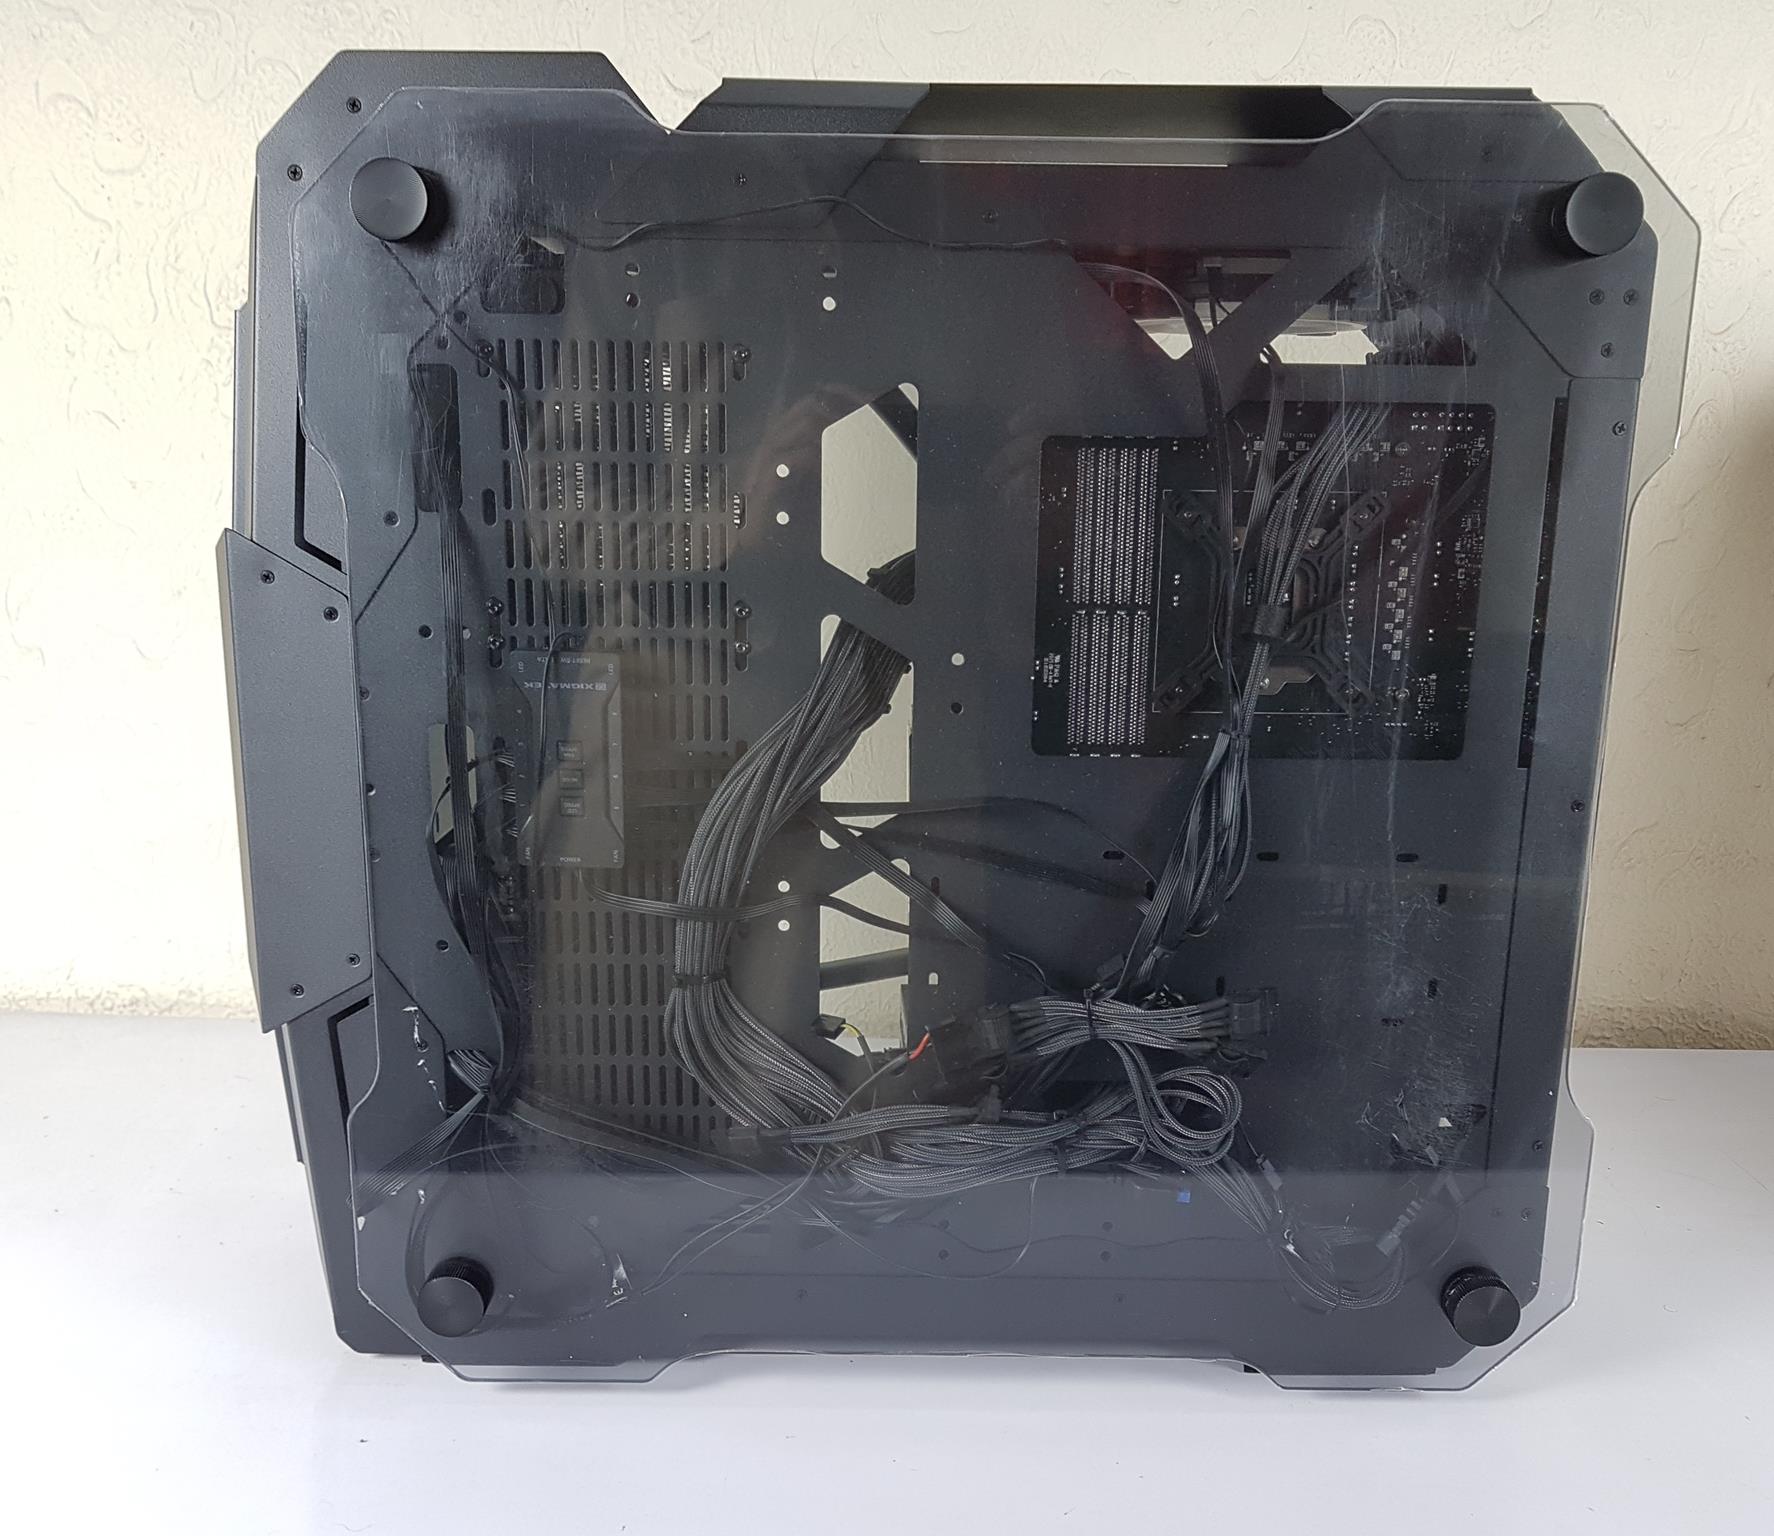
Bottom
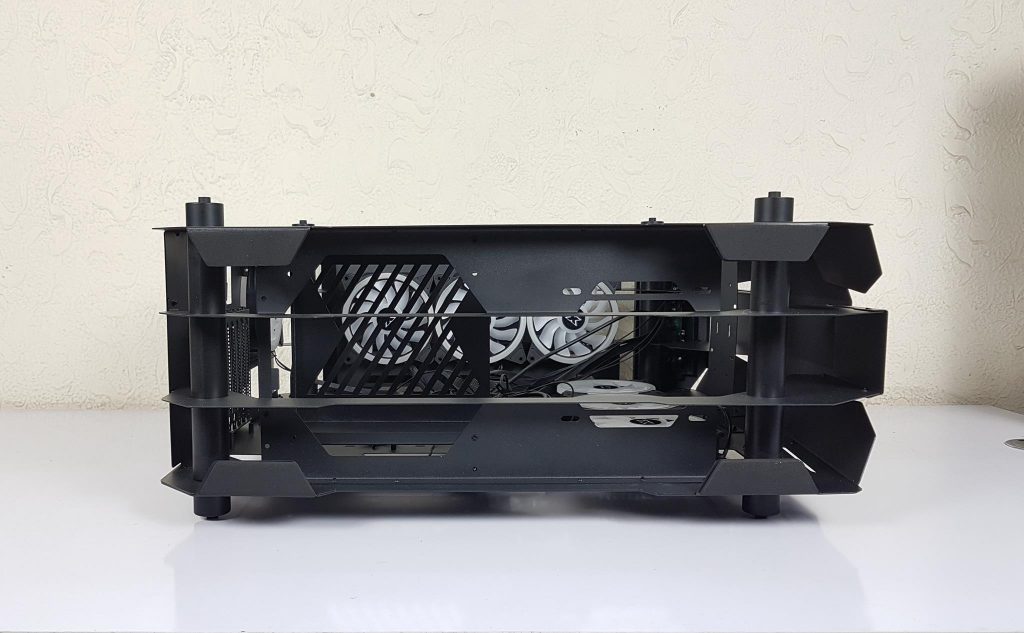
The base of the cooler shows the planar view of the frame and the interconnecting panels. One big downside of this particular layout is the lack of dust filtration all around. The four feet have anti-slip black color pads.
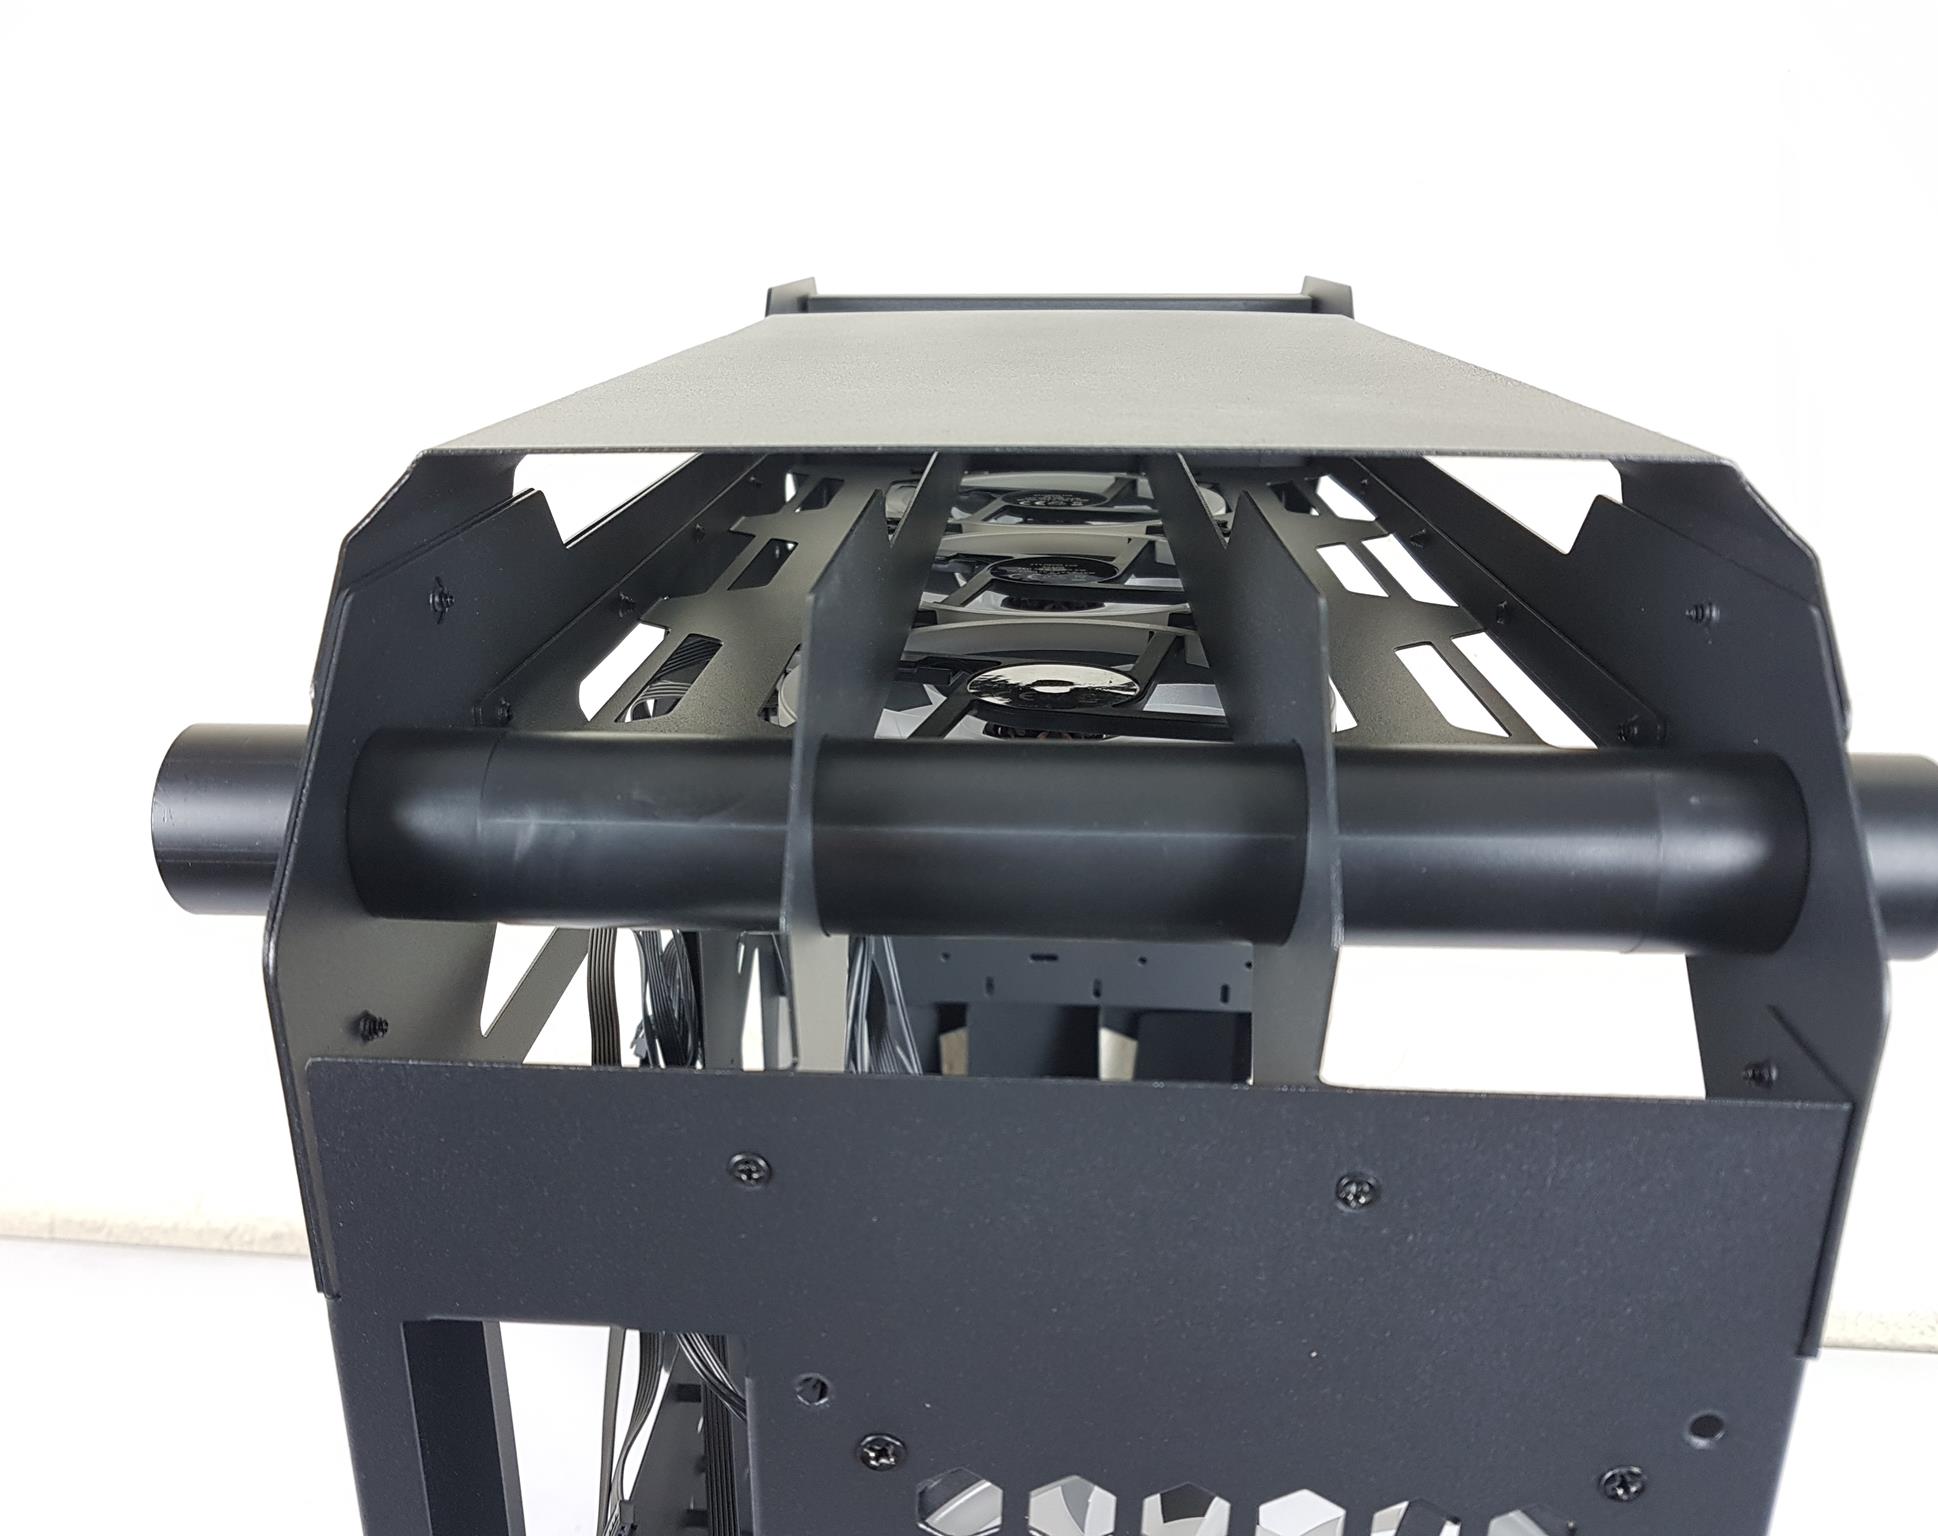
Top
Looking at the top of the case, there is a solid steel panel covering most of the case here. But it is still an open-frame layout. The removable panel is there more for an aesthetic reason.
There is an opening towards the front of the case on the top. we can see the pre-installed 120mm A-RGB fan through this opening.

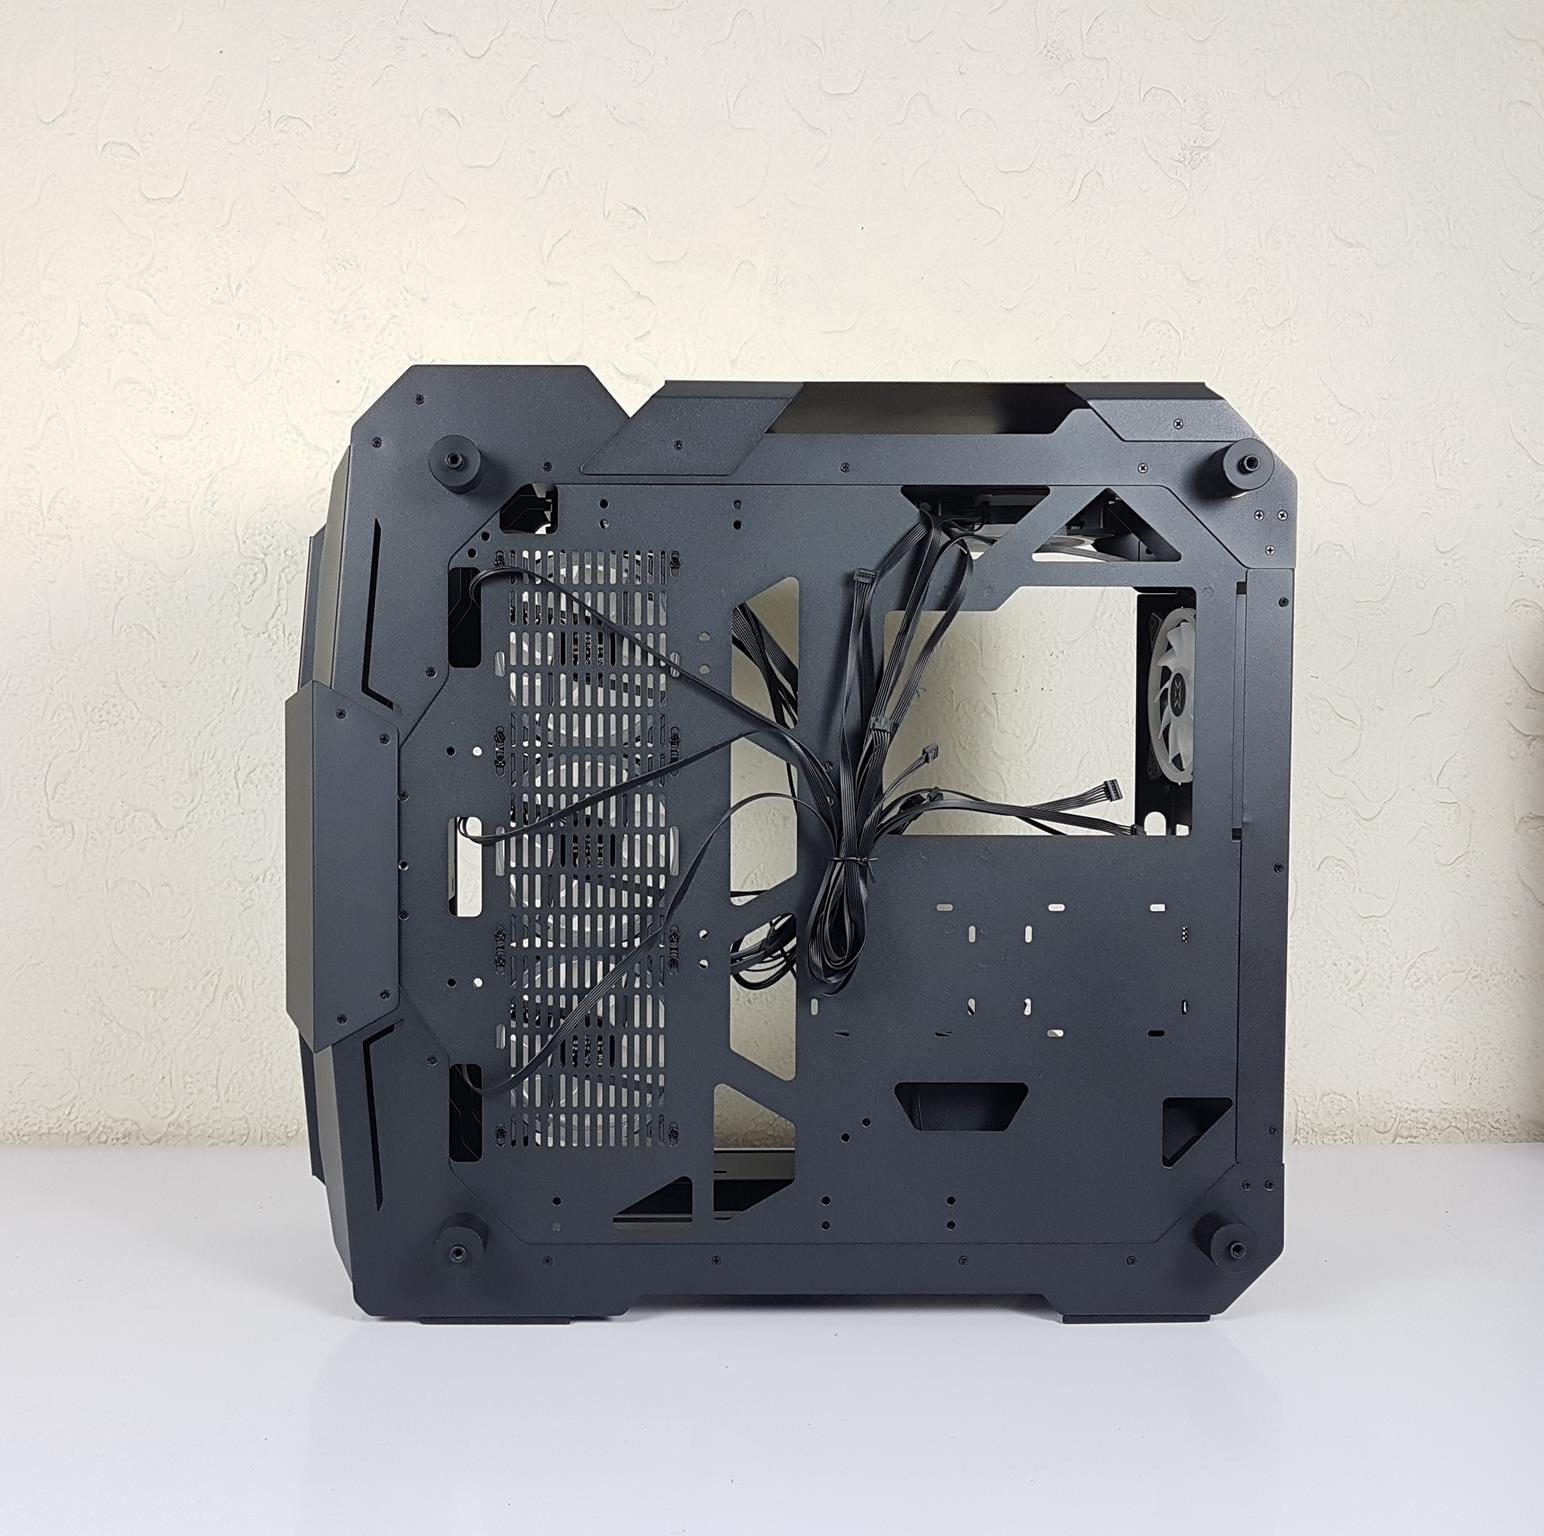
We’re starting with the backside, which doesn’t offer much action, hence only one picture. Cable management support is absent, not a single tie point for this open frame style, a necessary feature.
The tempered glass panel on the backside keeps it open, posing a challenge for cable routing and neatness. Prioritize handling cables before the build; a clear layout plan is crucial.
The user can install up to 2x 2.5”/3.5” drives on the back of the motherboard tray. We have openings all around and take them as your friend when handling cables.
Side – Glass Panel
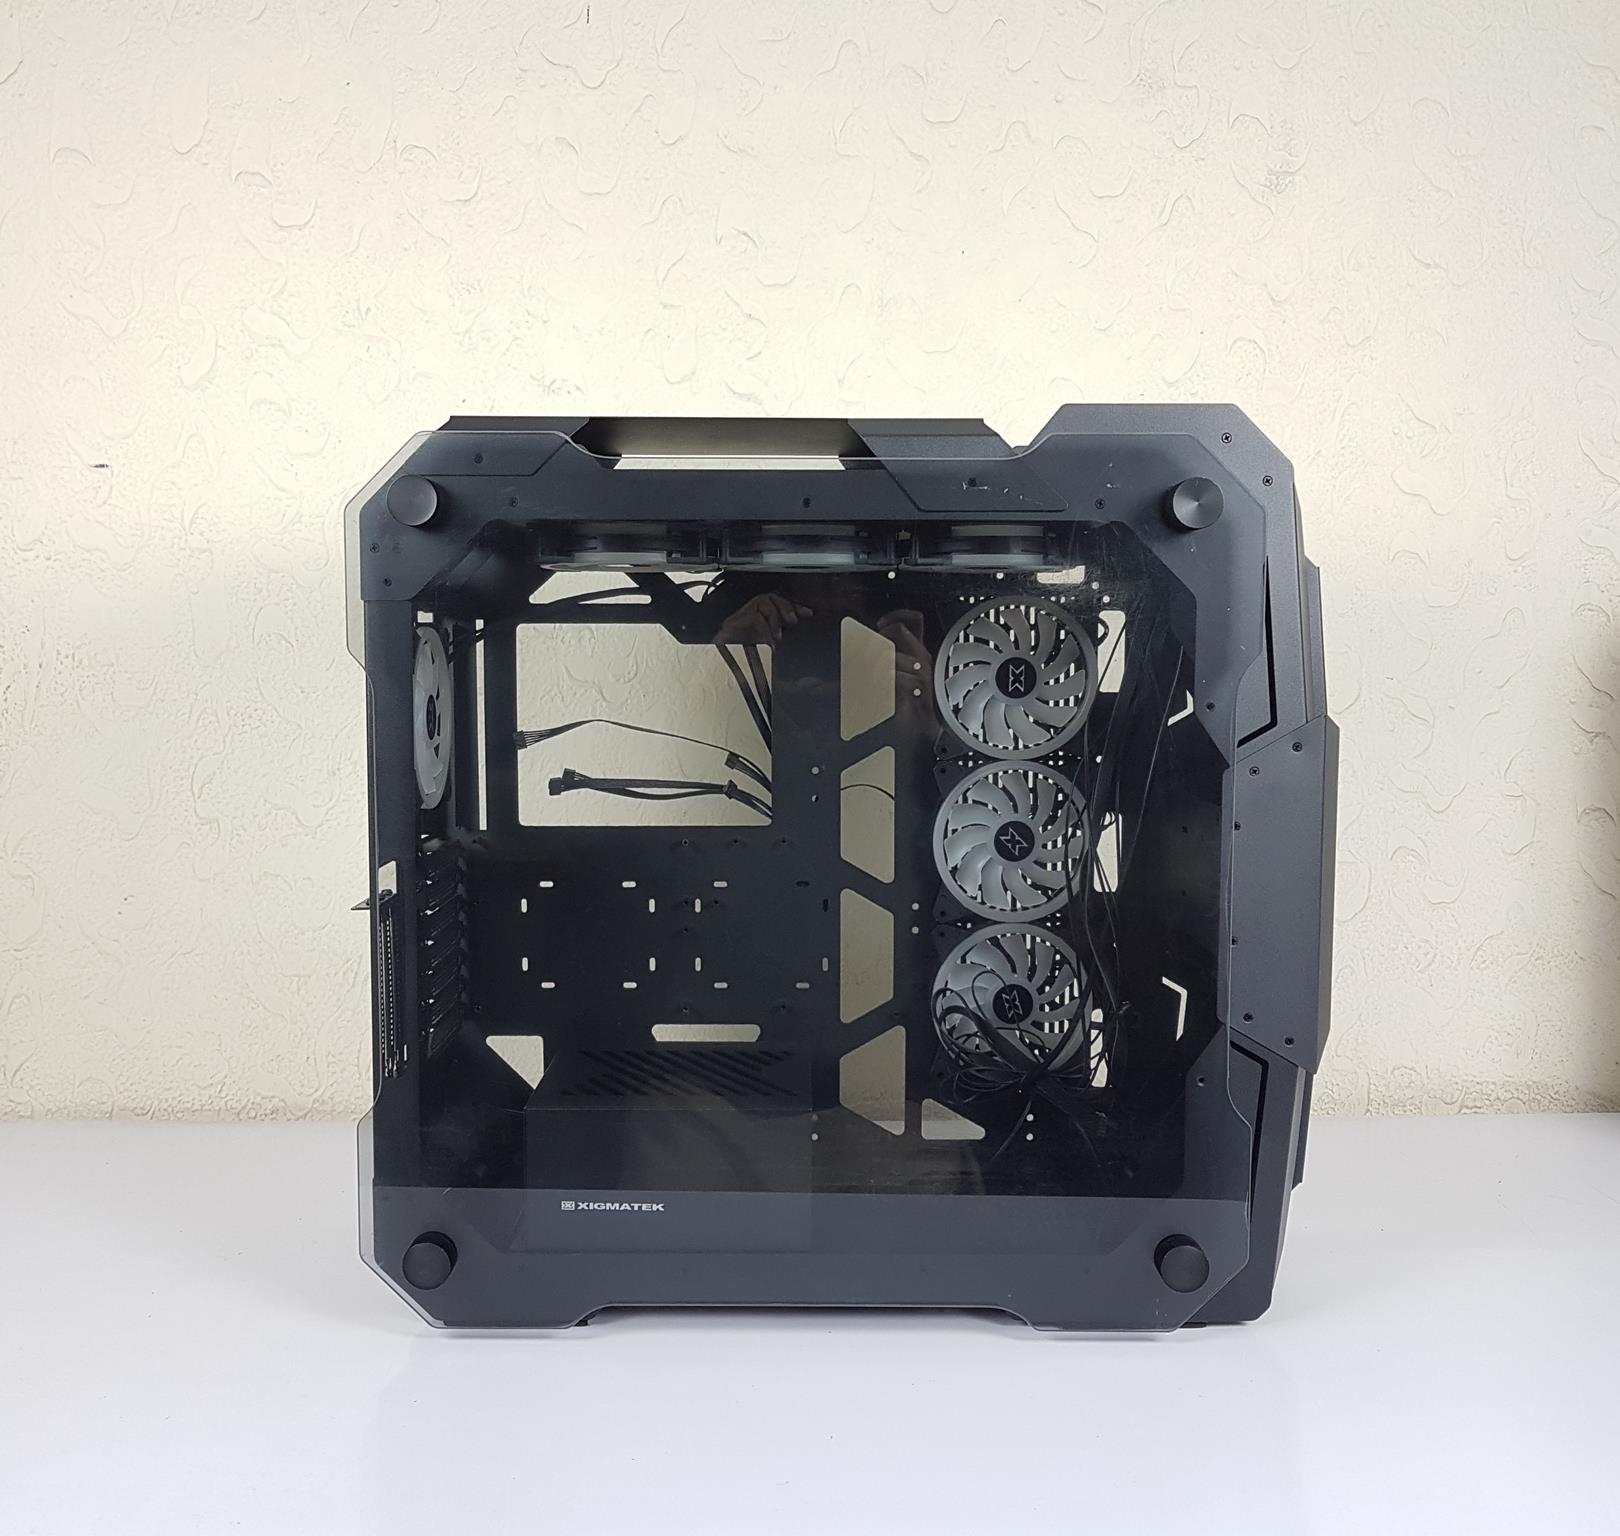
It is time to take a look at the main element of the Xigmatek X7 which is the PC building area inside the case. The case has a 4mm thick tempered glass panel which is to be mounted on the black color steel rods.
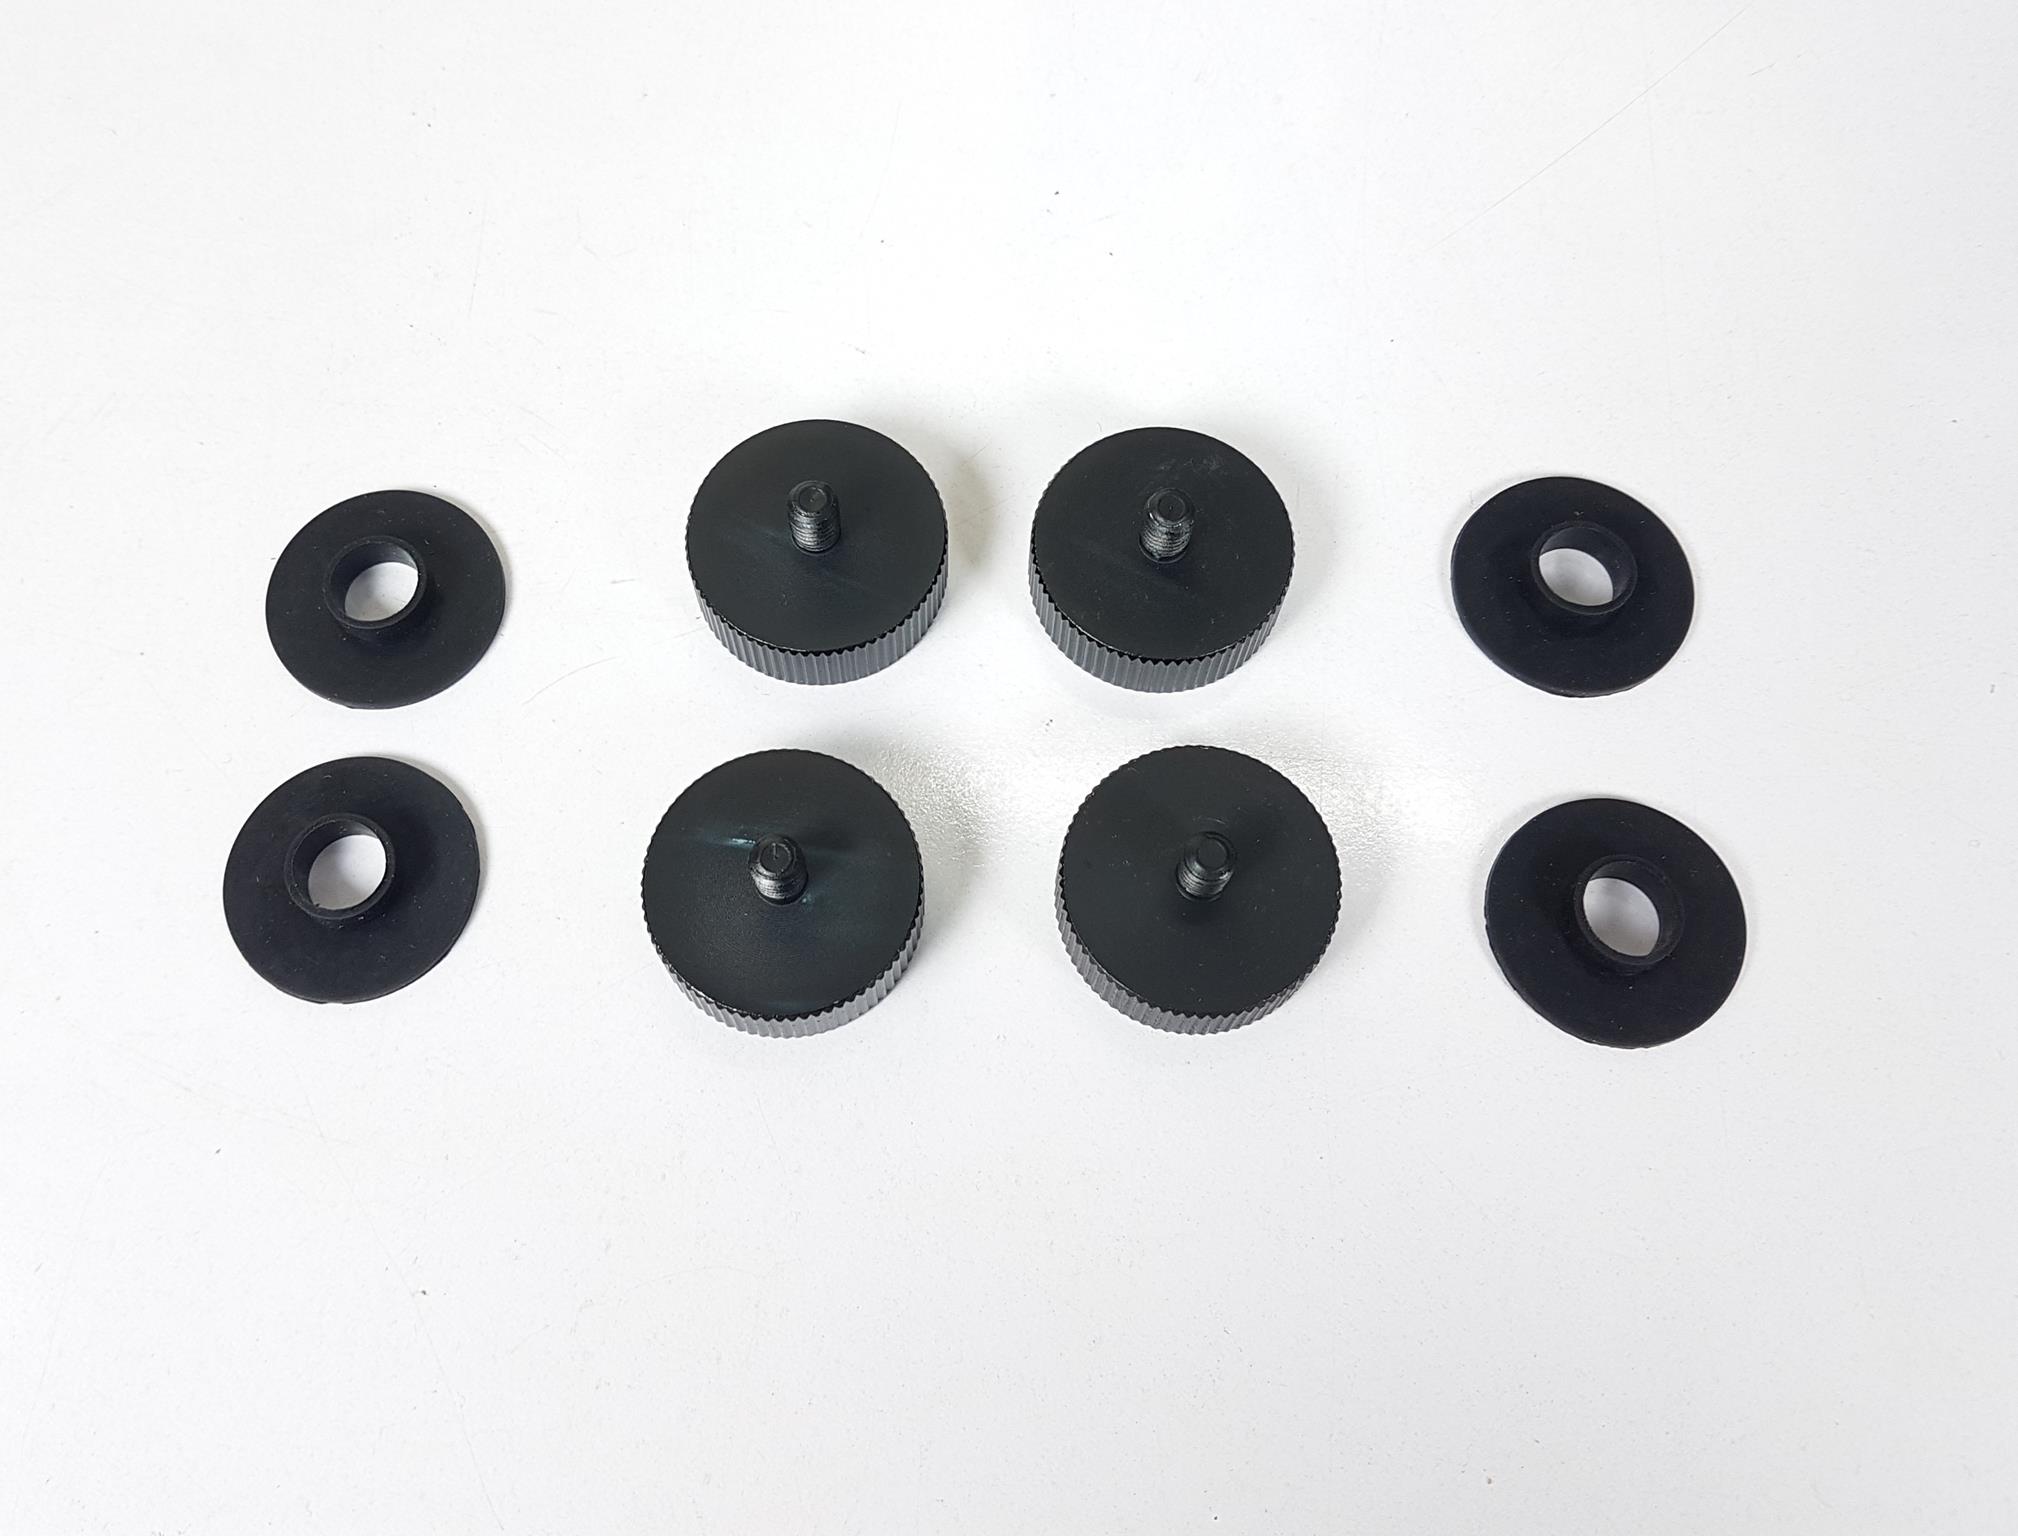
Xigmatek has provided rubber washers and large head screws to install the glass panels on the frame.
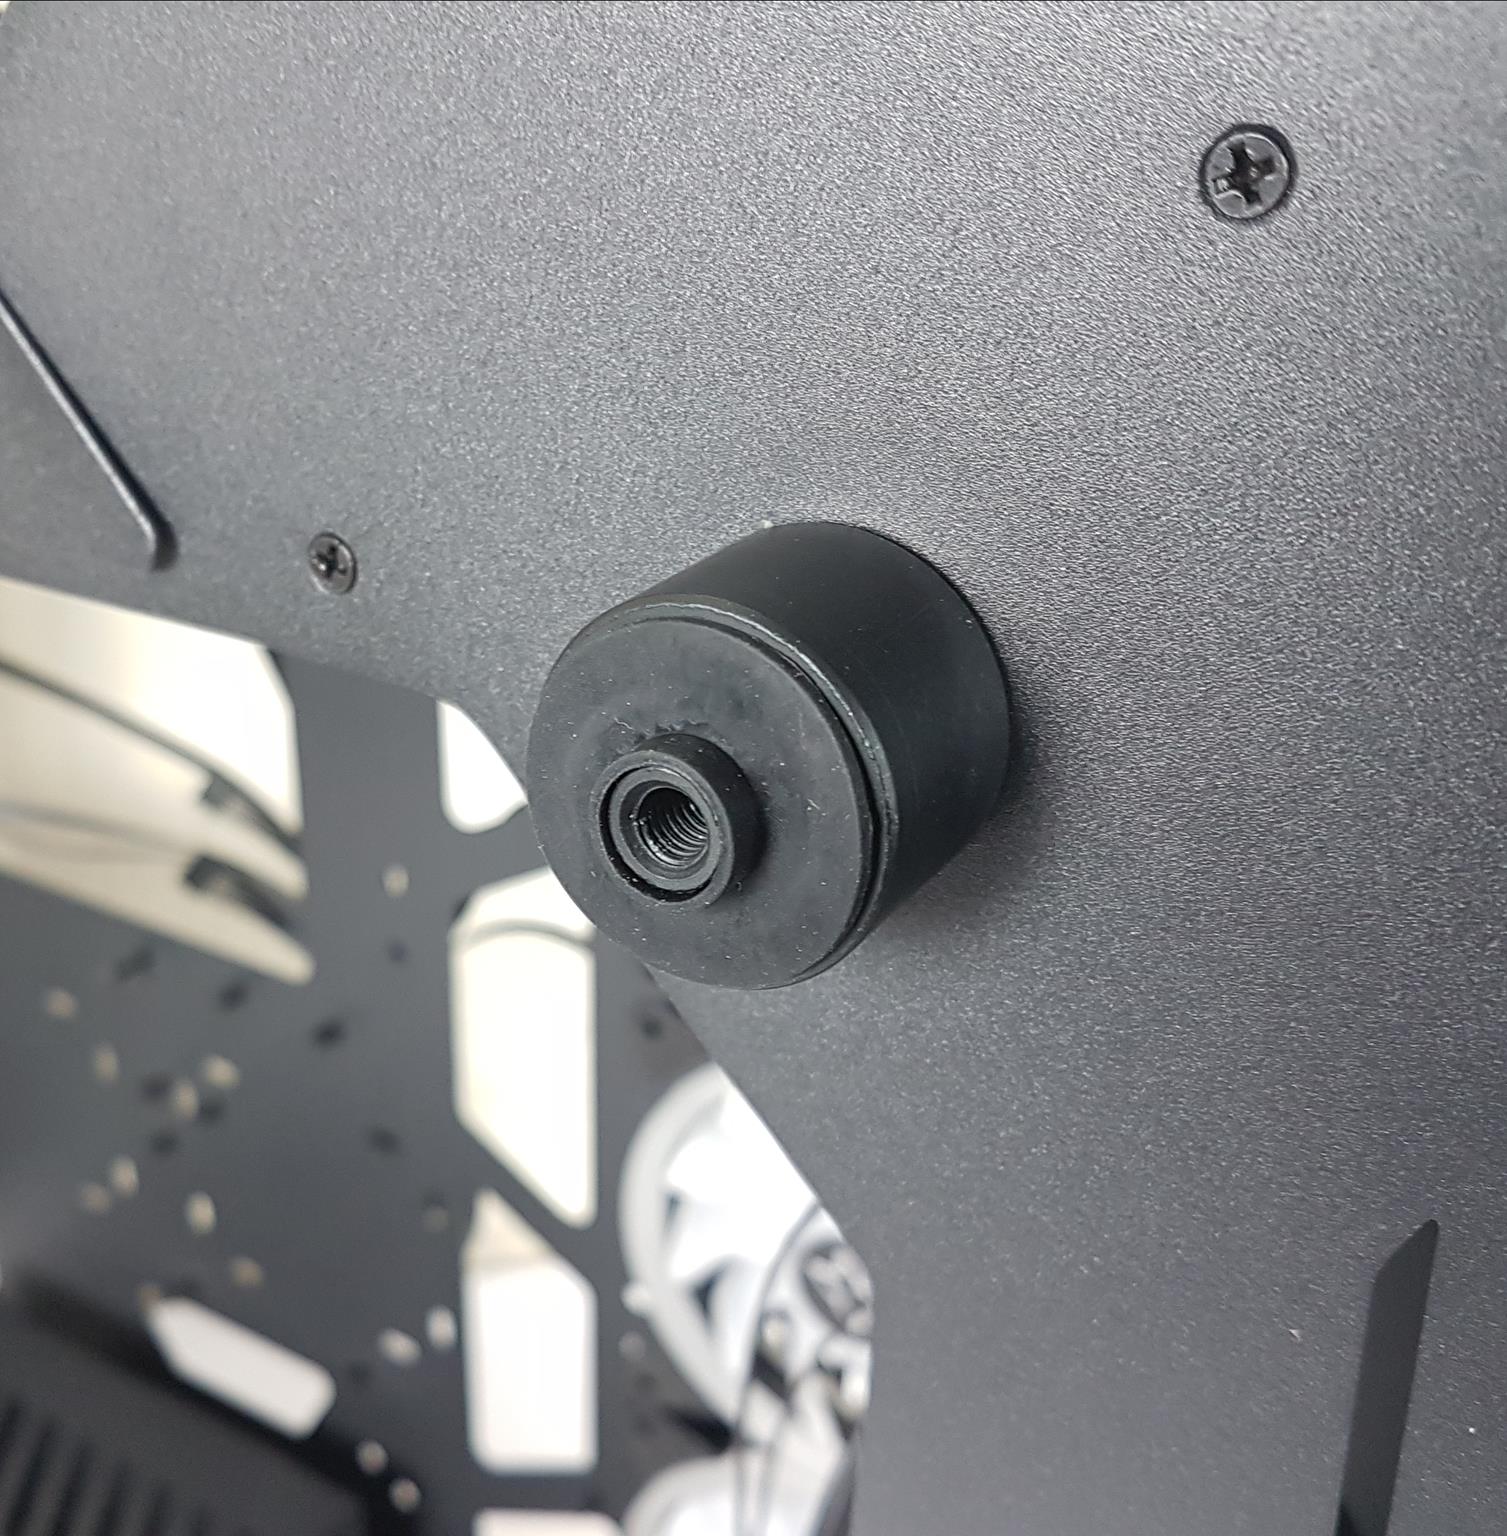
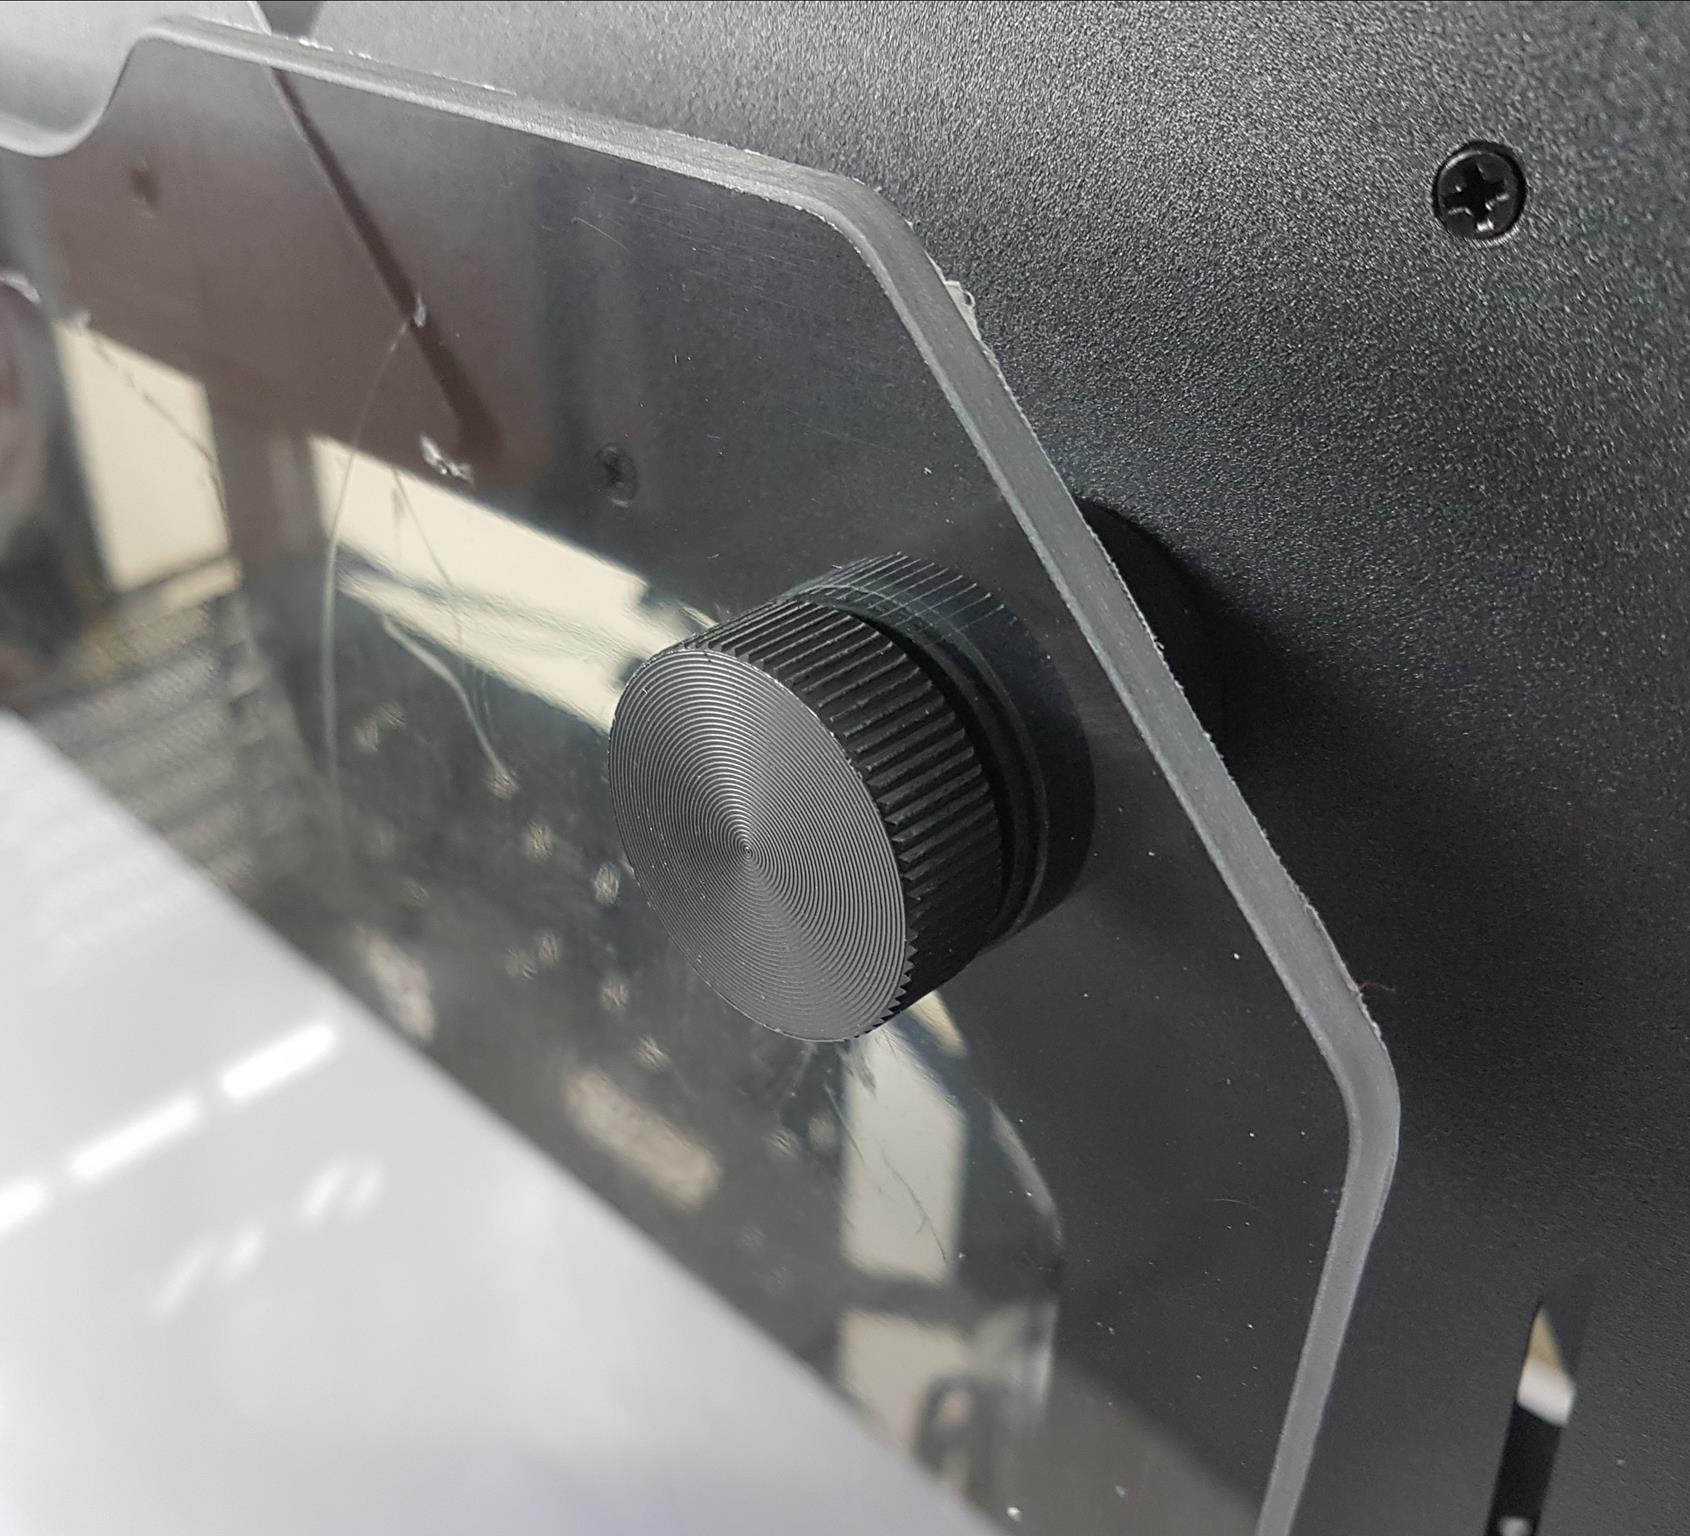
To install the glass panel, the user needs to place the 4x rubber washers on the tips of the black columns or rods. Use the large head screws to secure the panel on the frame.
The standoffs are pre-installed. These standoffs have more height to them as compared to the standard standoffs. Some standoffs have a shorter height.
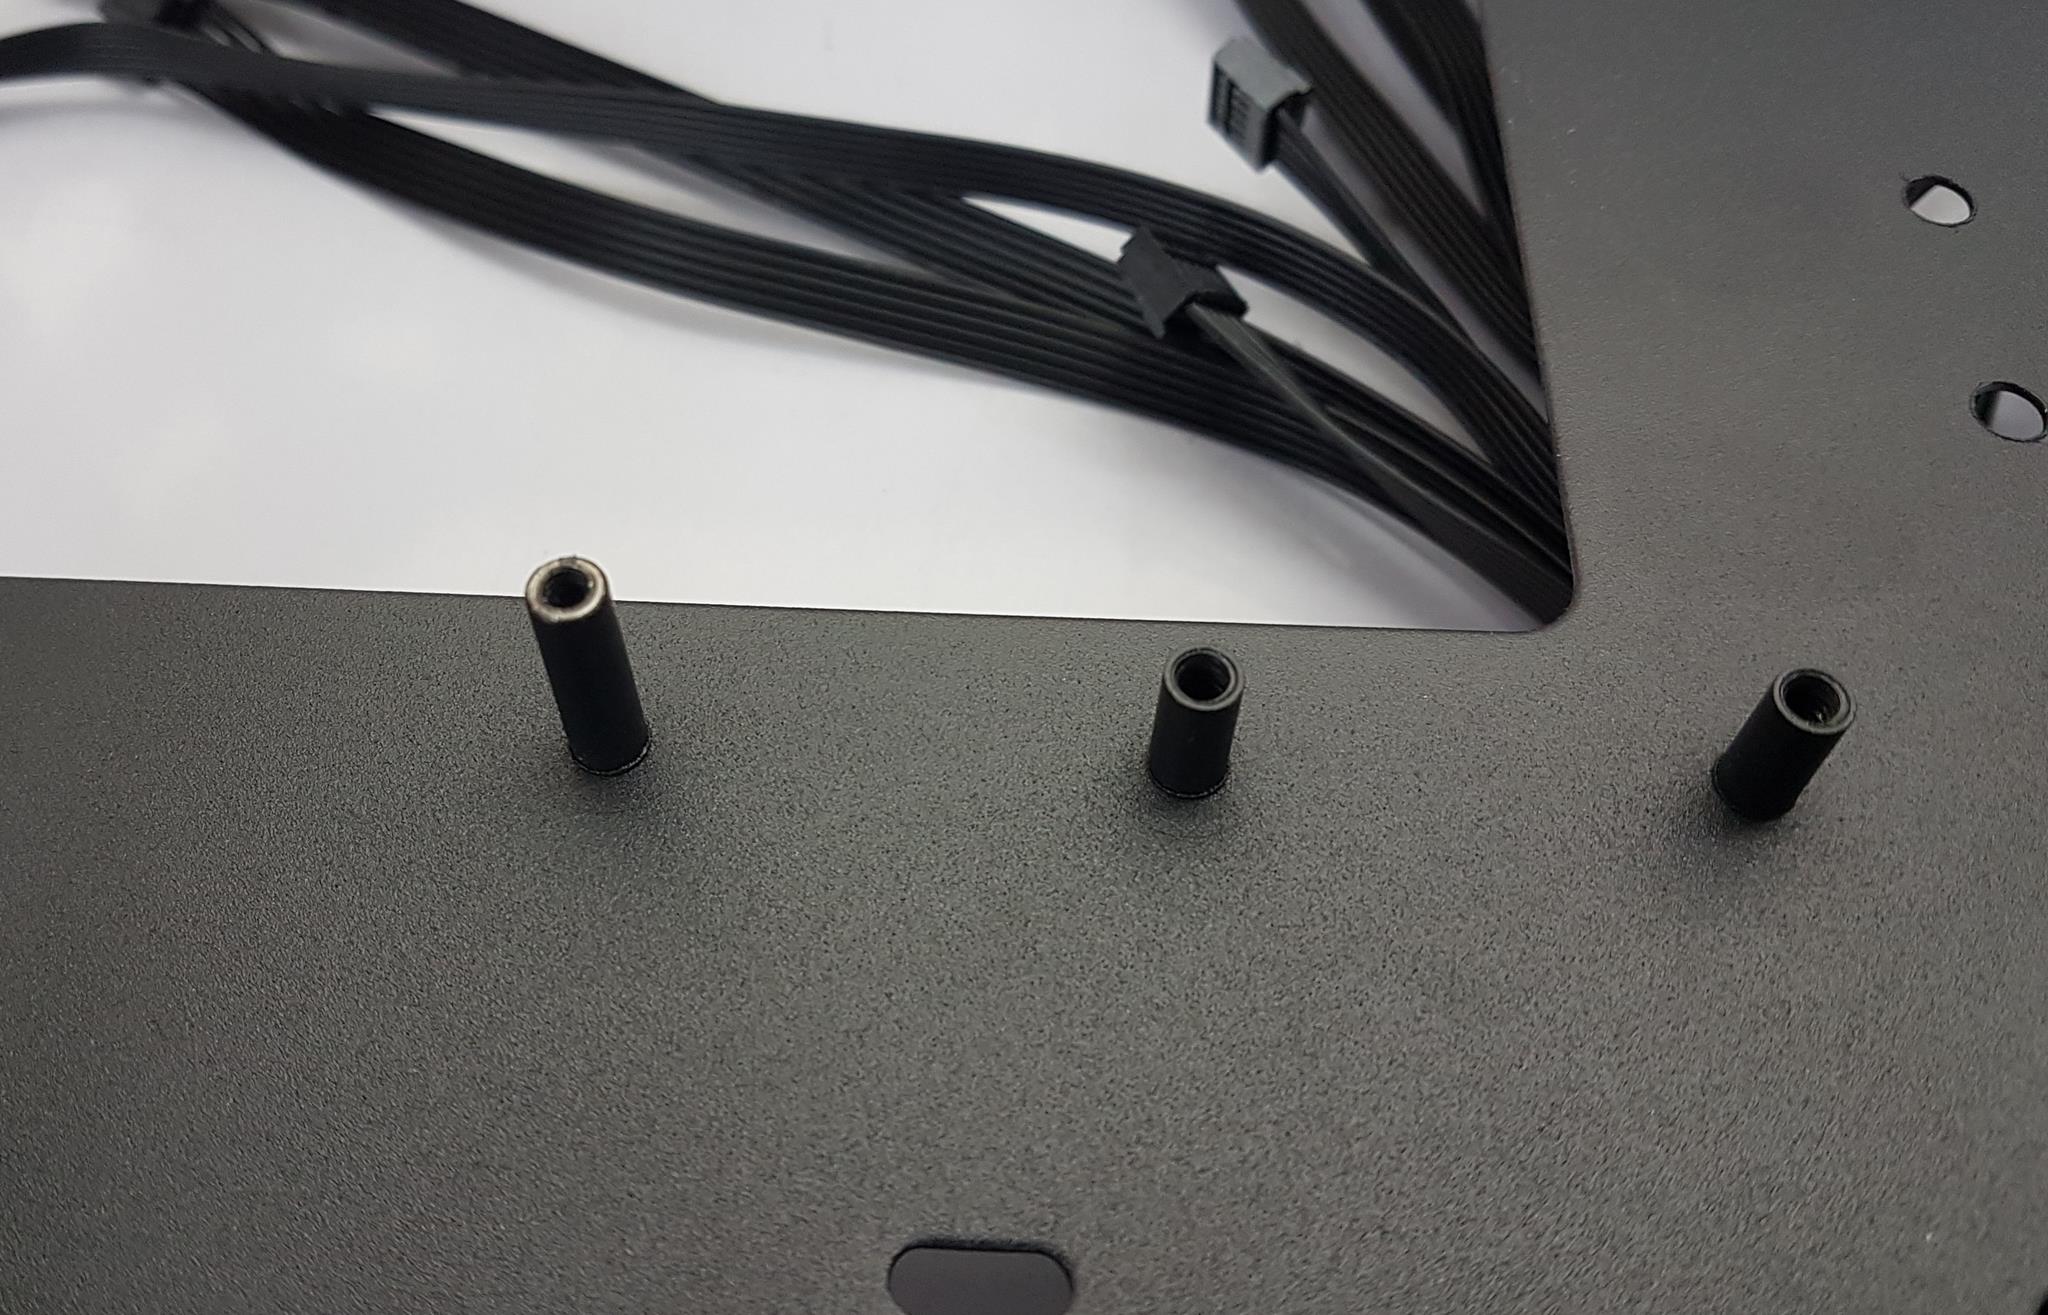

The above picture shows exactly that. One standoff has more height as compared to the other two. Xigmatek has provided brass color standoffs for the shorter height standoffs.
We attached 3 brass color standoffs to the shorter height standoffs, creating an unusual but effective setup that increases the gap between the motherboard and tray. This unique layout allows for convenient cable routing beneath the motherboard.
Plus I don’t think people are going to buy this large size closure for an mATX or mini-ITX build anyway so what is the point of not making all the standoffs equal length!
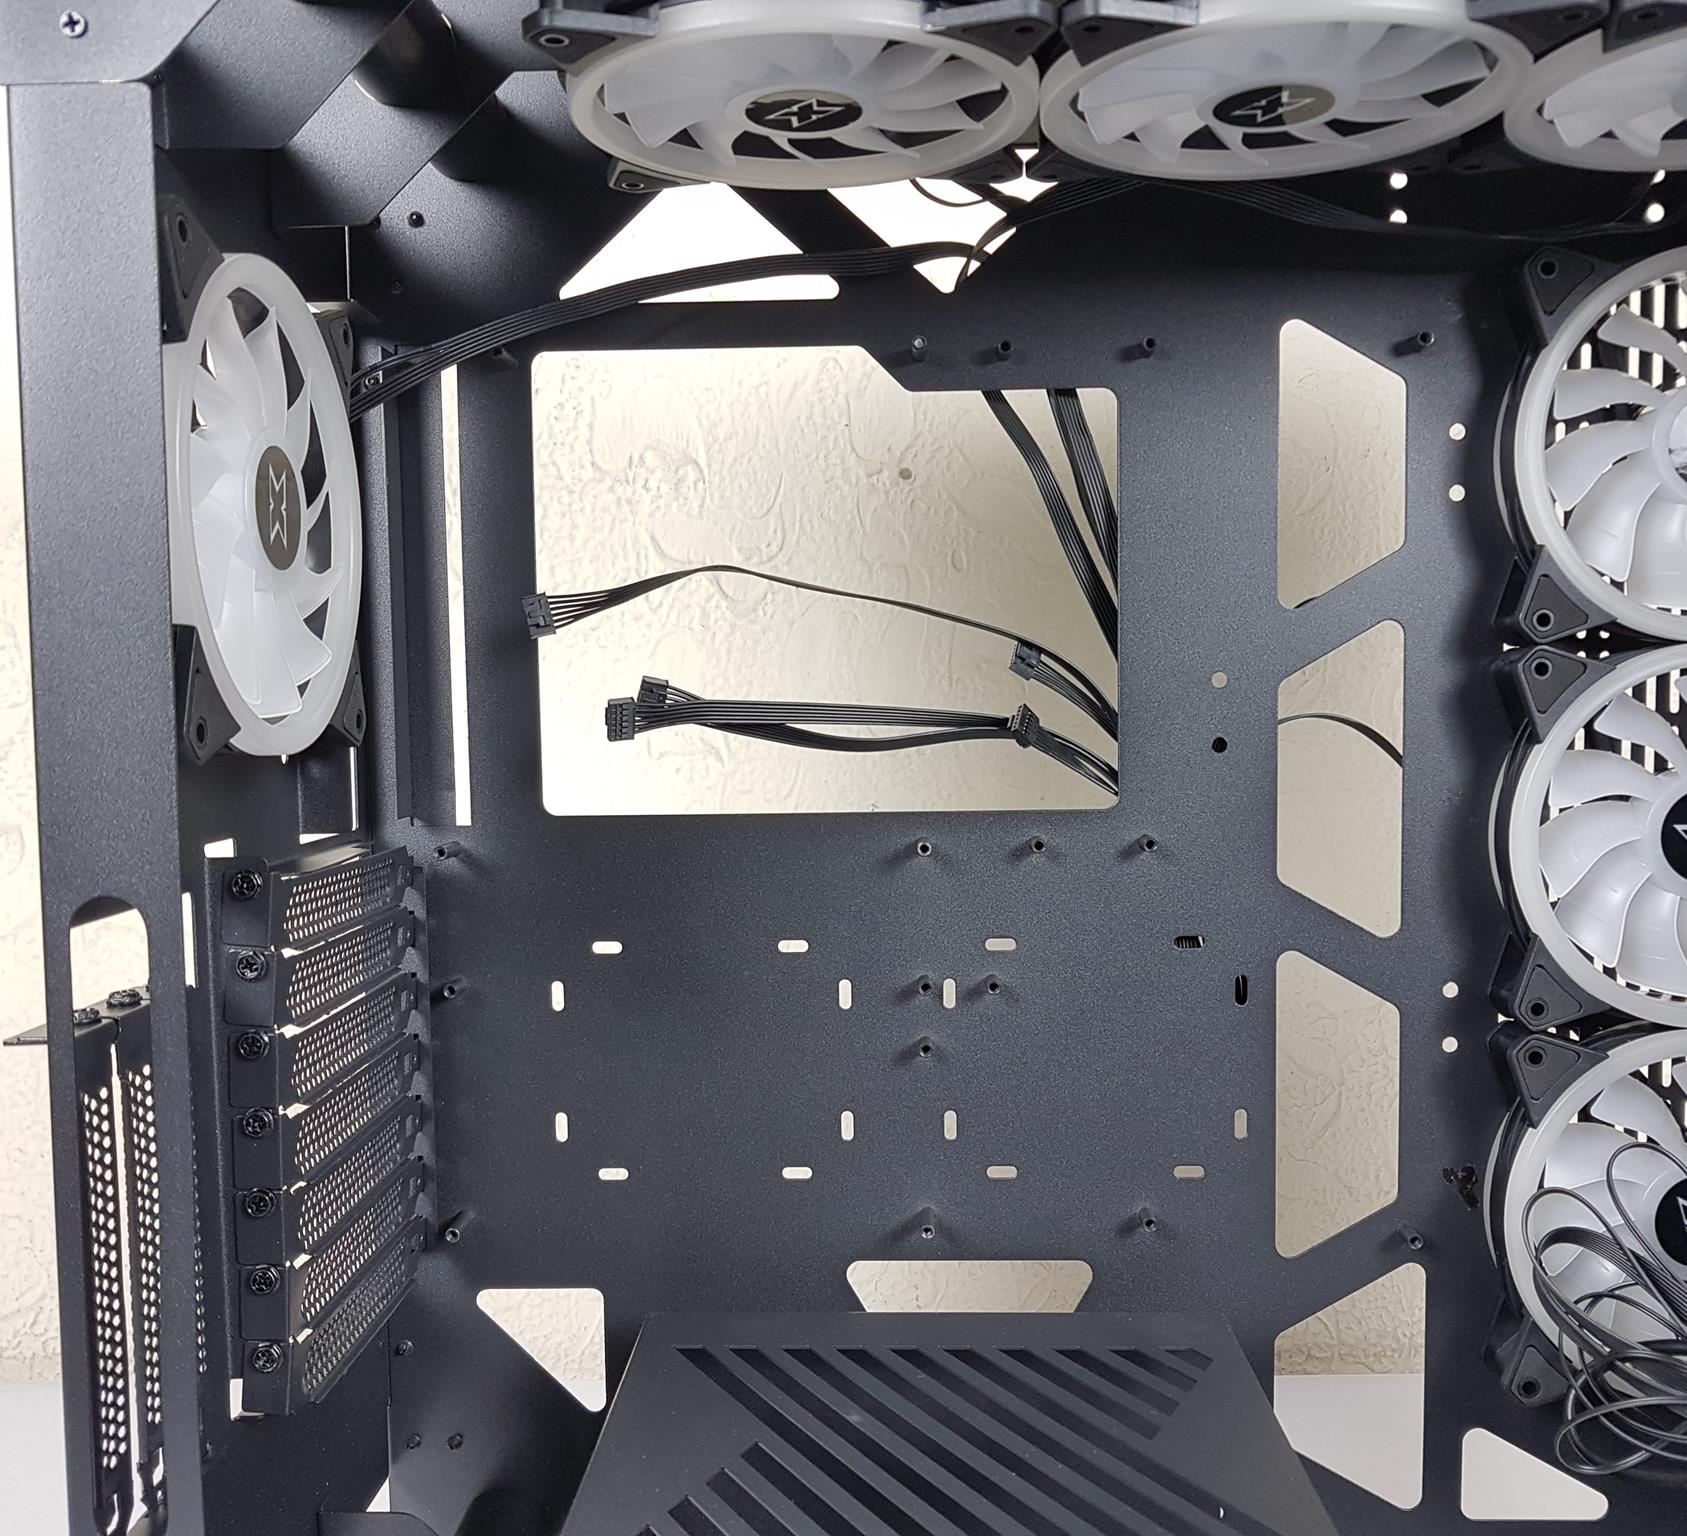
Returning to the motherboard tray, it features a sizable cutout for easy CPU cooler installation, providing a generous 60mm clearance from the case’s top to the motherboard’s upper side. Additionally, there’s a 46mm clearance for RAM mounting.
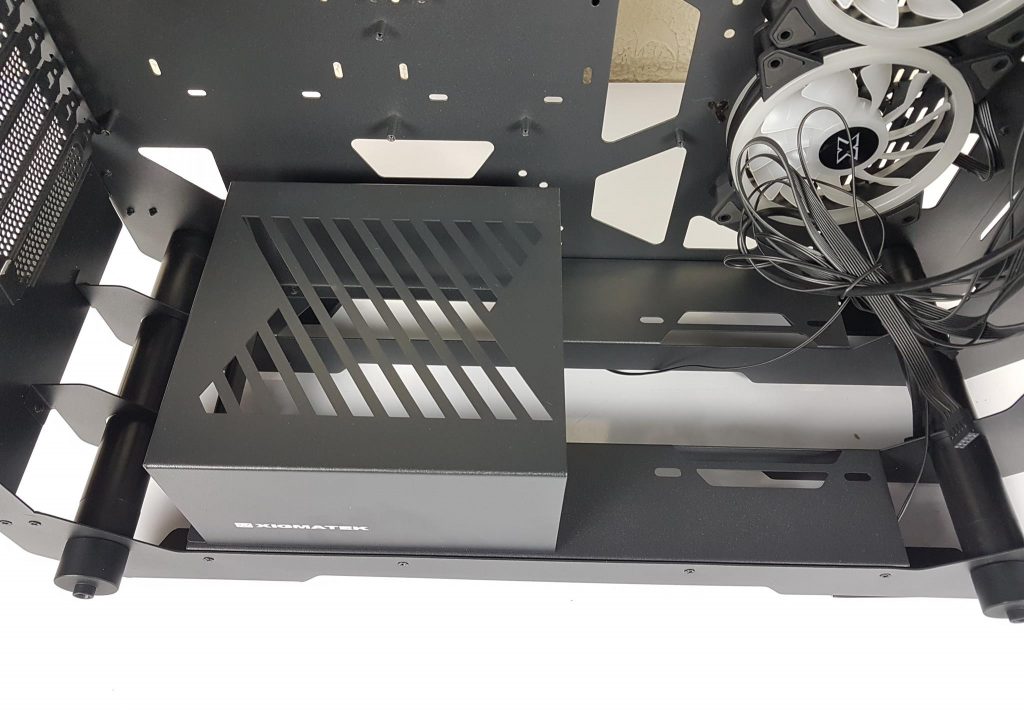
In the picture, observe the case base featuring a vented PSU shroud with Xigmatek branding. It rests on interconnecting plates, allowing for a 120mm fan installation. Note that PSU cables may obstruct the fan mount with PSUs exceeding 160mm in length.
This angle gives a clear view of the layout, highlighting the XIGMATEK X7 case’s lack of airflow considerations due to its open design. The gap between the PSU shroud and the case’s rear requires routing the power cable from underneath, posing a challenge for connection. The case accommodates PSUs up to 220mm in length.
Pre-Installed Fans
A downside is that the PSU can only be installed with the fan side down. I am not sure what Xigmatek was thinking when designing XIGMATEK X7 case. They should have left this option to the user.
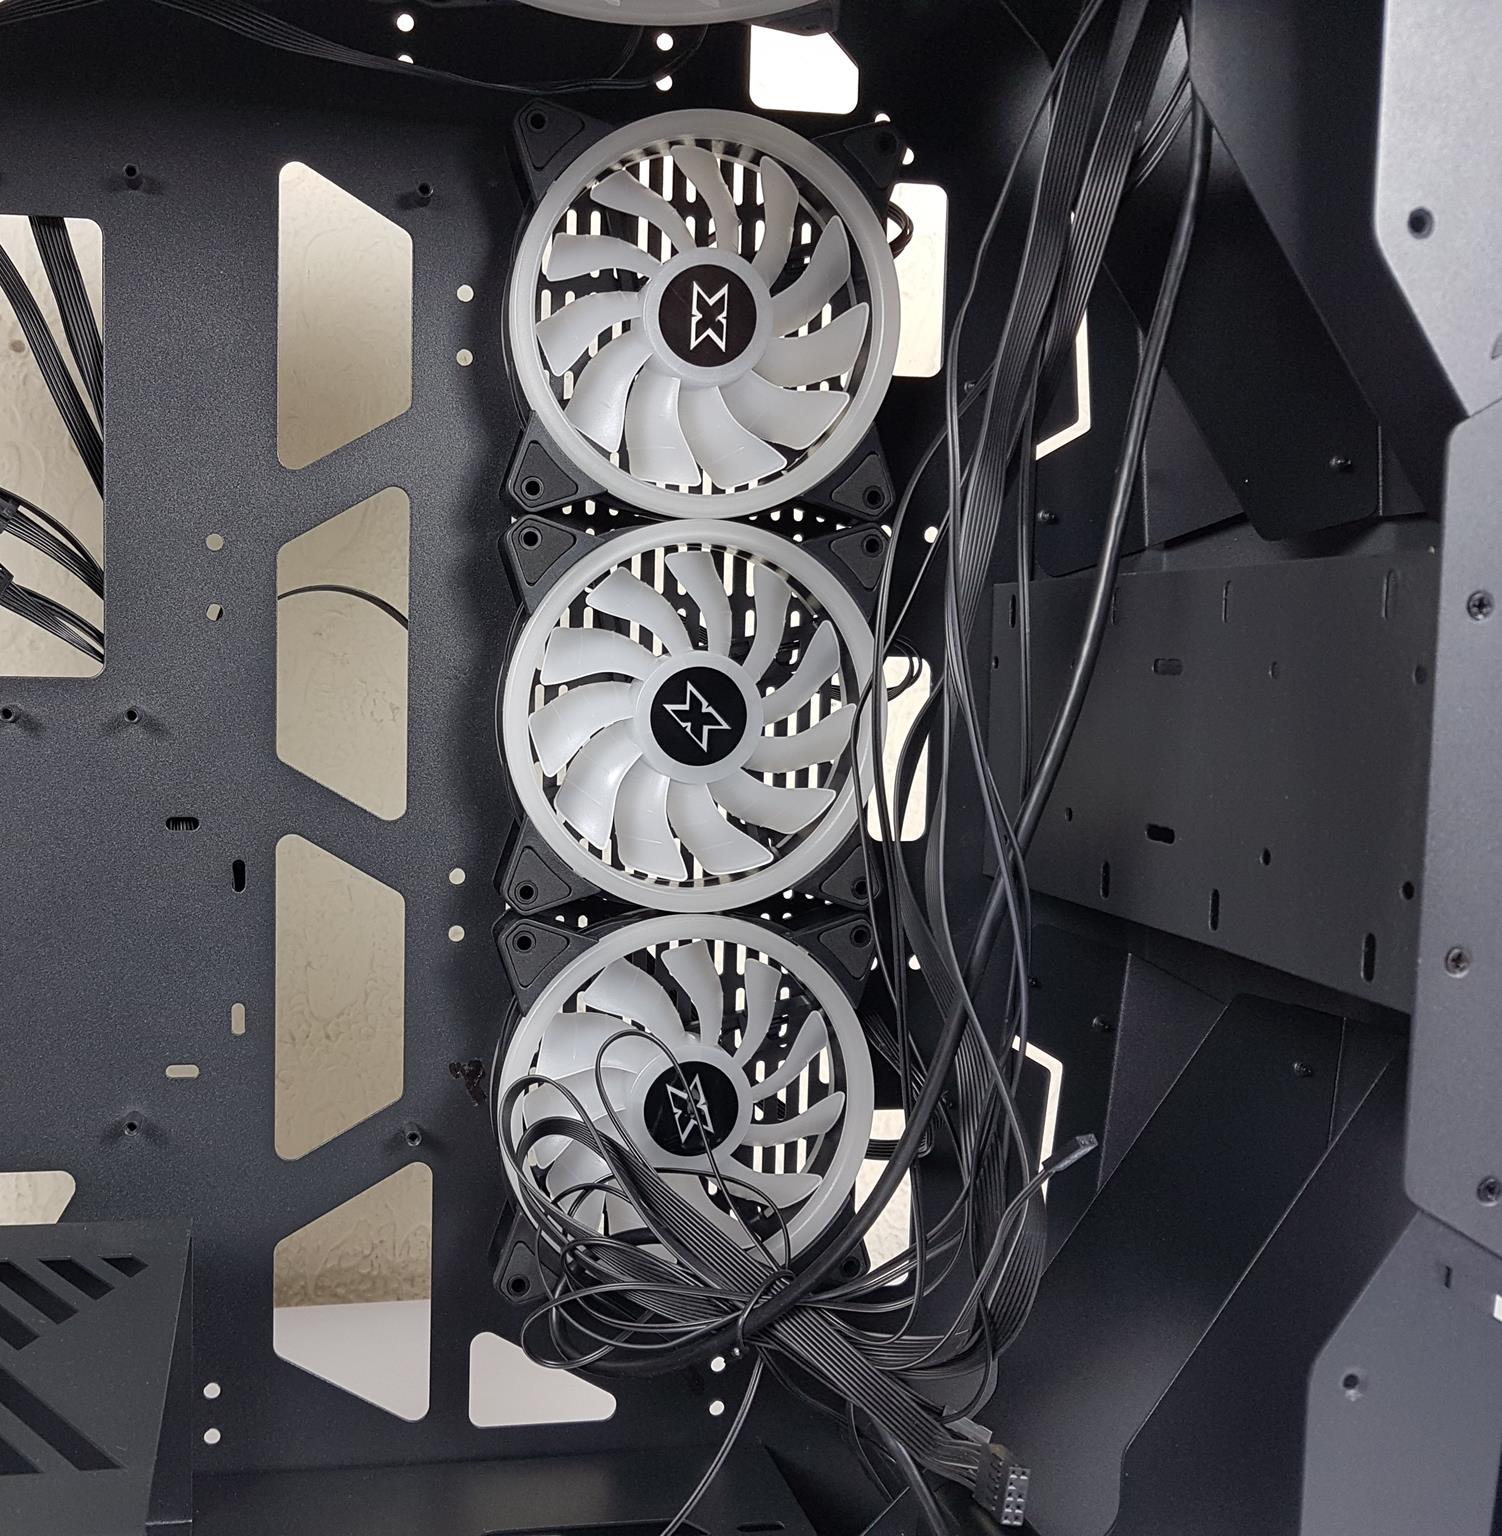
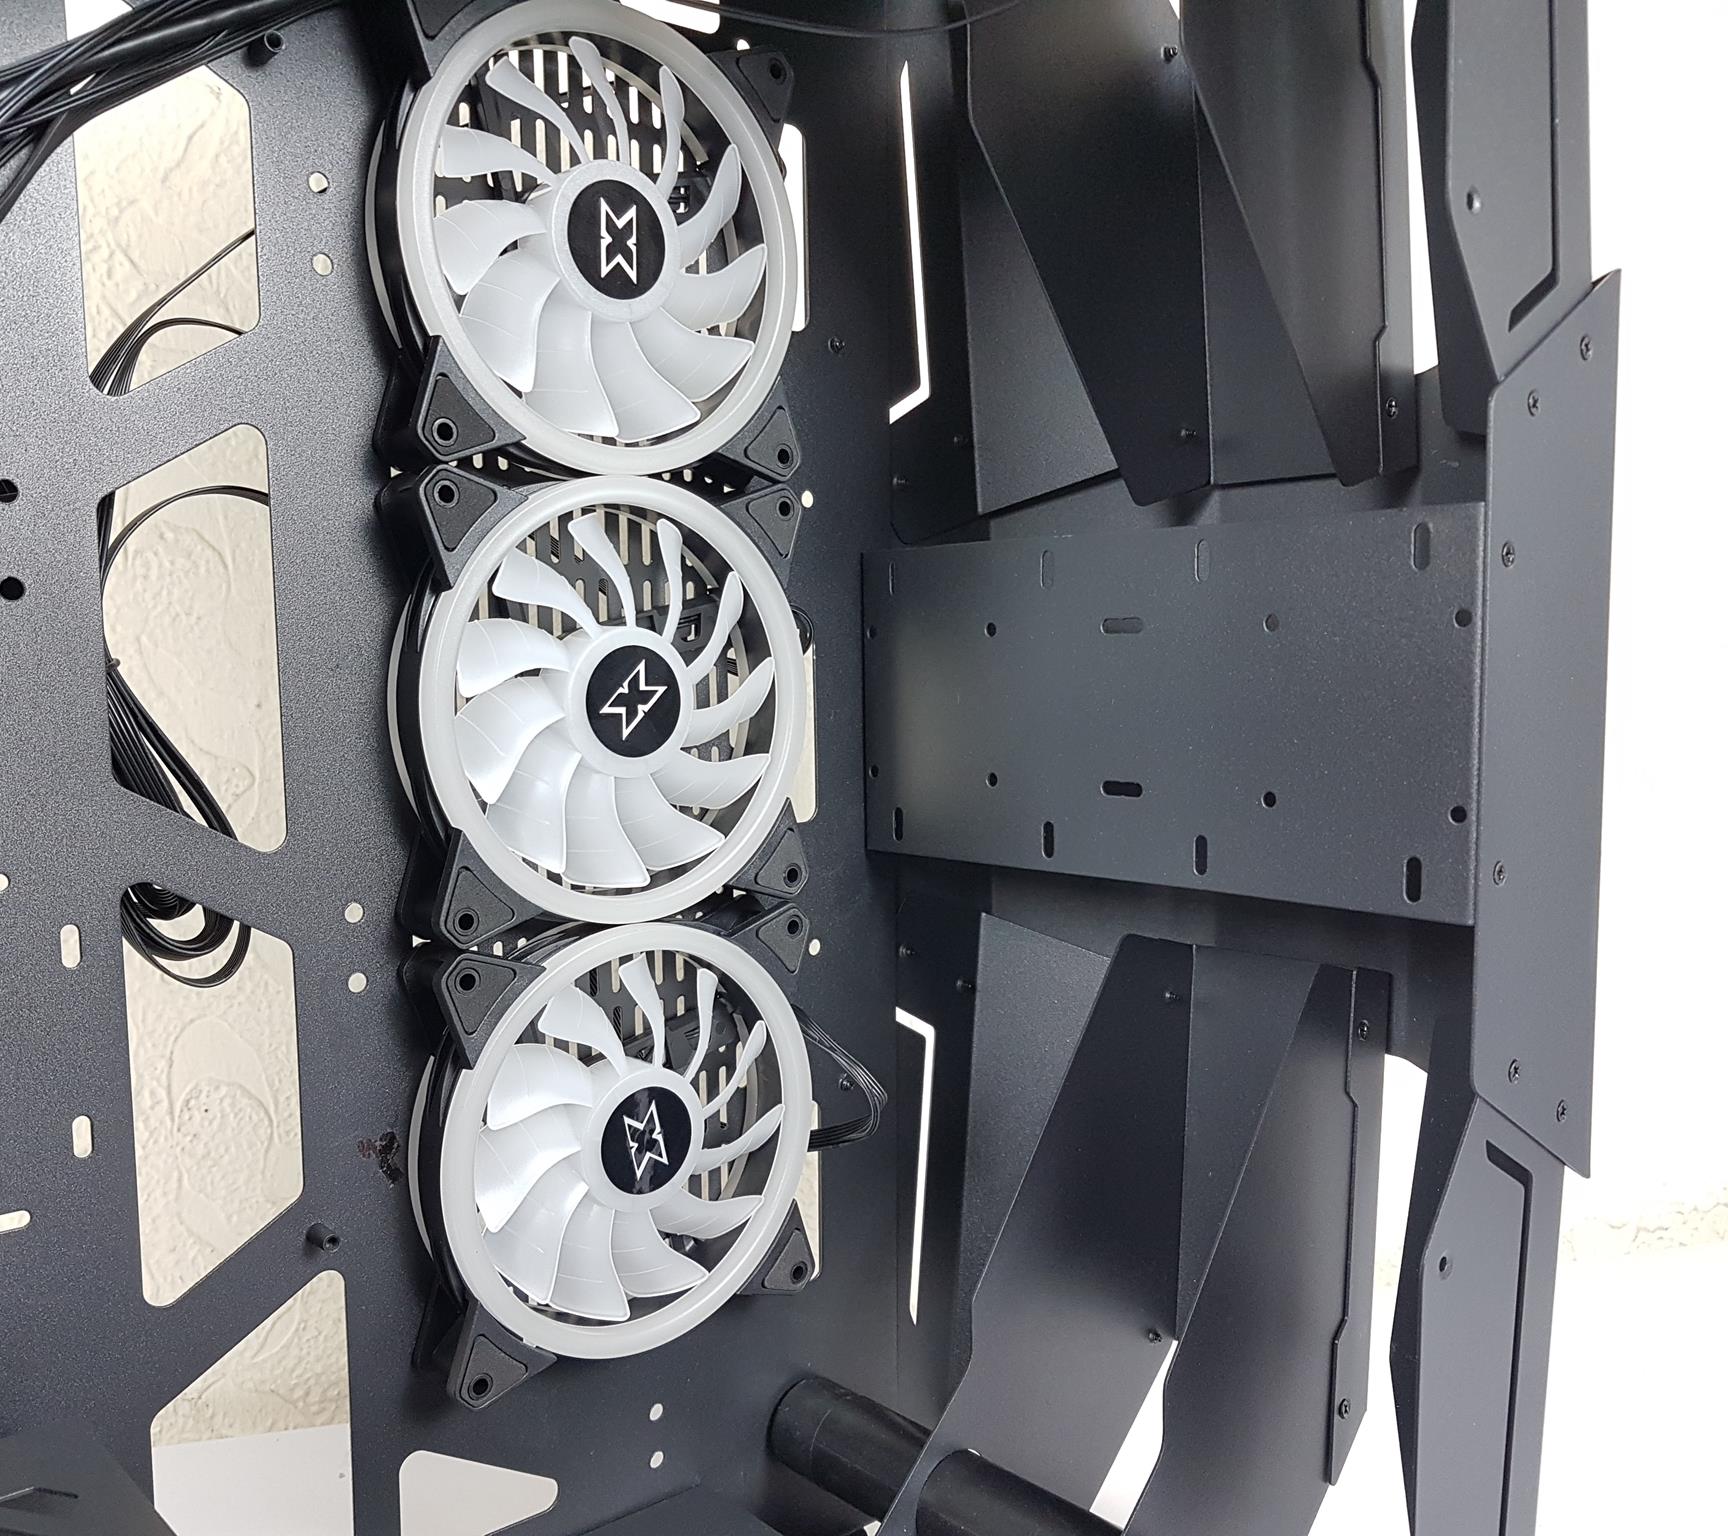
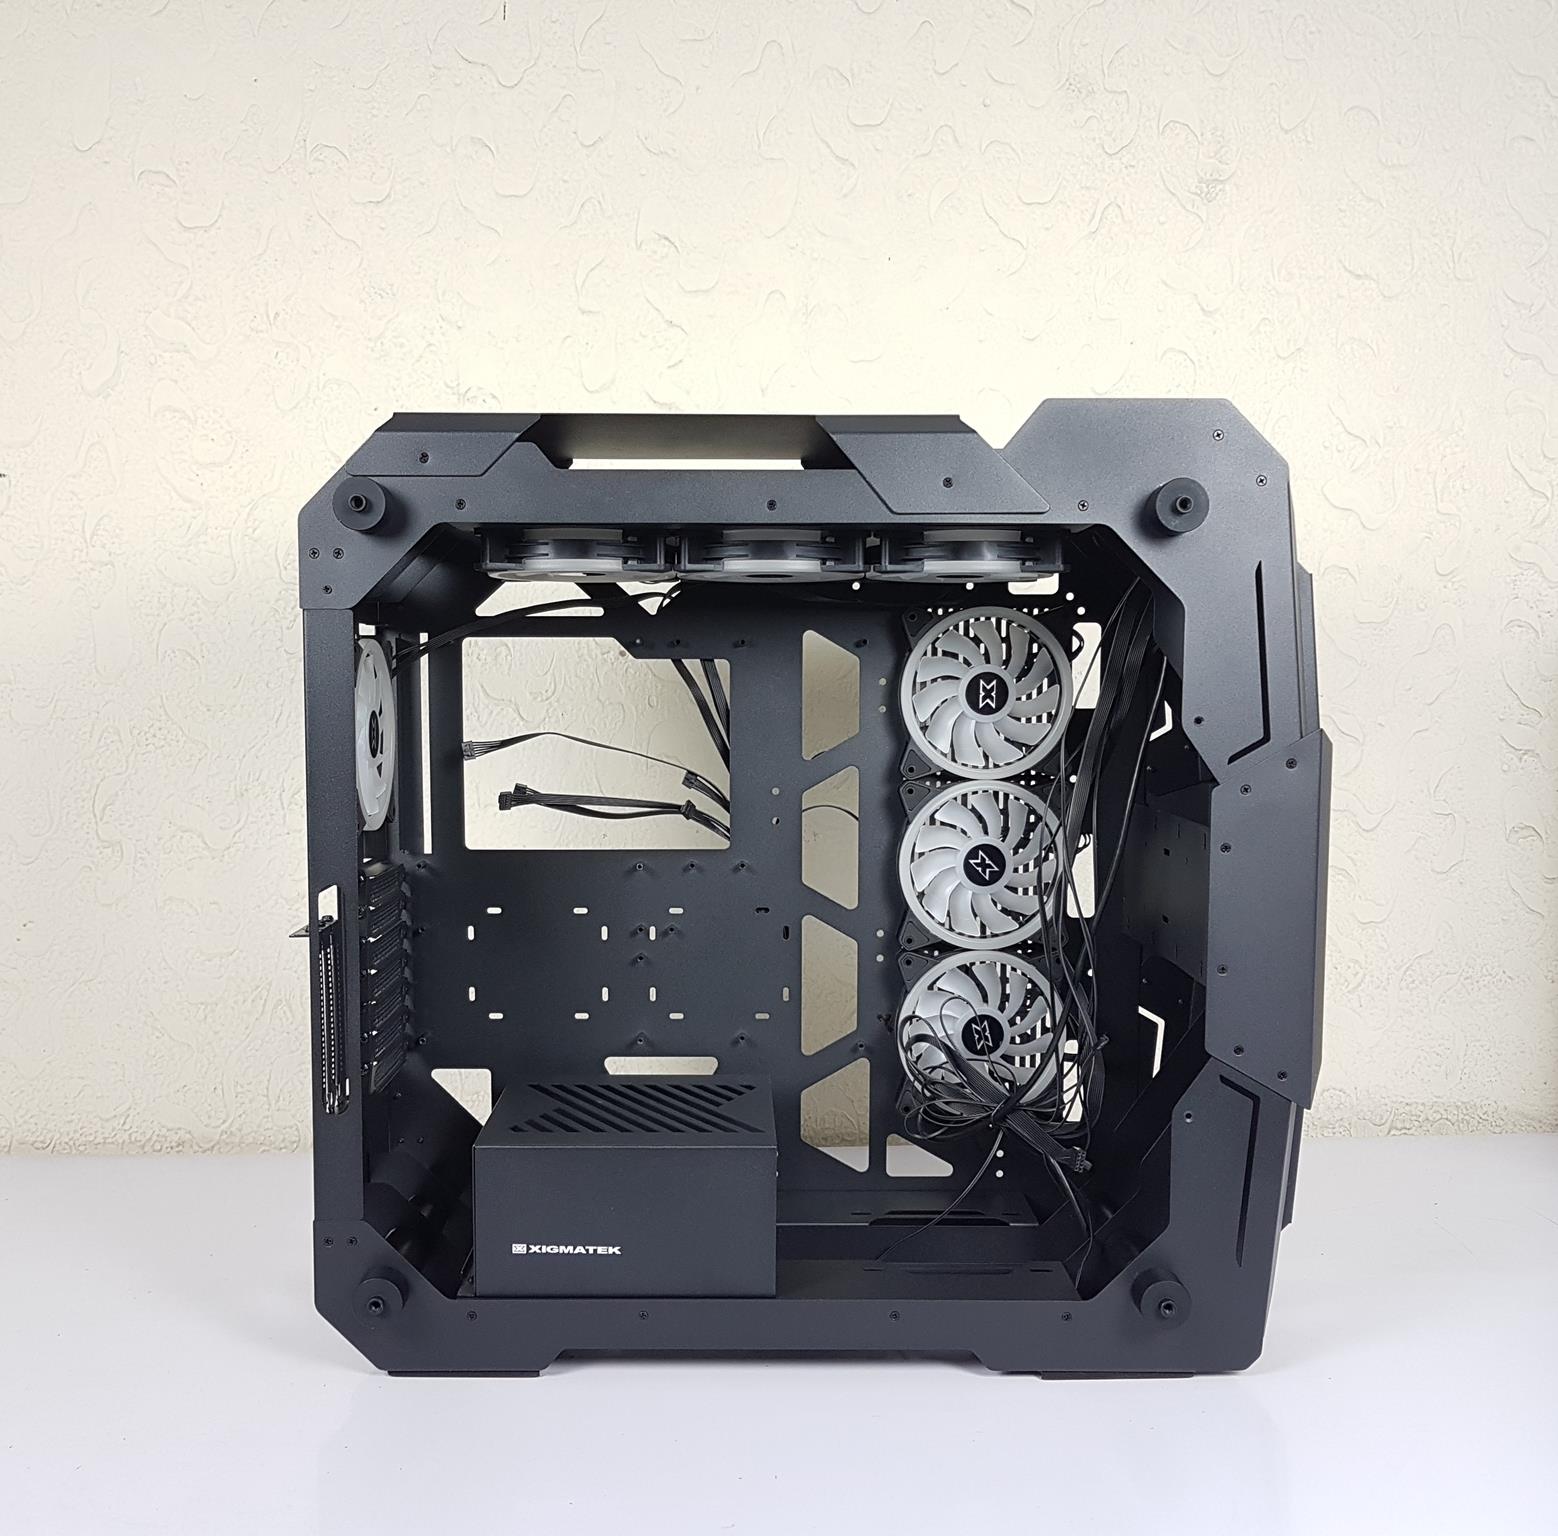
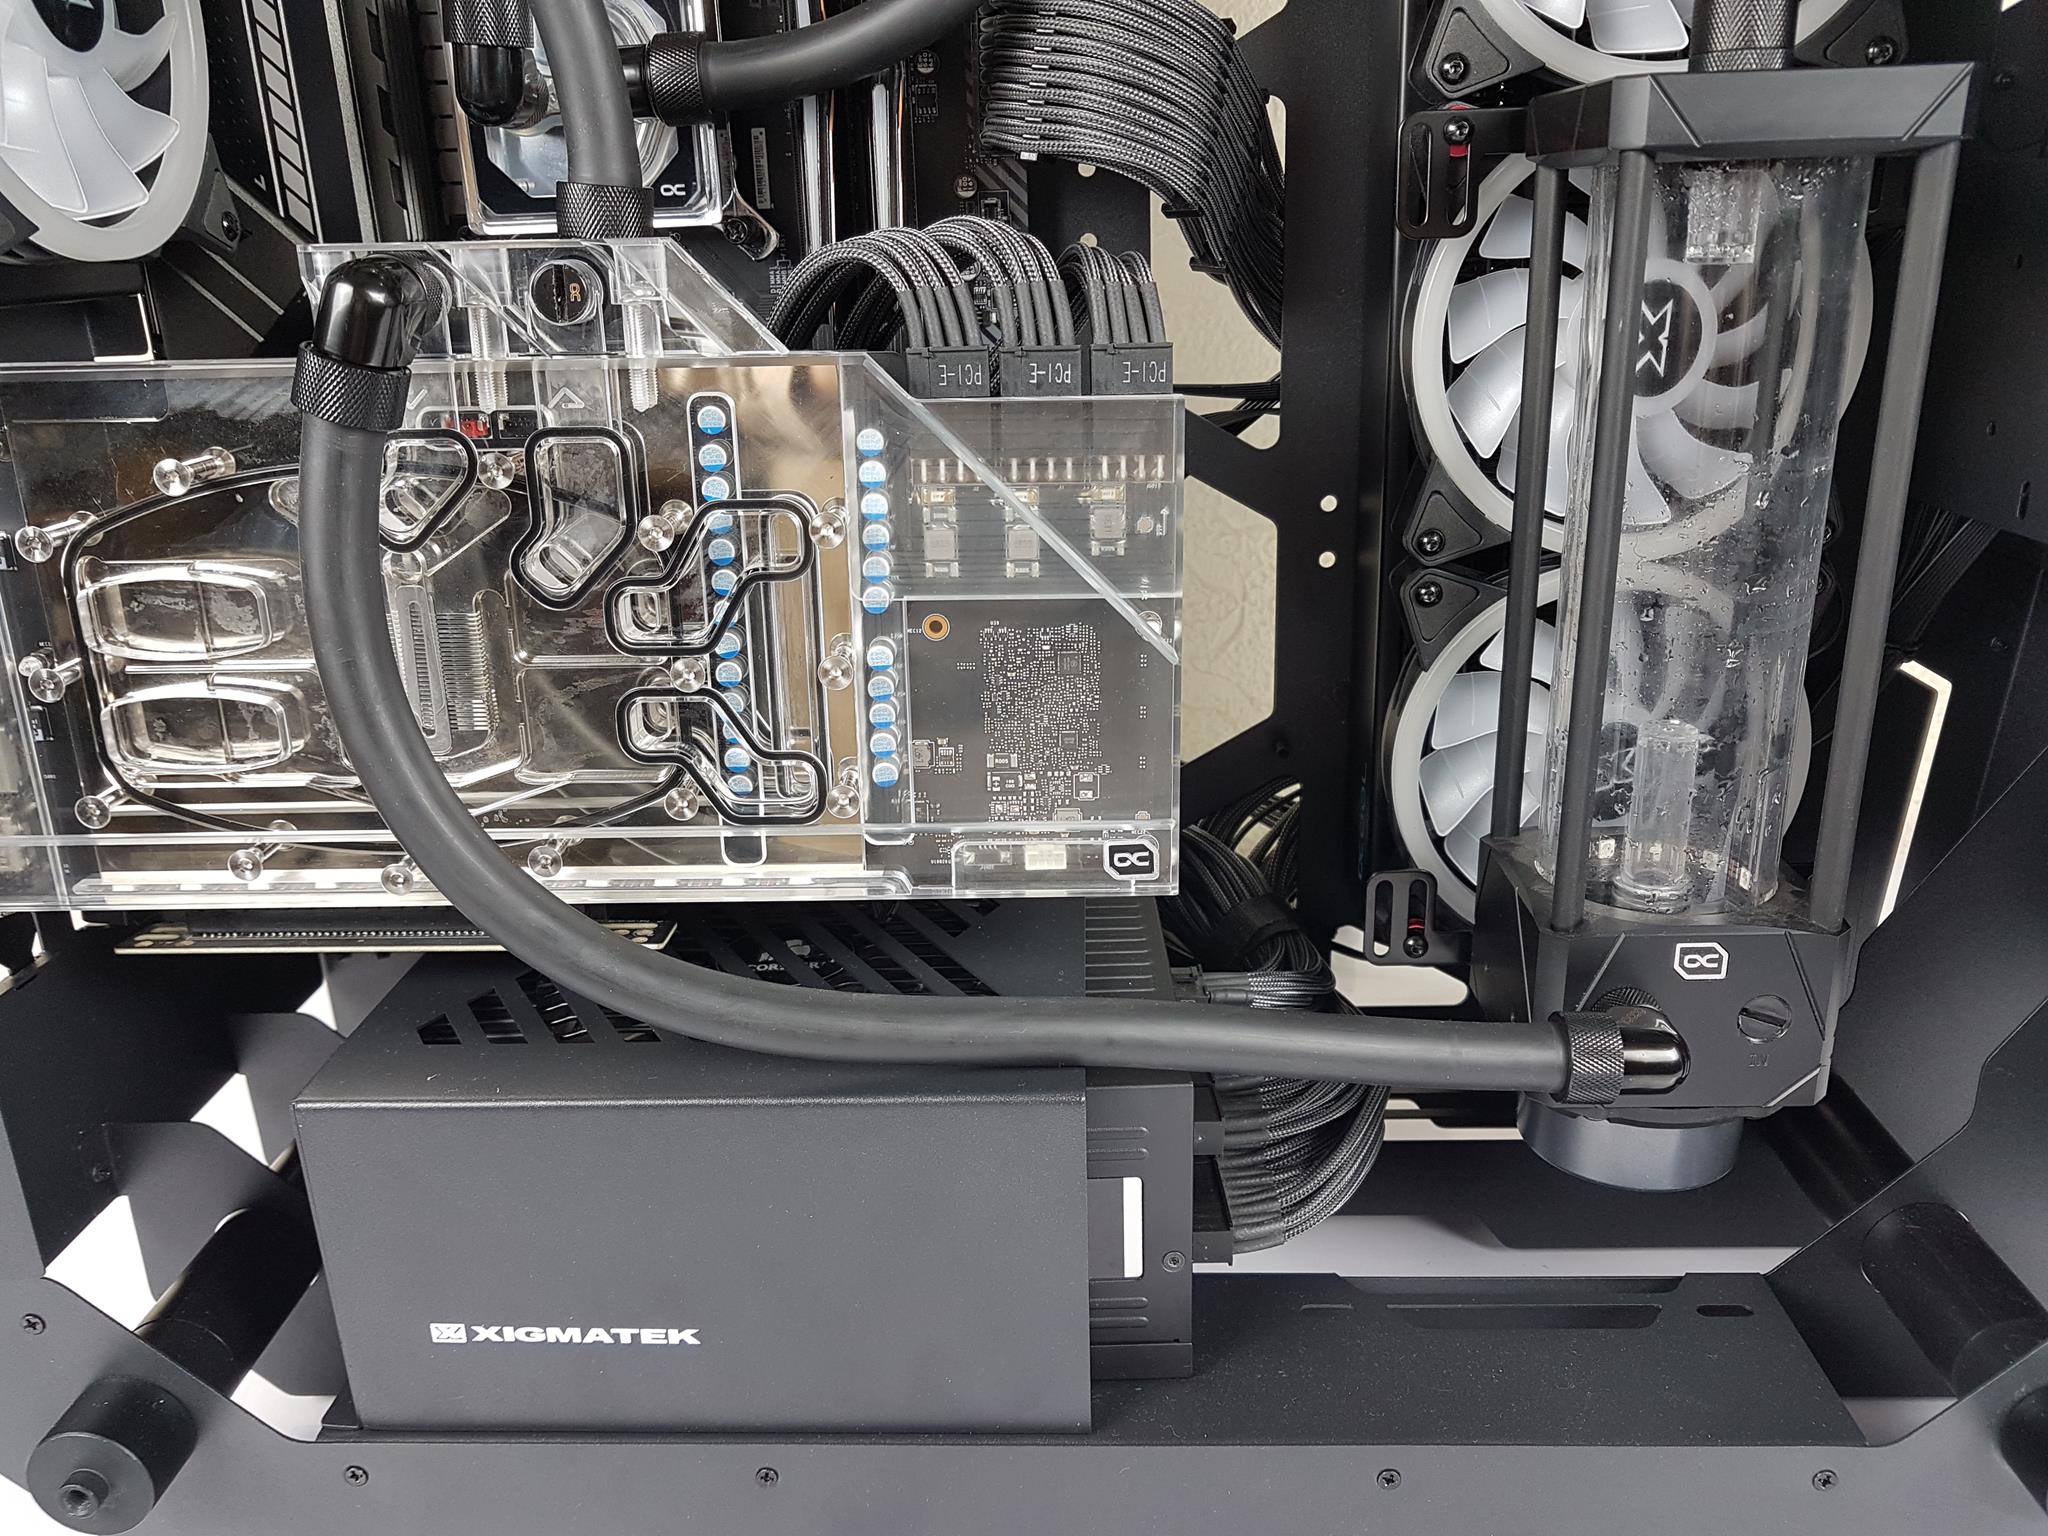
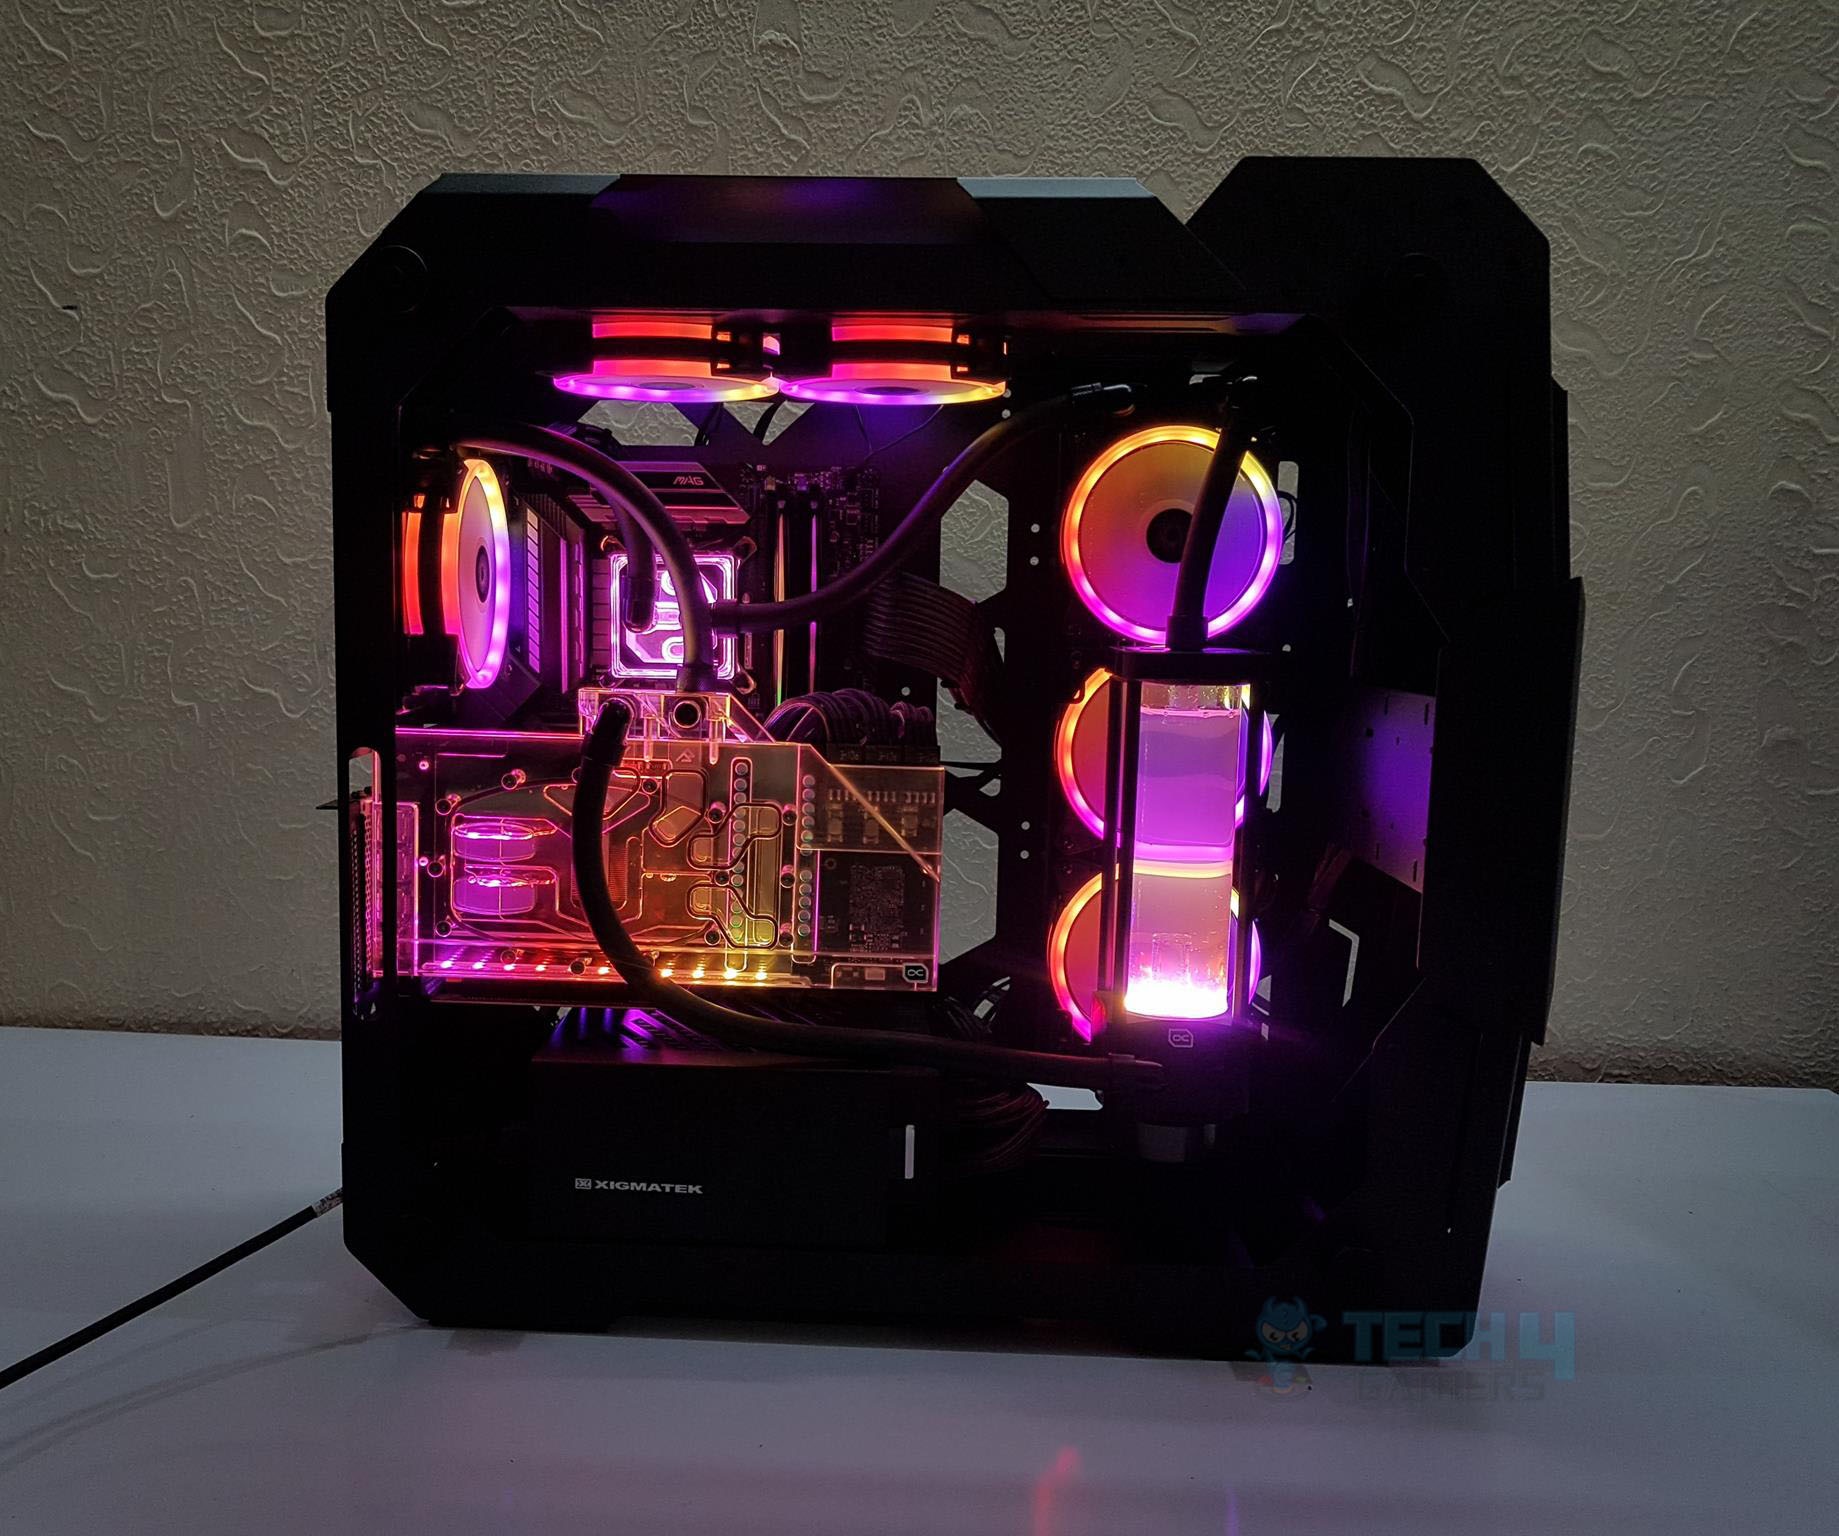
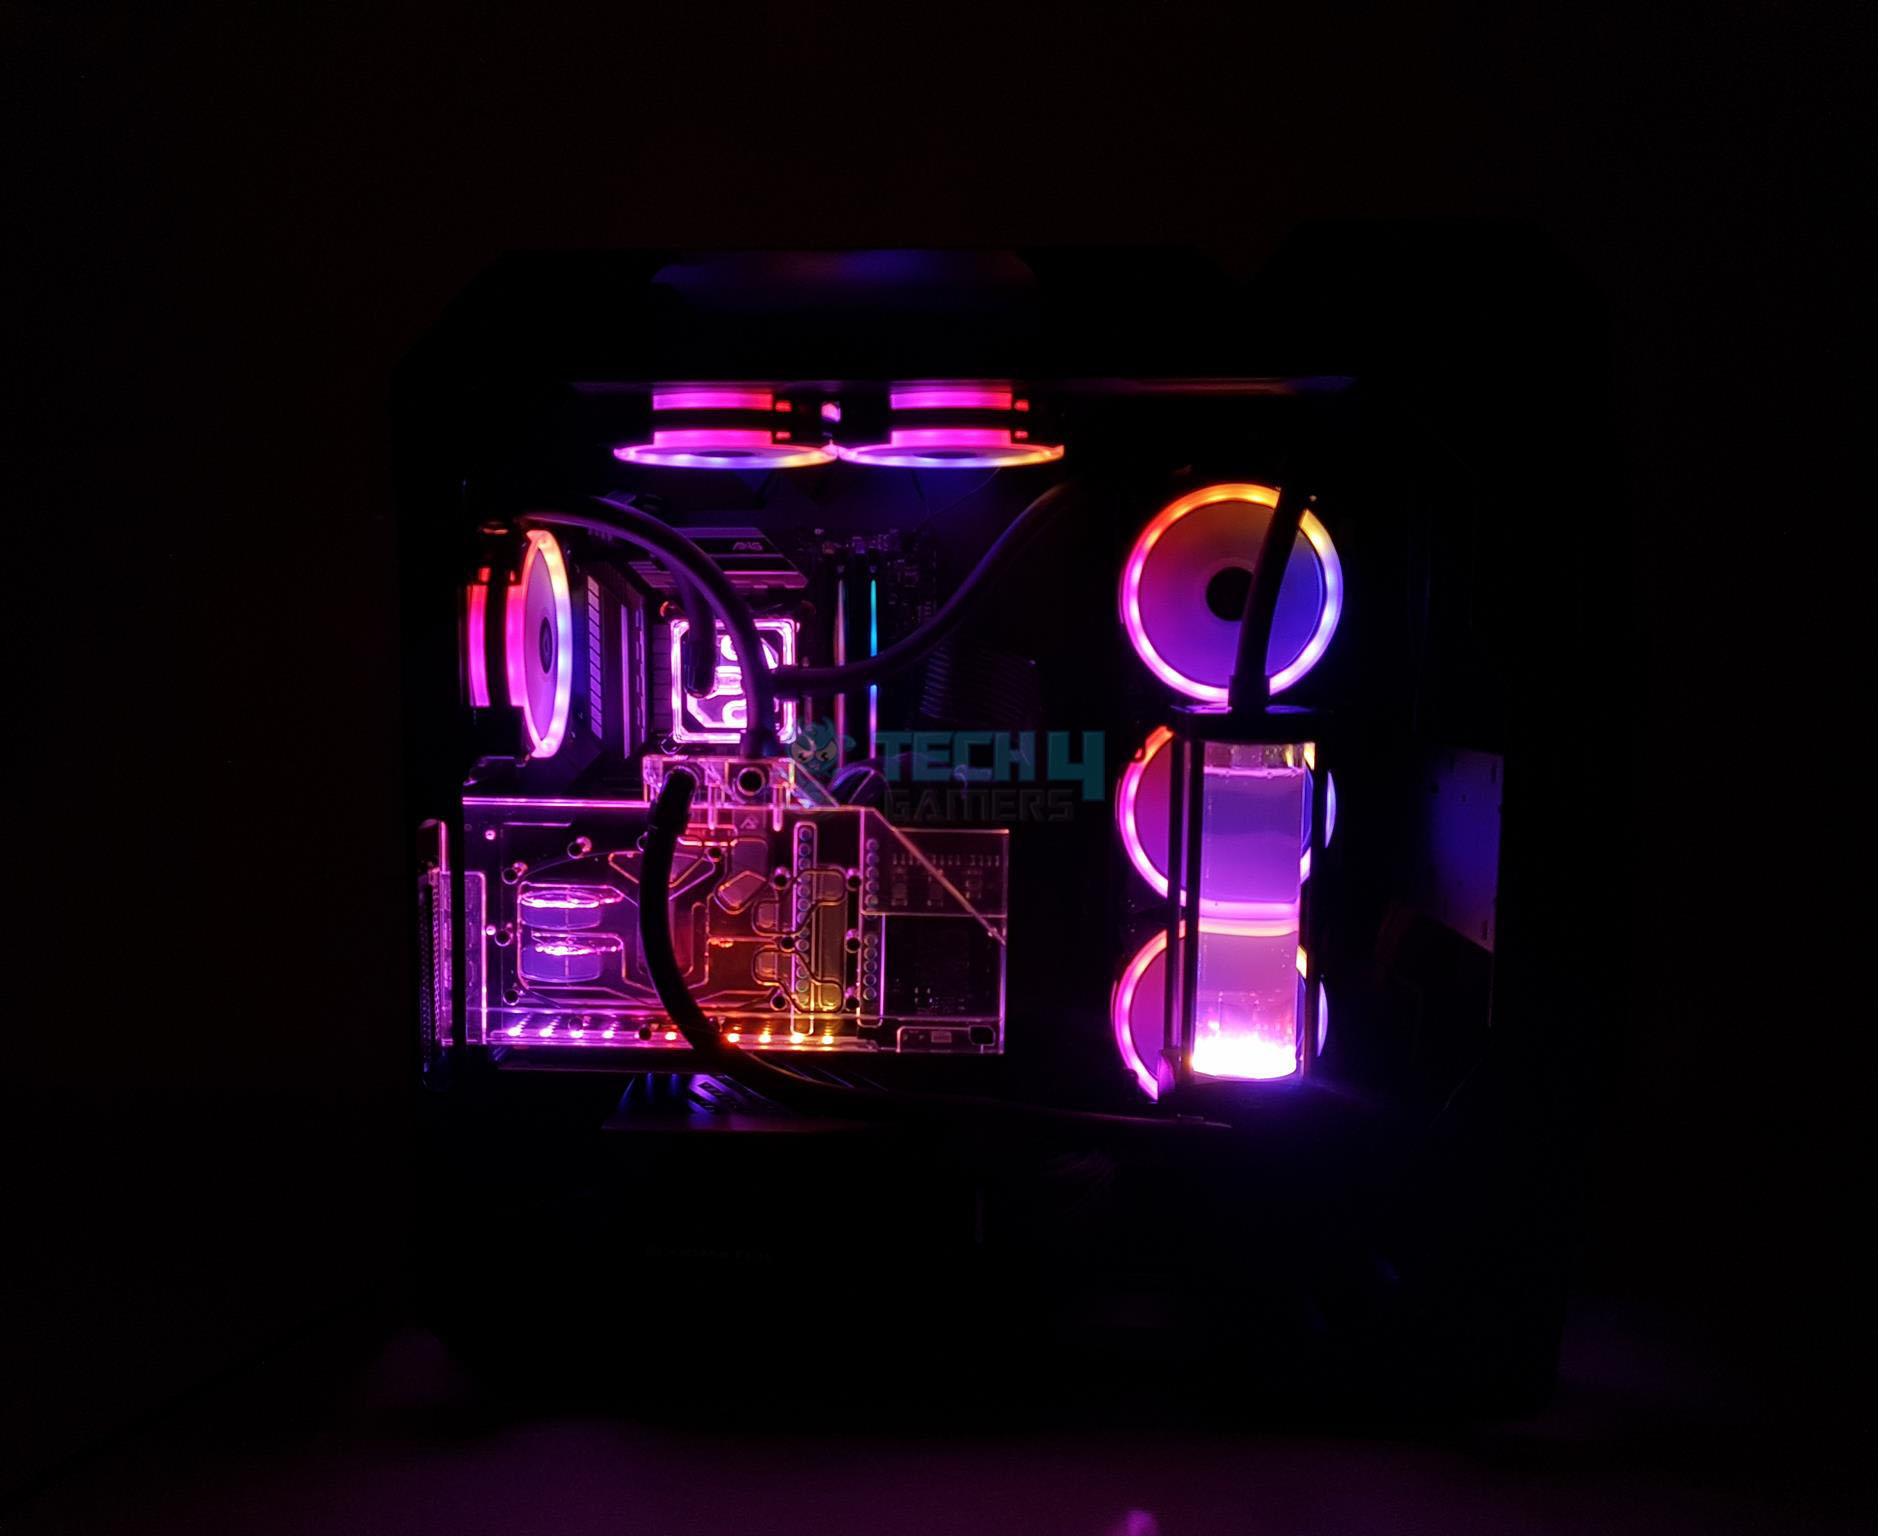
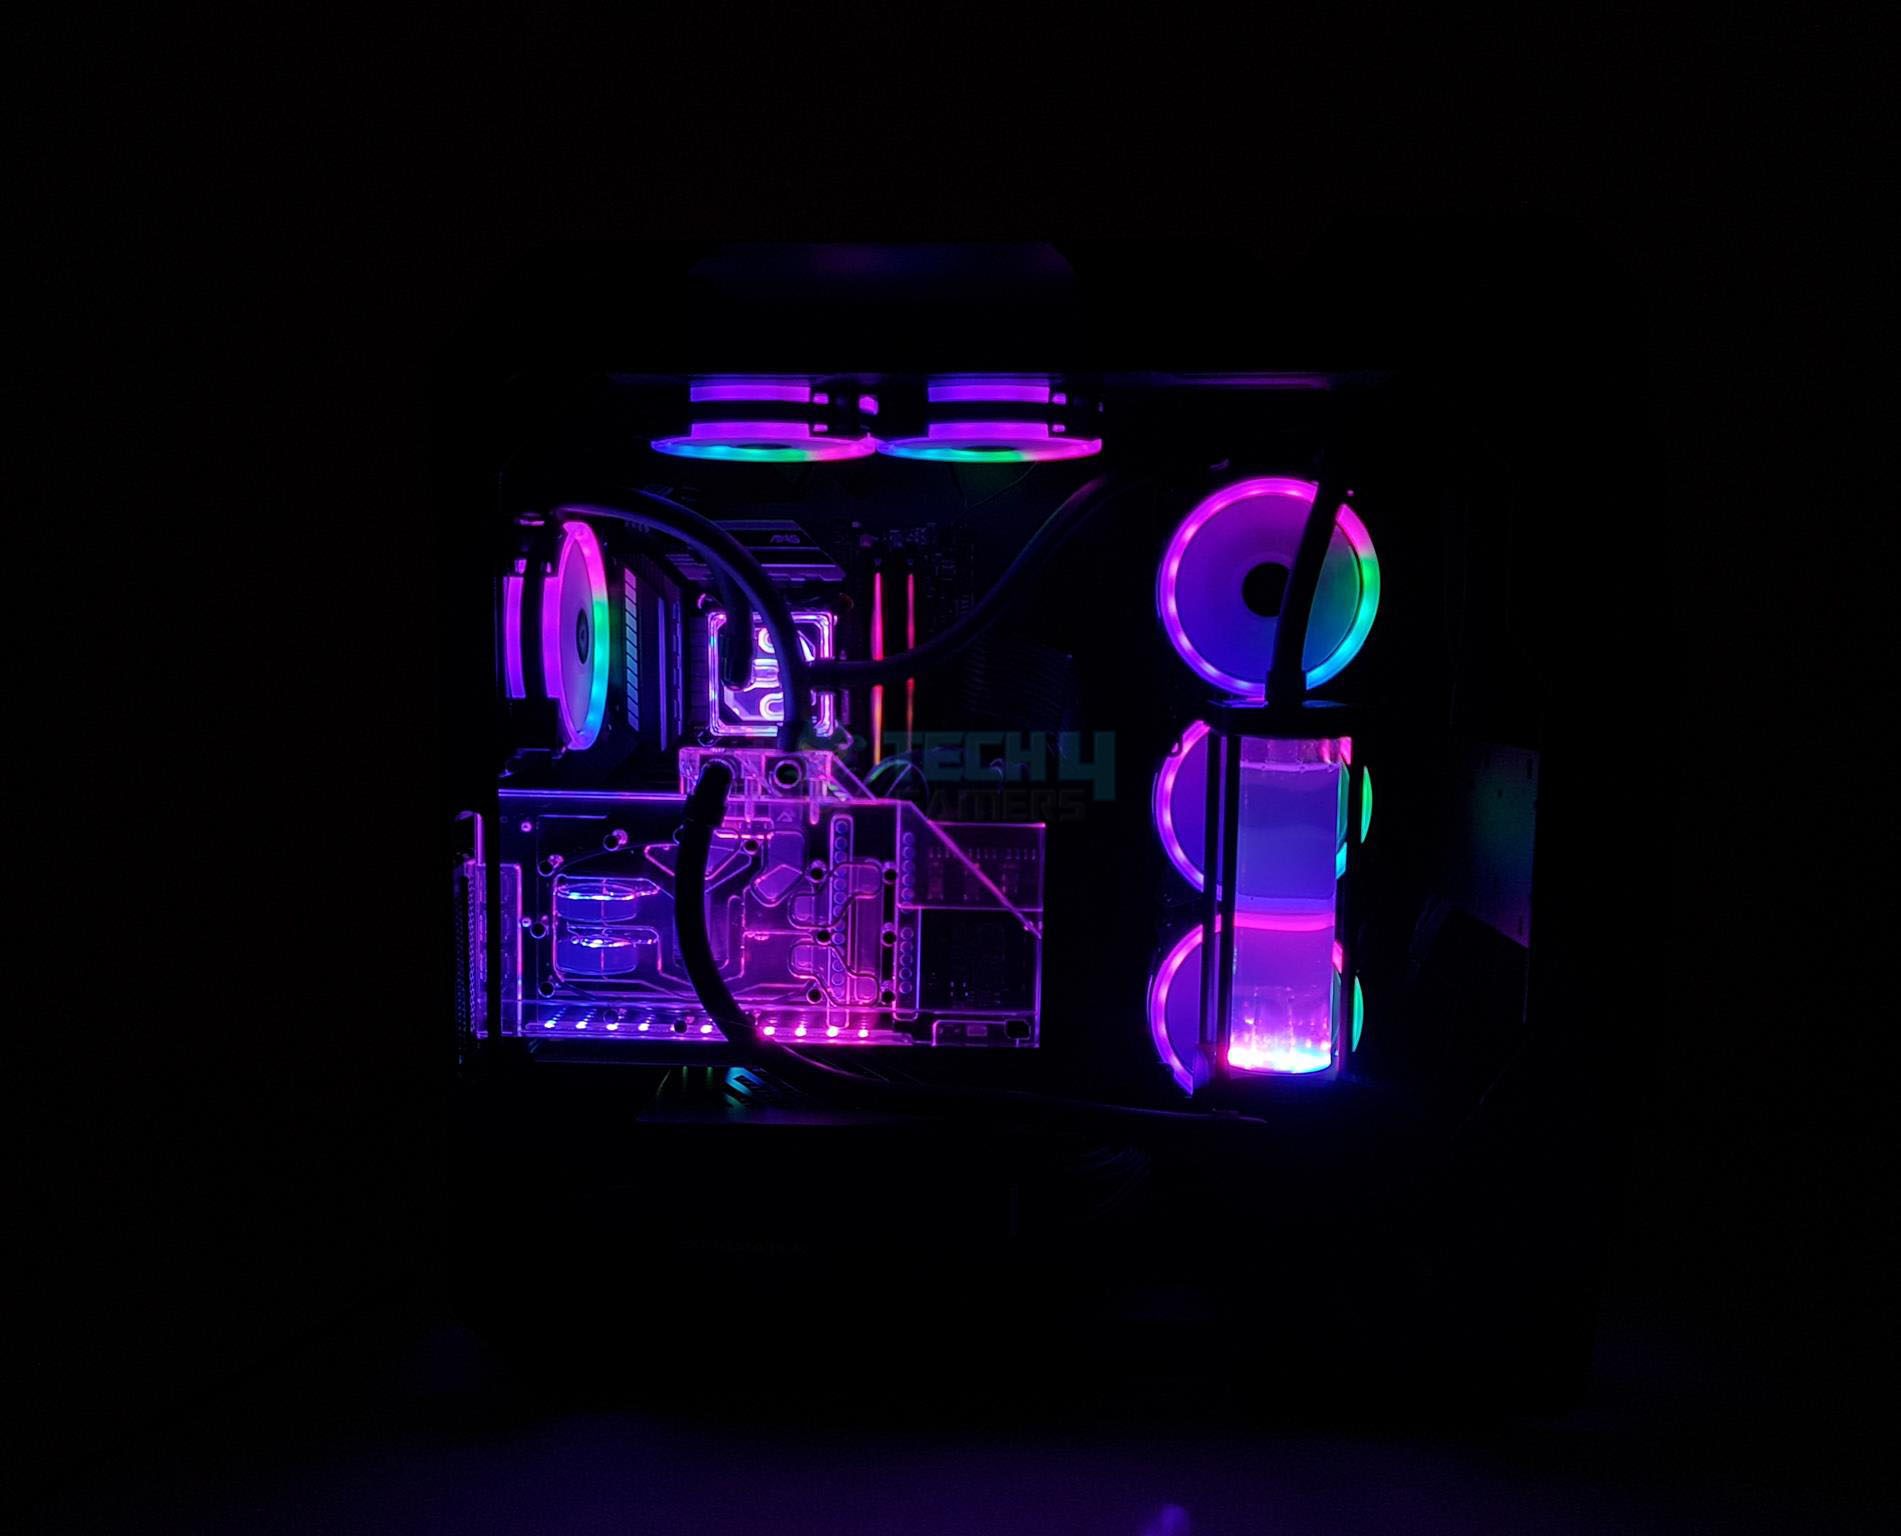
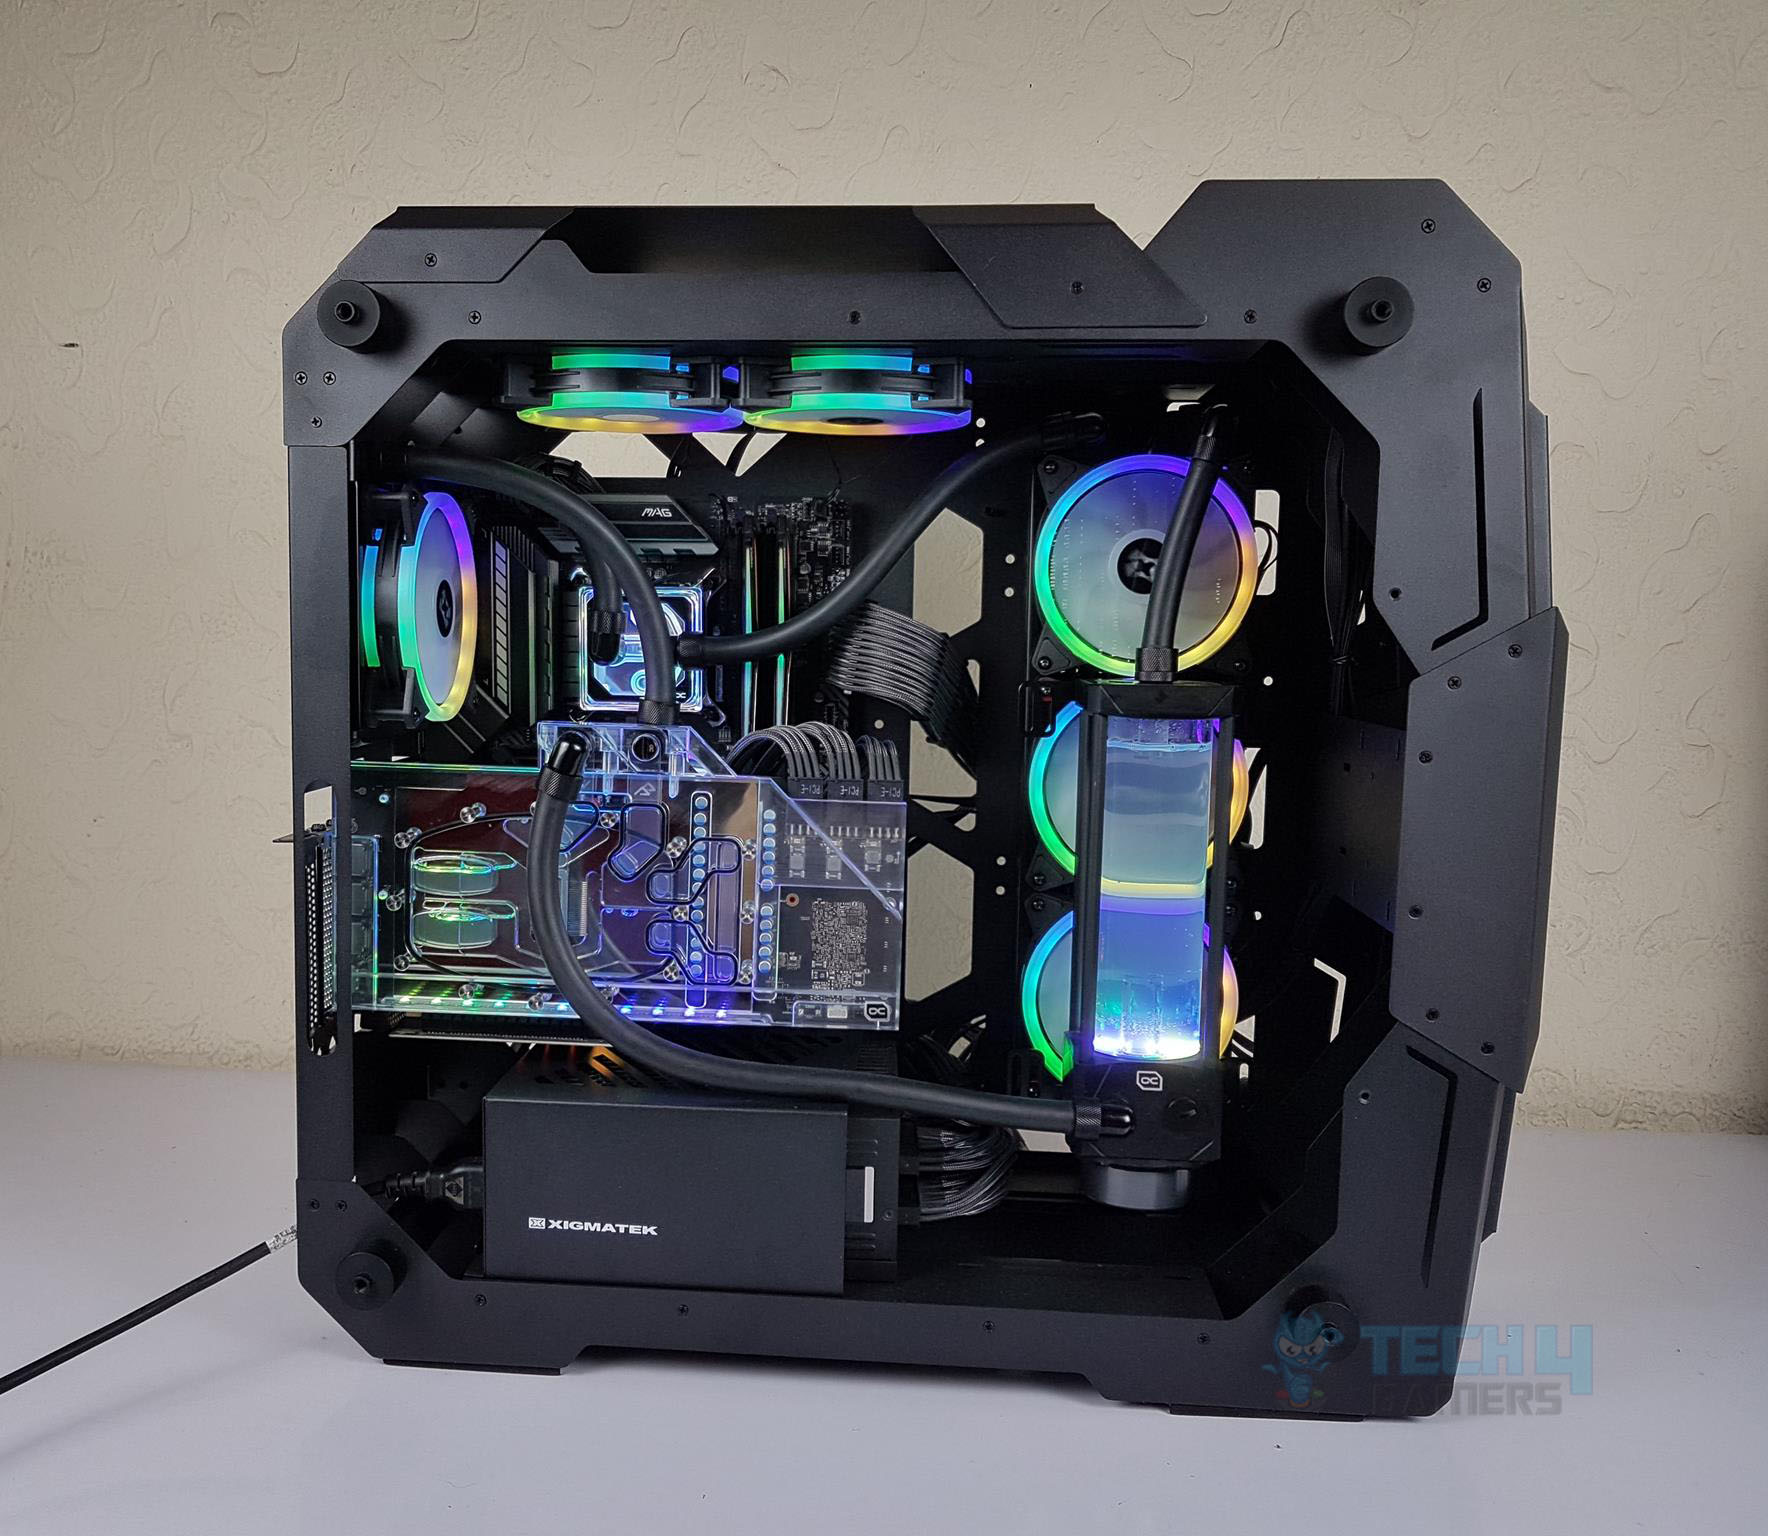
There are 3x 120mm A-RGB fans pre-installed on the right of the motherboard tray. They are installed in the exhaust layout. This is the only side in the case where we can push some air inside and I would suggest the user reverse the side of these fans to make as intake. We can install up to 360mm radiator here as well.
There is a mounting plate that can house up to 2x 2.5” or 3.5” drives.
We have 7x PCIe slots in horizontal and 3x in the vertical layout. Please note that there is no supported bracket for the vertical slots and the graphics card will be hanging off the wall of the case with only support coming from the PCIe slot frame of the case.
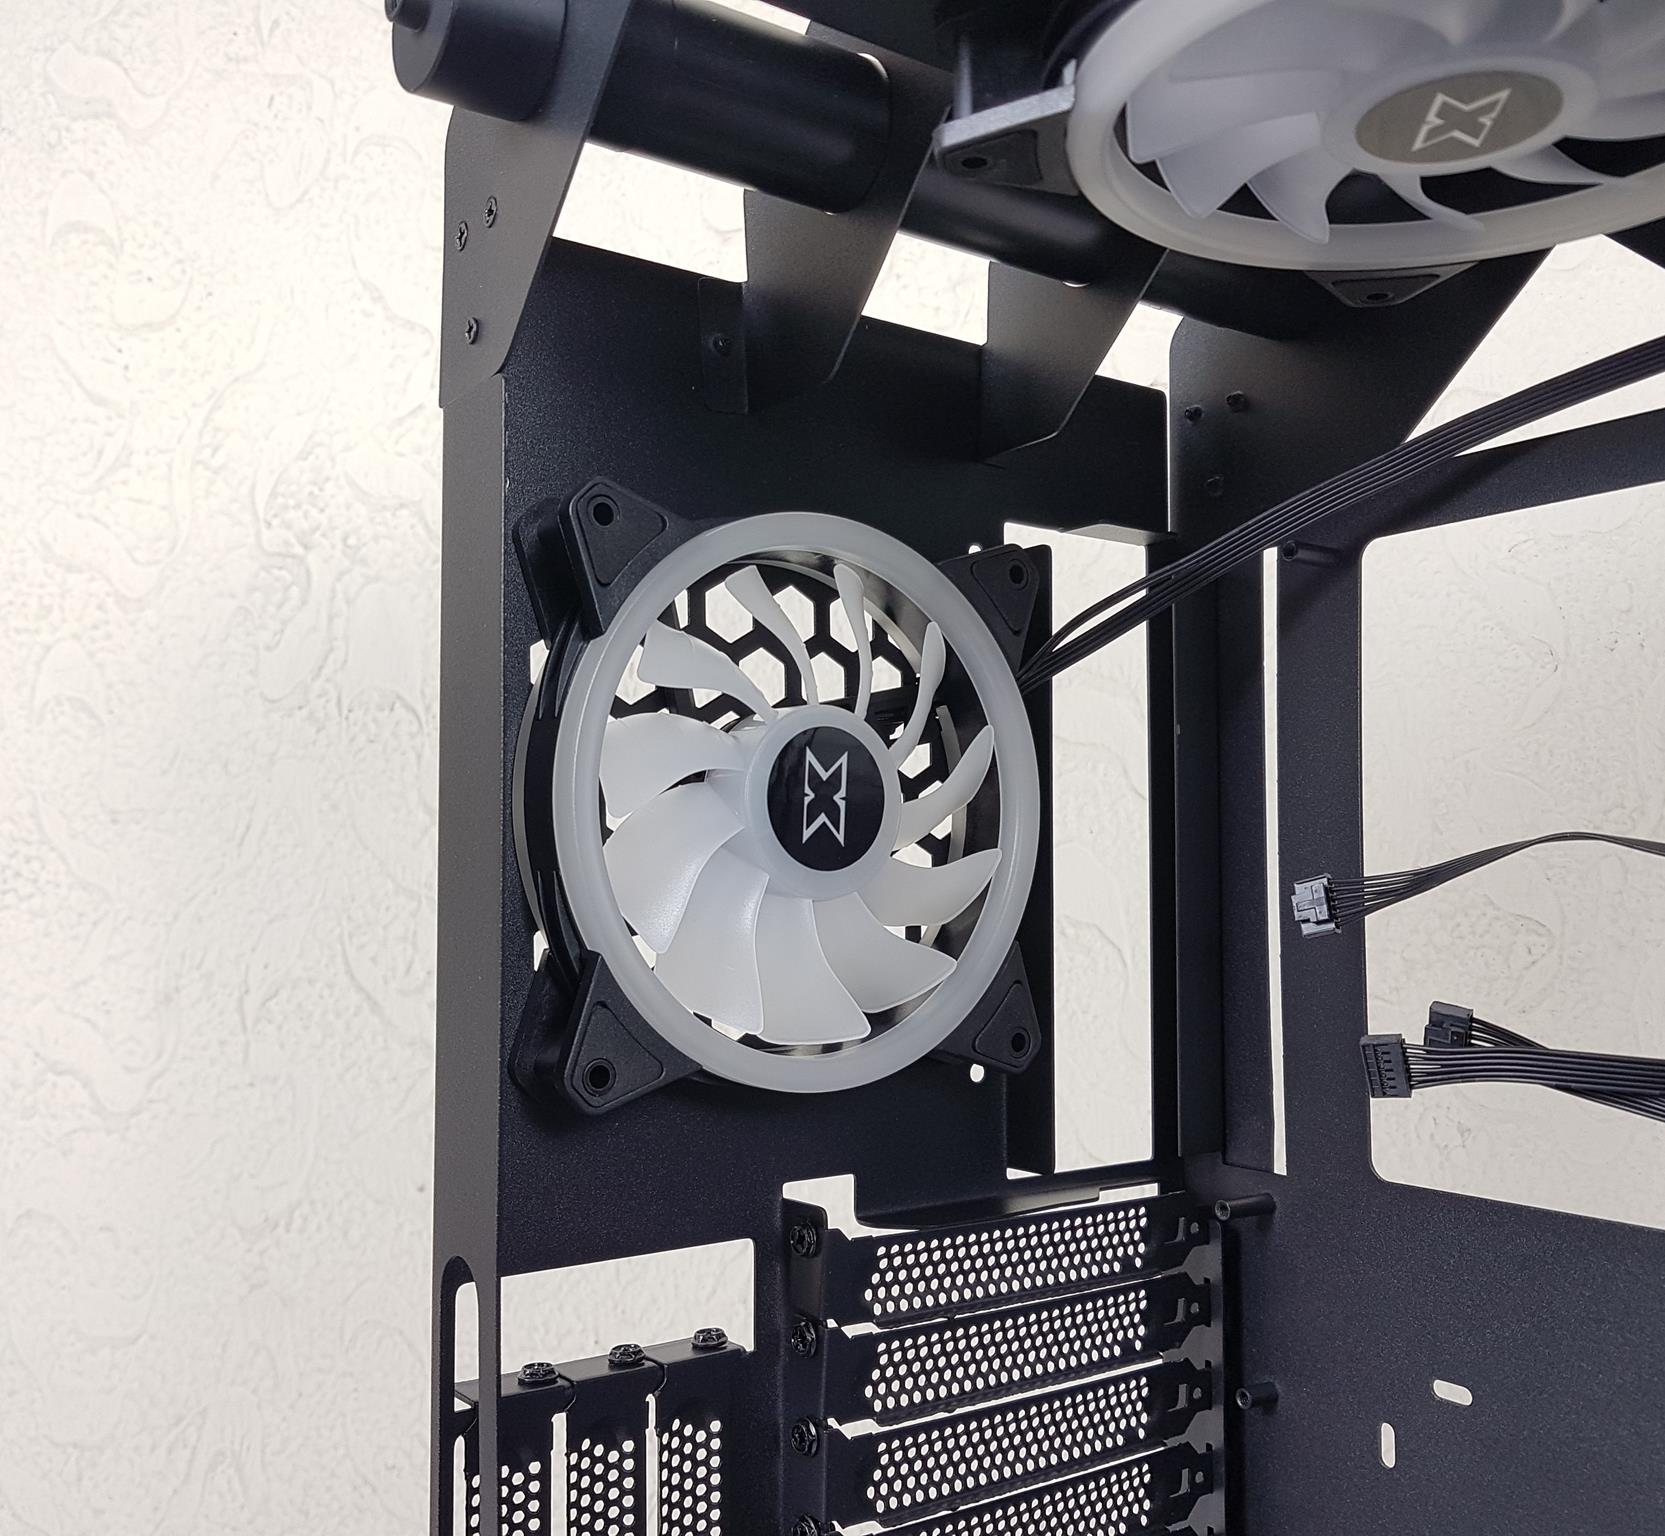
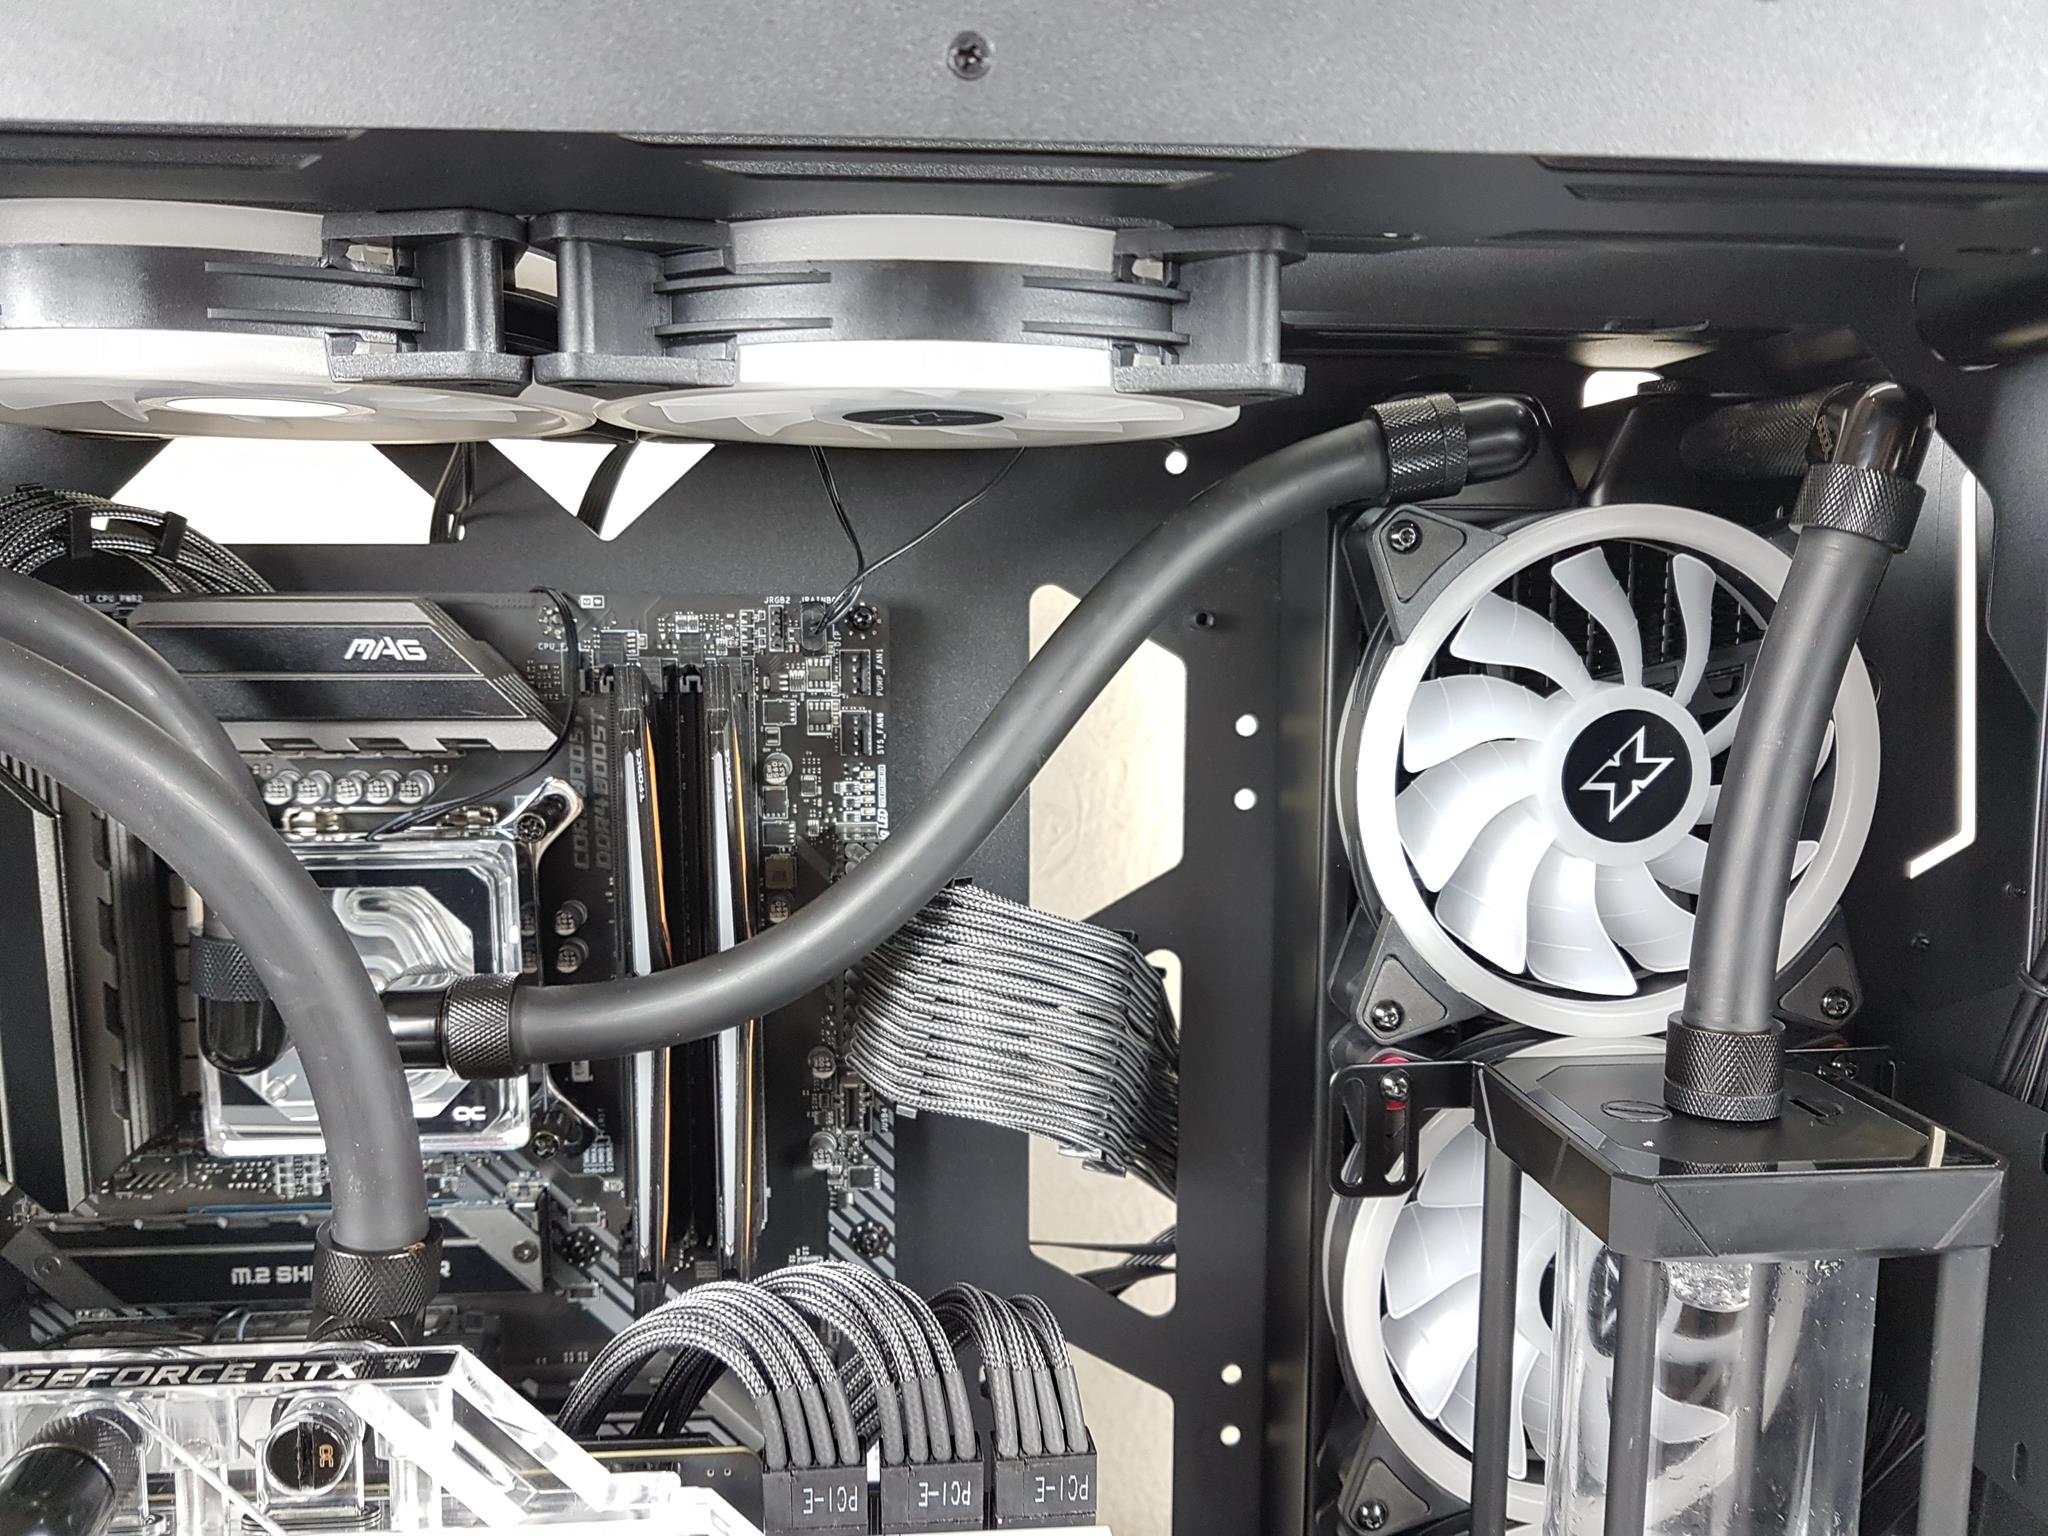
There is a 120mm A-RGB fan on the rear. The user can also install a 140mm fan here. This is the only side of XIGMATEK X7 case that can house a 140mm fan.
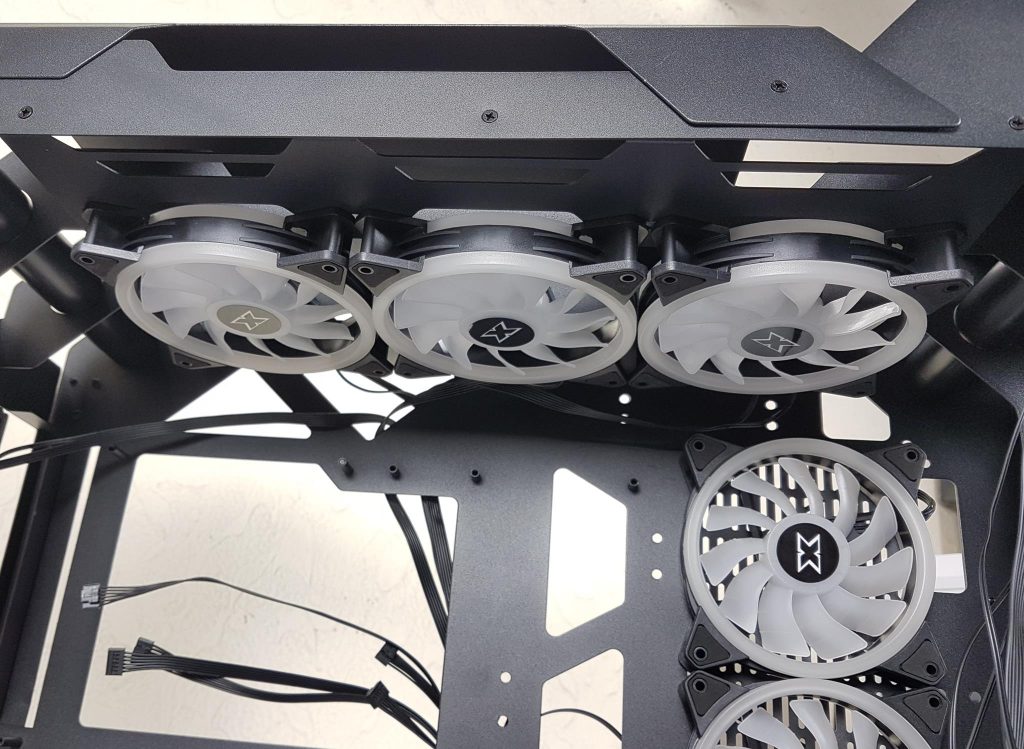
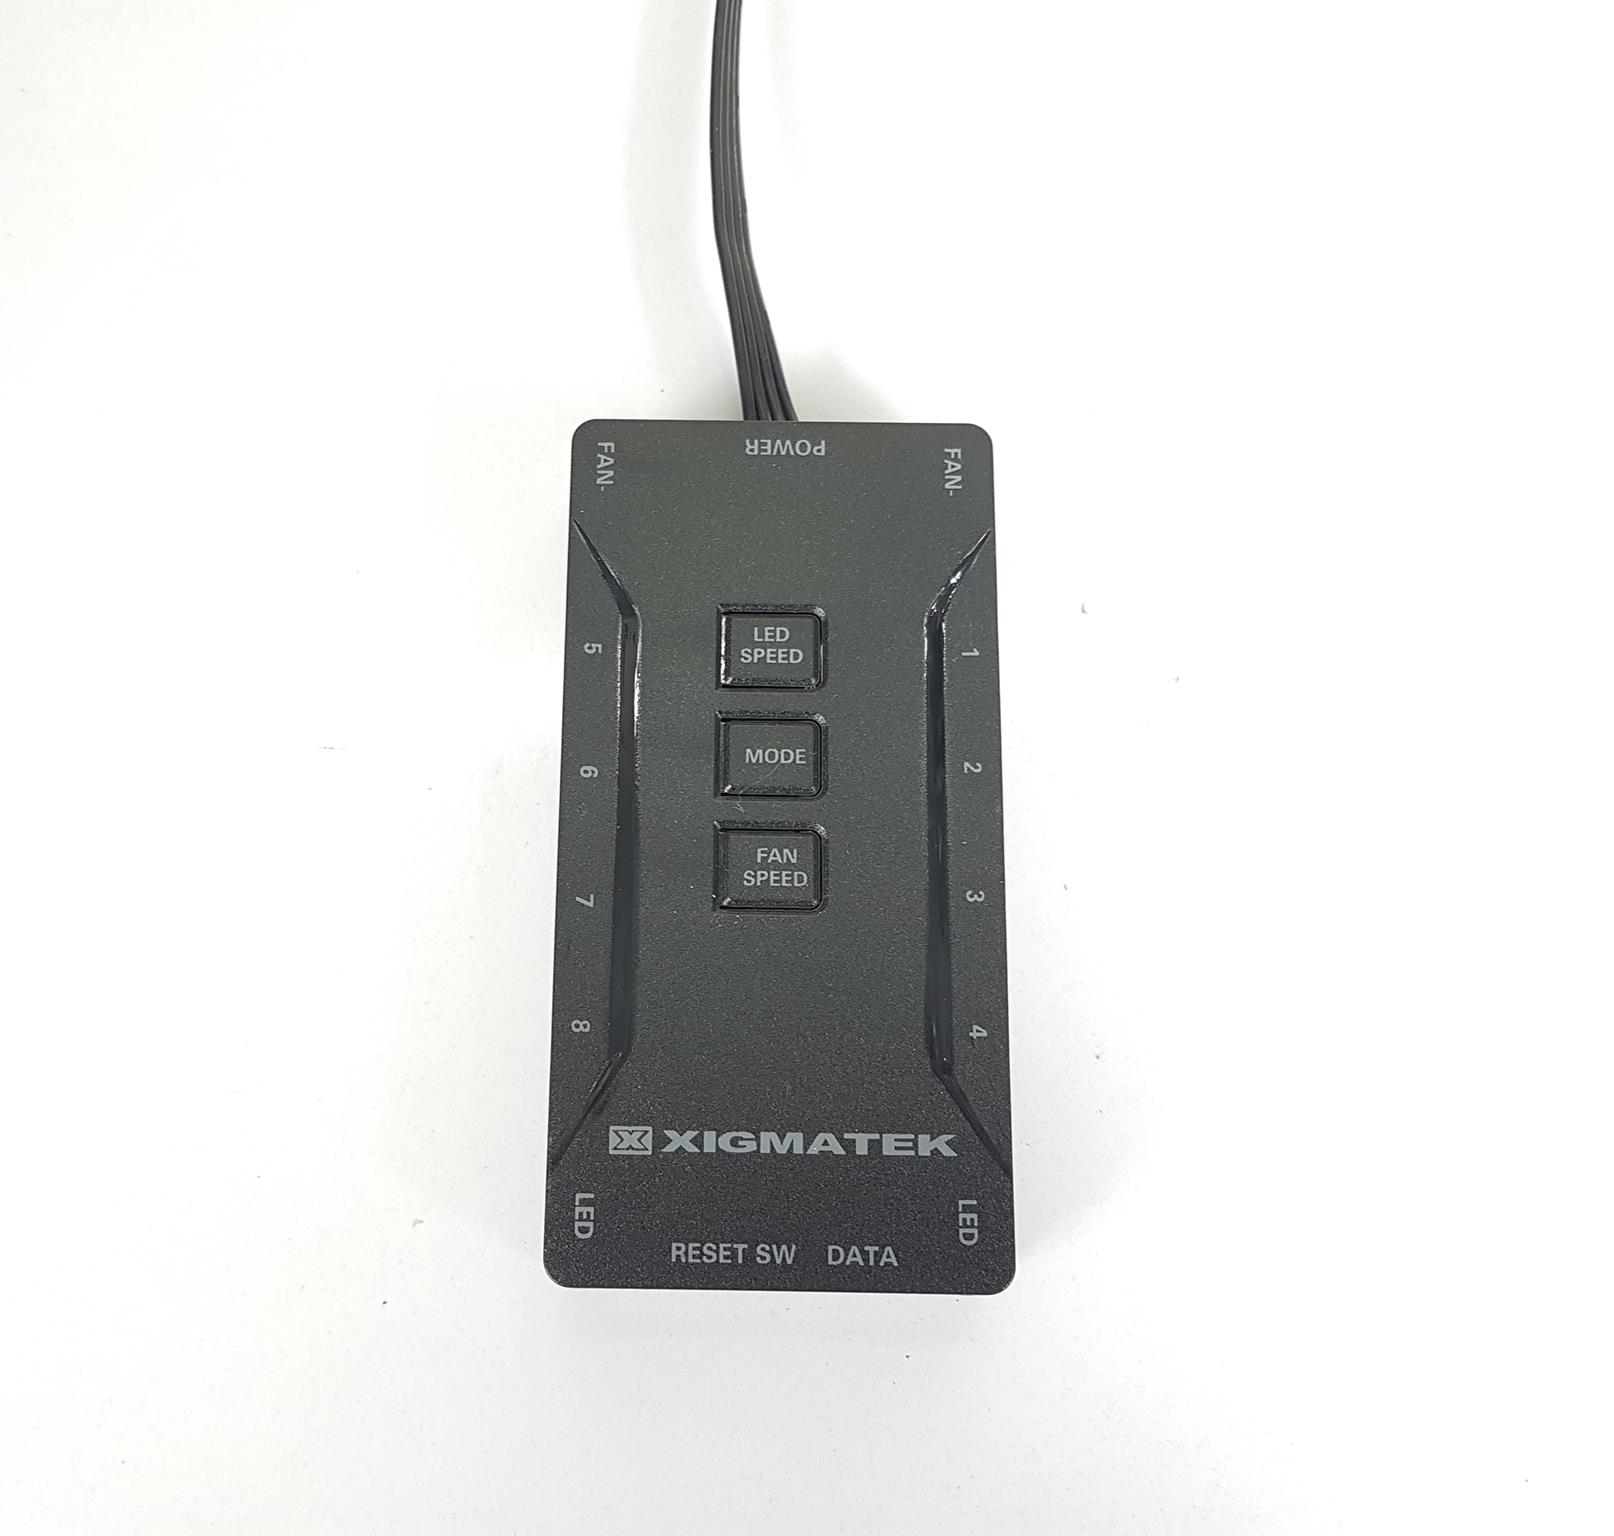
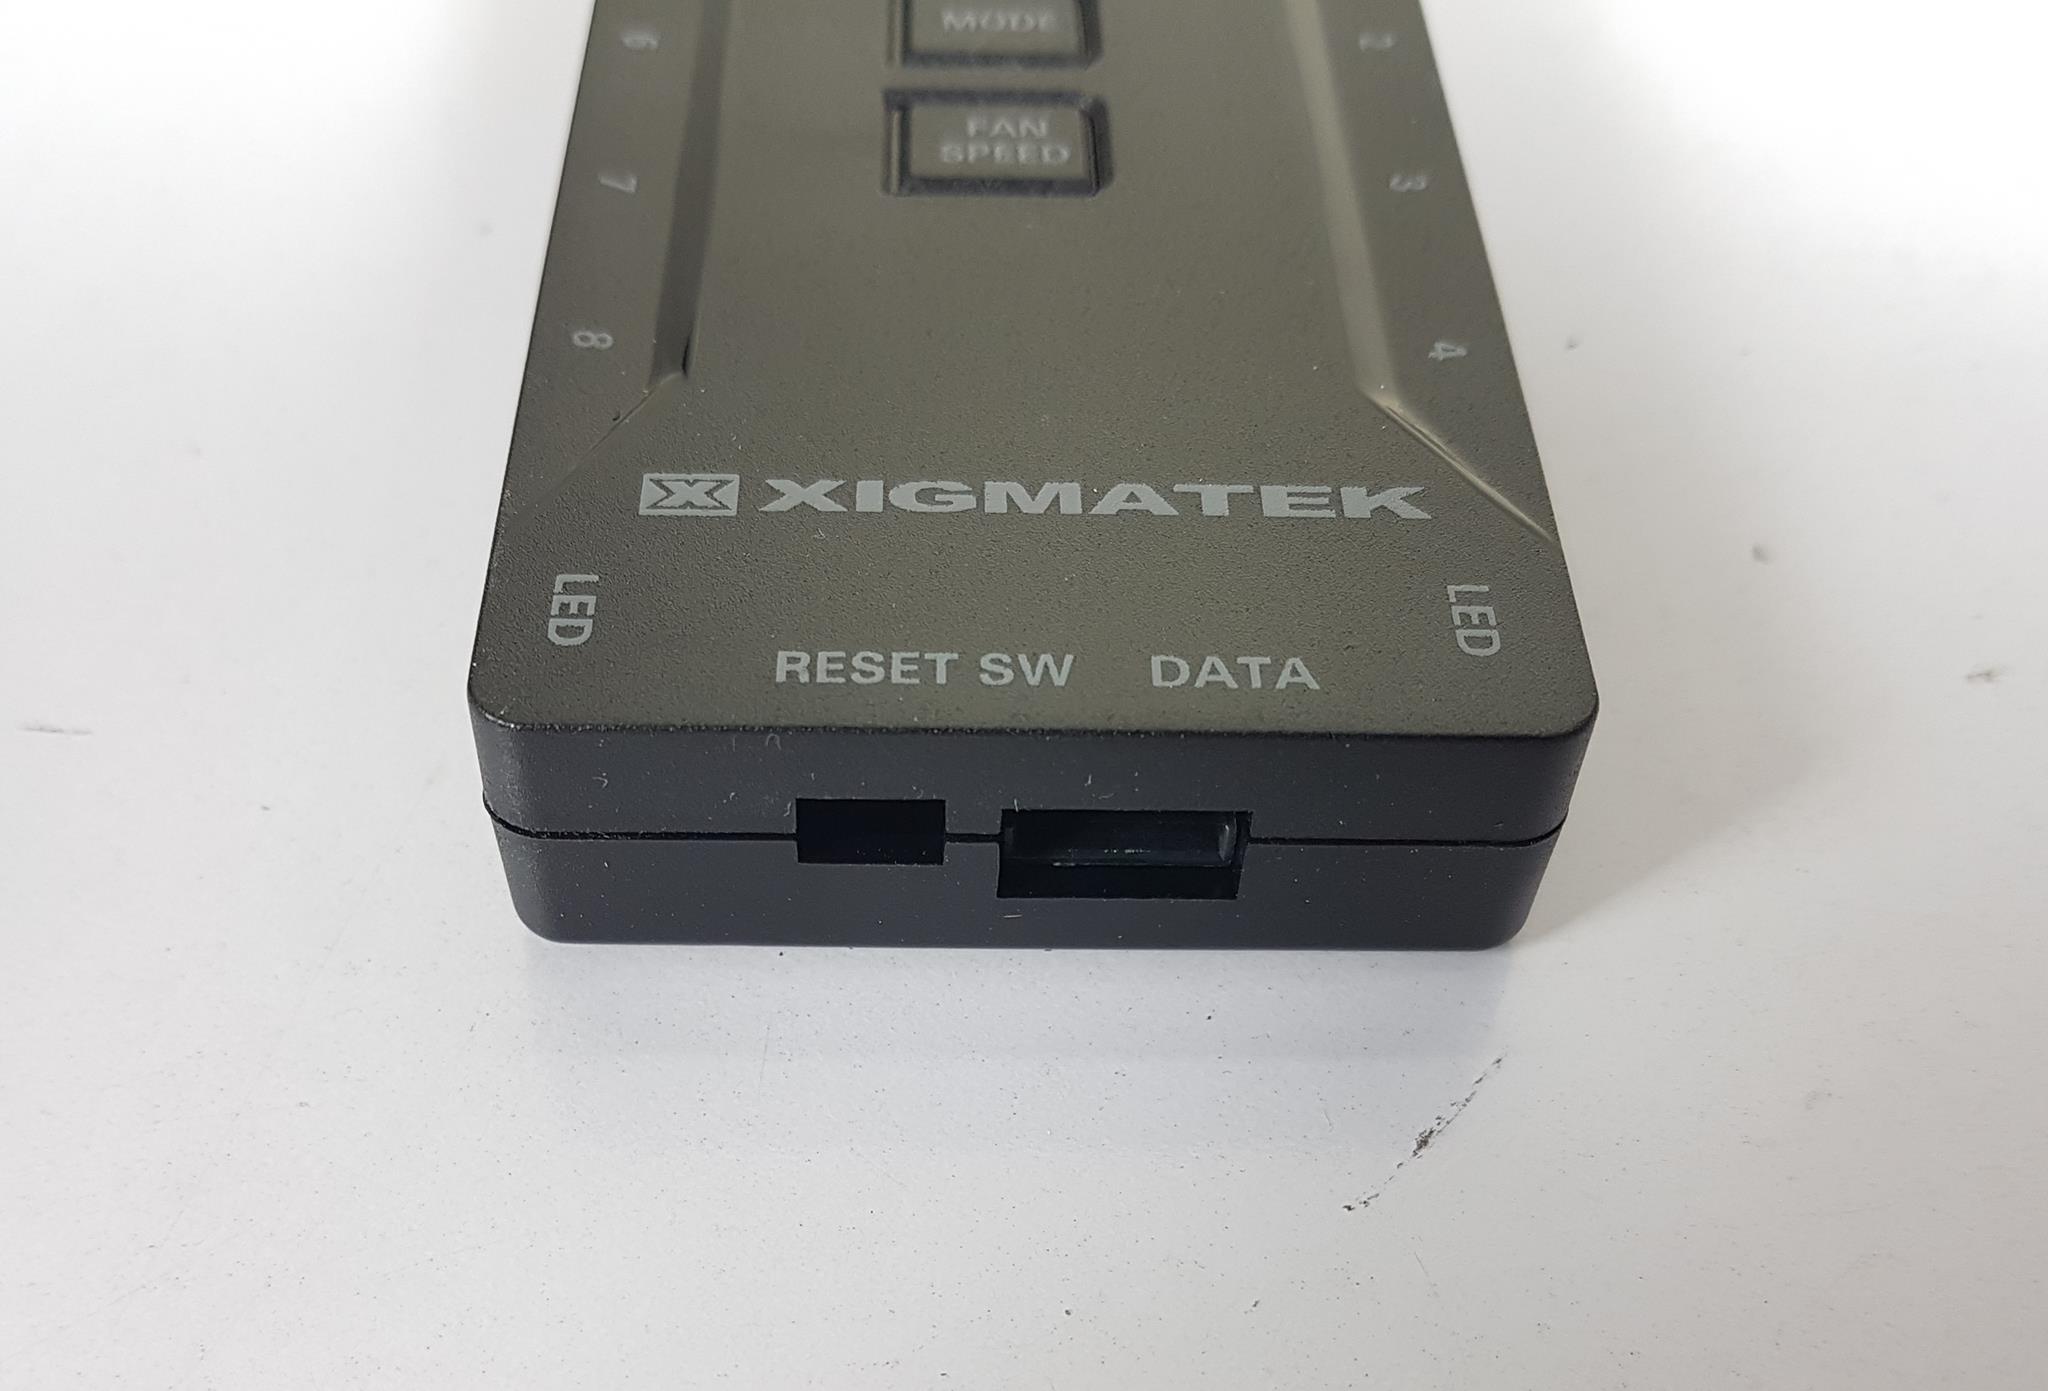
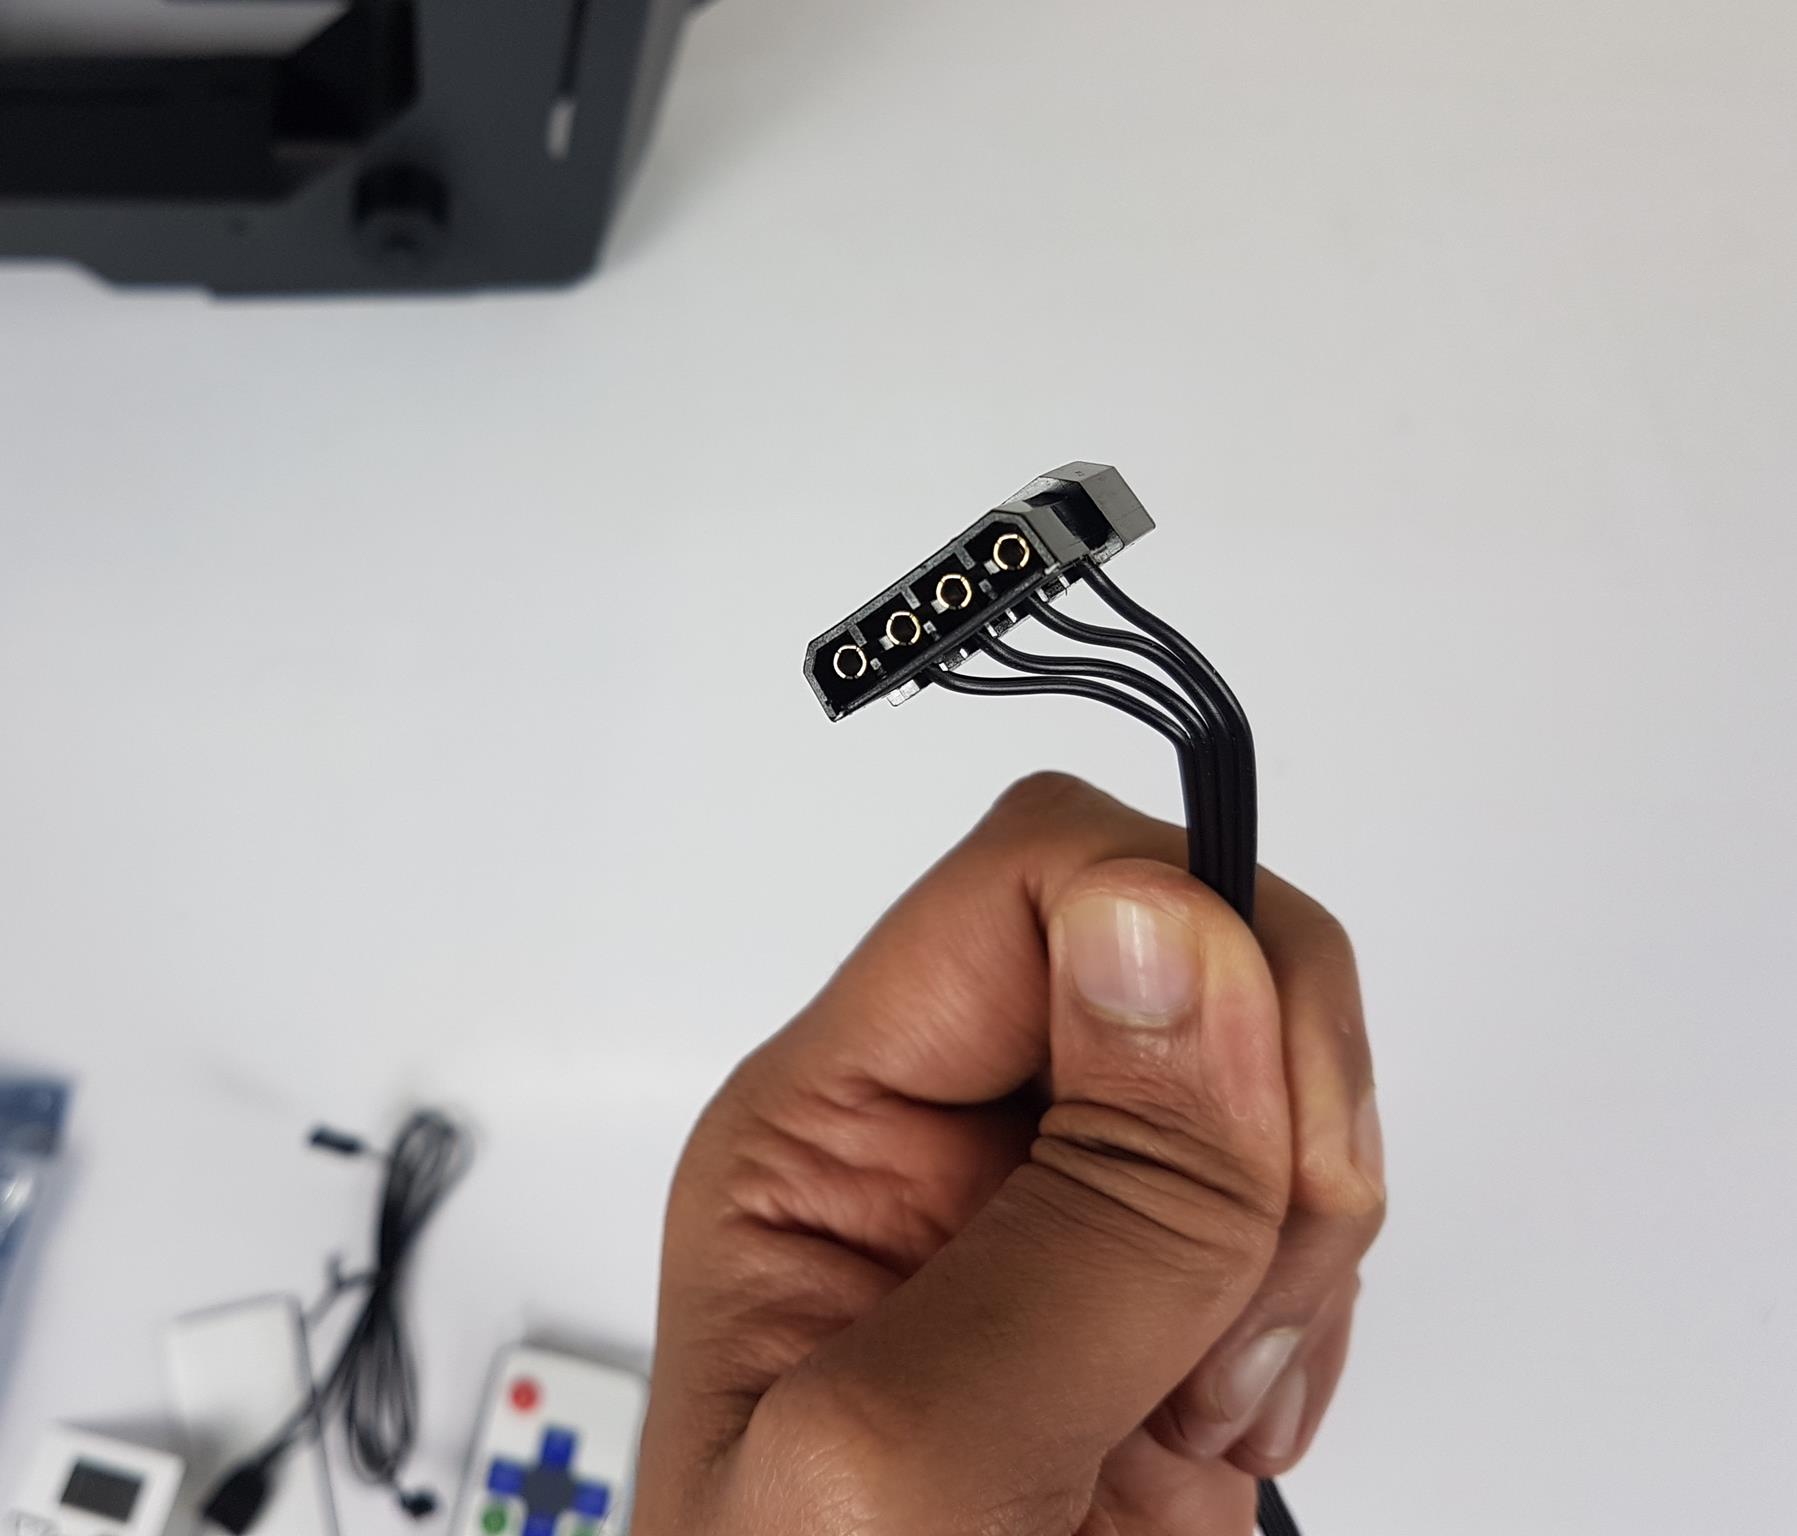
We have 3x 120mm A-RGB fans on the top as well. All 7x fans are exhausting. These fans have a 6-pin proprietary connector that can only be used using the provided hub. This is a sort of design I am totally not up to. Should there be any issue with the hub, say bye-bye to the cooling and lighting.
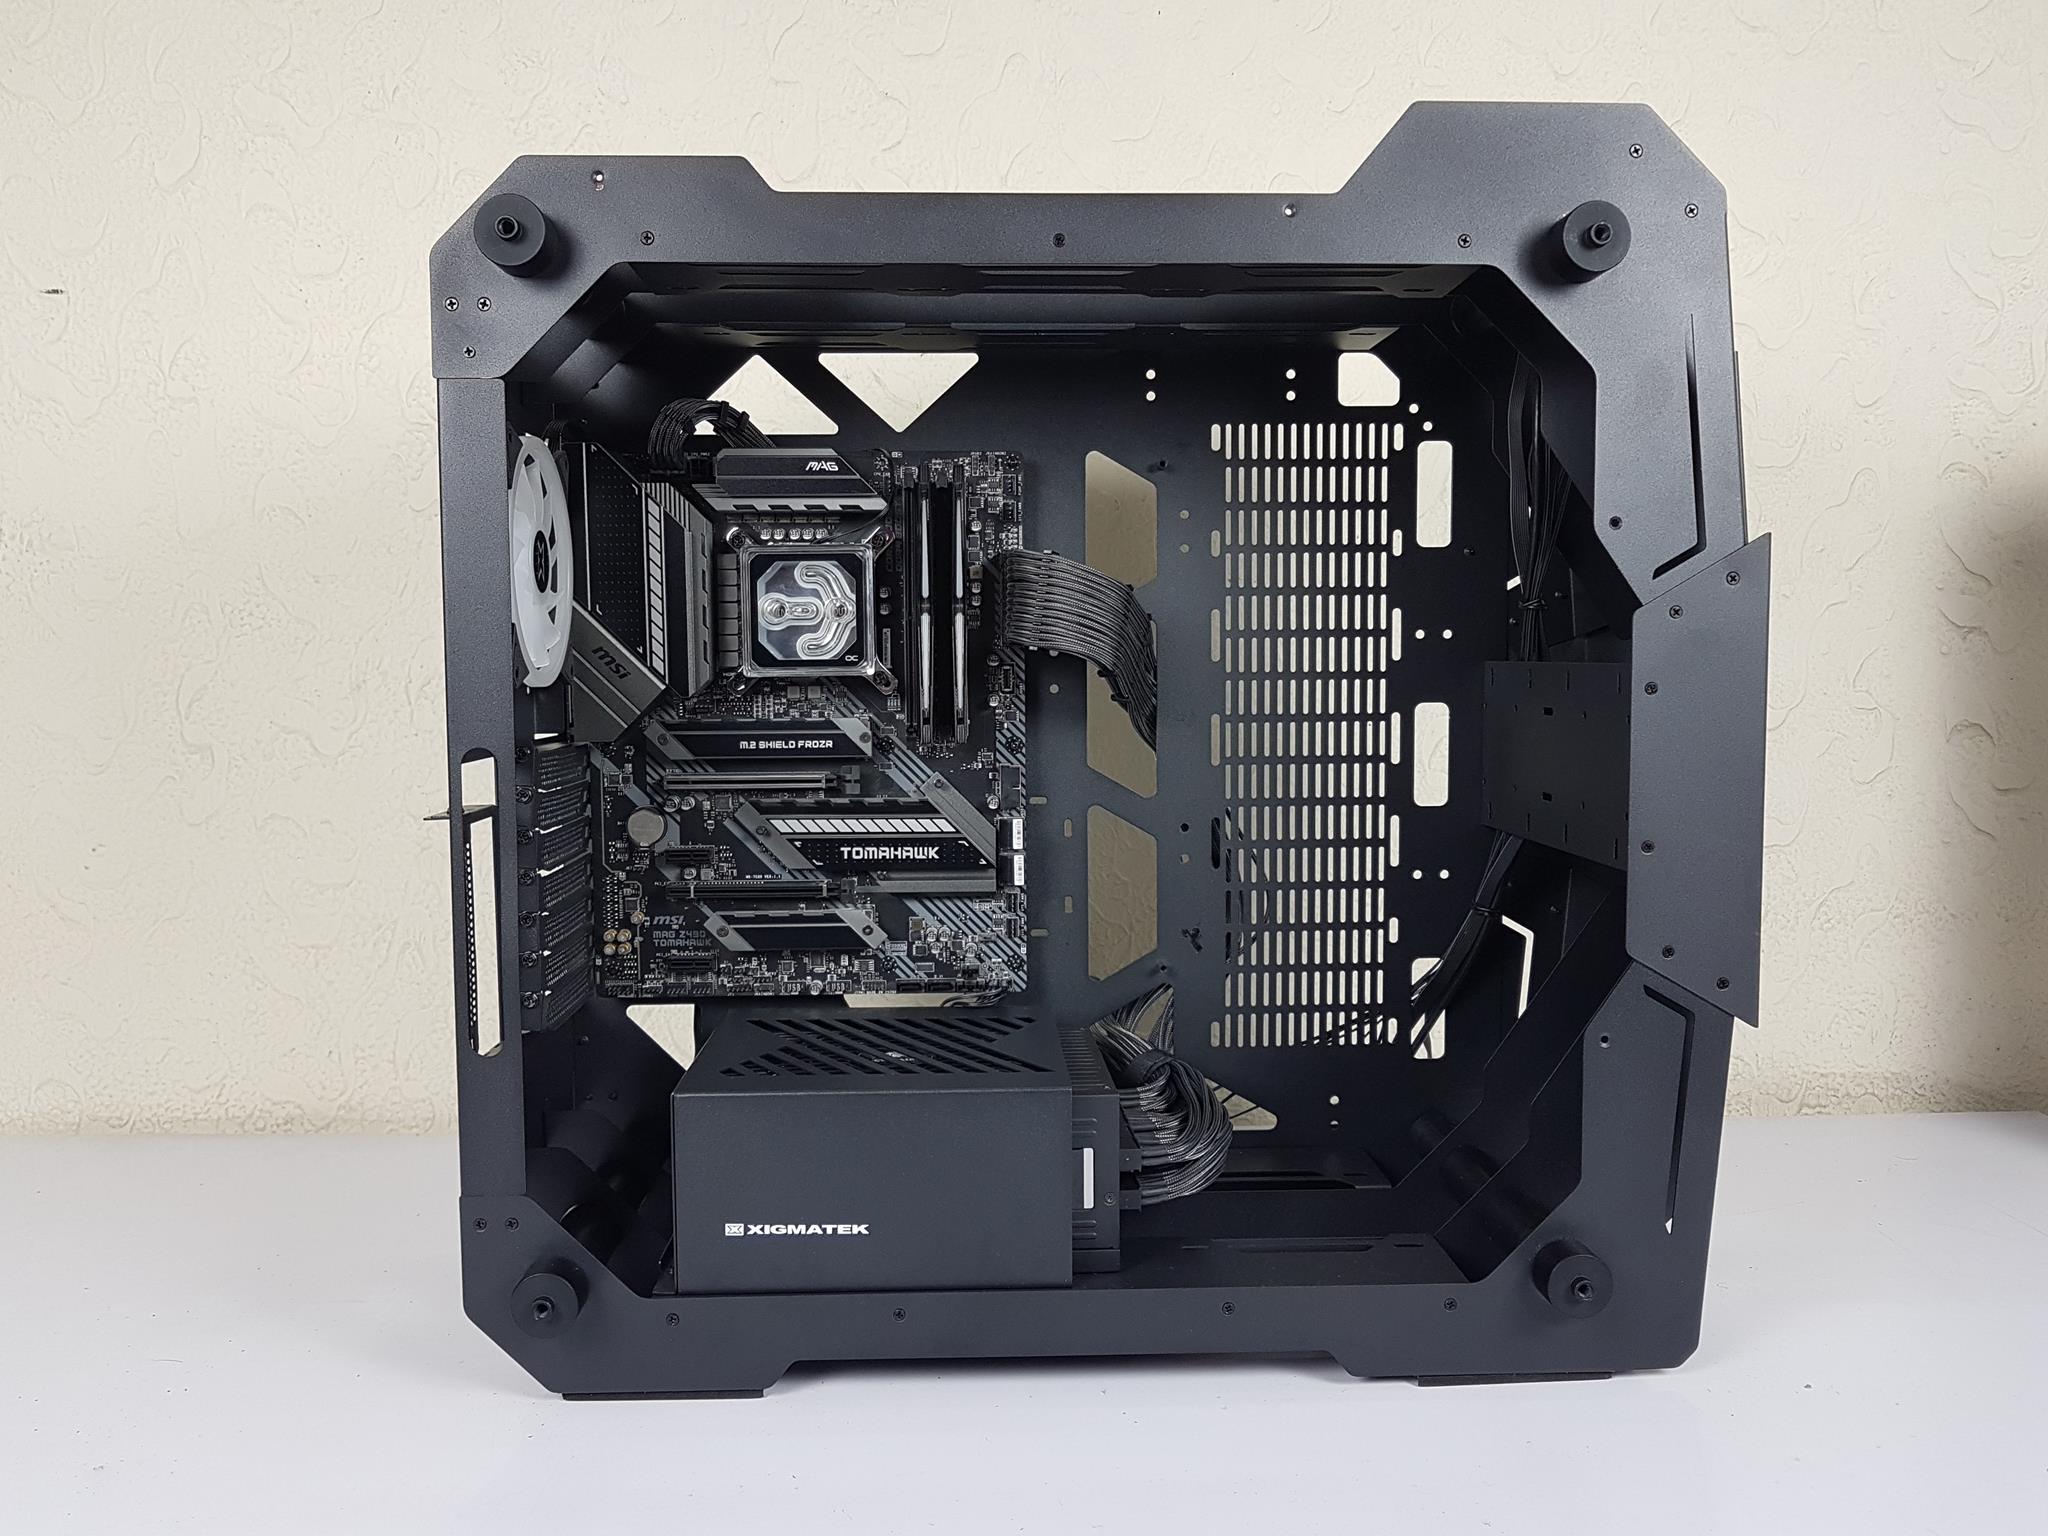
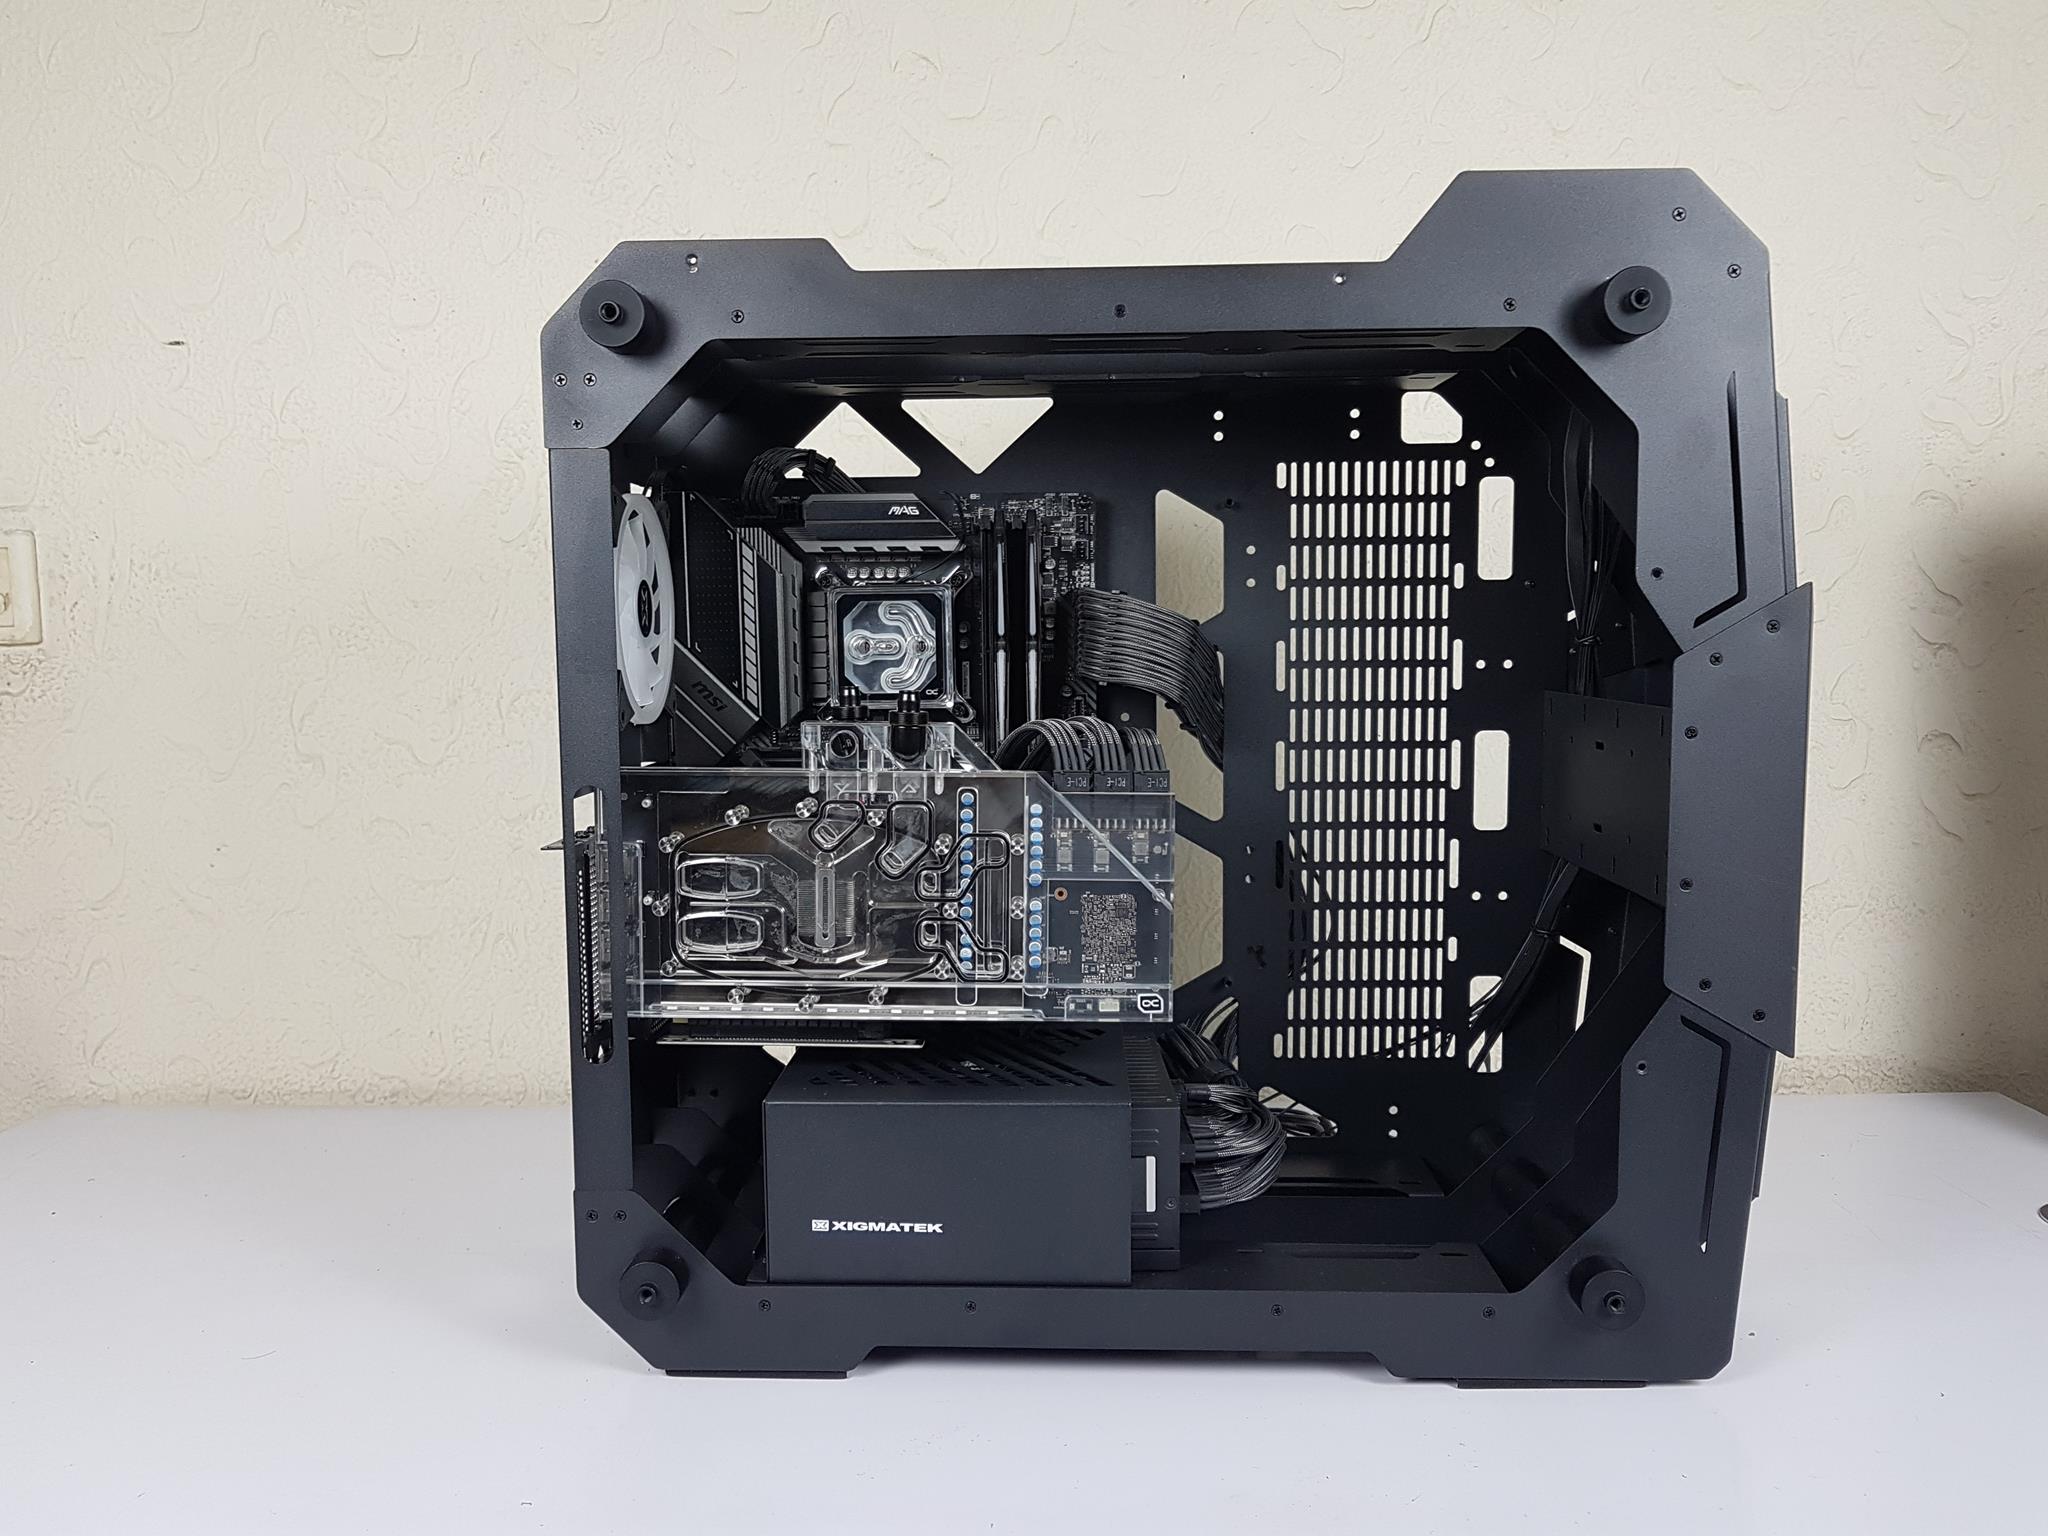
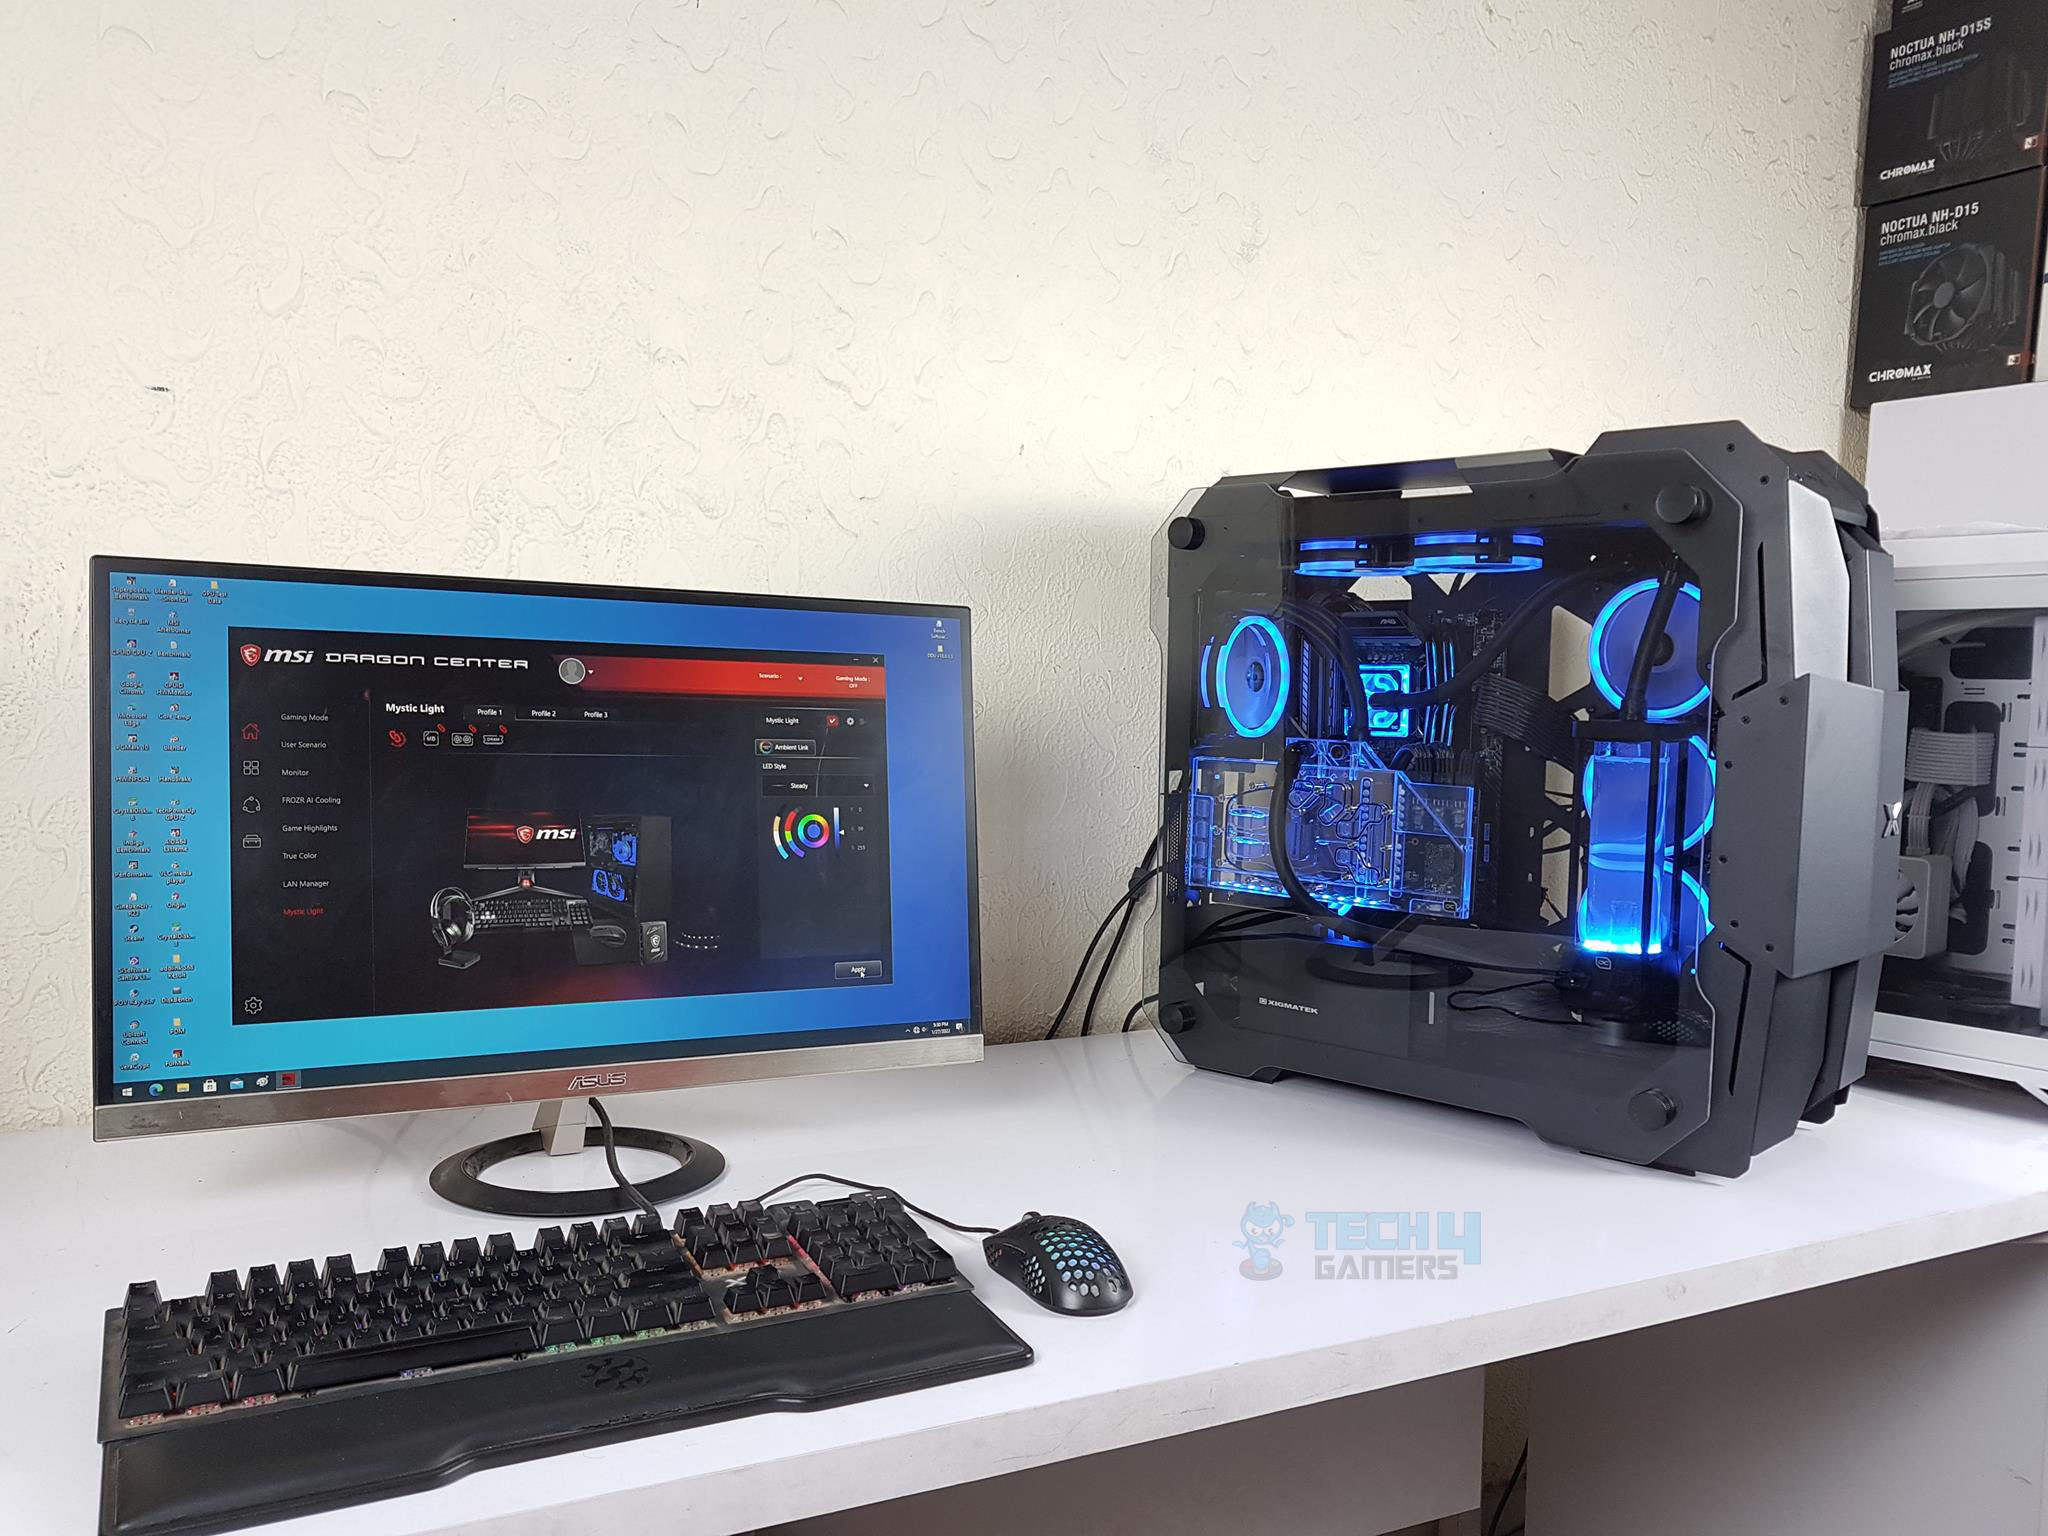
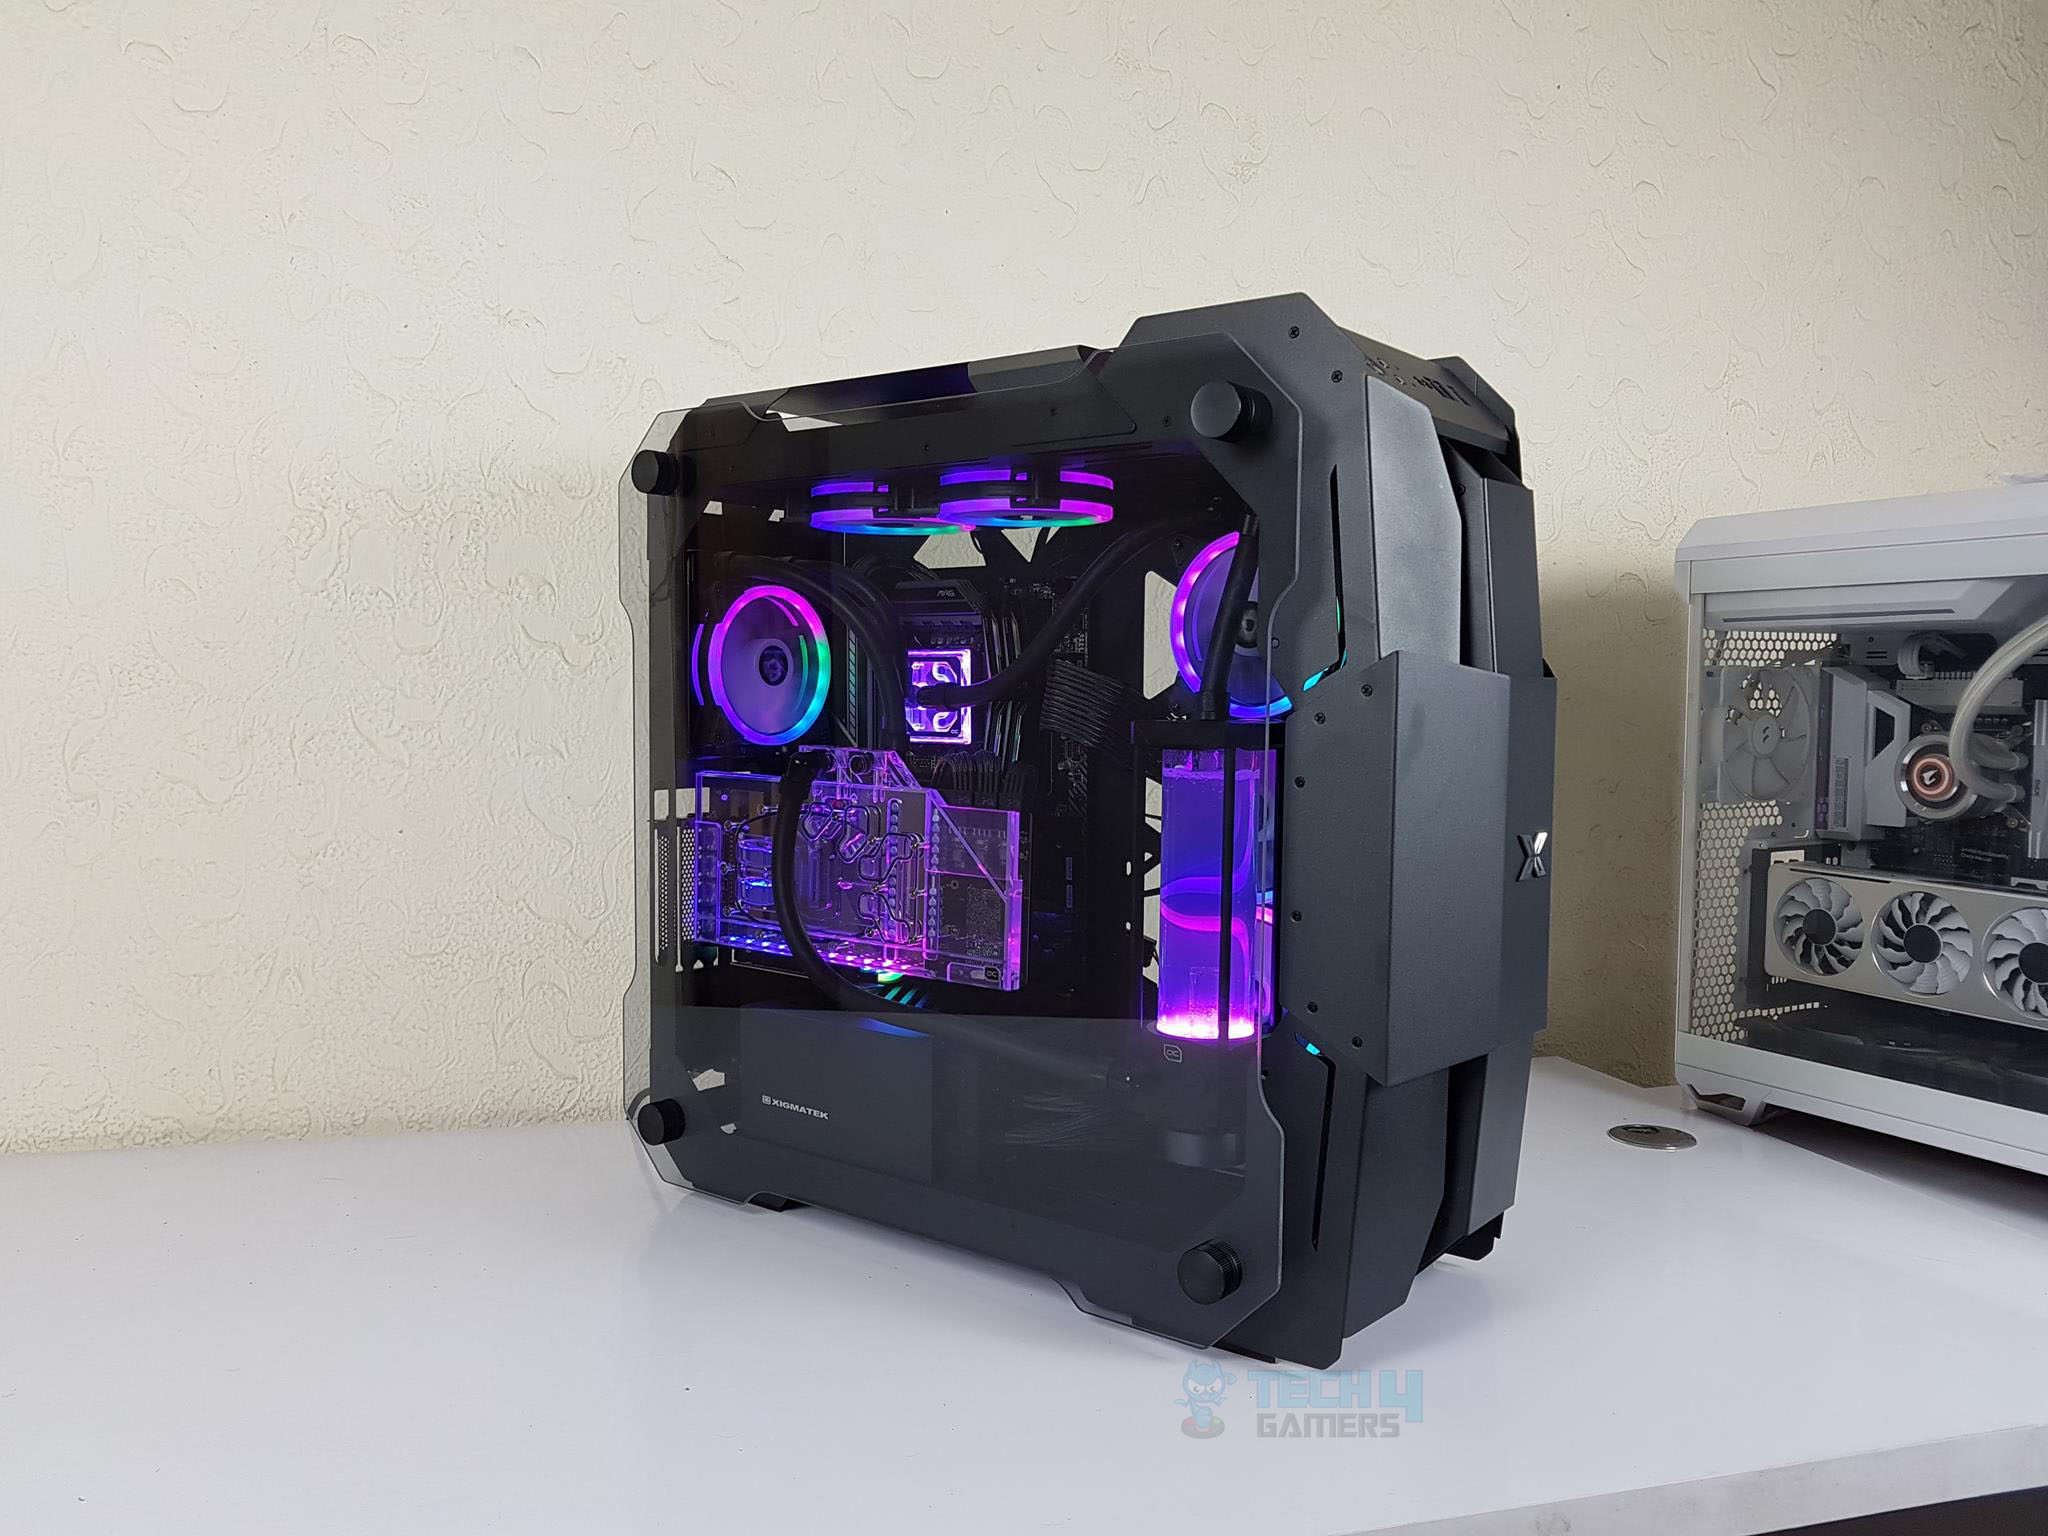
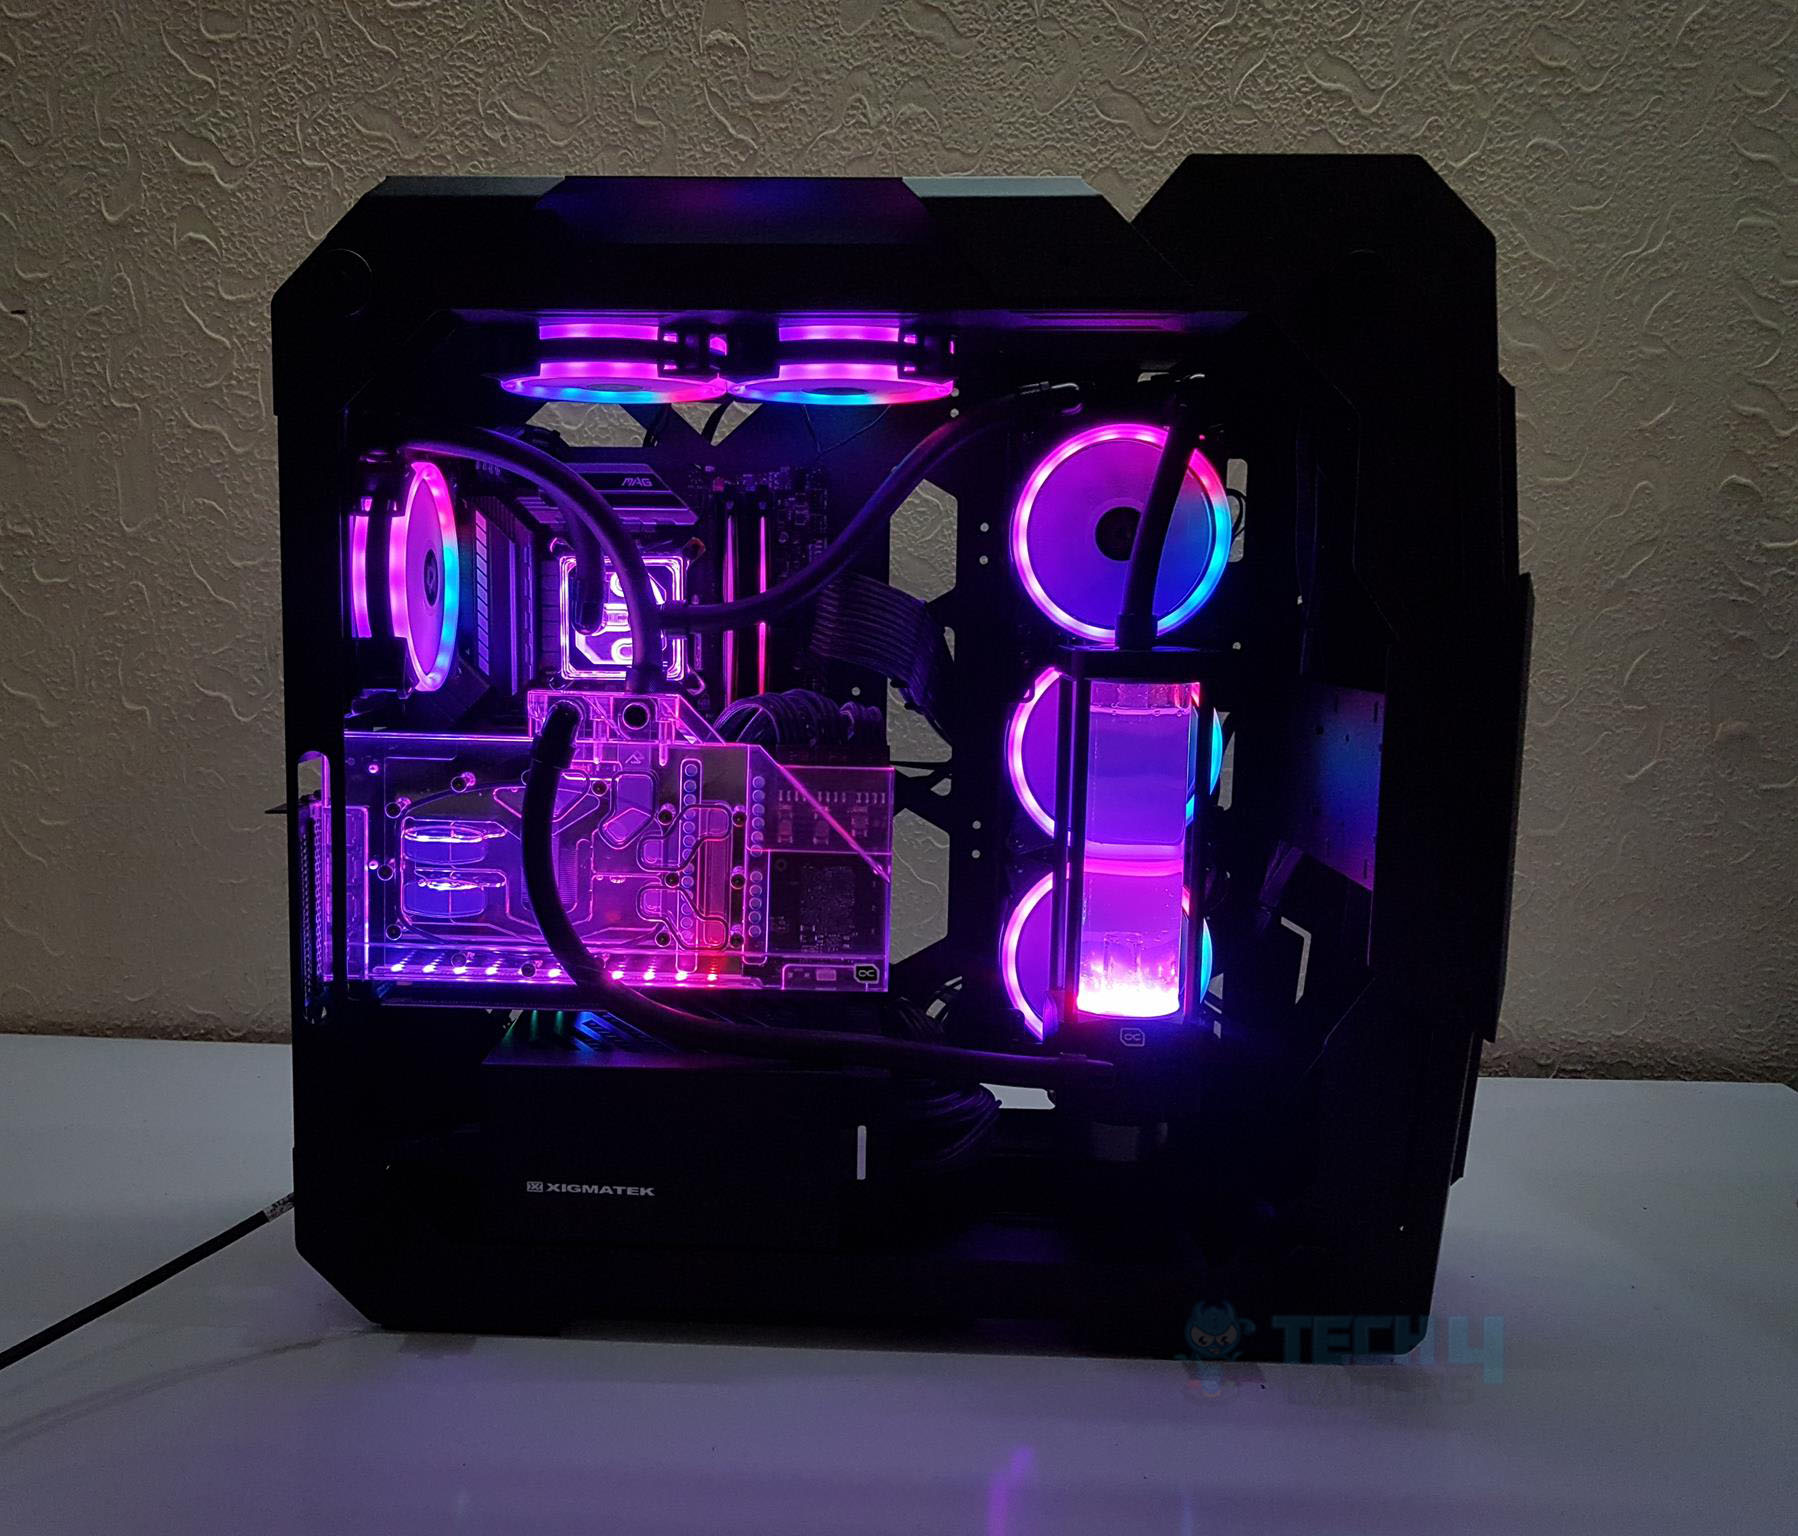
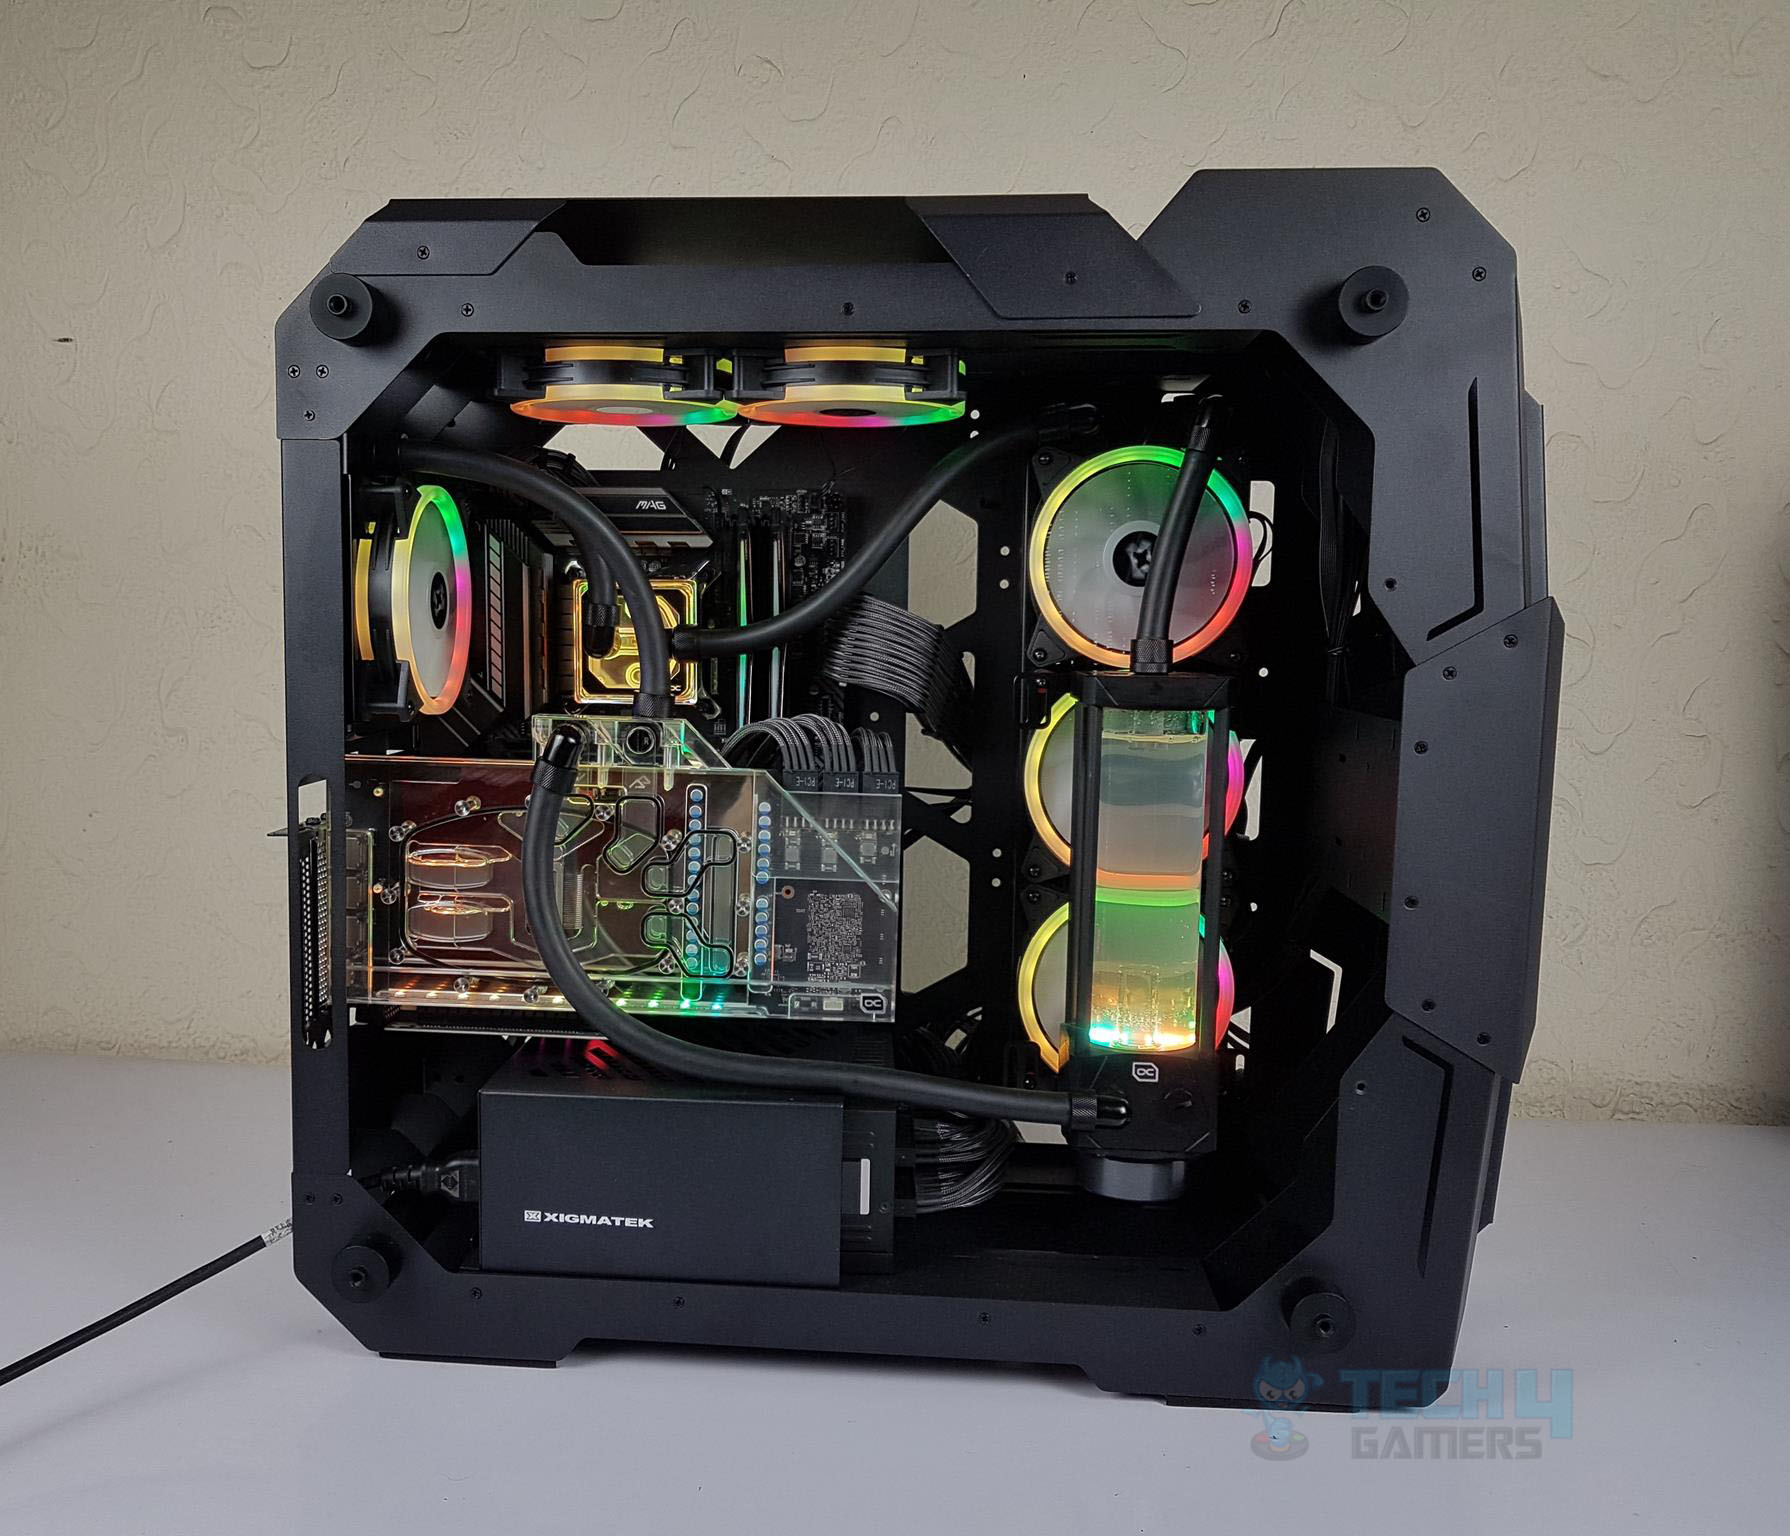
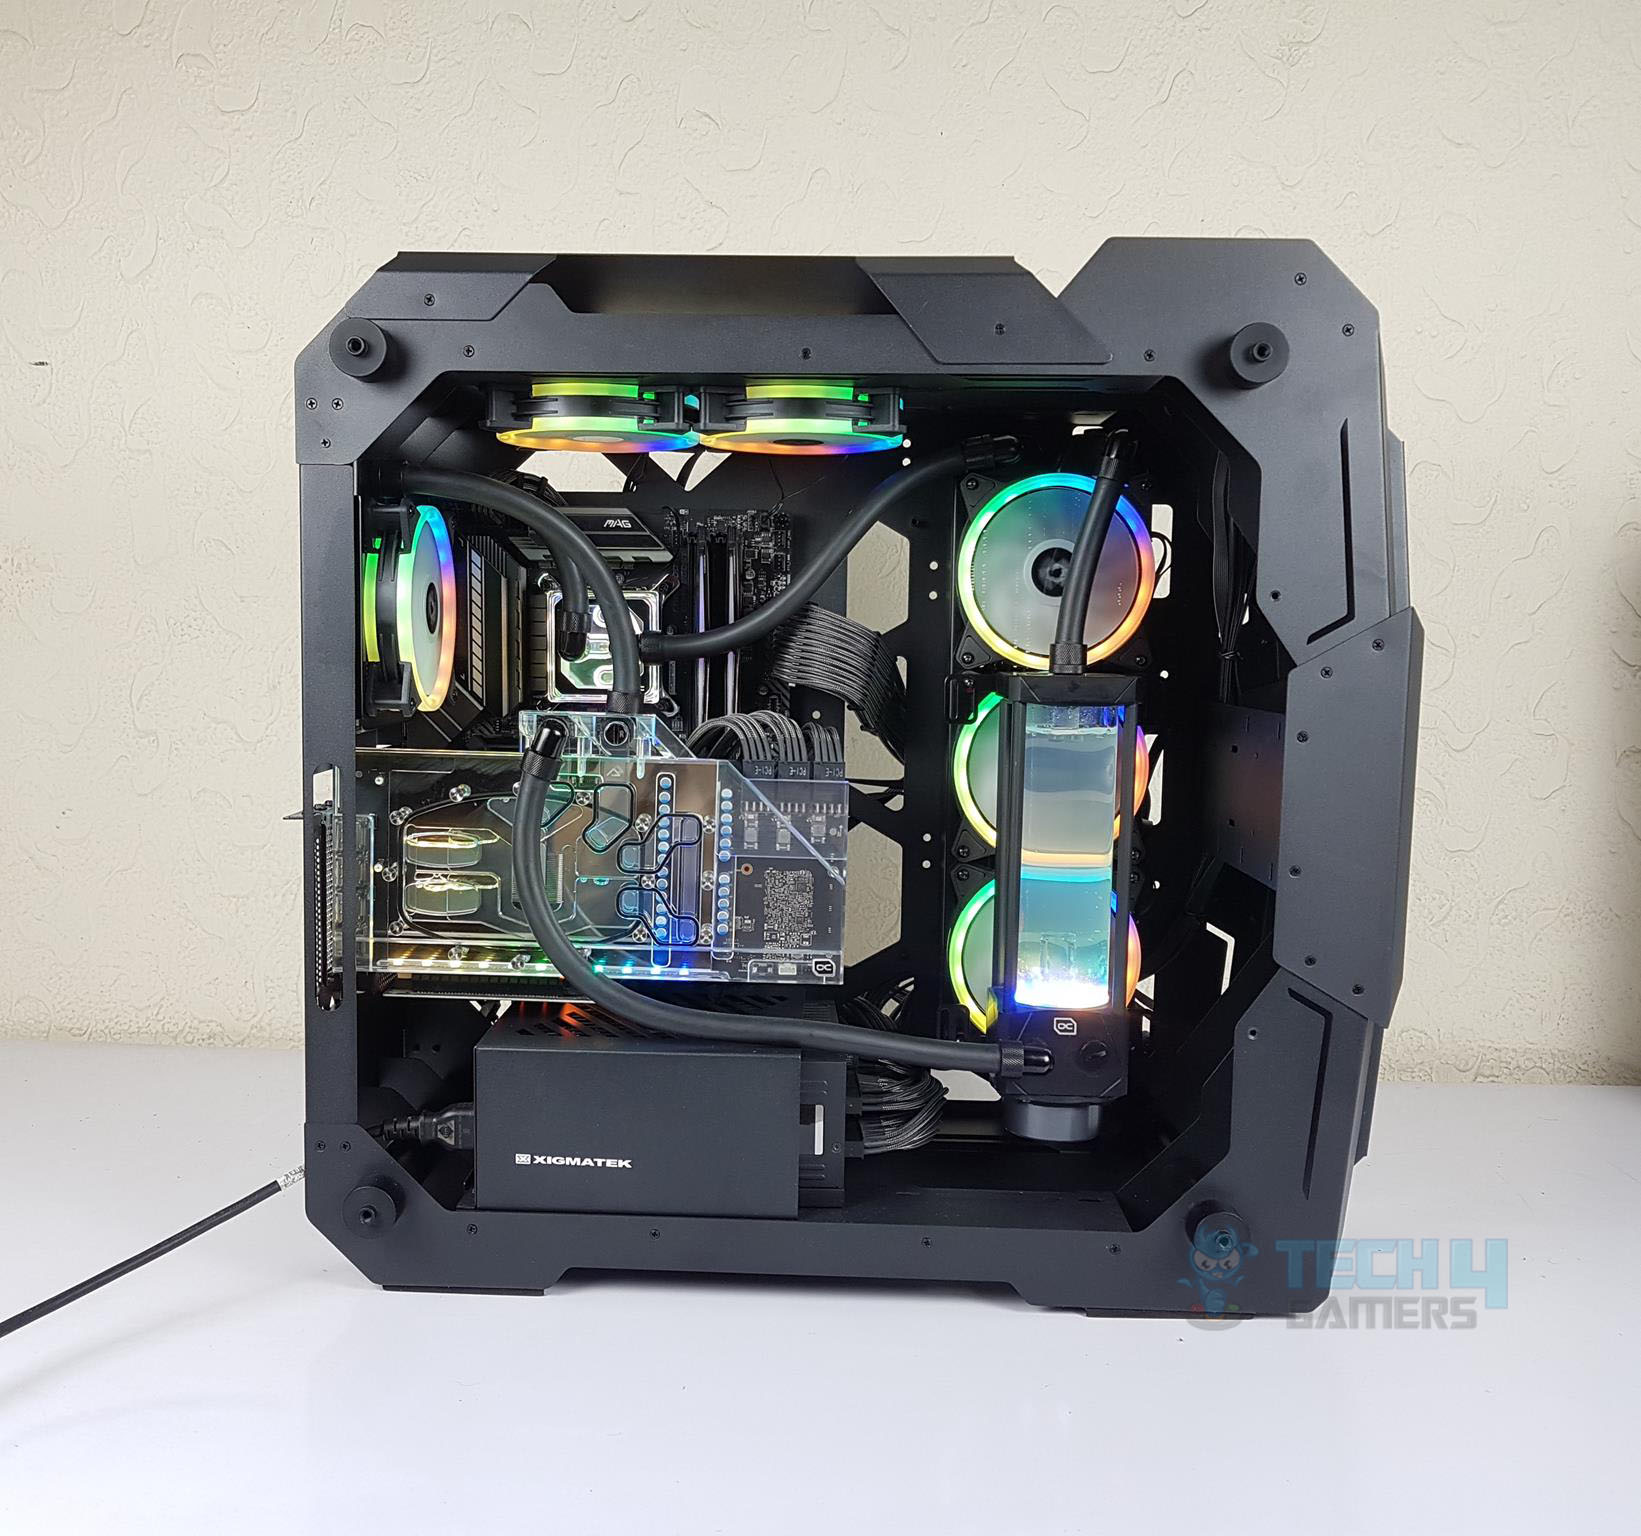
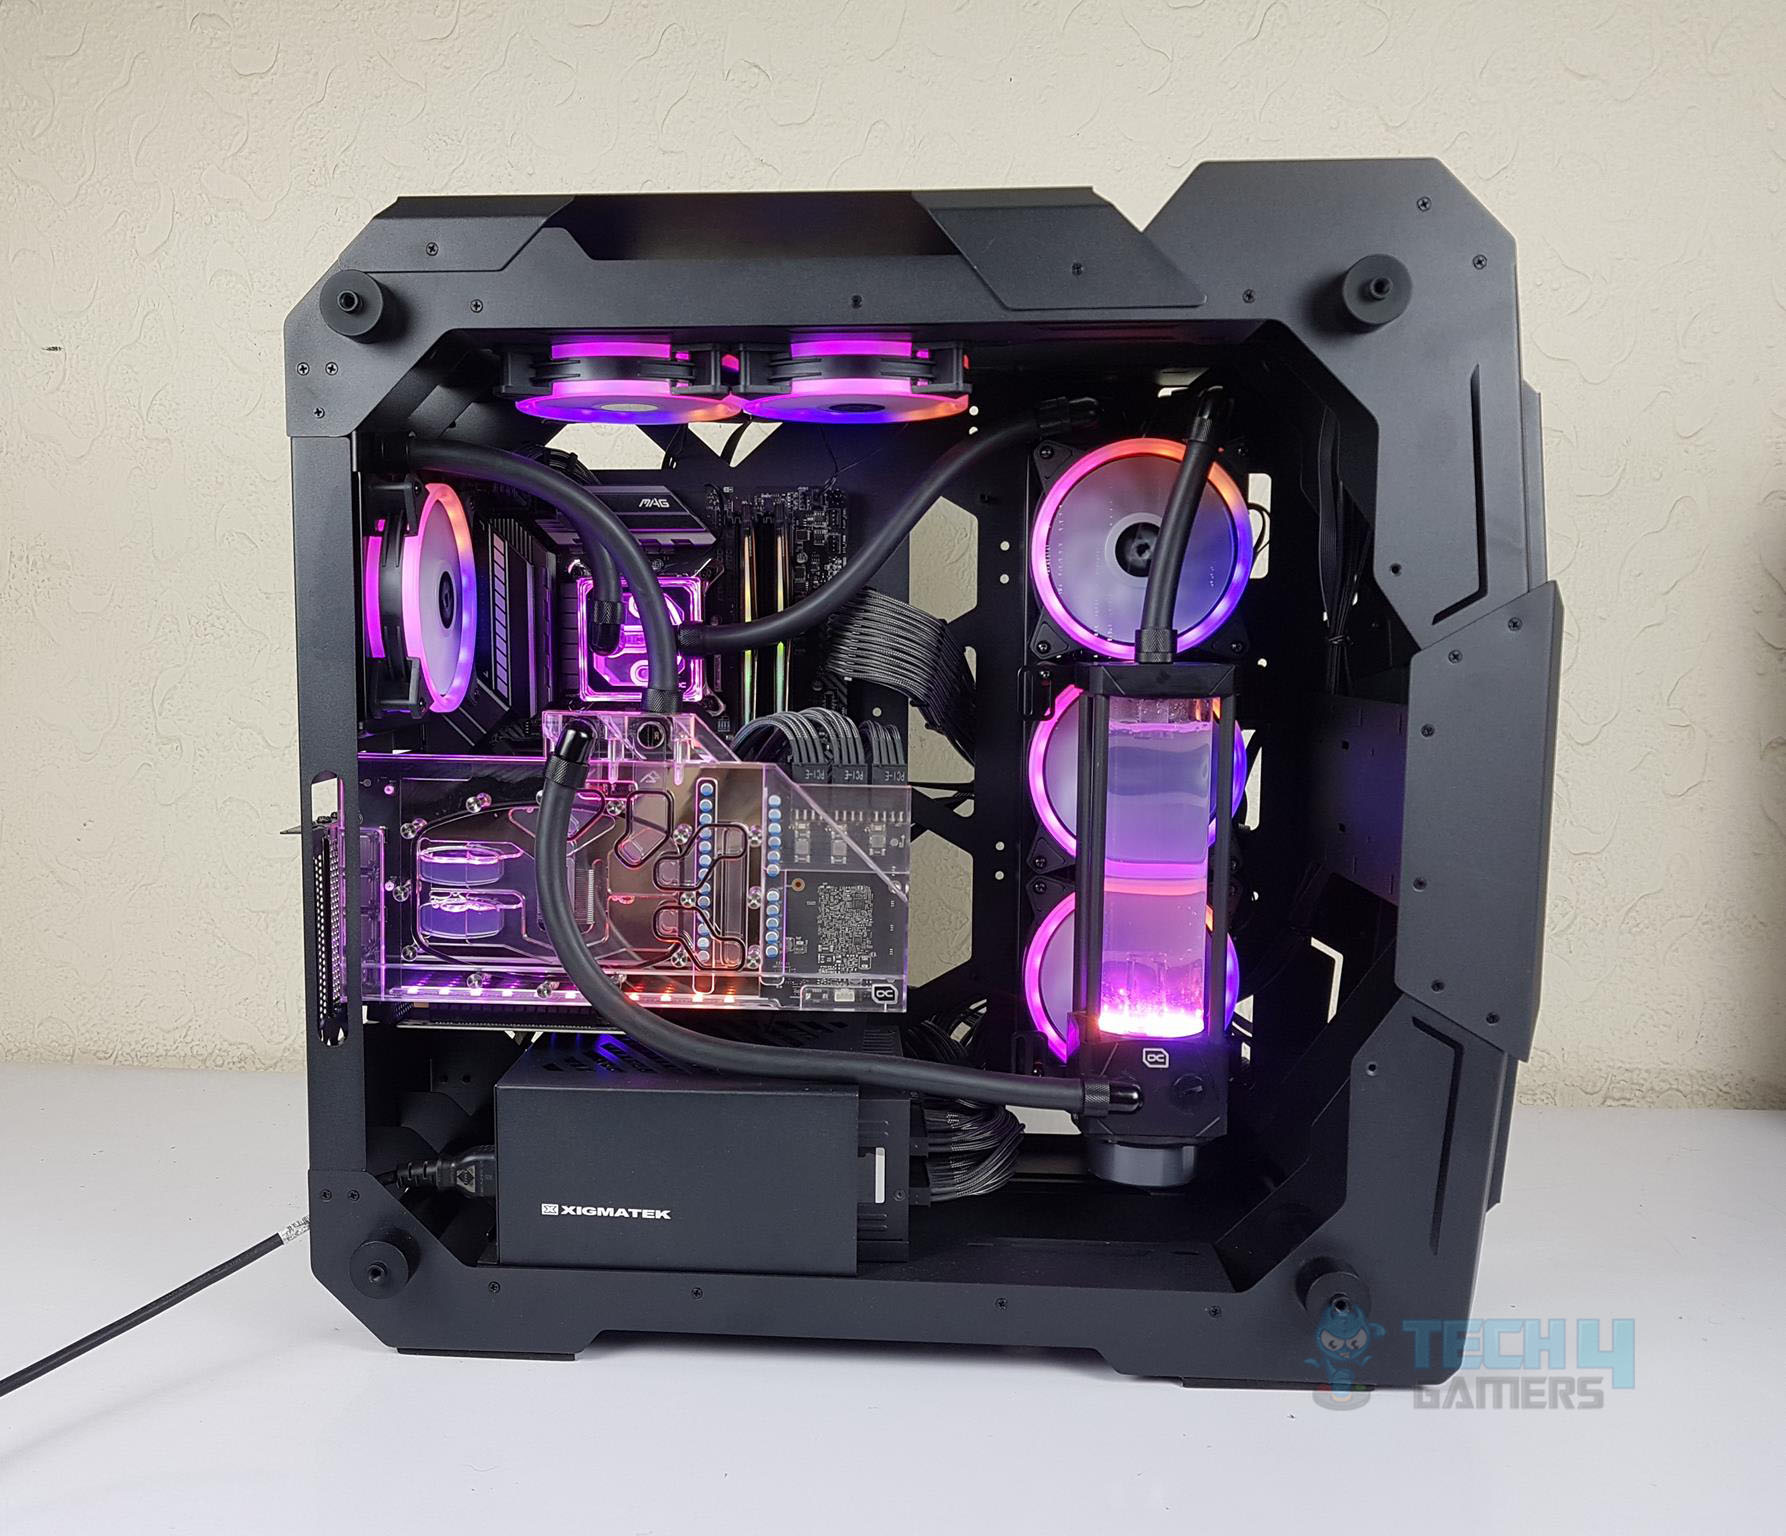
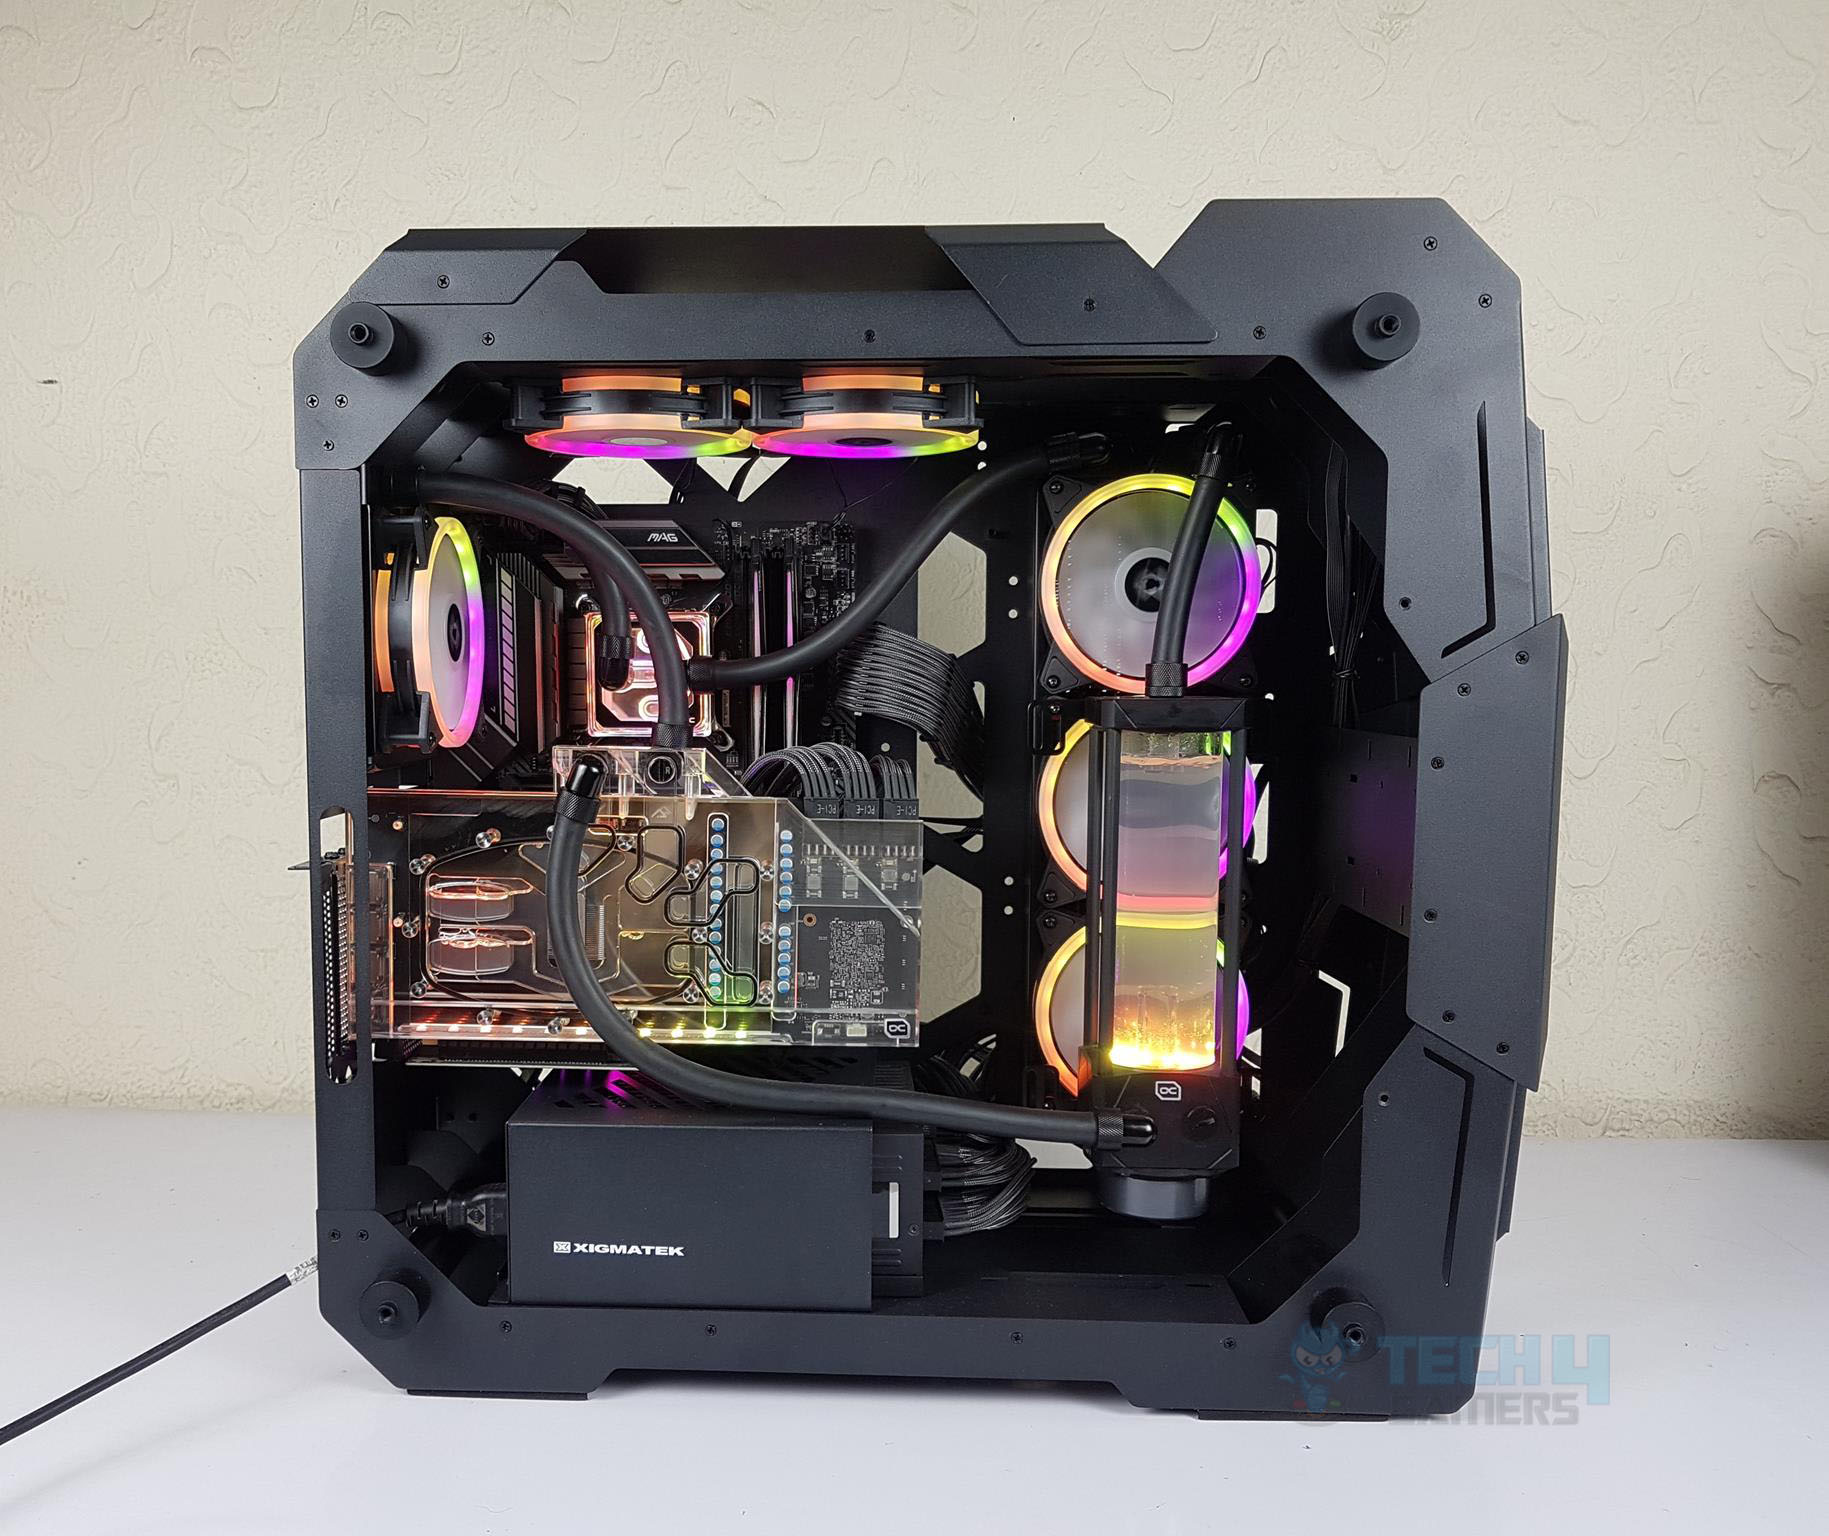
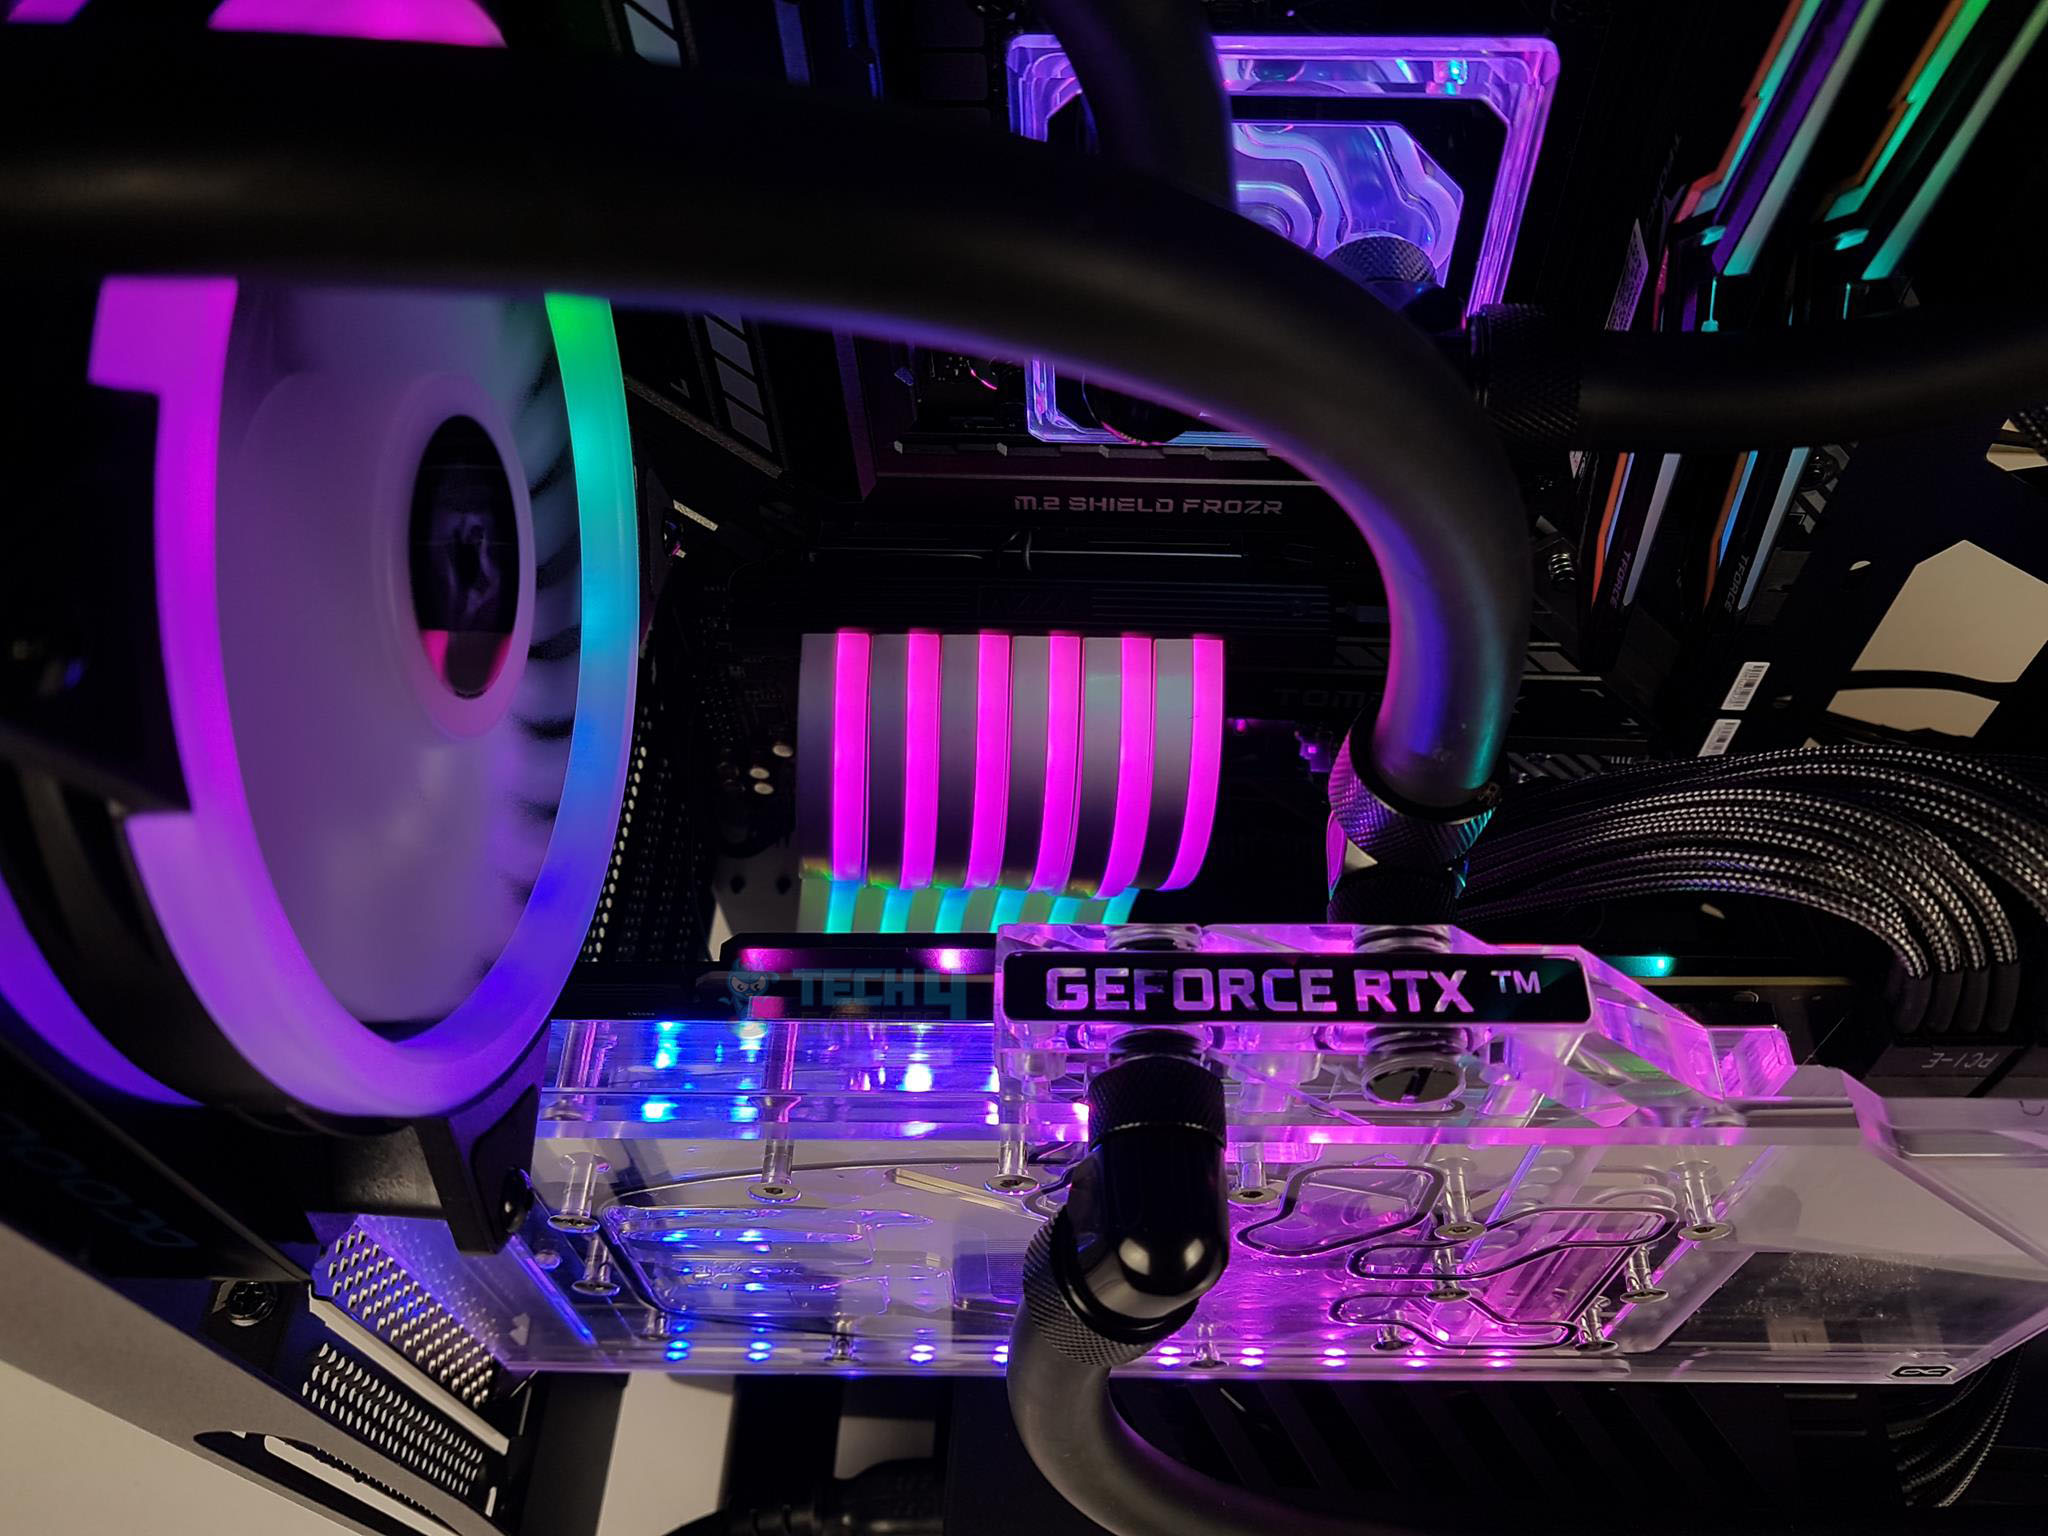
Test Build and Experience
The following configuration is used:
- Intel i7 10700k at 5.0GHz using 1.325V
- MSI MAG Z490 TOMAHAWK
- T-Force NightHawk RGB 16GB 3200MHz Kit
- MSI GeForce RTX 3090 Gaming X Trio 24G
- addlink S70 256GB NVMe Drive
- CORSAIR AX1200i PSU with CORSAIR Custom Sleeved Cables
- Alphacool Cooling Gear
I started with installing 3x brass color standoffs. They were not a proper fix anyway which is strange.
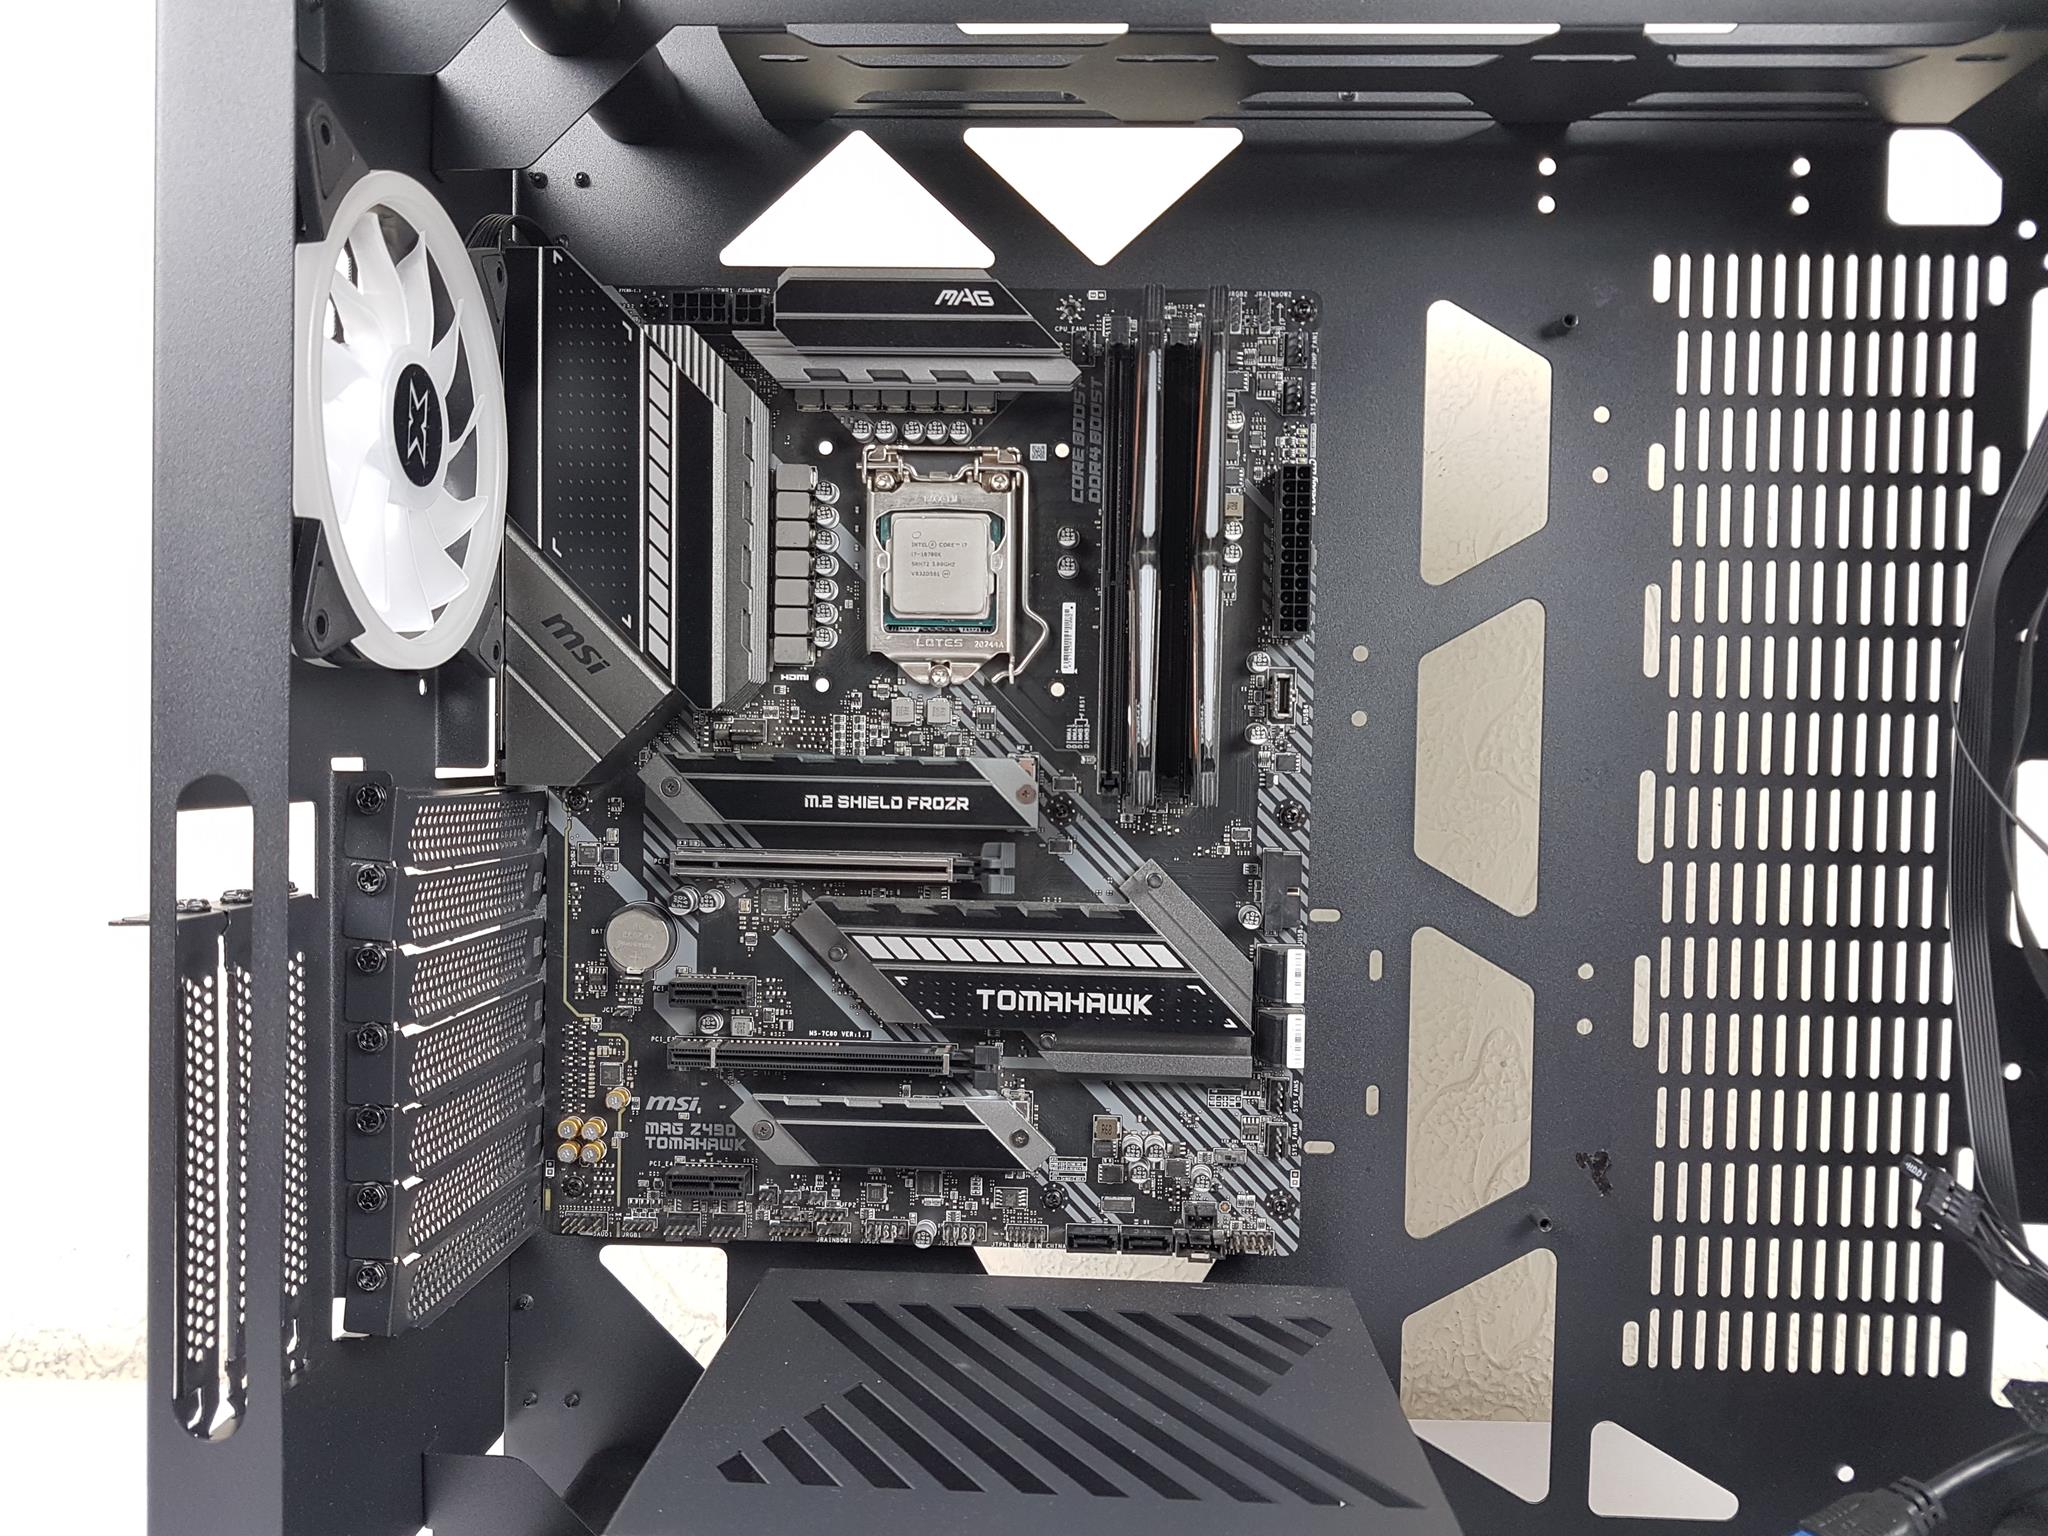

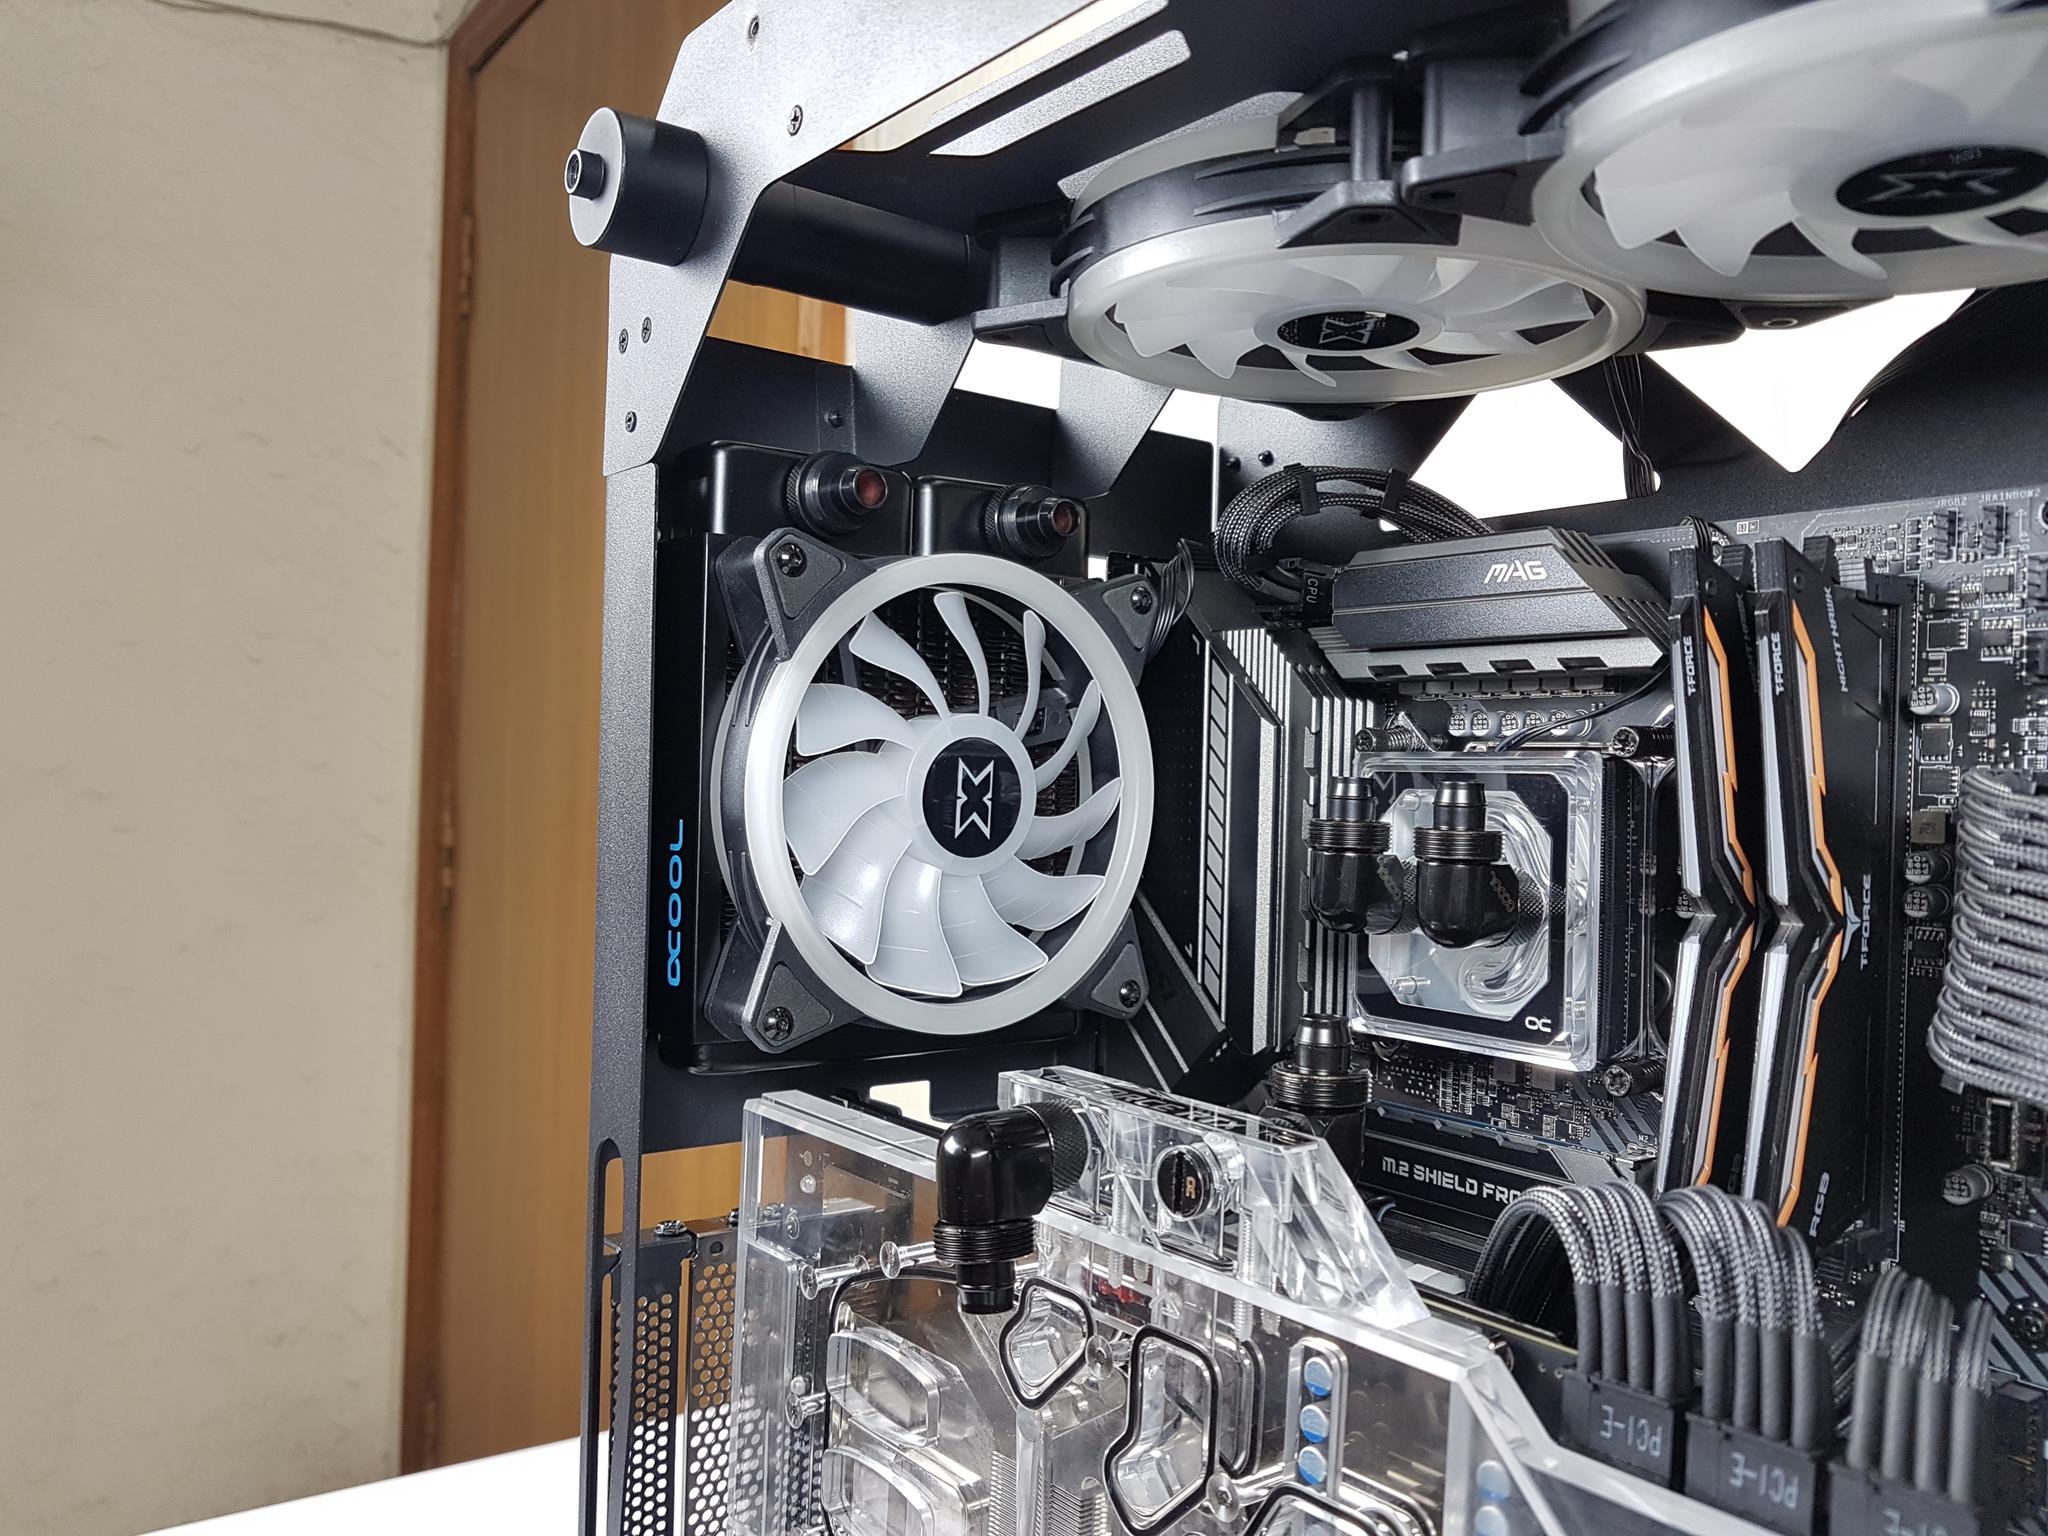
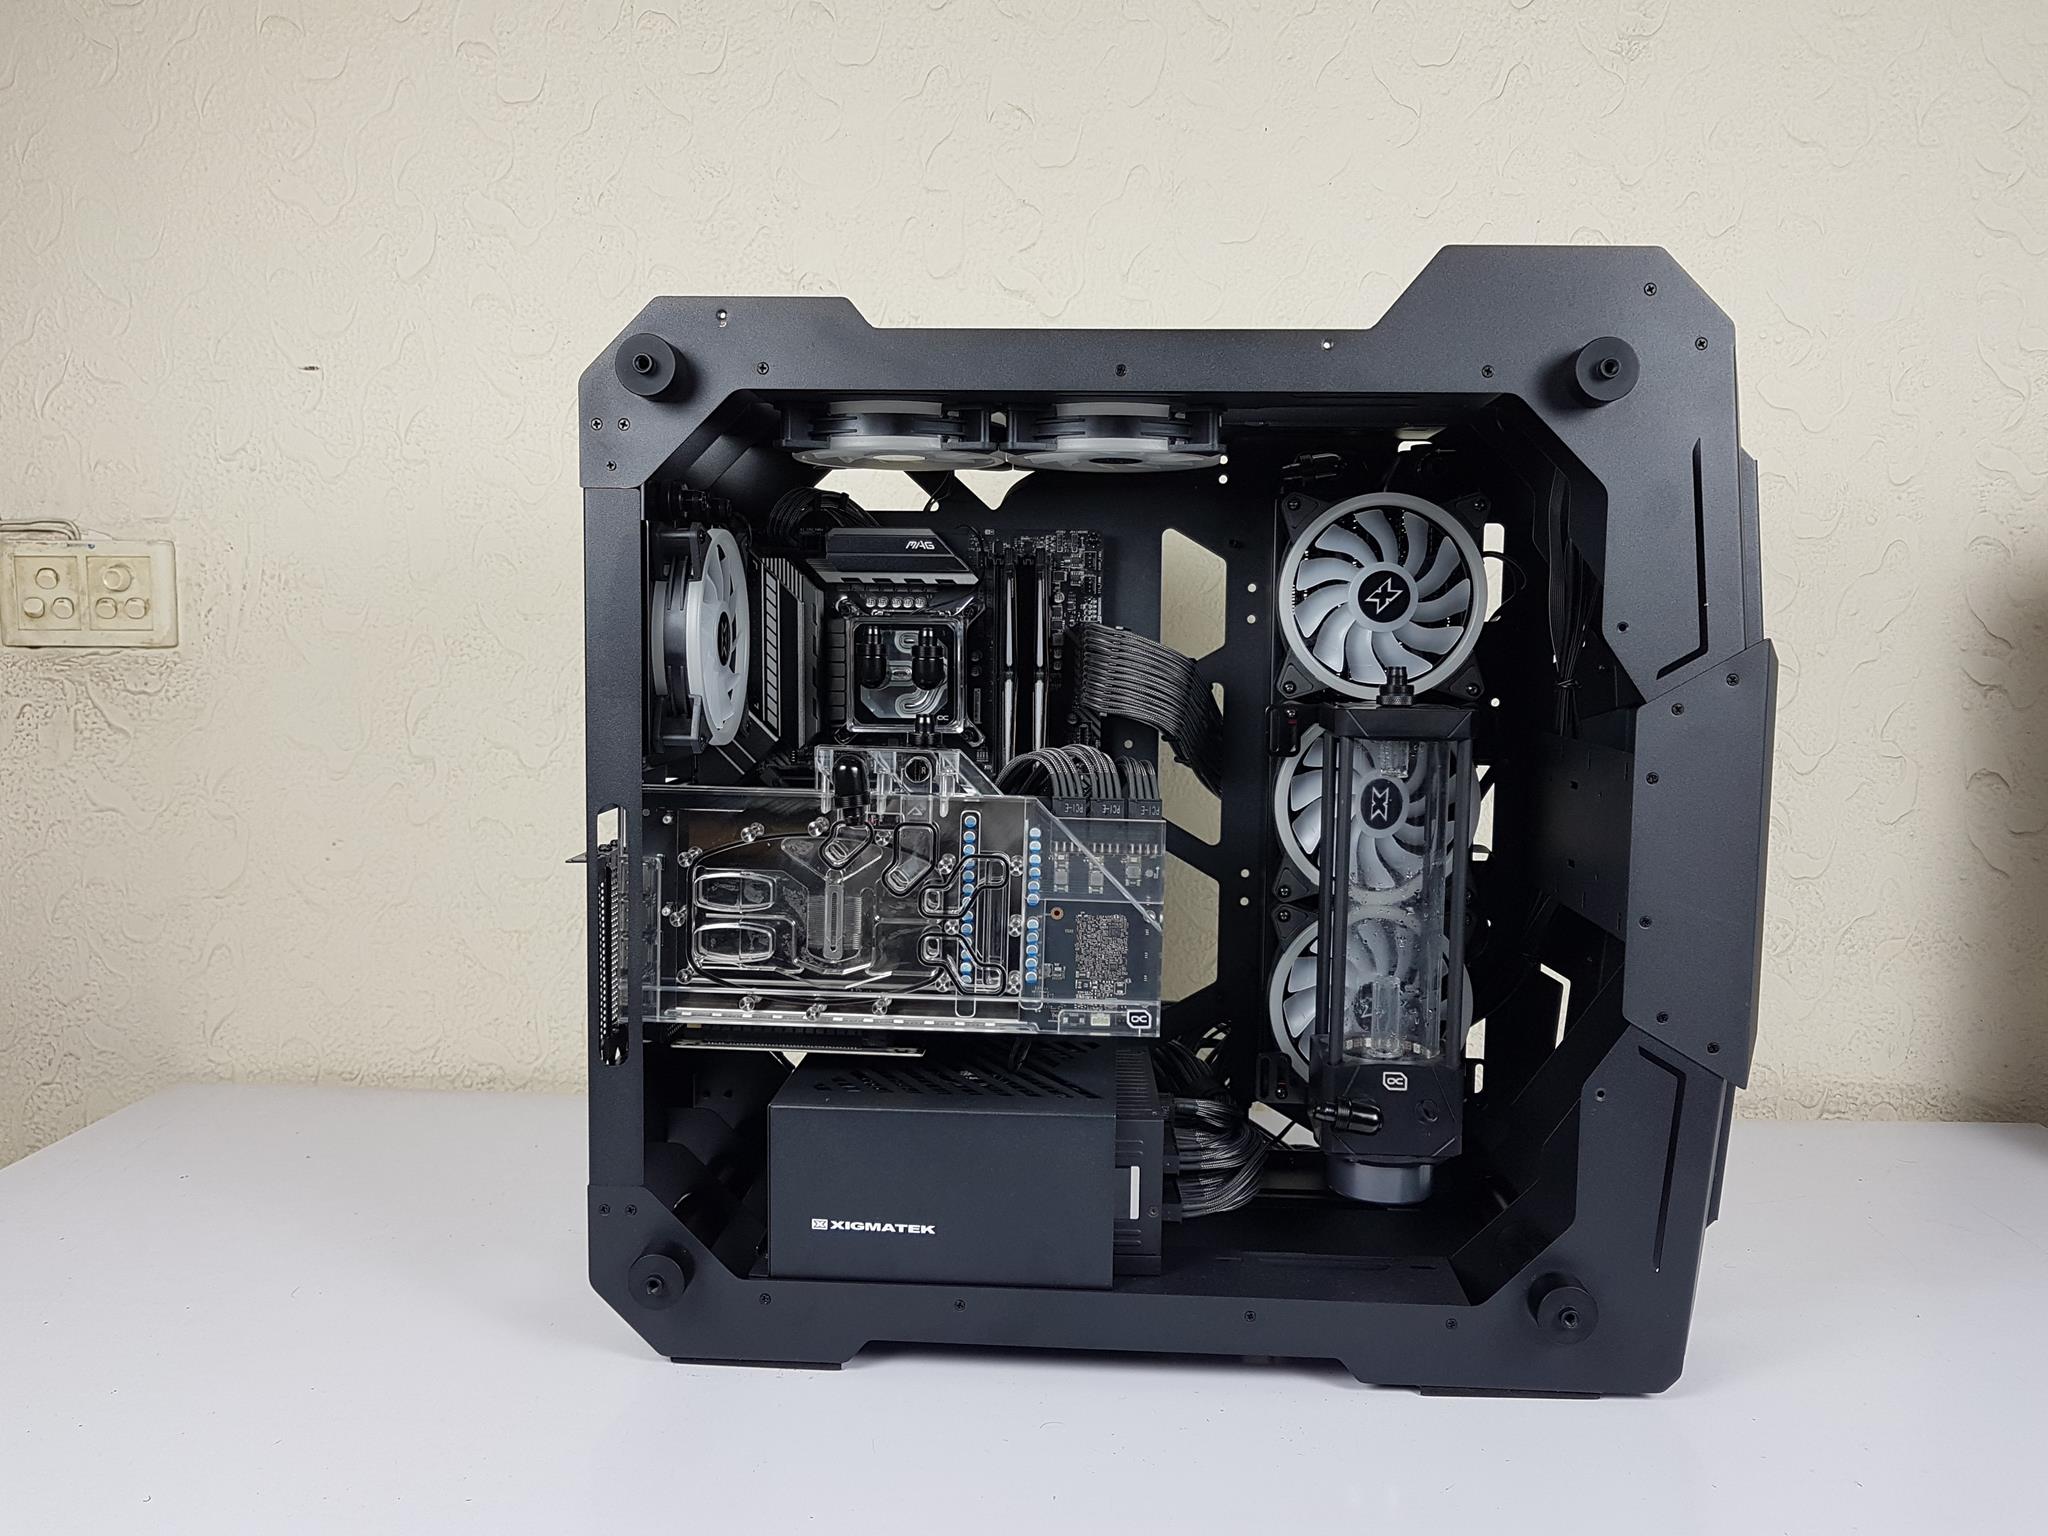
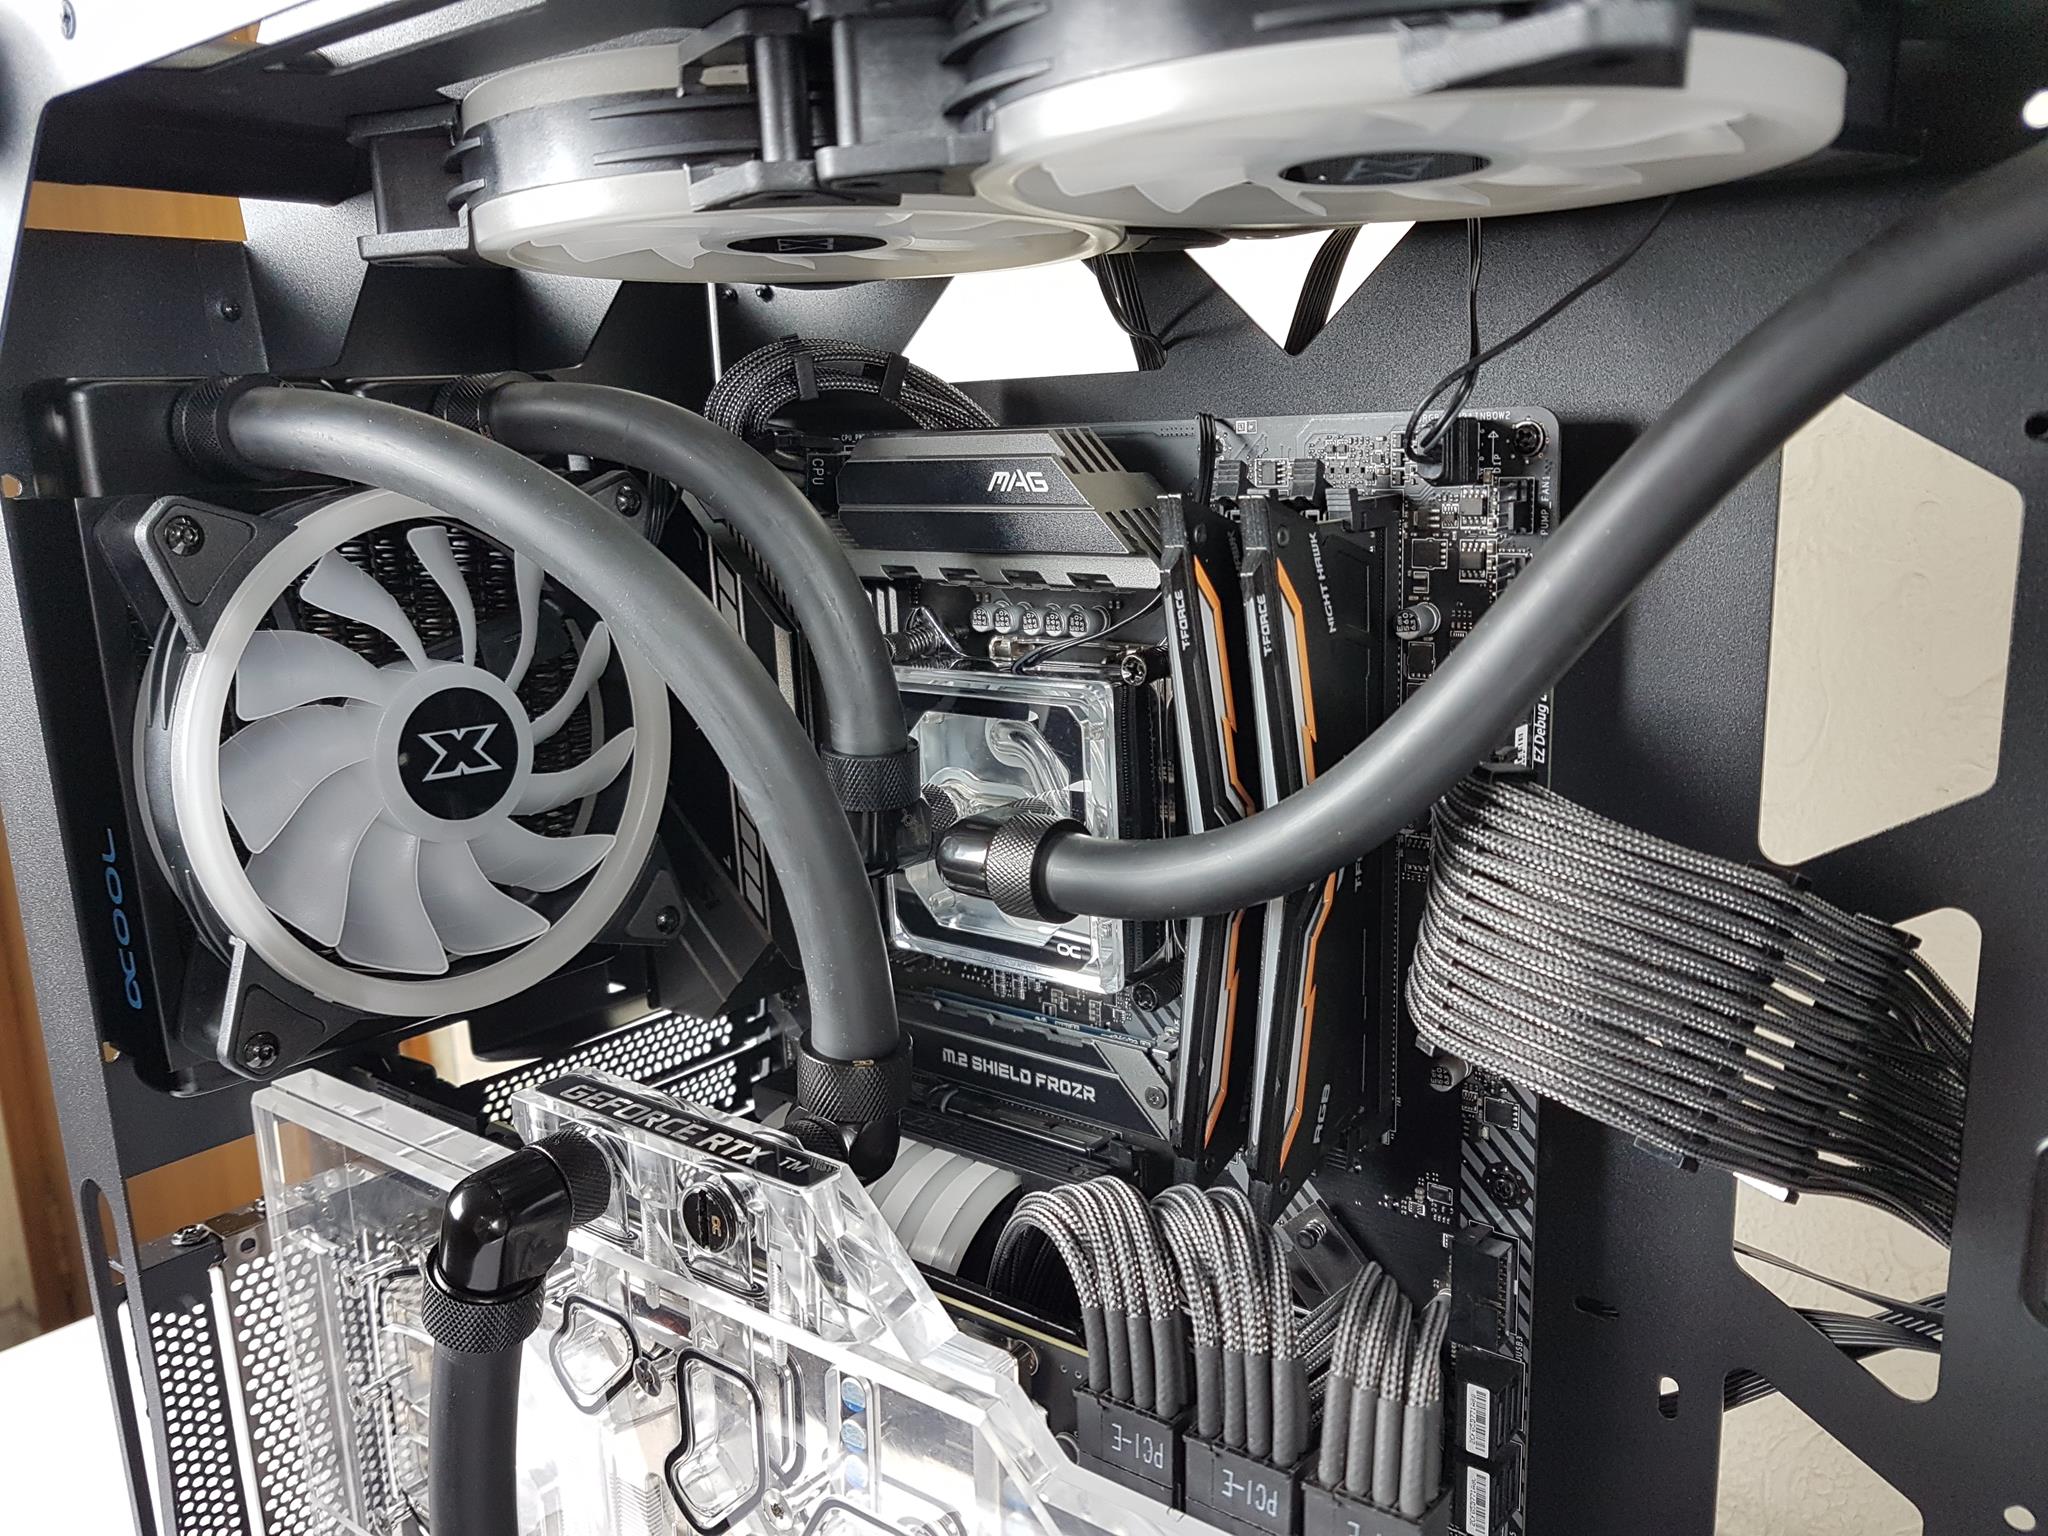
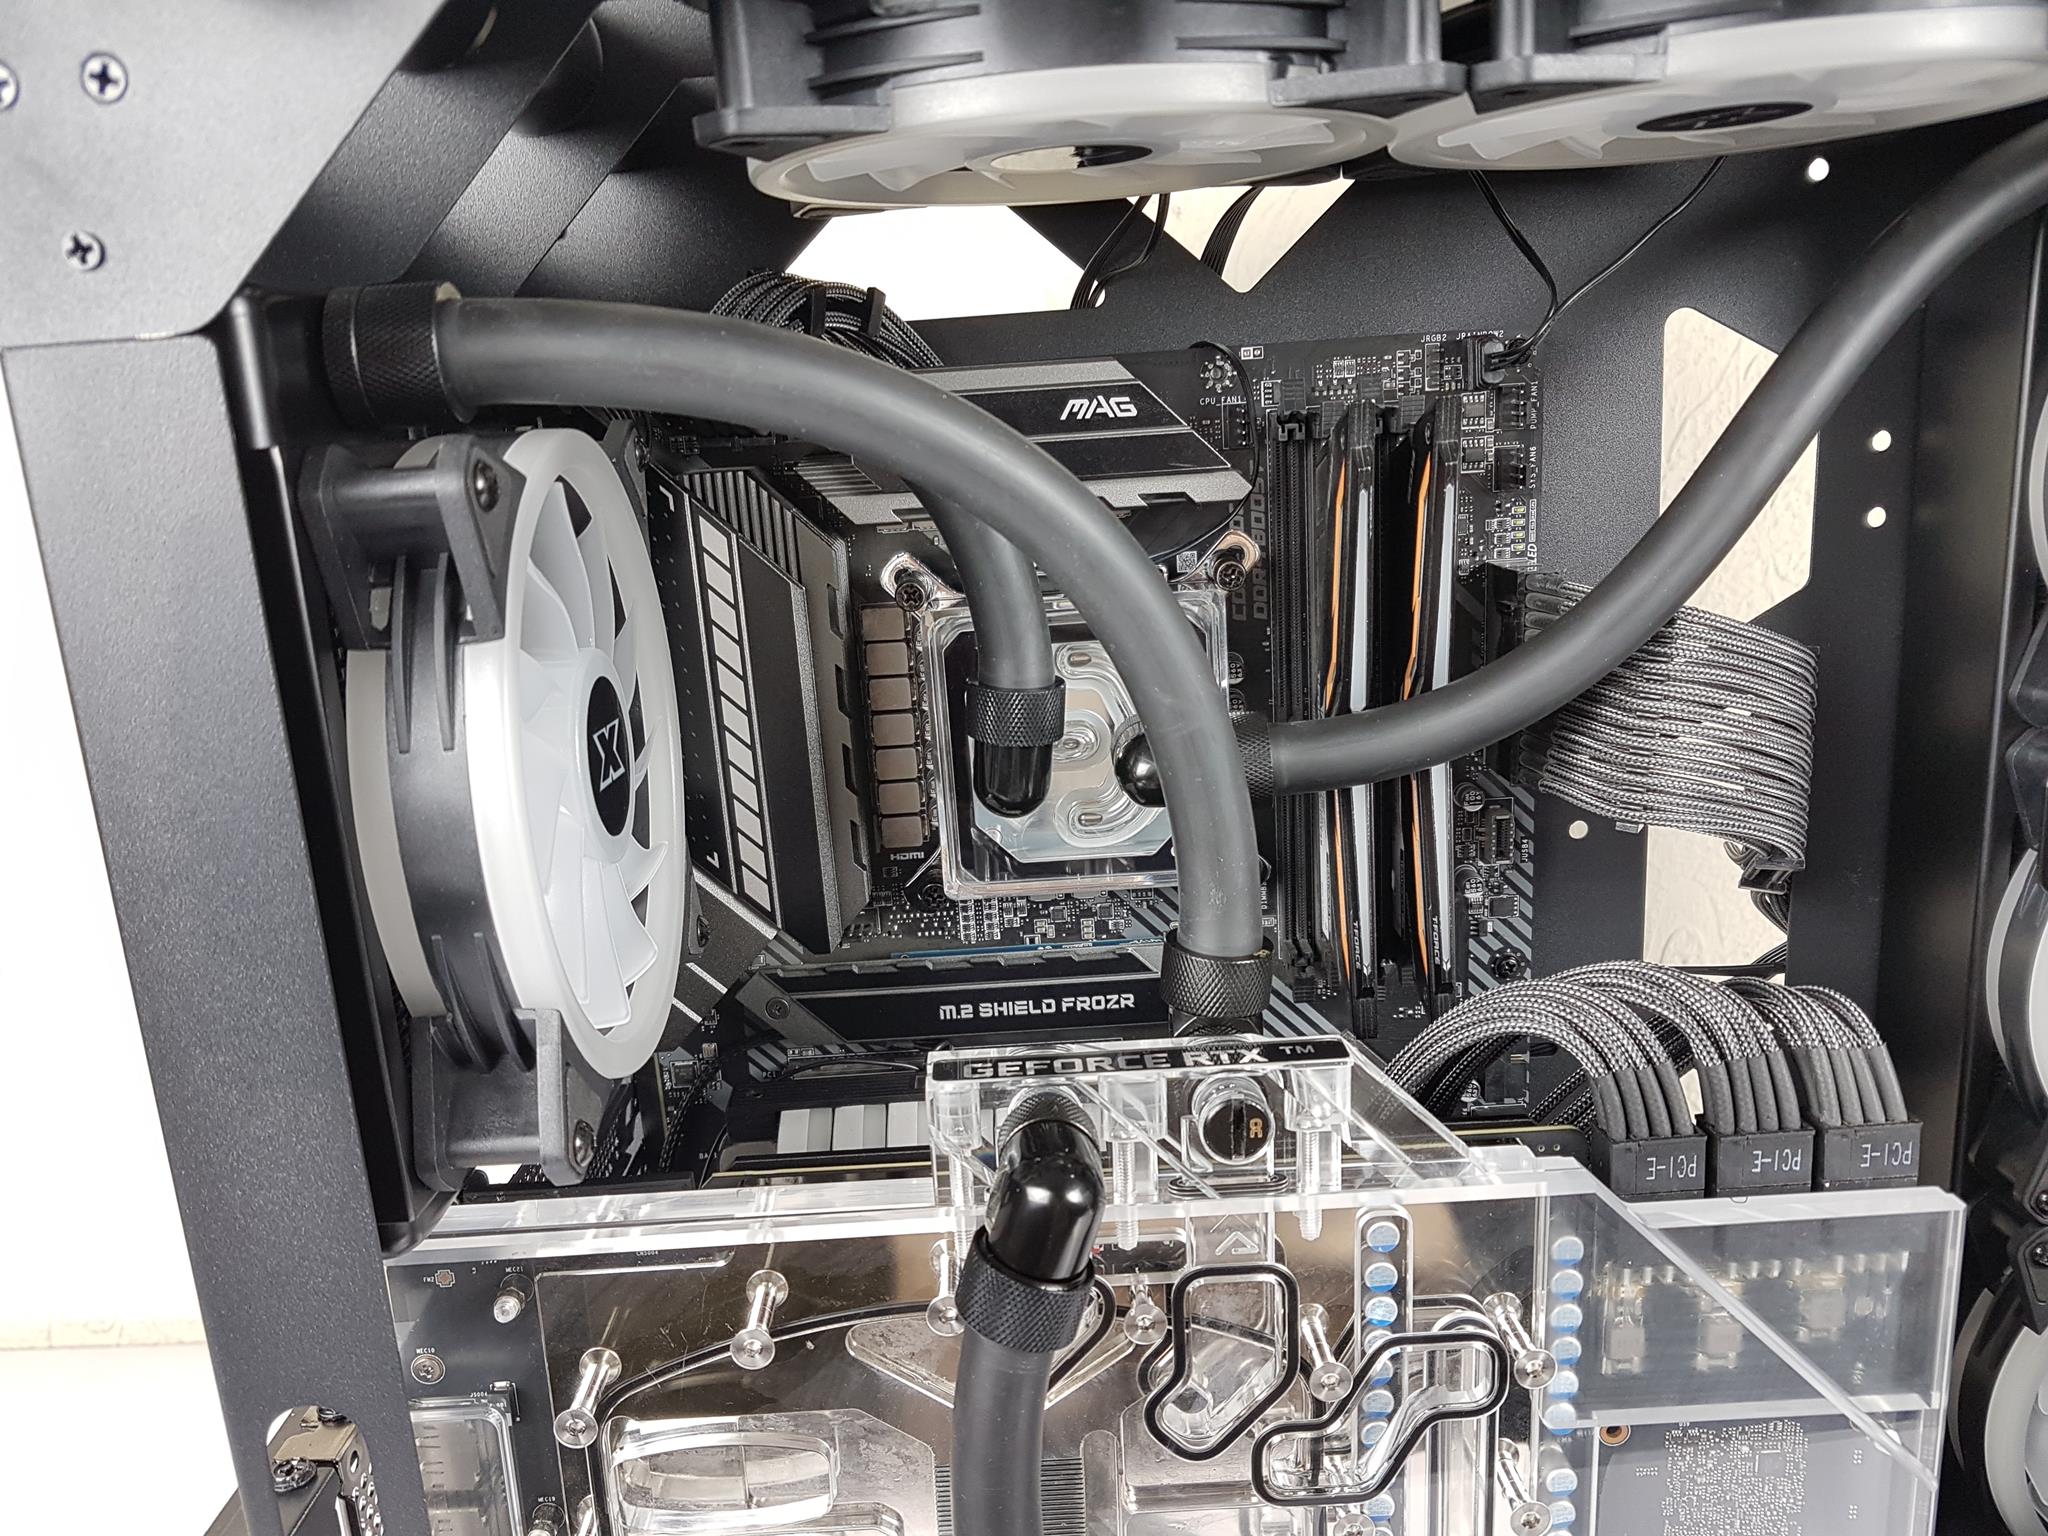
Note: I could not install a 360mm Alphacool NexXxos XT45 radiator on the top as the overall thickness of 70mm was hindered by the VRM heatsink of the motherboard. This has more to do with the raised height of the motherboard in the case. Should Xigmatek have used the standard low height standoffs, there would not have been this issue. The only other option was to use the 360mm radiator has a thickness of 30mm but I had to do with what I have. This is why I went with a 120mm radiator on the rear.
Here are some pics of the build.


Should You Buy It?
It’s time to break down who this case is and is not for.
Buy It If
✅ You Prioritize Modding & Open-Frame Layout: Ideal for enthusiasts who love modding and desire an open-frame layout for test bench setups, offering ample space for customization.
✅ You Prefer a Distinctive Design: If you seek a standout PC case with a bold, stylish outlook, the Xigmatek X7’s rugged build, distinctive design, and spacious layout might be enticing.
✅ You’re In Need of Ample Cooling: With 7 pre-installed A-RGB 120mm fans and a layout optimized for cooling, this case suits those requiring efficient cooling provision for high-end builds.
Don’t Buy It If
❌ Cable Management is Important: If cable management is a priority, the X7 might disappoint due to the lack of cable management support, cable tie points, and rubber grommets for clean organization.
❌ You’re Concerned About PSU Installation Options: Limited PSU installation (fan side down only) might not suit those seeking versatile installation options or specific PSU configurations.
❌ Dust Protection is a Priority: For users who prioritize dust protection, the absence of any dust filtration might be a deal-breaker, as the open-frame design lacks this essential feature.
Final Thoughts
The Xigmatek X7 stands out with a unique design and open-frame layout, catering to modding enthusiasts and high-end setups. Positioned between mid-tower and full-tower sizes, it’s crafted from sturdy 1.2mm Steel, accommodating up to an E-ATX motherboard. Sporting two 4mm tinted tempered glass panels, it’s visually striking.
Featuring 7x 120mm A-RGB fans and an RGB controller, this case prioritizes aesthetics and cooling. However, it lacks dust filtration due to its open-frame design and falls short on cable management support with no tie points or grommets. The PSU installation is limited to fan side down, and the absence of vertical GPU support and cable management might challenge users. The proprietary fan connectors limit customization options, preferring a standard interface for lighting and fan control.
Despite its limitations, the Xigmatek X7 impresses with a distinctive design, robust build quality, ample space, and pre-installed A-RGB fans. It’s a solid choice for those seeking unique aesthetics and have specific needs for modding or high-end configurations.
We are grateful to Xigmatek for the provision of X7 for the review.
Recent Updates
- December 29, 2023: Few text changes to improve readability. Also added image galleries.
Thank you! Please share your positive feedback. 🔋
How could we improve this post? Please Help us. 😔
[Hardware Reviewer & Editor]
Meet Nauman Siddique, a highly experienced computer science graduate with more than 15 years of knowledge in technology. Nauman is an expert in the field known for his deep understanding of computer hardware.
As a tech tester, insightful reviewer, and skilled hardware editor, Nauman carefully breaks down important parts like motherboards, graphics cards, processors, PC cases, CPU coolers, and more.
- 15+ years of PC Building Experience
- 10+ years of first-hand knowledge of technology
- 7+ years of doing in-depth testing of PC Hardware
- A motivated individual with a keen interest in tech testing from multiple angles.
- I majored in Computer Science with a Masters in Marketing
- Previously worked at eXputer, EnosTech, and Appuals.
- Completed Course in Computer Systems Specialization From Illinois Tech
Get In Touch: nauman@tech4gamers.com


