 Threads
Panoramic View!
Review Summary
XPG Invader X is a mid-tower case perfect for high-tier PC builds. I love the dust filtration on the top, side, and bottom, as well as the ability to house up to 360mm radiators. The 5x pre-installed fans are a great touch, and the GPU support bracket and riser cable are the icings on the cake. The overall height of the case can make it difficult to connect cables on the top headers of the motherboard, but that’s a minor inconvenience. I highly recommend the XPG Invader X case to anyone looking for a high-quality and feature-rich case for their next PC build.
Hours Tested: 18

Overall
-
Design - 9/10
9/10
-
Build Quality - 9/10
9/10
-
Features - 9.5/10
9.5/10
-
Cooling Provision - 9/10
9/10
-
Storage Provision - 8/10
8/10
Pros
- Panoramic View Design
- Good Fust Filtration all around
- Rail Mount System for fans and radiators
- GPU Support Bar
- Supports Back-plug motherboards
- Ample Airflow
- Versatile IO Ports
Cons
- Price
- Non-reusable PCIe covers


XPG’s latest addition to the Invader series, the Invader X, offers a panoramic view and impressive features. Notably, the PCIe 4.0 riser cable, though contributing to the price, is a quality inclusion. Highlights include 3mm tempered glass, versatile GPU installation, magnetic dust filters, and support for extensive cooling options with up to 10 fans. This case is designed for easy cable management, with a focus on hassle-free installation for ATX/mATX motherboards. Stay tuned for detailed features.
Key Takeaways
- XPG Invader X is a Mid-tower PC case for high-end builds with a panoramic view, strong cooling, and customization options.
- It is for users who want a panoramic view case with top-notch specs and prioritize strong cooling (up to 10 fans) and dust filtration.
- It is not for users who already own a feature-rich mid-tower case, are on a tight budget or have height restrictions for top-mounted AIO coolers.
- Why you can trust Tech4Gamers: Our reviews are based on dedicated hands-on testing by our team of experienced hardware experts. Find out more about how we test.
Here are the specifications of the XPG Invader X PC Case.
| Specification | Details |
|---|---|
| Dimension (HWD) | 448 x 245 x 475 mm (17.64 x 9.65 x 18.70 inch) |
| Colour | Black / White |
| Material | SPCC / 3mm Tempered Glass |
| Form Factor | ATX, Micro-ATX, Mini-ITX |
| 3.5″ HDD/HDD Tray | 3 (3.5” HDD or 2.5” SSD) |
| I/O Port | USB 3.2 Type-C x 1, USB 3.2 Type-A x 2, HD Audio Port x 1, Power Button x 1, Reset Button x 1 |
| Fan Included | 5 x 120mm (optional by model) |
| Fan Configuration | 4 x Reversed Fans + 1 x Regular Fan |
| Fan Support | Rear: 120mm x 1 / 140mm x 1 – Top: 120mm x 3 / 140mm x 2 – Bottom: 120mm x 1 / 140mm x 1 – Side: 120mm x 3 |
| PSU shroud | 120mm x 2 |
| Radiator Support | Rear: 120mm – Top: Up to 360mm – Side: Up to 360mm (Vertical GPU Mounting only) |
| Clearance | Graphics Card: 400mm (Vertical / Horizontal GPU Mounting without side radiator) – Graphics Card: 270mm (Horizontal GPU Mounting with side Radiator) – GPU Vertical Installation height clearance: 30.5mm |
| CPU Cooler Height | up to 175mm |
| PSU Length | up to 240mm |
| Weight | Product: 8.95kg – With Package: 10.2kg |
| Without Pre-installed Fans | Product: 8.2kg – With Package: 9.5kg |
| Warranty | 2 Years |
| Remark | Optional by model: (1) Vertical GPU Mounting Kit: PCIe 4.0 riser cable (180mm) (2) Pre-Installed 4 x Reversed Fans + 1 x Regular Fan |
Packaging and Unboxing
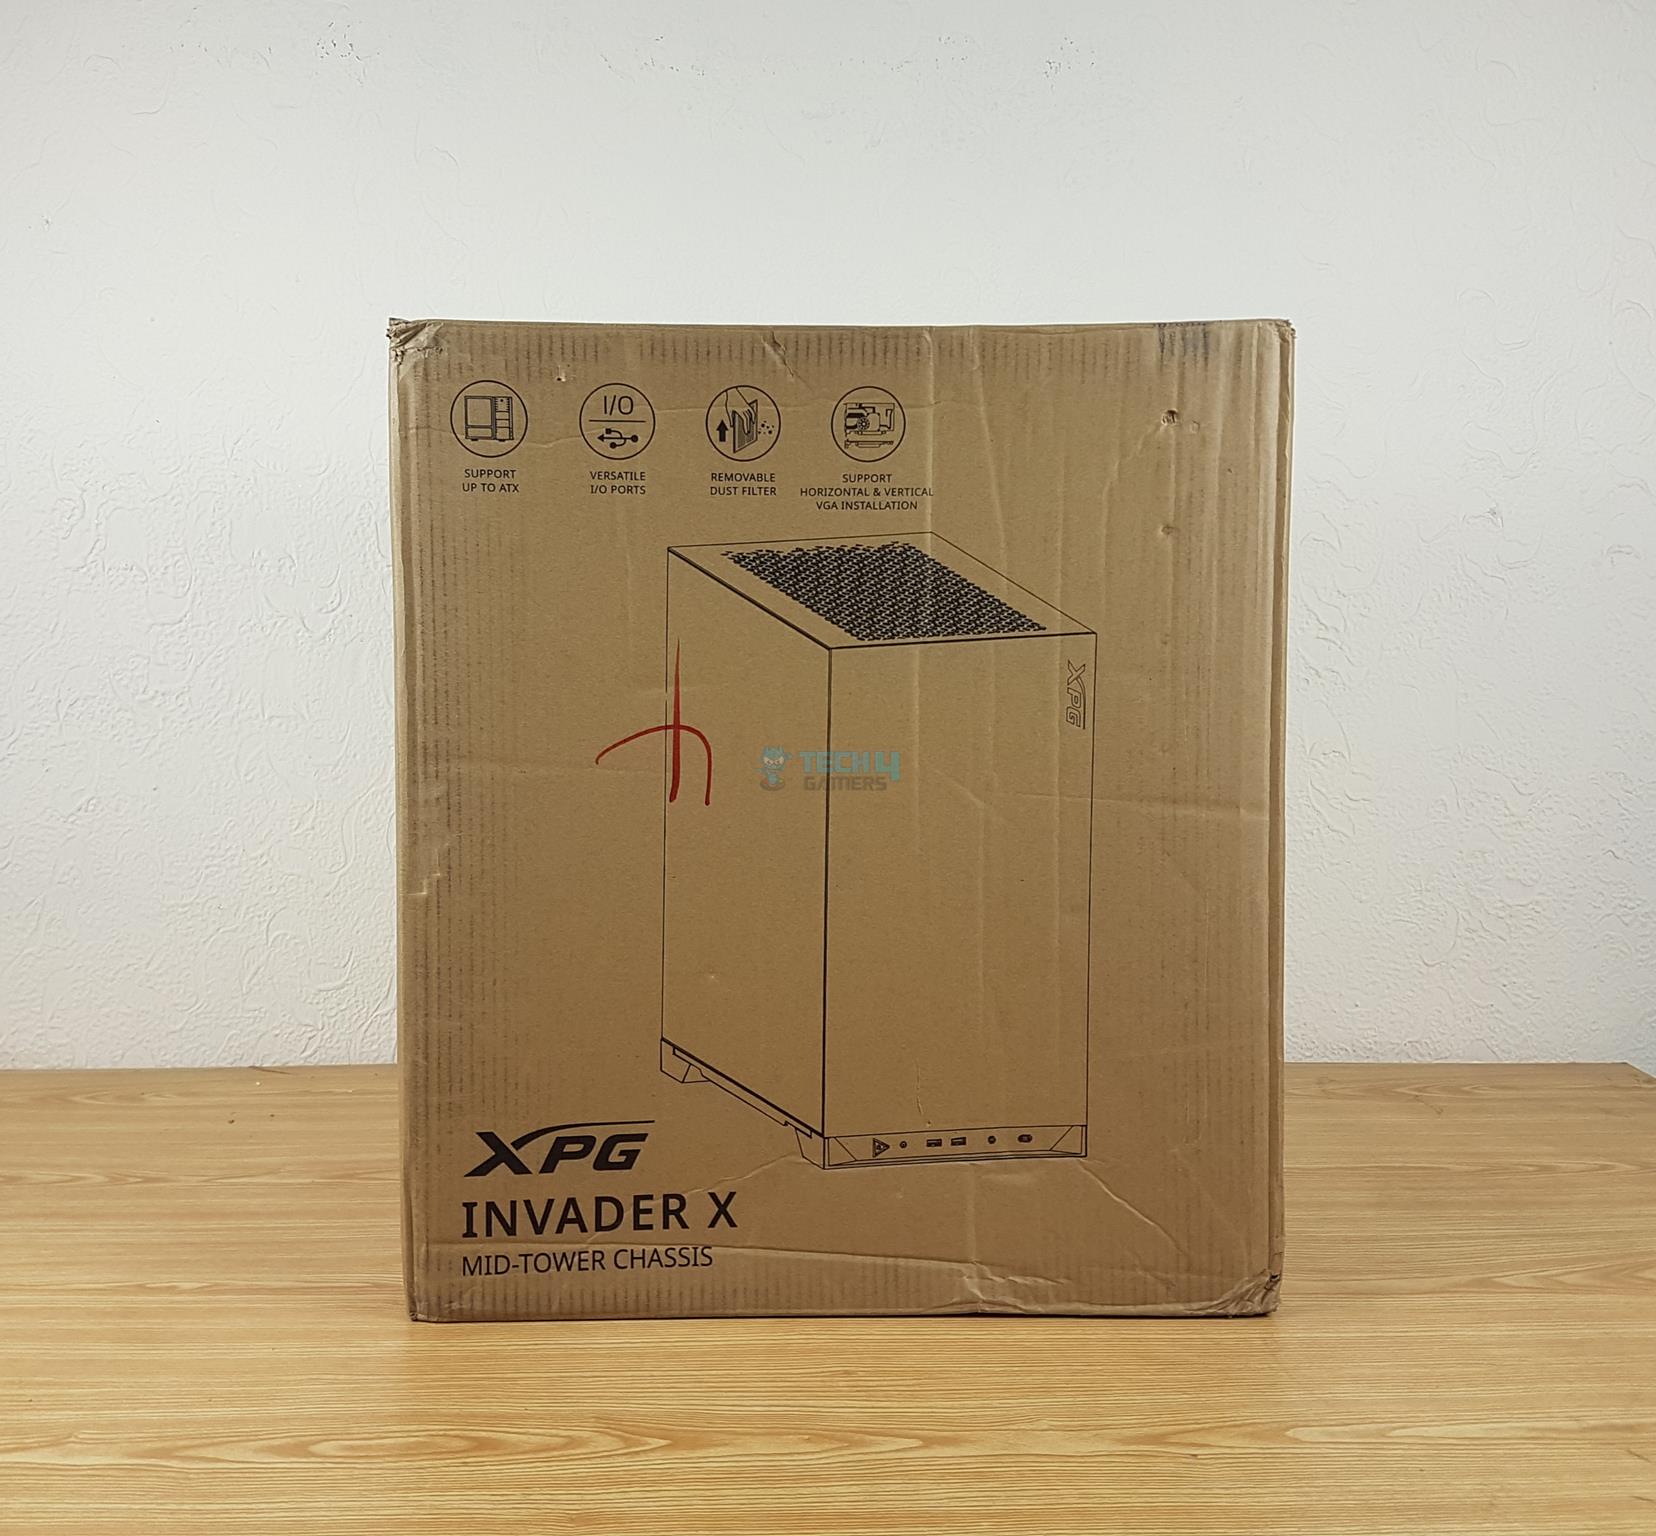
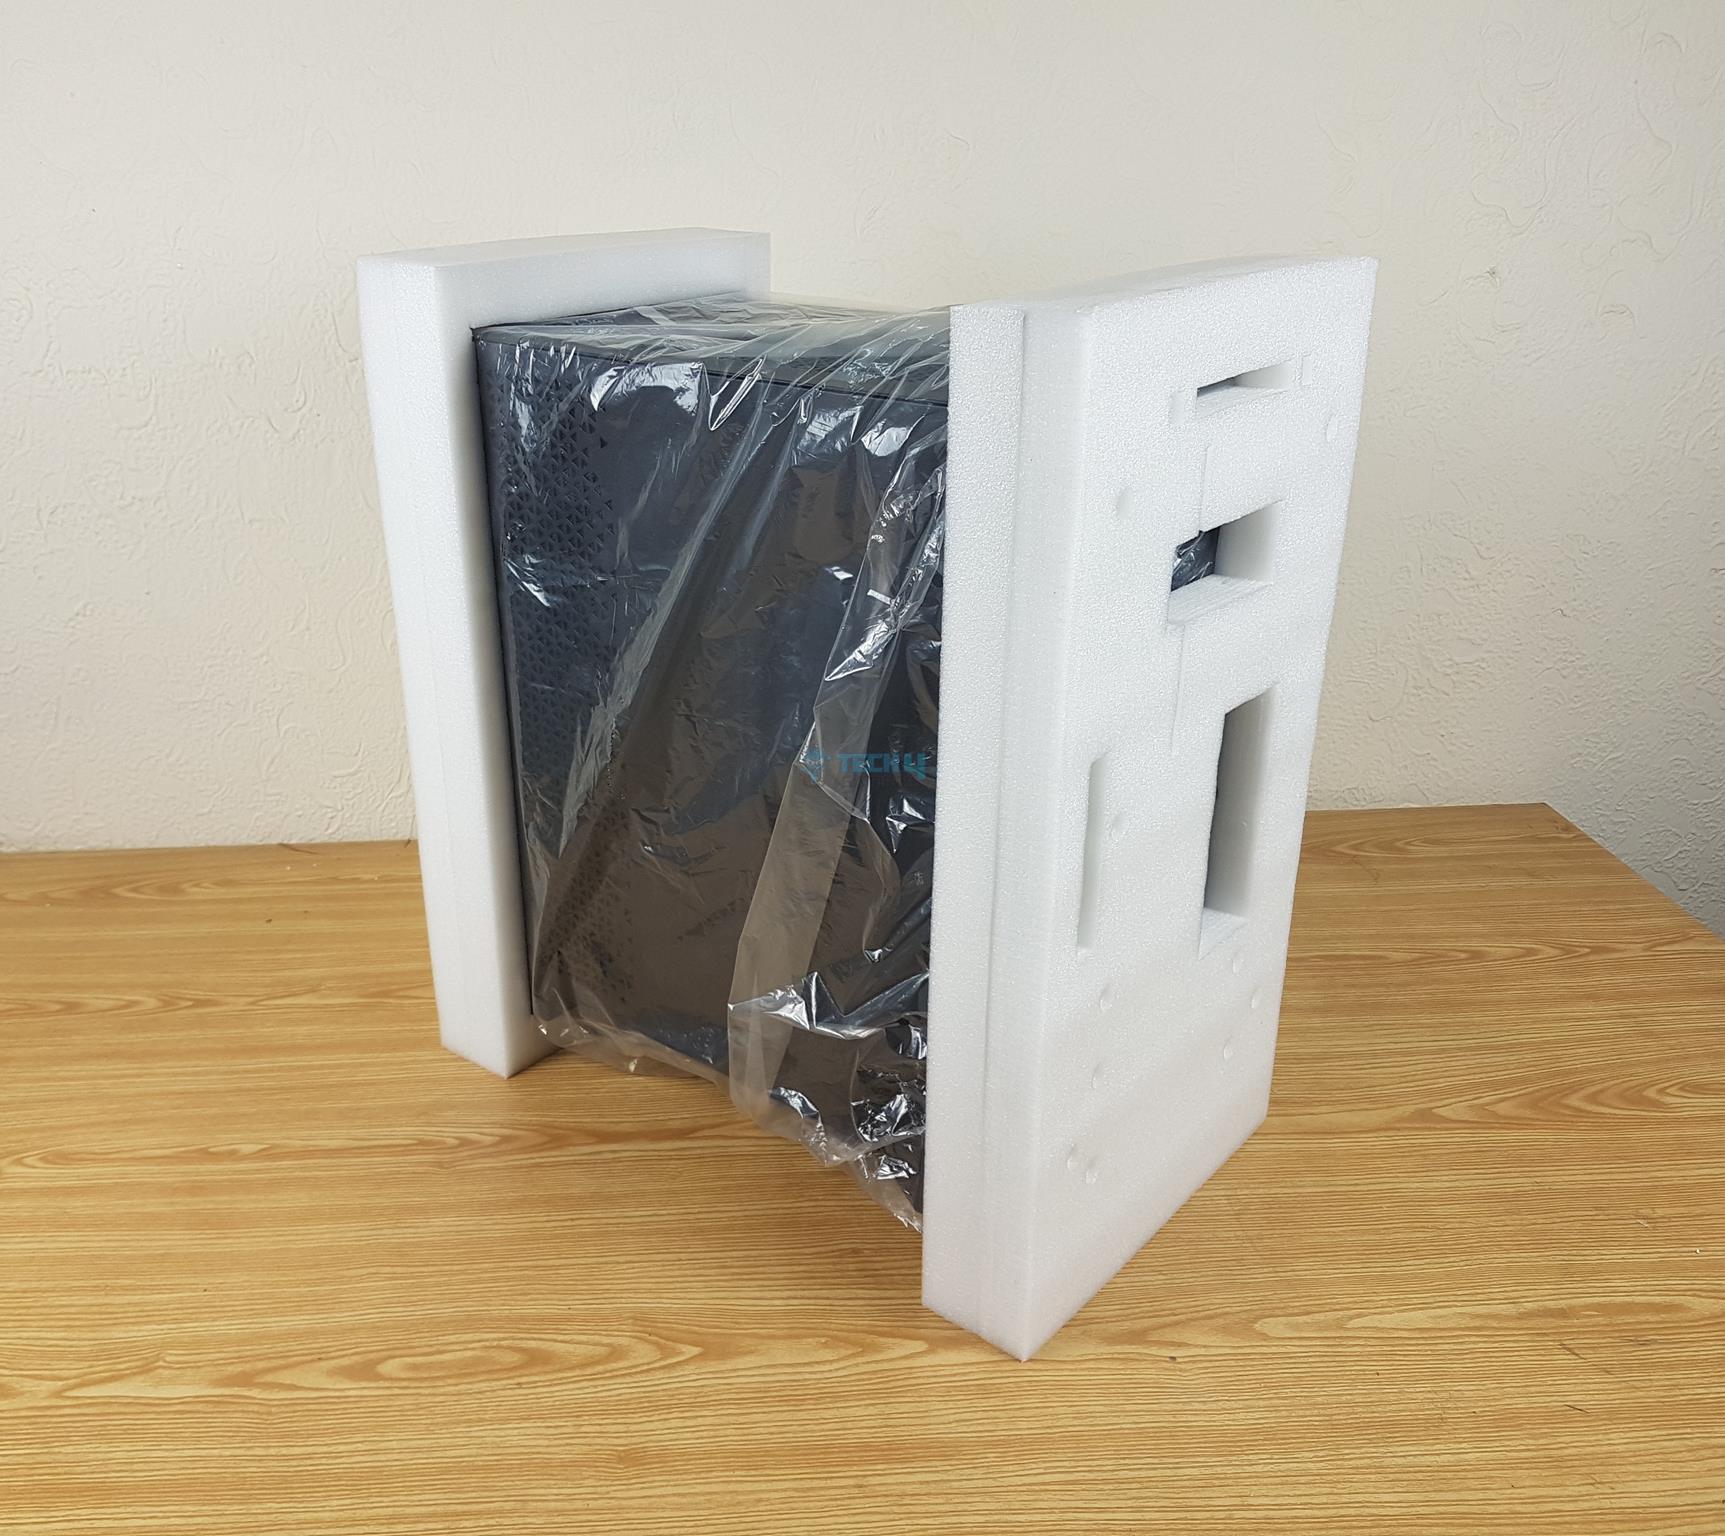
The unit is shipped inside a standard brown colour cardboard box. XPG has highlighted key features in a modular style, like storage capabilities, removable dust filters, Versatile IO ports, etc. The case comes tucked between two white-colored Styrofoam pads.
Box Contents
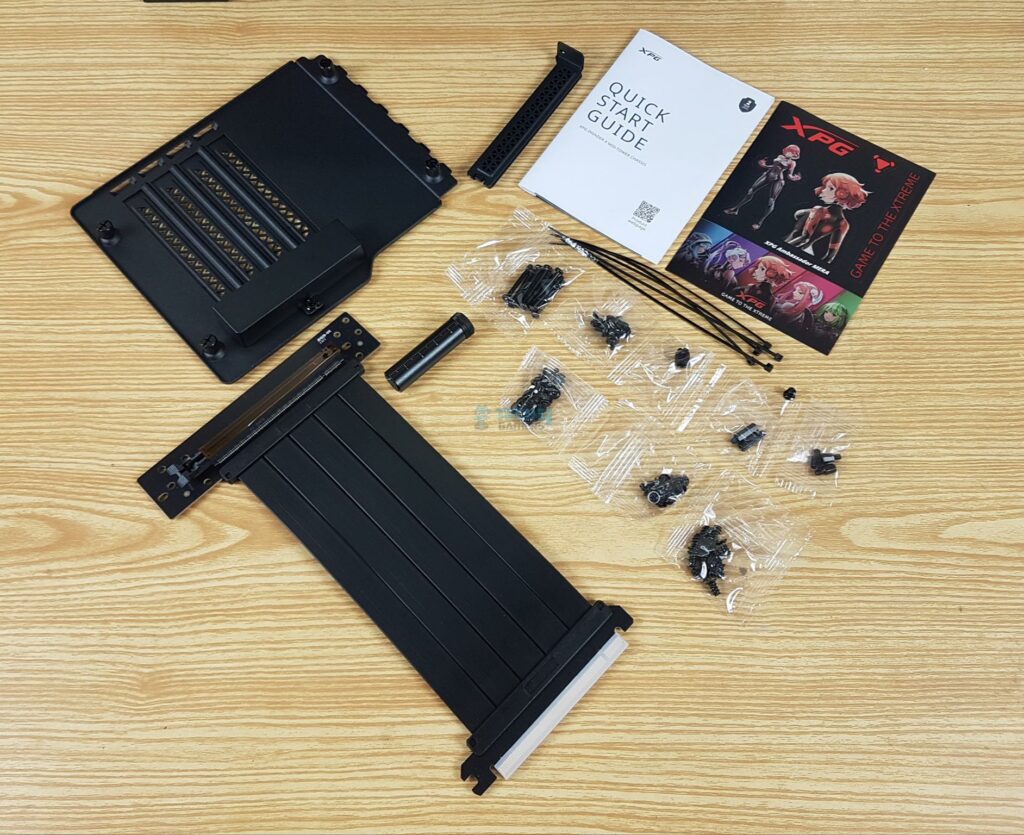
XPG has provided the following in the accessory box:
- 1x 180mm GPU Riser Cable in 90ᵒ
- 1x Vertical GPU Bracket
- 1x GPU Support Bracket
- 3x Steel made PCIe slot covers
- 5x Zip Ties
- Various Screws and standoffs
- 1x User Guide
- 1x XPG Sticker Sheet
Design
The XPG Invader X is a mid-tower case. It has a dimension of 448x245x475mm (HxWxD). It is made of SPCC, Tempered Glass, and plastic materials. The weight of this case is 8.95 kg. Let’s take a closer look at Insider and Outside views as our major categories.
External View
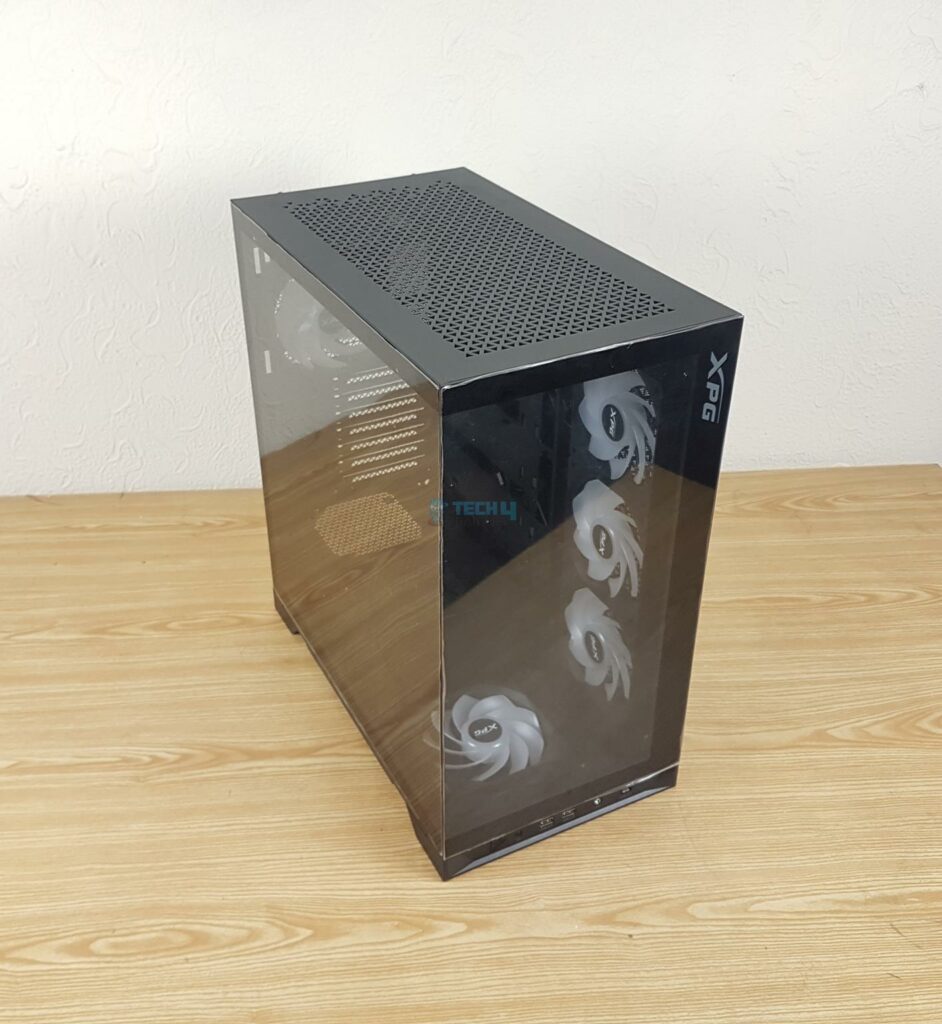
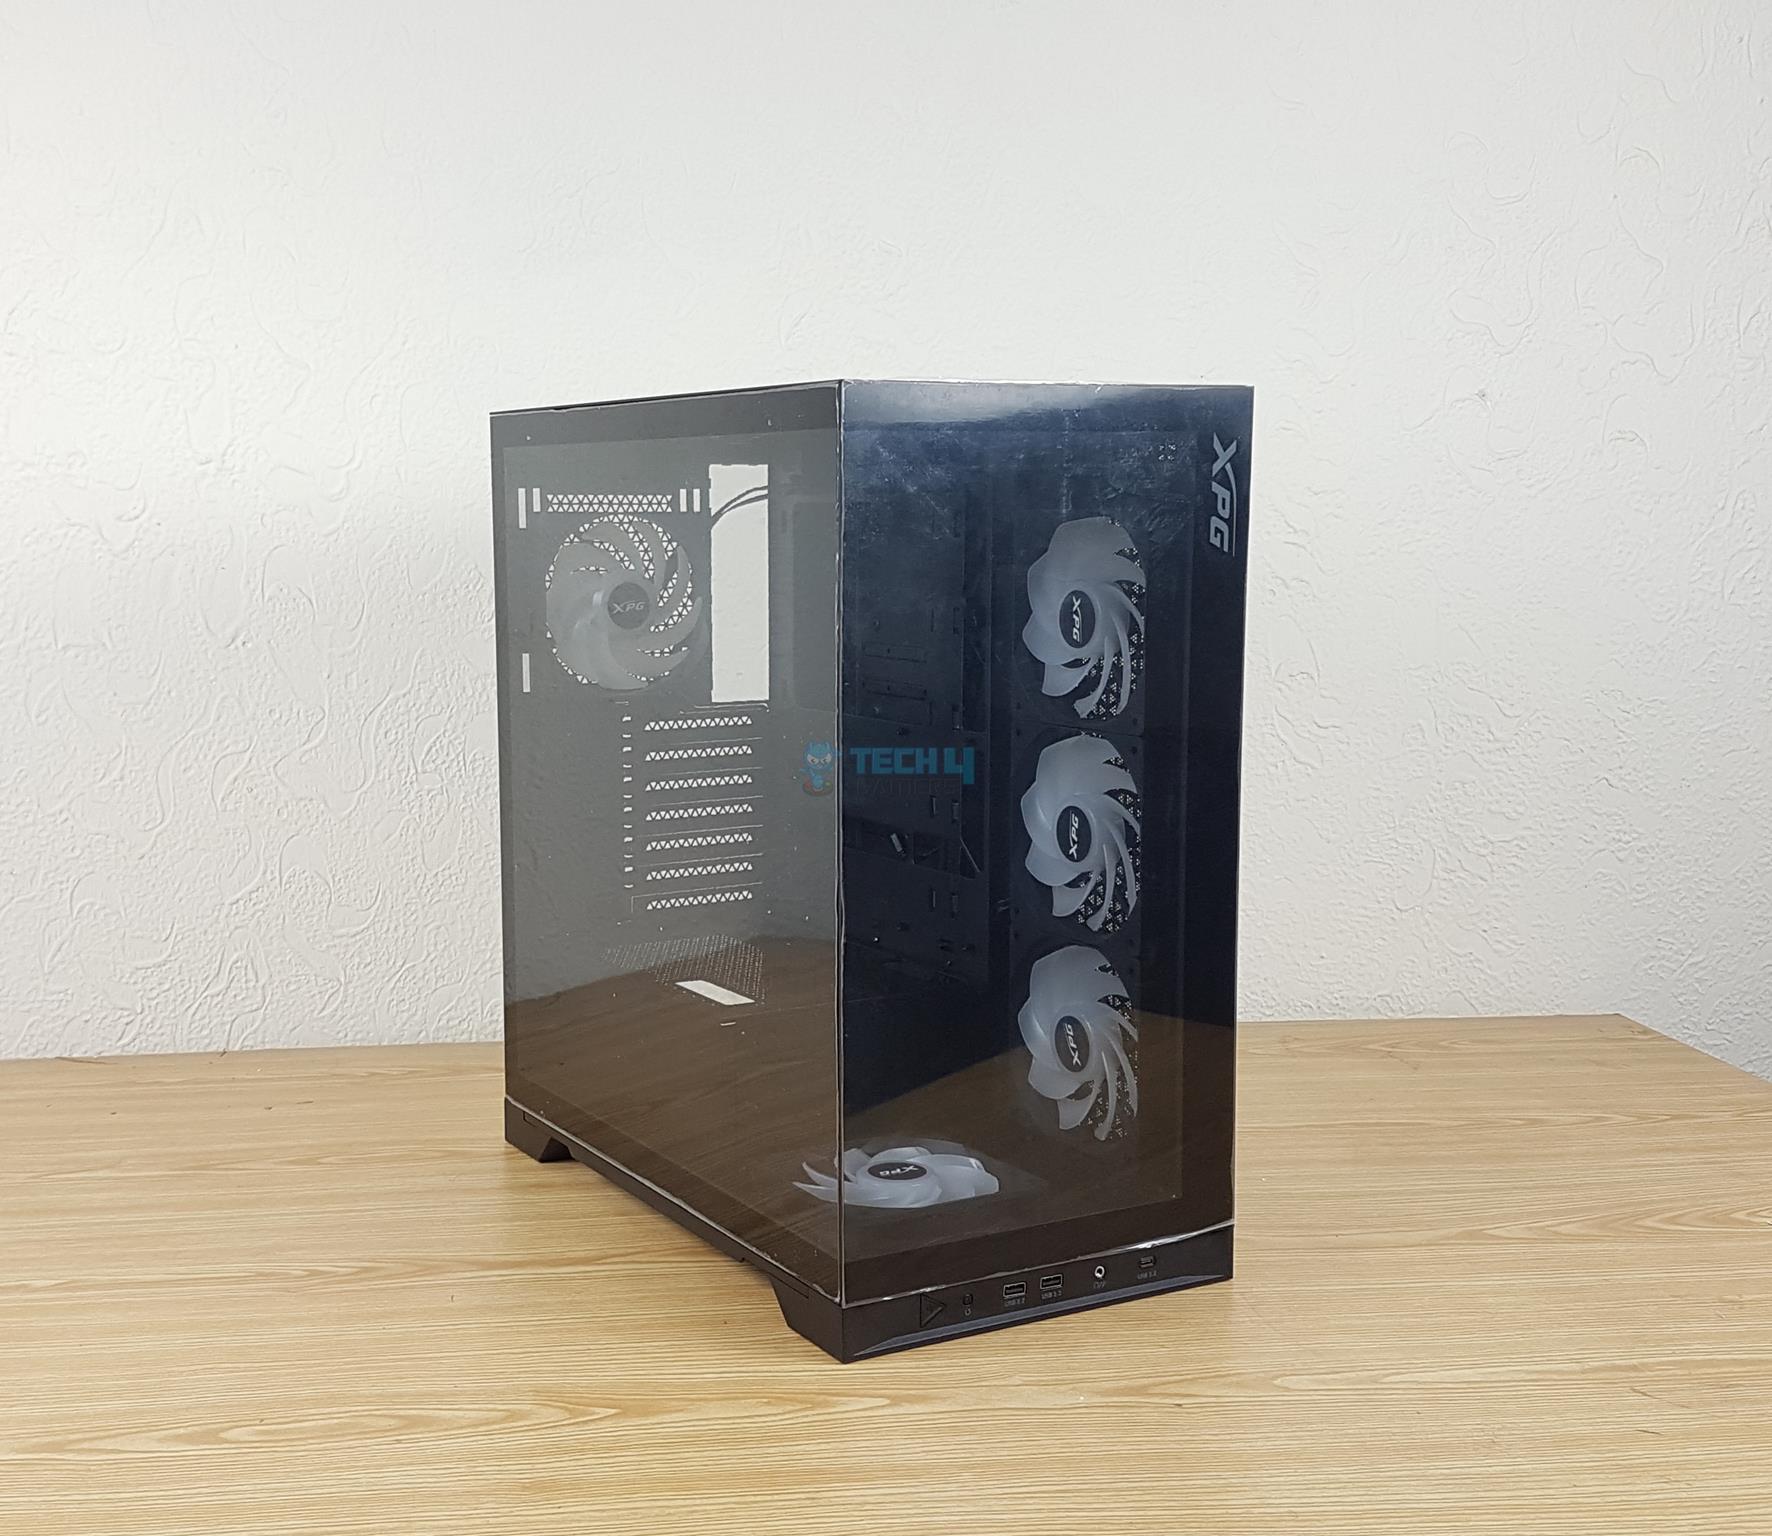
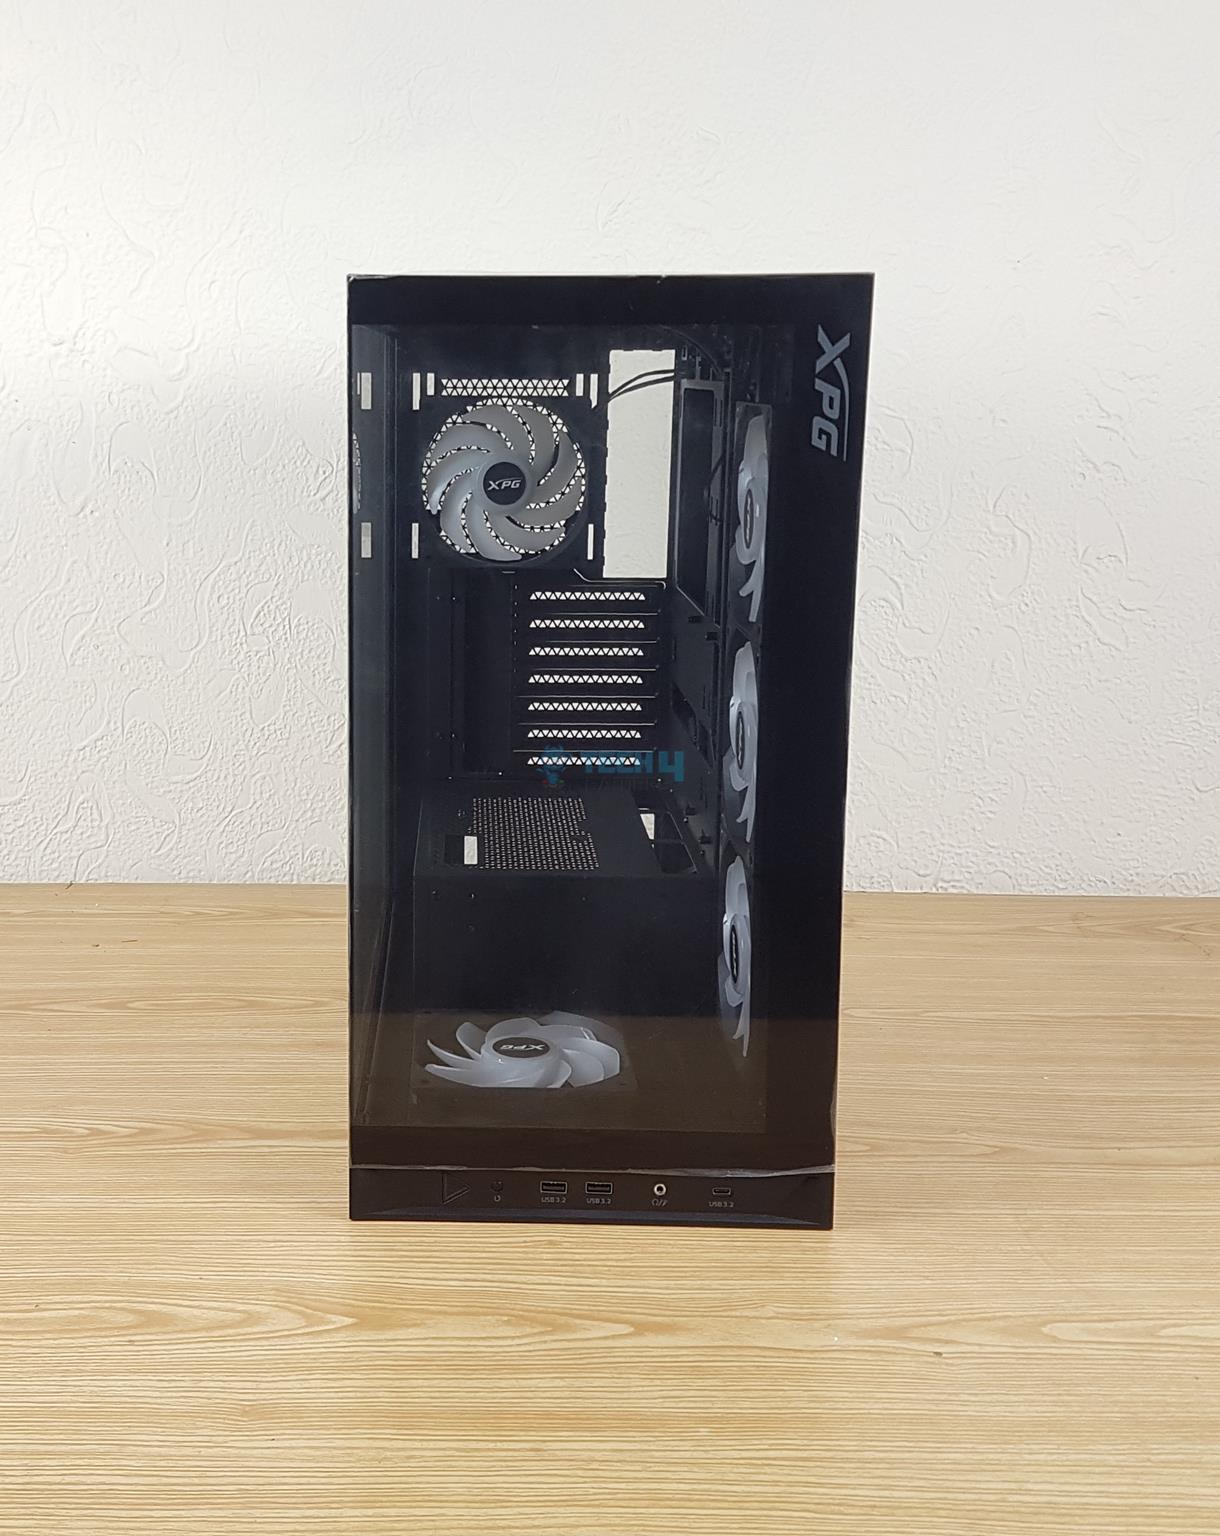
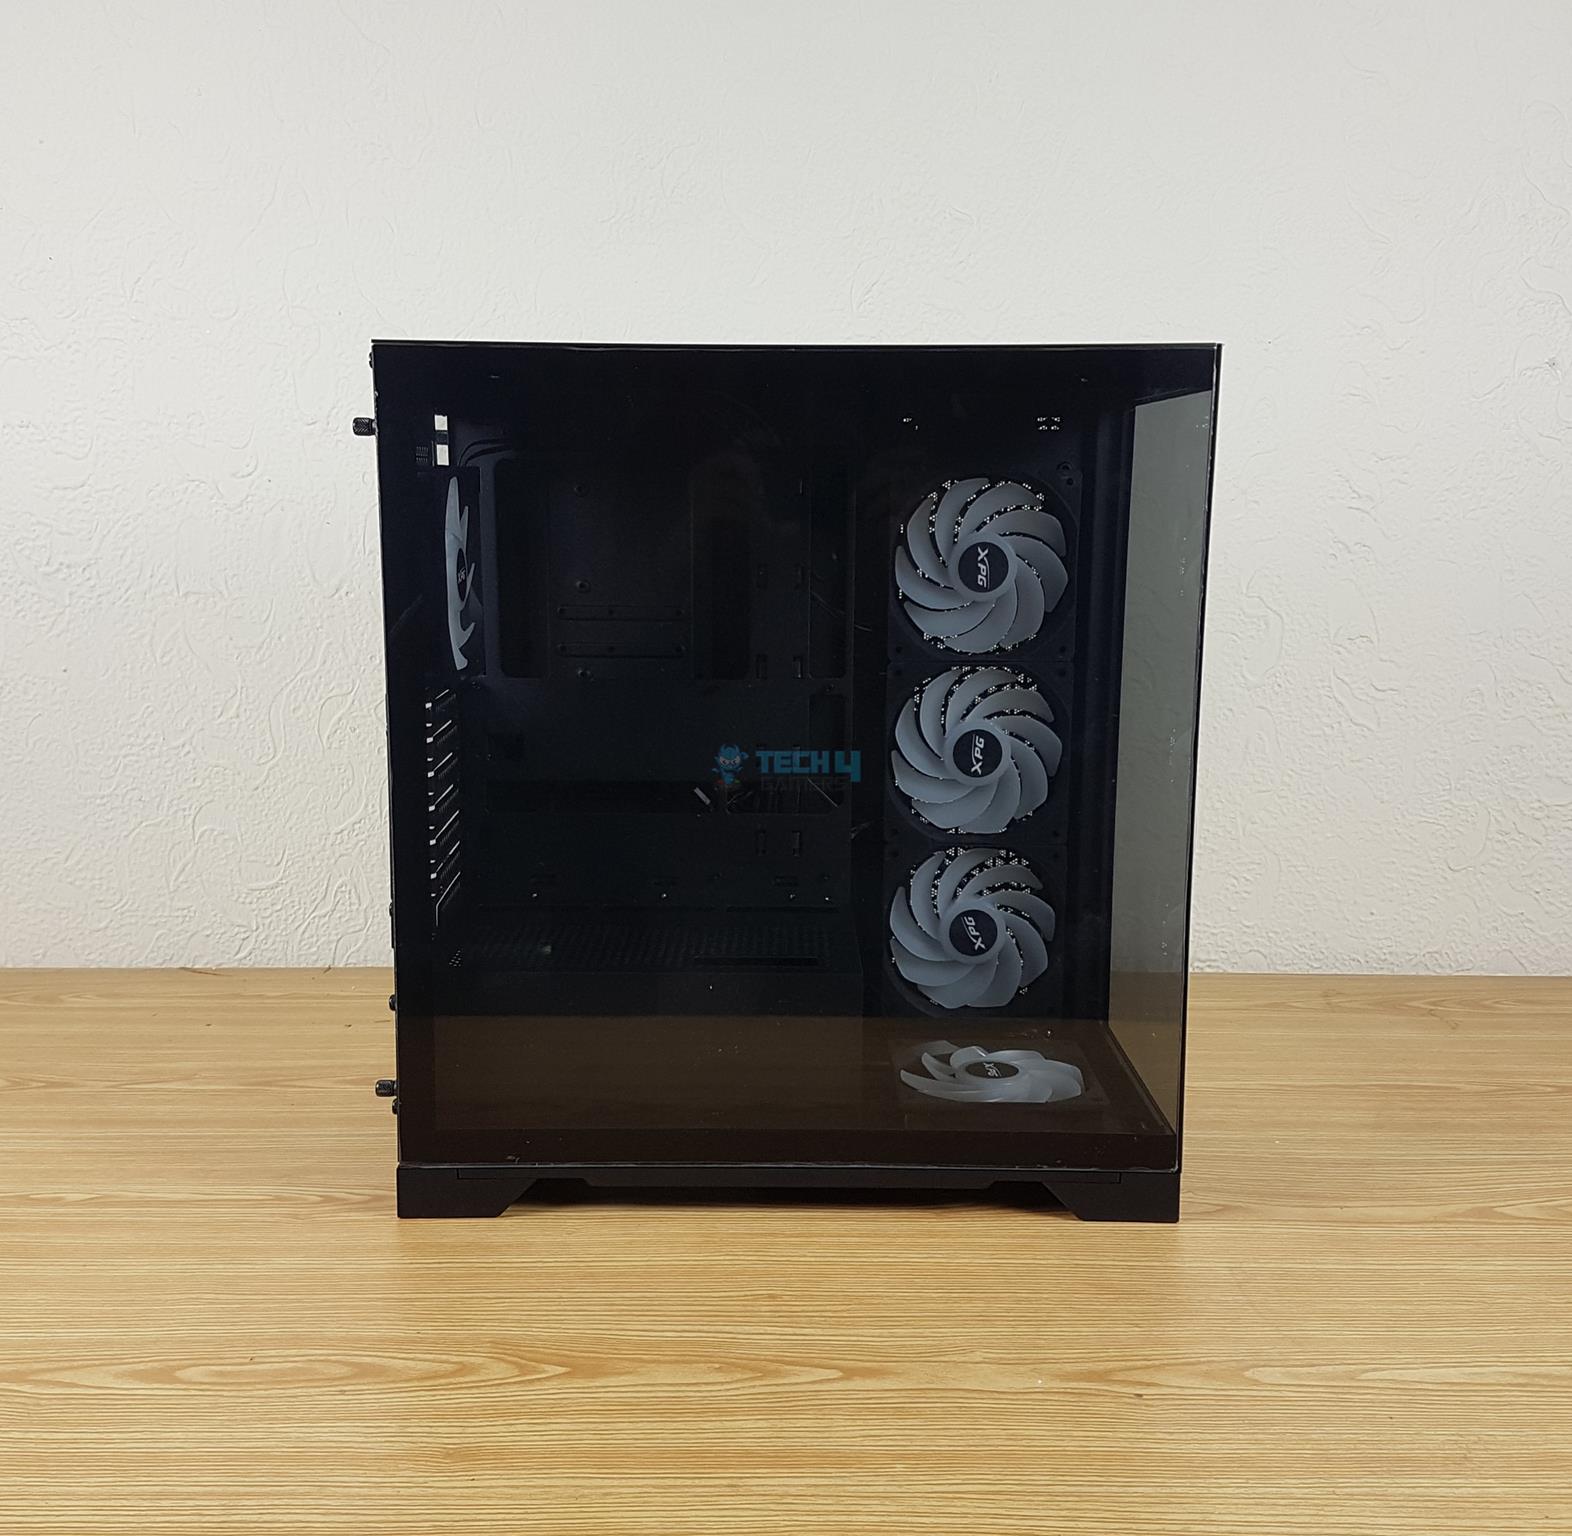
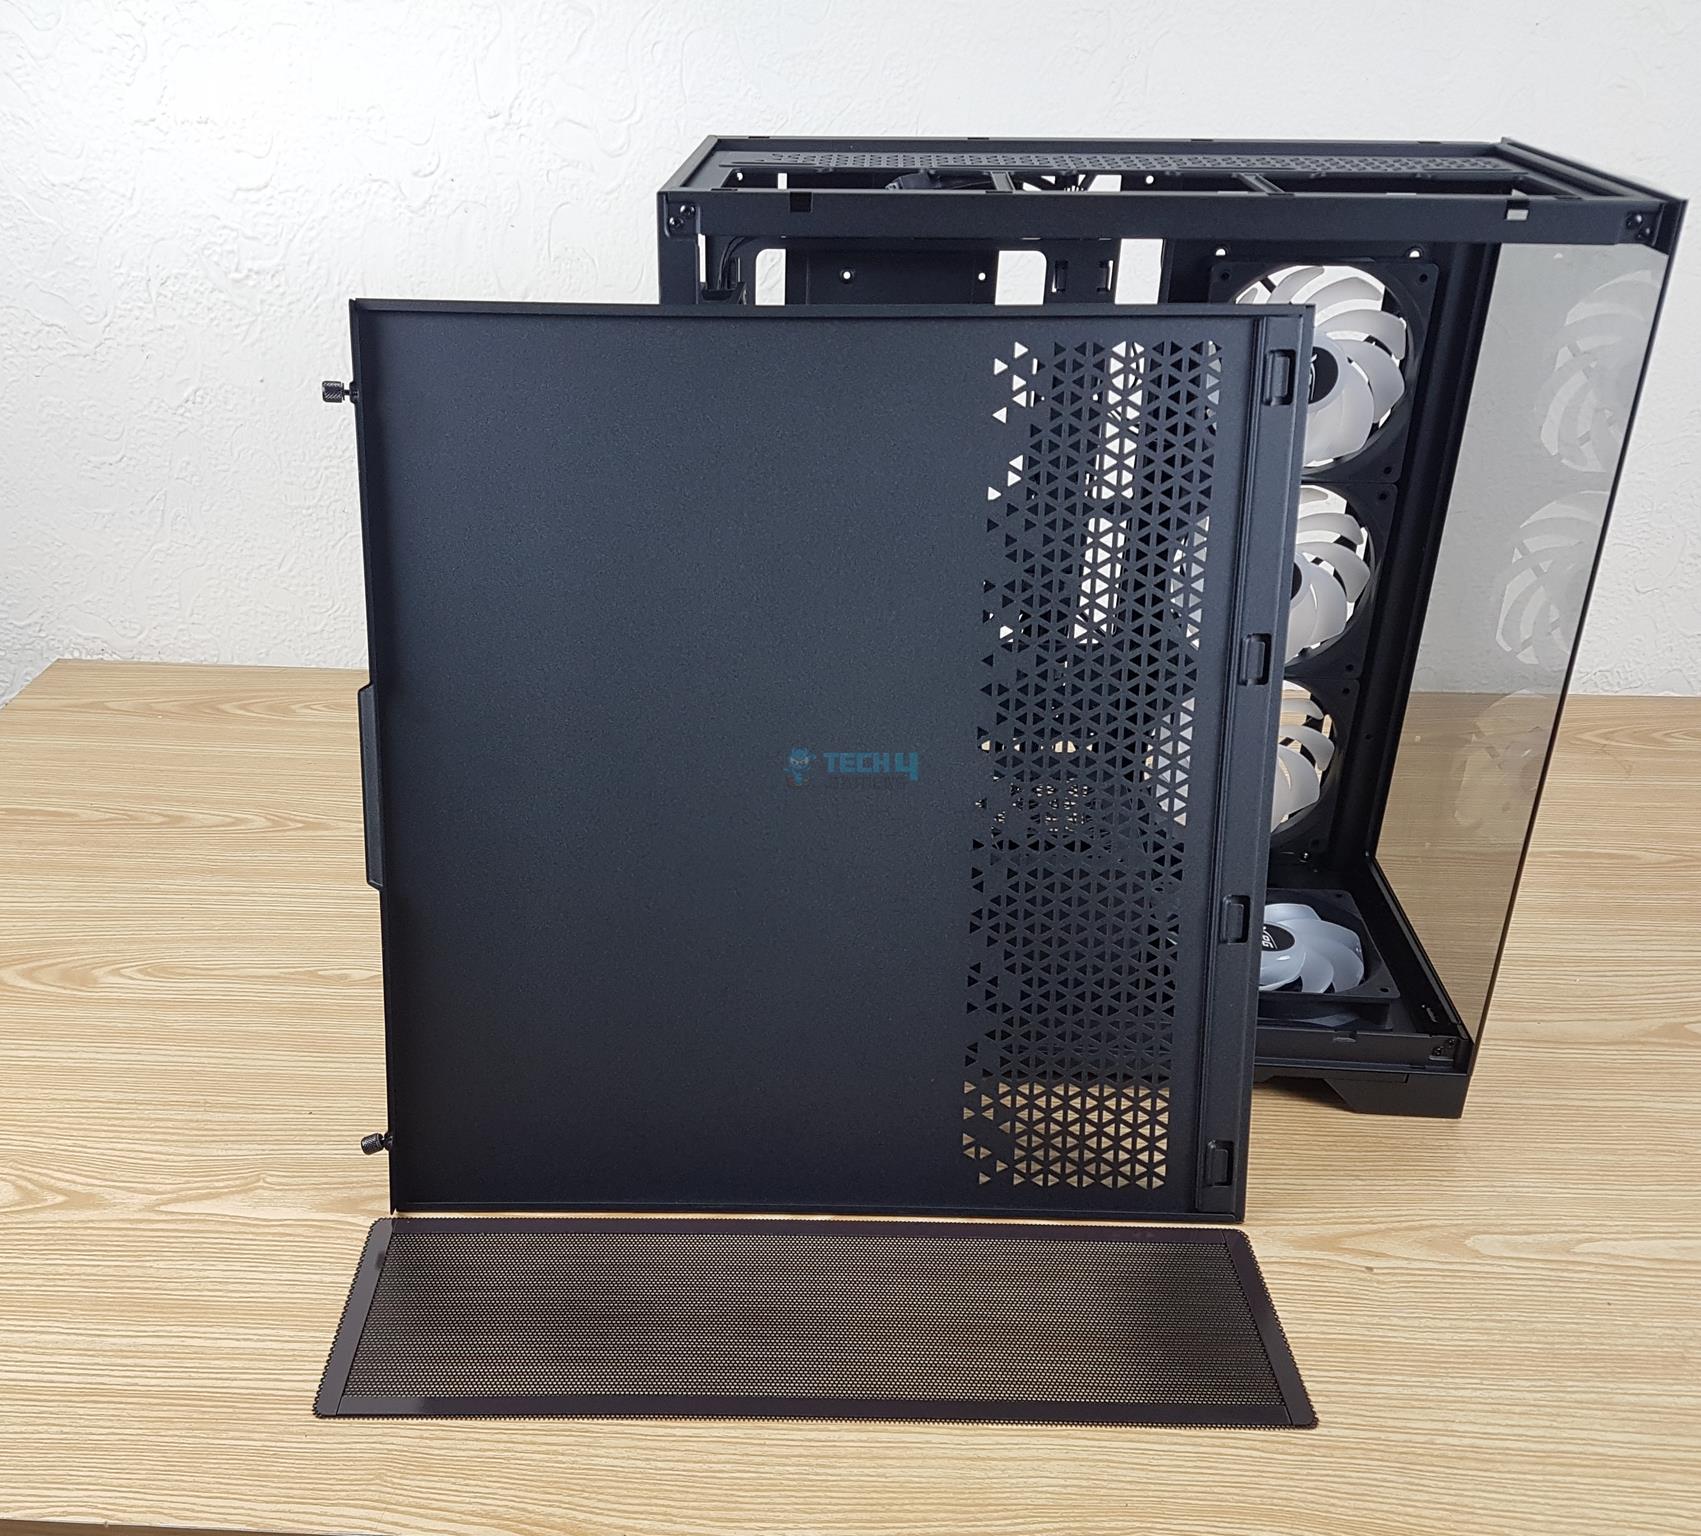
We can see that this case is based on the panoramic view concept. There is a fixed, clear, see-through glass on the front and a 3mm clear tempered glass on the side. Together, these two provide a panoramic view of the complete build inside this case. I guess Lian Li’s design is still kicking in well. The front of the Invader X shows little tooling work since the 3mm tempered glass is fixed. It can’t be removed, so don’t try that. The other salient design is the front IO port located at the base of this case. The glass panel is a bezel-less design.
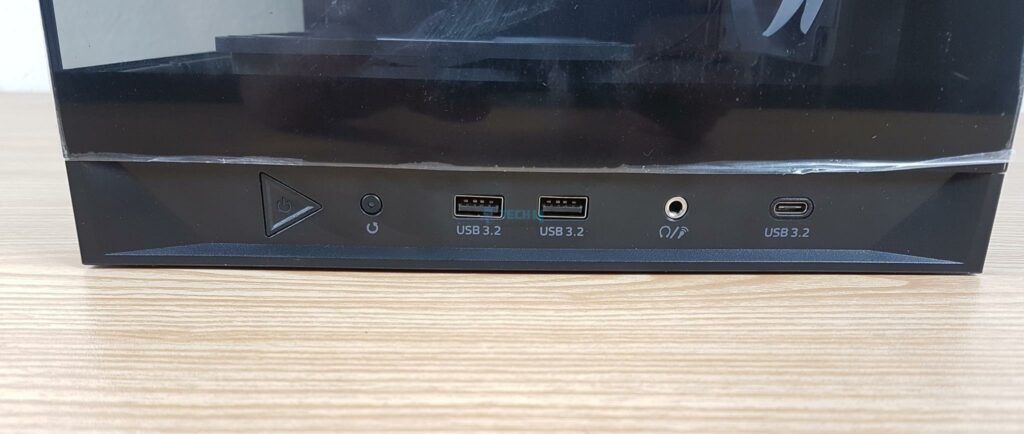
These are the options available for I/O on the bottom of the front panel:
- 1x USB 3.2 Type C port
- 2x USB 3.2 Type-A ports
- 1x HD Audio Port
- 1x Power Button
- 1x Reset Button
The power button has a nice click and tack to it without wobbling.
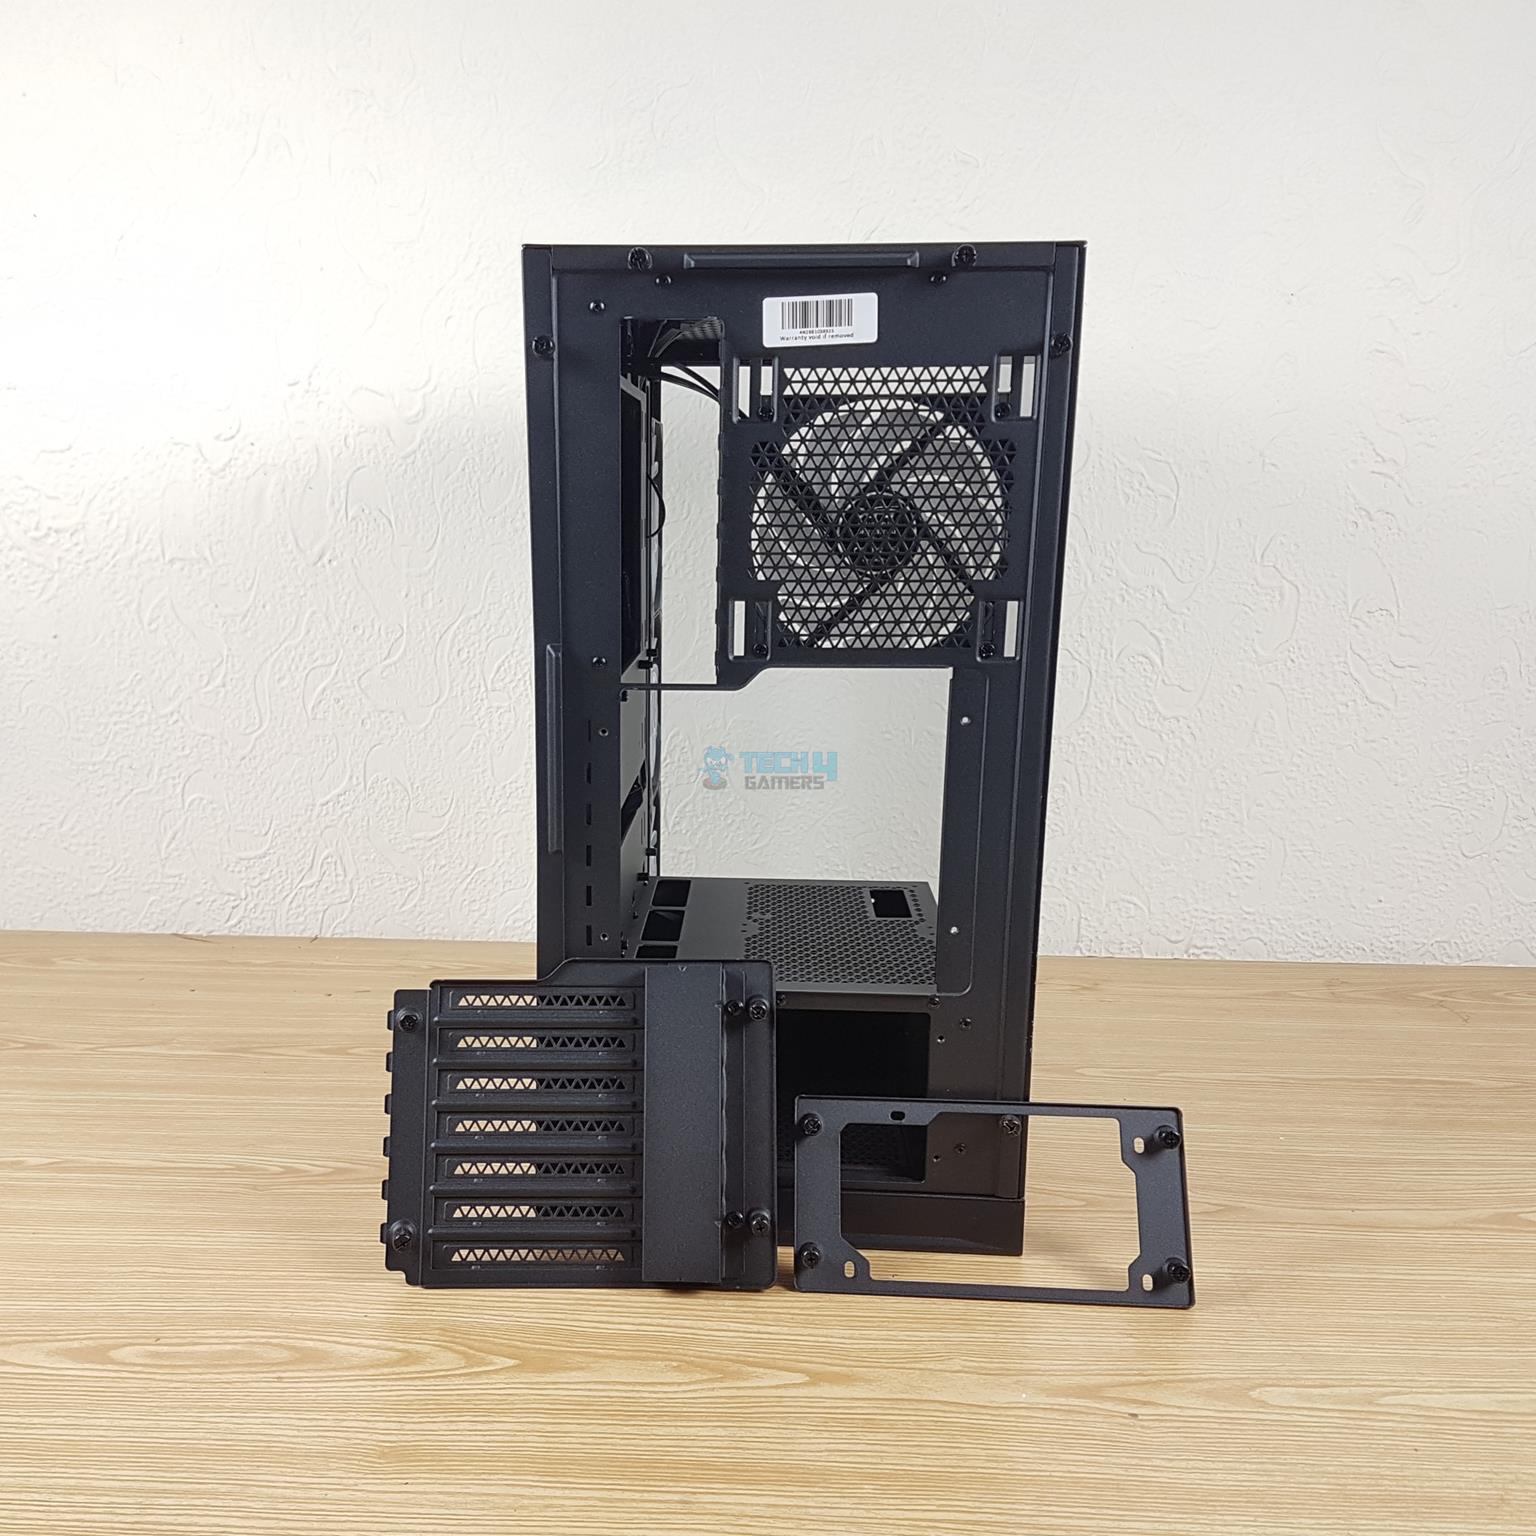
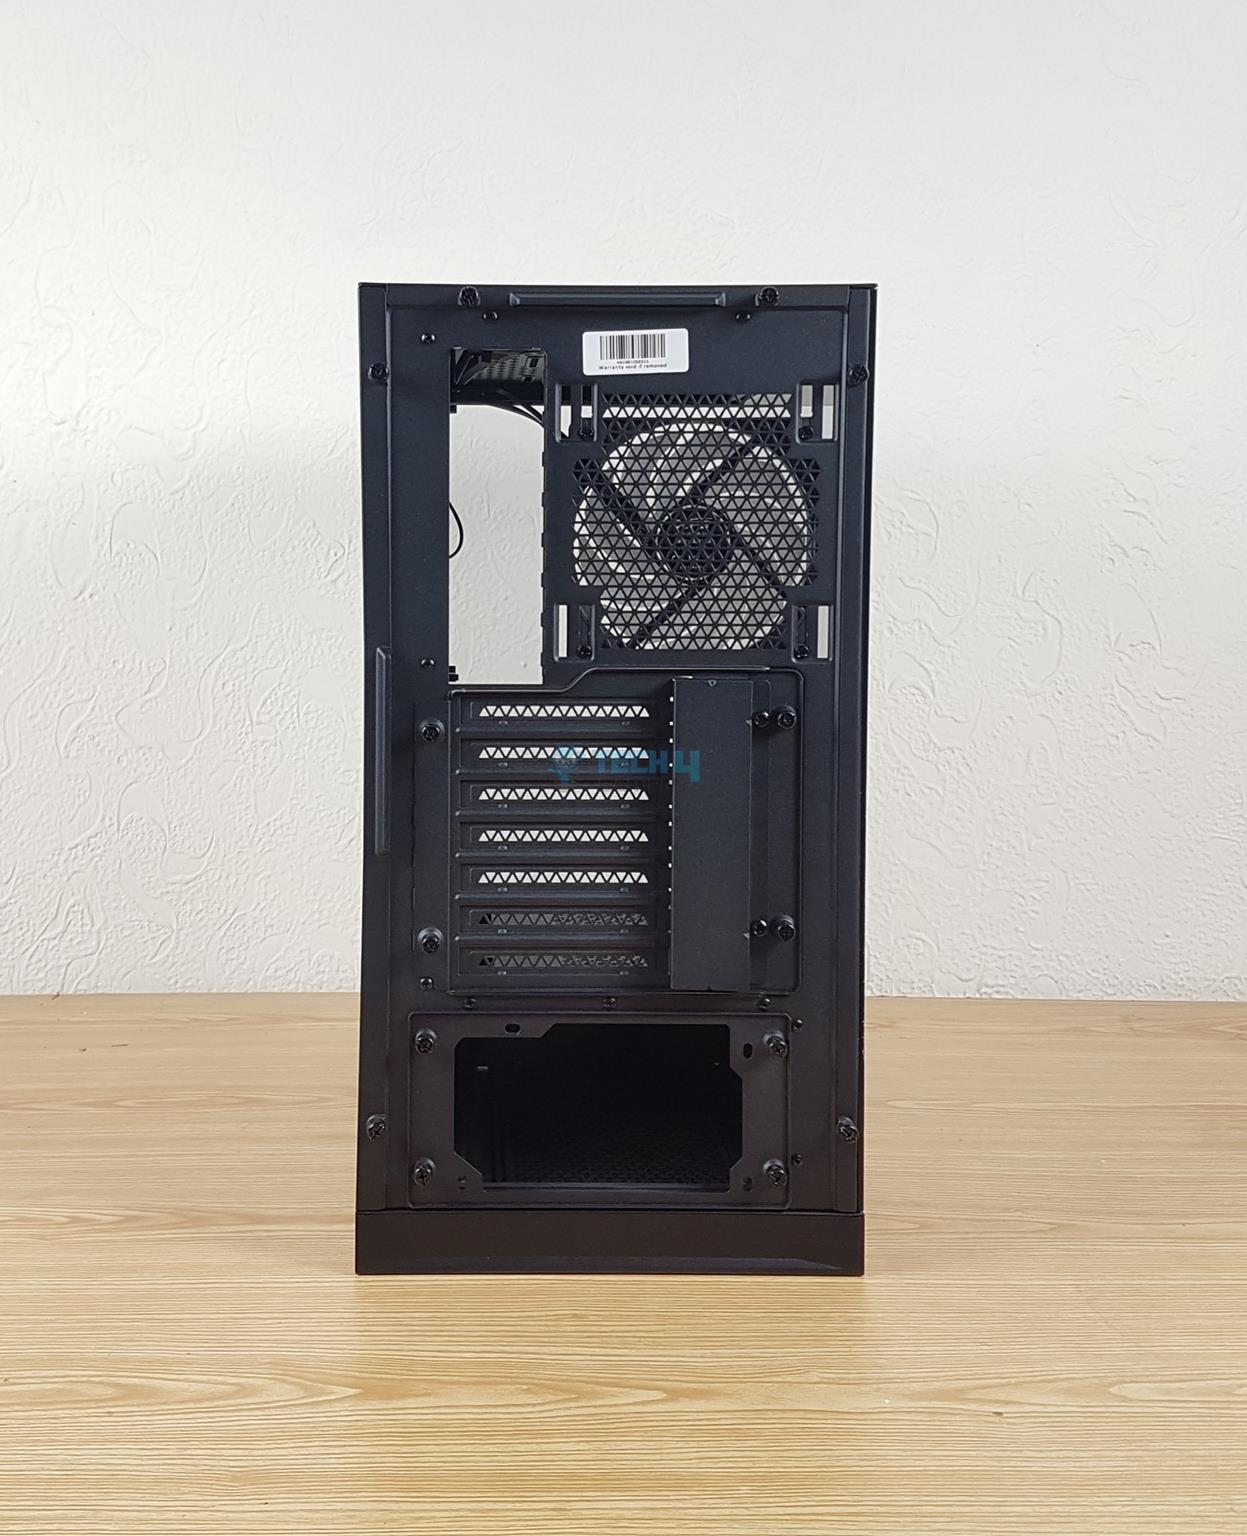
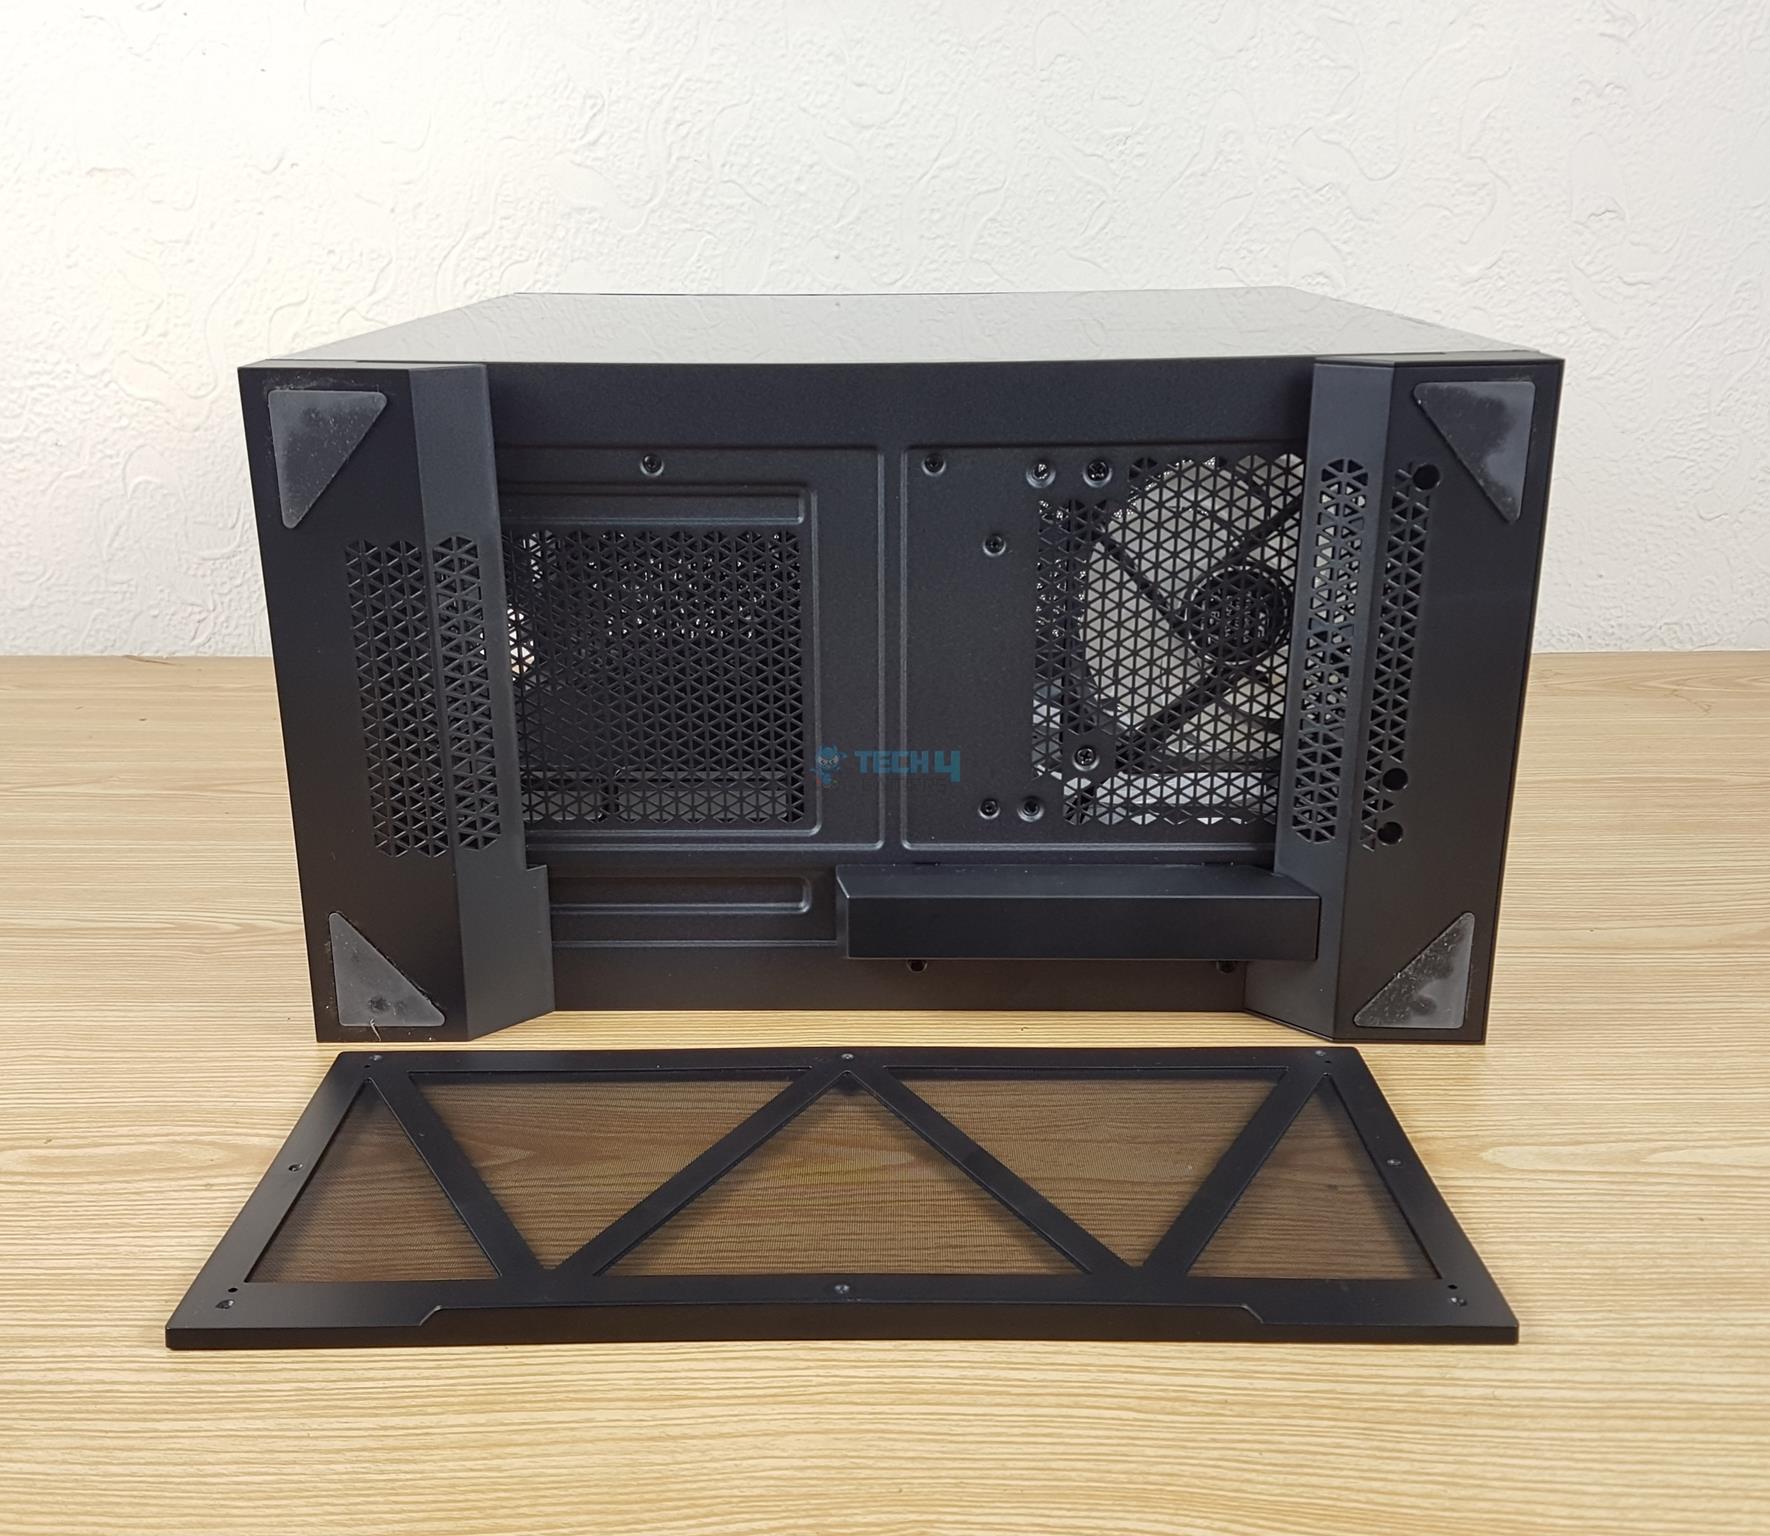
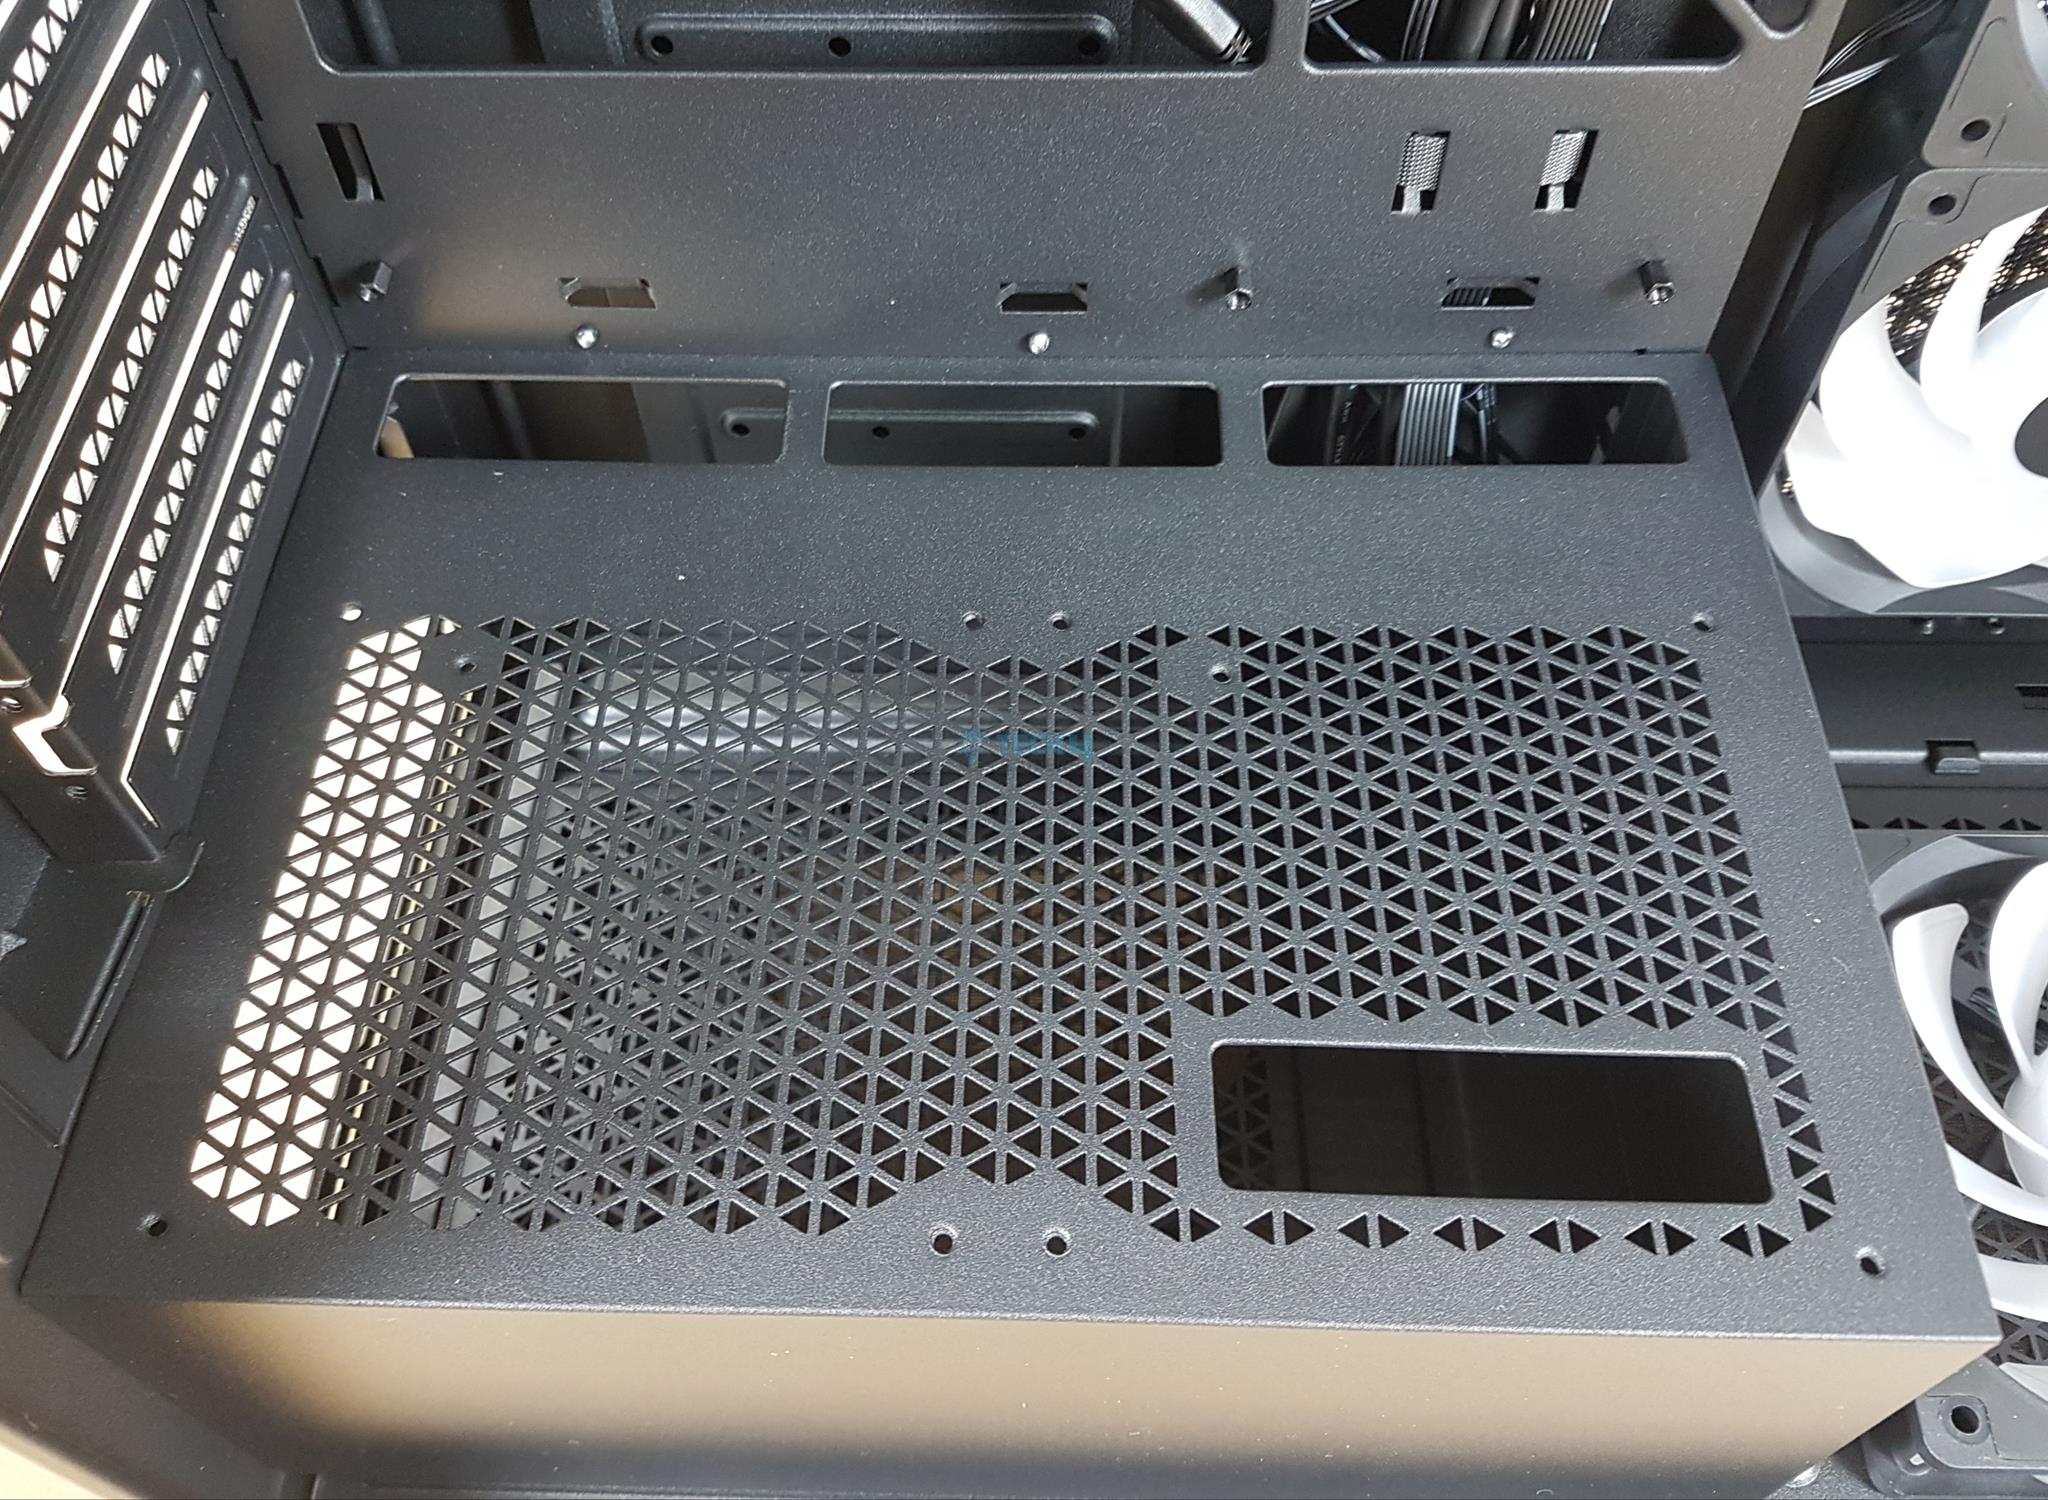
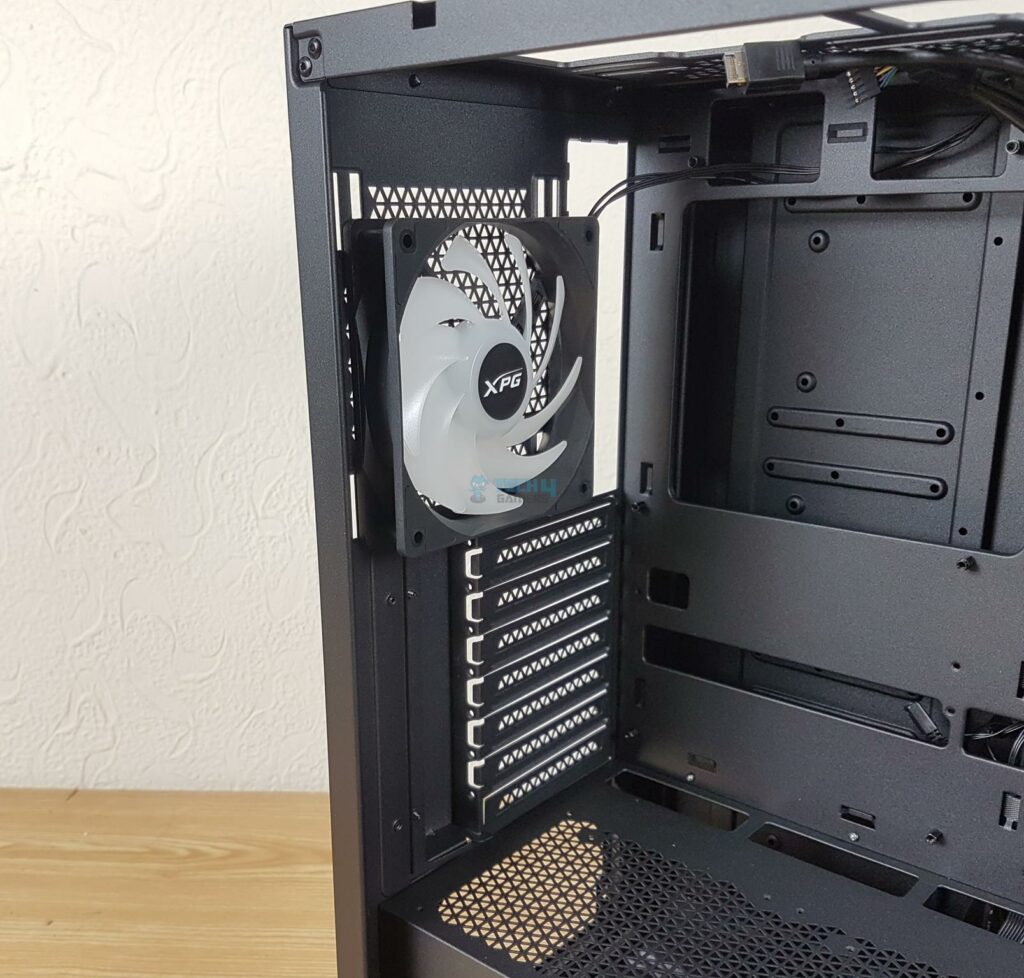
Check out the sleek rear of Invader X! The top section features a cutout for the motherboard’s rear IO panel, with space on the right for a 120mm or 140mm fan (there’s one pre-installed!). I love the adjustable rail mount for fan height. In the middle, we’ve got 7 non-reusable PCIe slot covers in an easily removable single-piece bracket. The bottom is the perfect spot for an ATX PSU. Remove and install the cover, then slide in the PSU from the rear. And guess what? XPG has made it super easy with captive thumb screws all around!
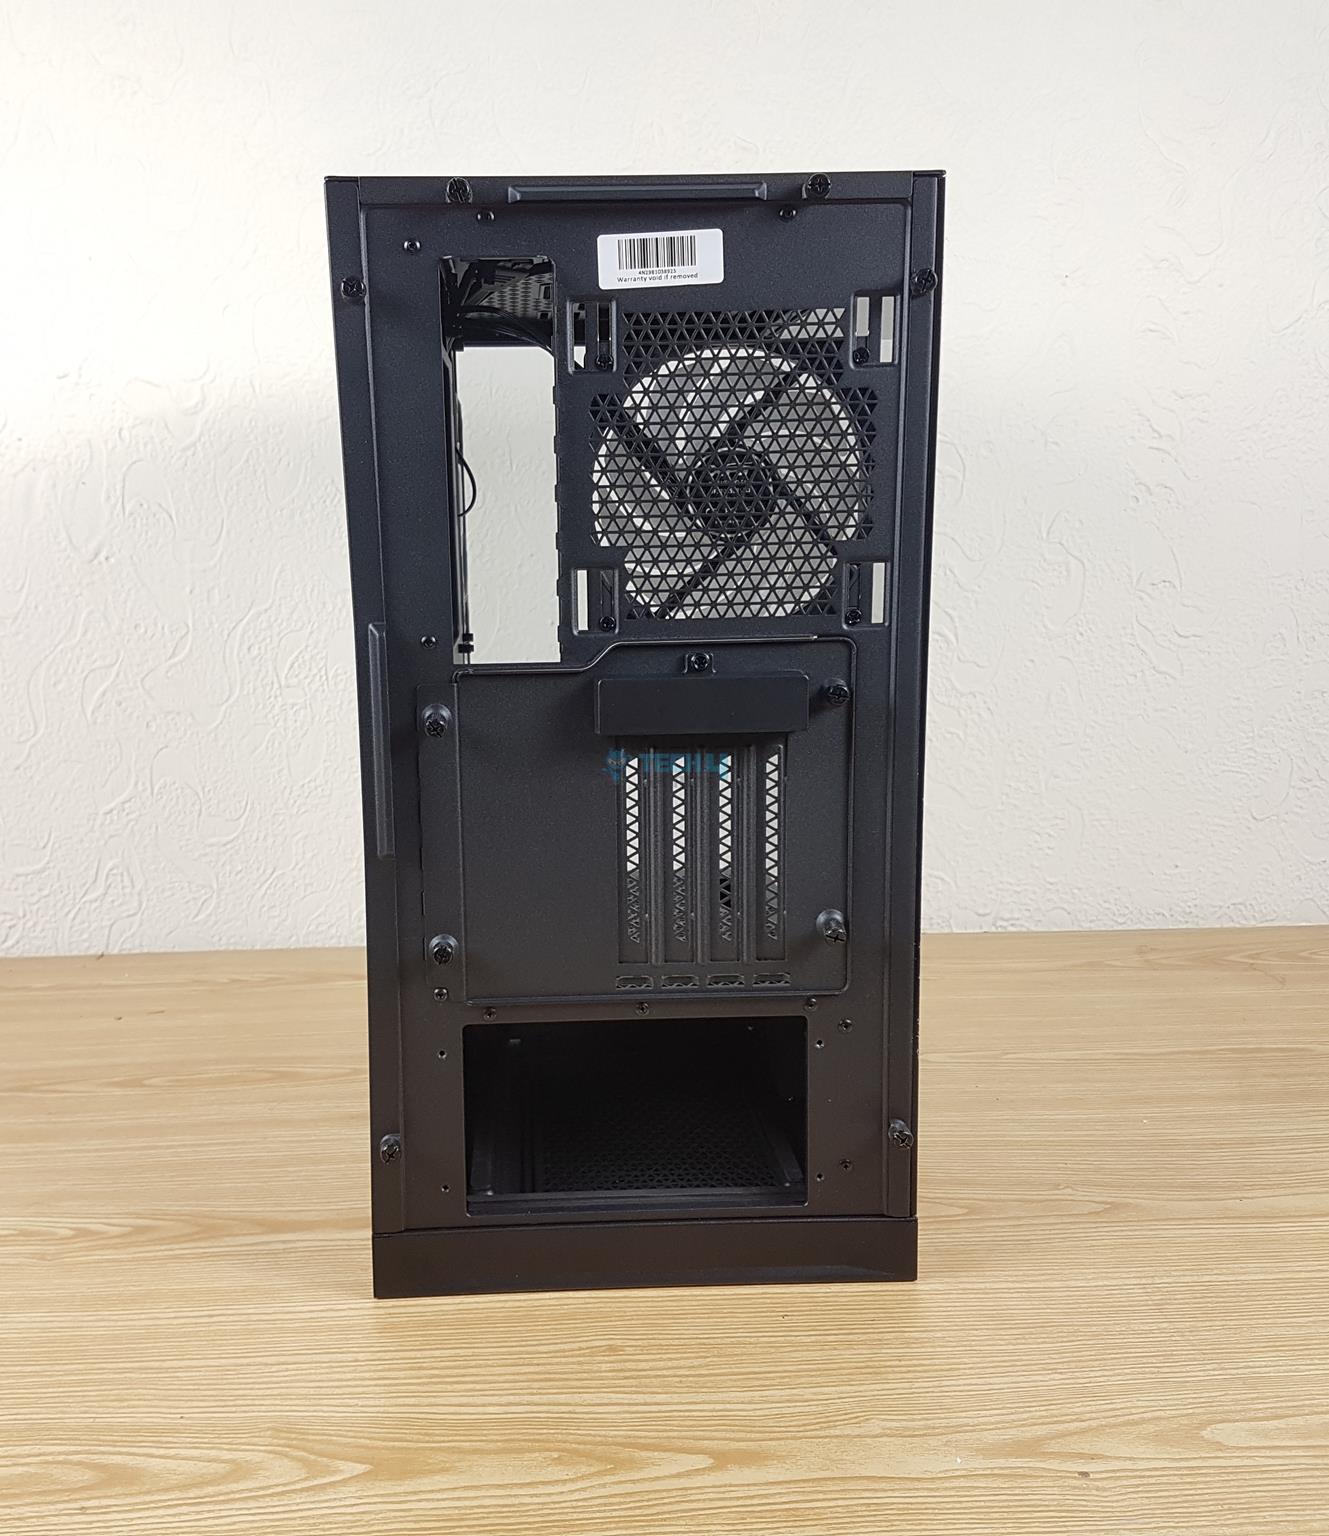
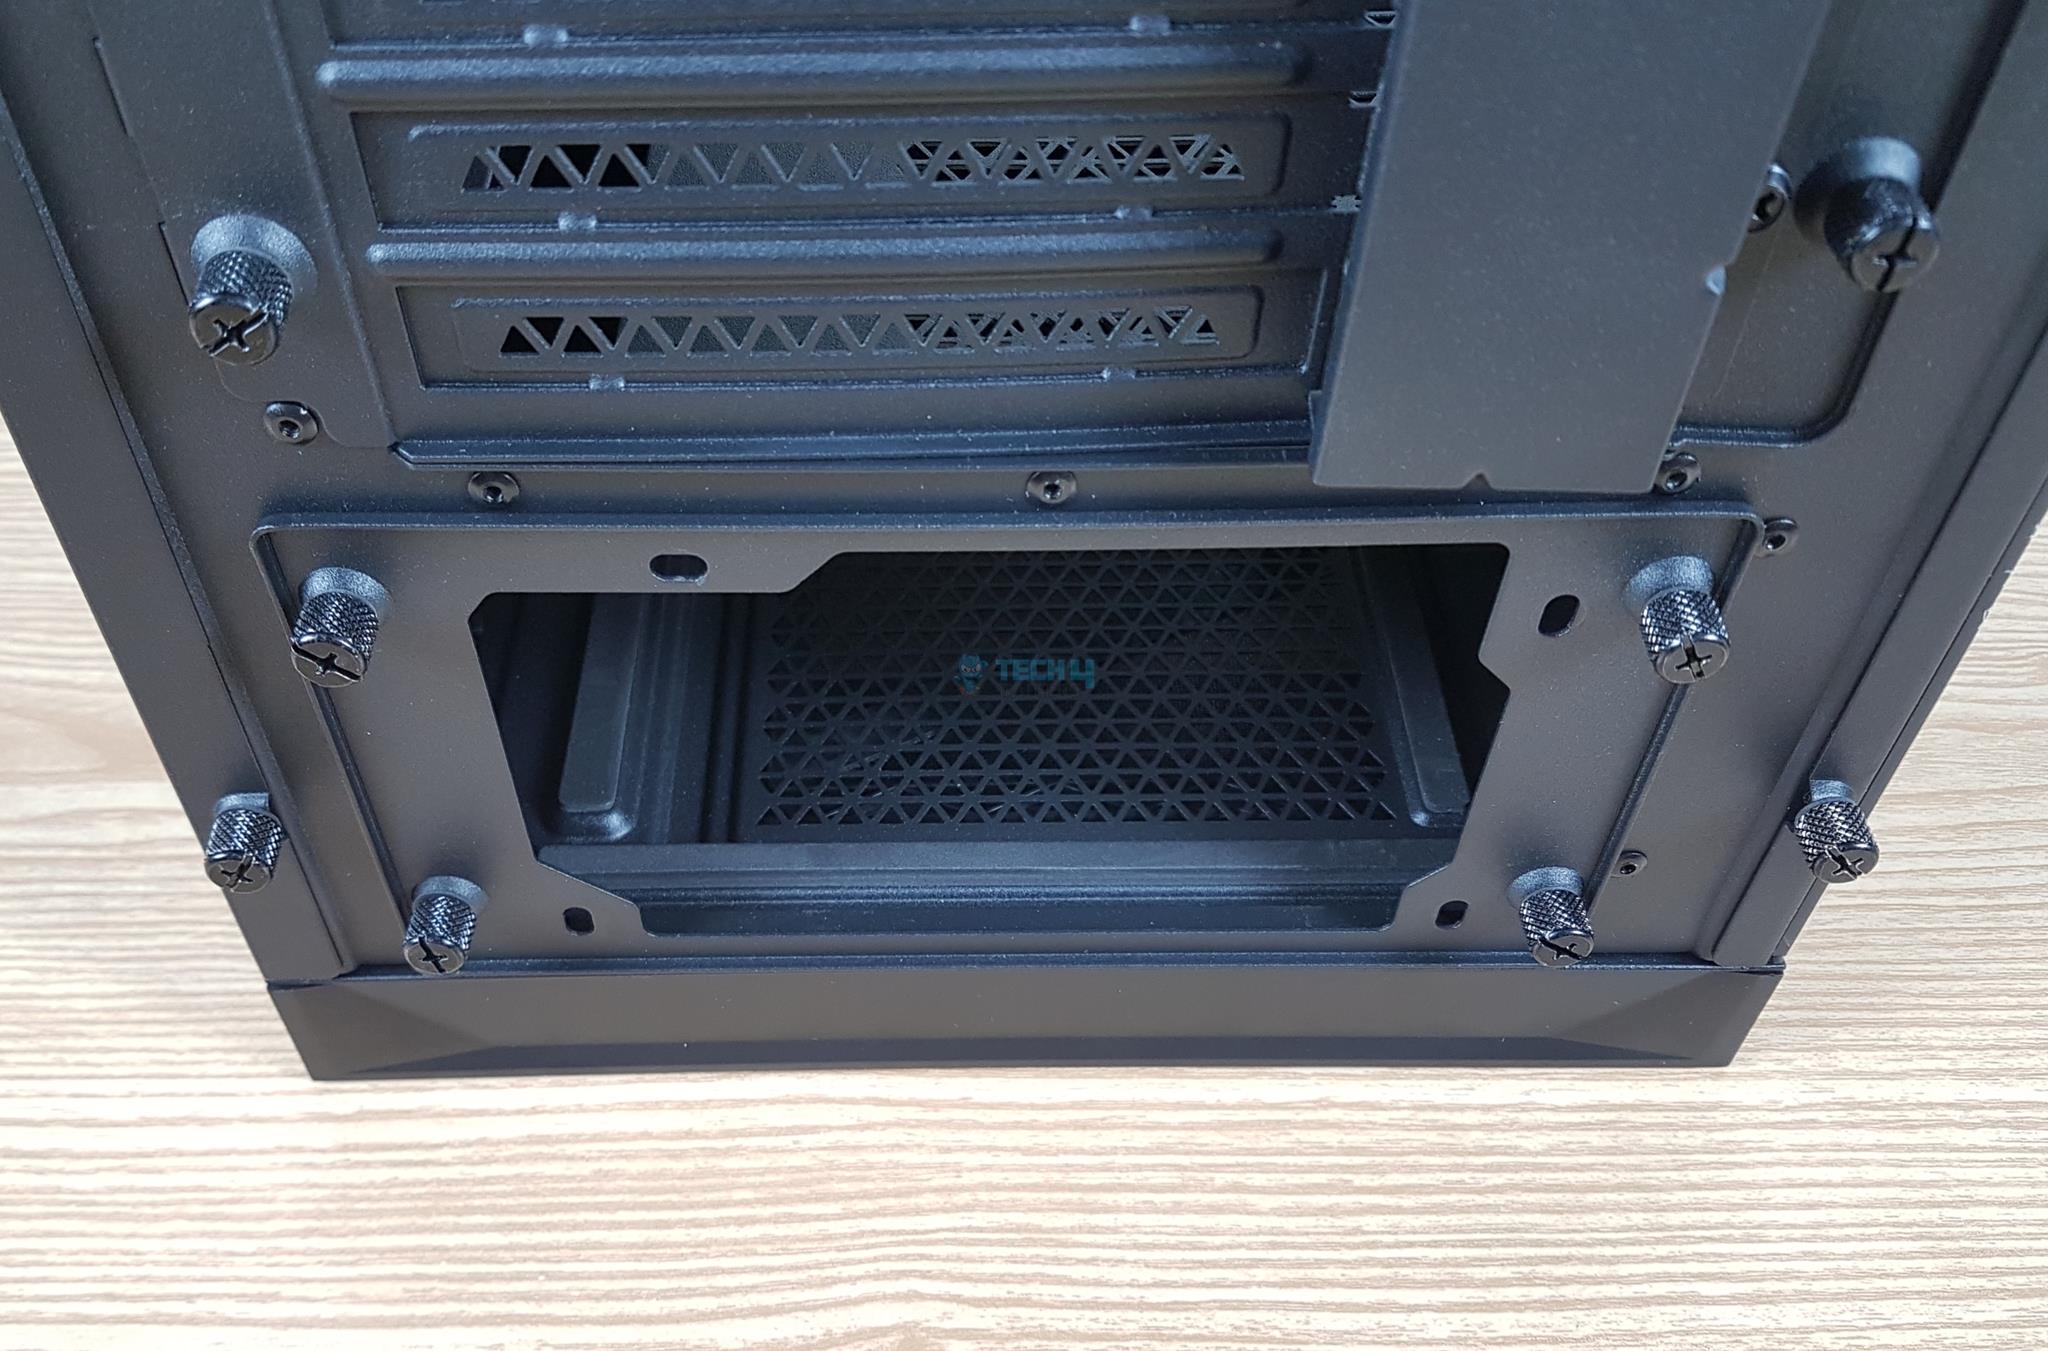
I am showing the horizontal GPU bracket and the PSU cover bracket removed from the case. I have installed a vertical GPU bracket with 4x PCIe slots on the rear. I appreciate how easy it is to change these brackets.
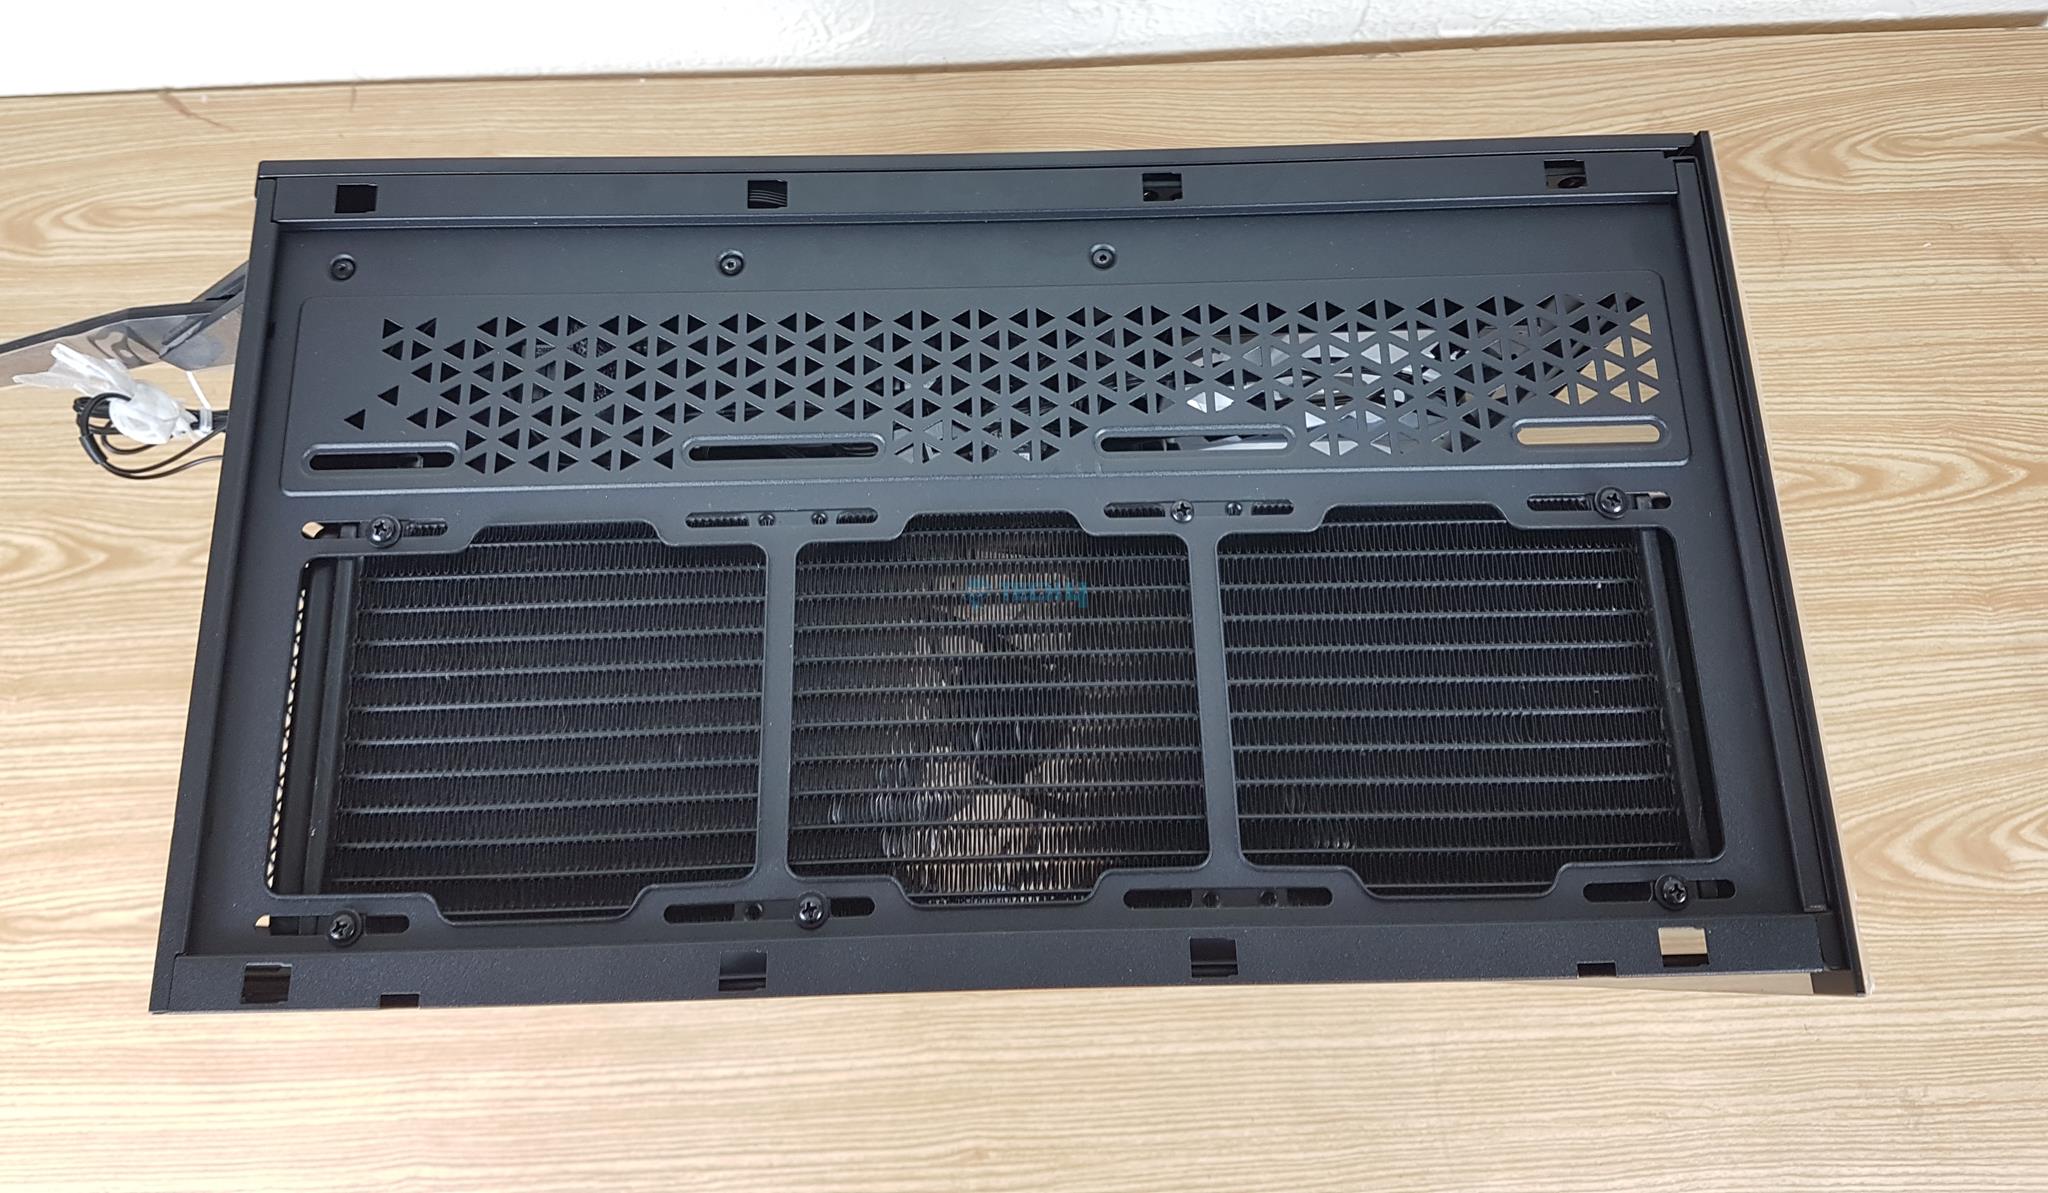
The top of the CORSAIR 4000 PC Case has a solid metal cover with a removable design. Two thumb screws secure it at the back. Just unscrew and pull to remove. The cover features a full-length magnetic dust filter. Using the rail mount system, you can easily install up to 3 120mm fans or 2x 140mm fans on the top. Thanks to XPG’s smart design, there’s a 44mm offset towards the side, providing more space to install a top-mounted cooler.
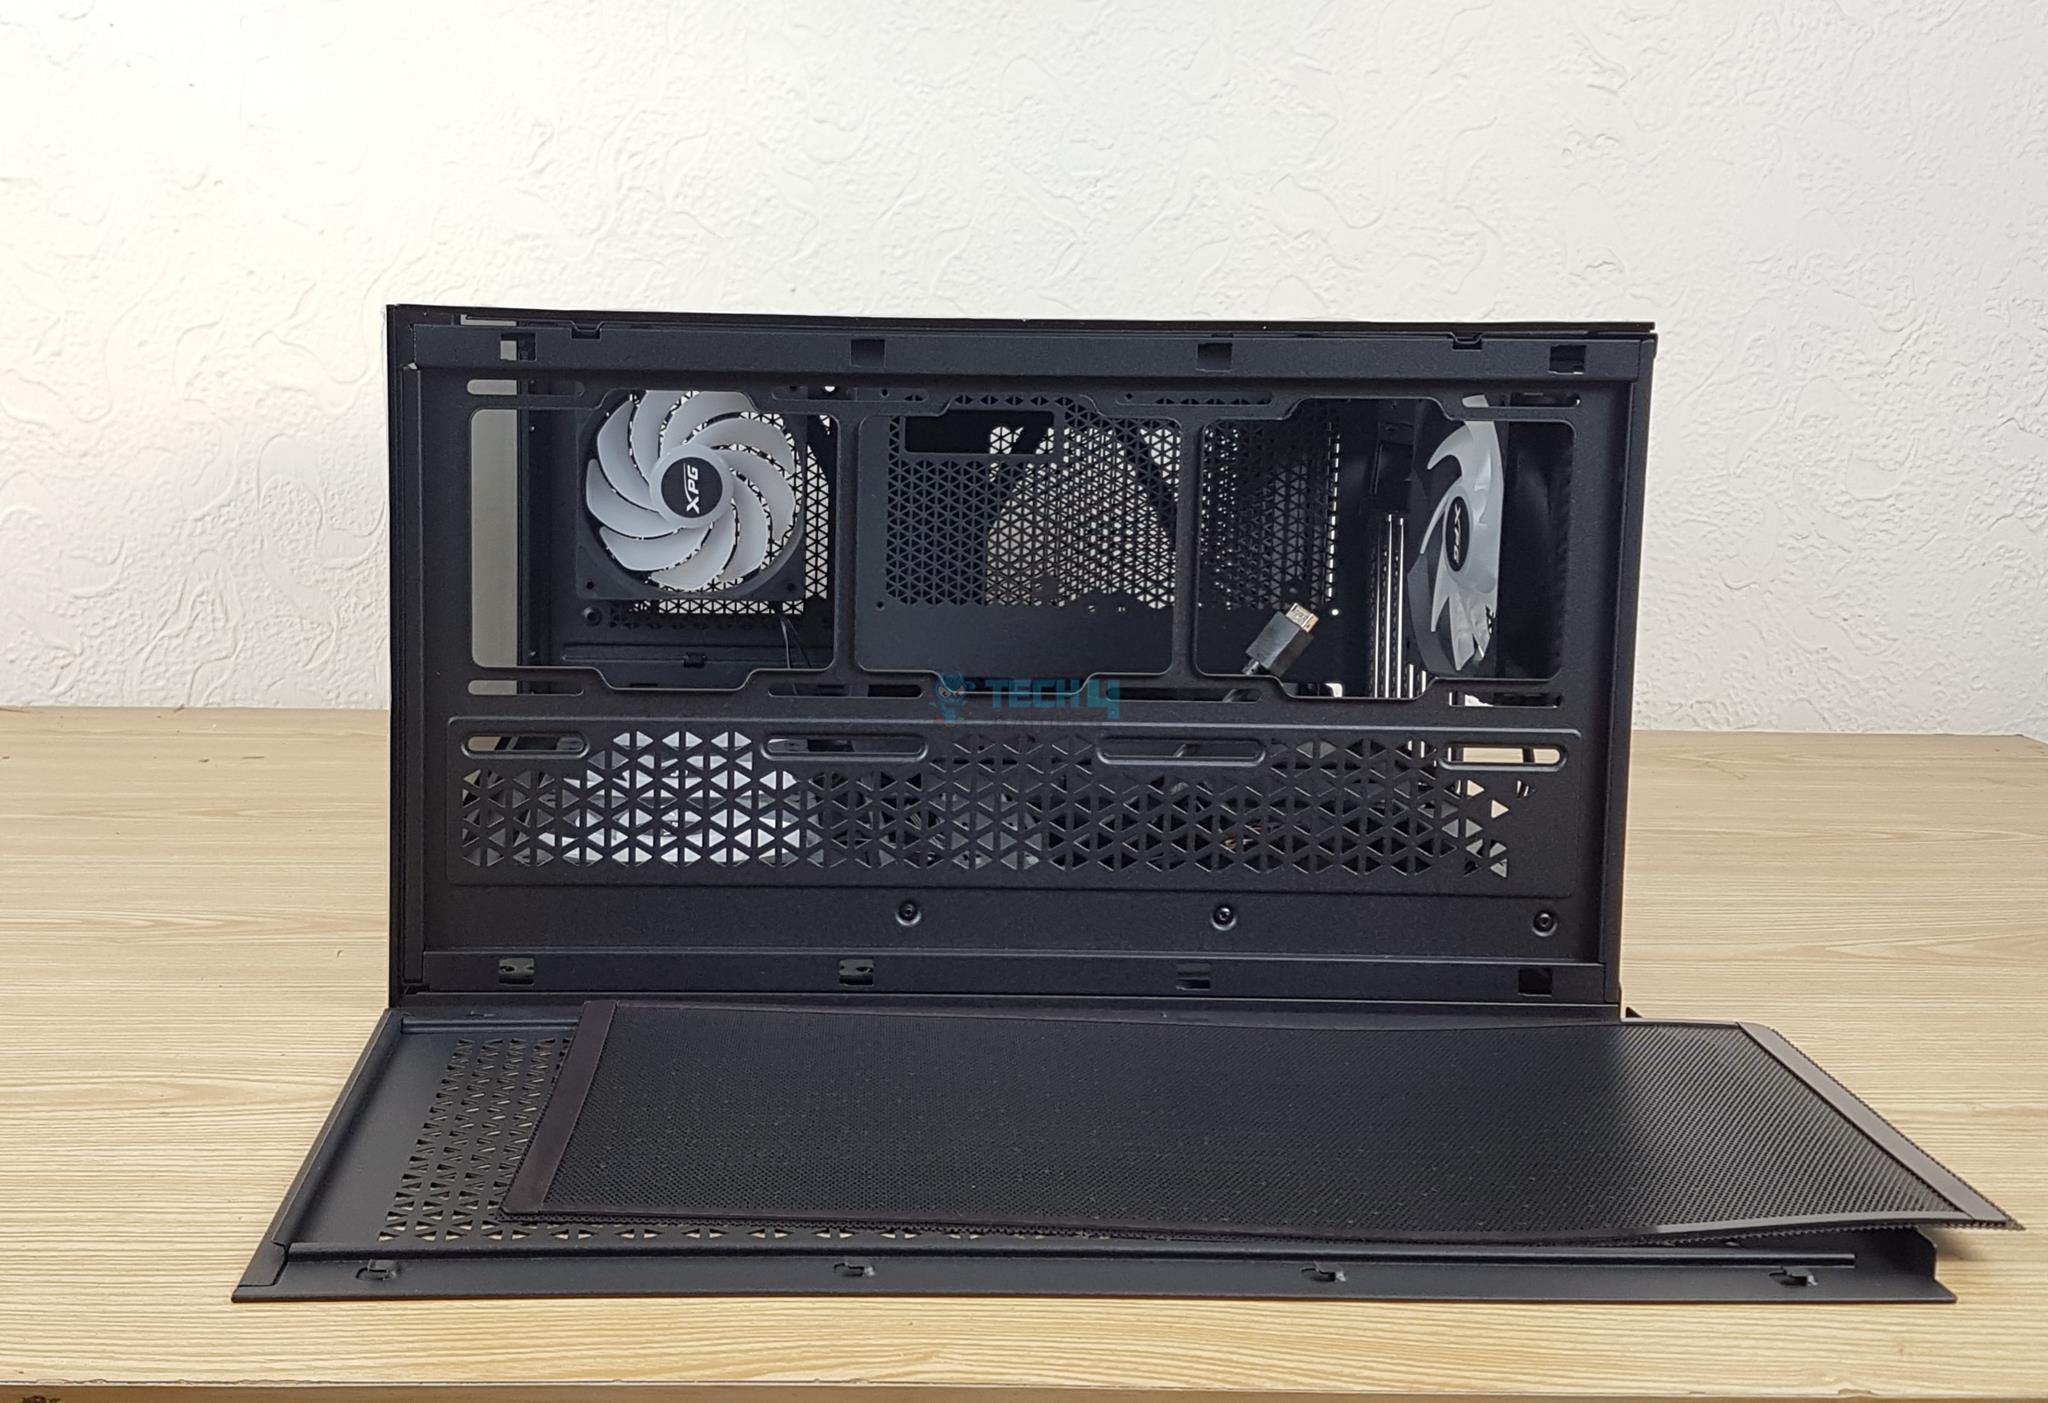
I am showing a bottom view of this case. A large non-magnetic dust filter can be removed by pulling it from the side. There are 4x triangular-shaped anti-vibration rubber pads on the feet. I have removed the dust filter and now show the PC case’s base. The PSU bay has a vented area. There is also a vented area towards the front side where we can a pre-installed fan from inside.

Internal View
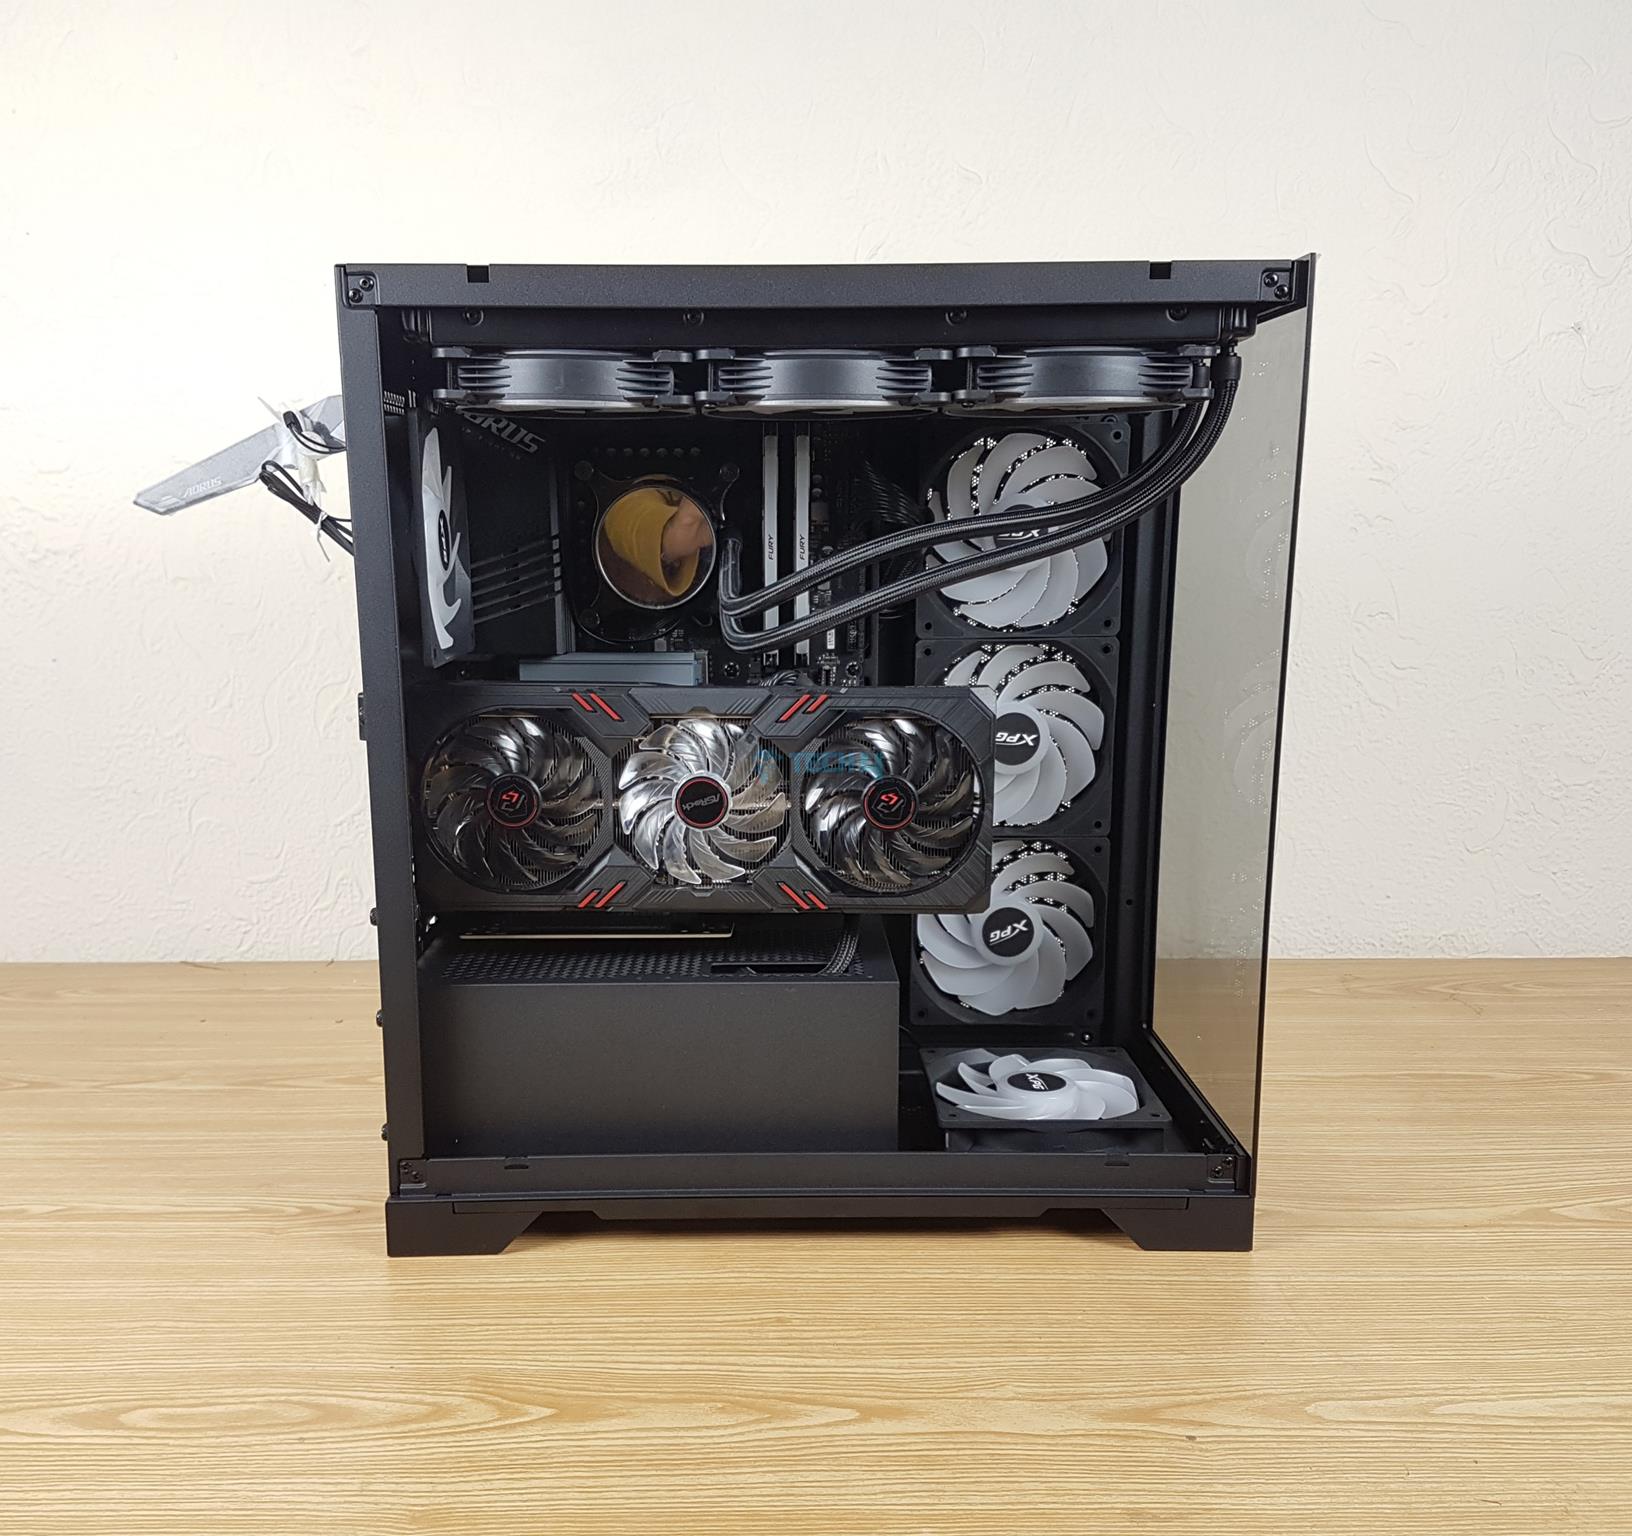
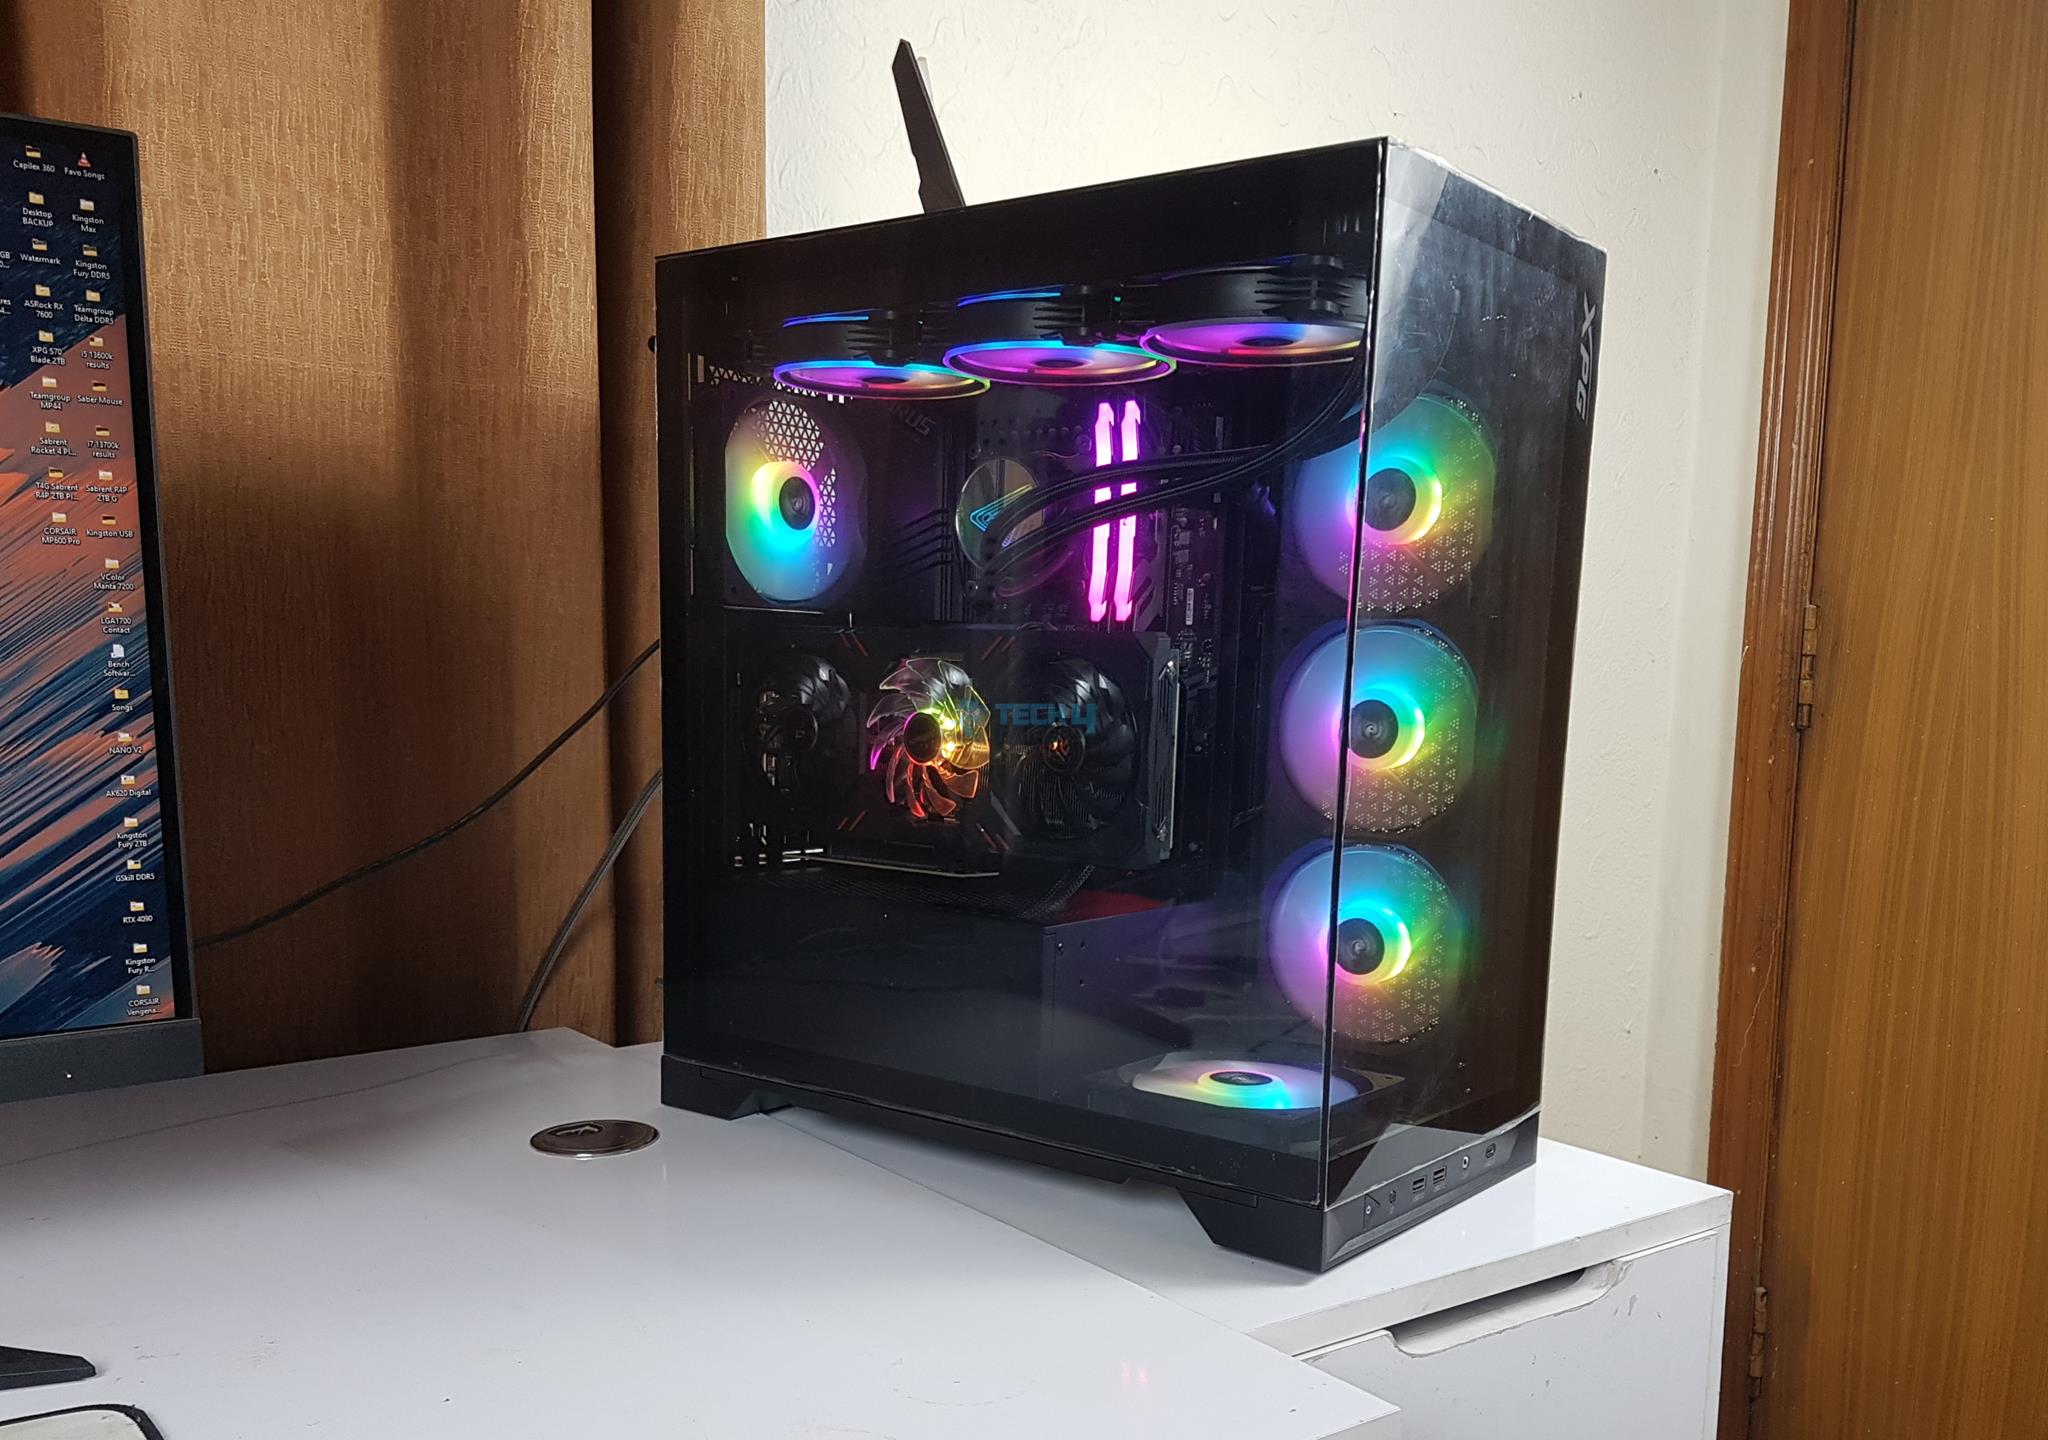
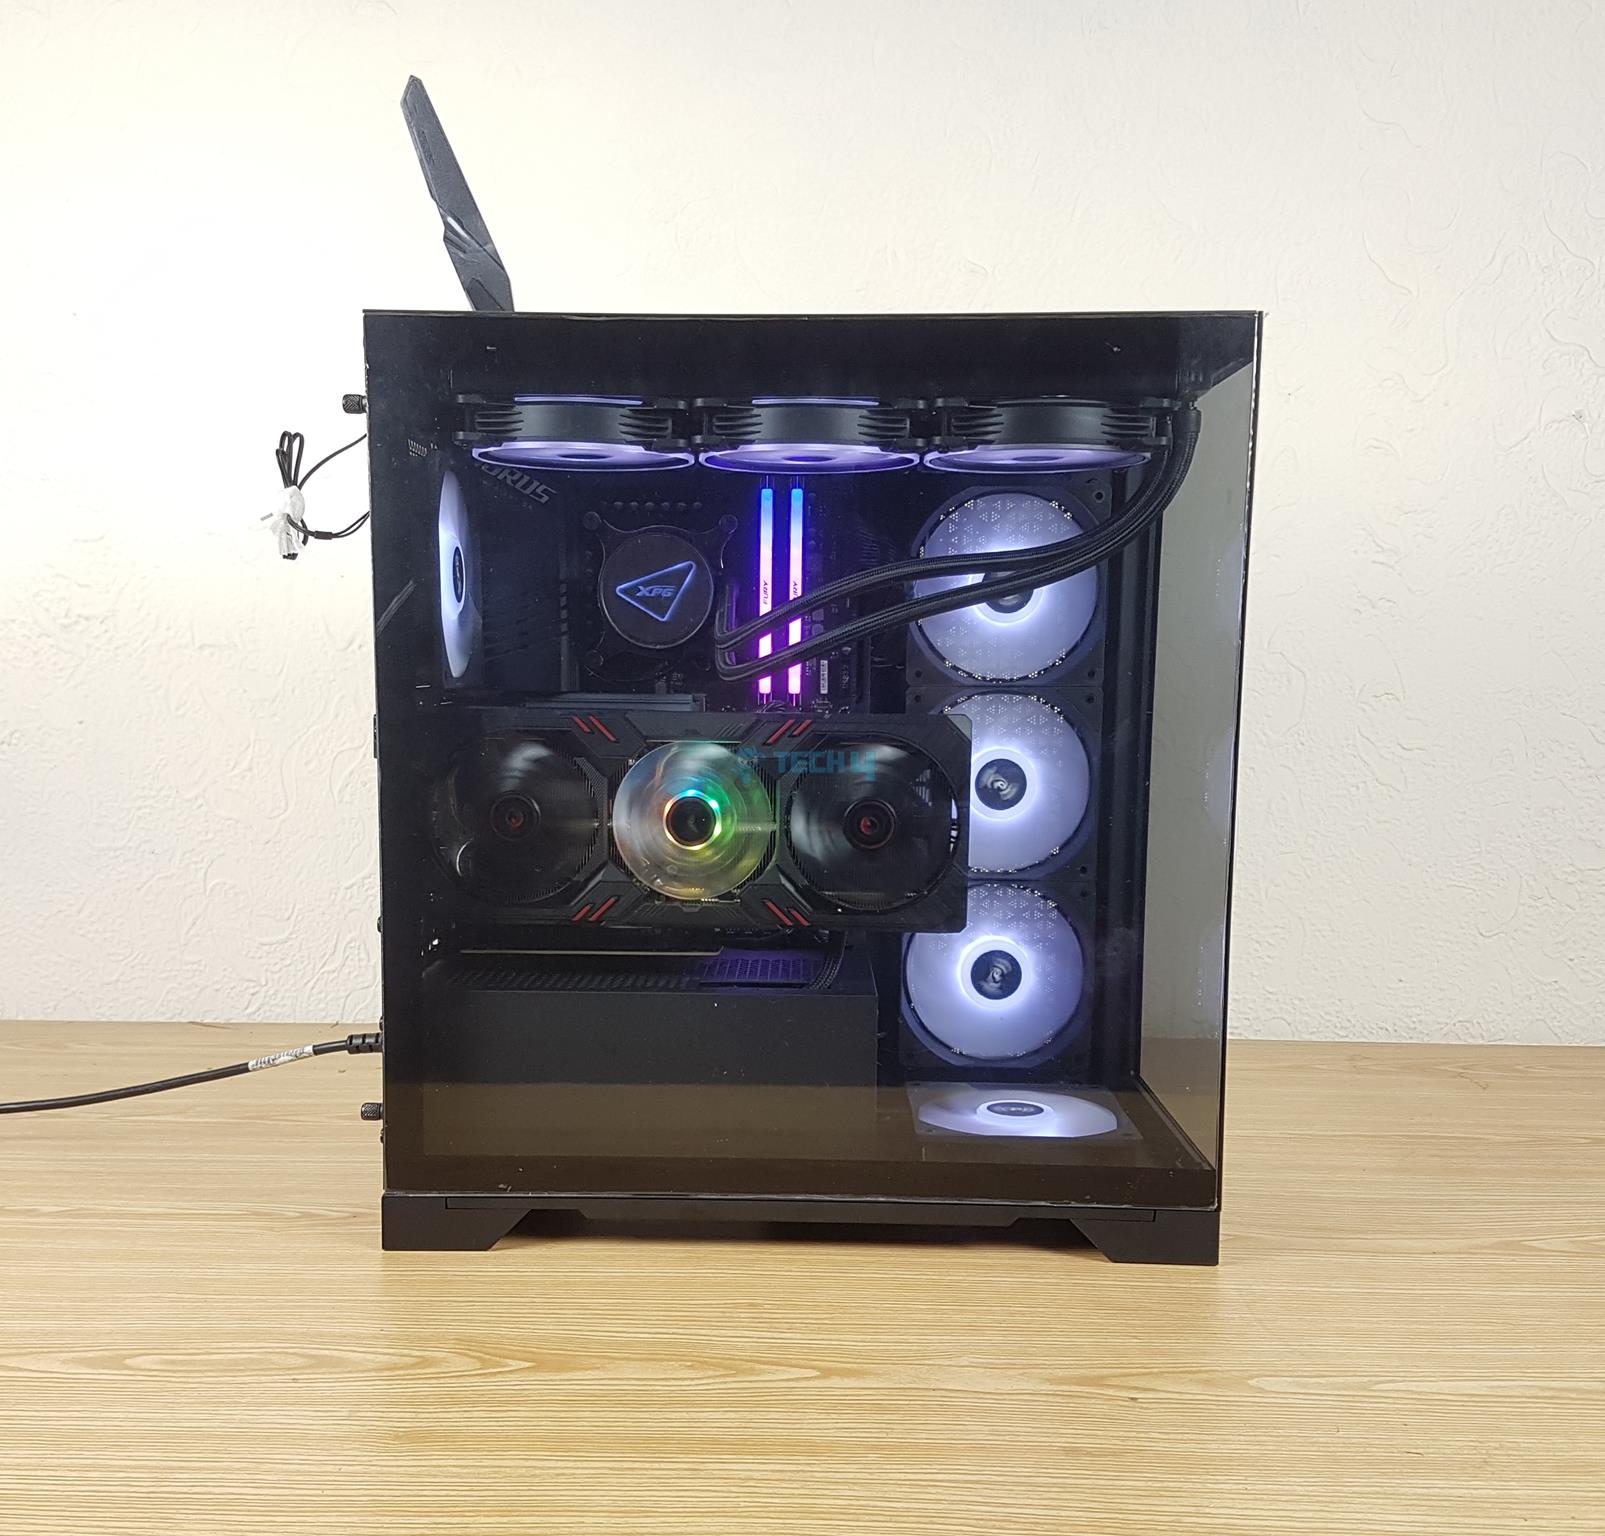
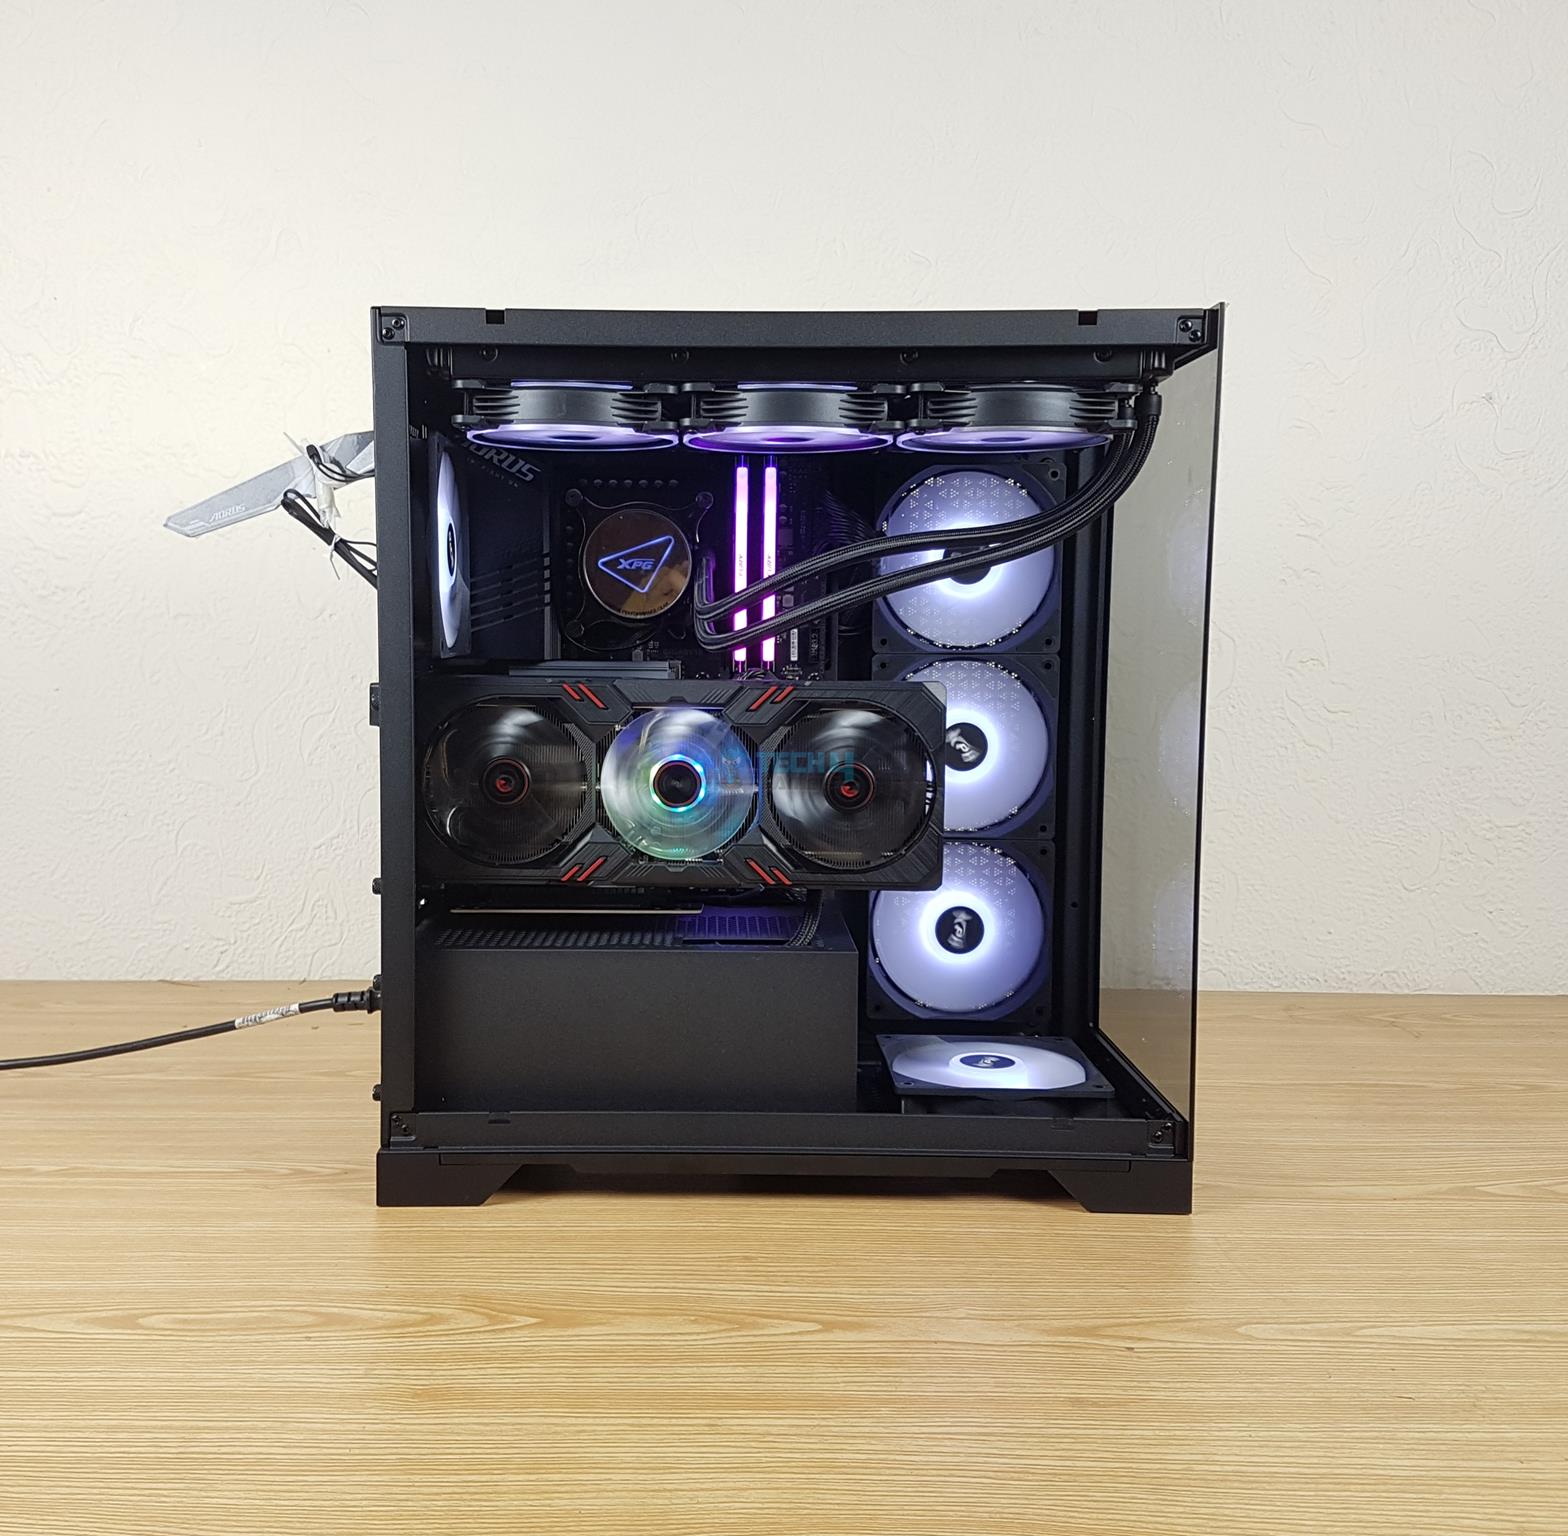
There is a 3mm tempered glass on the side panel. It is bezel-less in design so that users can glimpse what is inside the case. It is somewhat tinted. The above picture shows a complete overview of the case. This is our working space; hence, it needs more attention from the design aspect.
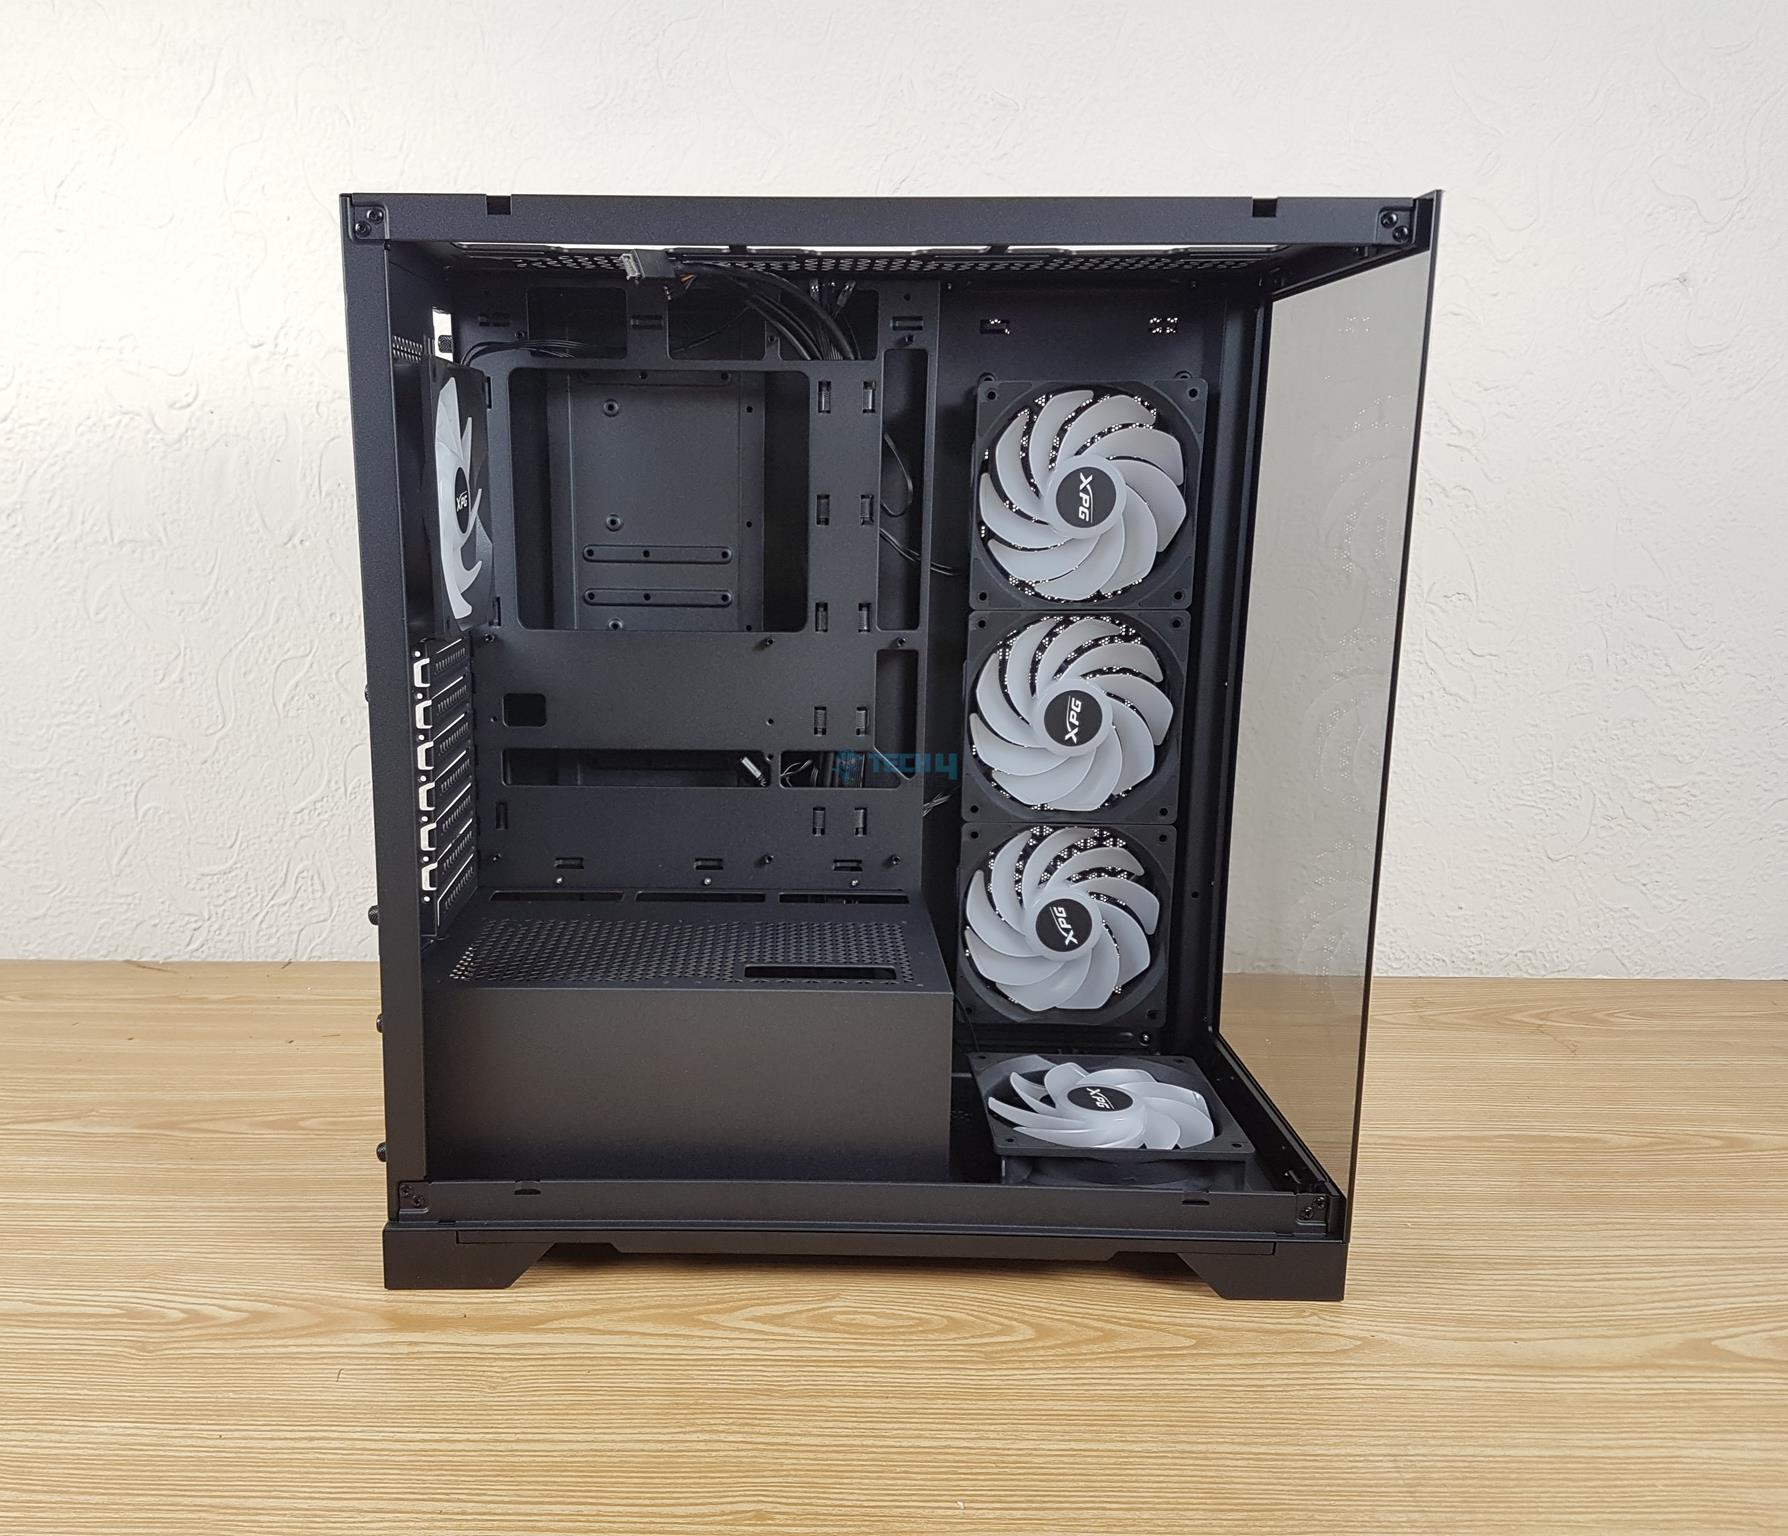
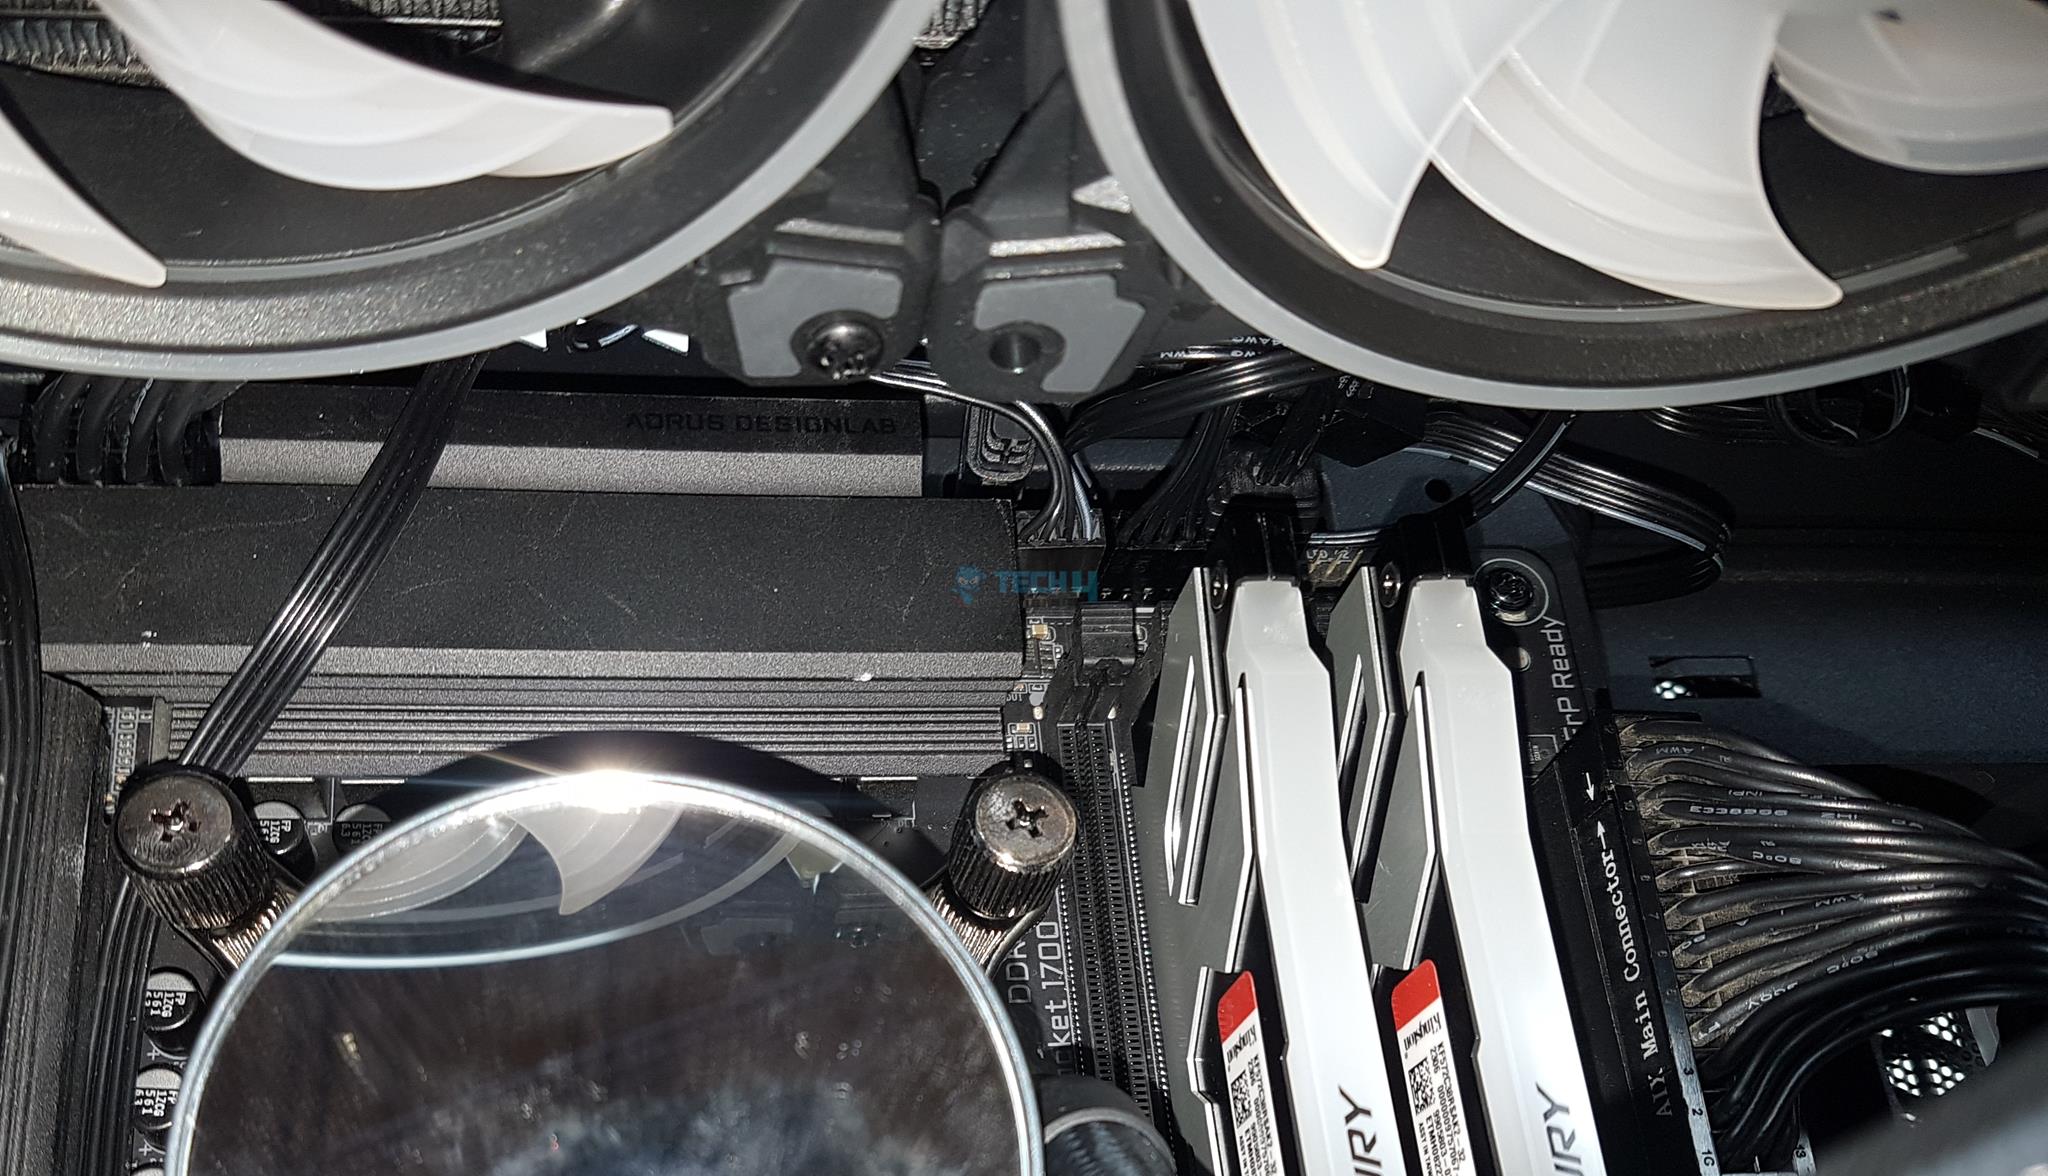
Check out our workspace. The PSU shroud has vents and 120mm fan holes. Install 2x 120mm fans if you like. Spot three cable-routing cutouts near the motherboard tray and a big one for graphics card cables. The motherboard tray has a CPU cutout for easy cooler installation. It supports Mini-ITX, mATX, and Full ATX, including back-plug motherboards for future upgrades. All 9 standoffs are pre-installed, and cutouts align with reversed power connectors. No rubber grommet on cutouts. The tray is 320mm by 240mm (HxL), with a 22mm displacement from the case’s top.
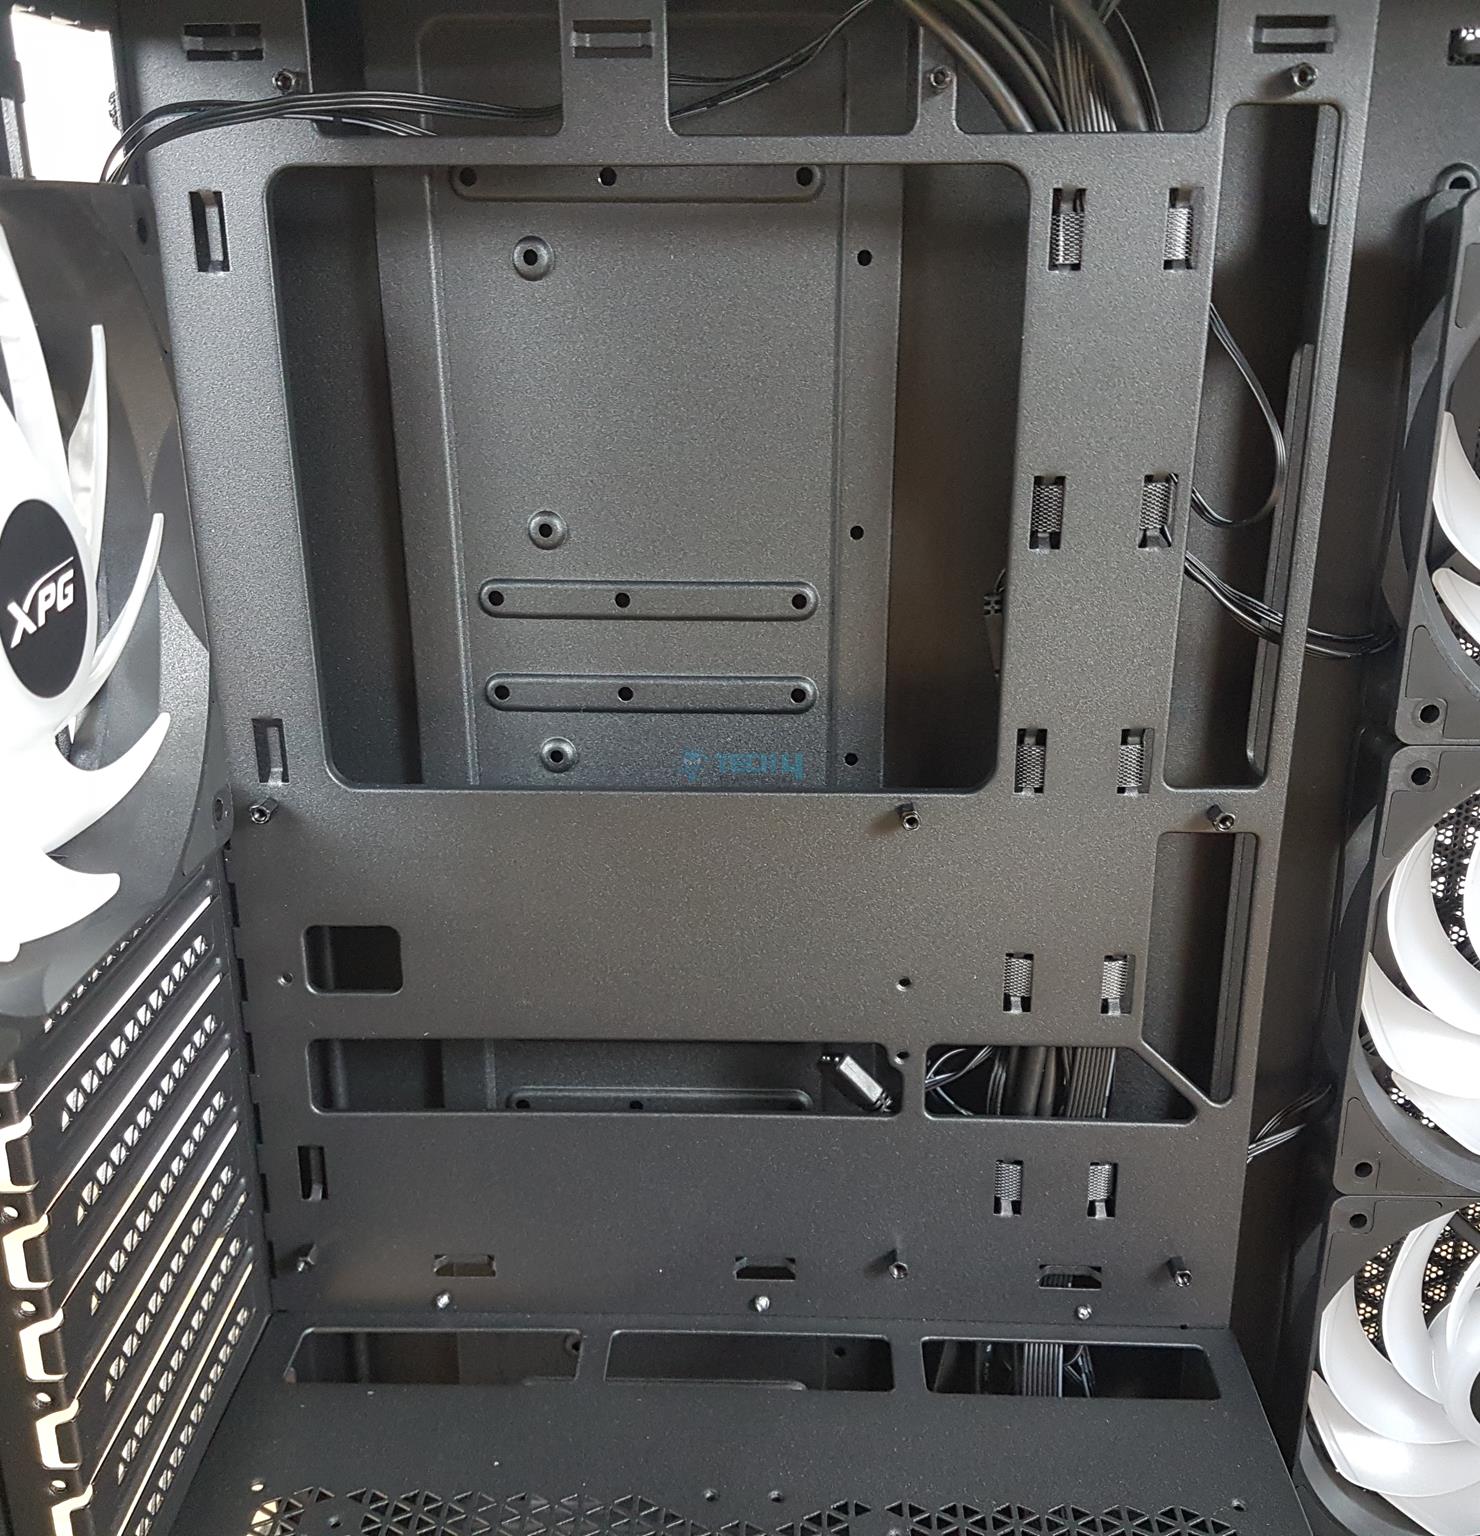
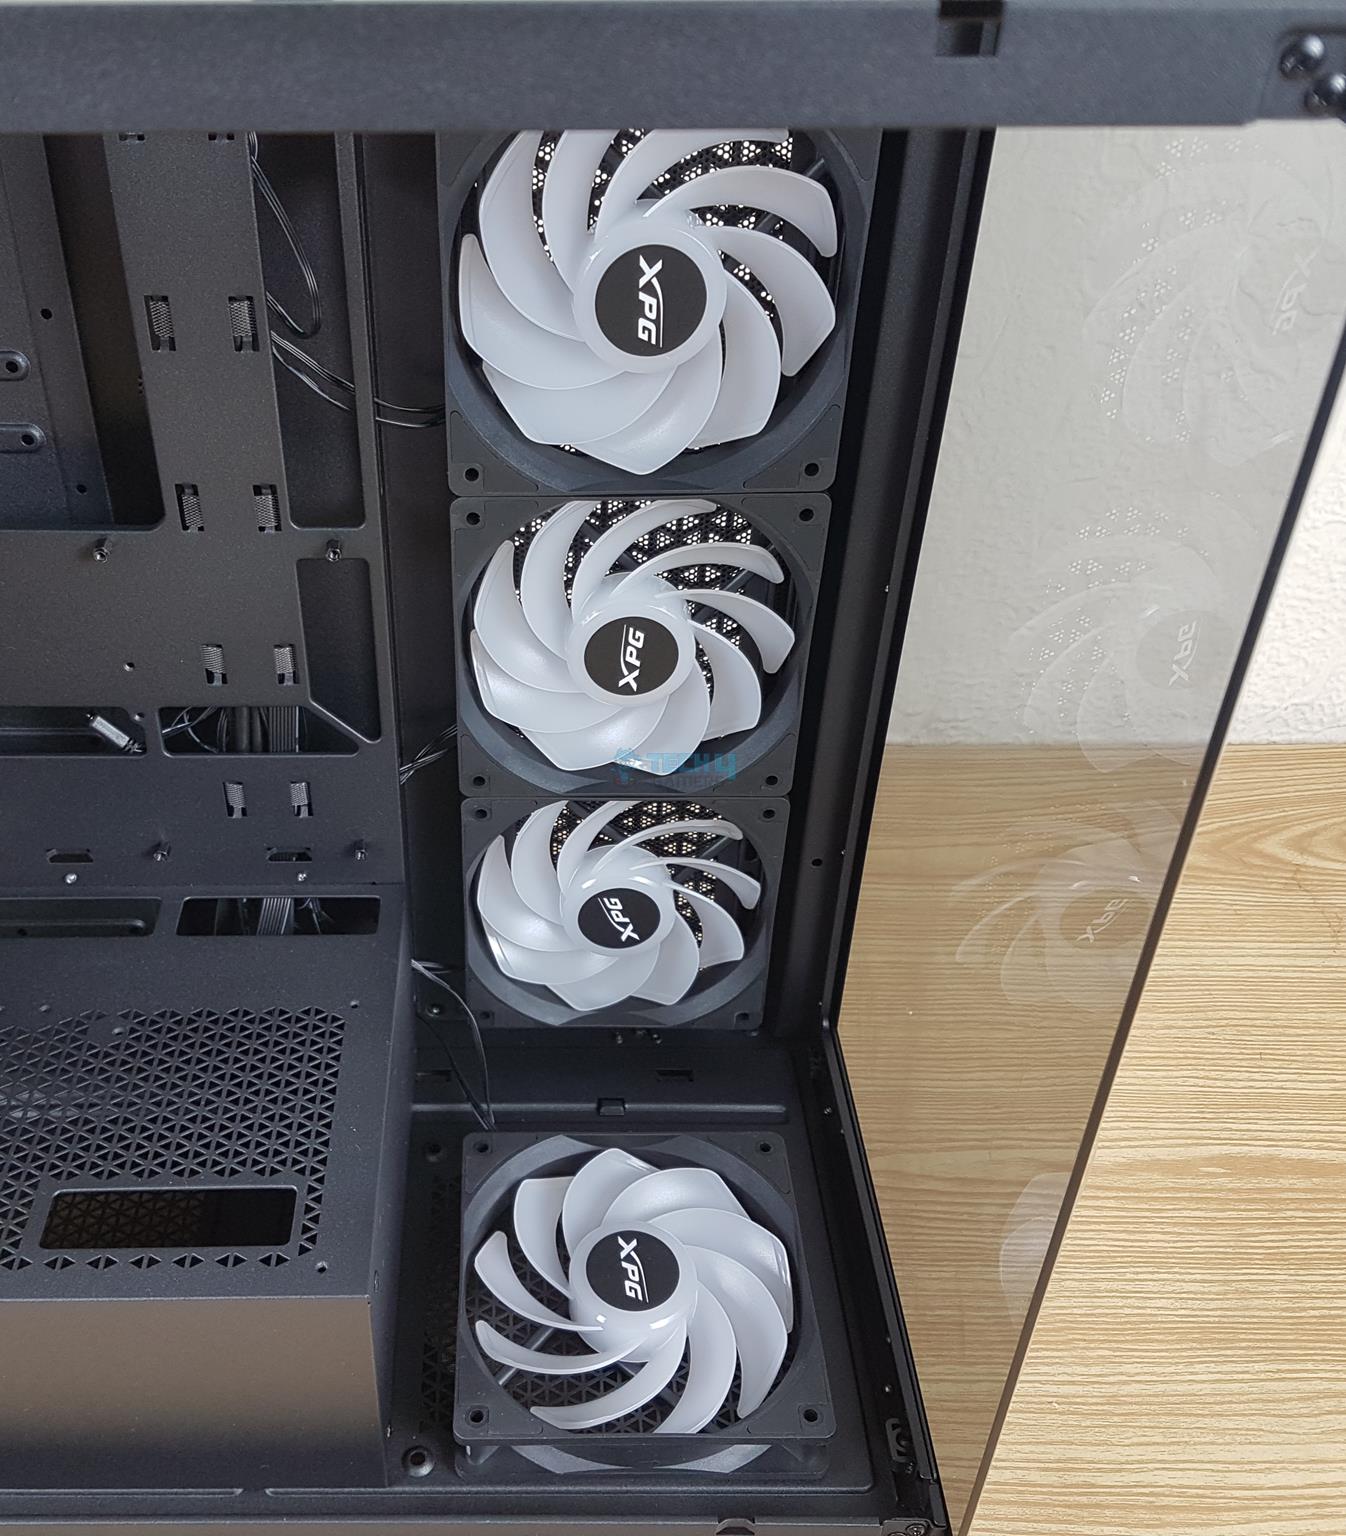
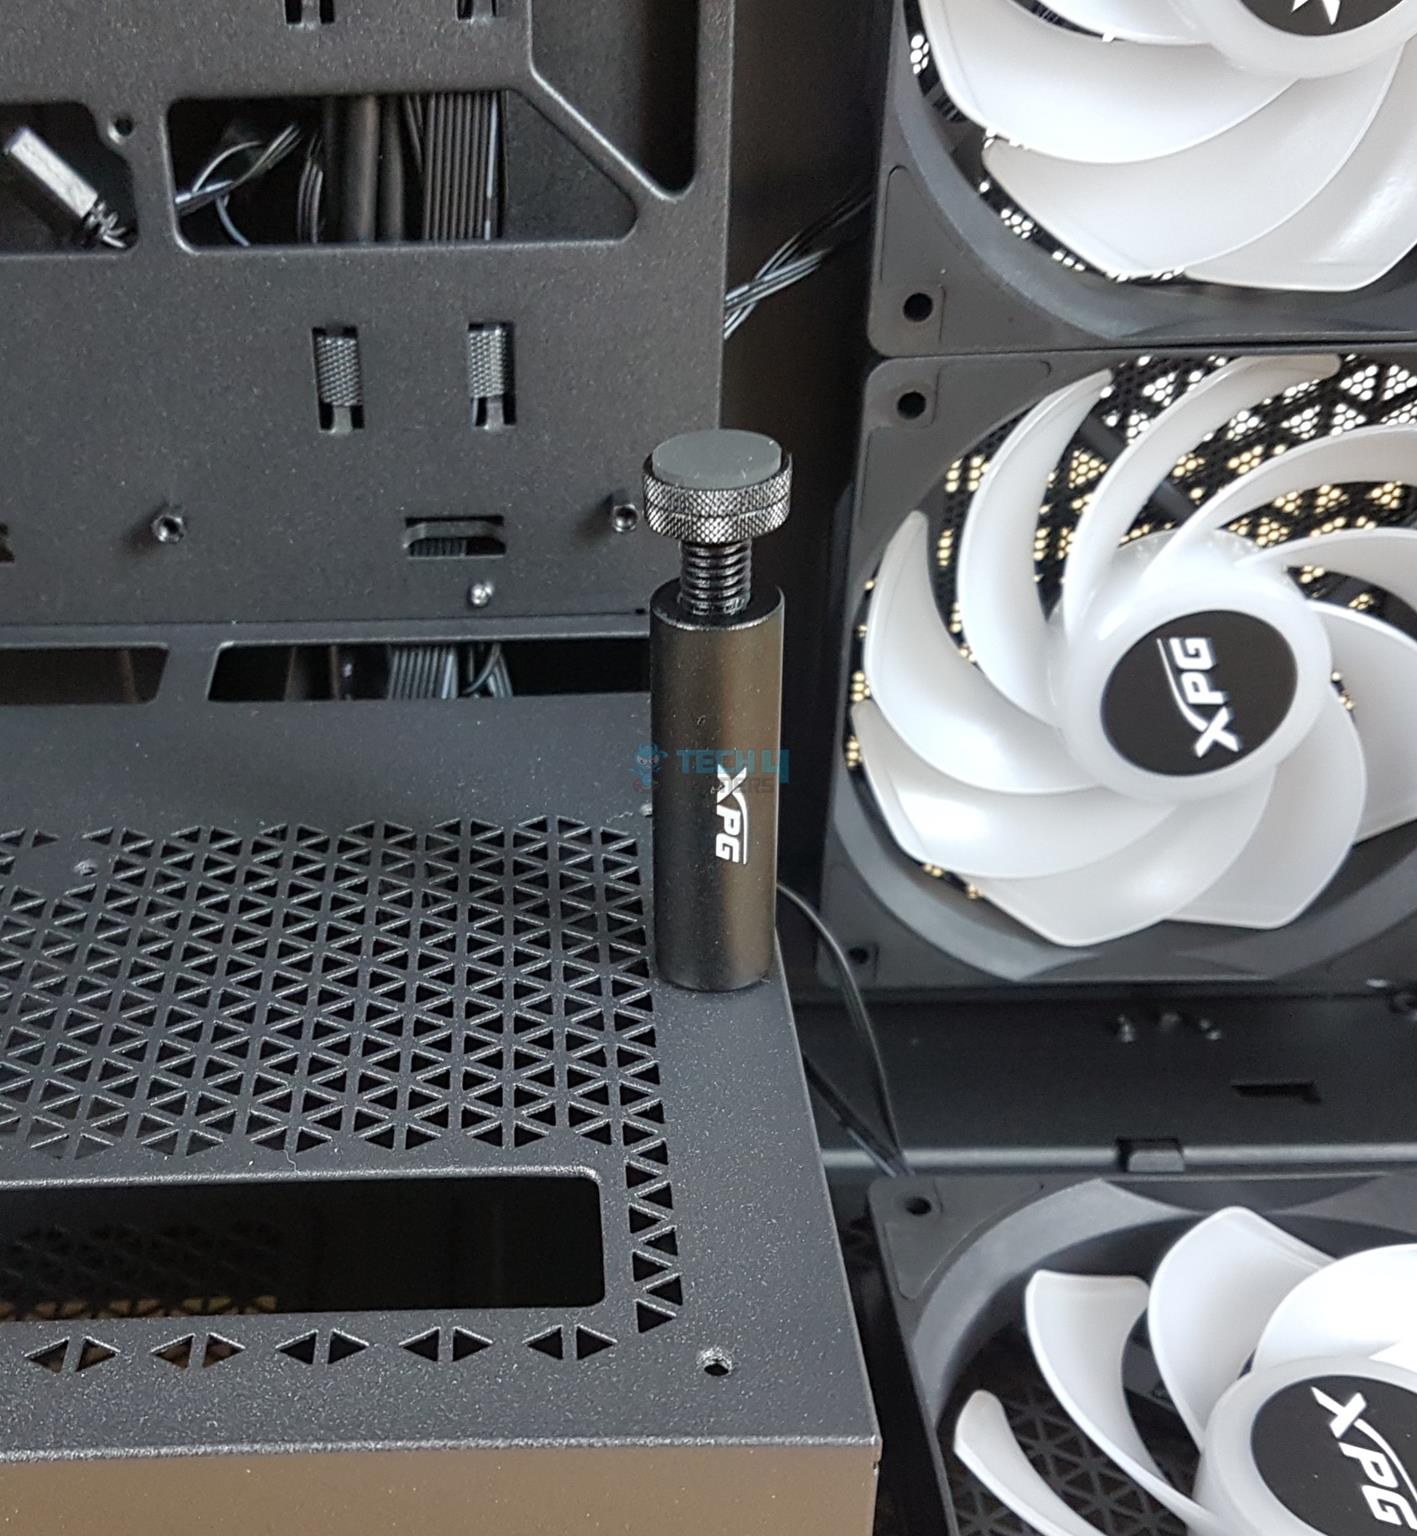
XPG has installed 4x digital RGB 120mm fans with reversed blades on the side and at the base. You can install up to 3x 120mm fans on the side and 1x 120mm or 140mm fans on the base. Similarly, you can install up to a 360mm radiator on the side. These fans are taking the air in. There is a cylindrical shaped magnetic bar that acts as a support for the horizontally installed heavy graphics card. The magnetic portion is attached to the PSU shroud, and the height of the screw column can be adjusted as per the requirement. This is quite a convenient solution.
There is a 120mm digital RGB fan on the rear, exhausting the air out of the case. We can see 7x non-usable PCIe slot covers. It seems like a non-practical design, but XPG has wisely included 3x PCIe slot covers, which should cover this limitation. Still, I would have preferred a removable and reusable 7x PCIe slot covers.
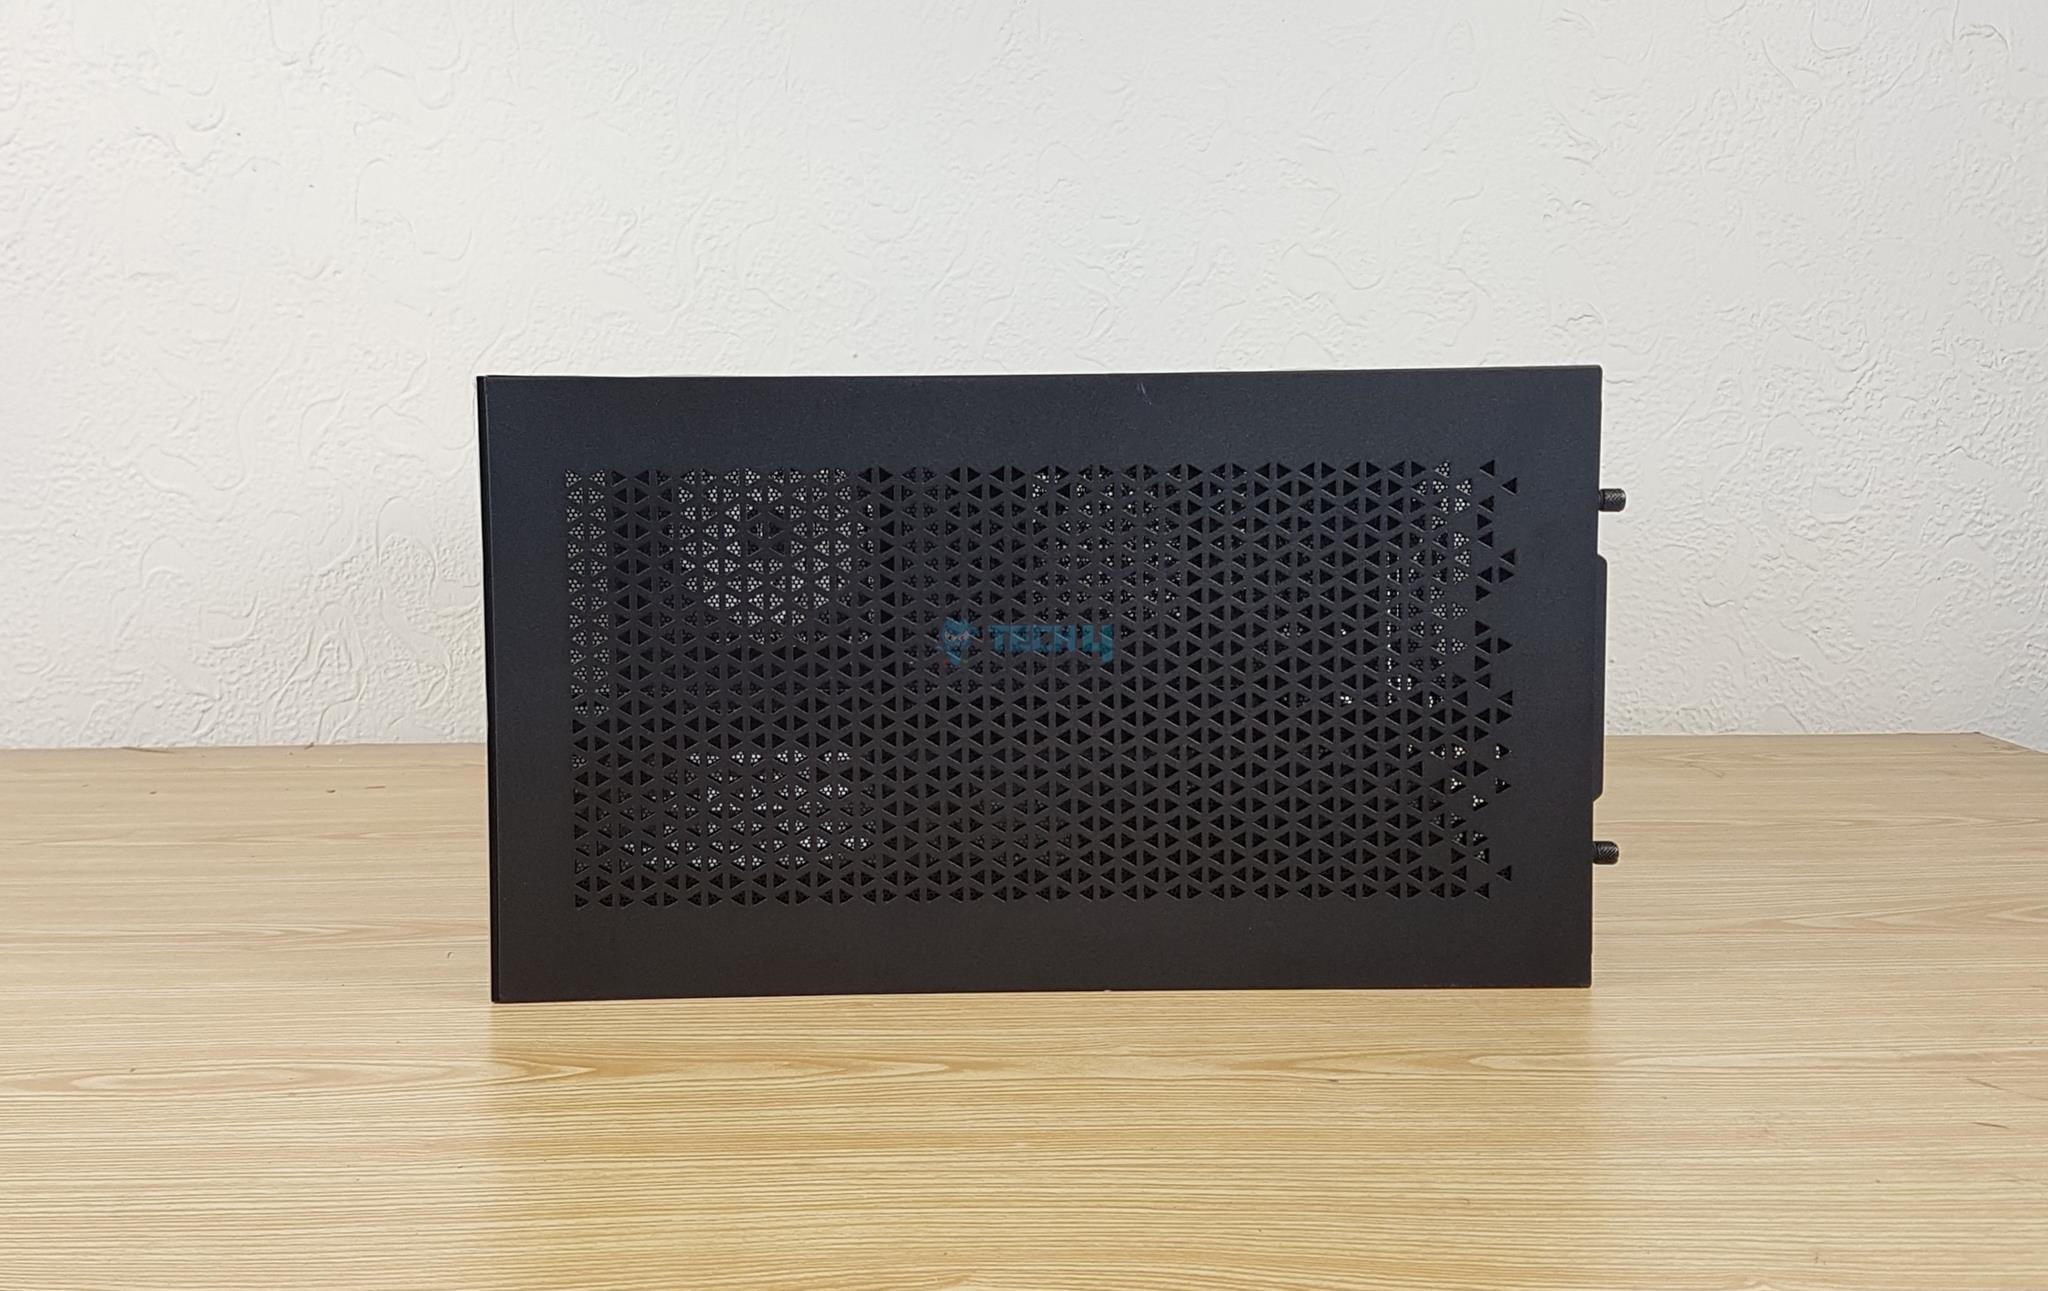
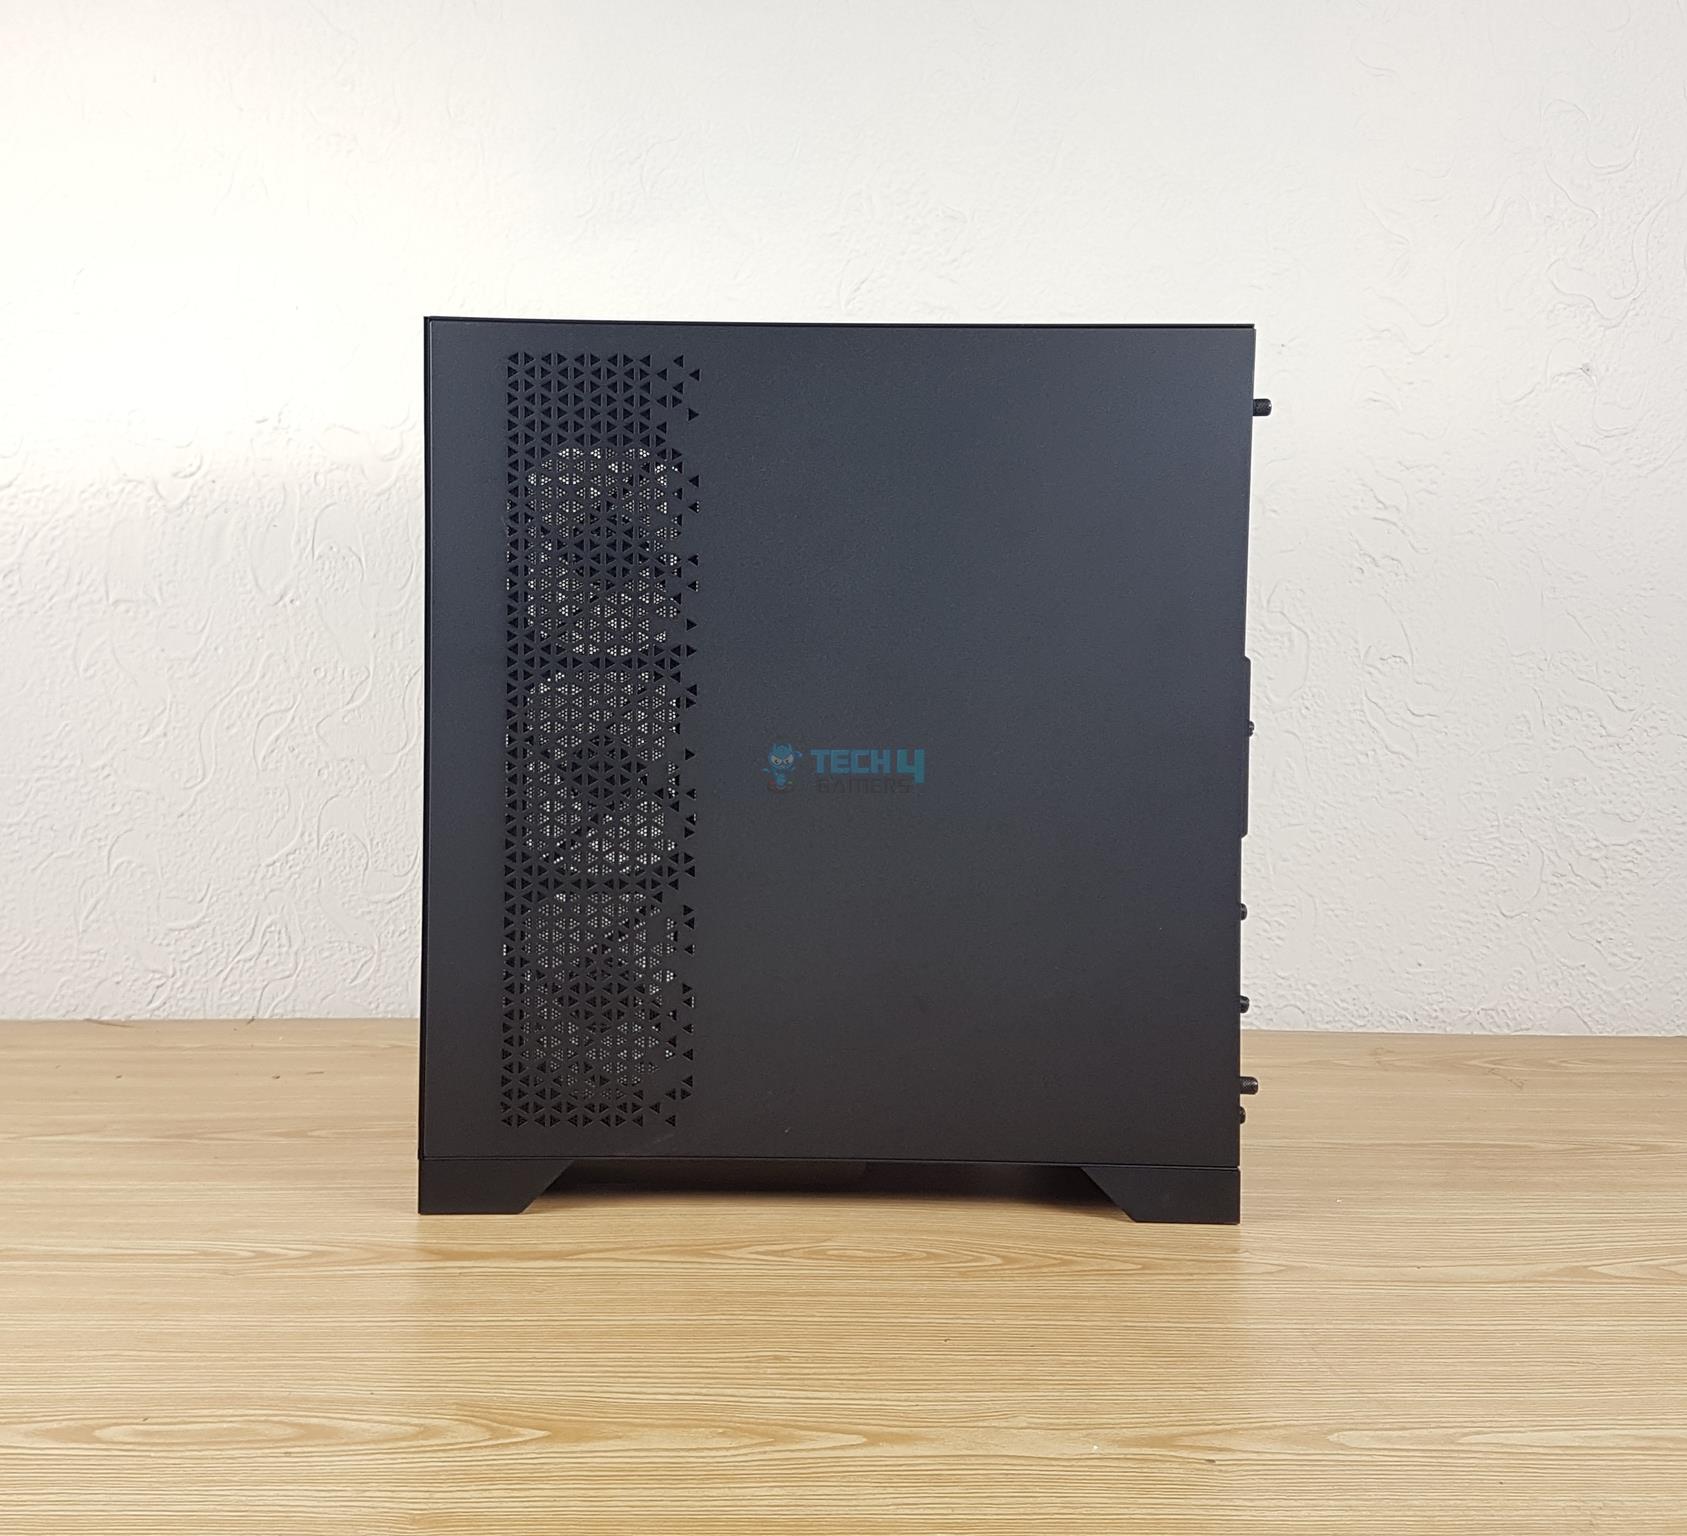
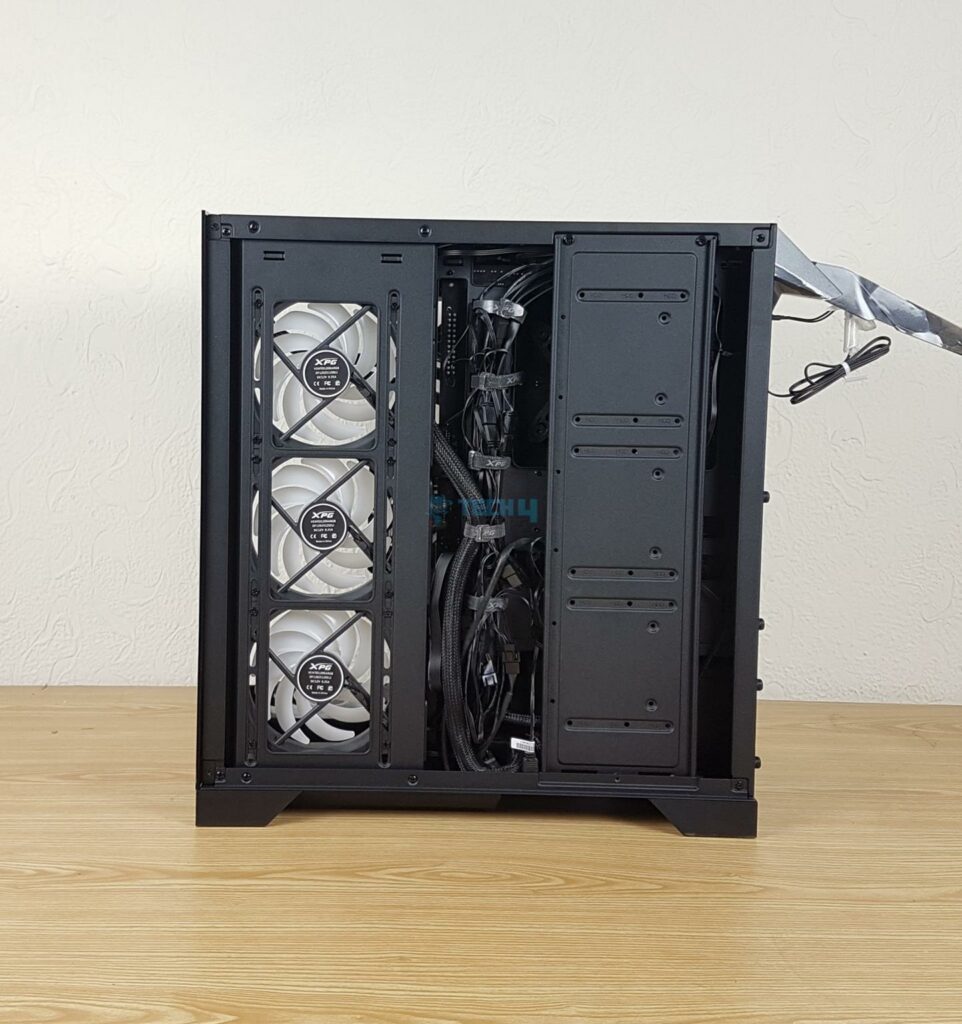
There is a steel-made backside panel. It has a vented portion towards the front of the case, and we can see 3x 120mm fans pre-installed there. A magnetic dust filter covers the vented area on the side panel.
Now, let’s check the inside of the case from the back. A pre-installed bracket stands out, capable of holding 3x 3.5” or 2.5” drives. It’s the sole storage spot, cleverly designed by XPG to free up space for other components while offering decent storage. I removed the bracket for a clearer view, revealing a spacious area for cable management. XPG has neatly routed and managed cables with 5x Velcro strips.
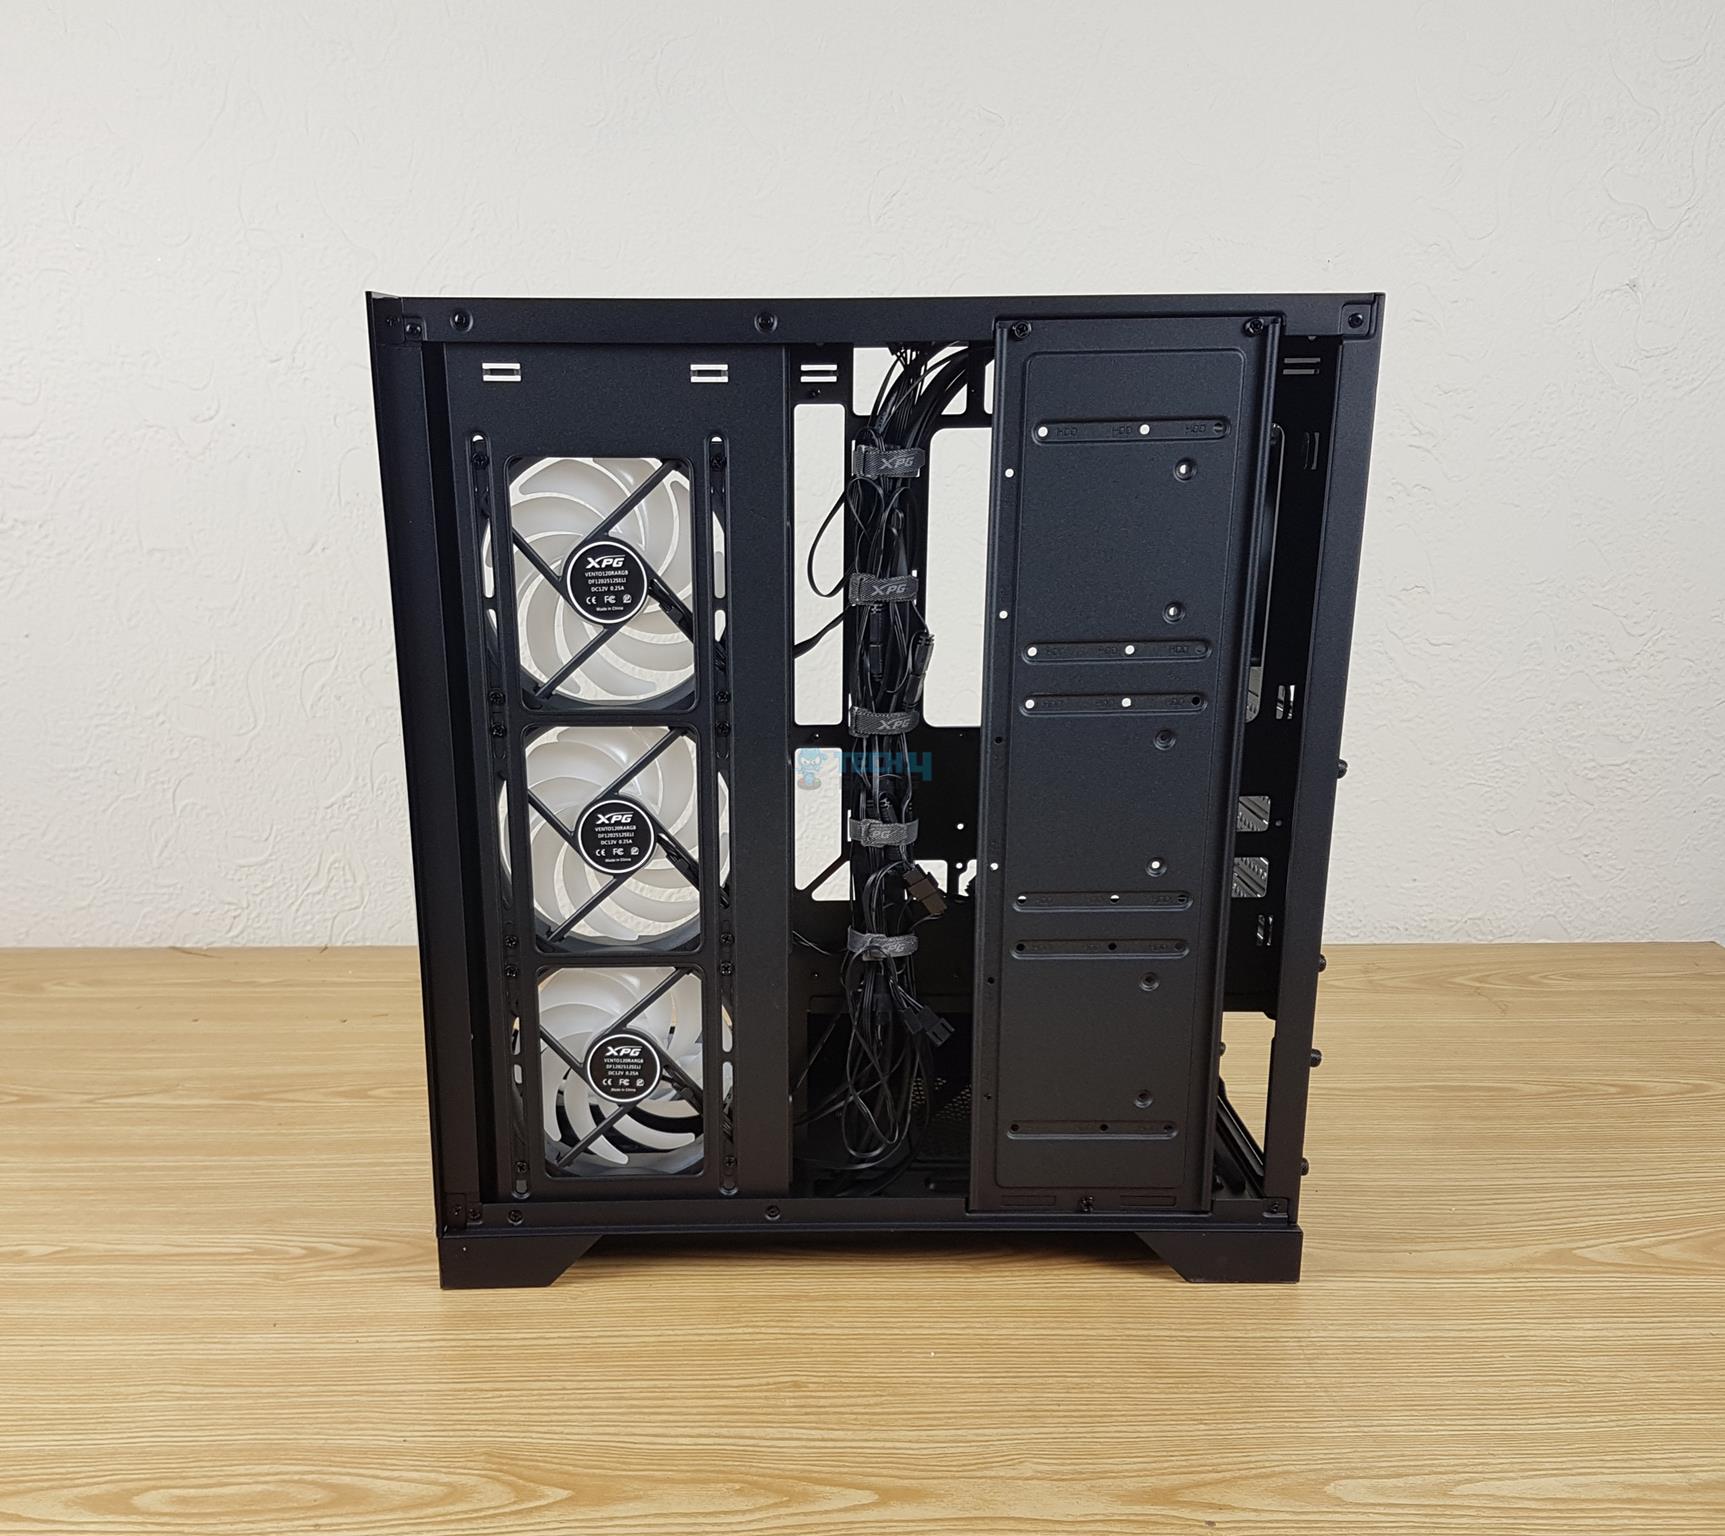
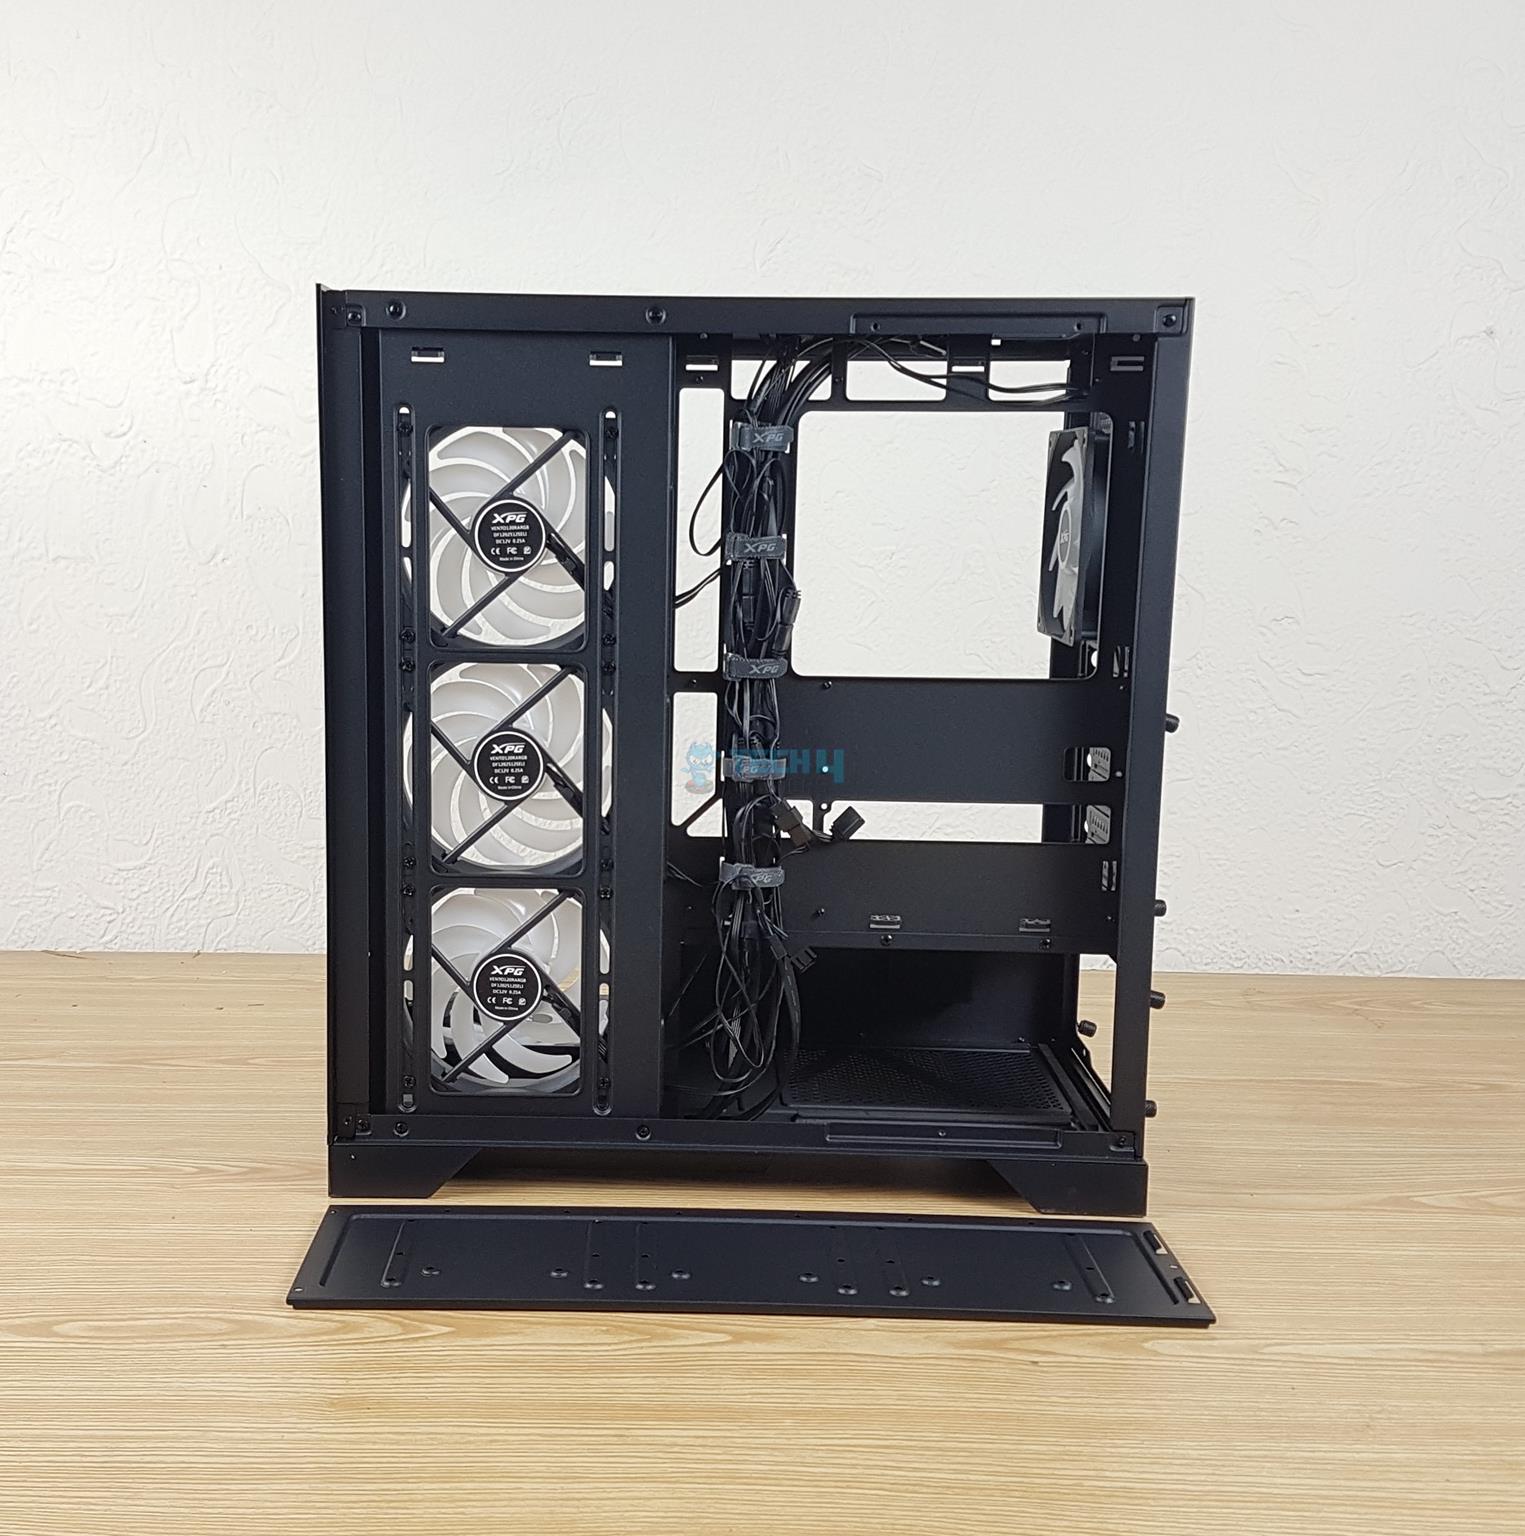
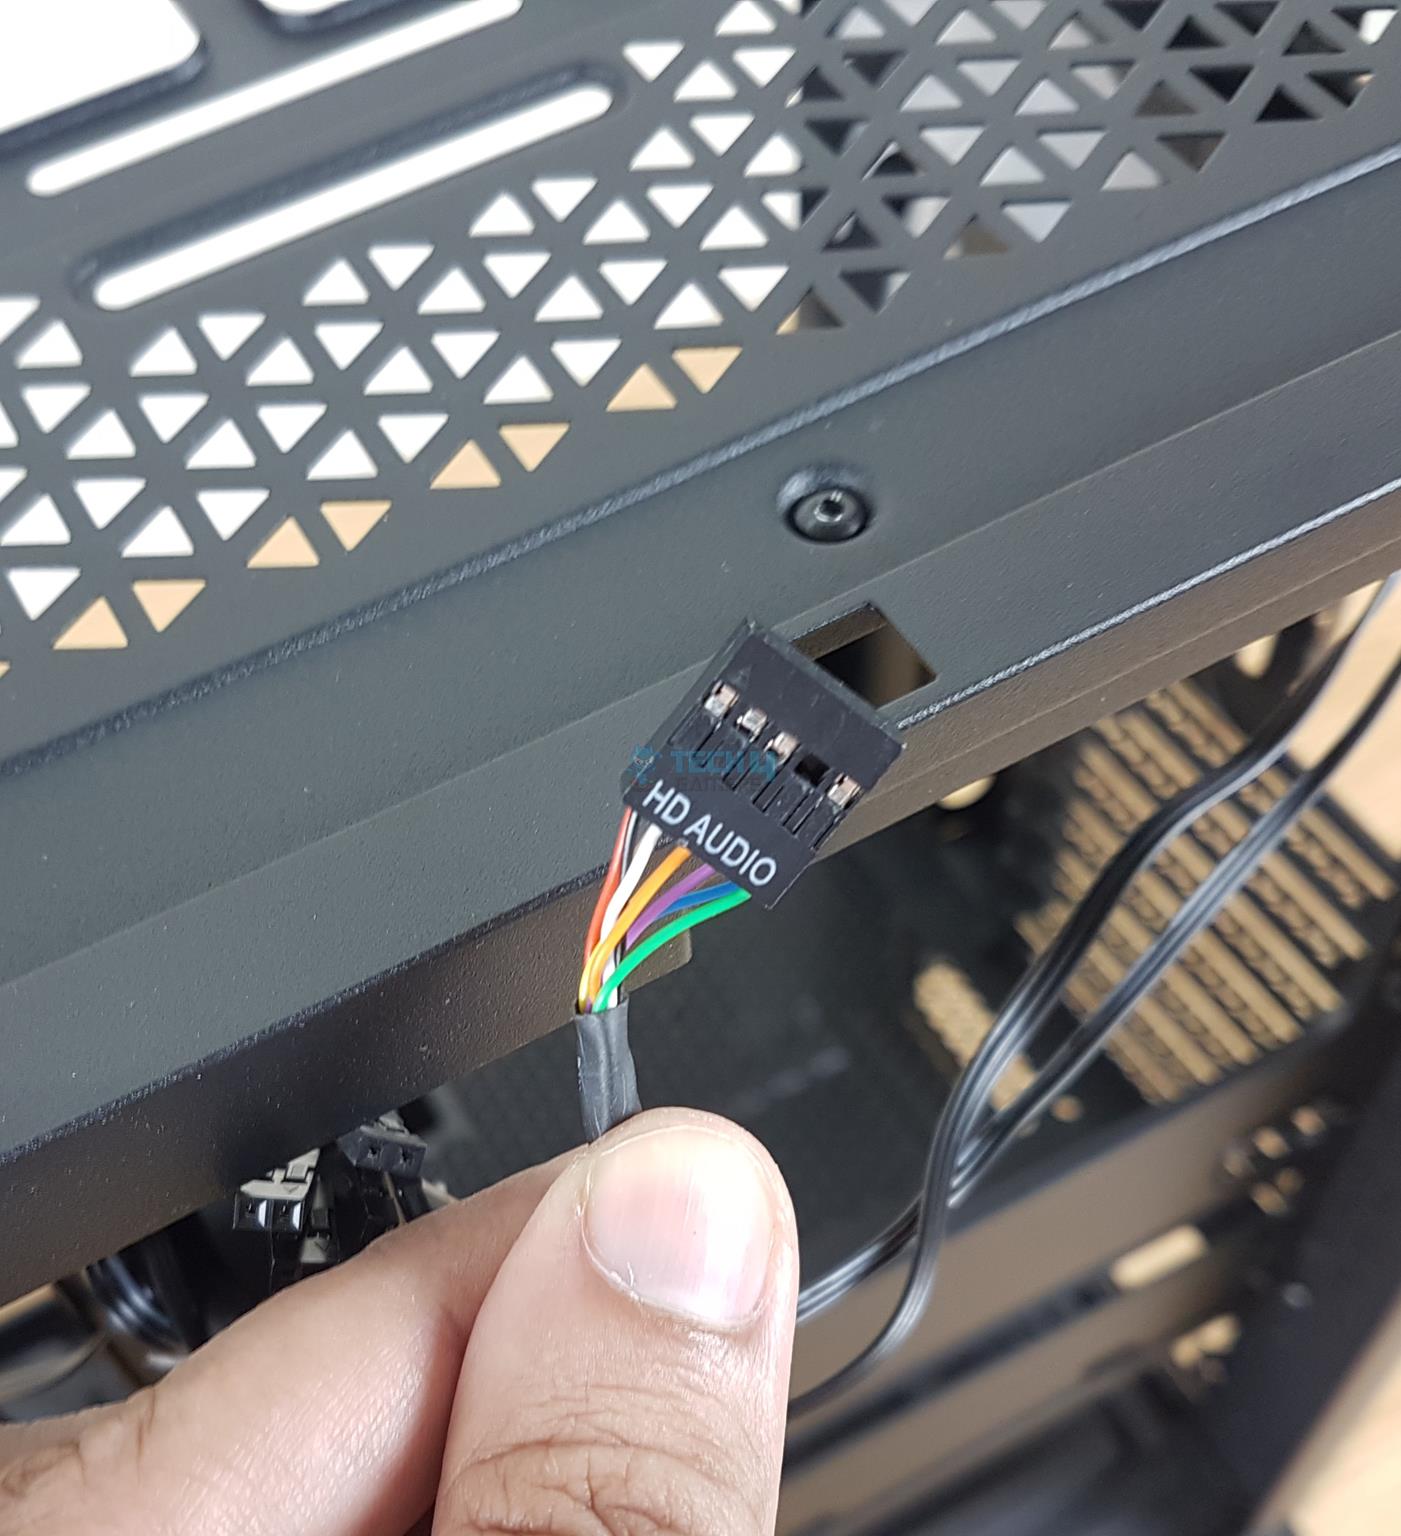
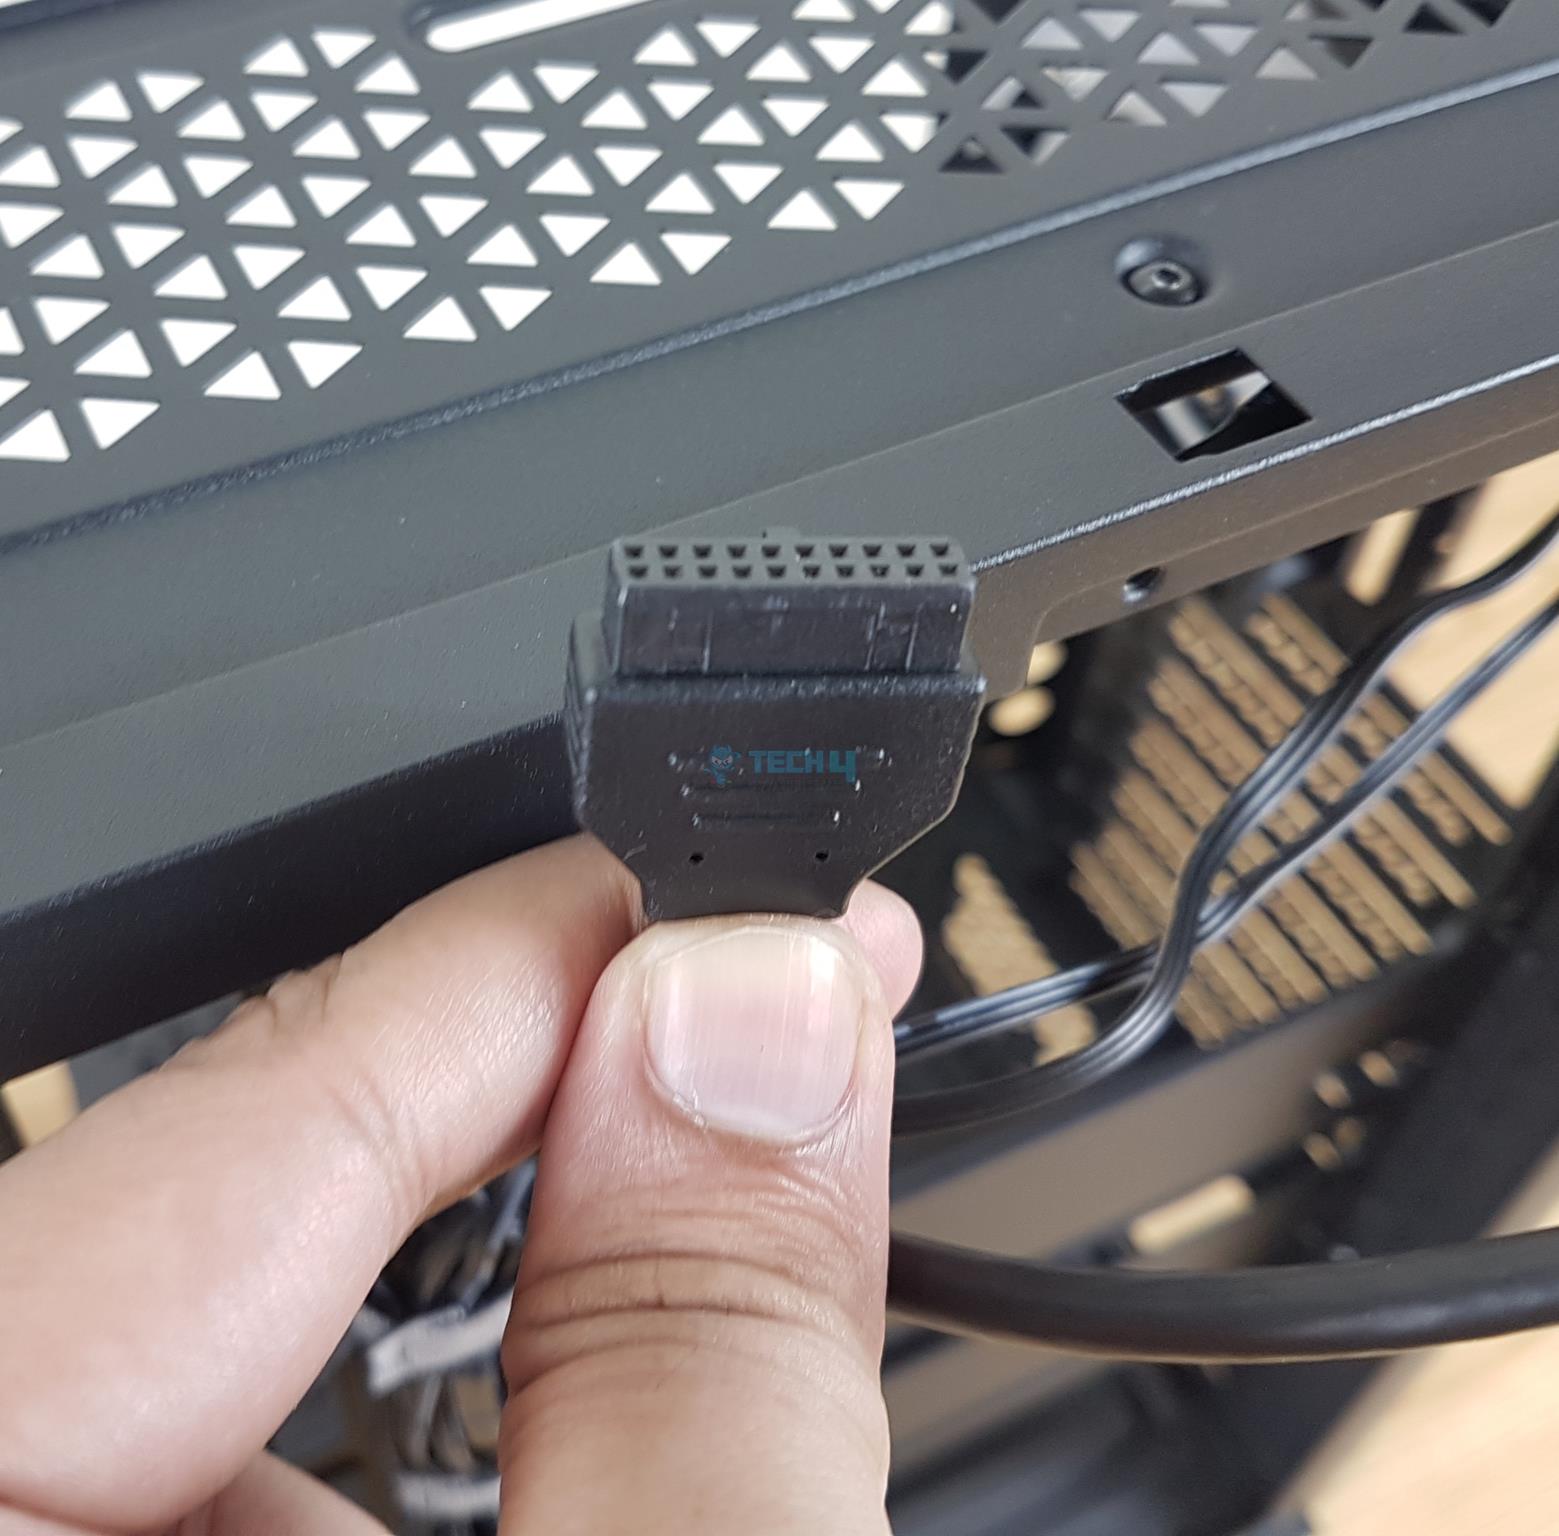
However, I noticed that the USB 3.2, HD Audio and front panel connectors were at the top instead of the bottom where they should be, except for the USB 3.2, which should be in the middle. There are 13 cable tie points. Fans on the left side are on a rail mount, and a PSU bay is at the bottom right, accommodating up to a 240mm PSU. A standard 160mm PSU allows ample space to hide cables inside the bay.
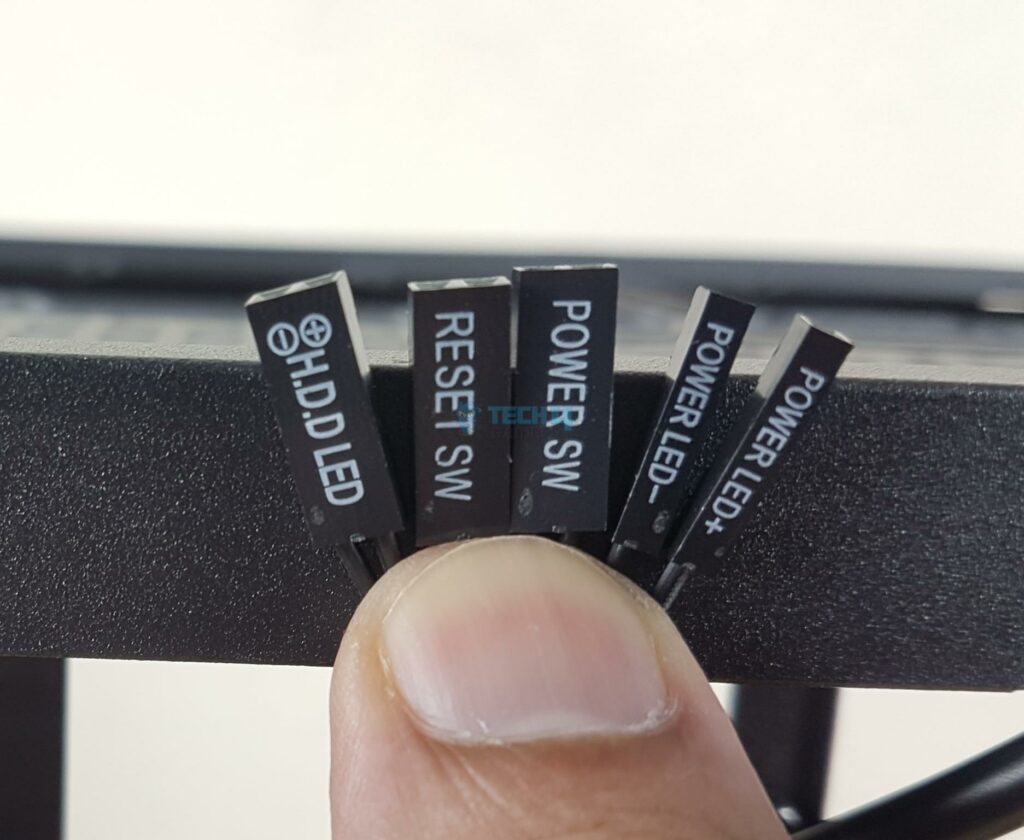
XPG has provided:
- 1x USB Type-E 3.2 Connector
- 1x USB 3.2 main Connector
- 1x Front Panel Connectors
- 1x HD Audio Connector
Test Build
We have used the following configuration for testing of this case:
- Intel i7-13700K
- GIGABYTE Z790 AORUS ELITE AX
- XPG Levante X 360
- Kingston Fury Renegade RGB 32GB DDR5 7200MHz Kit
- ASRock Radeon RX 7600 Phantom Gaming OC 8G
- Sabrent Rocket 4 Plus 2TB NVMe [OS]
- Be Quiet! Straight Power 11 850W Platinum PSU
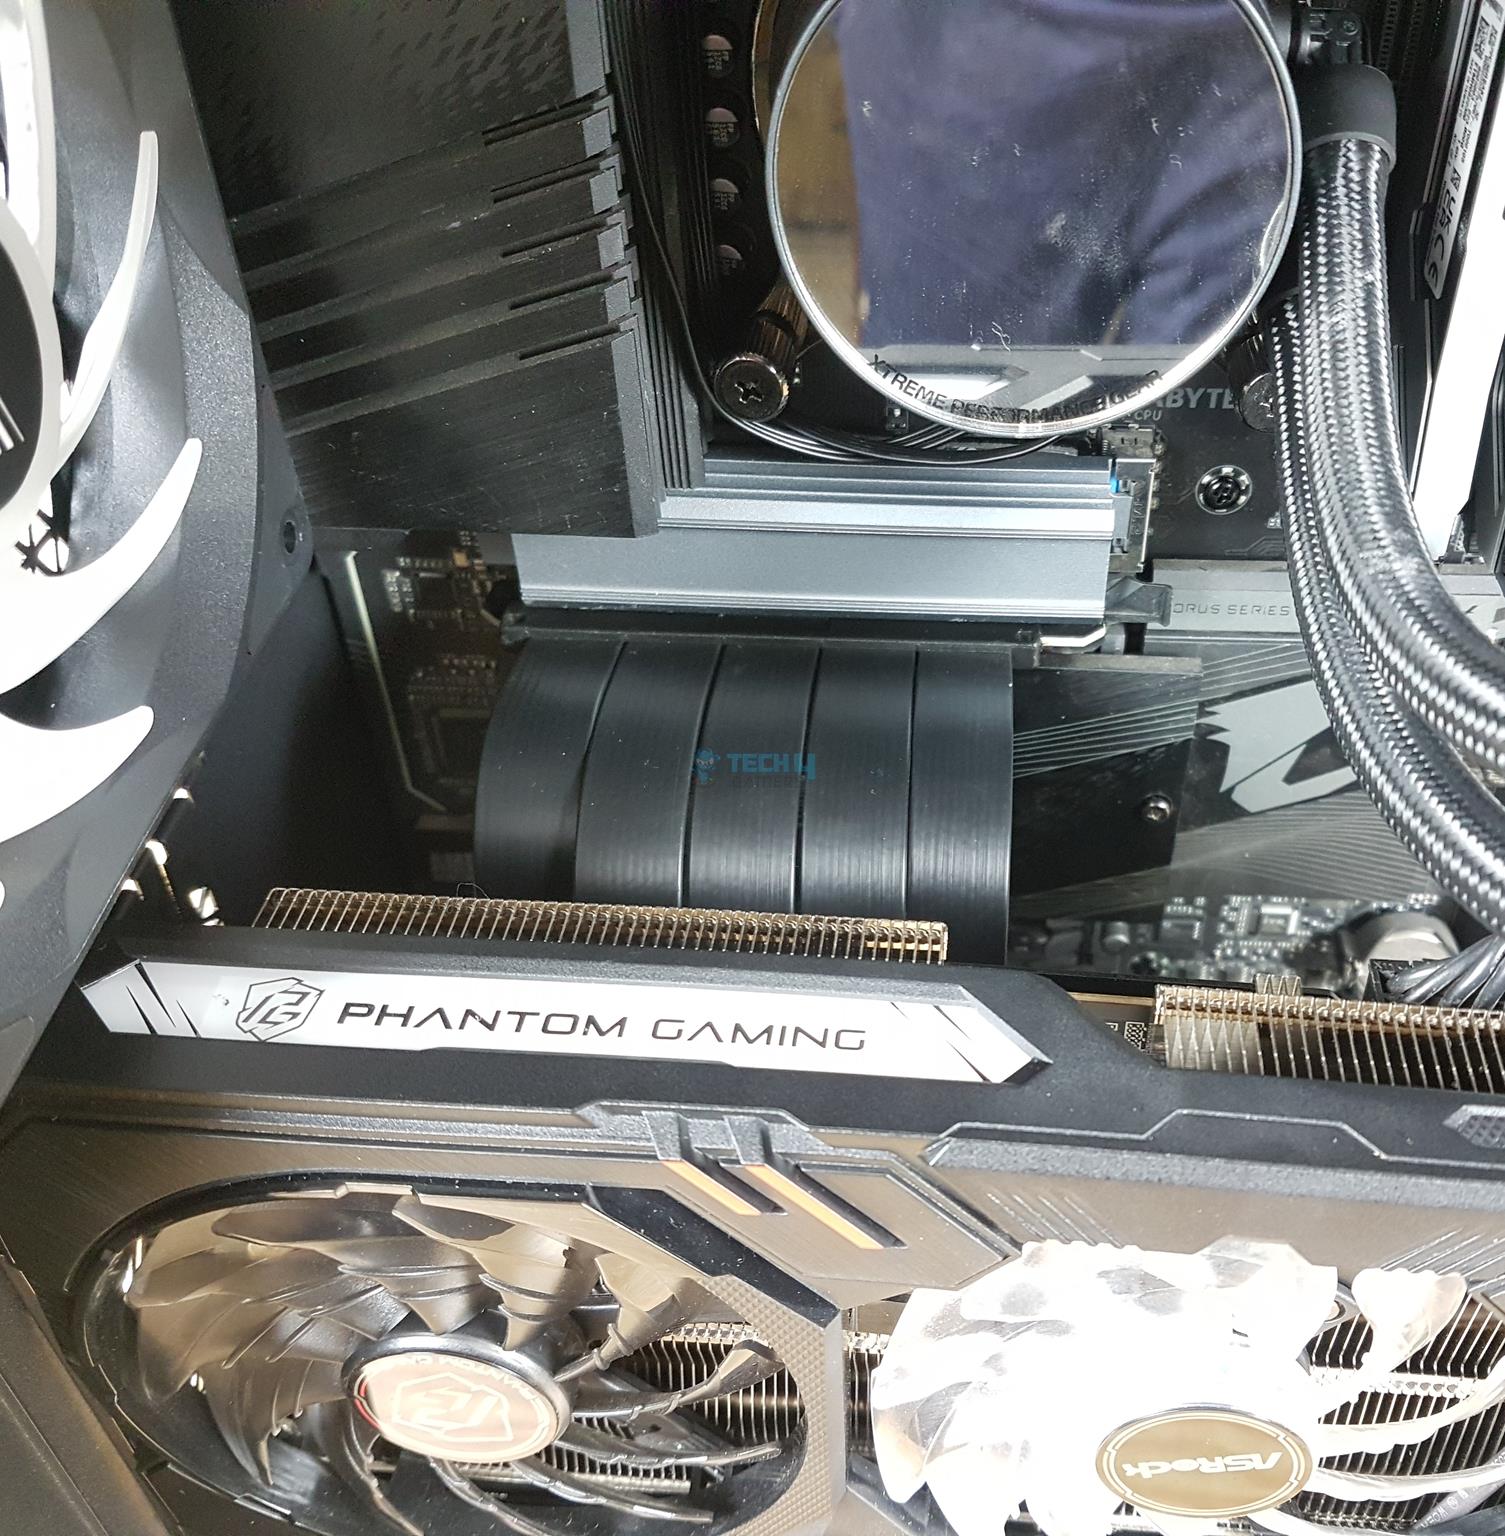
I put the RAM and cooler hardware outside the case, but you can install them inside. No obstacles. Before putting in the motherboard, I switched the GPU bracket from horizontal to vertical, removing two covers. Installed the motherboard, then the liquid cooler (XPG Levante X 360 AIO), leaving 44mm space in the tray. Install the radiator without fans first, then route fan cables before adding them to avoid restricted access.
I am showing the top of the motherboard with the cables connected to the headers on the motherboard. It was a challenging step since I installed the fans on the radiator outside of the case. There was no issue installing the graphics card vertically. The riser cable was easily attached to the PCIe slot of the motherboard.
I am showing the cable management done on the backside of the case. The storage bracket provides a natural cover to hide the cables if storage devices are not used.
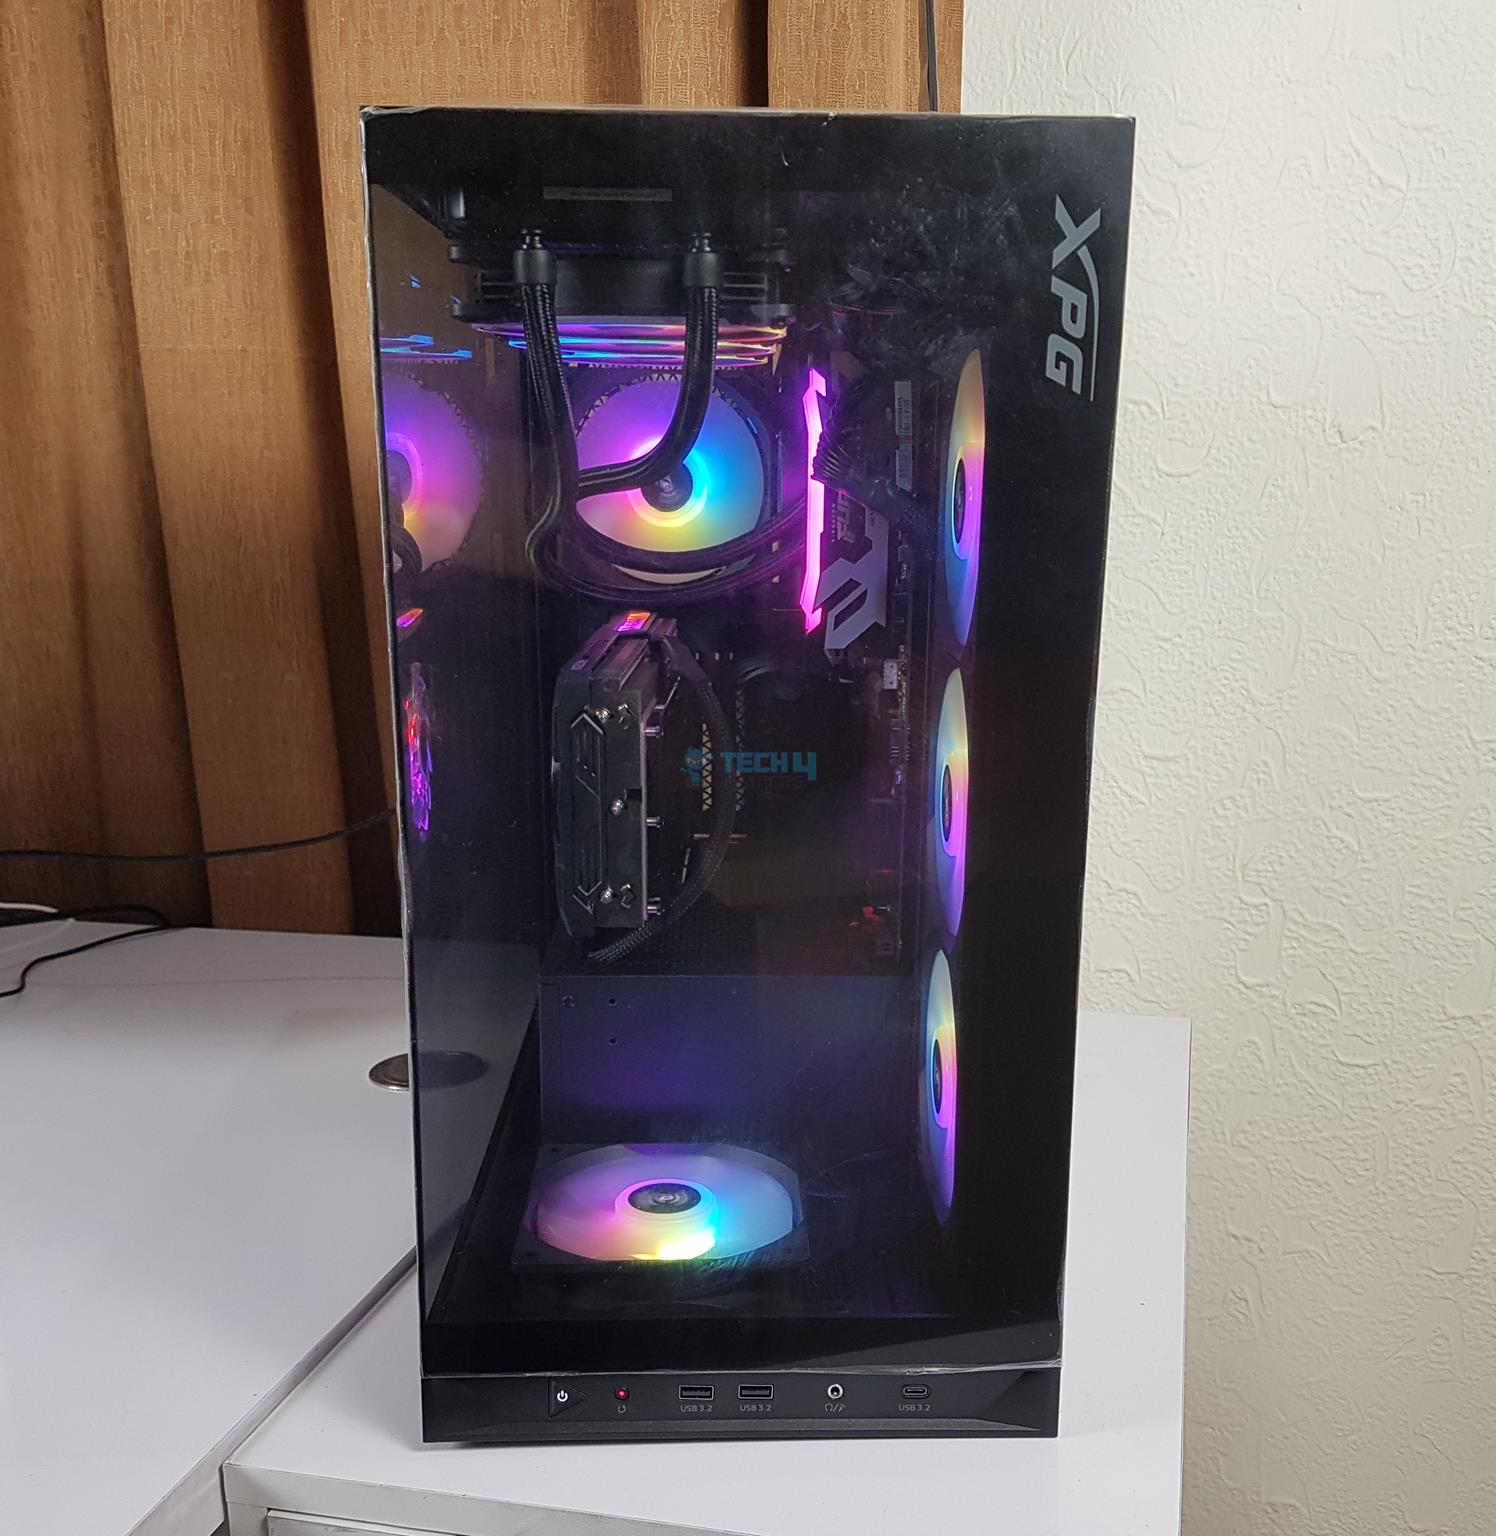
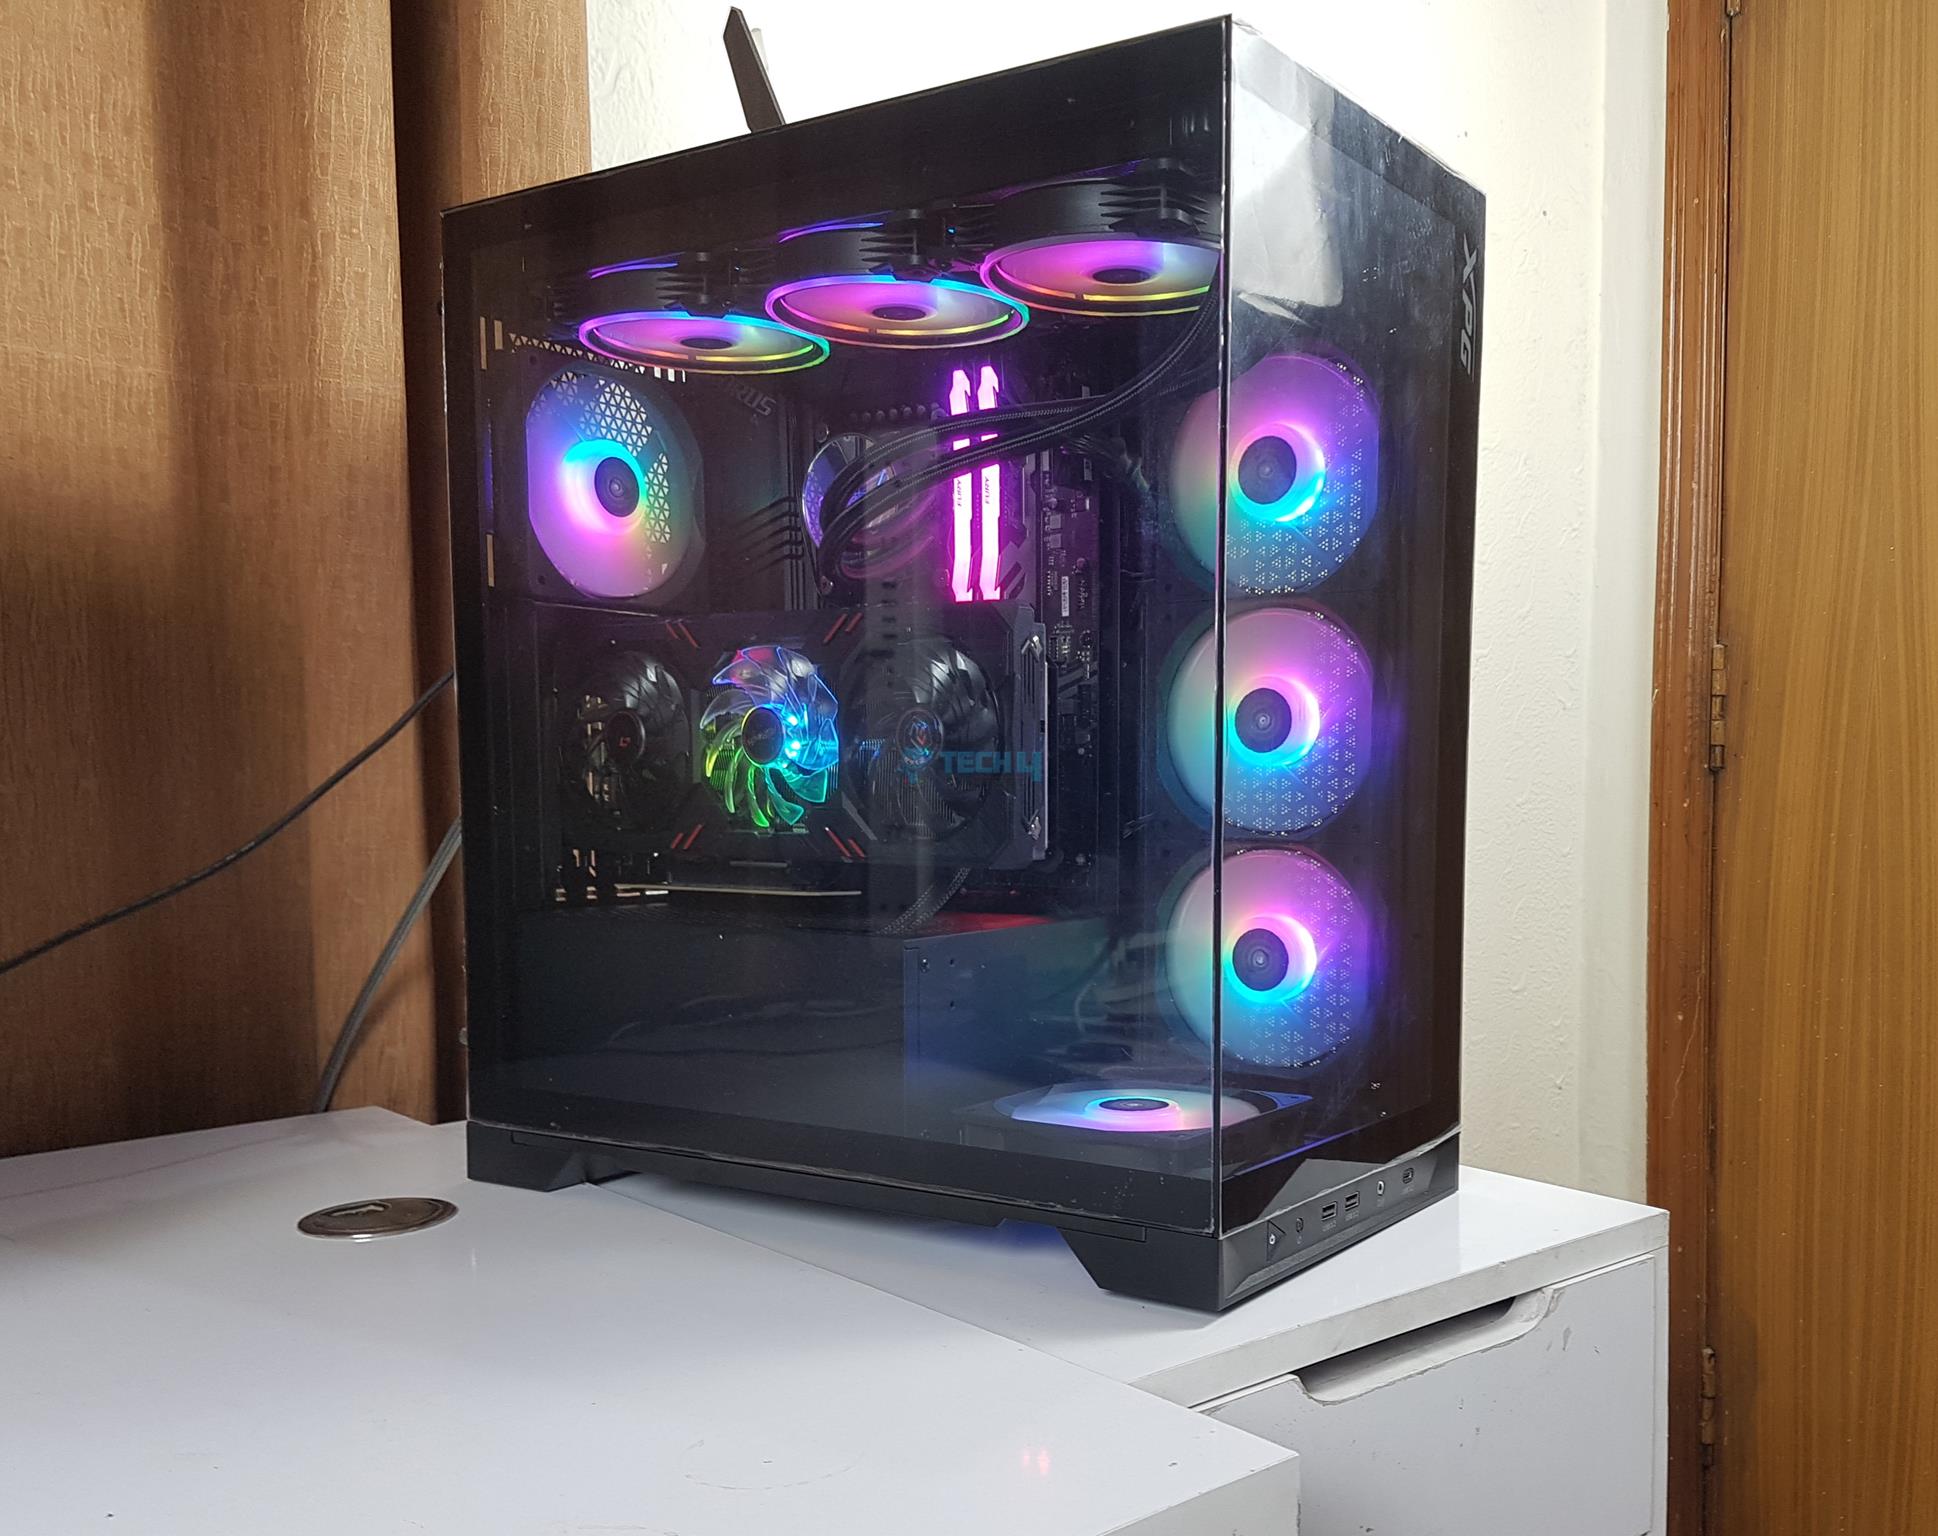
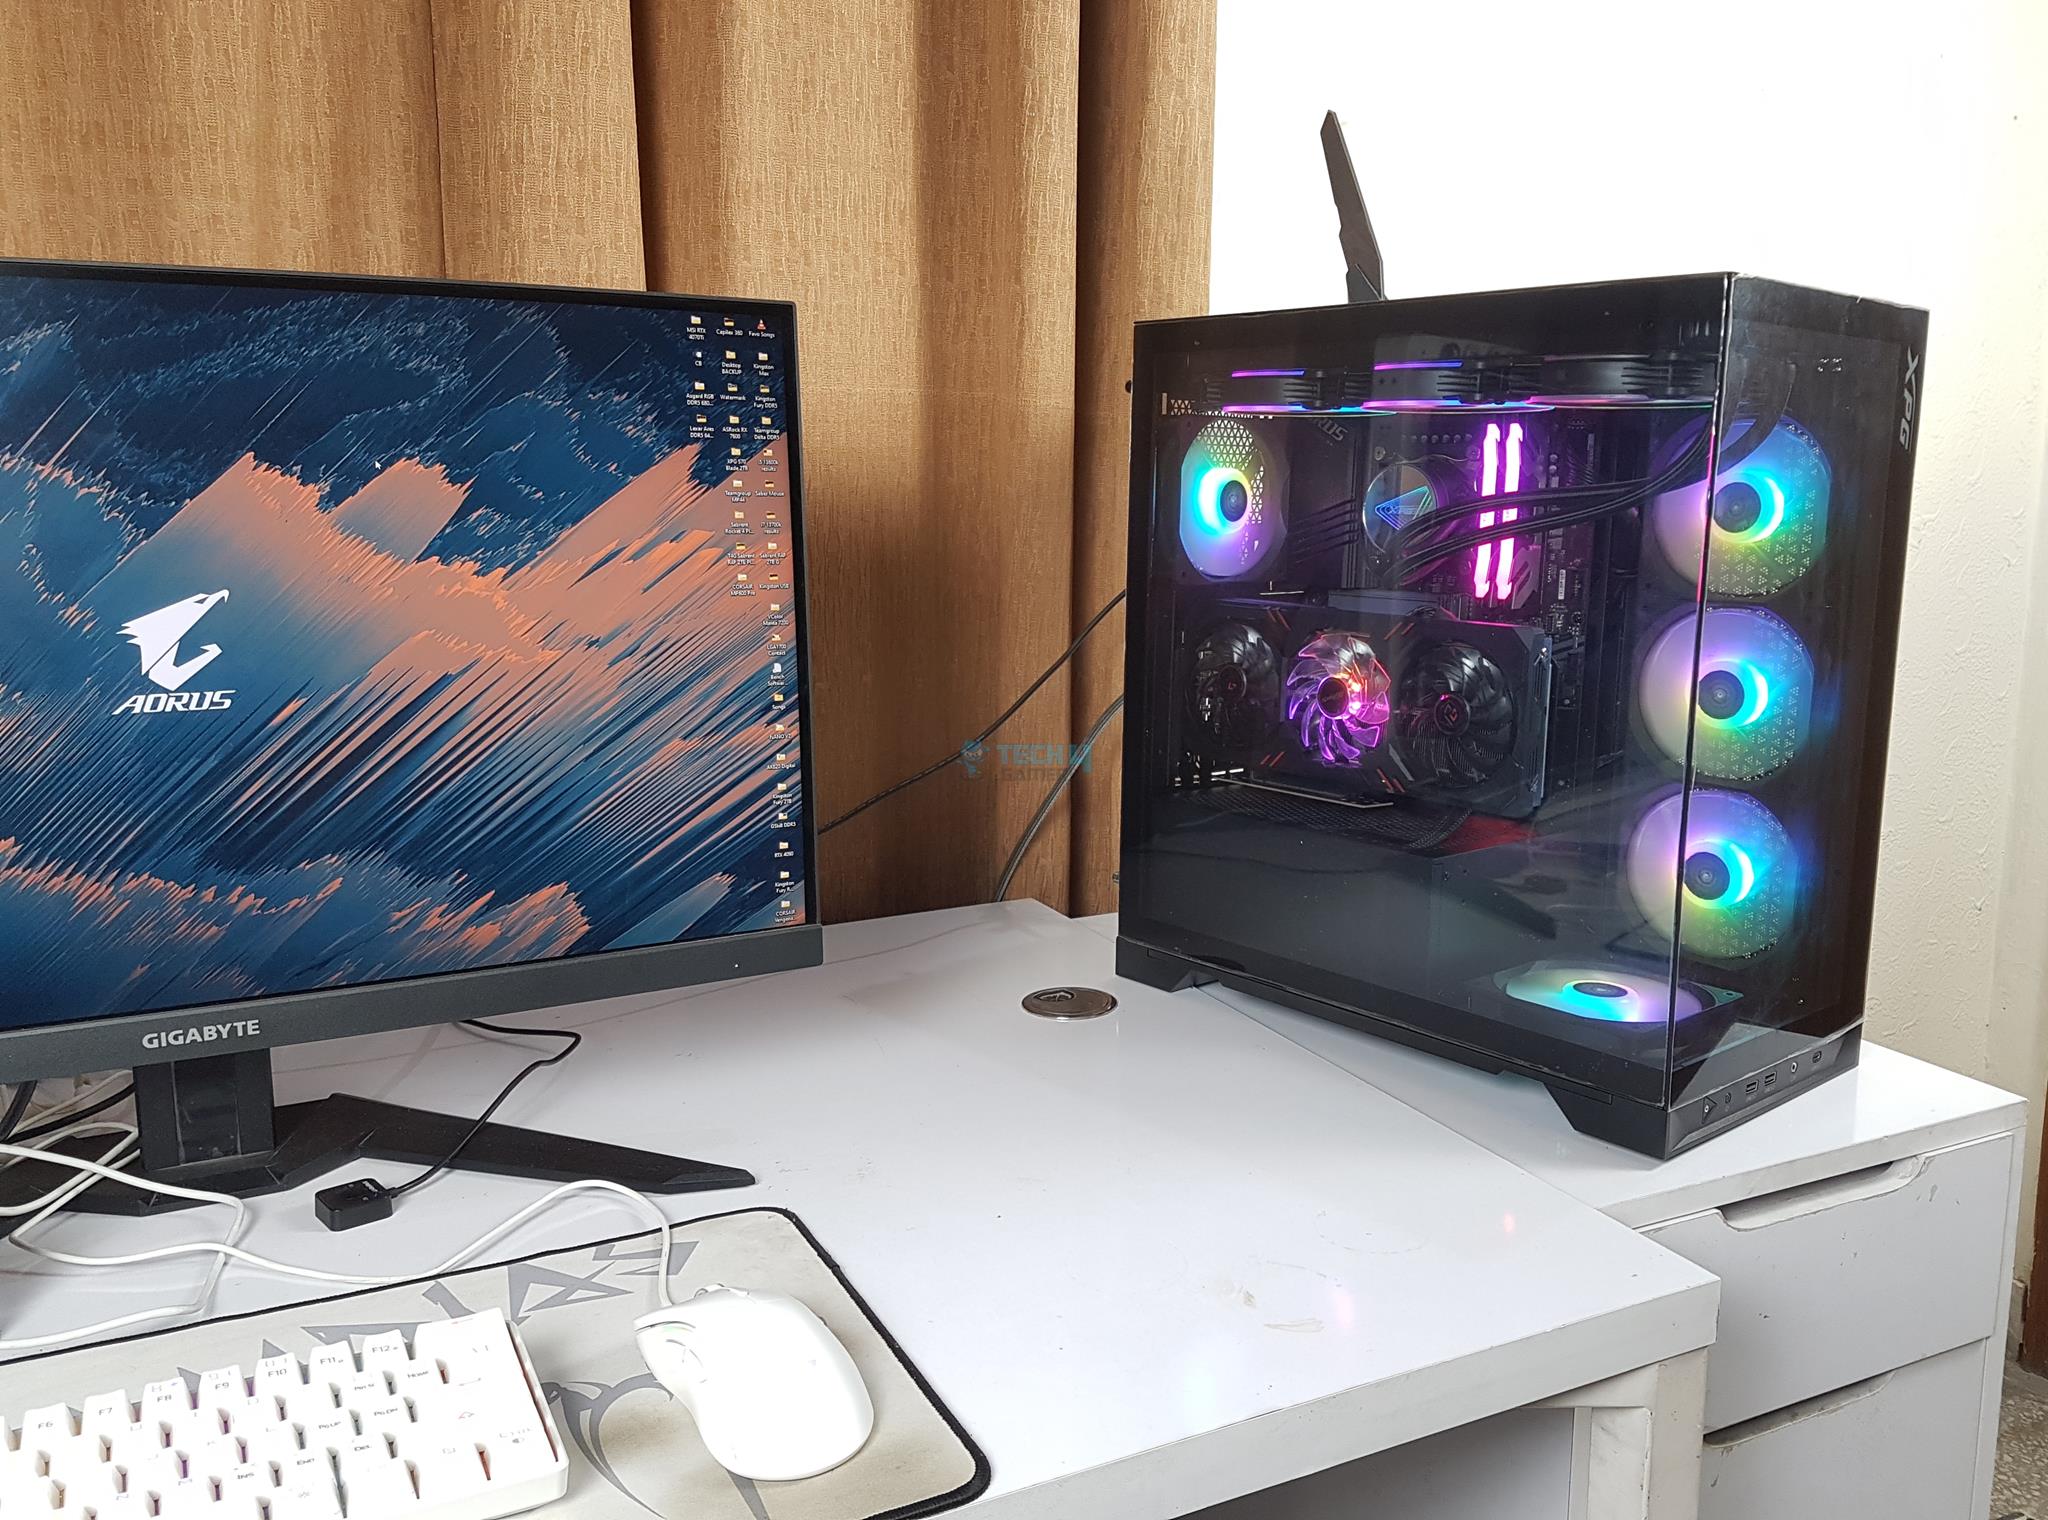
RGB Lighting
Below are a few pictures of the test build and its live pictures when in action.

Testing
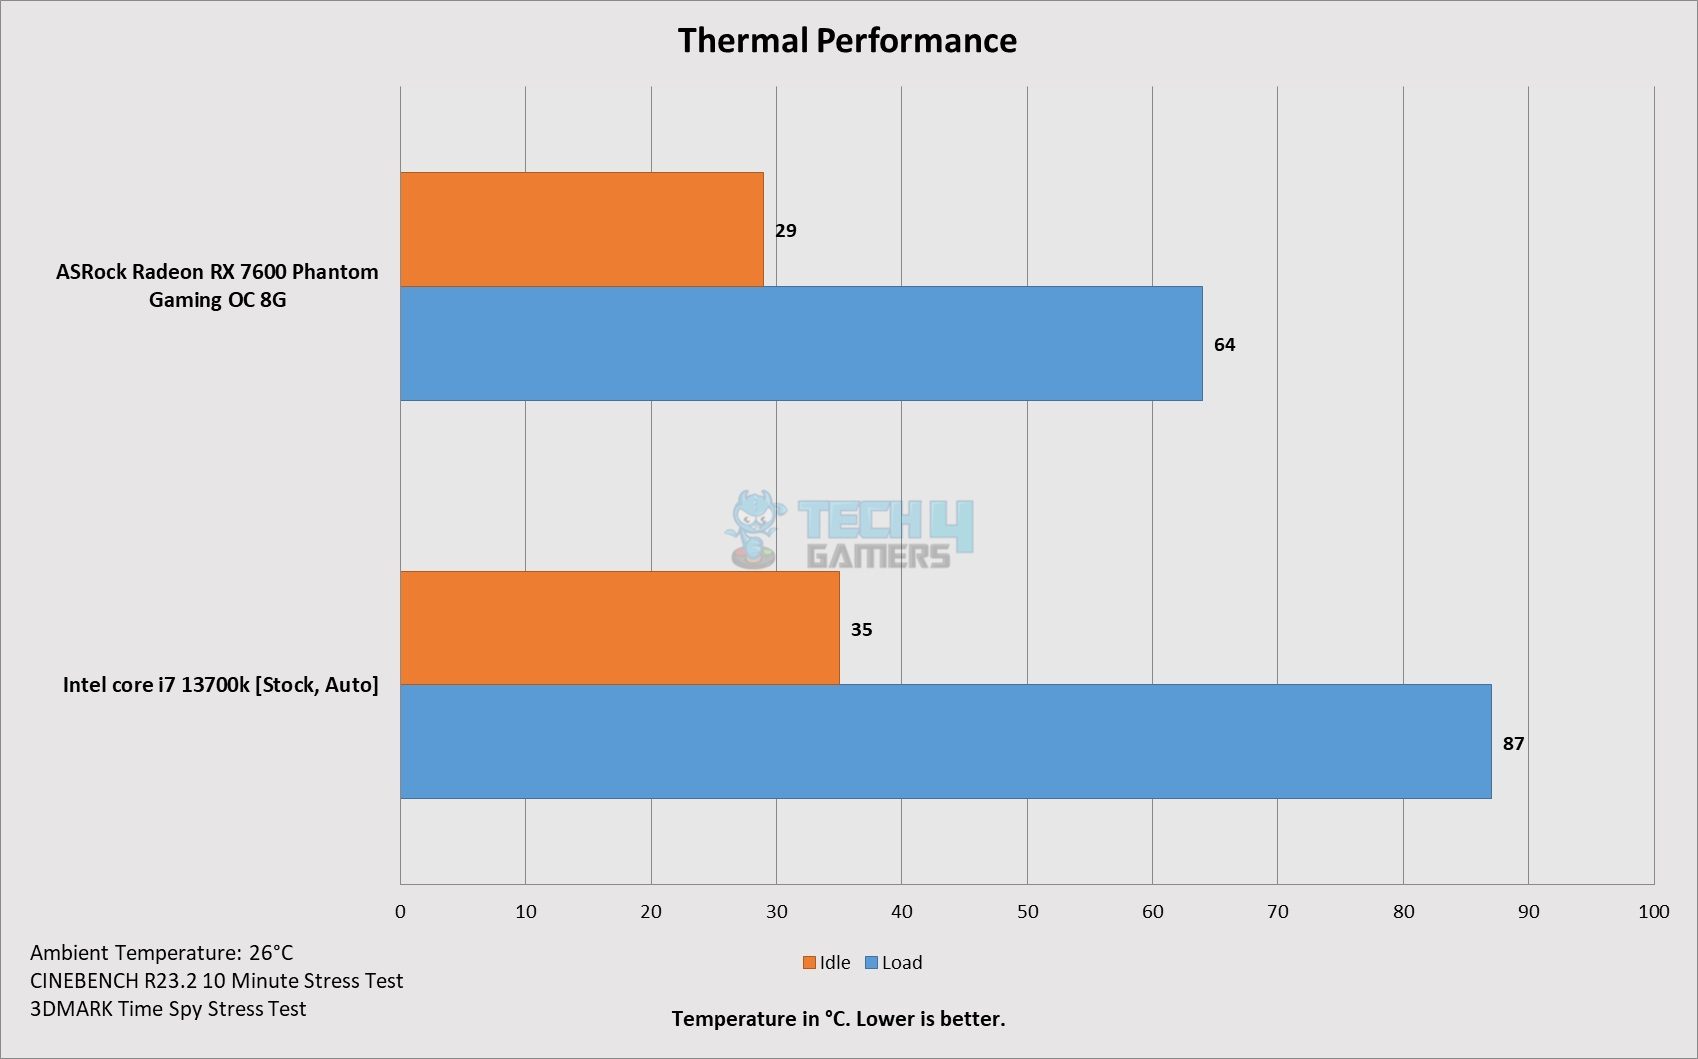
We have tested the Intel i7 13700k on auto and stock settings. The power limits were removed; hence, we are looking at a 250W power draw by the CPU under CINEBENCH R23.2 CPU Multi load. I have used Noctua NT-H1 thermal paste on the CPU. The fans and the pump were set to run at 100% PWM cycle.
Thermals
In this case, the XPG fans operated at full speed. The motherboard’s 3-pin, 5B digital RGB headers covered the RGB lighting. The graphics card operated at its stock settings, and XPM was loaded from the UEFI BIOS. The remaining settings in the UEFI/BIOS were set to Auto and Stock. The system idled for a minimum of 5 minutes at an ambient temperature of 26°C. The results reveal an impressive performance, indicating efficient airflow inside the XPG Invader X PC Case.
Acoustics
The overall noise level was at 55 dBA on ambient 33 dBA, which is a bit on the high side, but remember that 8x fans were operating at full speed.
Should You Buy It?
Upon carefully analyzing the XPG Invader X PC Case, I concluded that:
Buy It If
✅ You need a panoramic view case: The XPG Invader X has a view design from the bezel-less front and side tempered glass panels. Remember that the market is filled with such designs now; hence, competition is tough.
✅ You want A high-spec PC Case: Filled with excellent features like a 180mm 90ᵒ riser cable, up to 2x 360mm radiators, 10 fans, 3x 2.5”/3.5” drives and a bundled GPU support bracket, the chassis is a must-have for those who want top-notch specs. This case also supports back-plug motherboards, making it a future-ready PC Case.
Don’t Buy It If
❌ You already own a mid-tower case: If you already have a nice features mid-tower PC Case, I would not suggest spending hefty bucks on this case.
❌ You are on a budget: If you are on a tight budget, this case is not for you. Period.
Final Words
The XPG Invader X is a top-notch PC case with excellent dust filtration, strong cooling for up to 360mm radiators, and space for large graphics cards (400mm without side fans, 270mm with a side radiator). It holds three drives, fits full ATX motherboards and 240mm PSUs, and has good cable management space with a 160mm PSU. It supports 175mm CPU coolers and includes brackets for vertical/horizontal GPU mounting, a riser cable, and back-plug motherboards. The Invader X, highly recommended for its quality and design, features five preinstalled fans, a flexible rail system, and a well-equipped front panel, despite potential cable issues with top AIO coolers. XPG offers a 2-year warranty, making it a top choice in PC cases.
Recent Updates
- January 21, 2024: A few text changes to improve readability.Improved image galleries.
Thank you! Please share your positive feedback. 🔋
How could we improve this post? Please Help us. 😔
[Hardware Reviewer & Editor]
Meet Nauman Siddique, a highly experienced computer science graduate with more than 15 years of knowledge in technology. Nauman is an expert in the field known for his deep understanding of computer hardware.
As a tech tester, insightful reviewer, and skilled hardware editor, Nauman carefully breaks down important parts like motherboards, graphics cards, processors, PC cases, CPU coolers, and more.
- 15+ years of PC Building Experience
- 10+ years of first-hand knowledge of technology
- 7+ years of doing in-depth testing of PC Hardware
- A motivated individual with a keen interest in tech testing from multiple angles.
- I majored in Computer Science with a Masters in Marketing
- Previously worked at eXputer, EnosTech, and Appuals.
- Completed Course in Computer Systems Specialization From Illinois Tech
Get In Touch: nauman@tech4gamers.com


