 Threads
Cooler Master H500 Mastercase Review
Review Summary
The Cooler Master Mastercase H500 ARGB impresses with its stylish design, featuring a tinted glass panel and vibrant MF200R ARGB fans that strike a balance between high airflow and aesthetic appeal. Tailored for enthusiast gamers seeking top-notch cooling performance, the case delivers an immersive visual experience with its ARGB lighting and transparent front cover. The only notable drawback is the small size of the reset button, but overall, Cooler Master delivers a compelling package in this price range.
Hours Tested: 8-10

Overall
-
Design - 8/10
8/10
-
Build Quality - 8.5/10
8.5/10
-
Value - 9/10
9/10
-
Features - 7/10
7/10
Pros
- Aesthetics
- Airflow
- ARGB
- Build Quality
- Customization
- Cable Management
Cons
- Small Reset Button


Cooler Master has continued the design element of H500P, and they have released the ARGB versions. Today, we will look at their Cooler Master Mastercase H500. Cooler Master has learned quickly from airflow and a few others lacking in the initial design of the H500 and has addressed those in the later iterations. We have also tested the Cooler Master MasterCase H500P Mesh, make sure to check it out as well.
Key Takeaways
- The Cooler Master Mastercase H500 is a stylish mid-tower case featuring a tinted glass panel enhanced by vibrant MF200R ARGB fans. Its design balances high airflow and aesthetic appeal, making it an attractive choice for PC builders.
- This case is ideal for enthusiast gamers seeking top-notch cooling performance. The H500 ARGB boasts excellent airflow with its ARGB fans. Aesthetics seekers will appreciate the tinted glass and transparent front cover, allowing for a visually pleasing showcase of their builds.
- The H500 ARGB may not be the best fit for those prioritizing compact builds or on a tight budget. Its mid-tower size and premium features contribute to a higher price point. Compact build enthusiasts and budget-conscious users may find more suitable alternatives.
Overview
This time, they provide mesh and solid transparent front panel covers in a box, allowing users to customize the front as required. This chassis features two 200mm ARGB fans on the front, for which Cooler Master has also provided a dedicated controller. This mid-tower chassis can house a full ATX and E-ATX motherboard.
The user can install a 2x 2.5” drive and a combination of 2x 2.5” or 3.5” drives. There is an ample cooling provision as well. The user can also install a 200mm fan on the top. The chassis has a broader frame, giving it a good clearance for a top-mounted AIO from RAM.
Dust filtration is provided on the top, front, and bottom. The chassis has a handle on the top for ease of carrying.
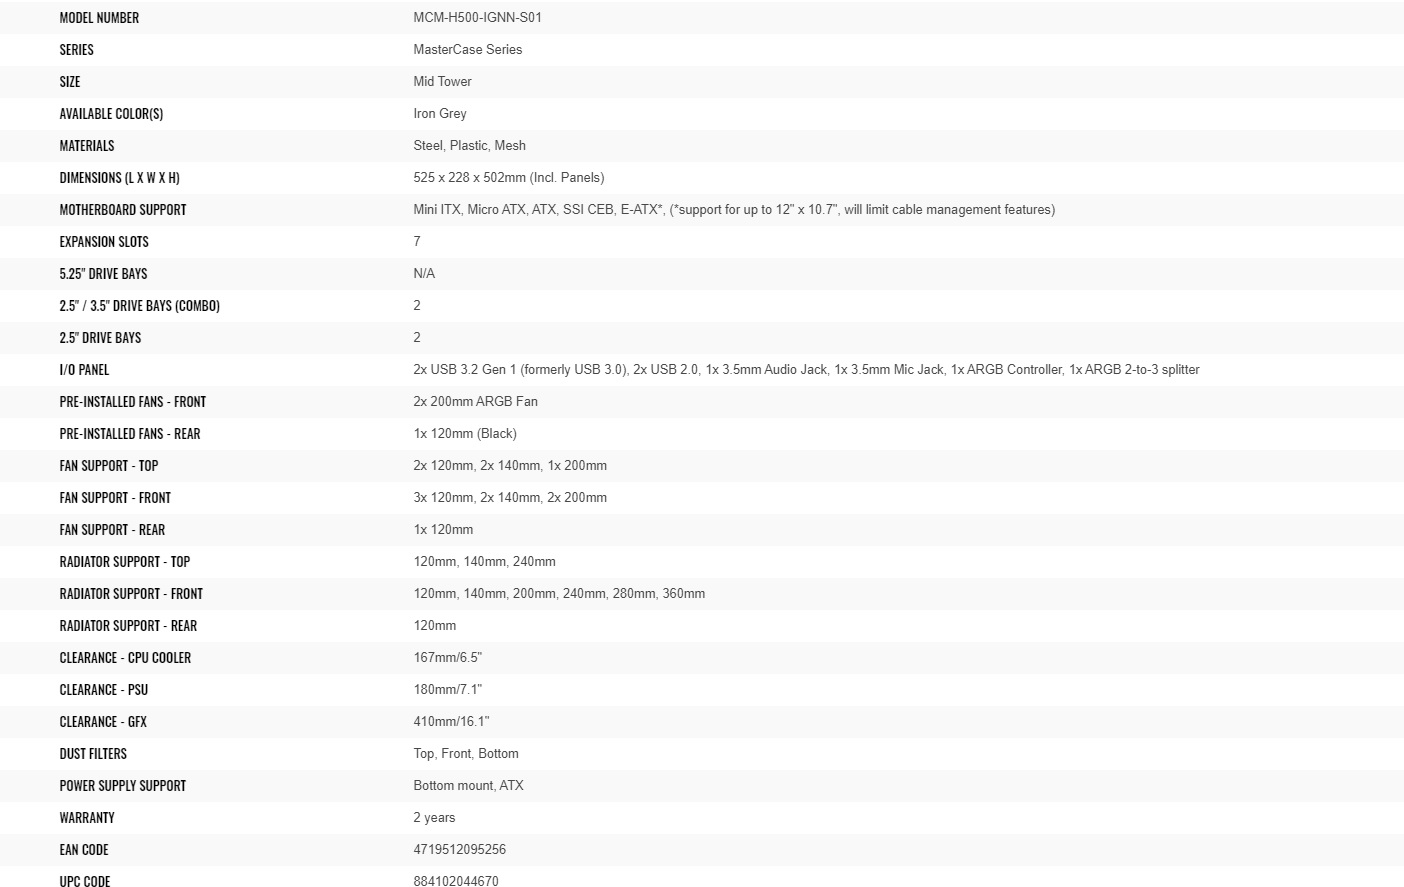
Here are the specifications
Packaging and Unboxing
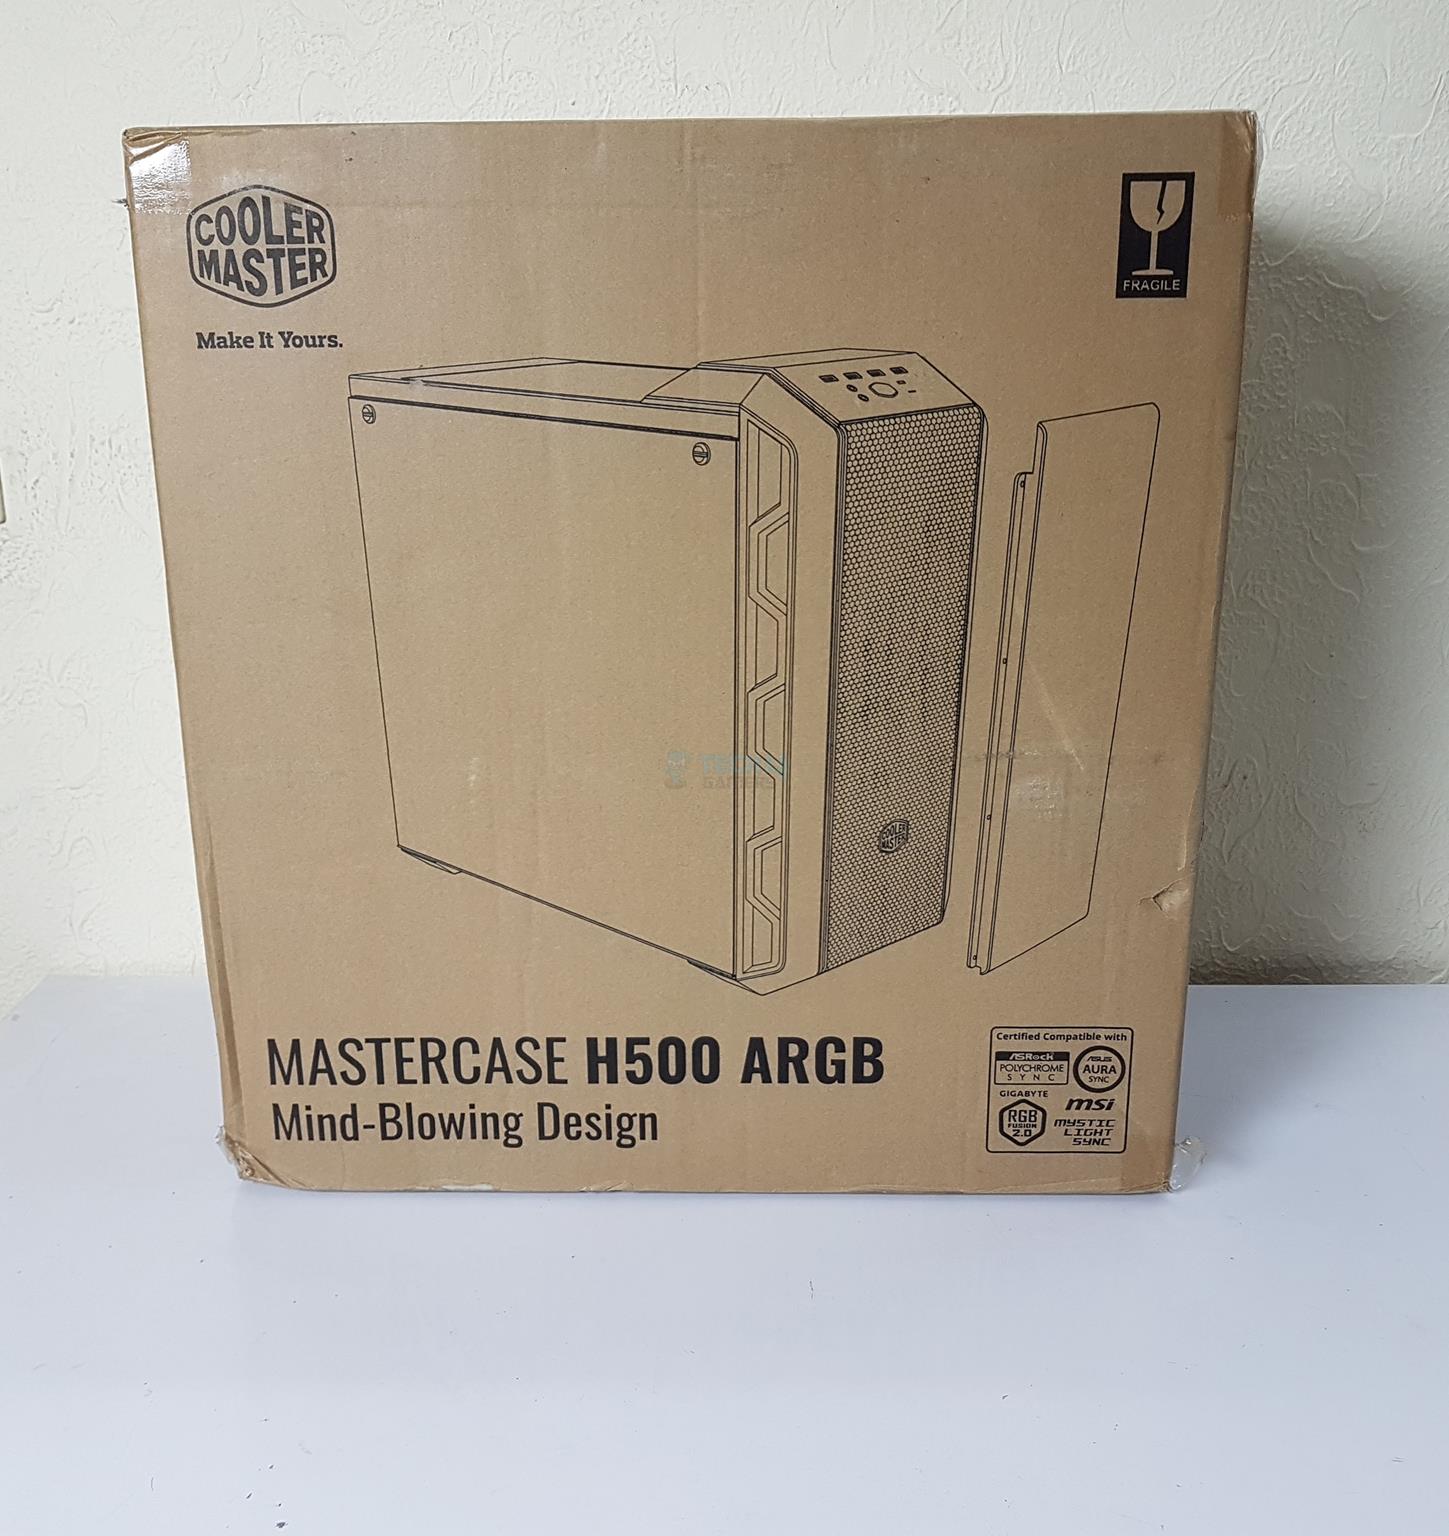
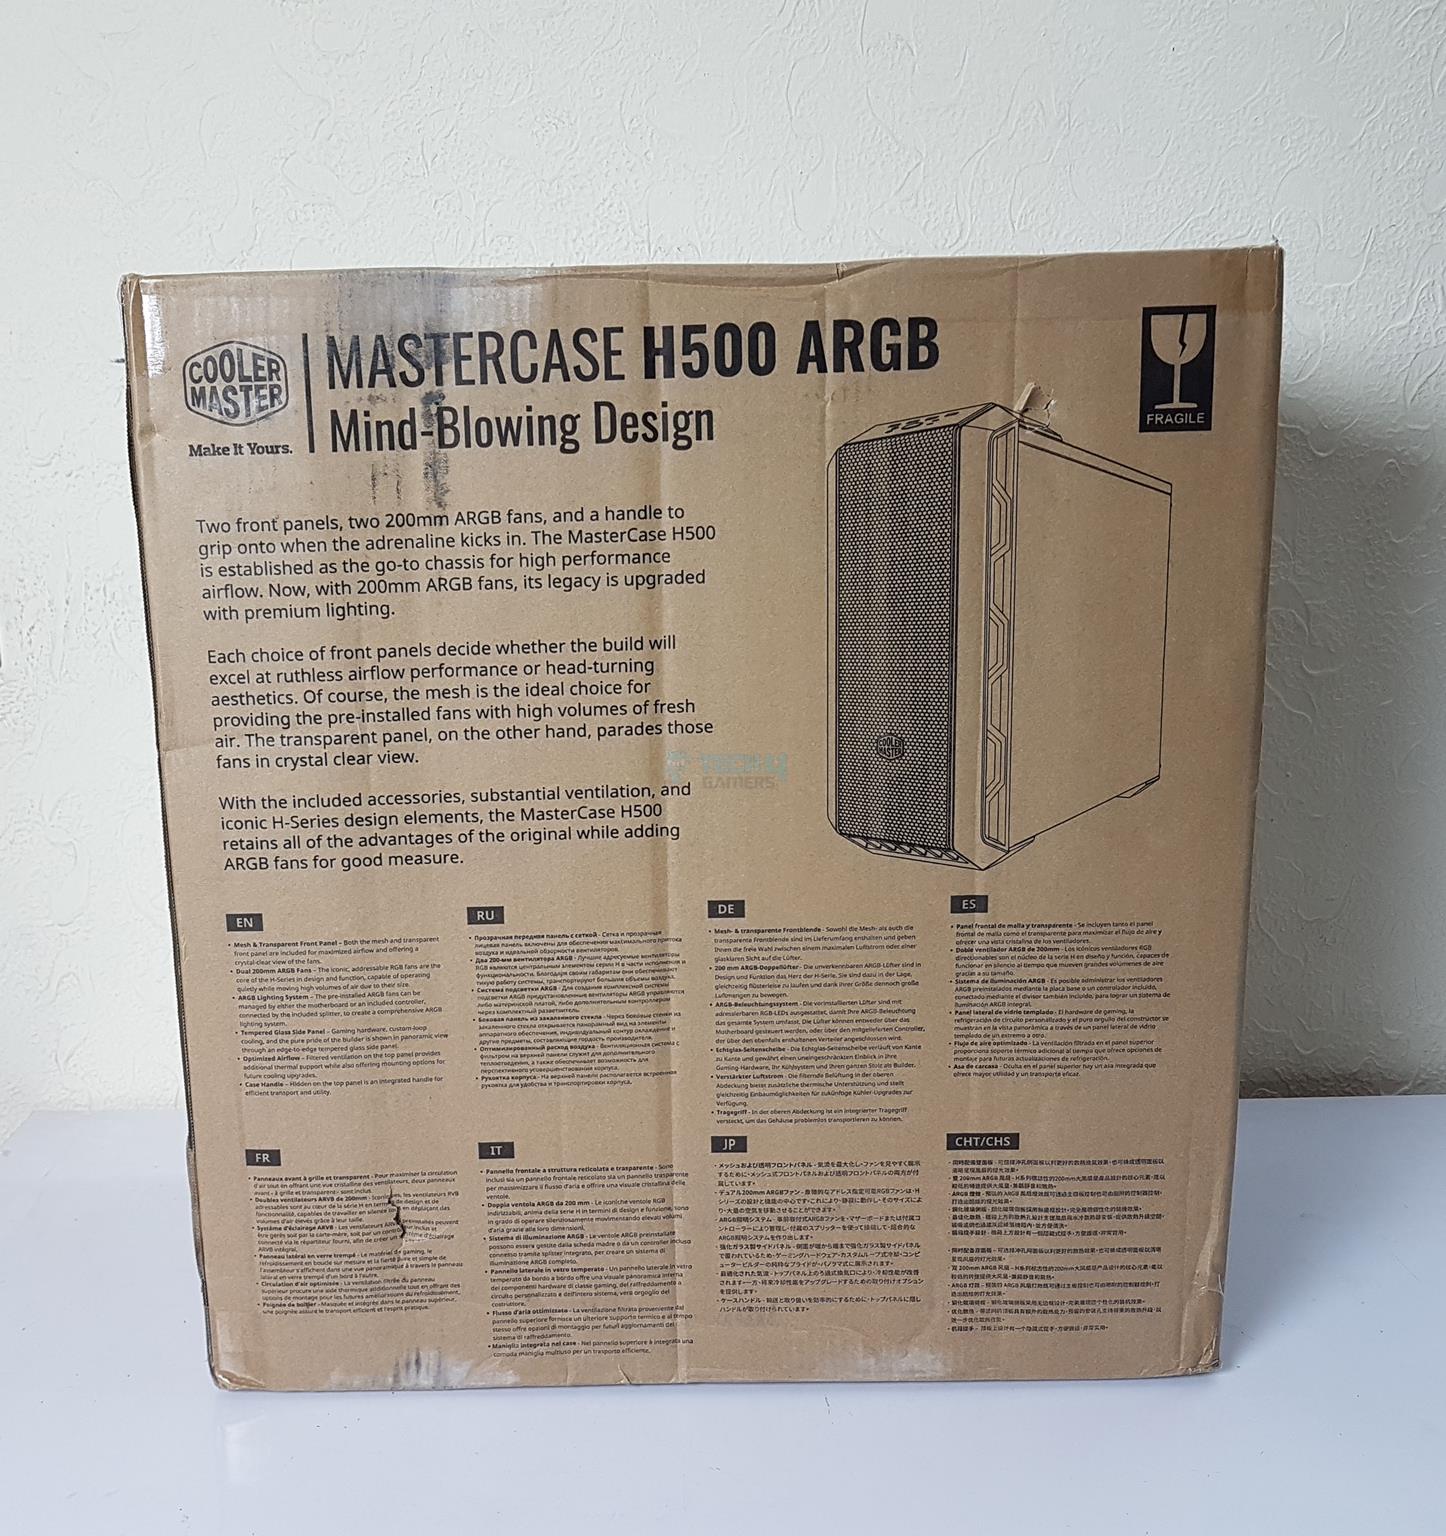
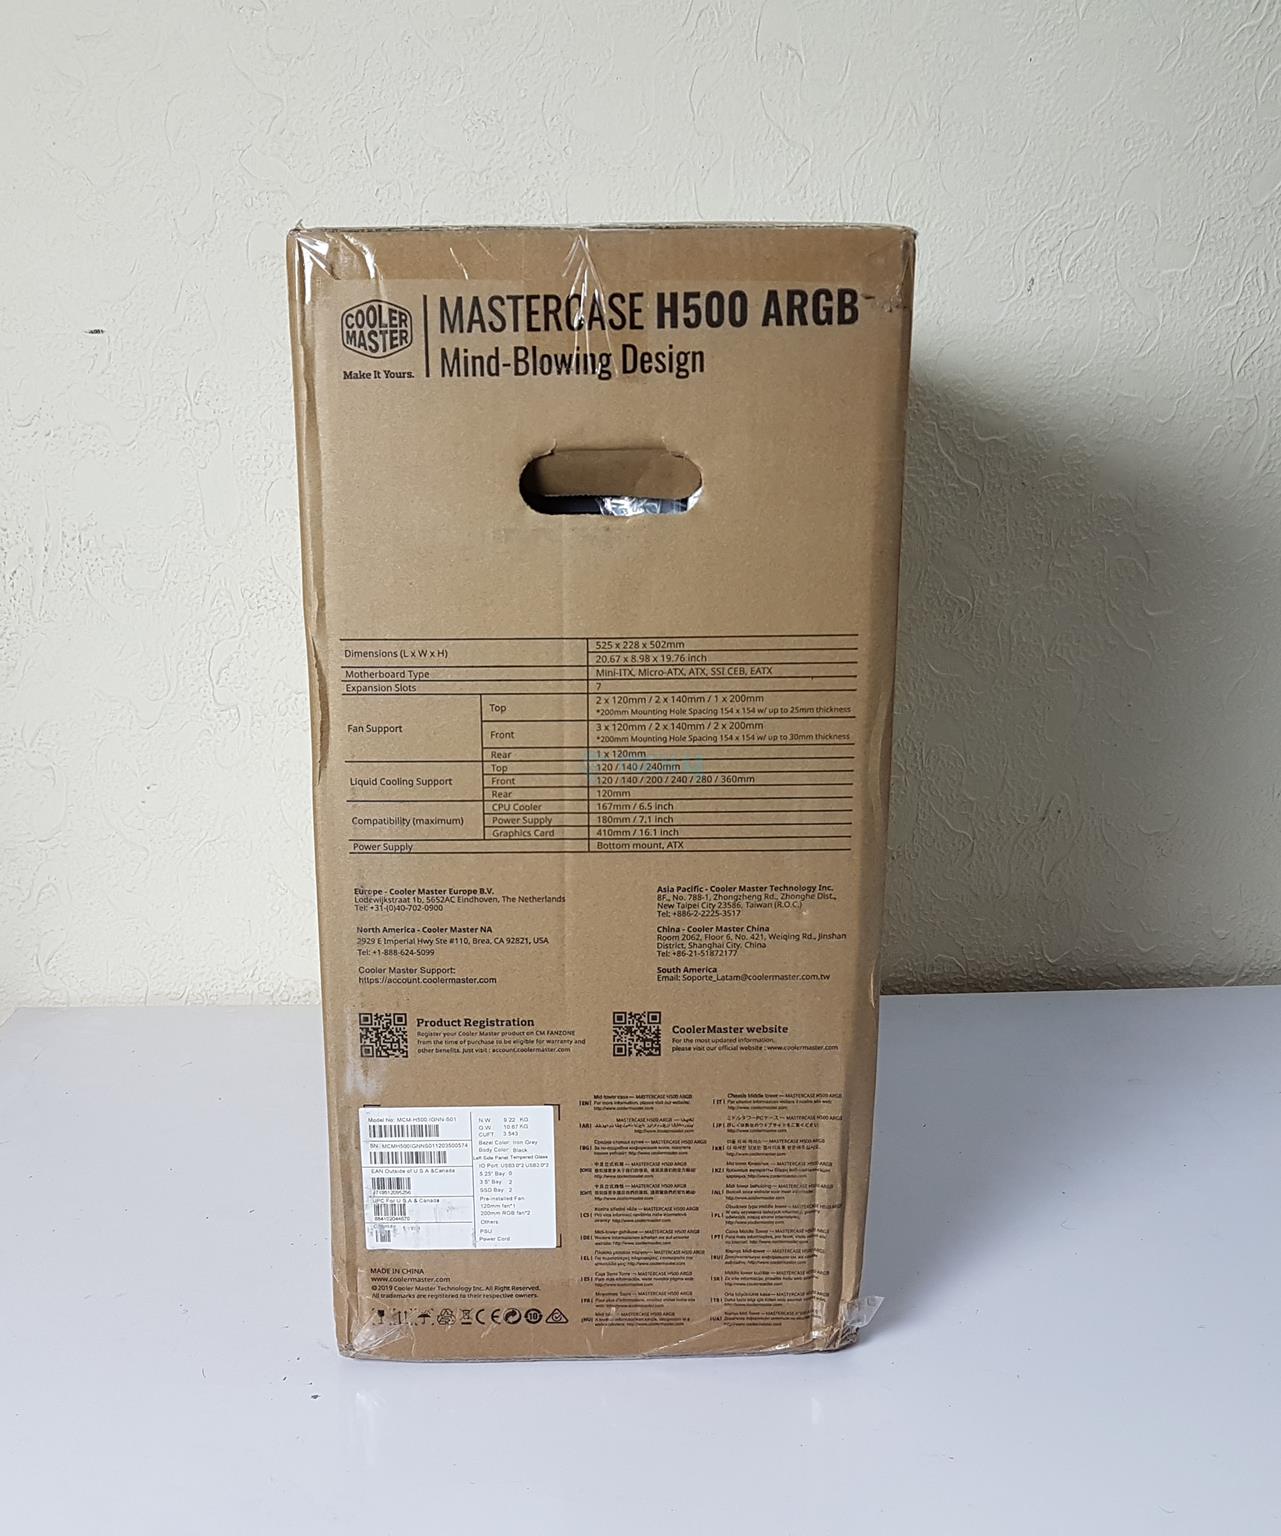
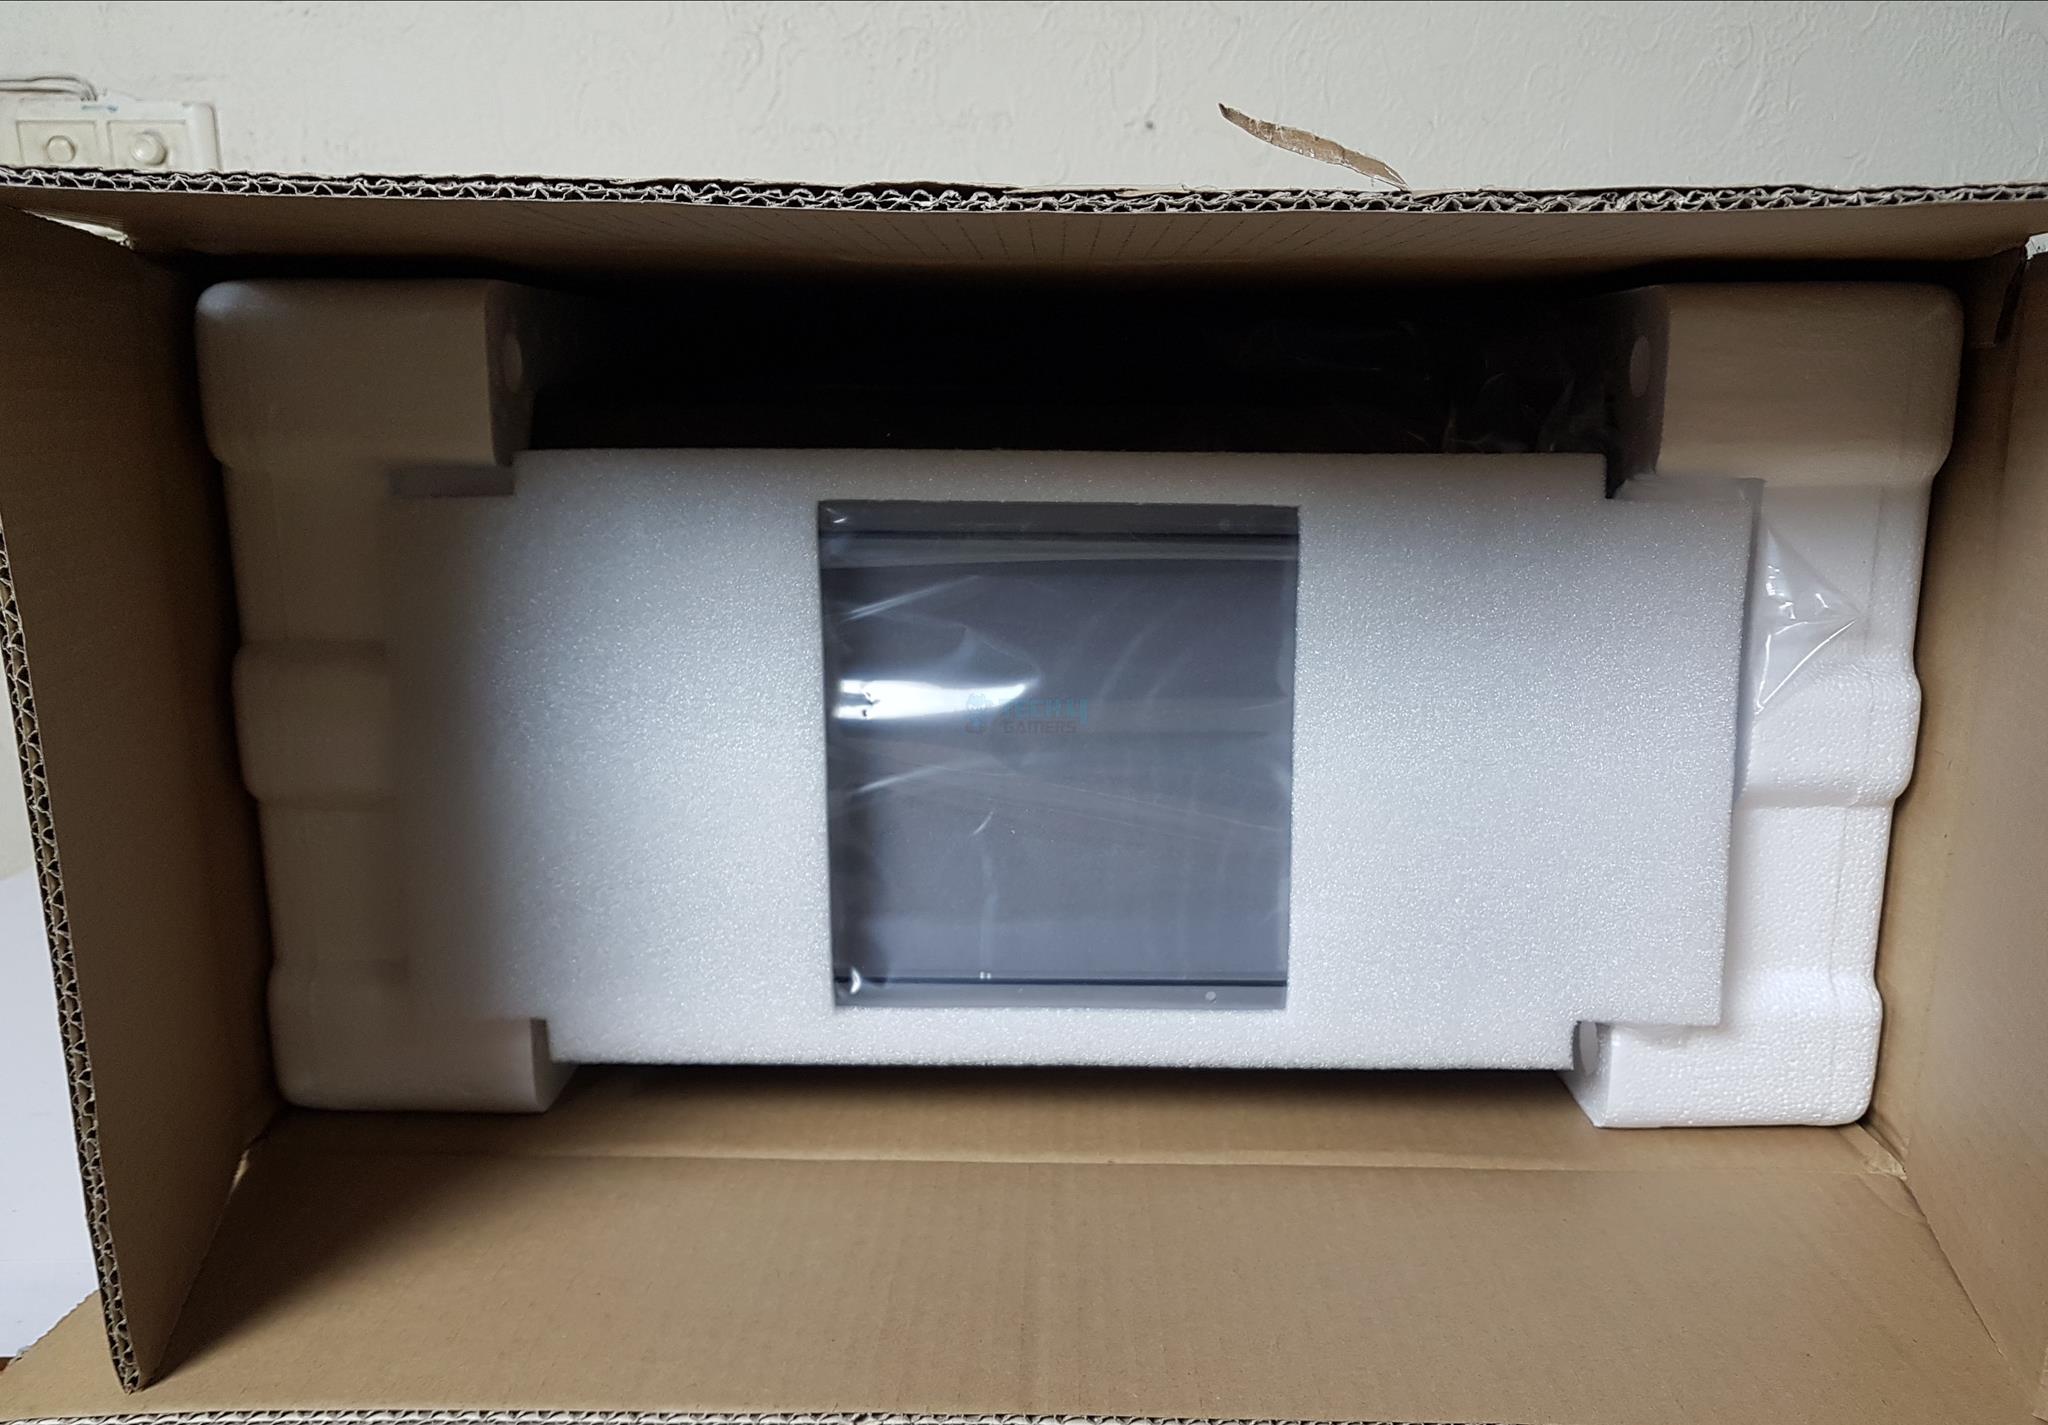
The chassis is shipped inside a brown cardboard box, which is a standard for shipping.
Design
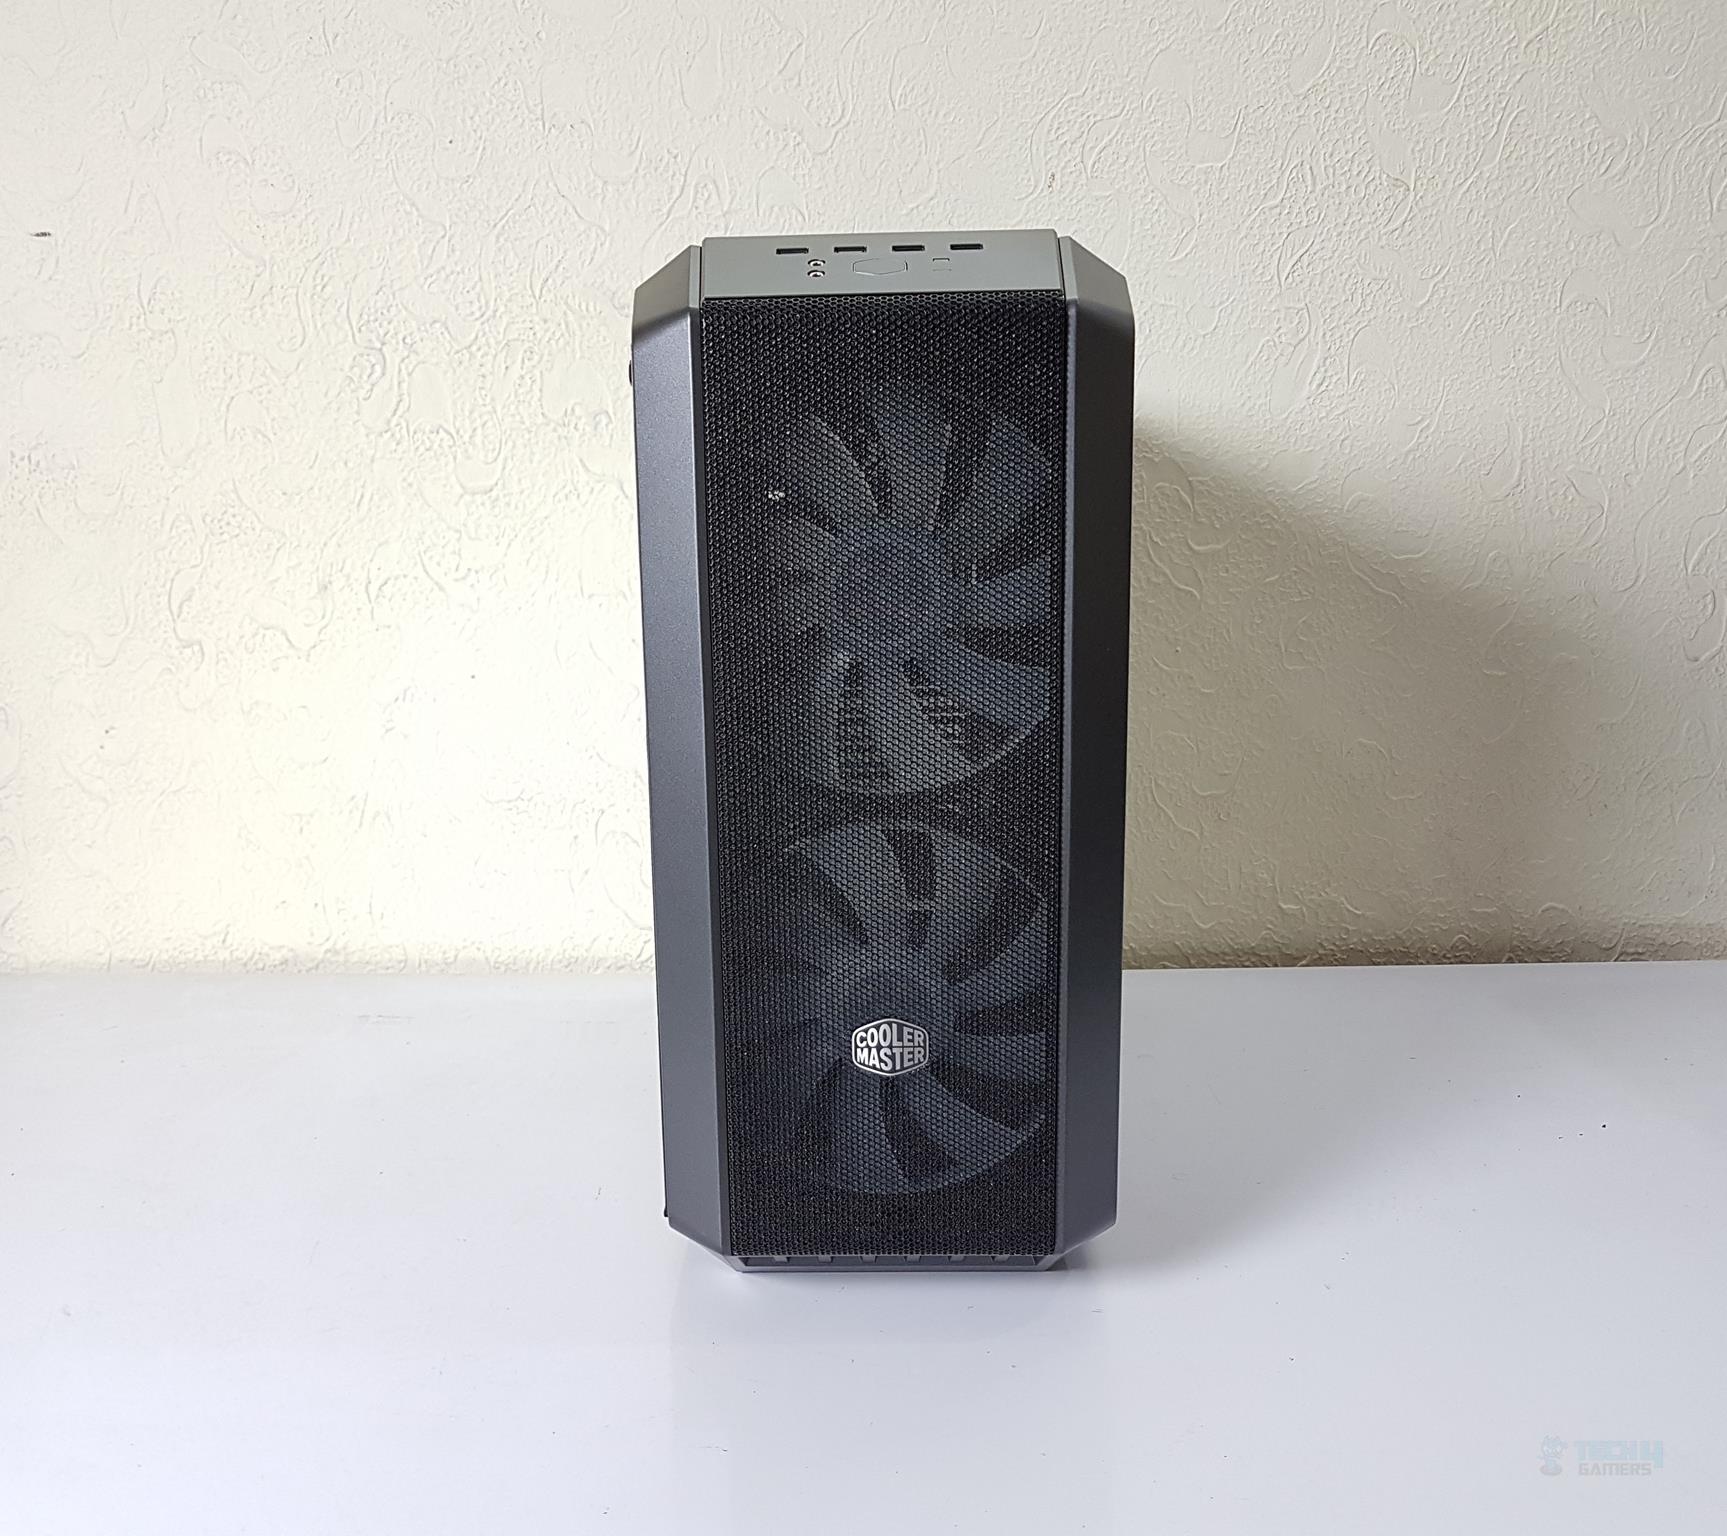
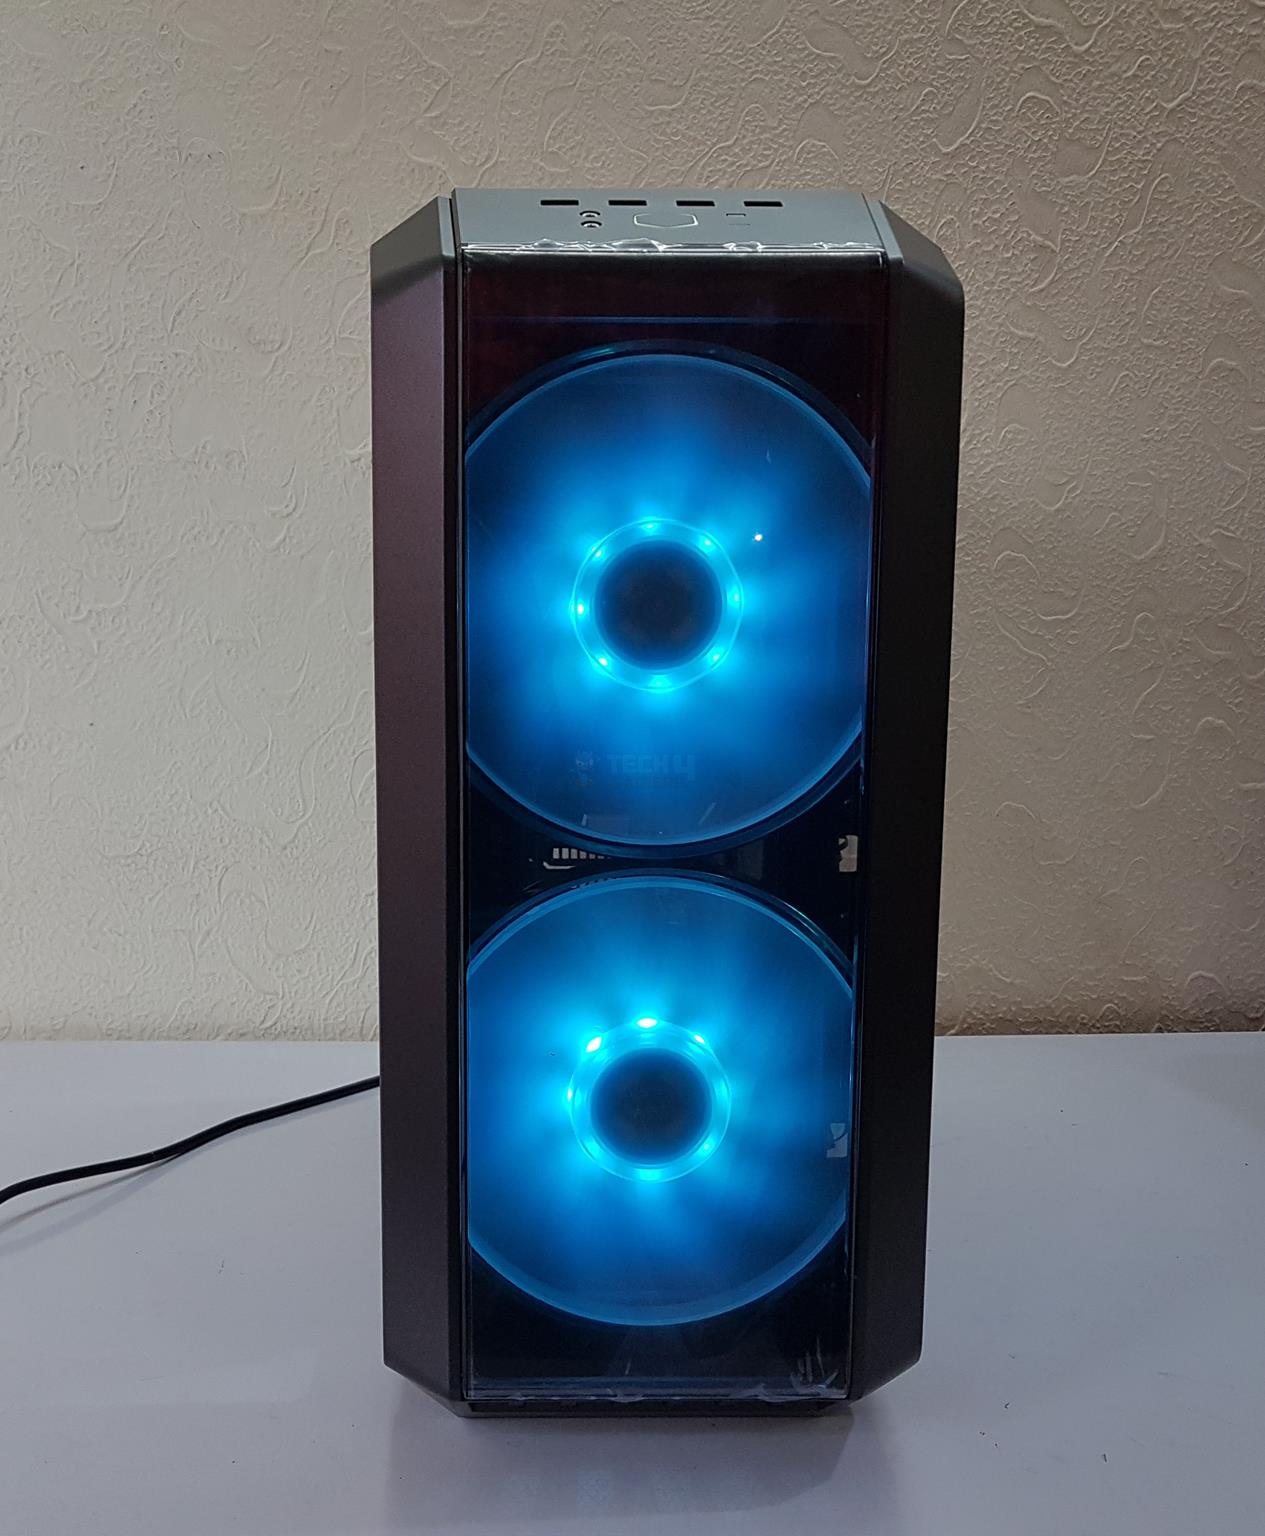
Let’s start by taking a look at the exterior of the chassis. The Cooler Master Mastercase H500 comes with a mesh panel pre-installed. We can spot the two pre-installed 200mm ARGB fans on the front. We have the same design legacy as we saw on the original H series chassis. Cooler Master’s brand logo is on the lower section.
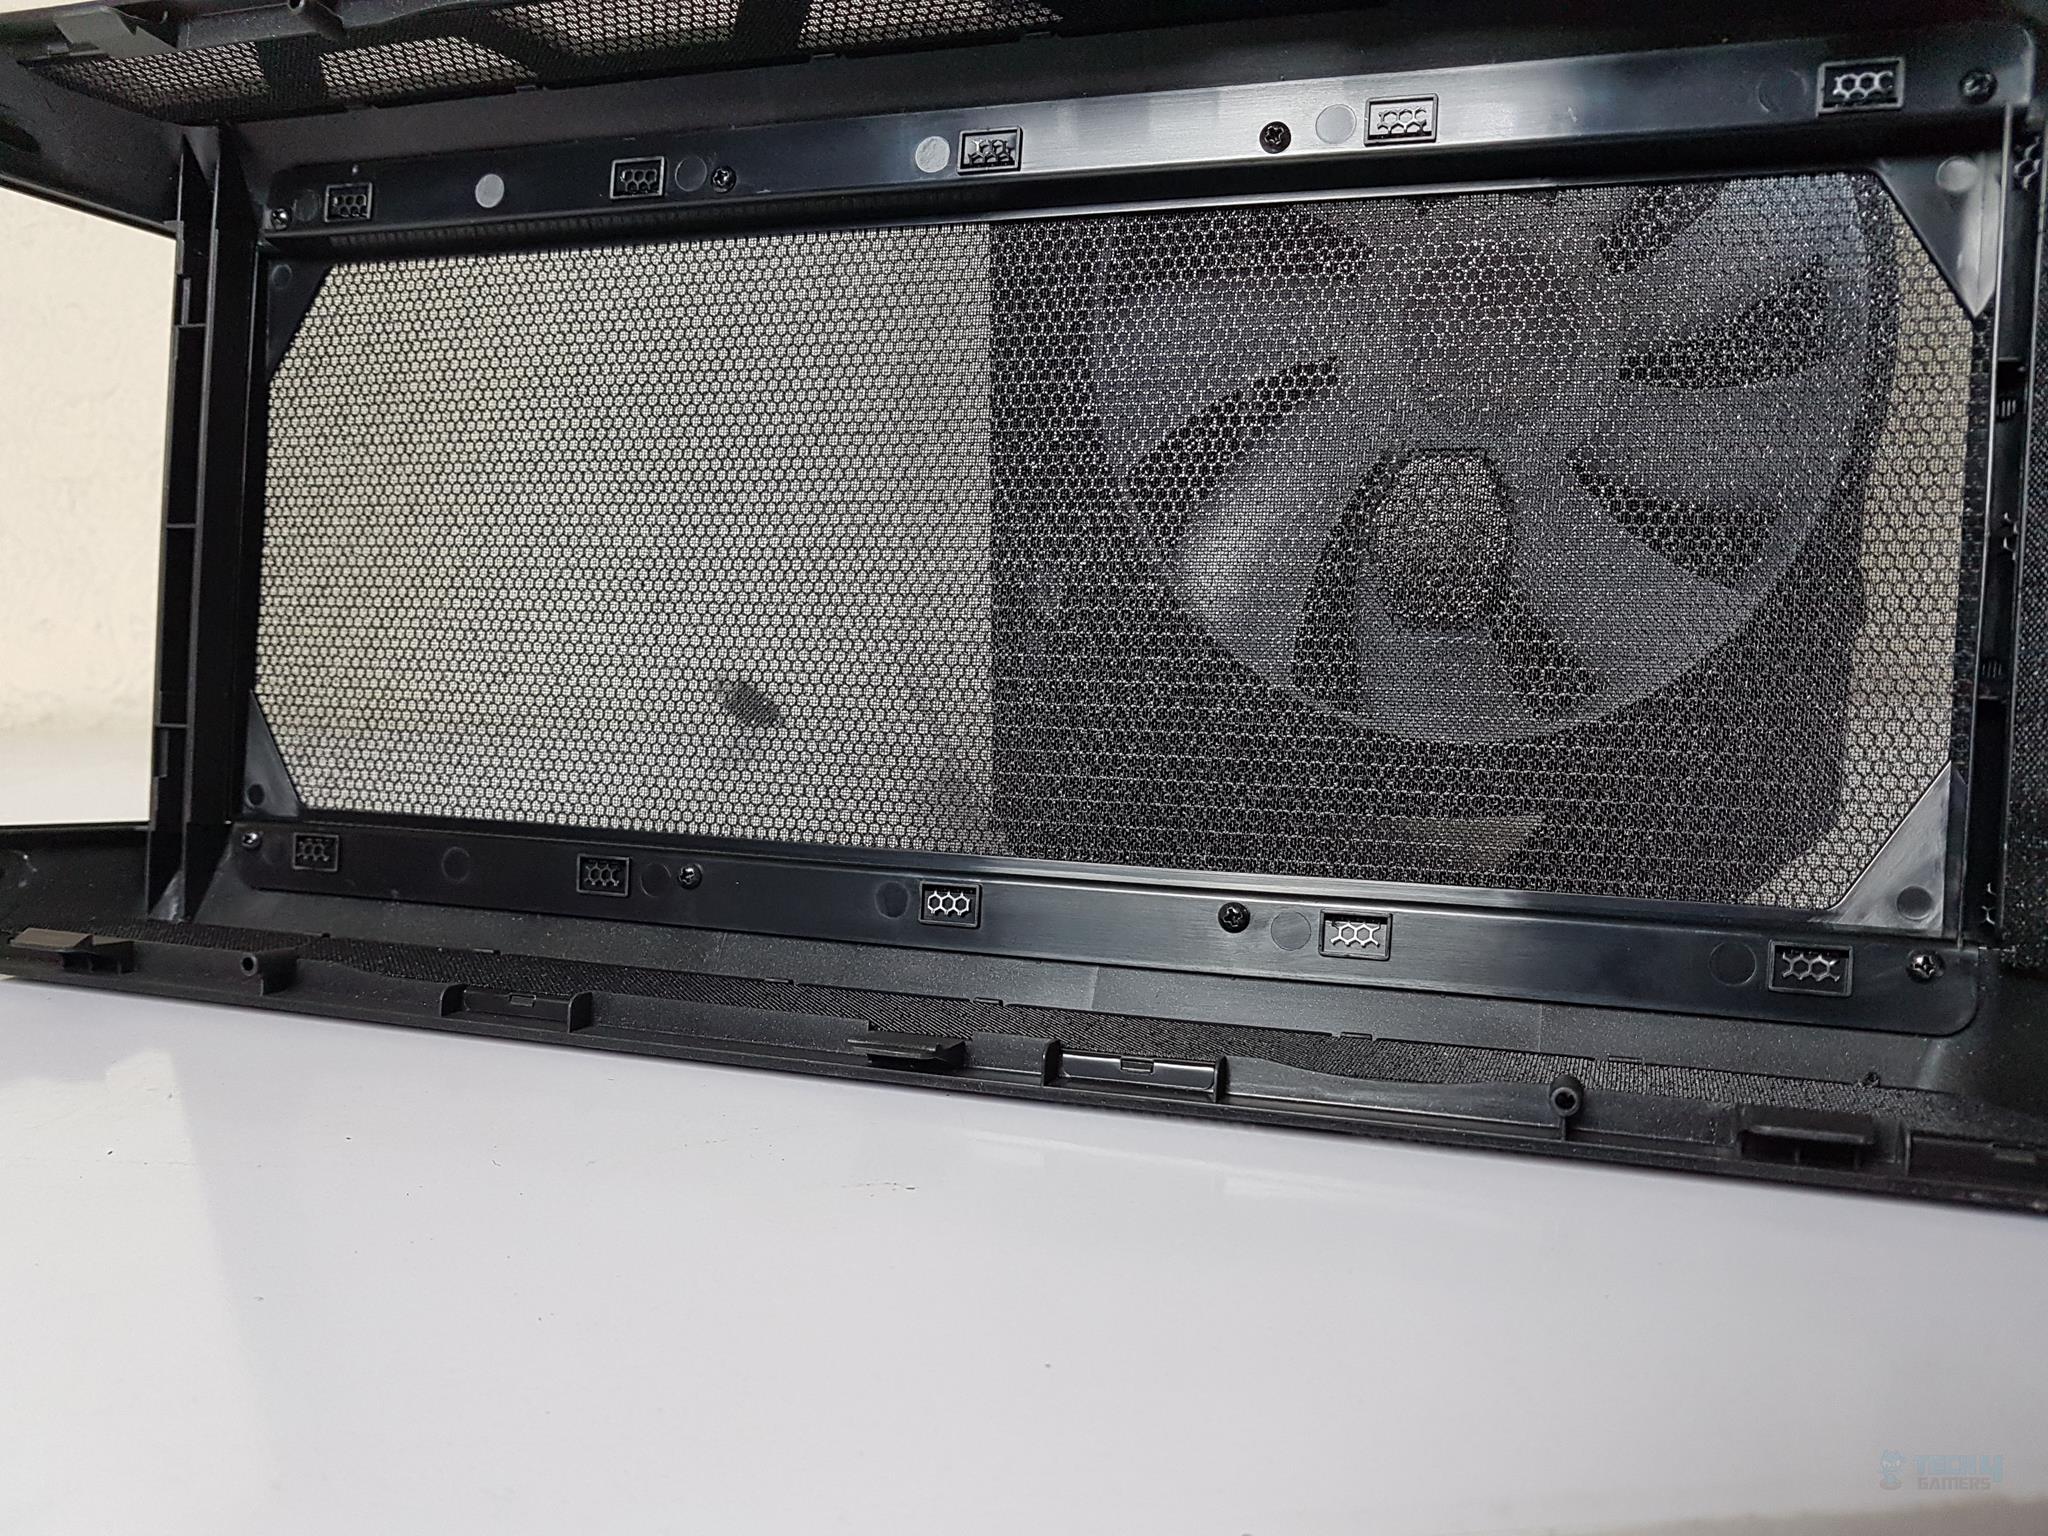
The mesh design seems dense. Please note that the complete front panel can’t be removed by simply pulling it off the chassis. There are 2x tabs or latches on each side of the panel. You must open the side panel and press those tabs/latches. This will release the panel, and you can take it off. It is cumbersome as we need to open the side panel and access the opening mechanism inside the chassis.
The picture below shows the dual option that has been given to the user. We have a mesh panel as well as a fully transparent panel. It is up to the user to select which panel to be used as per the requirement. I appreciate the flexibility offered by the Cooler Master.

Switching the panels is an easier task. There are 8x screws on the inner side of the mainframe. Take them off. Slide down the mesh panel a bit and then take it out. Place the transparent panel and secure it using the same 8x screws. This is vice versa. There is enough gap between the front-mounted fans and the front cover.
The following picture shows the front side with a transparent front cover made of plastic. The transparent front cover adds more to the aesthetics of the chassis, in my opinion, but it would restrict the airflow.

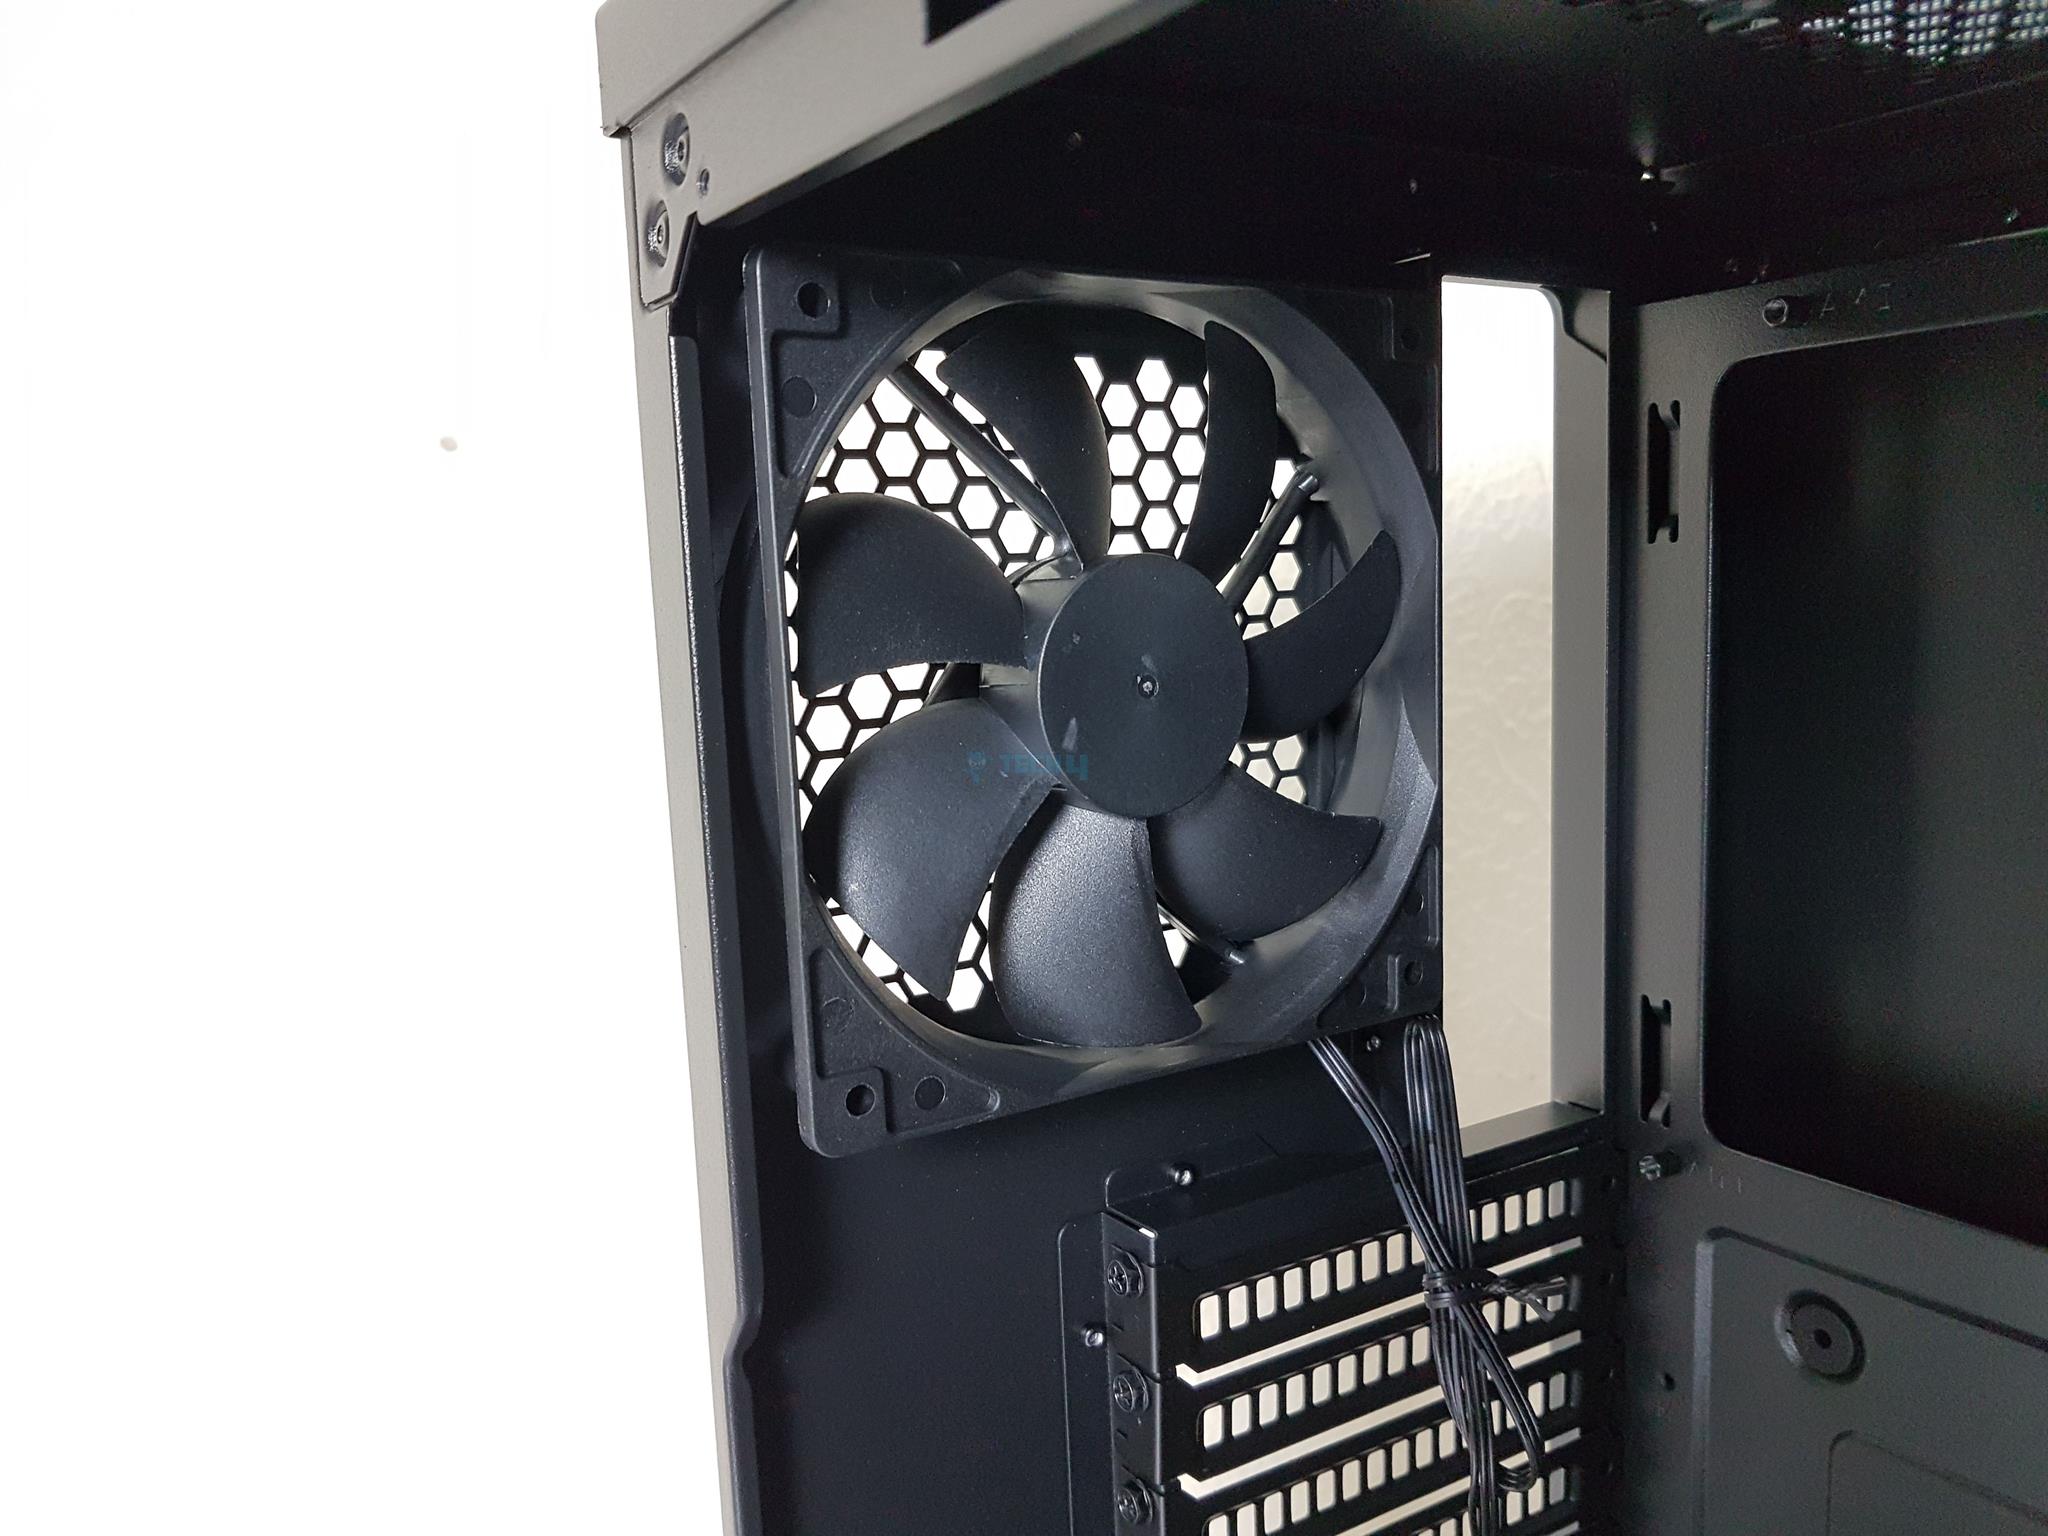
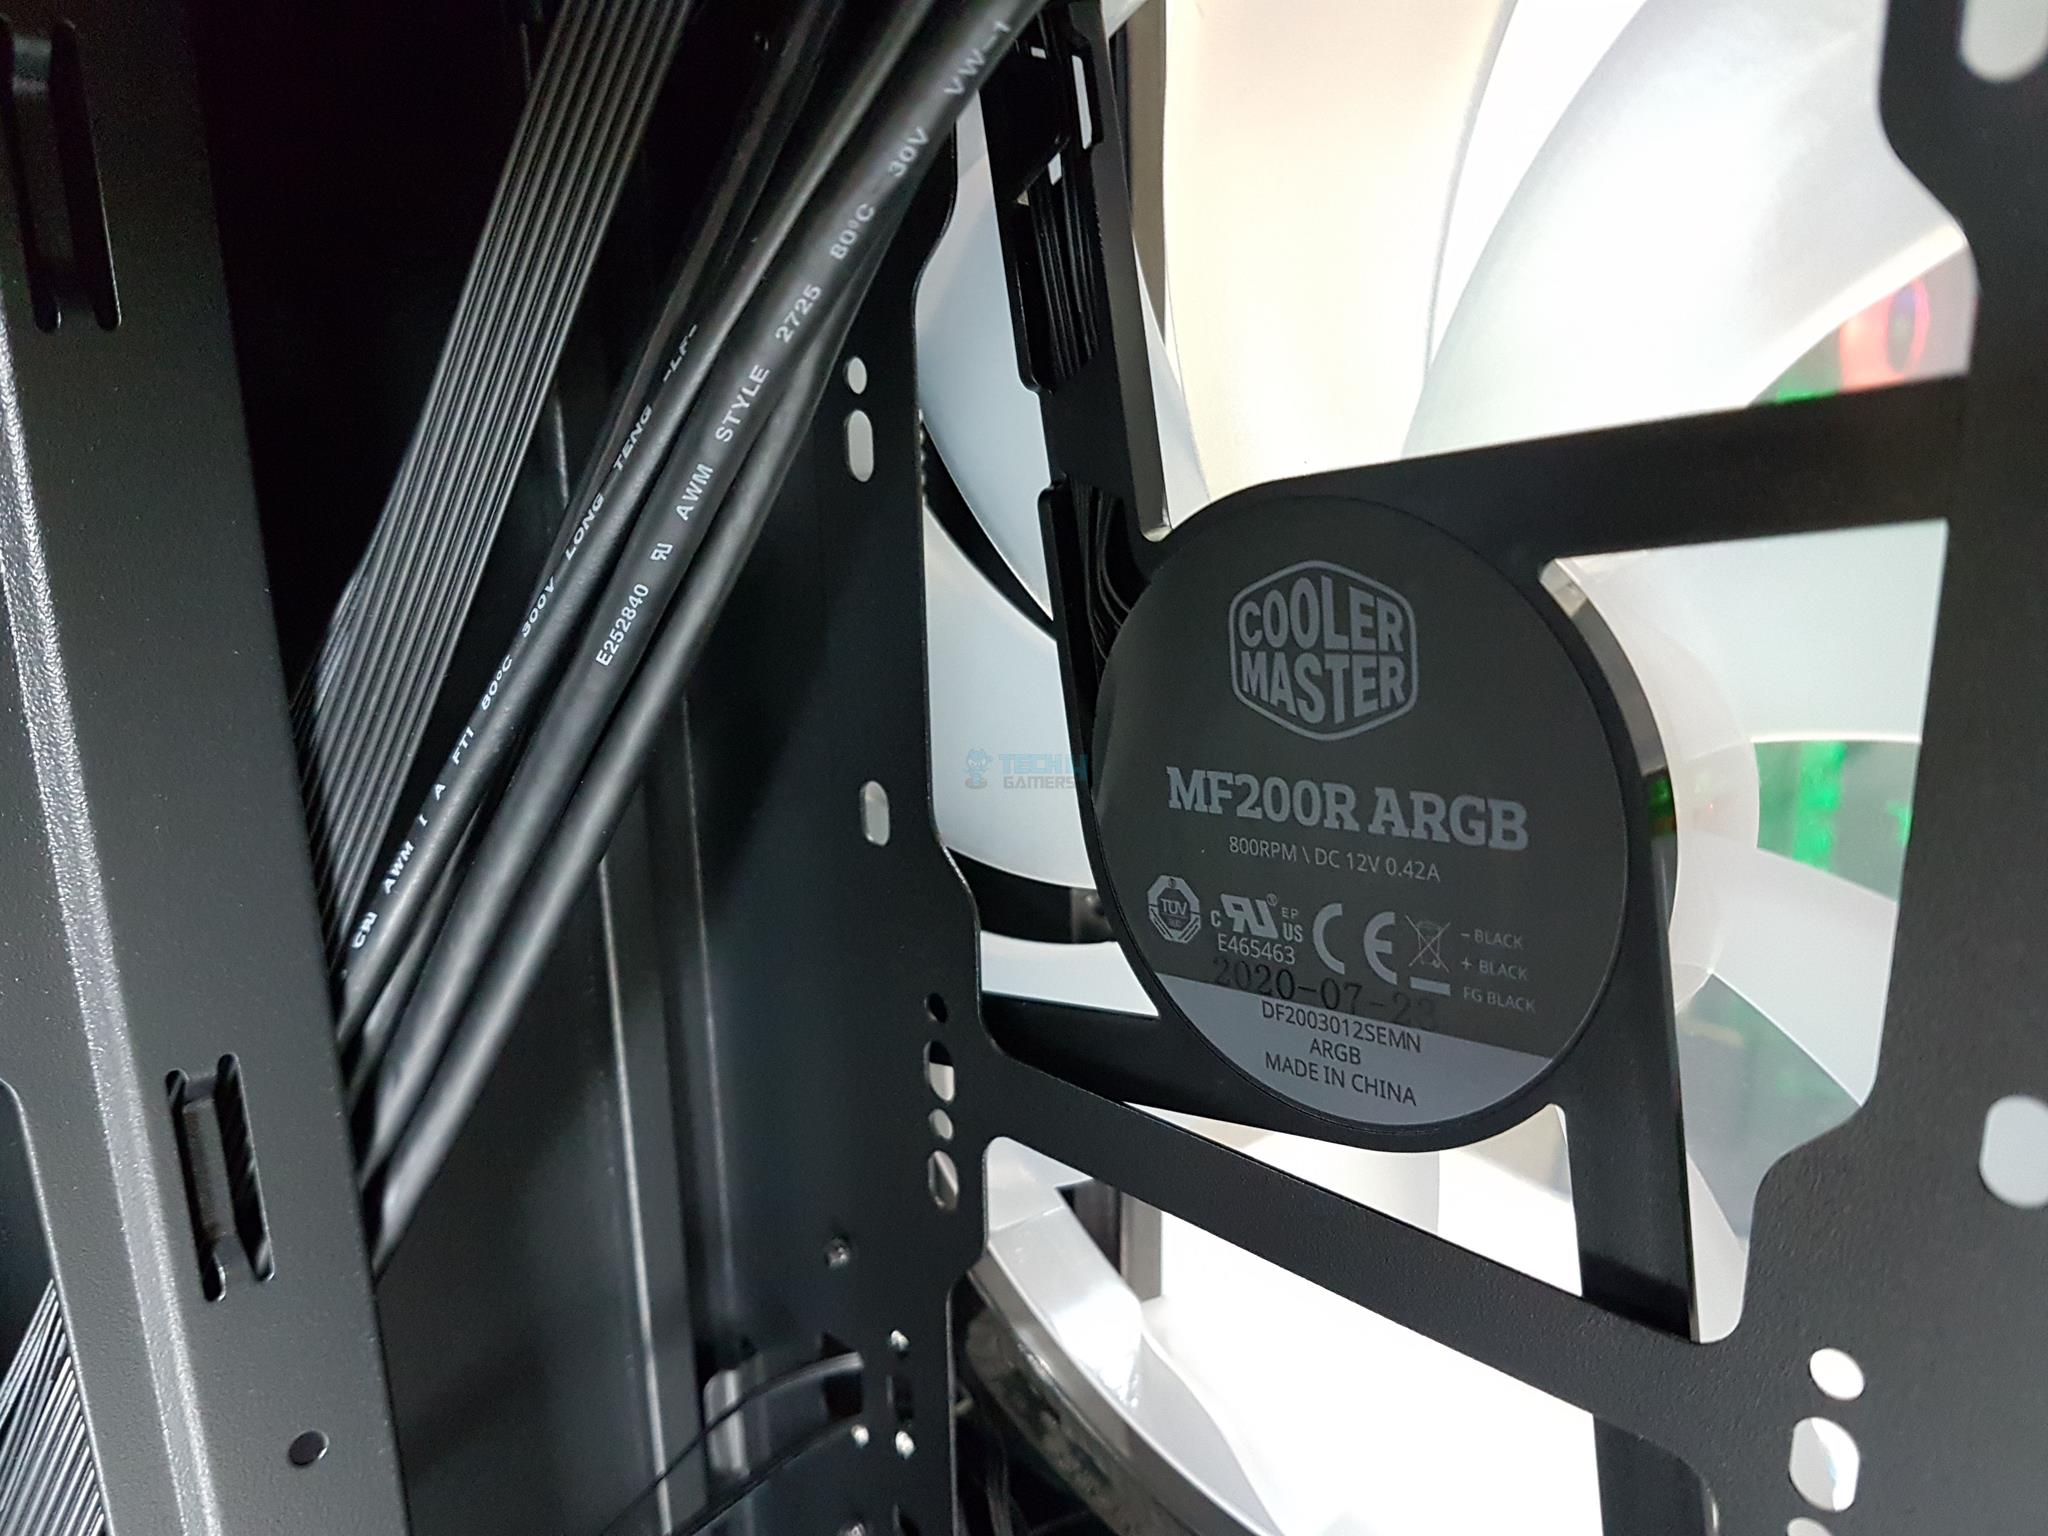
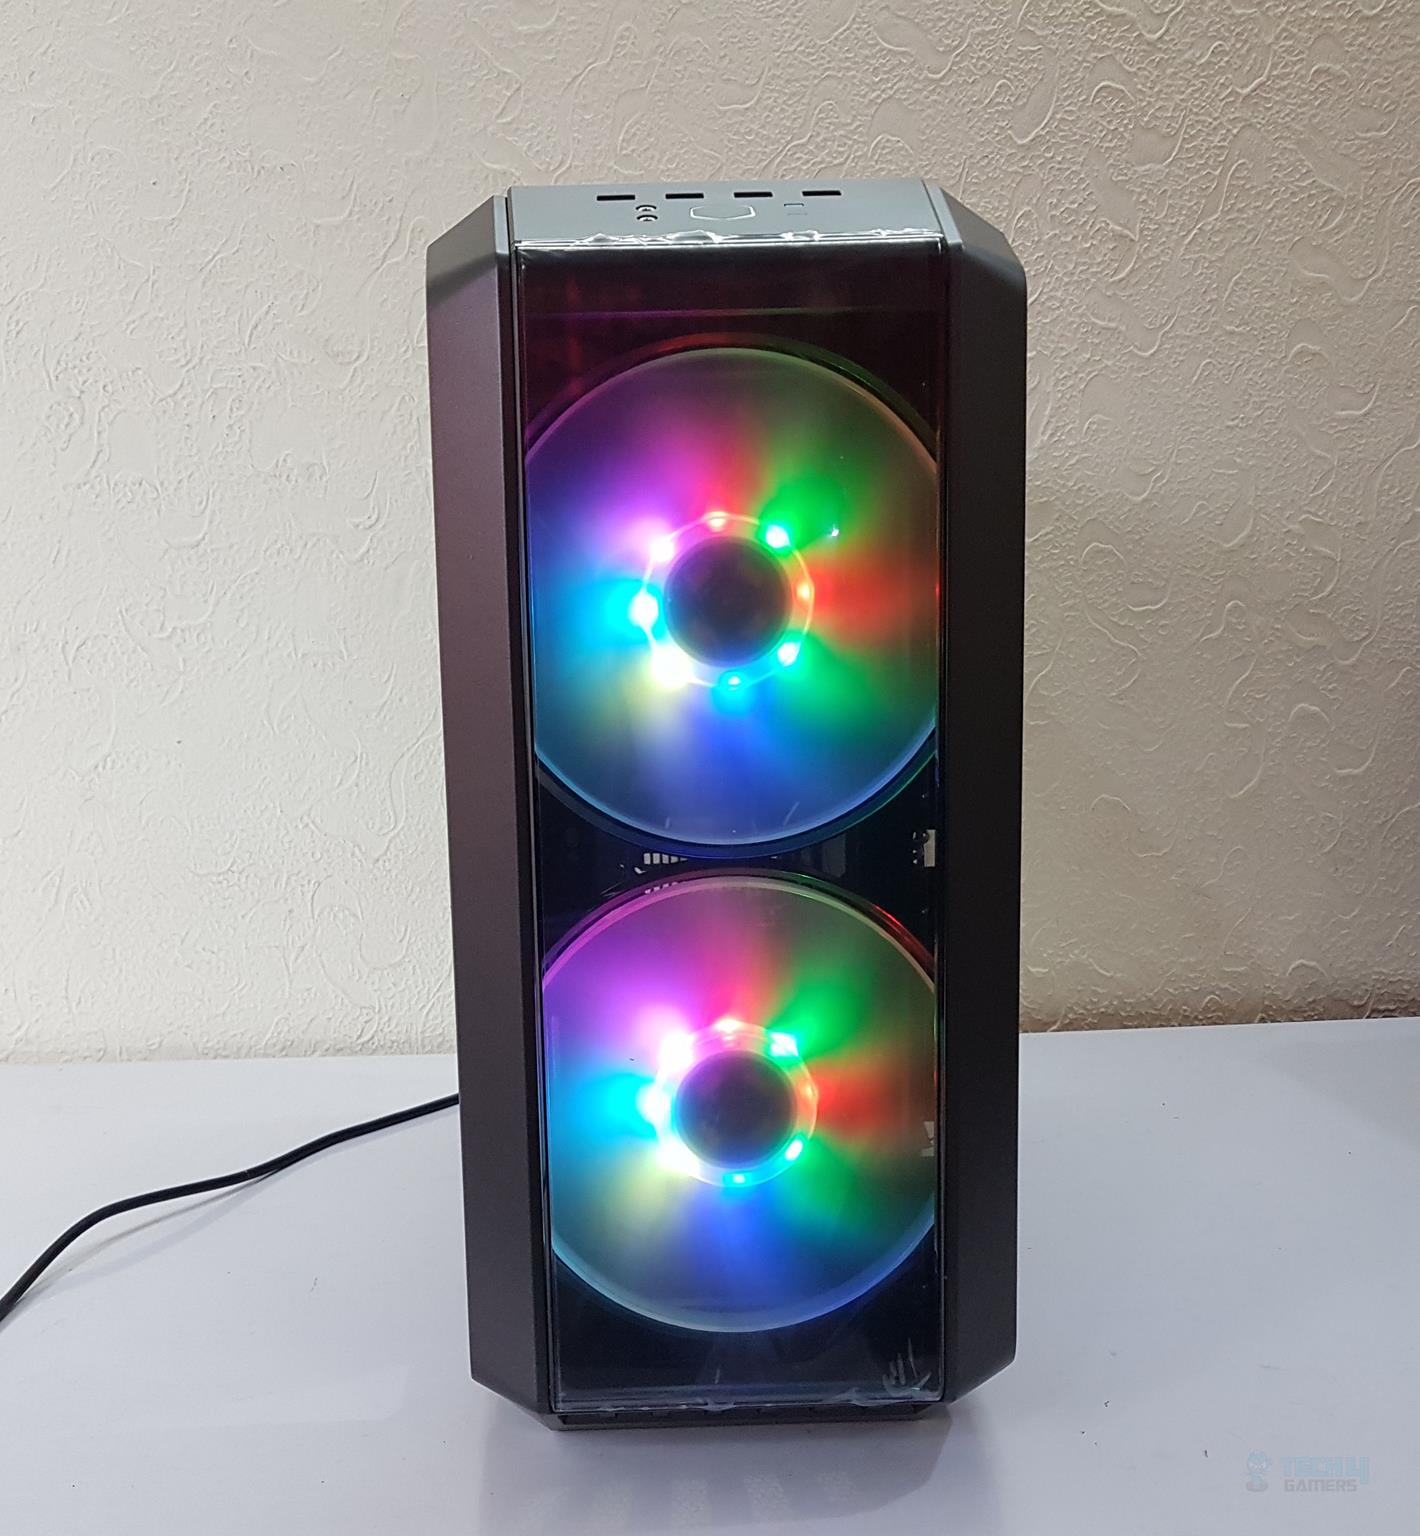
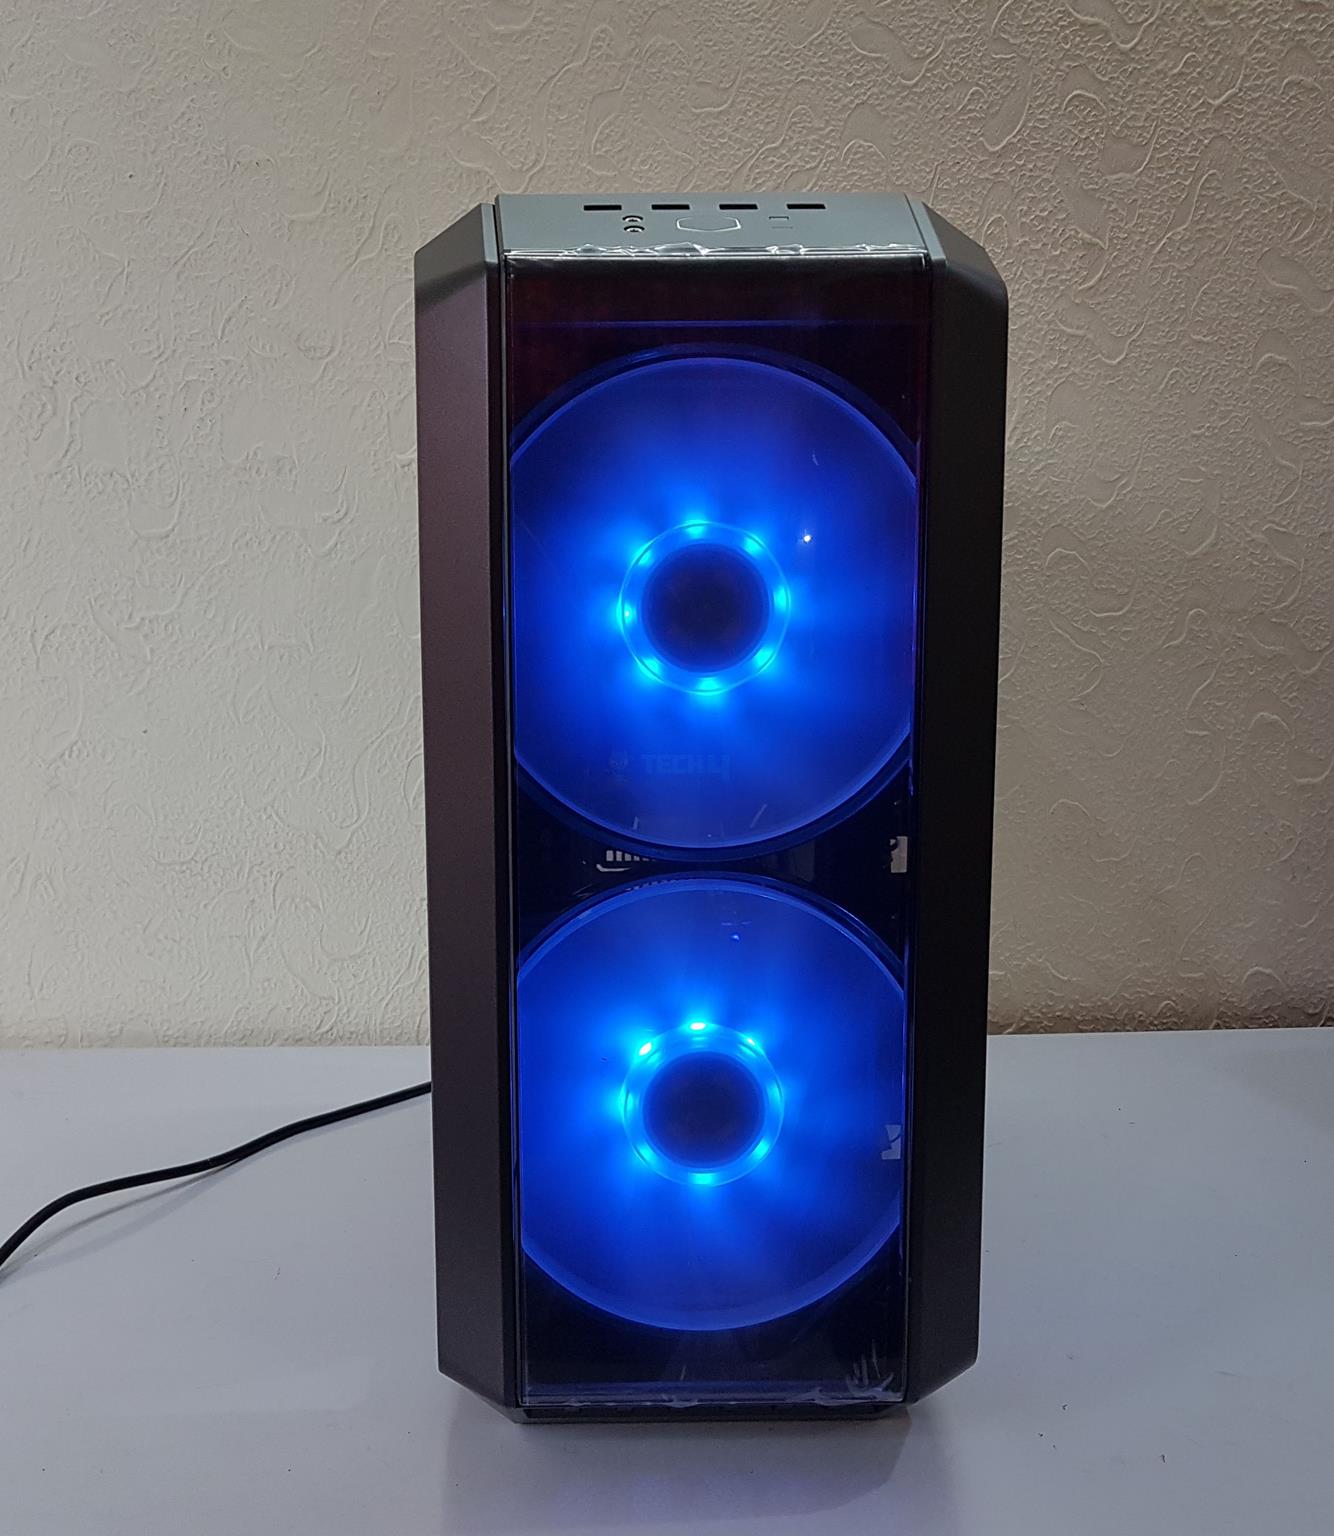
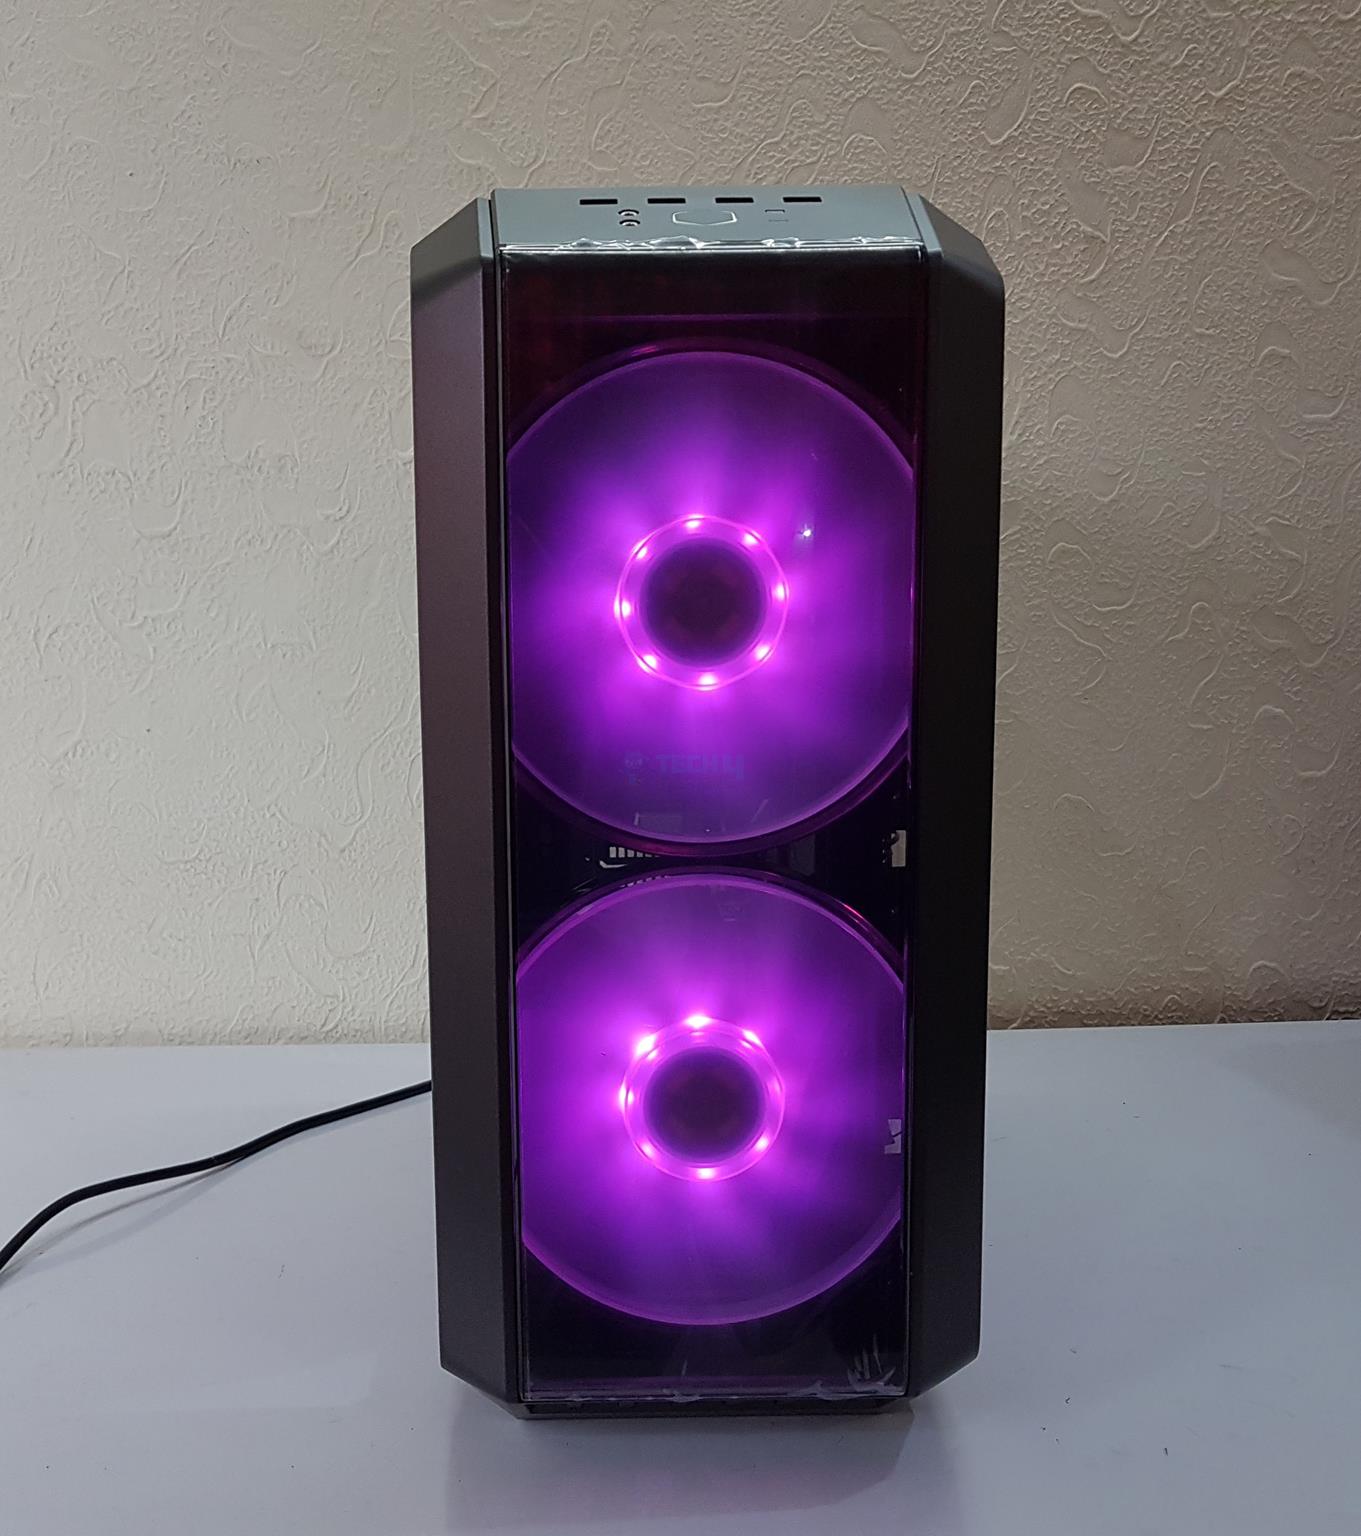
Taking the complete front panel off will showcase the 2x MF200R ARGB 200mm fans. These fans are rated for 800 RPM speed. In my experience, I did not feel any reasonable amount of airflow by placing my hands behind these fans when they were spinning.
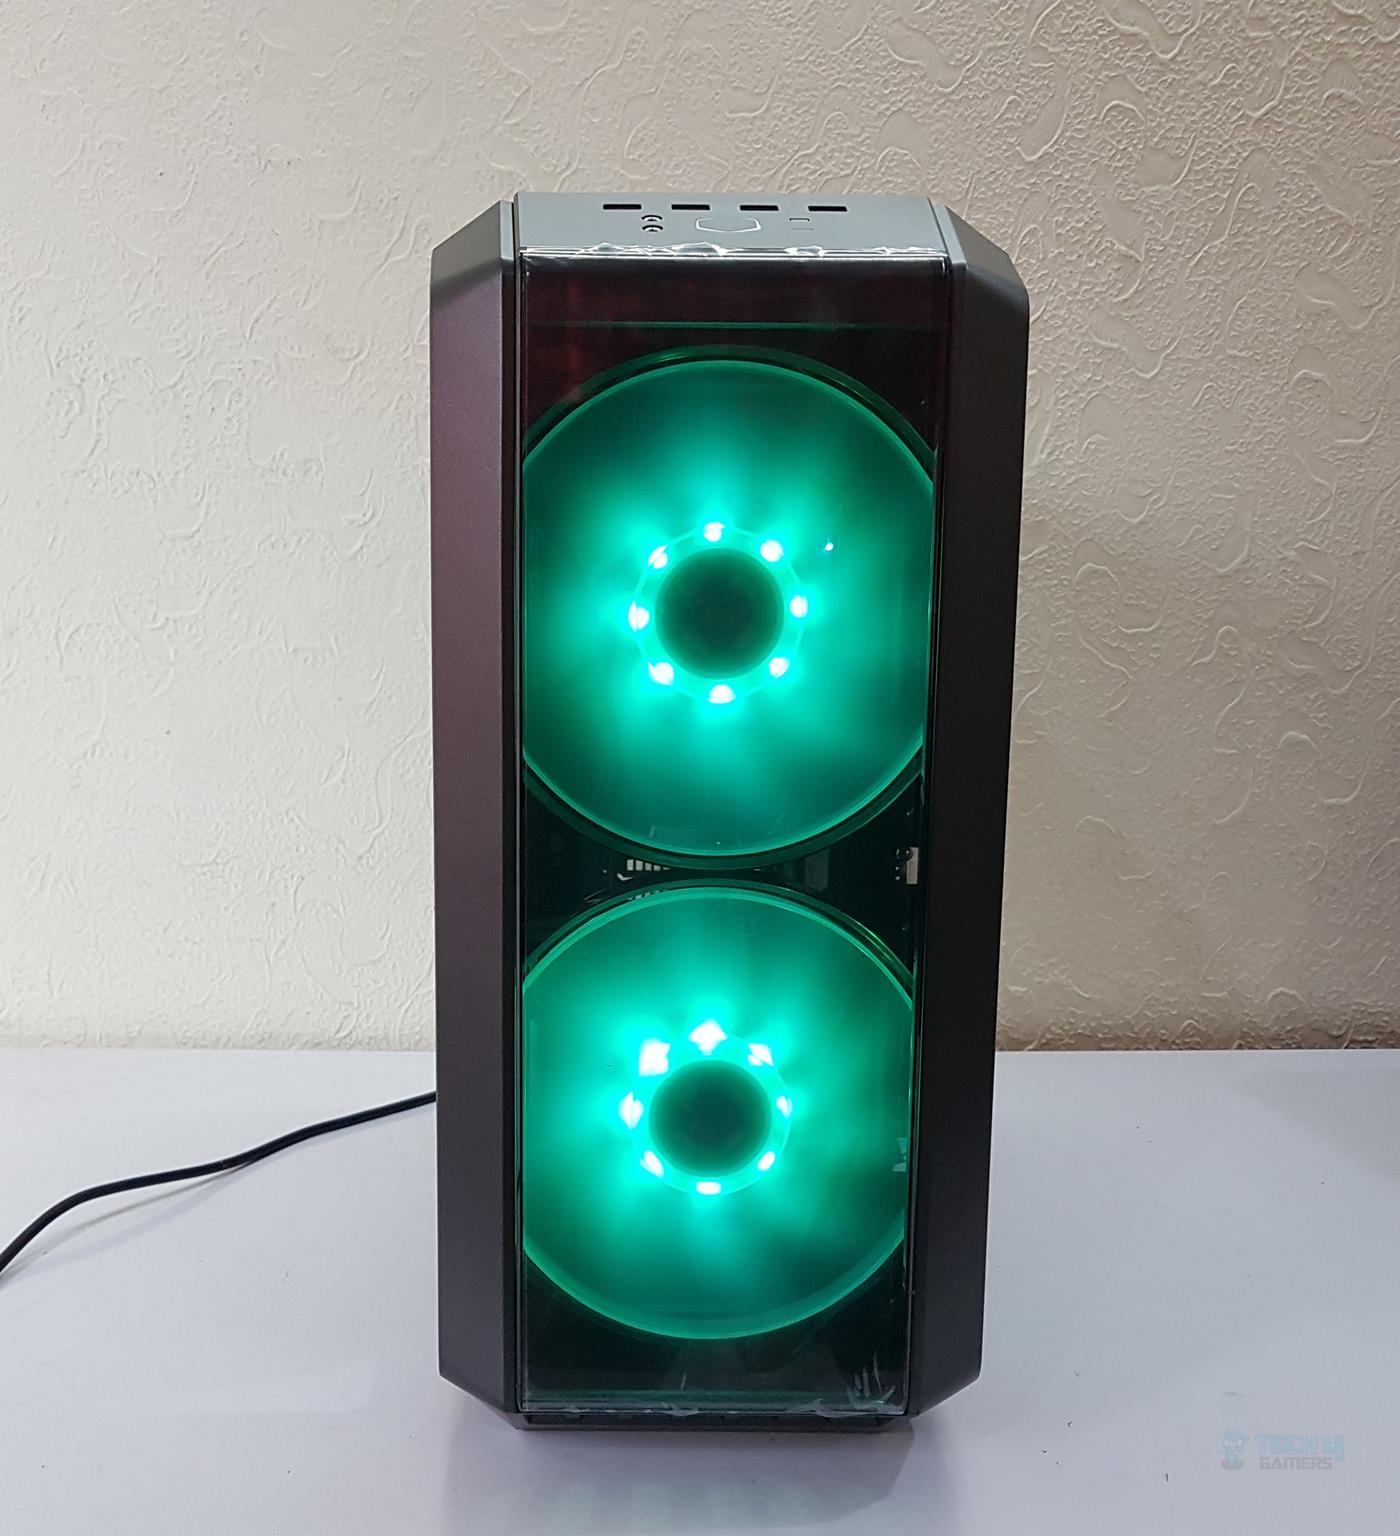
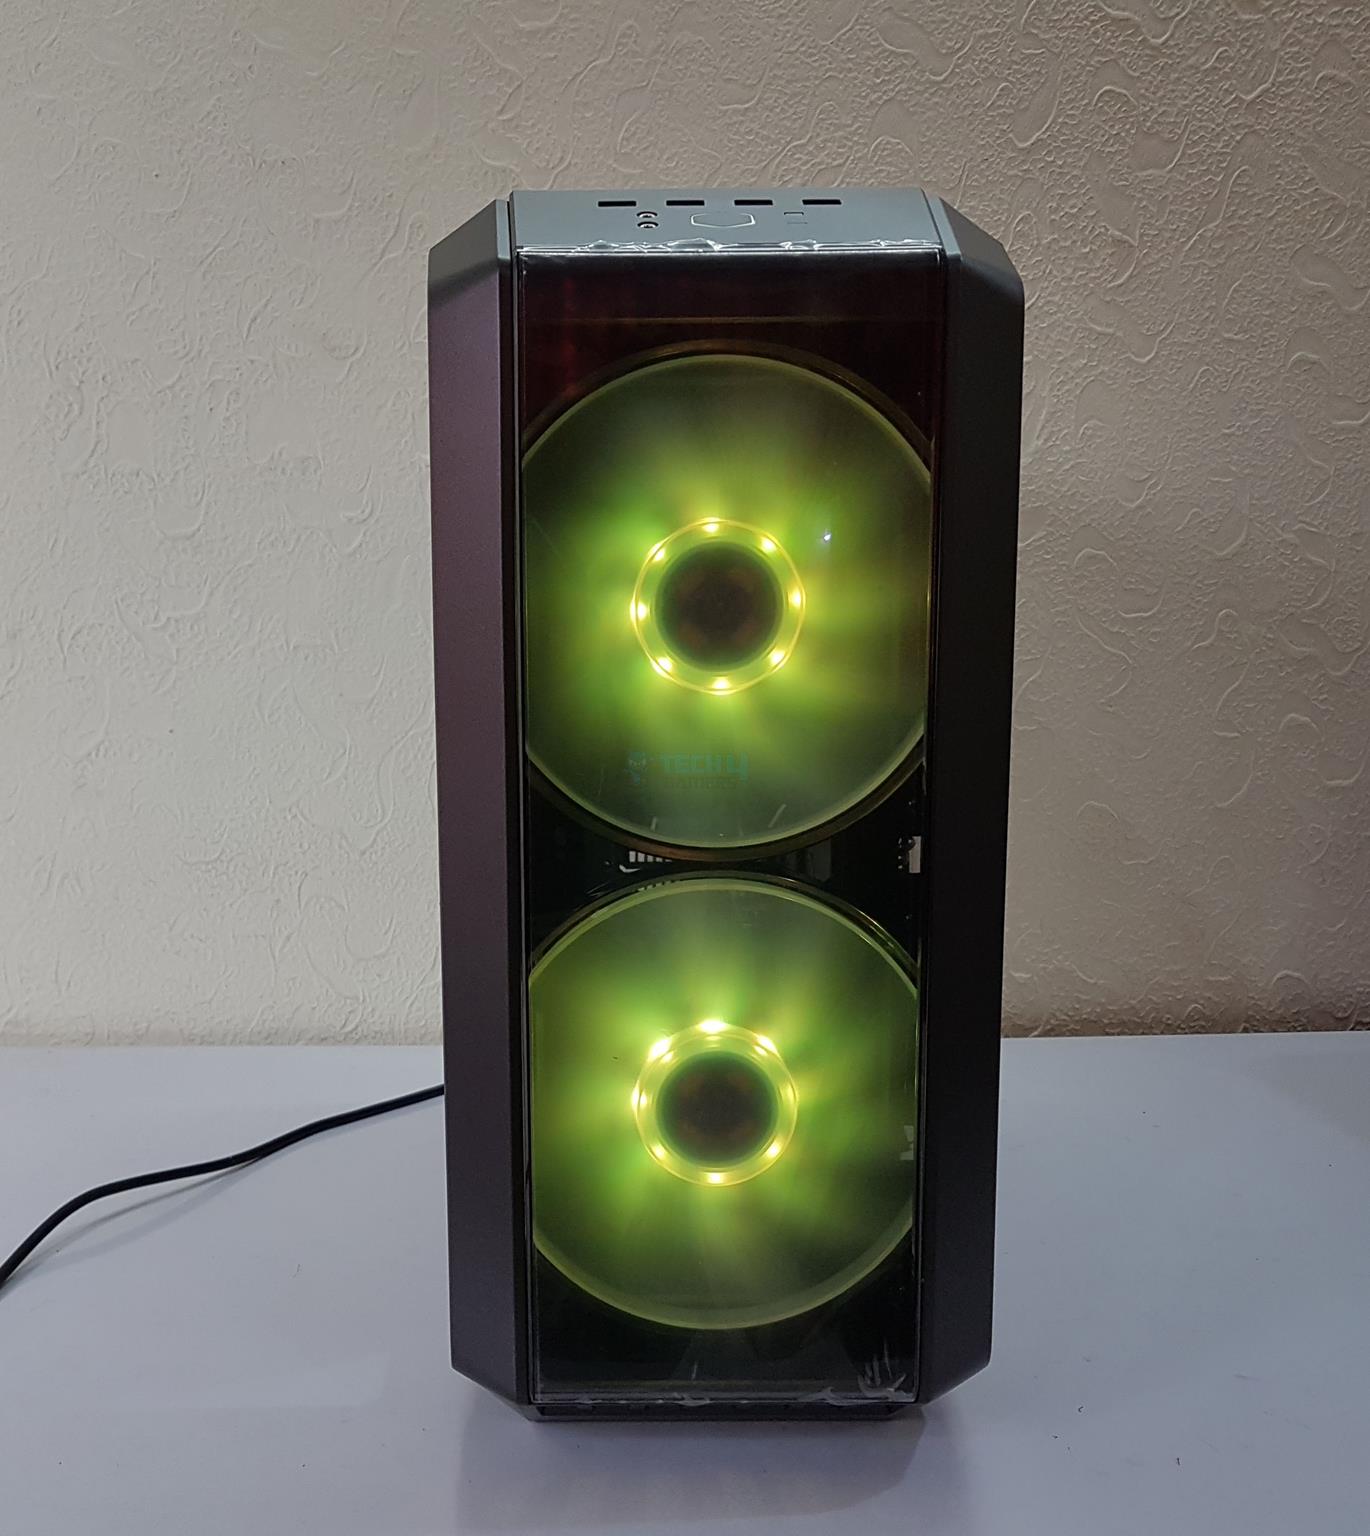
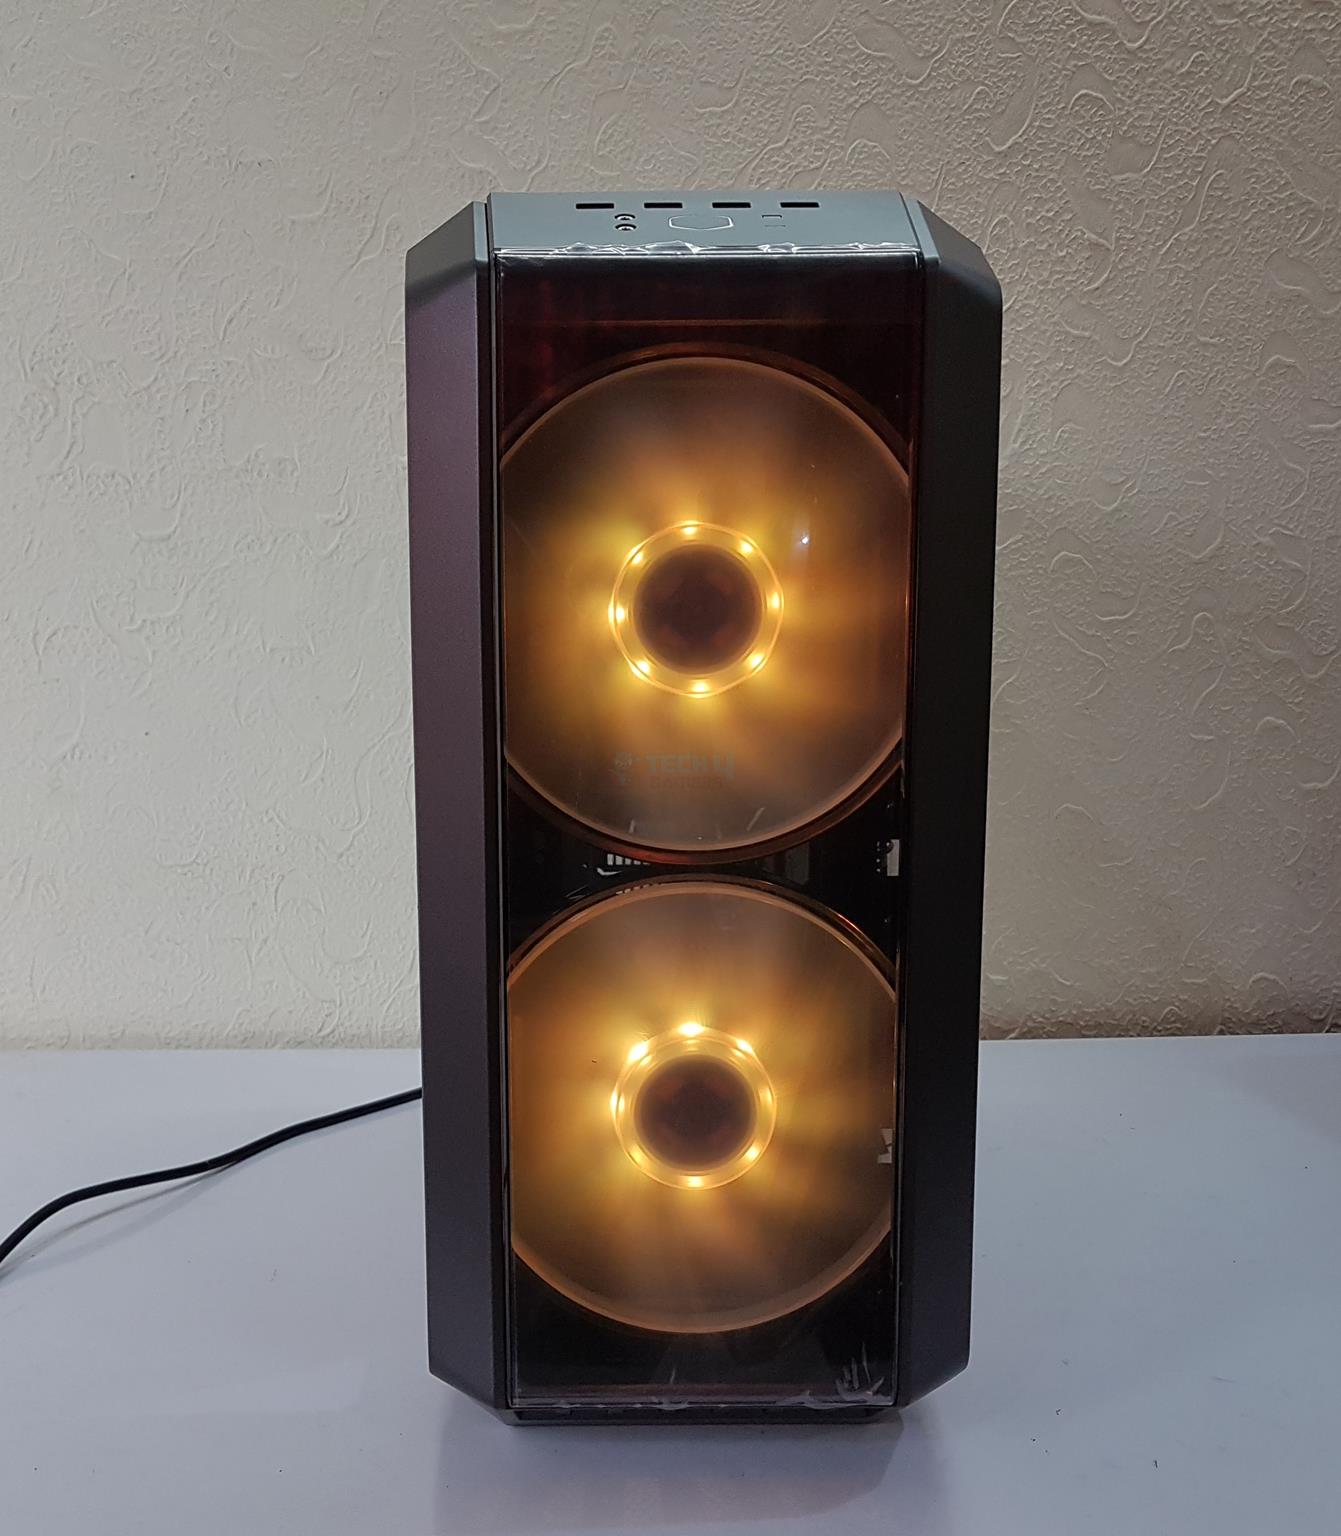
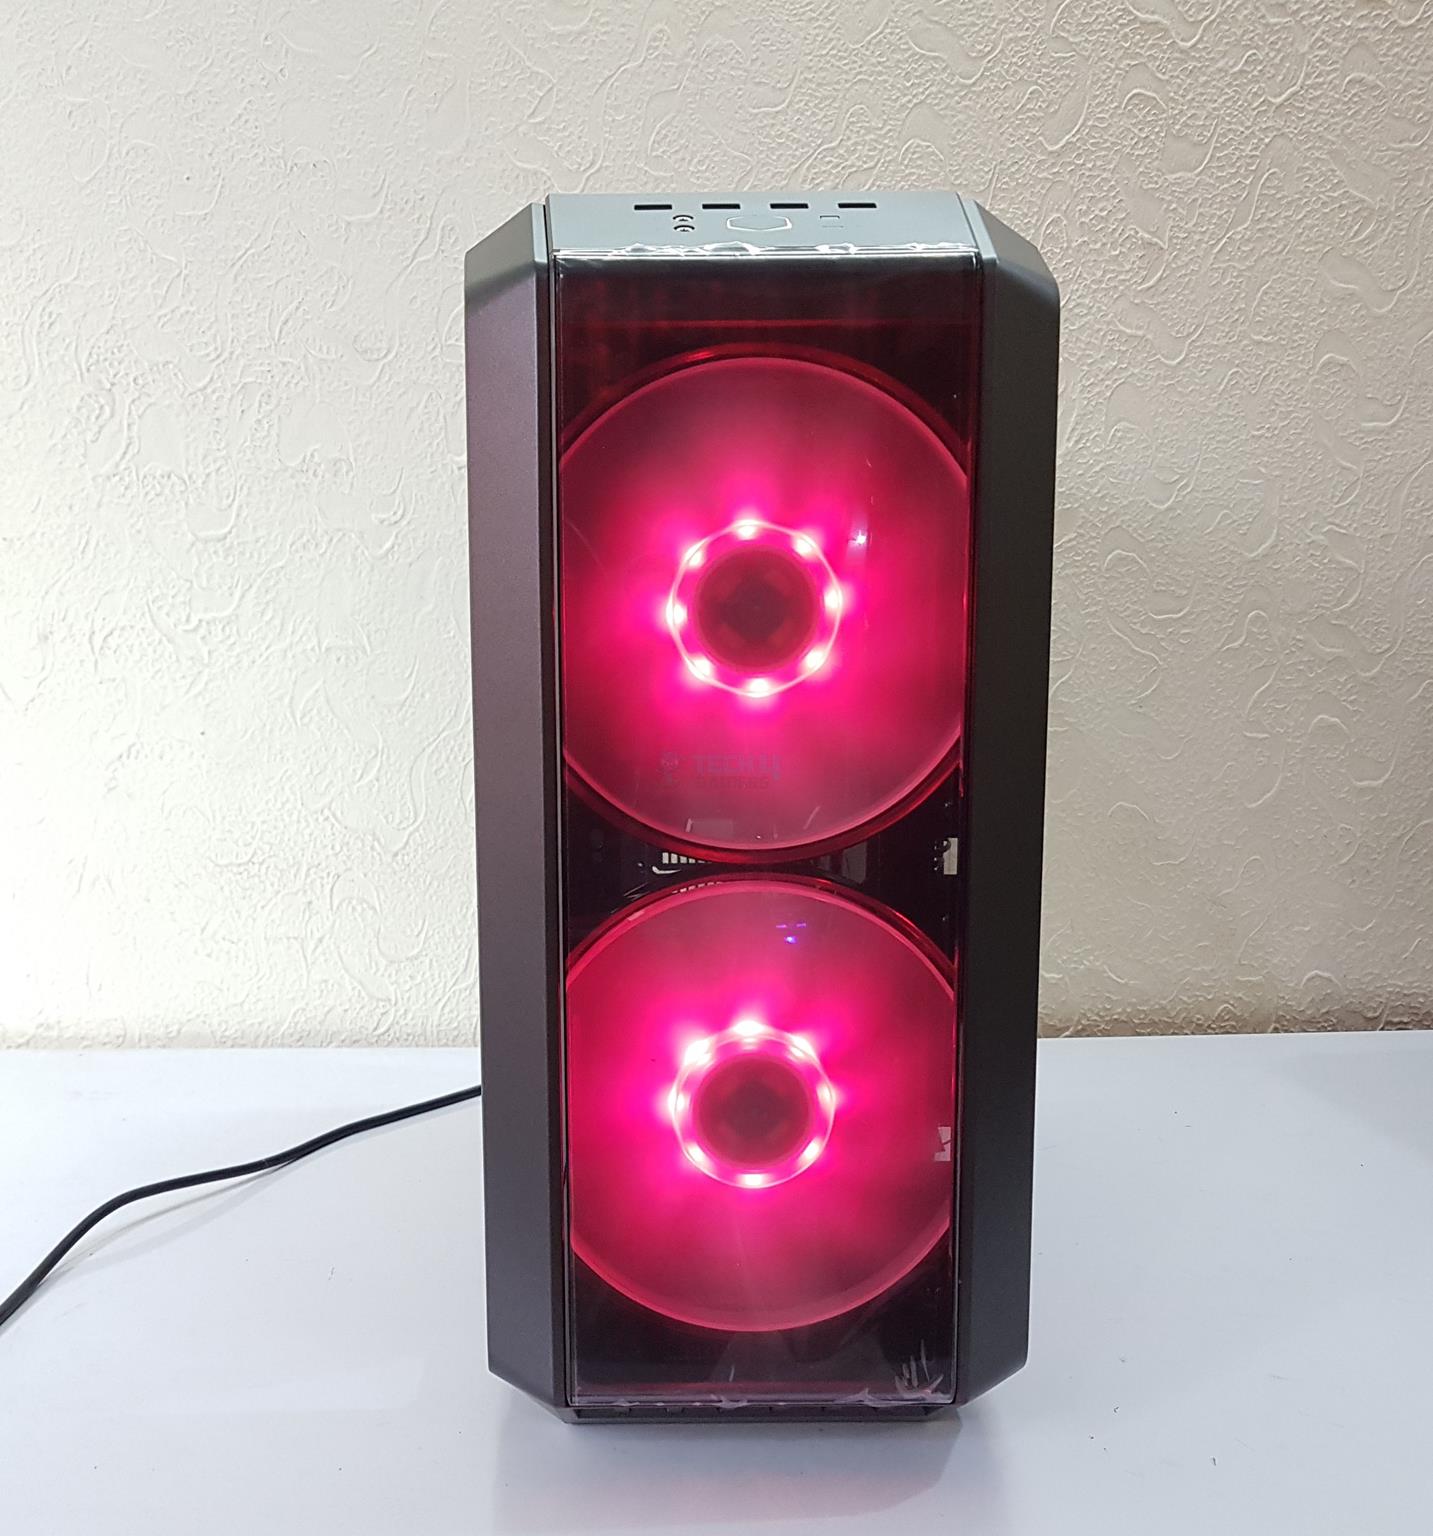
Small cutouts are on the upper right side of each fan mount for cable passing. The ARGB LEDs are housed inside the center, and the white translucent blades help in even diffusion, giving a pleasing AURA lighting effect.
Here are the cooling options for the front side:
- Up to 3x 120mm fans
- Up to 2x 140mm fans
- Up to 2x 200mm fans (Mounting Hole spacing 154×154 with up to 30mm thickness)
- 120 / 140 / 200 / 240 / 280/ 360mm Radiator
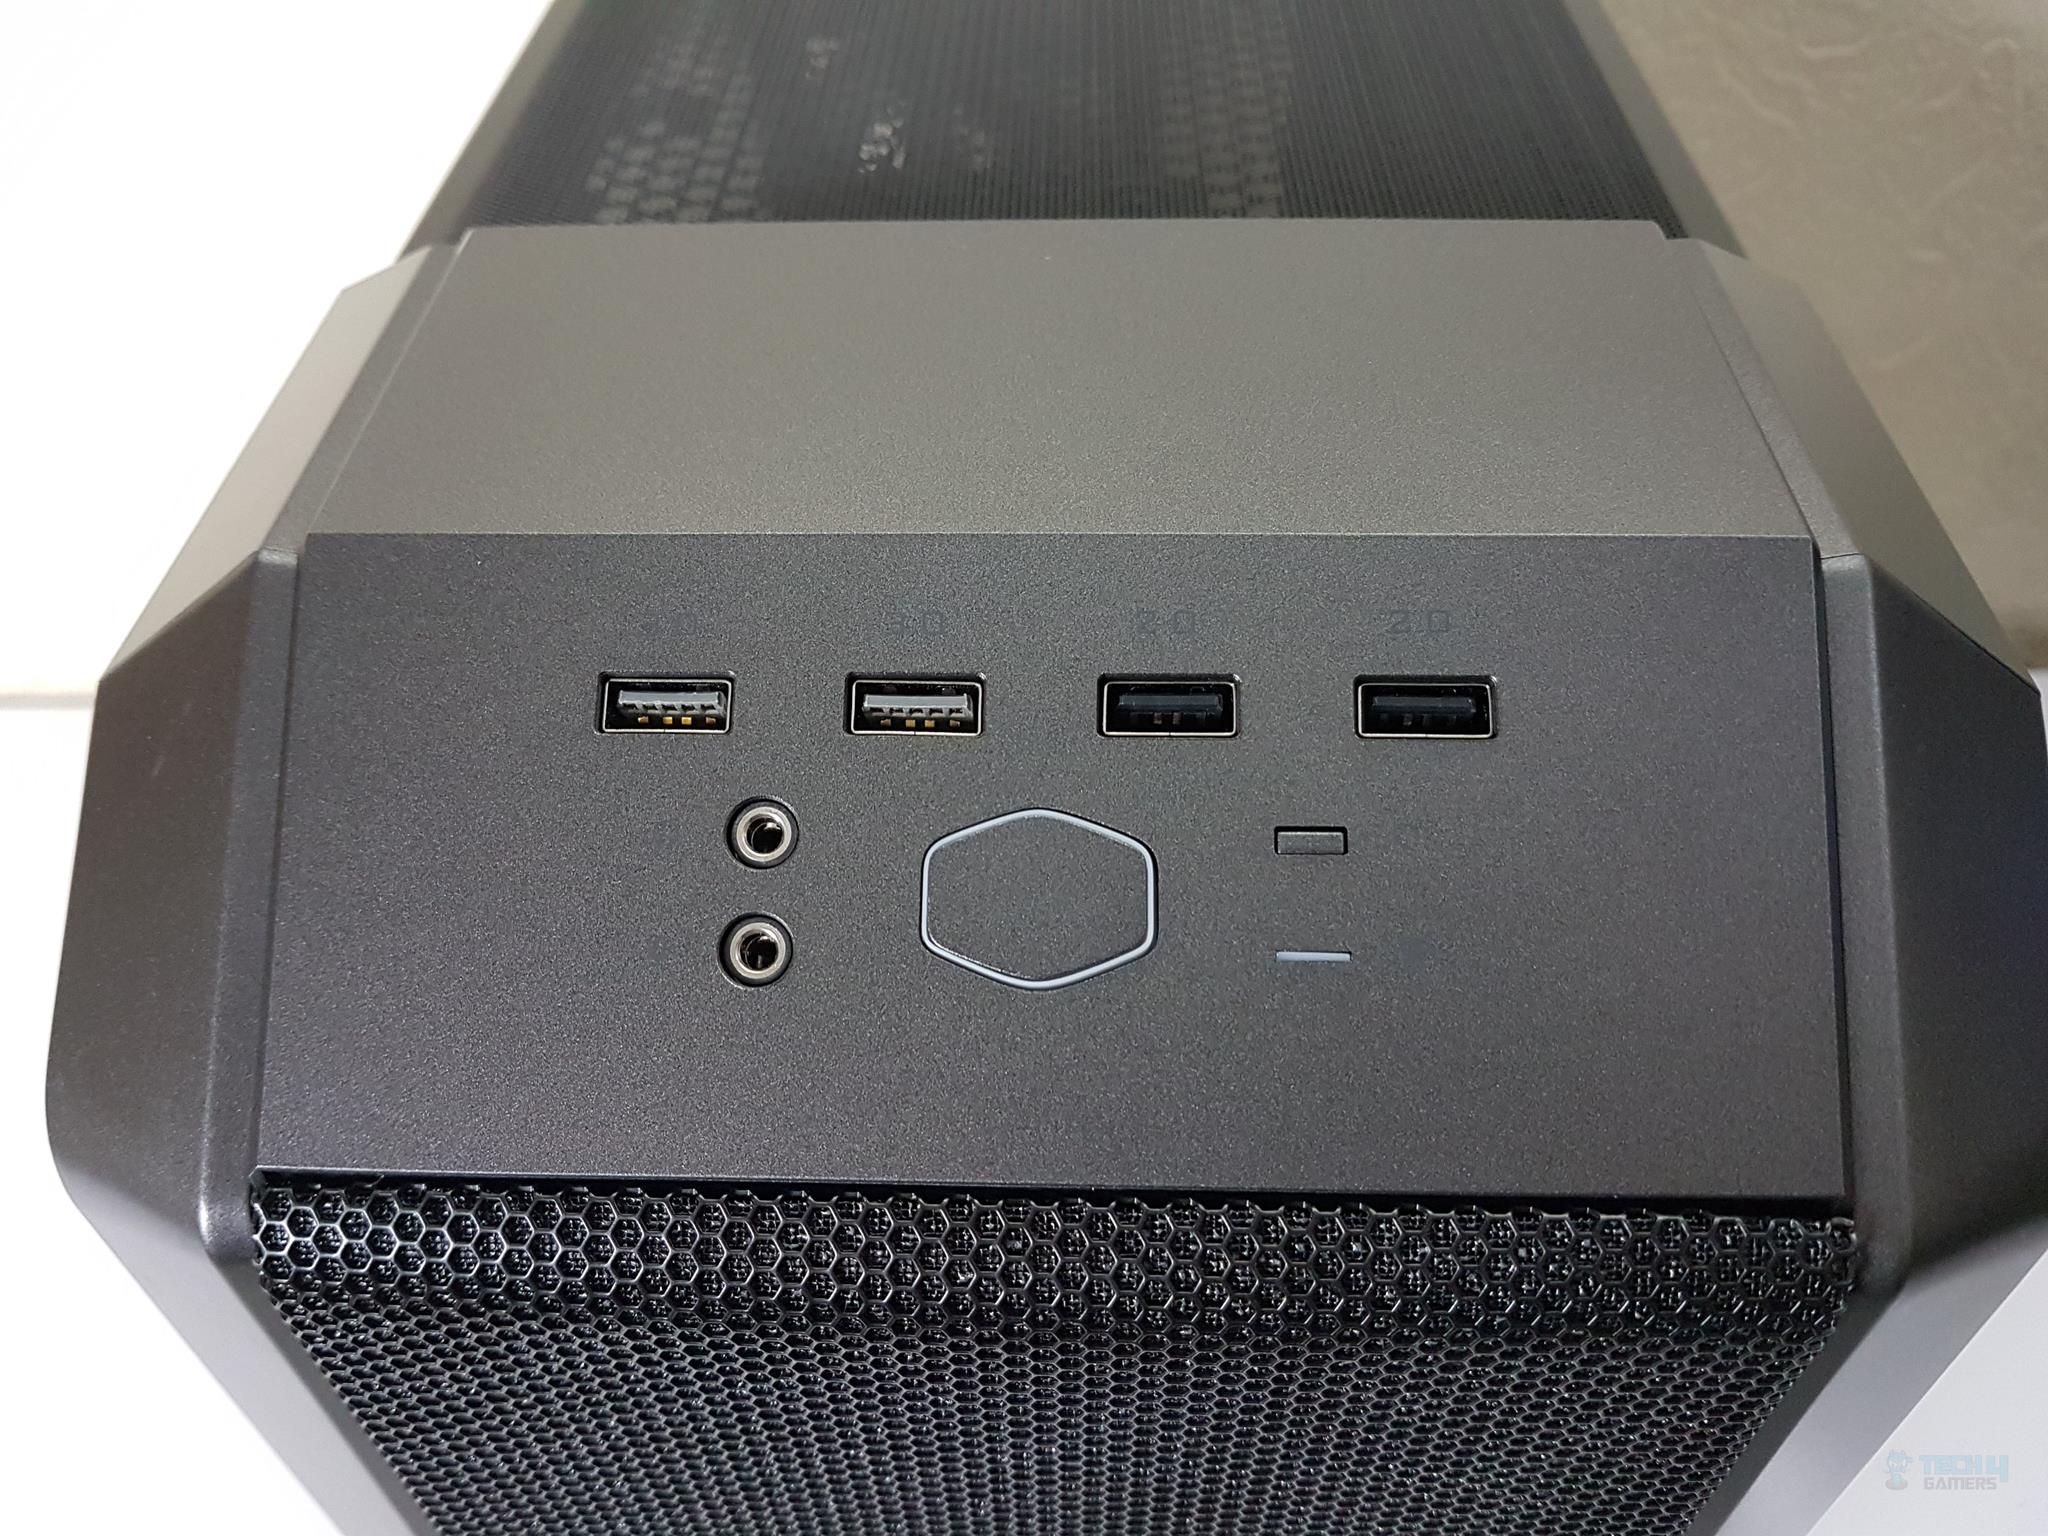
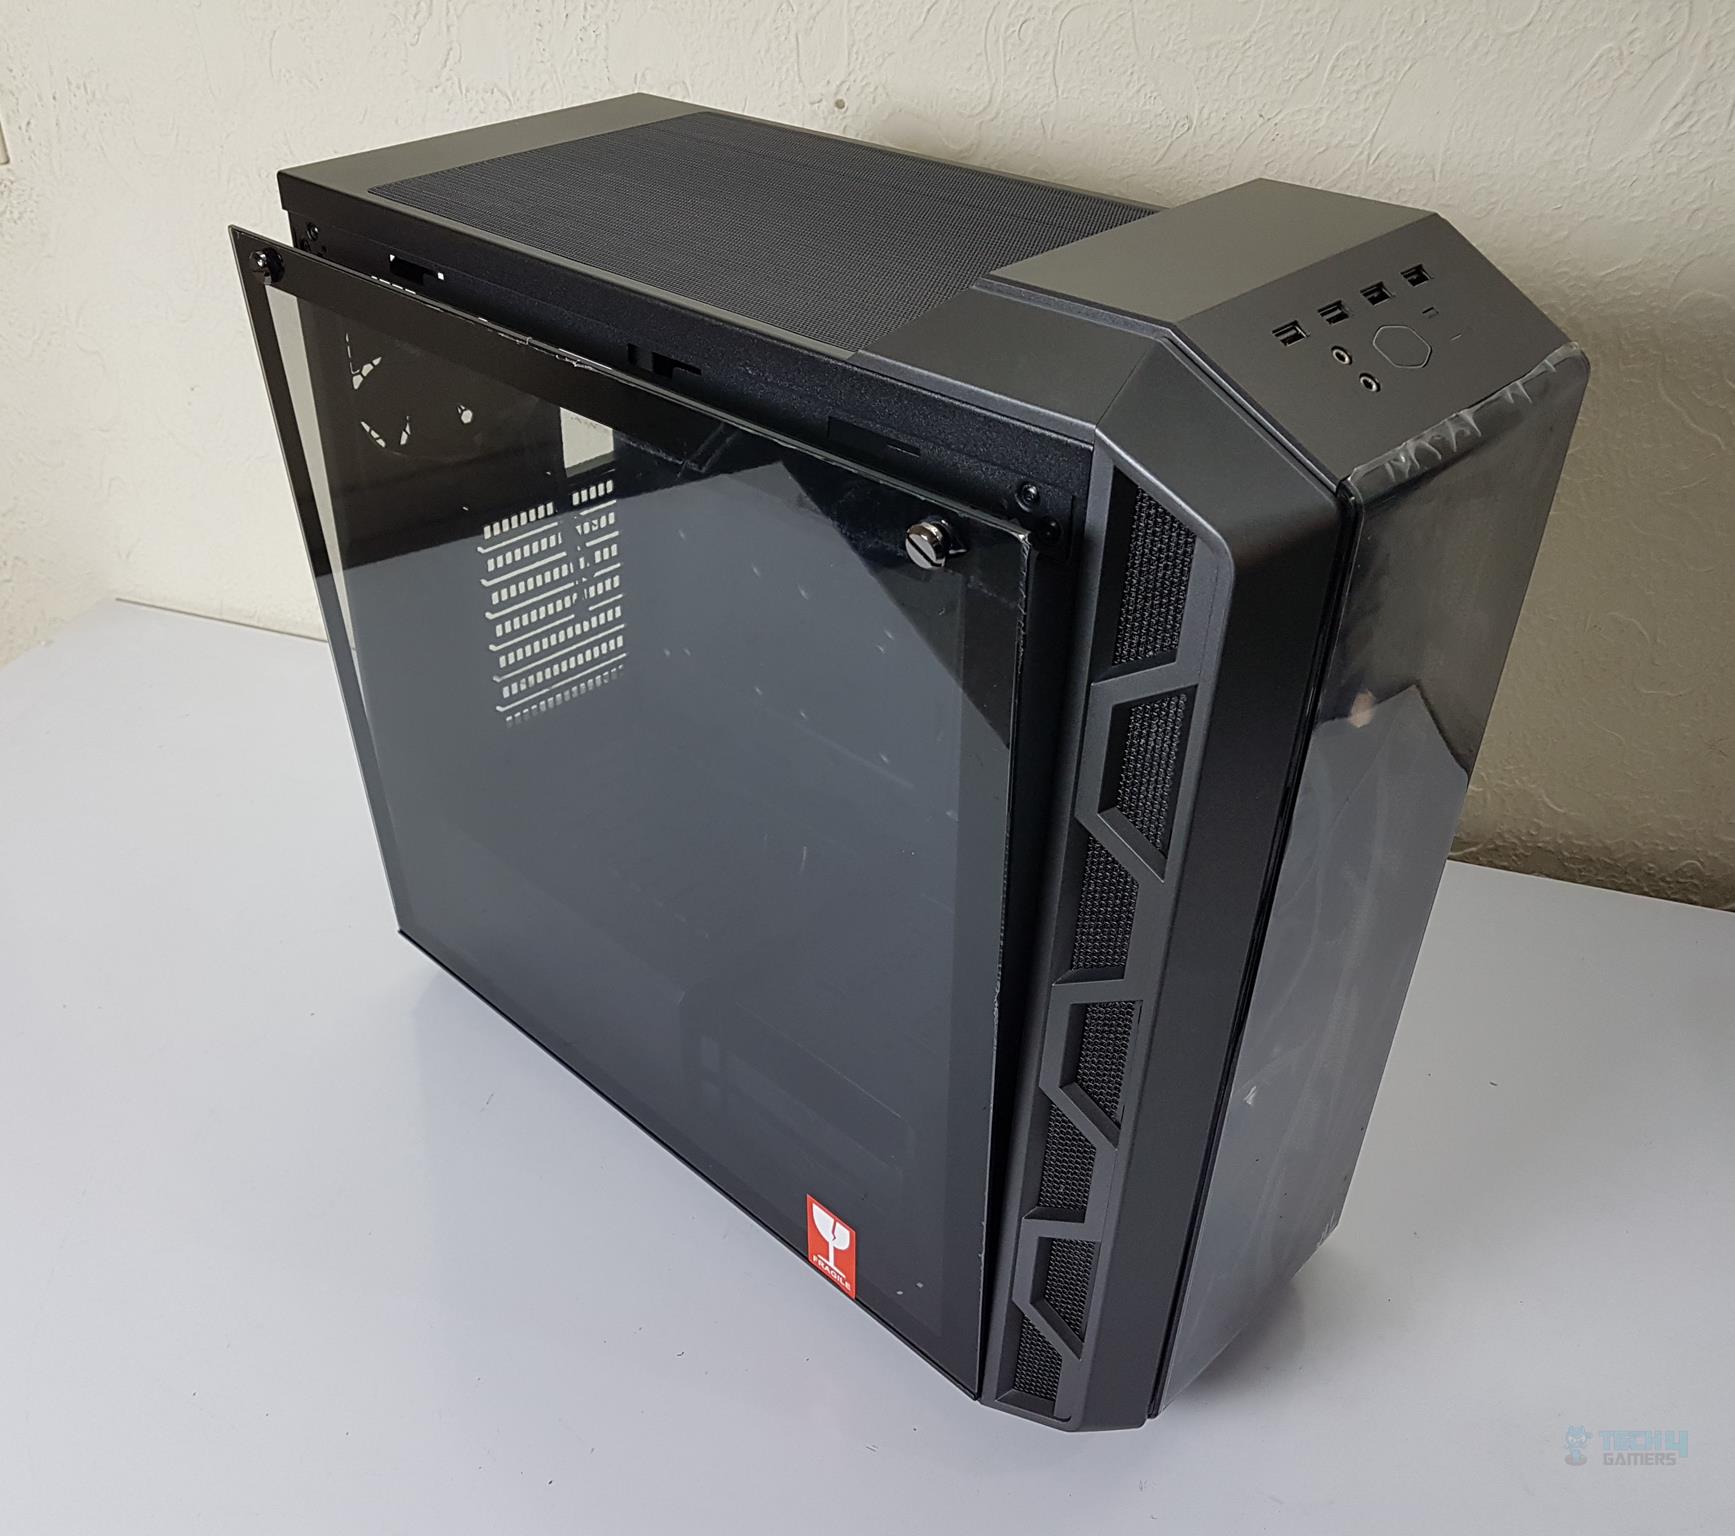
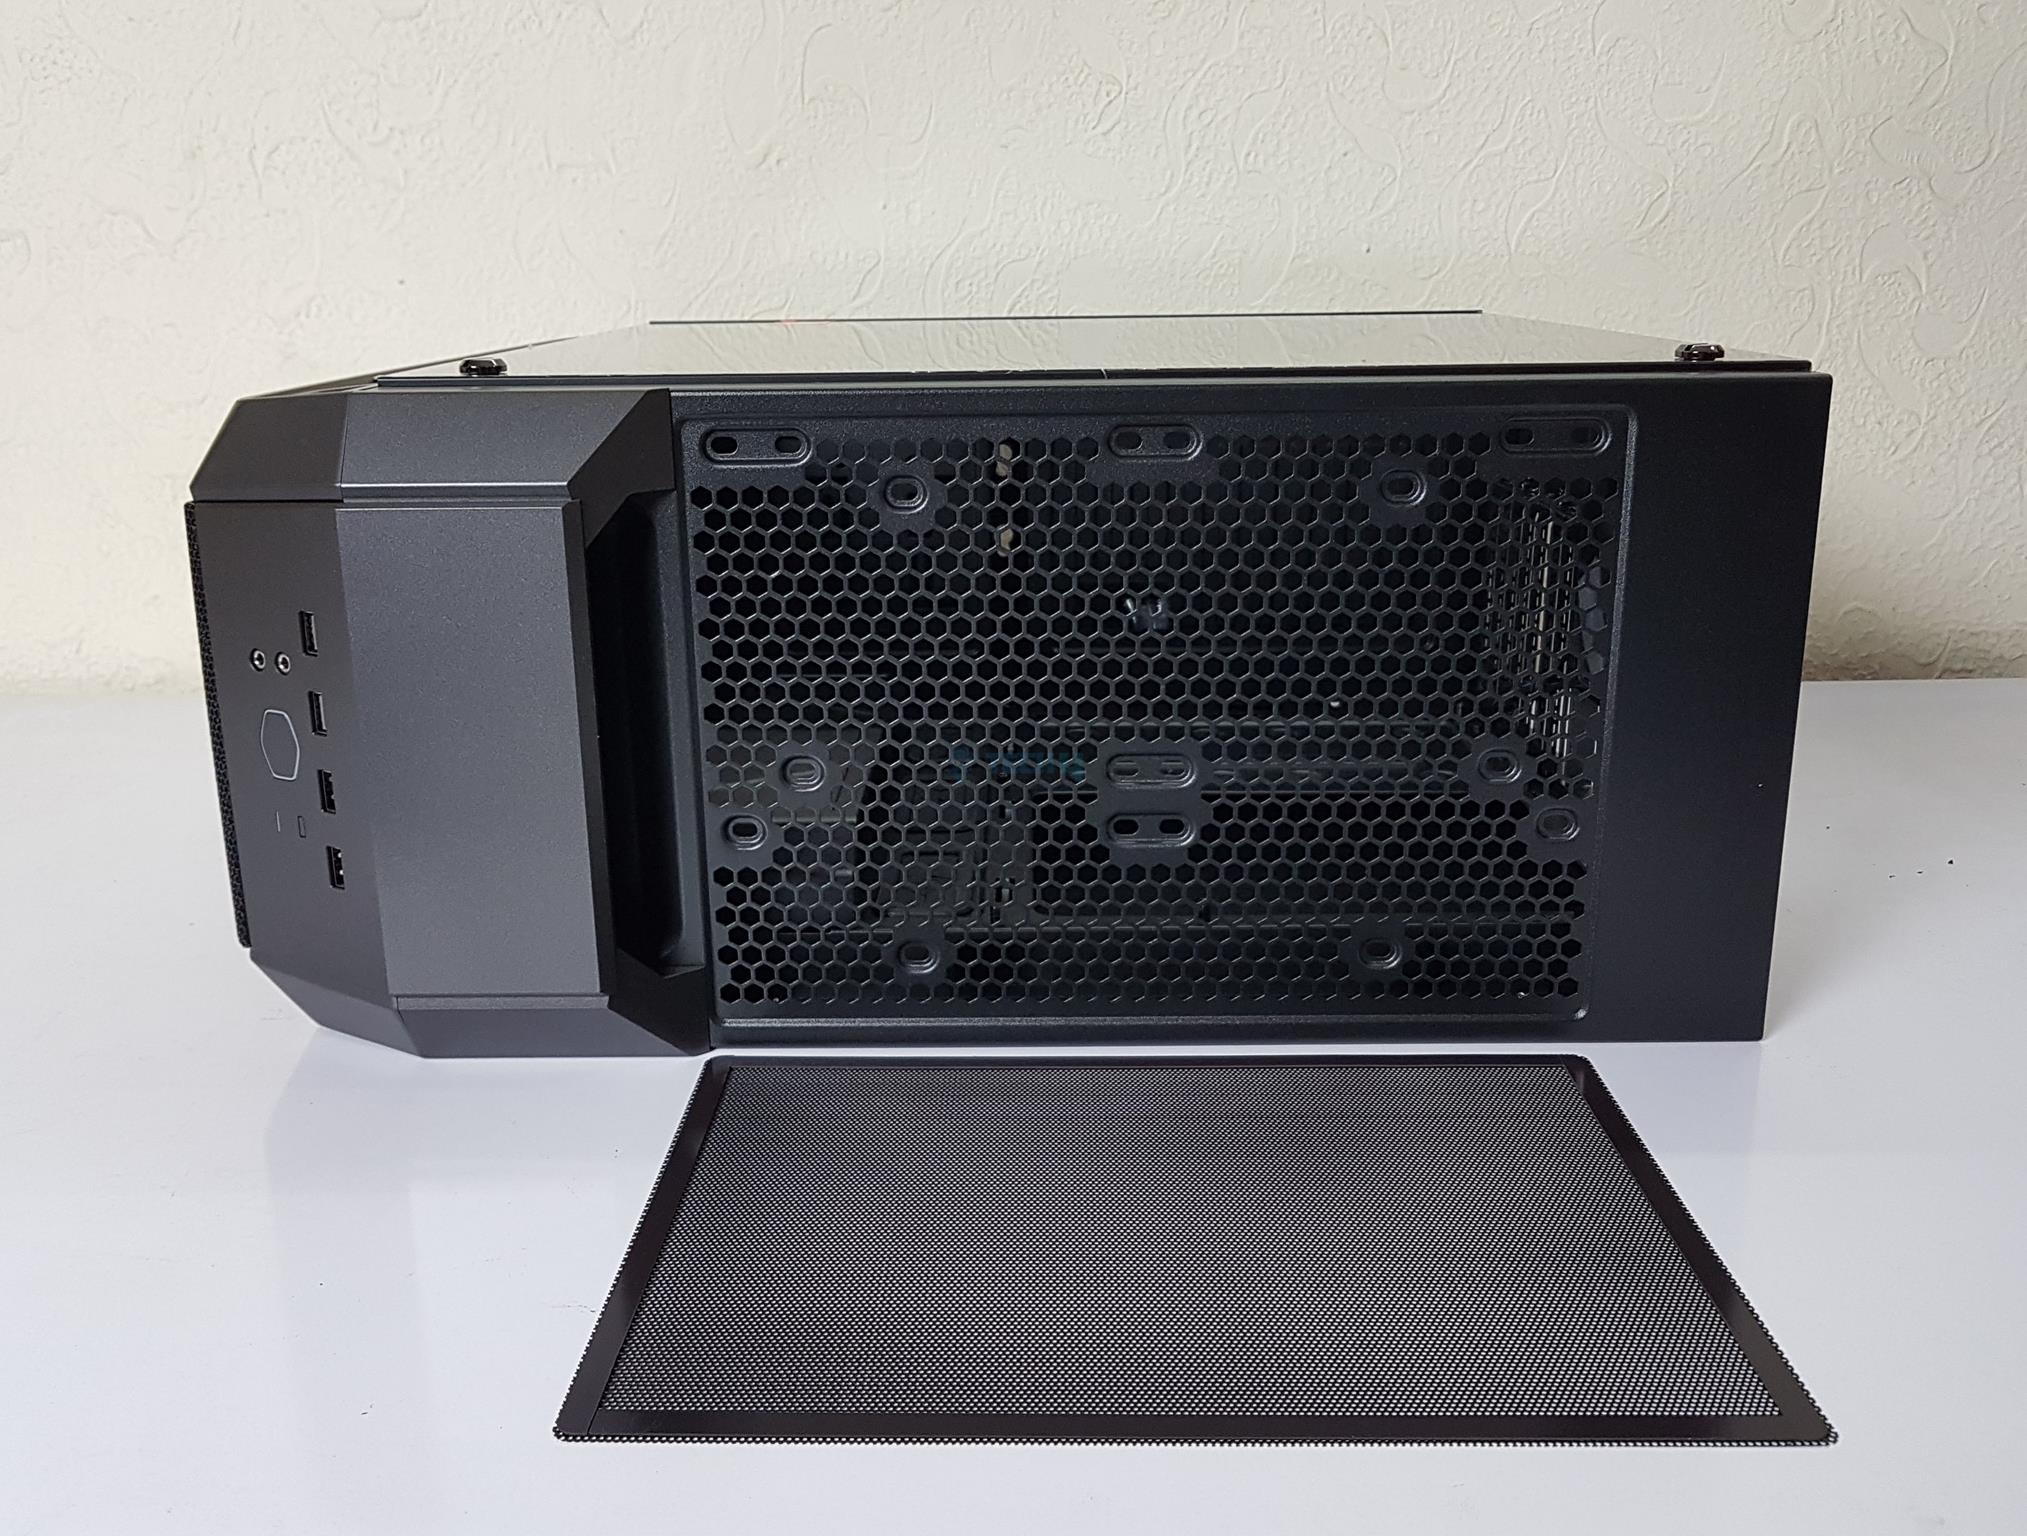
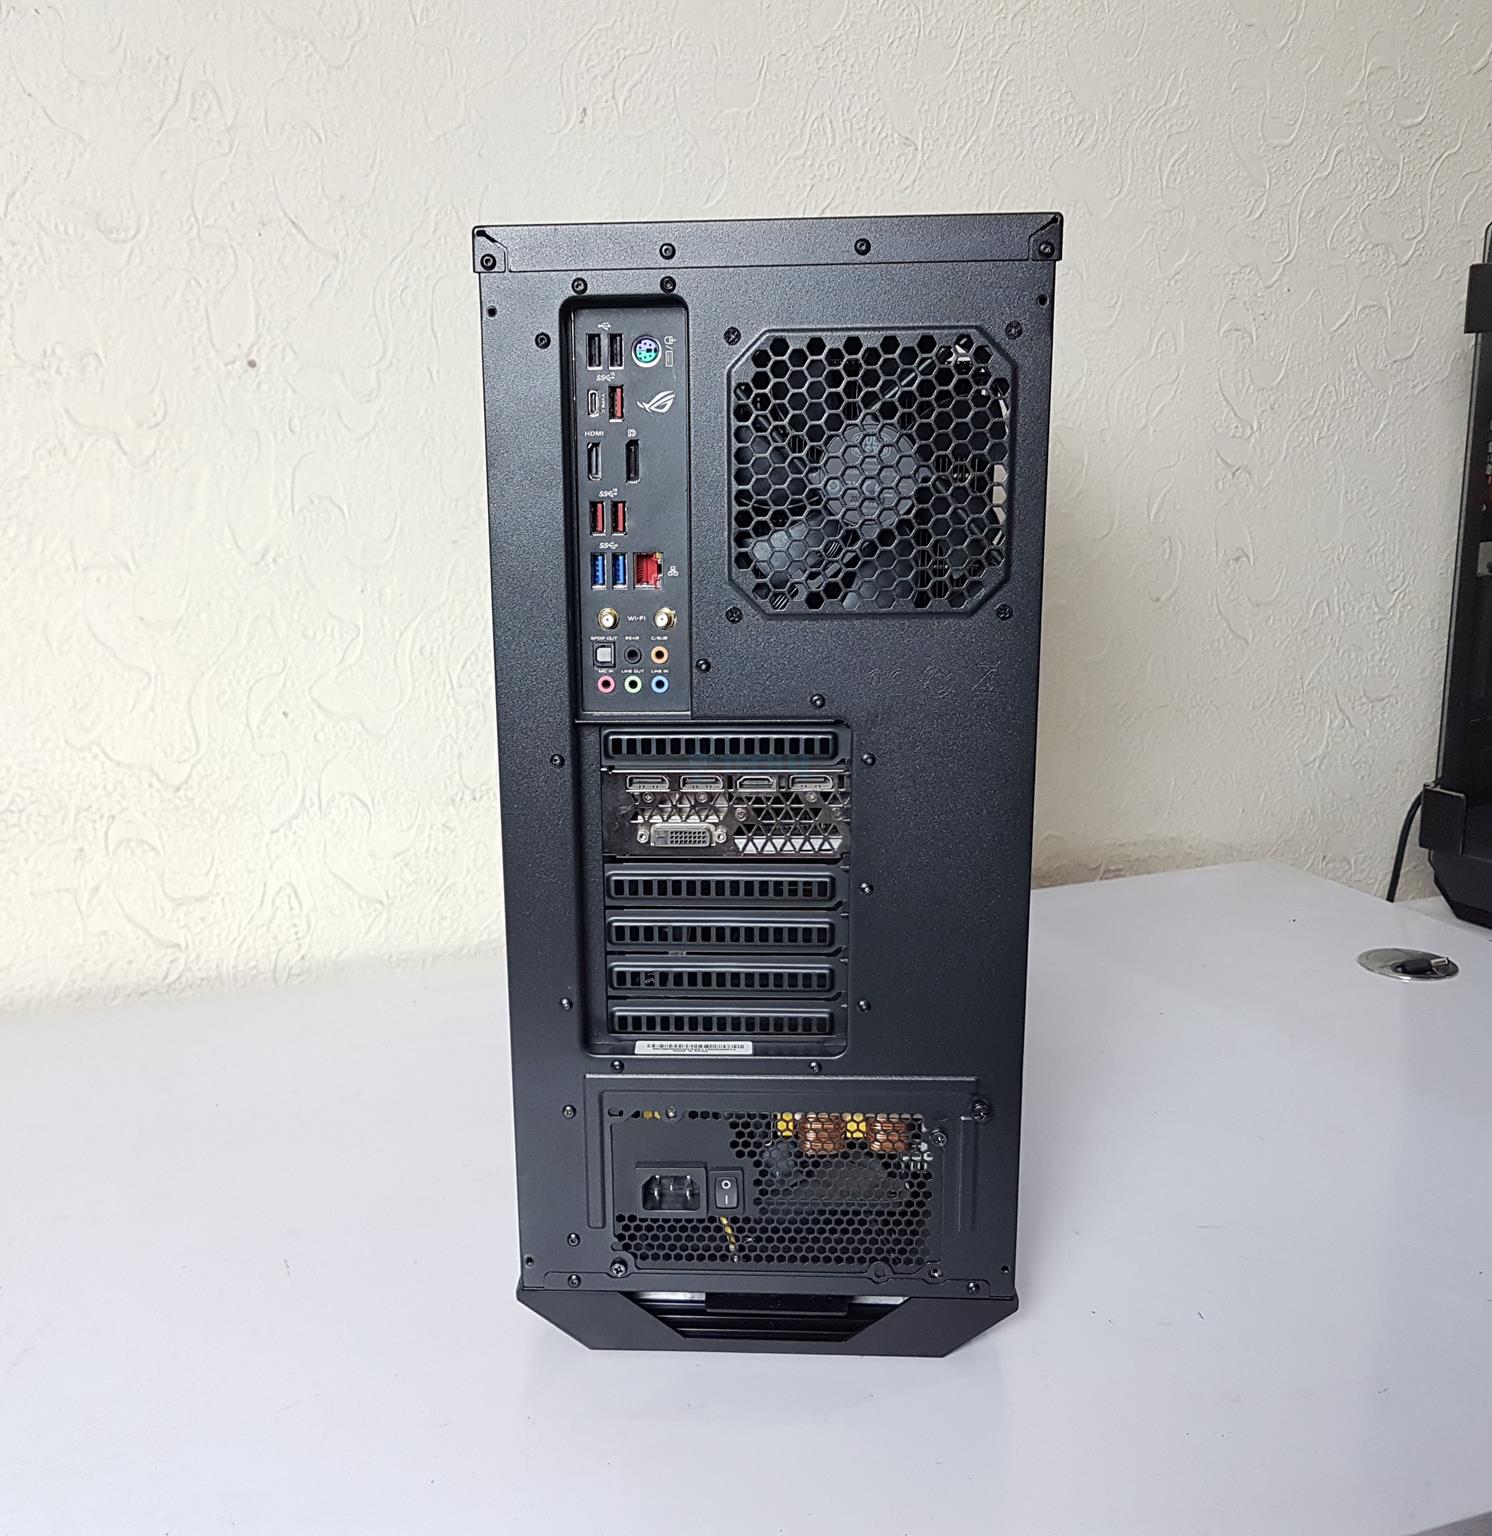
The I/O panel is on the top of the case handle. It includes:
- 2x USB 3.2 Gen 1 (USB 3.0) ports
- 2x USB 2.0 ports
- 1x 3.5mm Audio Jack
- 1x 3.5mm Mic Jack
- 1x Power Button designed in a Cooler Master branding
- 1x Reset Button
- 1x LED Indicator
The reset button is not easy to use, given its small size. I used my fingernail to use this button as I was controlling the ARGB lighting using this button. This is something Cooler Master should address.

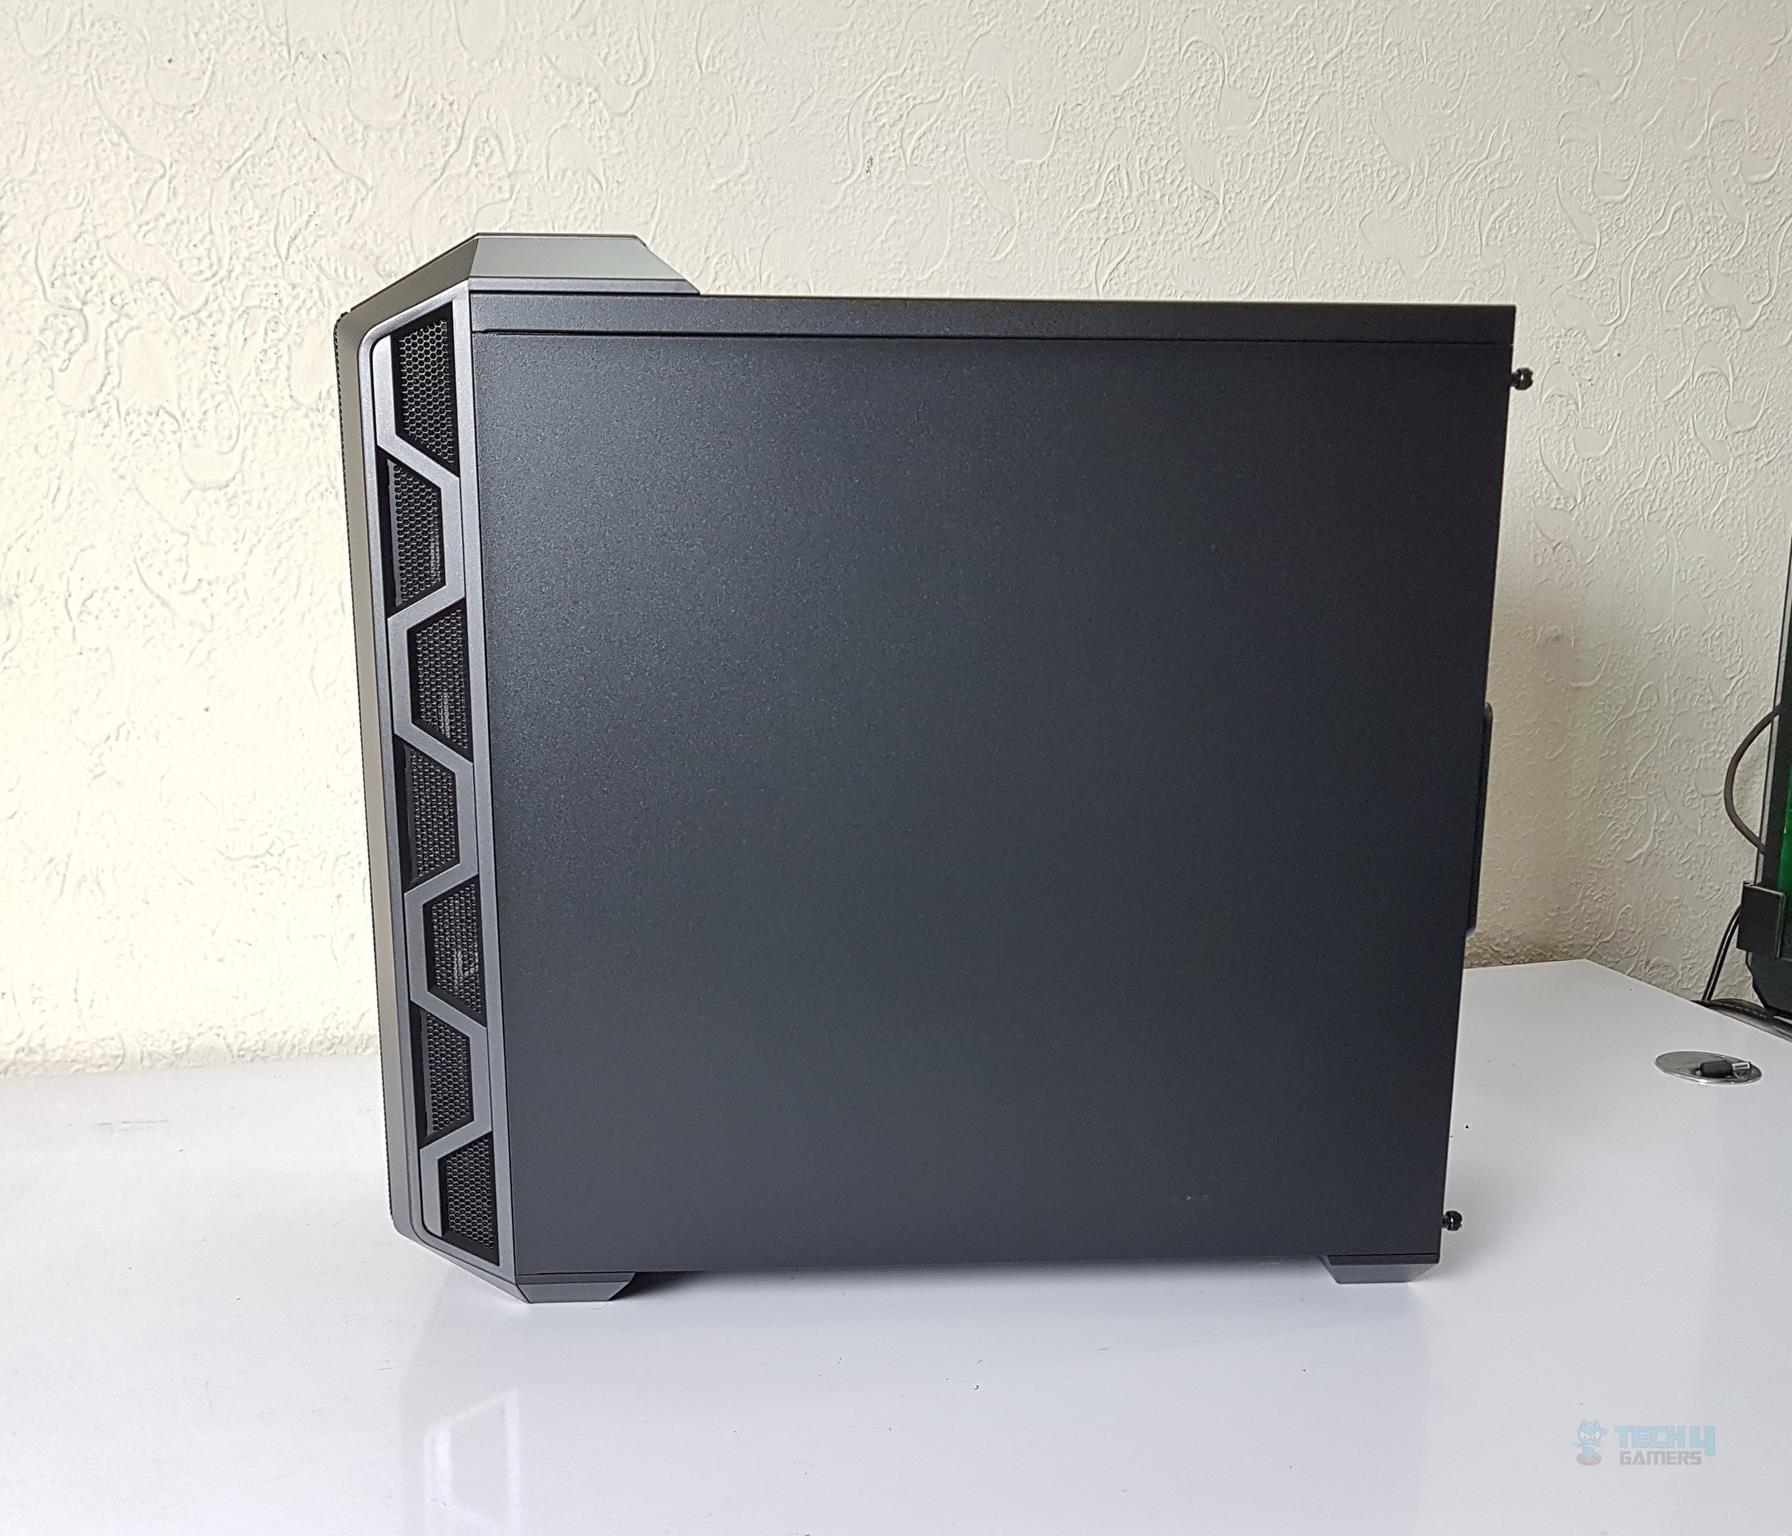
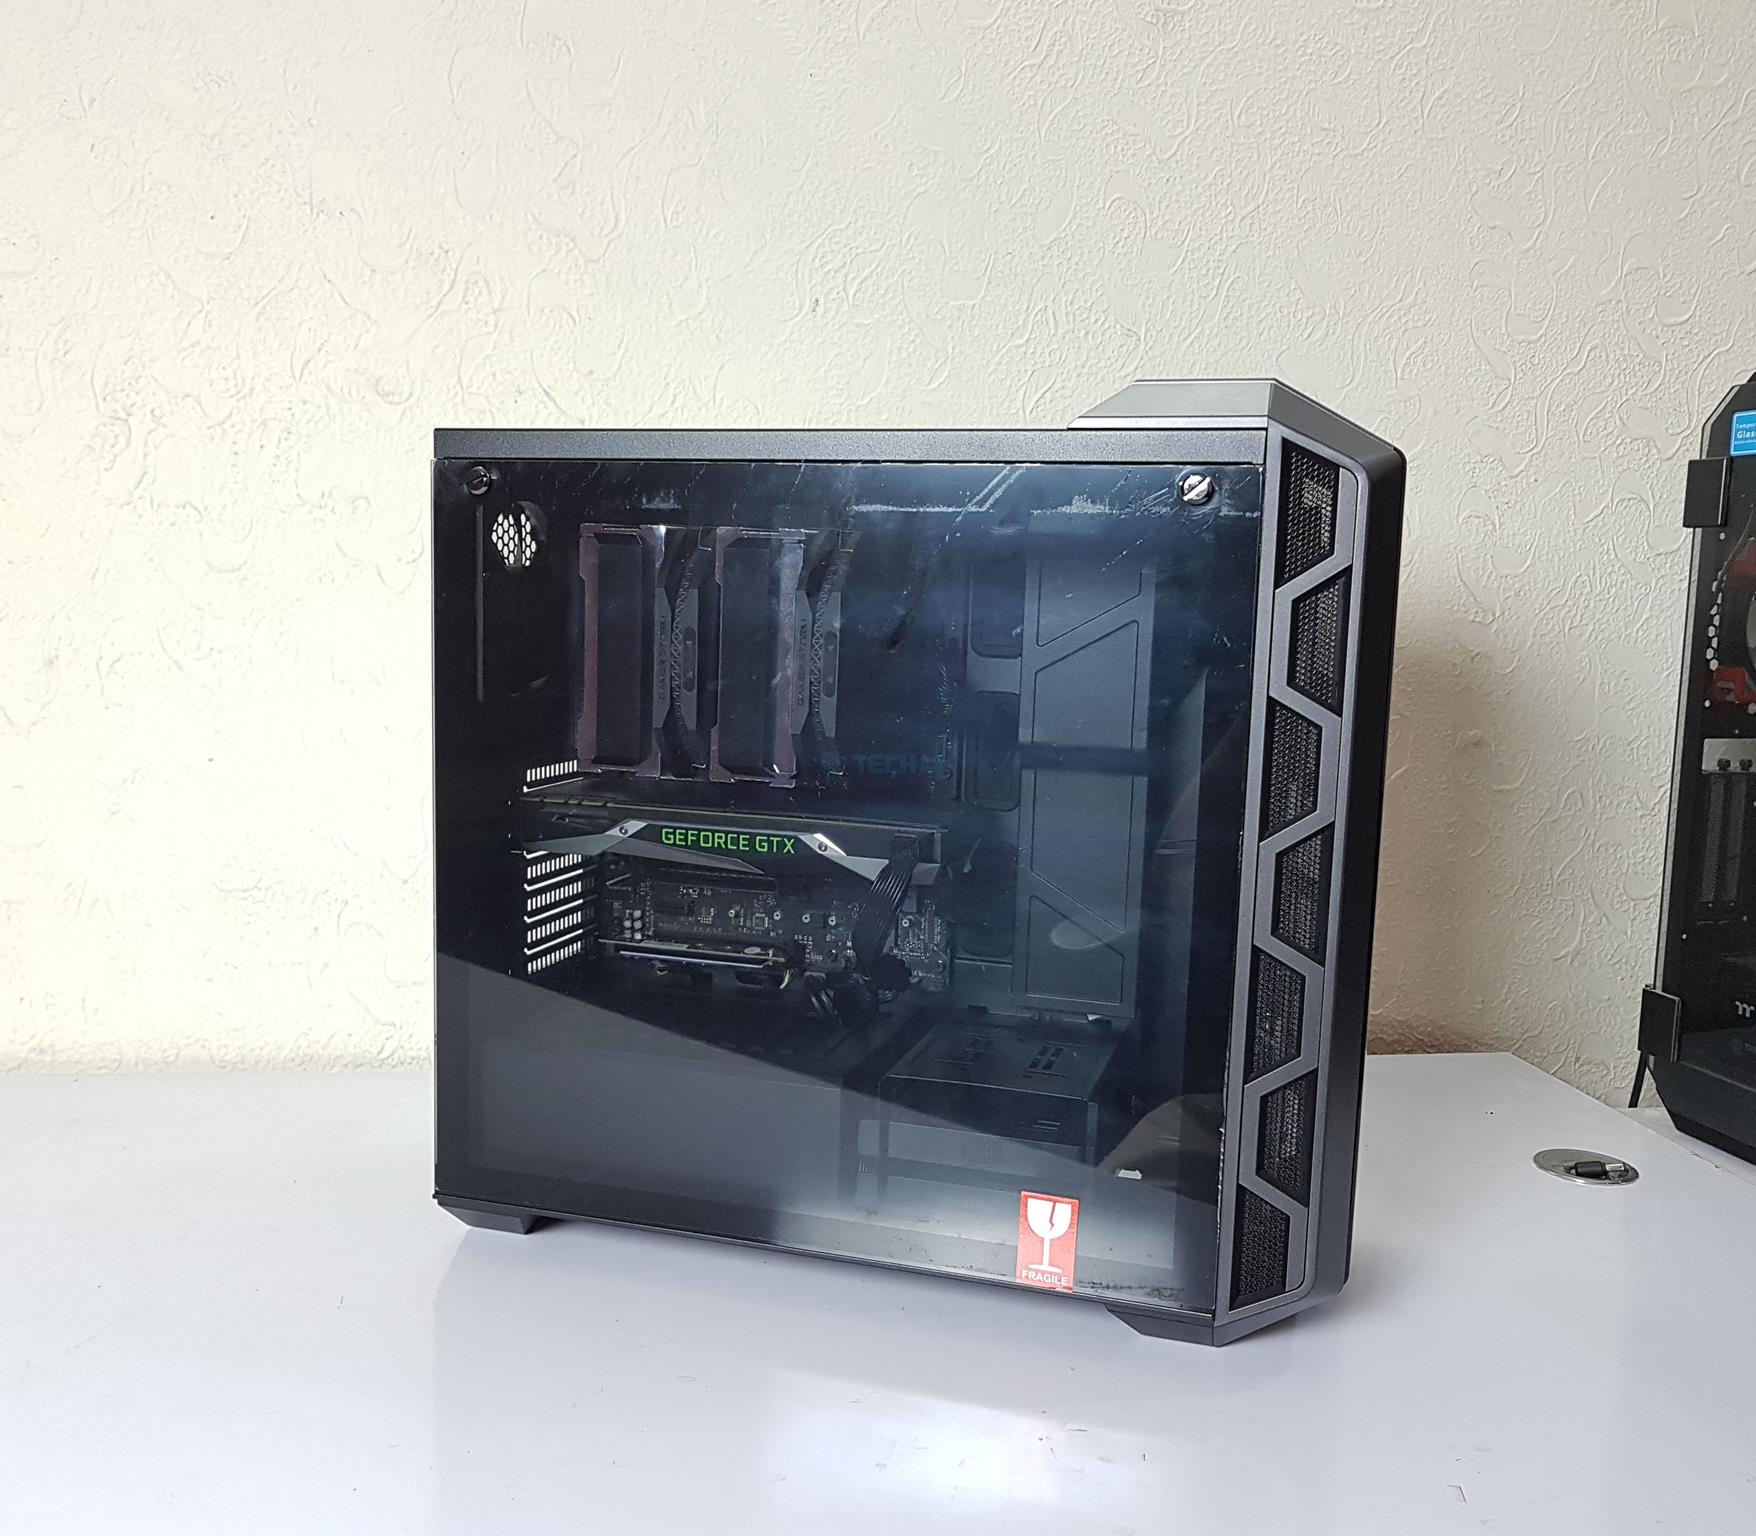
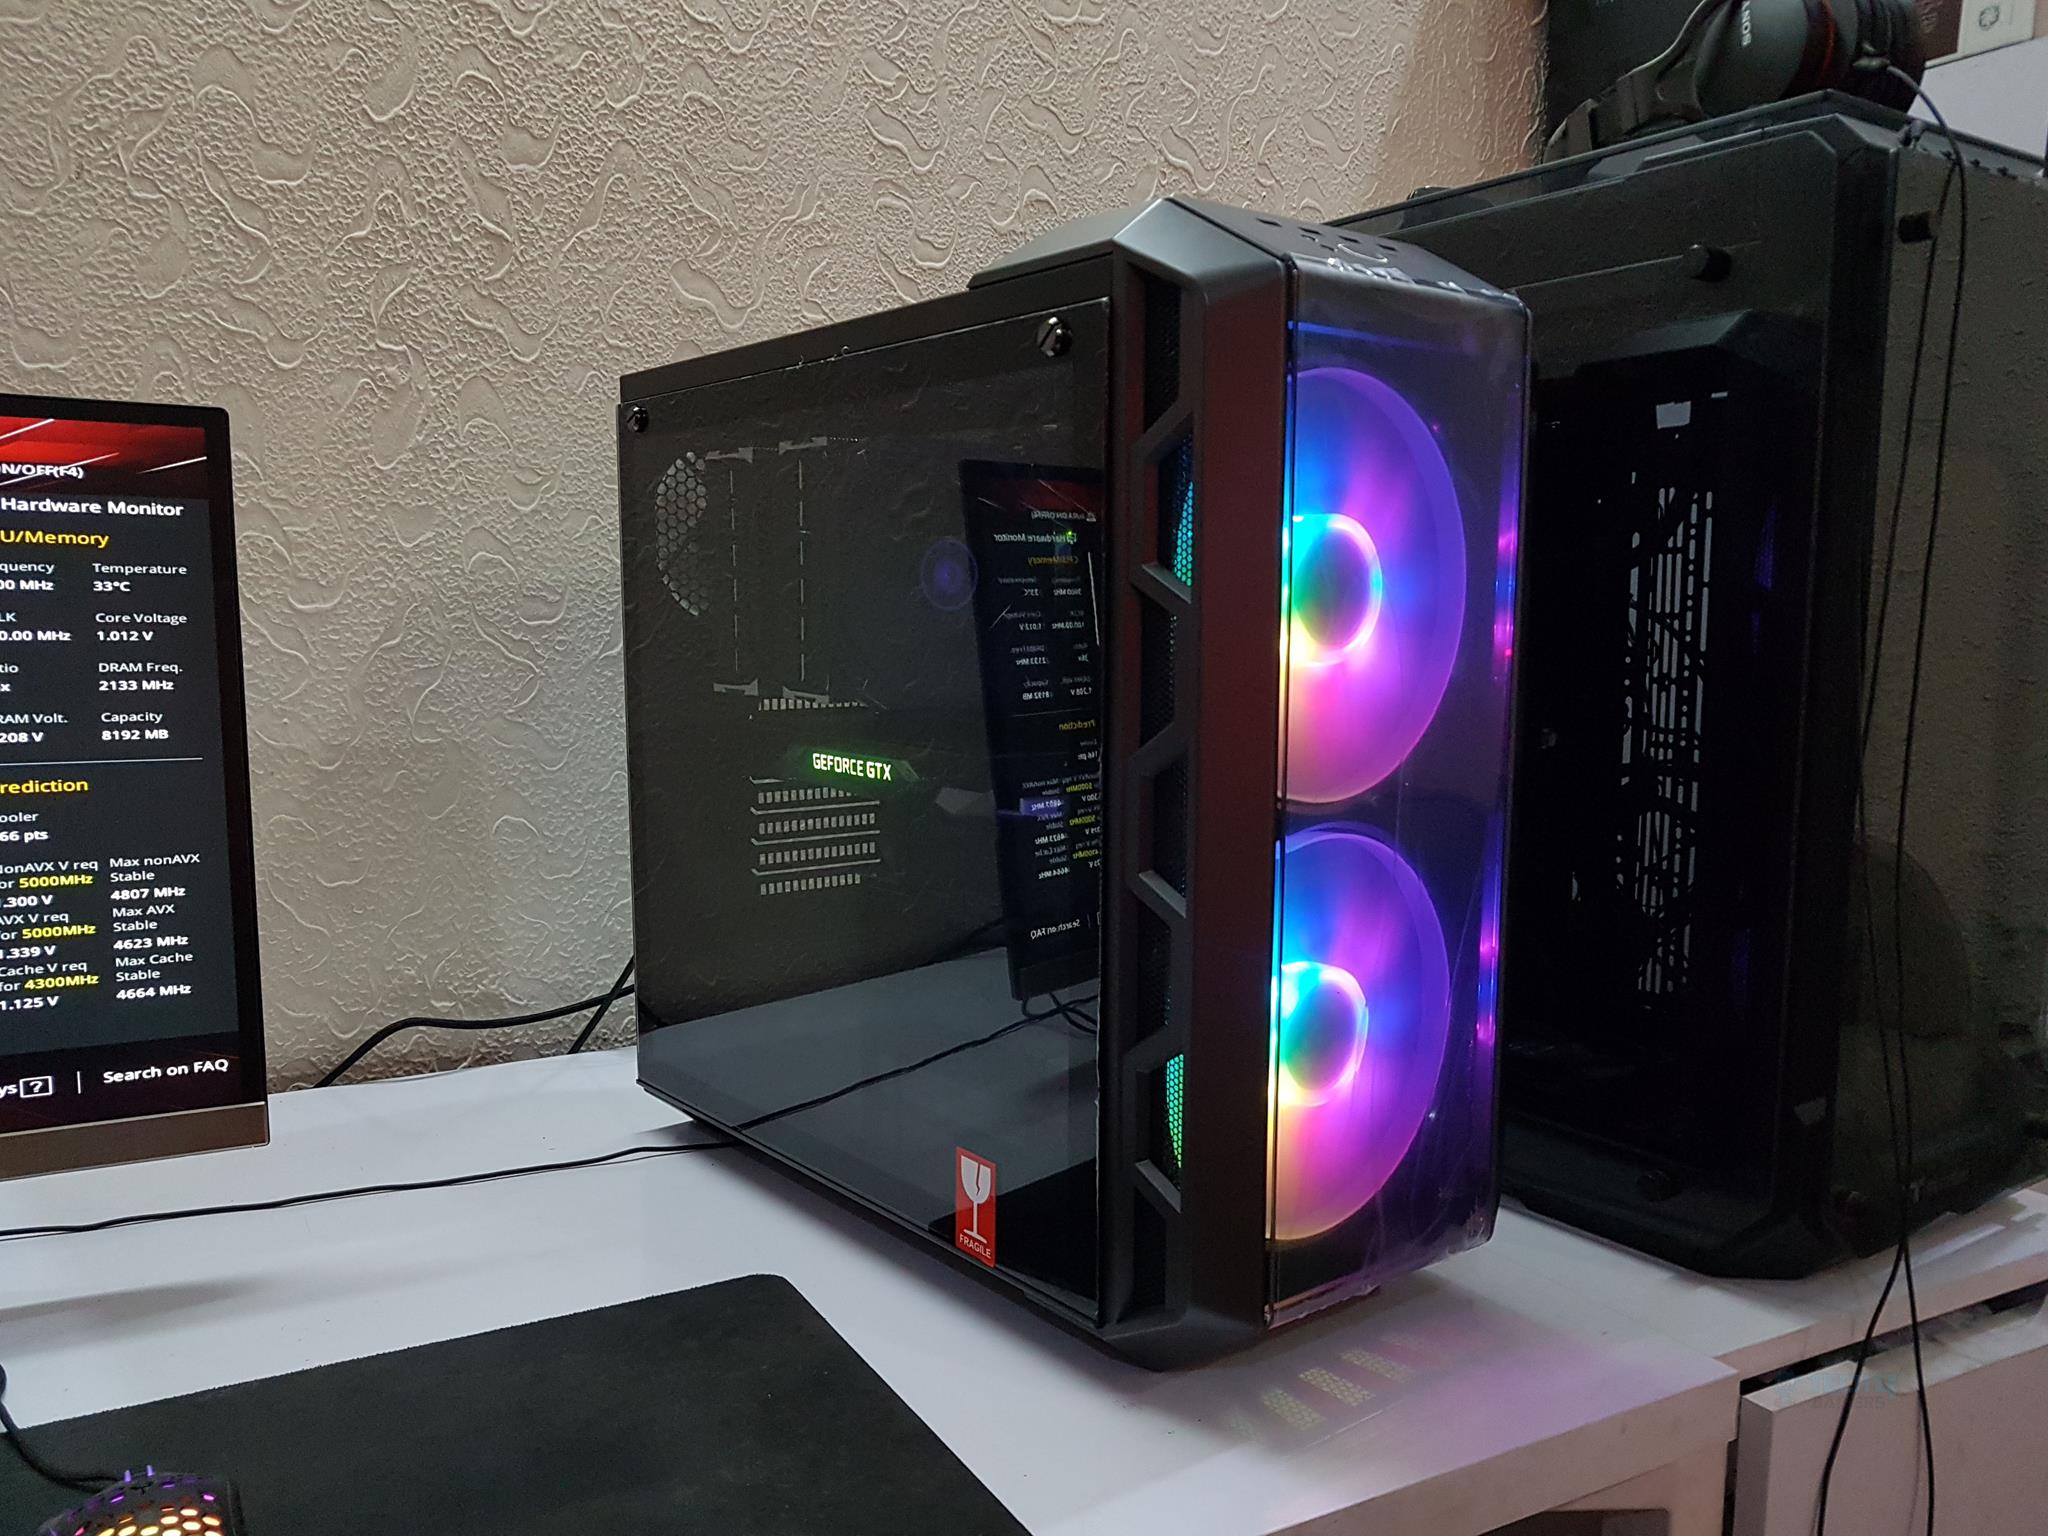
The side panel is made of tempered glass and finished in a tinted black. A fragile sticker is on the bottom, cautioning the user to hand the panel carefully. The panel is flushing with the chassis frame, though it is thicker, and a particular portion extrudes it.
There is enough surface area on both sides of the front panel for ventilation. Cooler Master has also retained the original design scheme from the H series here. There is a nice flow in the overall design symmetry. There are two captive thumbscrews on the glass panel.
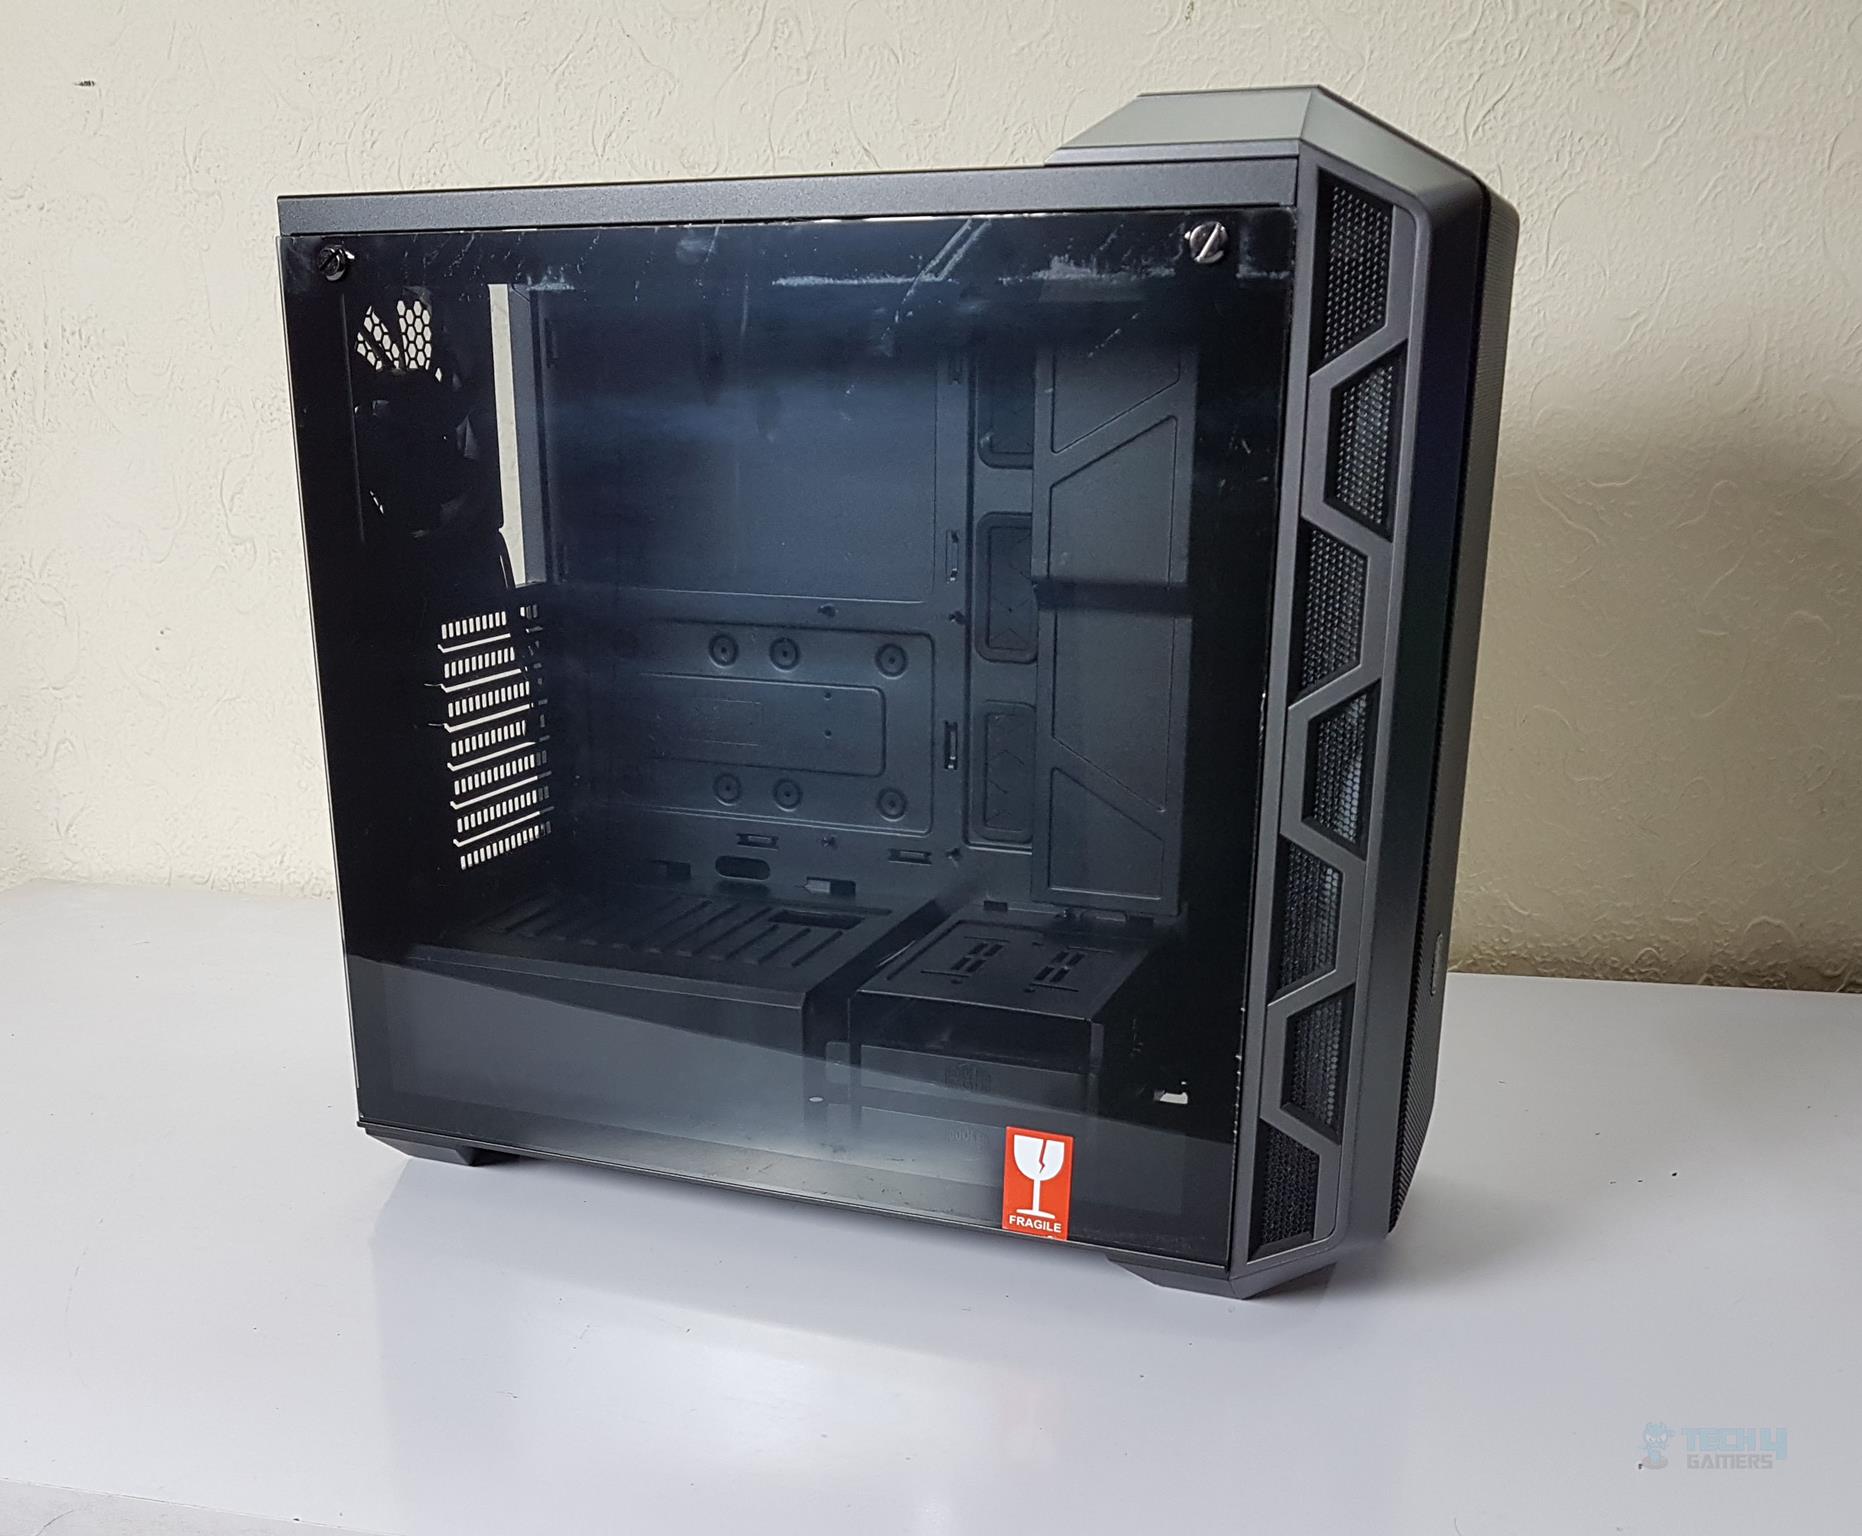
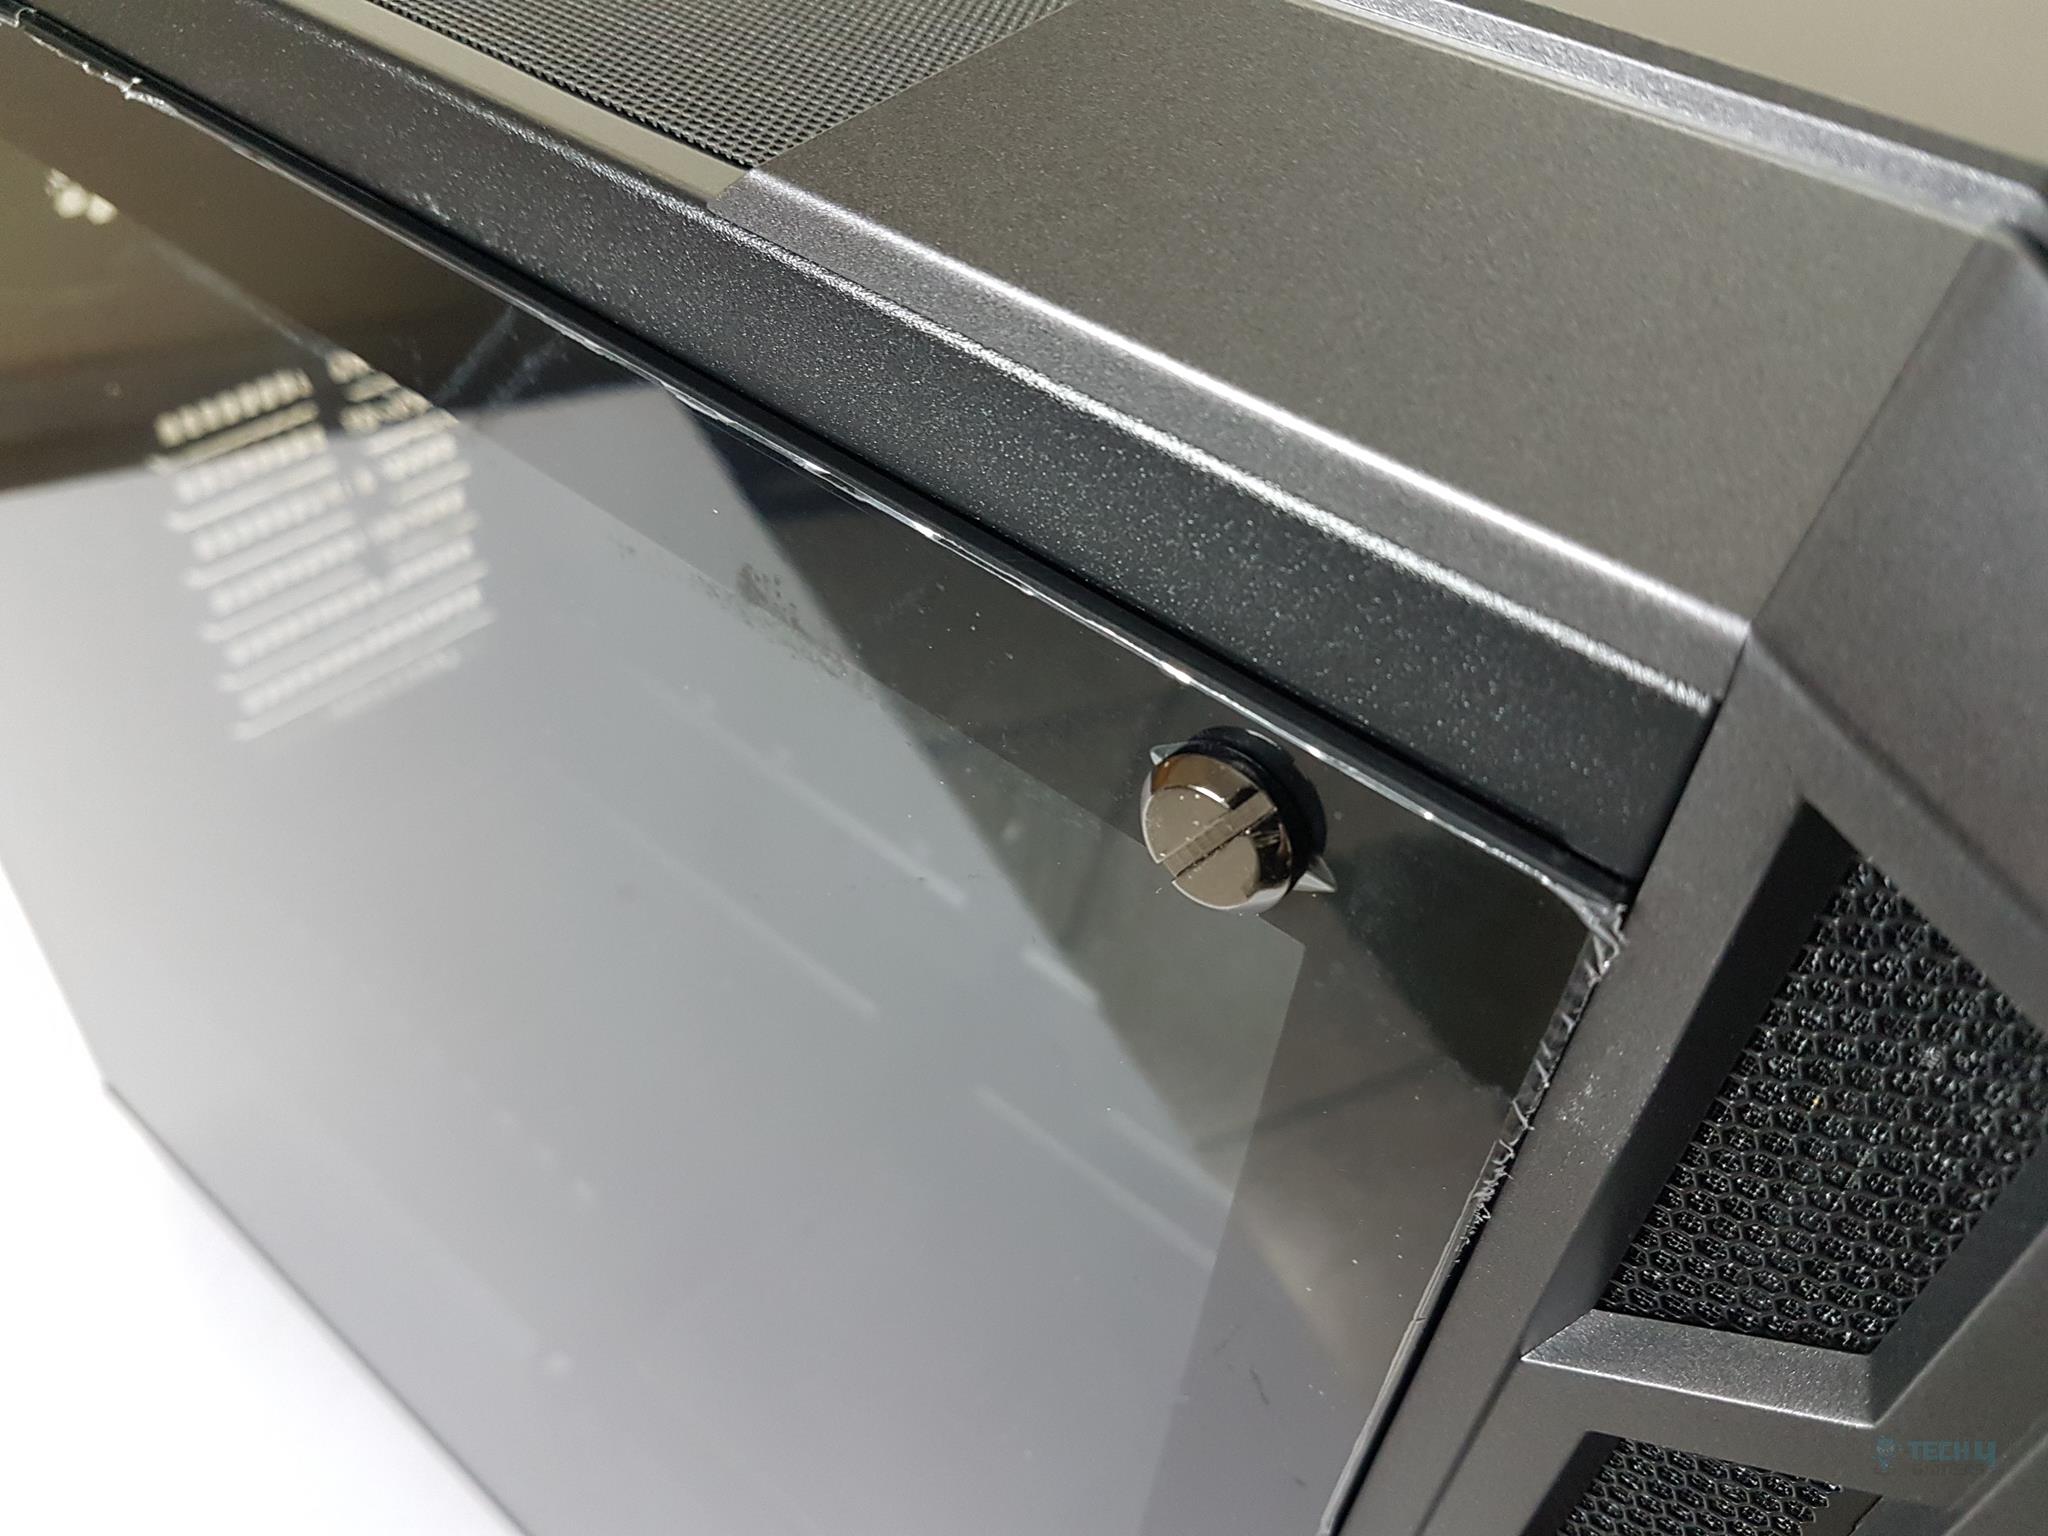
The good thing about the glass panel handling is that it will not fall after releasing the thumbscrews. It will slightly open and remain there thanks to the mechanism provided at its base that prevents it from falling. The user should still exercise care while handling the glass panel. The other side panel is made of steel and is solid-finished. The ivory-gray color is speaking for itself!
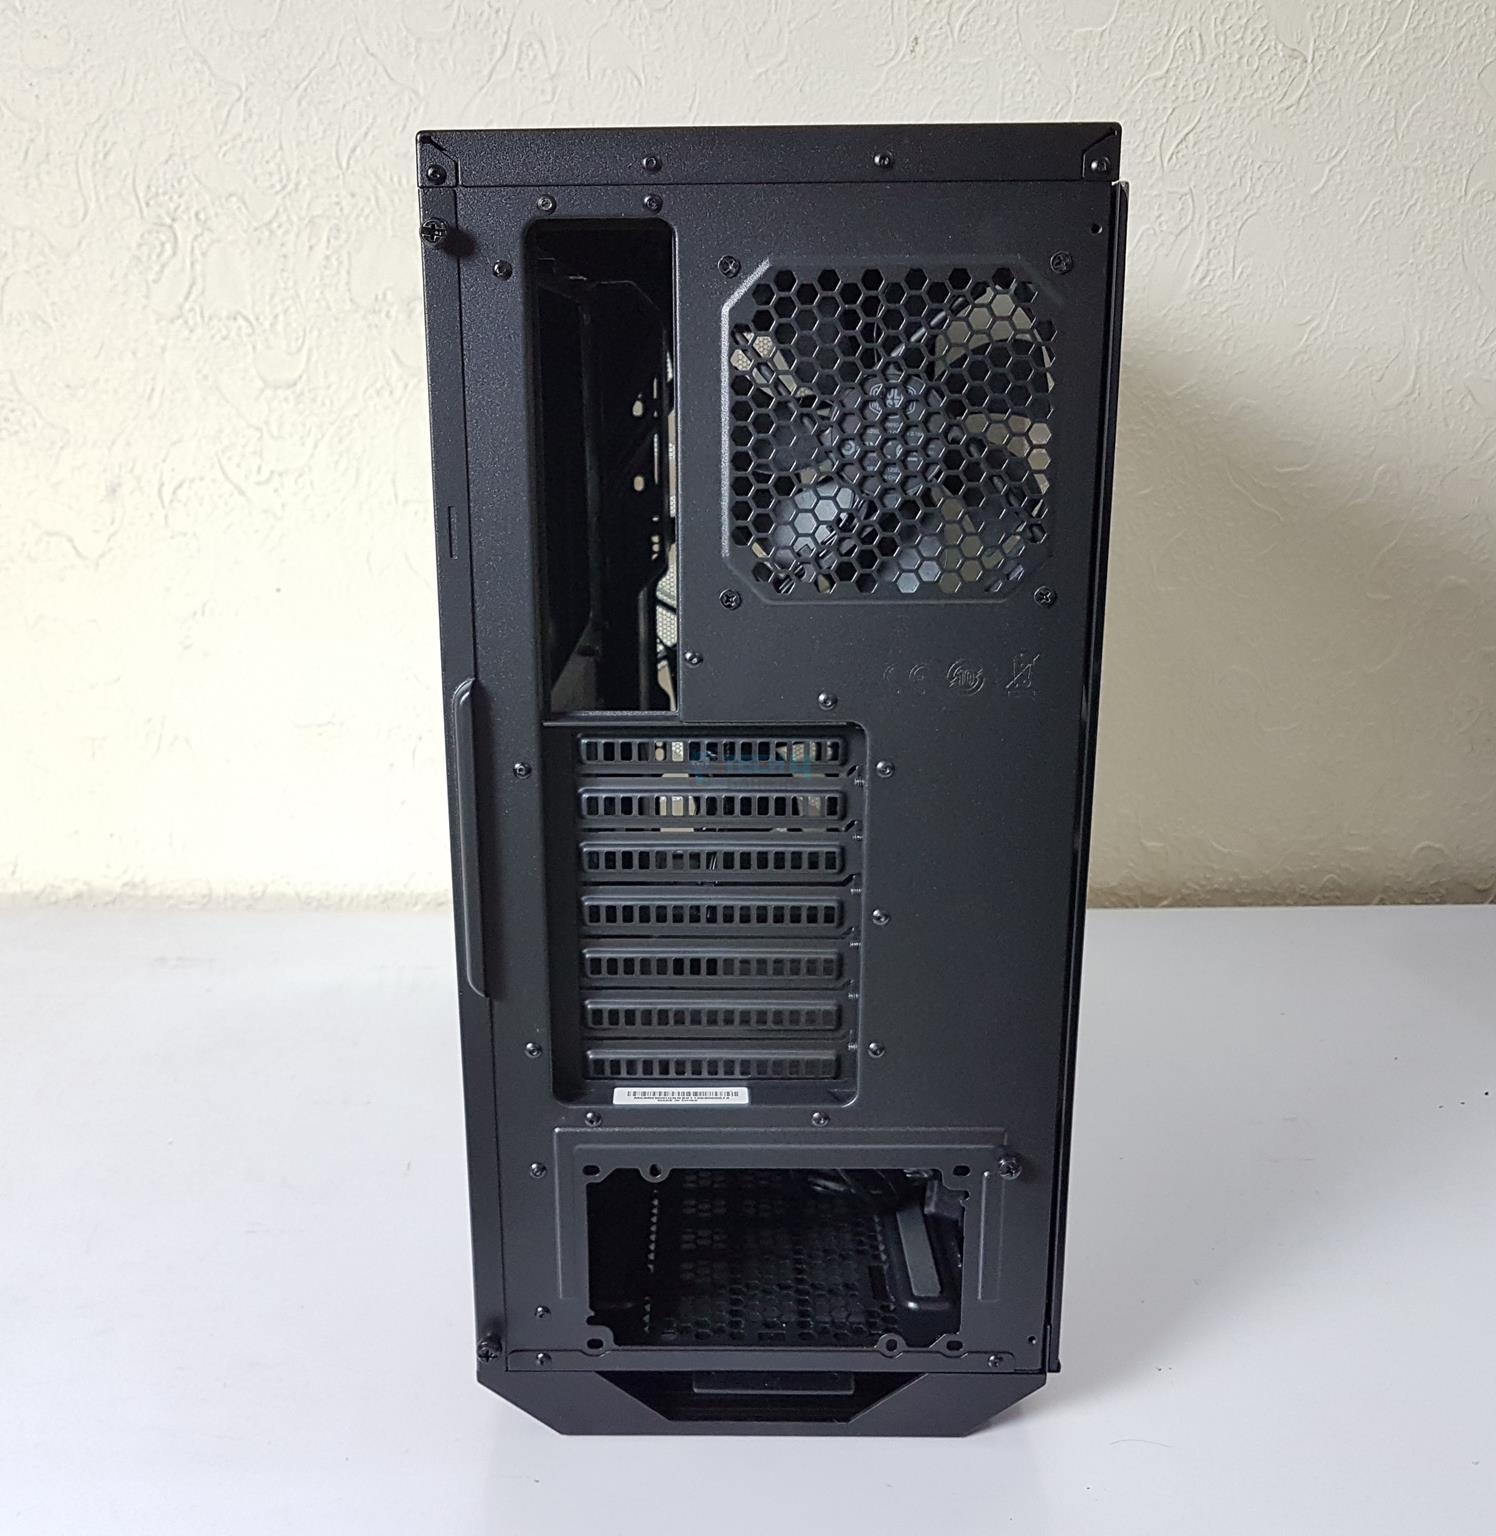
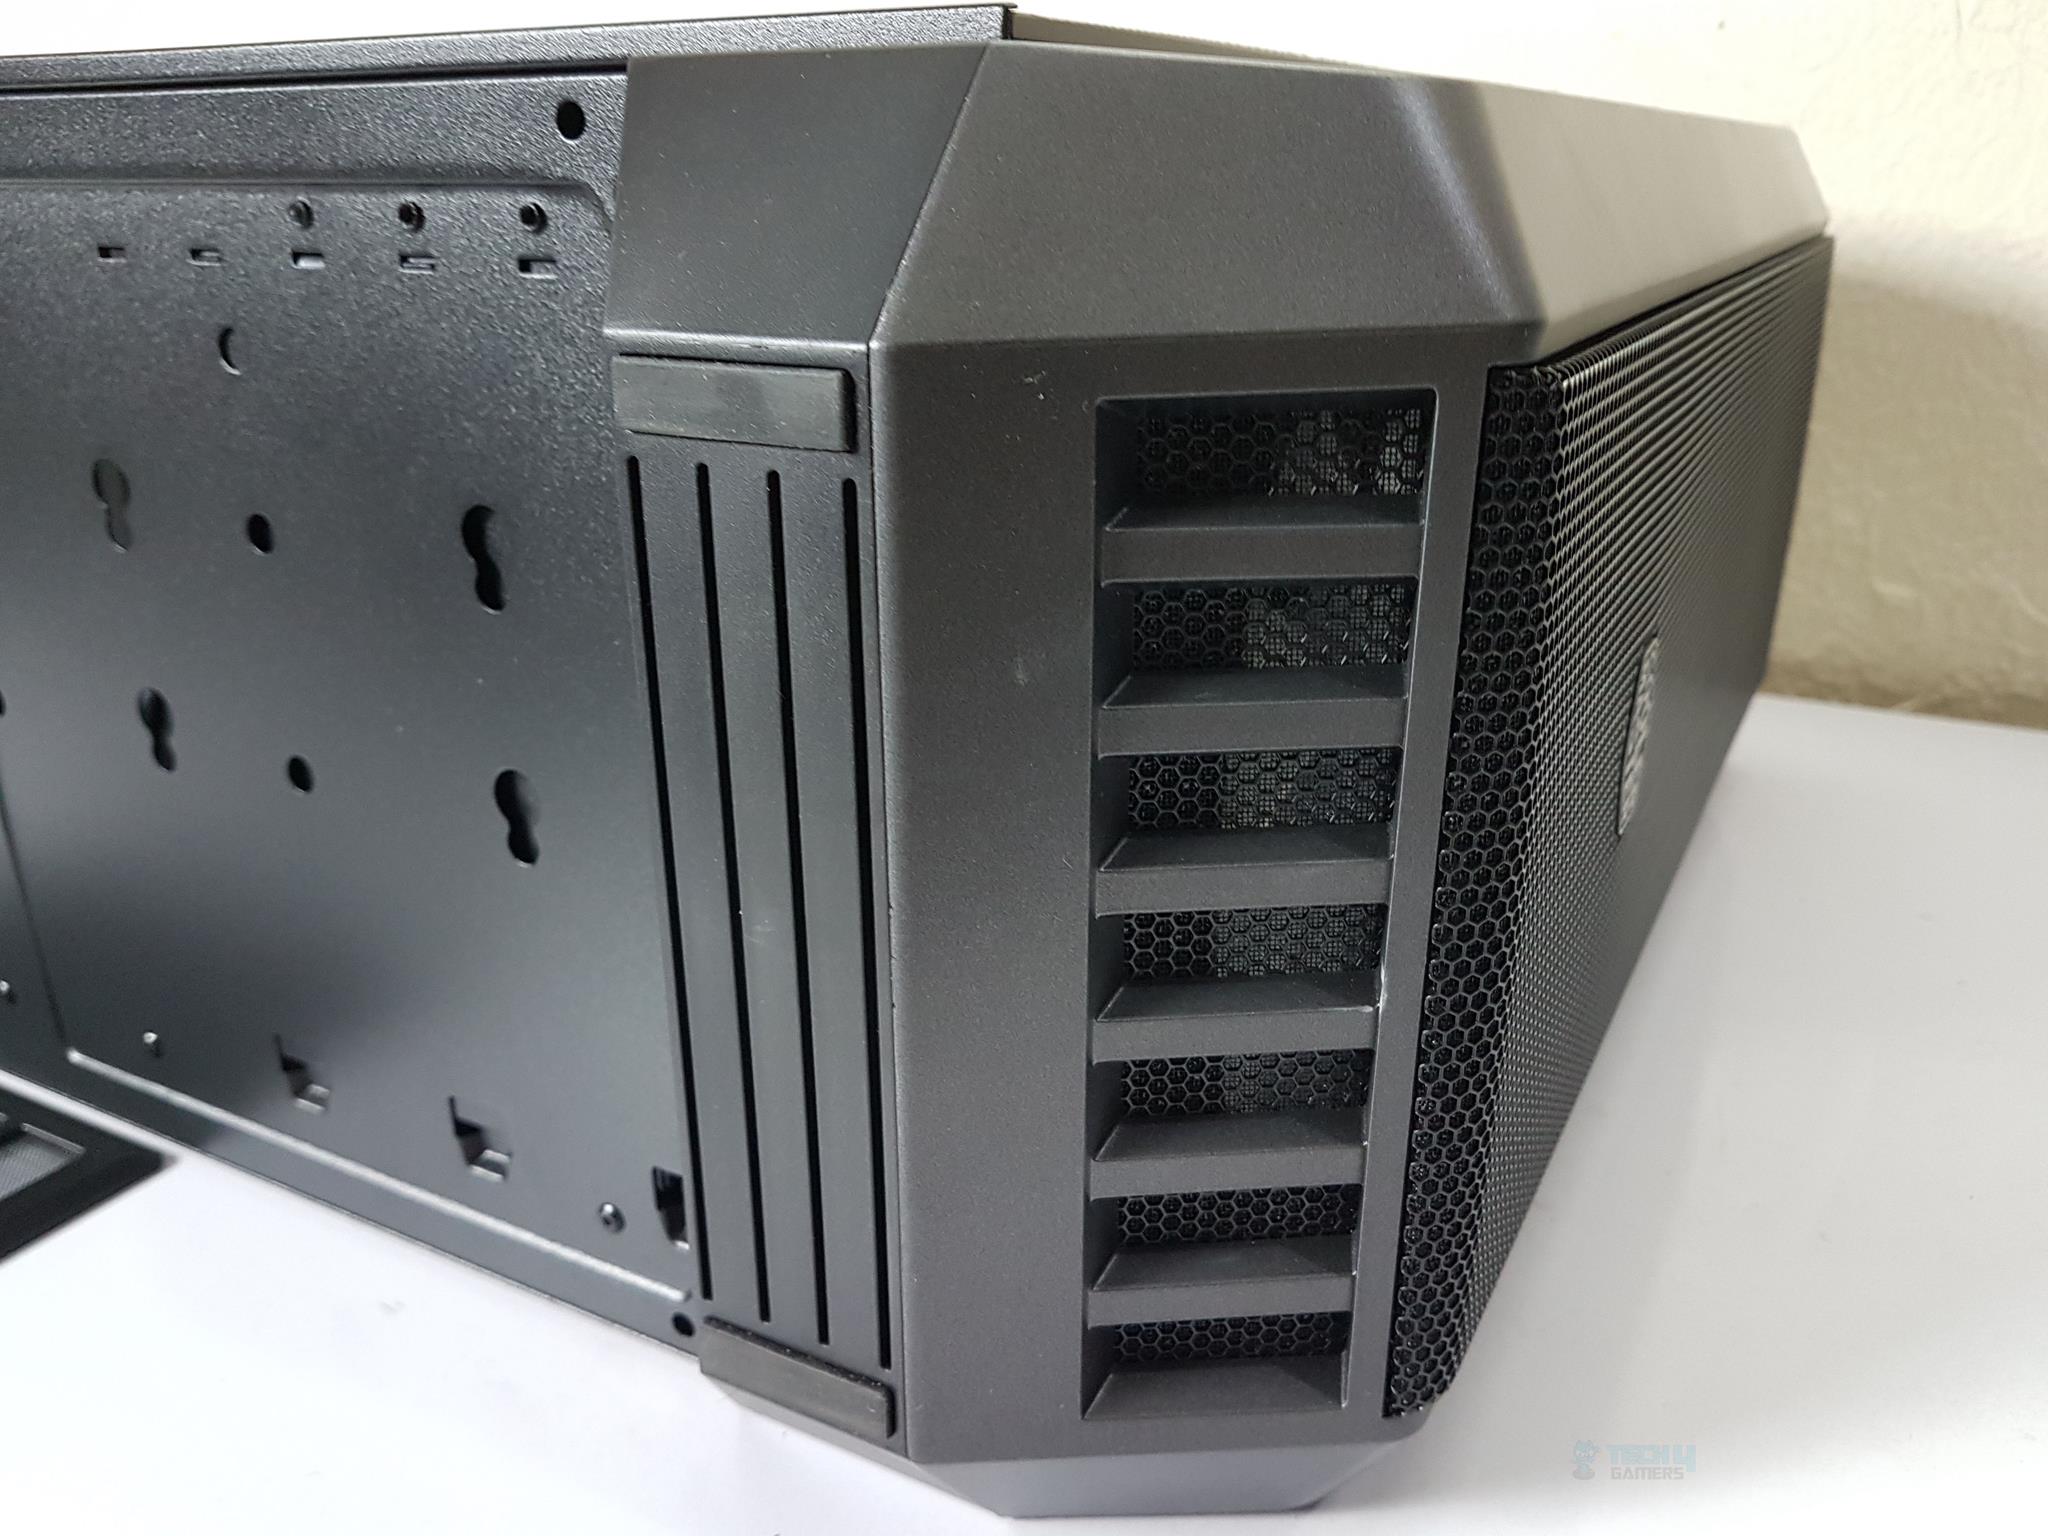
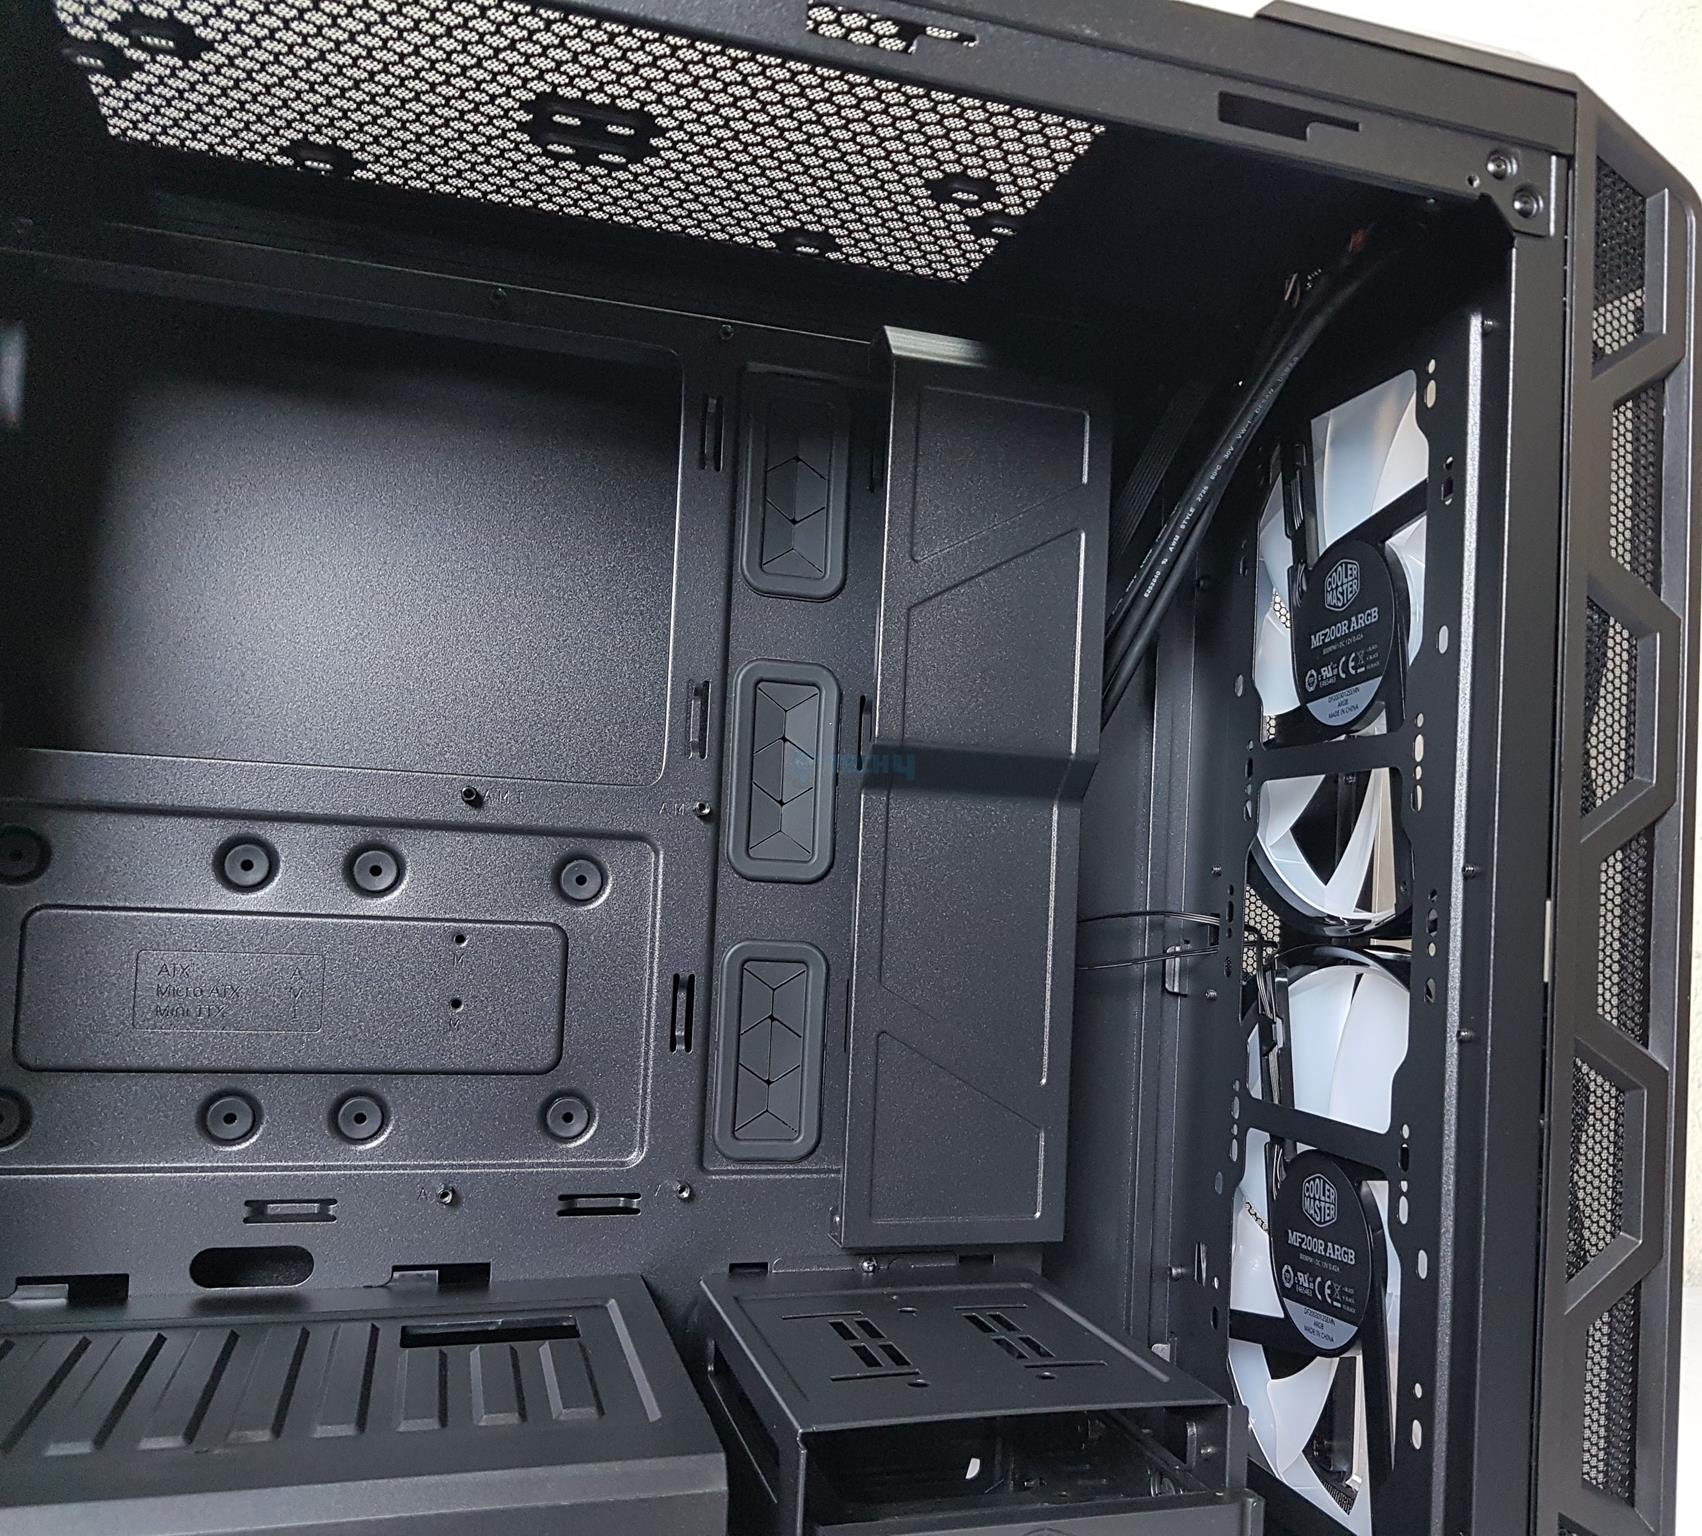
We have a cutout for the motherboard’s IO shield on the rear side of the chassis. A perforated area on the right side of the IO cutout where a 120mm black color fan is pre-installed. Note that we can’t adjust the height of the rear fan, and there is no mounting for a 140mm there.
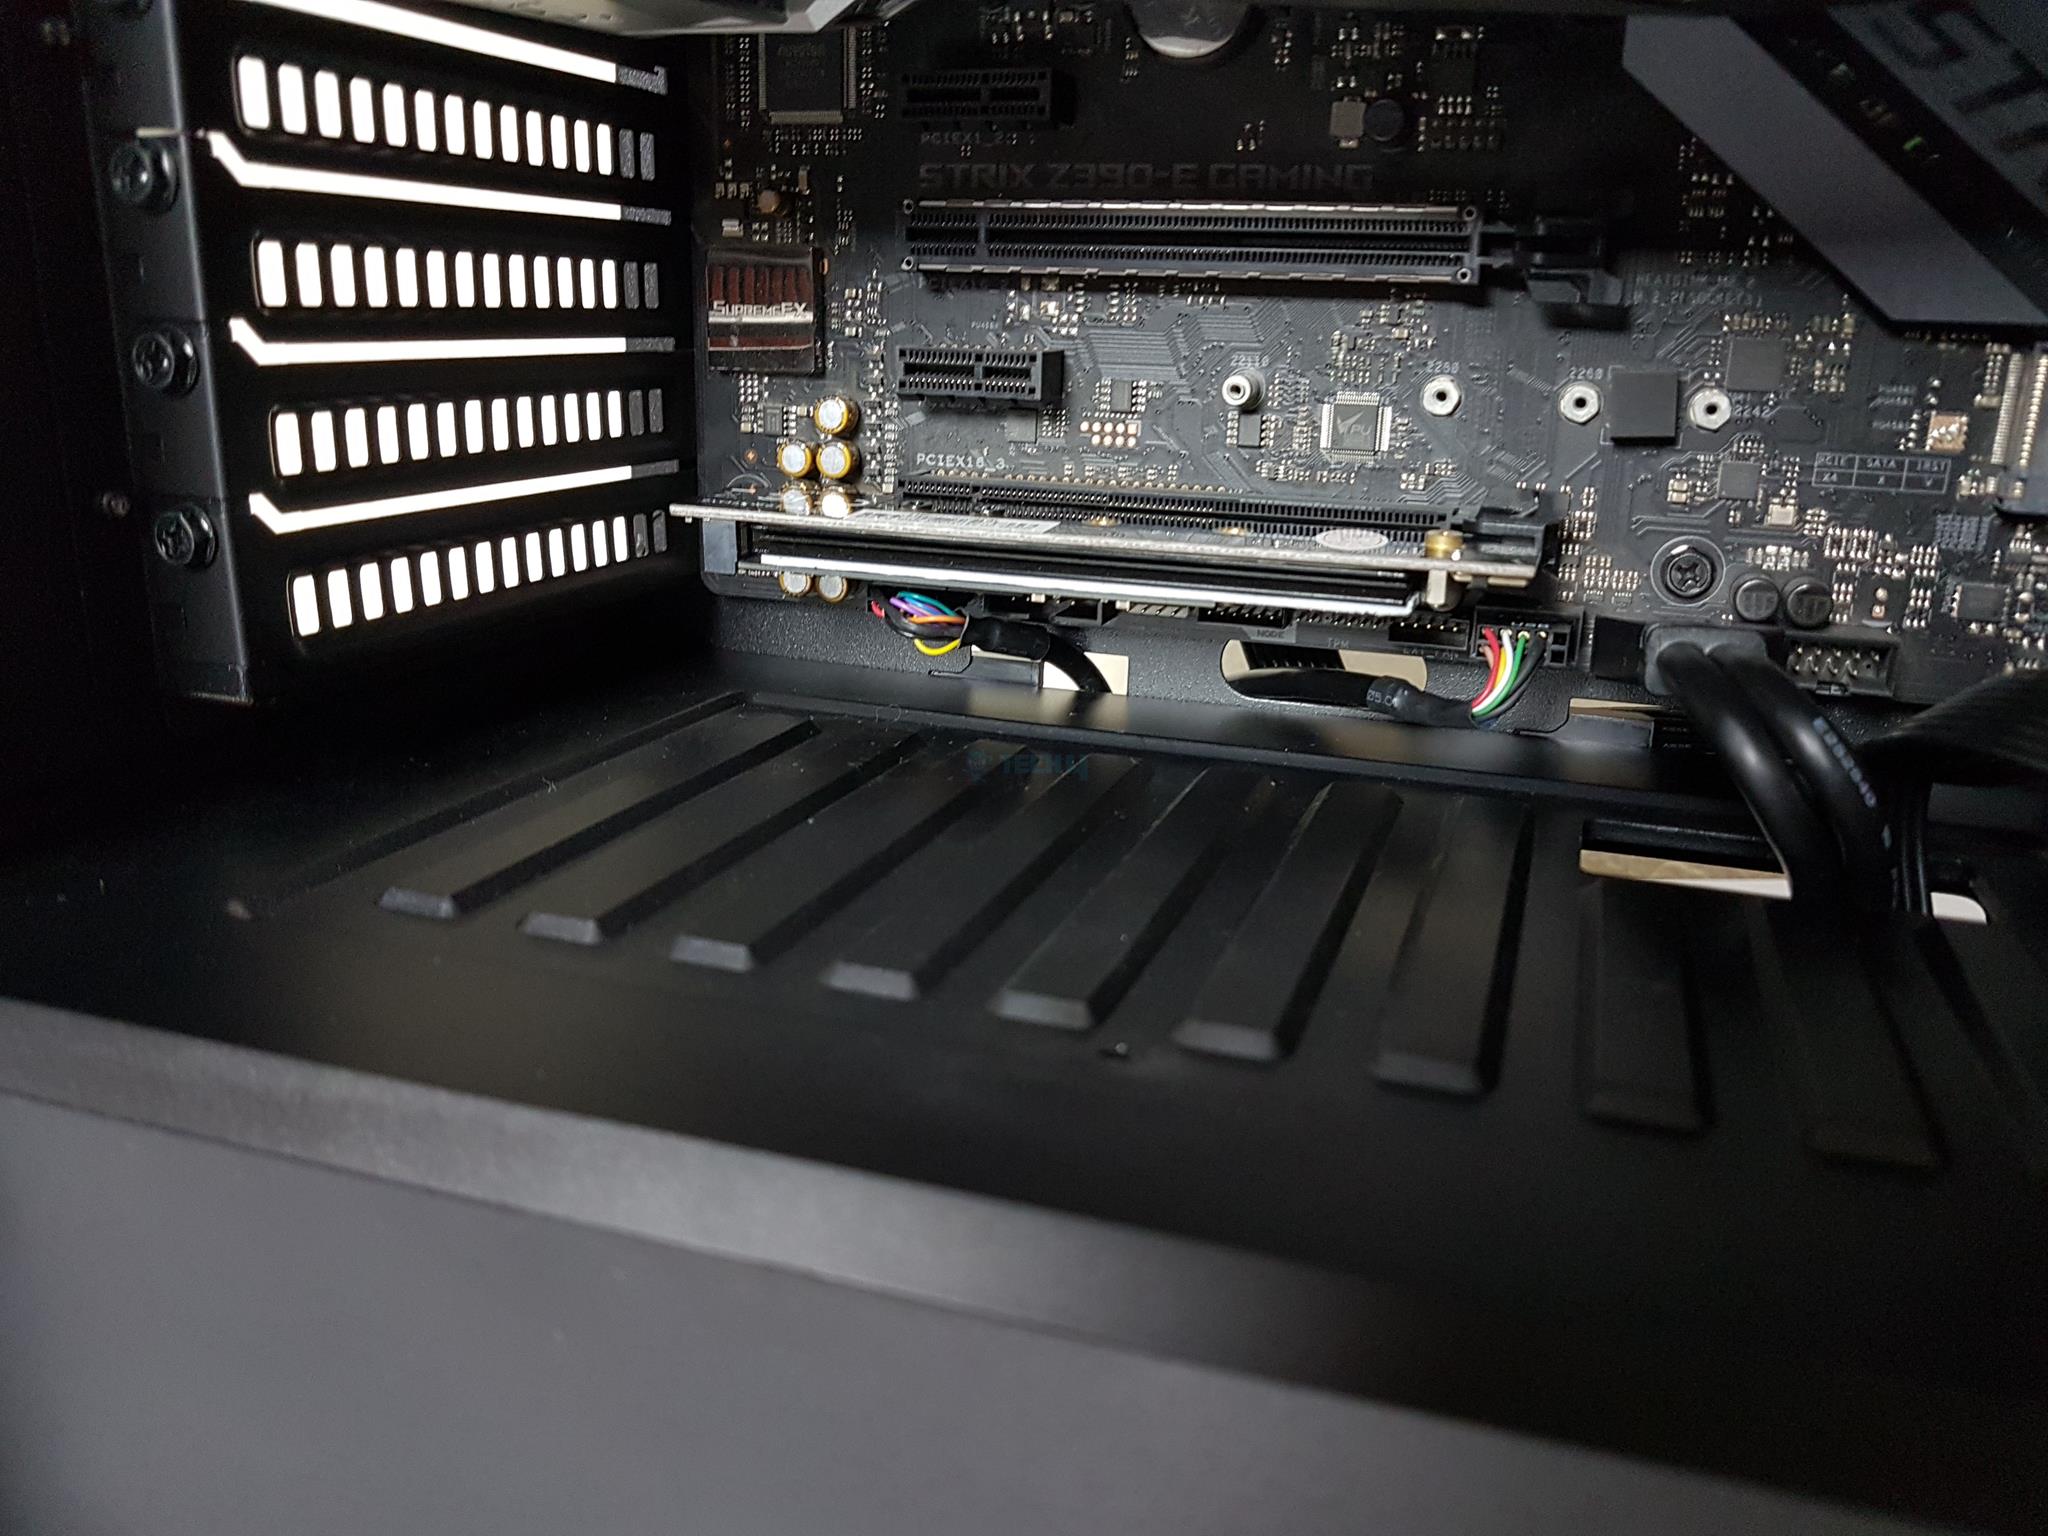
We have 7x PCIe slot covers. These are reusable and have perforations for ventilation. At the bottom, we have a standard ATX PSU mounting area. There is a thumbscrew on the top right side of the PSU mount. It is securing the PSU cover on the inner side of the chassis.
The top side of the chassis has a perforated area with mounting holes. A magnetic dust filter is provided on the top for protection from the dust. The cooling options are:
- Up to 2x 120mm fans
- Up to 2x 140mm fans
- 1x 200mm fan with a thickness of 25mm
- 120 / 140 / 240mm Radiator
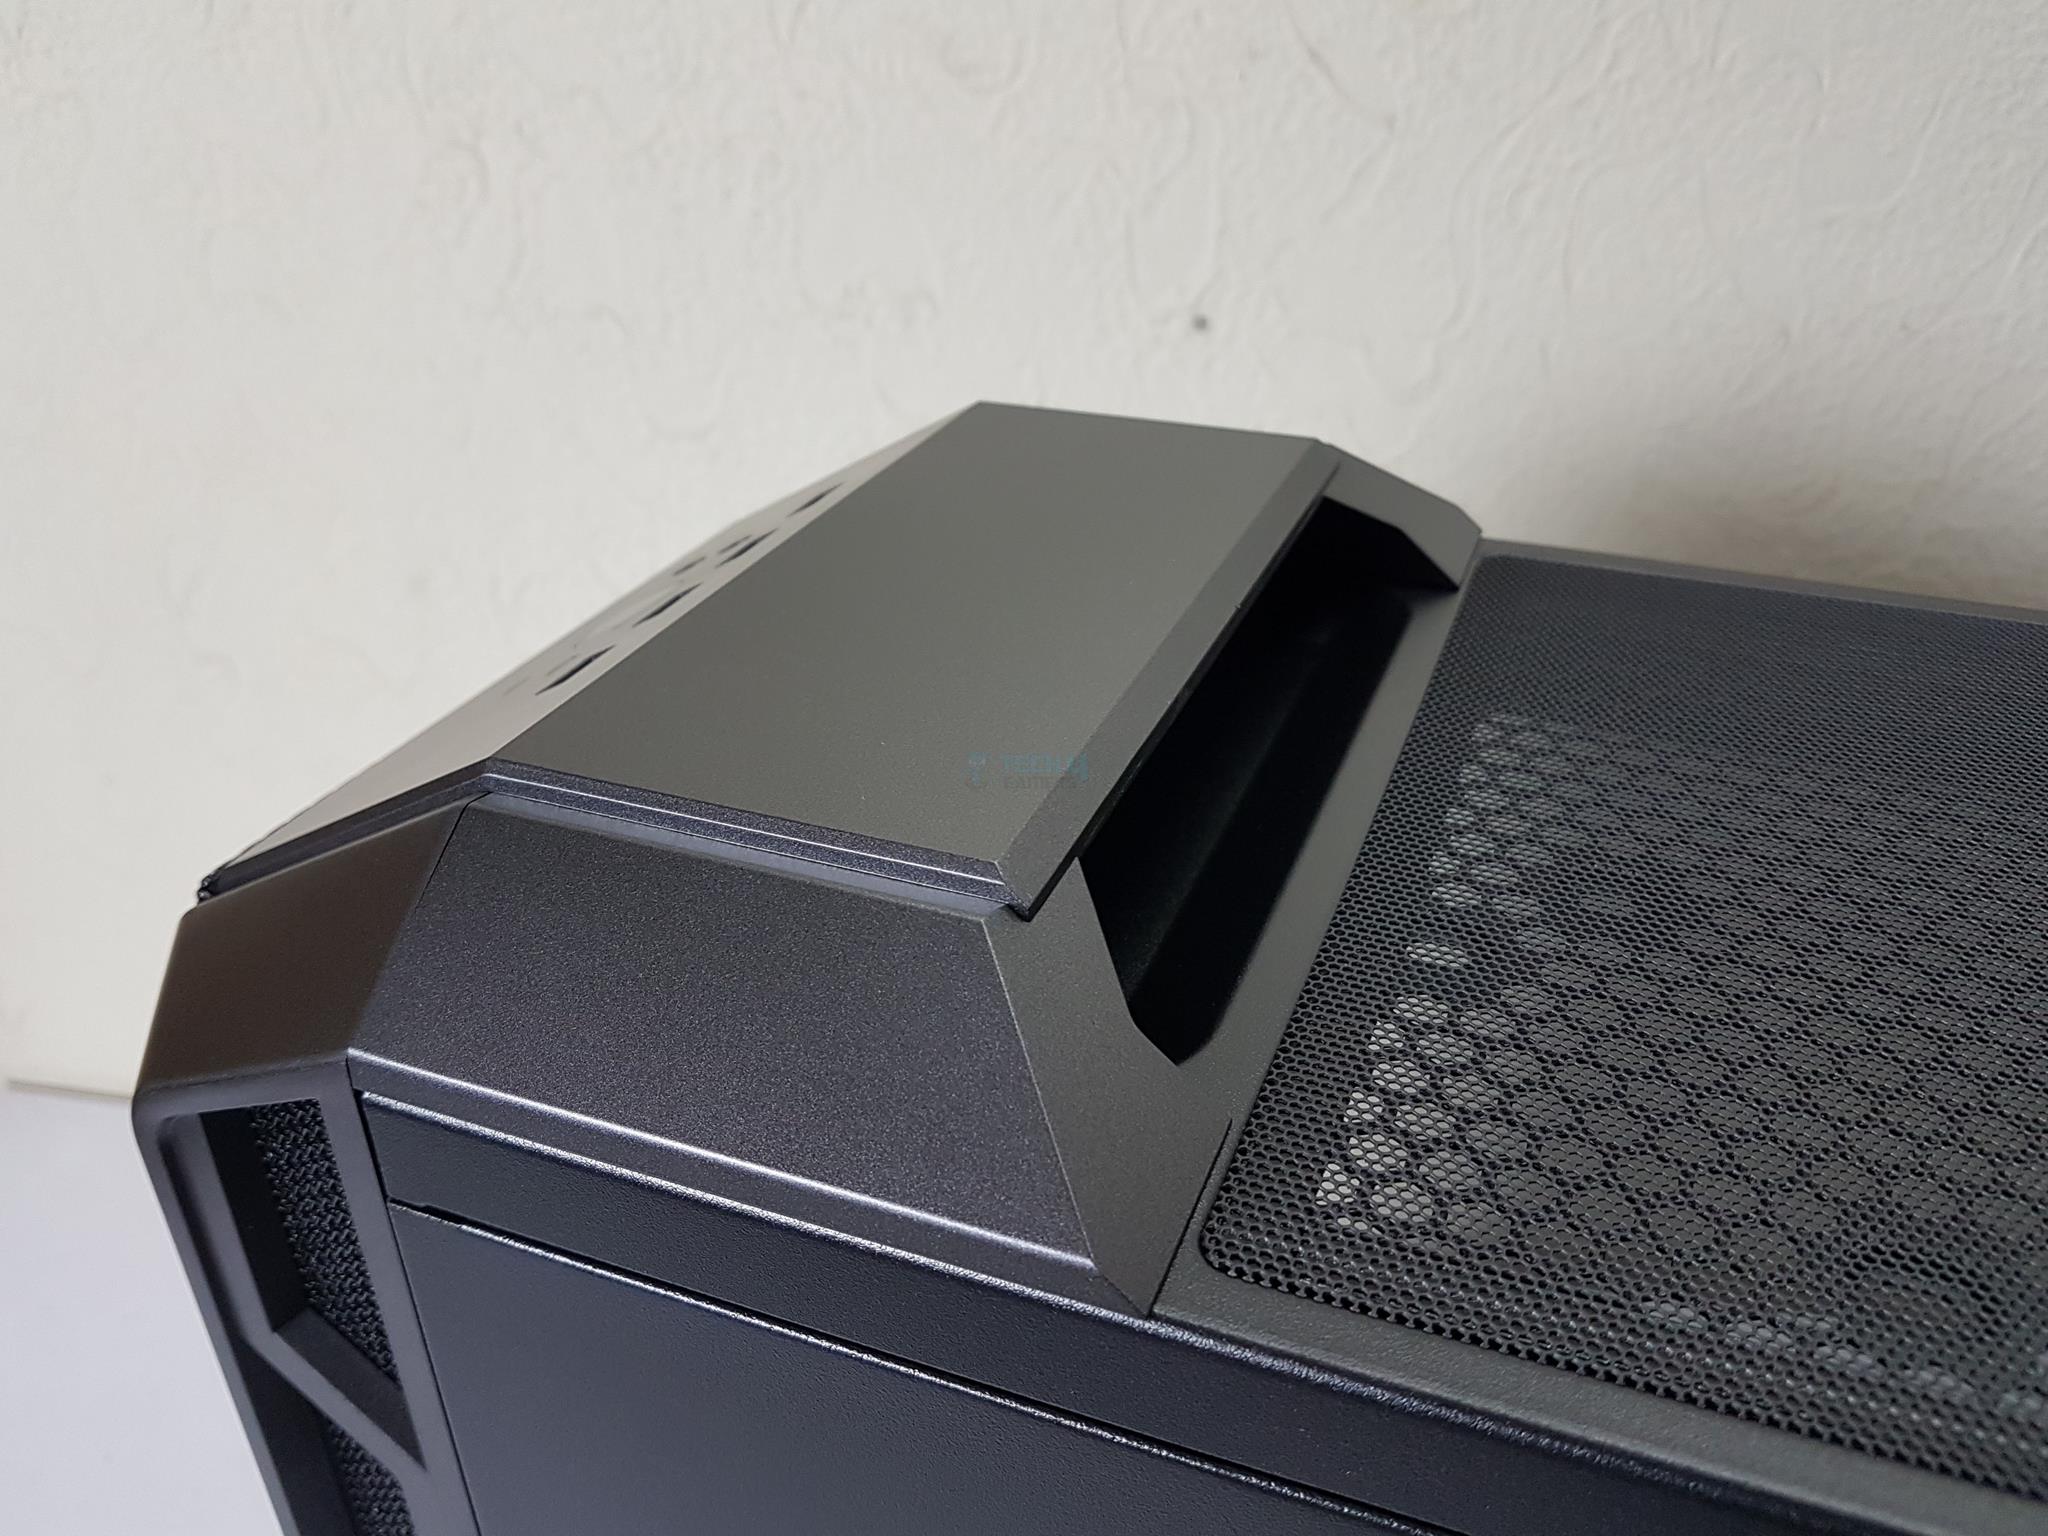
A handle is provided near the front side of the chassis on the top for ease of carrying it. This also sits well with the overall layout design and mainly helps with the shape of the sliding design on the top front, which otherwise would have looked incomplete.
The bottom side of the chassis has two large feet on both ends, which run on the entire width of the chassis. They provide ample height to the chassis from the table surface. The PSU area is perforated for ventilation and has a non-magnetic dust filter, which is washable.
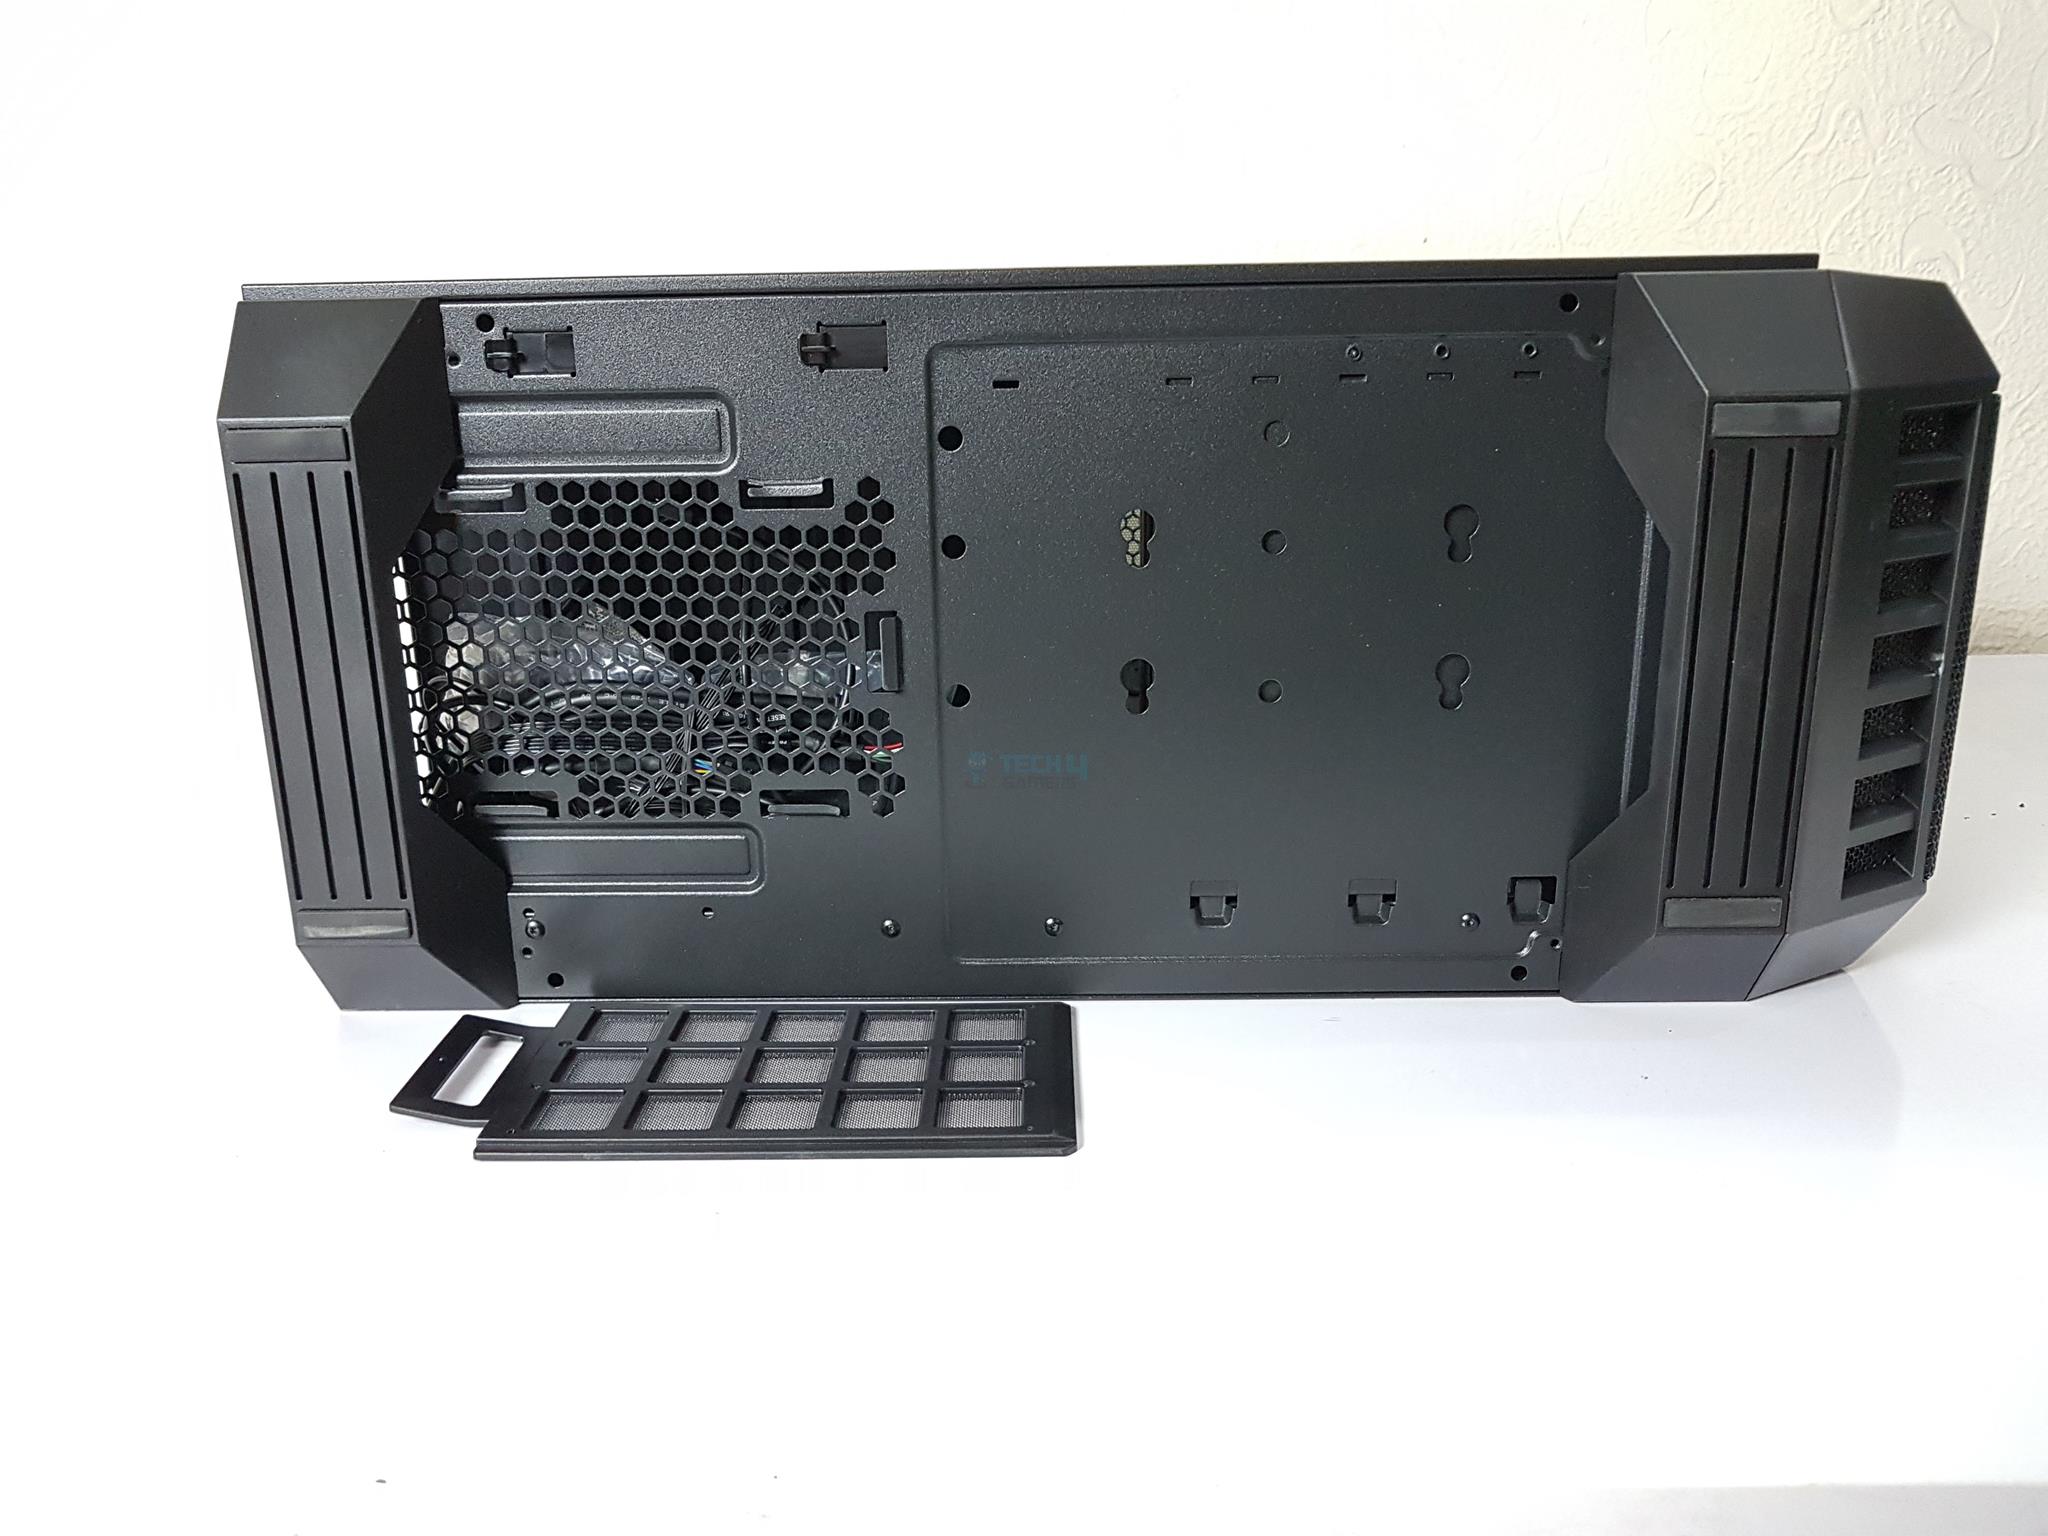
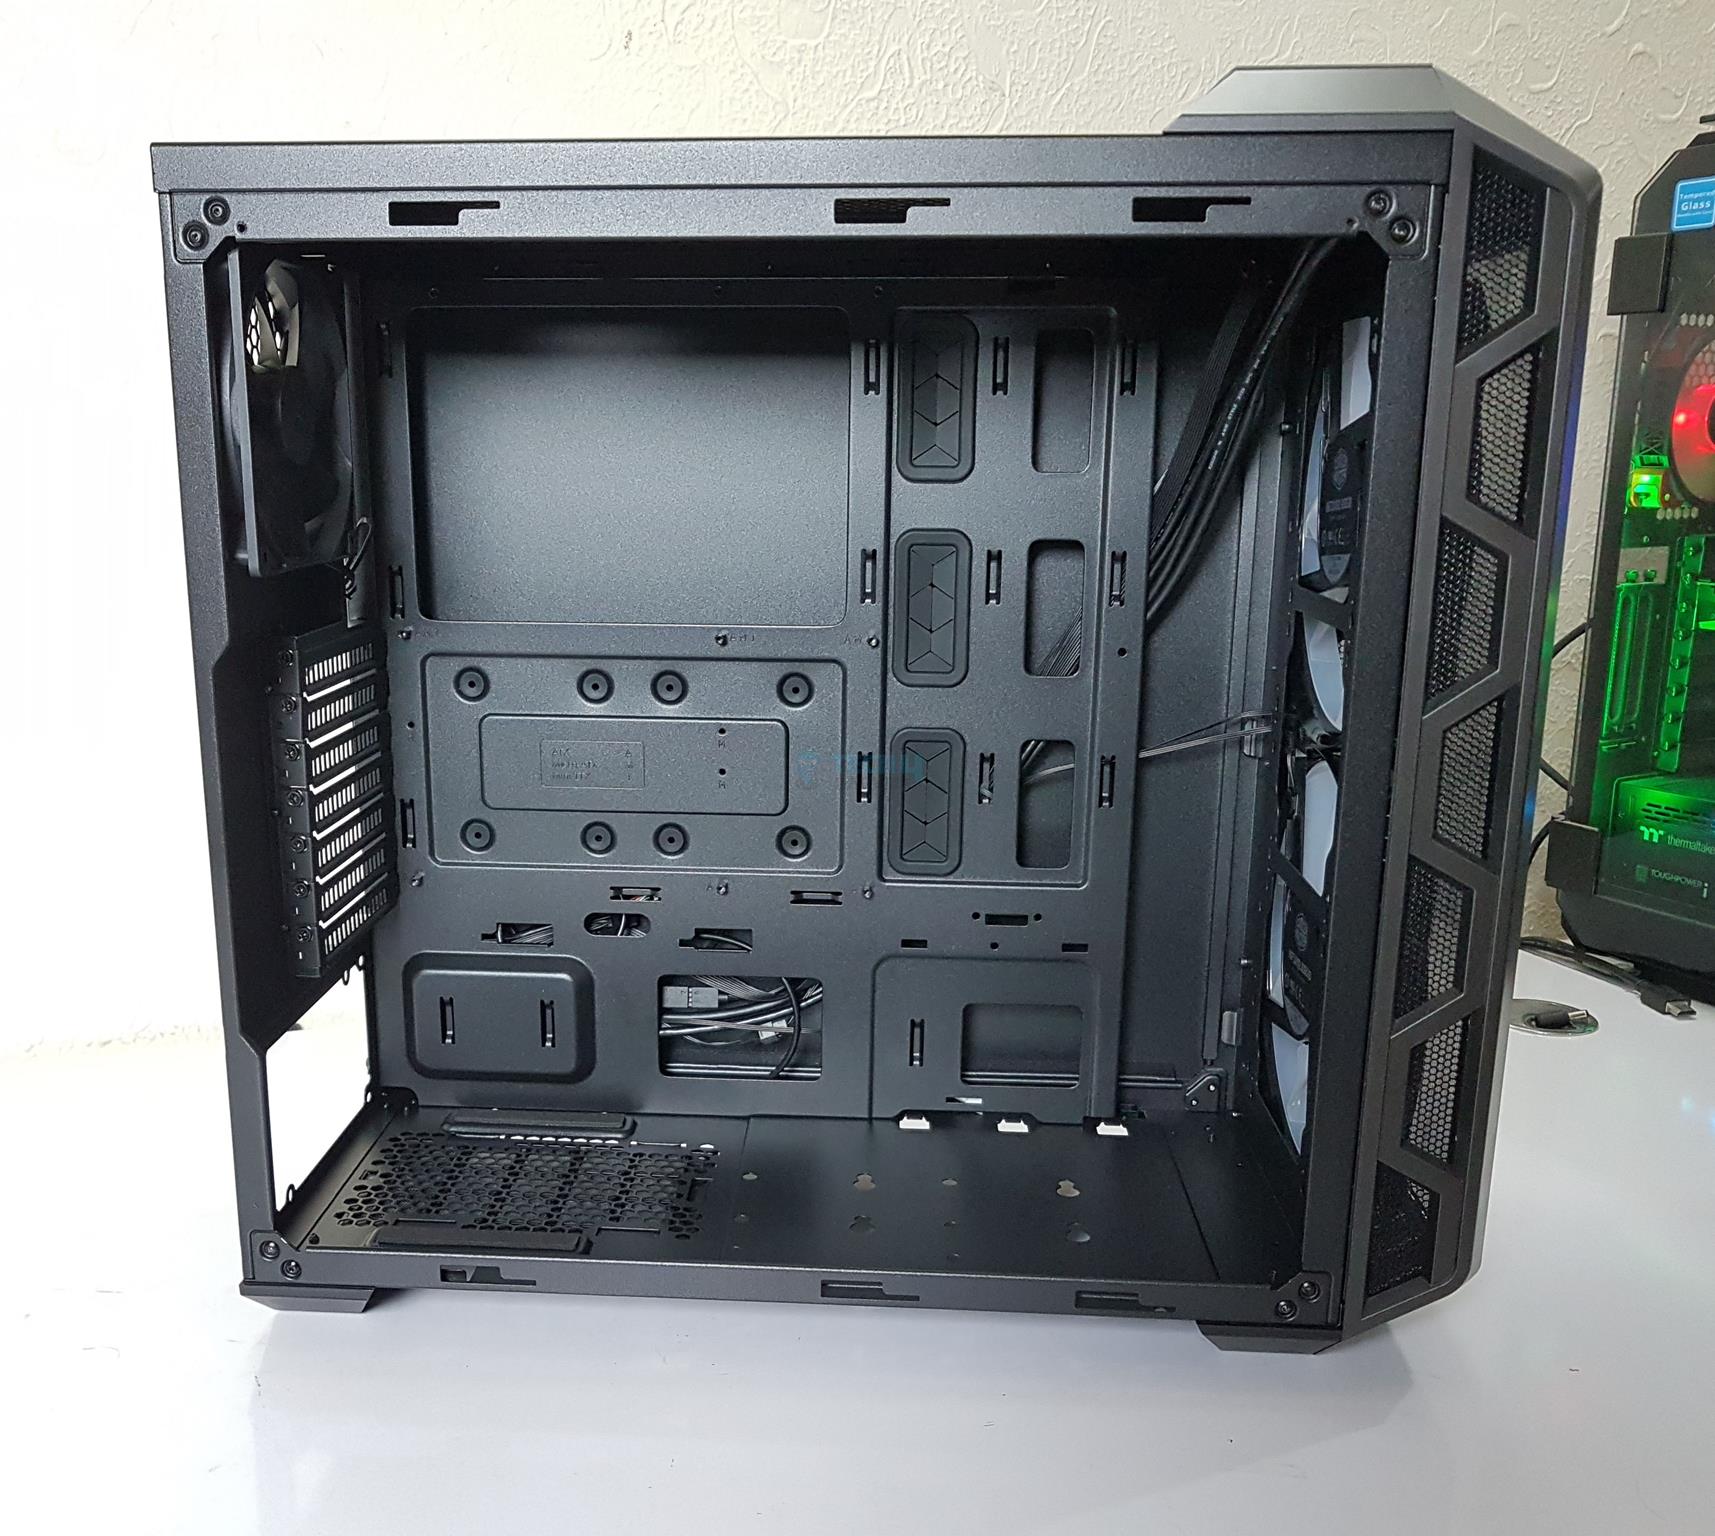
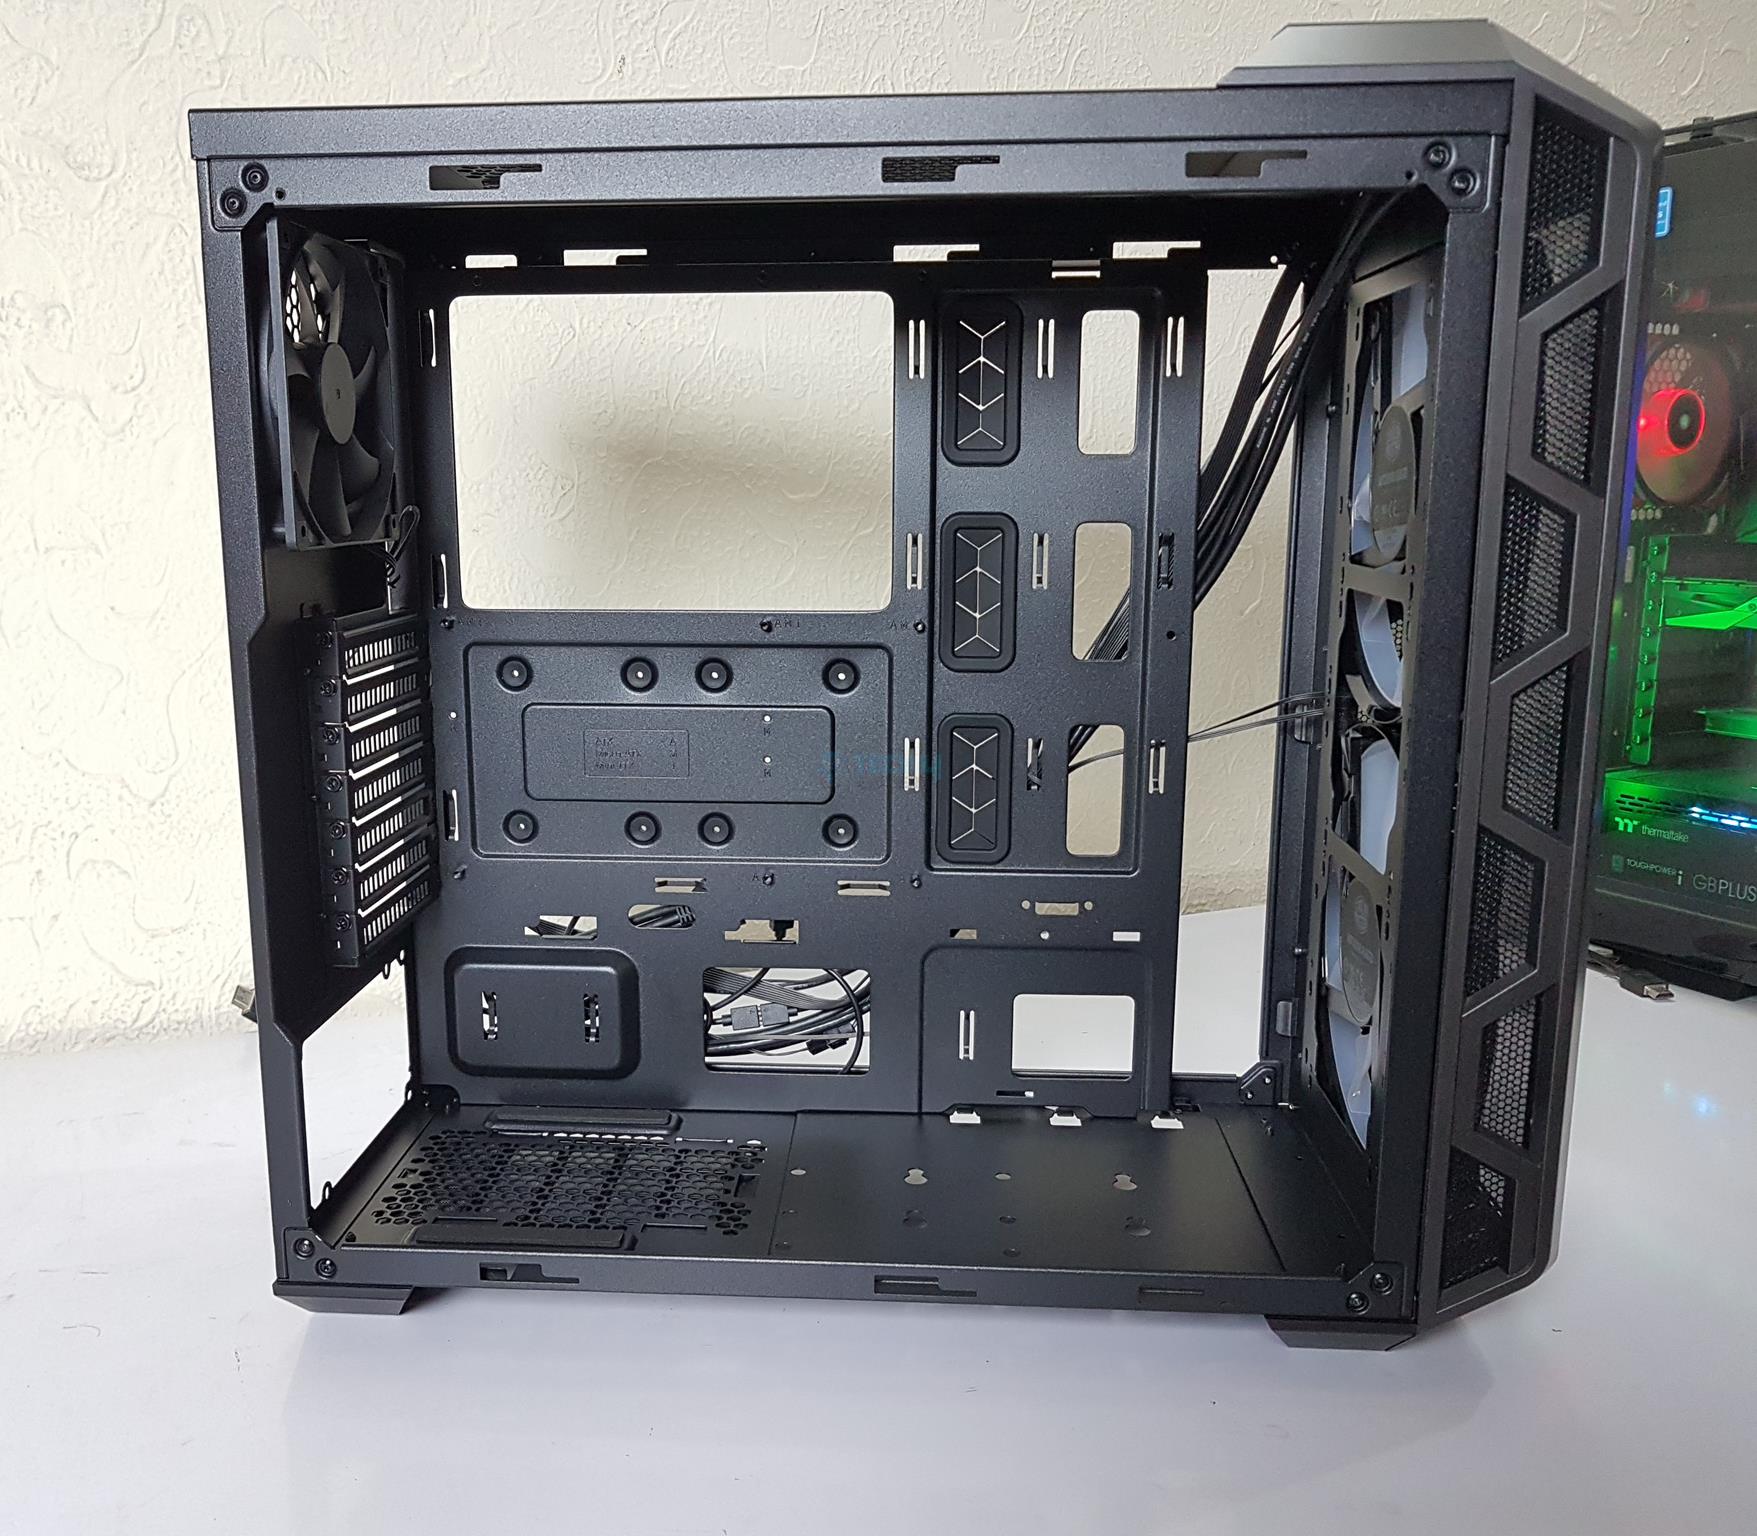
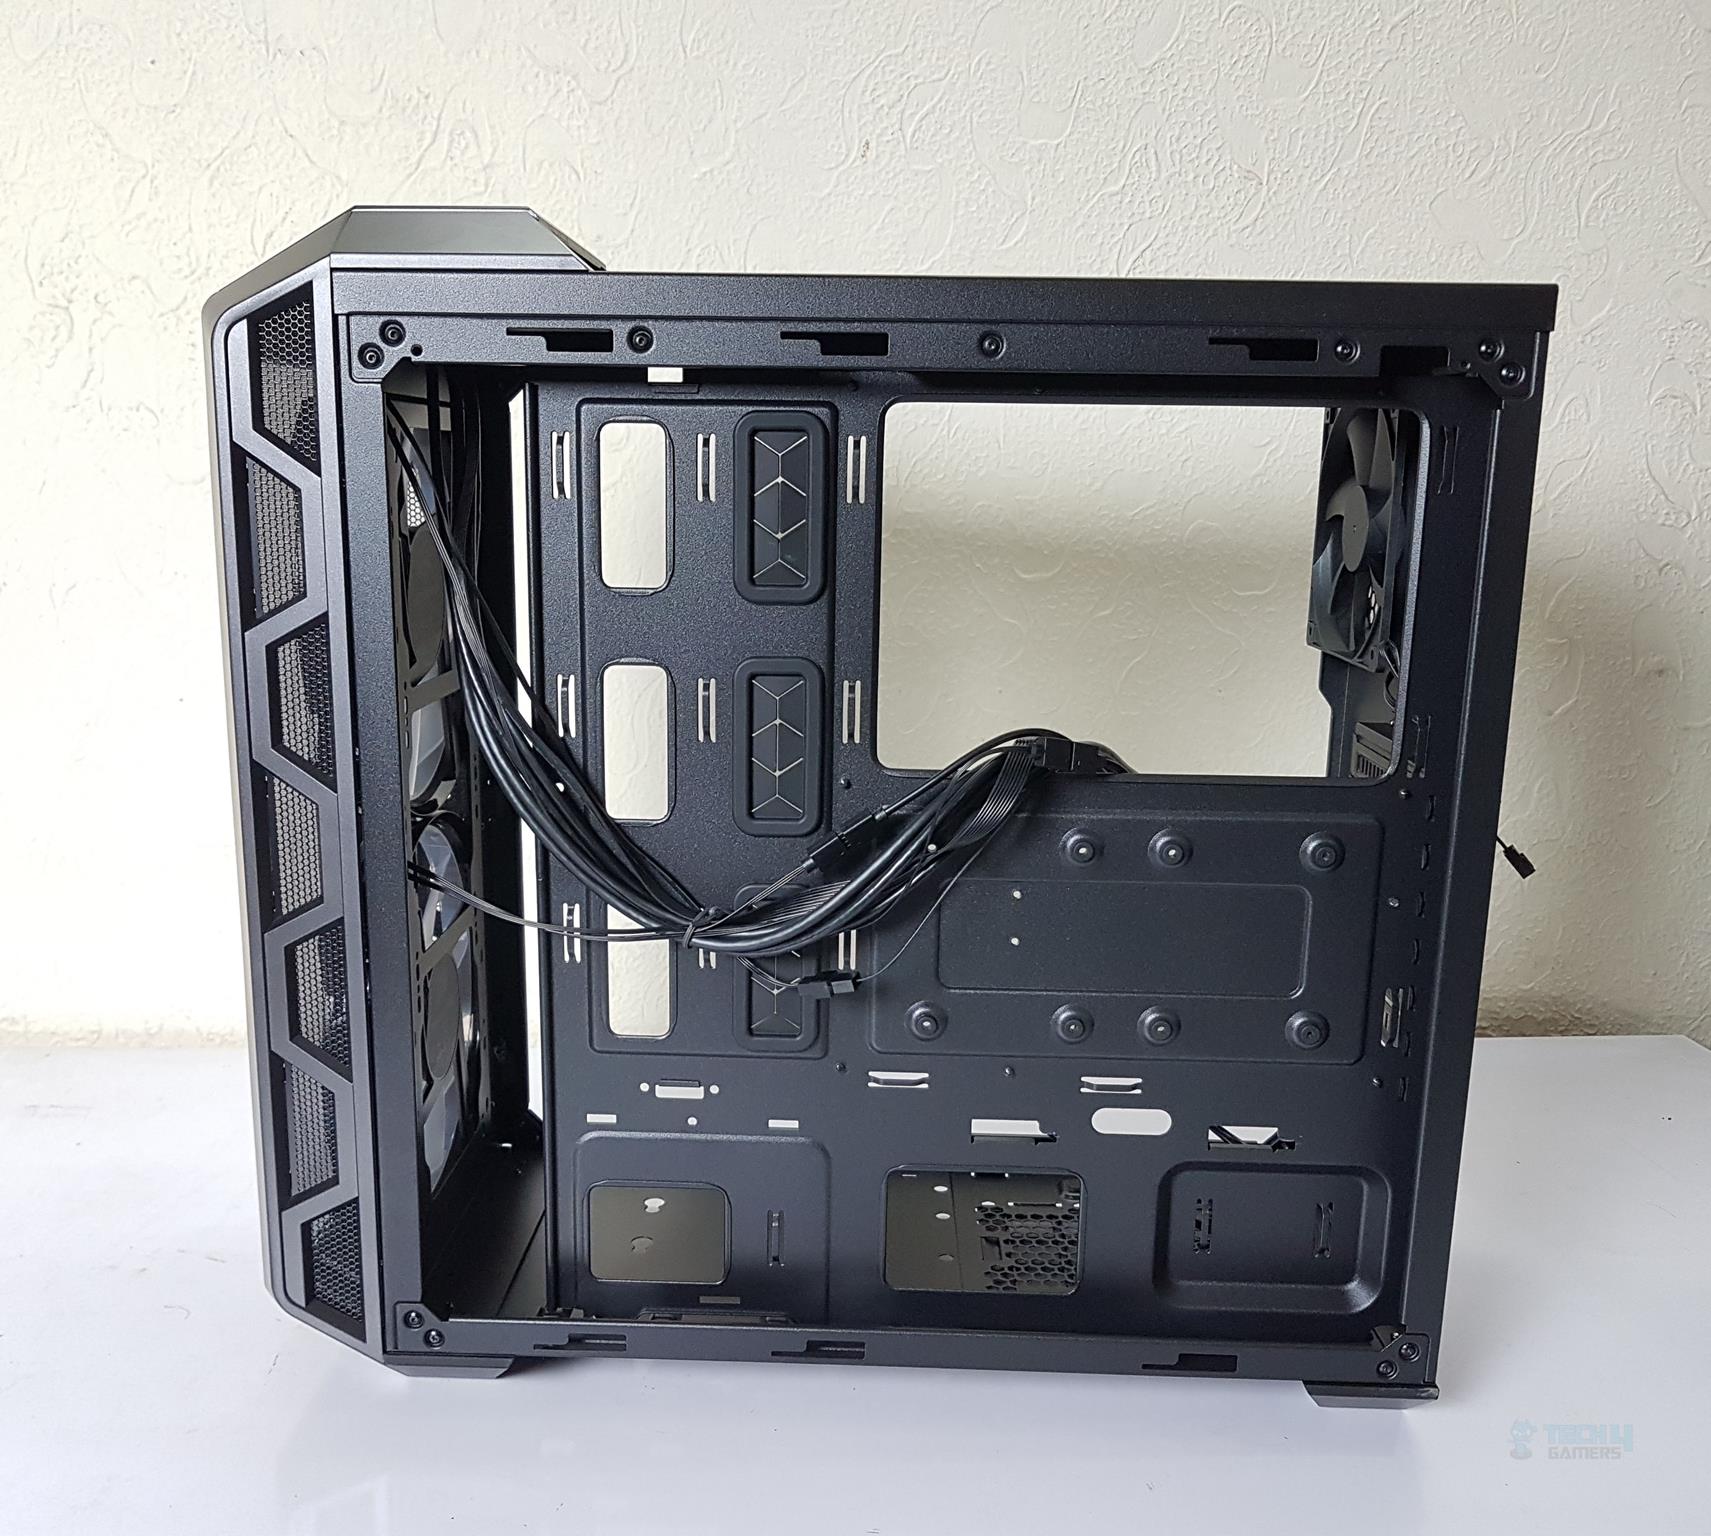
The area towards the front side on the bottom has a slide-down design with mesh on the inner side. The complete front area has dust filtration. Now, it is time to look at the chassis inside. The inner layout is spacious. The look and feel of the chassis are too good. We have a cable cover in this chassis as well. Cooler Master has retained this design element from the original H series.
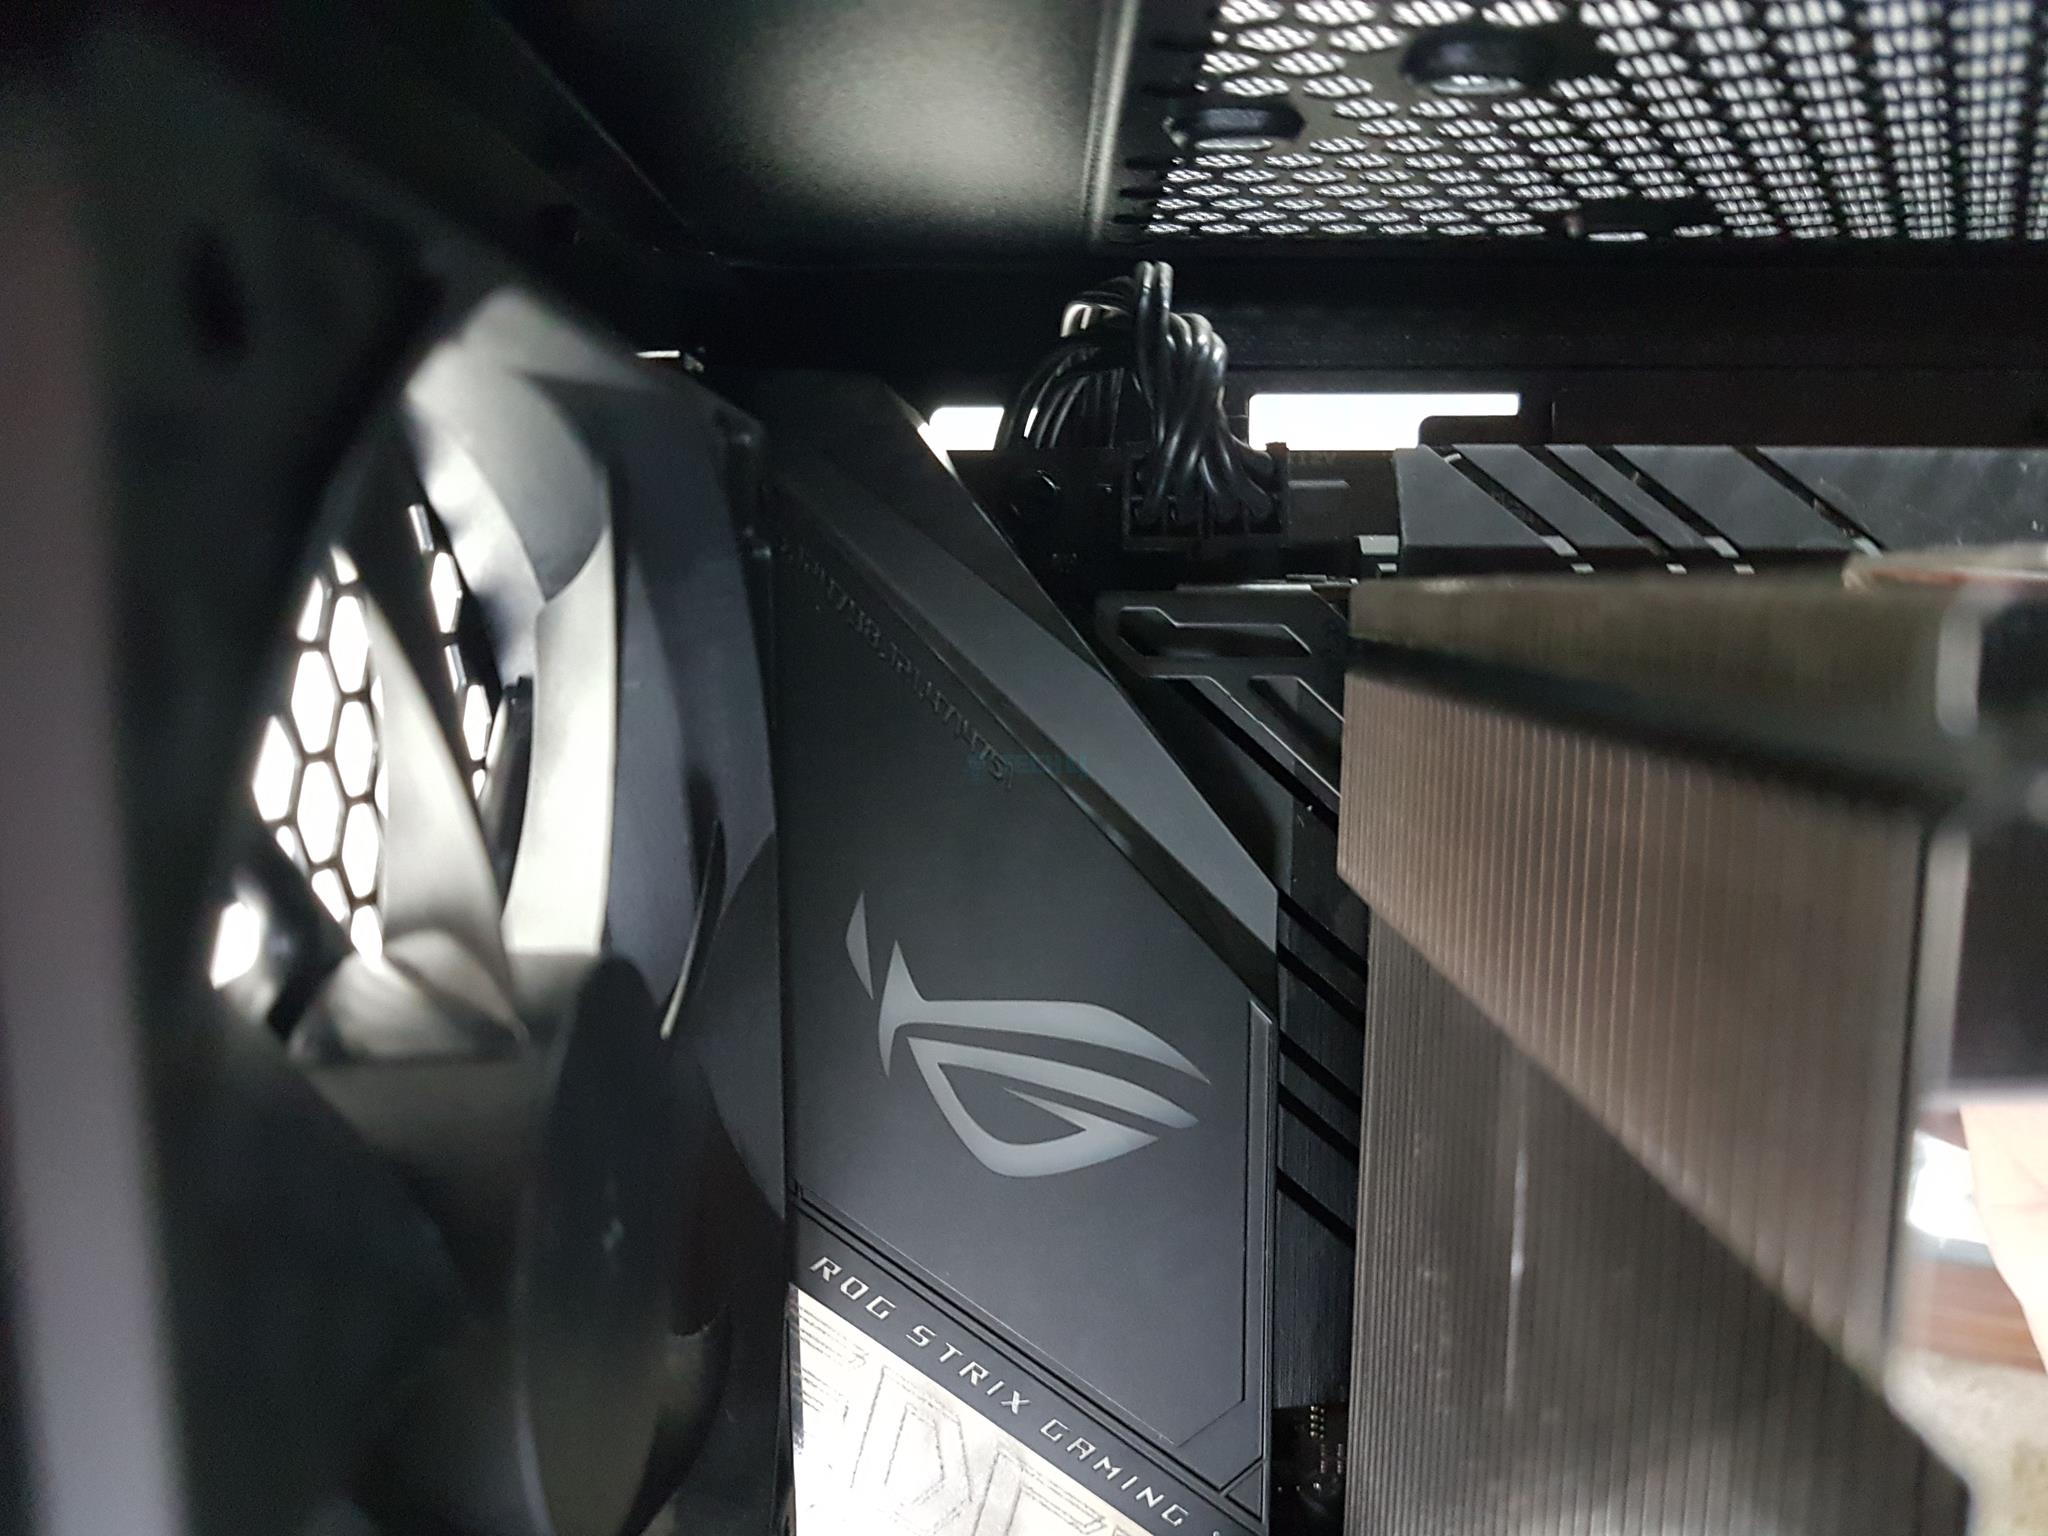
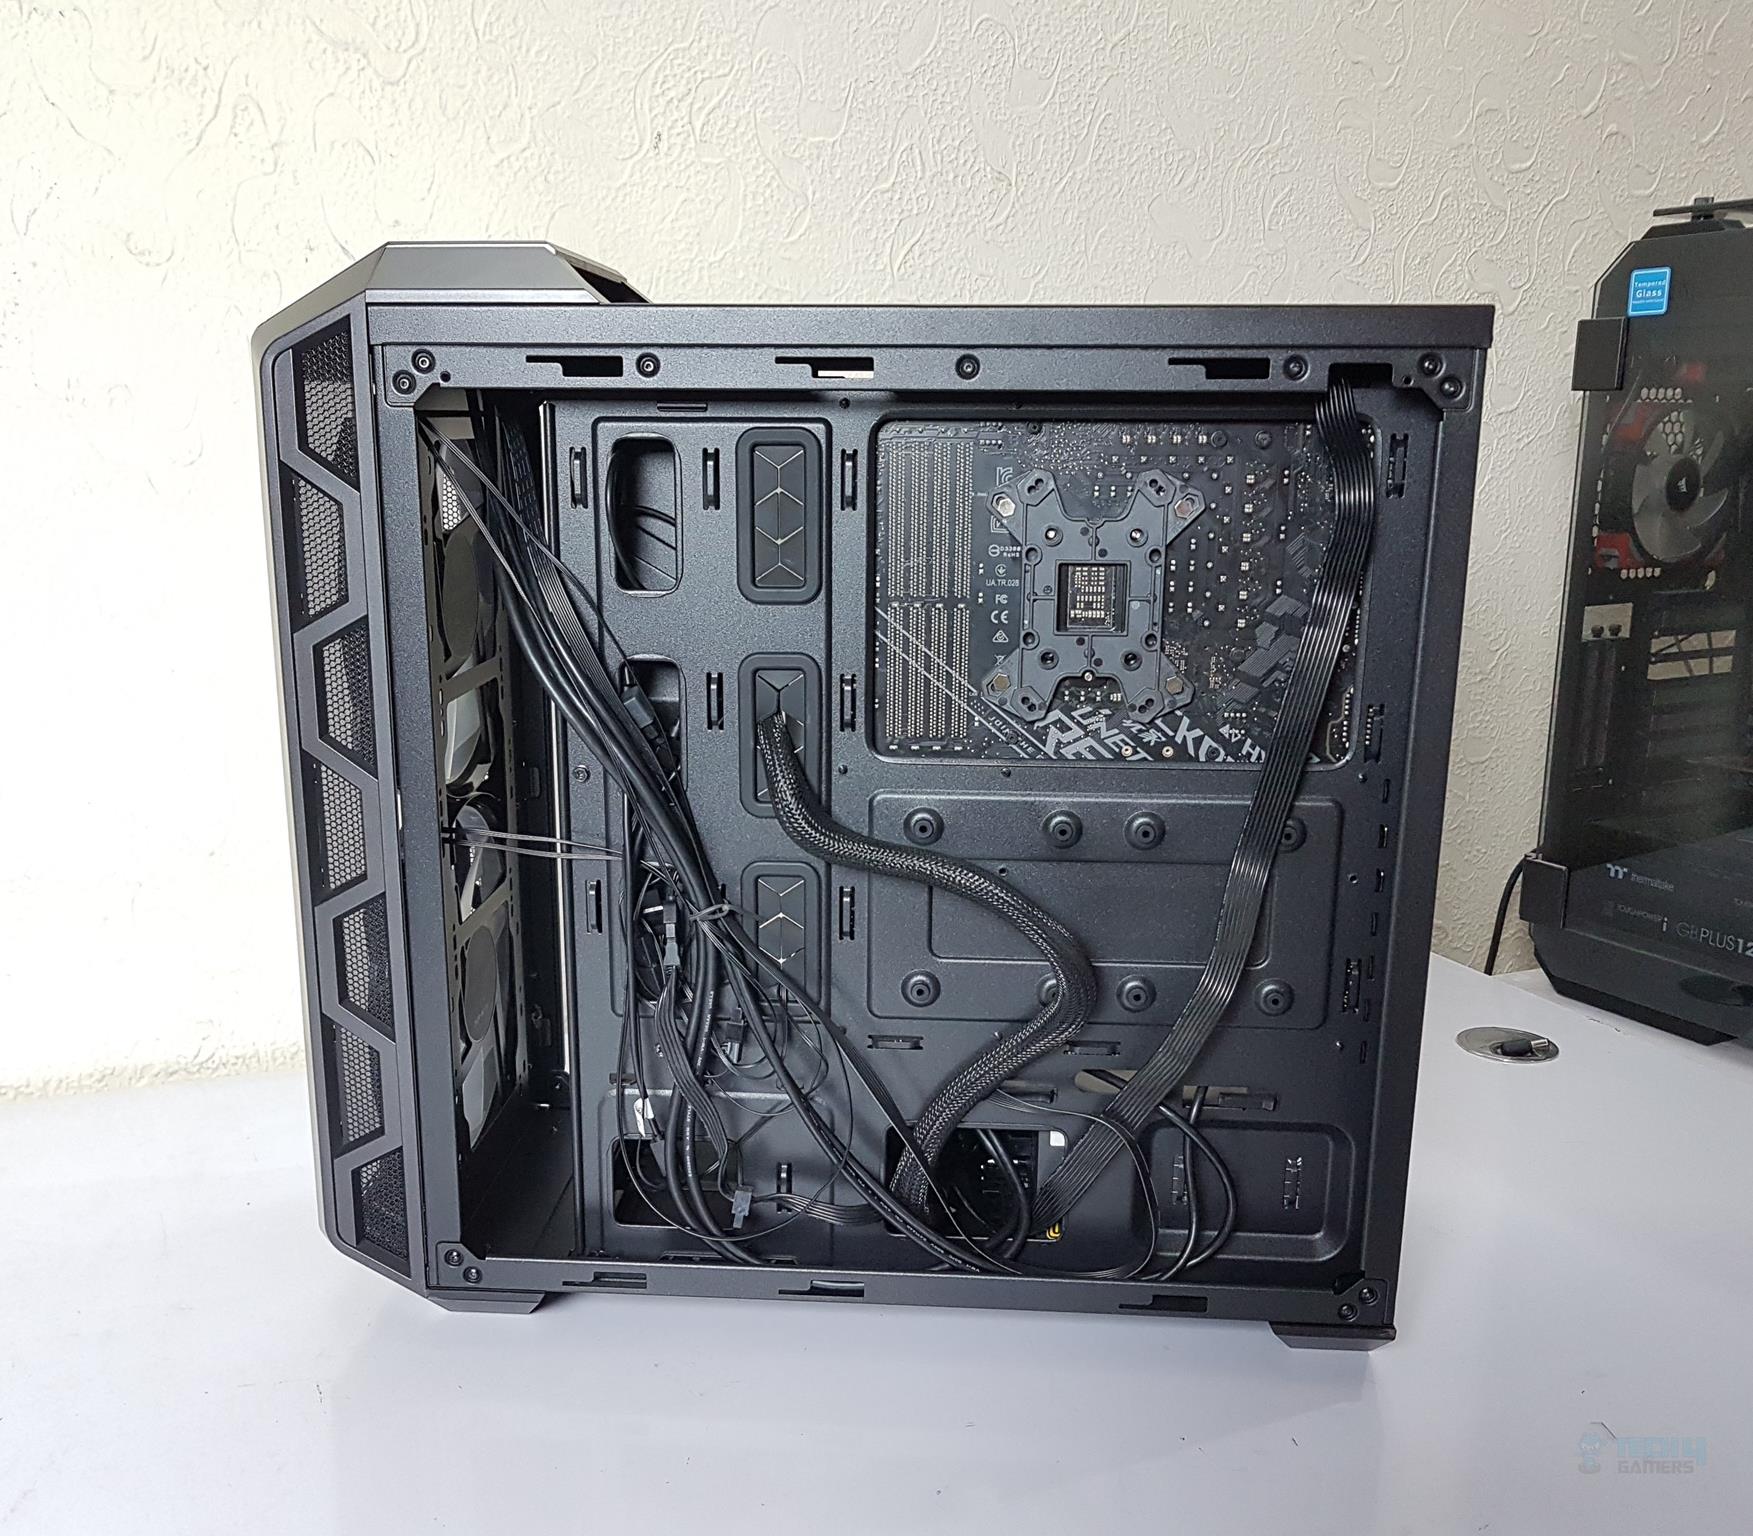
The Cooler Master Mastercase H500 supports motherboards up to the E-ATX size. Remember that the E-ATX motherboard will cover the cutouts with rubber grommets. You will have to use the cutouts hidden under the cable cover. We have a removable PSU cover and an HDD cage. A gap (60mm) from the front rail to the motherboard tray exists. The user can install a thick radiator on the front. There is a significant CPU cutout on the motherboard board tray.
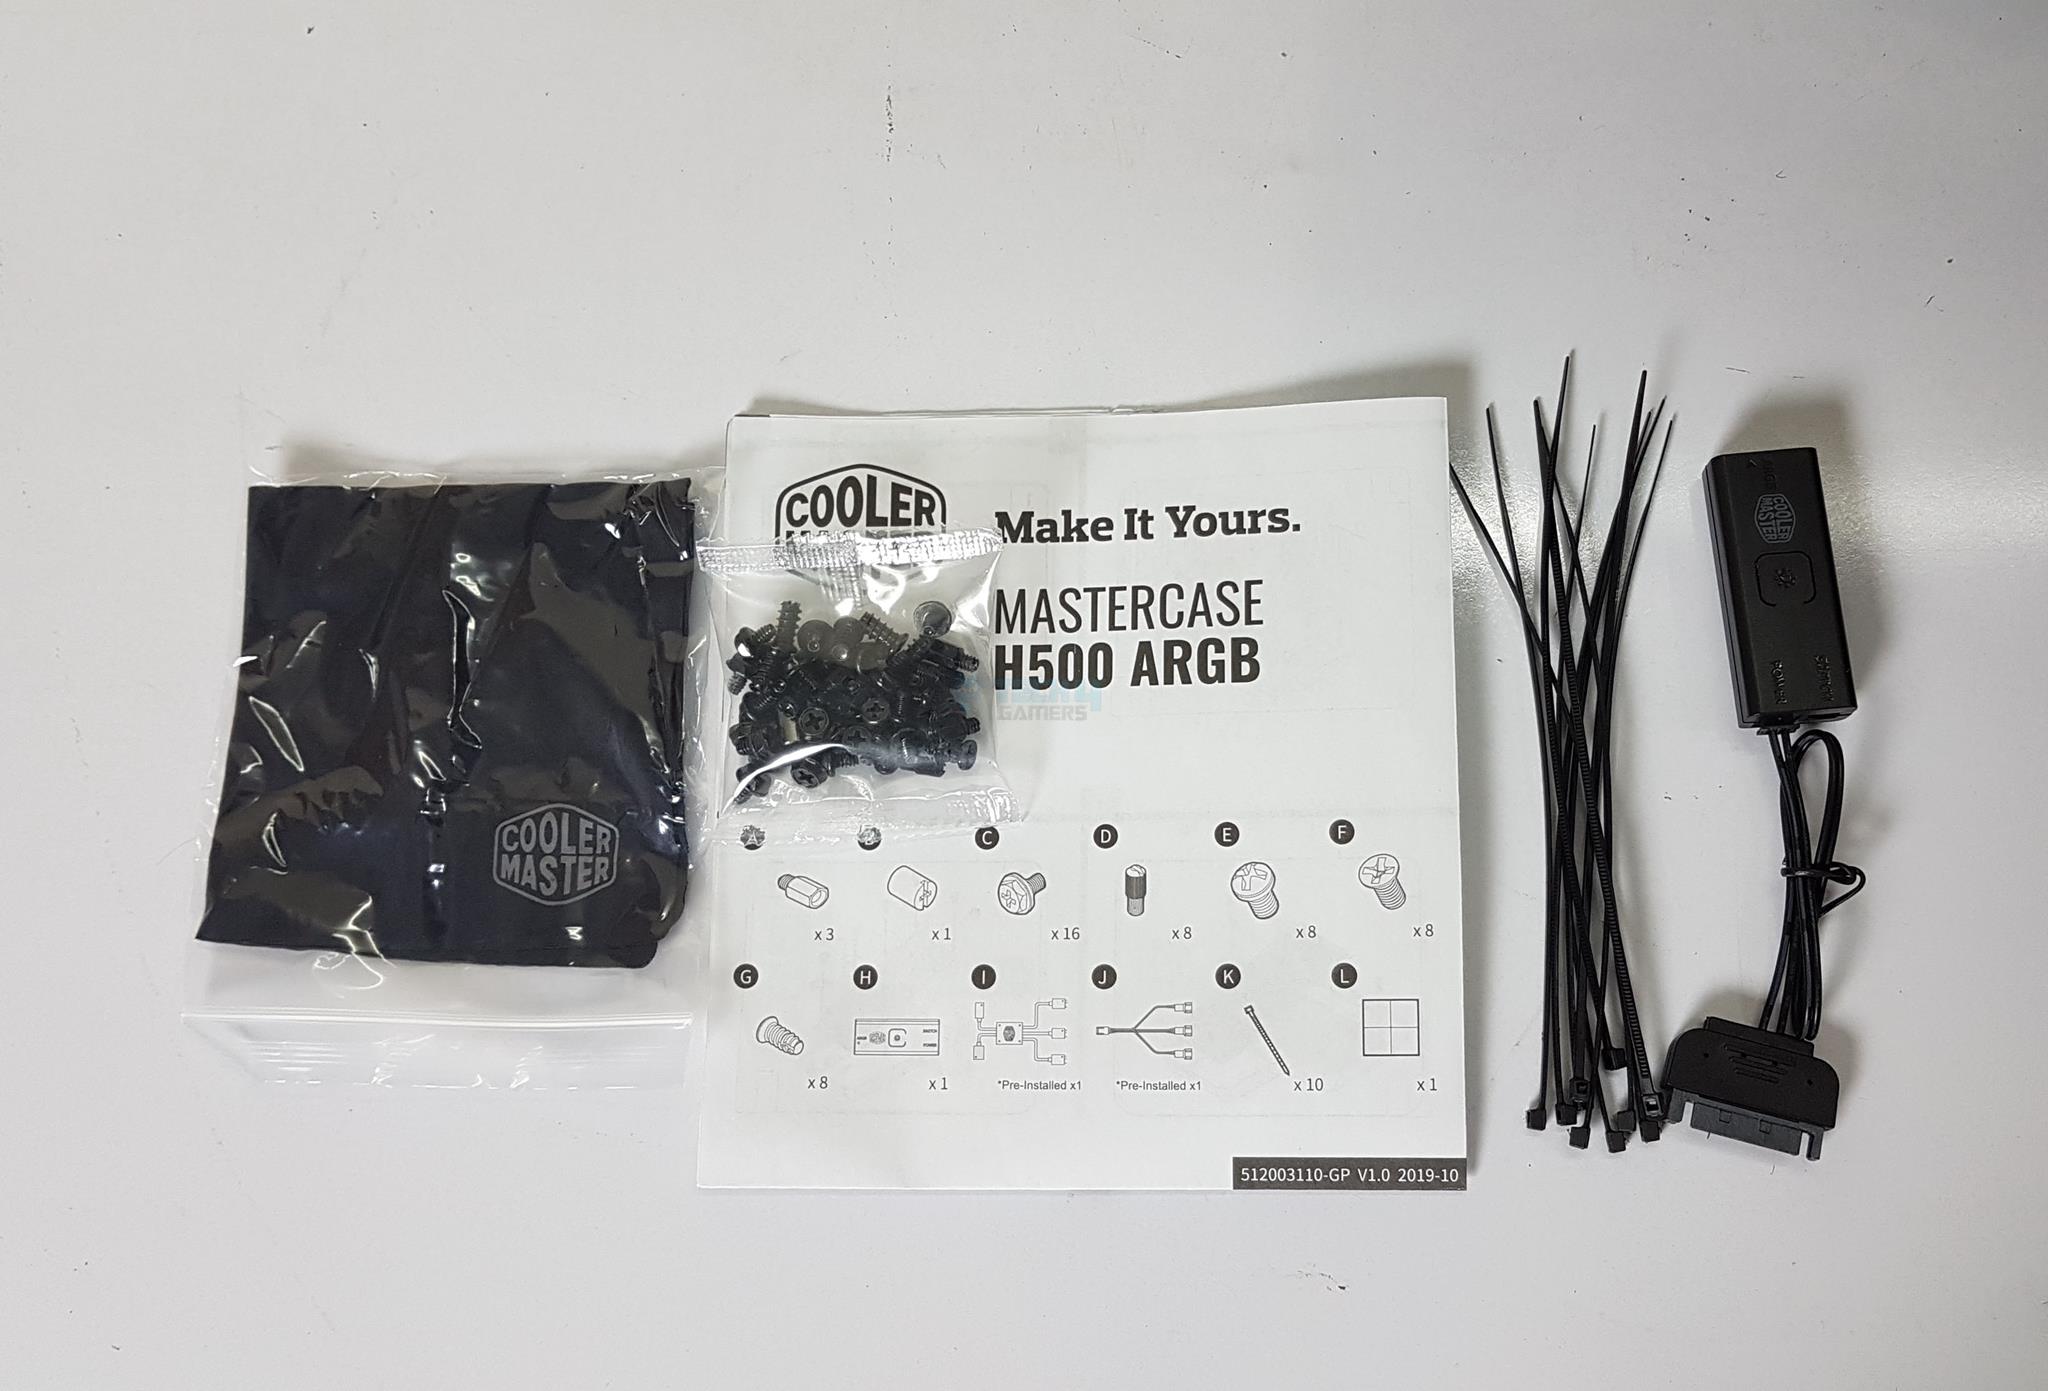
The excellent point is that the Cooler Master has pre-installed the nine standoffs. The accessory bag has a socket wrench for standoff removal/installation. There is a displacement of approximately 32 mm from the top of the motherboard to the top of the chassis. Similarly, there is a displacement of approximately 58 mm from the side of the top-mounted AIO to the RAM.
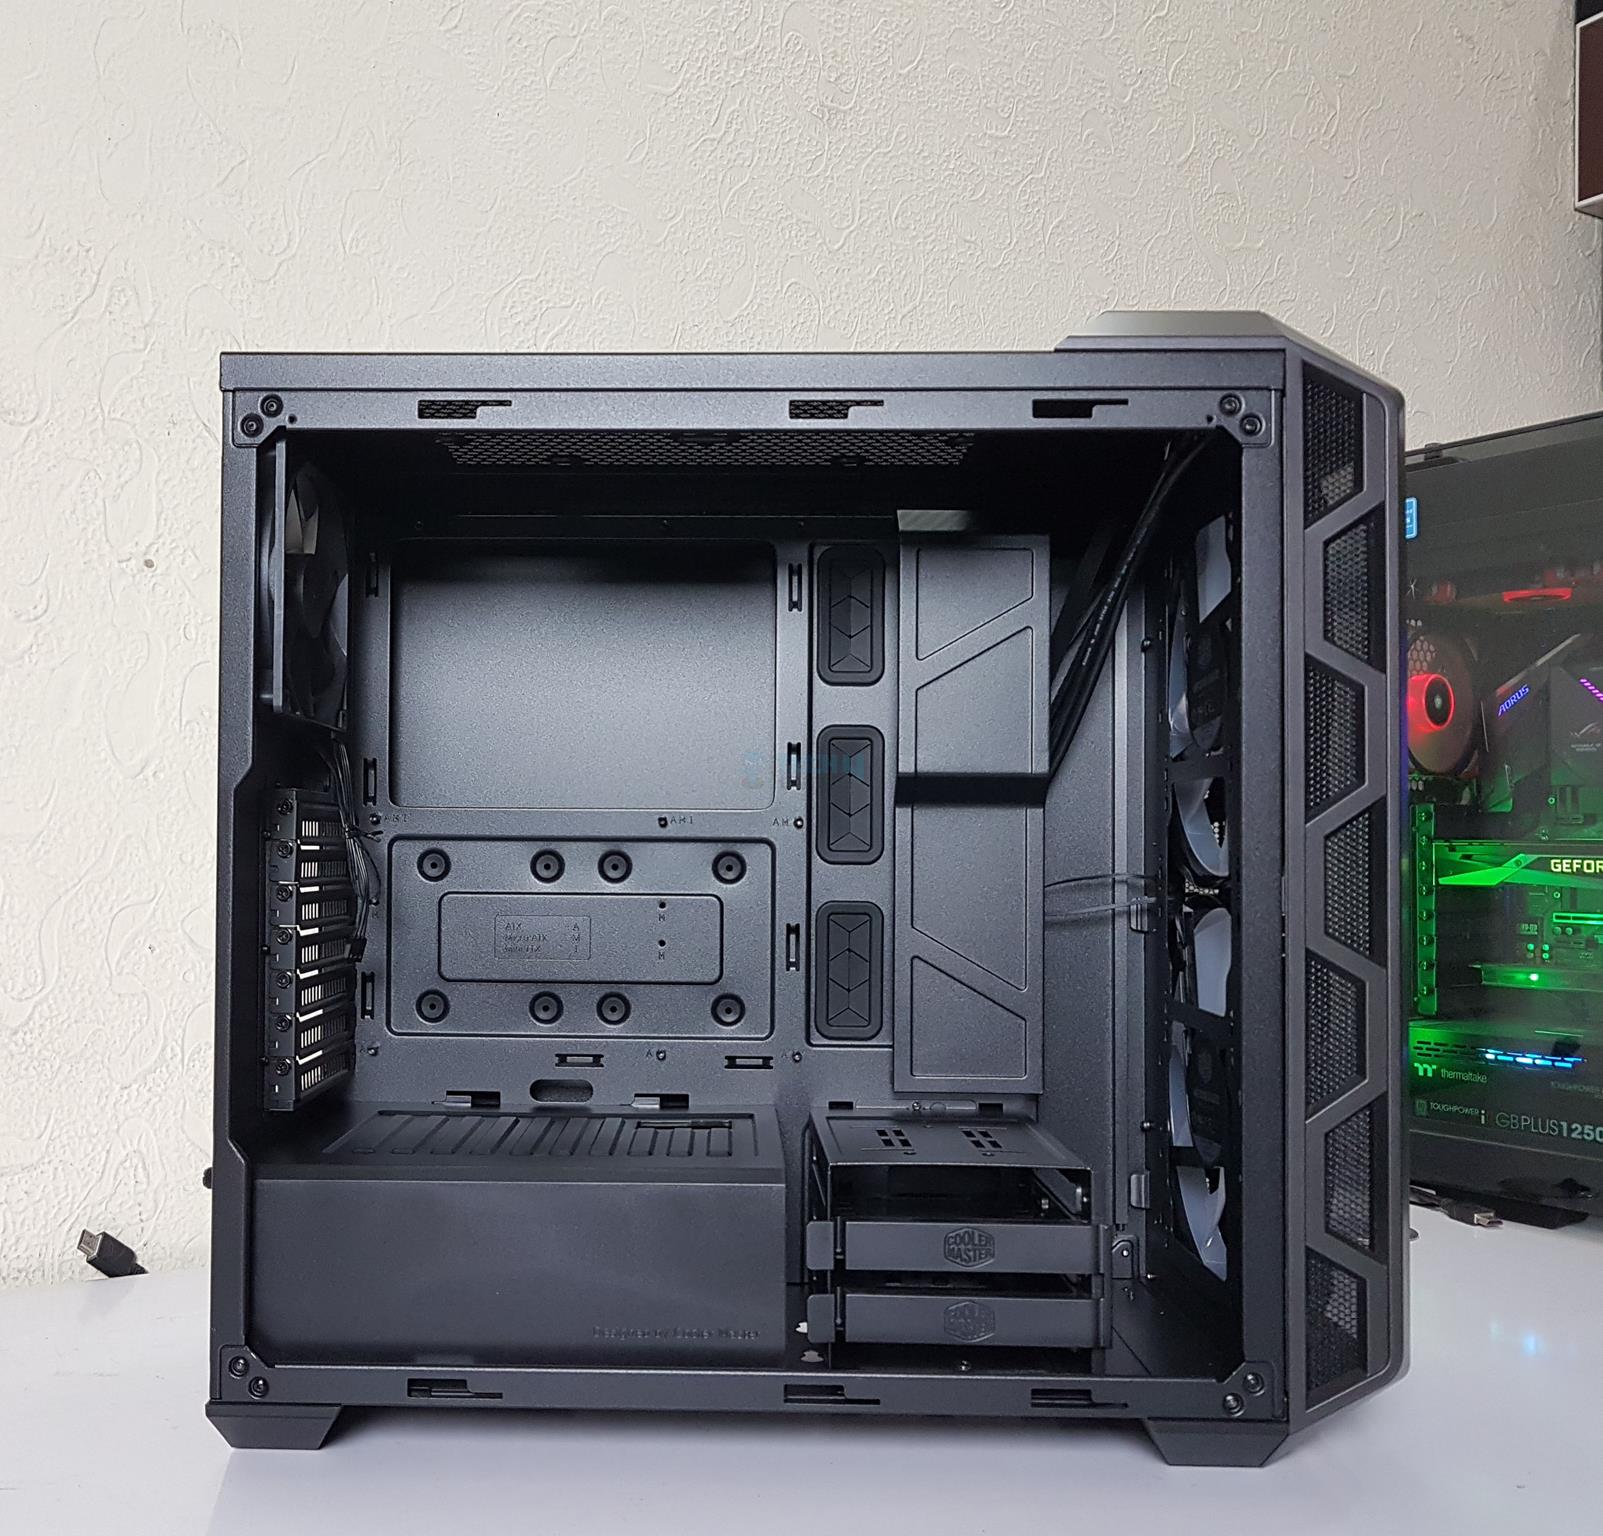
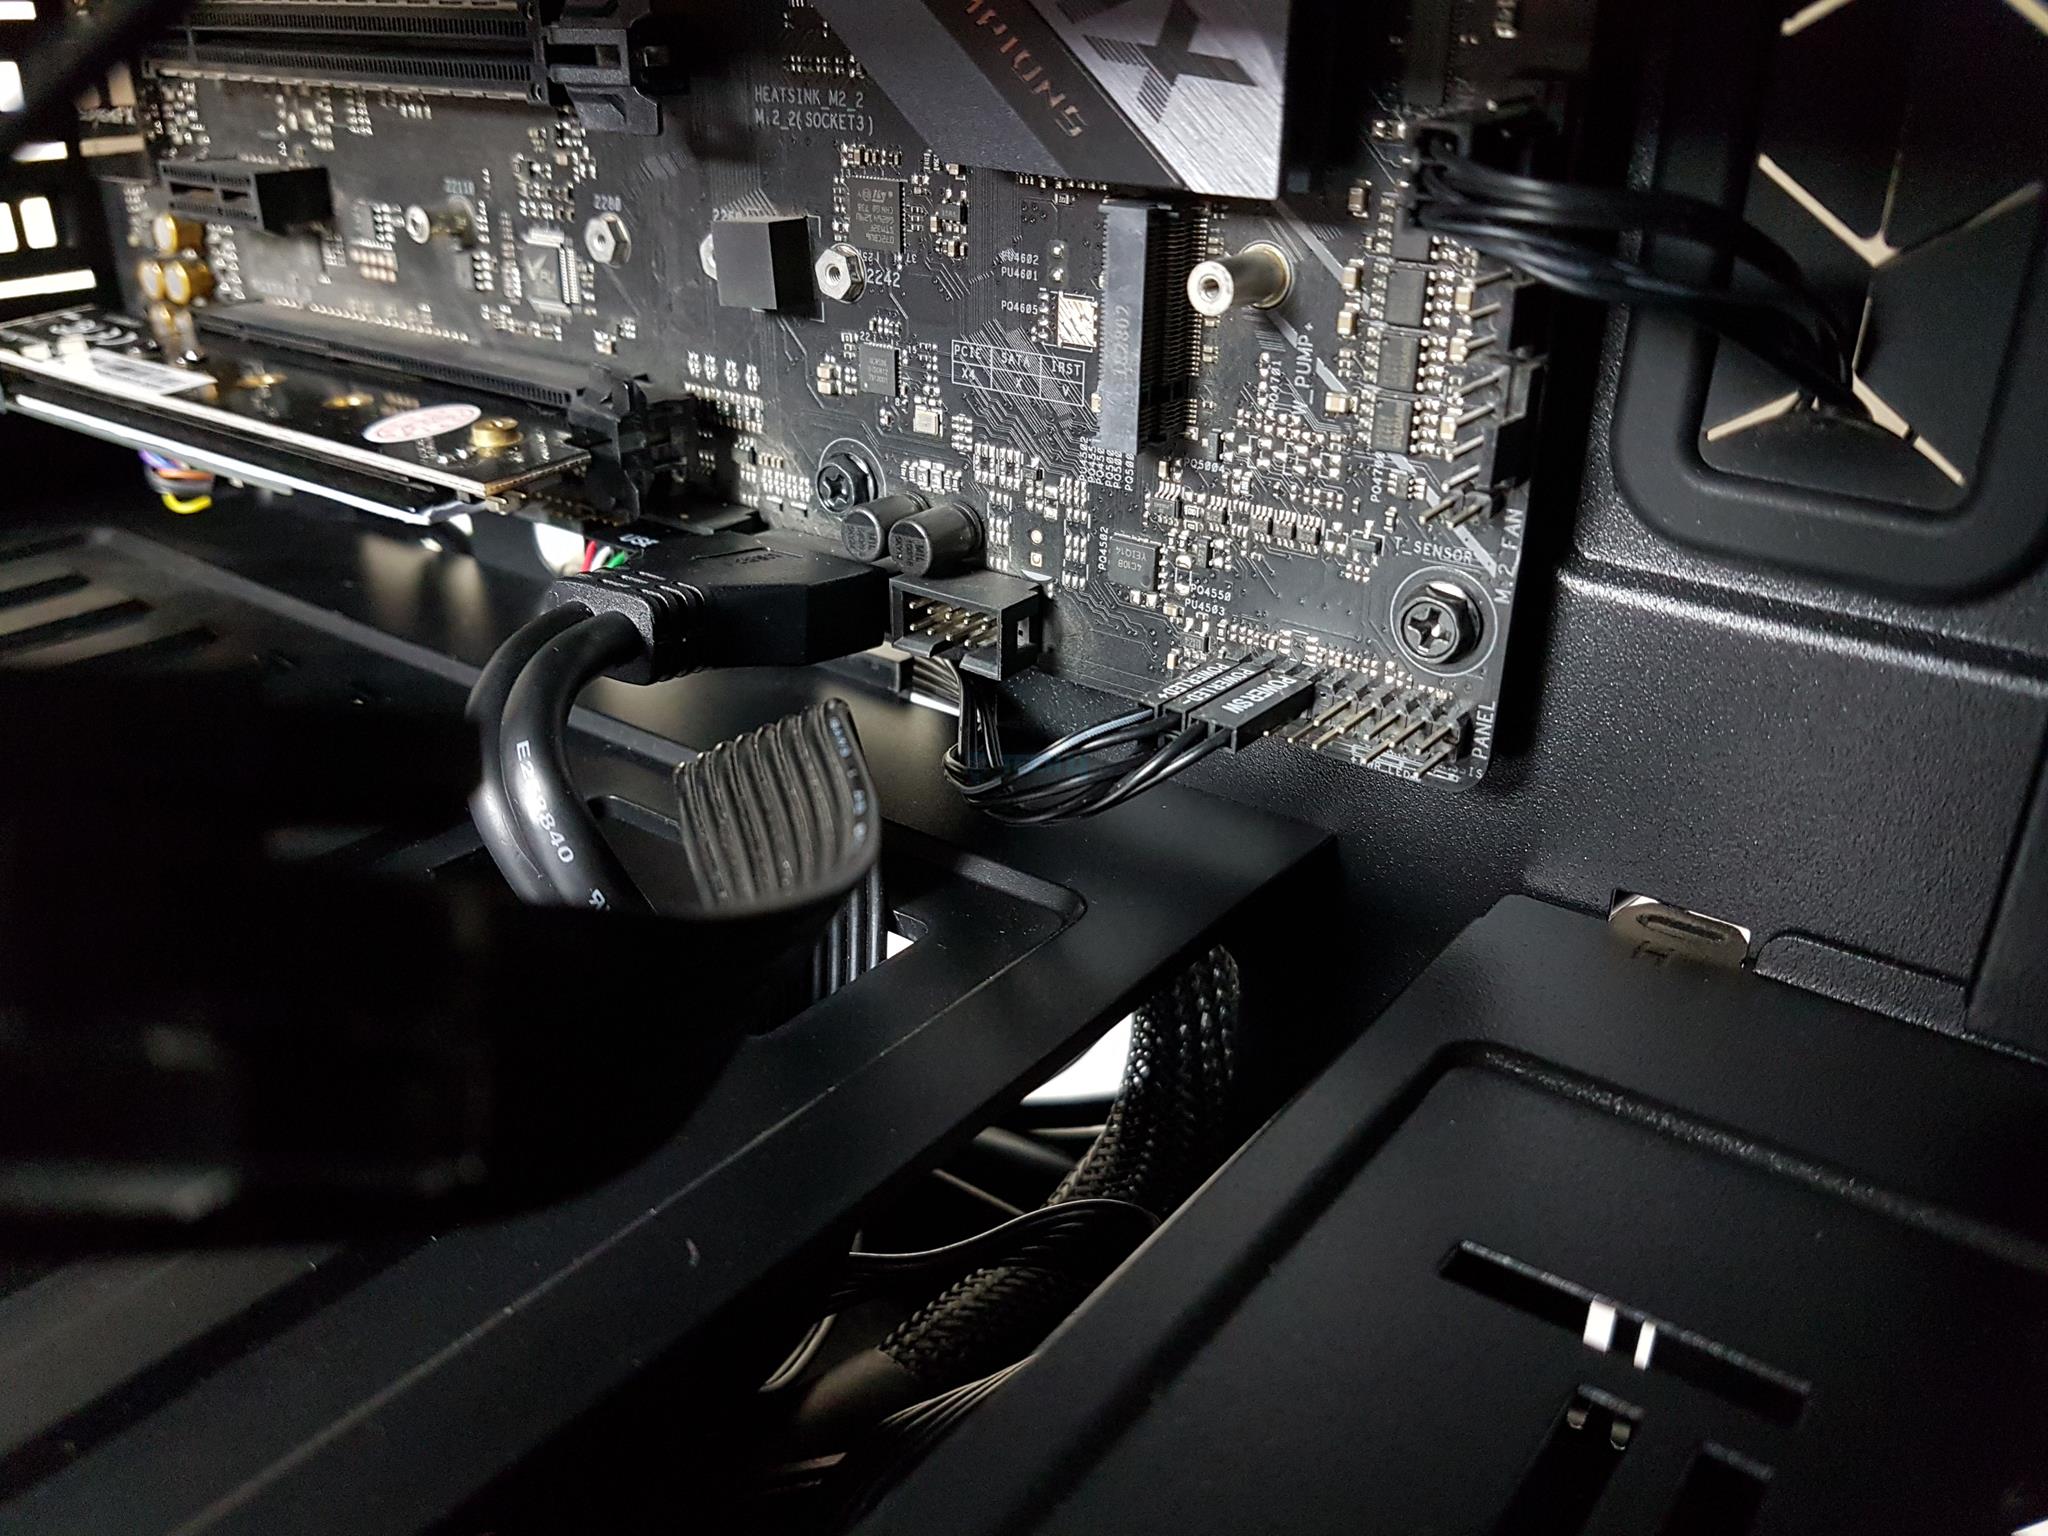
We have 7x perforated PCIe slot covers, which are reusable. There is a single 120mm black color fan on the rear. It has a 3-pin power connector. The MF200R ARGB fans on the front also have 3-pin power connectors. The front fans are daisy-chained, and a 3-pin header will allow the user to connect all three fans of the chassis and control them from a single source. The user can install a 120mm radiator on the rear as well.
A stylish plastic PSU shroud/cover has a cutout towards the motherboard side. This cutout does not have a rubber grommet. There are channels on the bottom and motherboard tray where the PSU shroud’s hooks slide in. The cover is then secured using a thumbscrew (non-captive for obvious reasons) on the rear side of the chassis.
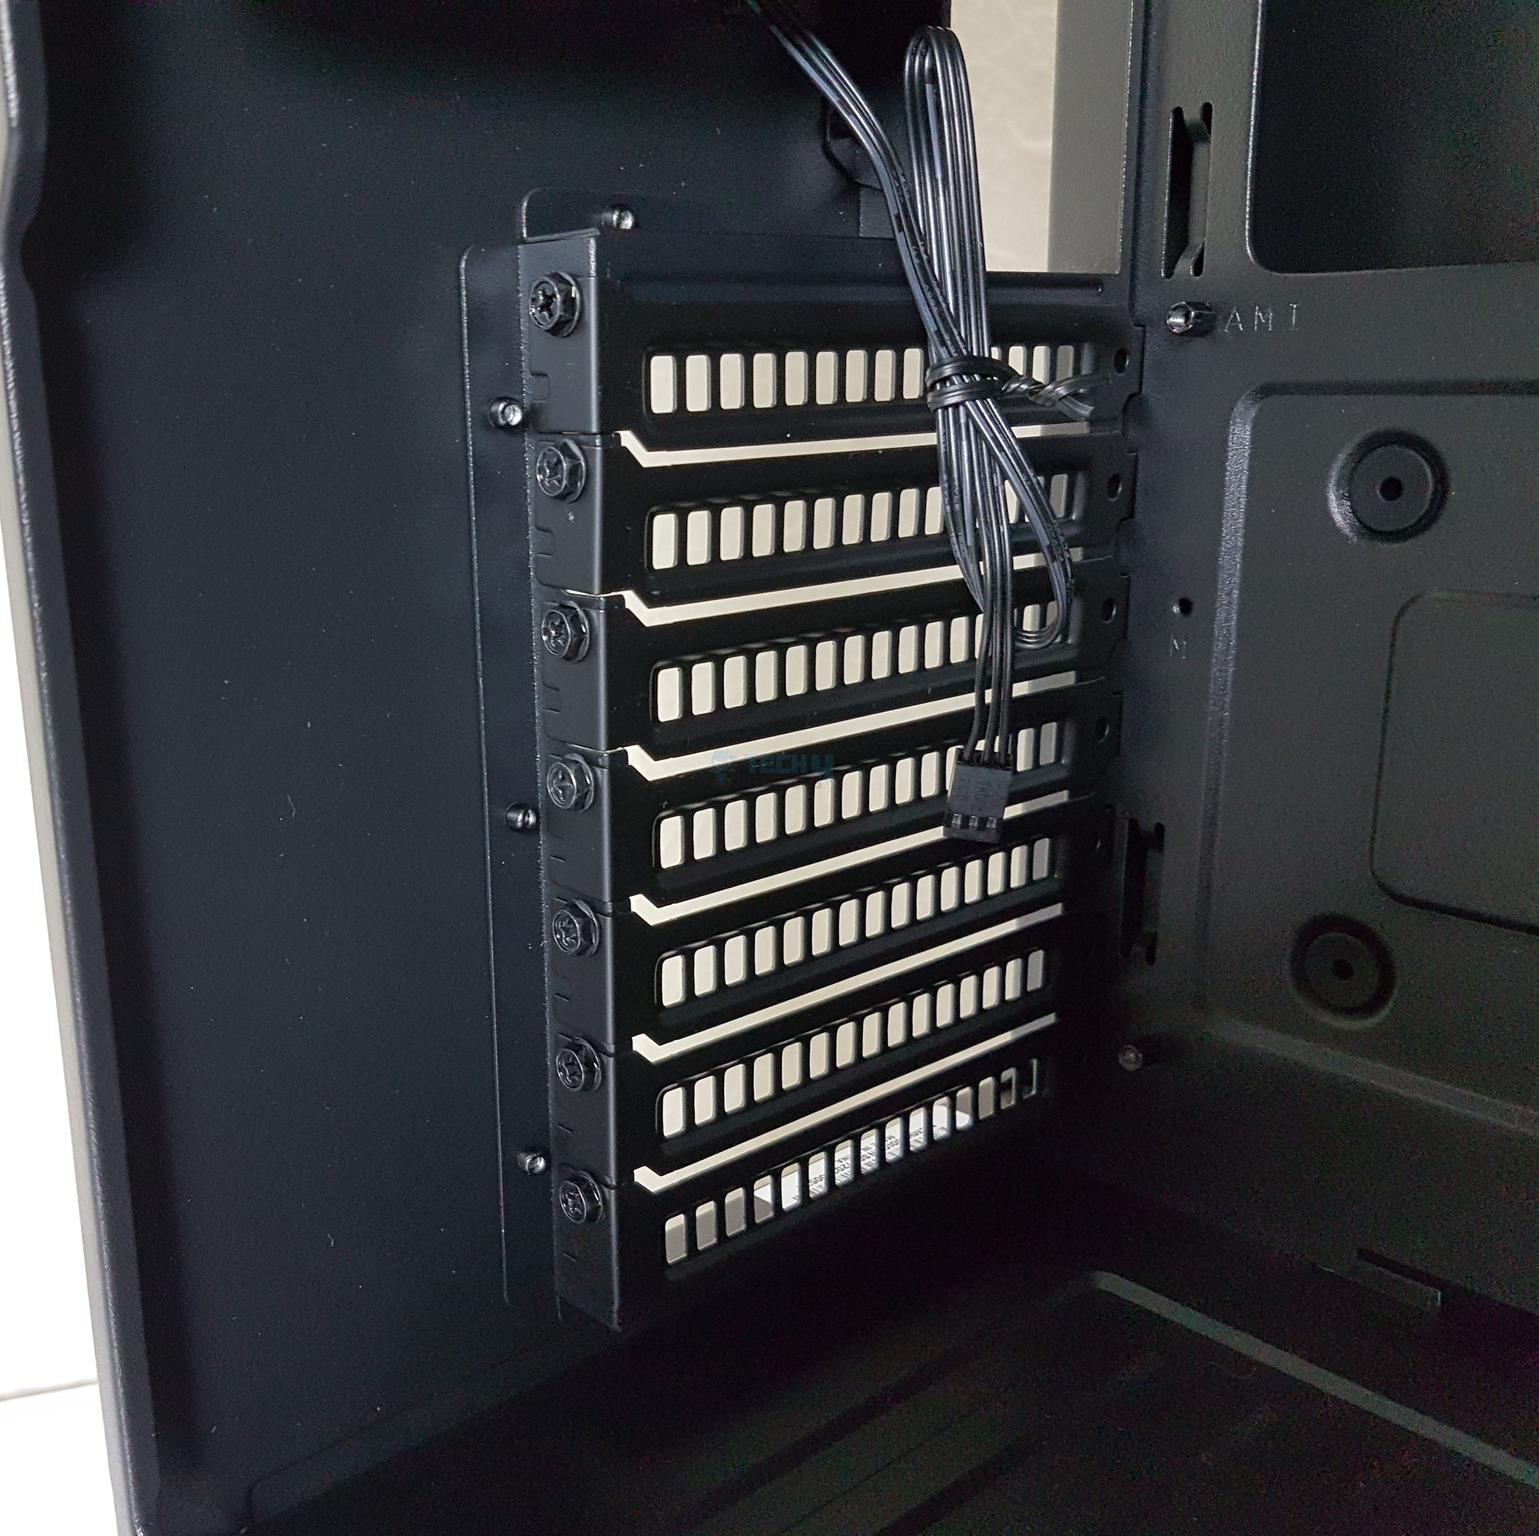
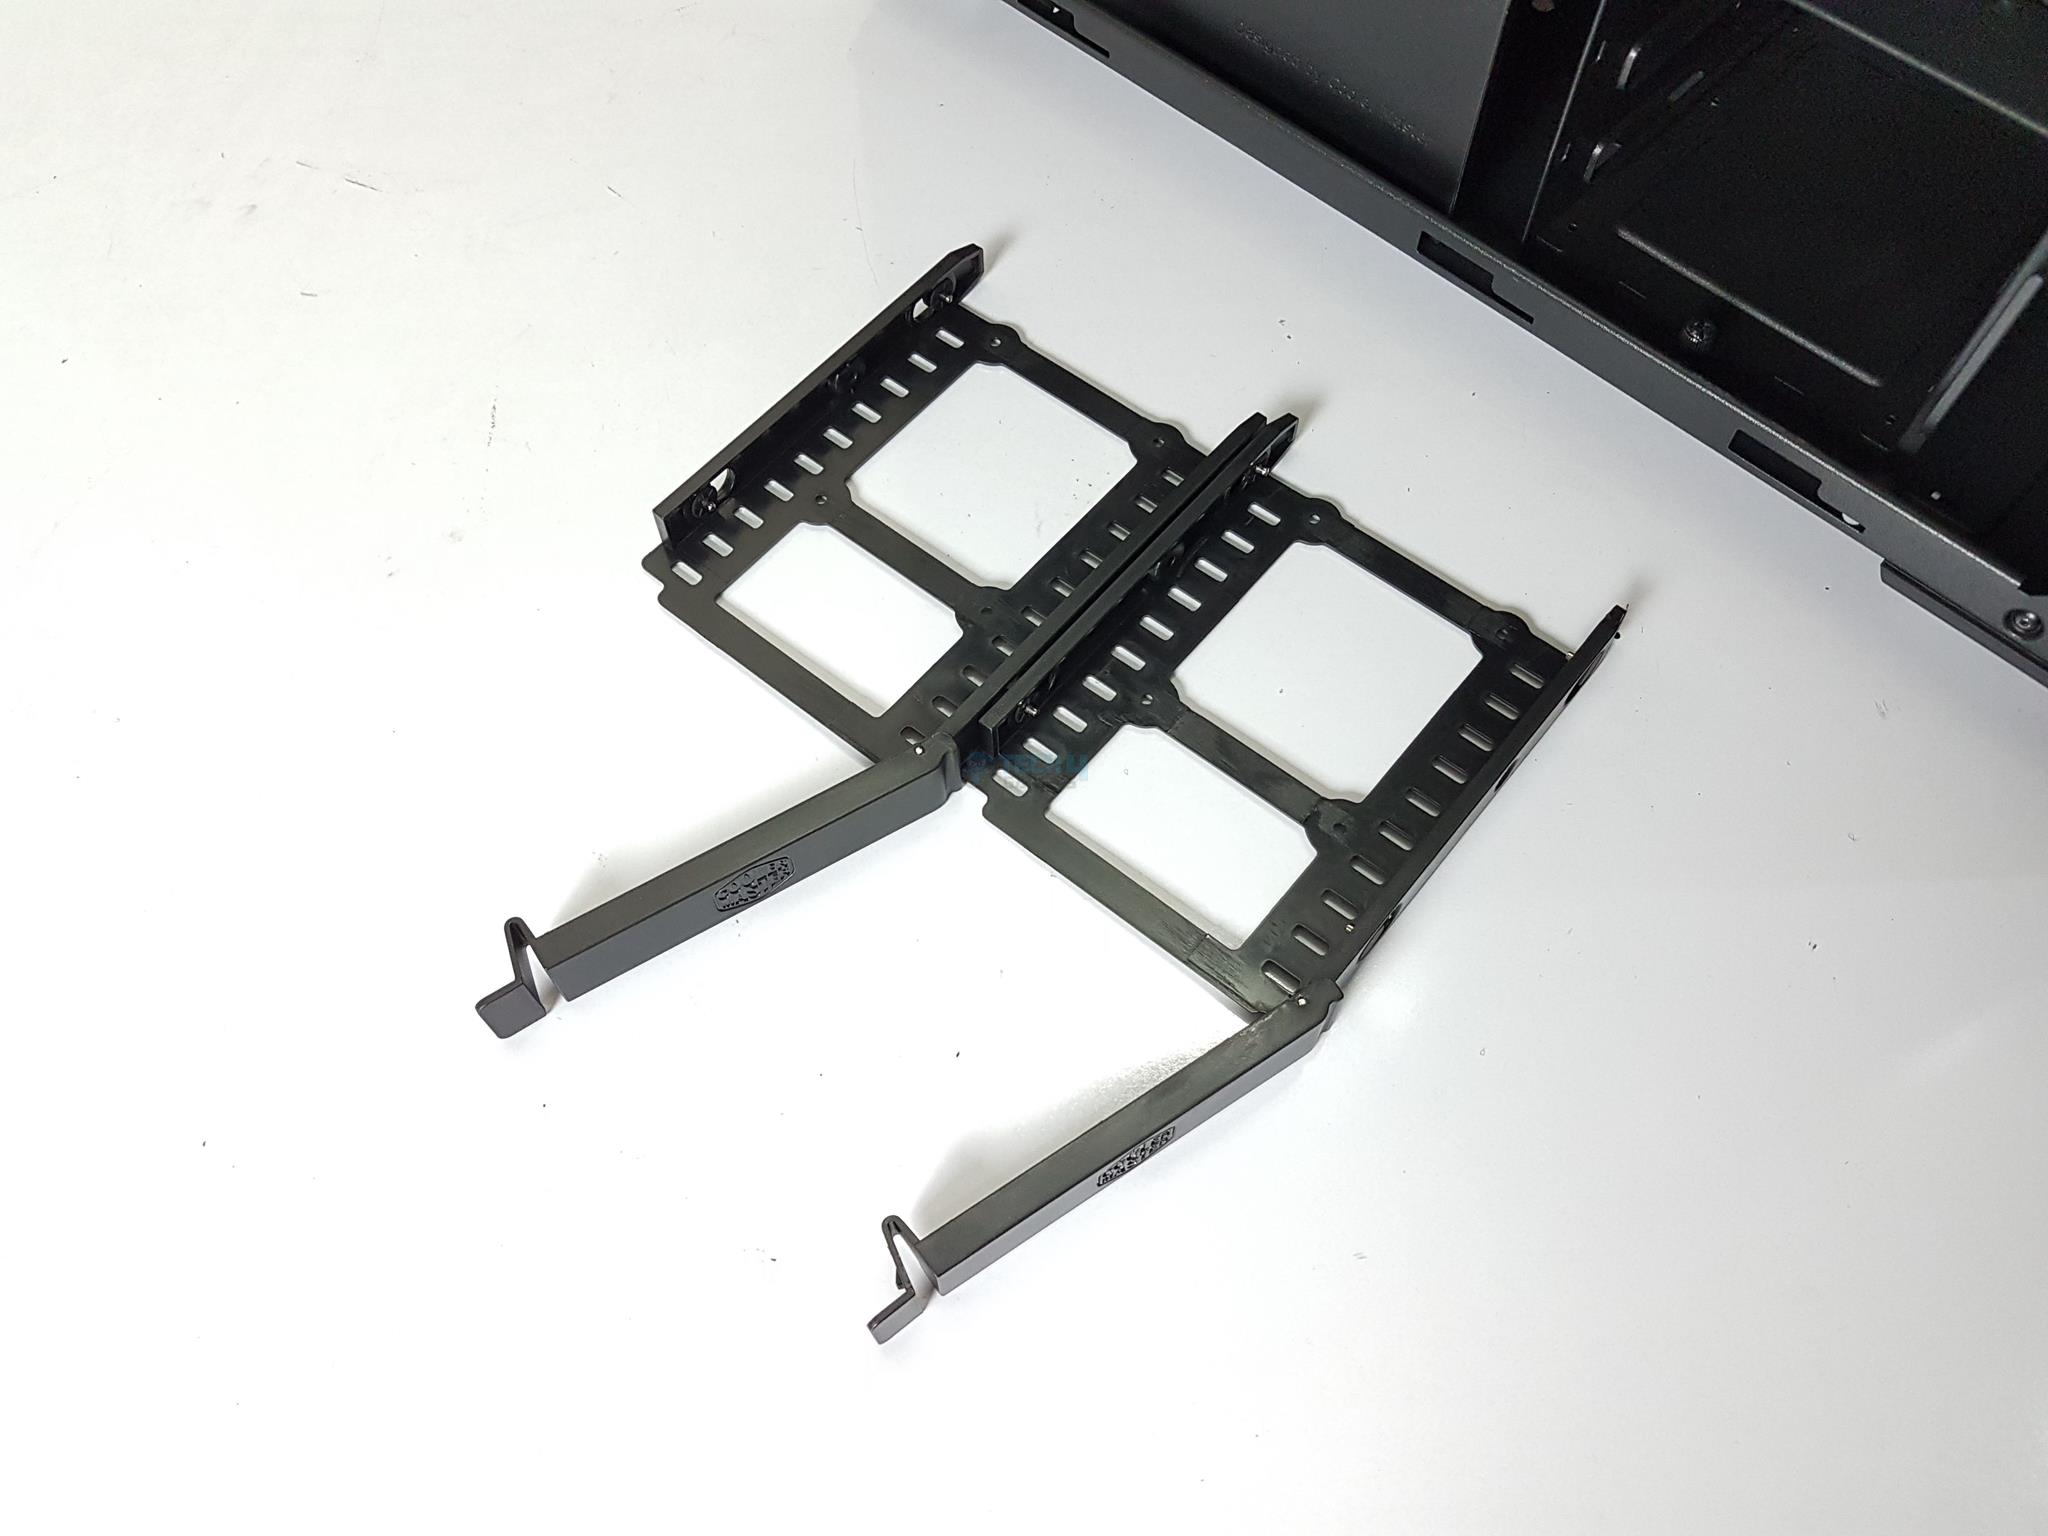
The total area under the PSU cover is roughly 240mm, making it enough for the PSU and its cables. A PSU up to 180mm wide can be installed in the chassis. There is a metallic HDD cage secured on the base of the chassis. A captive thumbscrew is on the front side of the cage, securing it.
There is also another screw on the backside of the motherboard tray. You would need to remove both screws to take out the HDD cage. It has two caddies that are tool-less by design. The locking cover of the caddy has Cooler Master branding in the center. Press the latch of the cover and slide out the caddy. Install the drive and slide it back in with a latch, locking the cover to the cage.
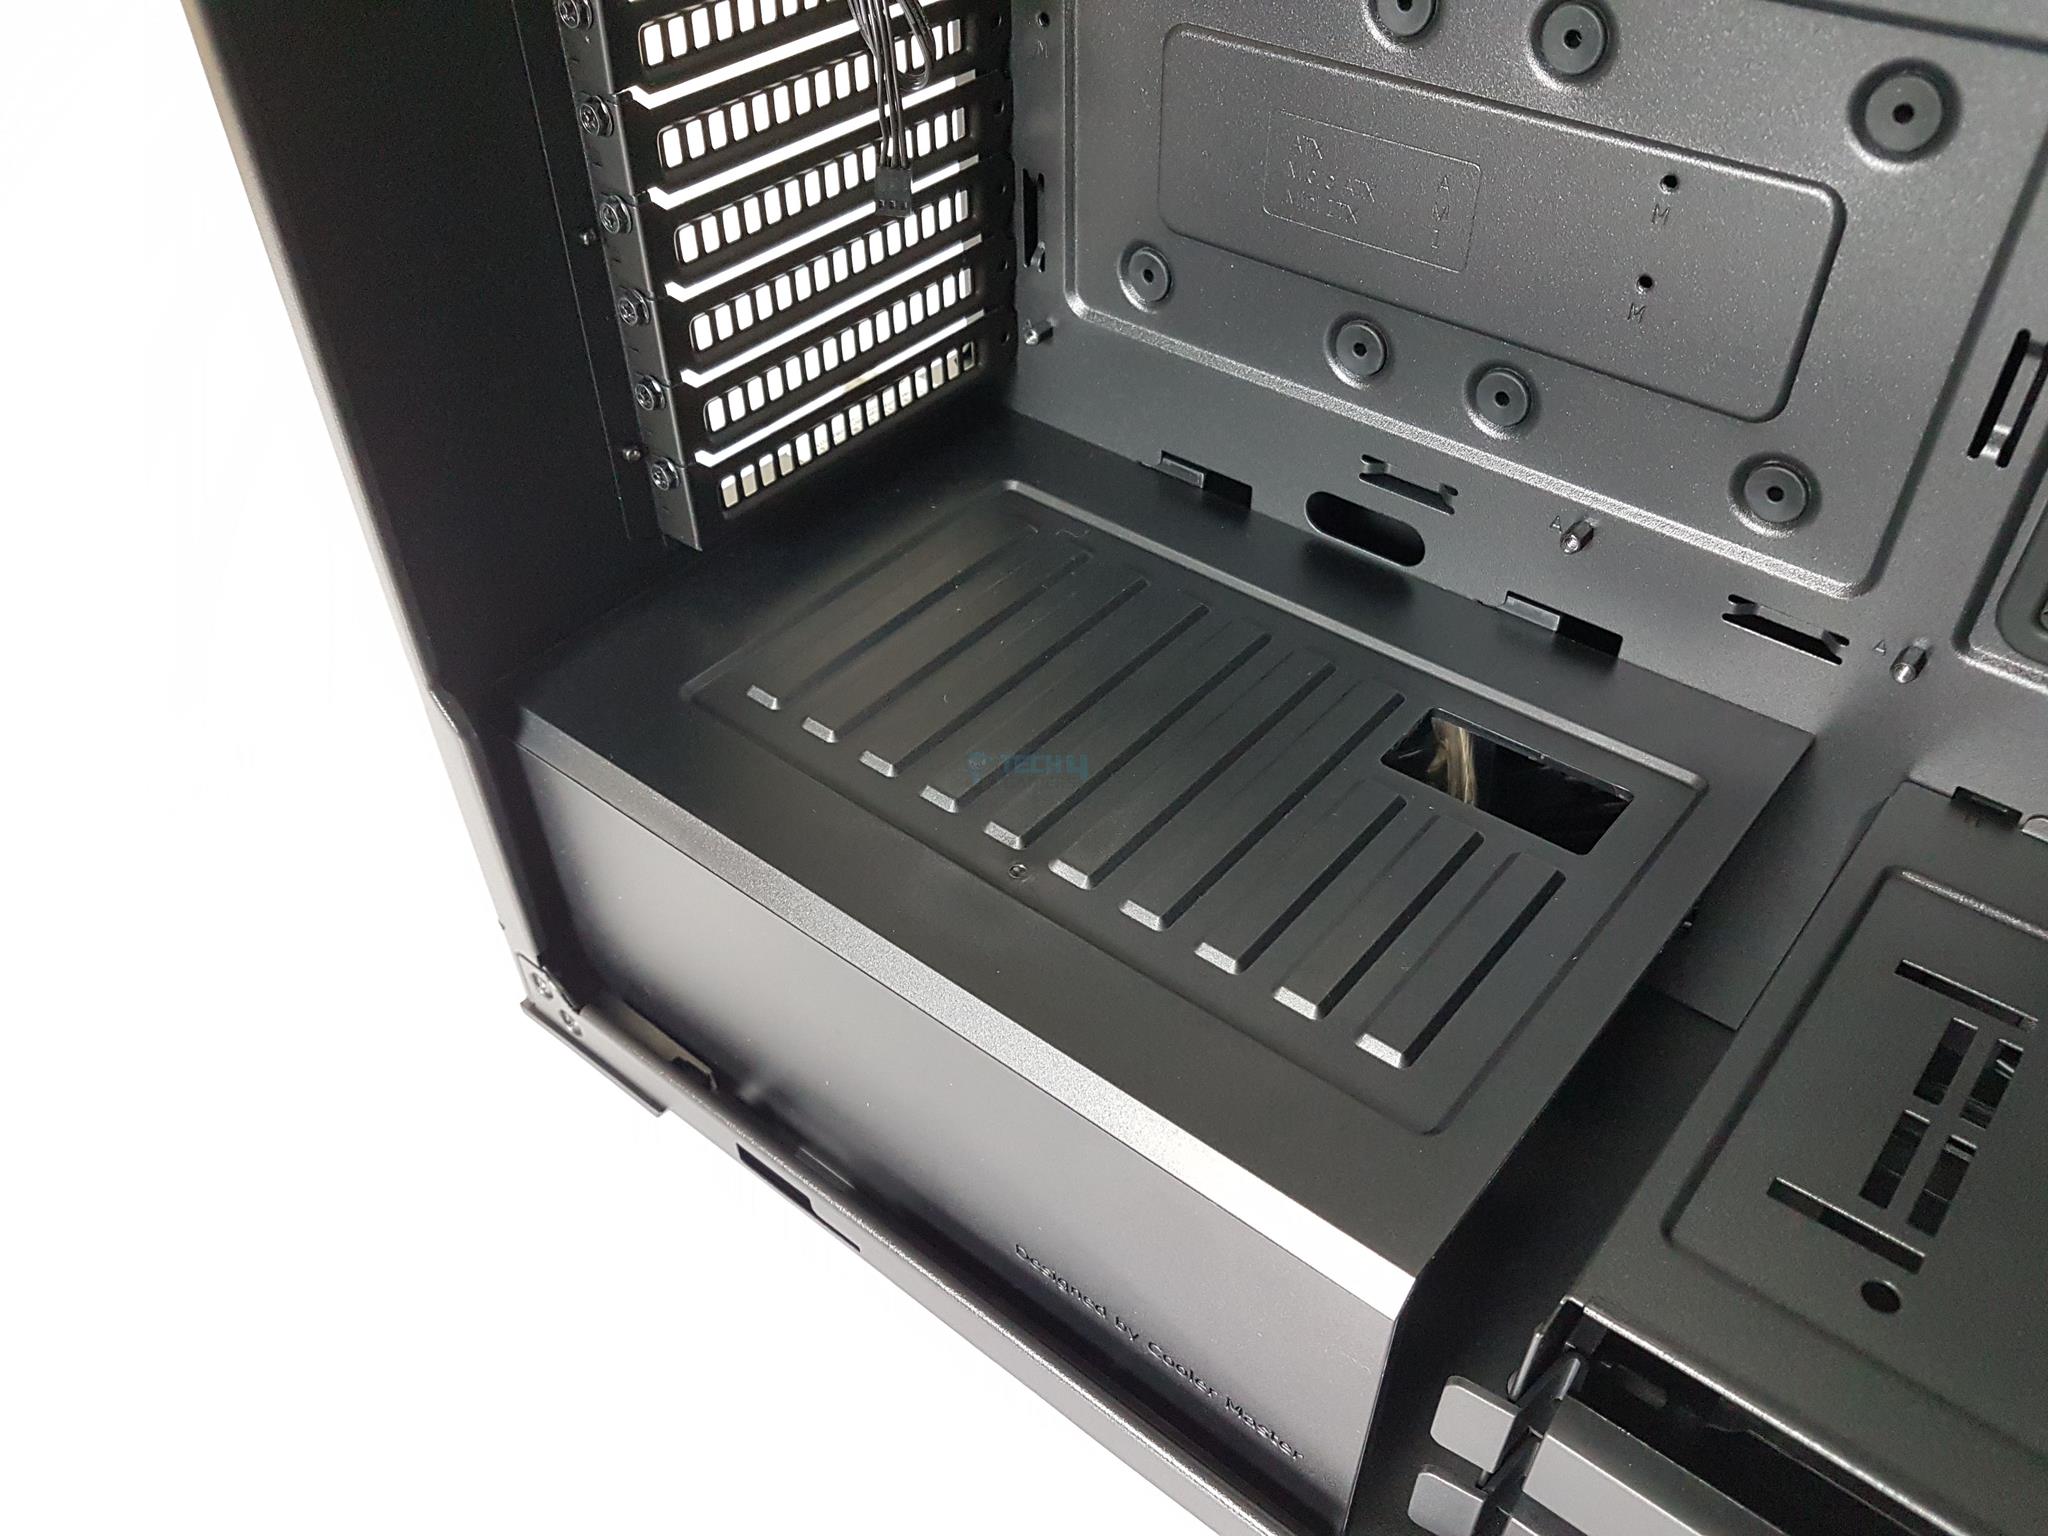

The below picture shows both caddies out of the cage. Here are the mounting options:
- Up to 2x 2.5” drives
- Up to 2x 3.5” drives
You can install 2x drives in the HDD cage using a combination of 2.5” and 3.5” drives.
The cable cover is fully metallic and is secured using 3x screws from the backside of the motherboard tray. The raised portion of the cover is facing the 24-pin ATX header of the motherboard. Each standoff has a label printing indicating its support for ITX, microATX, and ATX mount.
A close-up look at the backside of the Master Fan MF200R ARGB. We have fixed mounting holes on the front bracket to install the cooling gear. After removing the PSU cover and HDD cage, we can spot the front panel cables and accessories bag tucked. They were hidden under the PSU cover.
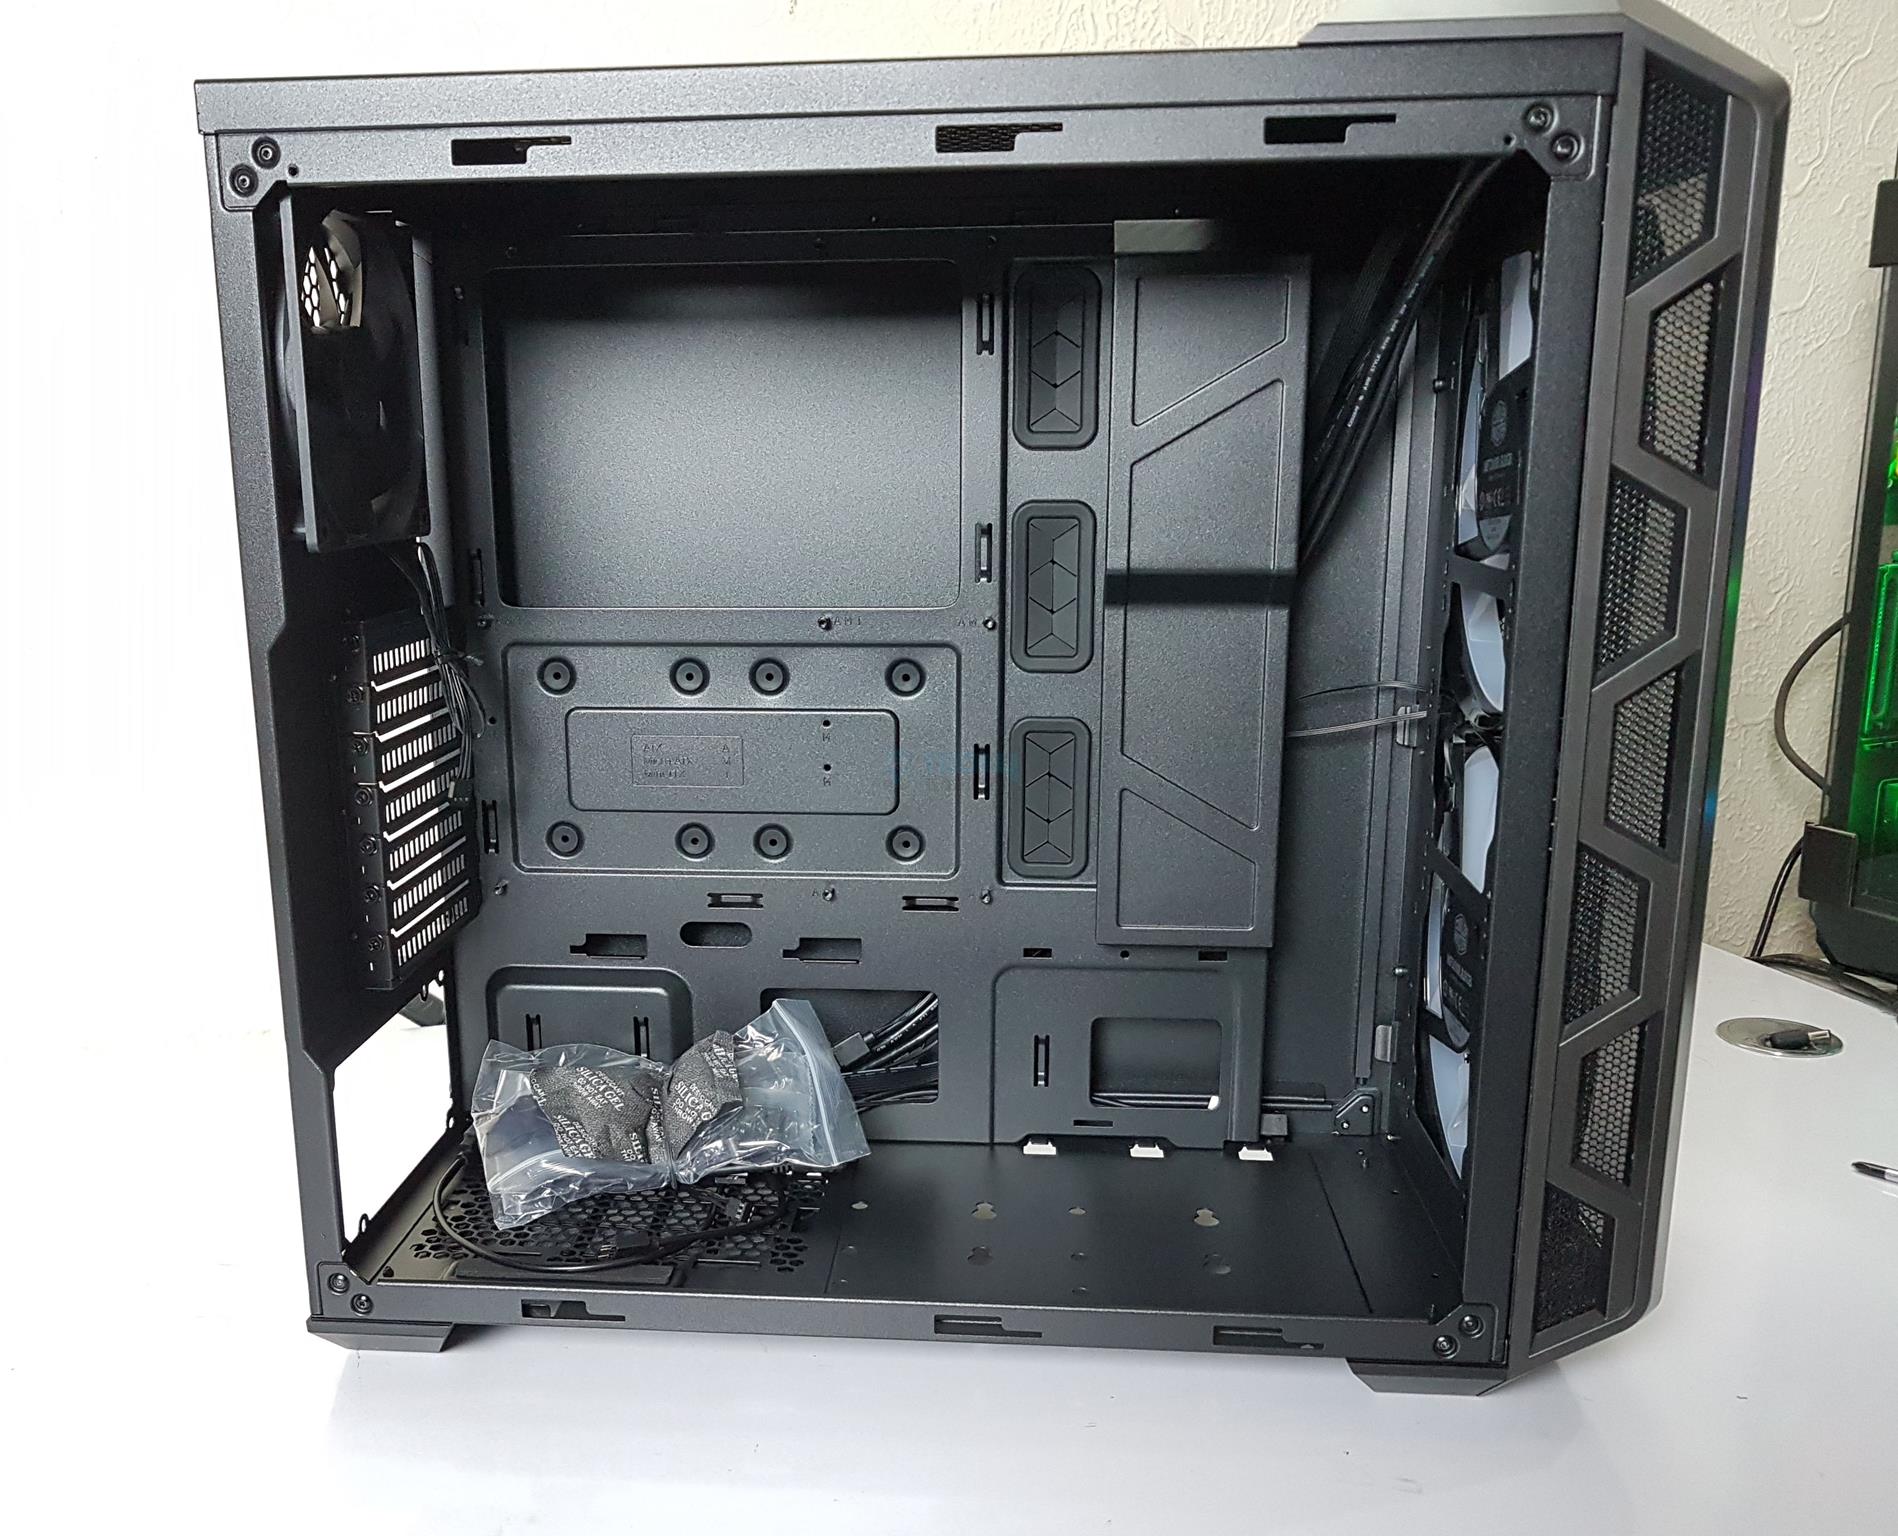
The picture shows the complete inner layout with the removed PSU cover, HDD cage, and Cable Cover. Note that the three cutouts hidden under the cable cover are now visible. Since they are not visible by design, no rubber grommet is on them. The inner area has a height of 440mm and a length of approximately 445 mm. A graphics card of length 410mm can be installed. A CPU cooler of 167mm in height can be installed in the chassis. Below is a skeleton look at the MasterCase H500 ARGB.
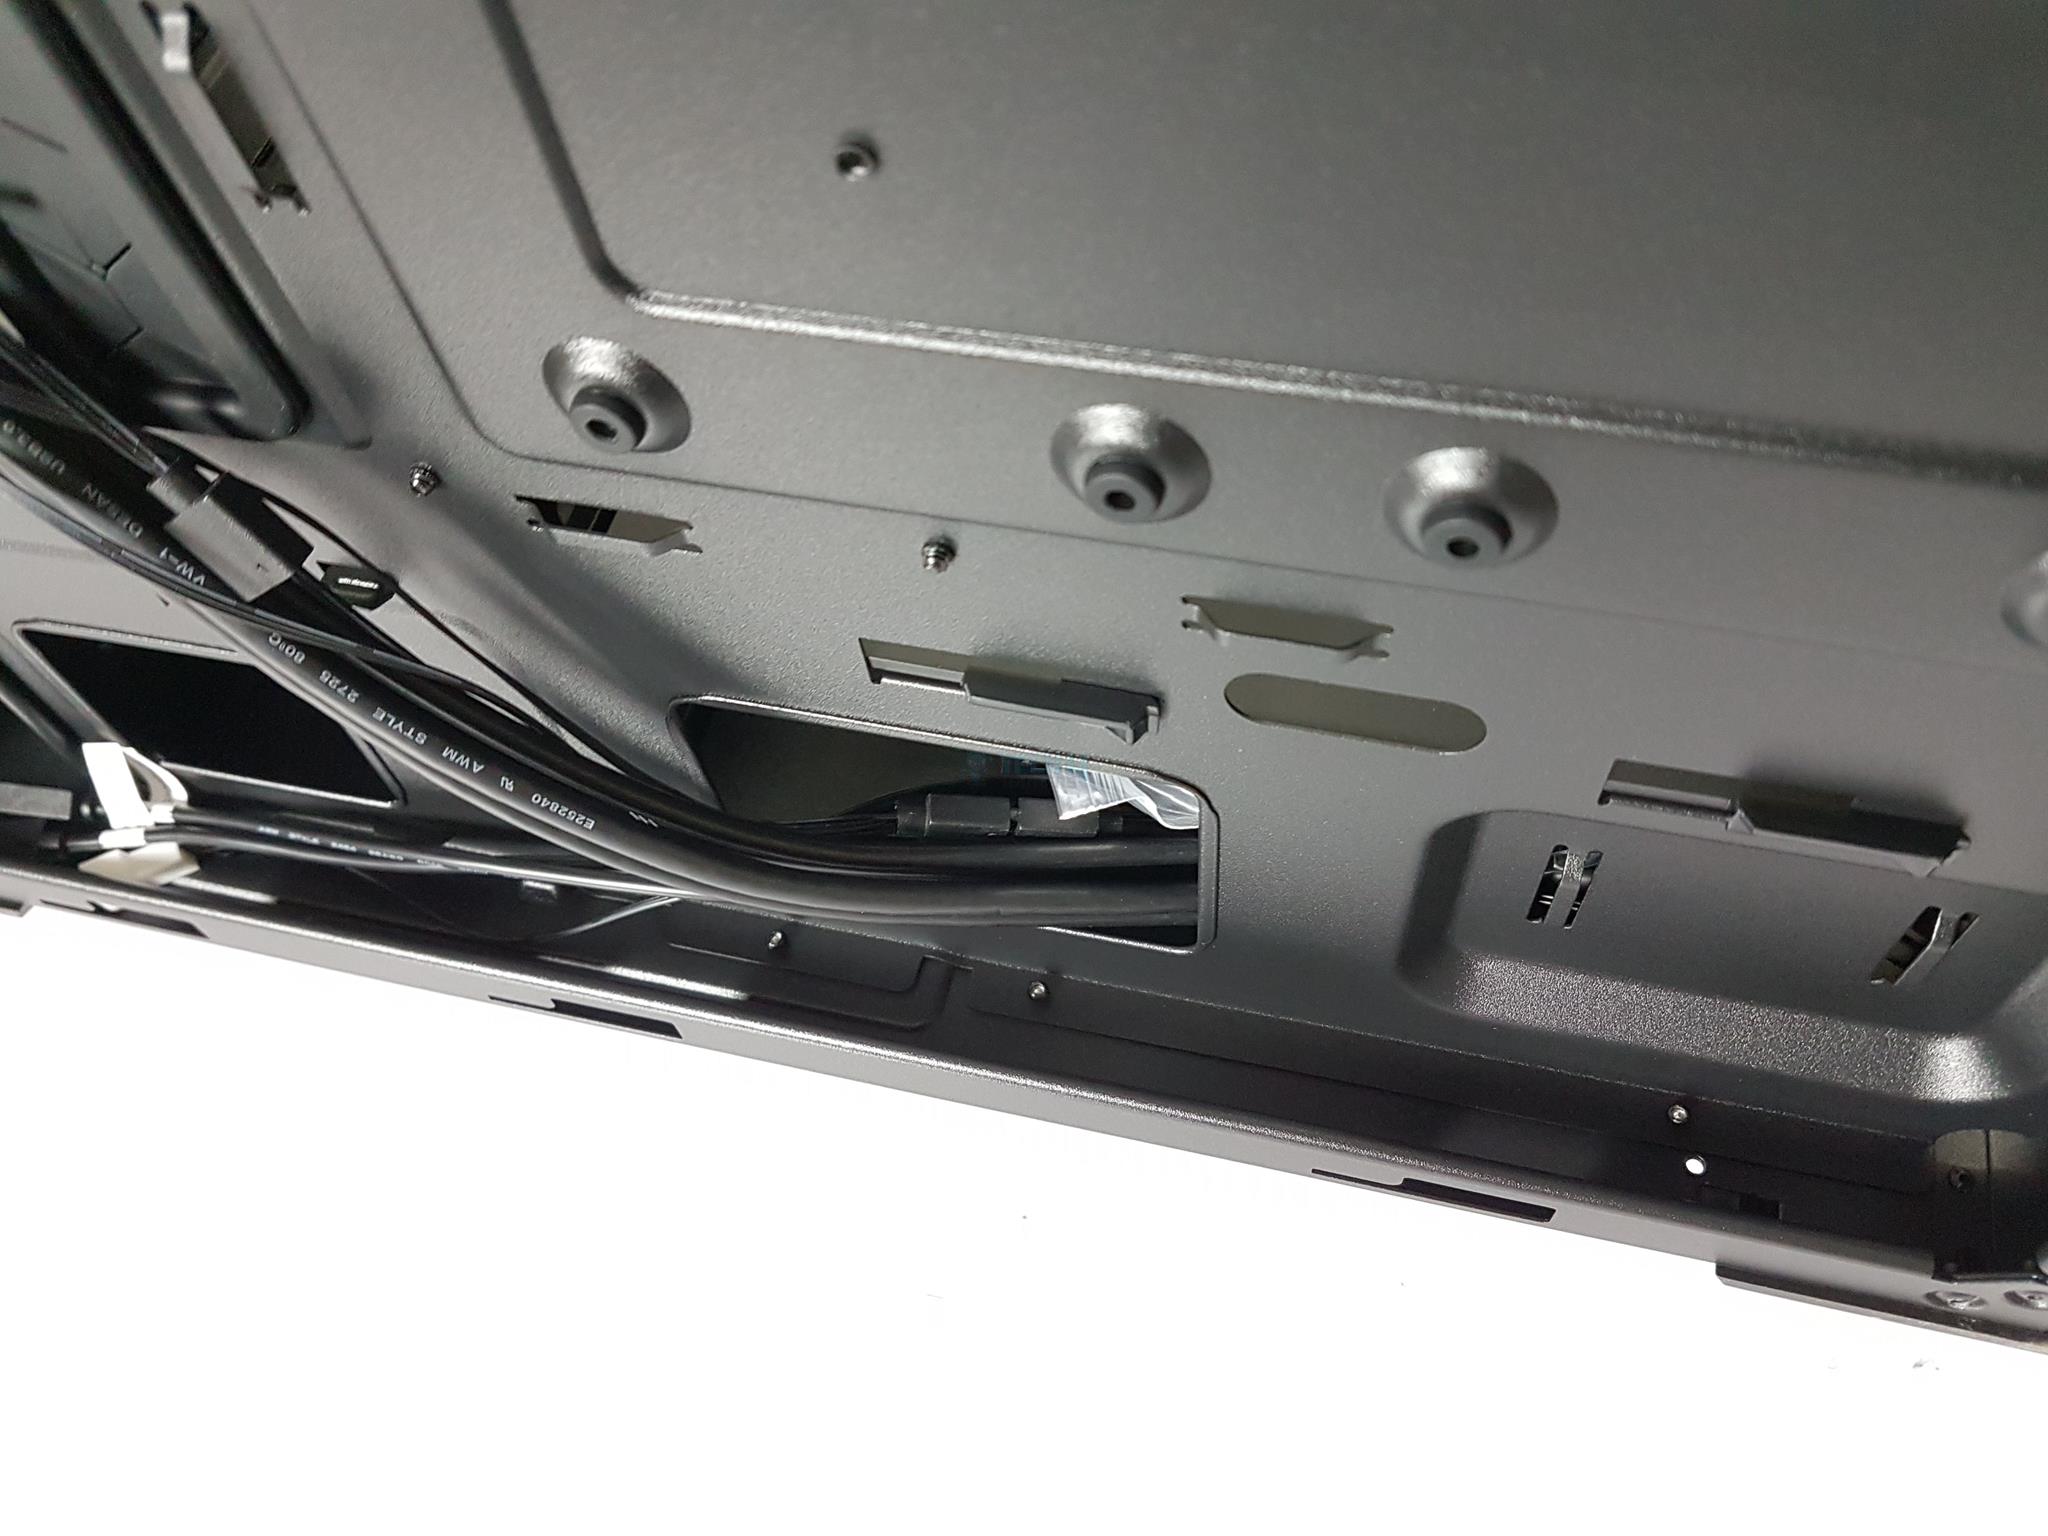
Let’s take a look at the backside of the chassis. We have 17x cable tie points on the backside. There are two mounting provisions for 2.5” drives on the backside of the motherboard tray. If you want to install the SSDs there, then make sure to install the SSDs before the installation of the motherboard, as SSDs are secured using screws from the other side of the tray. The front panel cables are neatly routed.
Notice the gap between the front bracket and the motherboard tray. It is roughly 60mm, allowing the user to install thick radiators on the front, though doing so would reduce the permissible length of the graphics card. Also, notice the 3x screws below the cables. The bottom is for the HDD cage, whereas the two on the top are for the cable cover. One more screw for the cable cover is hidden below the cables.

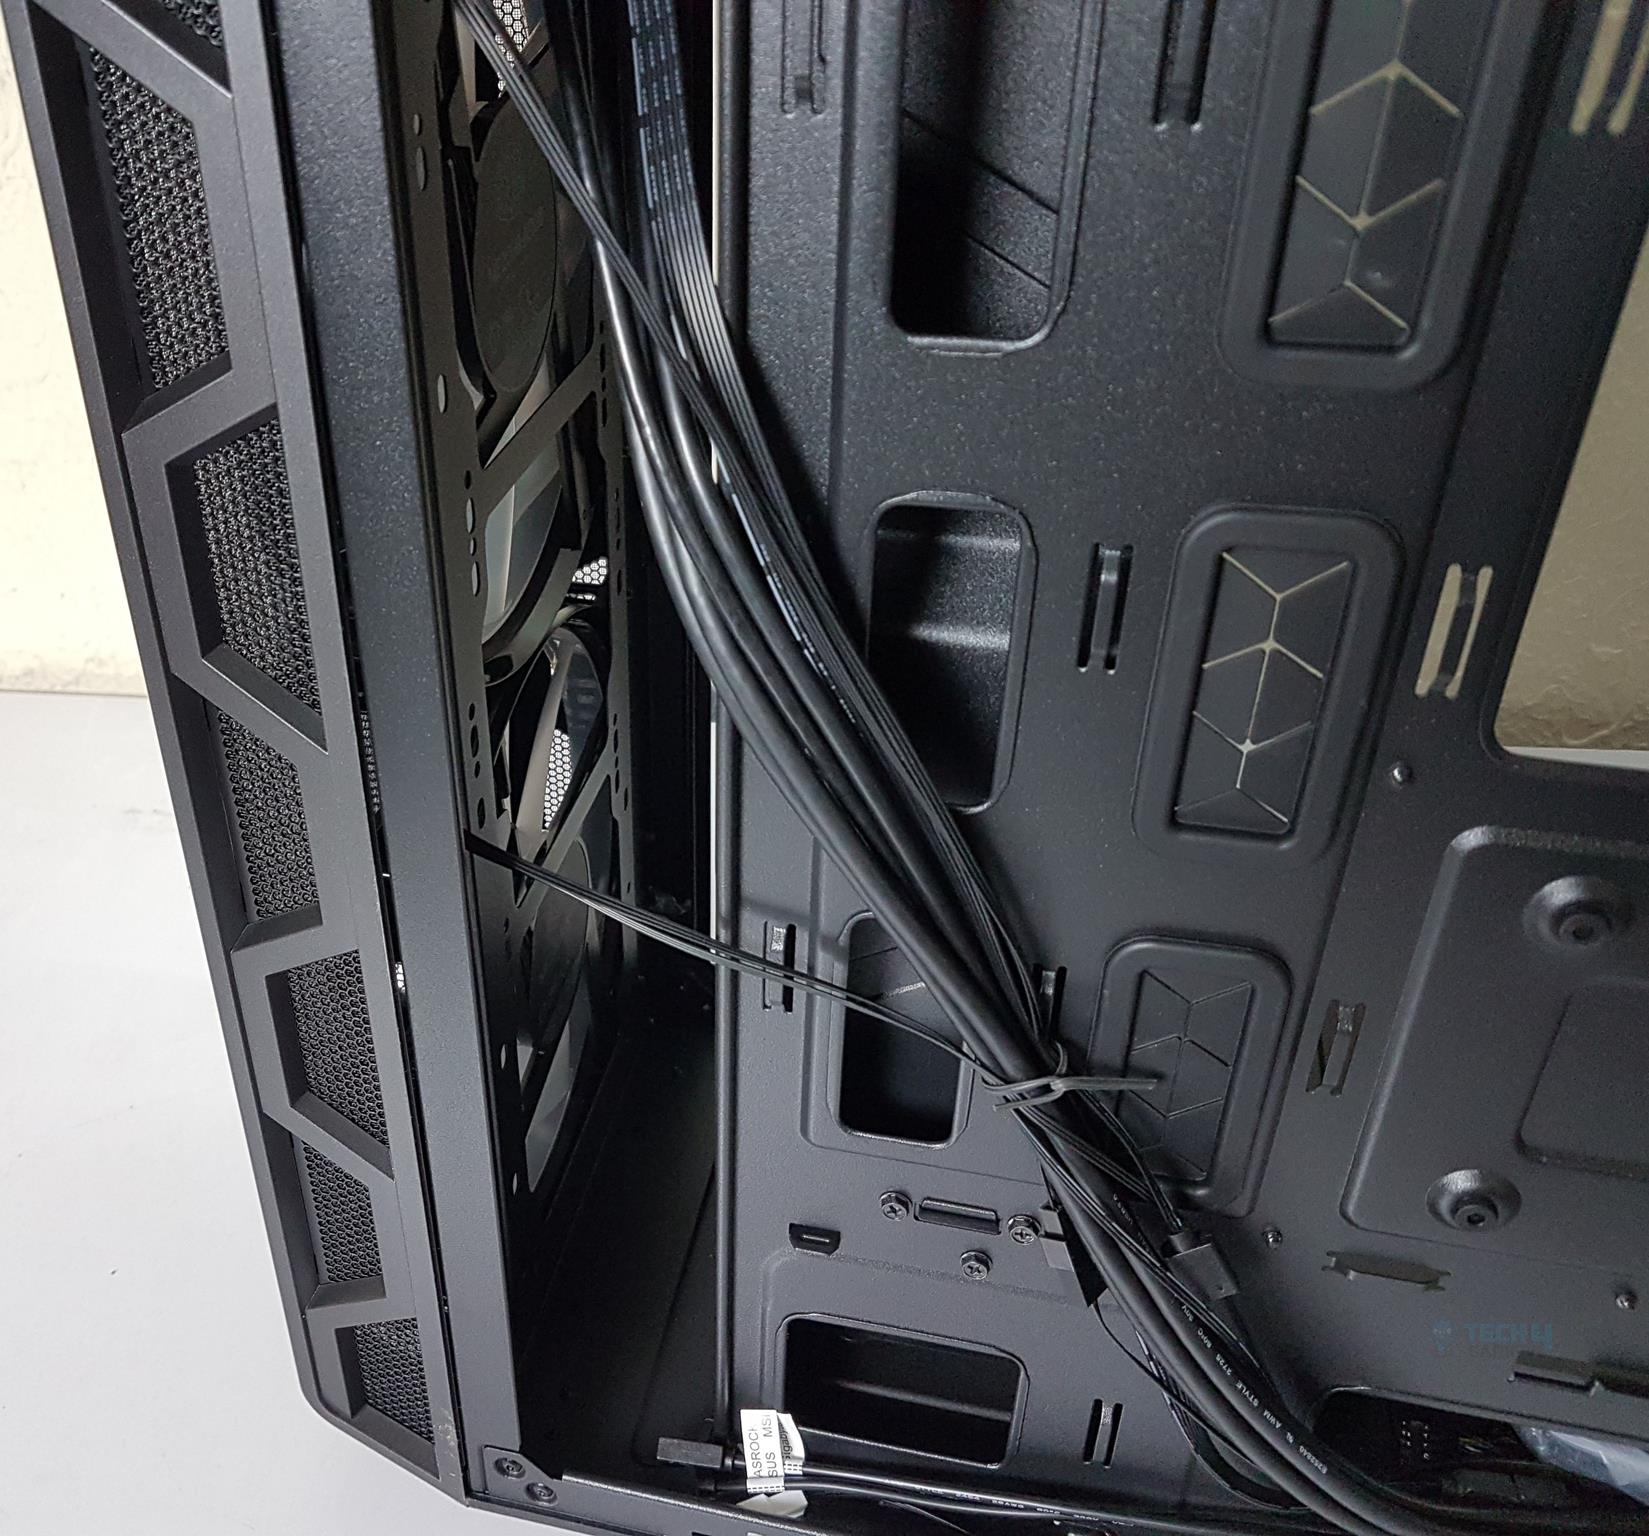
Here is another view of the backside with cables routed through the CPU cutout. Notice the three small cutouts above on the rightmost side above the bottom. The user can route cables through them. These are the channels for the PSU cover. I have routed HD Audio, USB 2.0, and system panel cables through these cutouts and installed the PSU cover. We have roughly 30mm or so spacing for the cable management. In my experience, we should not have any issues handling the cables in the MasterCase H500 ARGB.
The IO Panel cables include:
- USB 3.0 cable
- USB 2.0 cable
- HD Audio cable
- Front Panel cables
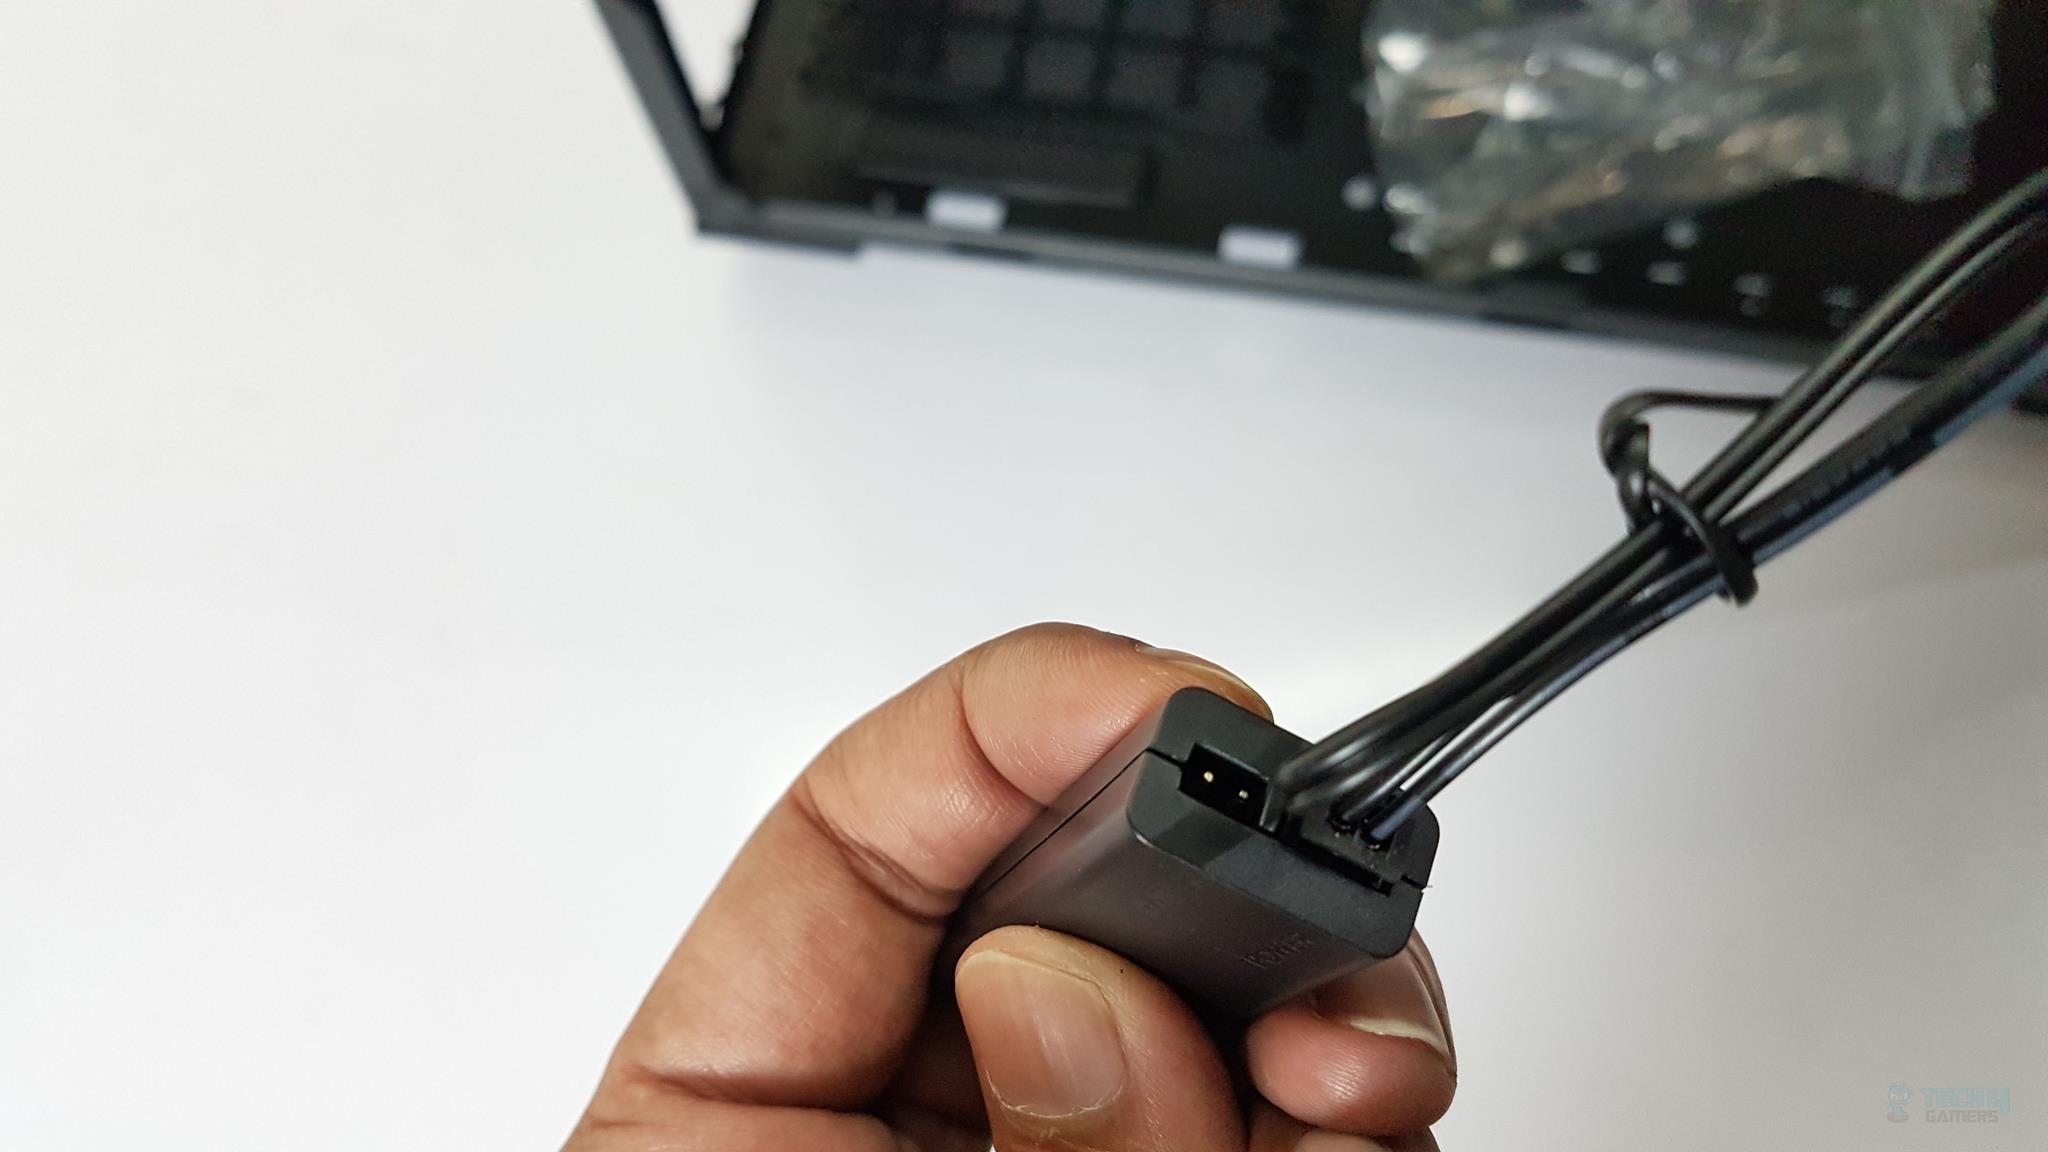
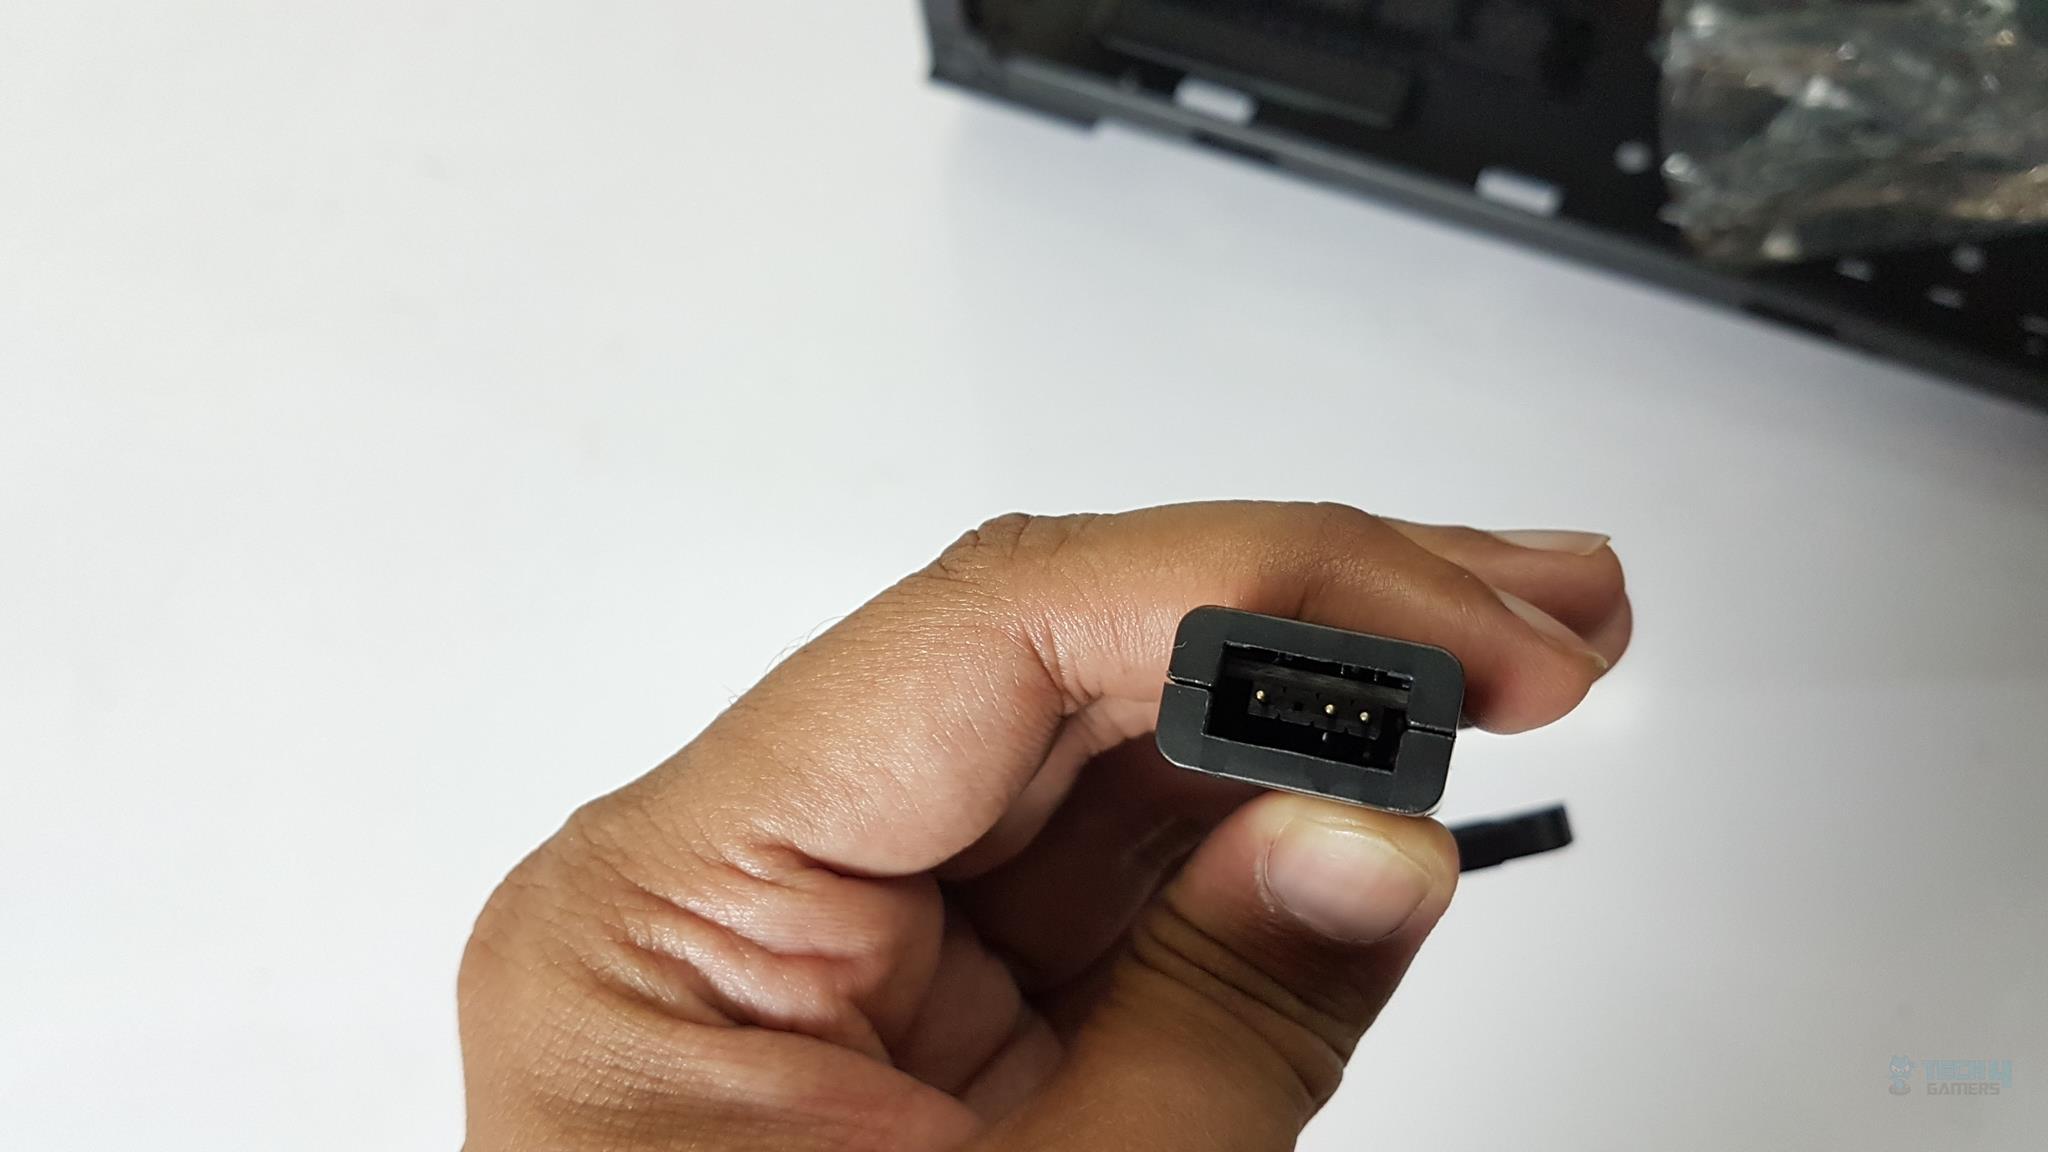
There are 3-pin 5V lighting cables for ARGB devices. Two header cables are also provided. One is for the GIGABYTE motherboards, whereas the other is for the rest of the manufacturers’ boards.
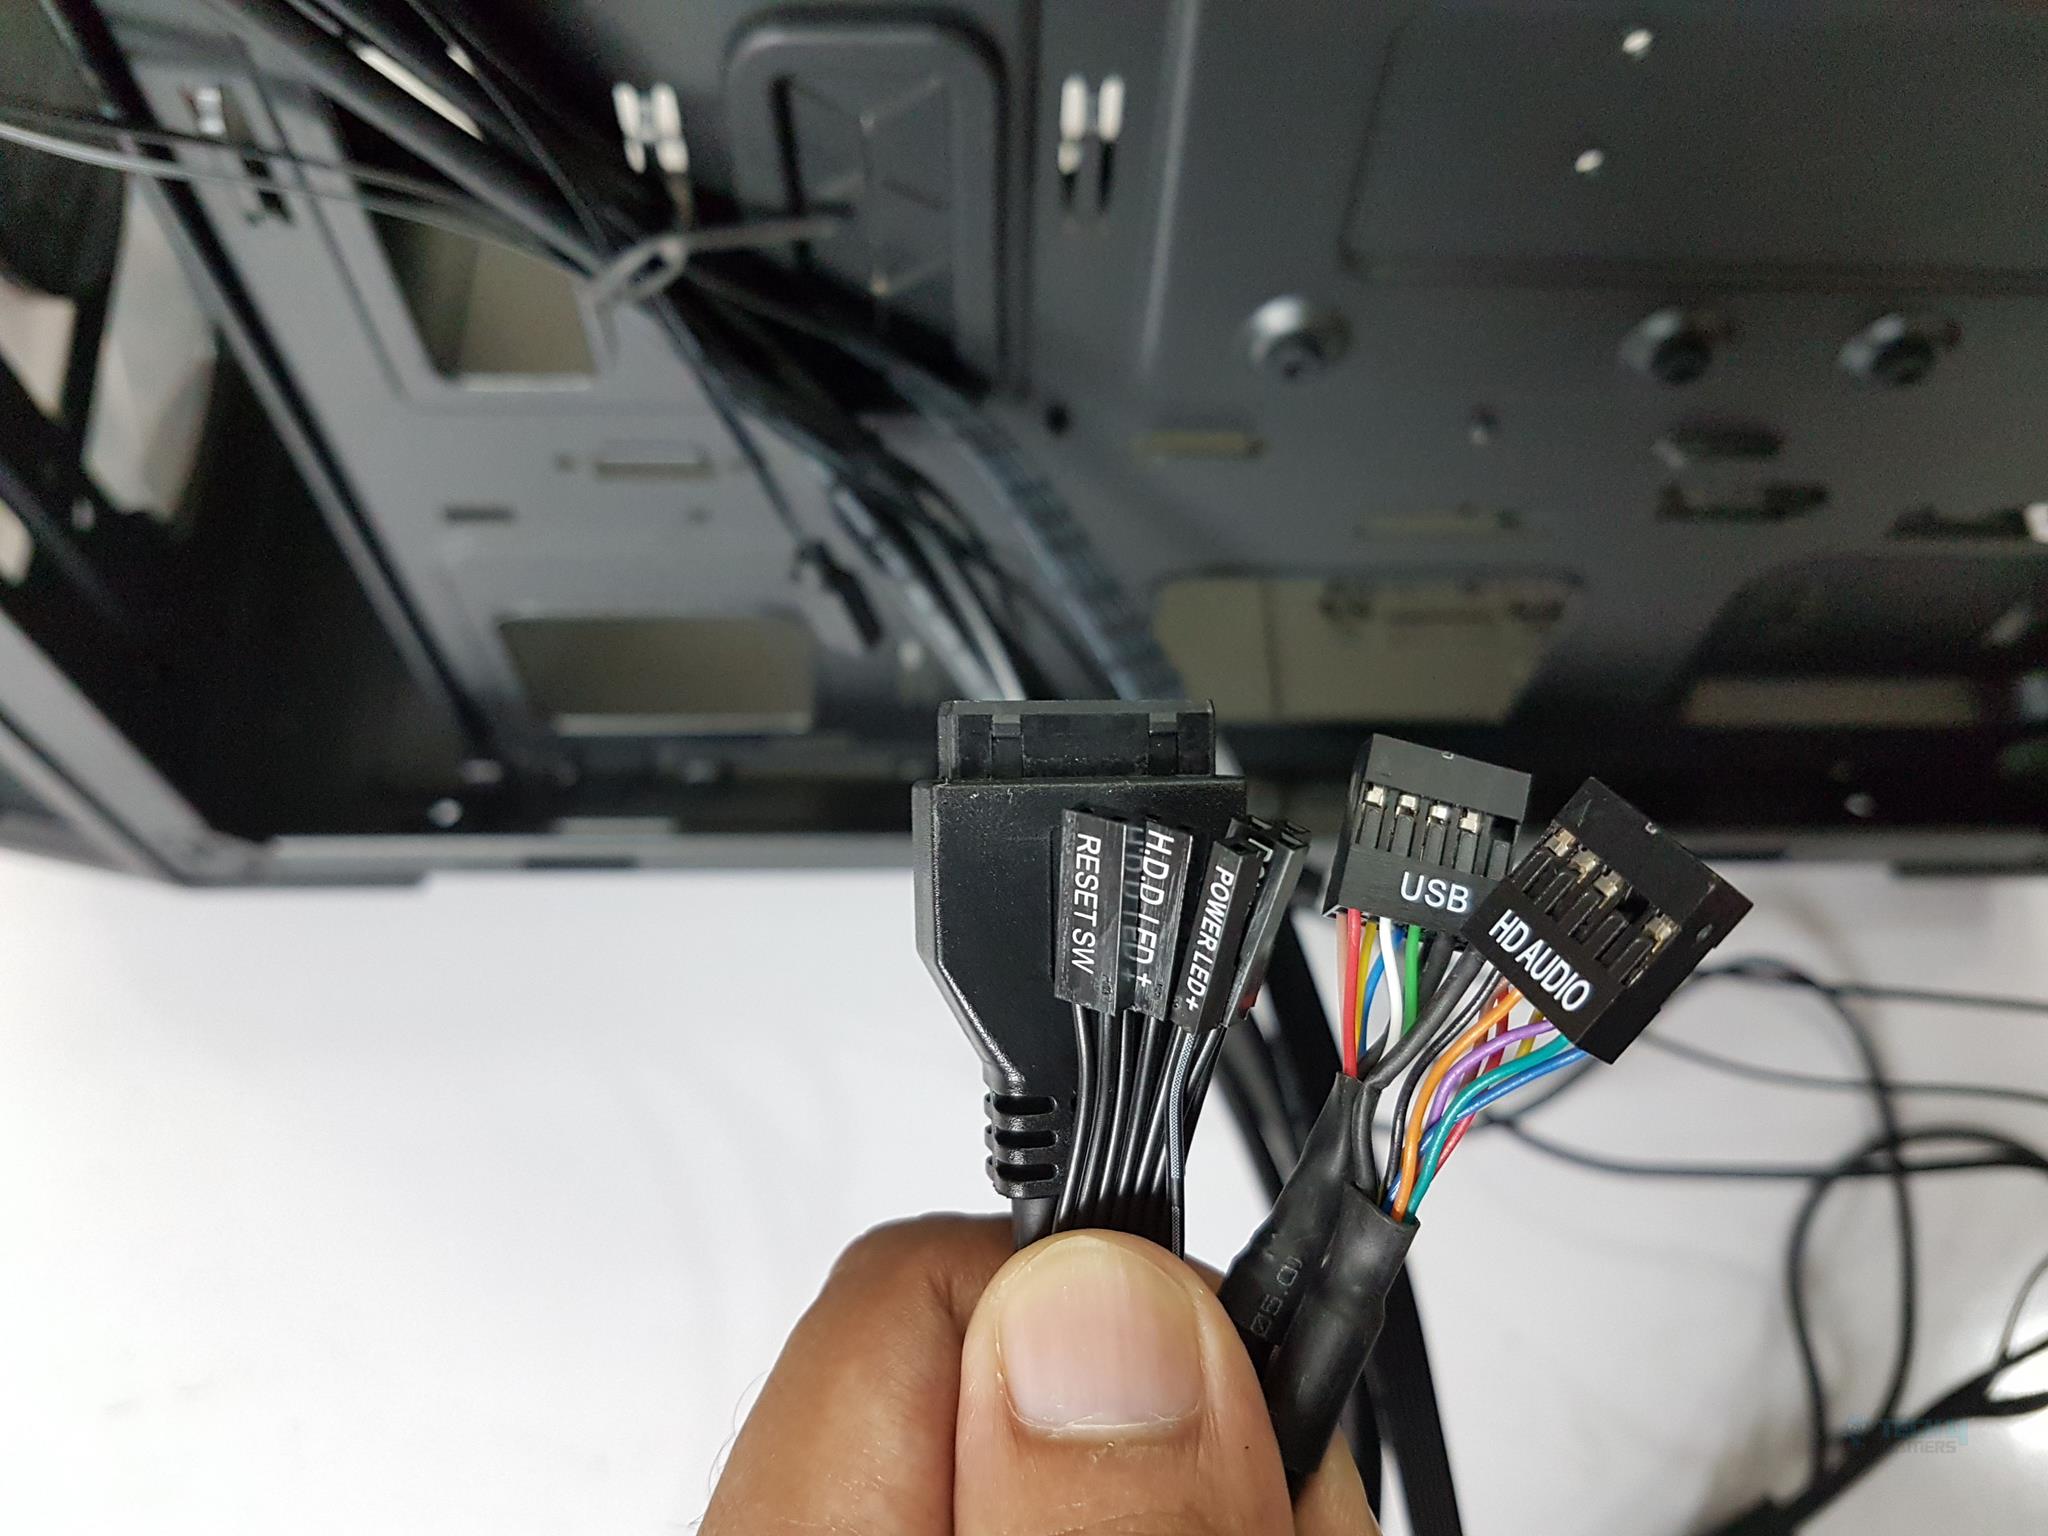
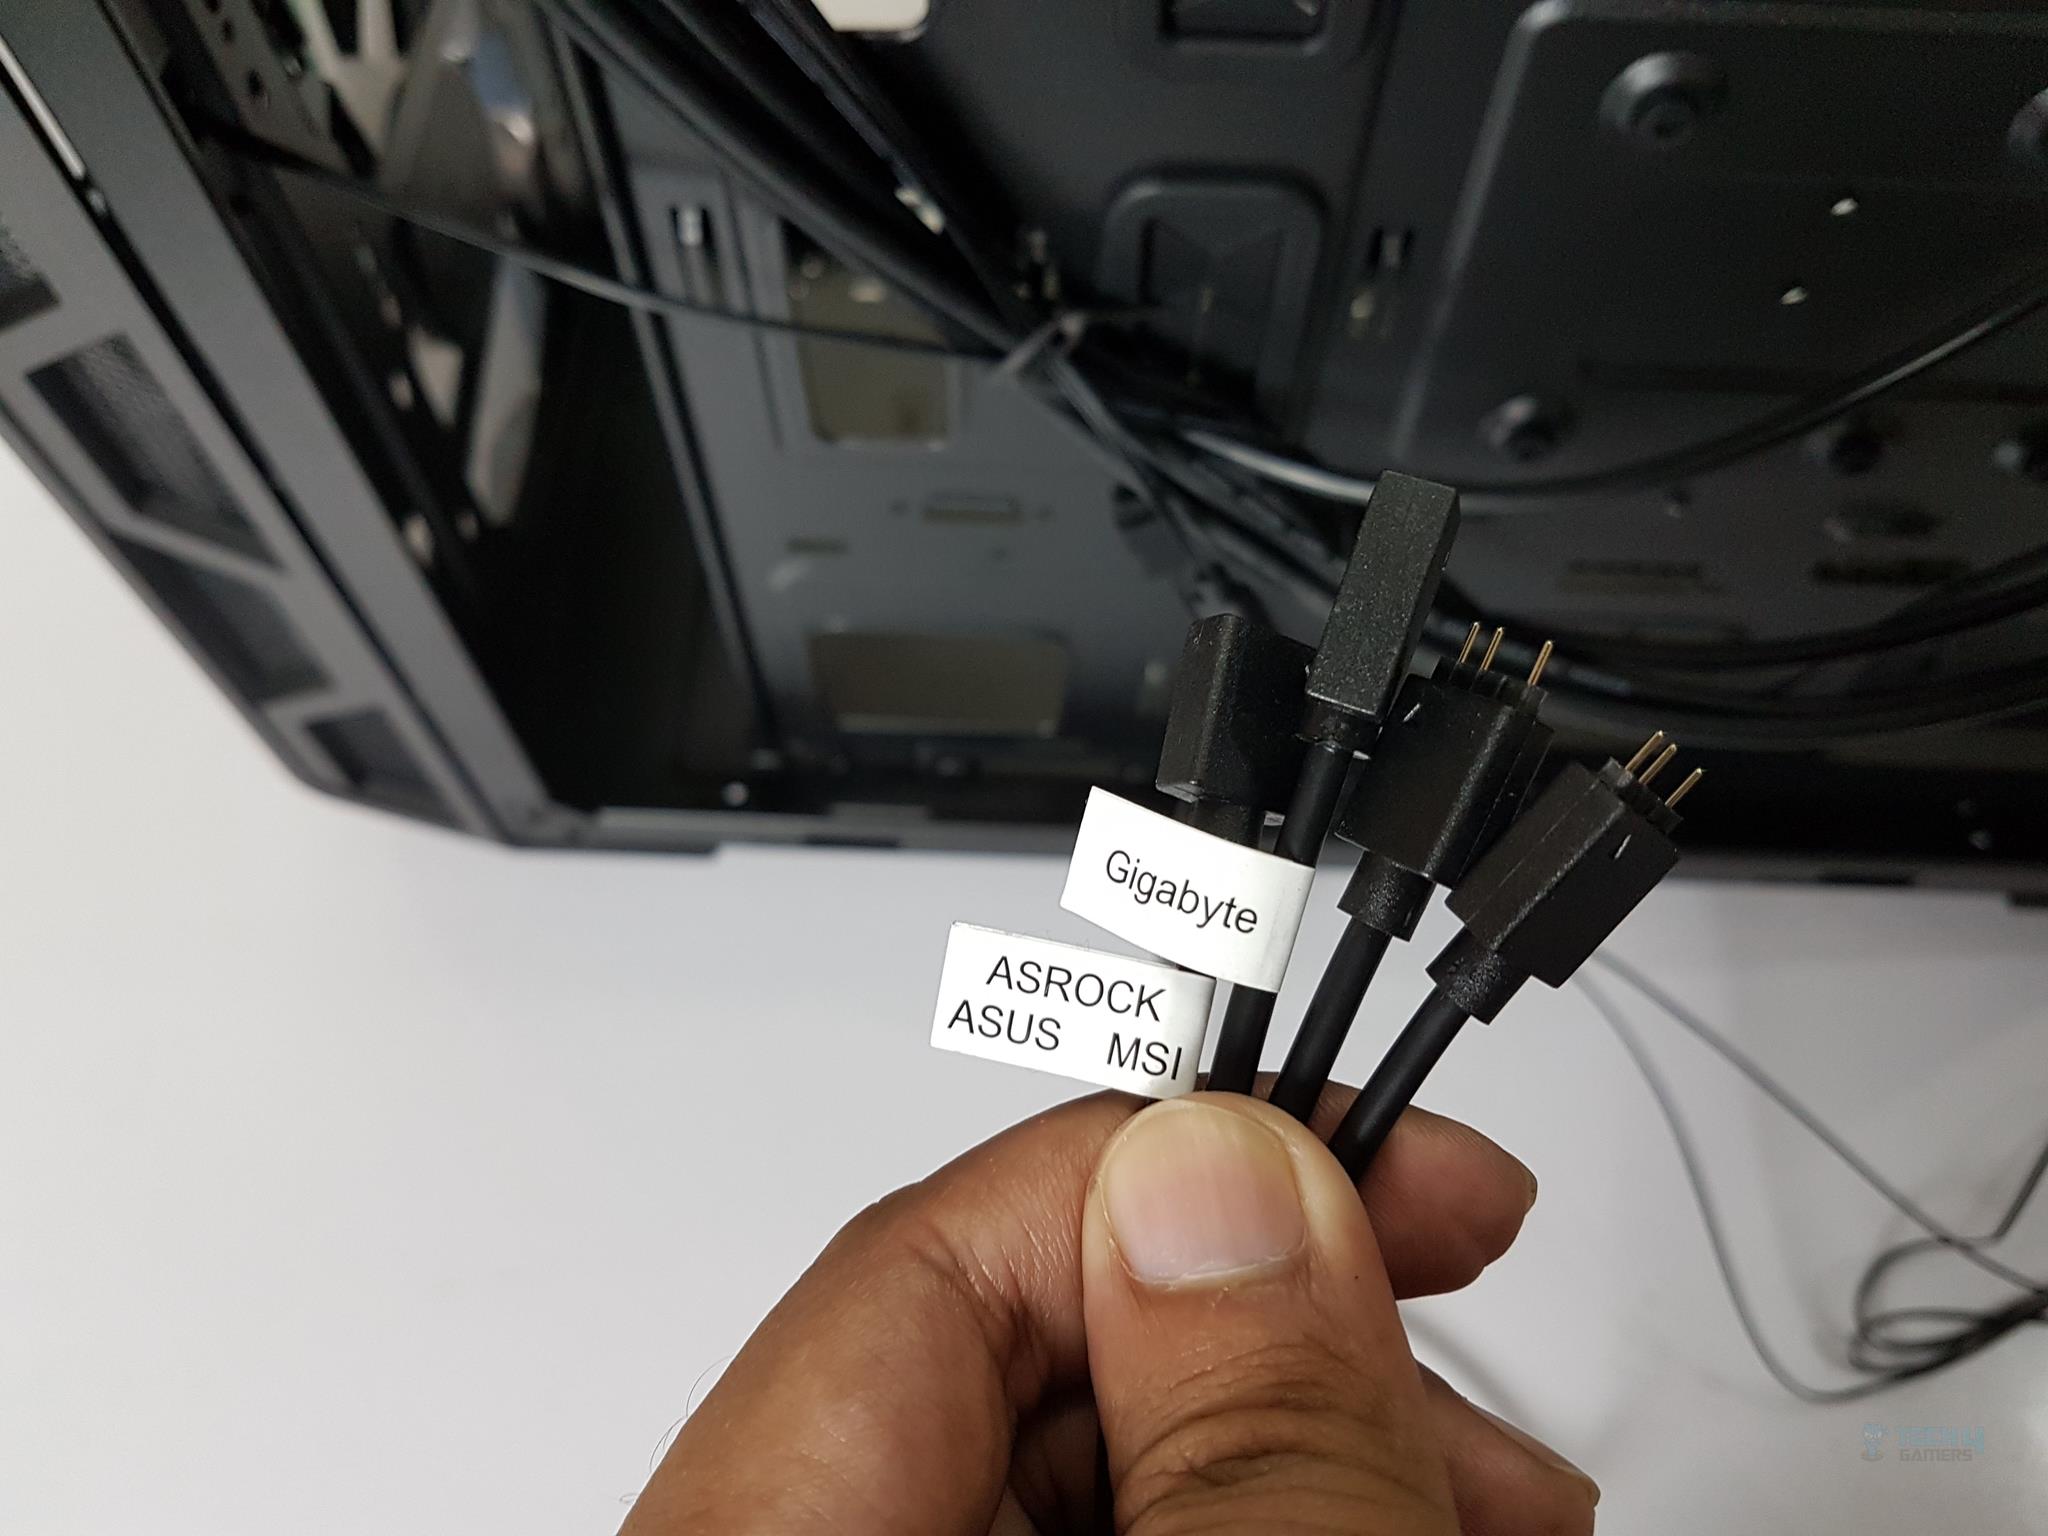
A black 3-pin connector is there, which is to be connected to the motherboard’s fan header. A white color 3-pin header is also provided. Optionally, the user can connect the rear fan’s 3-pin connector to this header and control the speed of all three fans from the single motherboard fan header. The front-mounted MasterFan MF200R ARGB fans are daisy-chained.

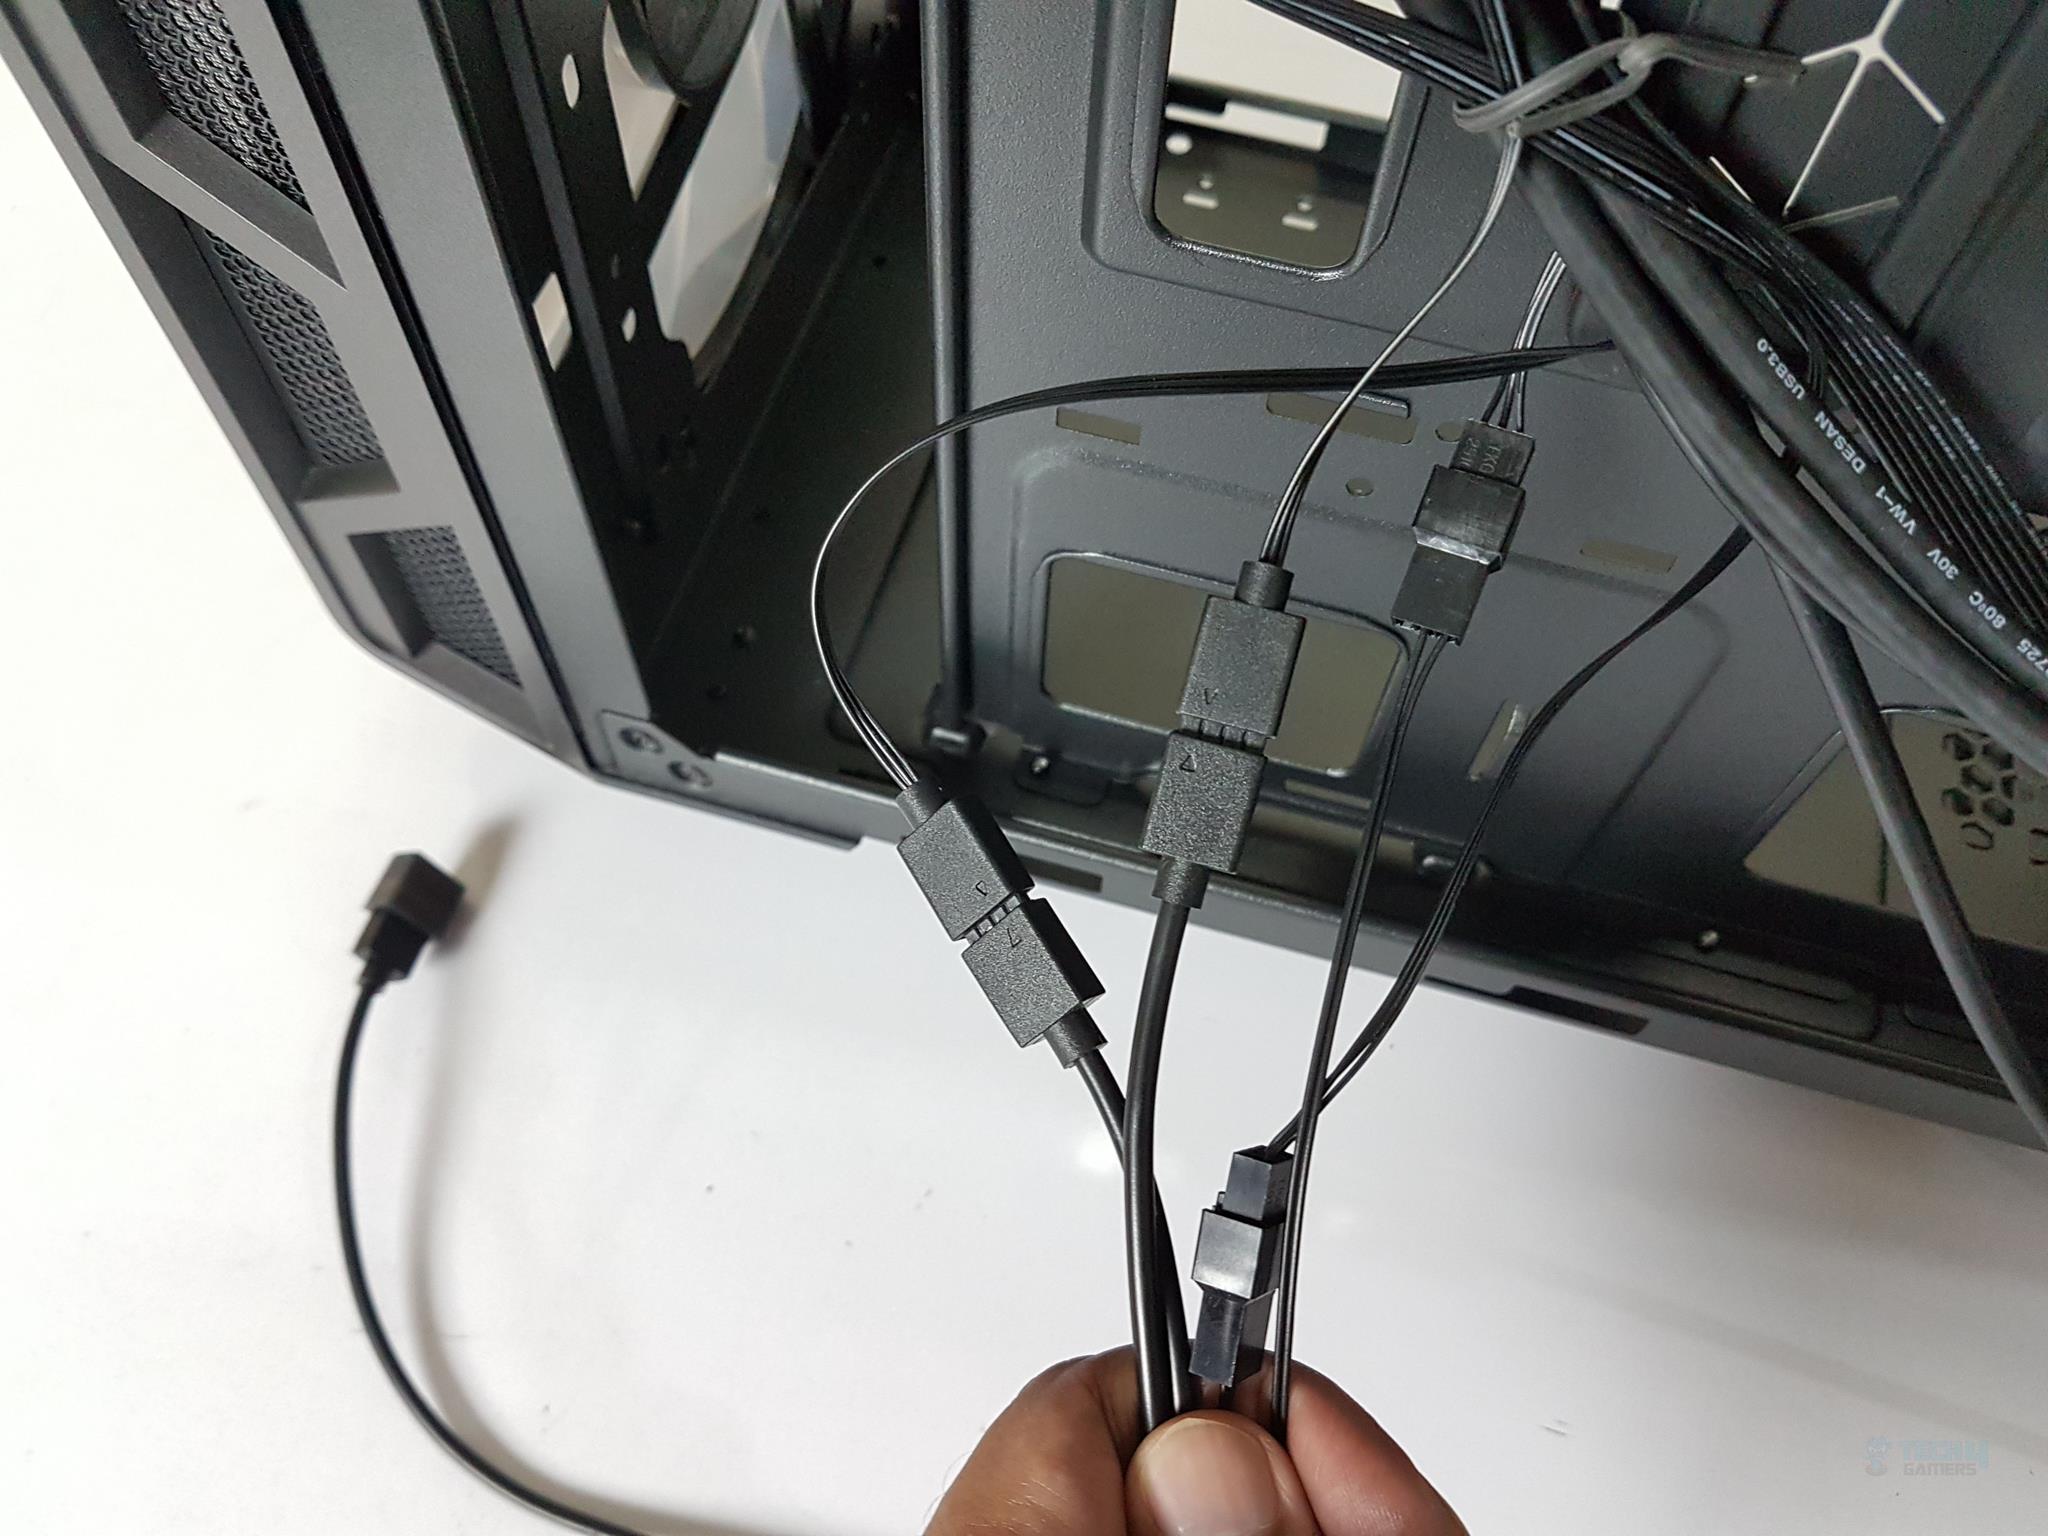
Cooler Master has provided a controller hub with a simple interface to control the lighting effect on the MF200R ARGB fans. It is SATA powered. A button in the middle toggles among the pre-defined lighting modes. It has a dimension of 53.5×20.9x12mm. The maximum output ampere is 3A. There are two ports on one side of the hub. One is labeled as Power. The SATA cable is already connected to it. The other port is labeled as Switch.
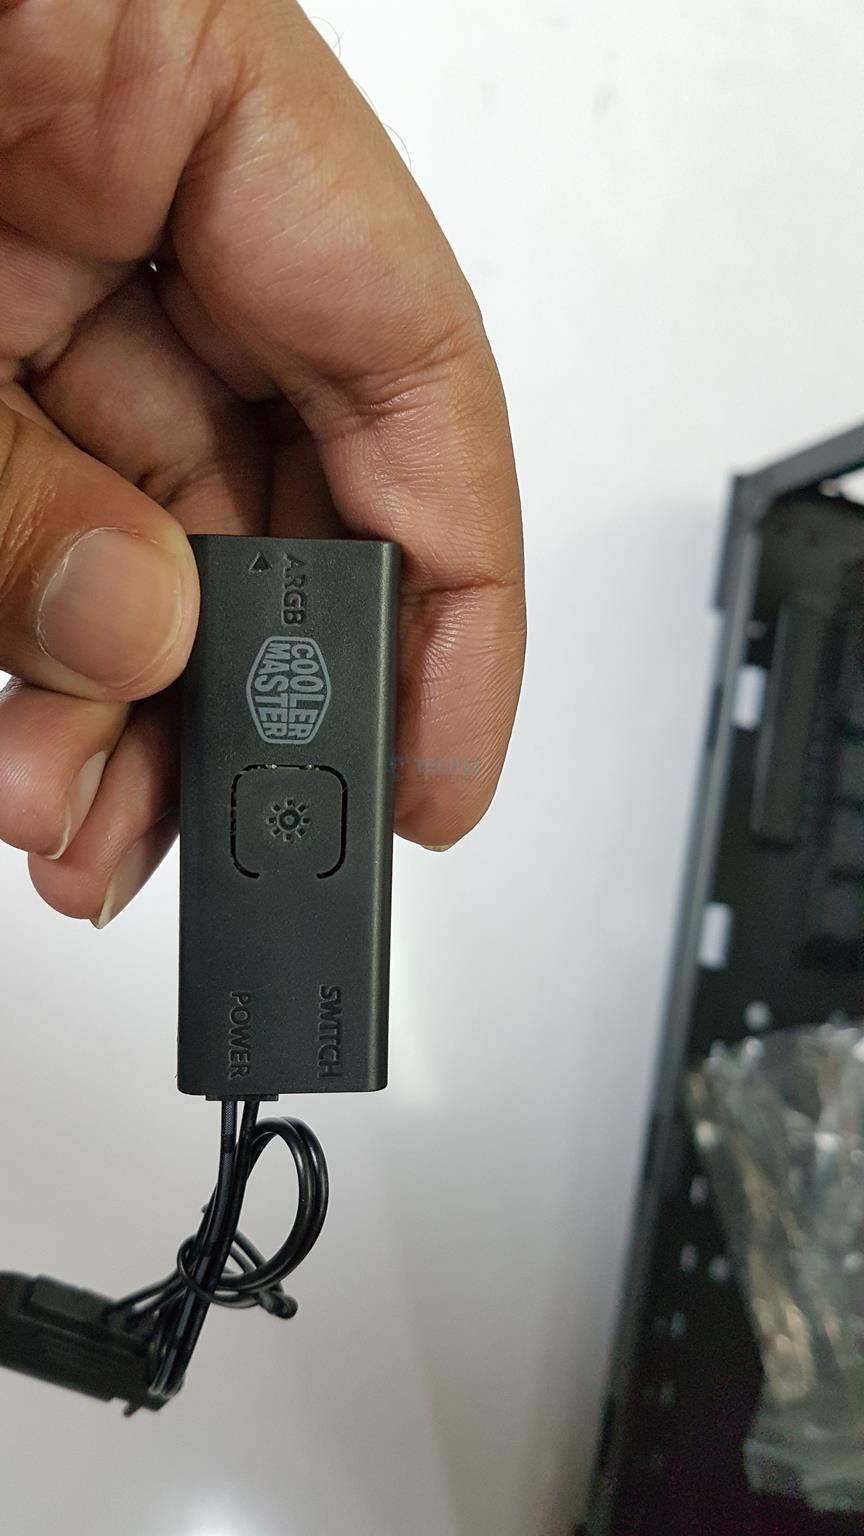
The switch labeled is a 2-pin port. The user can connect the chassis Reset cable to this port and control the fans’ lighting using the Reset button on the IO panel. This is how I have controlled the lighting on MasterCase H500 ARGB. The third port on the hub is labeled as ARGB, a 3-pin port. Connect your 3-pin lighting cable to this port.
Test Build
The following test build has been used:
- Intel i9 9900k
- Asus ROG Strix Z390-E Gaming
- DeepCool Assassin III
- GSkill Aegis 16GB @ 2800MHz
- Nvidia GeForce GTX 1080 FE
- Lexar 120GB SSD
- Cooler Master MWE 650W Gold PSU
I started the build with the motherboard and RAM installation. It was super easy, with no hurdle. Before installing the cooler, I hooked up the EPS cable, which otherwise would have become difficult with the air cooler. Since the PSU is fully modular, there was no issue connecting the EPS connector to the PSU later. Then, the dual tower CPU air cooler was installed, and the fans were connected to the CPU and CPU_OPT fan headers.
The rear fan was connected to the Chassis Fan1 header. Then, the PSU was installed. The following picture shows the EPS cable connected to the motherboard. With a bulky air cooler, there is not enough space to connect this cable after the cooler’s installation, so keep that in mind. This is less of a consideration with a liquid cooler or a single tower air cooler.
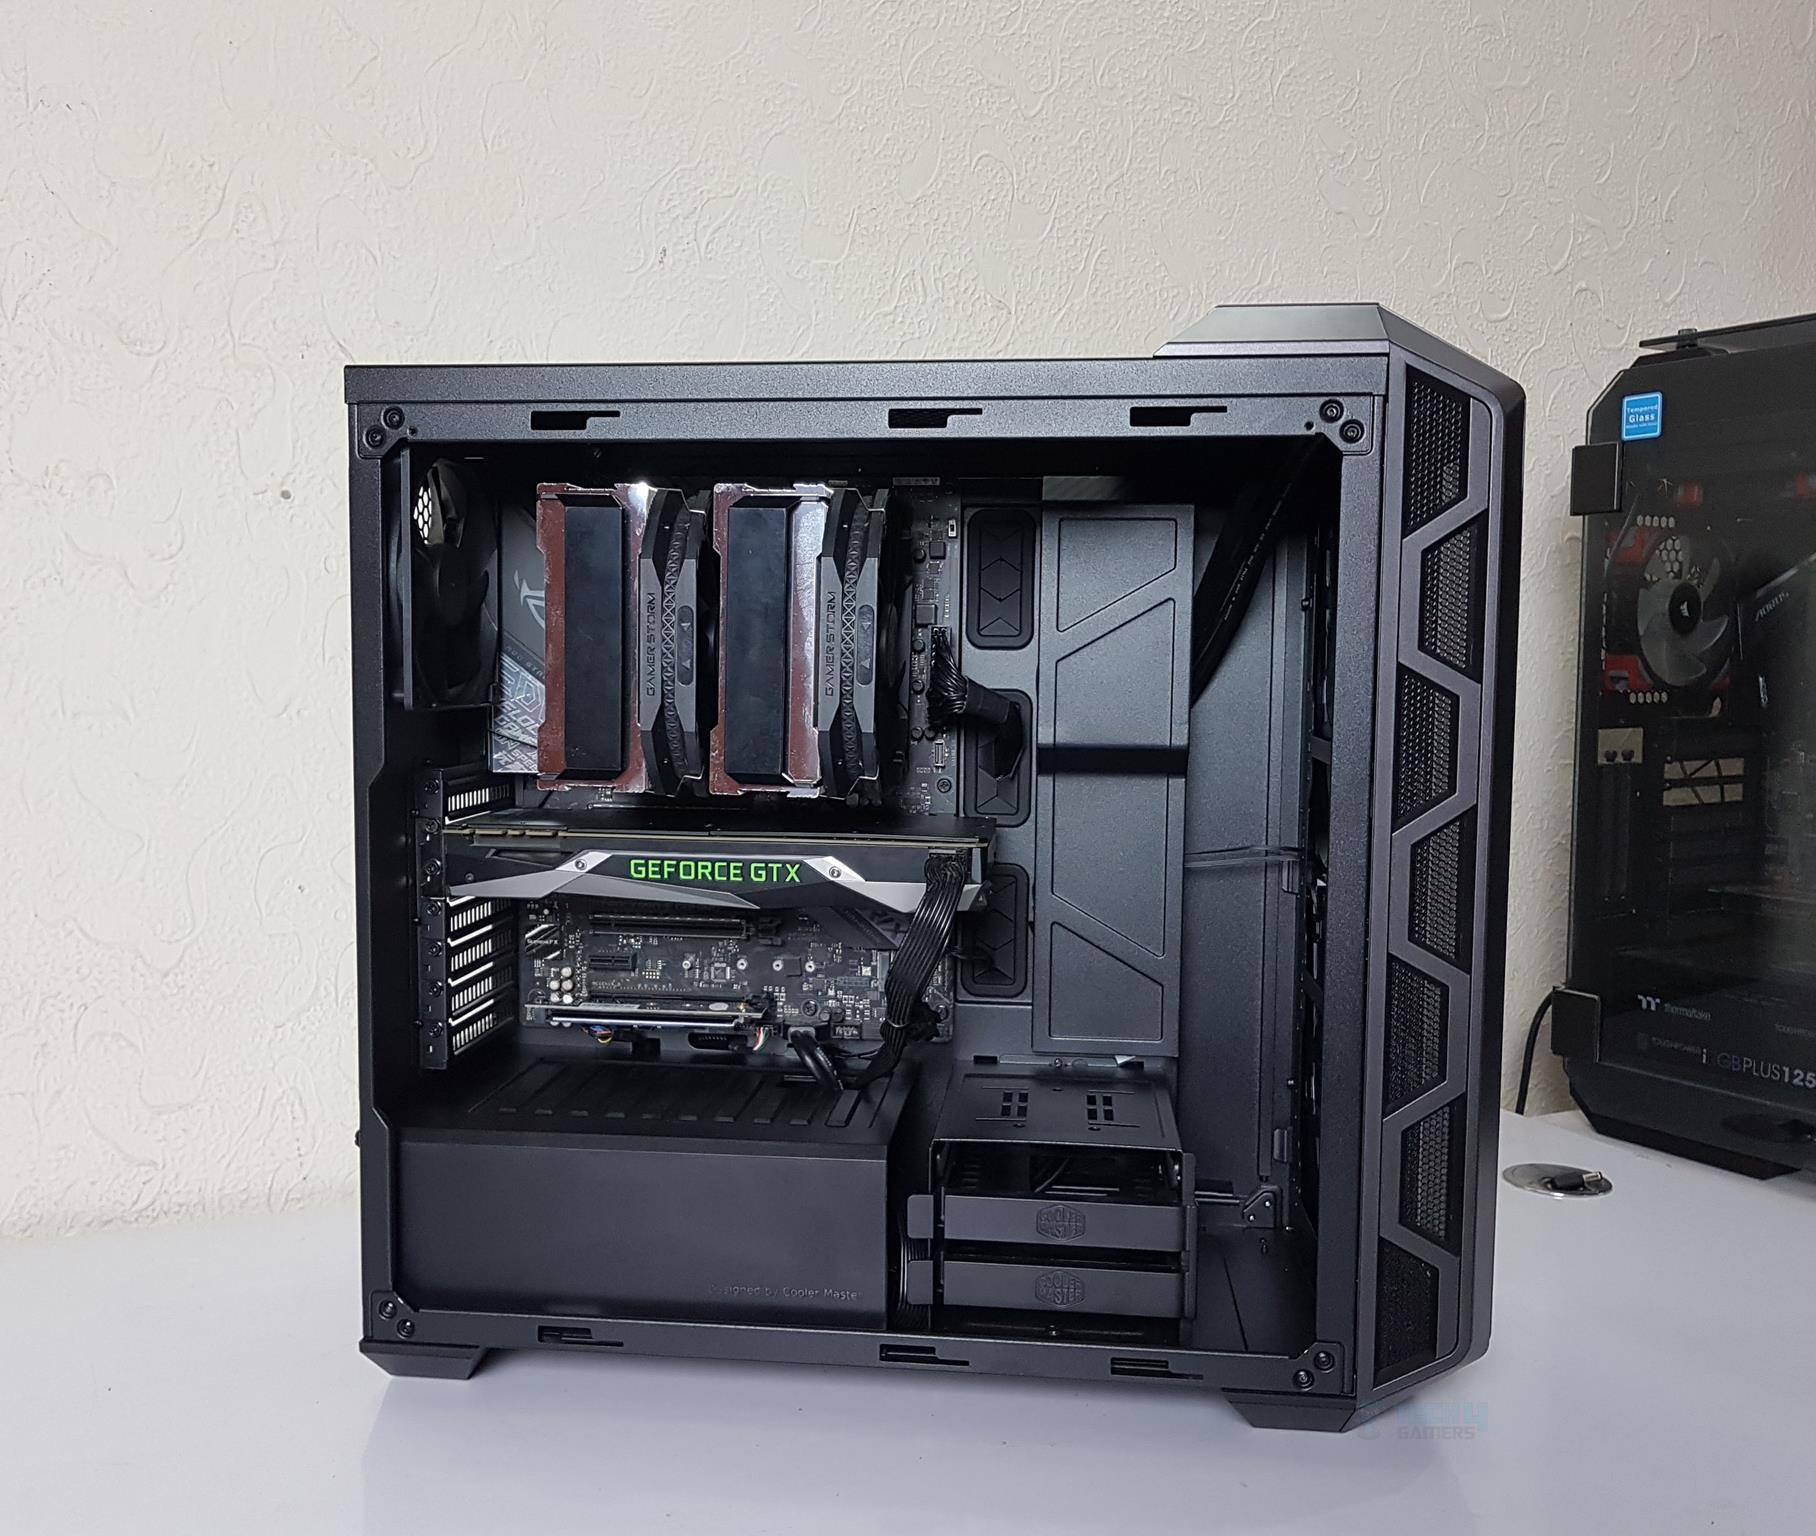
The graphics card was an easy go as well. The front IO panel’s cables were routed through the cutouts on the bottom of the motherboard tray. The USB 3.0 connector was passed through the cutout on the PSU cover. The system panel cables were also routed through the cutouts. The below picture shows the layout. The PEF cable was passed through the PSU cover.
The picture below shows the rear side of the chassis after installation. There is ample room on the back side for cable management. I did not do any cable management to show how easy it is to work around in Cooler Master Mastercase H500. The backside panel was easily installed.
Finally, the glass panel was put on, and the test build was ready to fire up.
RGB Lighting
The small ARGB Controller is a mini-sized controller that allows Addressable RGB devices to be powered and controlled. The controller comes with 14 pre-defined lighting modes to fully use the Addressable LEDs in the system and also allows it to be completely switched off by long-pressing its button.
Attaching any external 2pin button to switch presets without opening the system or attaching the chassis Reset cable is also possible. The Small ARGB Controller uses the standardized 3-pin ARGB connector to allow complete compatibility across devices and brands, including ASUS, GIGABYTE, MSI, and ASRock.


Thermal Performance
I have used Far Cry 5 at 1080p using Ultra settings for gaming performance, as most users would be gaming. The CPU was on stock settings with Asus Auto Enhancement disabled.
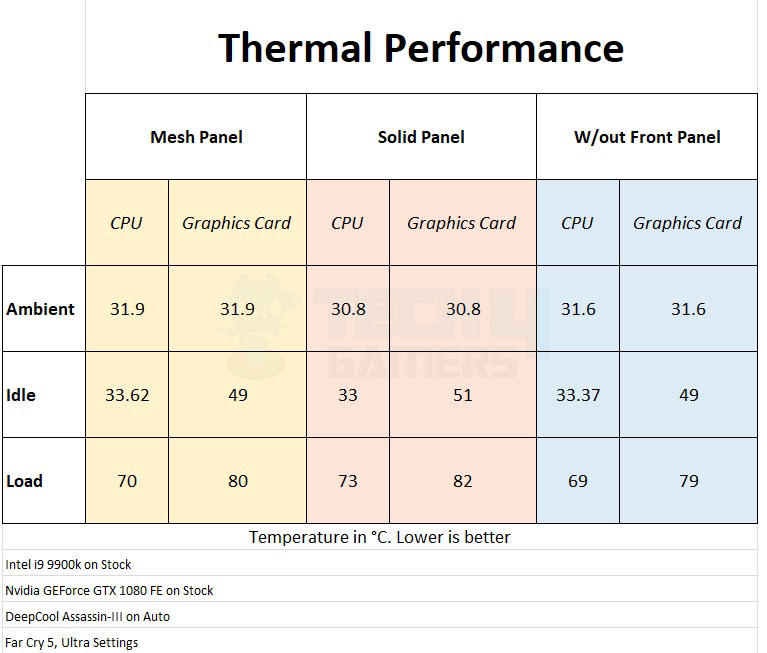
Temperatures are acceptable in this chassis. We did not observe any significant deviation between the mesh and solid cover as it was 3°C, which is still within the acceptable tolerance range. However, the difference between the solid cover and no cover was 4°C. The reference cooler on the graphics card is struggling.
Should You Buy It?
Buy It If
✅ You are an enthusiastic gamer: The Cooler Master Mastercase H500 is an excellent choice for gamers who prioritize cooling performance with its two 200mm RGB fans in the front and ample space for additional fans or liquid cooling solutions.
✅ You are a PC builder looking for Versatility: The Mastercase H500 allows easy customization with a removable partition panel, adjustable top cover, and a PSU shroud, giving builders the flexibility to create a clean and personalized setup.
✅ You have a knack for Aesthetics: If you’re looking for a case that performs well and adds a visually appealing touch to your gaming rig, the Mastercase H500 with its RGB accents might be the right choice.
Don’t Buy It If
❌ You have a limited Budget: If you’re on a tight budget and looking for a more affordable case, the Cooler Master Mastercase H500 might be overkill.
❌ You favor a Compact build: If you want to build a compact system for a small living space or LAN events, this case may not be the most practical choice.
❌ You require extensive drive bays: While the case provides adequate storage options, users who require a massive number of drive bays for extensive storage configurations might find the Mastercase H500 lacking.
Conclusion
Cooler Master is continuing the legacy of the original H series while retaining the same design elements but with delicate refinement. We took a spin on their new Cooler Master Mastercase H500. The MasterCase H500 ARGB has the same design as the original H series with modifications on the front. We now have two 200mm ARGB fans on the front, and the user can switch the mesh cover with a transparent cover (provided in the box) on the go as per the requirement.
The glass panel does not fall when two captive thumbscrews are removed. You should still exercise caution when handling the glass panel. The glass panel is tinted, so some lighting inside the chassis would help showcase the build. I did not face any issues during assembling the test build. My only complaint is the small size of the reset button, which is a bit recessed in its port. I ended up using my nail on the finger, pressing this button. Besides that, this chassis is a solid proposition from the Cooler Master in this price range.
Recent Updates
- December 22, 2023: A few text changes to improve readability. Also added image galleries.
Thank you! Please share your positive feedback. 🔋
How could we improve this post? Please Help us. 😔
[Hardware Reviewer & Editor]
Meet Nauman Siddique, a highly experienced computer science graduate with more than 15 years of knowledge in technology. Nauman is an expert in the field known for his deep understanding of computer hardware.
As a tech tester, insightful reviewer, and skilled hardware editor, Nauman carefully breaks down important parts like motherboards, graphics cards, processors, PC cases, CPU coolers, and more.
- 15+ years of PC Building Experience
- 10+ years of first-hand knowledge of technology
- 7+ years of doing in-depth testing of PC Hardware
- A motivated individual with a keen interest in tech testing from multiple angles.
- I majored in Computer Science with a Masters in Marketing
- Previously worked at eXputer, EnosTech, and Appuals.
- Completed Course in Computer Systems Specialization From Illinois Tech
Get In Touch: nauman@tech4gamers.com


