 Threads
Worth the Hype?
Review Summary
The XPG Invader X BTF is a solid mid-tower case that supports full ATX backplug motherboards and offers a sleek panoramic view with tempered glass panels. It provides ample cooling with five pre-installed A-RGB fans and room for up to 10 fans, including support for 360mm radiators. With limited storage options and a competitive price tag of $140, this case offers a stylish design but faces stiff competition in its segment.
Hours Tested: 13

Overall
-
Design - 9/10
9/10
-
Build Quality - 7/10
7/10
-
Features - 9/10
9/10
-
Cooling Provision - 9/10
9/10
-
Storage Provision - 8/10
8/10
Pros
- Panoramic View Design
- 3mm Tempered Glass
- 5x Pre-Installed Fans
- ATX Size Backplug Motherboards supported
- Good Fust Filtration all around
- Rail Mount System for fans and radiators
- Storage Bracket
- GPU Support Bar
- Vertical & Horizontal GPU Bracket
- Ample Airflow
- Versatile IO Ports
- Supports up to 2x 360mm Radiators
- 3x Reusable PCIe Slot Covers
Cons
- Non-reusable PCIe covers
- Removal of the top panel to take off the glass panel


Today, I am testing the XPG Invader X BTF, a successor to last year’s Invader X, which we tested earlier. The key difference between both cases is that the original Invader X can support mATX motherboards with back plugs, whereas the Invader X BTF now supports full ATX-size back plug motherboards.
It seems like this is a joint venture with Asus, as BTF is the naming convention of Asus for the back-plug motherboards. However, I will be using an MSI Project Zero back-plug motherboard for the test build. Maybe XPG needs to reconsider the naming convention to say brand-free!
Key Takeaways
- The XPG Invader X BTF supports full ATX backplug motherboards, offers a panoramic view, and comes with excellent cooling solutions.
- You should buy the XPG Invader X BTF if you want a high-end PC case that offers good features and supports backplug motherboards.
- You should not buy the XPG Invader X BTF if you want the best bang for the buck as there are more backplug-supported motherboards releasing that offer better value.
Here are some features:
- The BTF version is 10mm taller than the original Invader X to make room for ATX size backplug motherboards.
- XPG has removed the riser cable to reduce the price for the BTF version compared to the original Invader X.
- The BTF version has 4x reverse blades A-RGB fans and 1x regular A-RGB fan.
- This case can house up to 10x 120mm fans.
- XPG has provided a vertical GPU bracket as well as the support frame for the horizontally mounted GPU.
Here are the key specifications:
| Dimension | 458x245x448mm (HxWxD) |
| Color | Black/White |
| Form Factor | ATX |
| Expansion Slots | 7x Horizontal and 4x Vertical |
| Storage | 3x 2.5” or 3.5” drives |
| Cooling Support |
|
| GPU Clearance |
|
| CPU Clearance | 175mm Height |
| PSU Clearance | 240mm Length |
What Makes The XPG Invader X BTF Different?
The XPG Invader X BTF is a stylish and versatile mid-tower case that offers full compatibility for ATX-sized backplug motherboards. This is its main selling feature. This case has ample cooling provision with 5x pre-installed fans. Another plus point is the option to install the graphics card vertically or horizontally with good clearance. However, this case has limited storage provision, but the overall feature set is competitive.
My team and I have also tested and reviewed these backplug motherboards:
Packaging And Unboxing
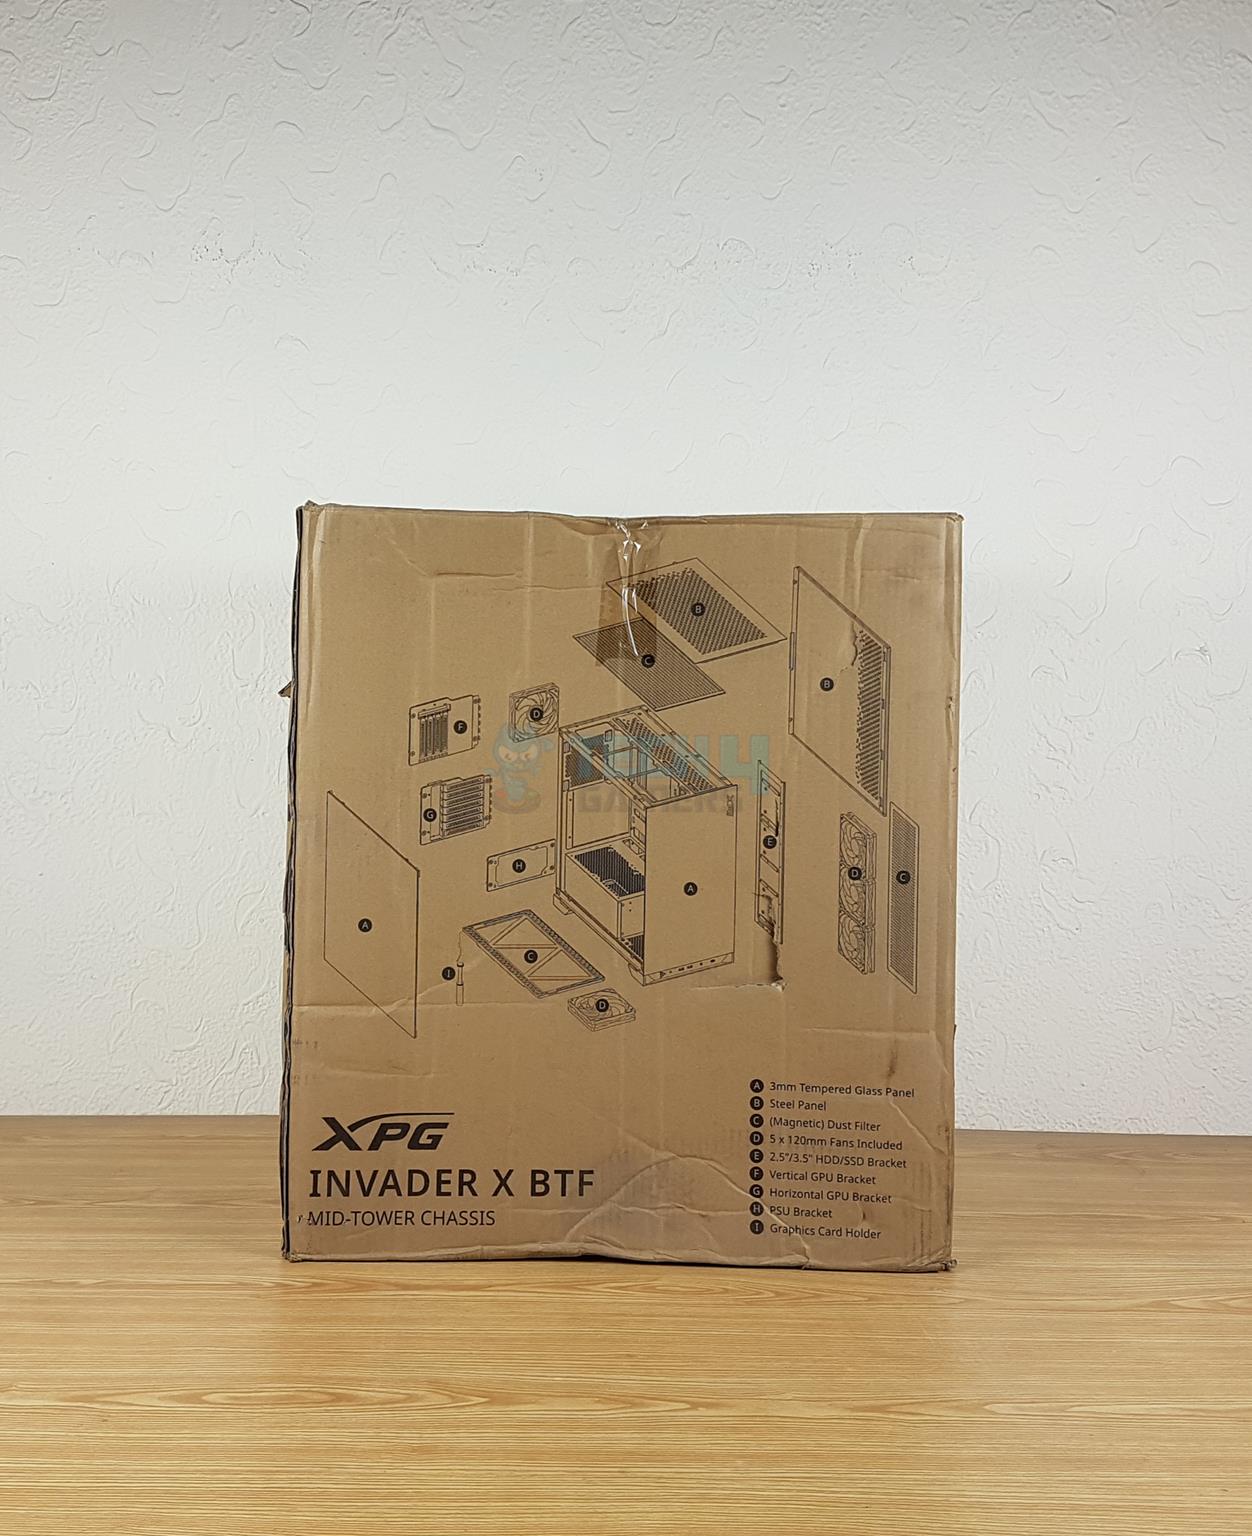

The unit is shipped inside a standard brown color cardboard box. XPG has highlighted key features on the packing box. The case is tucked between two white Styrofoam pads for protection.
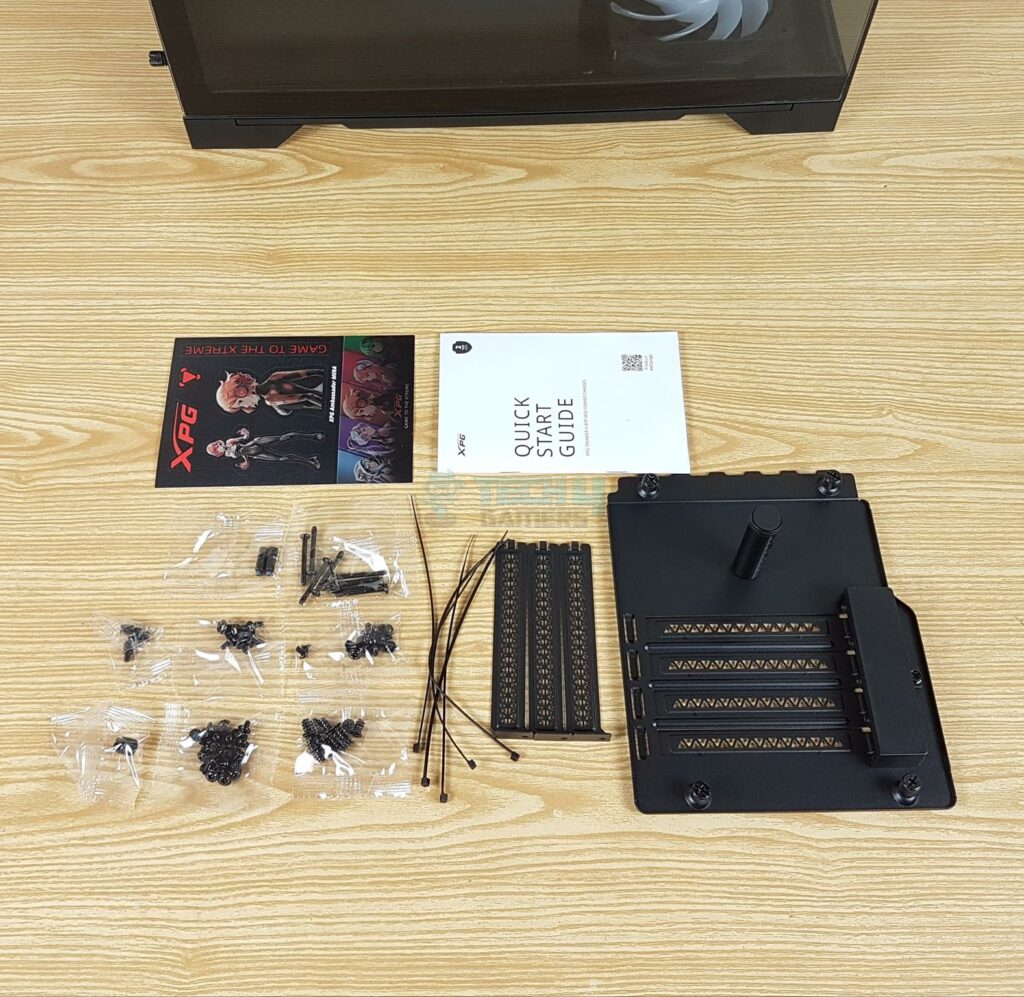
XPG has provided the following in the accessory box:
- 1x Vertical GPU Bracket
- 1x GPU Support Bracket
- 3x Steel made PCIe slot covers
- 5x Zip Ties
- Various Screws and standoffs
- 1x User Guide
- 1x XPG Sticker Sheet
Design
The XPG Invader X BTF is a mid-tower case that has a longer height than the original Invader X to make room for ATX-size motherboards. It has a dimension of 458x245x448mm (HxWxD) compared to the dimension of Invader X’s 448x245x475mm (HxWxD). It is made of SPCC, tempered glass, and plastic. The weight of this case is the same, 8.95 kg. Let’s start taking a closer look at the case.
What Does The Outside View Look Like?
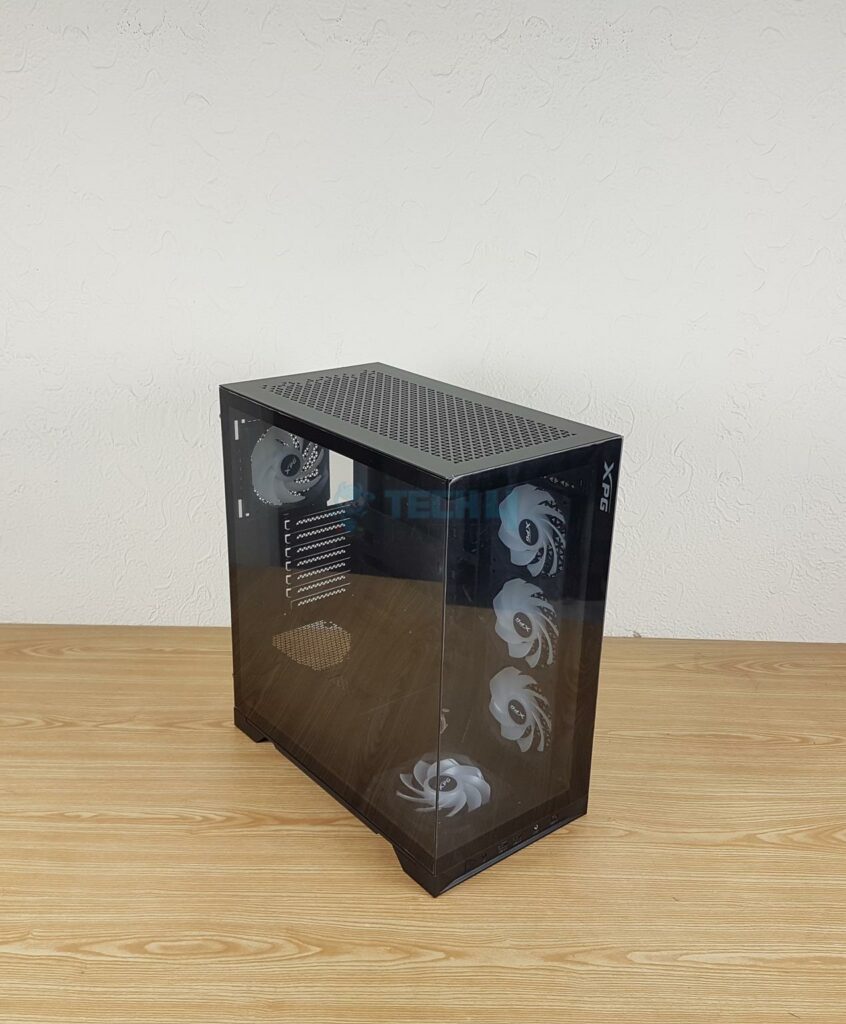
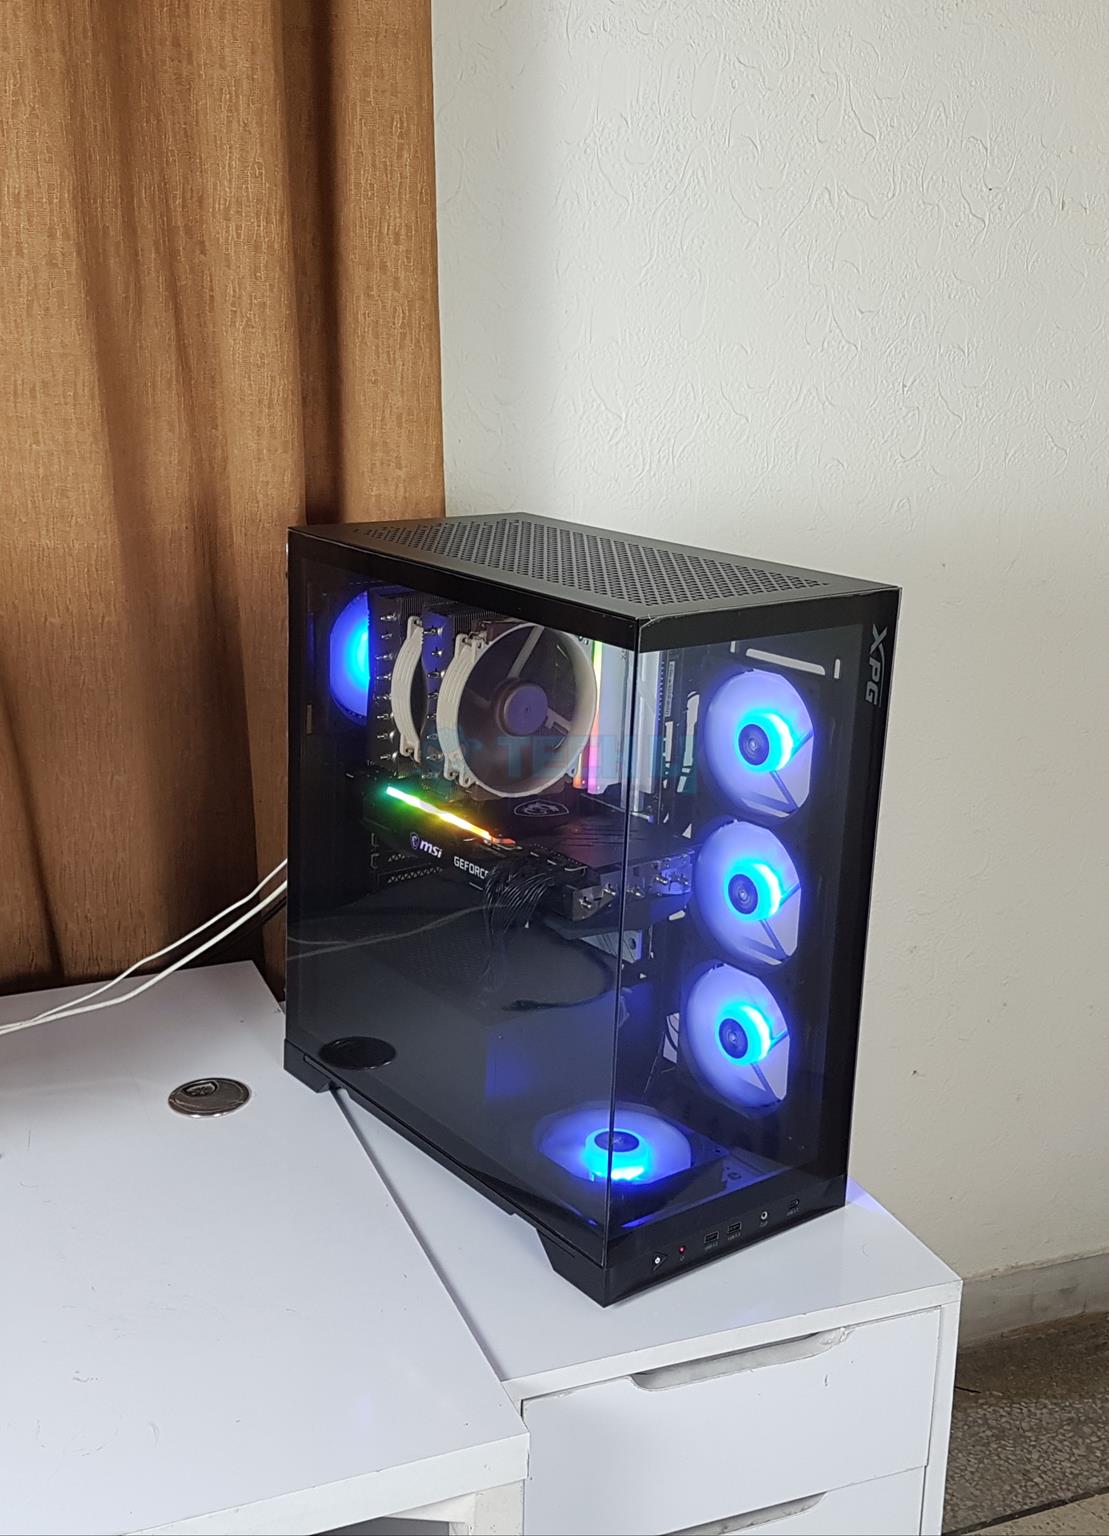
XPG has retained the panoramic view on the Invader X BTF. There is a clear see-through glass on the front, which is fixed, and a 3mm clear tempered glass on the side. The basic footprint of this case resembled XPG Invader X.
The Front Panel
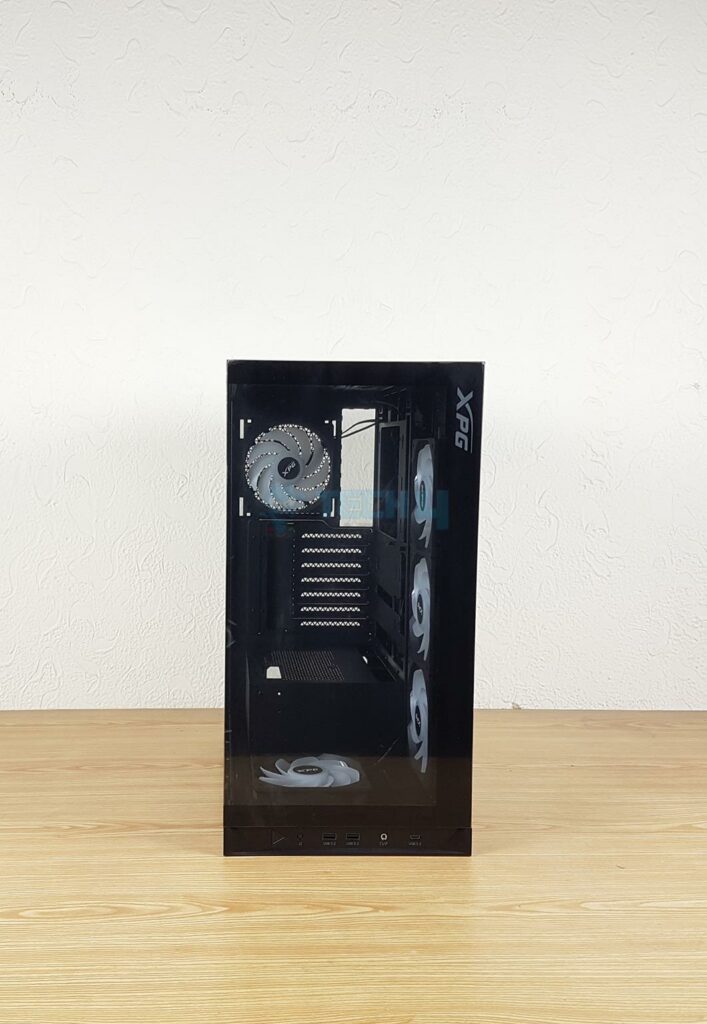
There is a fixed glass panel on the front, which is the same as on the Invader X. XPG has kept the IO panel on the base of the front panel as well. The glass panel is bezel less design.

- 1x USB 3.2 Type C port
- 2x USB 3.2 Type-A ports
- 1x Hybrid Audio Port
- 1x Power Button
- 1x Reset Button
The power button does not wobble and has a nice tack.
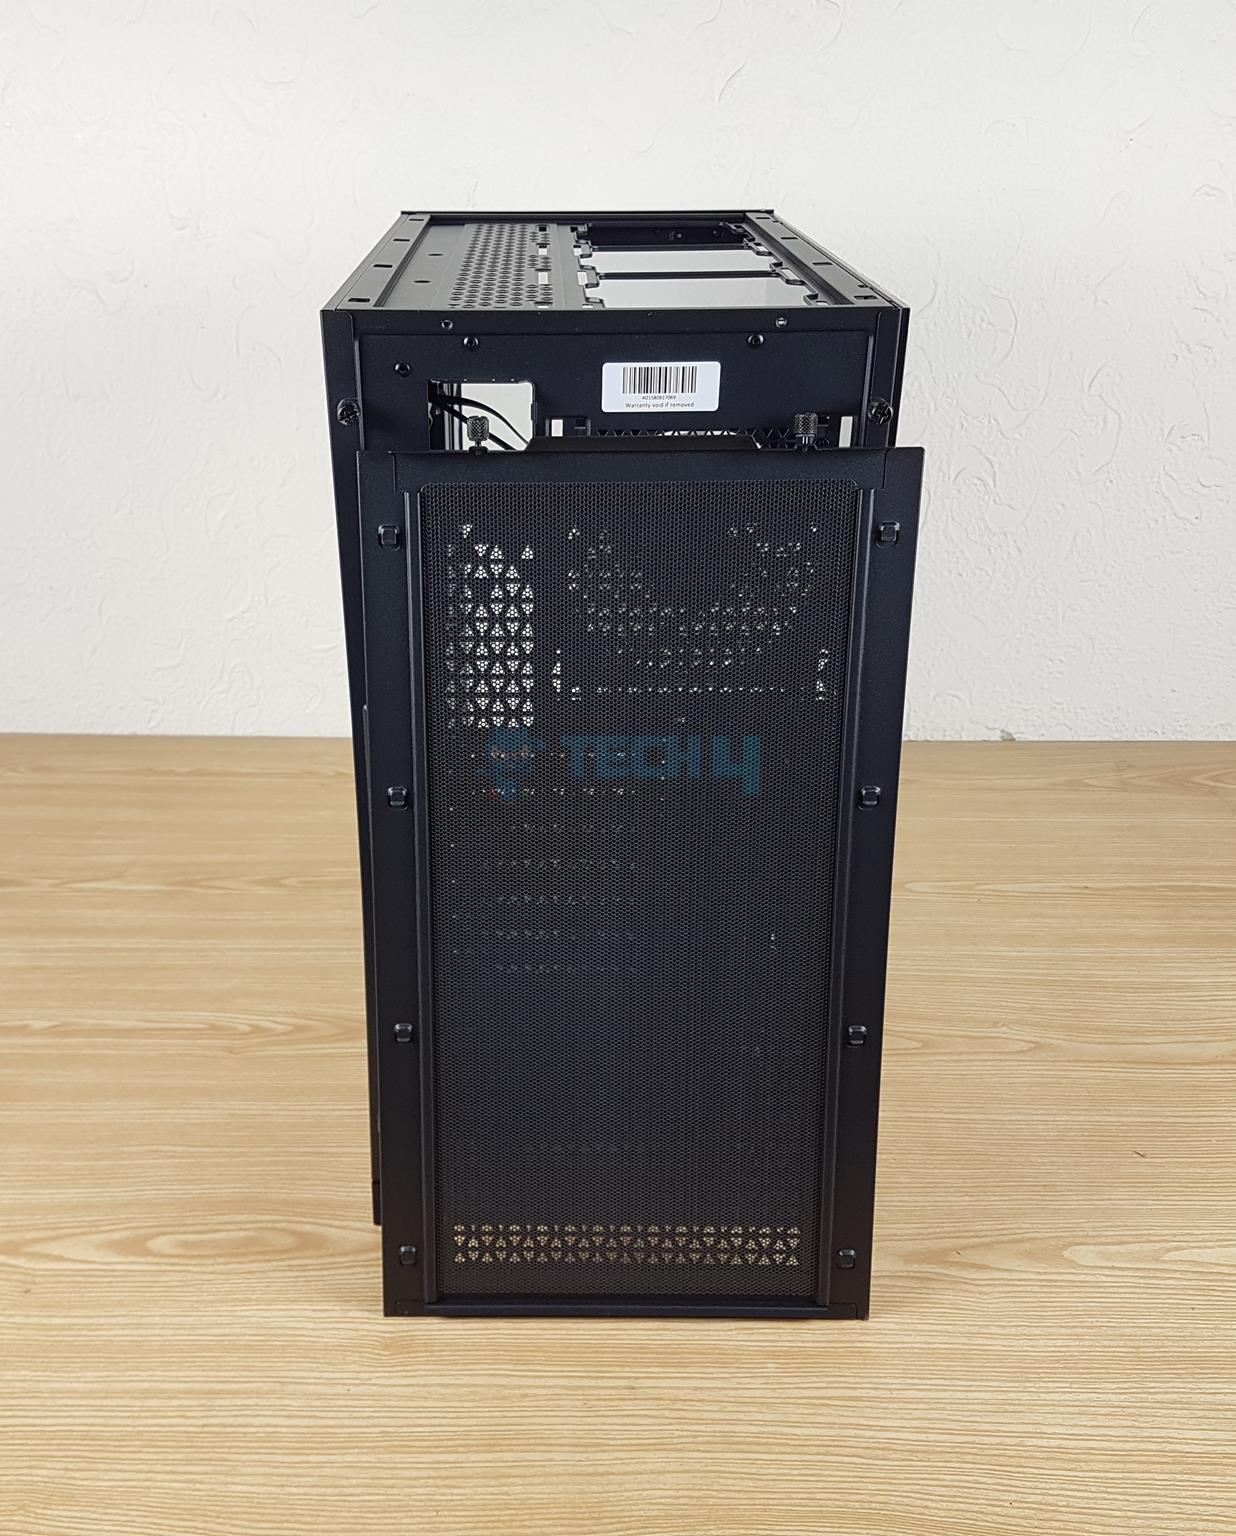
The Rear Panel
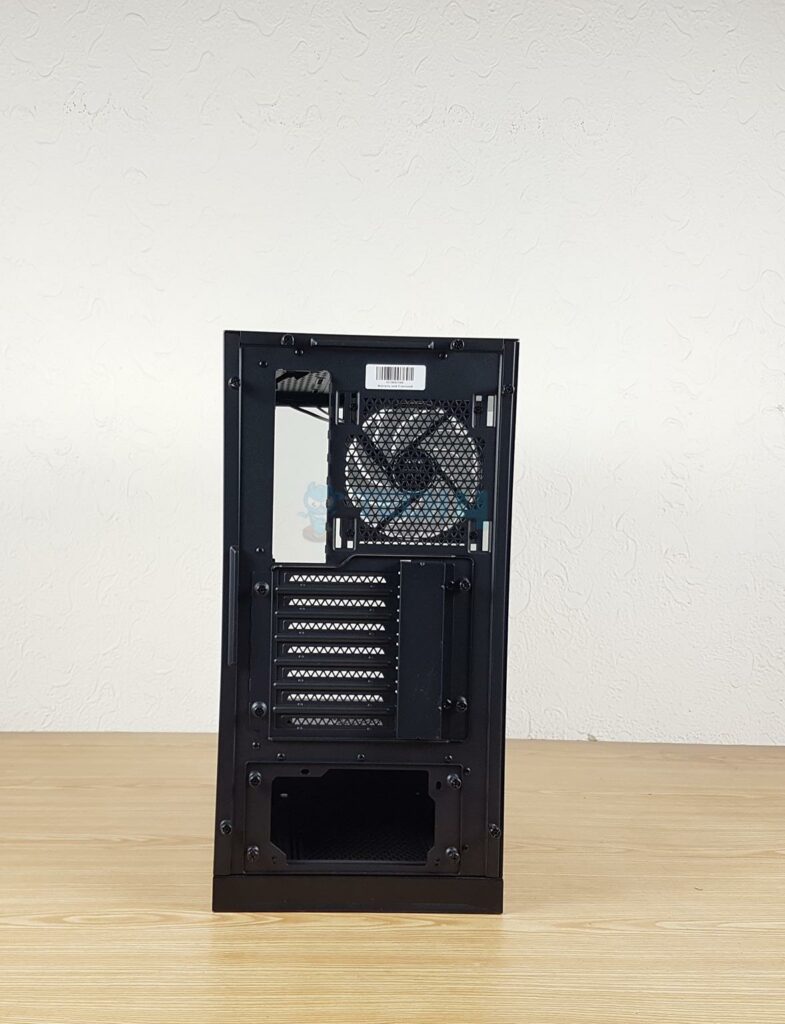
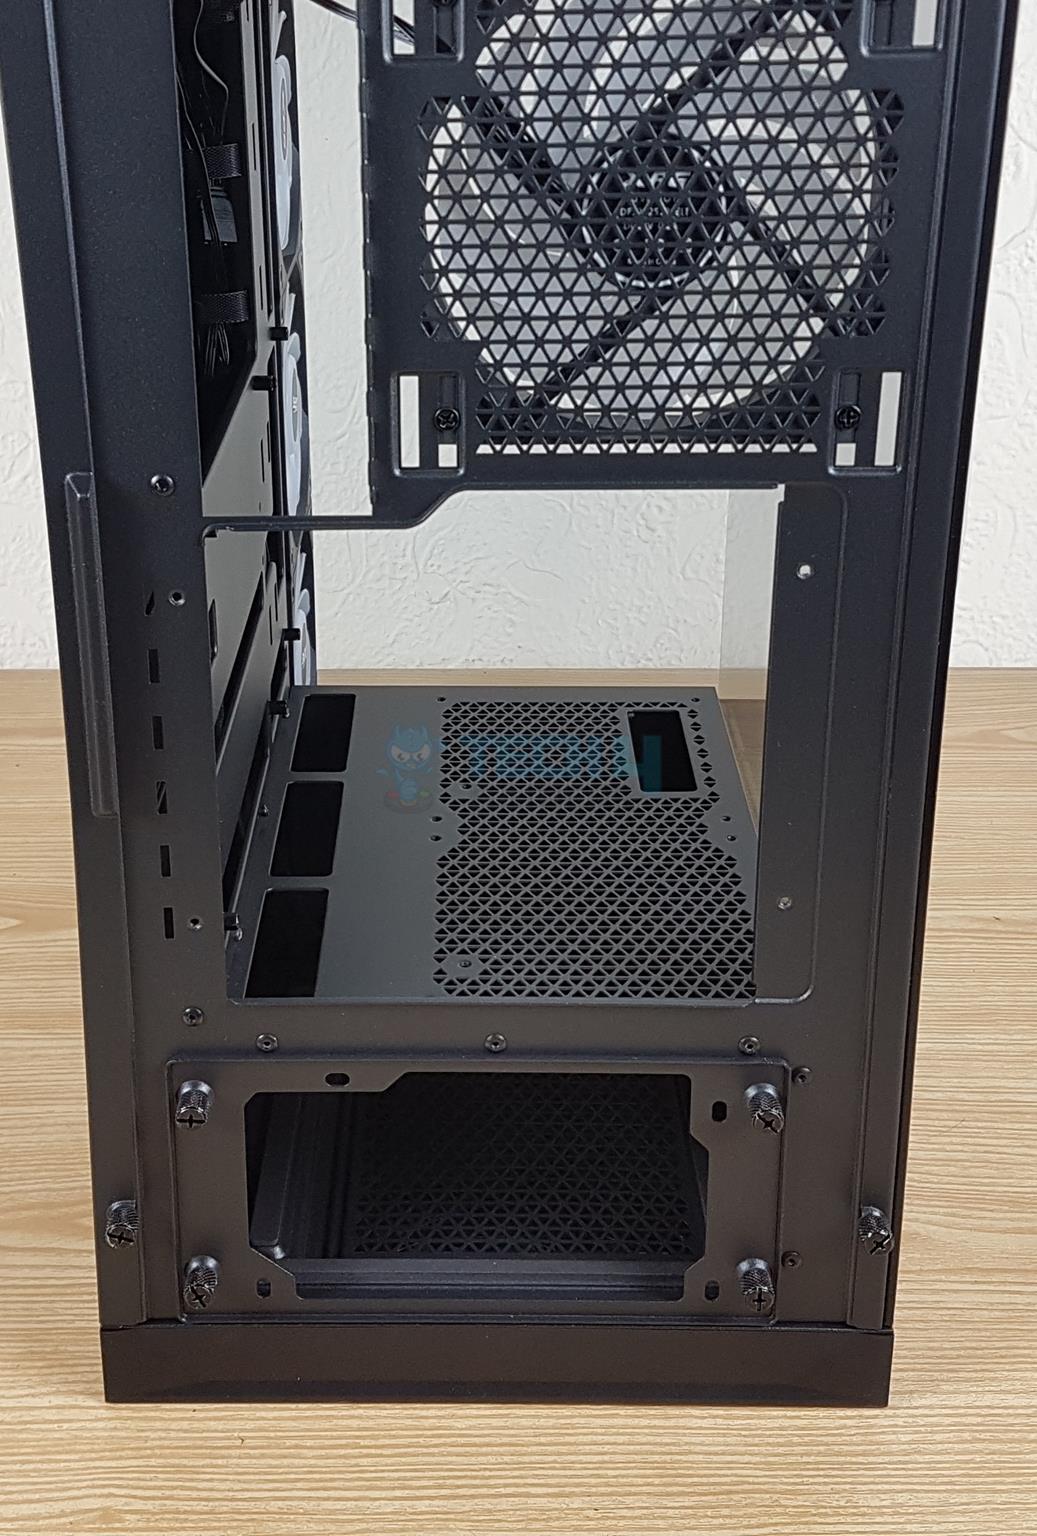
The rear side is almost identical to the original Invader X as well. The top section has a cutout for motherboard’s rear IO panel. On its right is a mounting location for a 120mm and 140mm fan. There is one 120mm fan pre-installed. This is a rail mount enabling you to adjust the height of the fan.
There is a removable graphics card bracket in the mid-section and standard ATX PSU mount at the base. The PSU cover needs to be removed and installed on the PSU. PSU is then inserted into the case.
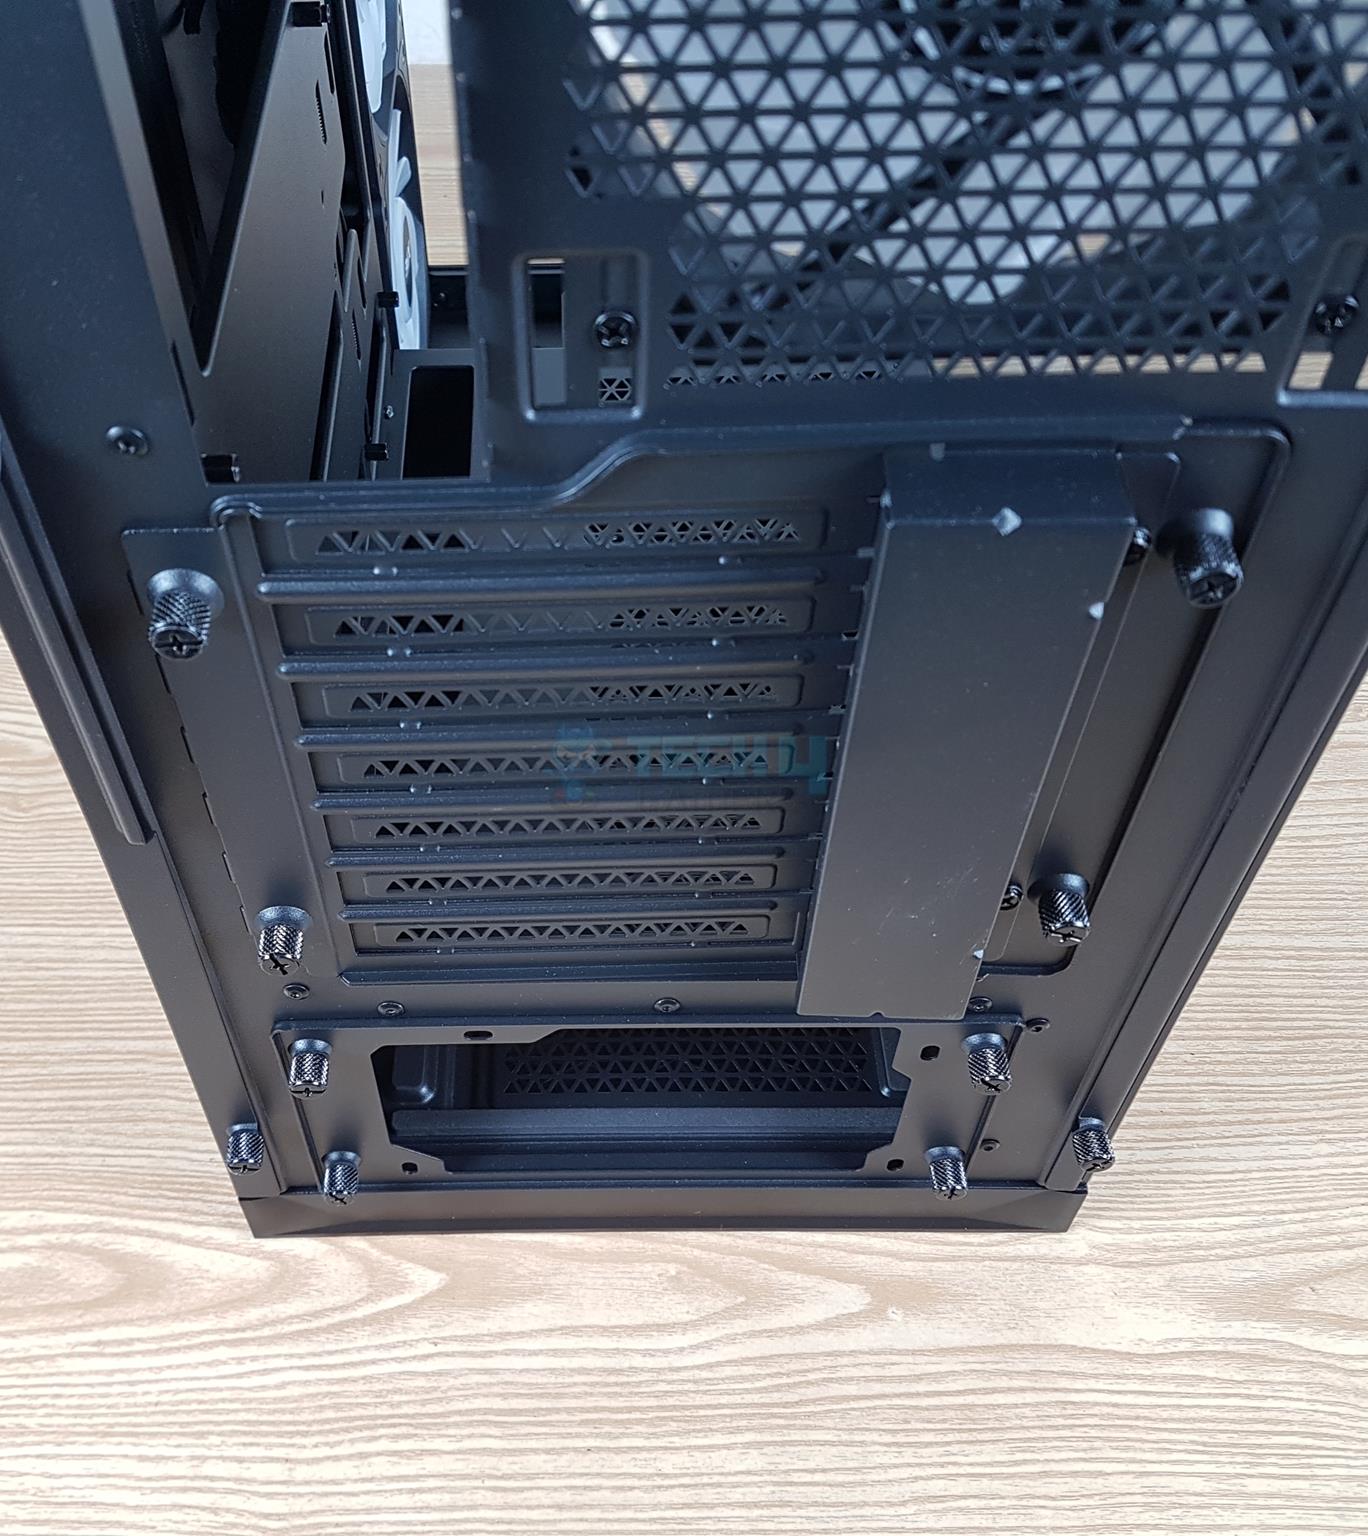
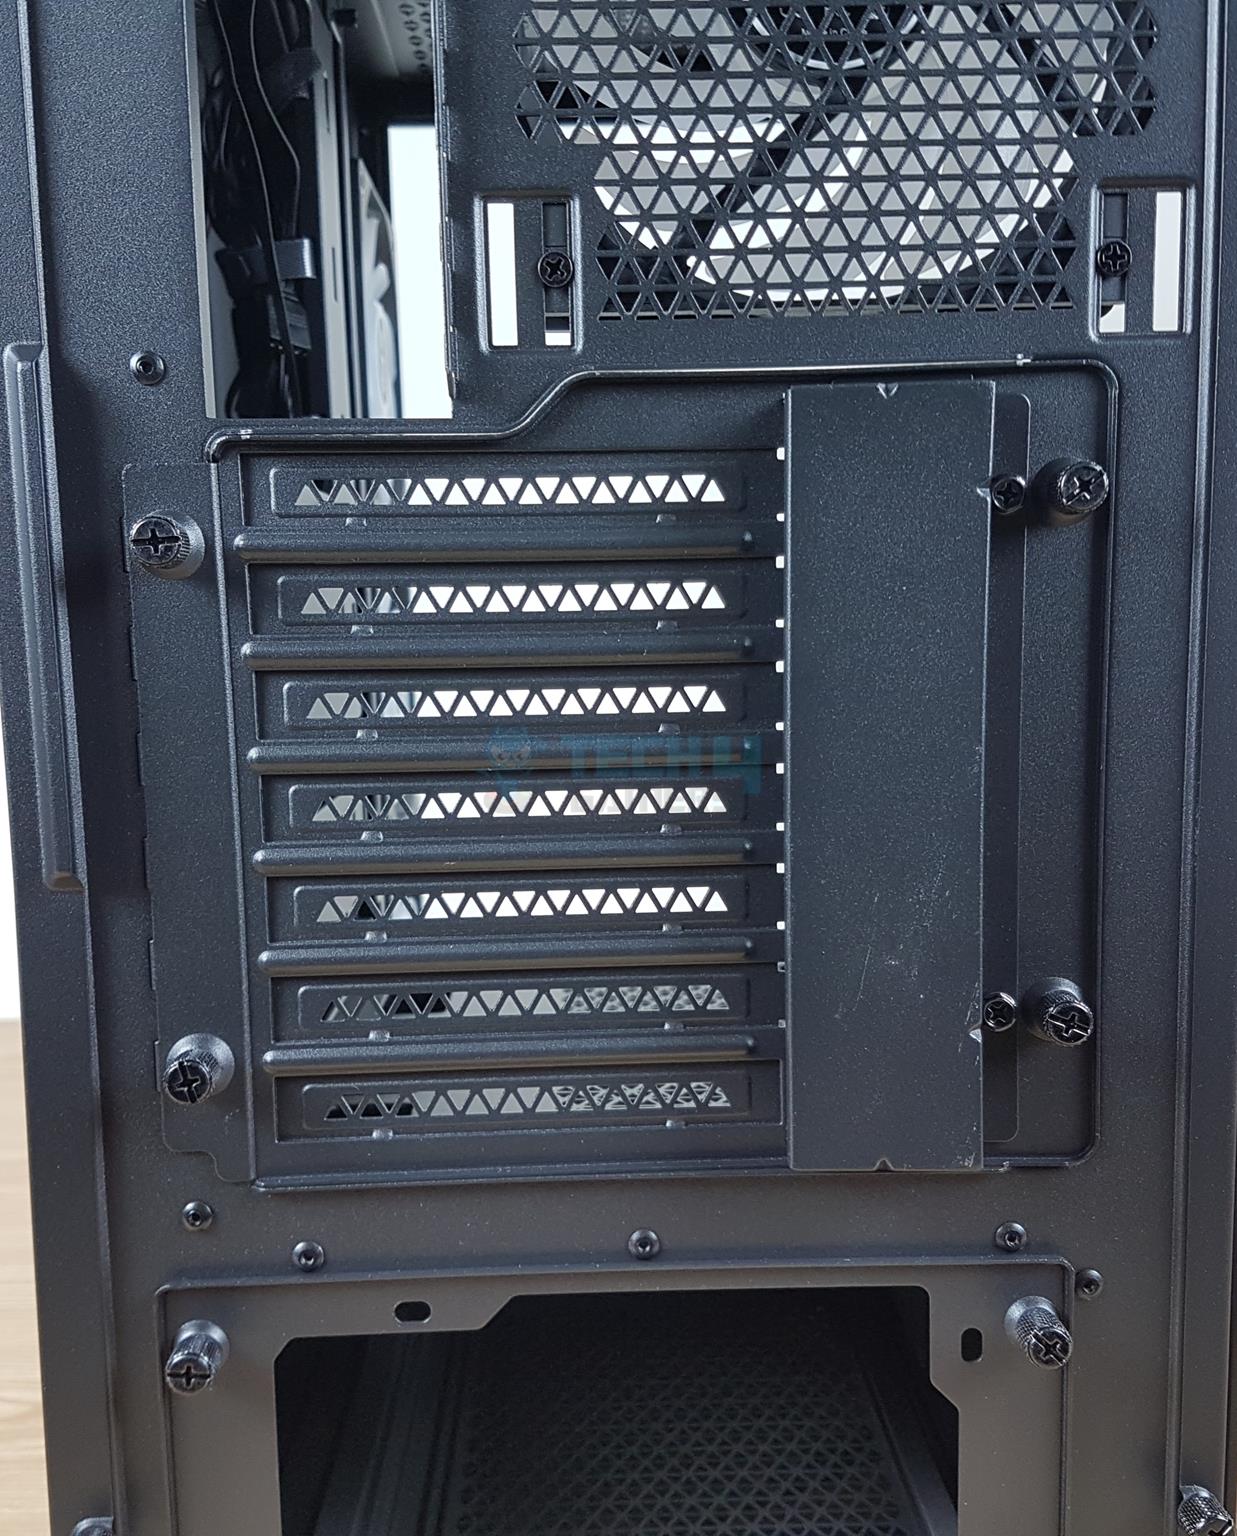
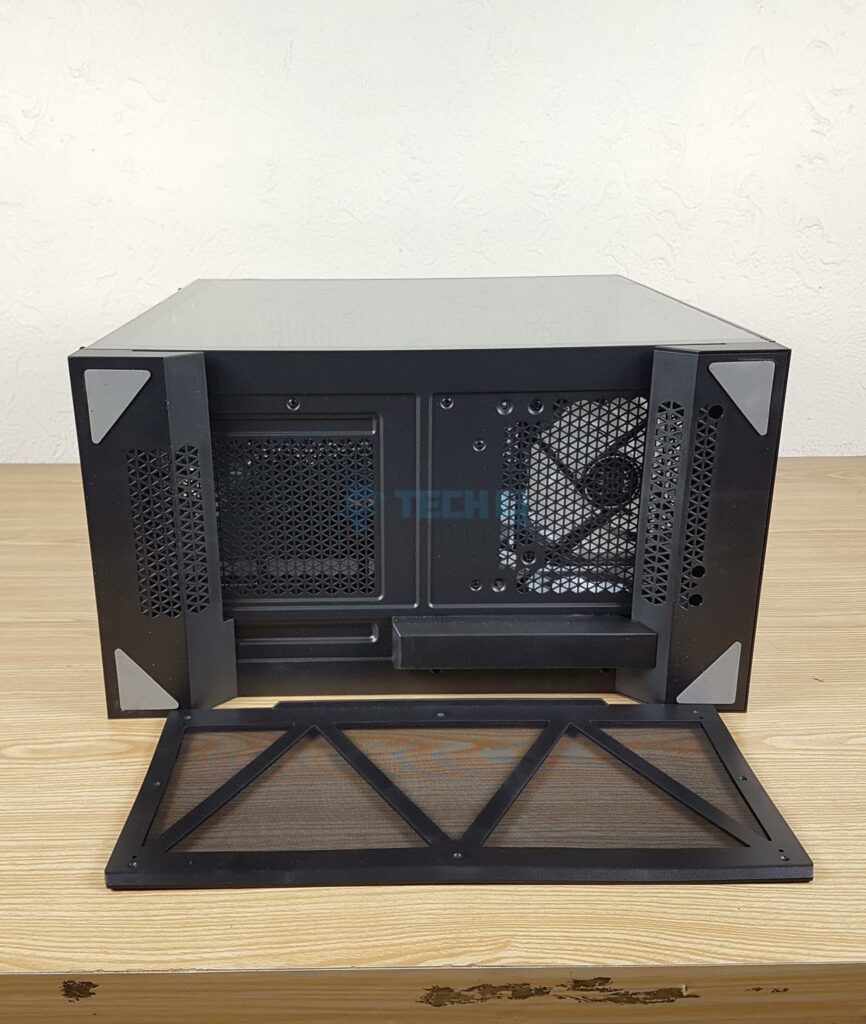
XPG has used captive thumb screws, which were also in the Invader X. There are 4x captive thumb screws holding the default GPU horizontal bracket on the main frame. Simply unscrews these captive thumb screws and take out the complete bracket easily.
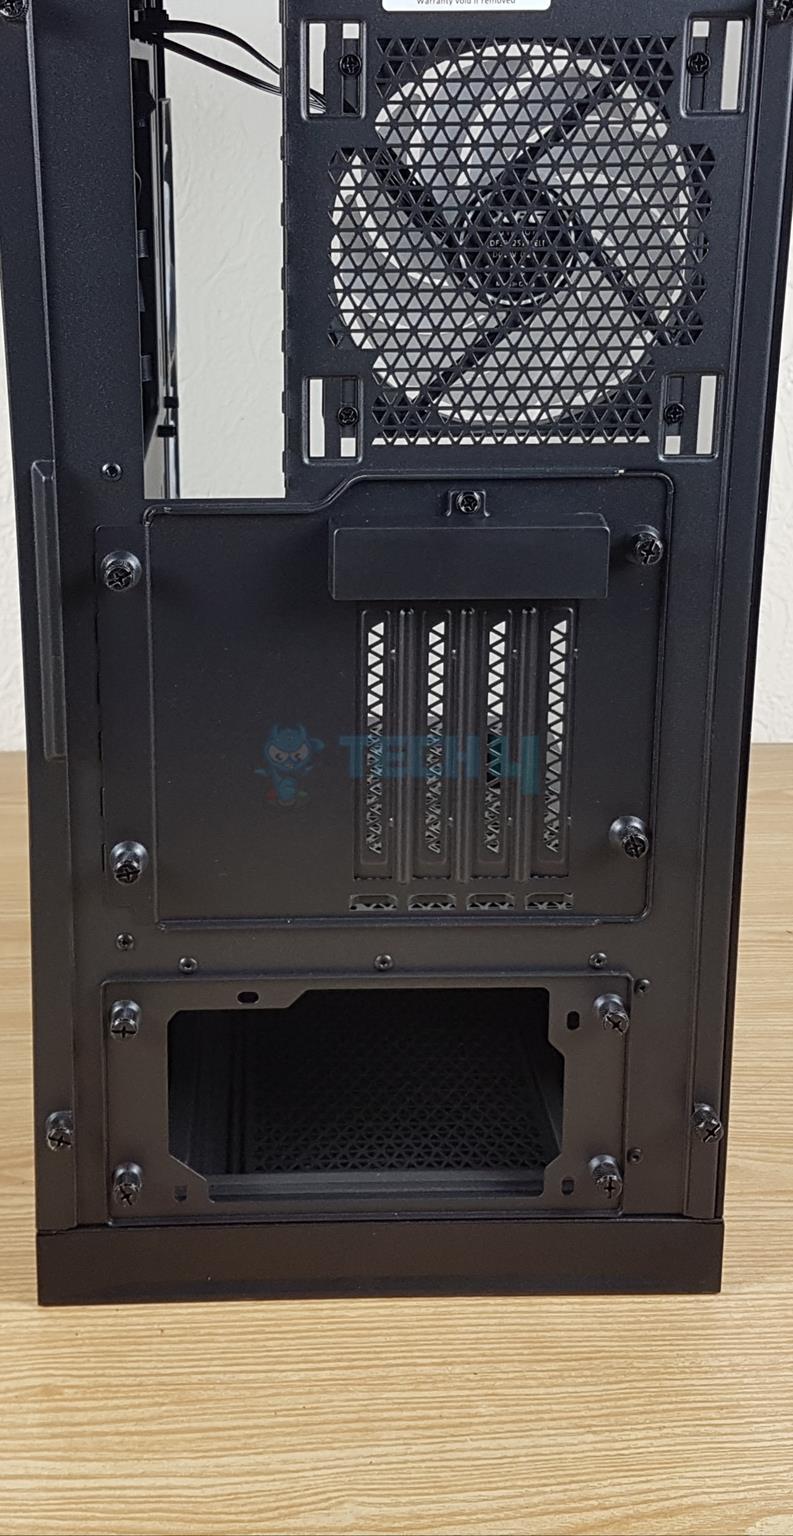
I have removed the bracket and shown the space available for both brackets. In the second picture, you can see that I have installed a vertical GPU bracket that has 4x PCIe slots on the rear. One thing that I noted during the testing of original Invader X is that these brackets are not reusable and it was my gripe. XPG has retained the same design in the Invader X BTF.
Also, the vertical bracket provides 270mm height clearance for your graphics card.
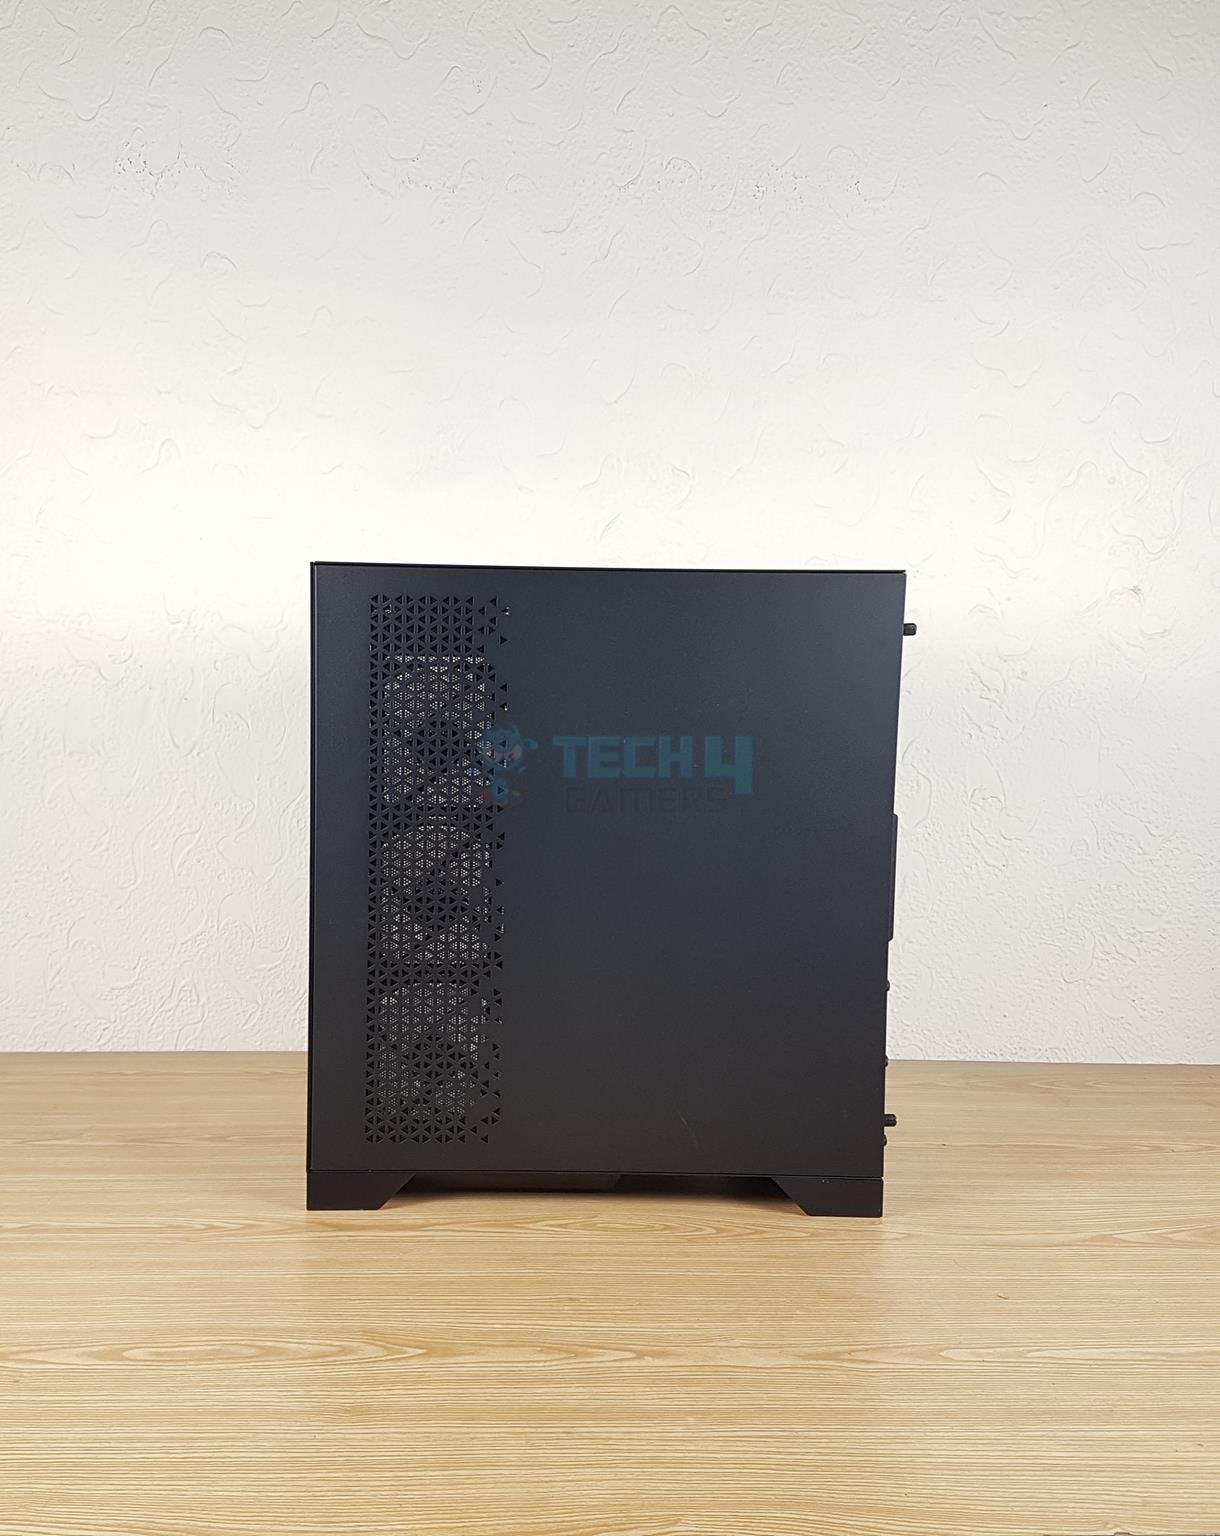
A Look At The Top
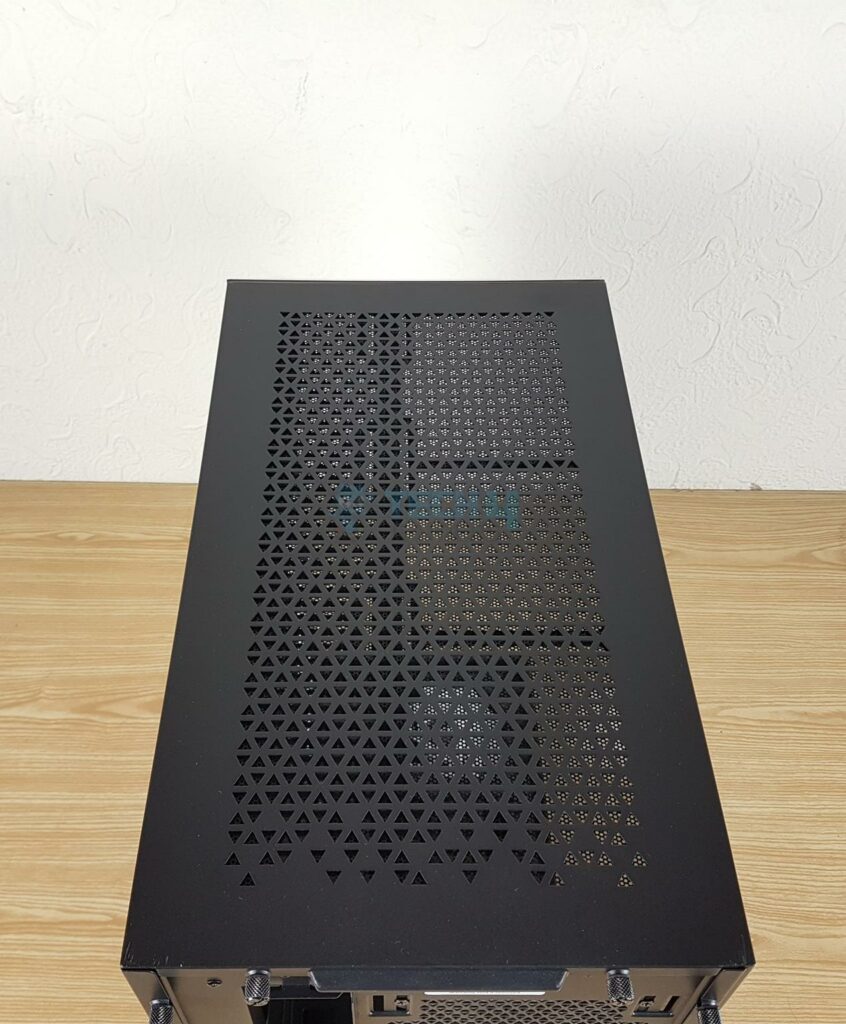
The top cover is perforated in a stylish manner for effective air ventilation. It is same design as on the original Invader X.
This cover has two captive thumb screws toward the rear of the case. Undoing these screws and pulling (sliding) the panel will remove it.
There is a full-length magnetic dust filter on the top panel. Look at the displacement from the solid panel to the actual fan bracket. This fan bracket is fixed. You can install up to 3x 120mm or 2x 140mm fans over here and up to 360mm radiator.
There is a rail mount system. XPG has done a fine job in the design department.
A Look At The Base Of The Case
A look underneath the case, there is a non-magnetic dust filter that runs to the full length of the case and it is side-mounted. The anti-scratching rubber feet are identical to the original Invader X.
The PSU bay is perforated for effective ventilation. The access to the base fan is on the underneath which should not be the case. So, take care when planning for the build using some other fan and do so when preparing the case for the installation.
Scratches Everywhere!
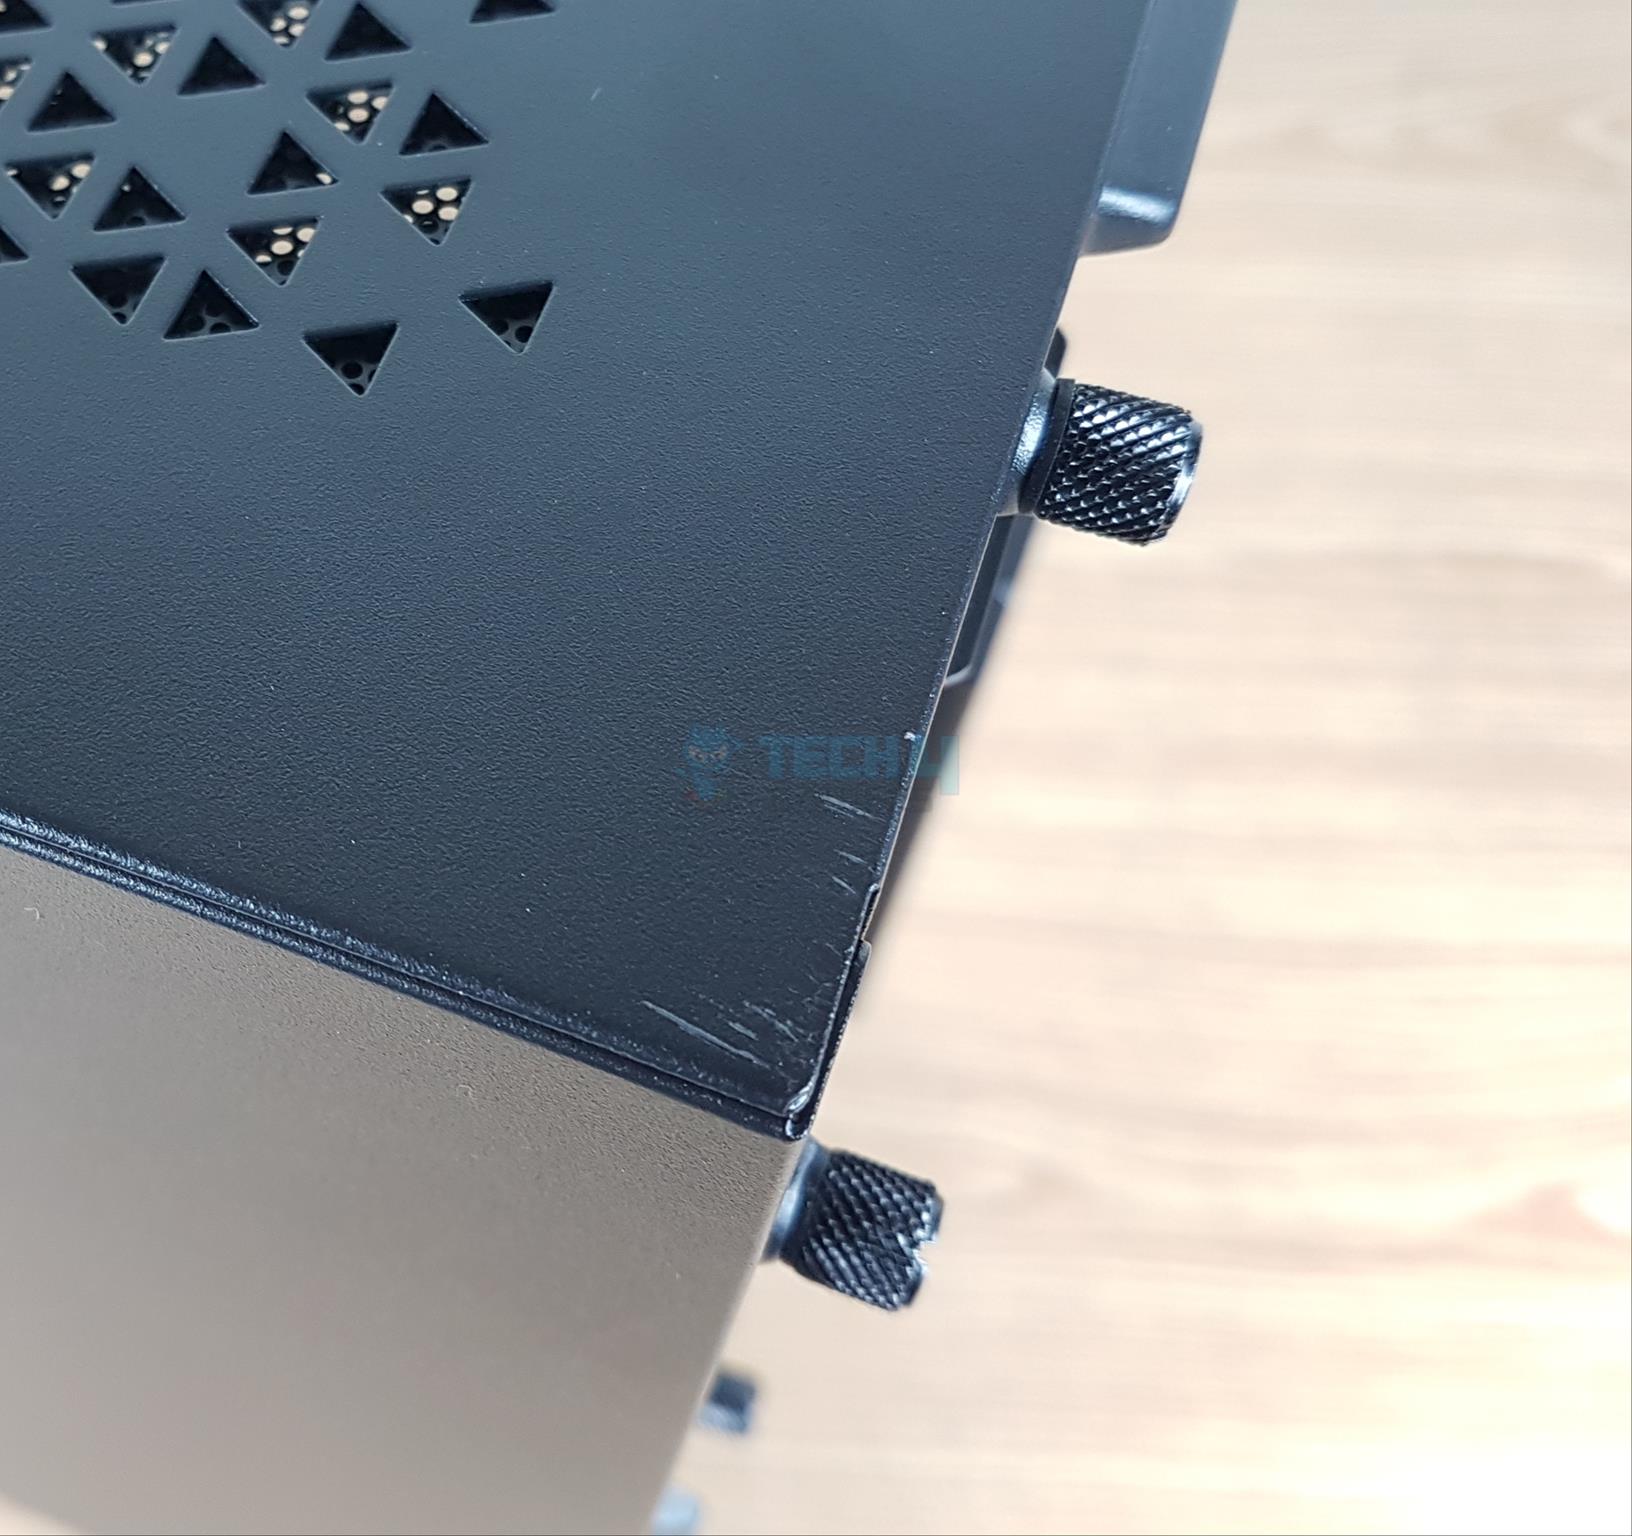
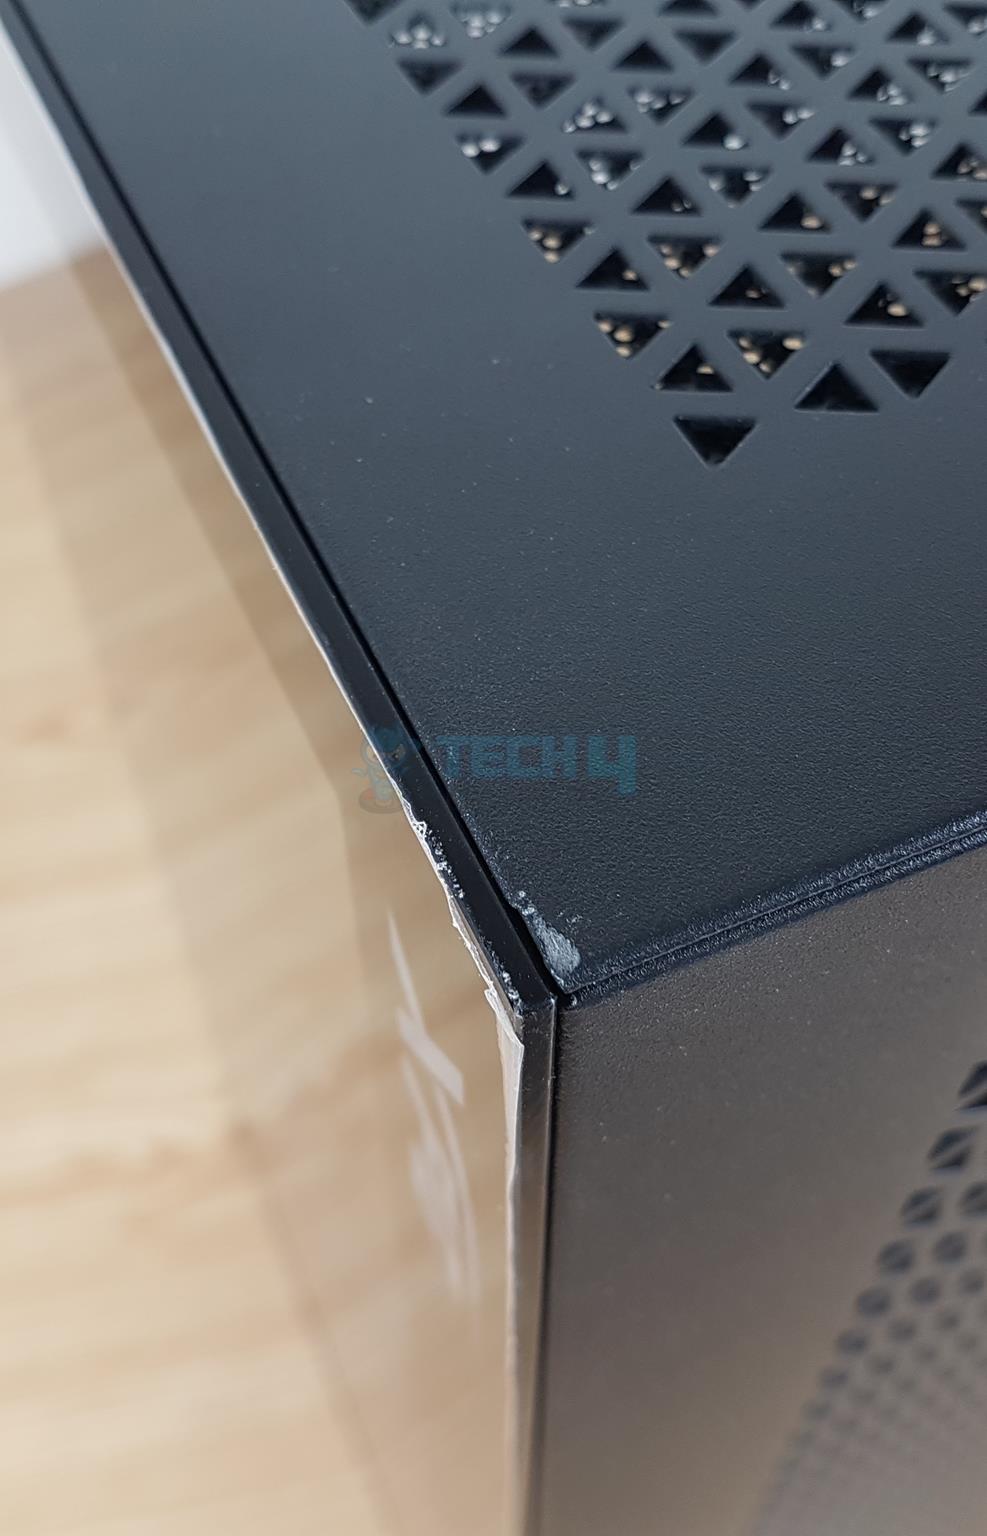
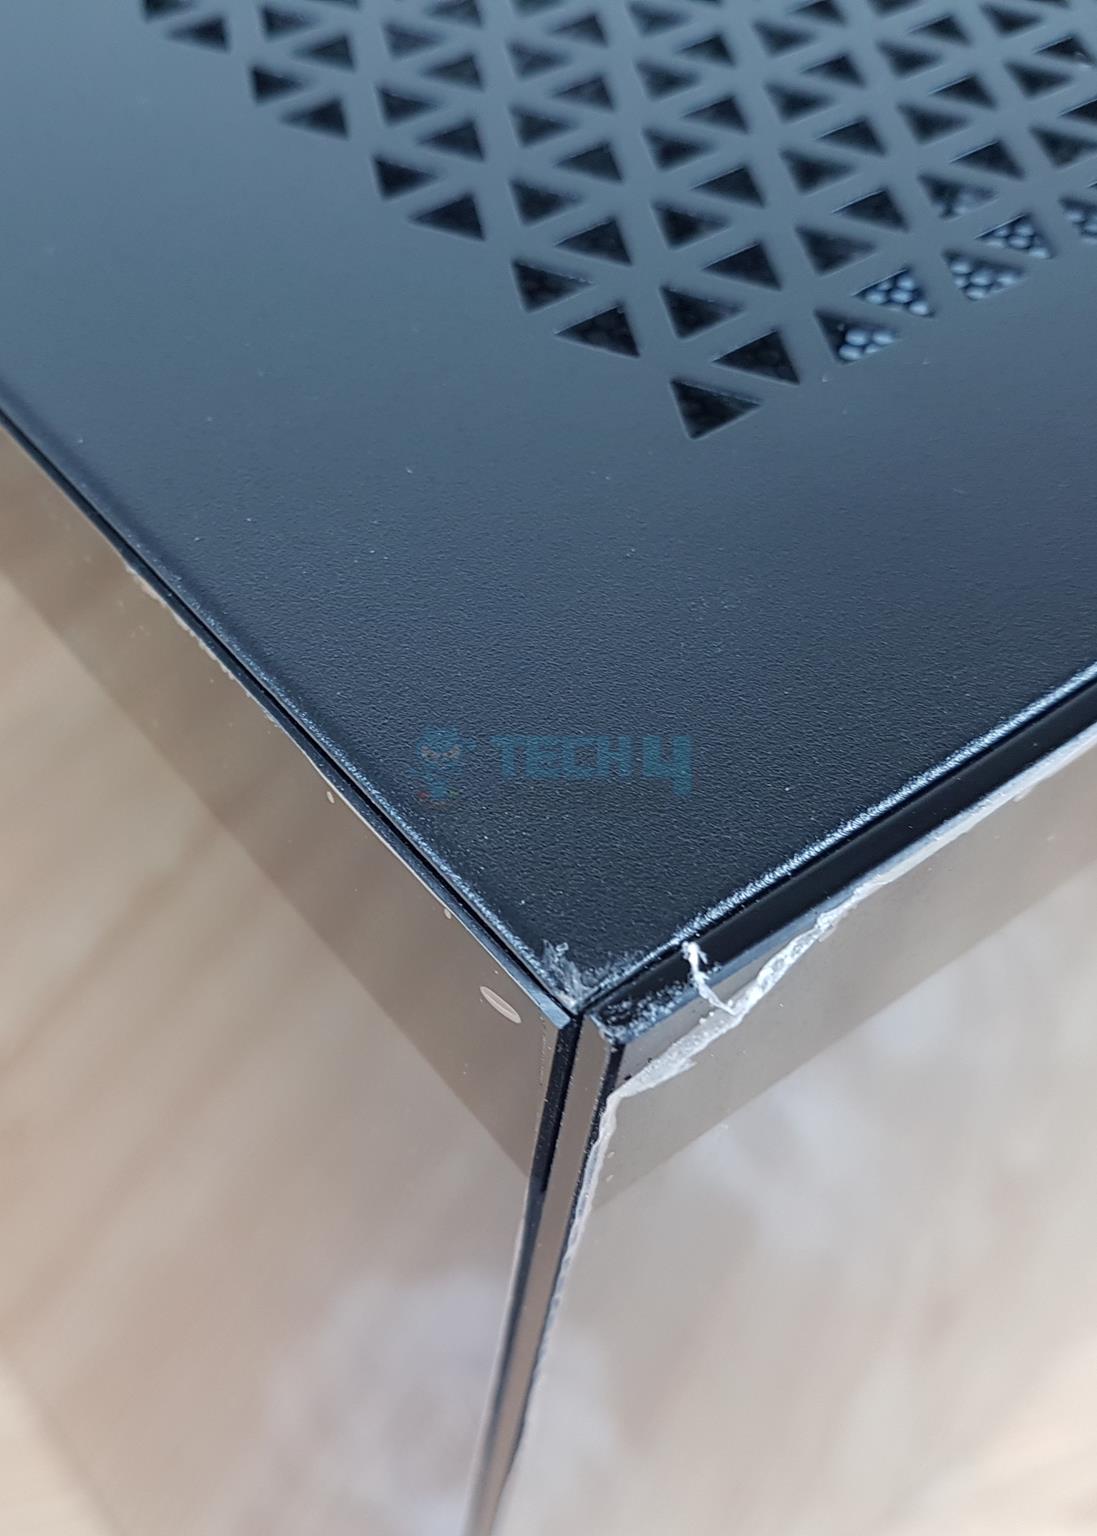
Multiple spots have scratches on the main housing or frame of this case. I found these out of the box, meaning they came from the factory as is. Even the stock GPU bracket has a scratch on it. We shared this issue with our XPG PR manager and they confirmed with pictures from the technician & warehouse that there were no stretches at the time of shipping so it could be due to the shipping and Customs inspection as the case was detained by Customs for over 20 days.
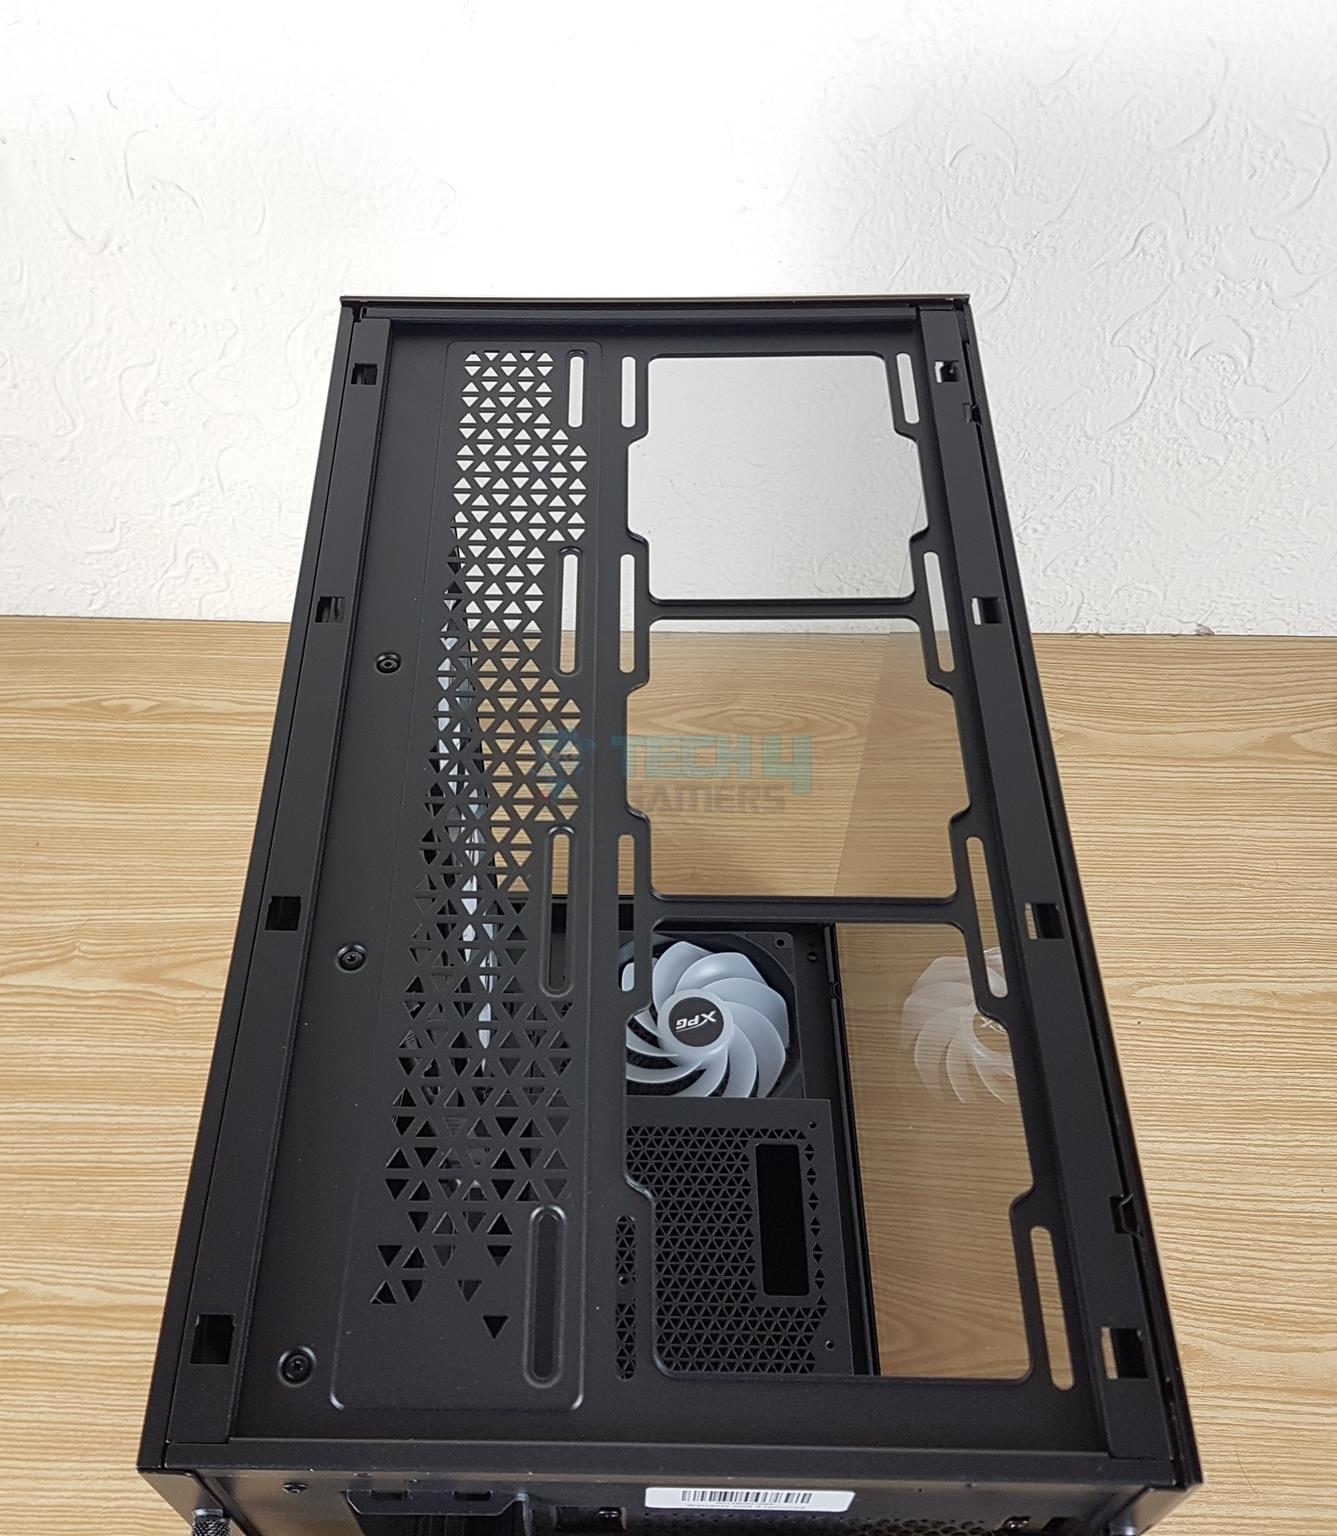
A Look At The Side Panel And The Interior

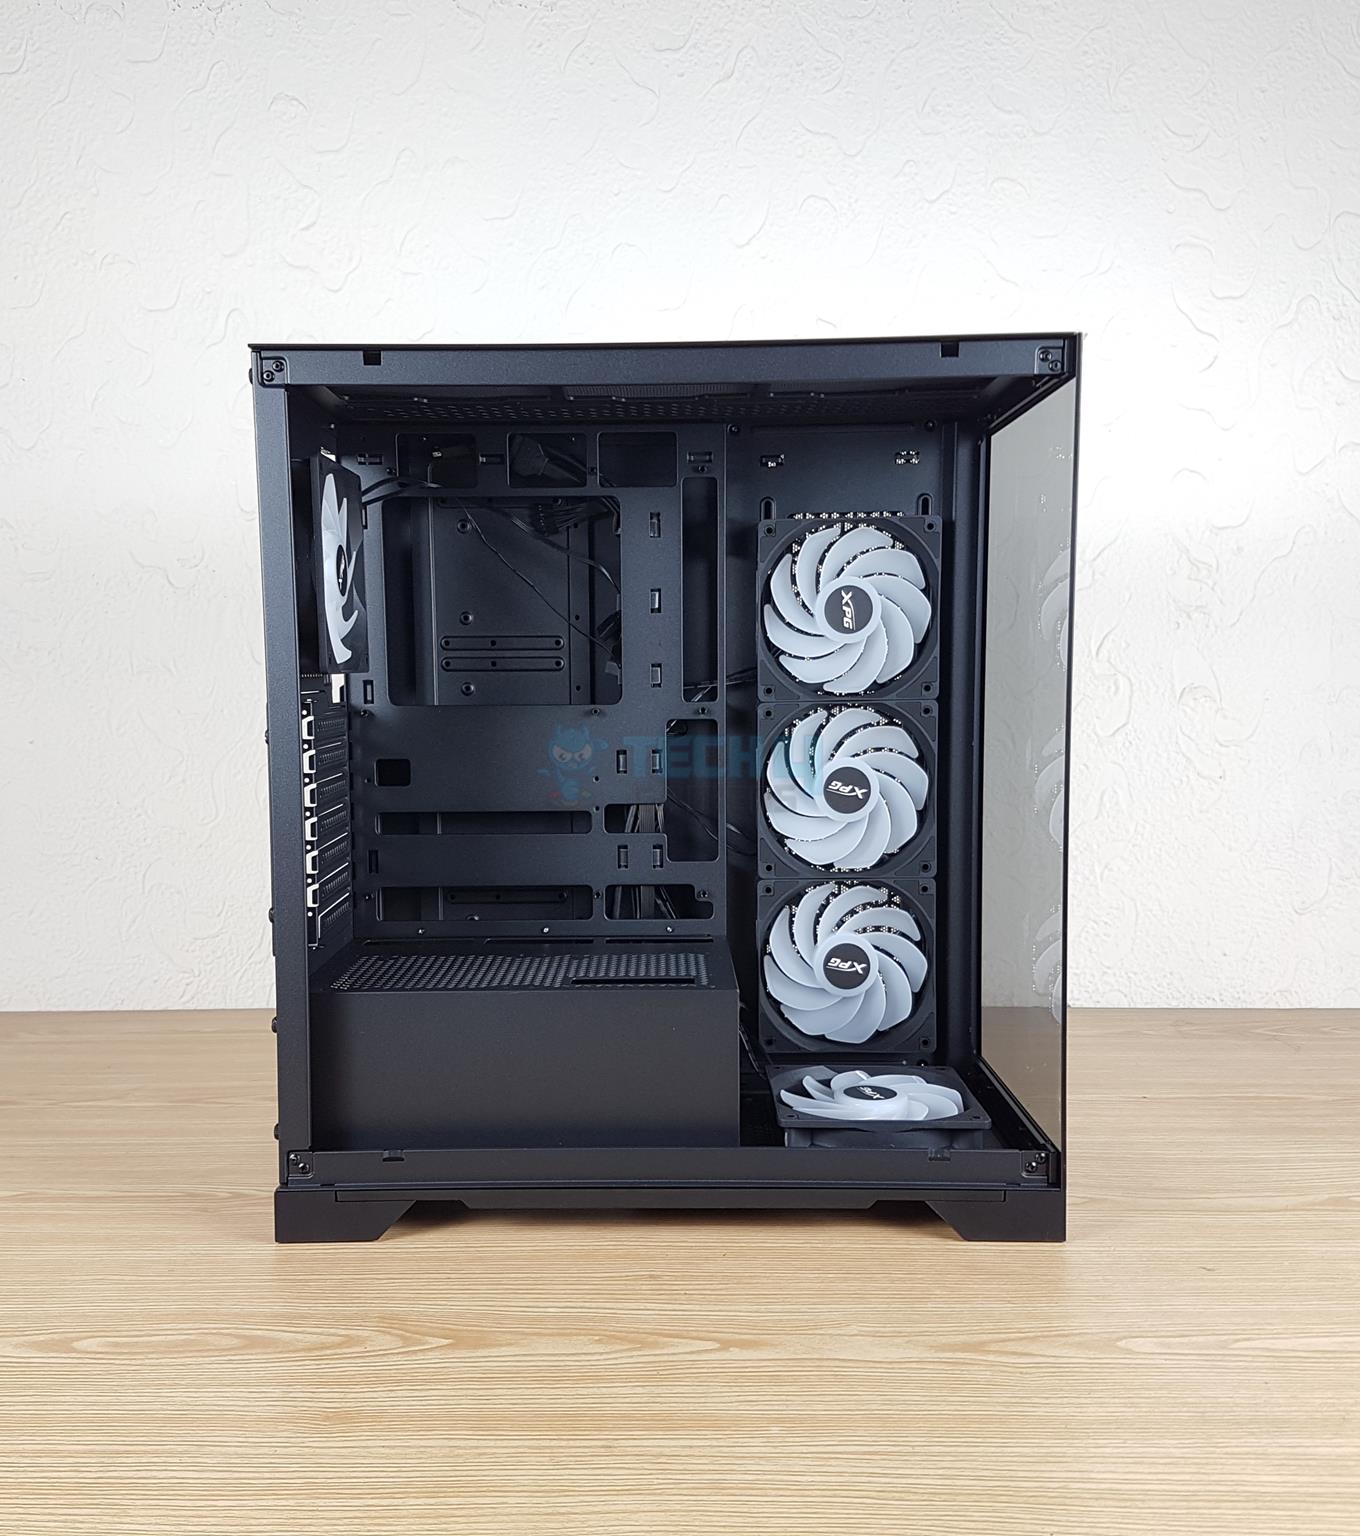
XPG has retained the same 3mm tempered glass panel on the main side as on the original Invader X. It is still a bezel-less design so that users can glimpse what is inside the case.
I have removed the glass panel. Removing the glass panel requires removing top panel which is cumbersome. I wish XPG had something for it in the Invader X BTF. You can see a spacious layout inside the main compartment. This is going to be our focus now.
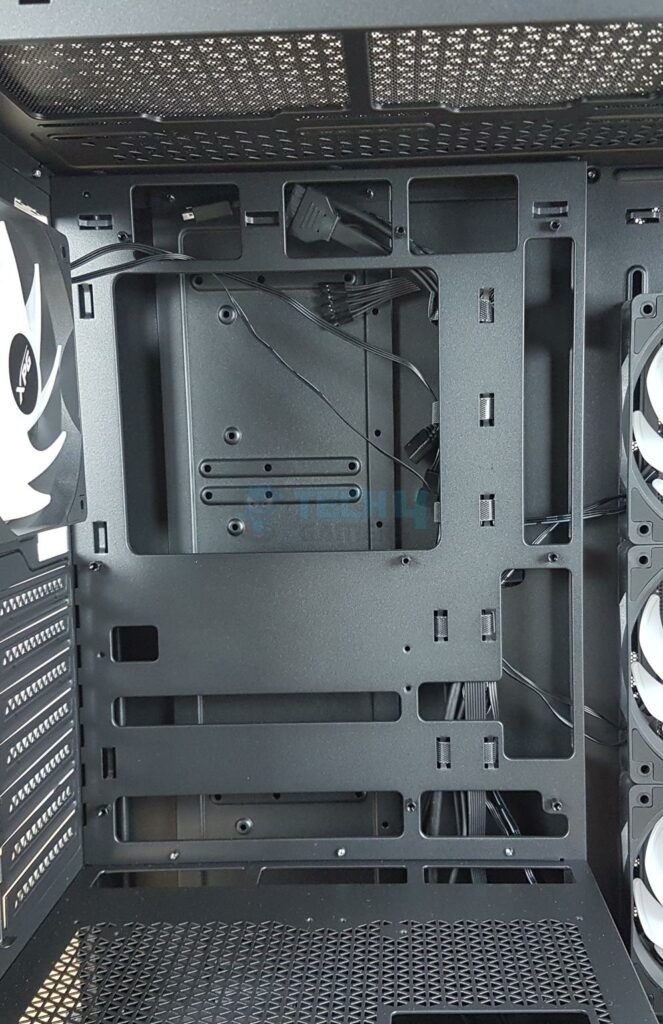
Checking the motherboard tray one thing that I noticed is a play in the tray itself. This was not the case with original Invader X. I am not sure if it is this particular sample or whatever. The tray has a large size cutout for easy installation of the CPU cooler. There are three cutouts on the top through which the backplug connectors make their way out towards the back.
Same goes for the side holes and the bottom holes. This case can house backplug motherboard as well as the regular motherboard in ATX, mATX, and mini-ITX sizes.
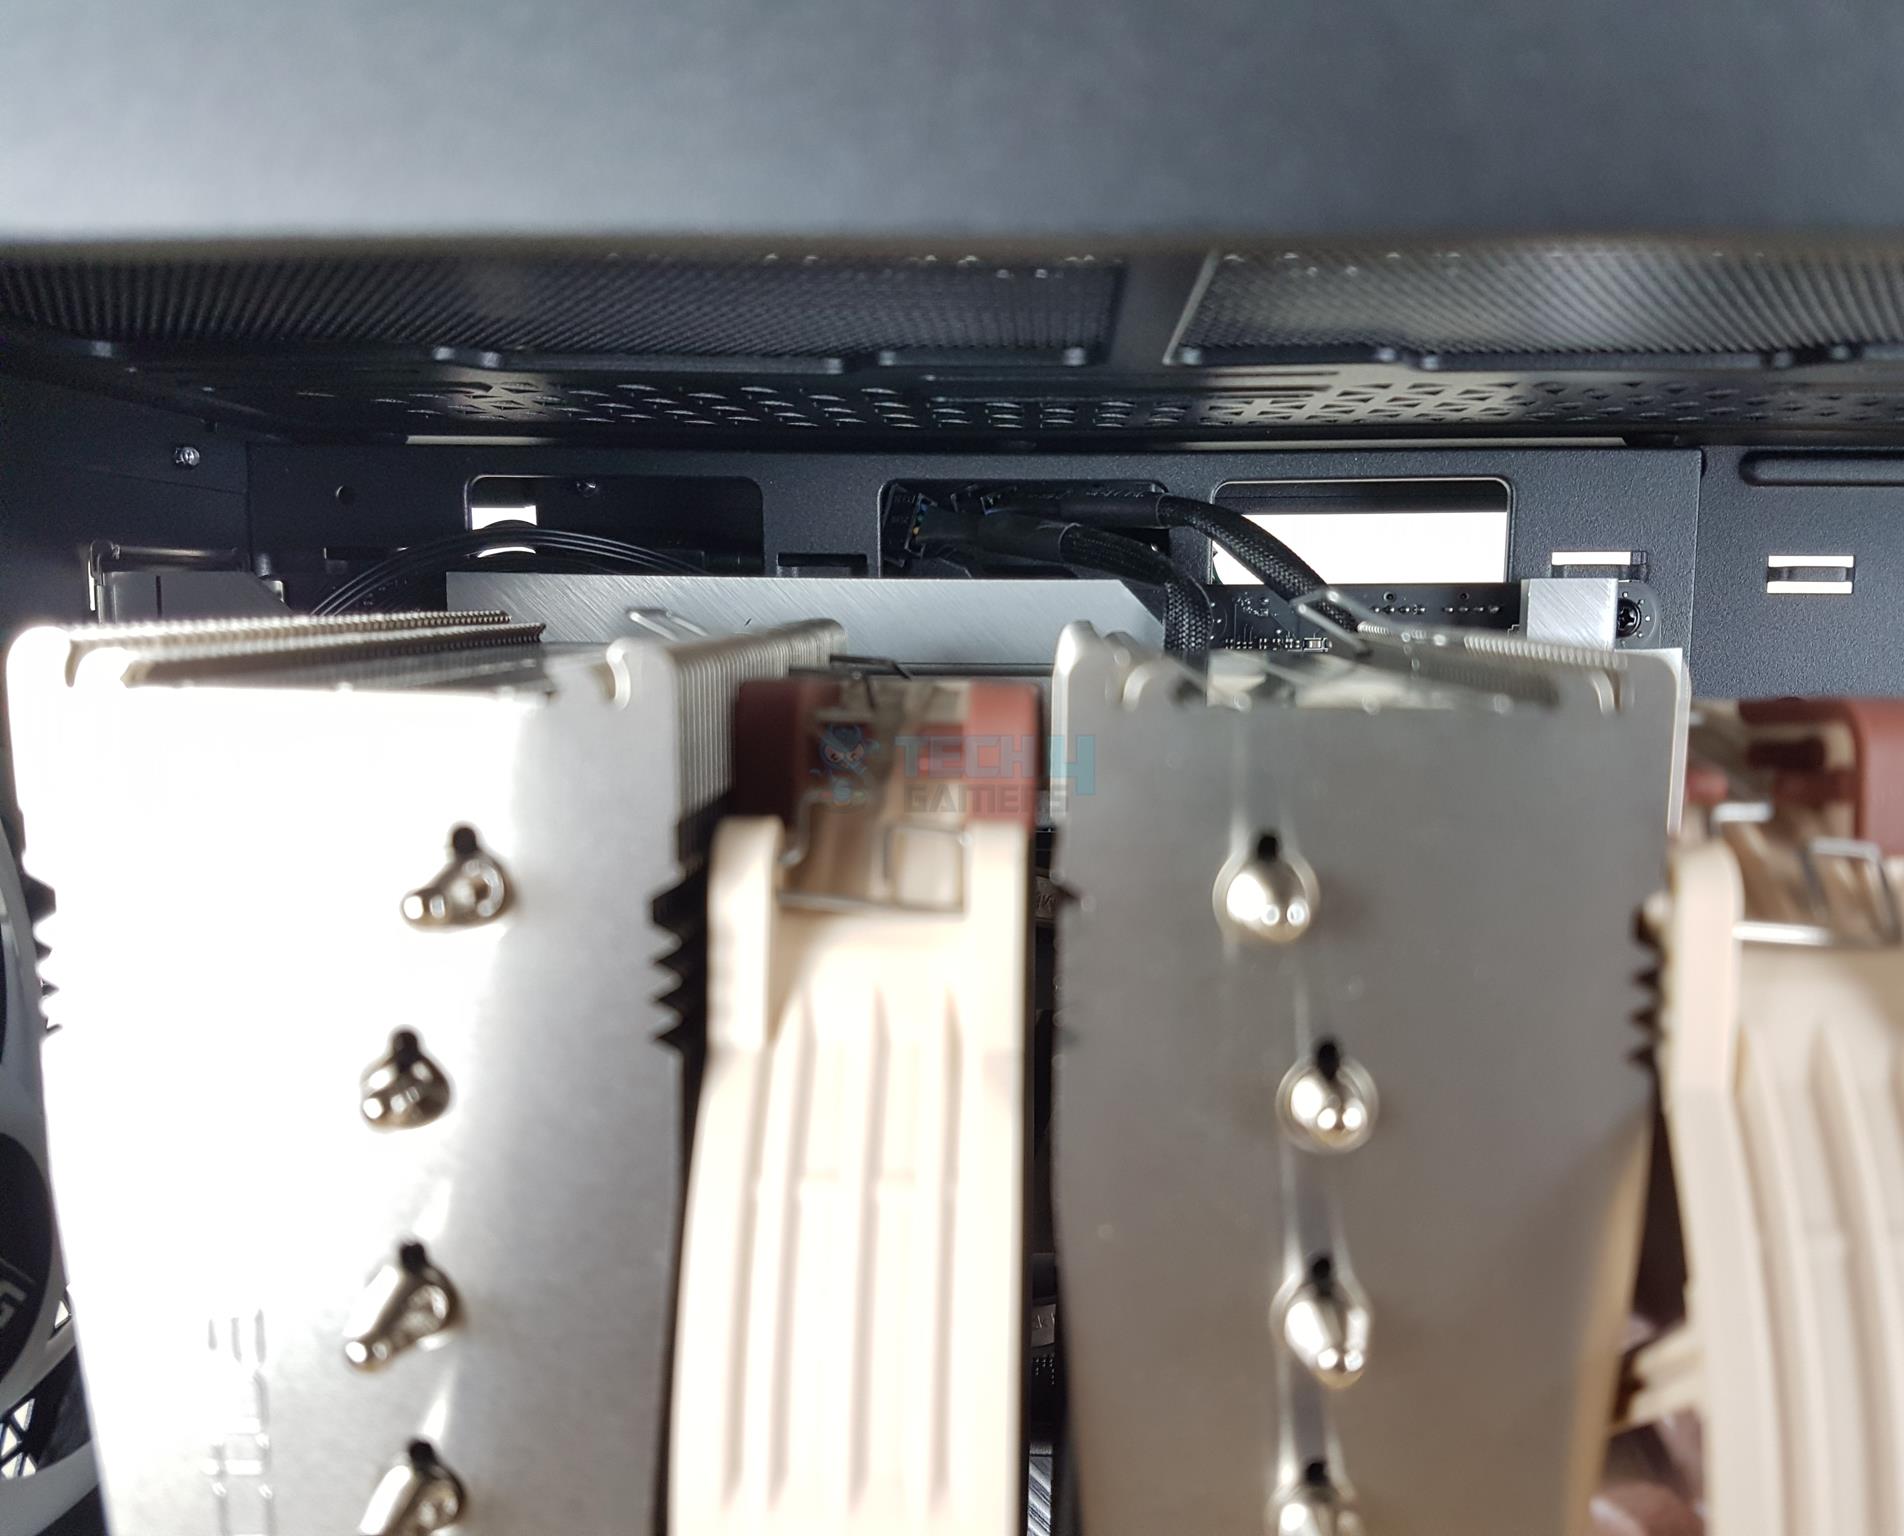
All 9x standoffs are pre-installed. There is no rubber grommet on the cutouts. There is a displacement of 28mm from the top of the case to the top of the motherboard. The side displacement is 70mm for the 120mm fans which is impressive and gives a better clearance for taller RAMs.
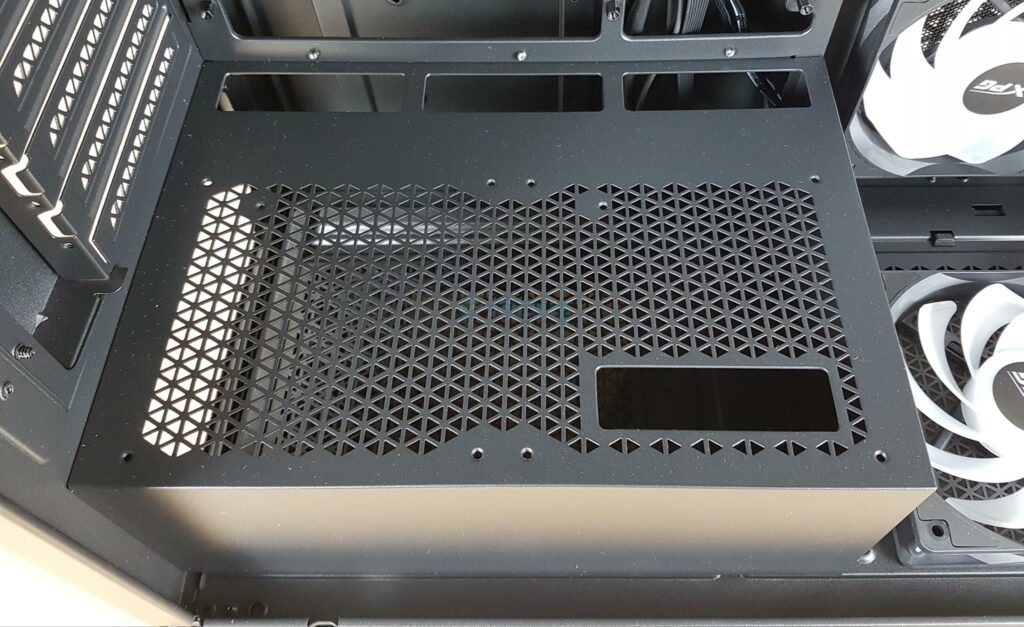
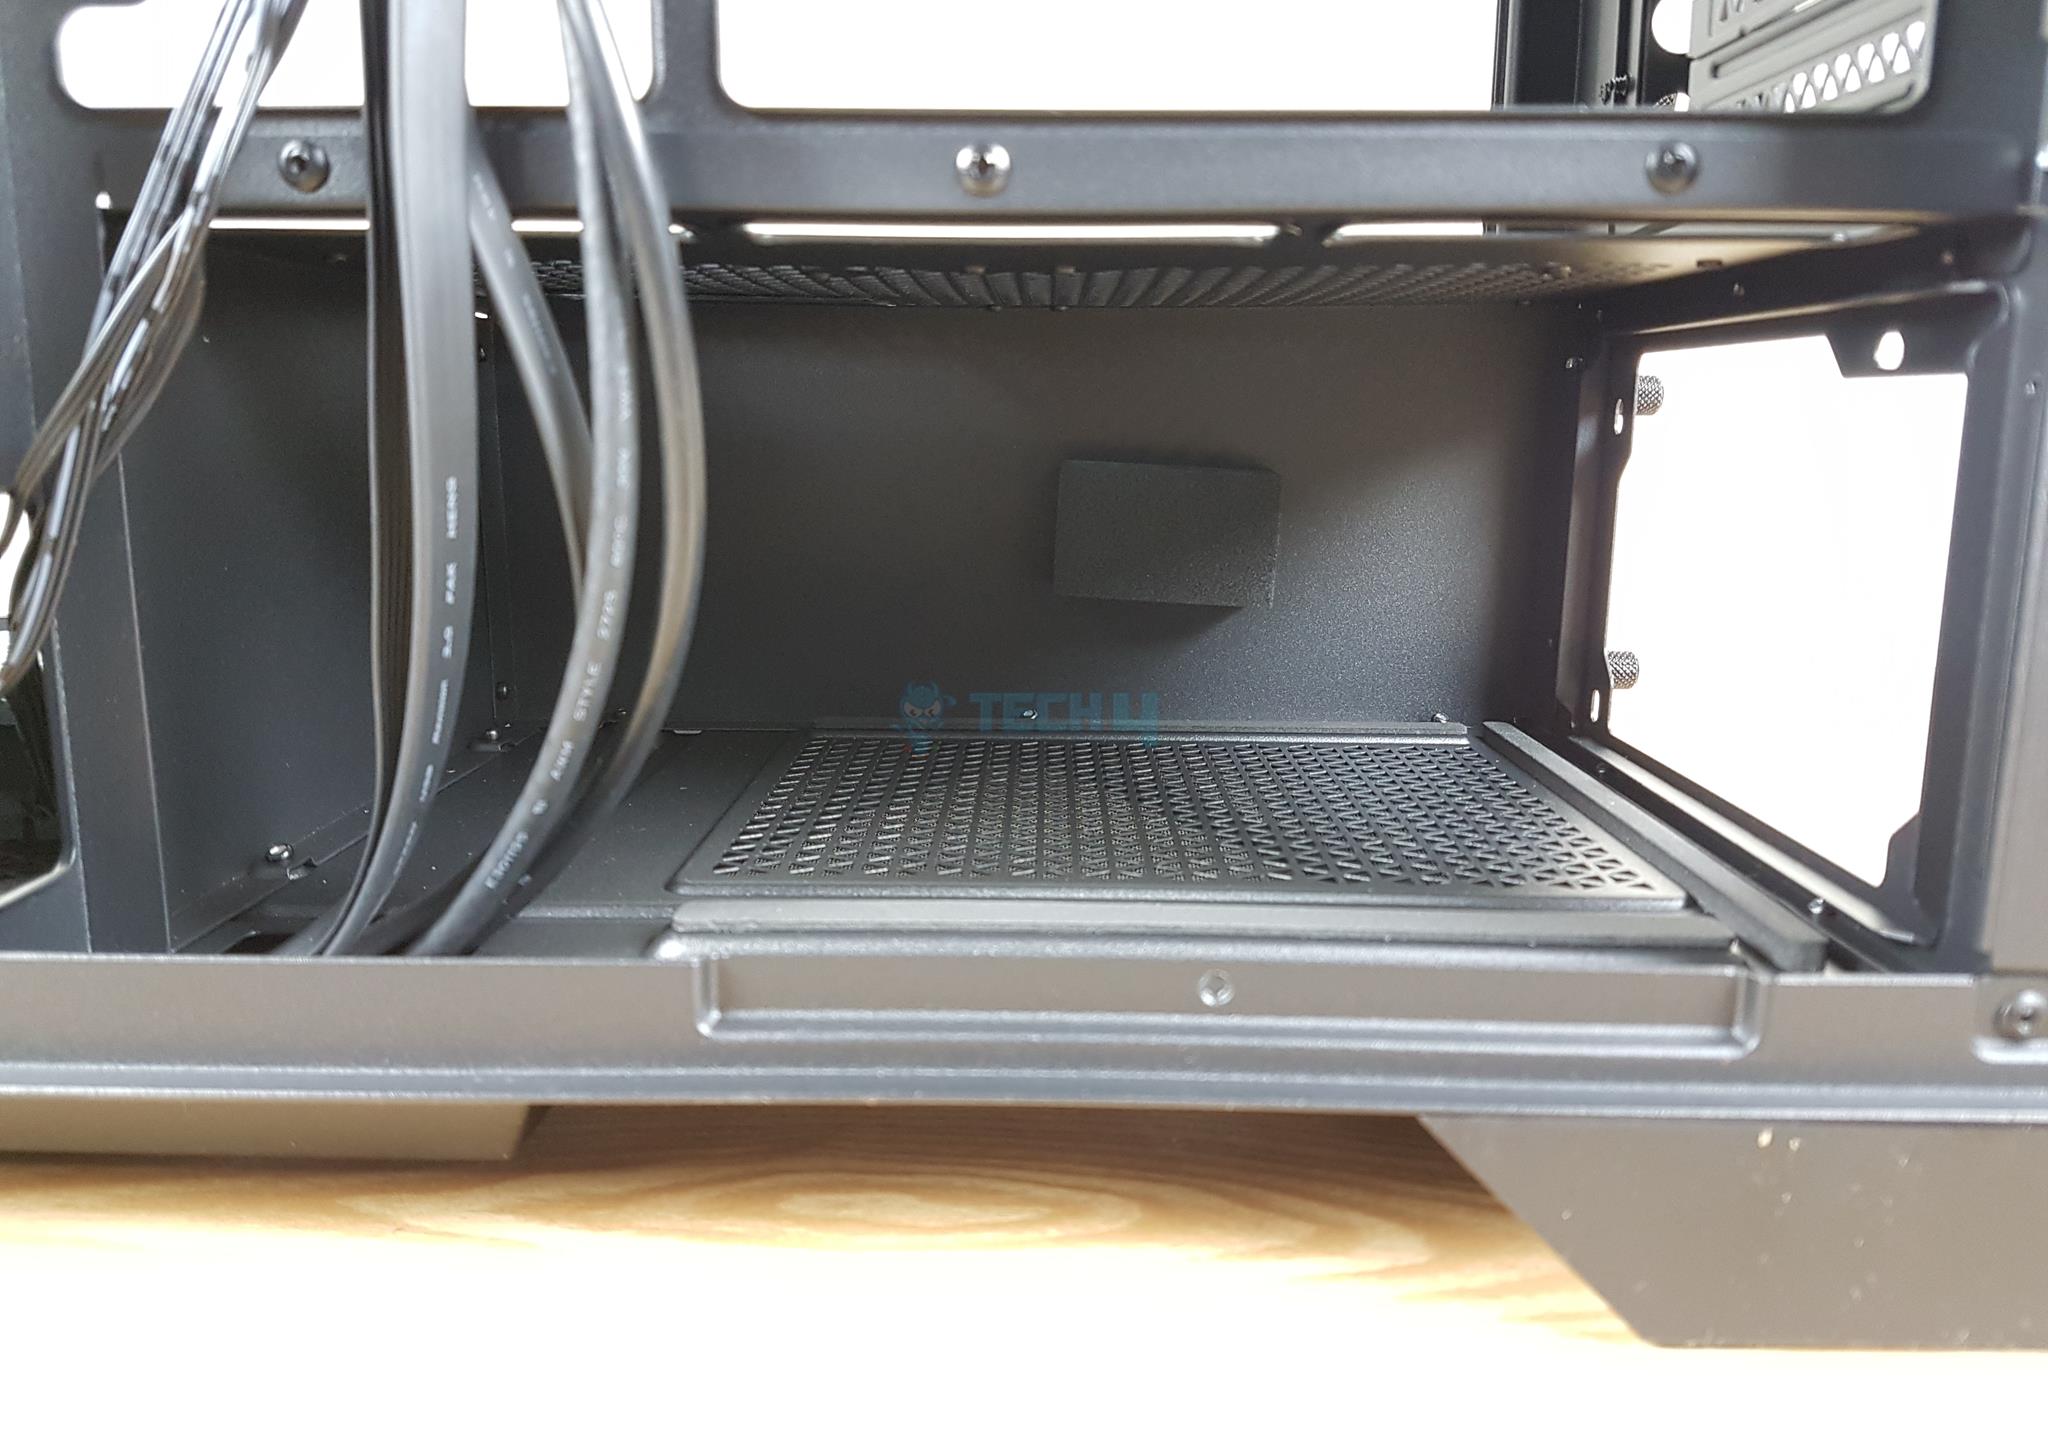
The PSU shroud is perforated for ventilation. There are mounting holes so that you can install two 120mm fans over the shroud to throw direct air on the graphics card. Three cutouts for cable routing towards the motherboard tray and a large cutout towards the front are for the graphics card cable routing. None of these holes have rubber grommets.
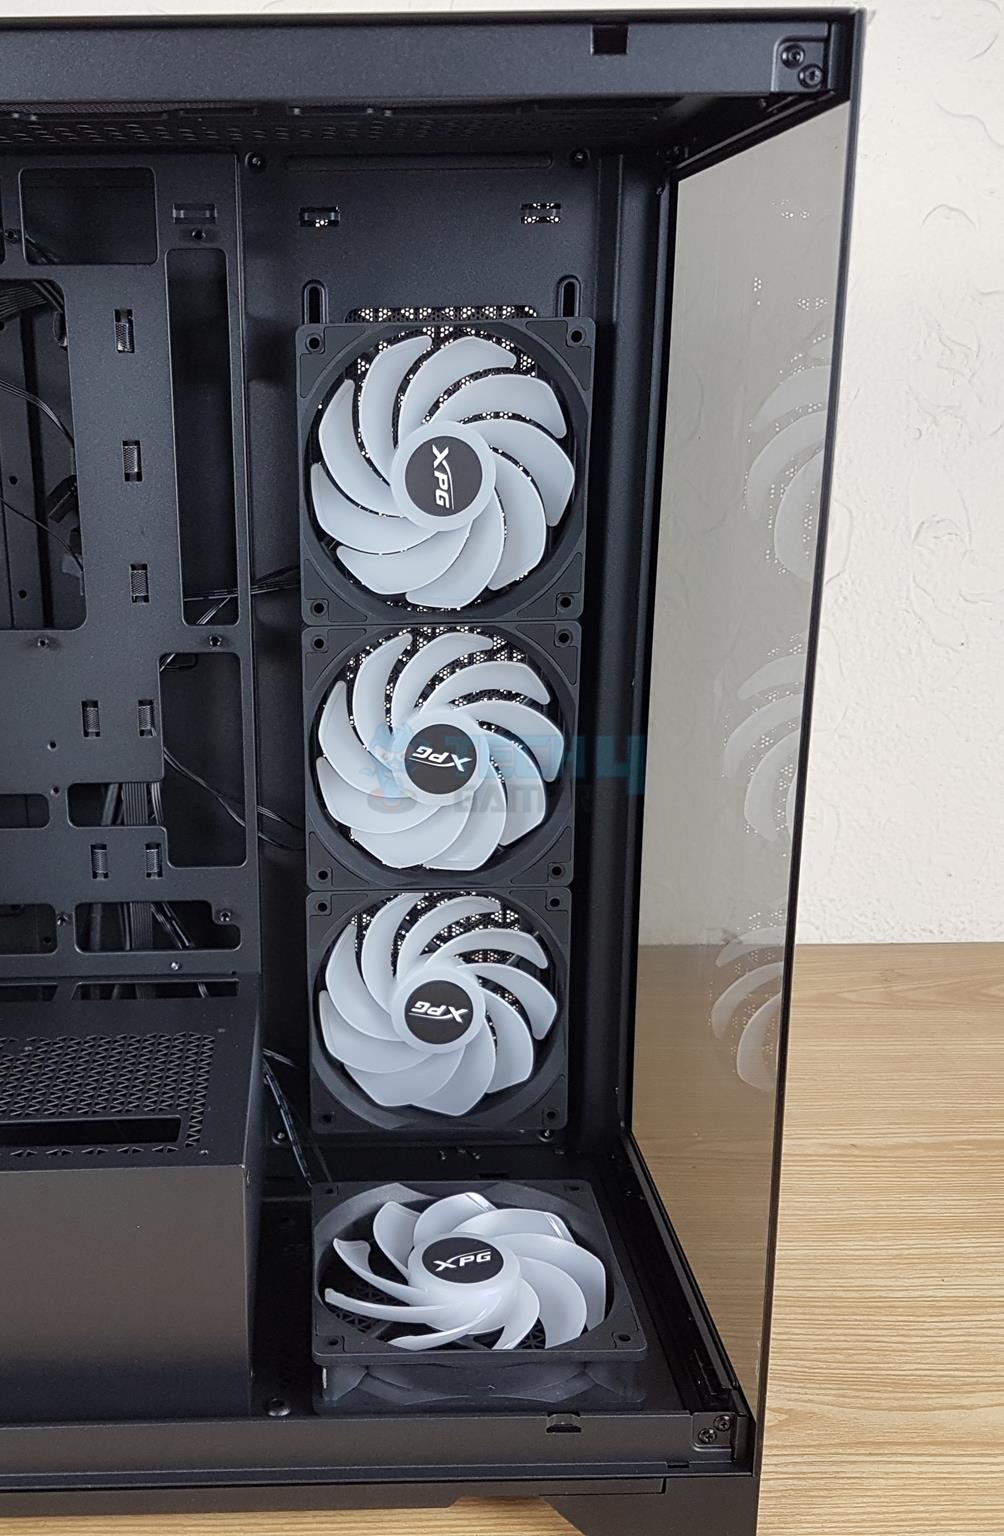

There are 4x 120mm A-RGB reversed blades fans pre-installed. Three fans are on the side, and one is on the base. XPG could have used a removable fan bracket on the base for convenient handling of that fan.
You can install up to a 360mm radiator on the side. There is no radiator support over the base.
There is a 120mm digital RGB fan on the rear pulling the hot air. You can see 7x non-reusable PCIe slot covers. This was my gripe in the review of the original Invader X, despite XPG having kept the same design in the BTF version. They have provided 3x PCIe slot covers so that should cover up this limitation.
Looking At The Backside

There is a steel backside panel. It has a vented portion towards the front of the case. This is there to provide ventilation for the 3x 120mm fans. A magnetic dust filter covers the perforated area on the side panel.
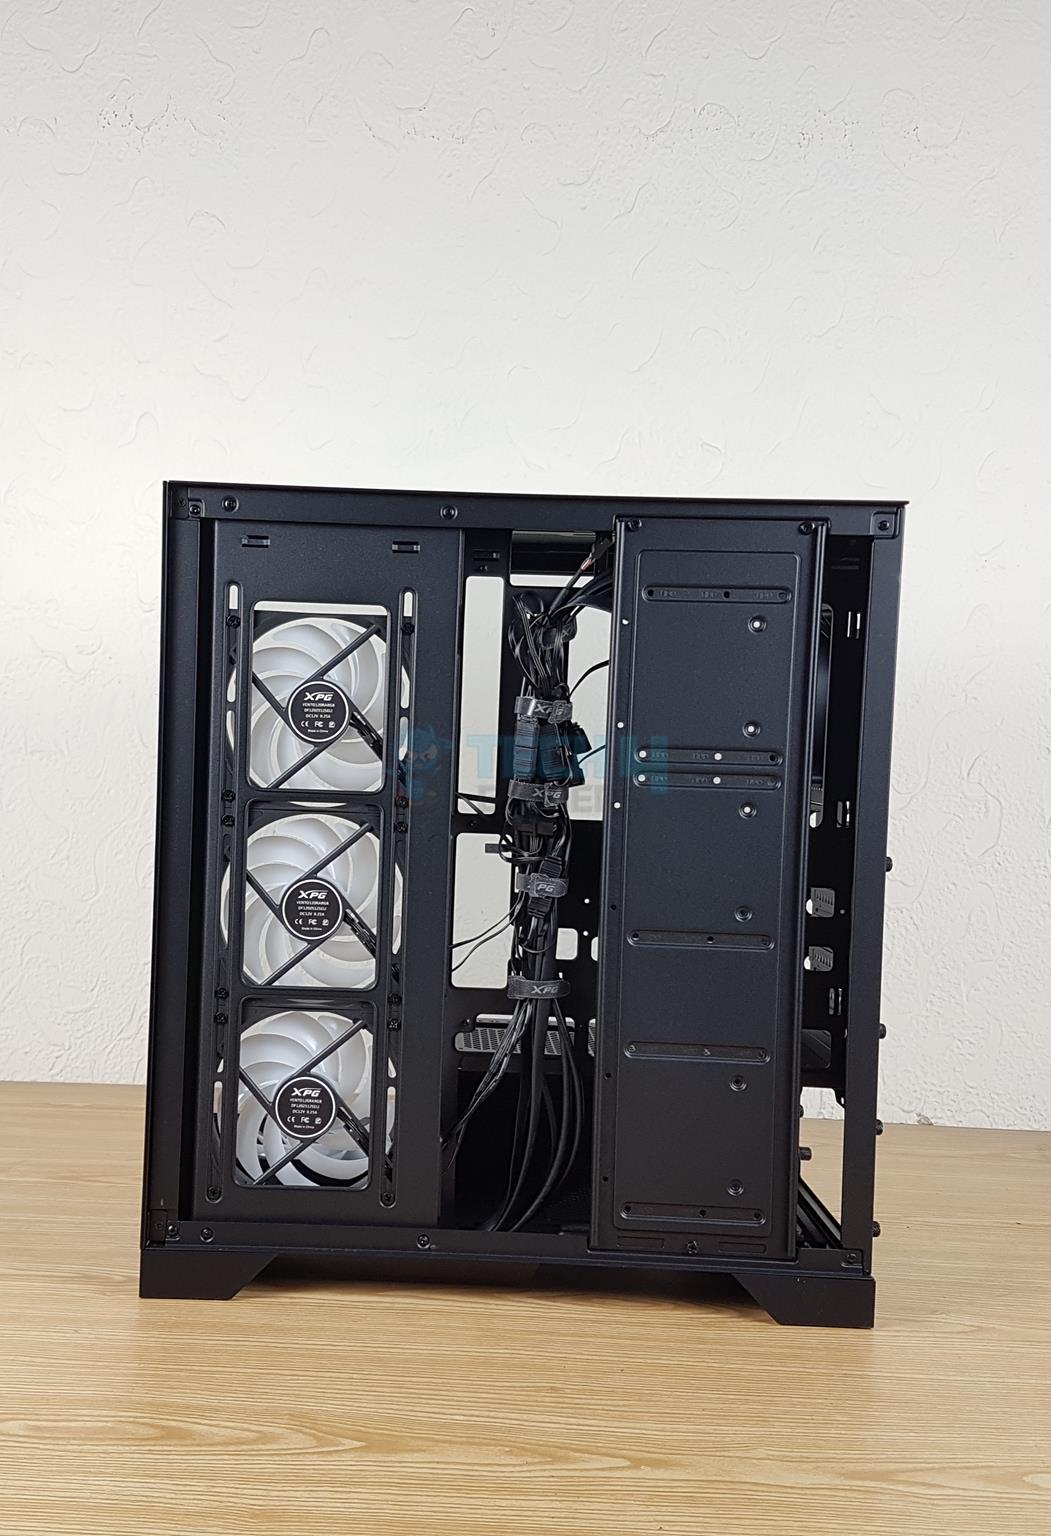
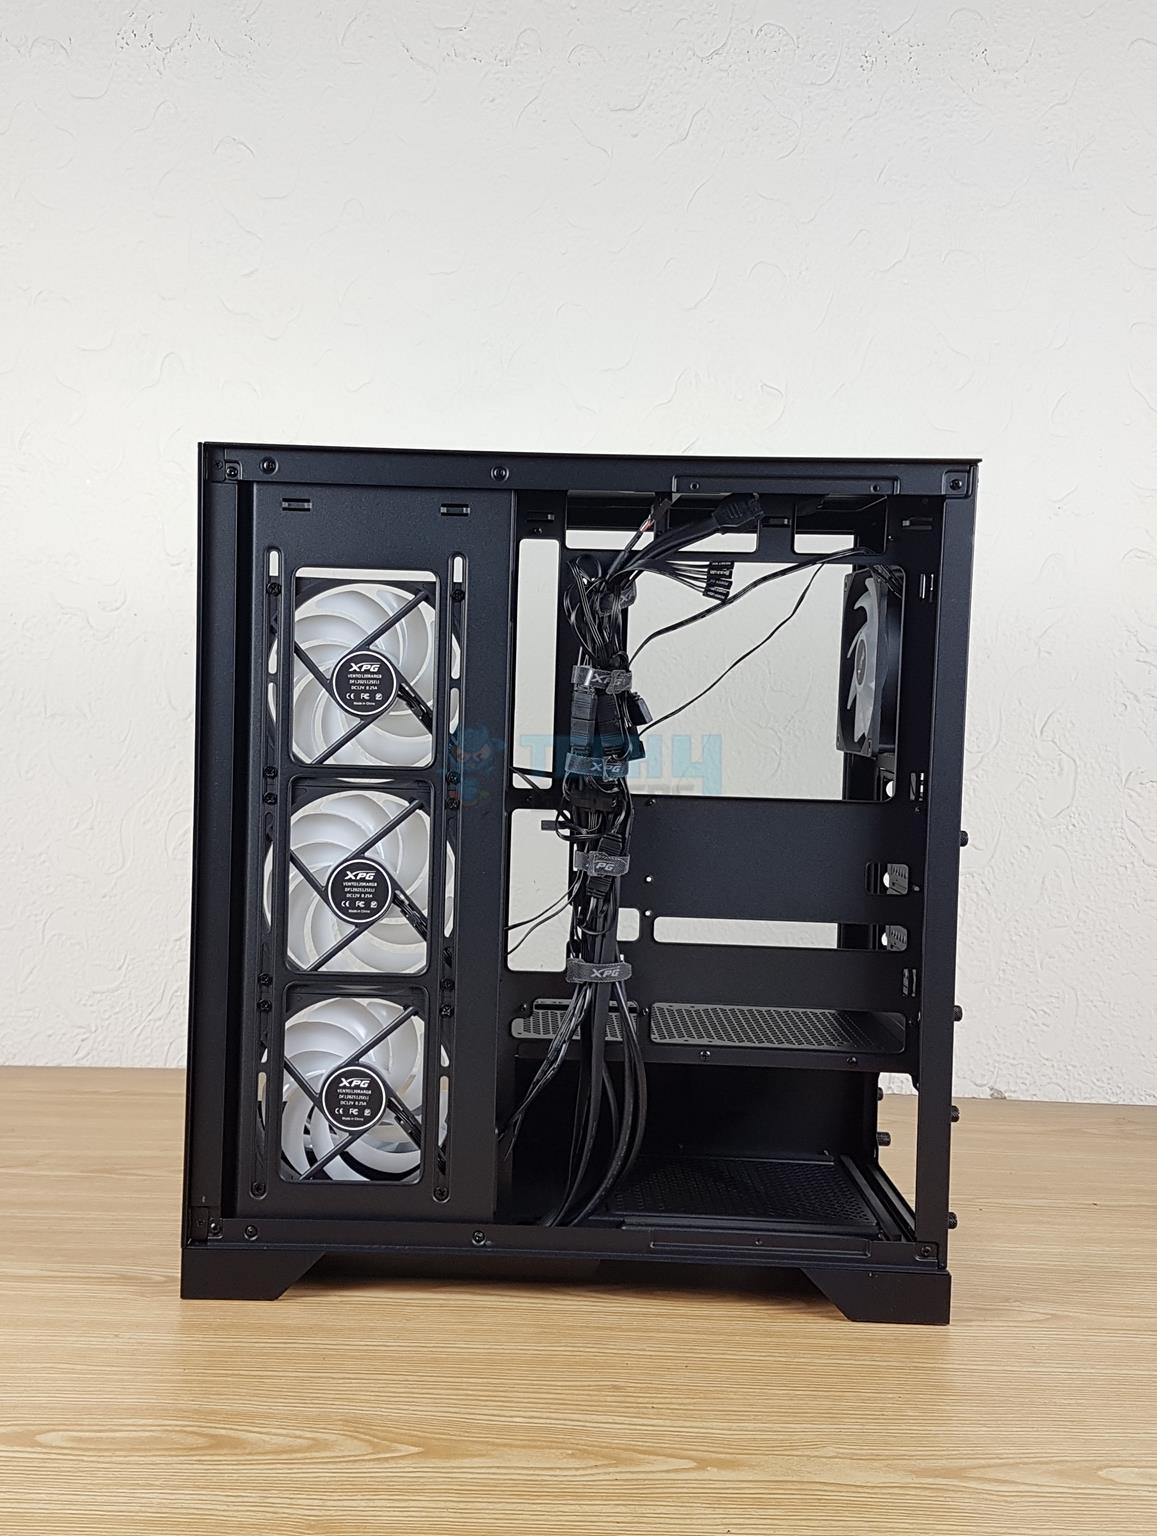
The backside layout is same as on the original Invader X. There is a storage drive bracket that can house up to 3x 2.5” or 3.5” drives. This is a decent storage provision in this mid-tower. You can see the cables are pre-routed and managed using Velcro Straps. This is nice but I made an observation during last time that front IO cables should be placed on the base except the USB cables. XPG still has kept these cables over the top.
I have removed the storage bracket to show a clearer view of the backside. There are 13 cable tie points. The fans on the left side are installed on a rail mount that allows them to be adjusted in height, though we don’t have much space except for moving them up.
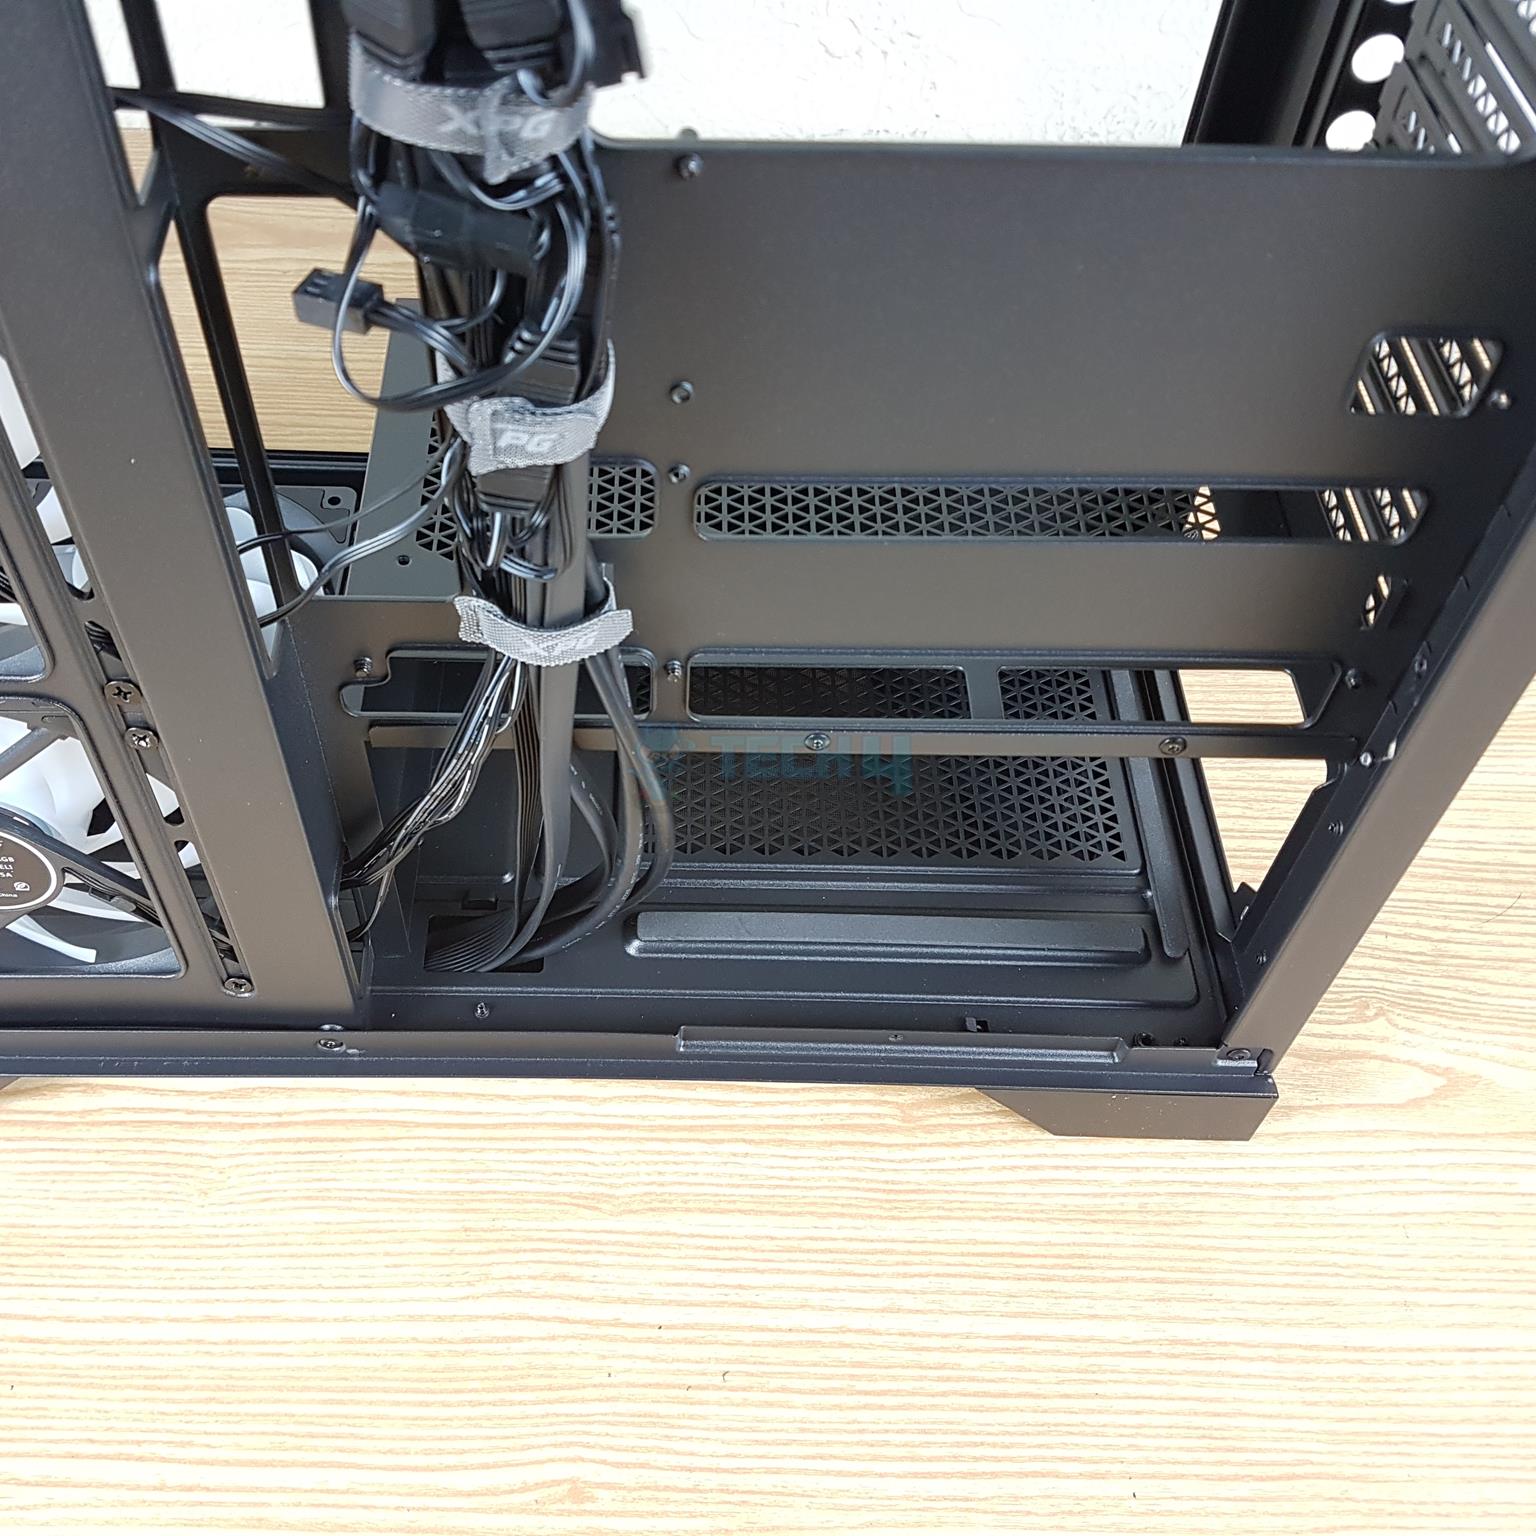
The cable management space is 36mm which is impressive and should suffice for any build. The PSU bay has a 240mm length available. Using a standard 160mm PSU would give you ample space to hide the cables conveniently inside the PSU bay.
Front IO Hub Cables
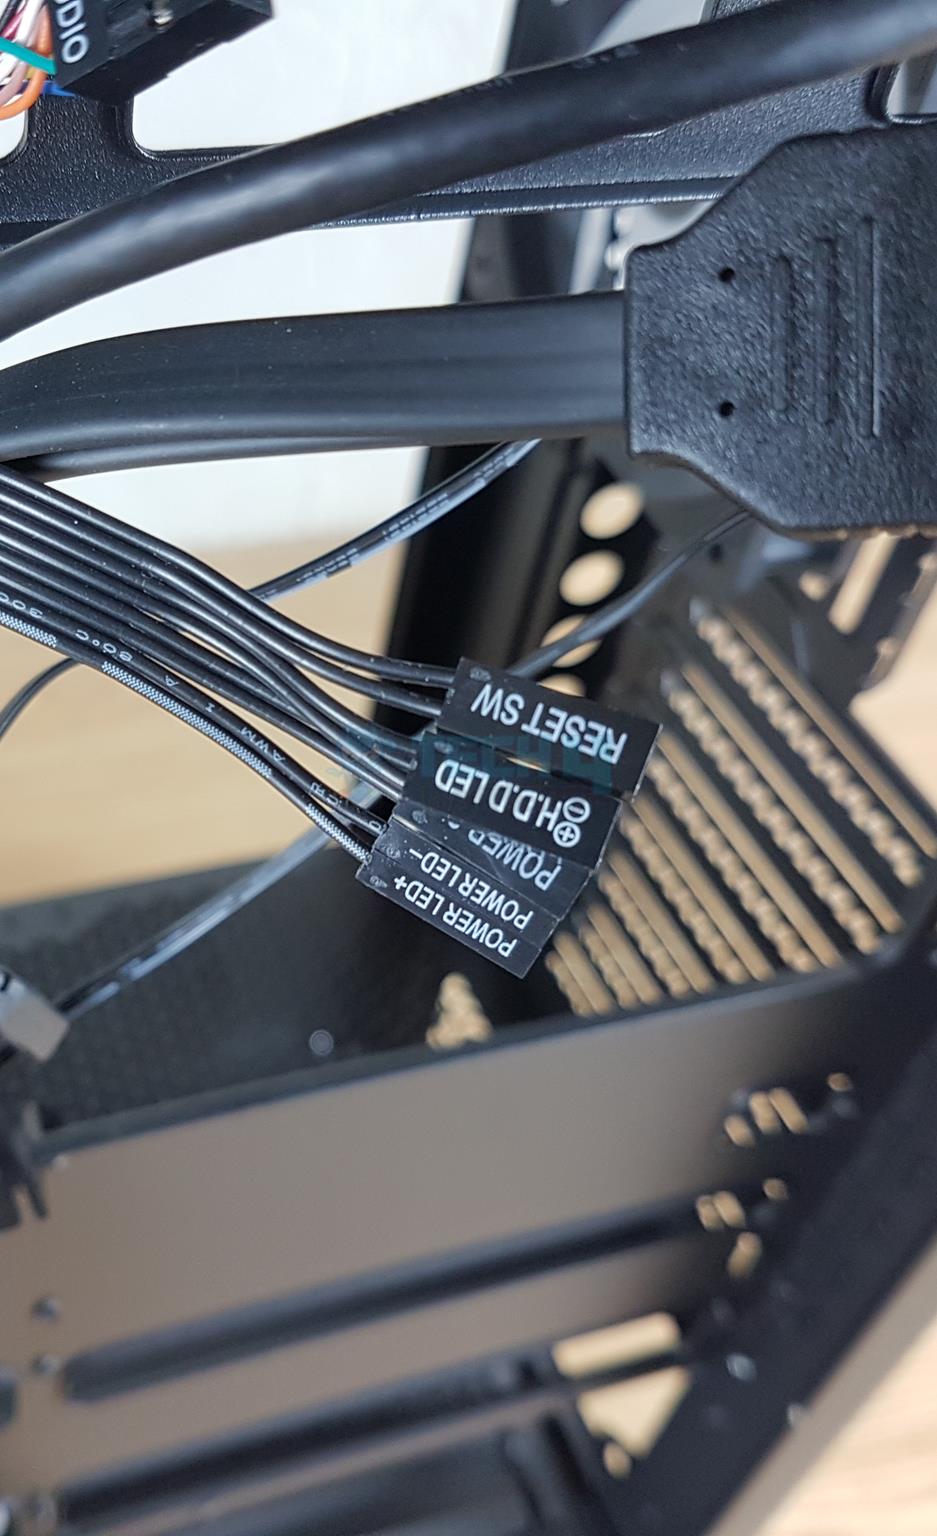
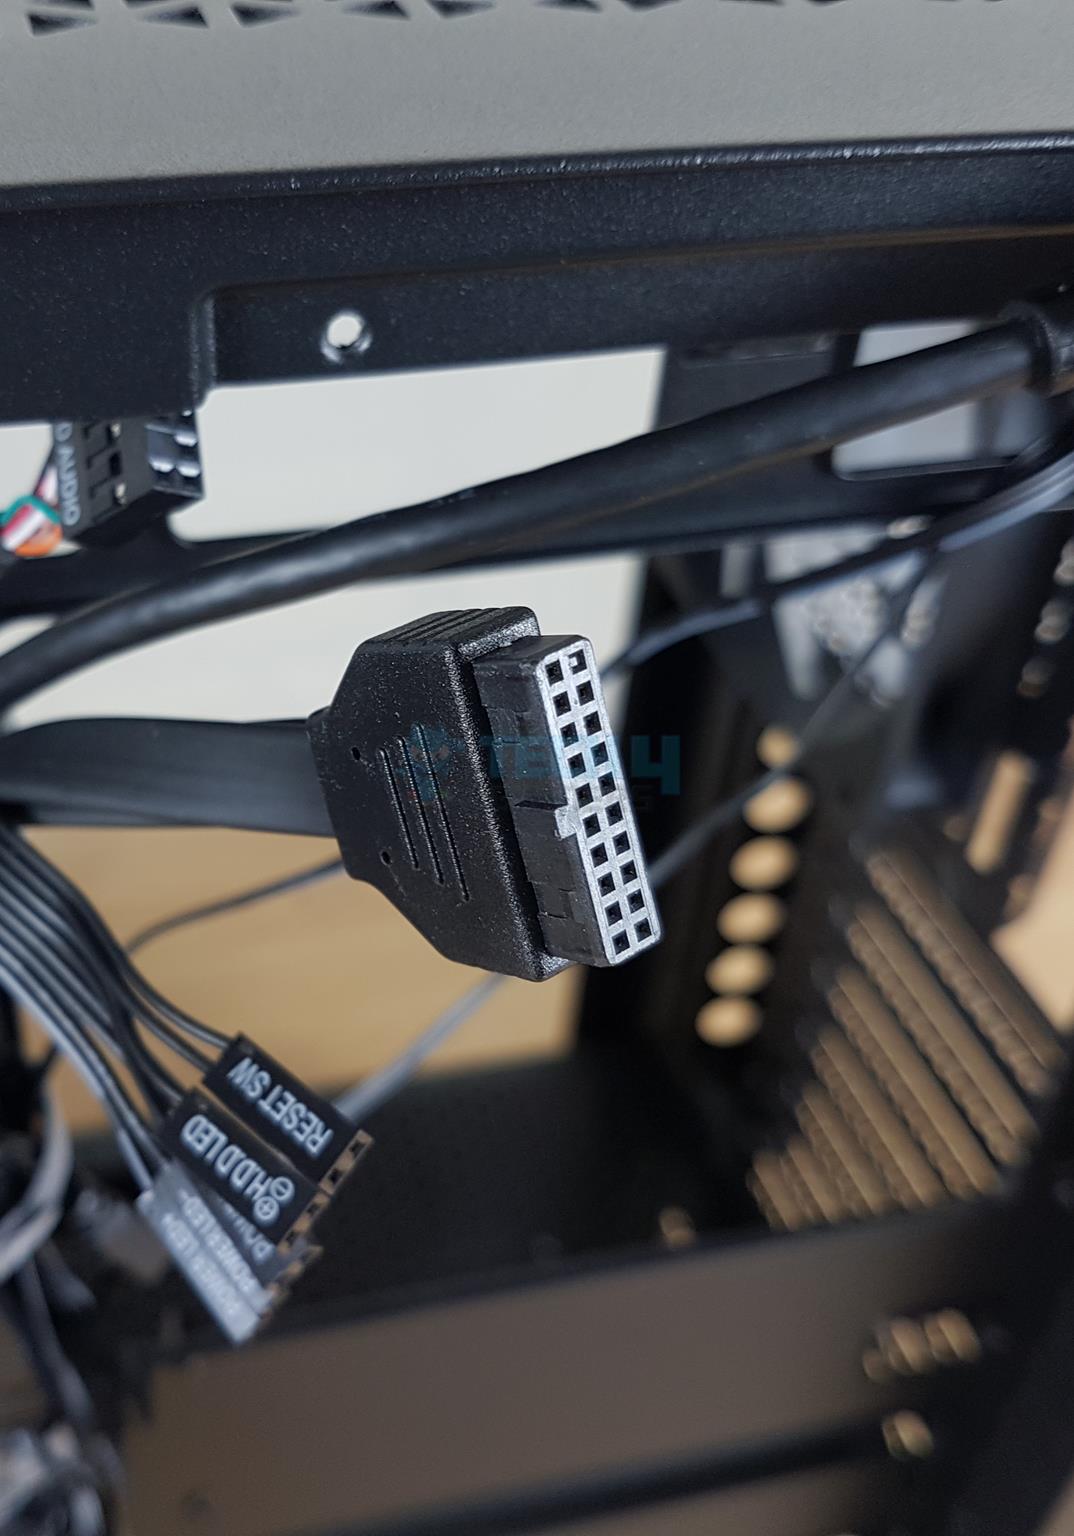
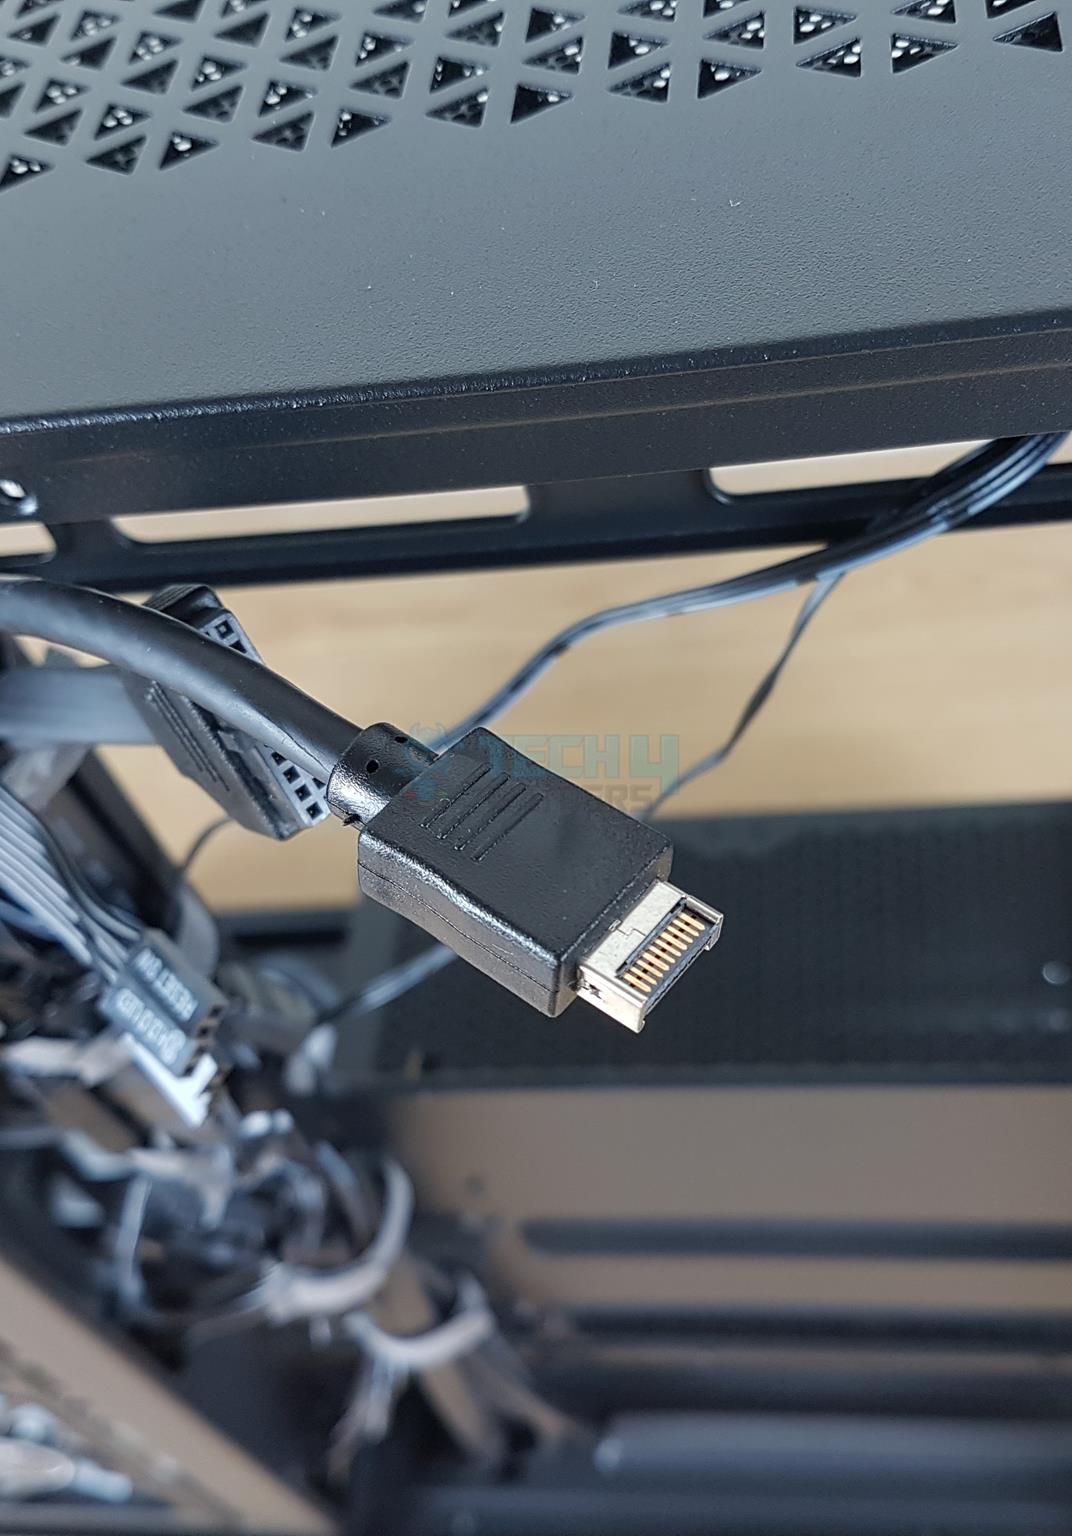
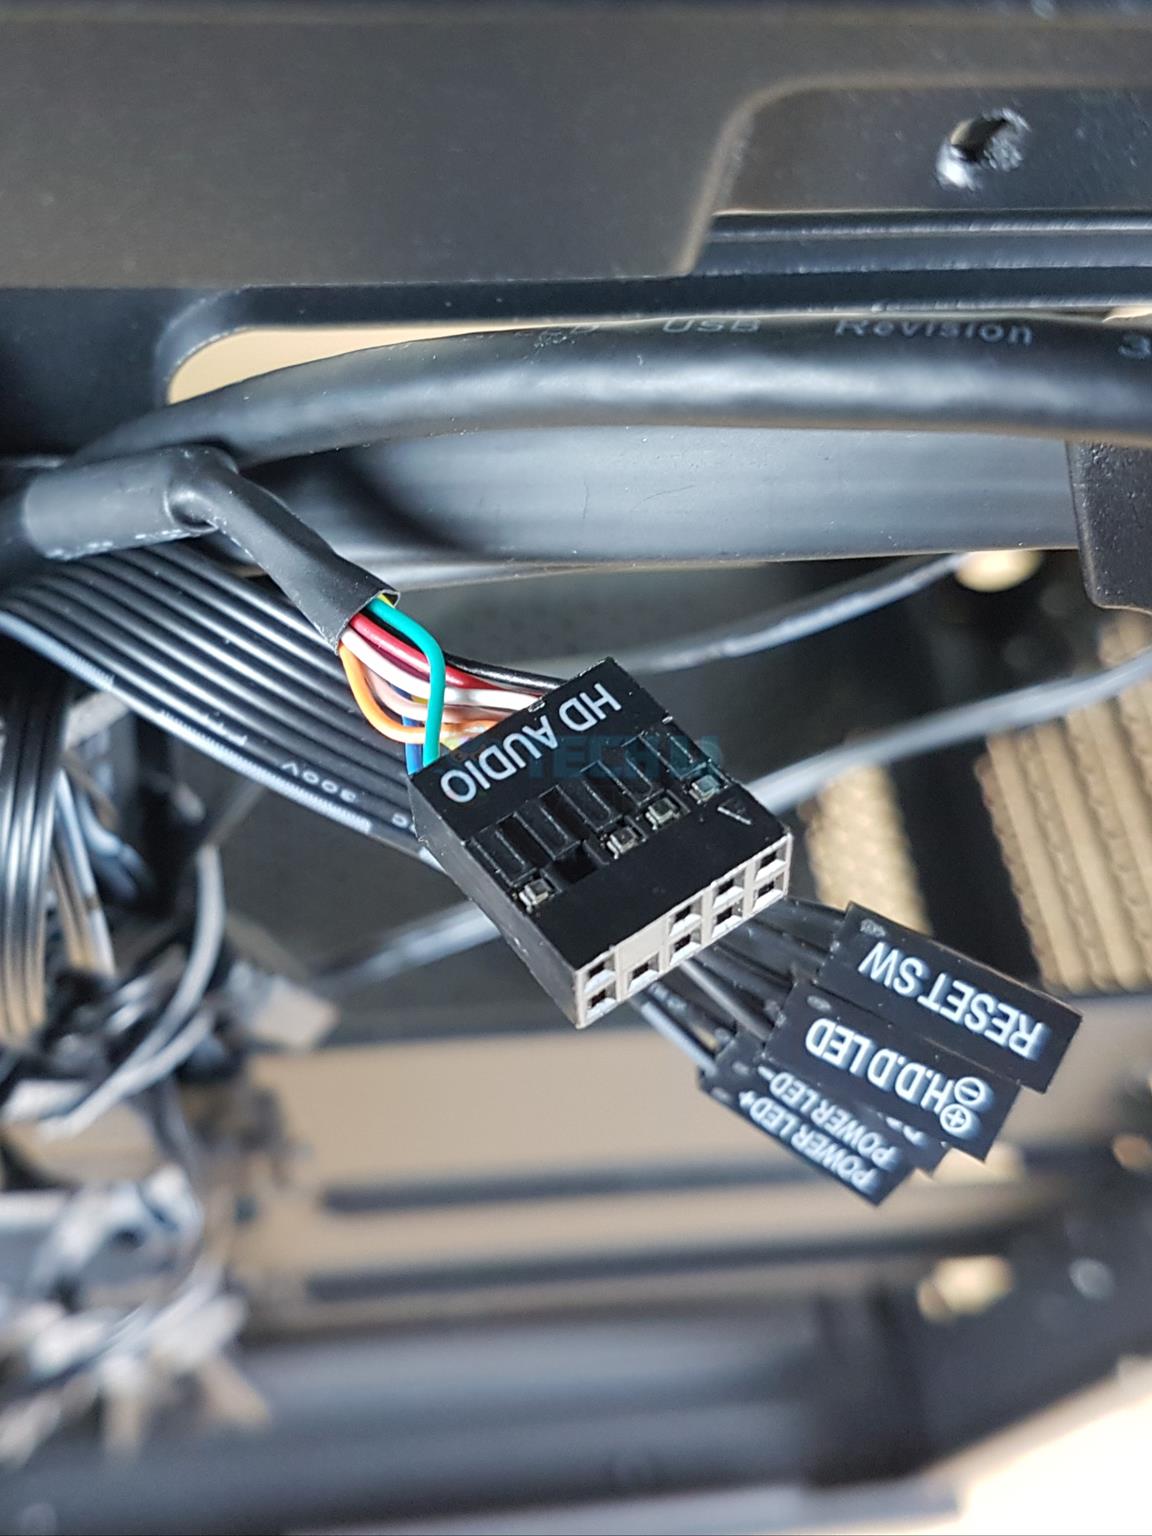
XPG has provided:
- 1x USB Type-E 3.2 Connector
- 1x USB 3.2 main Connector
- 1x Front Panel Connectors
- 1x HD Audio Connector
Test Build And Experience
We have used the following configuration for testing this case:
- Intel i7-13700K [Stock, Auto]
- MSI Z790 Project Zero [Backplug motherboard]
- Noctua NH-D15 G2
- Asgard Bragi 32GB DDR5 @ 5600MHz CAS 28
- MSI GeForce RTX 3090 Gaming X Trio 24G
- Sabrent Rocket 4 Plus 1TB NVMe SSD [OS]
- Fractal Design ION+ 2P 860W
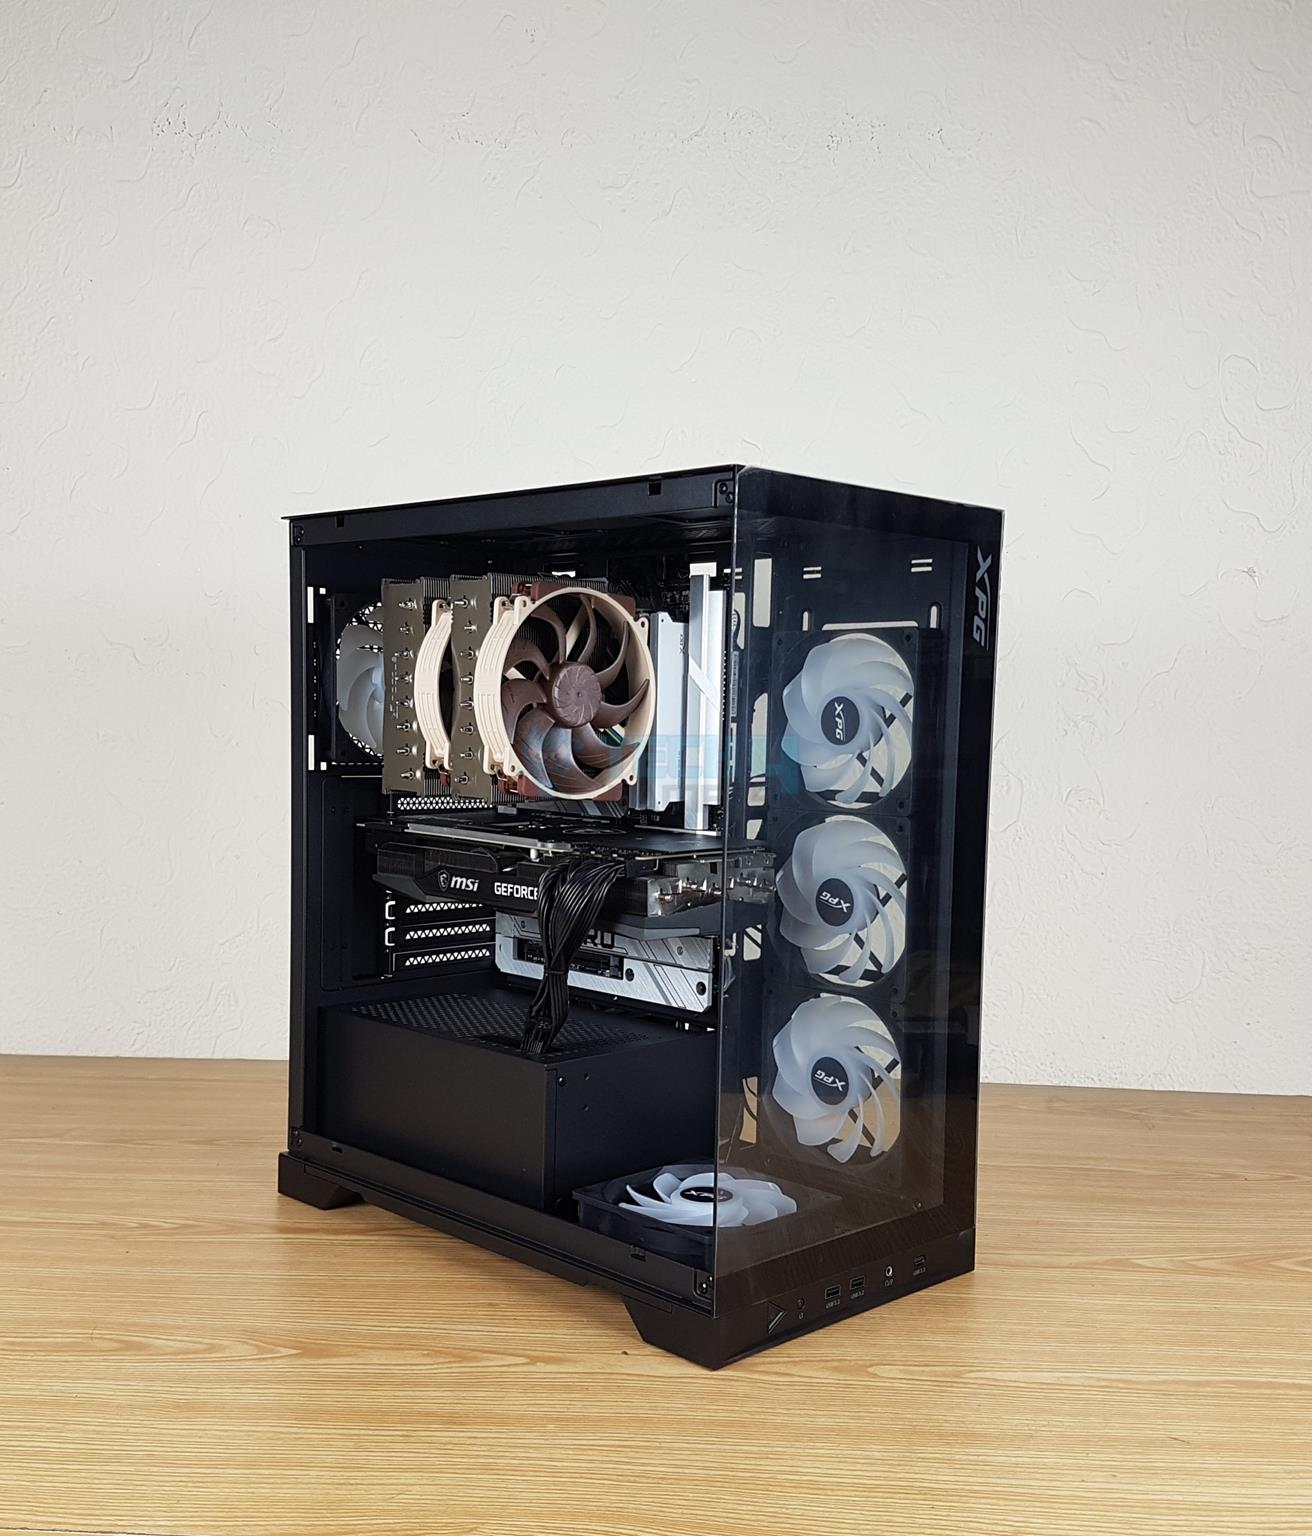
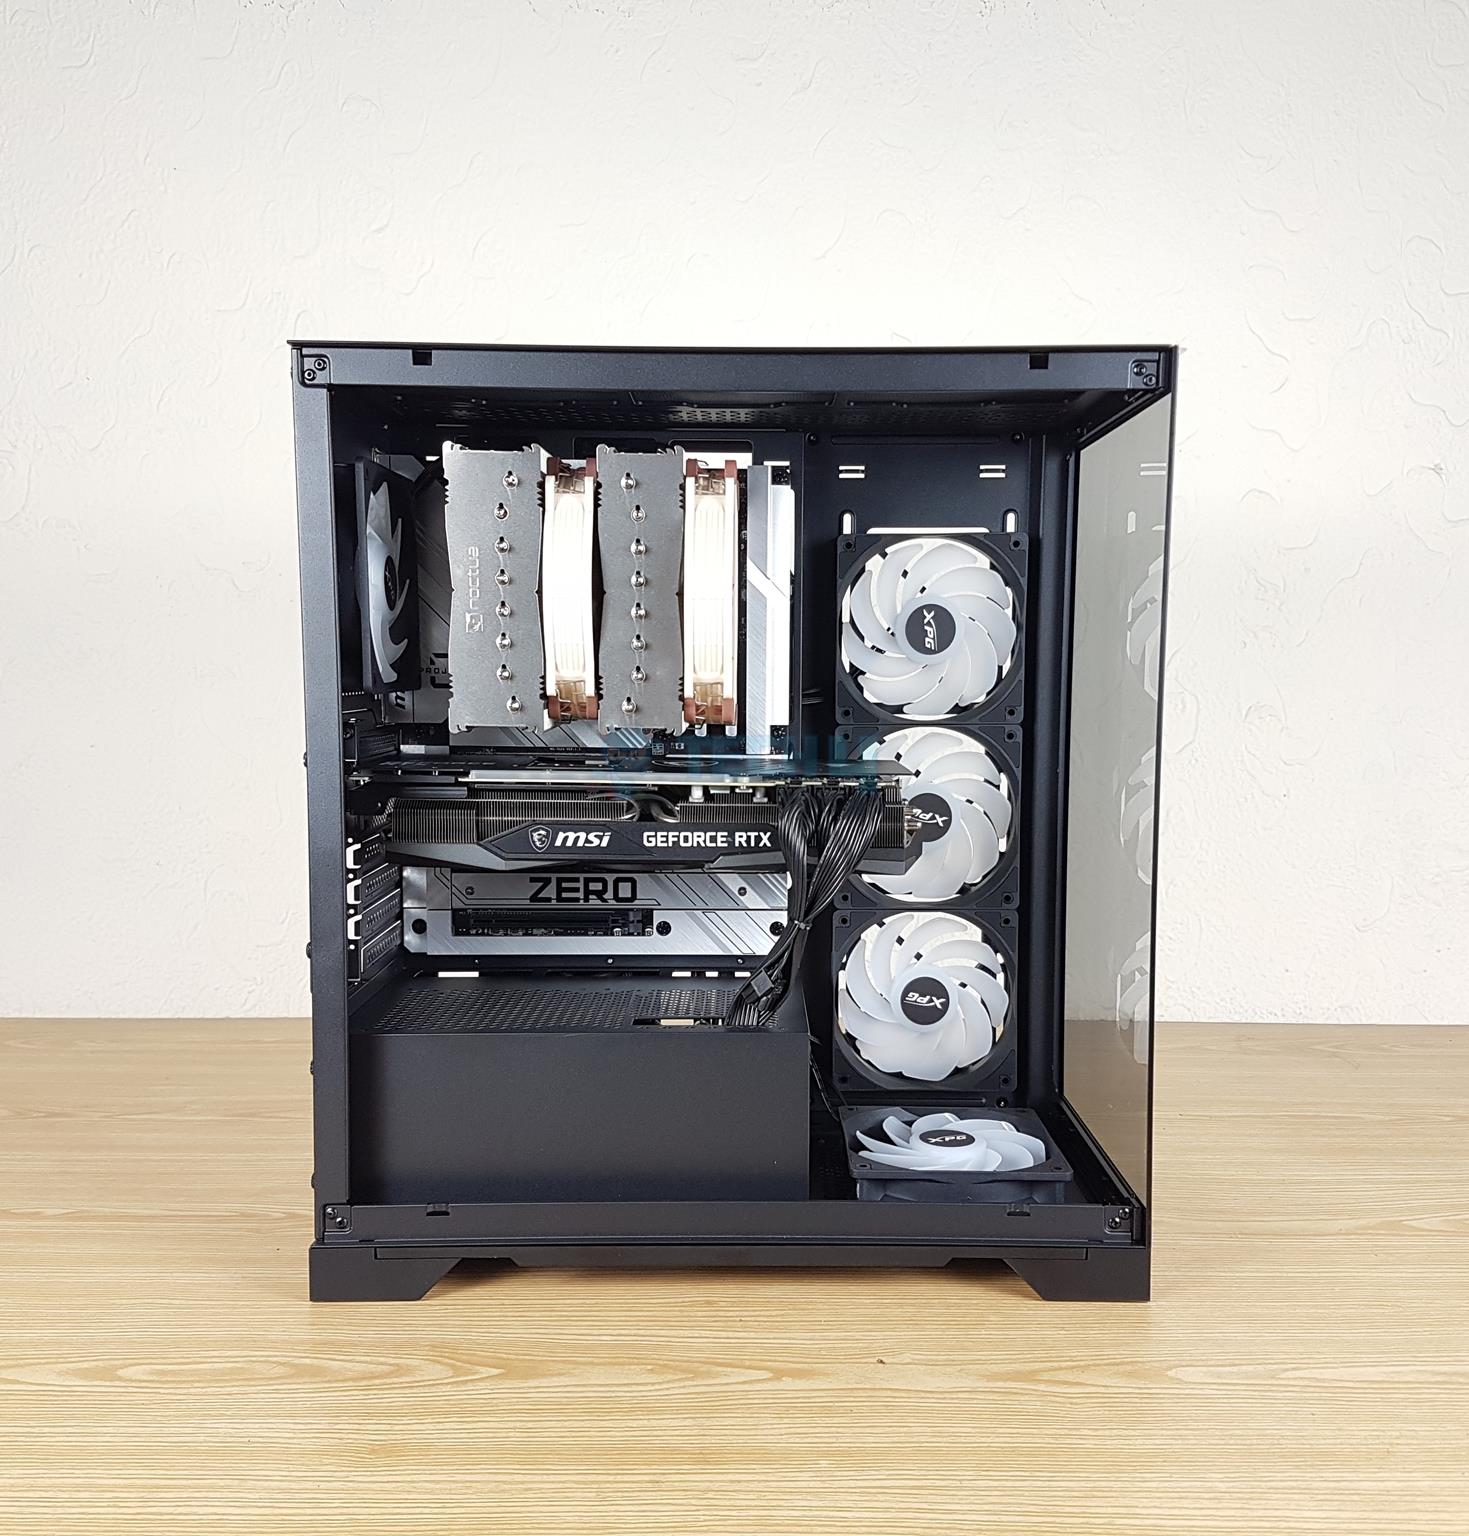

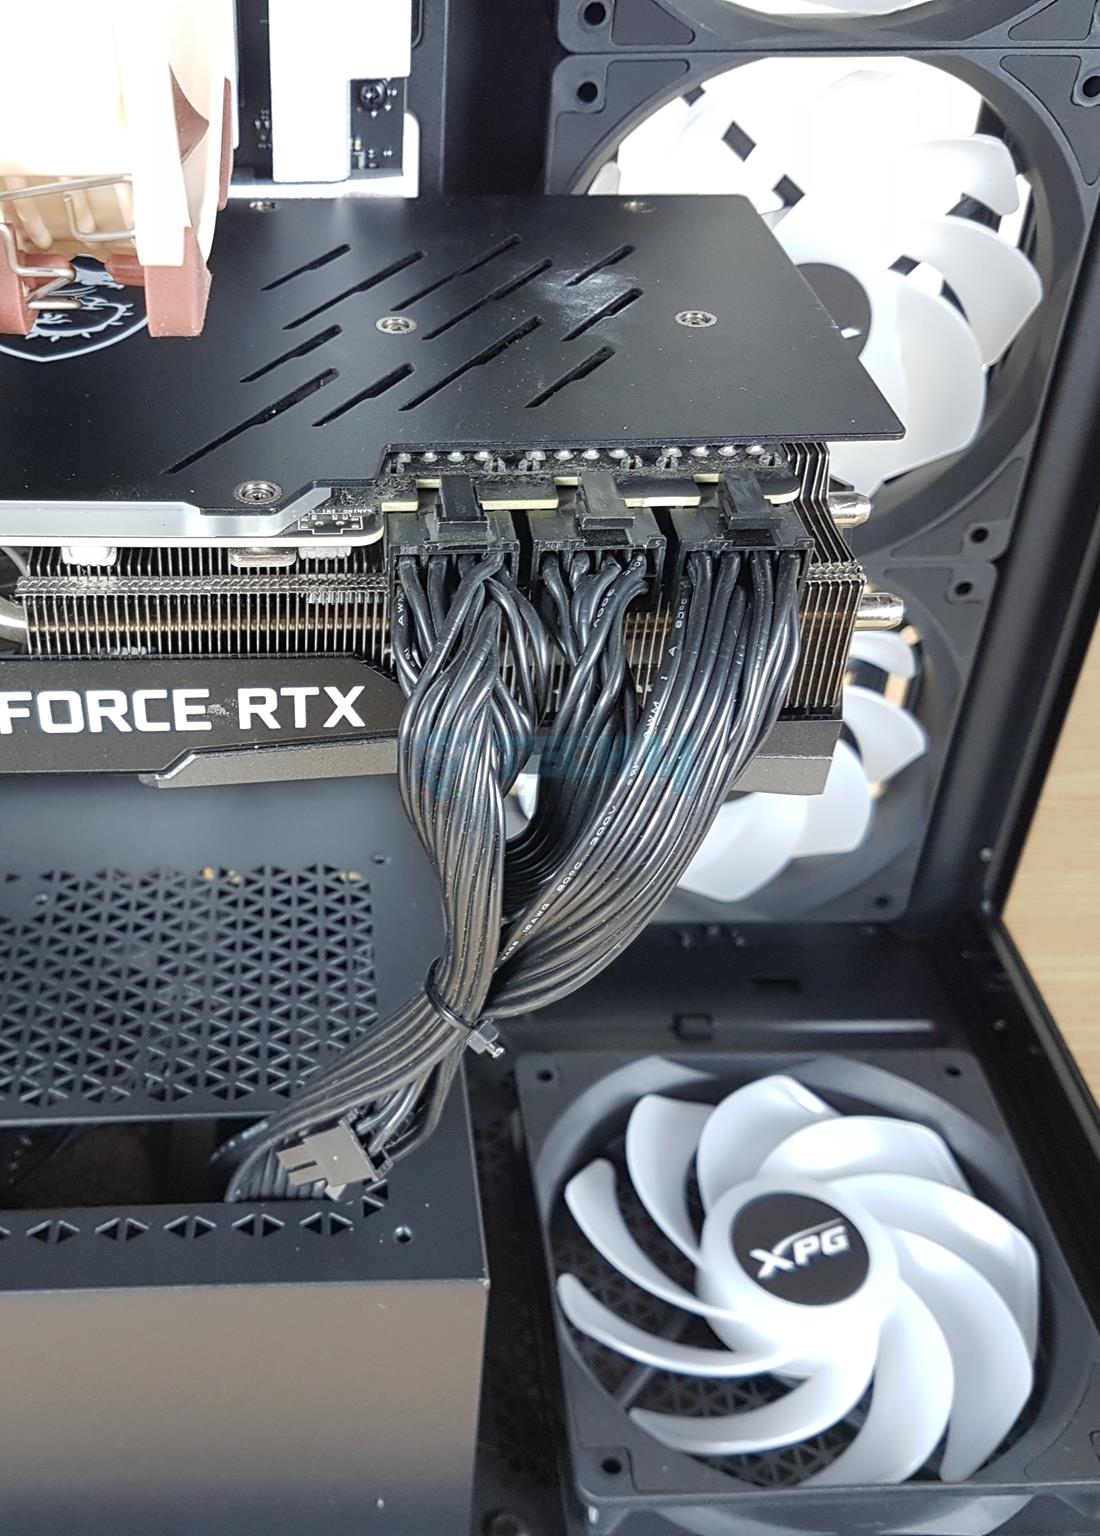
I installed the RAM, SSD, and cooler outside of the case. You need to remove the stock PCIe covers before installing the motherboard. The motherboard was installed, and it was a perfect fit. In the next step, the PSU was installed, and cables were connected.
Then the graphics card was installed and cables attached to it. If you are using AIO cooler then I would suggest installing the radiator alone first and then route the cables of the fans first before installing them.
Cable management is easy, and I did not face any issues. I did not do any cable management as I wanted to see if I could install the side panel without cables interfering, and there was no issue.
Invader X BTF Thermal Testing
I have used Intel defaults with power limits removed on the core i7 13700k. The XMP was enabled. The fans were set to run at full speed except for the graphics card. The thermal paste is Noctua NT-H2.
The RGB lighting was enabled using motherboard and MSI Mystic Sync app. The graphics card was operating at its stock settings. Rest of the settings were Auto, Stock in the UEFI/BIOS. System was put on idle for a minimum of 5 minutes. The ambient temperature was 24°C. Let’s take a look at the results.
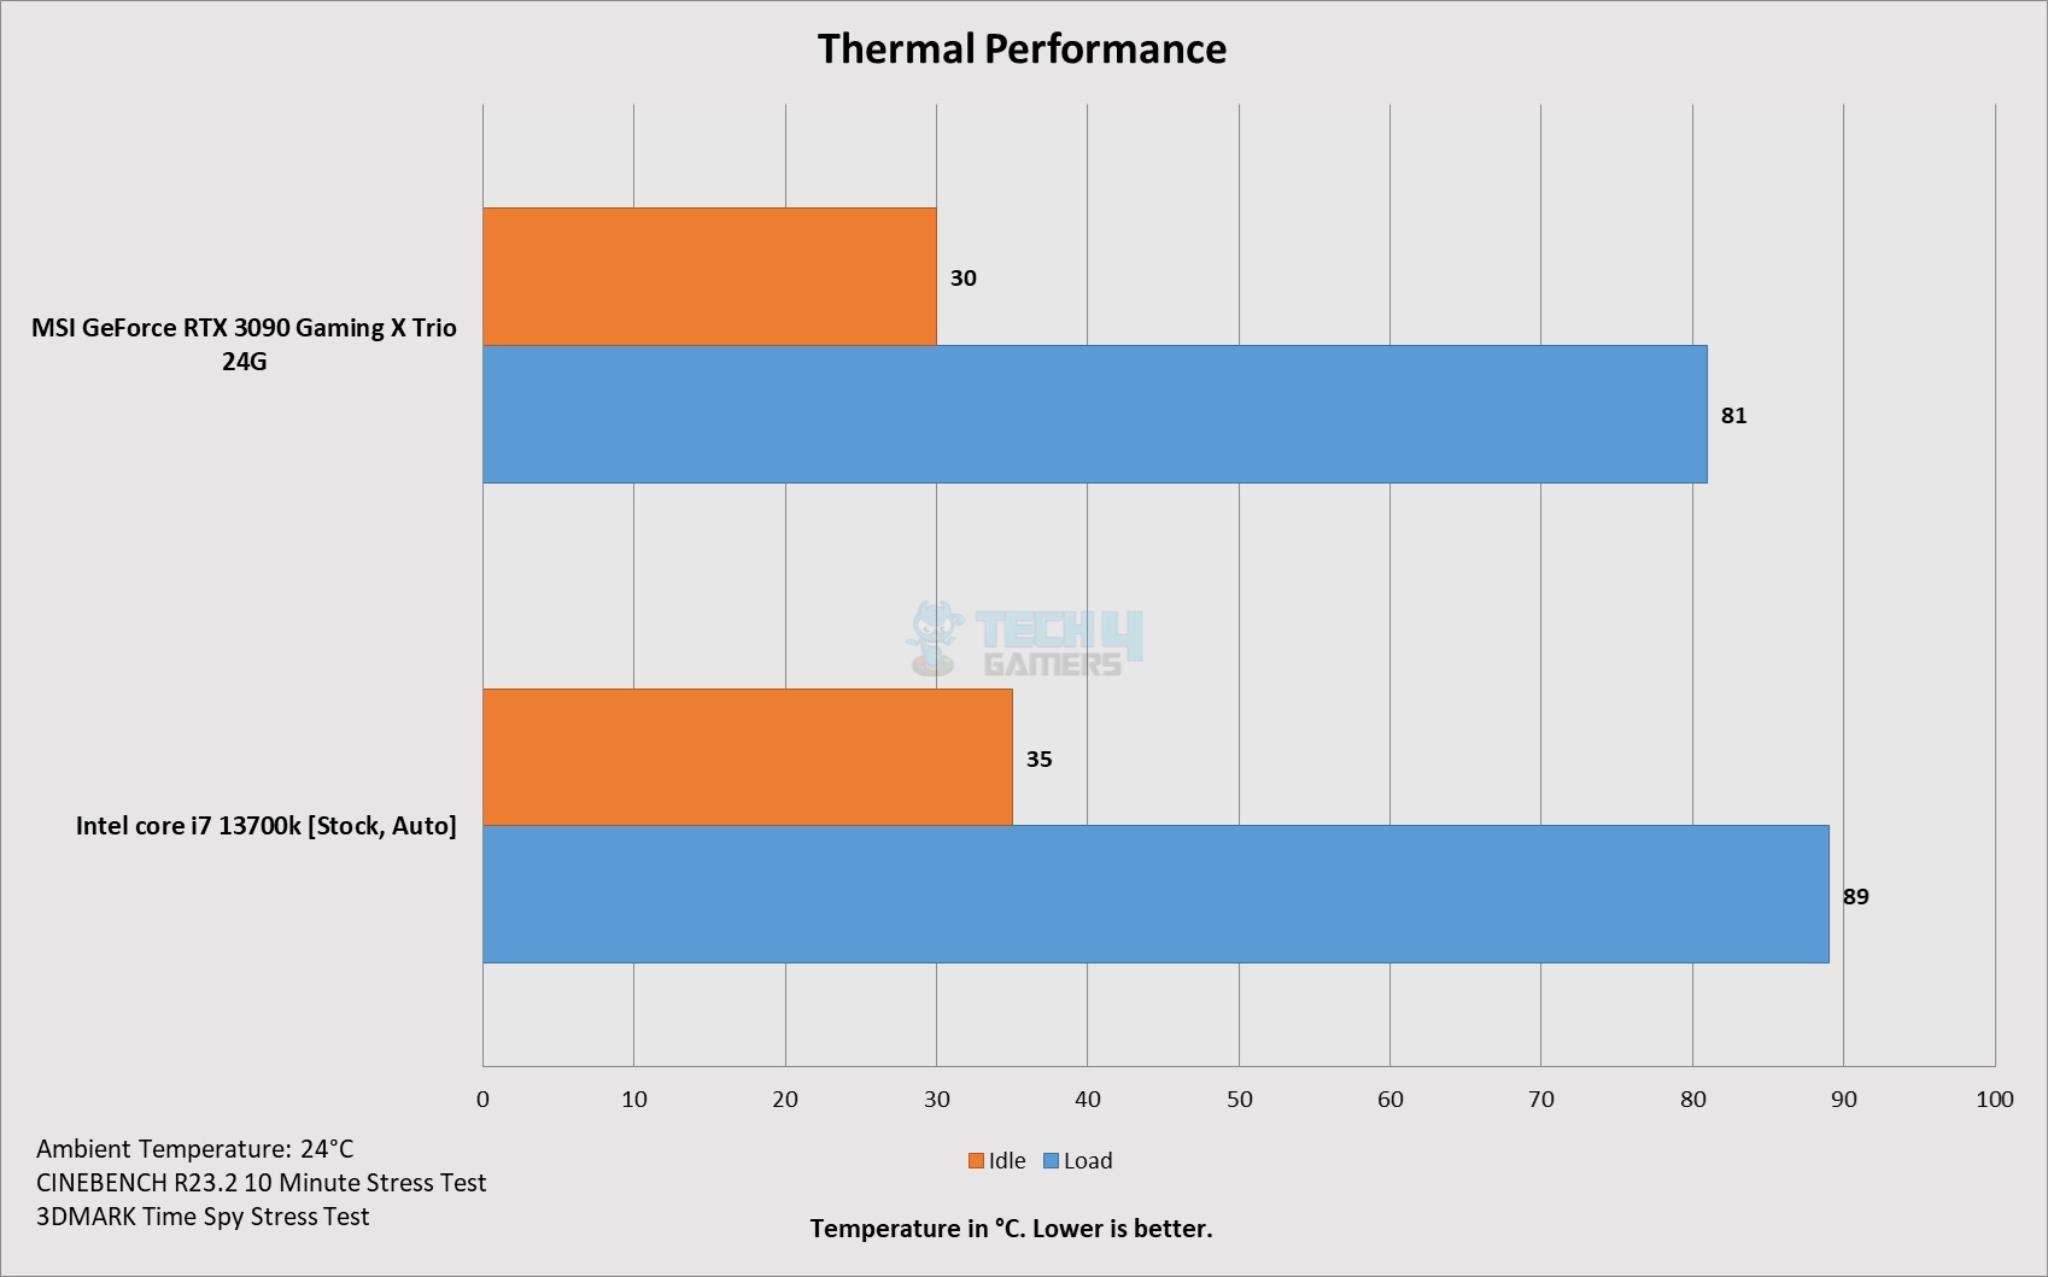
The overall performance is good, and there is no airflow restriction in XPG Invader X BTF.
Should You Buy It?
Buy It If
✅You need a panoramic view case with ATX motherboard support: The XPG Invader X BTF features a panoramic view thanks to bezel-less front and side tempered glass panels.
✅You are looking for a backplug-supported case: The XPG Invader X BTF, like its predecessor, supports backplug motherboards, but this time, the case supports ATX-size motherboards.
✅You want good specs: The XPG Invader X BTF comes with a vertical GPU bracket as well as a GPU support bracket (magnetic). This case can house up to 2x 360mm radiators and comes with 5x pre-installed A-RGB fans. Four fans are reversed.
Don’t Buy It If
❌You want more value: The market is filling with more options supporting back-plug motherboards. Some good options cost less while providing good specs.
My Thoughts
XPG is back with another iteration of Invader X. This time, it is Invader X BTF, which comes from the Asus ecosystem and shows support for back-plug motherboards. Both Invaders support back-plug motherboards, but the key difference is that the BTF version supports full ATX back-plug motherboards.
This case supports ATX, mATX, and mini-ITX motherboards. The ATX size backplug motherboard is also supported. This case has dust filtration on the base, backside and top. The case has panoramic view using 3mm glass panels.
The cooling department is the same as on the Invader X. Five 120 mm A-RGB fans with four reversed blades are pre-installed. Up to 360mm radiators can be mounted on the top and side. Ten fans, including two on the PSU shroud, are supported.
The storage options are limited in this case where you can install 3x 2.5” and/or 3.5” drives. The graphics card of length 400mm can be installed without side radiator. With radiator the supported length is 270mm. The case has a CPU cooler height clearance of 175mm and PSU length is 240mm.
The case comes with a vertical bracket for the graphics card and a support bracket for the horizontally mounted cards. The vertically mounted card has a clearance of 250mm in height. The PCI slots have reusable covers.
The front IO panel has a USB 3.2 Type-C port and 2x USB 3.2 Type-A ports. The PSU shroud has a perforated area. I found a flex or play in the motherboard tray, which was not in the original Invader X that I tested. There is a 36mm space for the cable management.
Assembling in this case is simple and straight forward. However, XPG should keep the front IO cables on the base in the pre-routed cables using Velcro Straps. XPG has ditched the PCIe 4.0 riser cable in the Invader X BTF case to reduce the price tag while making room for ATX backplug motherboard.
XPG offers a 2-year warranty on this case. Though I have no complaints about this case, the competition for this price tag of USD 140 is getting tough.
Thank you! Please share your positive feedback. 🔋
How could we improve this post? Please Help us. 😔
[Hardware Expert]
With a major in Computer Science, Sameed is a tech enthusiast who puts his passion for gadgets into words and creates informative blogs. From comparing different hardware to reviewing the best RAMs, motherboards, and graphics cards for your next build, Sameed has covered a wide spectrum of topics that have given him a special insight into every nook and cranny of the tech world. Sameed is also a certified expert at Computer Hardware & Networking.
Get In Touch: sameed@tech4gamers.com


