Best White Case?
Review Summary
The Torrent series is a new PC case from Fractal Design and has made strong market waves. Like the Define and Meshify series, the Torrent series has quickly gained a reputation and respect for a brilliant overall design with a true airflow implementation. This is one of those cases that will not disappoint, though it may also have some considerations. With the top-notch build quality and impressive features, it is hard to overlook the case.
Overall
-
Build Quality - 9.5/10
9.5/10
-
Design - 9/10
9/10
-
Features - 9/10
9/10
-
Value - 9/10
9/10
Pros
- High Airflow Design
- Open Front Grille
- Spacious inner layout
- Nexus 9P Slim Fan Hub
- Distinct Overall Design
- 2x 180mm Fans on front
- 3x 140mm Fans on Base
- Dust Filtration
- Strong Cooling
- Ample Storage Provision
- Cable Guide and Velcro Strips
- Aerodynamic Design PSU Compartment
- Tempered Glass Panel
- Subtle Digital RGB Lighting
- bolt-free top-latching Glass Panel
- Integrated water reservoir support
- GPU Support Bracket
- PCIe Bridgeless Design
Cons
- Price
- GPU Cable fell short to reach Graphics Card
- Challenging Cable Management with 2.5”/3.5” drives
Fractal Design, renowned for its commitment to innovation and top-notch build quality, shook up the market in 2021 by introducing the Torrent case series. Breaking away from traditional design norms, the Torrent series, available in three sizes, boasts six distinct SKUs.
Options include the sleek White RGB TG Clear Tint, the classic Black Solid, and more. The standout feature lies in the airflow-optimized design, notably the relocation of the PSU chamber to an upward position.
This bold move aims to maximize out-of-the-box airflow, with the Torrent case sporting impressive 2x 180mm front fans and an additional three 140mm fans on the base. The Torrent series exemplifies Fractal Design’s fusion of unique aesthetics and functional design.
The Torrent series offers six SKUs with distinctive features:
- White/Black/Gray options with various tint levels
- Focus on airflow with a unique layout, moving the PSU chamber upwards
- It comes with 2x 180mm front fans and three 140mm base fans
- A departure from conventional designs, the Torrent series showcases Fractal Design’s commitment to style and functionality.
Also Read: Fractal Design Celcius+ S36 Dynamic Cooler Review
Key Takeaways
- The Fractal Design Torrent White TG Clear Tint is a sleek white PC chassis with clear tinted tempered glass panels, optimized for advanced cooling and stylish, high-performance builds.
- This PC case is designed for users looking for a distinct design, more powerful cooling fans, glass designs, and RGB lighting.
- This case is not meant for users who want to avoid hefty cable management, have a lower budget, and have shorter cables for GPU and components.
- Why you can trust Tech4Gamers: Our reviews are based on dedicated hands-on testing by our team of experienced hardware experts. Find out more about how we test.
Let’s begin with the specifications
| Product | Fractal Design Torrent White TG Clear Tint |
|---|---|
| Dedicated 3.5" drive mounts | 2 (included) |
| Dedicated 2.5" drive mounts | 4 (included) |
| Expansion slots | 7 |
| Front interface | 1x USB 3.1 Gen 2 Type-C, 2x USB 3.0, HD Audio |
| Total fan mounts | 7x 120/140 mm or 4x 180 mm |
| Front fan | 3x 120/140 mm or 2x 180 mm (2x Dynamic GP-18 included in standard version, 2x Prisma AL-18 included in RGB version) |
| Rear fan | 1x 120/140 mm |
| Bottom fan | 3x 120/140 mm or 2x 180 mm (3x Dynamic GP-14 PWM included in standard version, 3x Prisma AL-14 PWM included in RGB version) |
| Dust filters | Front, Bottom |
| Fixed cable straps | Yes |
| Cable routing grommets | Yes |
| Tool-less push-to-lock | Both side panels |
| Captive thumbscrews | HDD brackets, SSD brackets, Top panel, Bottom fan bracket |
| Left side panel | Steel or Tempered glass (RGB version: Tempered glass only) |
| Right side panel | Steel or Tempered glass (Solid/White RGB: Steel, TG/Black RGB: Tempered Glass) |
| Motherboard compatibility | E-ATX / ATX / mATX / ITX / SSI-EEB / SSI-CEB |
| Power supply type | ATX |
| PSU max length | 230 mm |
| GPU max length | 461 mm total, 423 mm with front fan mounted |
| CPU cooler max height | 188 mm |
| Front radiator | Up to 360/420 mm, including 360x180 mm |
| Rear radiator | Up to 120/140 mm |
| Bottom radiator | Up to 360/420 mm (458 mm max length) |
| Cable routing space | 32 mm |
| Case dimensions (LxWxH) | 544 x 242 x 530 mm |
| Case dimensions w/o feet/protrusions/screws | 525 x 242 x 495 mm |
| Net weight | 11.1 kg except for Solid (10.4 kg) and White TG (10.8 kg) |
| Package dimensions (LxWxH) | 640 x 343 x 674 mm |
| Gross weight | 13.7 kg except for Solid (13 kg) and White TG (13.4 kg) |
Packing Box
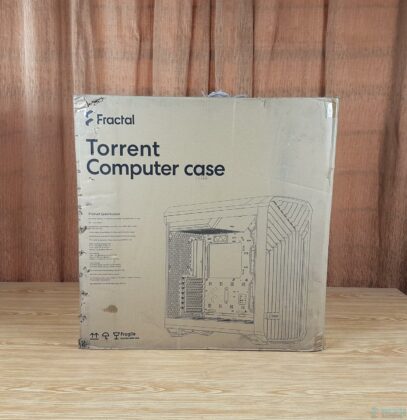
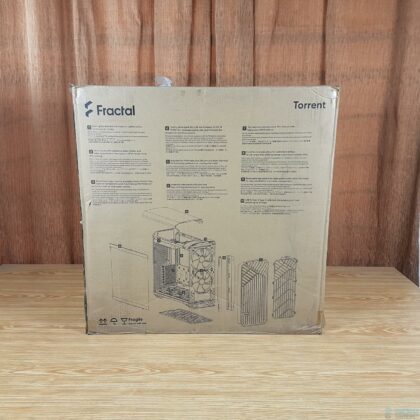
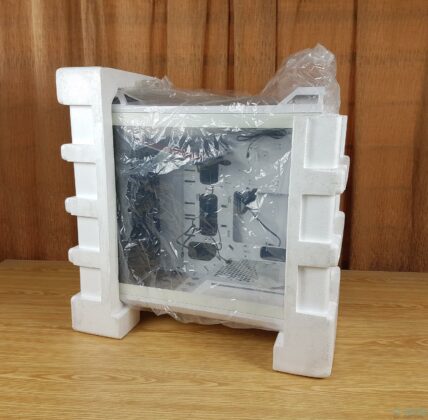
This case is shipped inside a brown color cardboard packing box.
Design
Prioritizing peak performance, I chose Fractal’s Torrent PC case for optimal airflow and compatibility with large cooling solutions. It features a top-mounted PSU compartment, full E-ATX/SSI-EEB support, and accommodates two 180 x 38 mm fans and three pre-installed 140 mm fans. With dimensions of 544x242x530mm and a net weight of 10.8 kg, the Torrent is built with durable materials—steel, tempered glass, and plastic.
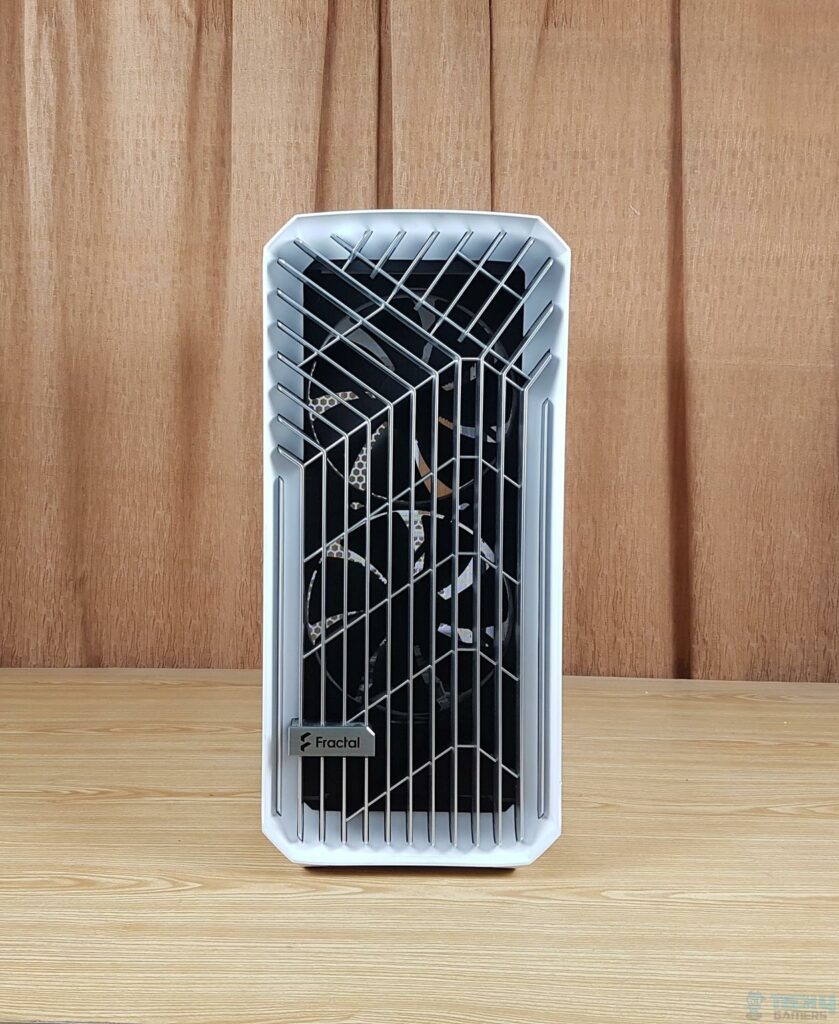
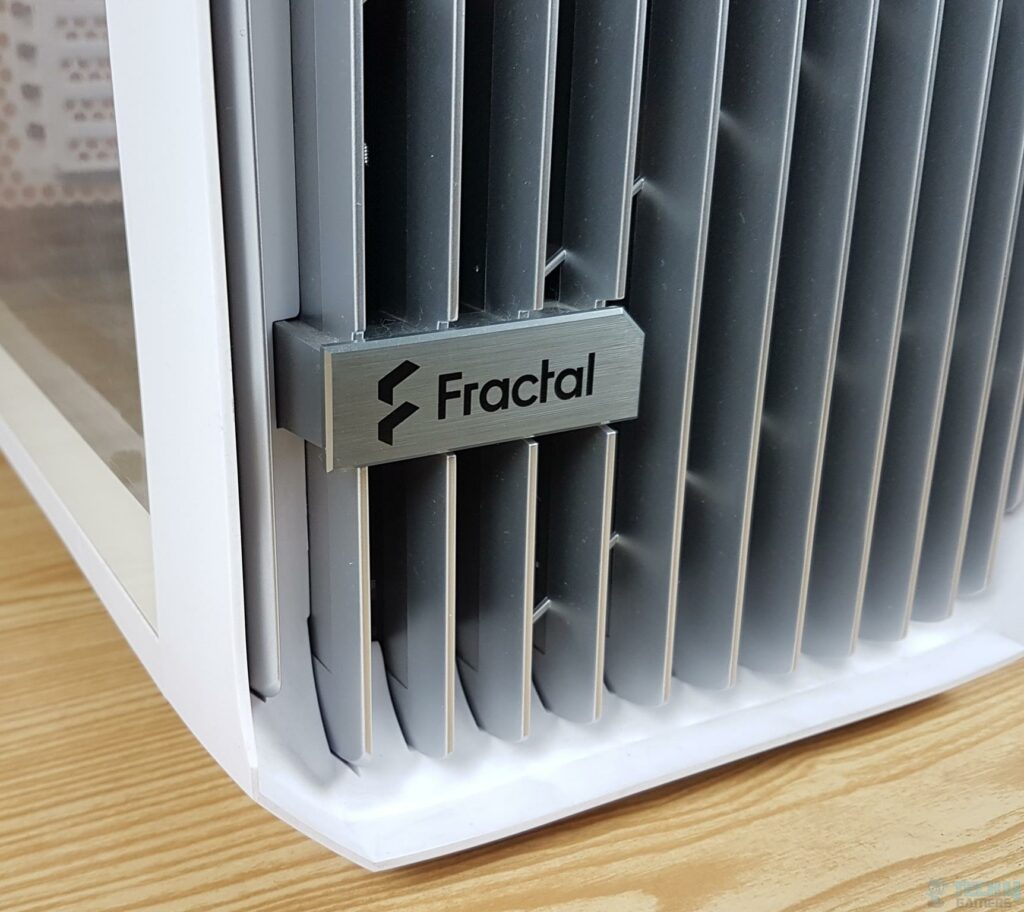
The Y-shaped grill is made of aluminum material in a silver color. Fractal Design has done an excellent job integrating this grille inside a white color plastic frame. We can see that there can be two fans behind this beautiful front panel. We have a brushed aluminum plate with Fractal Design branding over the top, giving a nice look to the front.
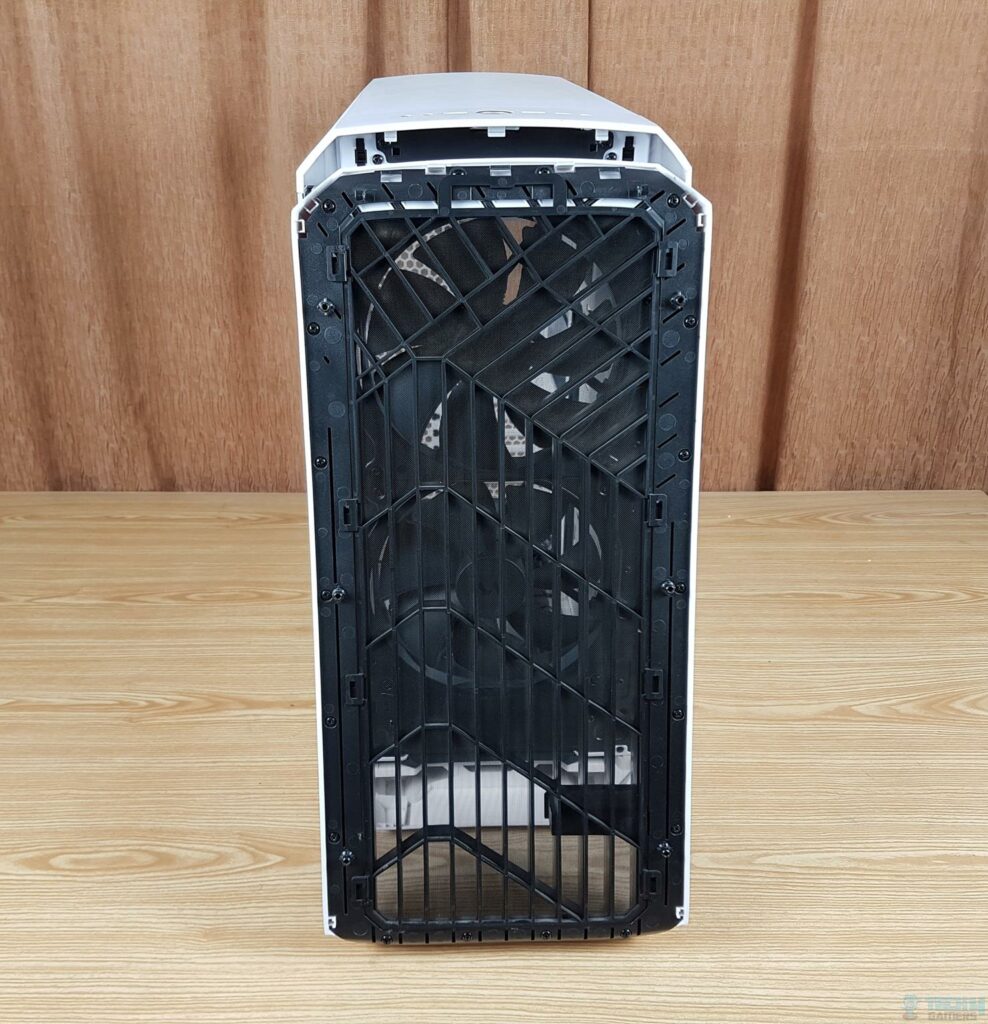
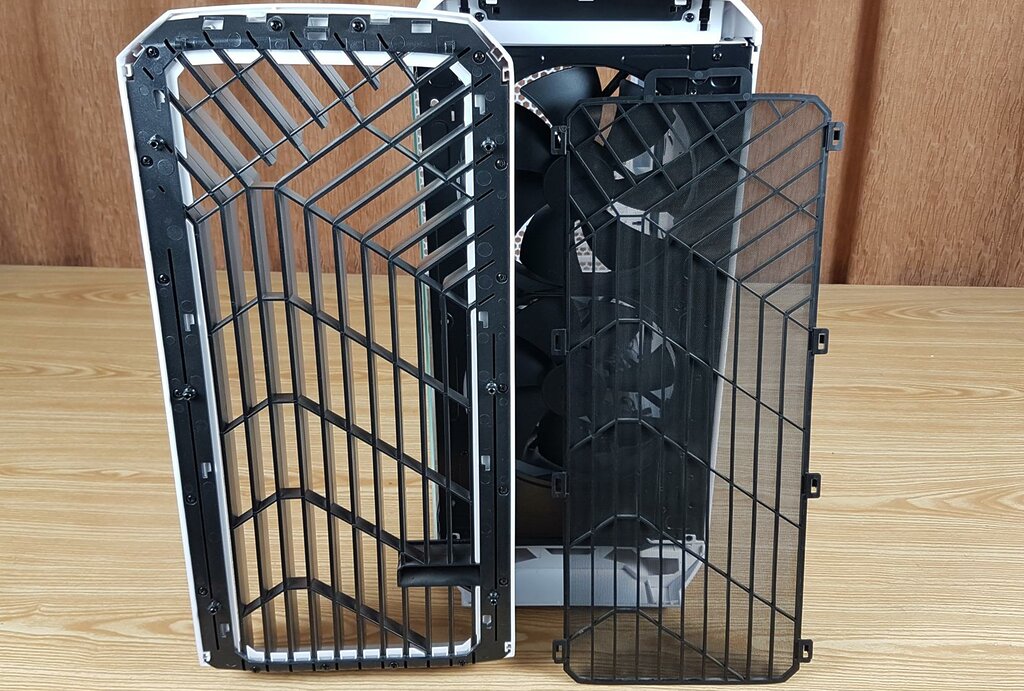
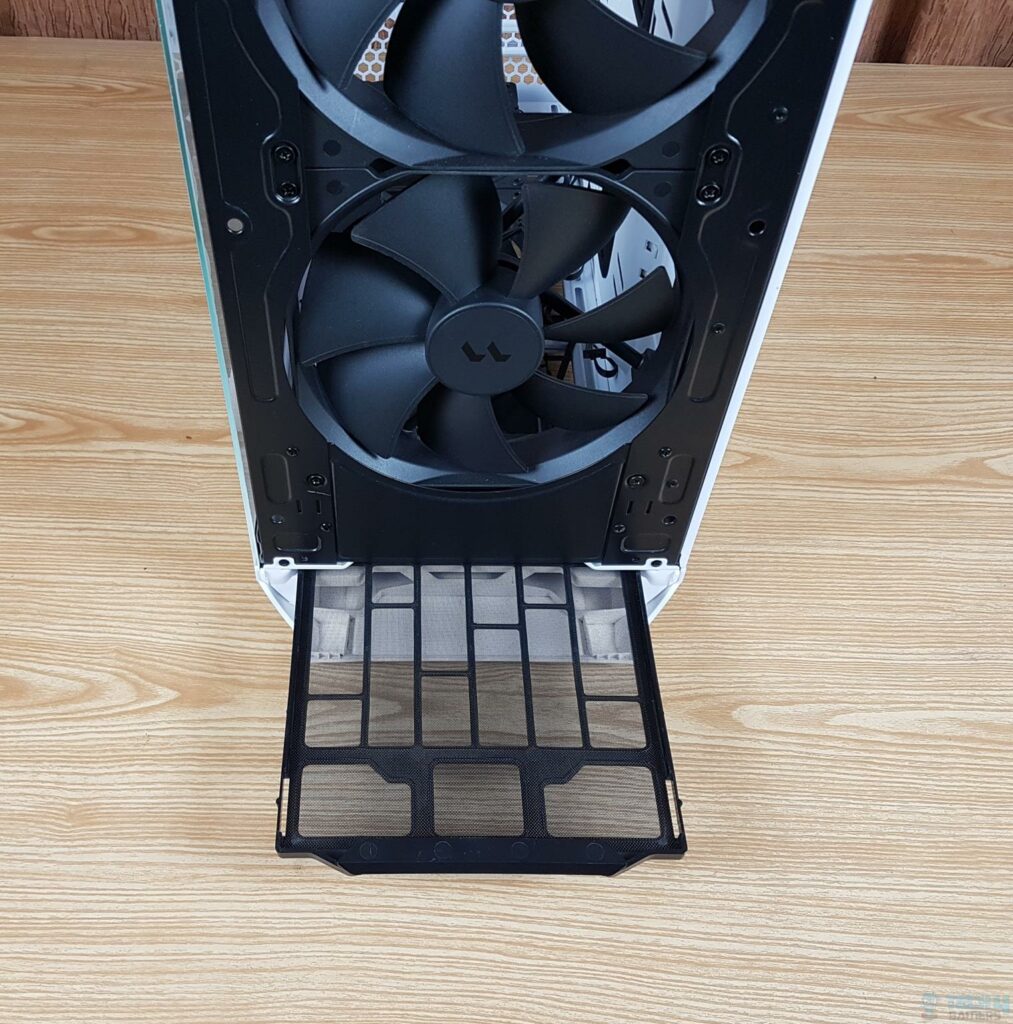
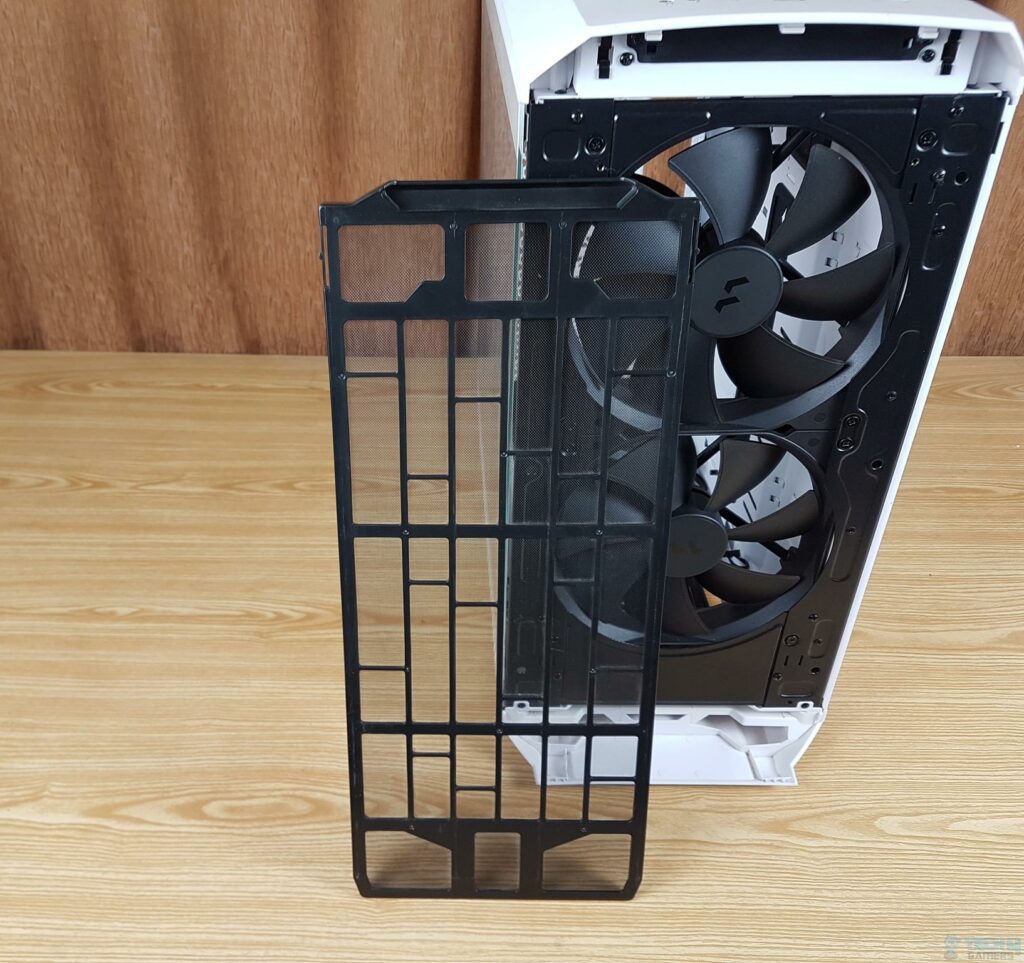
How good is that! The above picture shows the backside of the front panel. Notice a dust filter covering the entire front panel. Its removal is even easier. There is a catcher up top. Gently slide it upward. This will release the dust filter; now, you can pop it out. The front griller can also be removed by undoing the black color screws.
The above picture shows the dust filter and front panel side by side. This is not a magnetic attachment. Dust filters can be cleaned and washed easily. Now, we can gaze at the unrestricted airflow design on the front panel.
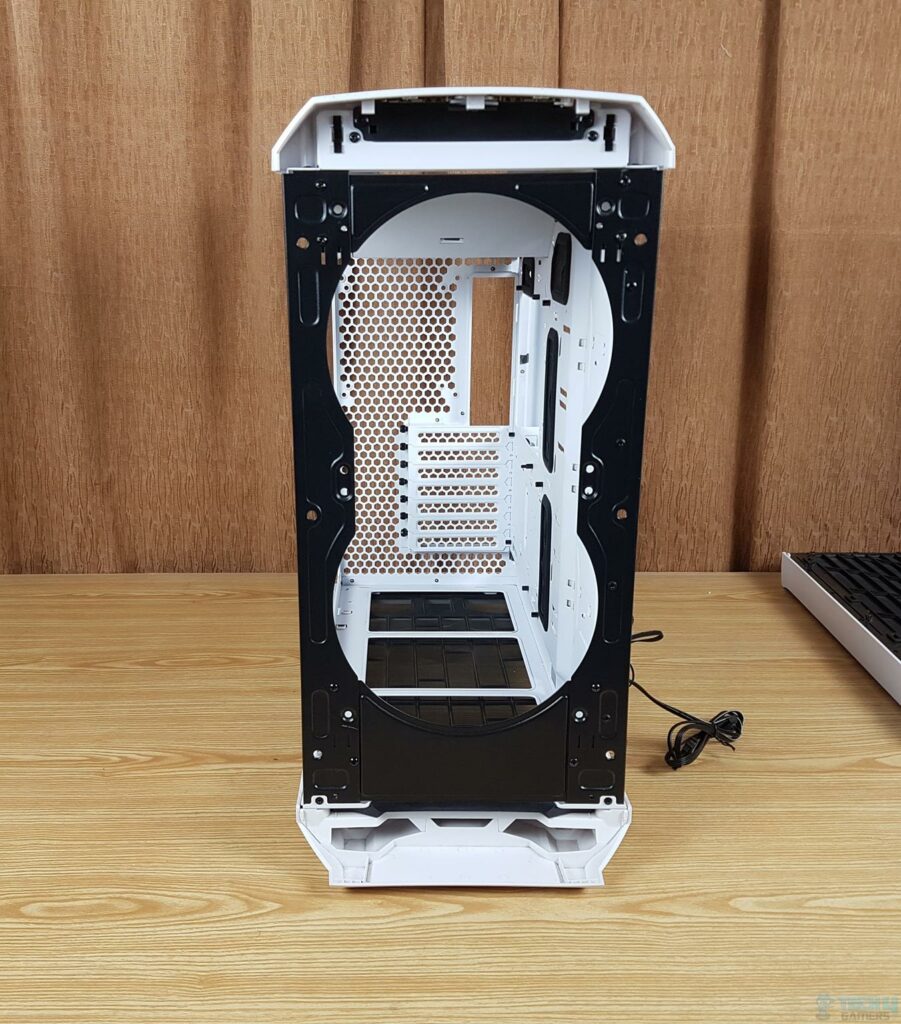
Behold two 180mm fans up front. If you are wondering what is so special? These fans are custom-designed and 180mm in size. They have a thickness of 38mm, not just 25mm. These are designed to generate and sustain a high amount of airflow.
Man, I love it. Taking out the front panel is simply a convenient job. Pull it from the top, and the complete panel will come off. This is because Fractal Design was paying attention to details. We have a hinged design, which makes installing or removing a panel easy.
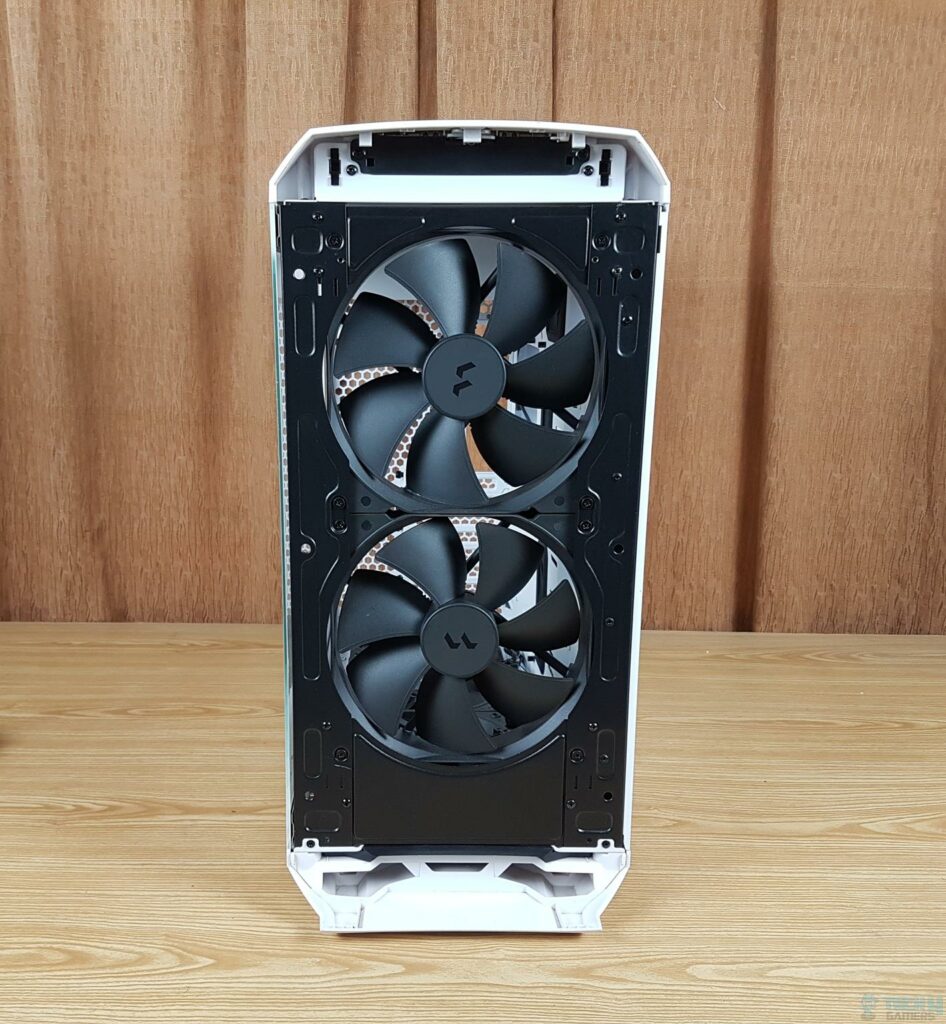
Another key note is that the panel will not completely get out as it may fall that way. It will become loose but remain attached to the main housing from the base. While we are at it, let’s take a look at their specifications:
| Size | 180x180x38mm |
| Screw Hole | 165x165mm |
| Speed | 300 to 1200 RPM |
| Noise Level | 16 to 35.4 dB(A) |
| Airflow | 44.9 to 153.7 CFM |
| Static Pressure | 0.4 to 2.26 mmH₂O |
| Input Power | 4.2W |
| Voltage | 12VDC |
| Startup Voltage | 6VDC |
| Input Current | 0.35A |
| Power Connector | 4-pin PWM |
| Service Life | 90,000 hours MTTF |
| Cable Type | Black Ribbon Cable |
| Cable Length | 1000m |
| Bearing | High-Grade LLS (Long Life Sleeve) |
Cooling Fans
The model of these fans is Dynamic X2 GP-18 PWM. The RGB edition of this case comes with PRISMA AL fans. These fans are installed using two brackets on top and bottom on the front housing. These fans are installed inside the case, not the front housing. This is why we have a concealed design on the front without any cutout for cable routing. These fans have a mounting hole pattern of 165x165mm.
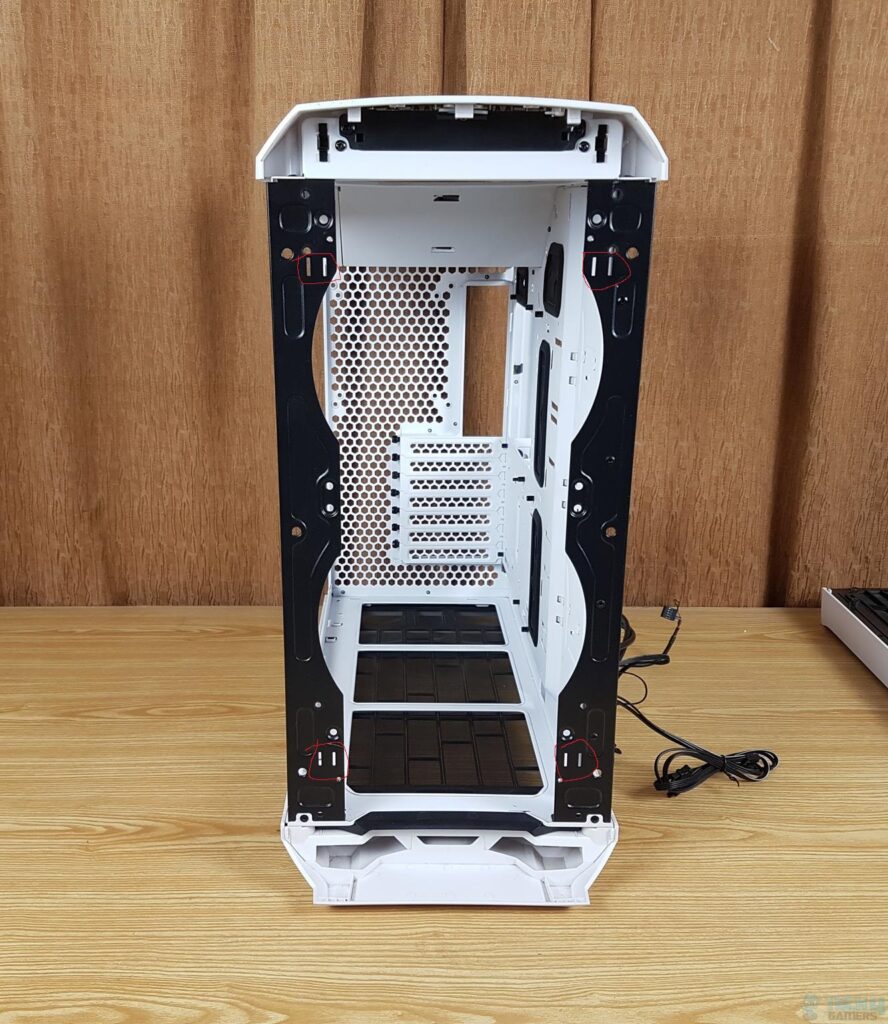
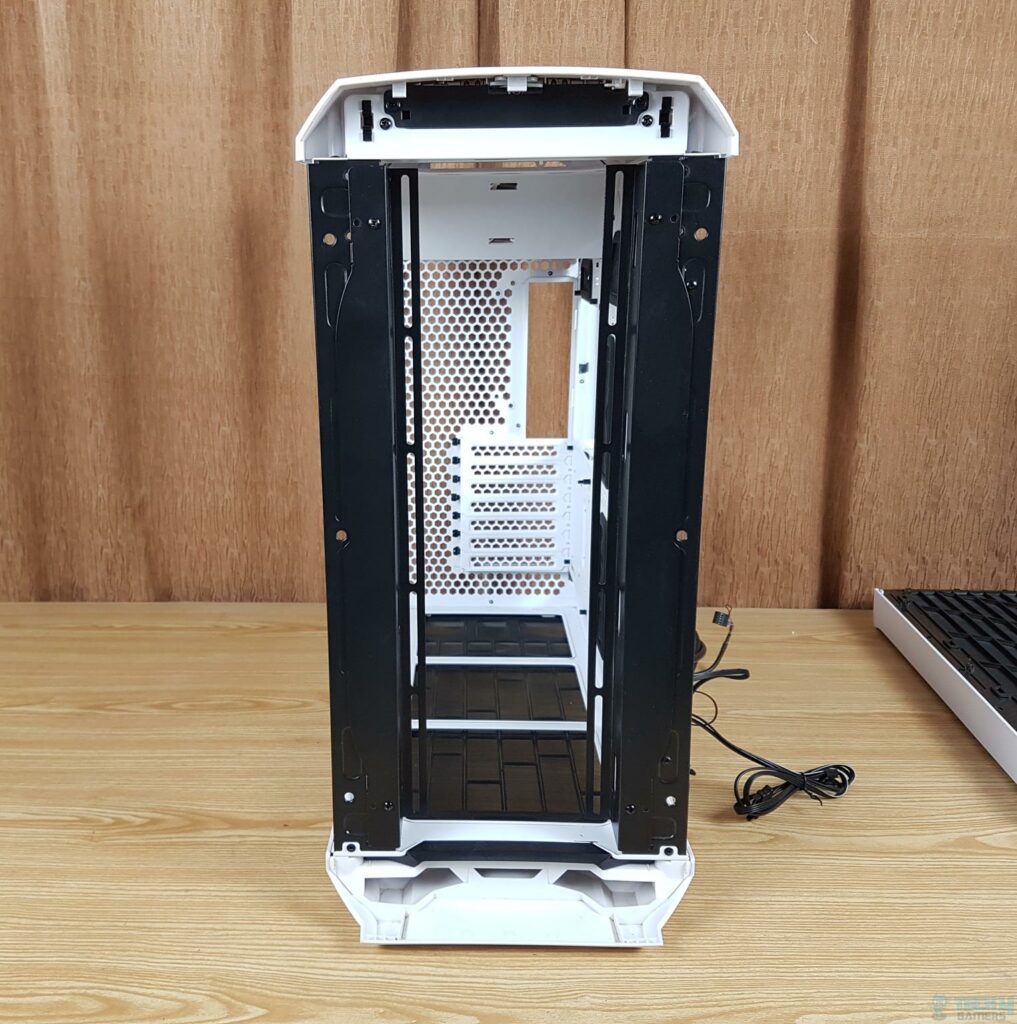
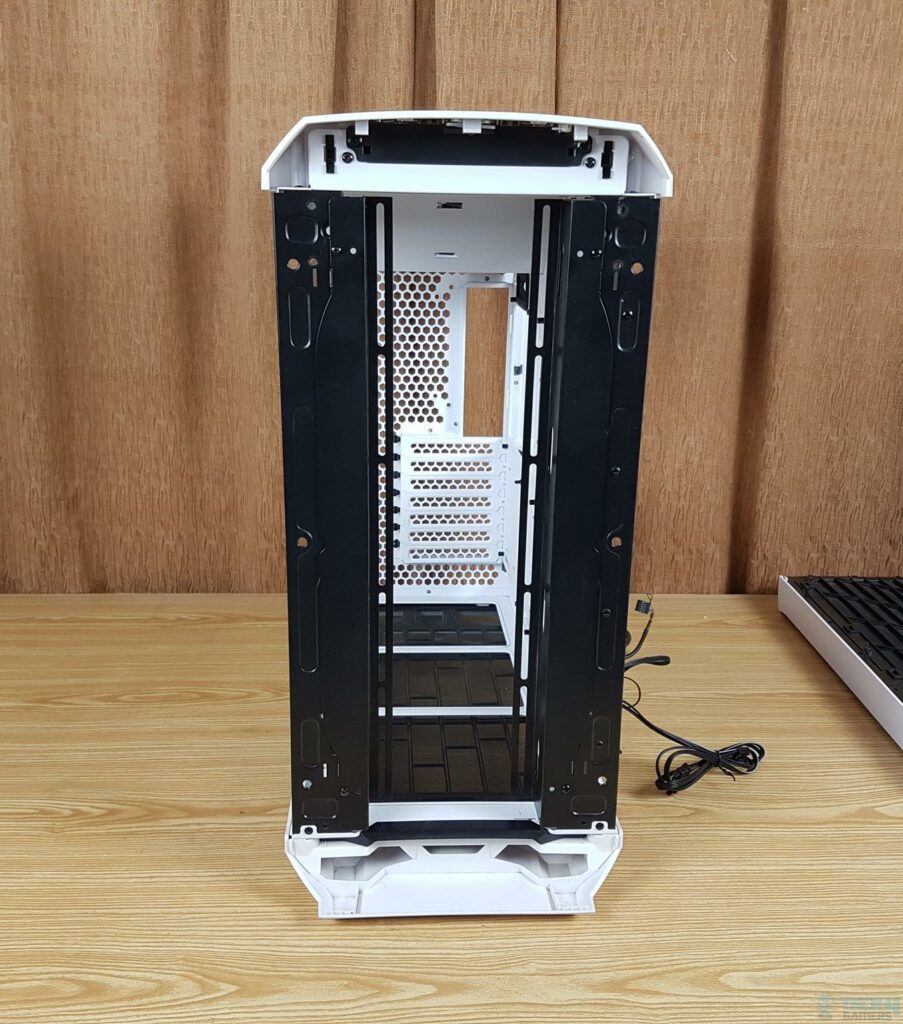
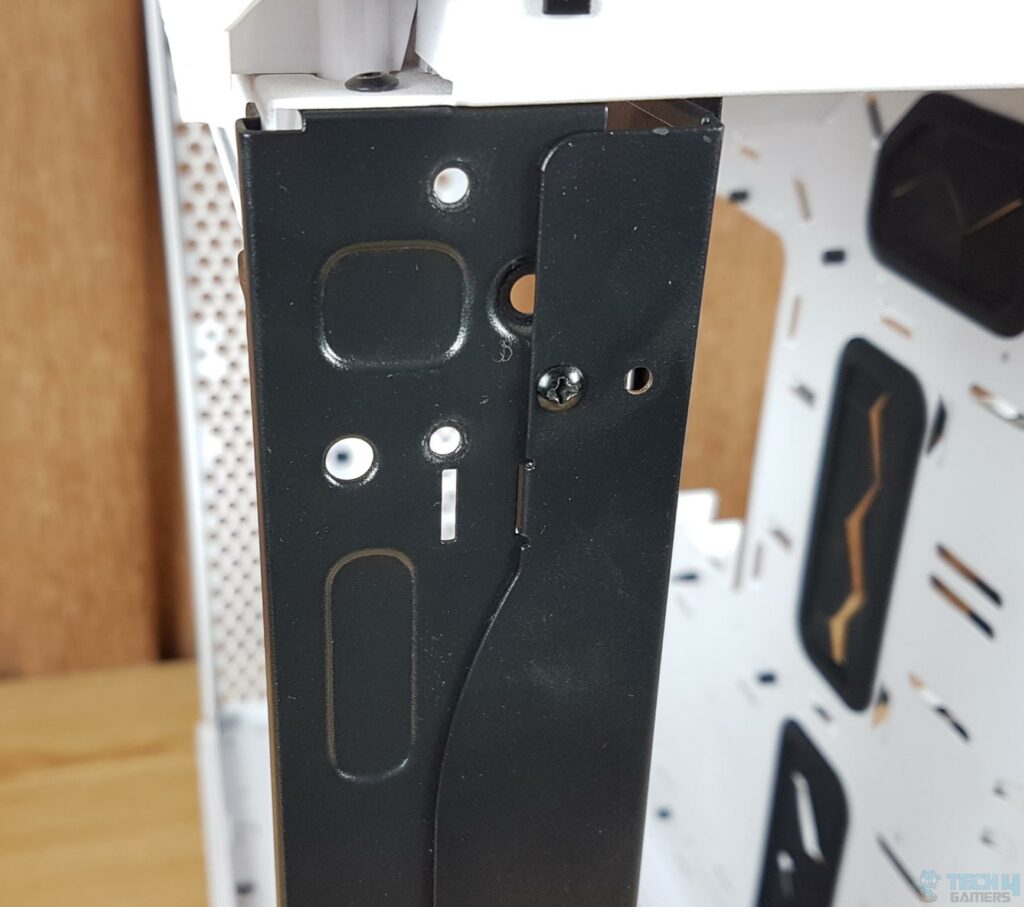
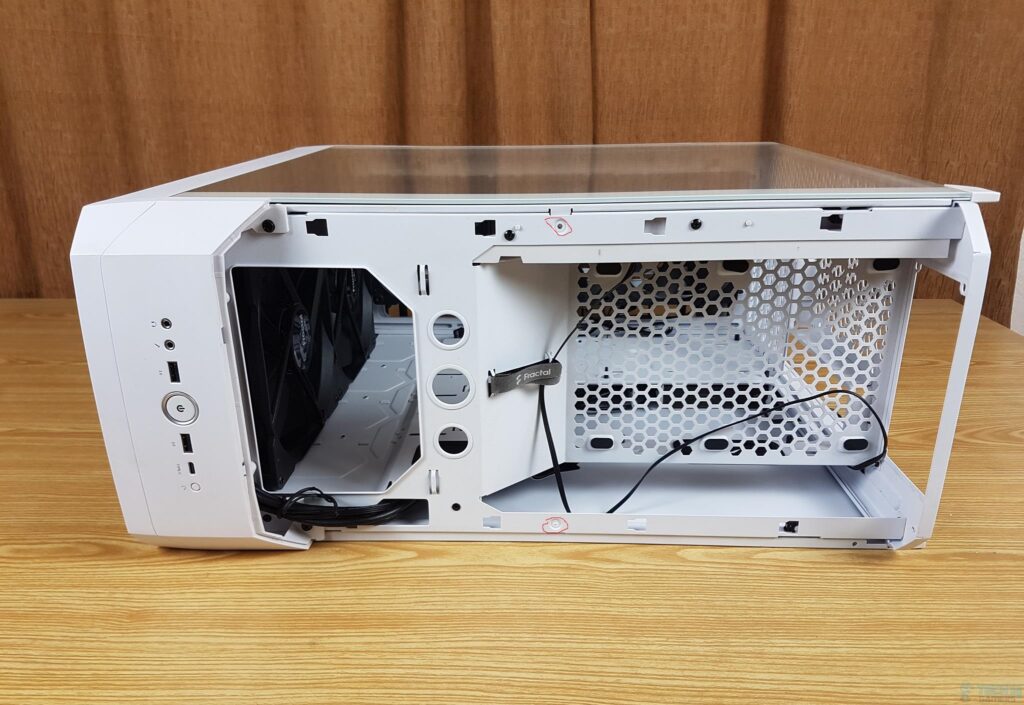
We have removed both 180mm fans by removing 8x self-tapping screws. Now, you can see the inside of the case through the front open area. We have now removed both brackets for 180mm fans. Now you can see the entire front area. We have red-circled spots in the picture. These are cutouts. These are placed with exact measurements, and they are there to catch fan brackets.
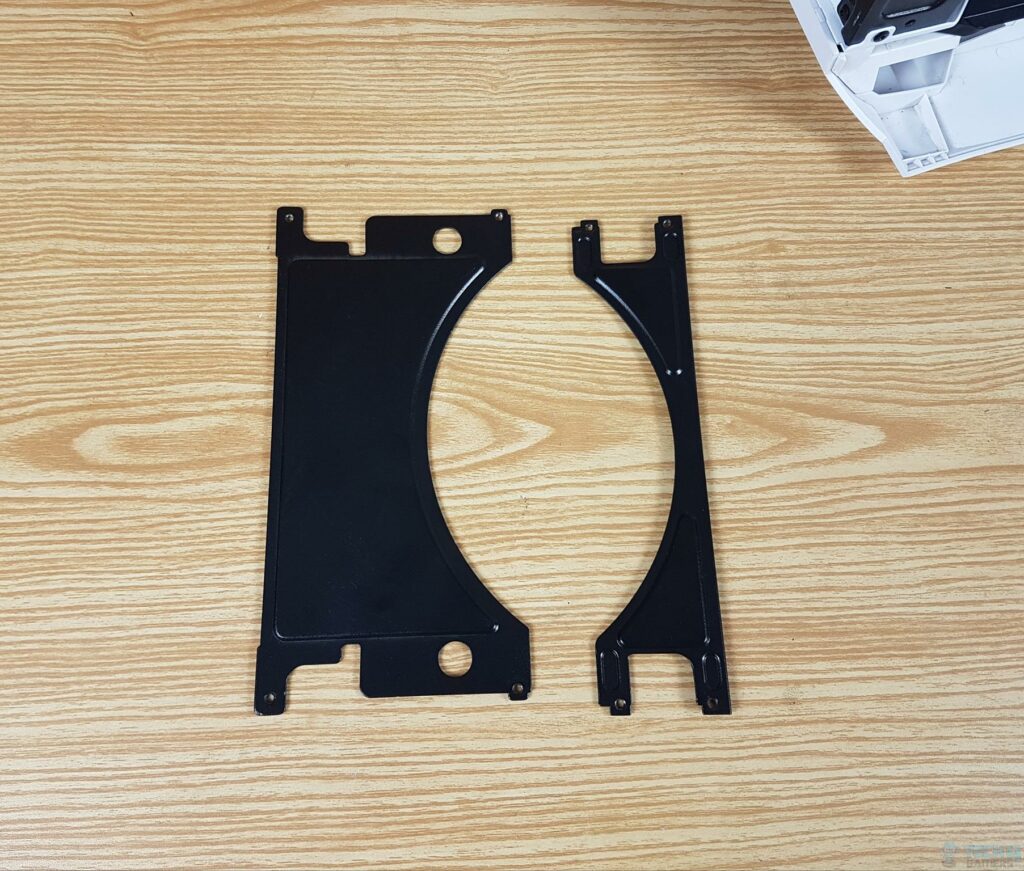
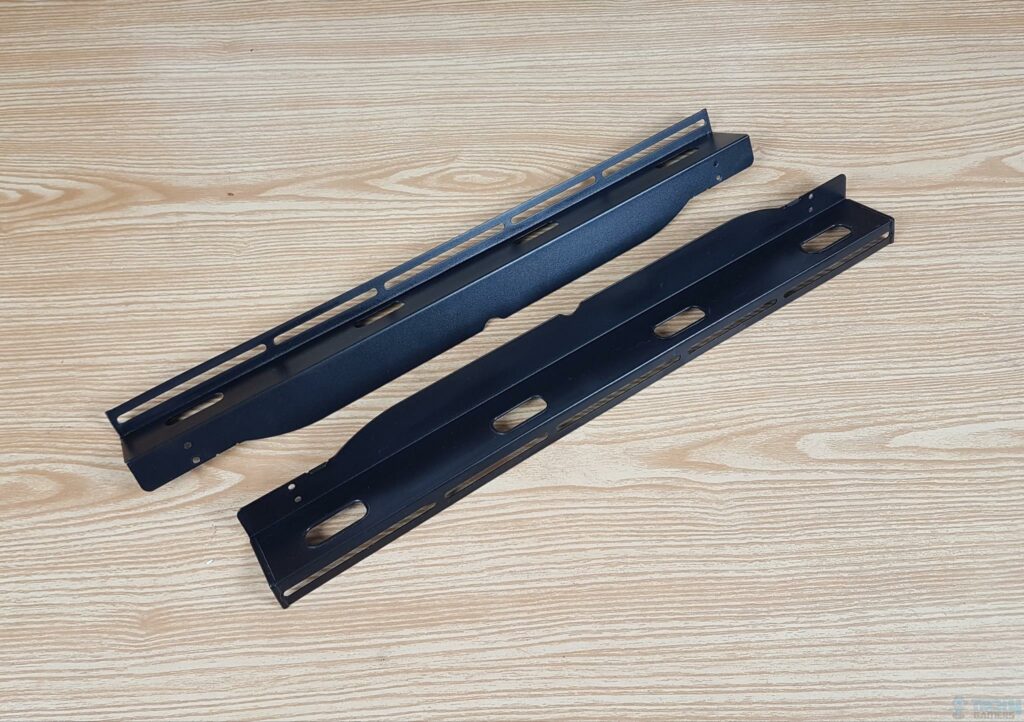
The above picture shows fan brackets for 180mm size fans. These come pre-installed and can easily be removed by undoing screws 7x screws. Wait, where am I going with all this? Remember, we mentioned fan brackets during unboxing. It is time to take a look at that box.
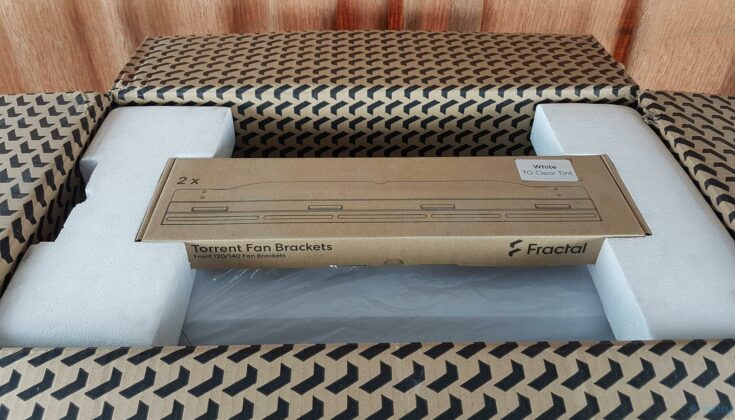
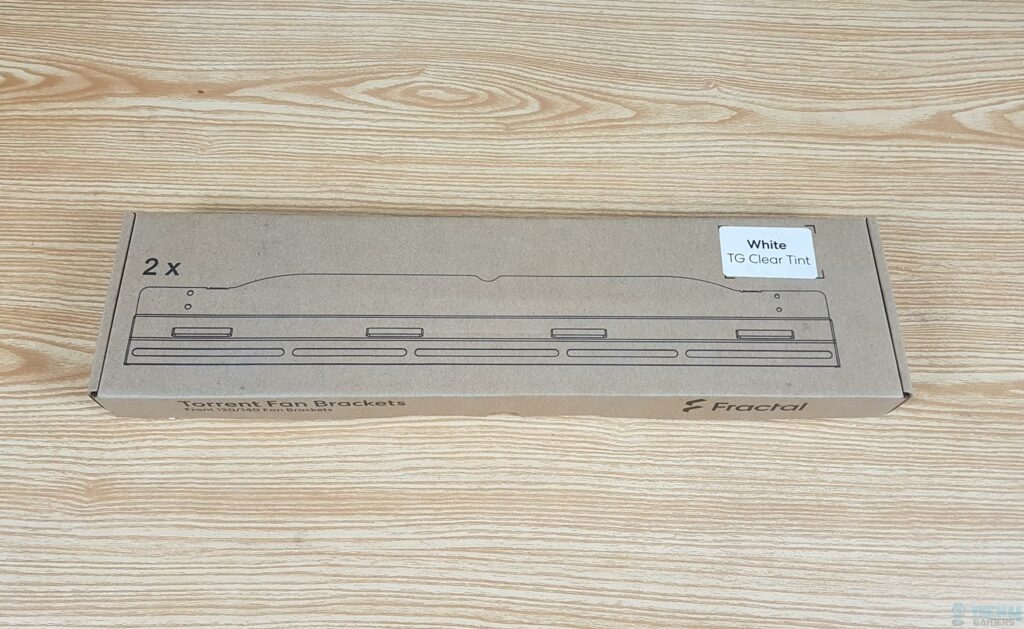
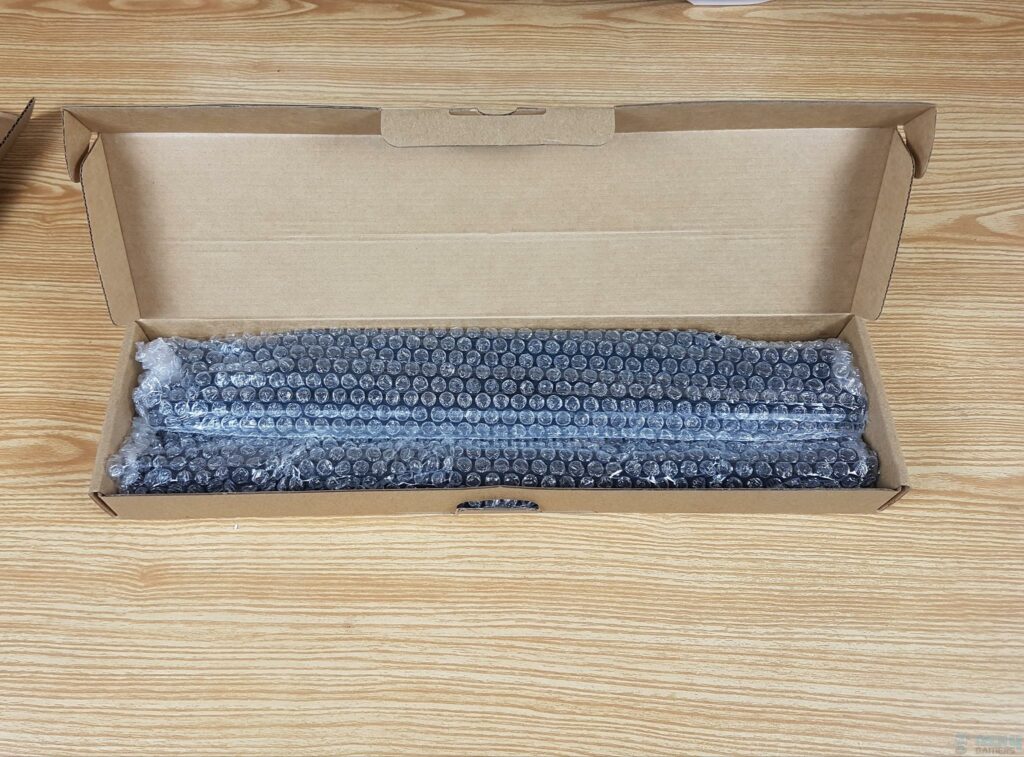
A cardboard-made accessory box is tucked between two white color pads in the main packing box. This box has fan brackets. Both brackets are placed inside a bubble sheet for further protection.
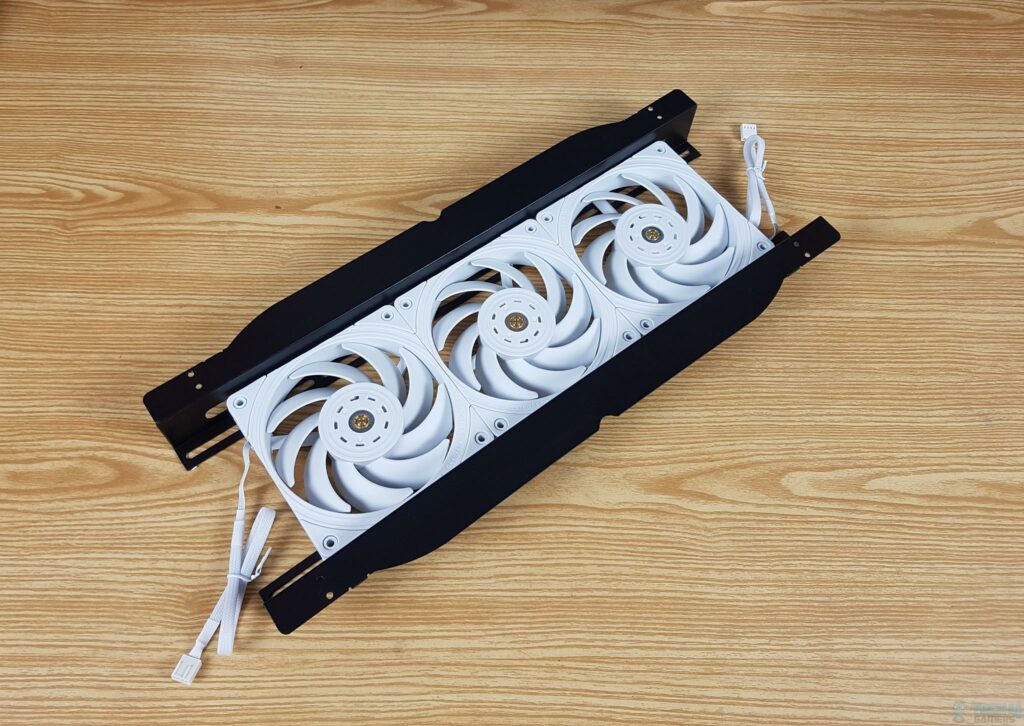
The picture below shows both fan brackets. These brackets can house 3x 120mm fans or 3x 140mm fans. These brackets are not for any other size due to their particular design and installation requirements in this case.
To show you an idea, we took 3x 120mm fans from Thermalright Frozen Magic 360 Scenic AIO and placed them inside the brackets. This is how you will see these brackets once installed in the case. The picture below shows fan brackets installed for a 140mm size fan configuration. Here is a close-up view of where brackets are installed for 140mm size fans.
The following picture shows fan brackets installed for a 120mm size fan configuration. Here is a close-up view of where brackets are installed for 120mm fans.
The idea is if you want to install 140mm size fans on the front of this case, then you would need to install fan brackets on the outermost cutouts, and if you are going with 120mm size fans, then the brackets would need to be placed in the innermost cutouts. This immediately gives away one Con. The picture below shows fan brackets installed for a 140mm size fan configuration.
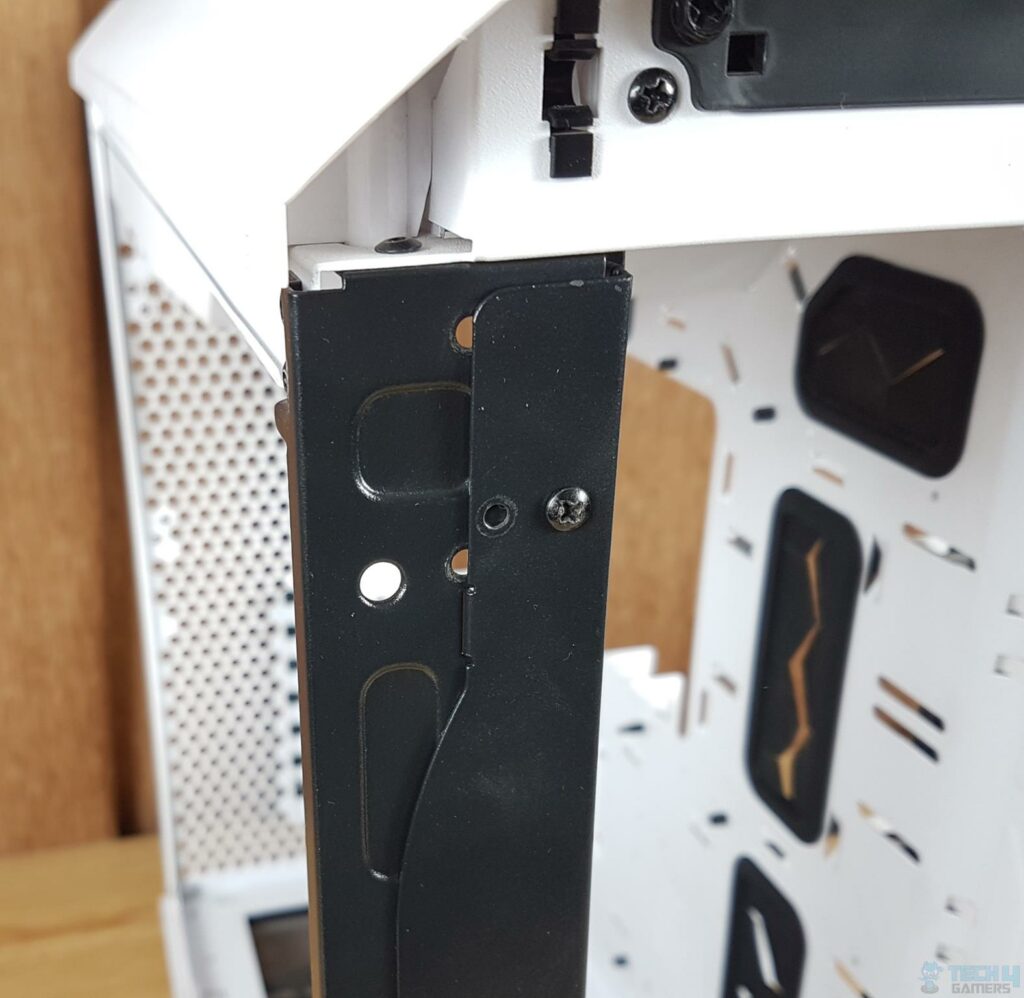
We don’t have a design where the user can install a 120mm or a 140mm fan regardless of the bracket design. These brackets have cutouts on the side to pass fans’ cables through. Fractal Design was paying attention to the design.
Cooling Provision on Front
So, what are our options for cooling items on the front?
- 2x 180mm Fans
- 3x 120mm Fans
- 3x 140mm Fans
- 1x 360mm Radiator in 180mm size
- Up to 360mm Radiator in 120mm size
- Up to 420mm Radiator in 140mm size
Push Pull configuration is also supported thanks to the spacious layout, but we will cover a few considerations down the road. There are 7x PCIe slot covers. They are removable and perforated as well.
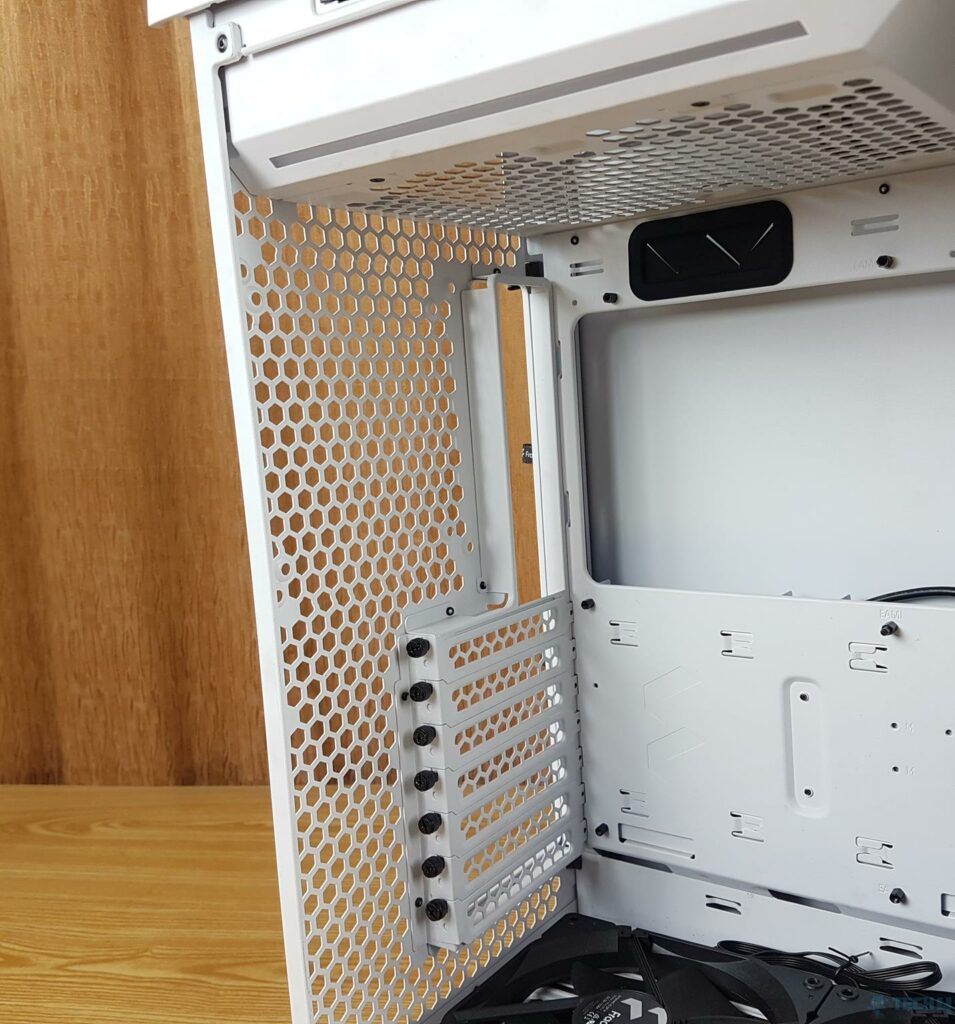
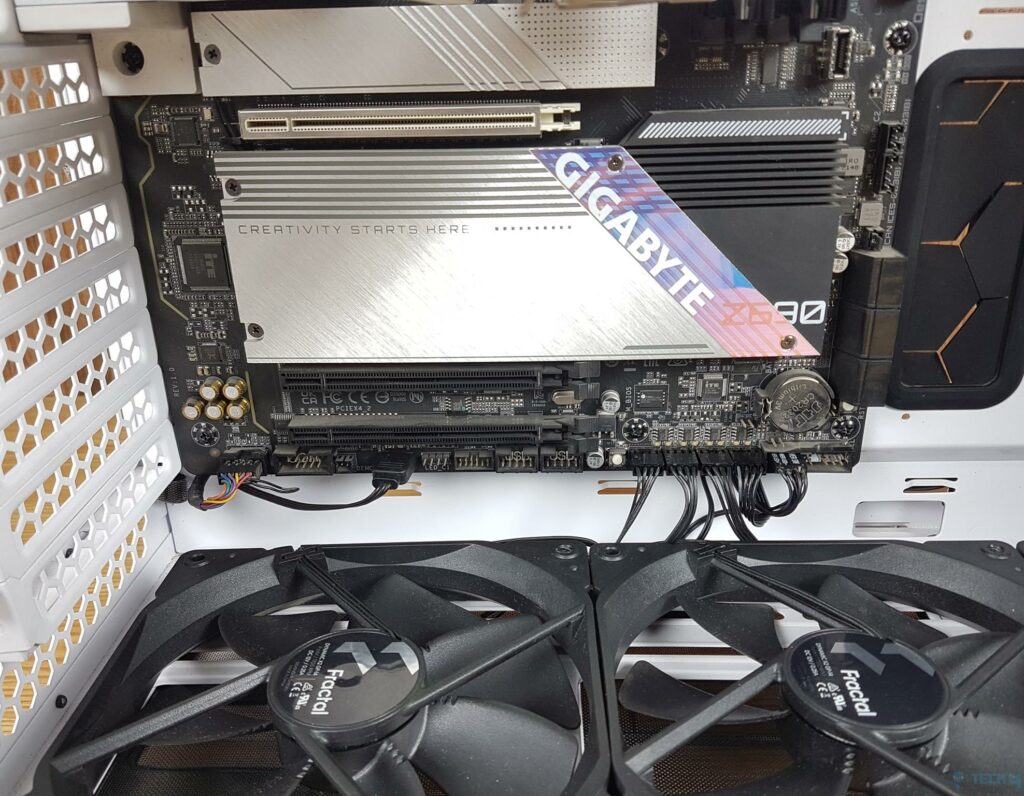
Another good design is that these slot covers are bridgeless design. This means there is no wall or frame between any two slots, as in most cases. Removing all covers would show a large-sized, open design. This makes it easier to install a vertical bracket for a graphics card.
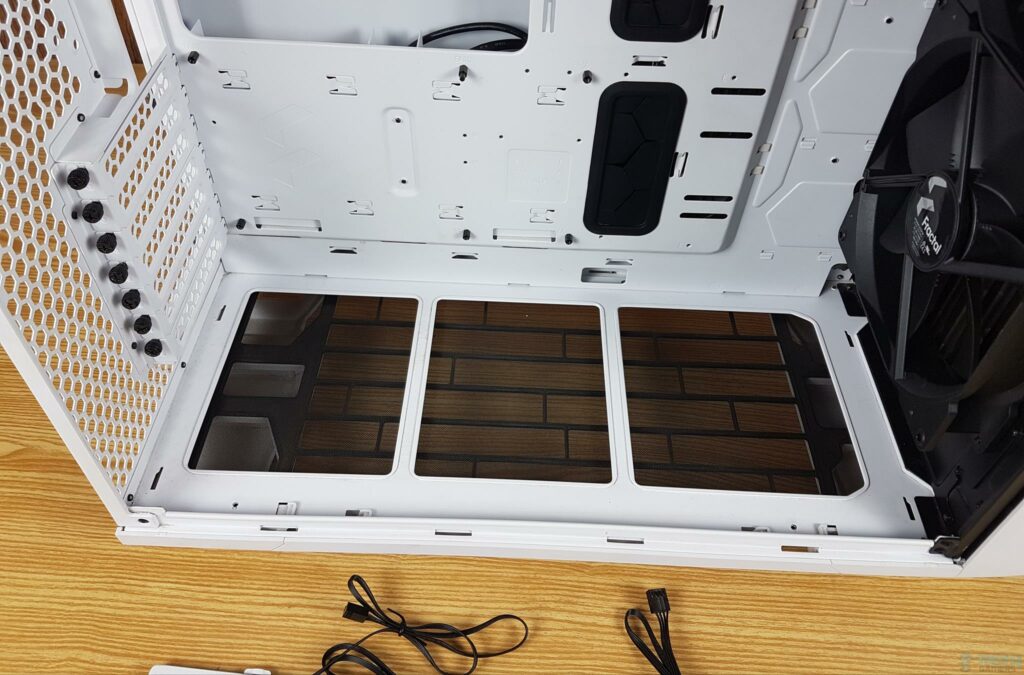
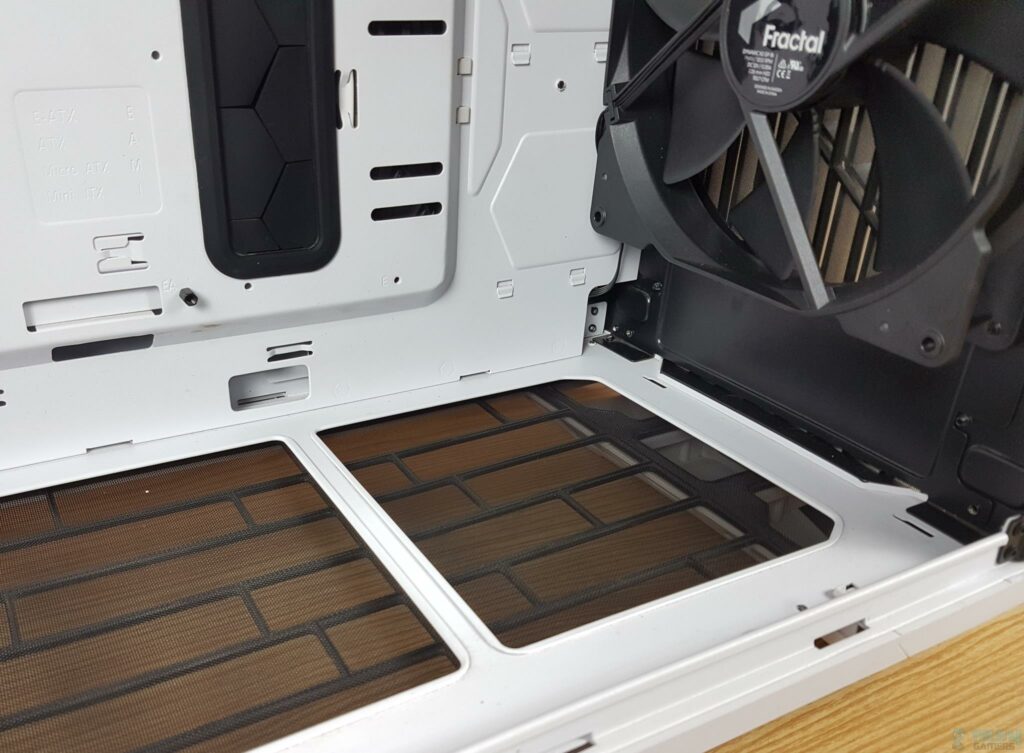
There is a single-piece, large-size dust filter on the base of this case. It can be pulled from the front, for which there is a requirement to remove the front panel. The bottom dust filter is made of nylon. It is non-magnetic and can easily be washed and cleaned.
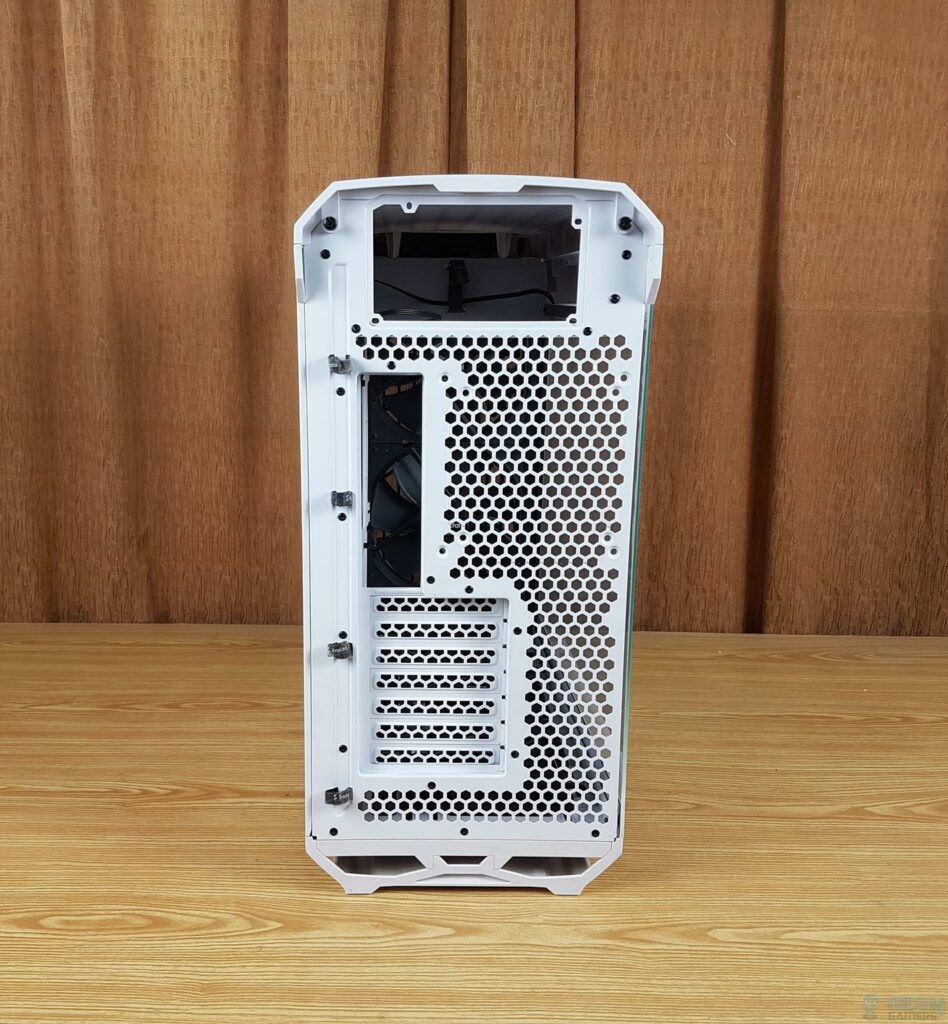
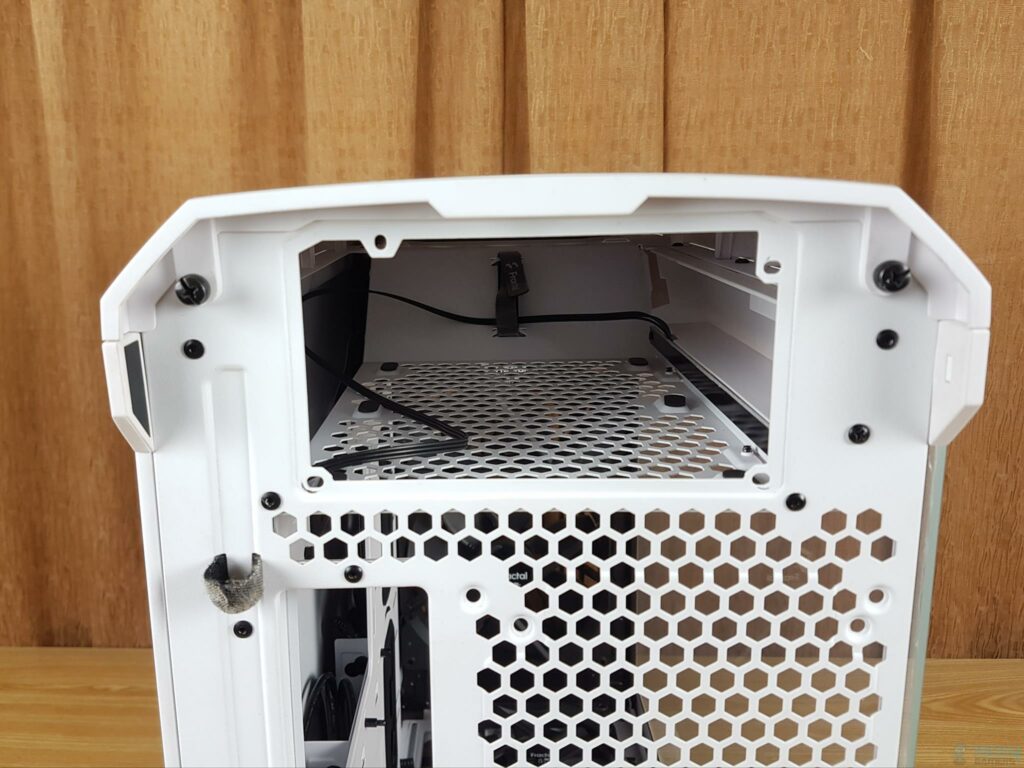
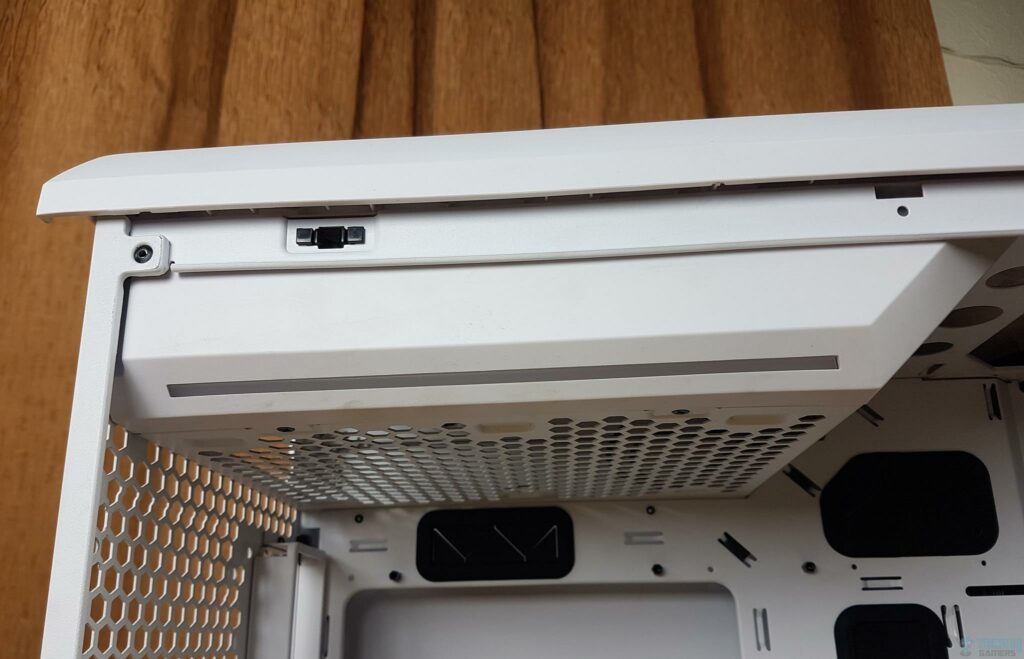
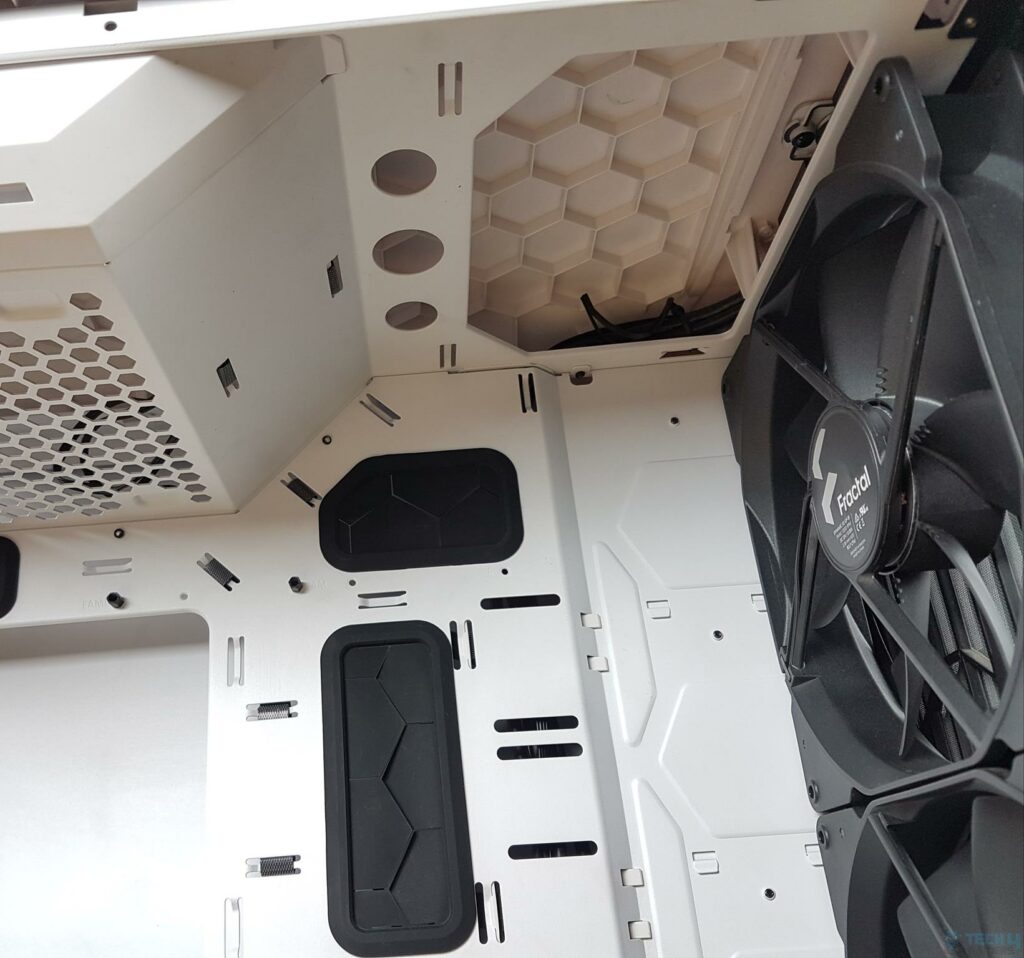
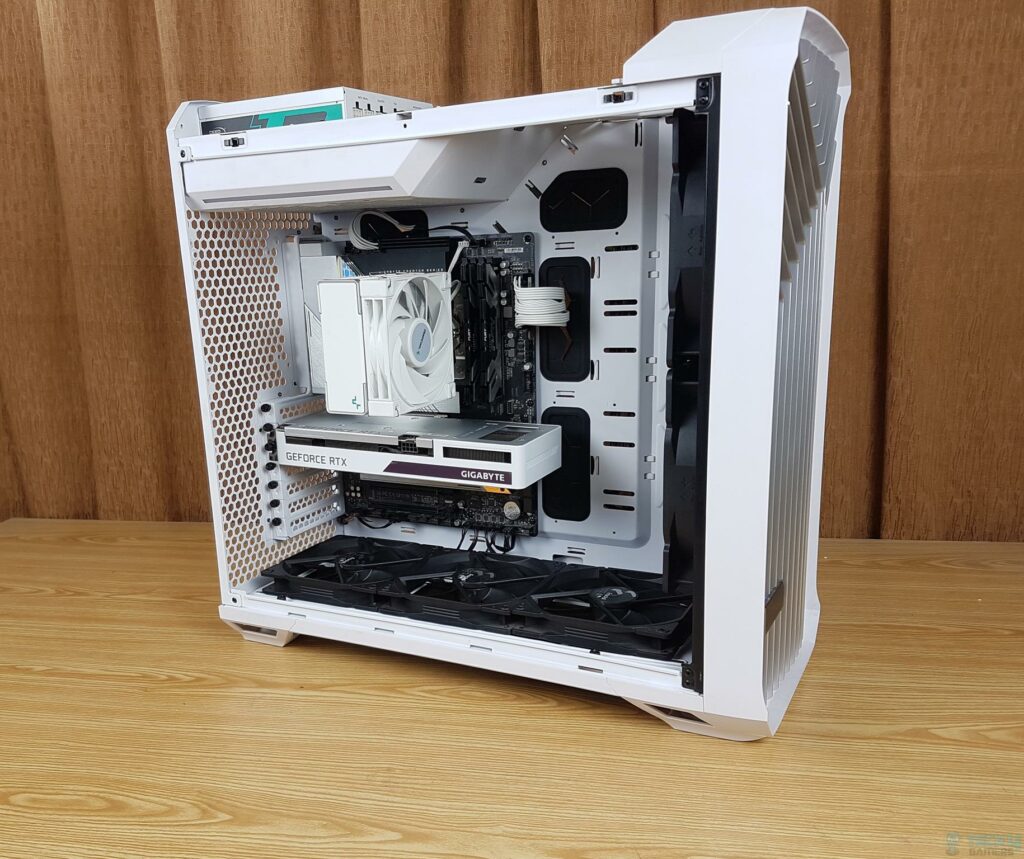
The rear view of the case features a top PSU chamber for a standard ATX-size PSU and a perforated honeycomb design for optimal airflow. It includes mounting holes for a 120mm and a 140mm fan, though none are pre-installed. The top cover, made of plastic, is secured with two captive thumb screws. The open grille pattern aims to facilitate efficient air exhaust without obstruction.
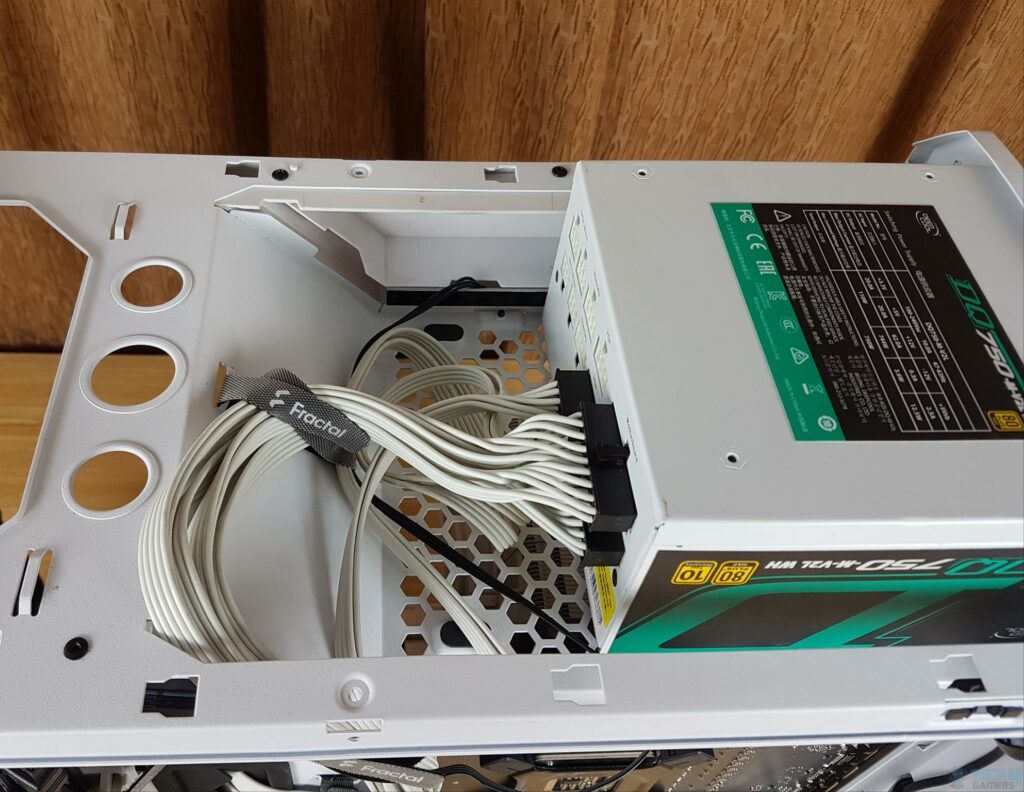
The top-mounted PSU requires the power cord to cover more distance, which is addressed by 4 Velcro Strips for cable management. A removable white plastic cover, secured with two screws, reveals a large cutout and three circular openings for reservoir access. Red-circled mounting holes allow securing a glass panel for added protection during shipping. Note the solid side panel requires inconvenient side-mounted screwing. The PSU bay has a perforated base with six anti-vibration pads. A large Velcro strip facilitates cable routing.
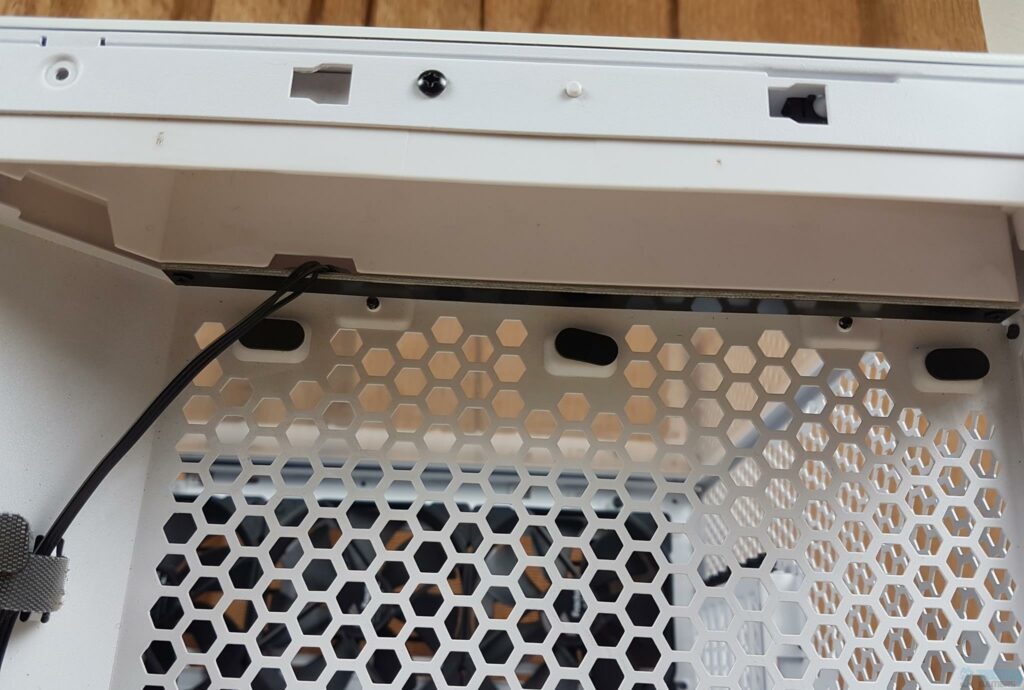
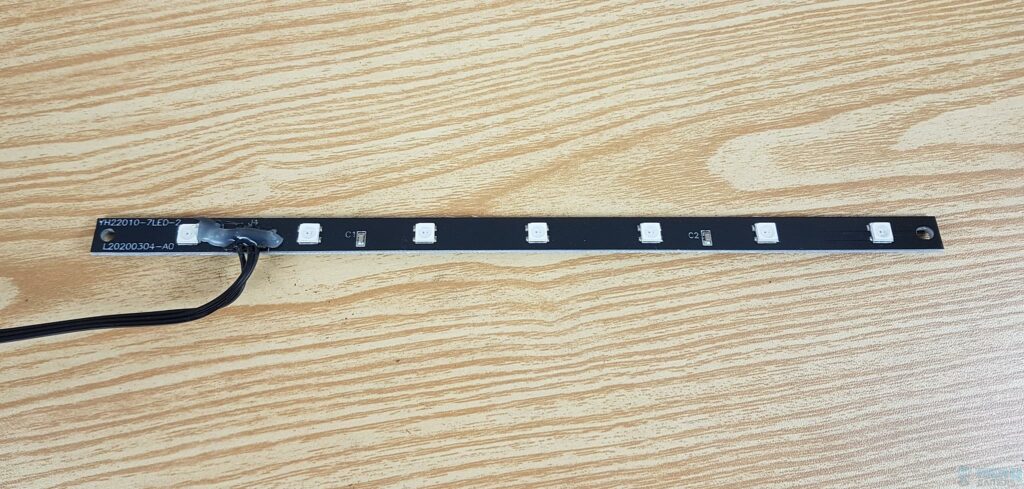
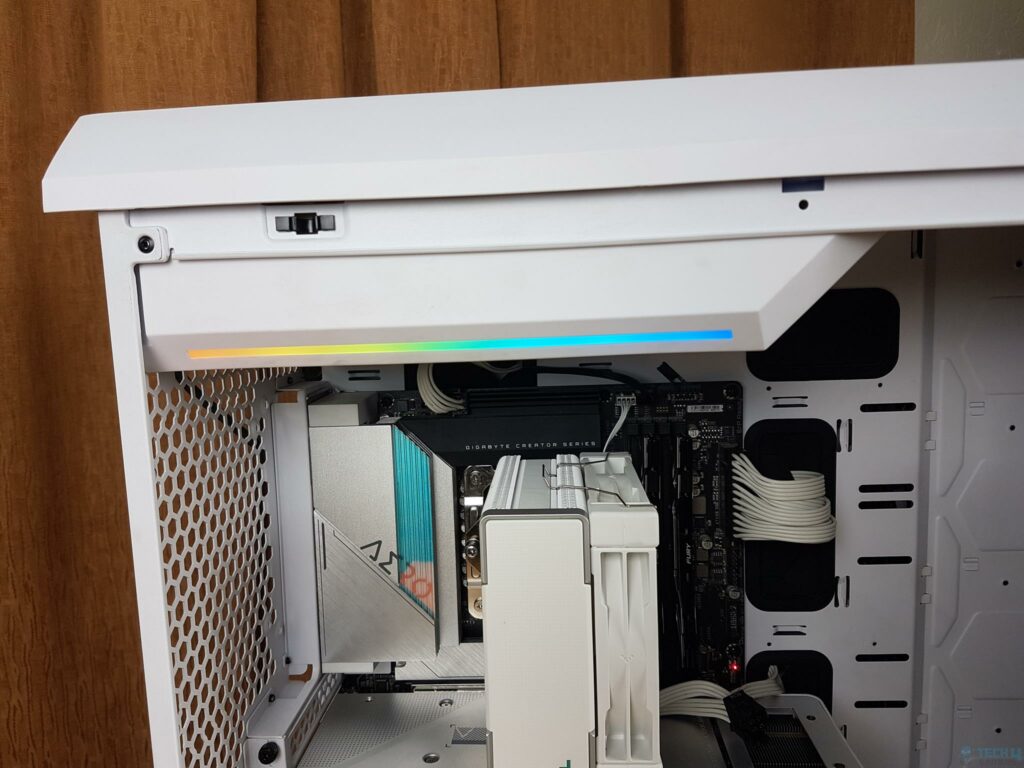
A digital RGB LED strip is pre-installed in the PSU chamber. It is powered by a standard 3-pin, 5V connector for which your motherboard must have a supported header. These LEDs face the diffuser towards the inner side of the PC Case. It will give a very subtle look. There are 7x digital RGB LEDs on this strip.
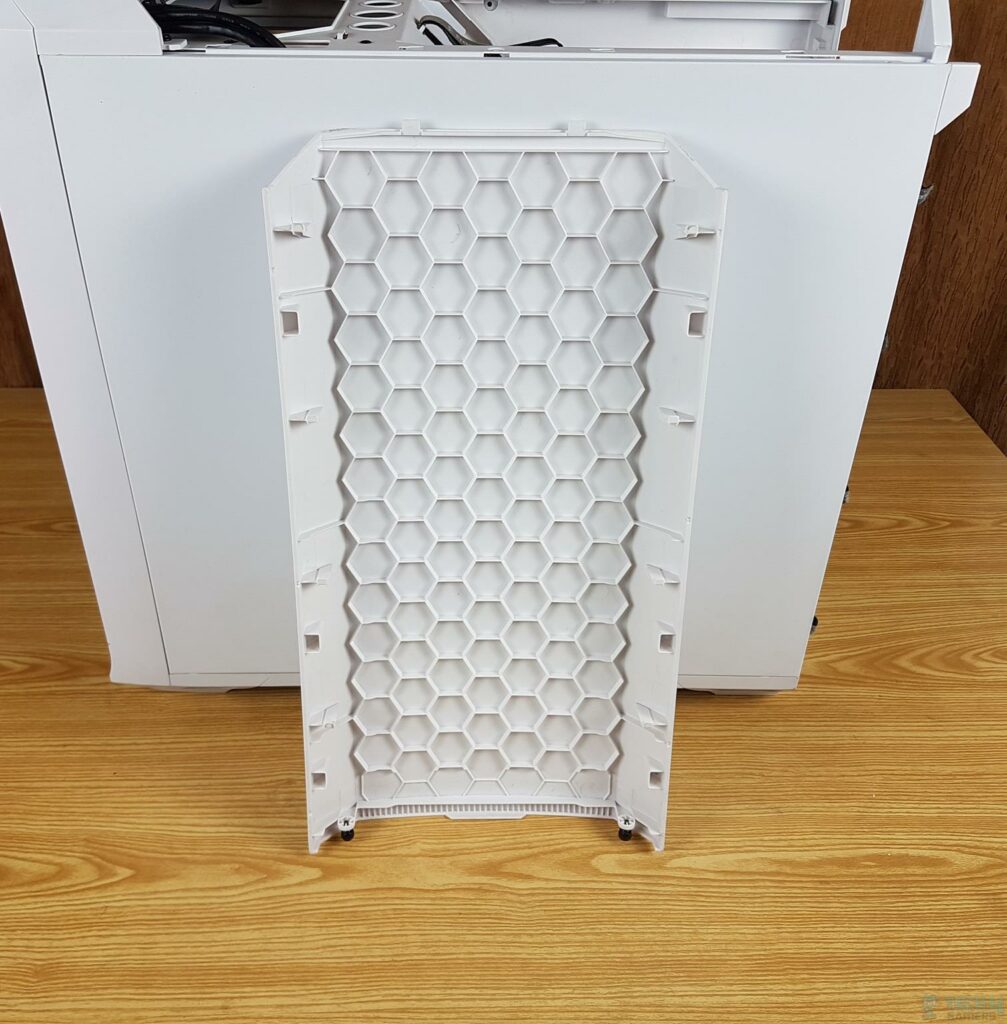
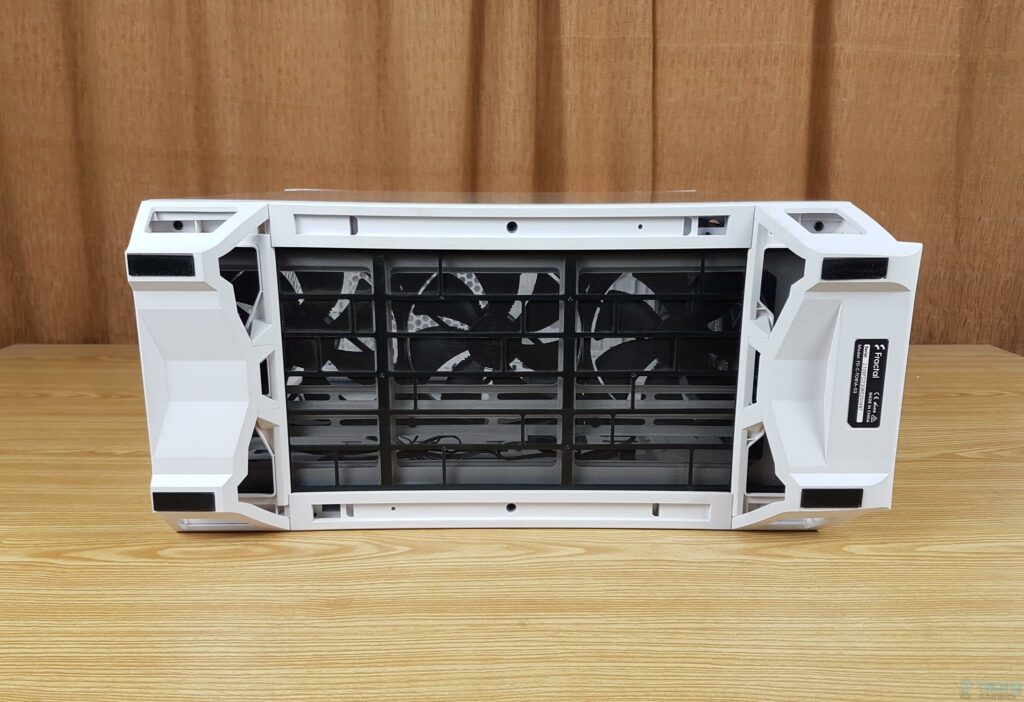
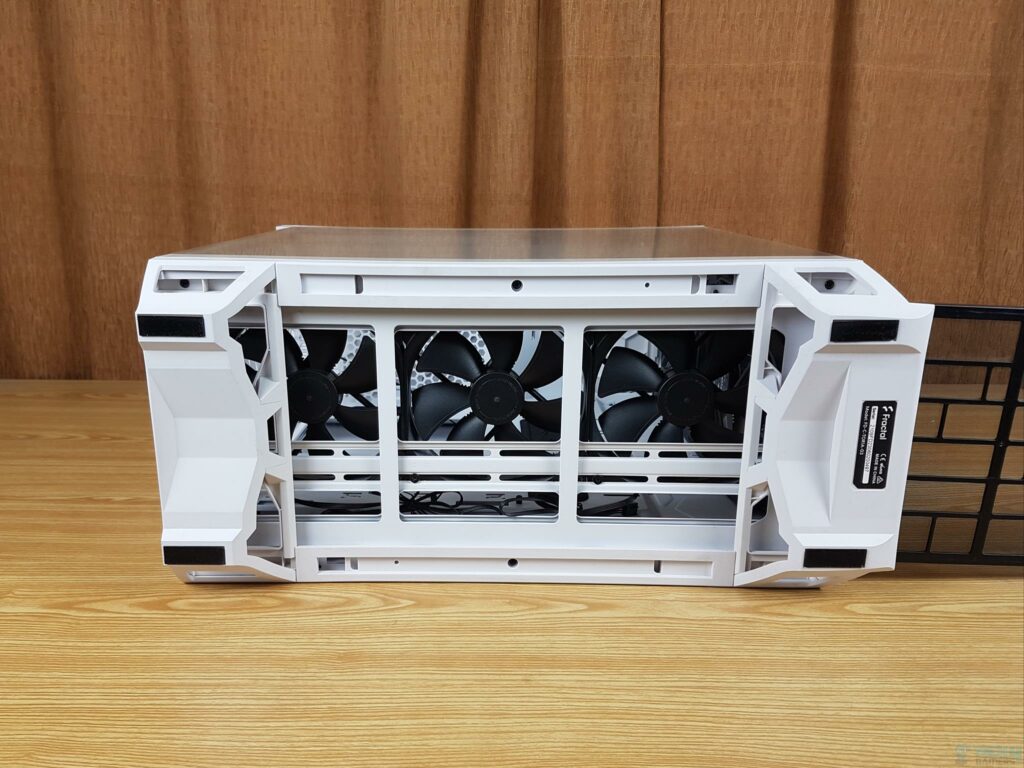
The plastic panel has a honeycomb pattern on the inner side. Looking at the bottom or base of the case from the outside, we can spot two handles having anti-slip feet on each end. These serve as feet of this case and prevent it from slipping and scratching the surface. There is a full-length dust filter. A serial number sticker is pasted toward the front as well. These feet are removable.
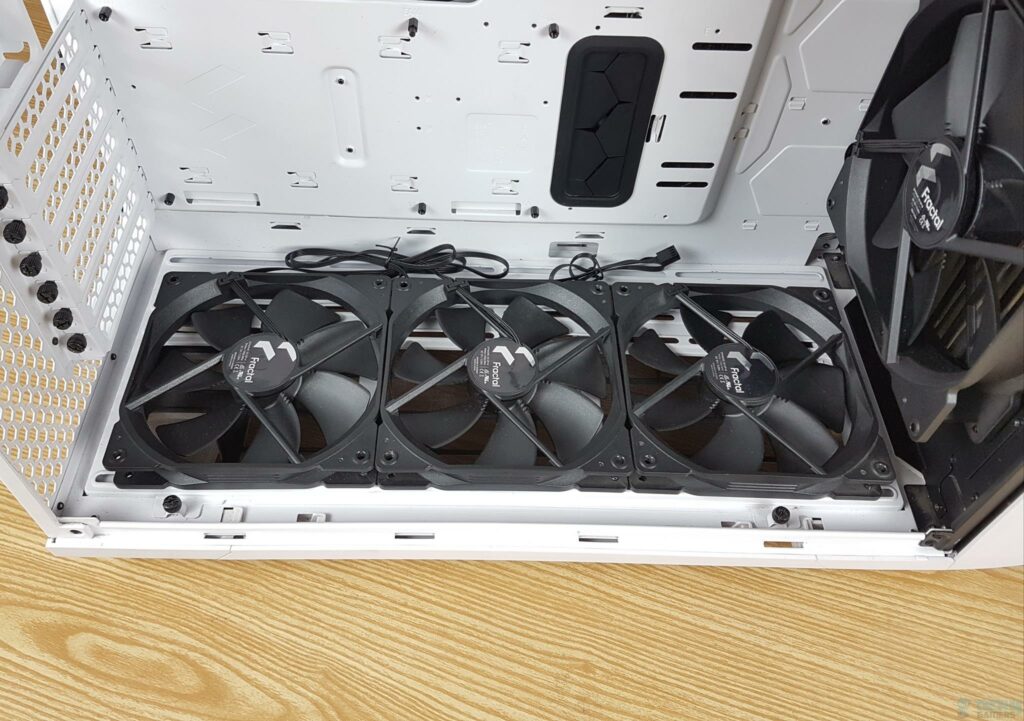
Now, we can see the fan bracket installed at the base of this case. We can see 3x 140mm fans, which are pre-installed. There are insets on the main frame at the top and base where users can install additional digital RGB strips.
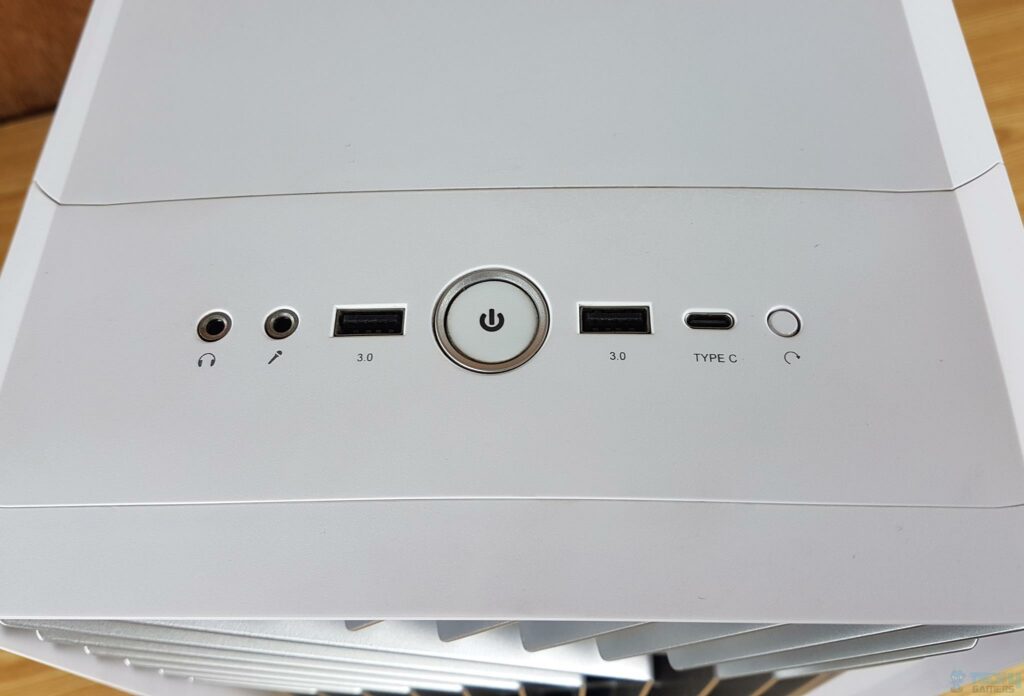
The I/O panel is located on the top side of this case towards the front area. Two Audio jacks, one USB Gen2 Type-C port, Power and Reset buttons, and 2 USB 3.0 ports are provided.
Side Panel Provisions
Now that we have almost covered the exterior of this case, including the possible details of the front and top areas, it is time to look at the central area of interest inside this case.
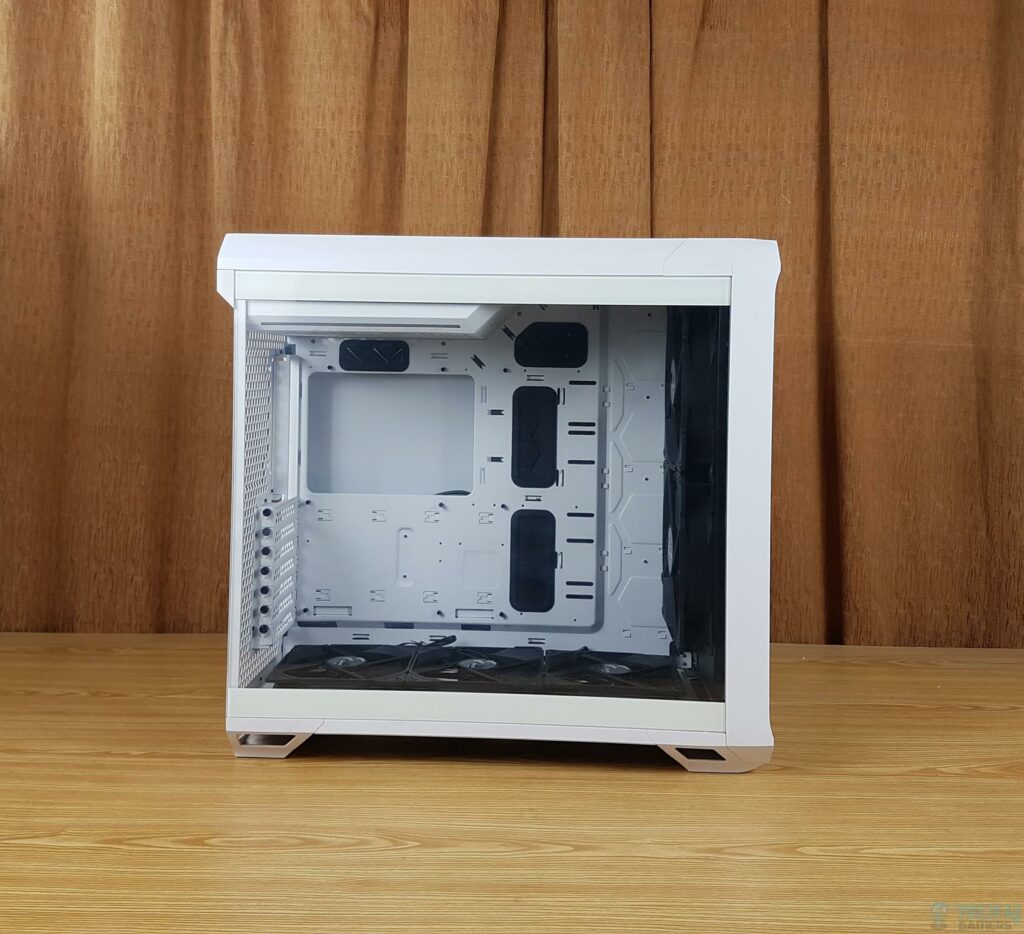
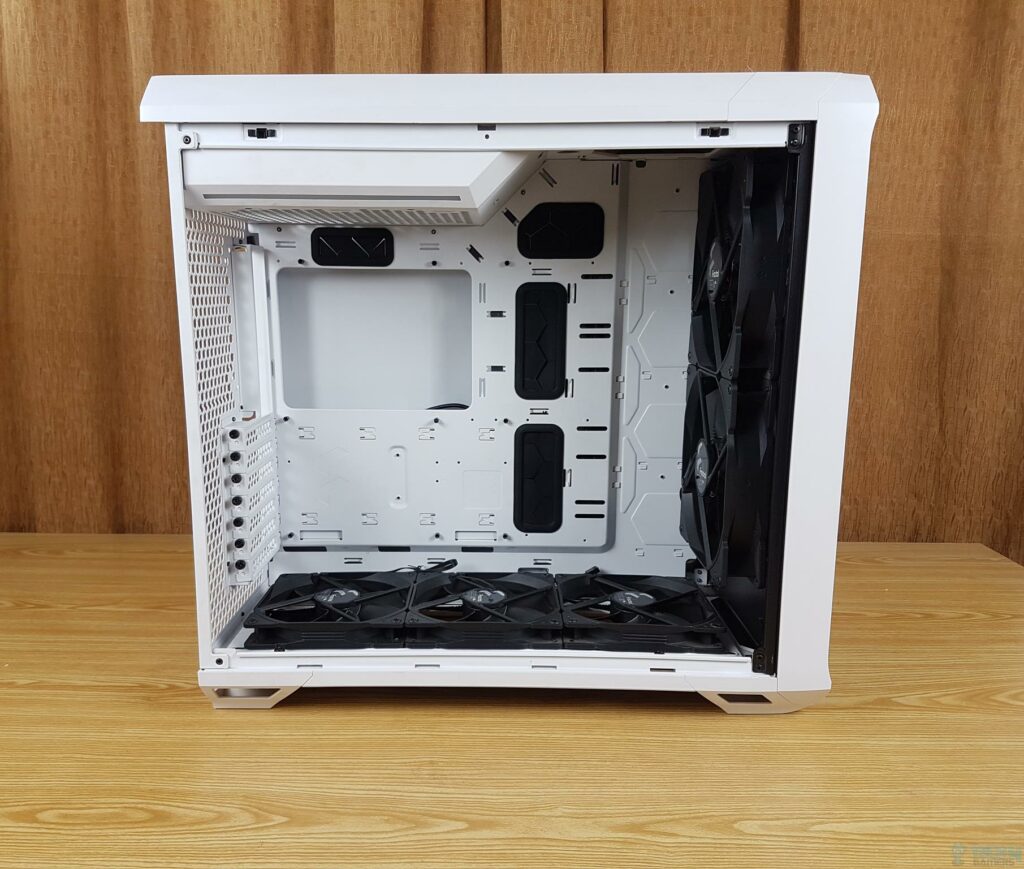
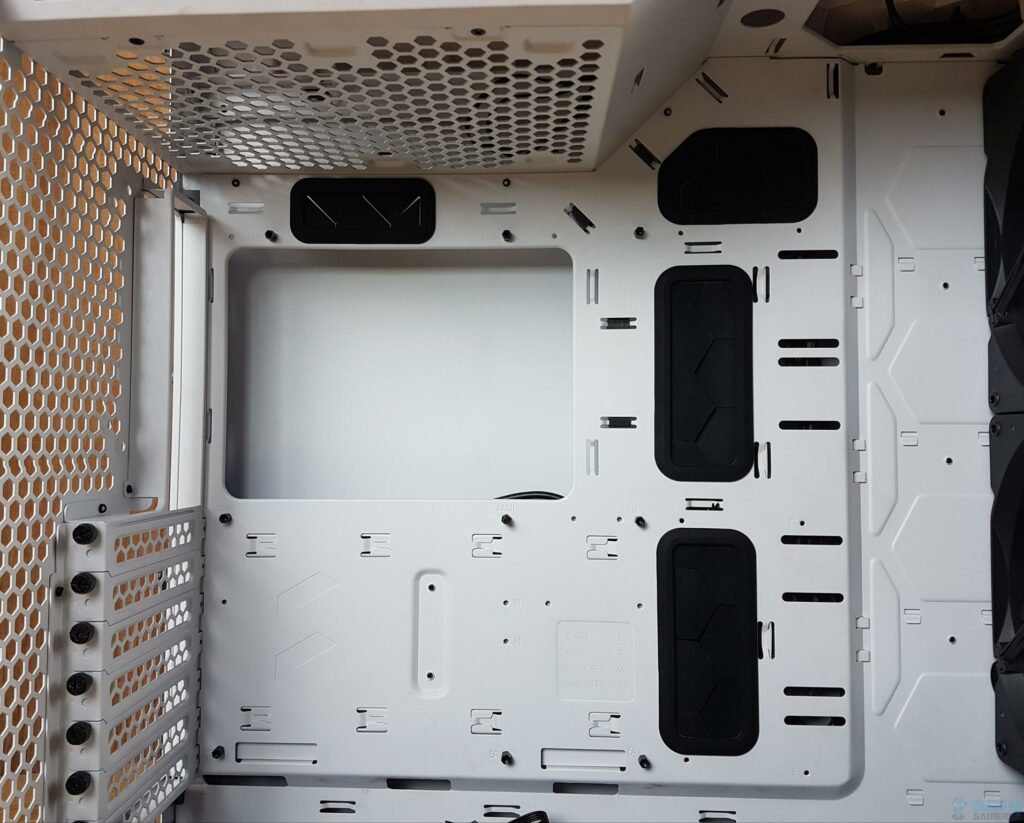
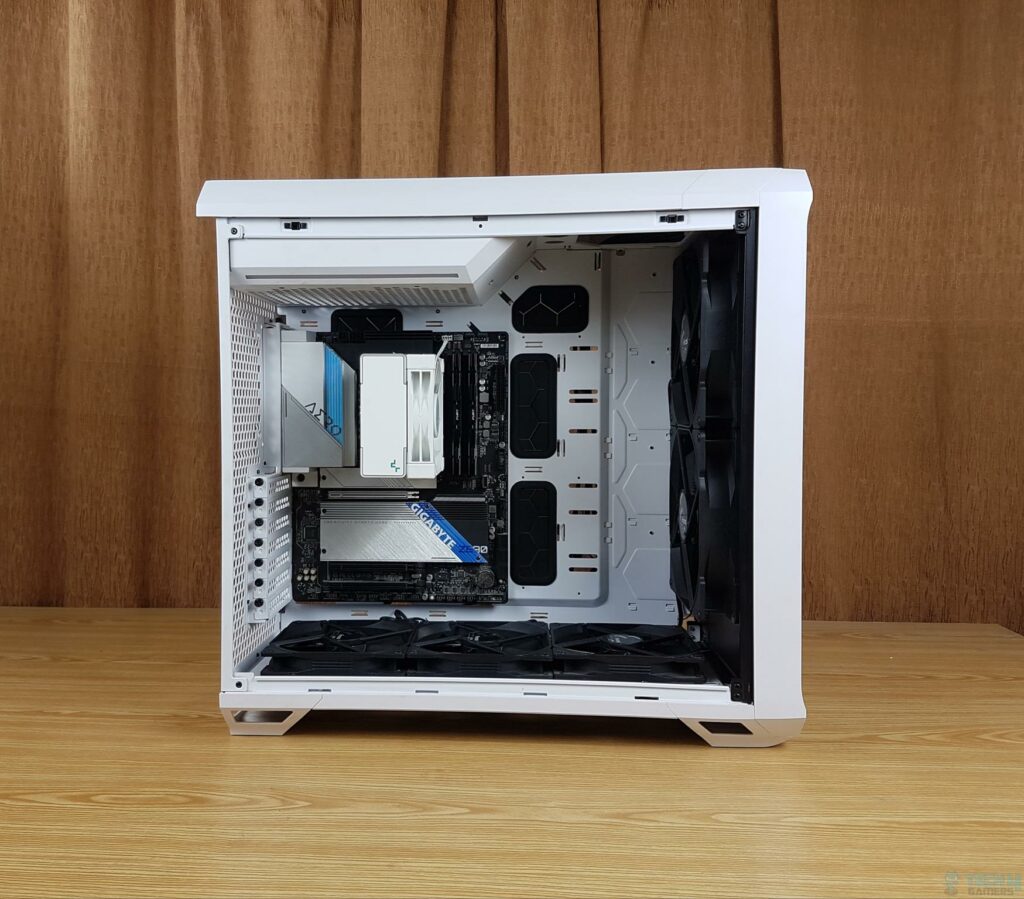
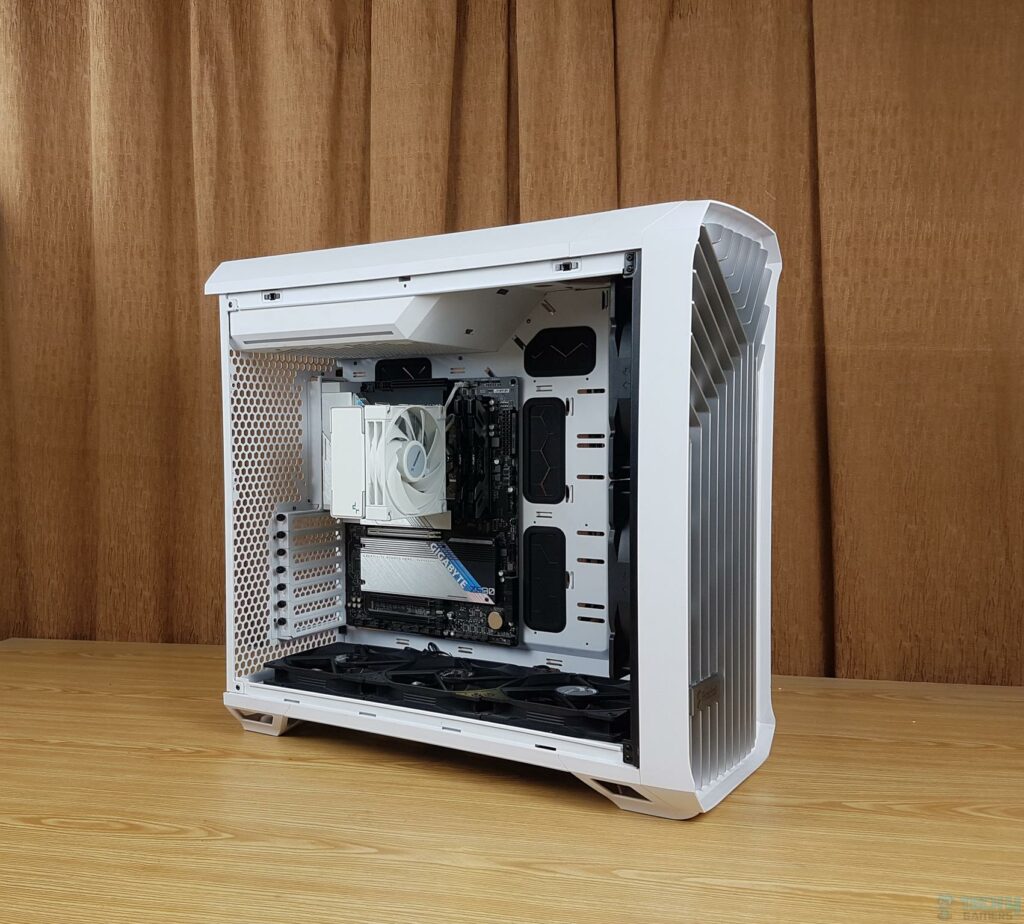
The Fractal Design Torrent White TG boasts a sleek tinted glass panel that is effortlessly accessed with a toolless top-latching mechanism. The rear handle ensures easy removal, with steel-reinforced edges for durability. The spacious interior features improved airflow, a white motherboard tray with black rubber grommets, and a pre-installed GPU support bracket. With approximately 32mm clearance for RAM and top-mounted liquid coolers, it offers a stylish and functional build.
The Torrent’s versatile motherboard tray accommodates various sizes, with eight pre-installed standoffs for easy ATX or E-ATX motherboard installation. The CPU cooler cutouts, both on top and in a vertical layout, provide flexibility. Though aerodynamic, PSU installation in the down position might raise inner temperatures due to warm air circulation. The PSU bay features a diffuser with 7x digital RGB LEDs for stylish lighting, adding a touch of flair to the case.
This case has seven PCIe slot covers. These are reusable, and a bridgeless design makes this case compatible with the Fractal Design Flex B 20 GPU Riser Bracket. This bracket is not included and can be purchased separately. There is no pre-installed fan on the rear. The user can install a 120mm or a 140mm fan on the rear. Similarly, a 120mm or a 140mm radiator can be installed on the rear. We have an open and full grille style on the rear, providing a large area for air exhaust.
We are looking at the top from the inside of this case. A plastic top cover faces the large opening with a honeycomb design. The cables from the top IO panel are also routed from opposite sides. This gives a neat and clean look.
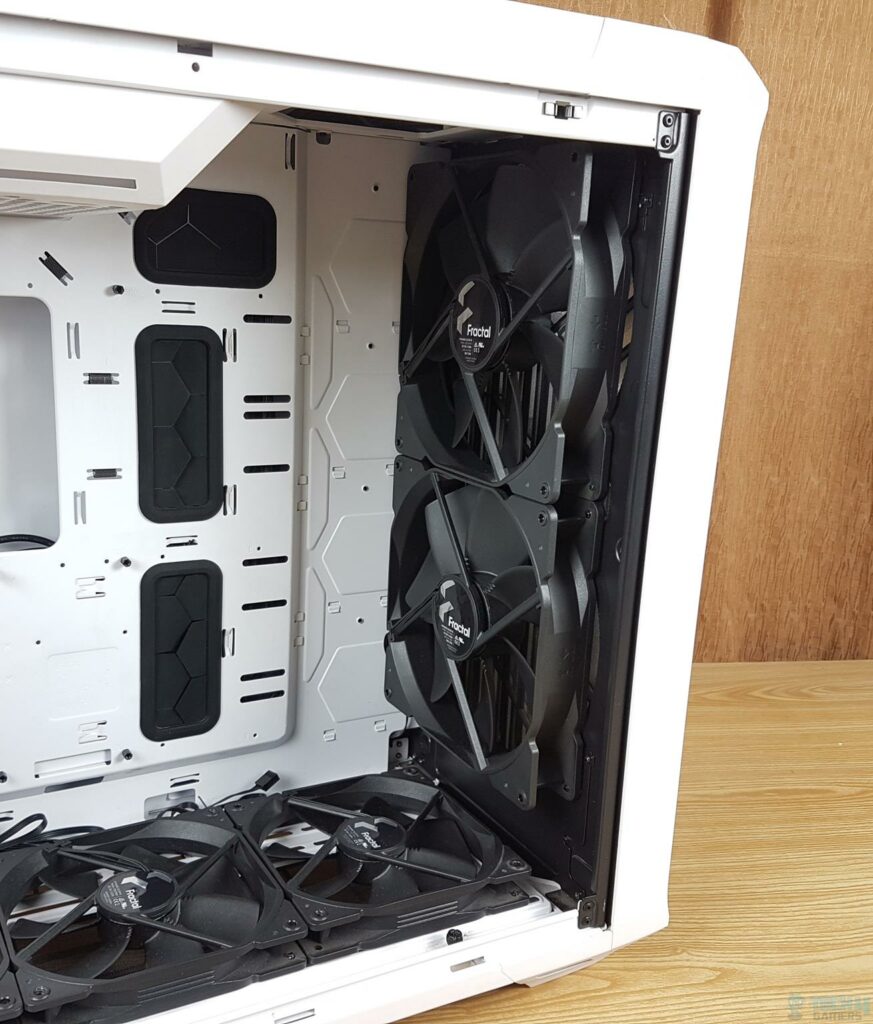
Here, we are looking at preinstalled 2x Dynamix X2 GP-18 fans. We have already discussed these fans in detail above. Notice the area available in front of these fans right before the start of the motherboard tray. This is quite a spacious layout for front cooling provision.
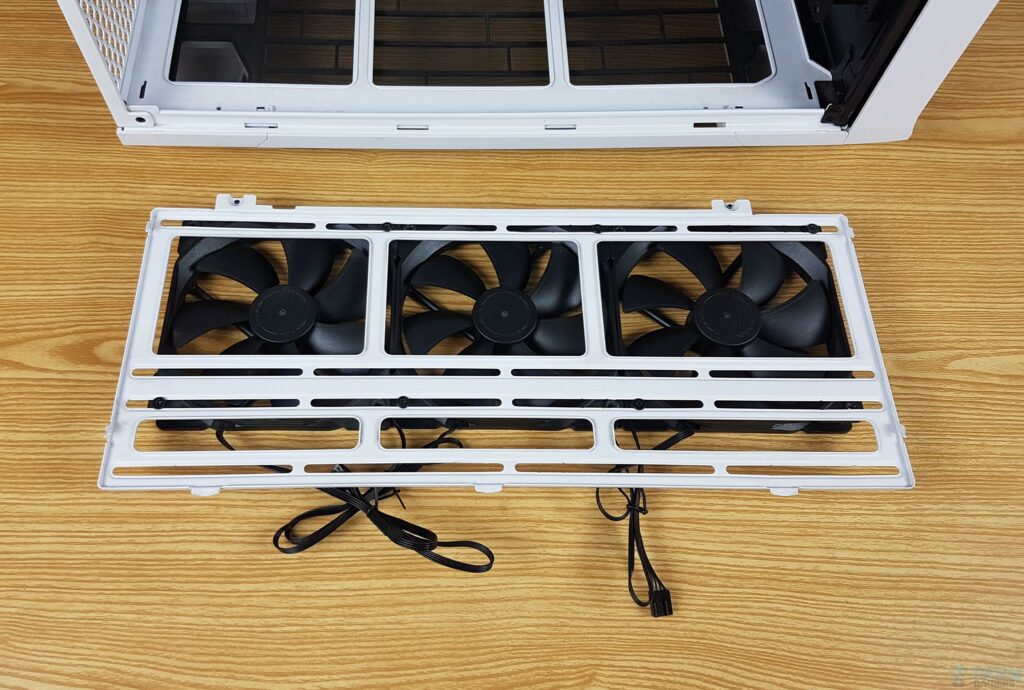
The base of the Fractal Design Torrent has a pre-installed fan bracket with three Dynamic X2 GP14 PWM fans in a pull configuration. Cooling options include 3x 120mm or 3x 140mm fans, 2x 180mm fans, and up to a 360mm radiator in 120mm size or a 420mm radiator in 140mm size.
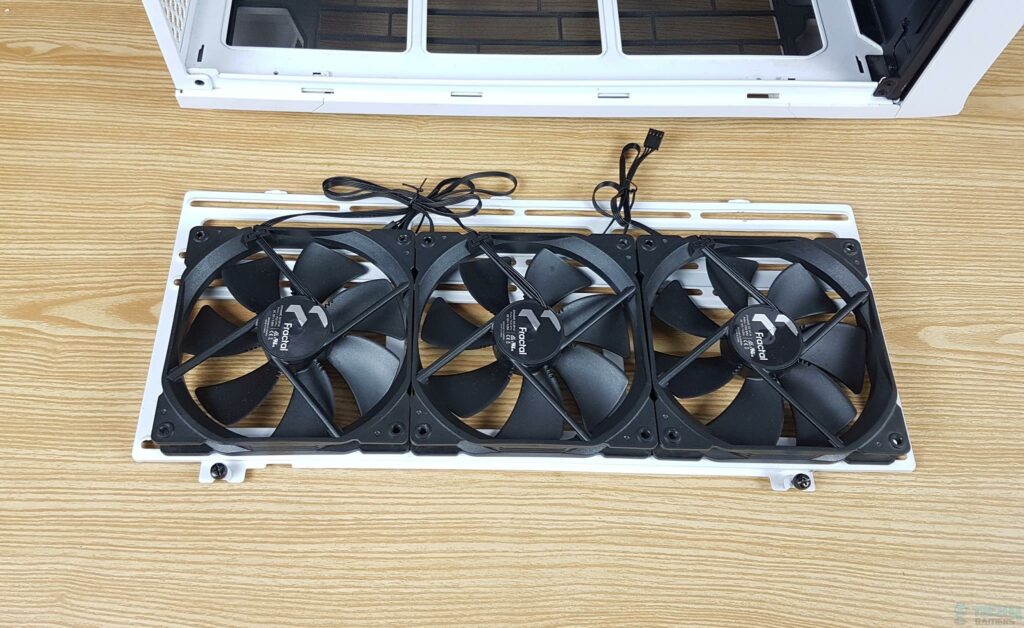
We have removed the fan bracket from the case. The following picture shows the opposite side of this fan bracket. Now, you can better see the mounting provision on this bracket. This bracket uses a rail design, so the fans’ position can also be adjusted.
Exploring the Torrent’s base, I noticed an intelligent cutout below the motherboard tray for clean cable routing. The grooves secure the fan bracket tabs, ensuring a snug fit. However, installing 120/140mm front fan brackets limits the bottom cooling setup. On a positive note, you can run 2x 420mm radiators simultaneously, offering impressive cooling potential.
Back Panel
It is time to look at the last cornerstone of this case, the backside.
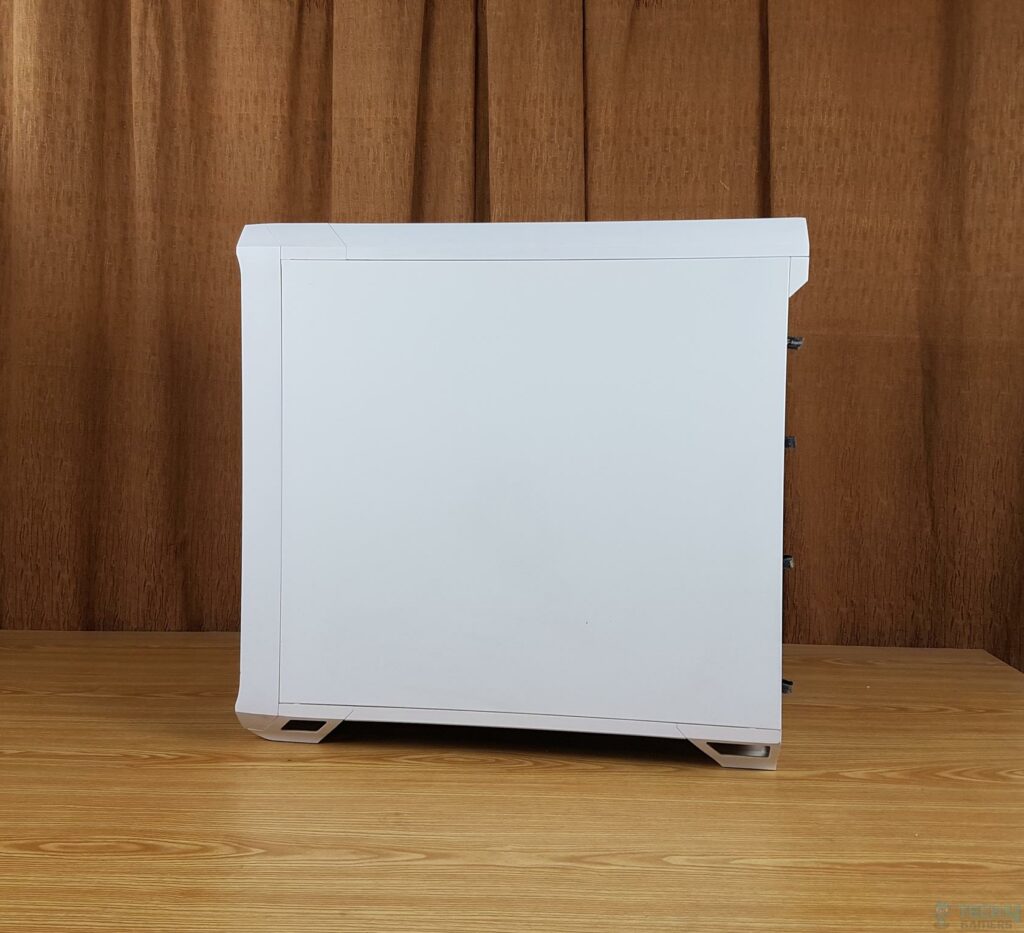
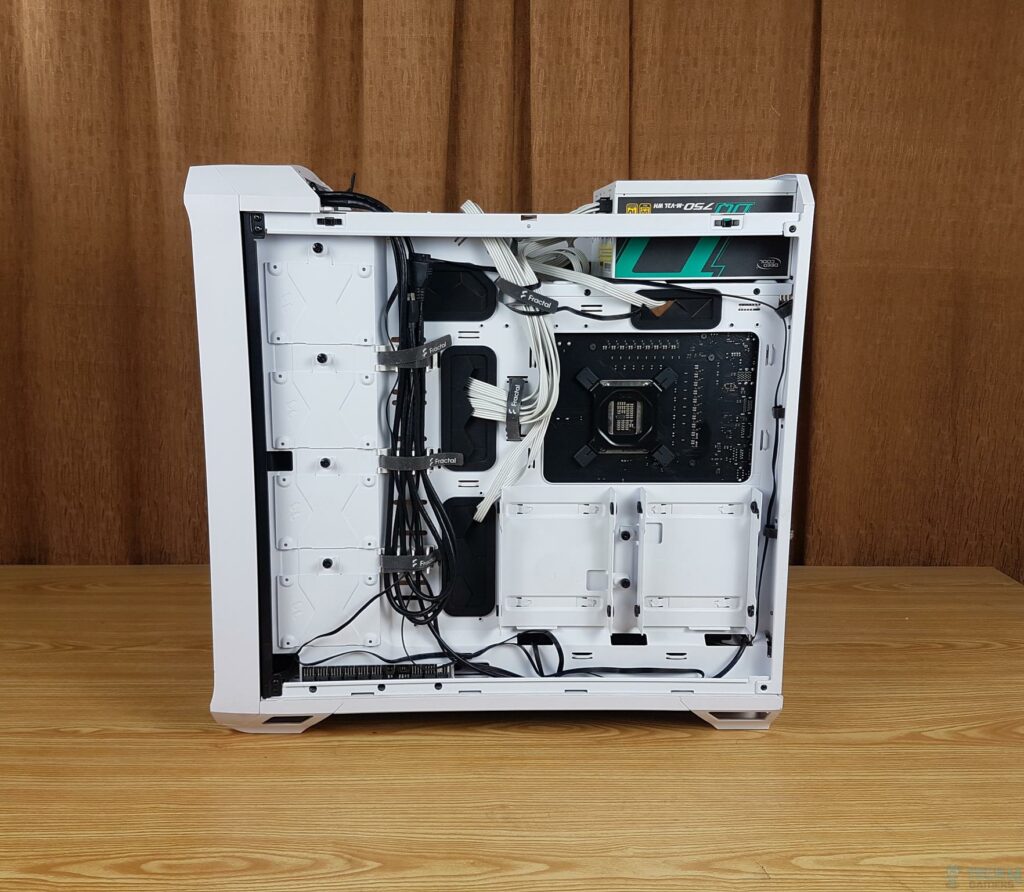
There is a solid backside panel in white color. It is made of steel, and we can see a bit of a difference in shade between this steel-made panel and the plastic front frame.
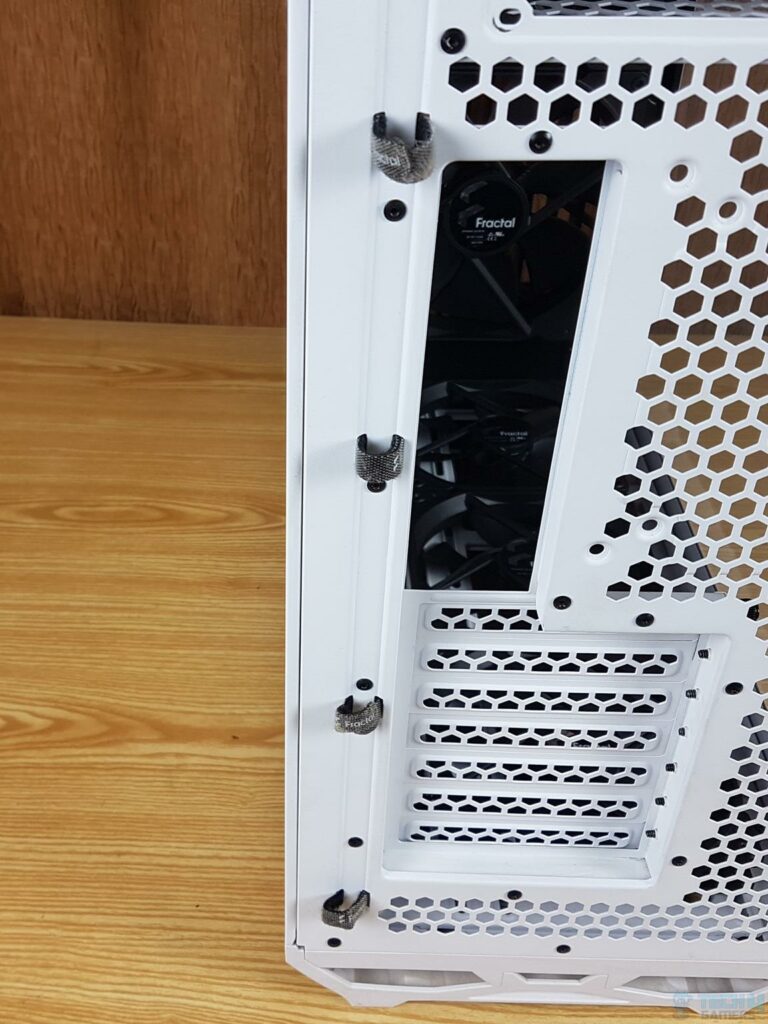
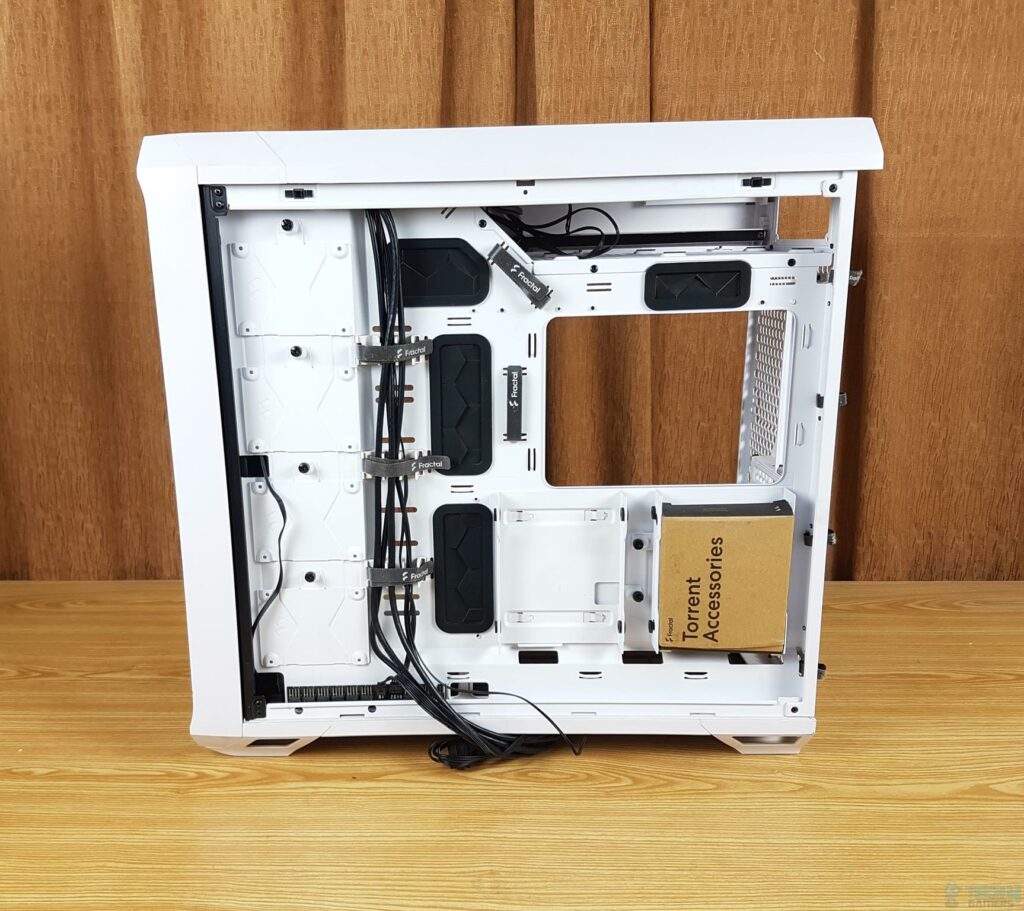
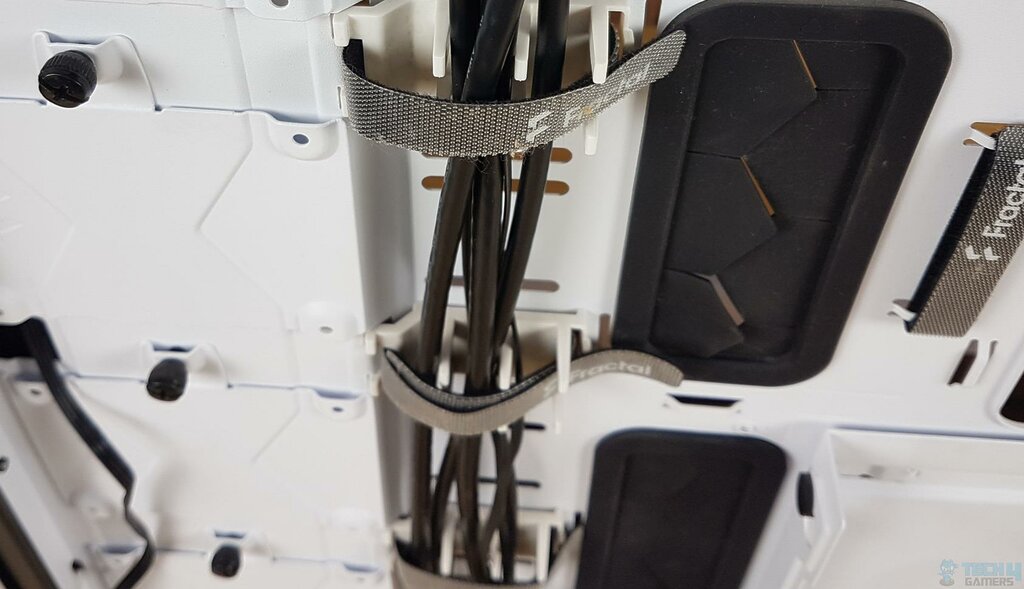
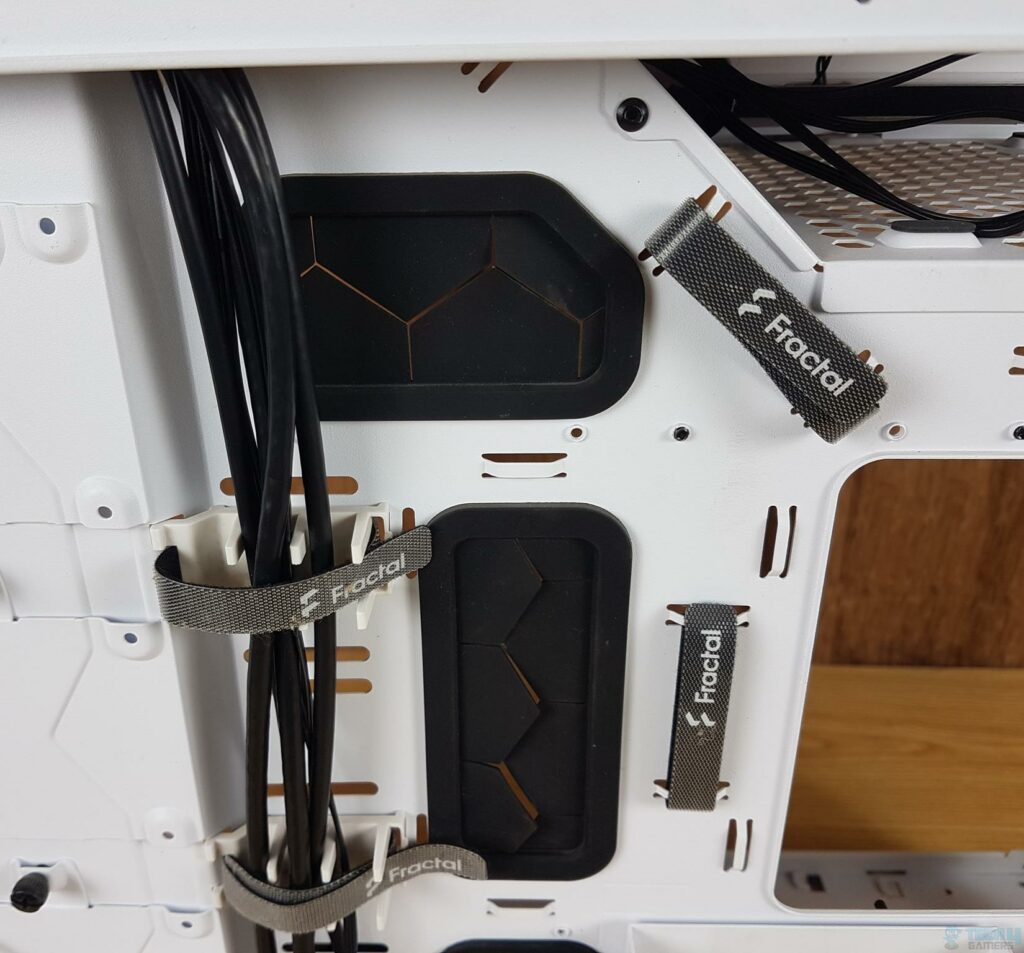
The backside of the case reveals a partially covered PSU bay and storage mountings at the top. With approximately 32mm of cable management space, there are 16 cable tie points, cable guides, and Velcro Strips for effective cable management. This design mirrors the approach seen in the Meshify 2 case, offering creative cable management solutions on both sides of the frame.
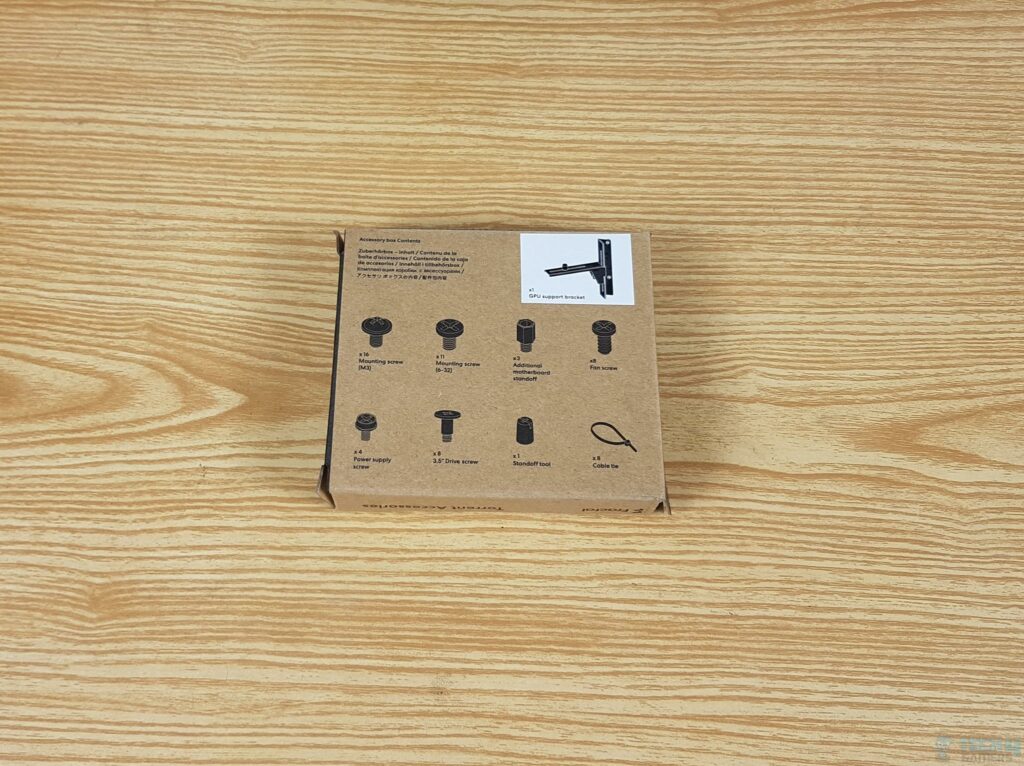
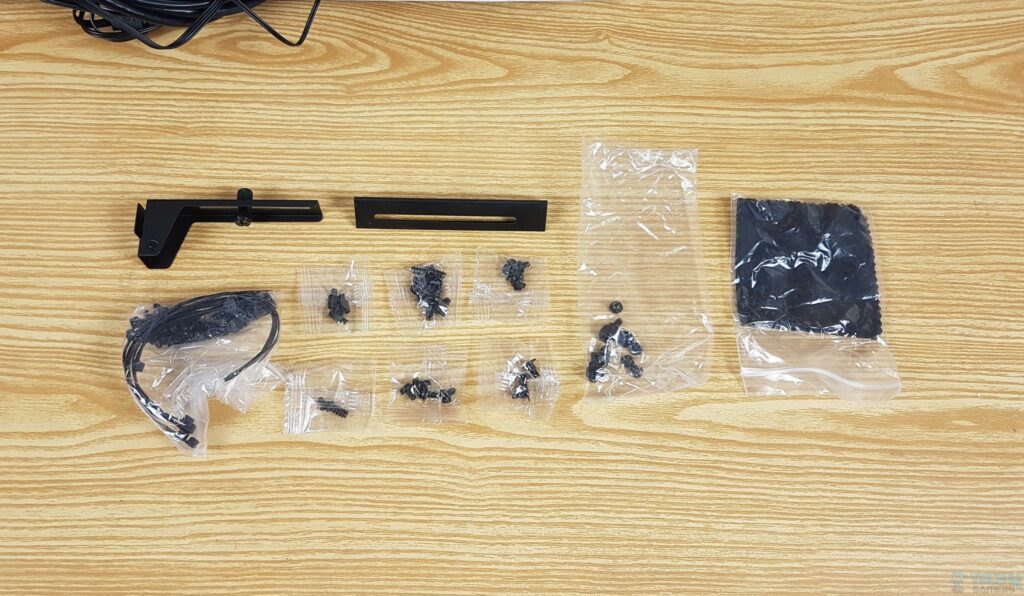
The accessory box is made of cardboard. Each item and its count are printed over this box. Fractal Design has provided a plethora of screws, cable ties, and microfiber cloth.
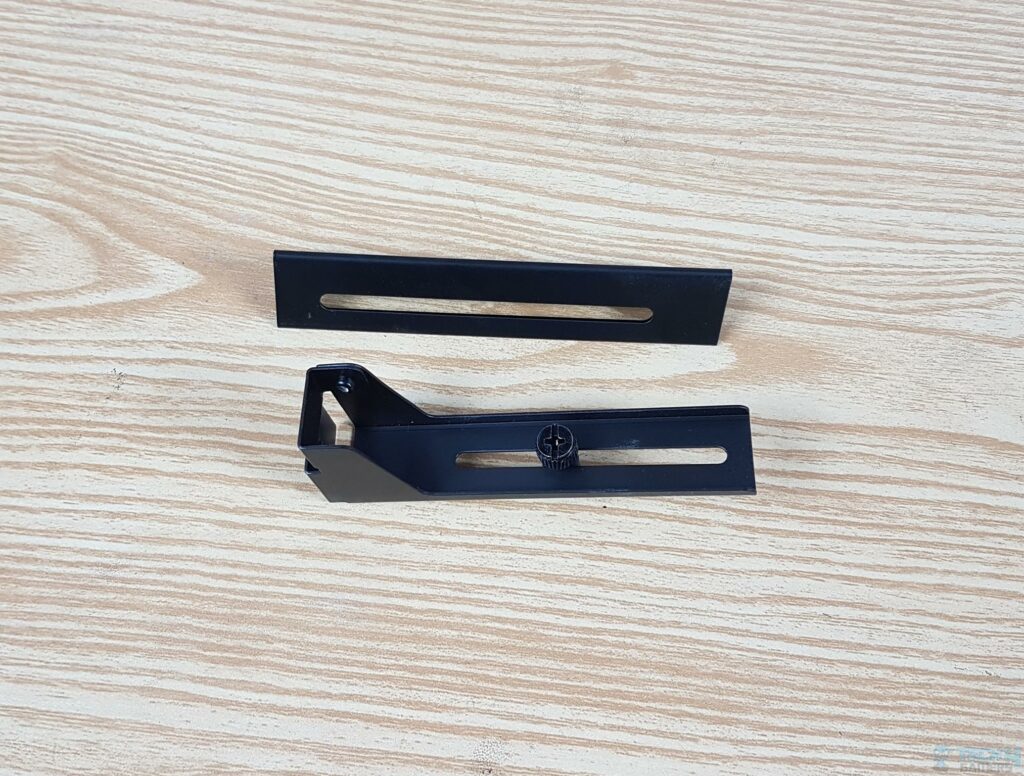
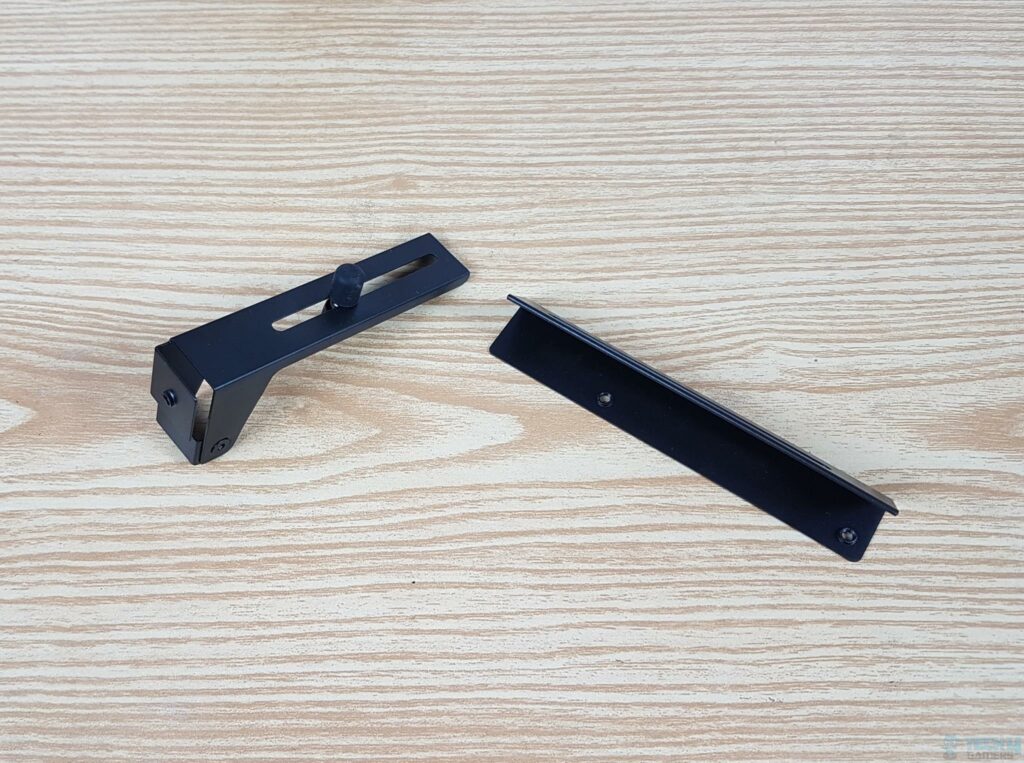
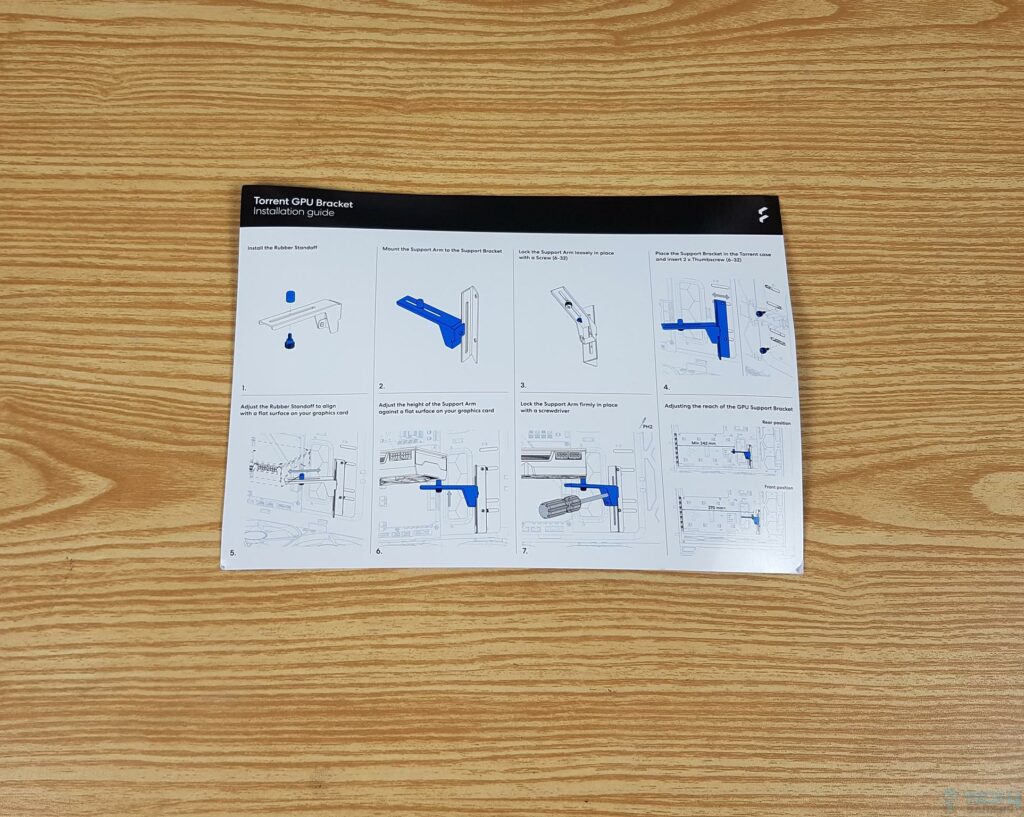
A two-piece GPU support bracket is provided as well. The triangular shape support frame is installed on the frame of this case. The support arm is installed on the support frame, and its position can also be adjusted.
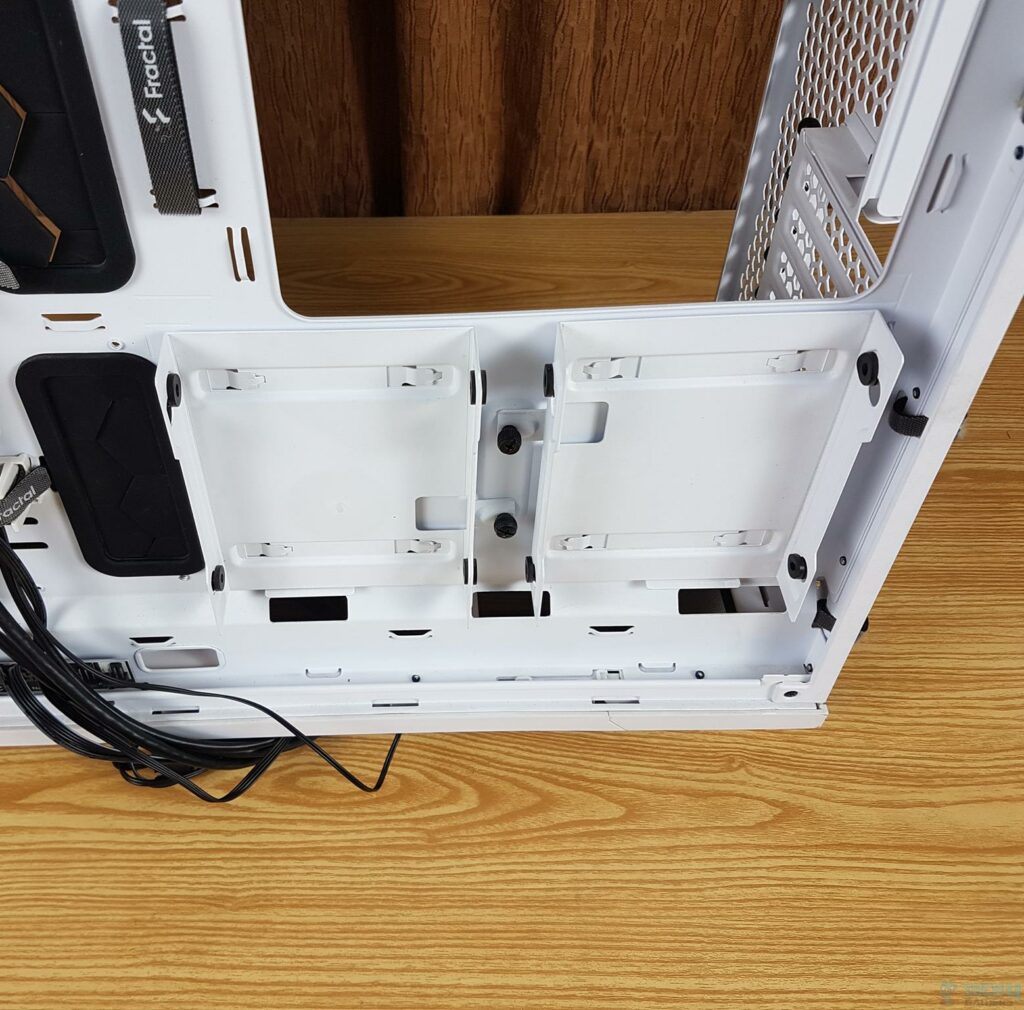
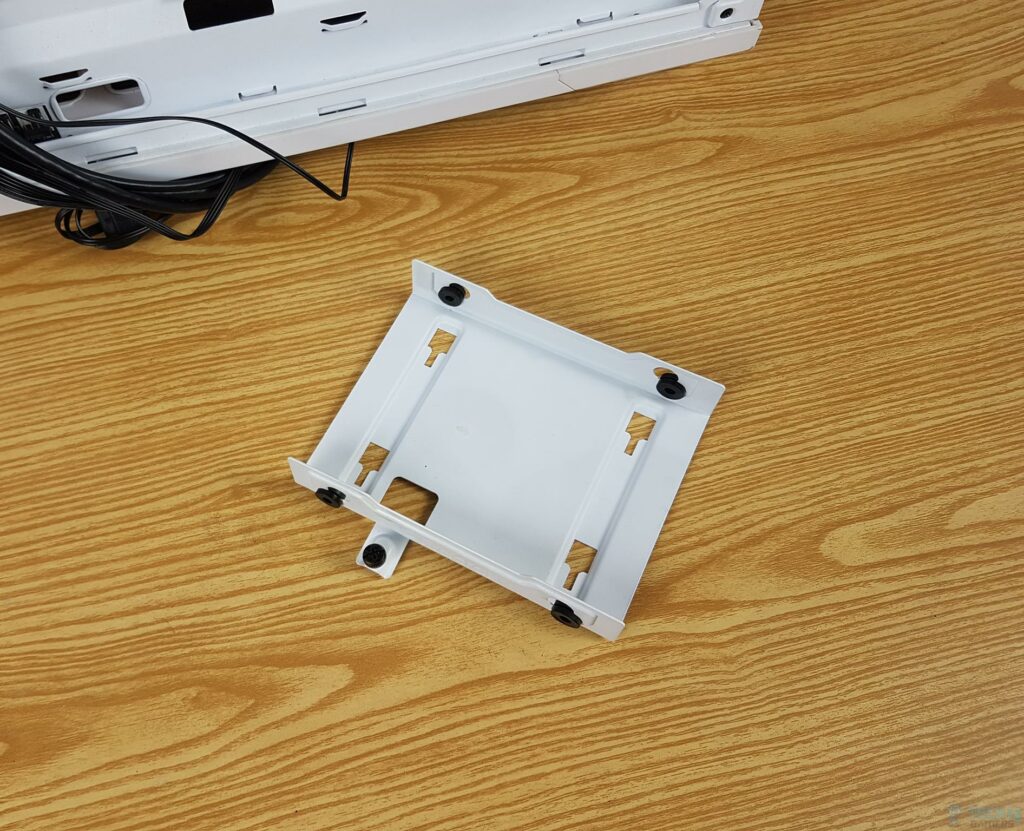
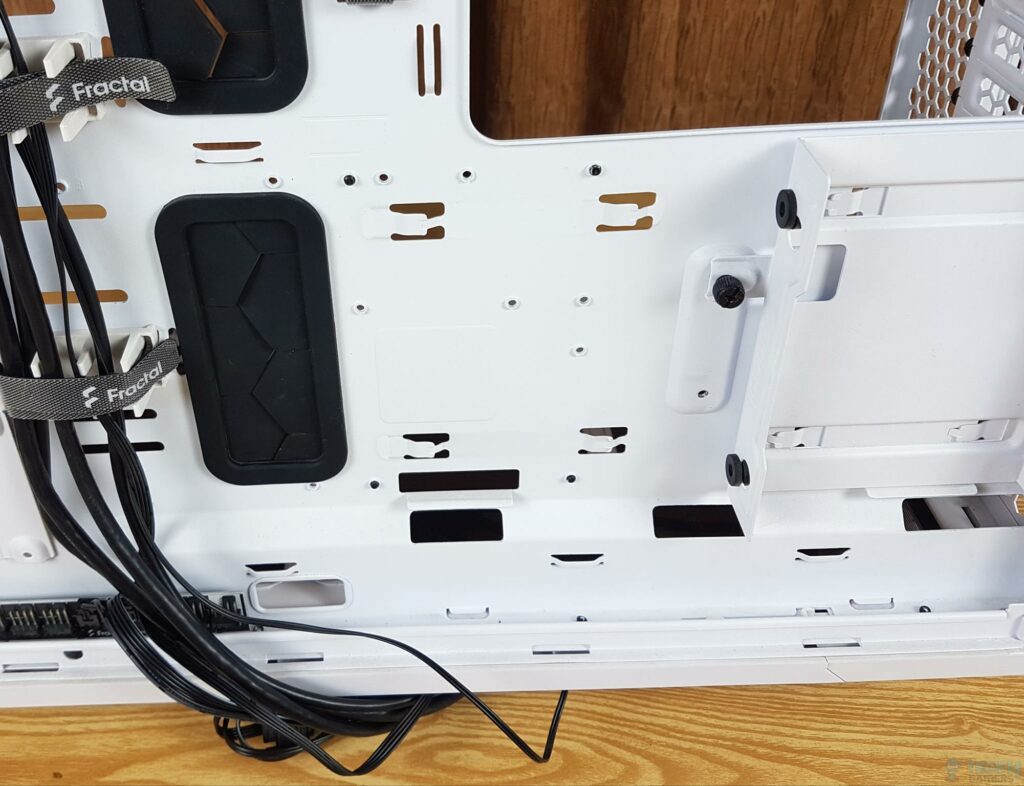
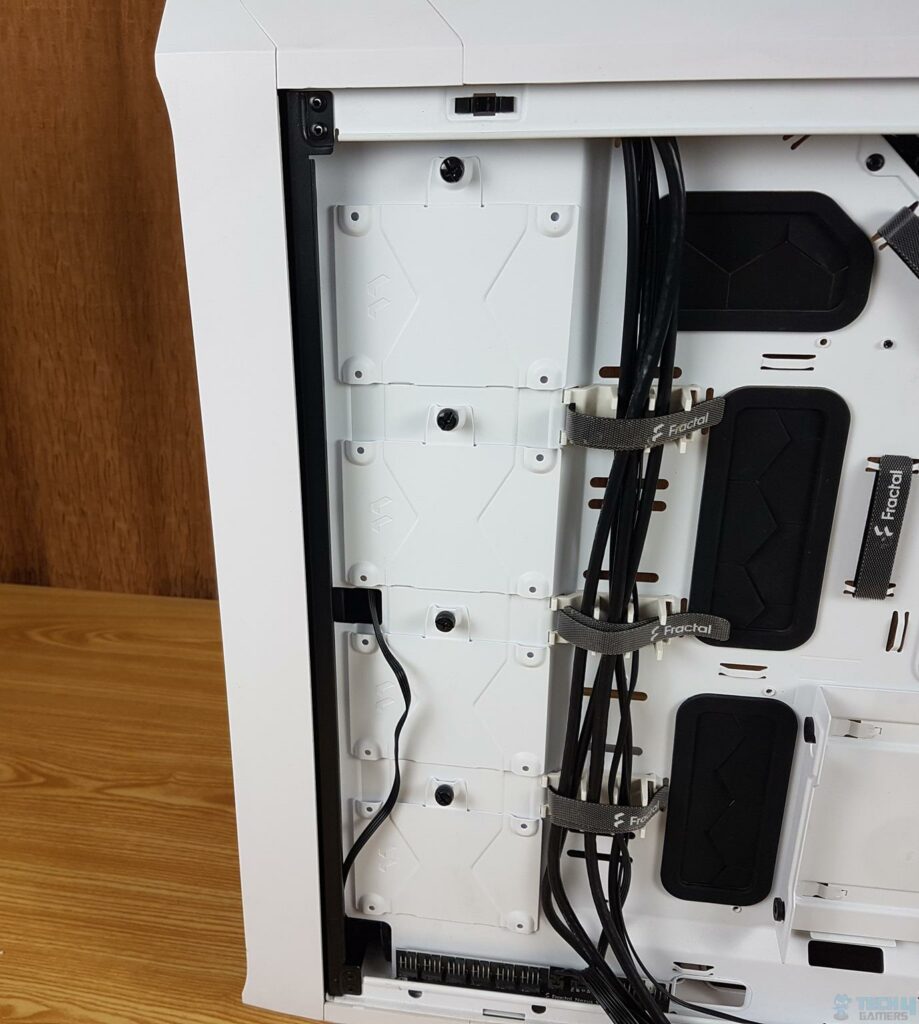
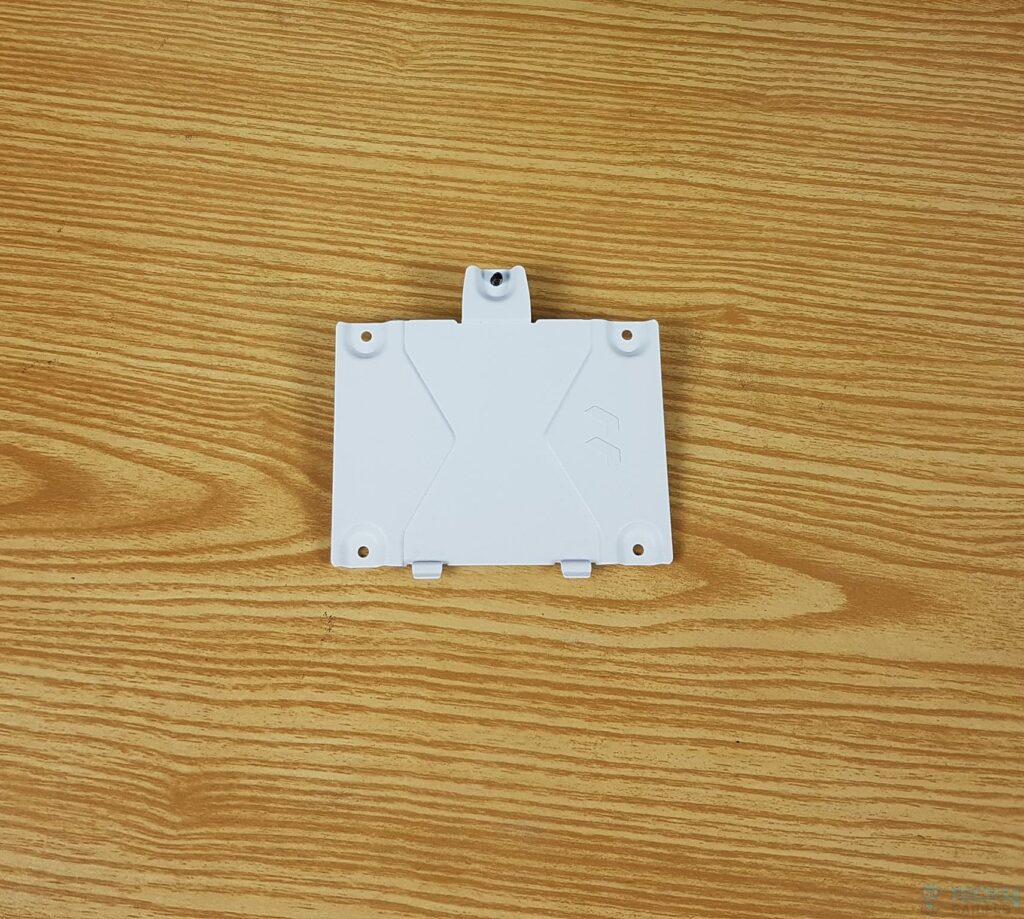
Fractal Design has installed 2x 3.5” drive brackets below the CPU cutout on the motherboard tray. They are secured using captive thumbscrews. The above picture shows a 3.5” drive bracket after removing from this case.
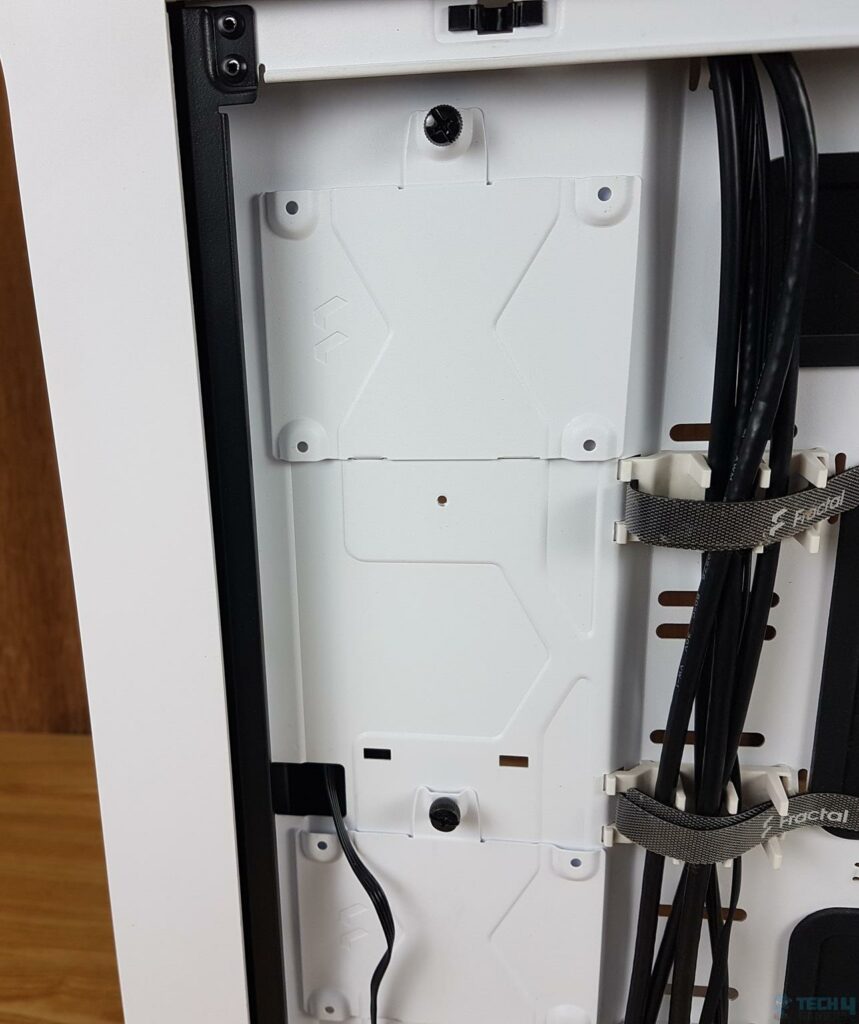
The above picture shows the area under the 3.5” drive bracket. One thing to note is the tight cable connector space for these brackets. Navigating cables with so many SATA and data connectors will be difficult. 4x 2.5” drive brackets are installed on the left side of this case using captive thumbscrews.
The above picture shows a close-up of the 2.5” drive bracket removed from the case. The next picture shows the side of a case after removing one 2.5” drive bracket.
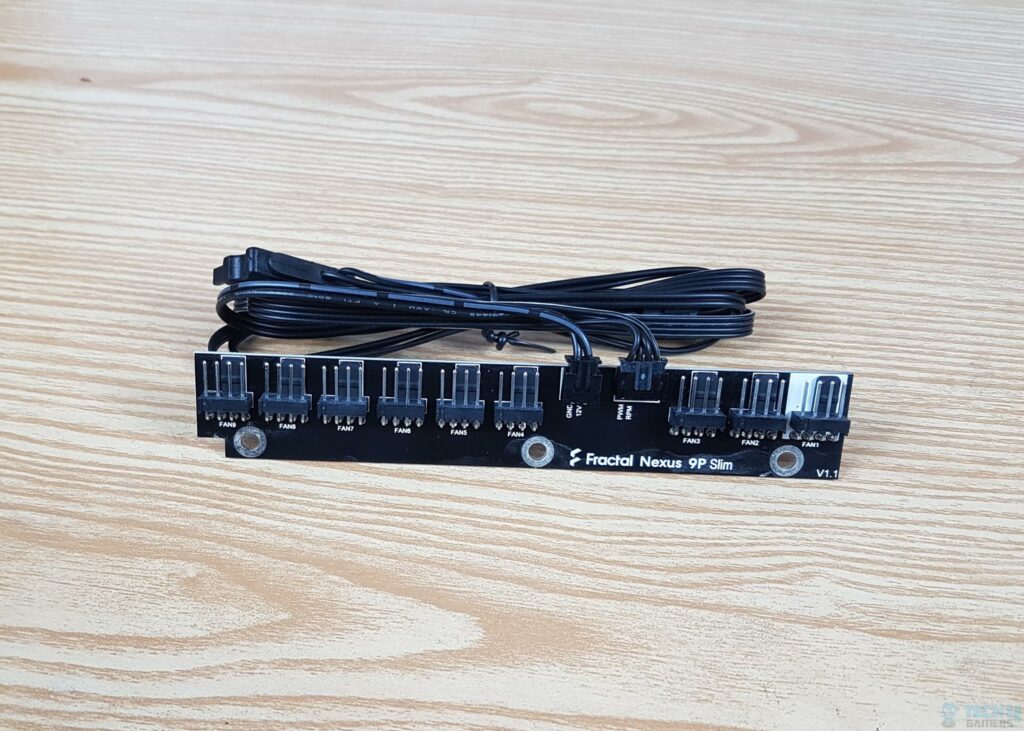
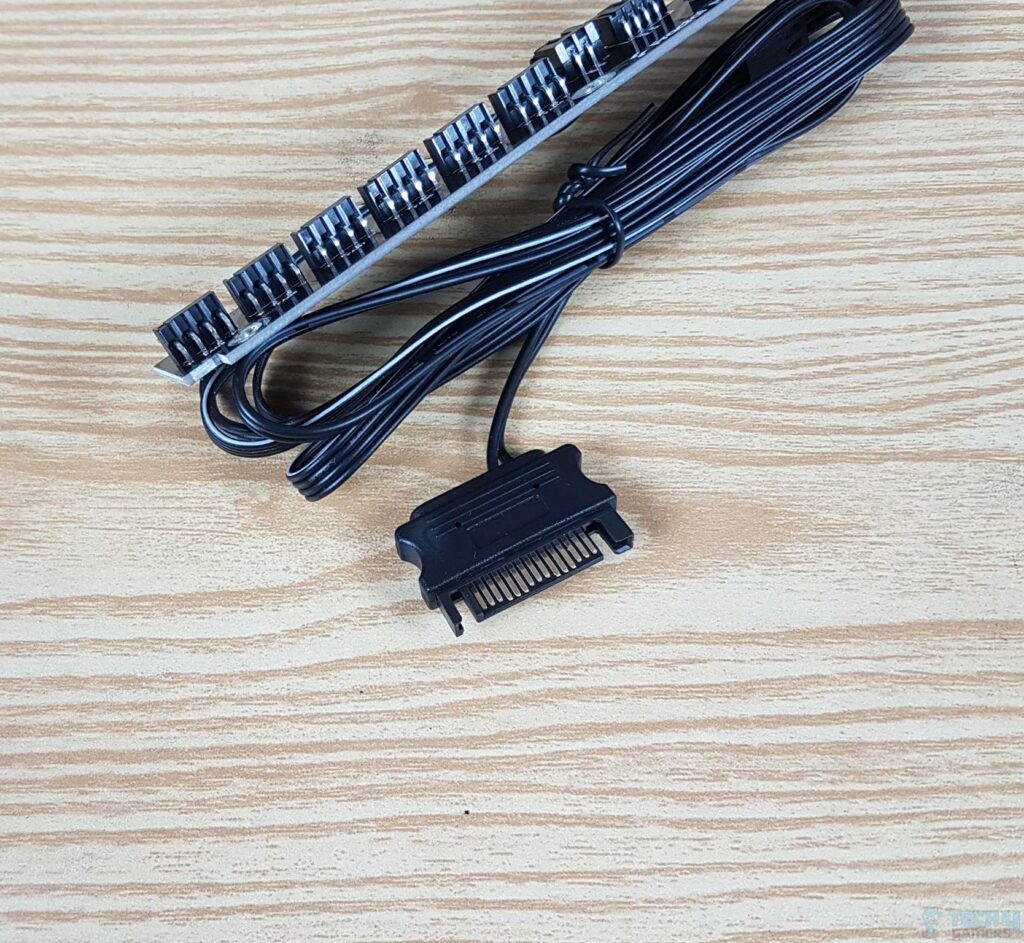
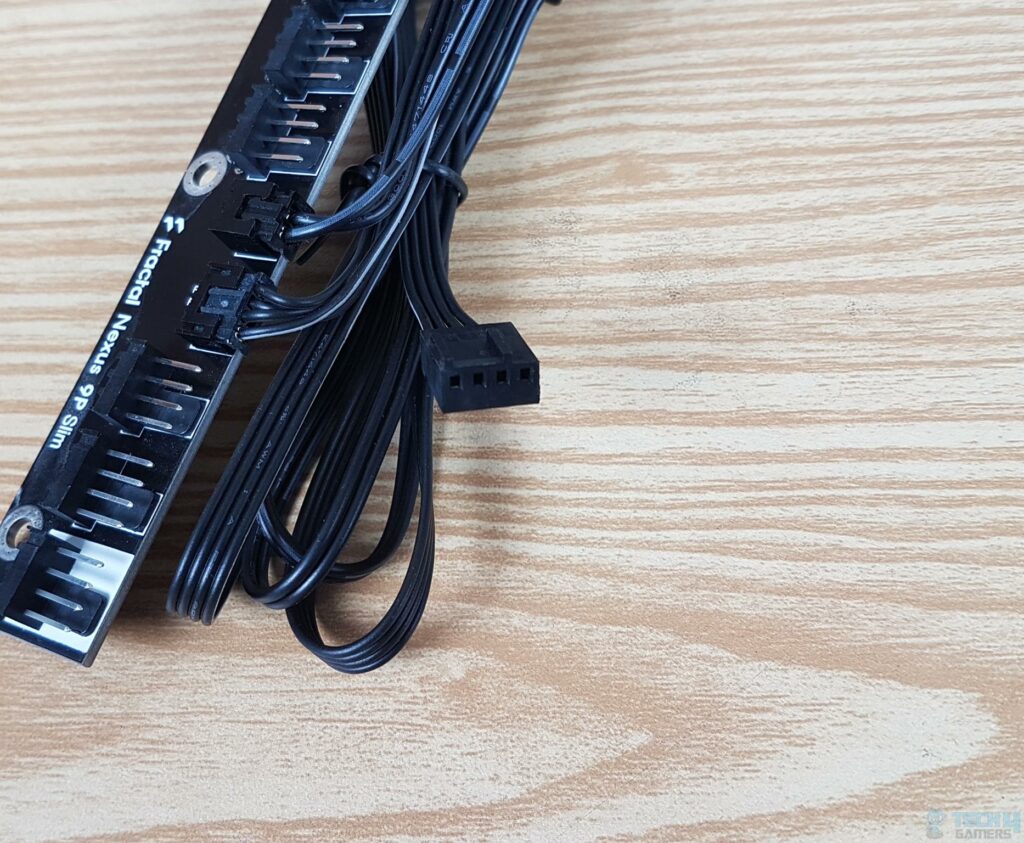
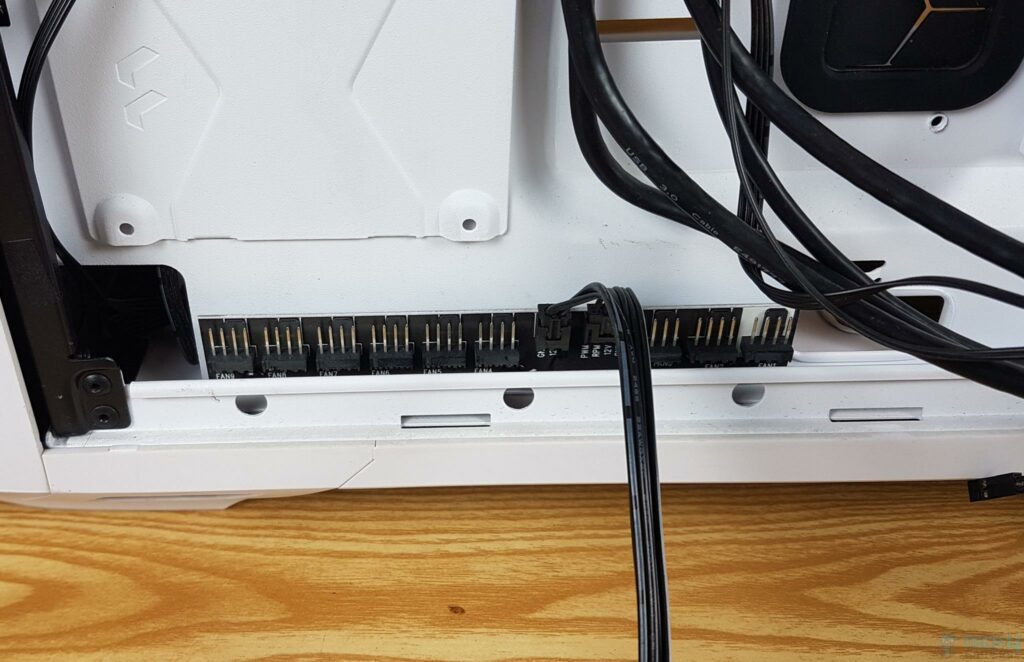
Fractal Design’s Nexus 9P Slim is a low-profile fan hub with 9x 4-pin PWM ports. Users need to connect their fans manually. An earlier batch had a hub shortage, promptly addressed with replacements and an option to return for a full refund. The hub features a central 4-pin header for fan speed reporting and a 2-pin power port. Customer-centric actions contribute to positive feedback. This fan hub is SATA powered.
There is a 4-pin PWM connector coming from this hub. It can be connected to a 4-pin PWM header on the motherboard for speed regulation. There are cable guides on the edge of the motherboard tray, providing channels on which the cables can be placed and routed. These guides have Velcro Strips as well.
Two Velcro Strips are facing the PSU bay and CPU cutout. These are there to catch and route the cables from the PSU bay. Hub is installed on the base, as can be seen above. It is removable.
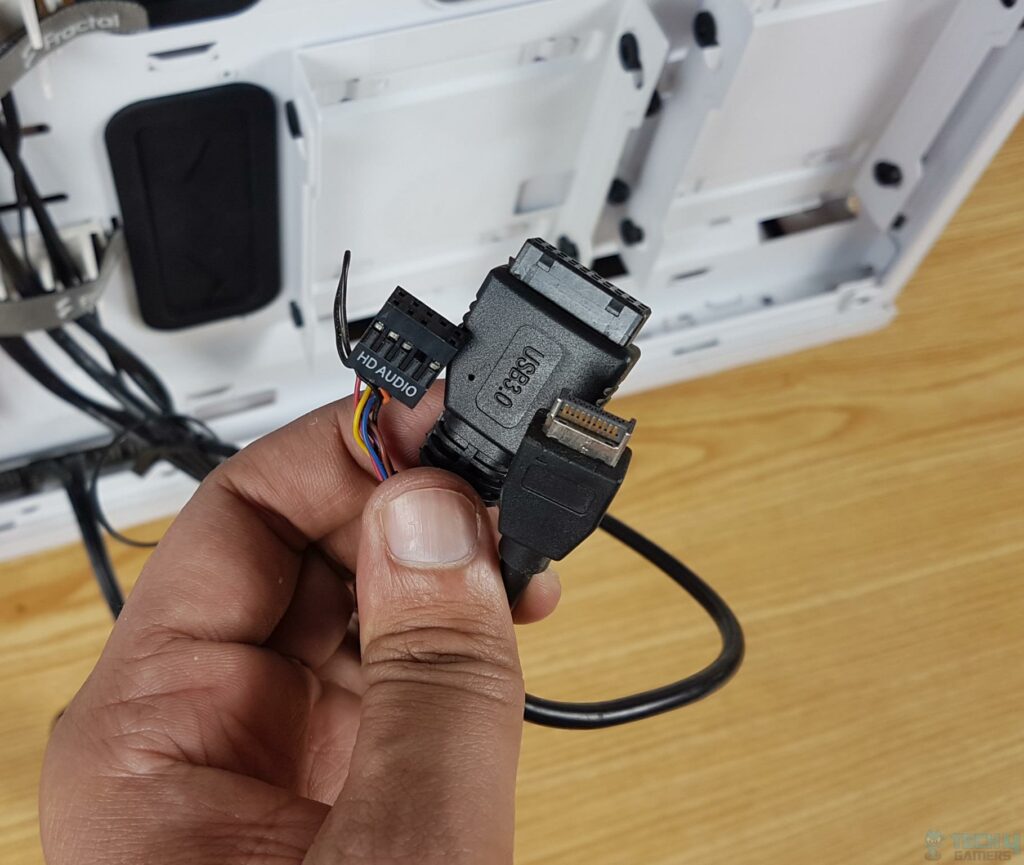
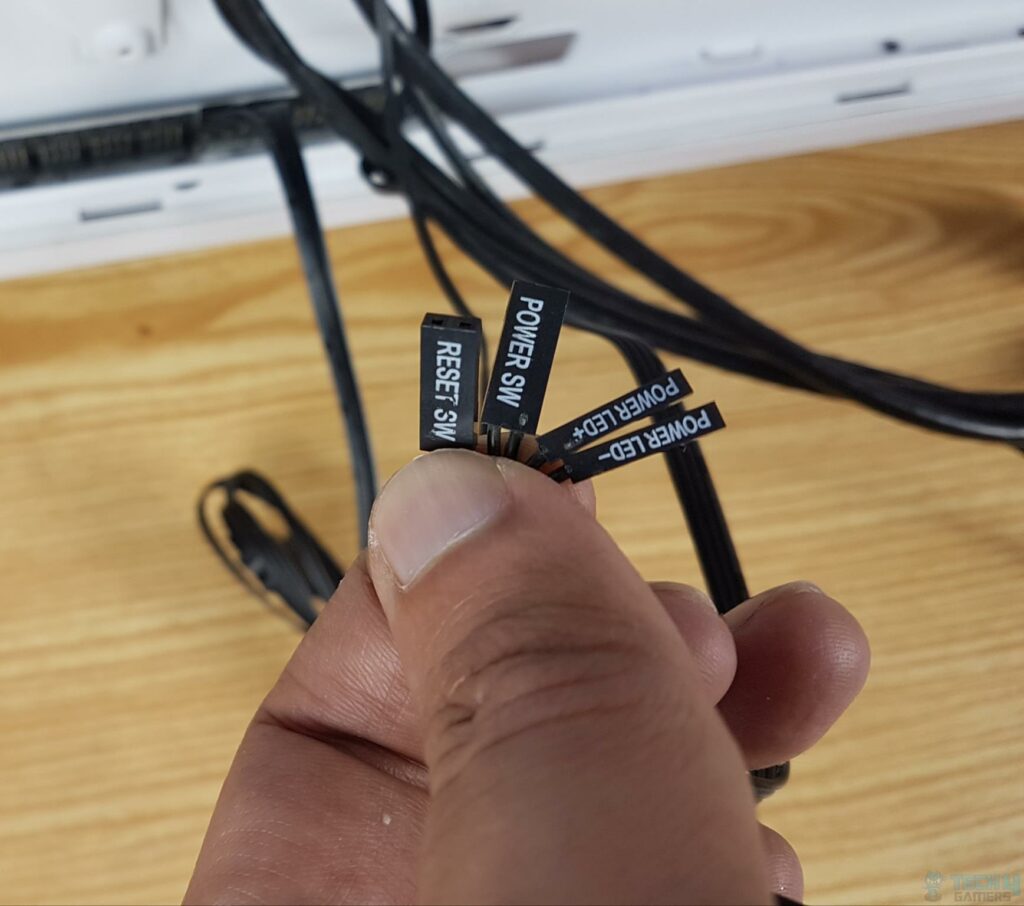
The front IO panel cables include 1x USB Type-C Gen2 Connector, 1x USB 3.0 Connector, and 1x HD Audio Connector. The above picture shows system panel connectors. There are no HDD LED indicator connectors, which is ok with me.
Storage Support
- 2x 3.5” Drives
- 4x 2.5” Drives
Clearance
- 188mm for the CPU Cooler height
- 423mm for the GPU with the pre-installed fans on the front
- 461mm for the GPU with no front fans
- 230mm for the PSU
- 32mm Cable Management space
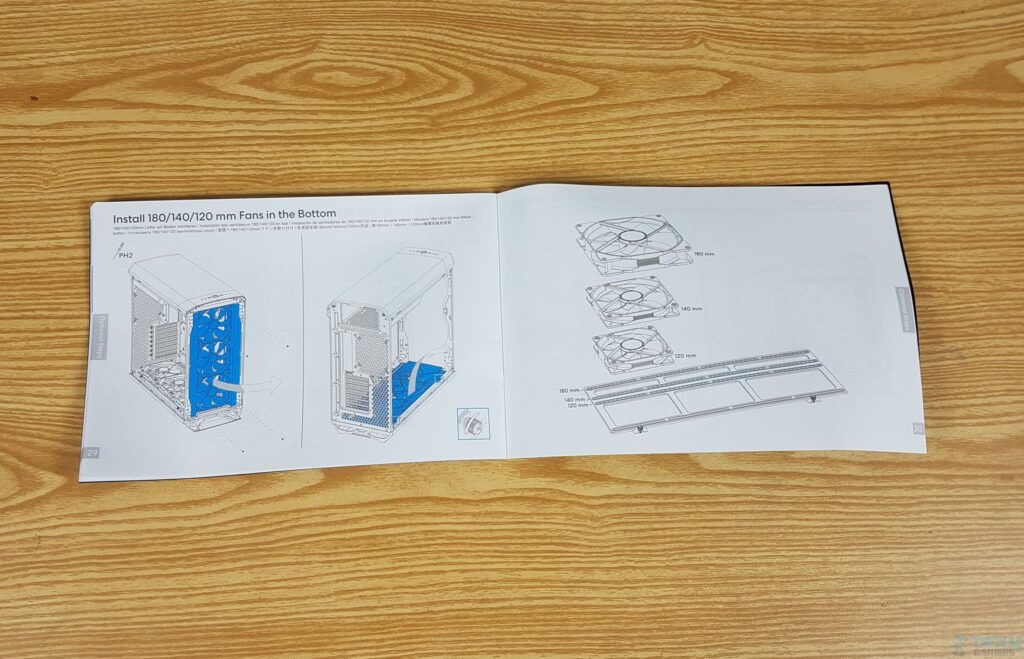
Fractal Design has provided an extensive user guide. There is also a guide on setting up the GPU support bracket.
Test Build and Experience
It is time to share our experience with the Fractal Design Torrent case. Overall, the PC building inside this case is convenient, but you must plan it well and consult the user manual. We did a test build using an air cooler so that thermal testing can be done in a stock configuration.
We installed the RAM and cooler outside of the case. The cutout on the motherboard tray is large enough to provide a straightforward approach for more extraordinary installation inside the case. The motherboard was installed without any glitches. We did not face any issues so far in the installation. The CPU cooler’s height is within the clearance limit as well.
We connected all three fans on the base of this case to the motherboard’s fan headers at the bottom. Other cables were routed and connected as well. Yes, I know, this motherboard needs cleaning.
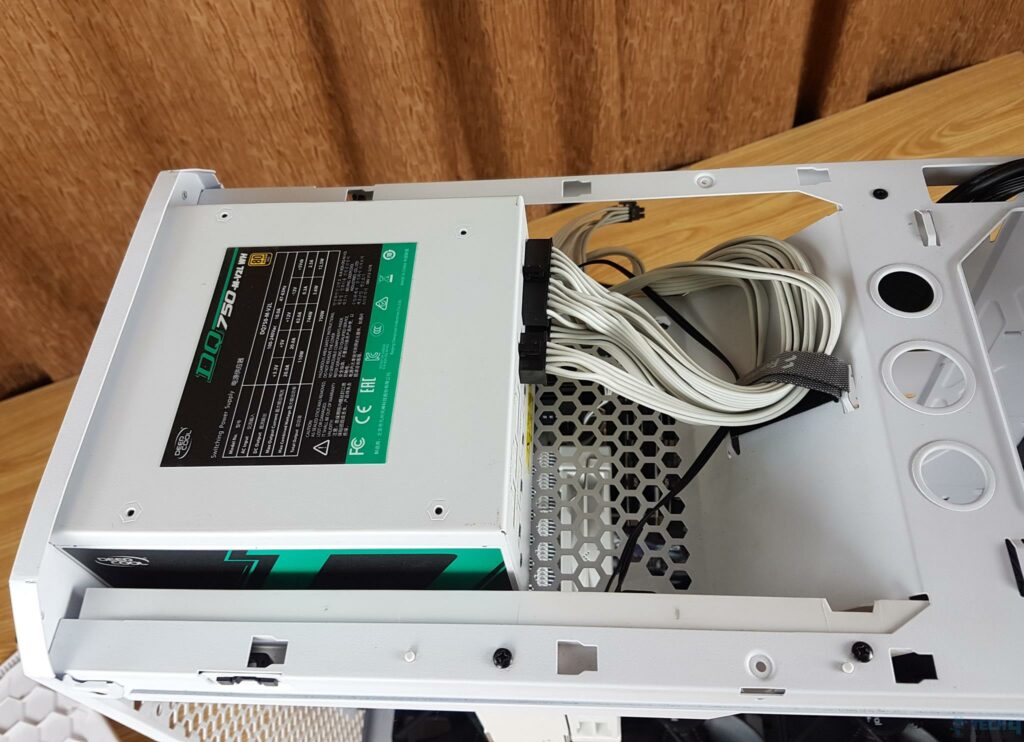
We installed the PSU with the fan side facing down. Having a modular unit would be handy as only the cables needed will be used, and it would reduce cable clutter. There is still someplace in the bay to carry the unused cables.
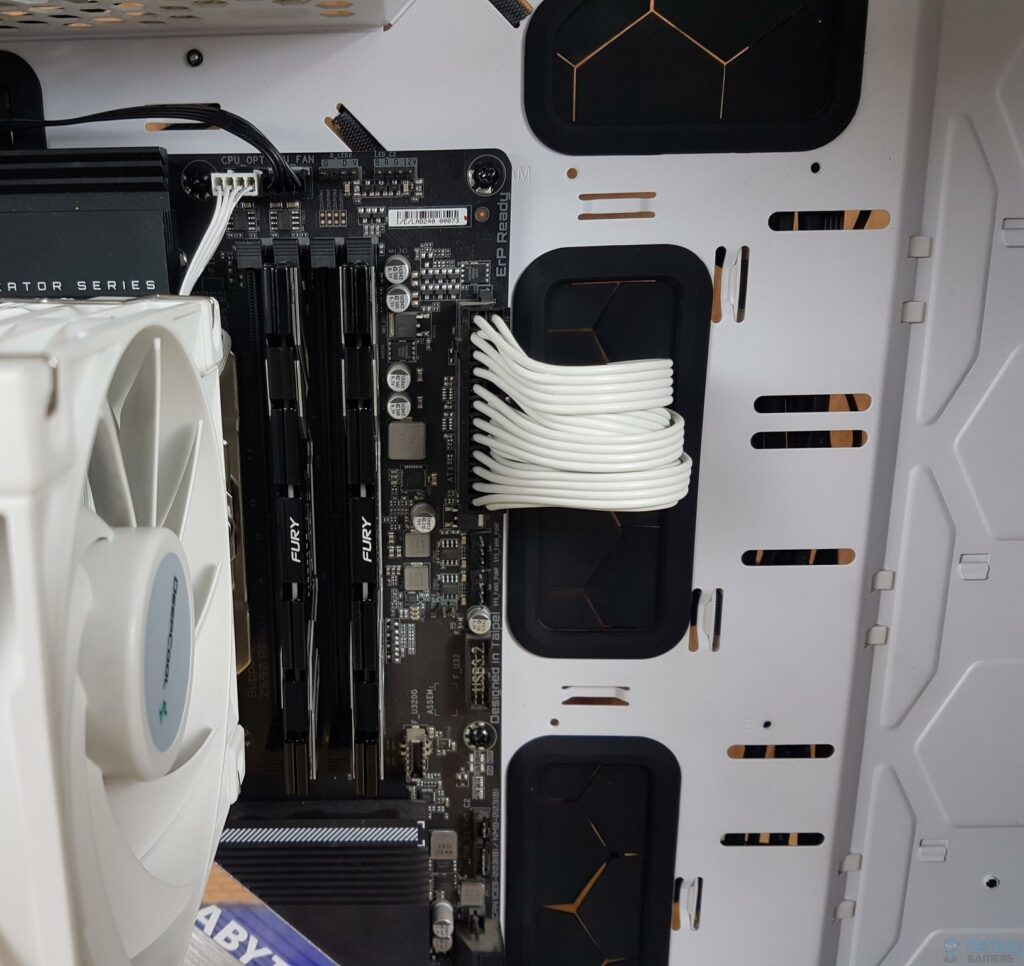
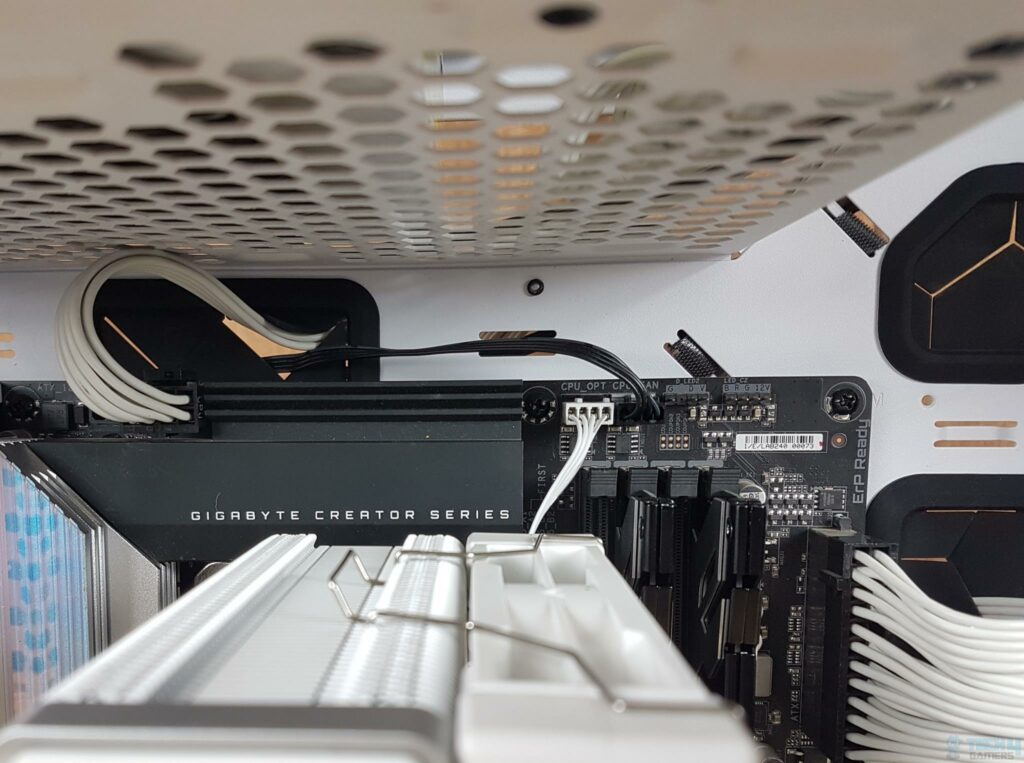
A 24-pin ATX cable was an easy connection. The CPU cooler’s fan was connected to the CPU_OPT fan header. One of the front fans was also connected to the CPU_Fan header. We did not use the Nexus 9P hub.
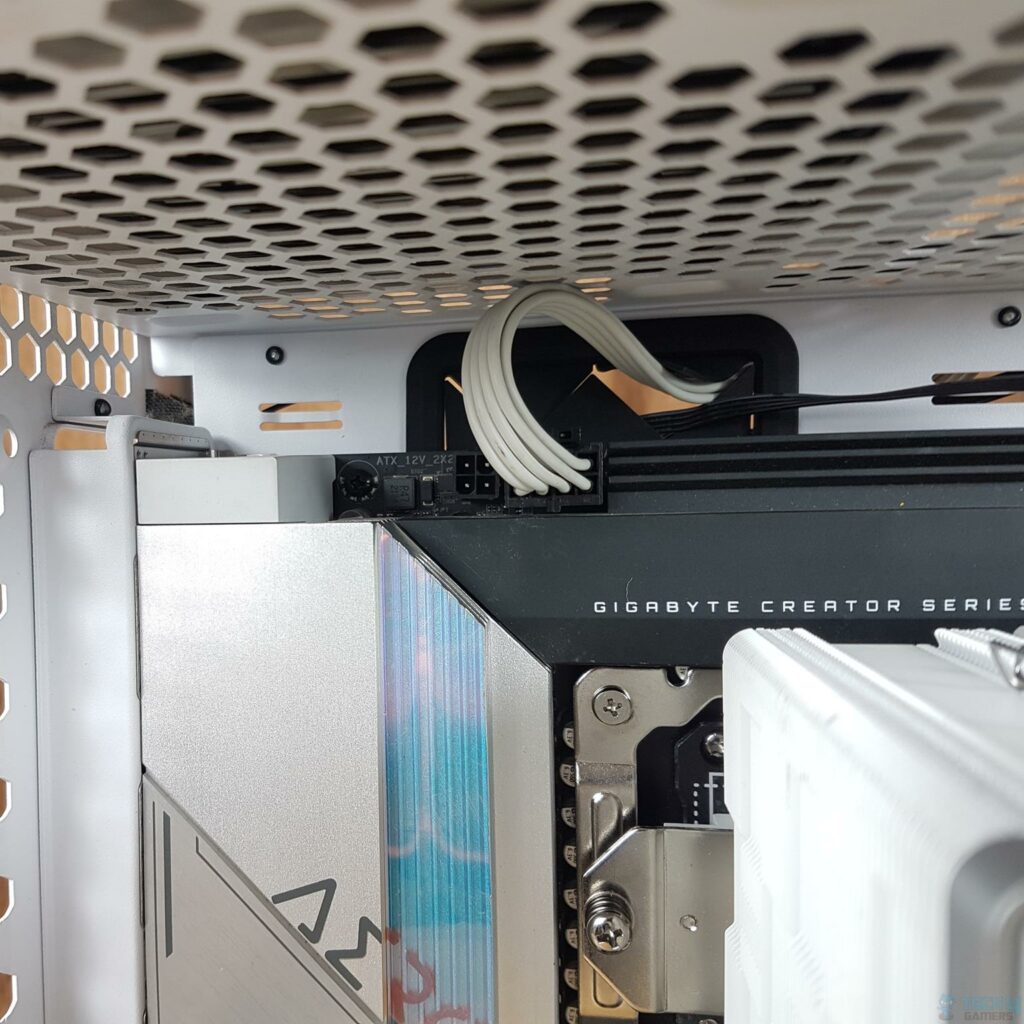
The EPS connector was a somewhat convenient installation due to space restrictions coming from the cooler, but nothing was glaring. We then installed a graphics card.
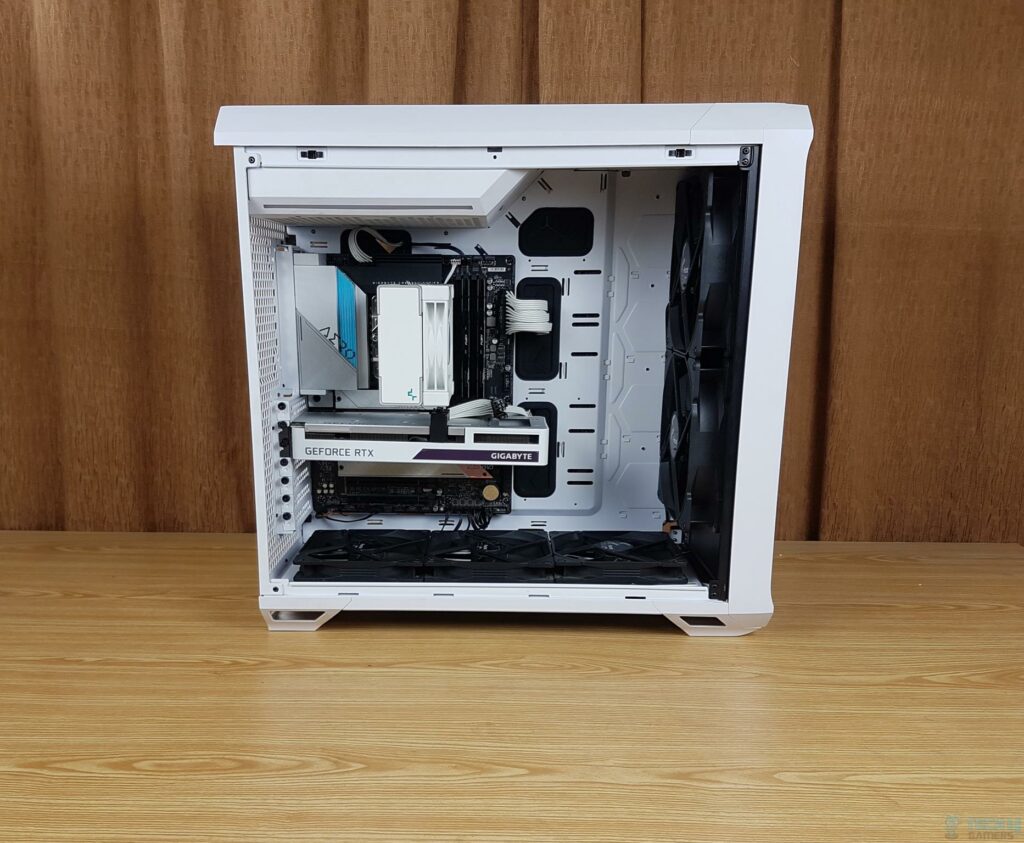
Here comes the severe first observation. Due to the particular design and location of the PSU chamber or bay, routing PEG or GPU cables is challenging. Their length is insufficient to reach the connector of the graphics card in the center. If this connector were located towards the front of the graphics card, it would have been a somewhat convenient installation. We ended up using a modDIY adapter connector for this installation. Otherwise, there was no way out.
Cables from the PSU were nicely routed outward toward the backside of the case, except for the PEG cable. We needed every inch of cable length possible to make it closer to the power connector of the graphics card. We did a little cable management, but it still came out nice. Installing 3.5” and 2.5” drives would add CHALLENGE for the user as it would be difficult to manage this closure.
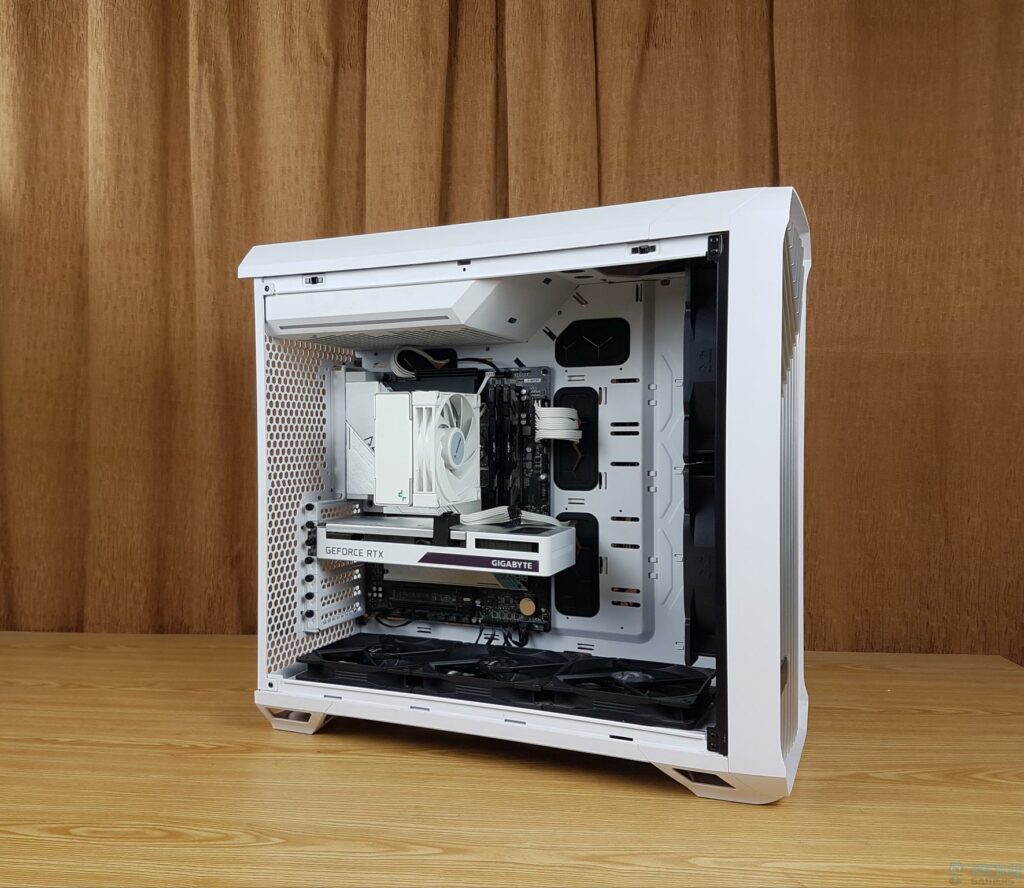
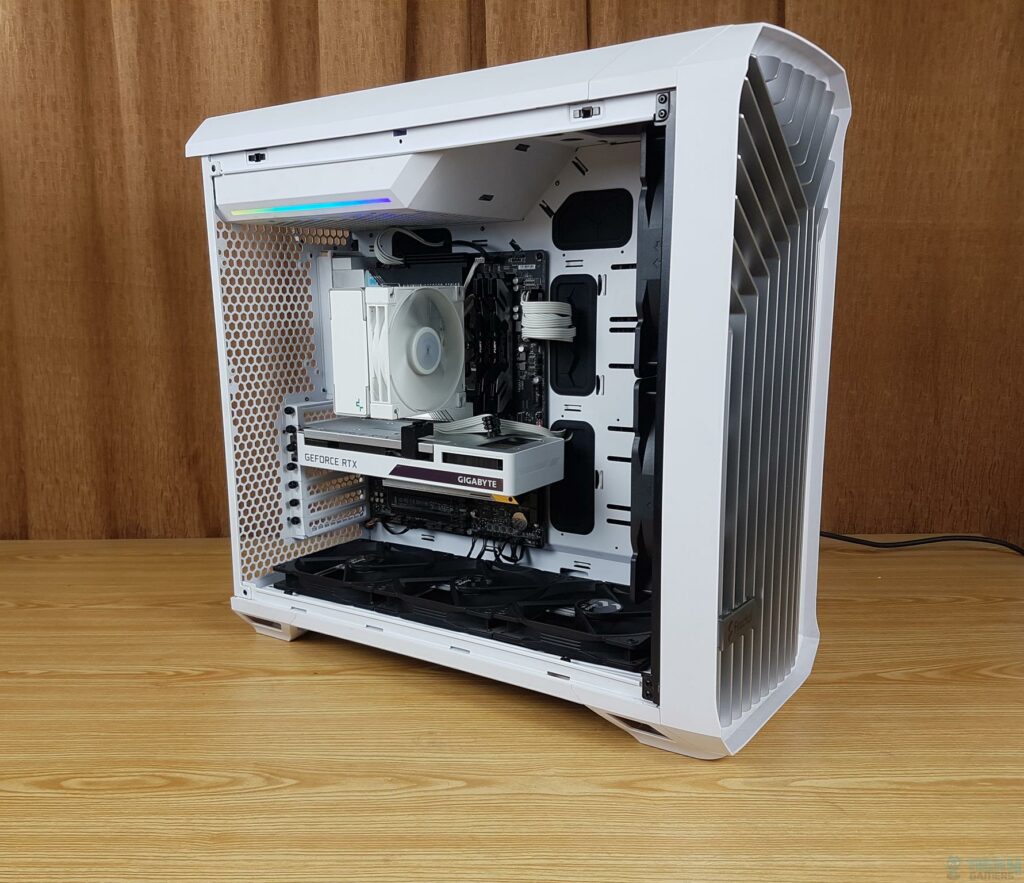
All cables are connected, and the system is ready to go. Here is another look at the assembled build.
POST was successful. You can see a nice AURA under the PSU bay. The above picture shows the digital RGB lighting from the PSU bay in a close-up.
Testing
We have used the mentioned configuration for a test build:
- Intel i7-12700K
- GIGABYTE Z690 AERO G
- Kingston Fury Renegade DDR5 kit @ 6400MHz CL32
- Sabrent Rocket 4 Plus 2TB NVMe SSD
- GIGABYTE GeForce RTX 3060 VISION OC Rev.2
- DeepCool AK400 White Cooler
- DeepCool DQ-750-M-V2L-WH PSU
Noctua NT-H1 is used on the CPU IHS. We have used CINEBENCH R23.2 to stress test the CPU for 30 minutes at 4.8GHz at all cores. Time Spy Extreme Stress test was used to load the graphics card and record thermals.
Also Read: Fractal Design Lumen S36 RGB Cooler Review
The ambient temperature was 24°C. This table shows the result:
| Idle Temperature in °C | Load Temperature in °C | |
| Intel i7 12700k | 26 | 77 |
| GIGABYTE RTX 3060 | 32 | 69 |
Overall, this is a good result from this case. We set the five fans of the case and the CPU cooler’s fan to run at 100% speed. The overall noise output is high. You can set a custom fan curve to that end.
Should You Buy It?
After looking at the product from all corners and analyzing it according to every situation, everyone ponders the same question: should I buy it?
Buy It
✅ Need for Optimal Airflow: If your gaming rig demands excellent airflow to keep your processor and GPU running cool and efficient.
✅ Preference for Open-Front Grille: If you appreciate the benefits of an open-front grille design, ensuring unrestricted airflow for your front fans.
✅ Desire for Distinctive Design Elements: If you crave a case that seamlessly integrates distinct design features such as tempered glass, captivating Digital RGB lighting, and ample fan slots to elevate your build aesthetics.
Don’t Buy It
❌ Budget constraints: If you are on a tight budget, you should avoid eyeing this case as the current price tag is around $190, making it a premium item.
❌ Short GPU Cables: If your GPU cable falls short, mainly due to the corner cutouts for tables, longer cables are required to connect all components effectively in this case, which makes it a don’t-buy item for some users.
❌ Prefer Easy Cable Management: If you want to avoid the complexities of cable management, especially when dealing with 2.5”/3.5” drives, which might pose a challenge in this case.
Conclusion
I am thrilled with Fractal Design’s Torrent PC case – a game-changer prioritizing optimal airflow. Opting for the sleek White RGB TG Clear Tint added a personal touch to my setup. With cooling prowess from 180mm fans, radiator support, and the Nexus 9P Slim hub, organizing my gaming haven with 2x 3.5″ and 4x 2.5″ drives was seamless.
In Torrent’s spacious interiors, I appreciated clearances for easy cable management, accommodating my ATX PSU, CPU cooler, and massive graphics card. The Y-shaped grille design, top-mounted PSU bay, and perforated rear grille added personality. Despite the $189.99 price, the Torrent’s unique design and top-notch features make it a justified investment for a statement-making gaming setup. I highly recommend the Torrent experience.
- December 11, 2023: A few text changes to improve readability.
Thank you! Please share your positive feedback. 🔋
How could we improve this post? Please Help us. 😔
[Hardware Reviewer]
Awais Khan is a Tech Geek, conscientious, reliable, and hardworking individual who pays attention to detail with excellent time management skills. Alongside that, he is an expert in PC Hardware; dealing with Benchmarks, Analysis, and testing before sharing information with readers. Whenever free, Awais occasionally shares Gaming Videos on his YouTube Channel.
Get In Touch: awais@tech4gamers.com


 Threads
![6 BEST 120mm Case Fans [Tested] Best 120mm Case Fans](https://tech4gamers.com/wp-content/uploads/2023/05/Best-120mm-Case-Fans-218x150.jpg)
