 Threads
Great Airflow!
Review Summary
The Aerocool One Eclipse is a mid-tower chassis designed for optimal airflow, featuring a fully vented front panel, 4x 120mm RGB fans, and a 4mm tempered glass side panel. While offering a balance of aesthetics and performance, it presents potential challenges during assembly.
Hours Tested: 13

Overall
-
Performance - 7/10
7/10
-
Features - 7/10
7/10
-
Value - 8/10
8/10
-
Design - 8/10
8/10
Pros
- Airflow
- RGB Fans
- Tempered Glass
- Sleek Design
Cons
- Cable Management
- Quality Control


Dive into the trend of airflow edition chassis with the Aerocool One Eclipse. No compromises here – just a fully vented front panel for maximum airflow. Designed for the mid-market segment, this mid-tower powerhouse boasts 4x 120mm RGB fans, with a smart placement on the front ensuring optimal cooling. The 4mm tempered glass side panel adds a touch of elegance, revealing the attention to detail by the Aerocool design team. Supporting standard ATX motherboards, with room for a 161mm CPU cooler and a 327mm graphics card, is it a versatile choice or not? Let’s find the answers!
- Why you can trust Tech4Gamers: Our reviews are based on dedicated hands-on testing by our team of experienced hardware experts. Find out more about how we test.
Key Takeaways
- Aerocool One Eclipse is a mid-tower chassis designed for optimal airflow, featuring a fully vented front panel, 4x 120mm RGB fans, and a 4mm tempered glass side panel.
- It is suitable for users seeking a balance of aesthetics and performance. Supports standard ATX motherboards, 161mm CPU coolers, and 327mm graphics cards.
- It is not for users seeking easy cable management or a hassle-free build due to reported issues like missing standoffs and twisted ARGB header pins, indicating potential challenges during assembly.
Here the specifications of Aerocool One Eclipse:
| Aerocool One Eclipse | Specifications |
|---|---|
| Model No. | Aero One Eclipse-G-BK-v1 and Aero One Eclipse-G-WT-v1 |
| Case Type | Mid Tower |
| Color | Black and White |
| Body Material | SPCC |
| Front Panel Material | ABS |
| Steel Thickness | 0.5mm ~ 0.7mm |
| Motherboards | ATX/micro ATX/mini-ITX |
| Case Dimensions (Overall) | 210 x 520 x 404mm (W x H x D) |
| Case Dimensions (Internal) | 210 x 440 x 330mm (W x H x D) |
| 3.5” Drive Bay | 2 Max. (1 x 3.5” and 1 x 3.5”/2.5”) |
| 2.5” Drive Bay | 3 Max. (2 x 2.5” and 1 x 2.5”/3.5”) |
| Expansion Slots | 7 |
| GPU Clearance | Supports GPU up to 327mm |
| CPU Cooler Clearance | Supports CPU up to 161mm |
| I/O Ports | USB3.0 x 2 |
| Liquid Cooling | Front: 120/240/280/360mm Radiator (Optional)Top: 120/240mm Radiator (Optional)Rear: 120mm Radiator (Optional) |
| Air Cooling | Front: 120mm x 3 or 140mm x 2 (Includes 120mm Eclipse Fan x 3)Top: 120mm x 2 (Optional)Rear: 120mm x 1 (Includes 120mm Eclipse Fan x 1)Supports VGA Fan: 120mm x 2 (Optional) |
| Net Weight/Gross Weight | 6.1kg/7.16kg |
| Internal Cable Management Depth | 24mm |
| Power Supply | ATX PSU (Including cables, up to 166mm) (Optional) |
| EAN Code | Black Edition – 4710562752342 White Edition – 4710562752359 |
Packaging and Unboxing
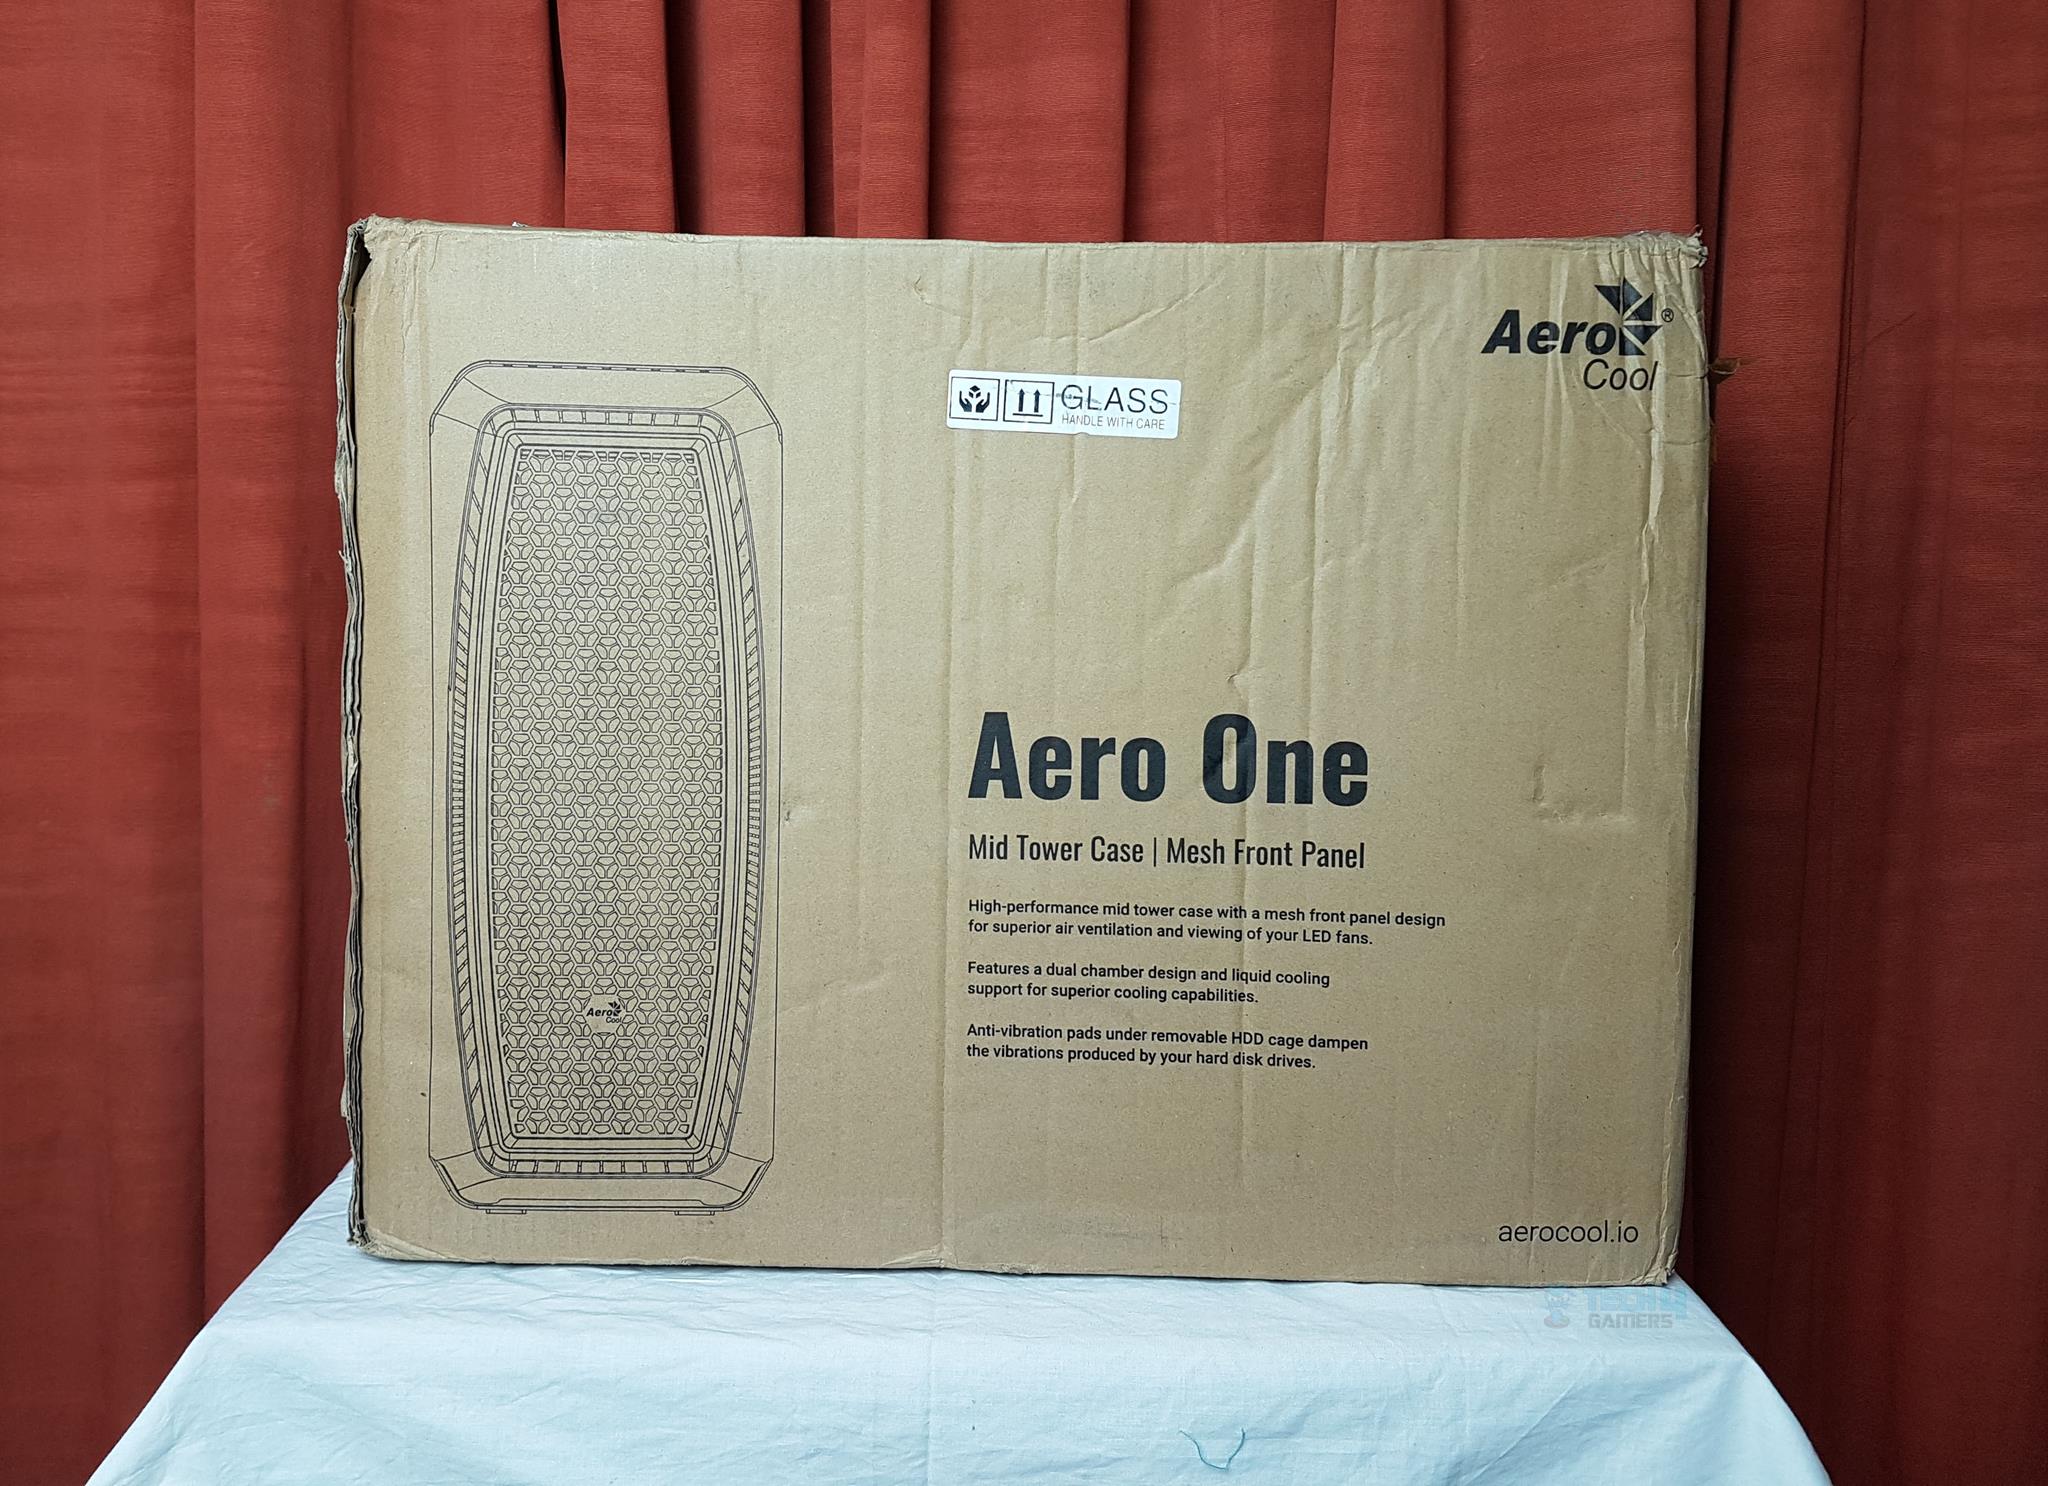
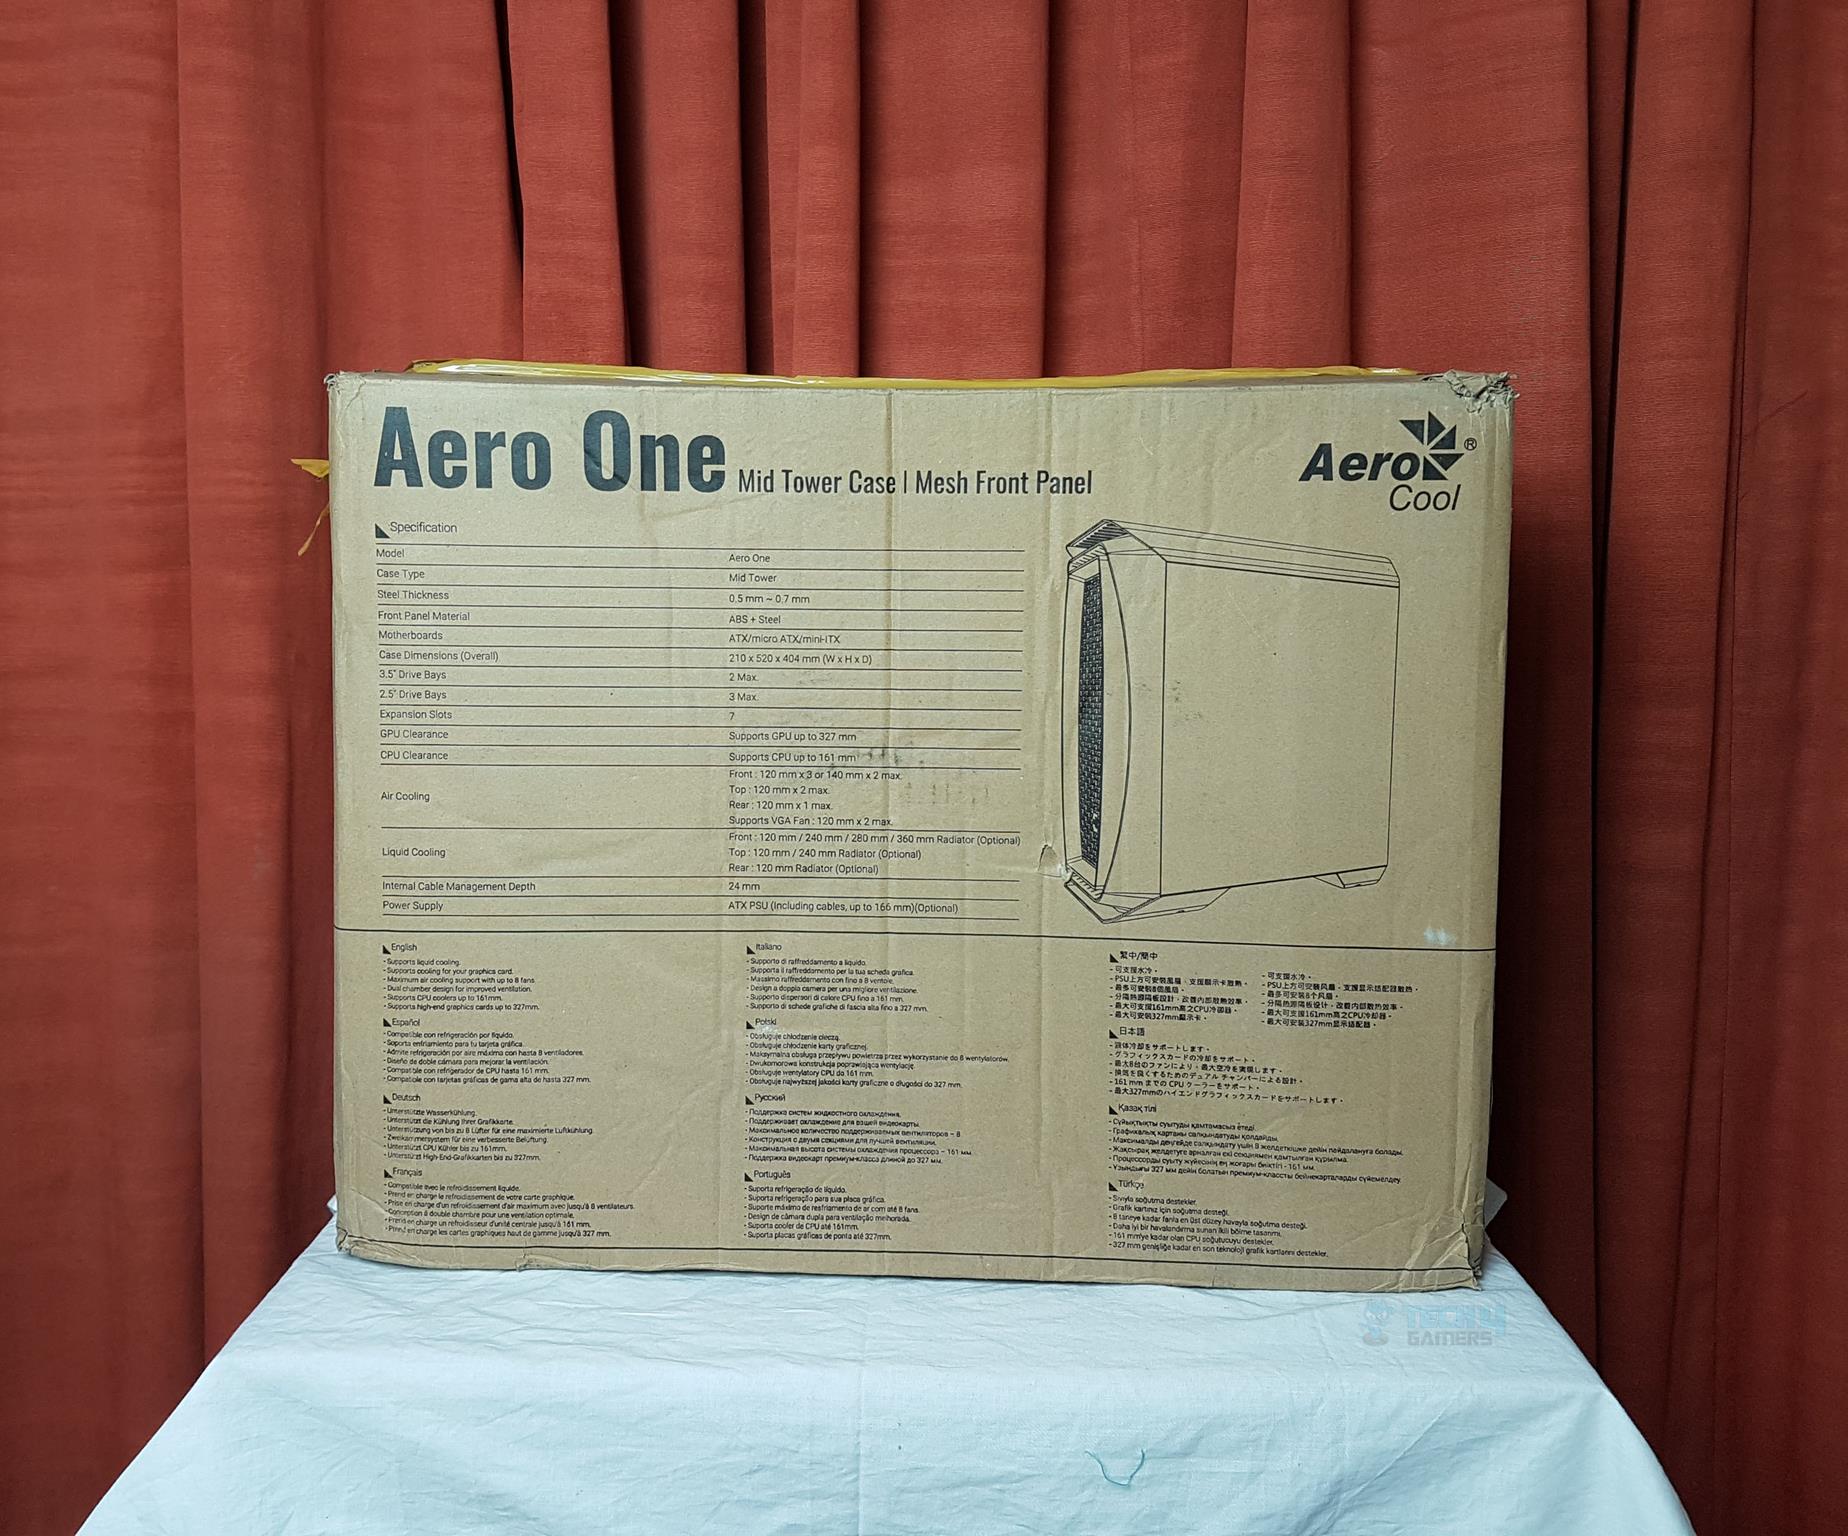
The chassis is shipped in a cardboard box. The packing box was pretty banged up when it reached us, and we suspected this might not have damaged the chassis, but luckily, the chassis, particularly the glass panel, was intact. The packing box provides some features of information to the user. There is a diagram of the chassis highlighting its meshed front panel for maximum airflow. Another key highlight is the dual-chamber design. The specifications are printed in a tabular format. There is a chassis diagram showing the design’s overall layout.
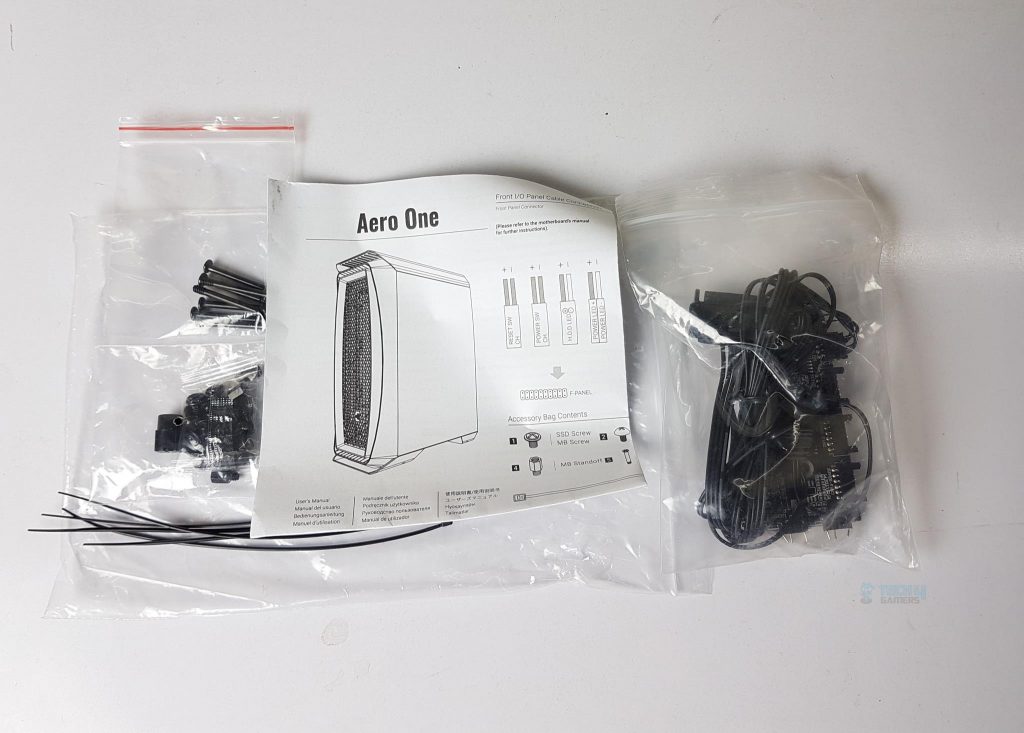
Box Contents
The Aerocool One Eclipse Review has provided a user manual to help with an installation inside this chassis and a bag full of various screws, standoffs, zip ties, and a SATA-powered hub. They have included long screws in case additional fans are to be mounted on the 240mm radiator if need be.
We made 3x observations:
- 1x standoff was missing.
- 1x long screw was missing.
- The ARGB header pins were twisted.
Quality control needs some workouts!
Design
The Aero One Eclipse is made of SPCC, ABS, and tempered glass. The steel’s thickness ranges from 0.5mm to 0.7mm. The overall case dimensions are 210 x 520 x 404mm (WxHxD). The internal dimensions are 210 x 440 x 330mm (WxHxD). It weighs 6.1 kg without any build. Let’s take a closer look at the chassis itself and discuss the design elements. We will look at the externals of the chassis, followed by the internals.
Exterior View
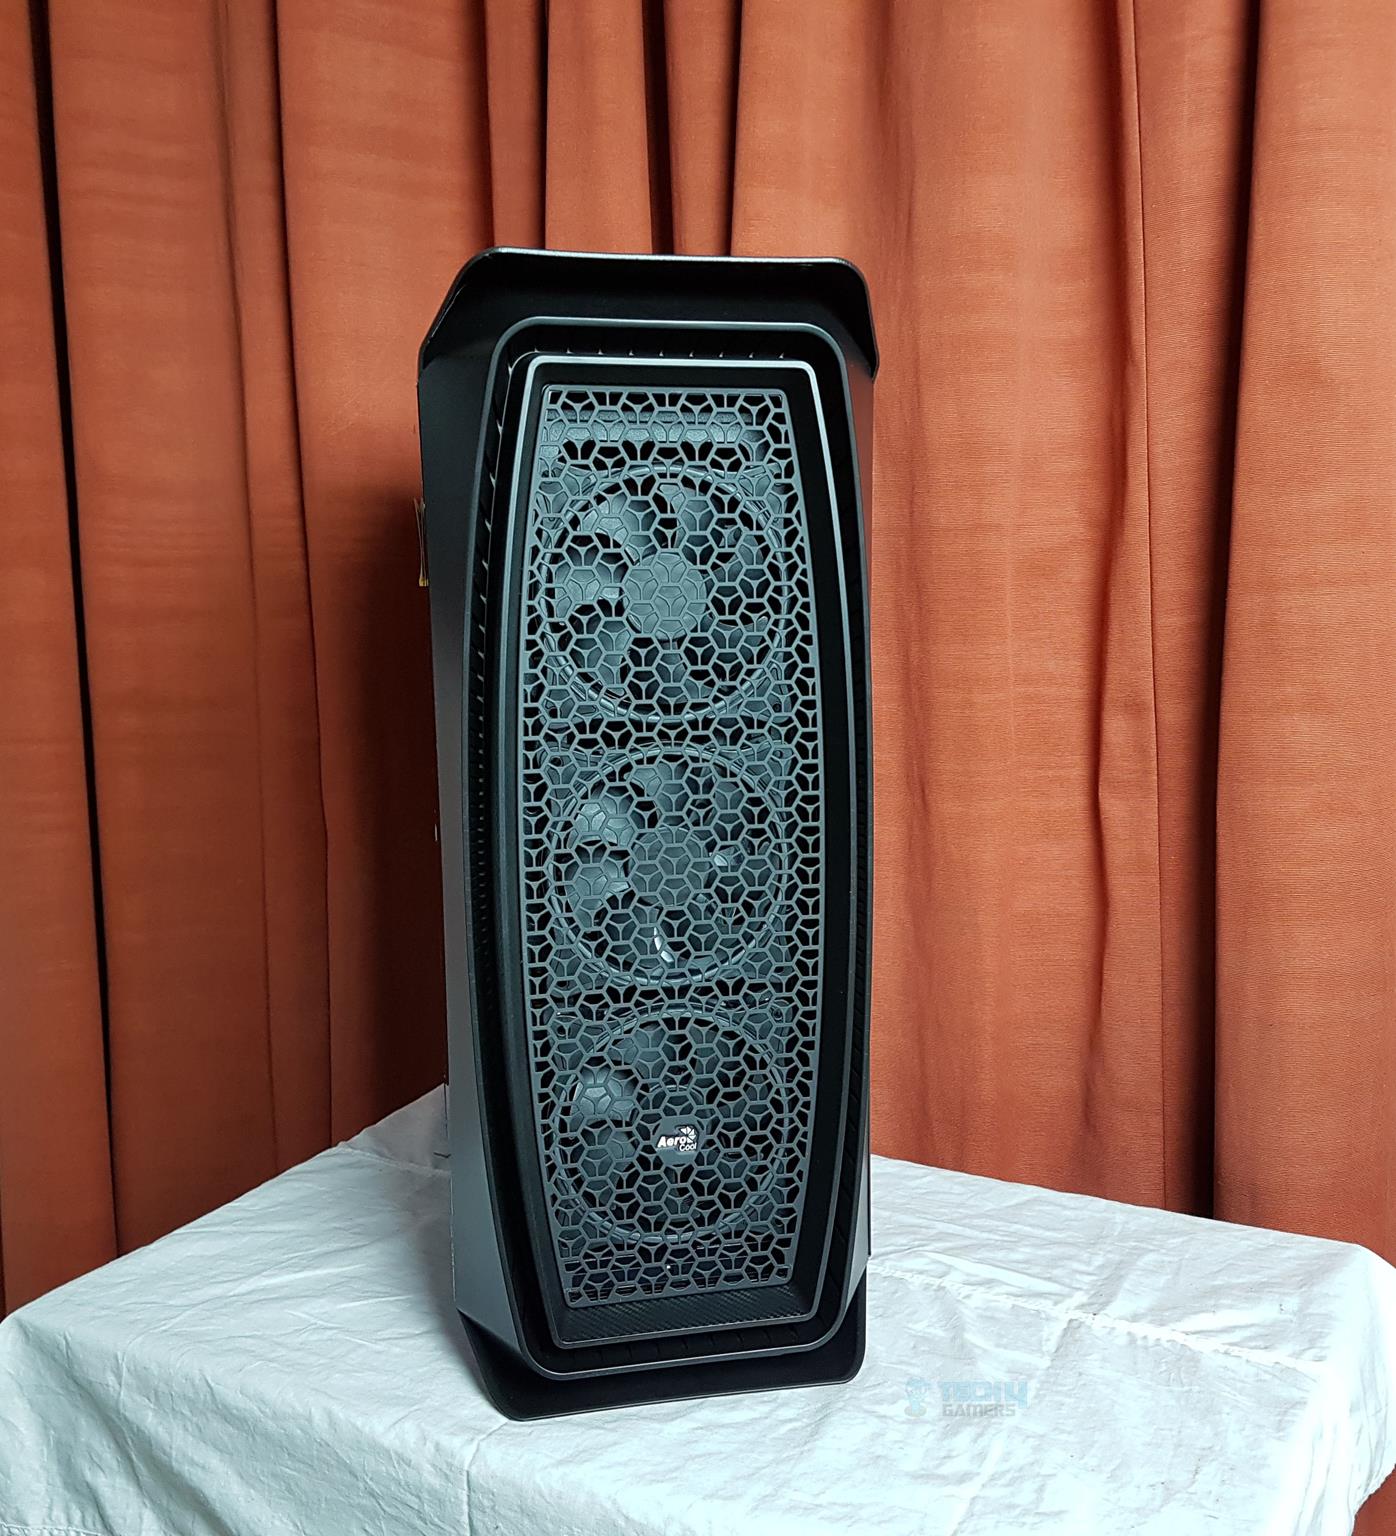
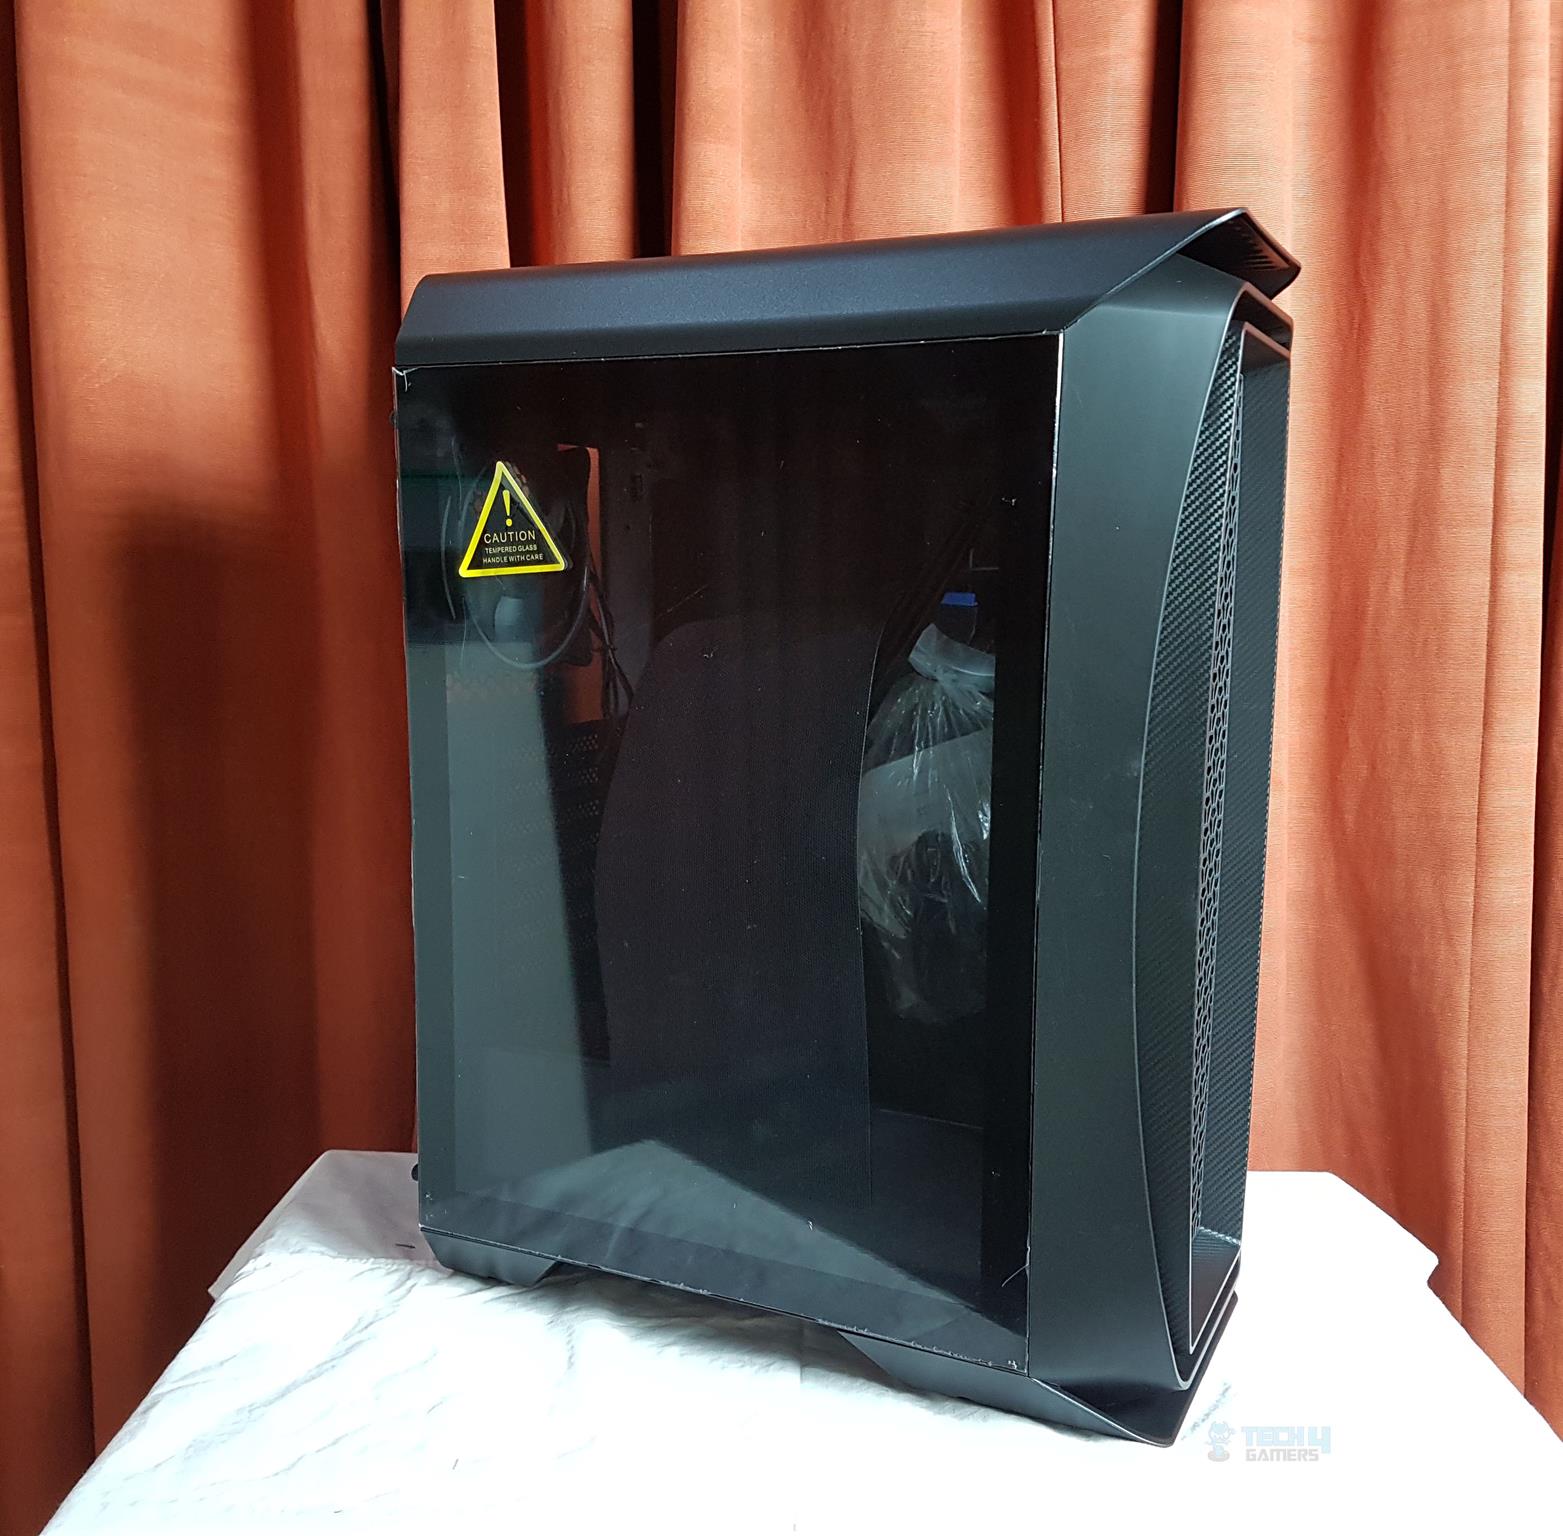
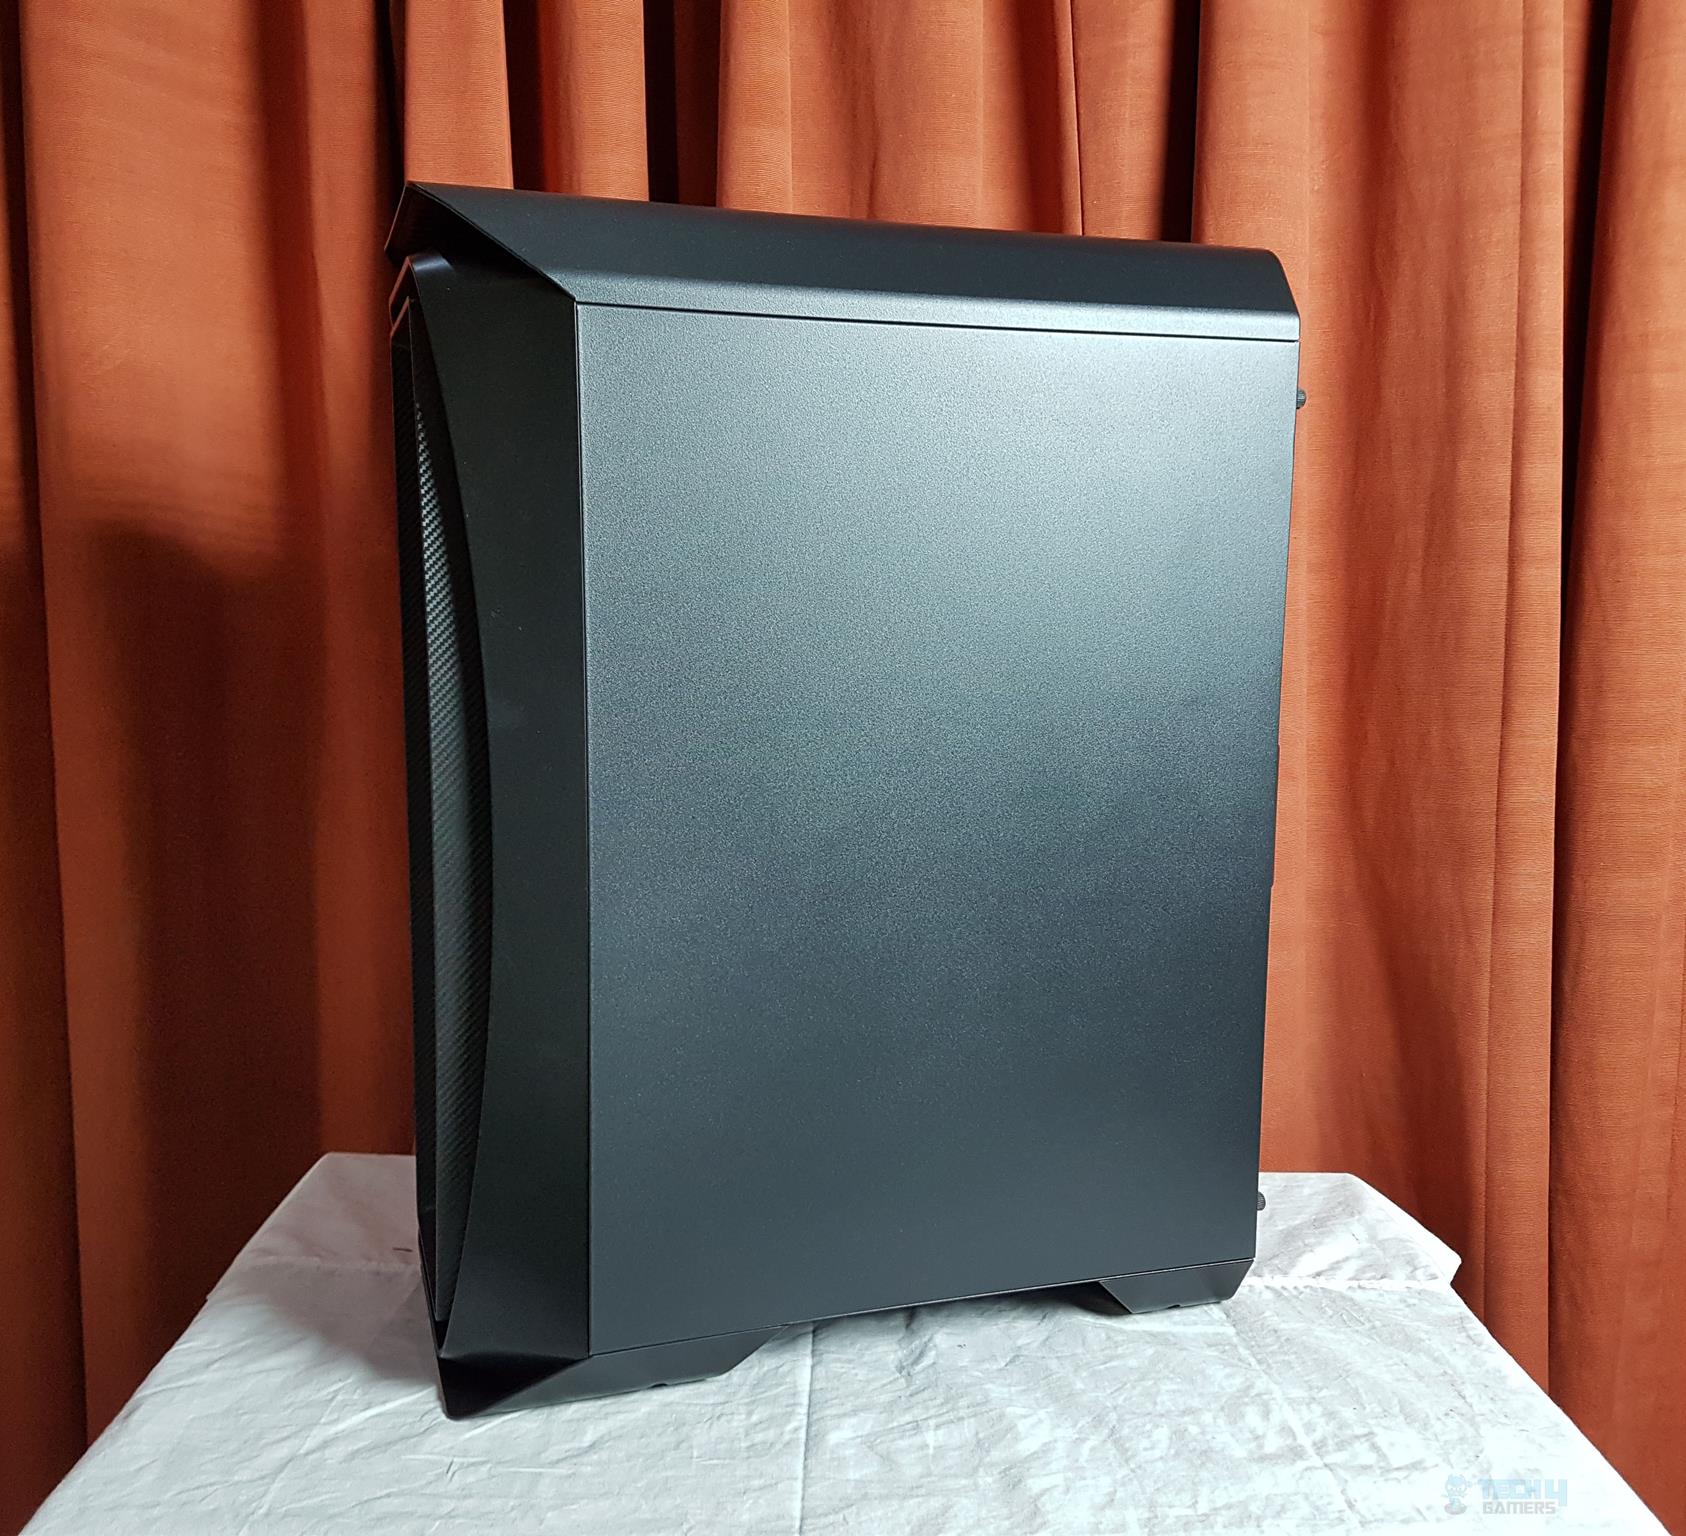
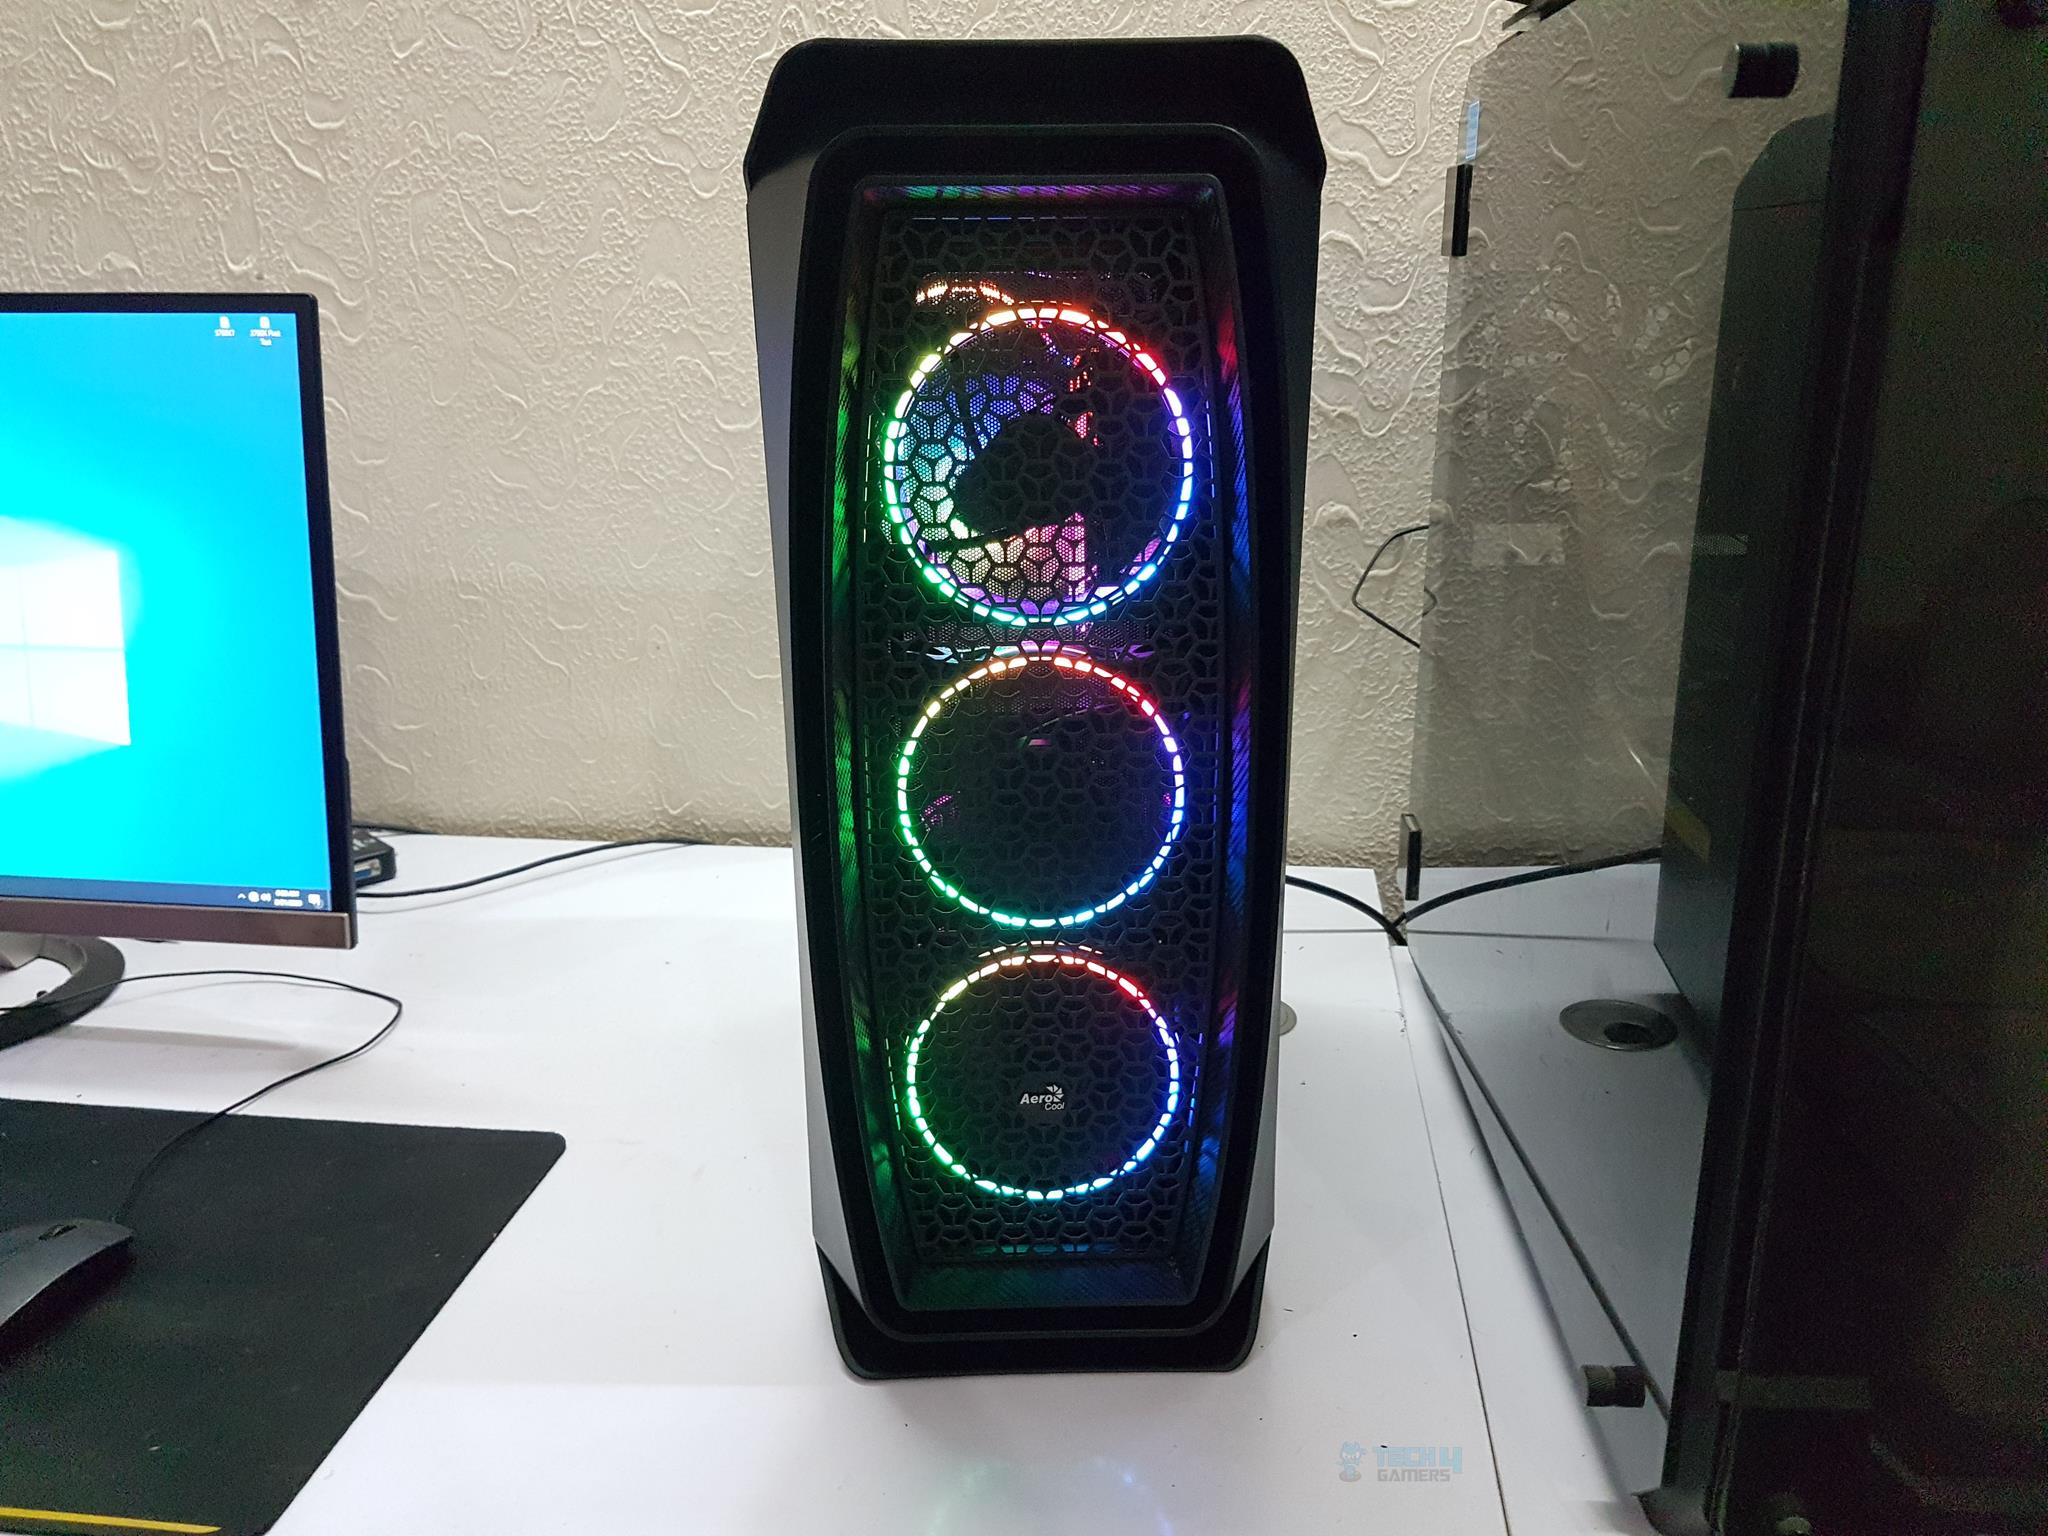
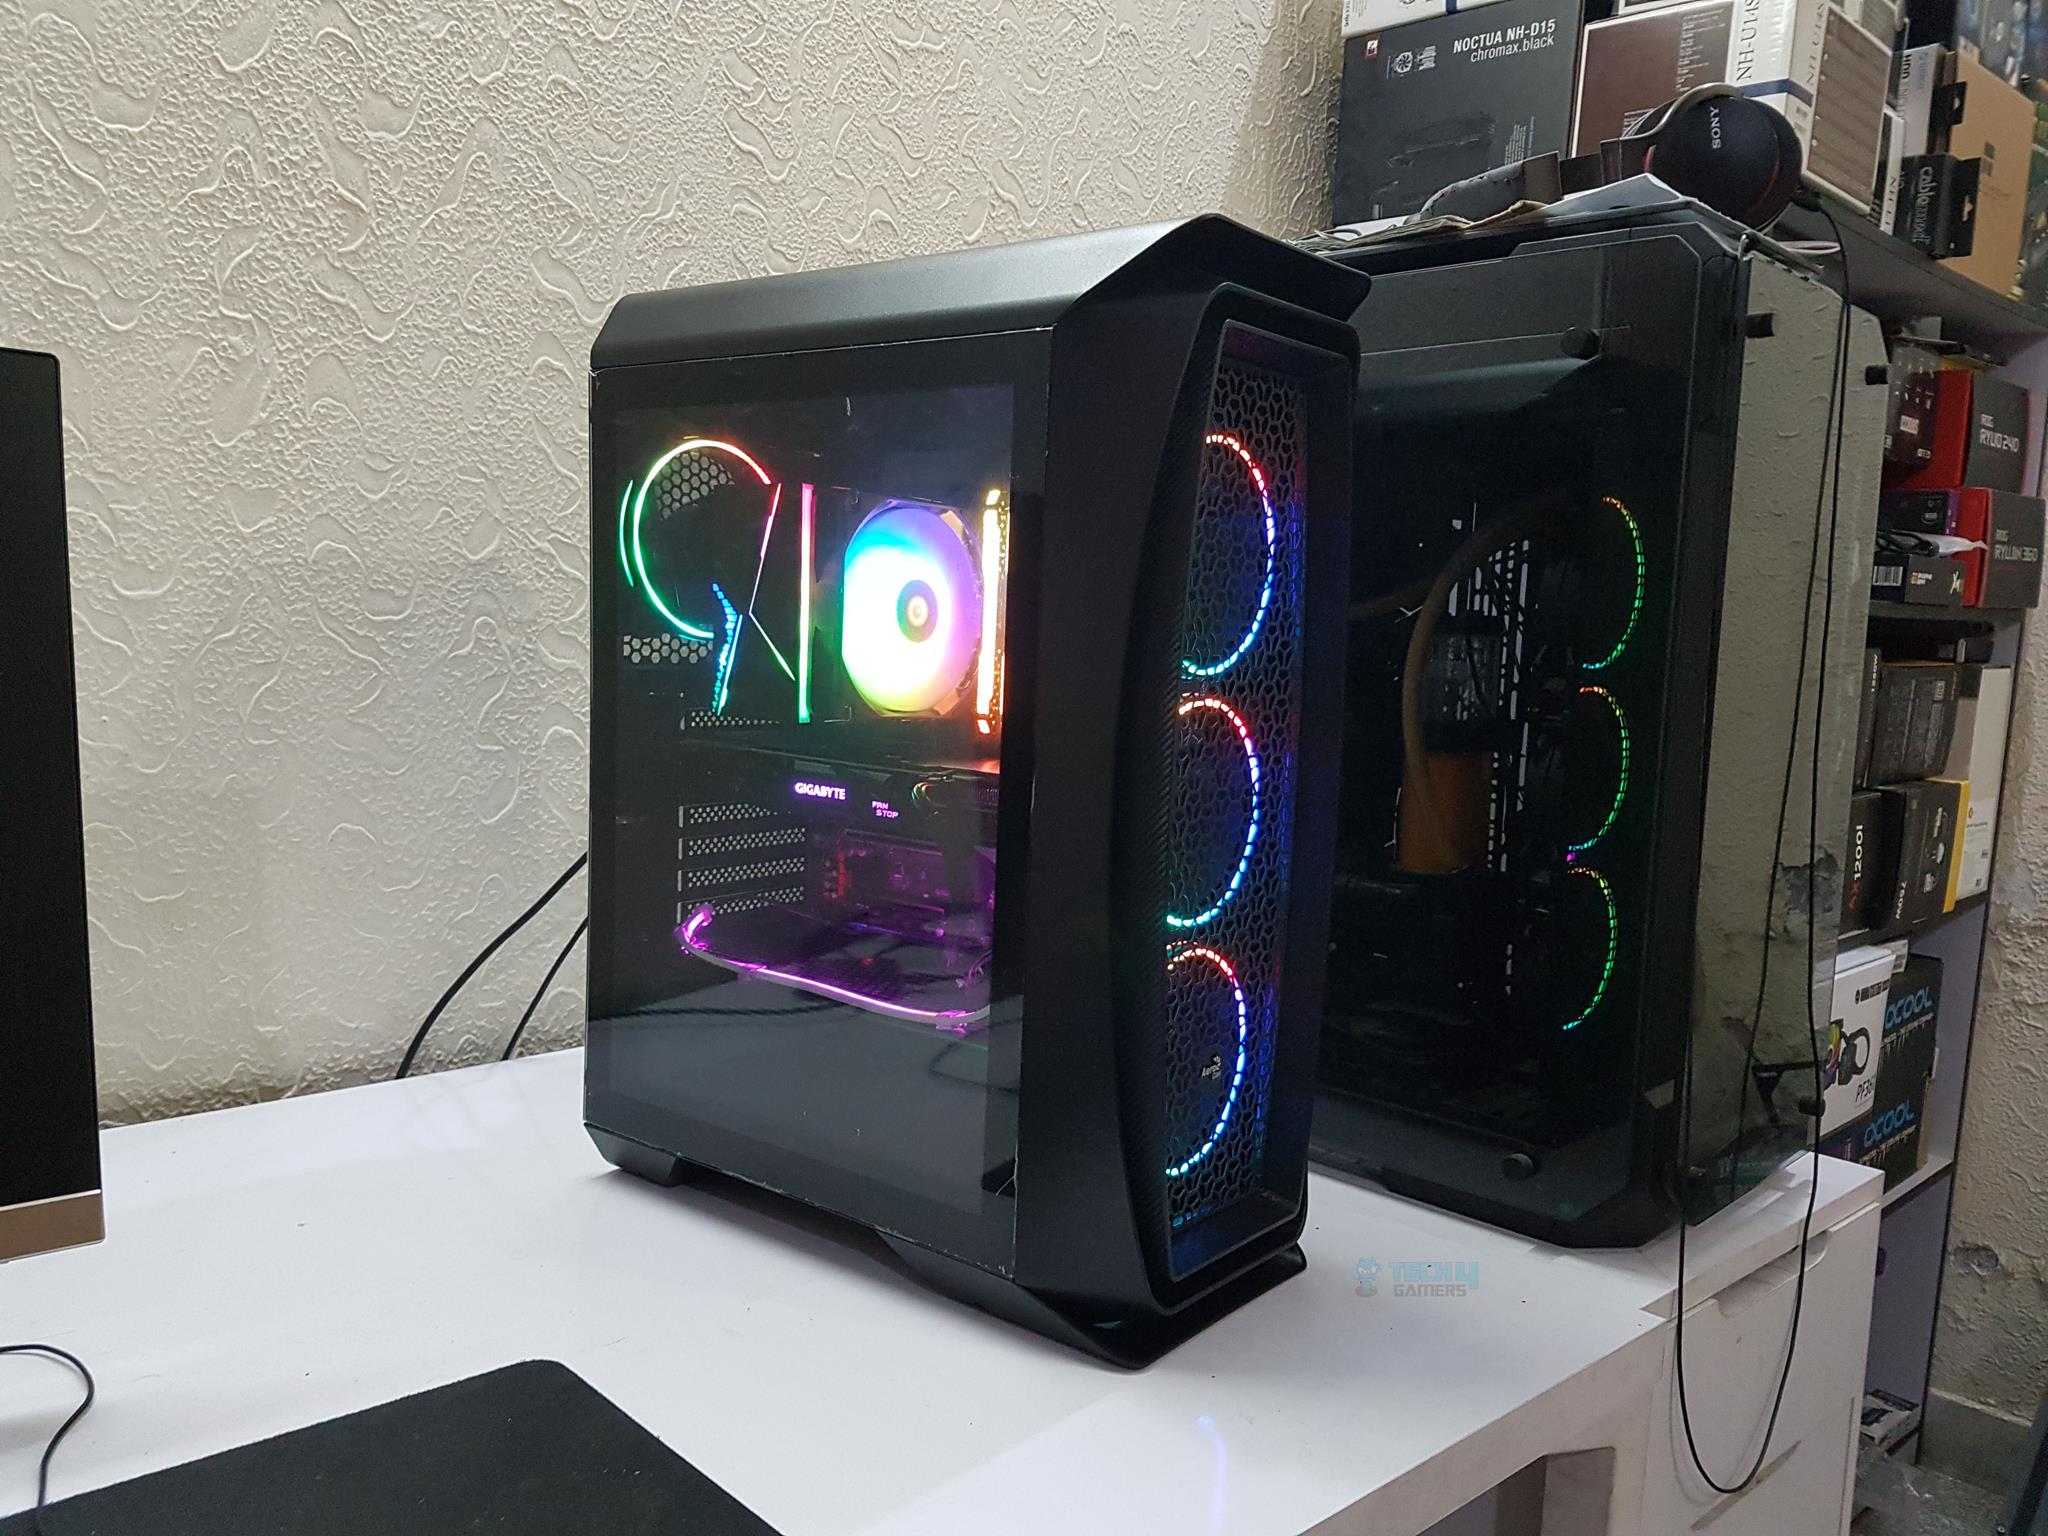
Check out the unique front panel design with multiple layers and a vented central façade. The outermost layer is part of the chassis frame, featuring an Aerocool logo and 3x 120mm Eclipse RGB fans. Notice the absence of a dust filter on the inner side. The carbon fibre wrap adds a cool touch to the aesthetics, even though it’s just for looks. The 4mm tinted tempered glass side panel, secured with thumbscrews, won’t fall when unscrewed. However, a magnetic dust filter is wrongly placed on front panel cables instead of behind the fans.
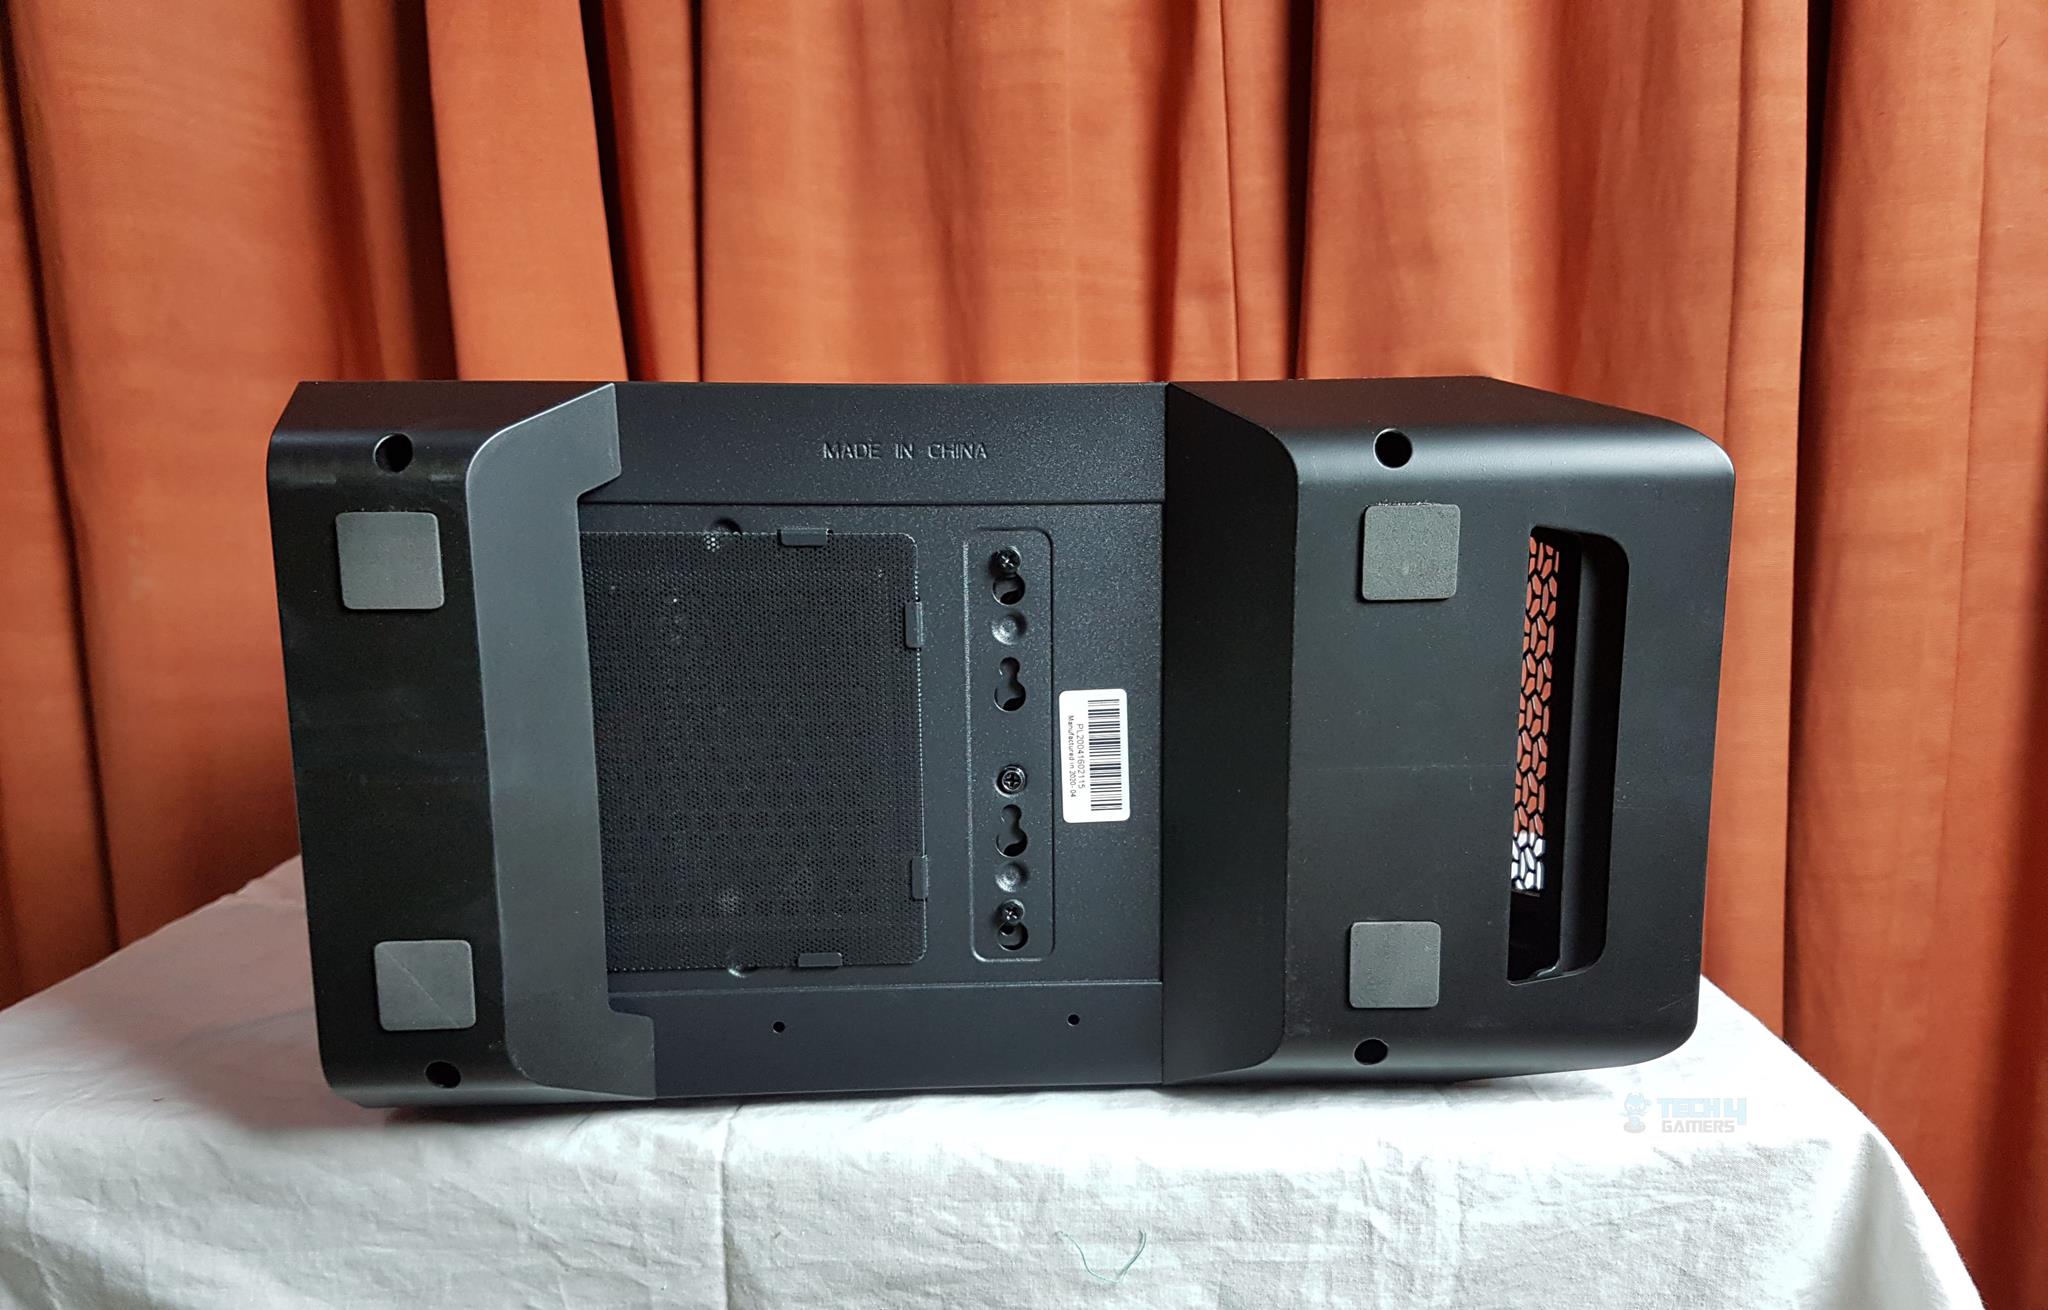
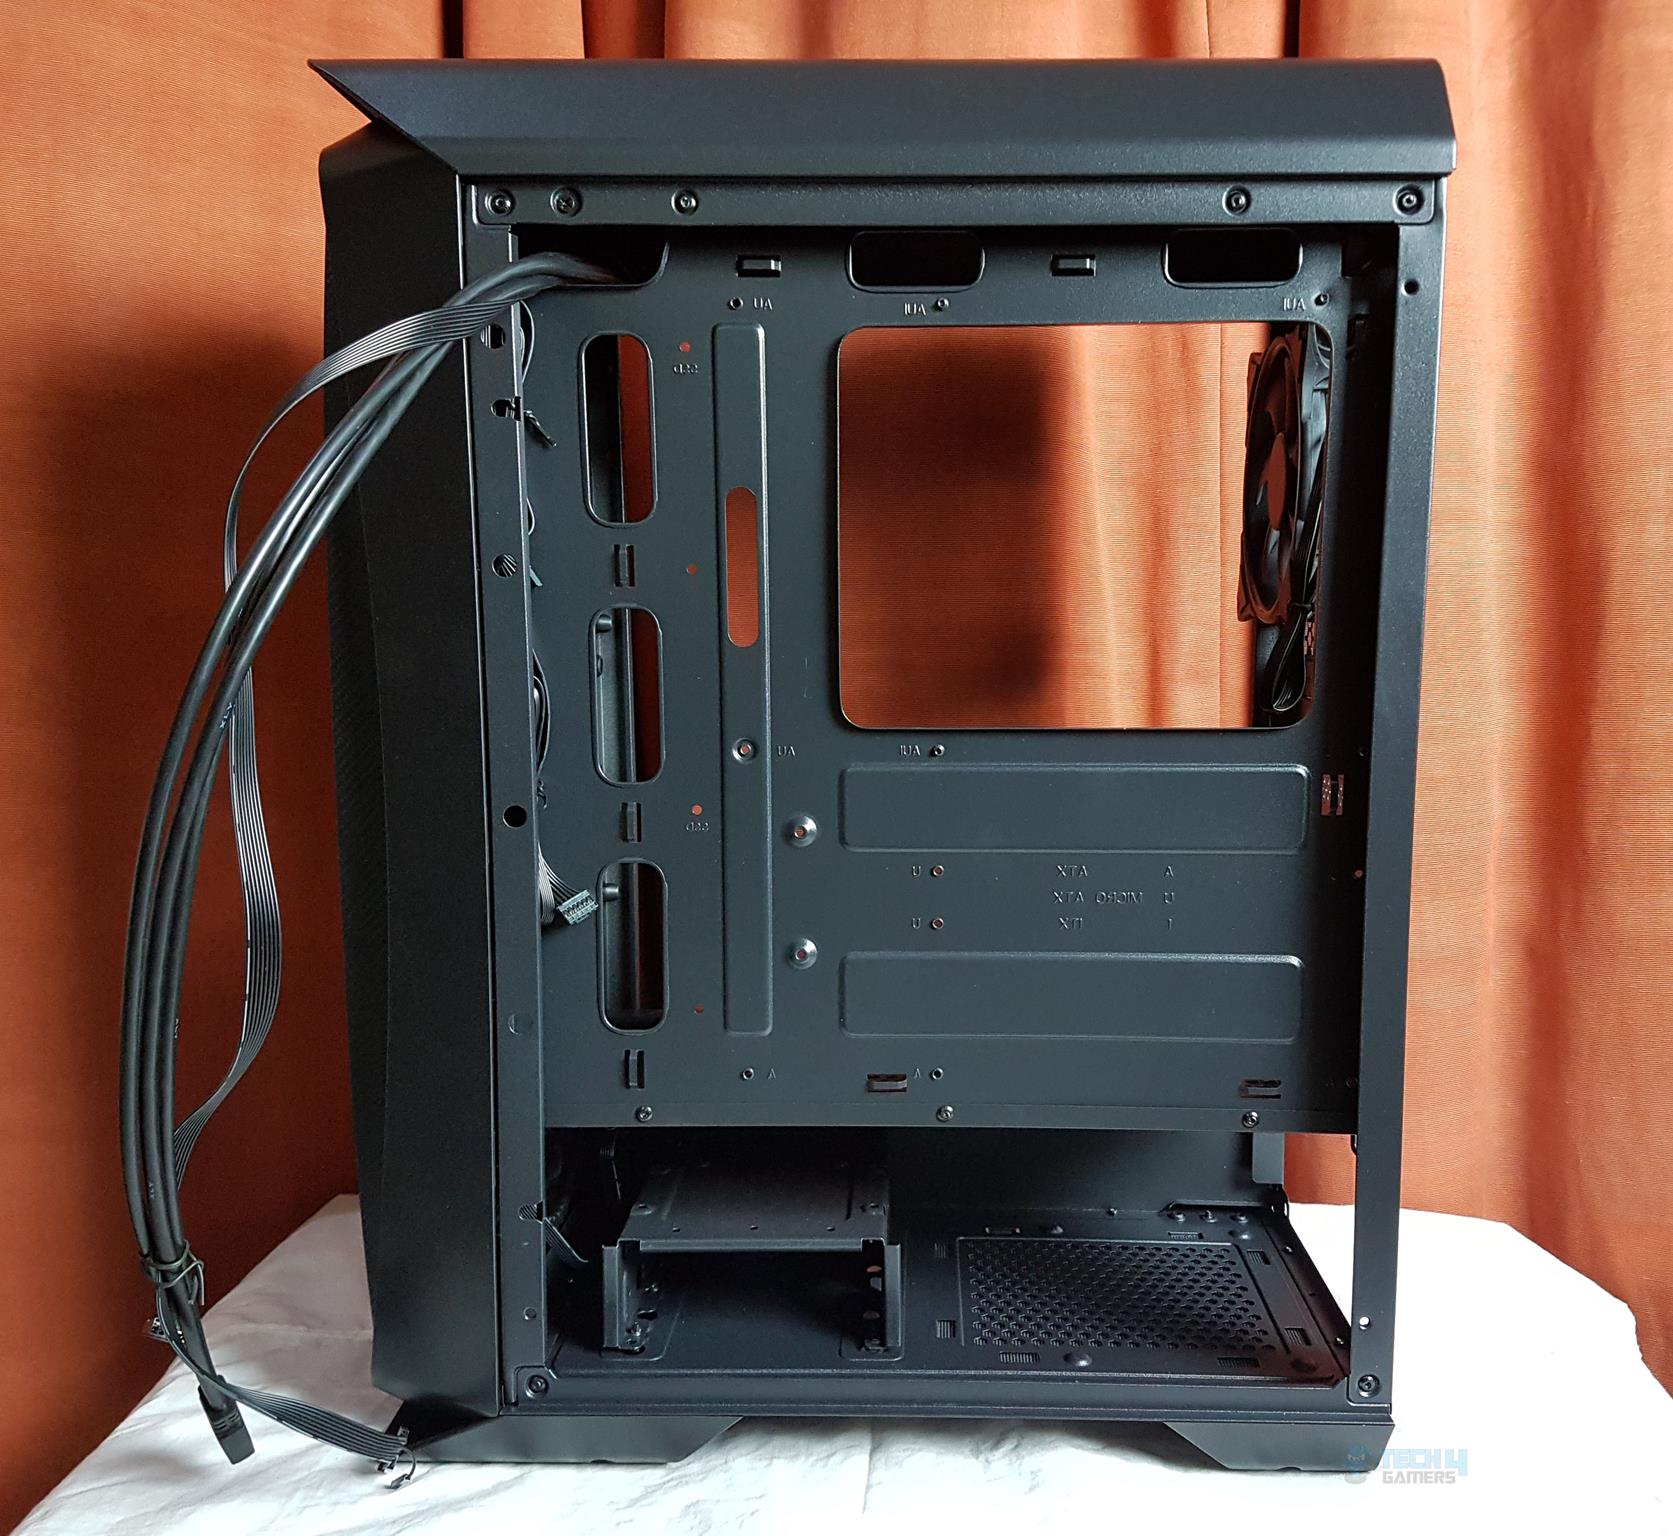
The chassis features a sturdy steel back panel that slides in/out easily and is secured with two thumbscrews. The Aerocool One Eclipse has a standard rear layout with a motherboard I/O shield cutout, a vented section with a height-adjustable 120mm fan, and 7 non-reusable PCIe slot covers. I’d prefer reusable covers like the SilverStone FARA R1, even if it means ditching the carbon fibre wrap. The main cover for the PCIe slots is secured with a thumbscrew, and a standard ATX PSU mount is at the bottom.

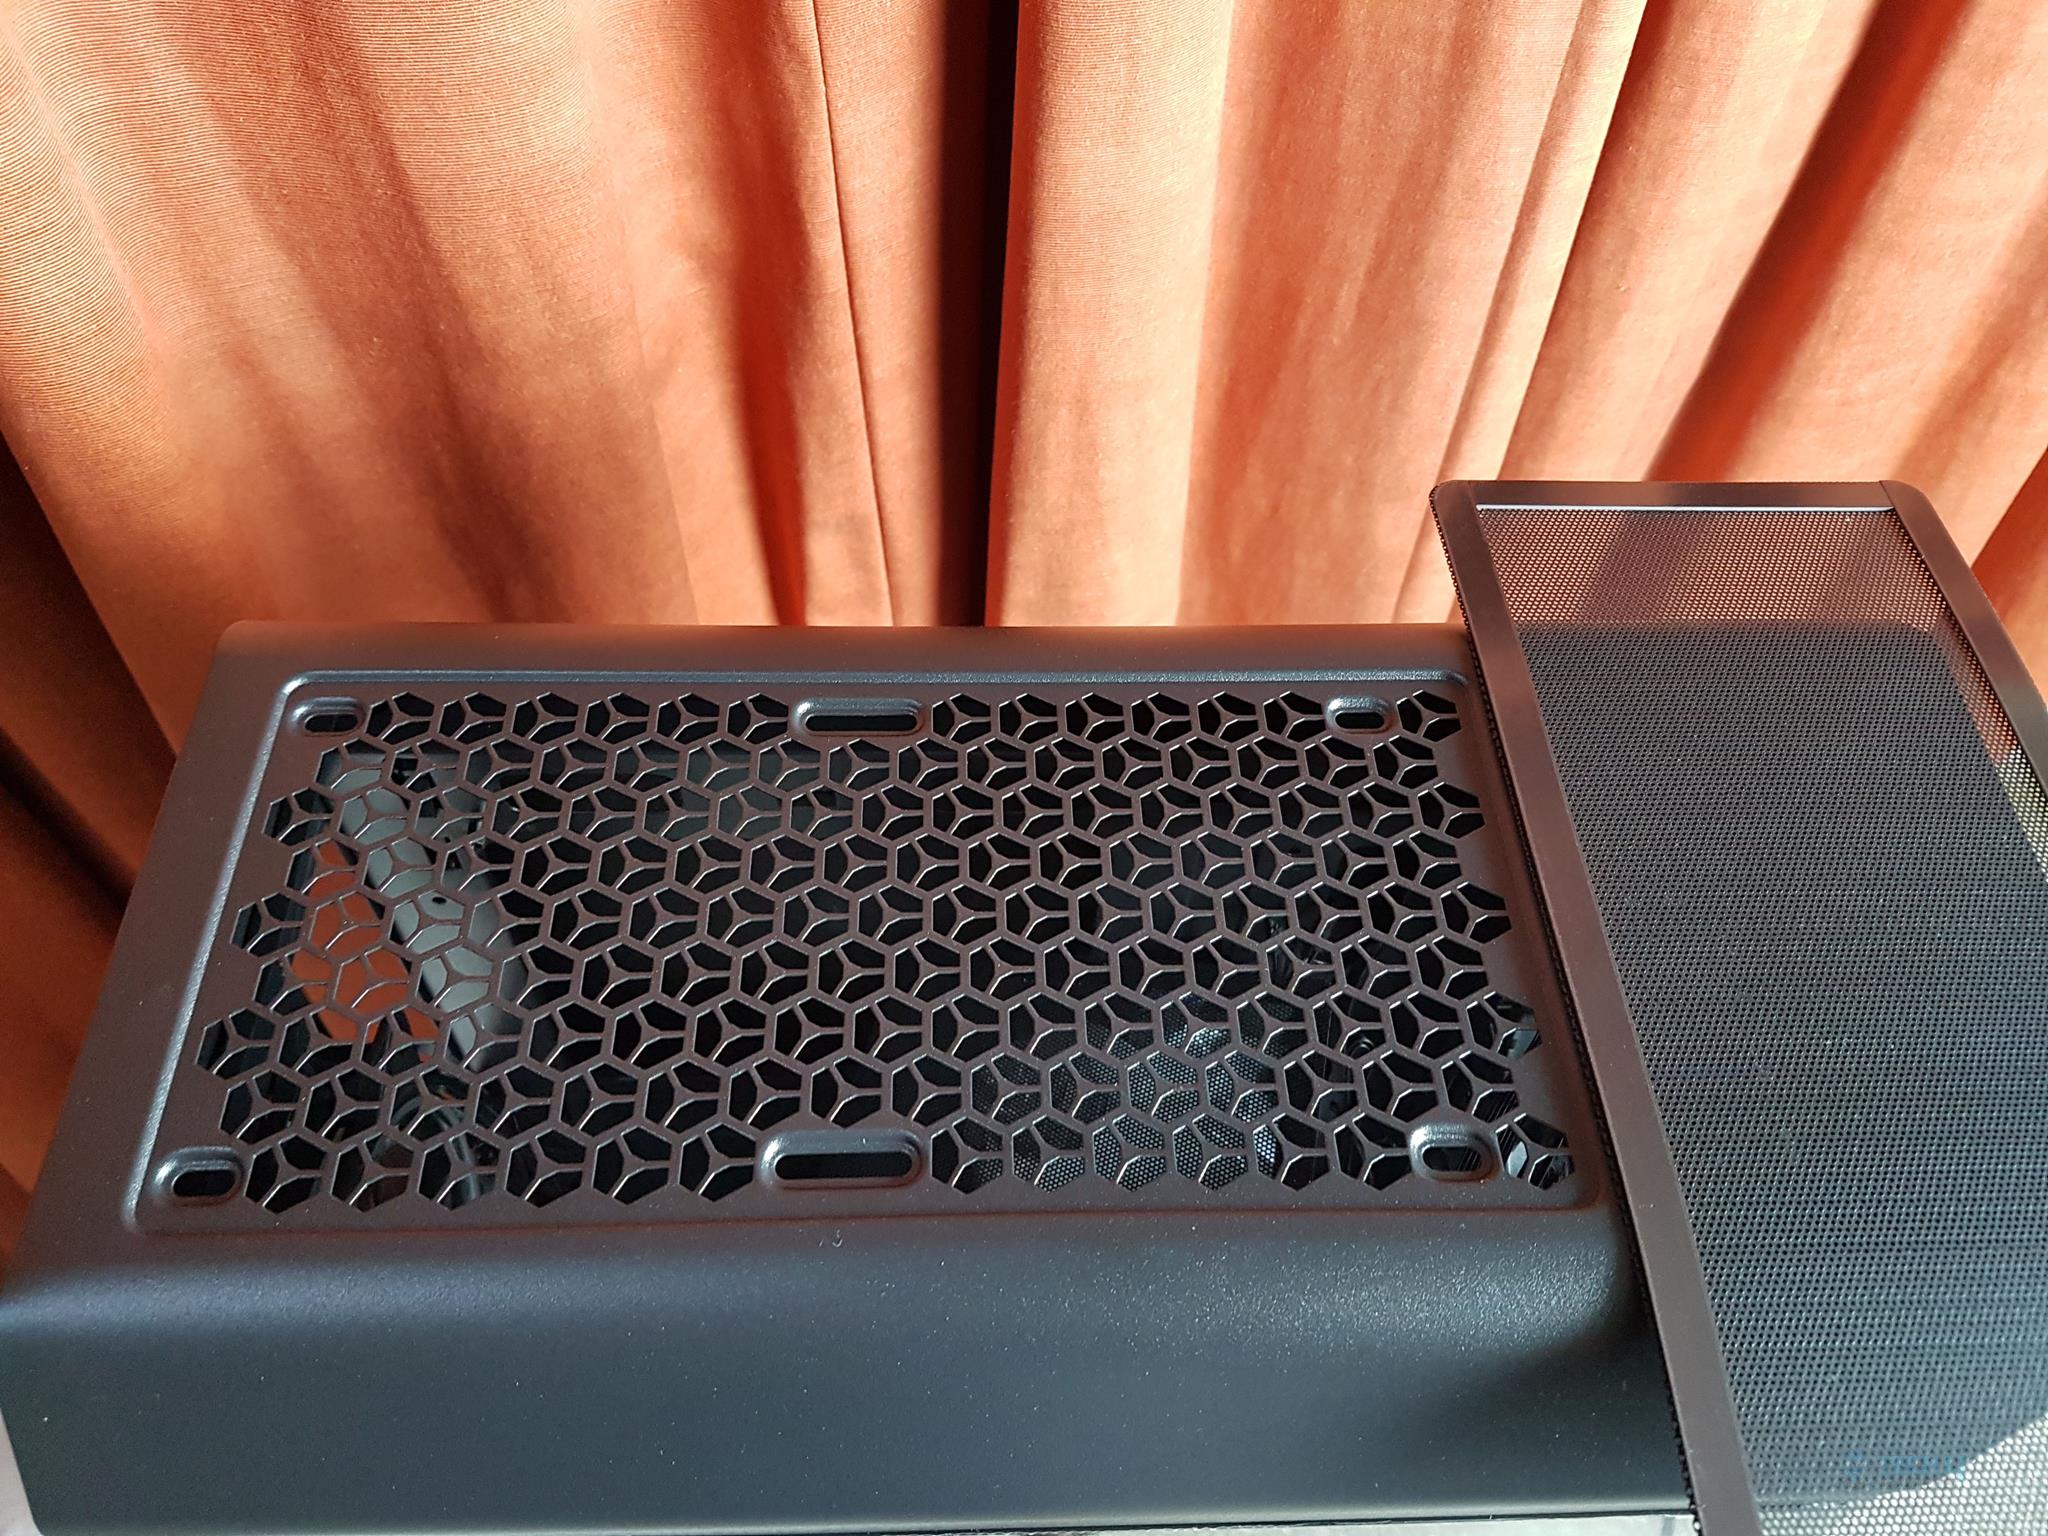
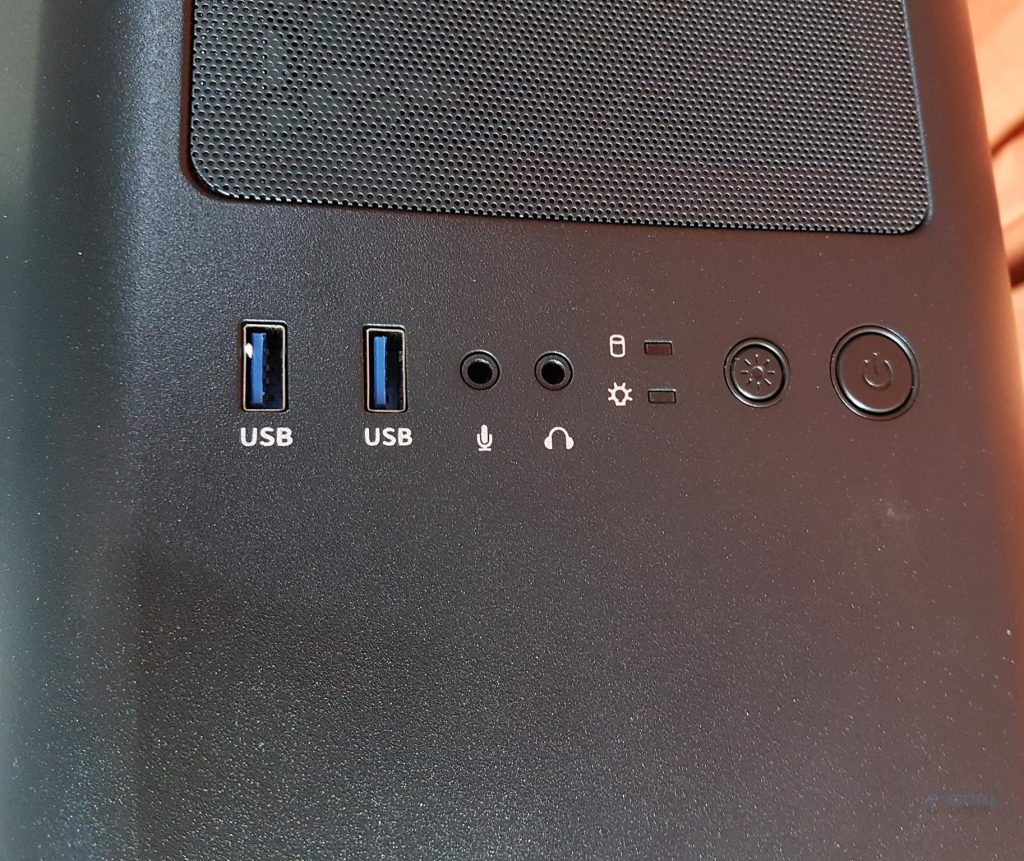
The top side of the chassis has an I/O panel towards the front side. There is a magnetic dust filter on the top covering the fan mounts. The user can install 2x 120mm or 140mm fans and a 120mm or 240mm radiator on the top. The steel cutout design is the same as is on the front vented portion.
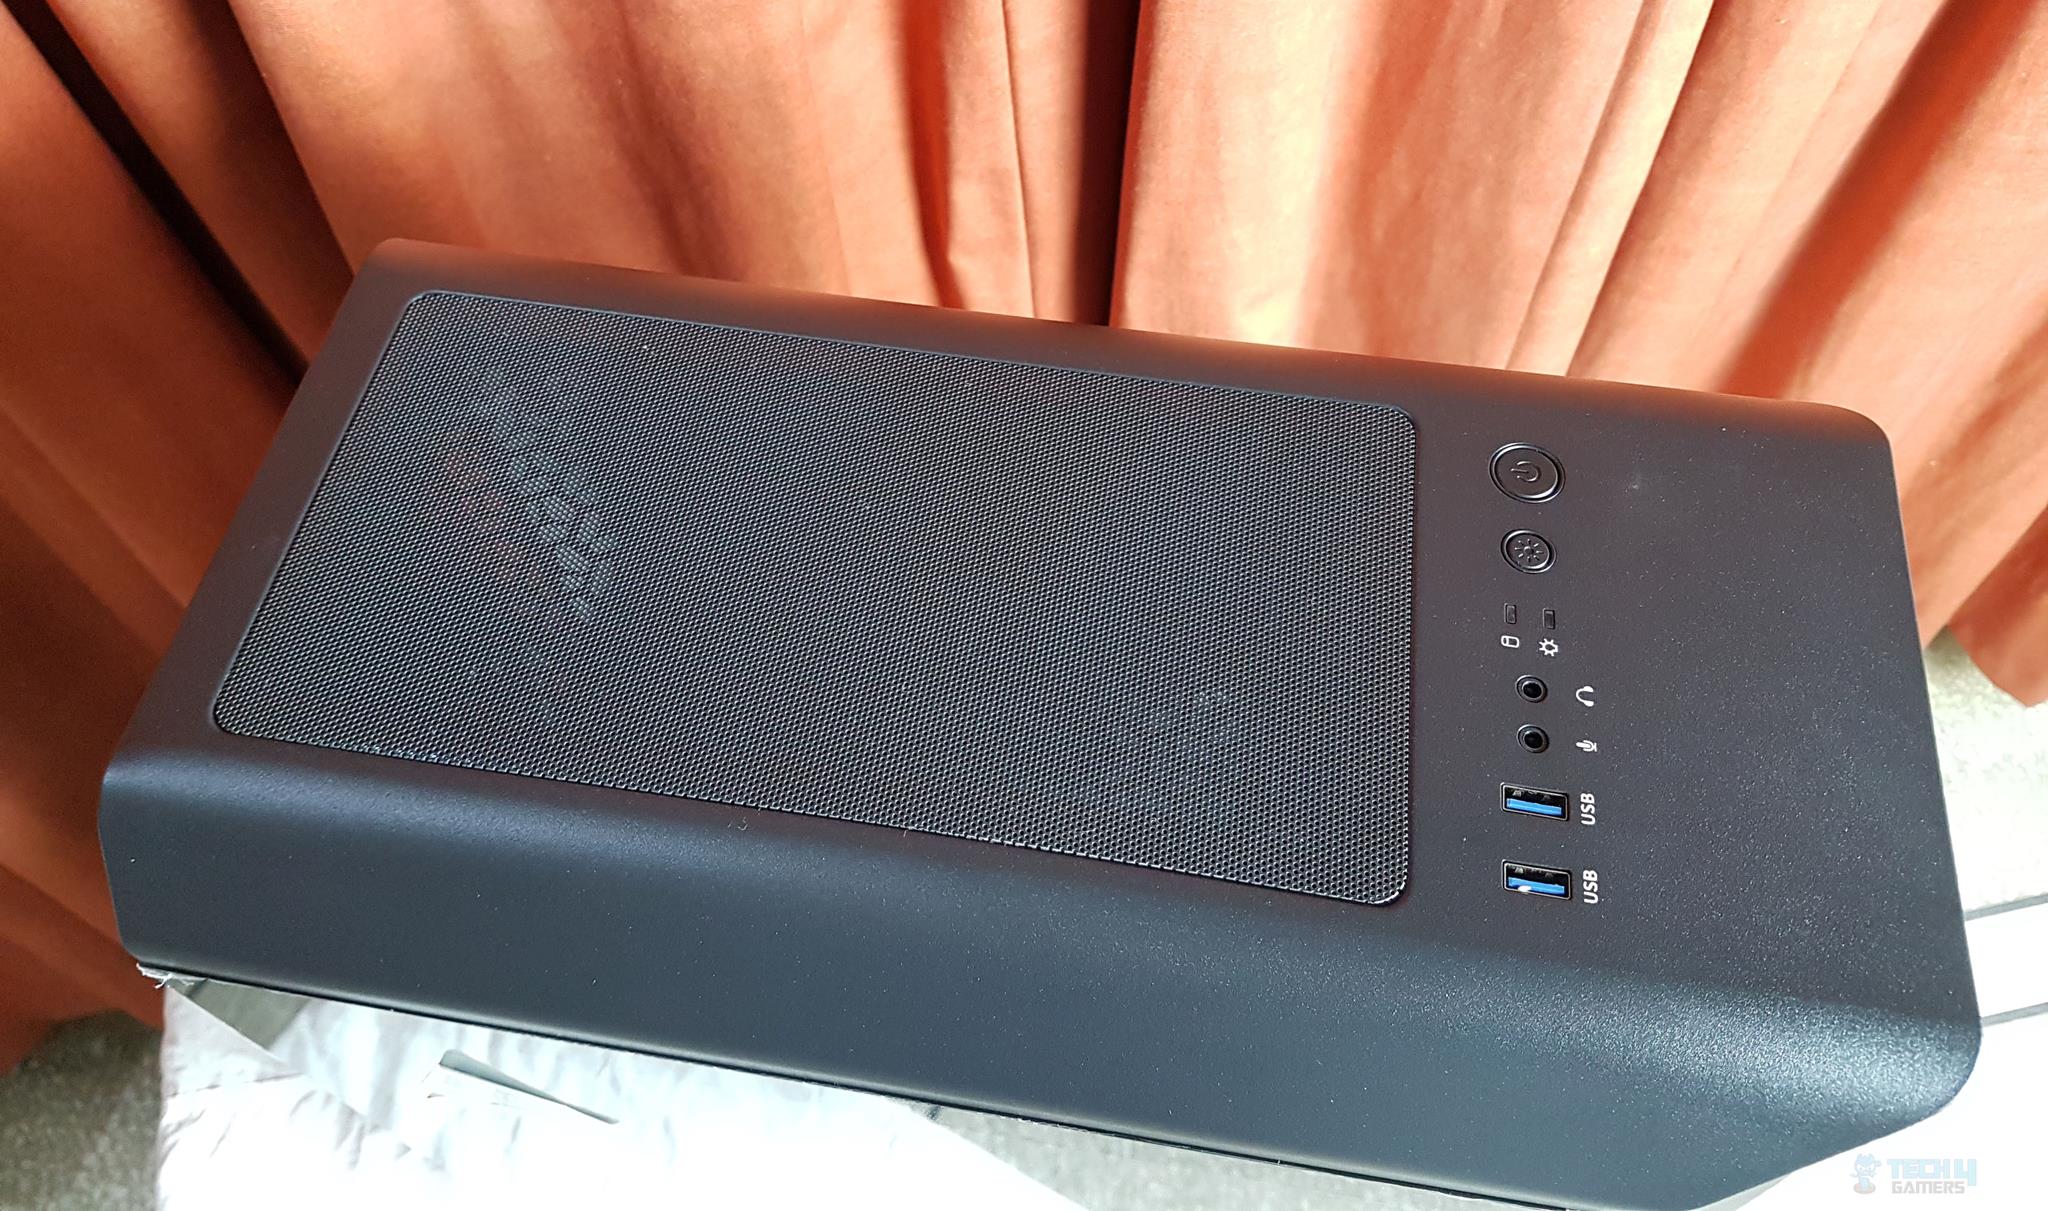
The I/O panel has the following connectivity provisions:
- 1x Power Button
- 1x Reset/Lighting Control Button
- LED Indicators
- Headphone and Microphone Jack
- 2x USB 3.0 ports
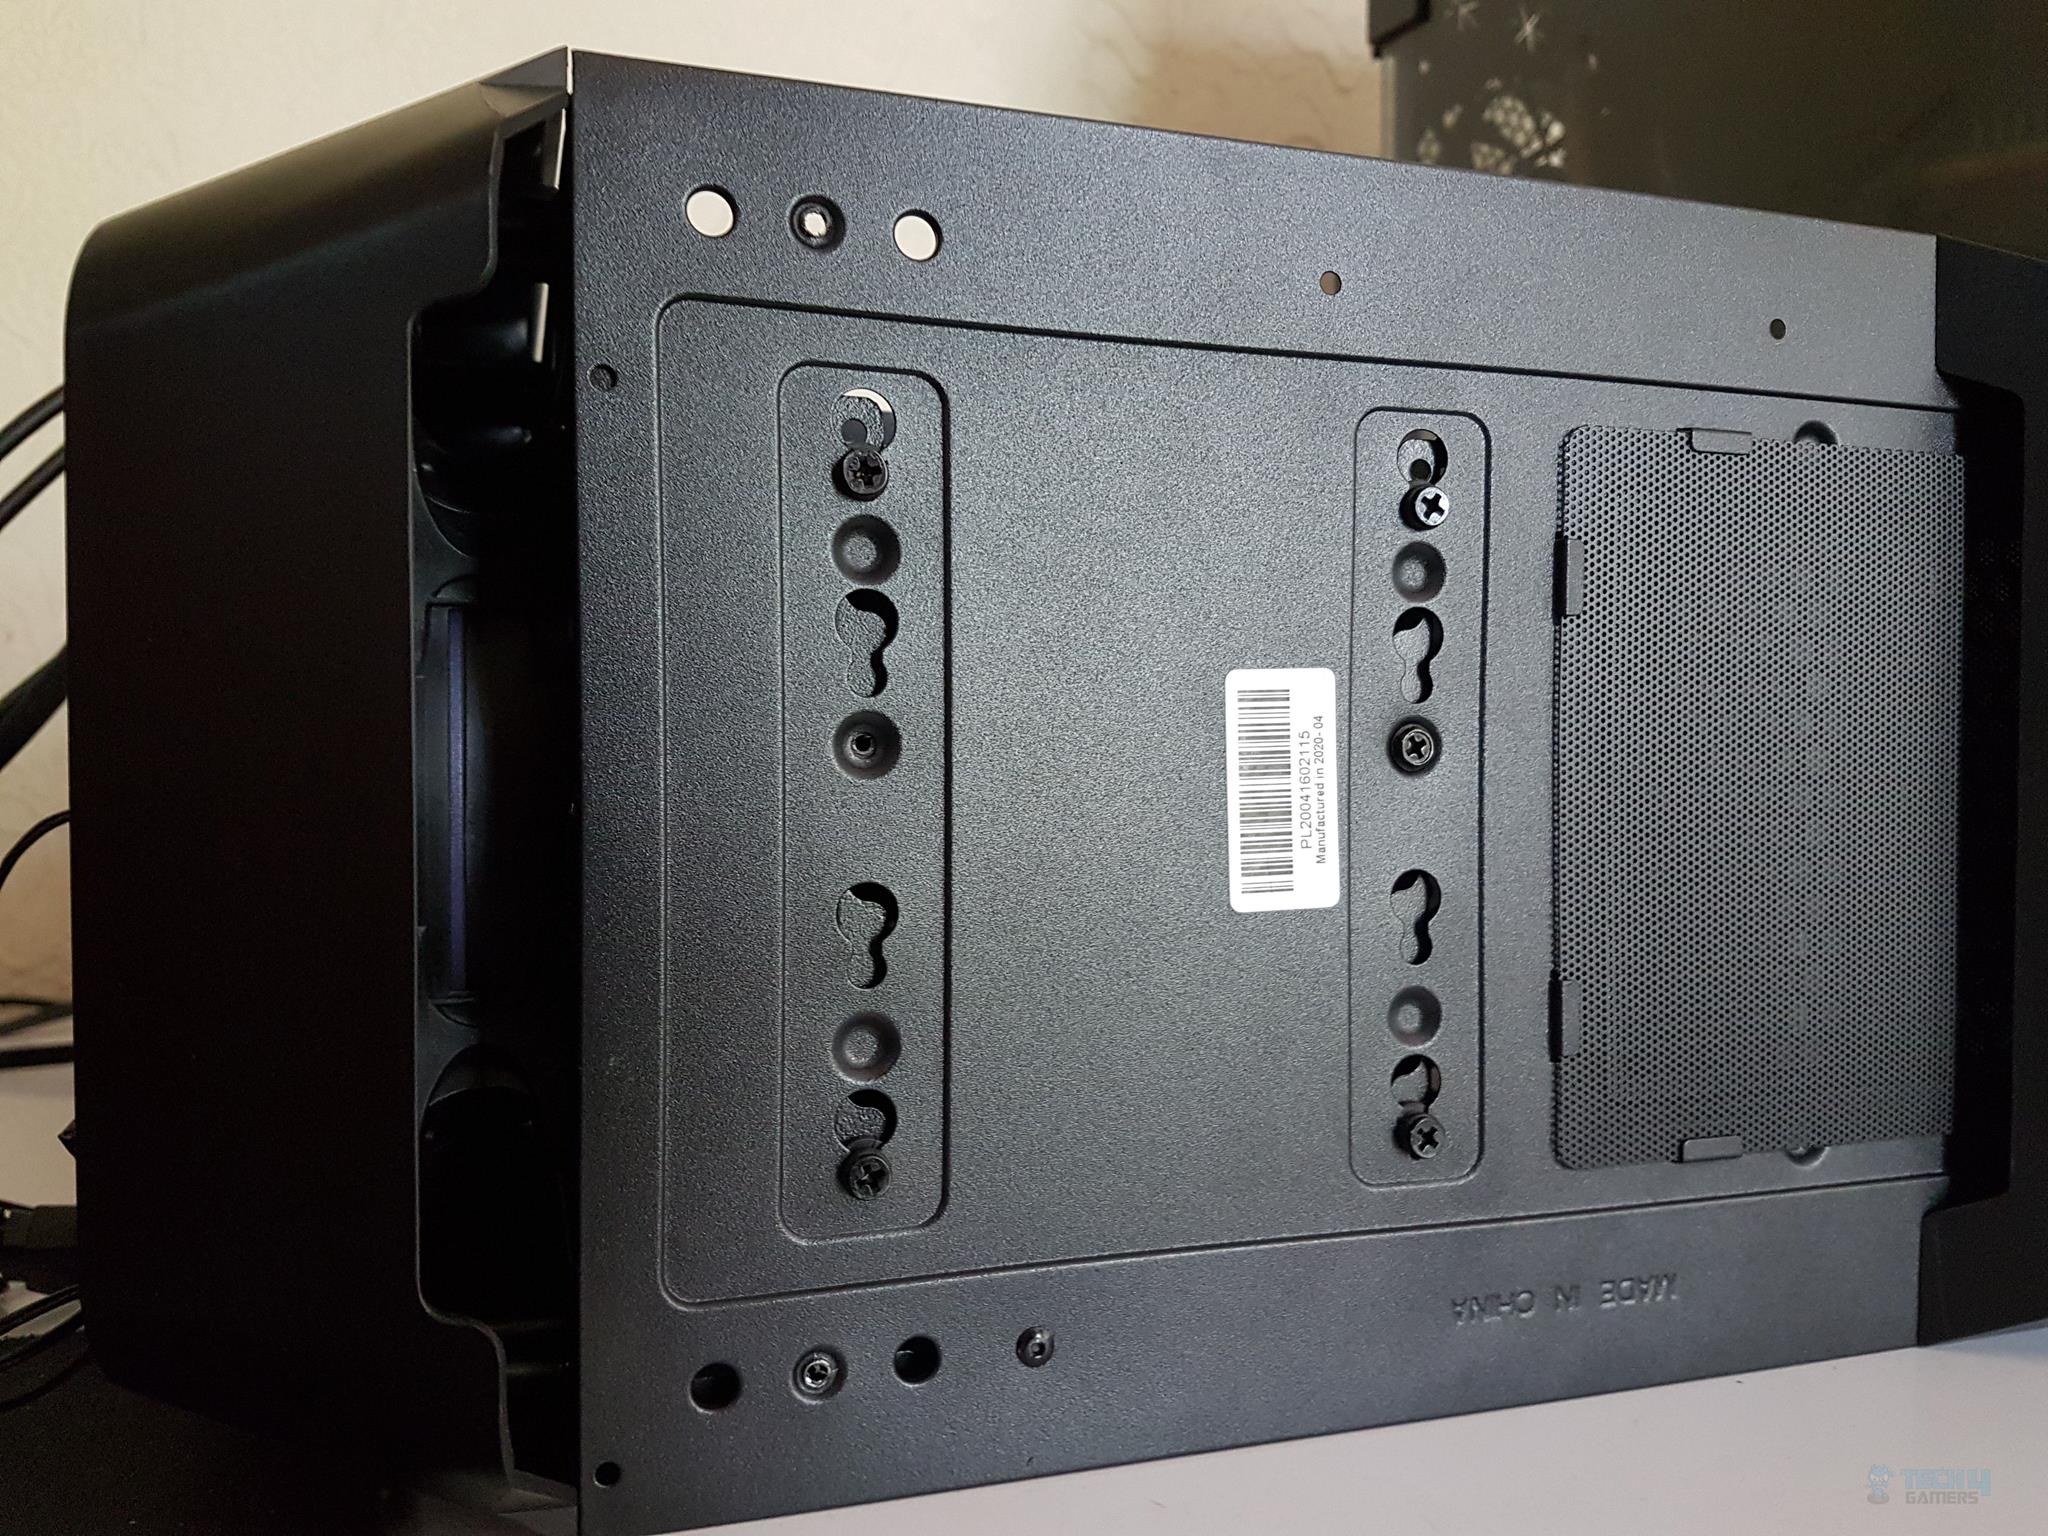
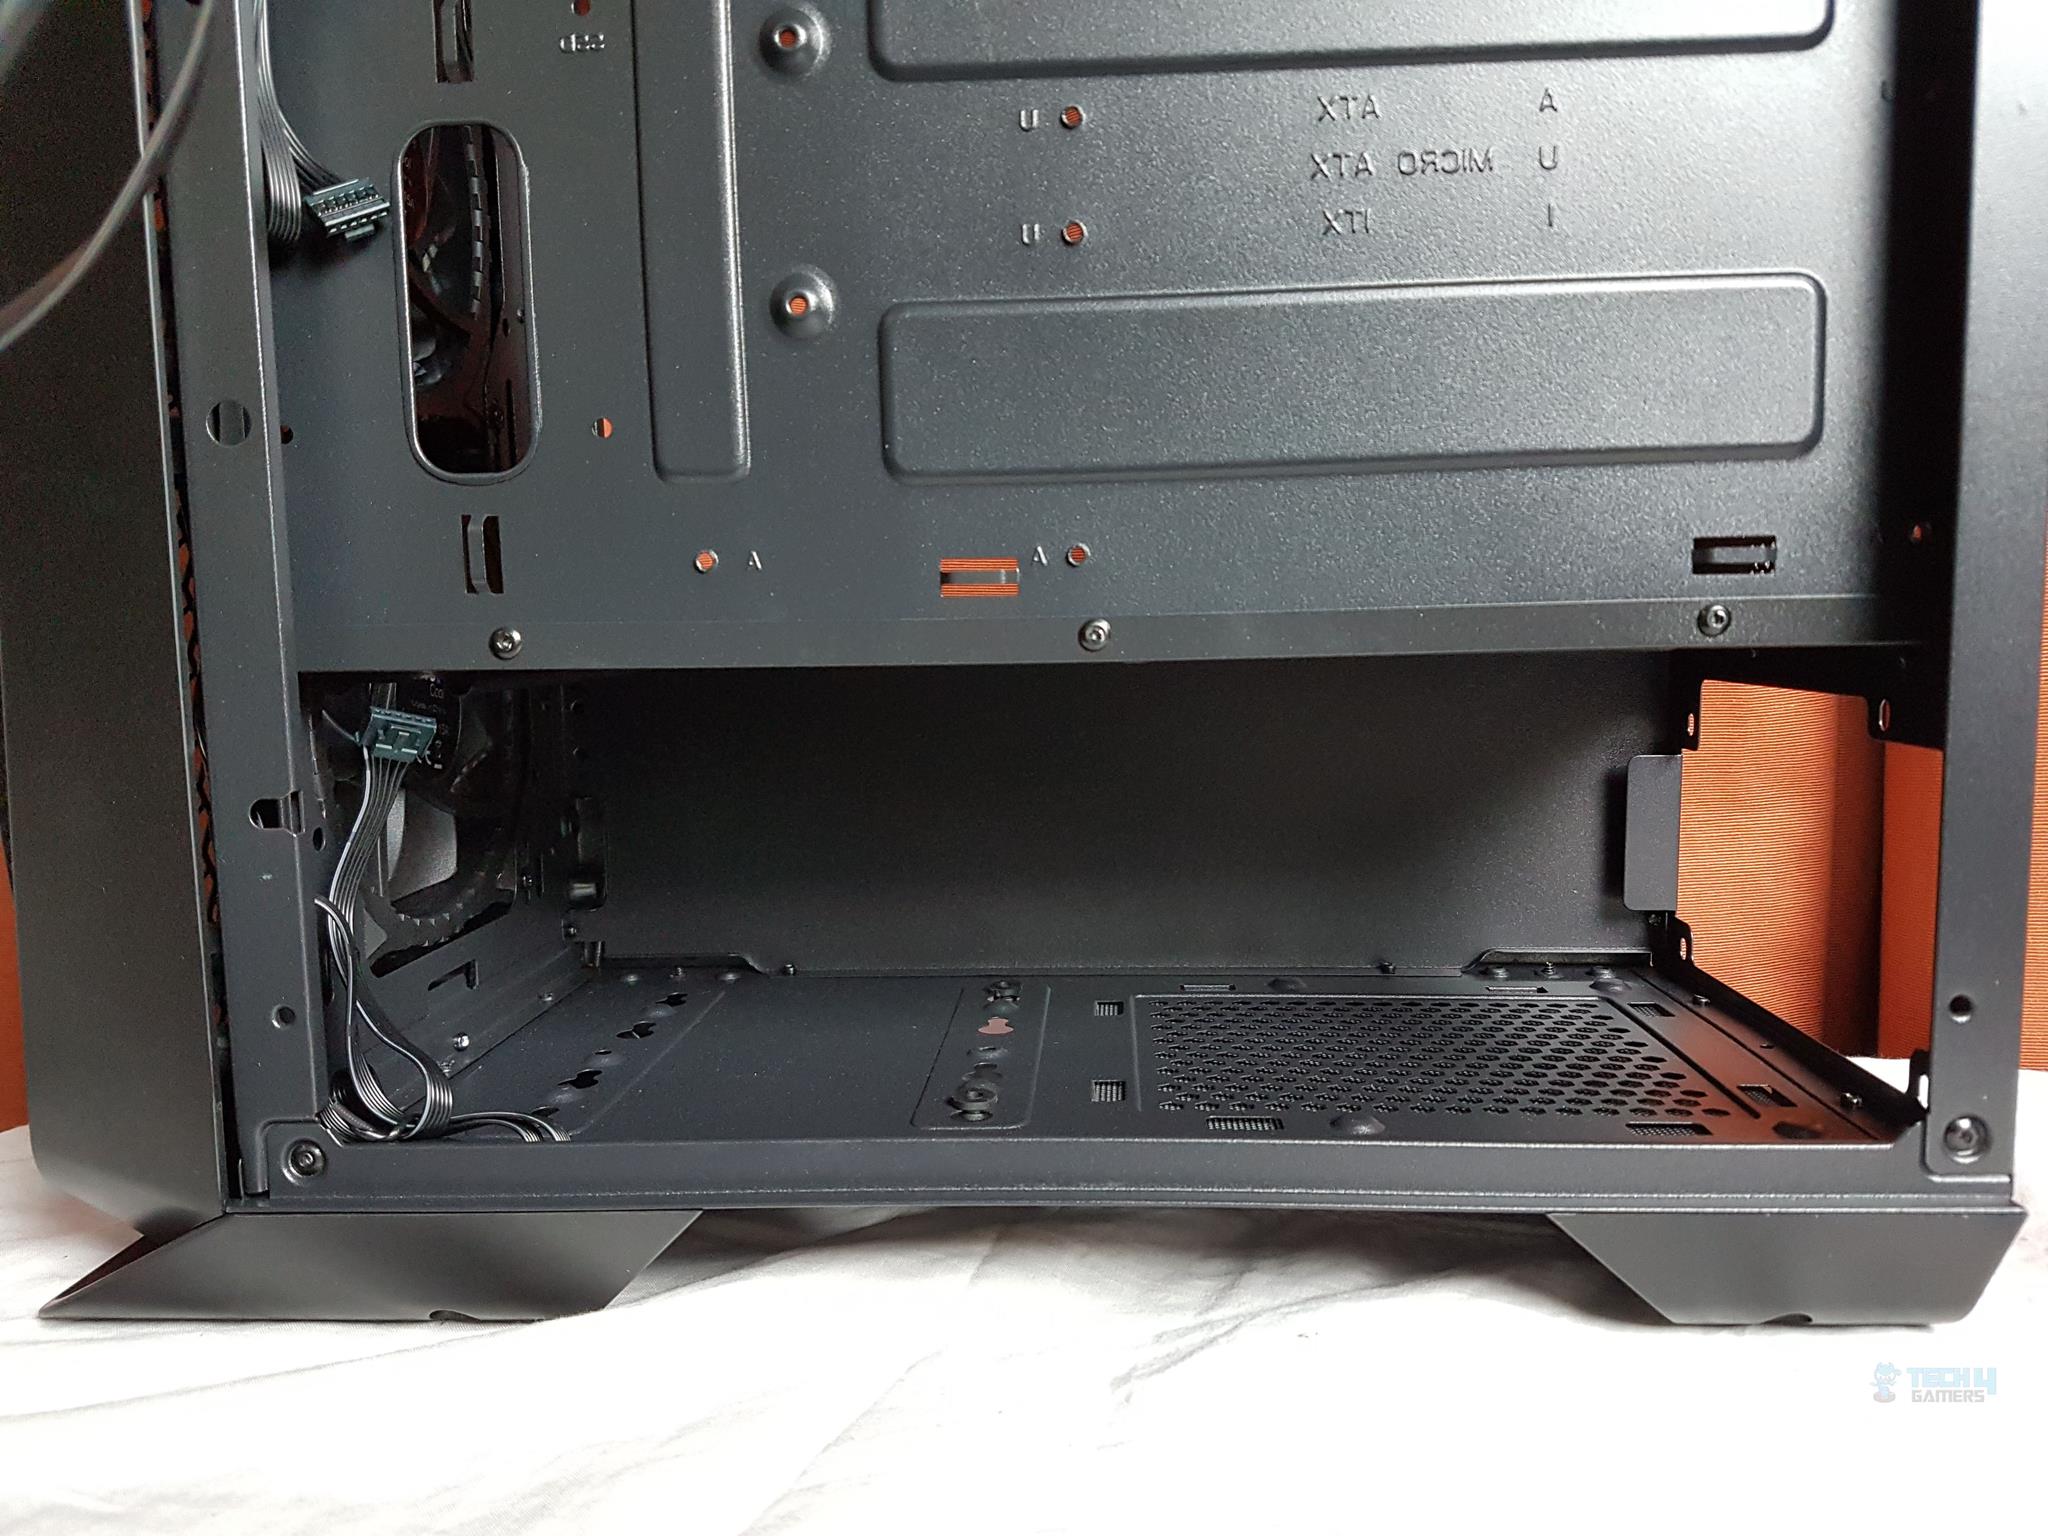
The chassis bottom has a unique design without the standard 4 feet, with cut-to-design structures resembling Phanteks Evolv ATX. These structures impede access to the PSU shroud and HDD cage. A non-magnetic dust filter is present on the PSU shroud. Three visible screws secure the HDD cage, totalling 5 screws. A front cutout facilitates panel removal. Removing the base feet reveals two additional screws. To take out the HDD cage, remove three visible screws and slide it out from the back.
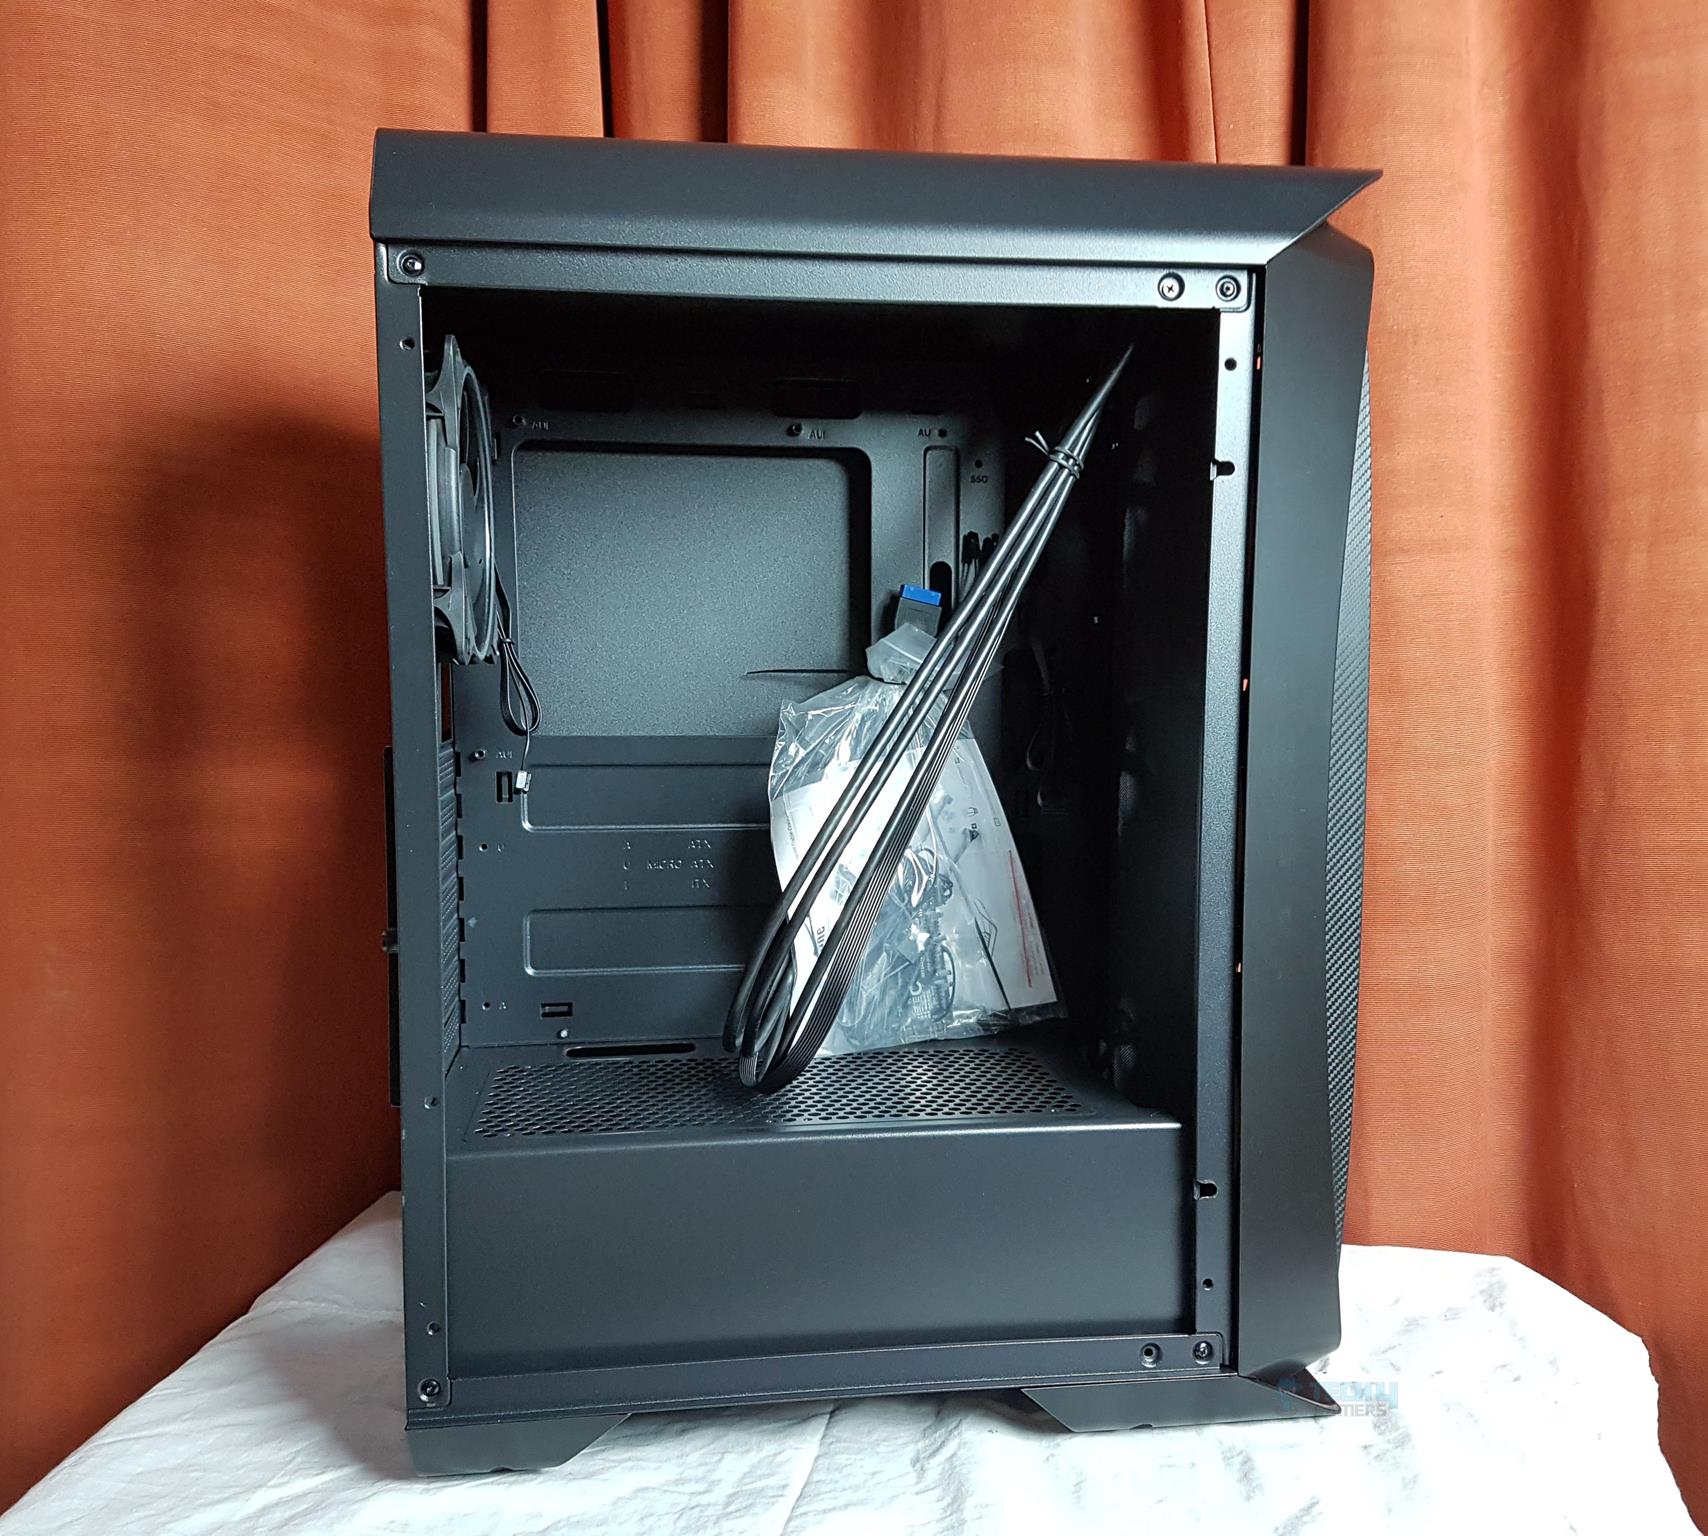
Interior View
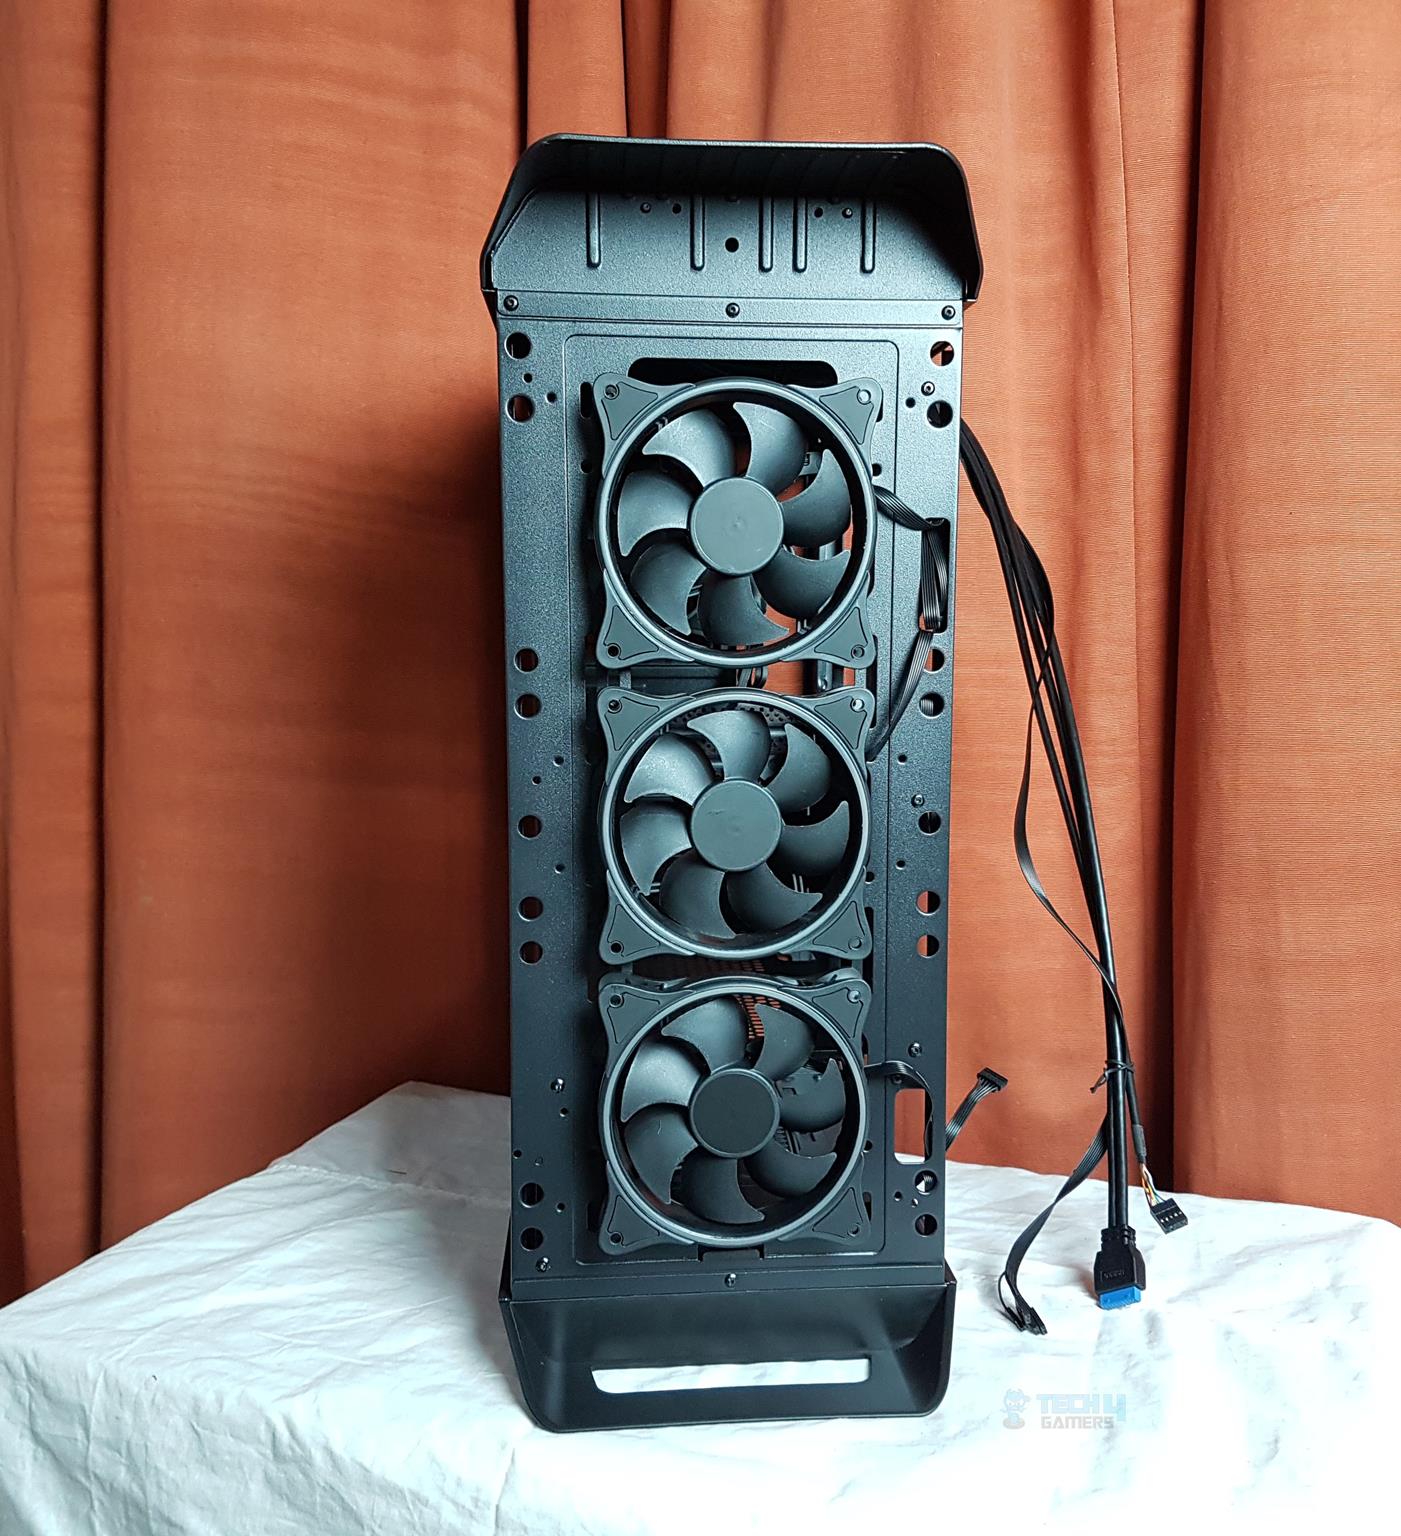
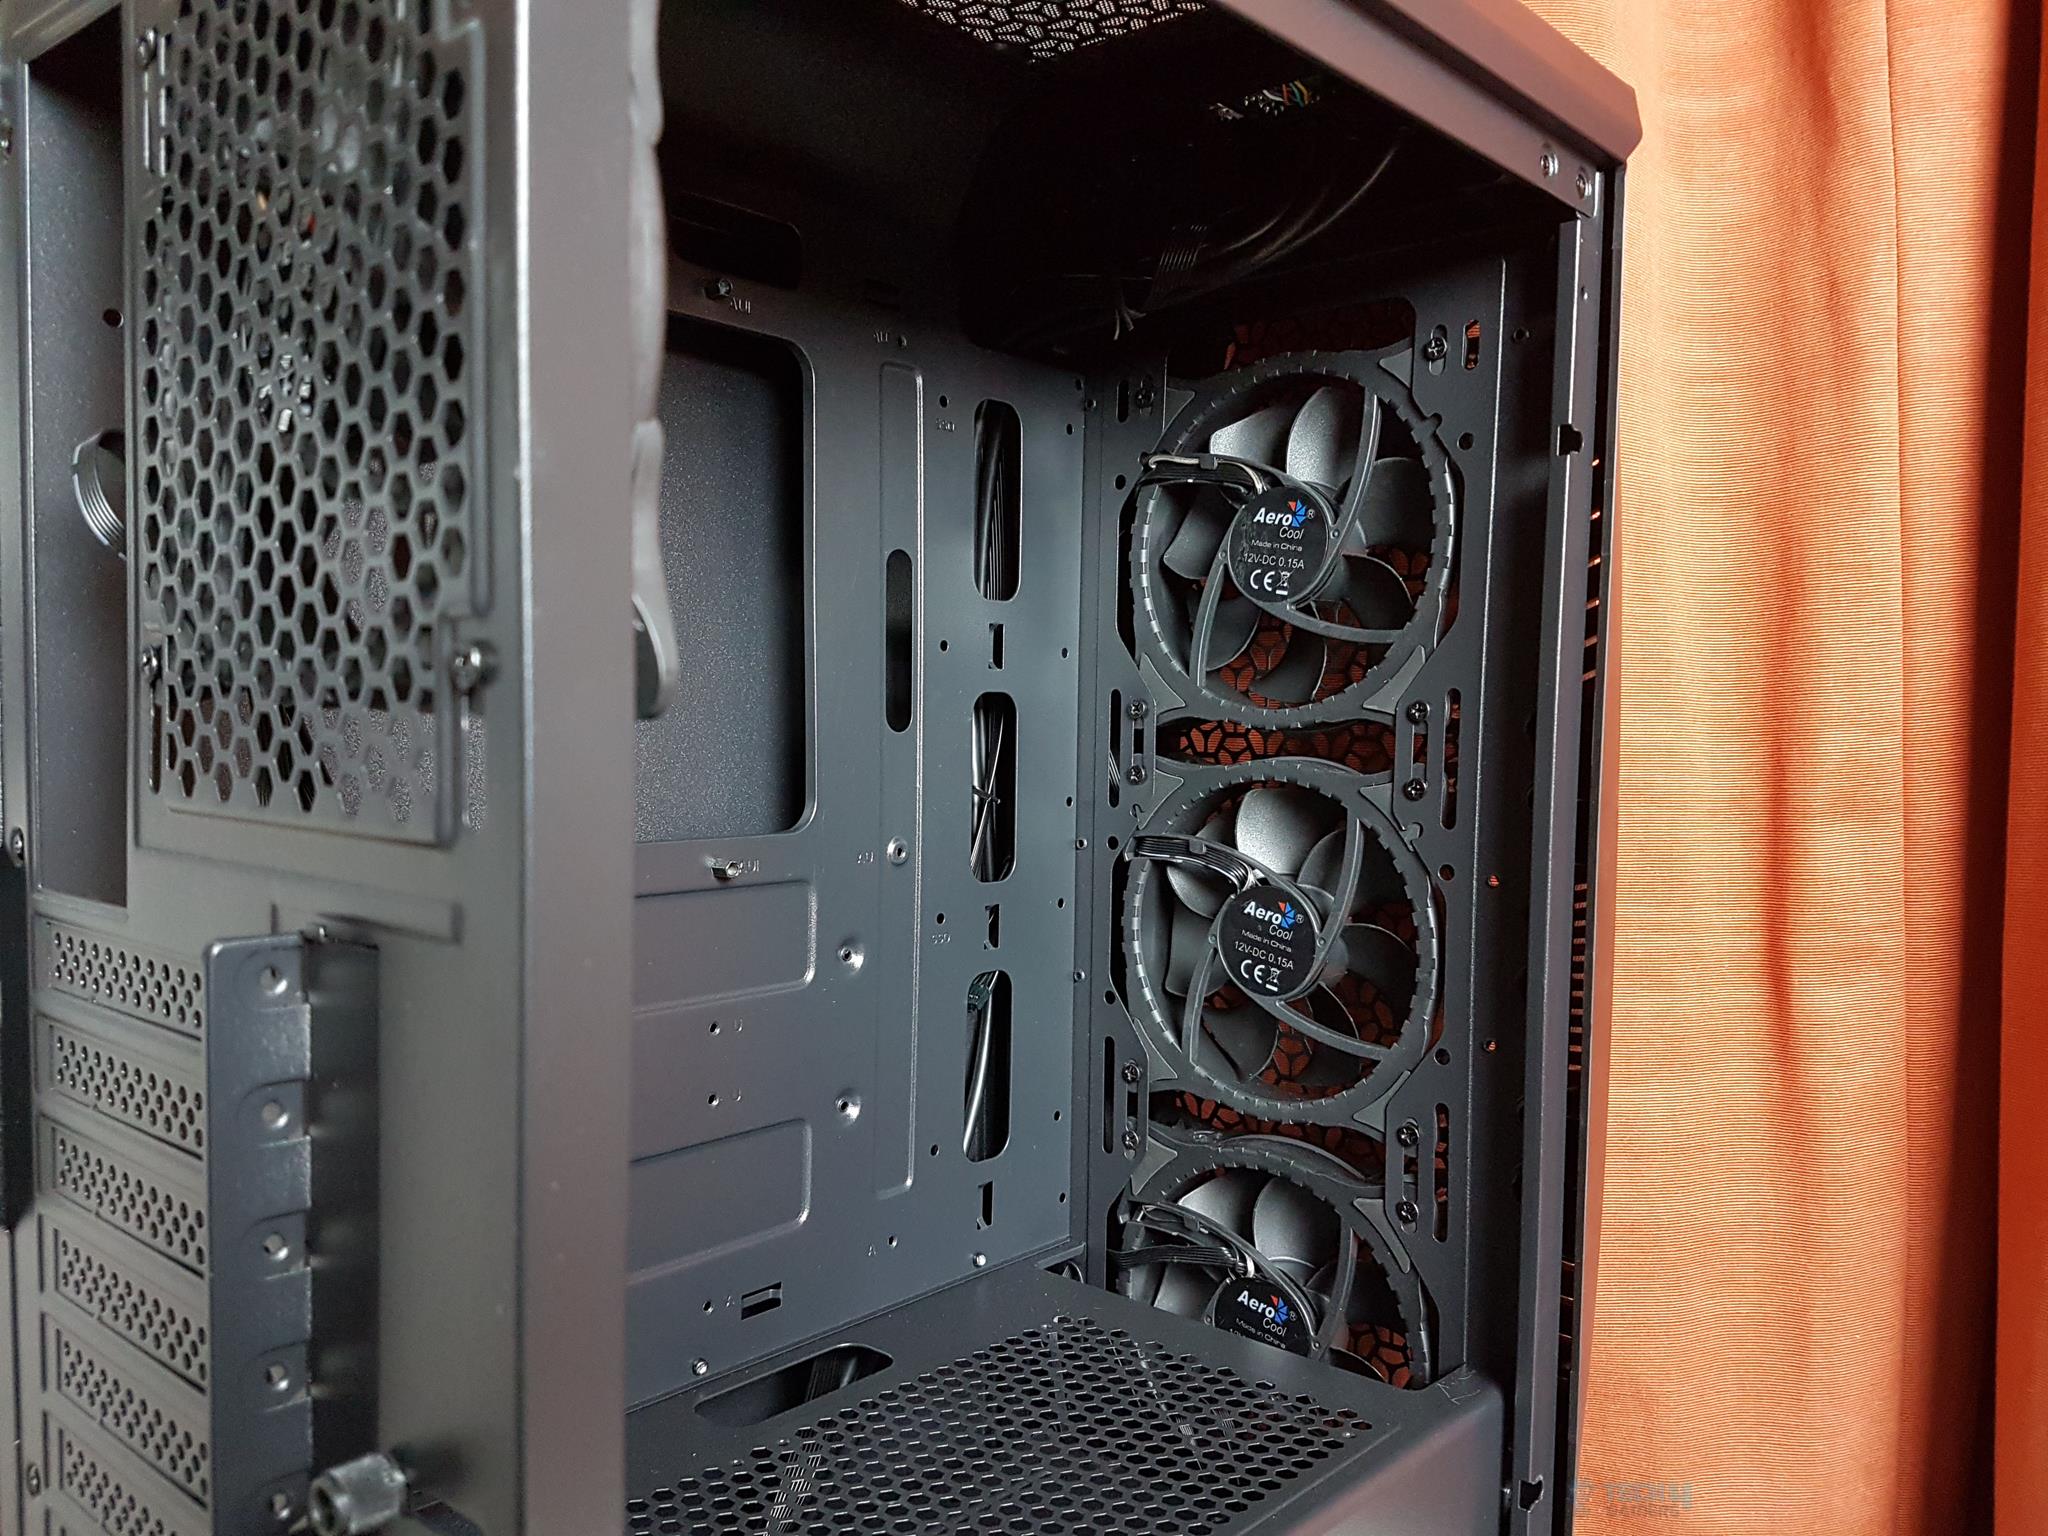
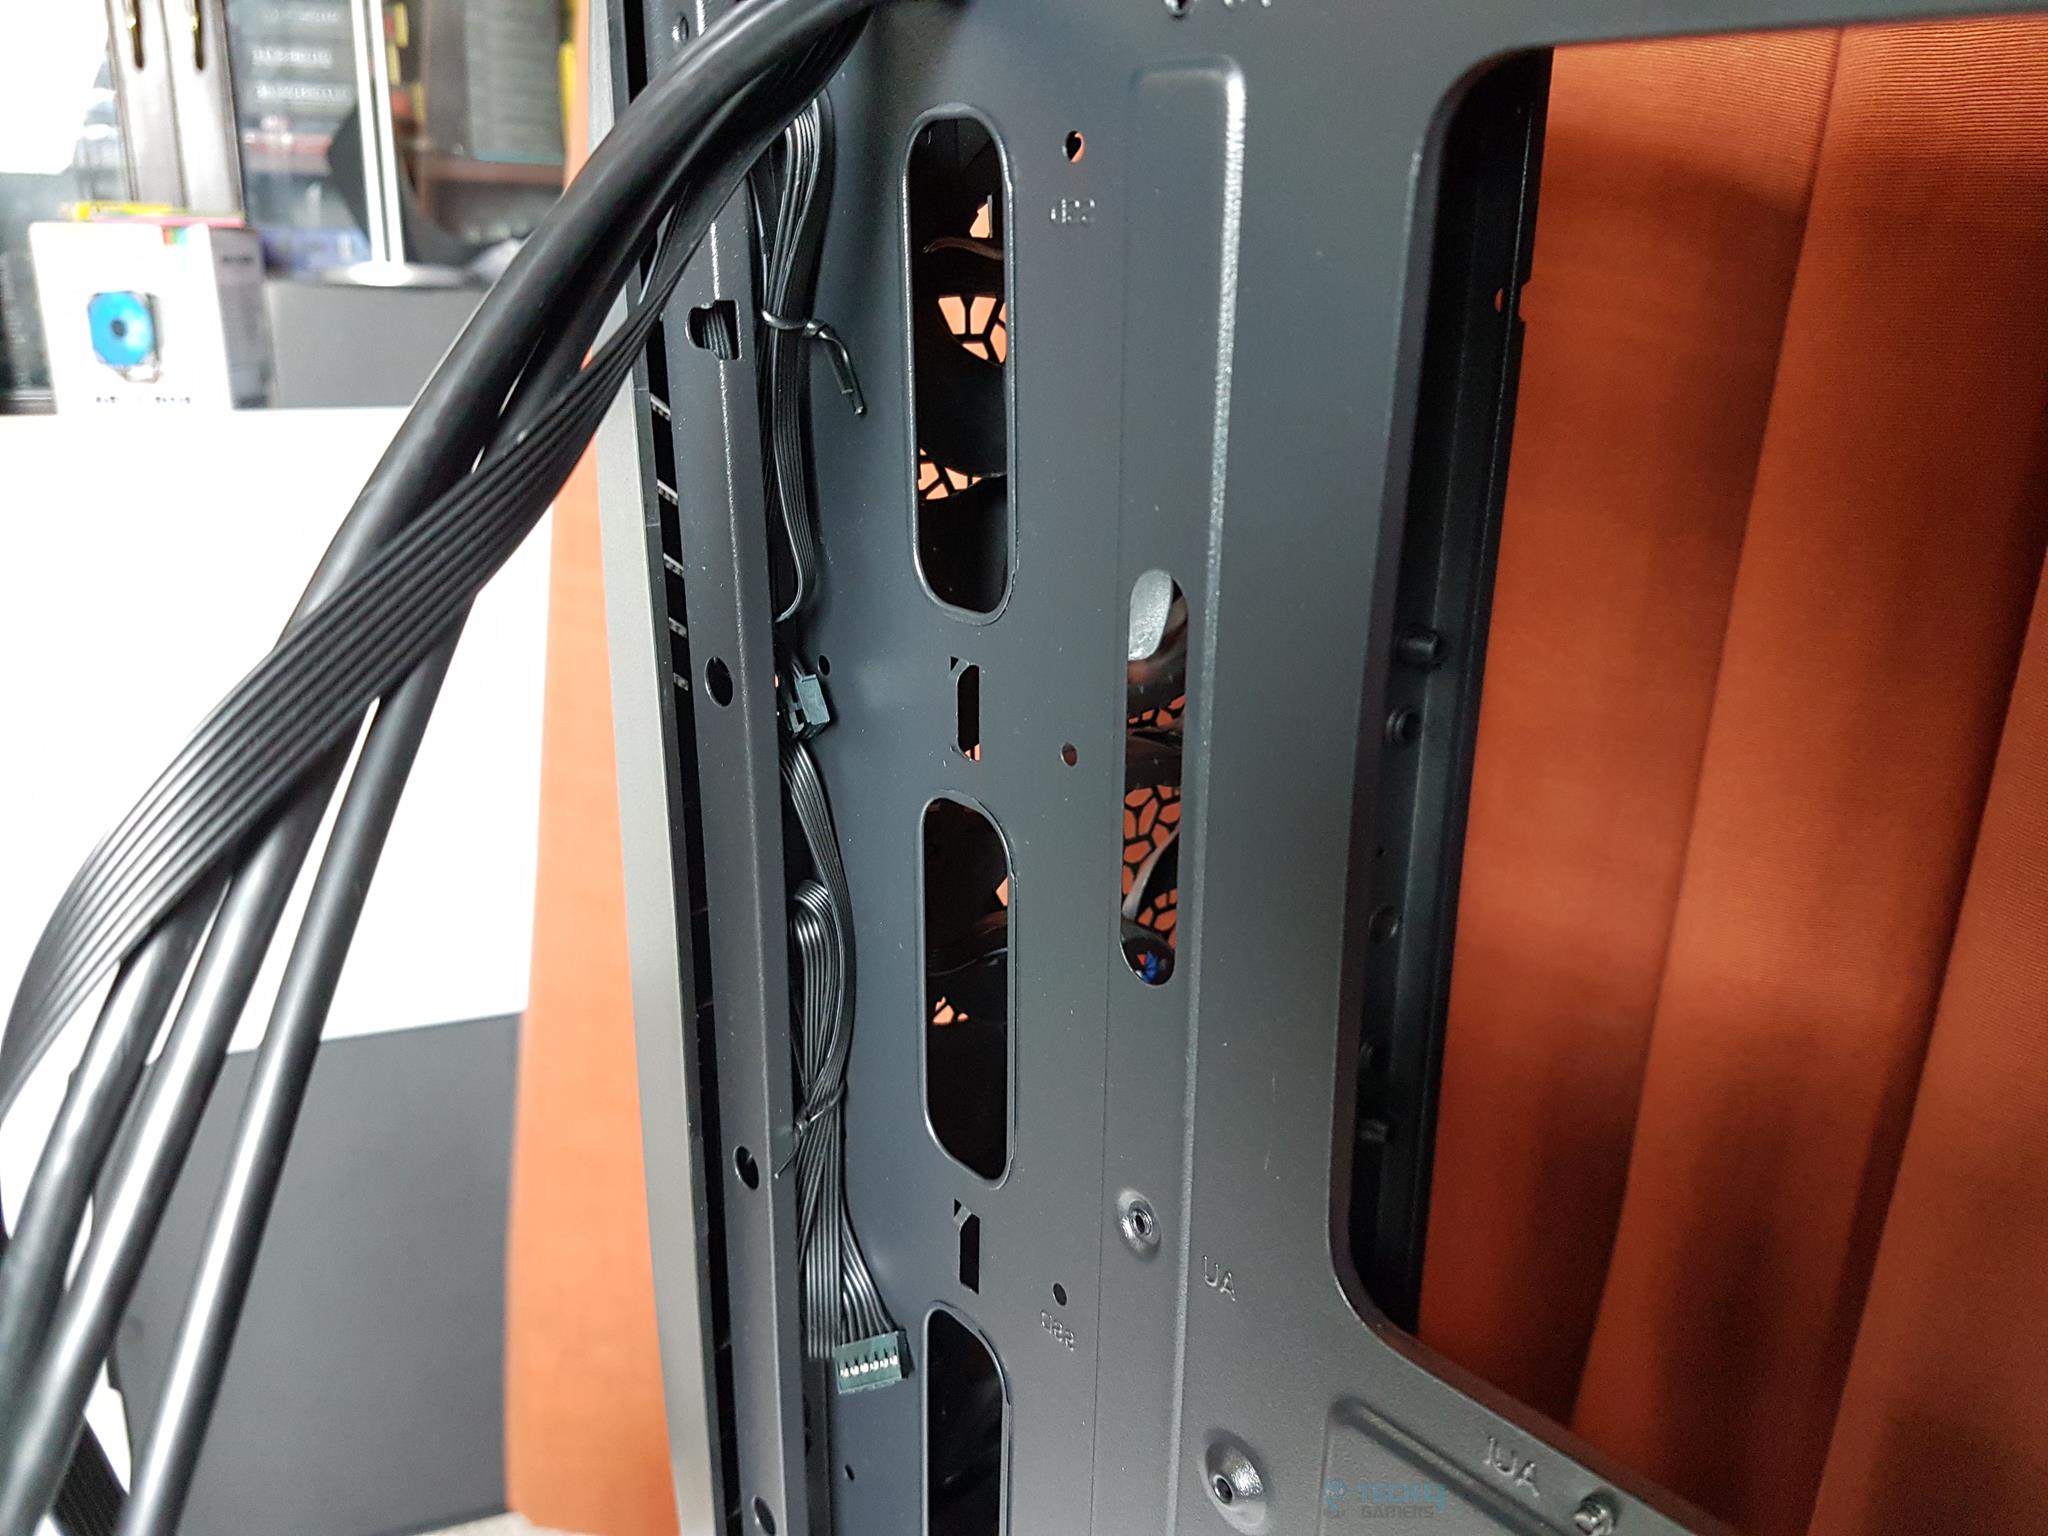
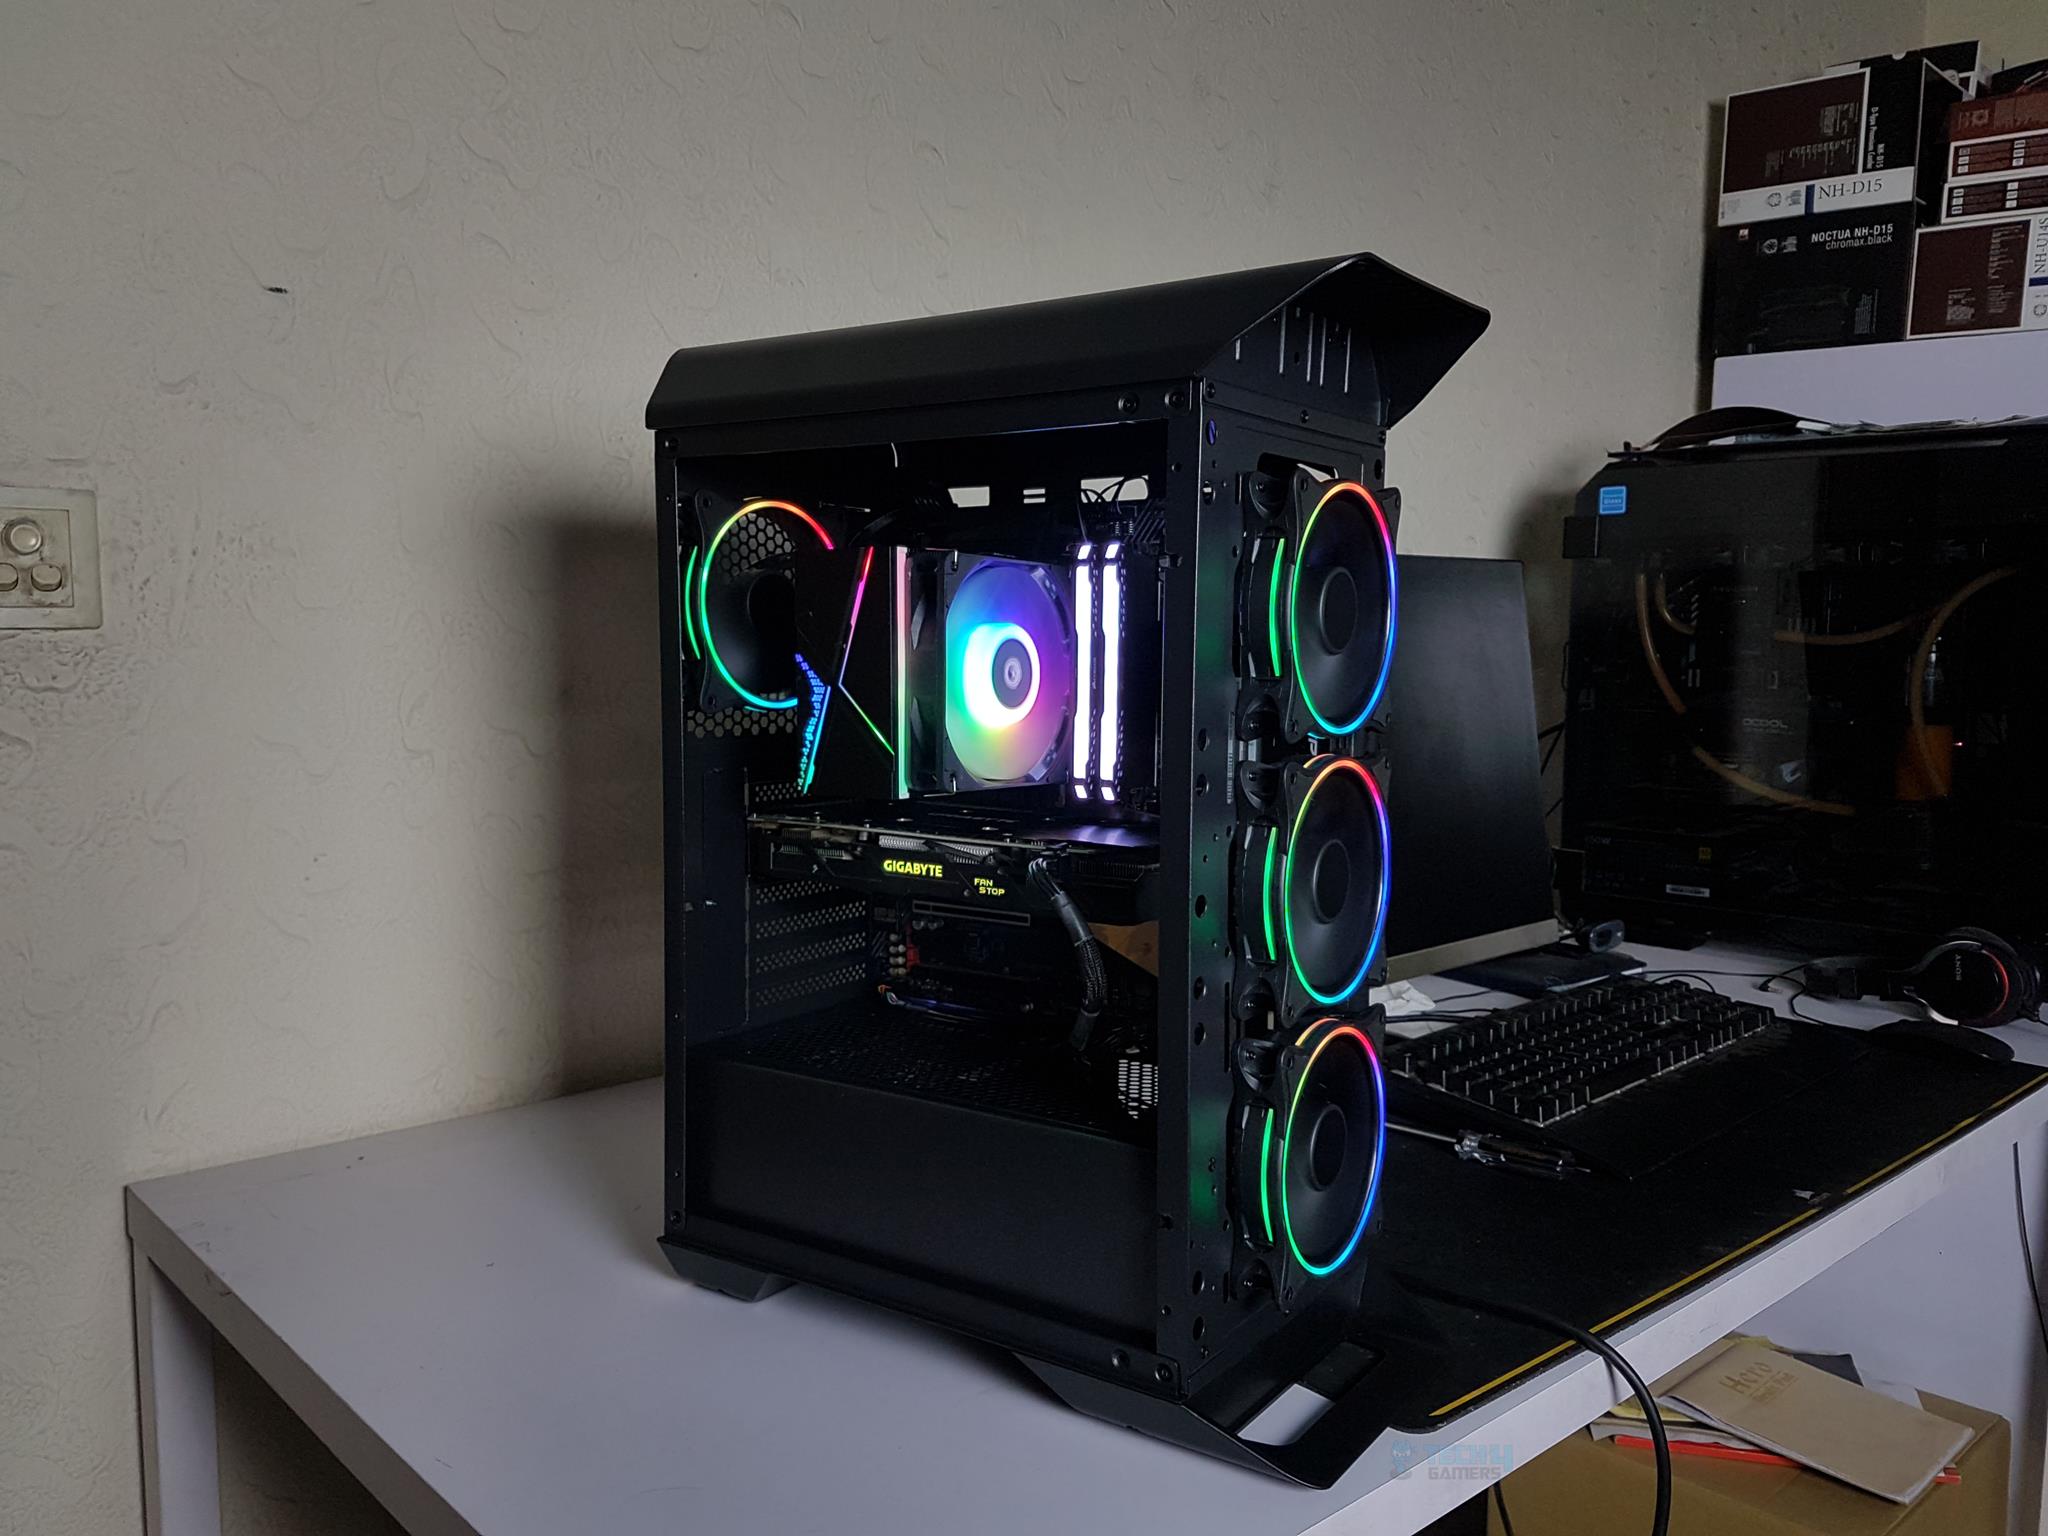
It is time to peek at the chassis’ inners and see what it offers to the builder/user. I removed the front panel to reveal 3 dazzling 120mm Eclipse RGB fans. Each fan lights up with dual rings when powered. You can install up to 3x 120mm or 2x 140mm fans and a 360mm radiator. Two cutouts on the right side allow for easy cable management. Unfortunately, there’s no dust filter on the inner side of the front panel, but a magnetic dust filter is provided for the front-mounted fans. I’d suggest adding a cut-to-size dust filter on the backside for better filtration.

Check out the Aero One Eclipse from the inside – a compact mid-tower that cleverly raises the chassis for better fan proximity. I can easily install a 240mm AIO on top. The motherboard tray’s a bit flexible; add the 4 standoffs provided, and you can use the wrench for the rest (labelled A/U/I). Cutouts for CPU cooler and SSDs, with a 68mm gap for AIO on top. Easy and sleek! The user can’t install the SSD in the mid-section as only two holes would be available there.
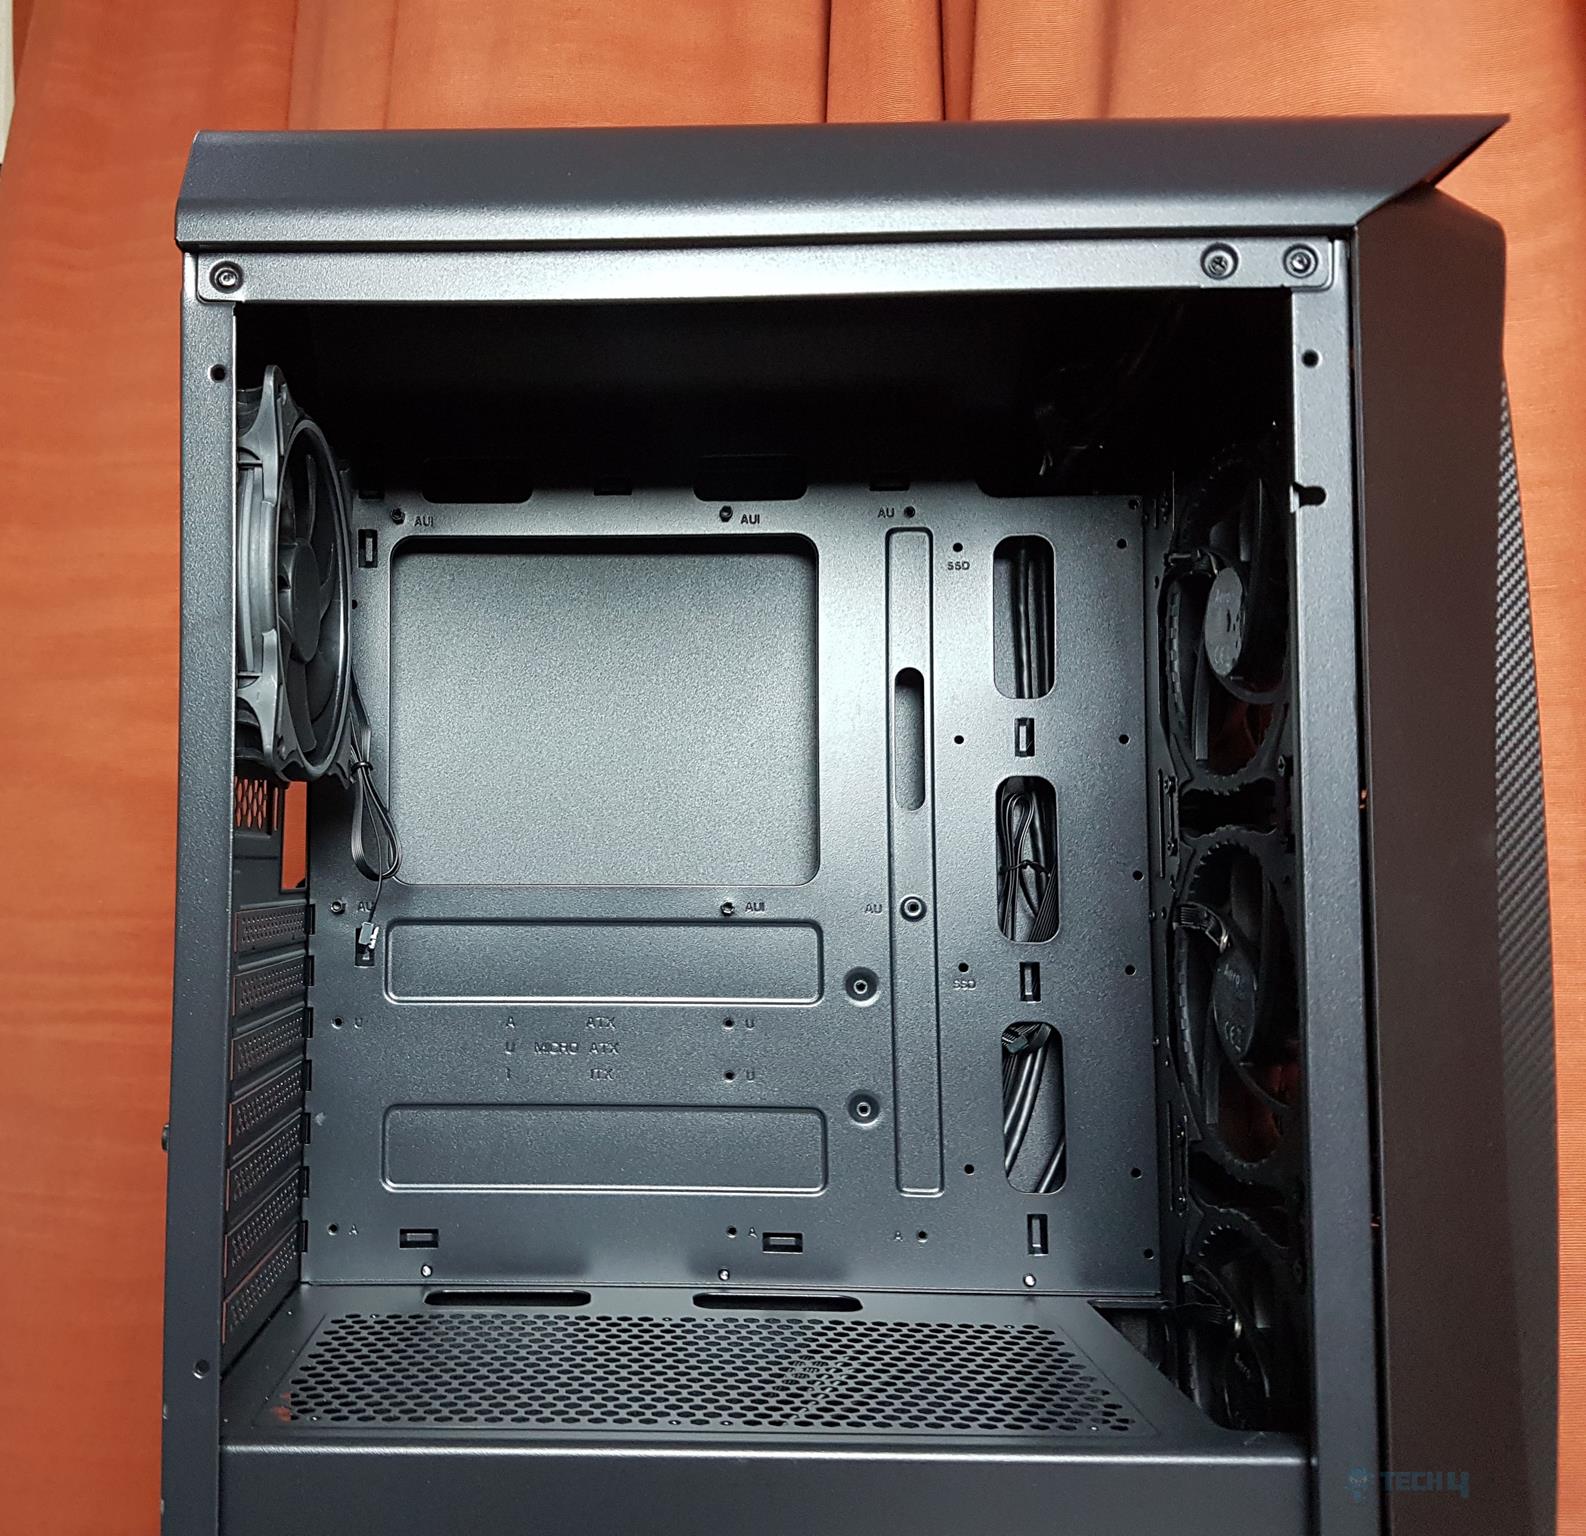
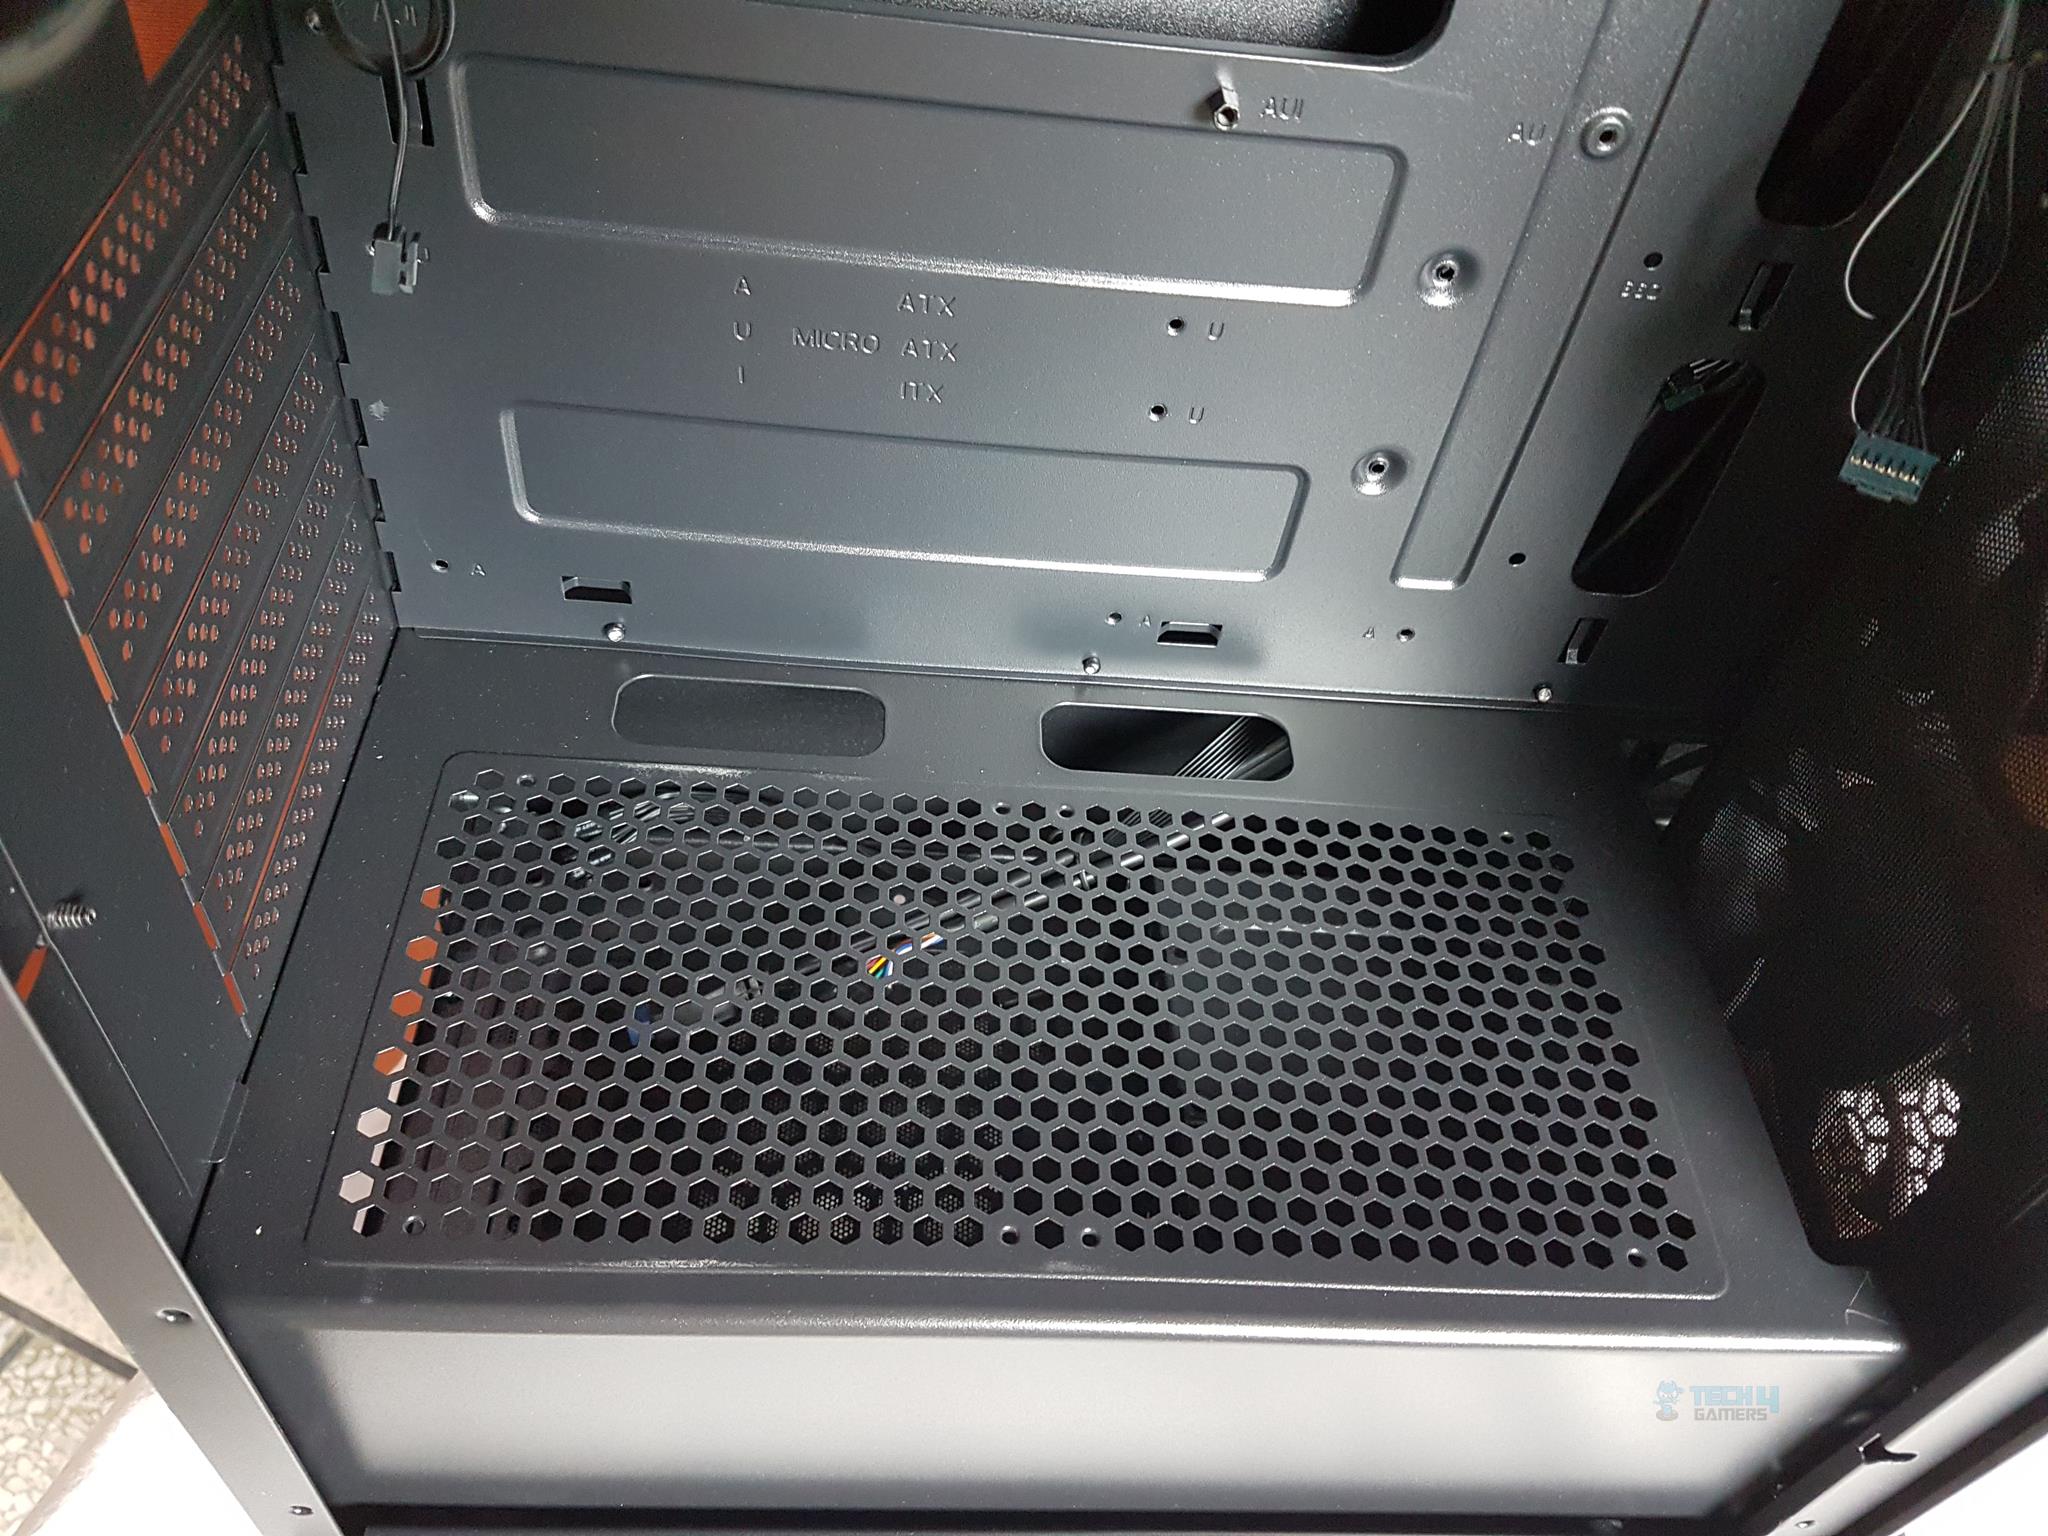
The PSU shroud is vented. Looking closely, one can observe the 120mm fan mounts. The user can install up to 2x 120mm fans to draw air in from the bottom, which would be helpful for the graphics card. There are two cutouts on the far side of the shroud in front of the motherboard tray. These are there to route the cables through for connectivity on the bottom area of the motherboard. These cutouts don’t have rubber grommets. The rear side shows the pushed-out design of PCIe slot covers, which align with the chassis frame. At least two of these should have been reusable covers.
The front side has a magnetic dust filter. The gap from the front fans to the shroud is approximately 30mm. If you install a 360mm radiator on the front, the permissible thickness without fans would be 29-30mm. The 3x Eclipse RGB fans are installed on the front side of the mounting rail. I have removed the magnetic dust filter to show the backside of the fans and the rail.
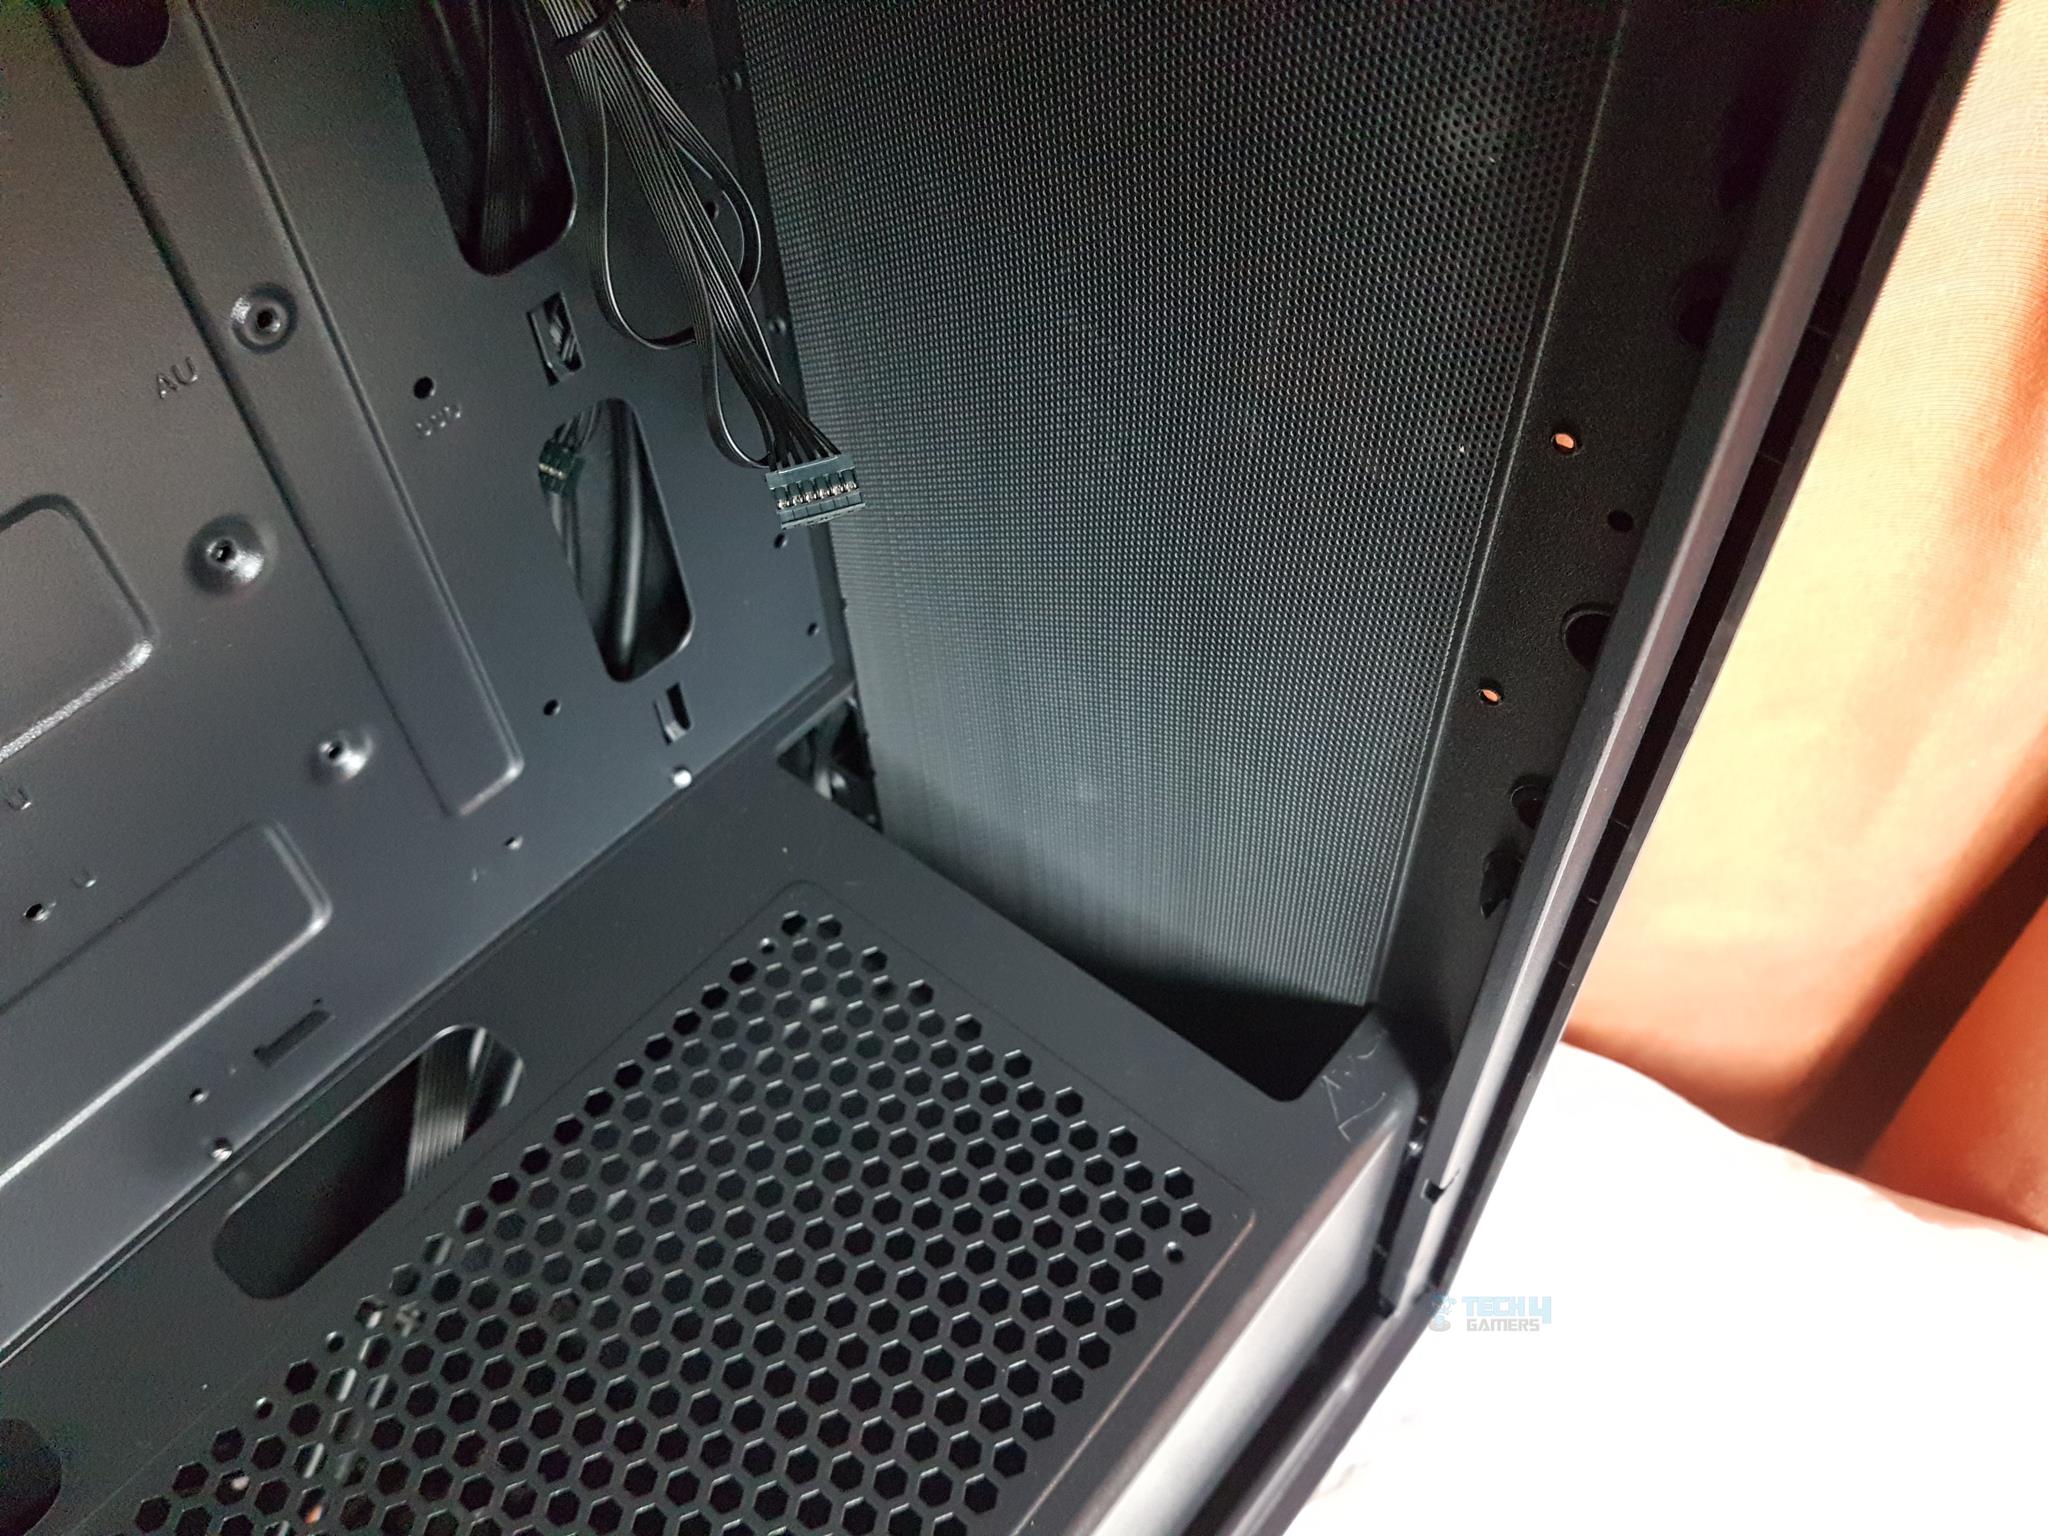
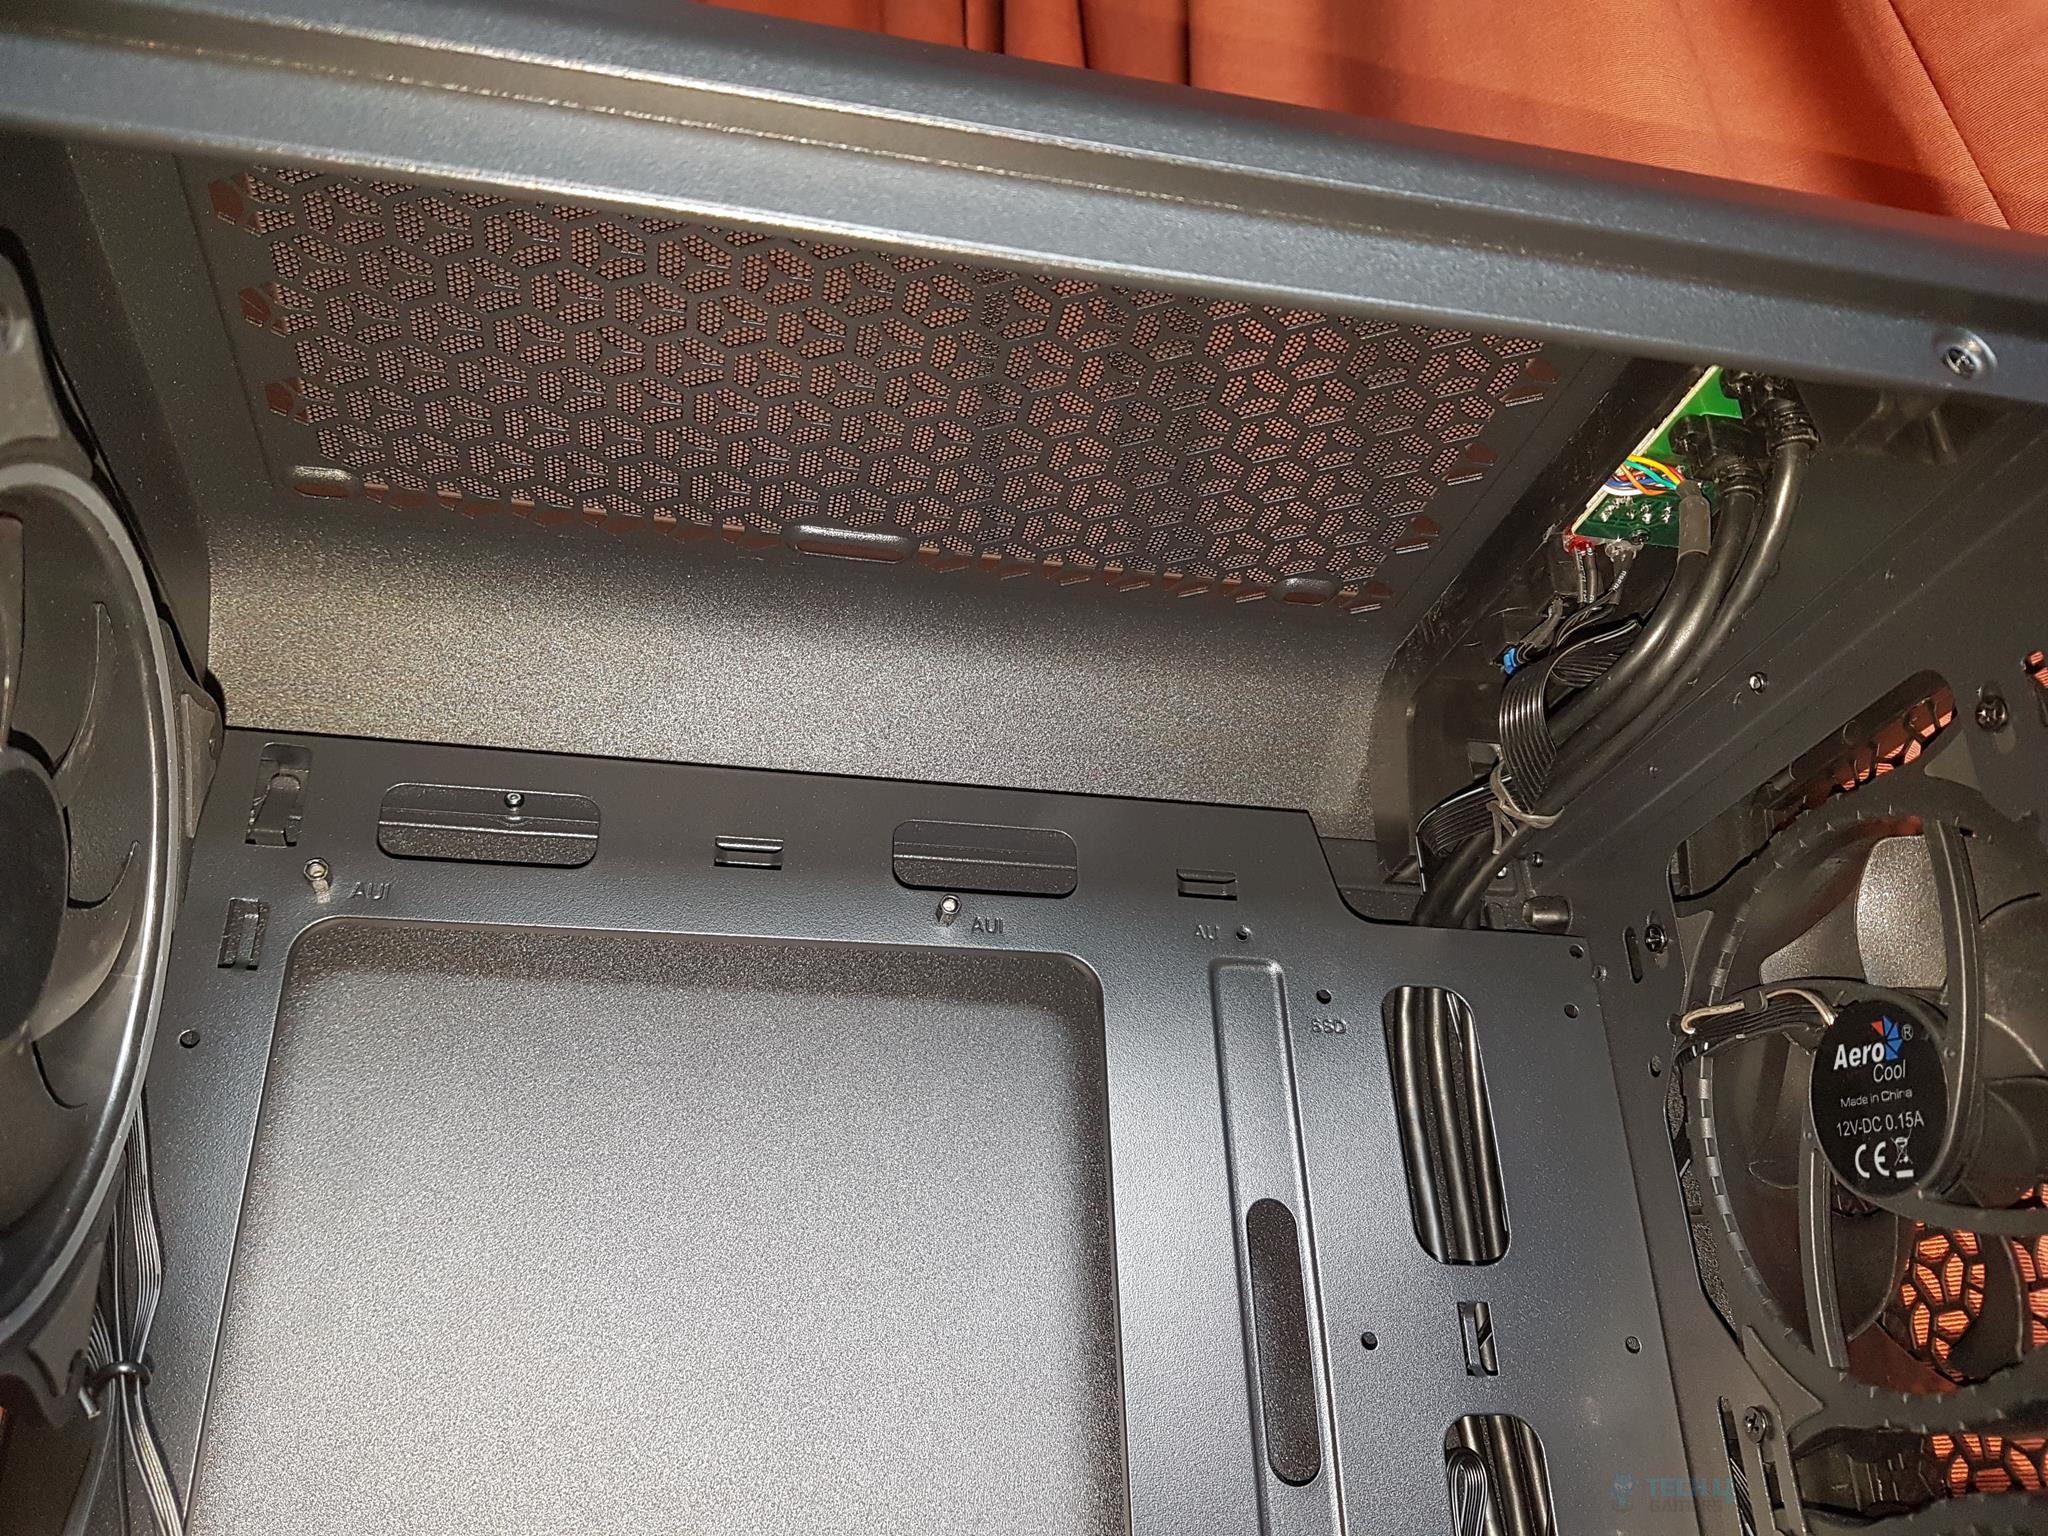
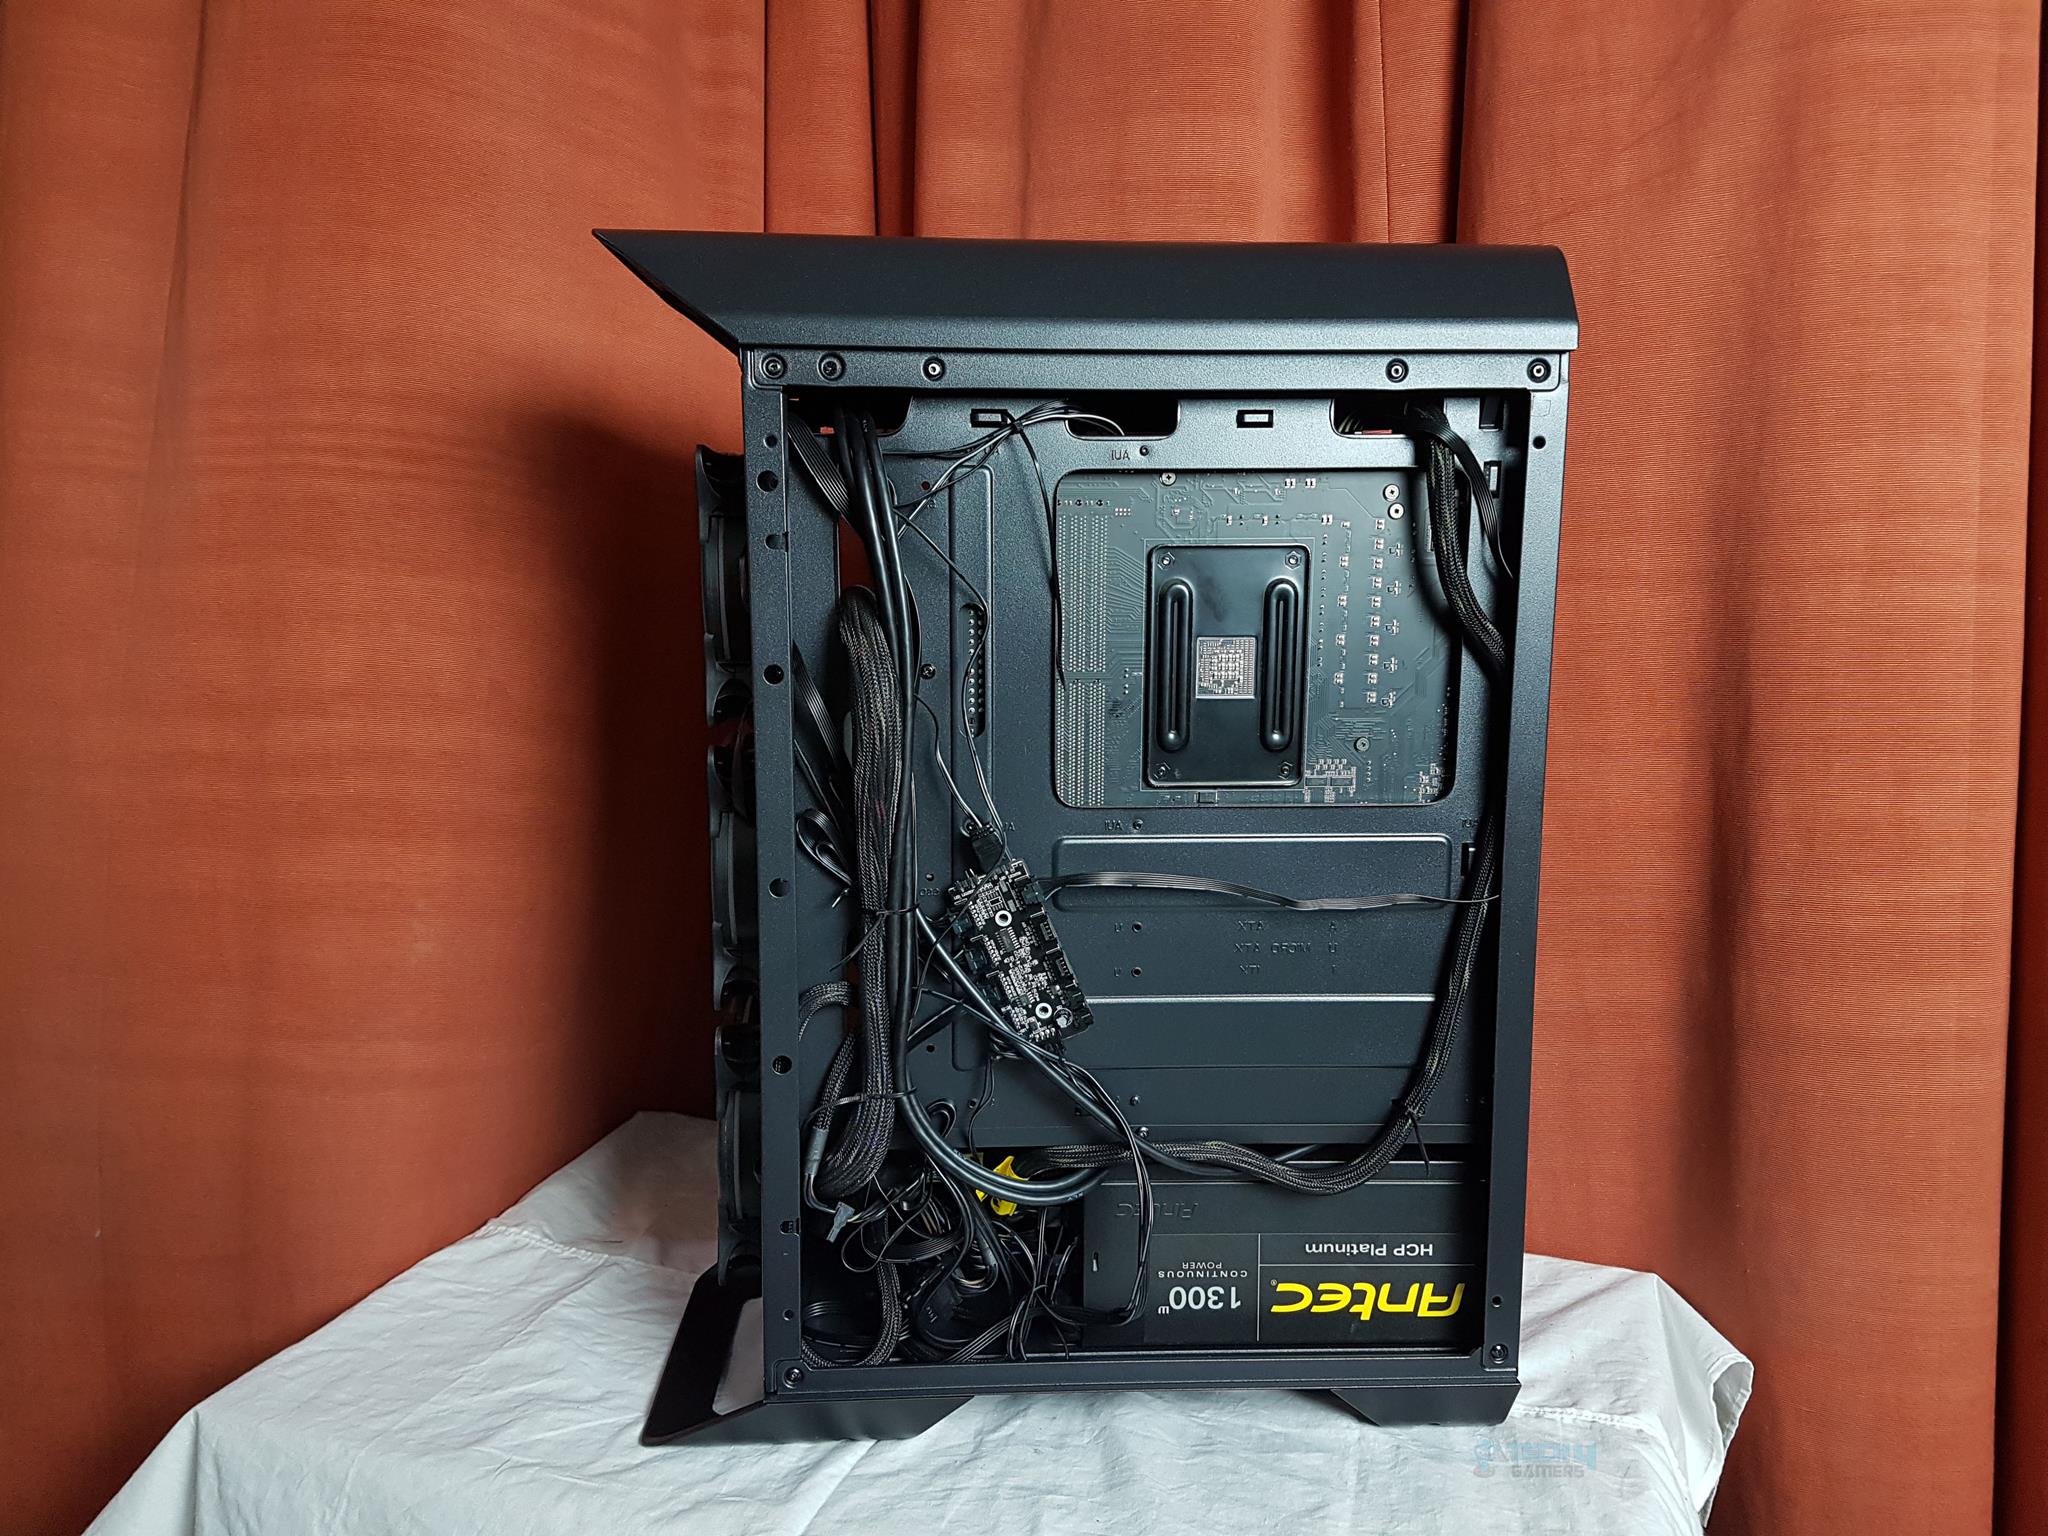
There is enough room up top to install the 240mm AIO. It is time to take a peek at the backside of the chassis. We have a total of 9 cable tie points. The dual-chamber design is obvious here. The PSU shroud makes the dual-chamber, isolating the storage drive cage and PSU from the rest of the build. I have routed the top I/O panel’s cables from the top left-most cutout towards the backside.
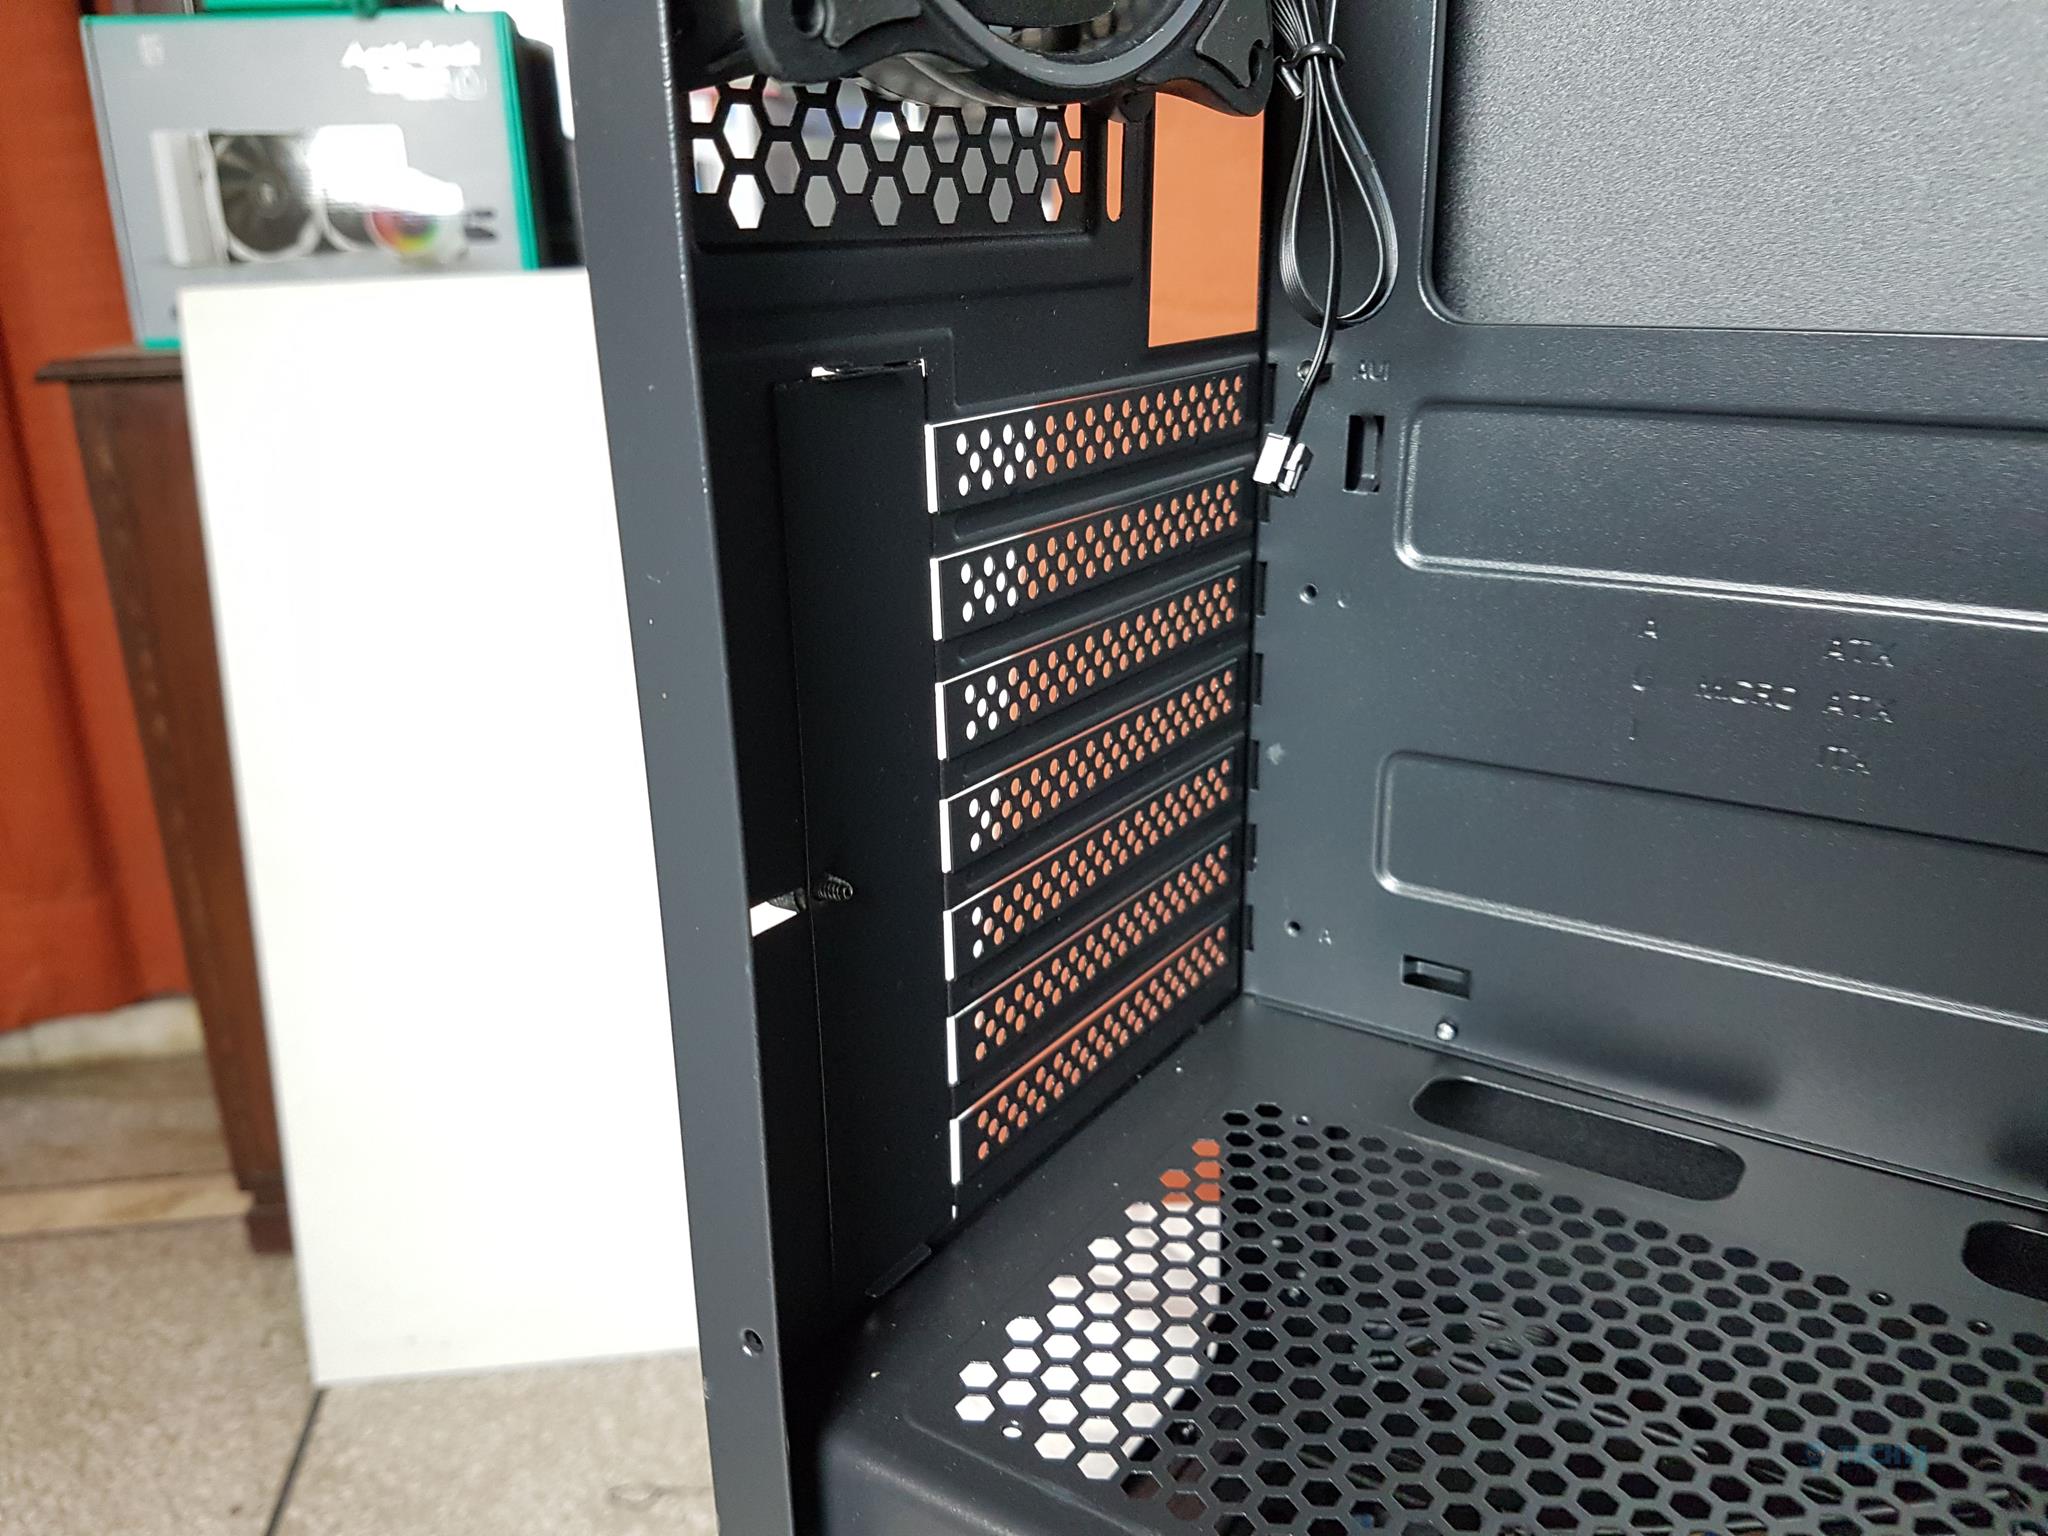
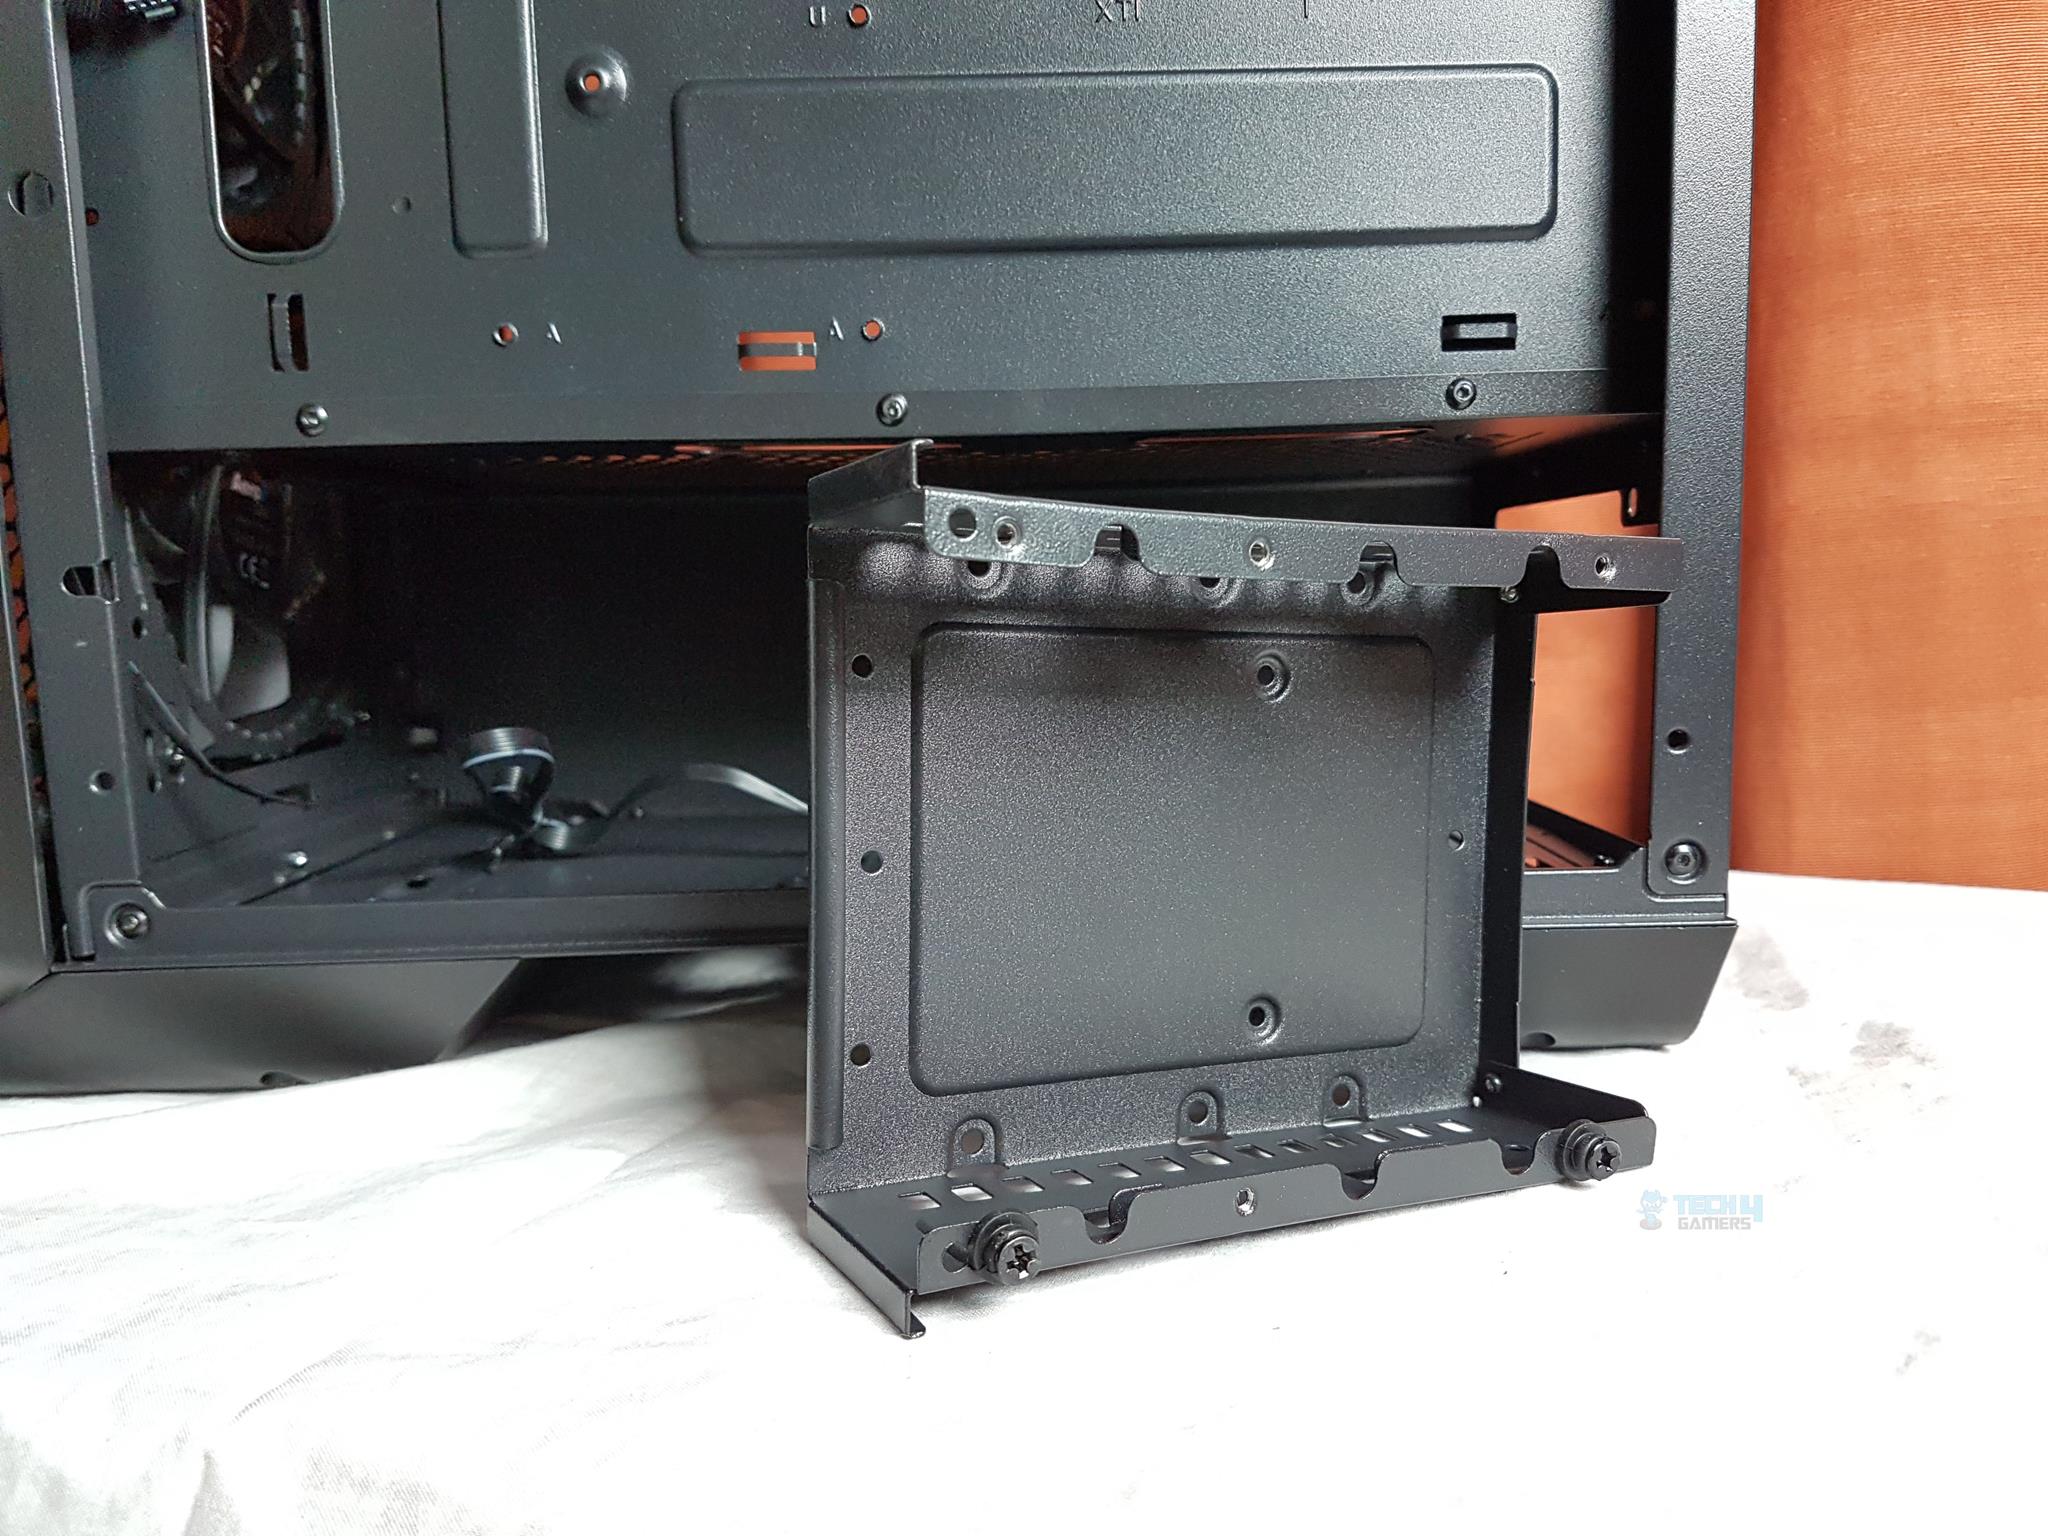
The Aero One Eclipse has roughly 23mm of cable management space, which is quite good. You’ve got about 185mm of space on the right side of the HDD cage. Installing a 160mm PSU leaves only 25mm for cables. Non-modular PSUs pose a challenge, especially if you’re adding two 3.5″ drives. Disappointingly, the HDD cage lacks a caddy, allowing only one 3.5″ drive inside; the second goes on top. If you’ve already installed a drive inside the cage, take it out to mount the second one on top, as the screws need routing from the inside.
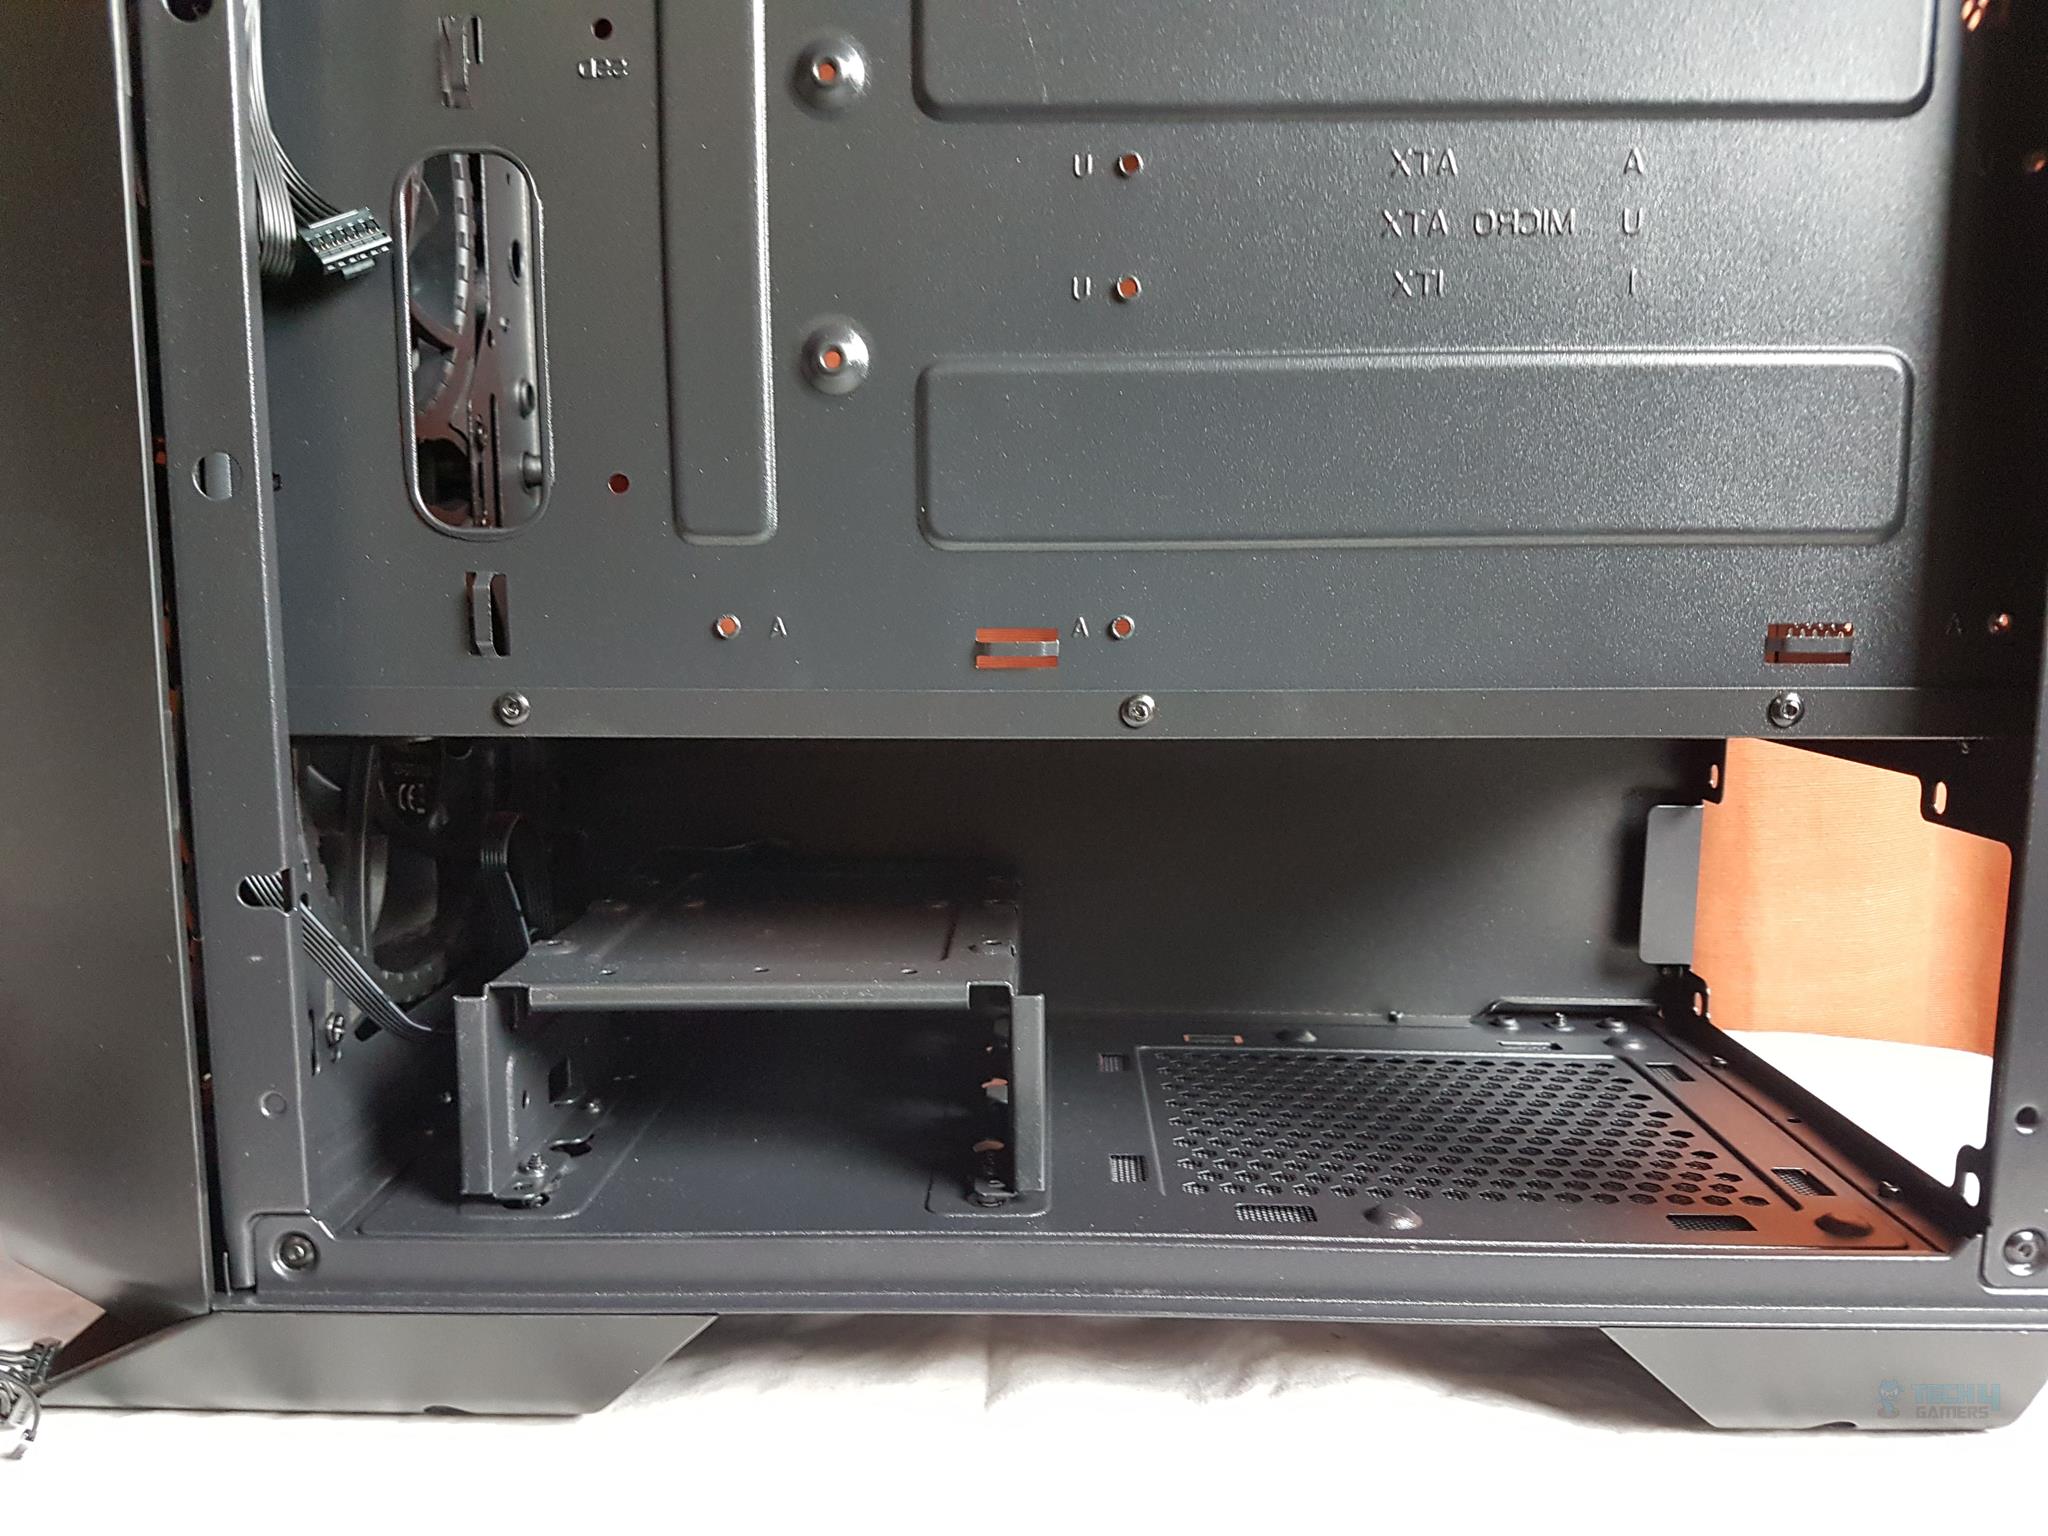
The HDD cage is made of steel and finished in black. It has a vented portion on the left and right sides. There is roughly 325mm or so space available to the user by removing the HDD cage. The bottom mounts on the HDD cage location have rubber tops that help reduce the vibrational noise. There is no rubber padding on the tabs where the PSU is placed.
Aerocool offers a lighting control hub for their Eclipse fans with unique 6-pin connectors. I’m not a fan of these exclusive connectors as they tie control to the hub, risking total loss if it fails. The hub has 3x 6-pin headers for Eclipse fans, labelled SUPER FAN 1 to SUPER FAN 6. Two 3-pin headers, LIGHTS1 and LIGHTS2, allow the ARGB (5V) and standard RGB lighting devices to be connected. The twisted pins on the ARGB headers raise concerns about quality control. A power header with a SATA cable is on the left, and a two-pin header lets you connect the front I/O Panel’s Reset button for RGB control, sacrificing the reset function.
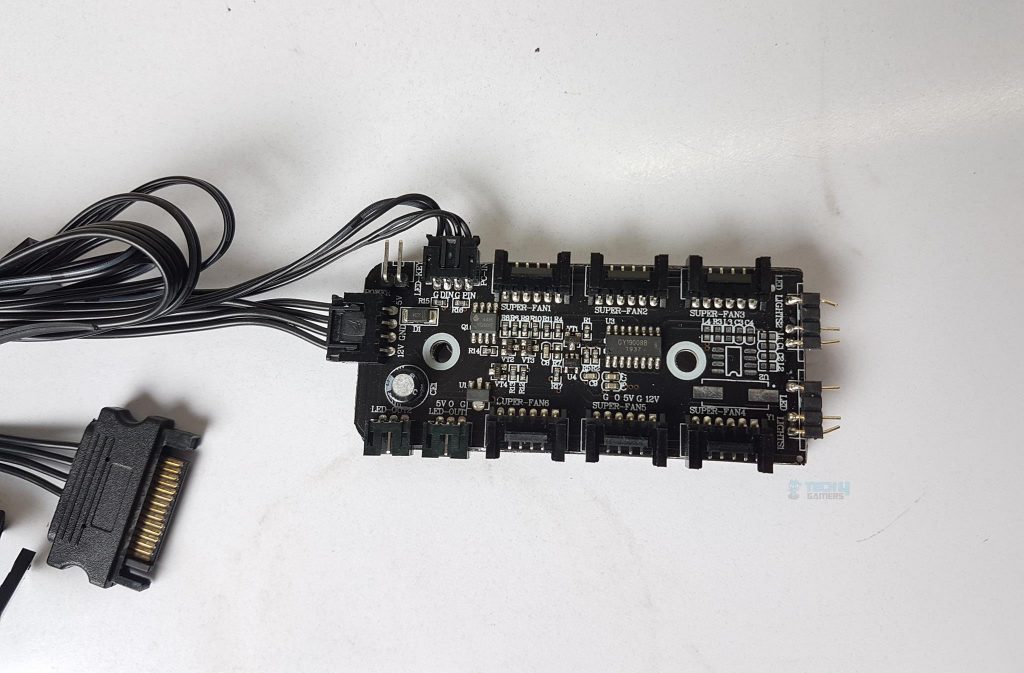
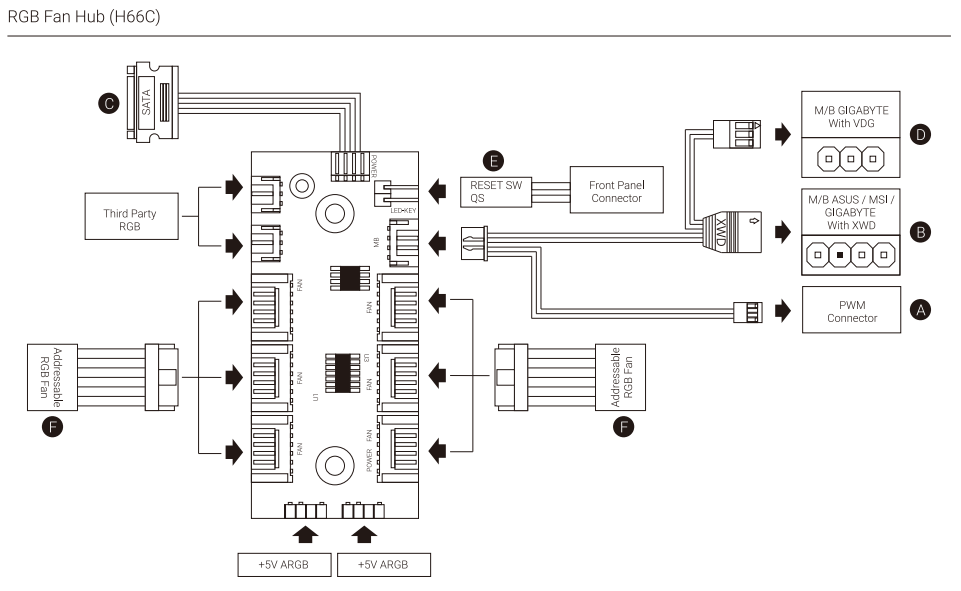
The below diagram shows the RGB Hub and its connectivity options. Connect the hub to your motherboard’s addressable lighting header (compatible with ASUS, MSI, and GIGABYTE). The 4-pin PWM connector with two wires may hinder fan speed control due to a lack of RPM signal. Toggle the RGB hub and motherboard control by holding the Reset button for 3 seconds. To turn off lights, press for 6 seconds; a single press afterwards will turn them back on.
Test Build
The following components were used for the test build:
- AMD Ryzen 7 3600X
- ID-Cooling SE 234-ARGB
- X570 AORUS Pro WIFI
- Corsair Vengeance Pro 2x8GB DDR4 @ 3200MHz CL16
- GIGABYTE GeForce GTX 1060 6G Gaming G1
- HyperX 120GB SSD
- Antec HCP1300 PSU
I began by installing the standoffs but noticed one was missing. I put in the motherboard and added the cooler and RAM outside the chassis. Installed the PSU with the fan down. No issues except the missing standoff. Easily installed the graphics card and connected the PSU and front panel cables. All smooth!
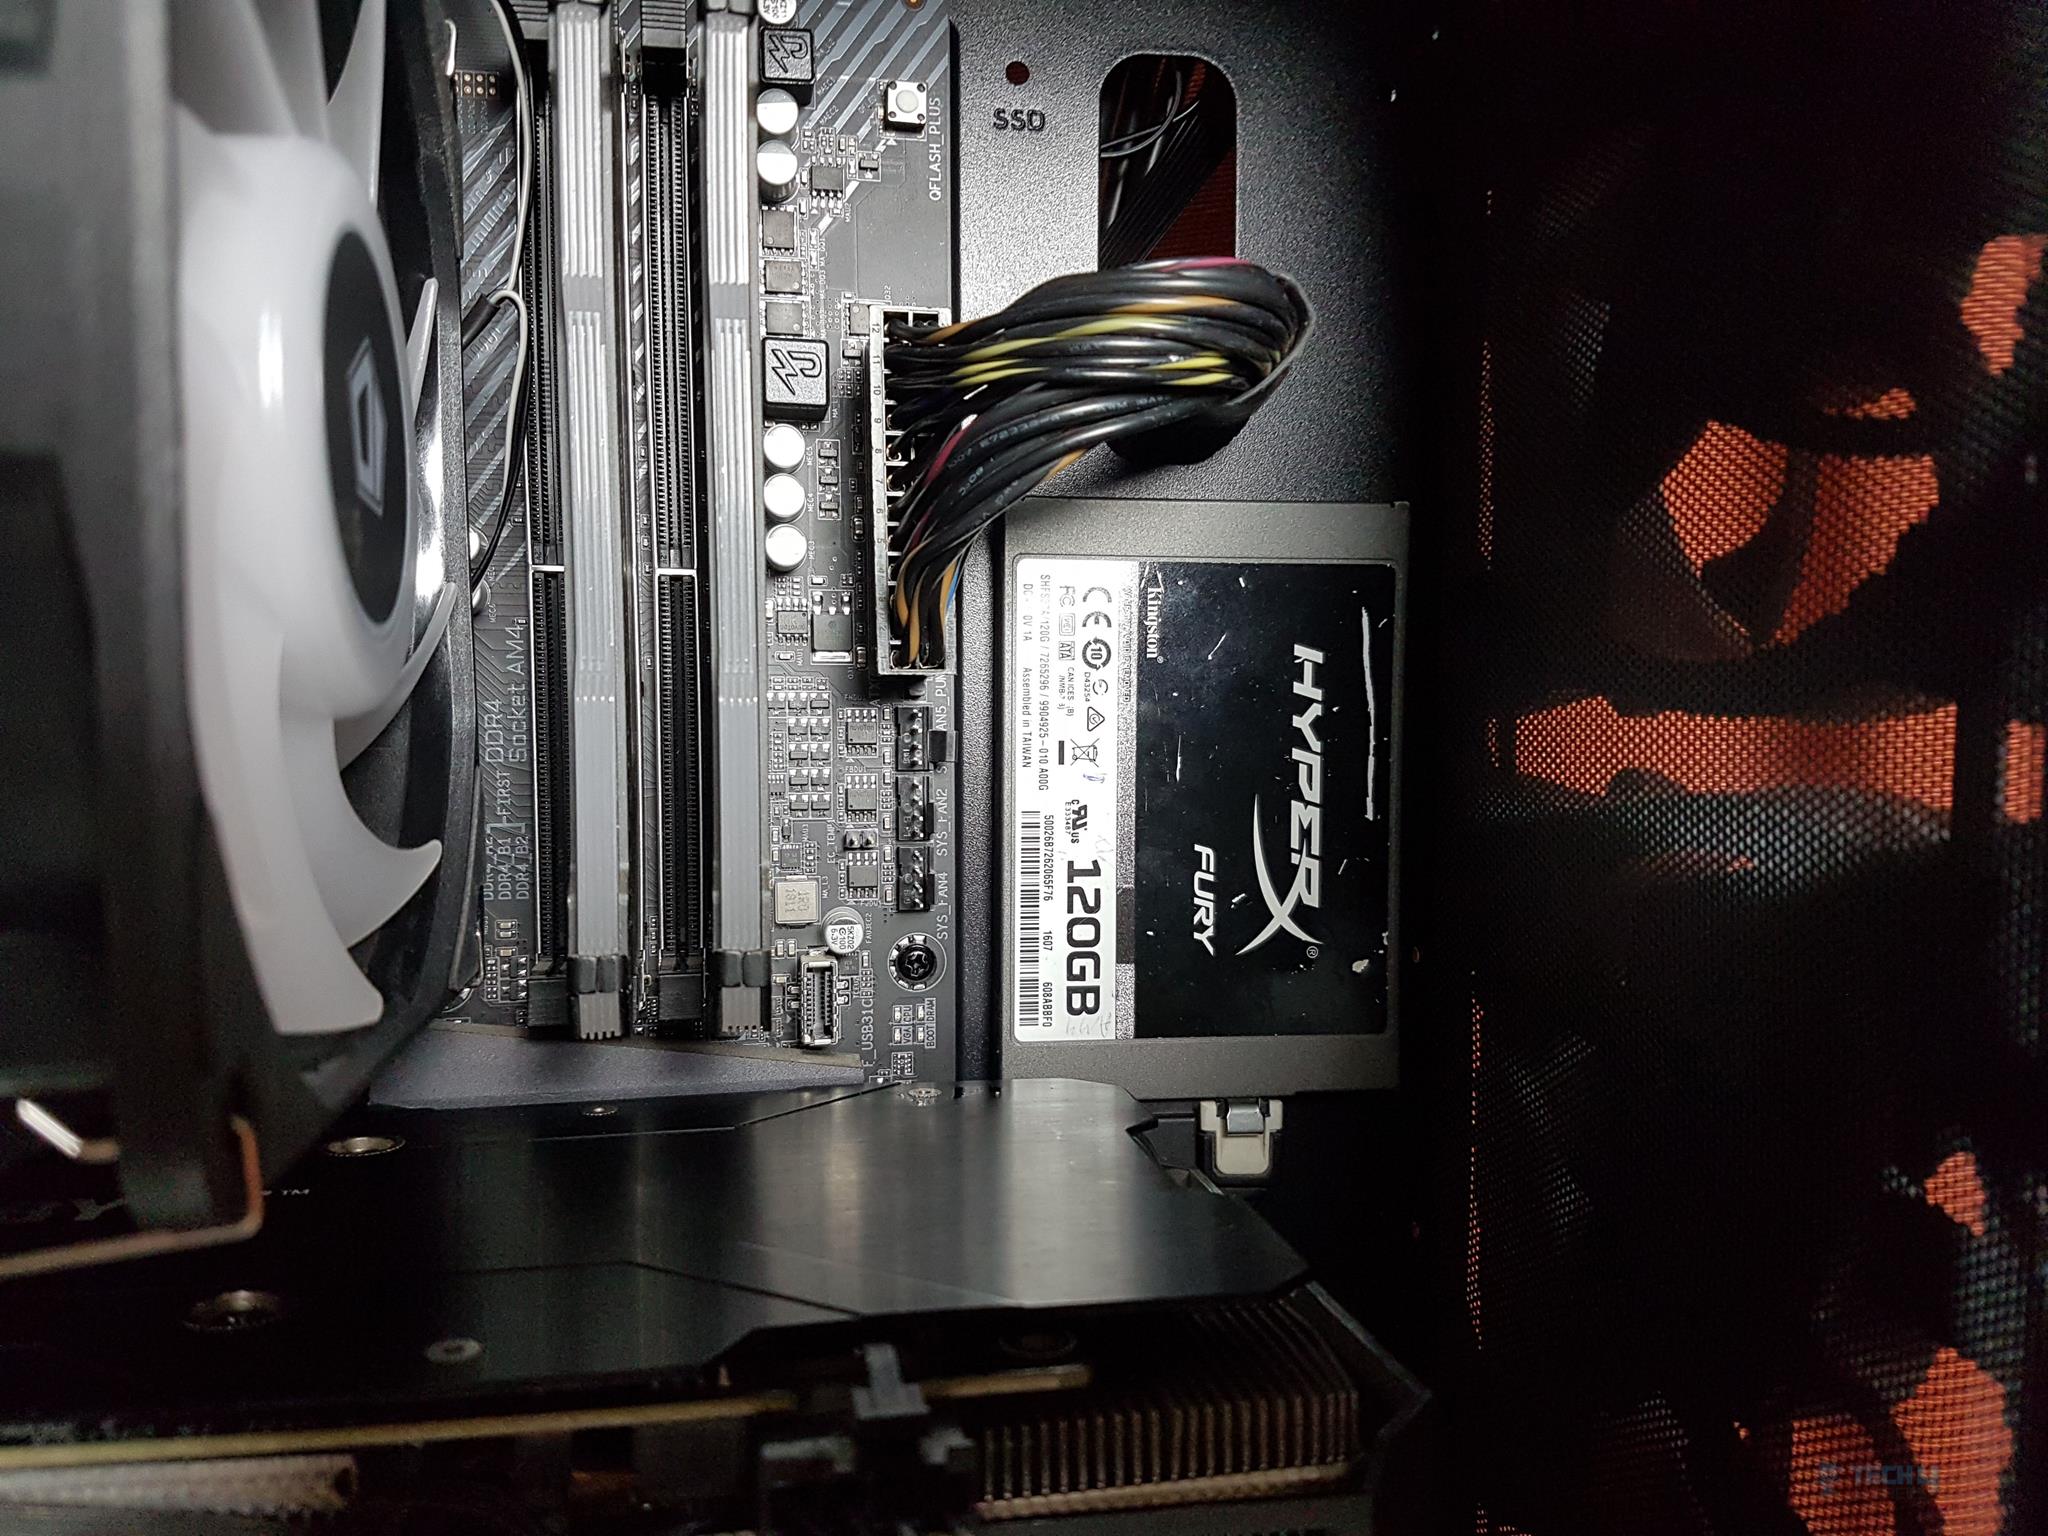
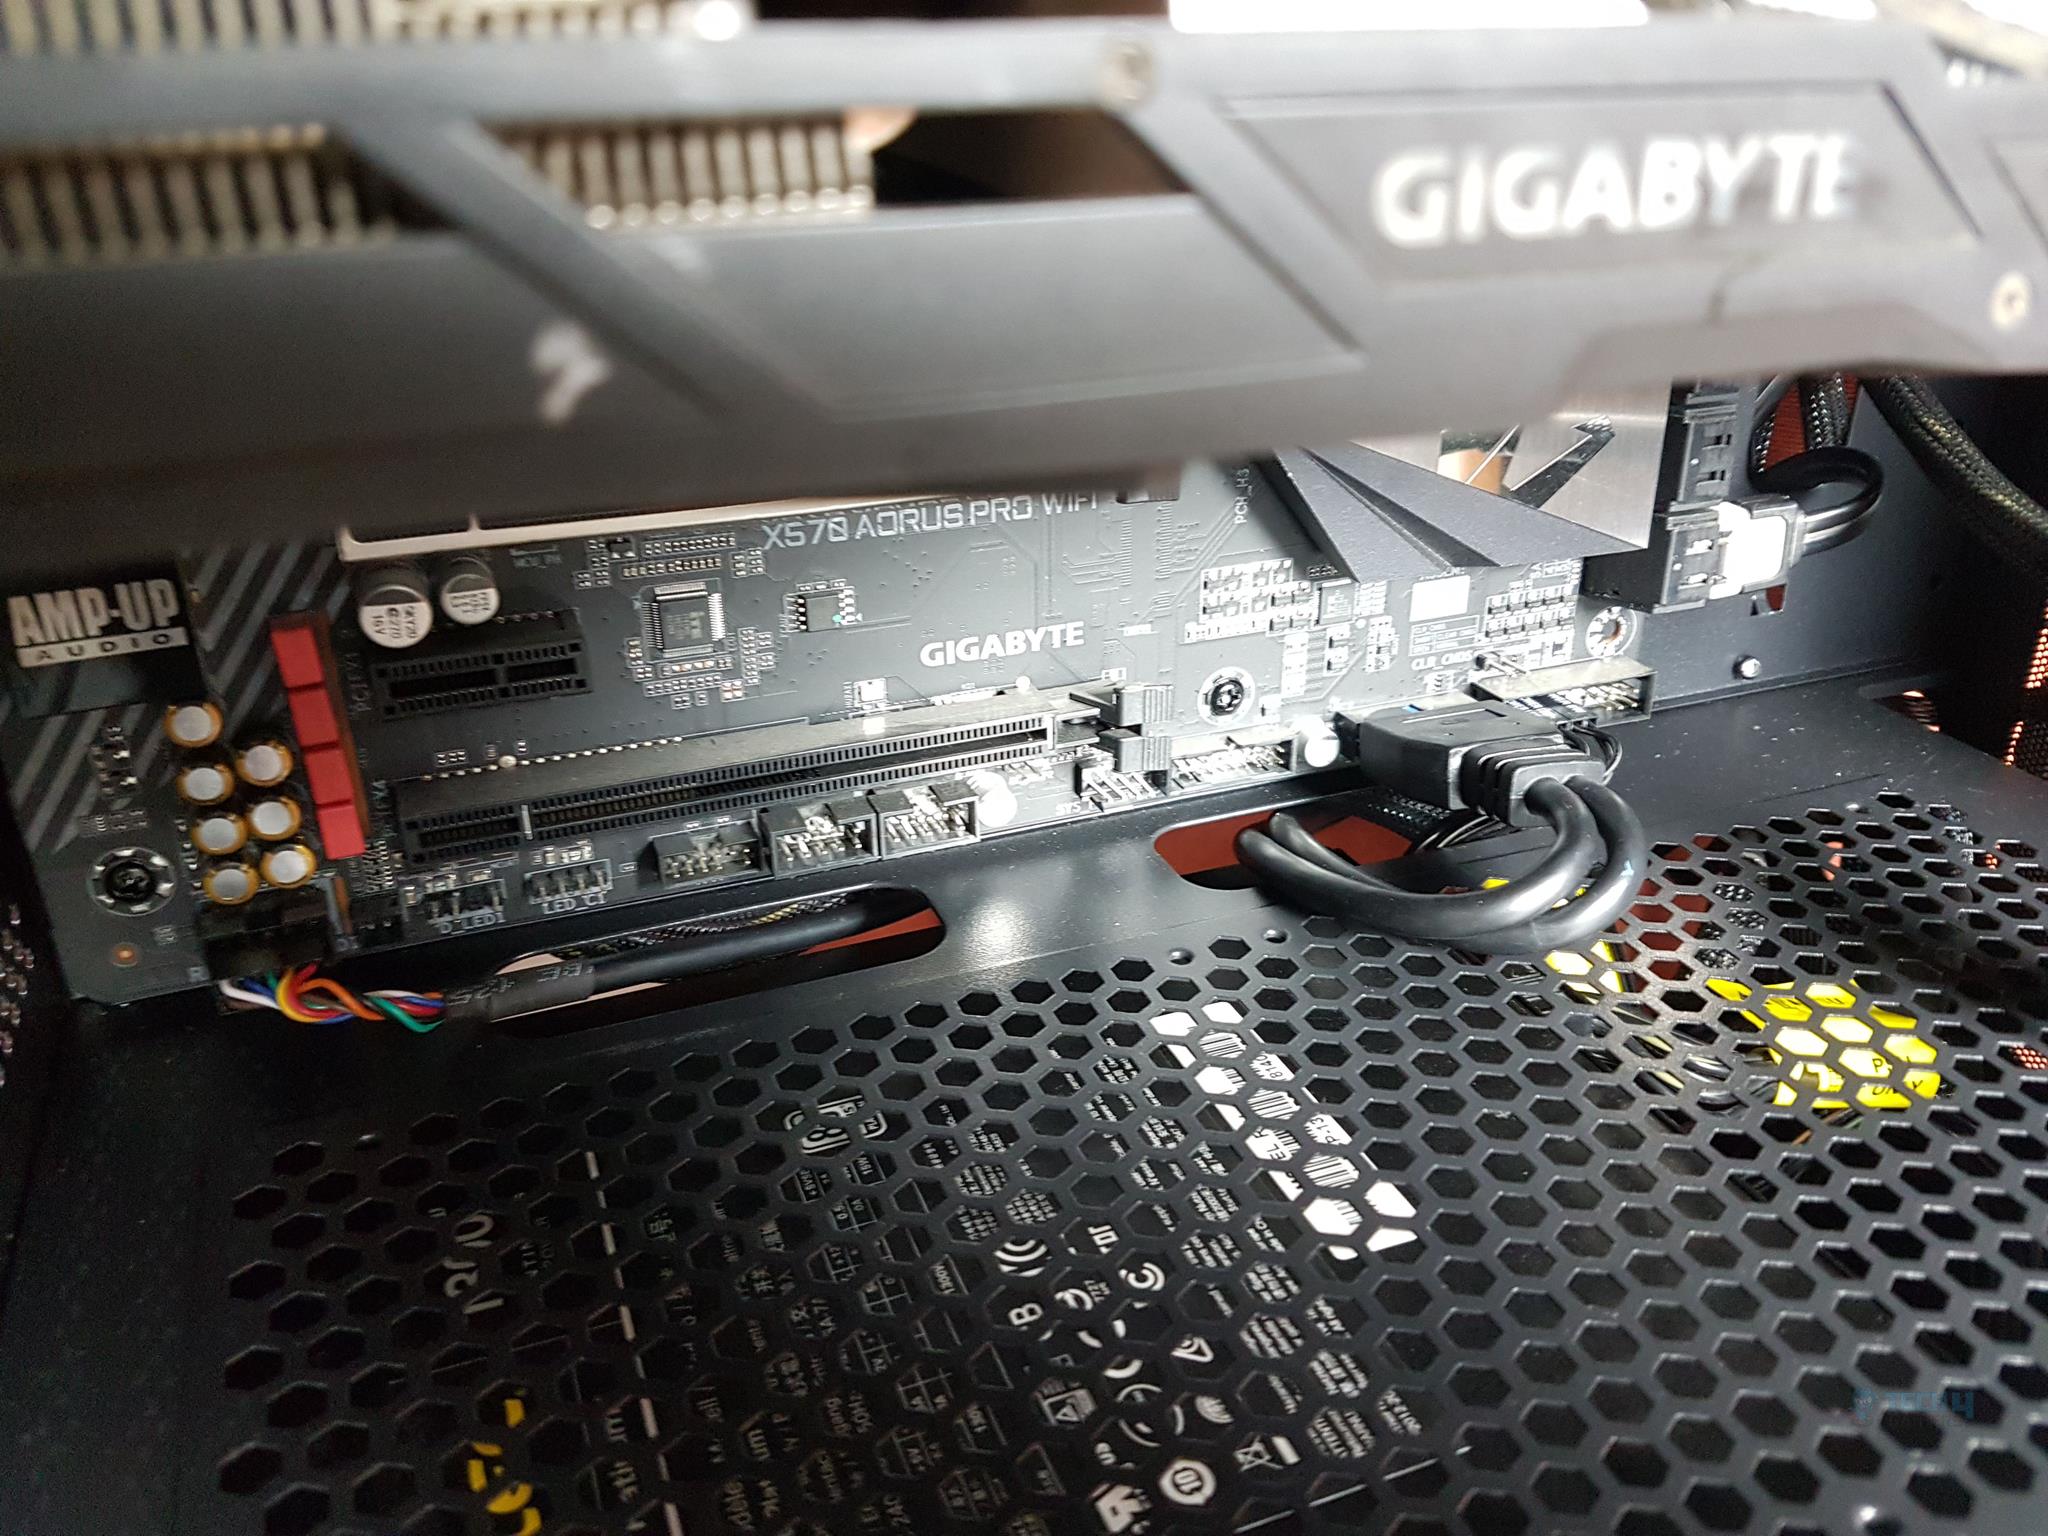
I installed the 2.5” SSD in the middle since cables blocked the top and bottom slots. Positioned the RGB hub on the chassis back using dual-sided tape. Routed my Eclipse fan cables to the hub and connected the SATA cable to my PSU. Attached is the front panel’s 2-pin Reset cable to the hub. Despite the cable bulk, I closed the side panel with force.

RGB Lighting
The RGB lighting on the Eclipse fans is subtle and not overly done. I like the minimalistic lighting approach using two rings instead of lighting up the entire fan using the blades. This is a personal preference, though.
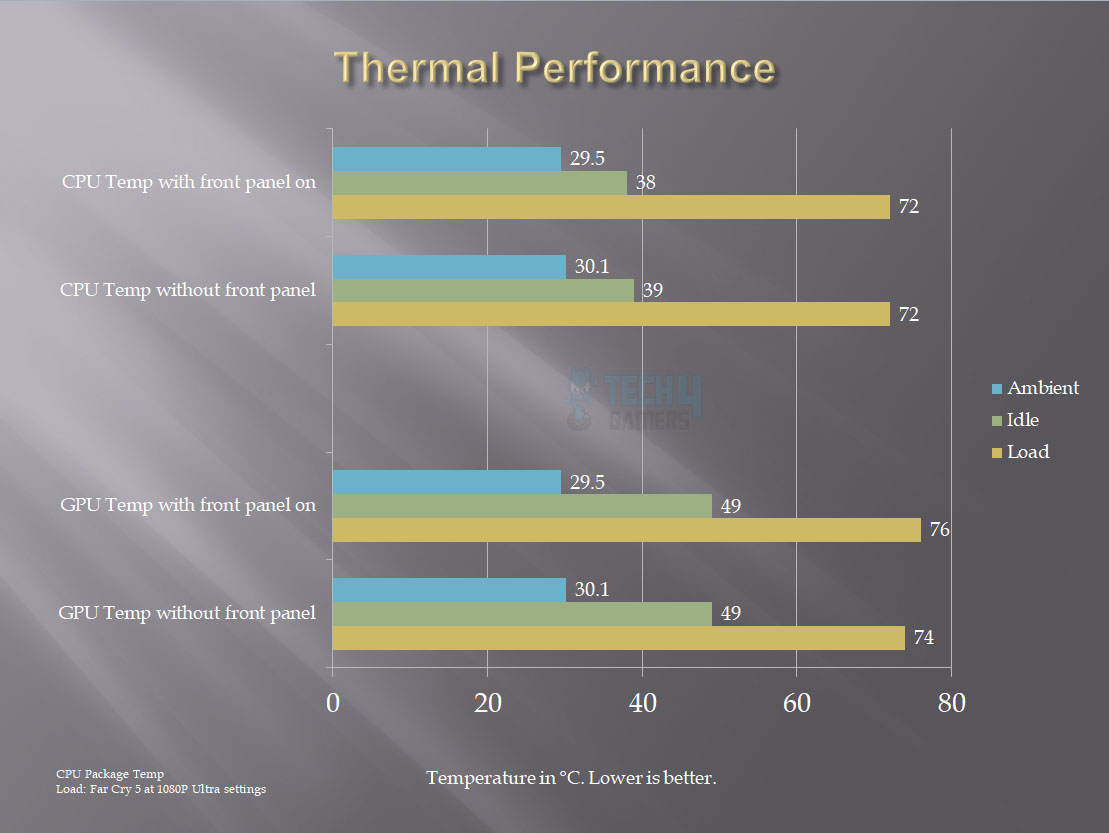
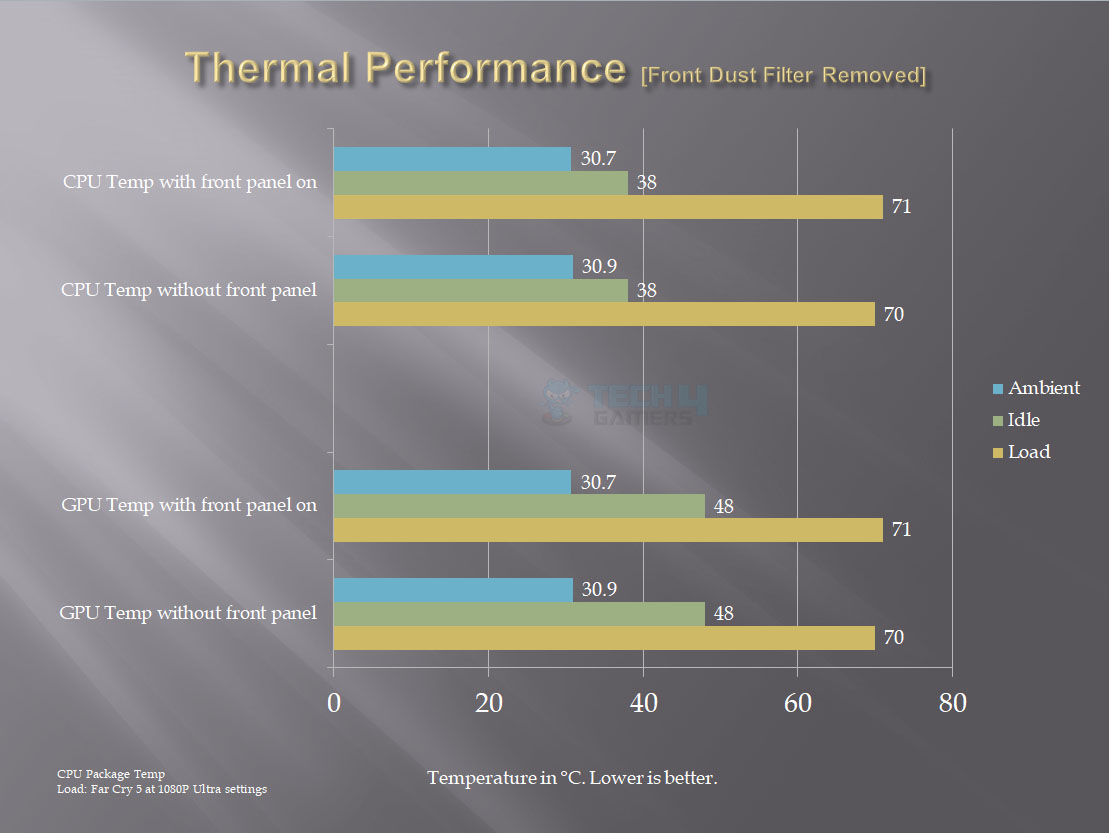
Thermal Performance
We have tested the thermal performance of the chassis using the following configuration:
- Configuration1 with the front panel and front magnetic dust filter installed
- Configuration2 with the front panel removed and the front magnetic dust filter installed
- Configruation3 with front panel installed and front magnetic dust filter removed
- Configuration4 with the front panel and front magnetic dust filter removed
Since there was no response to the speed regulation of the Eclipse fans, they were in their stock configuration throughout the testing. I am not sure at what speed they were operating.
Should You Buy It?
Upon careful review and analysis of the Aero One Eclipse, my assessment says that:
Buy It If
✅ You Want Optimal Airflow in a Mid-Tower Chassis: The Aerocool One Eclipse is tailored for you if you prioritise excellent airflow. With a fully vented front panel, this mid-tower case ensures maximum airflow to cool your components.
✅ You Need Efficient Cooling with 4x 120mm RGB Fans: In need of a case with advanced cooling? The Aerocool One Eclipse has 4x 120mm RGB fans strategically placed on the front panel for optimal cooling performance and a visually appealing setup.
✅ You Prefer a Sleek Design with Tempered Glass: For those who prioritize aesthetics, the Aerocool One Eclipse offers a sleek design with a touch of elegance. The 4mm tempered glass side panel showcases your internal components, adding a premium feel to the case’s overall look.
✅ You Are Looking for Compatibility with Standard ATX Components: If you use standard ATX motherboards, a 161mm CPU cooler, and a 327mm graphics card, the Aerocool One Eclipse is designed to meet your compatibility needs. Its mid-tower form factor accommodates commonly used components in gaming setups.
Don’t Buy It If
❌ You Prioritize Easy Cable Management: For those valuing easy assembly and cable management, be aware of reported issues with the Aerocool One Eclipse, such as missing standoffs and twisted ARGB header pins. Consider your preference for a hassle-free experience.
❌ You Prefer Reusable PCIe Slot Covers: If you have specific preferences for reusable PCIe slot covers, note that the Aerocool One Eclipse comes with non-reusable covers. Depending on your preference, this may impact your overall satisfaction with the case.
Final Words
The Aerocool One Eclipse stands out as a stylish mid-tower, constructed from SPCC, ABS, and tempered glass. It measures 210 x 520 x 404mm (WxHxD) and tips the scales at 6.1 kg. This case is designed for effective cooling, boasting three RGB fans at the front, an additional fan at the rear, and support for a top fan or radiator, ensuring it keeps temperatures in check. While it offers a range of storage solutions, managing cables can be a bit tricky and may block some connections.
It accommodates a 161mm CPU cooler, a 327mm GPU, and a 160mm PSU. However, it falls short by not providing reusable PCIe slot covers. The case’s design is enhanced by a carbon fibre-wrapped front panel and tempered glass that attaches securely. The PSU shroud is equipped with mounts for two 120mm fans, and there’s a magnetic dust filter on top for easy maintenance.
One downside is the GPU temperatures can rise due to a non-magnetic filter on the PSU shroud, which might need to be removed to improve airflow. The case introduces its own RGB connectors and includes an RGB Hub for controlling the lighting via the motherboard, although it misses some accessories in the bag, and the header pins may come twisted. Overall, the Aerocool One Eclipse combines aesthetics with functionality well, though it could benefit from a closer look at details such as reusable PCIe covers and further thermal optimizations to perfect the user experience.
We thank Aerocool for allowing us to review their Aero One Eclipse Chassis.
Recent Updates
- January 18, 2024: A few text changes to improve readability. Also added image galleries.
Thank you! Please share your positive feedback. 🔋
How could we improve this post? Please Help us. 😔
[Hardware Reviewer & Editor]
Meet Nauman Siddique, a highly experienced computer science graduate with more than 15 years of knowledge in technology. Nauman is an expert in the field known for his deep understanding of computer hardware.
As a tech tester, insightful reviewer, and skilled hardware editor, Nauman carefully breaks down important parts like motherboards, graphics cards, processors, PC cases, CPU coolers, and more.
- 15+ years of PC Building Experience
- 10+ years of first-hand knowledge of technology
- 7+ years of doing in-depth testing of PC Hardware
- A motivated individual with a keen interest in tech testing from multiple angles.
- I majored in Computer Science with a Masters in Marketing
- Previously worked at eXputer, EnosTech, and Appuals.
- Completed Course in Computer Systems Specialization From Illinois Tech
Get In Touch: nauman@tech4gamers.com


