 Threads
Verdict
Raijintek Scyla Elite Review Summary
The Raijintek Scyla Elite is a basic DIY kit offering a stunning light show, particularly on the glass reservoir which is a key highlight of the loop. The kit offers an effective cooling potential and being a DIY kit, one can expand the loop in the future as well.
Hours Tested: 5

Pros
- Effective Performance
- Easy to use
- Socket Compatibility
- Good Build Quality
- A-RGB lighting
- Powerful pump
- Tempered Glass Reservoir
Cons
- A bit inconvenient installation of the water block
- Lacks completeness


As the demand for customizable PC cooling solutions continues to rise, DIY cooling kits have become increasingly popular, especially among beginners looking to venture into the realm of open or custom loops. In this review, we take a closer look at the Raijintek Scyla Elite kit, specifically the 360mm variant, and we will explore each component of the kit, examining its specifications, build quality, and performance.
Raijintek has sent us the Scyla Elite kit for testing. Our unit comes with a 360mm radiator, a non-RGB water block, and a glass-based reservoir with a DDC pump. Of course, there are fittings, tubing, and fans. The coolant is not in the box as they have informed us that due to certain shipping restrictions, the coolant could not be shipped.
Key Takeaways
- The Raijintek Scylla Elite CA360 Water Cooling Kit is a customizable, high-performance liquid cooling kit with RGB features, designed for experienced PC builders seeking effective CPU cooling and expansion flexibility.
- You should go for the Raijintek Scylla Elite CA360 Water Cooling Kit if you want top-performance, love DIY builds, and can handle the custom challenges.
- You should avoid the Raijintek Scylla Elite CA360 Water Cooling Kit if you’re a beginner who prefer a play-and-play cooling setup or if you’re on a tight budget.
Last Updated:
June 16, 2024: Changed the formatting to improve readability.
Packing And Unboxing
The picture below shows all the contents that we’ve got with the kit. Please note that this kit is available in 240mm and 360mm radiator versions. Make sure to check the correct version. There is a filling bottle included as well.
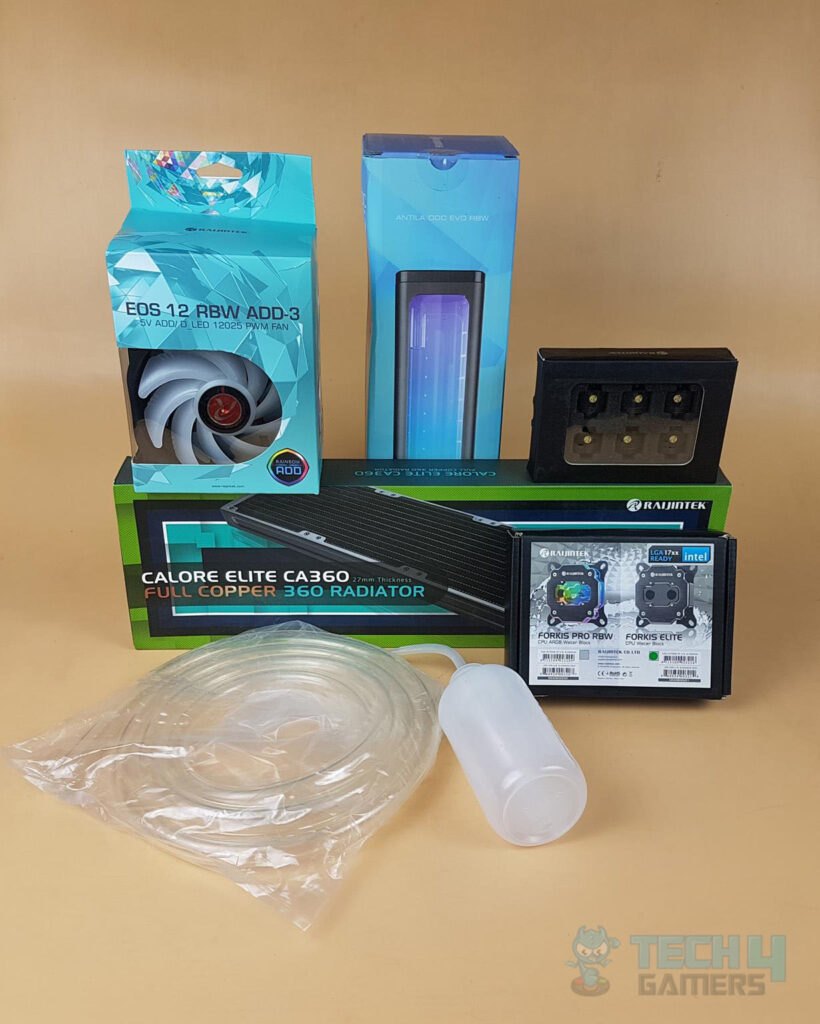
Now, let’s explore these contents one by one:
CALORE ELITE CA360 Radiator
Raijintek has sent us the 360mm variant which has a CALORE ELITE CA360 radiator. The 240mm variant will have CA240 in it.
| Product Name | CALORE ELITE CA360 | CALORE ELITE CA240 |
| Q’ty | 1 pcs | 1 pcs |
| Dimension [W×D×H] | 393×120×27 mm | 273×120×27 mm |
| Flat Tube | 12 sets ; 1.5×16 mm | 12 sets ; 1.5×16 mm |
| FPI (Fin per inch) | 17 | 17 |
| Tube row | 13 | 13 |
| Screw Threads | G 1/4″ | G 1/4″ |
| Port | 2 | 2 |
| Material | Copper | Copper |
| Weight | 796 g | 571 g |
| Surface | Black coated | Black coated |
Design
Radiator
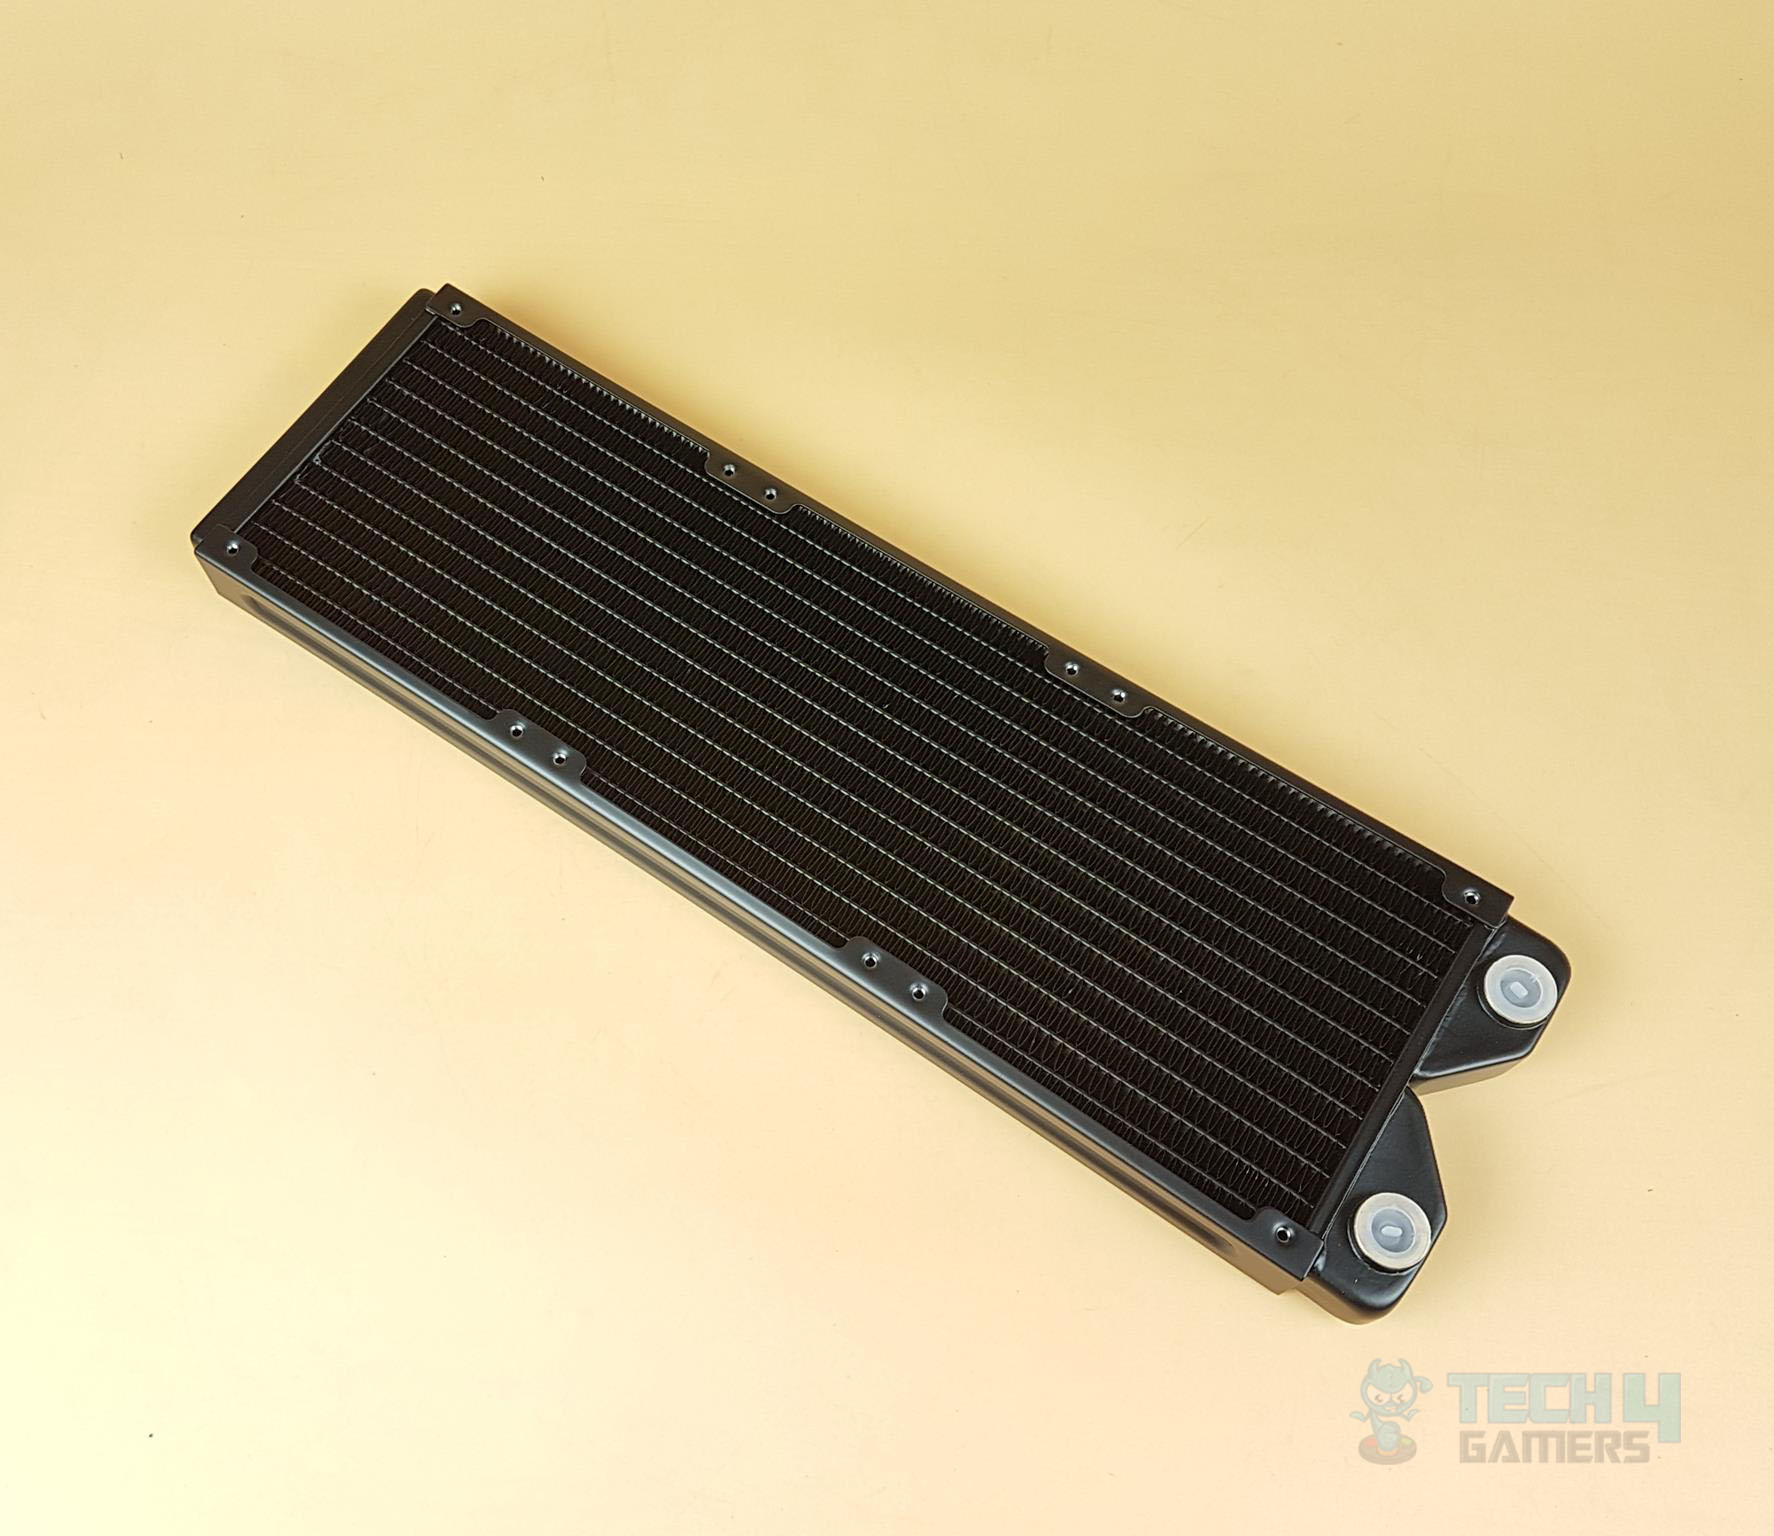
The radiator is made of copper. Raijintek has mentioned that the housing is also made of copper. The dimension of the radiator is 393x120x27mm. The 27mm is the thickness of the radiator. Combining it with 25mm thick fans, the overall thickness would stand at 53mm including the bulkheads of the screws.
The radiator has 13 channels with 12 flat tubes having a dimension of 1.5x16mm (Gap and Height) which are reflow soldered. The FPI count is 17. This count on a 27mm thick radiator indicates that fans with mediocre air pressure can do the job.
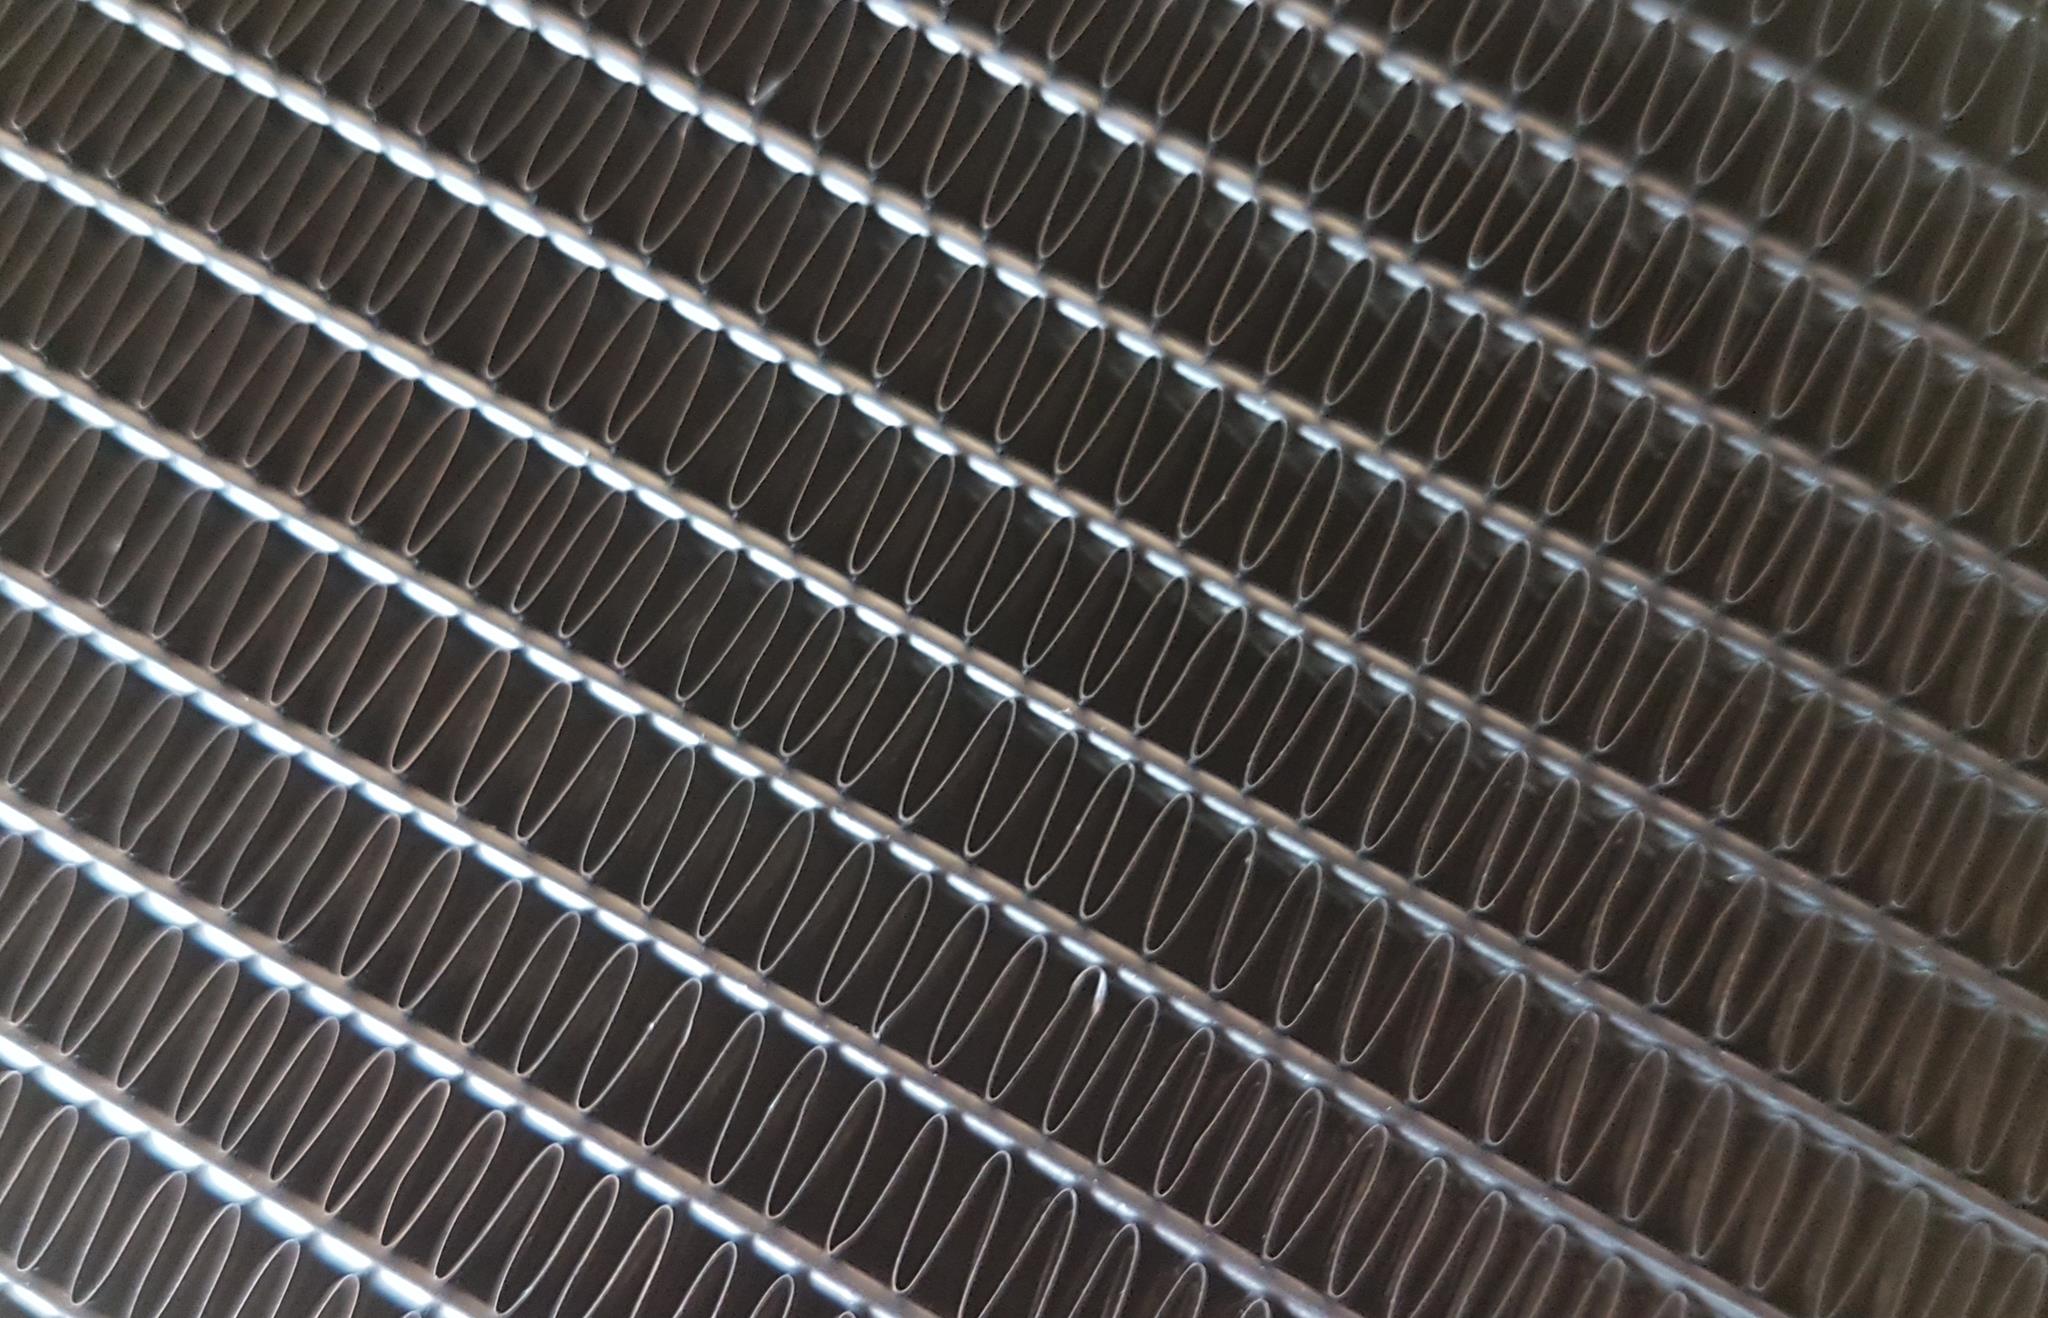
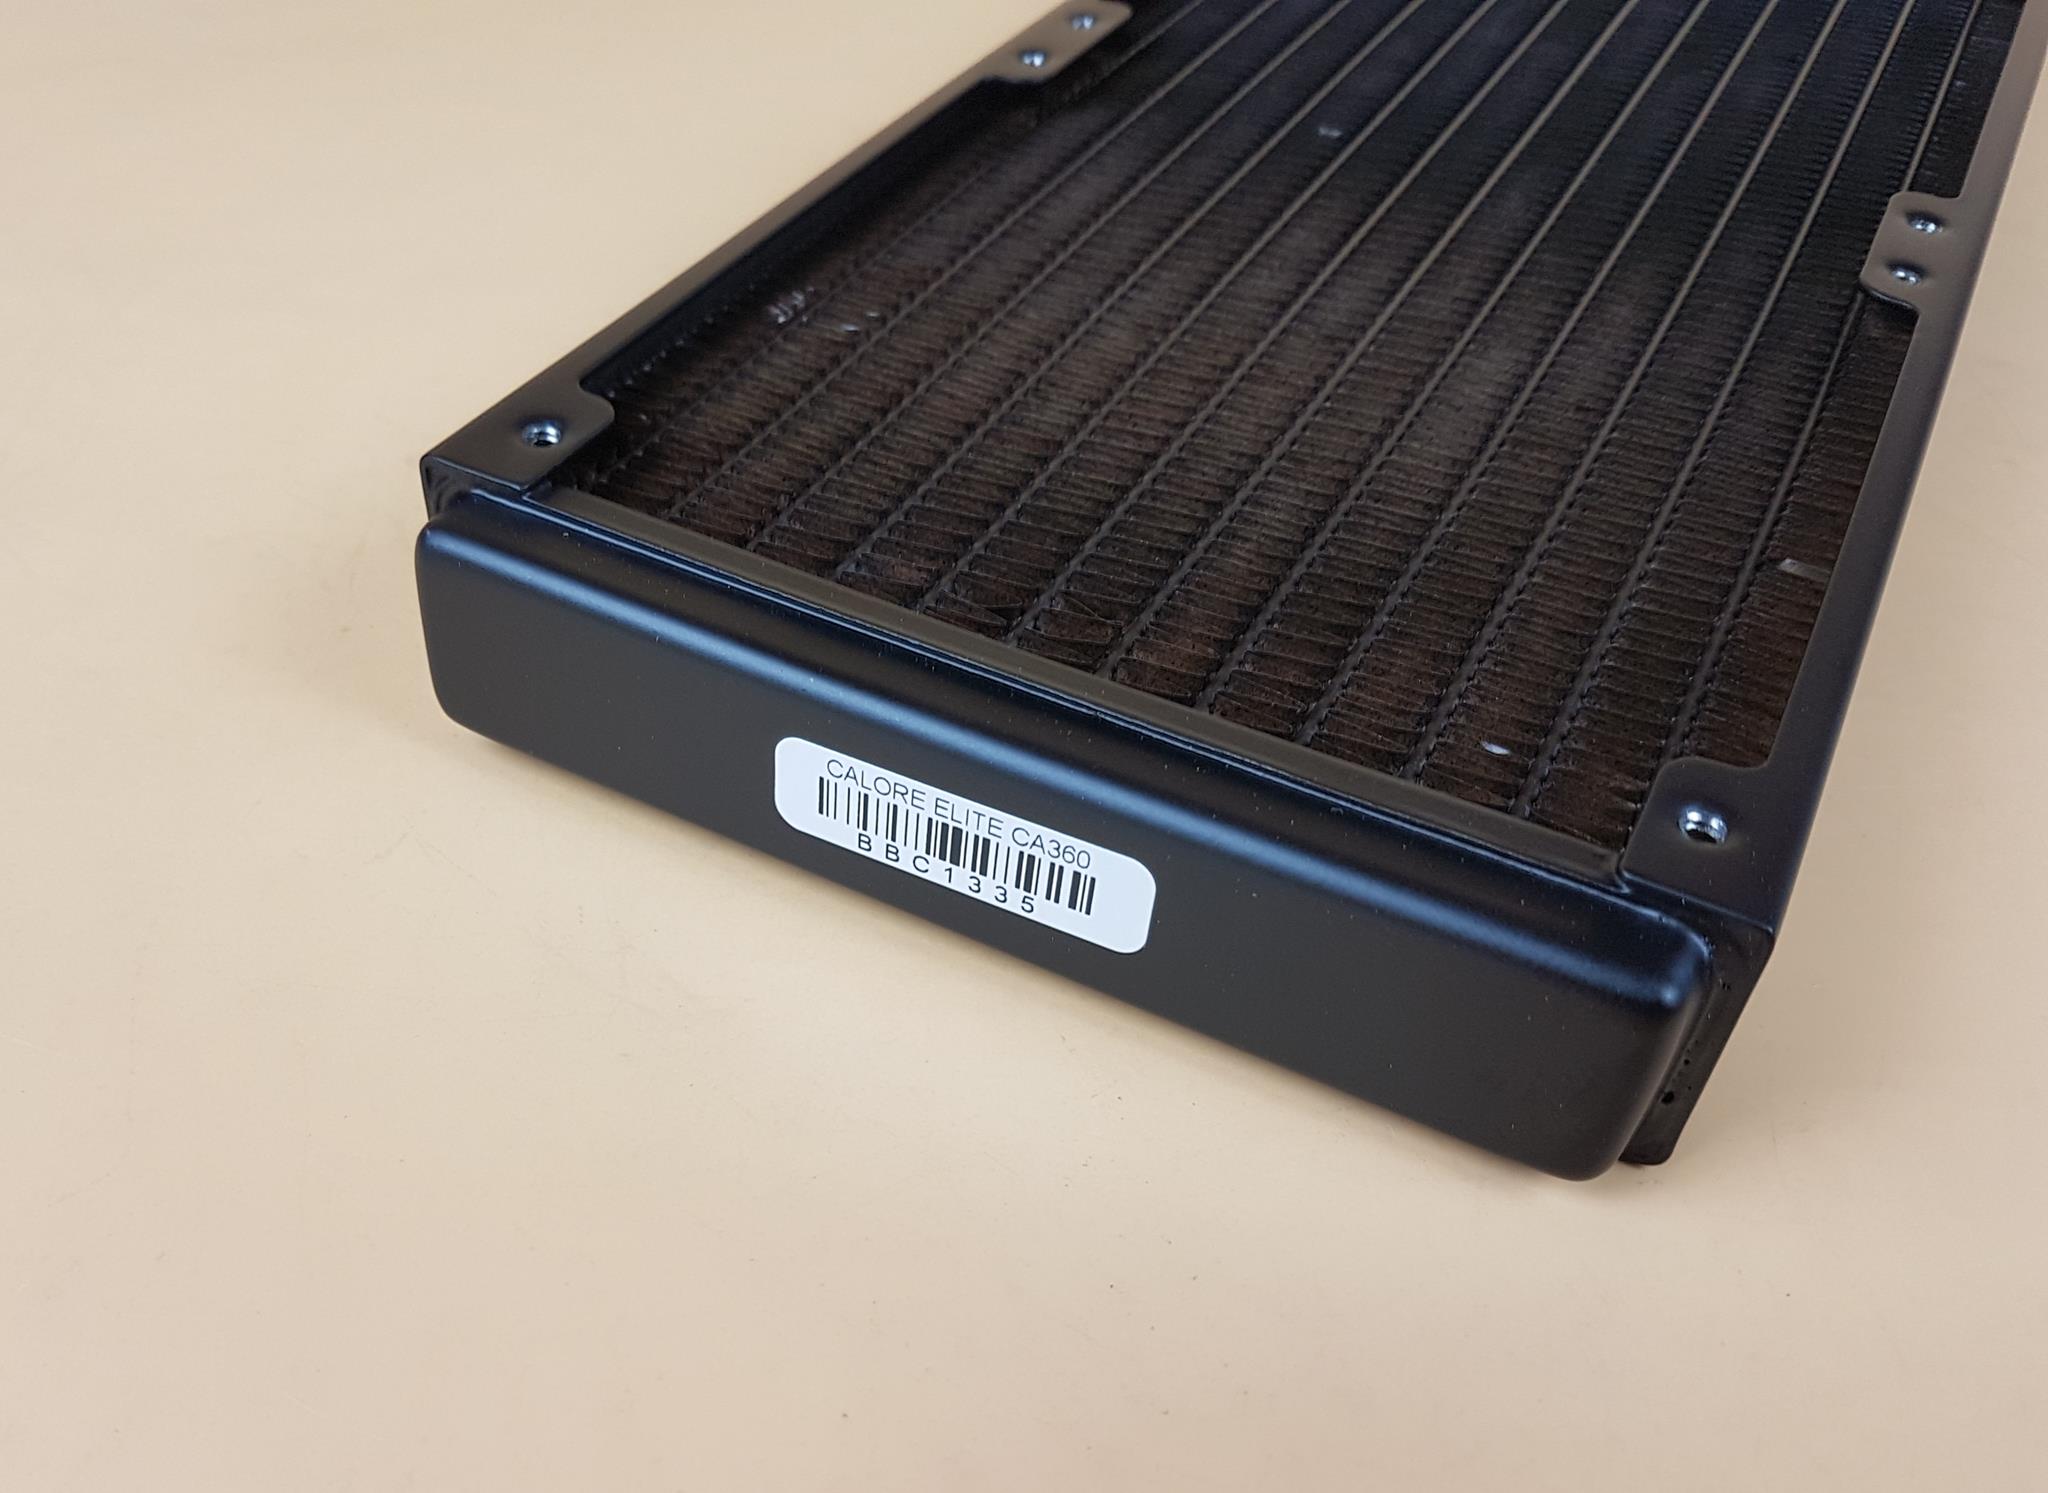
The fins are not dense and Raijintek has done a good job in the overall finishing and build quality. There is a serial number sticker placed on the far head of the radiator. The frame has rounded edges on the sides.
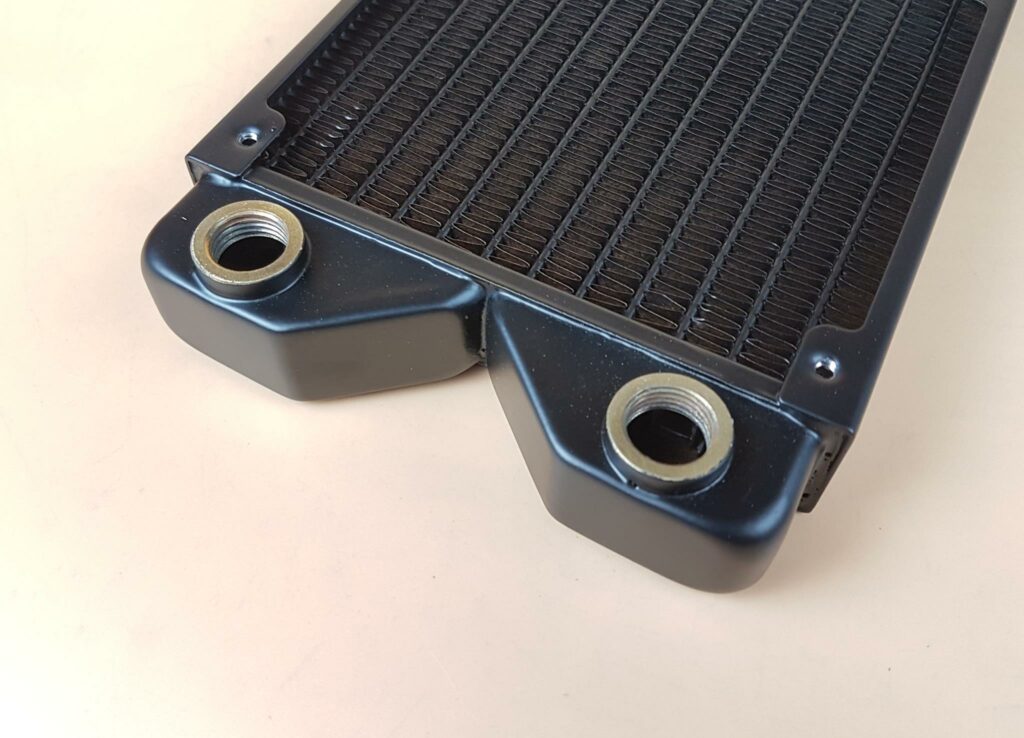
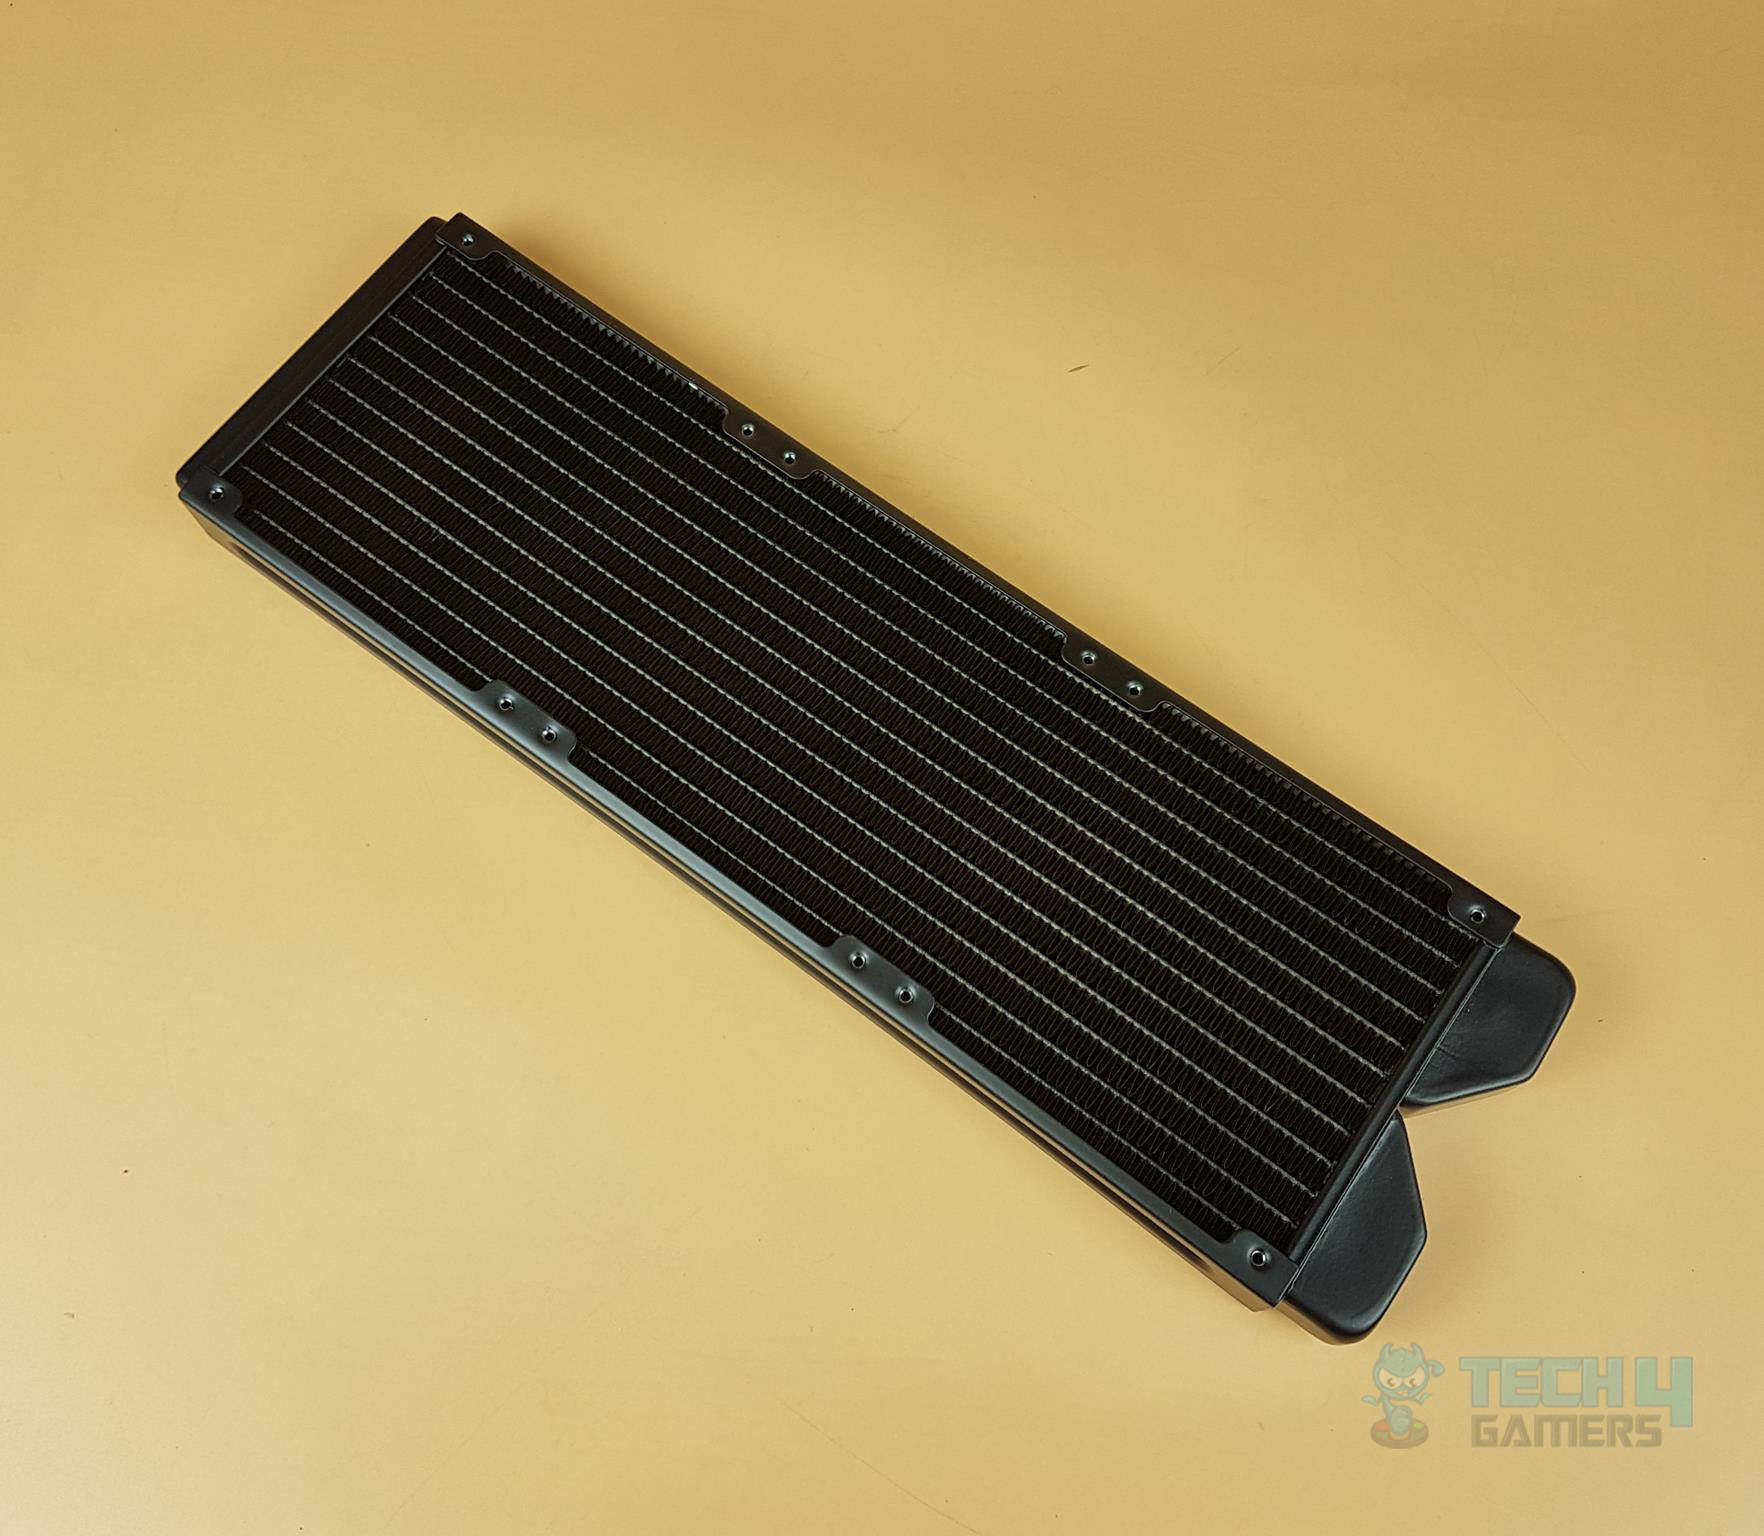
The above picture shows the G1/4” threaded ports on the radiator. This radiator has only 2 ports so the choices are narrowed for the user when it comes to deciding the placement of the radiator and routing the tubing in the loop.
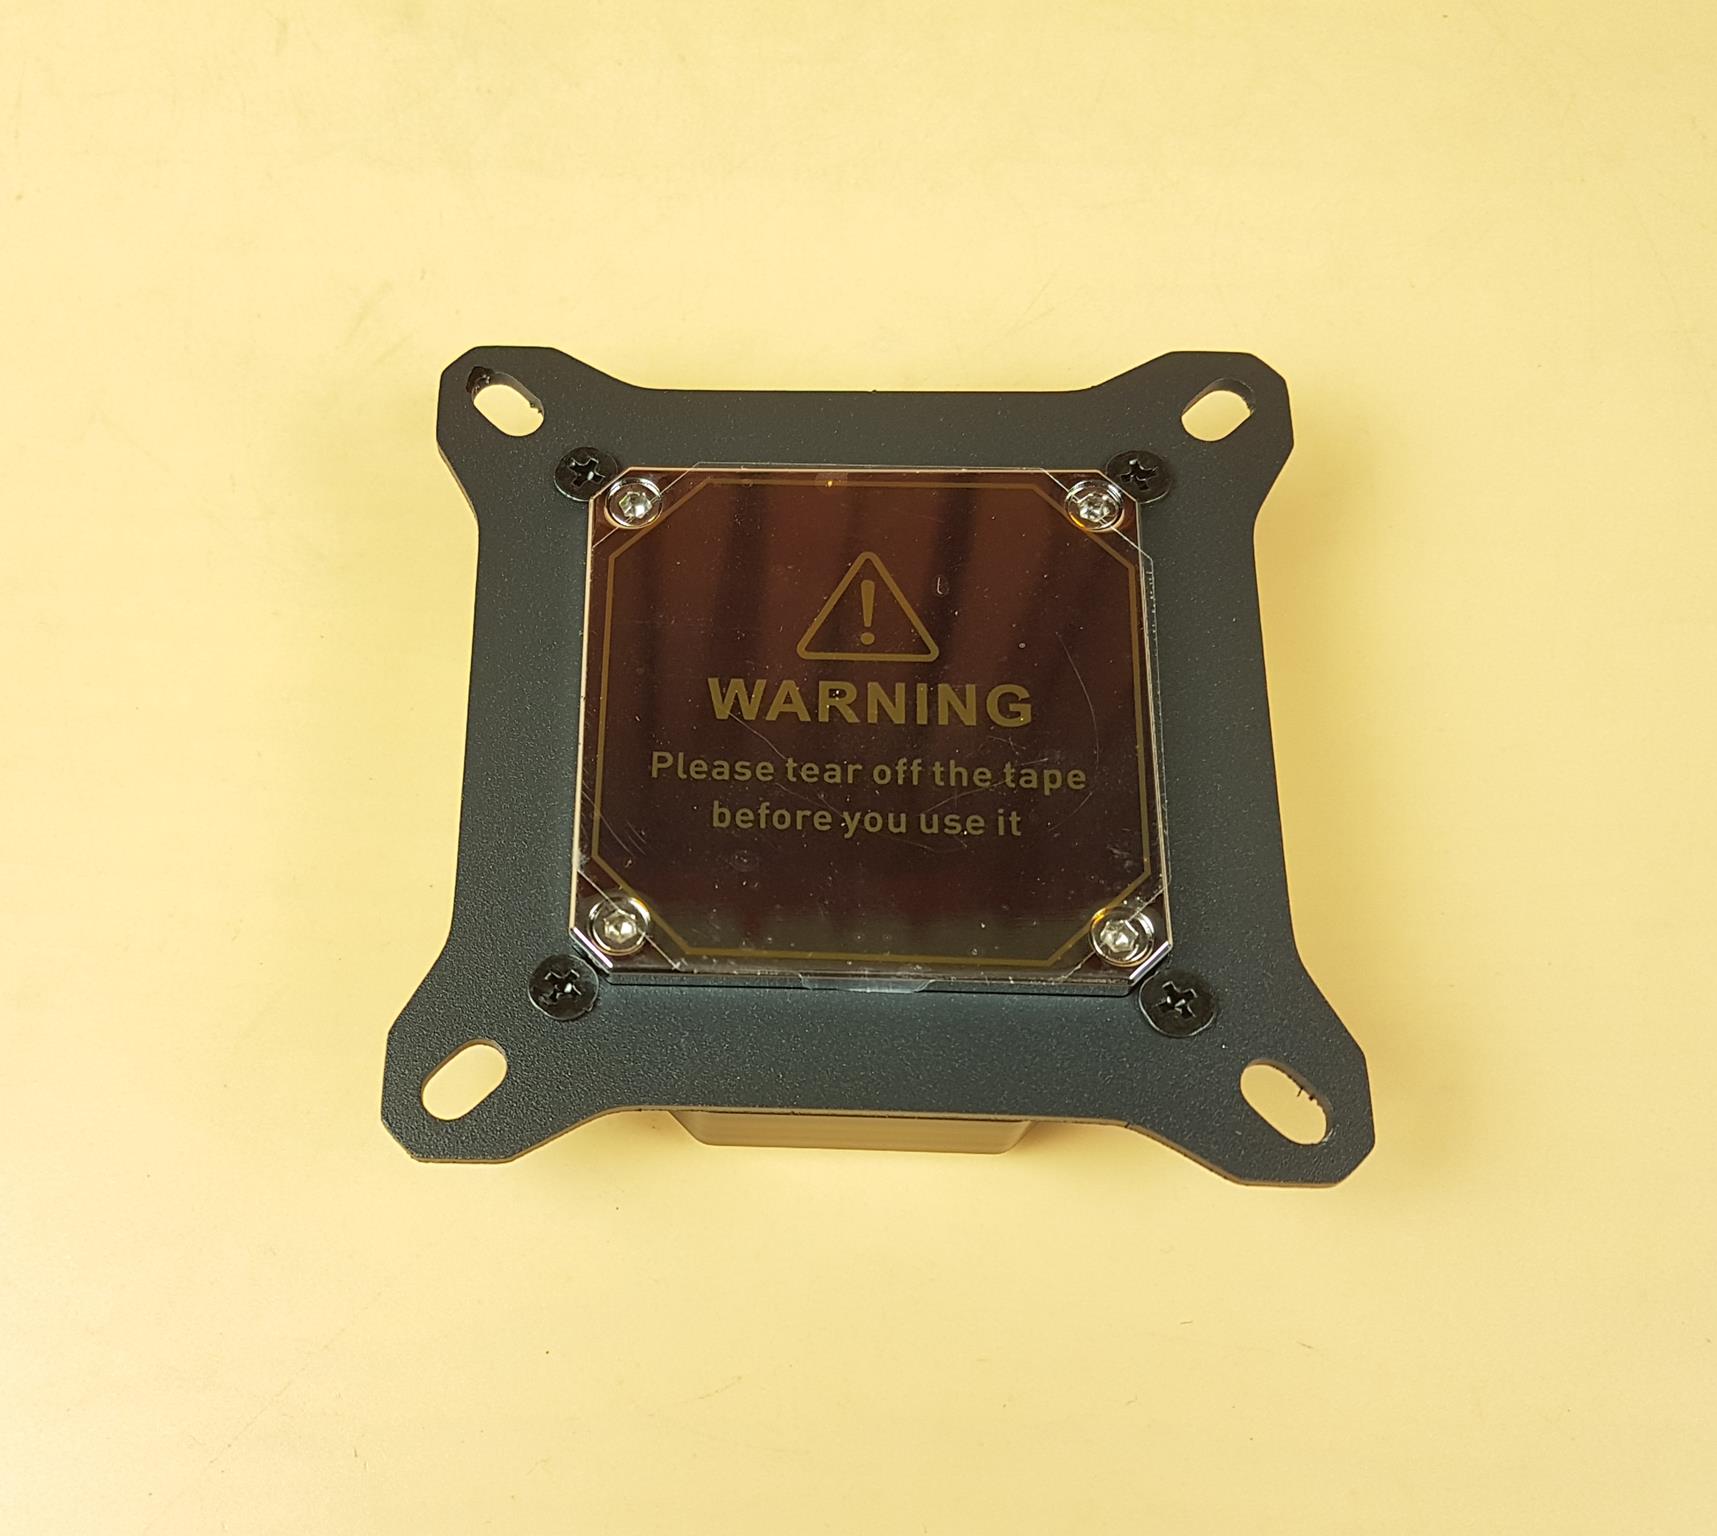
Forkis Elite Waterblock
Raijintek has provided Forkis ELITE CPU Water Block in this kit, the other kit comes with the RGB version of this block.
| Product Name | FORKIS ELITE |
| Q’ty | 1 pcs |
| Dimension [W×D×H] | 82×82×16 mm |
| Screw Threads | G 1/4″ |
| Material | Full copper block, nickel-plated, Aluminum + POM |
| Weight | 495 g [w/o clip] |
| Application – Intel | All Socket LGA 17xx / 115x / 1200 / 1366 / 201x / 2066 CPU (Core™ i3 / i5 / i7 / i9 CPU) |
| Application – AMD | All AM5 / AM4 / AM3+ / AM3 CPU |
This water block is compatible with leading sockets from Intel and AMD including the Intel LGA1700 socket and AMD AM4 socket.
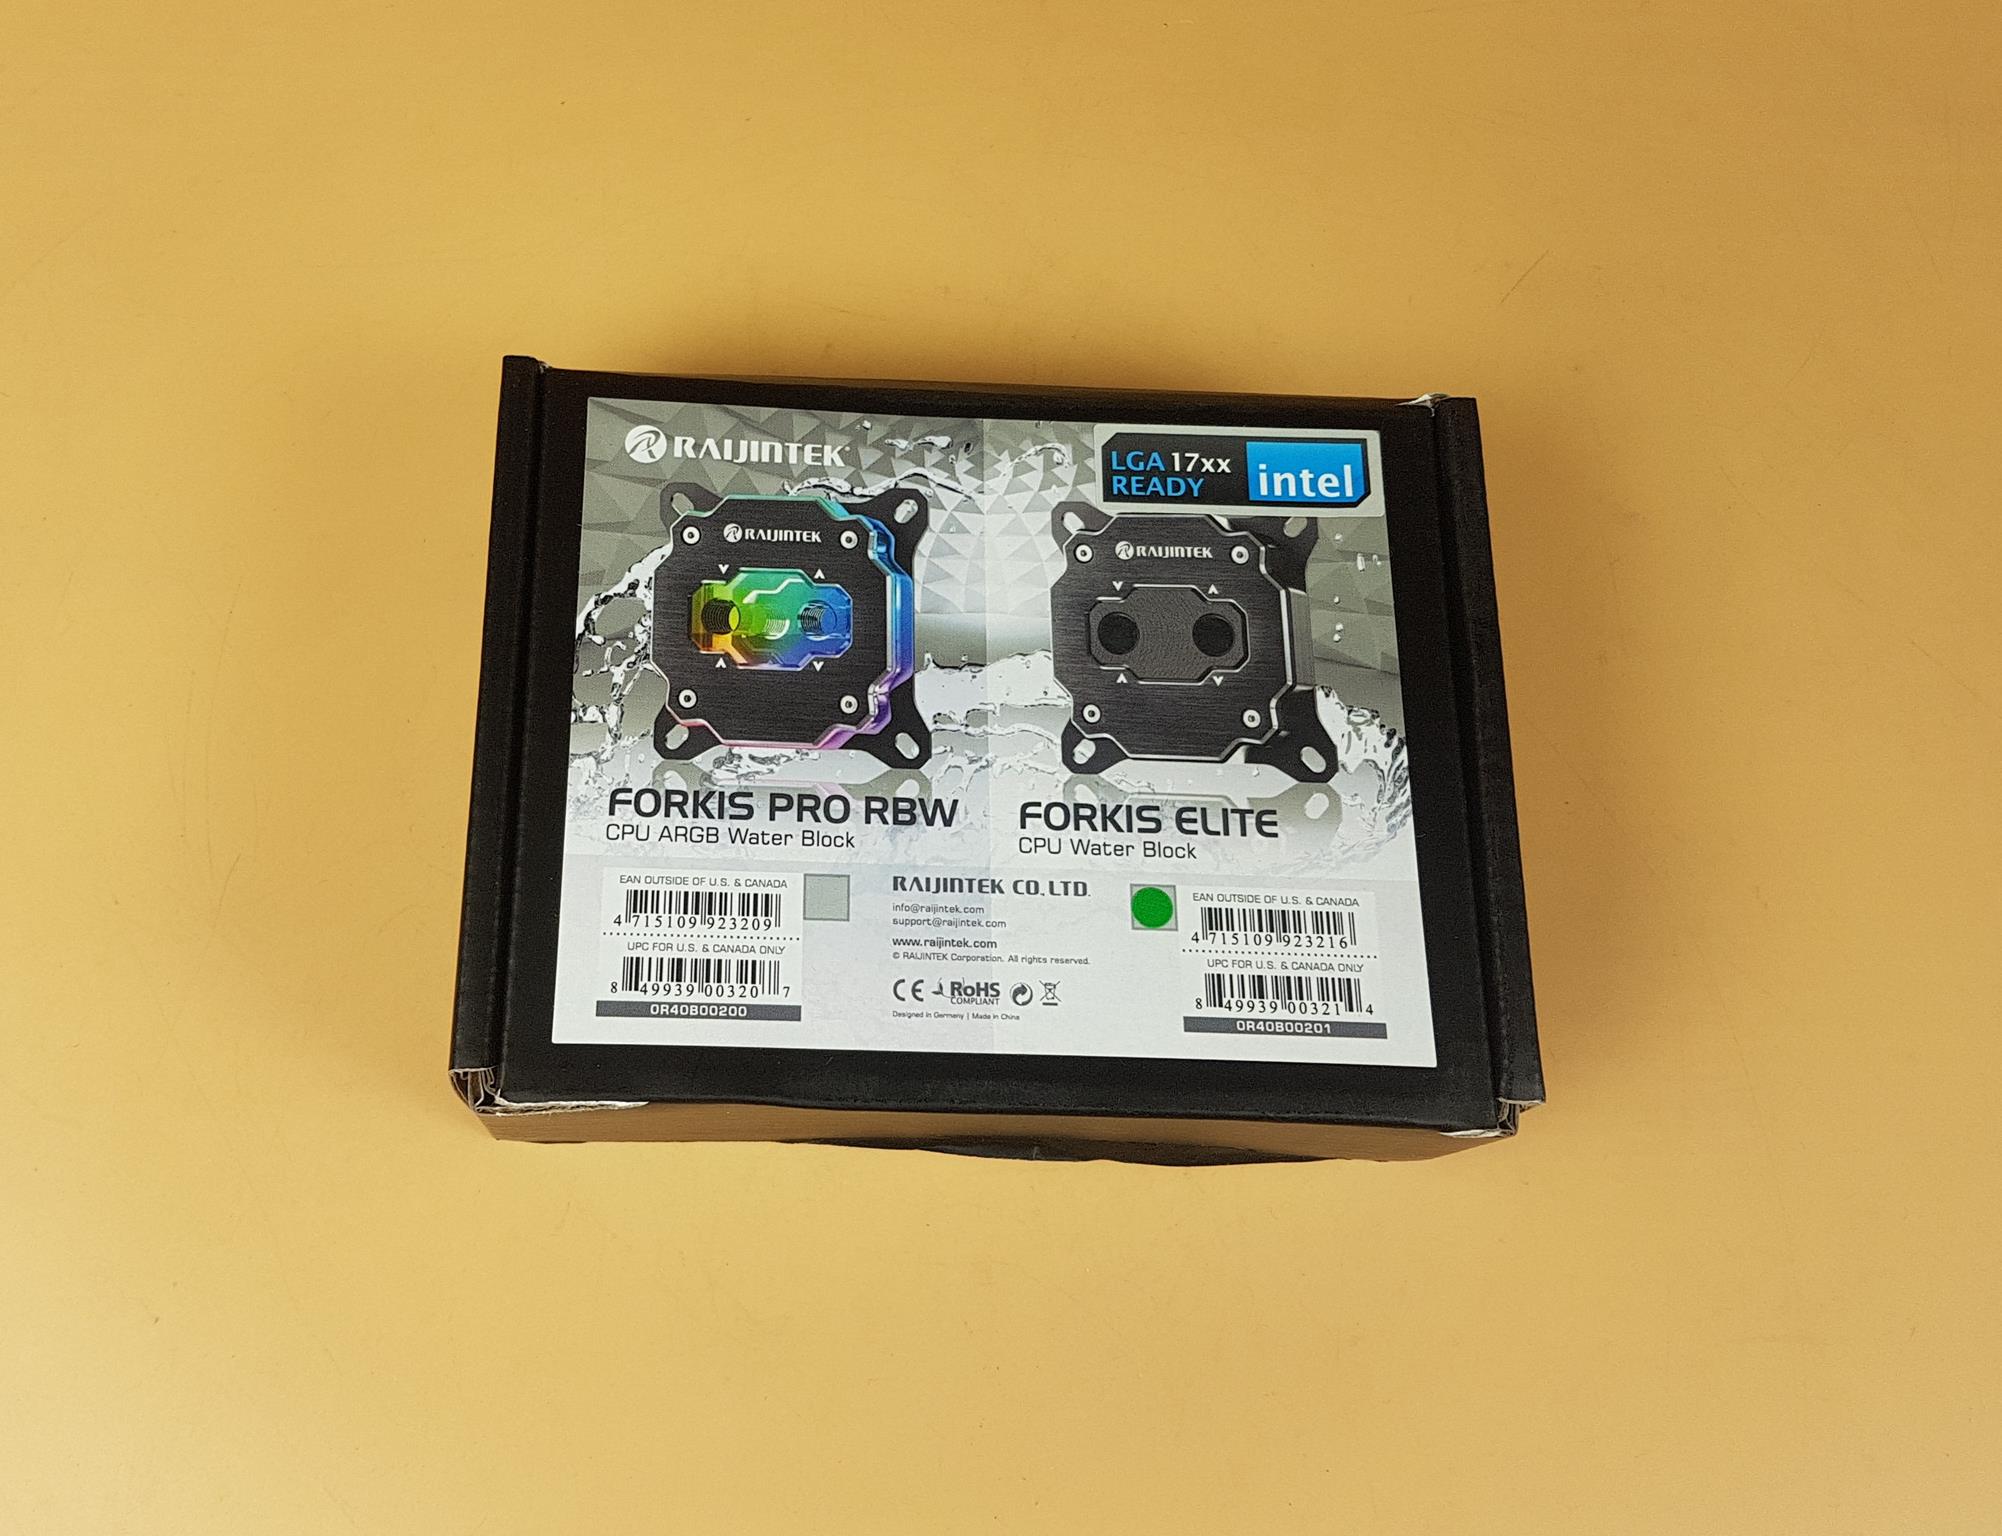
The unit is shipped inside a cardboard box of black color. Raijintek is using the same box for the RGB and non-RGB versions of the FORKIS ELITE. The EAN and UPC info labels are also placed below each type of block.
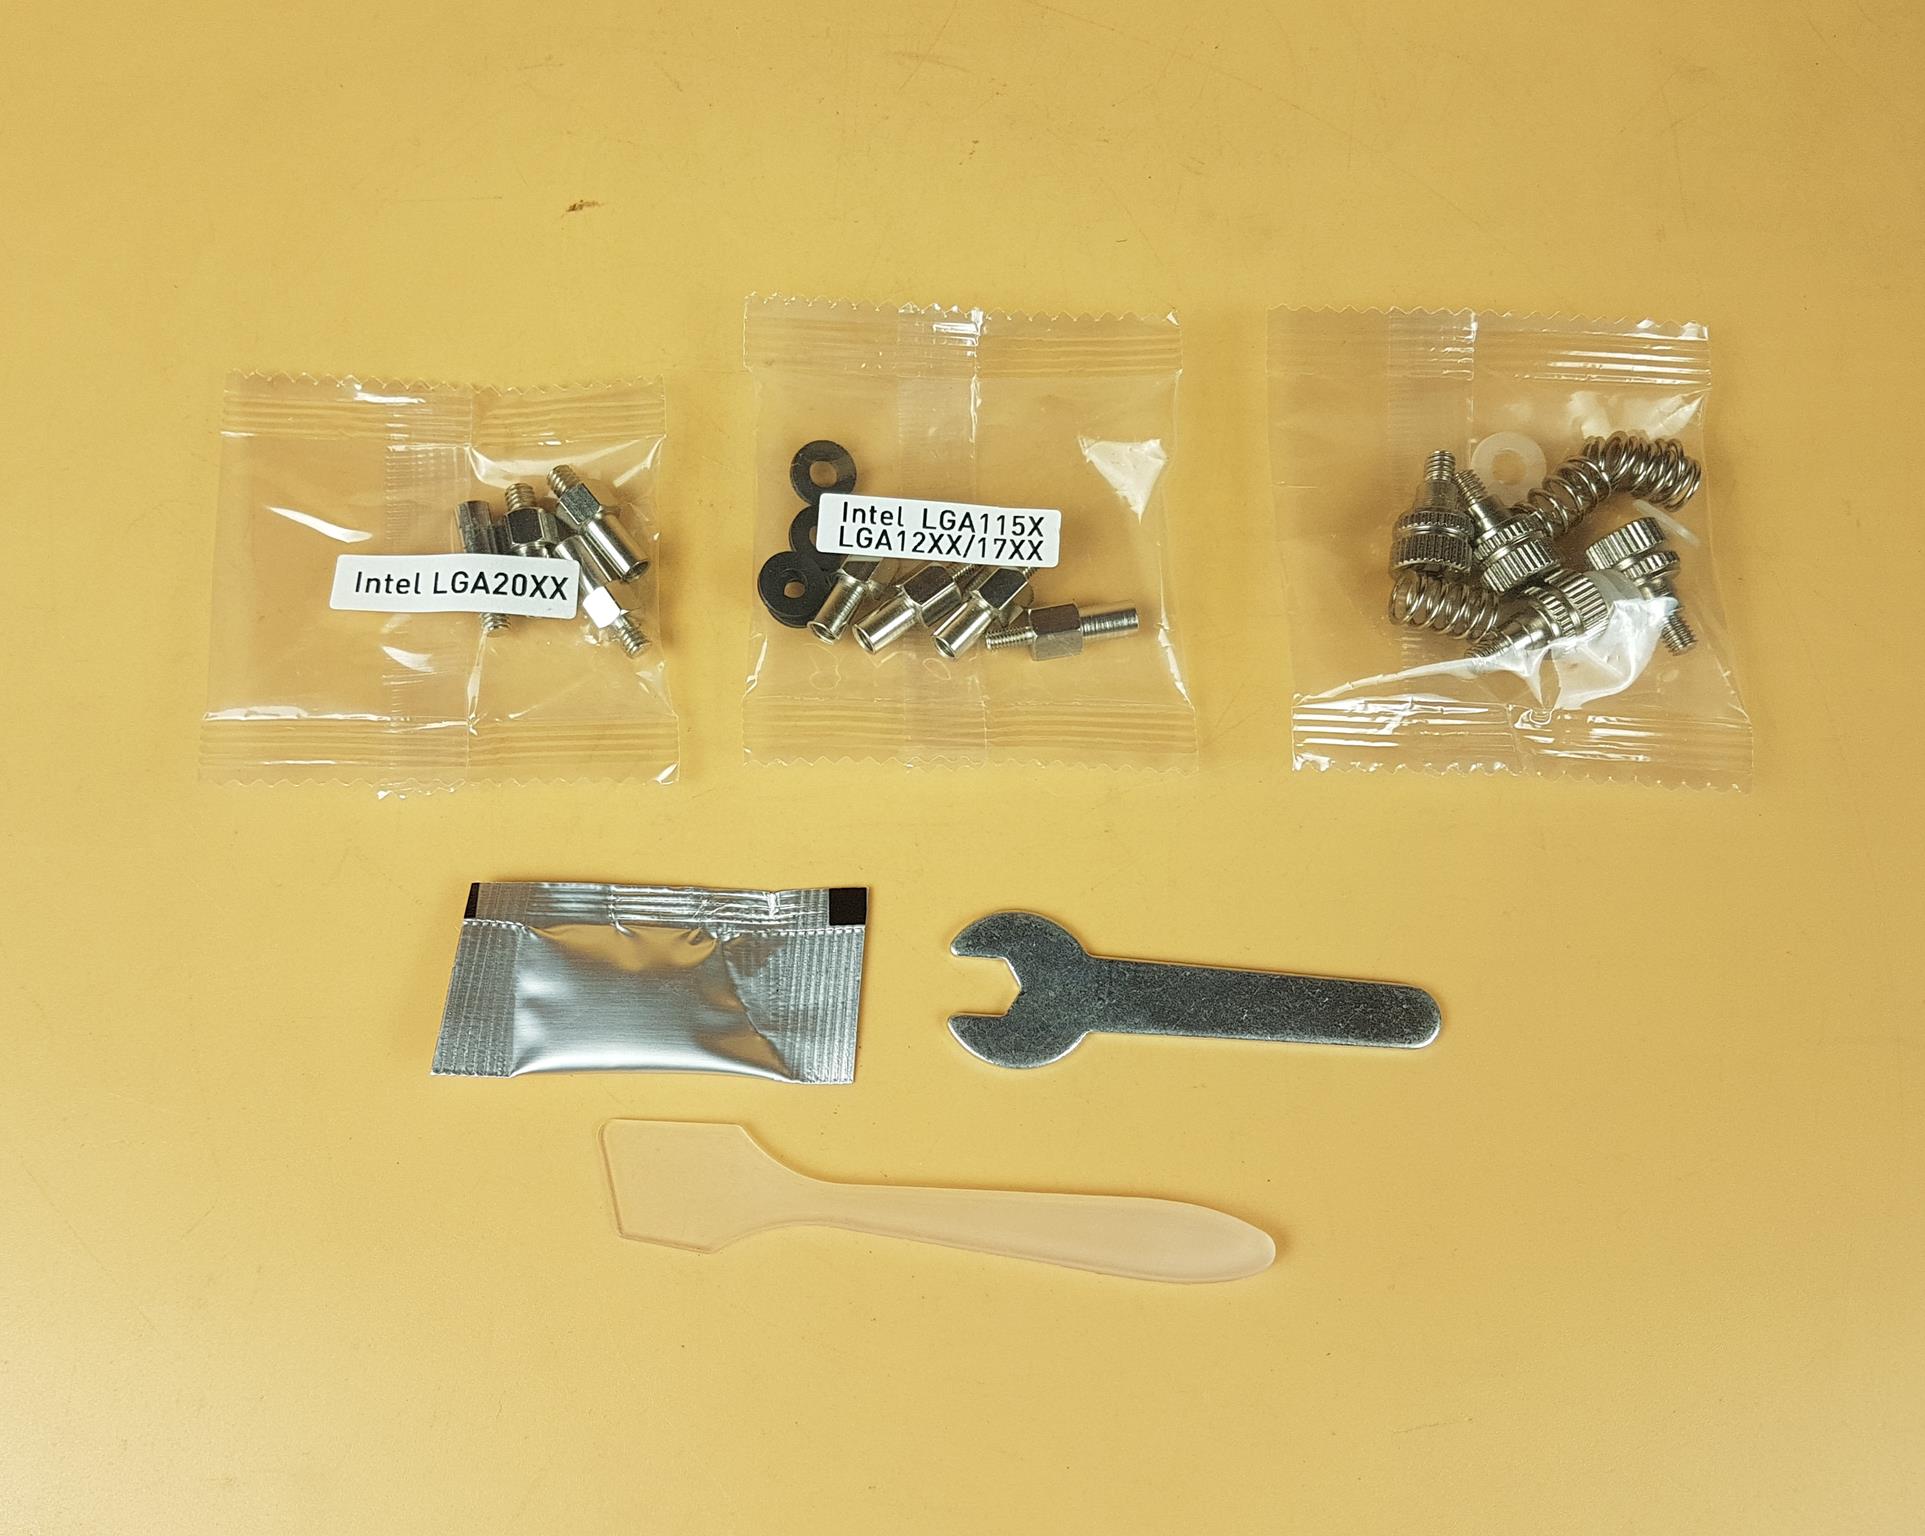
Raijintek has provided a handful of mounting hardware for the block which includes:
- 4x Pillars for the Intel LGA20xx
- 4x Black Spacers and Pillars for other Intel sockets
- 4x White color spacers
- 4x Springs
- 4x Screws
- 1x Wrench tool
- 1x Thermal Paste
- 1x Spatula

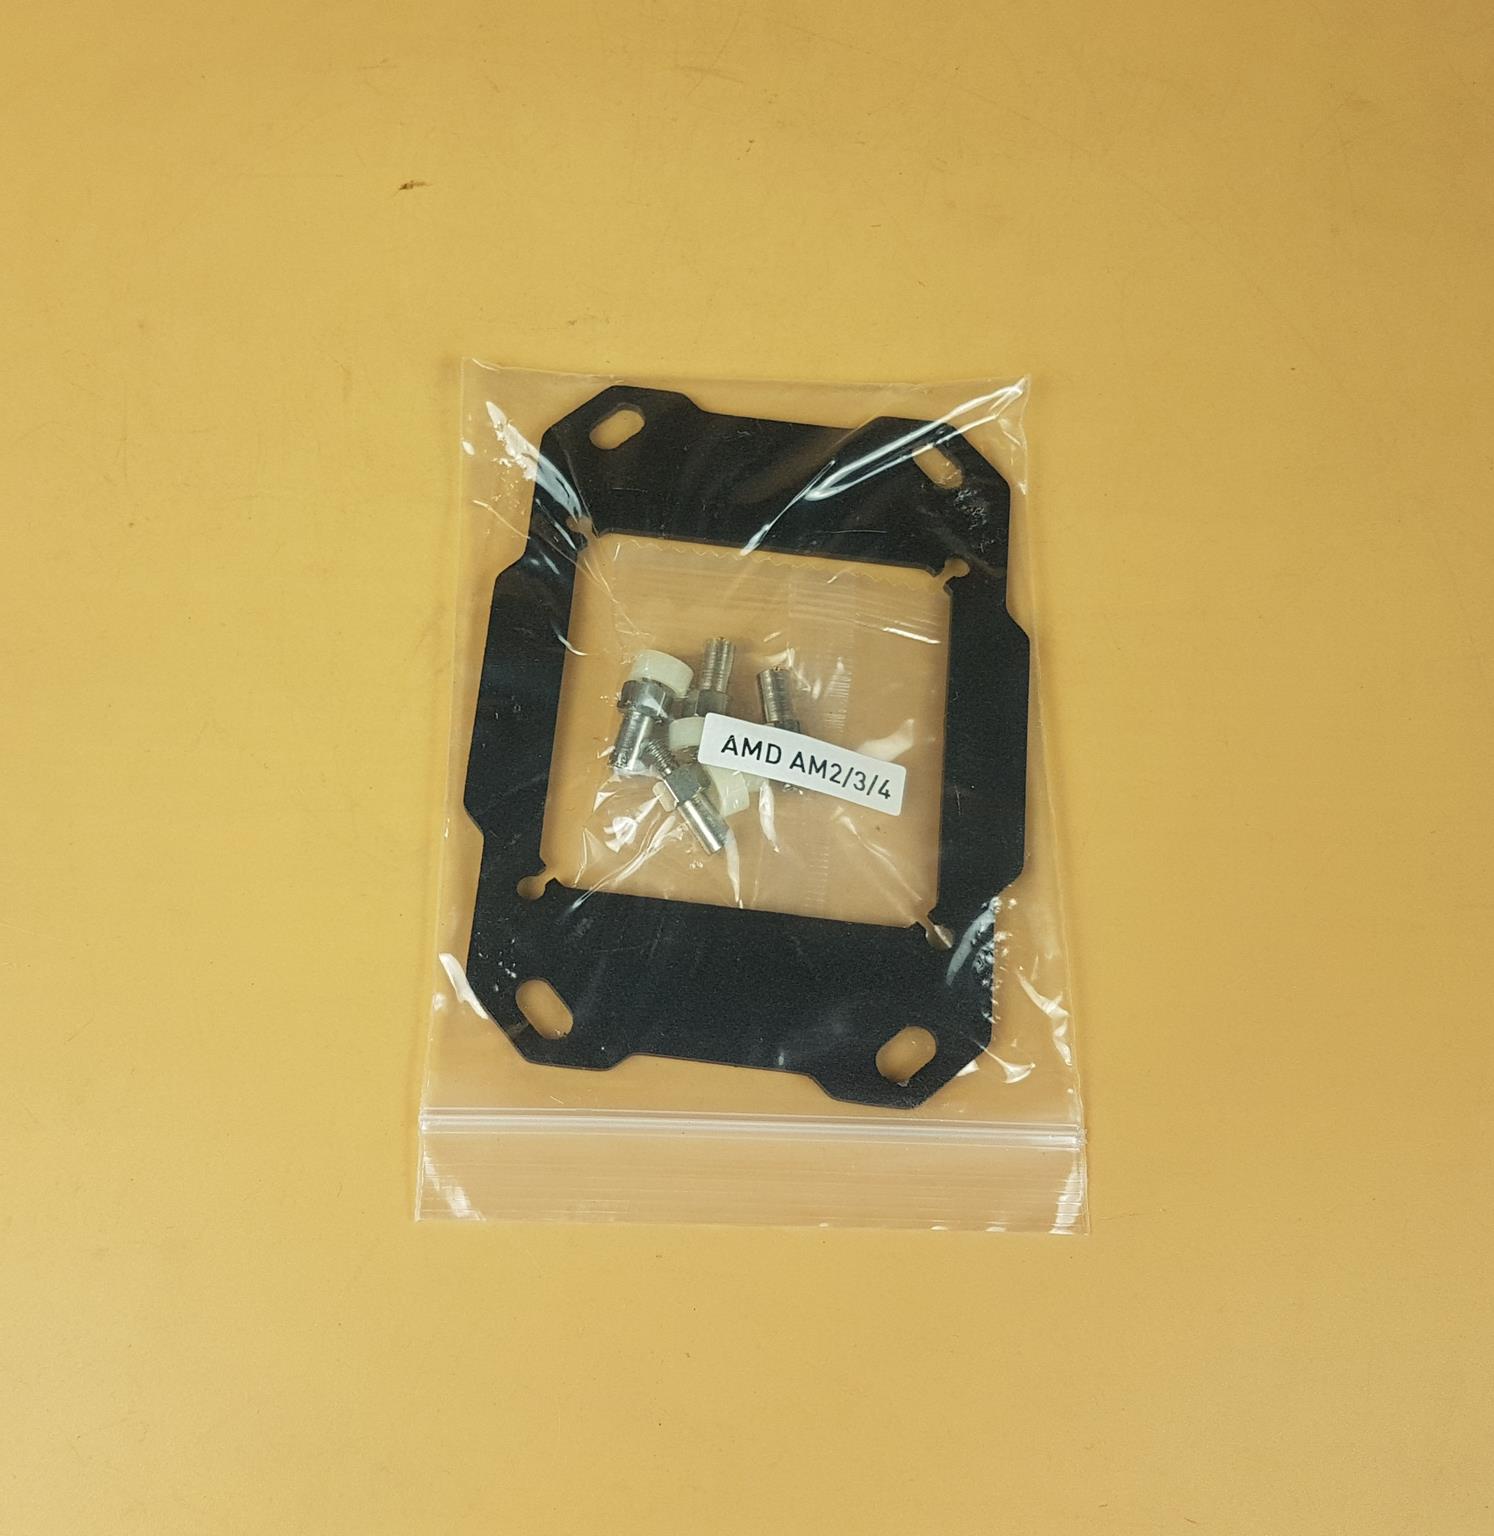
There is a 1x backplate for the Intel sockets excluding the 20xx socket. Raijintek has provided the following hardware for the AMD platform:
- 1x AMD Mounting Bracket
- 4x White spacers
- 4x Pillars
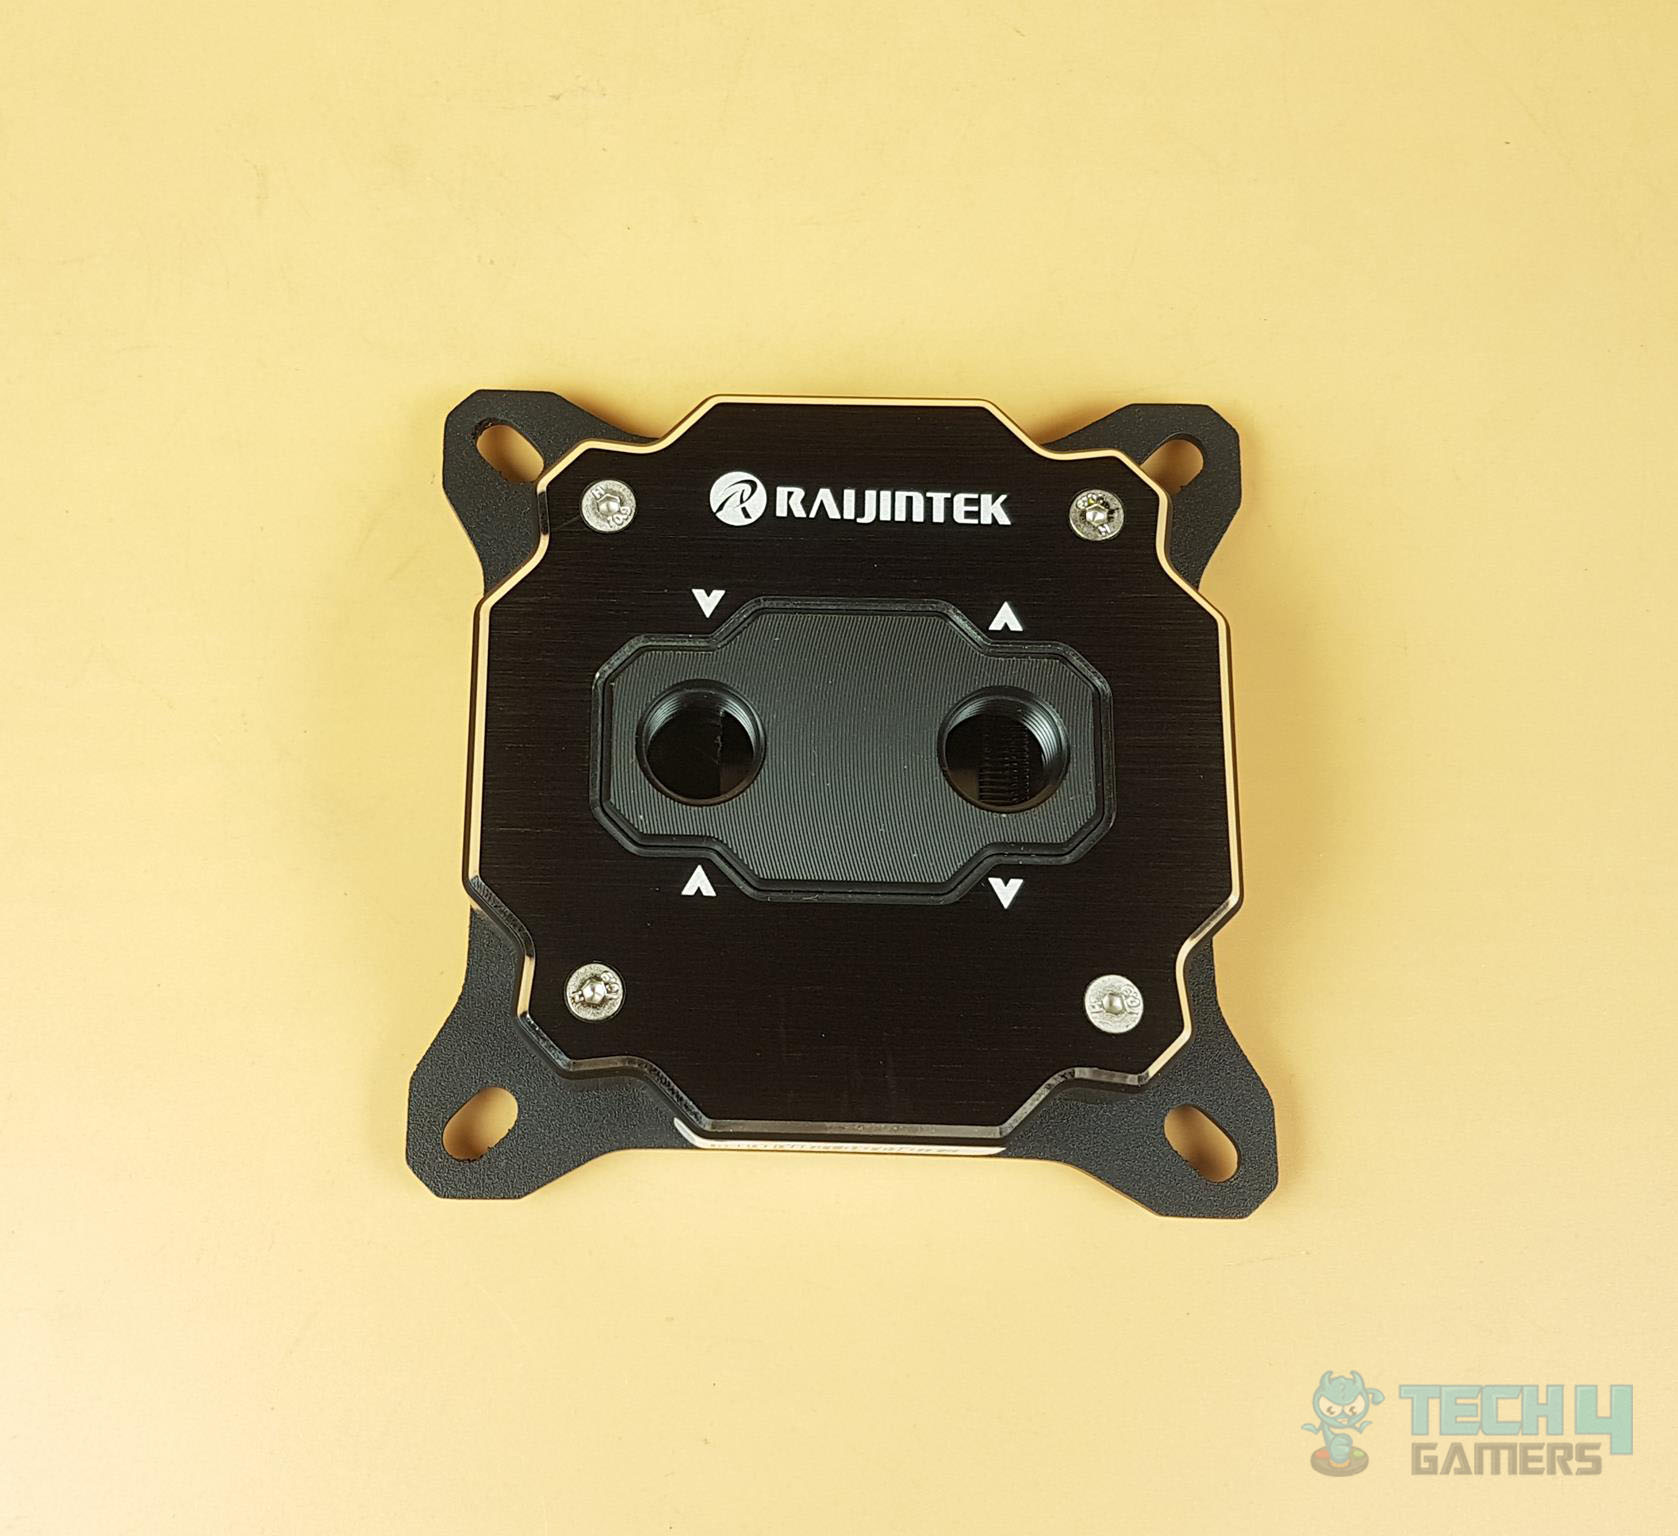
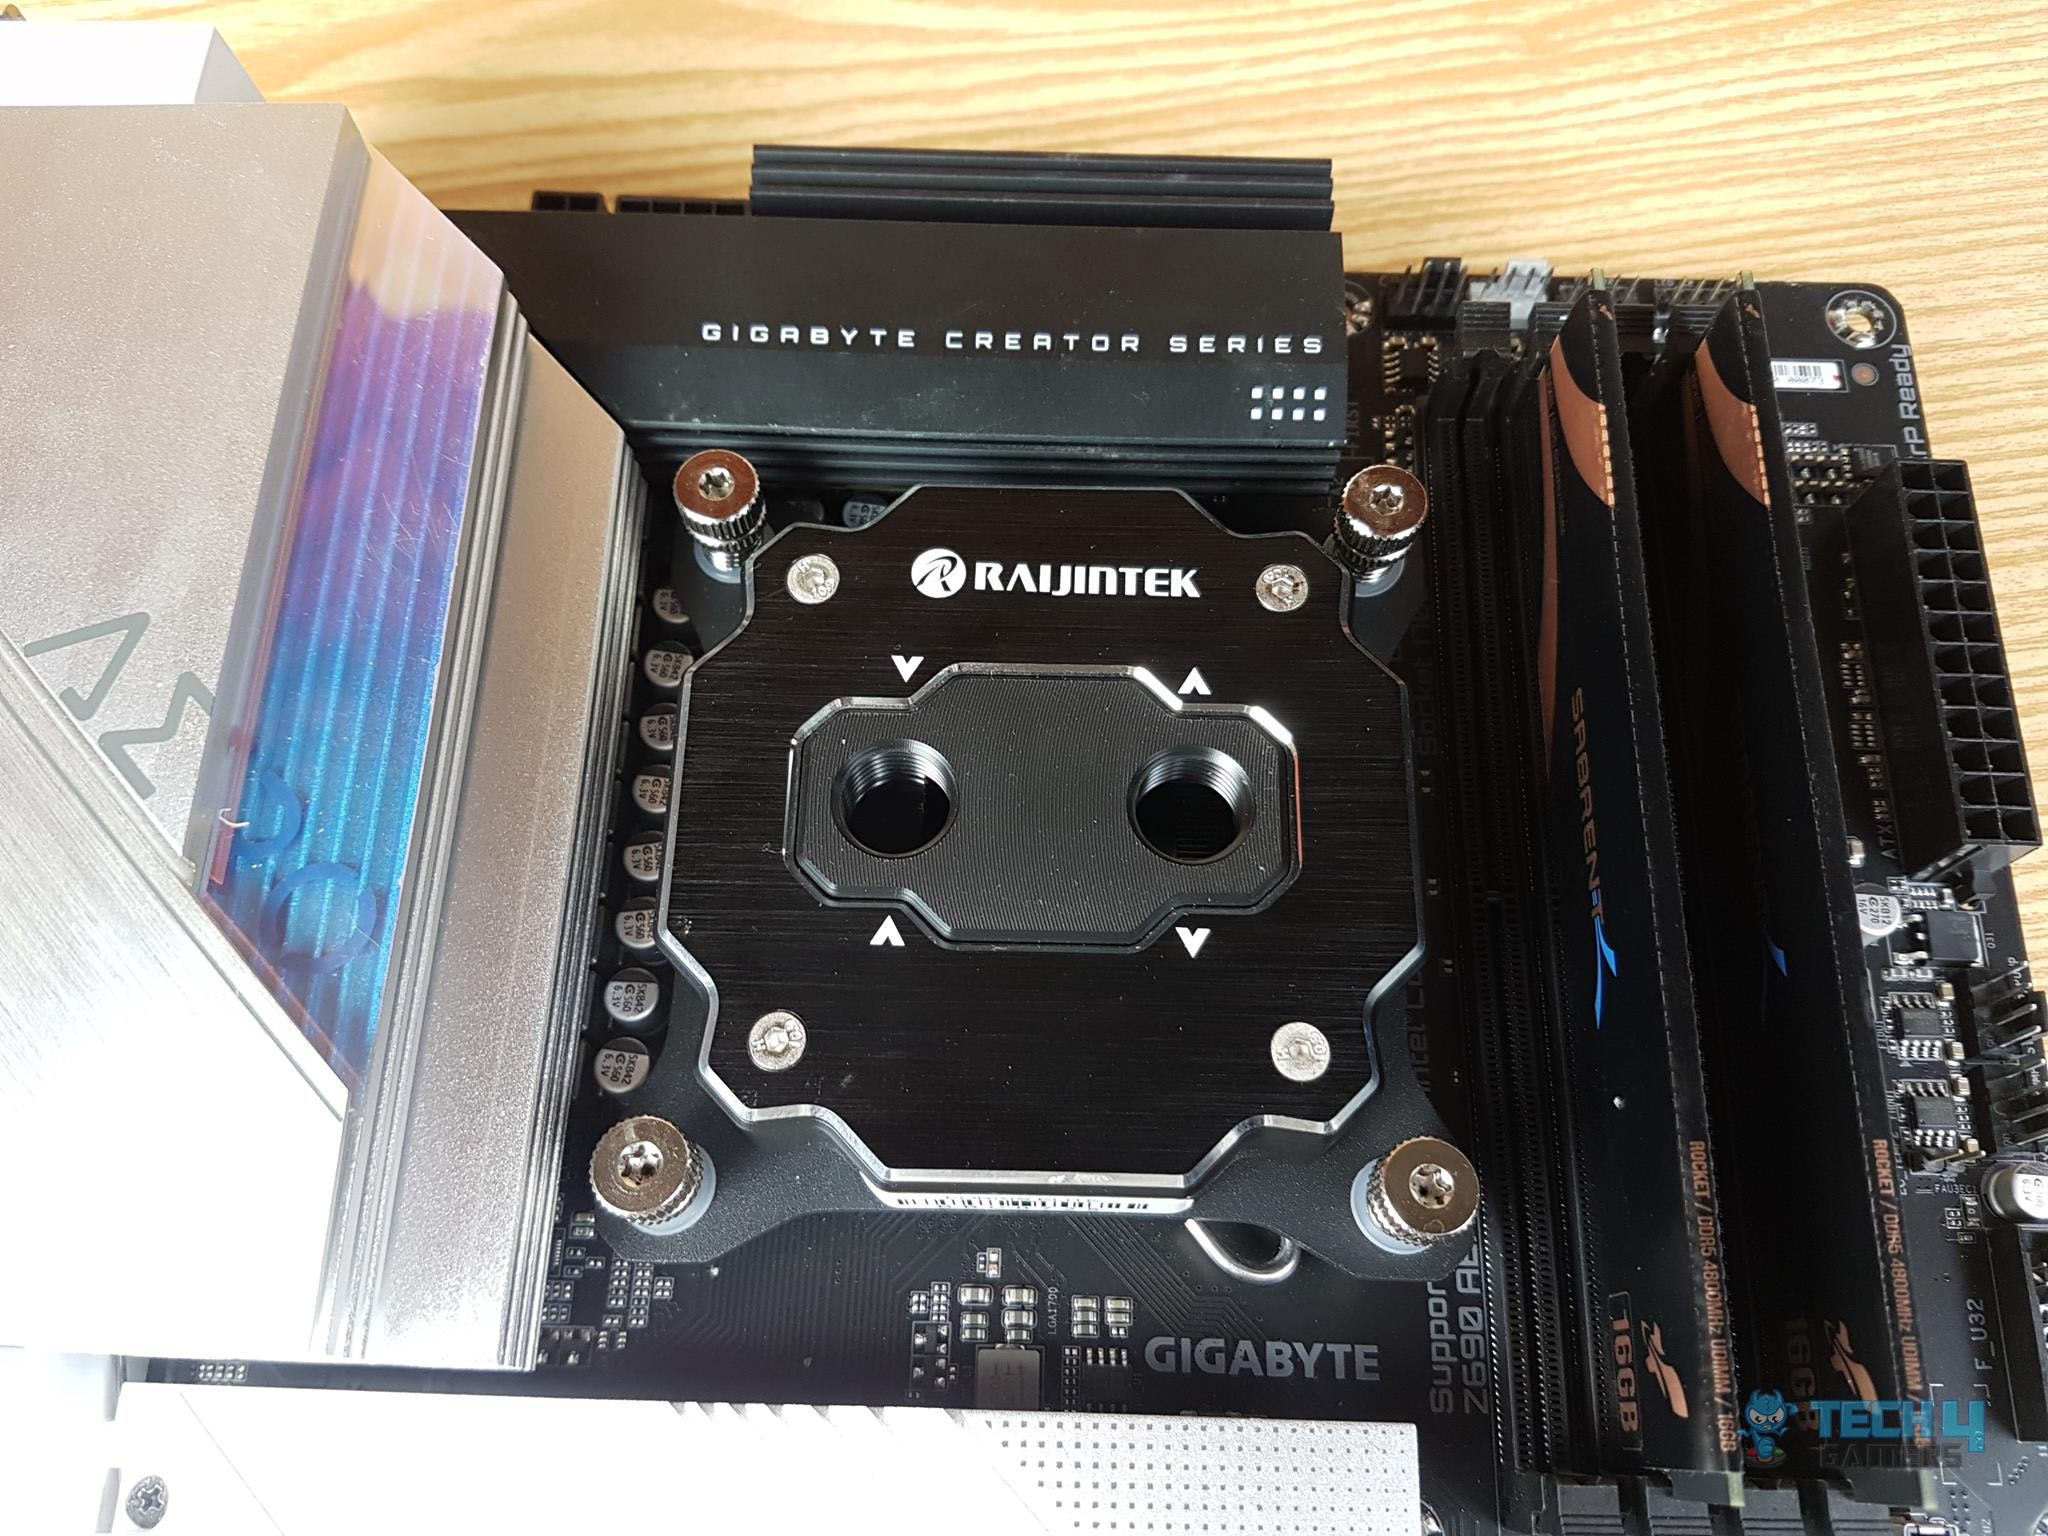
The block is made of nickel-plated copper, aluminum, and POM materials. The overall dimension of the block is 82x82x16mm. It weighs 495gm without the bracket. The block comes with the Intel mounting bracket pre-installed. The top plate is attached to the base using 4x Allen screws. There is a Raijintek branding on the top.
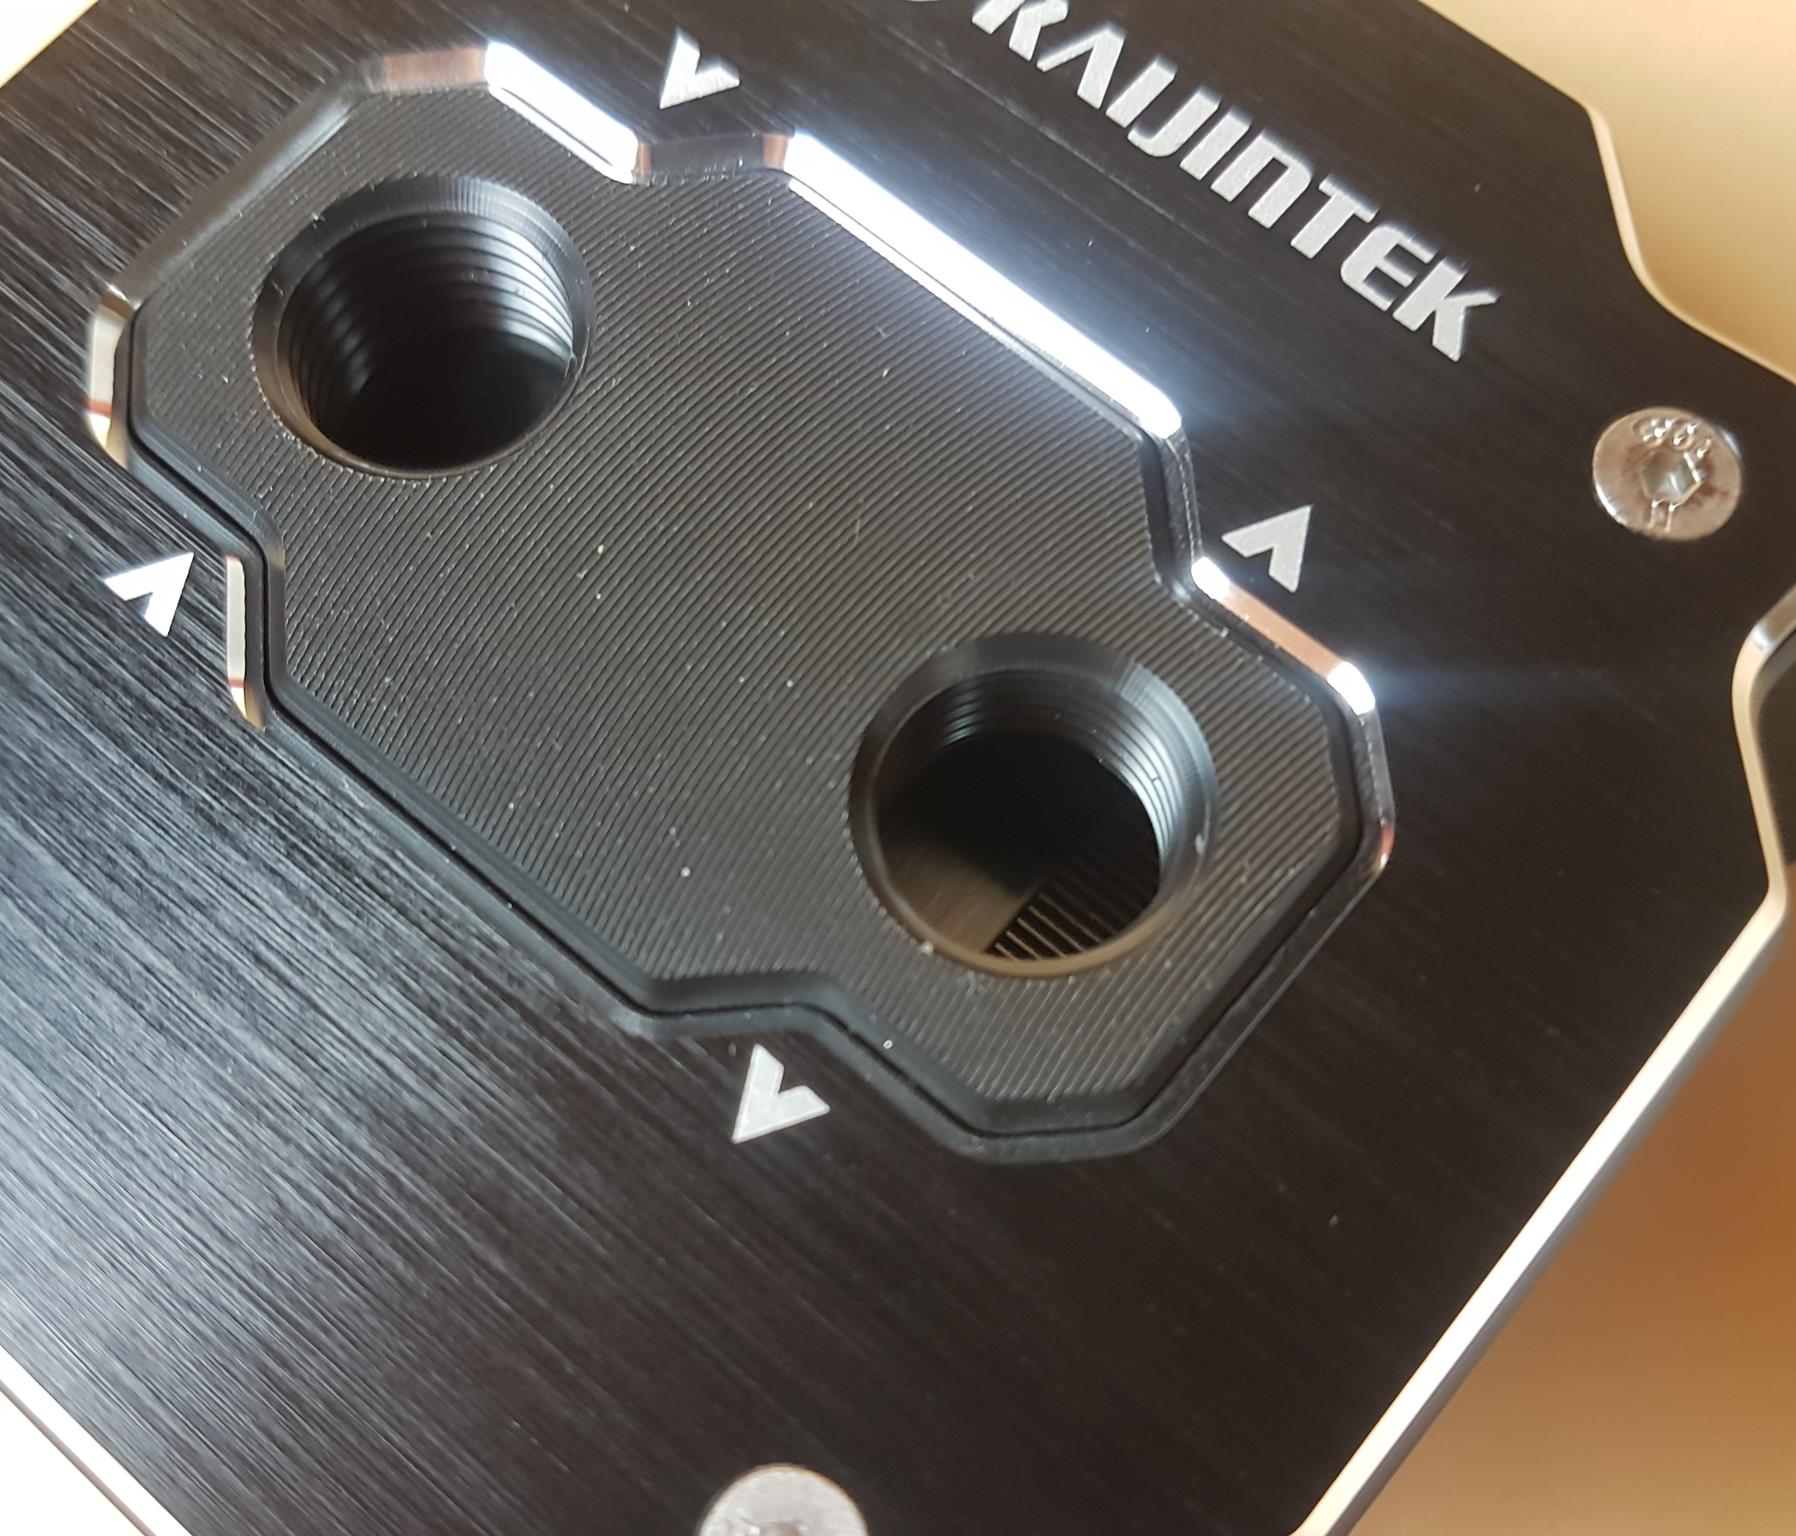
The block has two G1/4” threaded ports which is the most commonly used standard in the open loop/custom loop segment. The user can install any fitting on the block as long as the fittings follow the G1/4” threaded ends.
The arrow markers pointing toward the left port indicate that this is a dedicated inlet port on the block. The arrow markers pointing away from the right port indicate that this is a dedicated outlet port on the block.
The main housing is made of brushed aluminum and we have a two-tone color giving the block a stylish outlook. Looking closely, we can see the rubber gasket running across all sides of the gray color area. The border line is a silver color which further adds to the overall good looks.
The second picture shows a close-up view of the inside portion through the G1/4” port. We did not open the block as we had wanted to test it on the factory settings. Raijintek has mentioned that they are using a 3D microstructure with a flow tunnel inside.
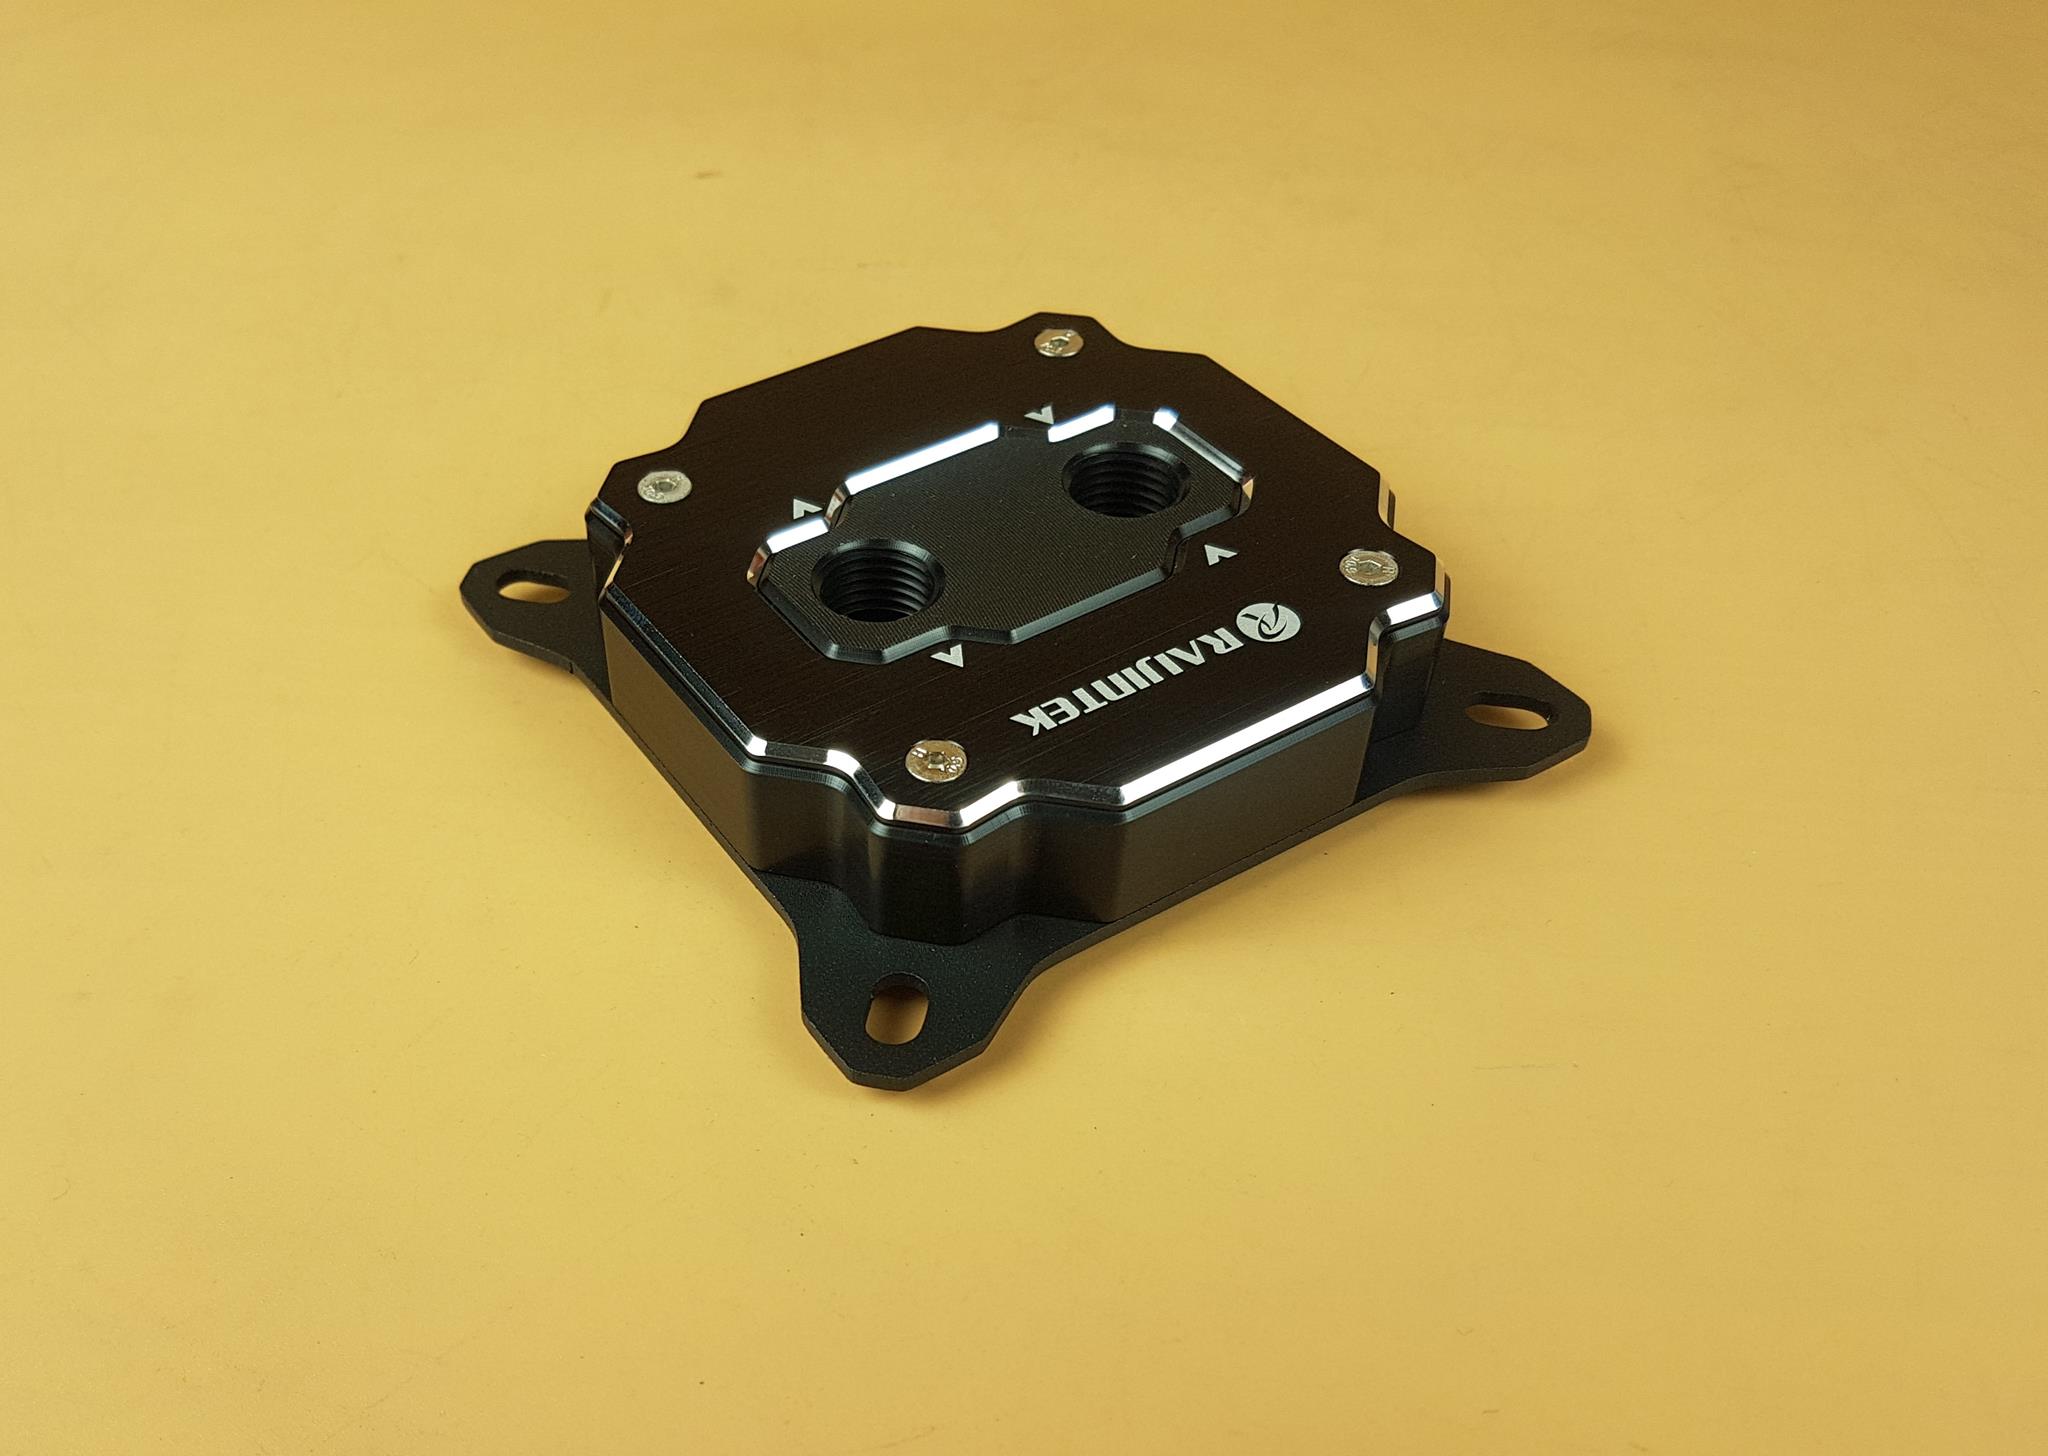
The side view of the block is stunning. The overall black and gray color theme is looking good. This is quite a heavy block almost weighing half a kg. The pre-installed Intel bracket is also in black color.
The Intel bracket is secured using 4x Philips screws. These can be removed if the block is to be used on the AMD platform. The base is also secured using 4x Allen screws and we have a protective cover on the base. The base is made of copper material and is nickel-coated. The base roughly measures 56x56mm.
Antila DDC EVO RBW DDC Pump
Raijintek has provided ANTILA series glass reservoir with an integrated DDC pump and A-RGB elements.
| Product Name | ANTILA DDC EVO RBW |
| Q’ty | 1 pcs |
| Dimension [W×H×D] | 80×95×292 mm [with Bracket] |
| Reservoir Dimension | 60×60×220 mm |
| Material | POM + Glass + Aluminum + Steel |
| Weight | 1280 g |
| Screw Threads | G 1/4″ |
| Bearing type | Ceramic Bearing |
| Maximum Head | 6.5 meter |
| Maximum Discharge | 750 L/H |
| Life Expectance | 50,000 hrs |
| Noise Level | 45 dBA [Max.] |
| Speed | 1800 RPM ~ 4800 RPM |
| Voltage Rating | DC12V |
| Input Current | 1.8A ±10% |
| Connector | SATA power 2510-3P [NA / NA / Fg ] |
| Addressable LED | 12 LED Rainbow (4pin header, 2510 spec) – Addressable LED |
| LED Control Method | Motherboard control / Remote control (by using Raijintek control hub) |
| LED Input Connector | 4-PIN header (2.5 Crimp) |
| LED Voltage Rating | 5V |
| Lighting Mode | By MB software or 20 Lighting MODE & 7 different static color choices by Raijintek’s 5V ADD control hub |
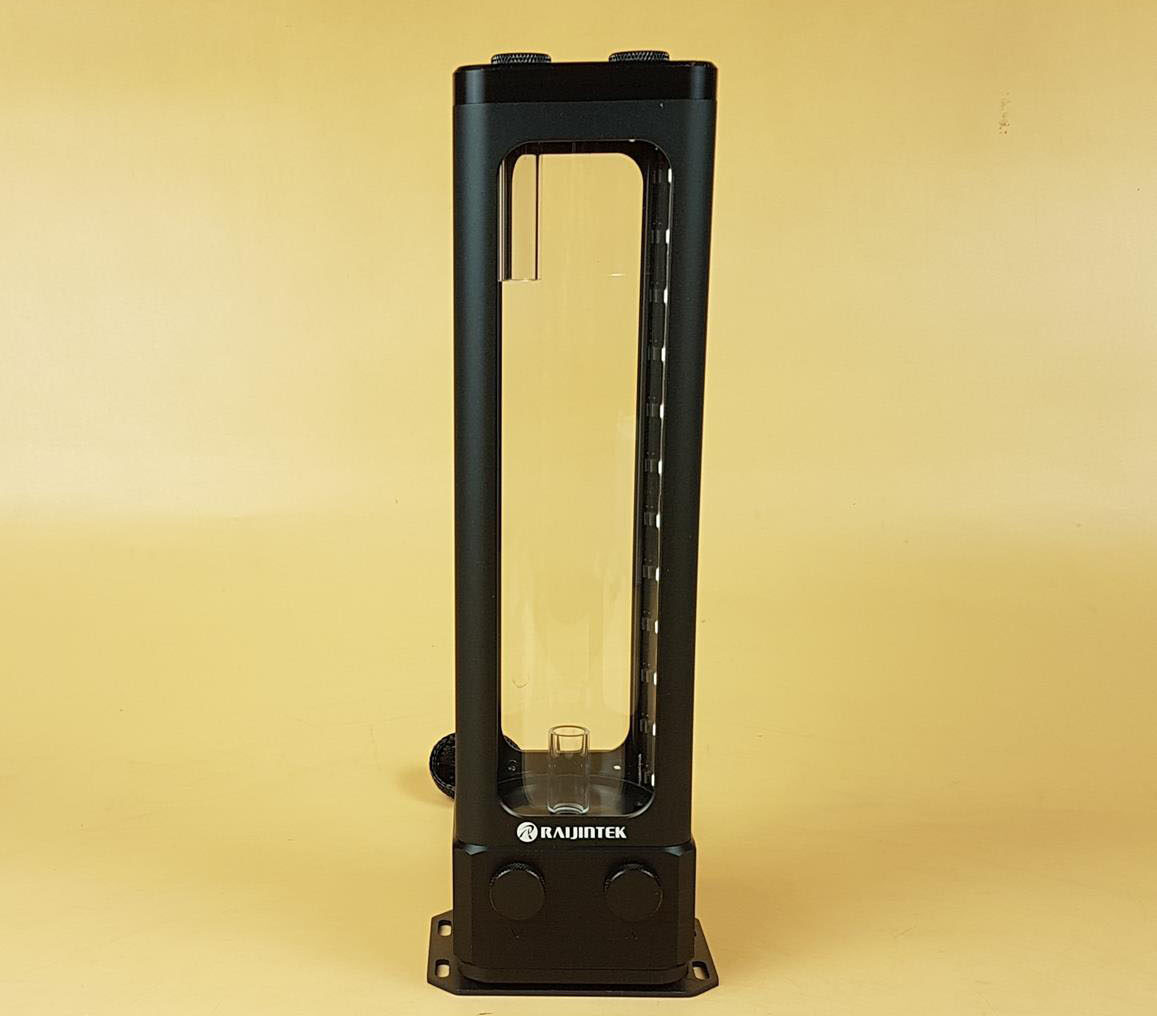
The ANTILA DDC EVO RBW is made of POM, glass, Aluminum, and steel materials. It stands at 80x95x292mm with the pre-installed bracket. Removing this bracket would give the dimensions 60x60x220mm. This unit weighs 1280 grams.
This is quite a stylish unit with two-tone coloring coming from multiple materials. The salient feature is the glass tube compared to the Plexi tube.
Since it is glass, one needs to be extra careful. Raijintek has wisely put out the aluminum columns on the four sides which encapsulate the glass tube and they have done it without compromising the look of the unit. The tempered glass has a 2.5mm thickness.
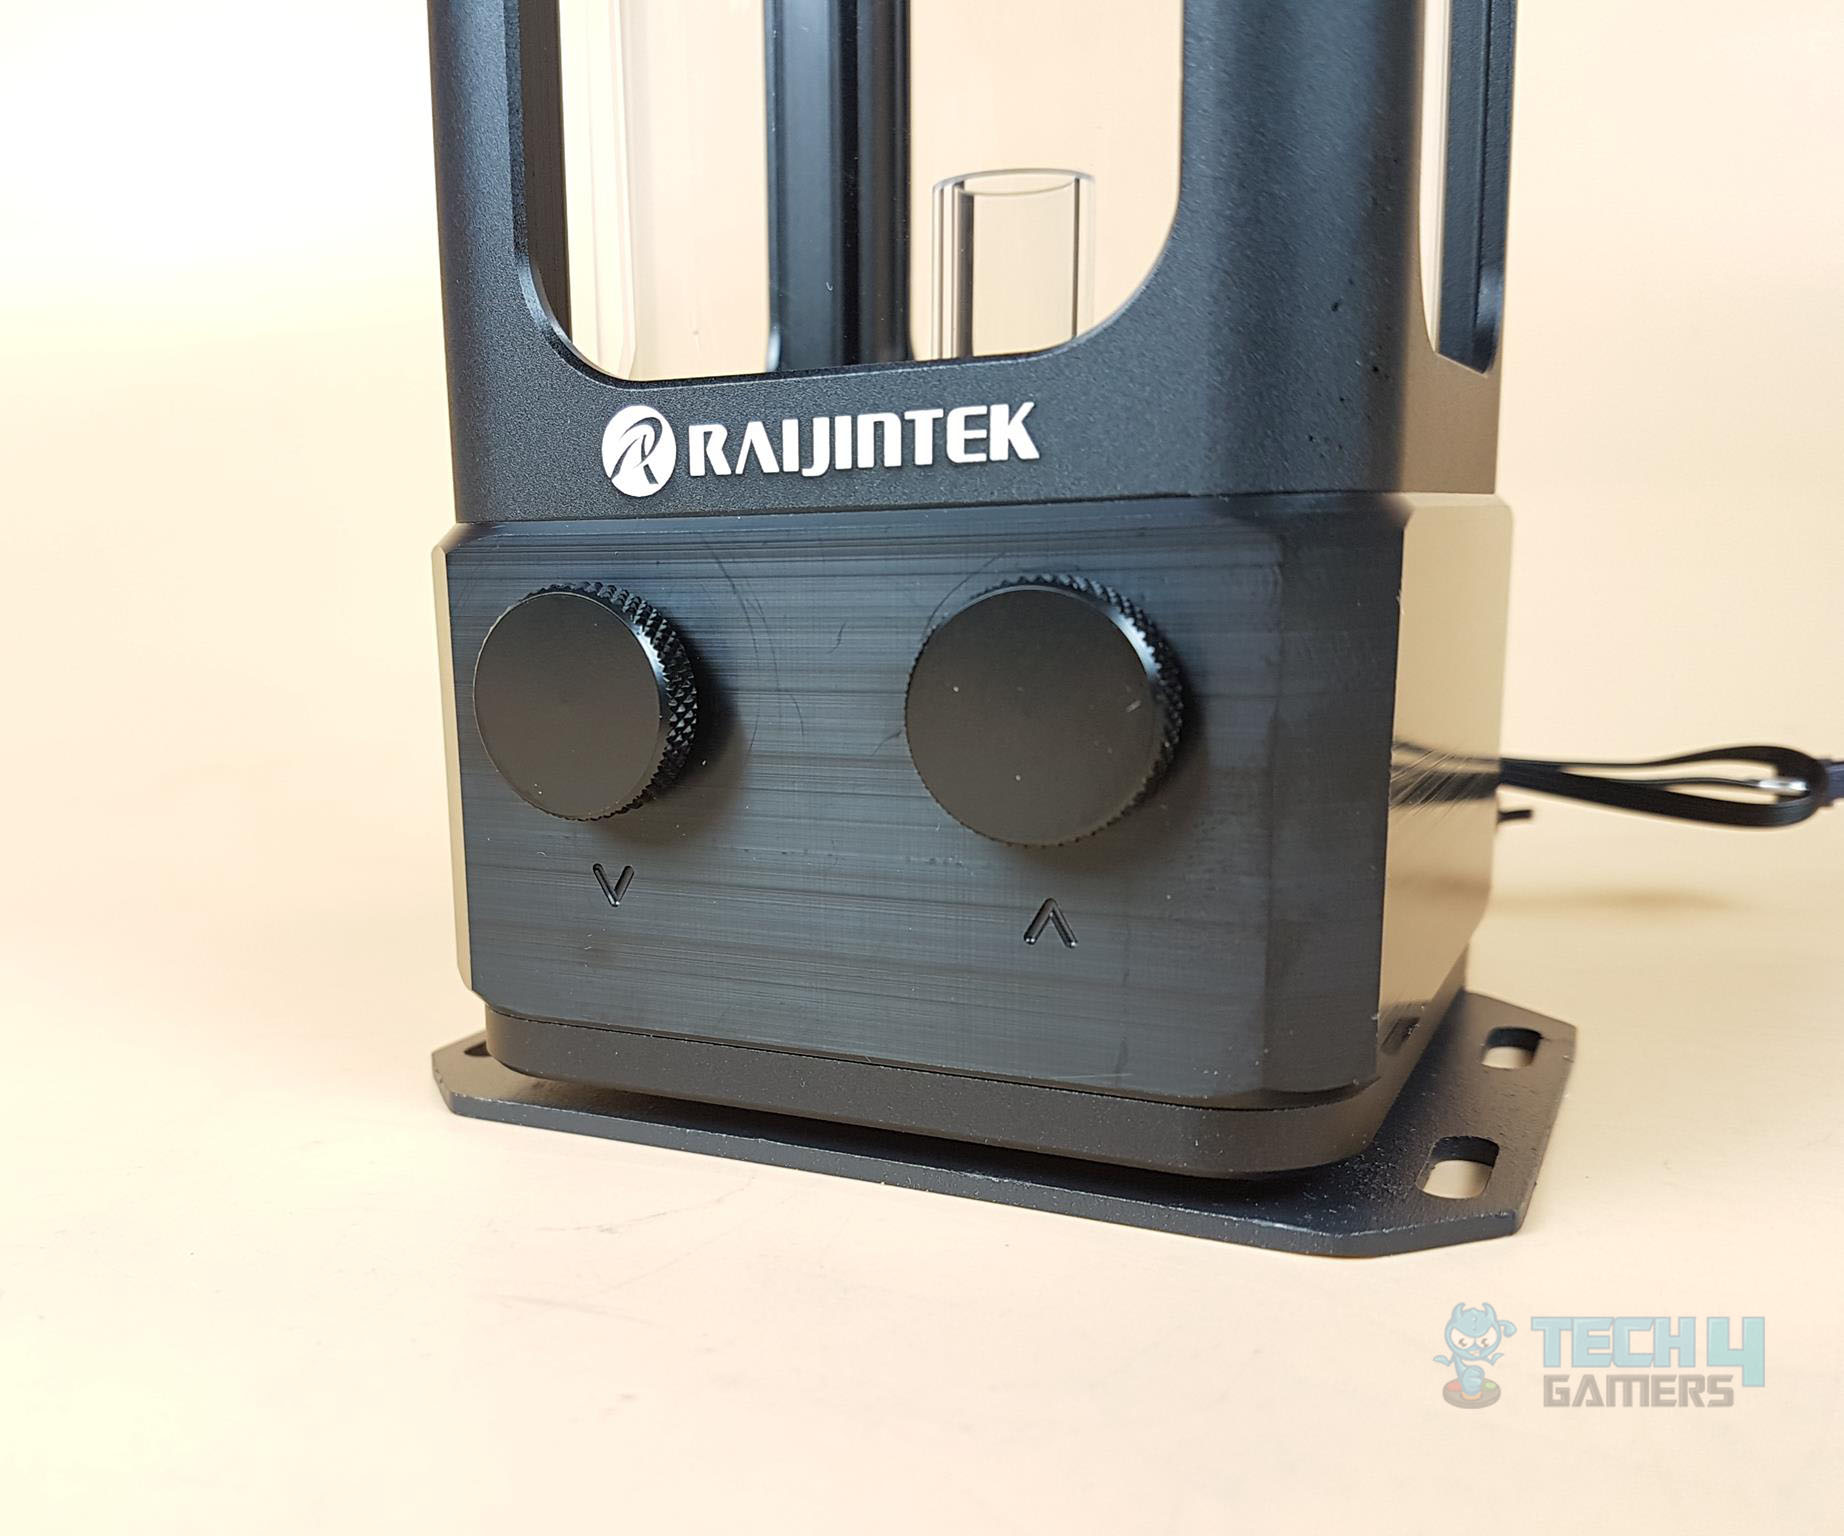
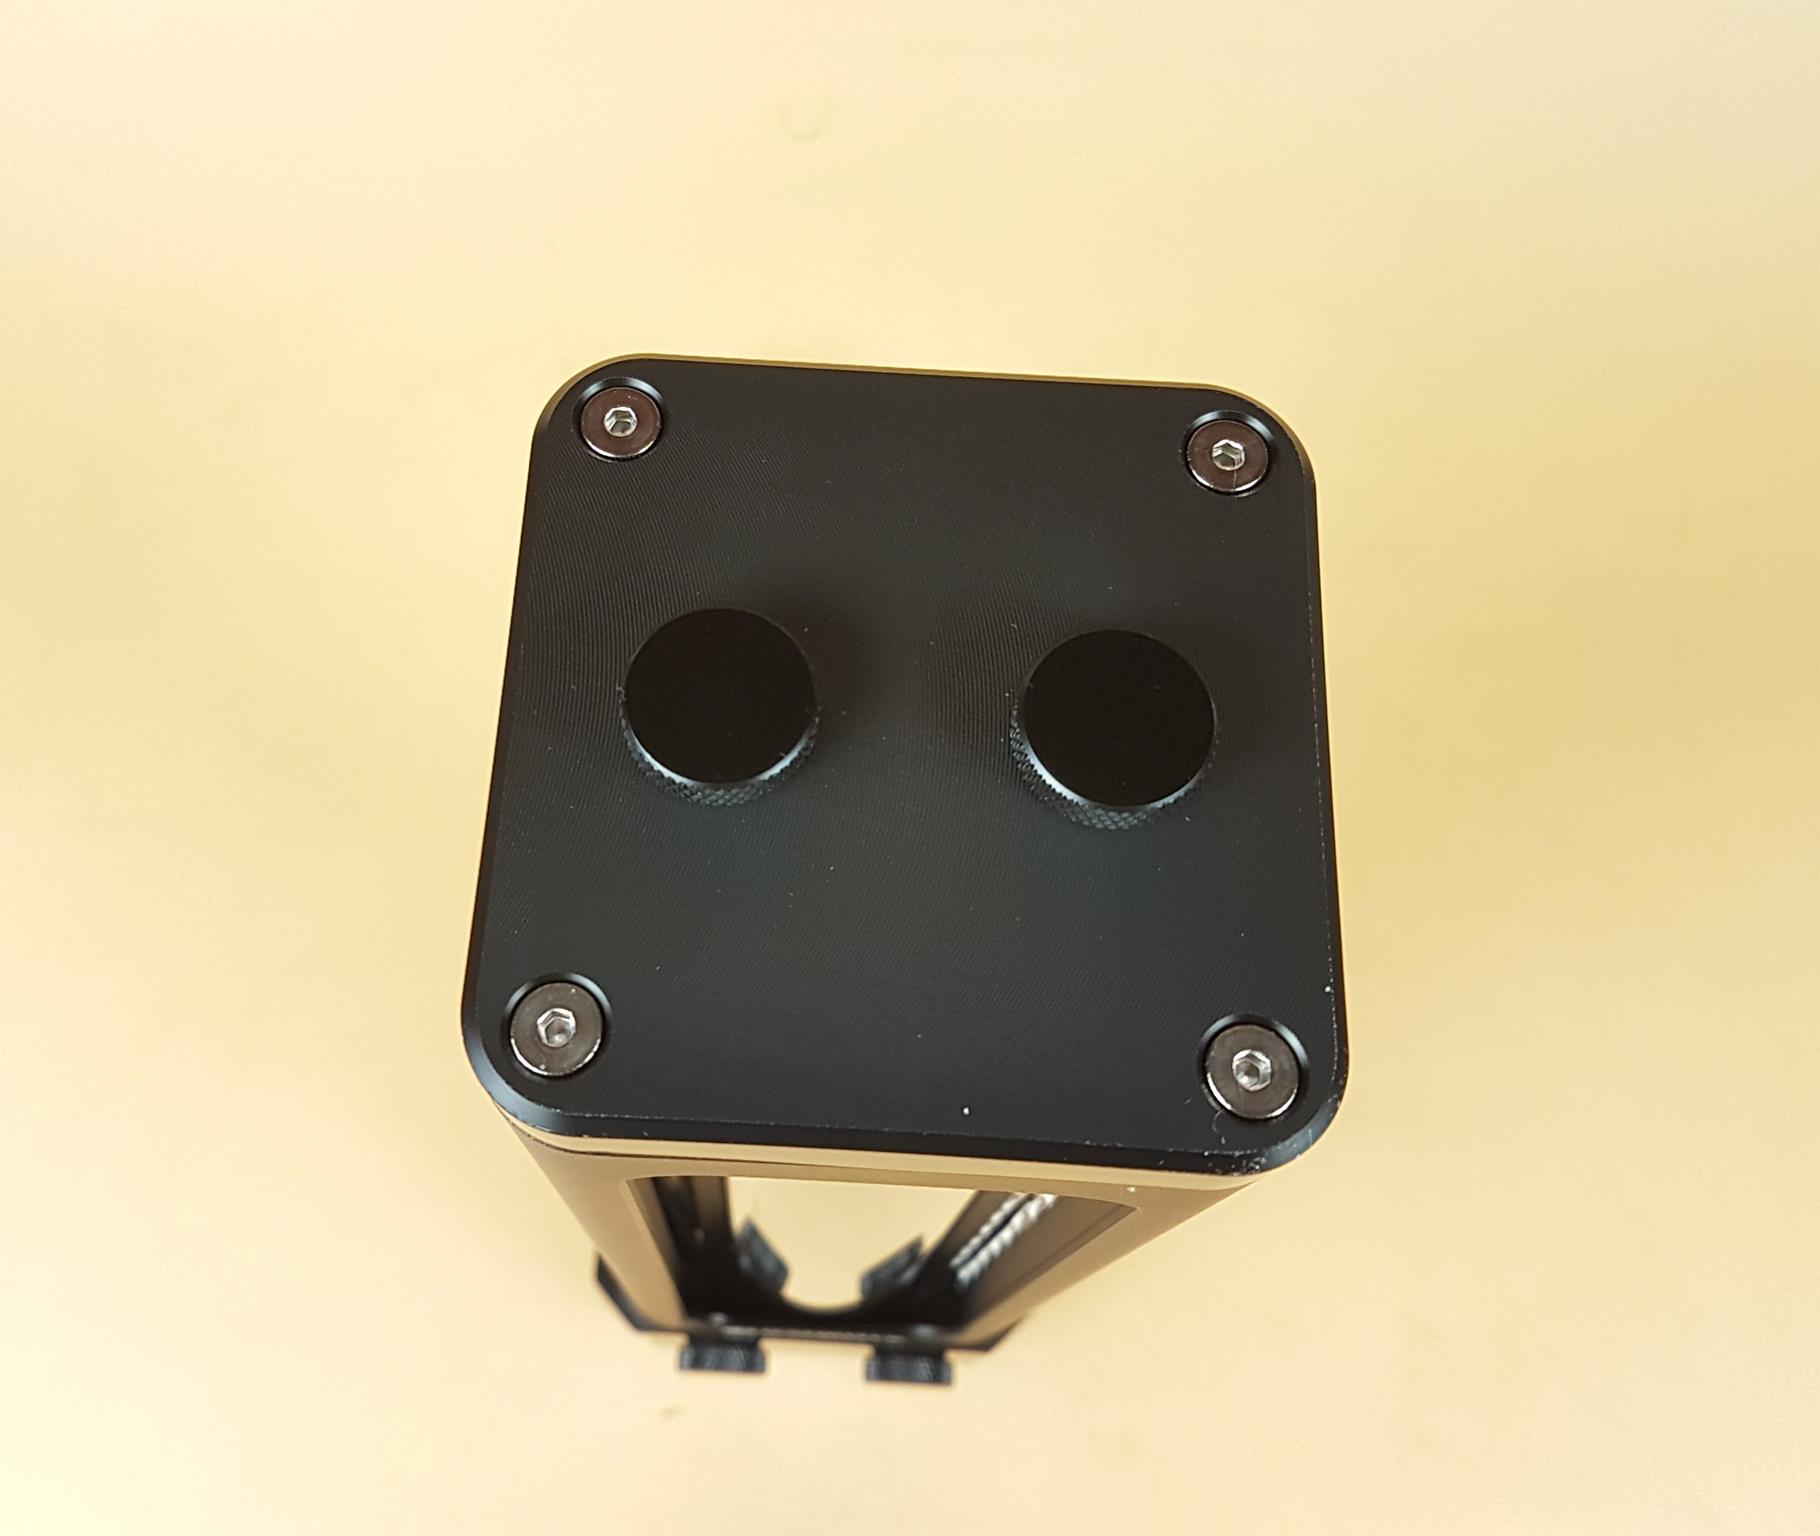
The second picture shows a view of the base on the front of the reservoir. We have two G1/4” ports with plugs. The arrow marker pointing away on the left port indicates that this is a dedicated outlet port. The arrow marker pointing towards the right port indicates that this is a dedicated inlet port. We can see the Raijintek logo in the white color above the pump housing. The lower portion in the gray with these two ports house the DDC pump inside. The housing is made of POM material.
Speaking of the pump, Raijintek has provided a DDC pump in this unit. It is using ceramic bearing and can provide up to 750 liters per hour flow rate with a maximum pressure head of 6.5m. The life expectancy is 50,000 hours. The noise rating is 45 dB(A) with a speed range of 1800 RPM ~ 4800 RPM. Our unit was reporting a maximum of 4400 RPM. The input voltage is 12VDC using 1.8A ±10%.
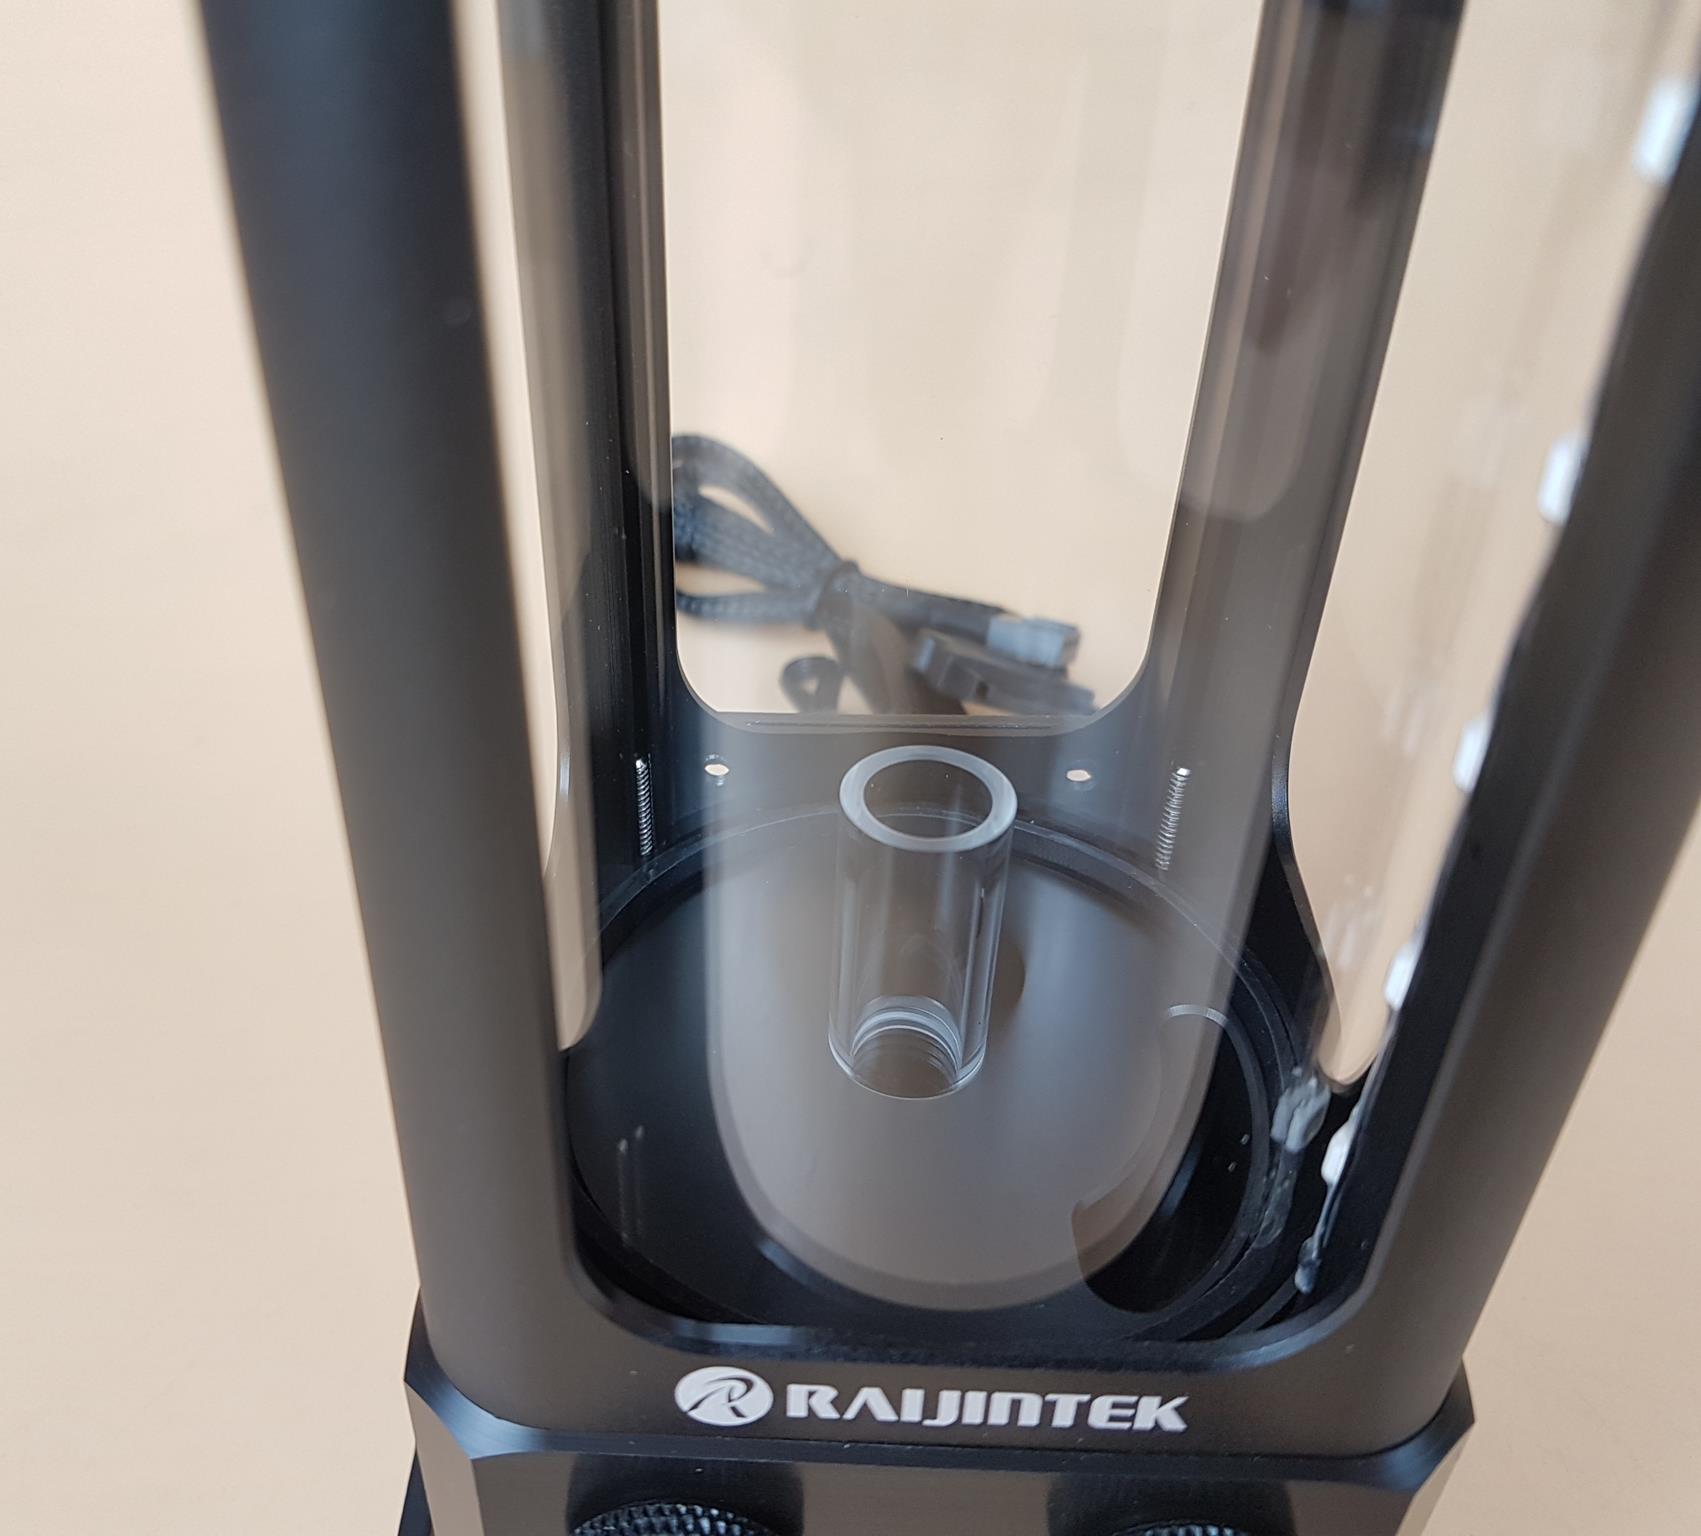
The above picture shows the return inlet pipe inside the main glass tube. It has a small length which can’t be changed to a high length one. We have seen Alphacool making such a design that allows the user to change the return inlet pipe.
We have two G1/4” ports on the top. One is dedicated to the return inlet (the left one), whereas the right one is a refill port. Both ports have plugs on them. The housing is made of POM material.

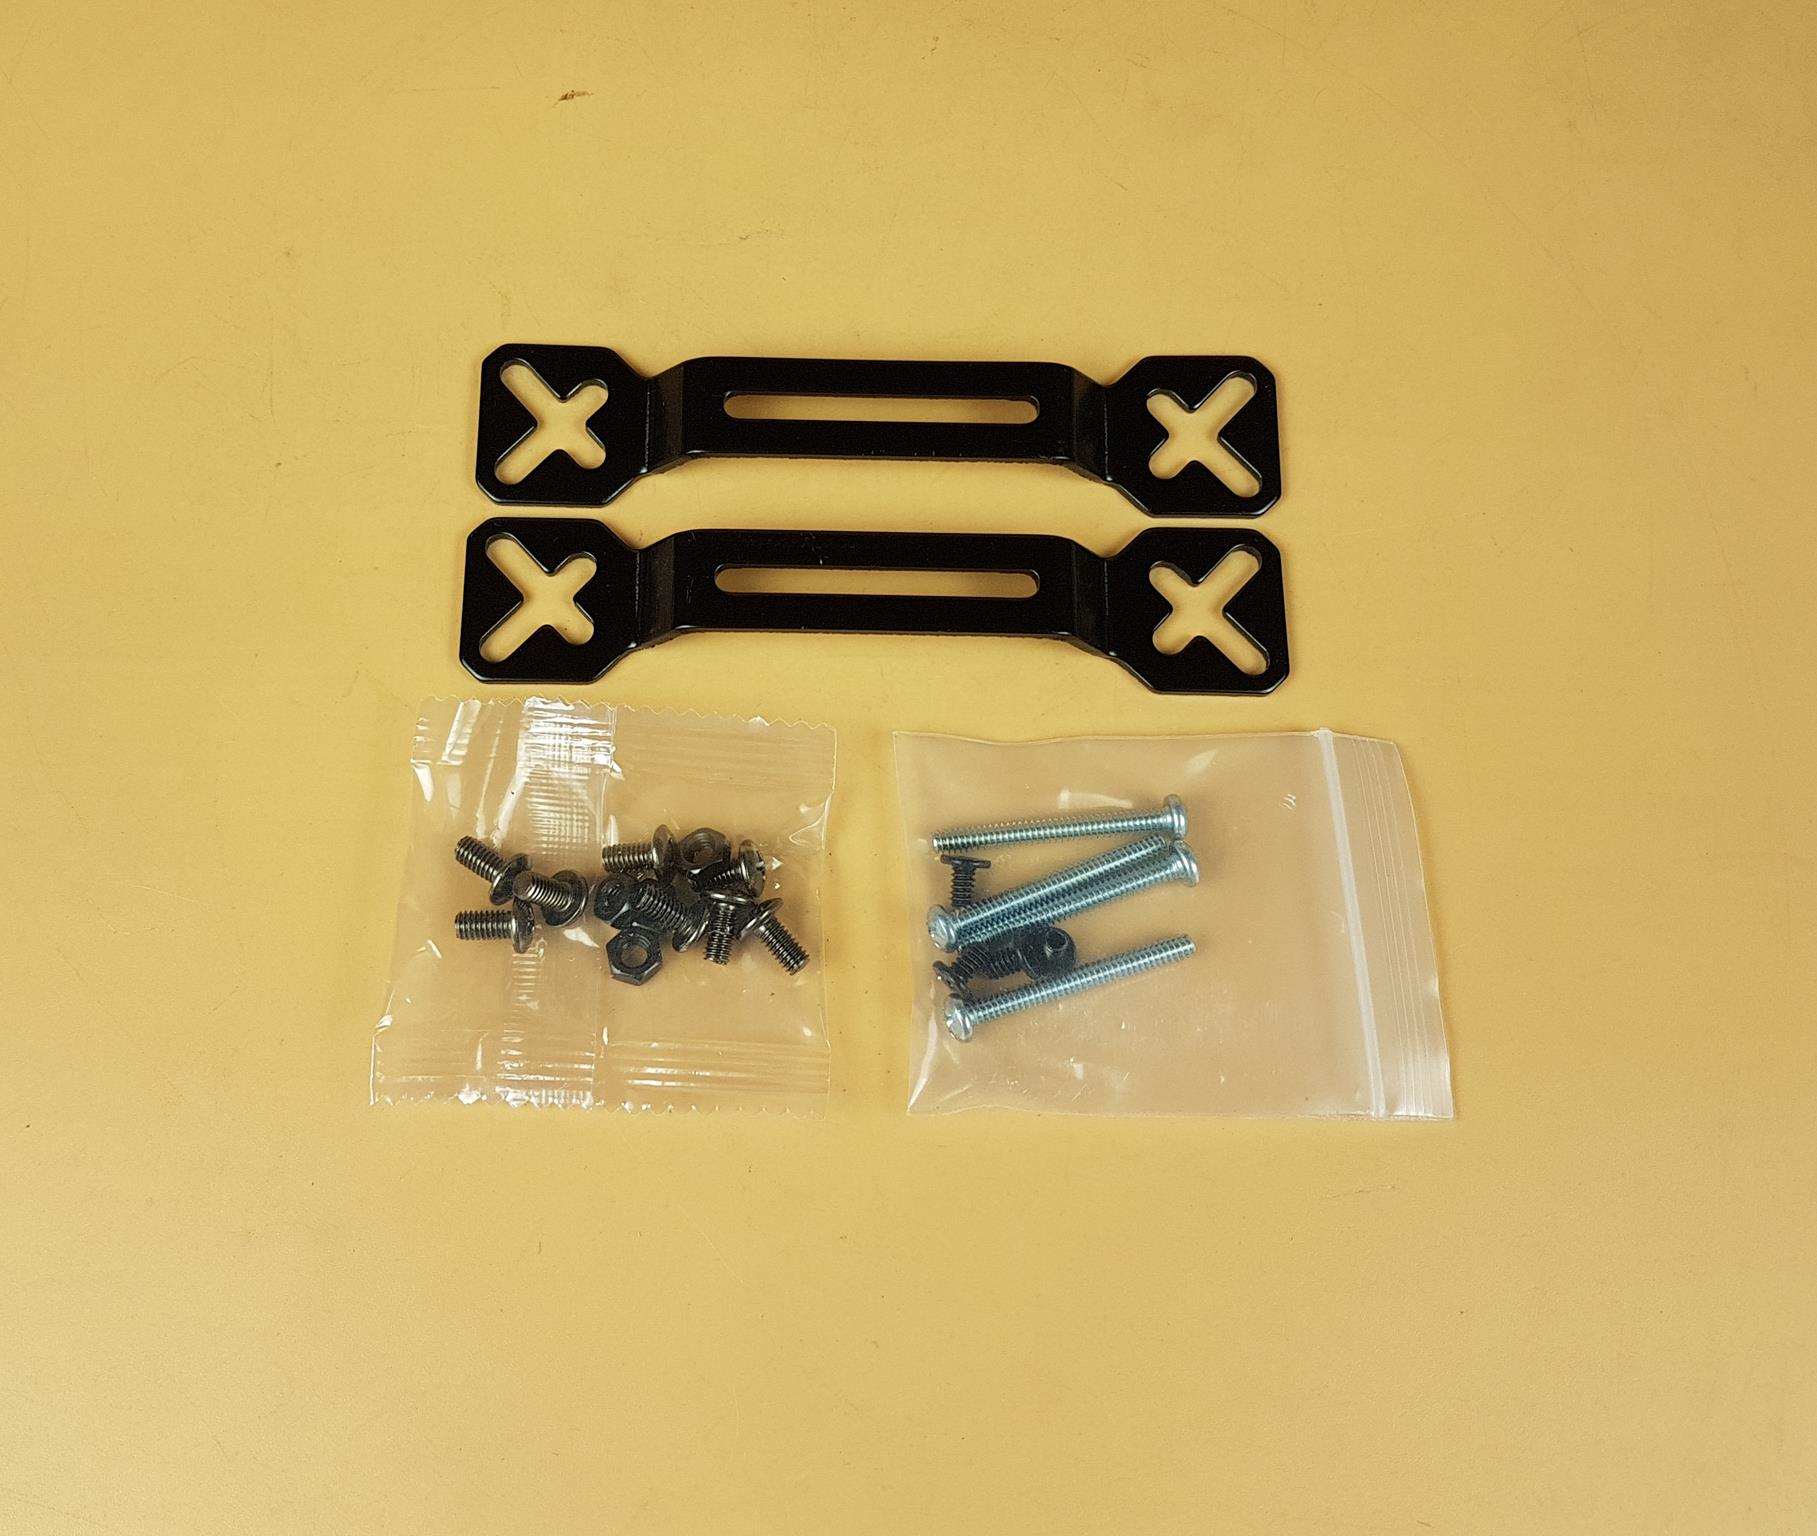
The first picture shows 2x mounting holes on the upper side of the reservoir housing. Similar holes are at the base of the unit.
These are there so that the provided fan mount brackets can be installed on the reservoir which allows the unit to be installed on the radiator or the PC Case with standard fan mounts.
The second picture shows the fan brackets or mounting clips and the nuts/bolts with the screws for the installation of the unit as per the requirement.
EOS 12 RBW ADD-3 Fans
Raijintek has provided a 3 fan box in this kit. These are EOS 12 RBW Add-3.
| Product Name | EOS 12 RBW ADD-3 | EOS 12 RBW ADD-2 |
| Q’ty | 3 pcs | 2 pcs |
| Dimension [W×H×D] | 120×120×25 mm | 120×120×25 mm |
| Voltage Rating | 12V | 12V |
| Starting Voltage | 7 V | 7 V |
| Rated Current | 0.17A±20% | 0.17A±20% |
| Power consumption | 2.1W±20% | 2.1W±20% |
| Speed | 800~1800 R.P.M. | 800~1800 R.P.M. |
| Bearing Type | Hydraulic Bearing | Hydraulic Bearing |
| Air Flow | 75 CFM [Max.] | 75 CFM [Max.] |
| Air Pressure | 2.3 mmH2O [Max.] | 2.3 mmH2O [Max.] |
| Life Expectance | 40,000 hrs | 40,000 hrs |
| Noise Level | 28 dBA [Max.] | 28 dBA [Max.] |
| Connector | 5V ADD Header PWM 4 pin Header |
5V ADD Header PWM 4 pin Header |
| Weight | 390g | 260g |
| Accessories | Screw × 12 ARGB-PWM control hub × 1 Remote controller × 1 |
Screw × 8 ARGB-PWM control hub × 1 Remote controller × 1 |

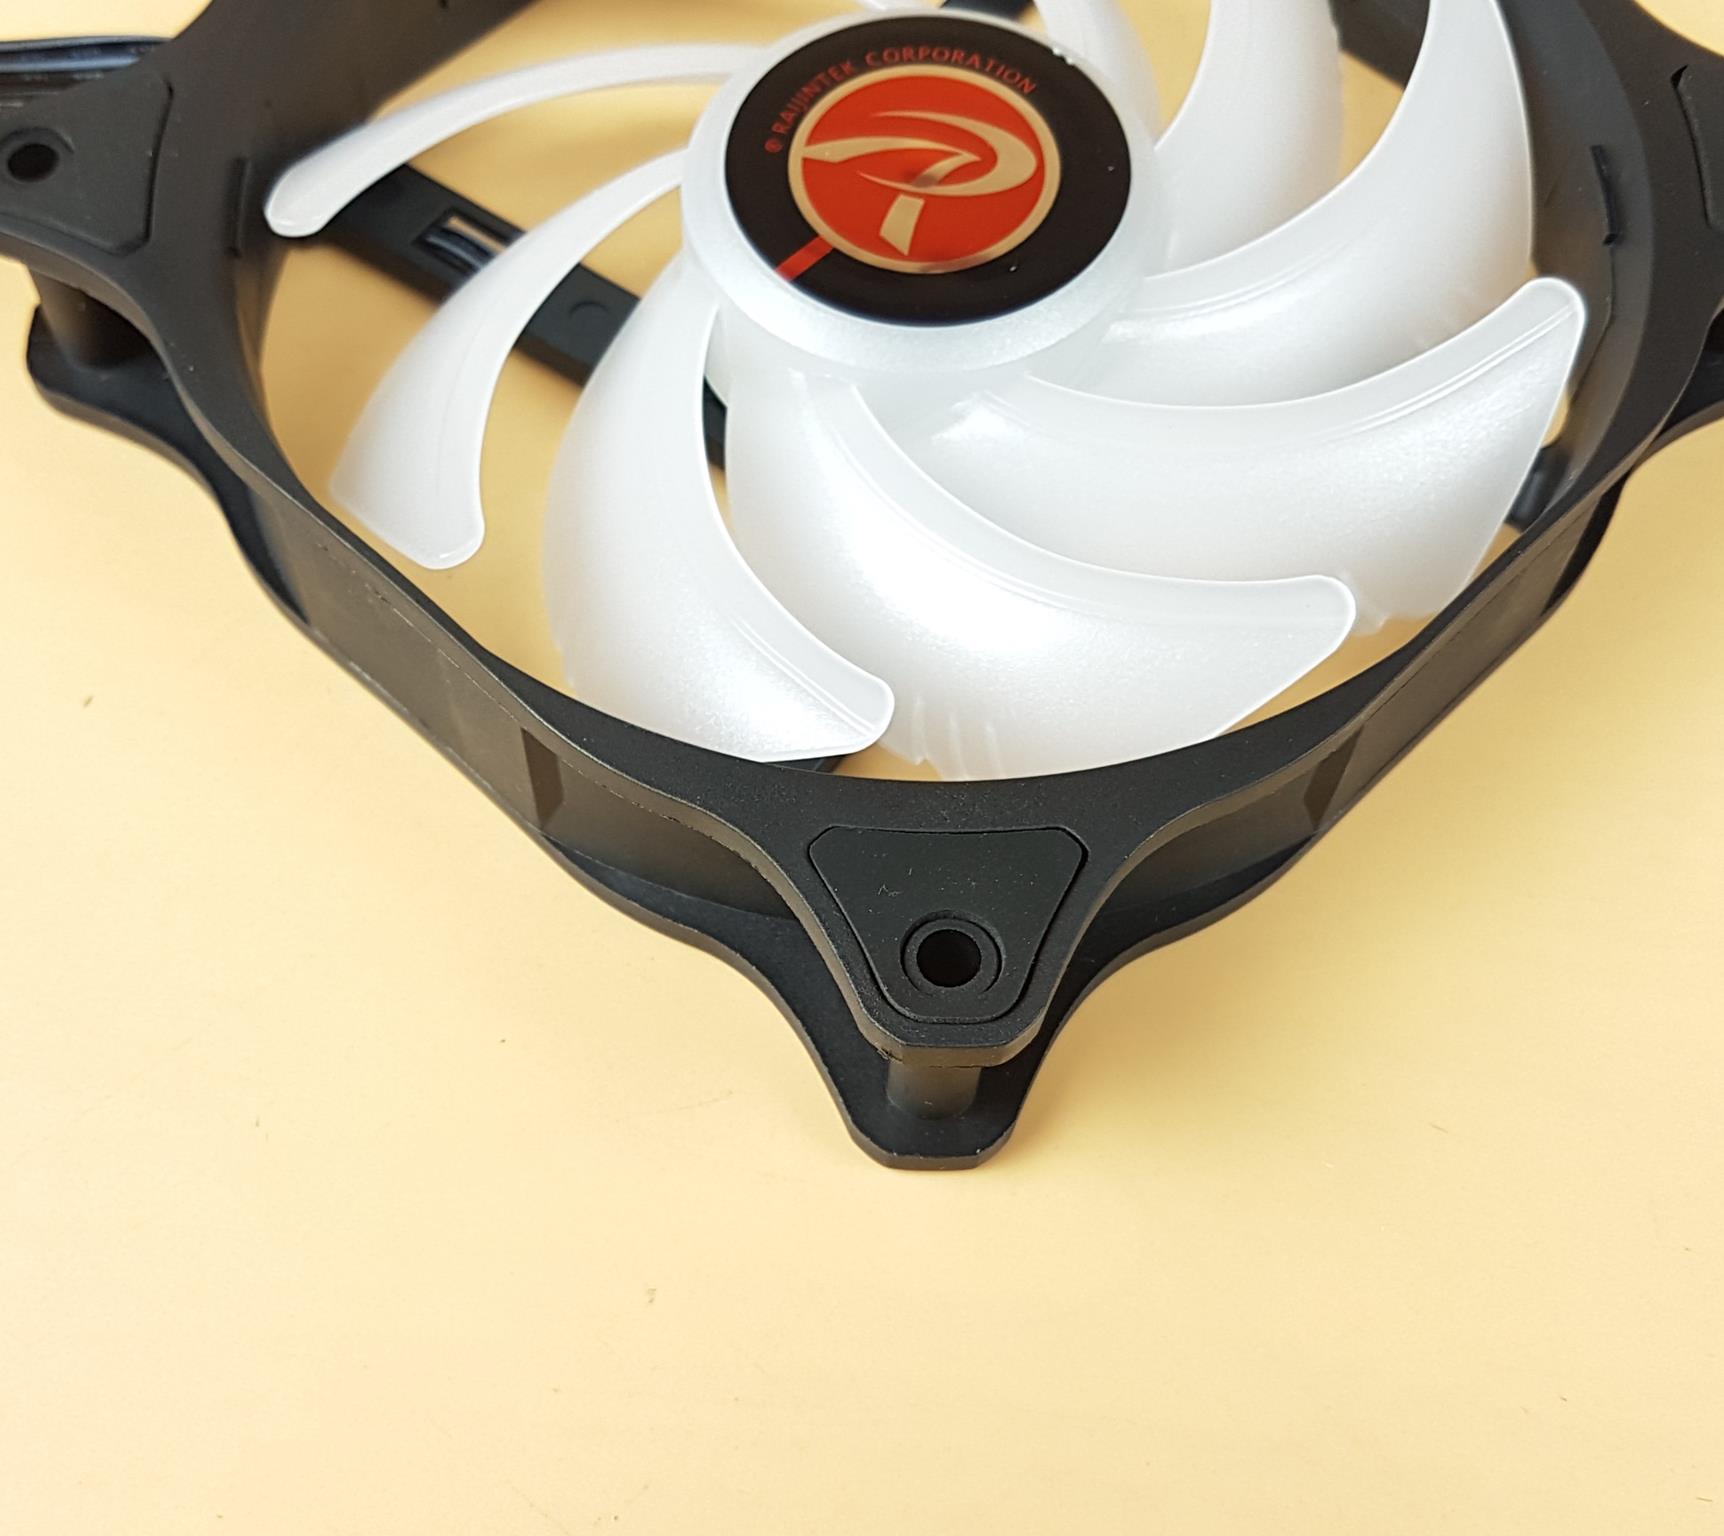
These fans have 120x120x25mm in size. Each fan has 9 frosted blades with trailing edges. There is a red color sticker in the center having a Raijintek logo. The center houses the ARGB LEDs for some vivid light show. These fans are rated for a maximum of 1800 RPM speed and have a rating of 2.3mmH₂O air pressure. The airflow rating is 75 CFM max with a noise level rating of 28 dB(A).
There is a cut-to-size anti-vibration pad on each mounting corner of the fans.

The fans have a black color frame which is quite sturdy. There are no arrow markers on the frame which help in identifying the direction of airflow and the direction in which the blades would spin.
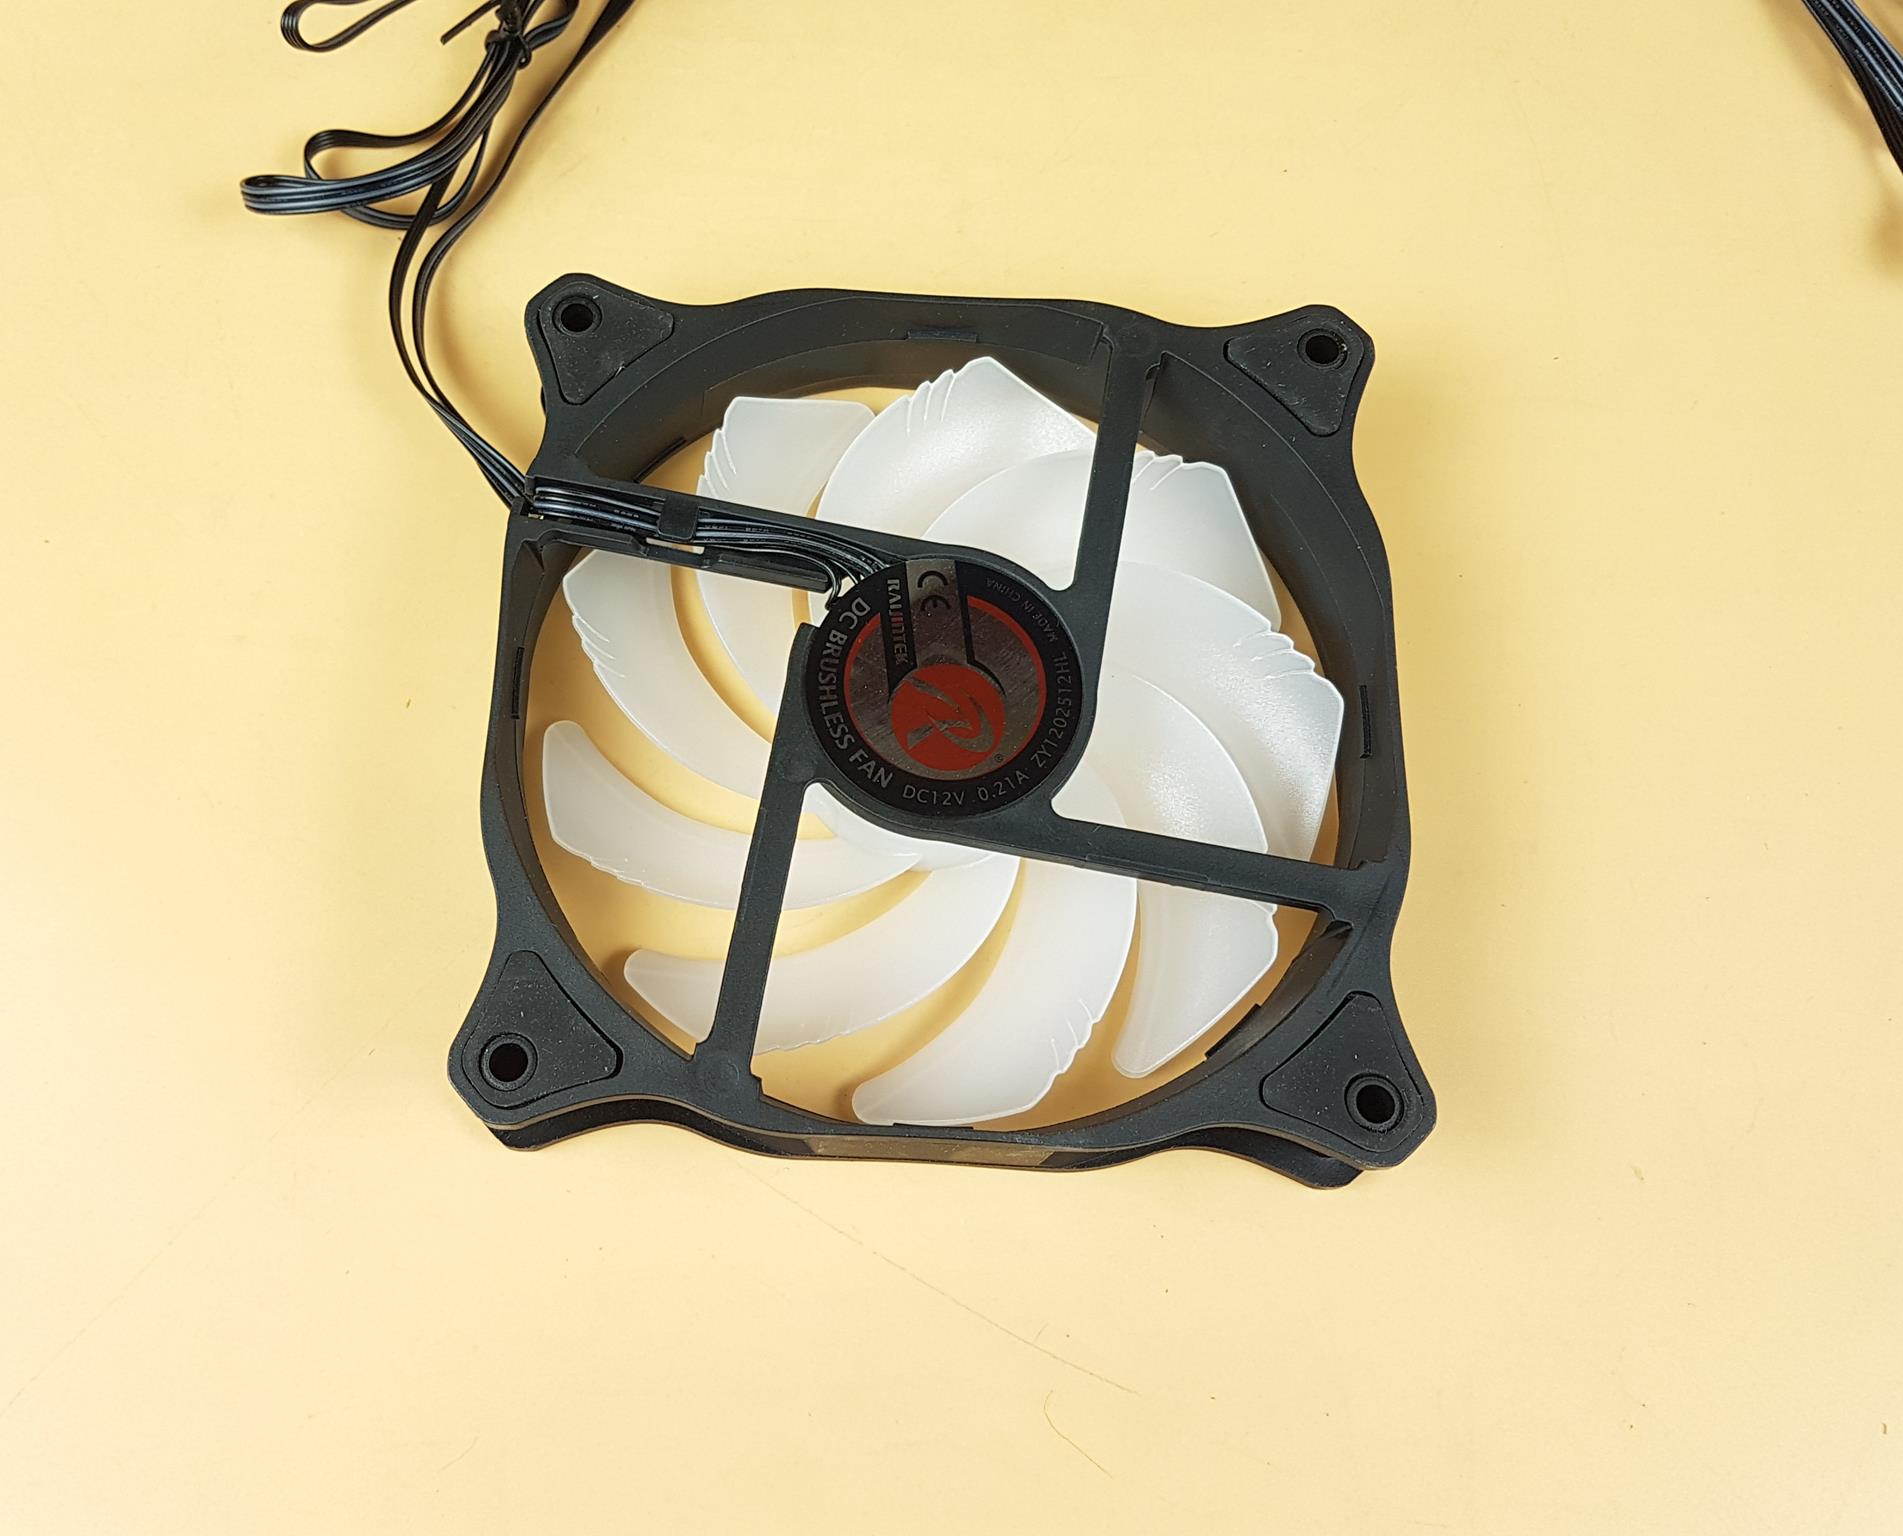
There is a 4-arms assembly on the backside of the frame. One arm is wider and has a groove inside on which the wires are placed. These are DC Brushless fans rated at 12VDC. These are using Hydraulic bearings with a life expectancy of 40,000 hours. The starting voltage is 7V. The power consumption is 2.1W±20% using a current of 0.17A±20%.
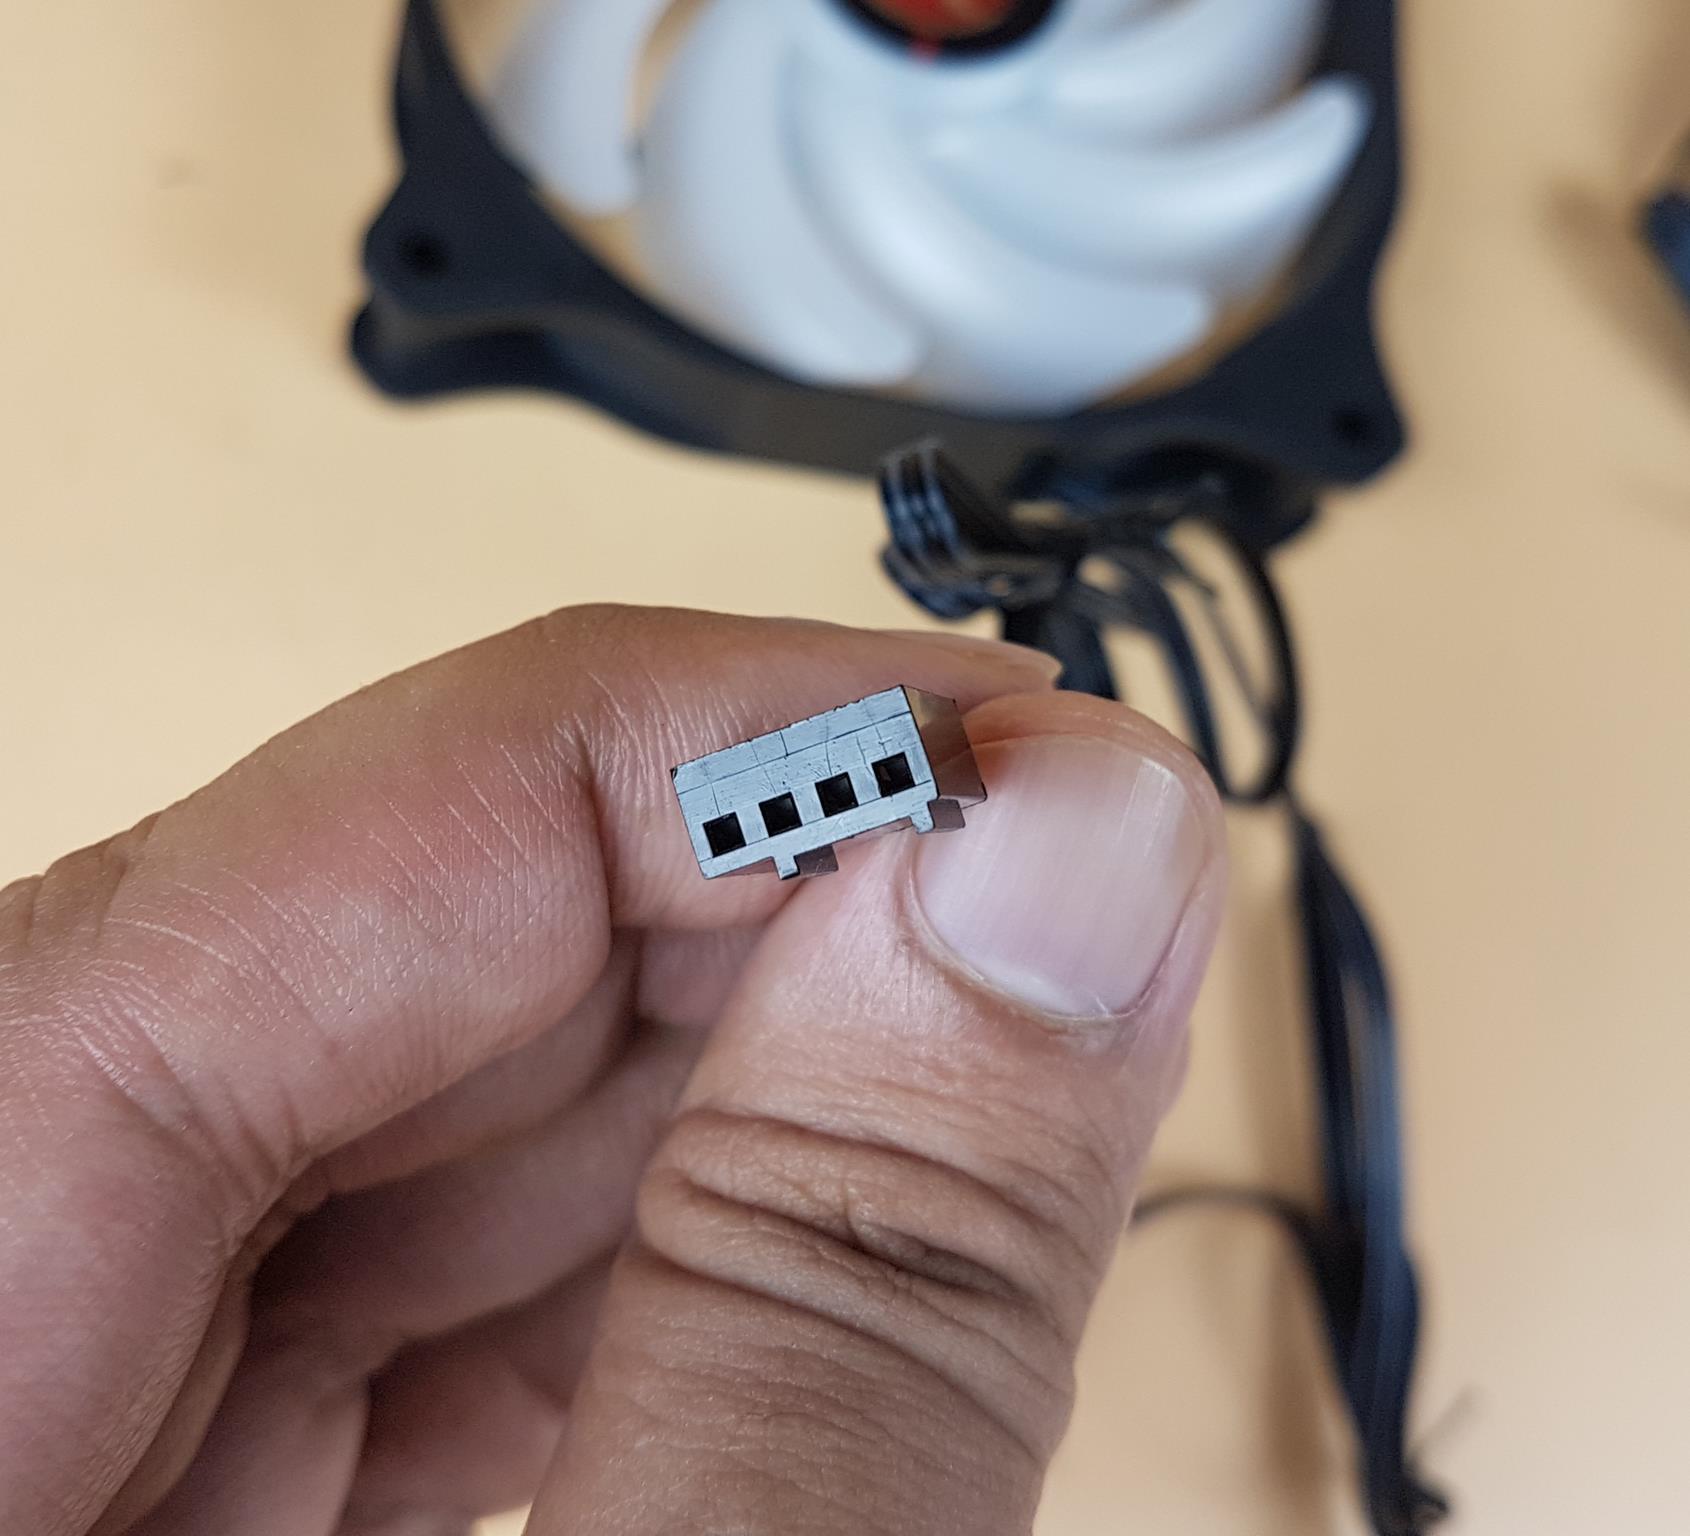
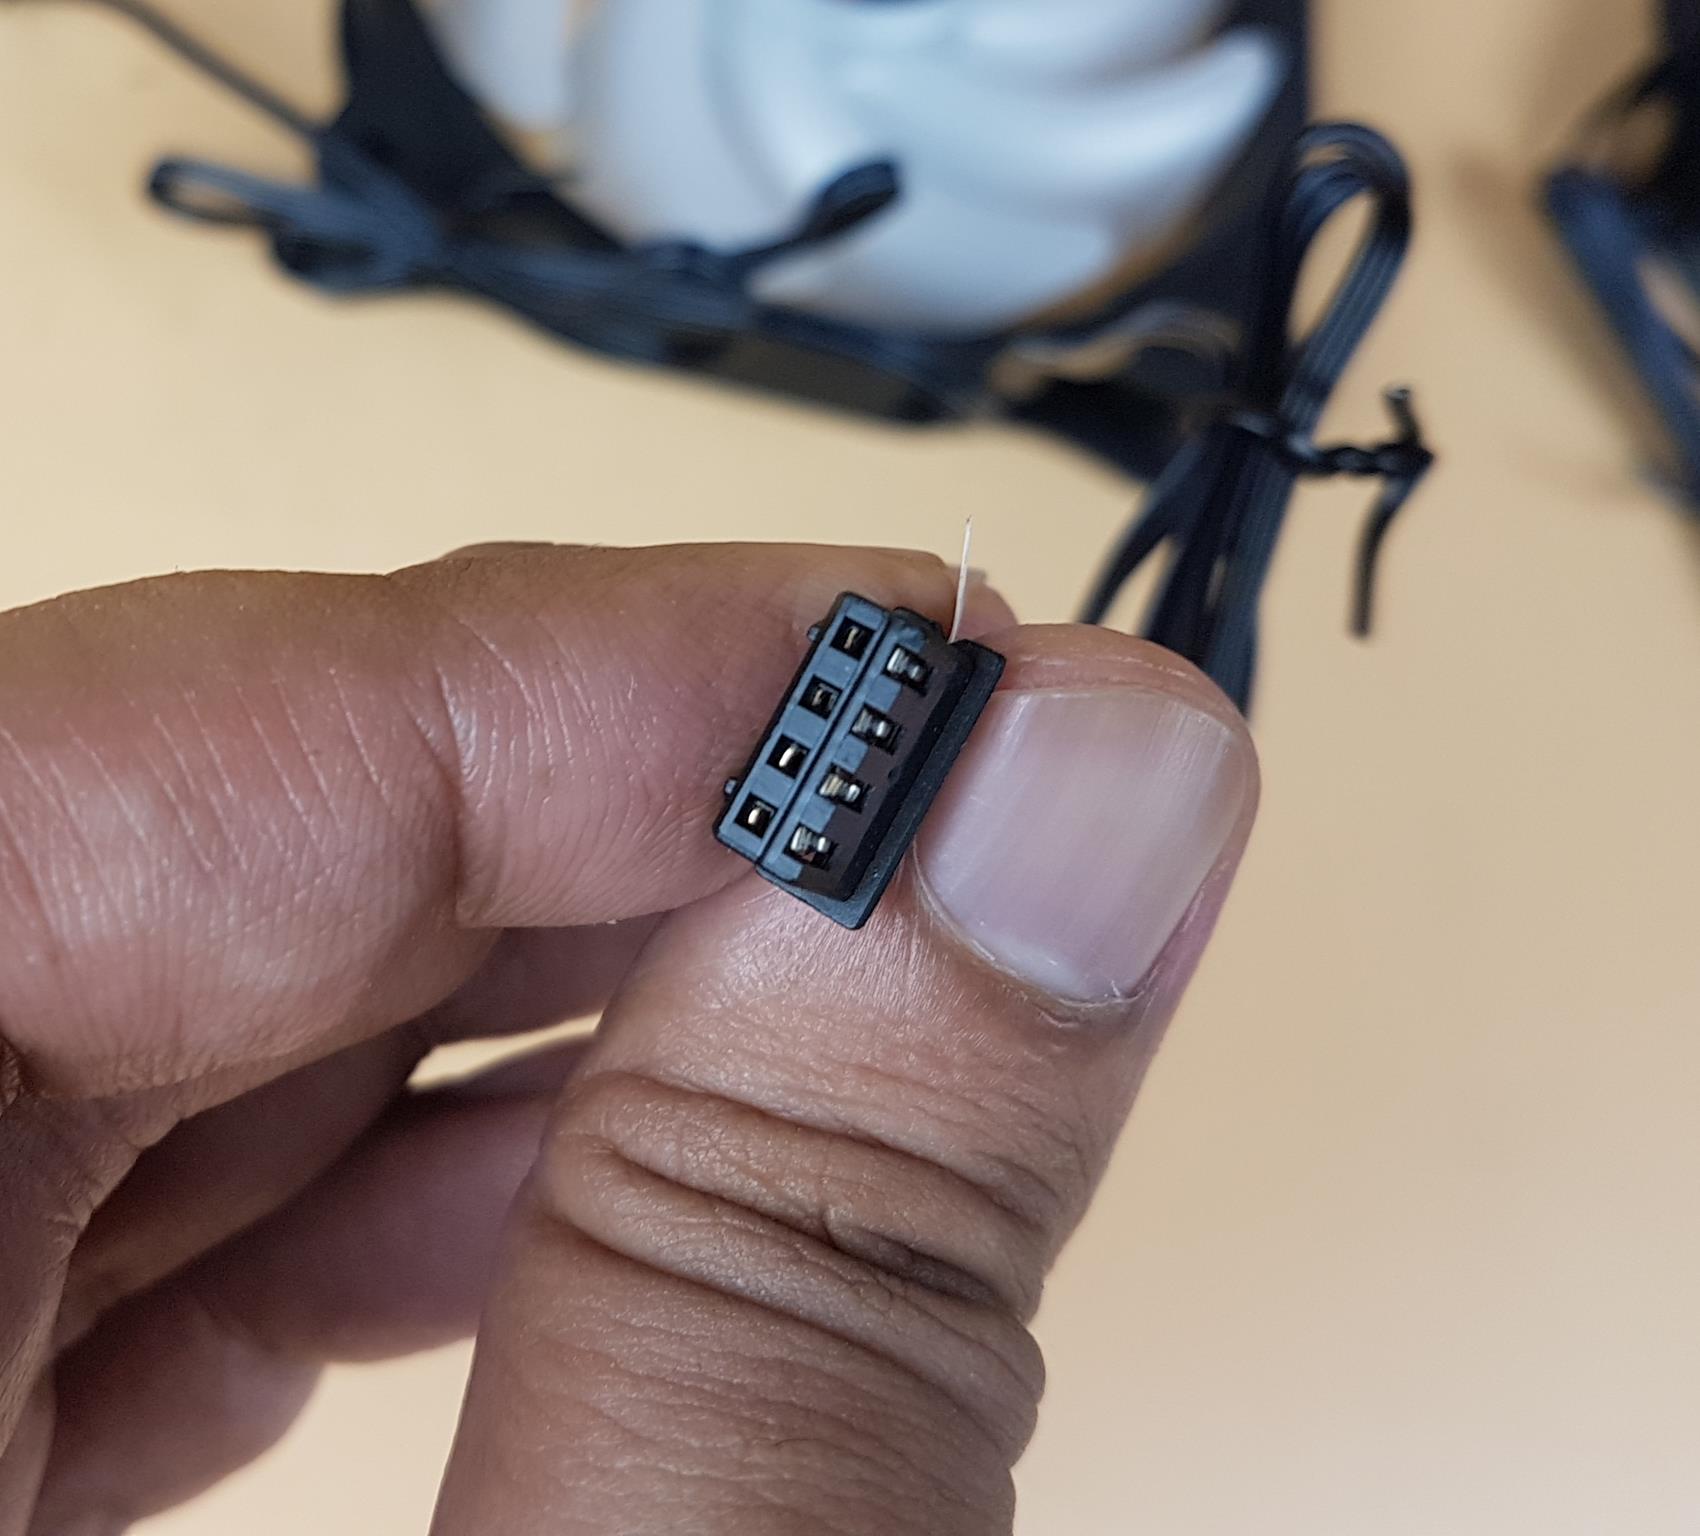
There are two cables coming out of each fan. One is the 4-pin PWM connector cable to power the fan’s motor. The second cable is used to power the fan’s ARGB LEDs. It has a proprietary 4-pin connector.
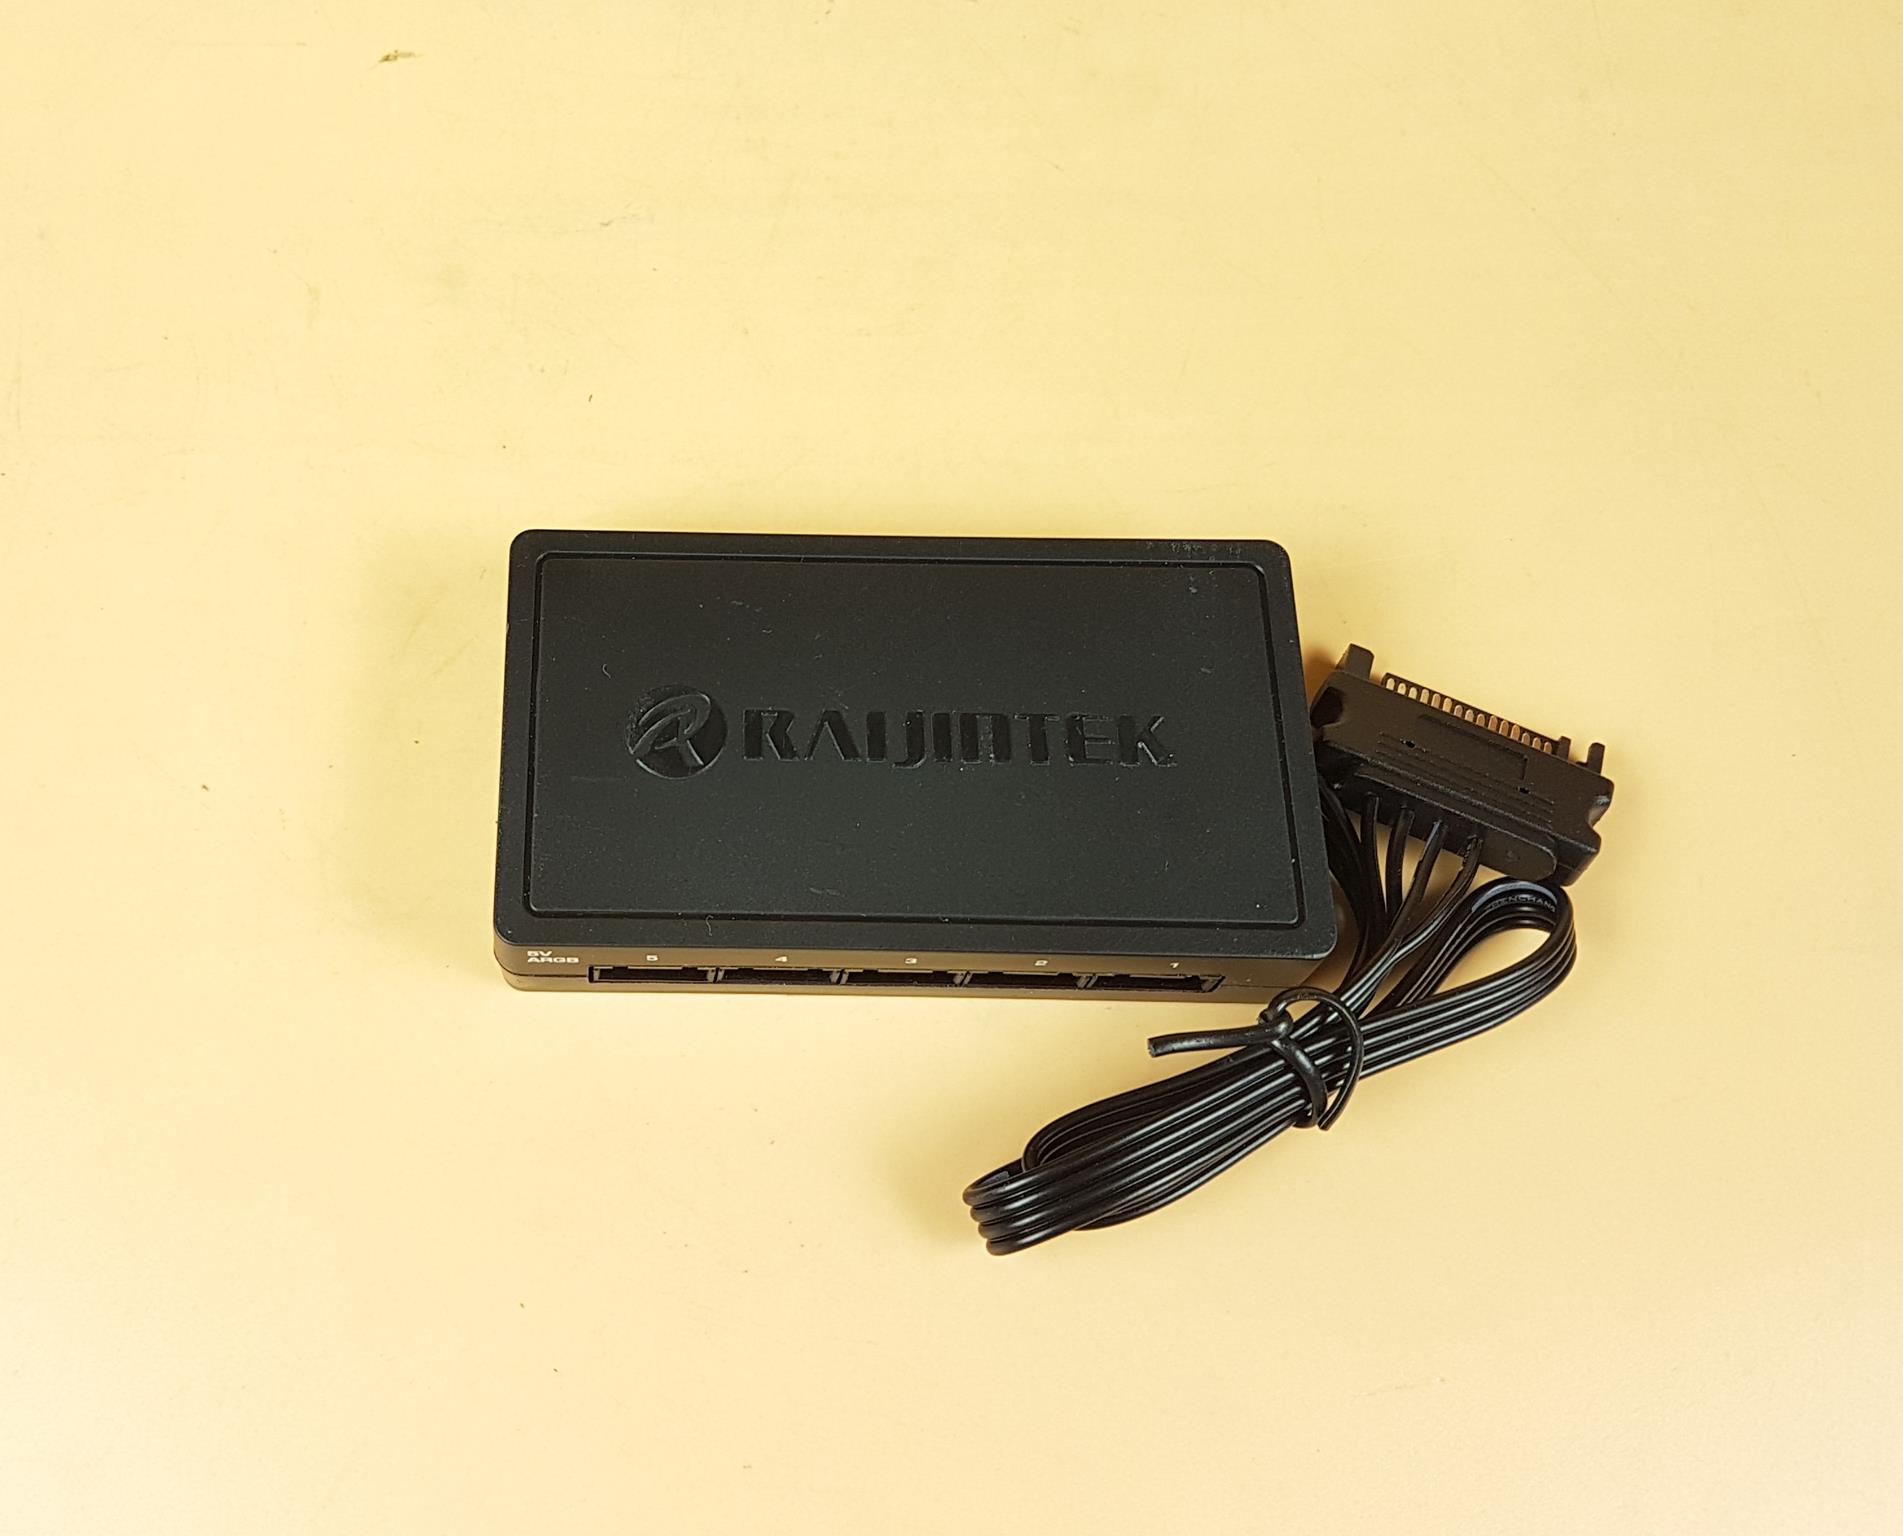

Raijintek has provided an RGB hub with the fans. The top view shows the Raijintek branding. The housing is made of plastic material and is finished in black color. The second picture shows the backside of the hub. There are 4x screws that can be removed to open the hub. The hub is SATA powered.
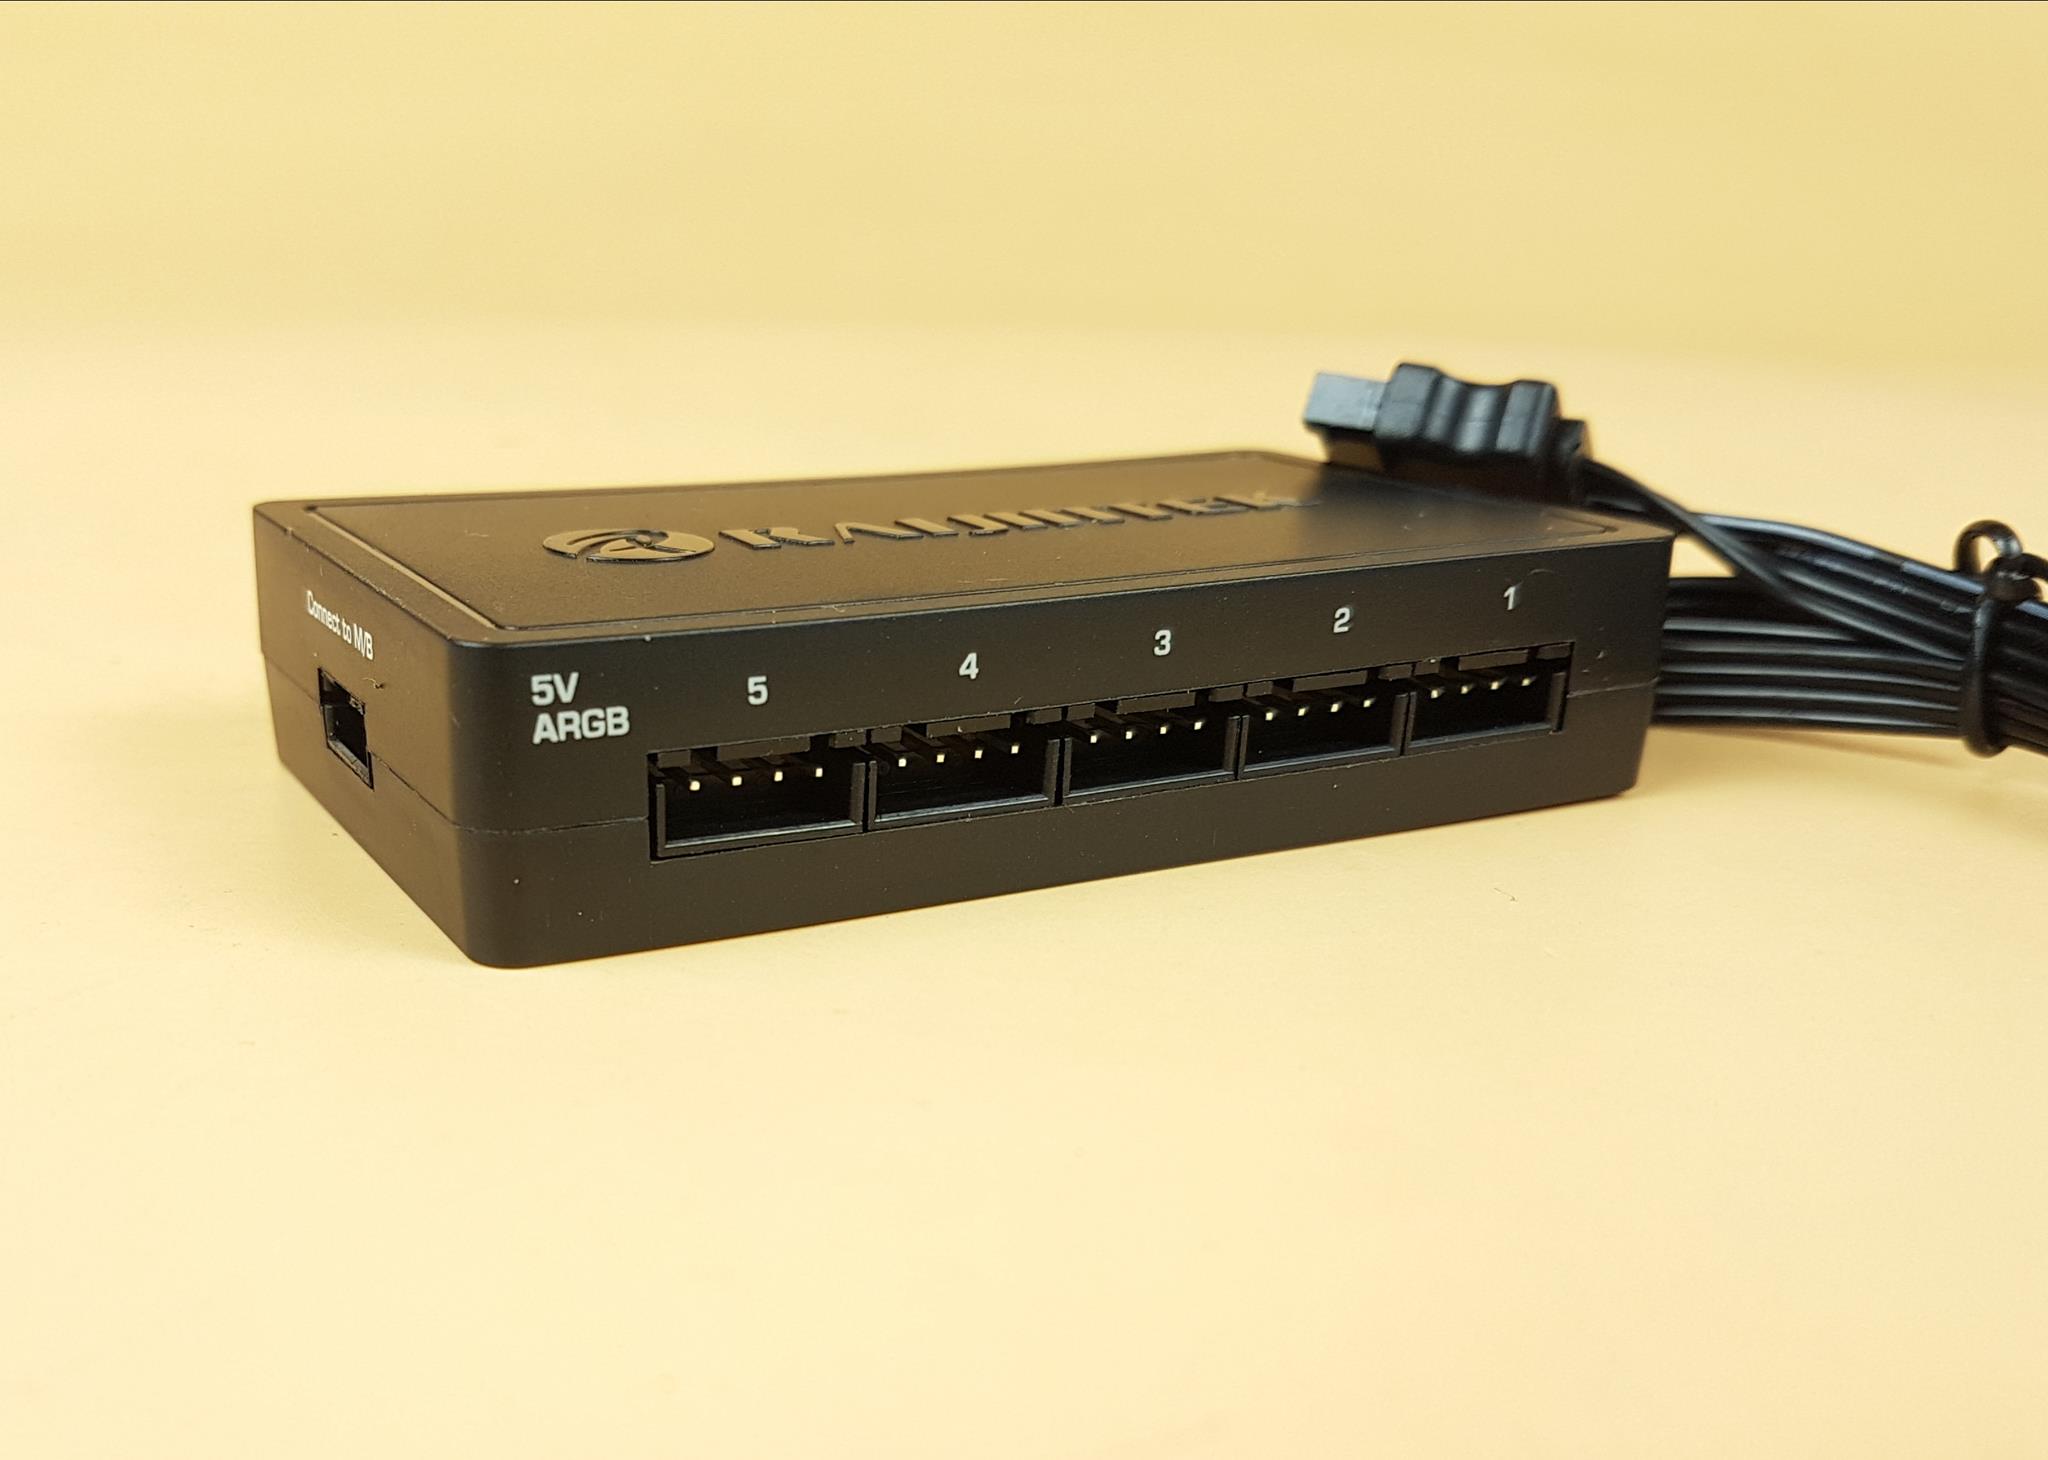
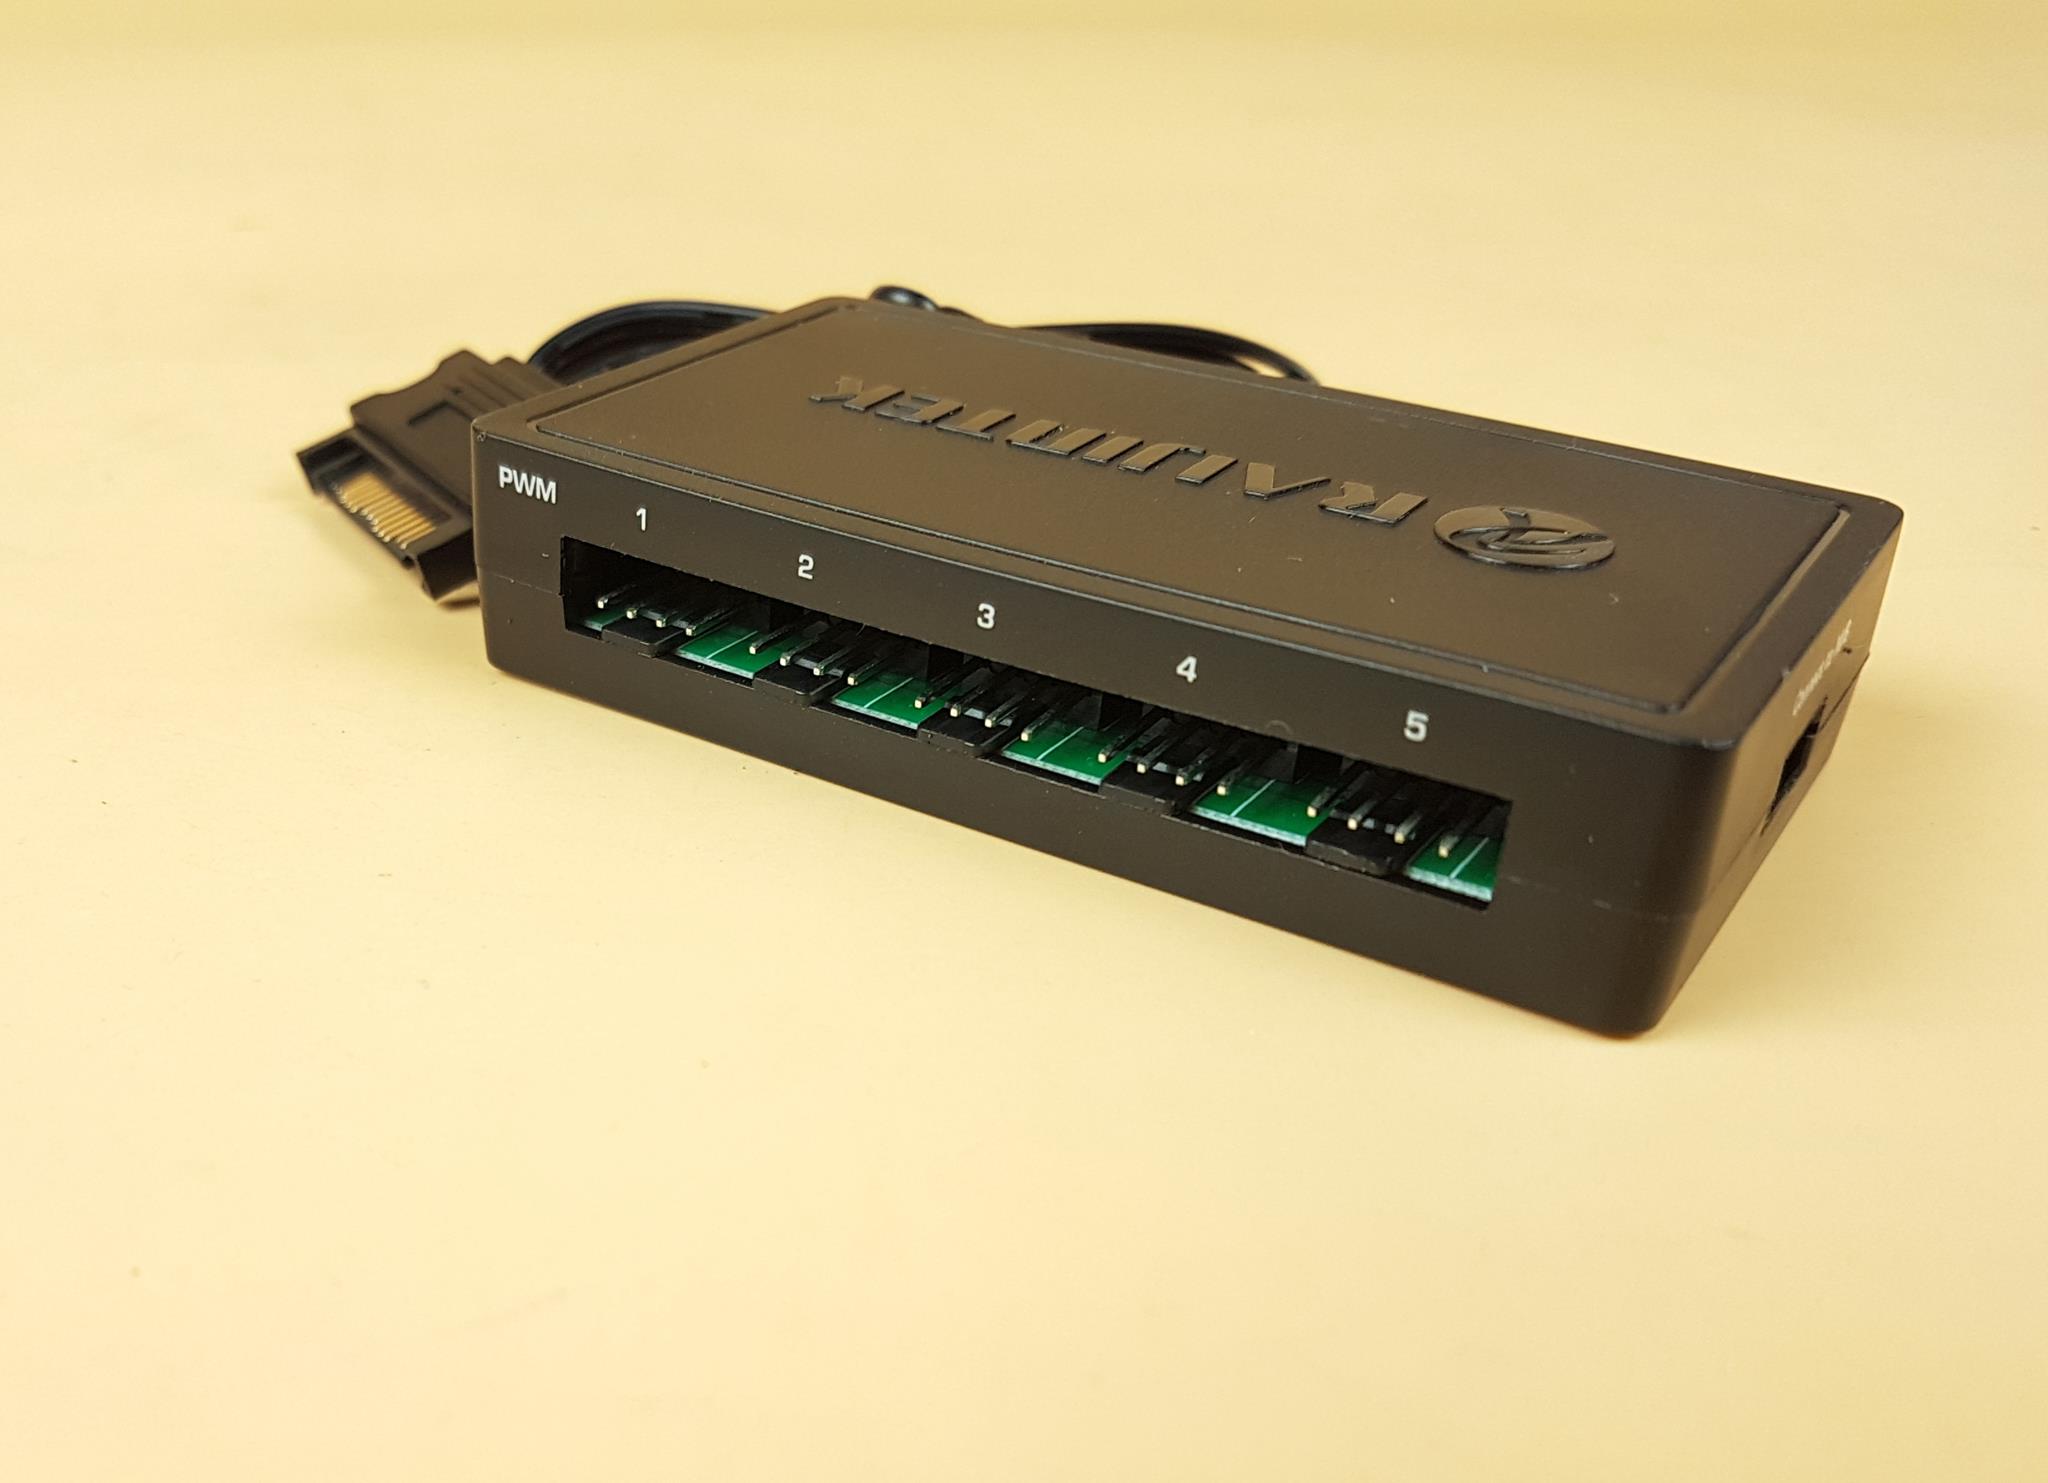
One side of the hub has 5x 4-pin ARGB (5v) ports. The user can connect the bundled 3x fans and the reservoir ARGB cable to these ports. Make sure to follow the numbering scheme. Start with port 1 and onwards. There are 5x 4-pin PWM fan headers on the hub as well.
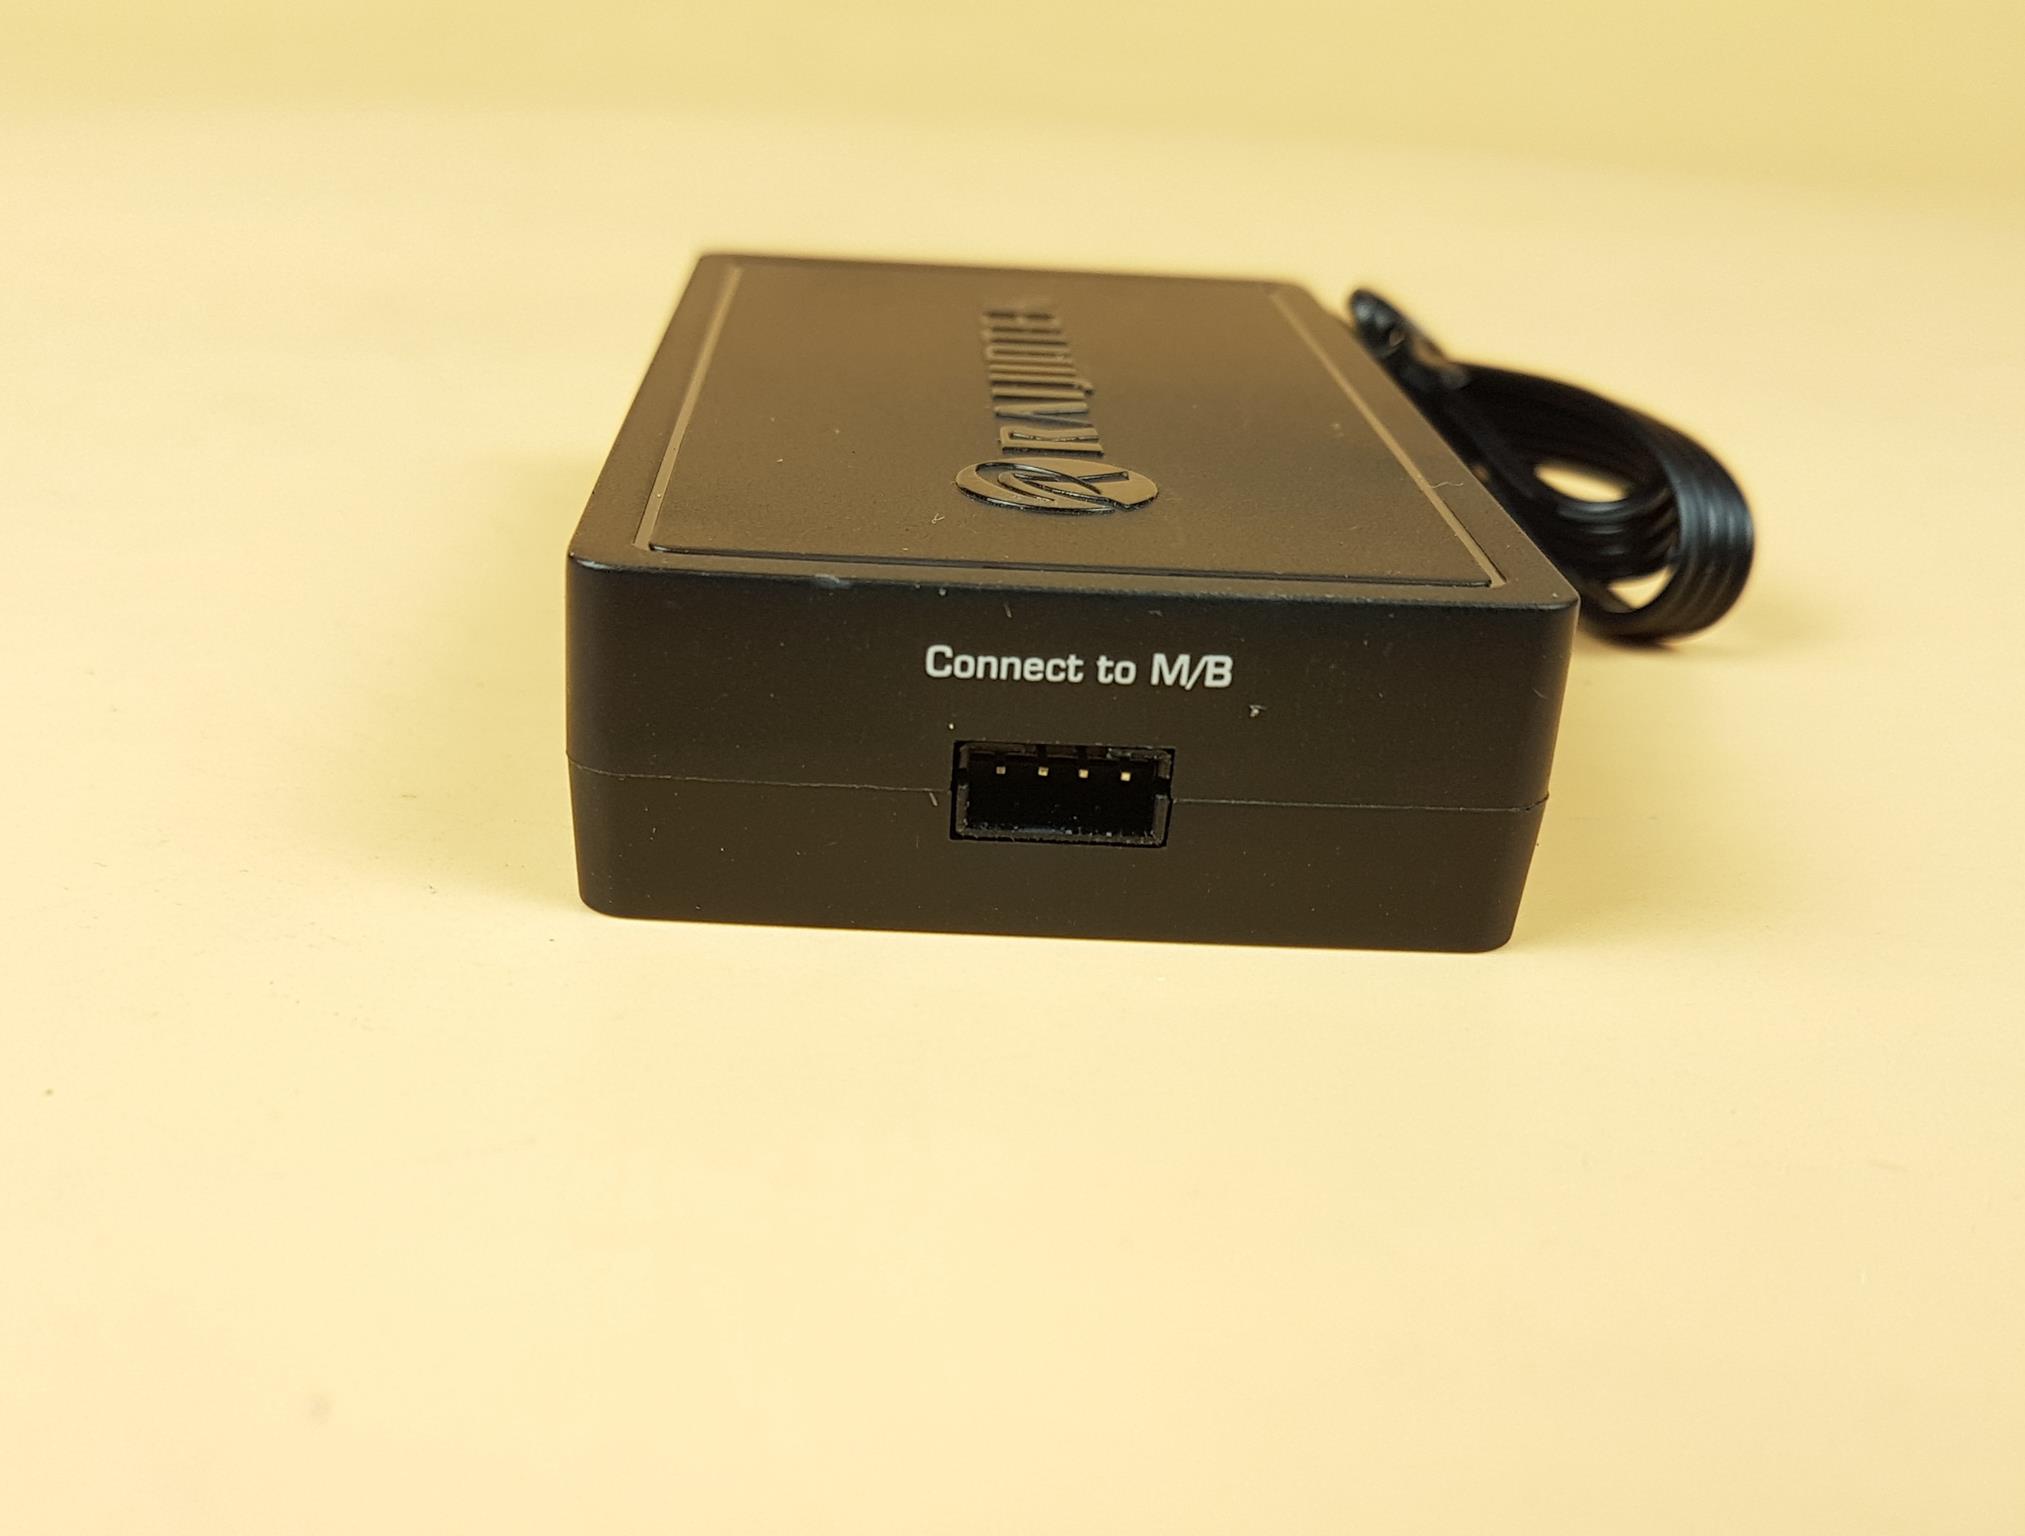
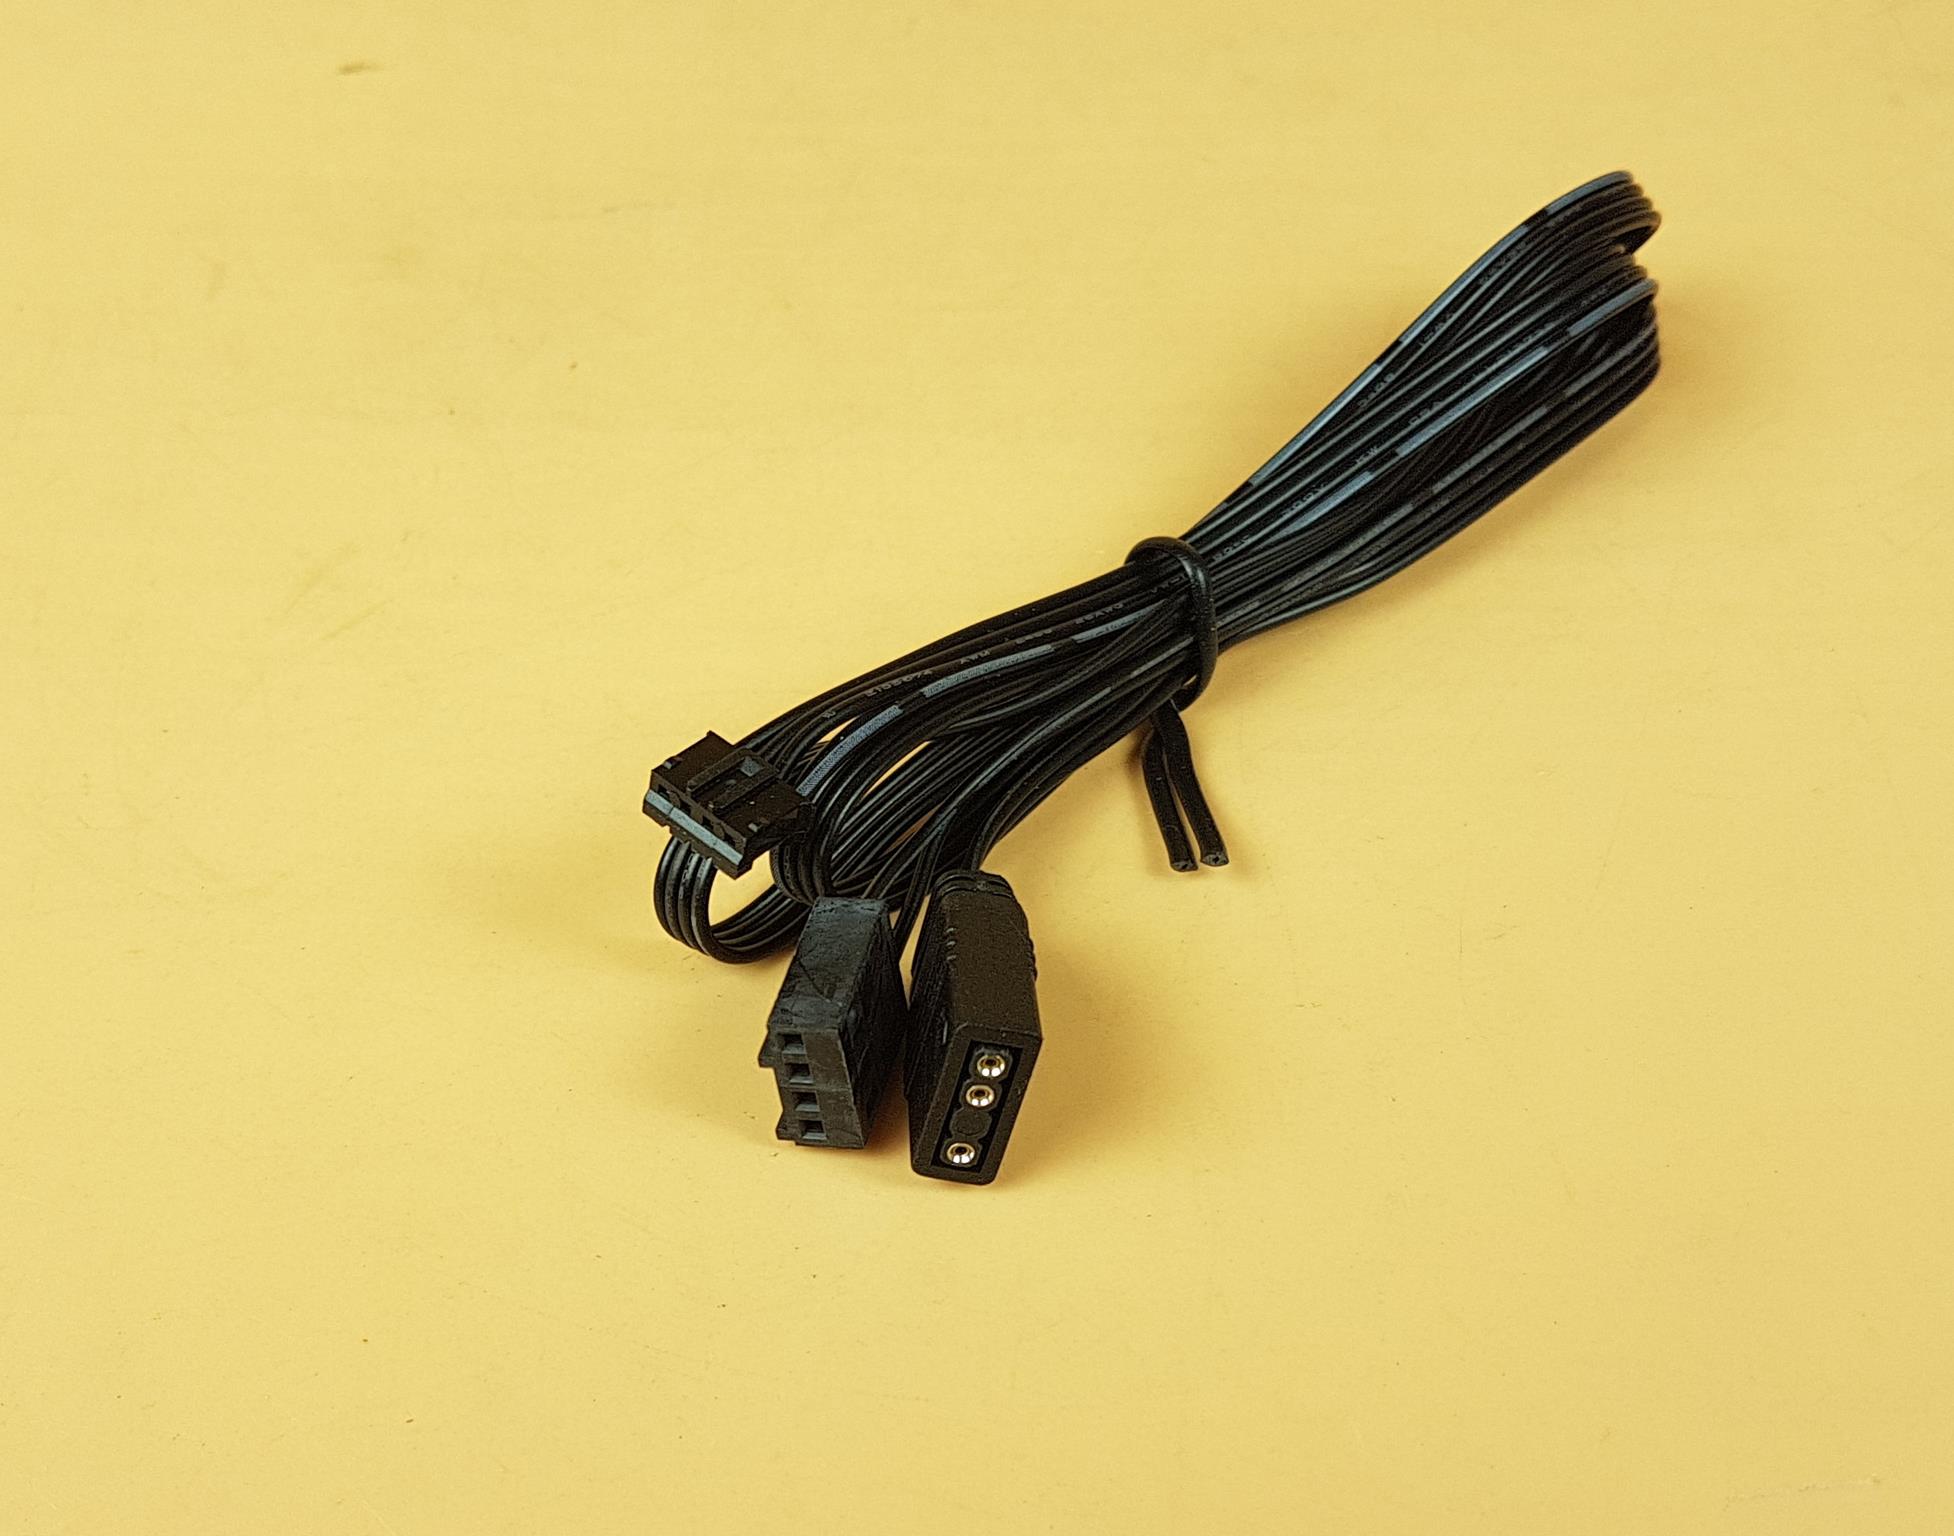
The first picture shows a port to which the motherboard sync cable is connected. The second picture shows the motherboard sync cable. Its 4-pin proprietary connector is attached to the hub, whereas the 4-pin PWM connector and a standard 5V 3-pin ARGB connector are attached to the respective headers on the motherboard.

Raijintek has provided a magnetic plate. The idea is to mount this plate to the hub, and then the hub can be magnetically attached to the PC case. The backside of the plate has a 3M adhesive. This is the side that is connected to the hub’s backside. Once it is firmly attached, the hub can be installed magnetically.
Raijintek has provided a remote controller with the hub that the user can use to change the LED modes and colors.
Copper Fittings
Raijintek has provided 6x copper fittings.
| Copper Fitting 180° Q’ty | 6 pcs |
| Material | Brass |
| Screw Threads | G 1/4″ |
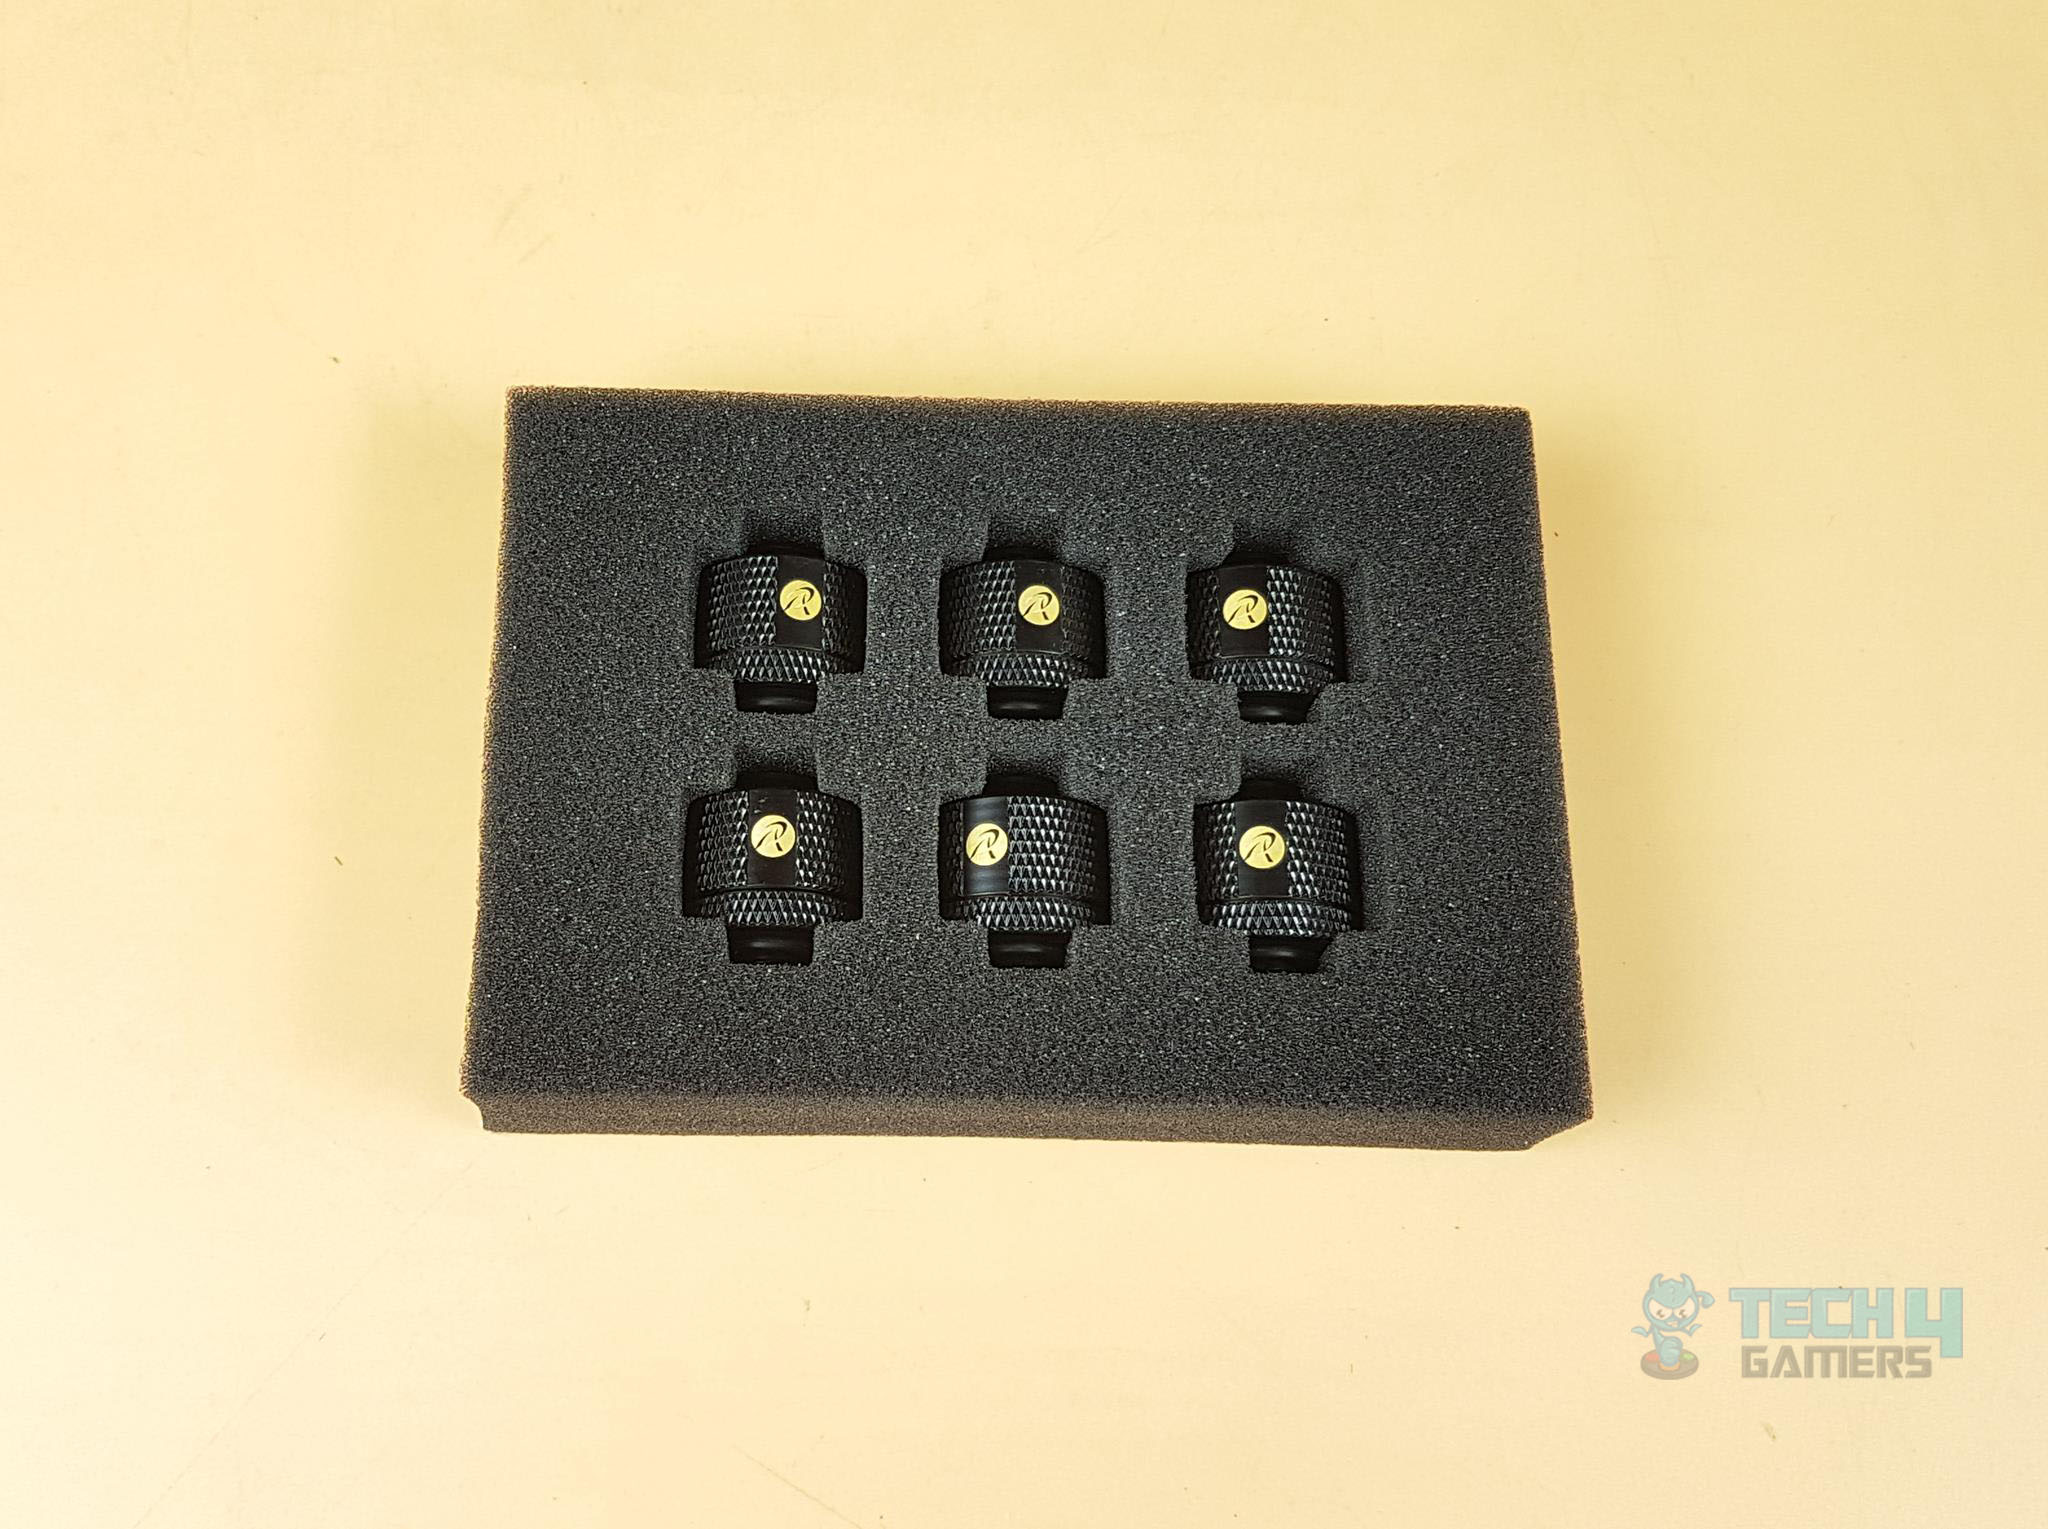
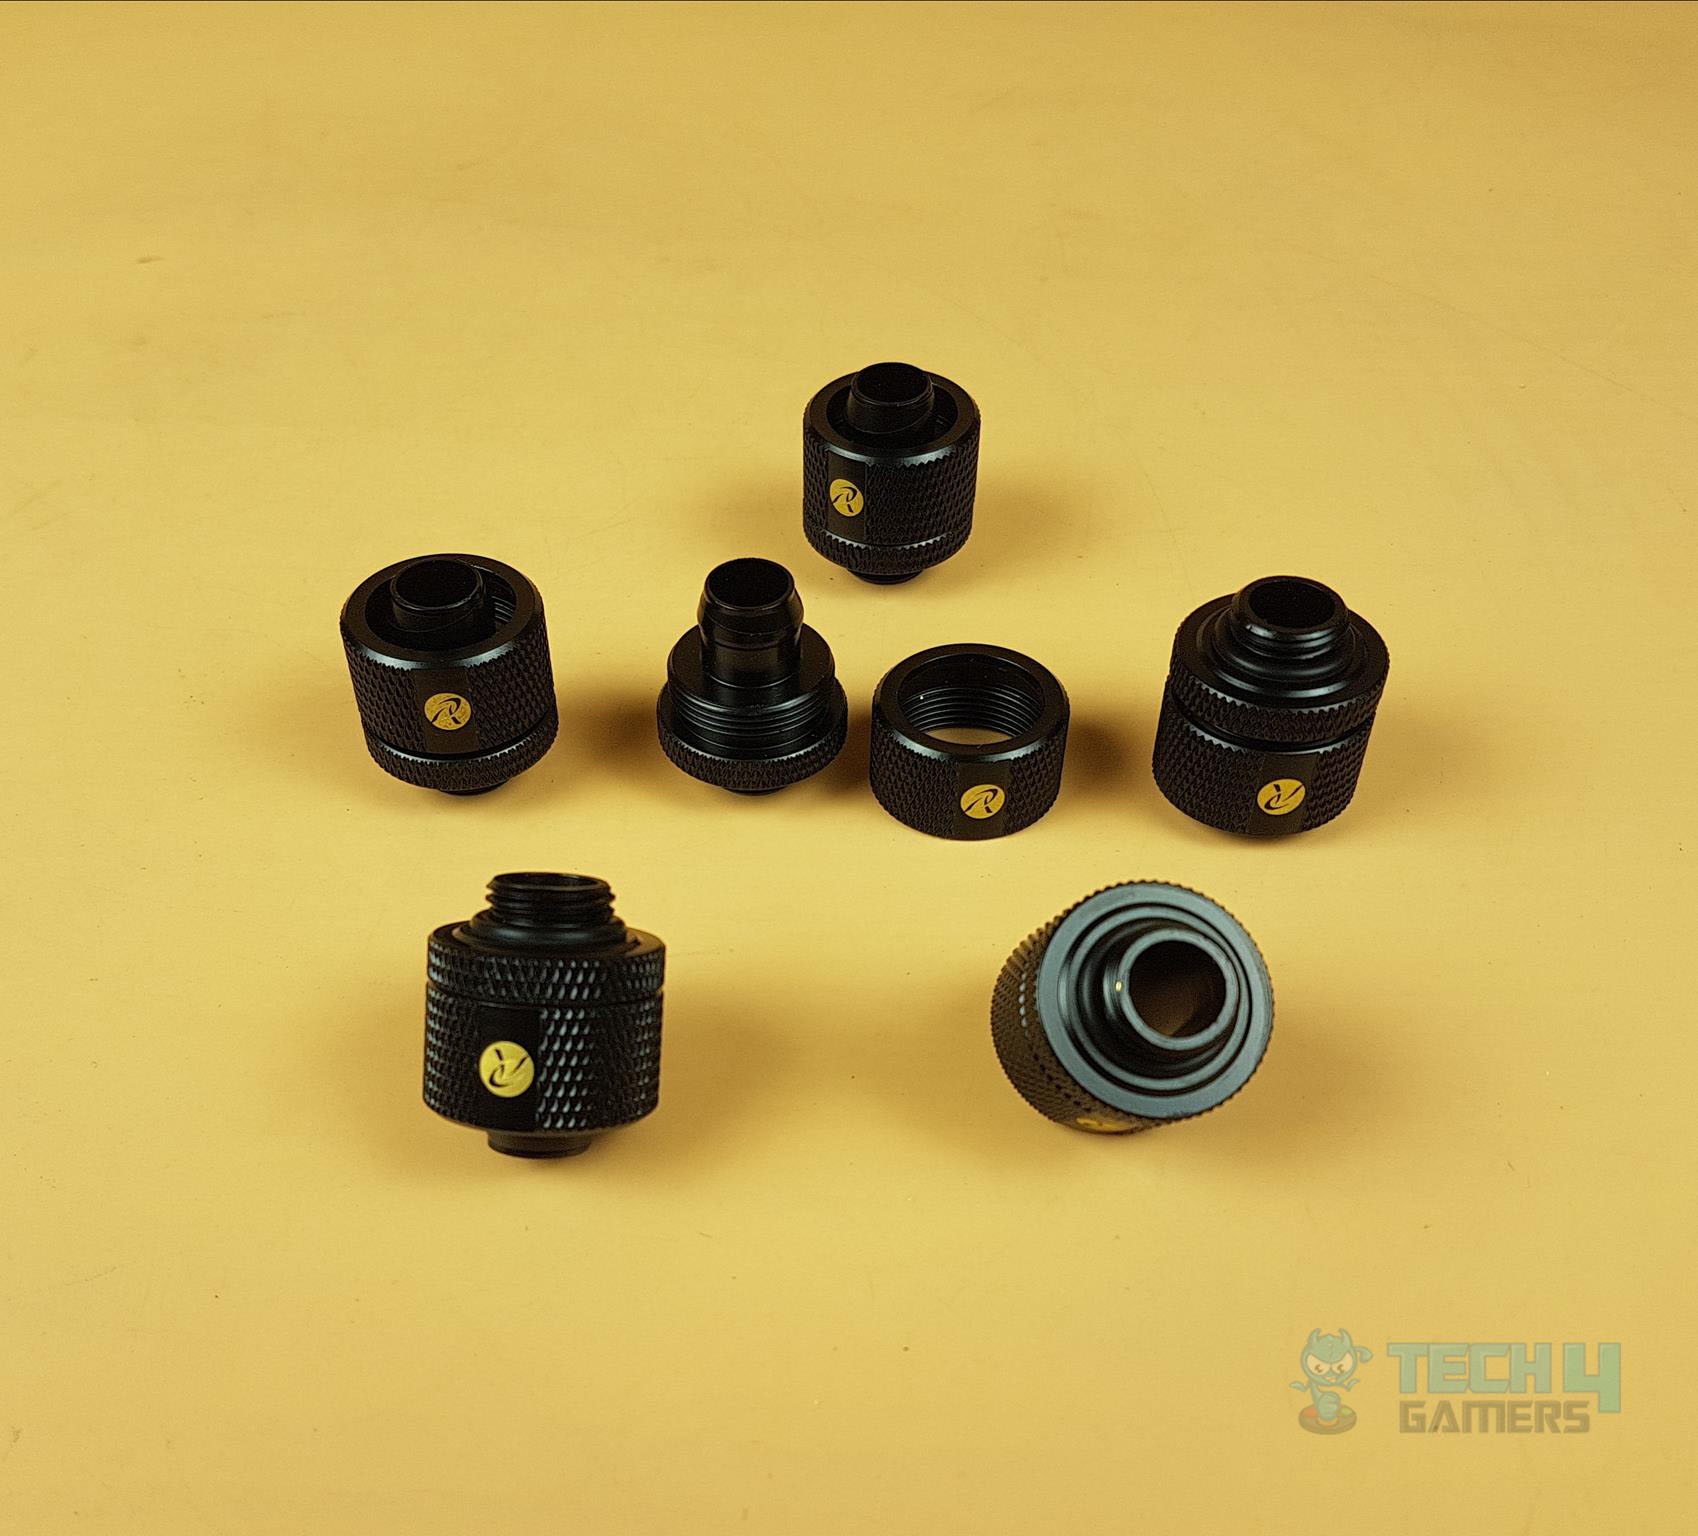
There are 6x 180° fittings placed in a thick Styrofoam pad container. These fittings are in black color and have a Raijintek branding on them. These all are straight fitting in 16/10mm size. There is no 90° adapter in the kit.
RAITUBO-T3
This kit is using soft tubing.
| Product Name | RAITUBO-T6 |
| Q’ty | 1 pcs |
| Diameter | ID 9.5mm ; OD 15.9mm |
| Material | PVC |
| Length | 2000 mm |
| Color | Transparent |
| Operation Temp. range | -20°C [-4°F] to 80°C [176°F] |
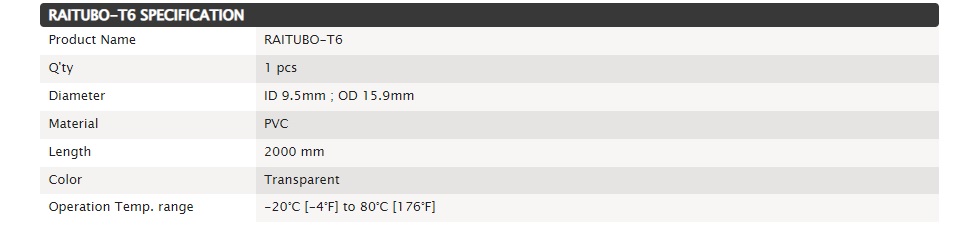
Apparently, there is confusion over the tube naming as the specifications are showing it to be T6 whereas the packing is showing it as T3. Raijintek has provided 200cm long tubing which should be enough for the simple and basic loop.
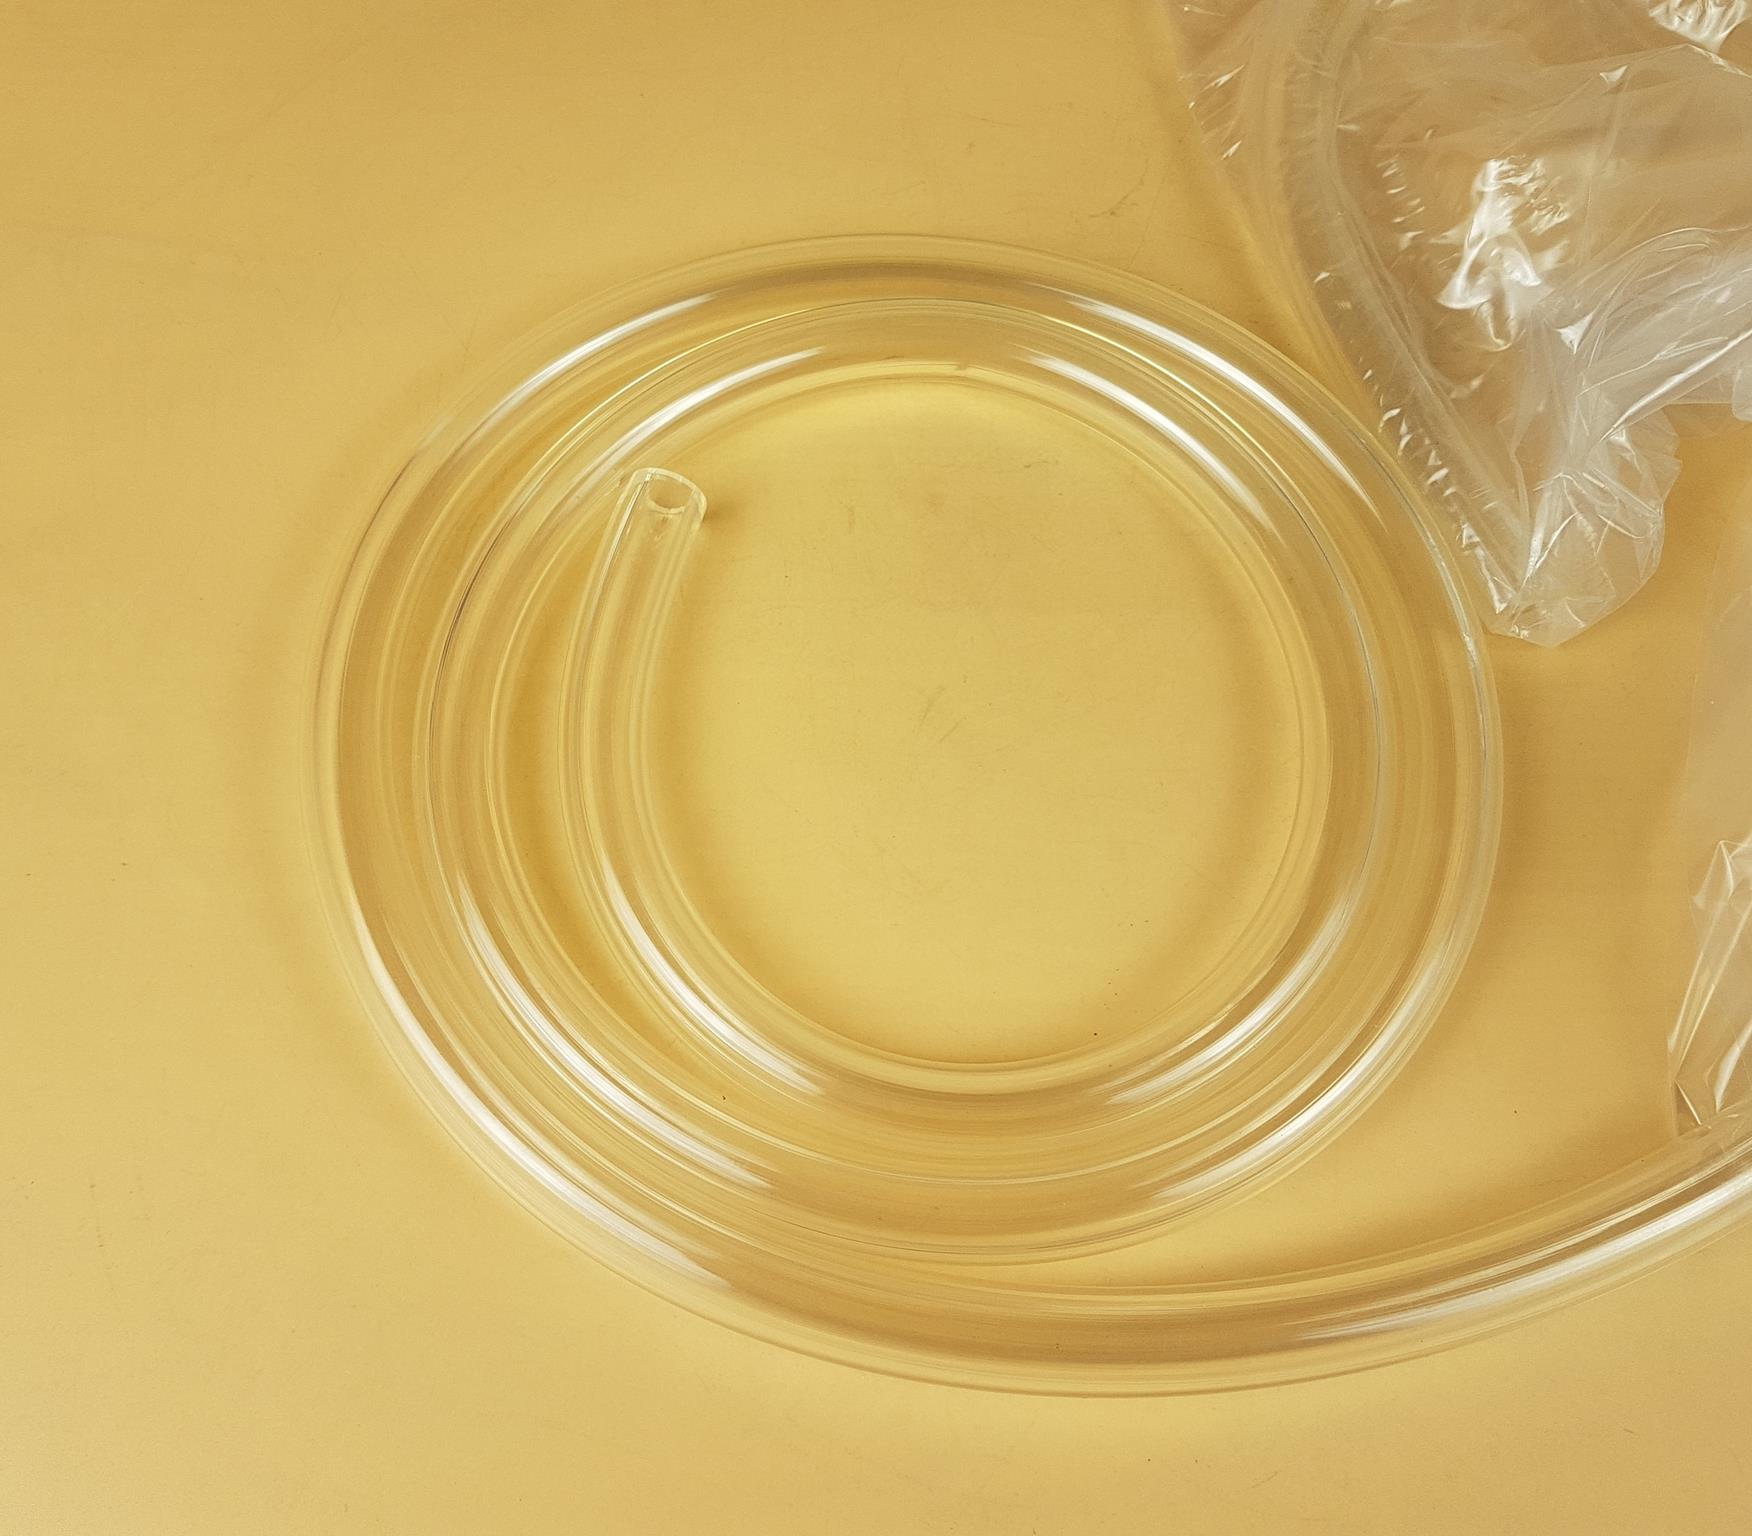
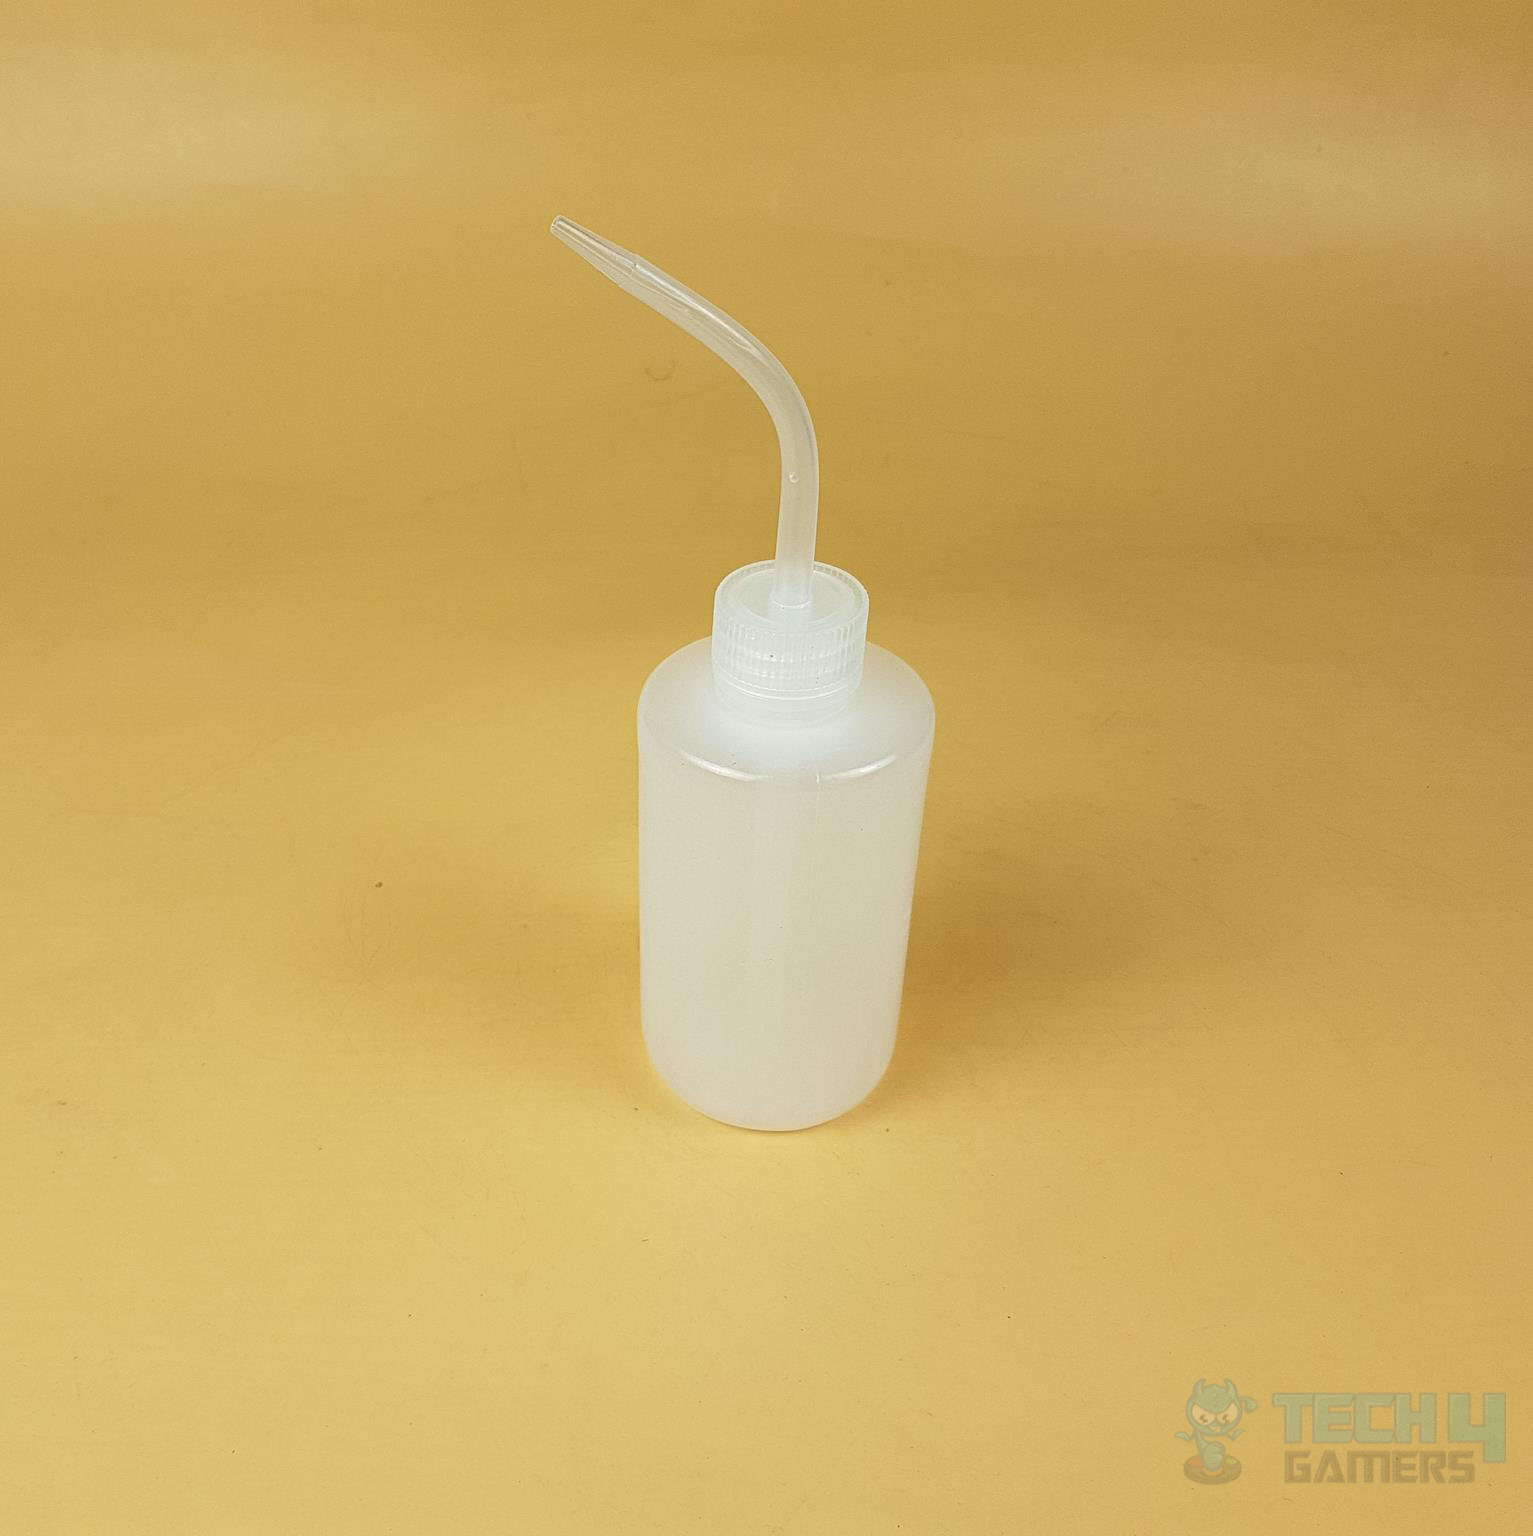
These are transparent tubes made of PVC material. They have an operating temperature range of -20°C to 80°C. These are in the size of 16/10mm. There is a filling bottle provided with the kit.
| Product Name | RAIAQUA-T1 |
| Q’ty | 2 bottles |
| Volume | 500 ml |
| Main composition | Water 95% & Propylene glycol 5% |
| Anti-freezing temperature | -5°C |
| Color | Transparent |
Raijintek is shipping RAIAQUA-T1 coolant bottles (500mlx2) with these kits. We did not get these bottles due to shipping restrictions from China.
Installation
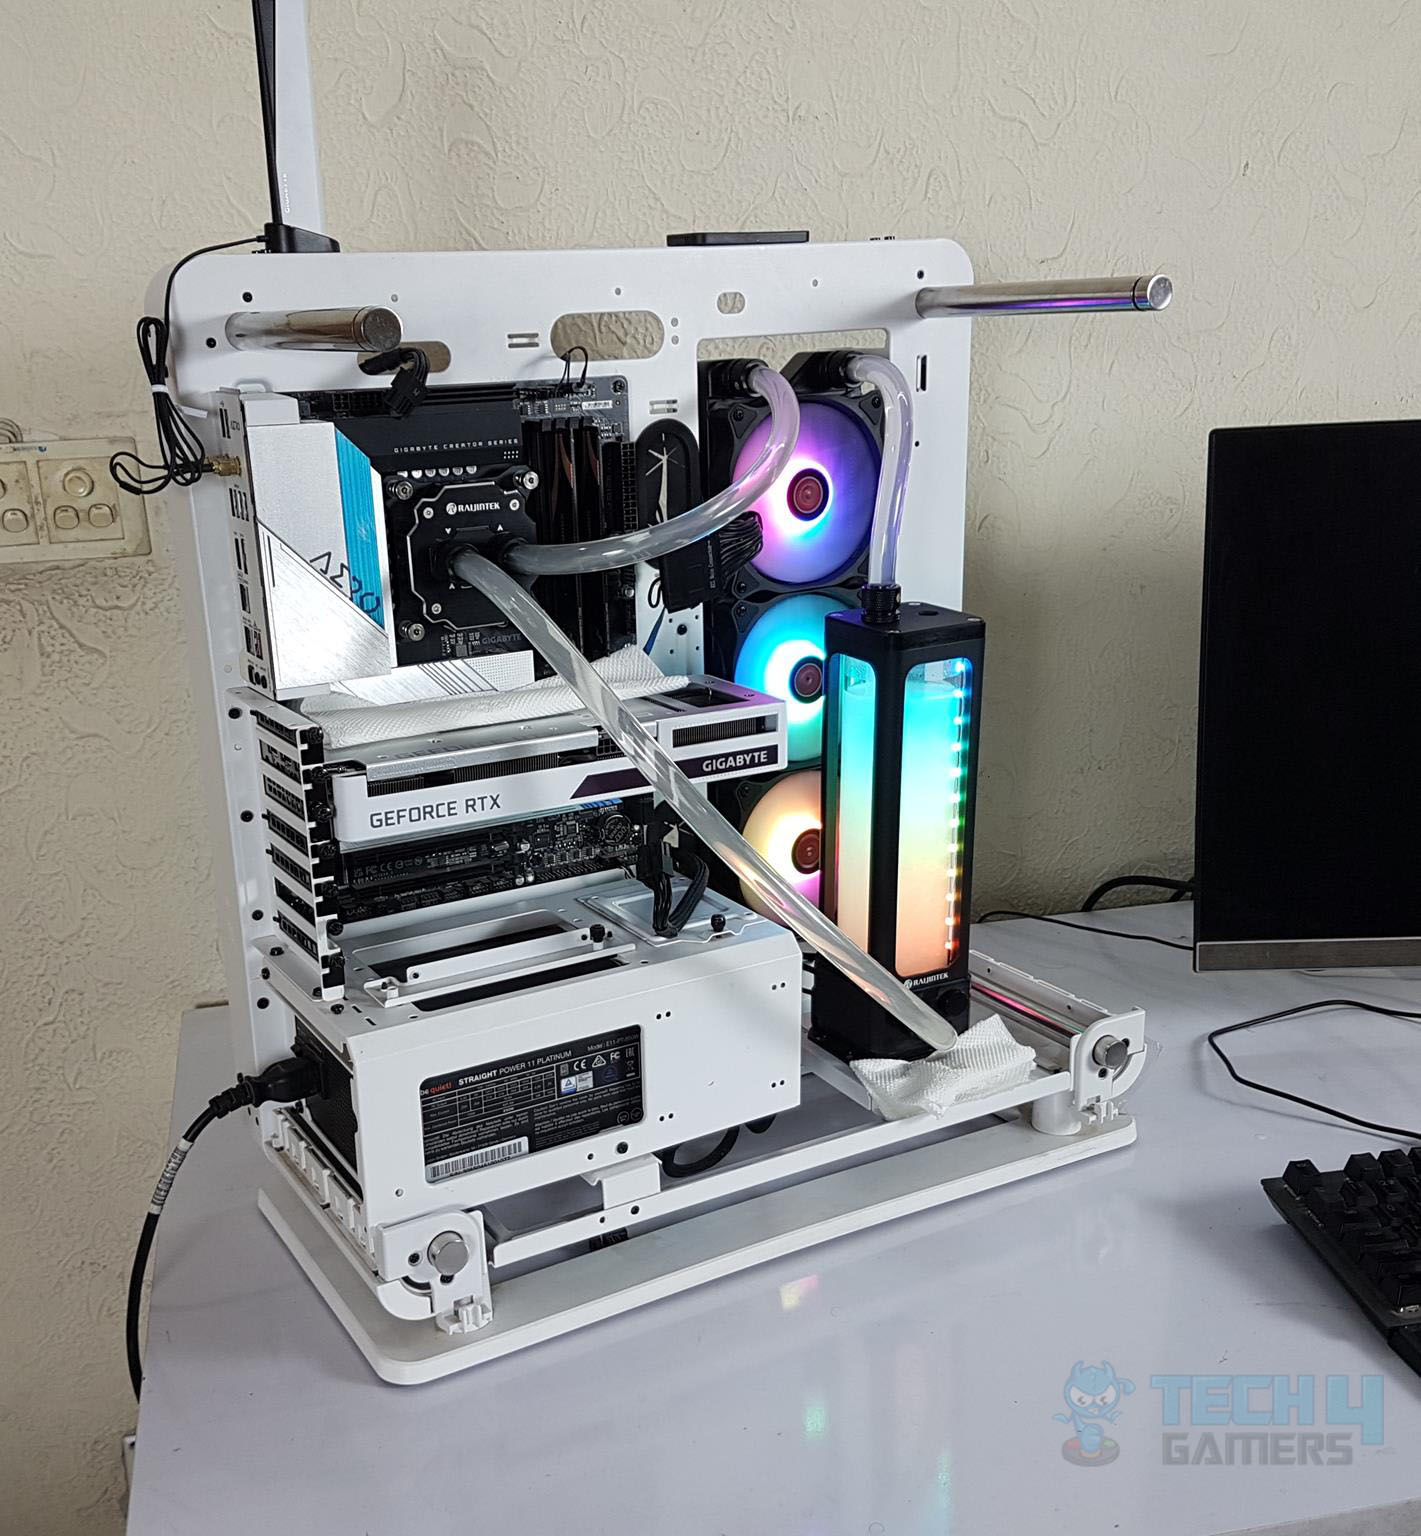
The kit is used on Intel LGA1700 socket using GIGABYTE Z690 AERO G motherboard and Intel i7 12700k CPU. The installation of the water block is not convenient.
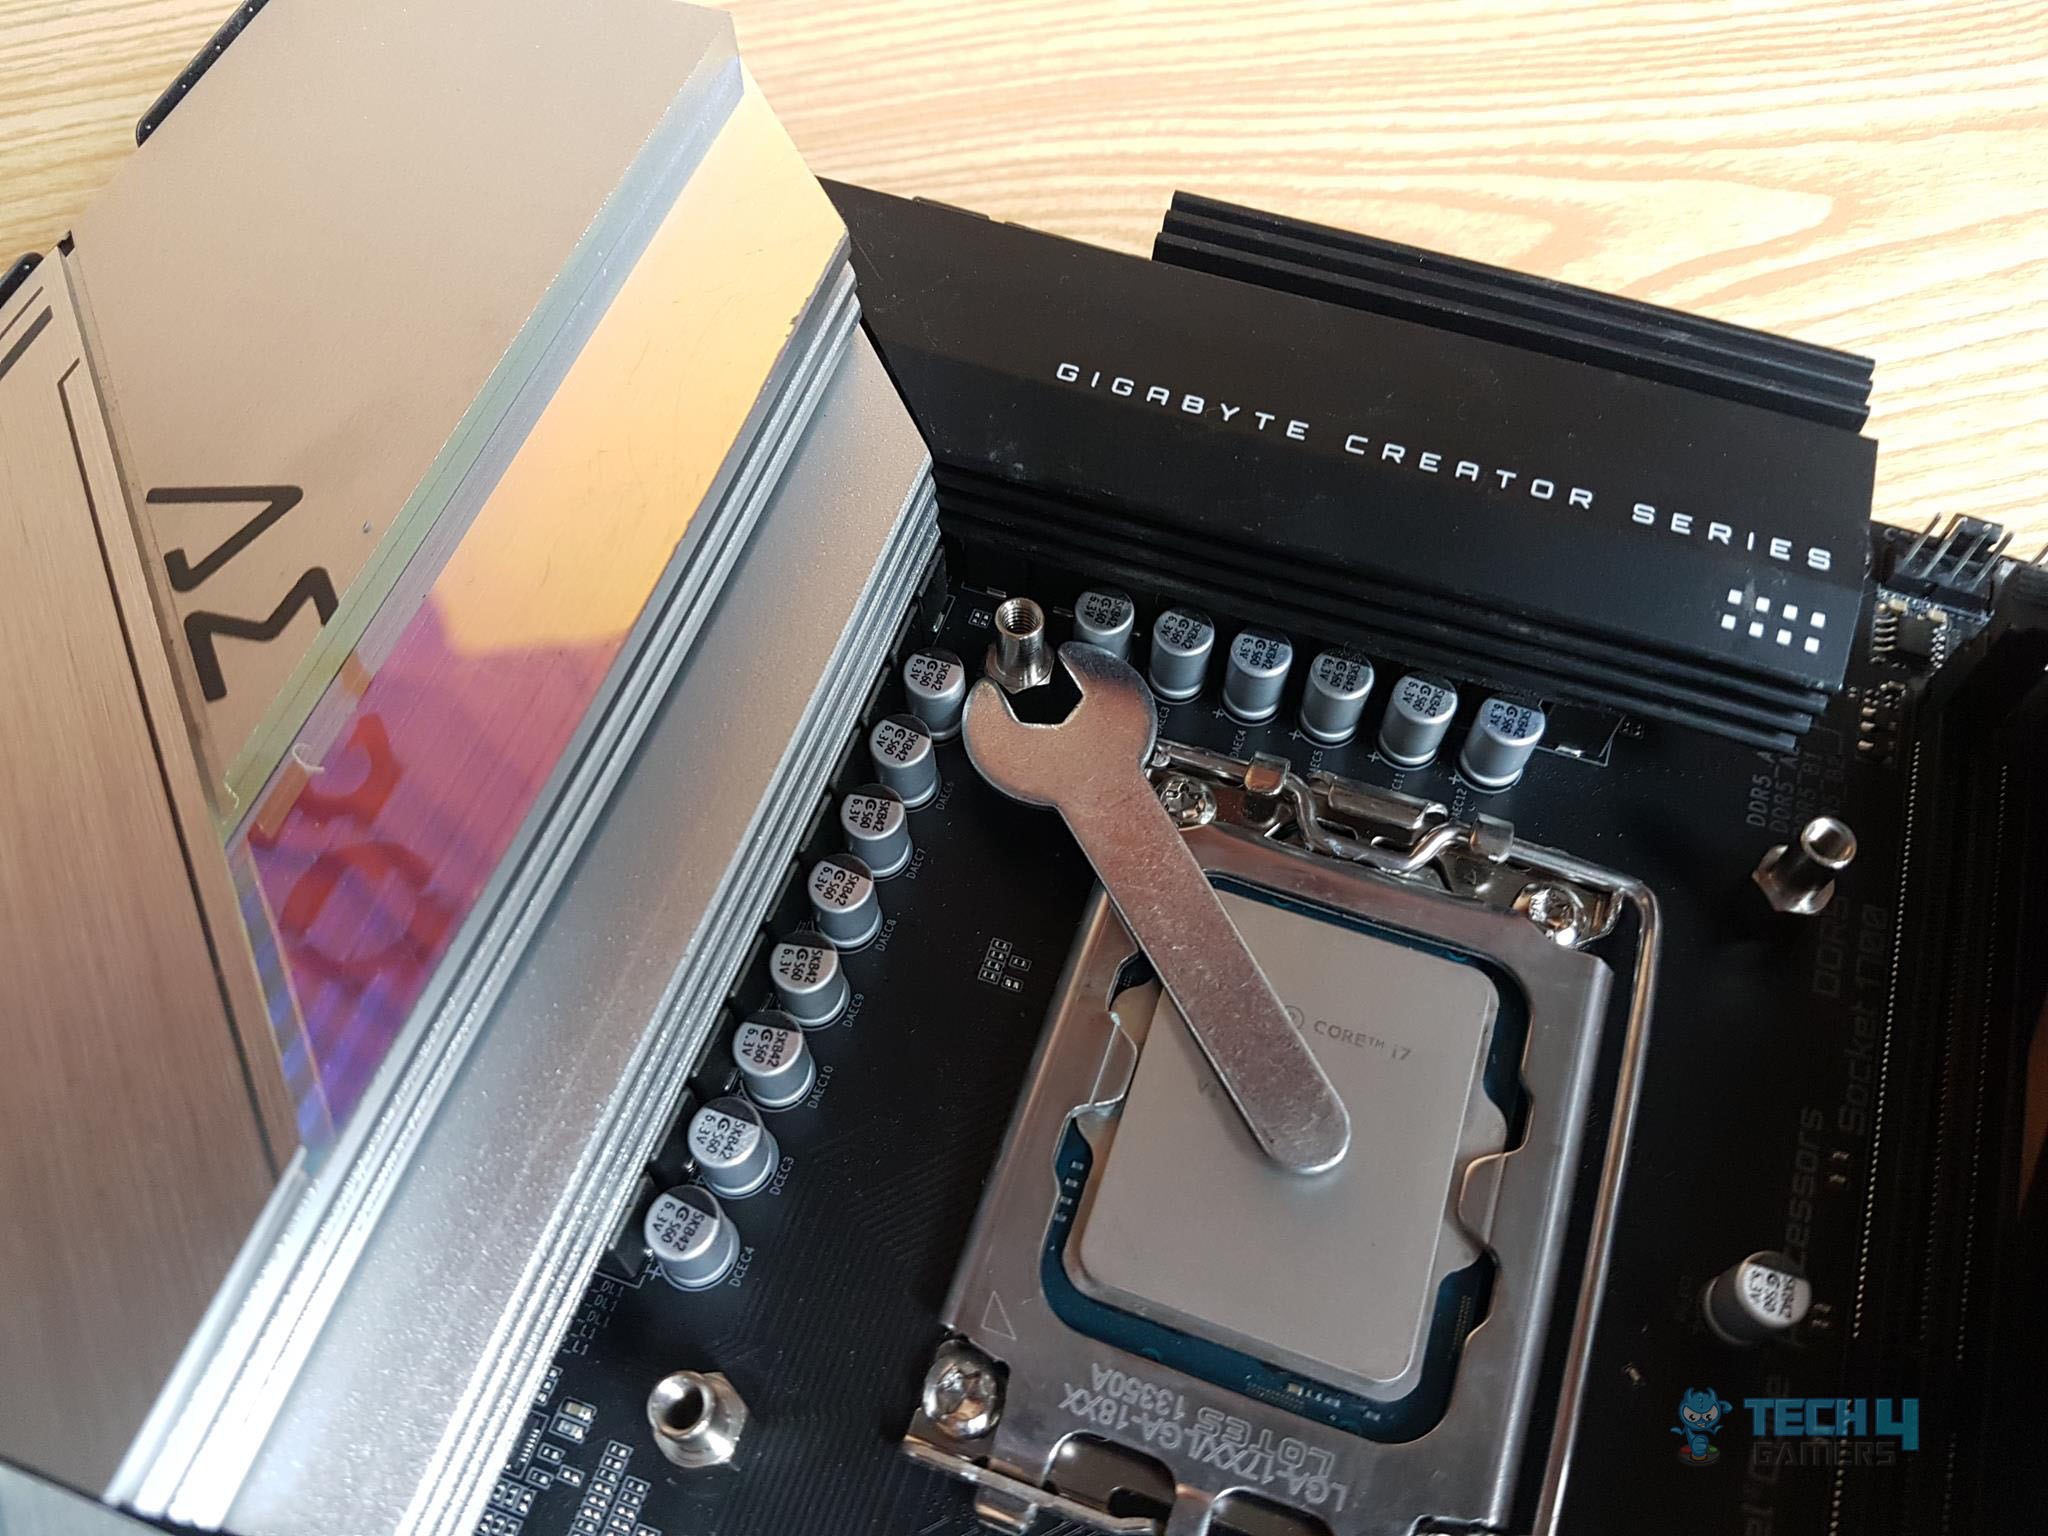
The pillars are supposed to be tightened using the provided wrench. As can be seen in the picture, this wrench touches the capacitors on the top right side of the socket. We have a space-constrained area here.
I would have preferred a socket wrench design over this wrench. The socket wrench would be placed directly over the pillar/standoff and can be tightened using the screwdriver.
There is no 24-pin ATX bridge provided with the kit so you will have to improvise. This bridge enables the user to start the PSU without powering the entire build and comes in handy for filling the loop and leak-testing it.
These are small details that matter. Other than that, there is no issue or complaint in the overall installation.
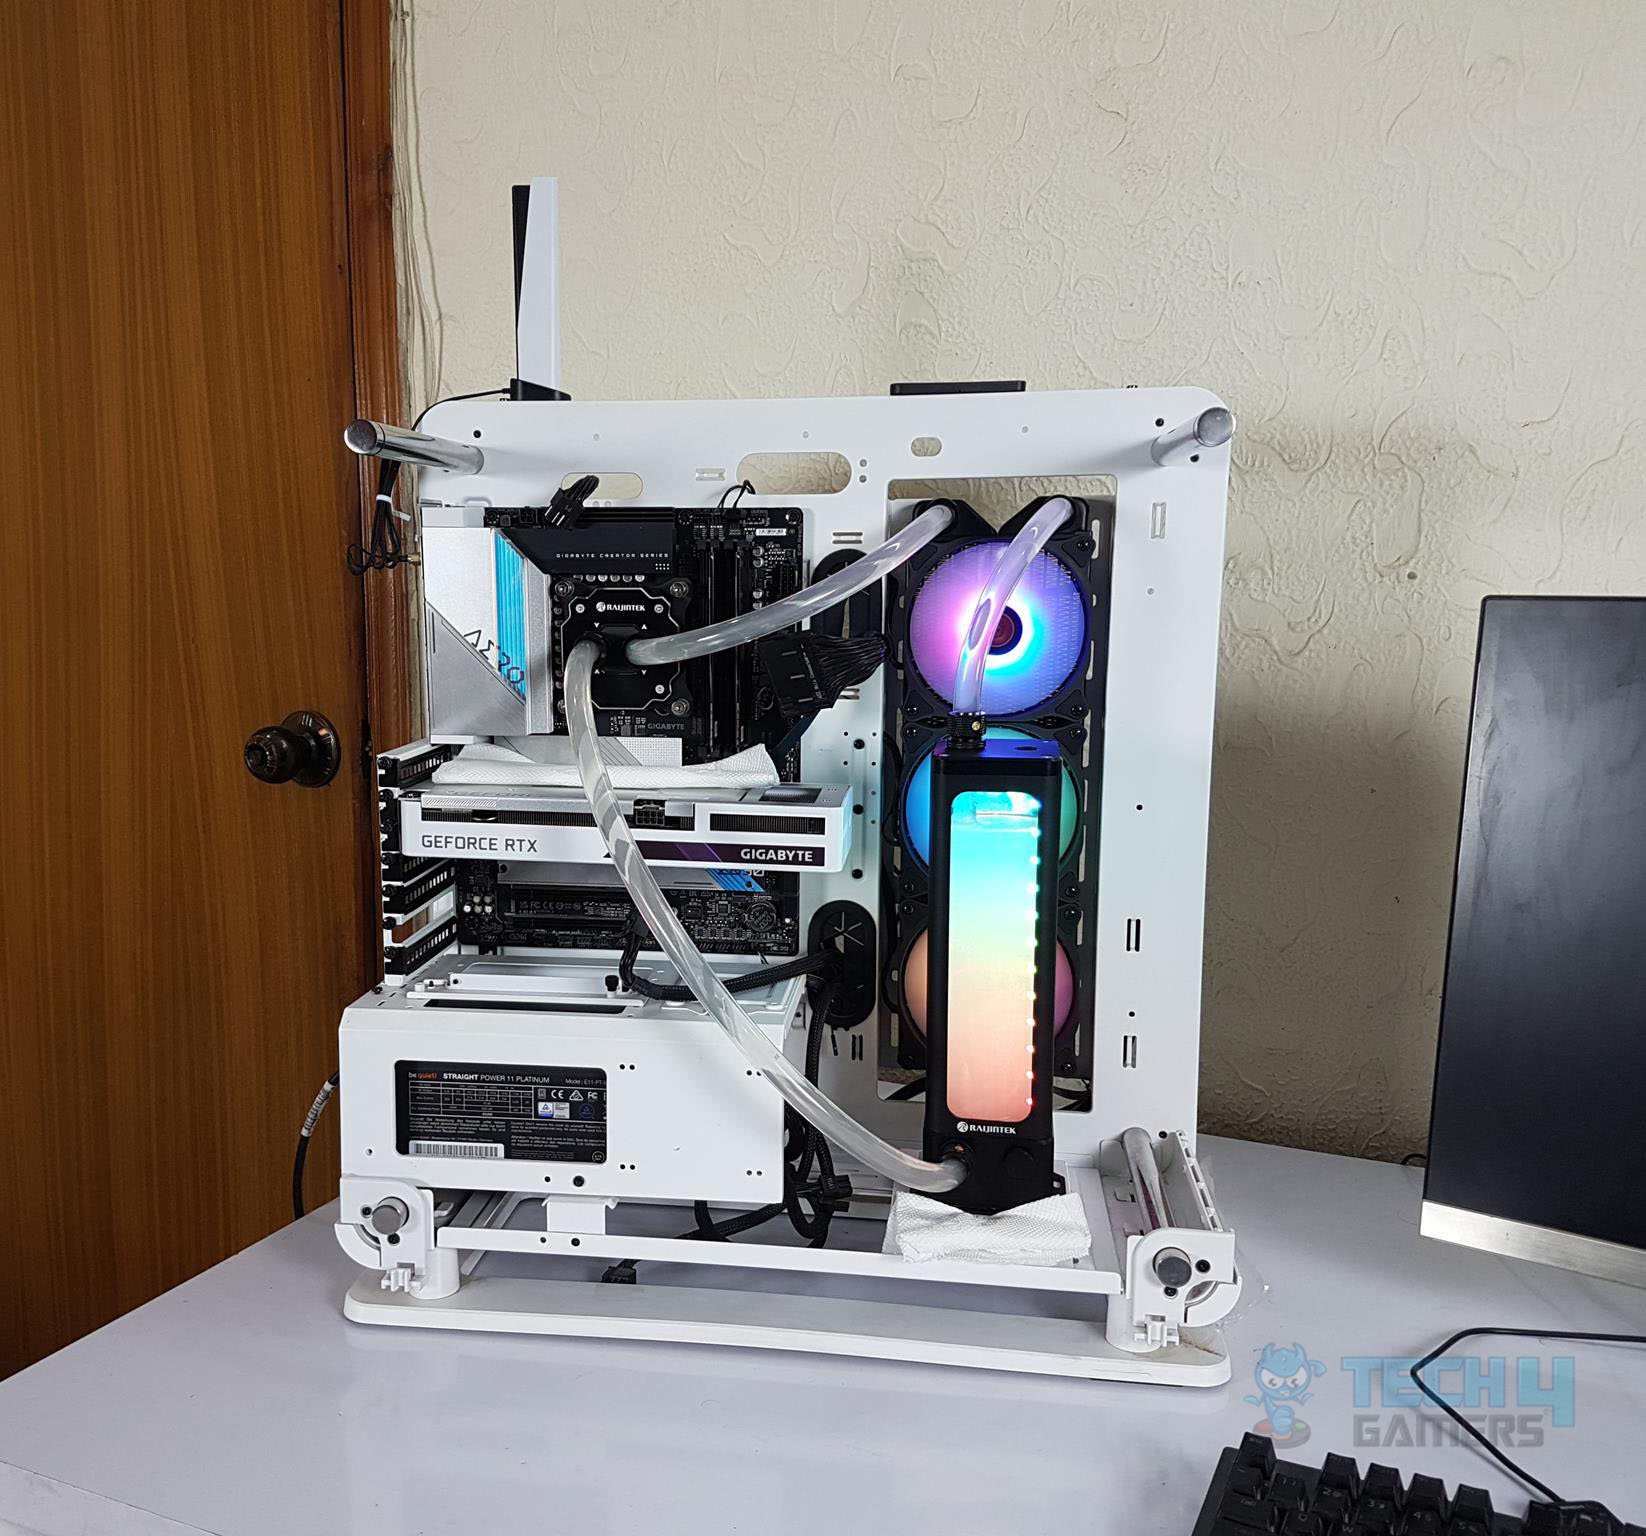
Here are a few pictures of the test build:
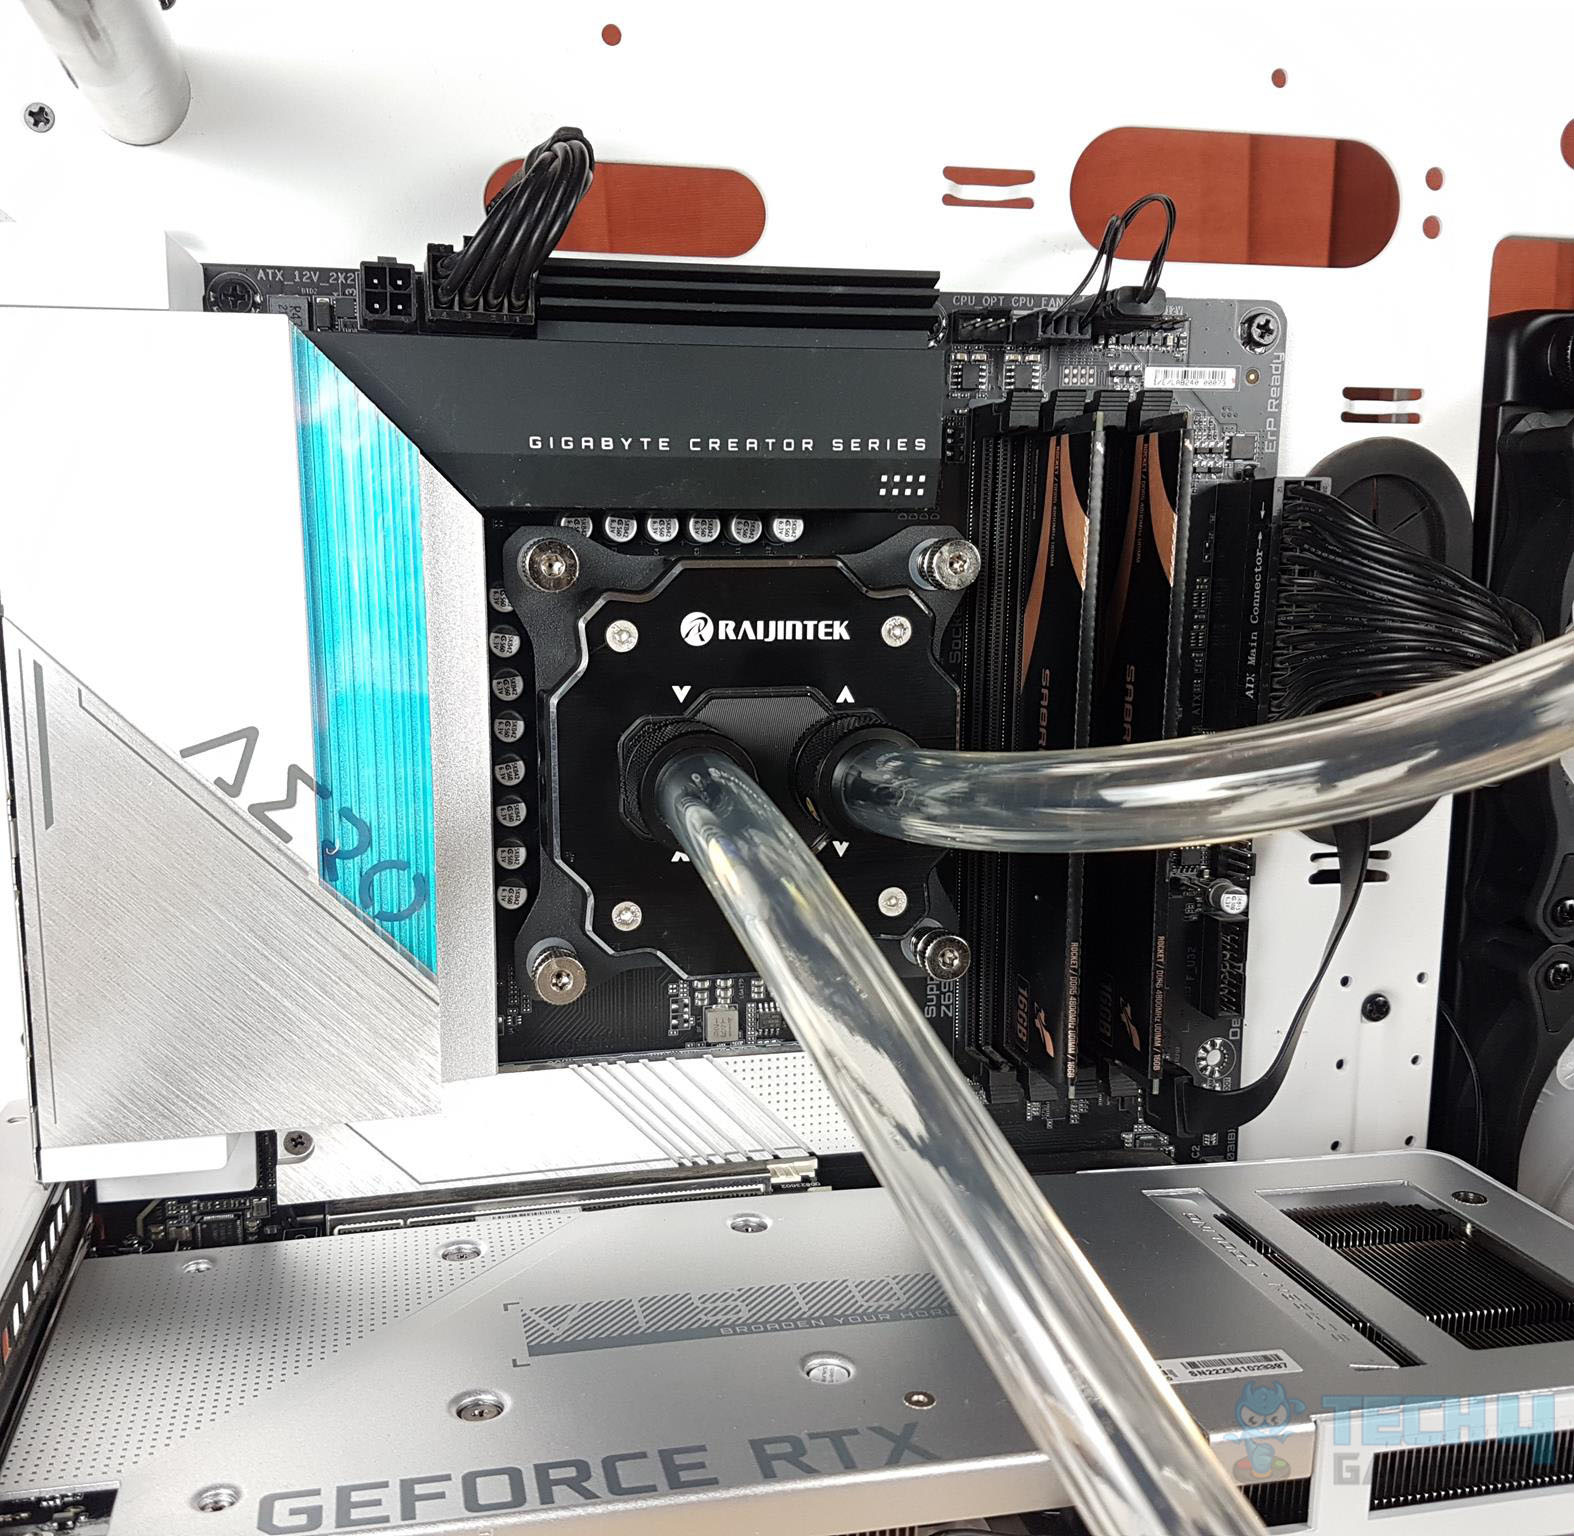
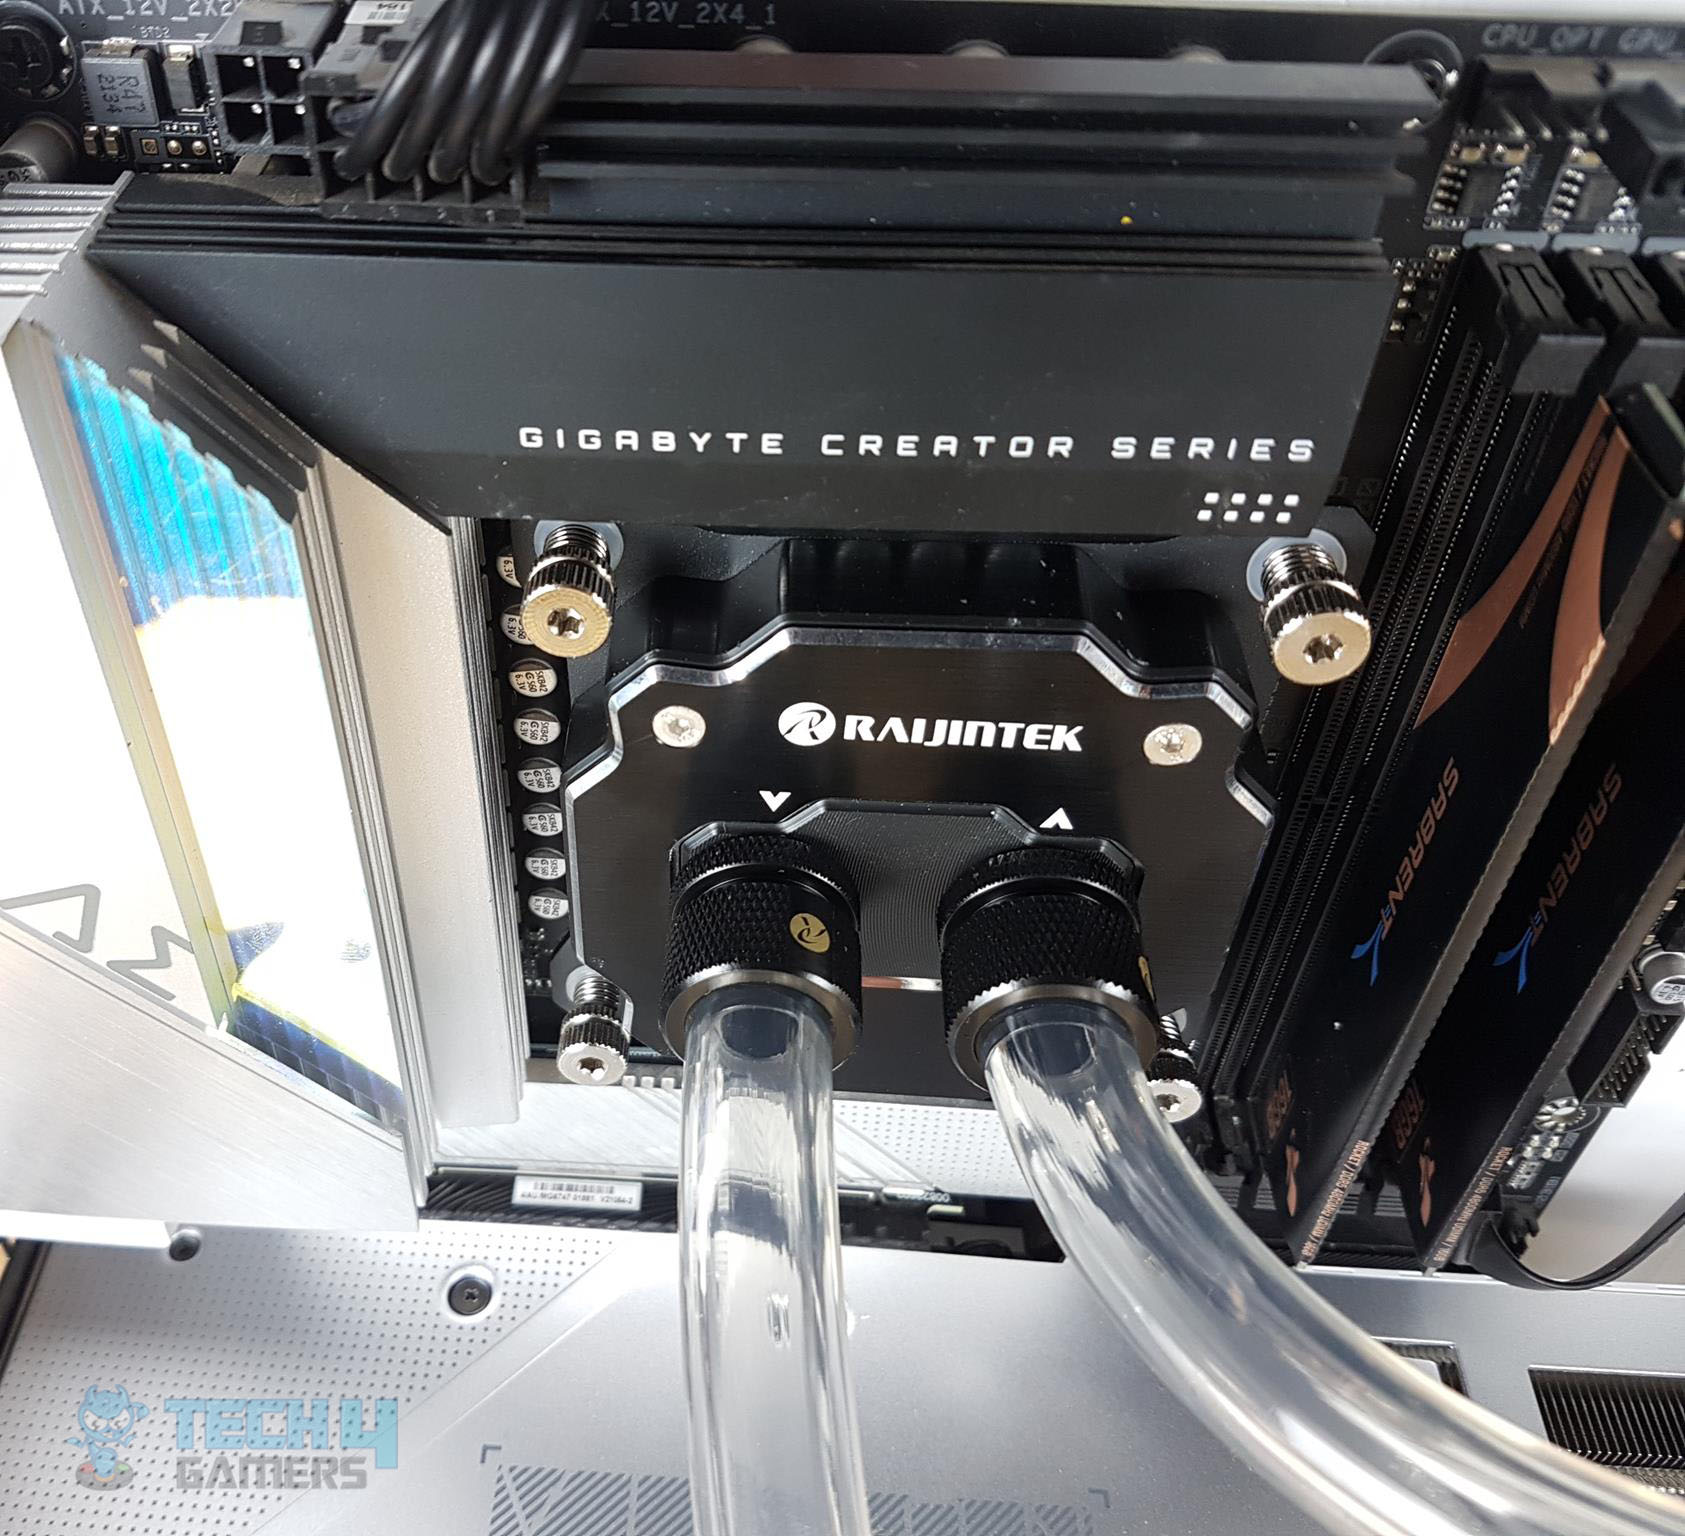
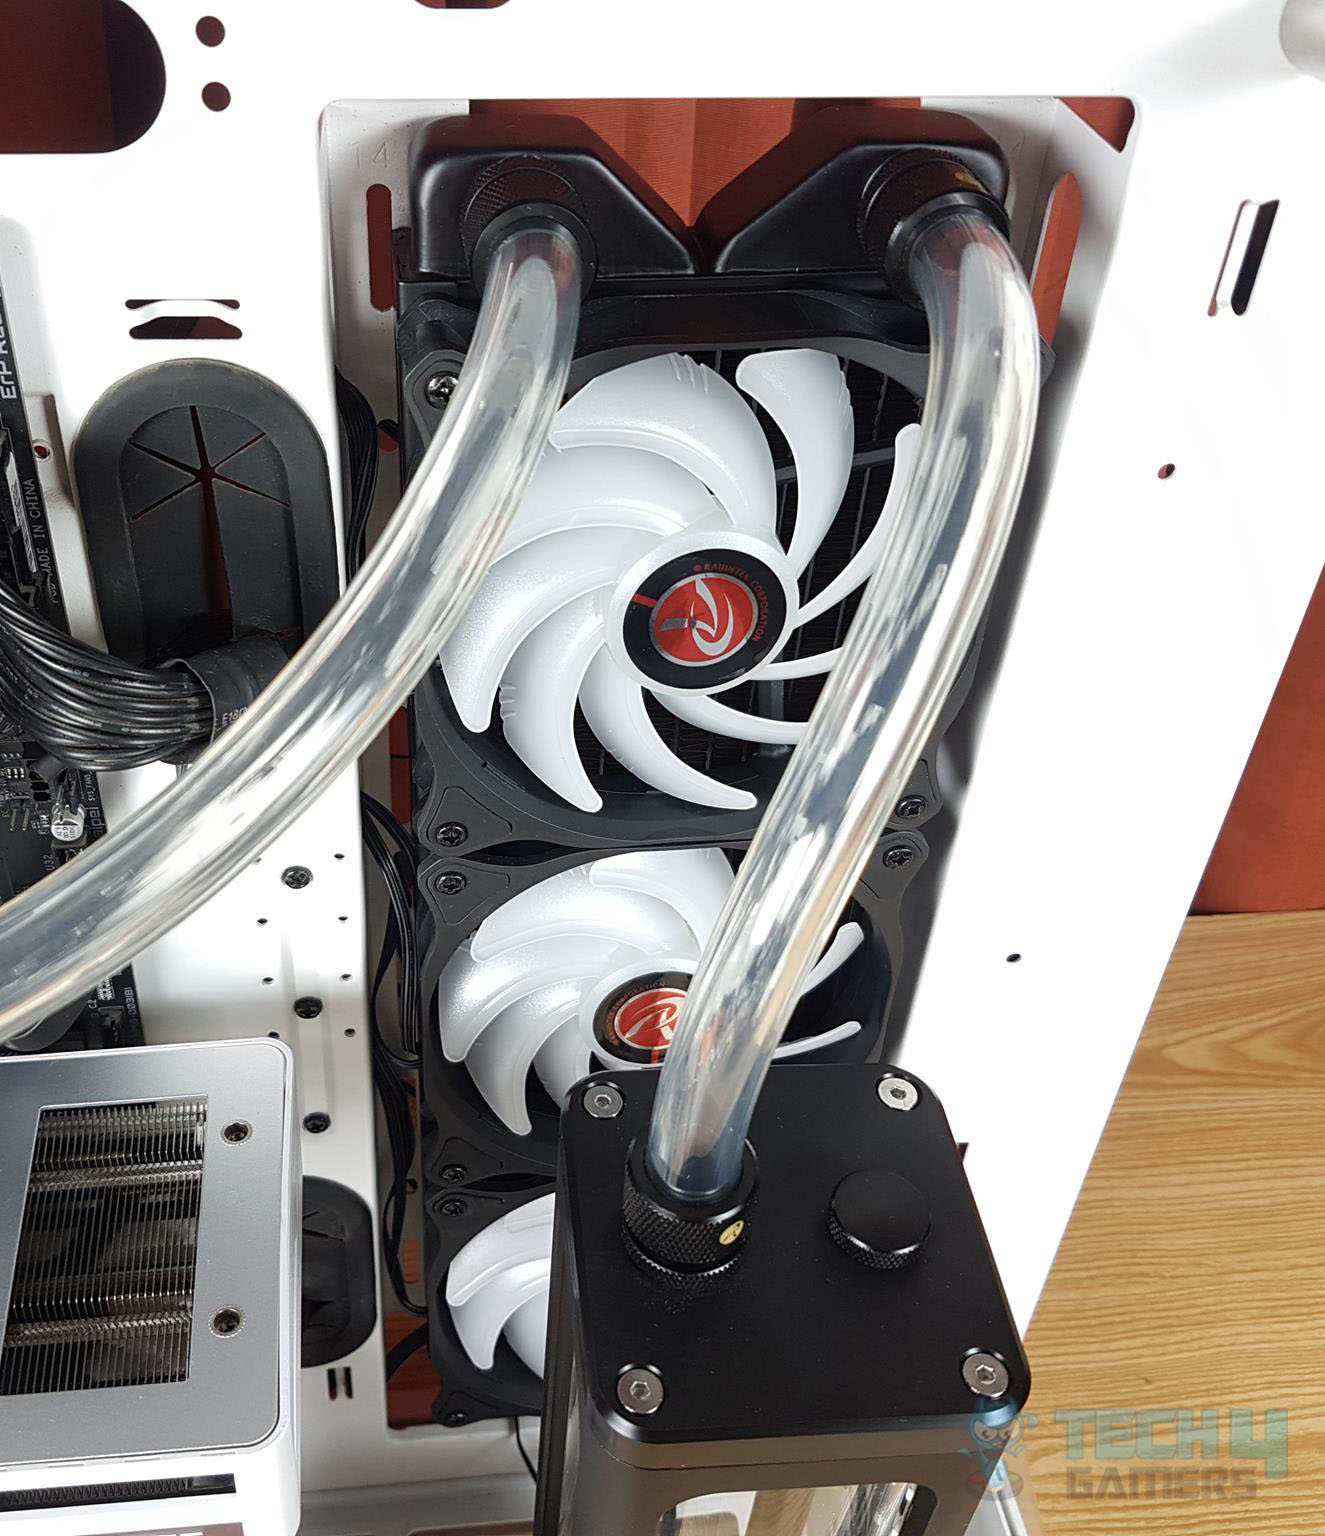
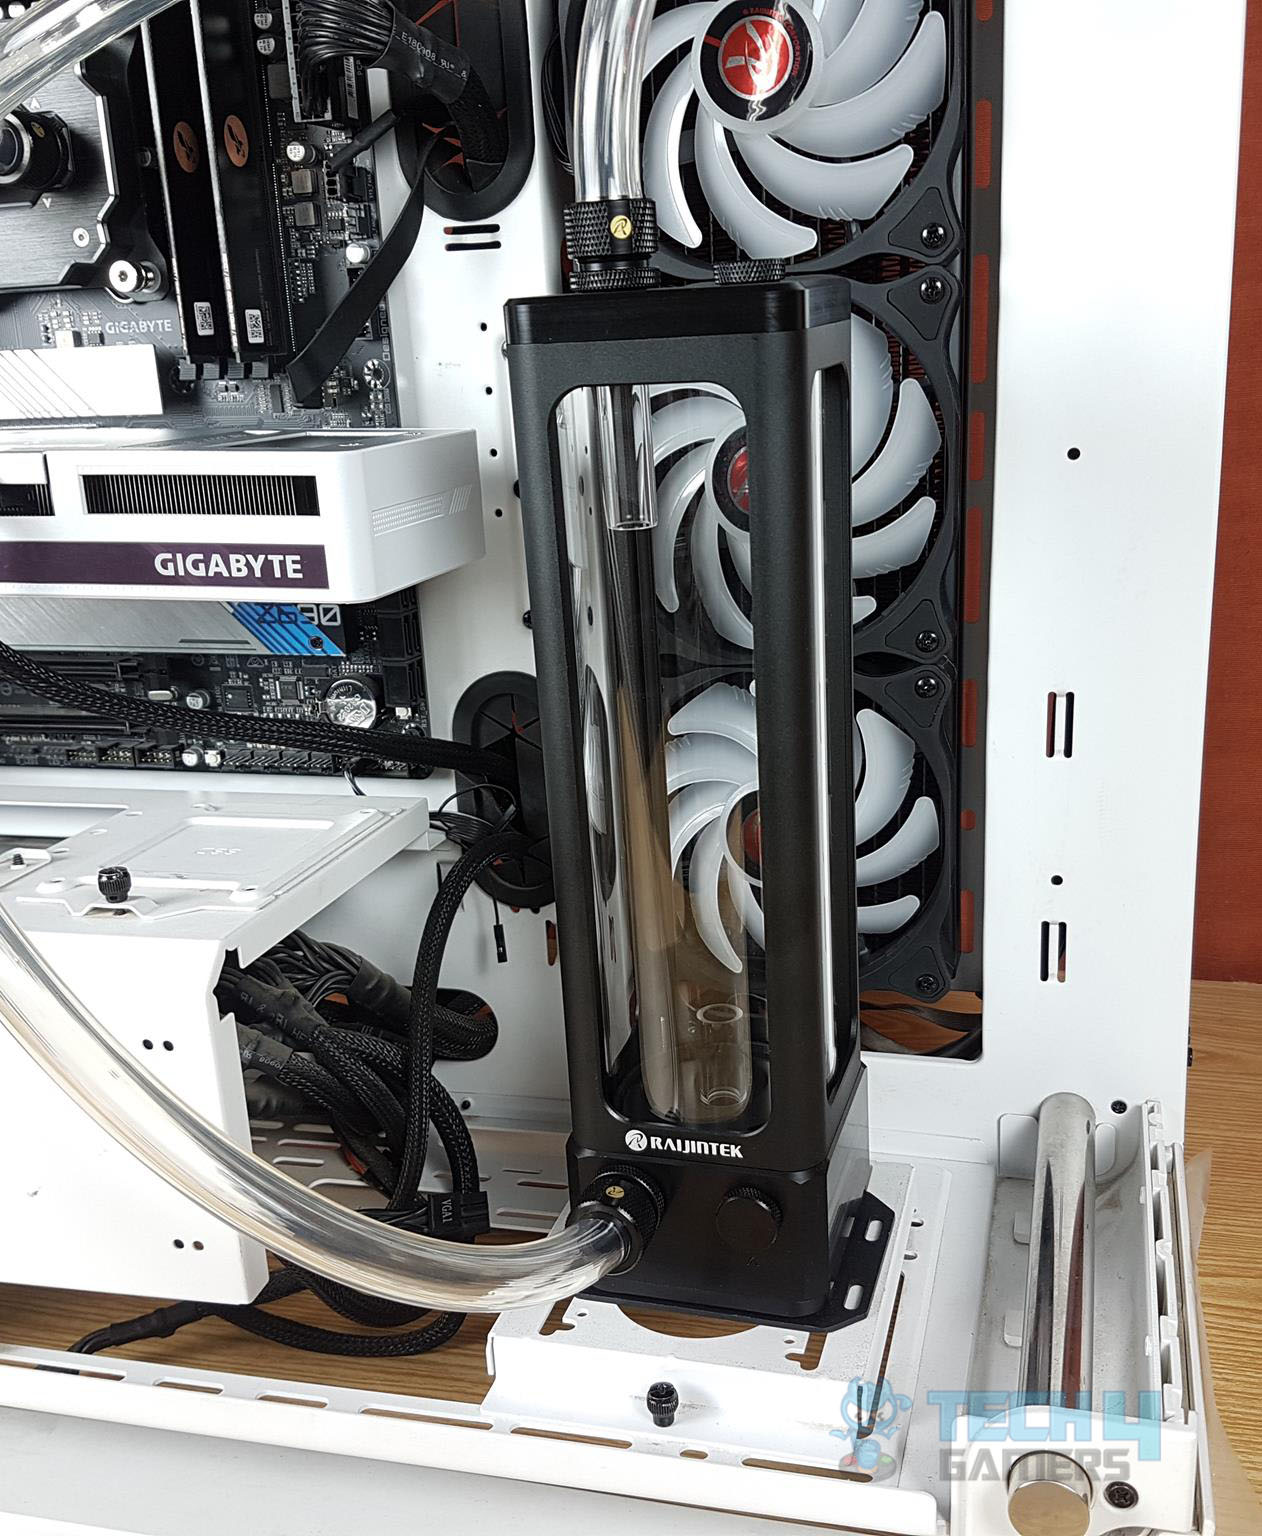


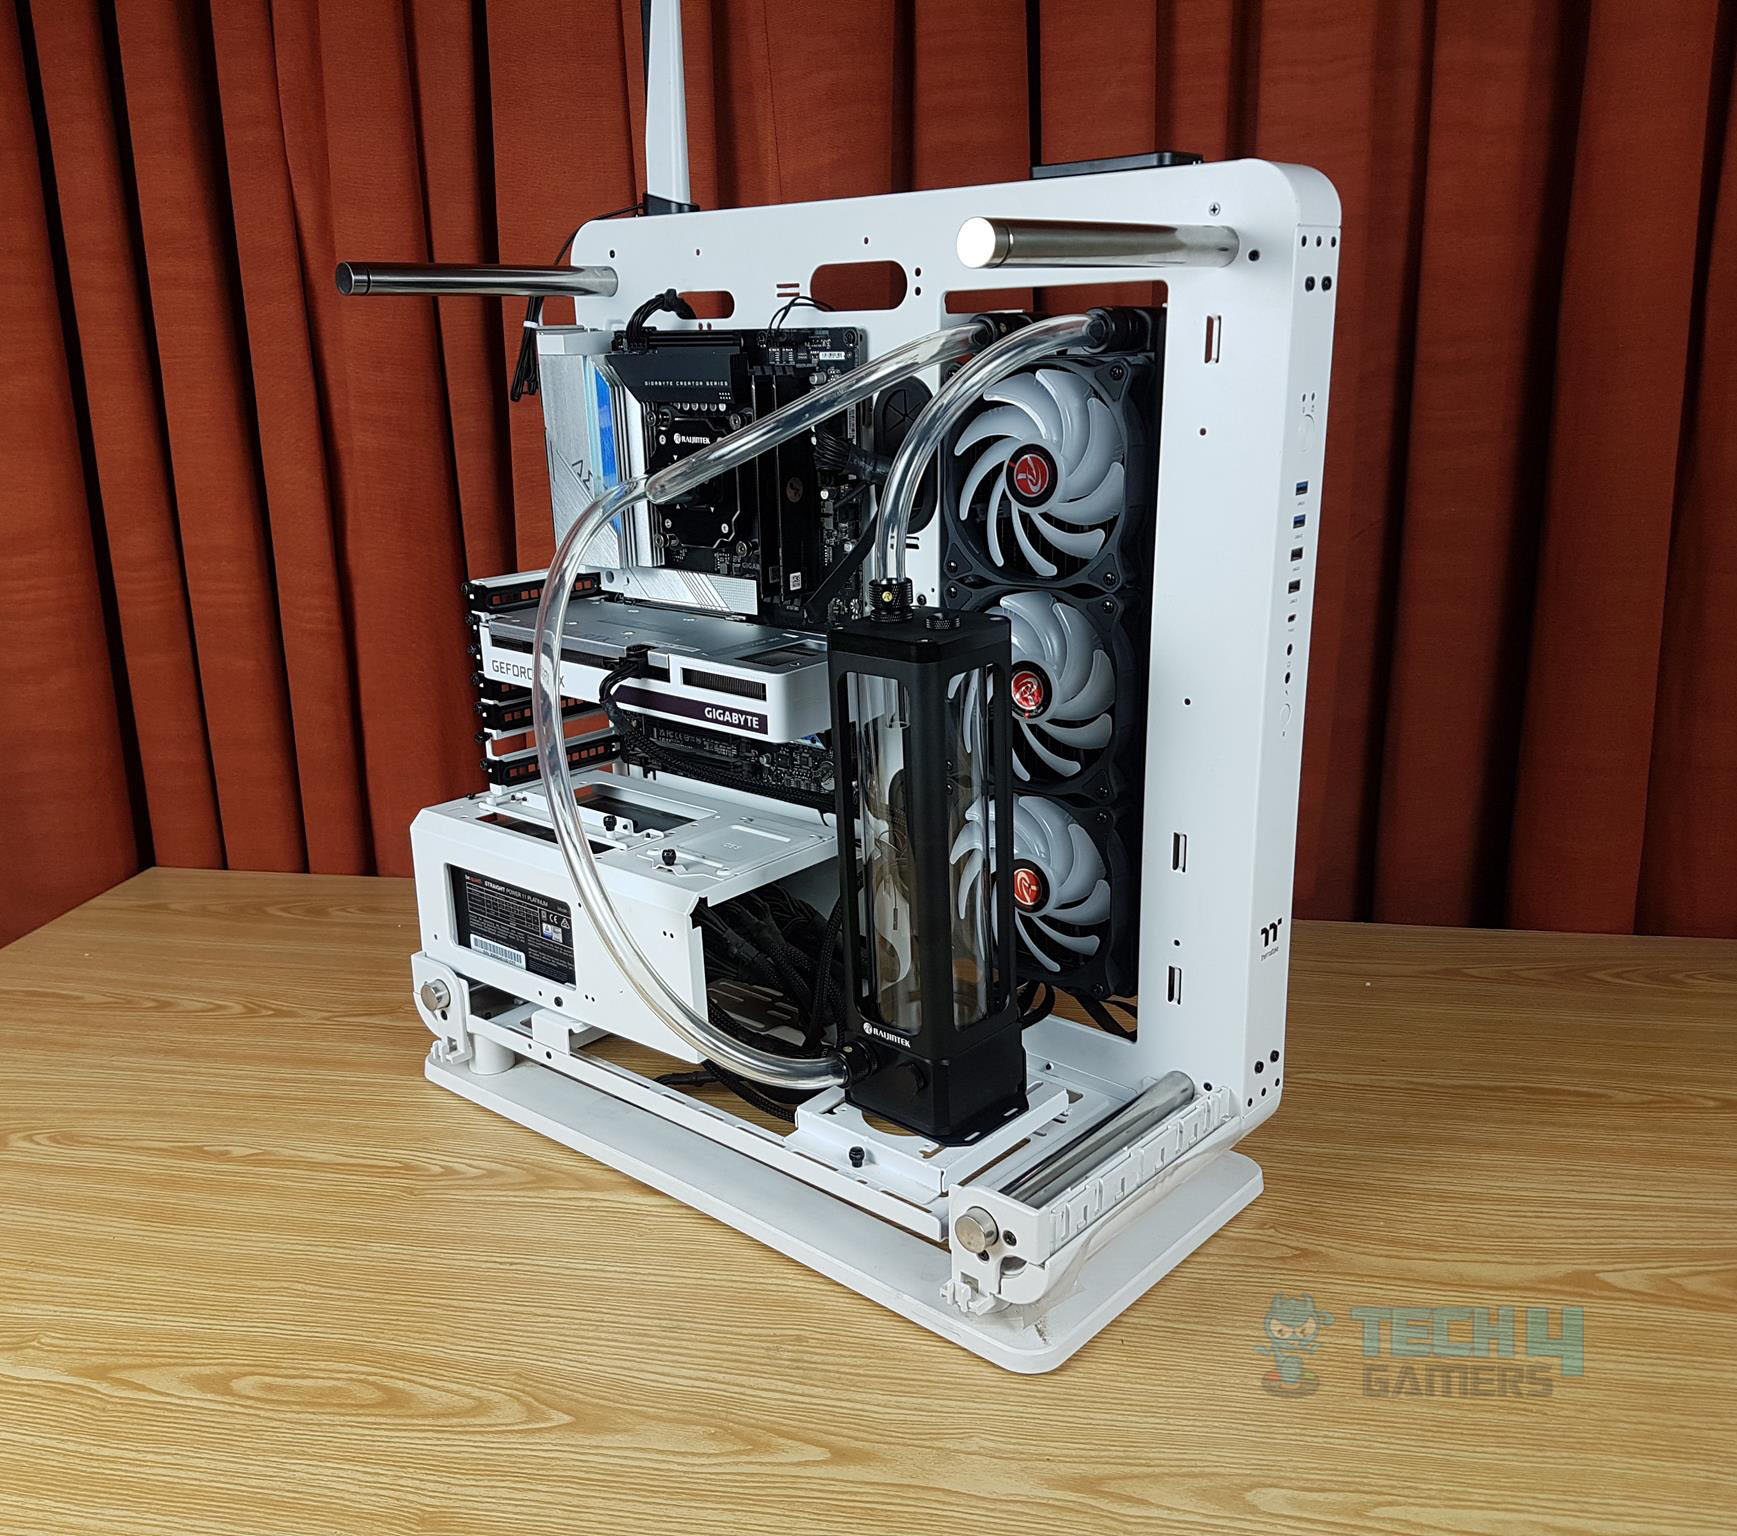

The loop is configured such as the coolant is moved to the CPU first. From the CPU, the hot coolant goes into the radiator from where the coolant comes into the reservoir from the top and the cycle repeats itself.
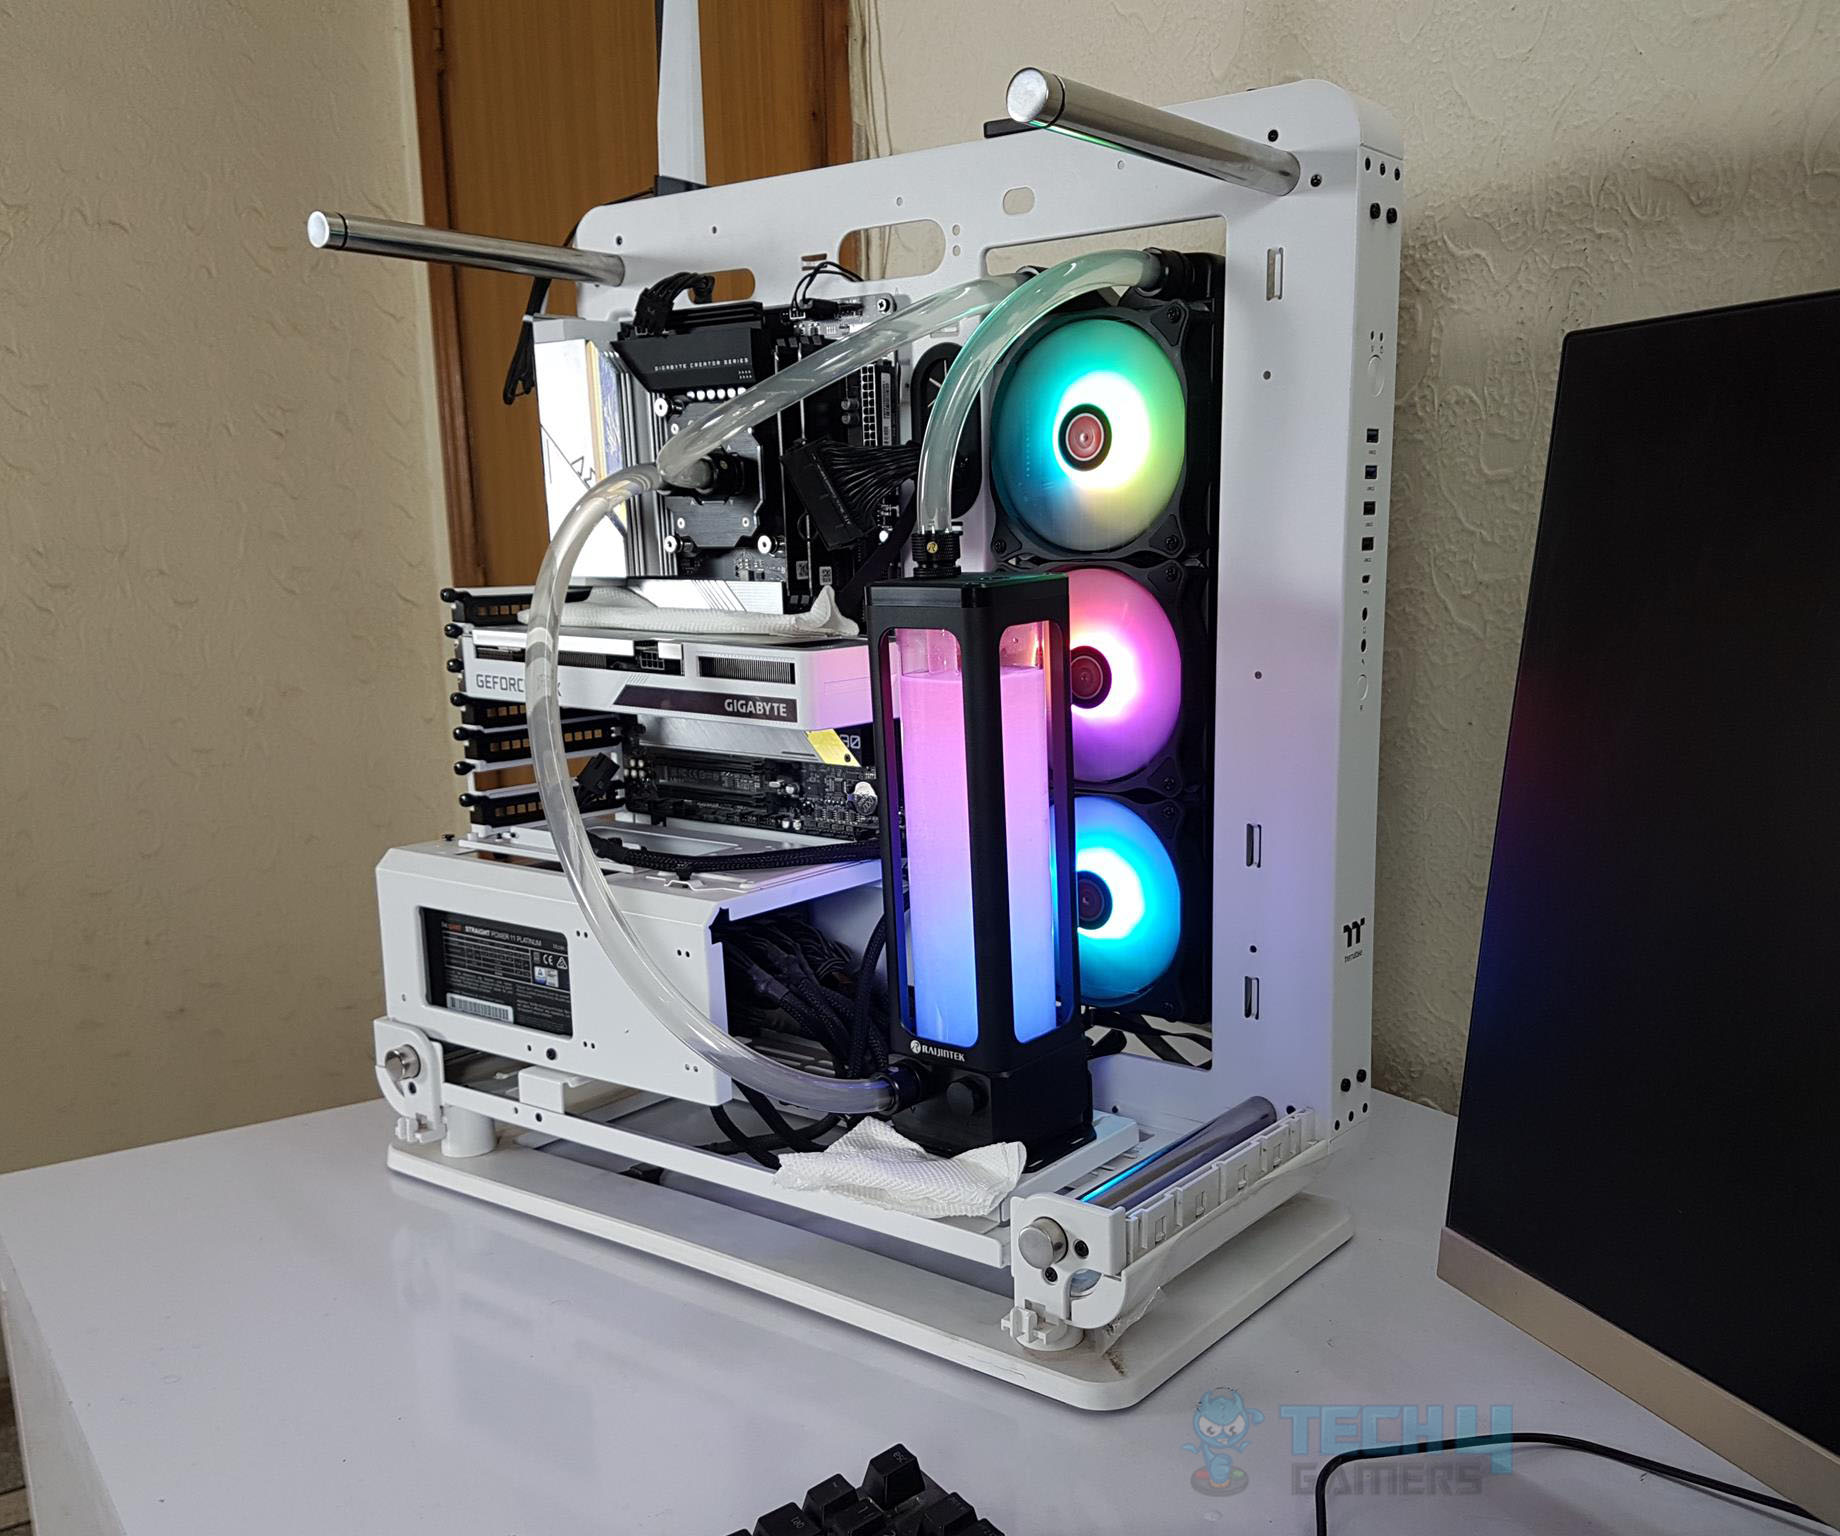
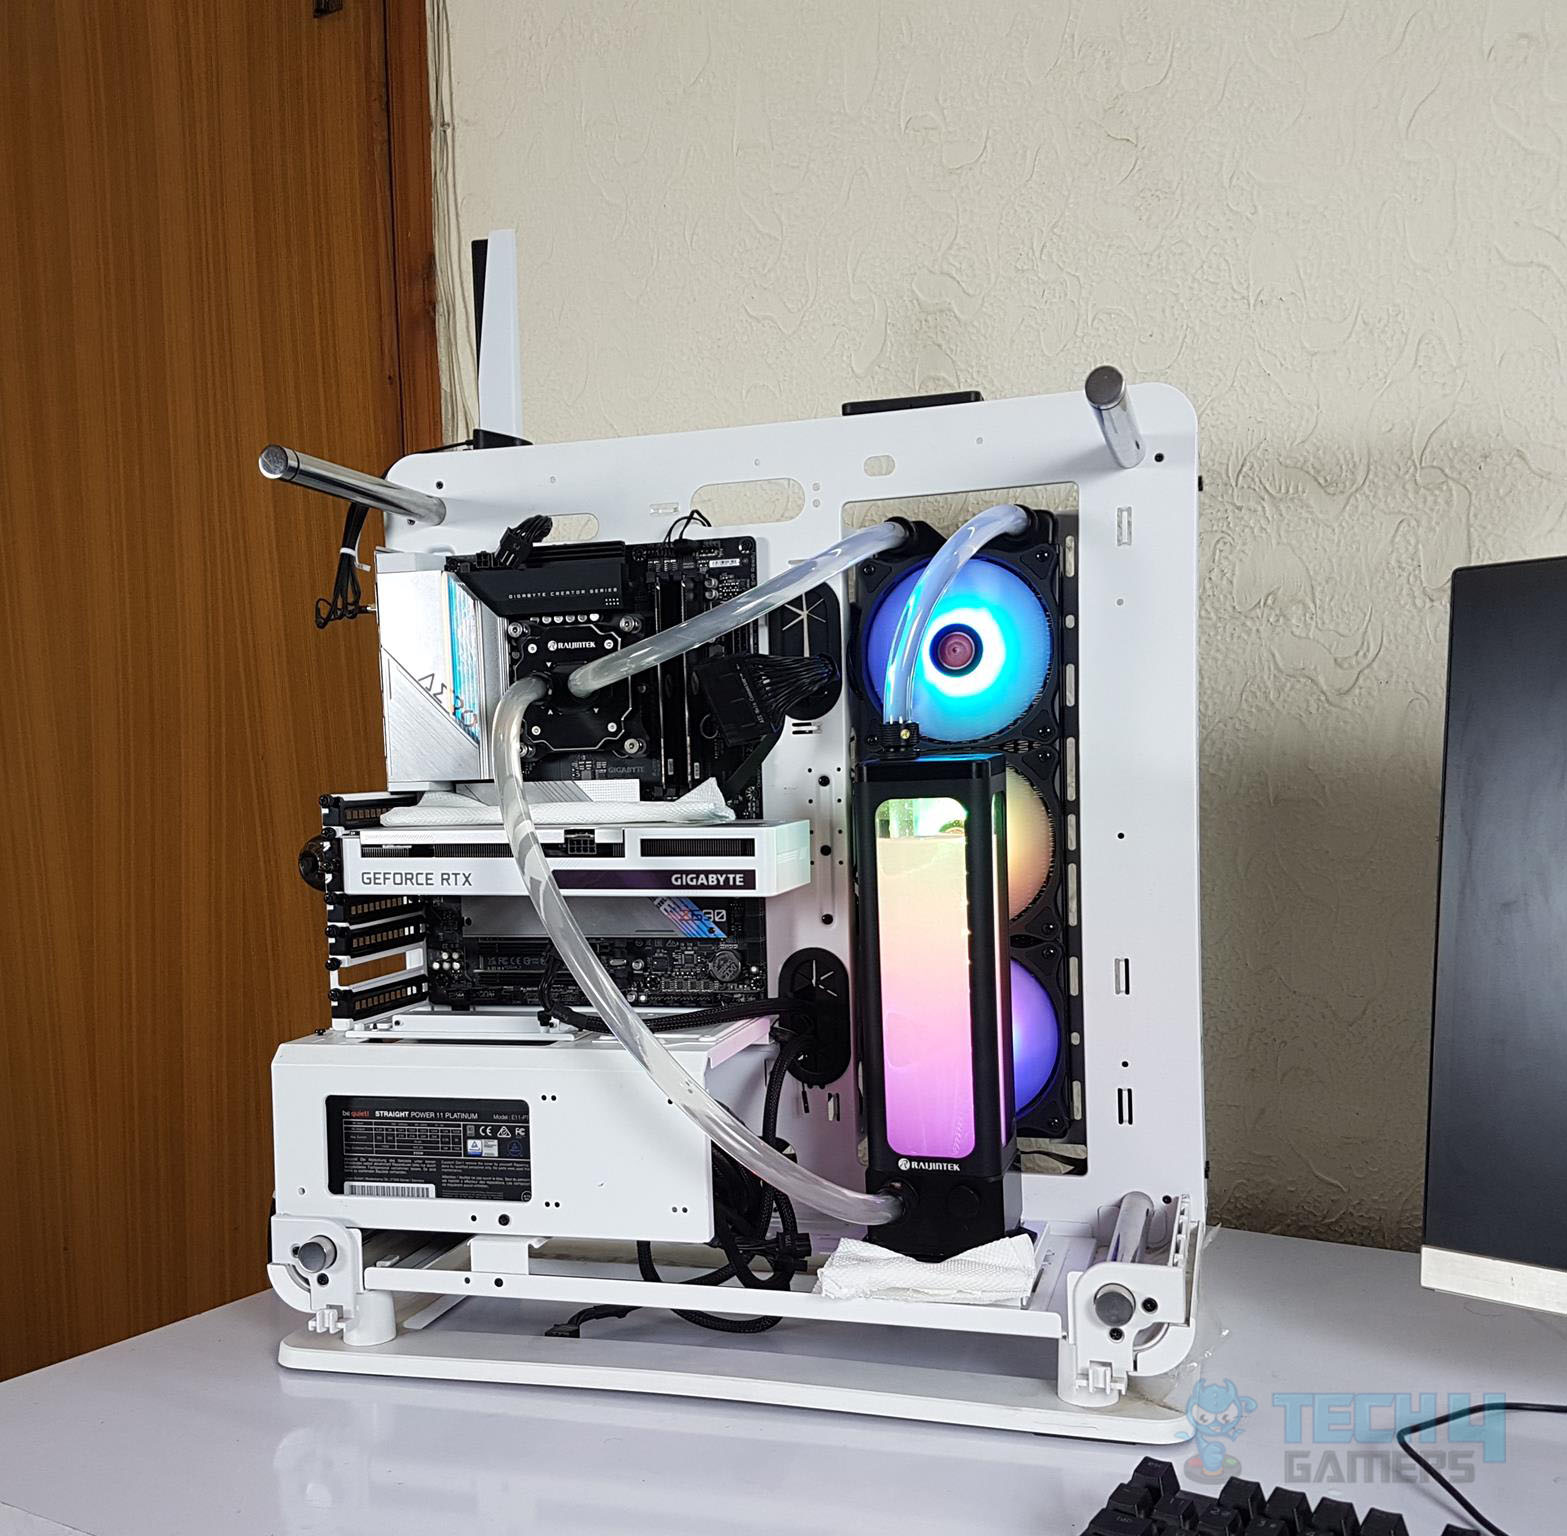
A-RGB Lighting
Here are a few pictures of the loop lighting.
Testing
Here is the test build configuration:
- Intel i7-12700k
- GIGABYTE Z690 AERO G
- GIGABYTE GeForce RTX 3060 VISION OC Rev 2
- Sabrent Rocket 2x16GB DDR5
- Sabrent Rocket Q 500GB NVMe SSD [For OS]
- Sabrent Rocket 4 Plus 2TB NVMe SSD [For Data]
- be quiet! Straight Power 11 850W Platinum PSU
- Thermaltake Core P6 TG Snow Edition in an open frame layout
- RAIJINTEK SCYLA ELITE KIT
Here is the settings table for testing:
| P-Cores Clock (MHz) | 4800 All Cores |
| E-Cores Clock (MHz) | 3800 All Cores |
| VCore (V) | 1.140V [Overrides to 1.183V] |
| Turbo Boost | Disabled |
| C-States | Disabled |
| Speed Step | Disabled |
| Thermal Paste | Noctua NT-H1 |
| Thermal Paste Application | 4 small and 1 large dots on the IHS. |
| Test Run Time | 20 minutes CINEBENCH R23 |
| Idling Time | 10 minutes |
| Fan Speed | 100% PWM Duty Cycle |
| Header | CPU_Fan/CPU_Opt Headers |
| Software | CINEBENCH R23 |
Here are the results:

The above graph shows the result of the P-Cores average temperature under Non-AVX load. The Scyla Elite 360 did well.
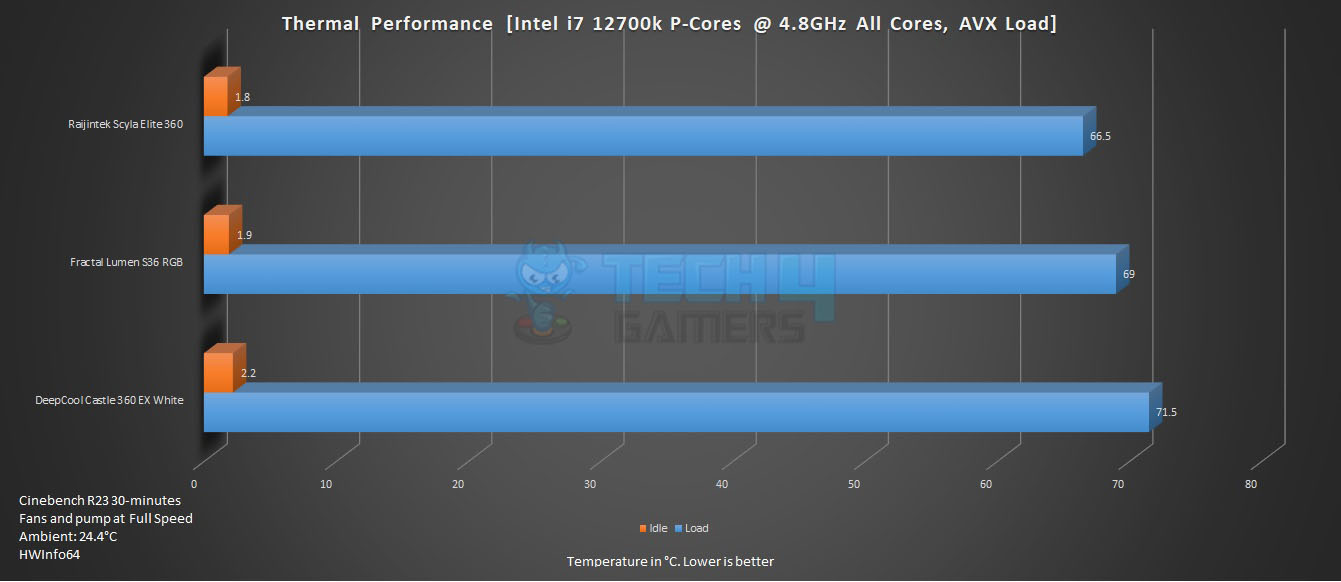
A good result here as well.
The overall noise output was not loud.
Should You Buy It?
Buy It If
You’re a DIYer and an enthusiast: If you enjoy building and customizing your PC, the RAIJINTEK DIY kit offers extensive customization options and high-quality components.
You want top-performance: The cooling potential of the RAIJINTEK DIY kit makes it a great contender for anyone who wants the most performance for their flagship CPU.
You plan to upgrade in the future: If you plan to expand your cooling loop in the future, the quality and compatibility of the components make it a flexible choice.
Don’t Buy It If:
You’re a beginner: The installation process, while straightforward for experienced builders, might be challenging for those new to PC building, especially due to the lack of certain tools like an Allen key and the potential complexity of custom loops.
You’re on a budget: Priced at $269.90, this kit may be overkill for those who are looking for more affordable cooling solutions.
Final Thoughts
The RAIJINTEK DIY kits feature the FORKIS series CPU water block, with the Elite version in black and gray, non-RGB. It has two G1/4” ports and is compatible with Intel LGA1700 and AMD AM4 sockets, but not TR4. The block includes necessary mounting hardware and an Intel bracket, with a nickel-plated copper base and a 3D micro-structure cooling engine.
The ANTILA DDC EVO RBW reservoir is tempered glass in a steel frame, with POM and aluminum components. It has 20 integrated A-RGB LEDs and four G1/4” ports, using a DDC pump rated at 4800 RPM, running at 4400 RPM, and features a ceramic bearing with a 50,000-hour lifespan. The pump speed is monitored but not controlled via the connector.
The CALORE ELITE CA360 copper radiator measures 393x120x27mm with a 17 FPI count and two G1/4” ports. It includes screws, anti-vibration gaskets, and requires flushing before use due to potential gunk.
The kit includes EOS12 RBW fans, with 120x120x25mm dimensions, 1800 RPM speed, and 2.3 mmH₂O static pressure, rated at 28 dB(A). The fans have PWM and ARGB cables and connect to an included hub that supports up to 5 ARGB devices and 5 PWM fans/pumps, powered by SATA.
RAIJINTEK provides six black straight fittings (16/10mm), a 200cm clear PVC tube, two 500ml coolant bottles (not included due to shipping), and a filling bottle. Installation is straightforward but could be improved with pre-loaded screws and an included Allen key. The provided wrench has space constraints with certain motherboard capacitors.
We couldn’t read fan speeds in the BIOS, nor control the pump speed via BIOS/software. Additional items like a 24-pin ATX bridge and 90-degree adapter fittings would be beneficial. Thermal performance on an Intel i7 12700k at 4.8GHz was effective, with expansion potential. The kit is priced at $269.90 with a 2-year warranty, though a 3-year warranty would be preferable.
Thank you! Please share your positive feedback. 🔋
How could we improve this post? Please Help us. 😔
Feedback By:
[Hardware Reviewer & Editor]
Meet Nauman Siddique, a highly experienced computer science graduate with more than 15 years of knowledge in technology. Nauman is an expert in the field known for his deep understanding of computer hardware.
As a tech tester, insightful reviewer, and skilled hardware editor, Nauman carefully breaks down important parts like motherboards, graphics cards, processors, PC cases, CPU coolers, and more.
- 15+ years of PC Building Experience
- 10+ years of first-hand knowledge of technology
- 7+ years of doing in-depth testing of PC Hardware
- A motivated individual with a keen interest in tech testing from multiple angles.
- I majored in Computer Science with a Masters in Marketing
- Previously worked at eXputer, EnosTech, and Appuals.
- Completed Course in Computer Systems Specialization From Illinois Tech
Get In Touch: nauman@tech4gamers.com


