 Threads

You need to check your PC specs if you’re considering a PC upgrade or any improvements to determine the extent of your upgrade. While it might seem simple, checking PC specs can be a bit challenging as they’re scattered throughout your system. However, a few third-party tools can simplify the information in one place.
Key Takeaways
- It is important to check PC specs if you are planning to sell or upgrade it.
- Different methods exist to check each component installed on your PC, such as Settings, Command Prompt, and Task Manager.
- Some methods involve using built-in apps to check the specs, while others require opening your PC case.
RAM
While researching, I found a few menus where I could check my RAM specifications. So, I went ahead and tested them, and all of them got me my RAM details.
Settings Ap
Here are the steps you need to follow:
- Open Device Specifications: Navigate to Settings > System > About.
- Note RAM Specs: Under Device Specifications, you can see your Installed RAM specs.

Checking RAM In About Tab (Image By Tech4Gamers)

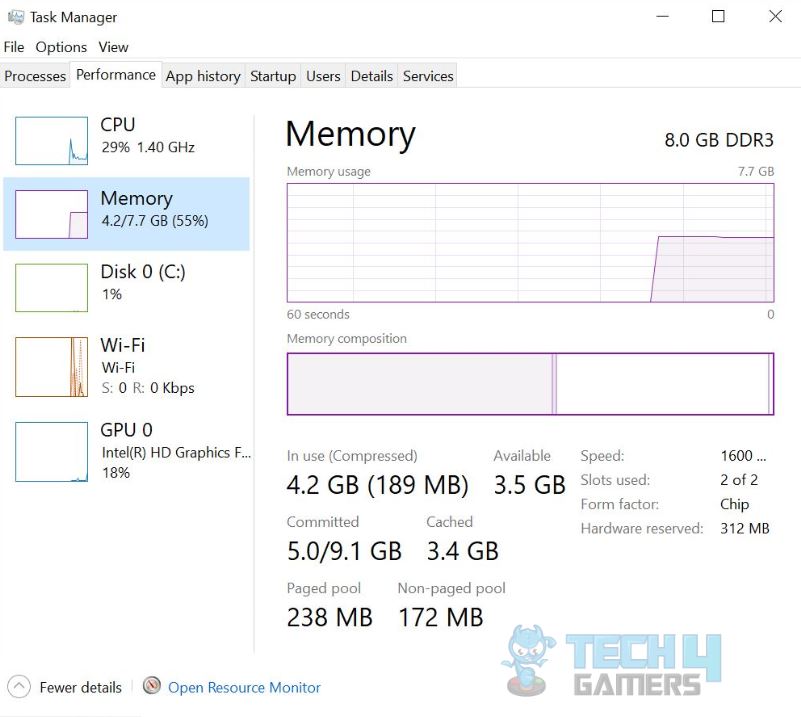
Task Manager
Follow these steps:
- Launch Task Manager: Type Task Manager in the Search Bar > Open it.
- Access Memory: Click on Performance > Memory.

Task Manager Showing Memory (Image by Tech4Gamers)
Command Prompt
Here’s how to do it:
- Execute Code In Command Prompt: Search for Command Prompt in Search Bar > Run As Administrator > Type the following command:
wmic memorychip get manufacturer
- Check RAM Details: You will see your RAM manufacturer and other details listed below.
Motherboard
The easiest way of checking your motherboard is by opening your PC case, which will be labeled with the manufacturer’s name. However, if you are a laptop user or do not wish to go through the hassle, check your motherboard through different apps on your PC.
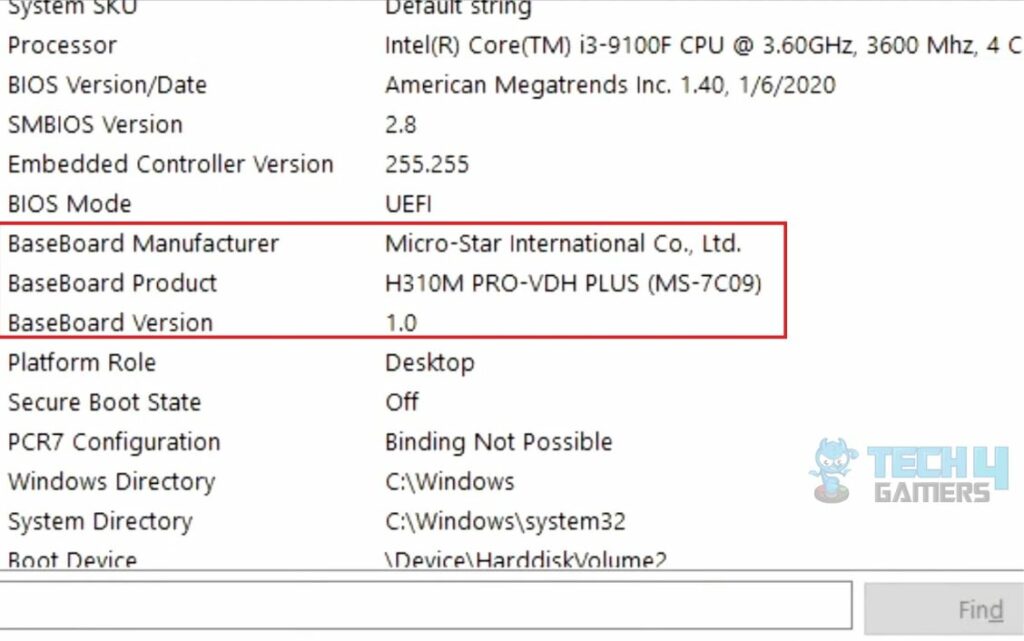
System Information
These are the instructions I followed:
- Open System Information Menu: Search for System Information in the Search Bar.
- Note BaseBoard Details: Navigate to System Summary. Notice BaseBoard Manufacturer for manufacturer’s name. Meanwhile, its Model and Version are written under it.
Command Prompt
Follow these steps:
- Access Command Prompt: Launch the Command Prompt in Administrator Mode.
- Run The Code: Type the command written below > Press Enter.
wmic baseboard get the product, manufacturer
Processor
Looking for the kind of processor you have is a relatively easy task. The four methods I mentioned below will help you get the precise Processor specs.
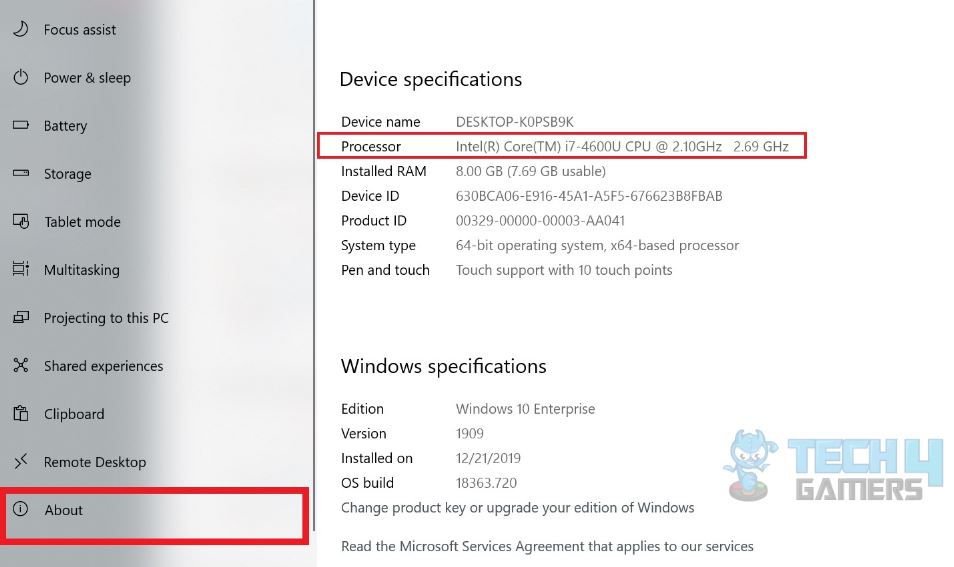
Settings App
This is how you should proceed:
- Head To Settings: Open Settings > System > About.
- View Processor Details: Notice the Processor under Device Specifications.
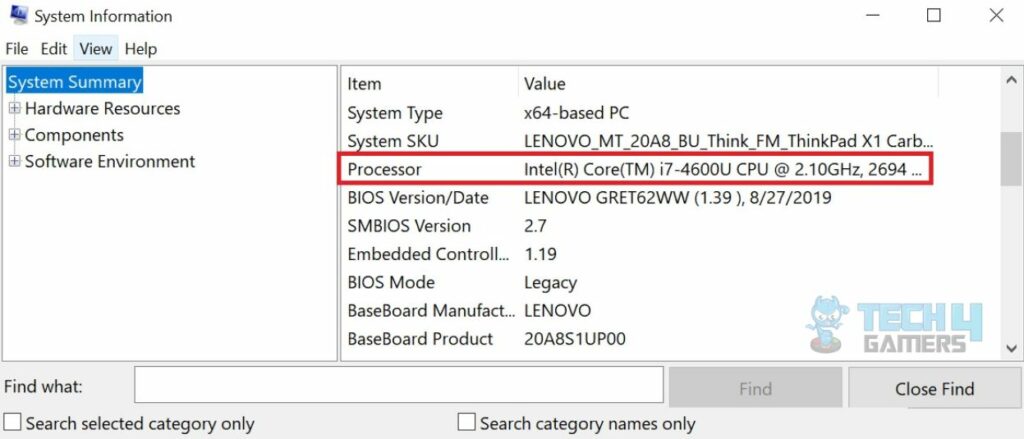
System Information
Take note of these steps:
- Access System Summary: Type System Information in the Search Bar > Find your Processor in the System Summary.

Processor Details In System Information (Image By Tech4Gamers)
Command Prompt
Enter the correct command:
- Enter The Code: Access Command Prompt > Type systeminfo > Enter.
- Get Processor Info: Look at the Processor details.

Processor Details In Command Prompt (Image By Tech4Gamers)

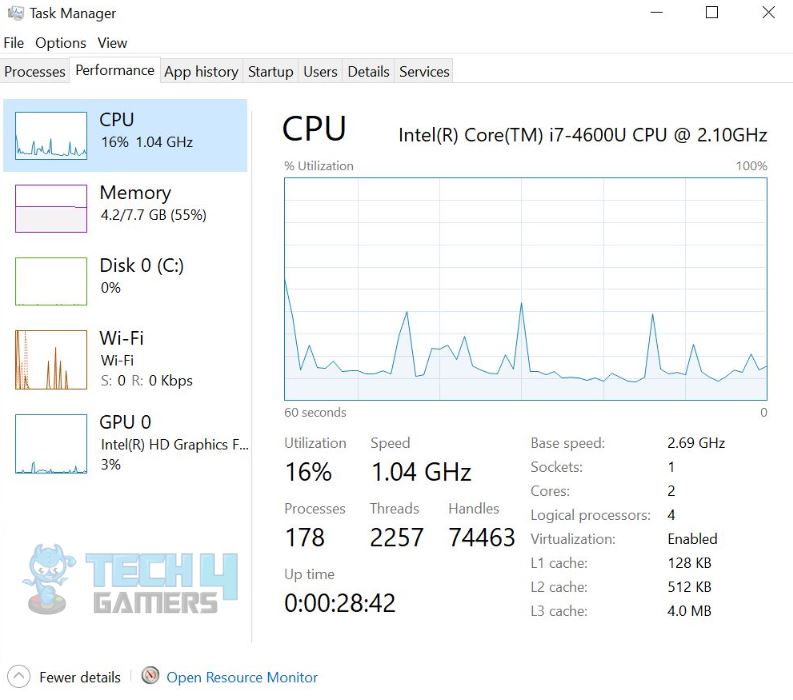
Task Manager
Fetch the specs with these easy steps:
- View Task Manager: Simultaneously press Ctrl+Alt+Delete to open Task Manager.
- CPU Performance: Go to Performance > CPU.

Resource Monitor (Image By Tech4Gamers)
GPU
Knowing your GPU specs is important for a rough estimate of the PC’s gaming and visual capabilities. A high-quality GPU can run games and videos with HD/4K graphics.
Device Manager
Here are the steps on how to do it for yourself:
- Open Device Manager: Right-click on the Taskbar’s Window Icon > Device Manager.
- Expand Display Adapter: Click on the Display Adapter tab. This will show you the GPU you have installed on your PC.
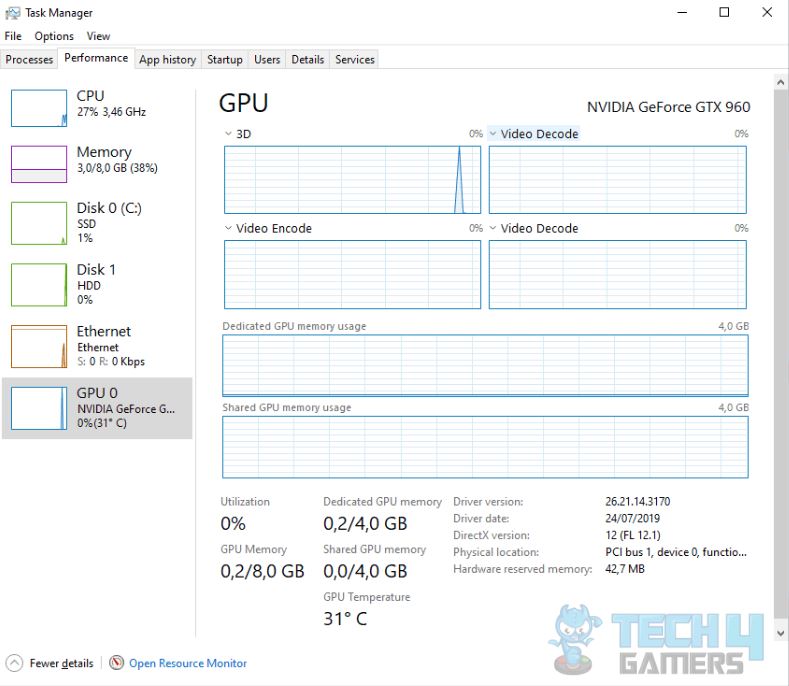
Task Manager
Use the following method:
- View GPU Performance: Open Task Manager > Performance > GPU.

Task Manager GPU Usage (Image By Tech4Gamers)
Hard Drive
It does not matter how many hard drives your PC has, these techniques will fetch details about all of them.
Settings App
Here are the complete instructions:
- Navigate To Storage: Enter Windows Settings > System > Storage.
- Calculate Storage: Add up the Used and Free Storage if the Total Storage is not displayed.
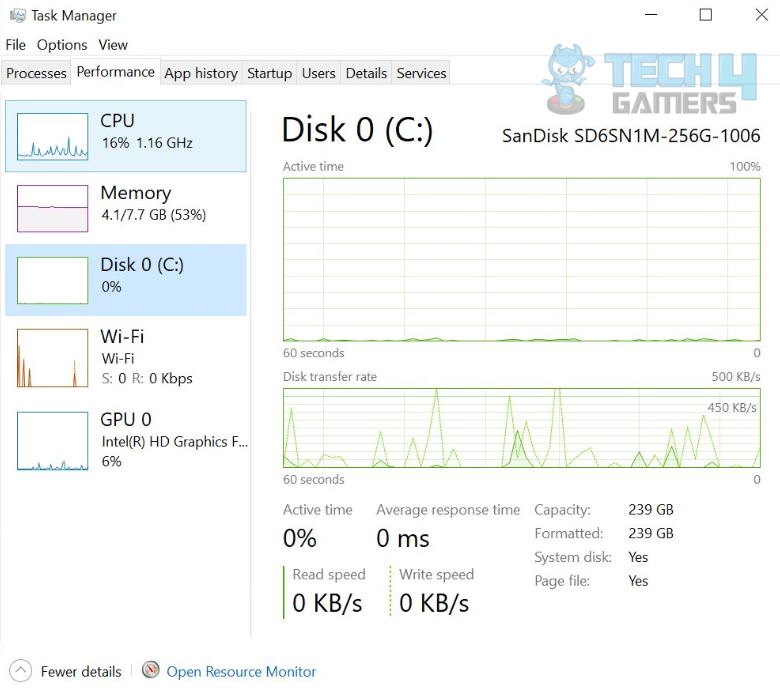
Task Manager
An easy way to do it is:
- Notice Disk Usage: Go to Task Manager > Performance > Disk.

Disk Usage (Image By Tech4Gamers)
Power Supply
The ways to check your power supply are pretty limited. You probably know your PC’s power supply if you have a customized PC. Otherwise, proceed with these methods.
Sticker On PSU
If you are someone who has opted for a prebuilt PC, then chances are that you are unaware of the Power Supply. One of the easiest ways to check the Power Supply is by opening your computer case and noticing the sticker on your PSU case.
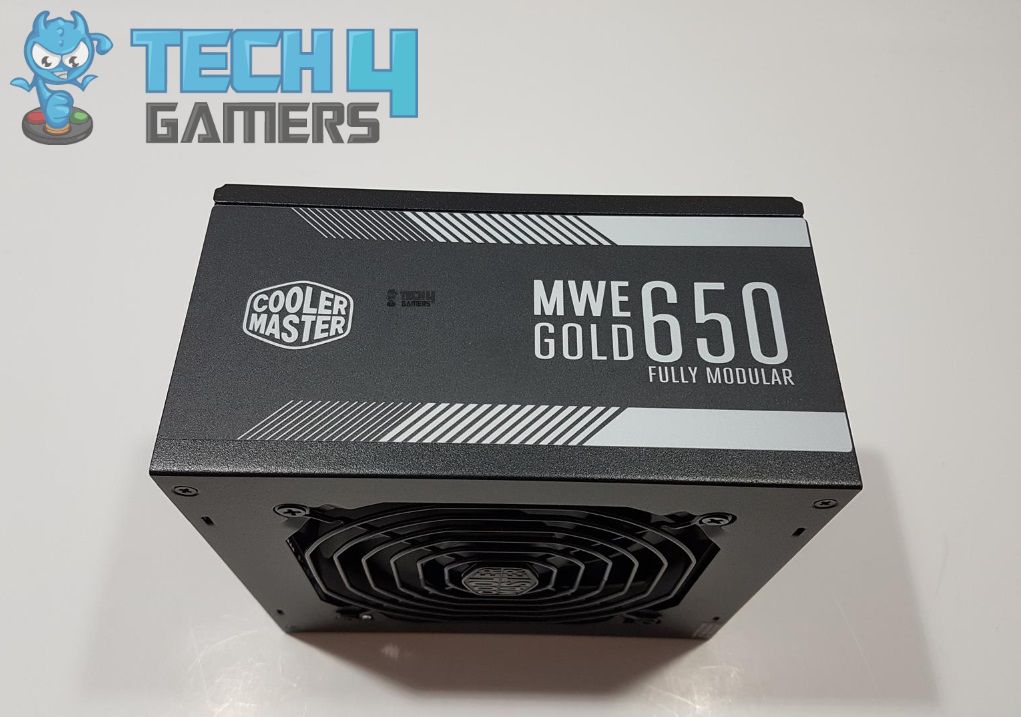
The sticker will look similar to the one shown in the picture above. Resort to the following method if the sticker is not present.
Checking With Volt Meter
You will need a volt meter and a paper clip to check your power supply. First, I removed the PSU from the PC case. Next, I looked for the ATX connector and checked whether it was 21-pin or 24-pin. You can take the help of the picture given below.

Take a paper clip, open and bend it into a U-shaped pin. Insert one end into the green port and the other into the black port. After that, turn on your PSU. Now, put the black pin of your volt meter into the black ports of your ATX connector.
Then, put the red pin in the orange port. The reading of the volt meter should be close to the one mentioned in the picture above, +3.3V. Similarly, check the other ports with the red pin while keeping the black pin connected to the black port of the ATX connector.
The readings according to the color should be as the ones mentioned below.
- Red Port: +5V.
- Yellow Port: +12V.
- White Port: -5V.
- Blue Port: -12V.
CPU Cooler
Assuming you have a prebuilt PC, search the manufacturer’s website, look for your PC, and check its specs. You will easily find your CPU cooler in the list of specs of your PC.
If you can not find it online, simply open your computer case and check the cooler’s label installed on your PC. You’ll find either an air cooler or a liquid cooler.
Software For Checking PC Specs
While finding the specs, I had to go through different apps and menus for each component. To skip the hassle, I downloaded third-party software that places all the specs in one place.
These are some popular third-party software you can use:
Last Words
Using the above techniques, I could fetch my PC specs to verify if it is compatible with the newer upgrades I wanted to install on my PC. While using third-party tools was effective, be careful only to install from trusted sites to prevent threats to your computer, such as malware and viruses.
Further About PCs:
- How to Build a Gaming PC In 2024: The Definitive Guide
- PC Building Mistakes To Avoid [14 Common Mistakes]
- How Much Is My PC Worth? [Valuation Guide]
Thank you! Please share your positive feedback. 🔋
How could we improve this post? Please Help us. 😔
[How To’s & Guides Editor]
Haddi has been in the Gaming and tech Space for over 10 Years Now; he has worked on notable websites like eXputer, Gamepur, Gear Siege, Gearnuke, and plenty more. He is an expert at Games & PC Hardware; you can expect him to solve any problem. People often joke, that if there is any problem anyone can solve, Haddi can solve it faster. Currently, Haddi writes and manages a Team of Experts at Tech4Gamers.
Contact: Haddi@tech4gamers.com


