 Threads
A Capable 360mm Cooler!
Review Summary
The ASUS ROG Ryujin 360 impresses with its top-tier 360mm AIO cooling, featuring a customizable LCD screen, 6th gen Asetek pump, and Noctua NF-F12 fans. It caters to enthusiasts and gamers seeking premium thermal solutions, offering silent operation and personalized aesthetics. However, its high price makes it less ideal for budget-conscious users. The OLED display and RGB lighting add a unique touch, making it a solid choice for those prioritizing both performance and aesthetics.
Hours Tested: 5

Overall
-
Build Quality - 8/10
8/10
-
Design - 8/10
8/10
-
Performance - 9/10
9/10
-
Features - 9/10
9/10
-
Value - 7/10
7/10
Pros
- Capable 360mm AIO
- Customizable screen
- 6th gen Asetek pump
- Noctua NF-F12 fans for silent operation
- Premium build quality
Cons
- Higher price
- Noise from 60mm fan
- Not budget-friendly


When it comes to PC Components, AsusTek is among one of the best names we have in the market. It was founded in 1989 in Taiwan. Ever since its foundation, Asus has seen phenomenal growth and diversity in its business line. When it comes to Asus, the first associated name that comes to mind is ROG or Republic of Gamers.
I was ecstatic when Asus sent us their ROG Ryujin and Ryuo CPU Coolers for review. I couldn’t wait to give these bad boys a spin and see how they perform for both enthusiasts and gamers alike. Today, I will be taking a look at their flagship thermal solution, the Asus ROG Ryujin 360.
Key Takeaways
- The ASUS ROG Ryujin 360 is for anyone who wants a capable 360mm AIO cooler with a customizable LCD screen.
- The ASUS ROG Ryujin 360 is not for those working with a limited budget.
- The ASUS ROG Ryujin 360 comes with a 6th gen Asetek pump, an additional 60mm fan for VRM cooling, and a fairly large LCD screen.
- Why you can trust Tech4Gamers: Our reviews are based on dedicated hands-on testing by our team of experienced hardware experts. Find out more about how we test.
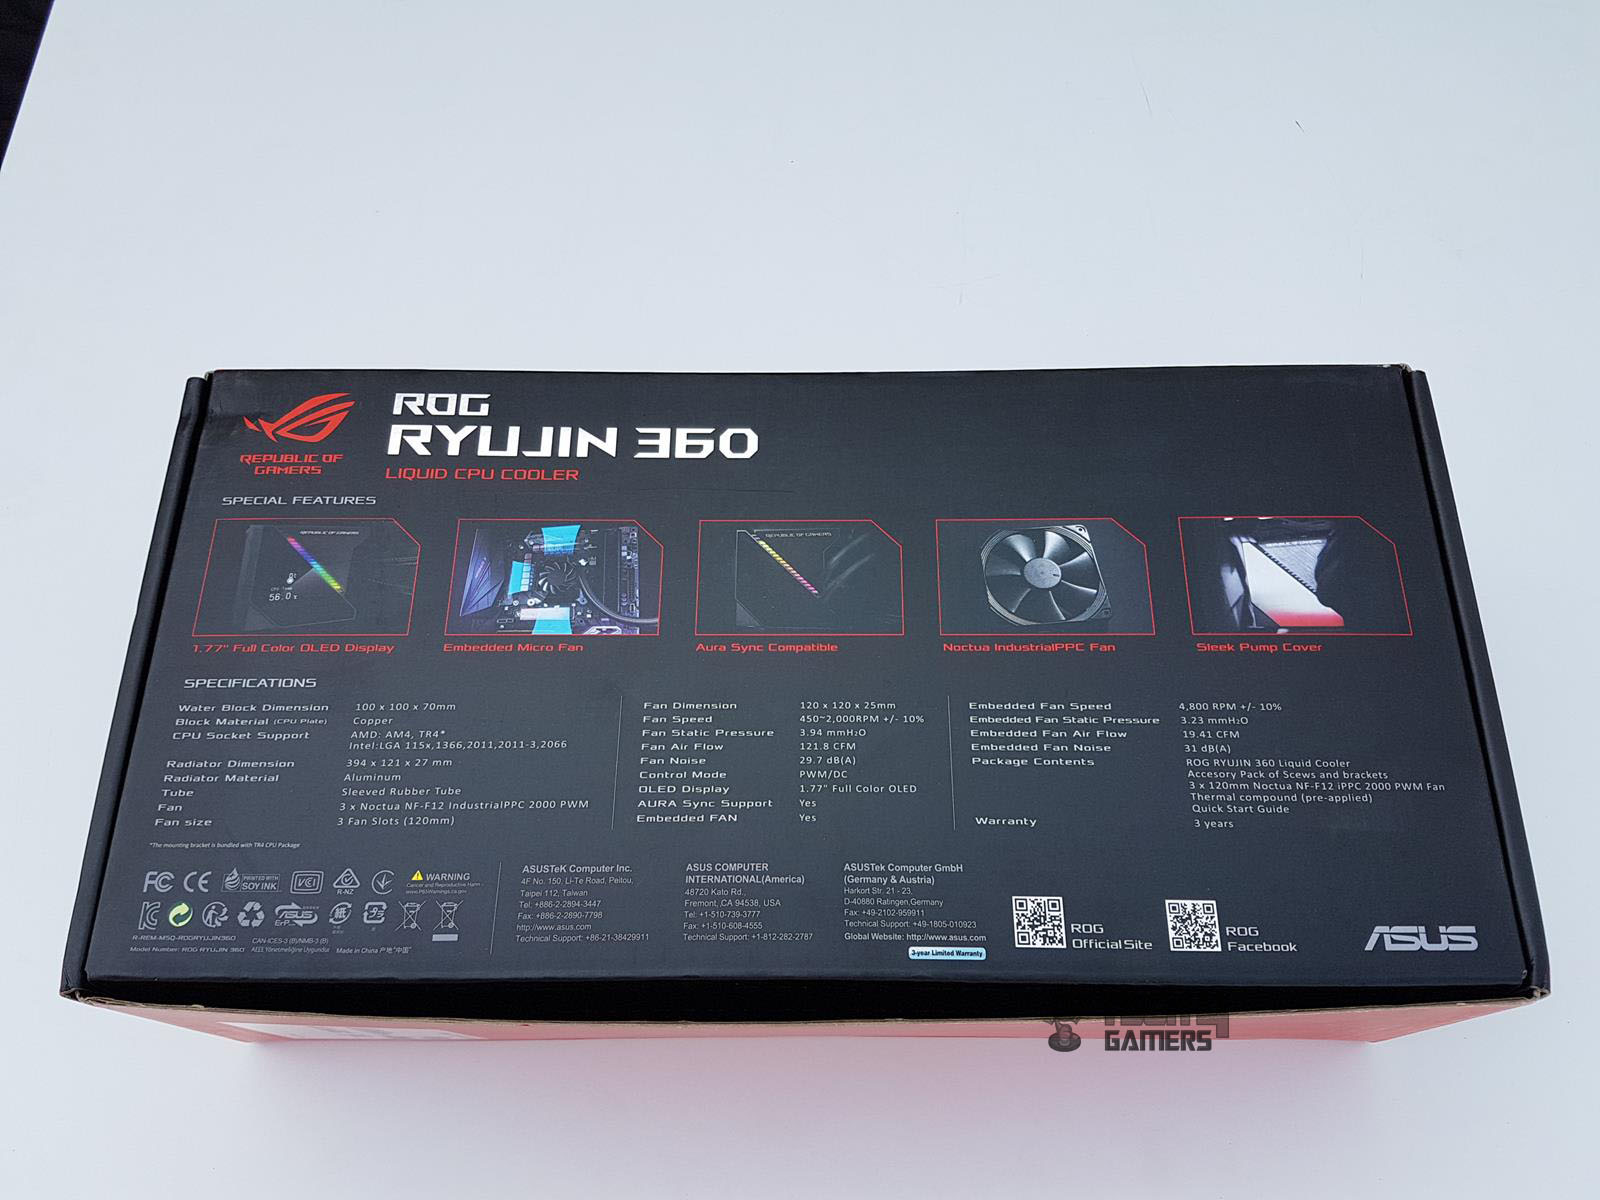
Let’s start with the specifications.
| Product | ASUS ROG Ryujin 360 |
| Intel Socket | Intel LGA 115x, 1366, 2011, 2011-3, 2066 |
| AMD Socket | AM5, AM4, TR4* |
| Warranty | 3 Years |
| Embedded Fan | 60 mm, 4800 RPM |
| OLED Display | 1.77″ Full Color OLED |
| Fan | 3x Noctua NF-F12 |
| Fan Speed | 450-2000 RPM |
| Fan Bearing | SSO2 Bearing |
| Noise Level | 29.7 dBA |
| Airflow | 121.8 CFM |
| Static Pressure | 3.94 mm H2O |
| Radiator | 121 x 394 x 27 mm |
| Water Block | 100 x 100 x 70 mm |
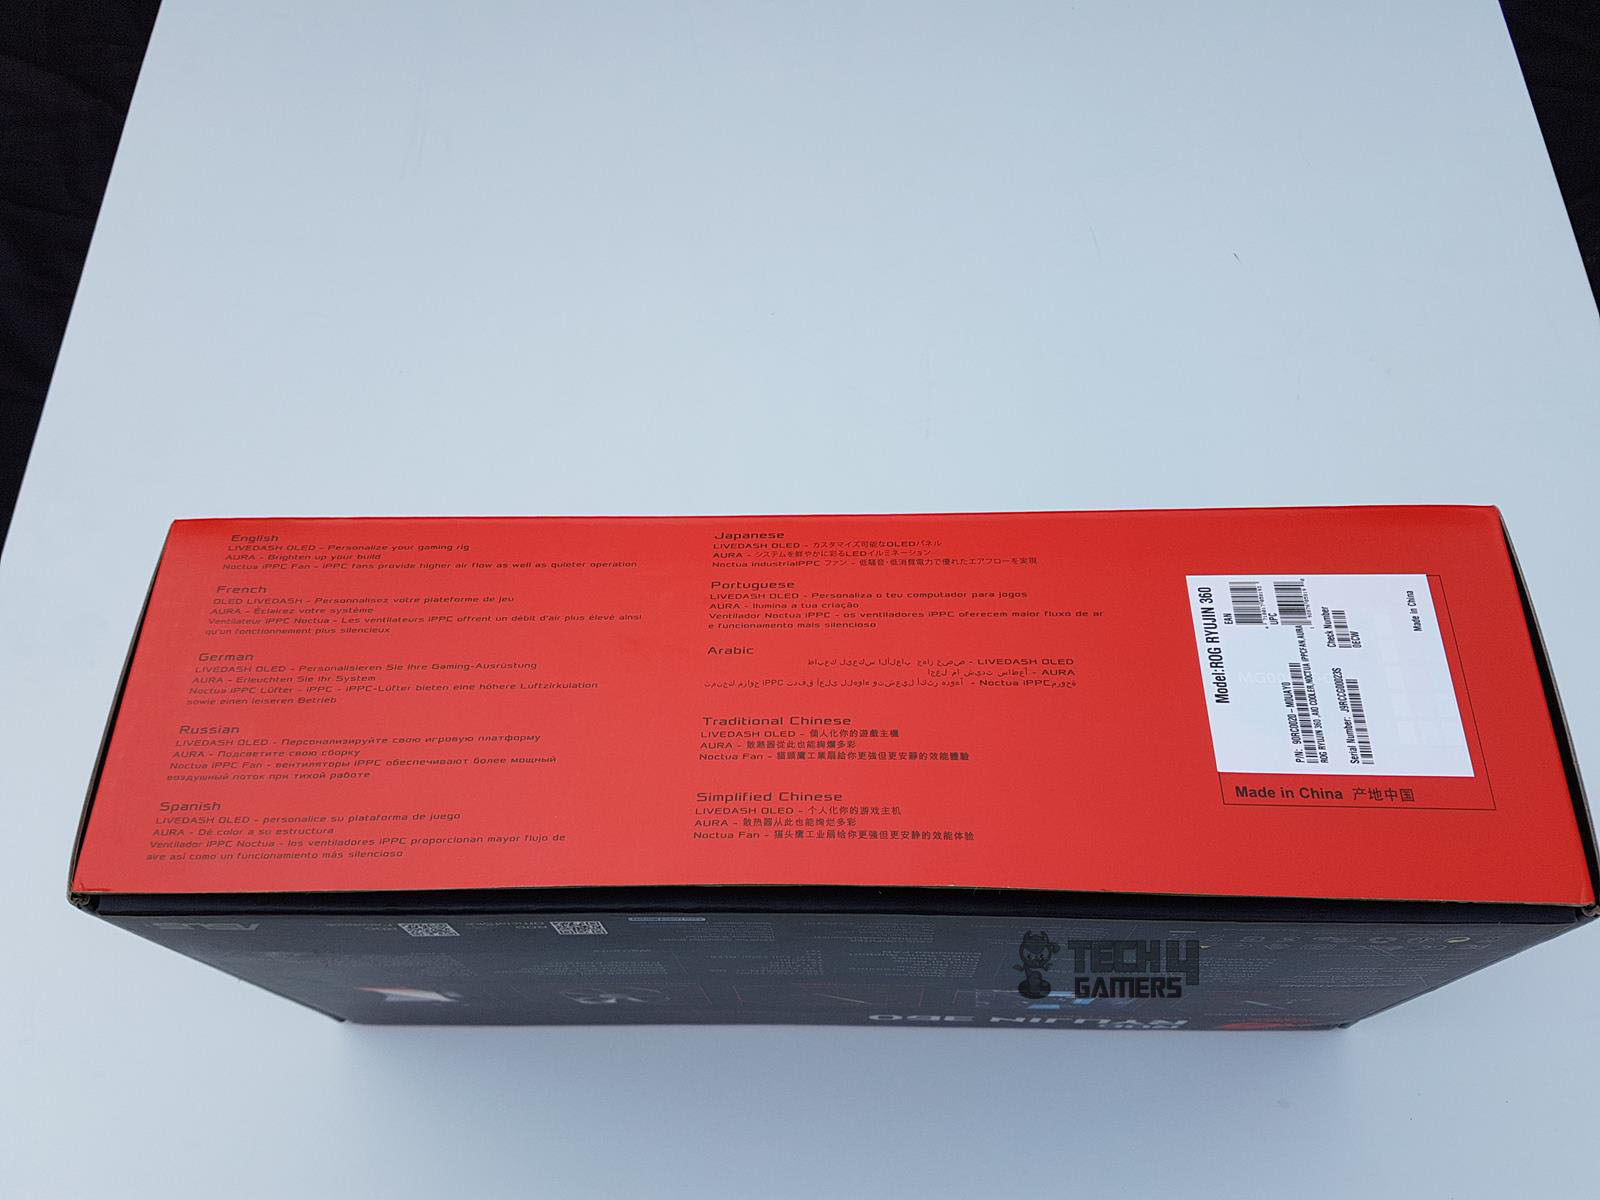
Packaging and Unboxing
The cooler is shipped in a standard ROG-styling packing box made of cardboard.
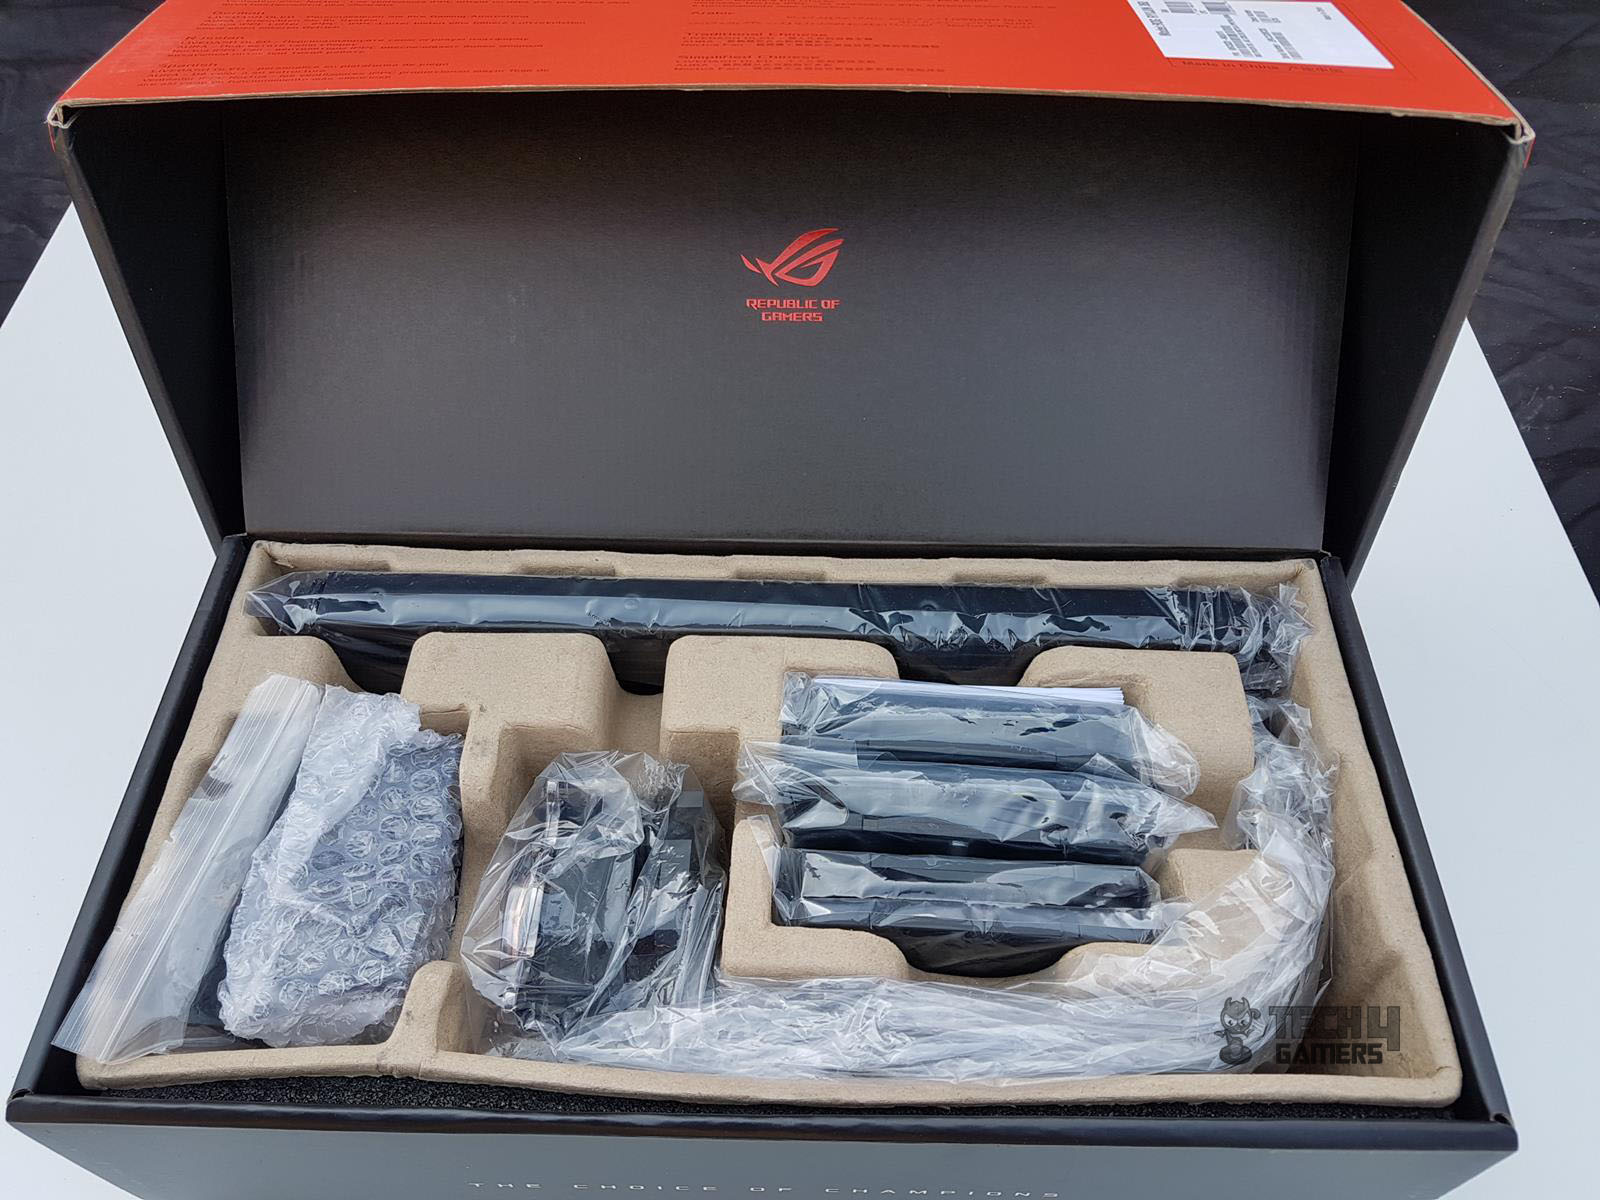
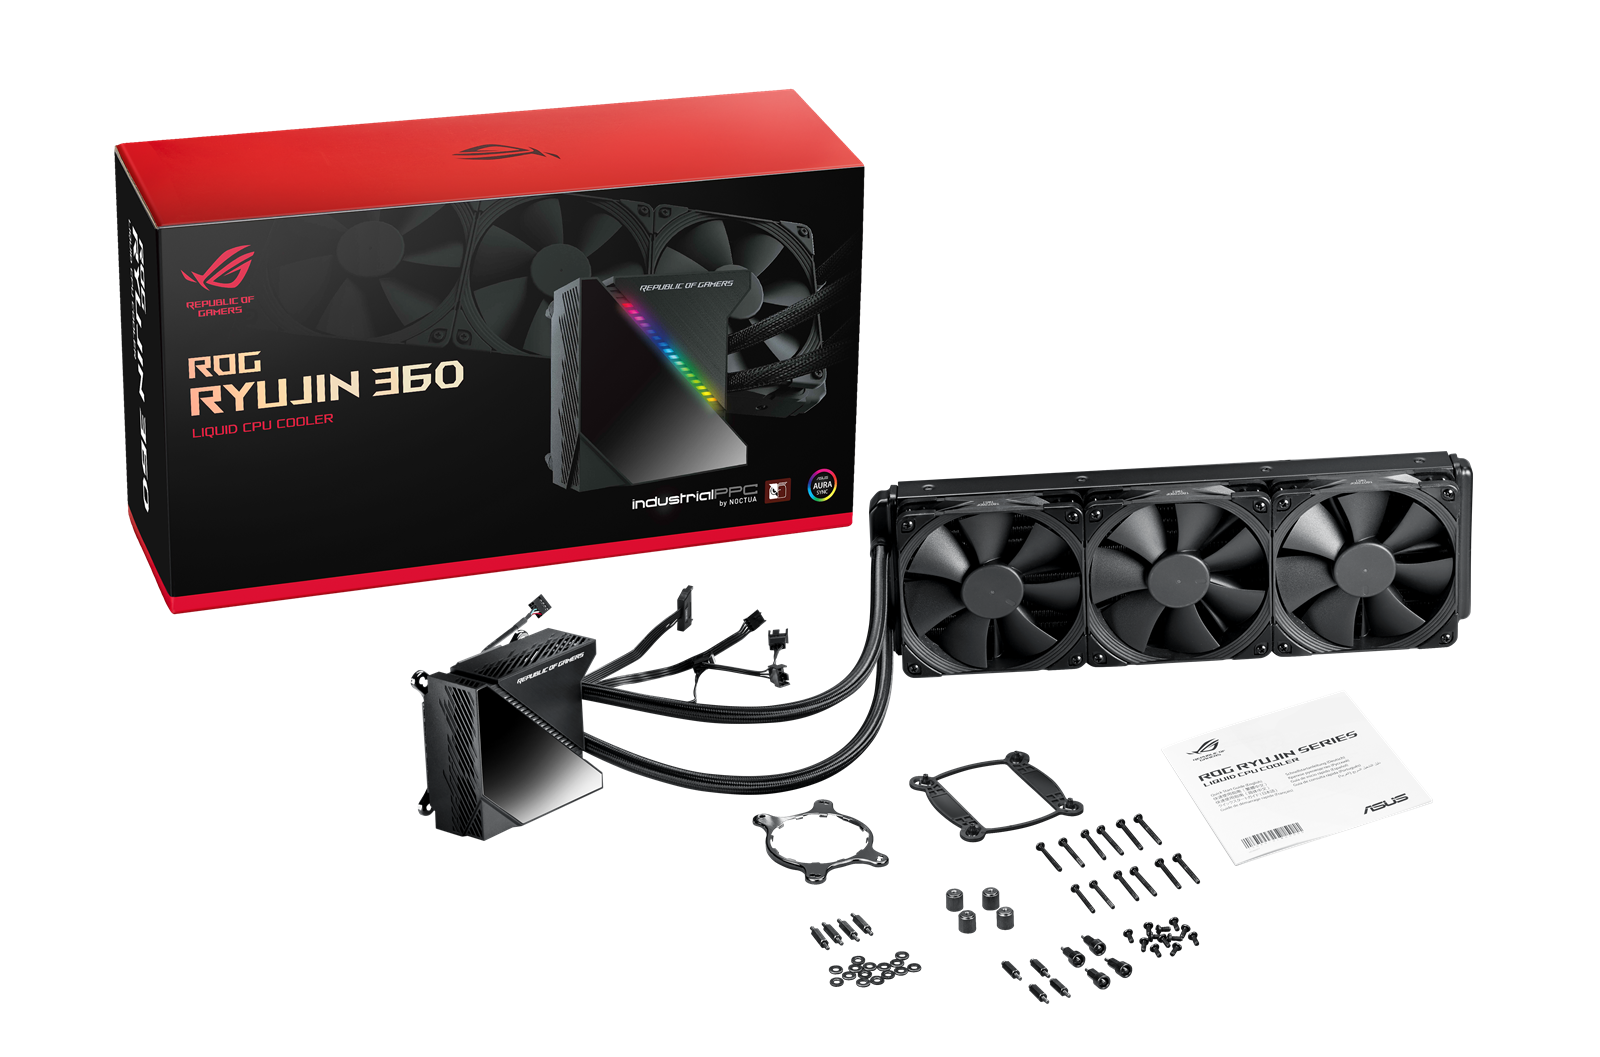
Box Contents
Following are included:
- 1x Radiator
- 3x 120mm Noctua iPPC 2000 PWM fans
- 1x Intel Backplate
- 1x Intel Mounting Bracket
- 1x AMD Mounting Bracket
- 4x Thumbscrew caps
- 24x Washers
- 12x UNC 6-32x30mm Fan Screws
- 4x Intel LGA 115x/1366 Standoffs
- 4x Intel LGA 20xx Standoffs
- 4x AM4 Standoffs
- 12x UNC 6-32x8mm Radiator Screws
- 1x Micro USB cable
- User Manual
Closer Look
Let’s take a closer look at the ASUS ROG Ryujin 360.
Radiator
The cooler’s radiator dimensions are 394x121x27mm (LxWxH), with a slim 27mm thickness. When equipped with 25mm fans, the total height is 52mm. The assembled unit measures 55.35mm in thickness, accounting for the fan screw heads. Further design analysis and testing will reveal its performance for users.
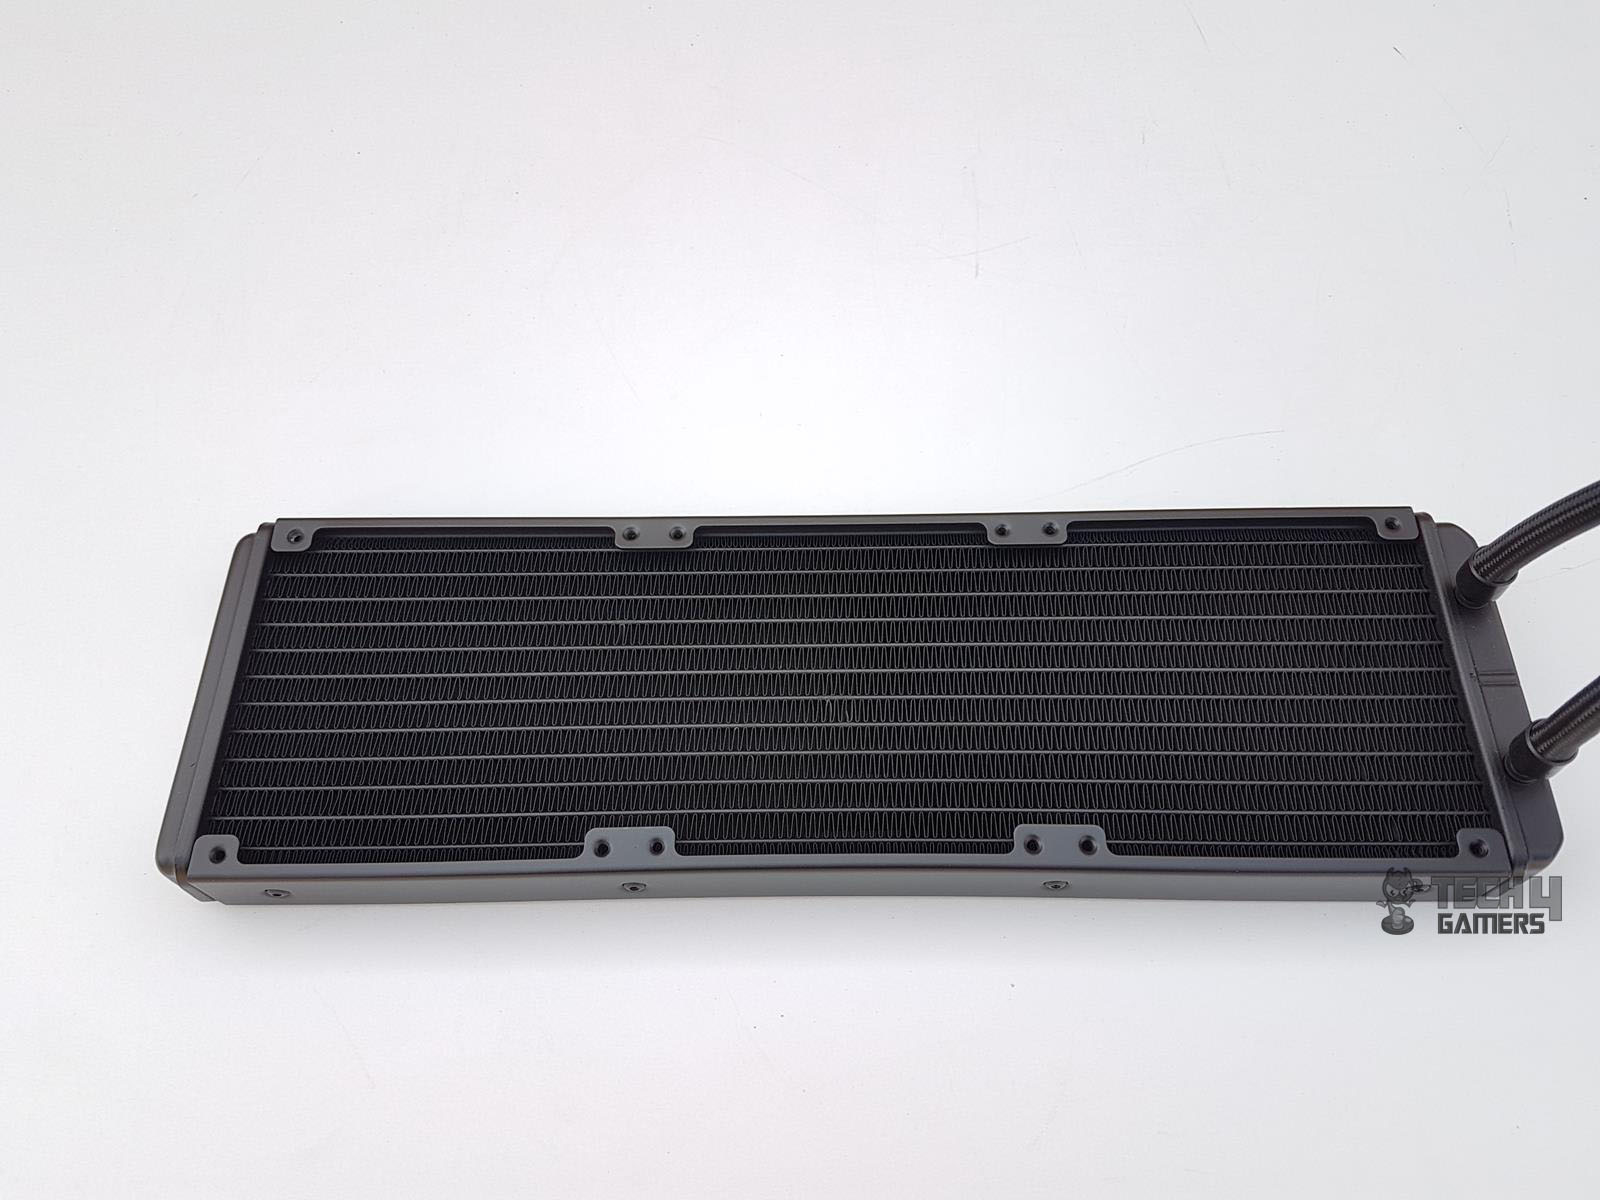
The aluminum radiator is lightweight, featuring 20 FPI (fins per inch) and angular edges. With 13 channels, it benefits from high airflow and air-pressure fans. The far chamber follows the common AIO cooler design, being relatively thinner. The radiator housing offers 105mm spacing between any two mounting holes. The fins area spans approximately 360mm in length and has a width of 121mm.
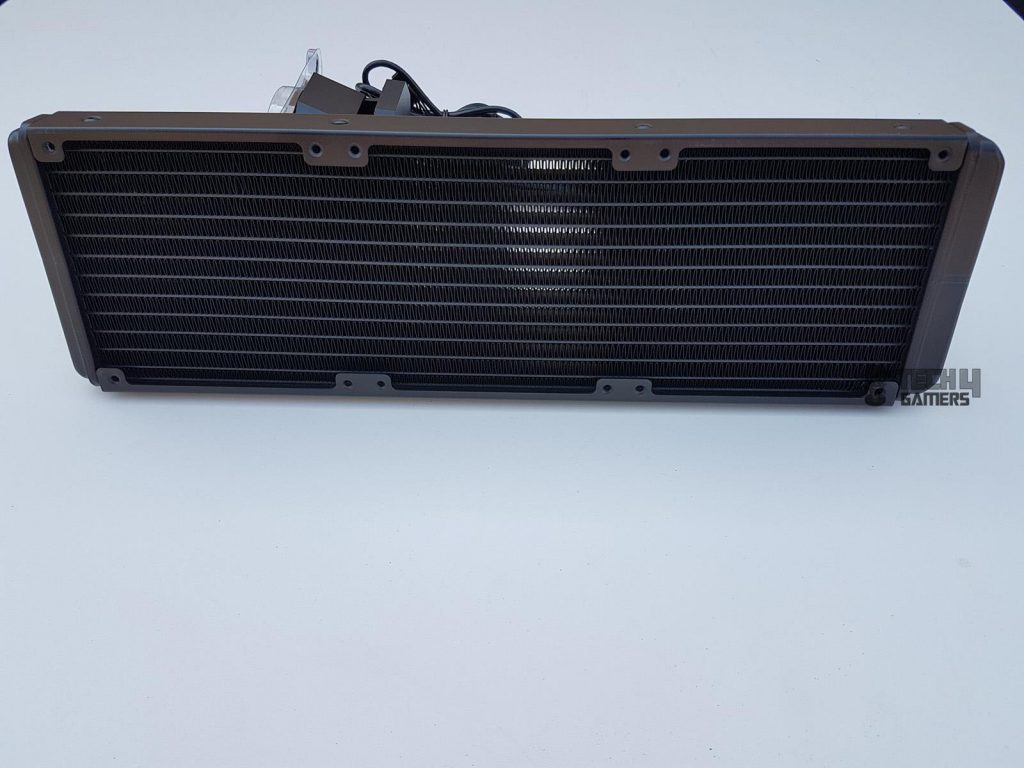

The fin stack has a total thickness of around 24.16mm. When installing fans, it’s crucial to note the absence of protective plating under the mounting holes. Using long screws could potentially damage the fins, impacting performance or, at worst, causing leakage from the radiator.
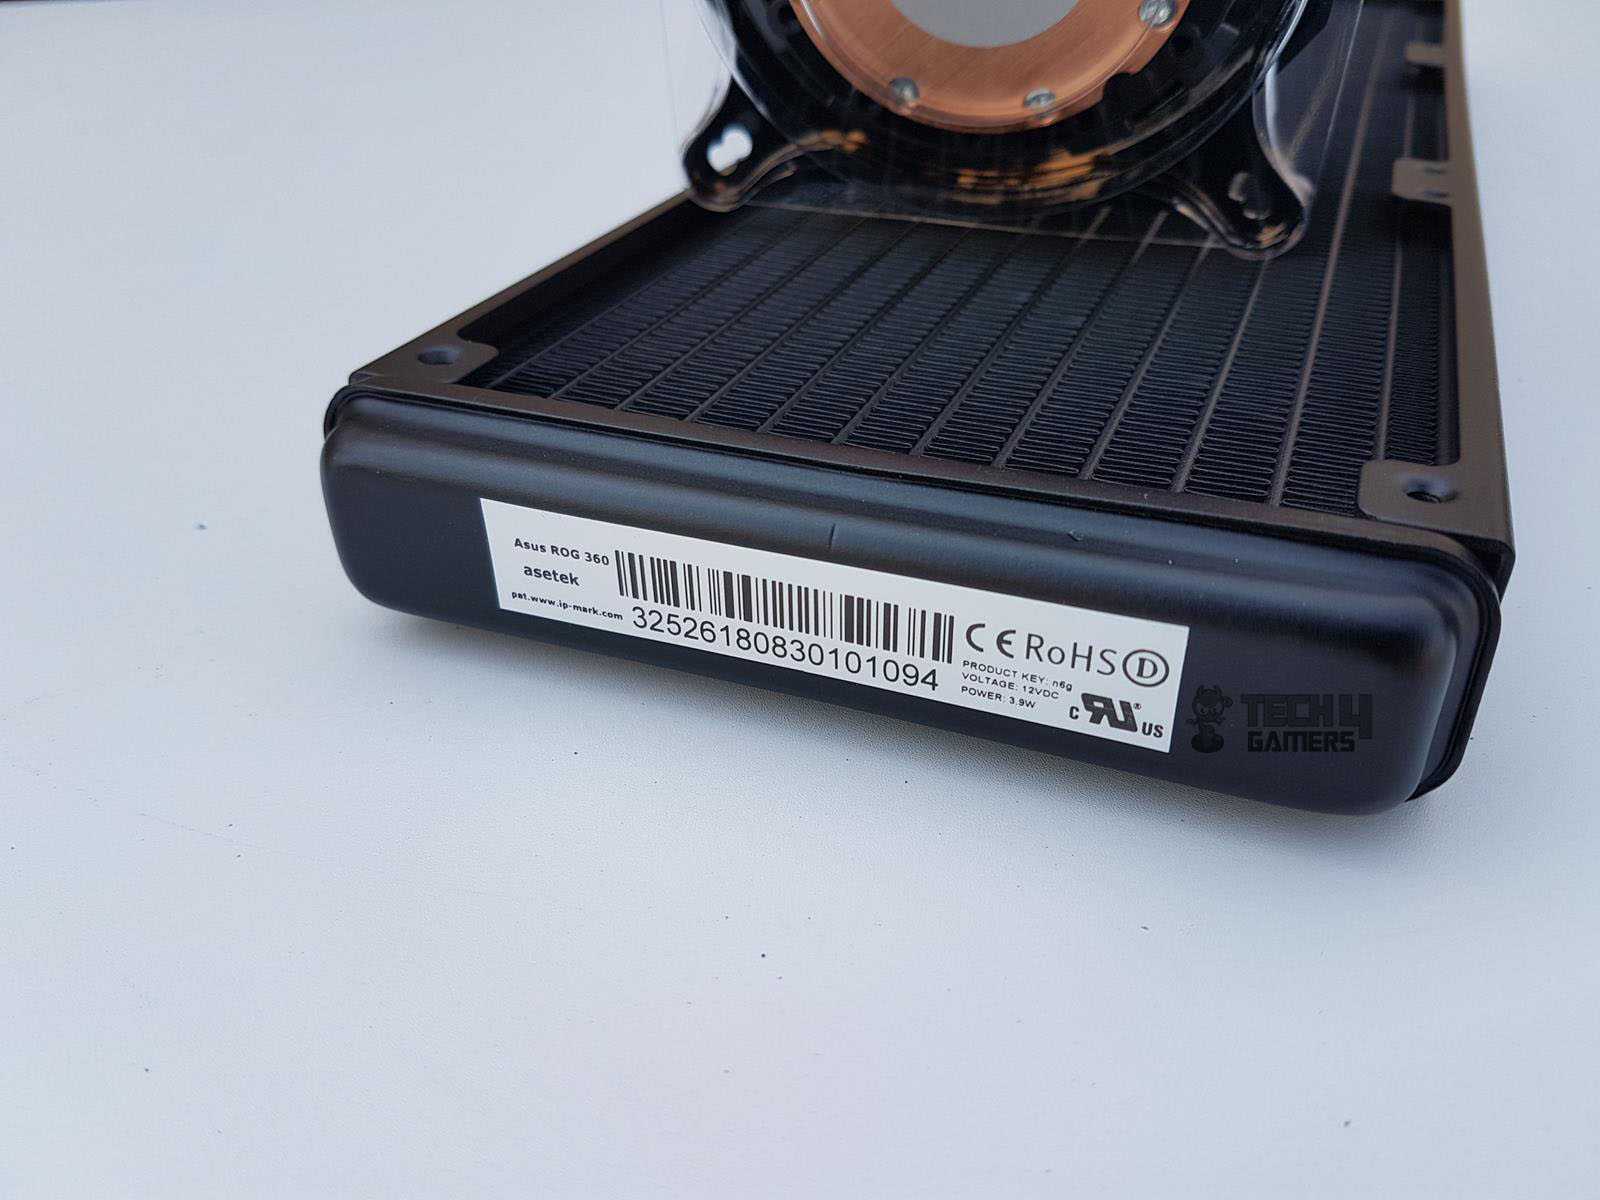
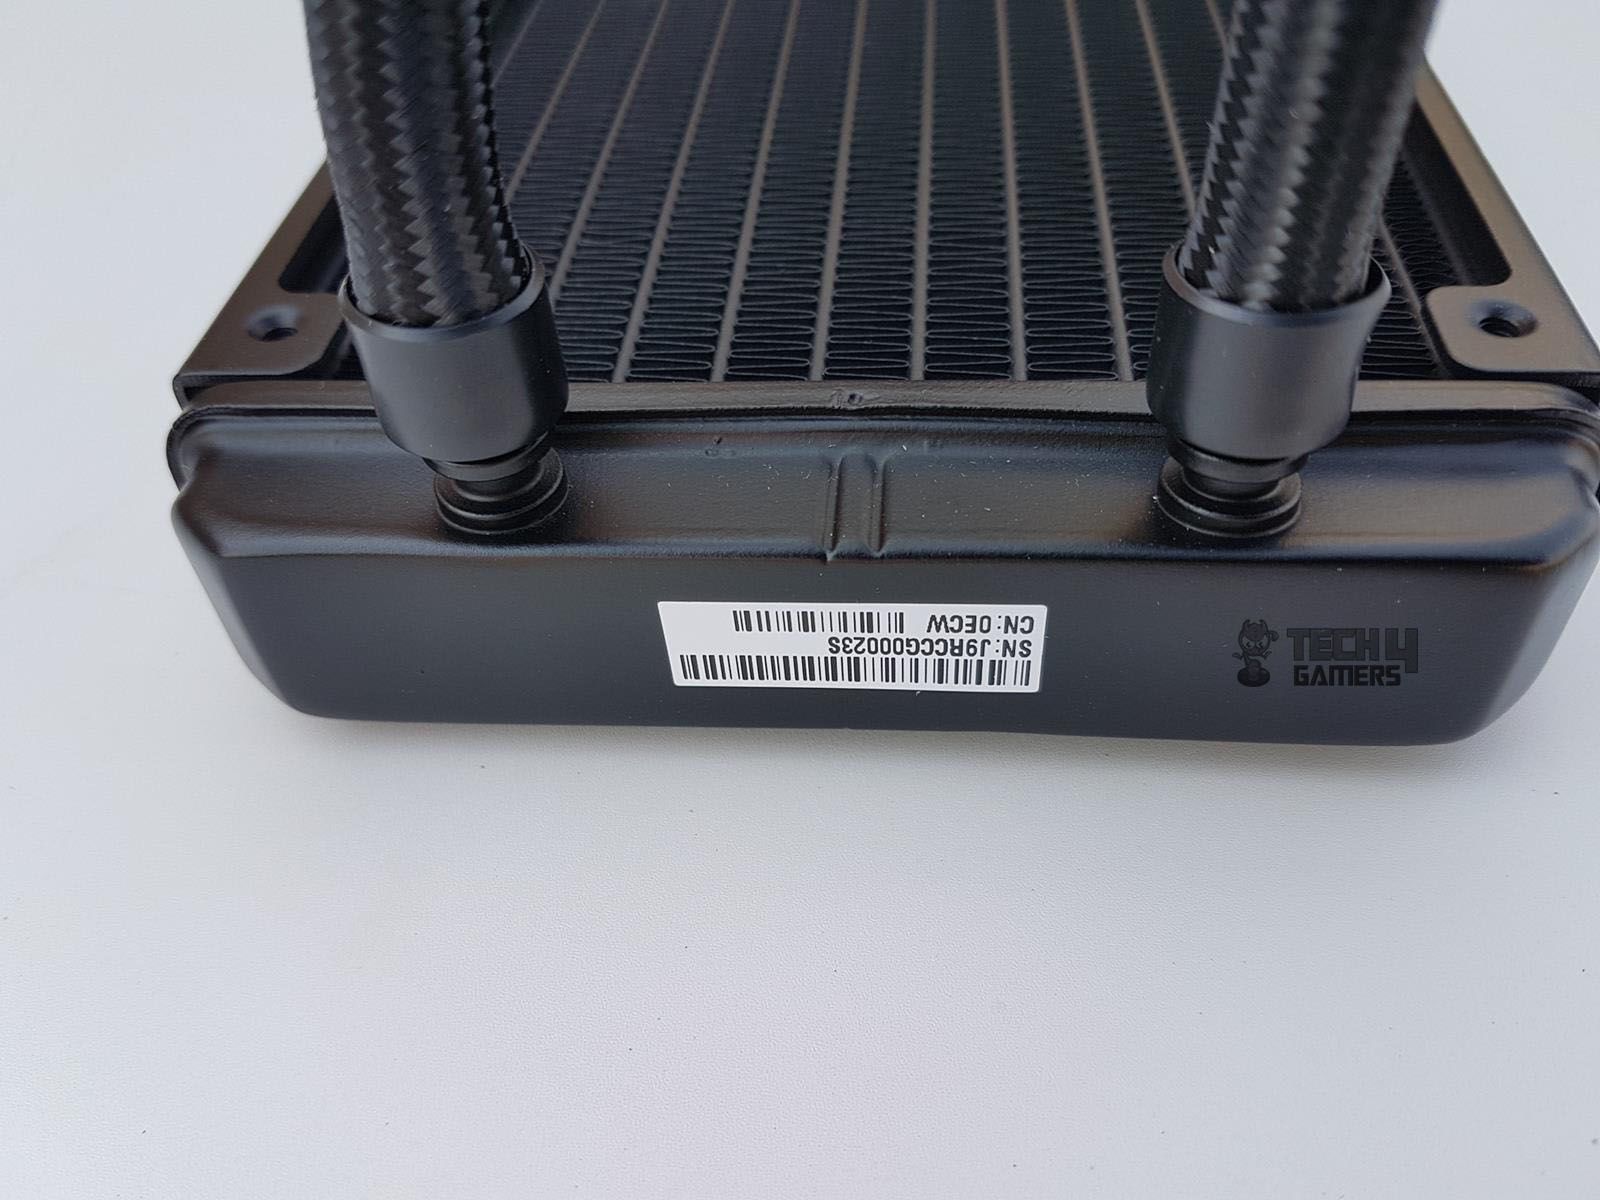
The tube chamber features a serial number sticker, a standard in AIOs using Asetek as the OEM. Both chambers have stickers. The cooler utilizes flexible rubber tubing with sleeves for enhanced aesthetics, boasting a 380mm tube length. The tubes measure 10.82mm in outer diameter, as measured with a digital caliper.
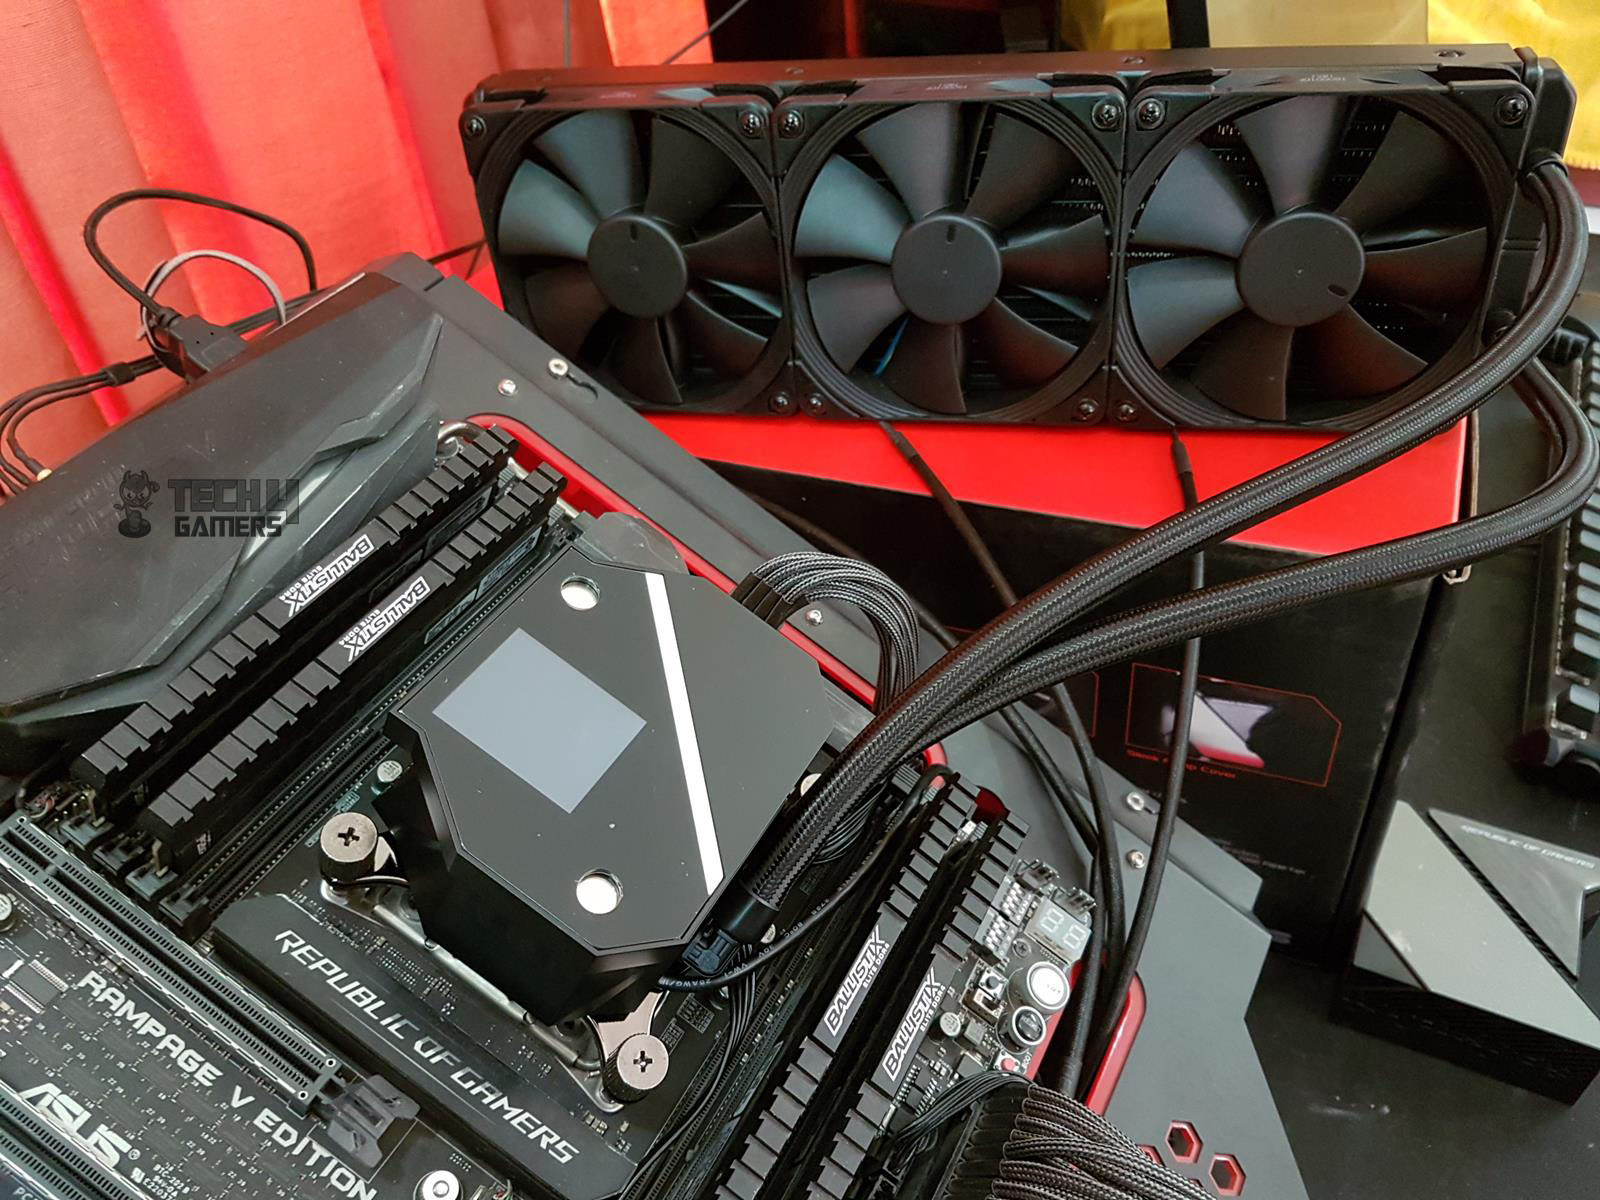
CPU Block
Now, let’s delve into the cooler’s centerpiece, the CPU block. The ASUS ROG Ryujin 360 showcases a cutting-edge cooling plate design with micro-channels, expanding the thermal dissipation area for efficient heat dispersion. Asus claims a remarkable 30% lower thermal resistance at 0.12 °C/W.
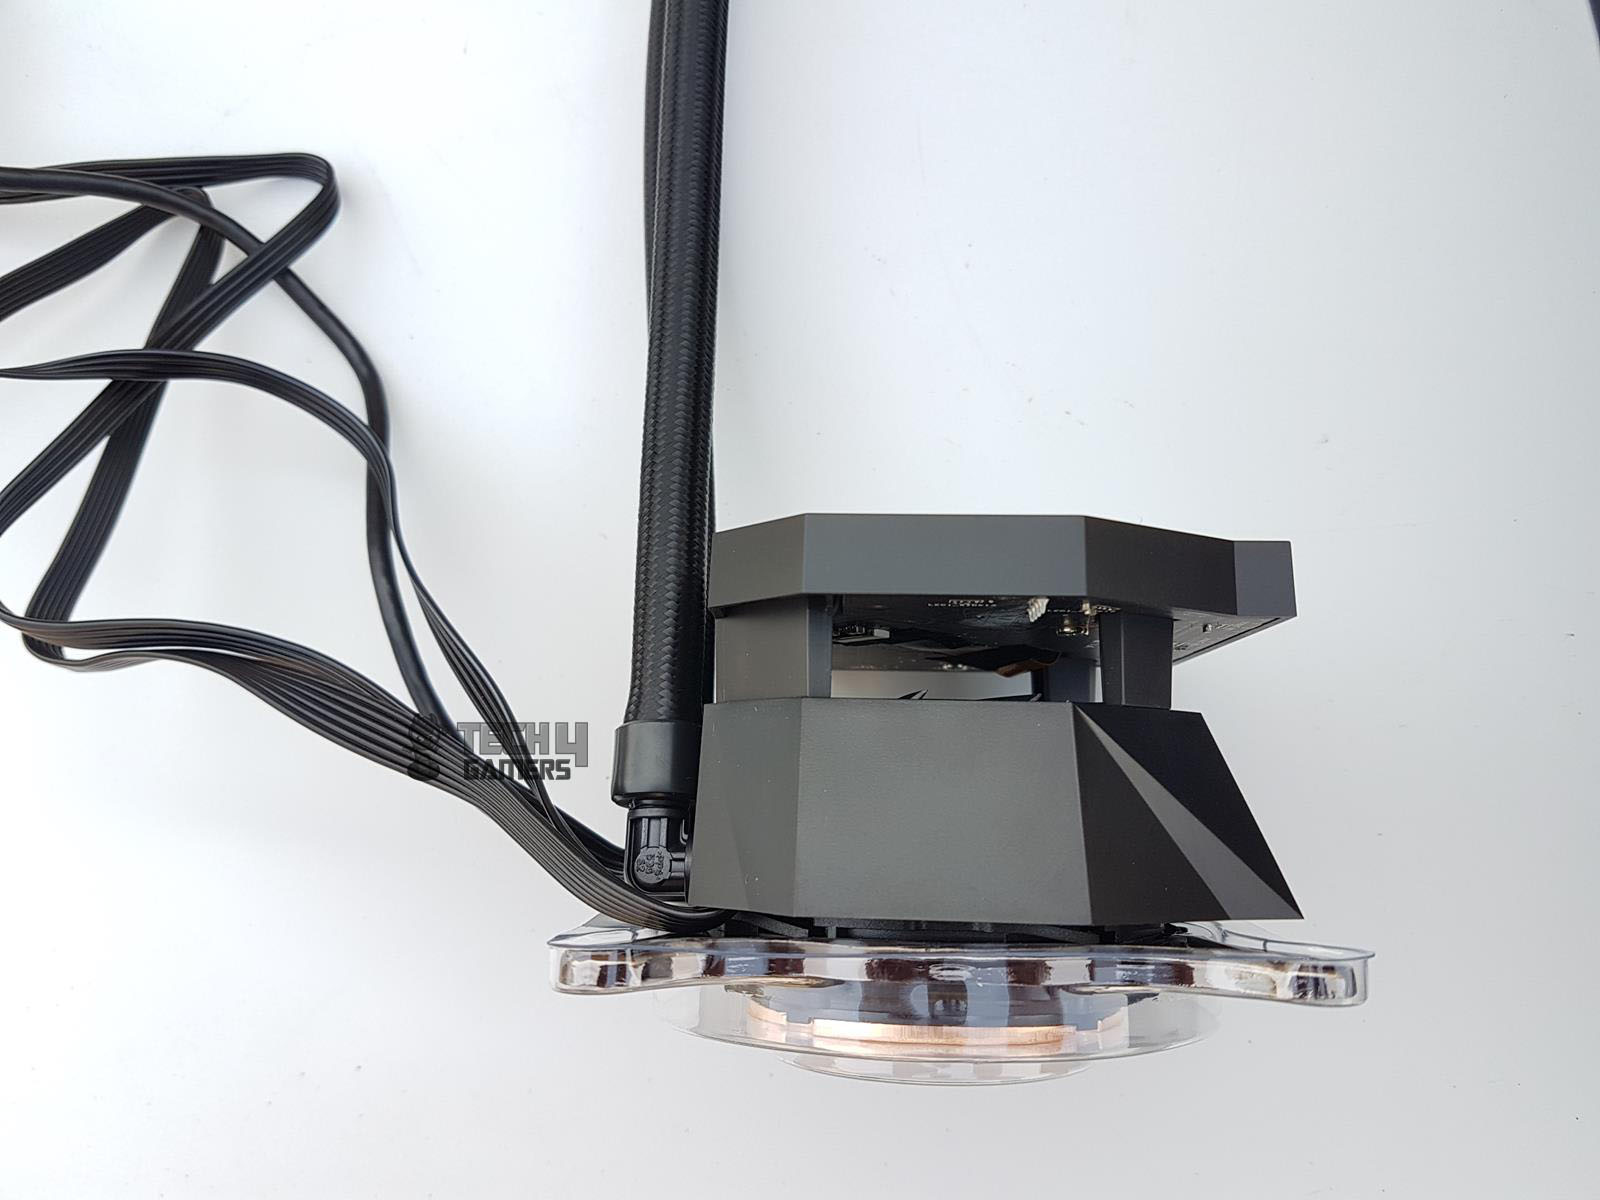
This boost in performance is attributed to the 6th generation Asetek pumps with Asus-customized PCB, ensuring optimal functionality. The pump housing, measuring 100x100x70mm, appears to be crafted from plastic.
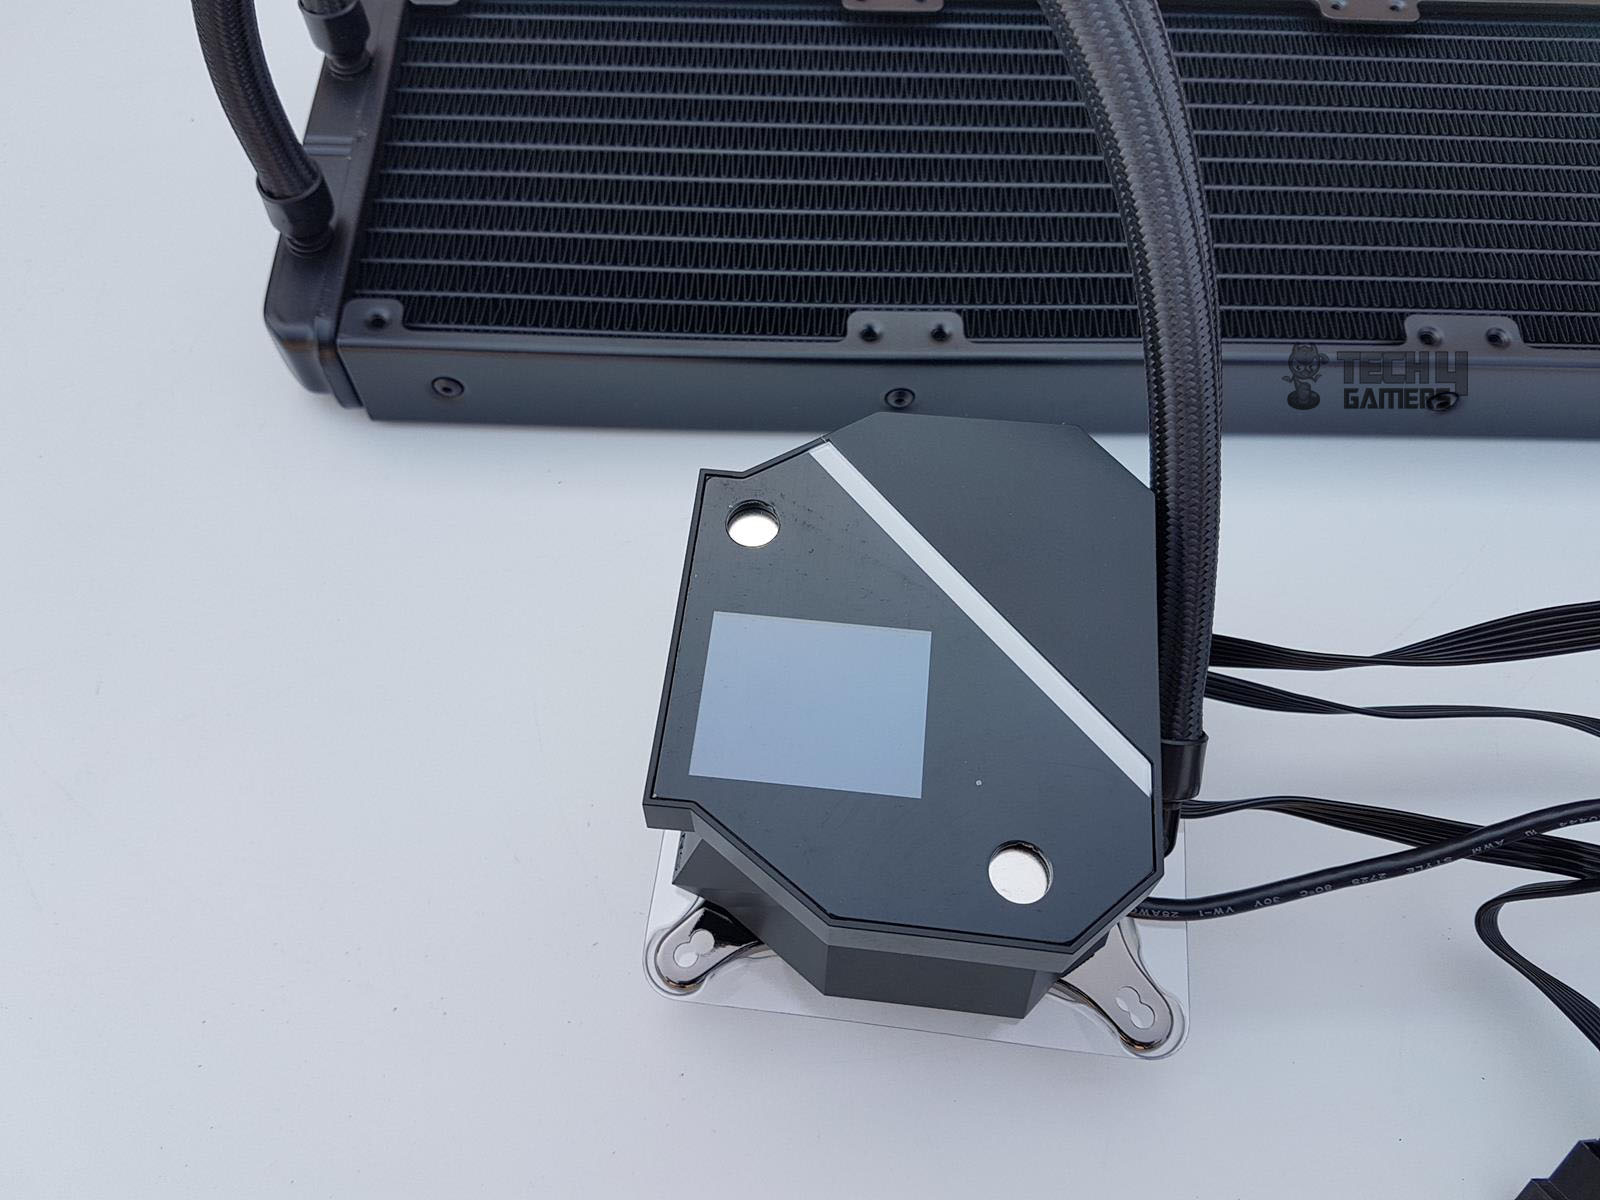
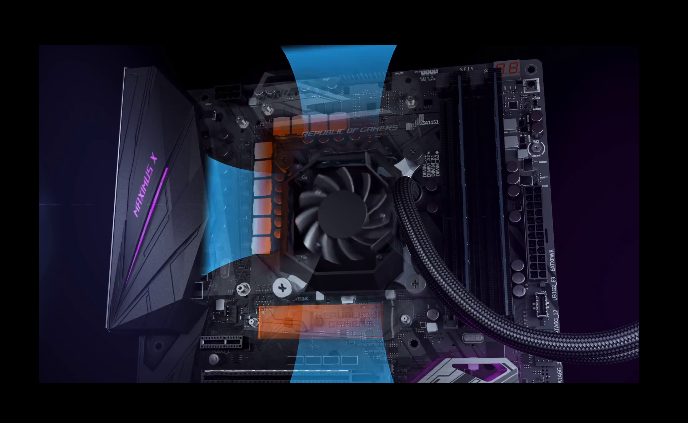
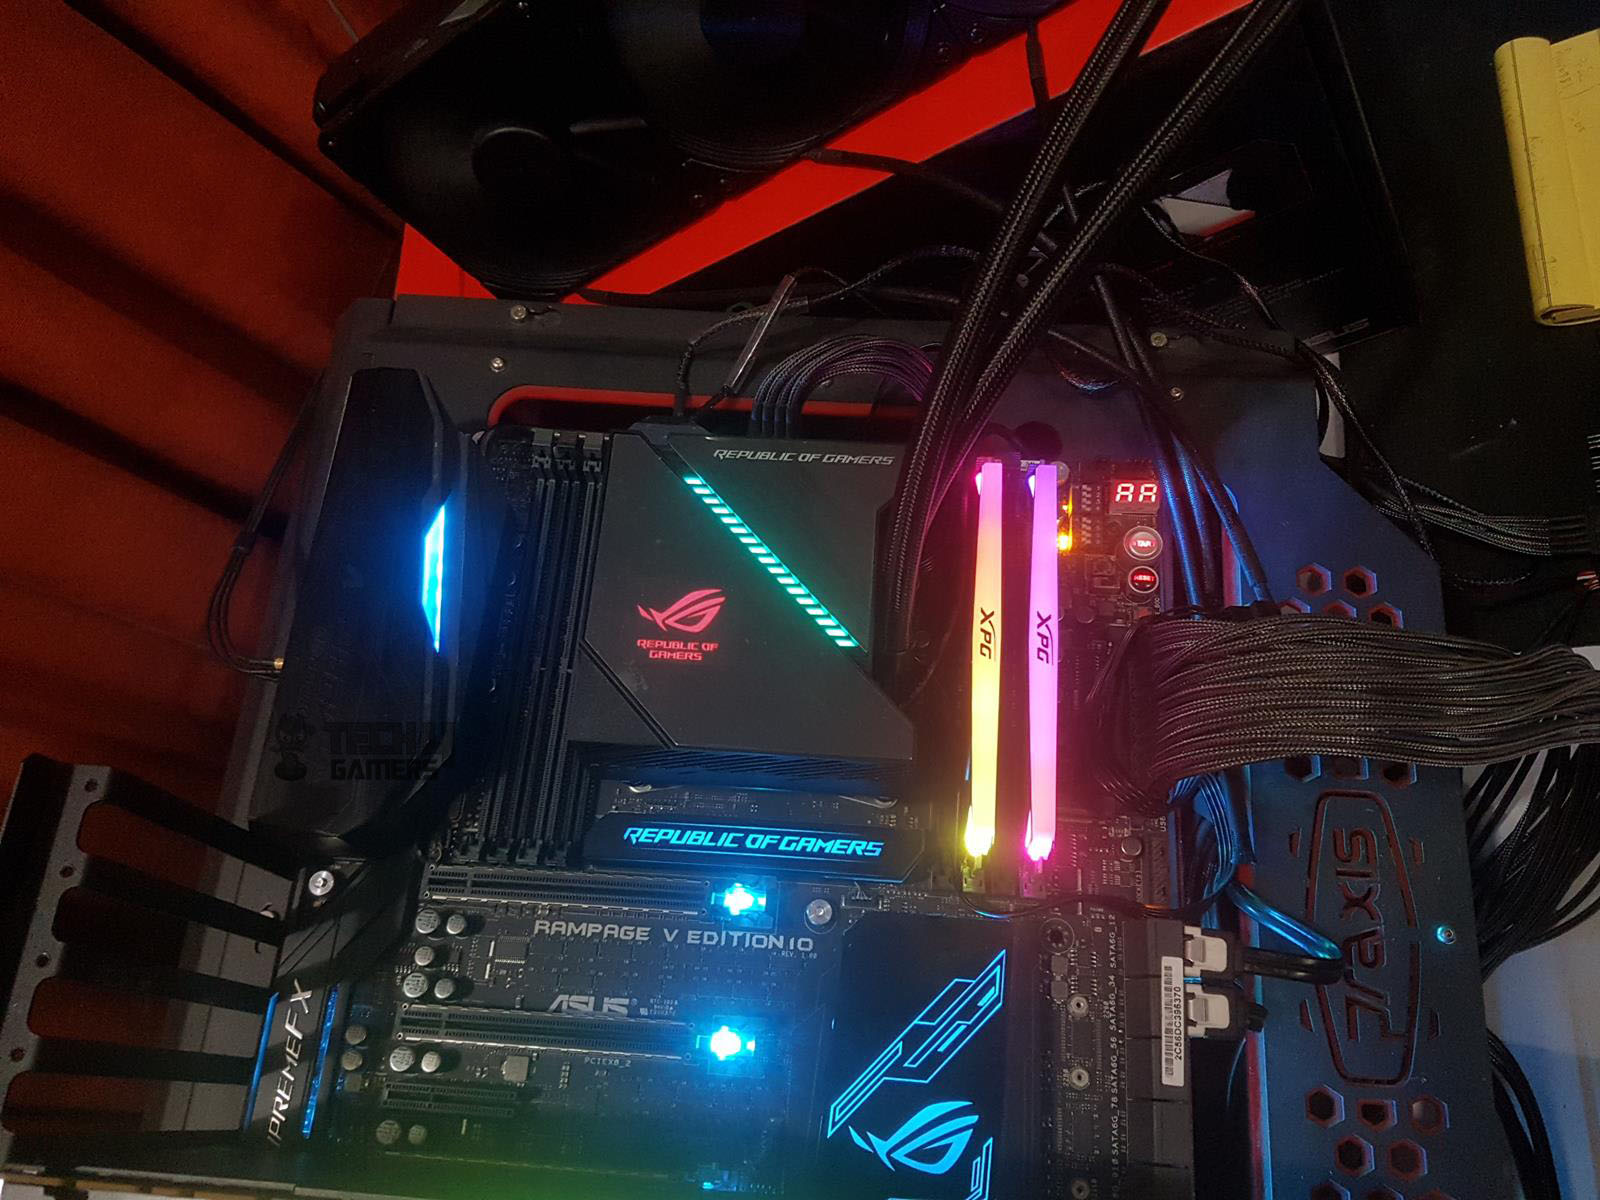
The black finish on the CPU block is truly impressive in person. I noticed a removable top cover, revealing a dual-section design with a captivating full-color OLED display and addressable RGB lighting. What caught my eye was the view of the PCB underside on the top part and a noticeable gap between the upper and lower sections. I liked the addition of a 60mm fan in the housing, a unique feature allowing temperature reduction for VRM/M.2 components near the CPU socket area.
The temperature difference, as measured in the Test section, supports the effectiveness of the idea. I observed a frosted white color diffuser with a line design on the top side of the upper portion, adjacent to the 1.77” full-color OLED screen. This OLED display, a first in the industry, accommodates versatile visuals within the specifications of 160×128 pixels in JPEG/GIF format and less than 1MB in size.
I also noticed two rounded cutouts on the top and bottom, featuring powerful magnets. During testing, I found their grip to be robust, easily catching a Noctua screwdriver passed nearby. These magnets secure metallic screws on the inner side of the top cover, ensuring a strong connection to the pump housing. The upper portion measures 87x74mm.
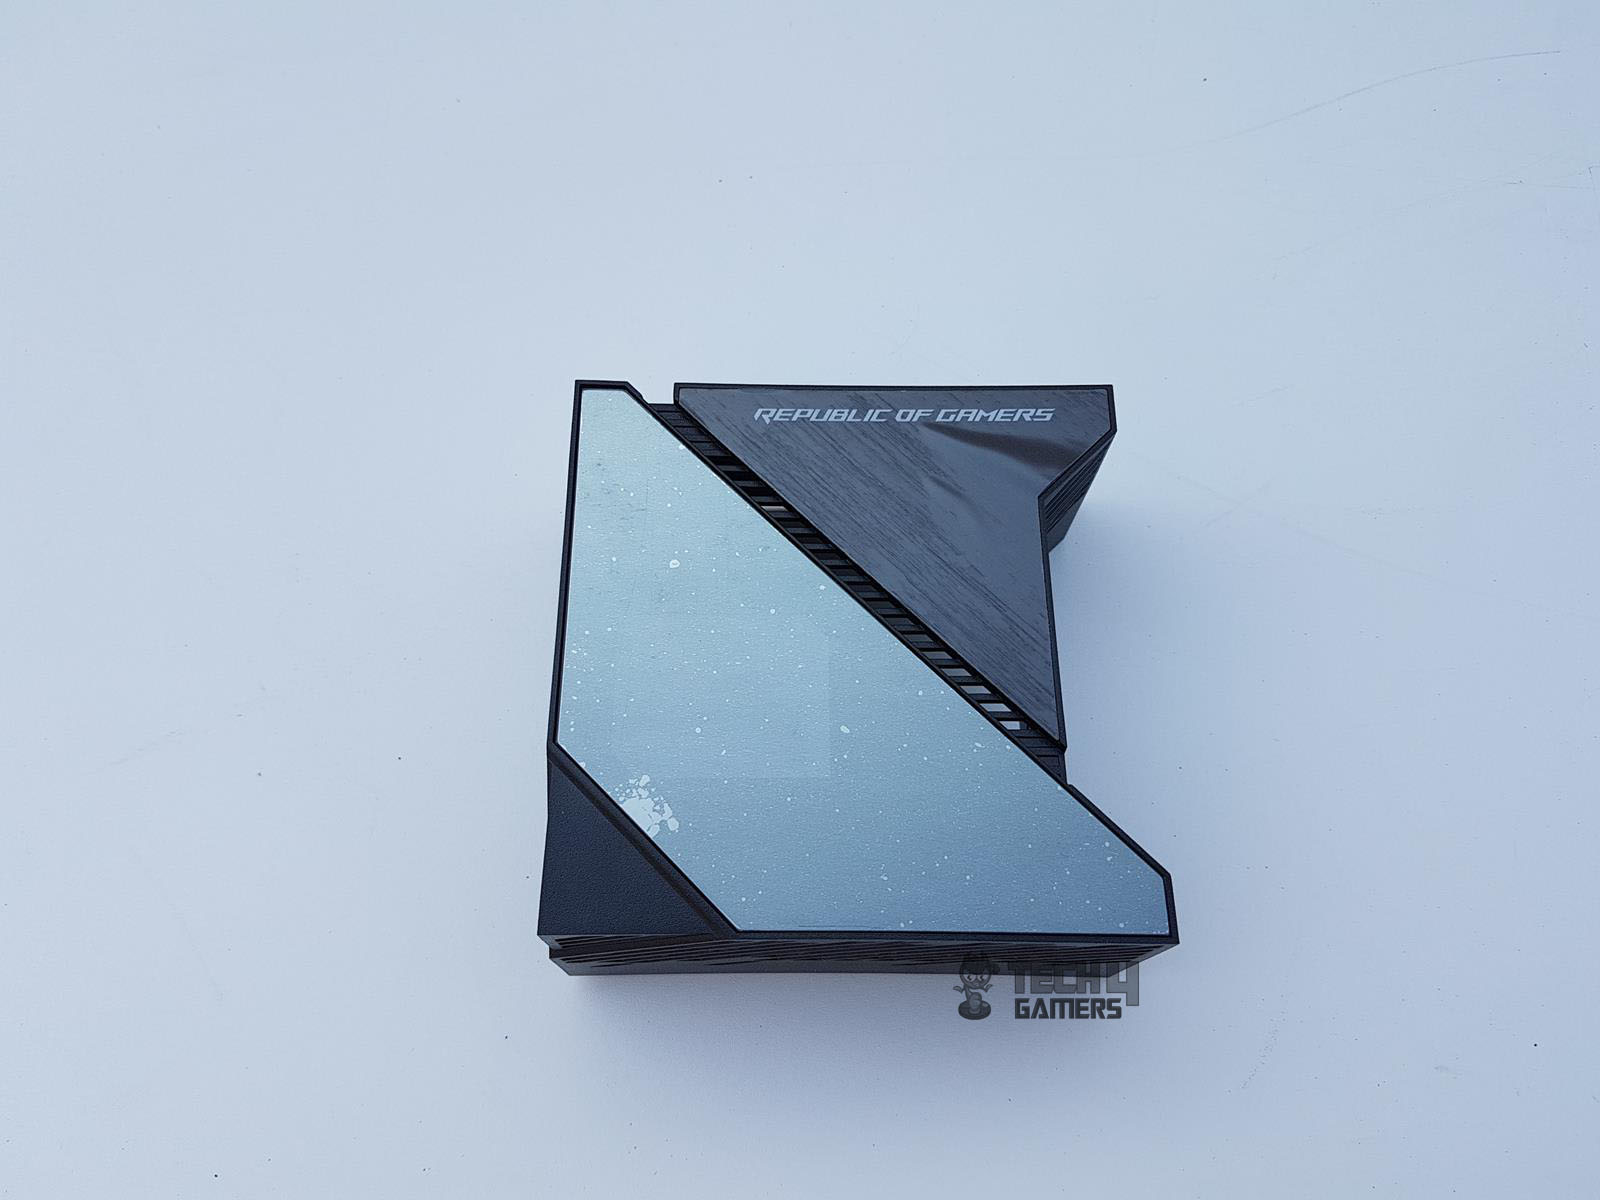
The plastic top cover, measuring 100x94x46mm (LxDxH), features a recessed central portion measuring 81mm from the center. Stylish cutouts on all sides, designed to accommodate the 60mm fan, ensure ample air intake to avoid choking and optimize functionality.
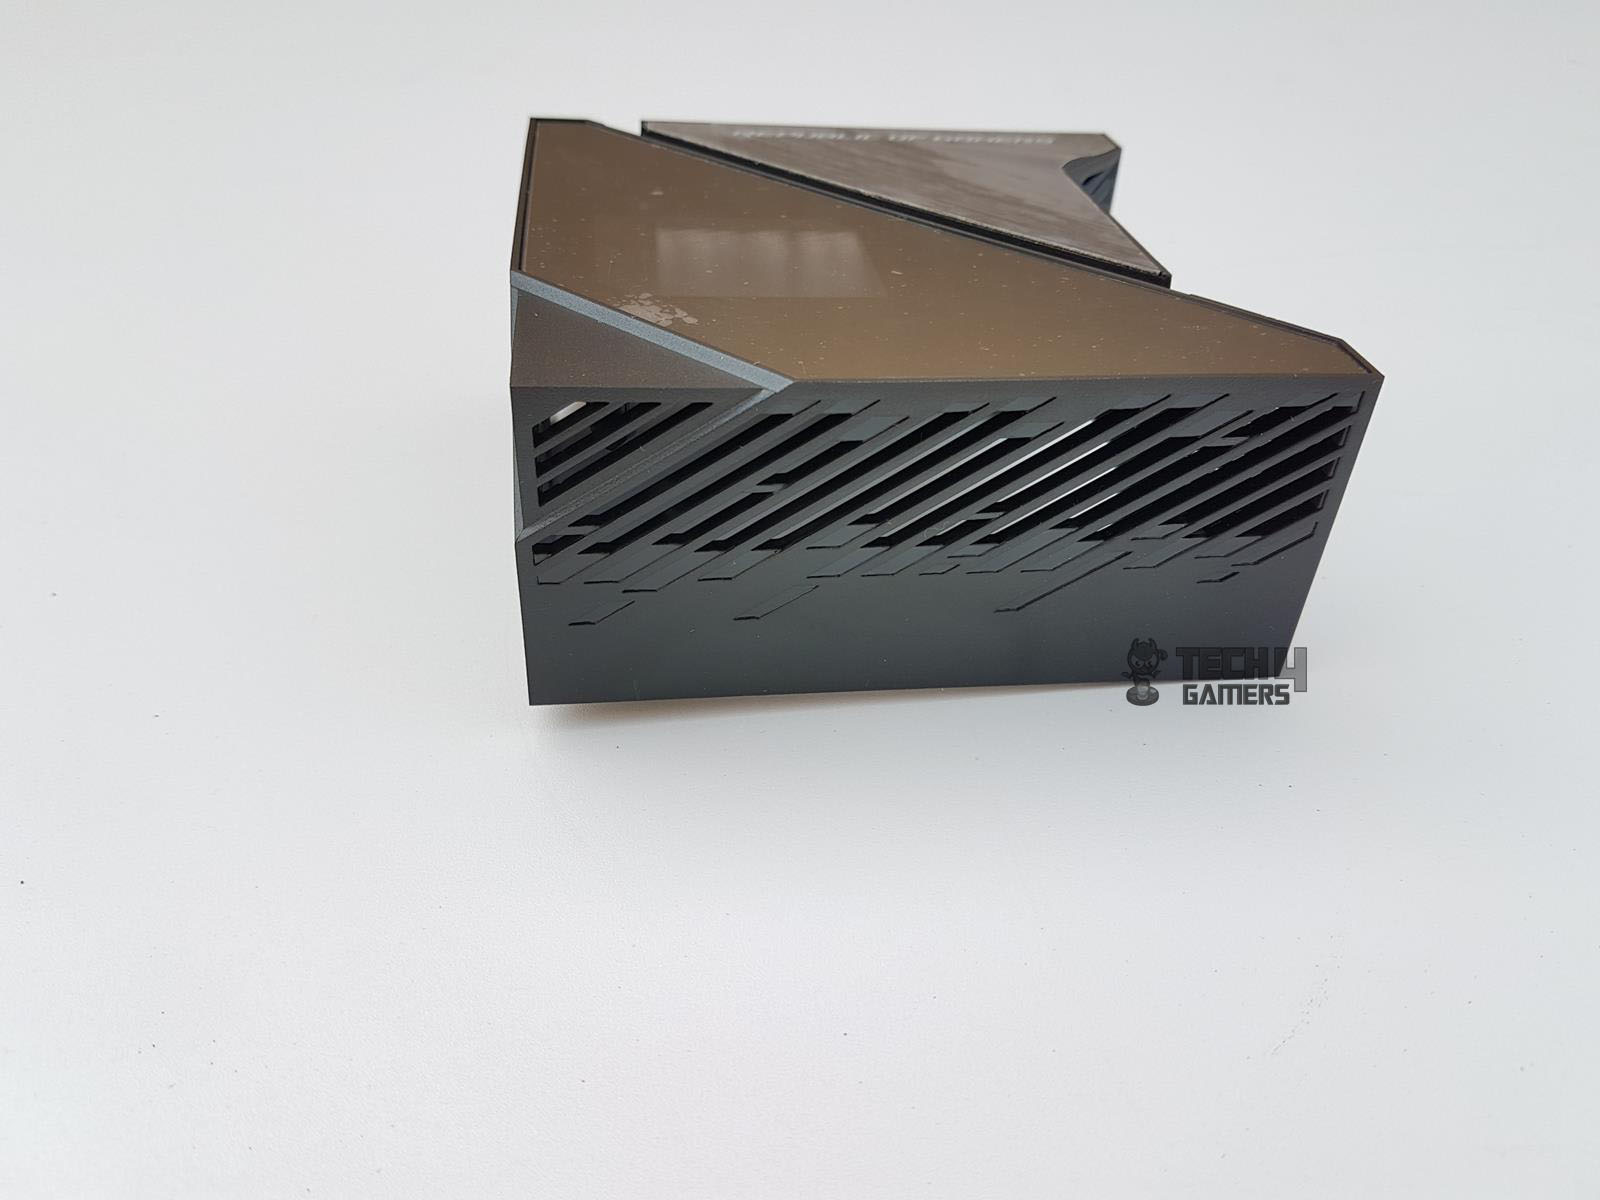

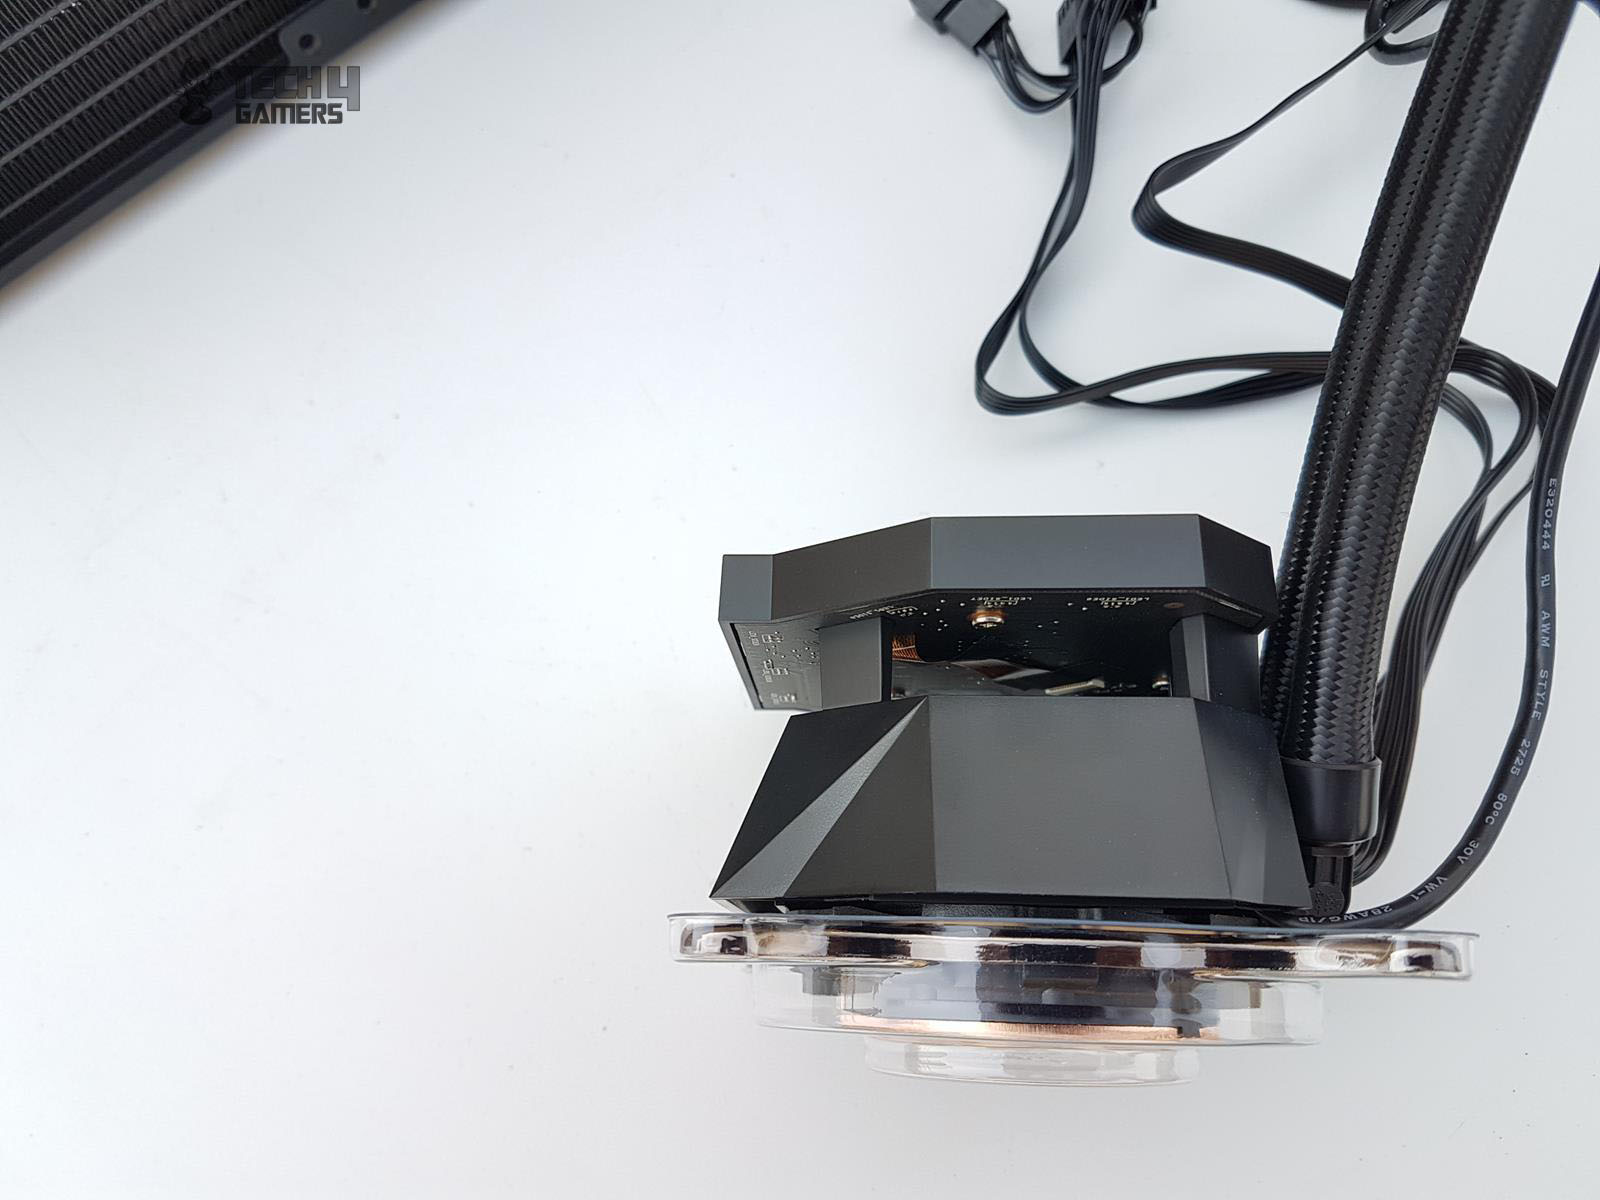
The top view reveals the NCVM coating spanning the length of the OLED screen side on the cover. A vented portion separates the NCVM-coated area from the opposite side, allowing the addressable RGB lighting to shine through. The right side, featuring the Republic of Gamers print, has a plain surface finished in brushed aluminum styling.
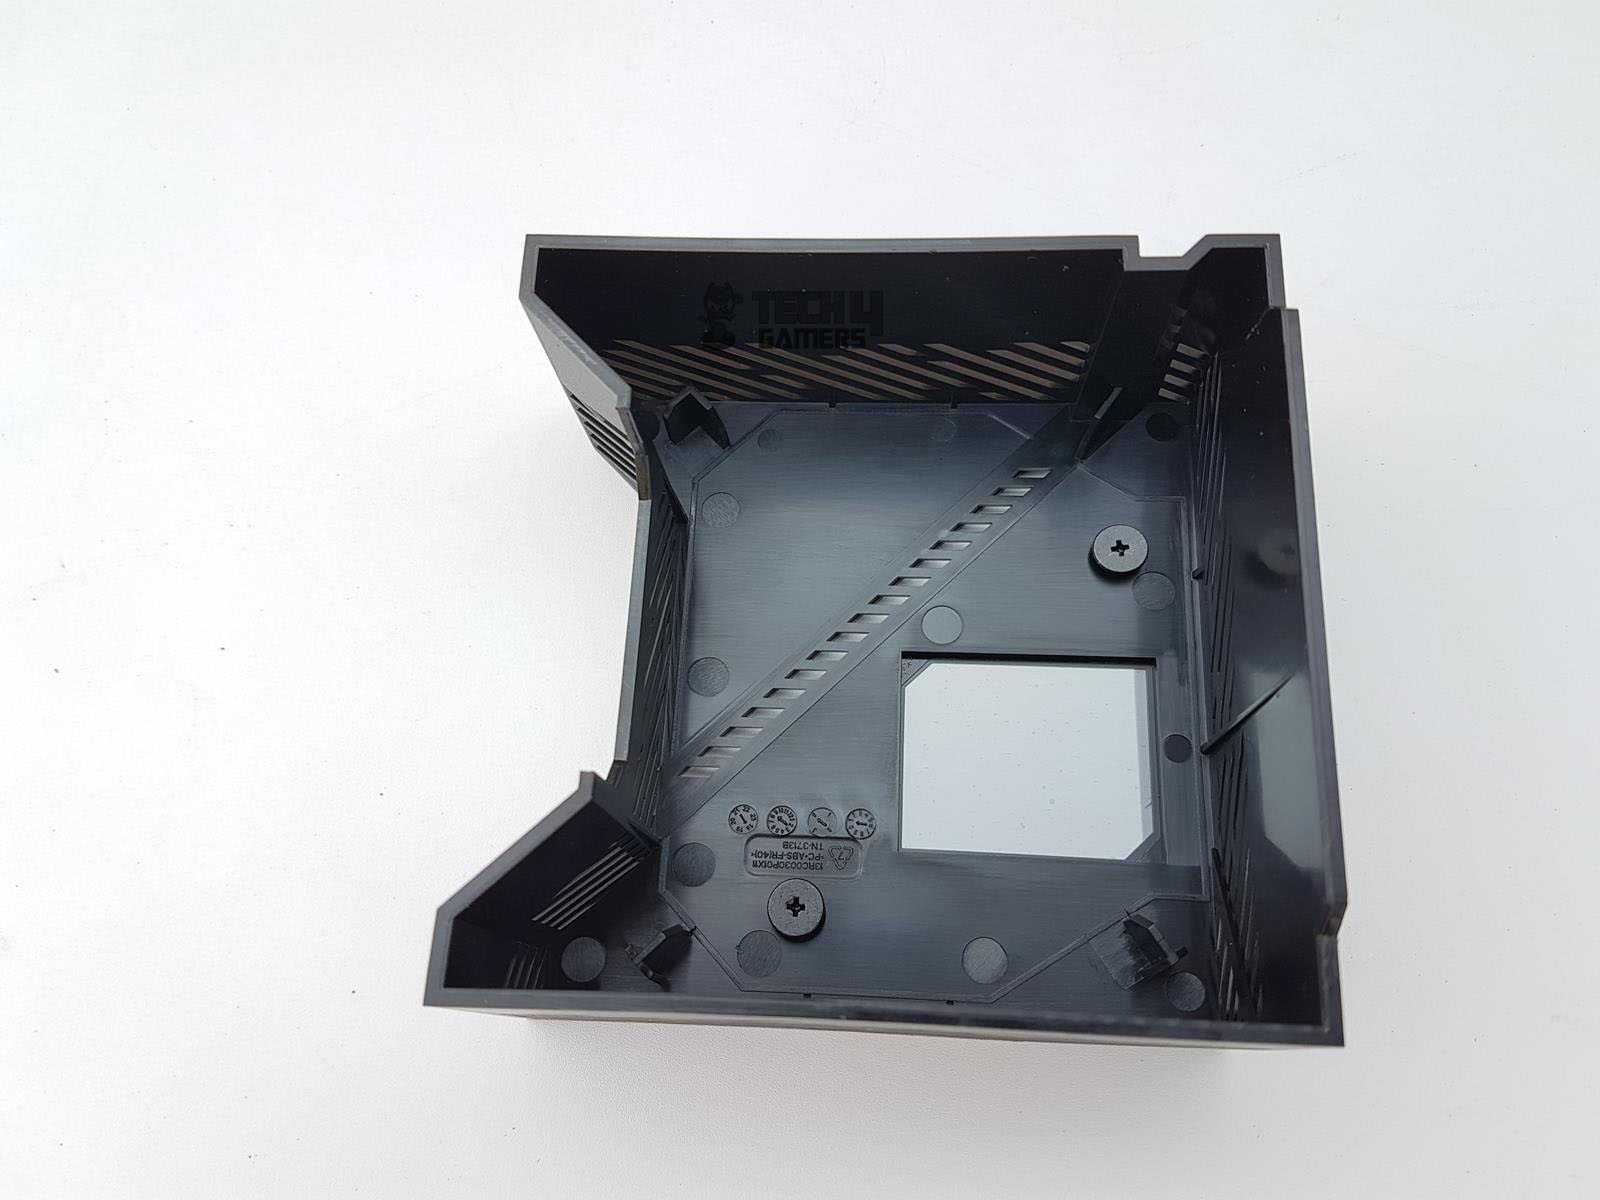
The inner side of the cover features two black metallic screw heads making contact with the magnetic cutouts on the upper portion, securing the top cover to the pump housing. The pump housing, lacking a circular design, defies easy comparison with a geometrical shape. Its front side appears pointed when viewed from the sides.
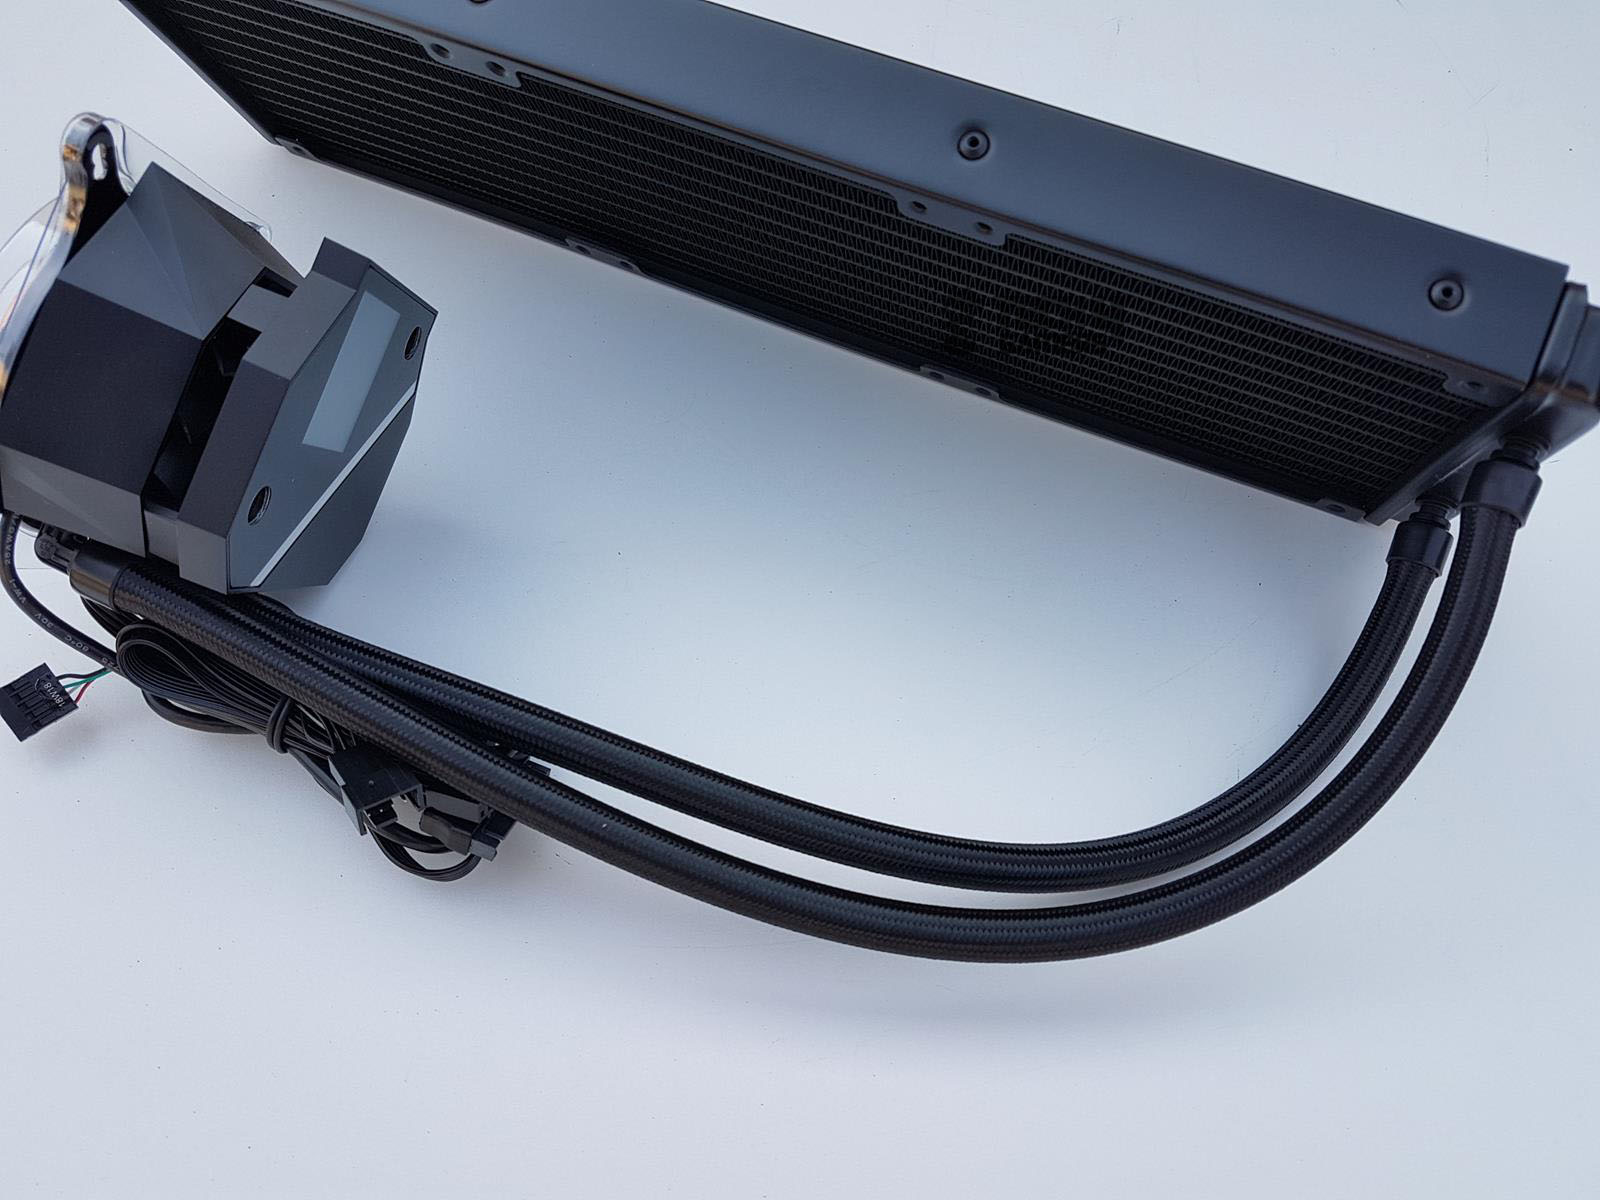
On the back side, 90° barb fittings are visible, with both tubes positioned at the same level. Notably, the tubes can be easily rotated to meet specific requirements.
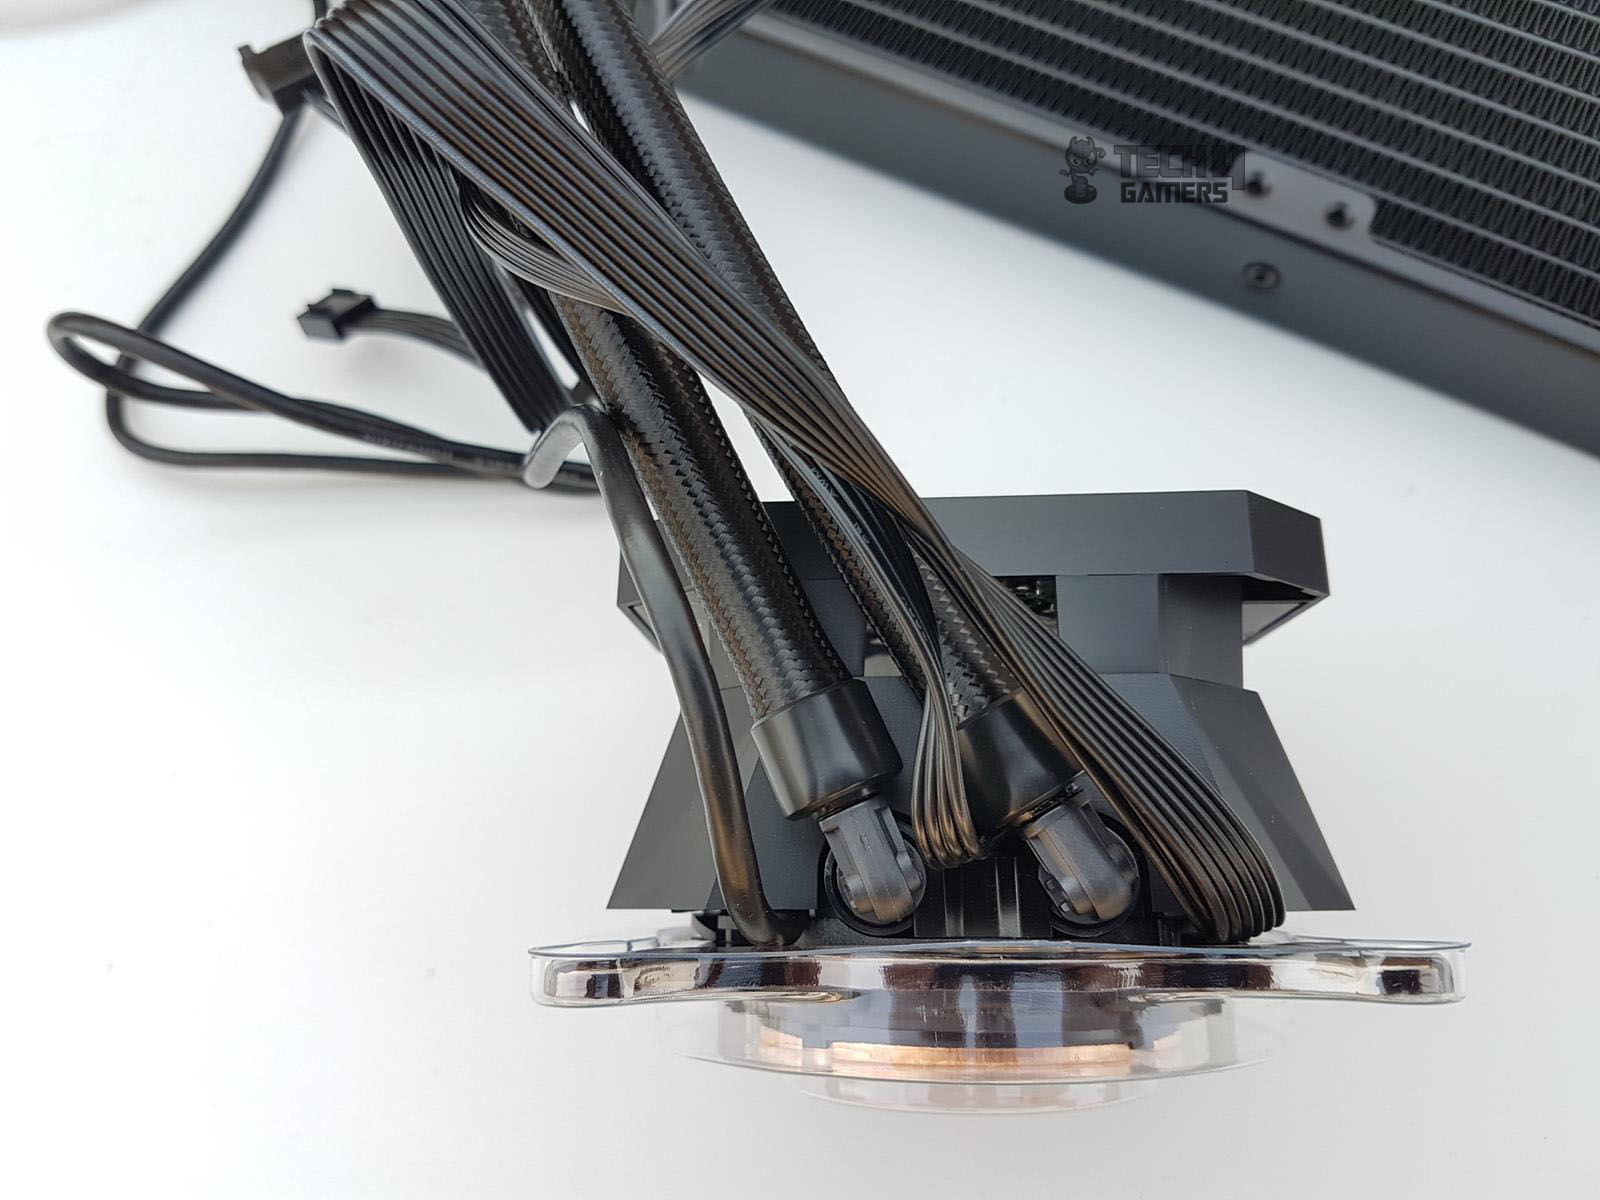
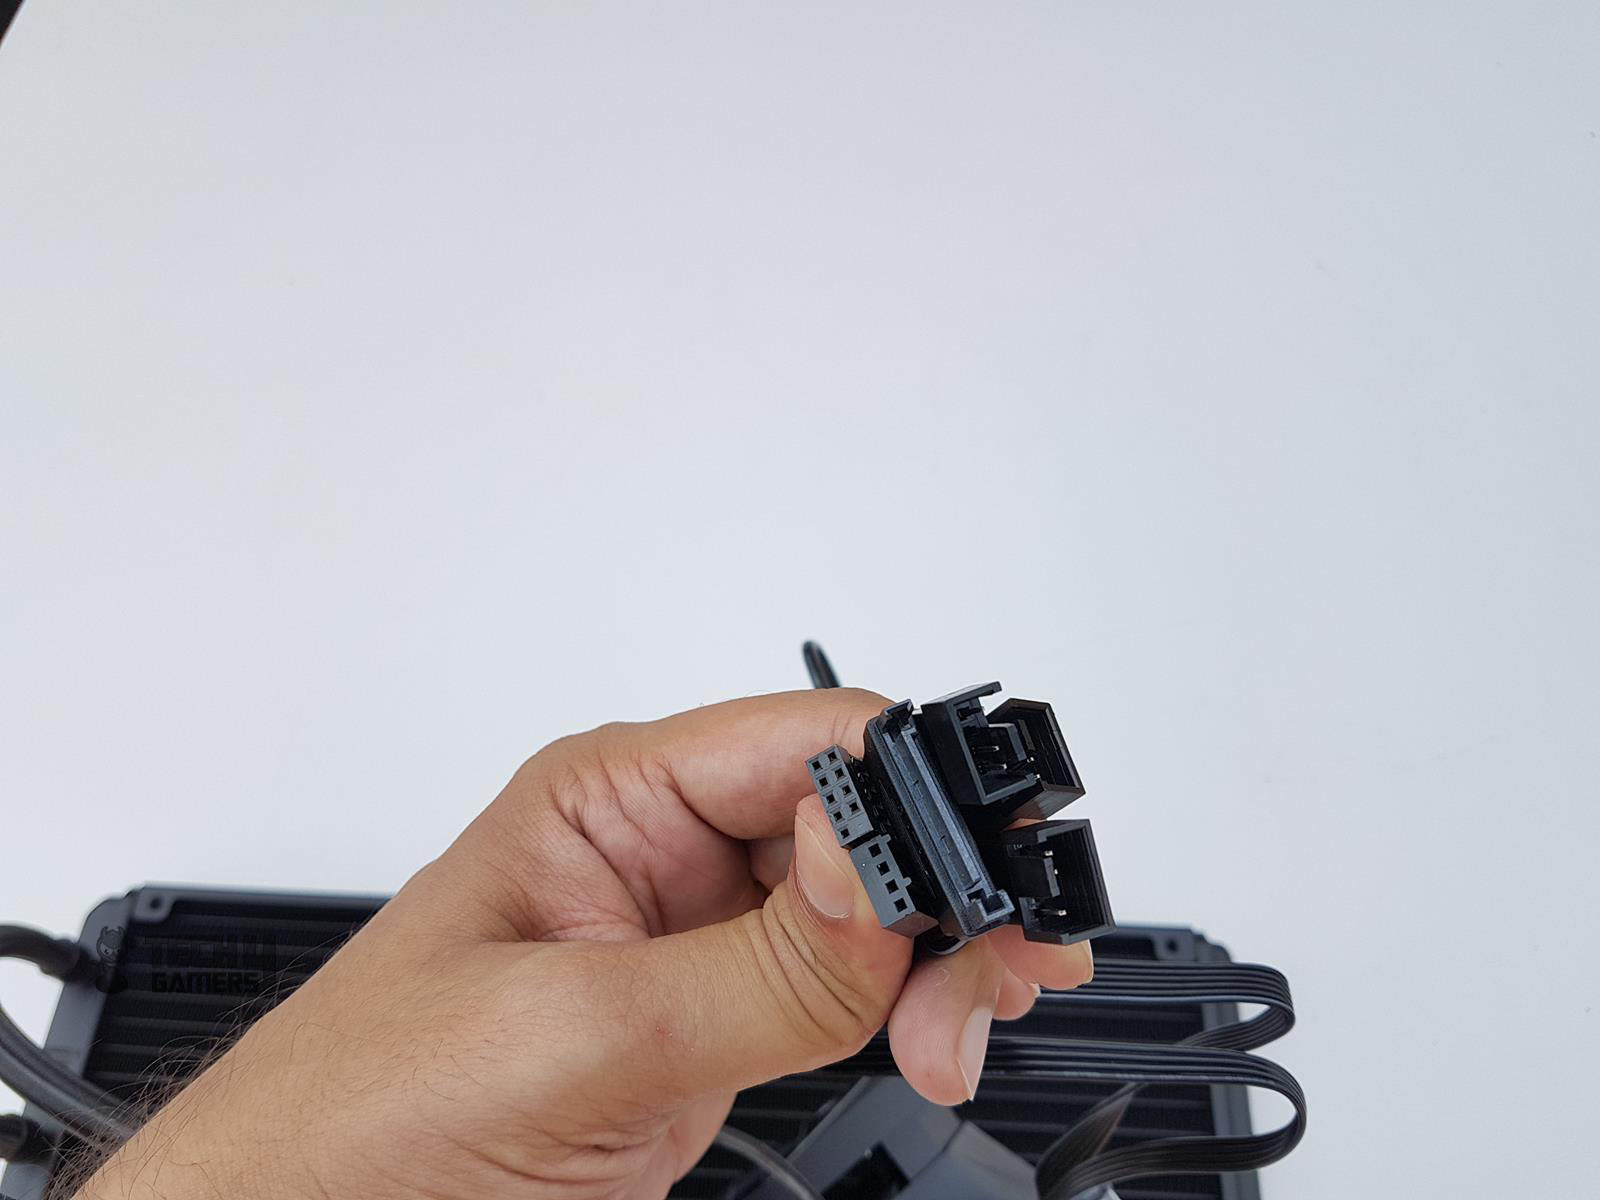
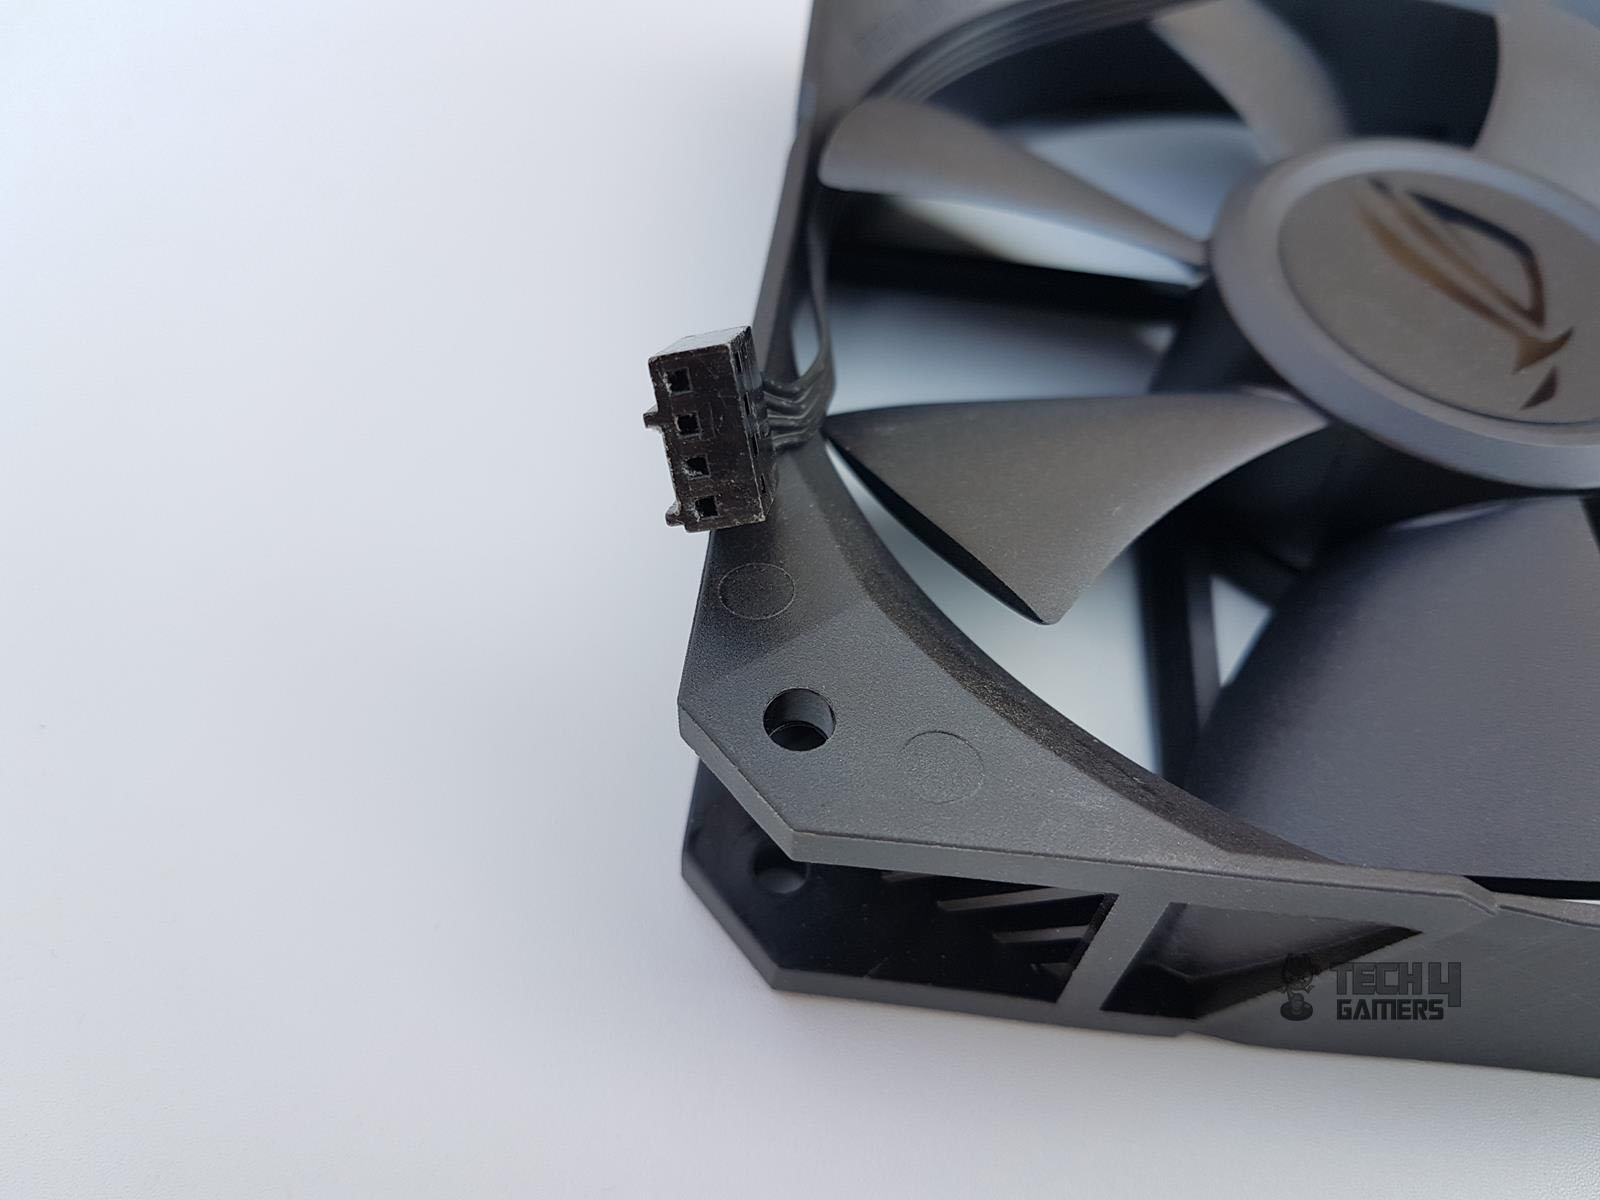
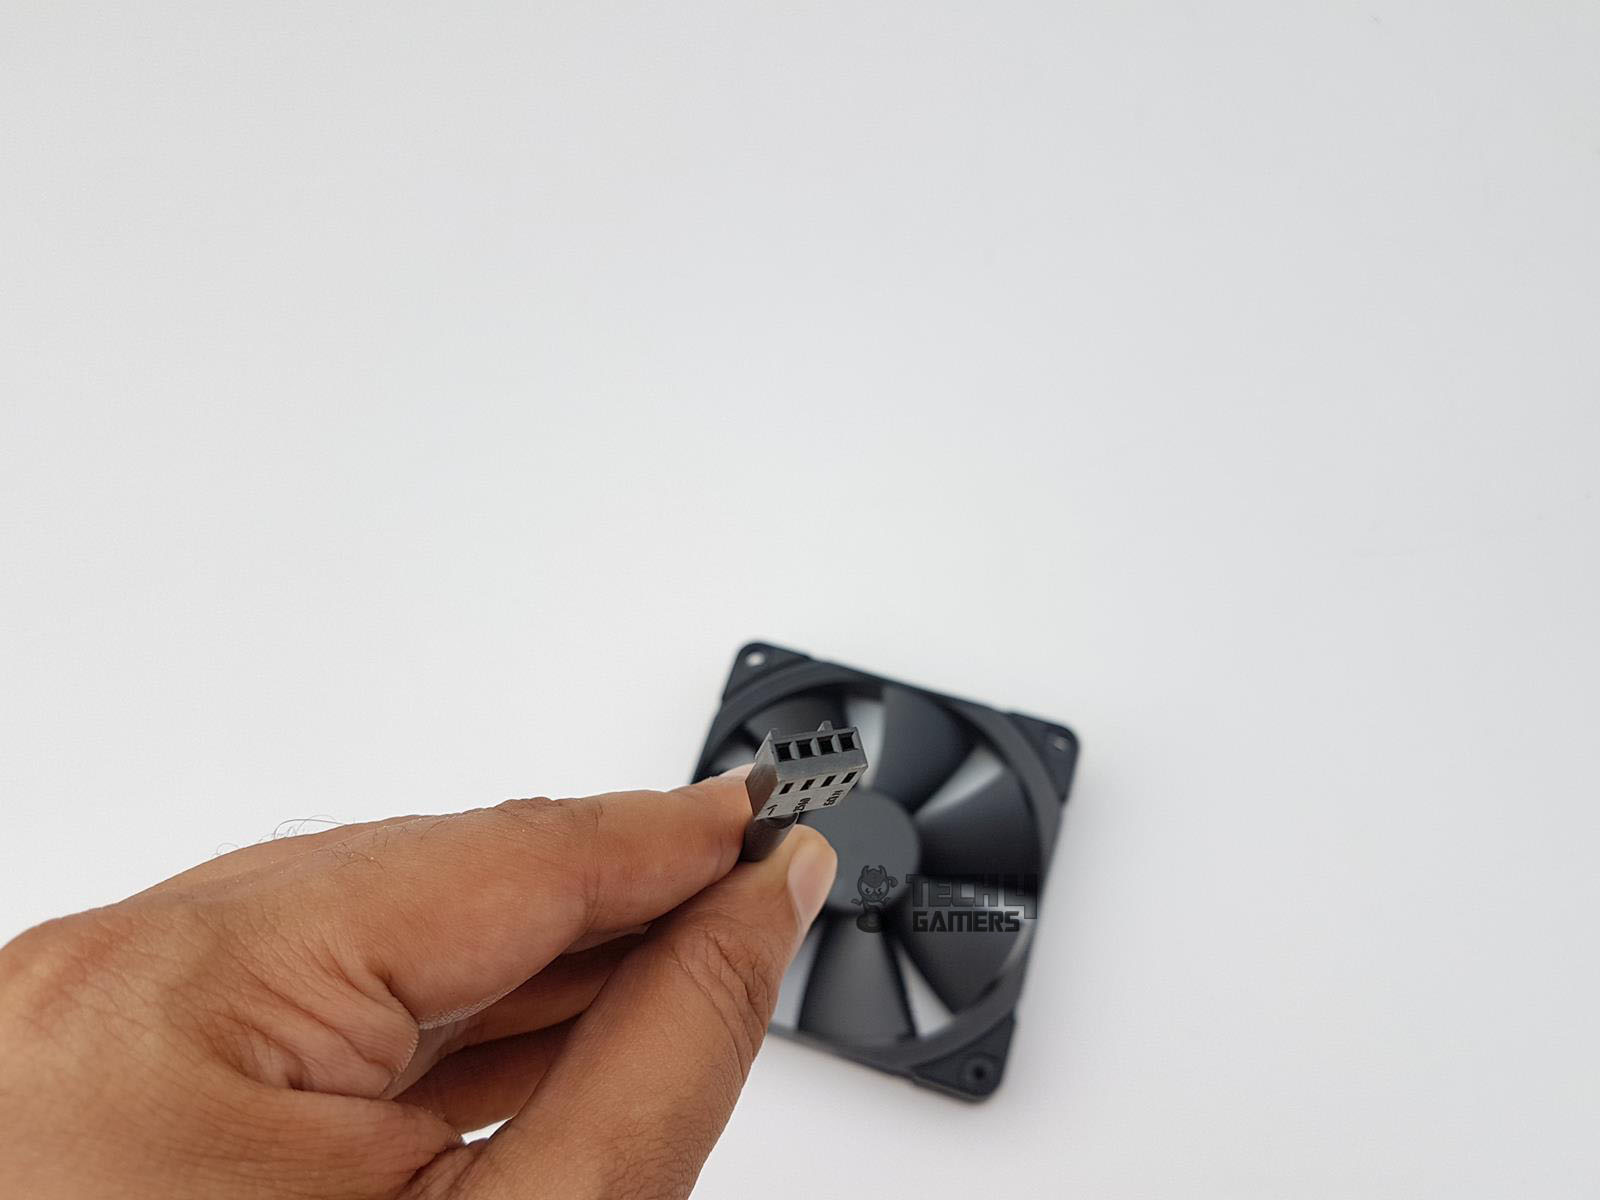
There are four cables coming out from the backside:
- 1x SATA cable measuring 298mm approximately
- 1x 4-pin connector cable measuring 305mm approximately
- 1x 3 way-splitter cable for fans measuring 282+50+50mm approximately
- 1x Micro USB cable measuring 935mm approximately
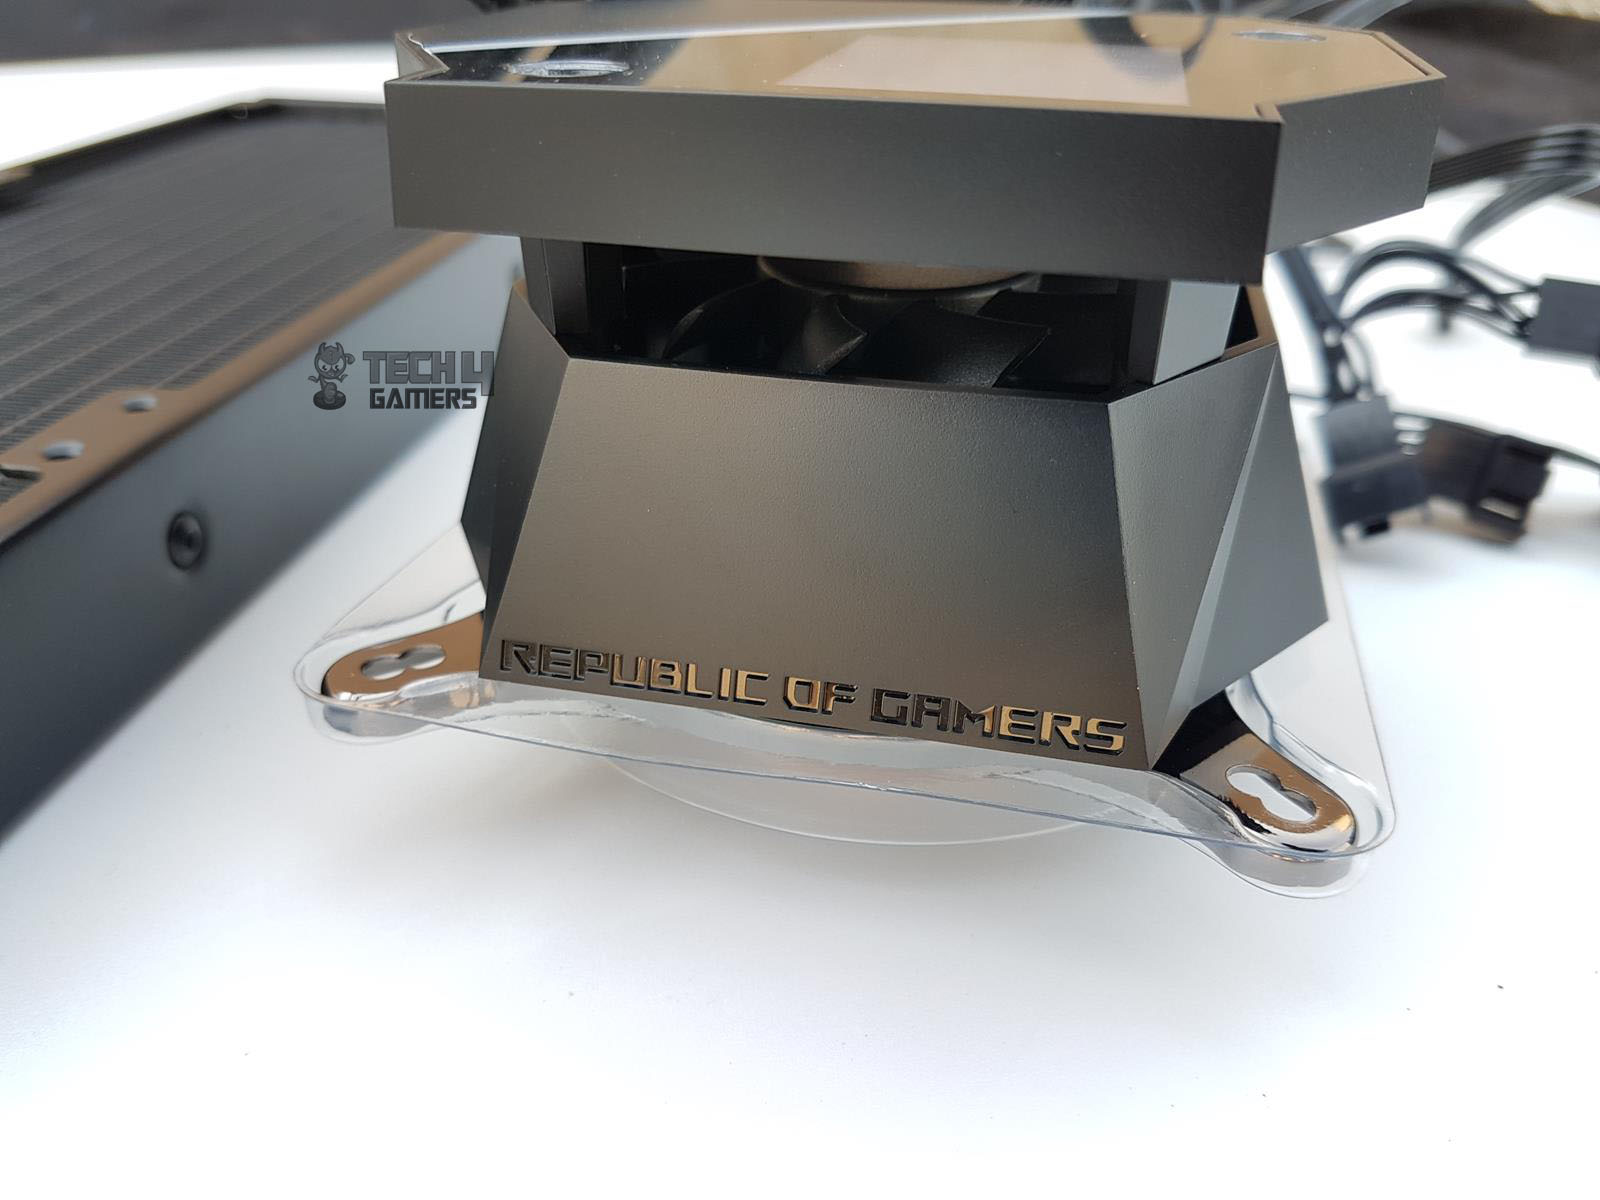
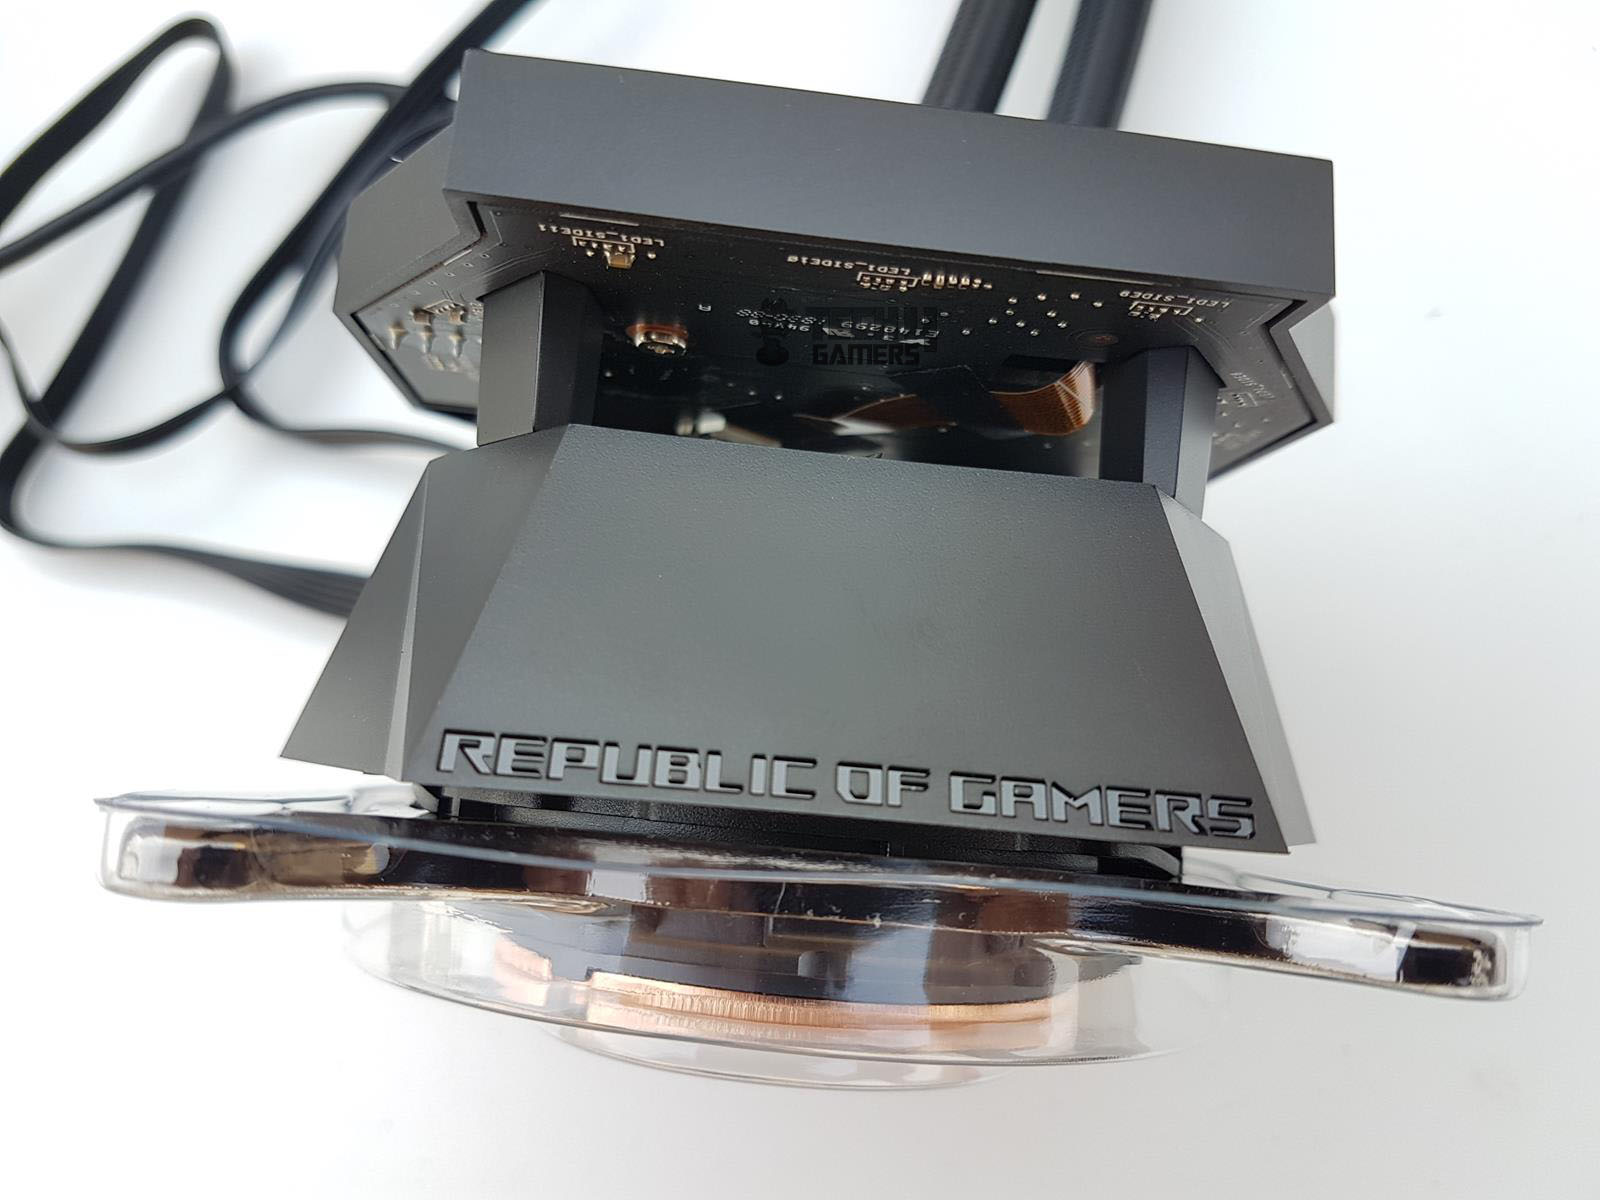
ROG Ryuo coolers feature a detachable micro-USB cable, while ROG Ryujin coolers have a permanently attached cable, posing cable management challenges. The cables exit at three points, demanding careful arrangement to preserve the OLED display and RGB lighting aesthetics. The pump housing, boldly designed with Republic of Gamers branding at the bottom of the front side, exudes an impressive aesthetic, especially with its distinctive lining style.
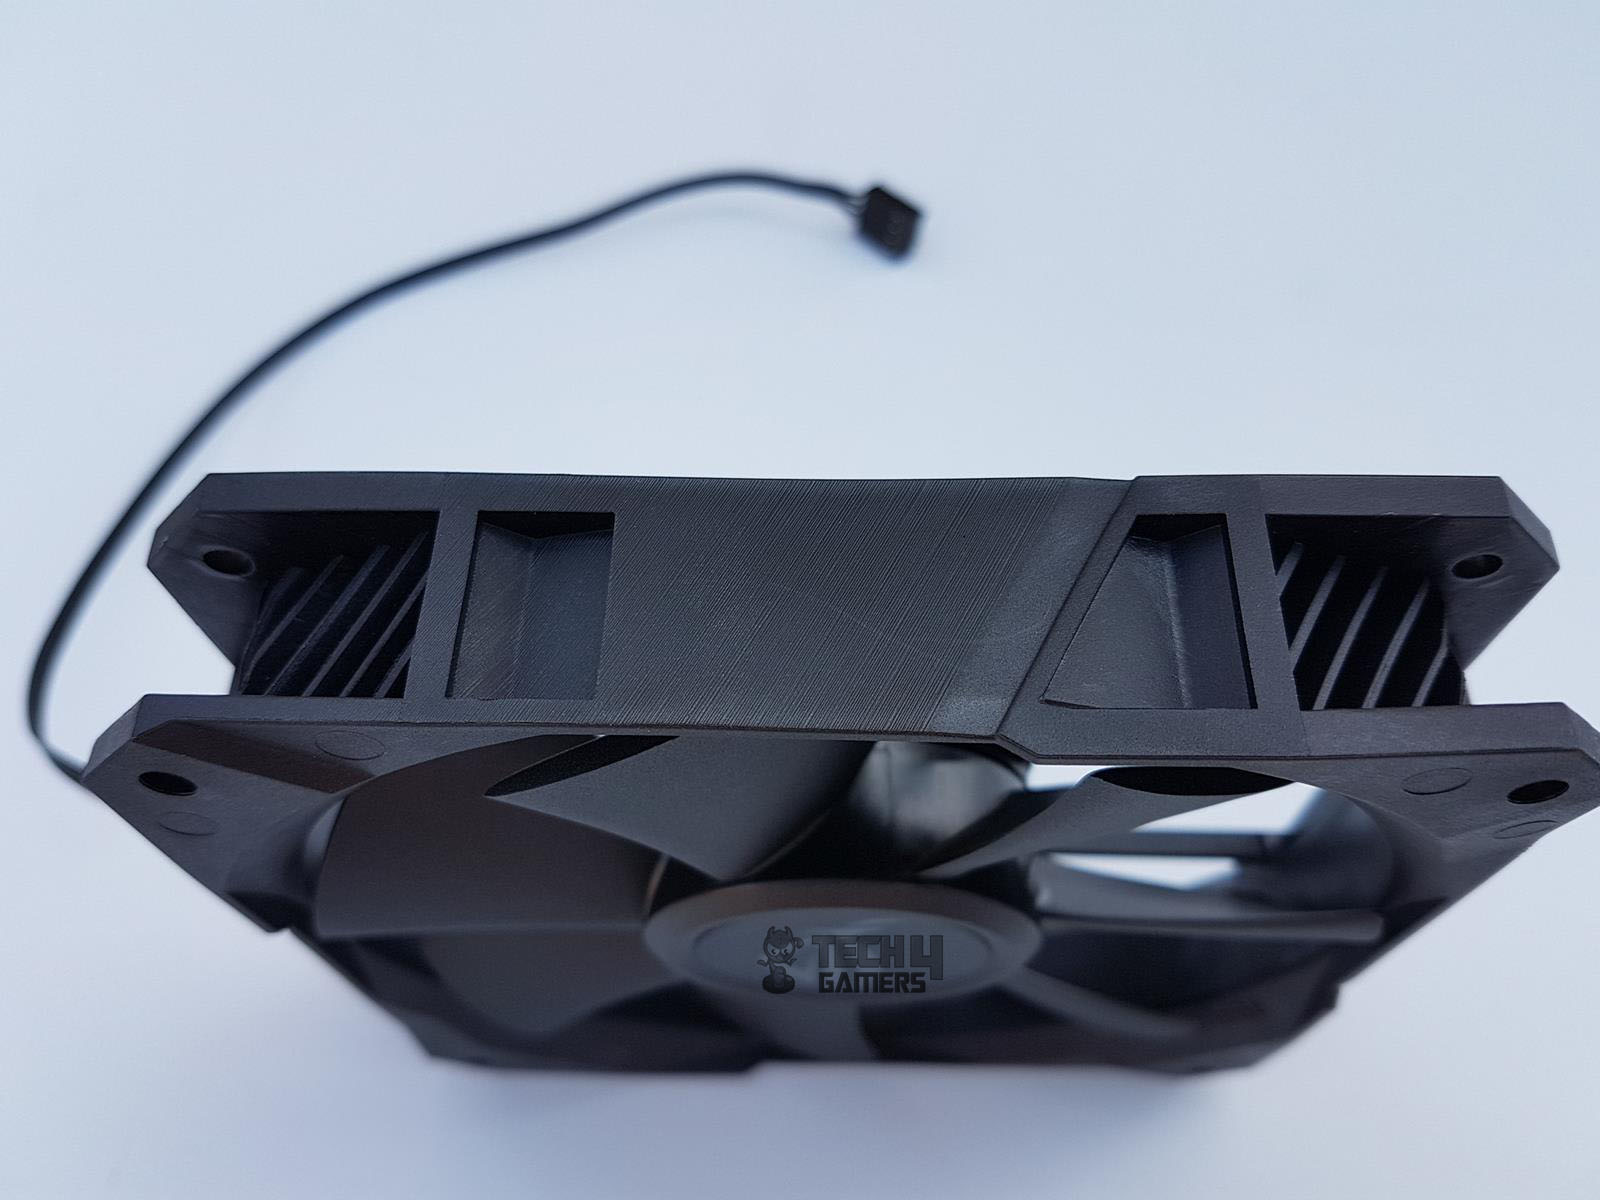
The top and lower portions connect stylishly via four frame arms, enhancing the overall looks, albeit hidden under the top cover. Housing a 60mm fan, as mentioned earlier, serves to cool the VRM/M.2 drive near the CPU socket. Specifications of this fan:
| Variable | Value |
| Speed (RPM) | 4800 ± 10% |
| Static Pressure (mmH₂O) | 3.23 |
| Air Flow (CFM) | 19.41 |
| Noise | 31 dB(A) |
This fan is quite noisy and it can only be controlled from the AiSuite software. The user is rather forced to install AiSuite to control the speed of this fan to bring the noise level down.
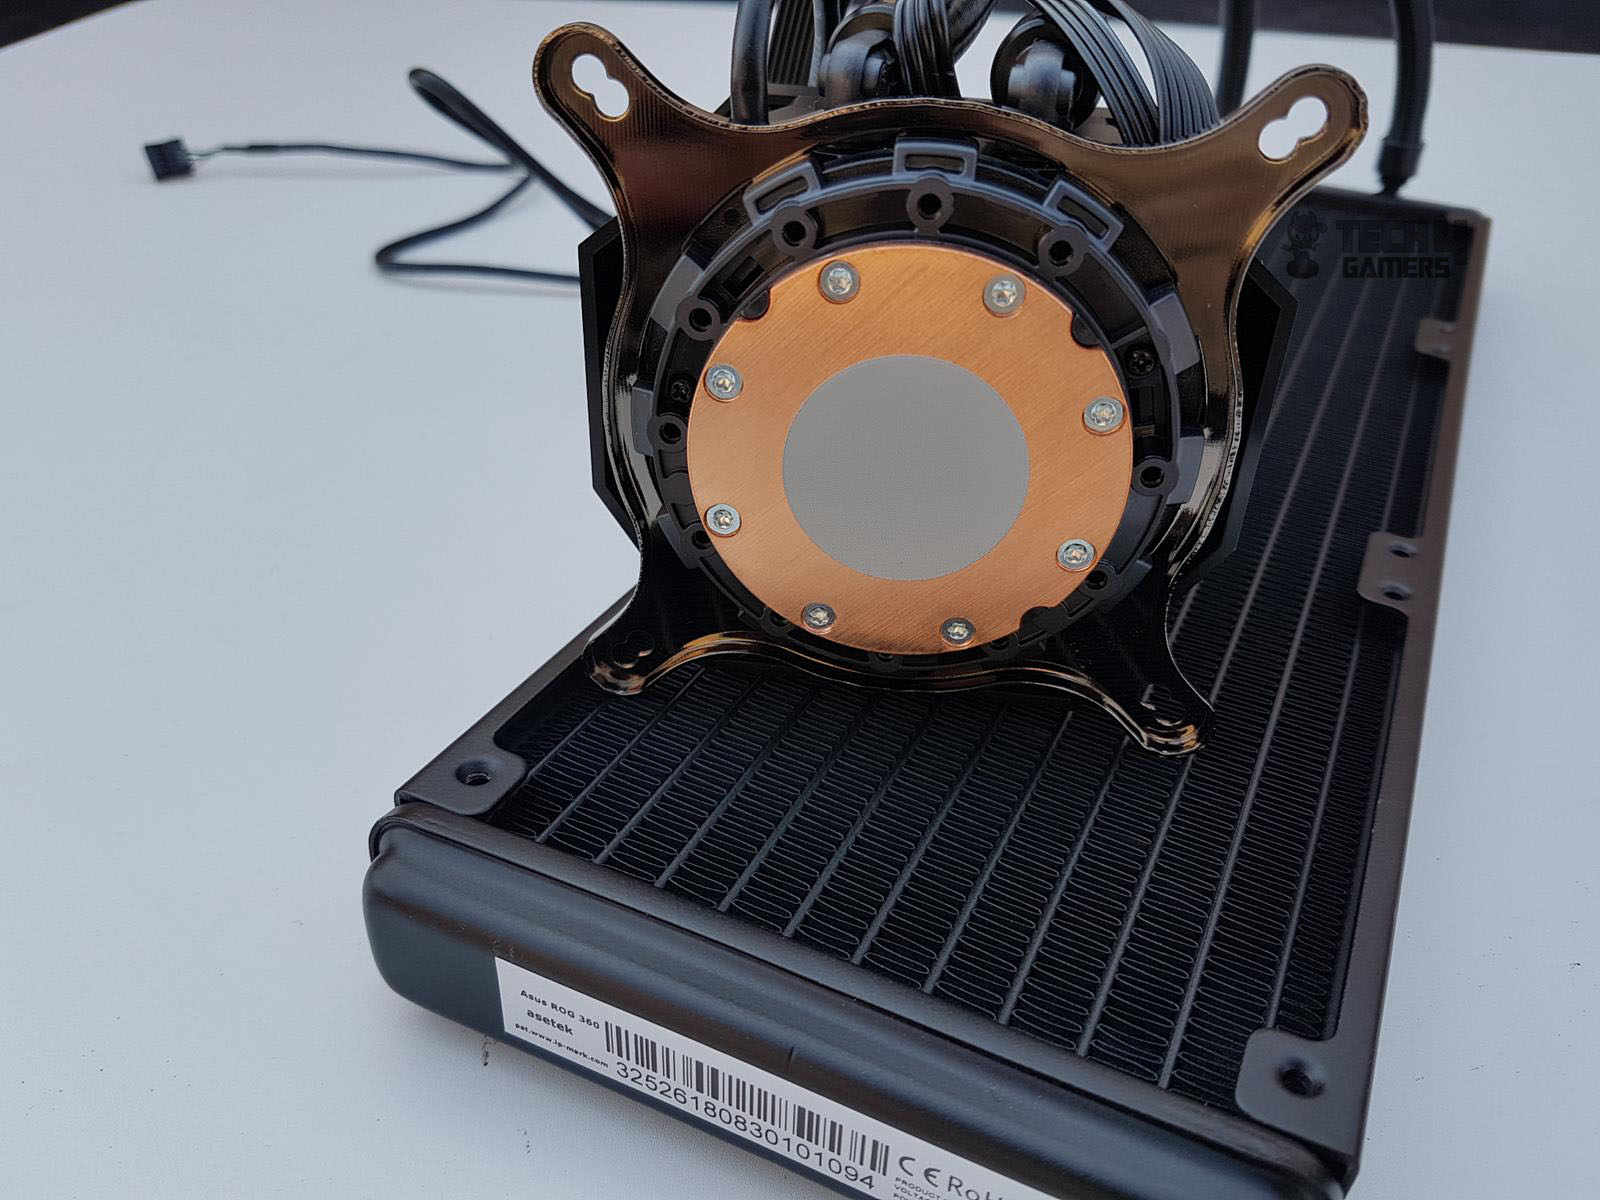
Examining the block’s bottom, I found a 54mm copper base with pre-applied thermal paste. Asetek’s thermal paste shows minimal performance difference in my testing. The pre-installed Intel bracket can be swapped for AMD. The pump, rated at 12VDC and 3.9W, hints at a current rating of 0.325Amps. The BIOS reports a max pump RPM of 2783, running quietly even at full speed.
Fans
Asus collaborates with Noctua, adopting an approach I’ve personally taken—pairing Asetek OEM AIO coolers with Noctua iPPC fans for superior cooling. This premium flagship cooling solution showcases Asus’ aggressive approach, ensuring ultimate cooling power with Noctua’s industrialPPC fans. Here’s a quick look at their specifications.
| Variable | Value |
| Dimension (mm) | 125x125x25 |
| Speed (RPM) | 2000 ± 10% |
| Static Pressure (mmH₂O) | 3.94 at 12V |
| Air Flow (CFM) | 71.74 |
| Noise | 29.7 dB(A) |
| Control | 4-pin PWM |
| Voltage (VDC) | 12 |
| Current (Amp) | 0.1 |
| Power (W) | 1.2 |
| MTTF | >150,000 hrs |
| Cable Length (mm) | 316 (approx) |
Asus is showing the airflow of these fans as 121.8 CFM whereas Noctua website is showing this reading to be at 121.8 m³/h. If we take the correct unit to be m³/h then the actual CFM comes out to be 71.74 by multiplying the 121.8 m³/h by 0.589. I have run it with Asus and Noctua. The correct airflow on these NF-F12 is indeed 71.74 CFM as confirmed by the Noctua.
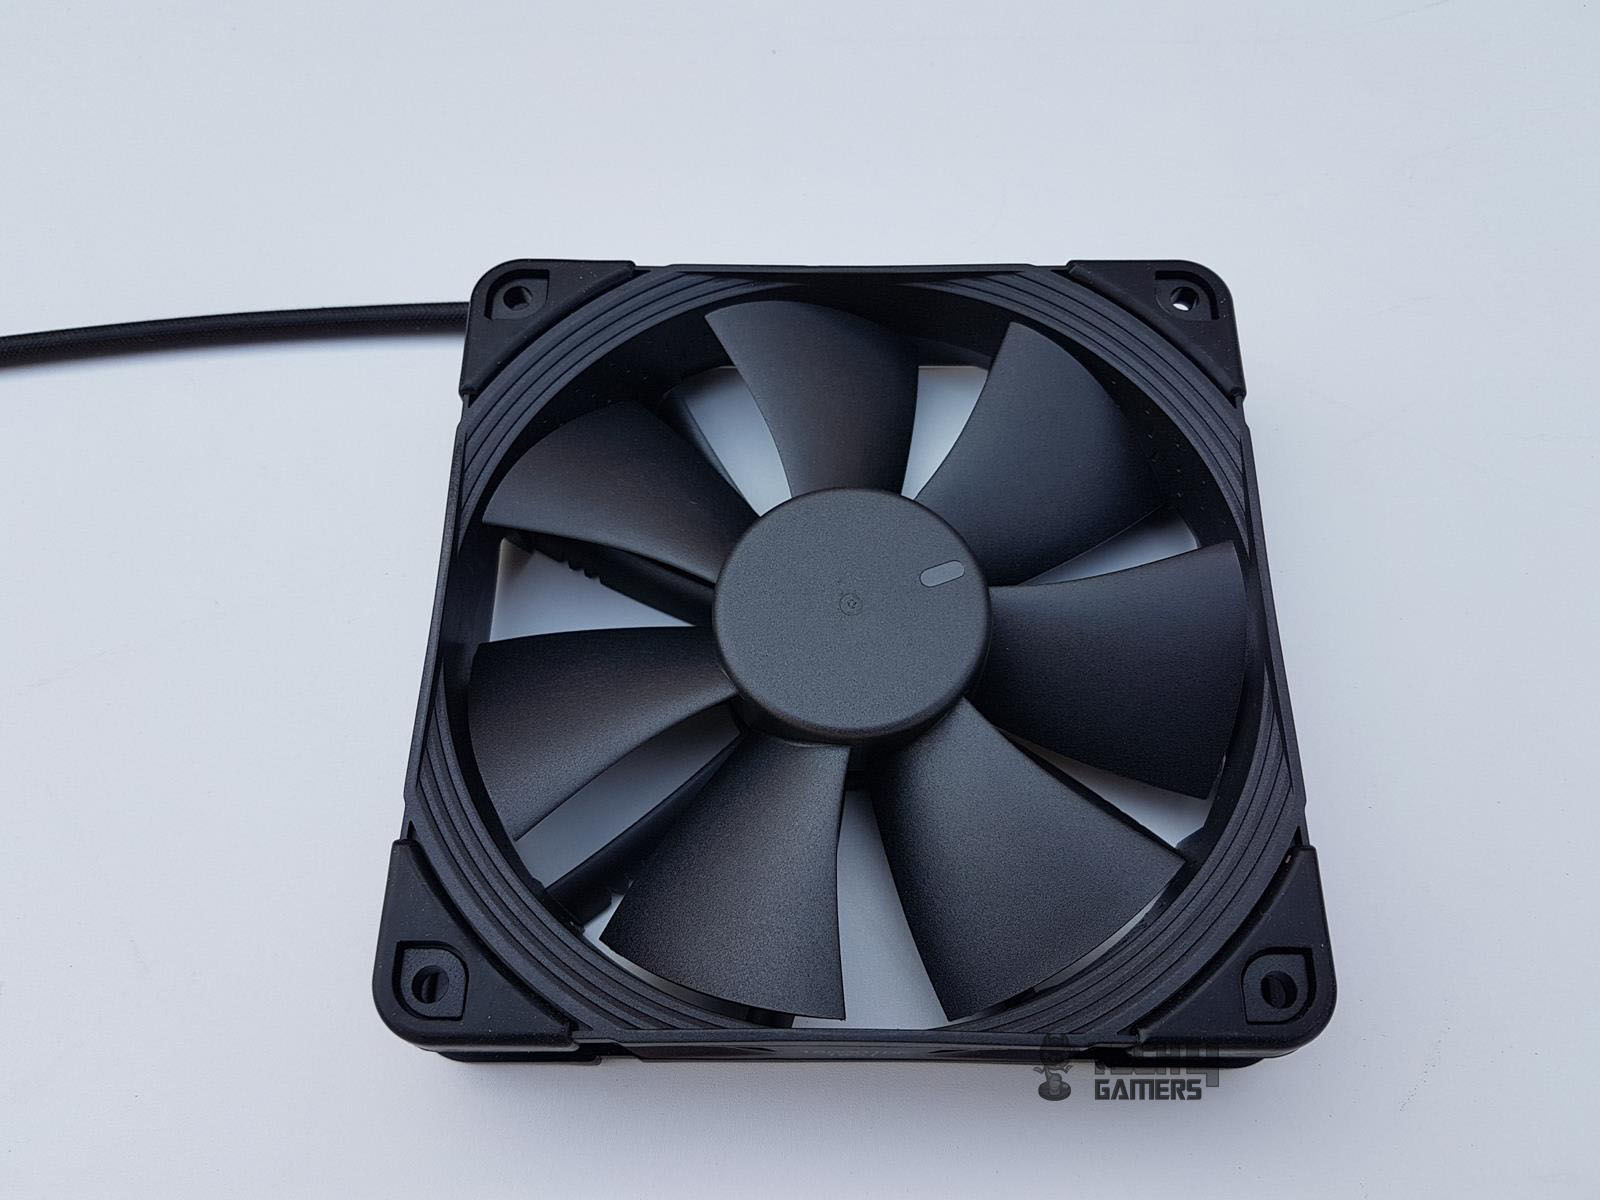
The Noctua NF-F12 iPPC (Protected Performance Cooling) 2000 PWM fan is a ruggedized high-speed version of the award-winning retail model. Thanks to the outstanding aerodynamic efficiency of the NF-F12 design and the use of a novel three-phase motor, the industrialPPC version provides superior airflow and pressure capacity while keeping noise levels and power consumption moderate as against comparable high-speed fans.
While its fiberglass-reinforced polyamide construction and certified water and dust protection (IP52) make the NF-F12 industrialPPC suitable for operation in challenging environments, the renowned SSO2 bearing technology guarantees an MTTF of over 150.000hrs. The NF-F12 industrialPPC is an ideal choice for highly demanding applications that require superior flow rates and ultimate dependability. We have reviewed the NF-F12 iPPC 3000 PWM earlier. You can check the review of the iPPC fans by clicking here.
NF-F12 industrialPPC fans feature seven impellers designed for optimal performance on resistant surfaces like radiators. The focused flow frame, with eleven stator guide vanes, channels airflow effectively. Varying Angular Distance and Vortex-Control Notches in the stator guide vanes contribute to a more pleasant sound pattern.
Noctua’s AAO frames, anti-vibration pads, and SSO2 bearings ensure performance, noise efficiency, and durability. The CNC-milled brass bearing shell guarantees precision and stability. Equipped with a custom-designed PWM IC with SCD, these fans offer automatic speed control for efficient cooling.
The NE-FD2 integrates Noctua’s proprietary Smooth Commutation Drive (SCD) technology, which suppresses PWM switching noises and thus makes the fan quieter at lower speeds. All these features are supported by a 3-phase motor design. There are black color anti-vibration pads on each mounting corner which can be replaced with their Chomrax series of anti-vibration pads available in 6 colors.
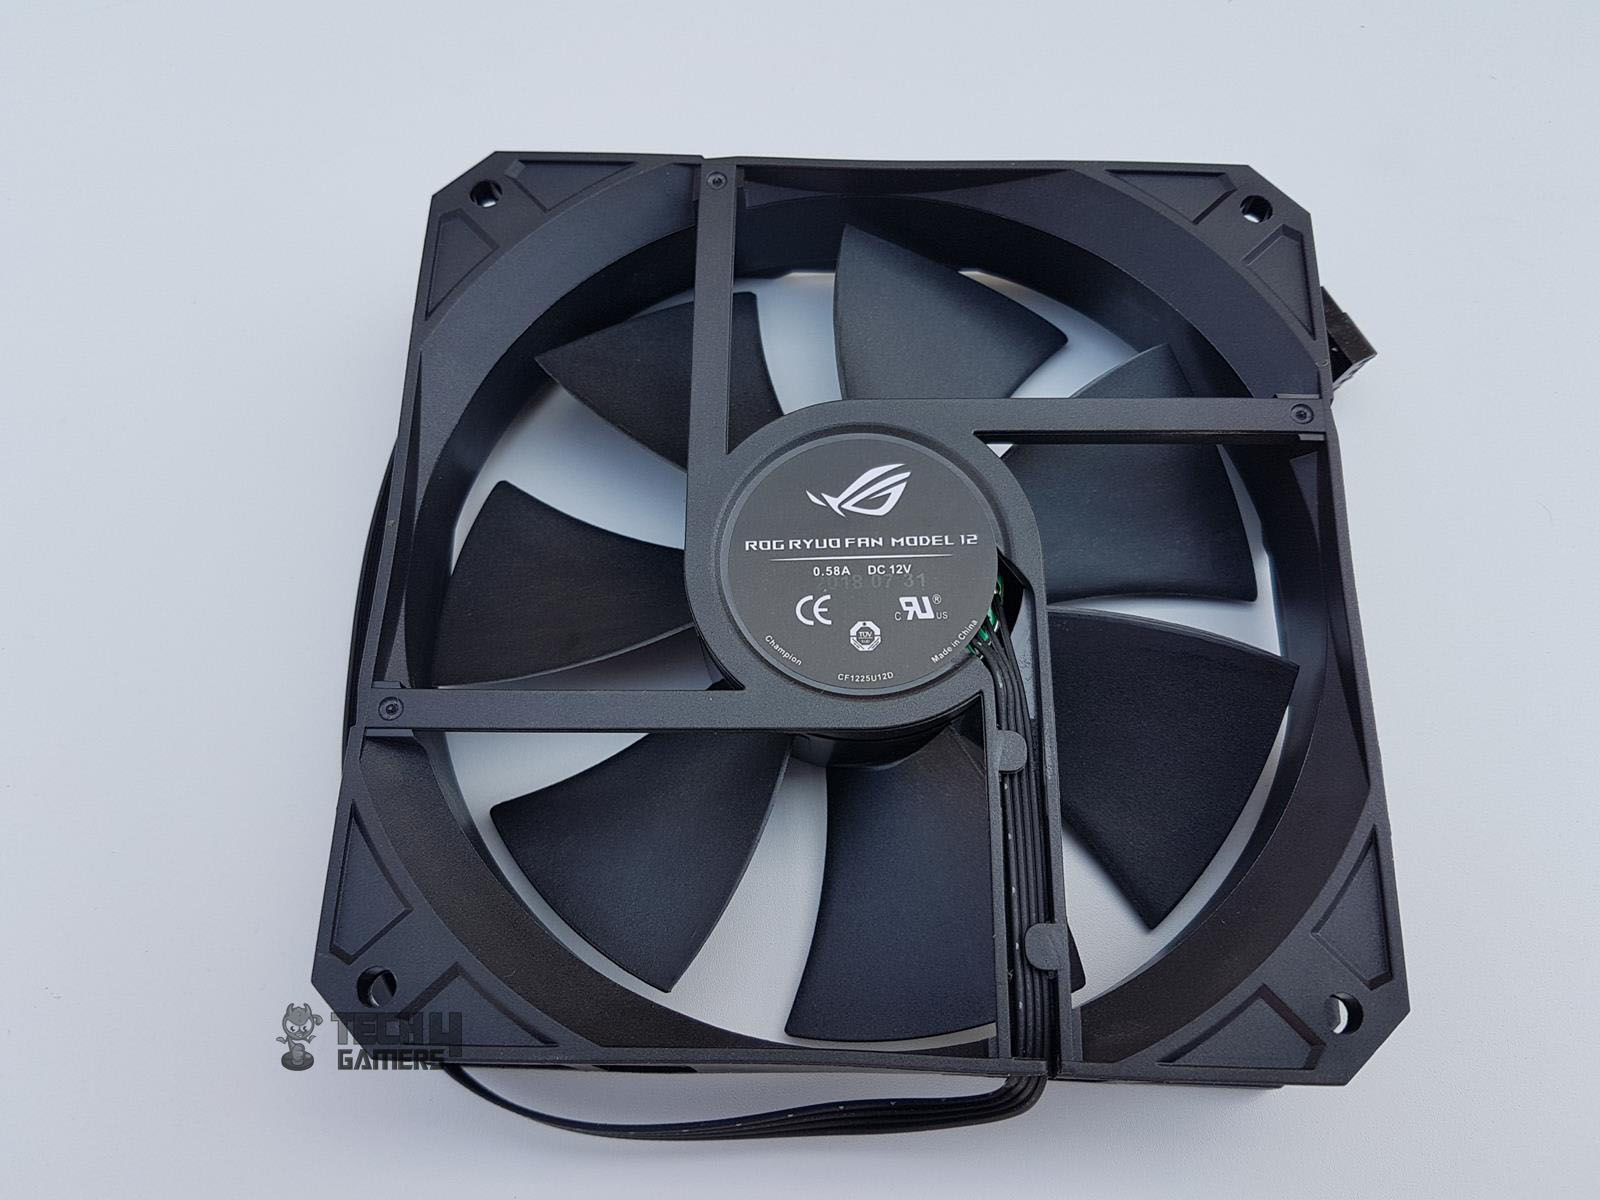
The backside of the fan has a different design as compared to the standard 4-arms assembly design. We have 1 stator guide vanes holding and securing the motor hub with the frame. There is a sticker pasted on the center with Noctua brand logo printed on its top. NF-F12 industrial-2000 PWM is printed in the center
These fans are drawing much less power as compared to the Asus ROG Model 12 fans introduced with the ASUS ROG Ryujin 360 Review.
RGB Lighting
Before moving on to the installation and testing sections, let’s take a look at the Vortex software to control the OLED display and AURA Sync lighting on this cooler. All Asus ROG coolers are AURA Sync compatible which helps the users to synchronize their complete lighting solution based on Asus hardware.

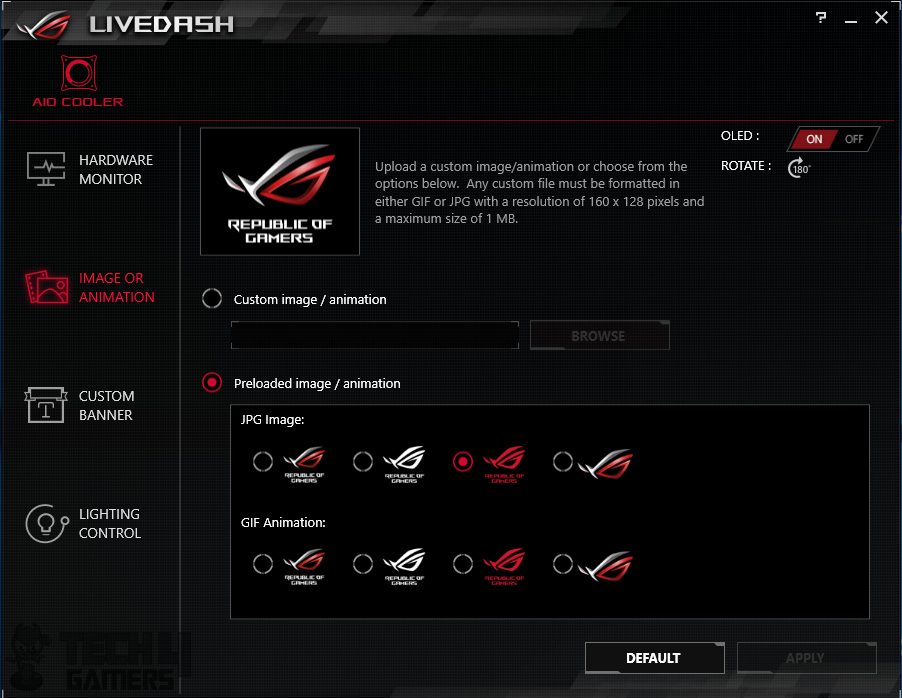
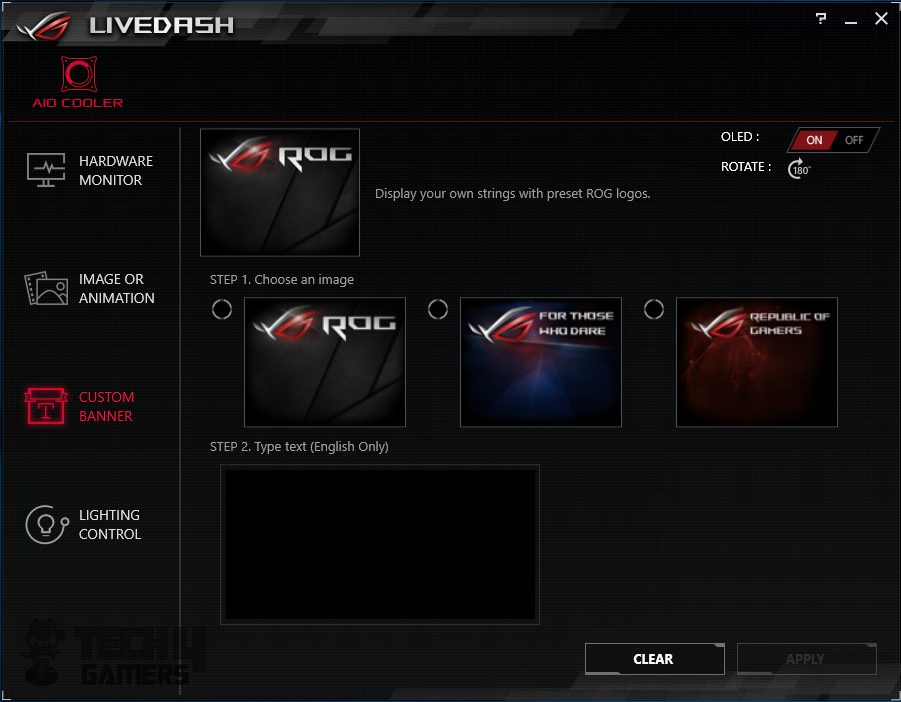
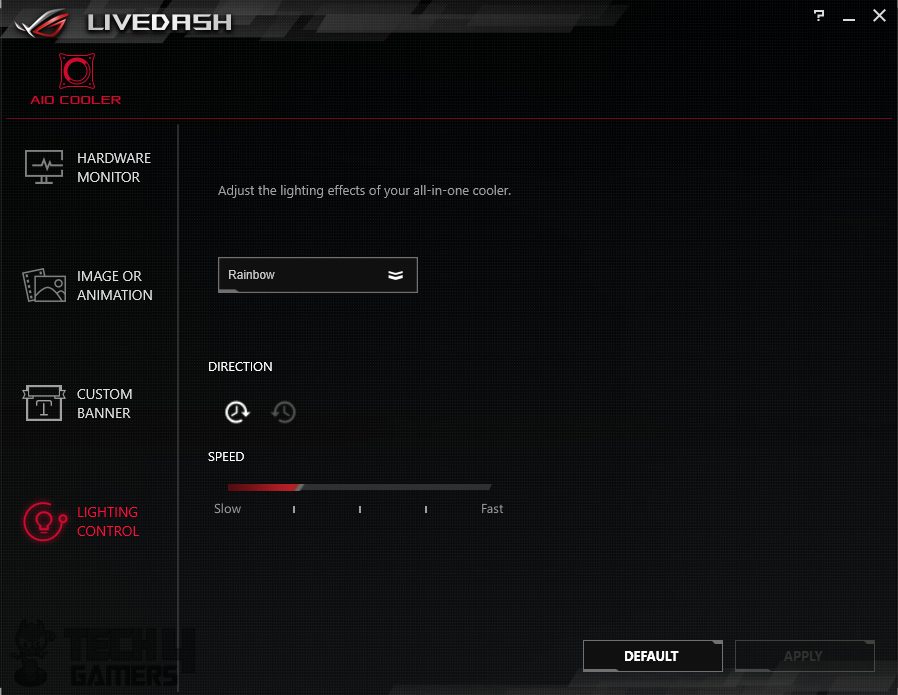
AURA SDK is also available for other manufacturers and developers. LiveDash can be downloaded from the Asus website and they work with the Asus ROG coolers. This software has a simplified interface which is appreciated and provides the users with the options to show hardware monitoring stats (only for Asus motherboards), animations, logos, pictures, texts, banners, you name it.
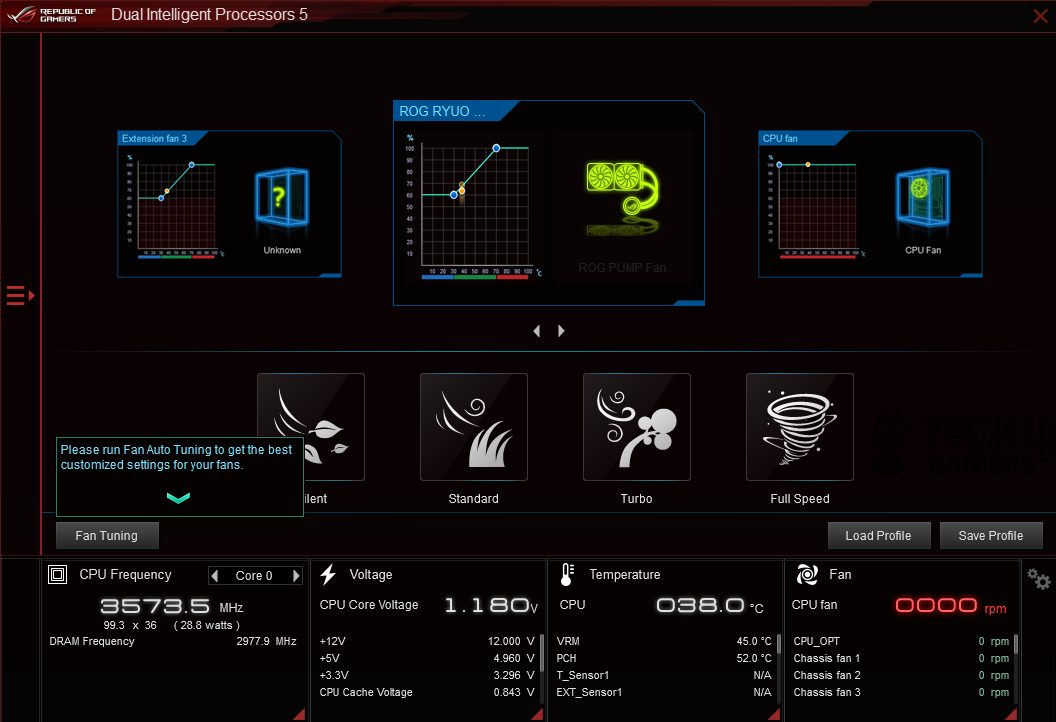
Please, note that you would need AiSuite to control and monitor the fans connected with the cooler. AiSuite can be downloaded from the Asus website. Under the Fan Xpert, there will be two entries with the name ROG RYUJIN Fan and Fan 1 showing the custom fan curve which the user can set as per the requirement.
Selecting a lighting mode on the cooler will also change the Asus motherboard lighting; using AURA Sync for separate control requires three different software, suggesting a potential inconvenience, and advocating for consolidation in LiveDash.
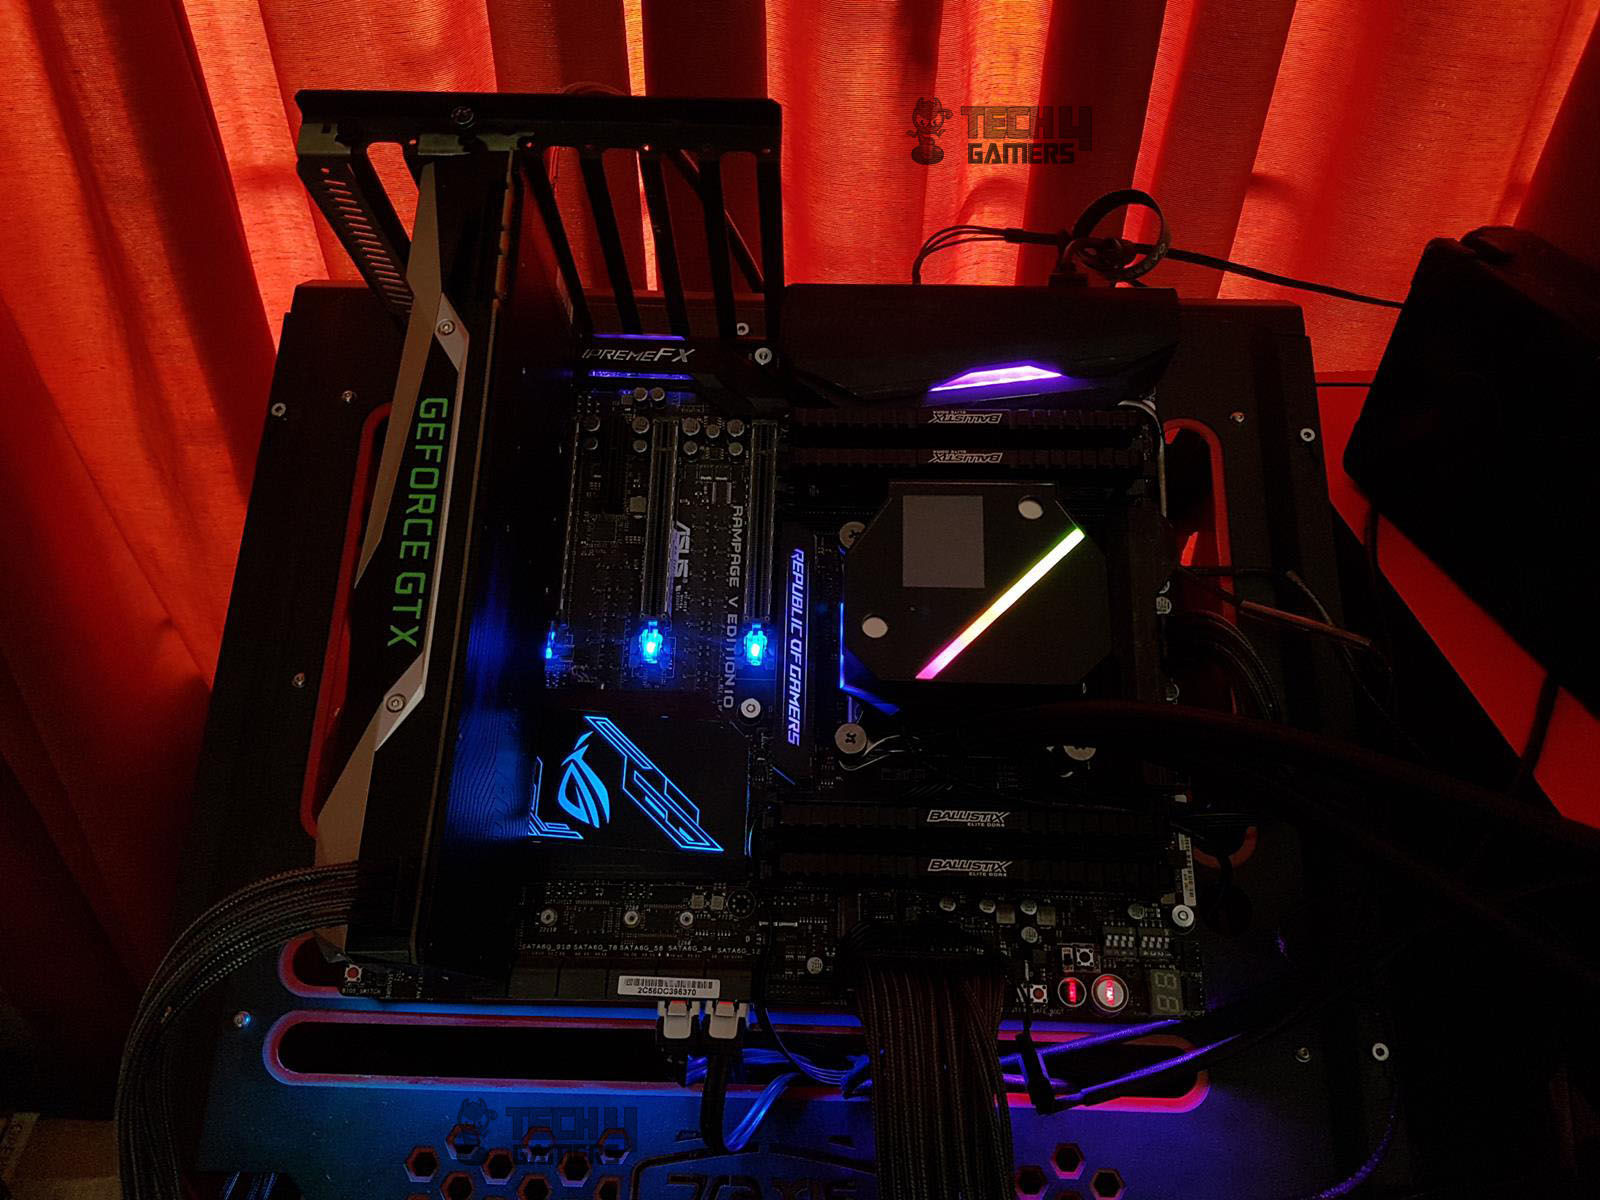
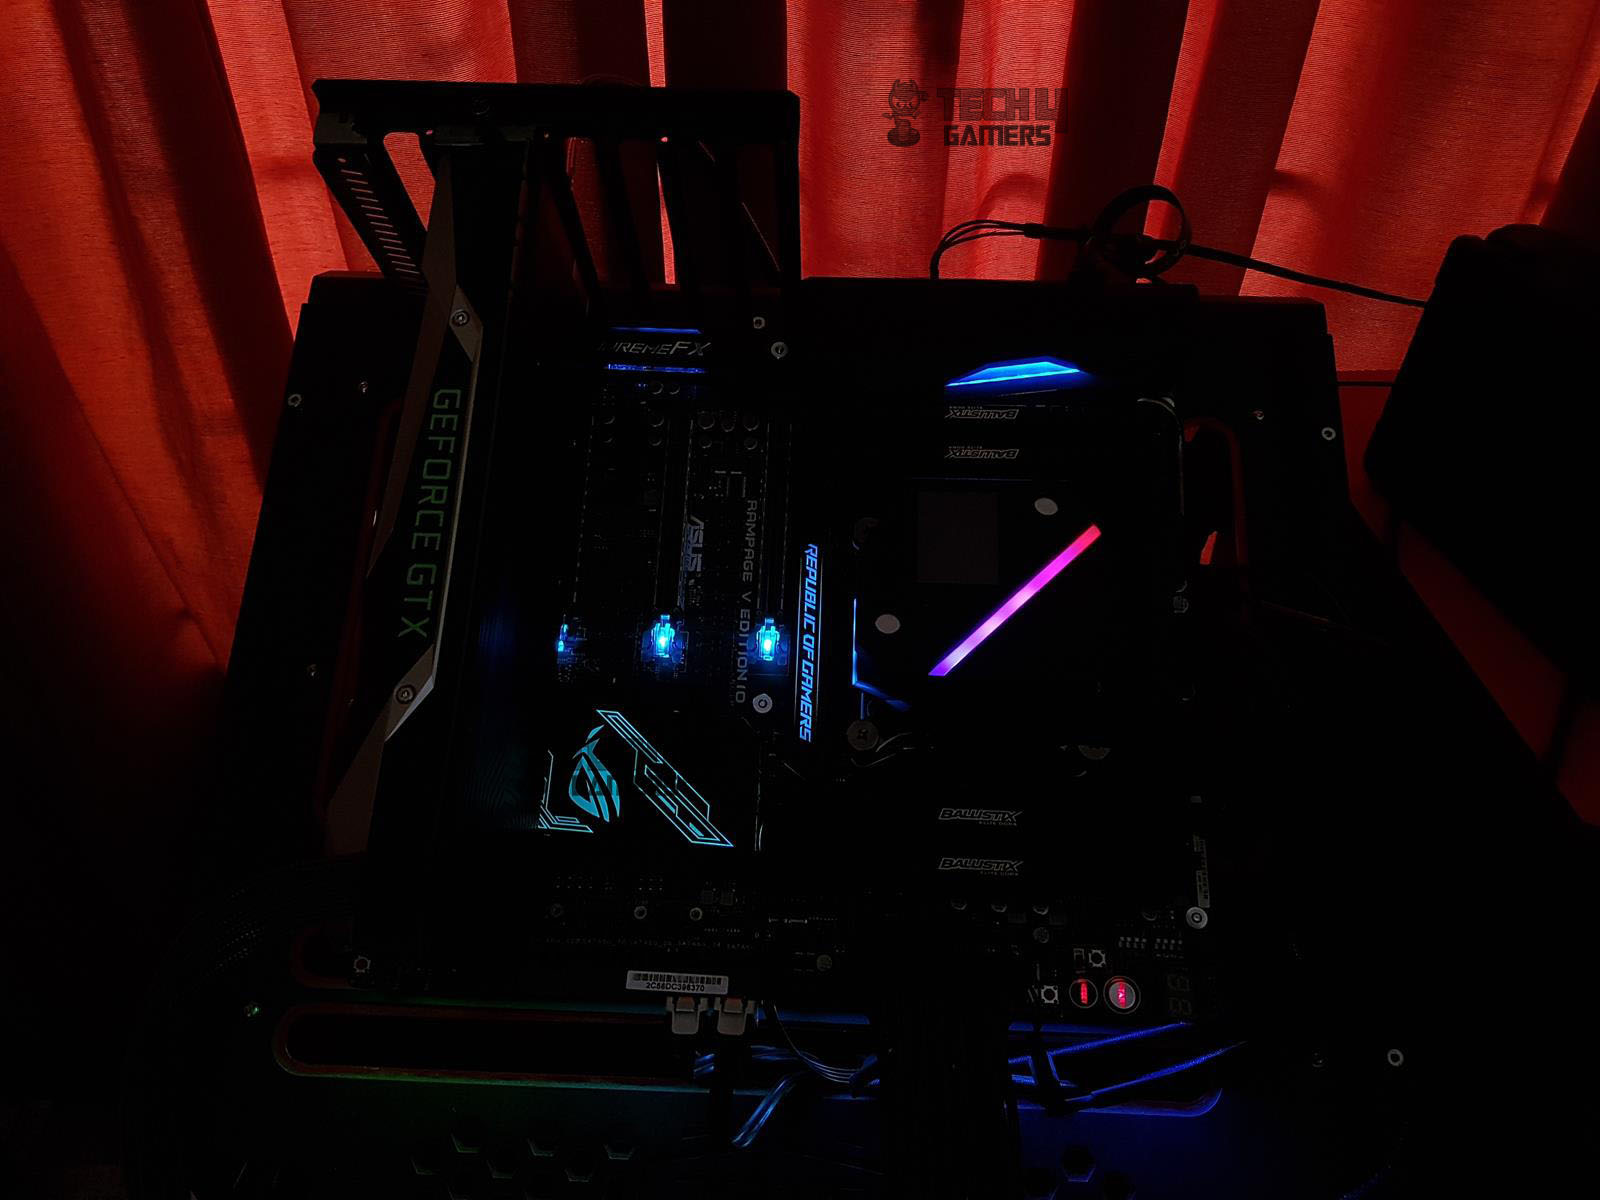
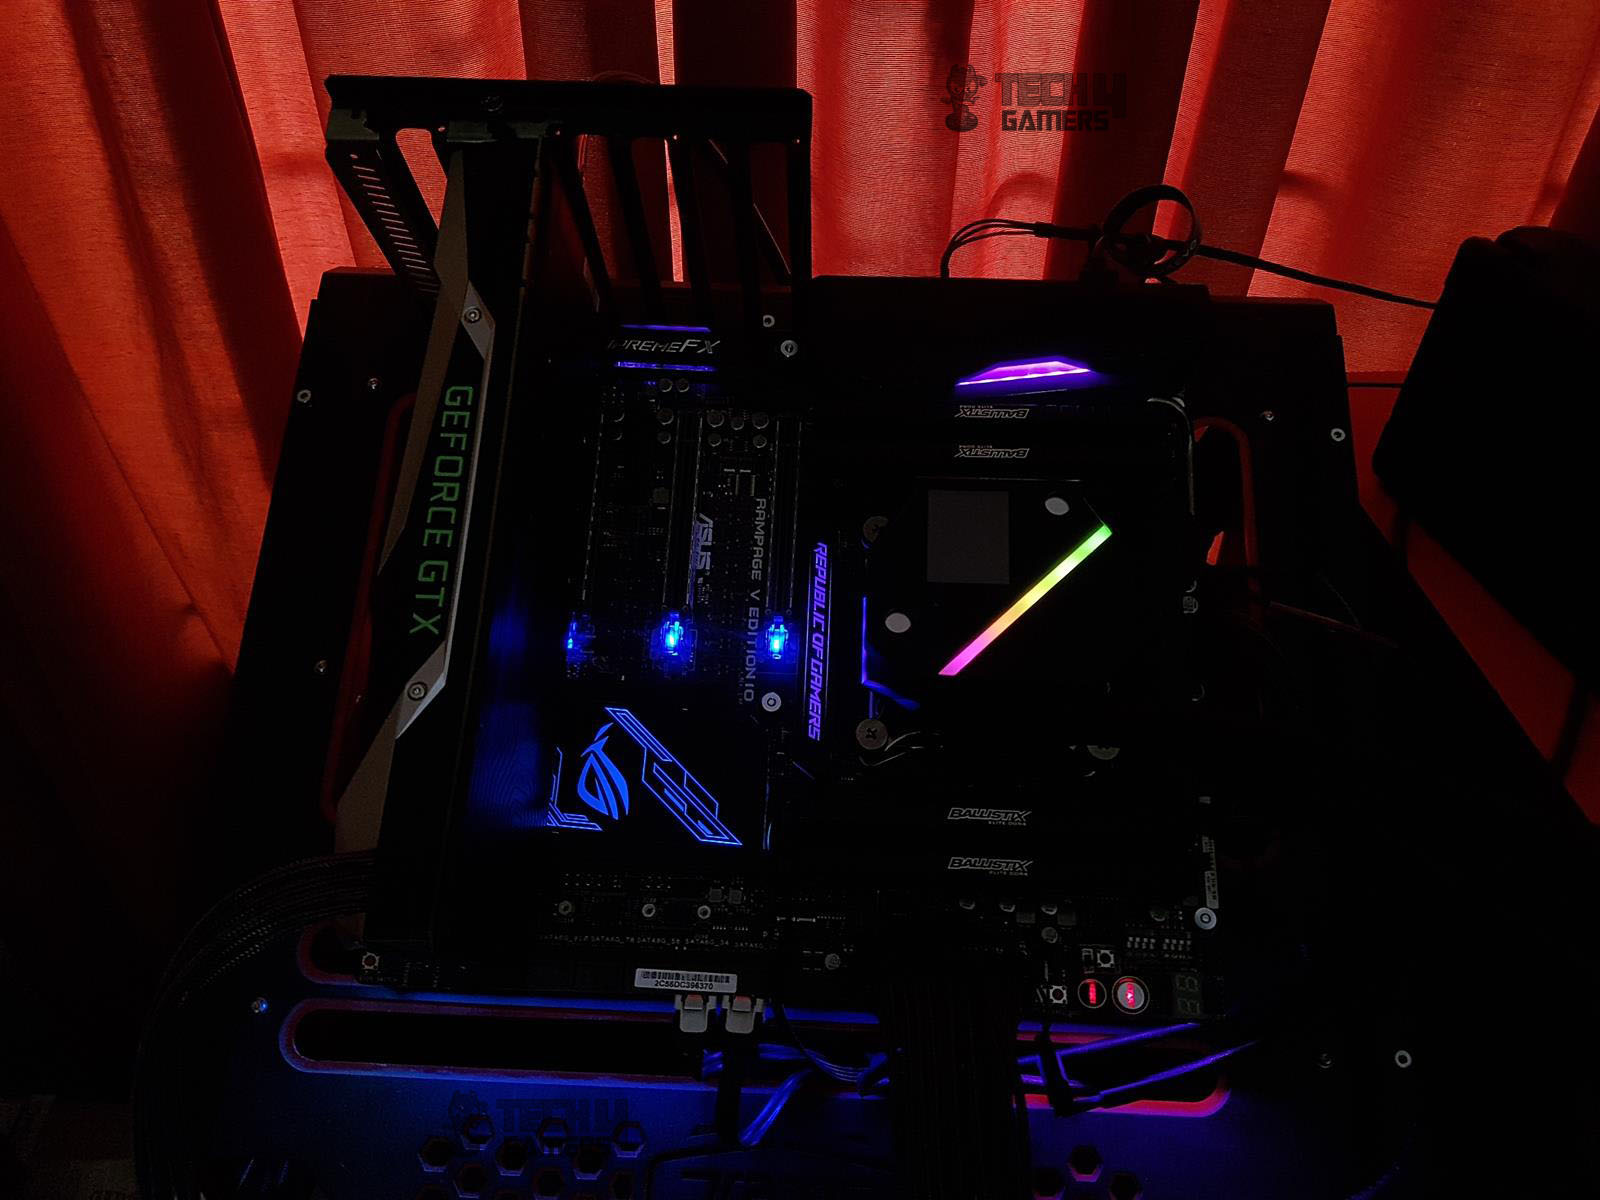


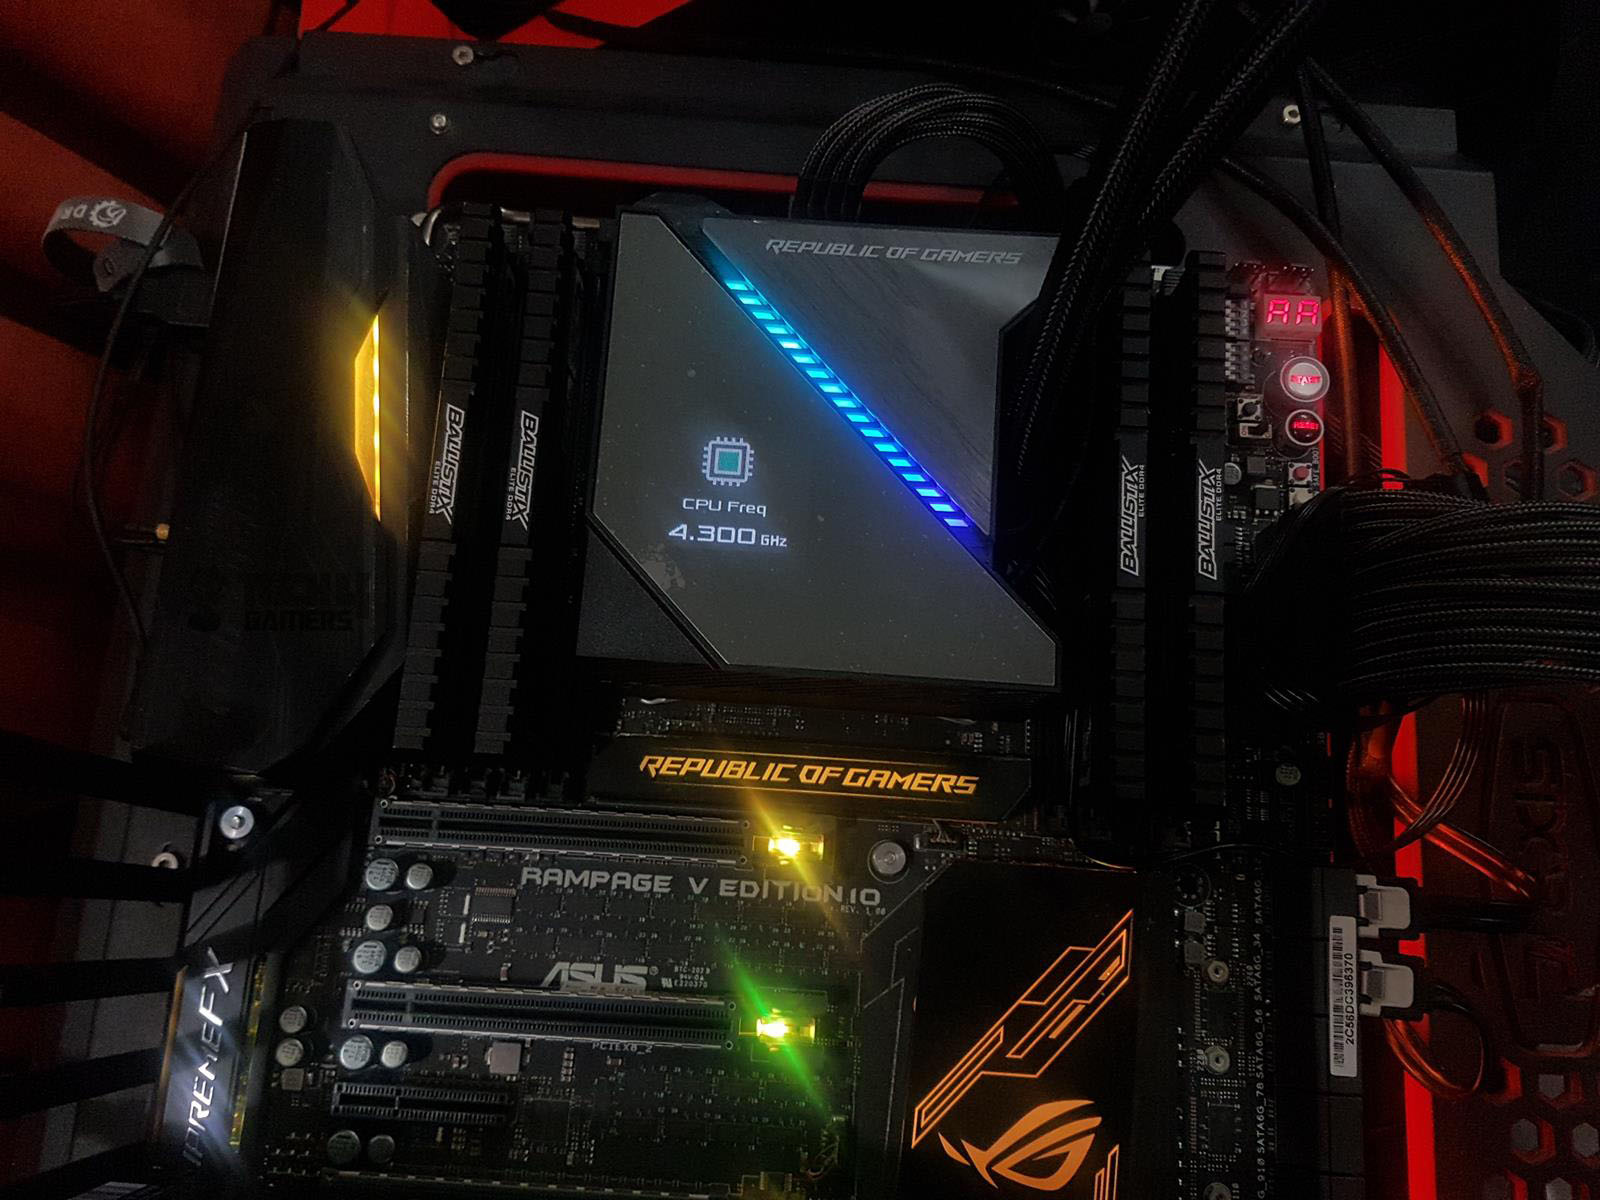
The lighting effects are right on the money and I love the colors. They are not overly done and has even lighting for smooth and better visuals. The OLED display is something out of this world on this cooler as we have yet to see such an option on any cooler. The ability to sync and coordinate the Aura Sync lighting-enabled devices is a big plus. I would like to say that it is brilliantly done!
Update on Intel i5 9600k testing with Asus Strix Z390E Gaming motherboard: Noticed a significant discrepancy in CPU temperature readings with LiveDash and AiSuite during the Blender benchmark. Reported temperatures were around 12°C lower than actual values. Cross-checked with RealTemp and HWInfo 64, confirming inaccuracies in AiSuite and LiveDash reporting.
Installation
Here are the Installation guides for the Intel LGA-20XX and 115X sockets:
LGA-20XX
- Install the LGA-20XX standoff screws on the mounting holes around the CPU Socket.
- Install the fans on the radiator using the supplied fan screws and washers.
- Place the water block on the CPU by aligning the mounting holes on the mounting bracket with the LGA 20XX standoff screws.
- Secure the block using the thumbscrew caps. Use a screwdriver for this job and go diagonally for even pressure.
- Connect the 4-pin PWM cable to the CPU fan header or any of your desired fan header.
- Connect the SATA connector to the PSU.
- Connect the fan power cables to the Y-Splitter cable coming from the block or use a Y-Splitter of your own and connect them to your desired fan header on the motherboard.
- Connect the micro USB cable to the 9-pin USB 2.0 header.
- Place the top cover on the pump housing making sure that its indent side is facing the tubes.
- This would complete the installation.
LGA-115X
- Set the pushpins on the Intel backplate according to the socket. Slide them down for the Intel LGA-115X.
- Place the backplate on the backside of the motherboard by aligning the push pins with the pre-drilled holes around the CPU socket.
- Use the Intel LGA1115X/1366 standoff screws and secure the backplate with the motherboard. There will be a flex in the backplate giving the impression that it is not mounted correctly. Ignore that it will be secured once the block is installed.
- Place the water block on the CPU by aligning the mounting holes on the bracket with the standoff screws.
- Secure the block using the thumbscrew caps. Use a screwdriver for this job and go diagonally for even pressure.
- Connect the 4-pin PWM cable to the CPU fan header or any of your desired fan header.
- Connect the SATA connector to the PSU.
- Connect the fan power cables to the Y-Splitter cable coming from the block or use a Y-Splitter of your own and connect them to your desired fan header on the motherboard.
- Connect the micro USB cable to the 9-pin USB 2.0 header.
- Place the top cover on the pump housing making sure that its indent side is facing the tubes.
- This would complete the installation.

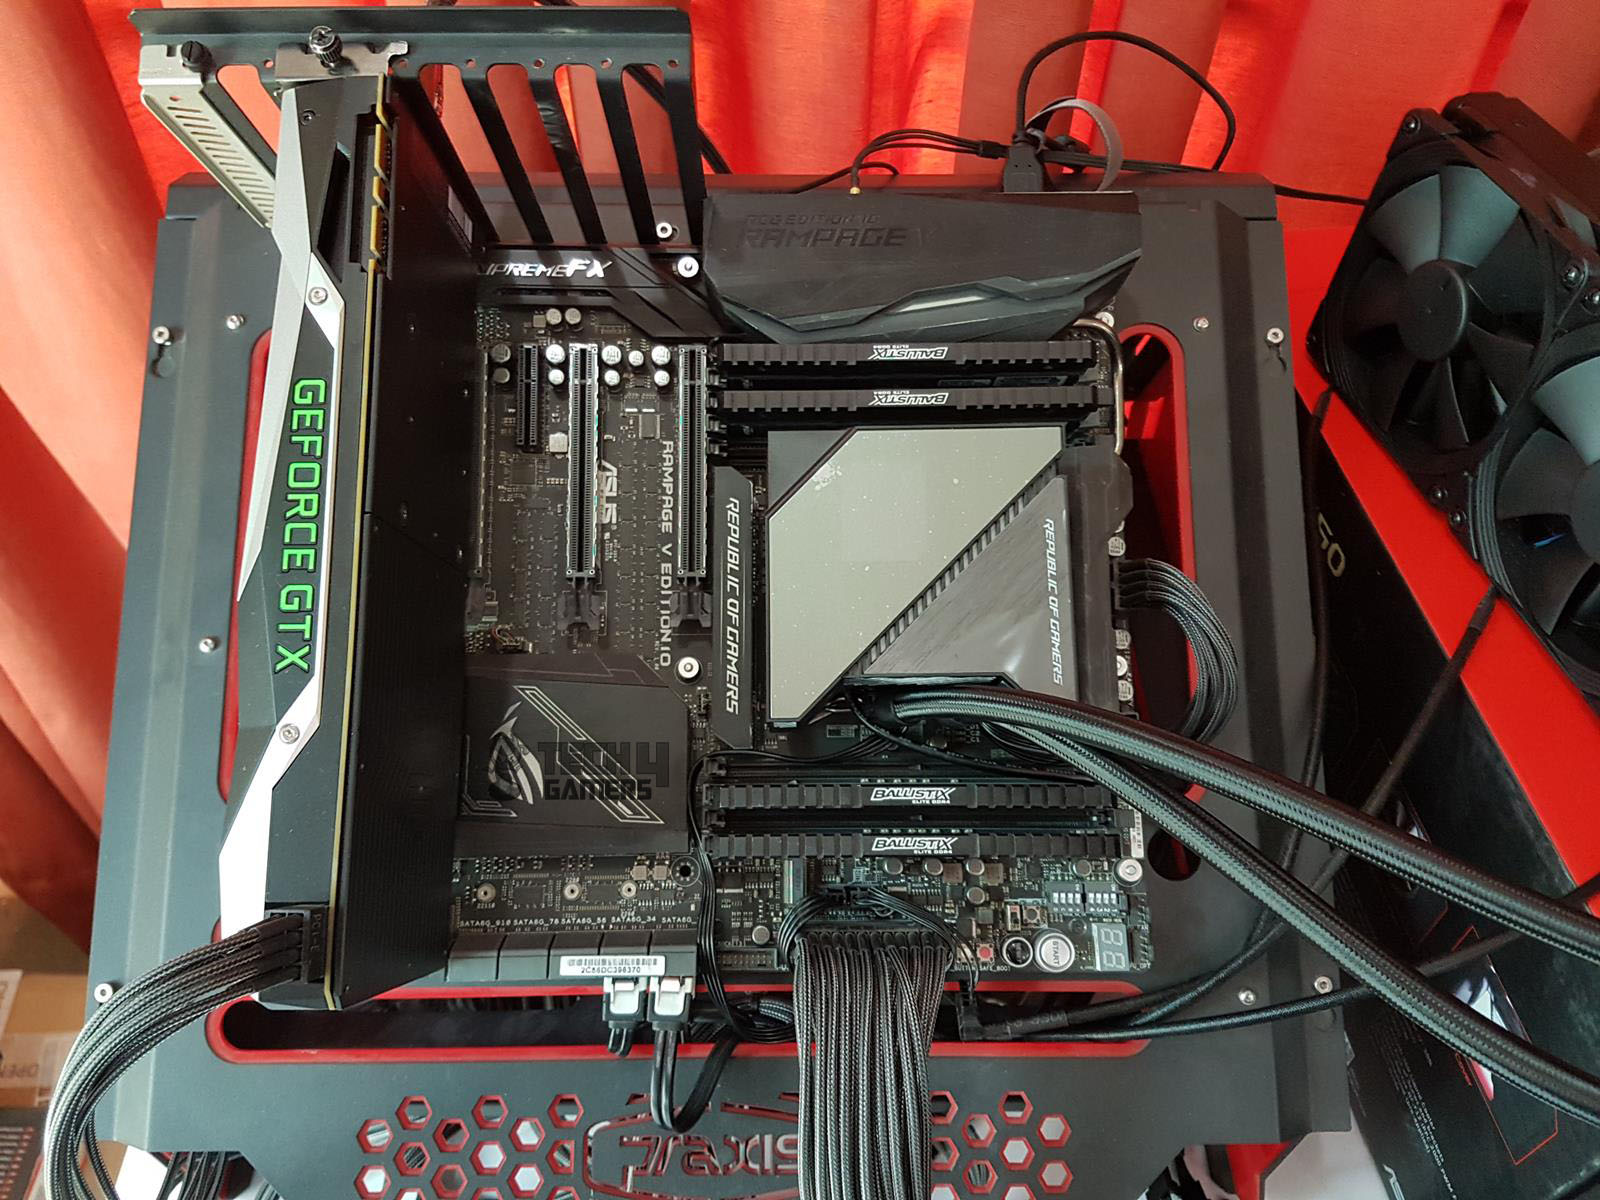
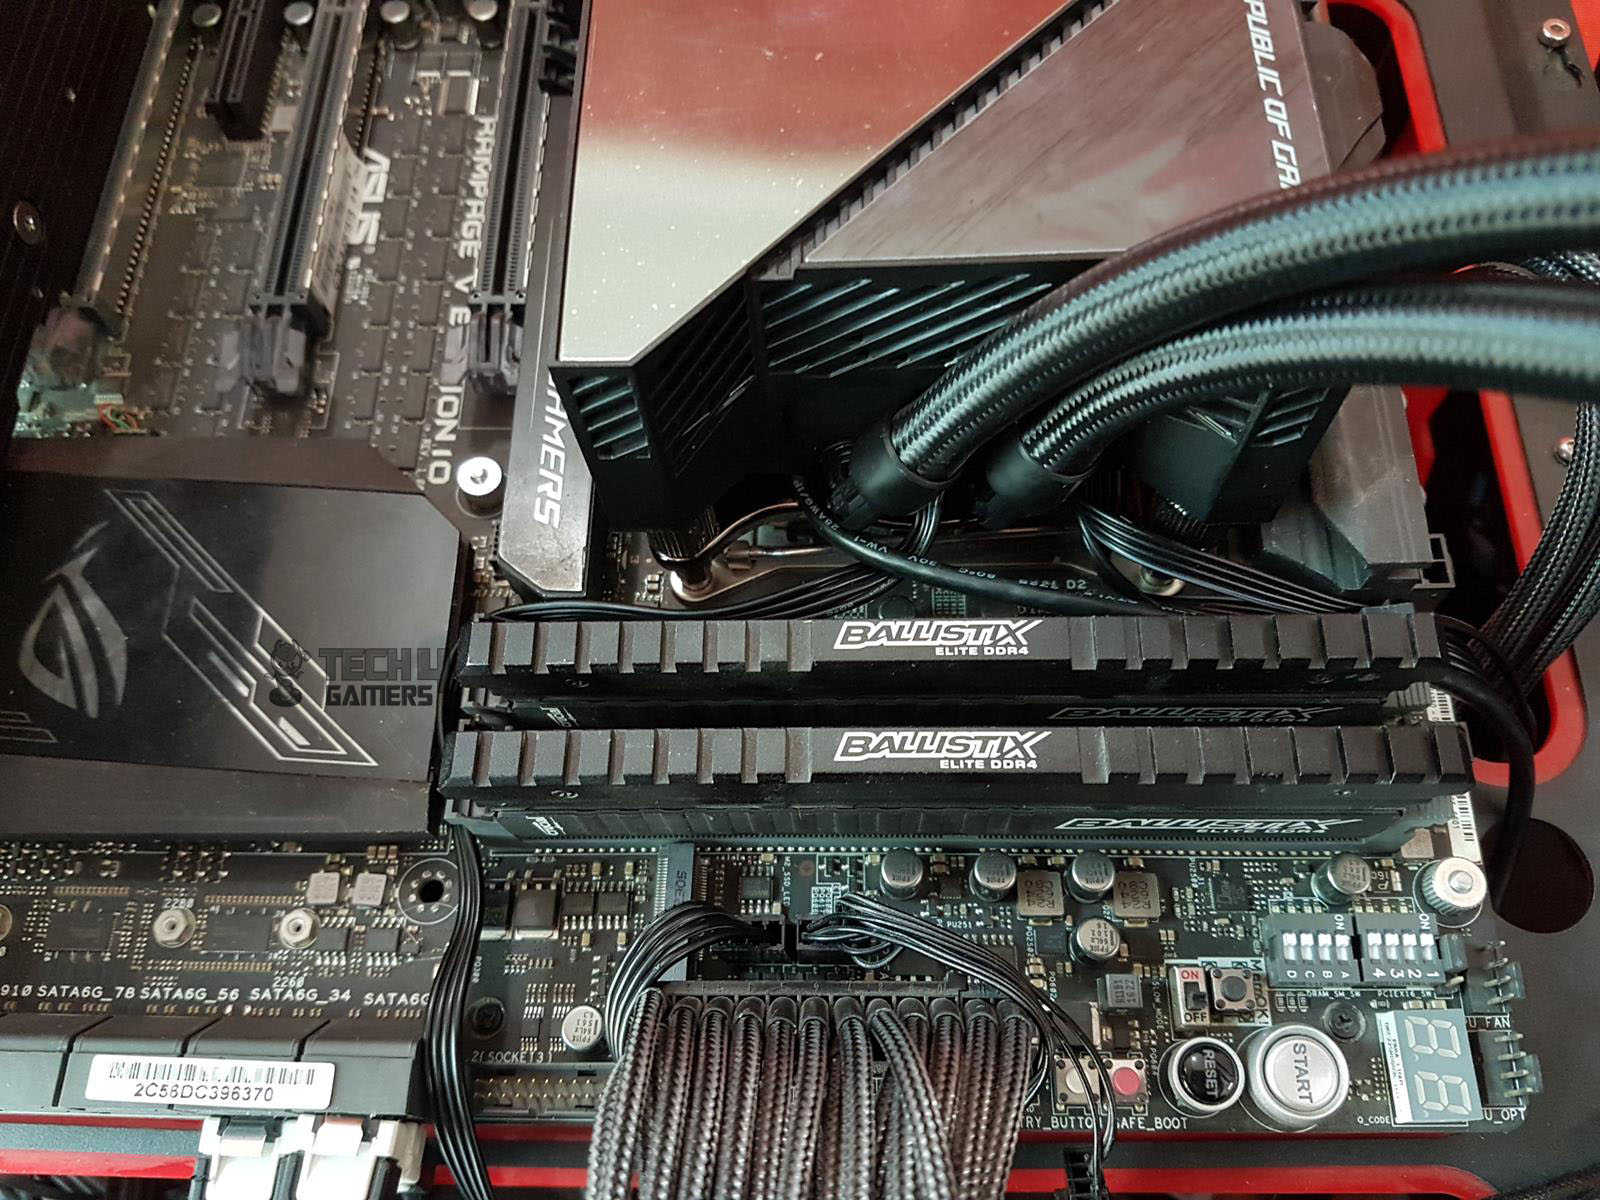
Clearance And Installation
The best thing about AIOs is the maximum clearance and compatibility with respect to the chassis, DIMM slots, and PCIe slots. This cooler has no such clearance issue. The tubes are not blocking any DIMM slot and RAM modules of any height can be used. Similarly, the block is not obstructing the first PCIe x16 3.0 slot. Make sure that the chassis has provision for a 360mm radiator mounting and you are good to go.
Testing and Methodology
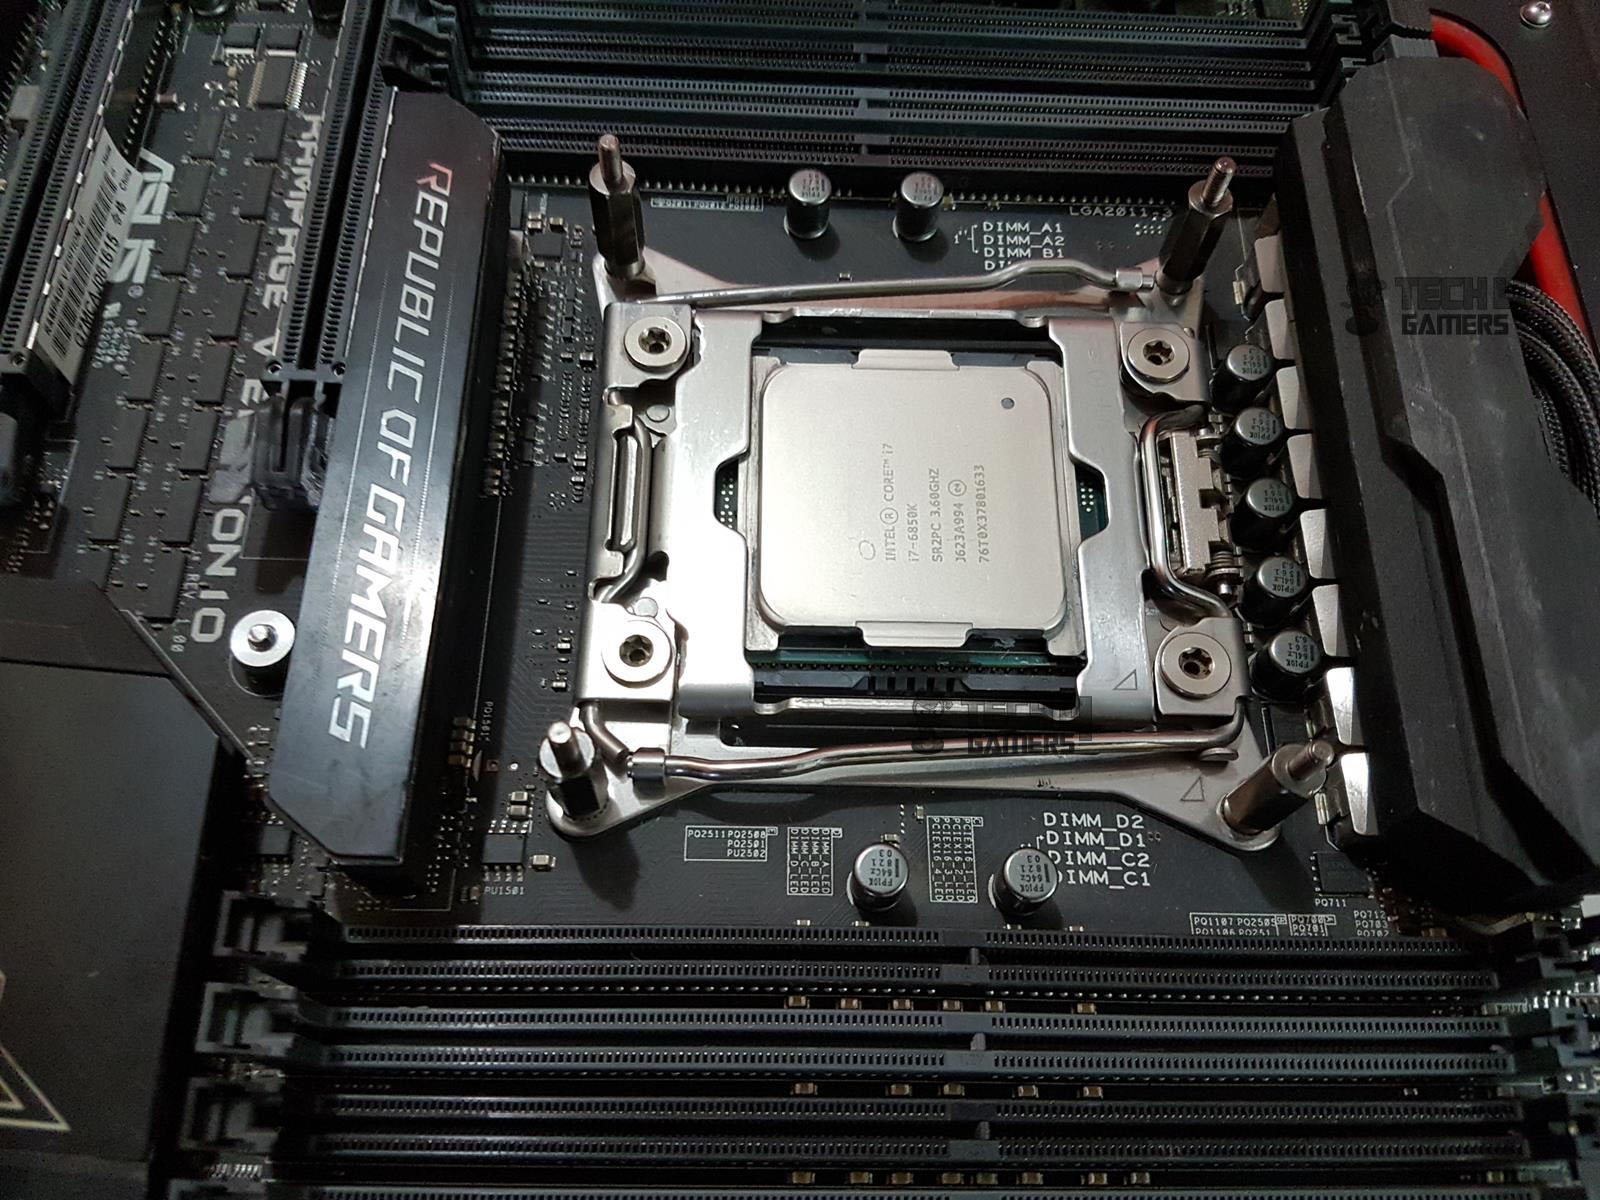
Following test bench is used for testing this cooler:
- Asus Rampage V Edition 10
- Intel i7 6850k
- Crucial Ballistics Elite 4x4GB @ 3000MHz
- Nvidia GTX 1080 FE
- Samsung 840 EVO 250GB SSD
- Seagate Barracuda 2TB
- Corsair AX1200i
- PrimoChill Praxis WetBench
Following software were used for the testing and monitoring.
- Asus Real Bench v 2.44
- Real Temp GT v 3.70
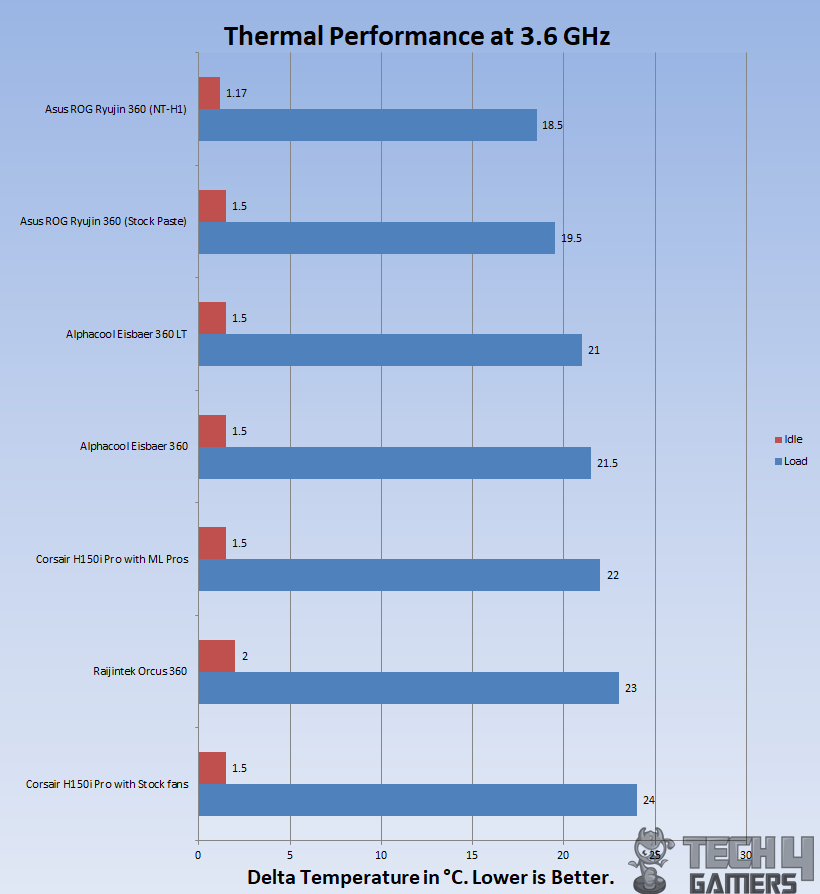
The Noctua NT-H1 thermal paste was tested alongside the stock paste on the Asus cooler. Standardization was maintained for all coolers to mitigate potential performance variations. Tests were conducted at stock clocks (3.6GHz, 1.136V) and overclocked (4.3GHz, 1.350V) using Asus RealBench 2.44.
Results for stock clocks with stock paste: Idle 1.5°C, Stress test ΔT 19.50°C.
Results for stock clocks with Noctua NT-H1: Stress test ΔT 18.50°C, a 1.0°C difference favoring stock paste. The cooler performed exceptionally well, securing a top position even with the stock paste. Asus demonstrates the effectiveness of their coolers with minimal variance, emphasizing consistent performance
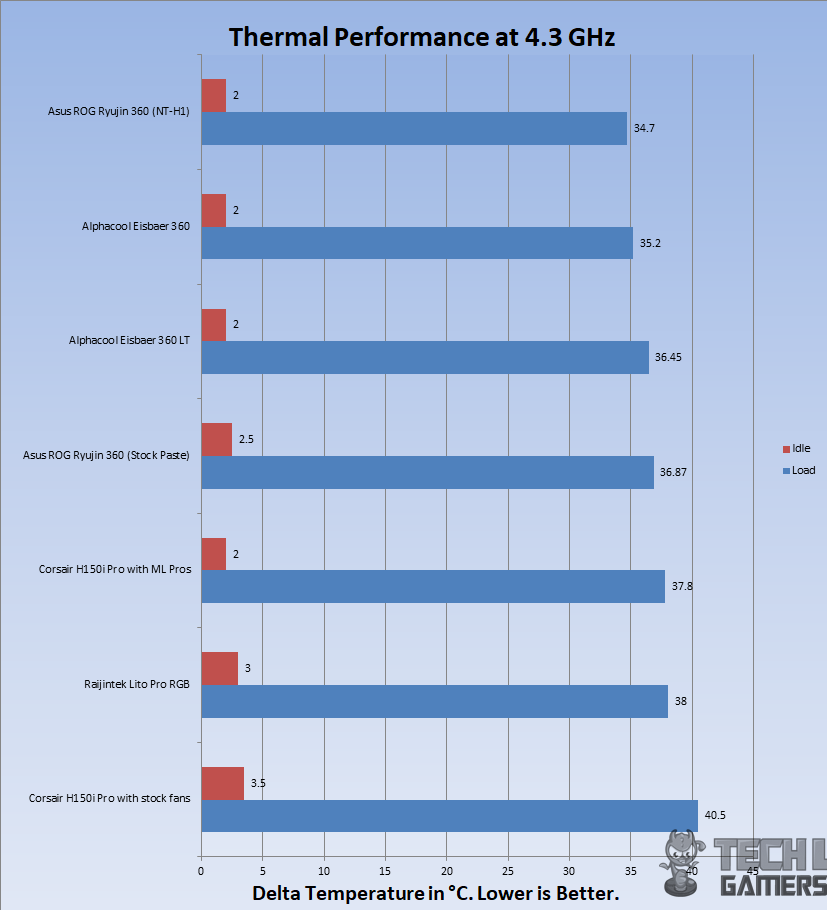
With an overclocked chip at 4.3GHz using 1.350V, the chip was doing 36.87°C under load using stock thermal paste. This is 0.42°C higher than the Alphacool Eisbaer 360 LT and 1.67°C higher than the Alphacool Eisbaer 360. With Noctua NT-H1 it was doing 34.7°C winning the top slot on the graph though it is a marginal victory by 0.5°C.
Embedded Fan Thermal Results
The cooler integrates a 60mm fan within the pump housing, designed to cool nearby components like VRM/M.2. Asus internal tests indicate a potential 20°C difference using this fan.
For testing, three thermal probes around the CPU socket monitored VRM/MOSFETs. Using the Reeven Polariz fan controller, I conducted a 1-hour stress test with the fan off, followed by idle time, and a final stress test with the fan at full speed. With the CPU overclocked to 4.3GHz at 1.350V, the fan reduced temperatures by an impressive 14.5°C. Actual results may vary based on CPU and motherboard specifics.
Acoustic Performance
I could not measure the sound level of the unit due to certain environmental noises that would invalidate the actual sound level reading from the sound meter. Based on my experience with the fans and coolers testing so far, the embedded 60mm fan in the pump housing is very noisy at full speed and definitely warrants a custom fan curve.
I am the sort of guy who prefers near-silent operations and these fans are not falling in this category. The Noctua NF-F12 iPPC-2000 PWM, on the other hand, was audible though not teasing as compared to the 60mm embedded fan.
Should You Buy It?
After hours of testing, I assessed who the ASUS ROG Ryujin 360 was designed for.
Buy It If:
✅You are looking for a capable 360mm AIO cooler: Throughout my testing, The ASUS ROG Ryujin 360 proved to be an extremely capable 360mm AIO cooler that does not miss the mark in terms of visuals.
✅You want an LCD screen: The ASUS ROG Ryujin 360 comes with a fairly large LCD screen, which you can customize to your liking.
✅You prefer silent operation: Despite the presence of three 120mm fans, the cooler manages to remain fairly silent for the most part, especially if you customize the fan curves.
Don’t Buy It If:
❌You are looking for cheaper coolers: The ASUS ROG Ryujin 360 is undeniably expensive.
❌You want a small form factor build: The cooler is not designed for anyone who wants to build a small form factor system.
Conclusion
I’m truly impressed with Asus’s commitment to maximizing the cooling potential of their flagship coolers. Pairing Noctua’s NF-F12 iPPC-2000 PWM fans with the Ryujin series is a smart move, considering I’ve been doing the same in my personal build. The OLED display’s requirement for a 160×128 pixel image/animation adds a touch of personalization to the cooling solution. While dealing with three software solutions might seem a bit cumbersome, the OLED screen’s display and addressable RGB lighting make it worthwhile.
The ASUS ROG Ryujin 360 has outperformed, claiming the top spot even with the stock paste at stock clocks. The thermal performance, especially at stock clocks and during overclocking, positions the cooler as a clear winner, although the margin narrows at higher clocks. The only downside is the noise from the 60mm fan, but a custom fan curve can help mitigate that. While the Noctua fans were nearly silent, the overall performance justifies the trade-of
Asus is offering 3 years of limited warranty on these coolers which is nice though, in this price range, 5 year warranty should have been provided.
Recent Updates
- January 7, 2024: Few text changes to improve readability.
Thank you! Please share your positive feedback. 🔋
How could we improve this post? Please Help us. 😔
[Editor-in-Chief]
Sajjad Hussain is the Founder and Editor-in-Chief of Tech4Gamers.com. Apart from the Tech and Gaming scene, Sajjad is a Seasonal banker who has delivered multi-million dollar projects as an IT Project Manager and works as a freelancer to provide professional services to corporate giants and emerging startups in the IT space.
Majored in Computer Science
13+ years of Experience as a PC Hardware Reviewer.
8+ years of Experience as an IT Project Manager in the Corporate Sector.
Certified in Google IT Support Specialization.
Admin of PPG, the largest local Community of gamers with 130k+ members.
Sajjad is a passionate and knowledgeable individual with many skills and experience in the tech industry and the gaming community. He is committed to providing honest, in-depth product reviews and analysis and building and maintaining a strong gaming community.


