 Threads
A Budget-Friendly Mid-Tower Case!
Review Summary
The Antec NX800 makes a solid comeback to the market with its mid-tower gaming chassis. Featuring a spacious layout, robust cooling options, and ARGB fans, it offers an affordable solution for gaming builds. The tempered glass side panel and fully vented front panel add to its aesthetic appeal. Despite some considerations, the NX800 strikes a good balance between features and pricing, making it a compelling choice for budget-conscious gamers.
Hours Tested: 14

Overall
-
Performance - 8/10
8/10
-
Value - 8.5/10
8.5/10
-
Design - 8.5/10
8.5/10
-
Features - 8/10
8/10
-
Dust Protection - 7/10
7/10
Pros
- Budget Friendly
- Decent Airflow
- Spacious Interior
- Excellent Build Quality
- Pre-installed Fans
Cons
- Limited Airflow Optimization
- Lack of GPU Riser Cable
- Non-reusable PCIe Slot Covers


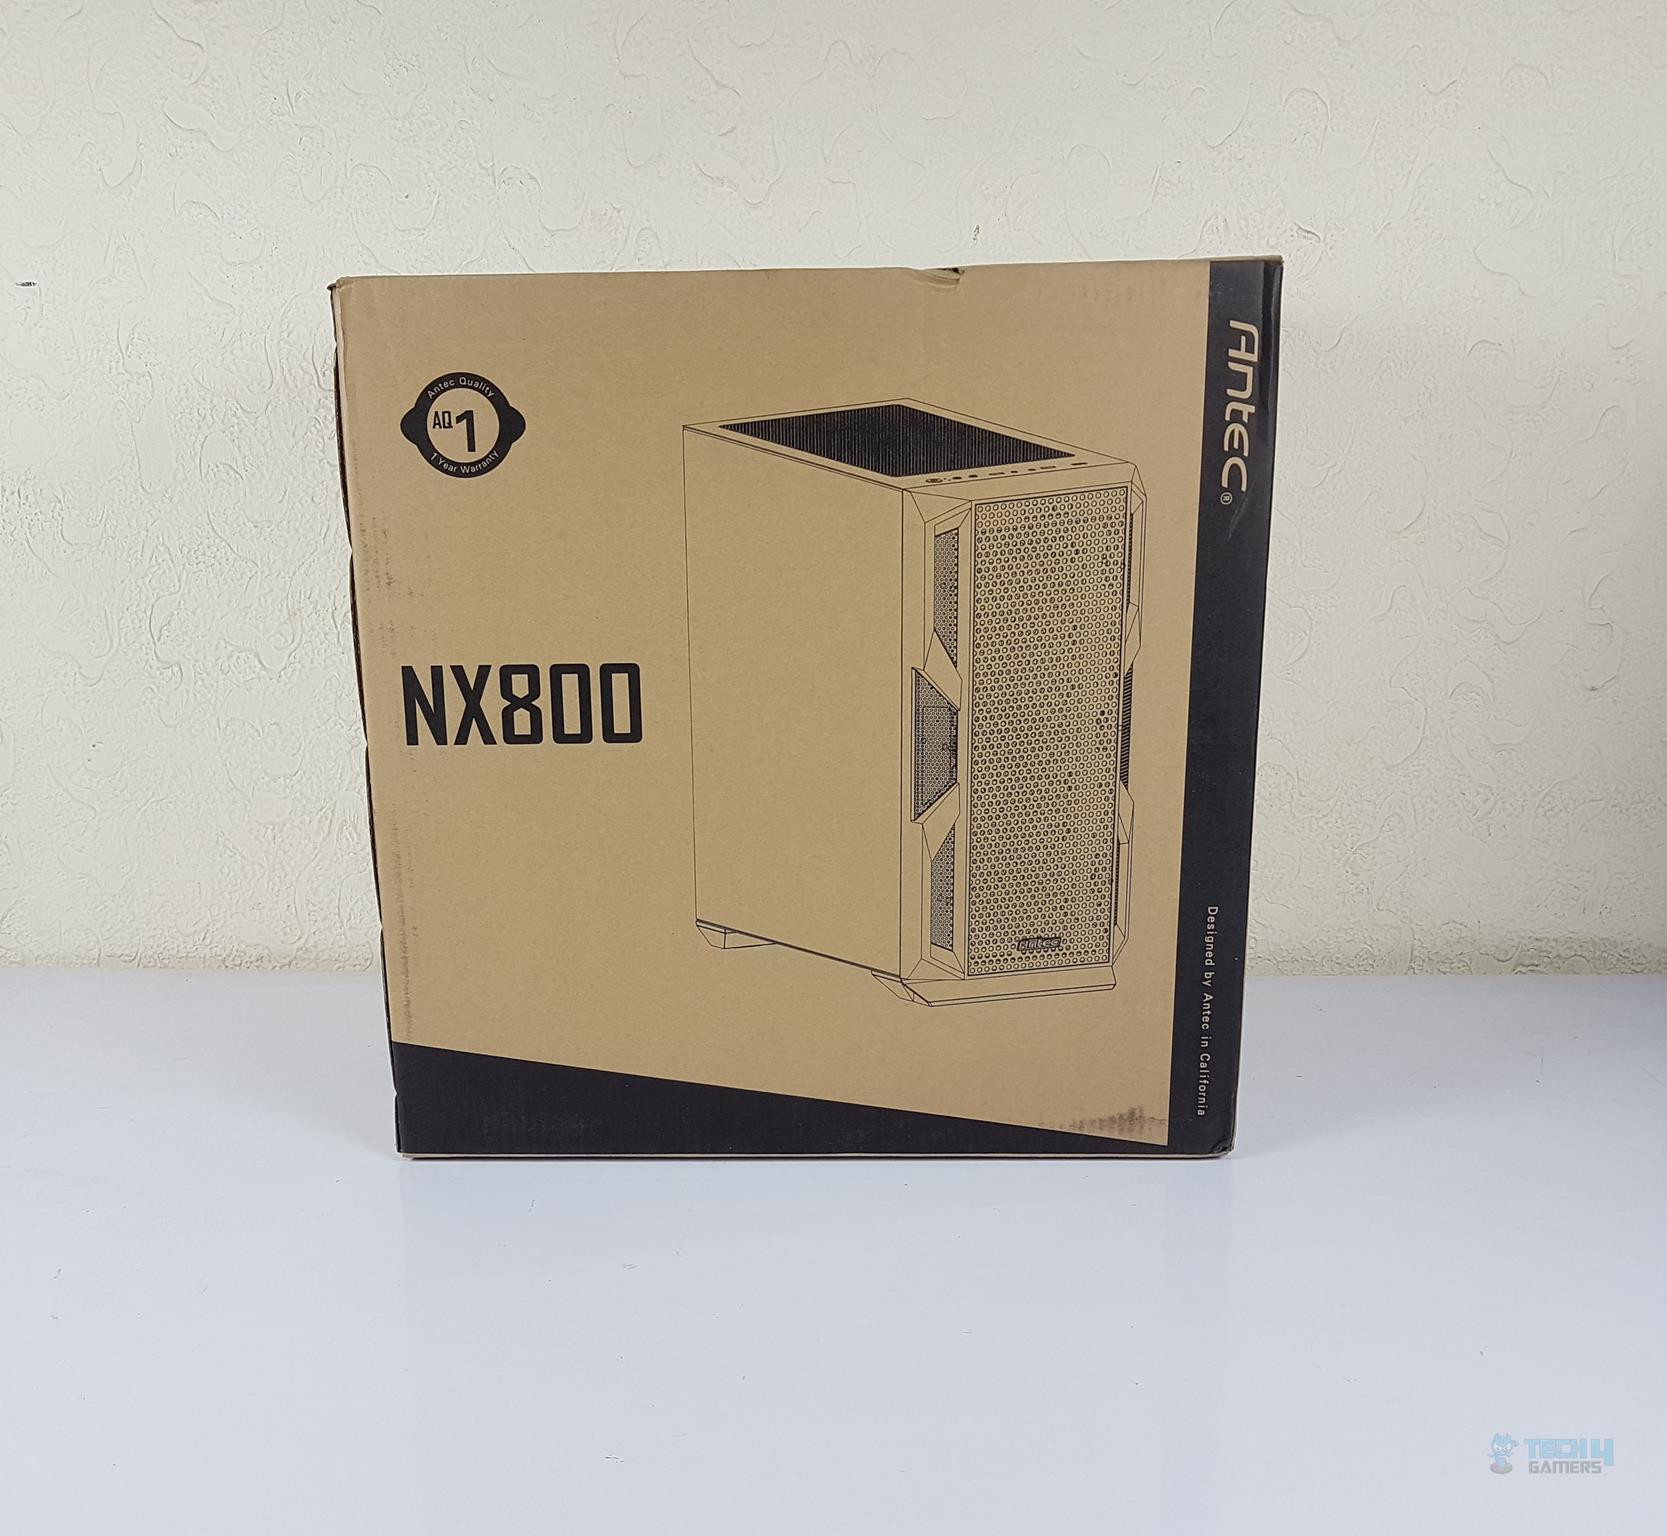
In this review, I will be taking a look at the Antec NX800 Review, a mid-tower chassis with a spacious layout and optimal provision of cooling gear and storage capacity. Antec also manufactures CPU Coolers and Power Supplies.
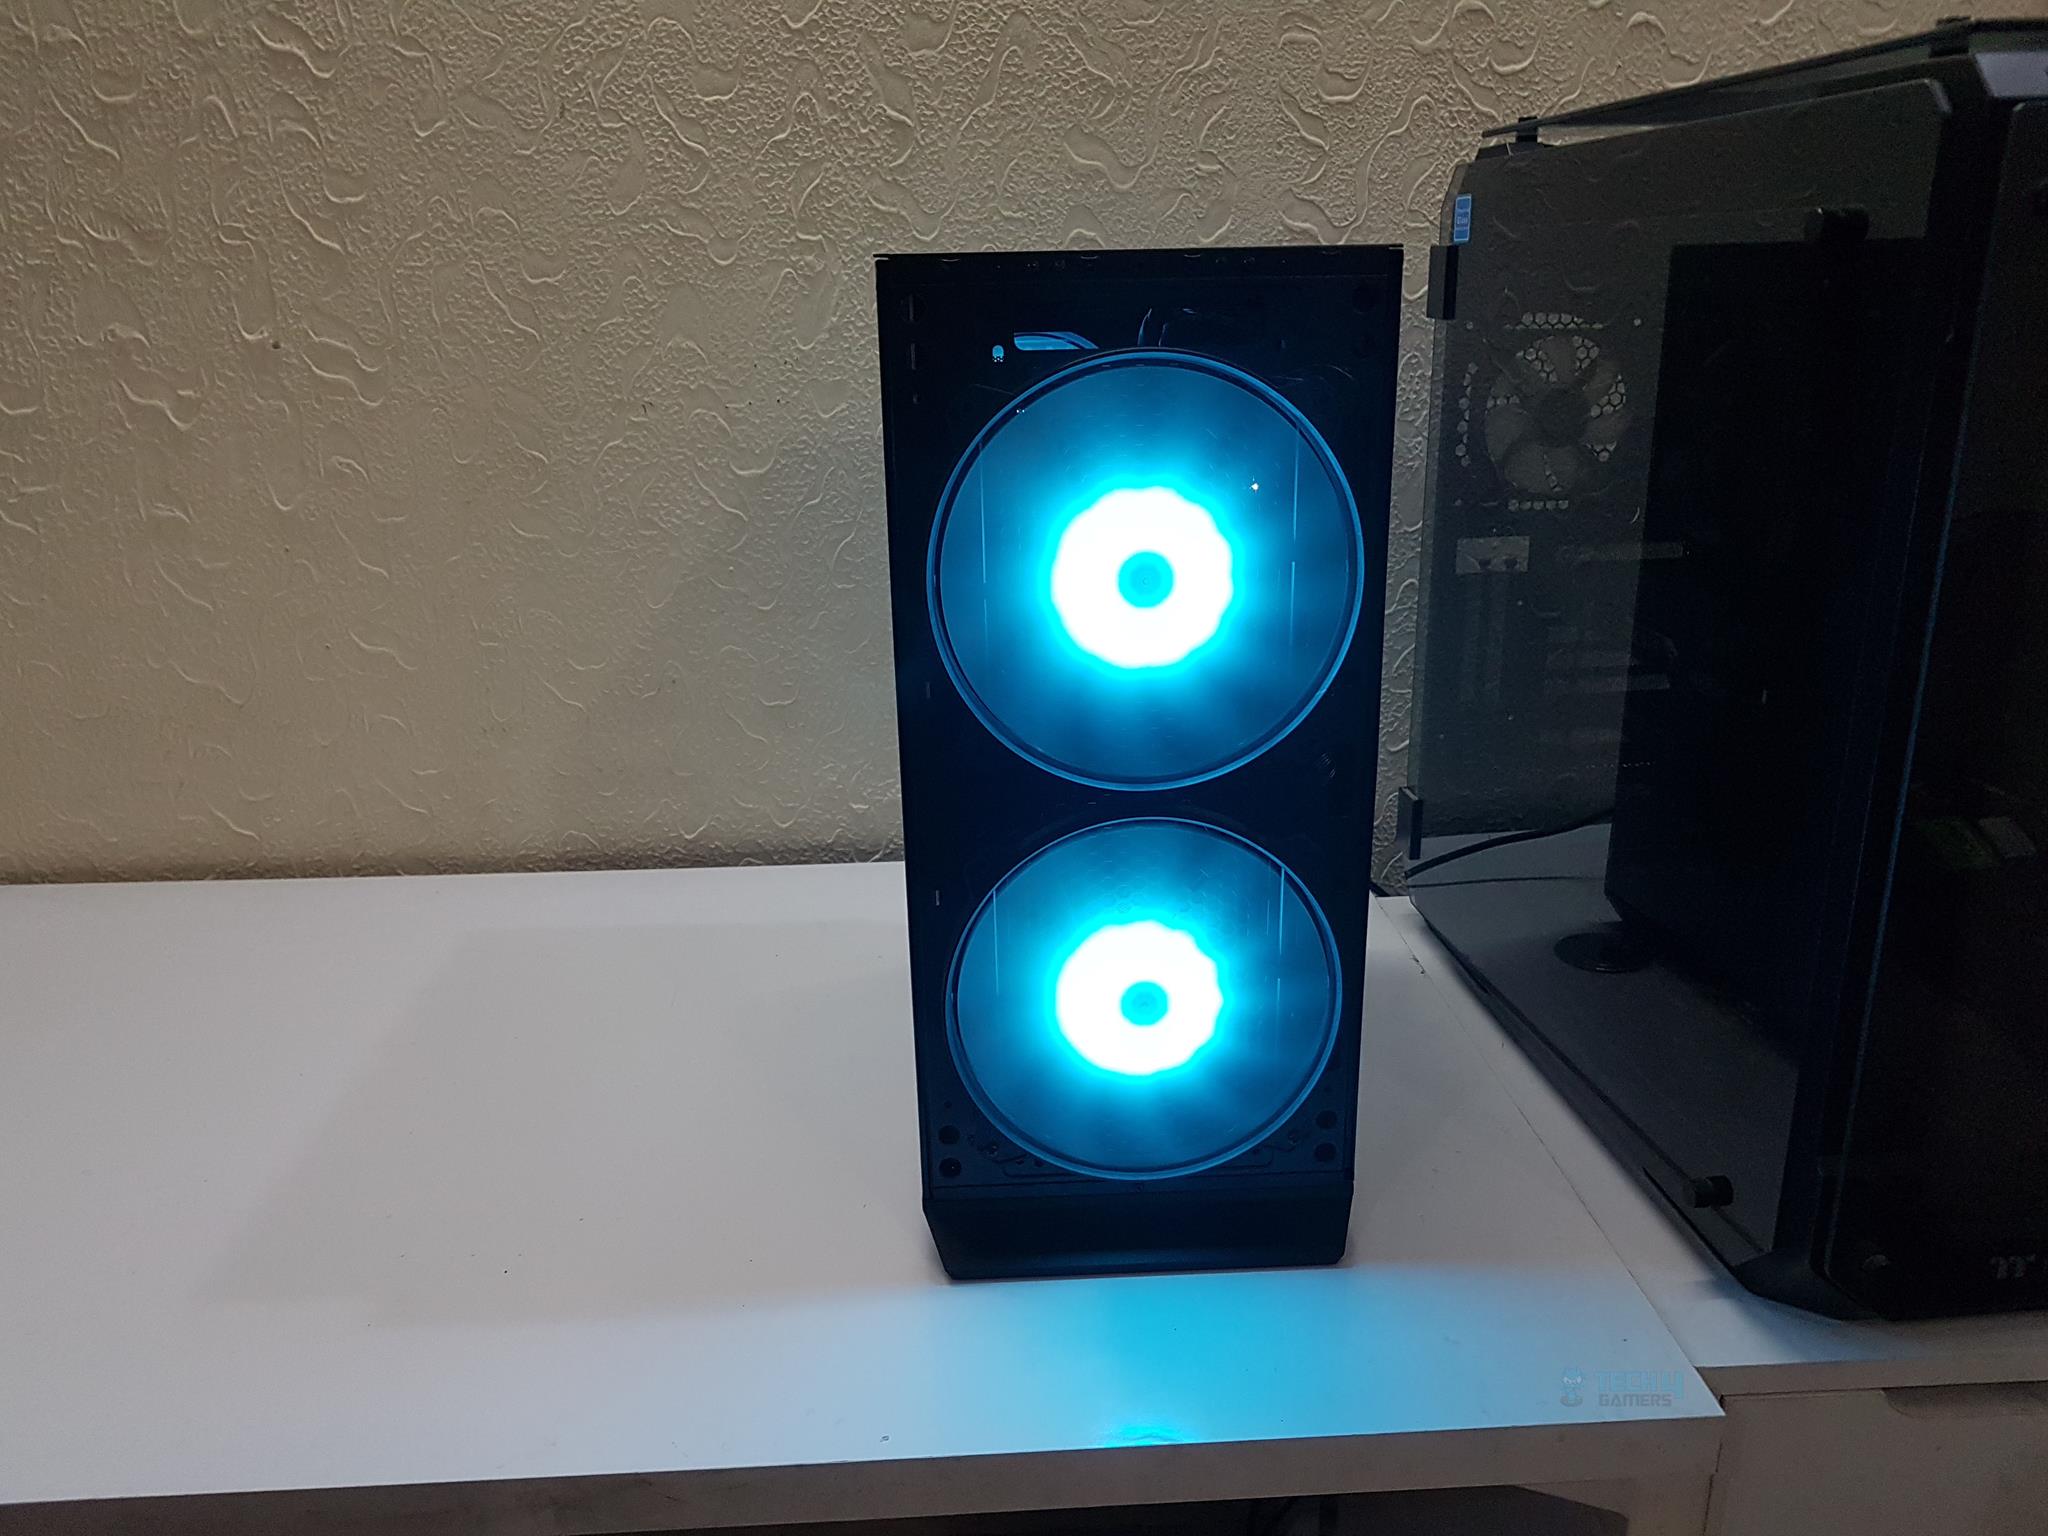
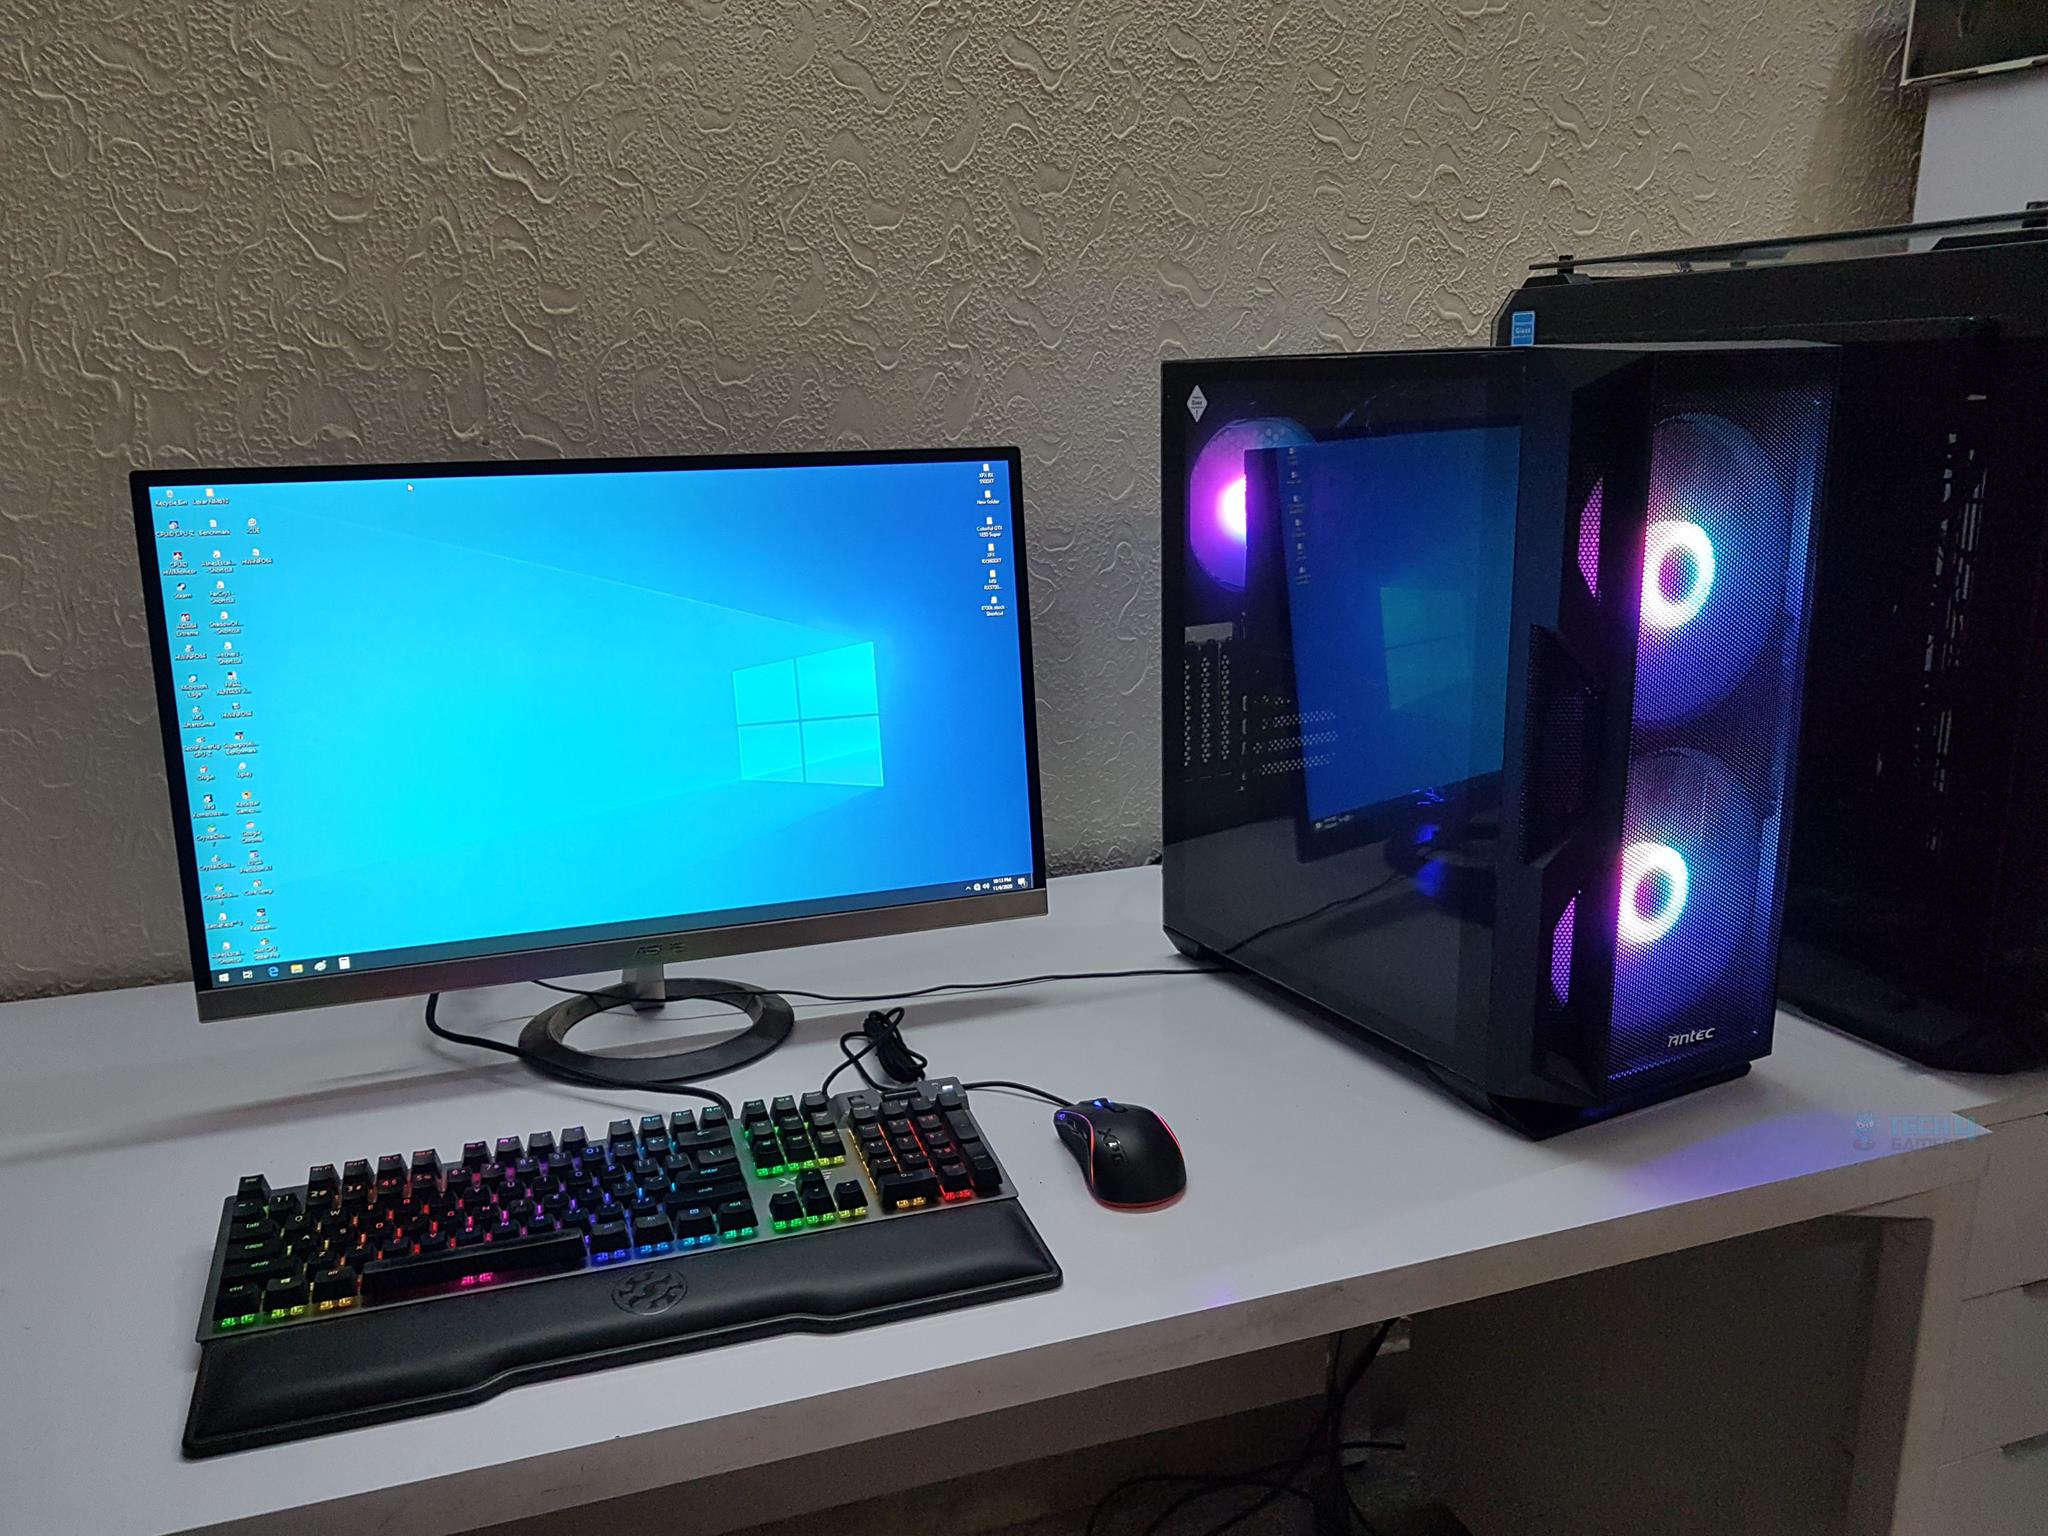
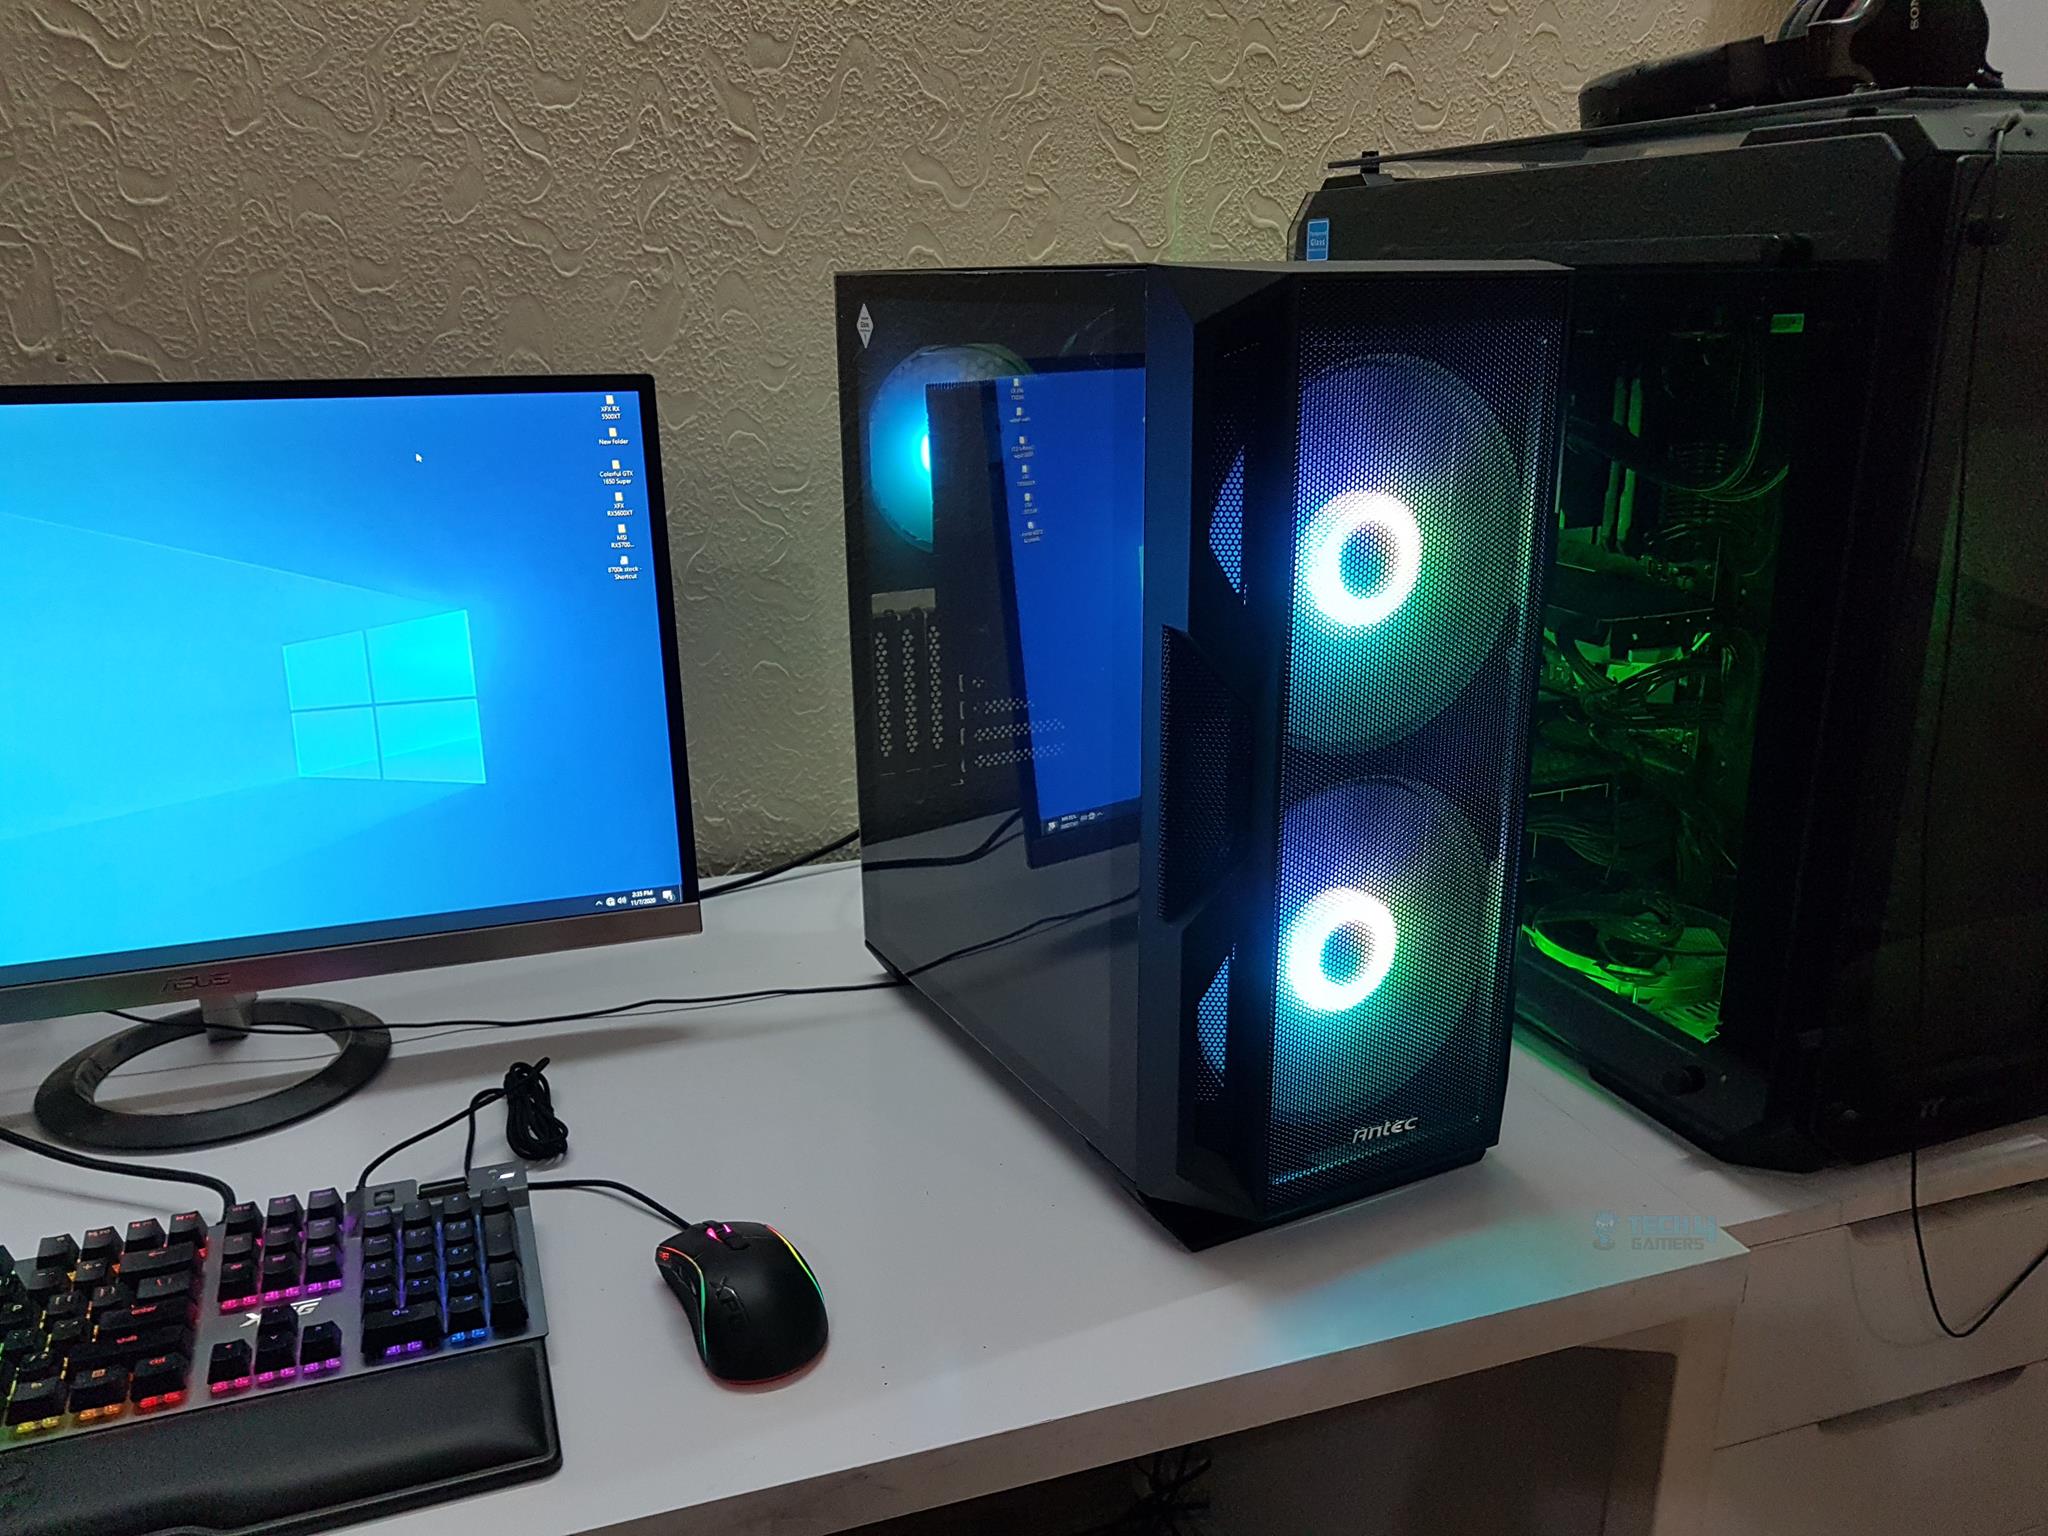
The chassis features two 200mm ARGB fans on the front and a 140mm ARGB fan on the rear. They have done it right! We have a tempered glass side panel and a fully vented front panel. Antec has installed a lighting controller on the backside of the chassis.
Key Takeaways
- The Antec NX800 is for anyone looking for a decent mid-tower case with pre-installed fans that do not break the bank.
- The Antec NX800 is not for anyone who wants unrestricted airflow.
- The Antec NX800 comes with three pre-installed fans, support for a 280mm radiator on top, as well as plenty of clearance for CPU and GPU.
- Why you can trust Tech4Gamers: Our reviews are based on dedicated hands-on testing by our team of experienced hardware experts. Find out more about how we test.
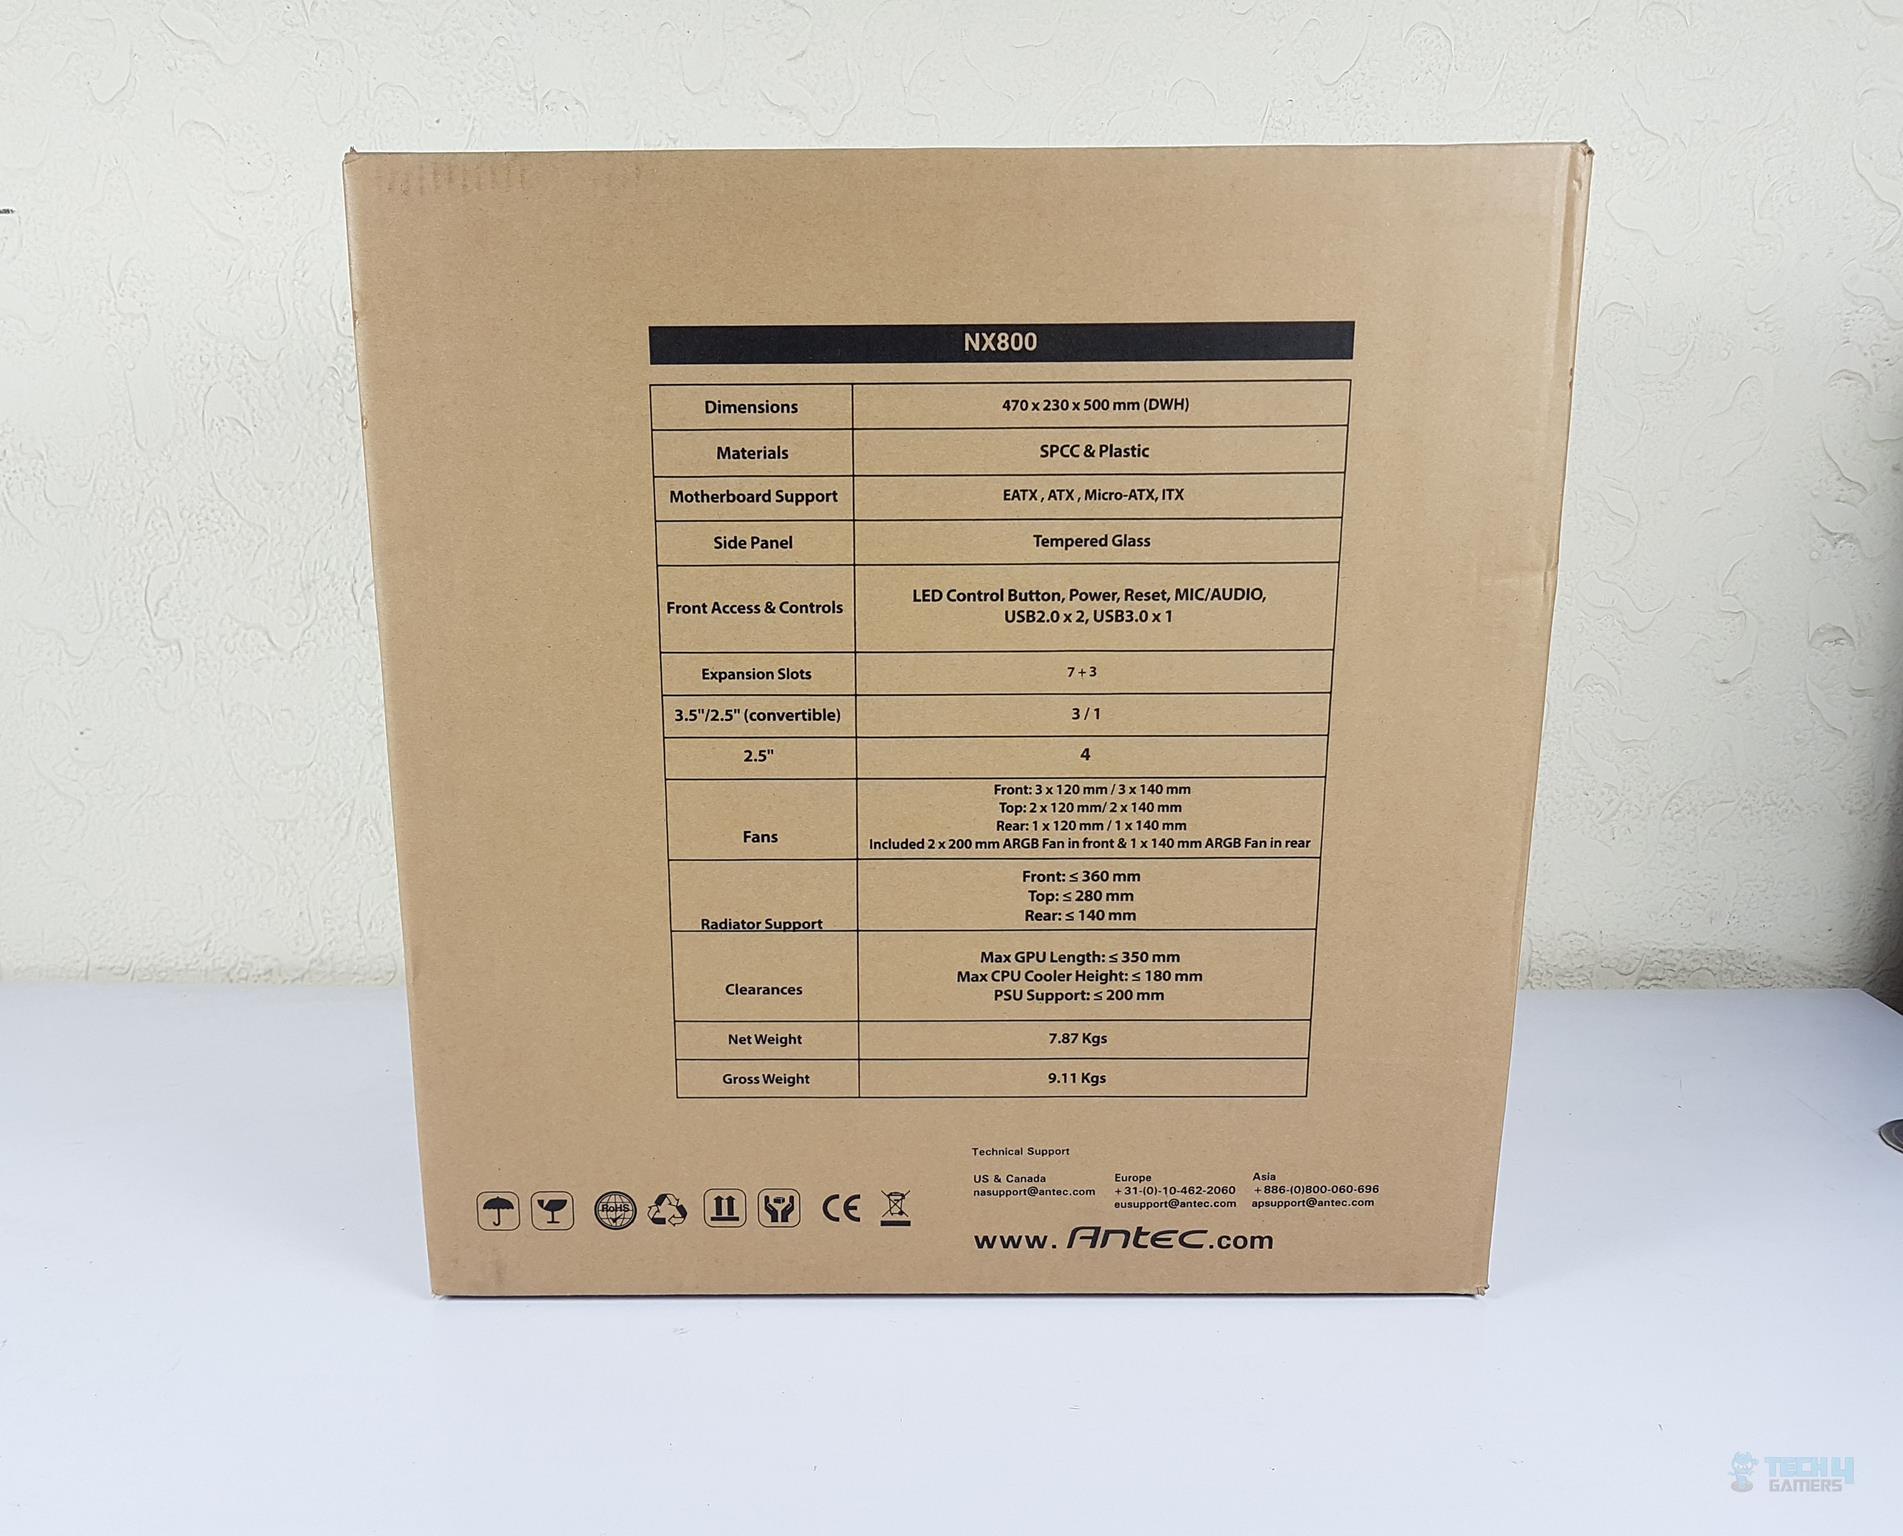
Take a look at the specifications.
| Product | Antec NX800 |
| Case Type | Mid-Tower ATX |
| Expansion Slots | 7+3 |
| Motherboard compatibility | E-ATX, ATX, Micro-ATX, ITX |
| Material | SPCC + Plastic |
| Radiator Support | Top: ≤280mm / Front: ≤360 Rear : ≤140mm |
| Fan Support | Top: 2 x 120mm 、2 x 140mm / Front: 3 x 120mm、3 x 140mm/ Rear: 1 x 120mm / 1 x 140mm |
| Pre-installed Fans | 2 x 200mm ARGB fans in front & 1x 140mm ARGB fan in rear |
| Front Access & Controls | Power, Reset, LED Control Button, MIC/Audio, USB2.0 x 2, USB3.0 x 1 |
| Clearance | CPU cooler height limitation: 180mm VGA length limitation: 350mm PSU length limitation: 200mm |
| Dimension (DWH) | 470 x 230 x 500 mm |
| Net Weight | 7.87 Kgs |
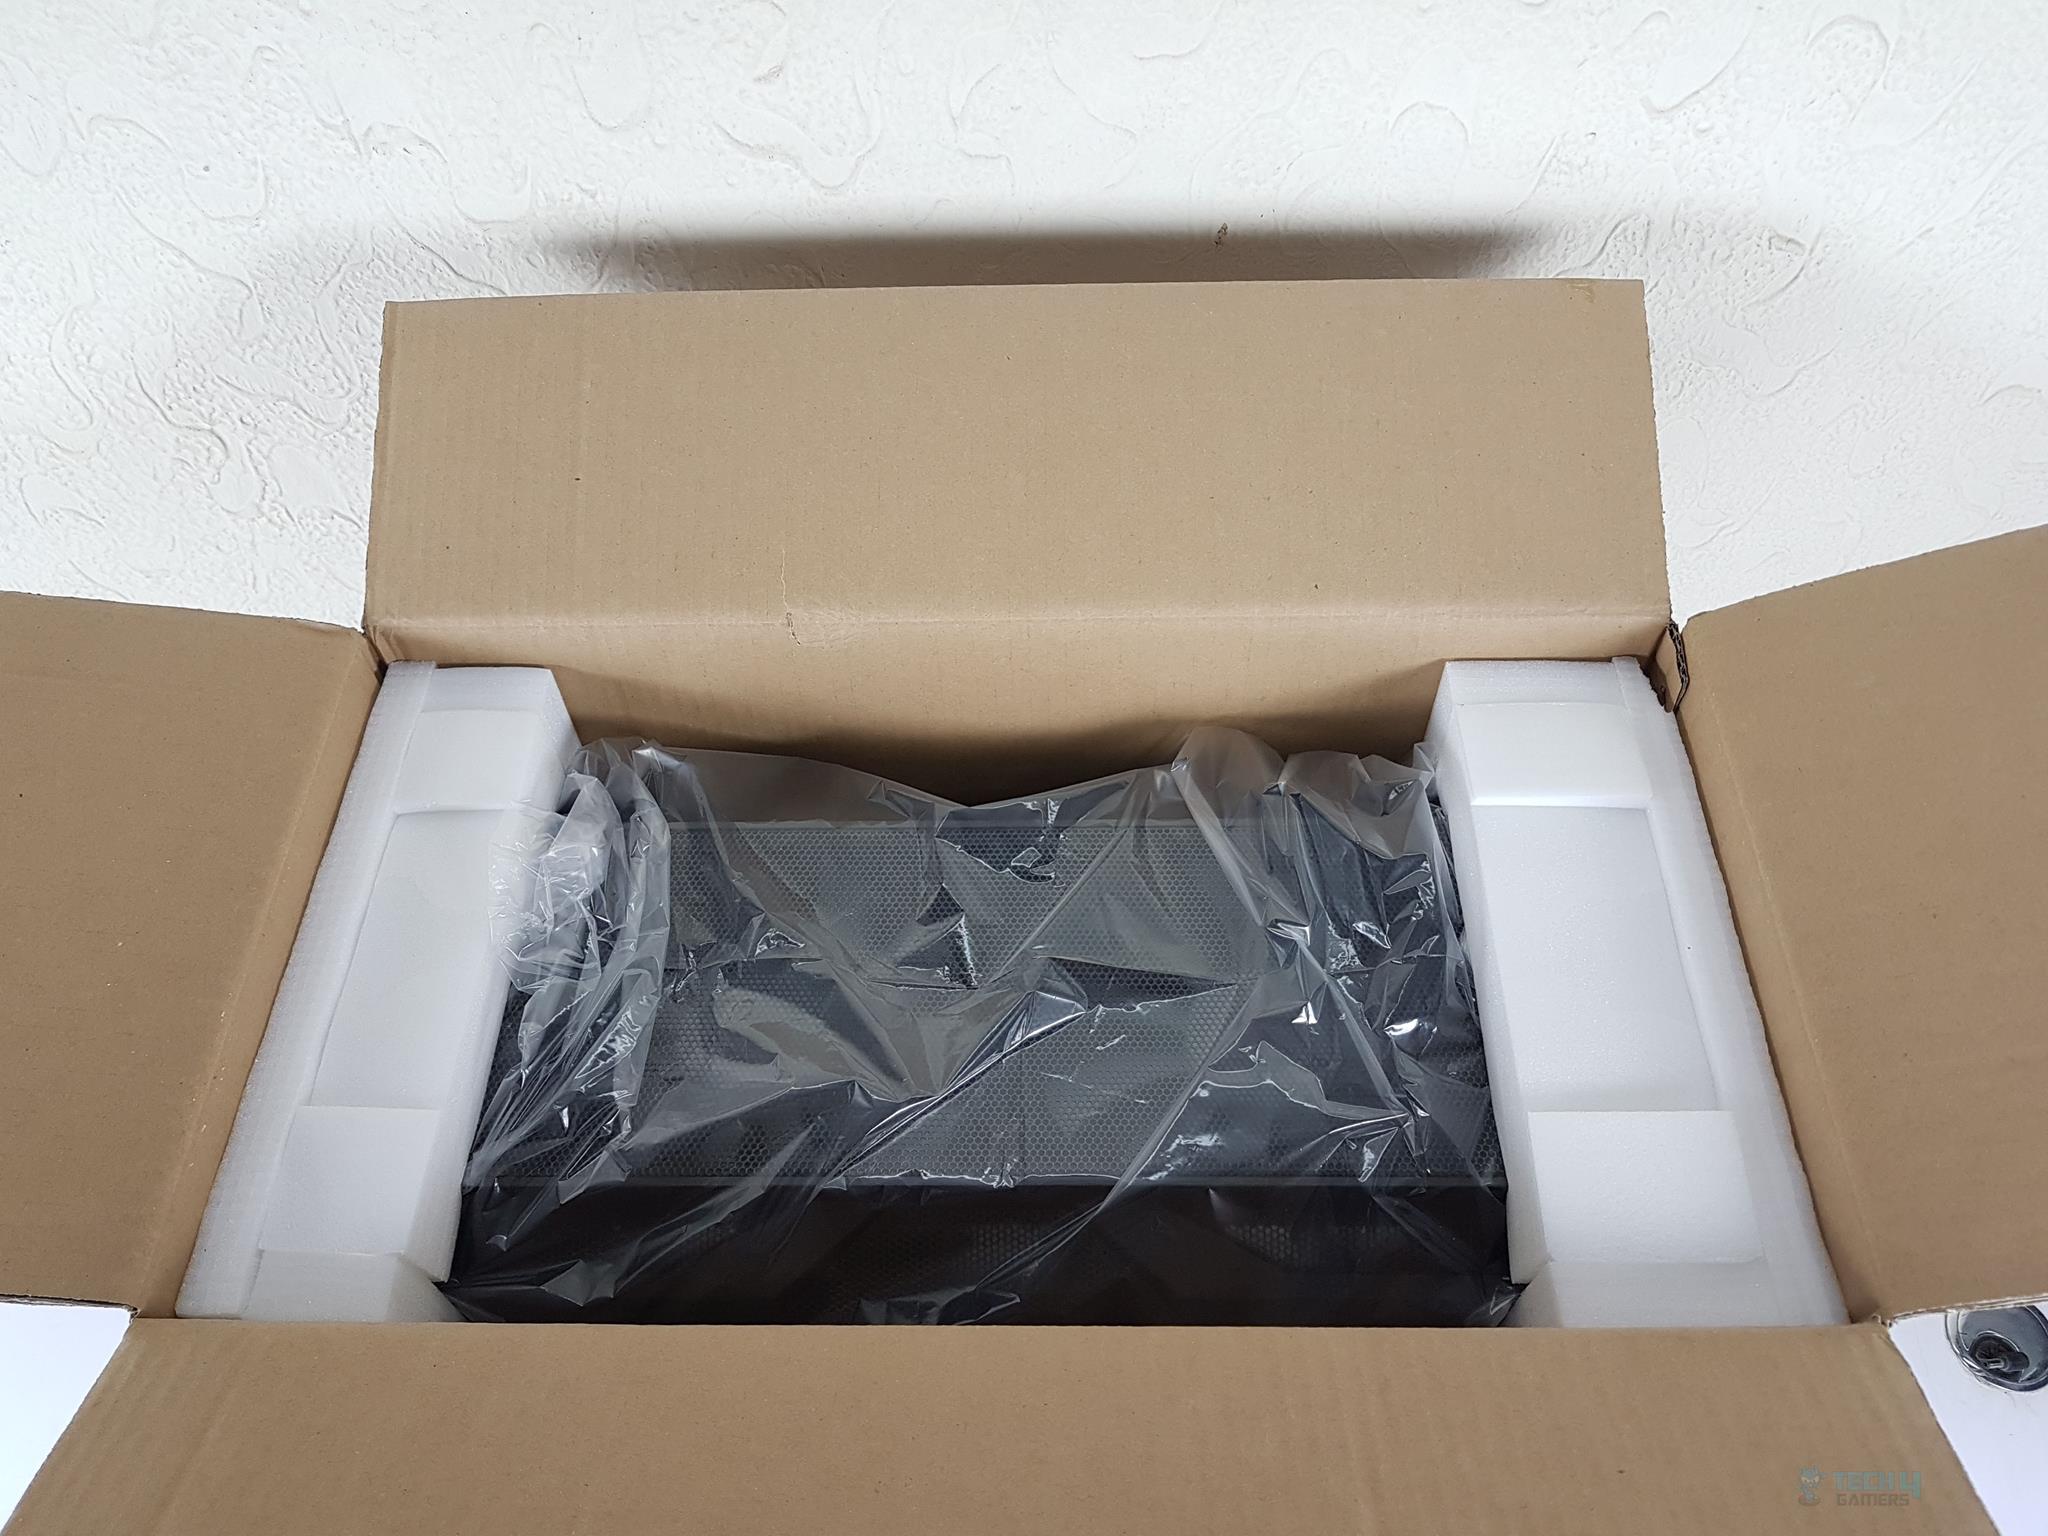
Packaging and Unboxing
Unboxing experience of the Antec NX800.

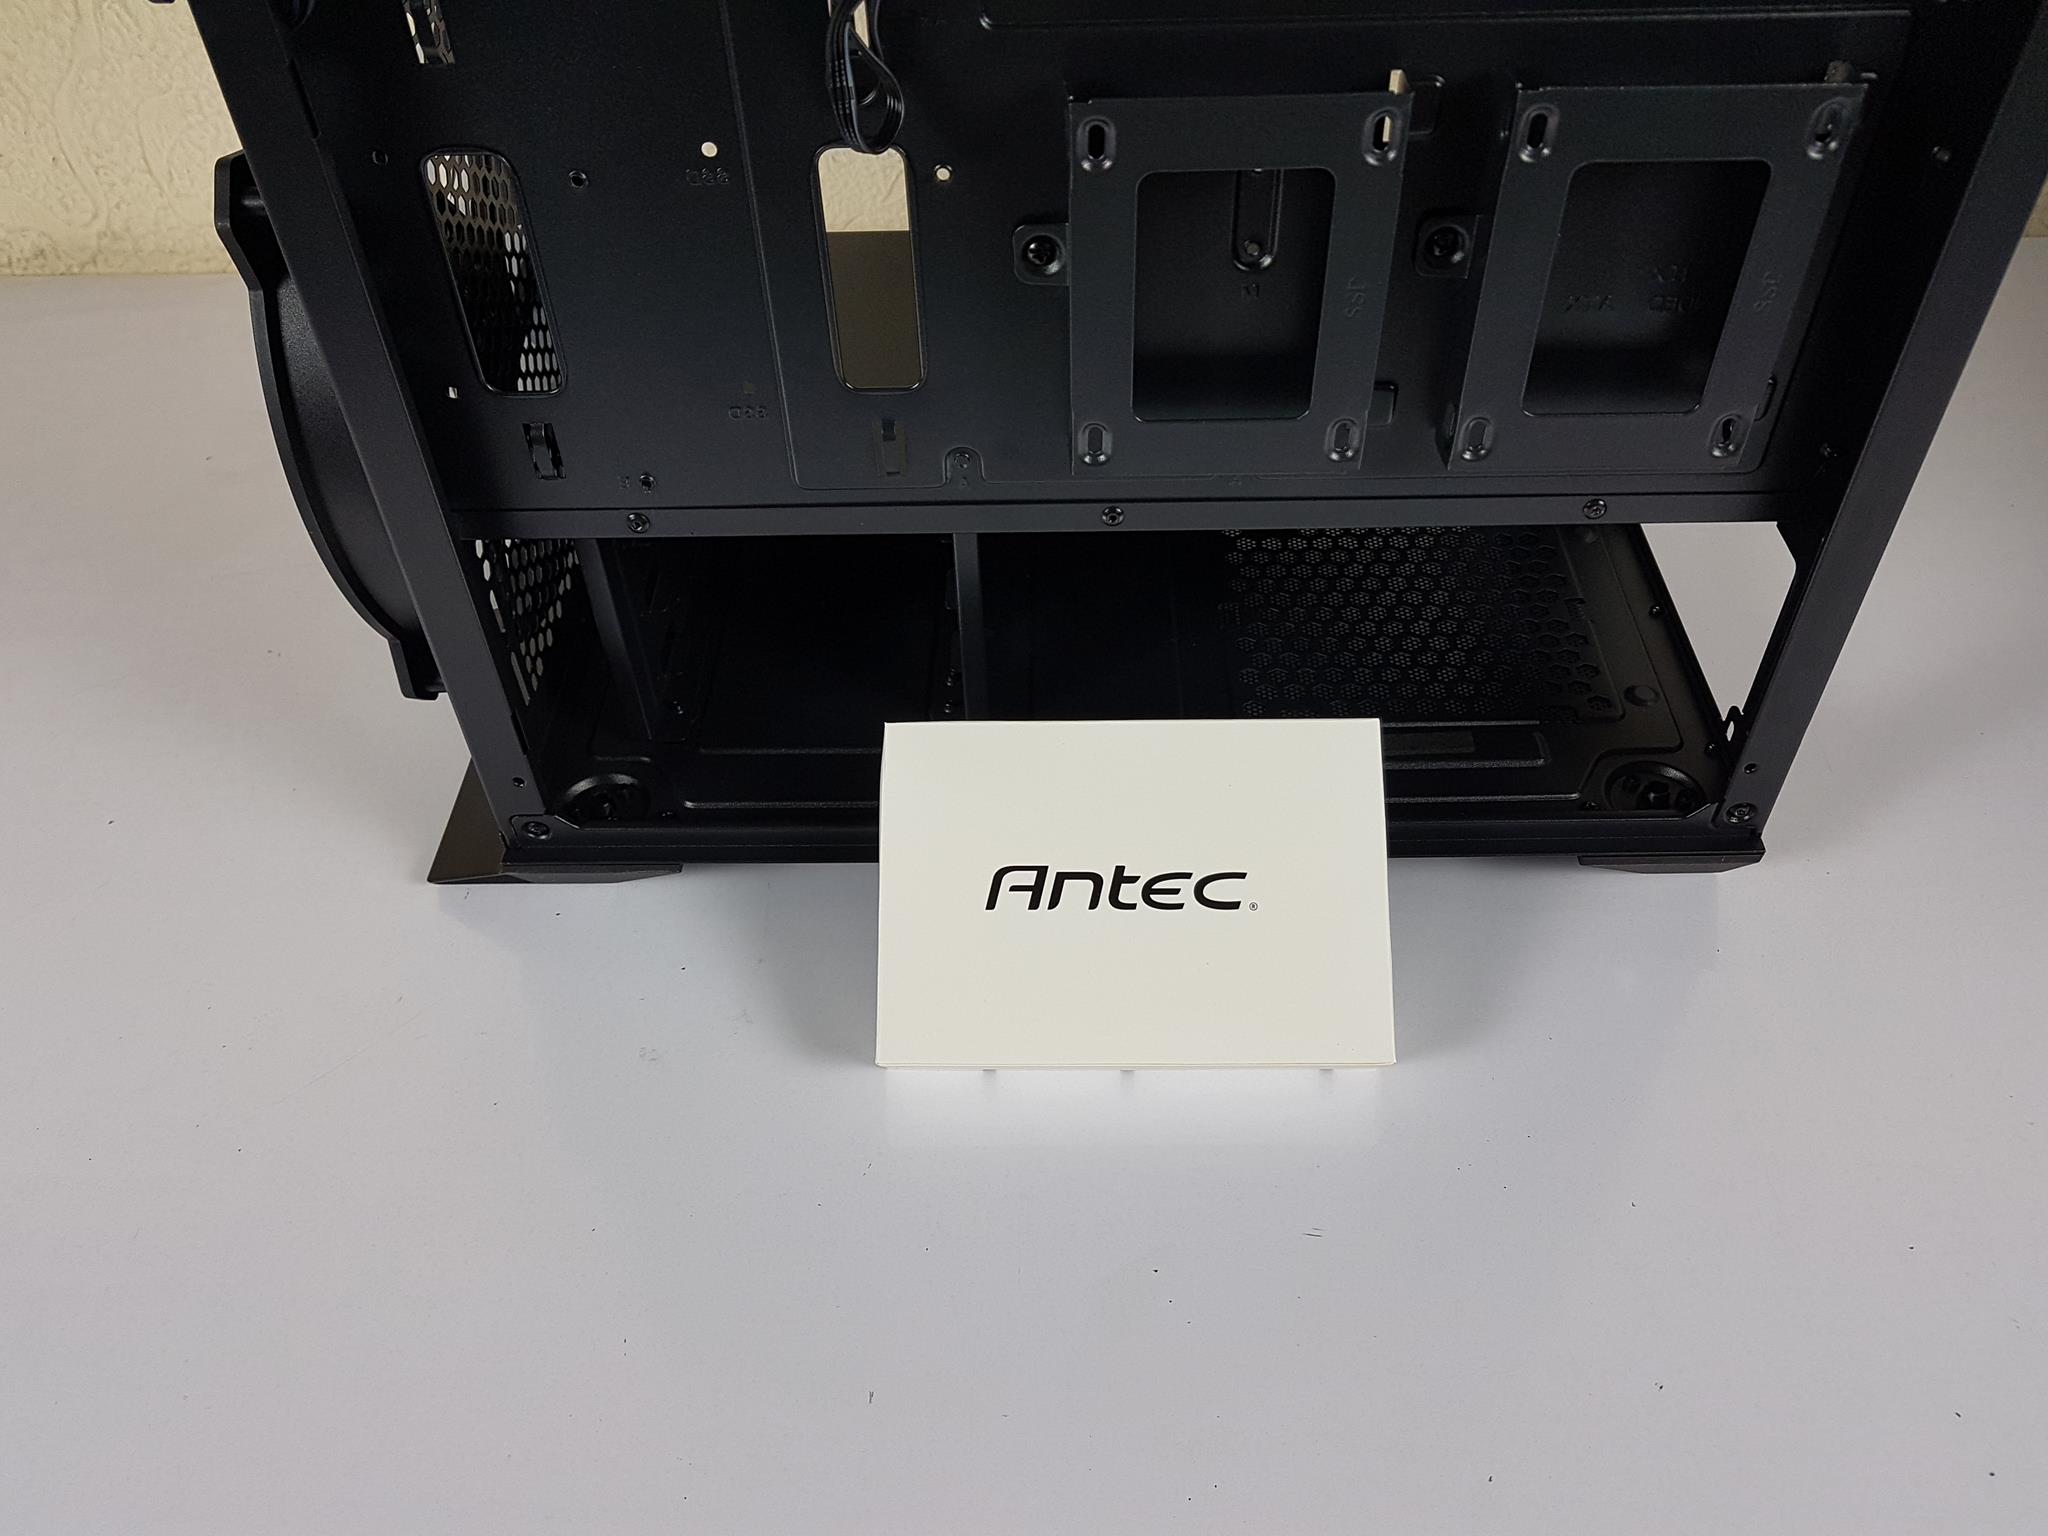
Accessories
Here are all of the included accessories you get with the case.

Closer Look
It is time to take a look at the chassis.
Front
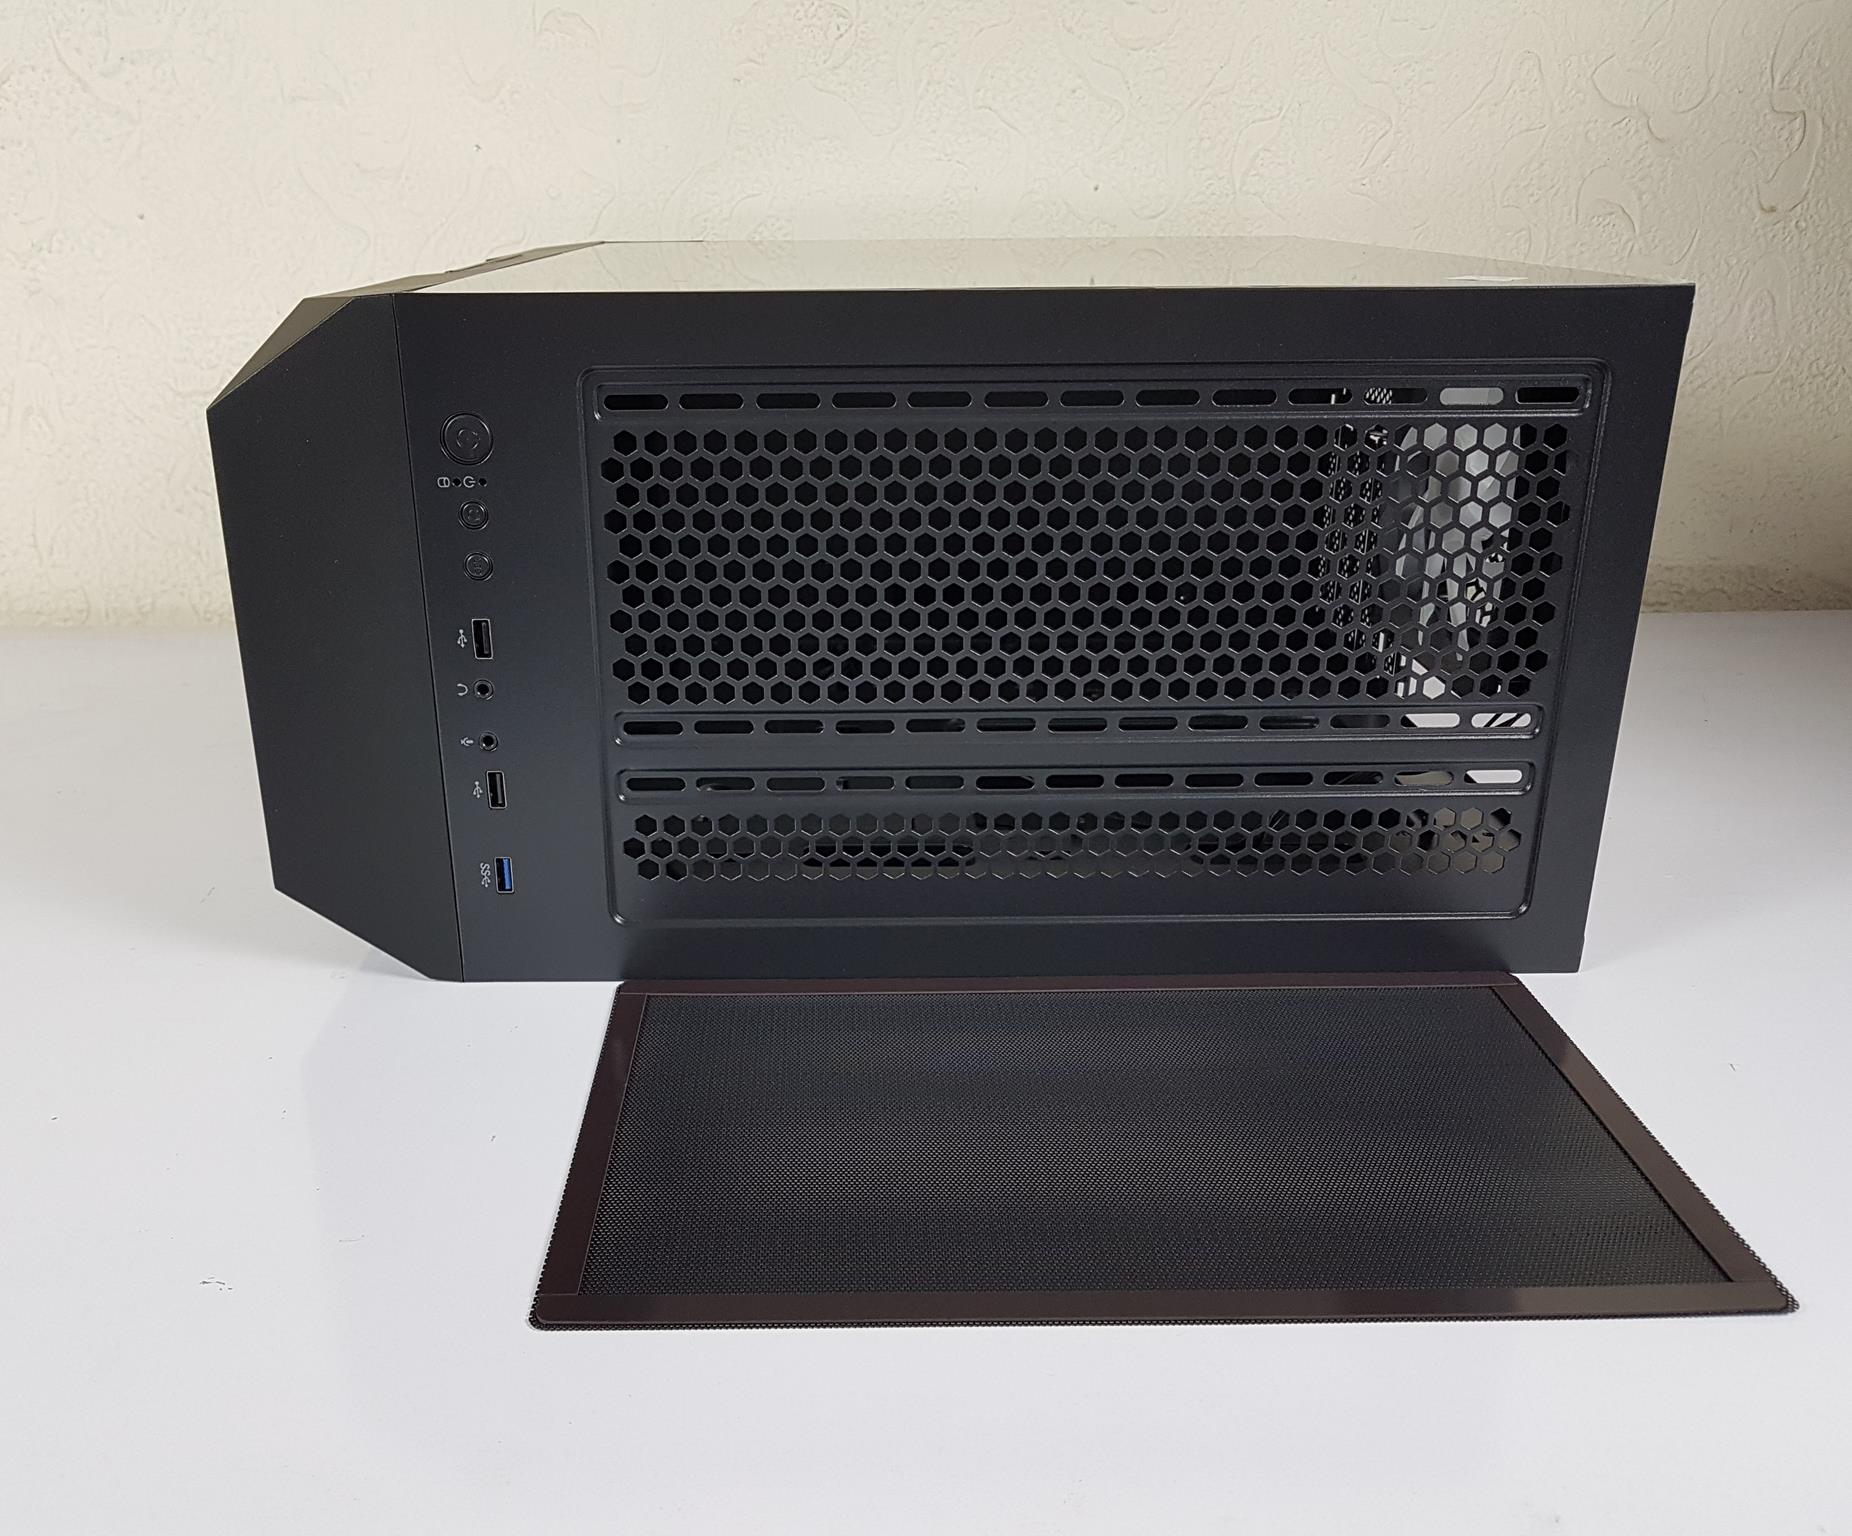
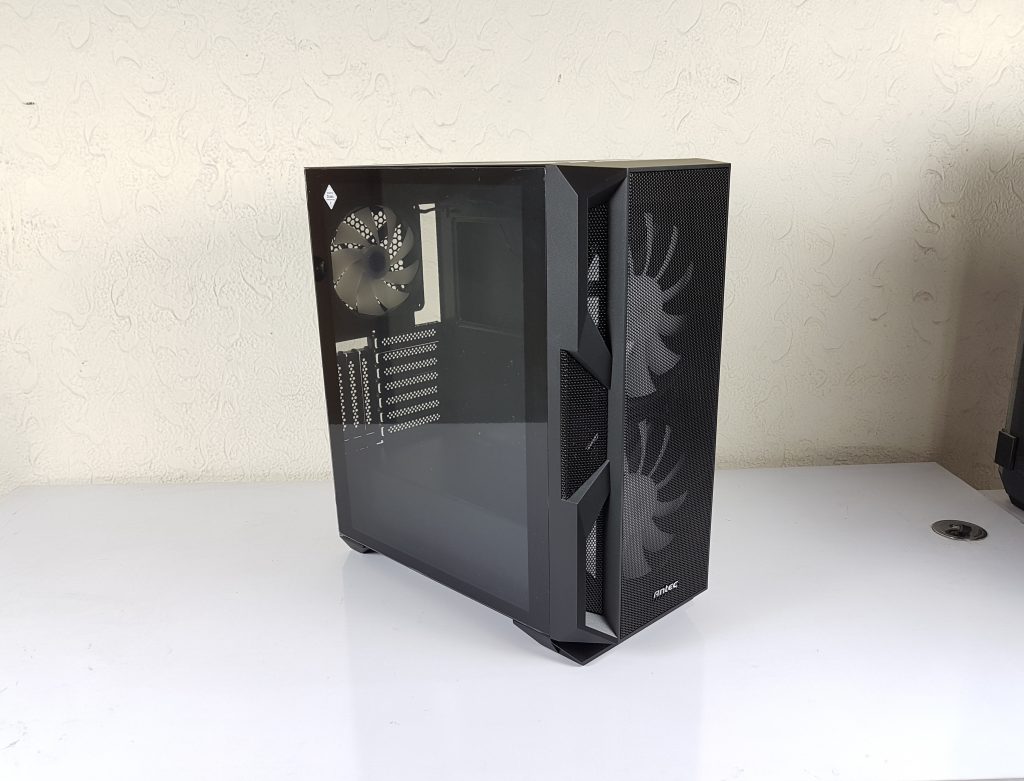
The Antec NX800 features SPCC, plastic, and tempered glass construction with dimensions of 470x230x500mm (DxWxH). Weighing 7.87Kg, it offers a graphics card clearance of 350mm, CPU cooler height clearance of 180mm, and PSU length clearance of 200mm.
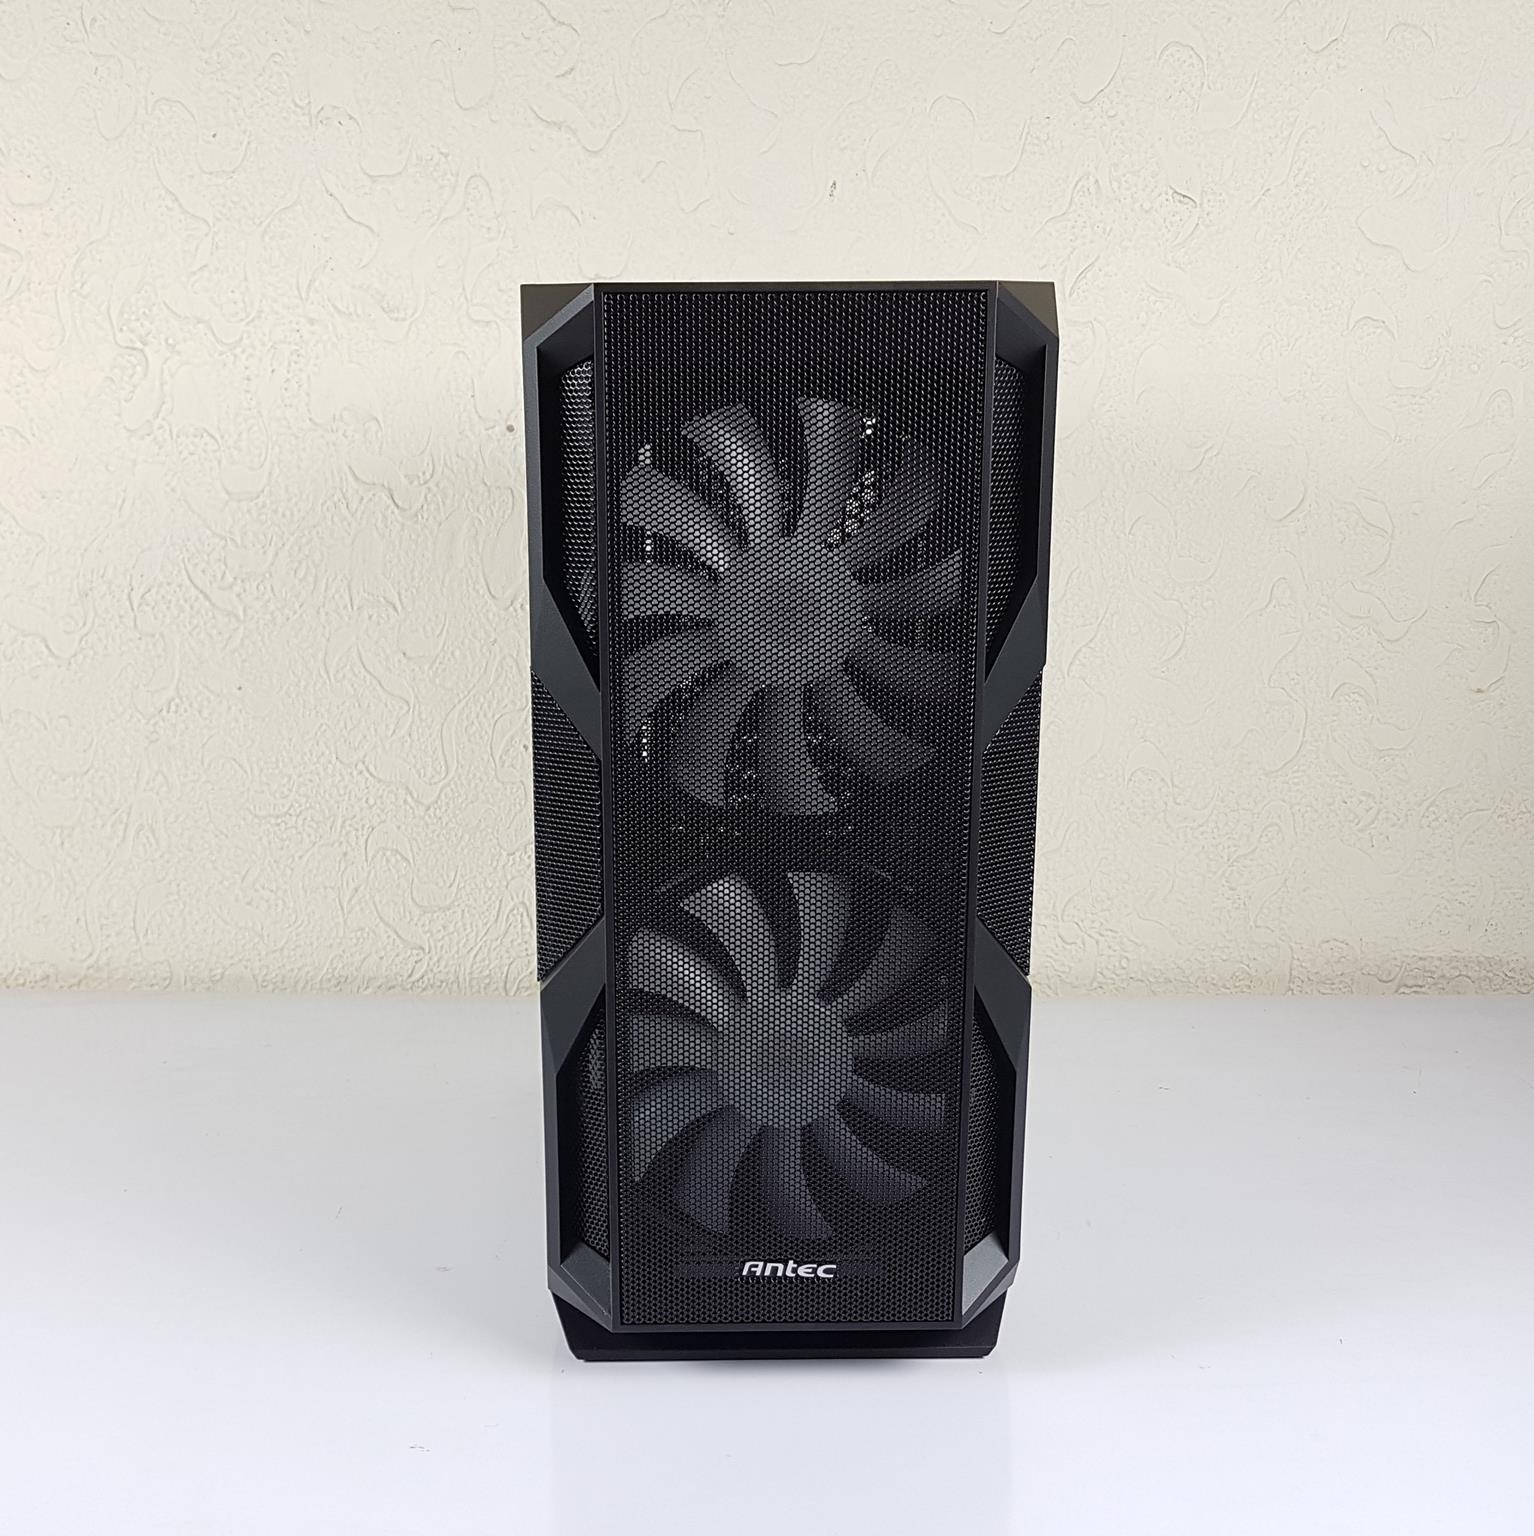
The front side rocks a fully vented panel, with no air intake obstructions – I love the aggressive, bold design, especially in person. The Antec branding at the bottom adds a nice touch. Behind that sleek panel, two 200mm fans are doing their job. The second picture gives a peek at what’s going on inside the front panel.
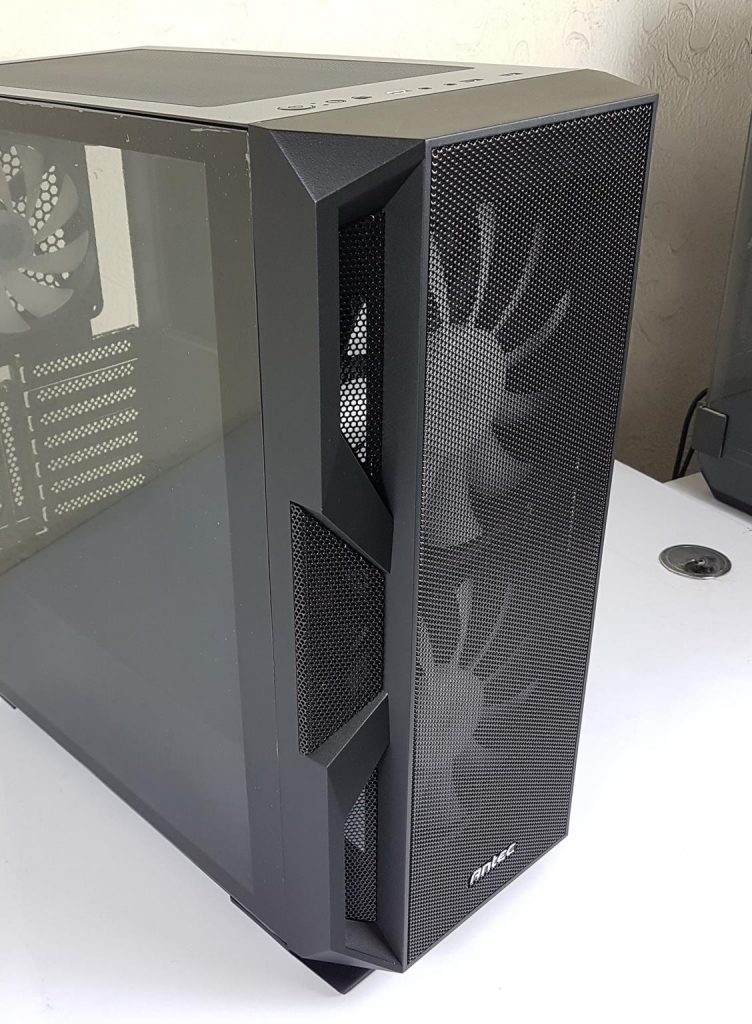
The side design really amps up the chassis’ overall aesthetics. I noticed the front panel is plastic; to remove it, I simply placed my hand on the bottom and gave it a pull.
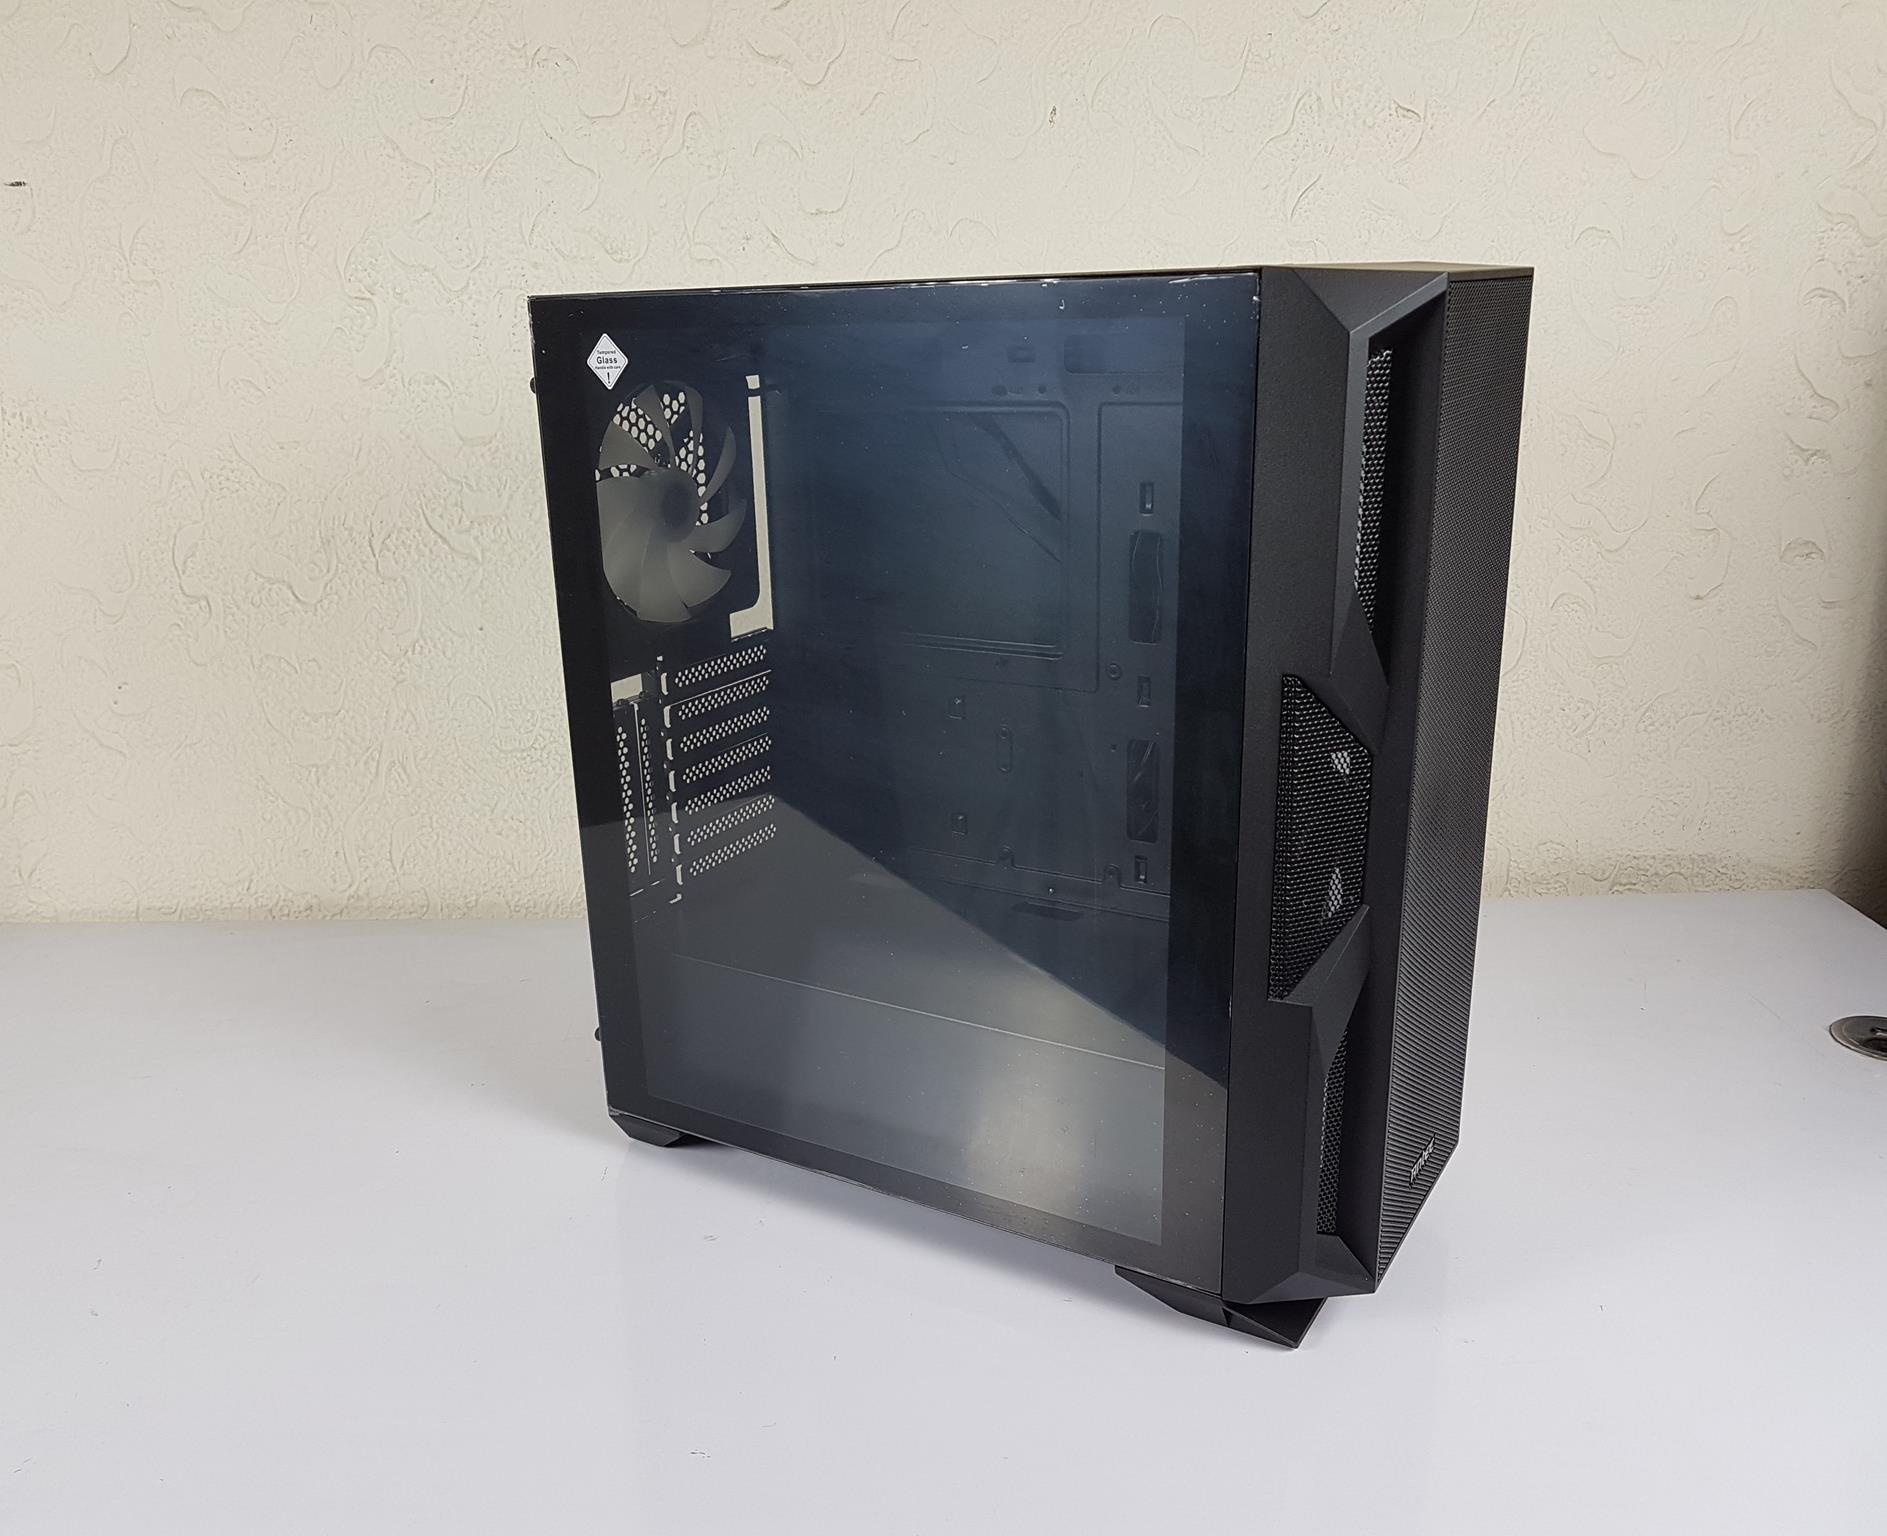
Upon closer inspection, I noticed there was no mesh filtration, prompting questions about dust on the front side. I’ll address that soon. The 4mm thick dark black-tinted tempered glass is a standout feature. Examining it closely, I spotted a slight gap at the top between the panel and the chassis frame.
The front panel sits flush. Handling with care, as the white caution sticker indicates, the glass panel has a sleek dark black border on all sides. Let’s dive into the chassis interior, starting from the front.
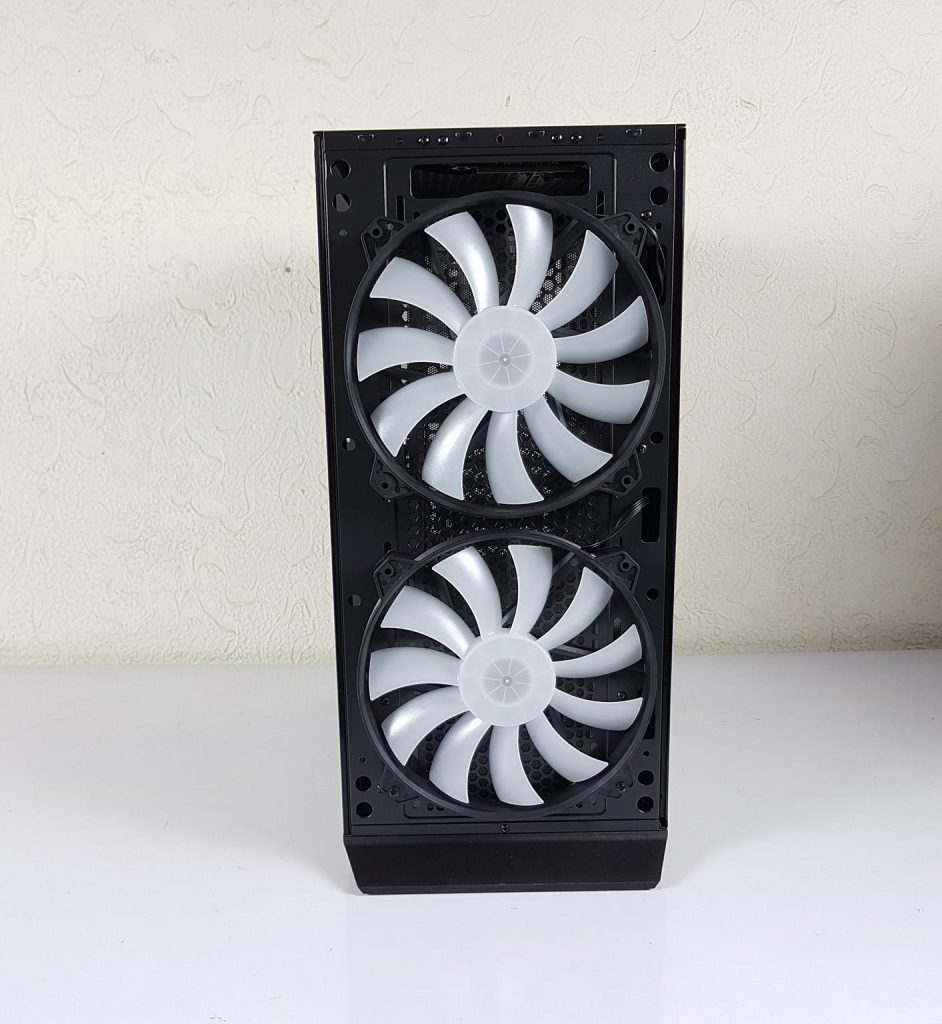
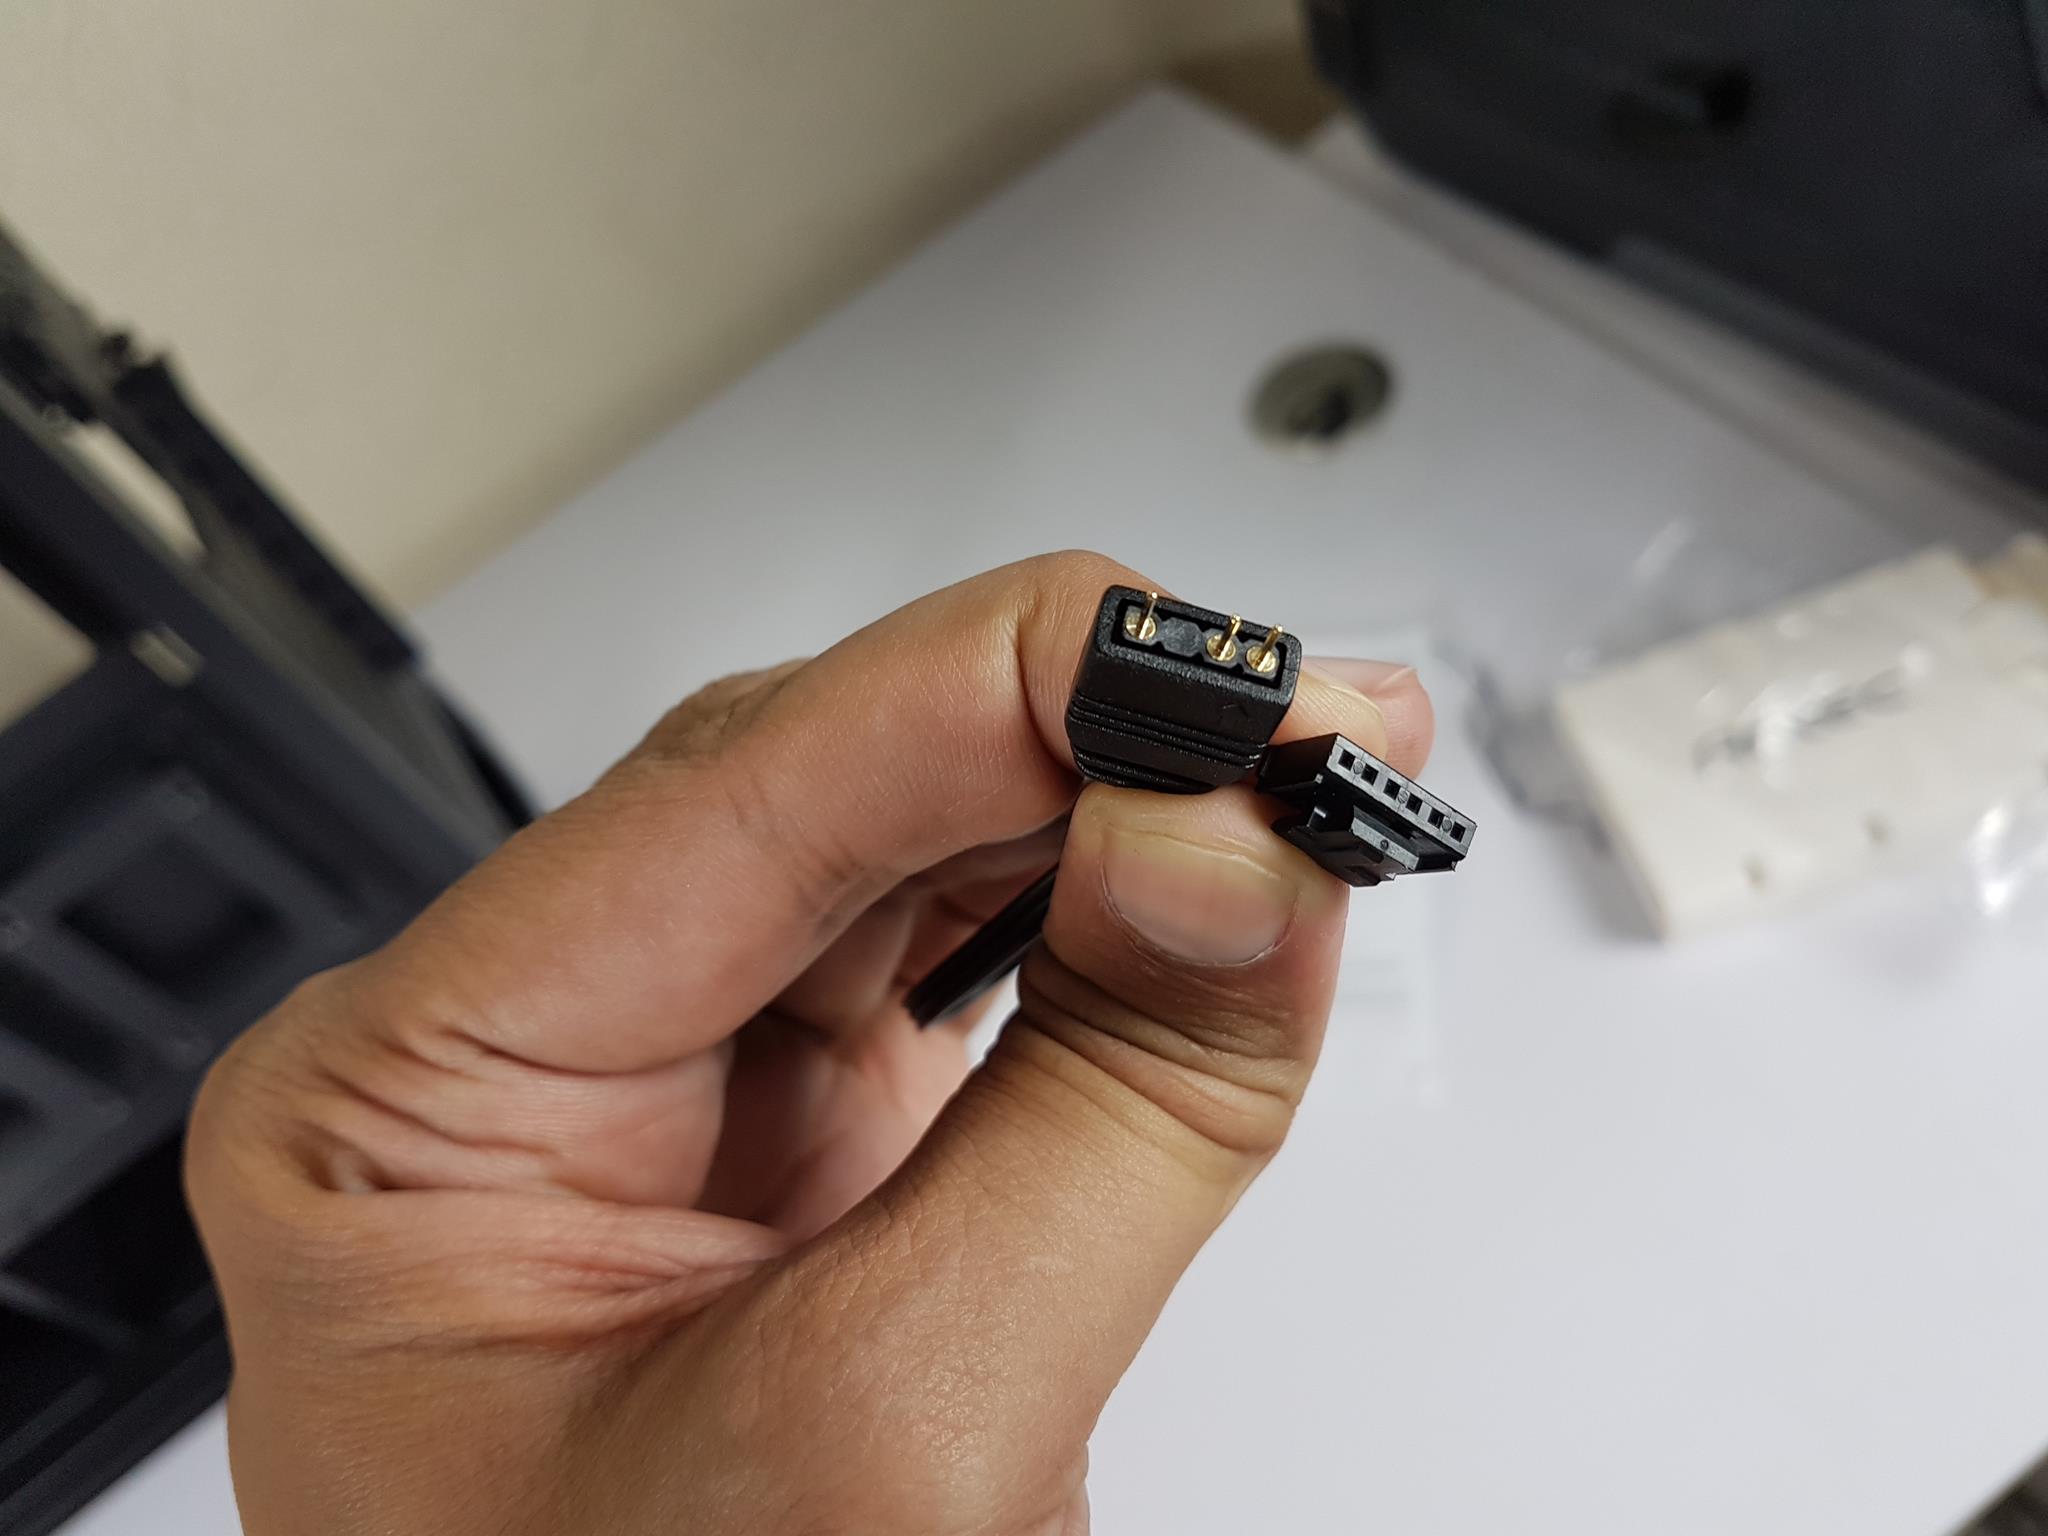
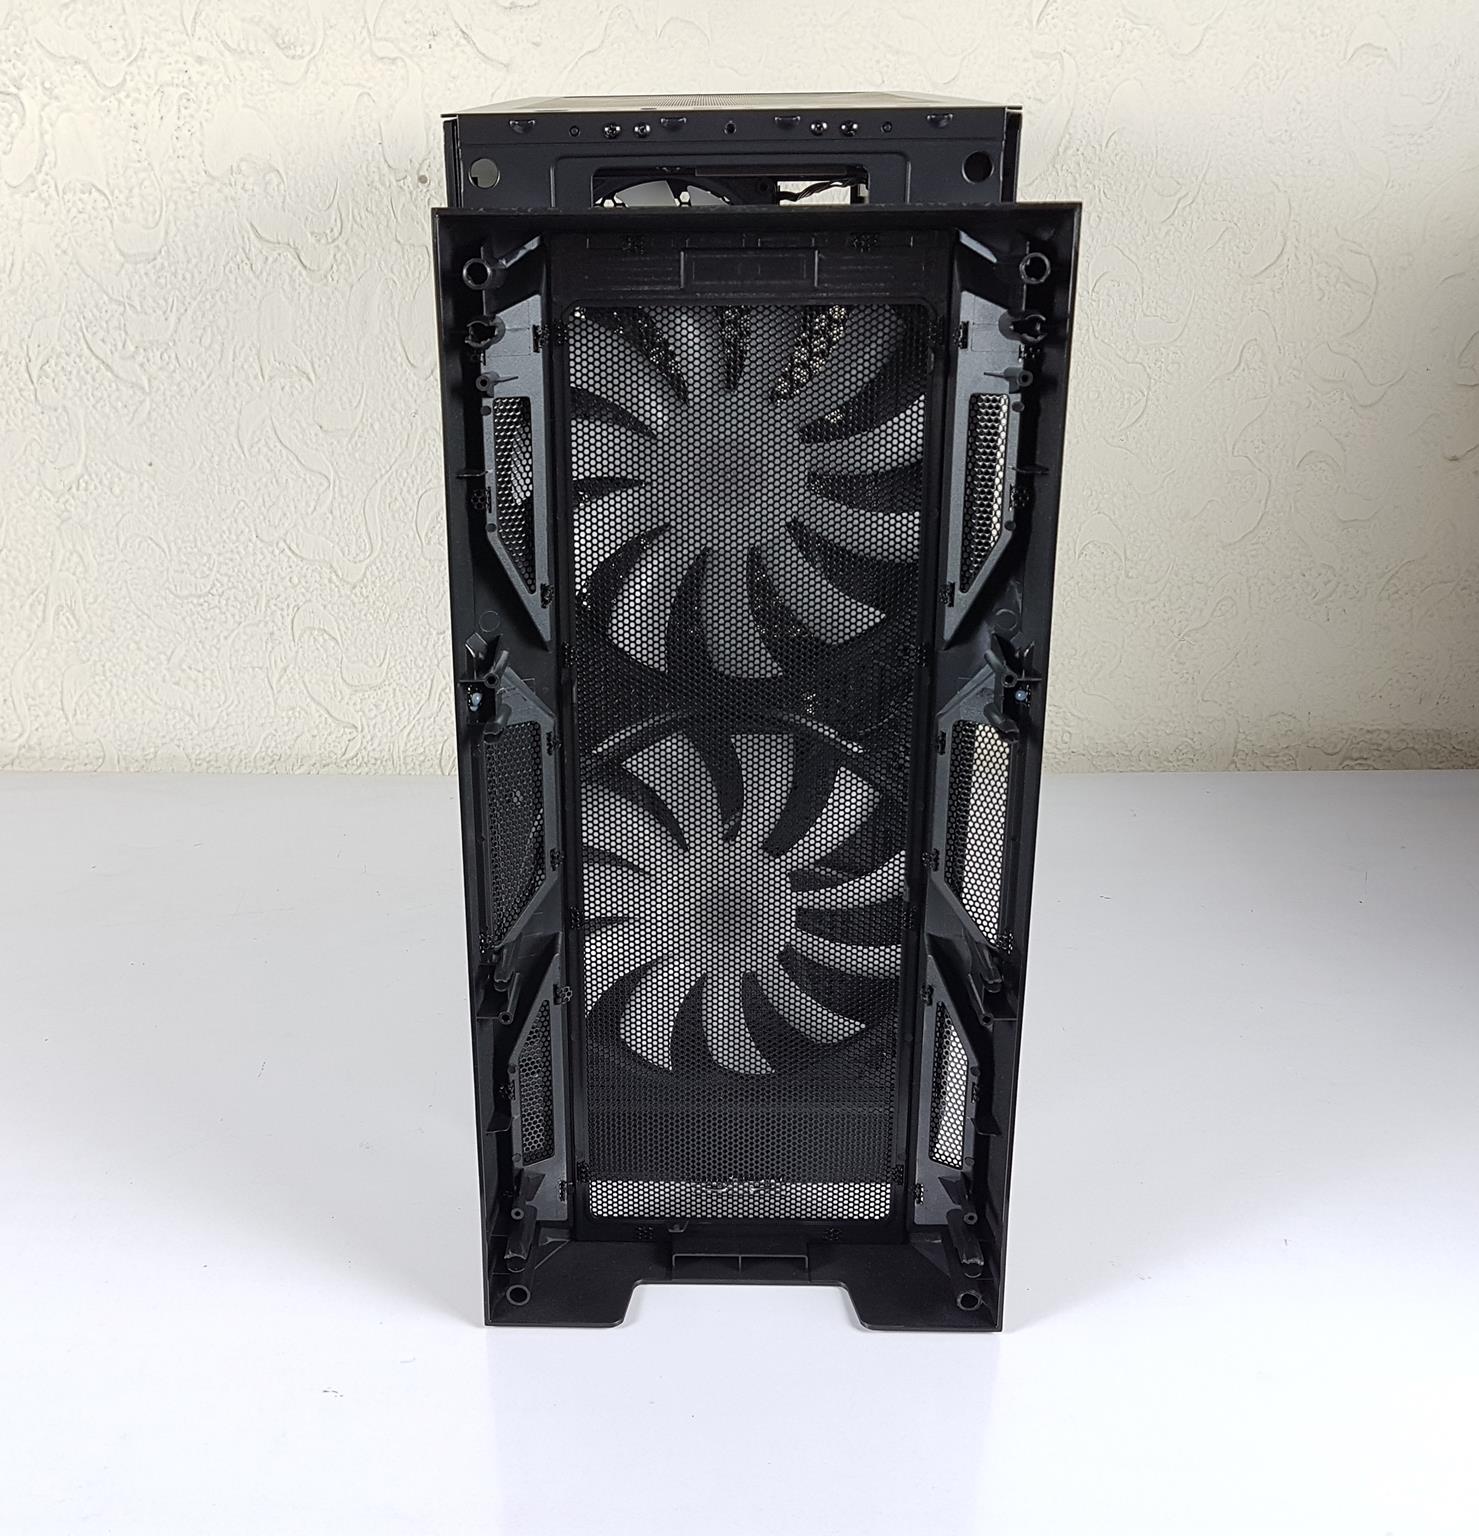
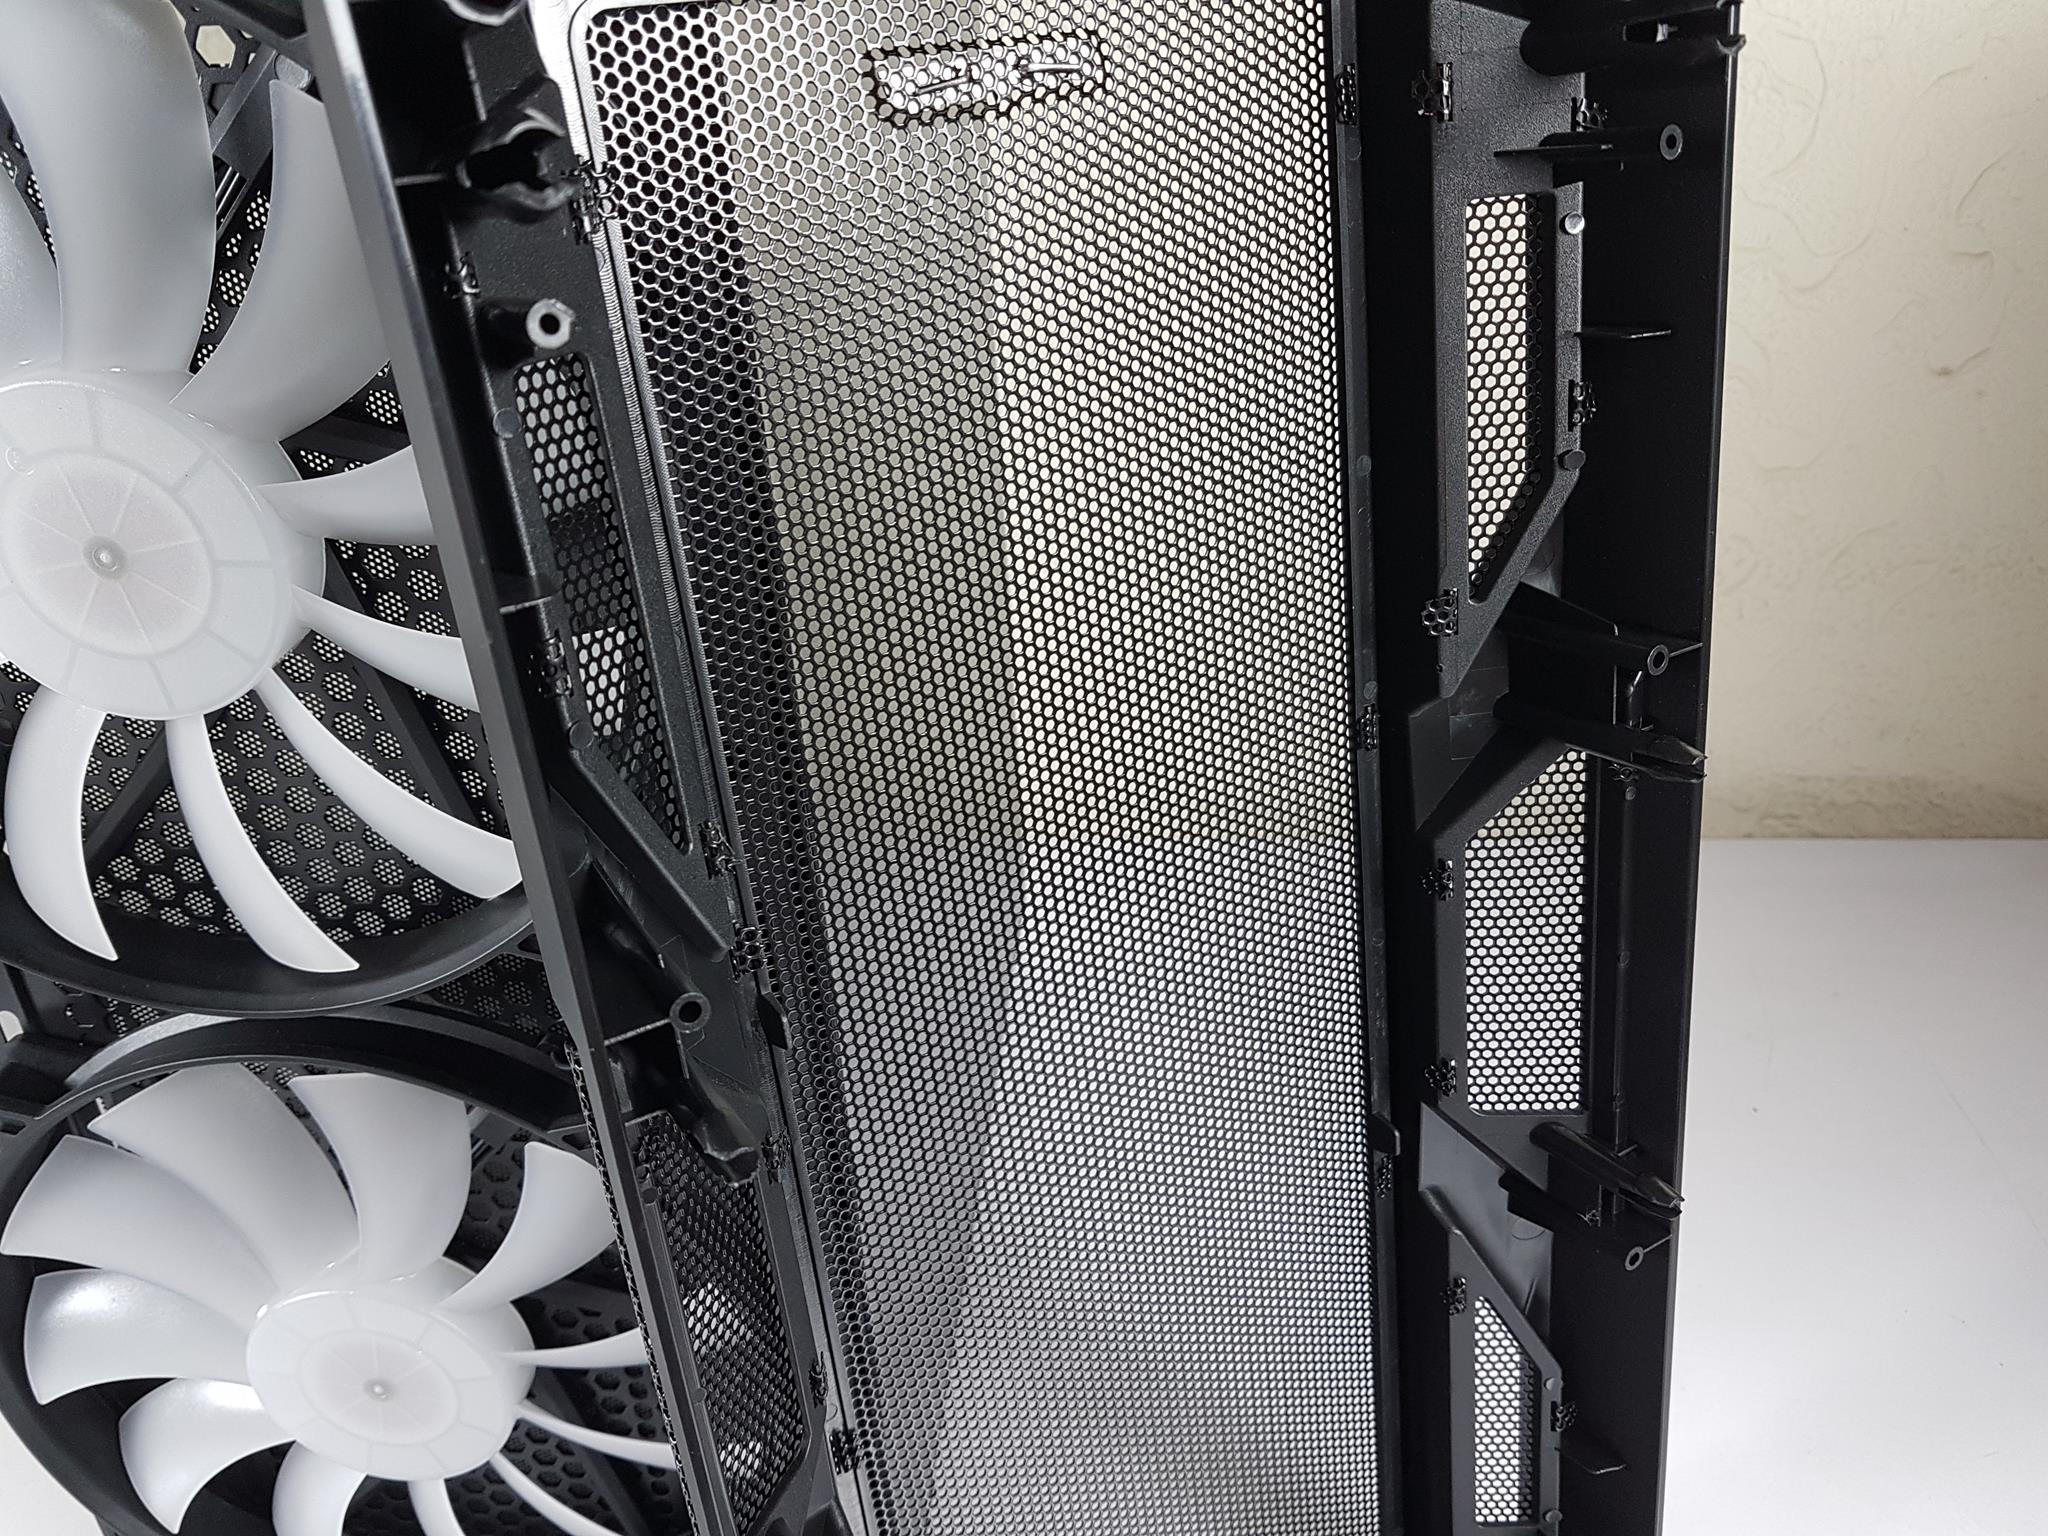
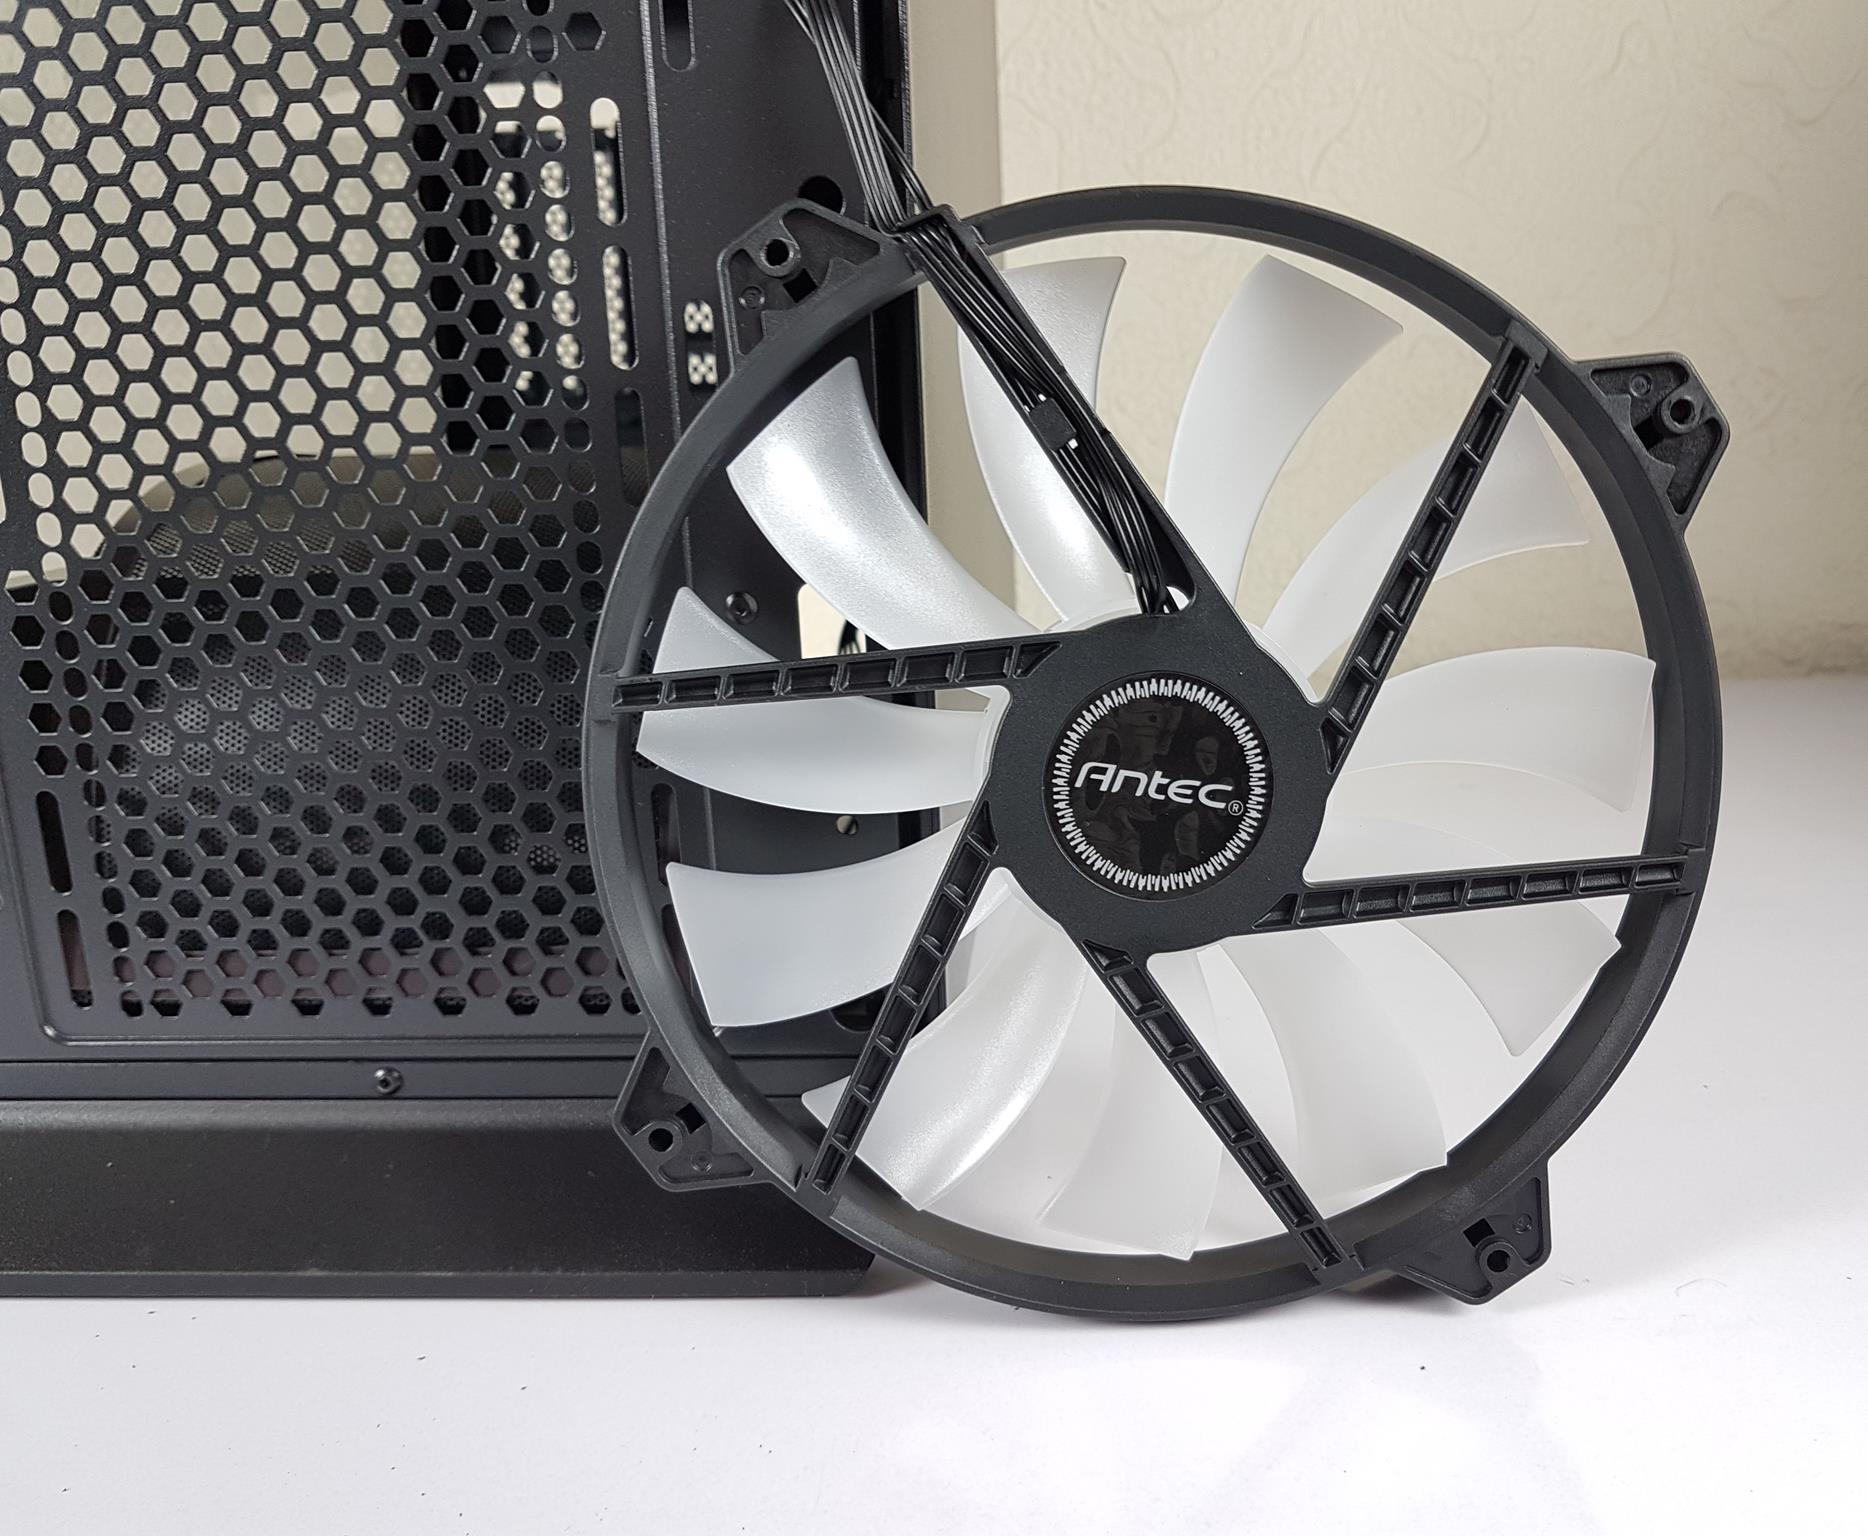
Taking off the front panel reveals two impressive 200mm ARGB fans. Unfortunately, speed control isn’t an option as a proprietary 6-pin connector is used. The 11 white translucent blades create vivid lighting effects. To manage the ARGB lighting, there’s a dedicated RGB button on the IO panel.
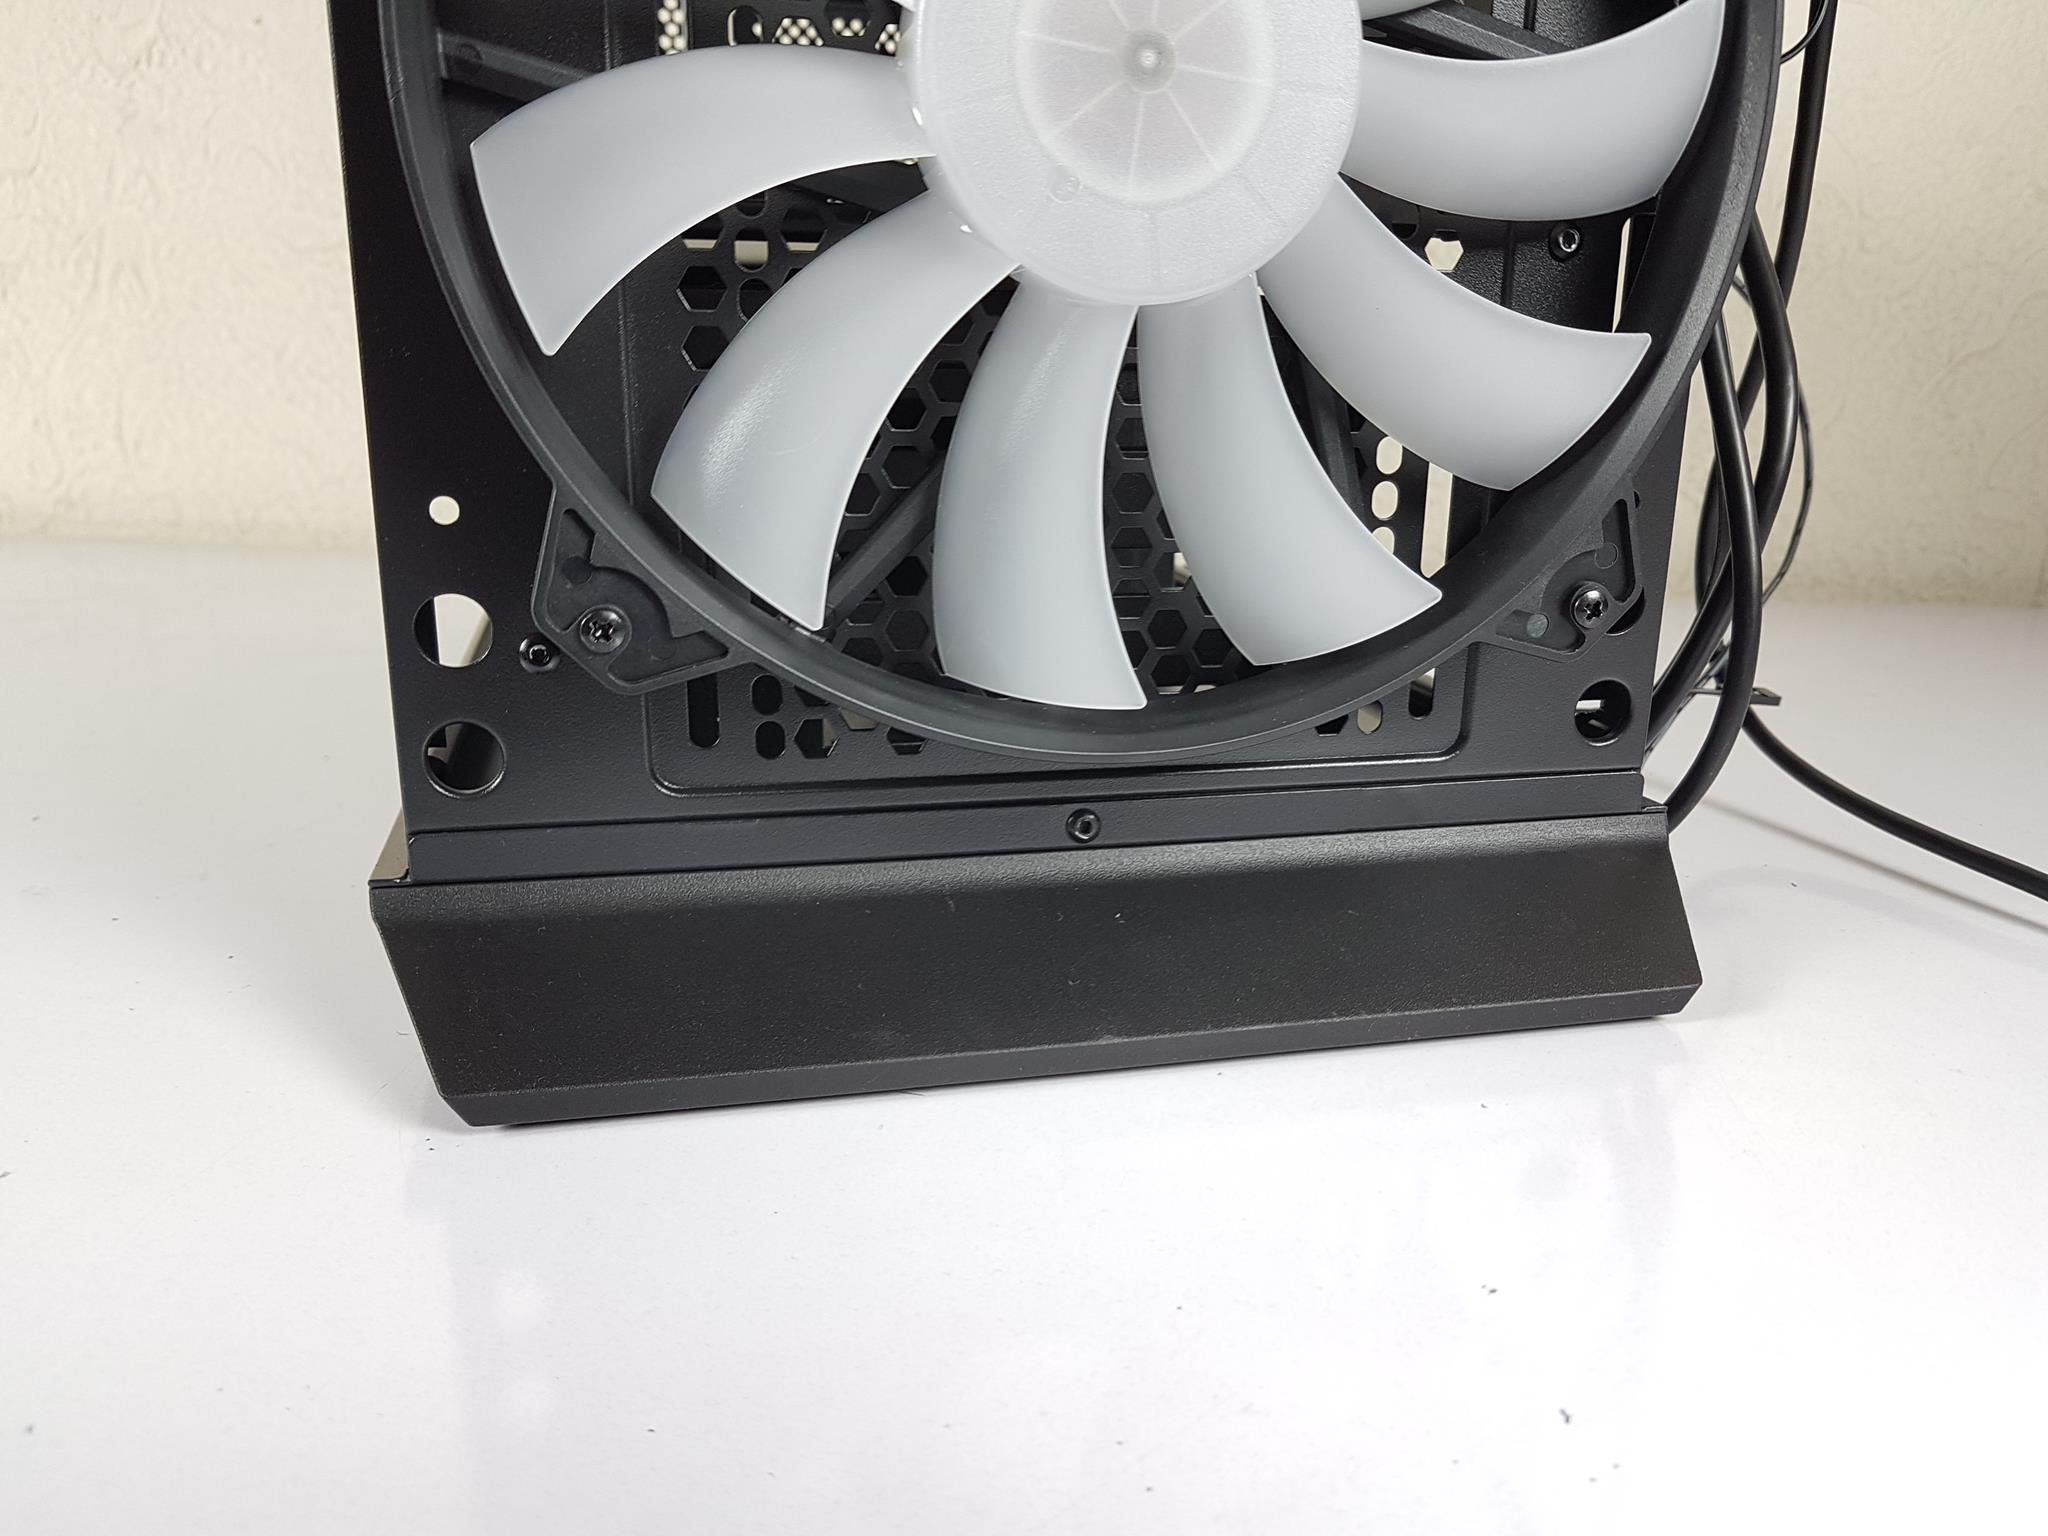
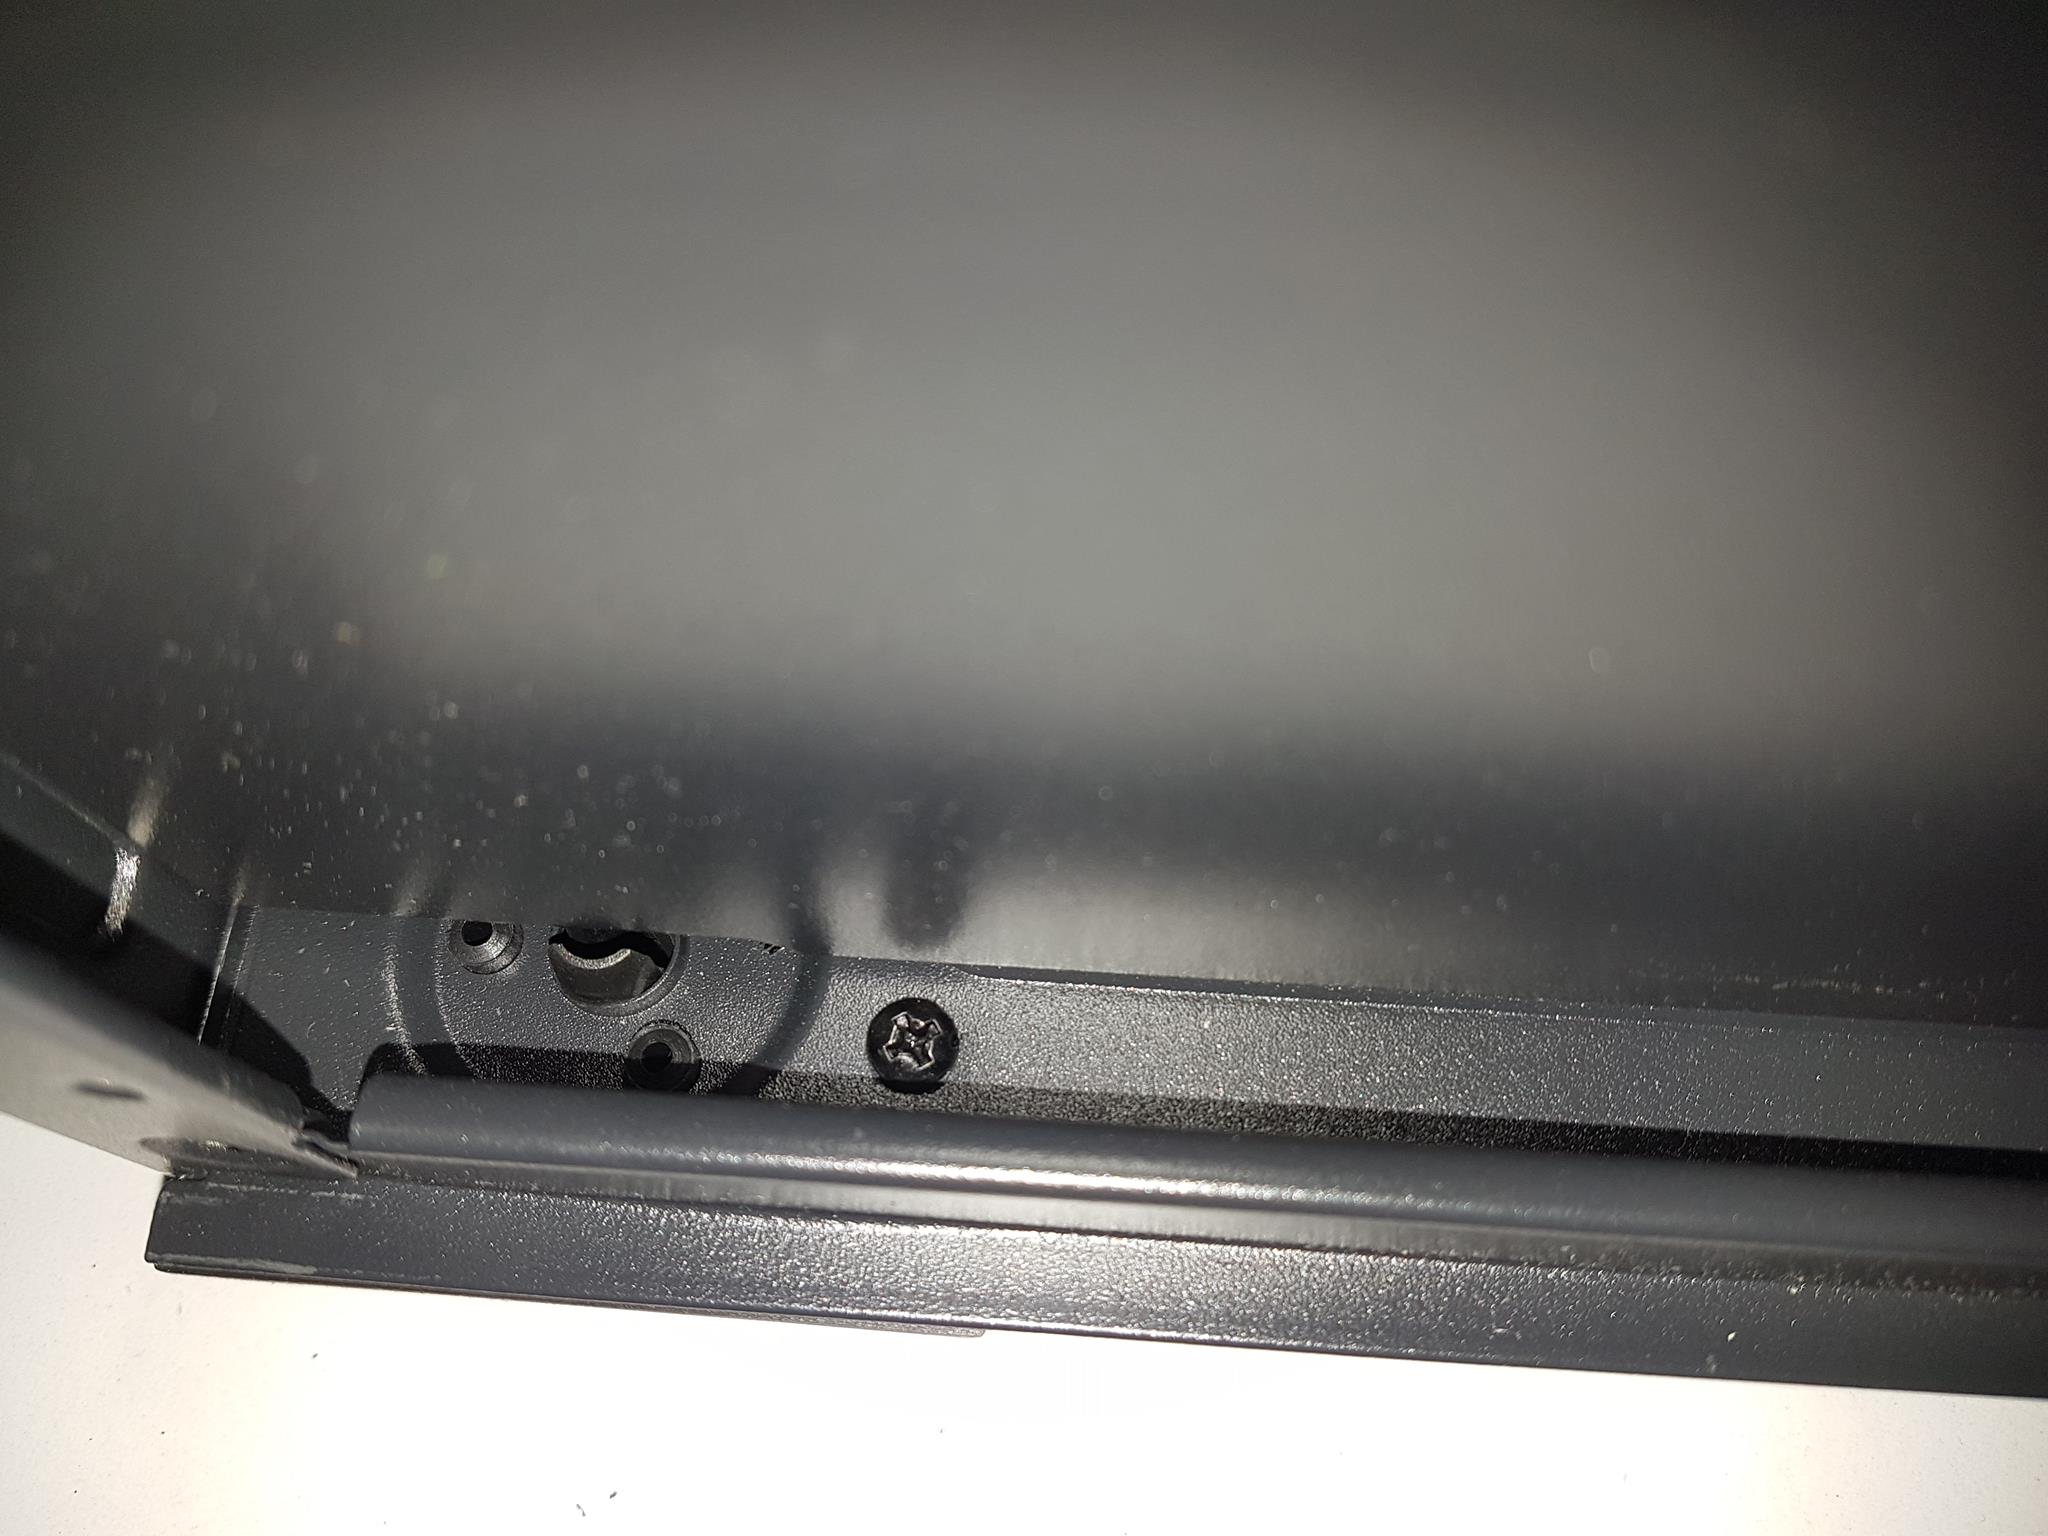
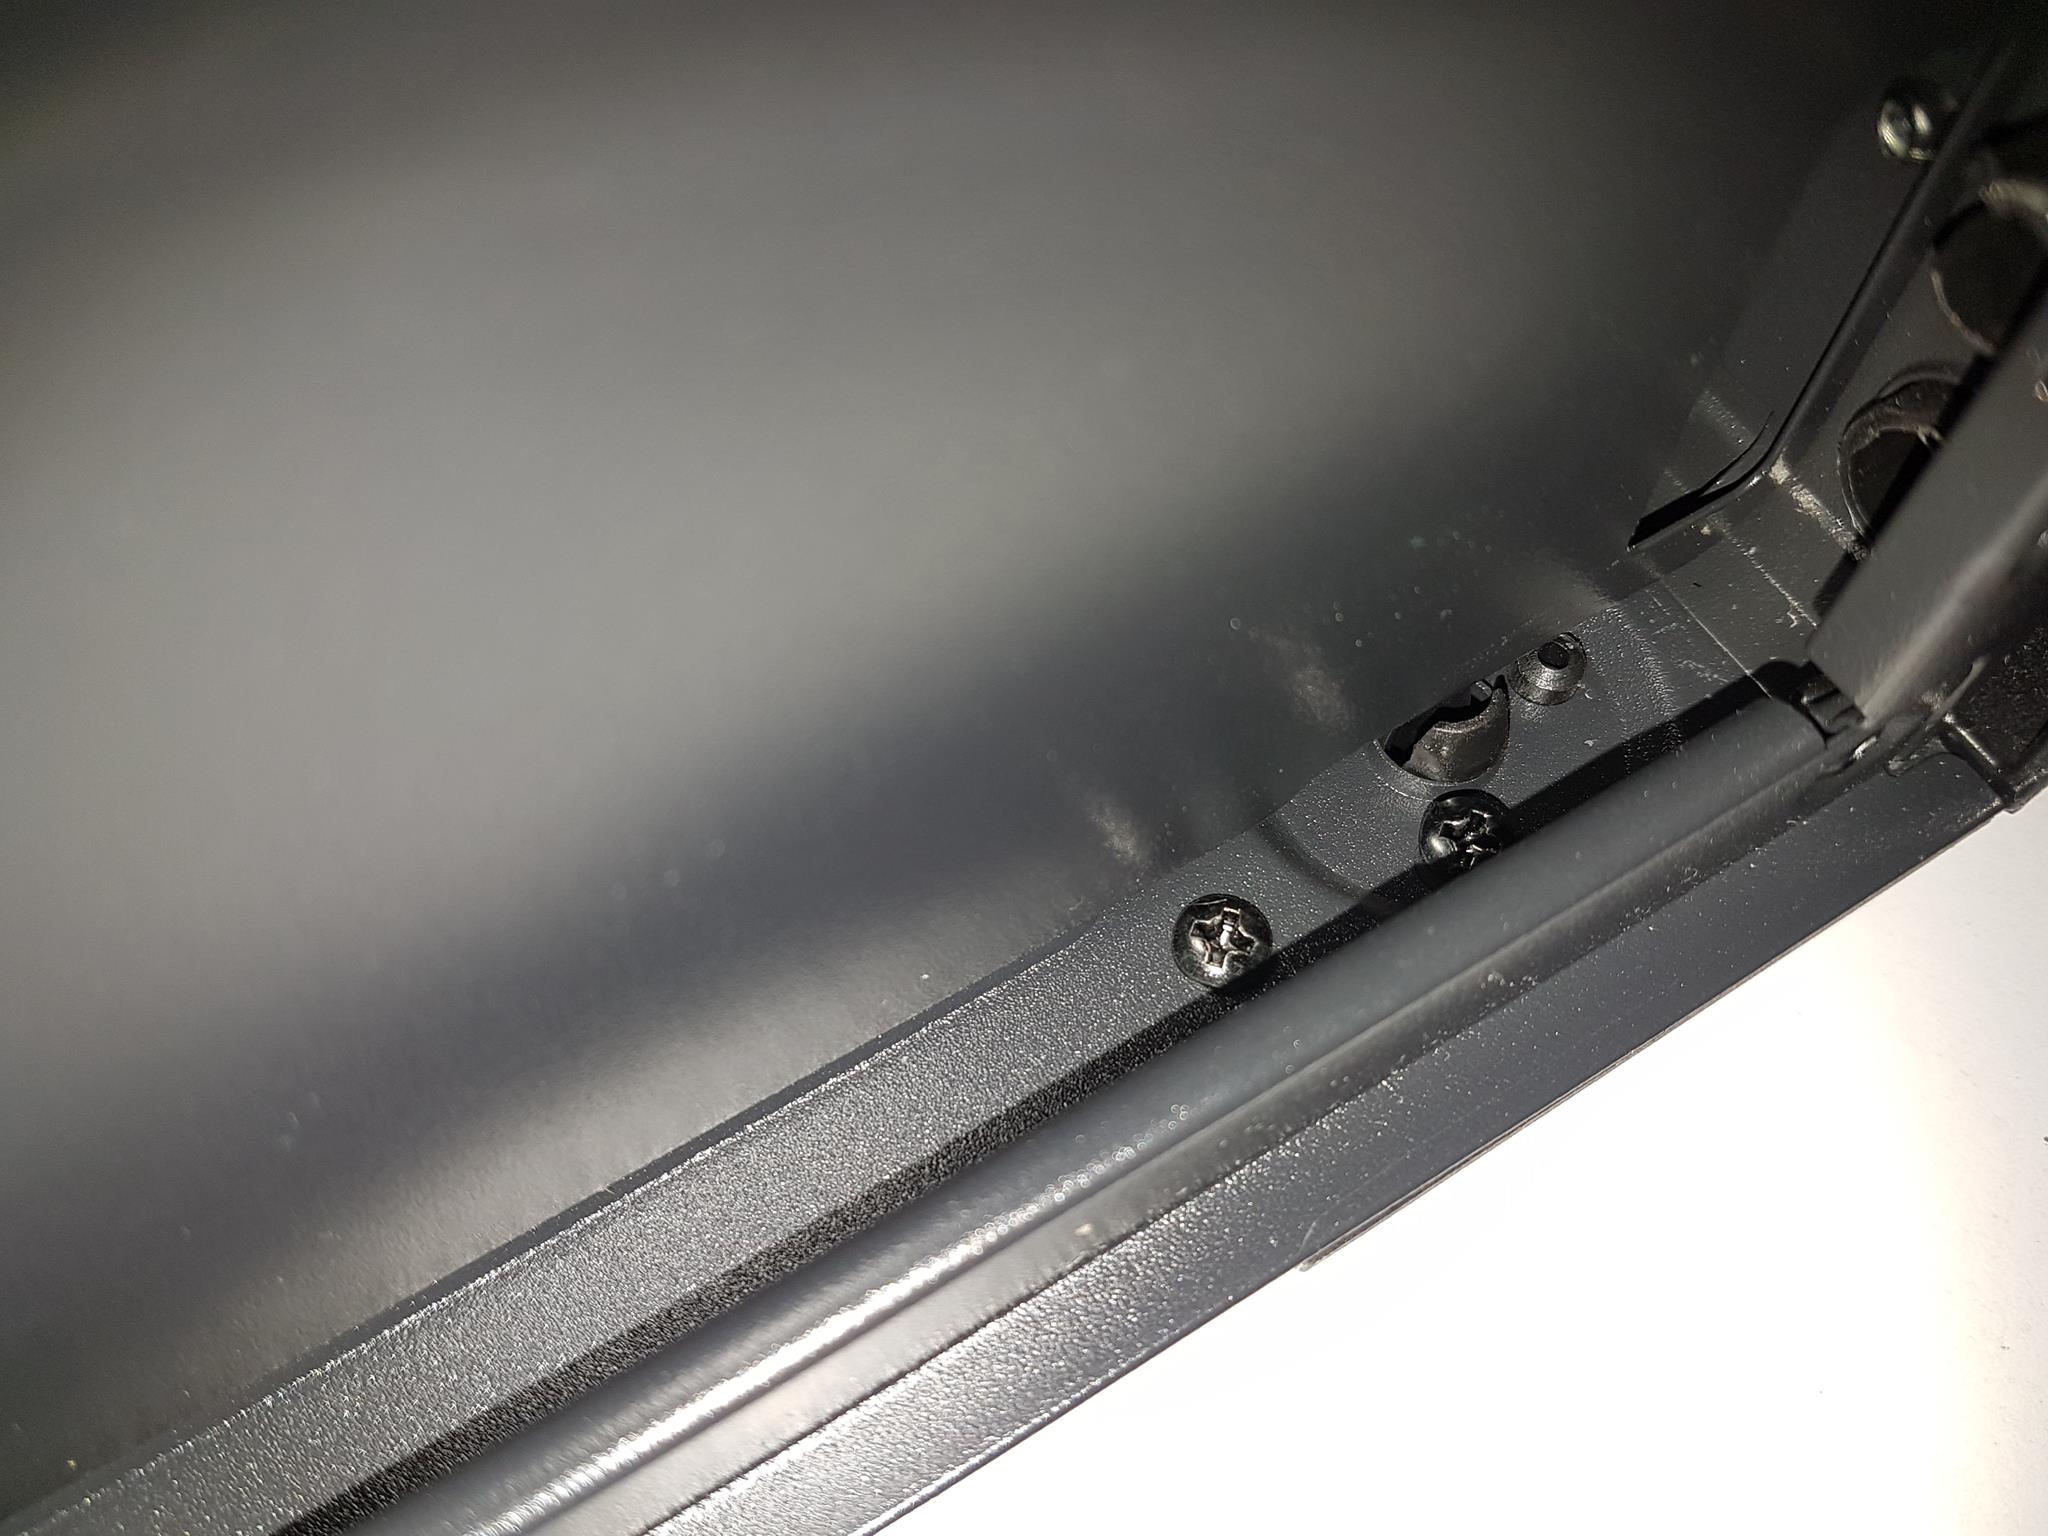
The fans are secured with M3 screws on the backside, making it necessary to remove the side panel for access. Antec’s thoughtful design choice of using 2x long screws on the bottom mount prevents inconvenience and deserves kudos! I was hoping to see some data on the backside of the fans but there is only Antec branding on the sticker.
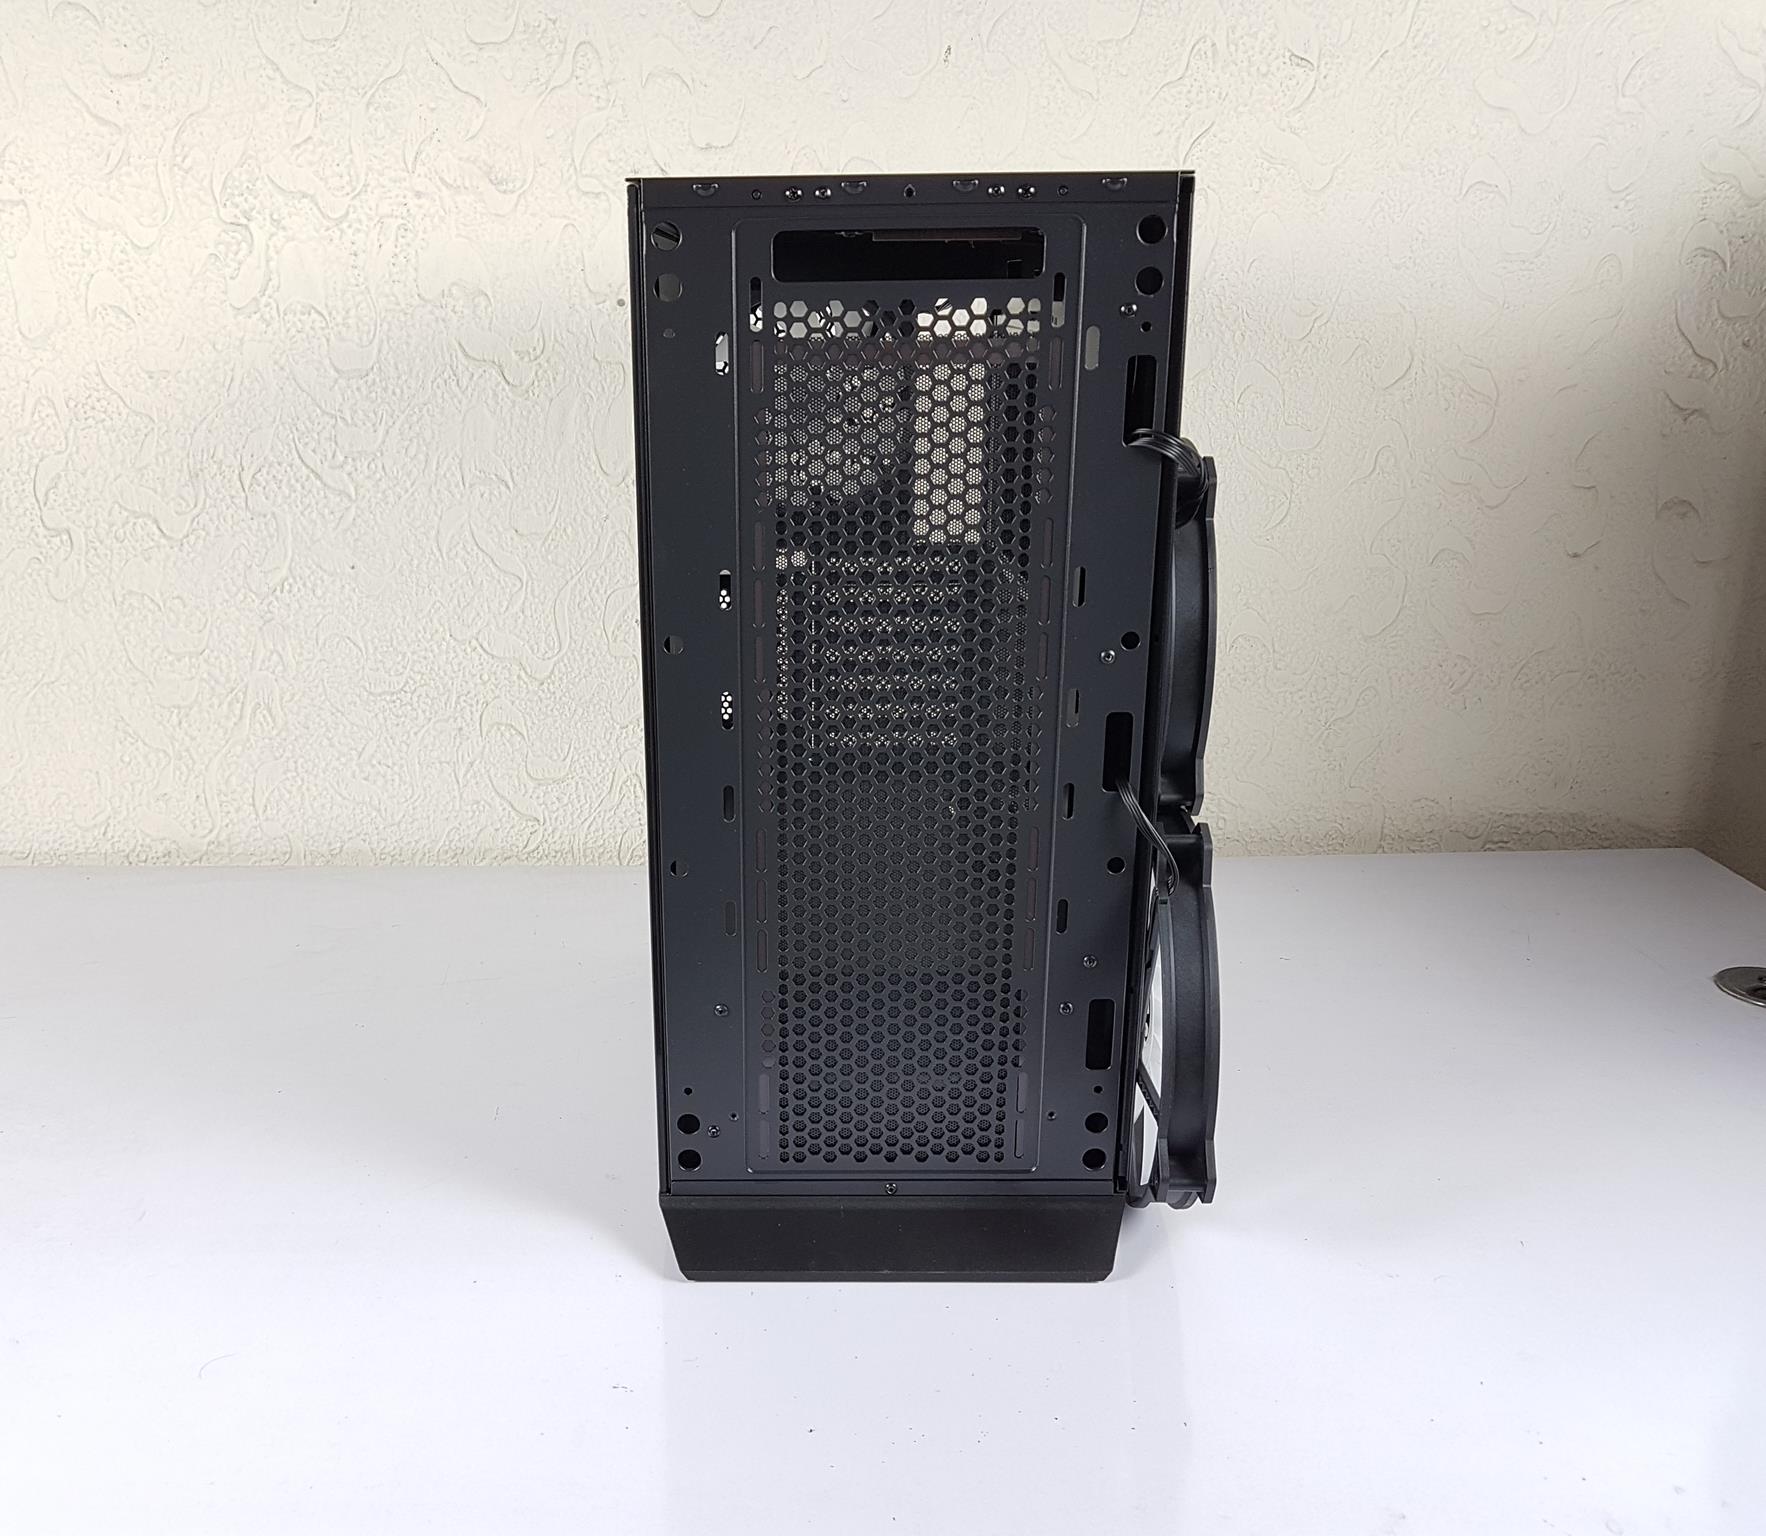
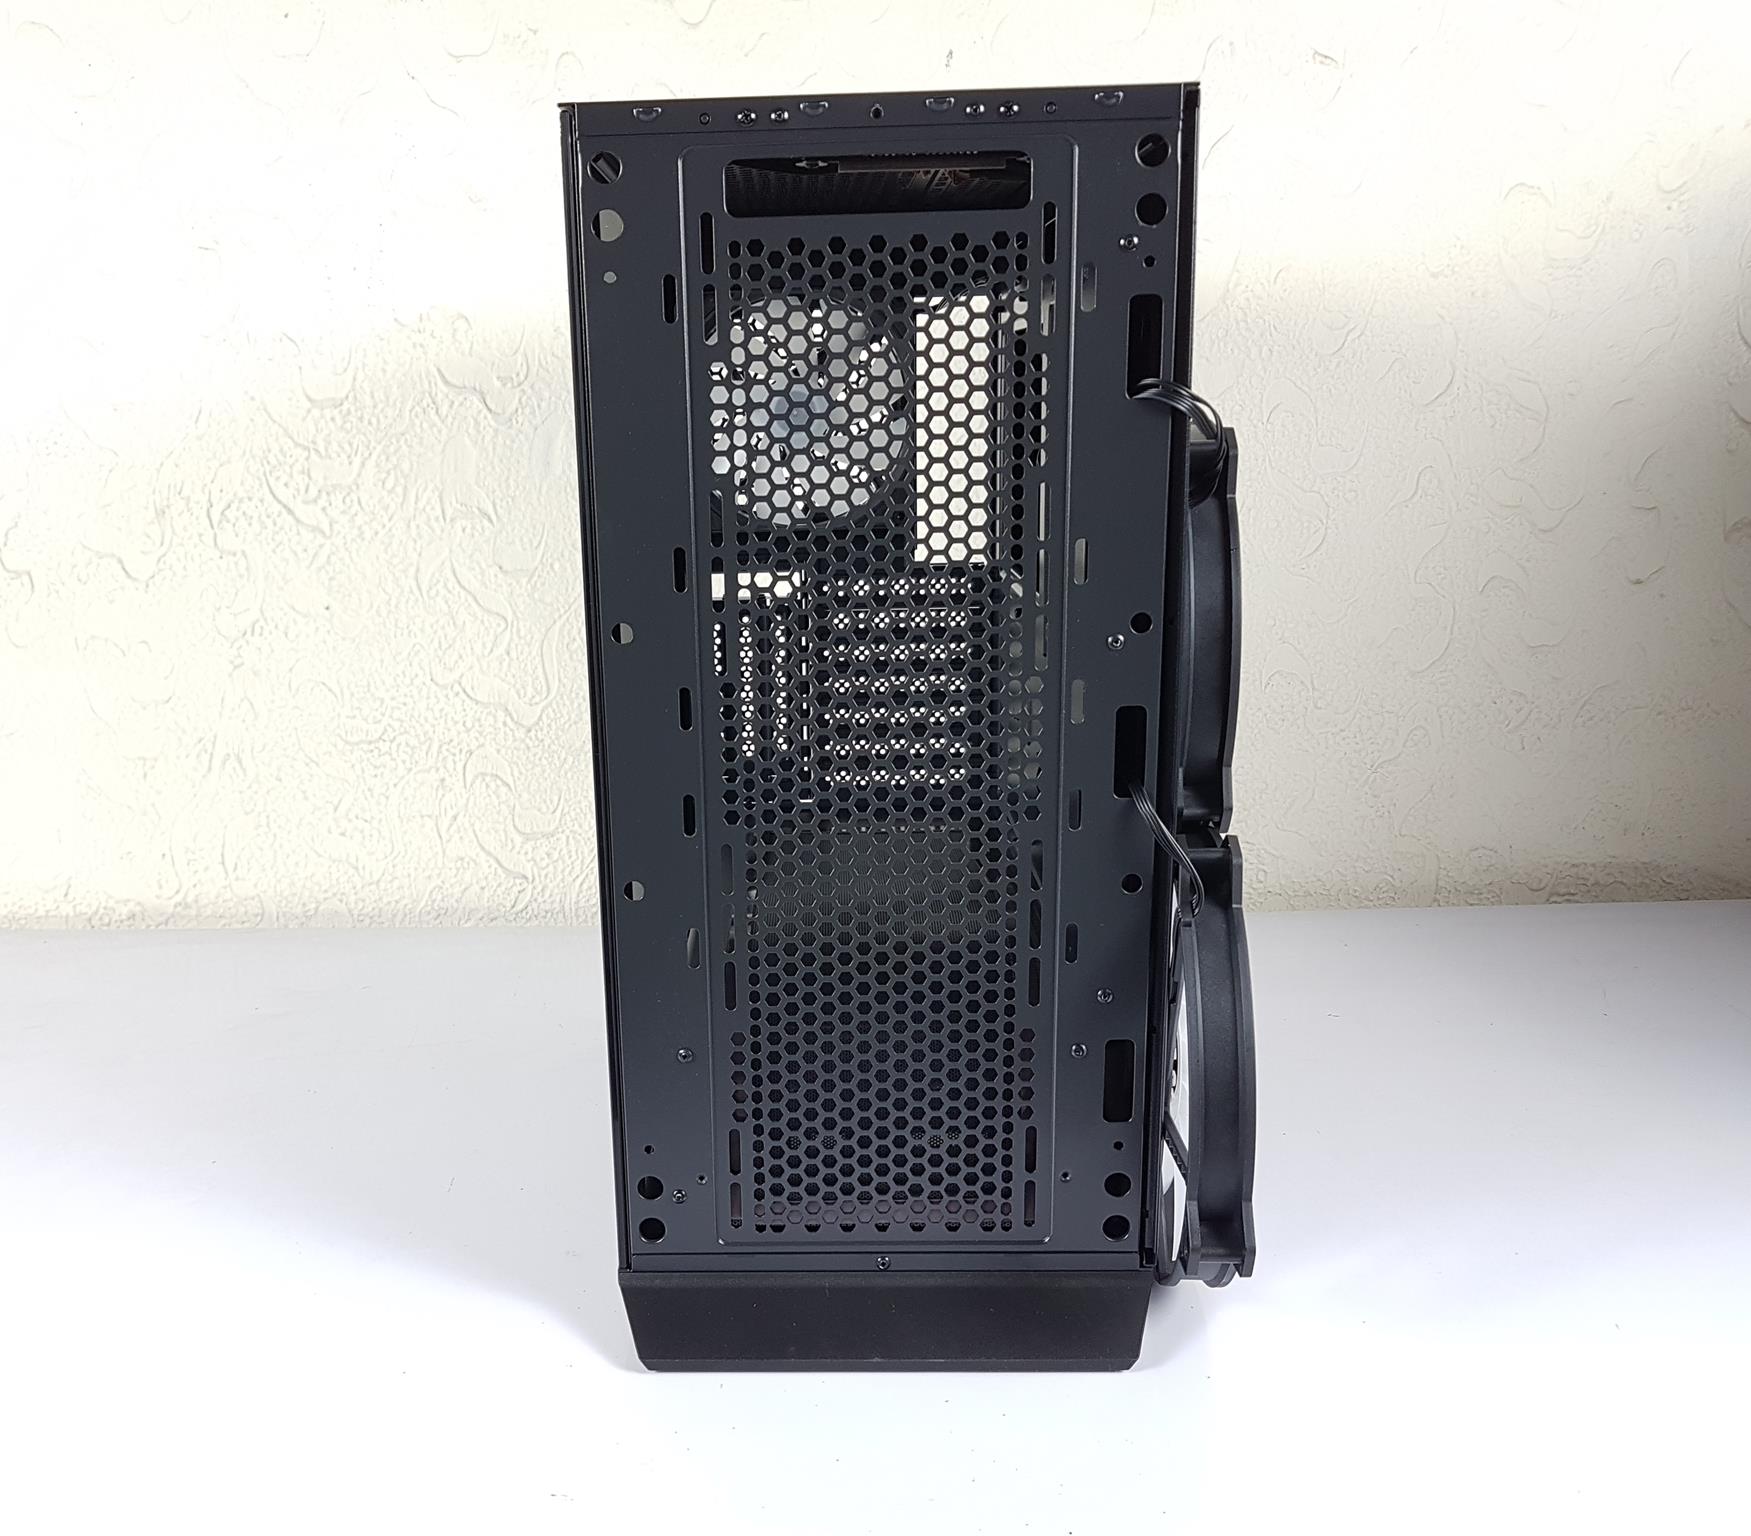
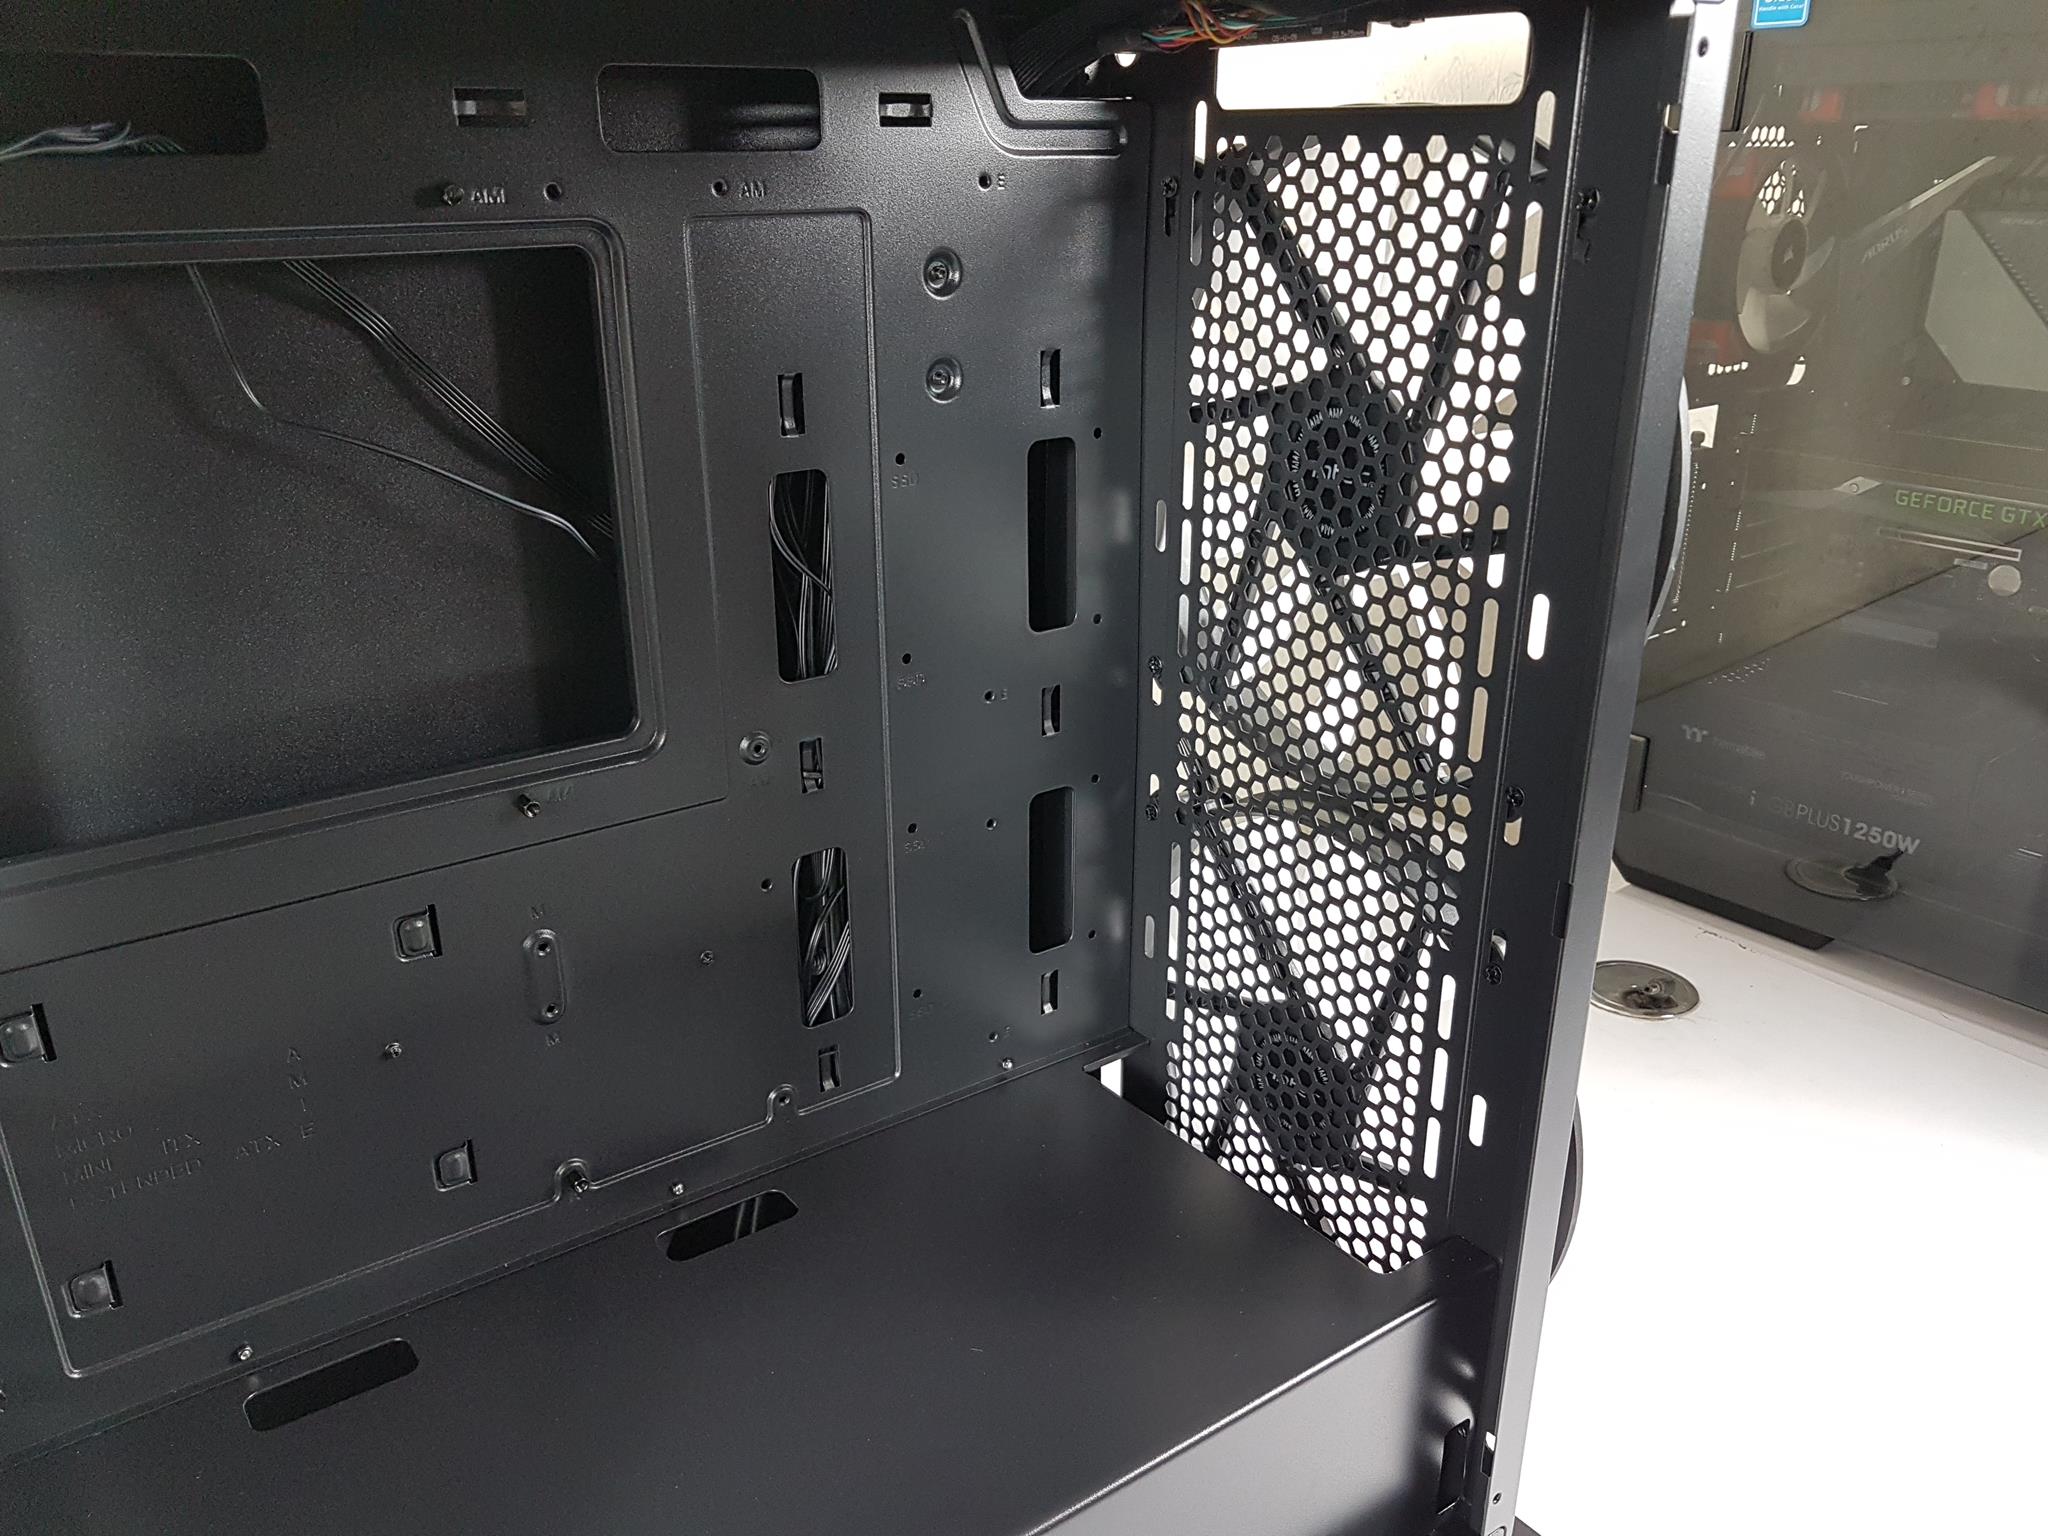
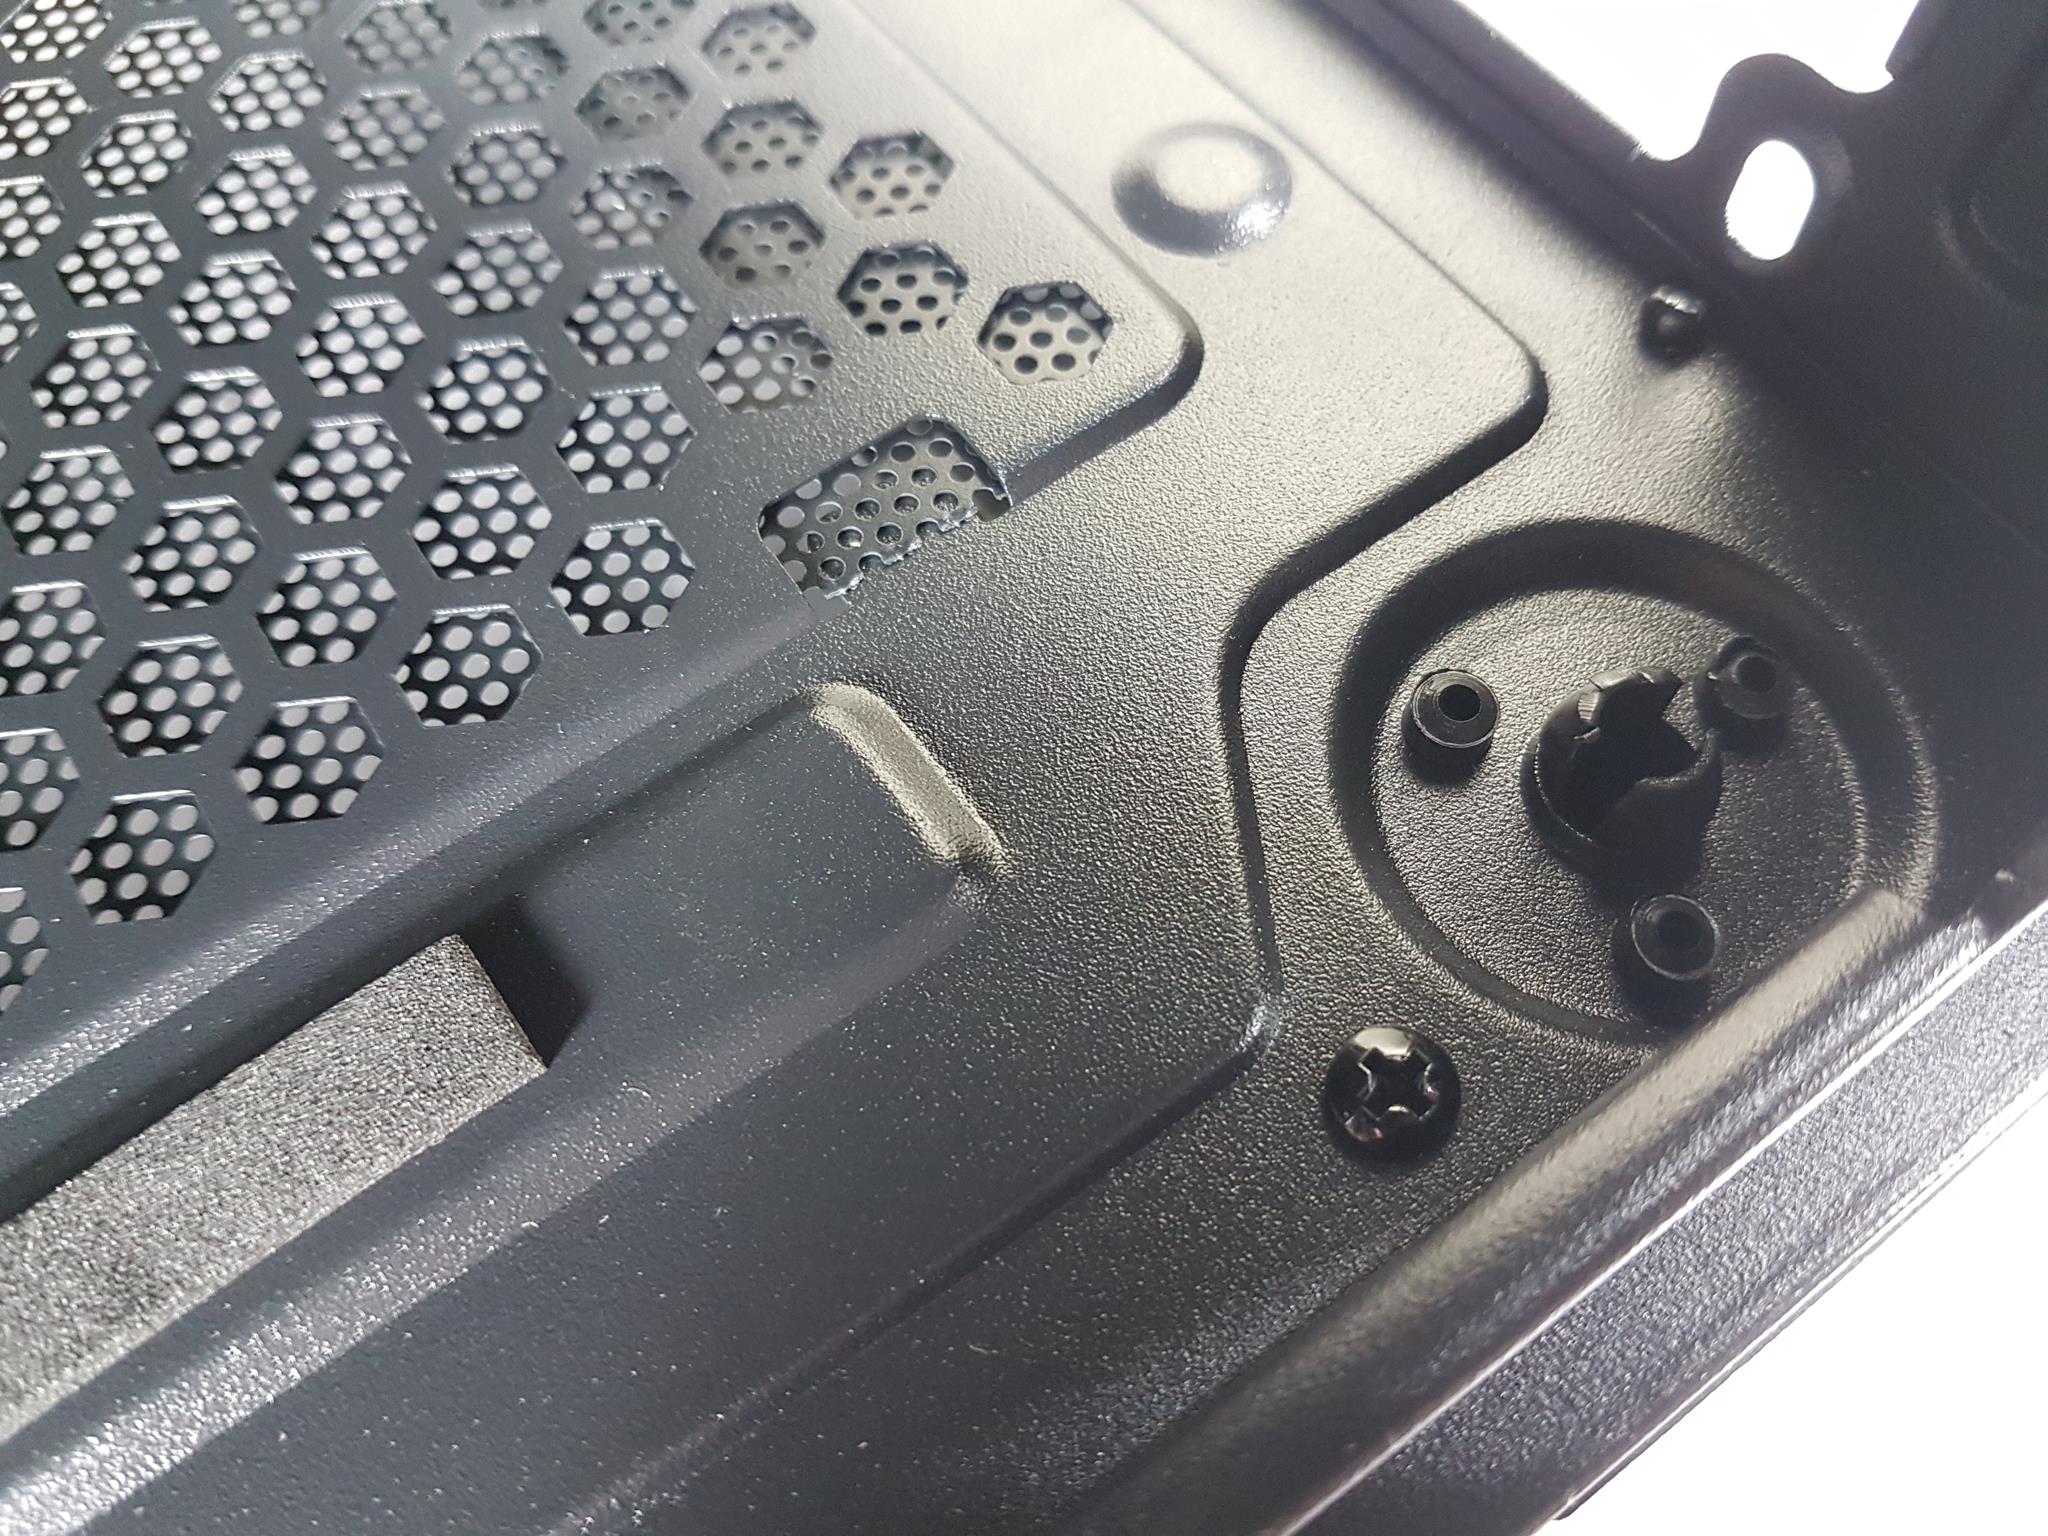
The chassis features a vented section running the full height, except for the top cutout. A magnetic dust filter at the back provides front dust filtration, leaving only the top cutout unfiltered. Three small cutouts on the right facilitate cable routing. In the second picture, the magnetic dust filter has been removed for a closer look.
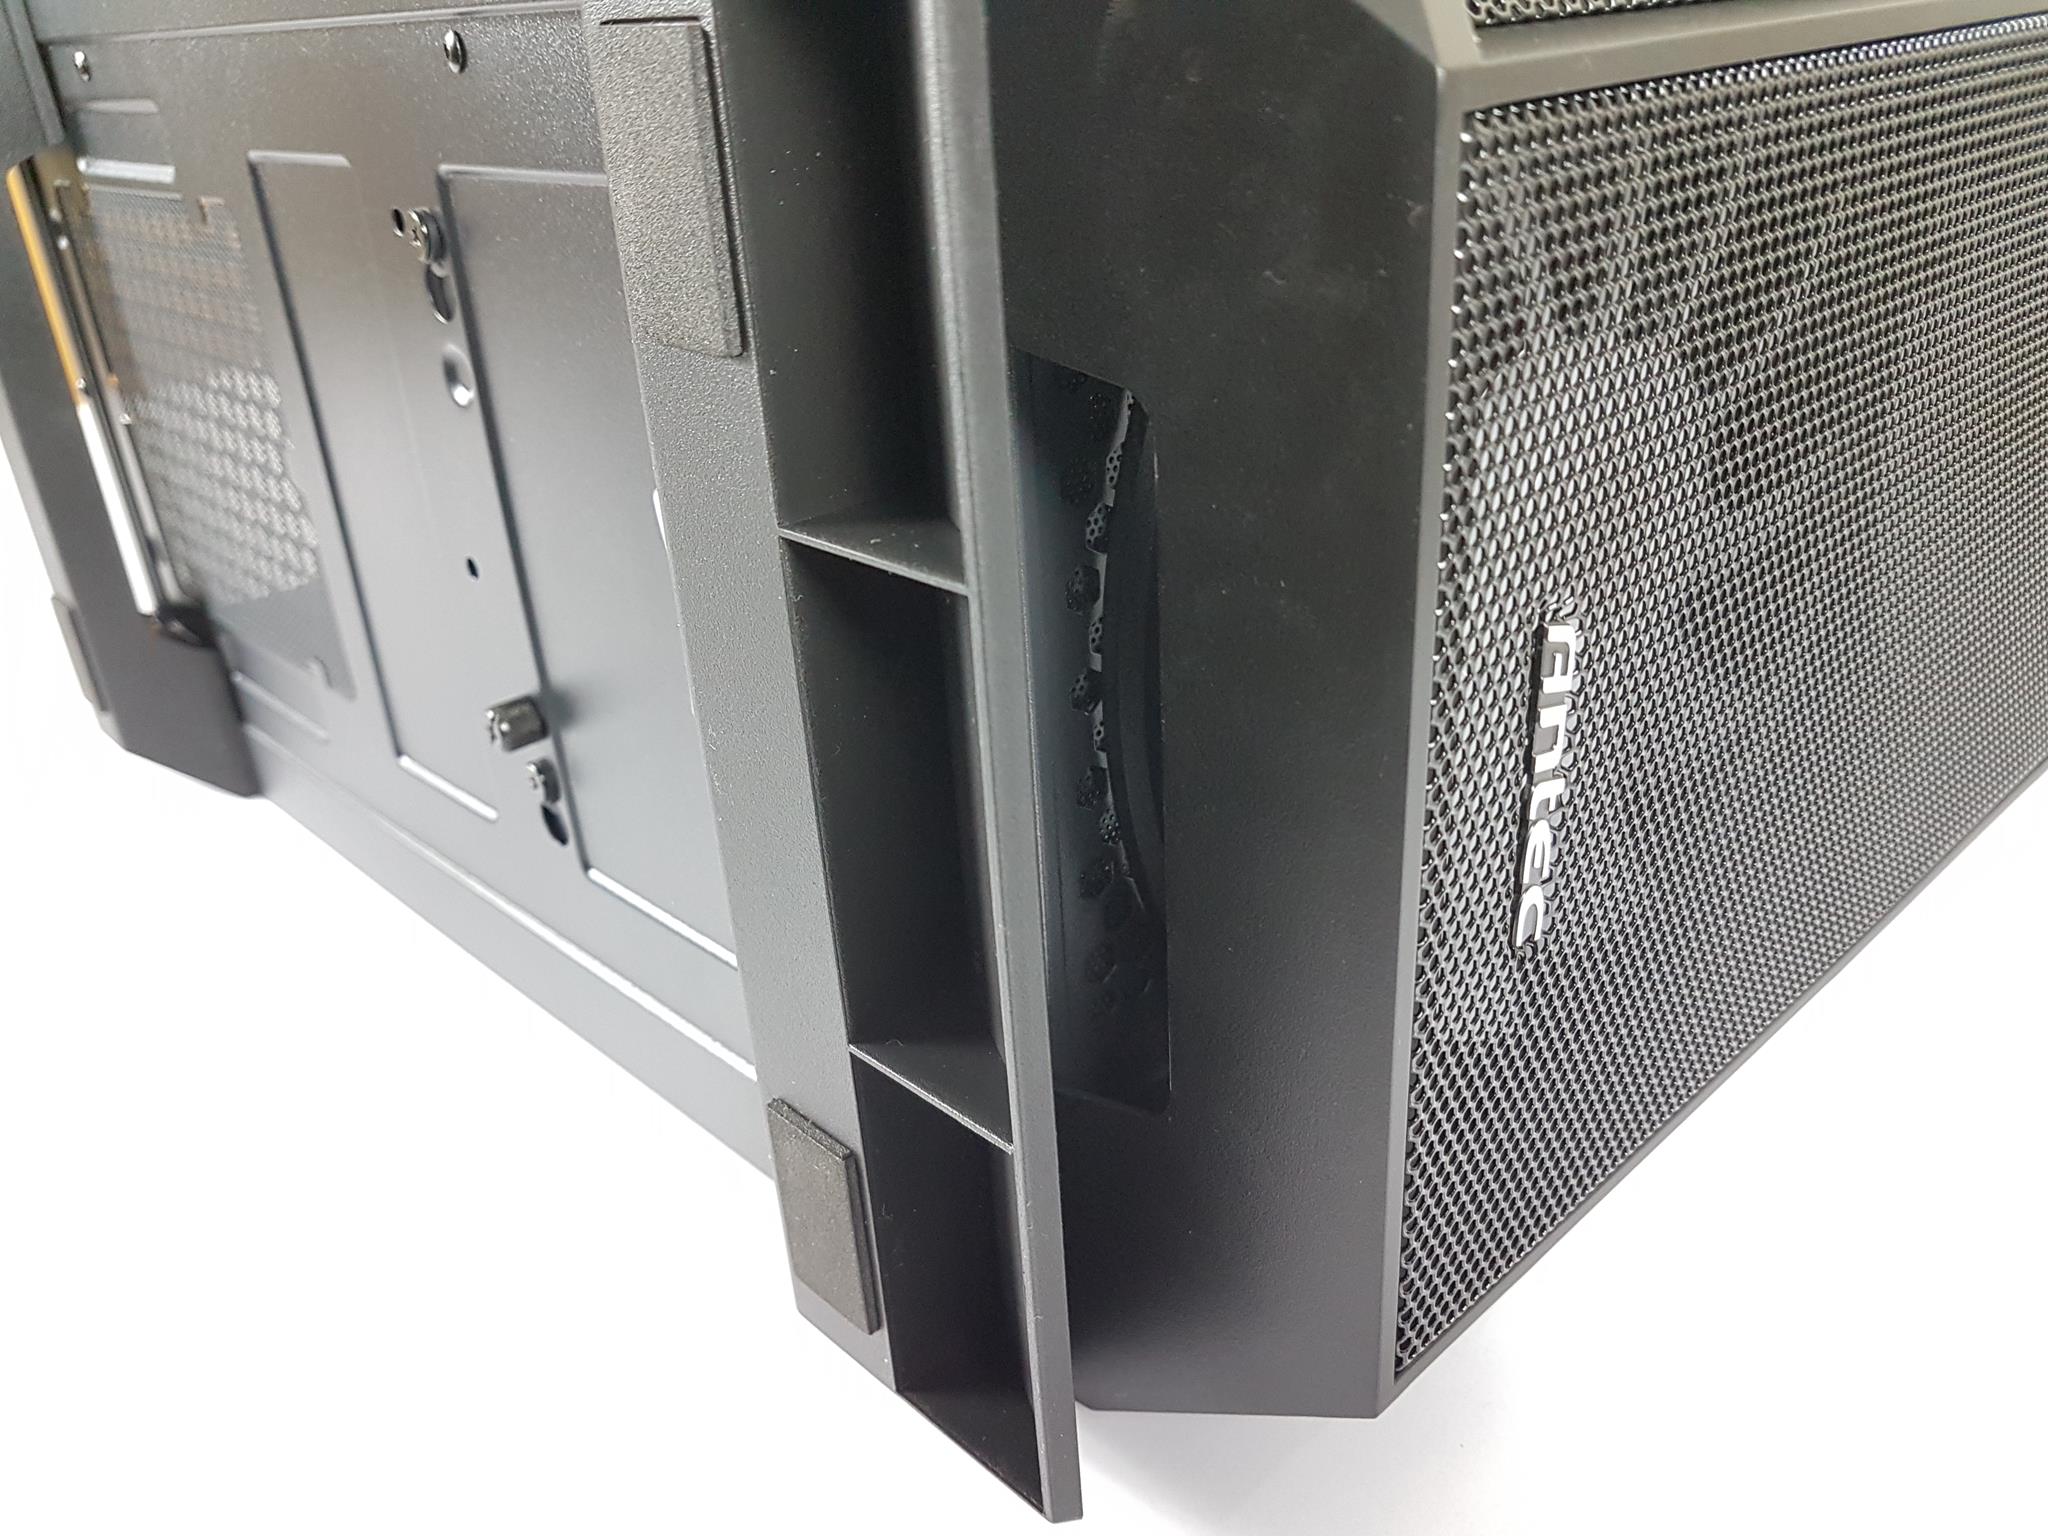
Rear

Examining the rear, I noticed ample space on the top with a cutout for the motherboard’s IO shield and a vented section for a 120/140mm fan mount. The rear fan’s height isn’t adjustable, but Antec includes a pre-installed 140mm ARGB fan. The 7 horizontal PCIe slot covers aren’t reusable, but the accessory box contains 4 reusable covers. For the vertical layout, there are 3 reusable PCIe slot covers, supporting a vertical GPU mount.
It’s worth noting there’s no additional bracket or riser cable provided for the vertical mount; the graphics card hangs with all the weight on the vertical mounting. We have a standard ATX PSU mounting provision on the bottom.
Top
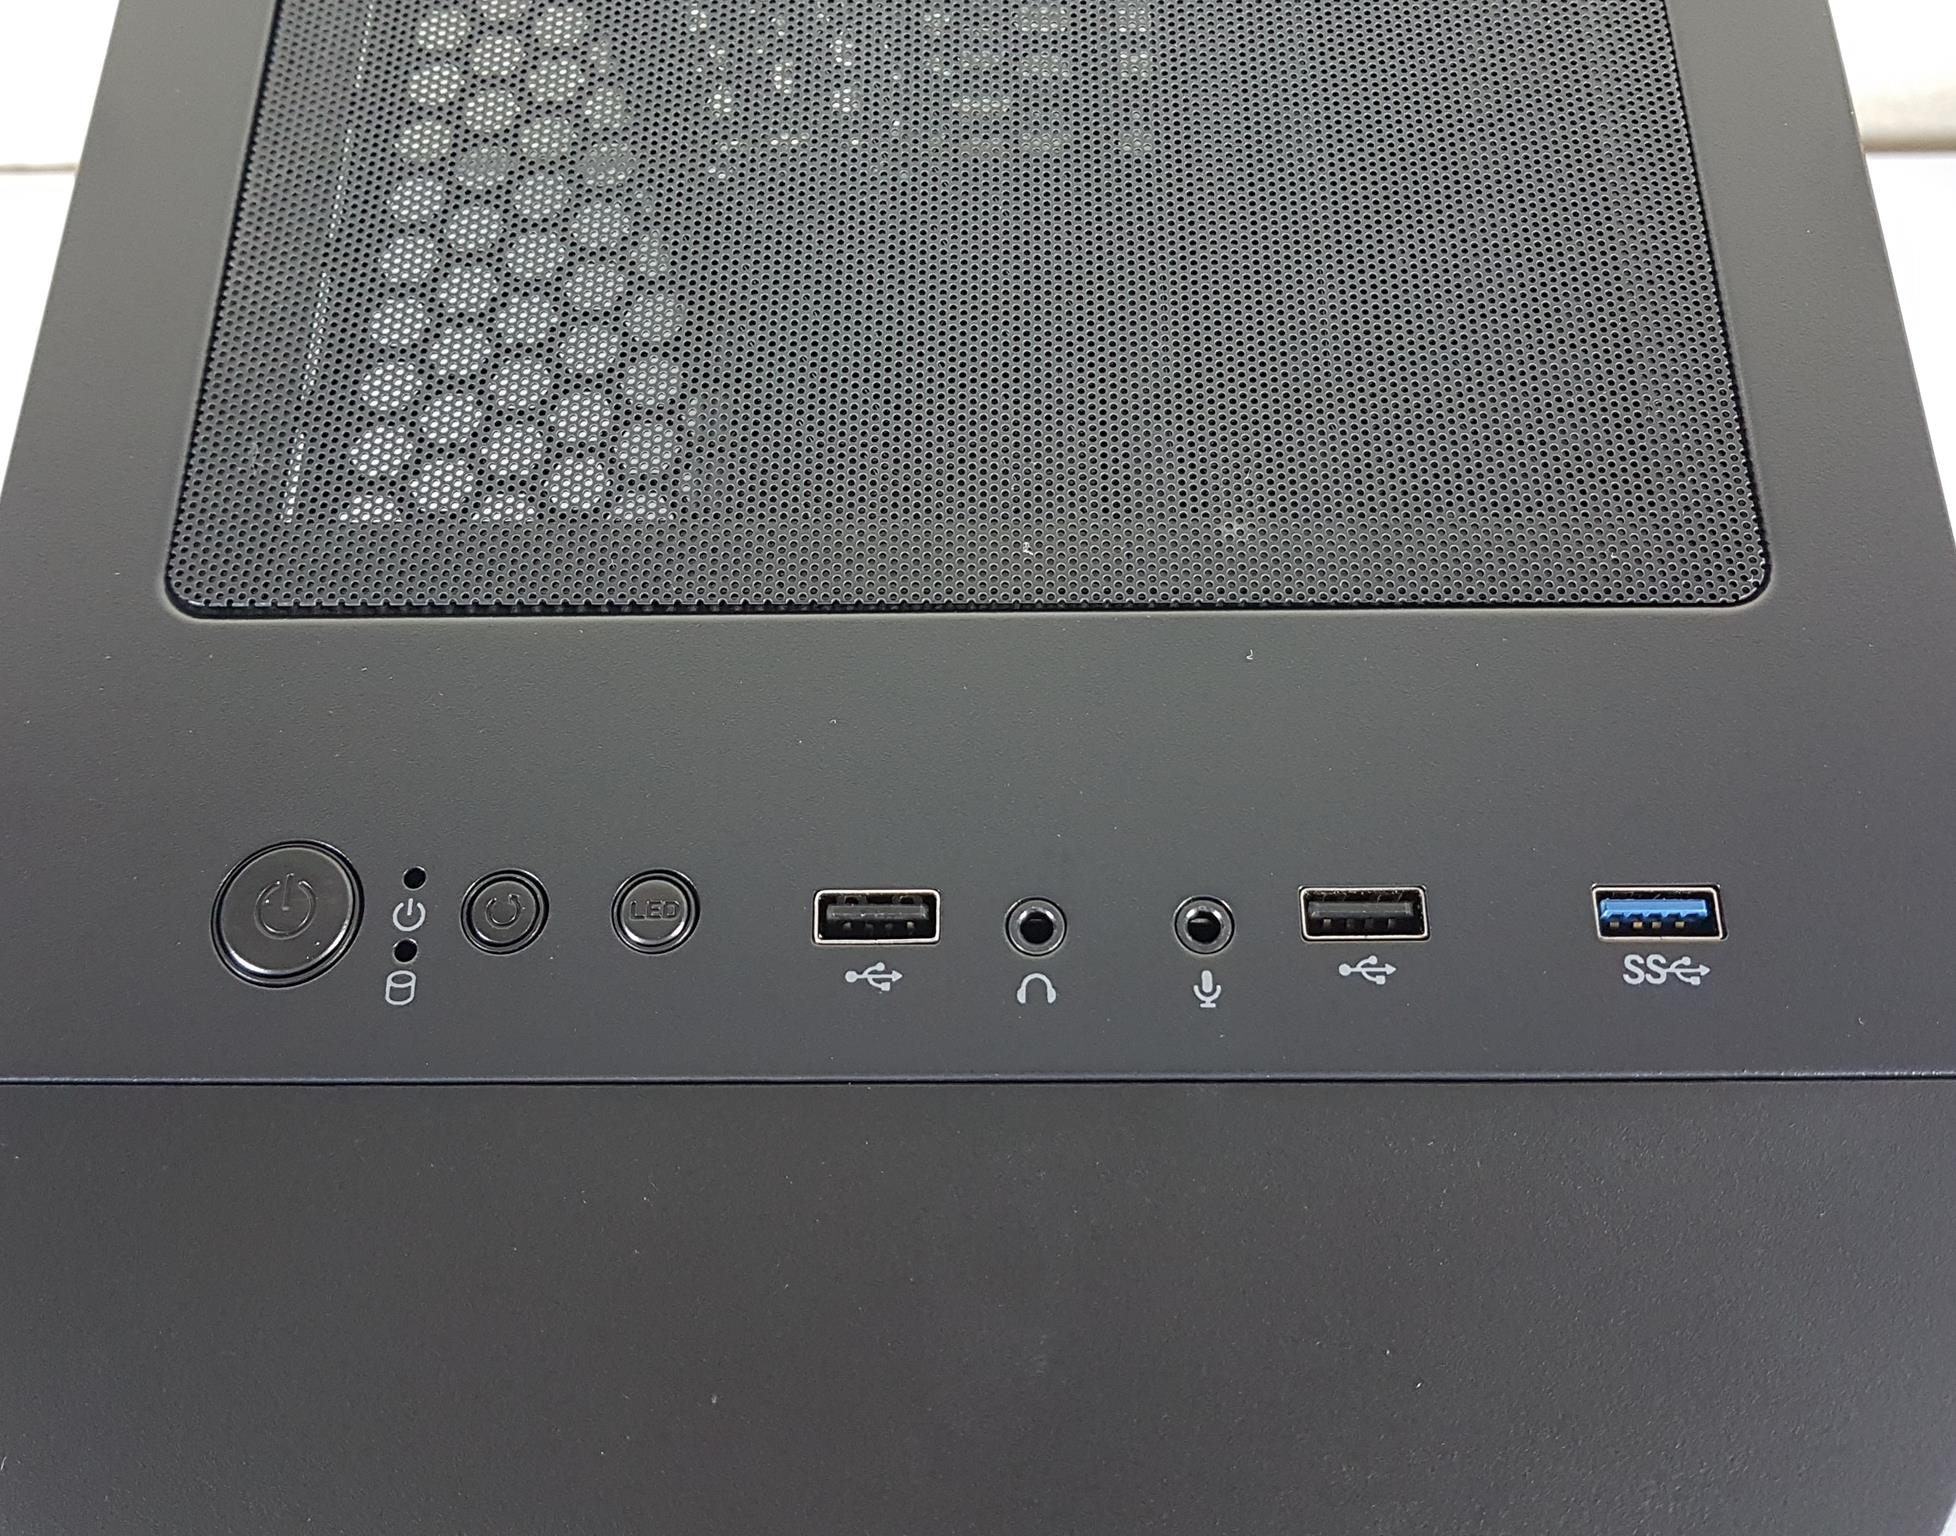
The top of the chassis features a magnetic dust filter, revealing a fully vented layout with mounting rails for 120mm and 140mm fans. Users can install up to 2x 120mm or 2x 140mm fans and a 120mm/140mm/240mm/280mm radiator on the top. The IO panel is conveniently located on the top as well.
Following connectivity options are provided:
- Power Button
- Reset Button
- RGB Button
- LED Indicator
- 2x USB 2.0 ports
- 1x USB 3.0 port
- Headphone Jack
- Mike Jack
Bottom
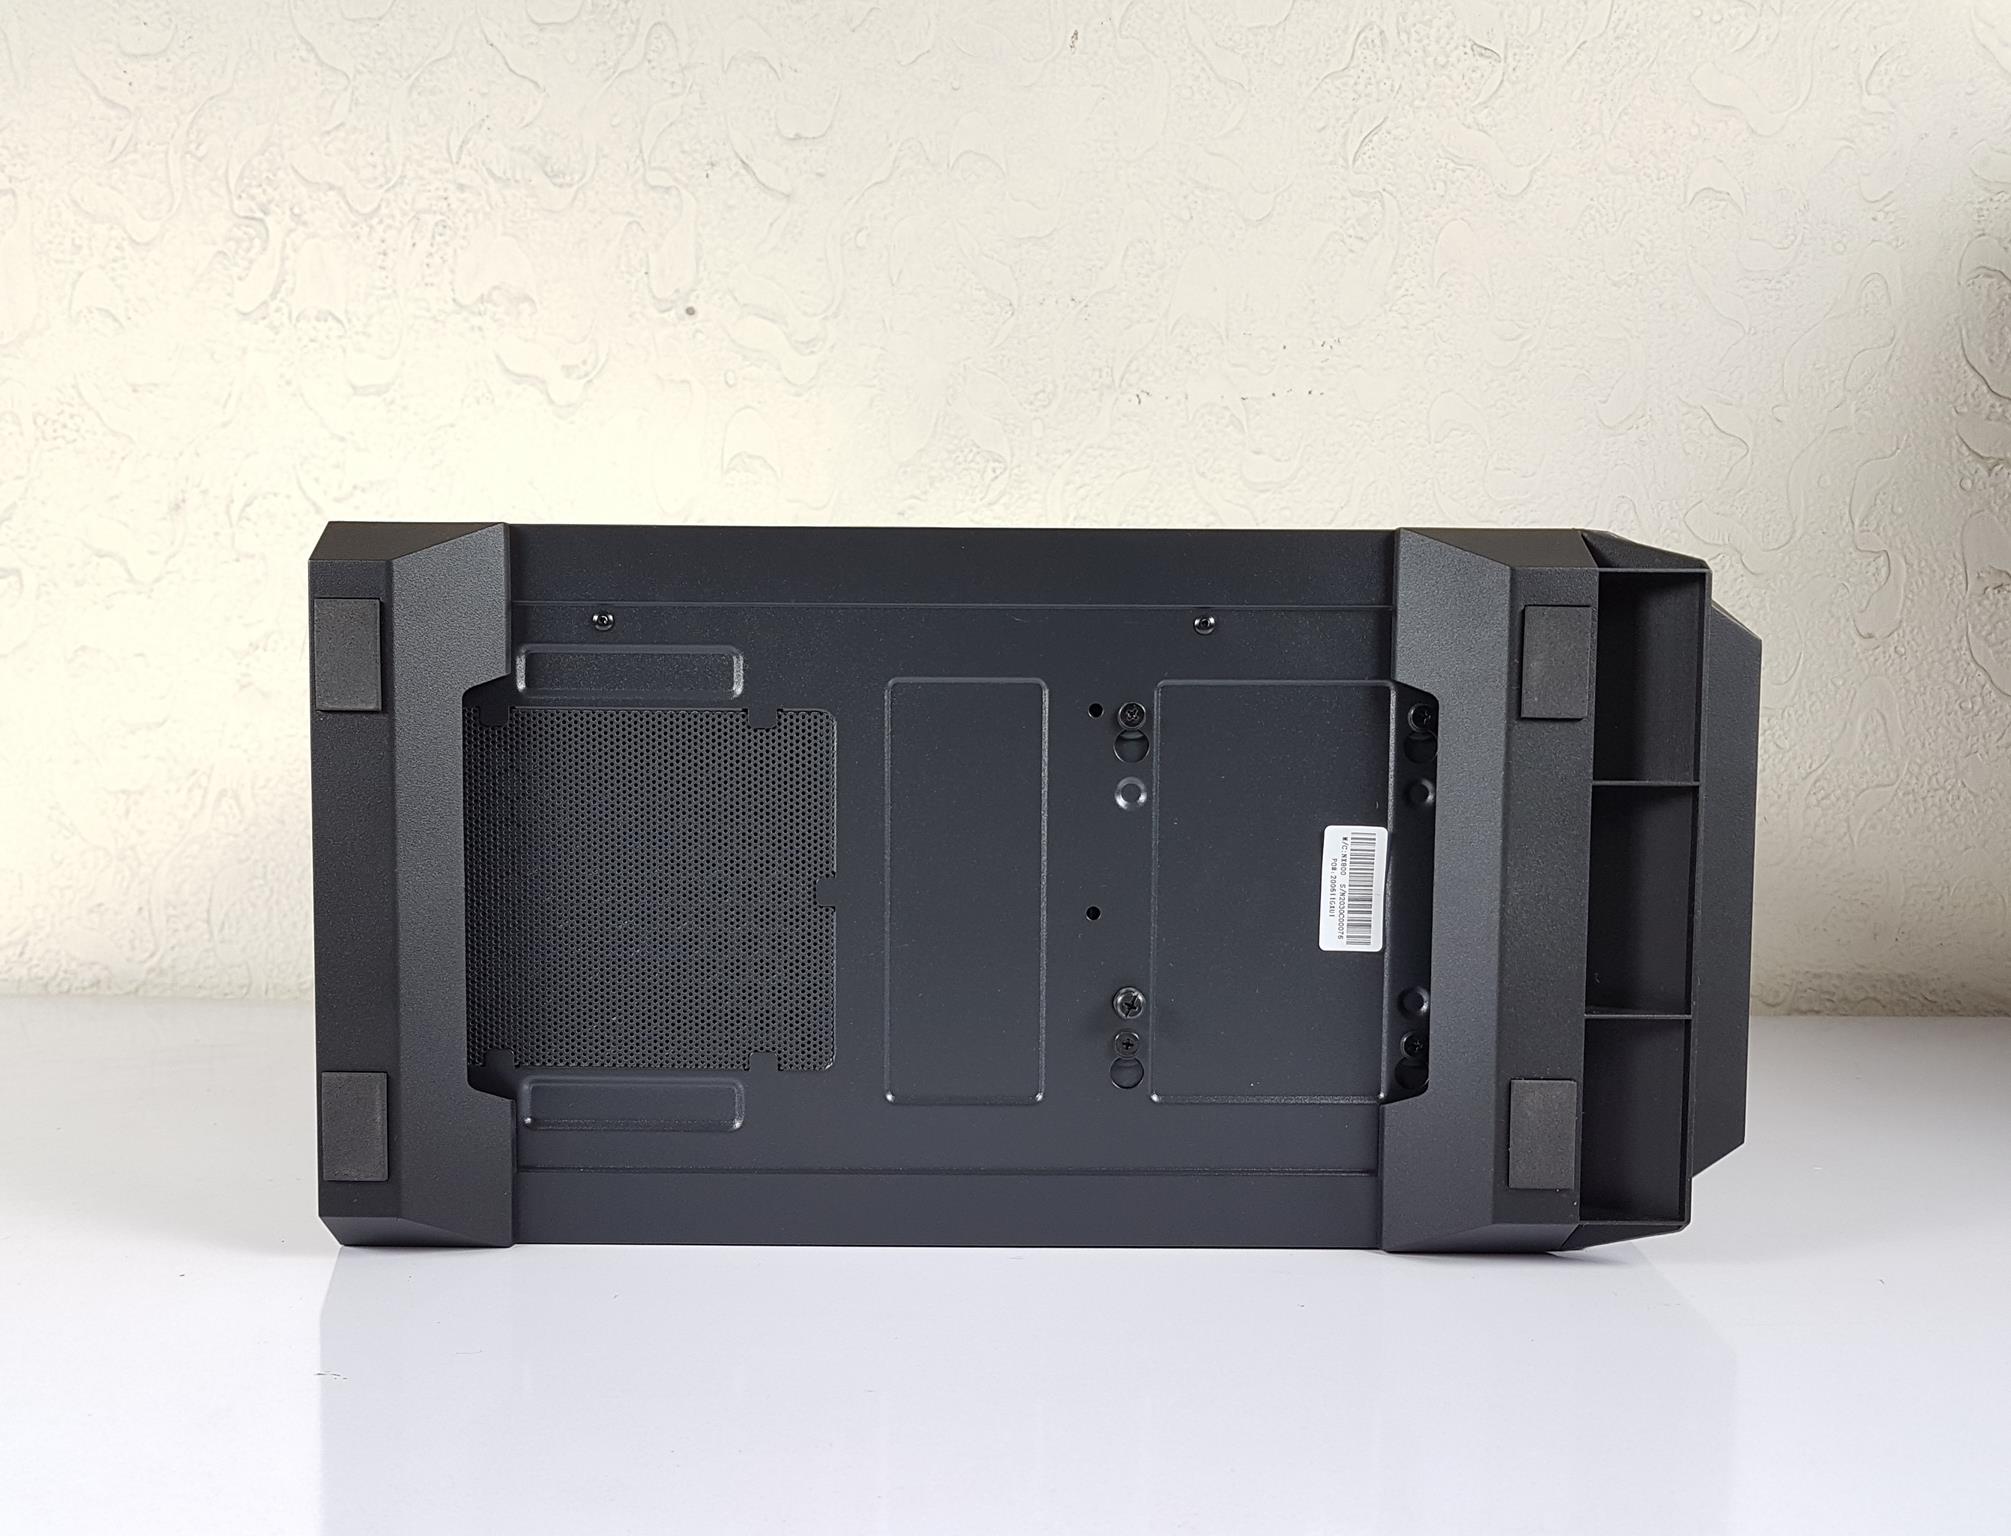
The bottom of the chassis has two large plastic feet, providing ample lift. A removable non-magnetic dust filter is present on the PSU mount. The foot handles feature rubber pads on each corner. Note that removing the dust filter might be inconvenient due to a portion being under the feet bracket.
There are 5x screws for the HDD cage. The user can remove the HDD cage by removing these screws. The HDD cage’s position is fixed and can’t be adjusted. There is a gap between the lower end of the front panel and the chassis frame. The user has to place the hand there to pull the front panel out and this is also an air intake.
Interior
Let’s take a look at the main side of the action where the majority of the components will be housed.
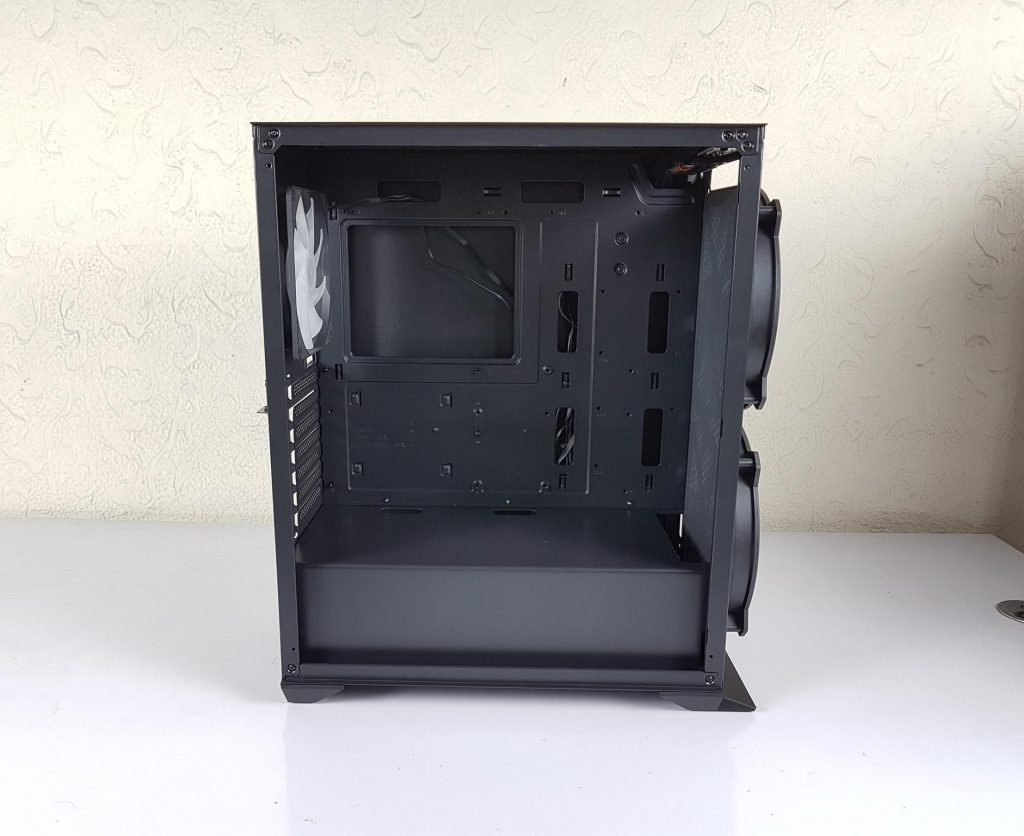
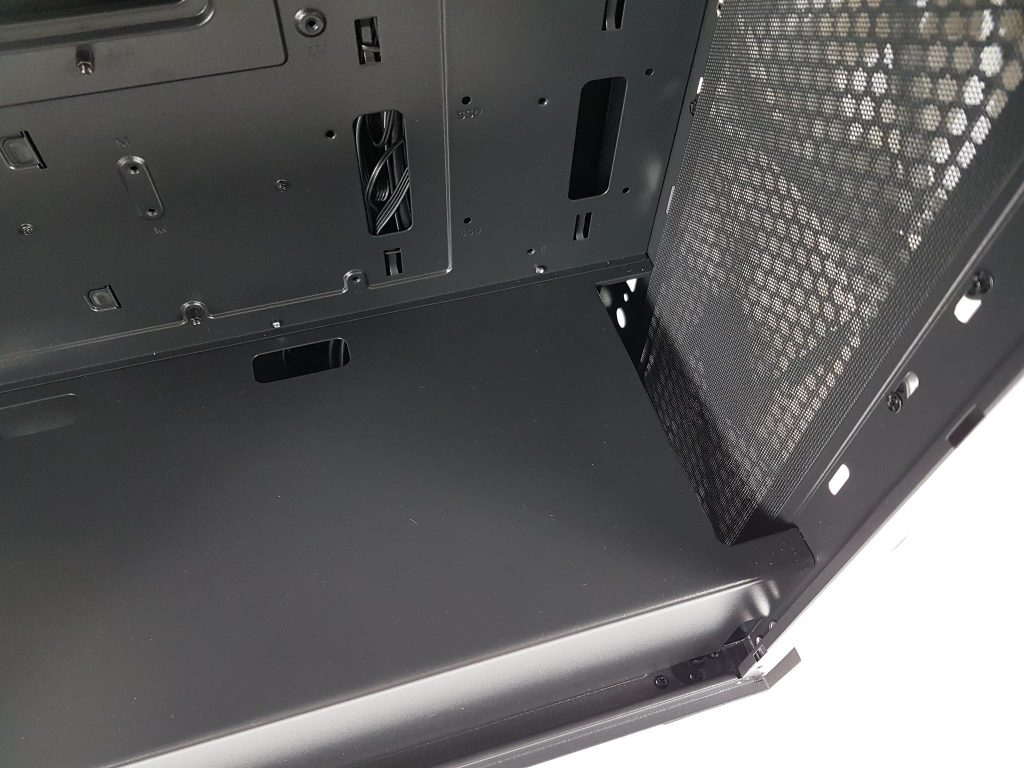
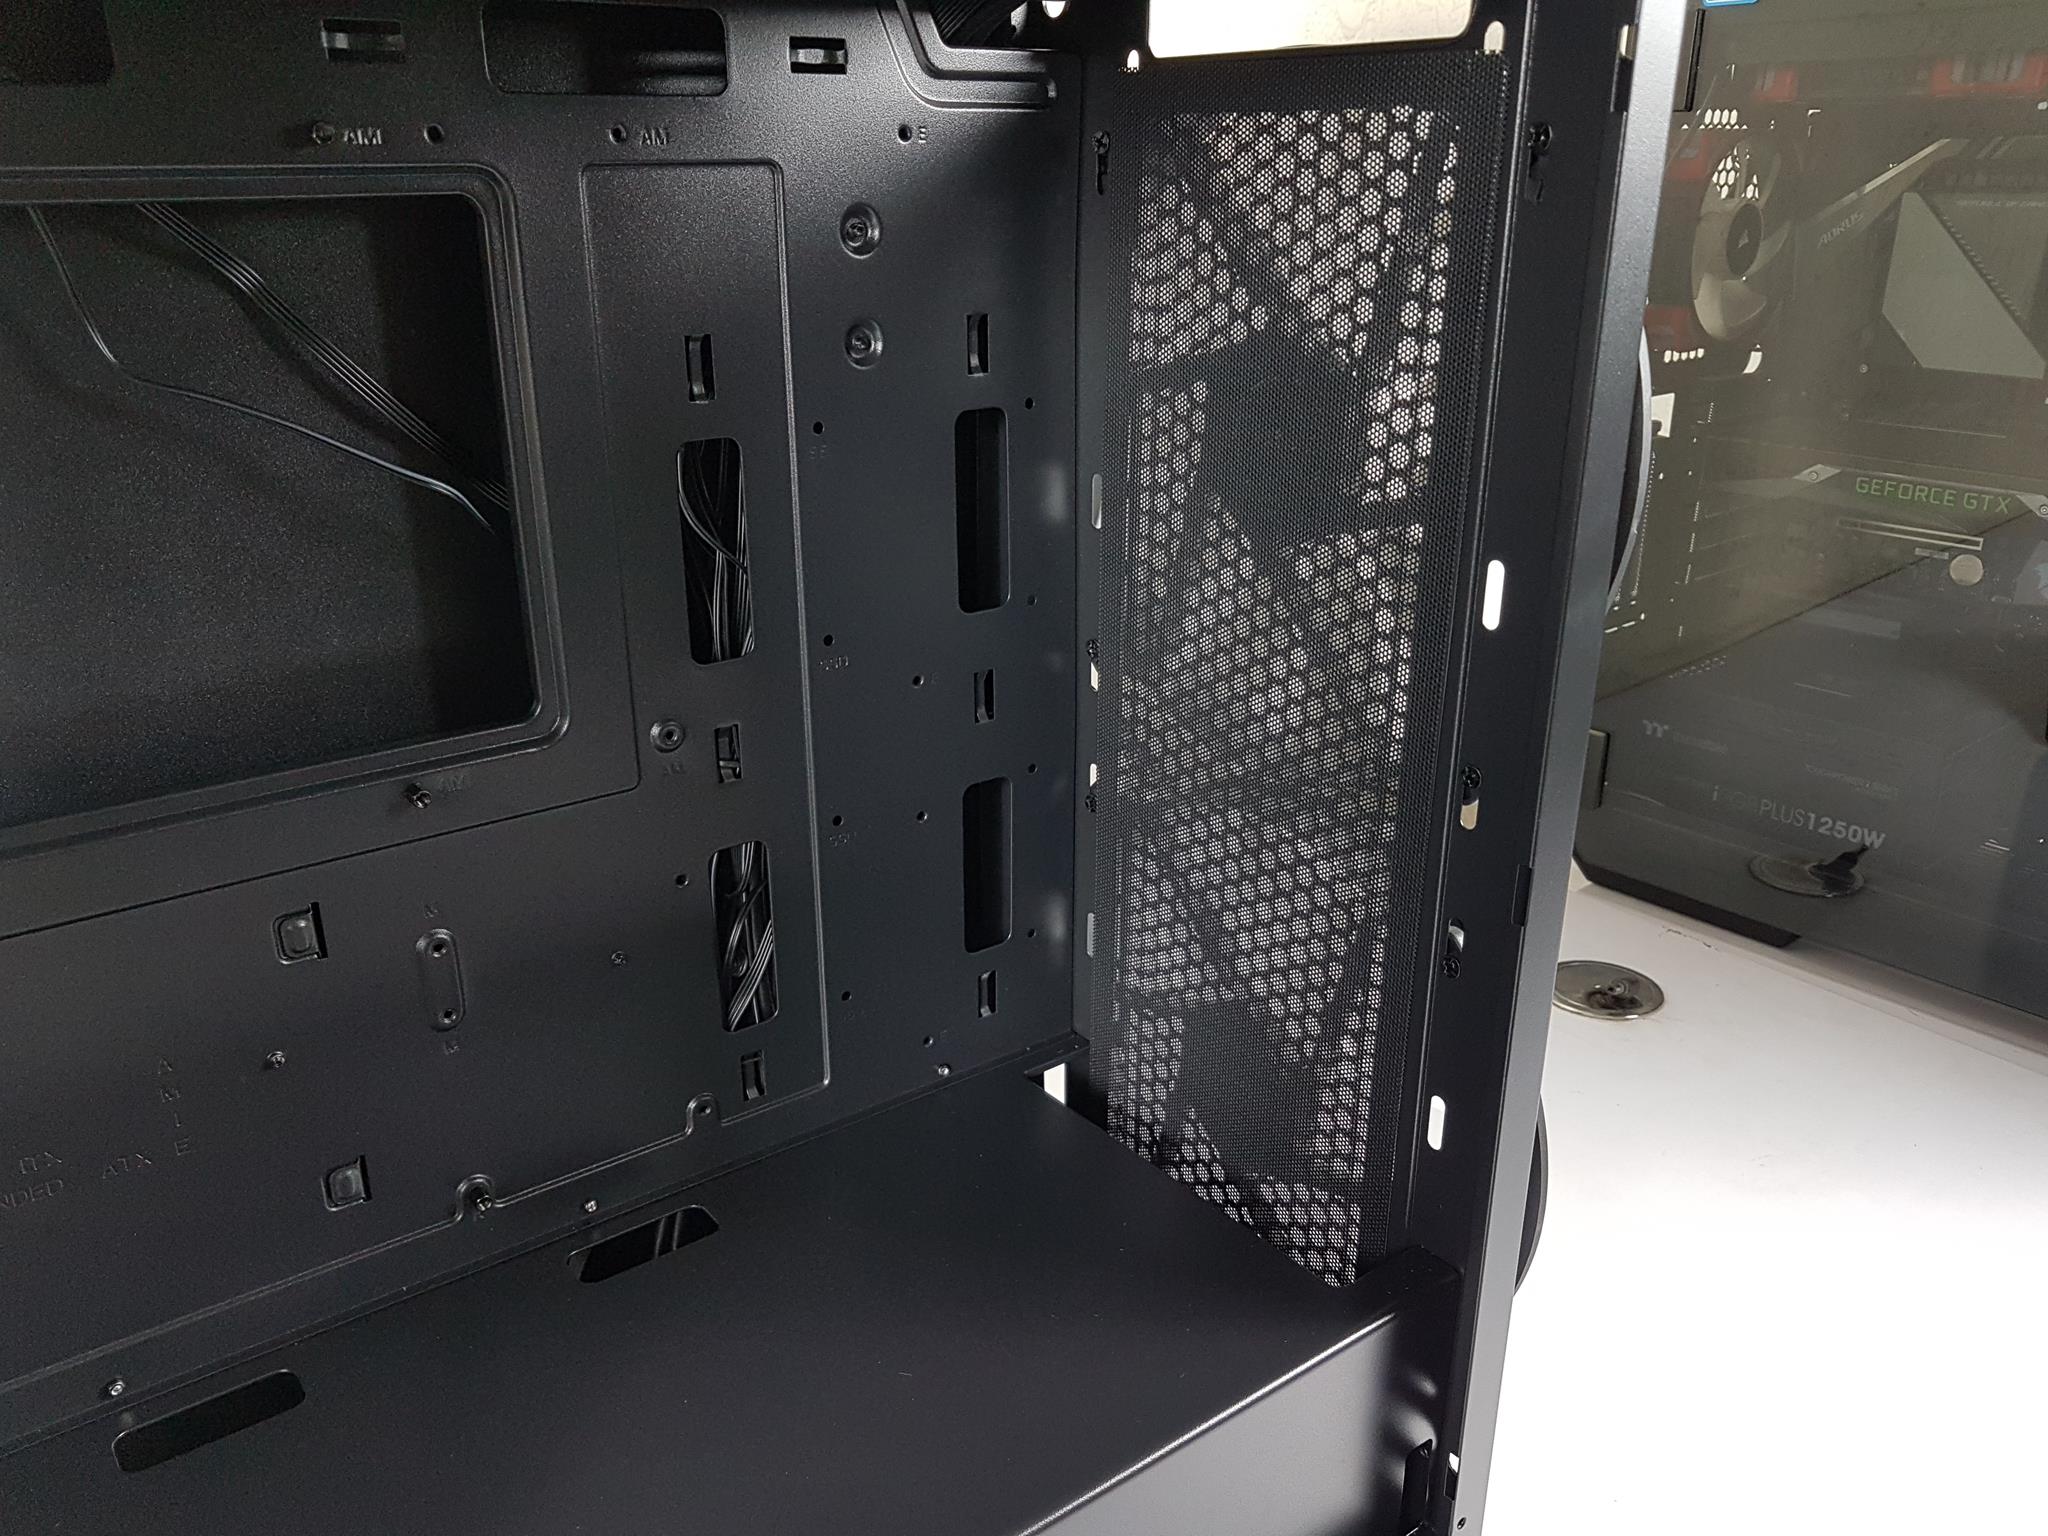
The spacious layout includes a full-length PSU cover, offering a generous motherboard tray area of approximately 387x361mm. The Antec NX800 supports up to E-ATX size motherboards. There are two cutouts on the top and a total of 4 on the right, arranged in two groups of 2. The additional cutouts on the right facilitate cable routing, particularly beneficial for E-ATX motherboards—a smart move by Antec.
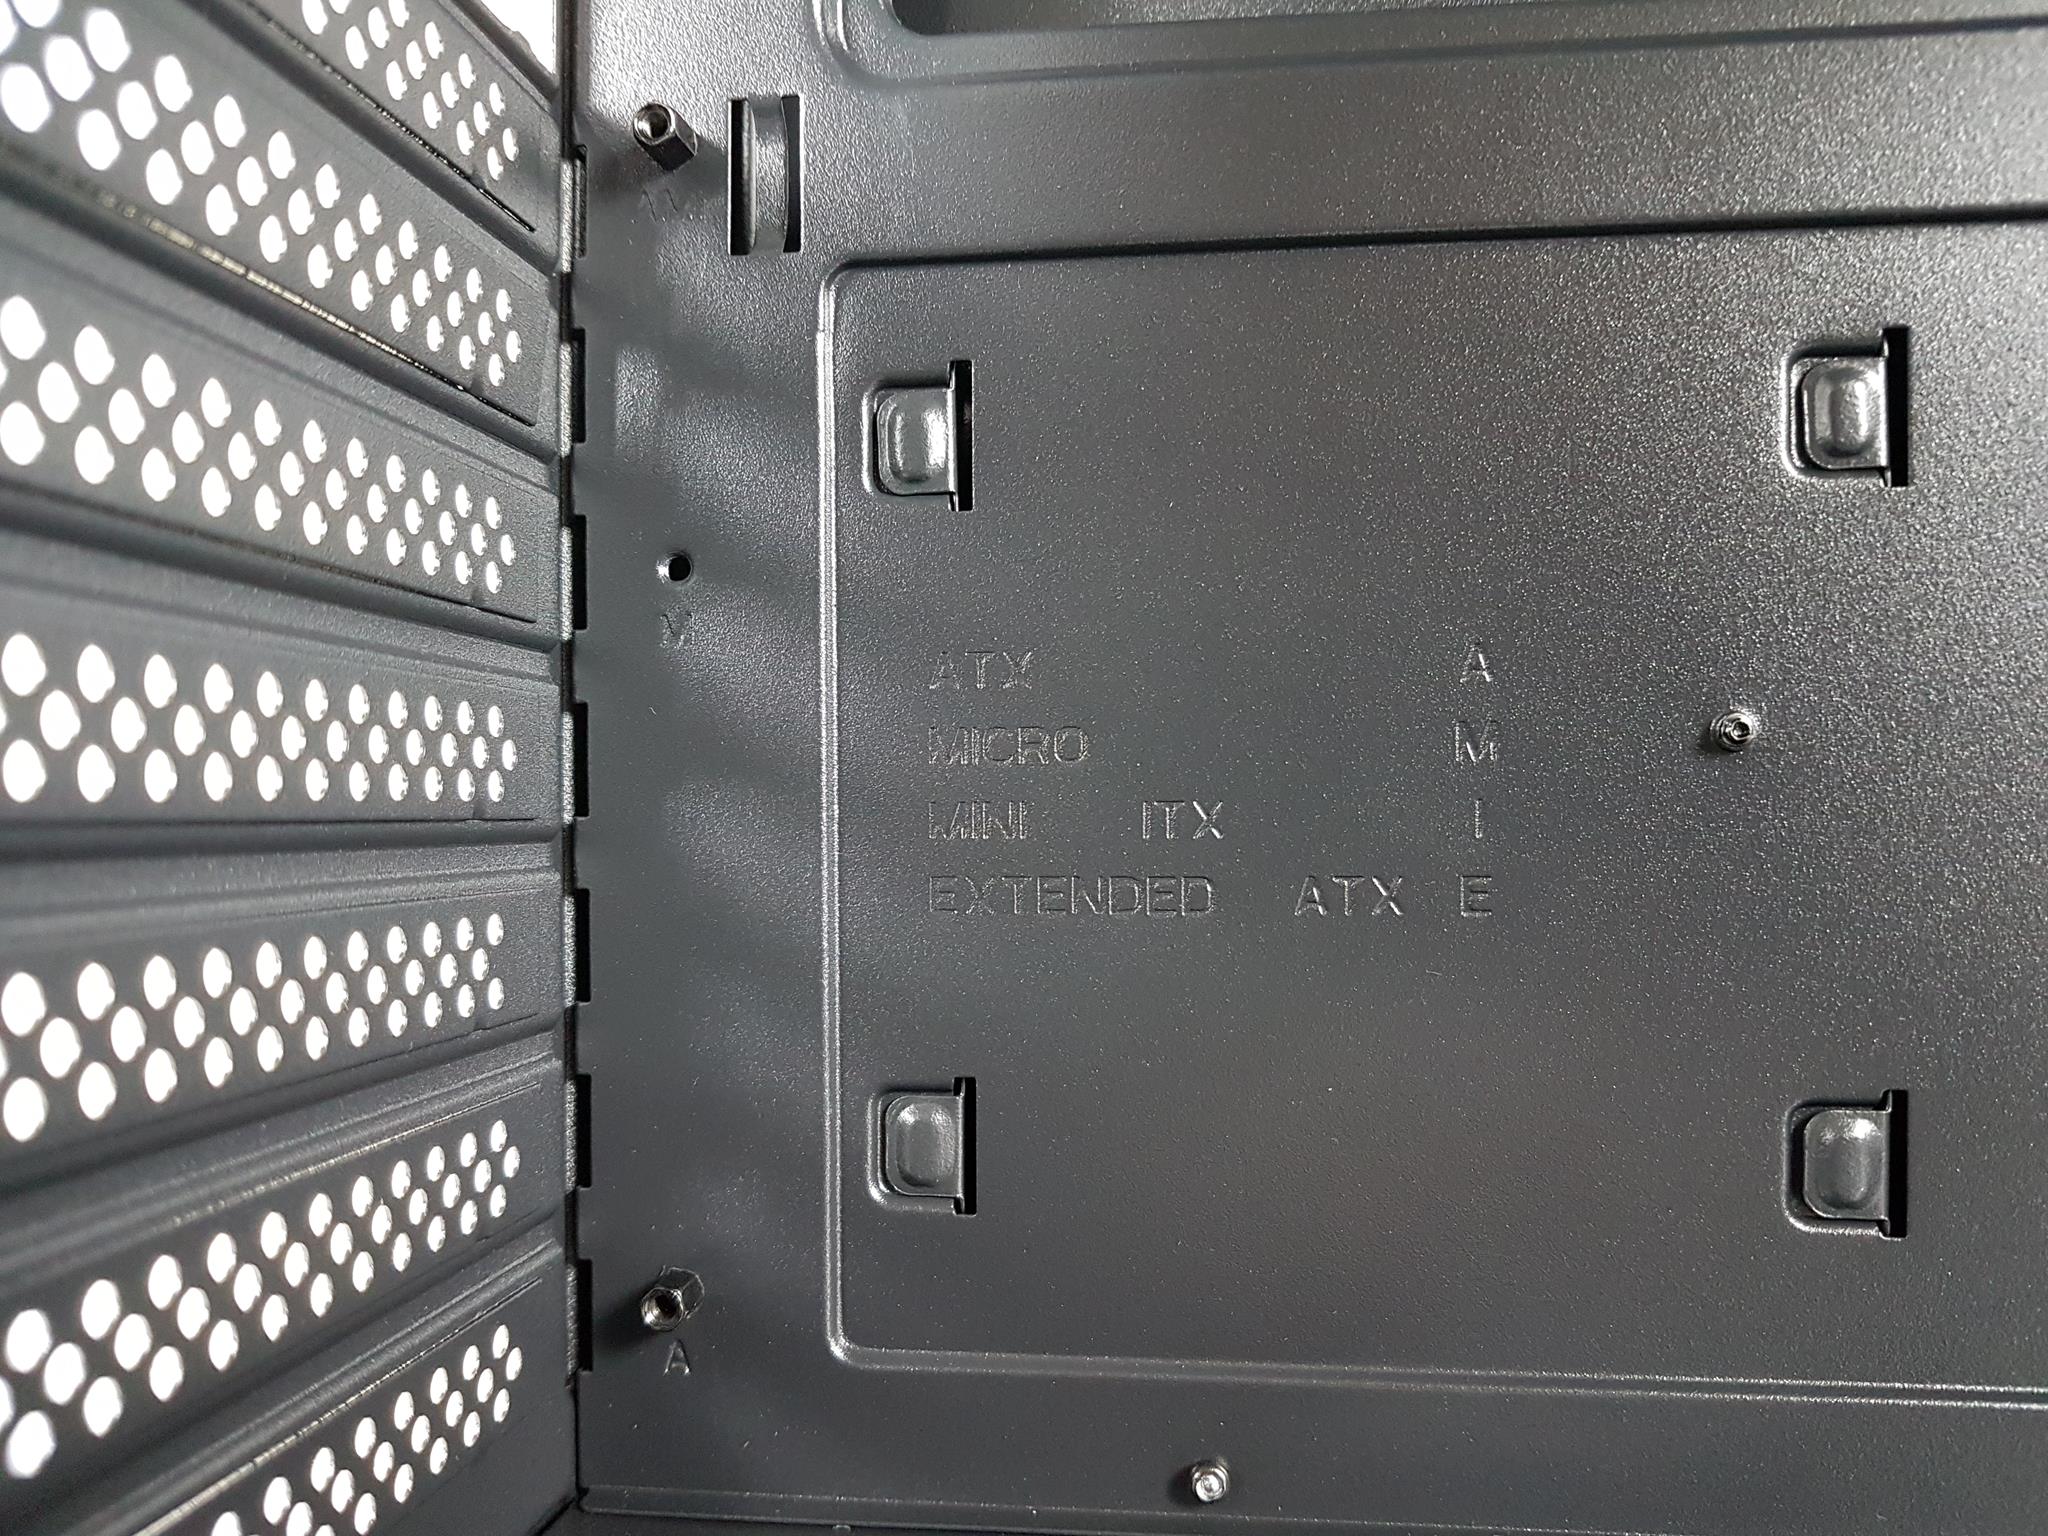
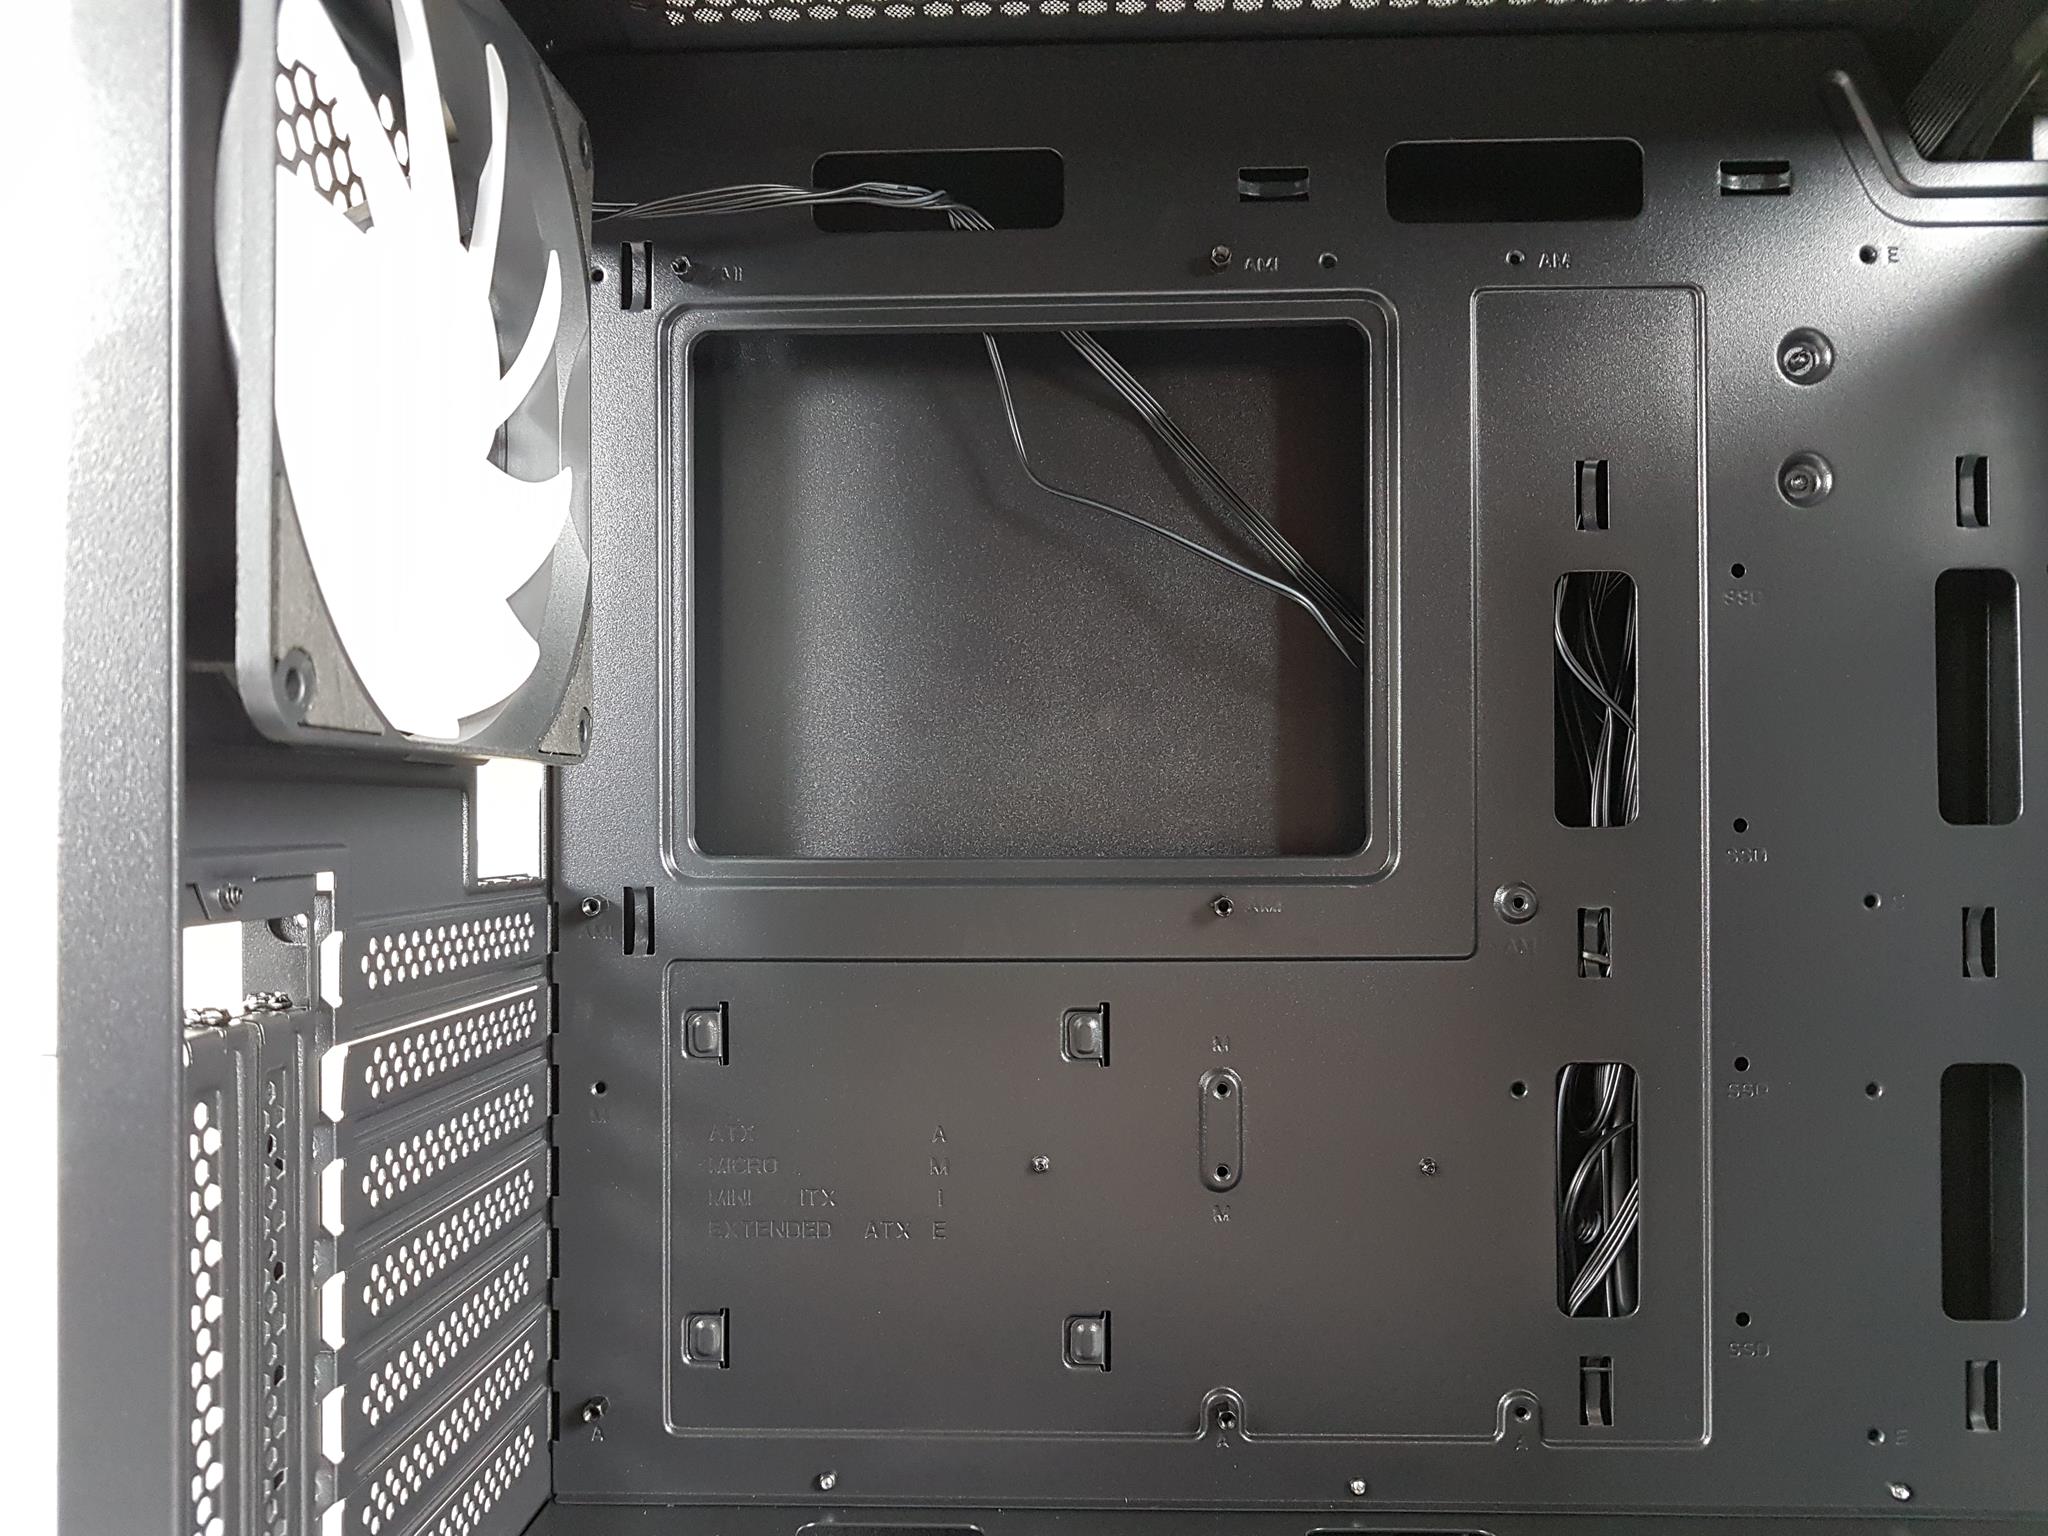
The legend on the motherboard tray helps with standoff positioning, each marked with a corresponding letter. Only 6 standoffs come pre-installed, and I had to add the remaining 3 for microATX and larger motherboards. Unfortunately, no socket wrench was provided, making it a bit challenging without the right tool. On the bright side, there’s a large cutout for the CPU cooler, and the motherboard tray shows no flex, showcasing a good overall build quality.
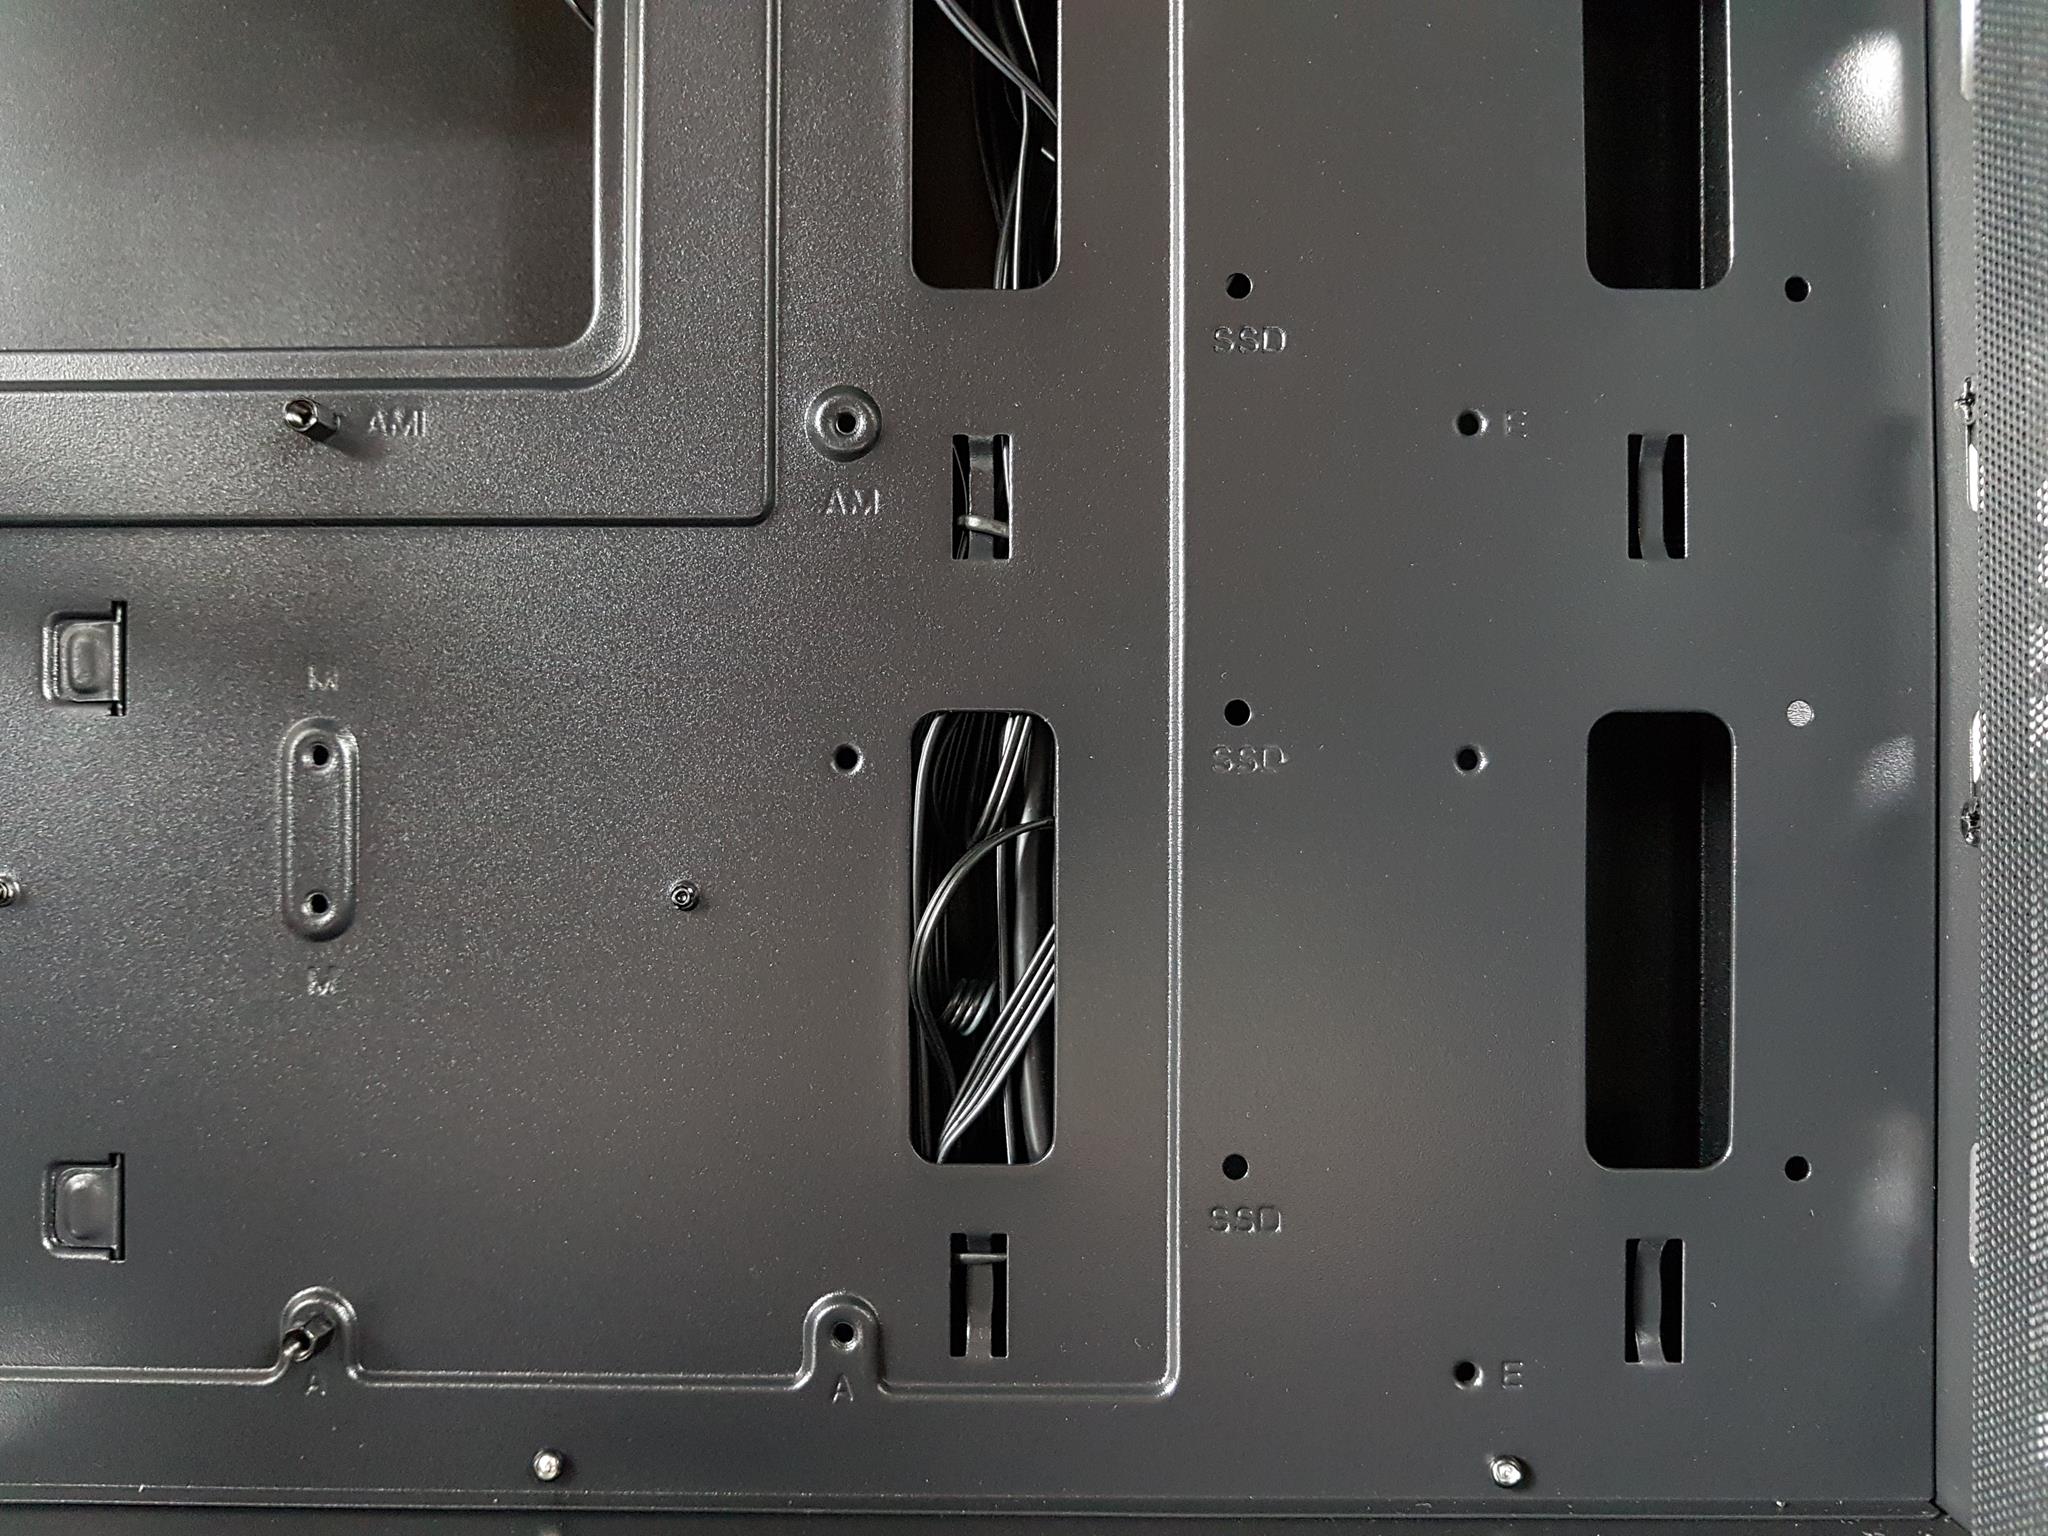
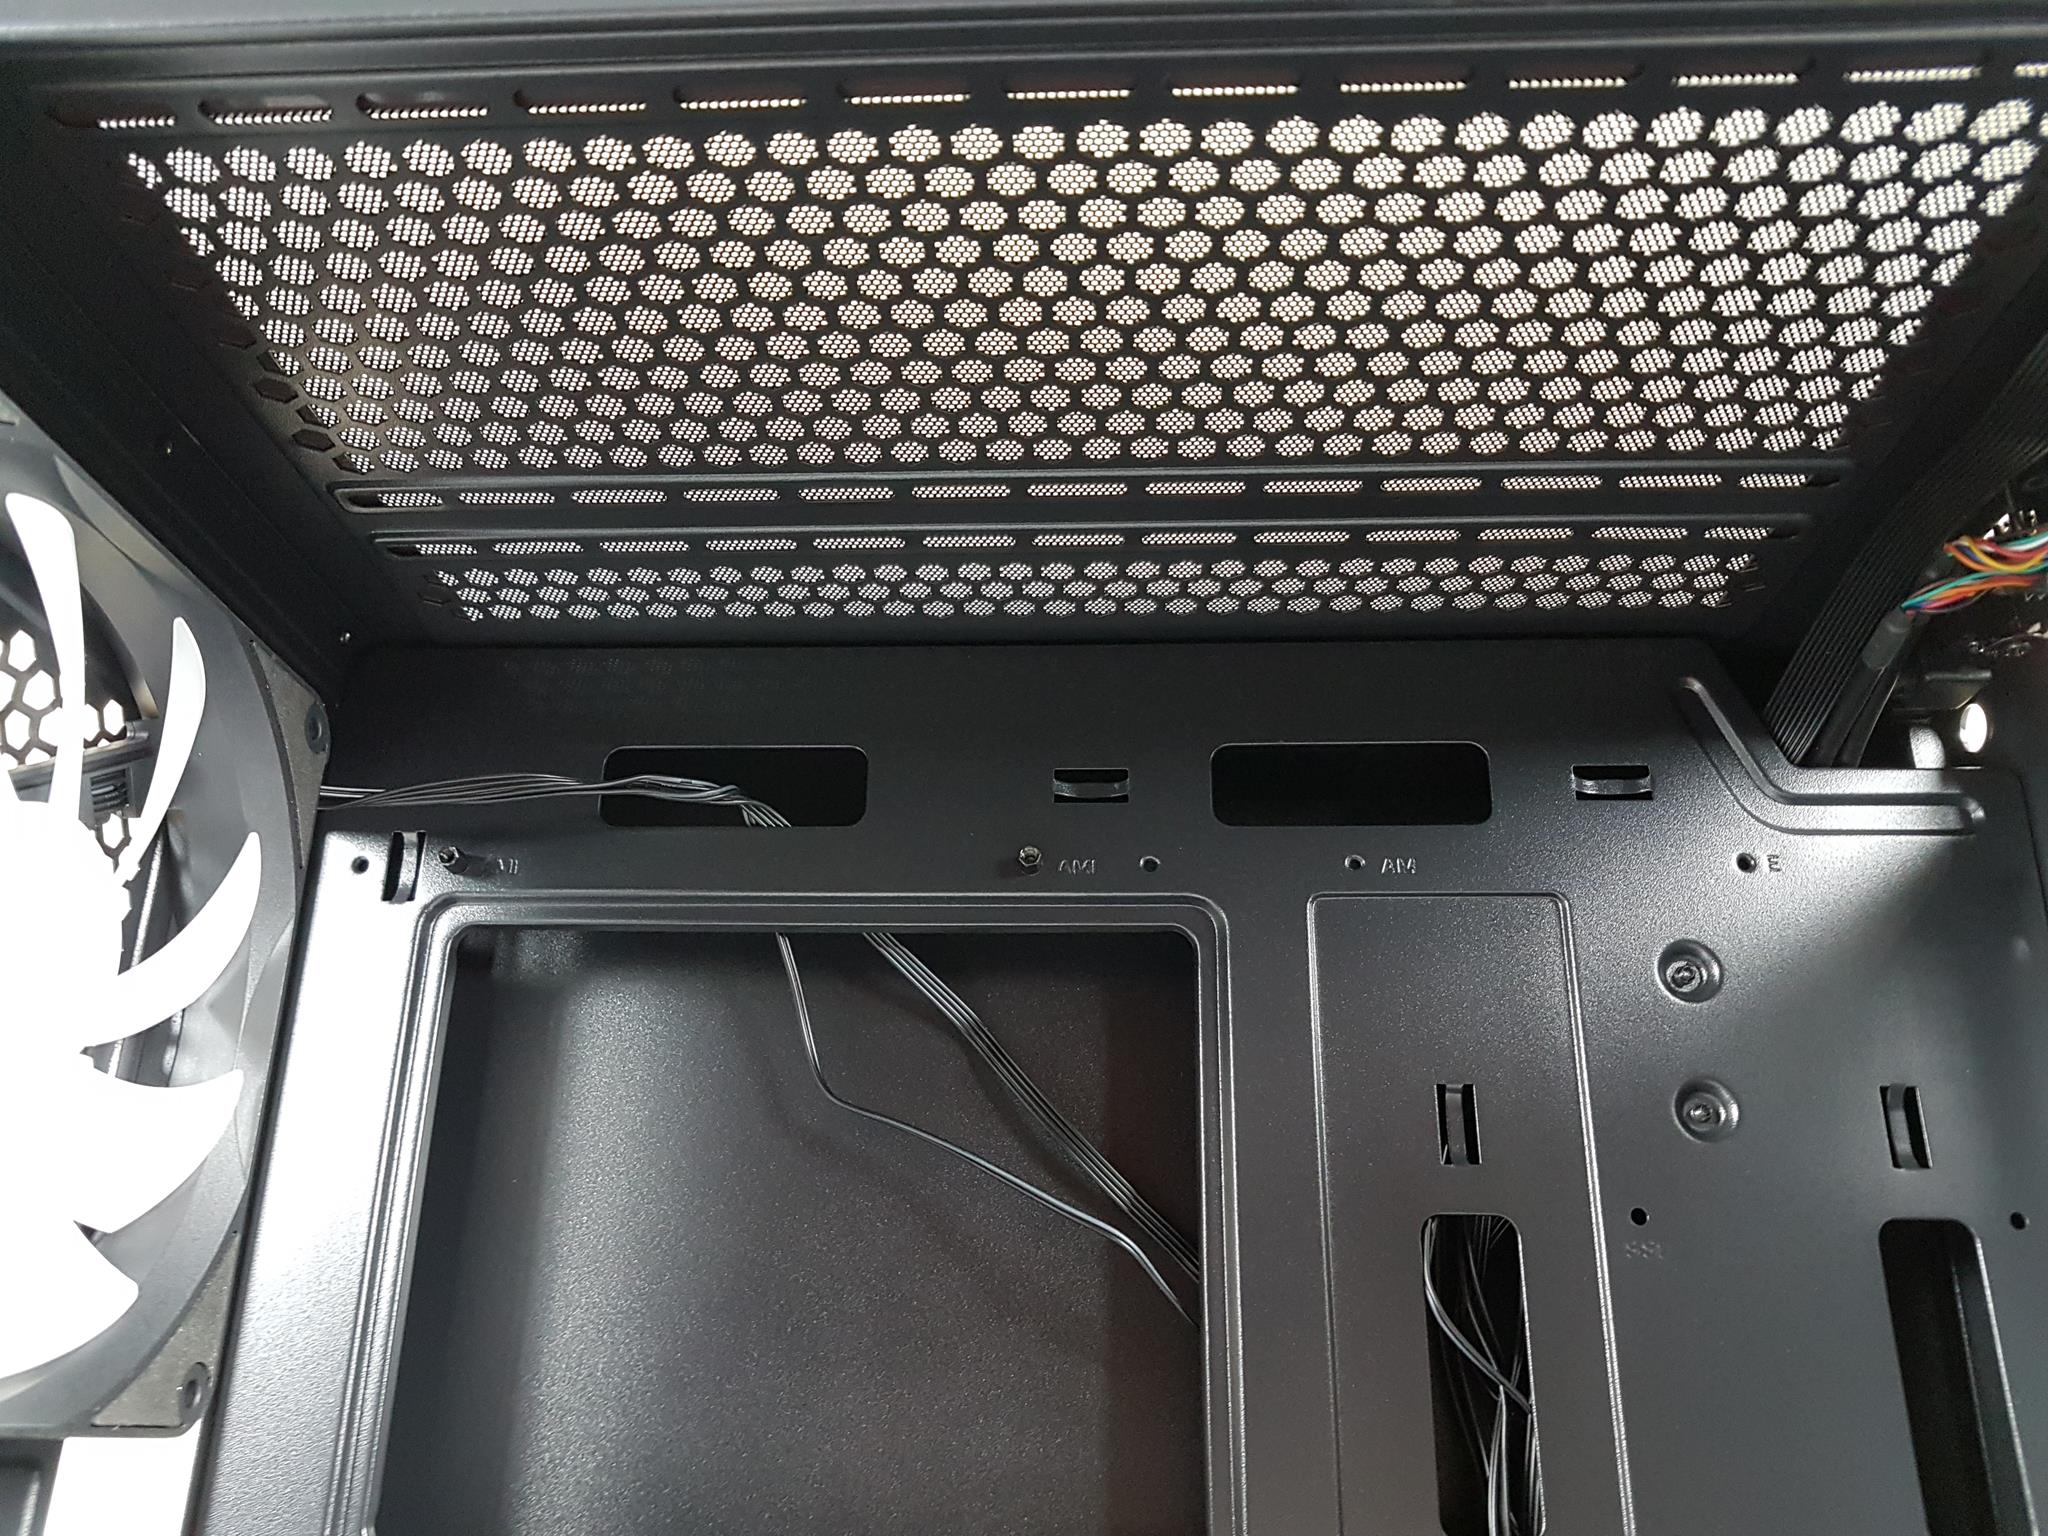
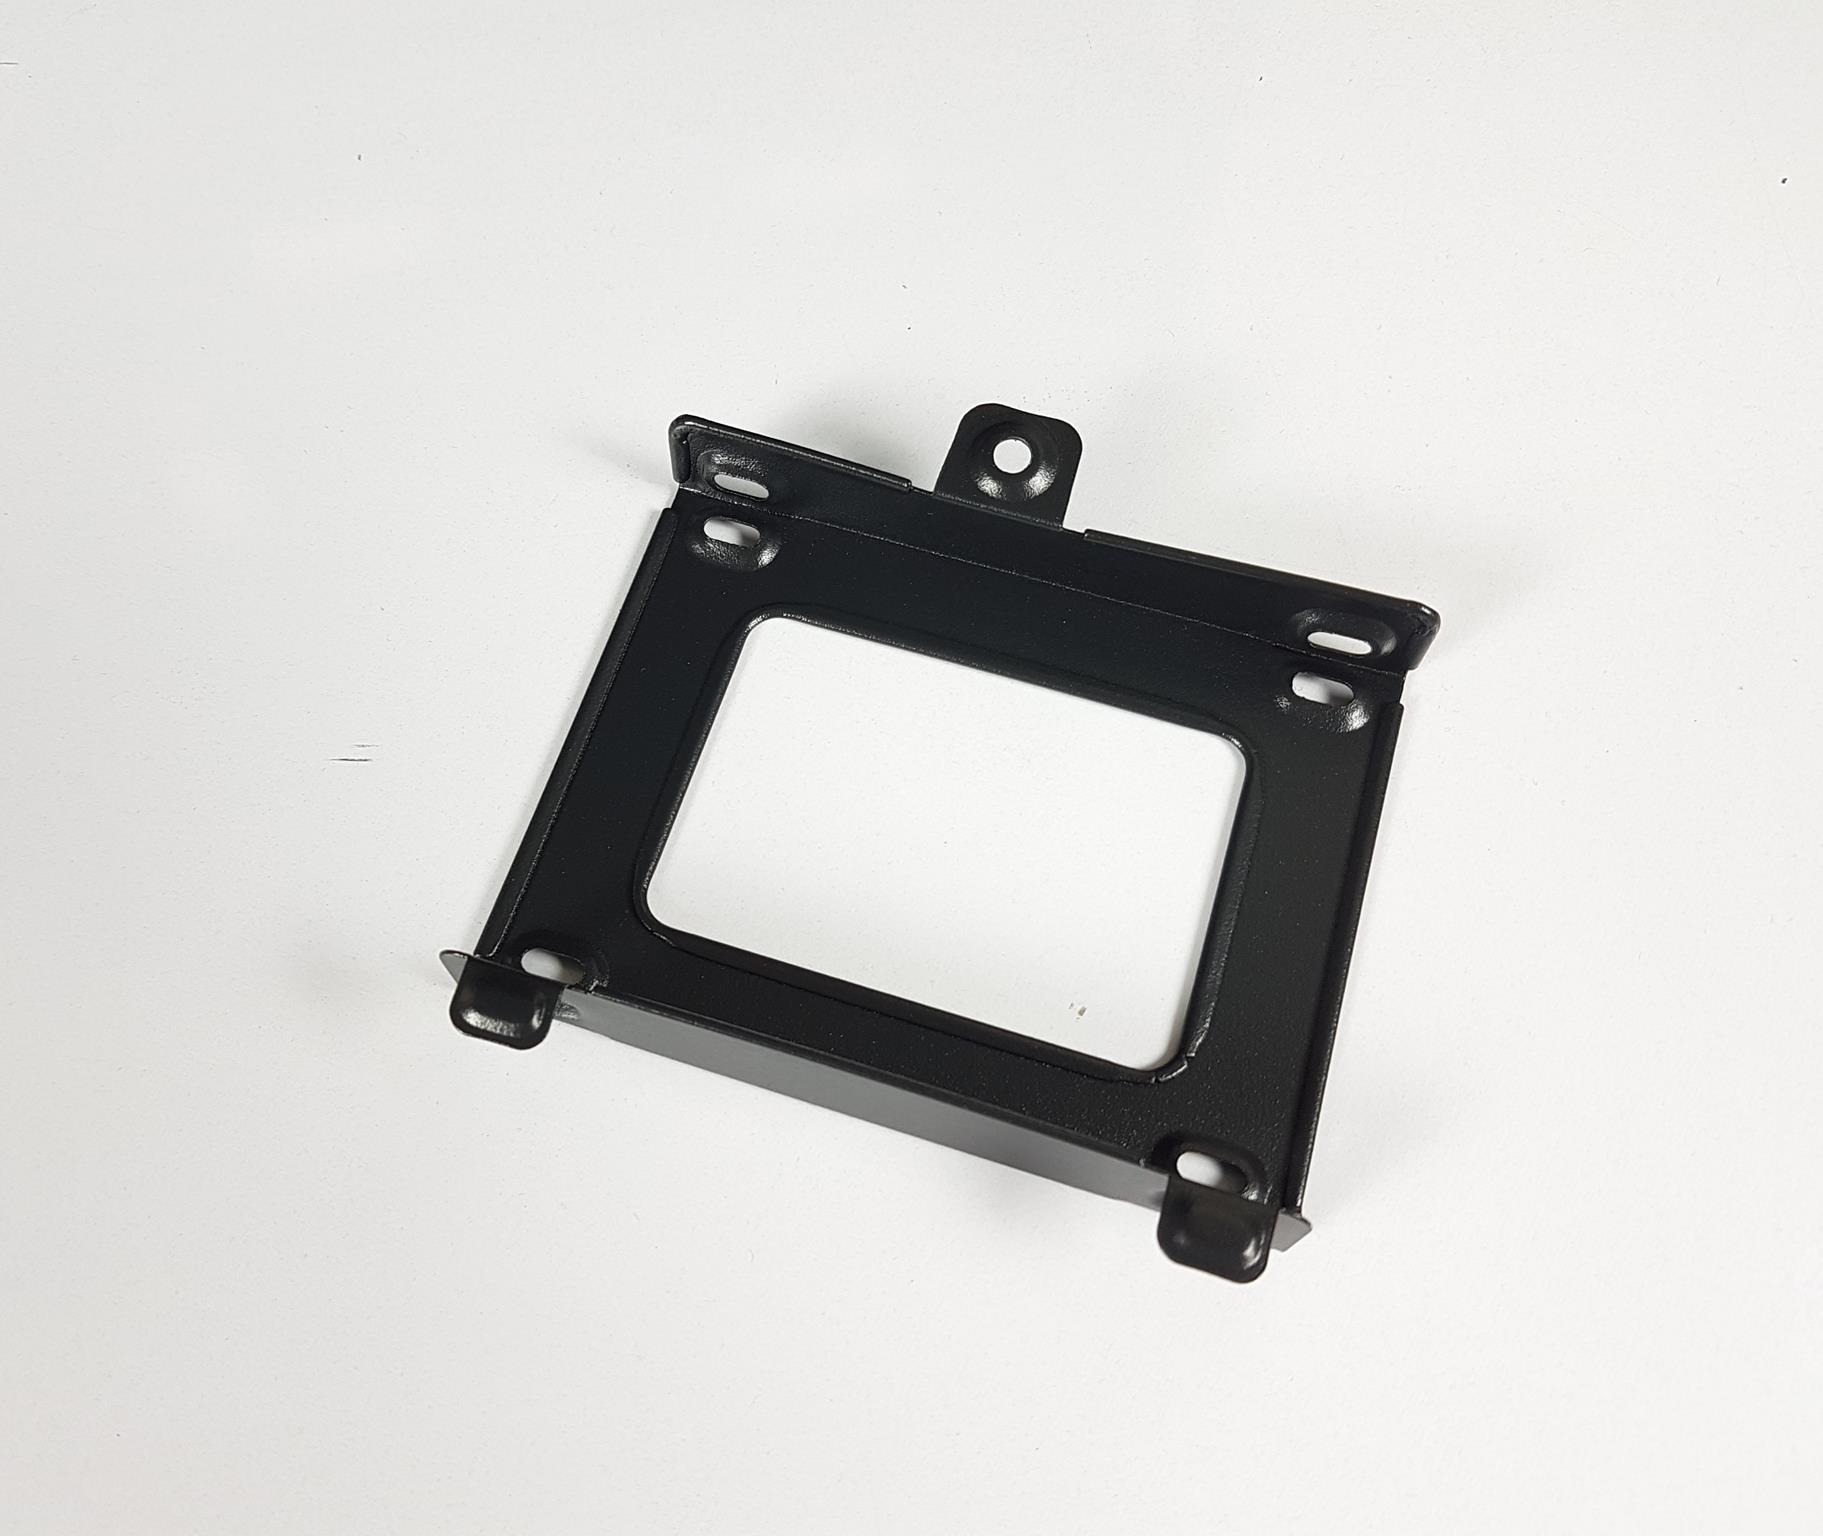
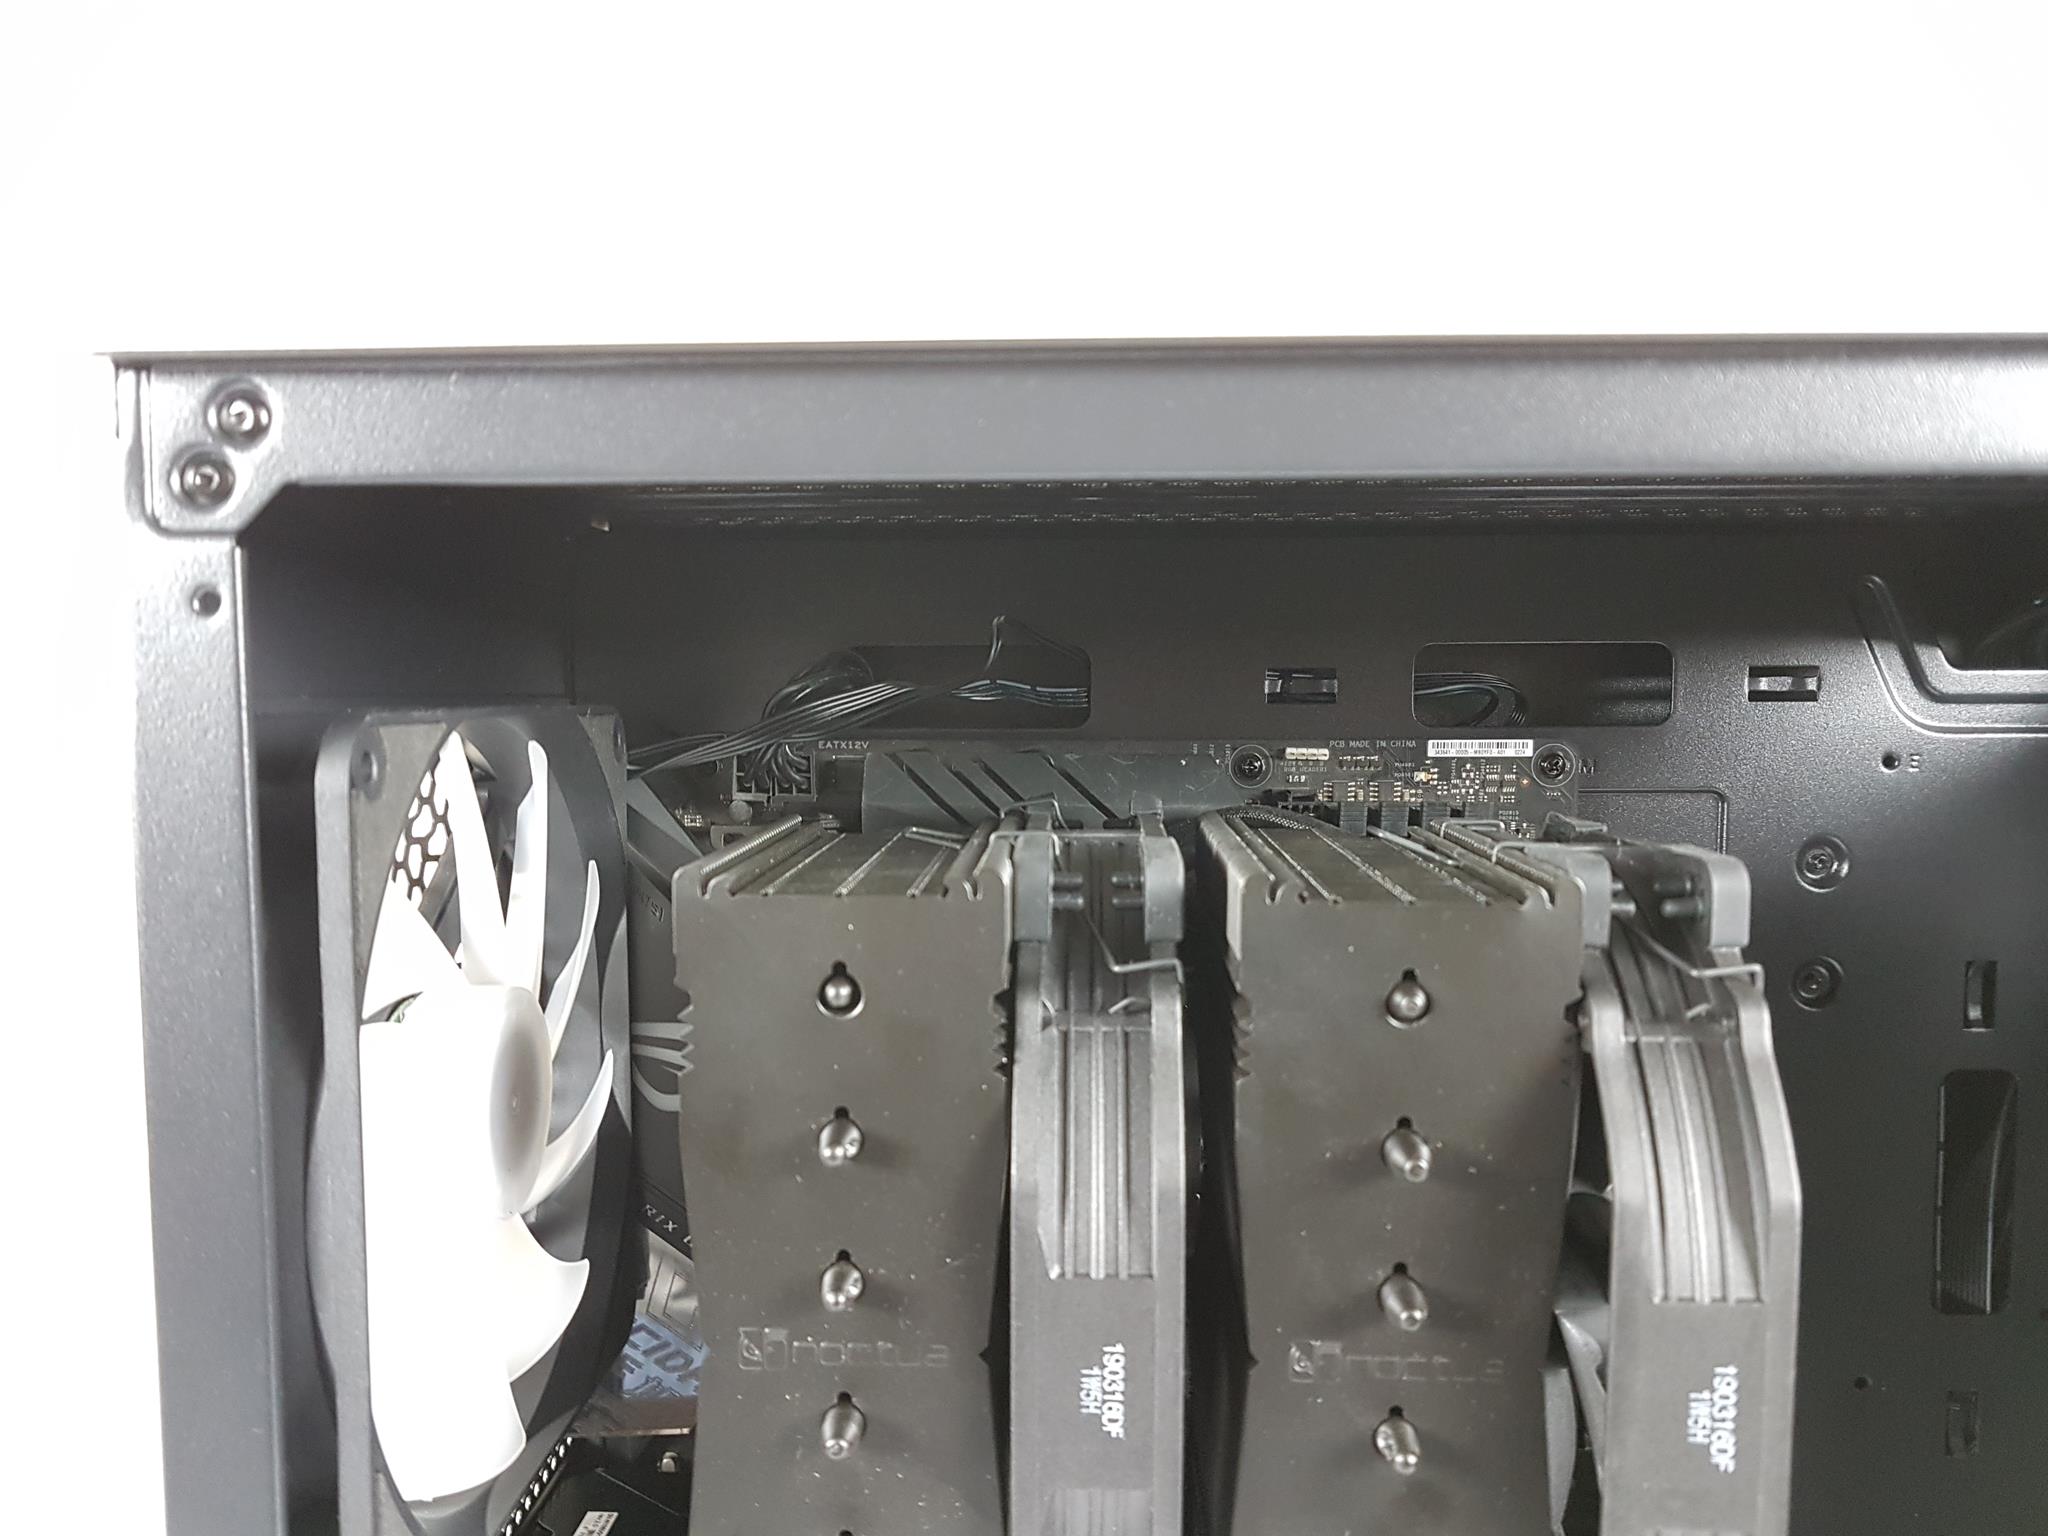
I noticed mounting holes labeled “SSD” on the right side, allowing me to install up to 2x 2.5″ drives on the backside of the tray—a smart use of space! With approximately 55mm of spacing from the chassis frame’s top to the motherboard and the same gap from the top fan/radiator mounting point to the frame’s side, there’s plenty of room.
This makes it easy for me to install an AIO on the top without any interference with tall RAM modules.
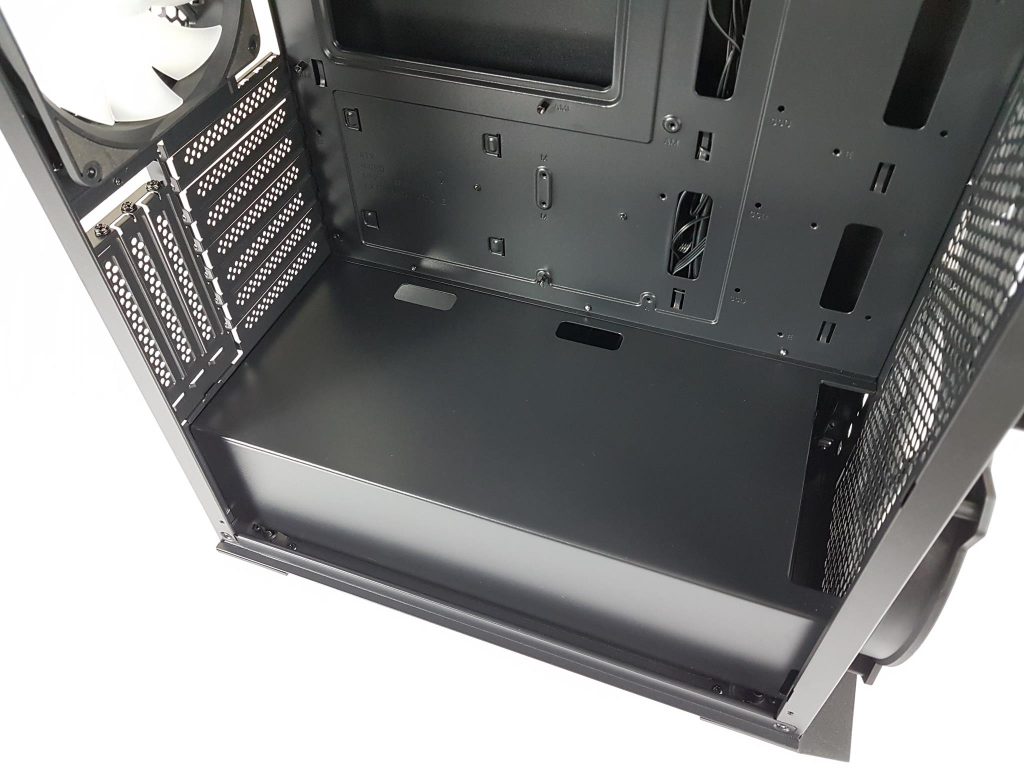
We have a solid design PSU cover. It has two cutouts towards the motherboard tray side. There is a bit of a gap between the sides of the chassis frame to the PSU cover.
There are screws on the above-mentioned gap. The user would need to remove these and the ones on the other side to take off the feet.
There’s a 30mm gap on the front side of the PSU cover, considering E-ATX motherboards and radiator installation. With a 360mm radiator, fans can only be installed on the front side, limiting push/pull configuration. No such constraint exists for a 240/280mm radiator.
The above picture shows the full-length magnetic dust filter on the front side. NX 800 filter has a dense mesh to it and it restricts the airflow. We will address this in our testing section. The second picture shows the vented layout on the front with a dust filter removed.
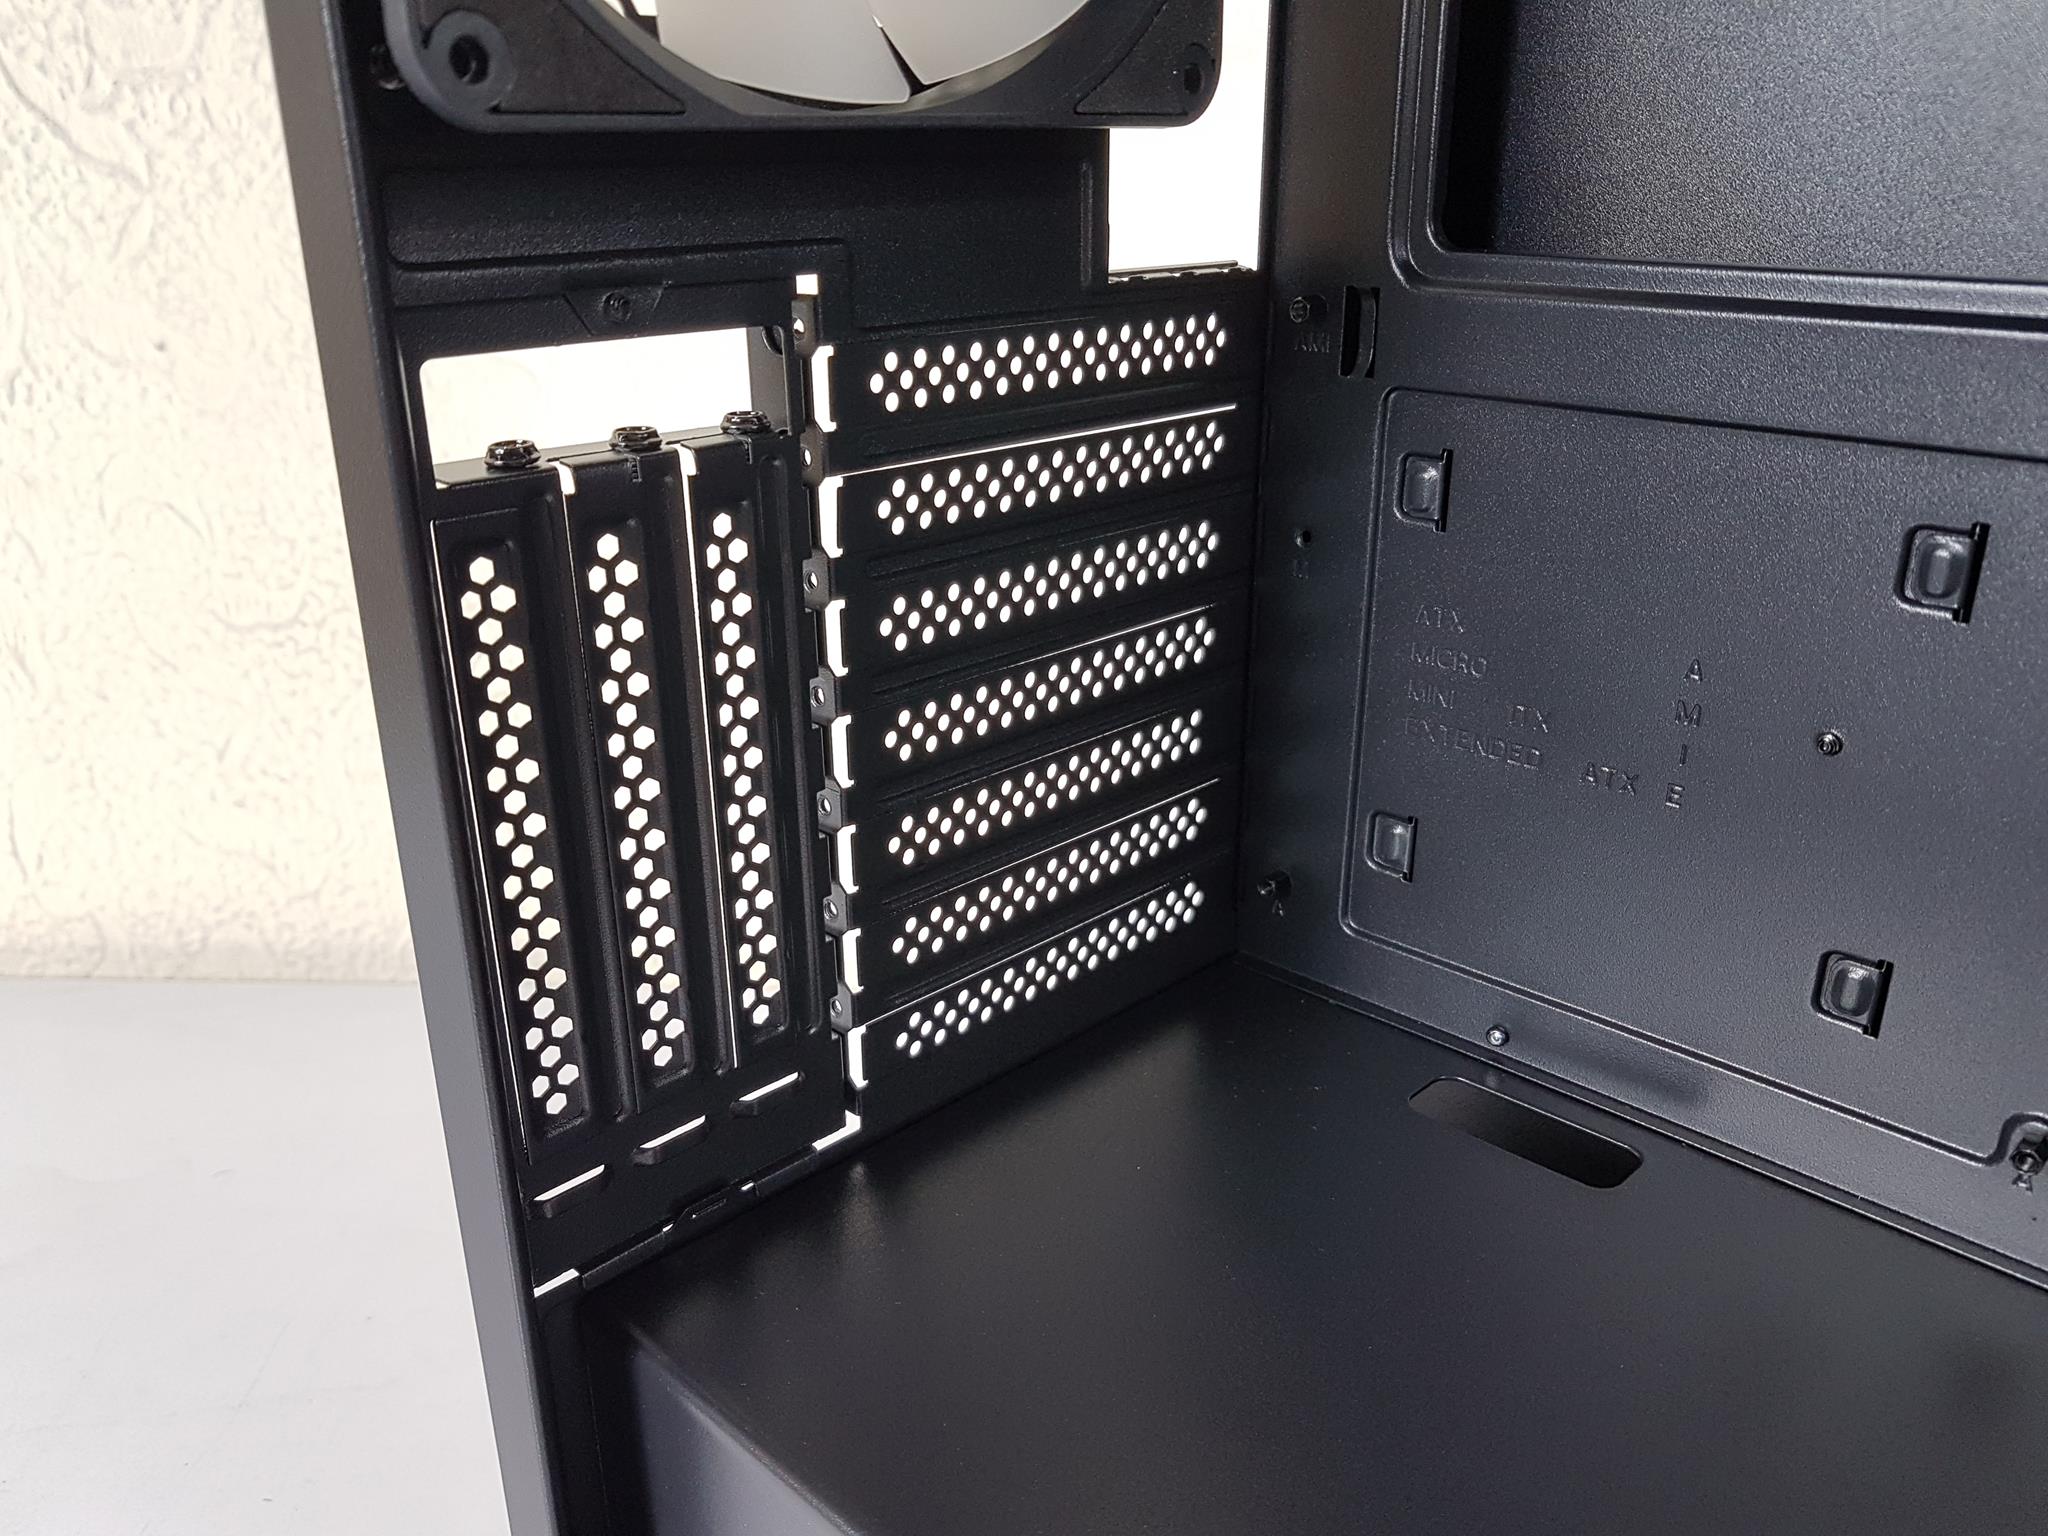
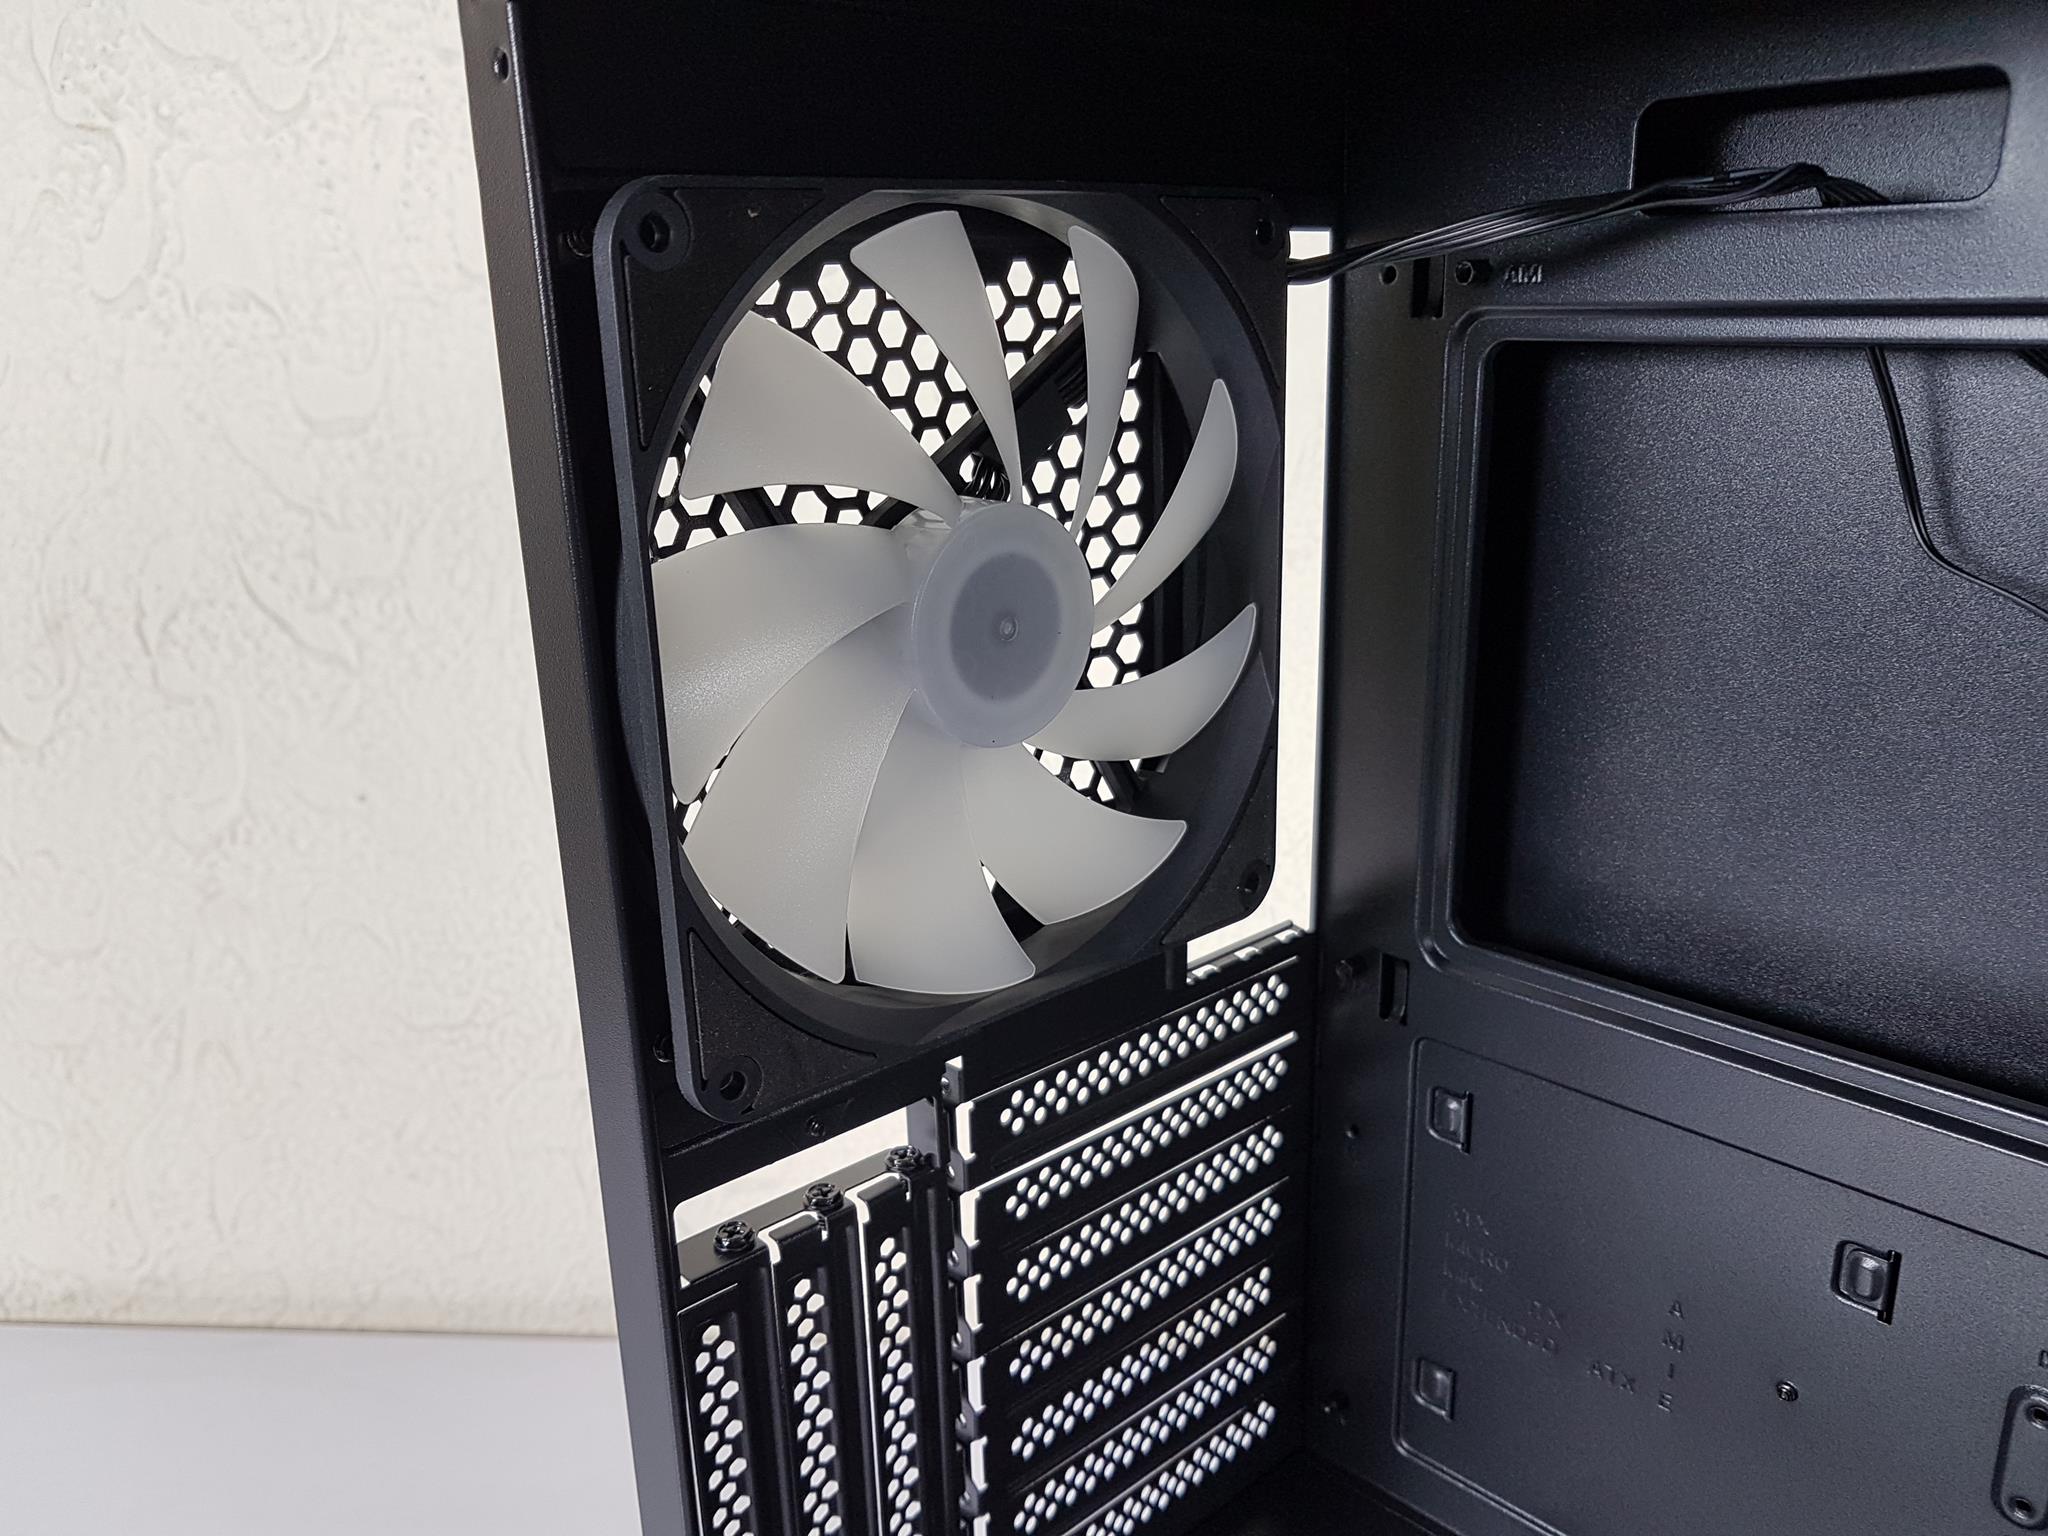
There are 10 PCIe slot covers in total (7+3). The initial 7 are non-reusable and need to be snapped off, but Antec includes 4 reusable covers in the accessory box. Additionally, a 140mm ARGB fan is pre-installed on the rear.
I must admire the approach by Antec as we see less of front and rear ARGB/RGB fans. The majority of the time the manufacturers provide ARGB/RGB fans on the front and non-RGB fan on the rear. Antec nx800 fan has a 6-pin proprietary connector hence we can’t control the speed.
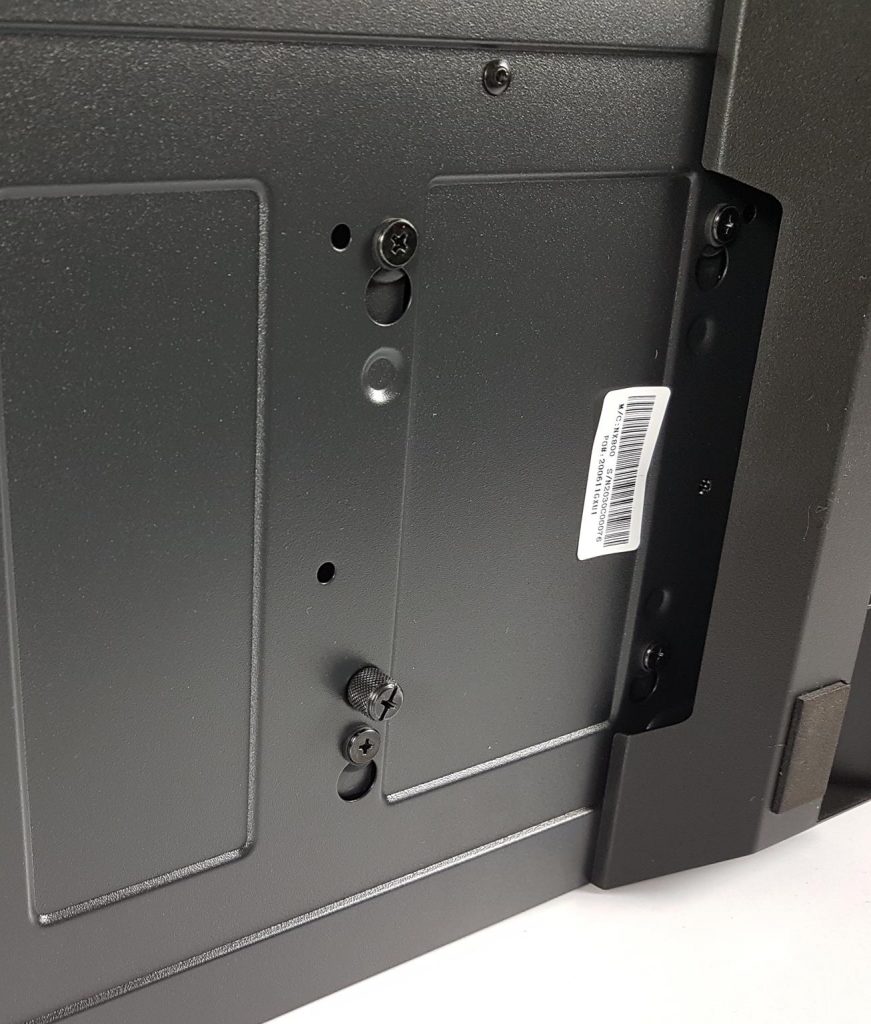
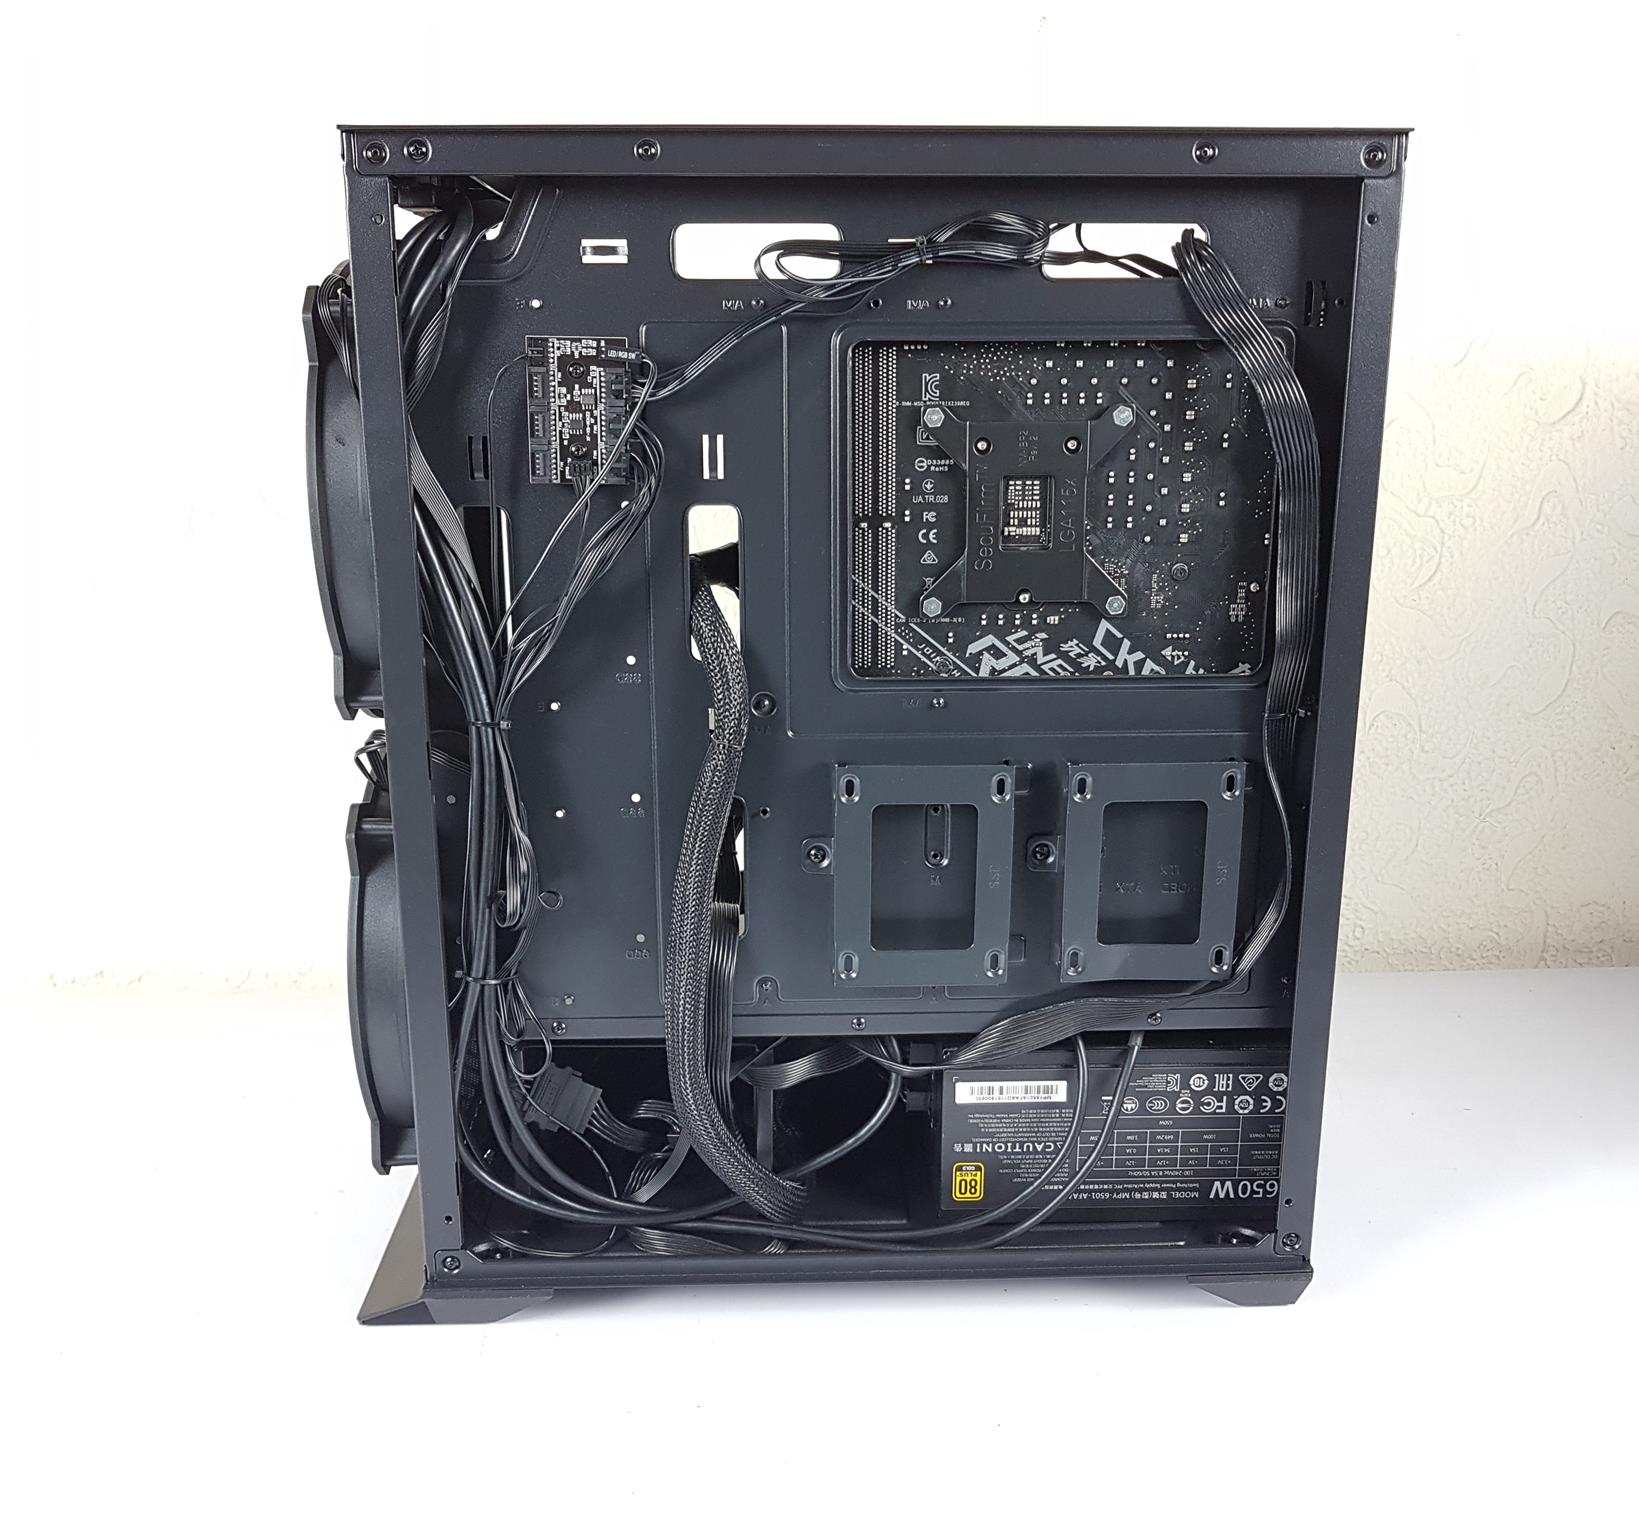
Backside
Let’s take a look at the backside of the chassis.
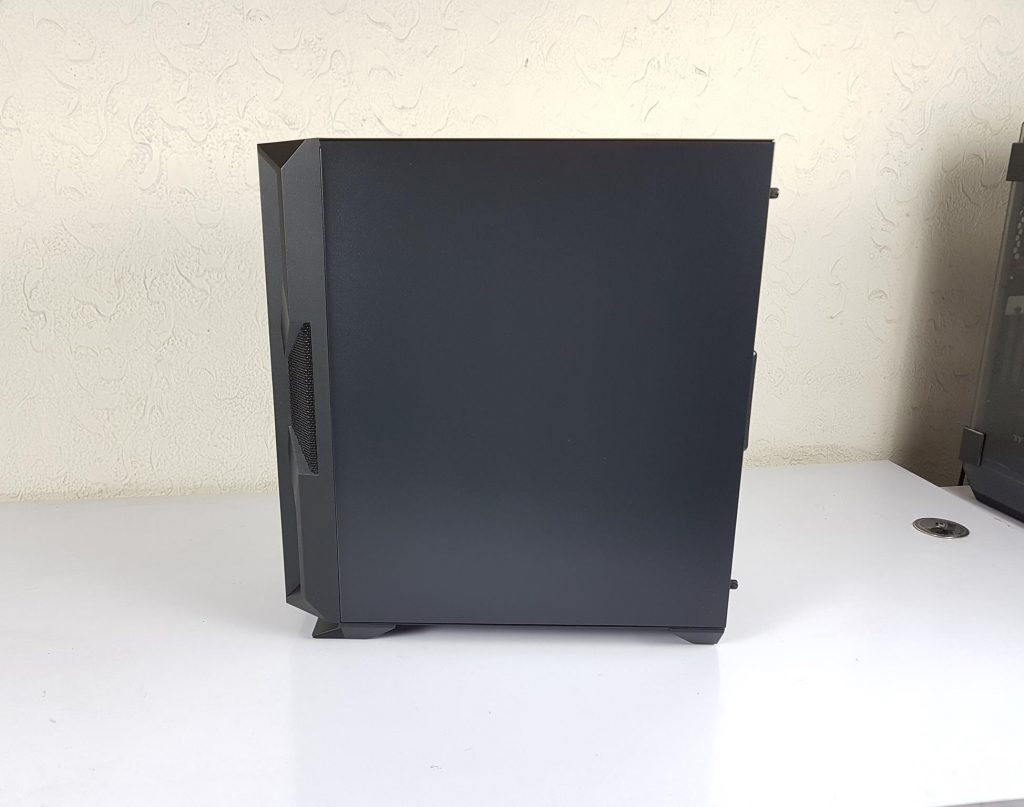
The left side of the chassis has a solid panel. Each panel is secured using two thumbscrews which are not captive.
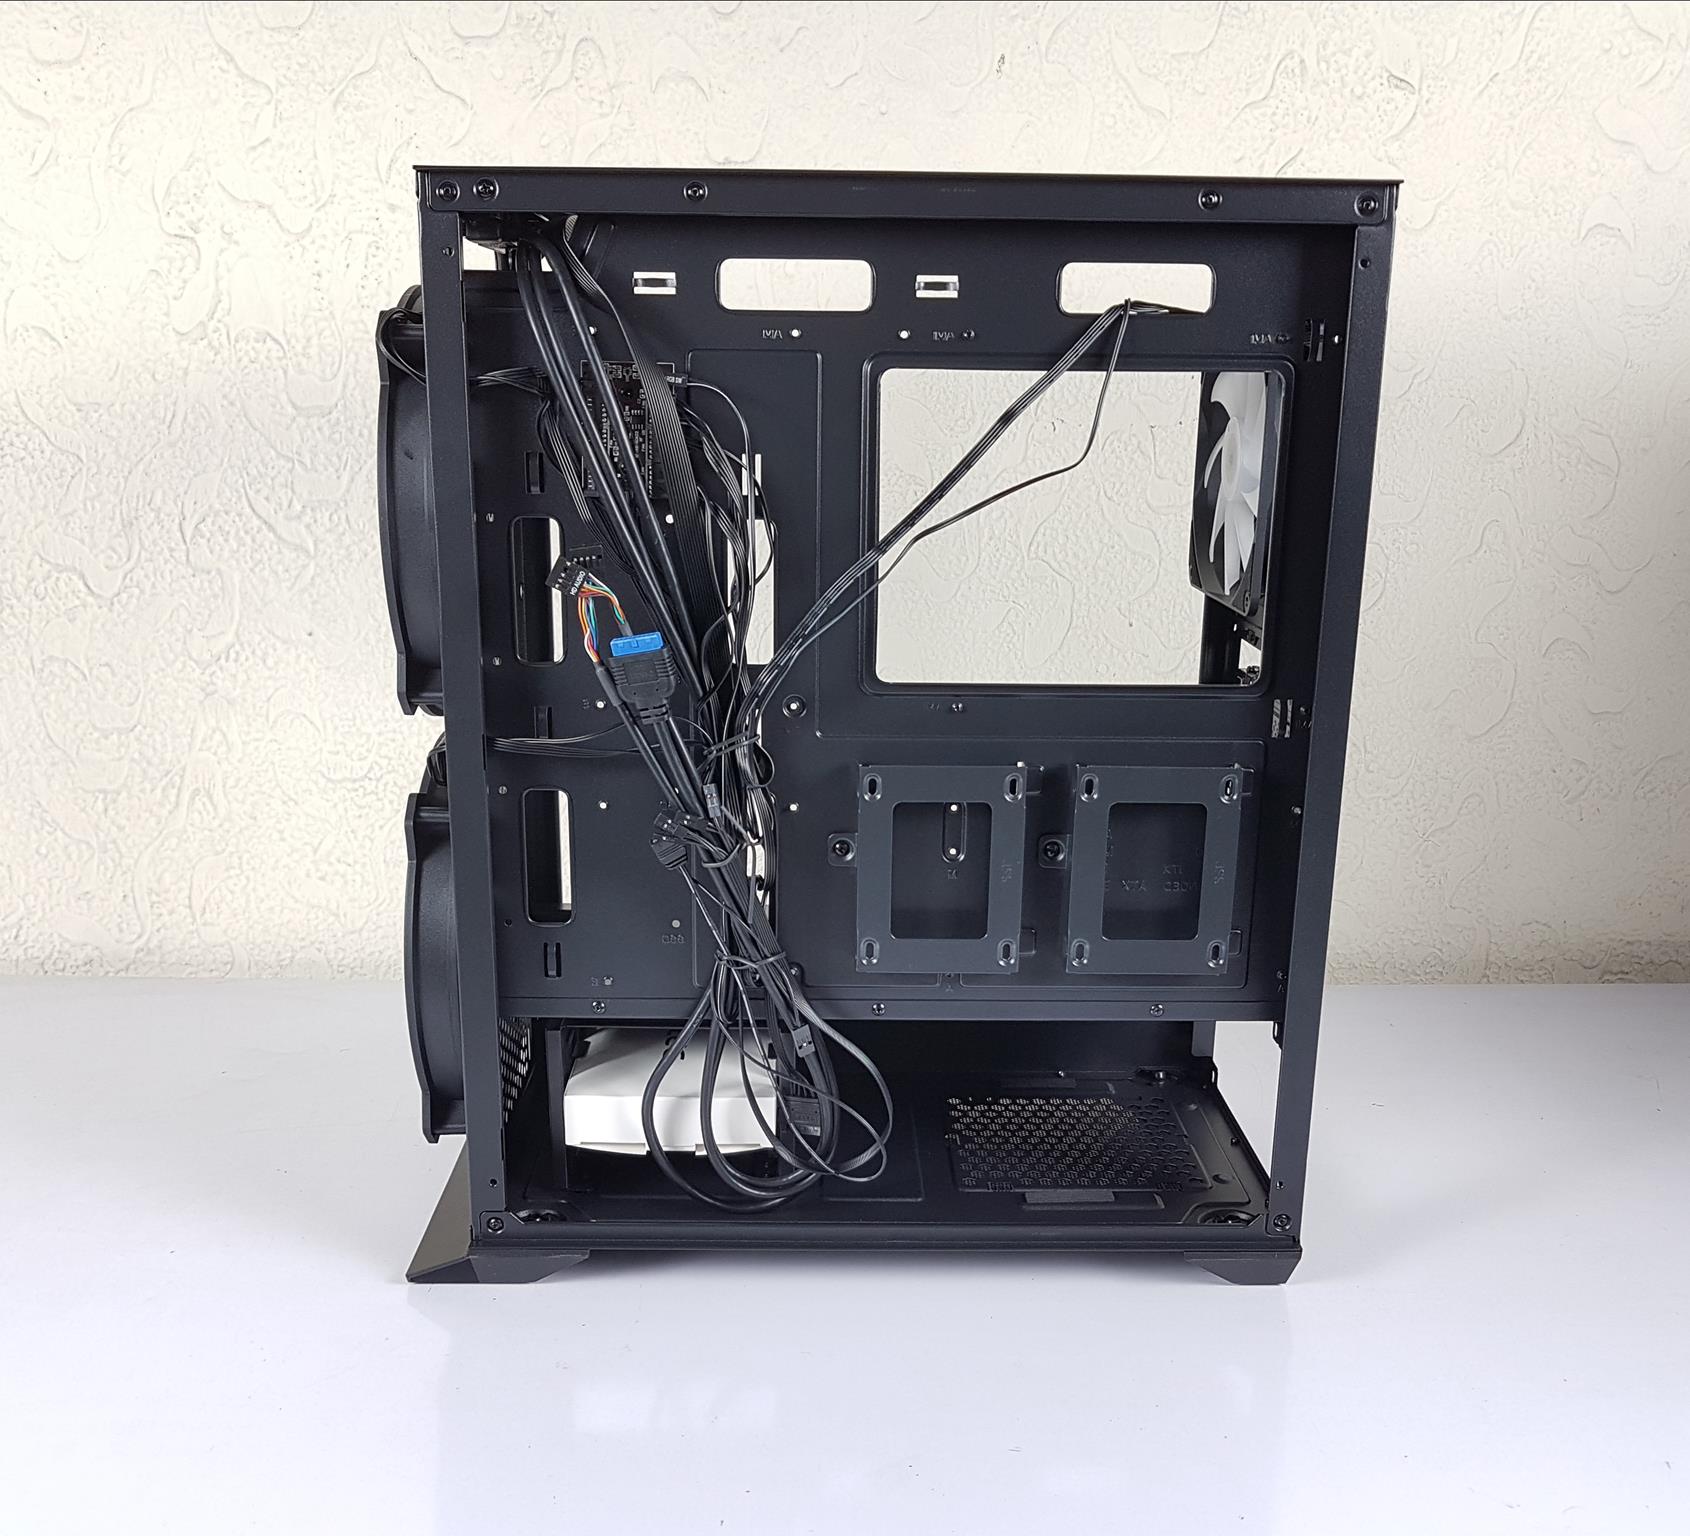
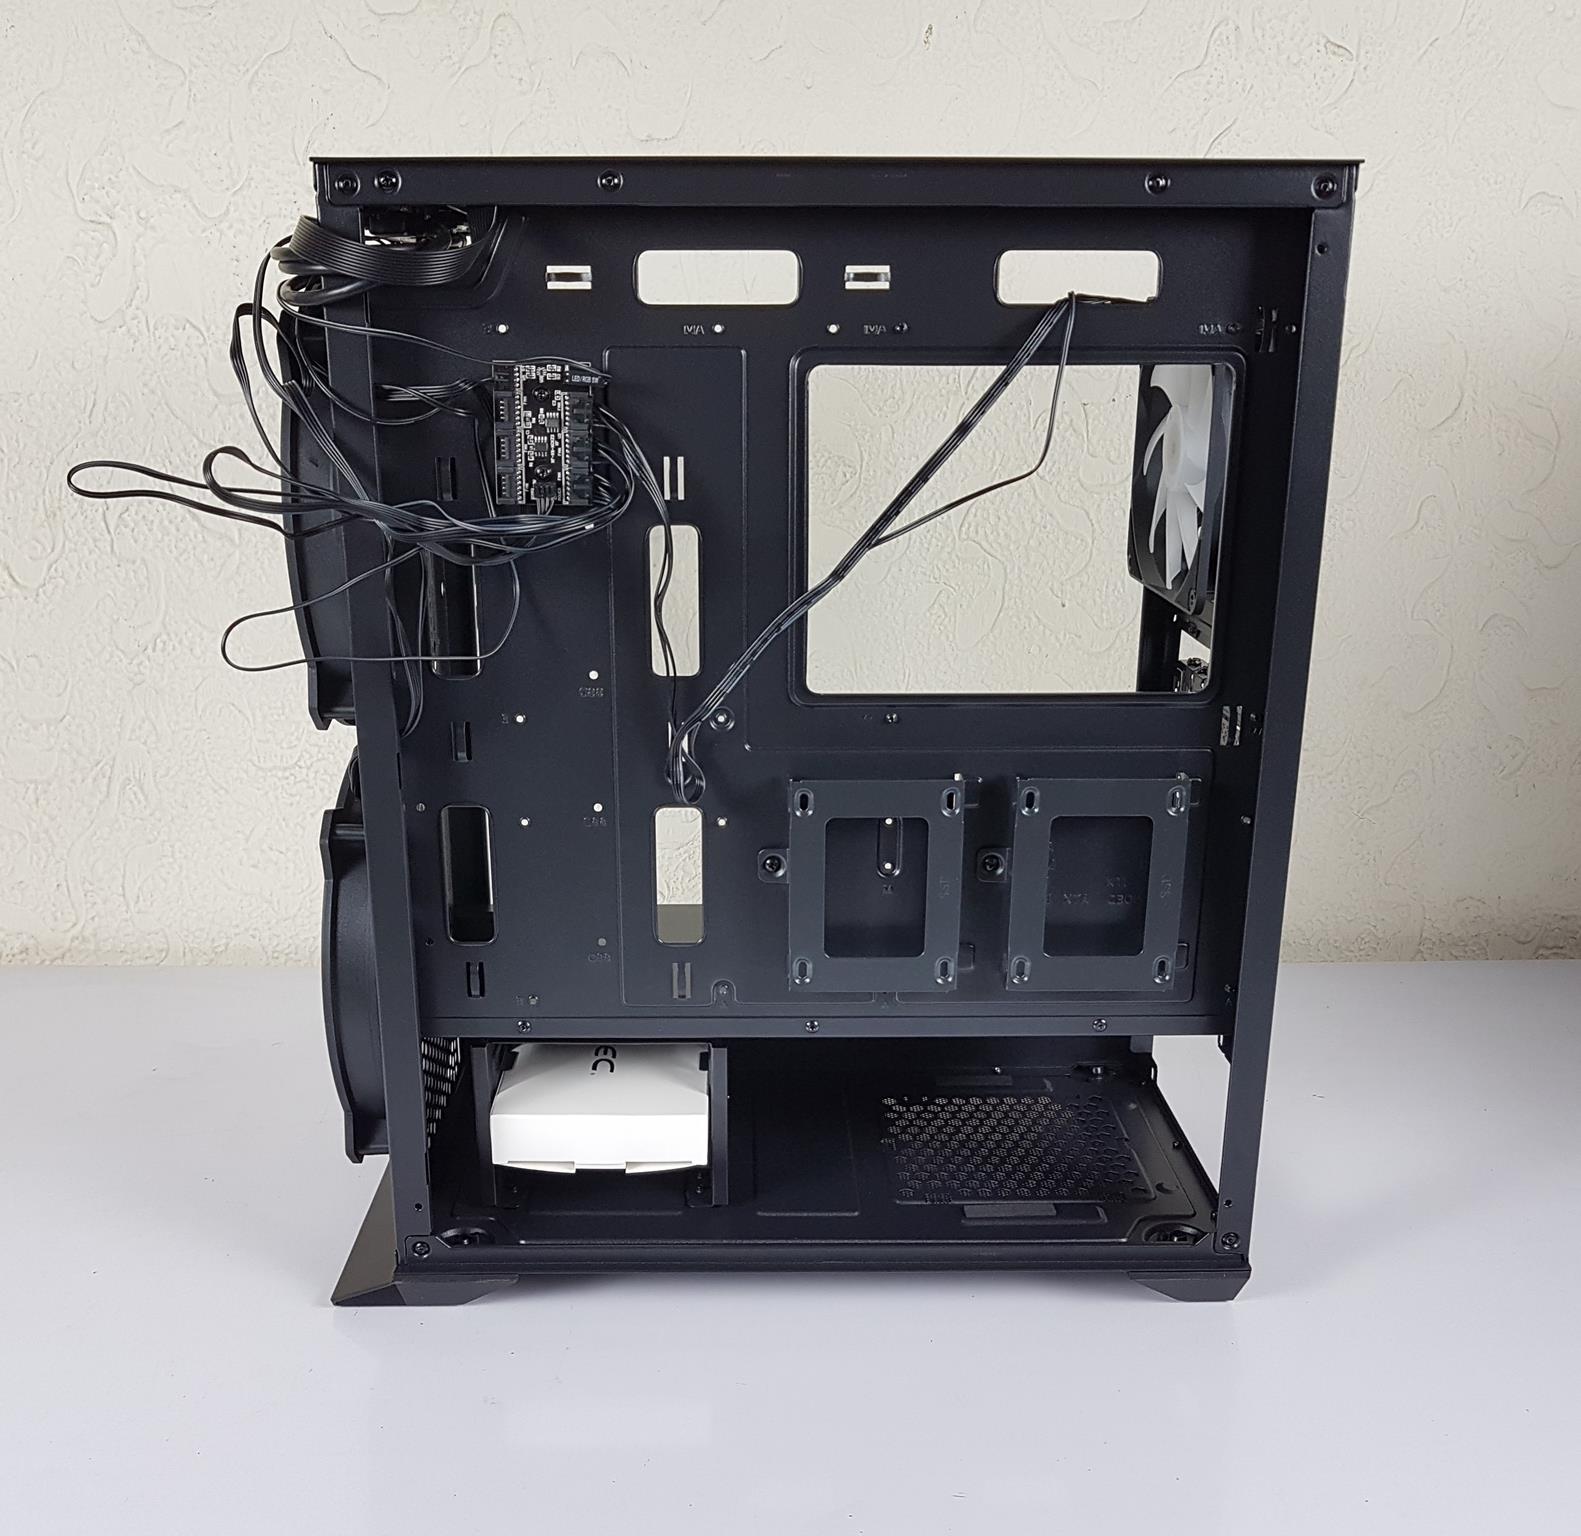
After managing the cables on one side, the entire backside of the chassis is visible. Two 2.5″ drive brackets are under the CPU cutout, while the front side’s lower chamber houses an HDD cage. The white accessory box contains a pre-installed lighting controller on the top. Approximately 18mm of cable management space is available, along with 10 cable tie points at various locations.
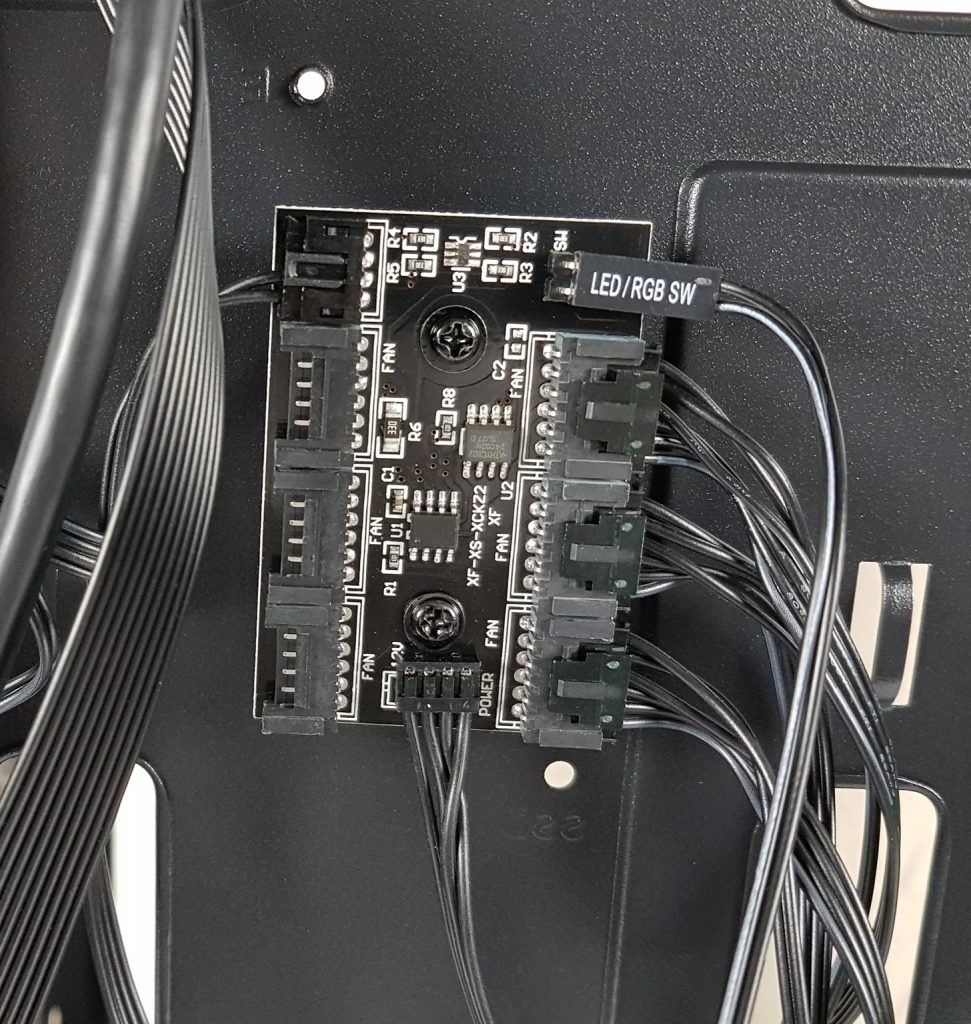
We have a 6-port light controller on the Antec NX800. Three ports are already in use as the pre-installed fans are already connected to it.

The above picture shows the cable options for the controller. The two-pin connector on the right is already connected to the dedicated button on the IO panel. This is another design element that I really appreciate. The majority of the other chassis compromise the Reset button’s functionality by optionally using it to control the lighting.
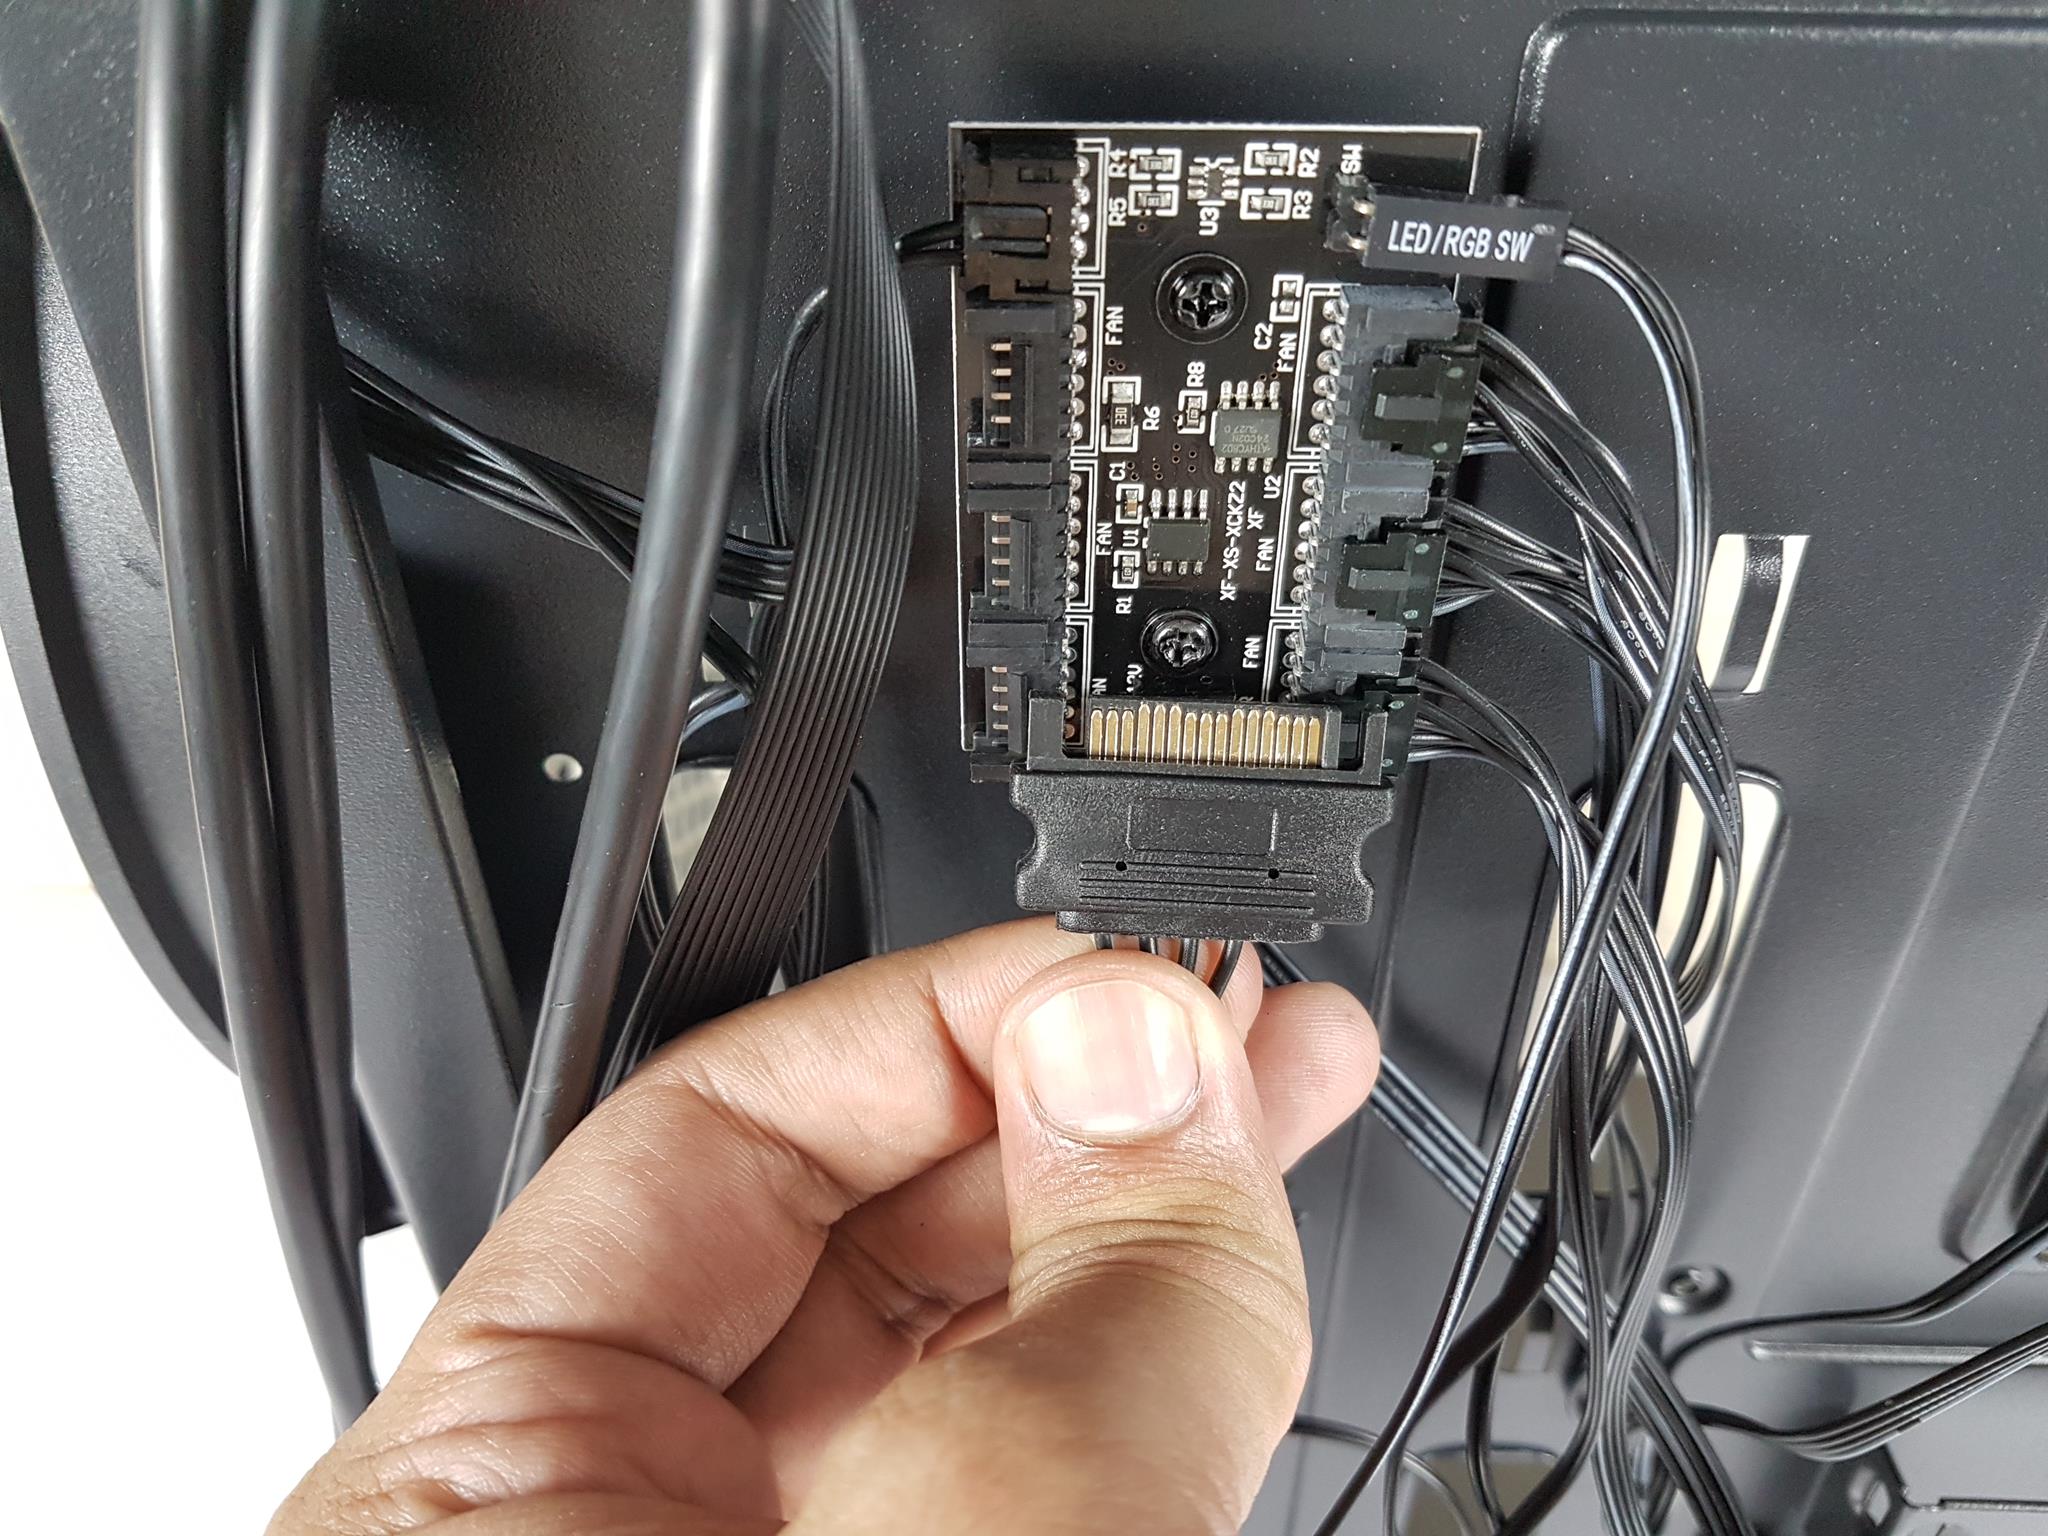
The controller is SATA-powered, offering more than 13 onboard lighting modes accessible through the dedicated RGB button on the IO panel. If I long-press the RGB button for 3-6 seconds, the control switches to the motherboard with a confirmation blink. Pressing the RGB button once returns control to the on-board controller. To turn off the lights, a long press for over 6 seconds, with the white light blinking four times before powering off.
In the provided picture, the 2.5″ drive bracket lacks a captive thumbscrew.
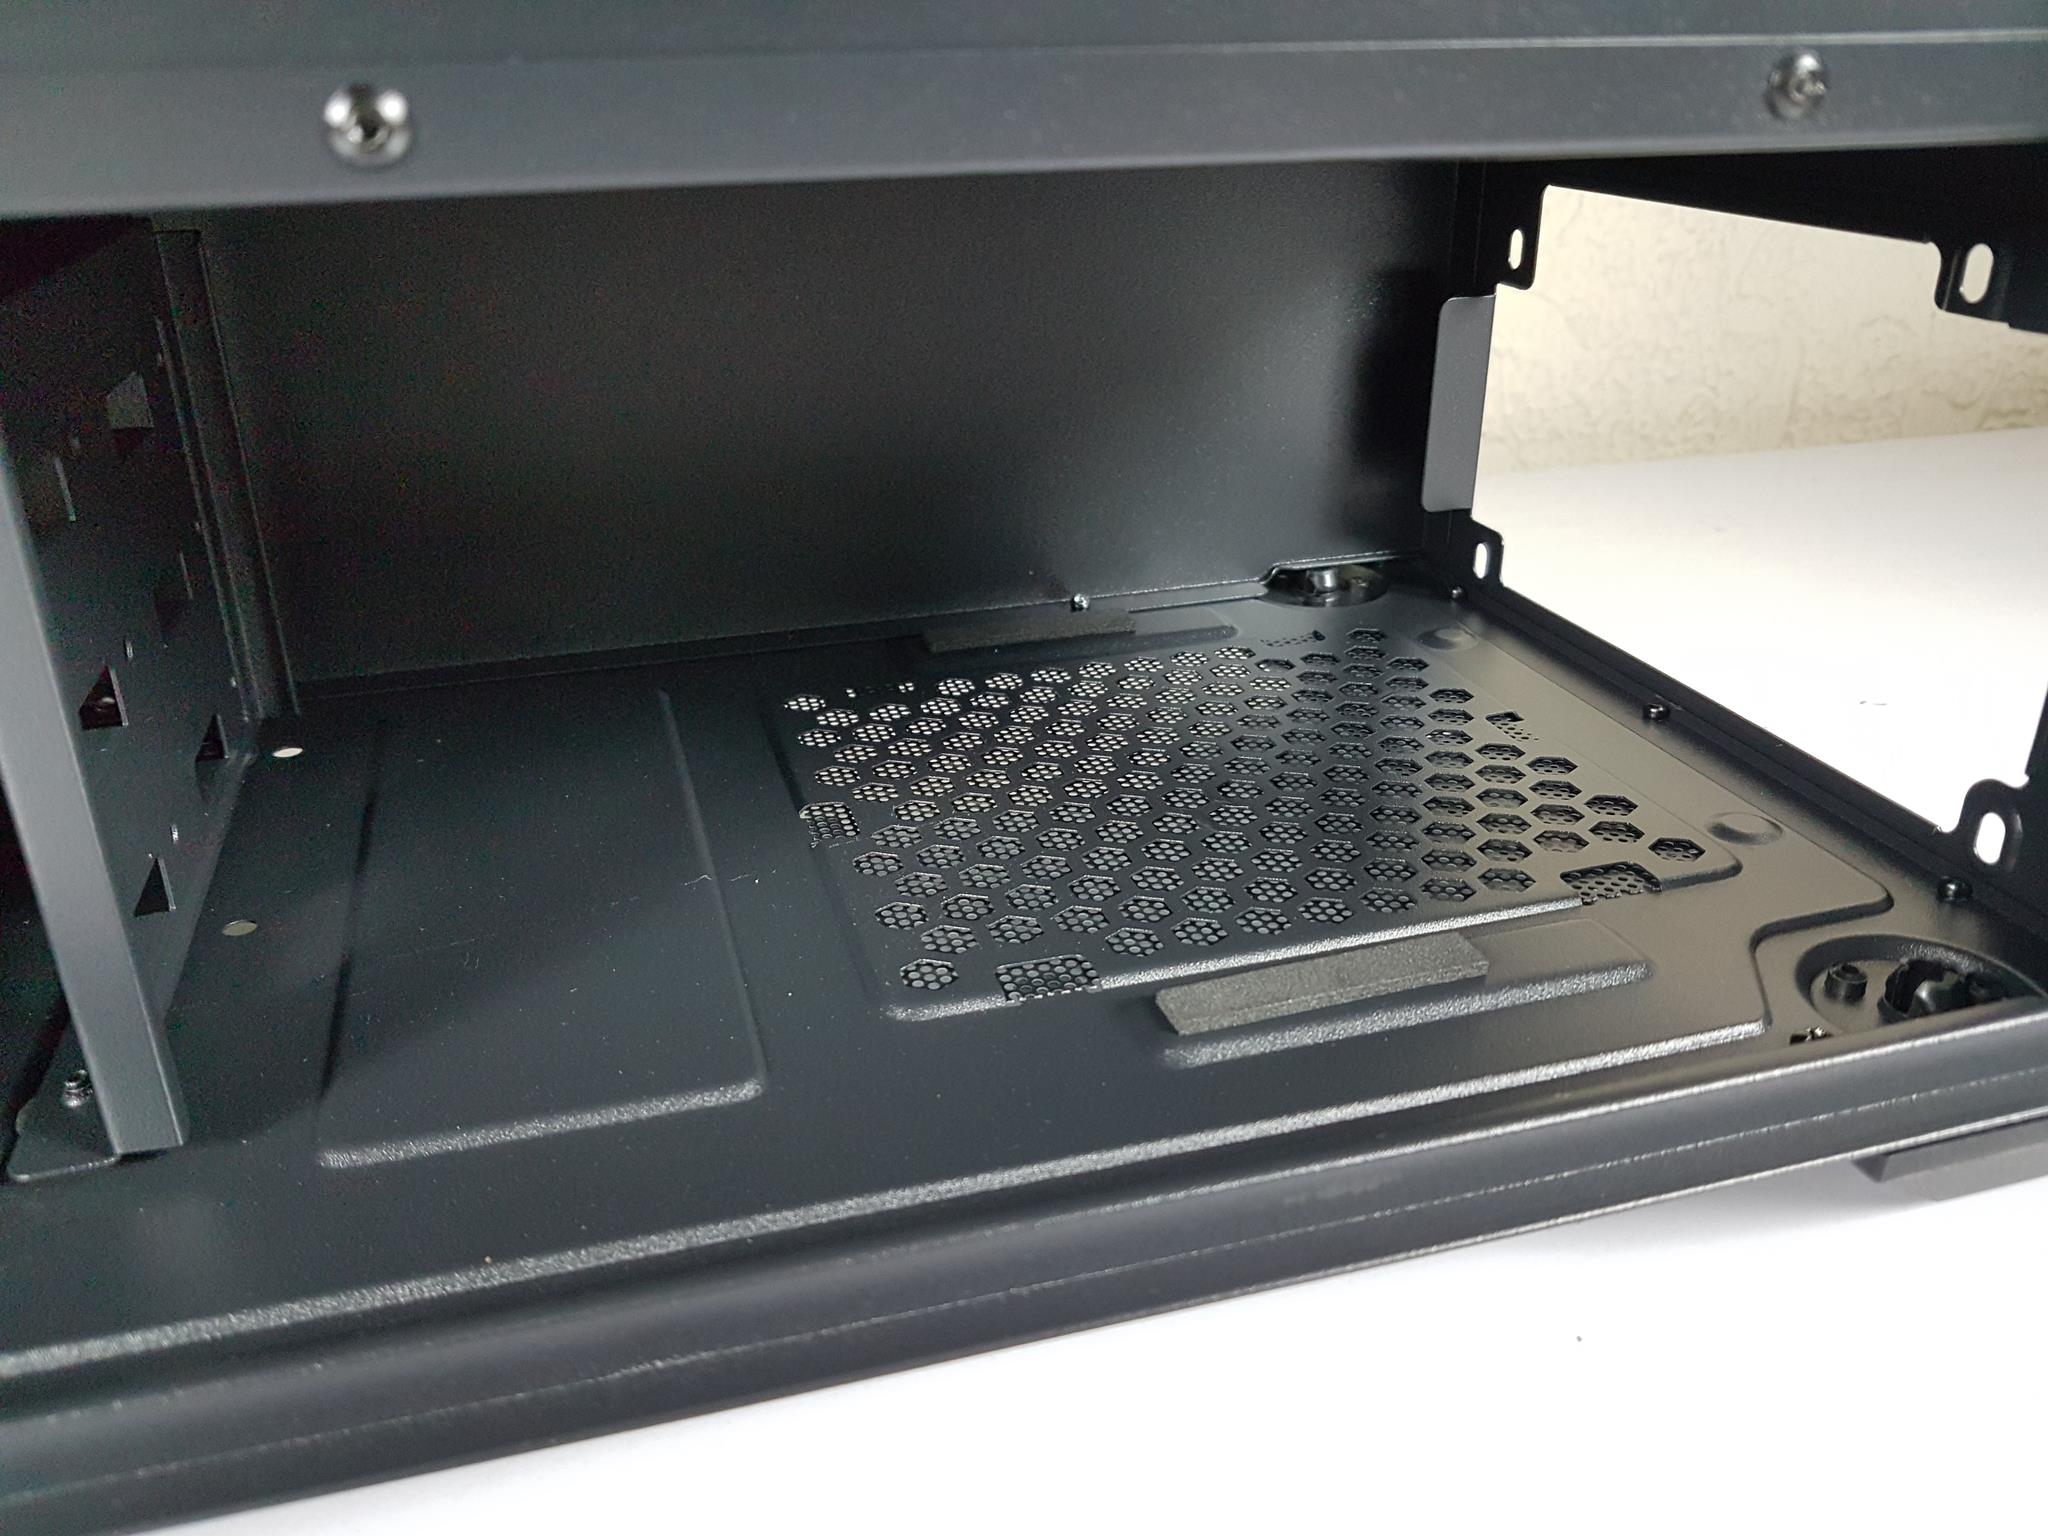
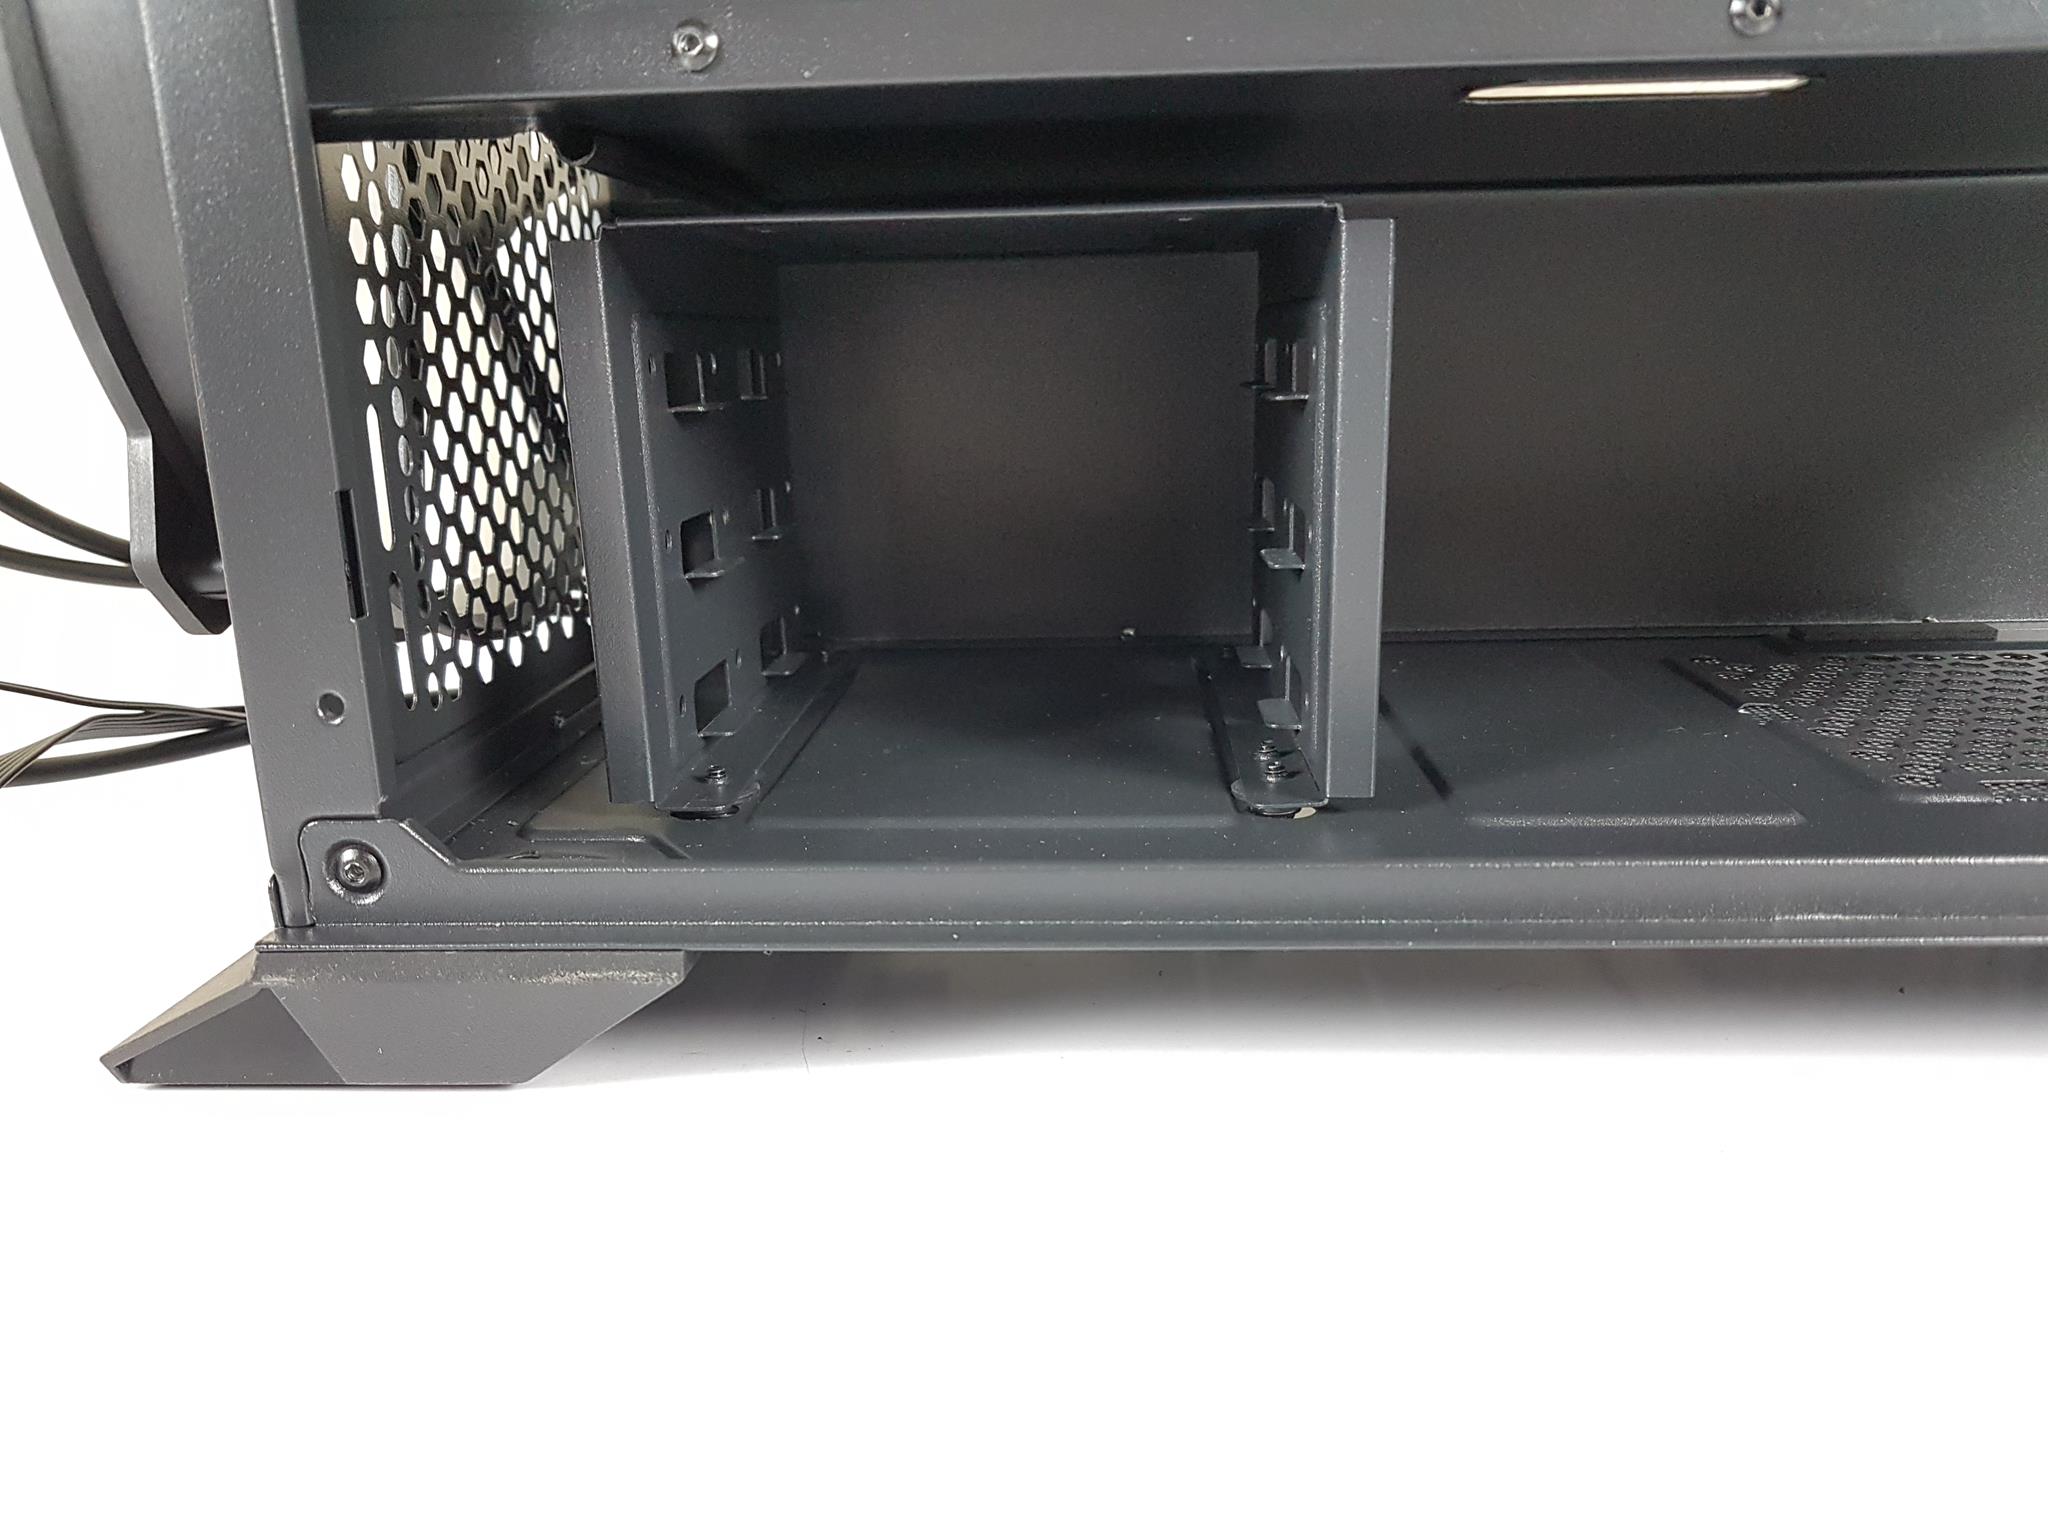
The PSU mounting area features ventilation with anti-vibration rubber pads on the left and right rails. With the HDD cage installed, there’s approximately 242mm of space for the PSU and cables. Removing the cage increases the space to about 385mm. For 3.5″ drive installation, the cage needs to be taken out, and it’s not tool-less. The storage capacity includes up to 4x 2.5″ drives and 3x 3.5″/1x 2.5″ convertible drives in the HDD cage.
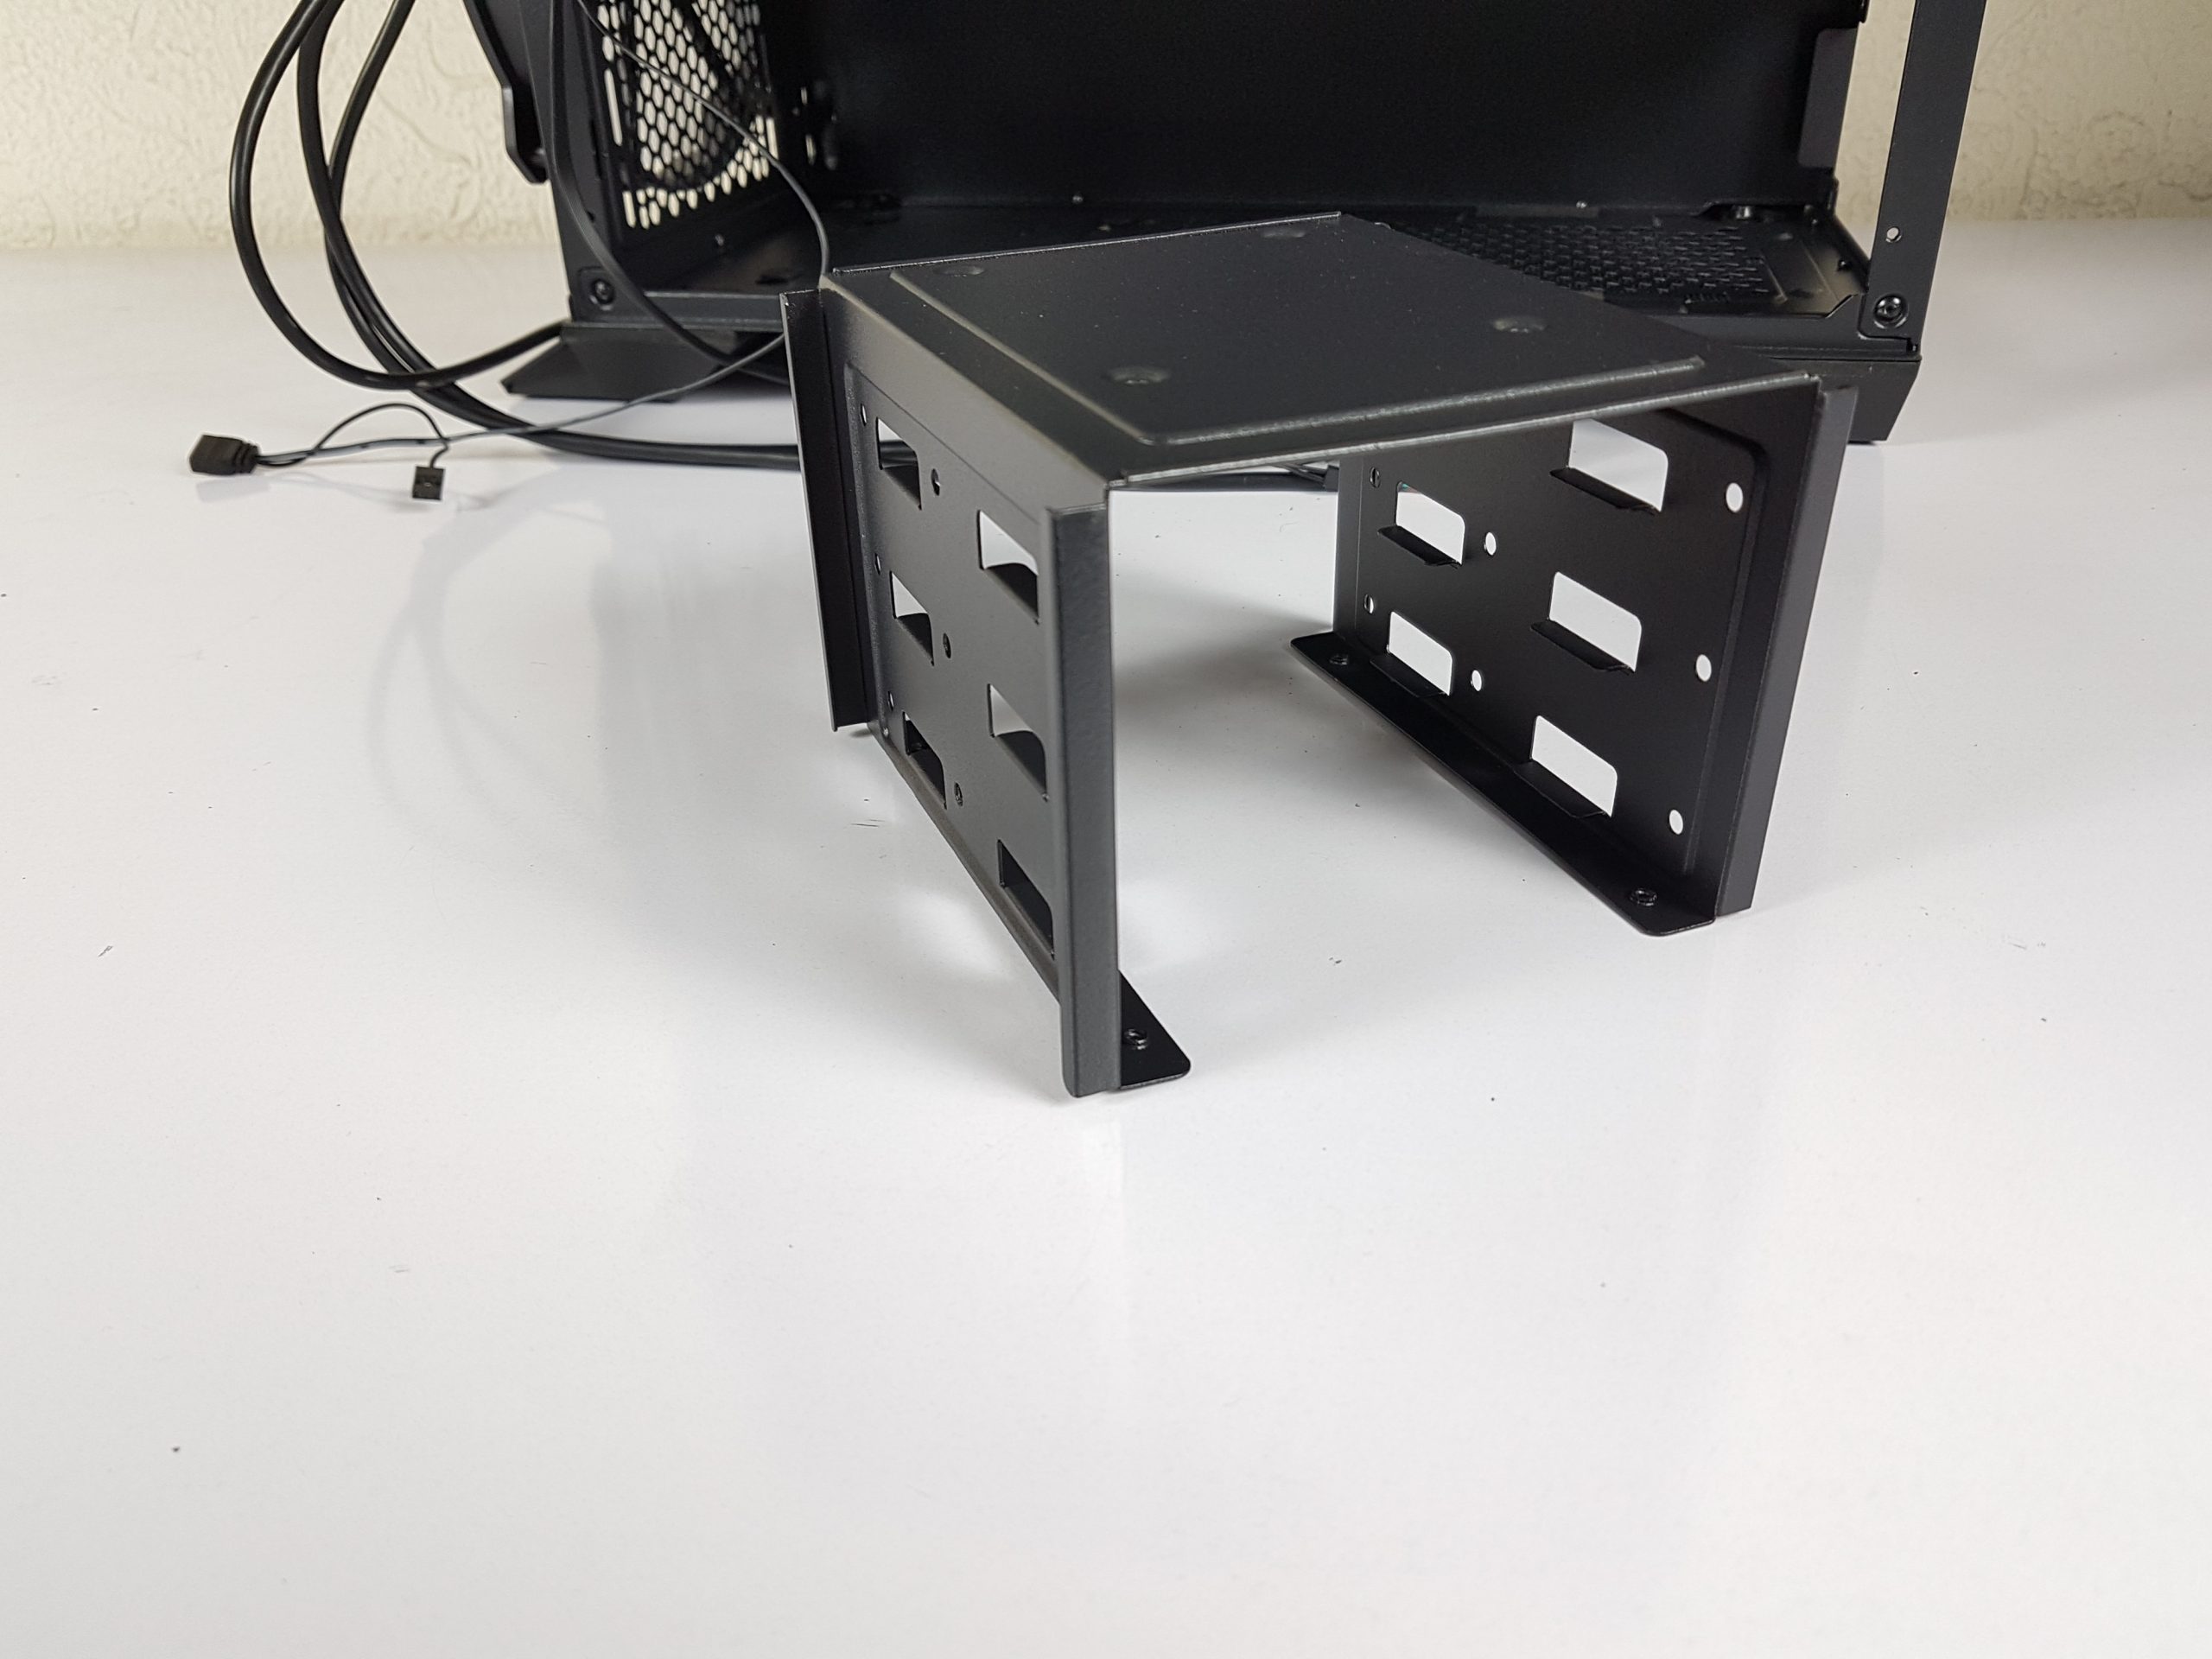

There are 4x mounting holes on the top of the HDD cage. These are for the 2.5″ drive mounting. We have roughly 385mm of space after removing the HDD cage in the lower chamber.

We have screws here. Take these out for removal of the feet. The same screws are on the other side.
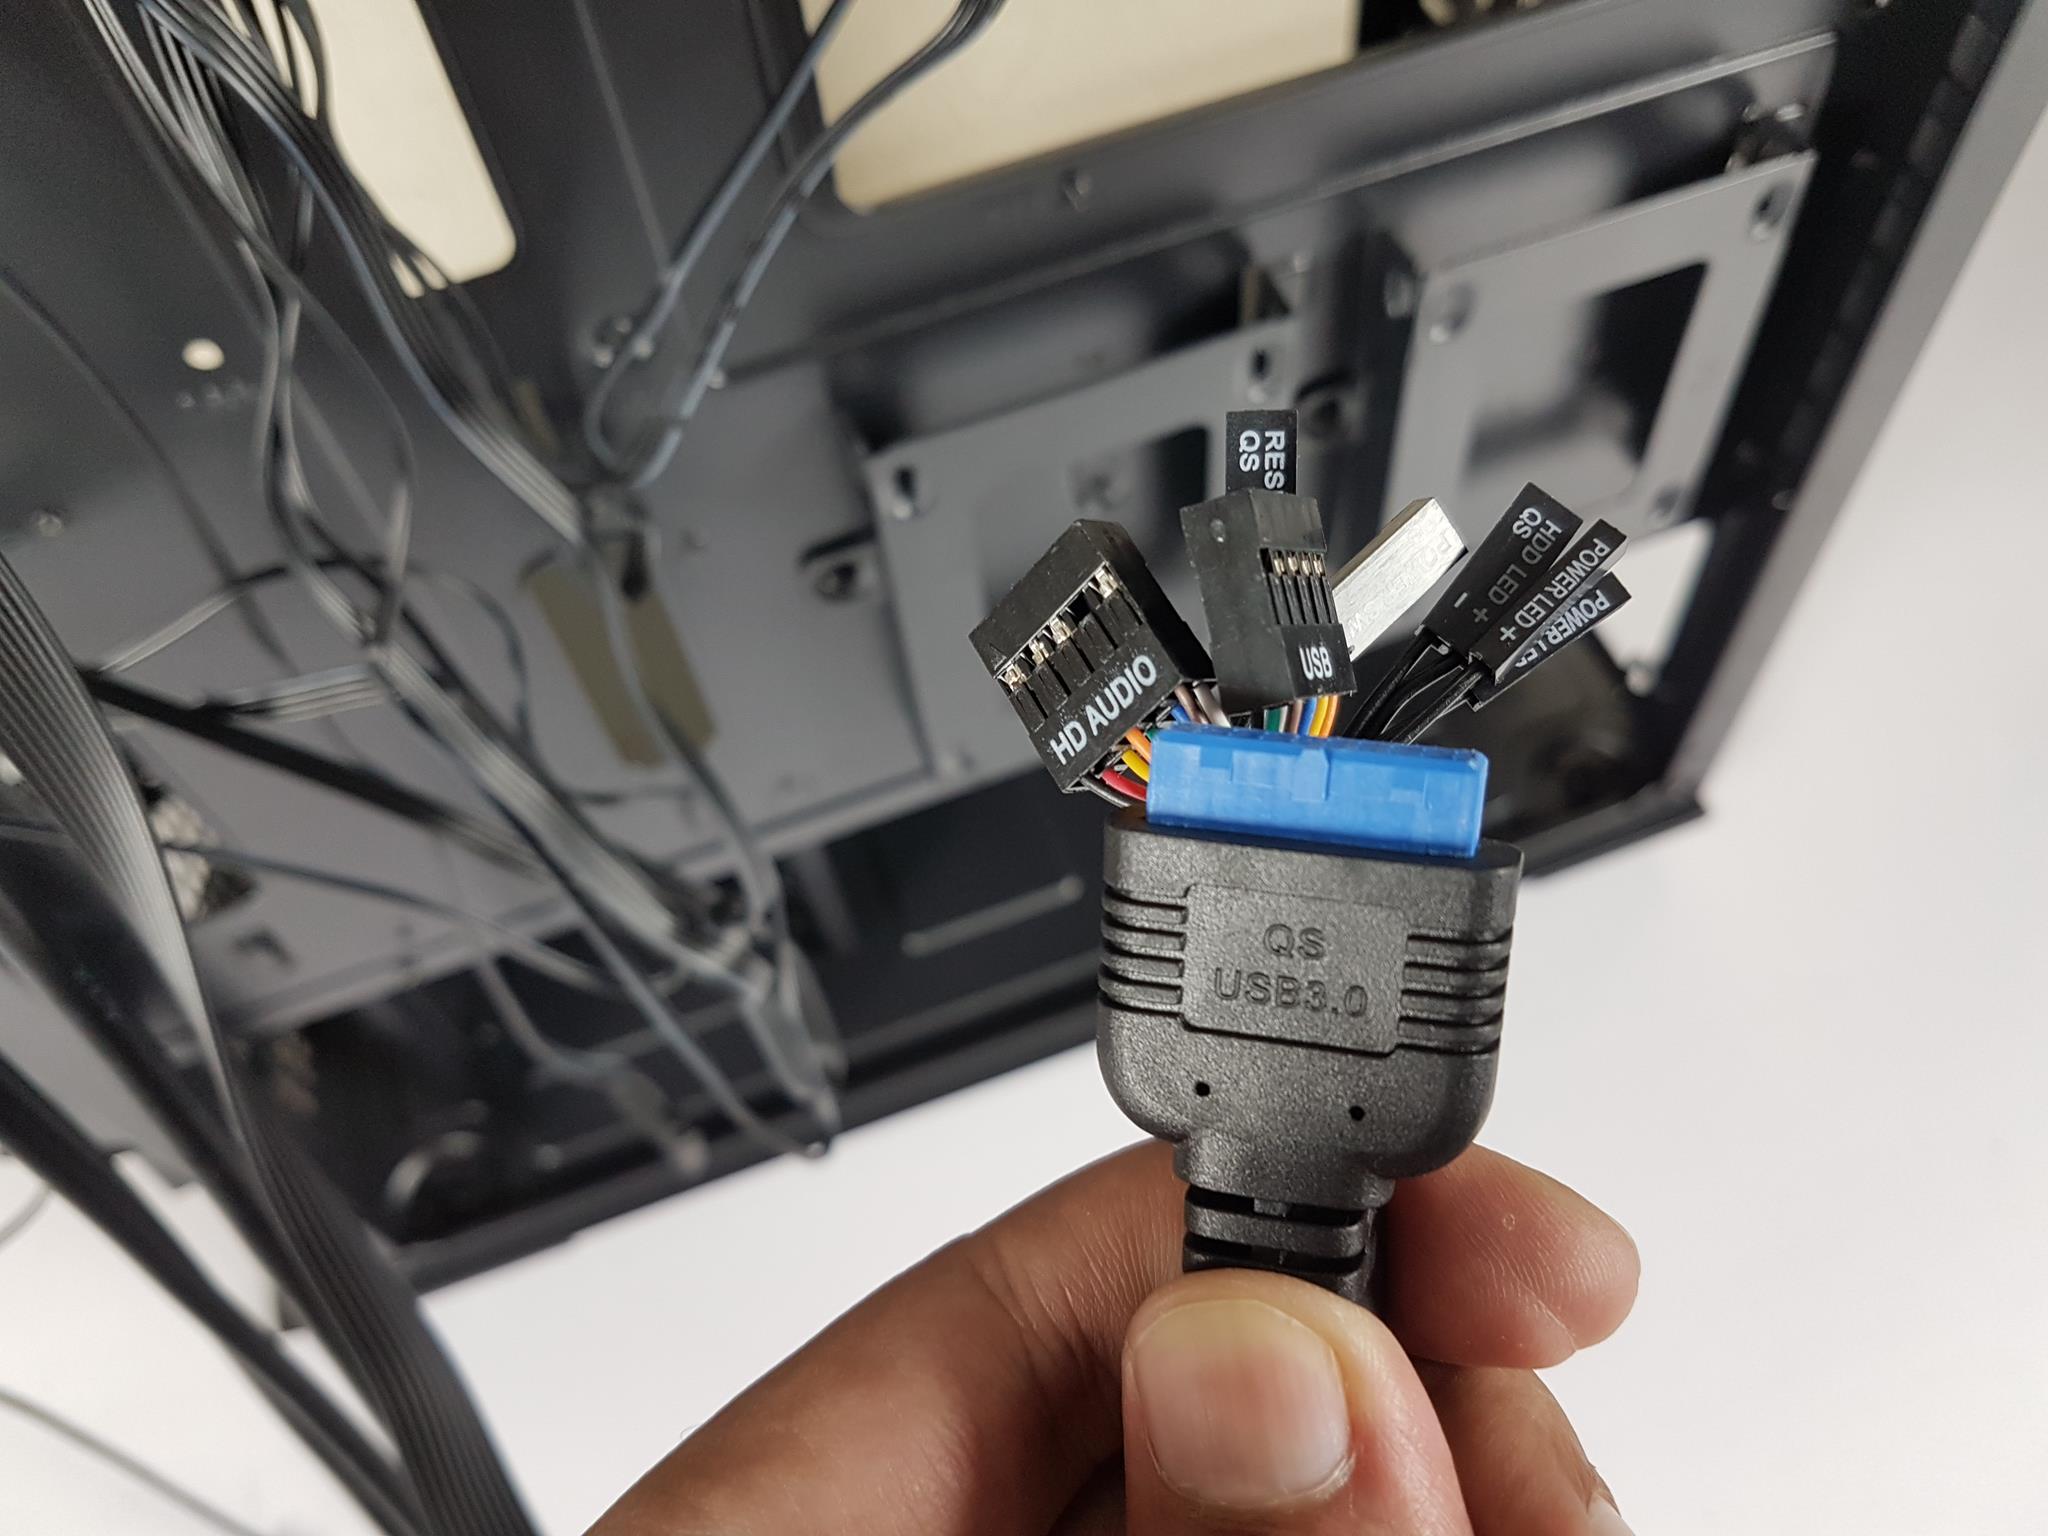
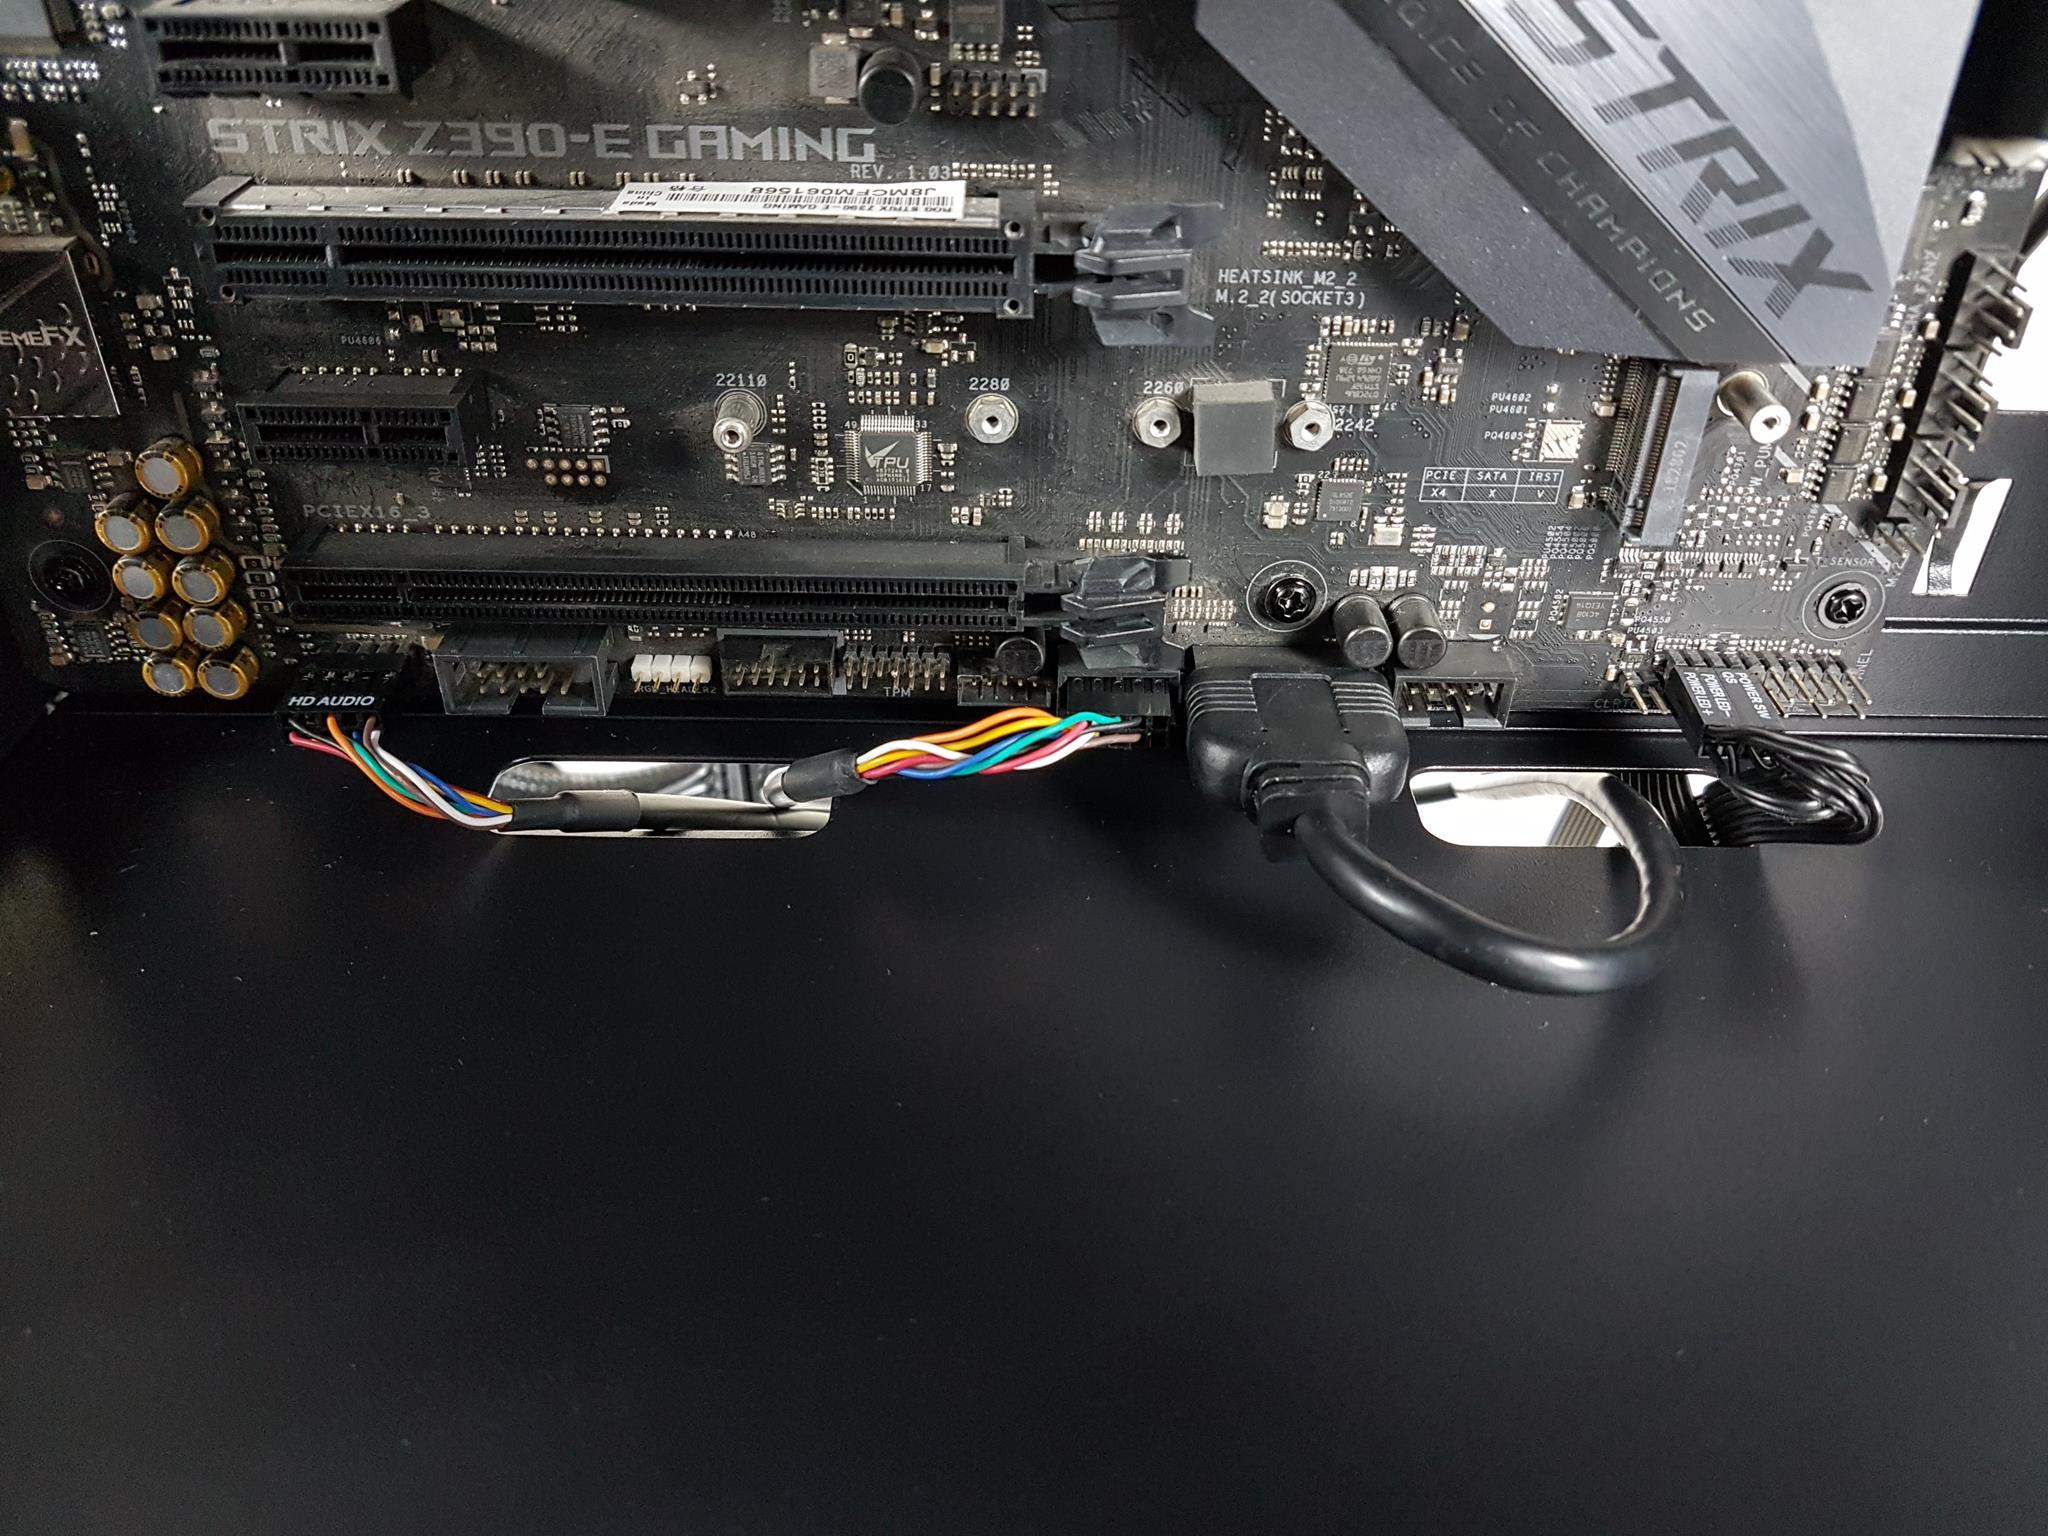
We have cables from the IO panel which include:
- USB 3.0 connector cable
- USB 2.0 connector cable
- HD Audio Cable
- System Panel Connector Cables
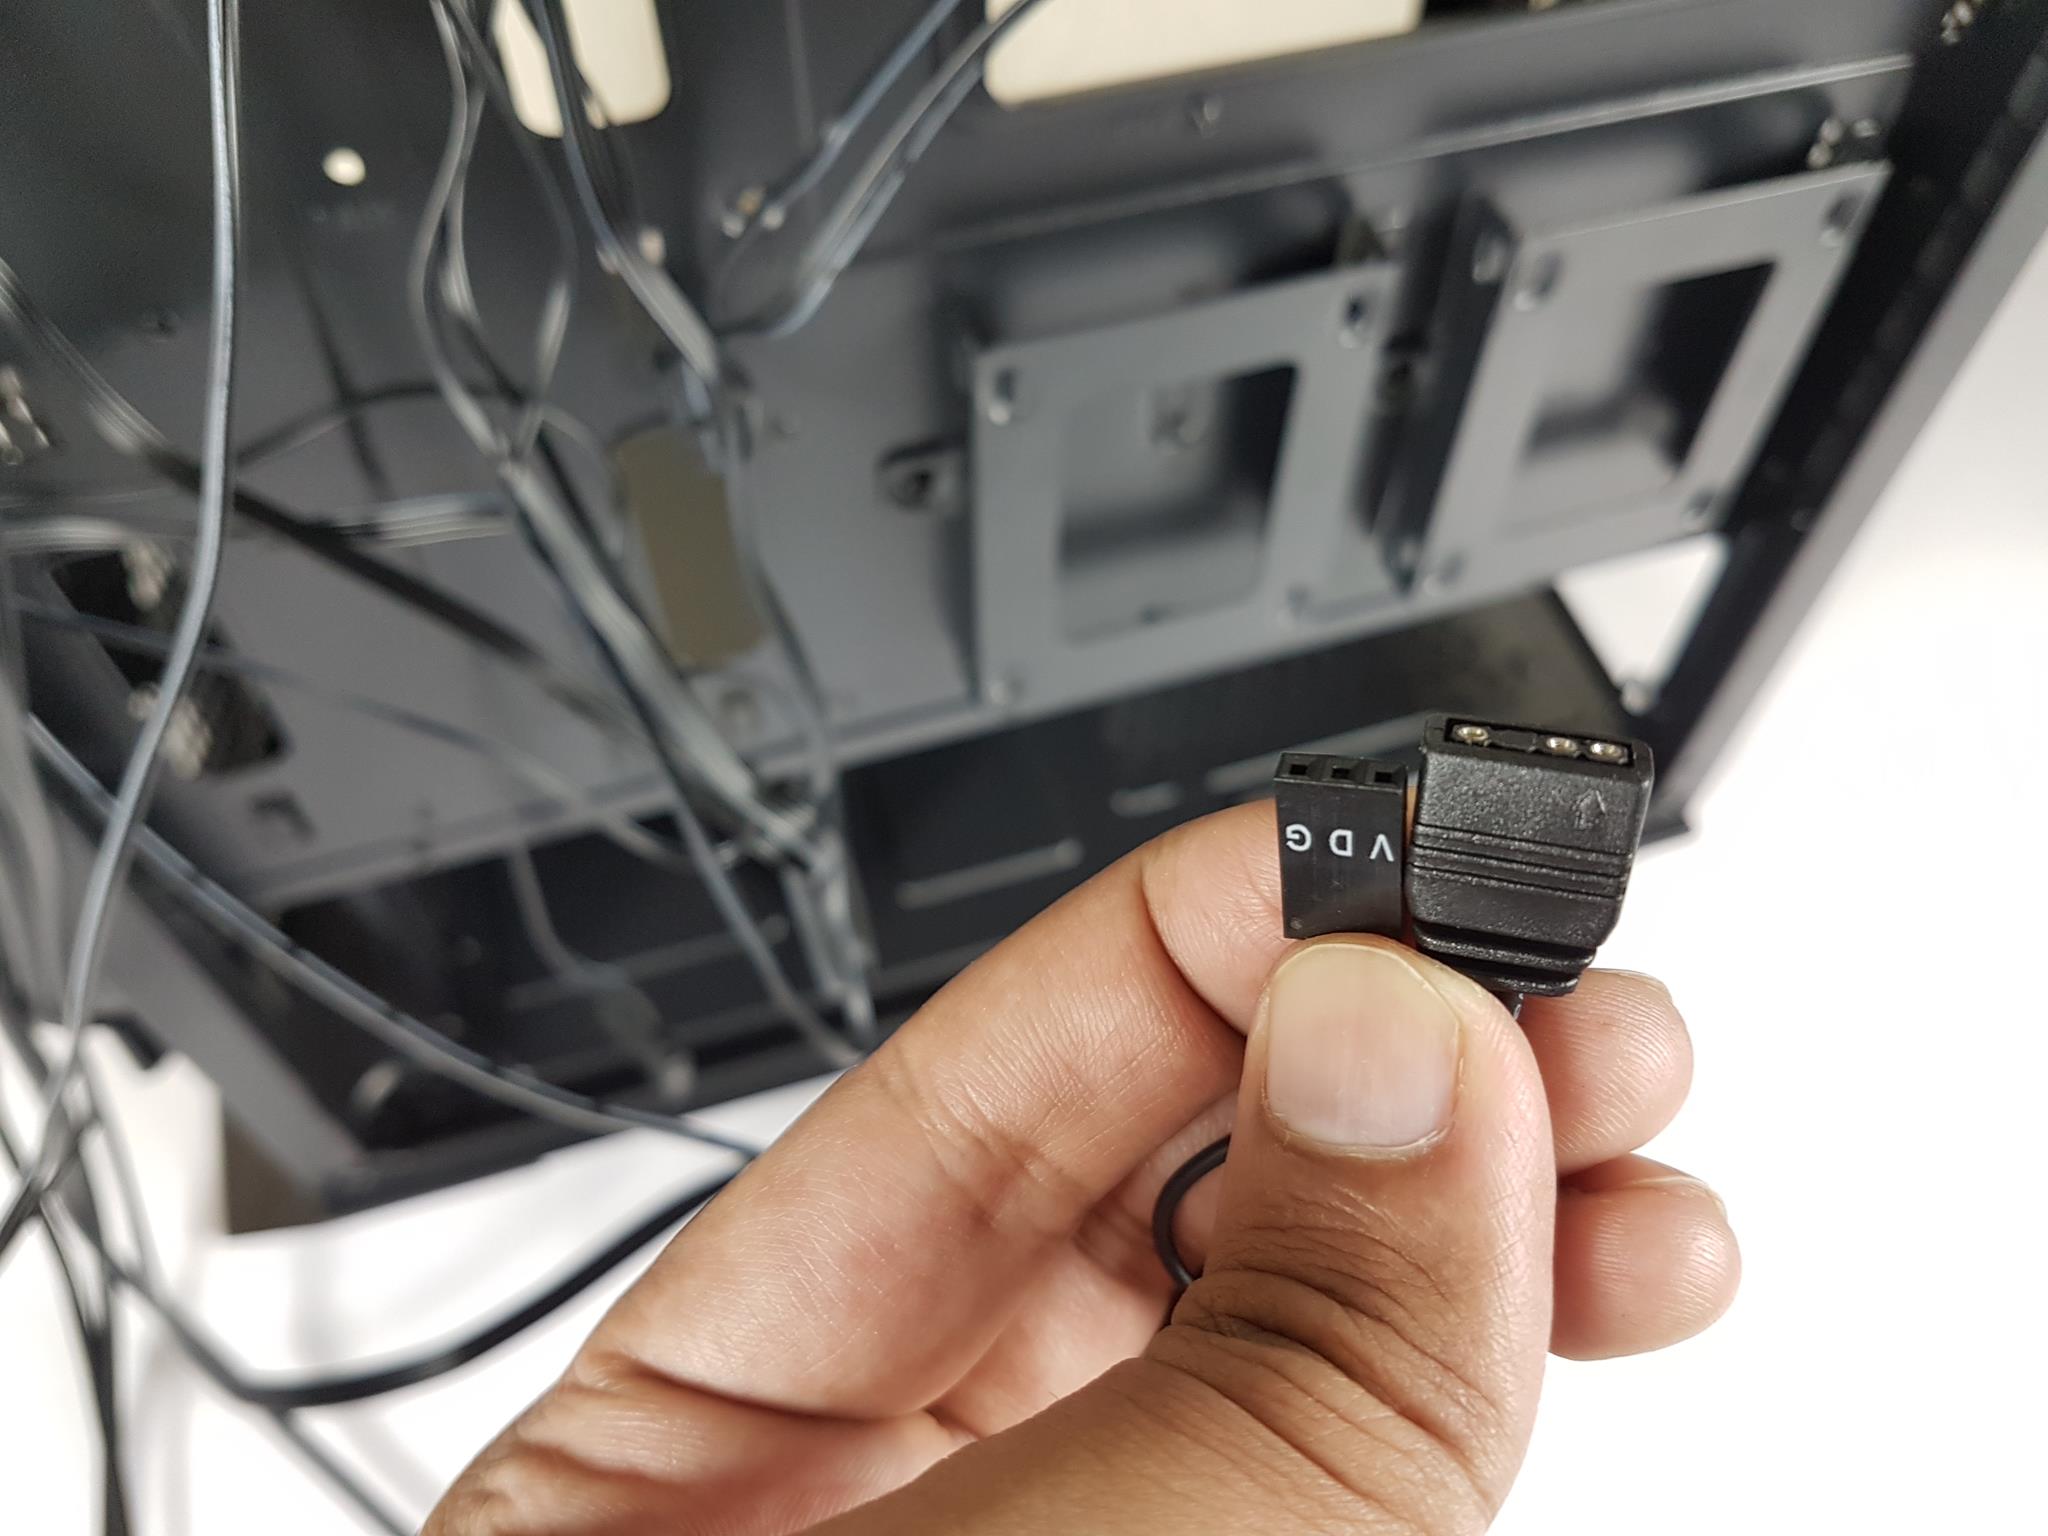
We have a motherboard sync cable to control the lighting from the motherboard.
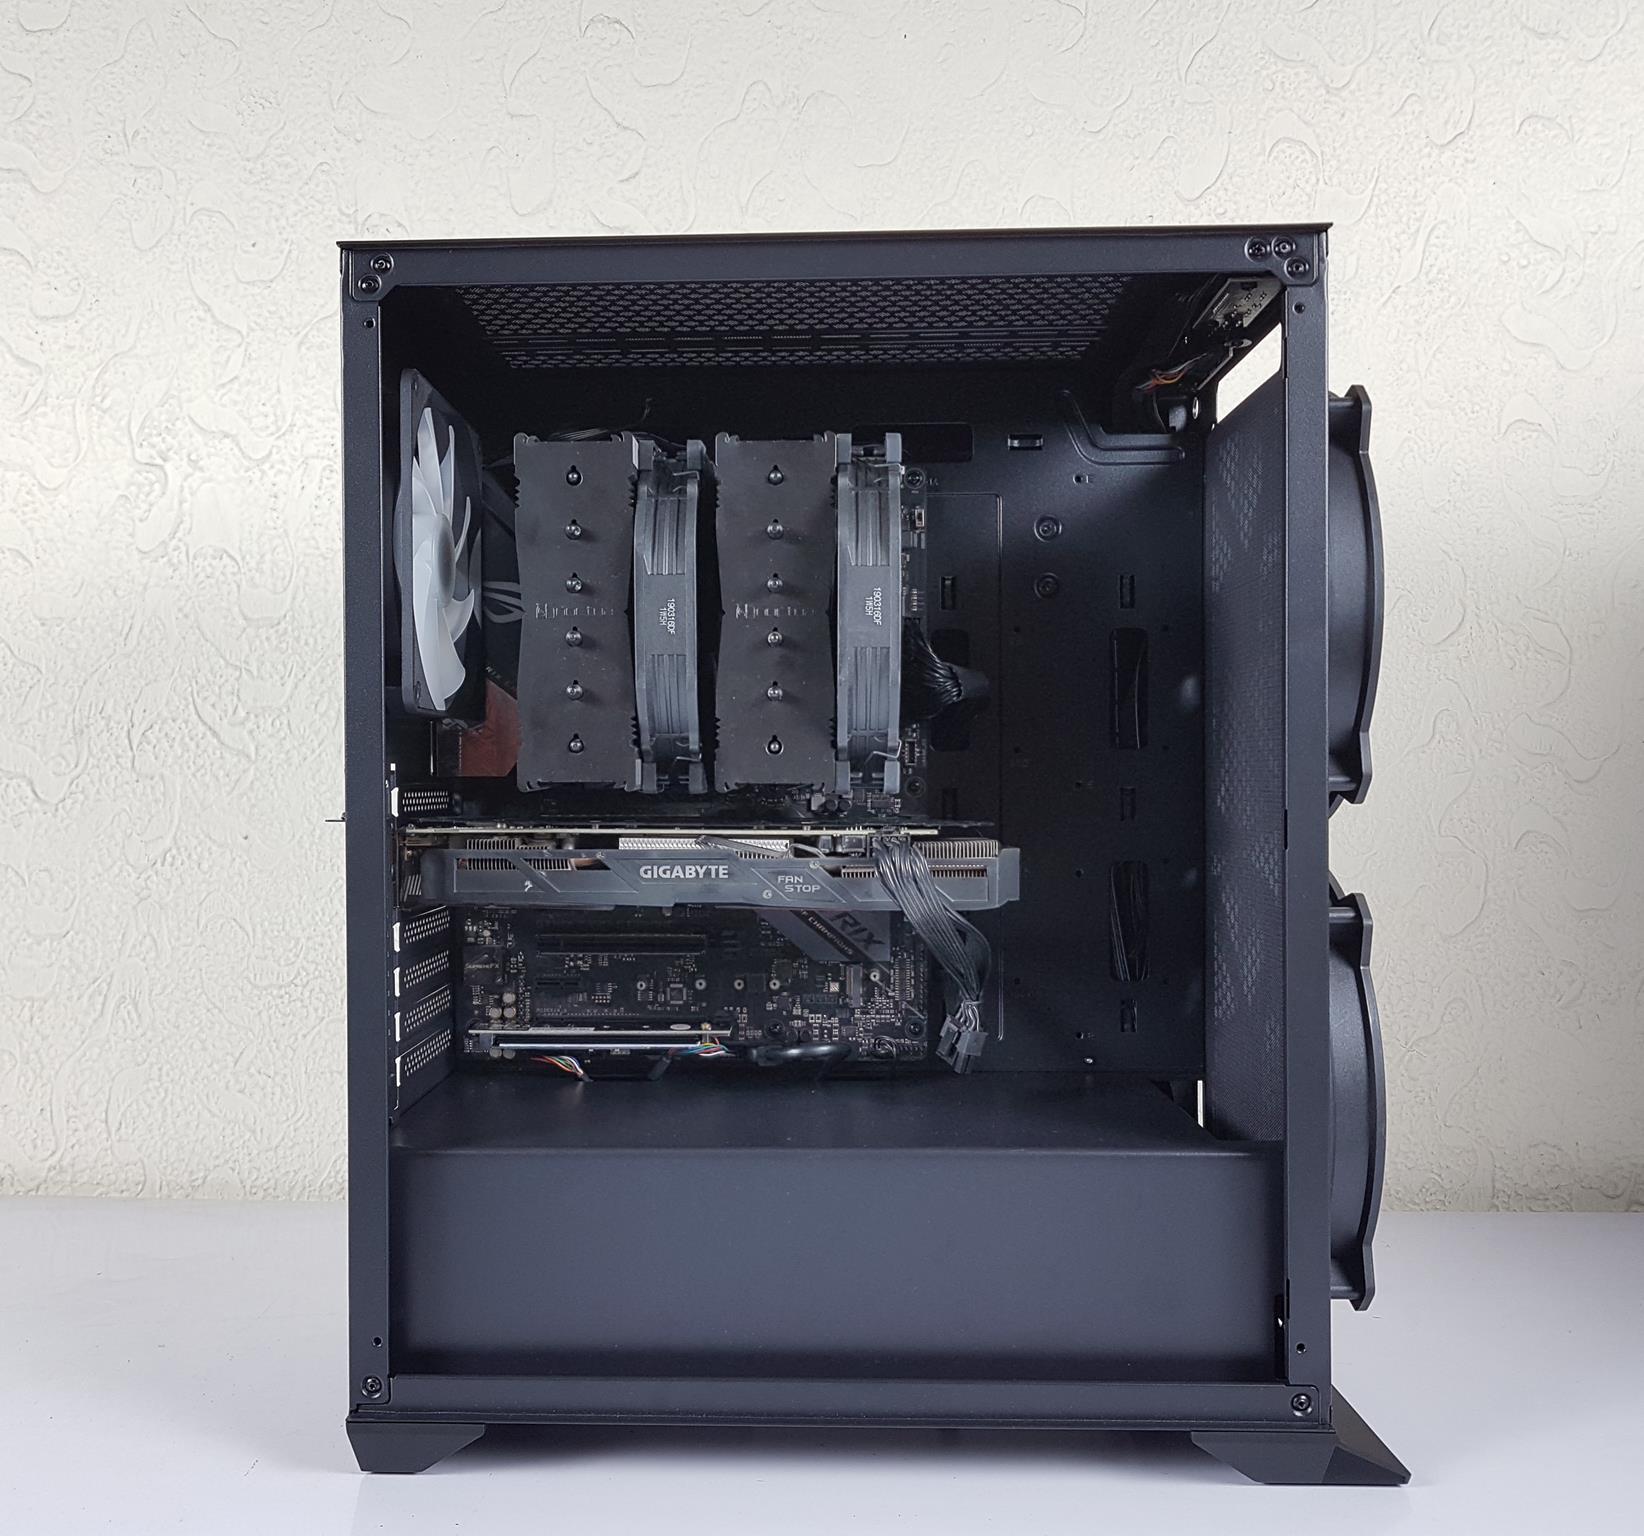
Test Build and Experience
The following configuration is used for the test build:
- Asus ROG Strix Z390E Gaming
- Intel i9 9900k [Stock, Auto]
- Noctua NH-D15 chromax.black
- Noctua NT-H1
- GSkill Aegis 16GB @ 2800MHz
- Gigabyte GeForce GTX 1060 6GB
- Lexar 250GB NVMe SSD
- Cooler Master MWE 650W Gold PSU
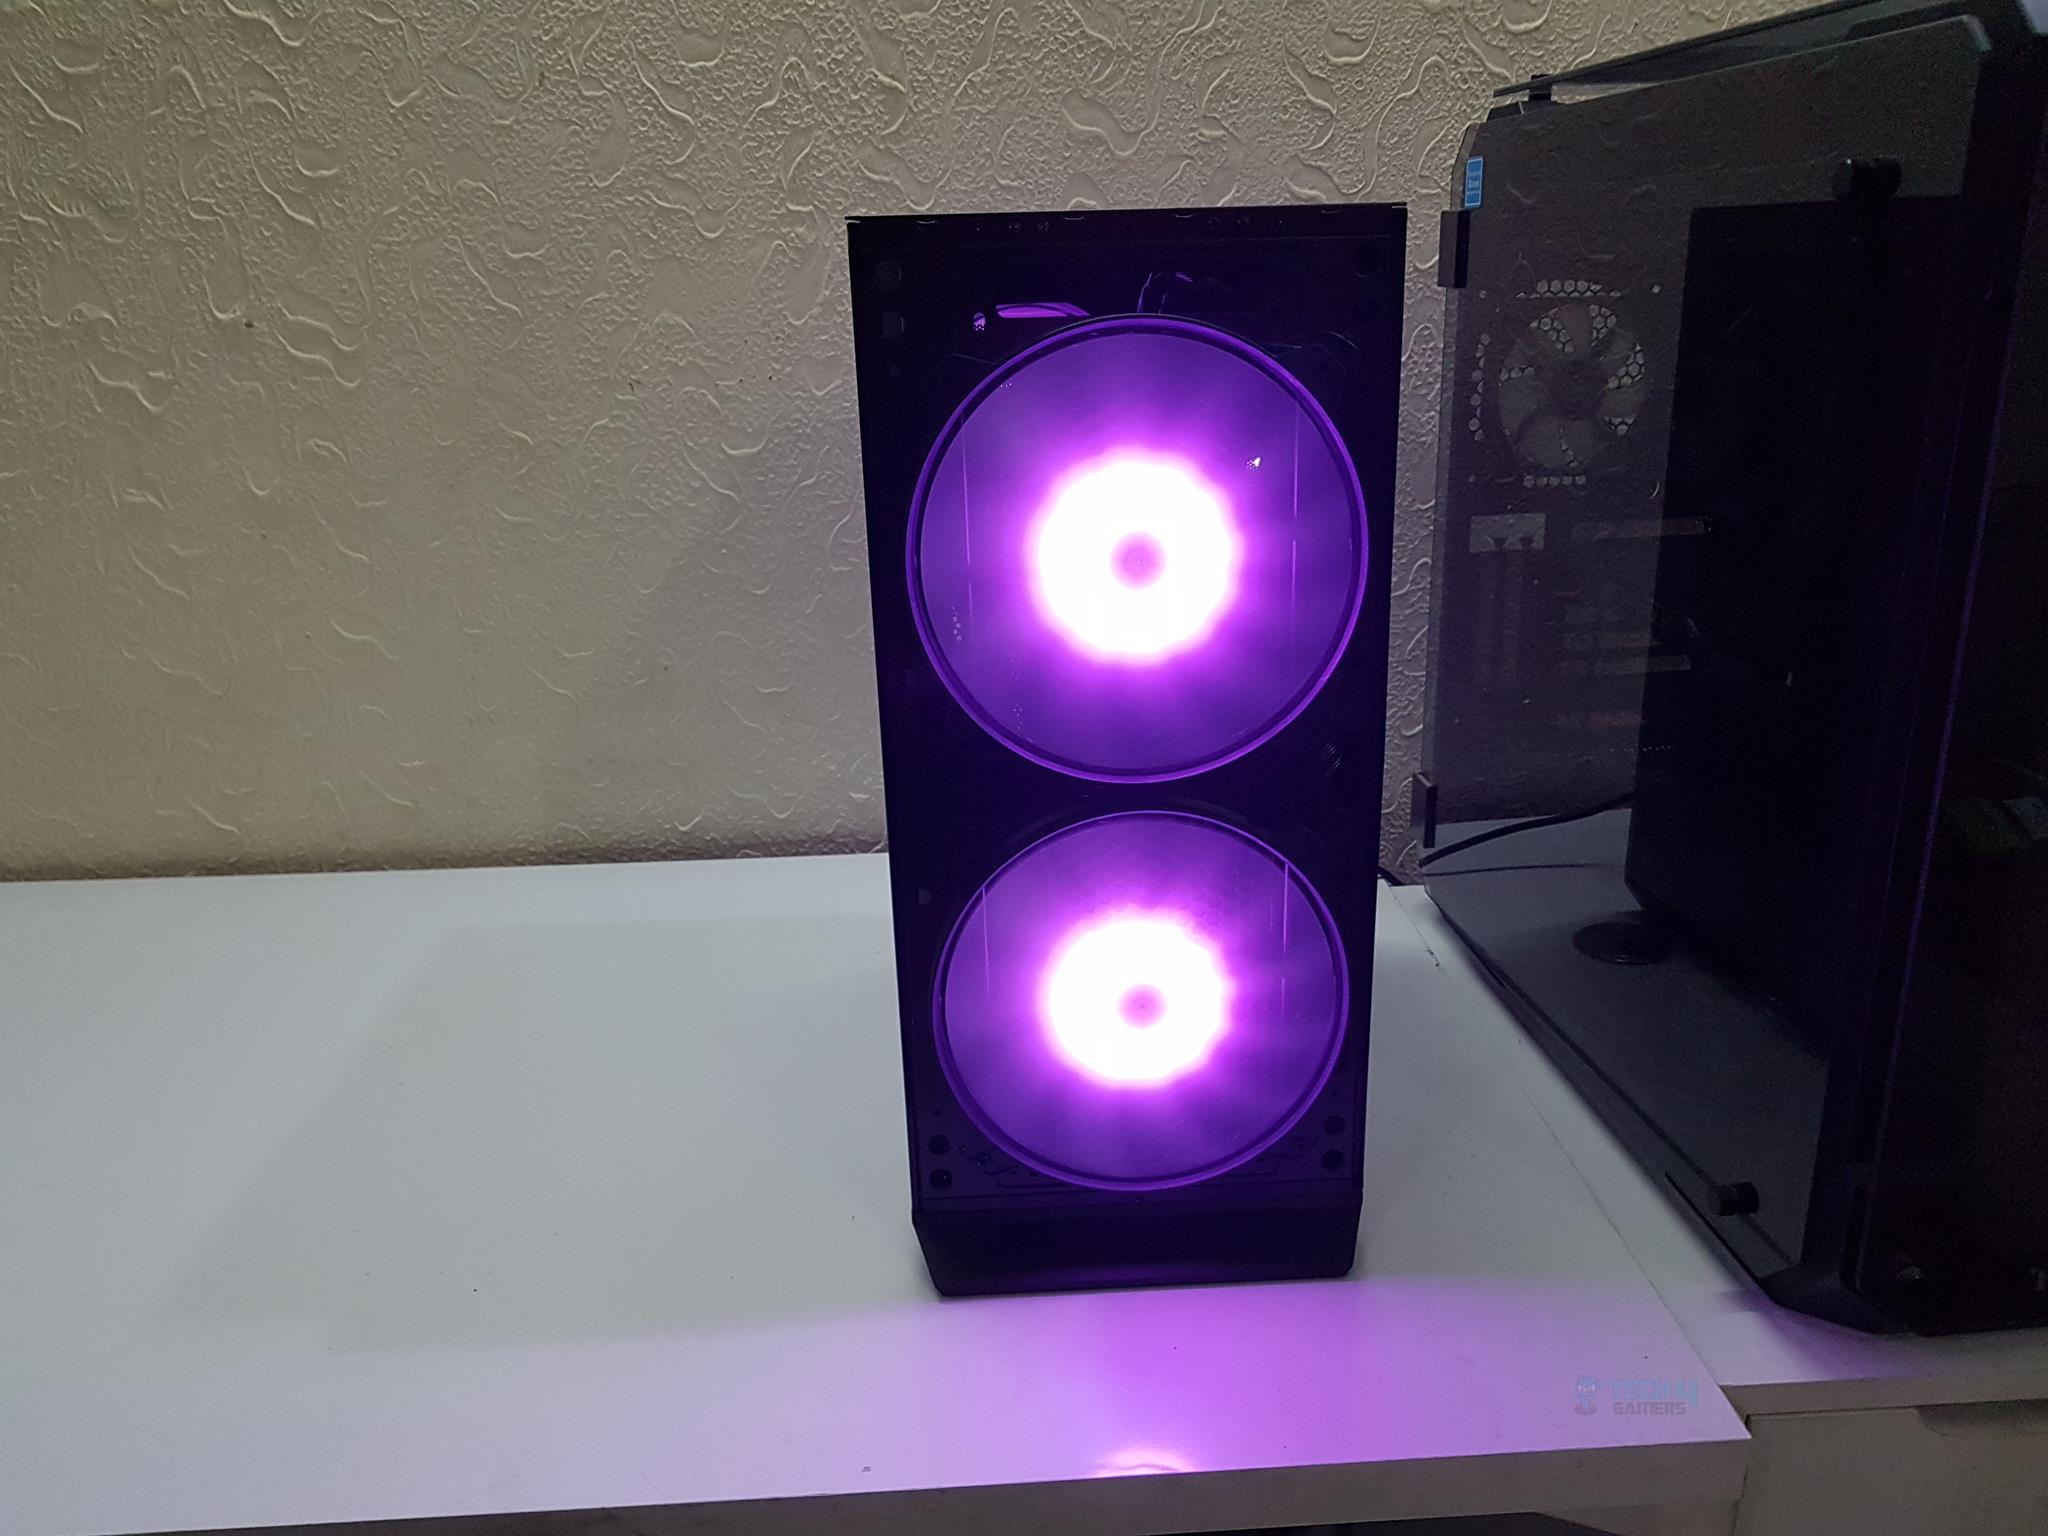
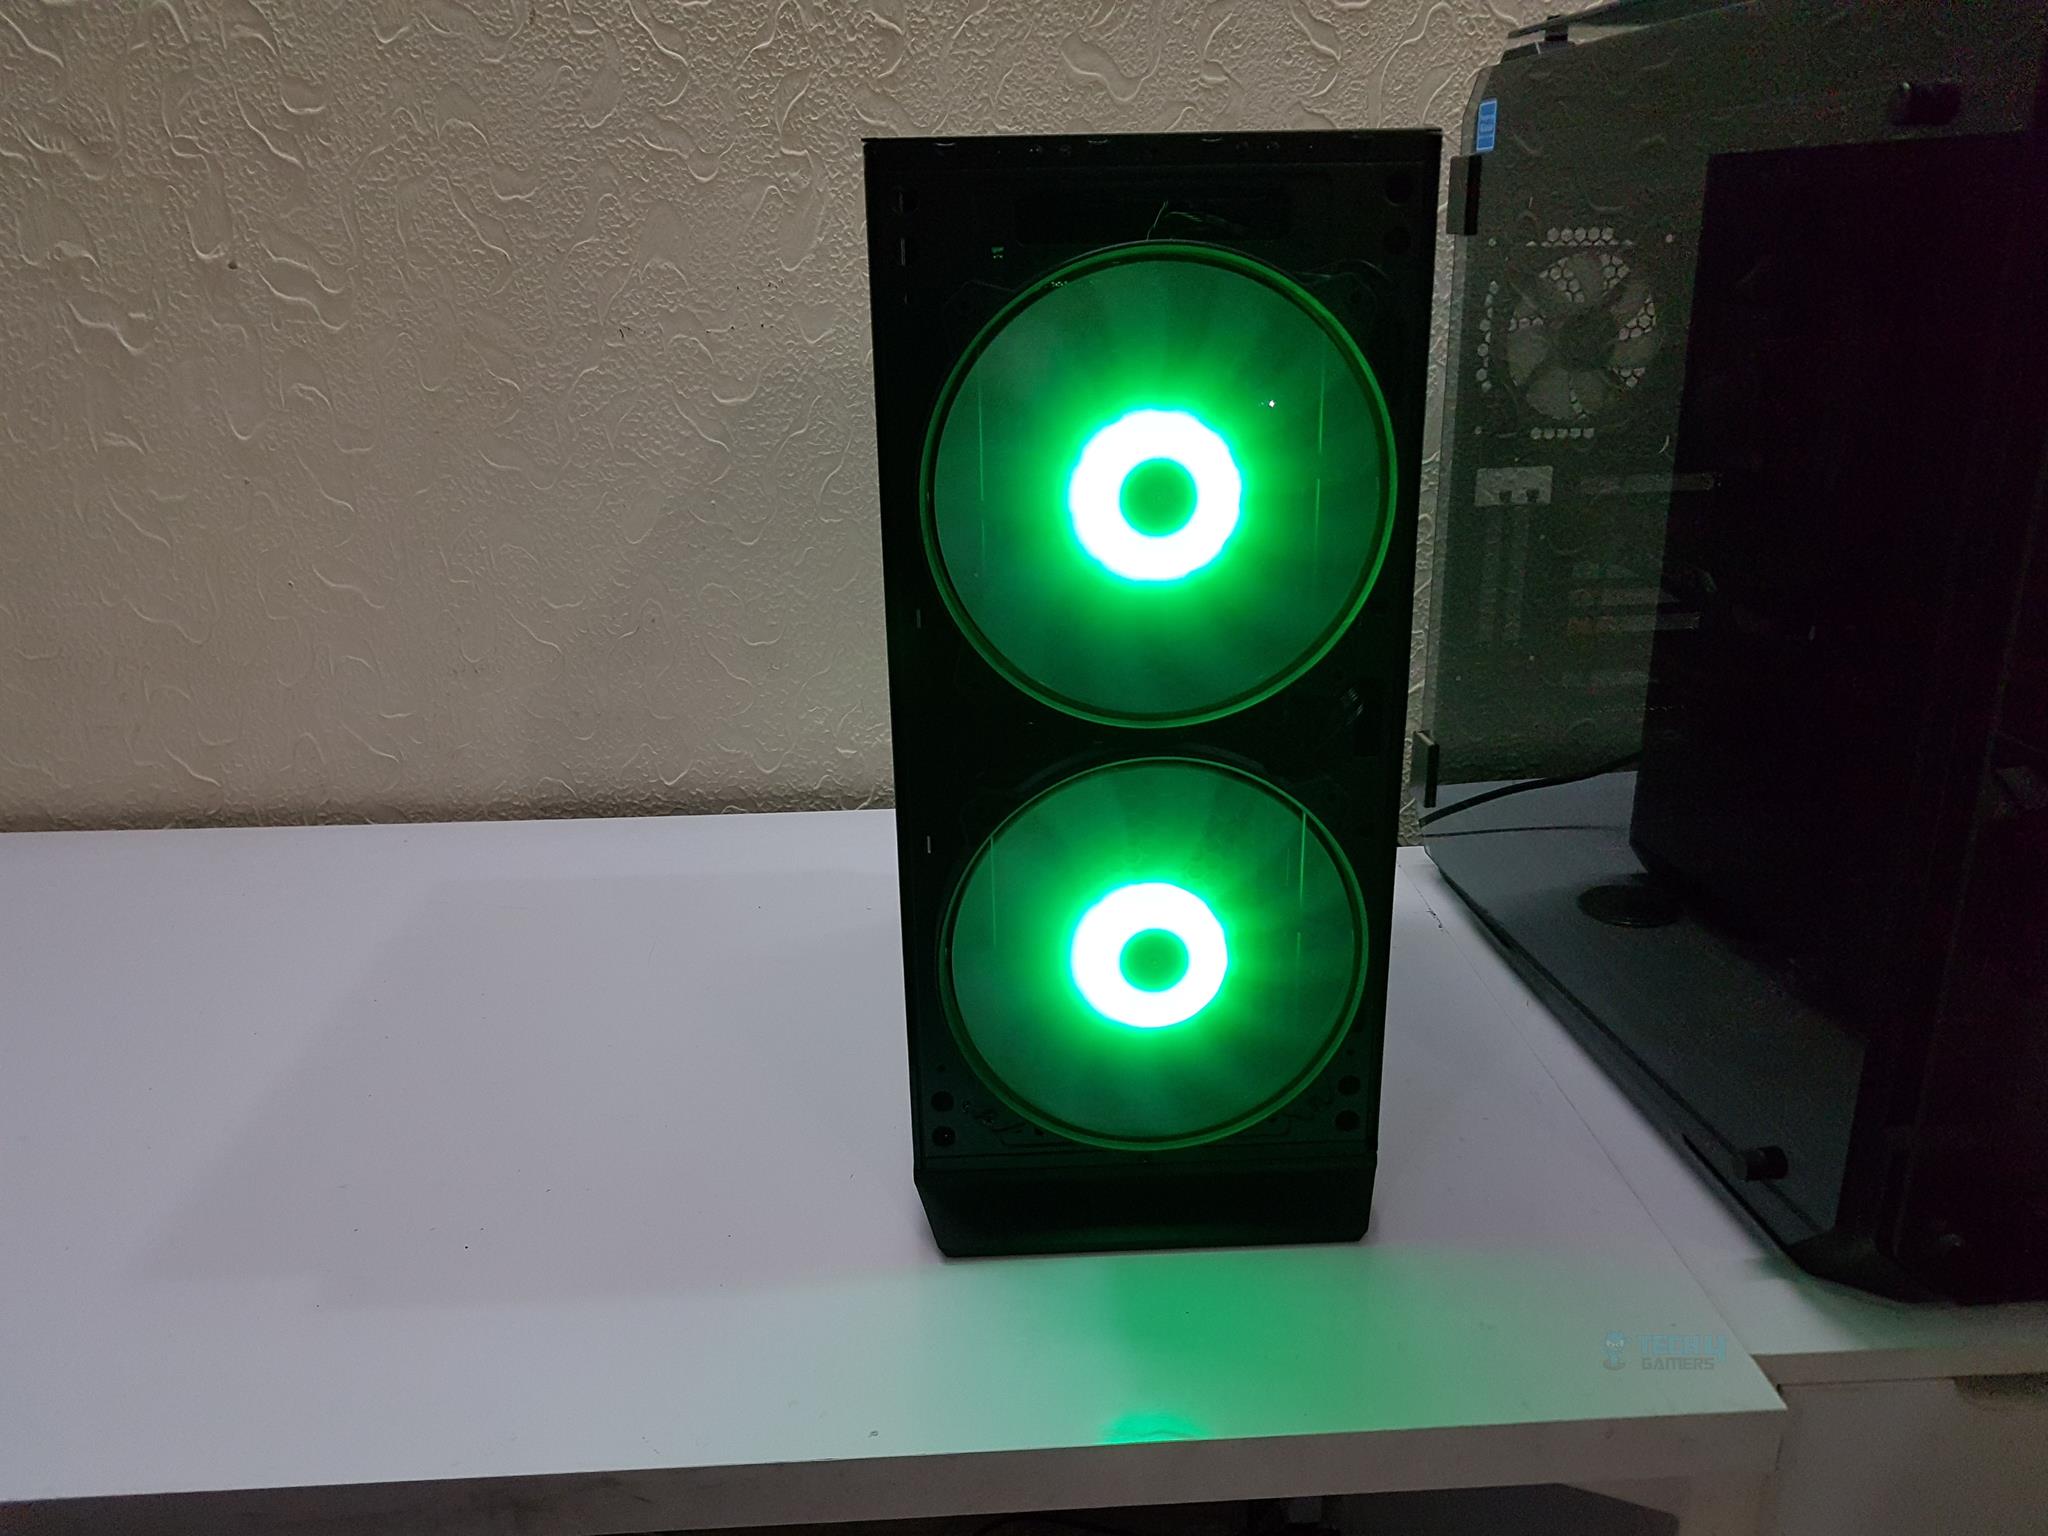
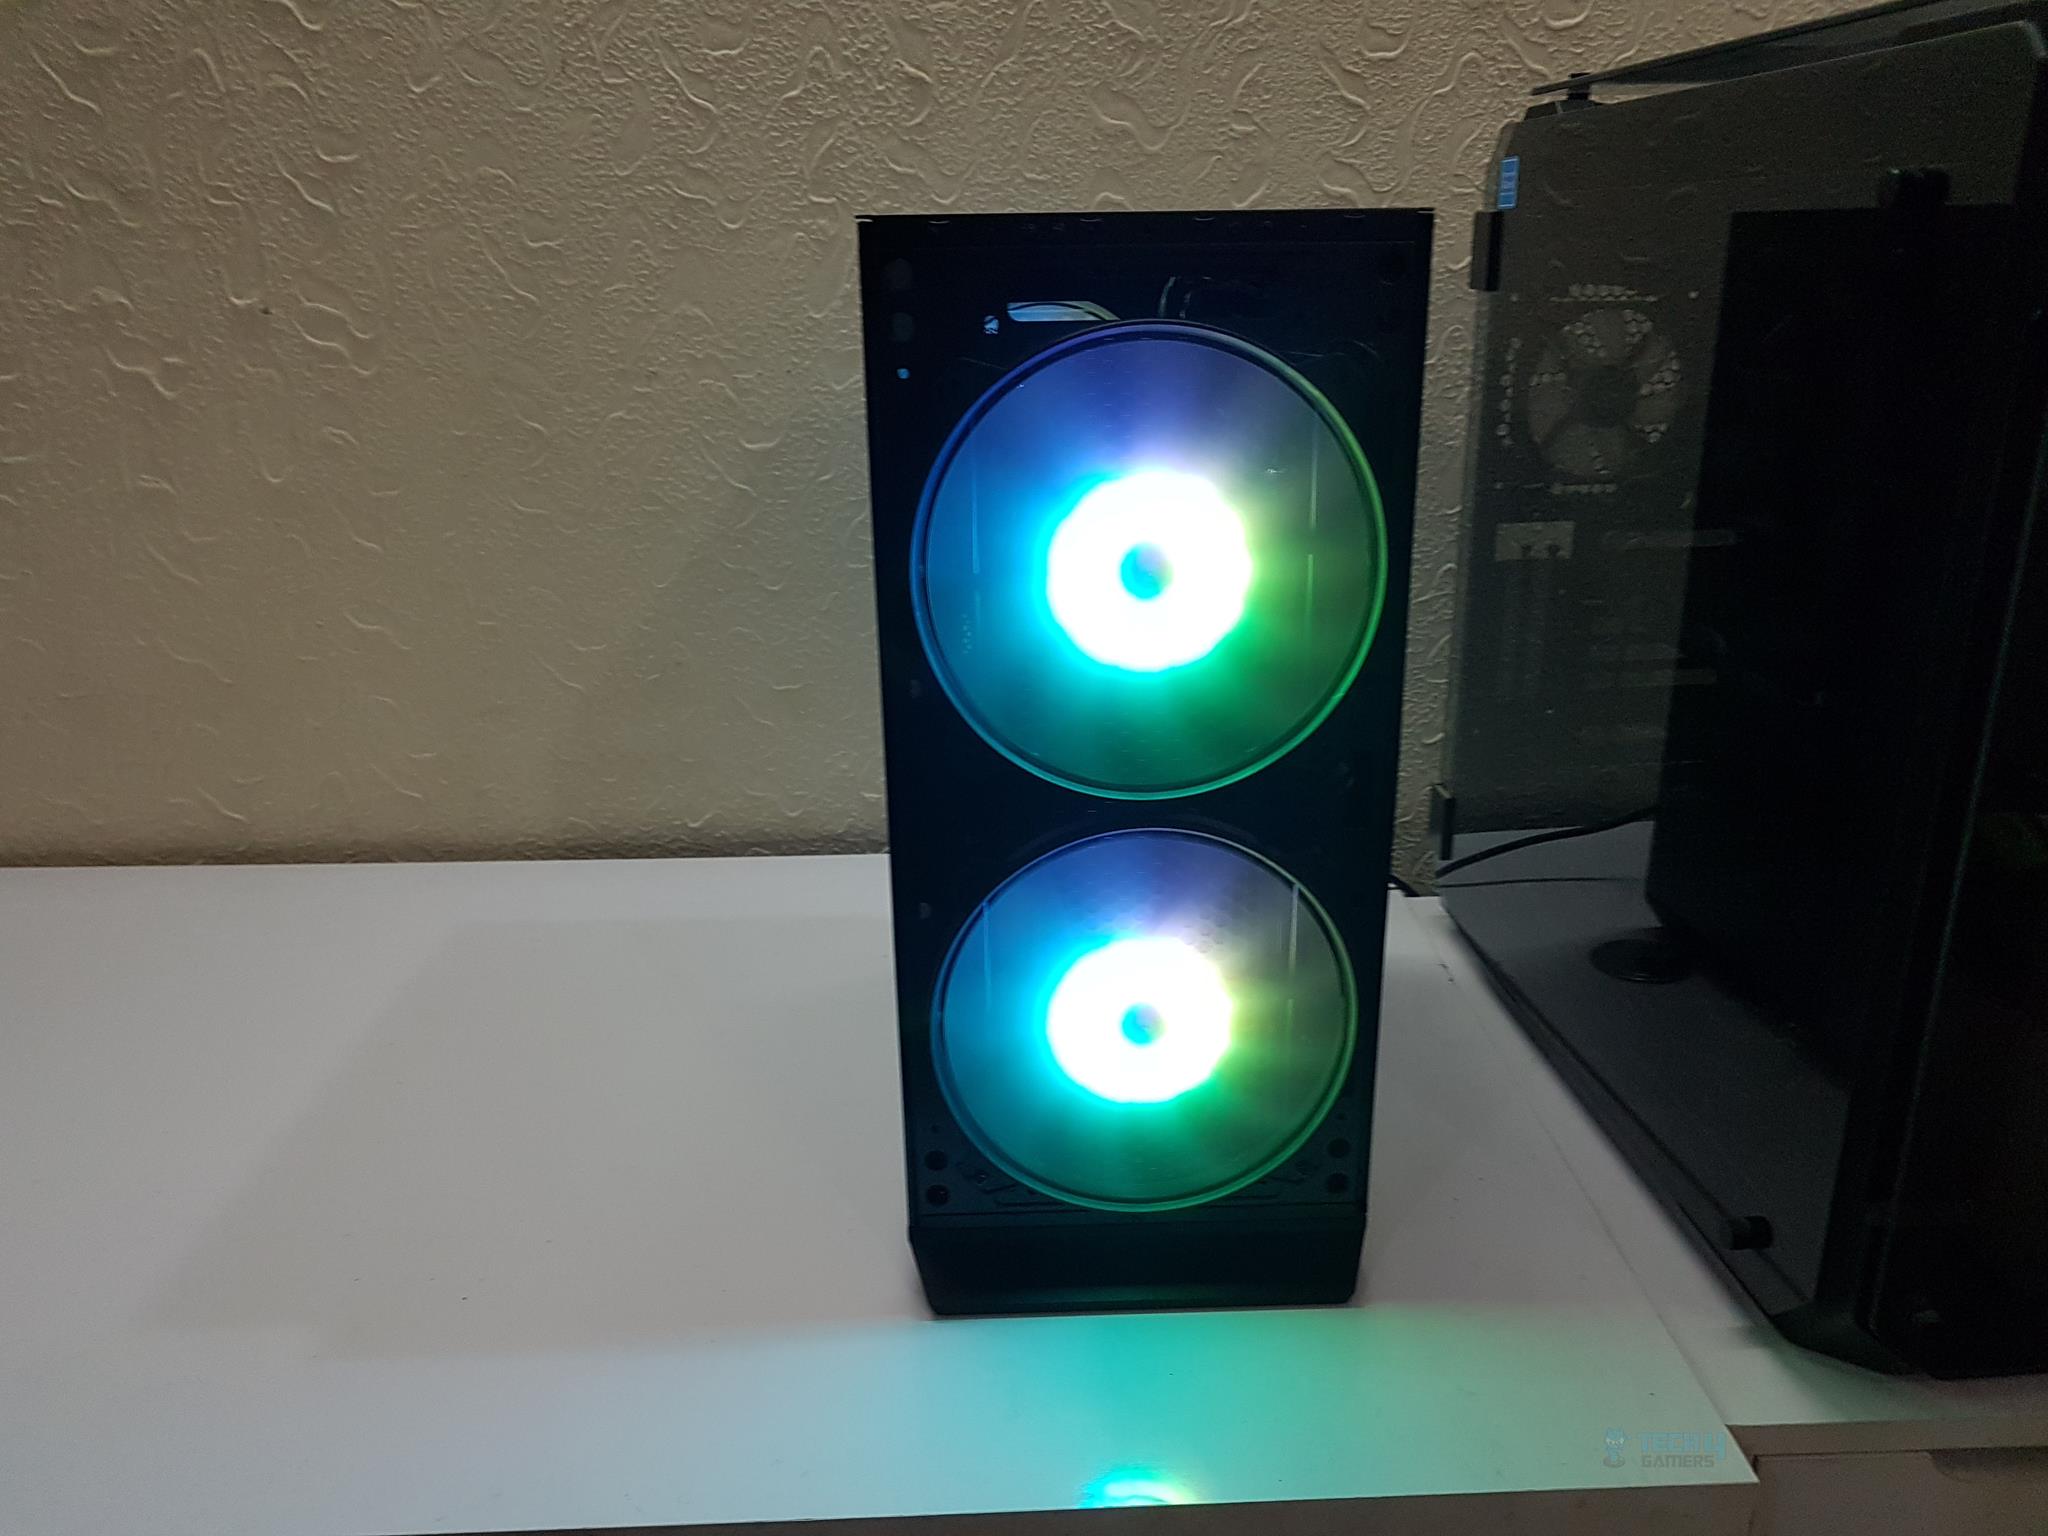
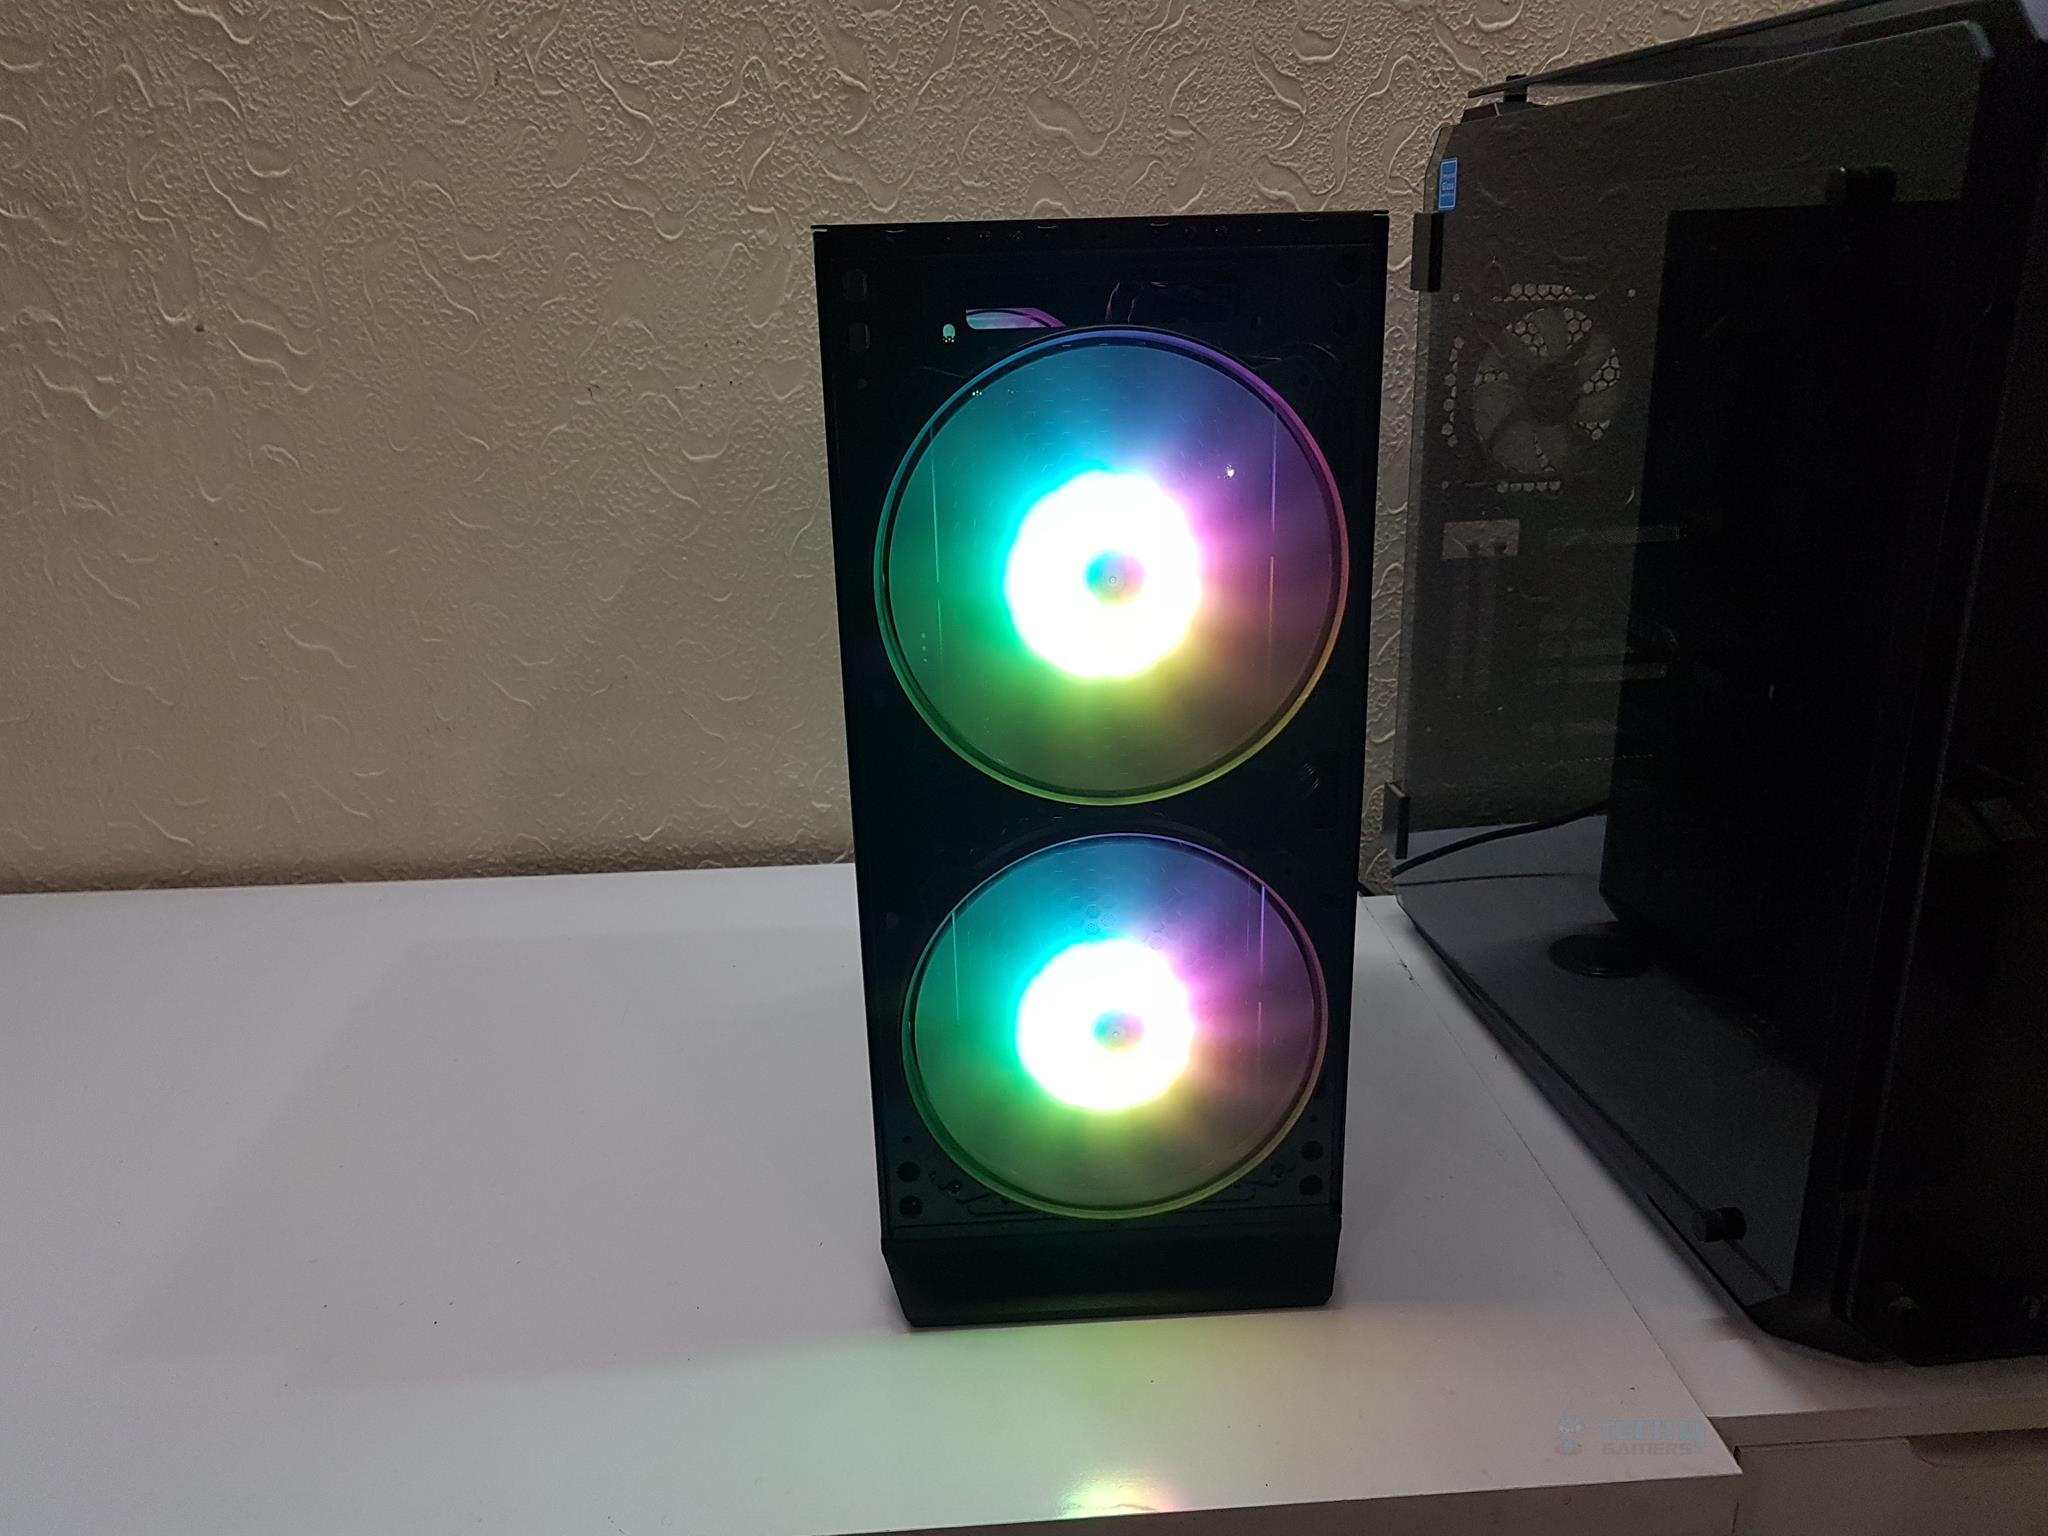
RGB Lighting
The Antec NX800 has two 200mm ARGB fans on the front and a 140mm ARGB fan on the rear. These produce some good AURA of lighting. Here are some pictures:


Thermal Testing
We have used Far Cry 5 at Ultra preset on 1080p and AIDA64 Extreme (CPU+FPU+Cache+GPU) for the thermal testing.
The following configurations have been tested:
- Gaming and Synthetic Stress test on stock settings
- Synthetic Stress test with the front dust filter removed
We did not remove the front panel as it has no dust filtering and is fully meshed from all sides so it should not restrict the air intake.
NX 800 Result
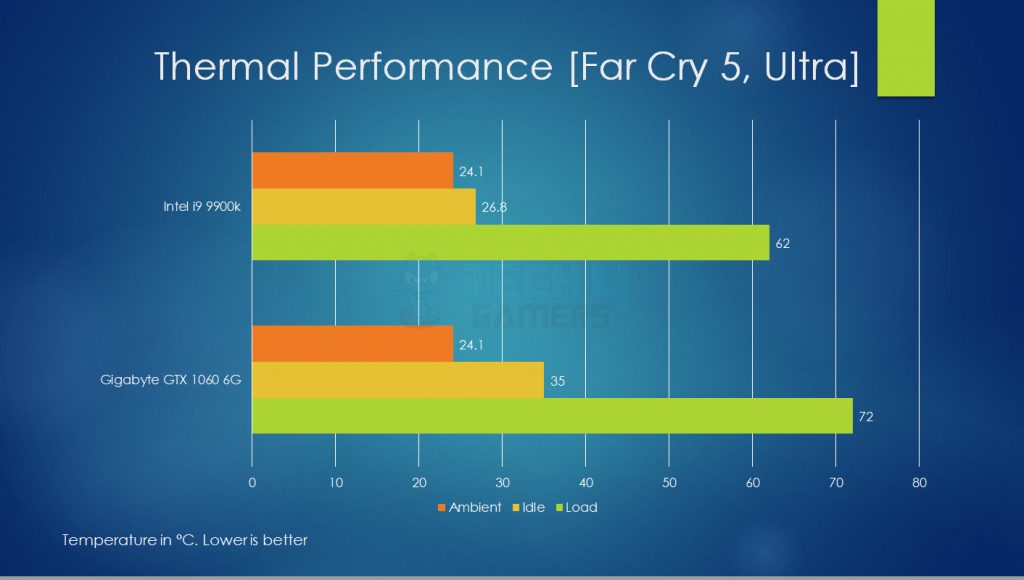
The thermals during gaming are good particularly when our Intel i9 9900k runs way hot on stock and auto settings.

We have tested the thermals with and without the front dust filter. There is a difference of up to 3°C for the graphics card and up to 2°C for the CPU. Though this is within an acceptable margin the point here is the dust filter on the front (particularly its placement) is restricting the airflow a bit.
Should You Buy It?
So, who is the Antec NX800 designed for?
Buy It If:
✅You want a budget-friendly built mid-tower case: Despite being surprisingly affordable, the Antec NX800 offers decent airflow, pre-installed fans, as well as a well-built structure.
✅You want pre-installed ARGB fans: The Antec NX800 comes installed with two 200m fans on the front along with a single 140mm fan on the rear, all three of which are A-RGB.
Don’t Buy It If:
❌You want the best possible airflow: The dust filter on the front might impact airflow.
Conclusion
I recently reviewed the Antec NX800, the flagship in the NX series, and found it to be a well-balanced mid-tower gaming chassis. Constructed with SPCC, plastic, and glass, it boasts dimensions of 470x230x500mm (DxWxH) and weighs 7.87 kg. The proprietary 6-pin connectors on these fans make them entirely reliant on the bundled controller.
Supporting up to E-ATX motherboards, the chassis offers thoughtful cable routing cutouts and a full-length PSU cover. Yet, the absence of a socket wrench for standoff installation and the non-reusable horizontal PCIe slot covers could be addressed.
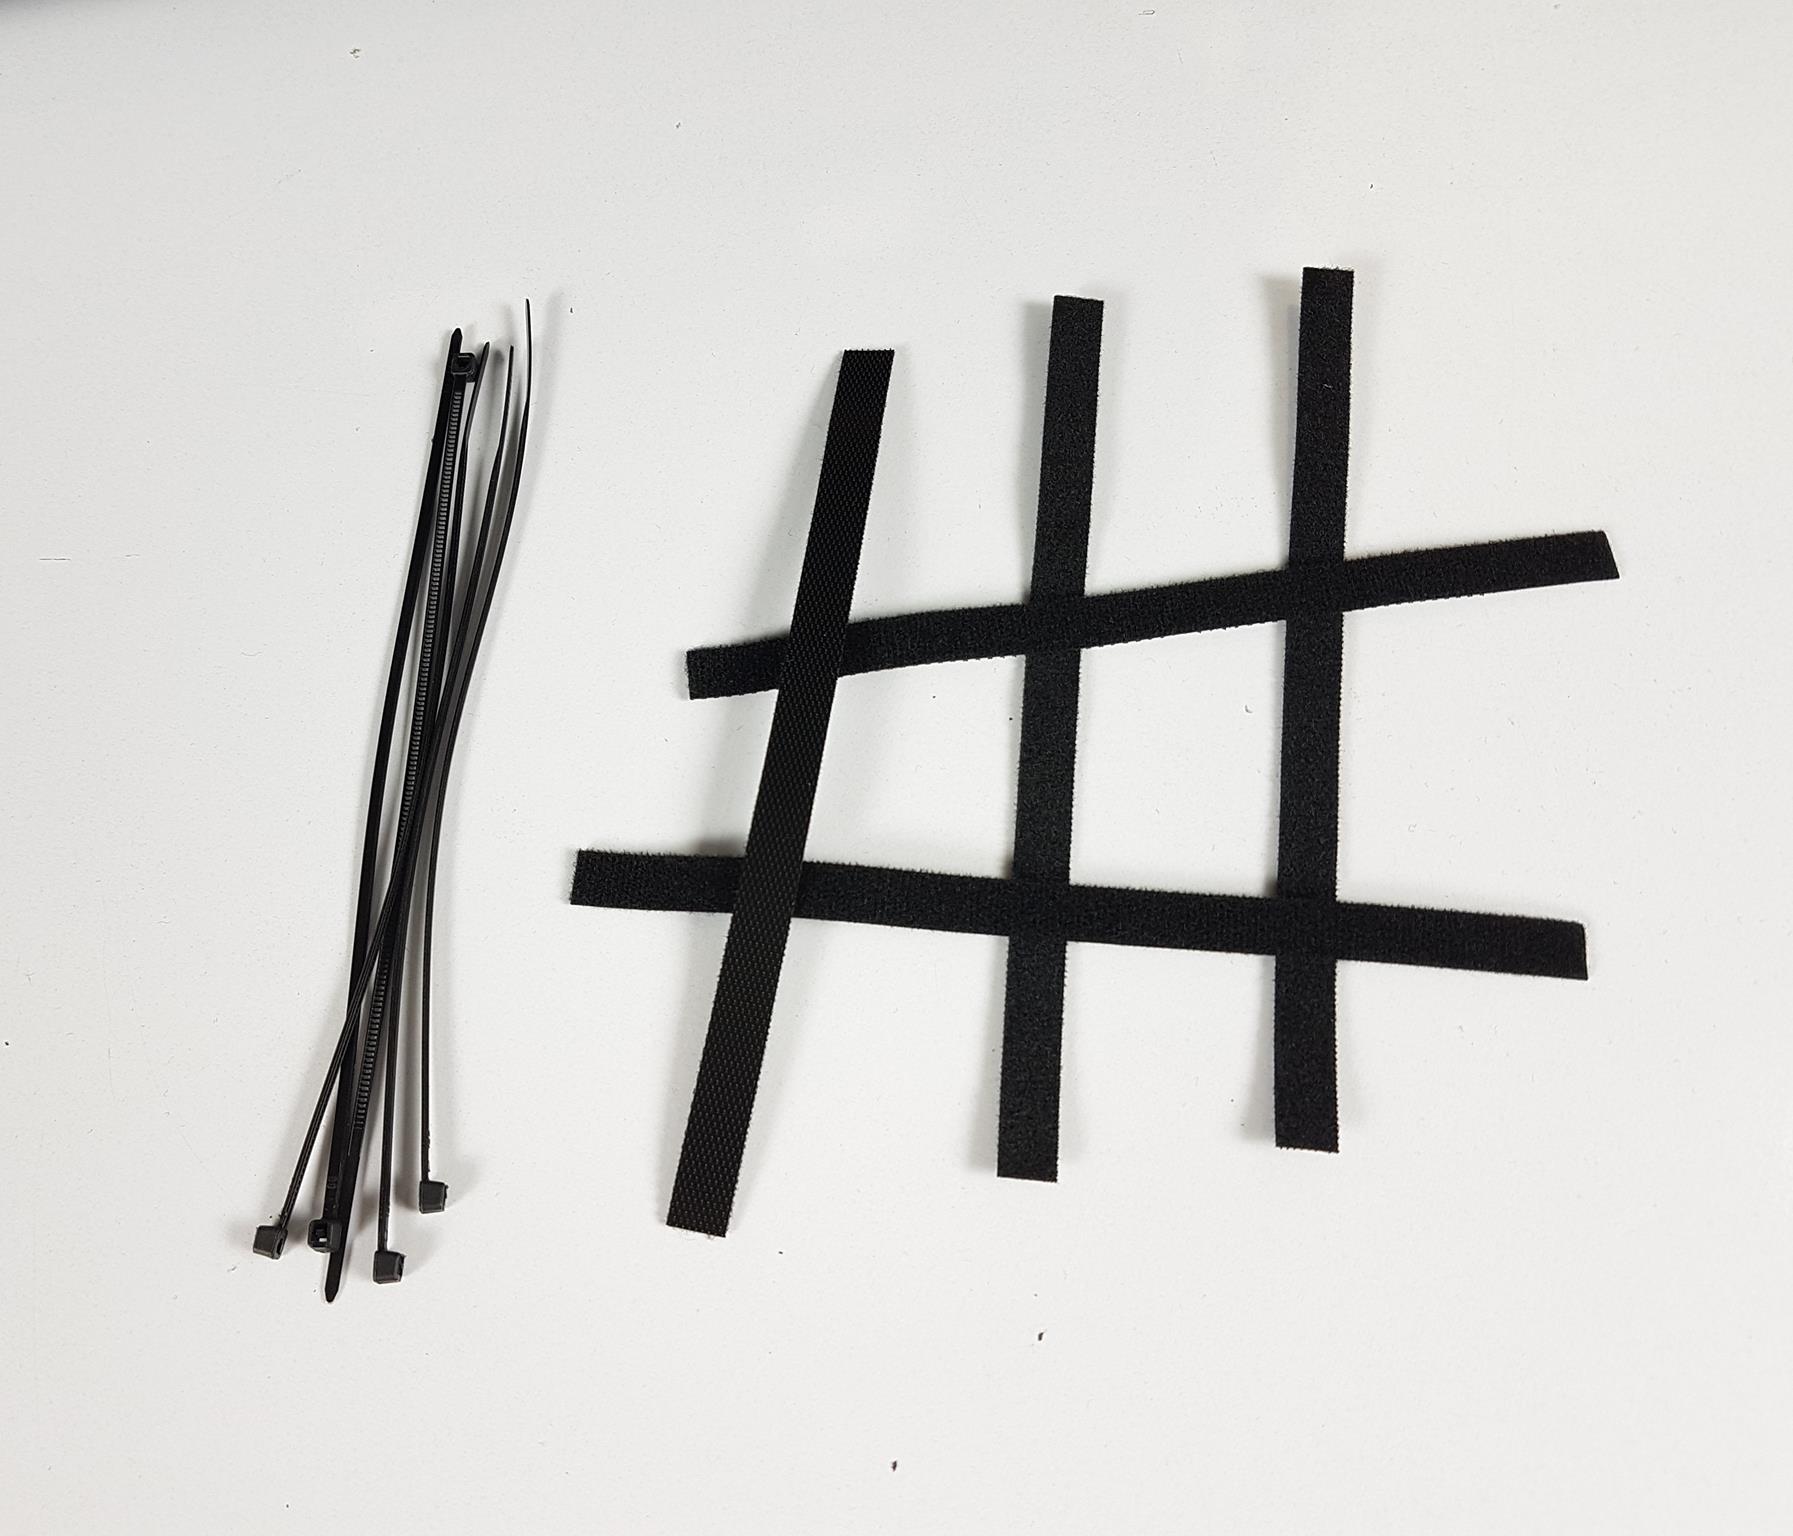
Assembling a PC inside the NX800 is convenient, and while thermals are generally acceptable, the front dust filter could impact airflow. Antec provides 4x reusable PCIe covers, Velcro strips, and zip ties, but lacks a GPU riser cable and additional support for vertical mounting. In conclusion, the Antec NX800 offers an impressive set of features and solid build quality at a competitive price point. The chassis strikes a good balance, making it a compelling choice for gaming builds.
Recent Updates
- January 22, 2024: Few text changes to improve readability.
Thank you! Please share your positive feedback. 🔋
How could we improve this post? Please Help us. 😔
[Hardware Reviewer & Editor]
Meet Nauman Siddique, a highly experienced computer science graduate with more than 15 years of knowledge in technology. Nauman is an expert in the field known for his deep understanding of computer hardware.
As a tech tester, insightful reviewer, and skilled hardware editor, Nauman carefully breaks down important parts like motherboards, graphics cards, processors, PC cases, CPU coolers, and more.
- 15+ years of PC Building Experience
- 10+ years of first-hand knowledge of technology
- 7+ years of doing in-depth testing of PC Hardware
- A motivated individual with a keen interest in tech testing from multiple angles.
- I majored in Computer Science with a Masters in Marketing
- Previously worked at eXputer, EnosTech, and Appuals.
- Completed Course in Computer Systems Specialization From Illinois Tech
Get In Touch: nauman@tech4gamers.com


