be quiet! Dark Rock Pro 4 Review
Summary
The be quiet! Dark Rock Pro 4 is a fantastic CPU cooler built for pure performance, with impressive silent fans even at full load, the cooler marks every checkbox. Sure, it is a bit pricey, but it makes up for it with its performance.
Overall
-
Performance - 9.5/10
9.5/10
-
Design - 9/10
9/10
-
Value - 9.5/10
9.5/10
-
Features - 9/10
9/10
-
Quality - 9.5/10
9.5/10
Pros
- Good Thermal Performance
- Silent Operation
- Amazing Stealth Look
- Easy To Install
Cons
- Heavy
- A Bit Pricer
- No Support For The AMD Threadripper platform
be quiet! has become synonymous with high-quality computer components. Their Dark Rock Pro 4 CPU Cooler, a pinnacle of air-cooling solutions, not only showcases a sleek design but also offers outstanding performance. In our comprehensive review, we’ll delve into its functionality, aesthetics, and overall value while also drawing comparisons with its predecessor. If you’re in the market for a top-notch CPU cooler that combines style and performance, this review is an essential read.
Key Takeaways
- Phenomenal cooling performance: Based on our tests, Dark Rock Pro 4 manages to provide satisfactory cooling performance that proves to be more than enough even for the highest-end processors available.
- Silent experience: It is designed to provide an extremely silent experience thanks to the addition of the two Silent Wing 3 fans, which remain quiet even under load.
- Easier Installation: Compared to older variants in the lineup, the cooler is relatively easier to install, which is an added benefit.
The Latest Iteration of the Dark Rock Series
The be quiet! Dark Rock Pro 4 is the result of ongoing advancements, featuring top-notch hardware, size, fan, and coating technologies. A 250W TDP and a TR4 variant are unique features of this version of the reviewed Dark Rock Pro cooler. During my tests, the be quiet! Dark Rock Pro 4 showcased excellent cooling capacity. Seven high-performance copper heat pipes are included, and its dual-tower layout accommodates two Silent Wings fans.
To keep the Cooler’s noise minimum, be quiet! Uses a range of Silent Wings PWM fans of varied sizes. Moreover, the Cooler is compatible with both AMD and Intel processors. Here is the list of all the compatible sockets.
AMD
- AM5 & AM4
Intel
- LGA 1700, 1200, 2066, 1150, 1151, 1155 & 2011
Specifications
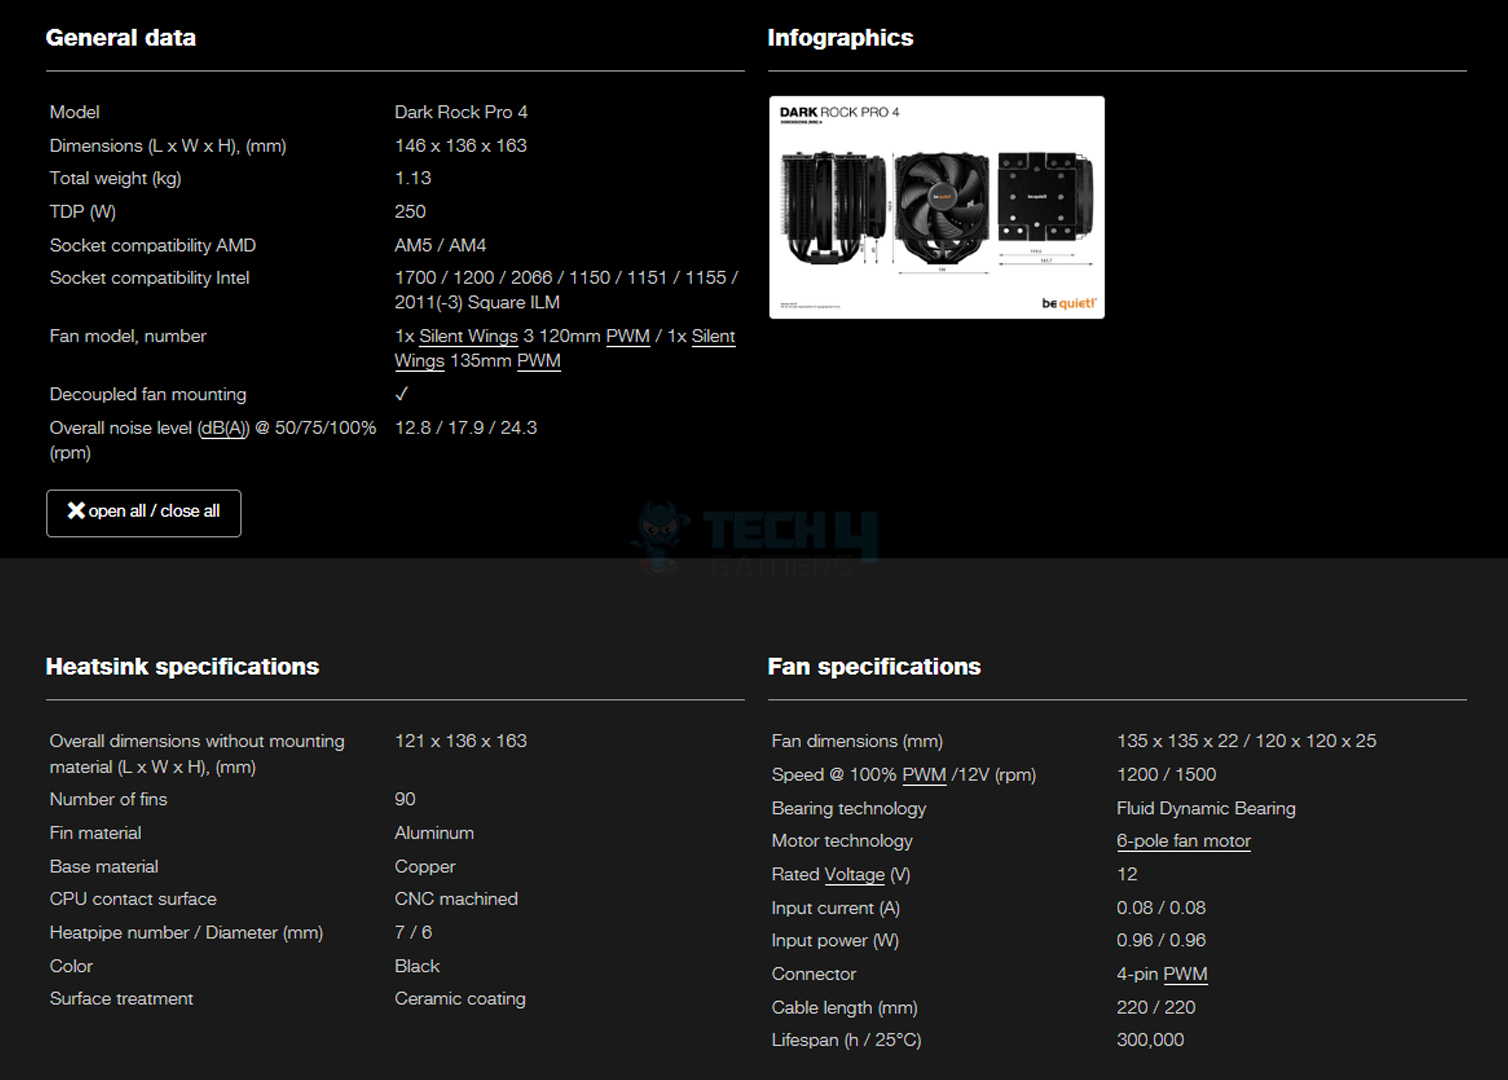
Packaging
What’s In The Box?
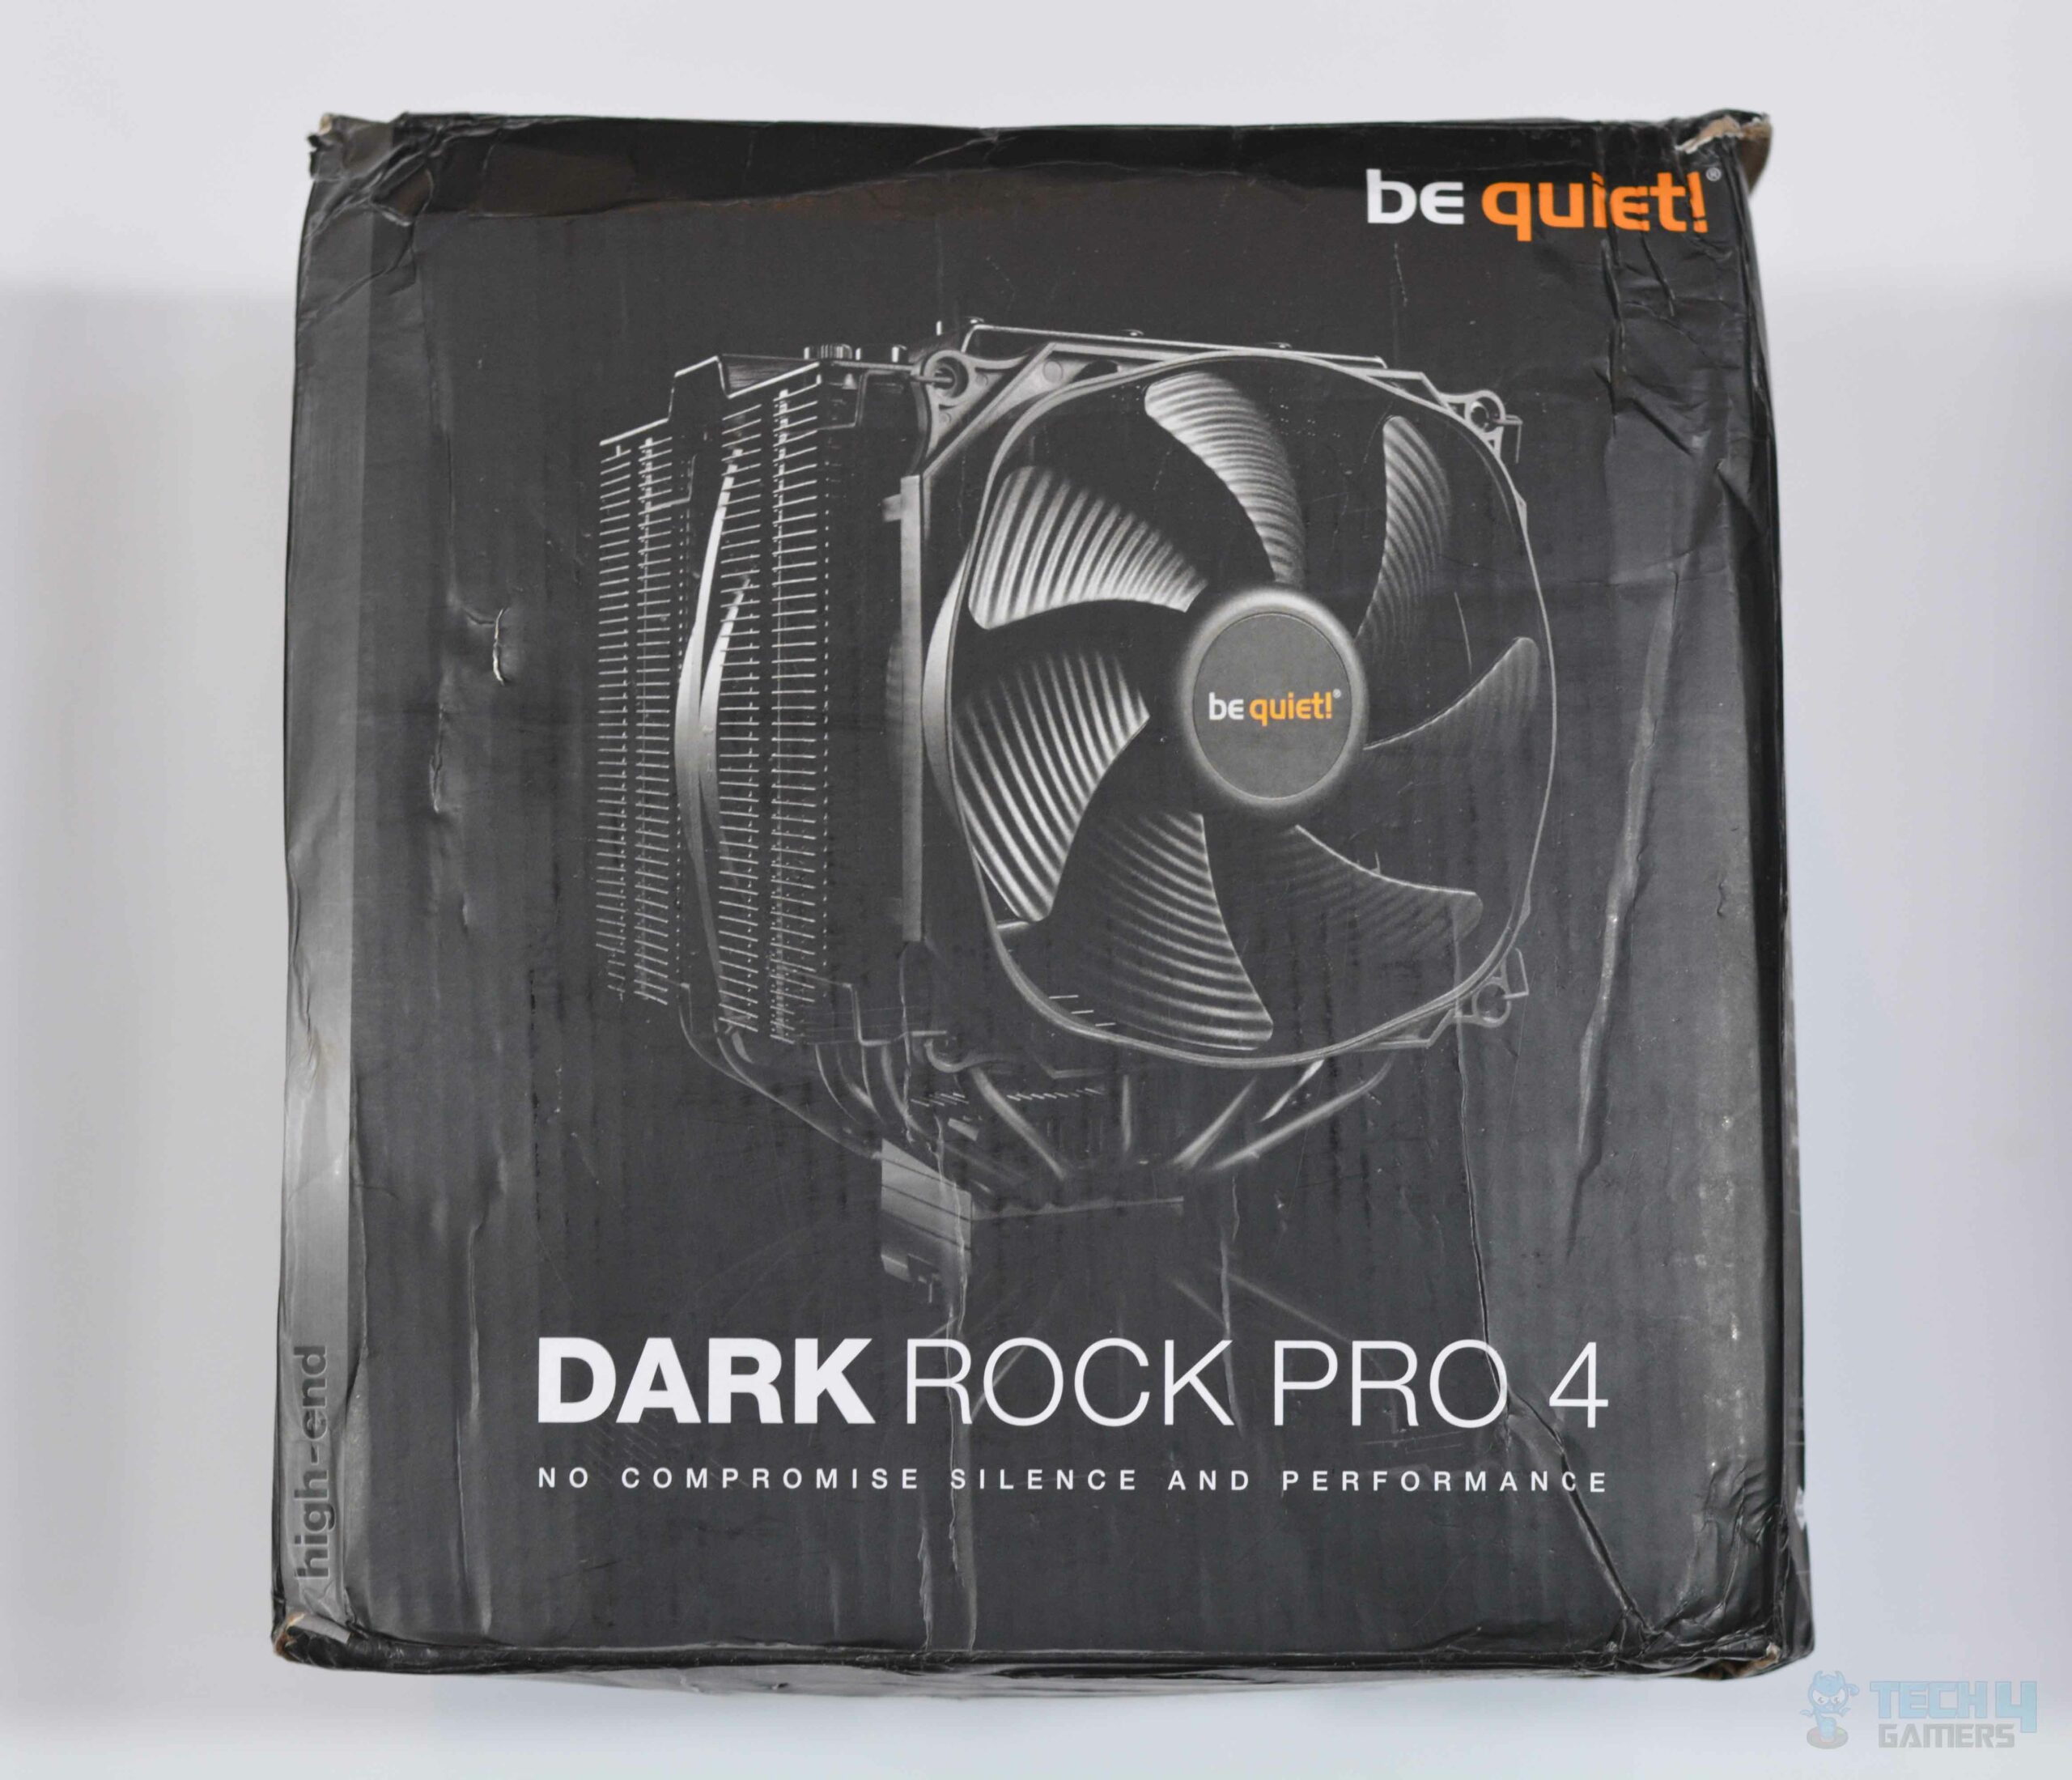
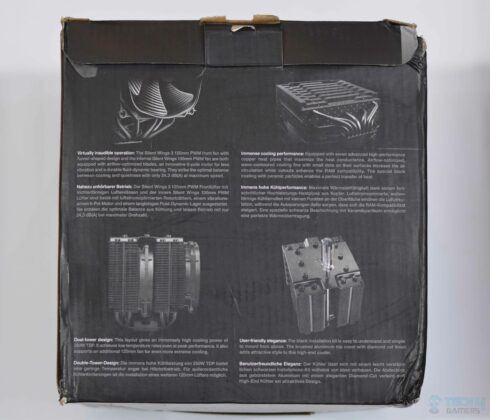
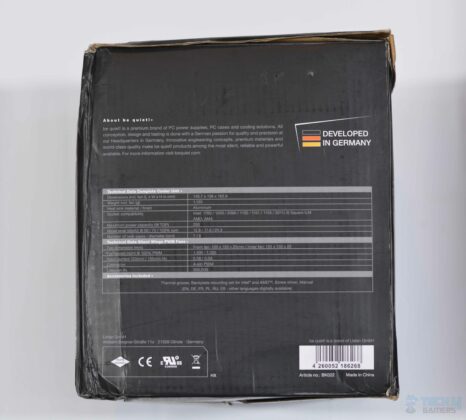
The quality of the packaging doesn’t stop with the outside. The hardware and documentation may be pushed into a notch in the foam that lines the Cooler’s inside, and the Cooler itself is surrounded by thick, dense foam to prevent any damage. Mounting tools, thermal paste, brackets, and a two-way PWM splitter are all included in the retail packaging’s meticulous attention to detail.
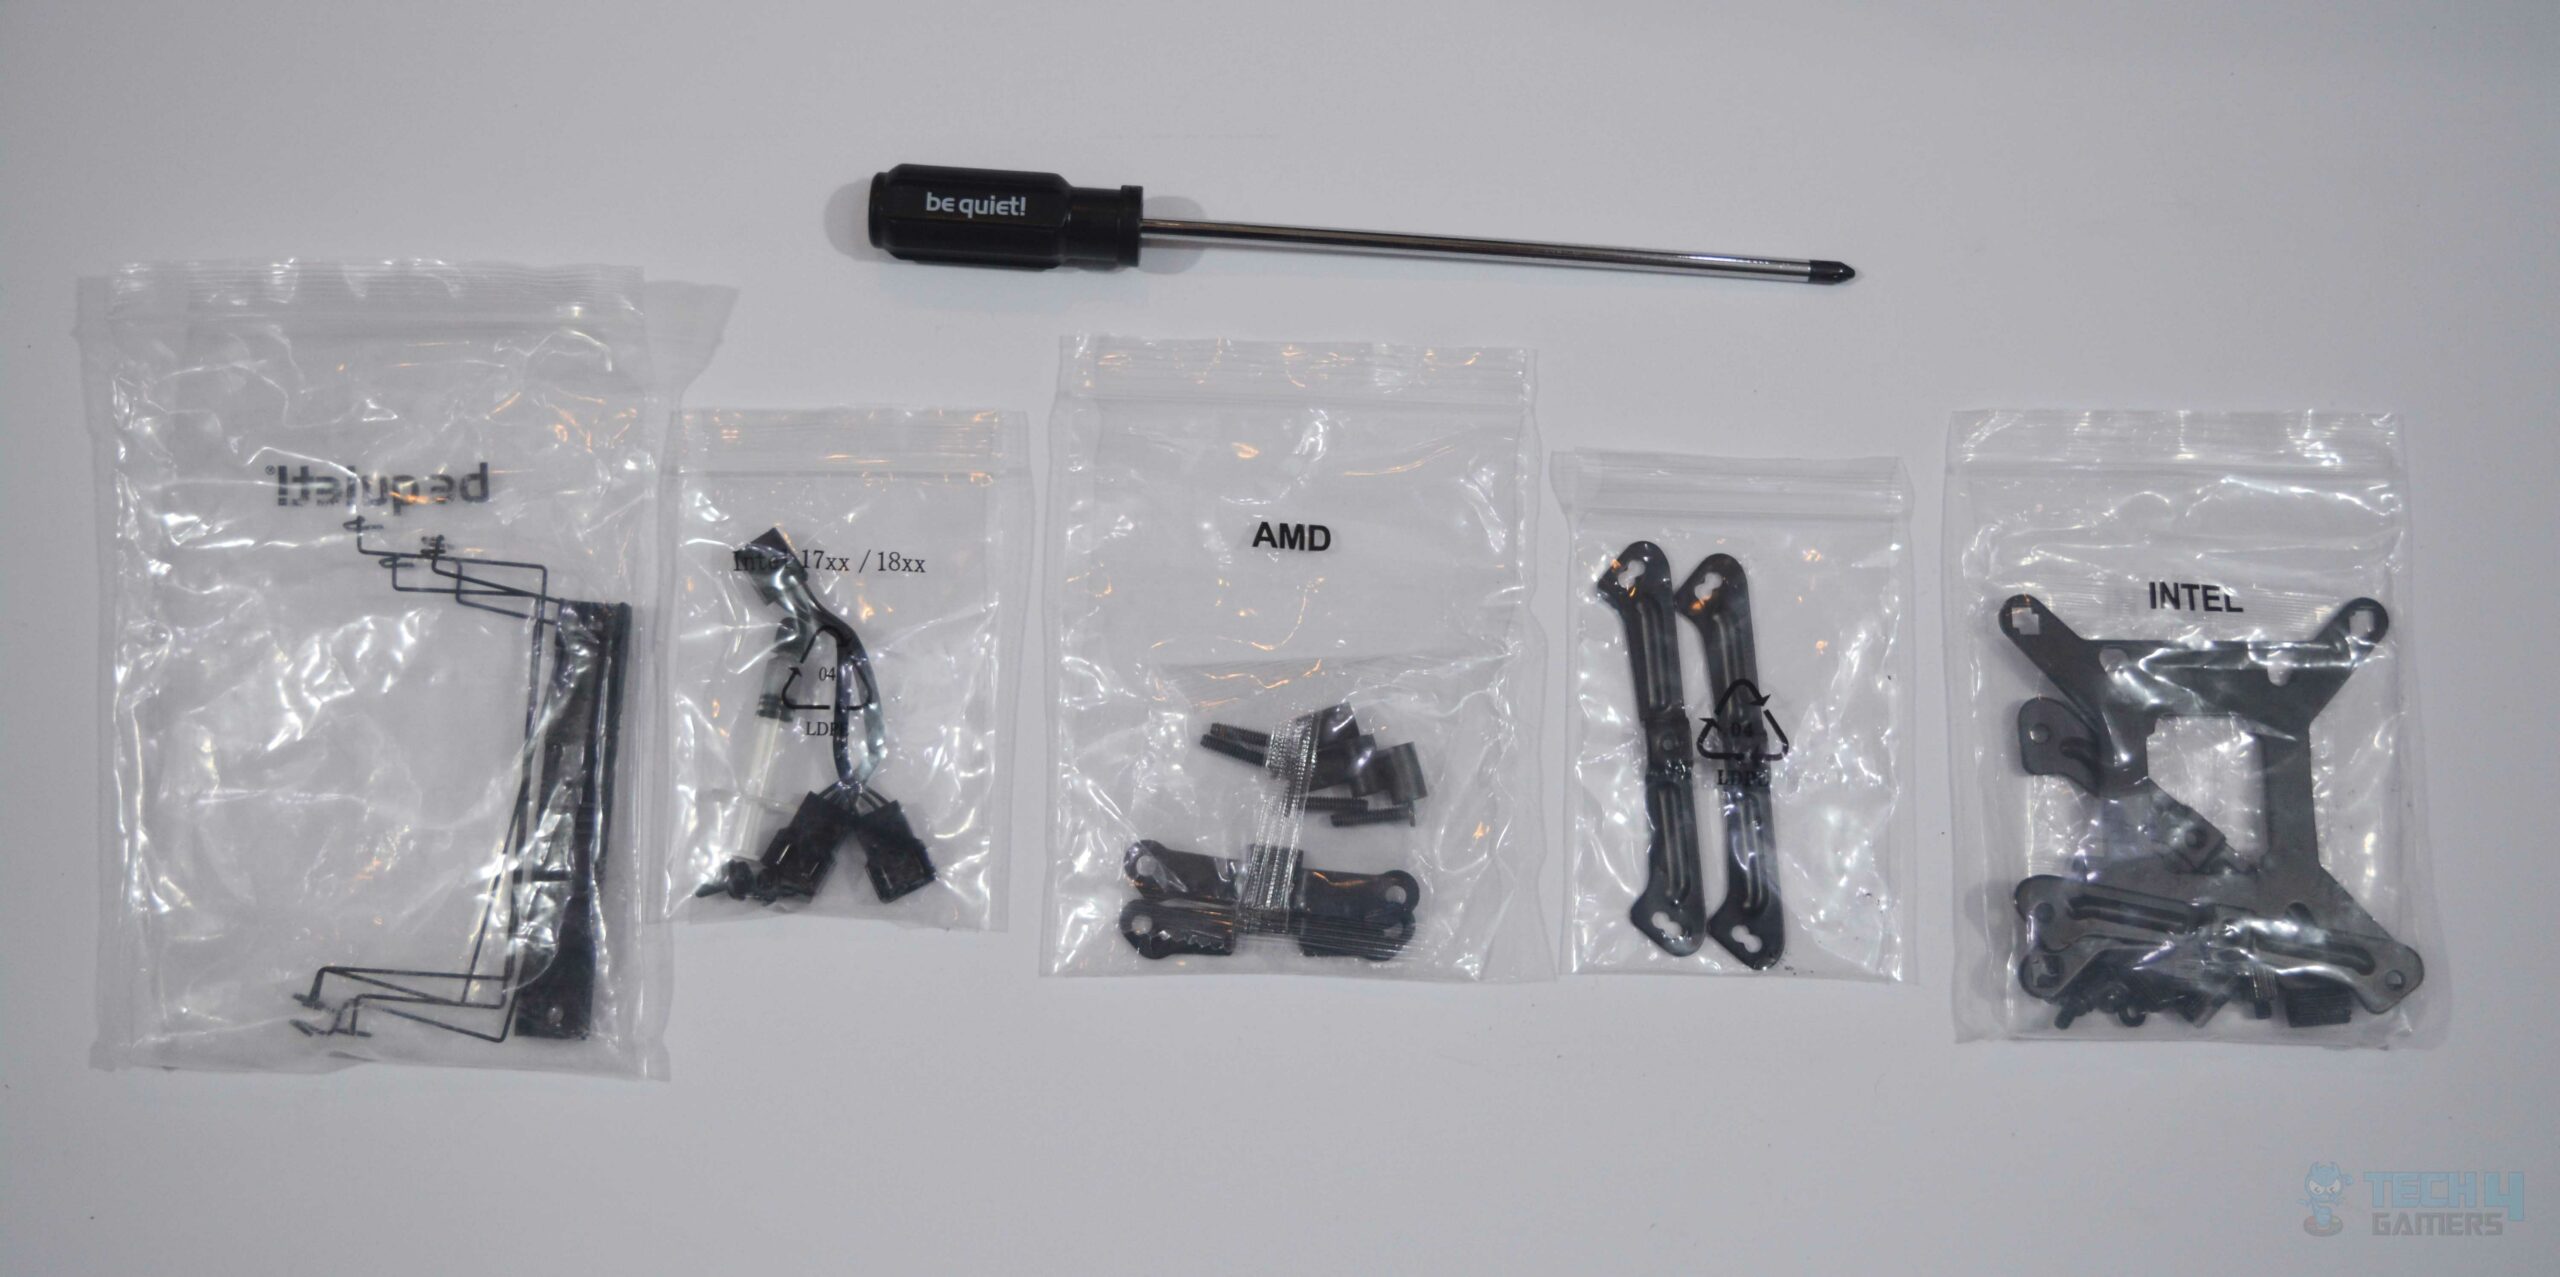
A lengthy magnetic Phillips screwdriver is included, which is a nice touch since it will be helpful throughout the installation process. It may easily be overlooked since it’s shoved against the rear of a single styrofoam piece, keeping everything orderly. Even if the installation may be done with any conventional screwdriver, be sure not to overlook it, as its length undoubtedly assists throughout the installation procedure.
After seeing it, I’m optimistic about the Intel mounting kit since it seems much more straightforward to set up than the Dark Rock Pro 3. All precautions taken are appreciated. Be Quiet went above and beyond with the packaging, and the Cooler’s build is as high-quality as one would hope for at this price.
First Look at the Dark Rock Pro 4
Since the Noctua NH D15 is also a dual-tower CPU air cooler, the Dark Rock Pro line of coolers has been on the market as a direct response. Be Quiet has made minor adjustments throughout time. There has been extensive research into the hardware, cooler size, fan configurations, and coating techniques, with the best solutions being implemented. The Dark Rock Pro 3 was already a big cooler in terms of size.
Compared to the preceding Dark Rock Pro 3, not much has changed. The performance, of course, is an exception. Compared to previous Dark Rock products, the Pro 4 is a seamless extension of the brand’s established design aesthetic. Many enthusiasts like this all-black aesthetic. The premium Dark Rock Pro 4 is the pinnacle of this product category since it represents the most advanced design ever.
This Cooler is as straightforward as they come in appearance and functionality. Heavy, performance, and robust would be three adjectives to characterize it. This CPU cooler is not recommended for those with small PC cases or needing a space-saving solution. Users who often relocate their PC cases, such as when taking the chassis to a LAN or other gaming event, may find working with a massive air cooler challenging.
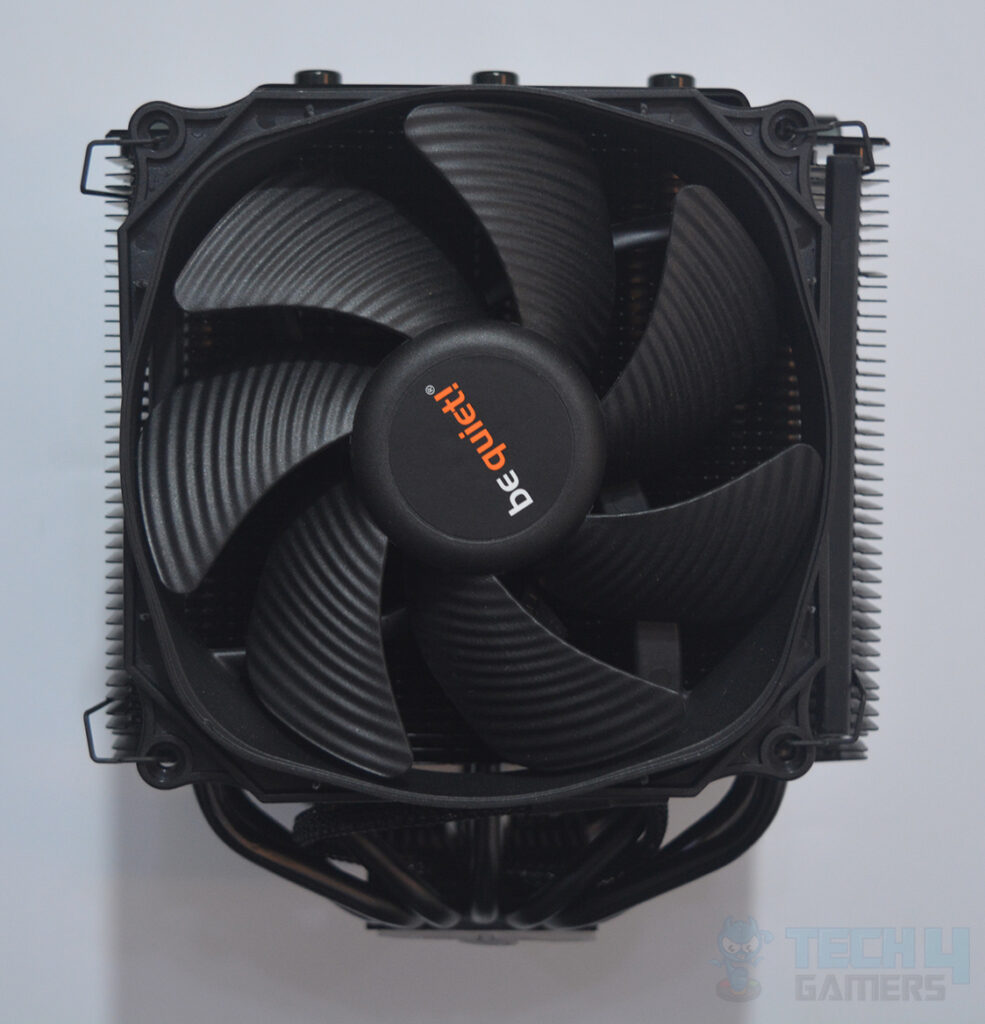
The Dark Rock Pro 4 has two fans, one 120 millimeters and the other 135 millimeters in diameter, sandwiched between two aluminum fin cooling towers. The first tower has a 120 x 25mm SilentWings fan at the front, which pushes air through to the first tower, which is met by a 135 x 22mm SilentWings fan. Air is driven from the second tower by the second fan and exits the Cooler’s back. Dual fans provide a push-and-pull air movement, and the Cooler’s open design ensures that hot air may escape from the Cooler’s four vents.
A 120mm Silent Wings 3 fan on the front of the Dark Rock Pro 4 can be seen primarily. This fan completely encircles the fin stacks from top to bottom but leaves some of the width uncovered. There are seven heat pipes under the fins and the fan, but two are curved behind the other pair, making them hard to notice from this perspective.
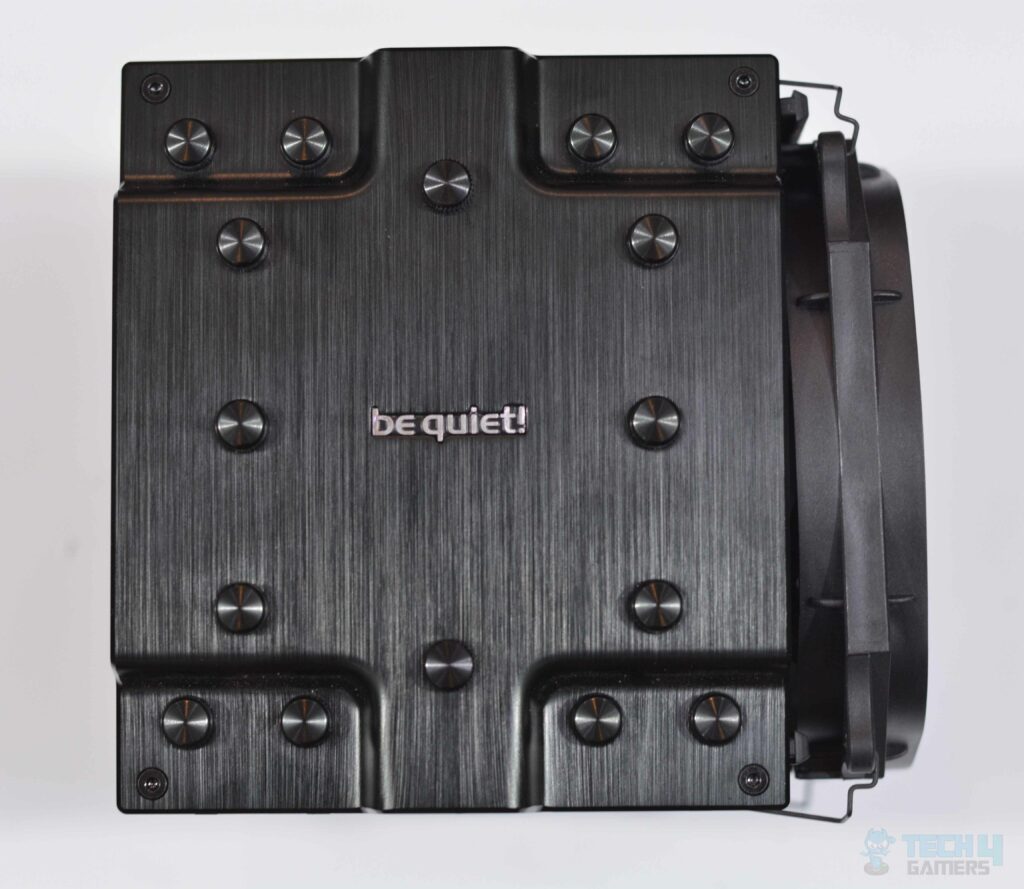
The Cooler’s top is built from metal that has been brushed and anodized black. There are sixteen caps total, but only fourteen cover the heat pipe tips, and the “be quiet.” logo in the middle stands out. The two attached to the nameplate’s detachable parts serve as mounting access holes for the cooler.
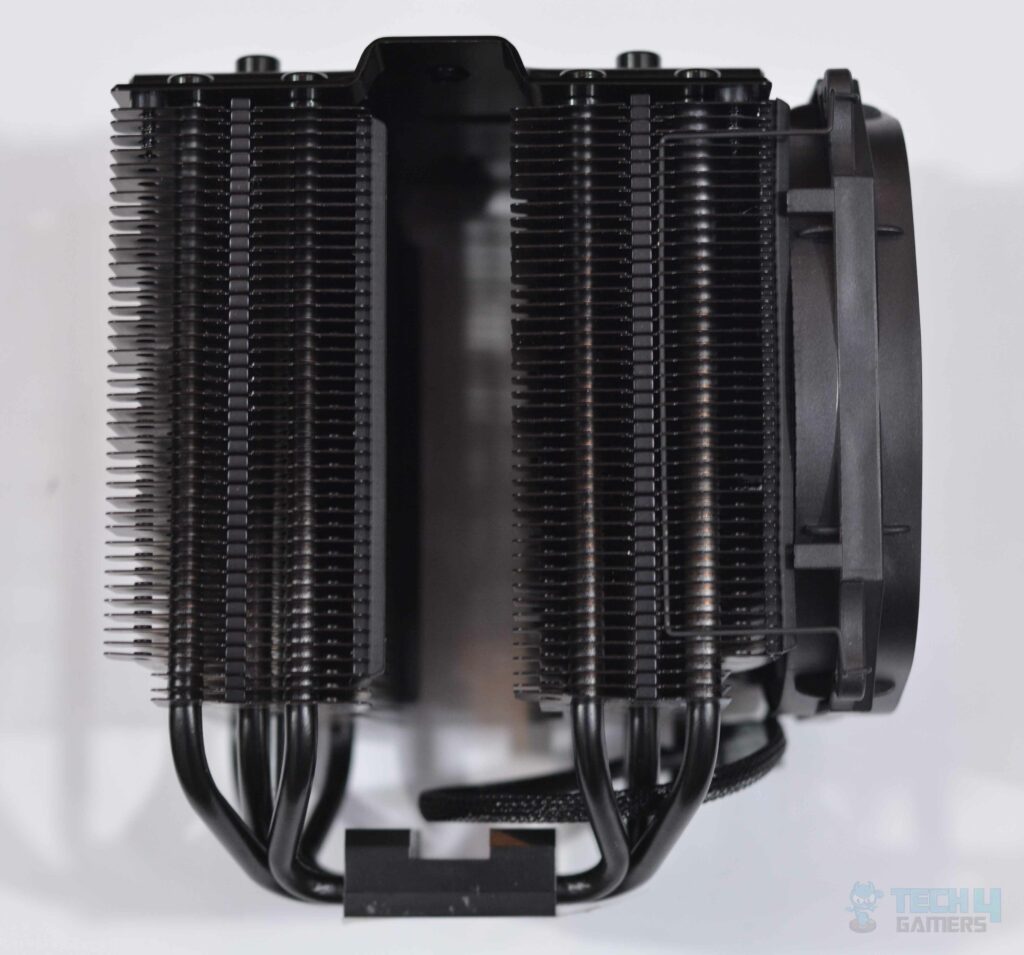
From the side, we can see a 90-fin tower alongside another 90-fin tower and a 120mm fan. At the base, we can see how seven pipes are utilized and get a clearer sense of the heat pipes’ bends.
If we turn the Cooler around, we can see the fin stack, and, more interestingly, we can observe that the fins themselves have varied shapes at different points, a feature also present in cutting-edge coolers. This modification “boosts” the capability of the CFM fans to cool a set of fins by allowing them to generate substantial pressure in specific locations.
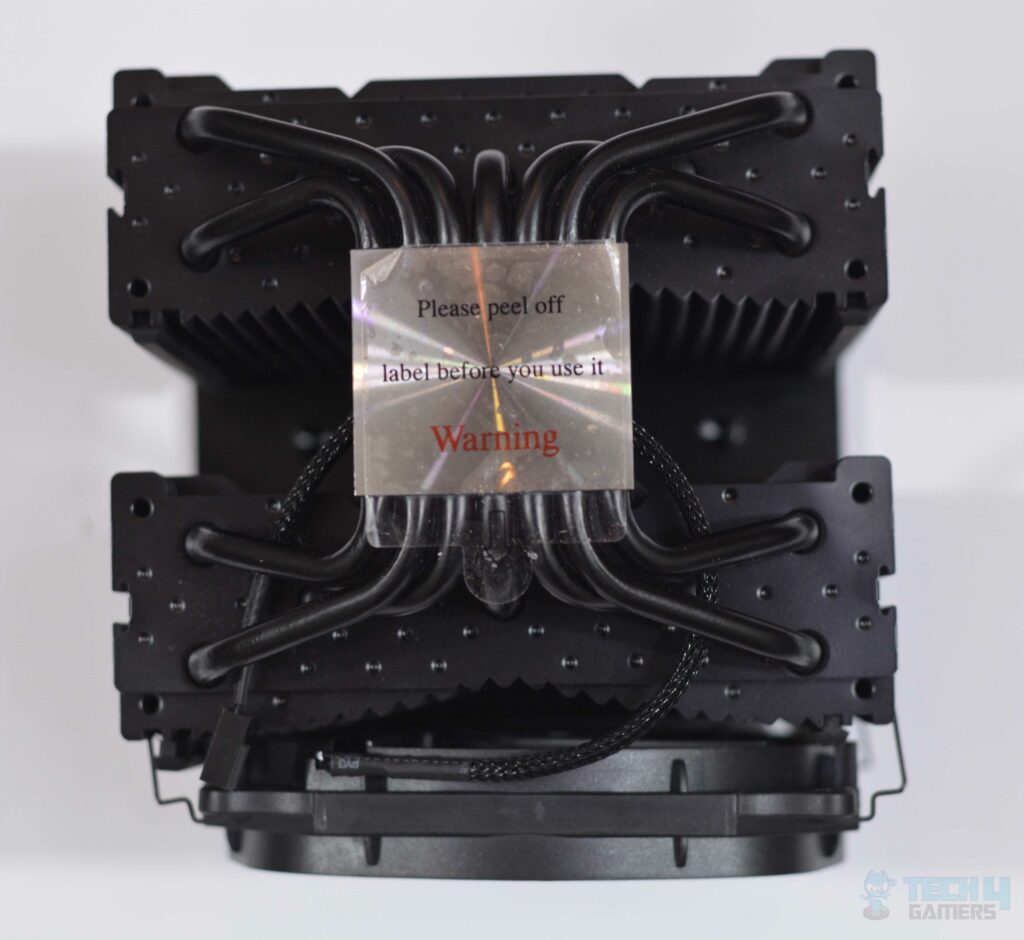
The Cooler’s base is equipped with seven copper heat pipes. These extend from the Cooler’s top and are capped at both ends with aluminum to maximize efficiency. This contributes to the Cooler’s overall utilitarian aesthetic. The nickel-plated base, now covered by a plastic sticker, is revealed as the last visible component. Upon removing the covering, we see that the base has been expertly machined, with just the barest indication of a cyclical pattern.
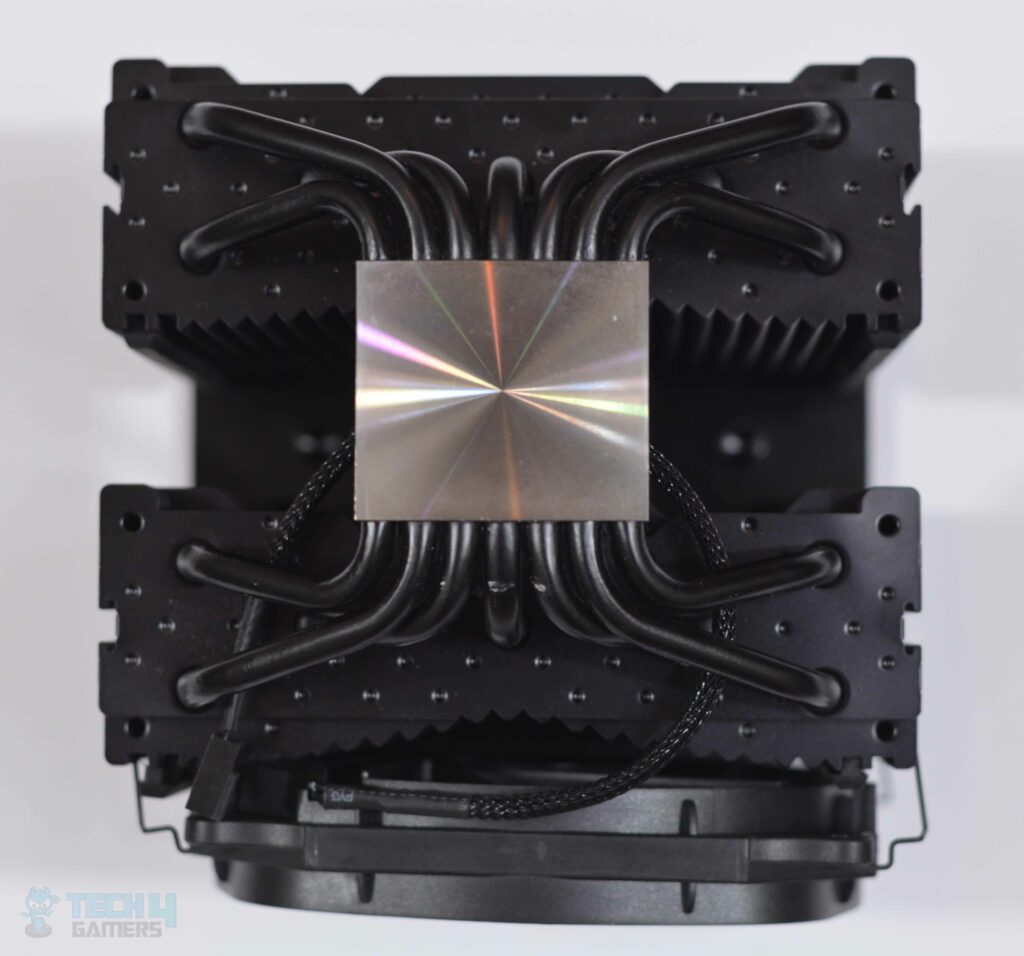
This foundation, like many others, is elevated in the center, facilitating the distribution of increasing pressure and productivity. The Pro 4’s twin fans work together to flow air more efficiently through the system’s two fin stacks, allowing more heat dissipation surface area and Heatpipe separation.
That’s preferable to having a giant cooling-fin tower with a single fan. In addition, This base’s top is slightly elevated, making it seem like a heatsink. In general, the Dark Rock Pro 4 stays loyal to the spirit of the previous versions. It’s an elegant way to keep your CPU cool that’s both effective and stylish.
Installation
Installation of the Dark Rock Pro 4 is quite comparable to that of other Heatpipe tower coolers. For this, you’ll need mounting bars, a crossbar, and threaded standoffs. Since the fans are attached after the Cooler has been installed, we require a solution for securing two screws into the mounting crossbar between the two rows of cooling fins. Moreover, a thin screwdriver comes with the be quiet! Package.
Its magnetic tip aids in holding the screws in place while they are maneuvered into a position, which amounts to surgical precision. Setting up the be Quiet! Dark Rock Pro 4 is a relatively straightforward process. Even if you have no experience putting together components, you should have no trouble with the mounting mechanism. This method is clear whether you’re using an AMD or Intel processor. Nonetheless, let’s keep things simple and cover the procedure one by one.
On AMD Platforms
- A Motherboard manufactured for the AMD platform requires the removal of black retaining brackets.
- Once the black spacers are in place, we can position the AMD retention brackets above it and secure them with the included screws. When installing the retention brackets, be sure the center component is facing the CPU.
- Applying thermal paste allows the central mounting bridge to be positioned on top of the Heatsink Base and remain flat.
- After the Cooler has been carefully placed over the CPU, ensure that the bridge’s holes line up with the retaining brackets, we may tighten the screws.
- Remove the two Thumbscrews from the Cooler’s top plate and insert the lengthy Be Quiet! Screwdriver underneath them.
On Intel Platforms
When installing on an Intel Platform Motherboard, there are a few extra measures to take throughout the setup process.
- If the motherboard you’re using doesn’t have a backplate already attached, you can utilize the one offered by Be Quiet!
- Place the silver Intel screws into the appropriate holes on the backplate according to the Socket you’re using and secure them with a rubber o-ring from Intel’s mounting bag.
- We may now screw the spacers in from the opposite side once the backplate is in place. The Intel Backplate screws are easily put on the boards with a backplate attached.
- Now secure the top retention brackets into place using screws. The retention bracket must be screwed in with the outwards pointing orientation.
- Applying thermal paste allows the central mounting bridge to be positioned on top of the Heatsink Base.
- After the Cooler has been carefully positioned over the CPU, ensure that the bridge’s holes line up with the retaining brackets’, and tighten the screws.
Dark Rock Pro 4 Fans
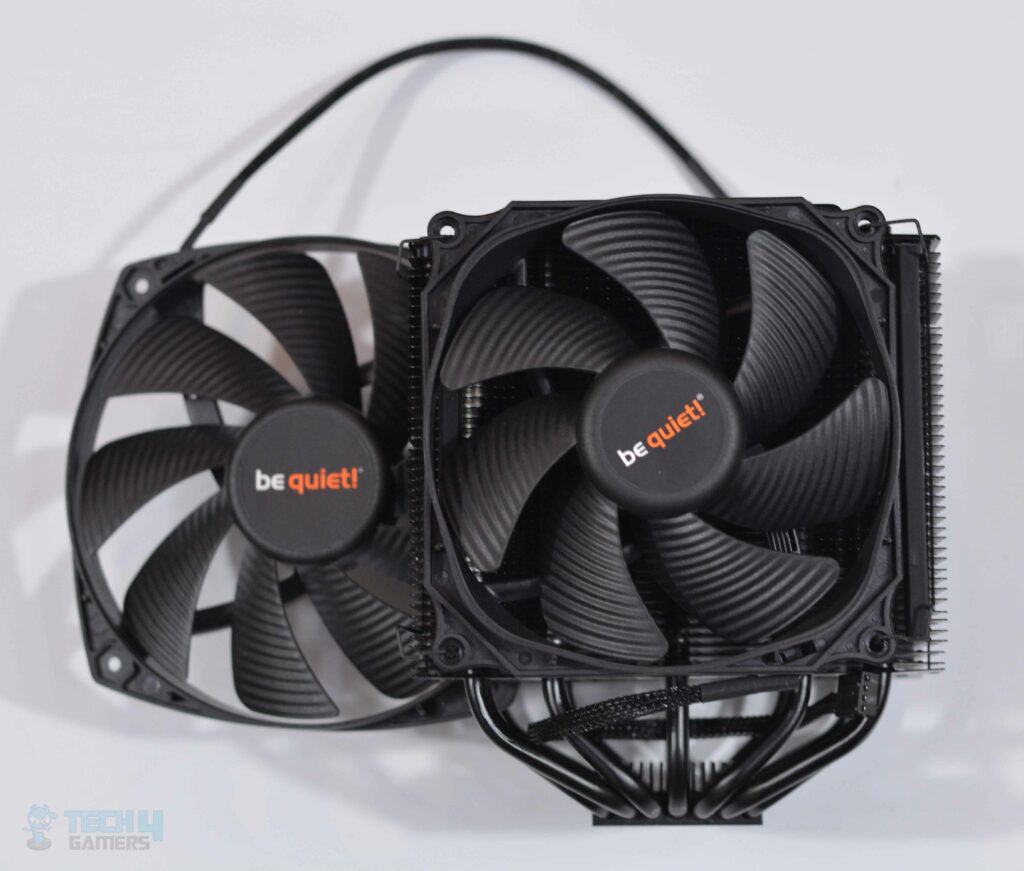
Mounting the fan comes next once you’ve attached the Cooler to the CPU. However, in my experience, setting up and putting down the fan has not been the most pleasant process we have completed. Once the 120mm fan is on the heatsink’s rubber-pad side, we can insert the clips into the Fan-Screw holes and push firmly on the sides to secure the clips.
While this may appear simple, removing the fan is a rather difficult task. We found that pressing the fan and pulling the fan-clip hook out of the fan hole was the most straightforward method. This will prevent you from scratching the heatsink’s protective layer.
The identical method, but with a little more effort, must be used for the 135mm fan in the center of the unit. The center fan of the Dark Rock Pro 4 must be pushed to the side. The next step is to wiggle the fan clips through into corresponding holes. When it comes to complex tasks, installation of the central fan is at the top, and removing it is even more of a nuisance.
Moreover, removing the Cooler is our only option if we need to upgrade the RAM in the system. I noticed that the wire fan clips may be easily unclipped with a pair of needle-nose pliers if the cooling fans’ replacement is necessary. Viewing the Dark Rock Pro 4 through a casing reveals a sleek cooler and premium and takes up very little vertical space. In my opinion, the Cooler has a sleek metallic design that is accompanied by a company logo, and a view of the front-mounted fan.
Dark Rock Pro 4 Testing & Benchmarks
It might seem today that testing a cooler is less complicated than it is. I have used the following parameters along with an ambient temperature of 24.4 degrees Celsius for the test. During my Cinebench test, the i7 12700k has no difficulty reaching 4.8 GHz. The fans and pump are at full speed. It’s been a while since the release of the Dark Rock Pro 4. But when you check it out alongside other coolers, you’ll see some differences.
Tech4Gamers makes a great effort to clarify all aspects of the benchmarking process so that readers may double-check the results and attempt to imitate them on their systems if they want. The results of our benchmark tests on the Dark Rock Pro 4 are relatively self-explanatory. Remember that the outcomes may differ based on the Processor, GPU, and many other components you utilize and that there is often some margin for error when using the software.
Test Build
Specifications for the test build are as follows:
- Intel i7 12700k
- be quiet! Dark Rock Pro 4
- Gigabyte Z690 Aero D
- Sabrent Rocket 32GB DDR5 @ 4800MHz
- MSI GeForce RTX 3090 Gaming X Trio
- be quiet! Straight Power 11 1000W Platinum
- Sabrent Rocket 4 Plus 2TB PCIe 4 NVMe SSD
- Praxis Wetbench
We’re using Dark Rock Pro 4 thermal paste to test the cooler. It would be easier to standardize if all coolers used the same thermal paste. On the graphs, normal temperatures are shown. The testing is performed on a bench system in the open air. Temperatures are predicted to climb once within the chassis, with the ideal airflow inside the casing significantly mitigating the expected temperature increase.
The stress test’s outcome may vary across repetitions. Several variables, including mounting pressure, thermal paste use, and ambient temperature changes, might be the reason. Even within the same family of chips, there might be noticeable variations due to the silicon used. Therefore, the testing procedure should be mentioned with the specifics.
let’s examine the result.
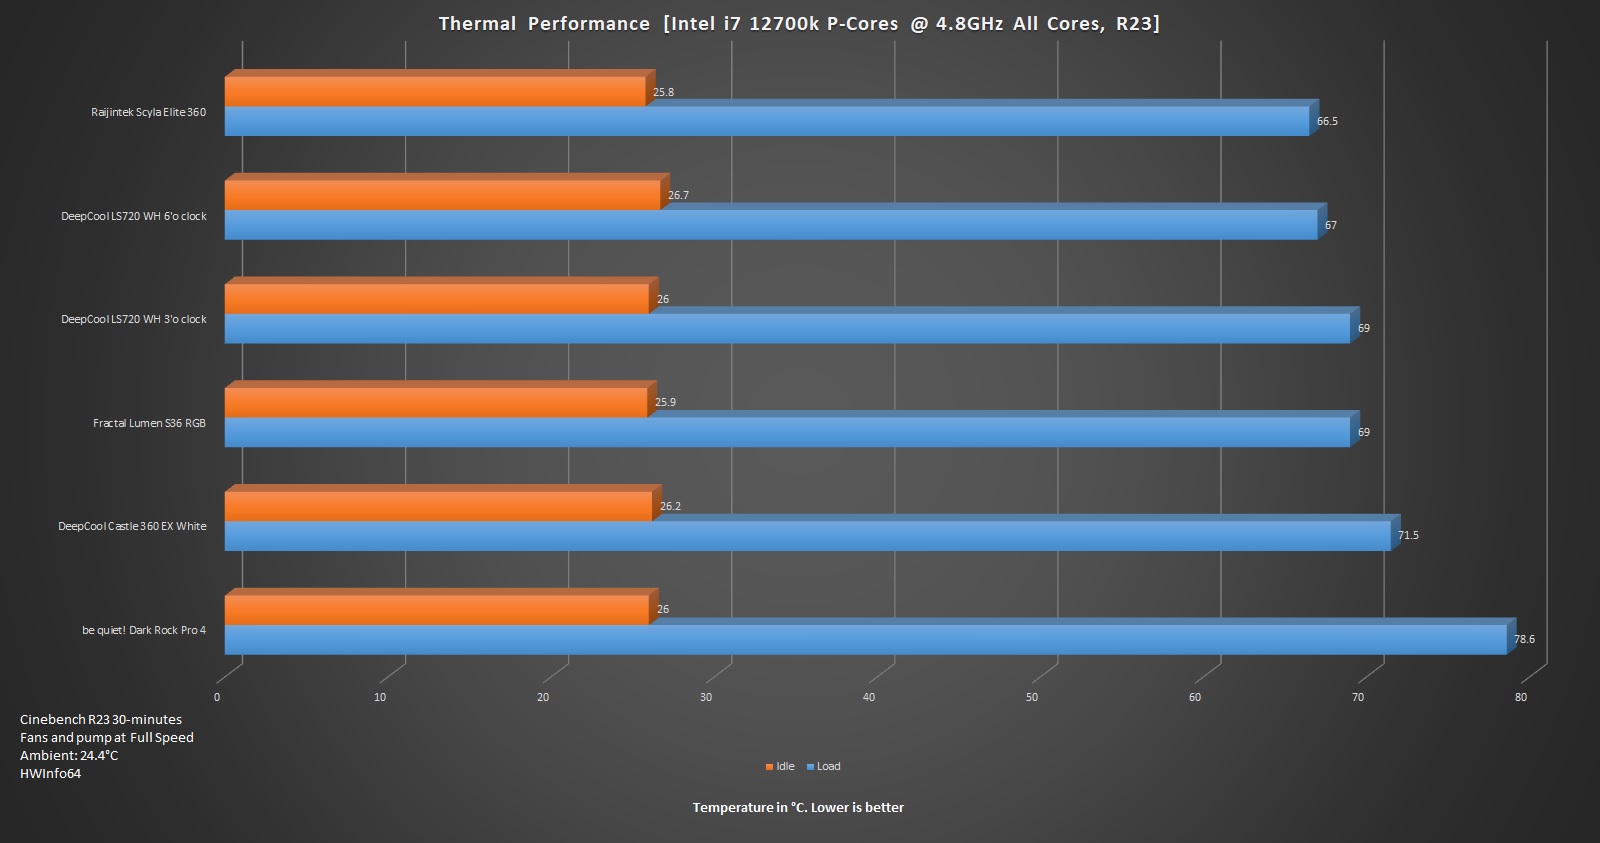
The processor’s load temperatures are shown in blue, while the idle temperatures are in orange. The graph above shows the average temperature of the P-Cores. As we can see, the Dark Rock Pro 4 performs quite well compared to the other coolers. The Dark Rock Pro 4 keeps the i7 12700k at 26°C on idle. On the other hand, it reaches 78.6°C on load.
Suppose you don’t feel safe utilizing water near your electronics. In that case, effective air coolers can be affixed to a 12-core CPU and provide sufficient cooling even under heavy load. Based on our results, the Be Quiet! Dark Rock Pro 4 is among the top air coolers on the market today. The same holds for overclocking; provided you don’t overburden your system and have sufficient case airflow, this Cooler should work fine.
Noise
Some may find the choice of “be quiet” to be overwhelming. That is, after all, the brand’s whole point. The outcomes justify their word in the quality of their products. This implies that it functions effectively and does so with little noise.
Price
Price is a significant factor, and if there is anything that may encourage a shift away from such a cooling option, it would be the cost. While $89,90 seems fair, given what we’re holding, most people don’t buy this approach. From what we can tell from the market, cheaper choices provide superior thermal performance but at the cost of bringing a great deal of additional noise into the system.
The Dark Rock Pro 4 is less expensive than an AIO but is significantly heavier on the Socket. Although most motherboards can take either, it’s just a personal opinion. The Dark Rock Pro 4 can compete thermally with AIOs unless you have a very compact chassis, Be Quiet! Dark Rock Pro 4 is an excellent contender for your next build, balancing the many factors that should be considered when selecting a new cooler. The impressive performance is matched by its attractive design.
Should You Buy it?
After hours of testing, the be quiet! Dark Rock Pro 4, I have summarized a few points based on performance benchmarks, specifications, as well as hands-on testing.
Buy It If:
You want a capable air cooling solution: Based on my testing, the Be Quiet! Dark Rock Pro 4 is near enough to the top of the thermal rankings to be considered a serious contender. be quiet! has consistently released innovative products, and its most recent Cooler isn’t any different. According to our review of the be quiet! Dark Rock Pro 4 CPU Cooler is one of the best options for cooling CPUs by using the air cooling option.
You want silent fans: The Dark Rock Pro 4 uses a 120mm and 135mm fan, which are almost inaudible under test and real-world conditions and nearly impossible to detect when run under PWM Control.
You are looking for an easy-to-install cooler: Throughout my testing of the Dark Rock Pro 4, I observed several enhancements in the installation procedure. Since Be Quiet no longer provides the bulky backplate they formerly did, mounting is much more convenient. The fact that we weren’t confronted with unsightly holes after installation is a further benefit, as are the top covers that can be removed for easy installation.
Don’t Buy It If:
You are looking for a smaller CPU cooler: You’d unlikely find reasons to skip pass on such a Cooler for your CPU, with its low noise profile, above-average performance, and enhanced mounting hardware; however, the Cooler’s size may indeed prevent some people from purchasing it.
Final Words
I absolutely love the Dark Rock 4 cooler for its sleek, all-black design and affordable price. Its darker aesthetic, with black-coated fins, a dark cover, and black heat pipes, beautifully complements modern motherboards with black PCBs. Throughout my testing, the two silent-wing fans performed exceptionally well at low RPM, delivering fantastic cooling, even during overclocking. Additionally, the Dark Rock Pro 4’s improved installation process and enhanced cooling performance over the Pro 3 make it a powerhouse in terms of efficiency.
While it might not be the absolute best at cooling, it more than compensates with its quiet operation and reasonable cost. However, the permanently connected top plate is a bit of a letdown, especially considering the convenience that comes with a detachable plate. Installing the central fan can be a bit tricky, particularly if the cooler is already inside the case. Nevertheless, once it’s up and running, the Dark Rock Pro 4 is a silent beast and an excellent choice for intense overclocking sessions. I wholeheartedly recommend the Dark Rock Pro 4.
Awards Received By Dark Rock Pro 4
The be quiet! Dark Rock Pro 4 has received the following Tech4Gamers Awards from our hardware testers:
- Best Overall CPU Cooler For Ryzen 7 7700X
- Best Air Cooler for LGA 1700
- Best Overall CPU Cooler For i9-13900KF
- Best Silent CPU Cooler Under $100
- Best Overall CPU Cooler For Ryzen 5 5600X3D
- Best Air CPU Cooler For Ryzen 7 7800X3D
- Best Overall CPU Cooler For i5-13600K
- Best Silent CPU Cooler For Ryzen 7 5800X3D
- Best CPU Cooler For i9 12900k
Thank you! Please share your positive feedback. 🔋
How could we improve this post? Please Help us. 😔
[Hardware Reviewer]
Awais Khan is a Tech Geek, conscientious, reliable, and hardworking individual who pays attention to detail with excellent time management skills. Alongside that, he is an expert in PC Hardware; dealing with Benchmarks, Analysis, and testing before sharing information with readers. Whenever free, Awais occasionally shares Gaming Videos on his YouTube Channel.
Get In Touch: awais@tech4gamers.com


 Threads

![6 Best CPU Coolers Under $100 [With Benchmarks] Best CPU Coolers Under $100](https://tech4gamers.com/wp-content/uploads/2022/06/Best-CPU-Coolers-Under-100-218x150.jpg)