 Threads
Worth the big bucks?
Review Summary
The ASUS ROG Ryuo 240 is an enthusiast-grade CPU liquid cooler that offers high-end features at a more affordable price, although it’s still quite expensive. it slightly outperforms other 240mm AIO coolers on my test bench. I’m a fan of everything it offers, except for the price.

Overall
-
Thermal Performance - 9.5/10
9.5/10
-
Acoustic Performance - 7.5/10
7.5/10
-
Build Quality - 9/10
9/10
-
Features - 9.5/10
9.5/10
-
Value - 6/10
6/10
Pros
- Performance
- Aura Sync Lighting
- Easy-to-use LiveDash software
- Full-color LiveDash display
Cons
- No protective plating under mounting holes
- Challenging cable management
- Inconvenient micro USB port location


When it comes to ASUS, the first associated name that comes to mind is ROG or Republic of Gamers. ROG brand was introduced in 2006, and it focuses on mainstream gamers/enthusiasts with products ranging from Motherboard and graphics Cards to Peripherals. ASUS has sent us their ROG Ryuo CPU Cooler for review, and I’ll be taking a spin at the review sample.
Key Takeaways
- The ASUS ROG Ryou 240 is for users who want an exceptional 240mm AIO cooler while also being interested in benefitting from the customizability that comes with an LED screen
- The ASUS ROG Ryou 240 is not for anyone on a strict budget, as suggested by its higher price tag.
- The ASUS ROG Ryou 240 provided excellent cooling, maintaining a temperature of 39°C on an i7-6850K at 4.3 GHz.

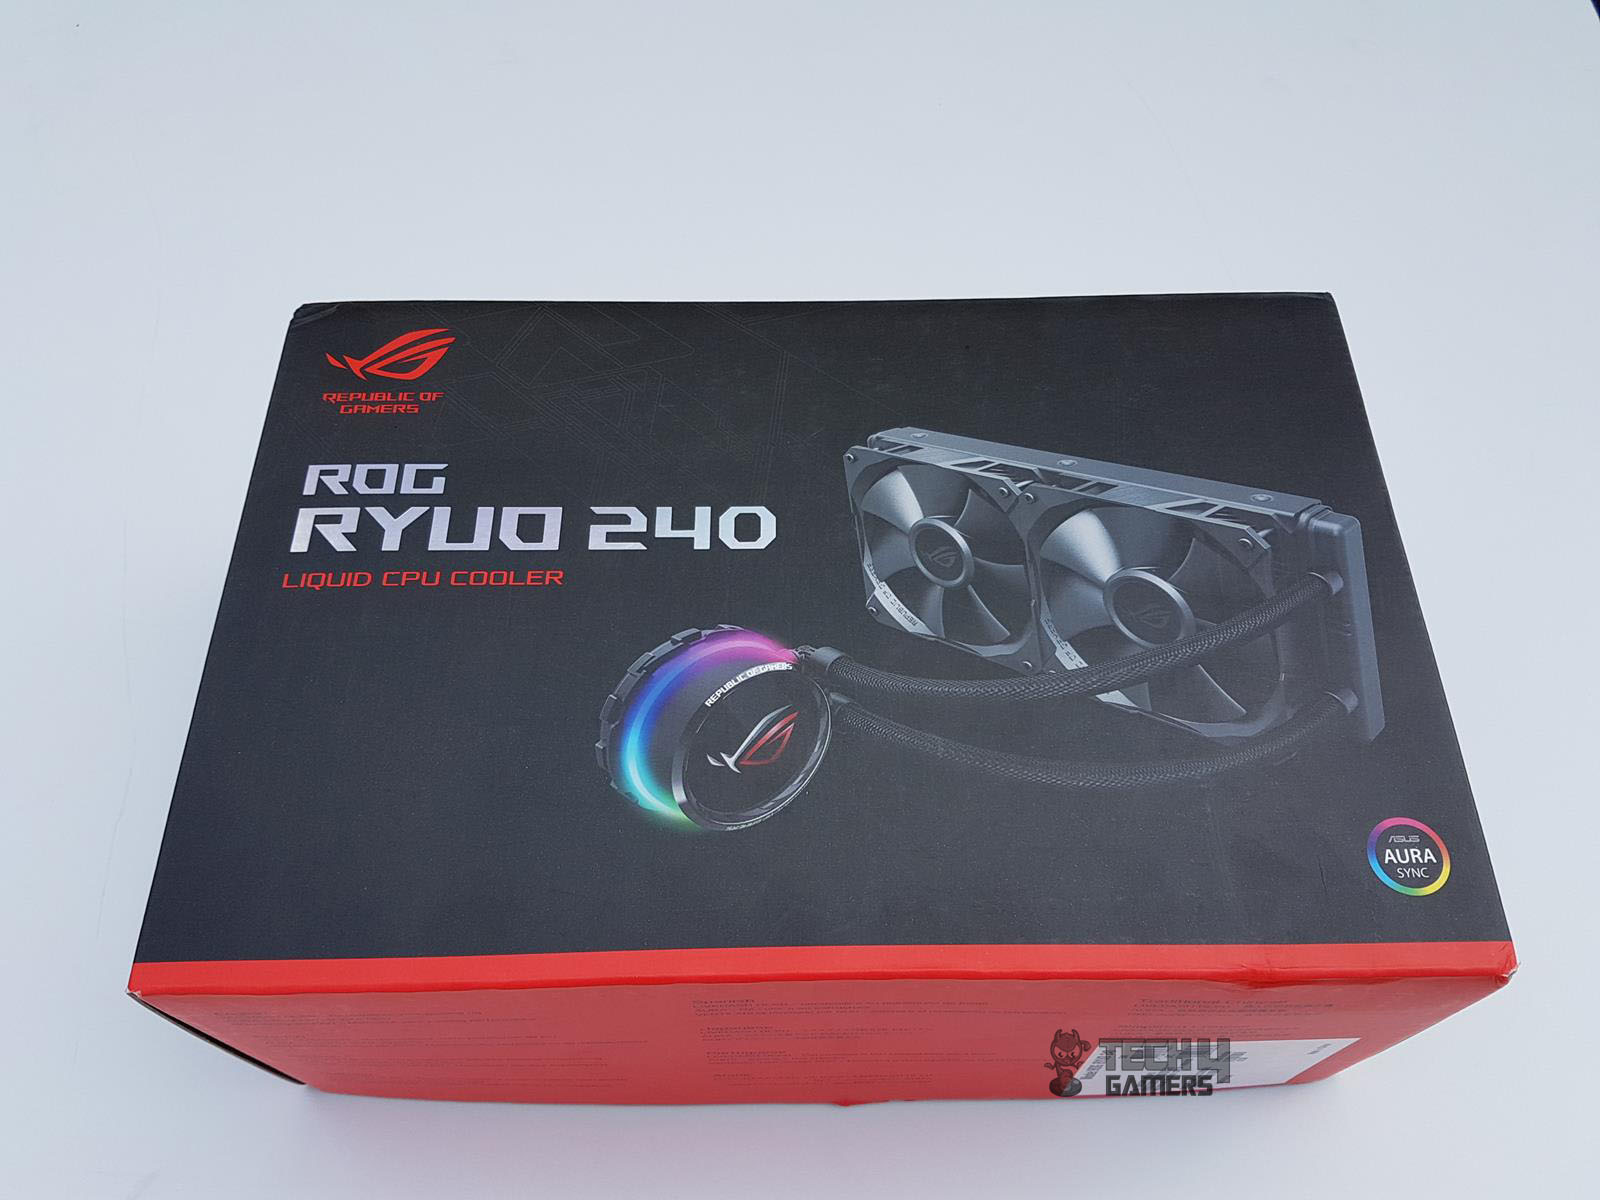
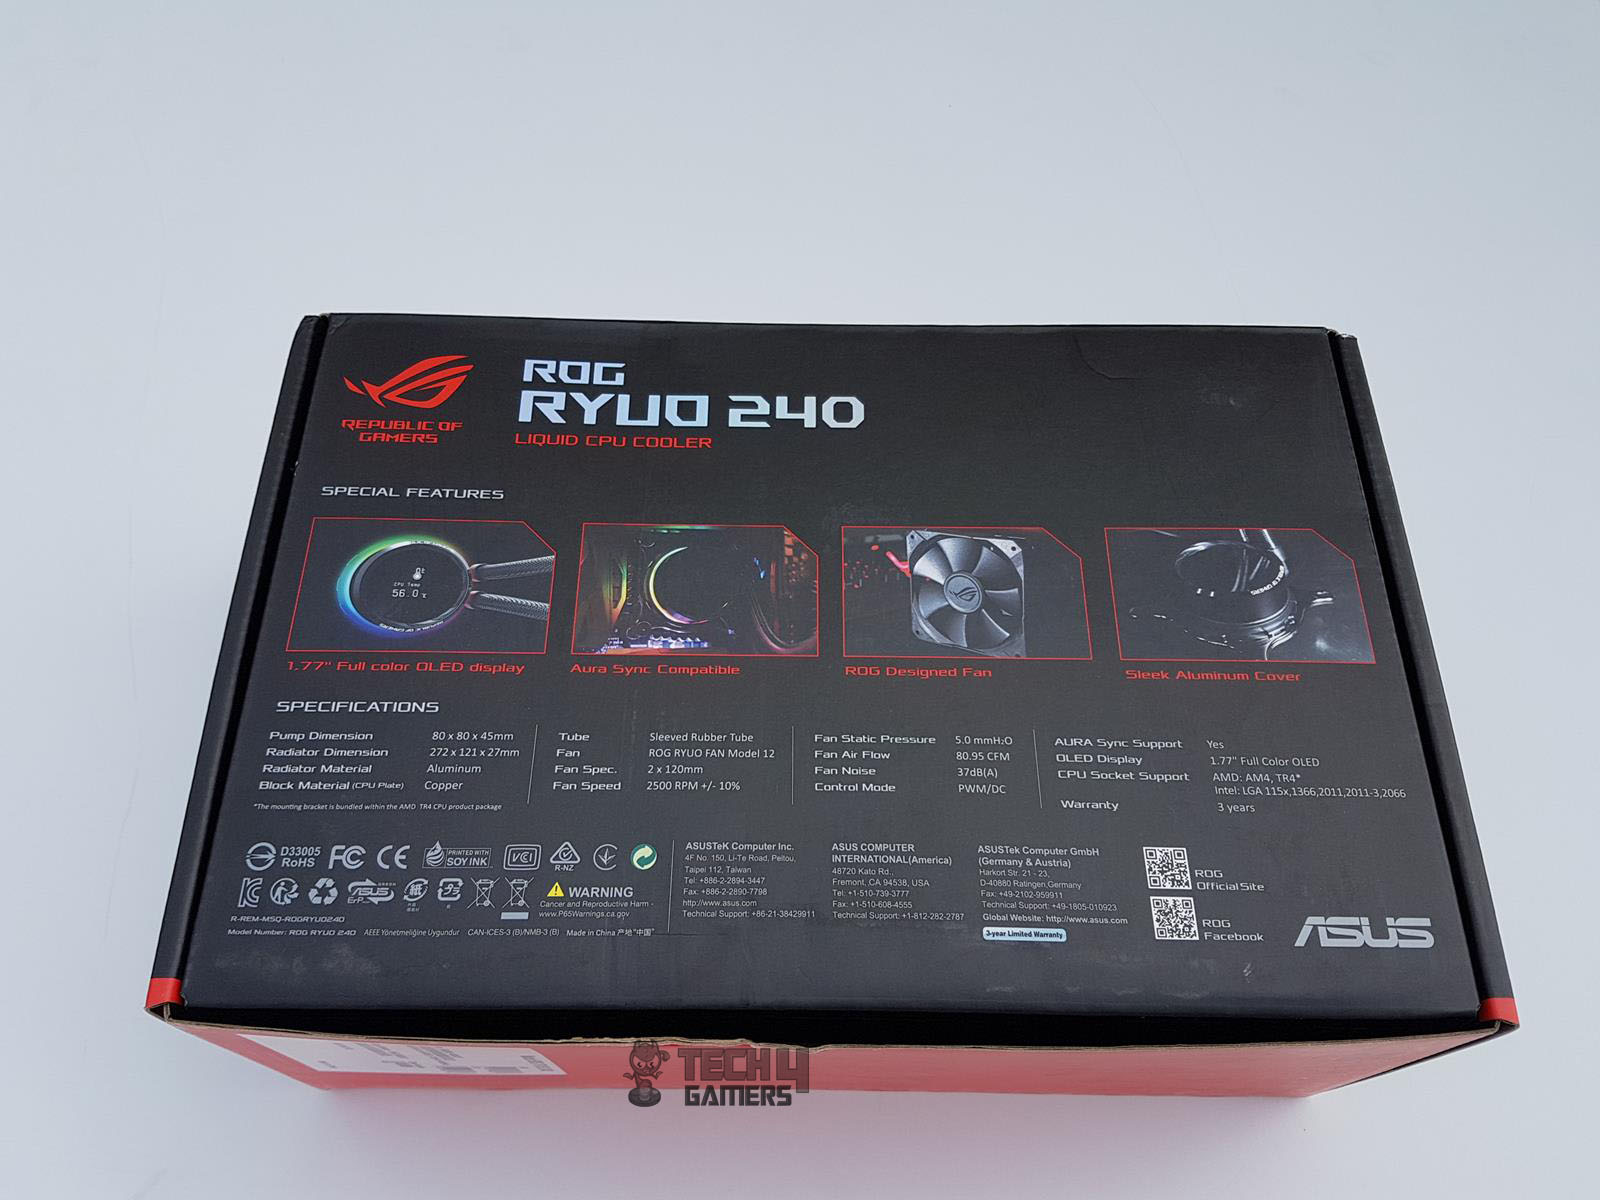
Packaging and Unboxing
The cooler is shipped in a standard ROG-styling packing box made of cardboard.
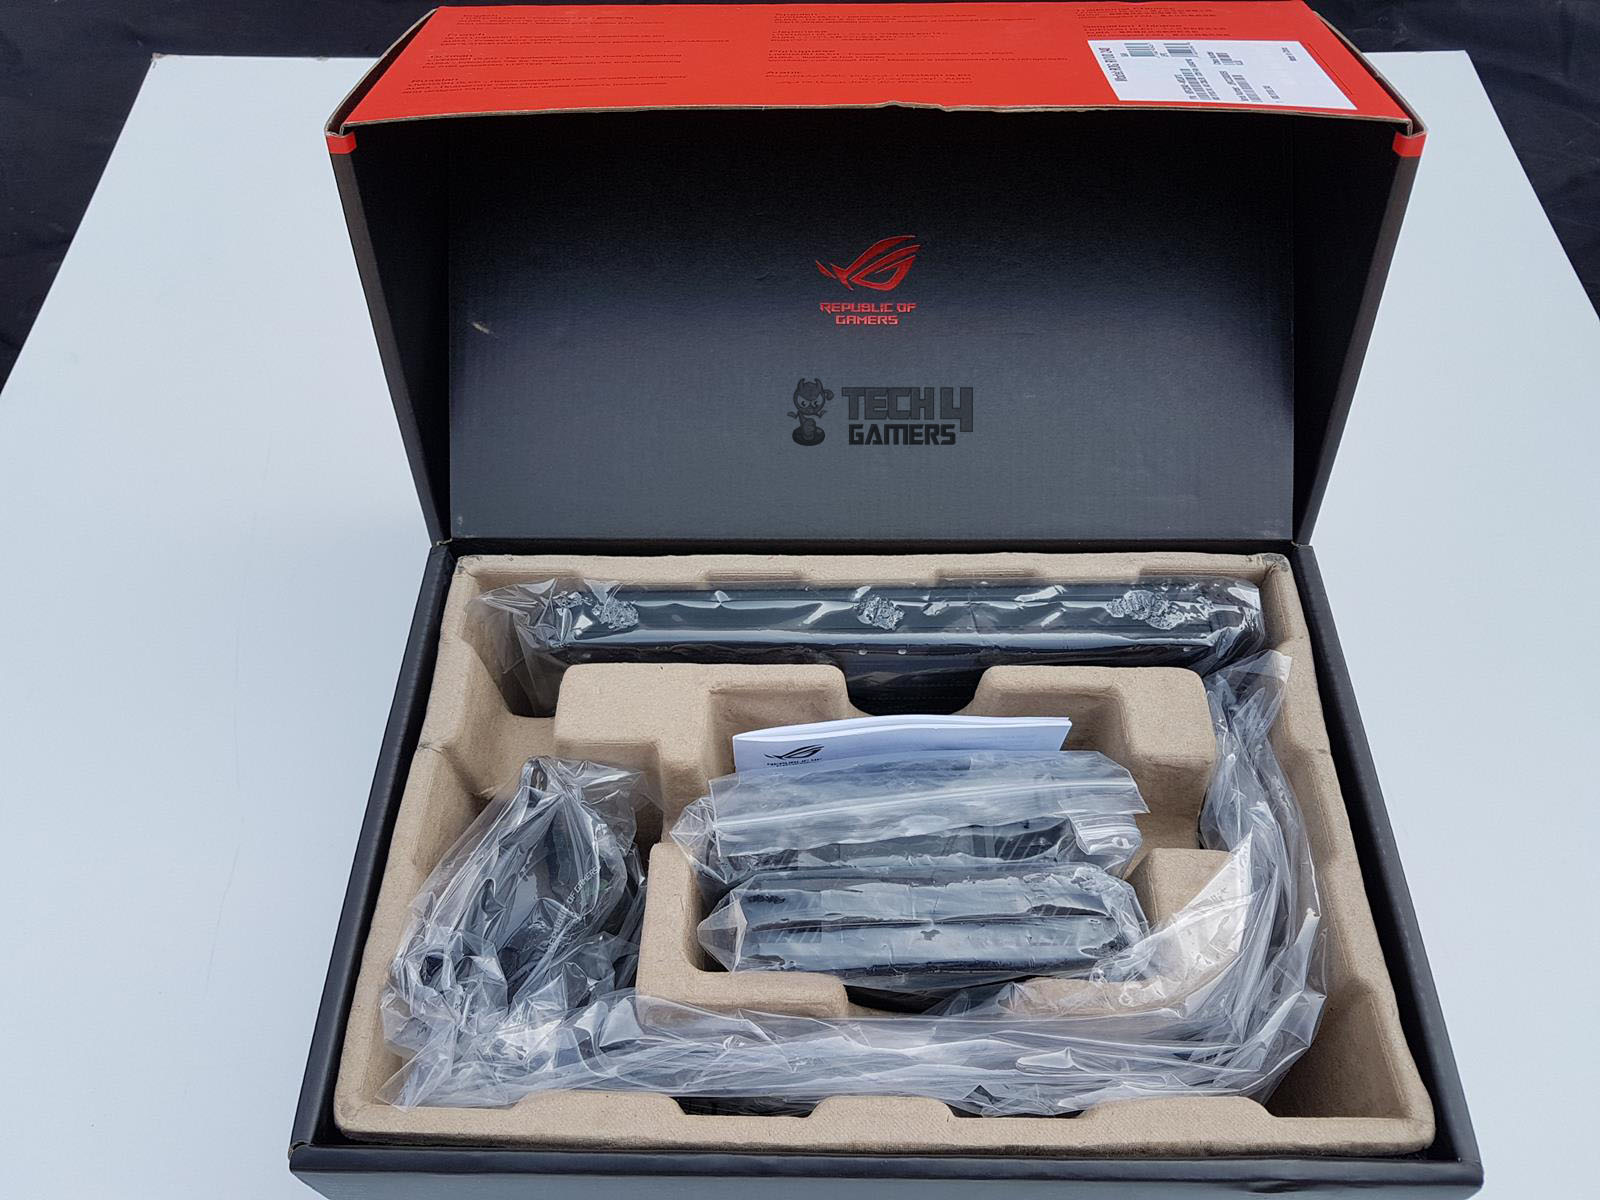
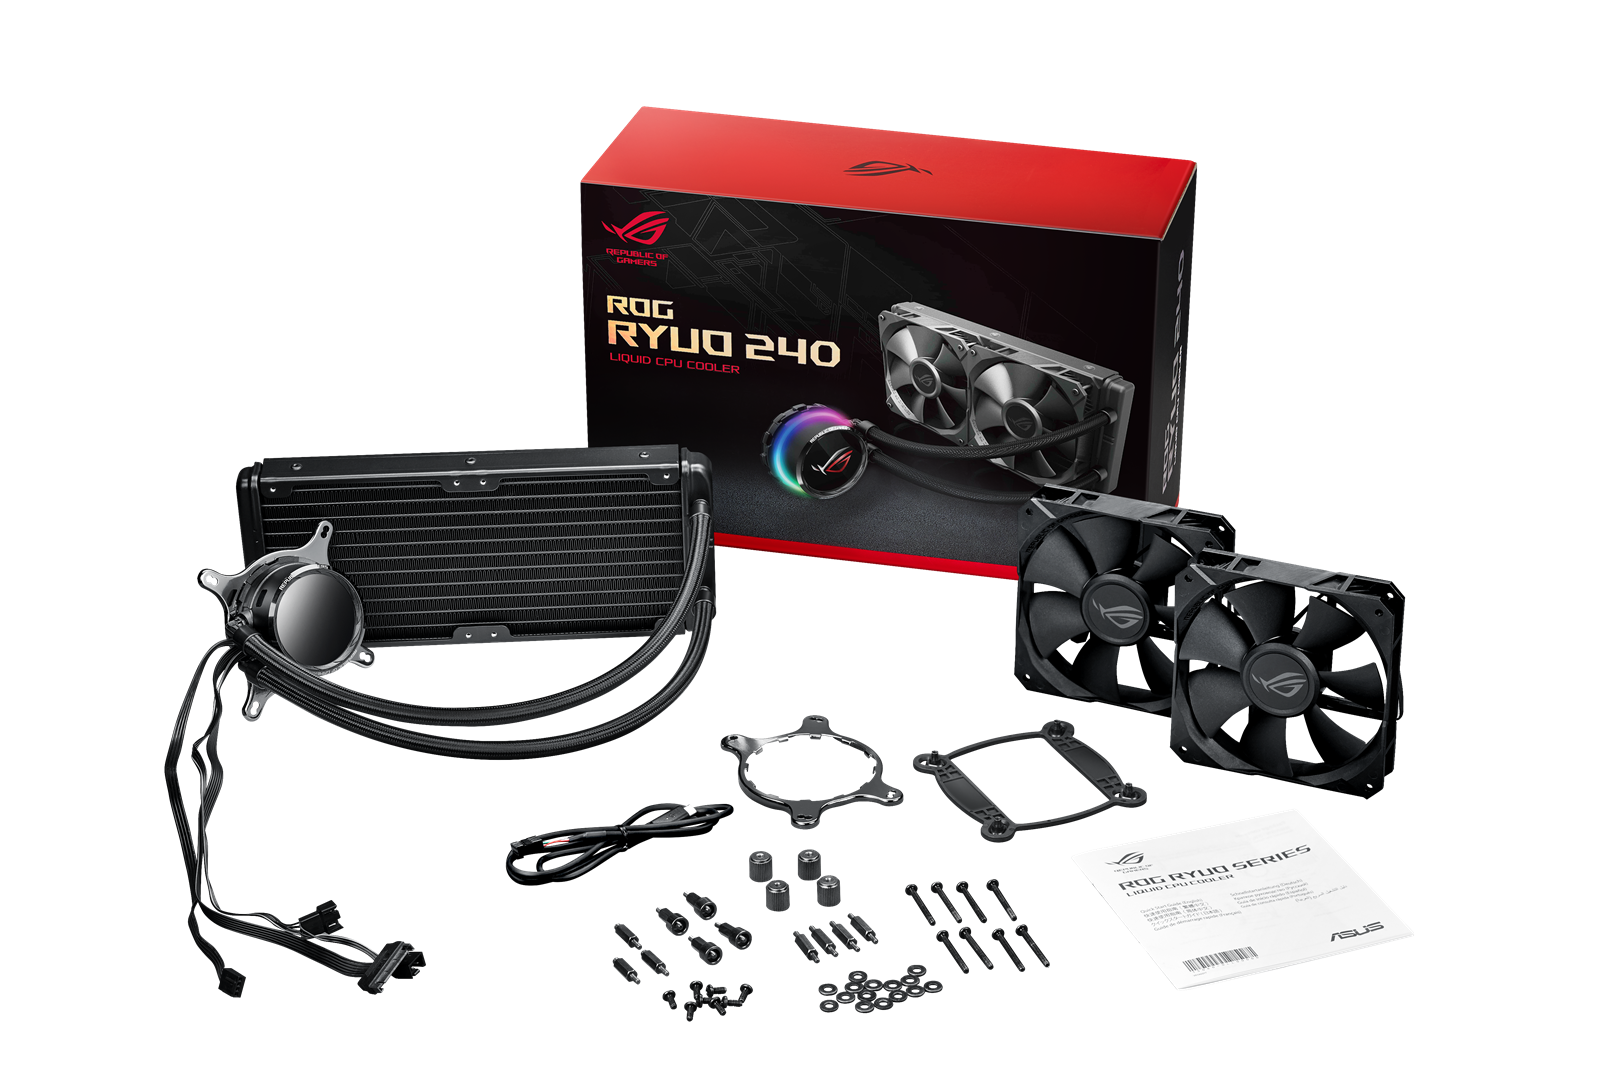
Contents
The image shows the box contents:
Closer Look
It is time to look into the design of this cooler, followed by our testing to see what it offers to the users.
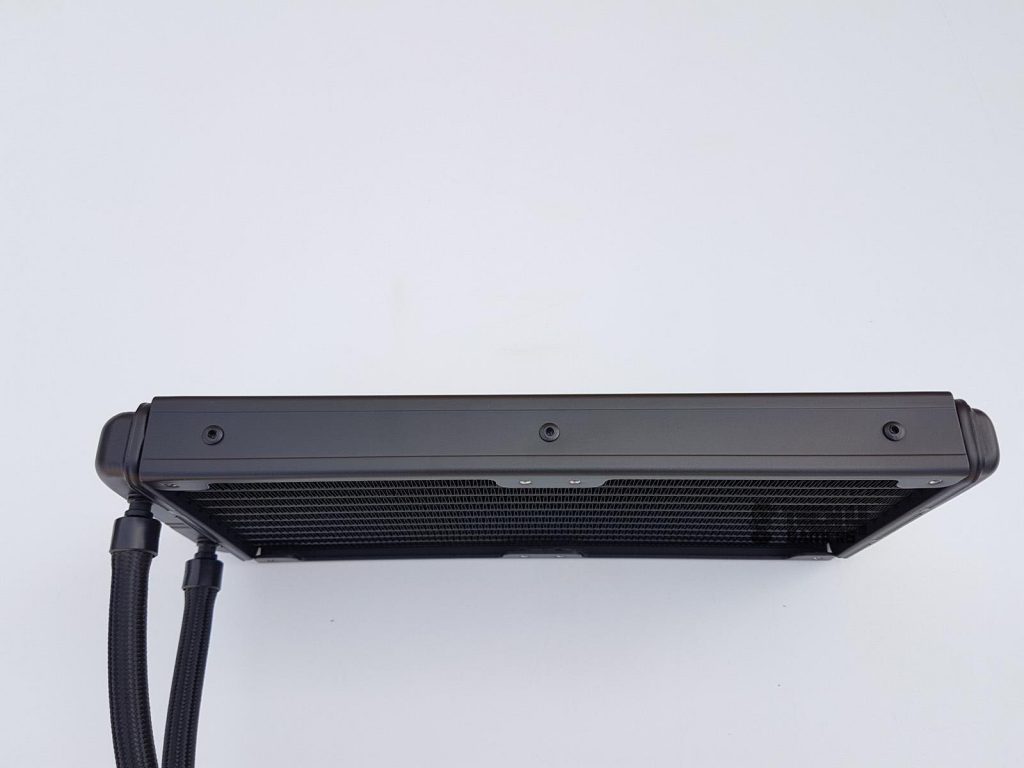
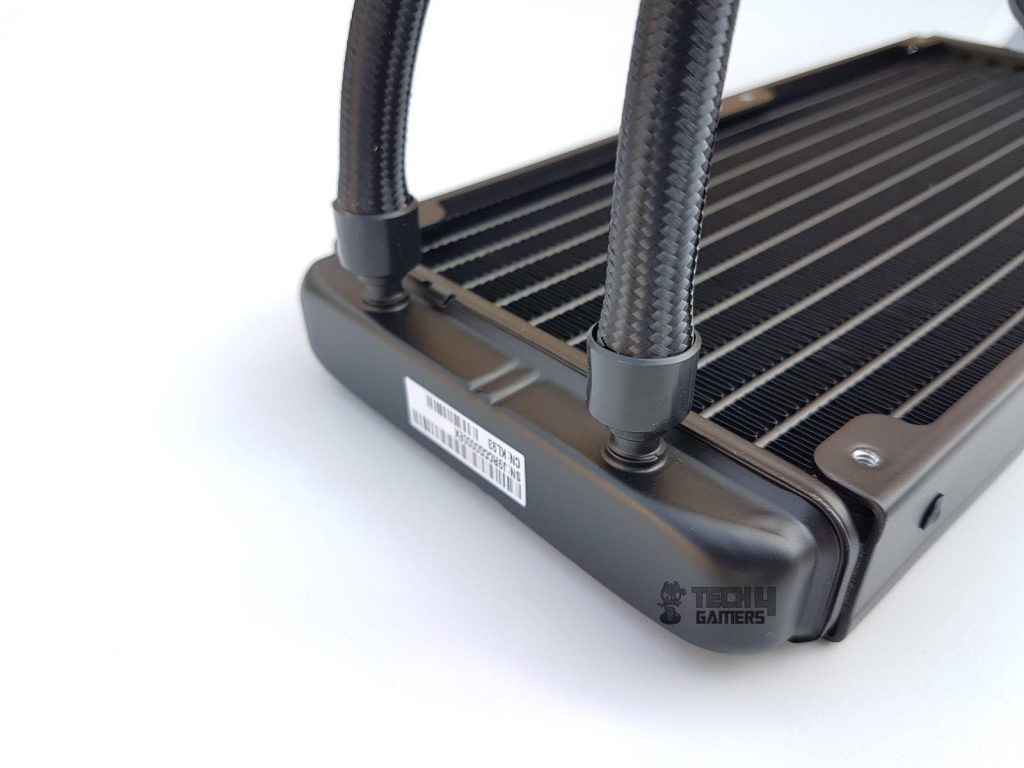
Radiator
The dimension of the radiator is 272x121x27mm, where 27mm is the thickness or height of the radiator. It is a slim radiator. With 25mm fans, the total height would be 52mm. The total thickness of the unit when assembled was 54.56mm, as reported by my digital caliper. This is due to the thick heads of the fan screws.
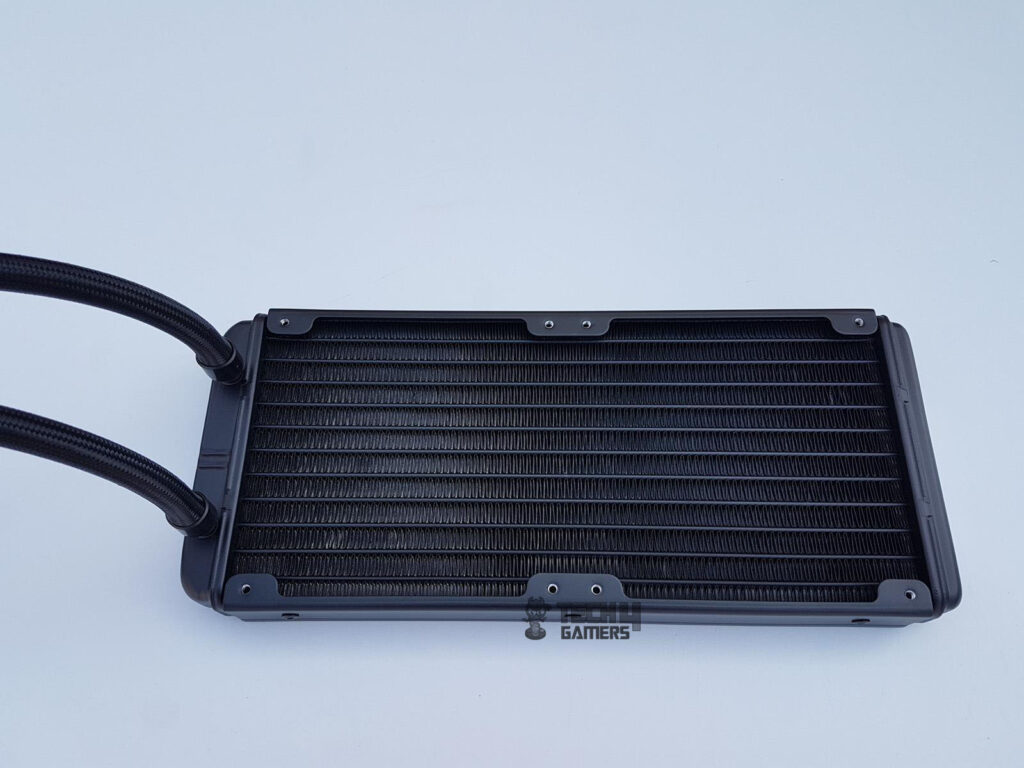
This aluminum radiator is lightweight, has 20 FPI for high airflow, and features 13 channels with angular edges. It has a thinner far chamber, 105mm spacing between mounting holes, and a 240mm long fin area. The radiator is 121mm deep, with a fin stack thickness of about 24.16mm.
Remain cautious when installing fans as there’s no protective plating under the mounting holes, which could potentially damage the fins and lead to performance issues or leaks.
This cooler uses flexible rubber tubing with sleeves on it for better aesthetics. The length of the tube is 380mm. The tubes have an OD of 10.82mm, as measured with a digital caliper.
Water Block
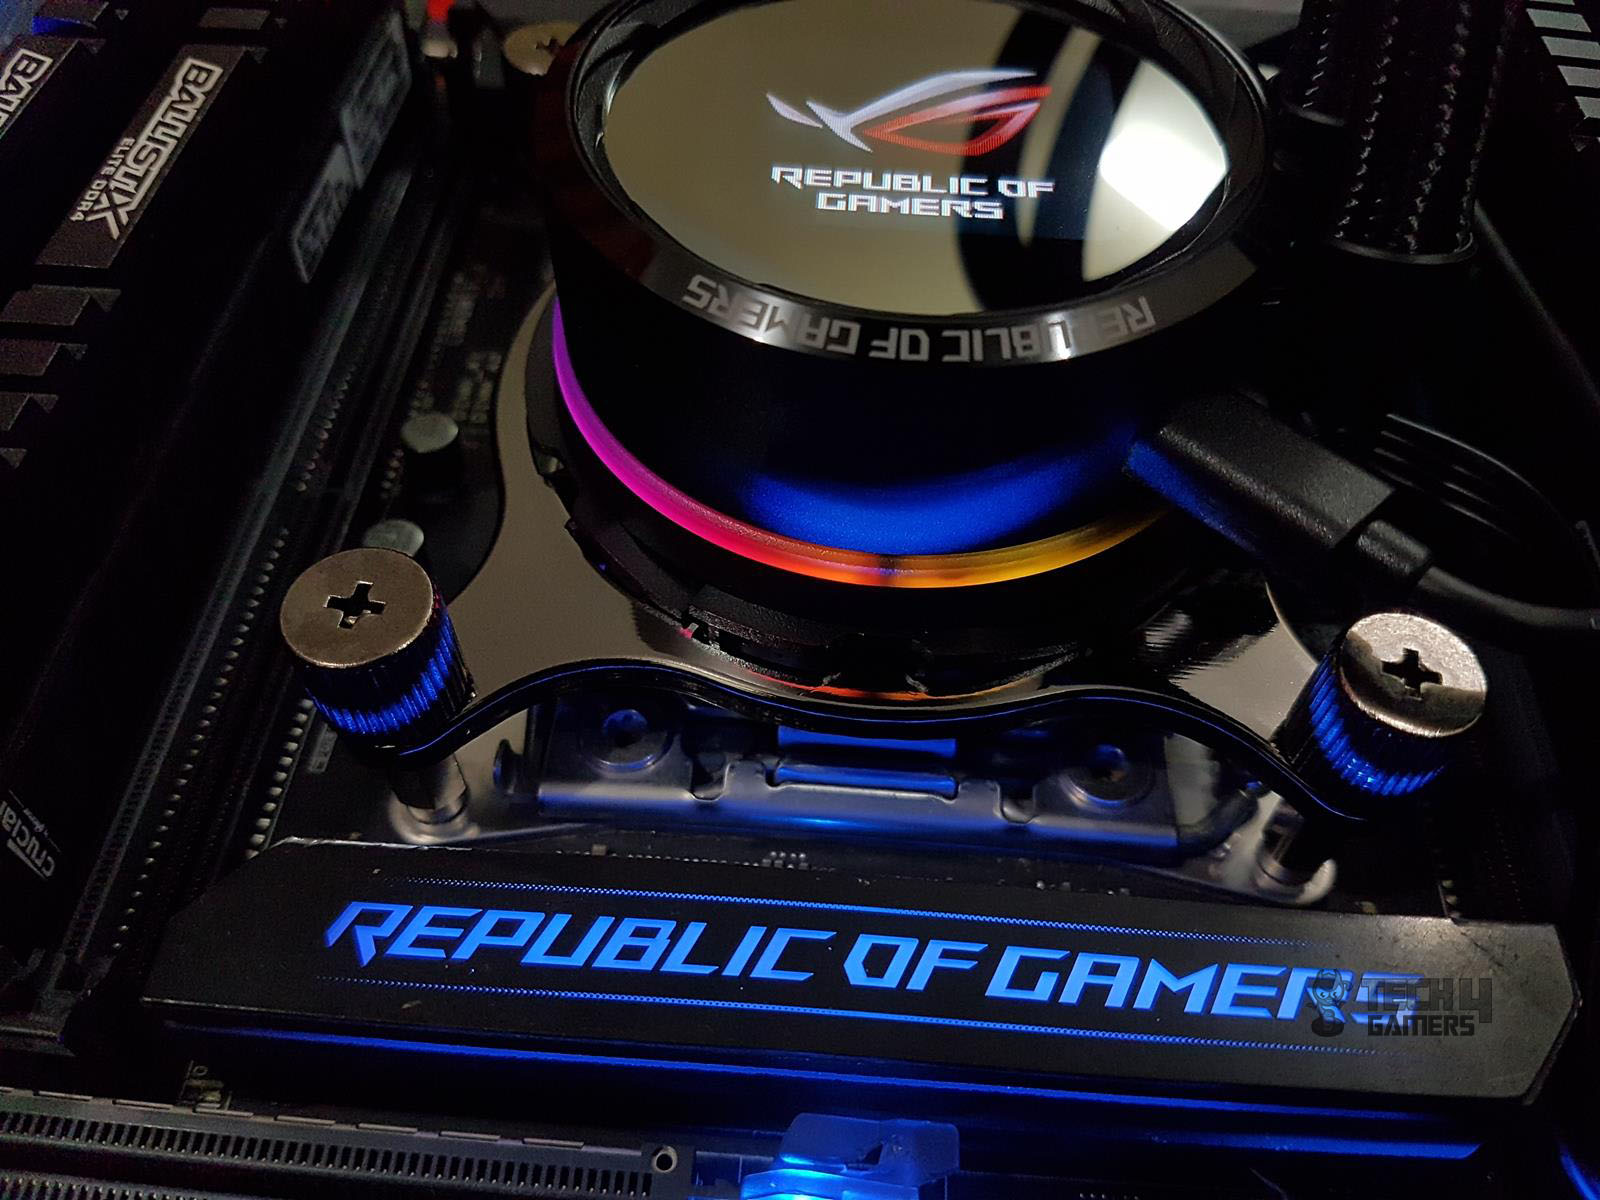
Let’s take a look at the main showcase of this cooler which is the CPU block. It boasts a cutting-edge cooling-plate design with micro-channels, enhancing thermal dissipation and reducing resistance for efficient cooling. It’s powered by the 6th generation Asetek pumps with an ASUS customized PCB for added functionality.
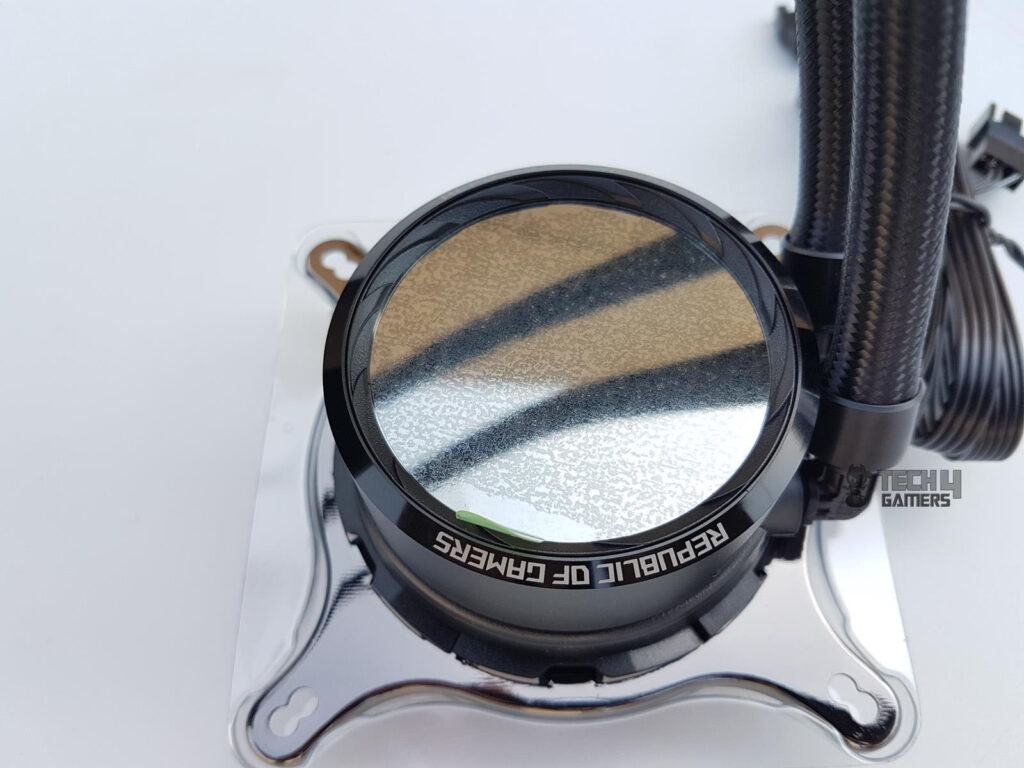
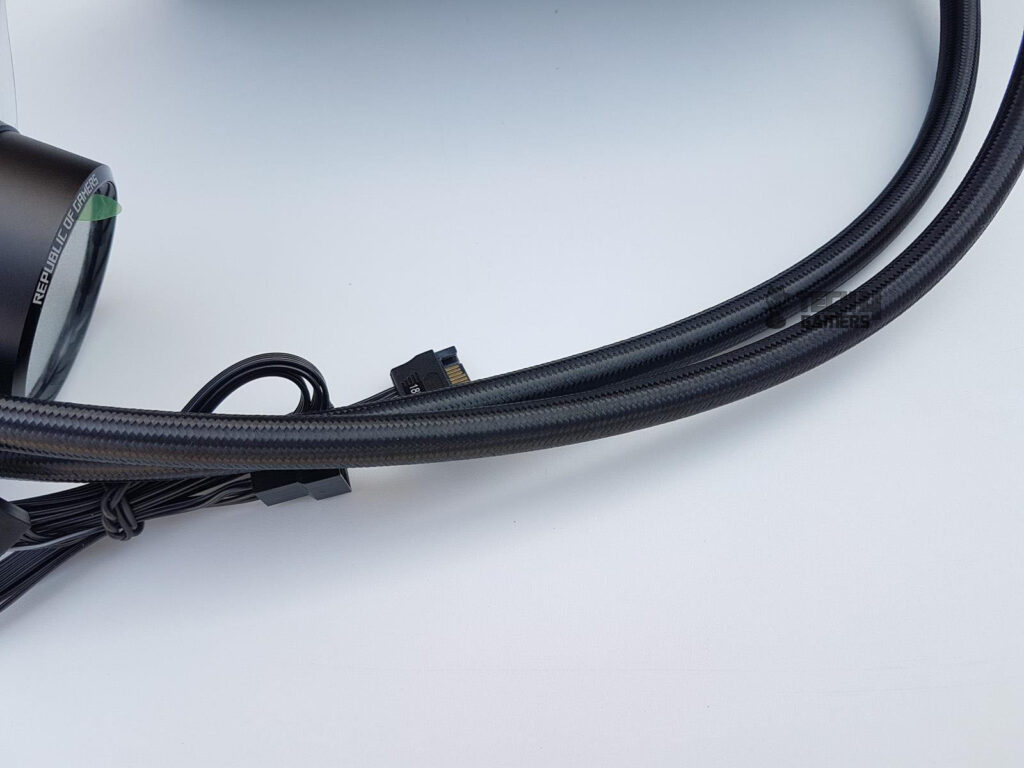
The pump housing is made of aluminum and measures 80x80x45mm. It is finished in a black color tone, and it looks damn impressive in person. The housing has a circular design with 90° barb fittings at the back, allowing easy rotation of the tubes.
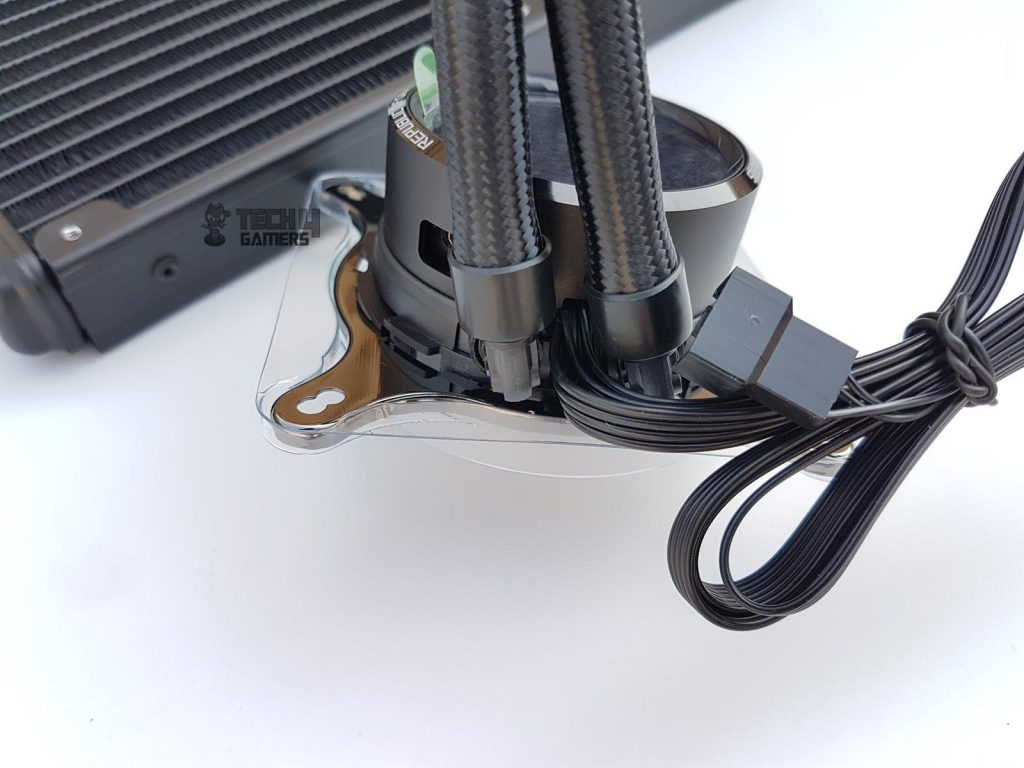
Three flat cables are situated between the fittings for cable management. This does add to the overall cable management challenge, and if the user is not good at it, the bulk of cables could ruin the impressive OLED display and RGB lighting.
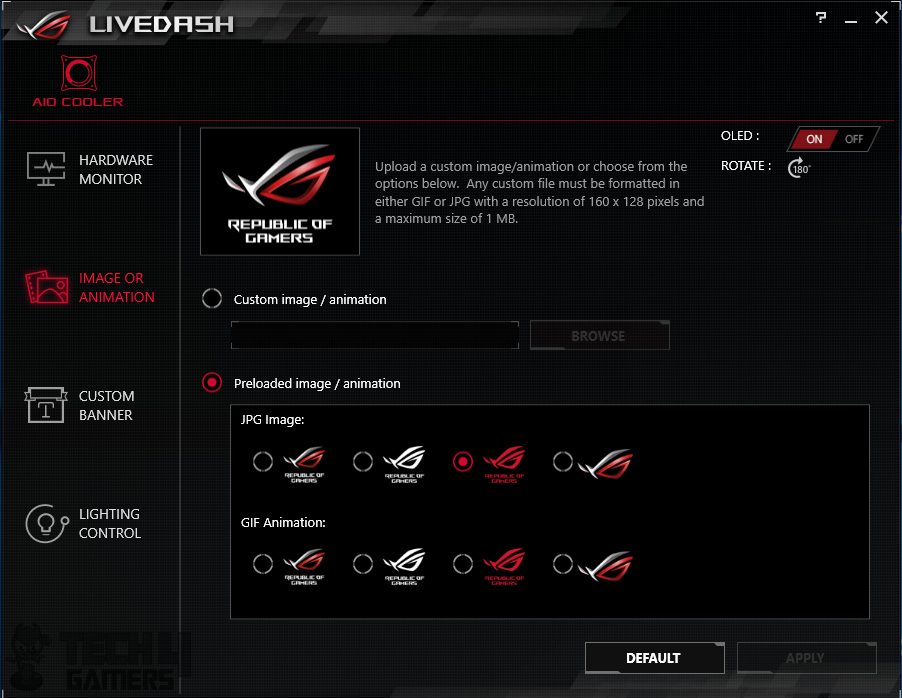
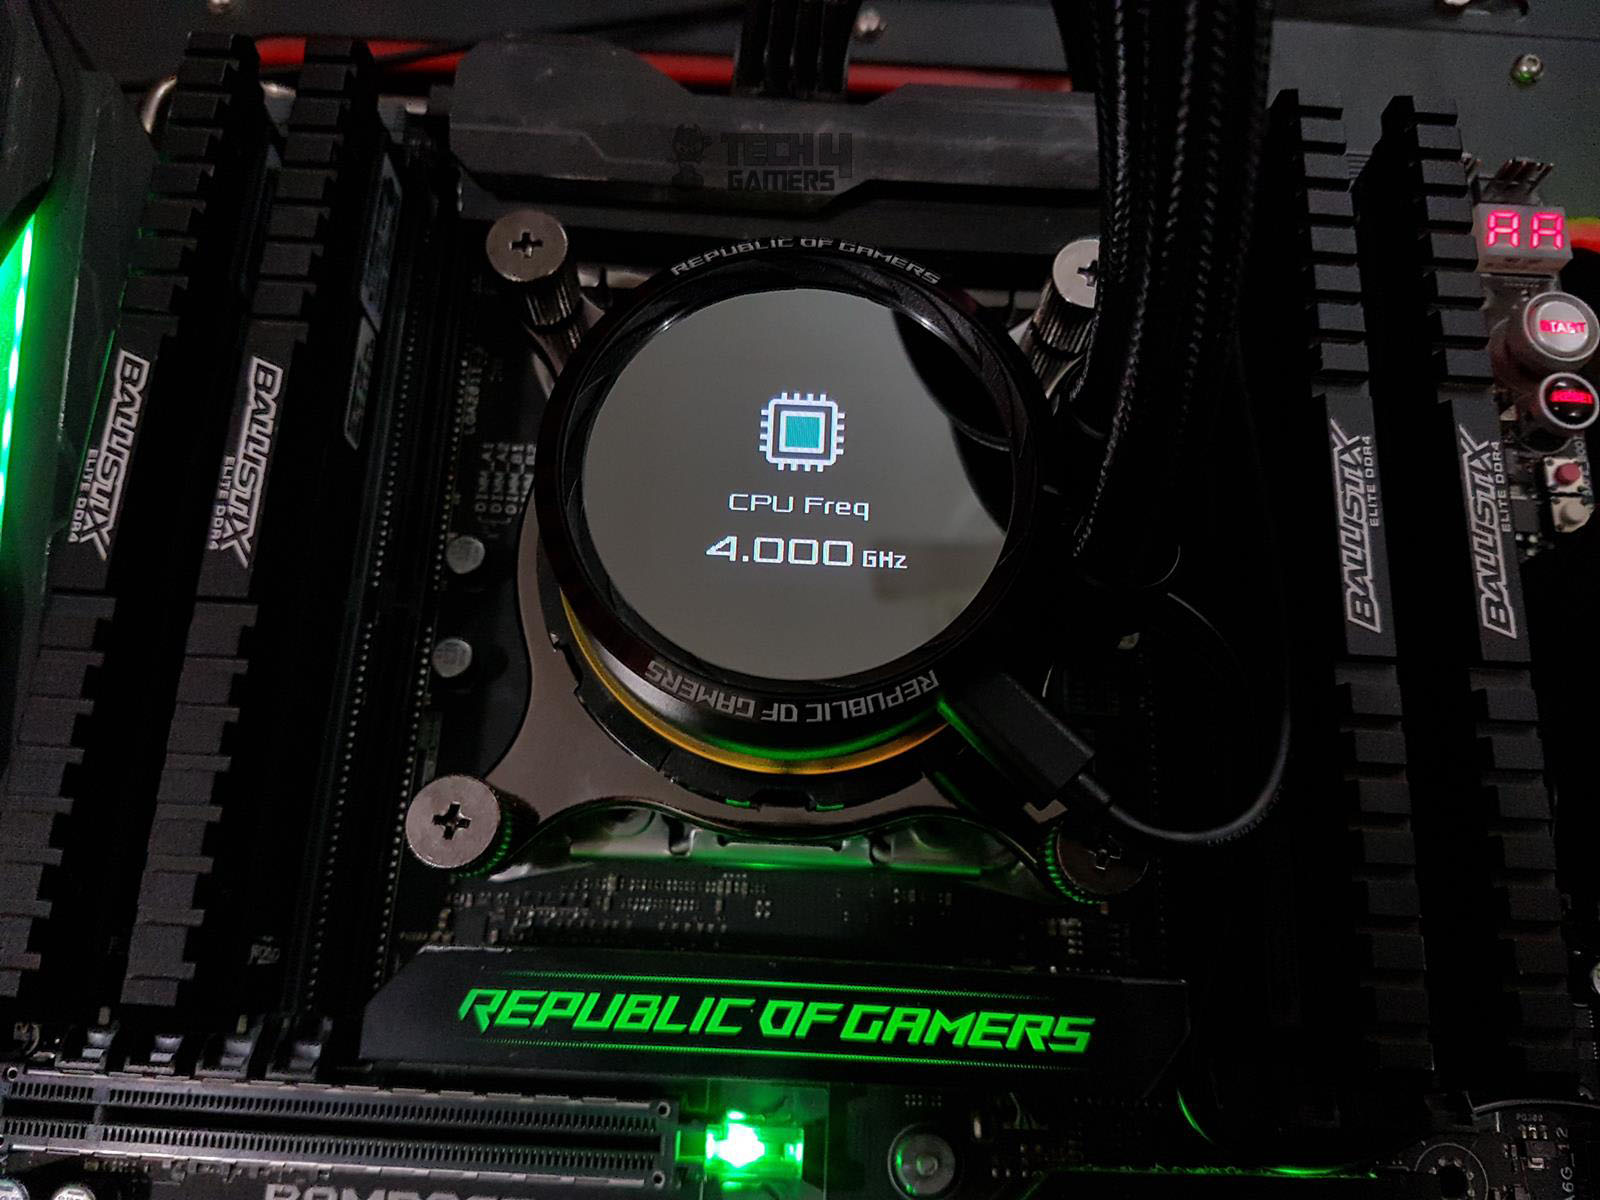
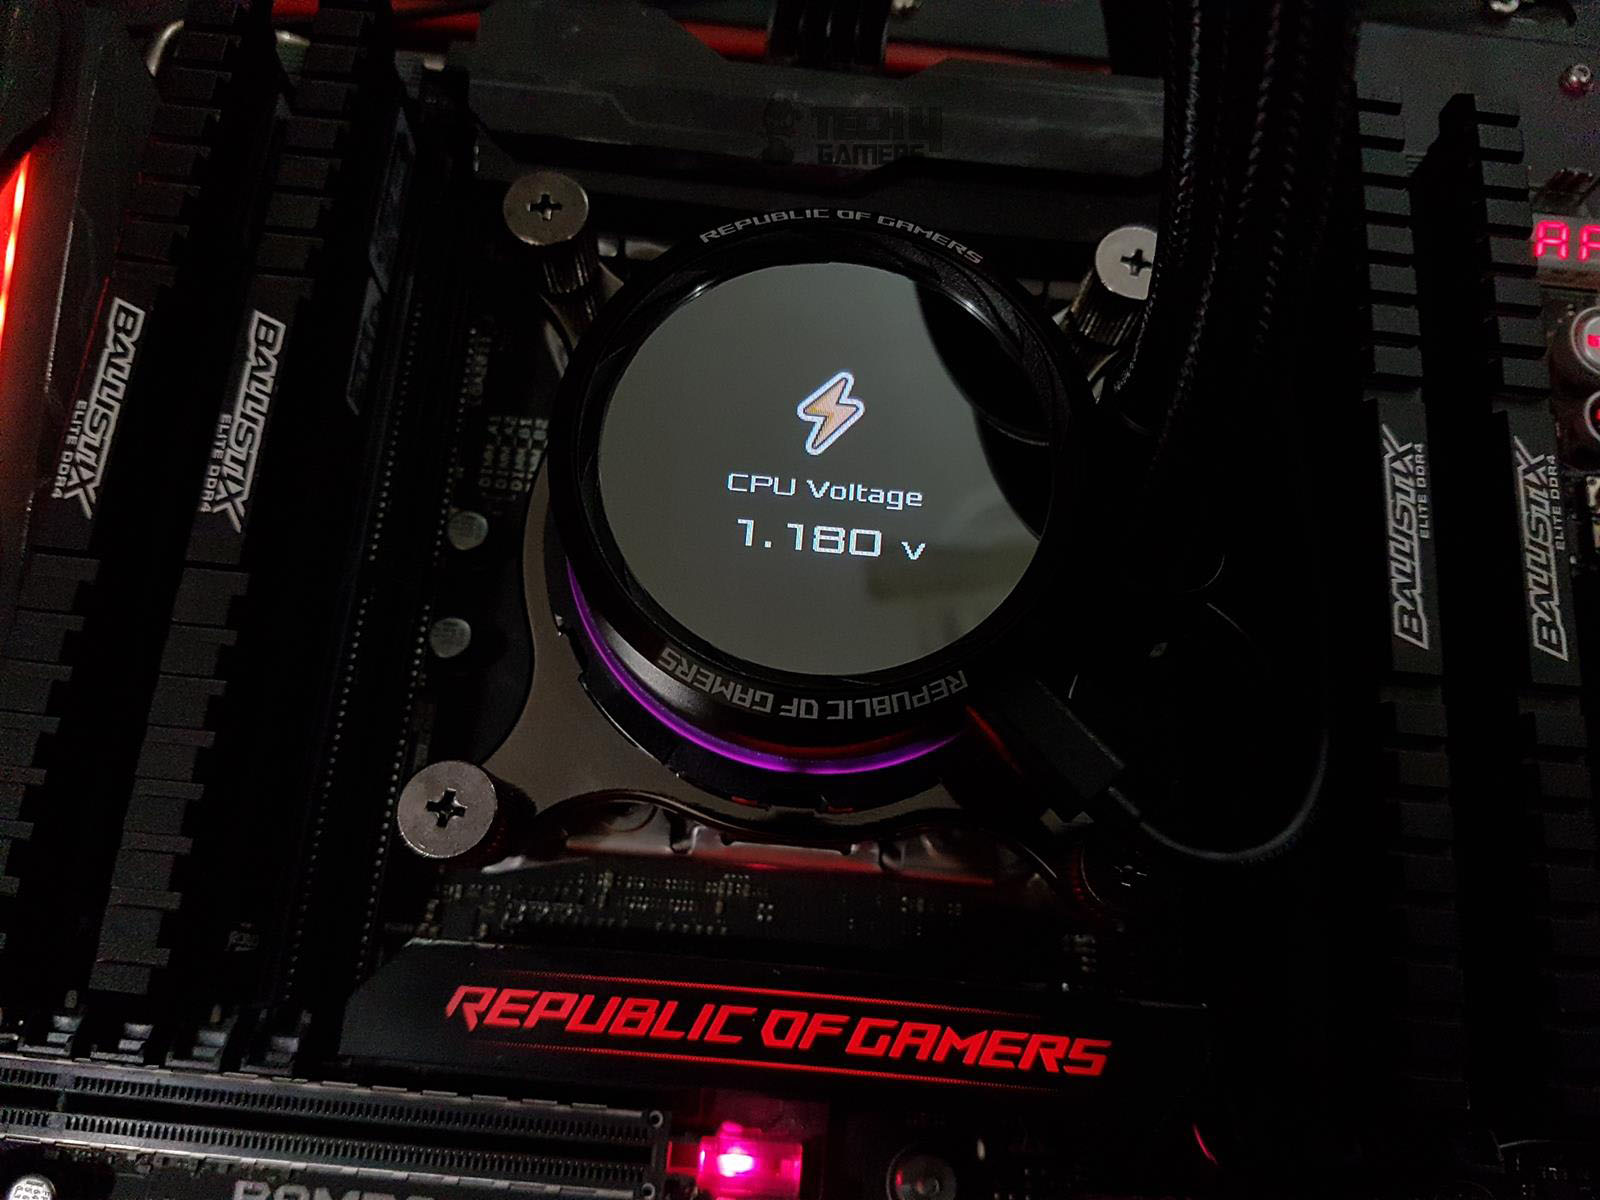
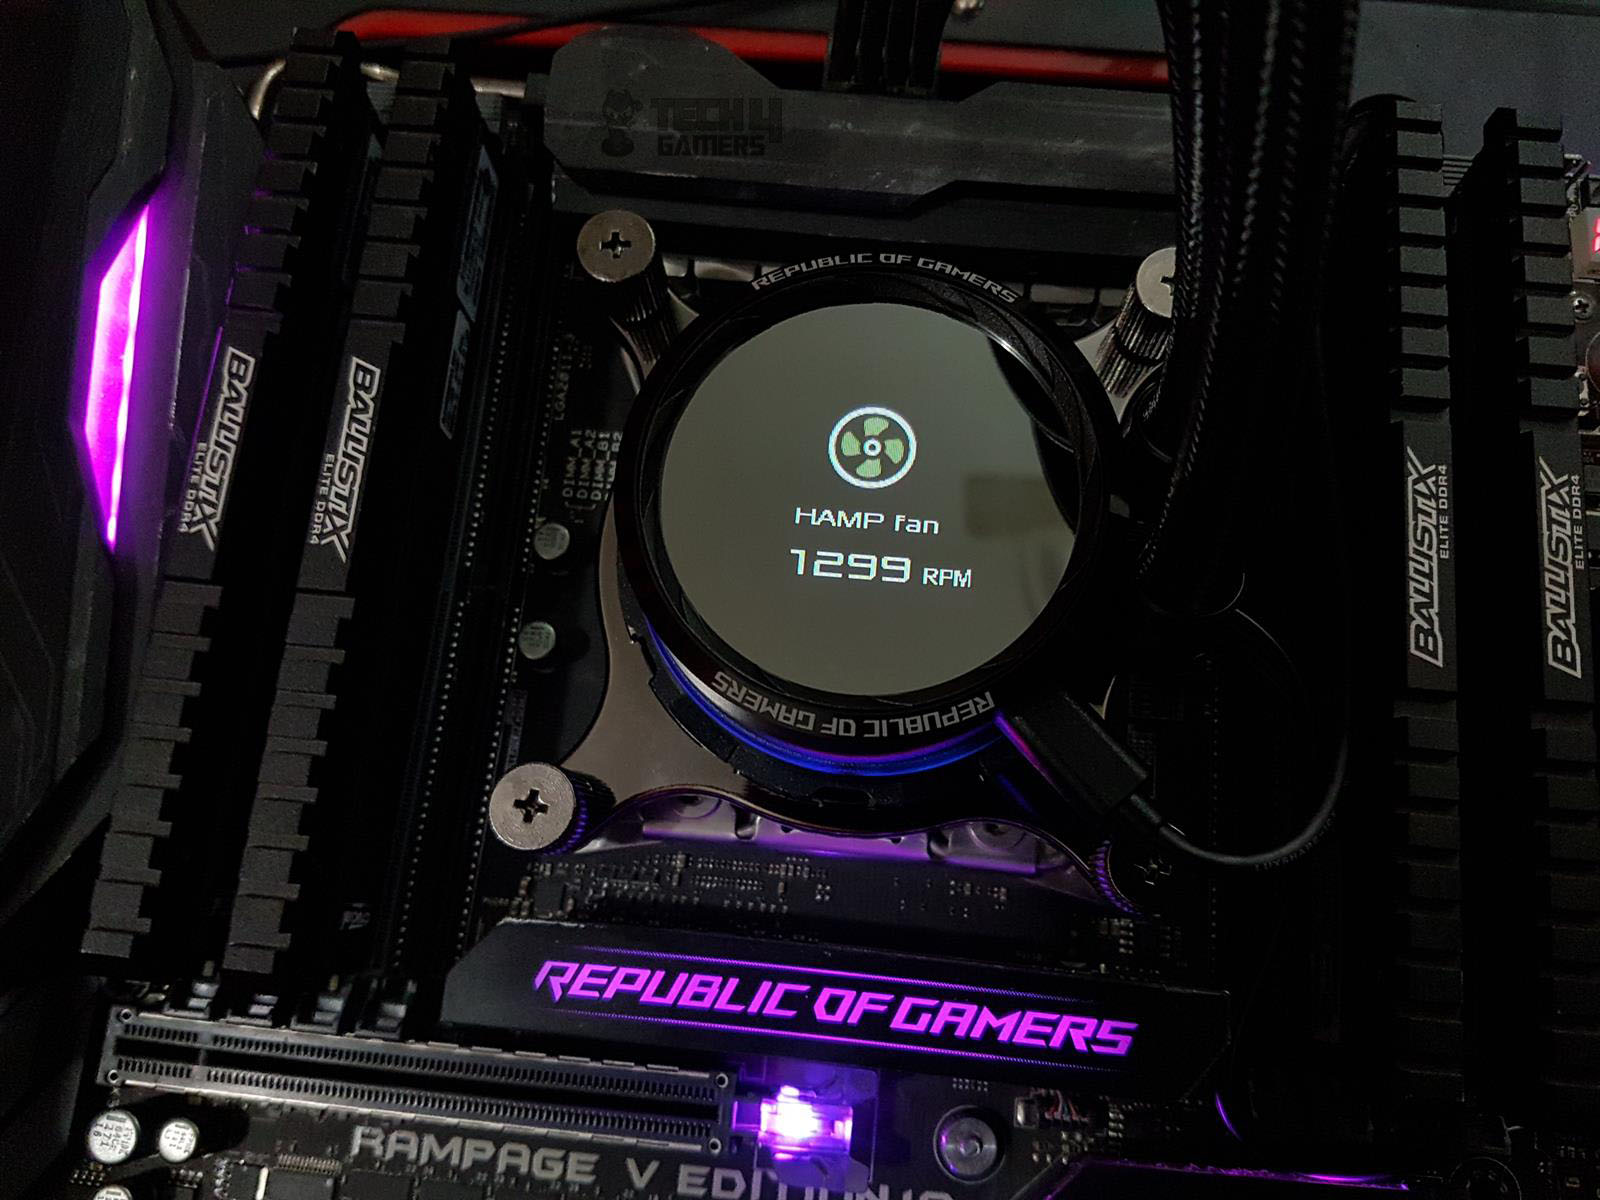
The top of the block features an NCVM coating and an industry-first 1.77″ OLED display, customizable for content within 160×128 pixel JPEG/GIF format under 1MB. ASUS provides user-friendly LiveDash software for managing the display, particularly optimized for ASUS motherboards to monitor hardware stats.
The user has the option of flipping the display 180°, so there is no need to worry about deciding upon the layout of the block when installing. The right side is plain. Plenty more to explore with this block.
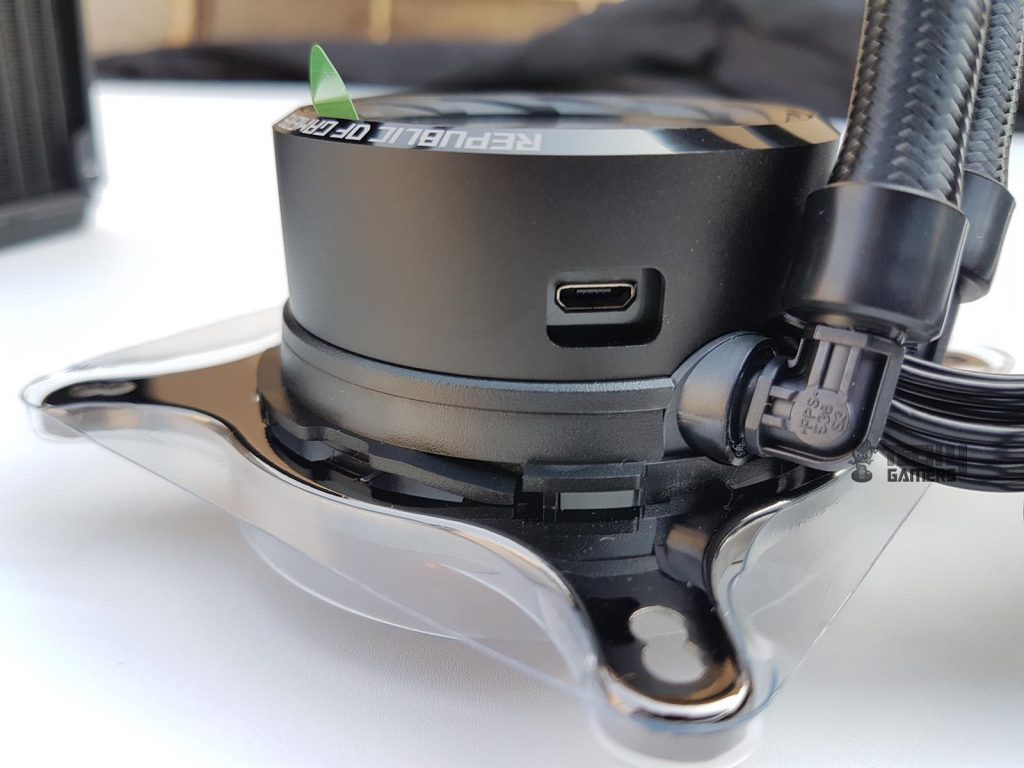

On the left side of the block, there’s a micro USB port, but it’s a bit deep into the housing, near the rear. My only gripe with this design is that accessing the port can be a bit tricky, especially after installing the block.
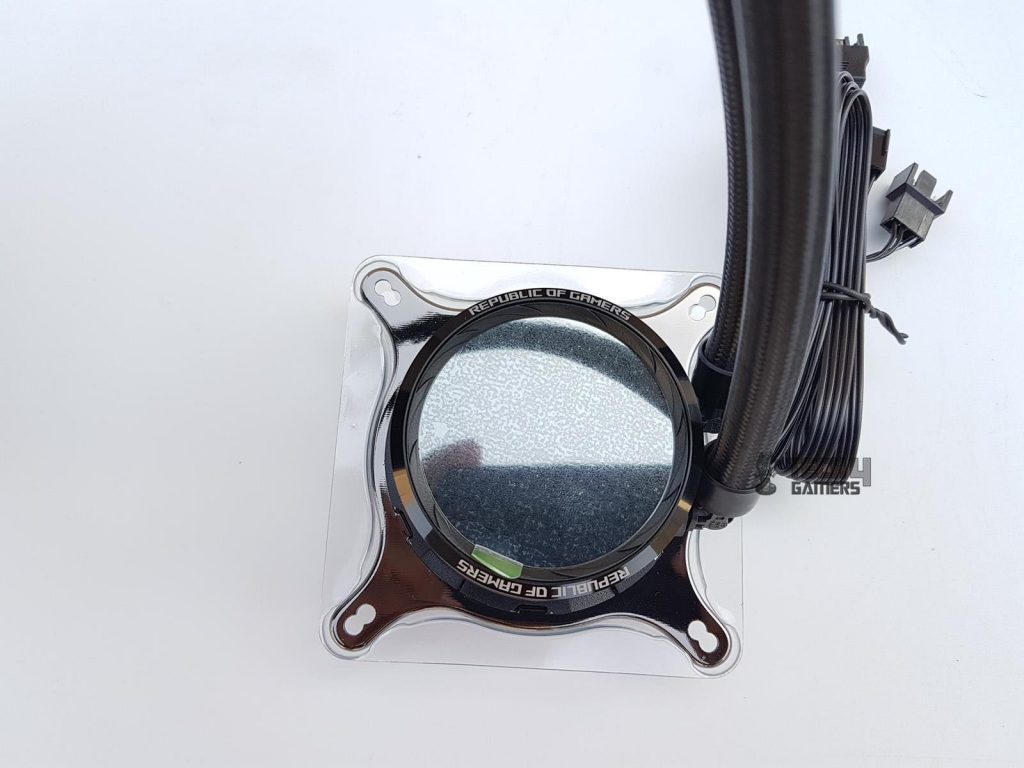
The top chamber is 19mm high, while the lower chamber is wider. An addressable RGB LED strip at this point lights up when connected to the PSU via SATA cable, creating a cool effect around the CPU socket.
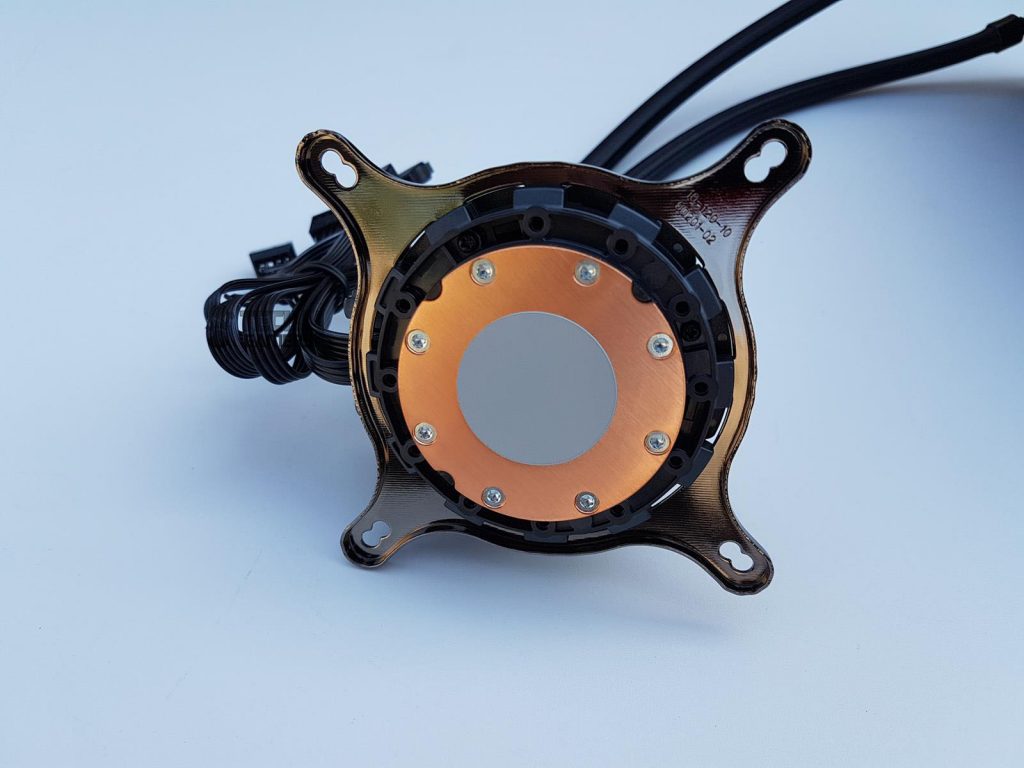
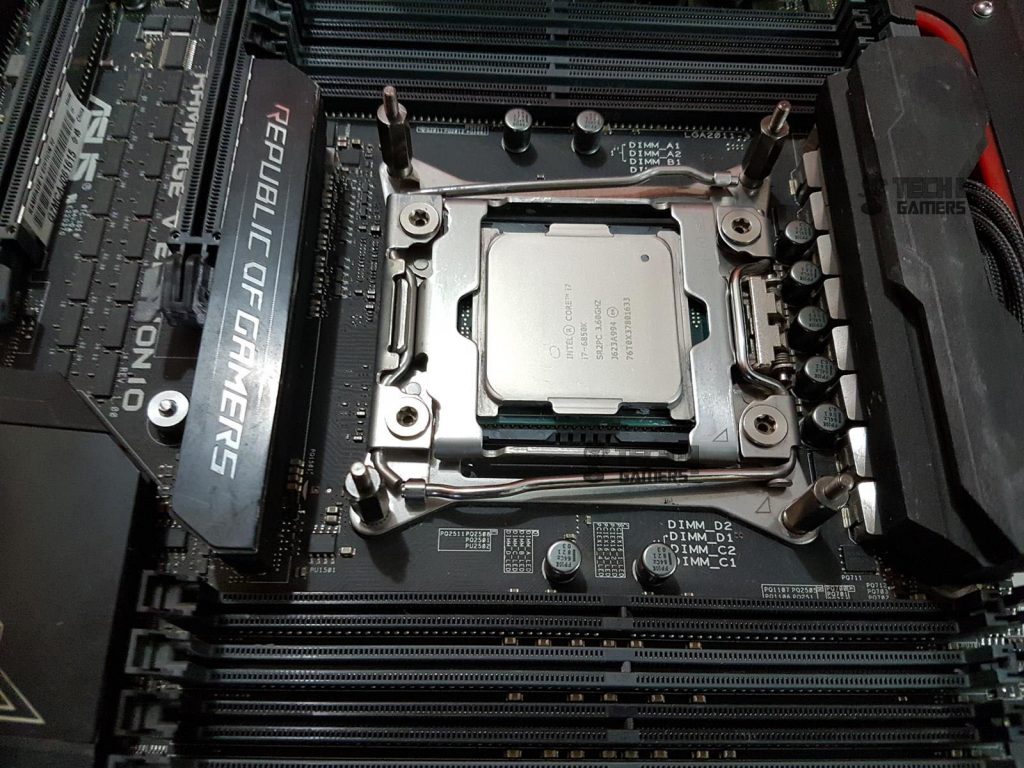
We have a 54mm diameter circular base made of copper at the bottom, and it comes with pre-applied thermal paste. Asetek seems to have improved their thermal paste as I tested the cooler with both their stock paste and Noctua NT-H1, and the performance difference is minimal.
The Intel mounting bracket was pre-installed, but I was able to remove it easily to install an AMD mounting bracket. I couldn’t find much information about the pump, but it’s rated at 12VDC and uses 3.9W. The pump’s maximum RPM, as shown in the BIOS, is 2780, and I found it to be silent even when running at full speed.
Fans
It is time to take a look at ASUS ROG Ryuo Model 12 fans. These are the custom fans introduced with their RYUO coolers, and they totally symbolize the ROG concept. First, let’s take a look at their specifications:
| Variable | Value |
| Dimension (mm) | 125x125x25 |
| Speed (RPM) | 2500 ± 10% |
| Static Pressure (mmH2O) | 5.0 at 12V |
| Air Flow (CFM) | 80.95 |
| Noise | 37.6 dB(A) |
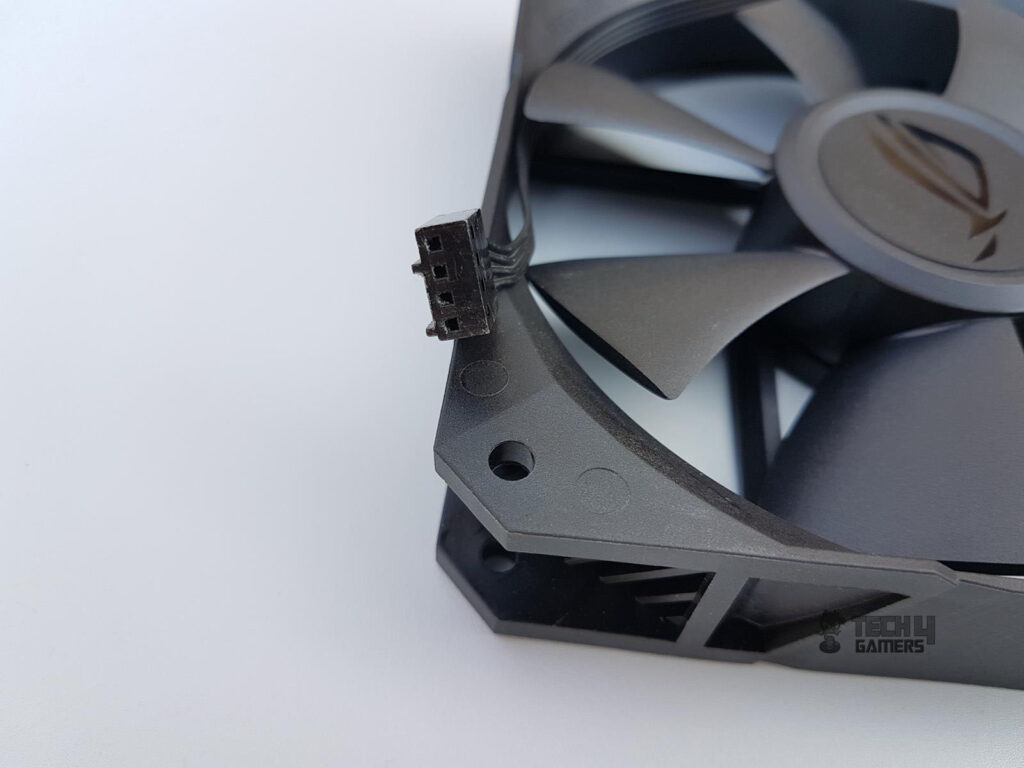
| Control | 4-pin PWM |
| Voltage (VDC) | 12 |
| Current (Amp) | 0.58 |
| Power (W) | 6.96 |
| Cable Length (mm) | 316 (approx) |
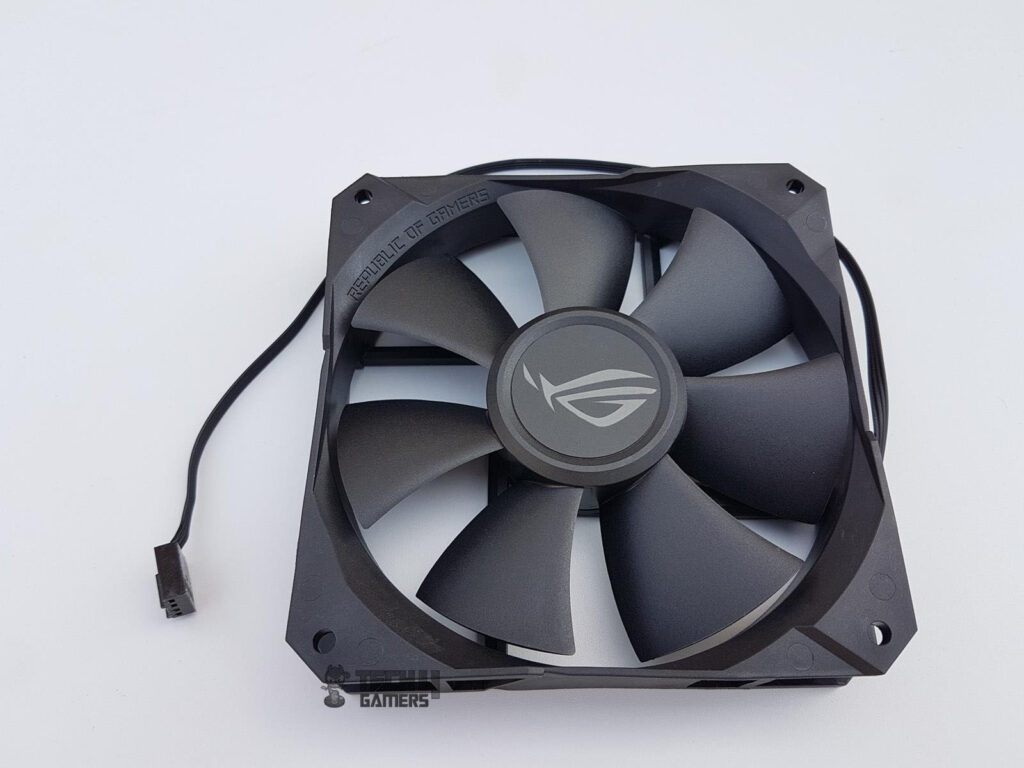
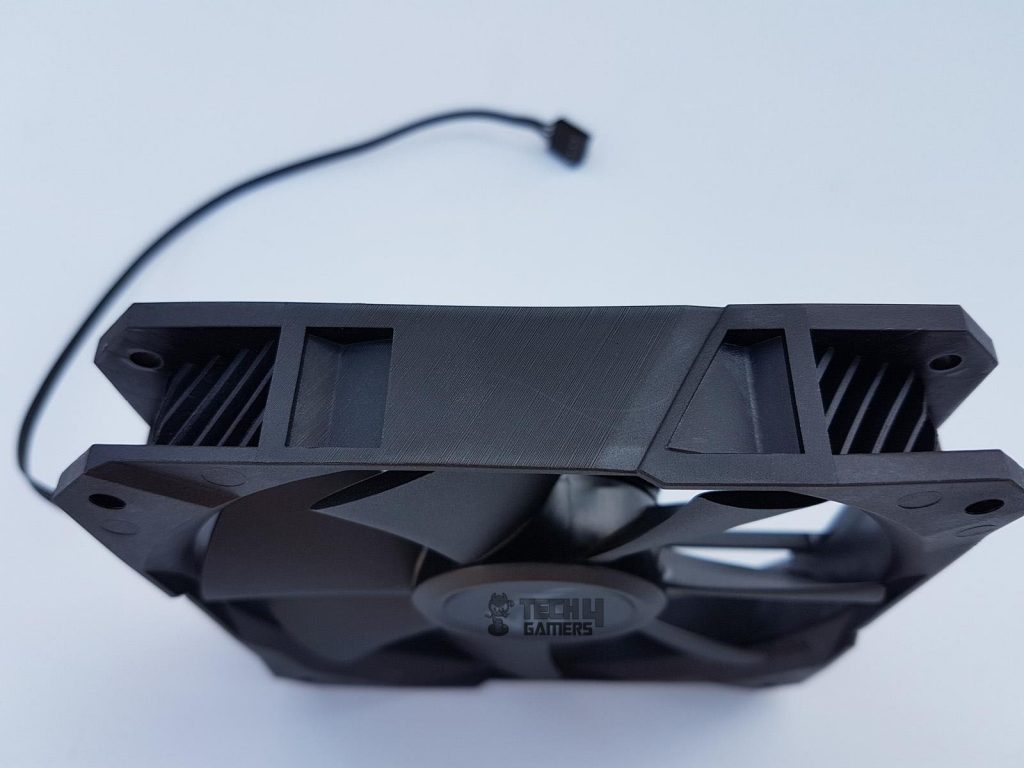
The fan has a black plastic frame with 7 impellers, designed for high-resistance surfaces, indicated by its static pressure rating. I found that it features a reflective ROG eye sticker at the center with a hub diameter of about 40mm. Surprisingly, there are no anti-vibration pads on the mounting corners, which I expected for the premium price.
The raised surface isn’t consistent along the entire length, making it tricky to use anti-vibration pads. The spacing between mounting holes is 105mm, and despite the plastic frame, it gives the appearance of brushed aluminum.
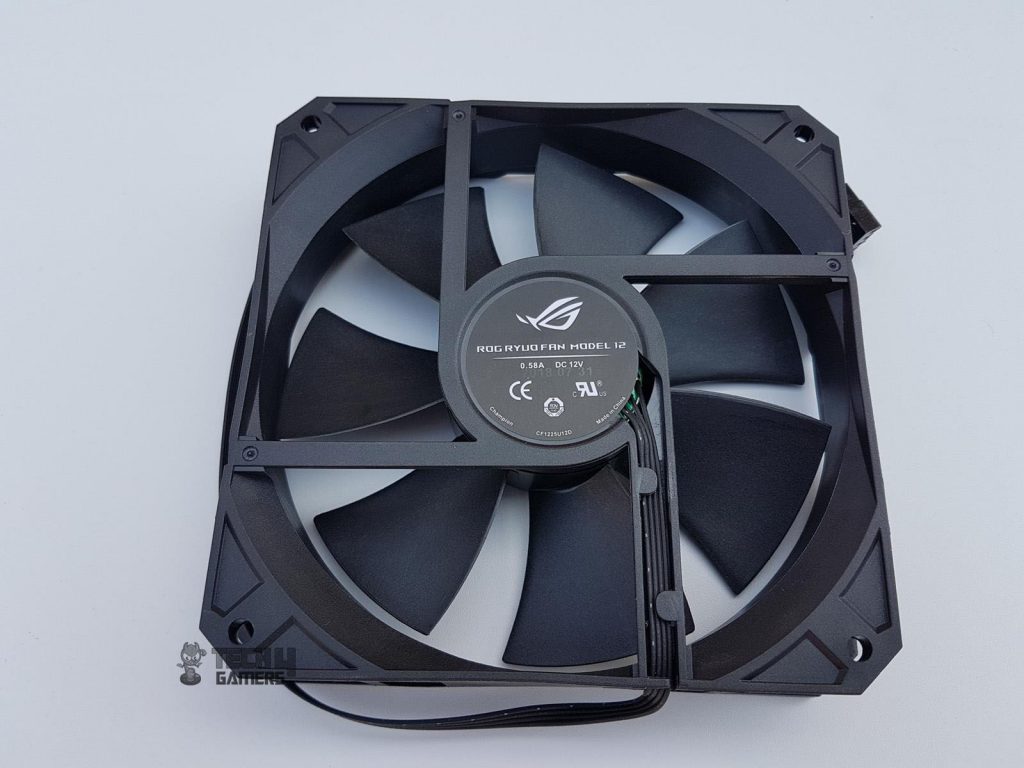
I couldn’t find the MTBF/MTTF info for the RYUO Fan model 12. ASUS claims they offer 12% more airflow and 7% more static pressure compared to other AIO fans. Unfortunately, there are no arrow indicators to show blade spin direction or airflow. These fans are not RGB if you are looking for this information.
OLED Display and RGB Lighting
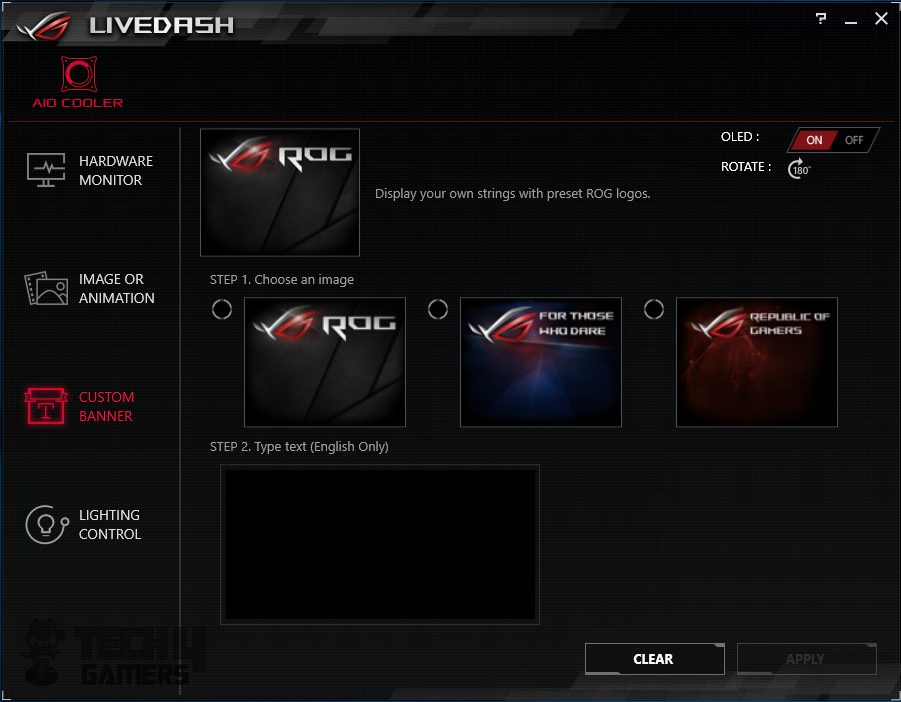
Livedash can be downloaded from the ASUS website, and they work with the ASUS ROG coolers. This software has a simplified interface, which is appreciated, and provides the users with the options to show hardware monitoring stats (only for ASUS motherboards), animations, logos, pictures, texts, banners, you name it.

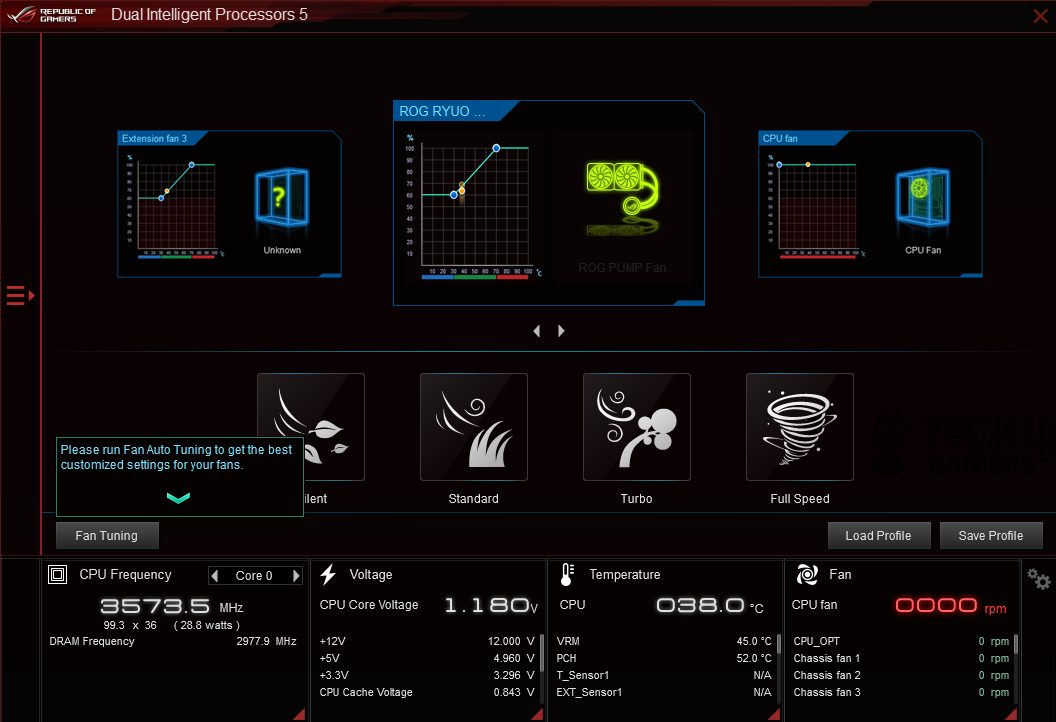
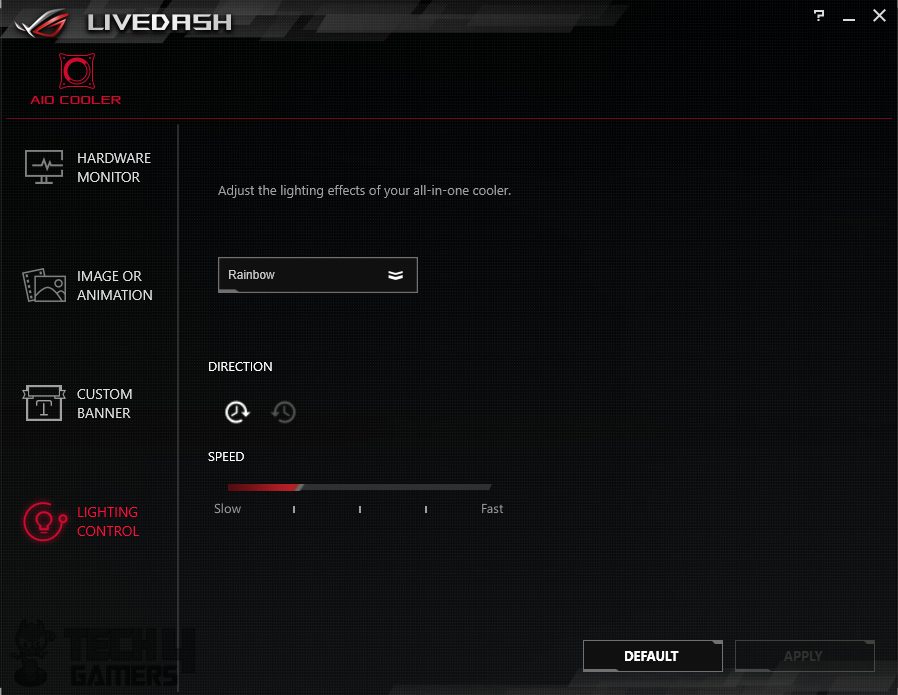
Next is the lighting control. 6 Modes are available for the addressable RGB lighting on these coolers. These are:
- Static
- Breathing
- Strobing
- Rainbow
- Color Cycle
- Flash and Dash
You can customize the lighting flow direction and control dynamic effects speed. However, when you select a lighting mode for the cooler, it also changes the motherboard’s lighting mode. If you want different lighting for the motherboard and cooler, you’ll need to use the AURA Sync software, which means you’ll need three separate software tools. It would be more convenient if Livedash had all the options in one place.
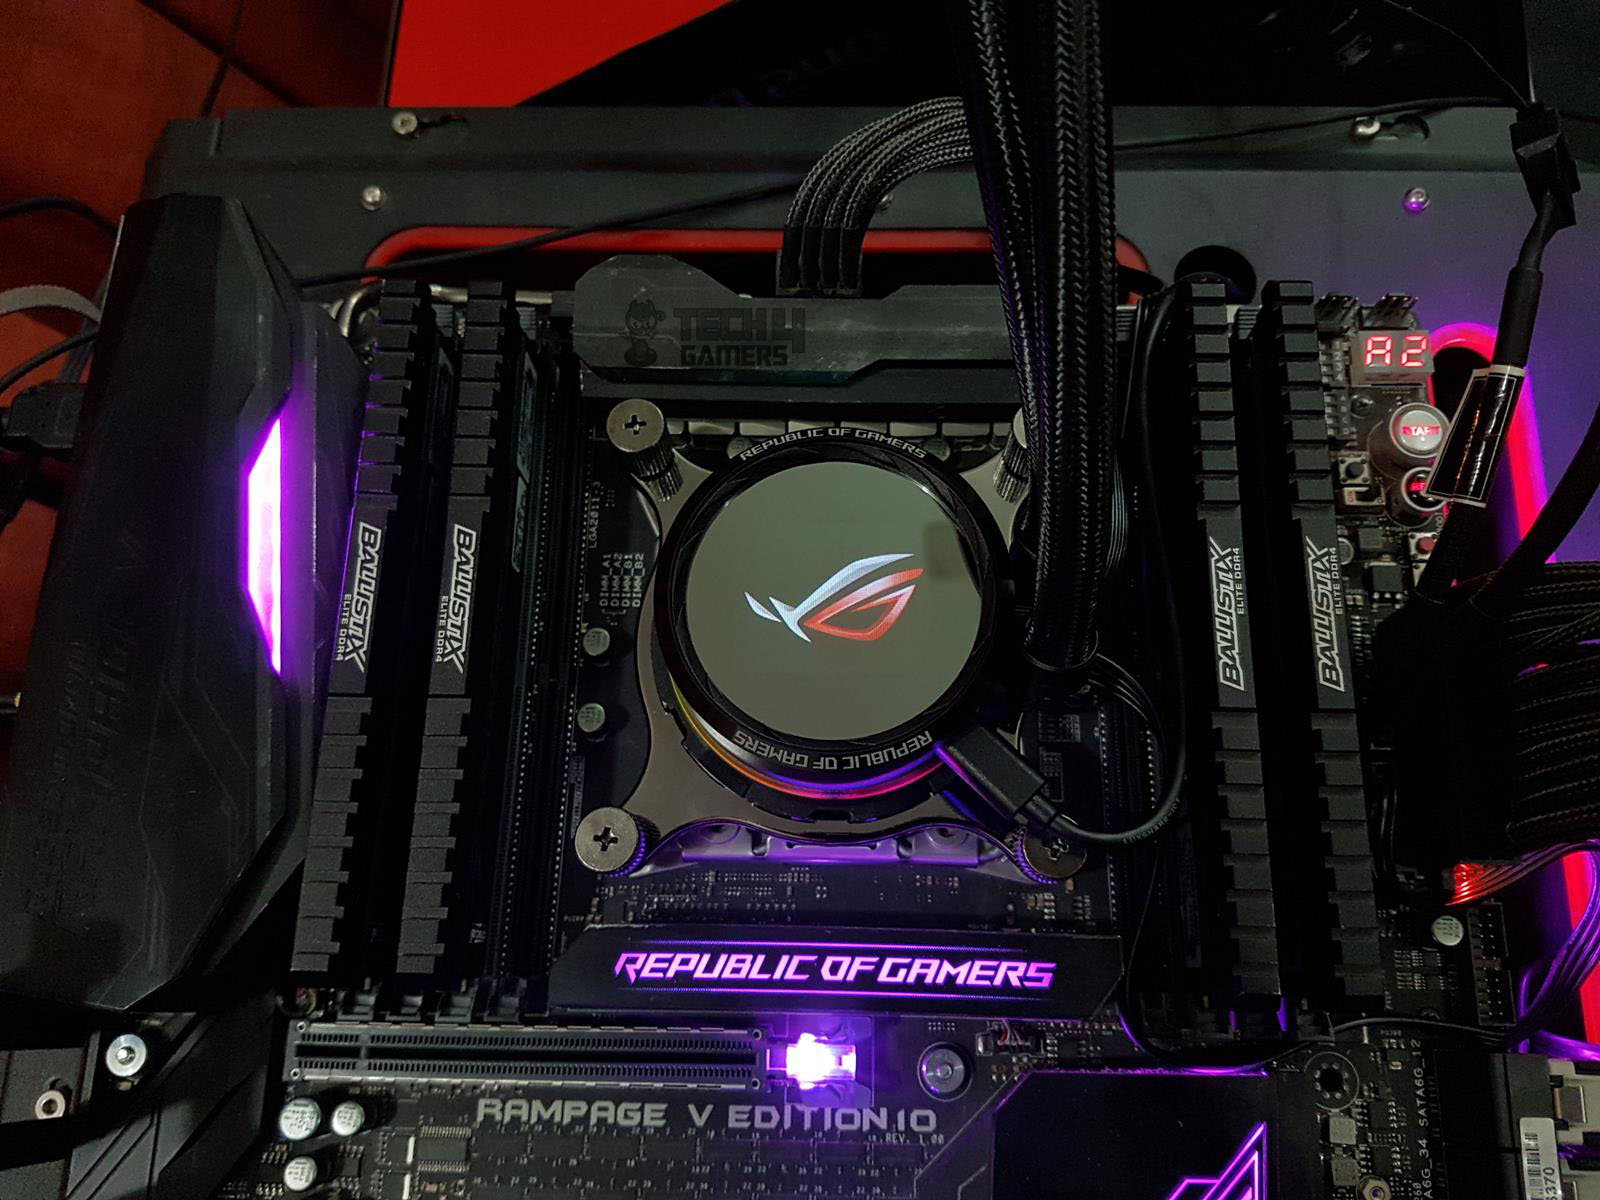

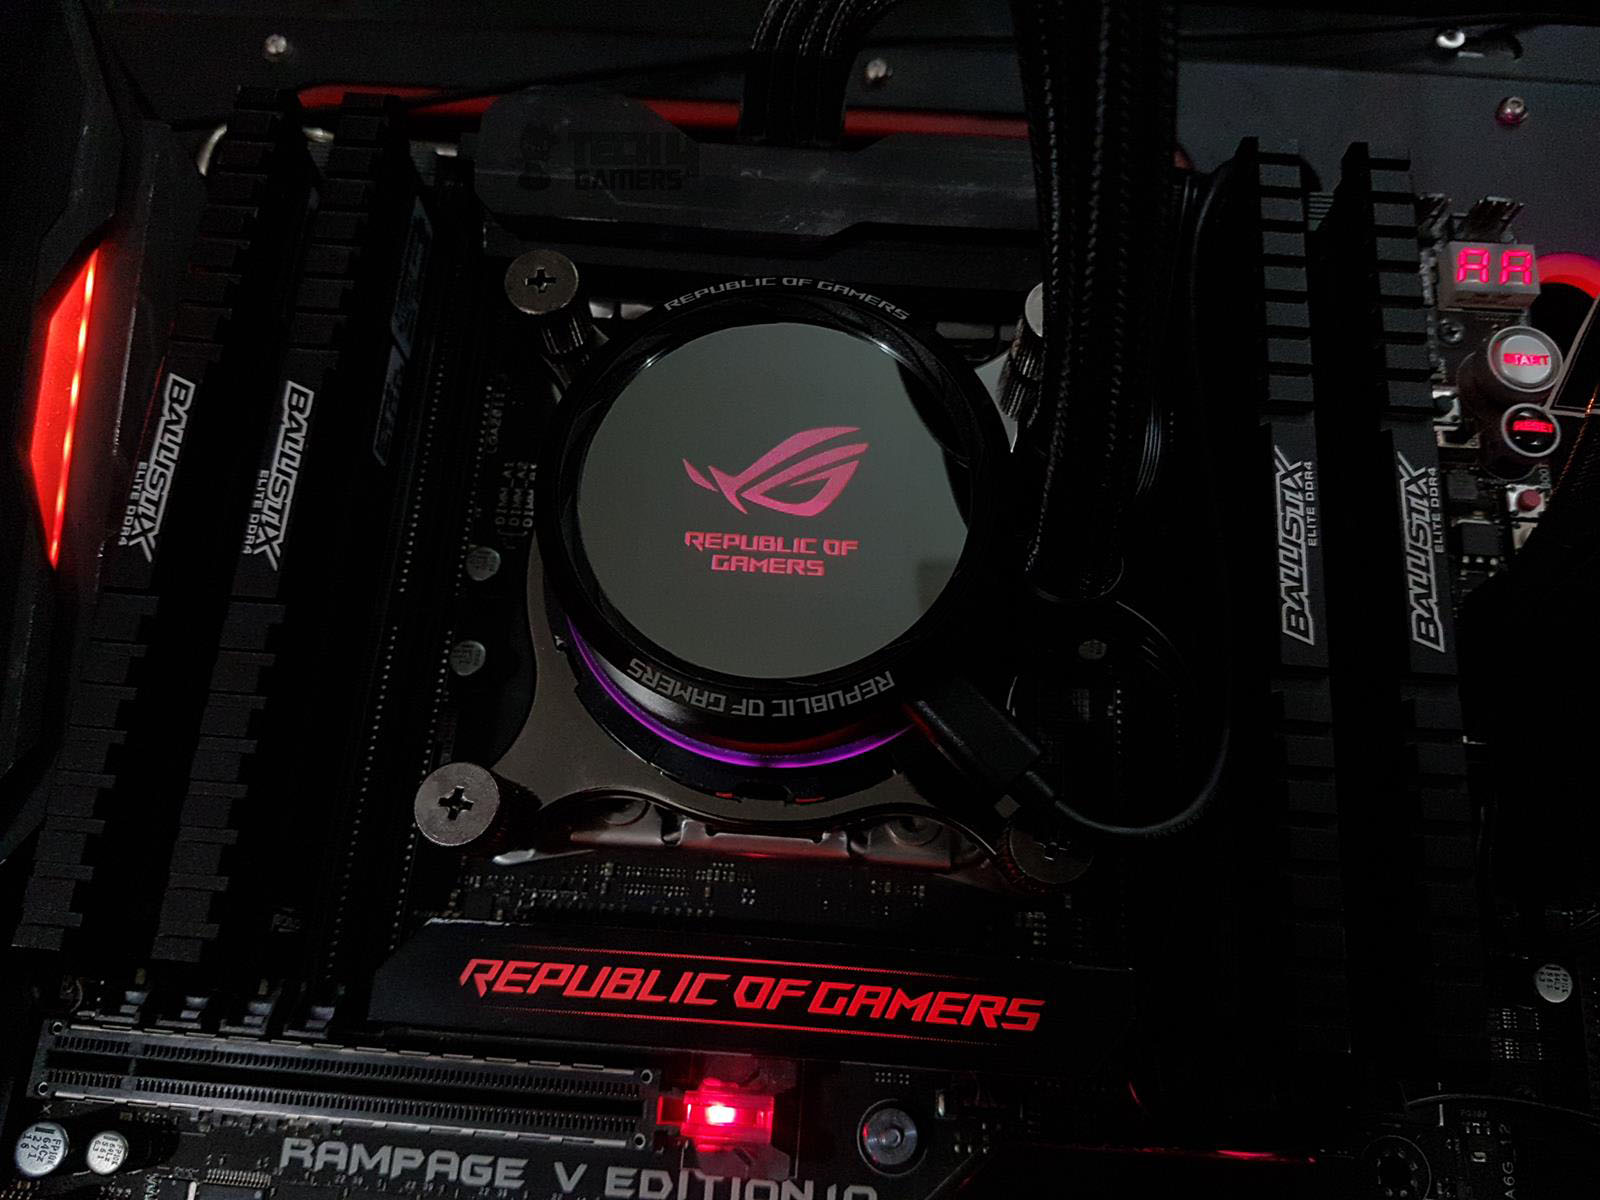

The lighting effects are right on the money, and I love the colors. It is not overly done and has even lighting for smooth and better visuals. The OLED display is something out of this world on this cooler, as we have yet to see such an option on any cooler. It is brilliantly done!
Installation
Here are the Installation guides for the Intel LGA-20XX and 115X sockets:
LGA-20XX
- Install the LGA-20XX standoff screws on the mounting holes around the CPU Socket.
- Install the fans on the radiator using the supplied fan screws and washers.
- Place the water block on the CPU by aligning the mounting holes on the mounting bracket with the LGA 20XX standoff screws.
- Secure the block using the thumbscrew caps. Use a screwdriver for this job and go diagonally for even pressure.
- Connect the 4-pin PWM cable to the CPU fan header or any of your desired fan headers.
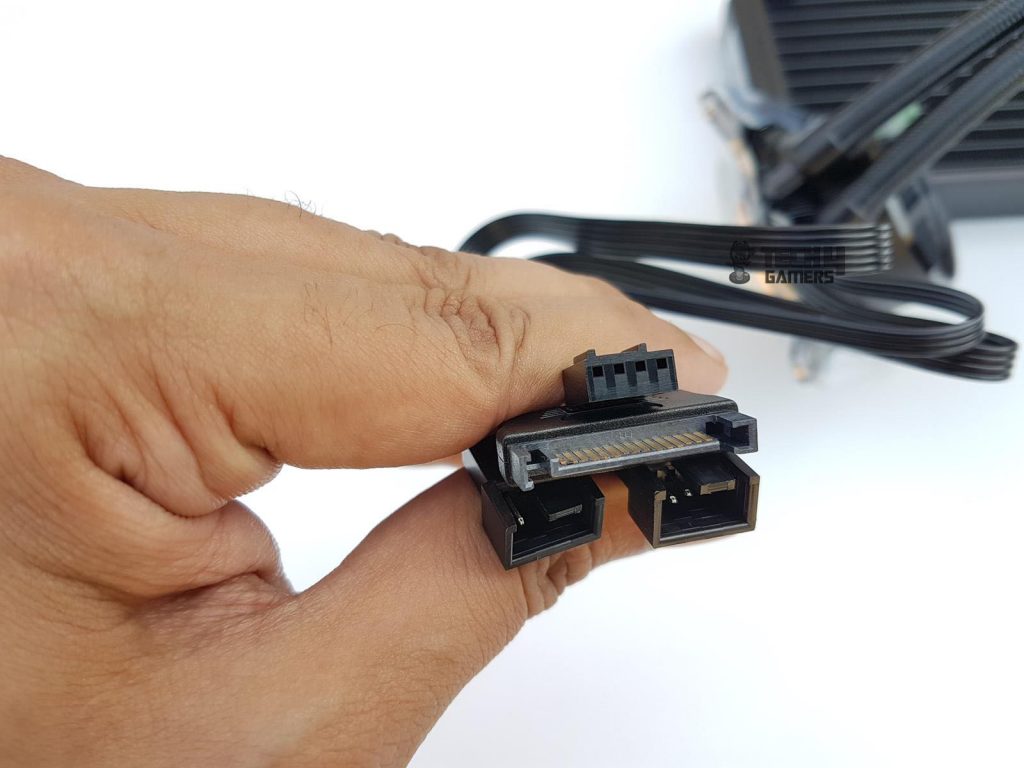
- Connect the SATA connector to the PSU.
- Connect the fan’s power cables to the Y-Splitter cable coming from the block or use a Y-Splitter of your own and connect them to your desired fan header on the motherboard.
- This would complete the installation.
LGA-115X
- Set the pushpins on the Intel backplate according to the socket. Slide them down for the Intel LGA-115X.
- Place the backplate on the backside of the motherboard by aligning the push pins with the pre-drilled holes around the CPU socket.
- Use the Intel LGA1115X/1366 standoff screws and secure the backplate with the motherboard. There will be a flex in the backplate giving the impression that it is not mounted correctly. Ignore that it will be secured once the block is installed.
- Place the water block on the CPU by aligning the mounting holes on the bracket with the standoff screws.
- Secure the block using the thumbscrew caps. Use a screwdriver for this job and go diagonally for even pressure.
- Connect the 4-pin PWM cable to the CPU fan header or any of your desired fan headers.
- Connect the SATA connector to the PSU.
- Connect the fan’s power cables to the Y-Splitter cable coming from the block or use a Y-Splitter of your own and connect them to your desired fan header on the motherboard.
- This would complete the installation.
Clearance and Installation Notes
The best thing about AIOs is the maximum clearance and compatibility with respect to the chassis, DIMM slots, and PCIe slots. This cooler doesn’t have clearance issues. The tubes don’t block DIMM slots, and any RAM height works. The block doesn’t obstruct the first PCIe x16 3.0 slot. Just ensure your chassis supports a 240mm radiator, and you’re all set.
Testing and Methodology
Since this is the first time with the ASUS ROG fans, I decided to measure their unrestricted airflow using the PerfectPrime WD9819 Anemometer. Since it is the summer season here, I will not be testing the acoustical performance of these fans due to certain uncontrollable environmental noises. These will be subjective based on my experience with testing various fans and coolers thus far. Let’s start with the airflow testing.
Airflow
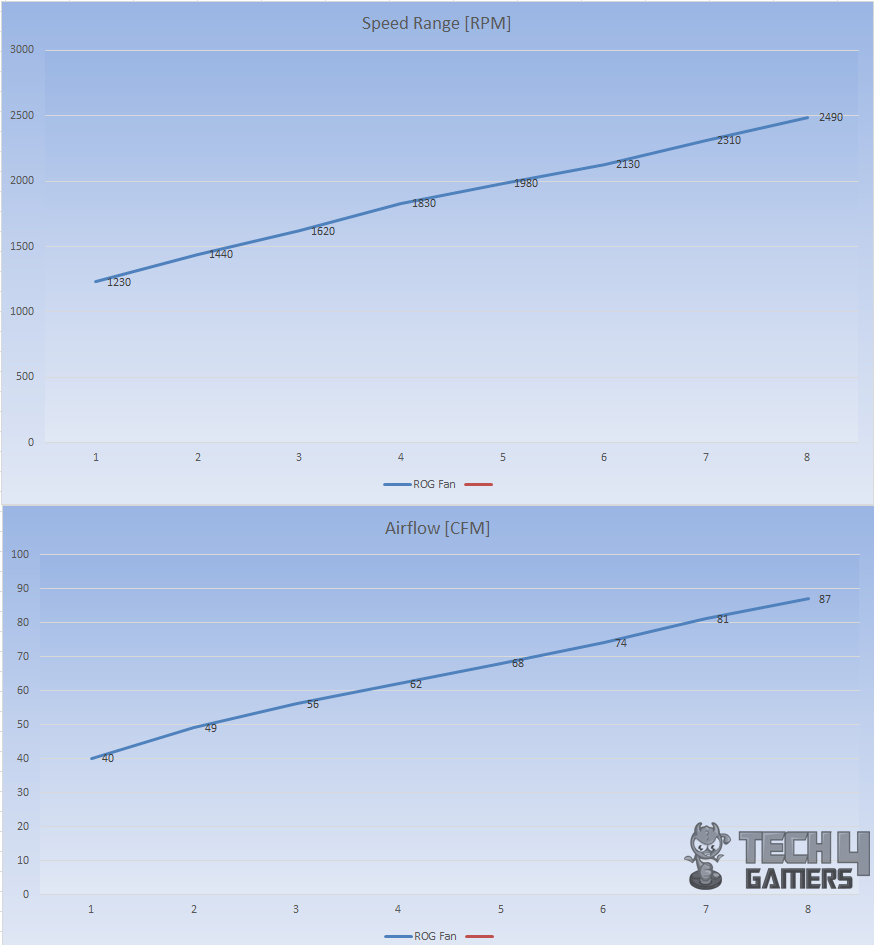
The airflow rating of these fans is 80.95 CFM, and my testing has shown the measured maximum airflow of 87 CFM, validating the airflow rating of the ASUS ROG RYUO Model 12 fans.
PWM Range
The Reeven Polariz RFC-04 fan controller was used to regulate the speed of the fans. Surprisingly, I could not take these fans down the 1200 RPM, making that to be their lower limit. This is something I was not expecting, as this reading was coming when the fan controller was at 5V. The maximum speed reading was 2490 RPM which is well within the 2500 ± 10% error margin (0.4% to be exact). Both fans reached the same speed.
Thermal Testing
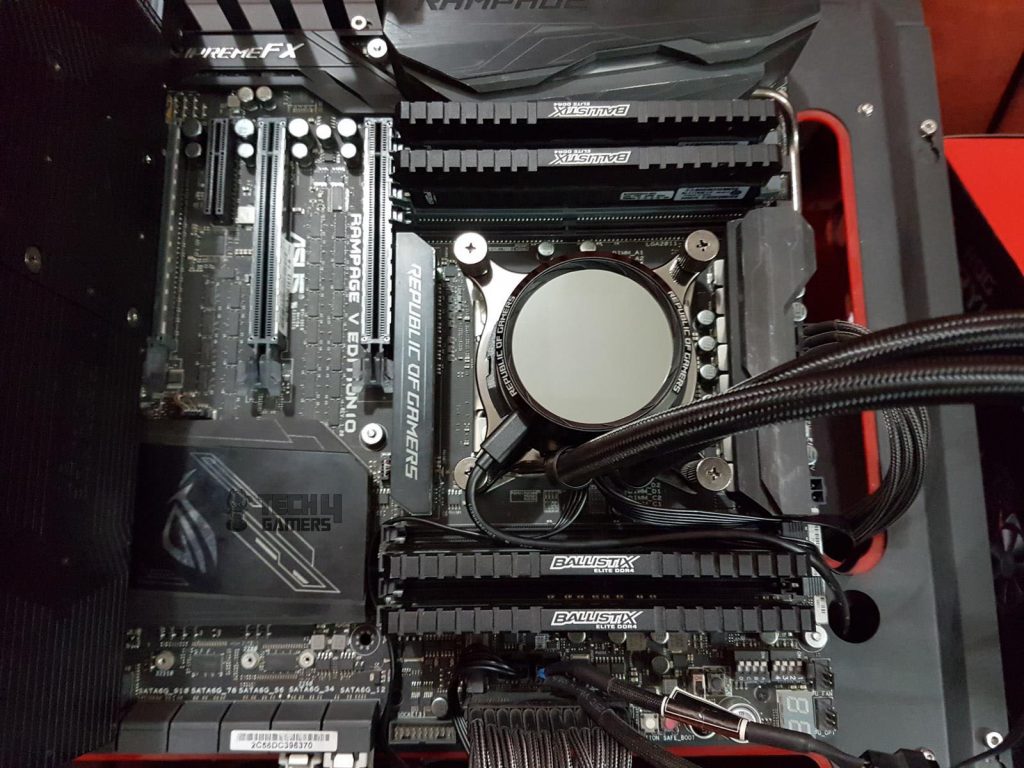
The following test bench was used for testing this cooler:
| Processor | Intel i7 6850k |
|---|---|
| Motherboard | ASUS Rampage V Edition 10 |
| RAM | Crucial Ballistics Elite 4x4GB @ 3000MHz |
| SSD | Samsung 840 EVO 250GB SSD |
| Graphics Card | Nvidia GTX 1080 FE |
| PSU | Corsair AX1200i |
| Case | PrimoChill Praxis WetBench |
The following software were used for the testing and monitoring.
- ASUS Real Bench v 2.44
- Real Temp GT v 3.70
I tested the cooler with both the stock paste and Noctua NT-H1 thermal paste, as per ASUS’s request for standardization. The tests were done at stock clocks (3.6GHz, 1.136V VCore) using ASUS RealBench 2.44 for 60 minutes of stress testing followed by 15 minutes of idle time. The fans and pump were set to run at their 100% RPM. CPU is overclocked to 4.3GHz with 1.350V manual Vcore.
I averaged the max temperatures across all CPU cores and calculated the delta by subtracting the ambient temperature. These tests were conducted on an open-air bench, so actual chassis temperatures may vary depending on airflow conditions inside.
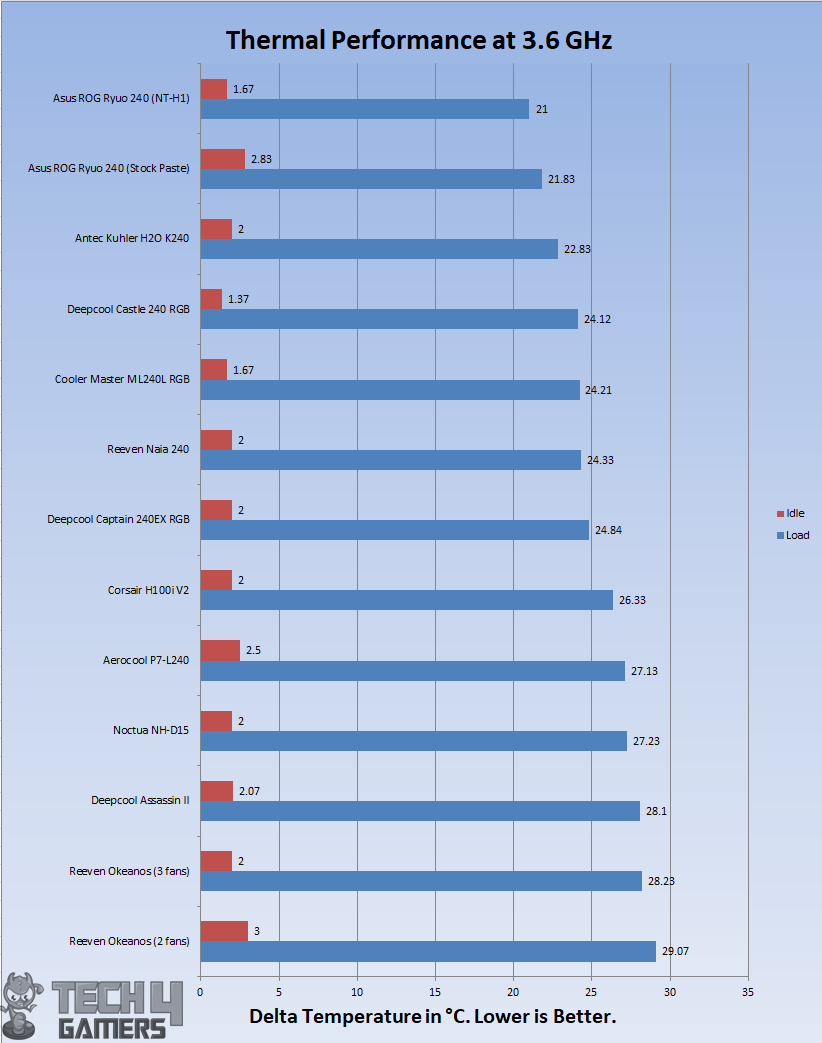
On stock clocks (3.6GHz, 1.13V), the chip idled at 2.83°C with the stock paste. Under stress testing, the cooler showed a delta of 21.83°C with the stock paste. Using Noctua NT-H1, the underload temperature was 21.0°C, just 0.83°C different from the stock paste.
This demonstrates that the stock paste performs exceptionally well. Even with the stock paste, the cooler ranks high, with a range of 1°C to 2.29°C. It’s clear that ASUS means business with these coolers.
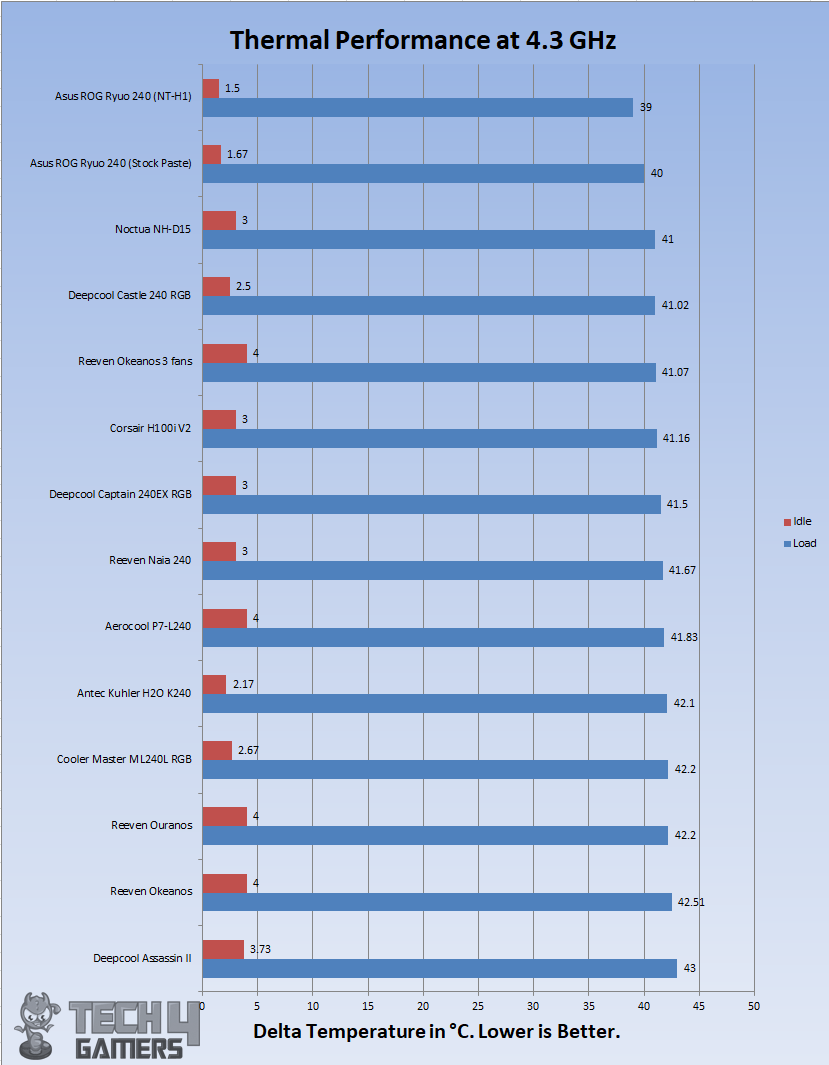
With overclocked chip at 4.3GHz using 1.350V, the chip was doing 40°C under load using stock thermal paste. With Noctua NT-H1, it was doing 39°C. This again confirms that the stock paste is indeed good for better thermal performance. Using the stock paste, the thermal performance range is 1° to 1.5°C which could be bettered using the aftermarket stock pastes as all the other coolers were tested using the Noctua NT-H1 thermal paste.
Acoustic Performance
I could not measure the sound level of the unit due to certain environmental noises that would invalidate the actual sound level reading from the sound meter. Based on my experience with the fans and coolers testing so far, these fans are noisy and definitely warrant a custom fan curve. I am the sort of guy who wants silent or near-silent operations, and these fans are not falling into this category.
Should You Buy It
Buy It If:
You want a capable 240mm AIO cooler: During our tests, the ASUS ROG Ryou 240 proved to be a capable cooler, offering respectable performance:
You prefer sleek visuals: Packed with an LCD screen as well as sleek RGB lighting, the ASUS ROG Ryou 240 is designed for anyone who prefers a visually stunning cooler.
You want an LCD screen: Anyone interested in obtaining a 240mm AIO with an LCD screen will be pleased by the ROG Ryou 240’s feature set and performance.
Don’t Buy It If:
You are on a limited budget: The ASUS ROG Ryou 240 is undeniably an expensive cooler, making it out of the question for anyone on a limited budget.
You want an easy-to-install cooler: Installation can be slightly challenging on the ASUS ROG Ryou 240.
Conclusion
The ROG Ryuo AIO liquid cooler brings the performance benefits of the ROG Ryujin liquid cooler in a more affordable package. Its aluminum pump cover is an optimized shape for high airflow yet skips the Ryujin’s extra shell in favor of a more spartan and conventional look.
The ROG Ryuo cooler is impressive with its innovative cooling-plate design, featuring micro-channels for efficient heat dissipation. The aluminum pump housing measures 80x80x45mm and looks sleek in black. The top boasts an industry-first 1.77″ OLED display, capable of showing various content within 160×128 pixels in JPEG/GIF format.
The OLED screen is a standout feature, creating stunning effects with addressable RGB lighting. The thermal performance is excellent, even with the stock paste, which is only 1°C different from Noctua NT-H1. It shines on stock clocks and overclocking but can get noisy, so a custom fan curve is recommended.
ASUS offers a 3-year limited warranty, which is good but considering the price range, a 5-year warranty would be more competitive. Corsair’s Hydro series coolers, based on the same pump, offer a similar experience with a lower cost and 5-year warranty, though they lack the OLED Display.
Price-wise, the ROG Ryuo 240 carries a premium price tag for a cooling solution whose main function is to cool the CPU though it is doing that in quite a style, many thanks to the OLED display and addressable RGB lighting.
I am thankful to ASUS for giving me the opportunity to review their ROG Ryuo 240 CPU Liquid Cooler.
Recent Updates
- November 7, 2023: Few text changes to improve readability. Added Galleries
Thank you! Please share your positive feedback. 🔋
How could we improve this post? Please Help us. 😔
[CPU Coolers & RAM Expert]
Hayyan Serwer is a tech enthusiast, with a love for PC building and article writing. Hayyan specializes in writing about CPU coolers and RAM kits. Hayyan has been familiar with the tech industry for over half a decade now, and has now stepped into providing quality reviews for the latest and greatest tech.
Get In Touch: hayyan@tech4gamers.com


