 Threads
Premium Tower Chassis!
Review Summary
The Thermaltake Level 20 GT ARGB Black Edition is a premium full tower chassis with a sophisticated design and innovative features. With impressive cooling, rotational PCIe 8 slots, and a modern I/O panel, it caters to enthusiasts and gamers.
Hours Tested: 12

Overall
-
Design - 8/10
8/10
-
Build Quality - 9/10
9/10
-
Space - 9/10
9/10
-
Versatility - 8.5/10
8.5/10
-
Value - 8/10
8/10
Pros
- Premium design.
- Efficient cooling.
- Rotational PCIe 8 slots.
- Convenient I/O panel.
- Compatibility with E-ATX motherboards.
- TT LCS certification.
- Customizable RGB lighting.
- Modular design.
- Multiple drive bays.
- USB Type-C connectivity.
Cons
- Front panel air intake design may impact GPU thermals.
- Top exhaust design could pose challenges for optimal cooling.


Launched in 2018 to commemorate Thermaltake’s 20 years of innovation, the LEVEL 20 GT ARGB Black Edition stands as a testament to the brand’s commitment to cutting-edge design and functionality. This full tower chassis boasts a sleek all-black color layout, housing impressive features like dual 200mm ARGB fans on the front, four 5mm tempered glass panels, a PSU cover, rotational PCIe 8 slots design, and a convenient USB Type-C port on the IO. With a dismantlable modular design, TT LCS certification, and support for motherboards up to E-ATX size, this case offers a compelling blend of aesthetics and practicality, making it an exciting addition to Thermaltake’s Level 20 series.
Key Takeaways
- The The Thermaltake Level 20 GT is a showcase of Thermaltake’s commitment to innovation, boasting a sleek full tower design with four 5mm tempered glass panels, dual 200mm ARGB fans, and a unique rotational PCIe 8 slots design.
- The Thermaltake Level 20 GT is good for gamers who want a spacious chassis with excellent cooling potential, thanks to features like dual 200mm ARGB fans and extensive radiator support.
- For those who emphasize maximum cooling efficiency, particularly for the GPU, alternative airflow-focused chassis options might be more suitable than the The Thermaltake Level 20 GT with its specific design considerations.
- Why you can trust Tech4Gamers: Our reviews are based on dedicated hands-on testing by our team of experienced hardware experts. Find out more about how we test.
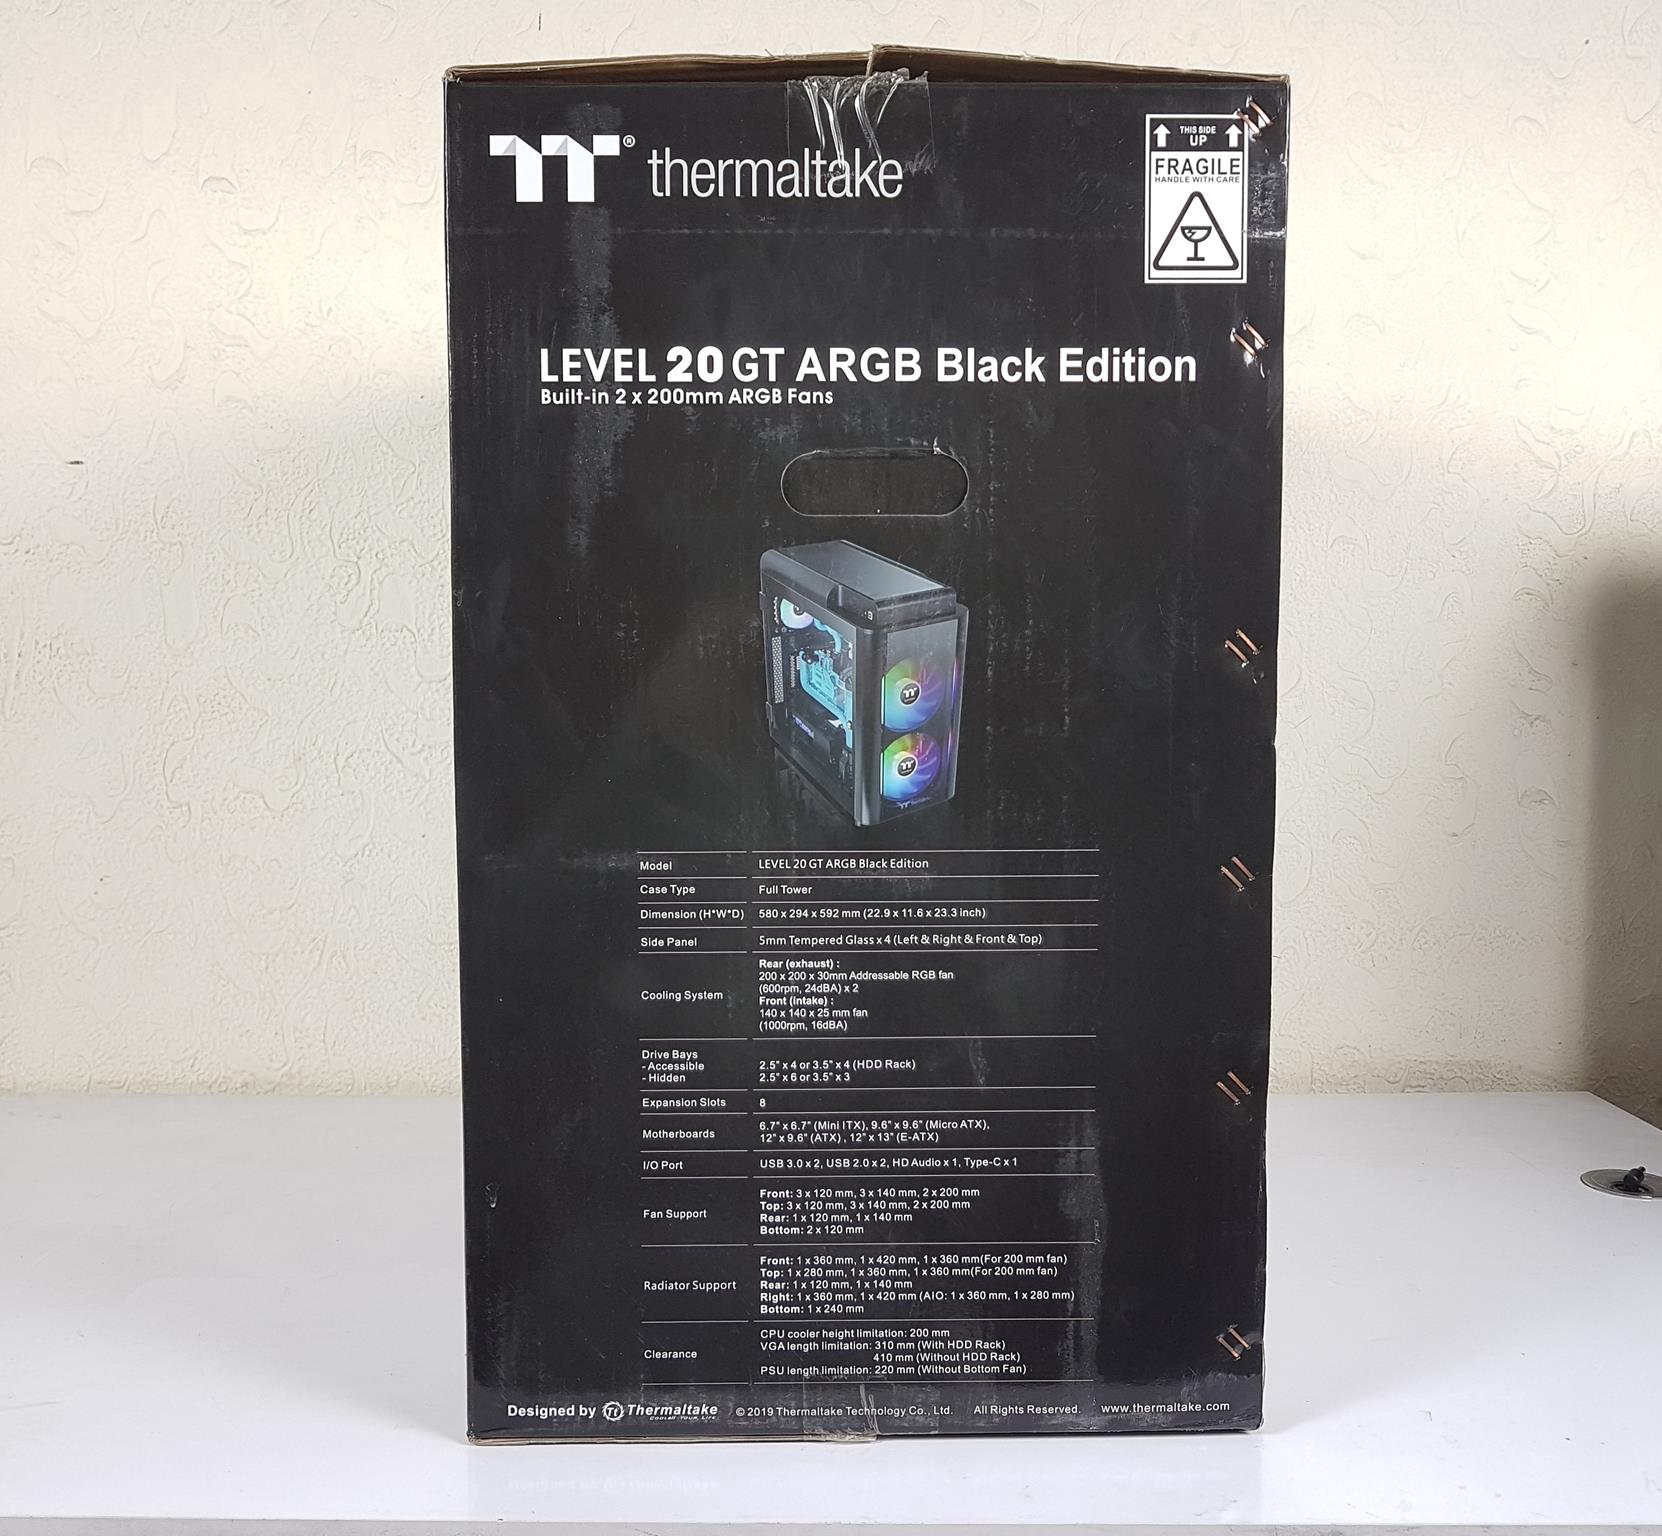
I’ll note down the key specs here:
| CASE TYPE | Full Tower |
| DIMENSION (HXWXD) | 580 x 294 x 592 mm (22.9 x 11.6 x 23.3 inch) |
| NET WEIGHT | 20.1 kg/44.31 lbs |
| SIDE PANEL | 5mm Tempered Glass x 4 (Left & Right & Front & Top) |
| COLOR | Exterior & Interior: Black |
| MATERIAL | SPOC |
| COOLING SYSTEM | Front (Intake): 200 x 200 x 30mm
Addressable RGB fan (600rpm, 24dBA) x 2 Rear (Exhaust): 140 x 140 x 25 mm fan (1000rpm, 16dBA) |
| DRIVE BAYS | Accessible: 2.5 x 4 or 3.5 x 4 (HDD Rack)
Hidden: 2.5 x 4 or 3.5″ x 2 (HDD Bracket) Hidden: 2.5 x 2 or 3.5 x 1 (Without HDD Rack) |
| EXPANSION SLOTS | 8 |
| MOTHERBOARDS | 6.7 x 6.7 (Mini ITX), 9.6 x 9.6″ (Micro ATX), 12″ x 9.6″ (ATX), 12″ x 13′(E-ATX) |
| IO PORT | USB 3.0 x 2, USB 2.0 x 2, HD Audio x 1, Type-C x 1 |
| PSU | Standard PS2 PSU (optional) |
| FAN SUPPORT | Front: 3 x 120mm, 3 x 140mm, 2 x 200mm
Top: 3 x 120mm, 3 x 140mm, 2 x 200mm Rear: 1 x 120mm, 1 x 140mm Bottom: 2 x 120mm |
| RADIATOR SUPPORT | Front: 1 x 360mm, 1 x 420mm, 1 x 360mm (For 200mm fan)
Top: 1 x 360mm, 1 x 280mm, 1 x 360mm (For 200mm fan) Rear: 1 x 120mm, 1 x 140mm Right: 1 x 360mm, 1 x 420mm (AIO: 1 x 360mm, 1 x 280mm) Bottom: 1 x 240mm |
| CLEARANCE | CPU cooler height limitation: 200mm
VGA length limitation: 310mm (With HDD Rack), 410mm (Without HDD Rack) PSU length limitation: 220mm (Without Bottom Fan) |
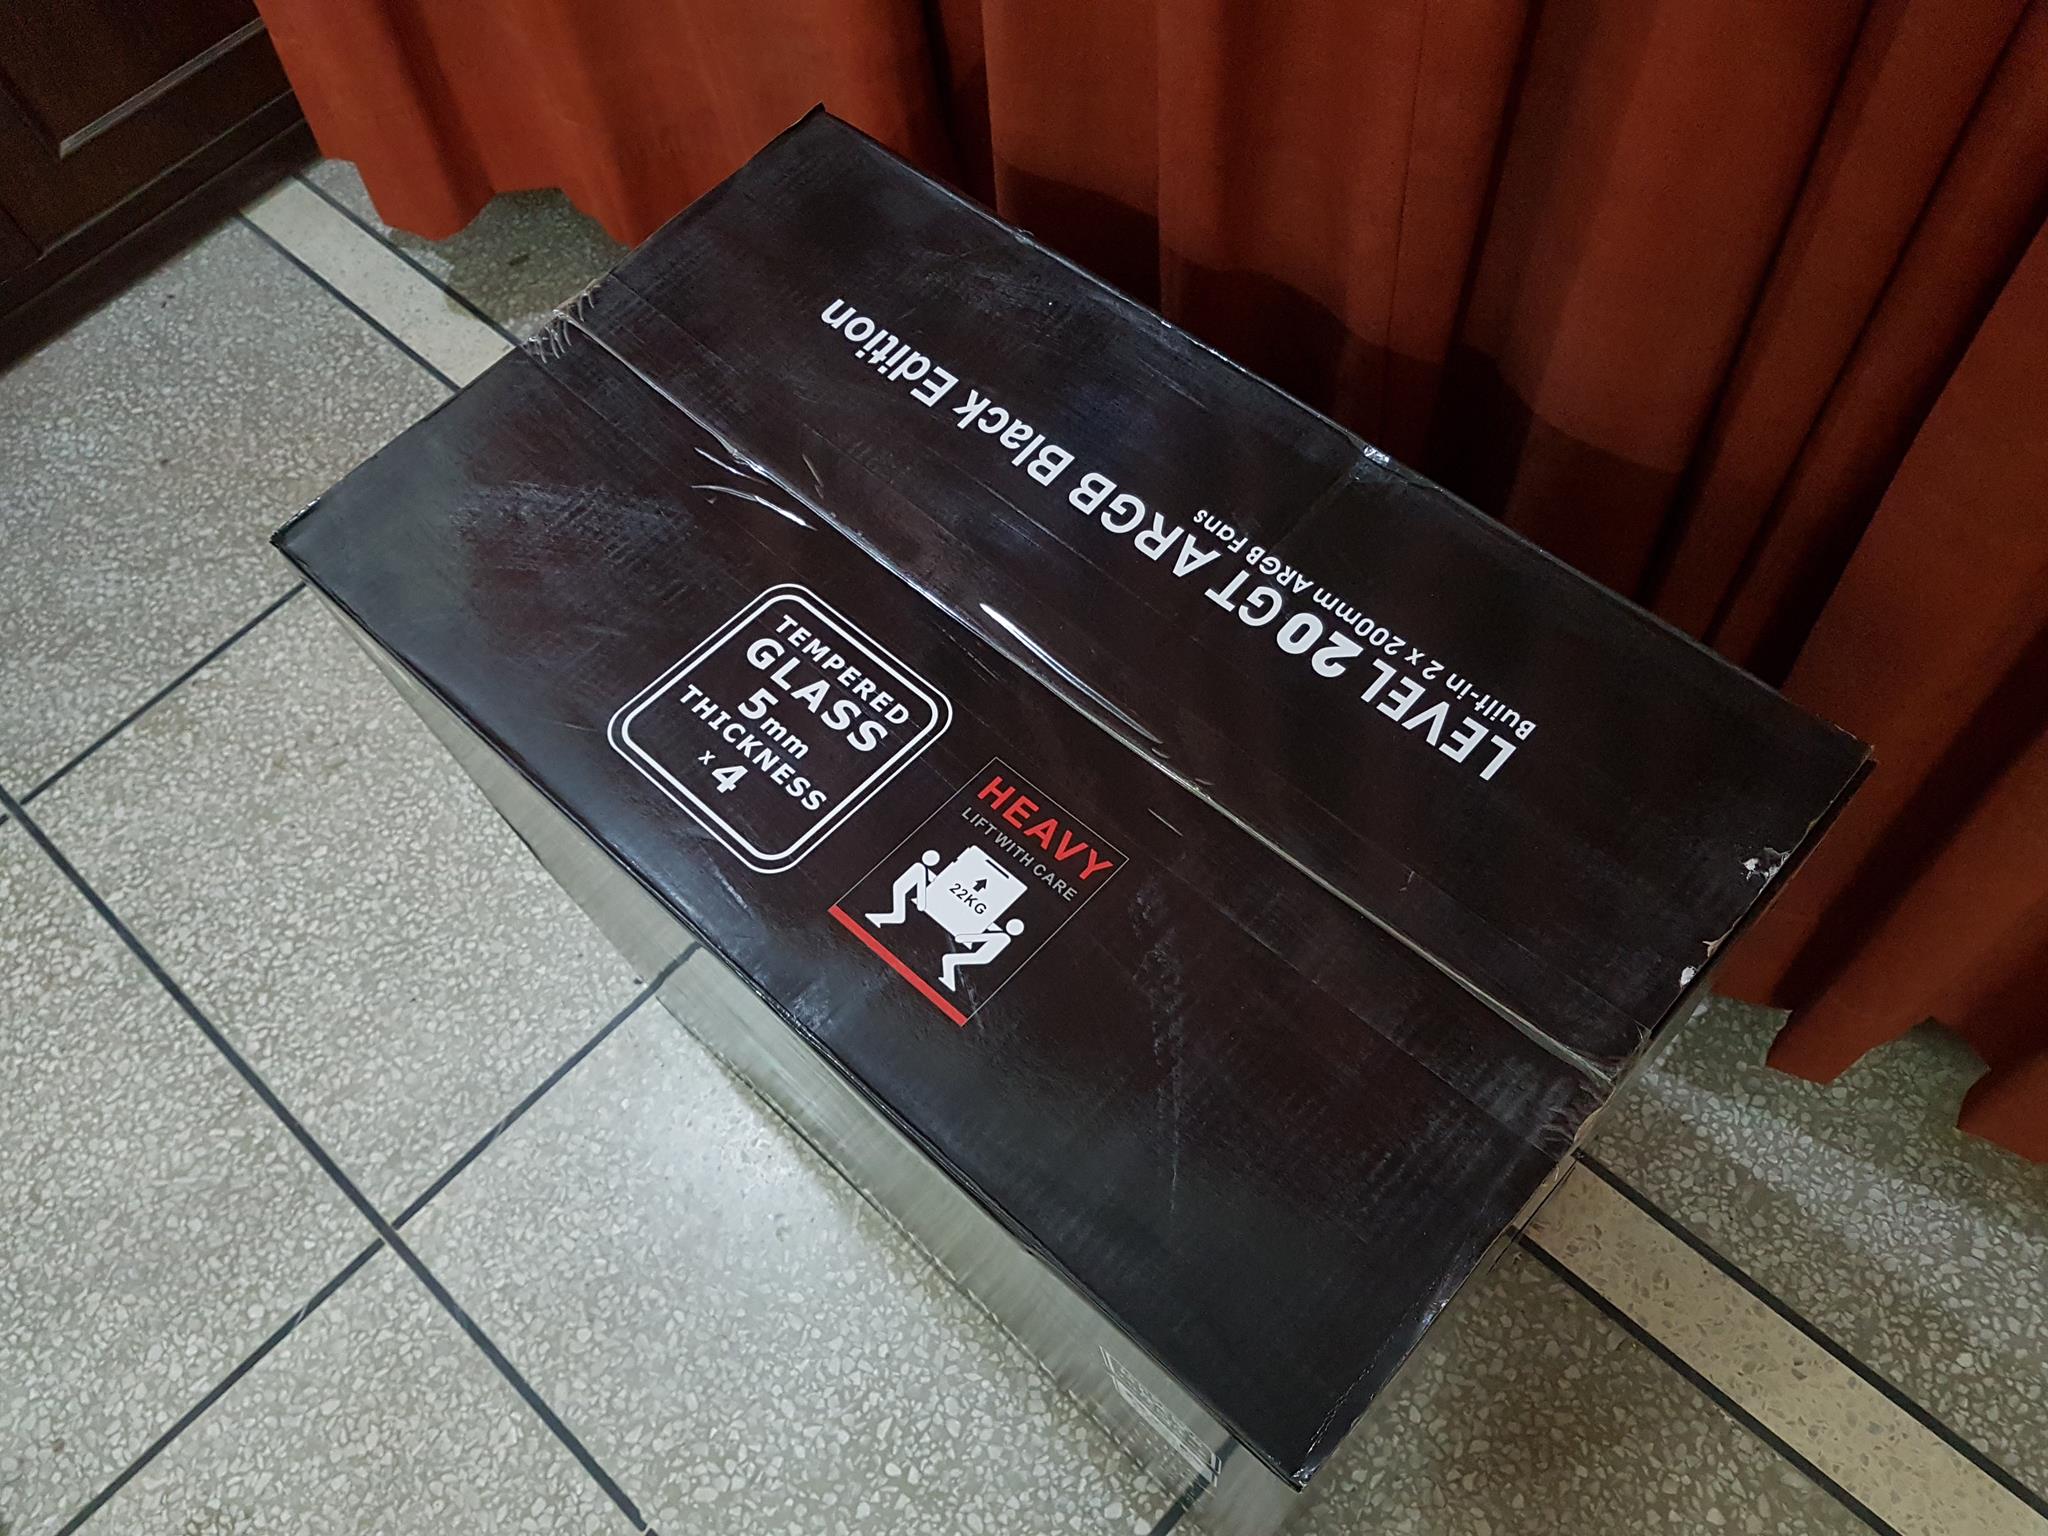
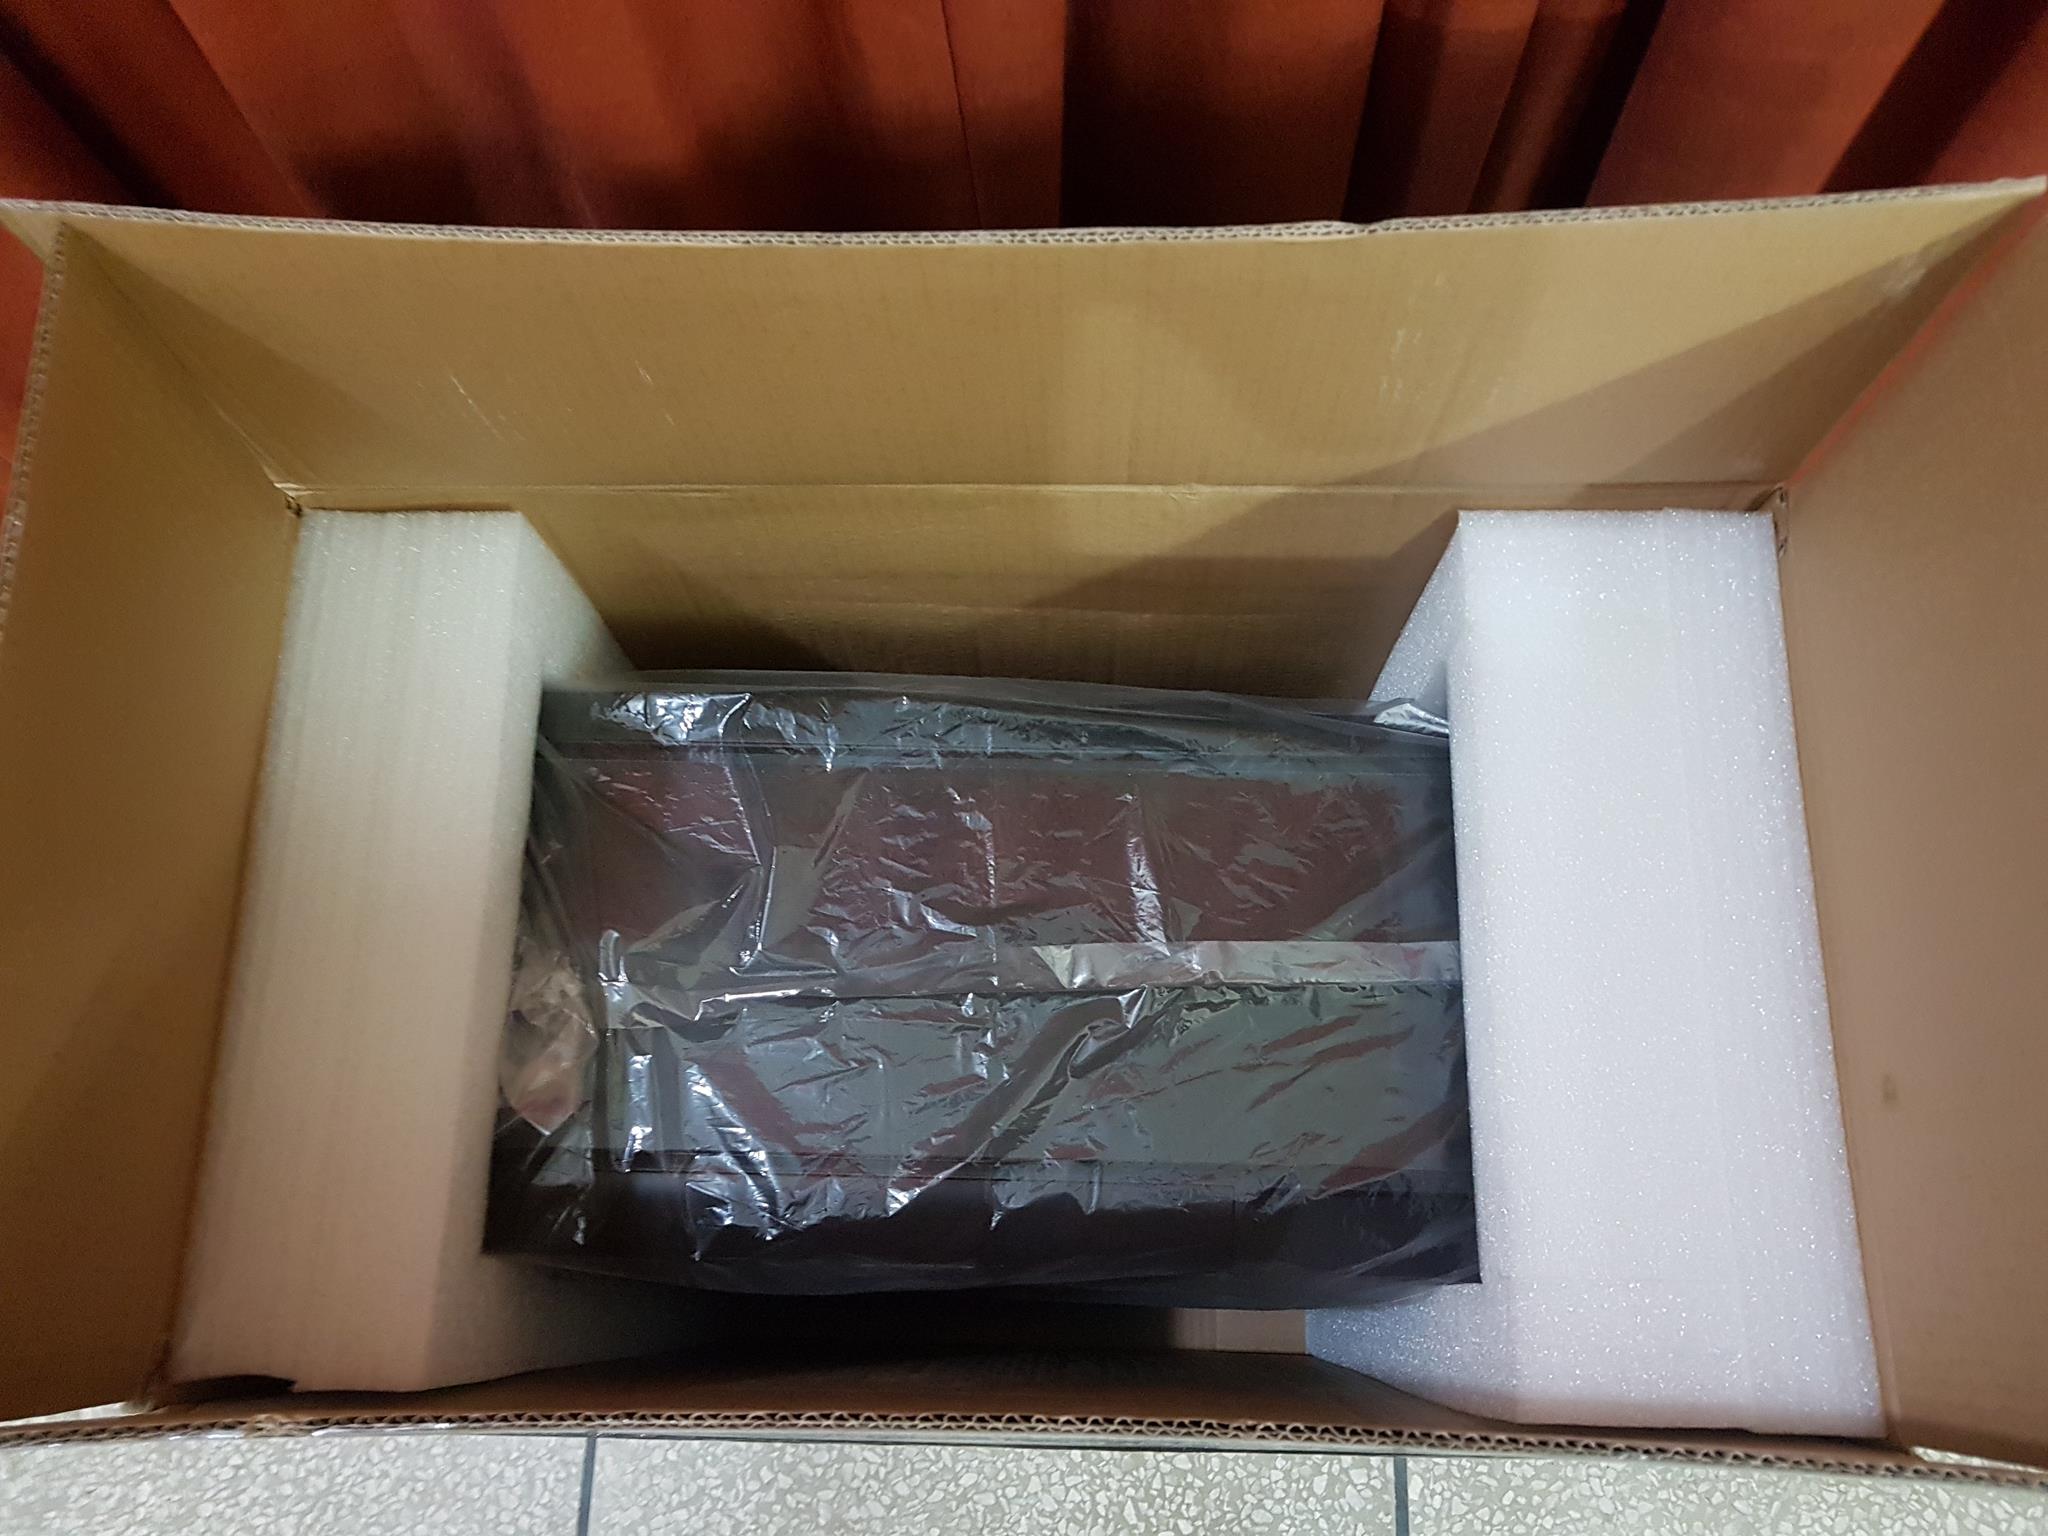
Unboxing
The chassis is shipped inside a large size cardboard box finished in black color. This is a premium chassis from the Thermaltake hence the packing box has that touch as well. This is a heavy box weighing like 22 KG. Keep that in mind when handling.


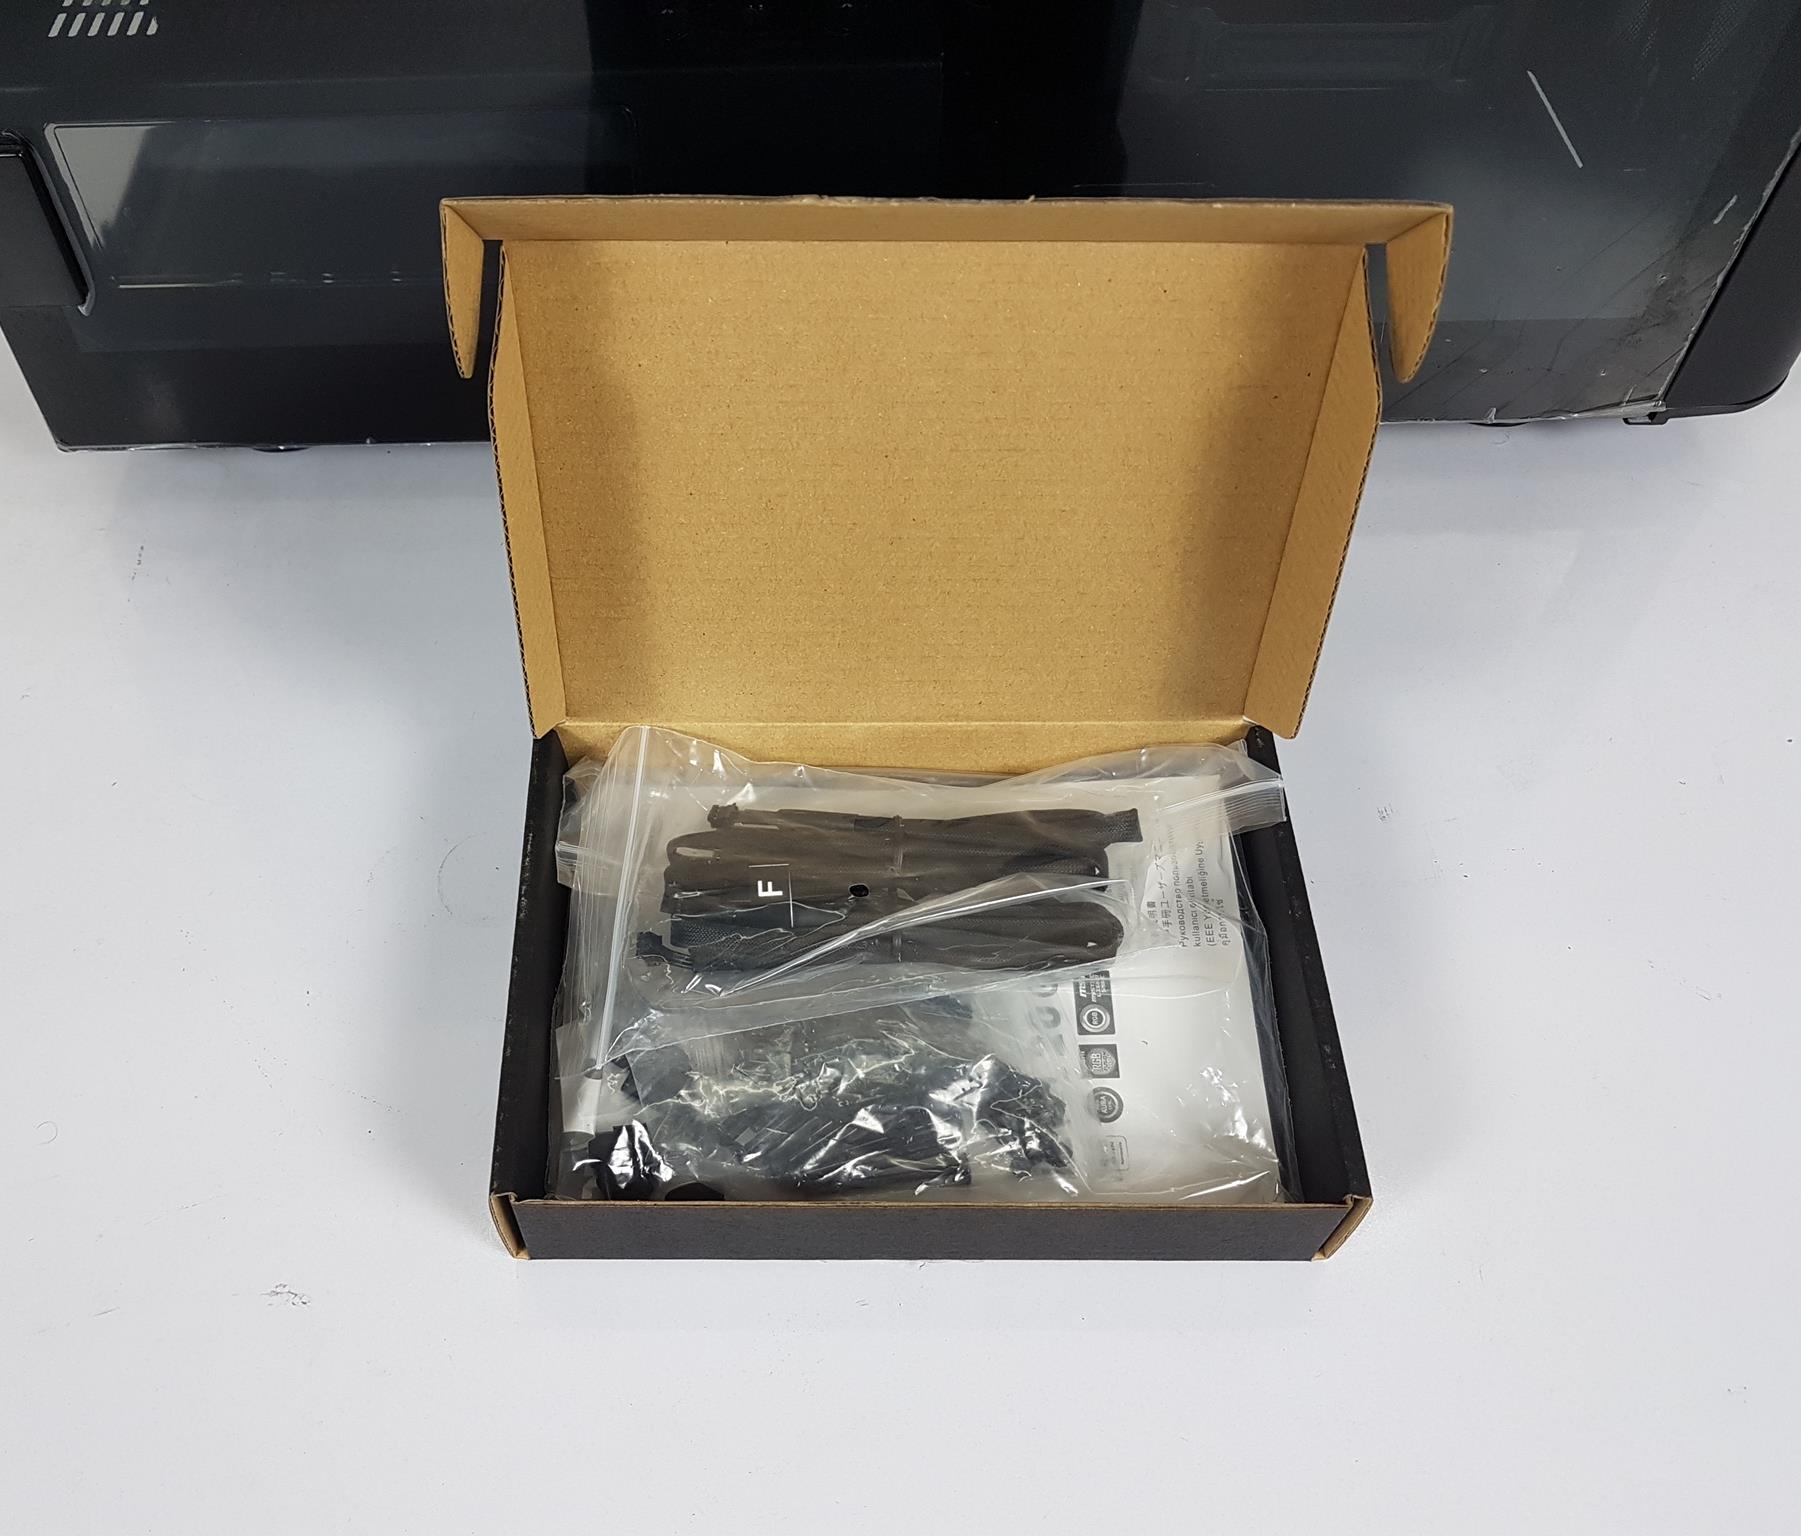
Contents
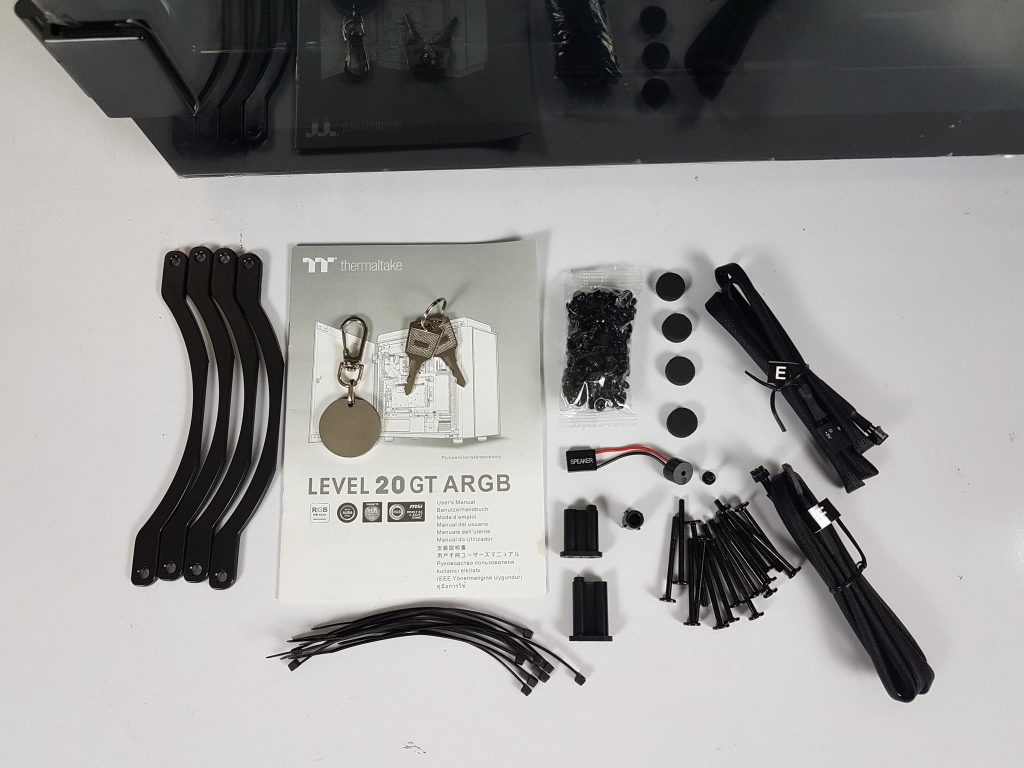
Accessories include:
- 200mm fans brackets
- Various Screws
- Long M3 screws for 200mm Fans
- Key and Keychain
- The user manual
- Cable ties
- MB Signal Bridge Cable for GIGABYTE [Labeled E]
- MB Signal Bridge Cable for ASUS, MSI, and ASRock [Labeled F]
- Feet for PSU
- PSU Cover Strip Stand
- PSU Strip Stand
- Speaker
Closer Look
Let’s now take a closer look at the internal and external components of the chassis, along with the installation options.
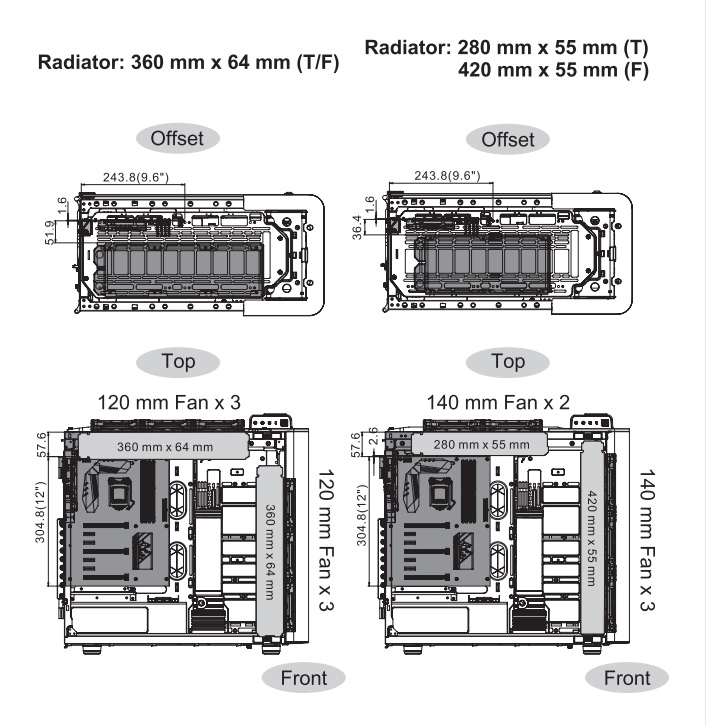
Dimensions
Before moving further, here are the dimensions!
Exterior
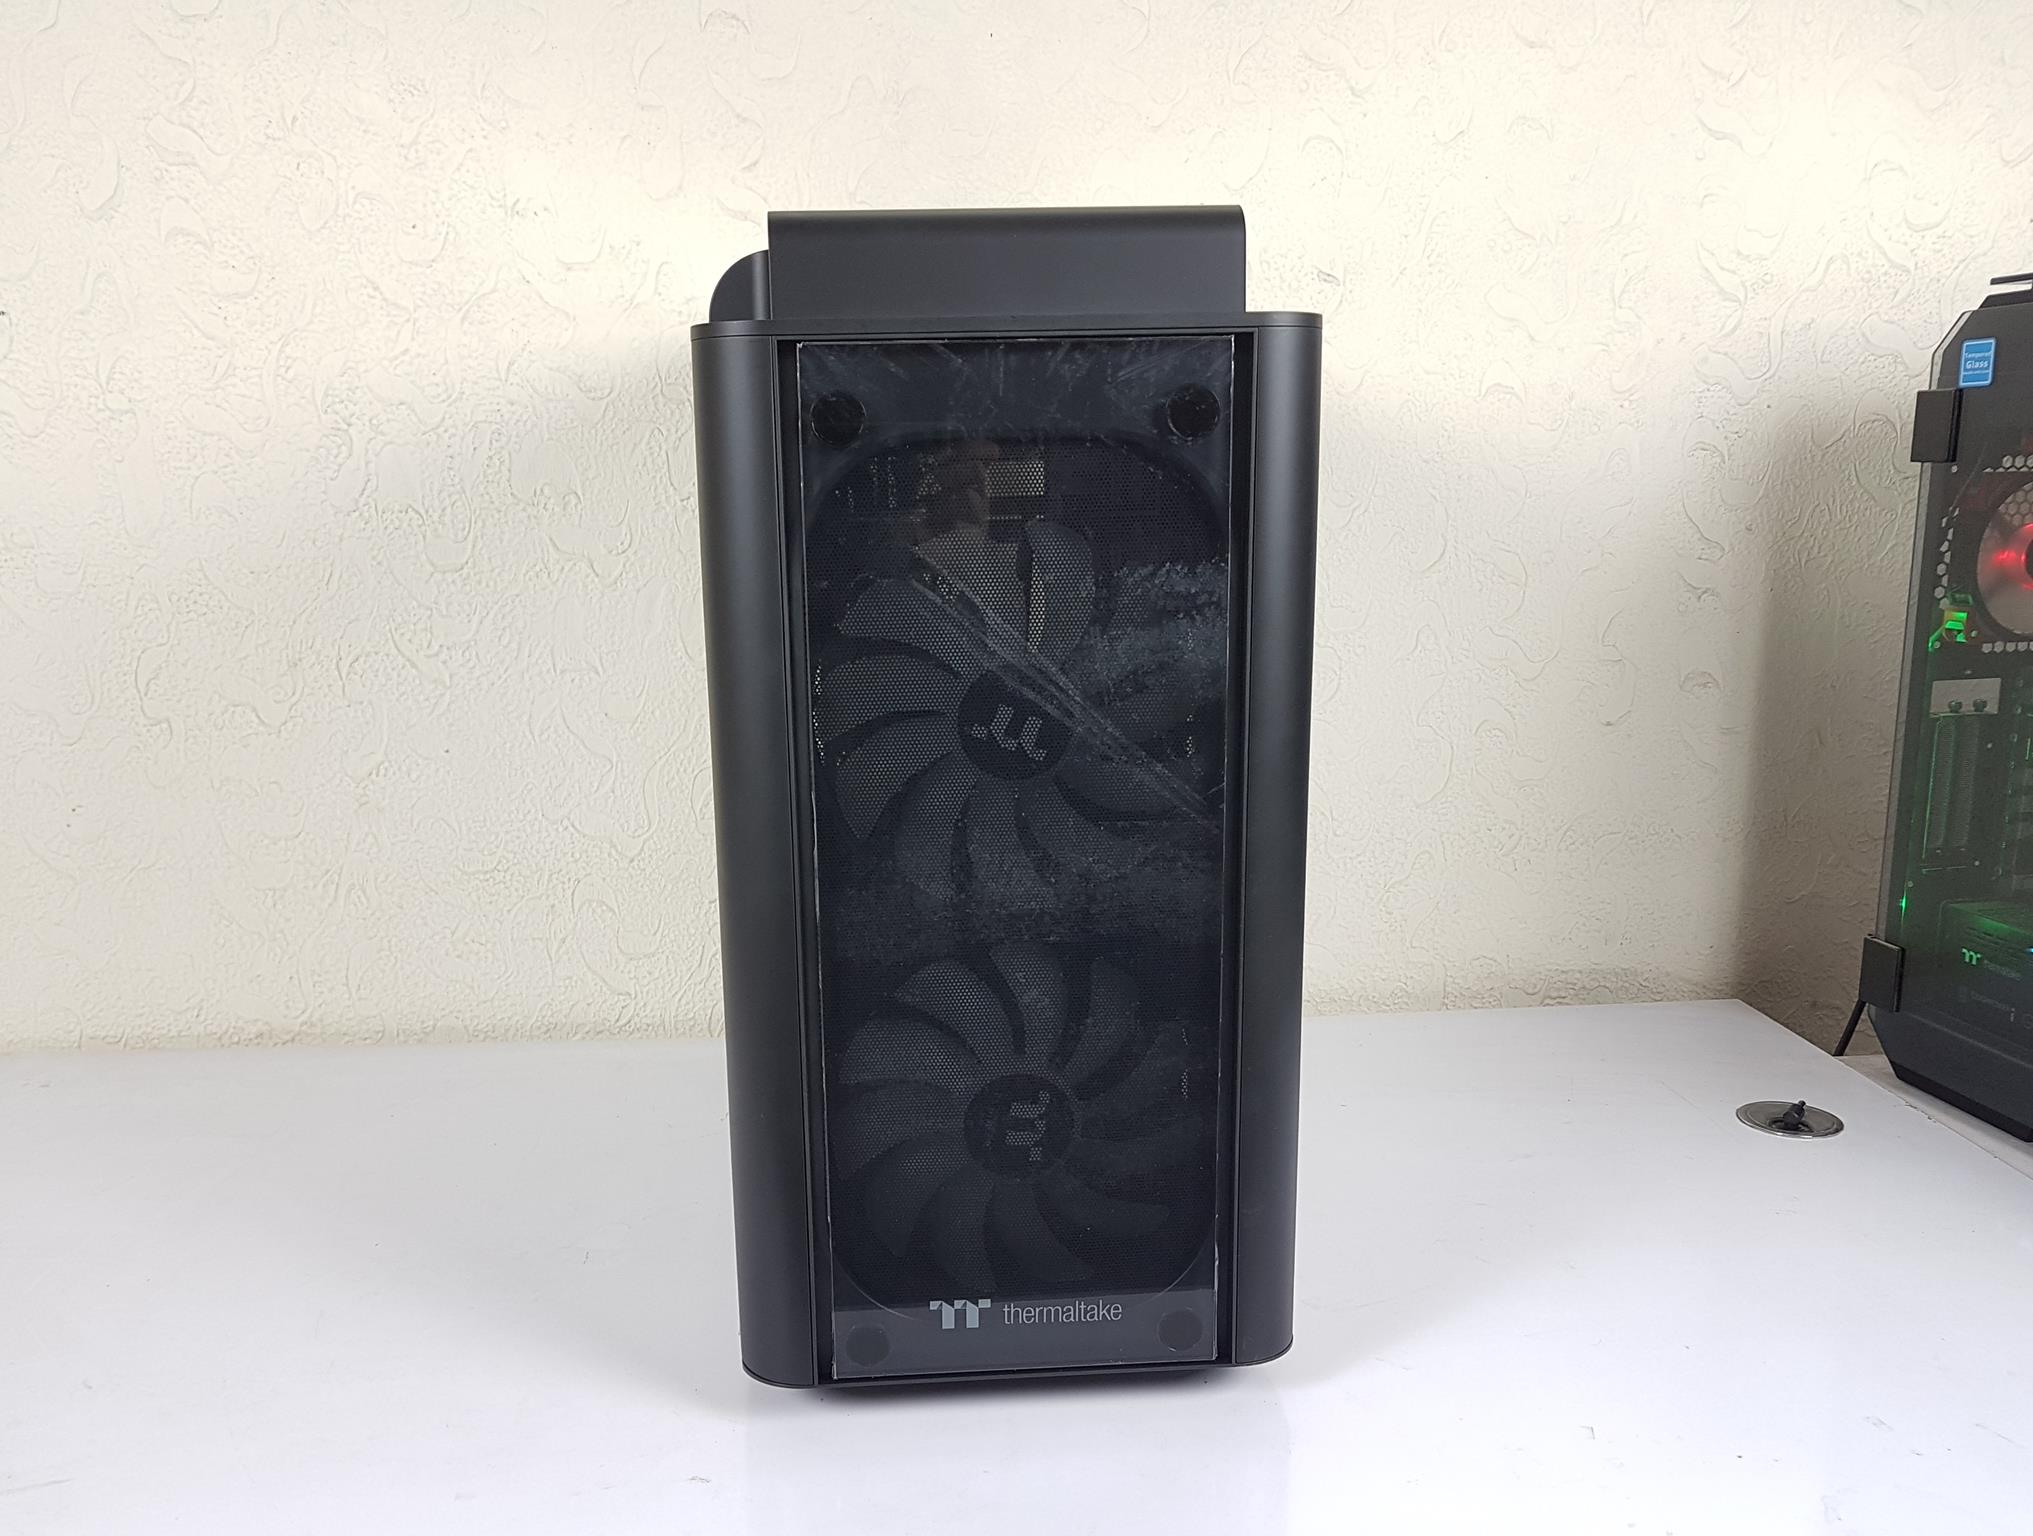
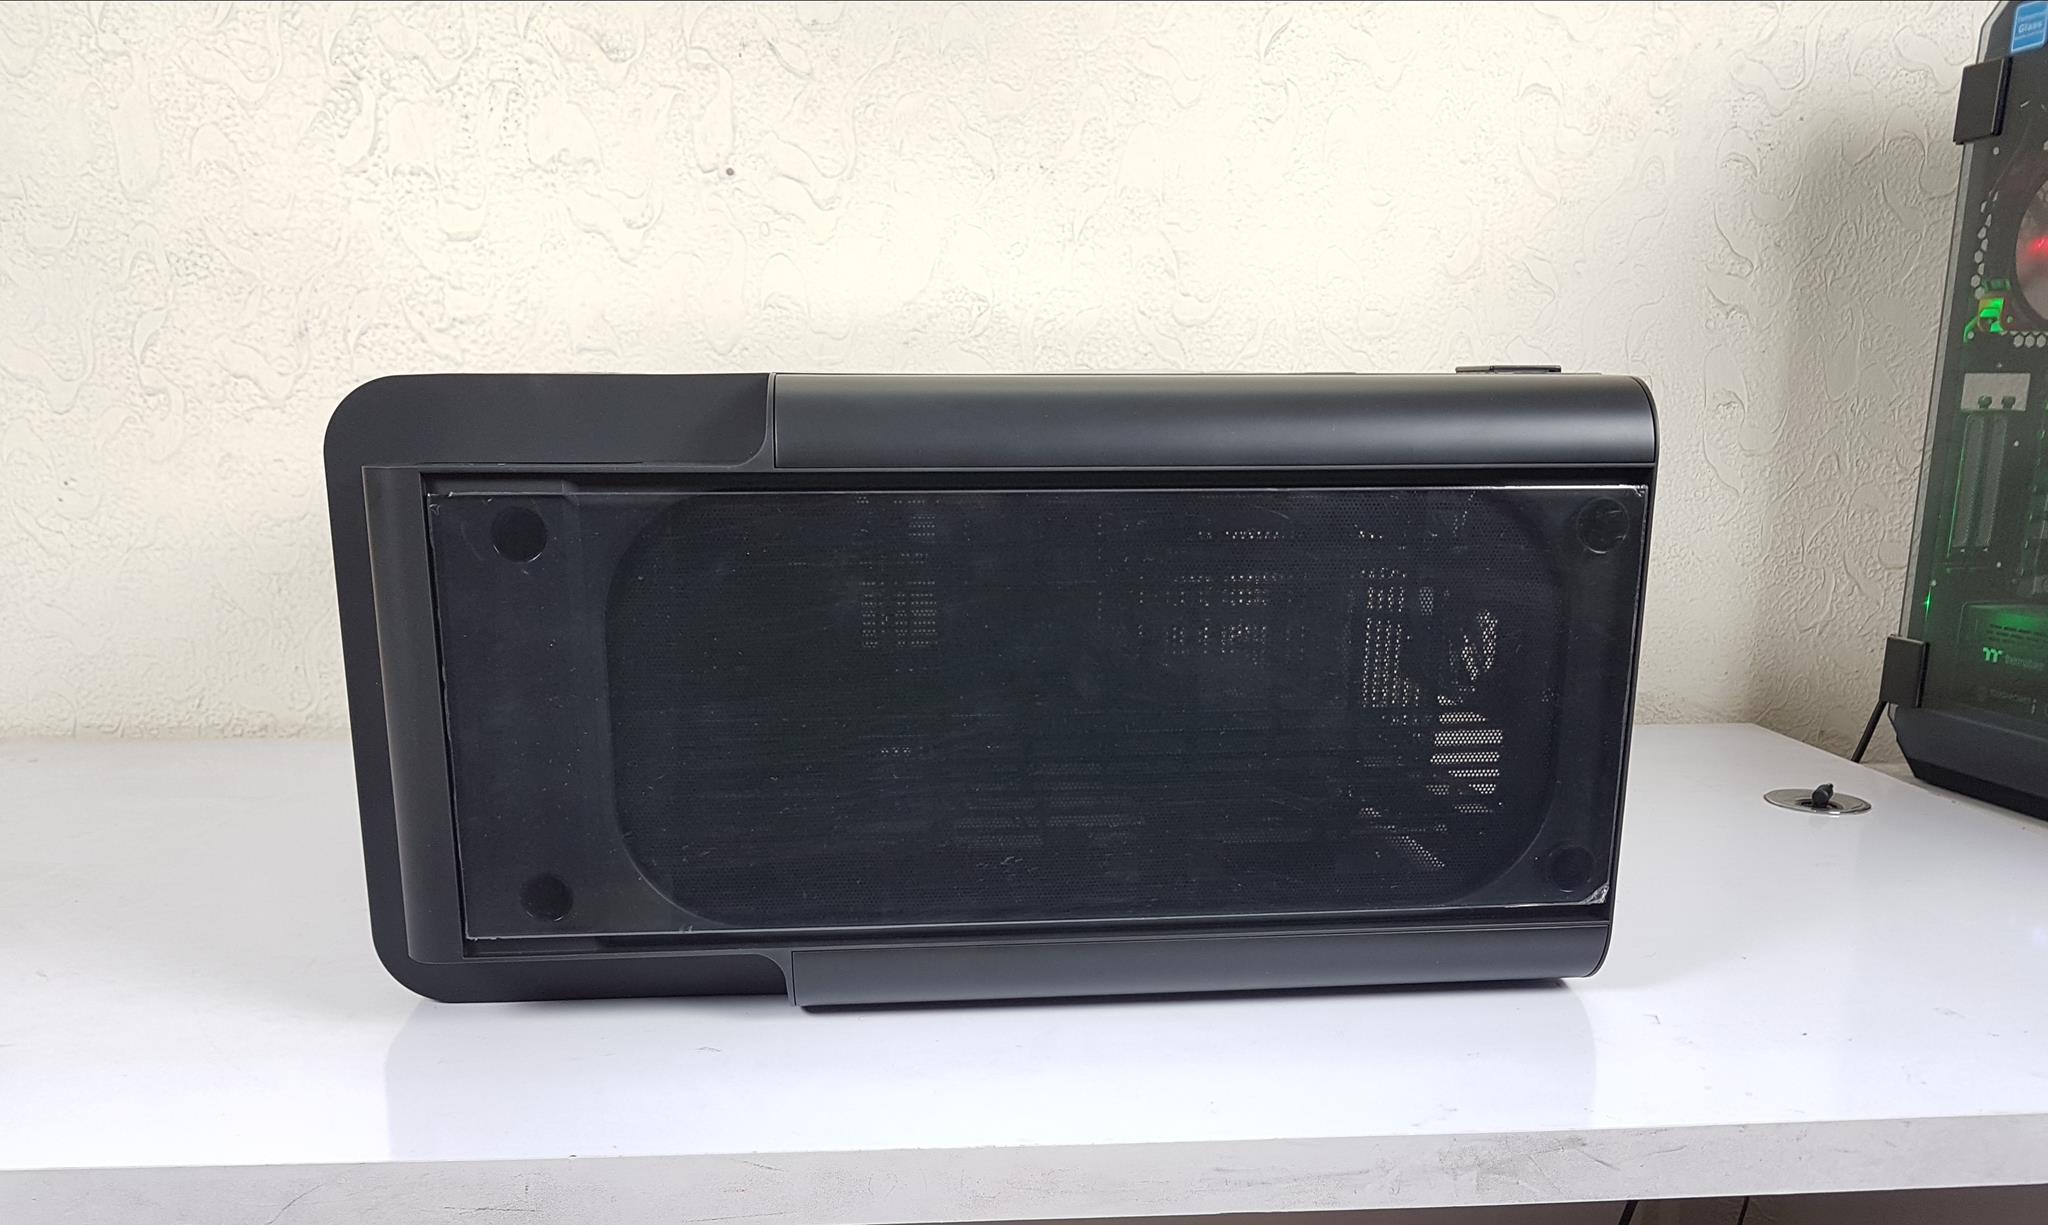
The Thermaltake Level 20 GT ARGB Black Edition features a sleek 4mm tempered glass front panel with rounded edges and Thermaltake branding. Behind it, two 200mm ARGB fans provide a stylish look, although the design suggests potential air intake restrictions. Unlike the View 71, the front glass is not externally accessible, impacting inner dust filter access. The top side maintains a distinctive appearance with a divided IO panel, lacking a front-mounted IO panel.
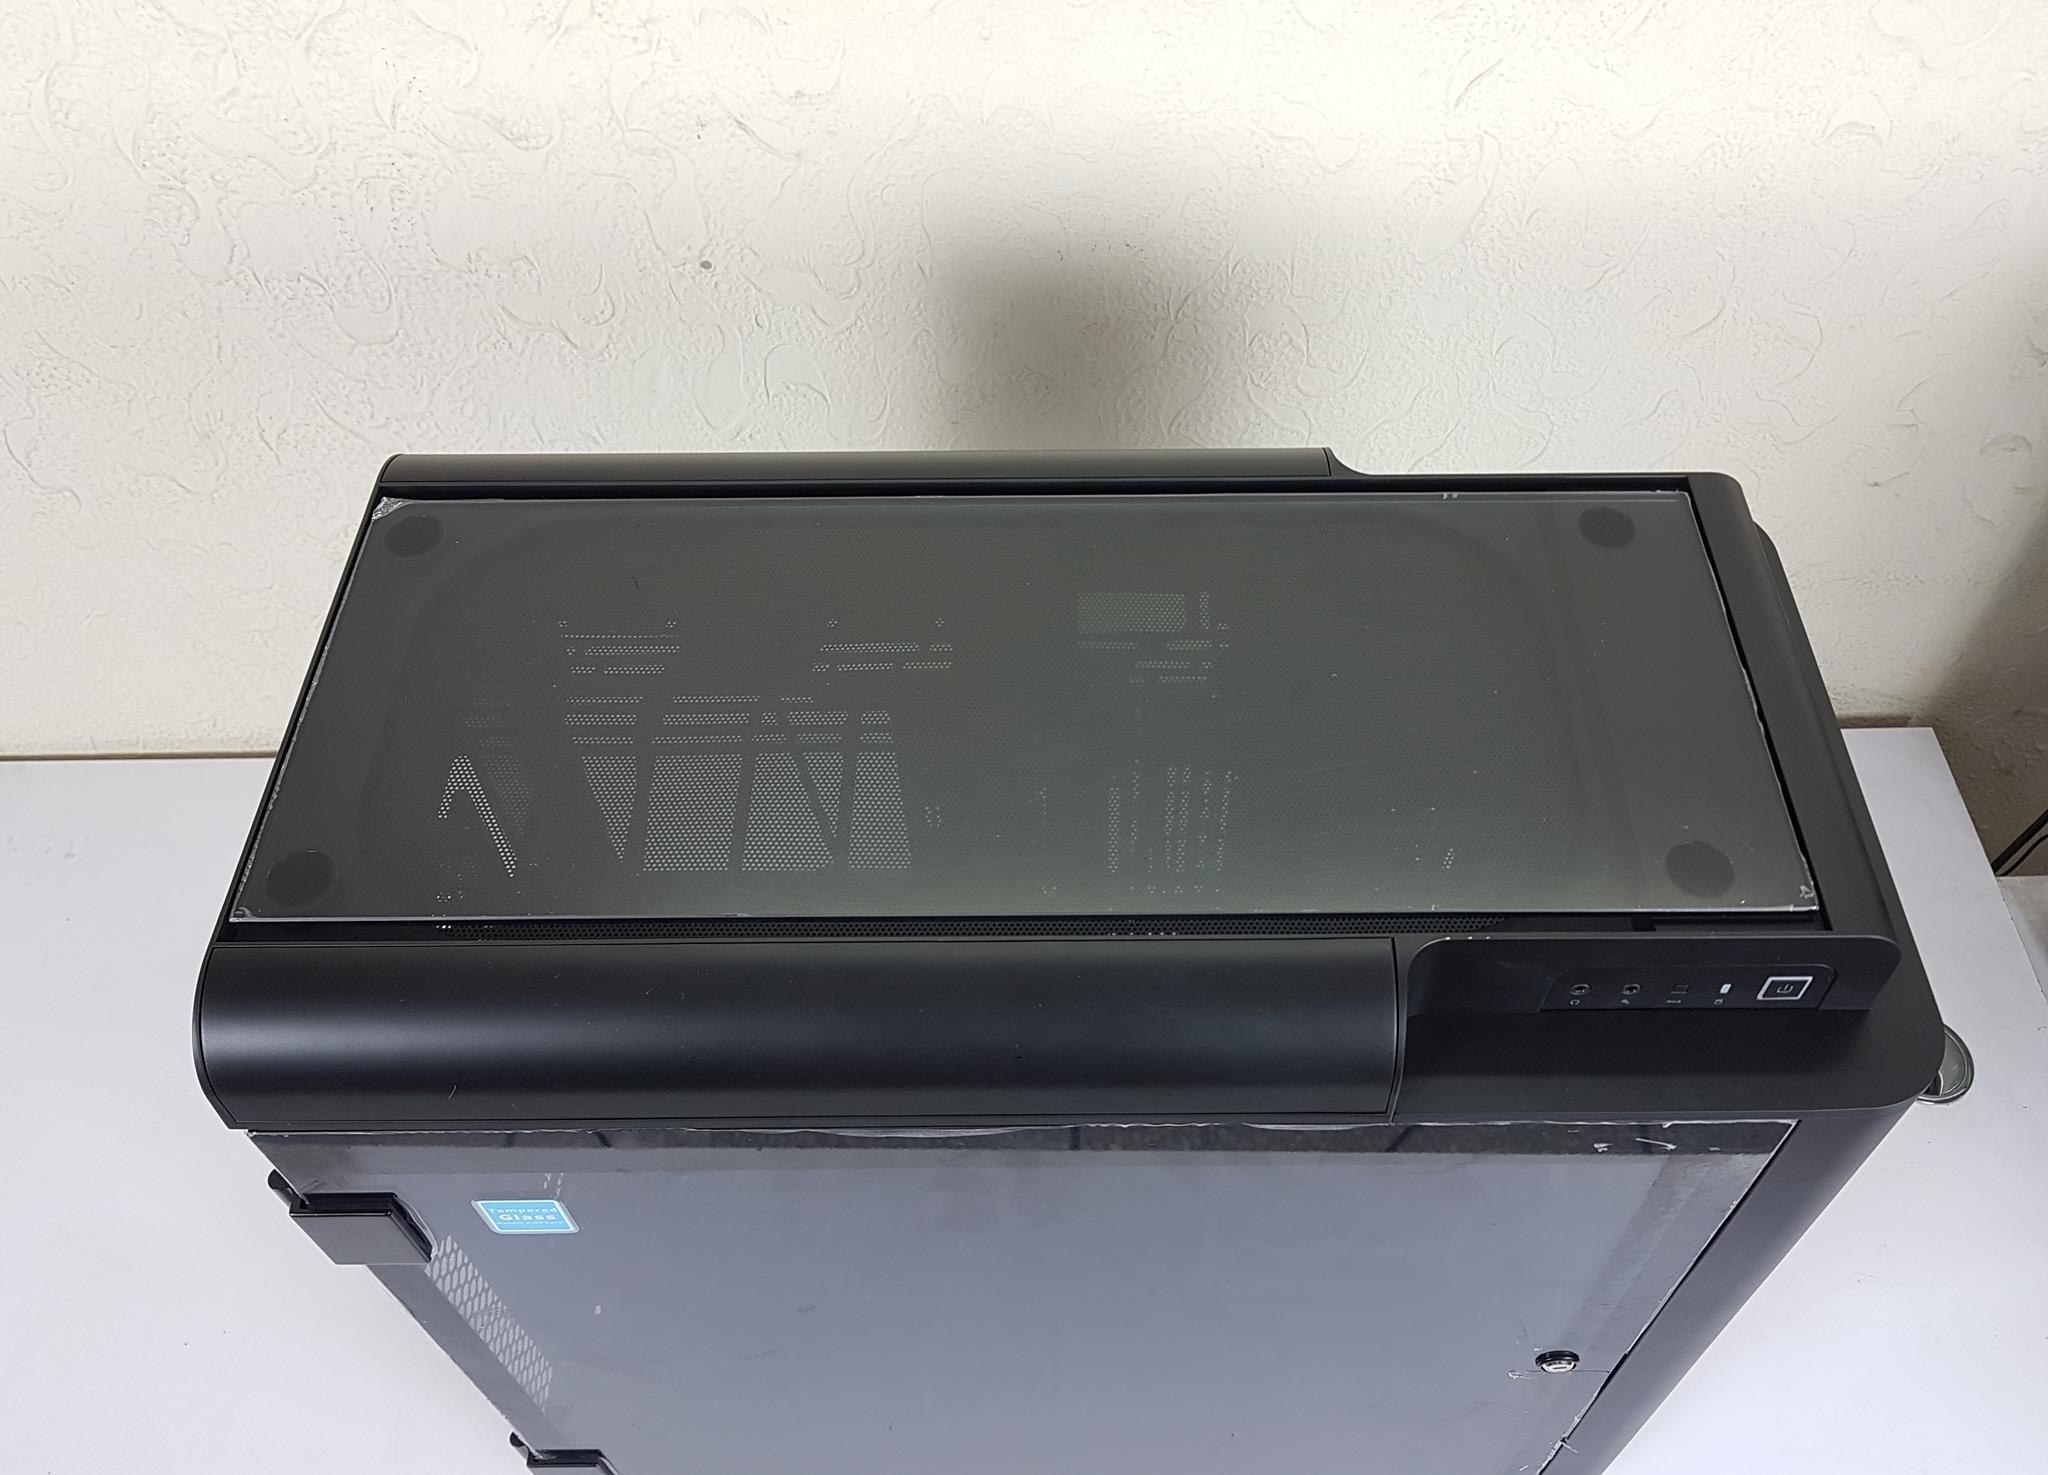
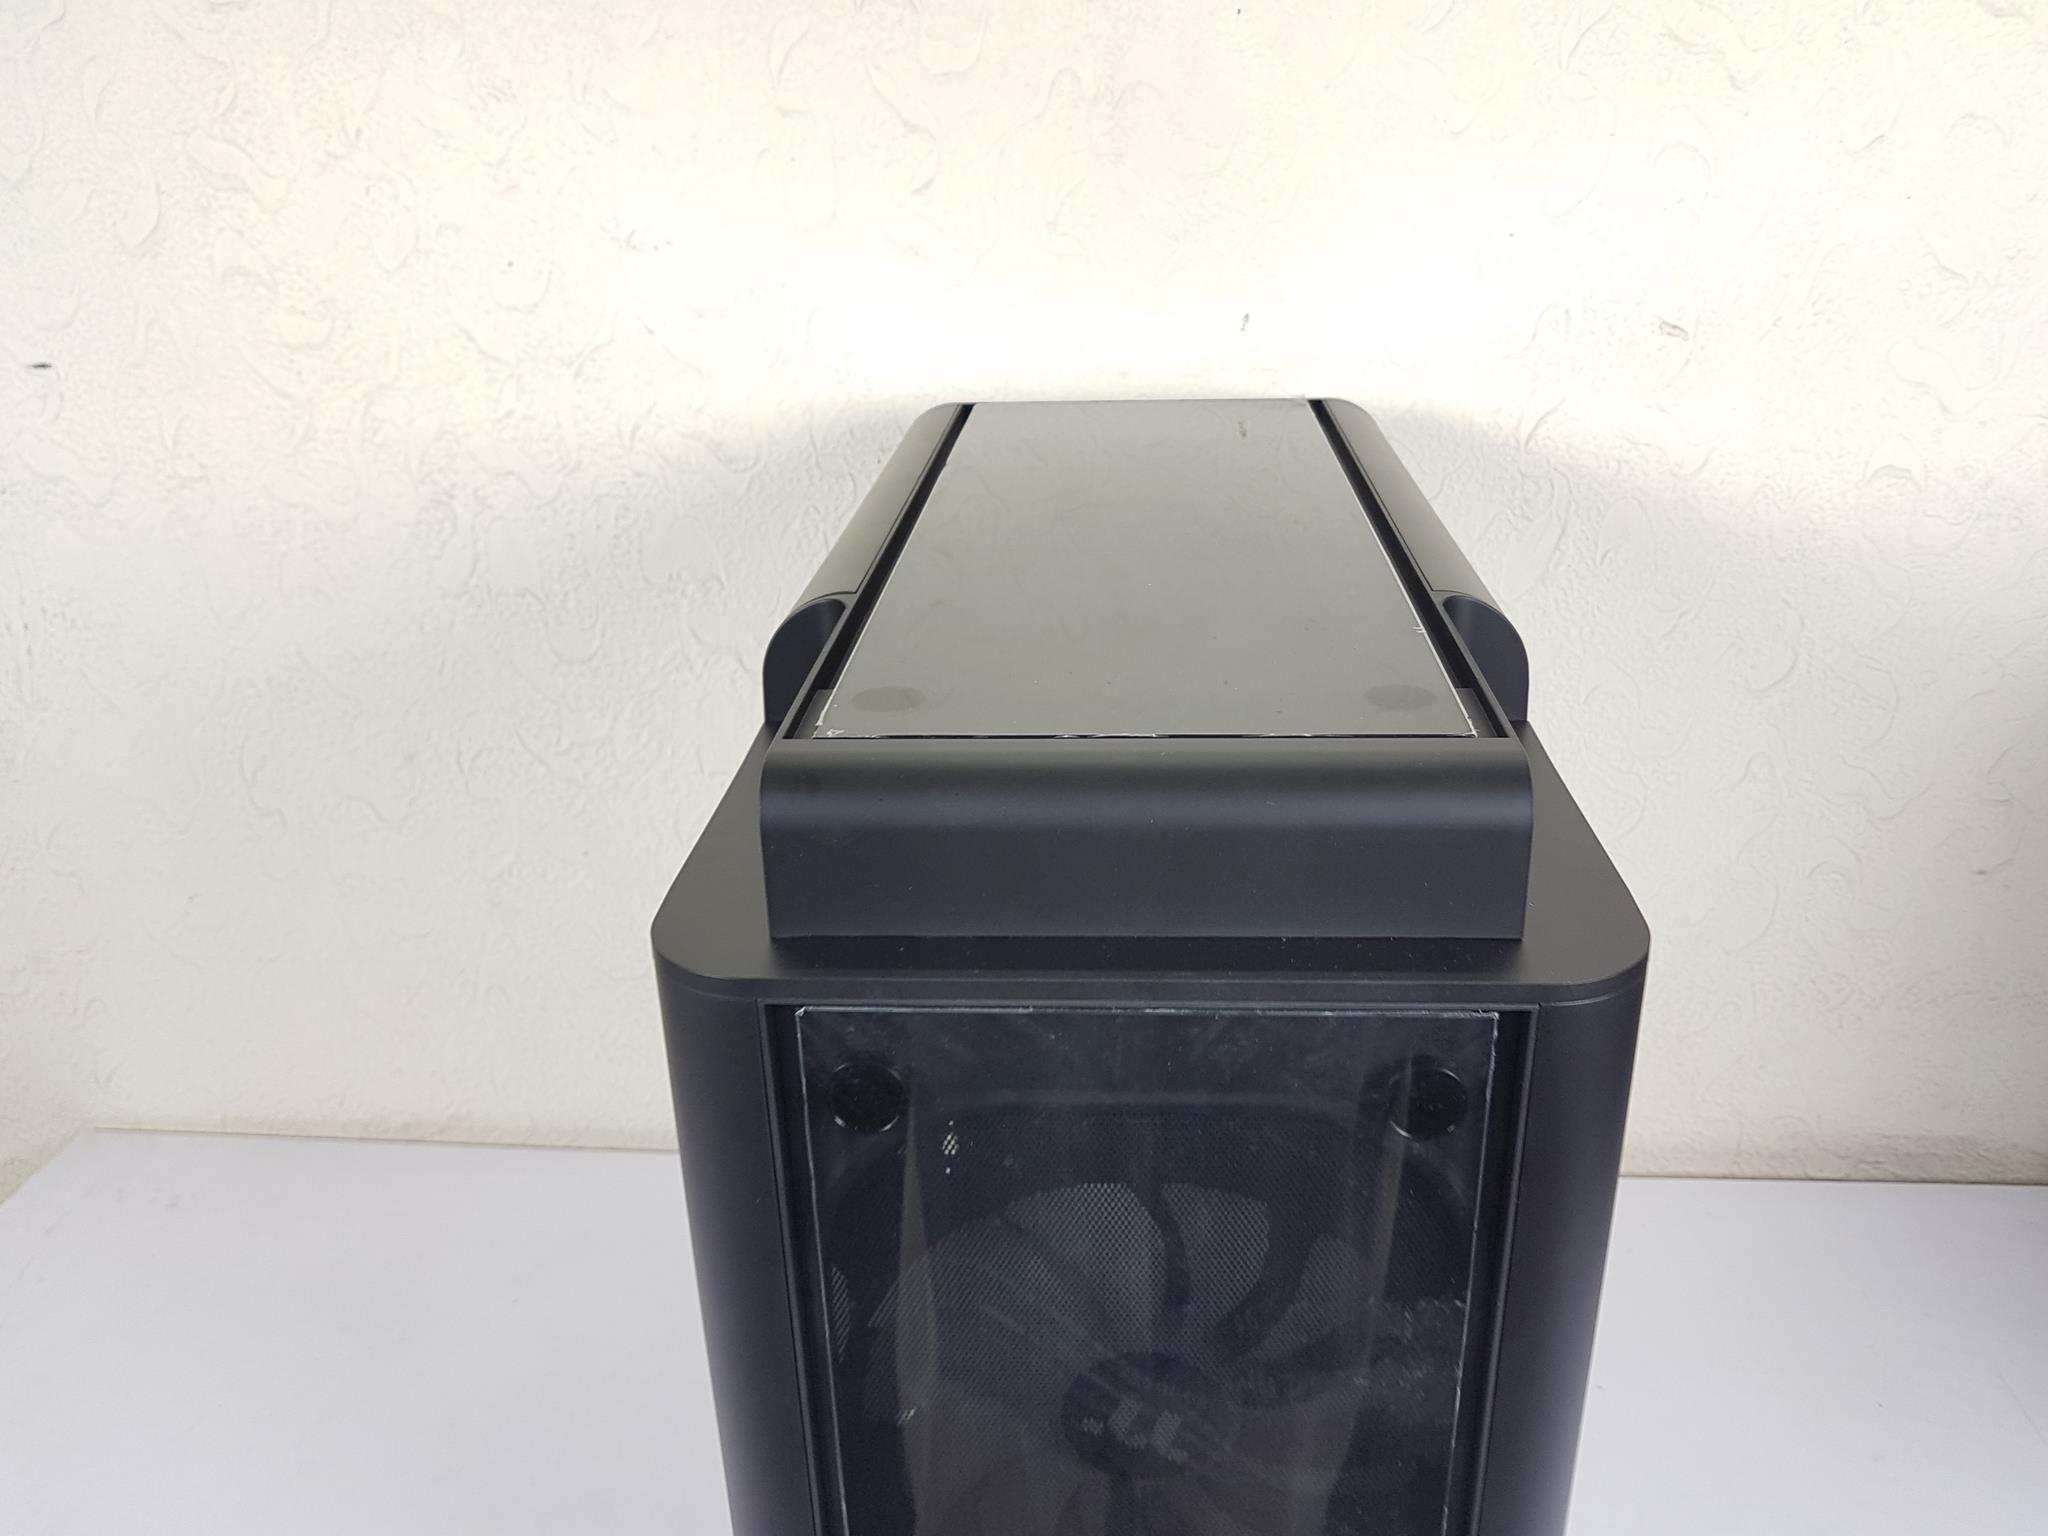
The above picture shows the top side of the chassis. Look at the glass panel’s implementation. It is the same as is on the front side. Also, we have the same narrow bezels on both sides of the glass panel making the airflow restricted. Thermaltake is not running the sides on the entire length of the chassis which really adds to the pleasant look of the chassis particularly when looking at it from the side.
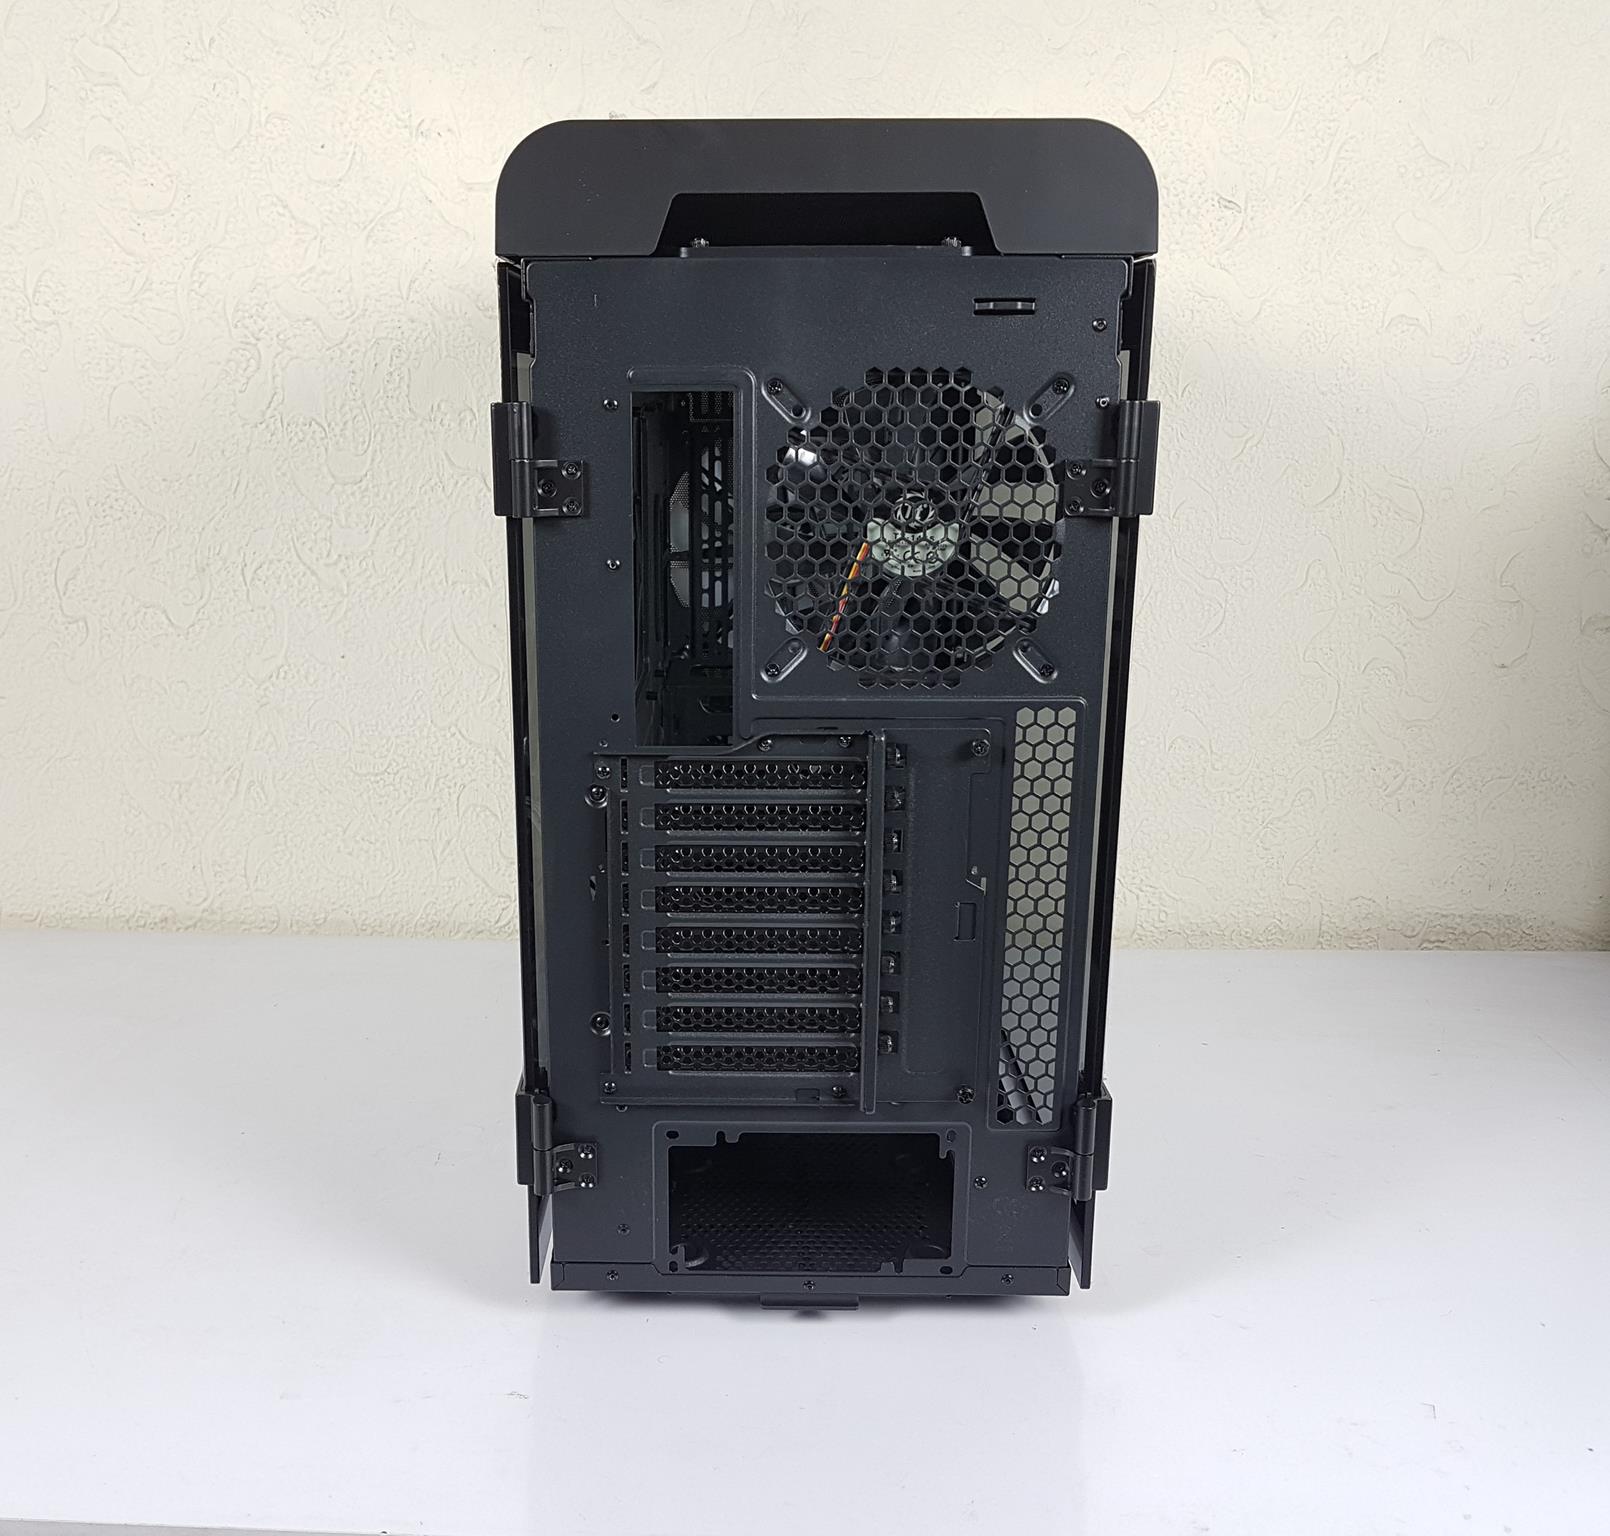
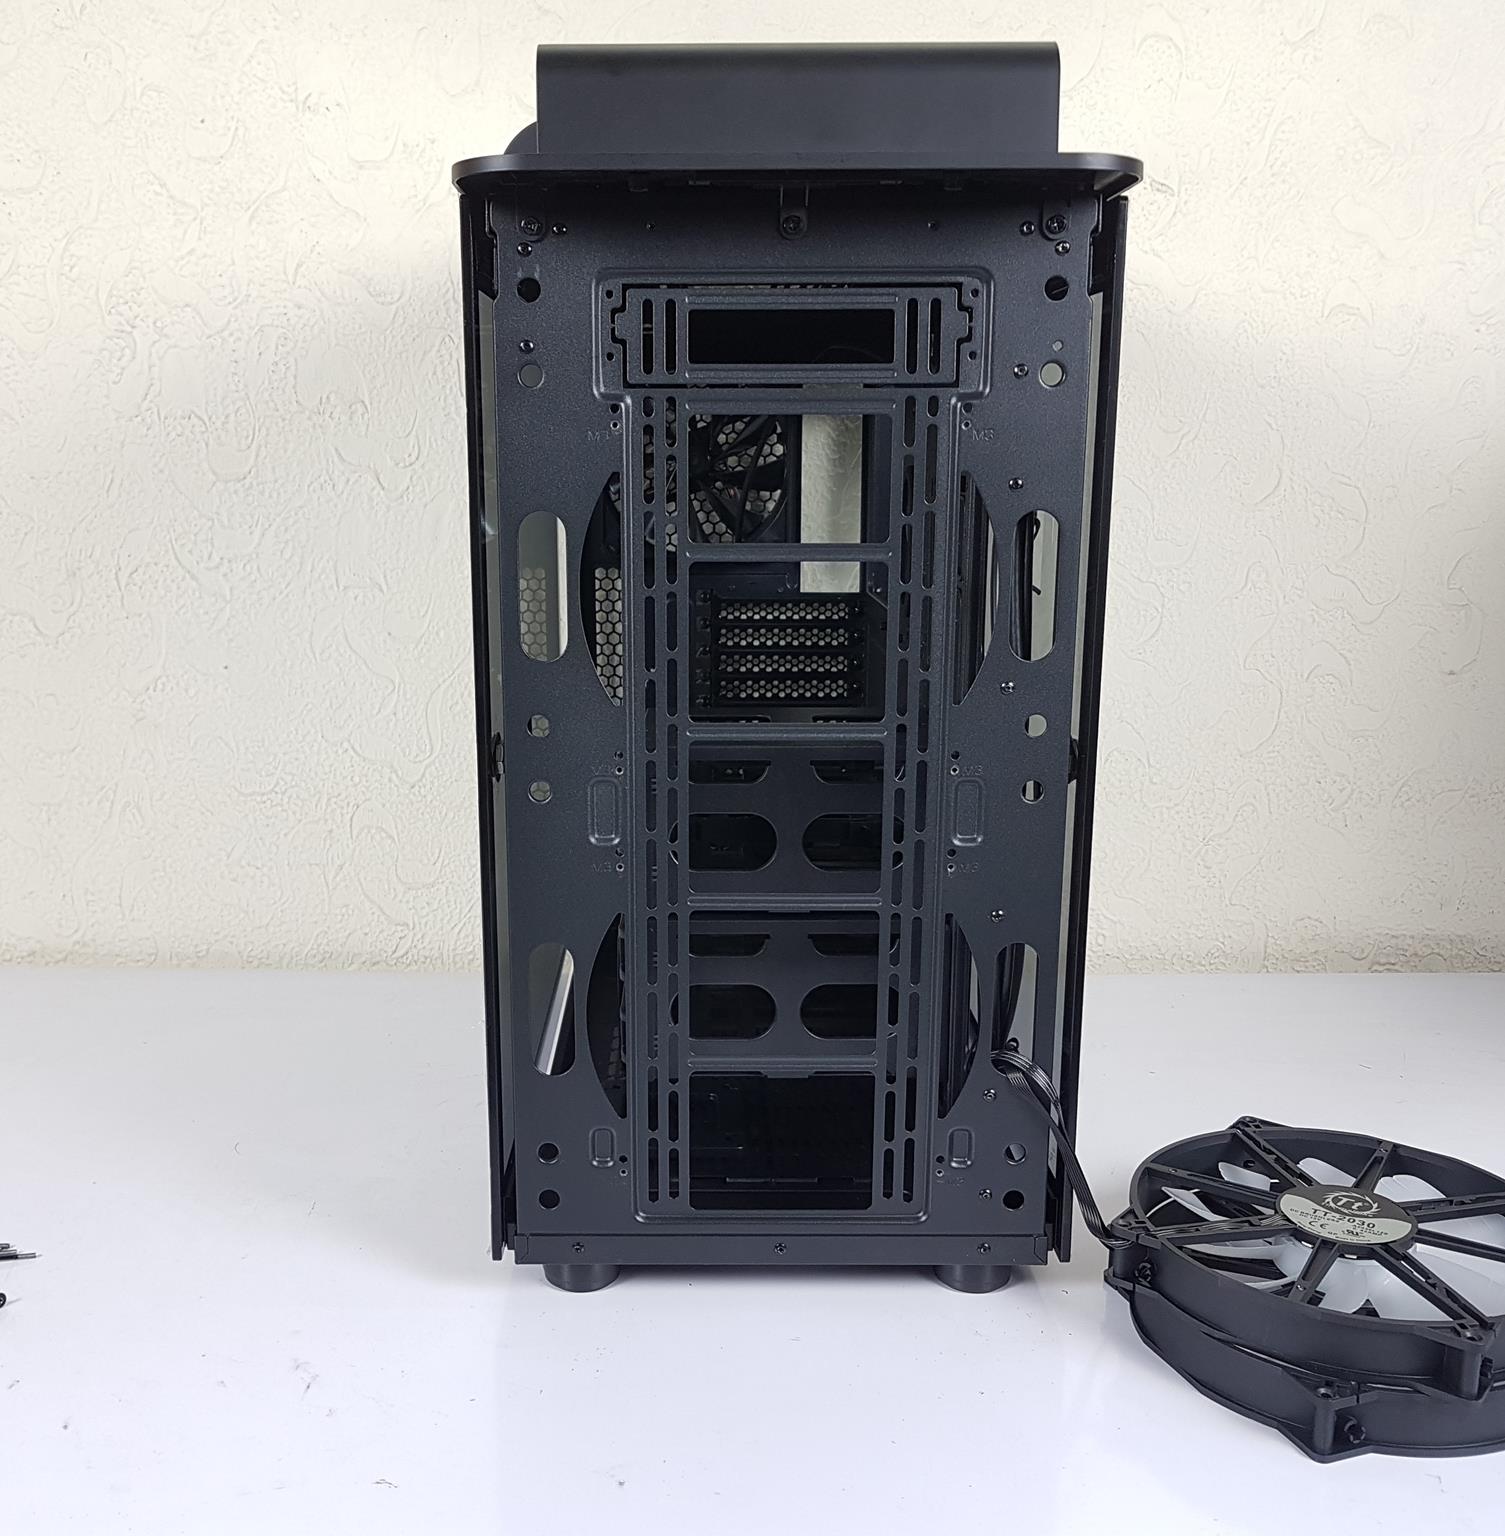
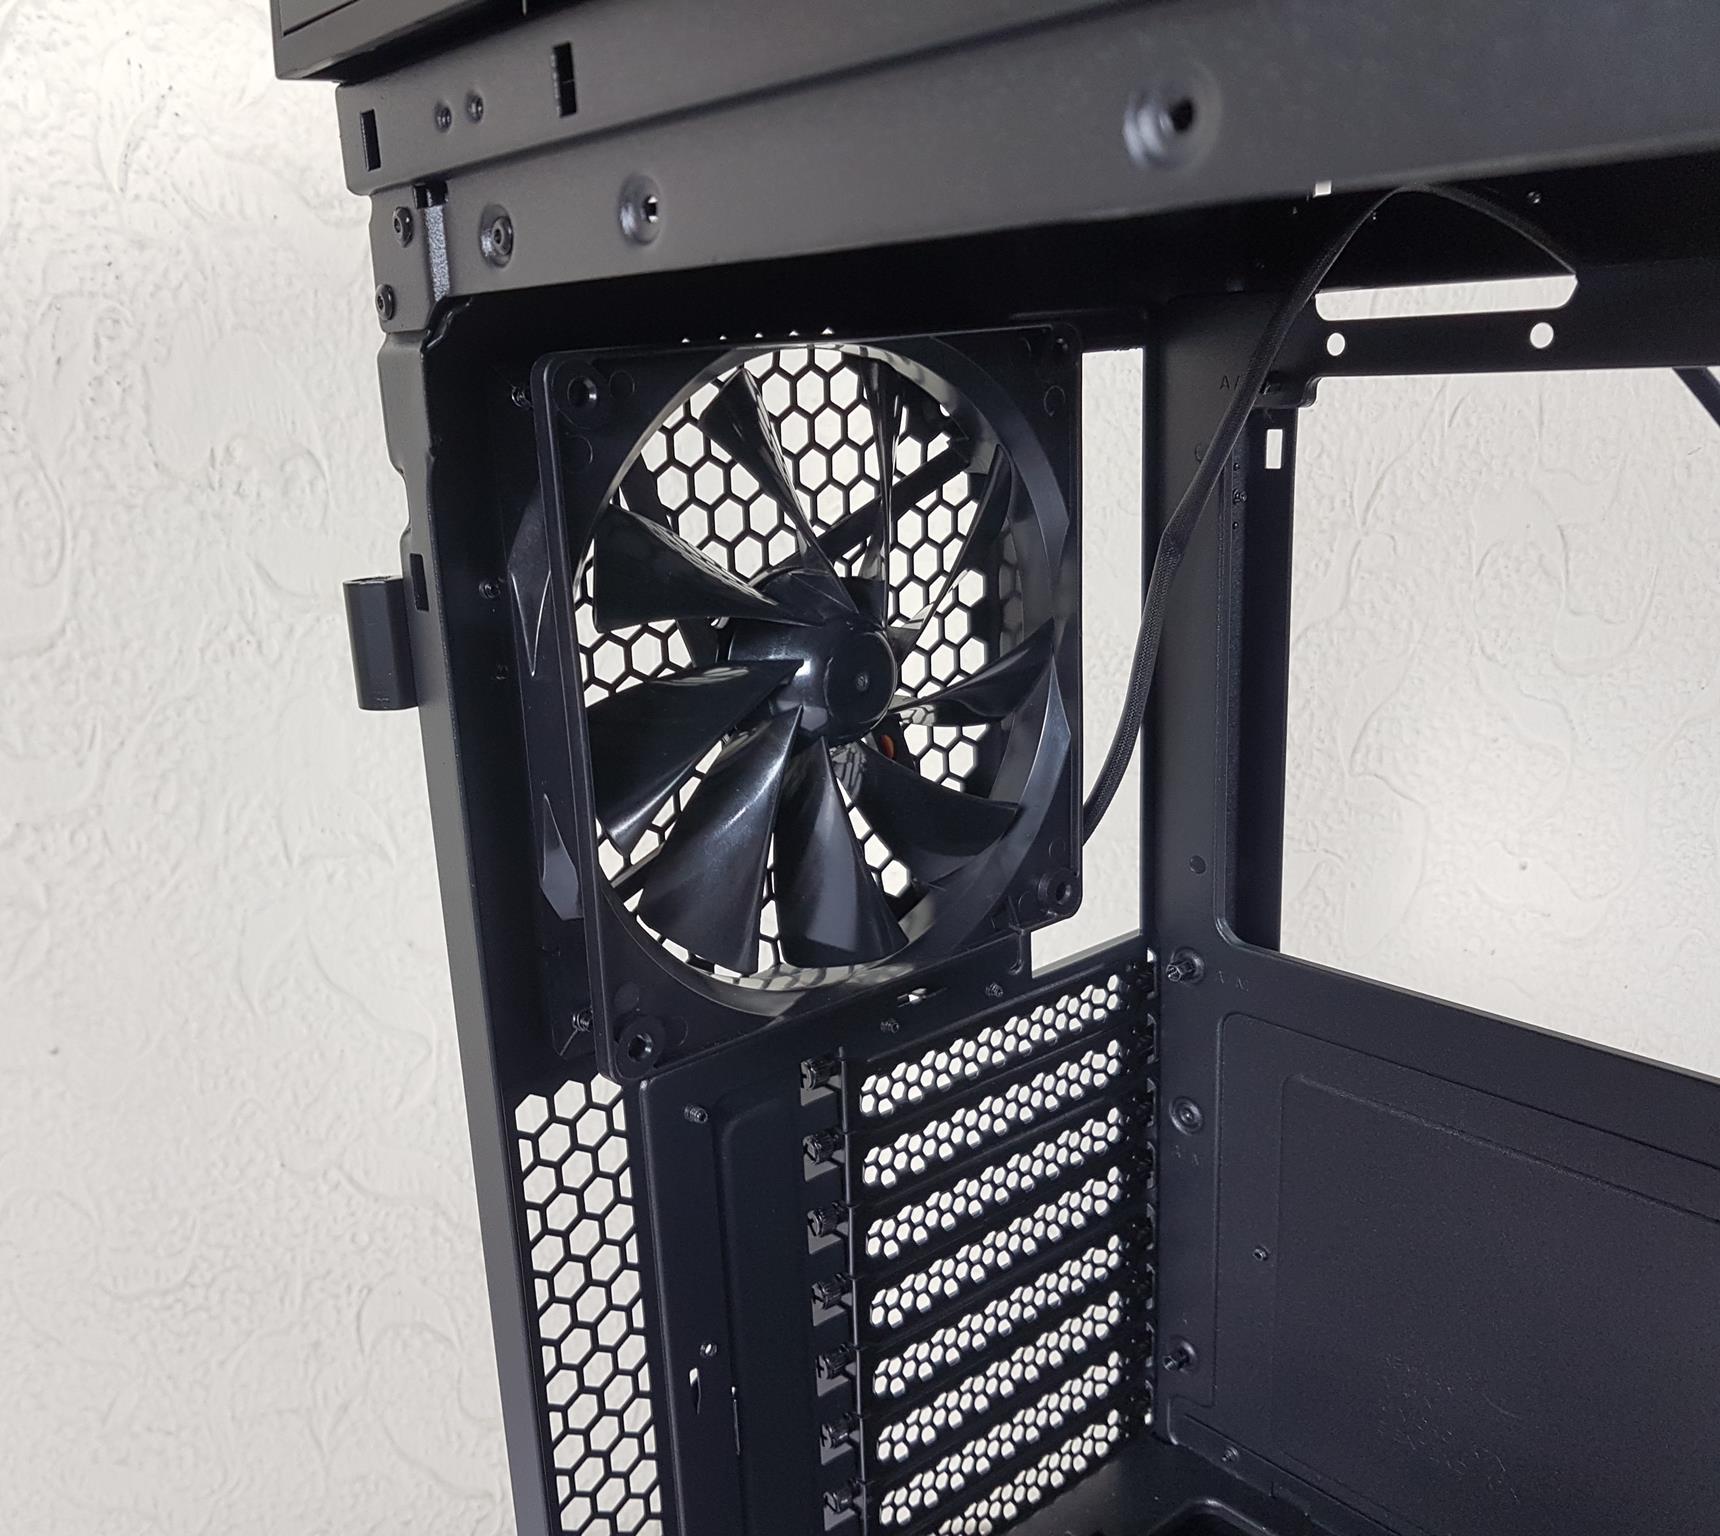
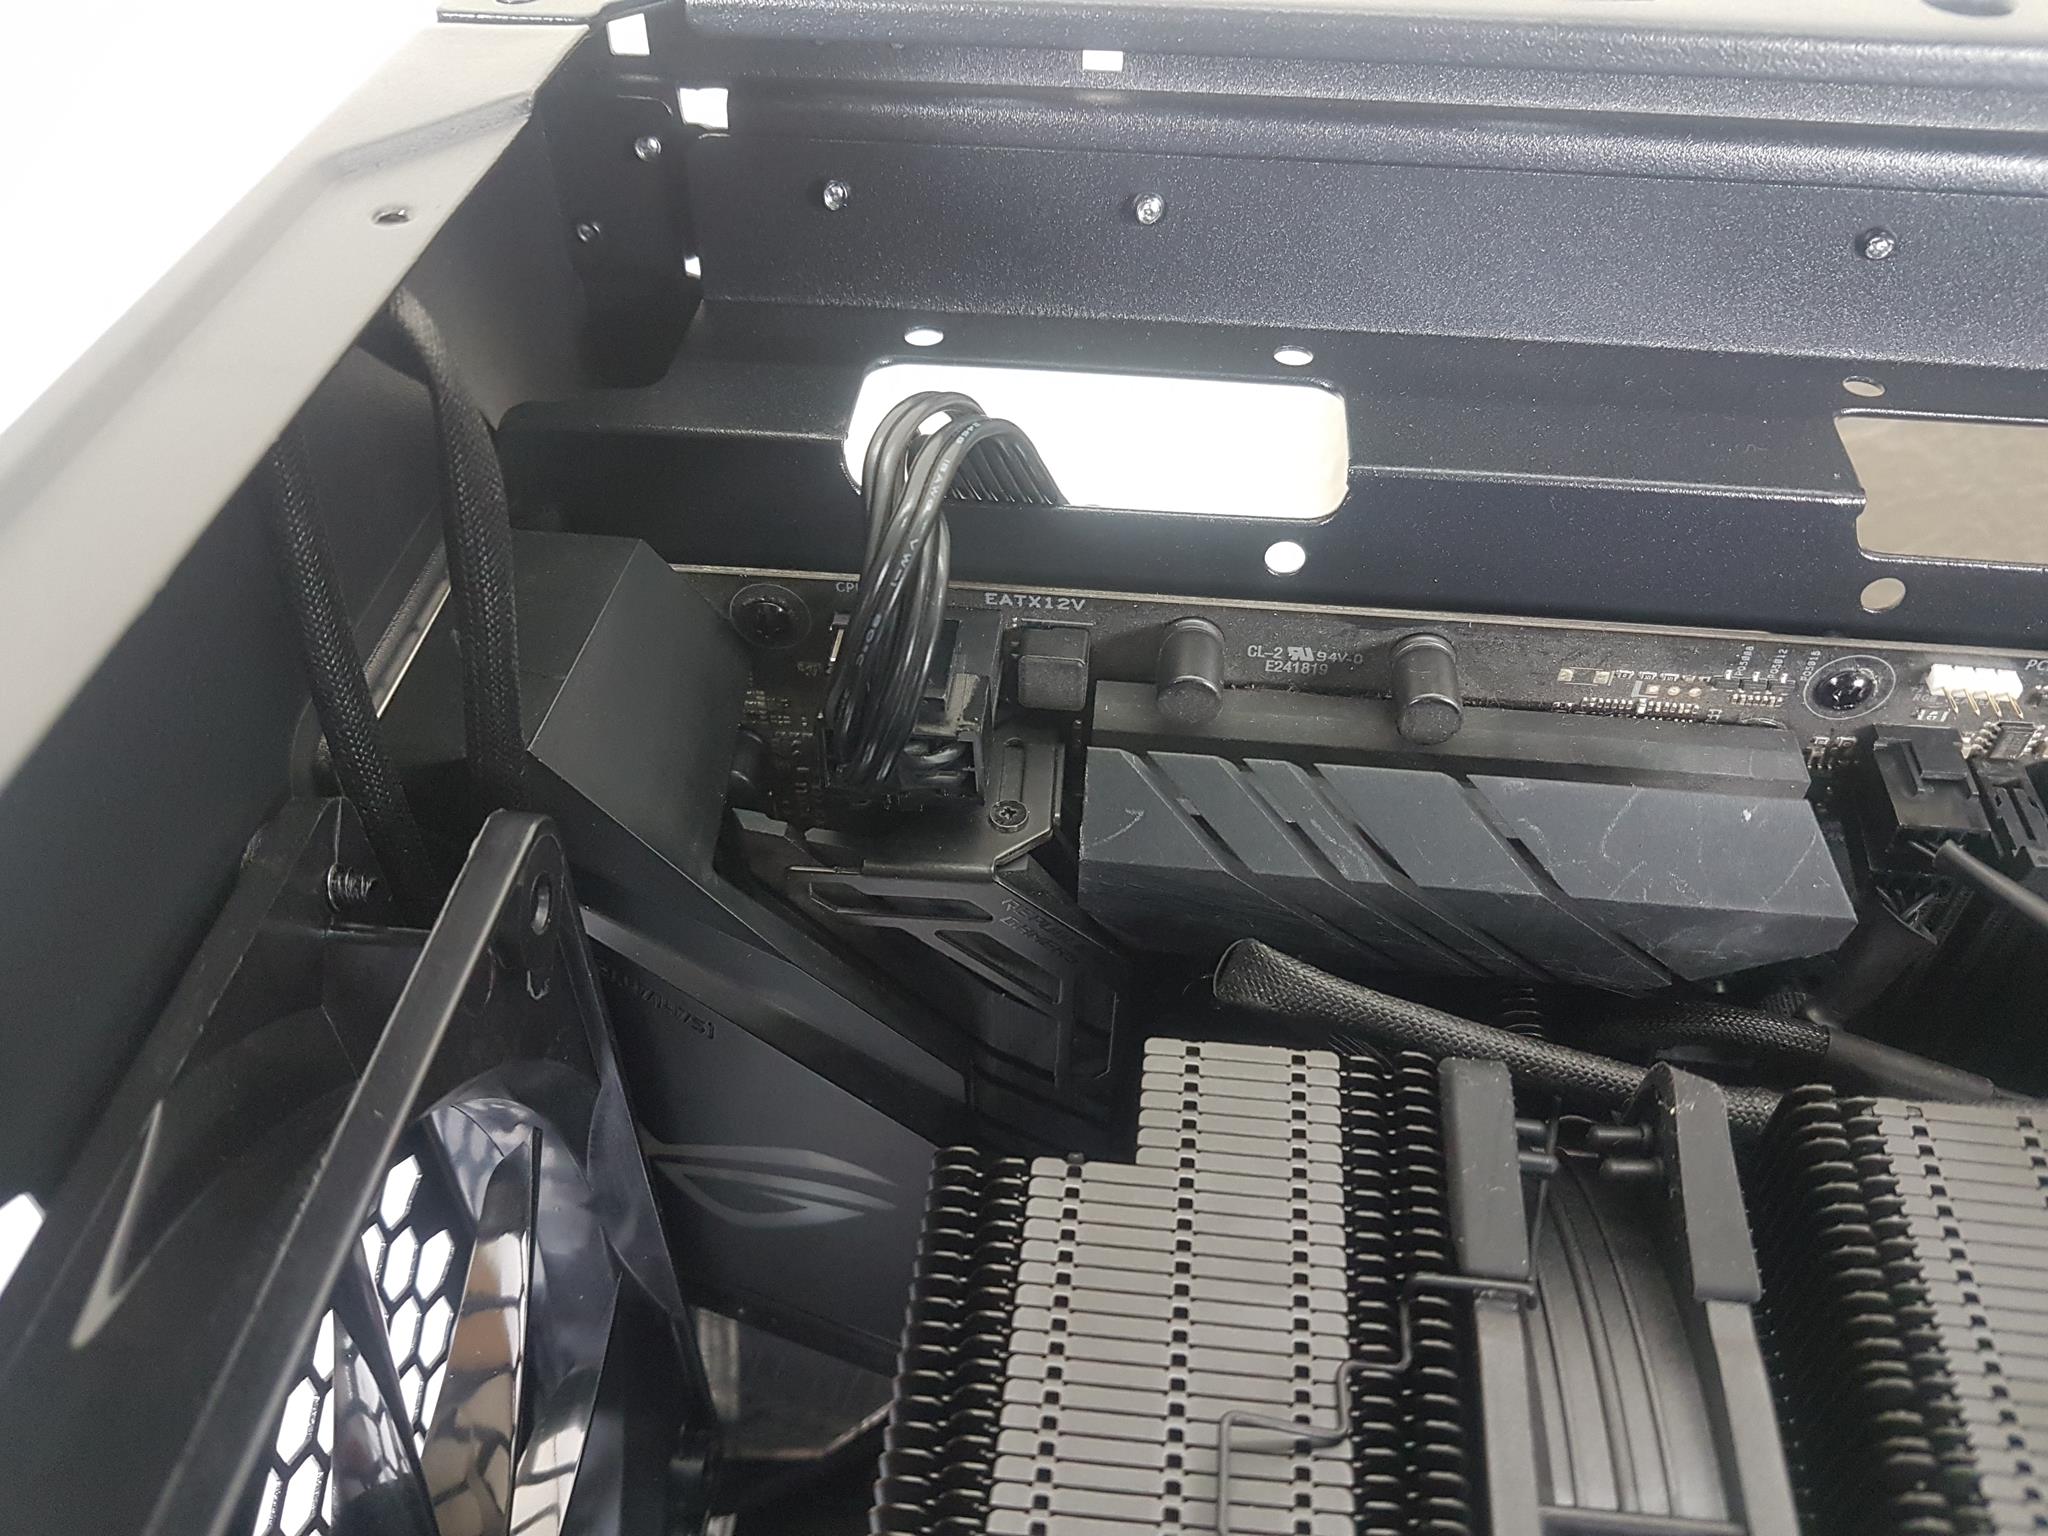
With its generous 294mm width, managing cables above the motherboard is a breeze, and the handy dedicated IO shield cutout adds that touch of user-friendly design. Cooling is top-notch, thanks to the versatile rear fan mount supporting 120mm or 140mm fans, coupled with a mesh area for optimal airflow.
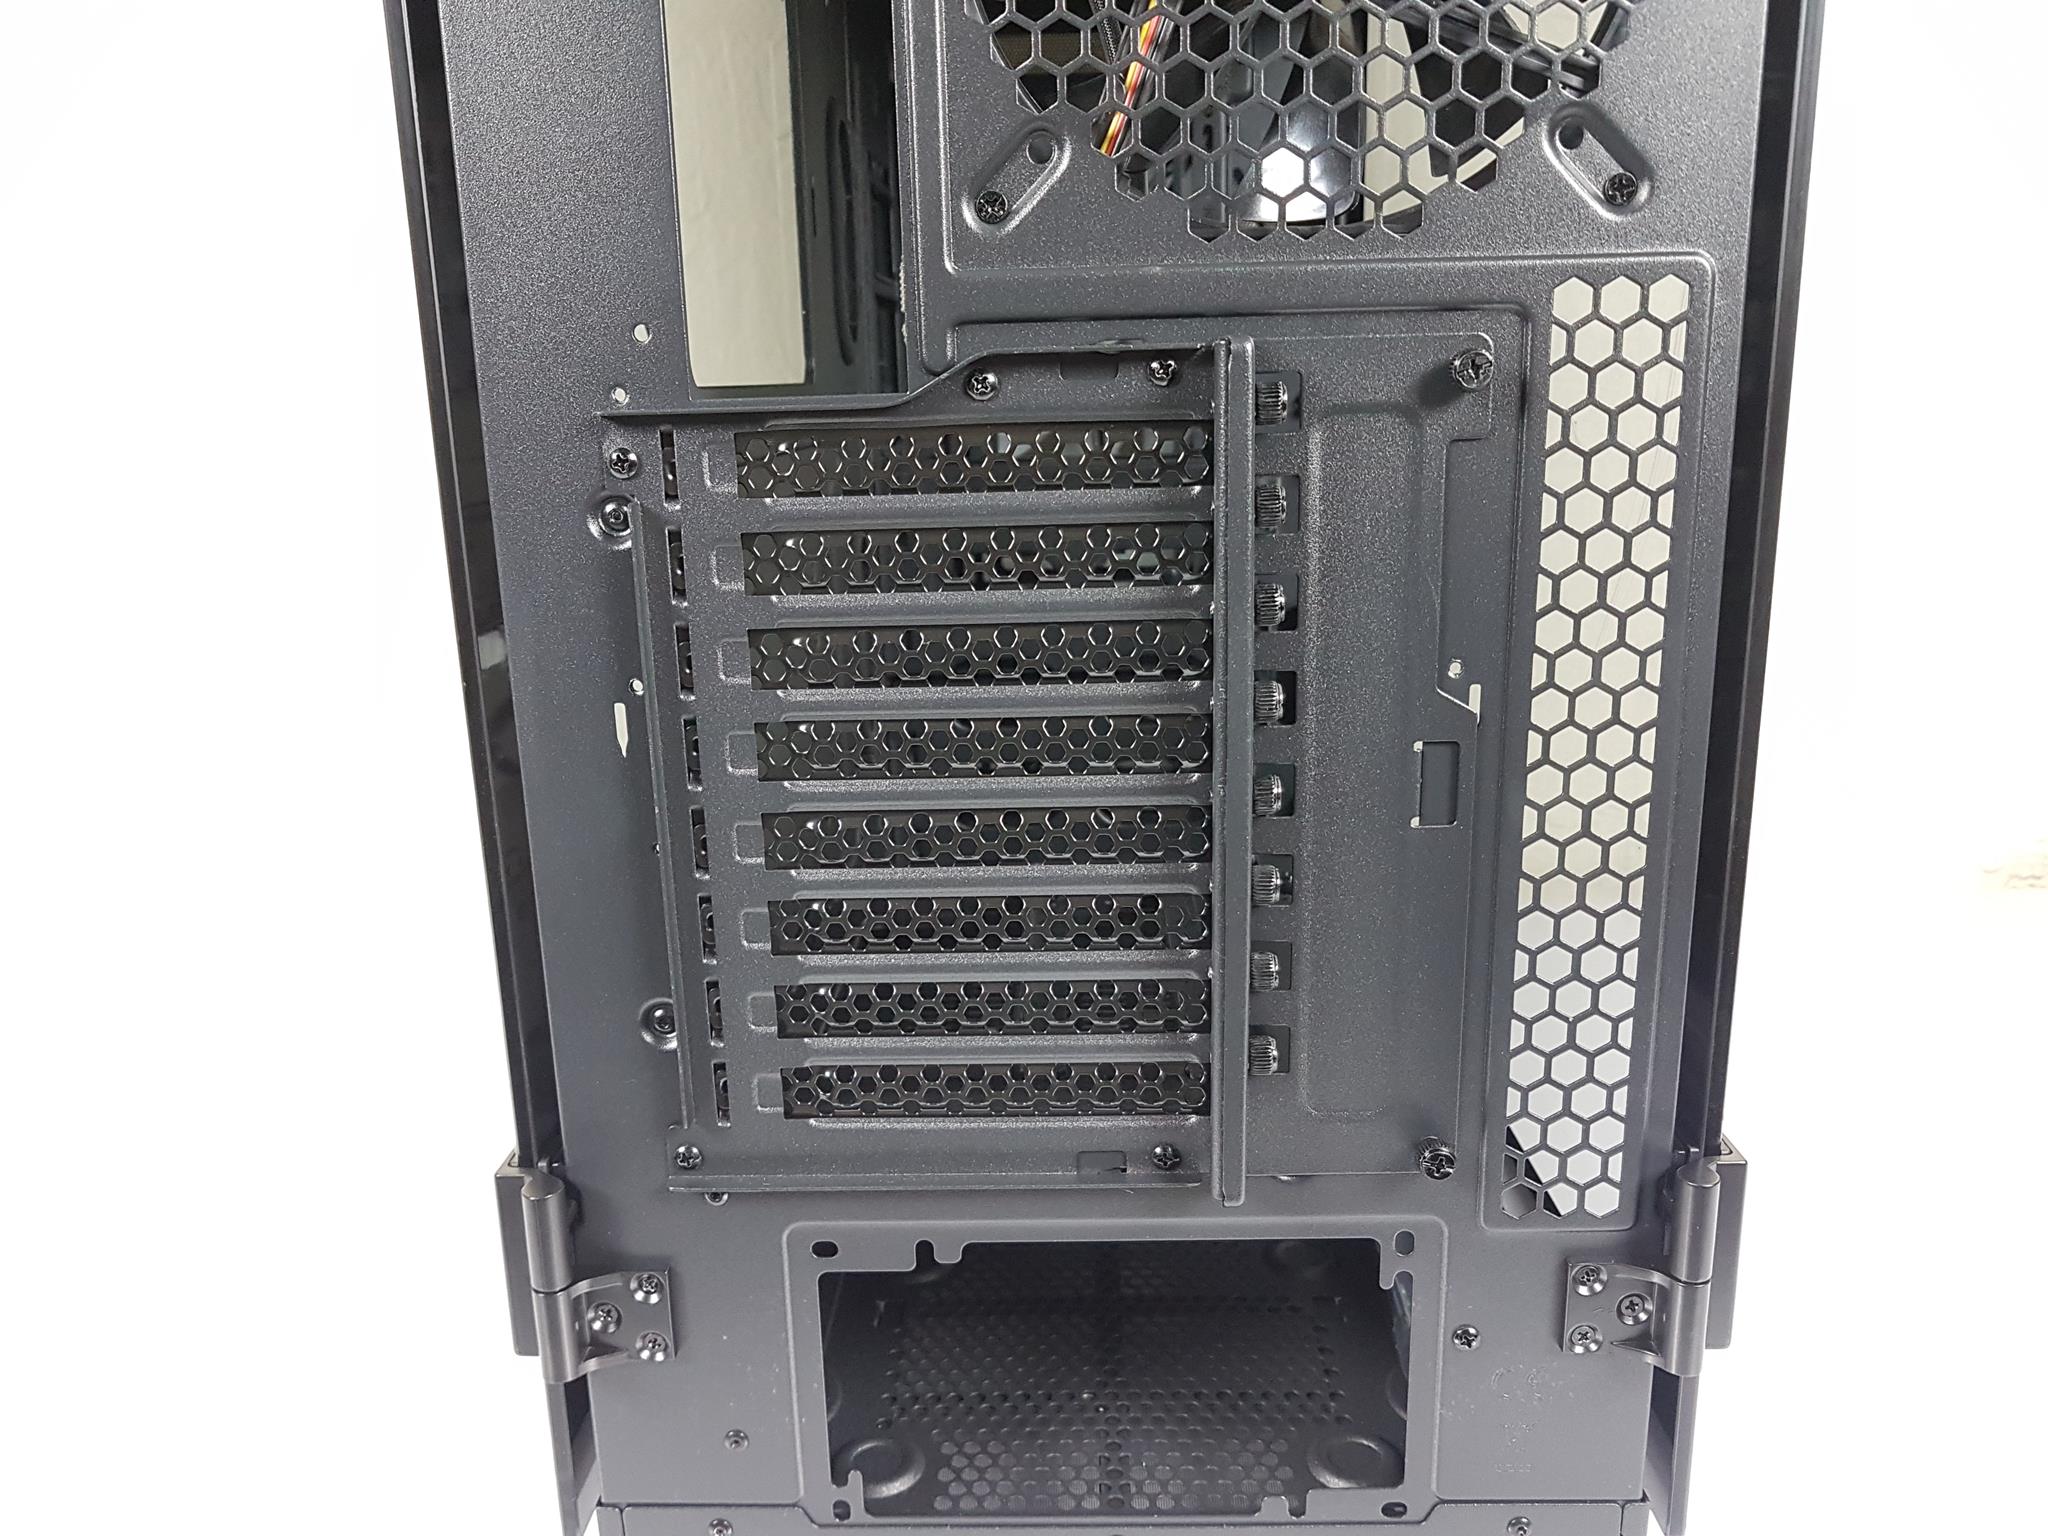
The Level 20 GT ARGB boasts eight PCIe slots that can be rotated, allowing you to showcase your graphics card in a stunning vertical setup. Topping it off, the standard ATX PSU mounting at the bottom ensures compatibility with a range of power supplies. The Level 20 GT ARGB strikes that sweet spot between space, flexibility, and cooling prowess.
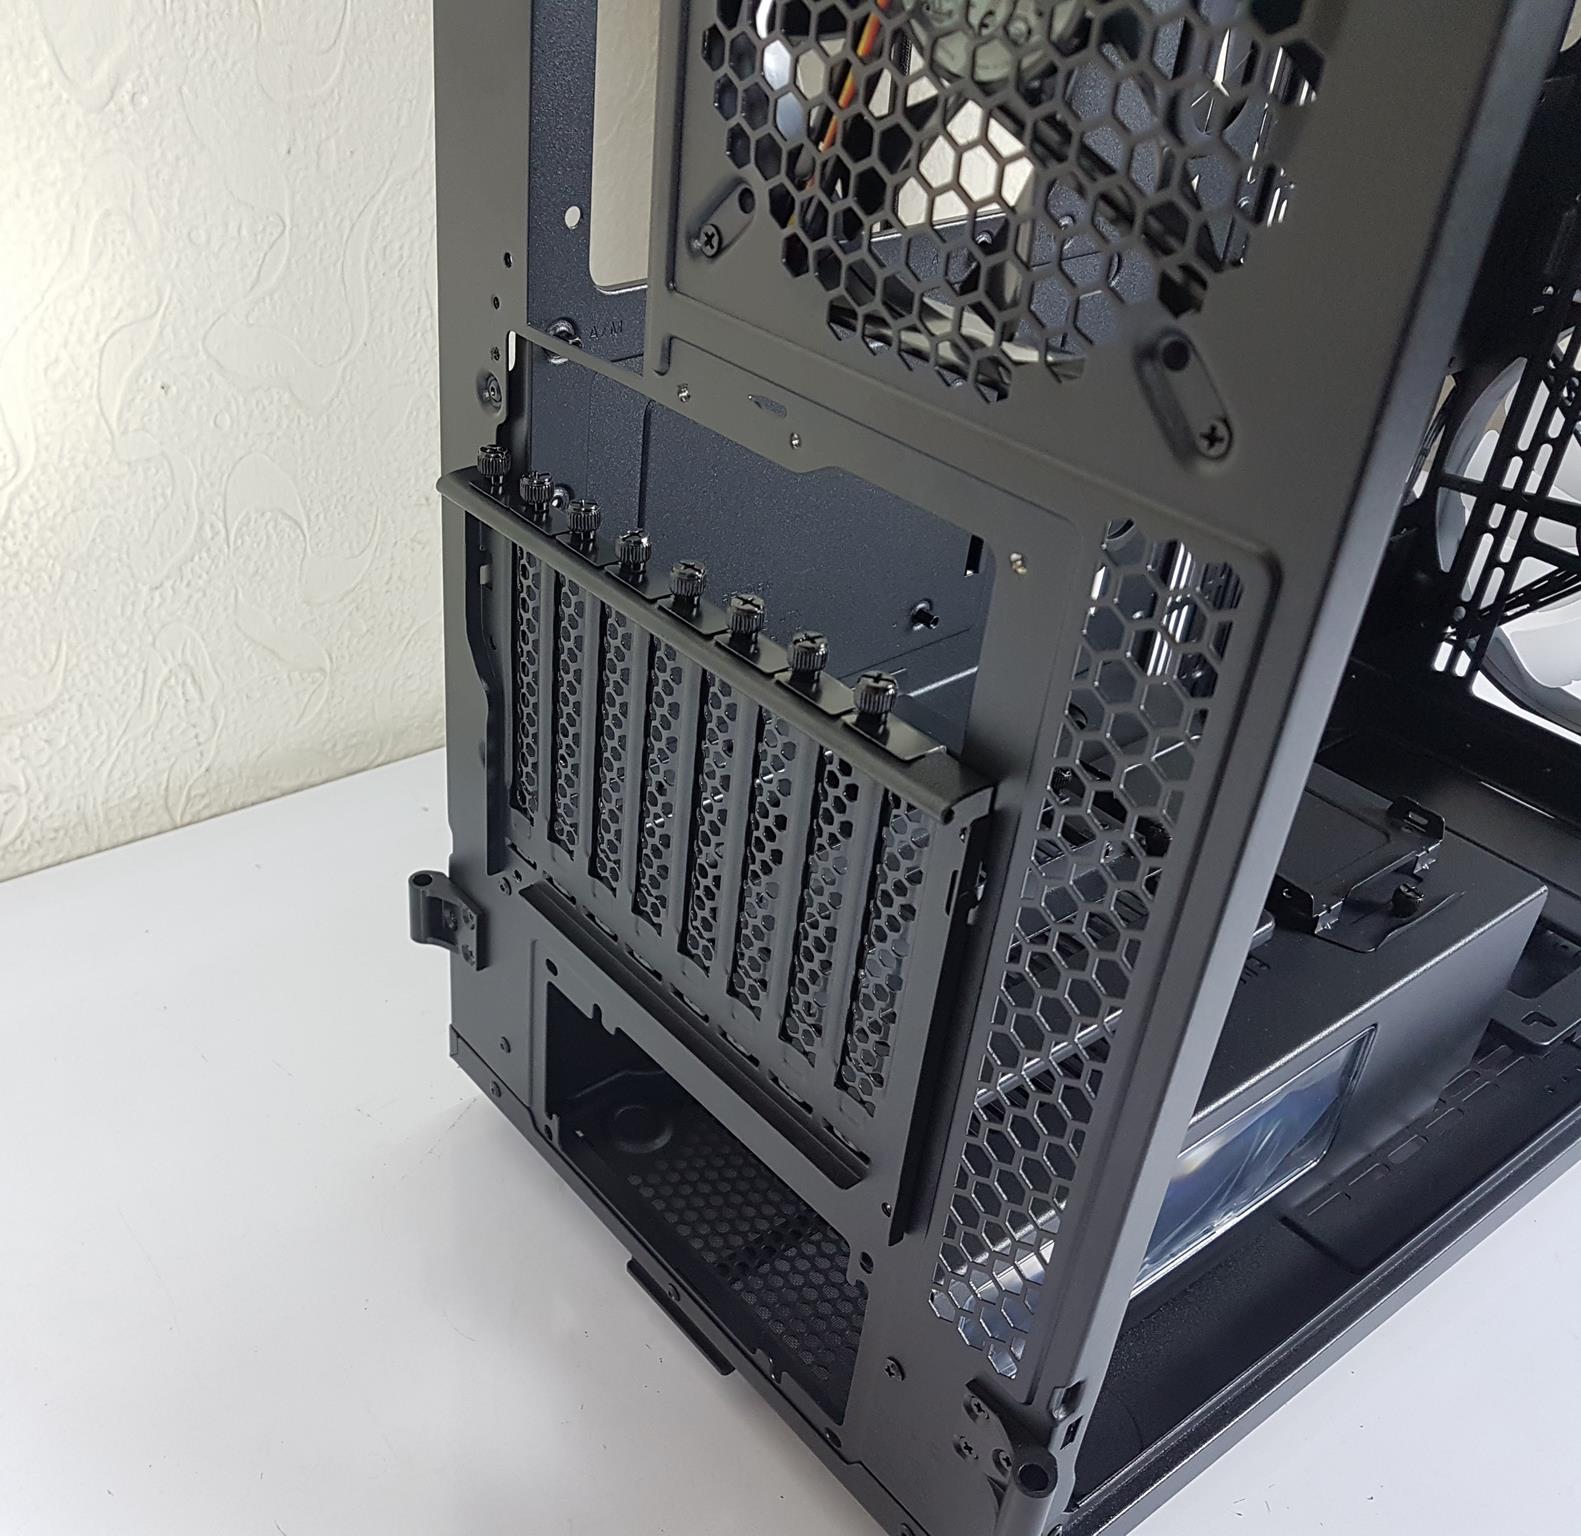
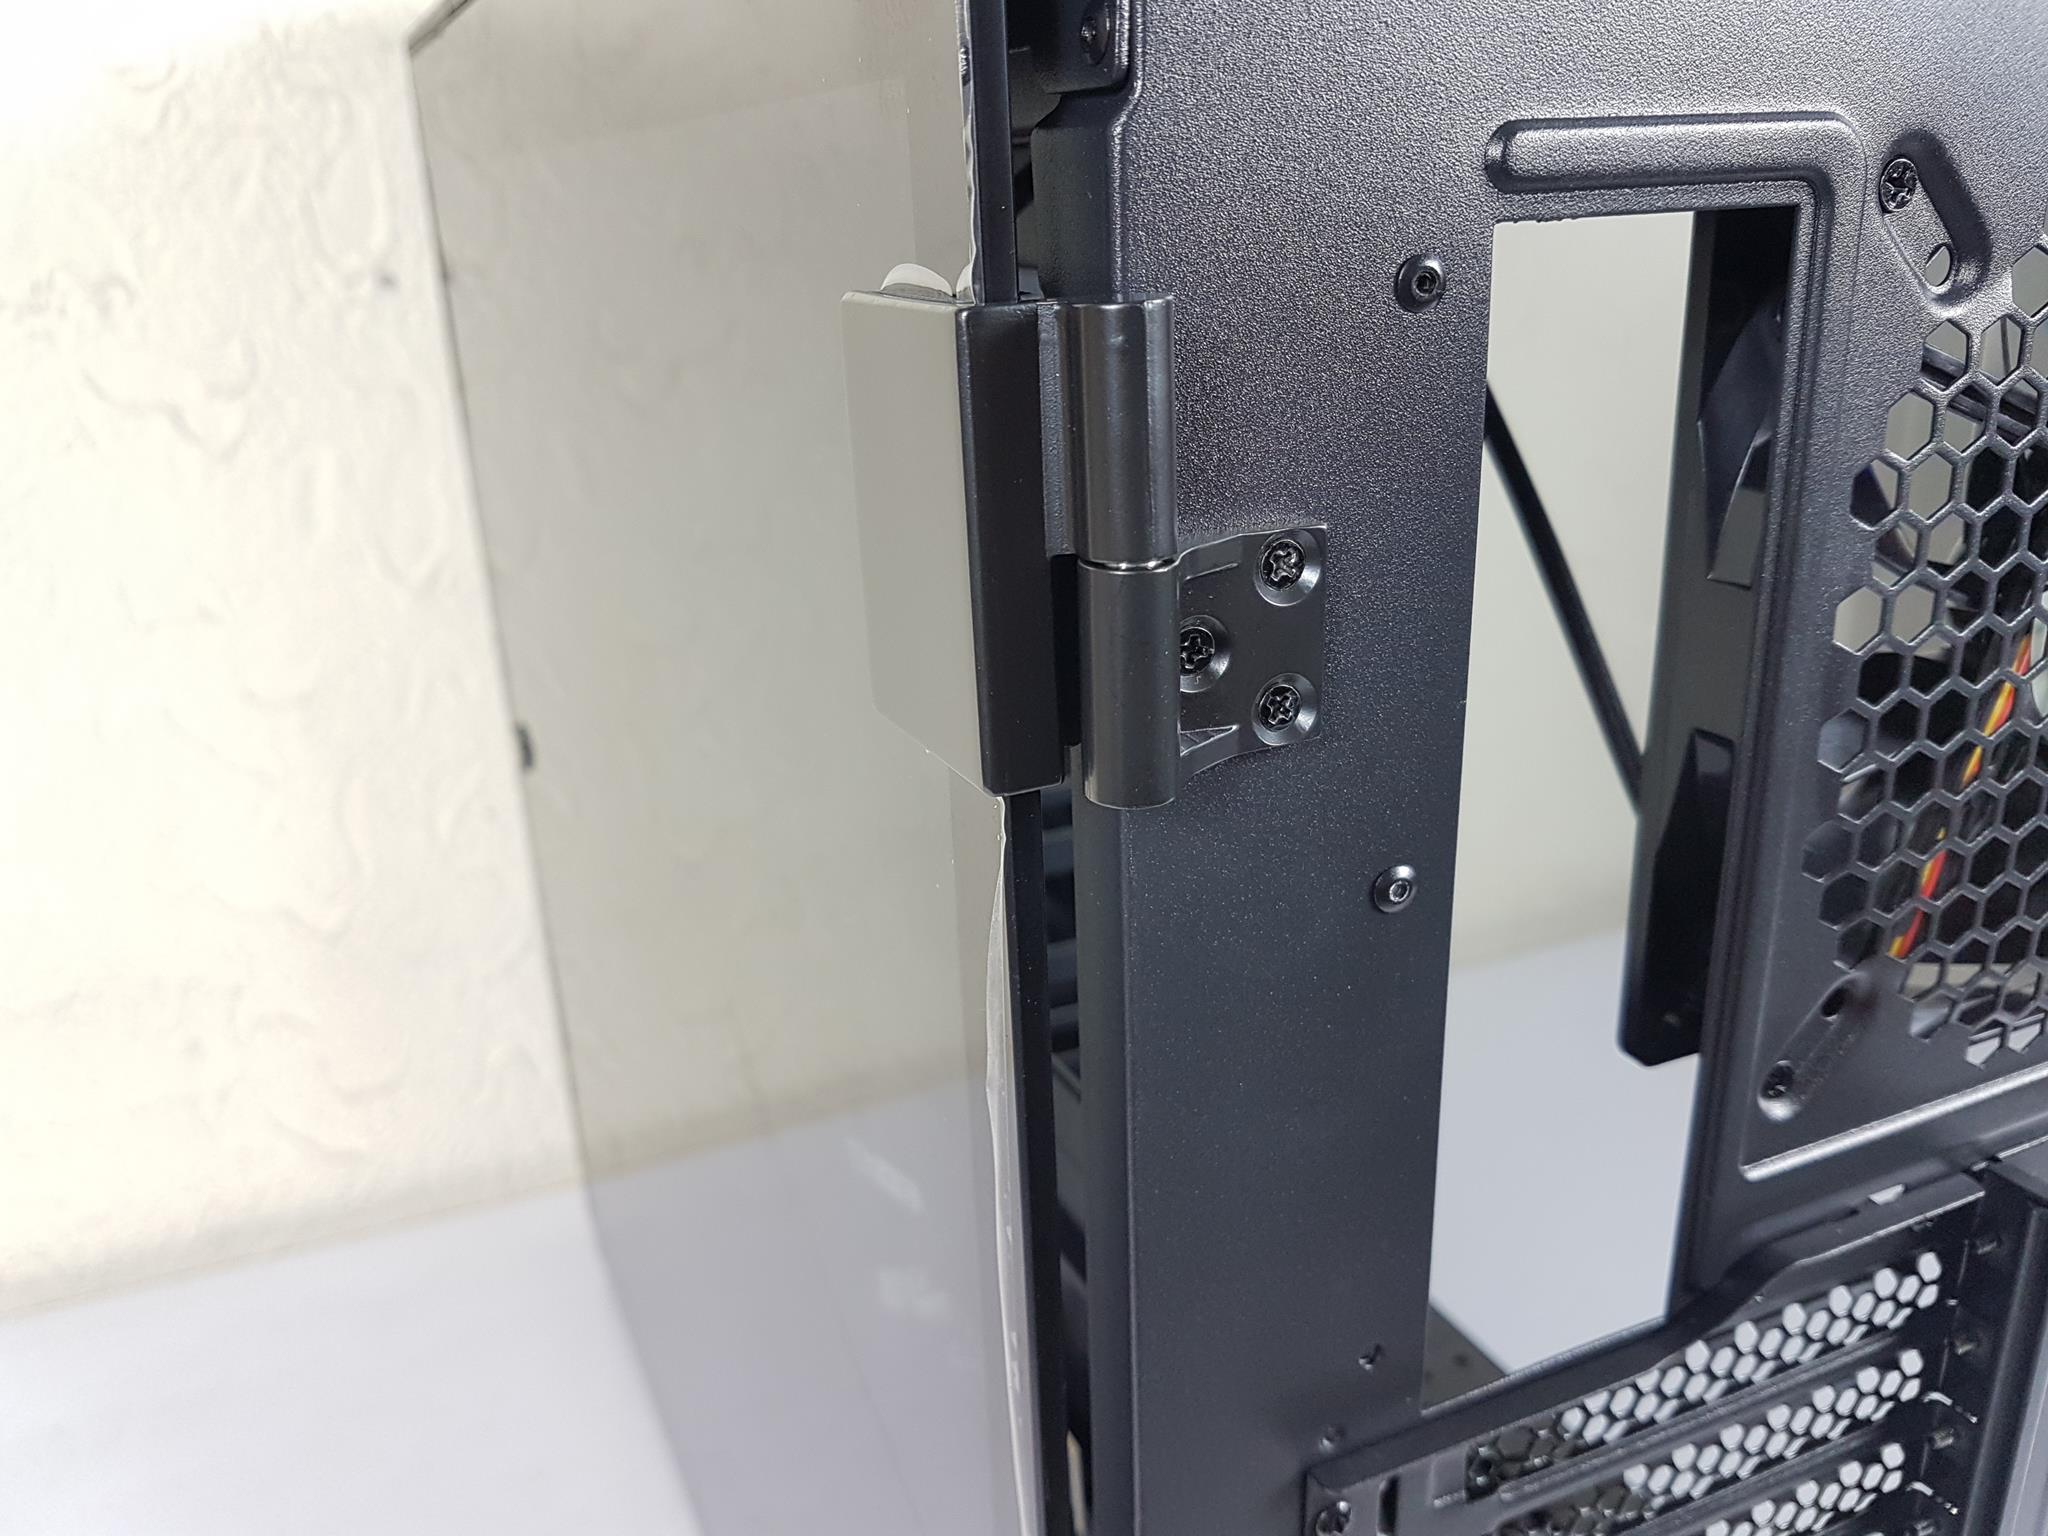
The above picture shows the PCIe bracket rotated and installed in the vertical layout. I can’t admire enough this smart move from the Thermaltake making it convenient to install multiple graphics cards in a vertical layout using native support from the chassis. The side panels are using hinge design. Each hinge is installed using 3 screws and is removable should it be required.
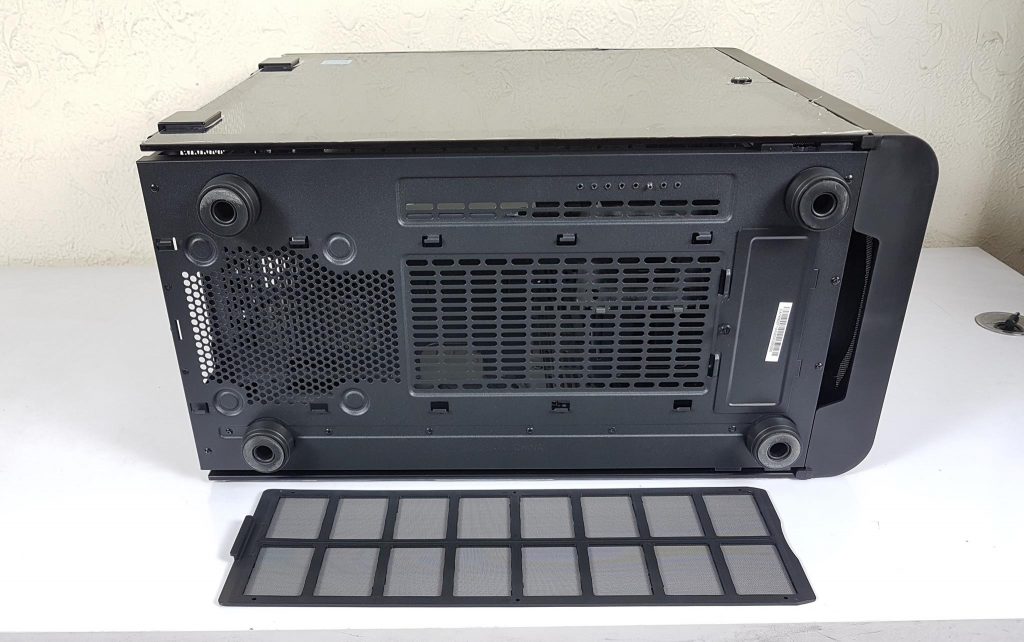
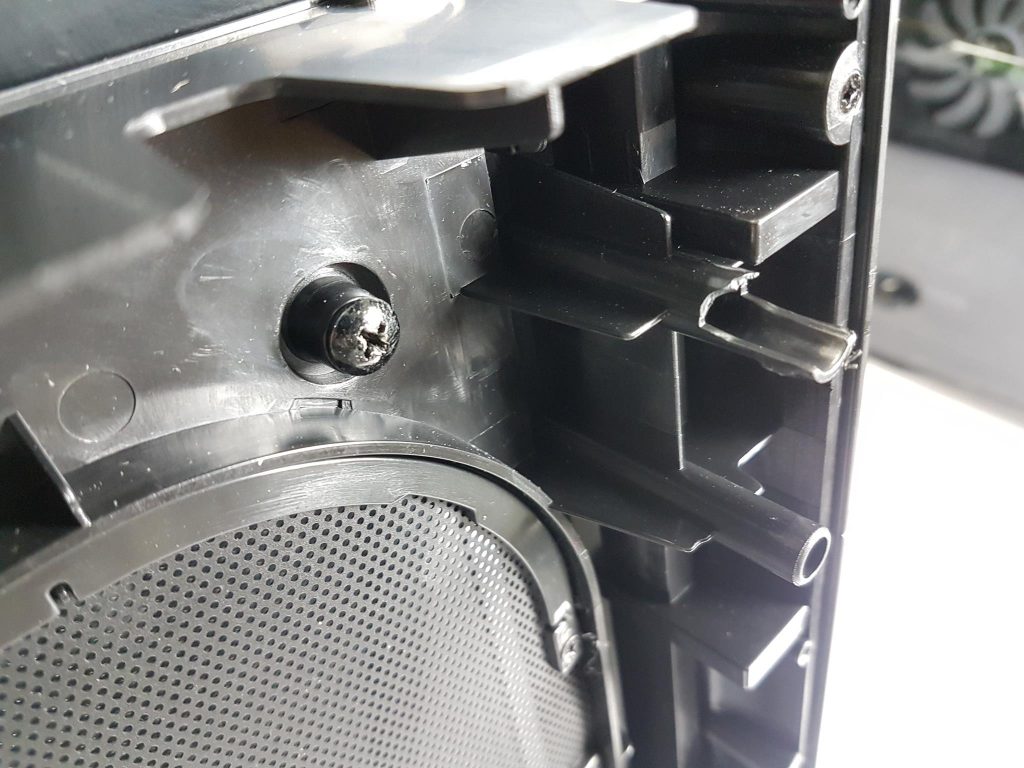
We have a large size dust filter that runs to the entire length of the meshed portion on the bottom. It is not magnetic. There is a vented portion above the PSU area. This is where the user can install the fans/radiator on the inside of the chassis. There is a rail design area on the top of this area. It has 8x holes and we can spot a screw tip on the third hole. These are provided for the pump/reservoir bracket. The bracket is pre-installed, which was not provided with View 71.

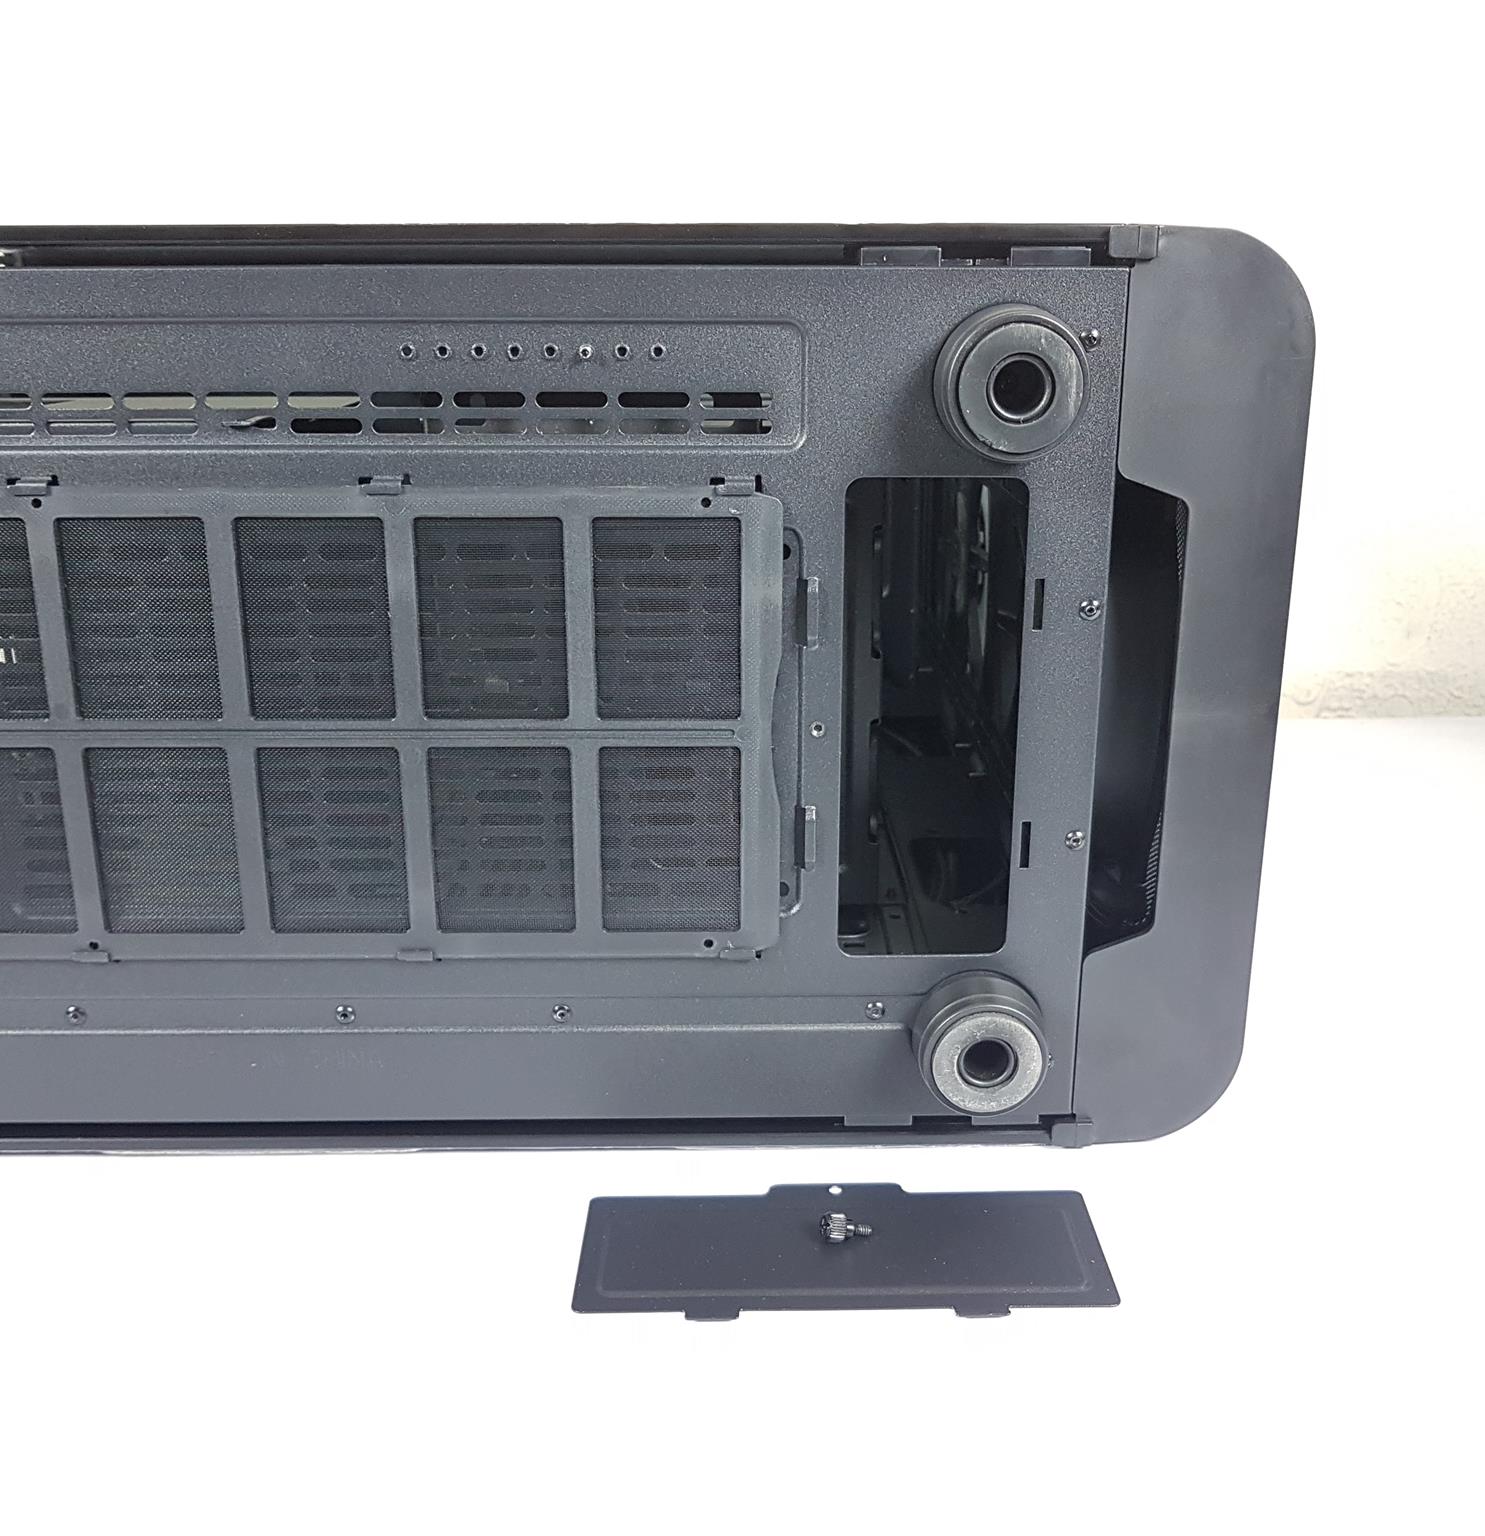
Another difference between this chassis and View 71 is the implementation of the feet. This thermaltake level 20 gt review chassis has rounded 4x feet giving enough height to the chassis from the bottom for ventilation. I prefer this design over View 71. There is a removable solid over towards the front side. This cutout portion is for the drain port of your custom loop setup.

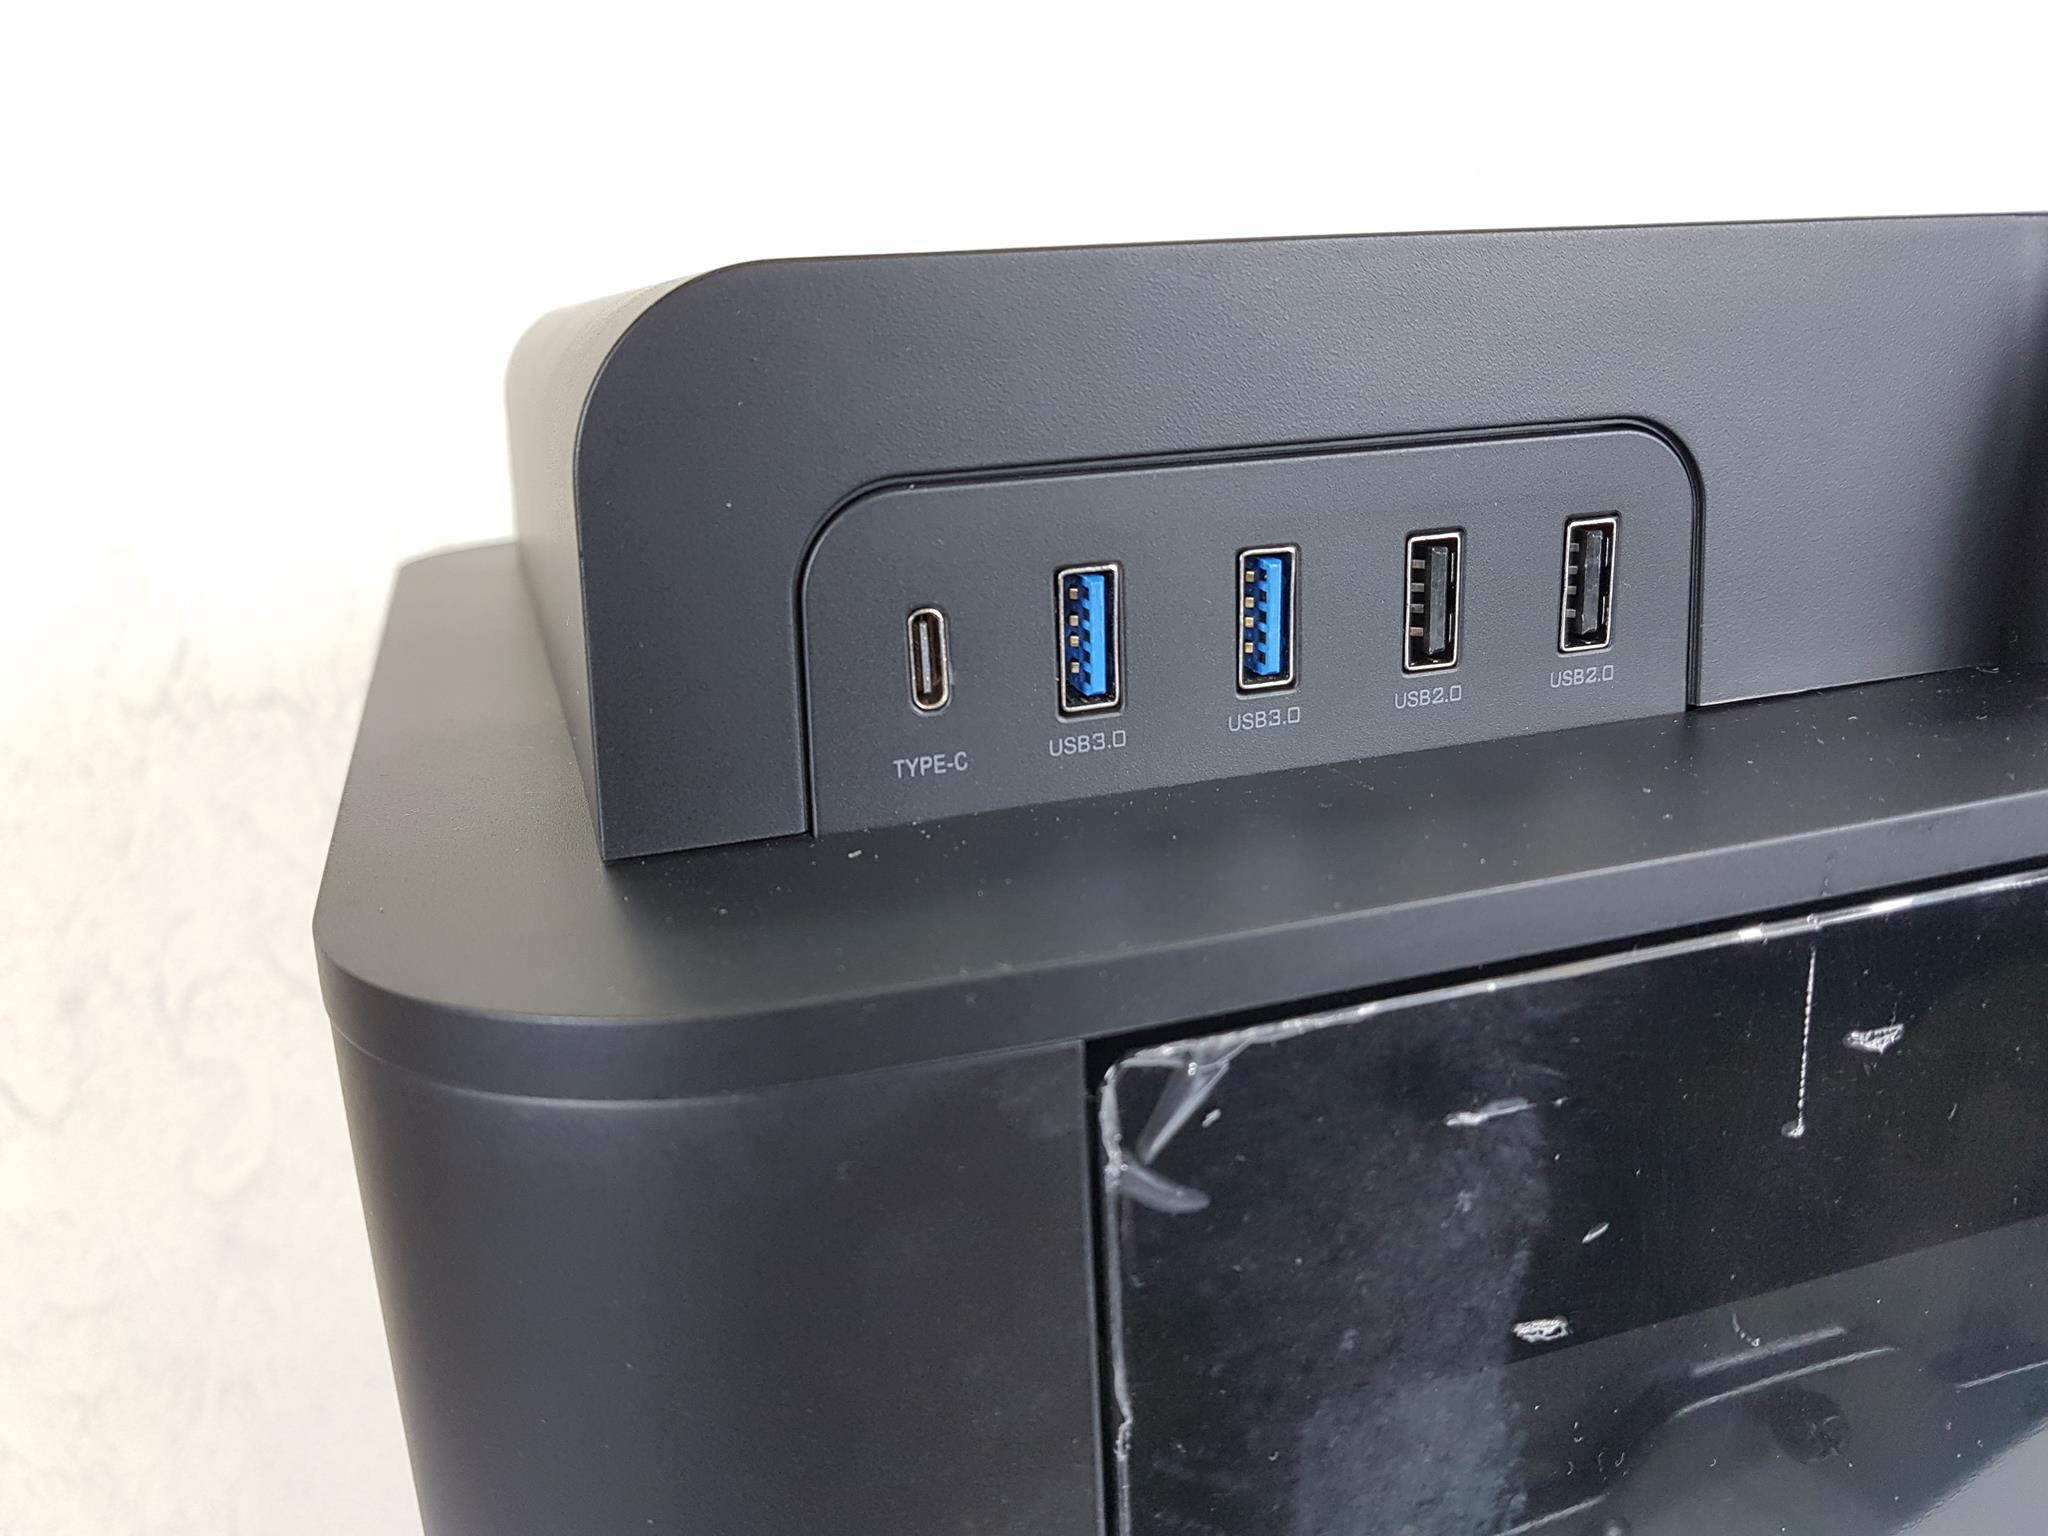
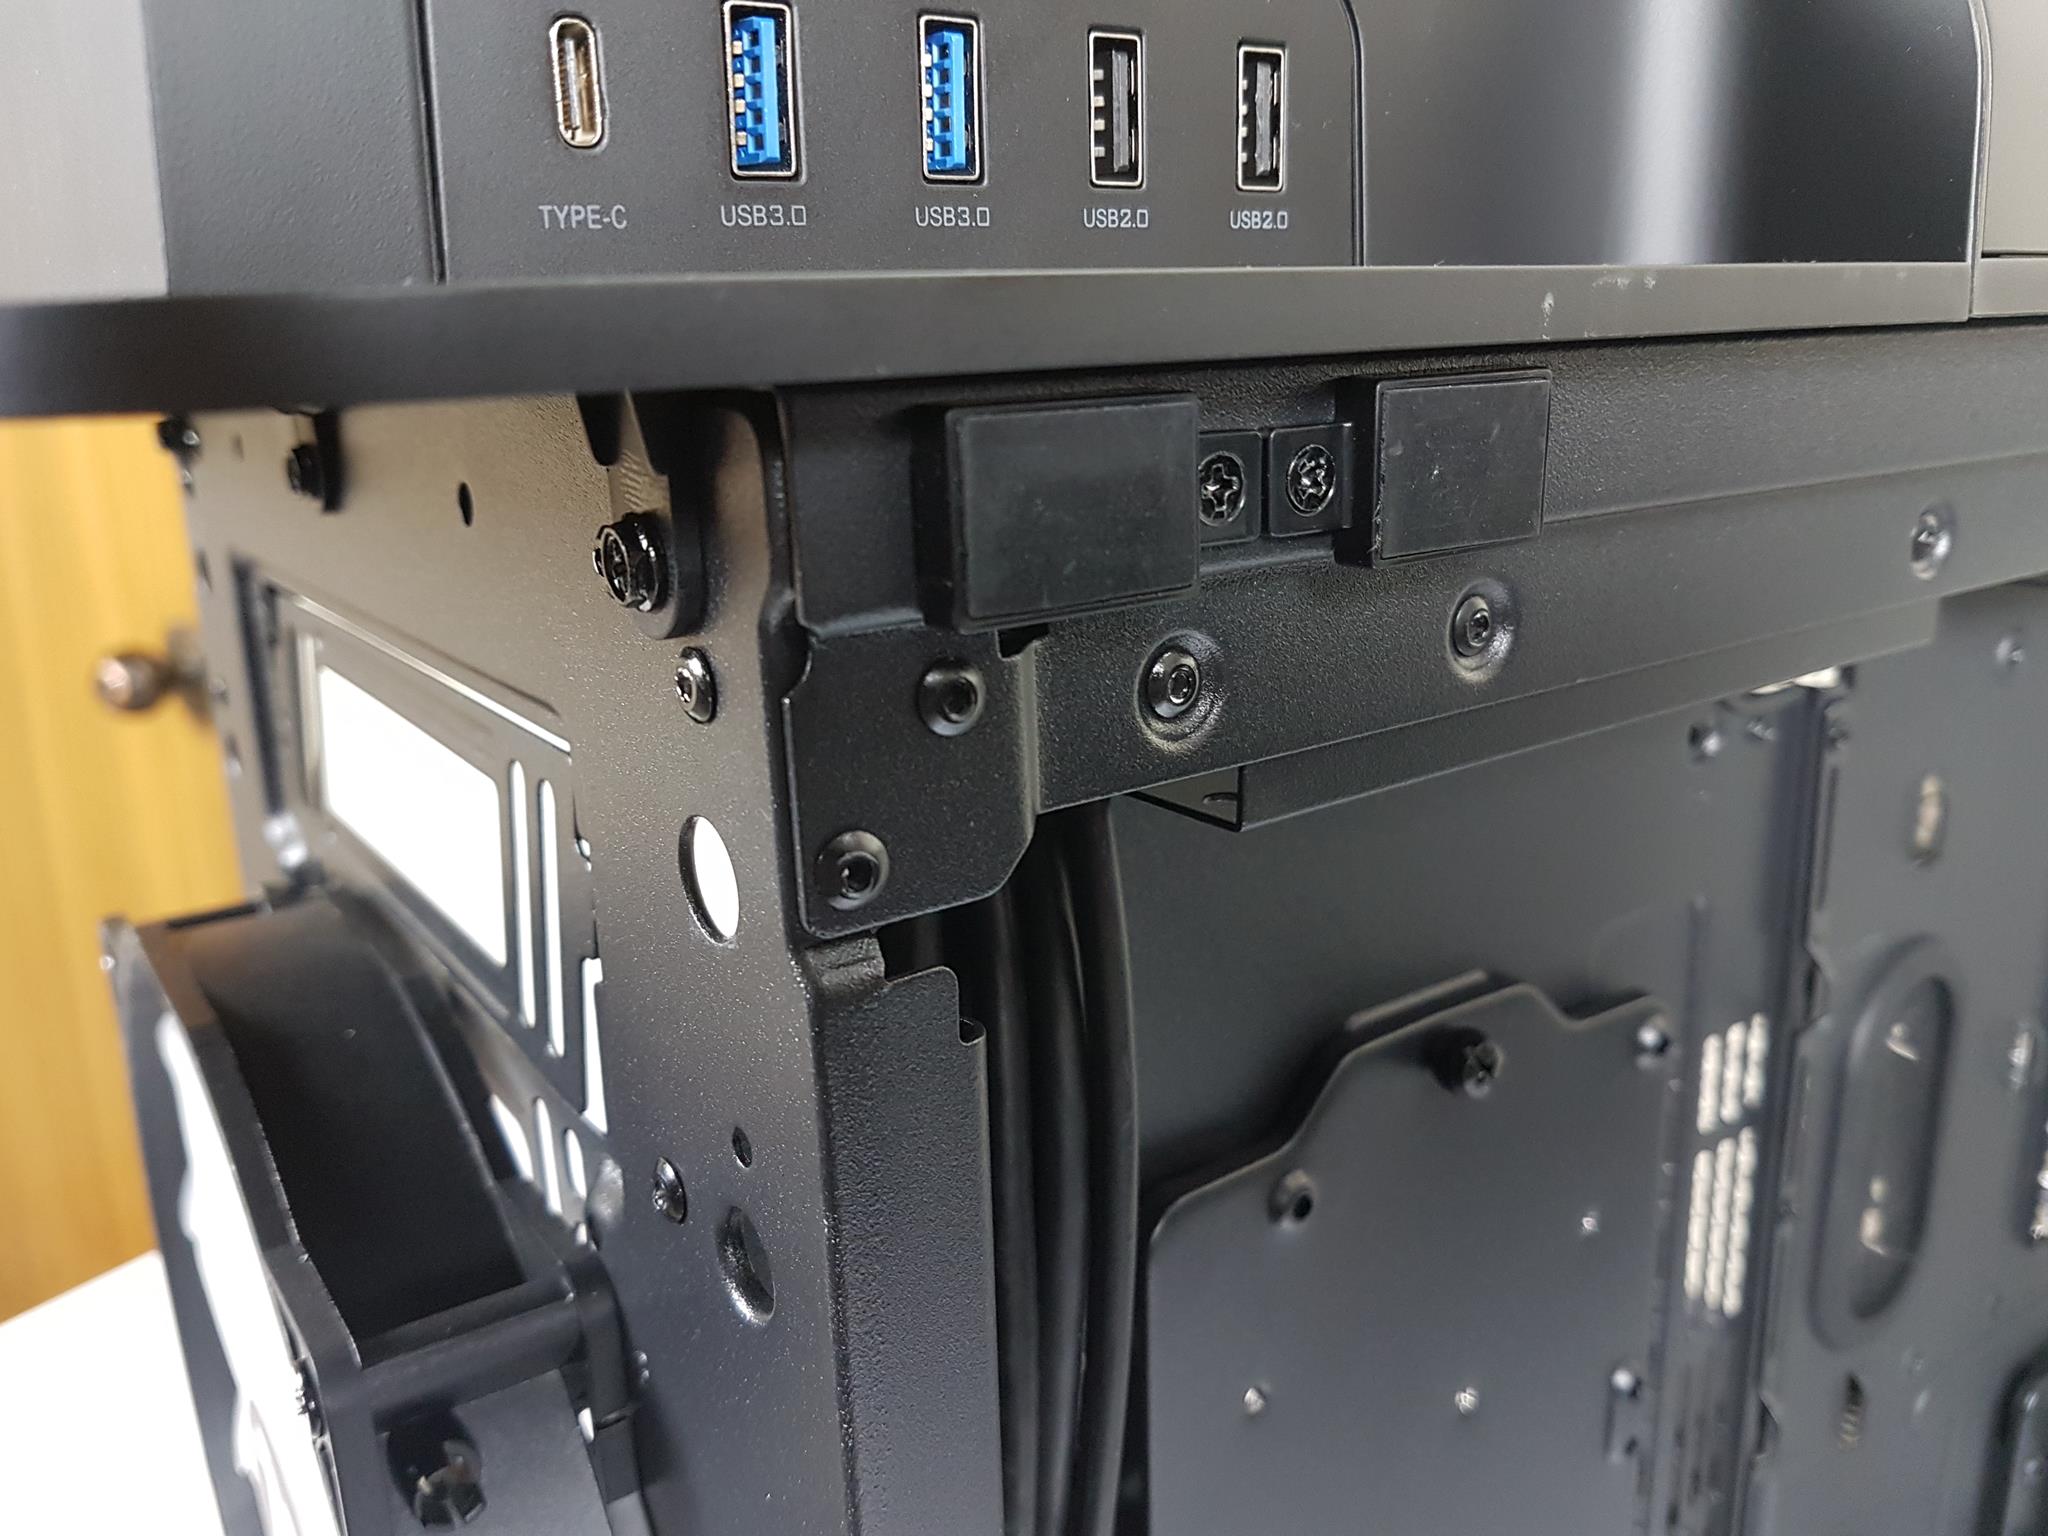
Flanking the front panel, two distinct zones cater to both practical and aesthetic needs. On one side, a white illuminated power button beckons, accompanied by an LED indicator for status updates. An RGB button, doubling as the reset button, lets you unleash your desired color palette, while dedicated microphone and headphone jacks offer direct audio access. Across the panel, a future-proof USB Type-C port stands alongside two familiar USB 3.0 ports and two legacy USB 2.0 ports. This front panel design provides a seamless blend of functionality and personalization, making it both convenient and visually appealing.
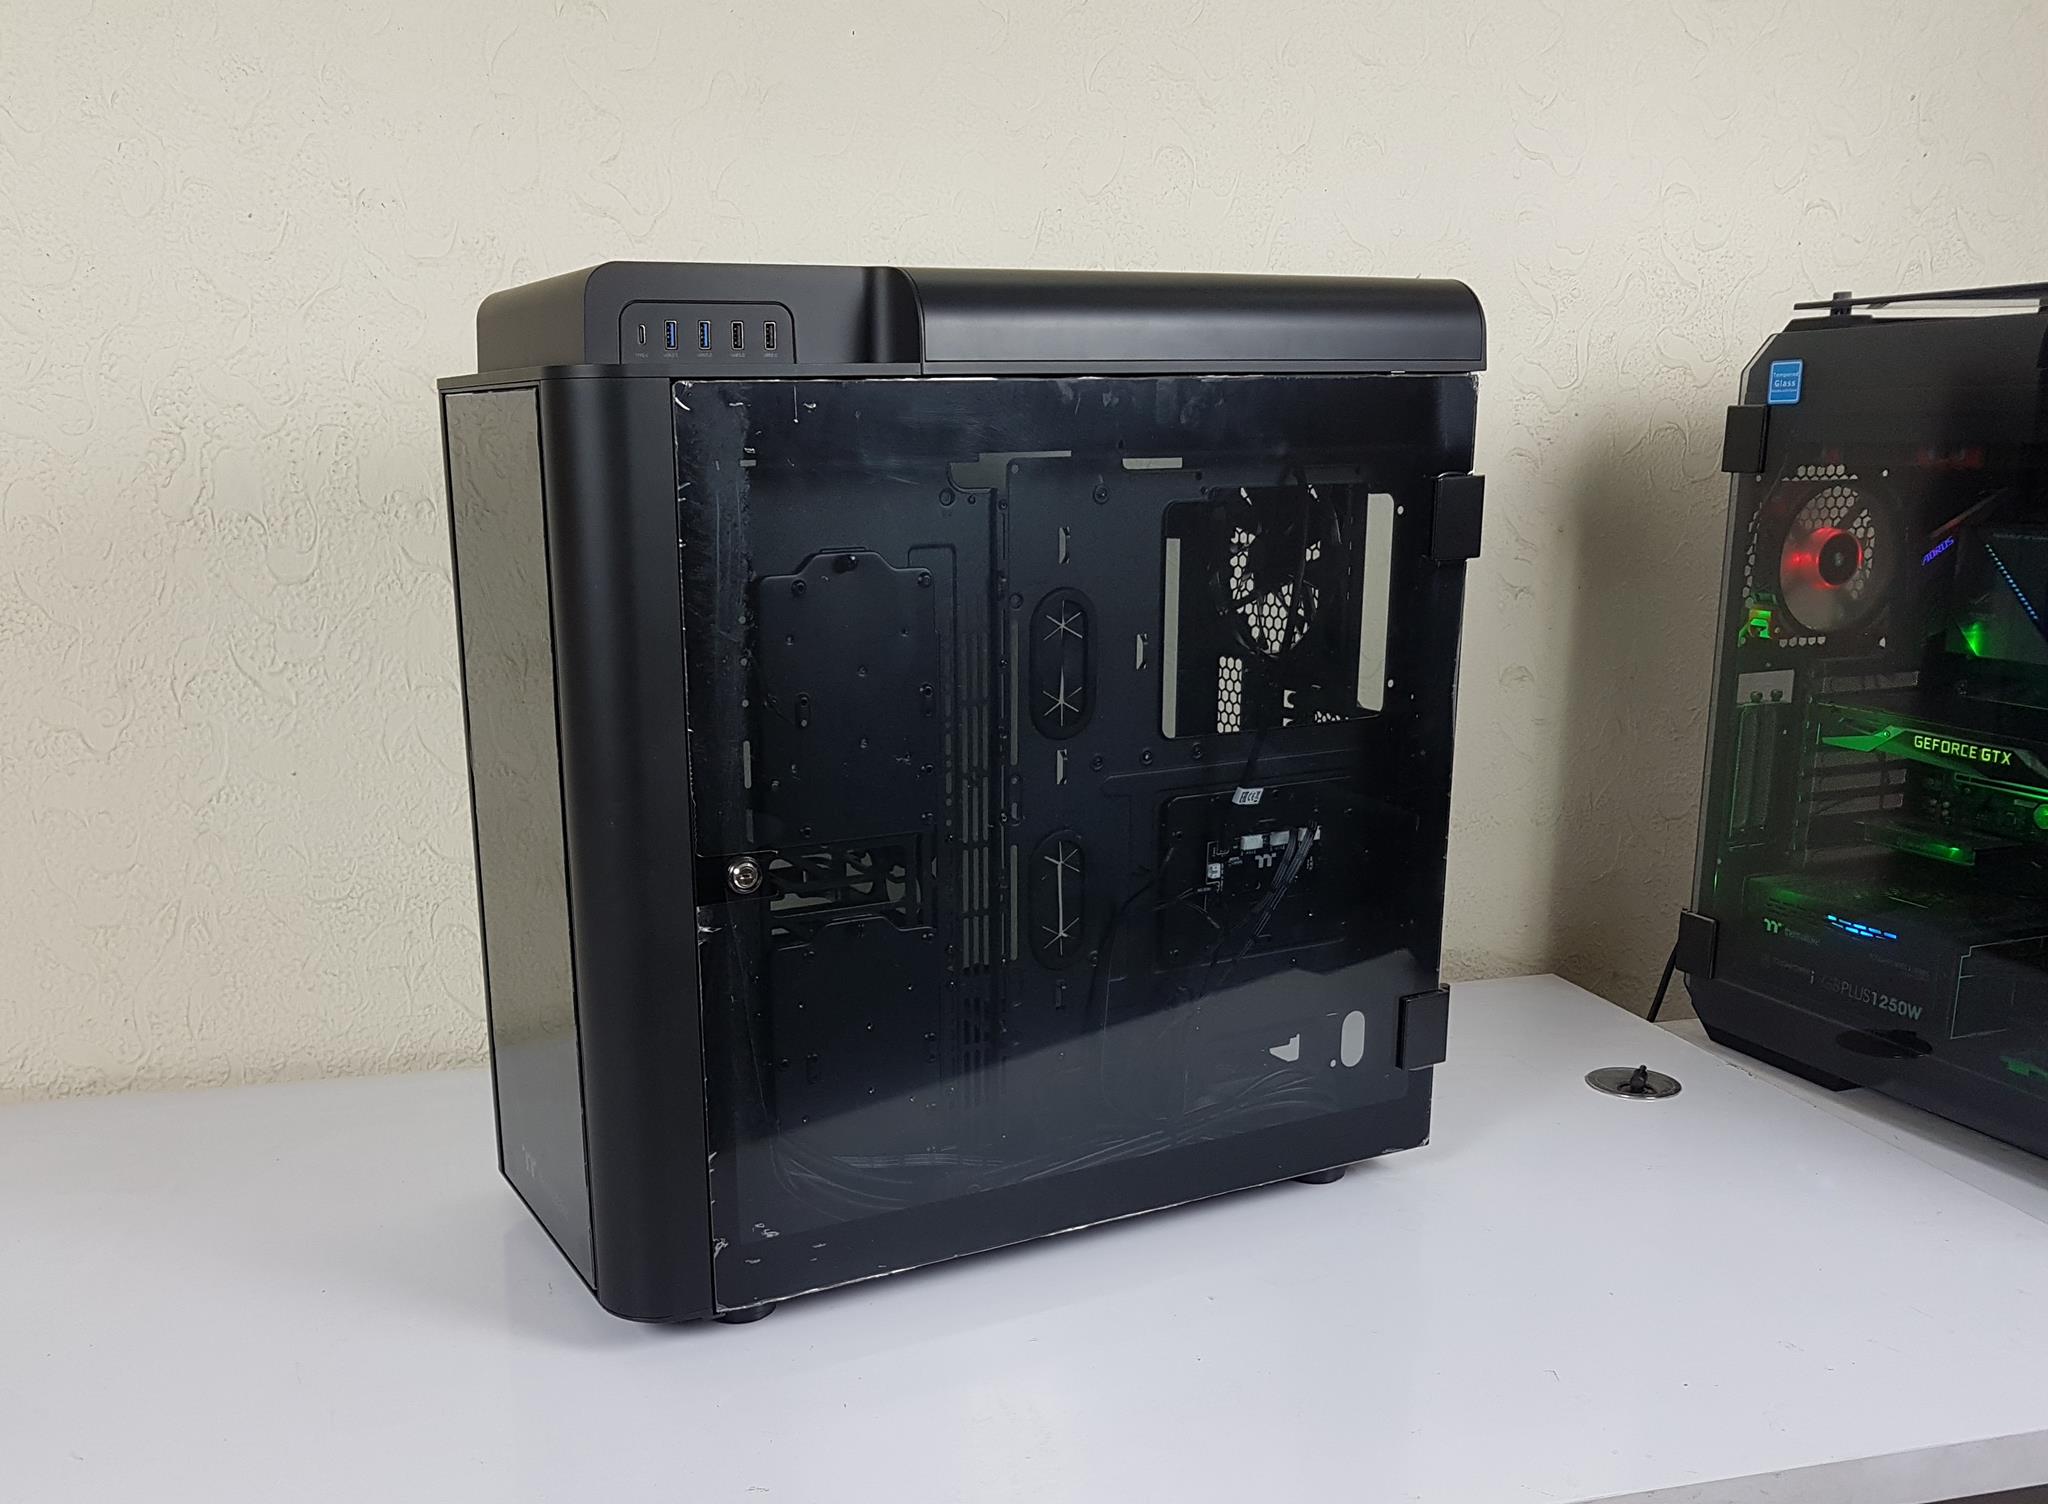
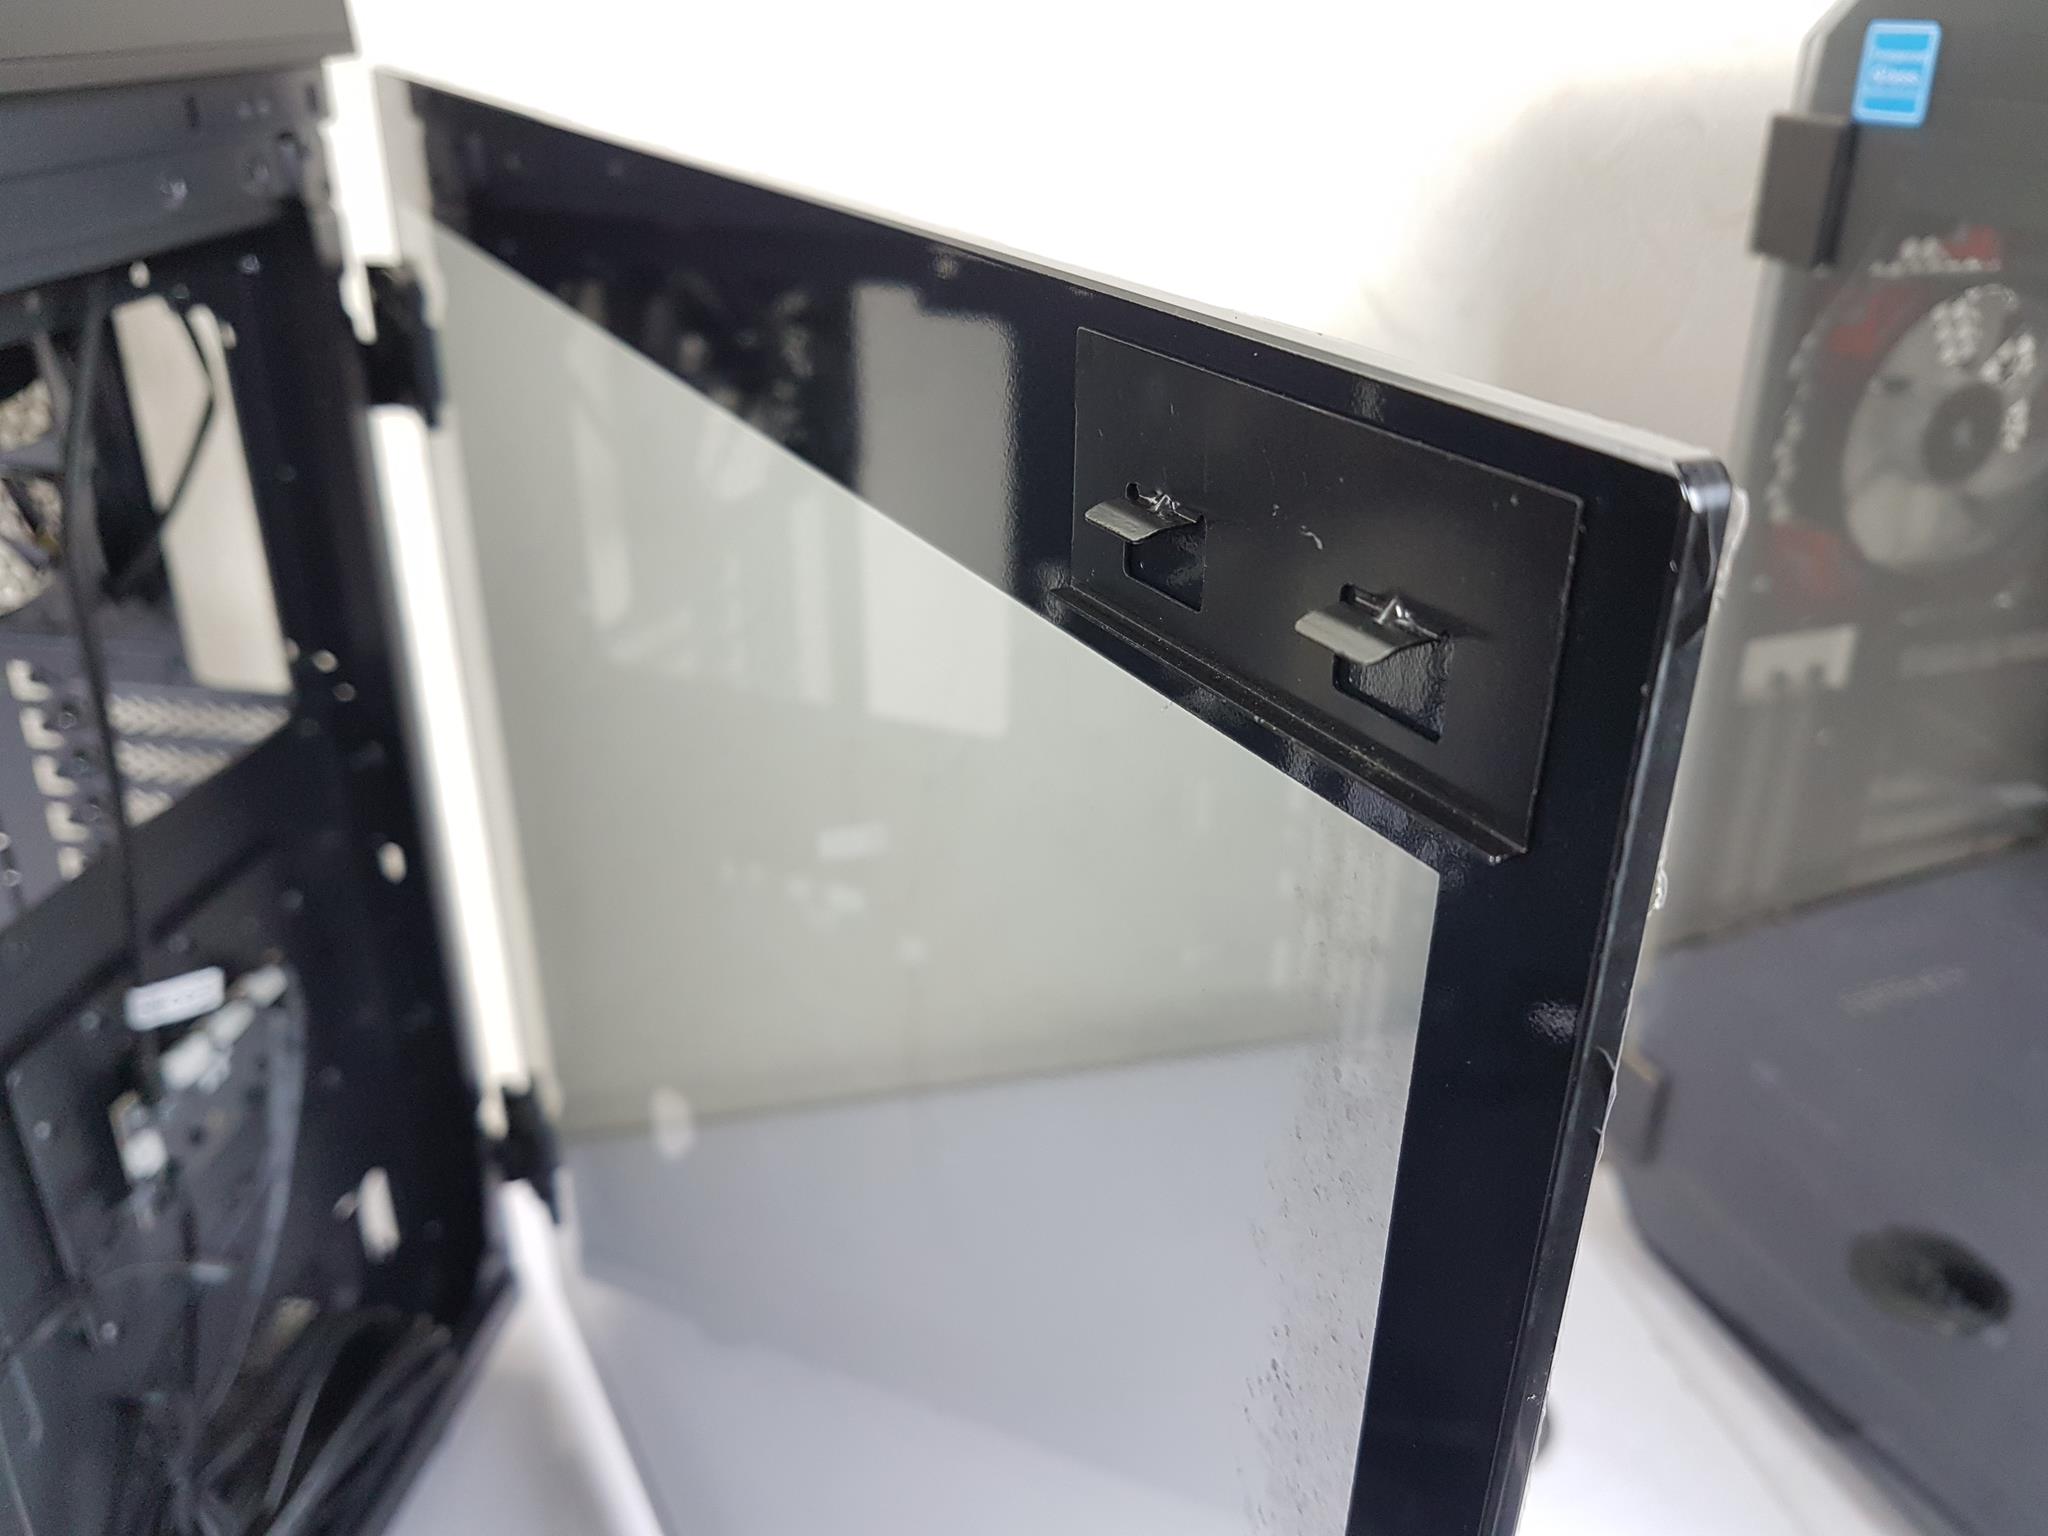
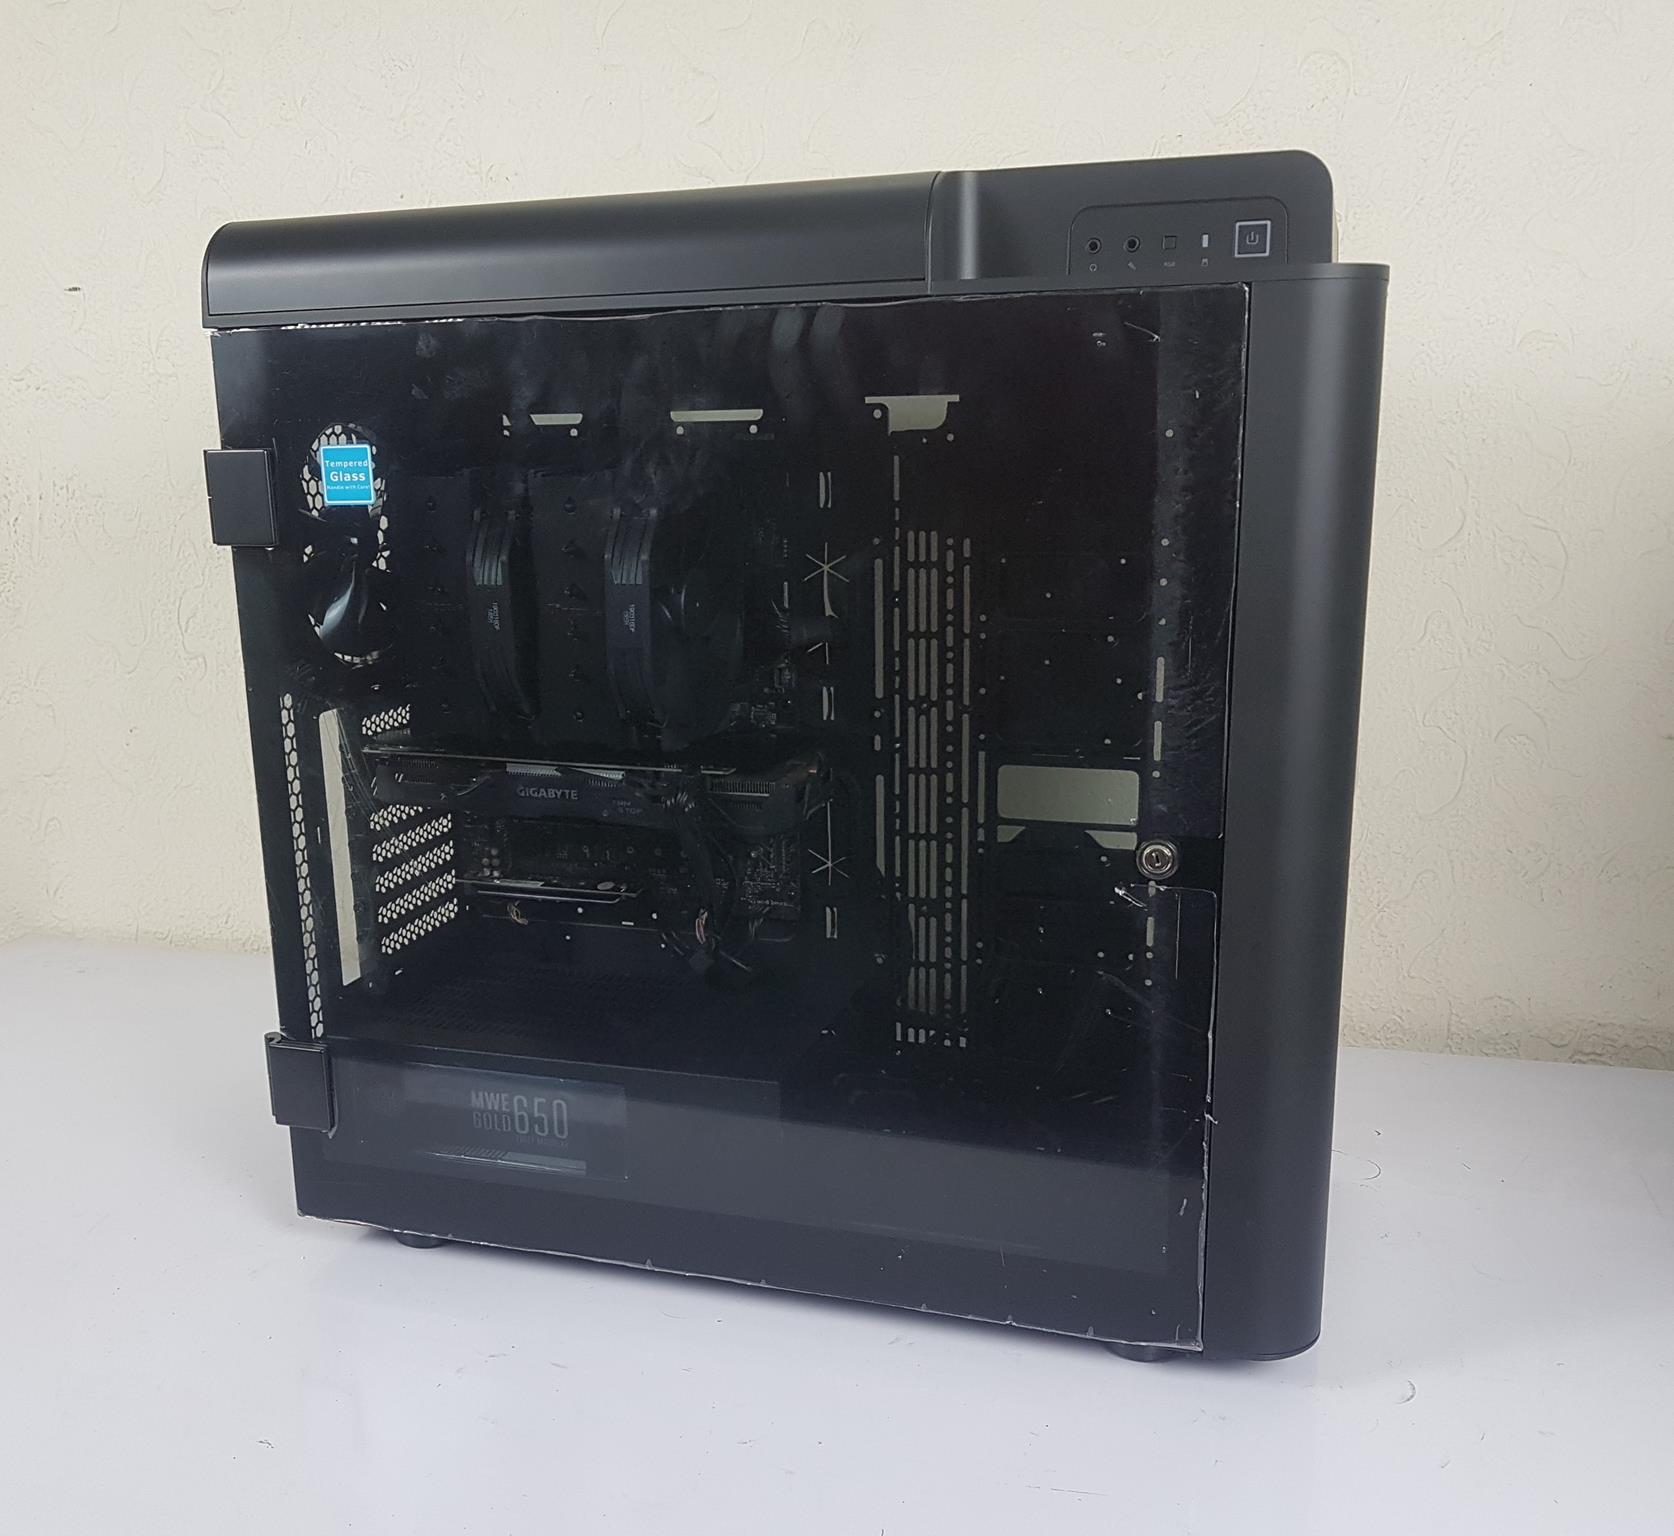
The chassis features sturdy 5mm thick tempered glass panels on both sides, securely held in place by a magnetic closing mechanism. For added security during transport, a locking mechanism is also provided for the side panel. Notably, there’s a deliberate gap between the glass panel and the front/top panels, and the top frame’s cutout design adds a touch of distinctive flair to the overall aesthetic.
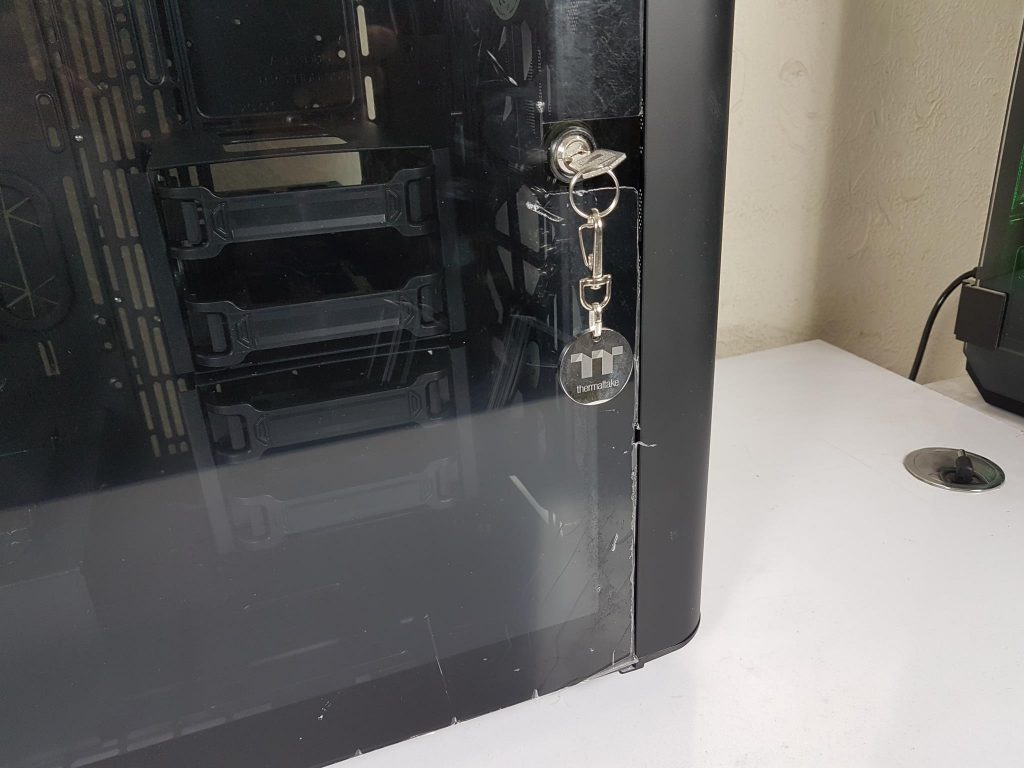
I love the Thermaltake branding on the keychain.
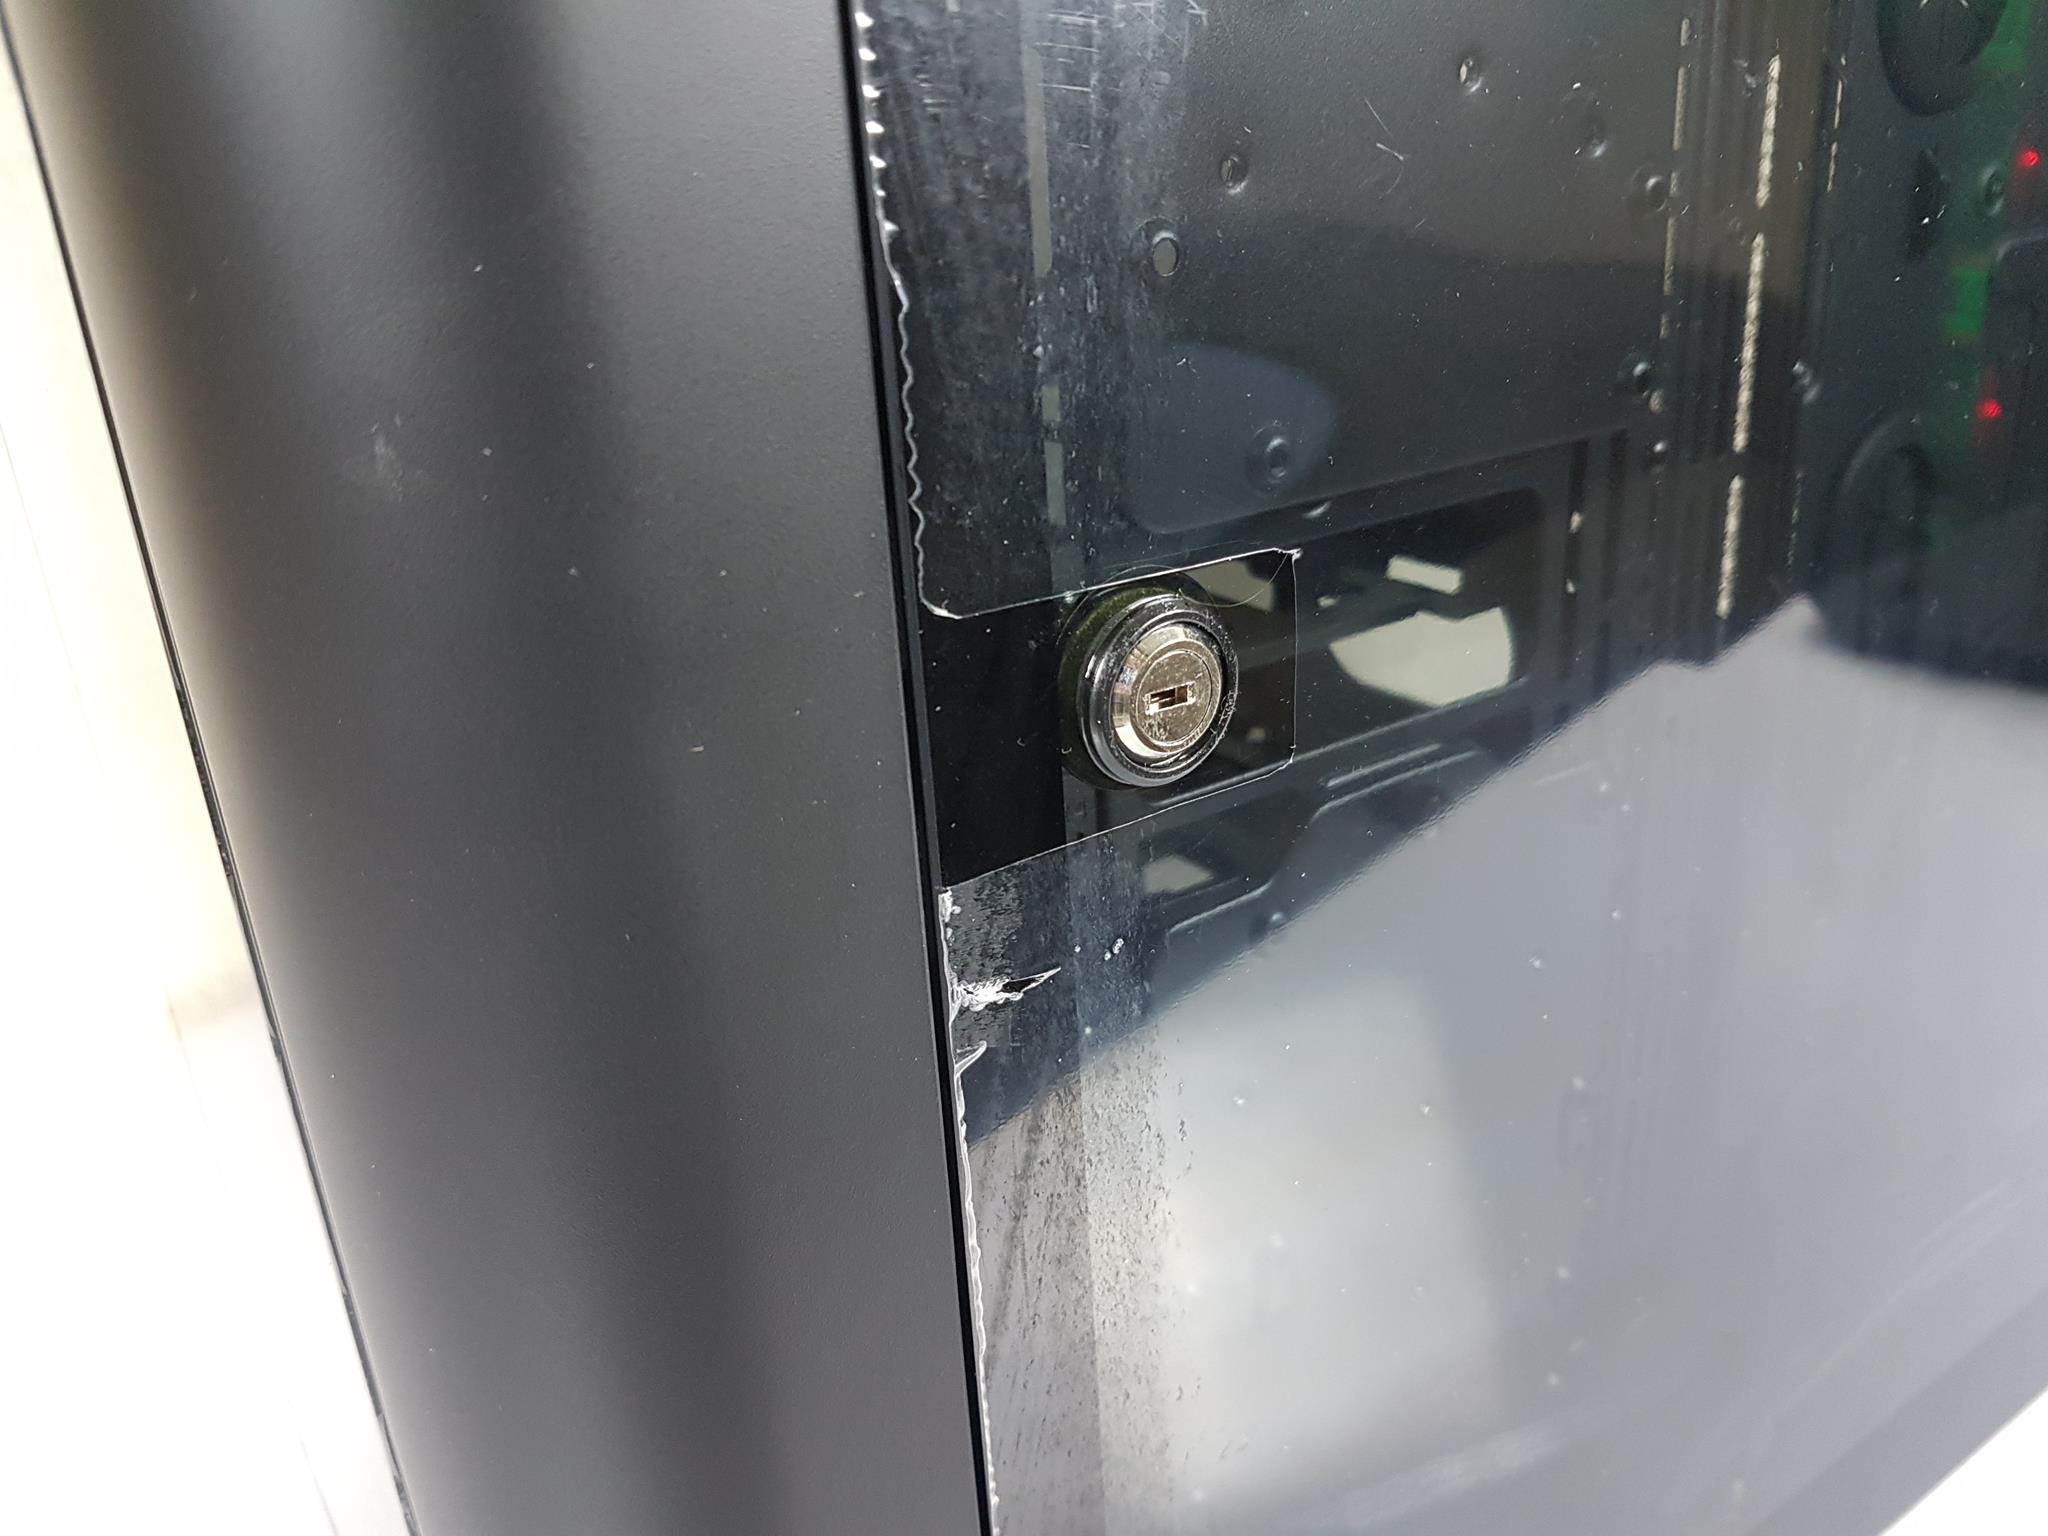
There is a locking mechanism for the locks on both sides. Rotating the key would turn the locking hand in a horizontal layout locking the panel.
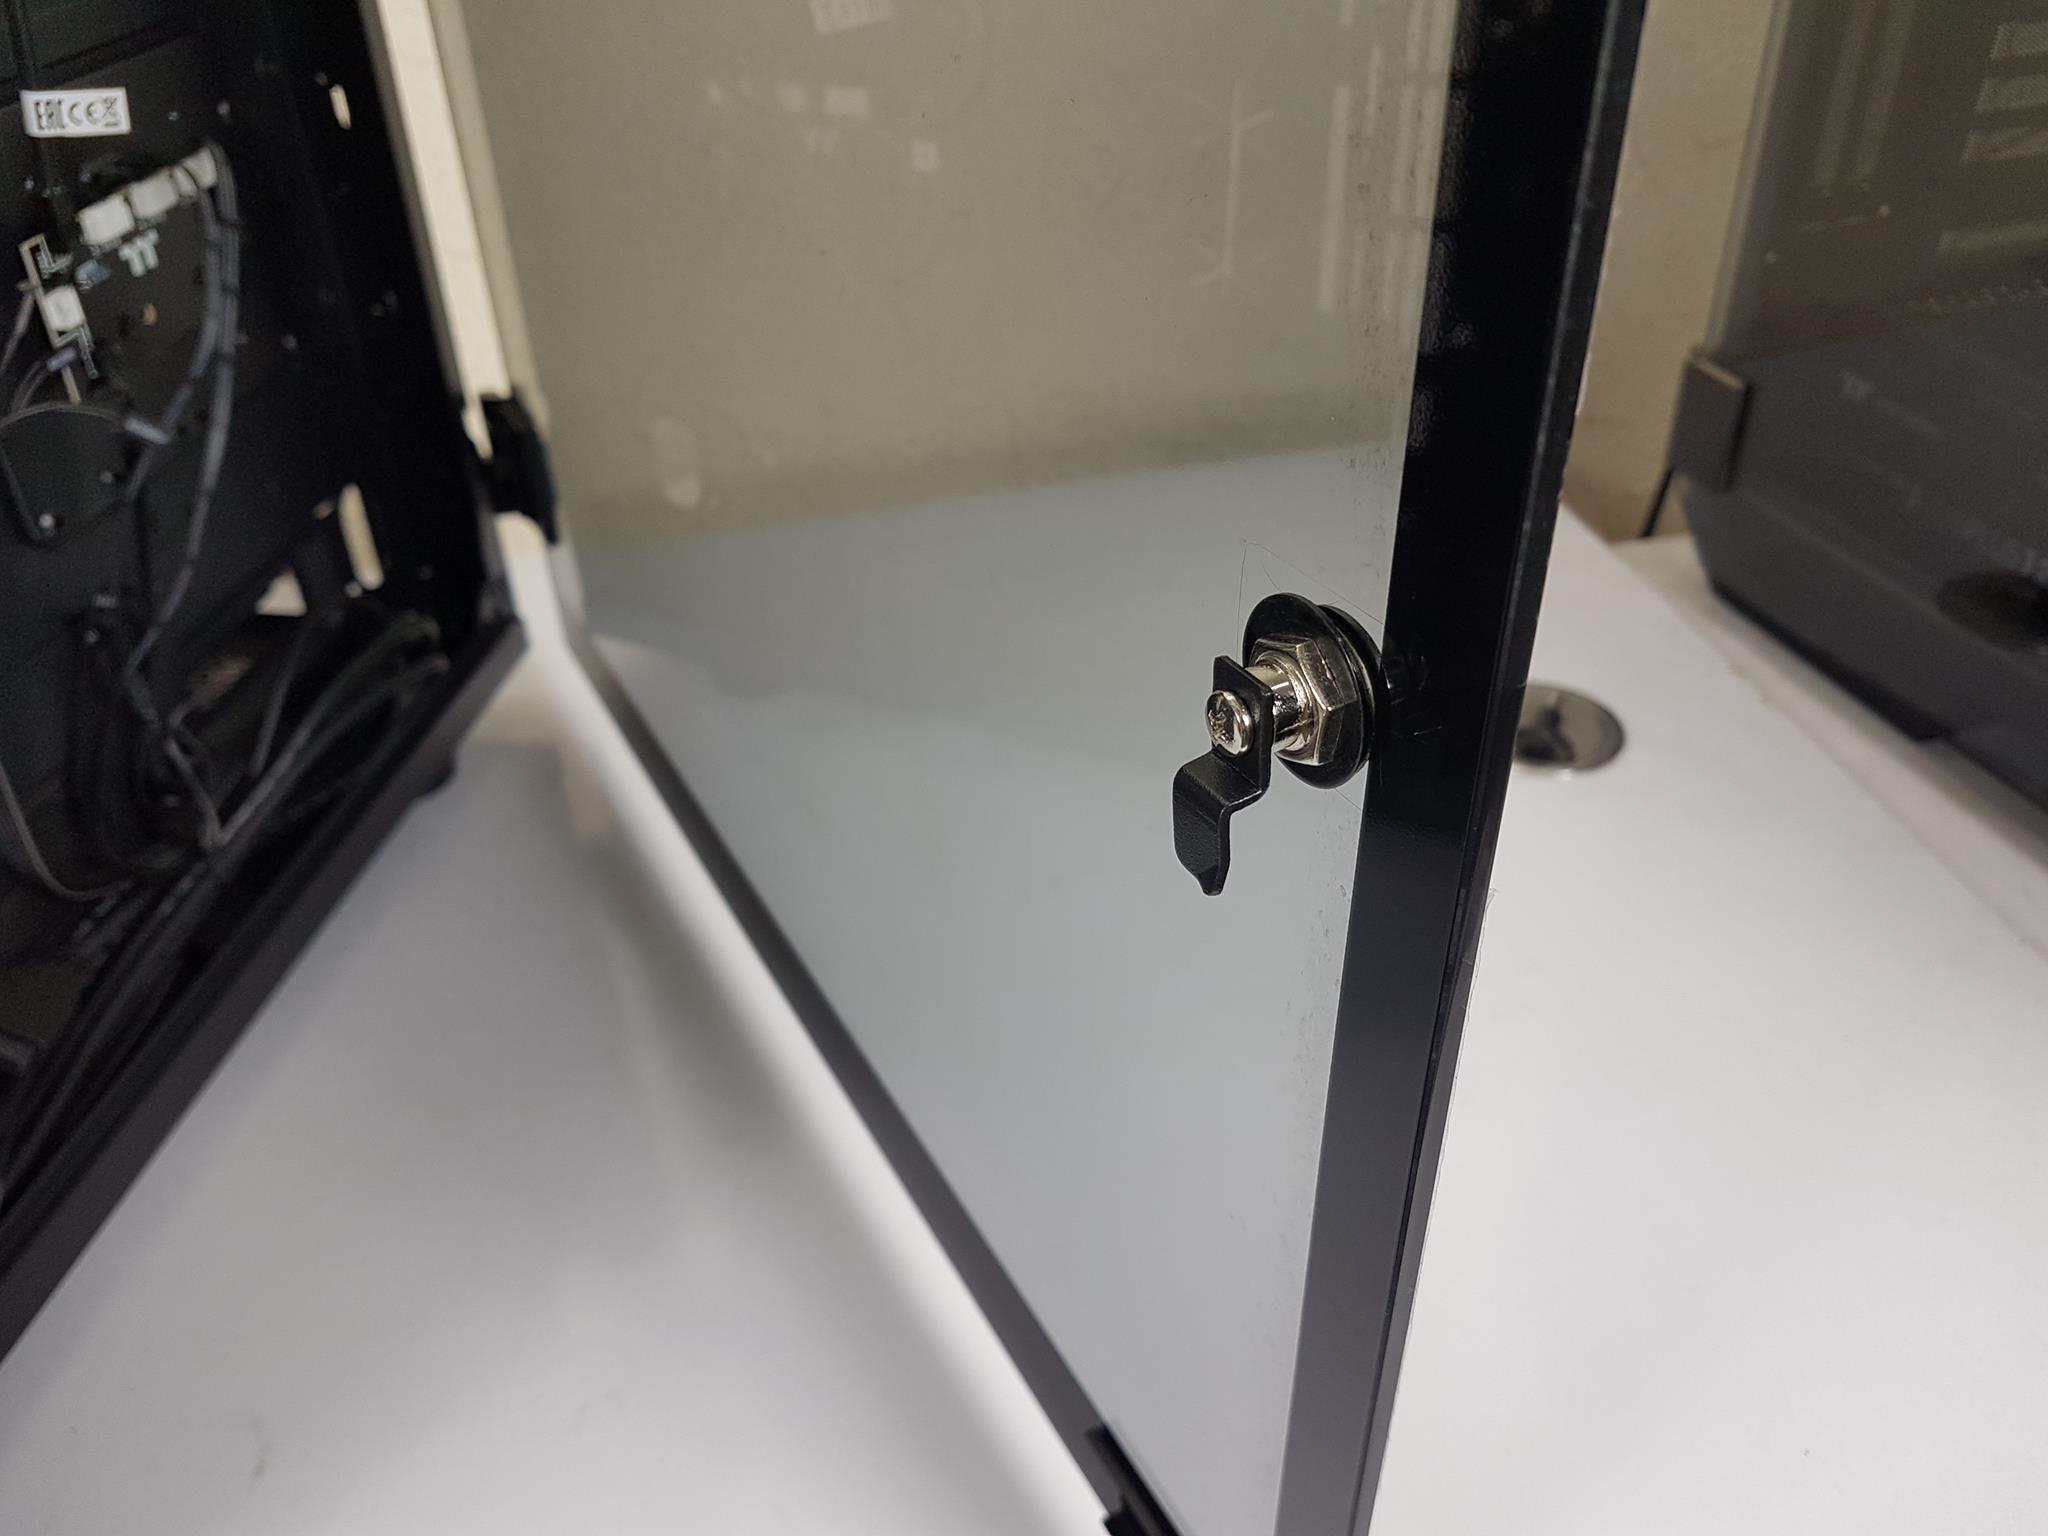
Here they are the two powerful magnets on the frame of the chassis. The locking hands on the panel itself are connected and attached to the magnets. The magnets are quite powerful as you will need to use some force to pull the panel.
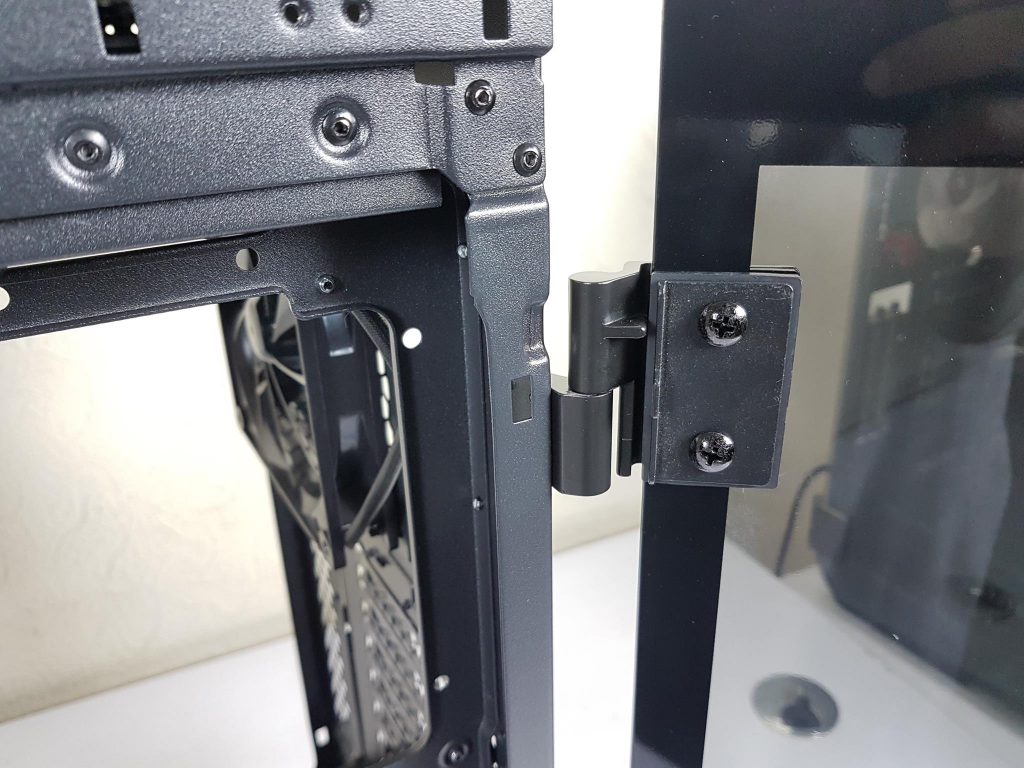
The panels are attached to the hinge structure using 2x screws.
Interior
It is time to take a look at the interior of the chassis.
Welp, our sample comes with one of the locking tabs of the panel broken. Nothing much to say!
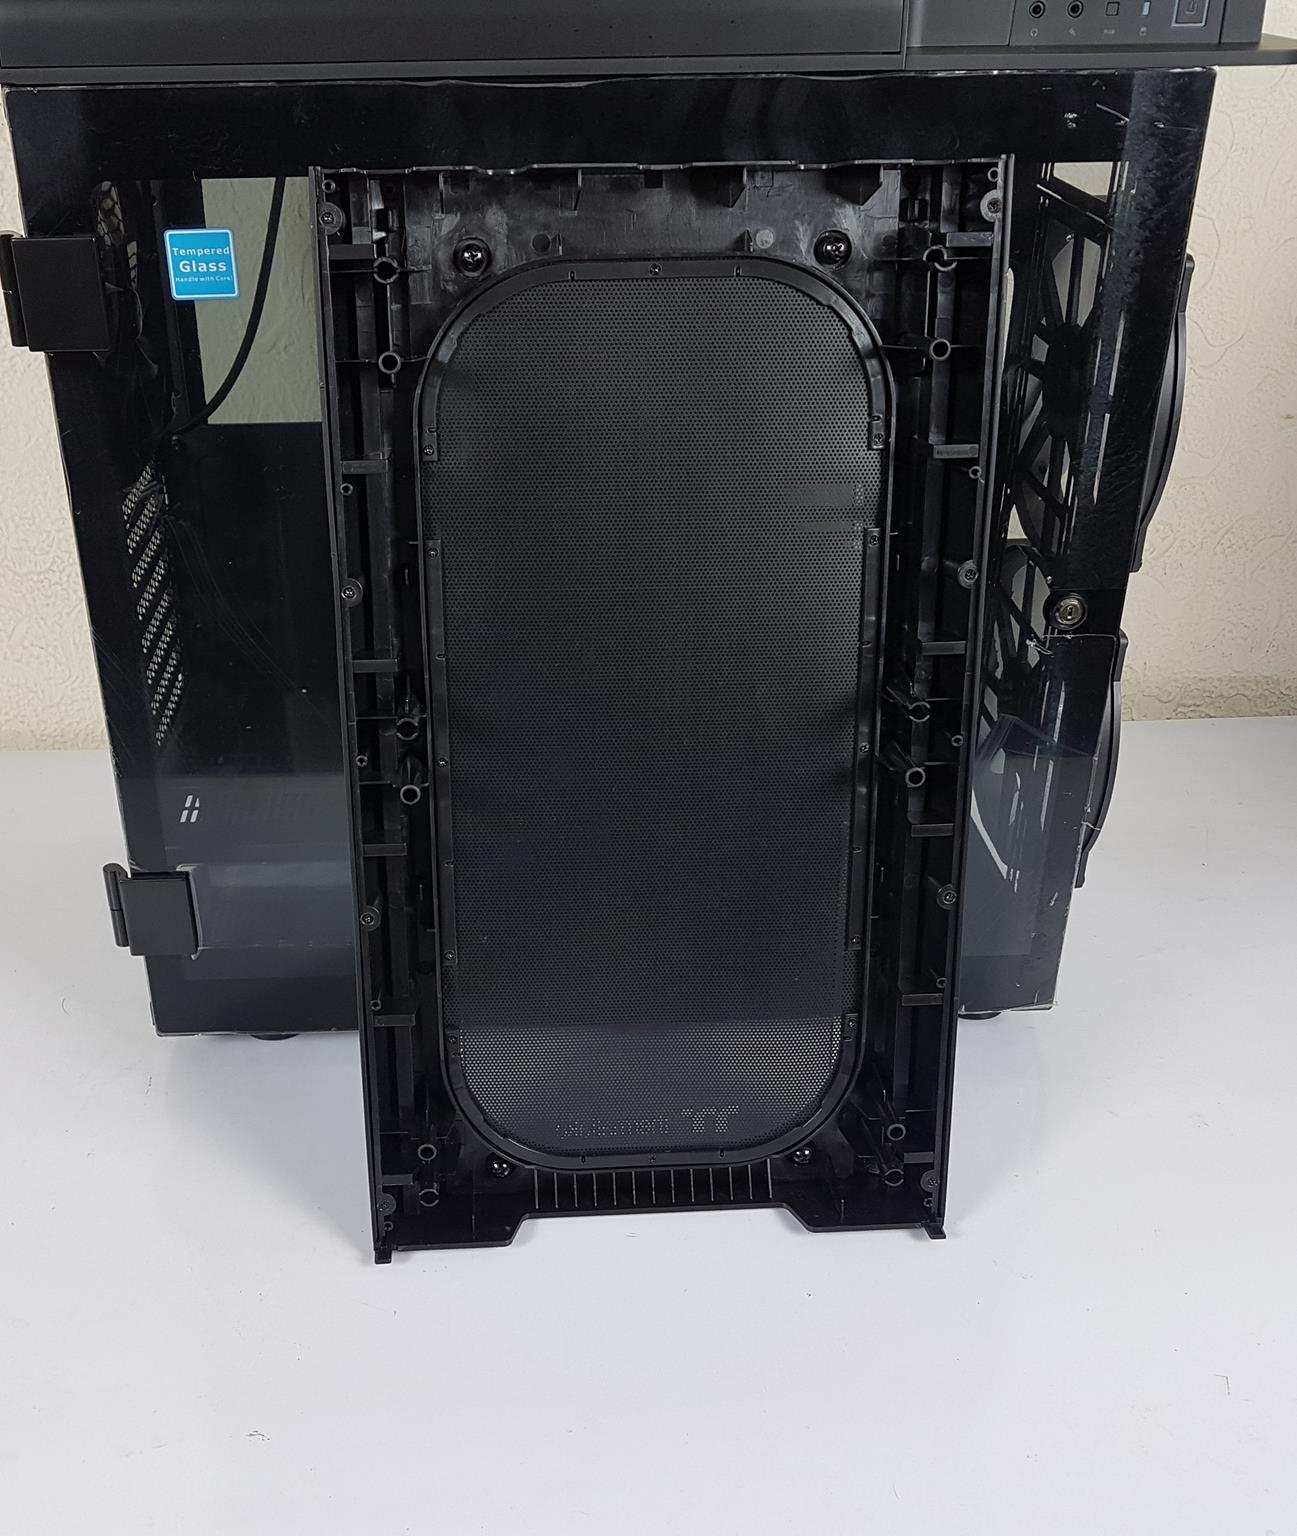
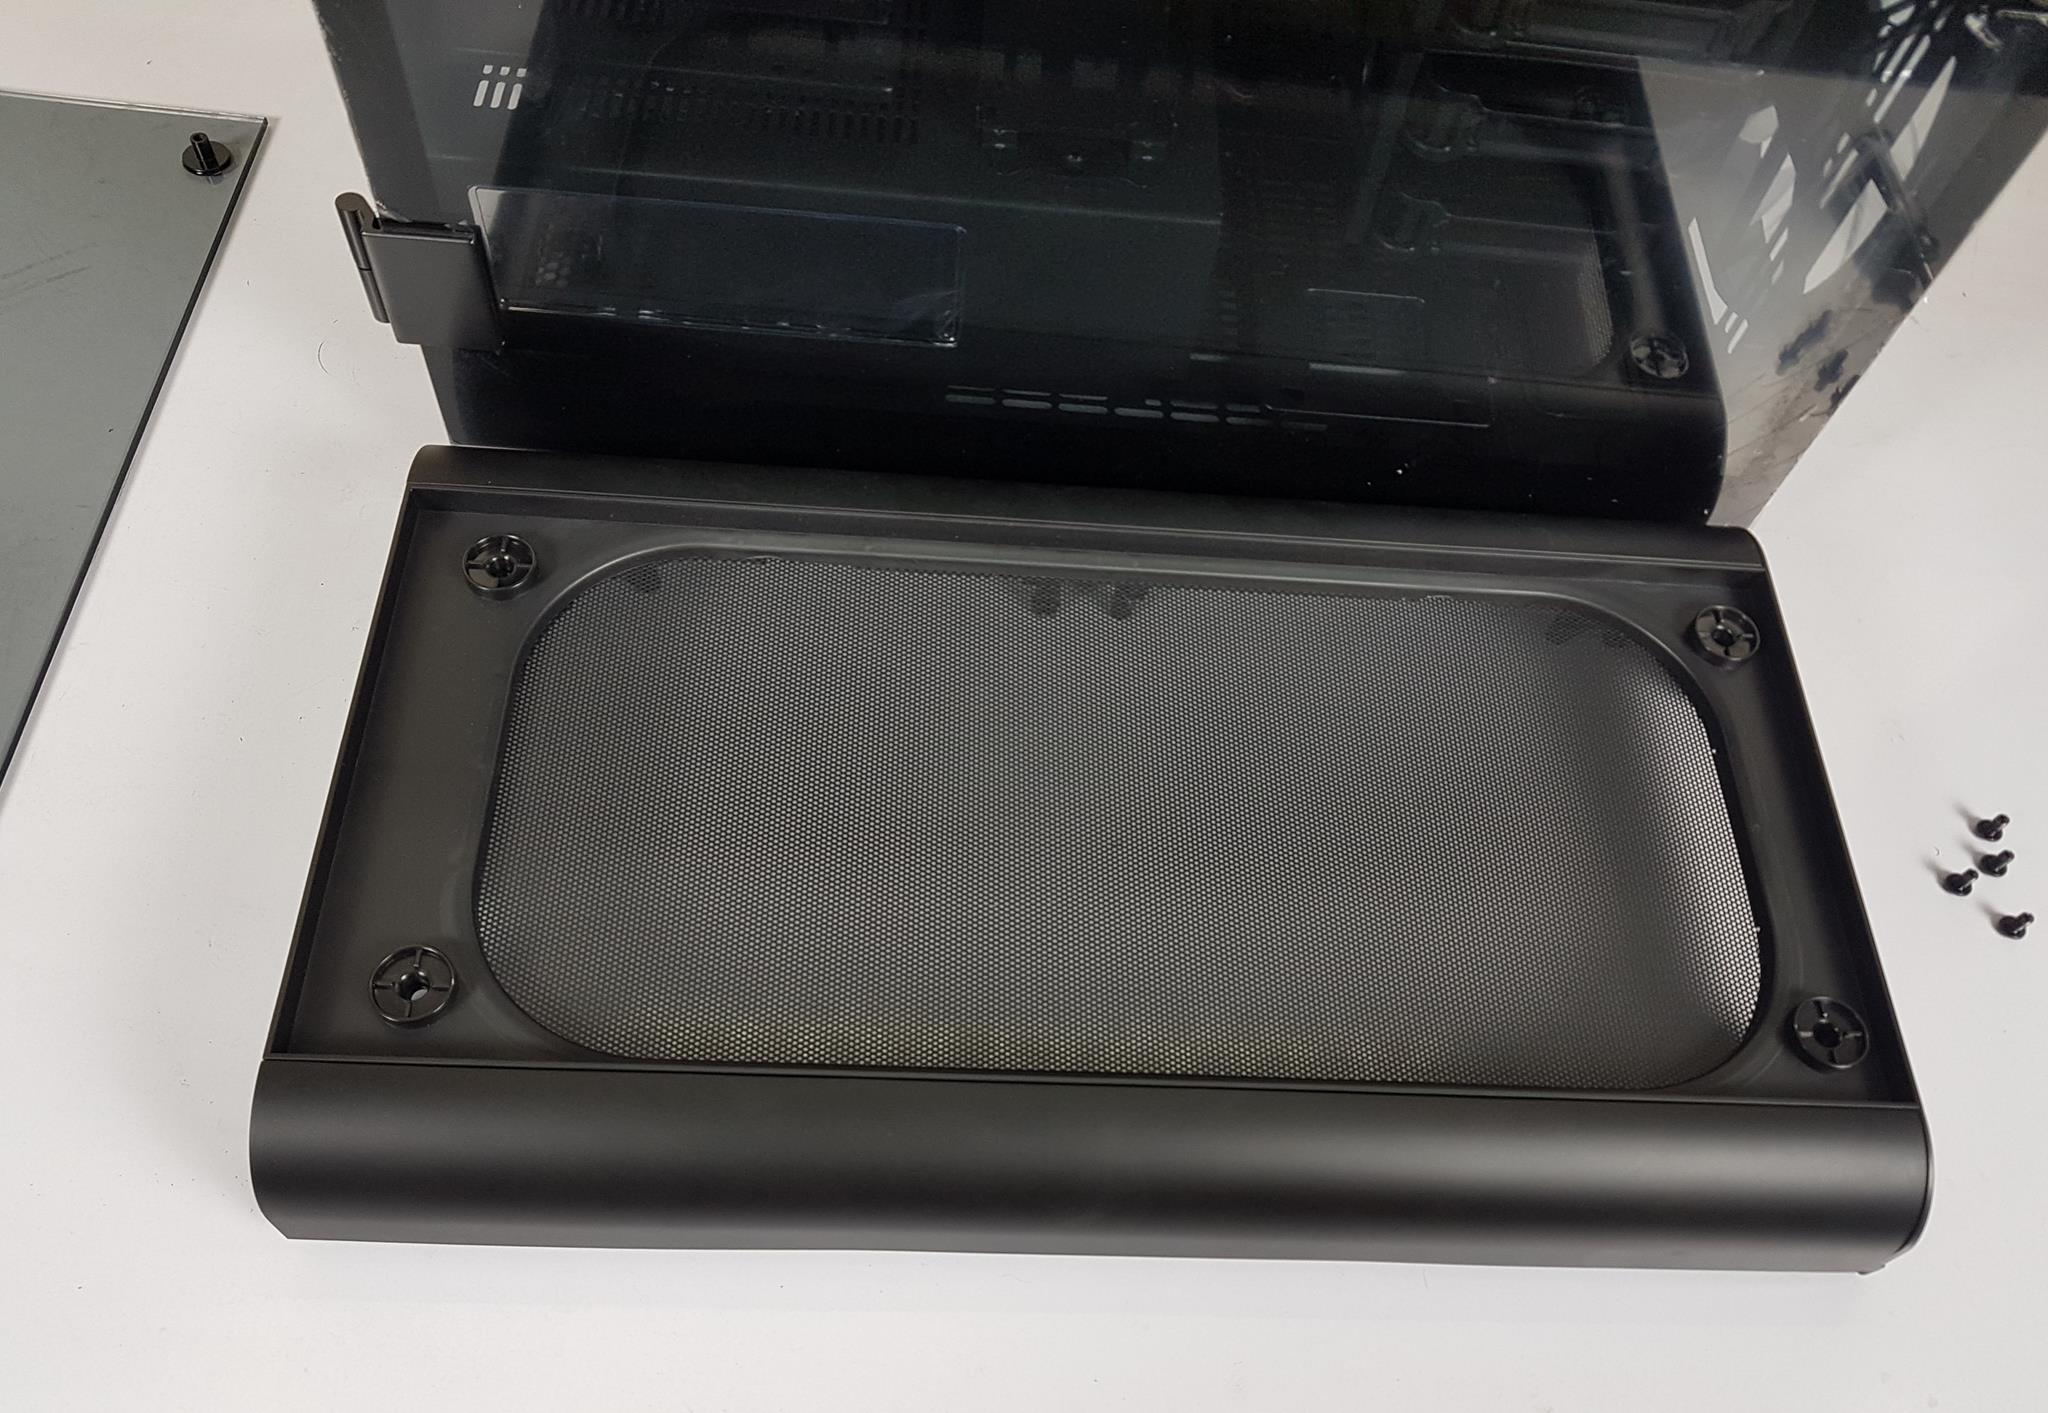
You need to pull the front panel out by placing your hand at the bottom side. You will need to exert more force than you think is needed. This is something I did not like much as it always gives the fear of not breaking something. The inner side of the front panel has a dust filter secured using a narrow bracket on 4 sides with small screws. There are 4x large thumb screws with two on the top and two on the bottom. These are holding the glass with the panel.
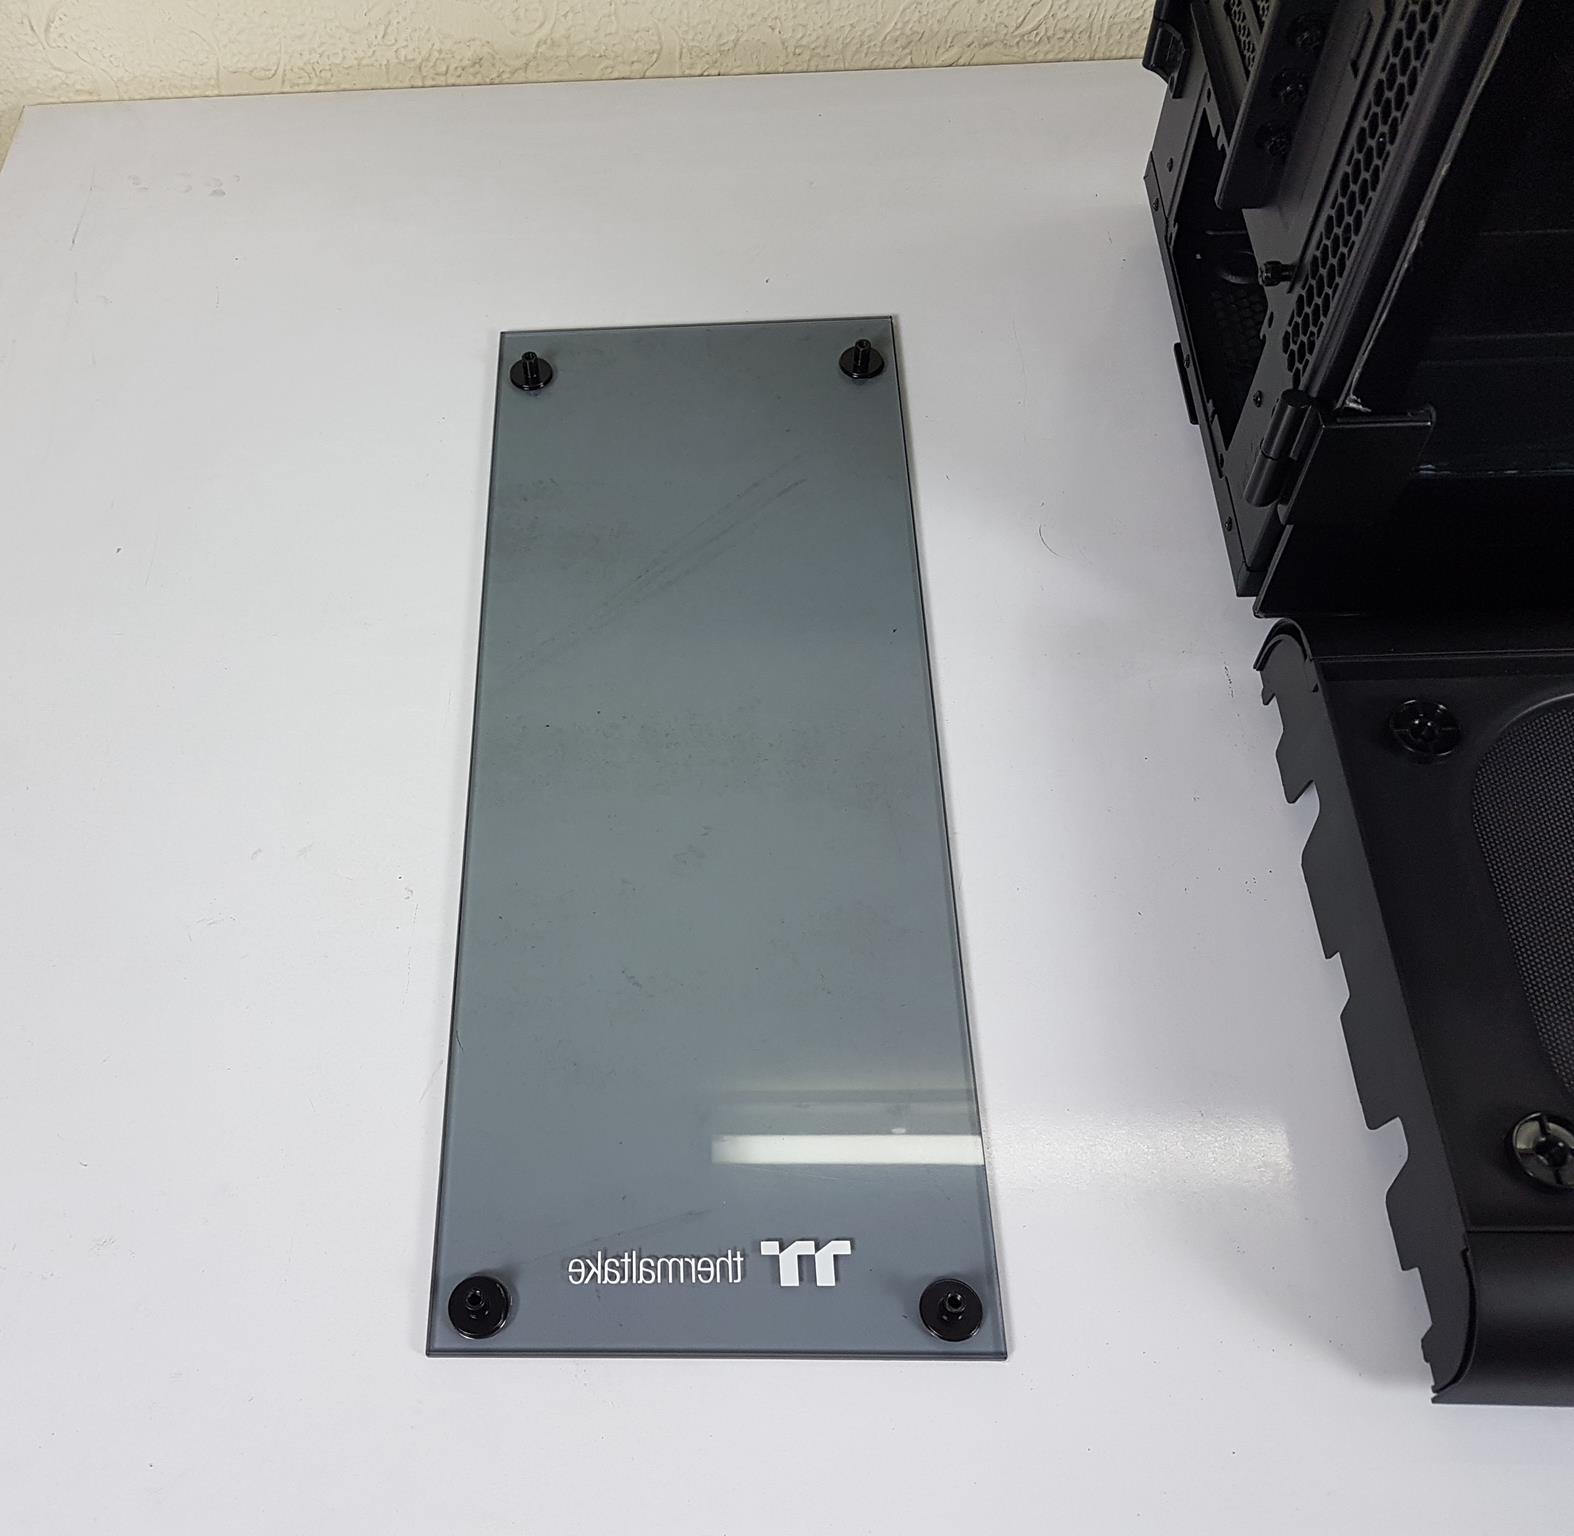
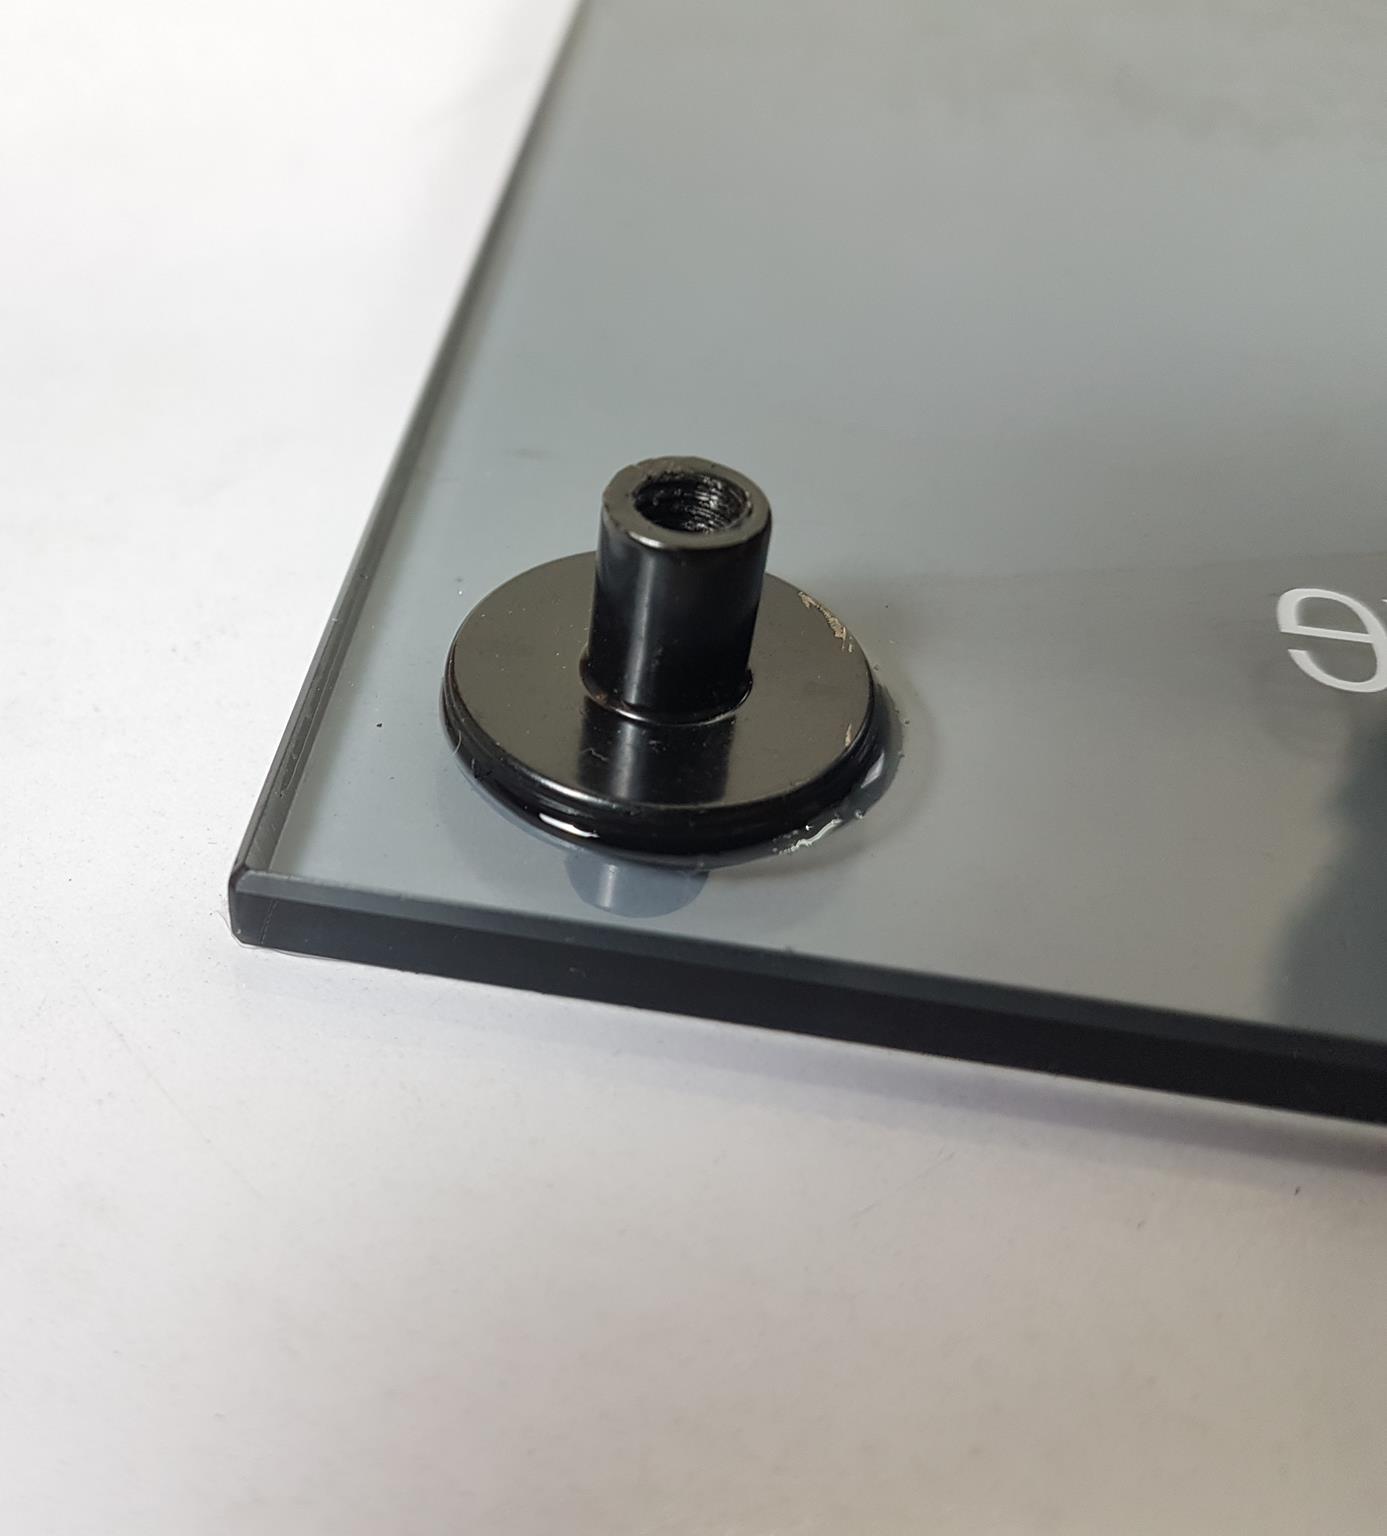
Here is the front glass itself. Each corner of the glass has black color standoff mountings.
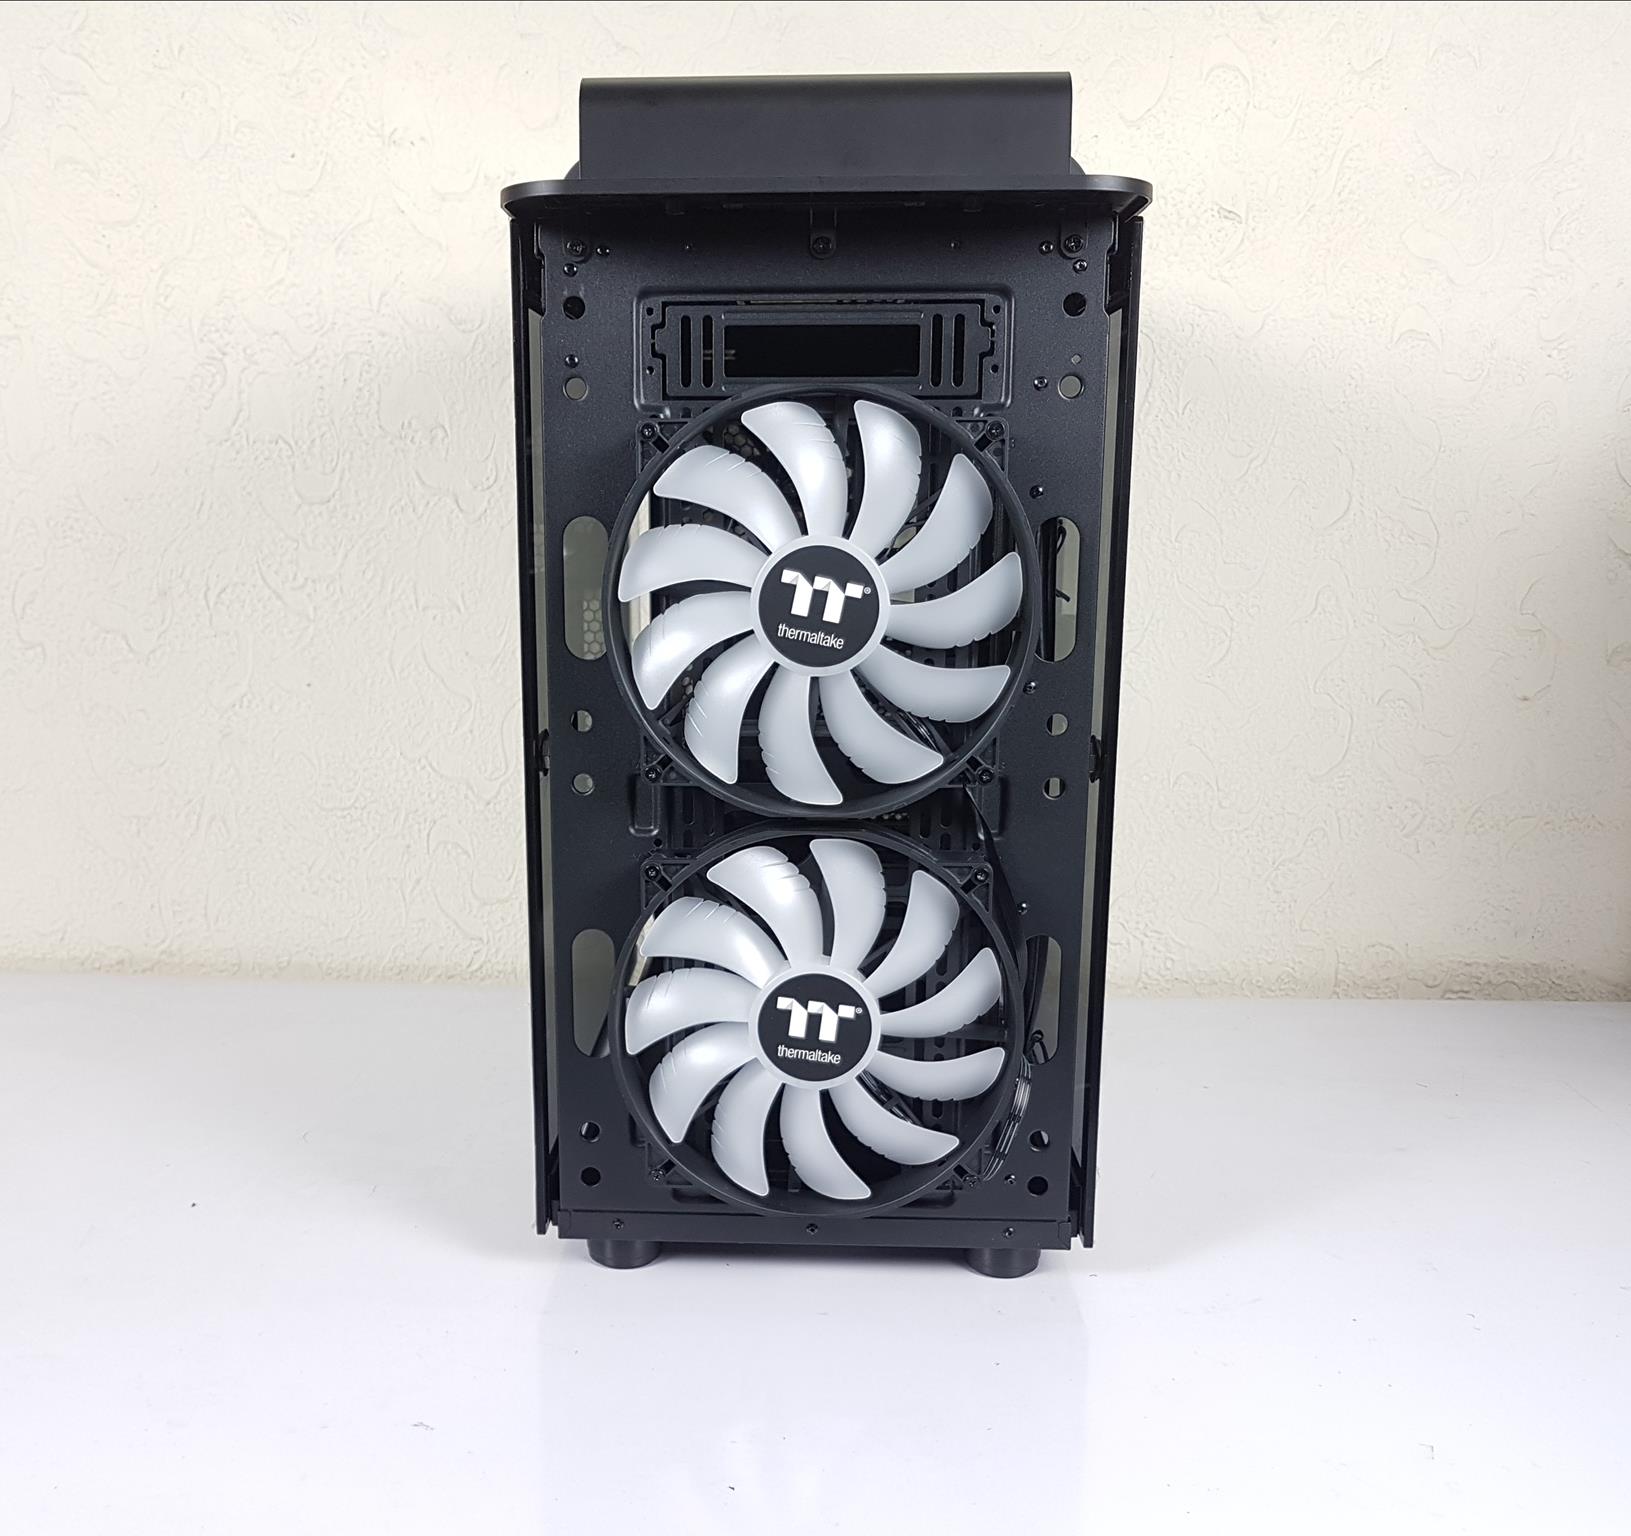
After removing the 2x 200mm ARGB fans, we can now take a look at what cooling gear we can install on the front side.
There are screw holes labeled M3. These are to be used for the 200mm fans mounting.
The top panel is also not easy to take off. You will need to use more force to pull it off. It has the same inner side layout as is on the front panel. You will need to remove the 4x large thumb screws to take off the glass from the panel.
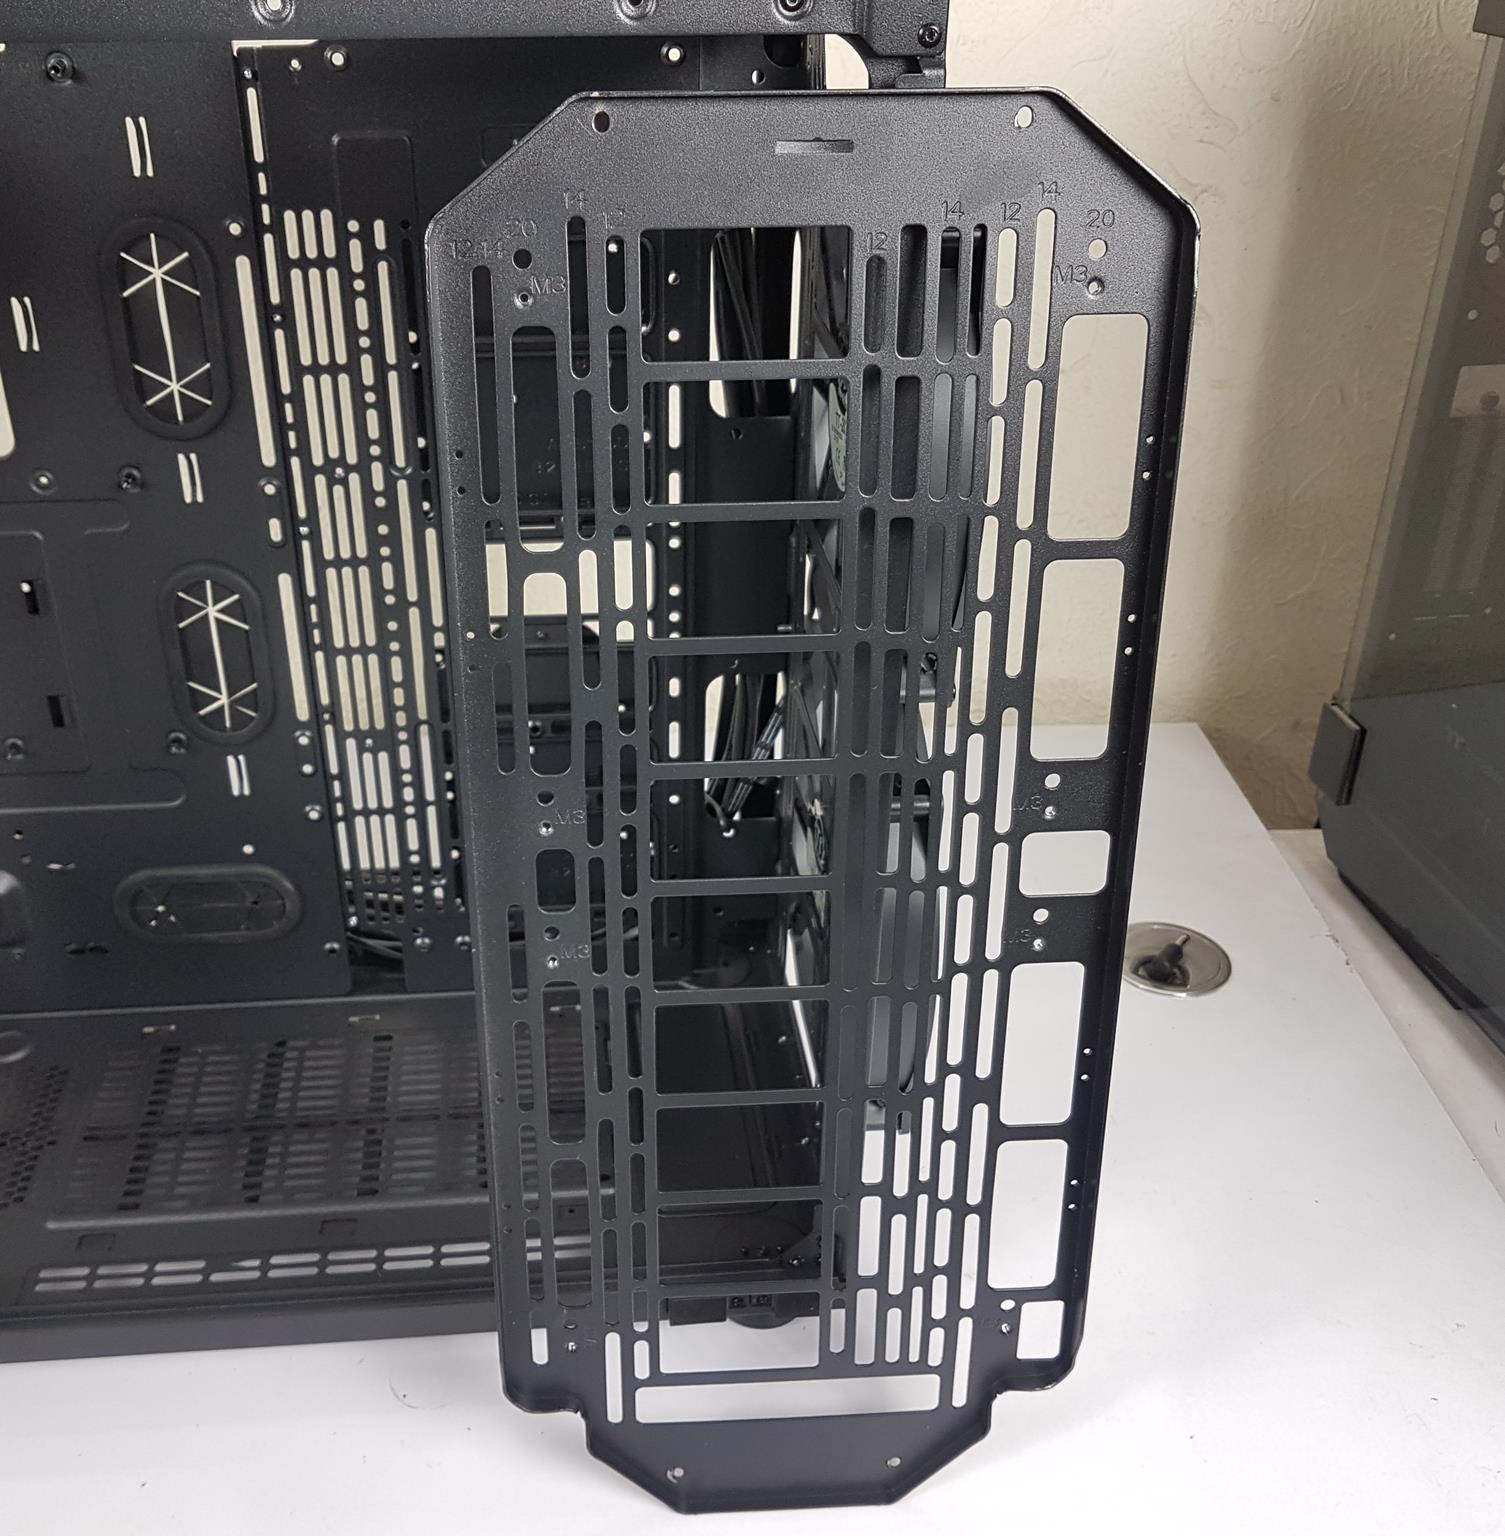
The chassis introduces an improved design for its expansive bracket, fastened with four thumbscrews. Unlike the View 71, it ditches preset offset positions, opting for a more versatile bracket with an adjustable rail system. Labeled with sizes like 12, 14, and 20, these rails facilitate easy customization of fan or radiator placement, elevating flexibility and compatibility with diverse cooling setups. This enhancement empowers users with a range of options for configuring their system.
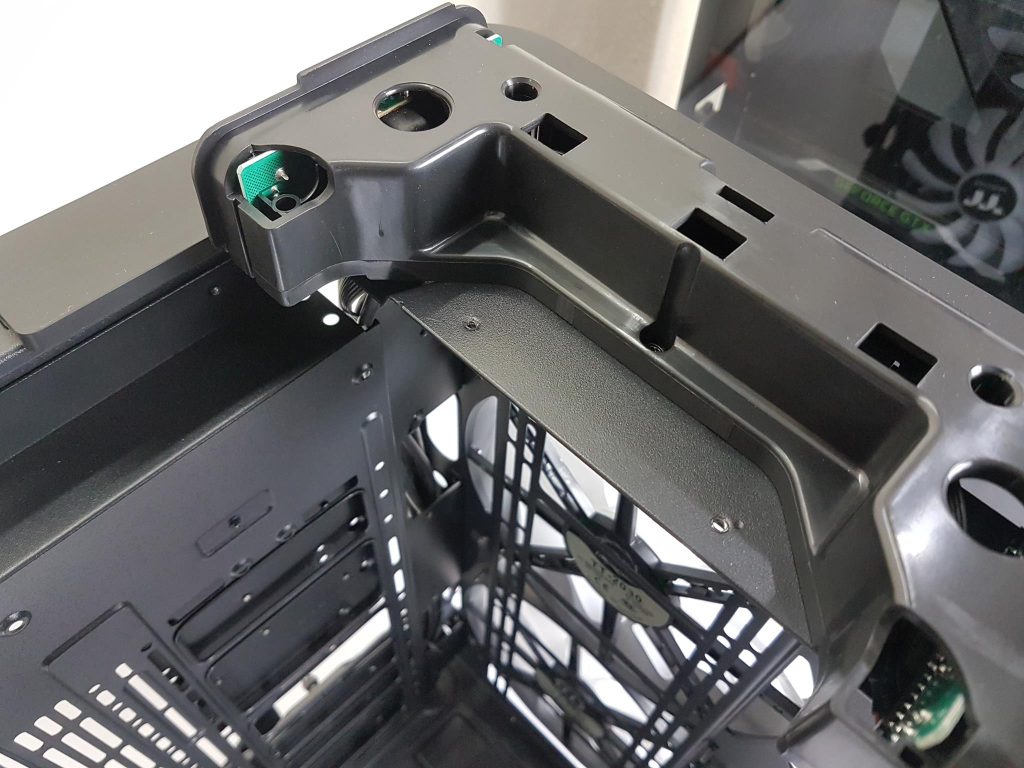
The machining and tooling on the chassis frame are on the money and the overall finishing is quite good.
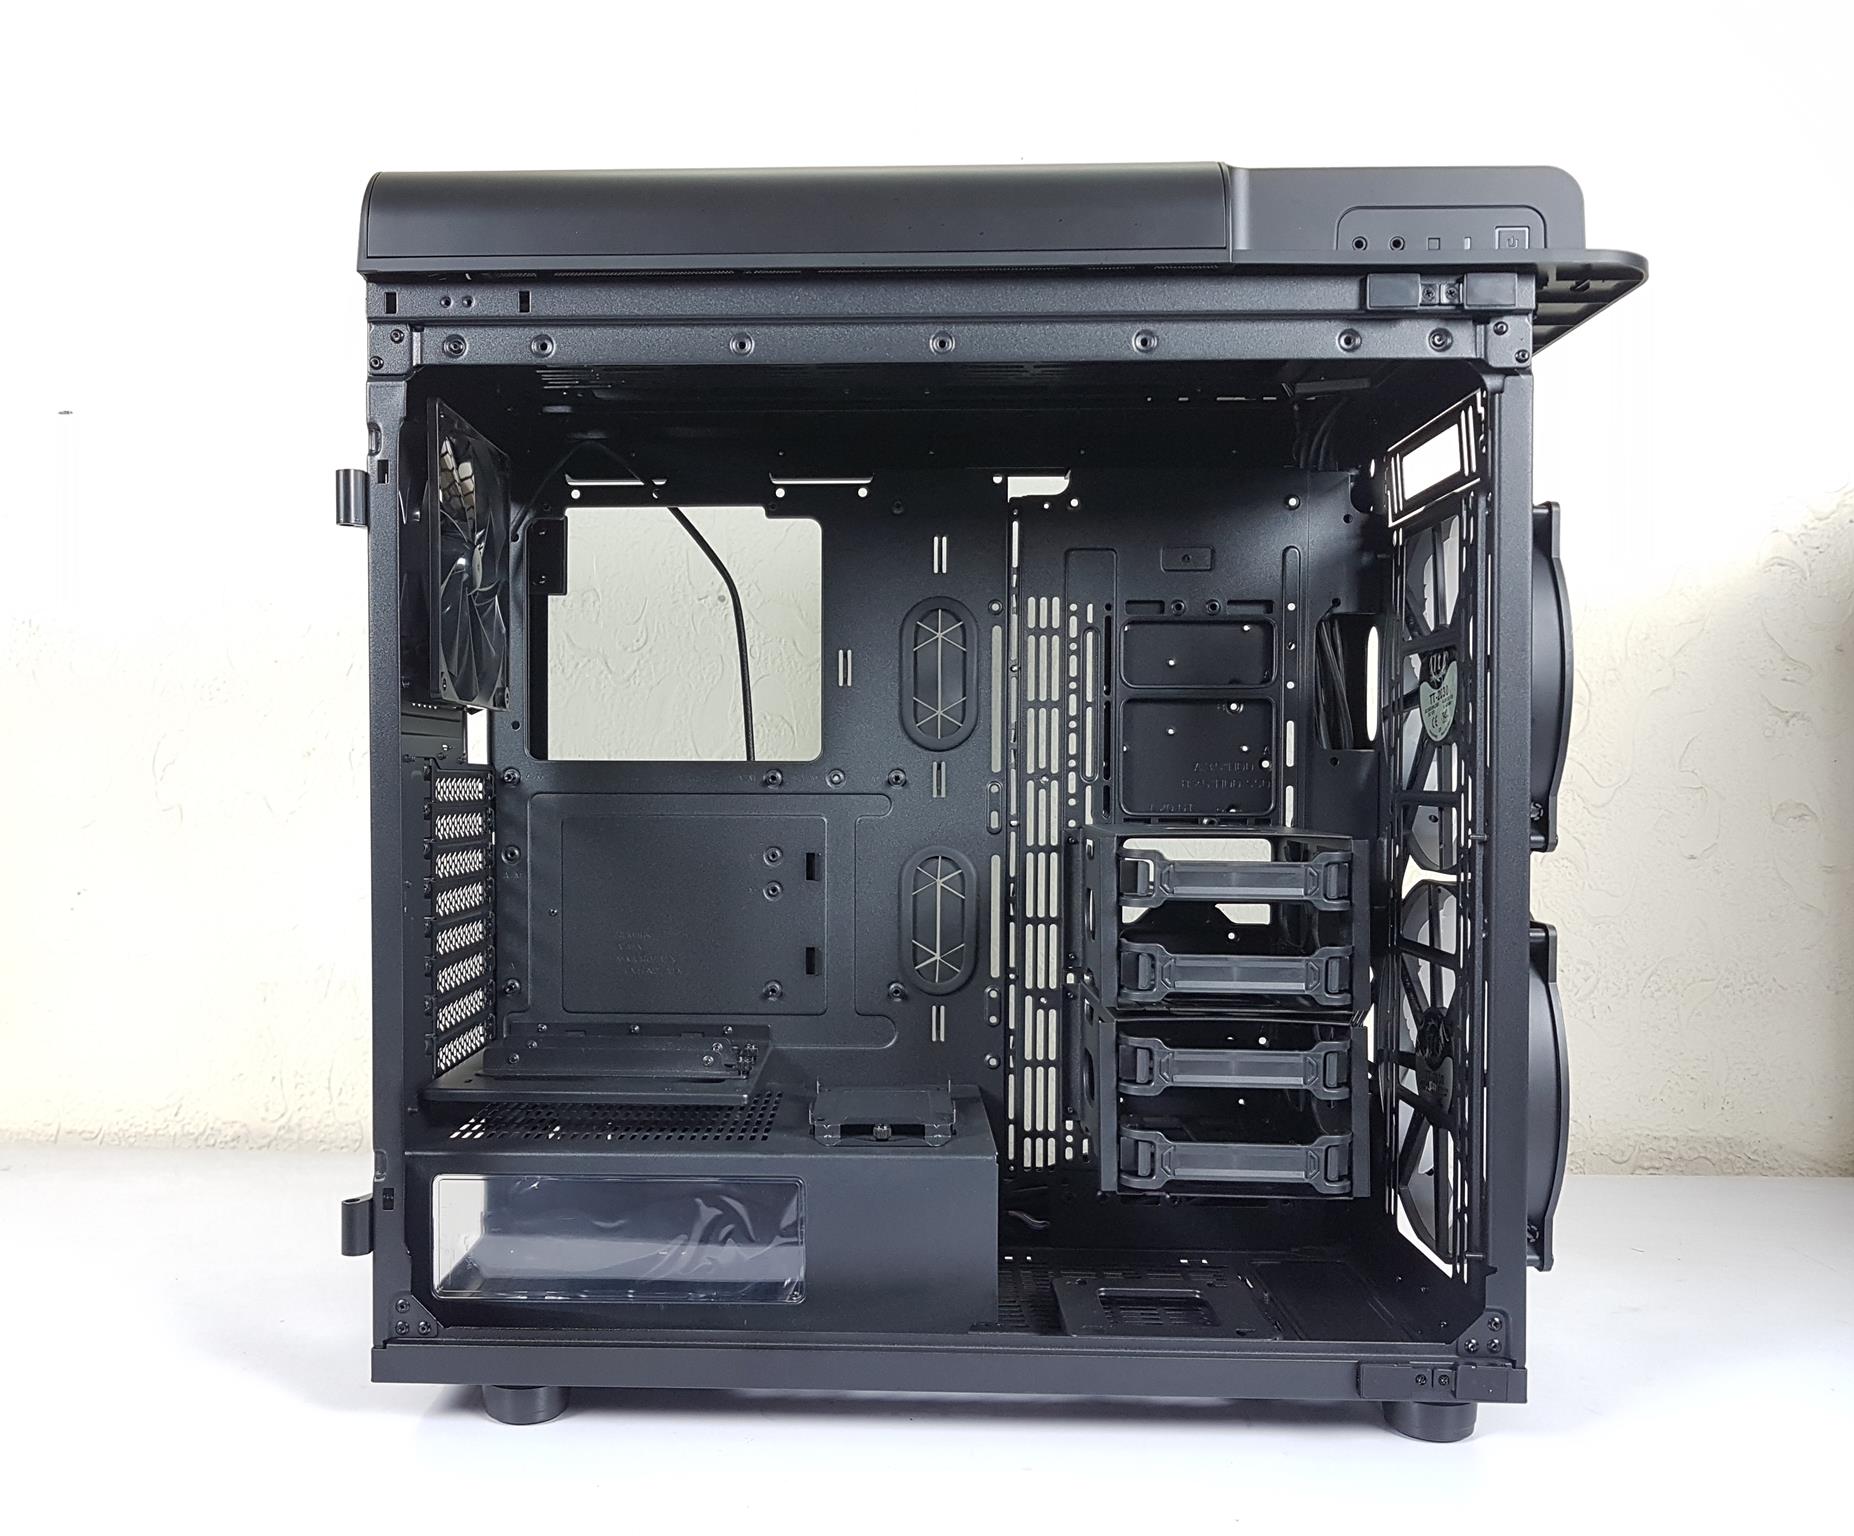
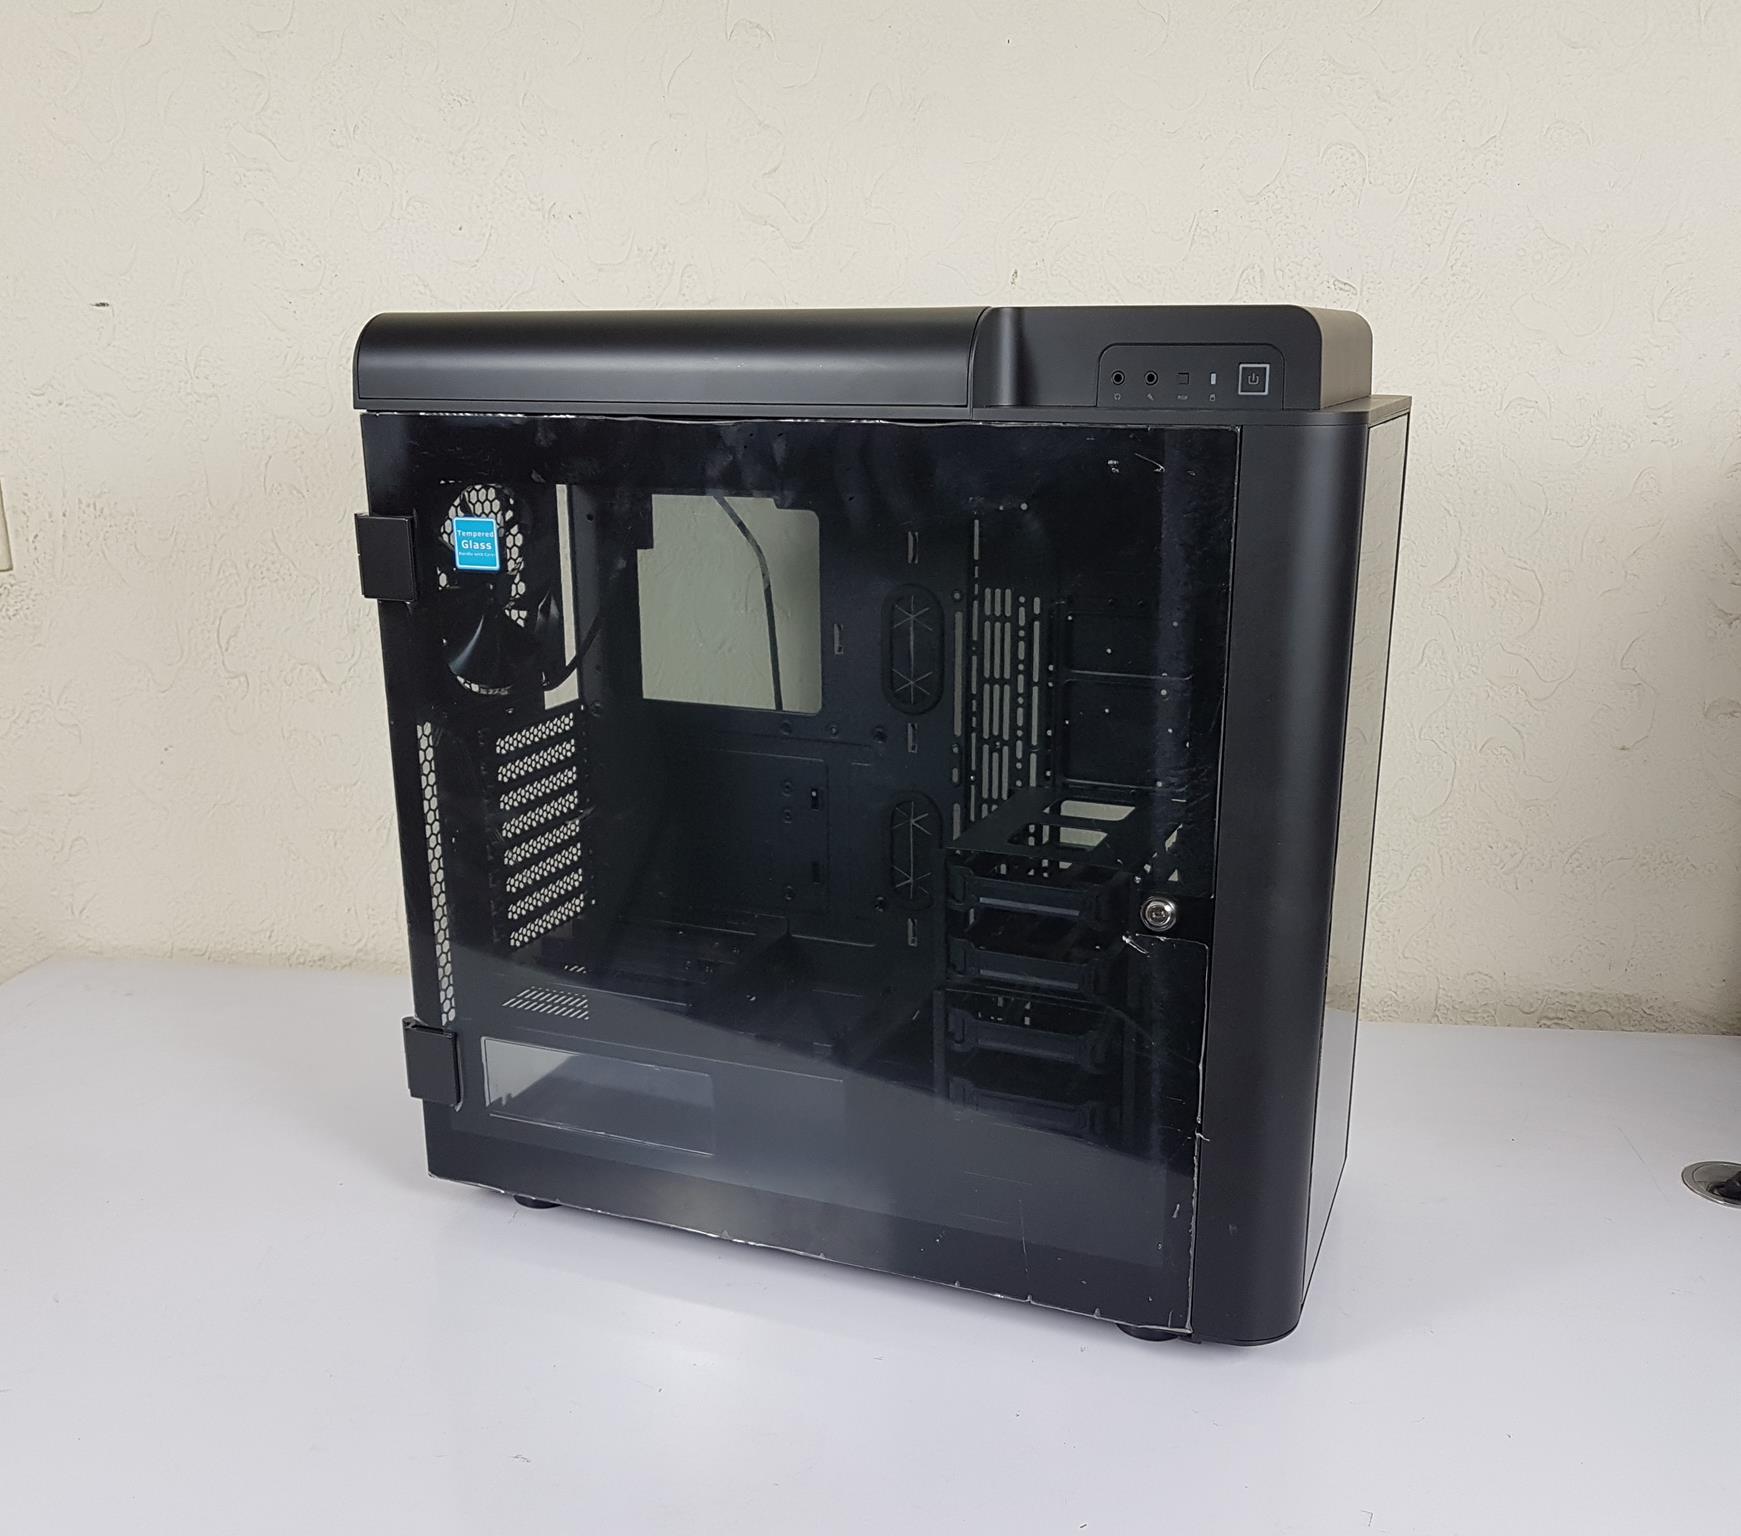
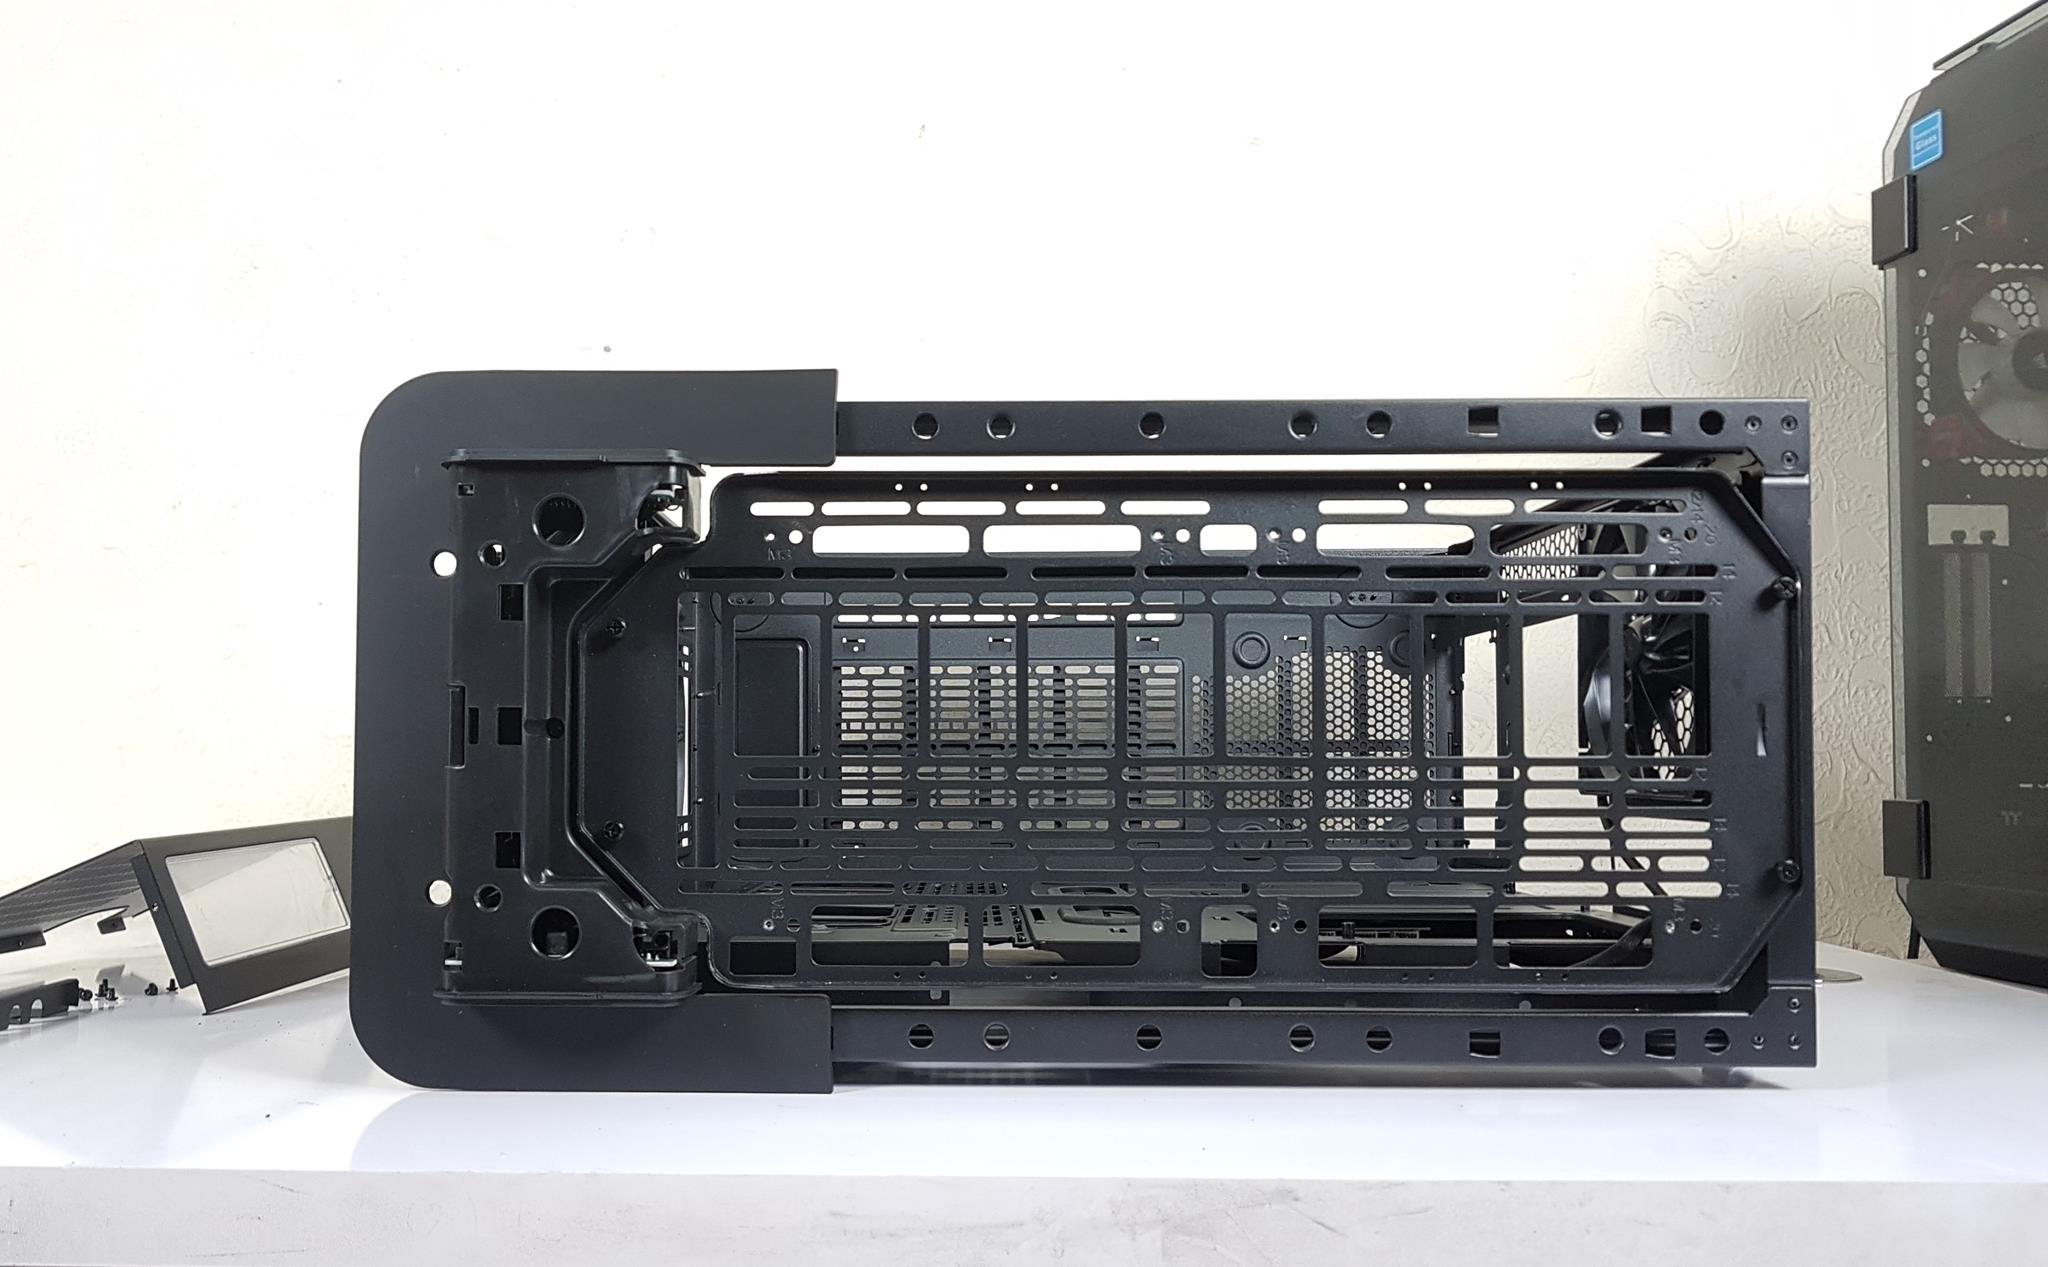
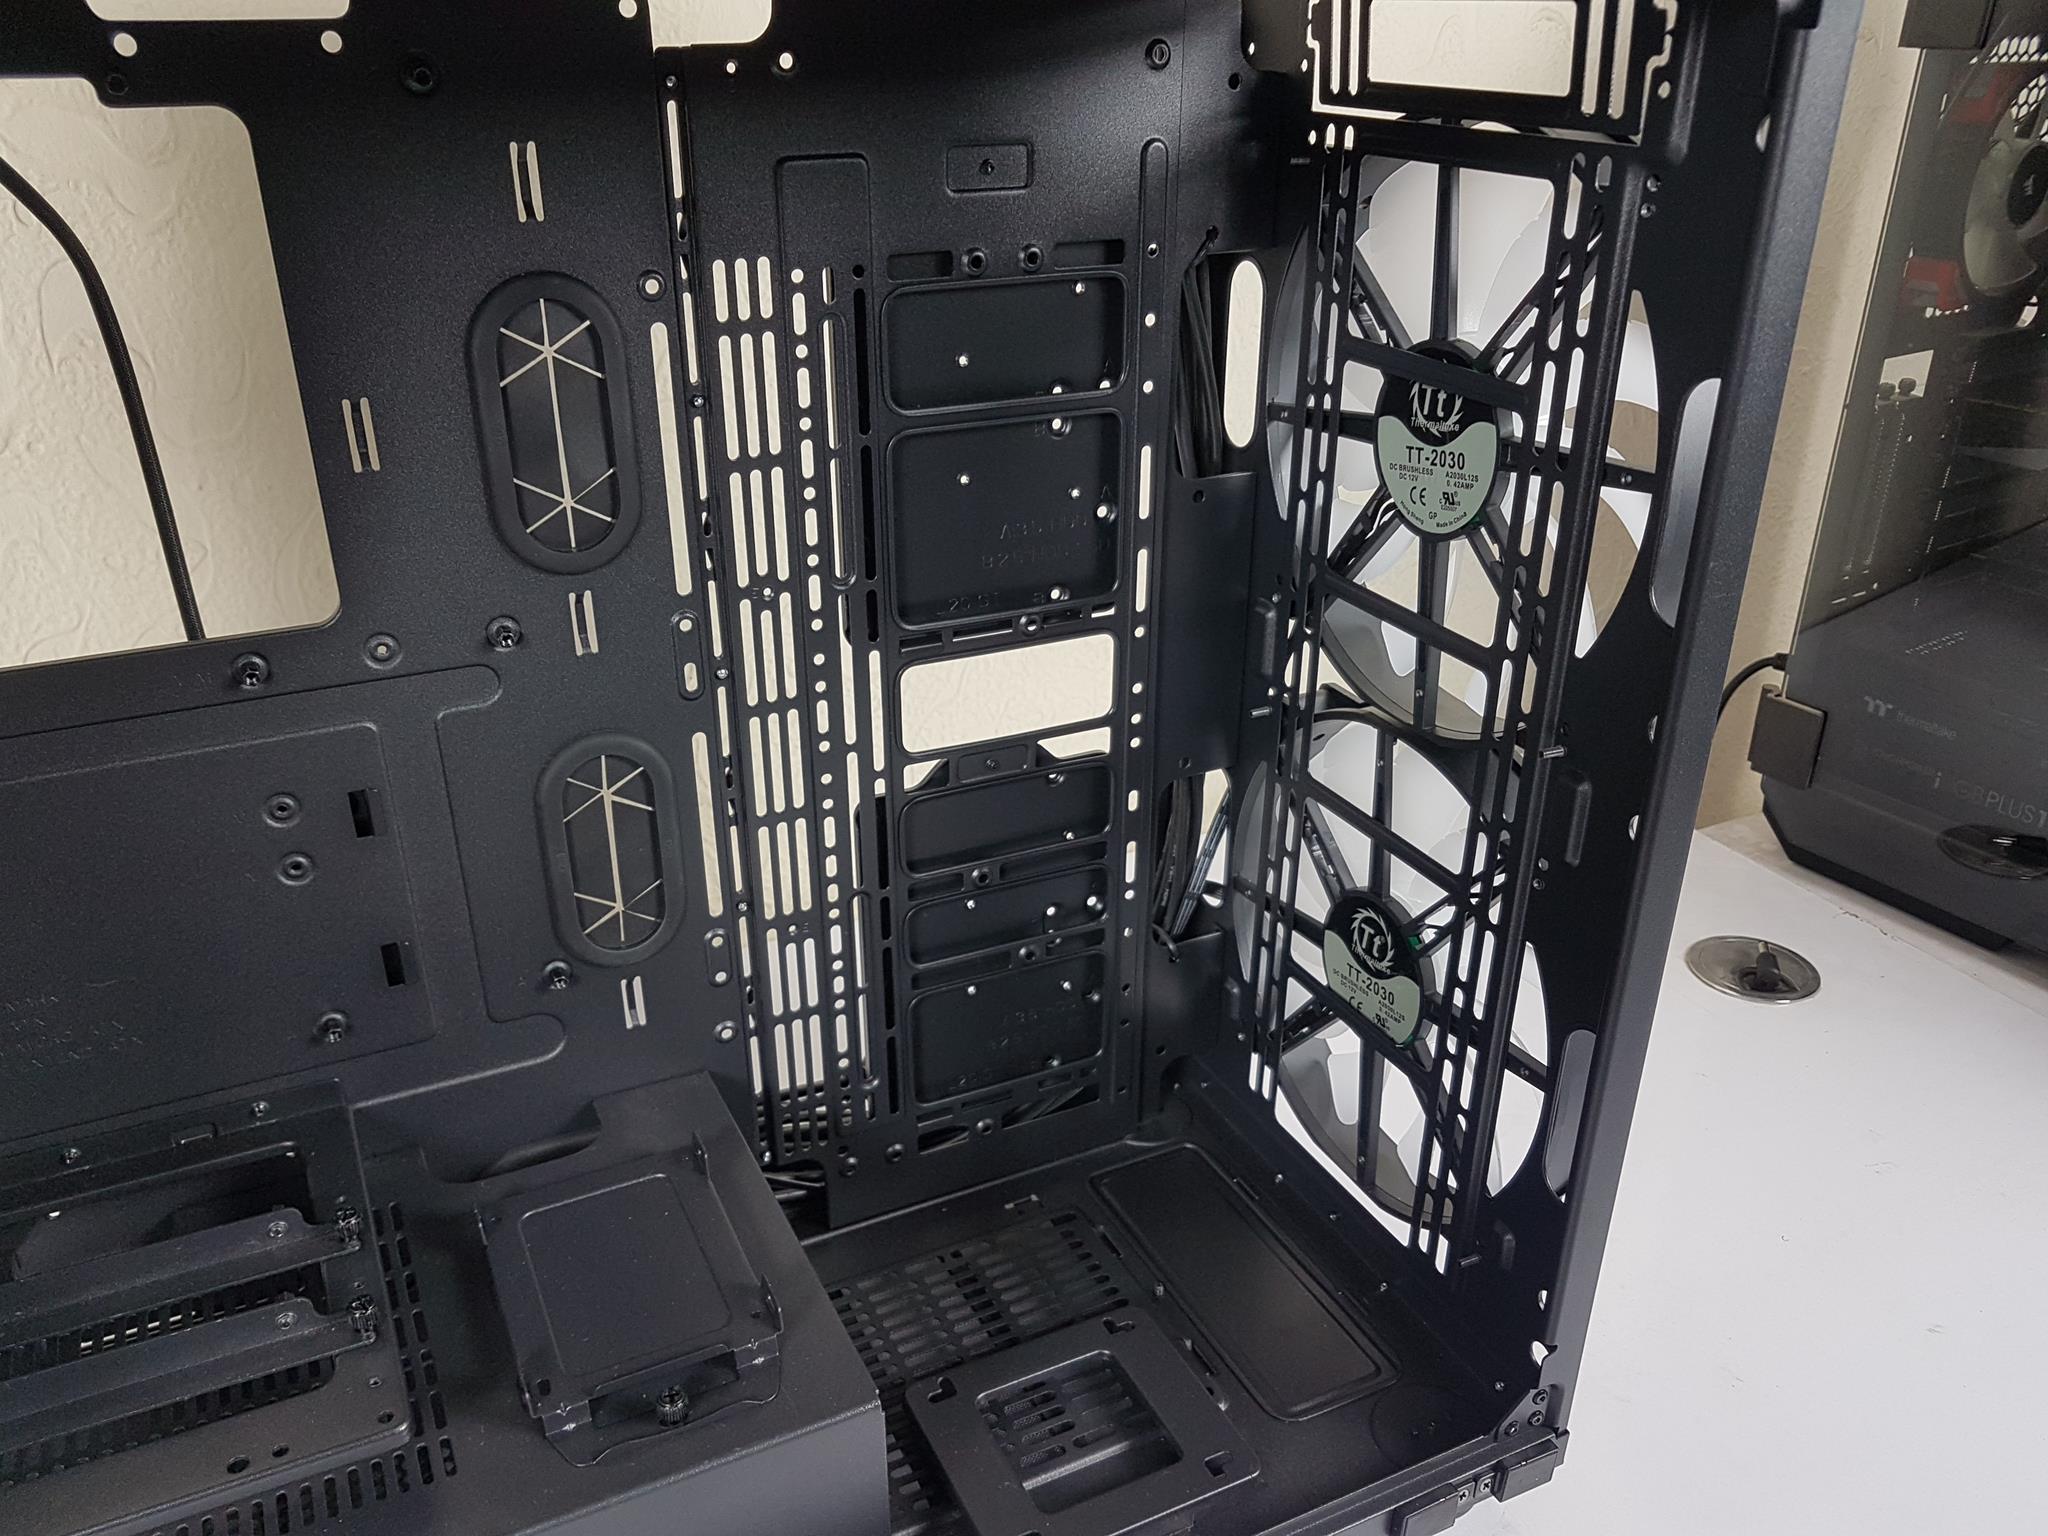
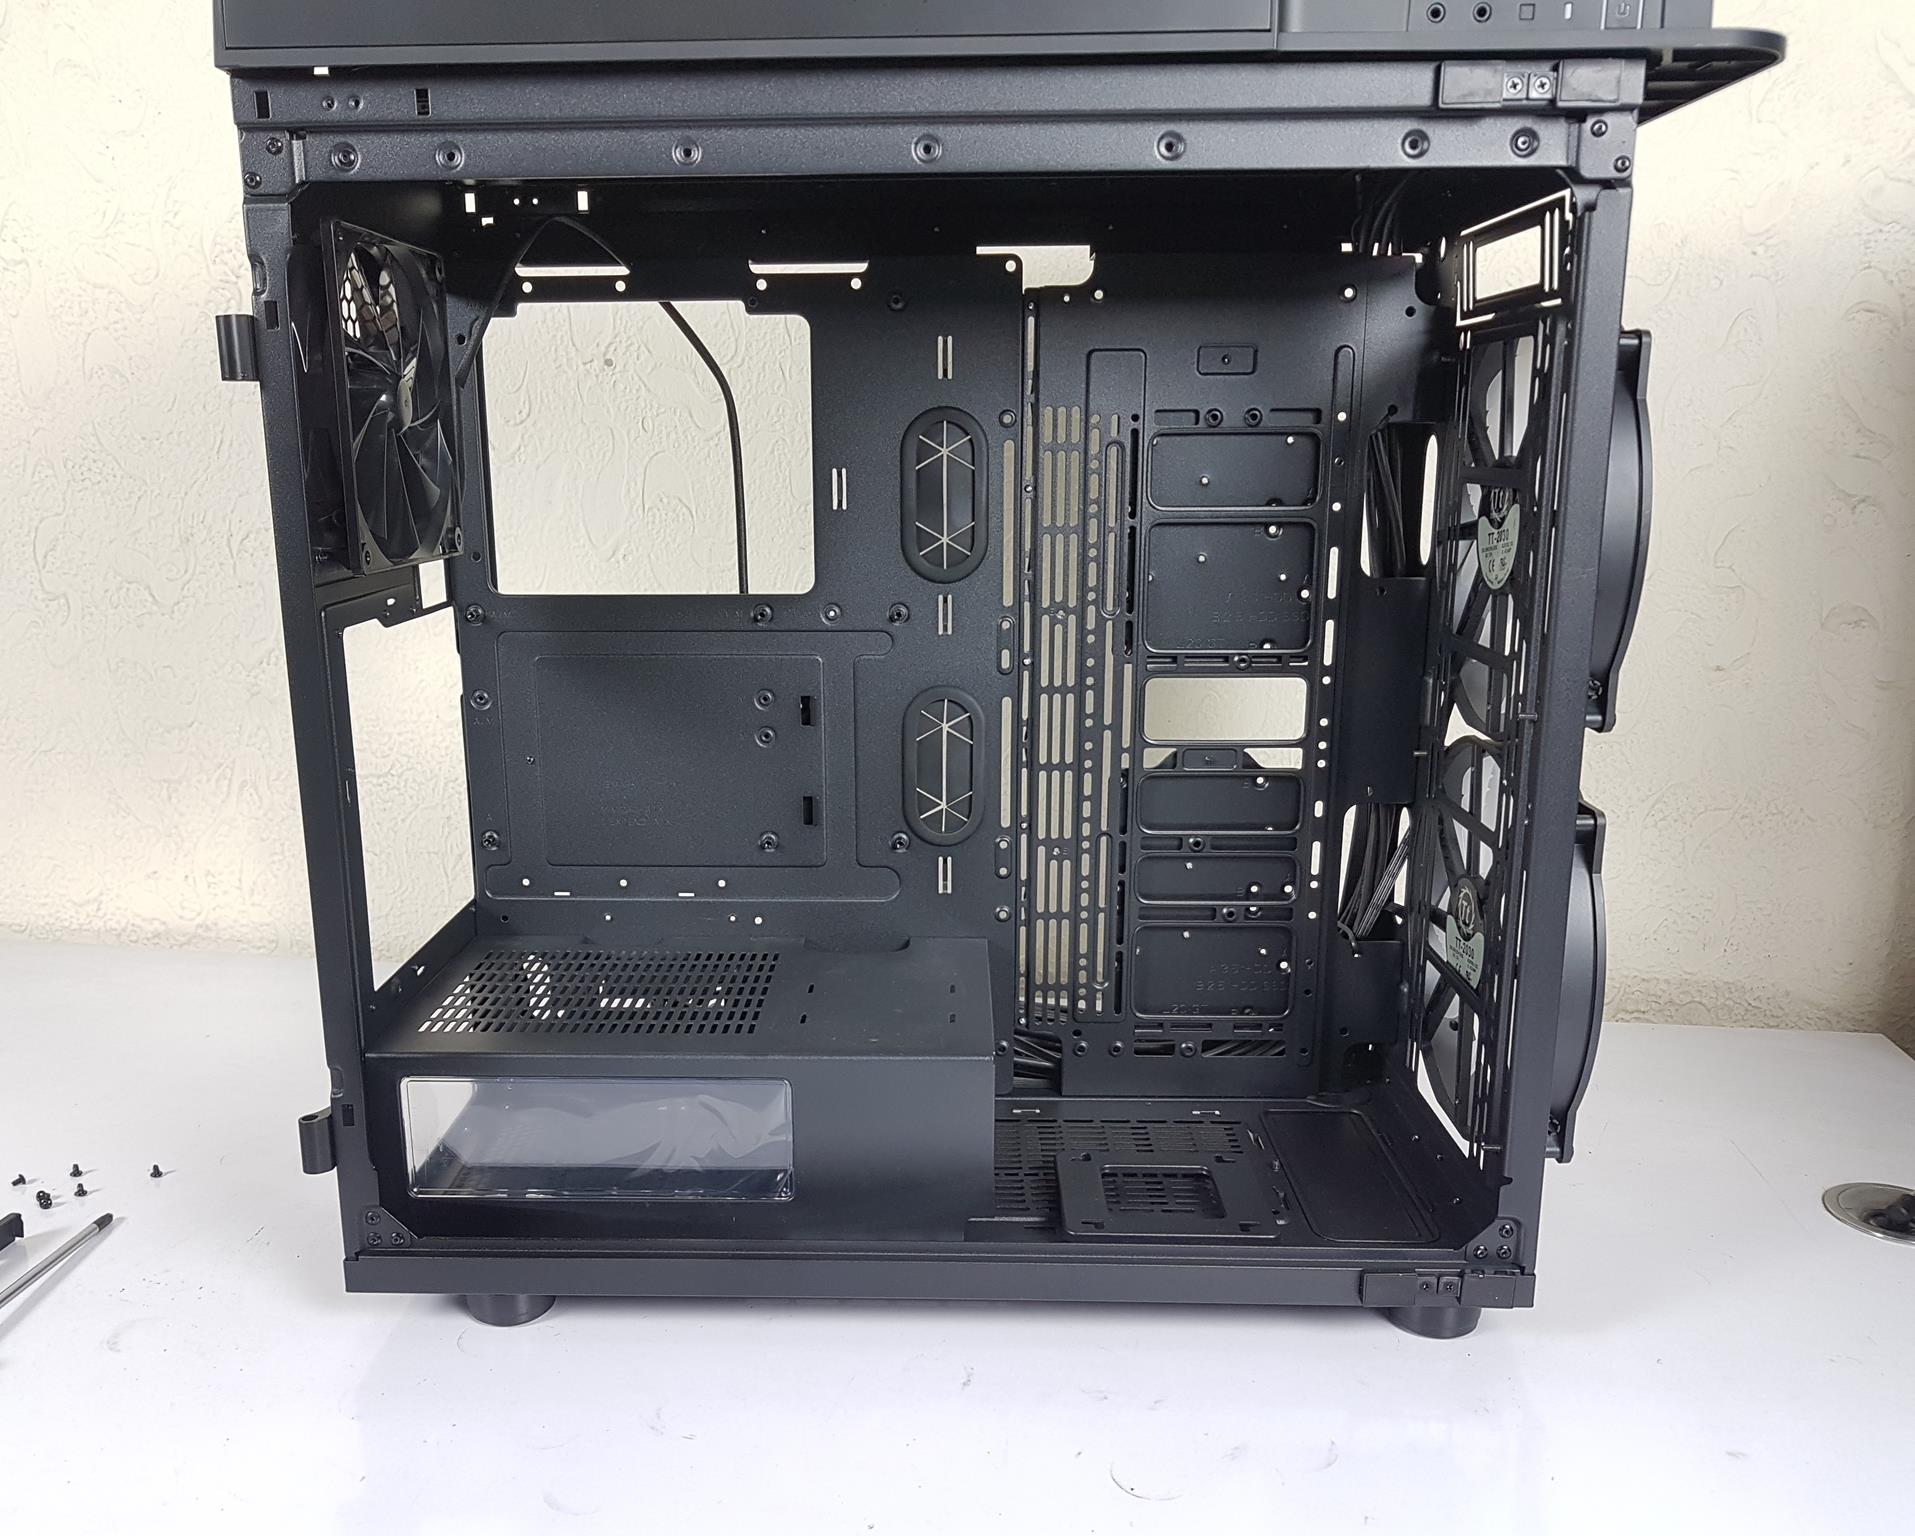
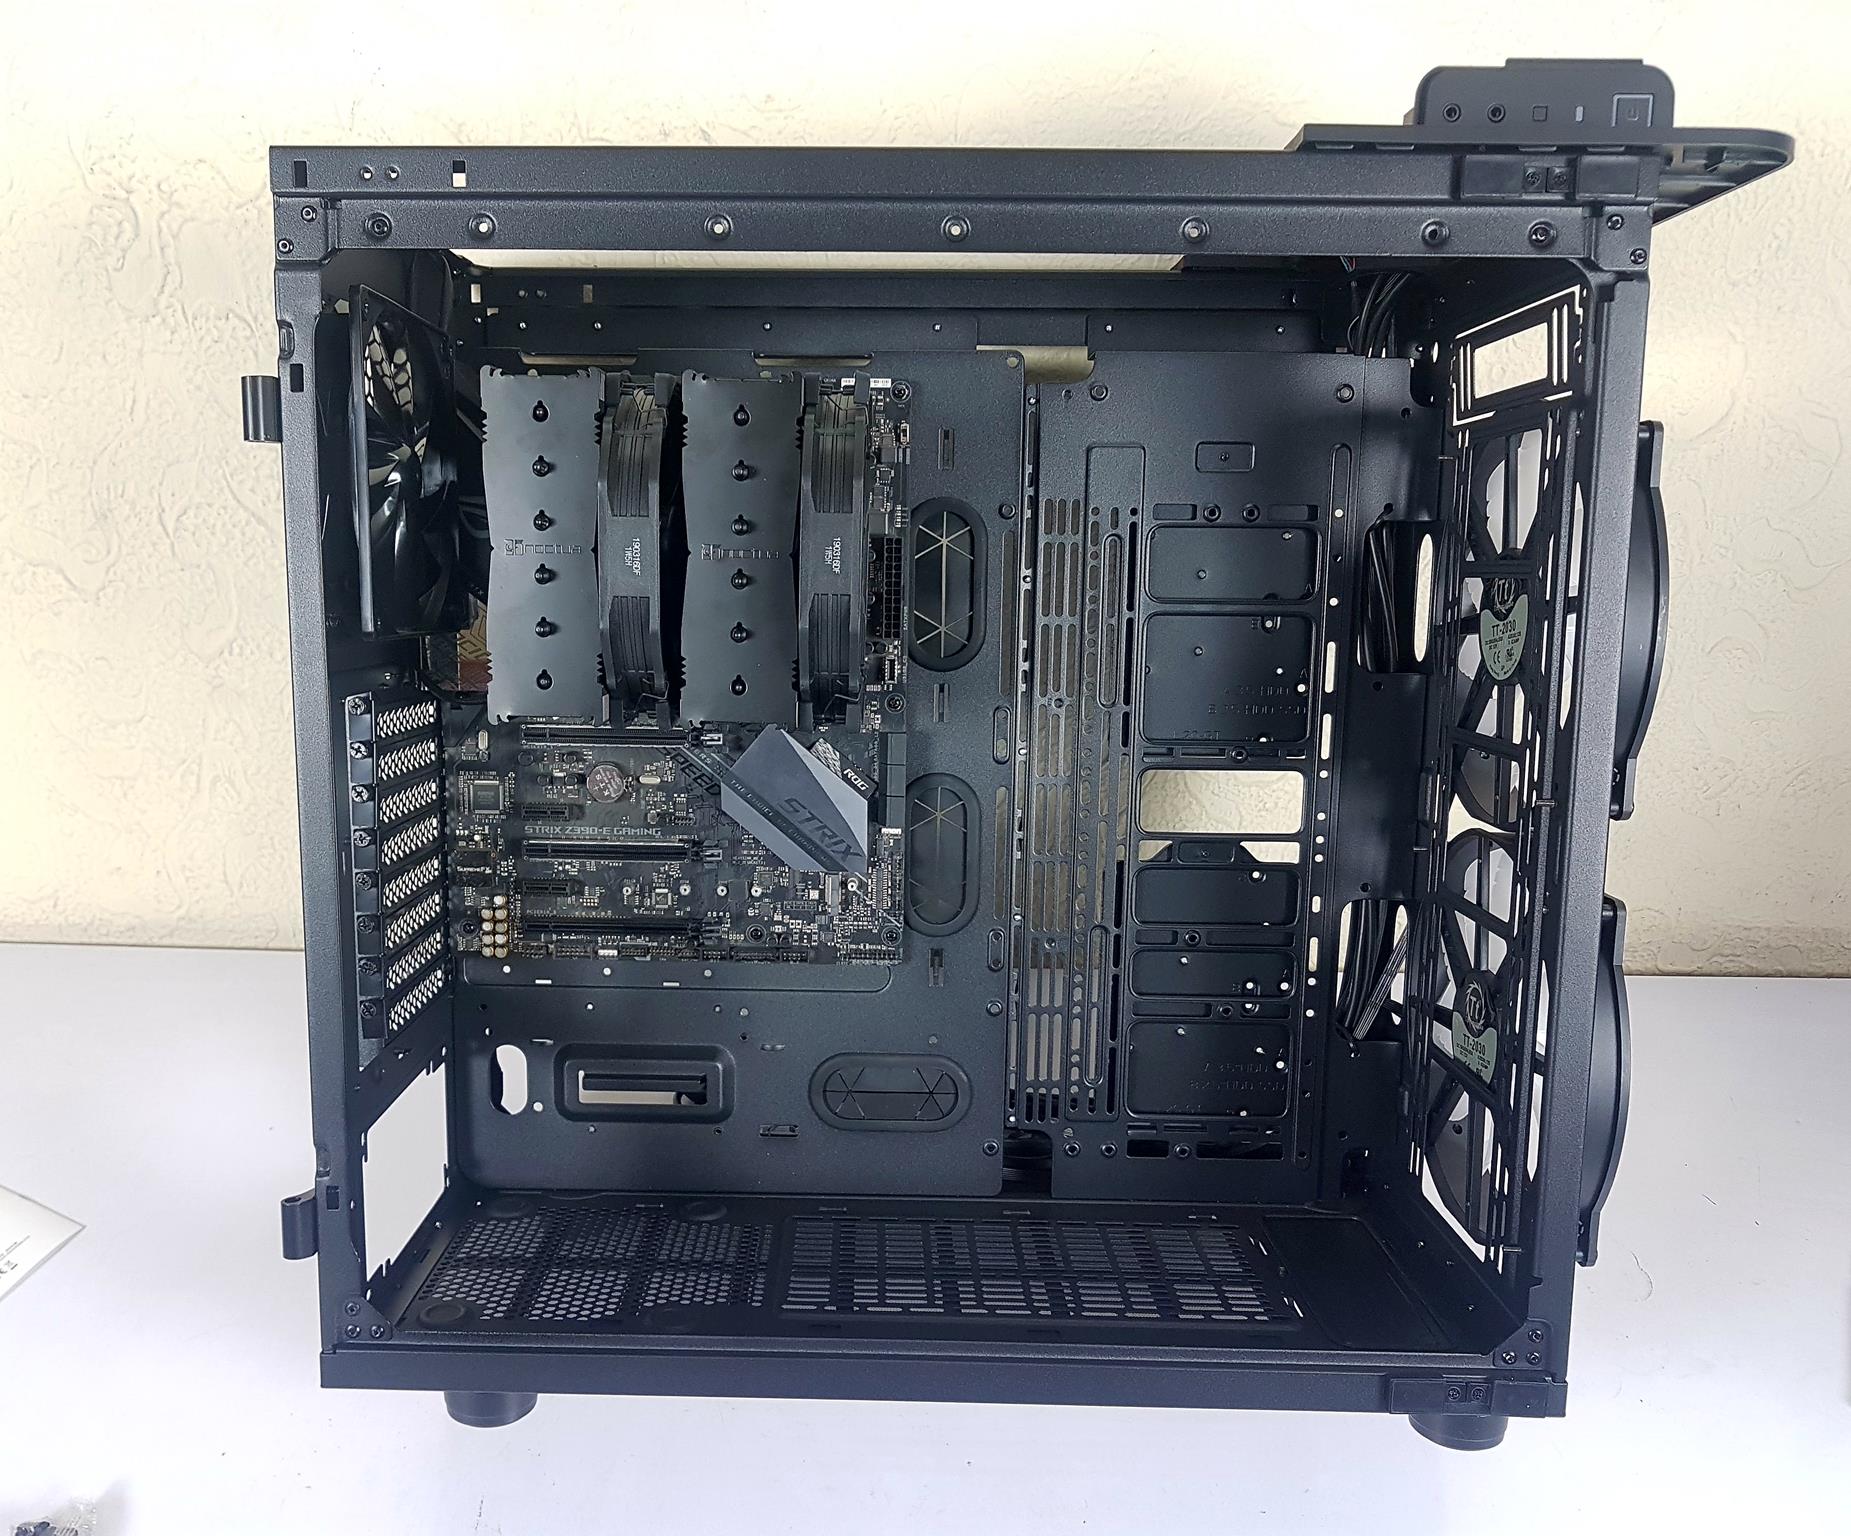
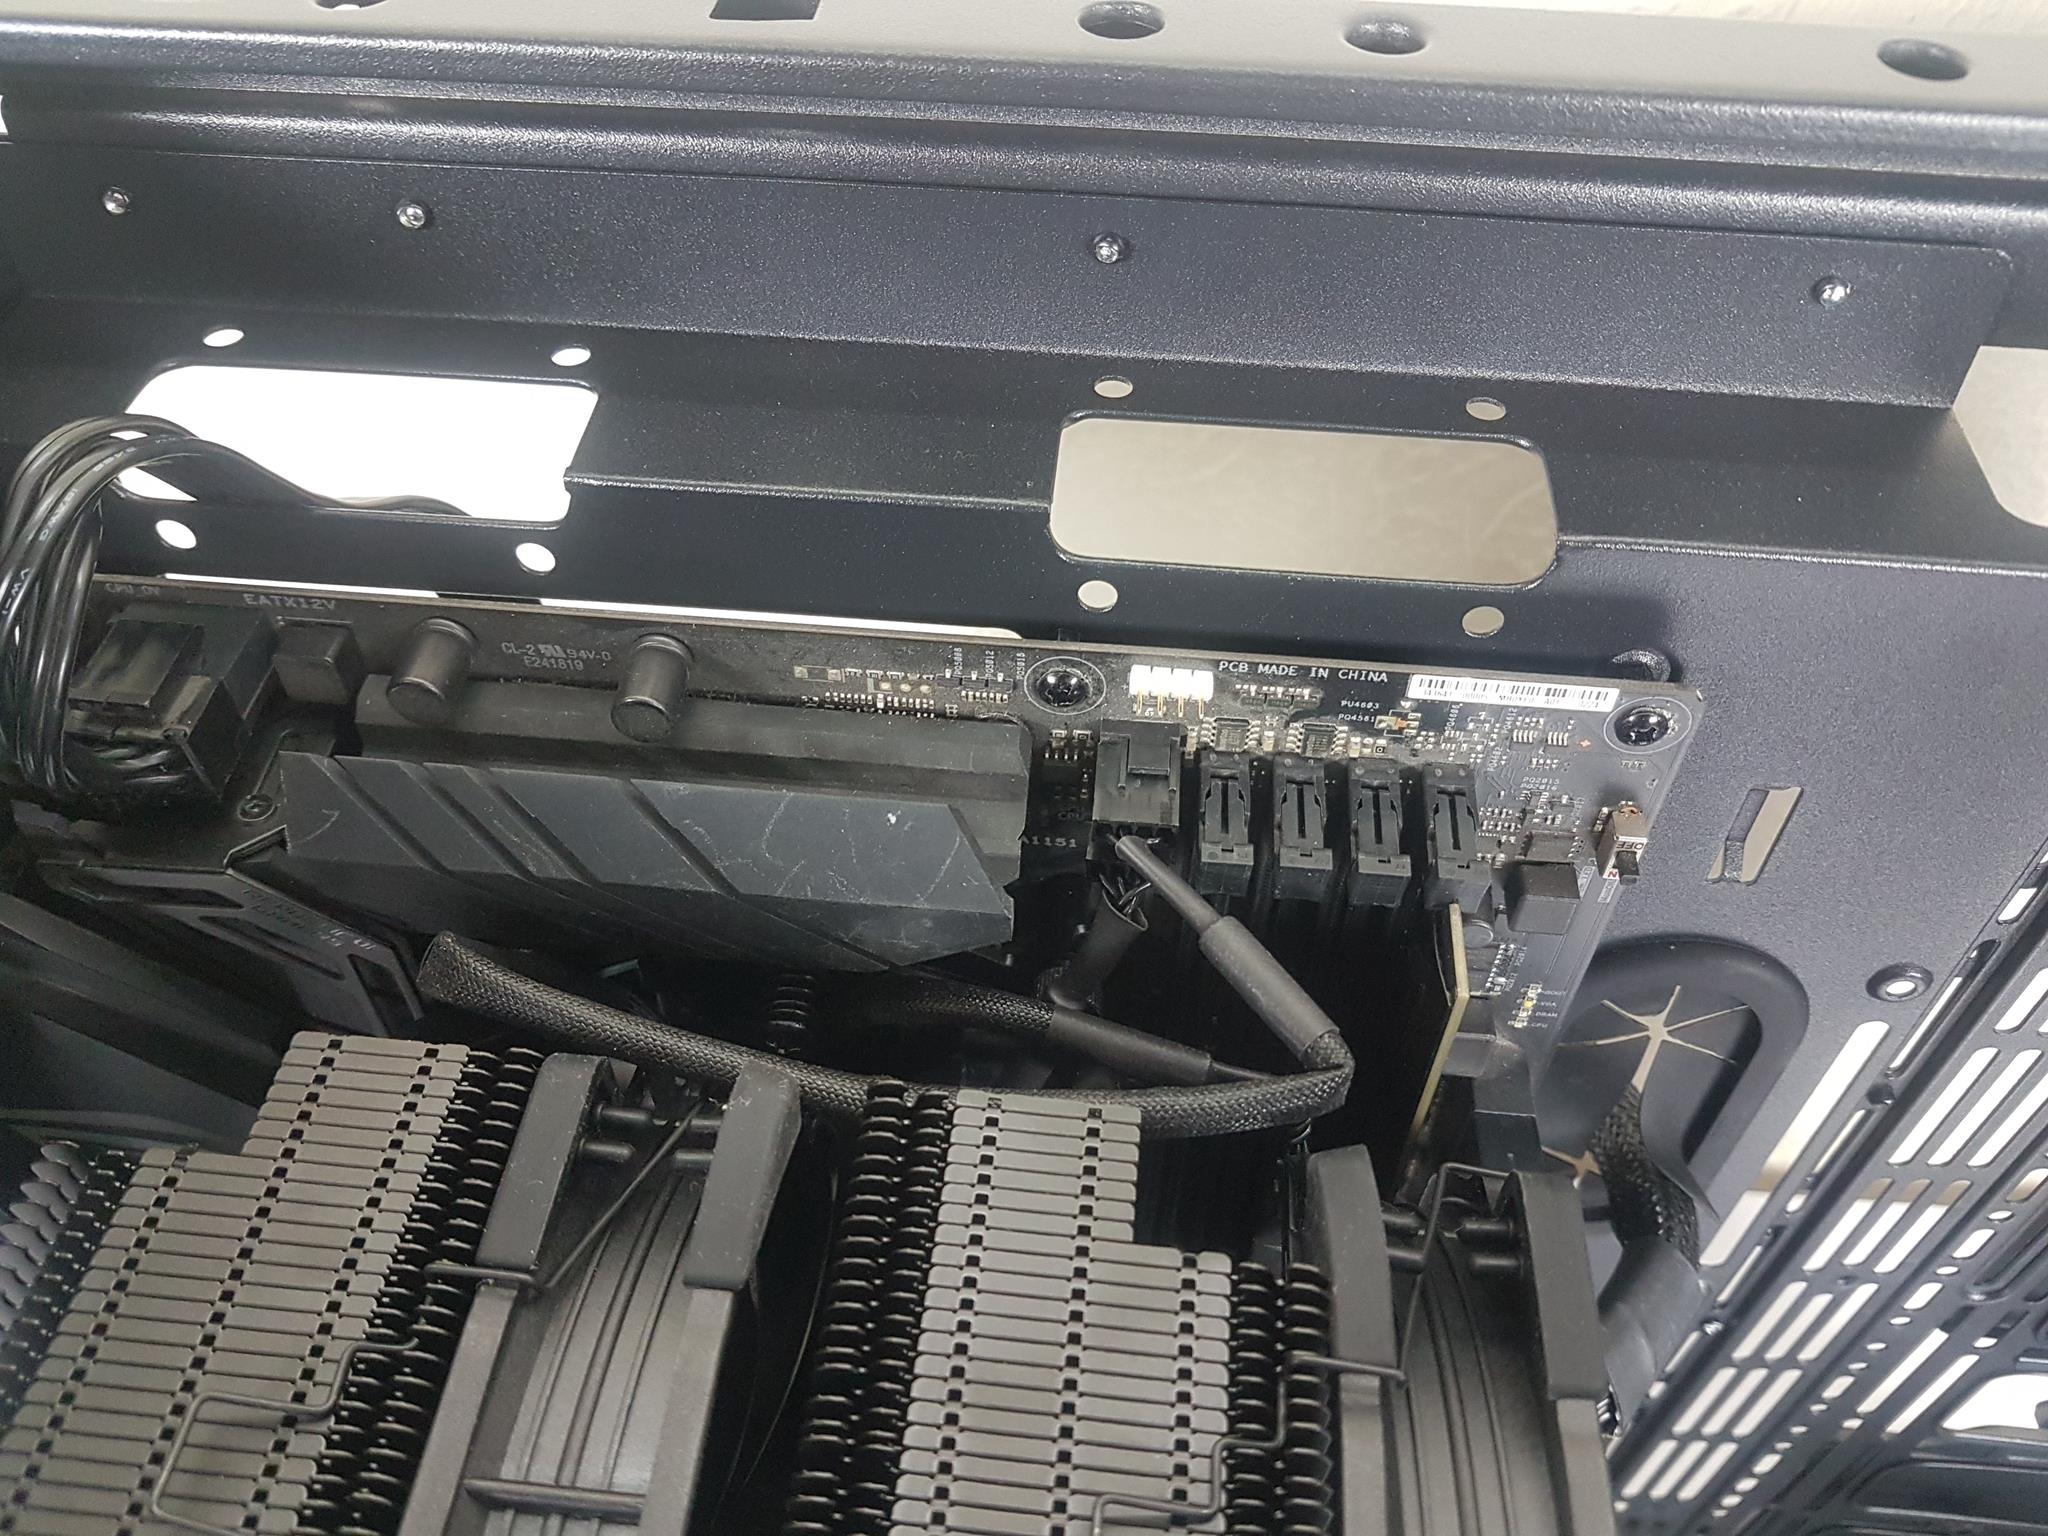
Upon opening the chassis, the internal layout is reminiscent of the View 71, albeit with notable differences. Positioned on the right side, two stacked HDD cages offer storage options. While supporting up to E-ATX motherboards, users should note that an E-ATX board may cover cable cutouts, requiring creative cable routing for right-side motherboard connectivity, including the 24-pin ATX cable.
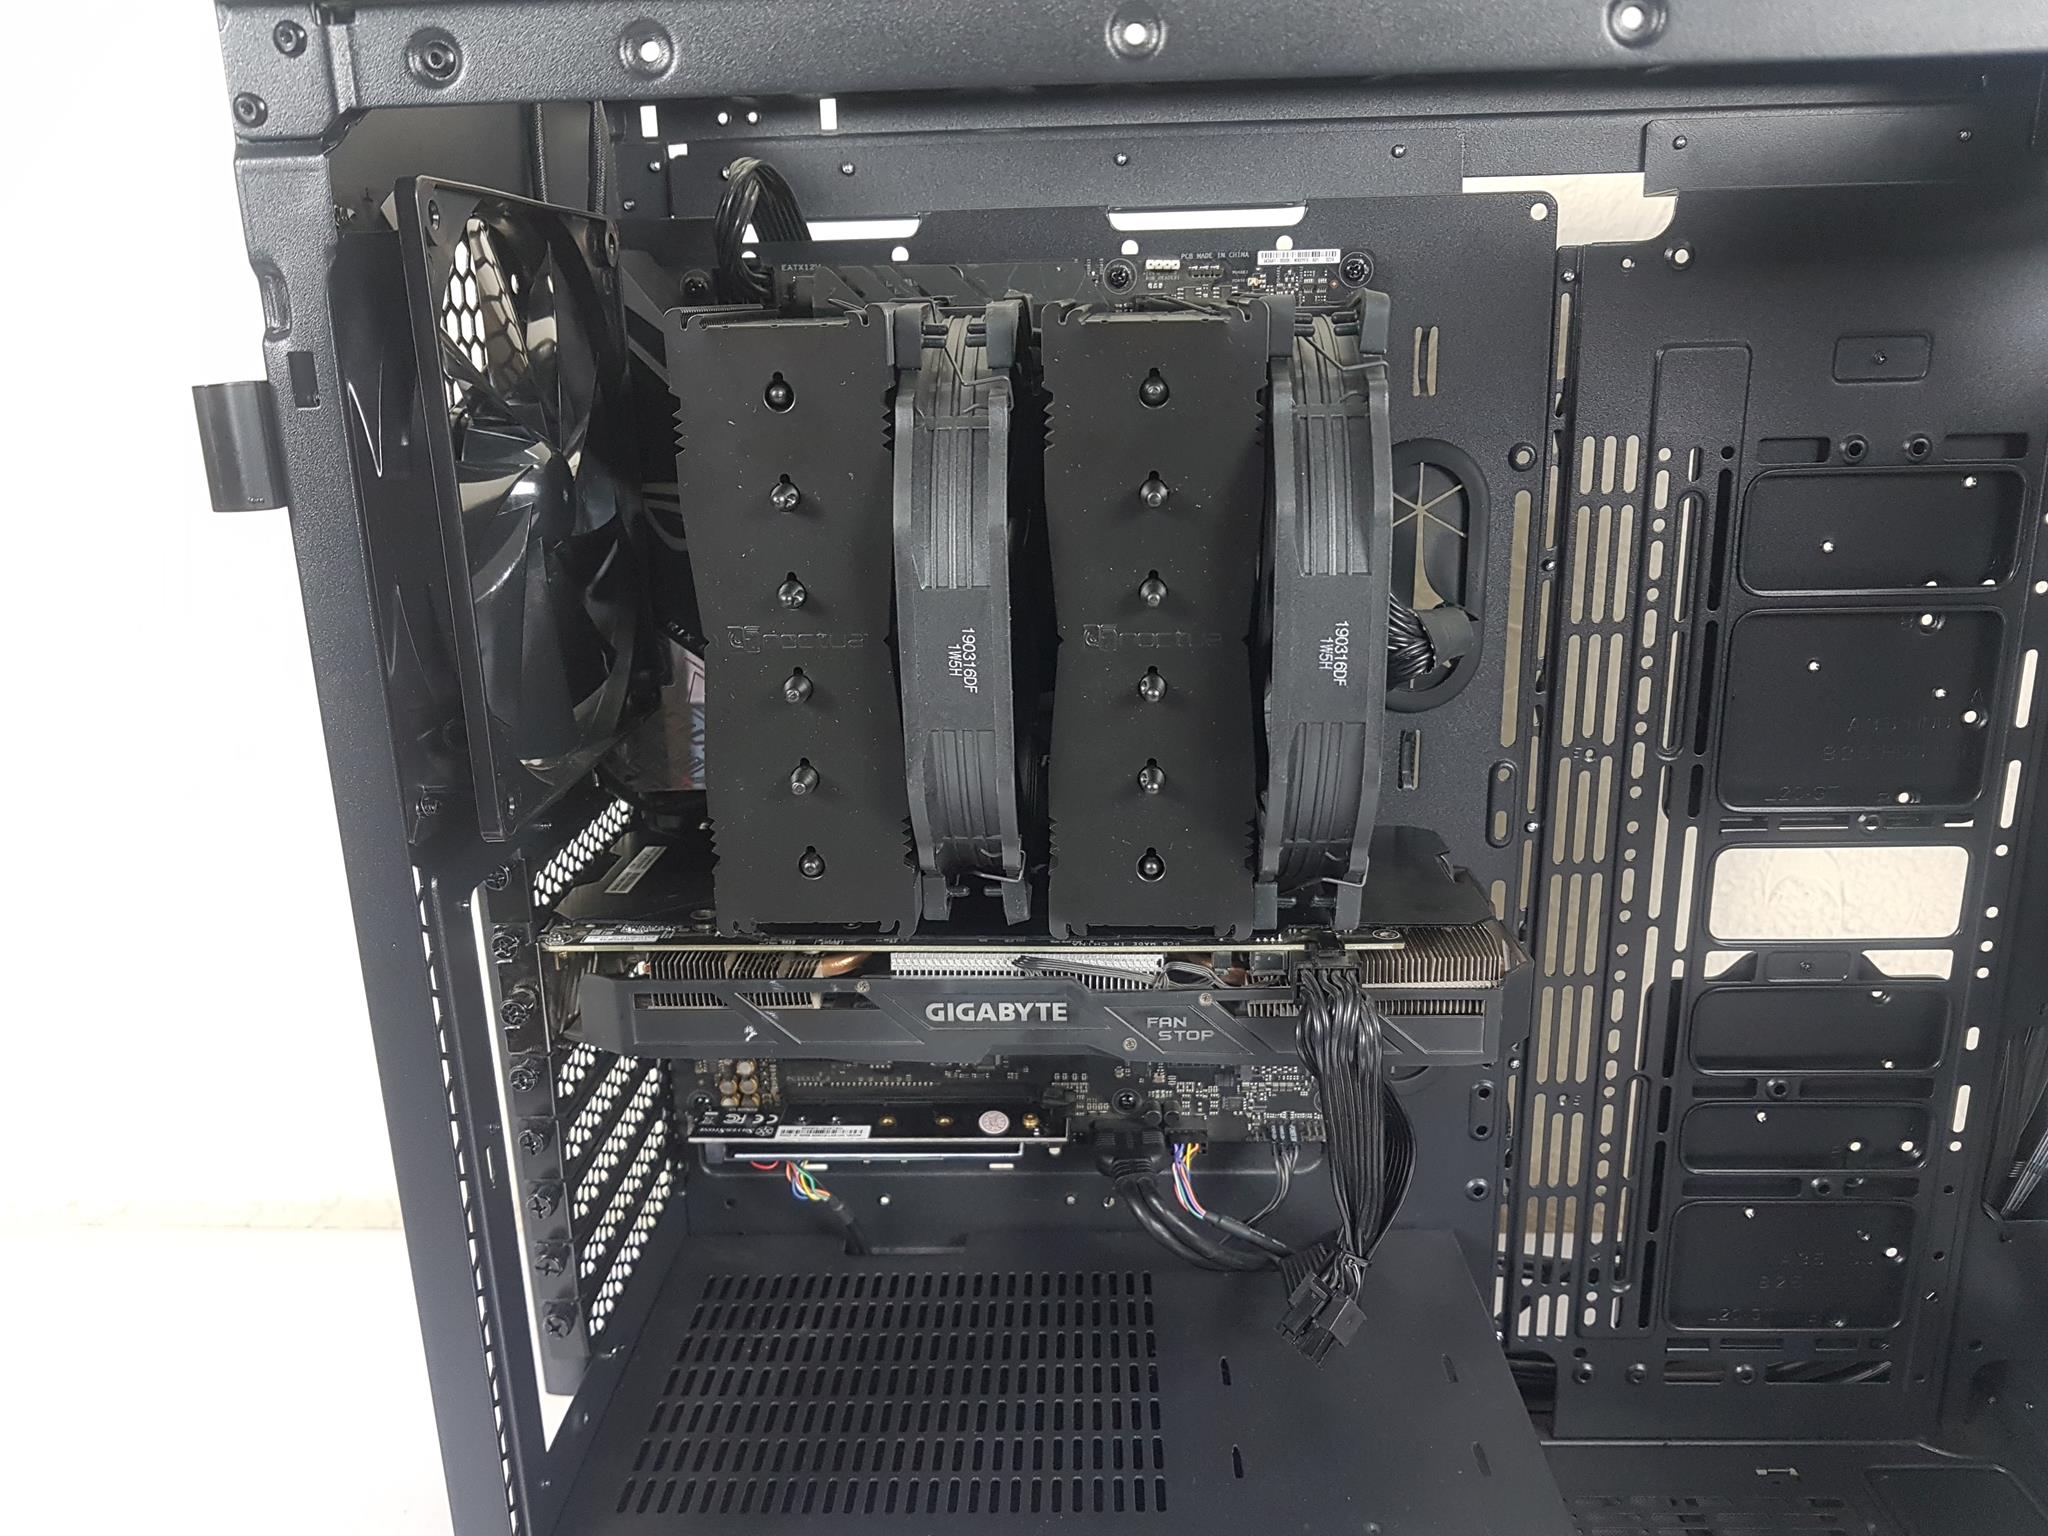
The interior provides ample space, with about 60mm from the top bracket to the motherboard’s top and an unrestricted inner space measuring 505x515mm (HxL). The CPU cooler accommodates a maximum height of 200mm, and without drive cages, the graphics card can extend up to 410mm, reduced to 310mm with drive cages in place.
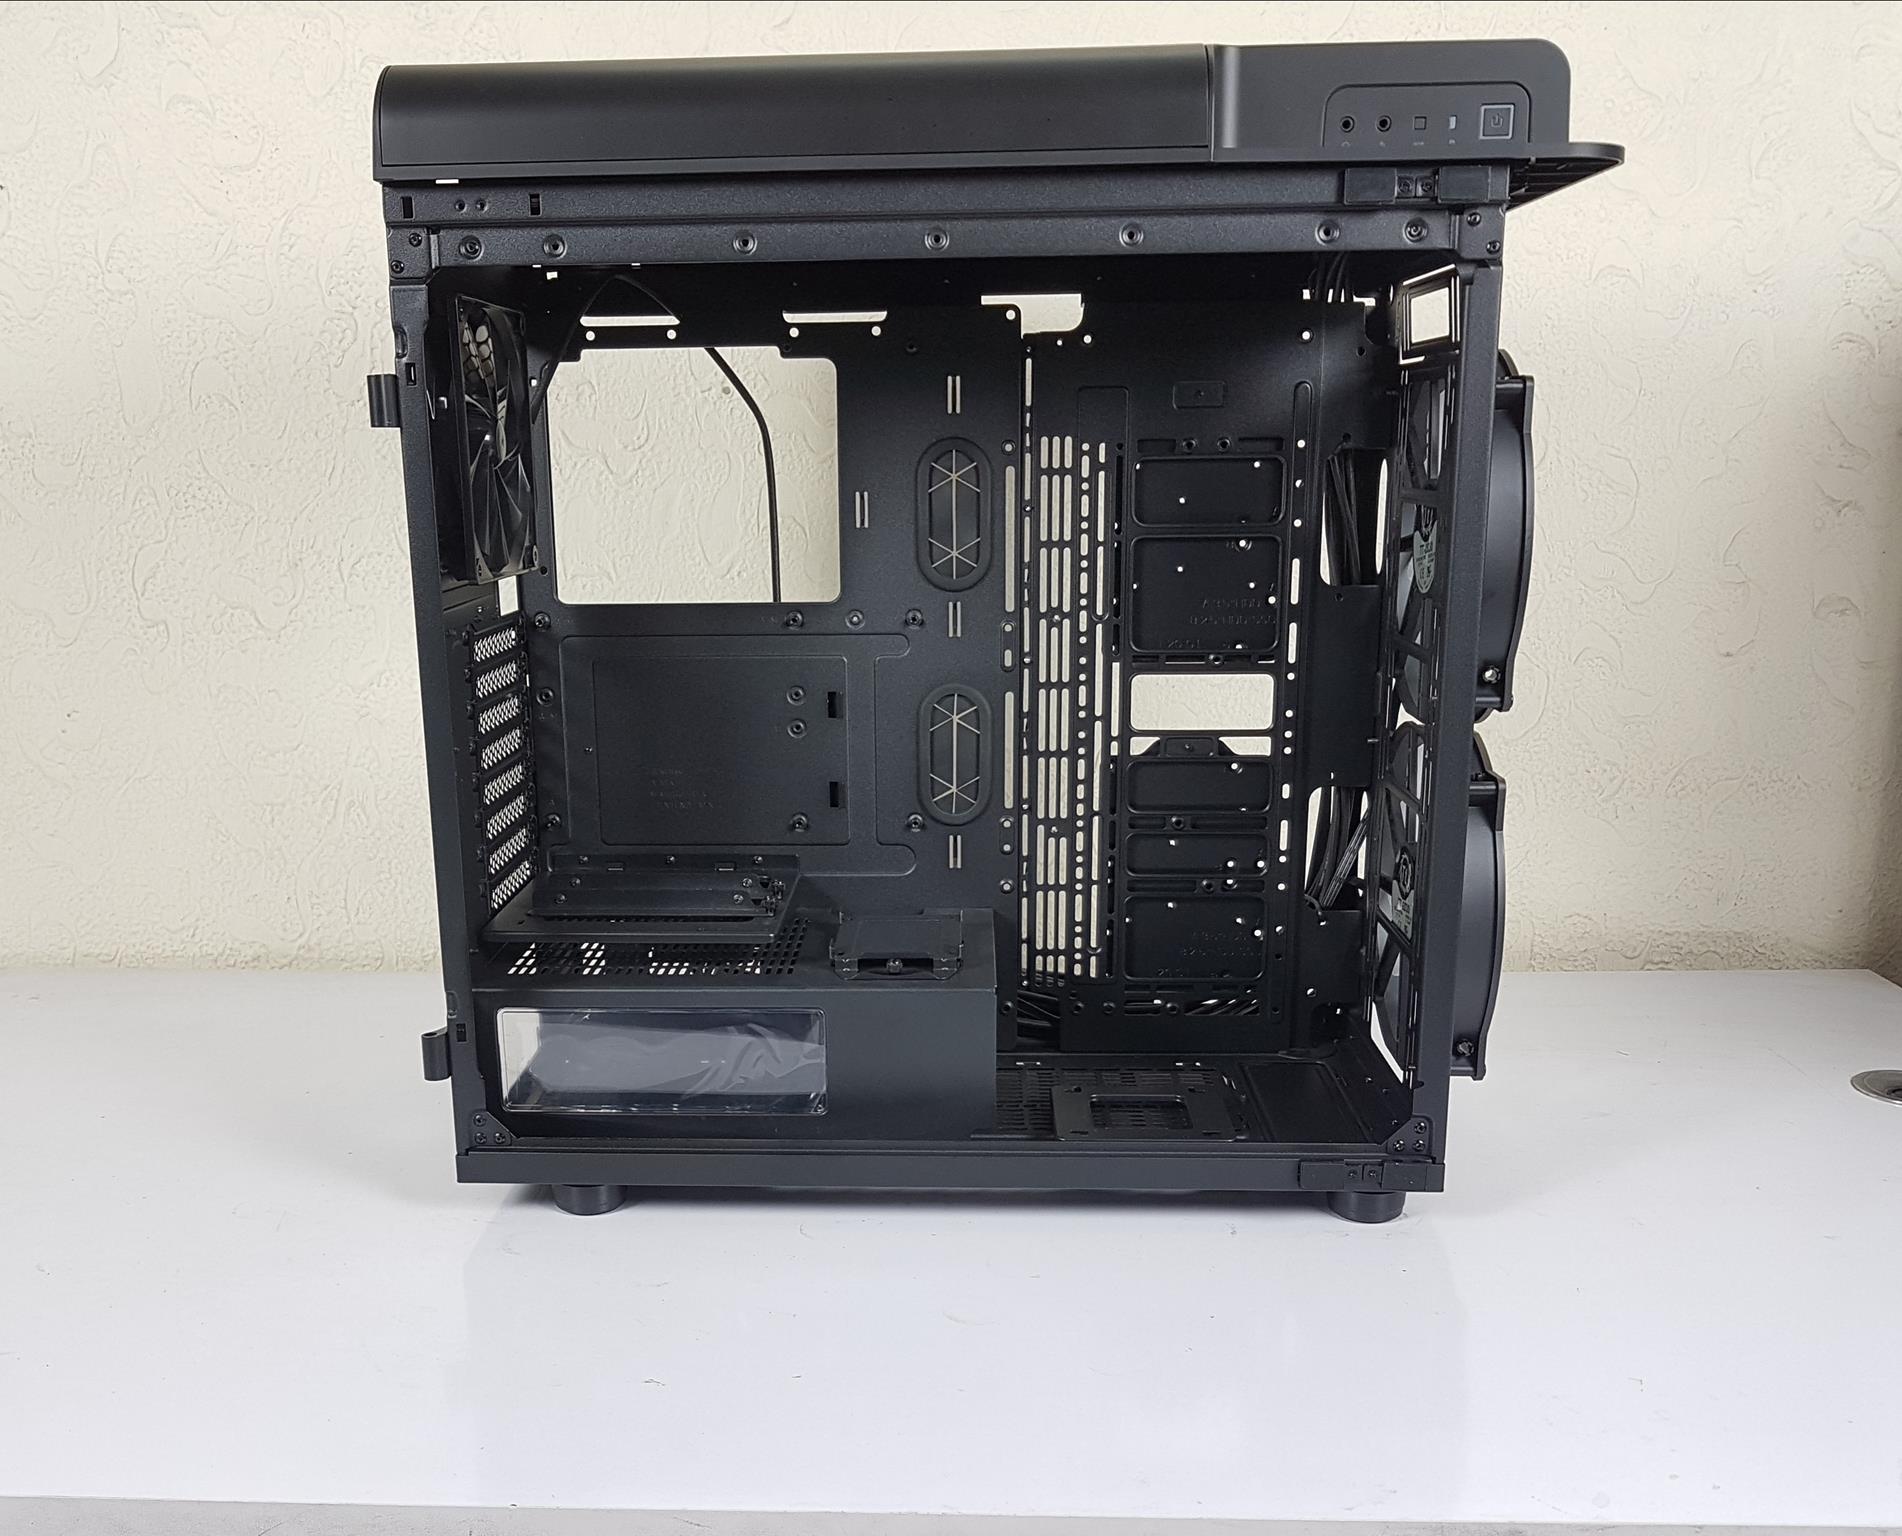
Removing the HDD cages requires addressing four screws on the chassis’s backside. A side rail mounting area facilitates easy installation of radiators or fans, supporting various configurations, including 120mm, 140mm, 240mm, 280mm, 360mm, or 420mm radiators, as well as 3x 120mm or 140mm fans. The labeled rail side aids quick identification of mounting positions for AIOs and radiators, ensuring flexibility for diverse cooling setups.
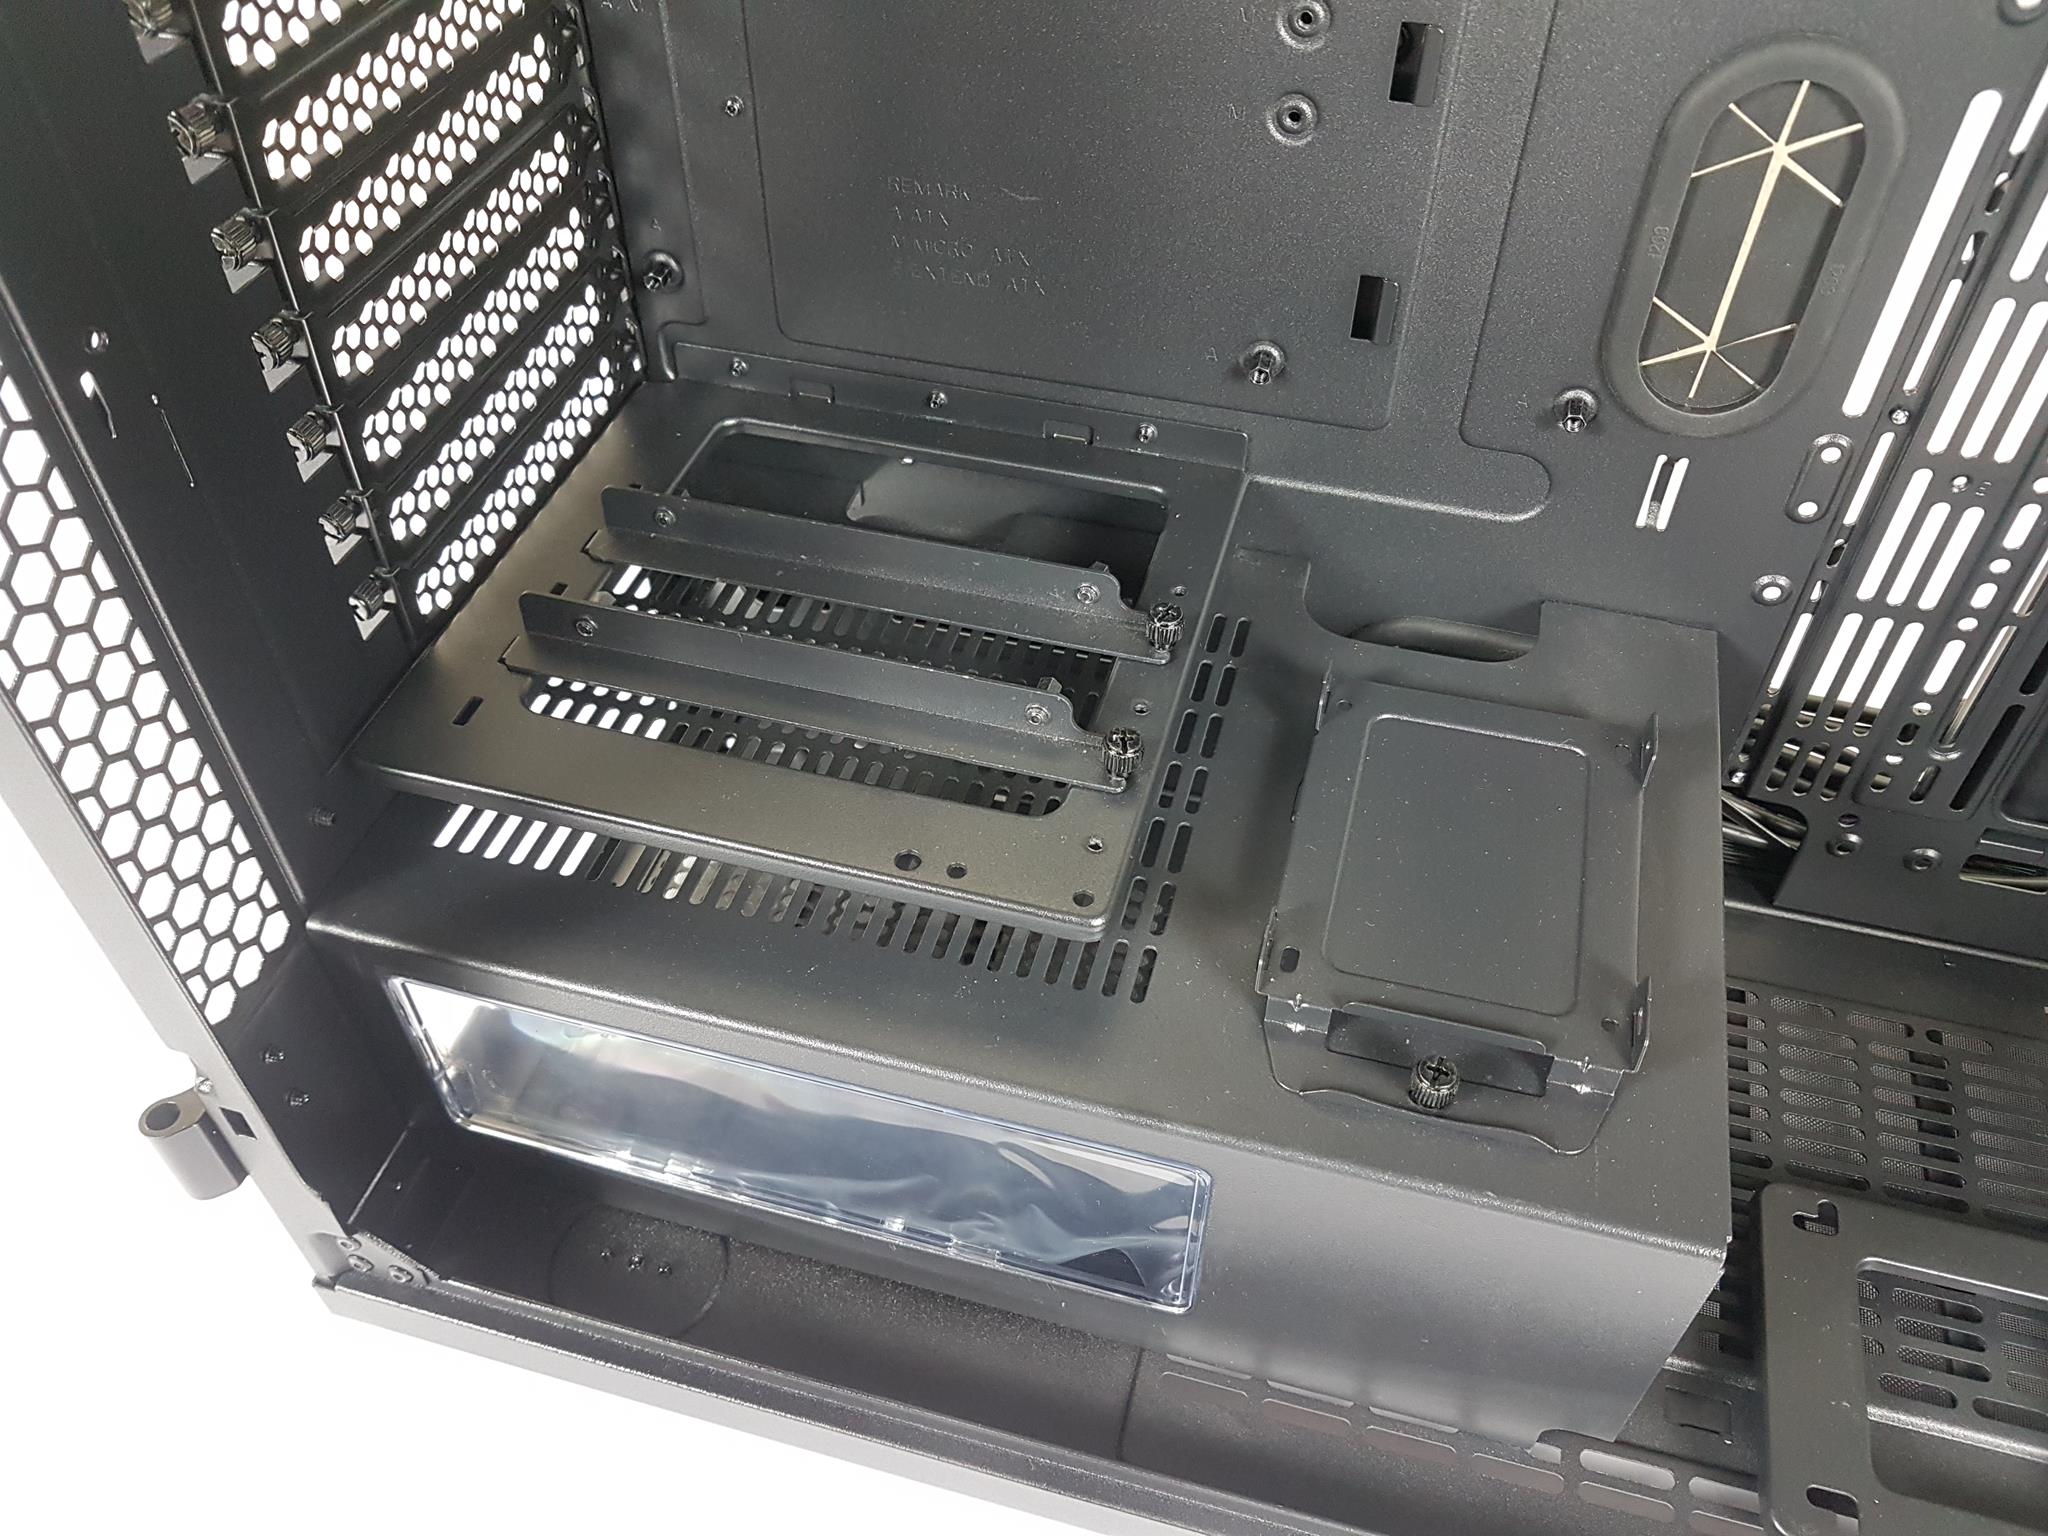

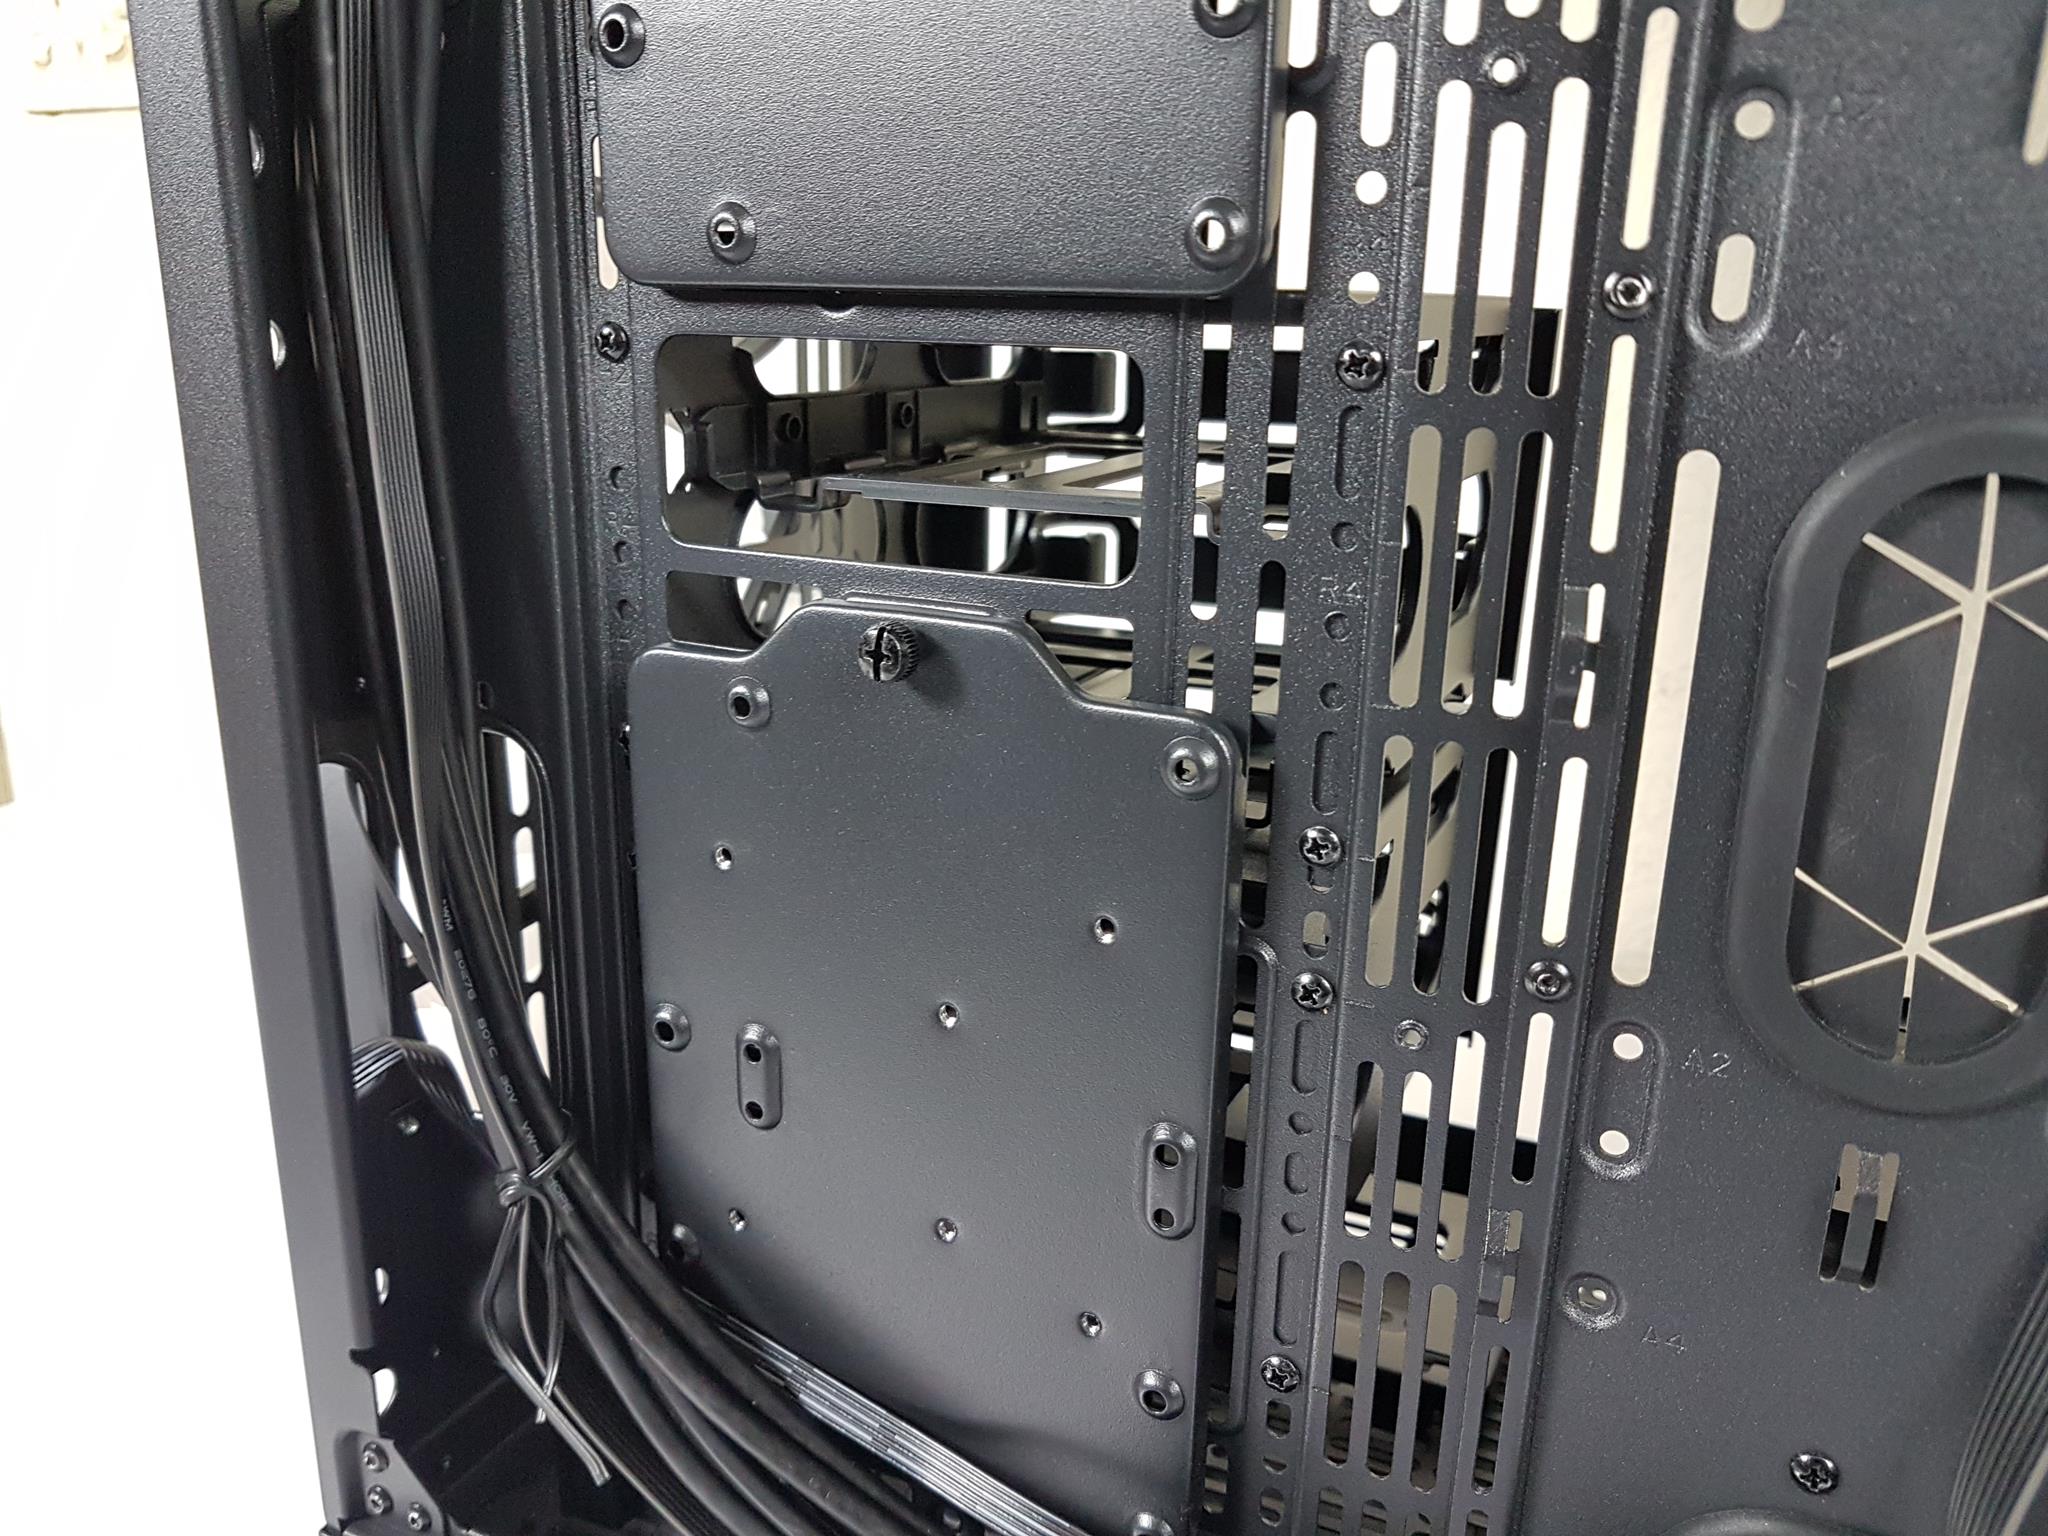
There is a bracket for the vertical installation of the graphics cards. It allows the installation of 2x graphics cards. There is no riser cable provided with the chassis so you will need to buy one if going that route. There is a 2.5” drive bracket as well provided on the top of the PSU cover.
There is a pump/reservoir bracket provided on the bottom of the chassis. It has L shaped mounting provisions.
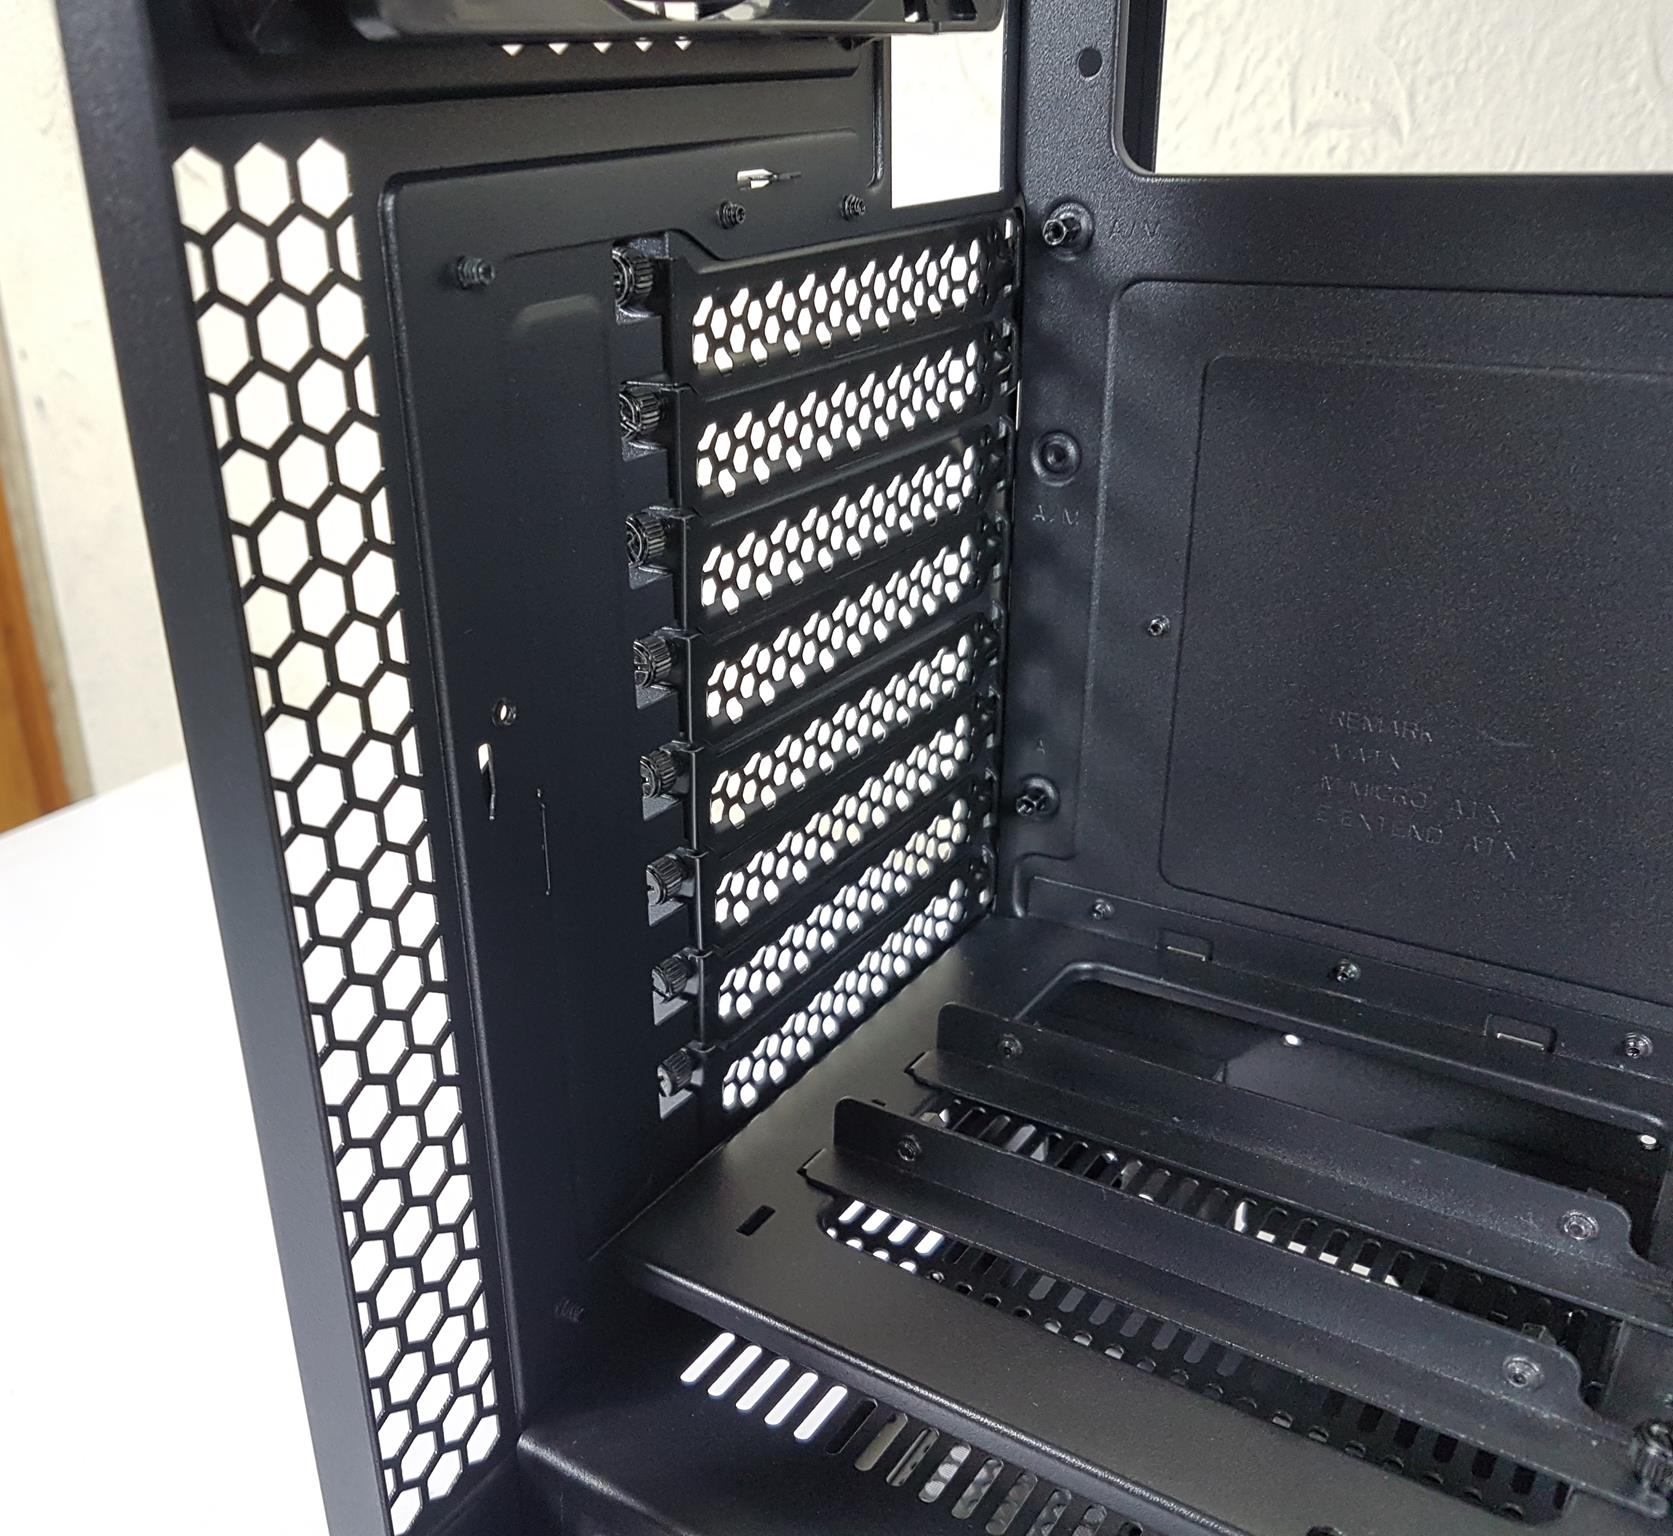
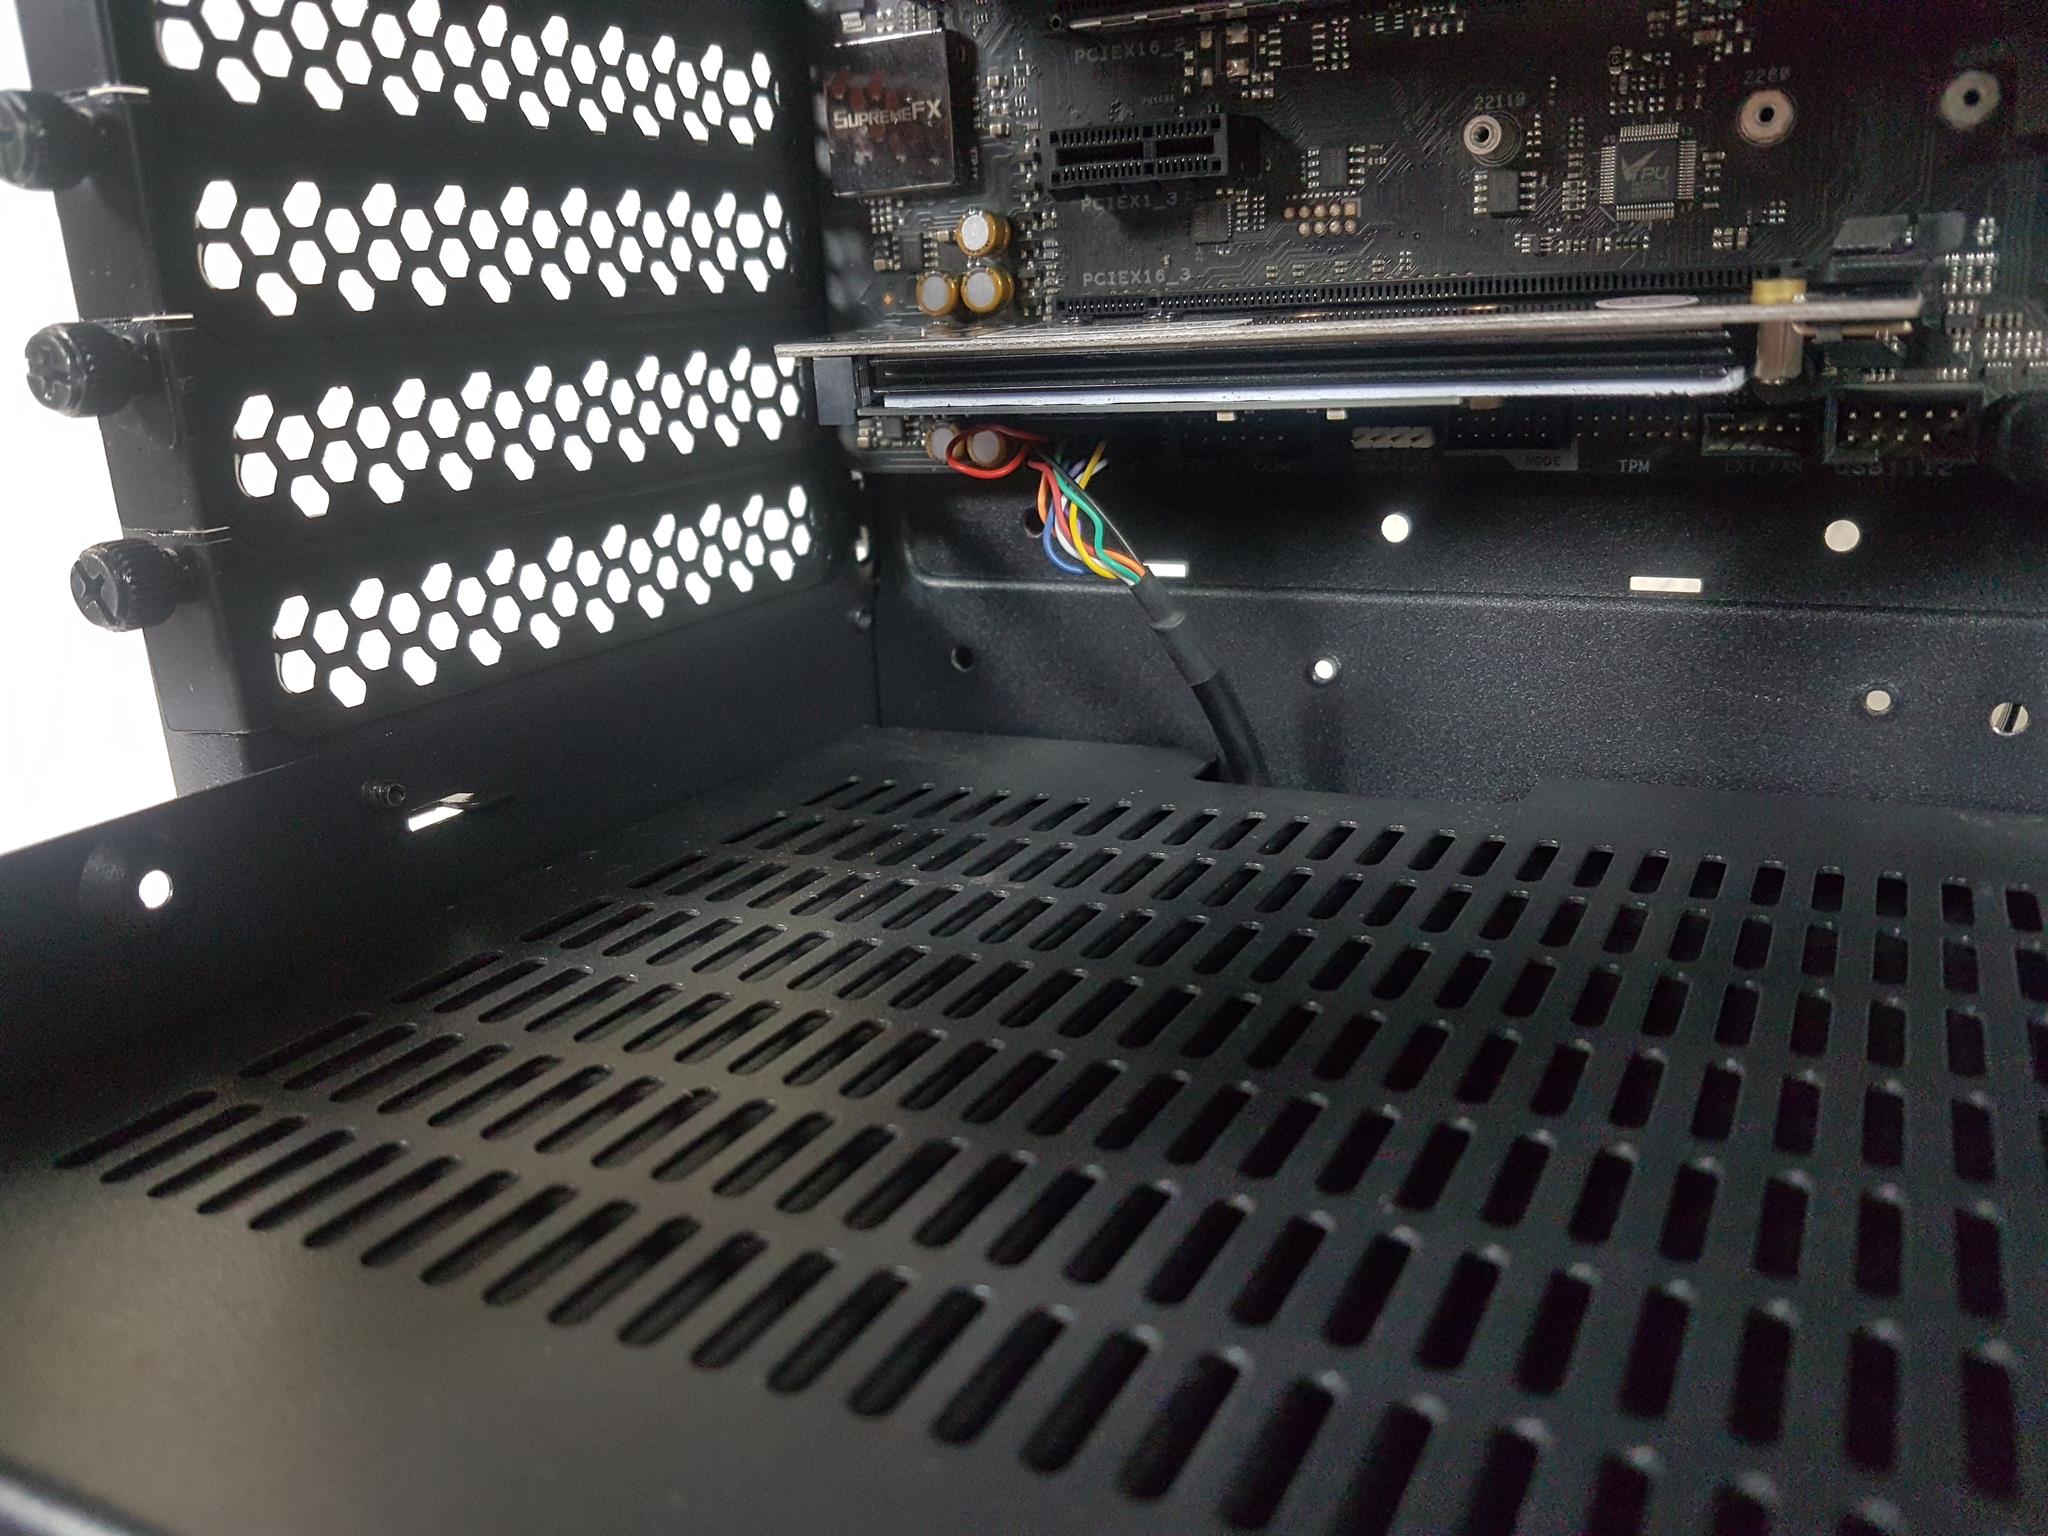
We can look at the 8x PCIe slot covers with the cover bracket removed. The slots are reusable and are vented. There is a black color 140mm fan on the rear. It has 9 blades and is rated for 1000 RPM. It is using a 3-pin power cable that comes pre-installed on the hub.
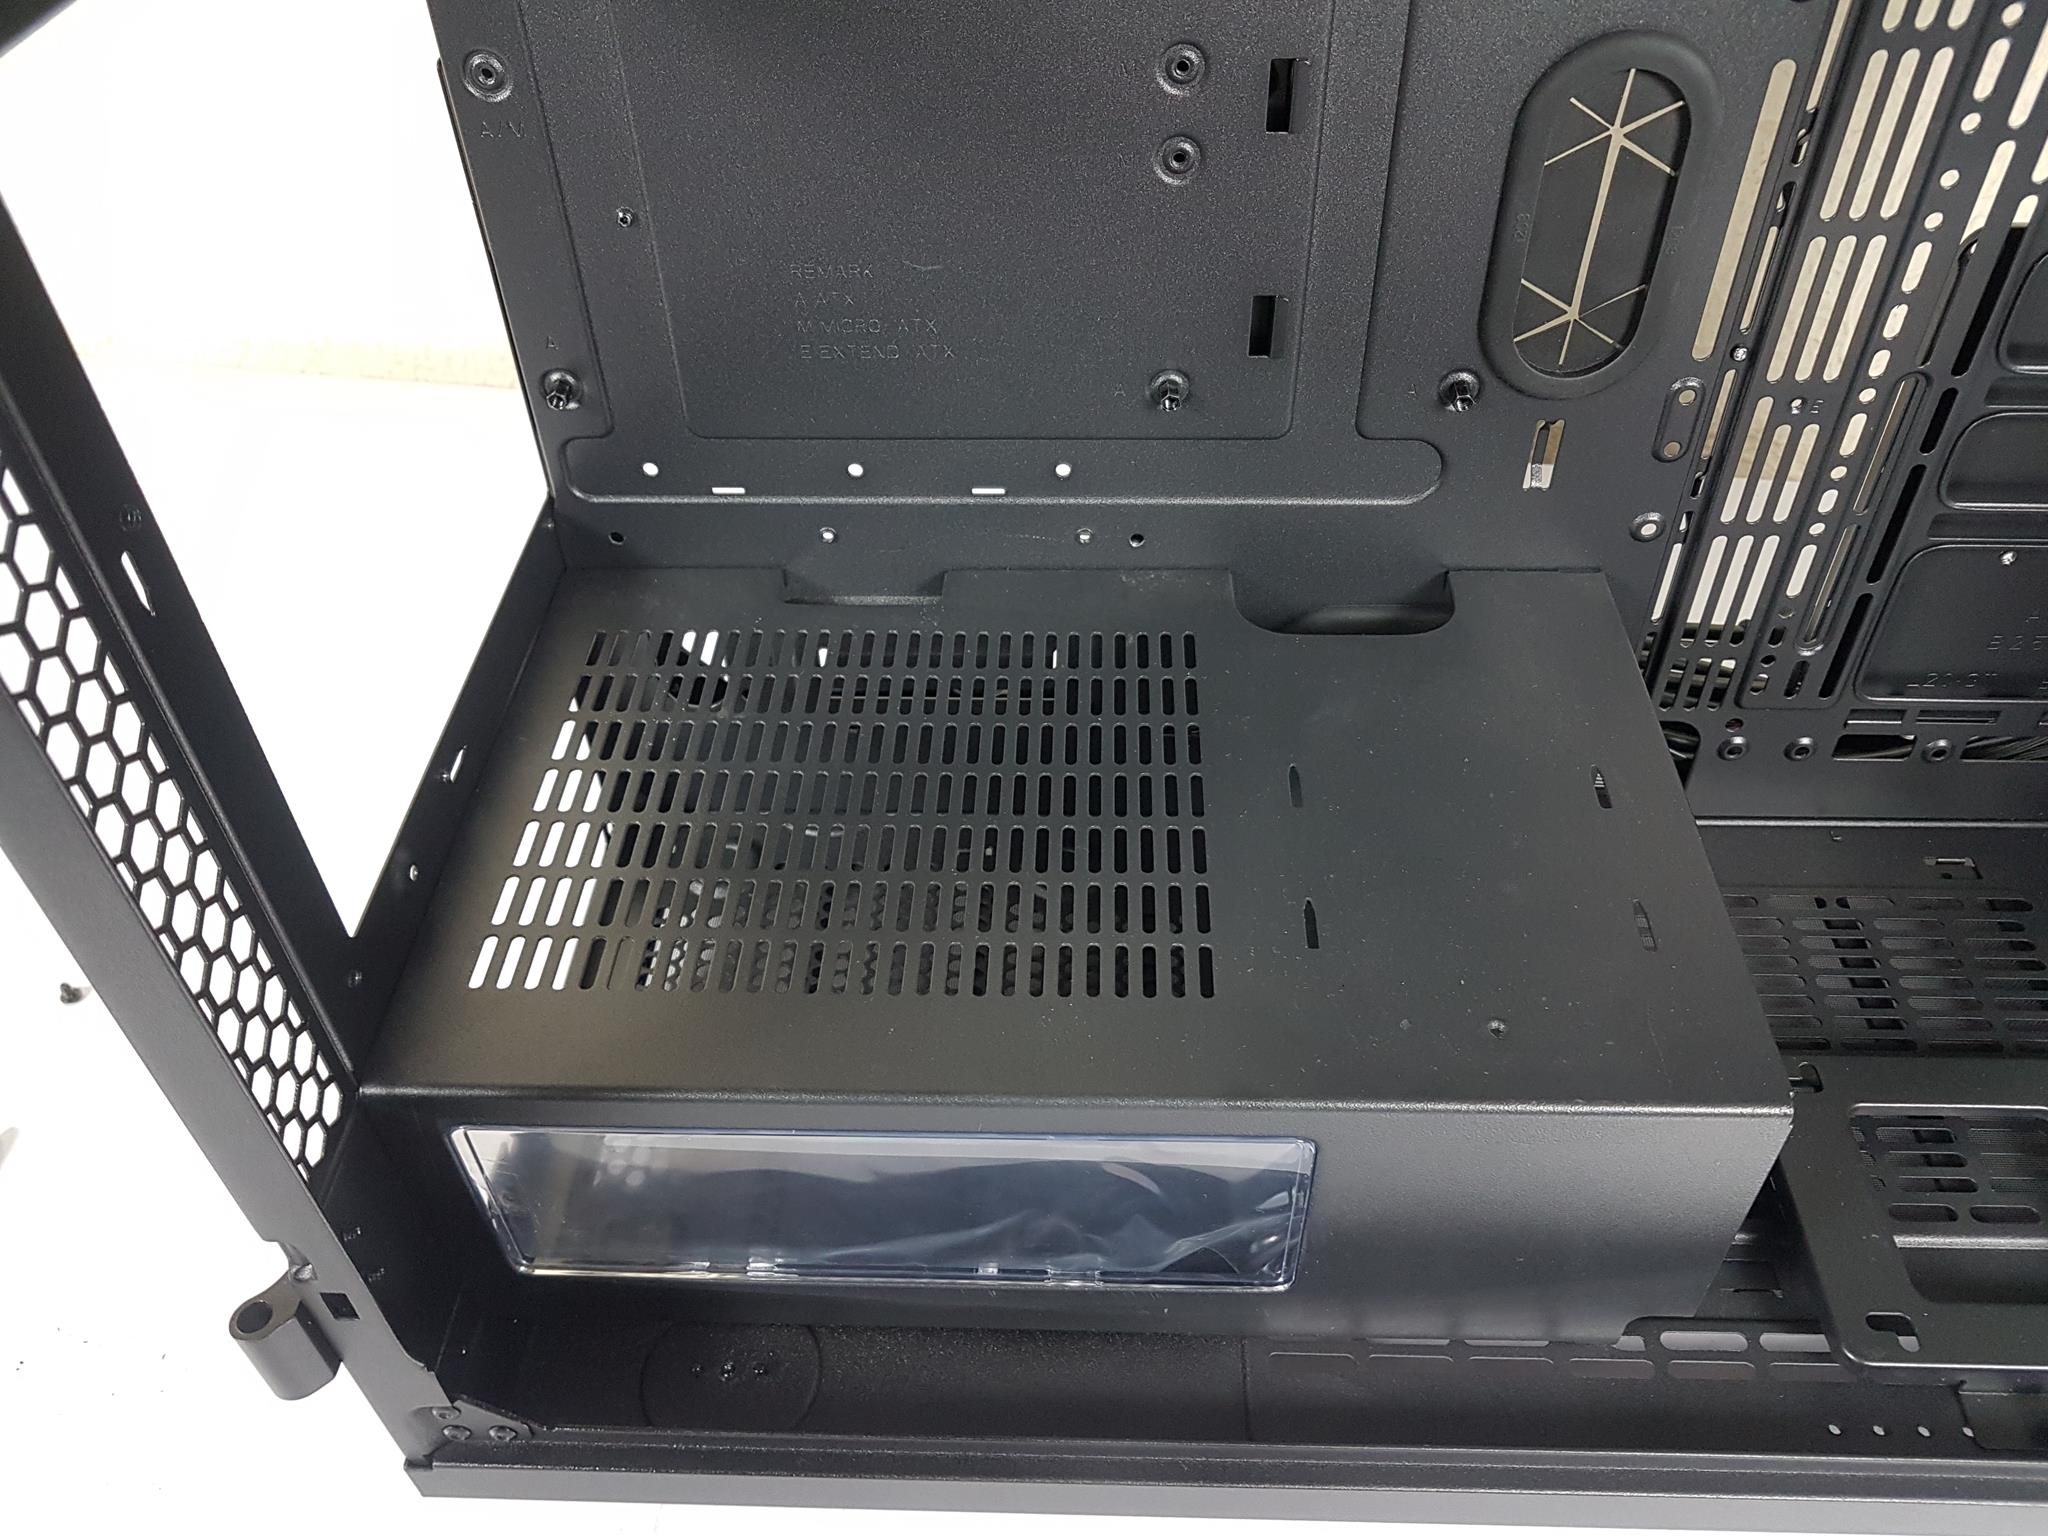
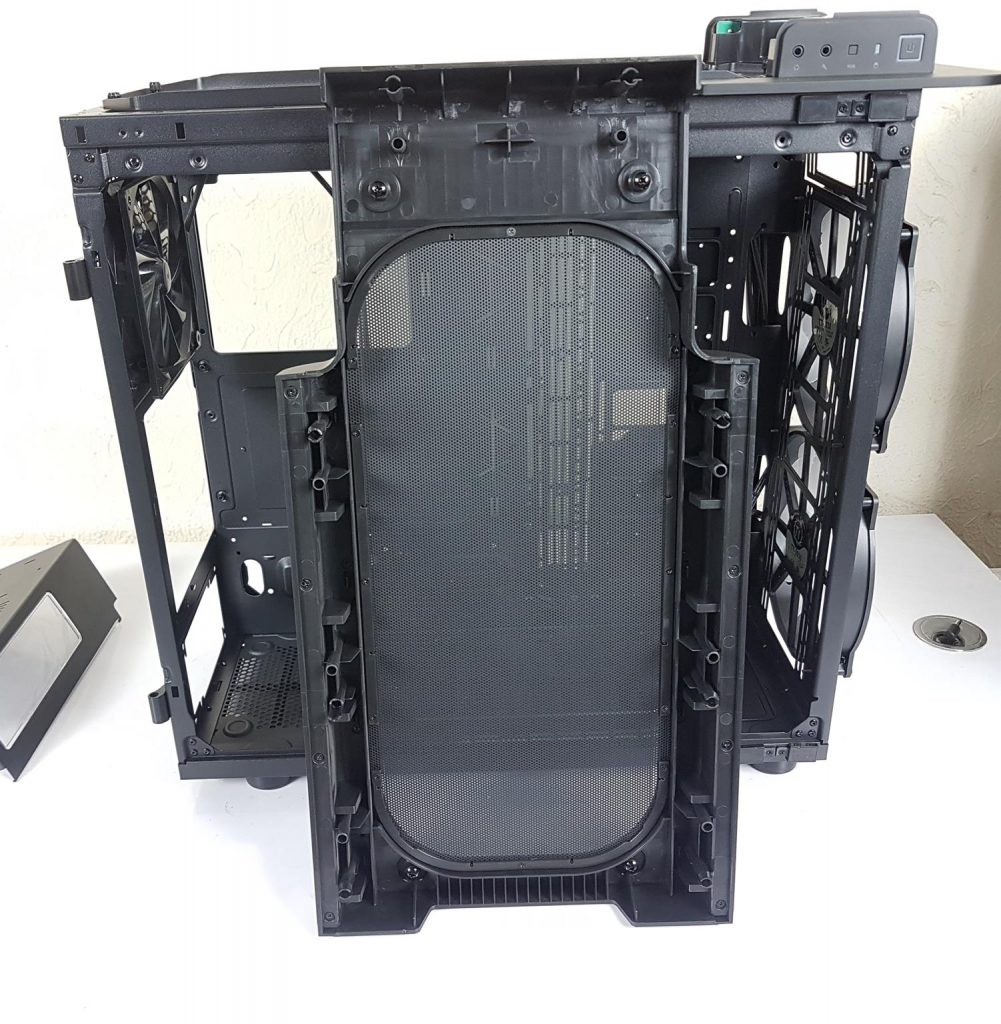
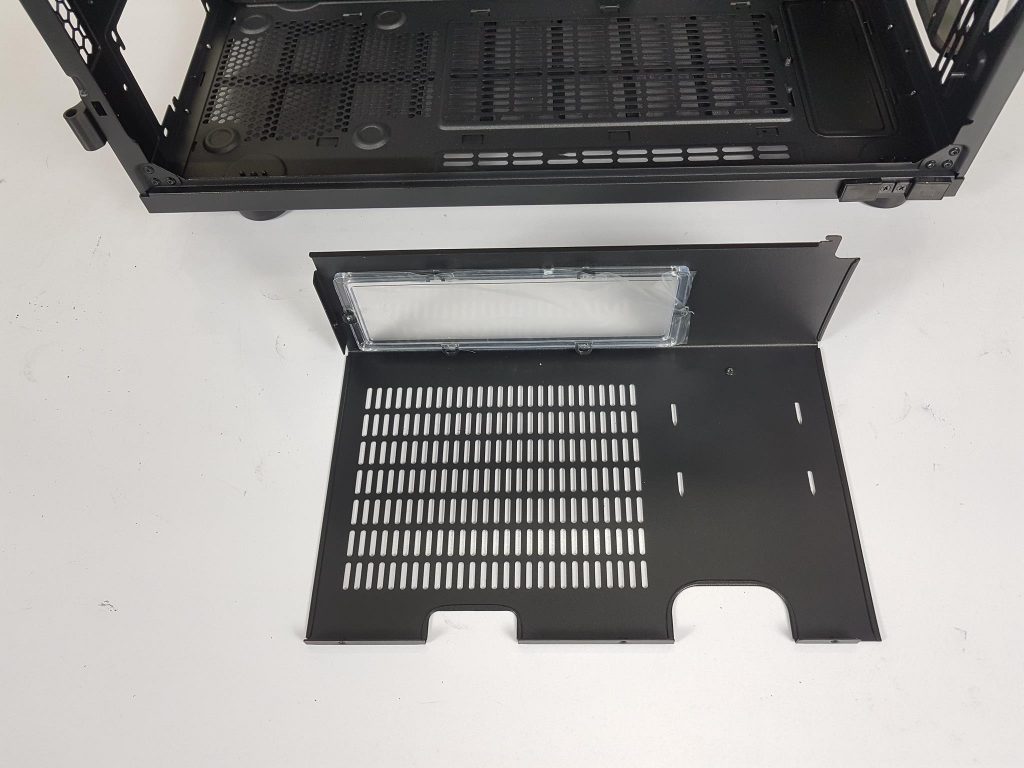
The Thermaltake Level 20 GT ARGB Black Edition’s front side offers ample room for cooling solutions, especially by removing the HDD cages at the cost of storage capacity. The PSU cover, with a vented top for versatile PSU installation, features two cutouts for convenient cable management. A 285mm-long cover includes an acrylic panel on the right side, adding an aesthetic touch by showcasing the PSU. Supporting PSUs up to 220mm in length, it ensures compatibility with a range of power supply units.
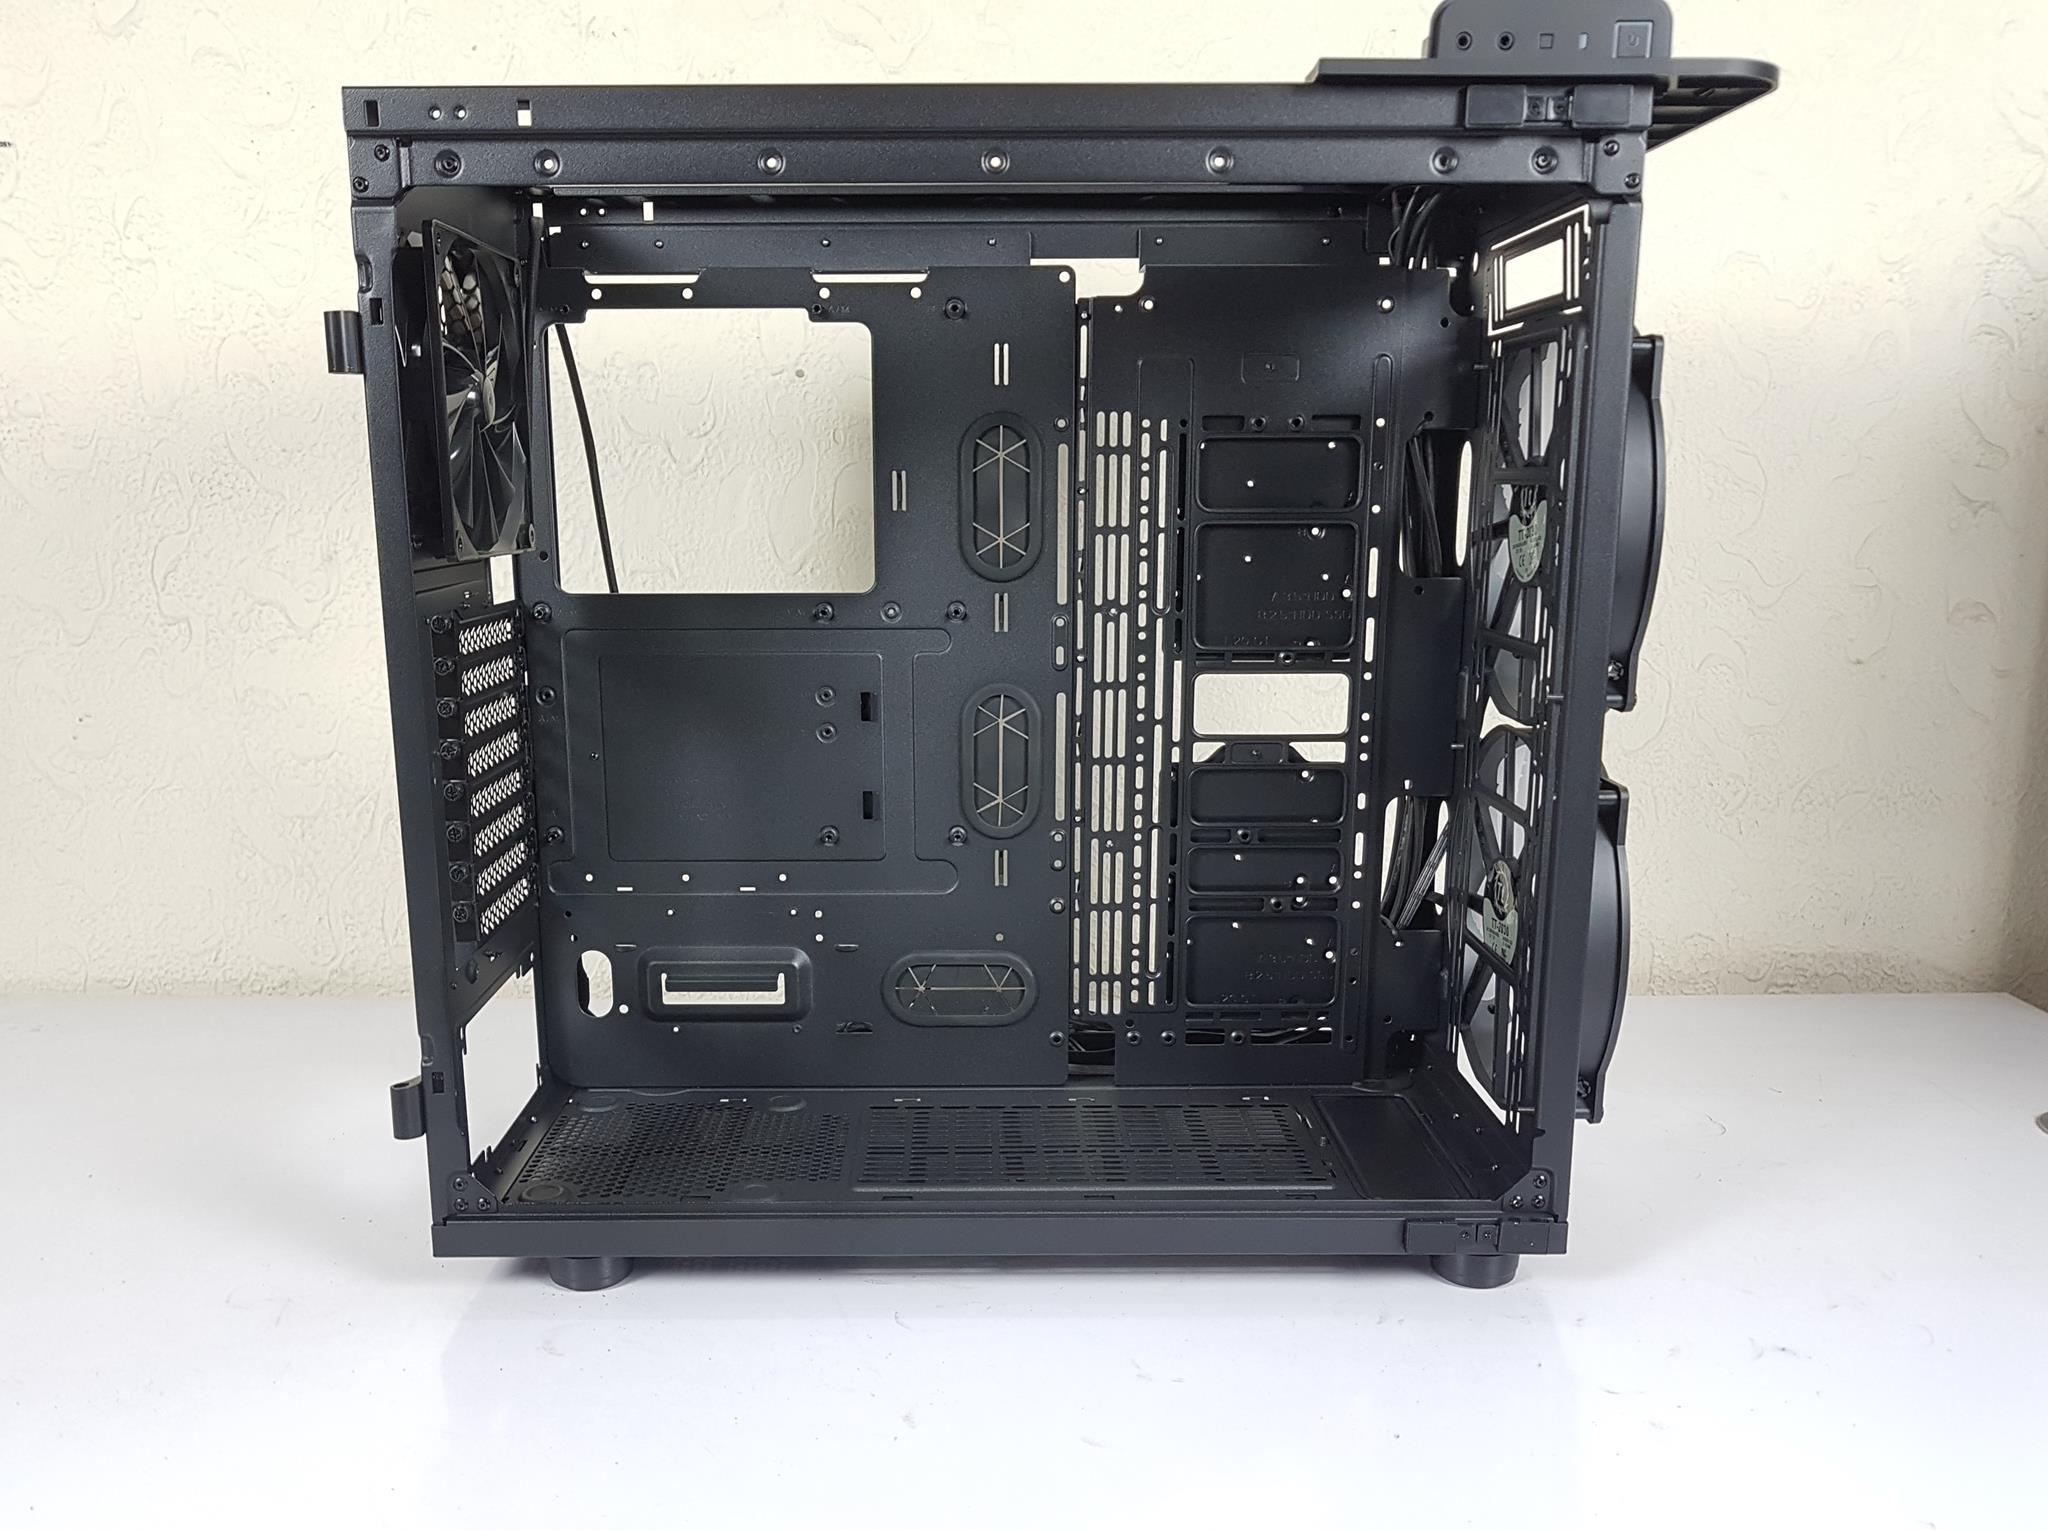
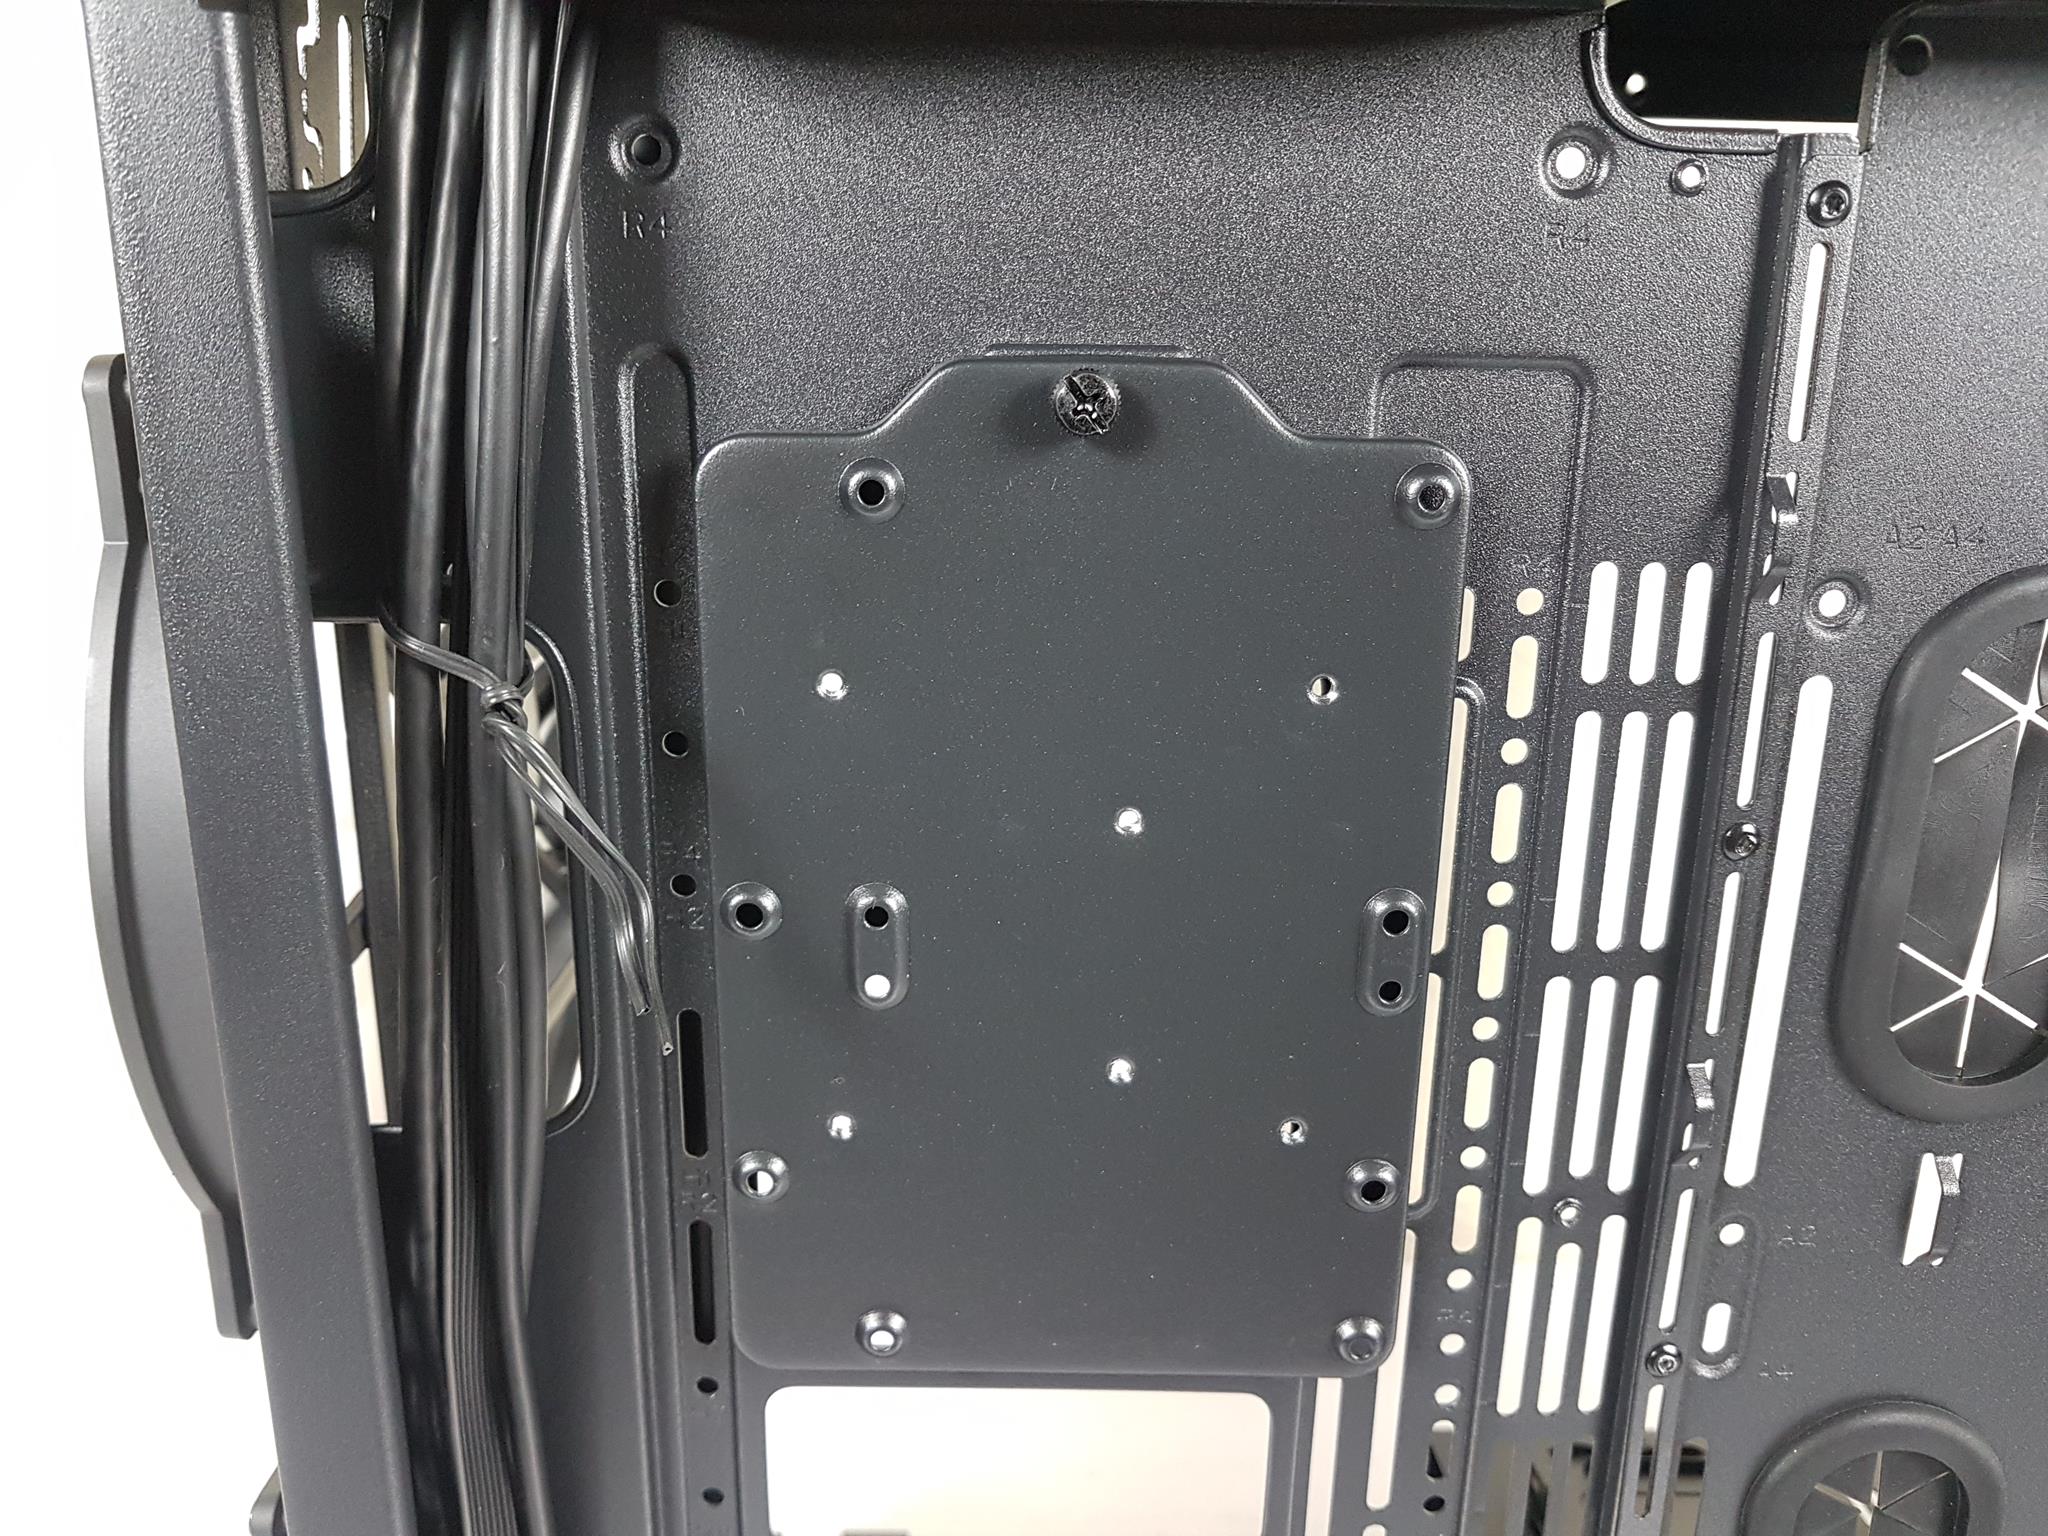
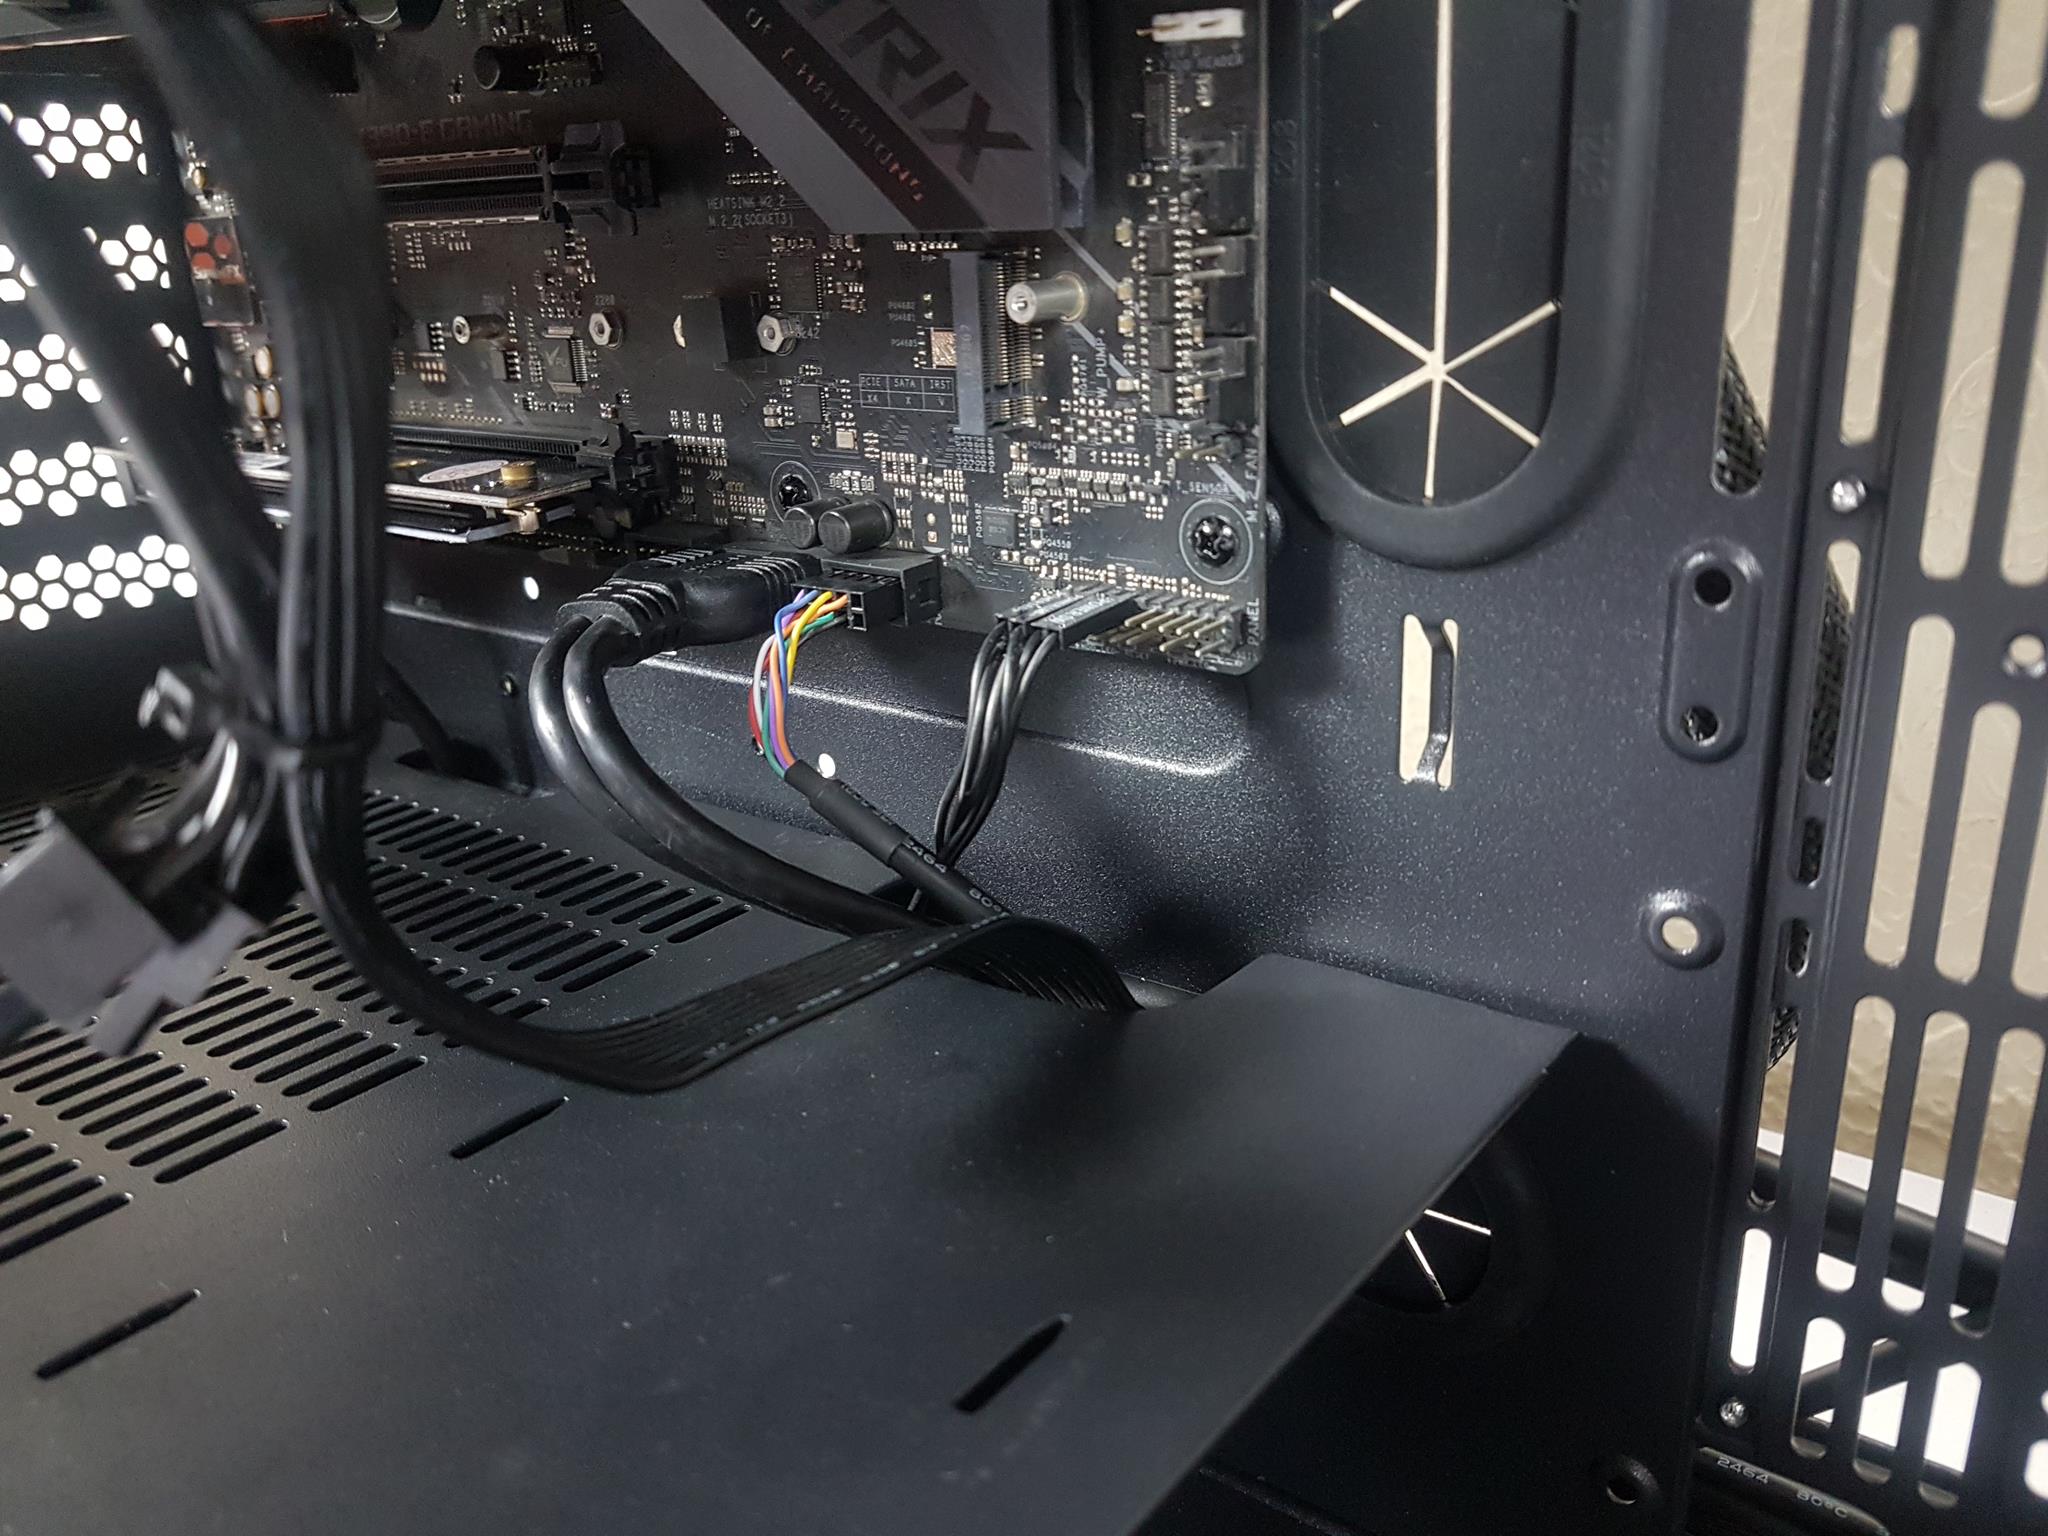
The remaining component is the PSU cover, featuring pre-installed labeled standoffs and a large cutout for easy CPU cooler installation. Rubber-grommeted large-sized cutouts on the right side of the motherboard facilitate cable routing. To explore the cutouts on the bottom side, the PSU cover needs to be removed. Concealed by the cover are three cutouts on the motherboard tray, including a sizable cutout with a rubber grommet for PSU cable routing. Careful cable management is required, especially for the rightmost two cutouts concerning the PSU cover.
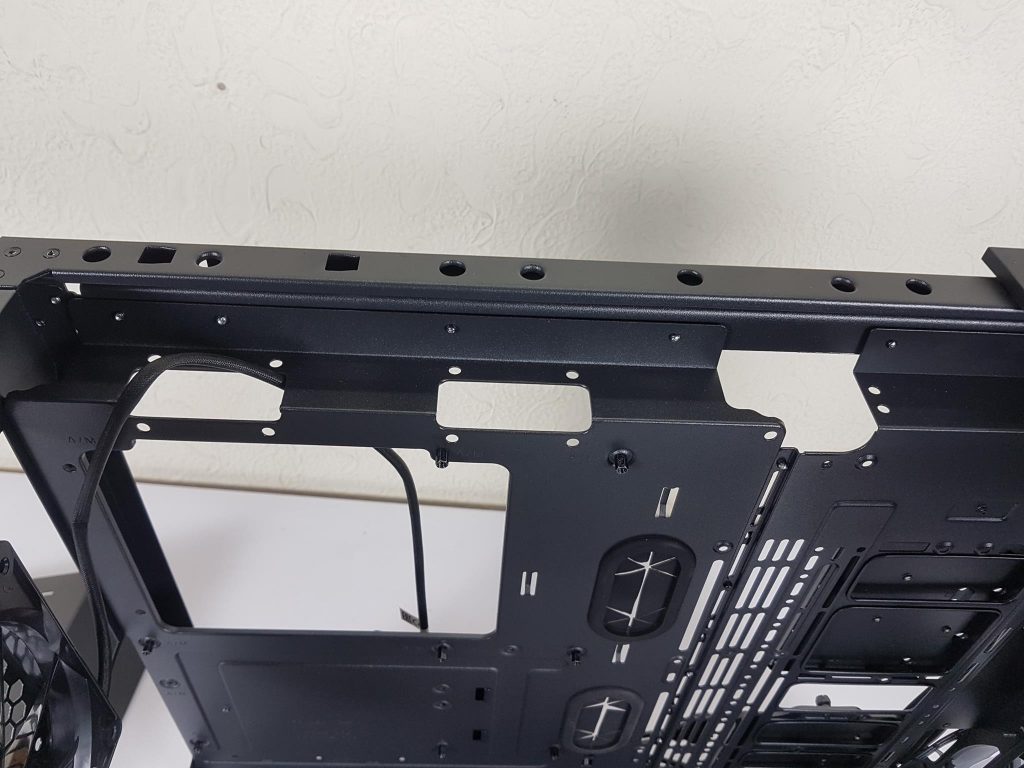
Room, room, room! We have plenty of room in whatever we want to do with our build. There are three cutouts on the top for cable routing.
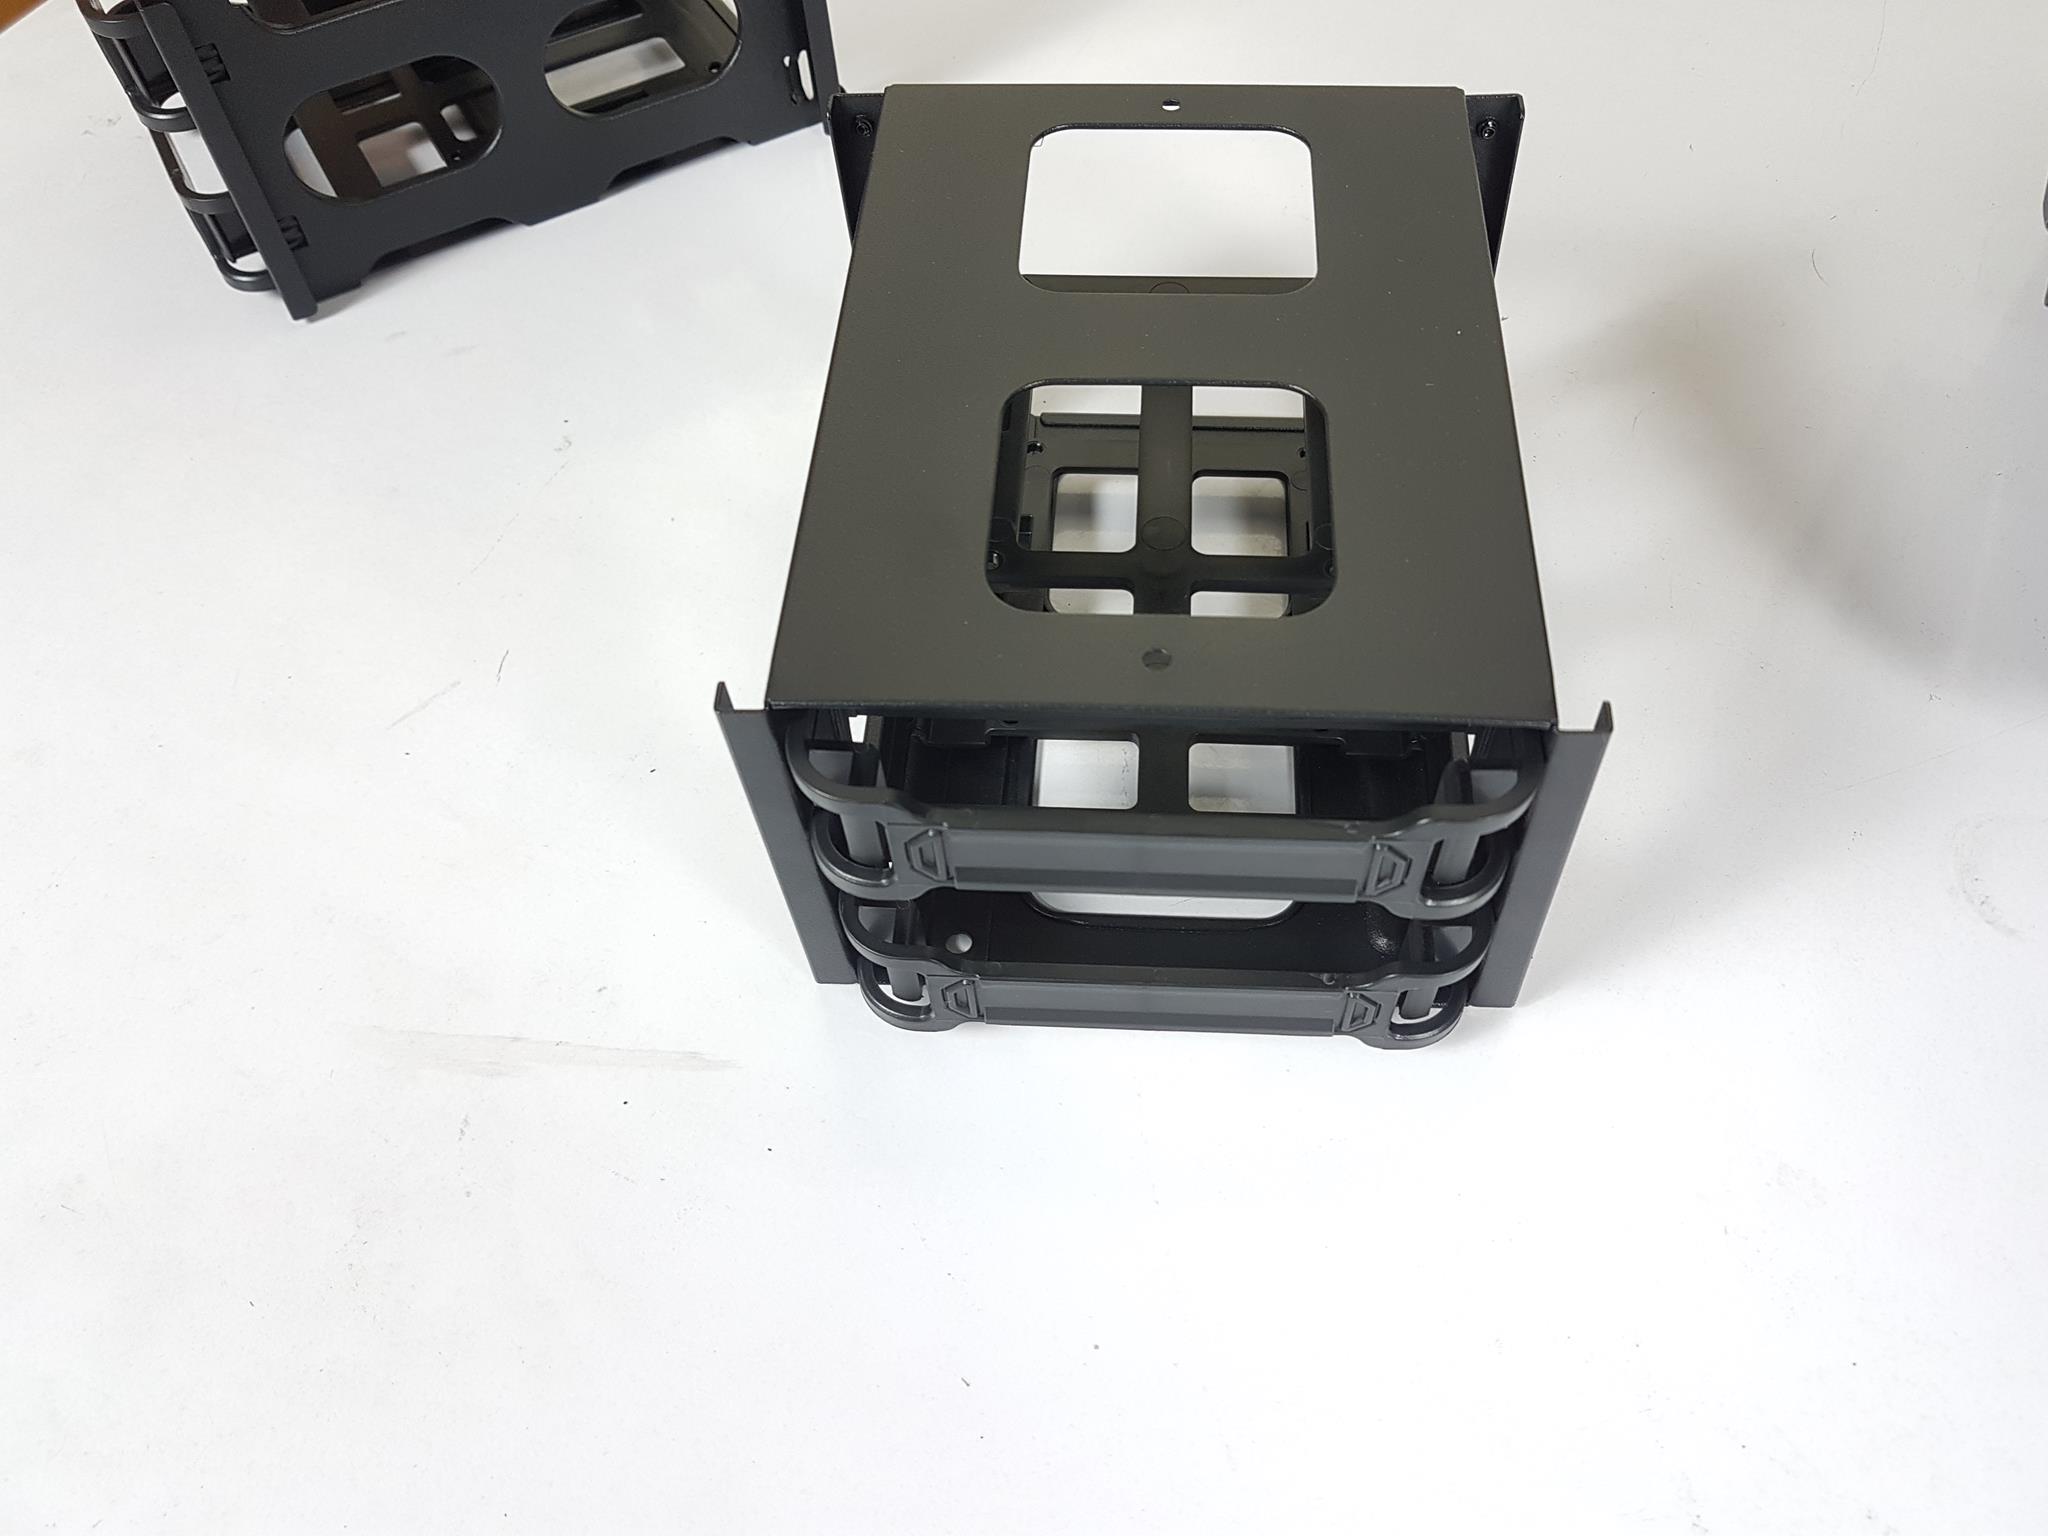

Here is the HDD cage removed from the chassis. It is made of steel and has 2x HDD caddies. Place a finger on each side and press both sides and at the same time pull these out. Combined we have a total of 4x caddies.
Storage options include:
- 4x 2.5” or 4x 3.5” drives using HDD Cages
- 4x 2.5” or 2x 3.5” drives using HDD brackets
- 2x 2.5” or 1x 3.5” drive without HDD Cage
The above picture shows the inner side of the PSU cover.

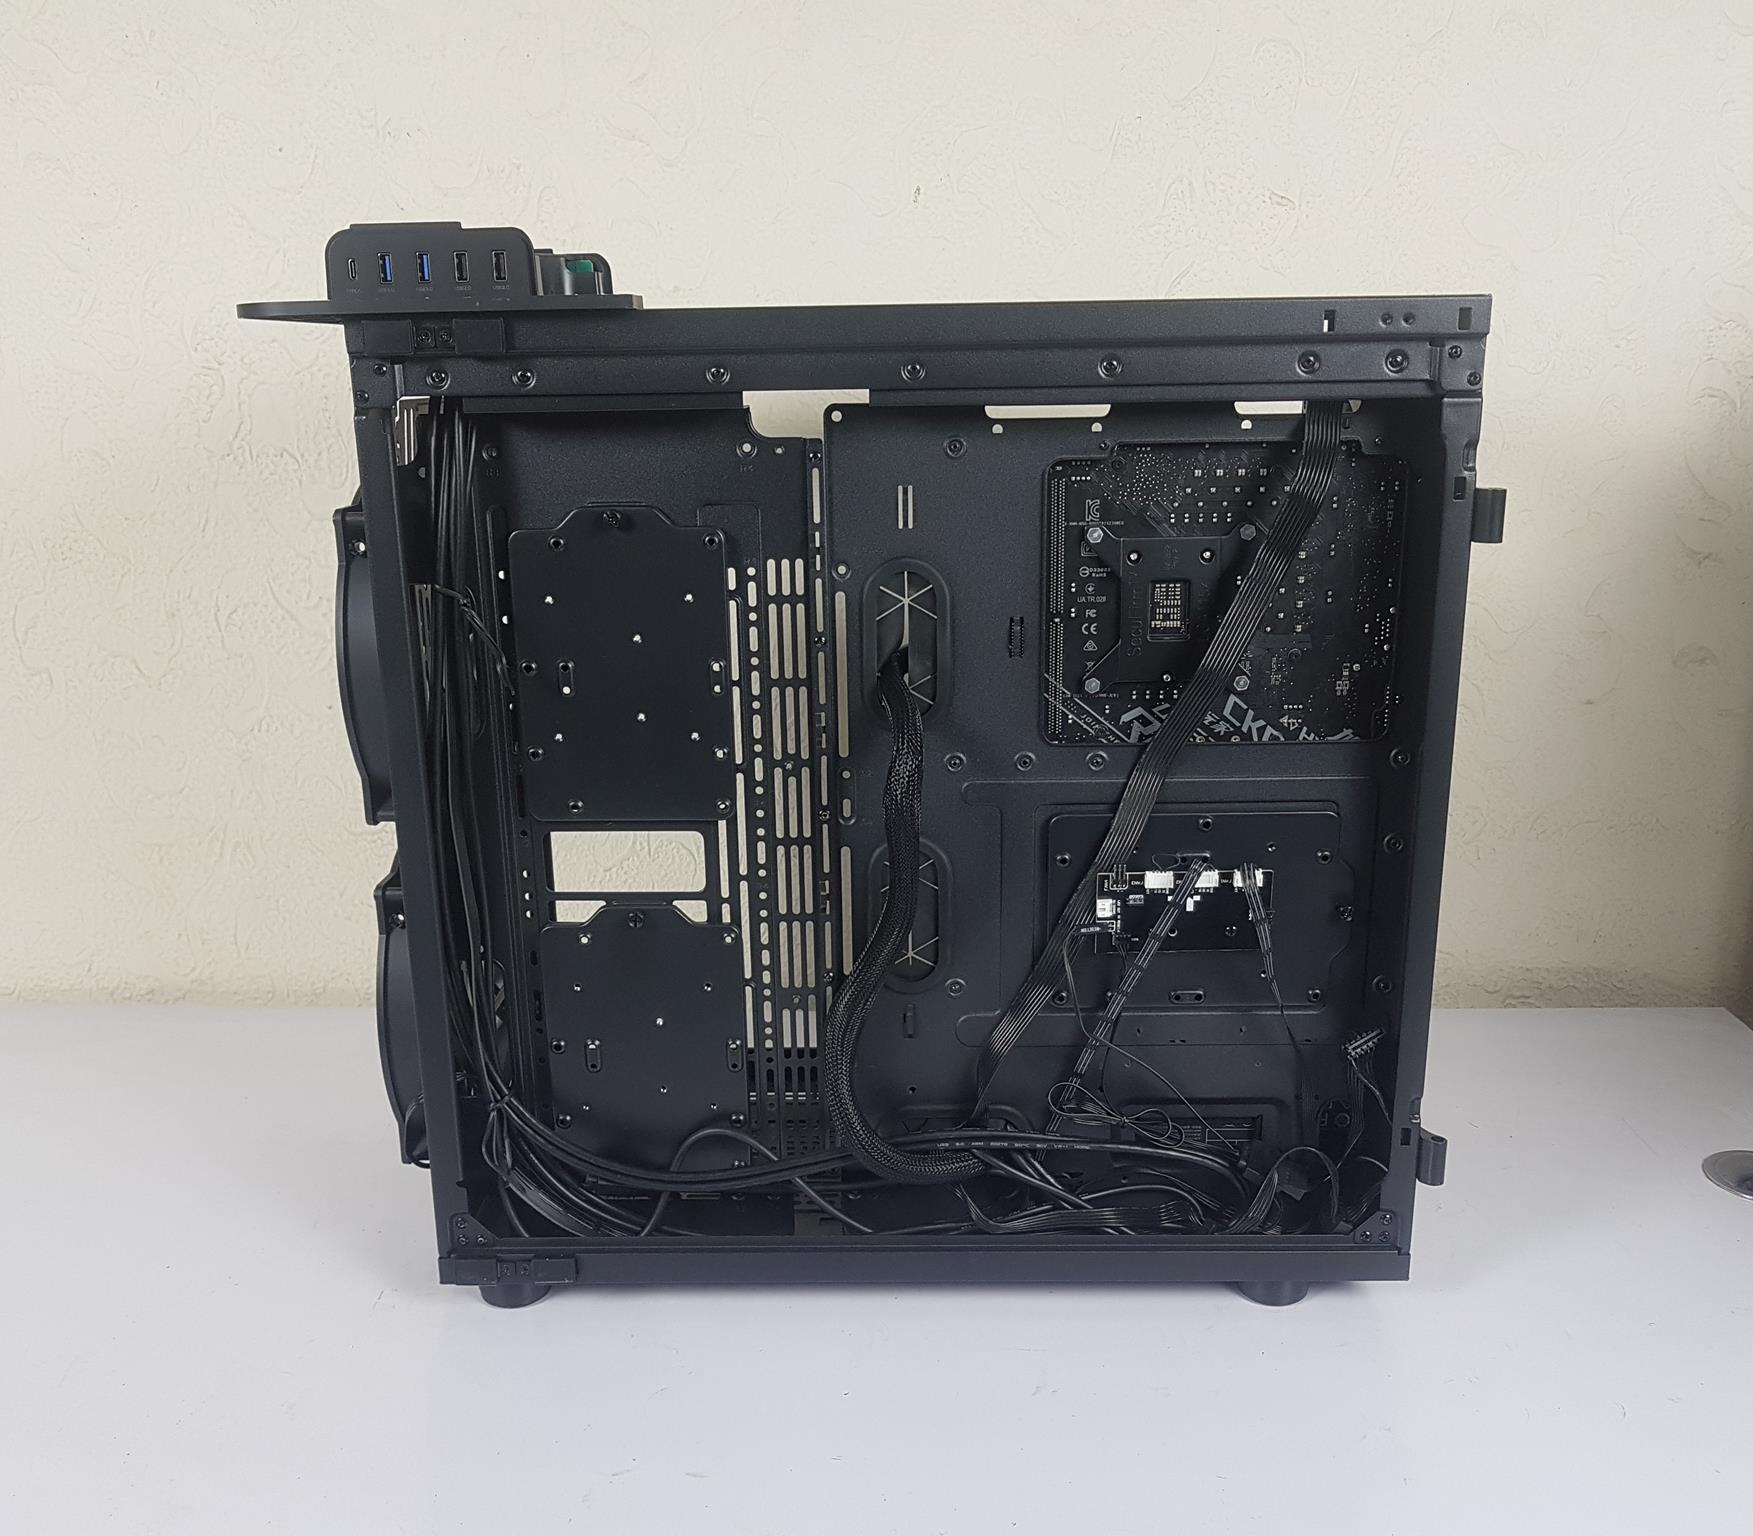
Let’s take a look at the backside of the chassis. There are only 7x cable tie points here. This is a bit surprising. We have 3x drive brackets here. One on the backside of the motherboard tray has a hub pasted on it. The user can relocate the hub if so required. The front mounted 200mm ARGB fans are using Thermaltake proprietary connectors which will work with this hub only. These fans are rated for 600 RPM at 24 dBA.
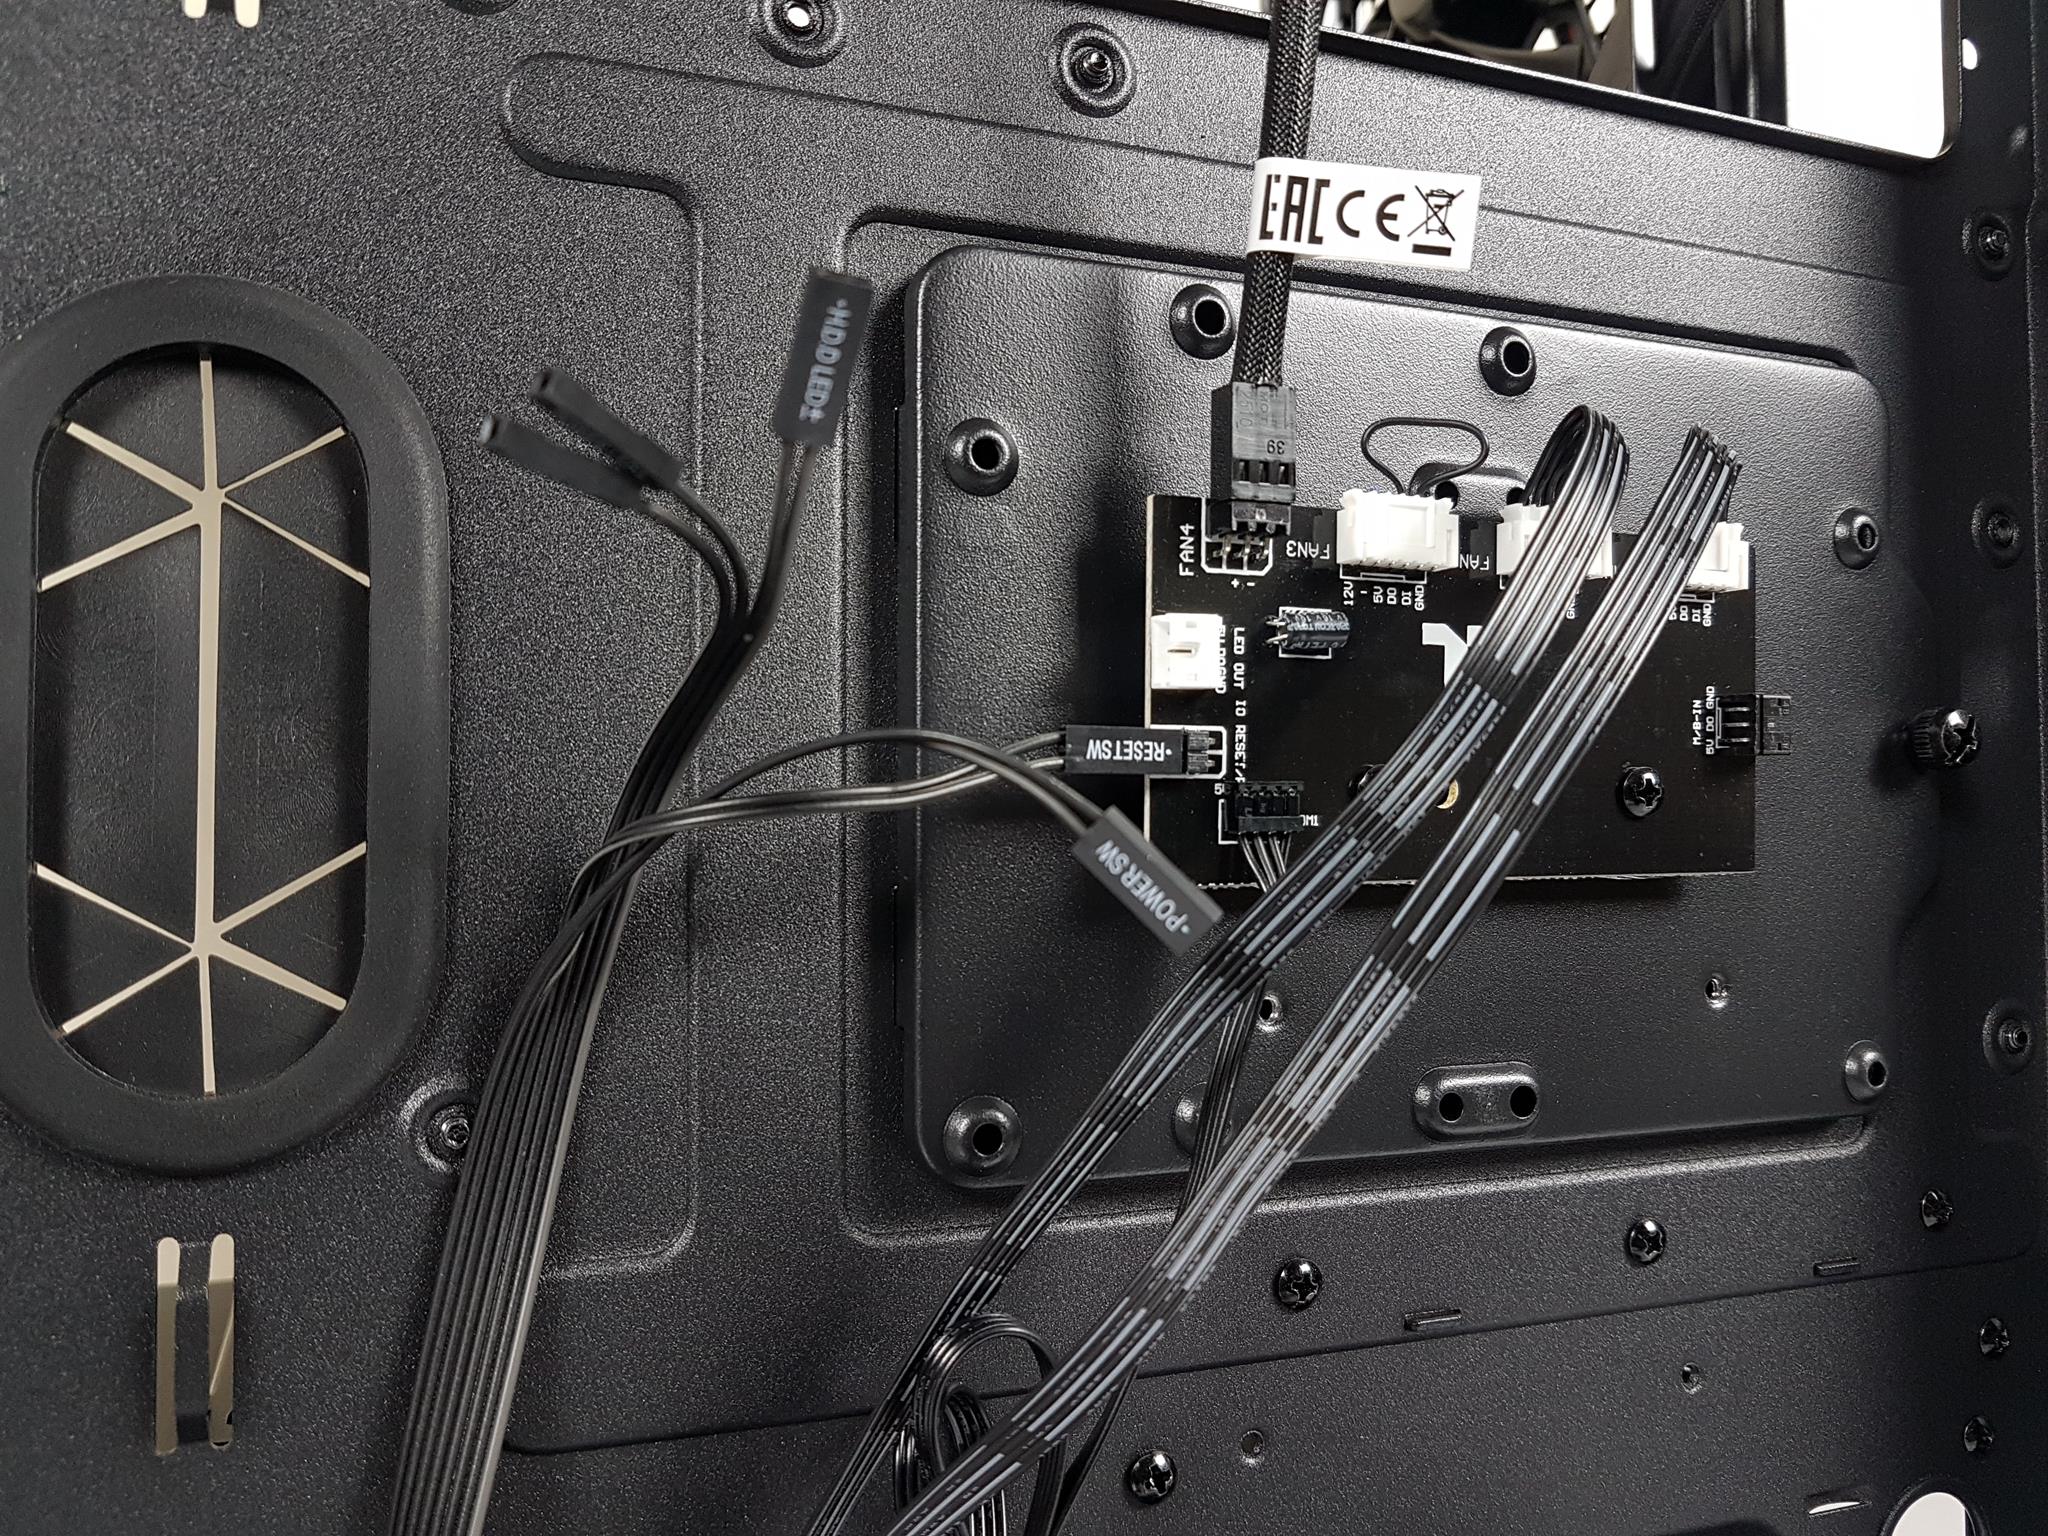
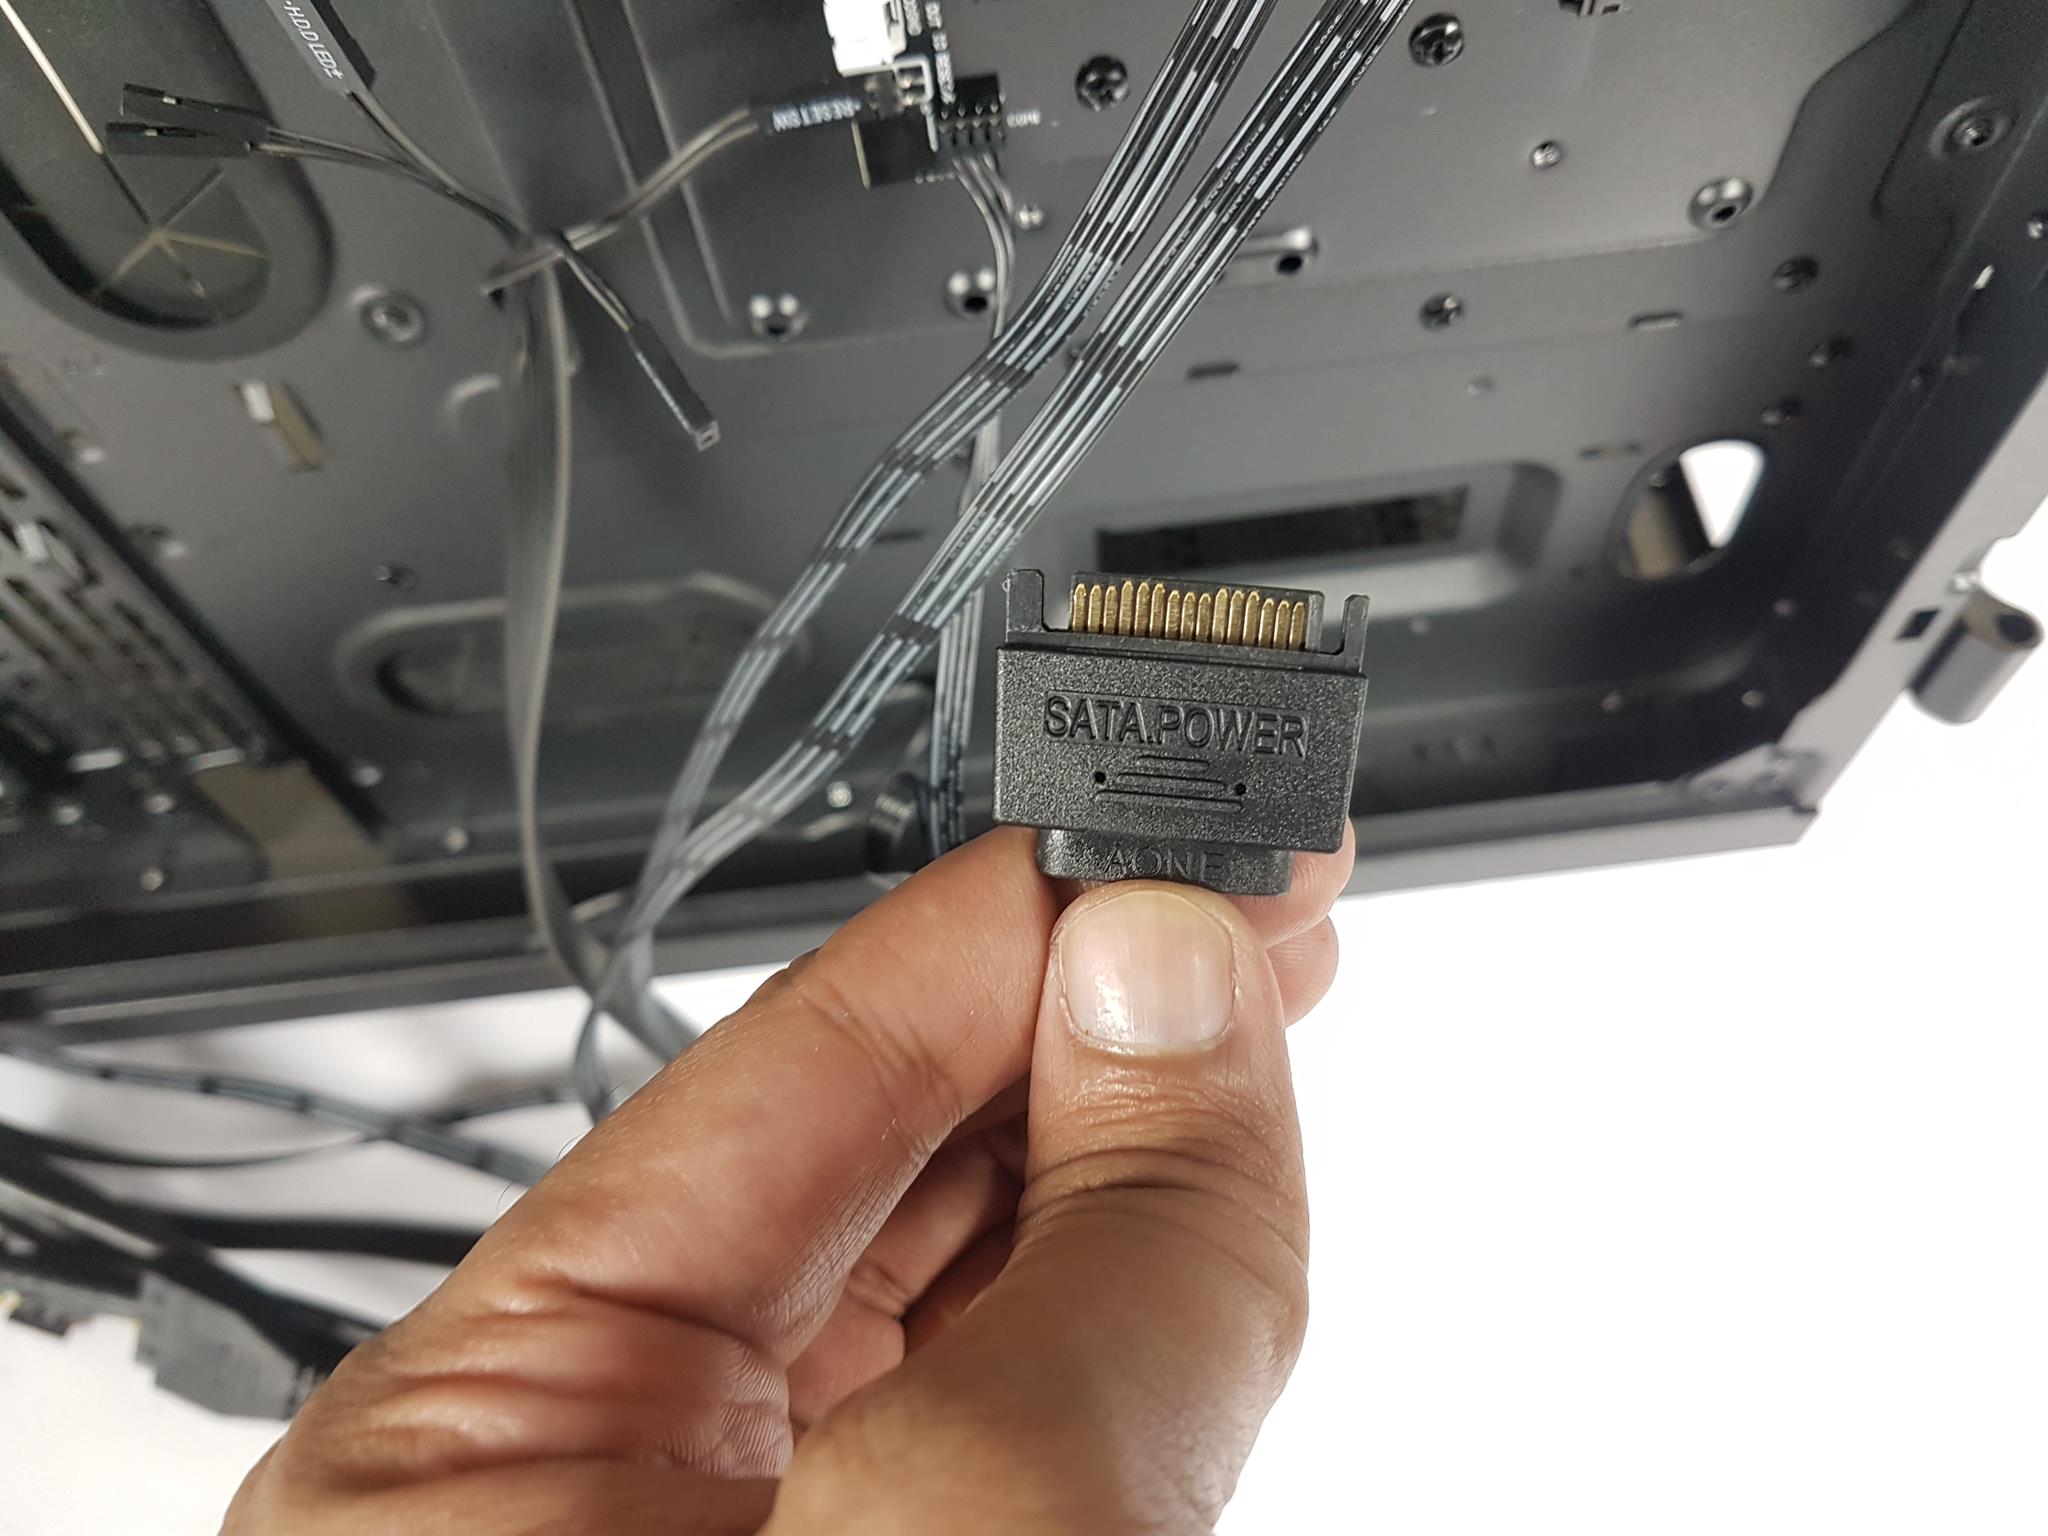
The SATA-powered hub, featuring a black PCB, supports up to 3x ARGB devices. Connect the hub to the compatible motherboard’s digital lighting header using the provided white-colored LED_Out labeled header and cables (labeled E and F). Choose the appropriate ARGB sync cable (bundled) based on your motherboard type. To sync with the motherboard, connect the chosen cable, press and hold the RGB switch on the top I/O panel, and utilize the provided 3-pin fan header for additional fan connection. The reset cable is pre-connected to the 2-pin header.
The HDD cages are secured using a total of 8x screws. Remove these screws to take out the cages. Each bracket can support either 2x 2.5” drives or a 3.5” drive.
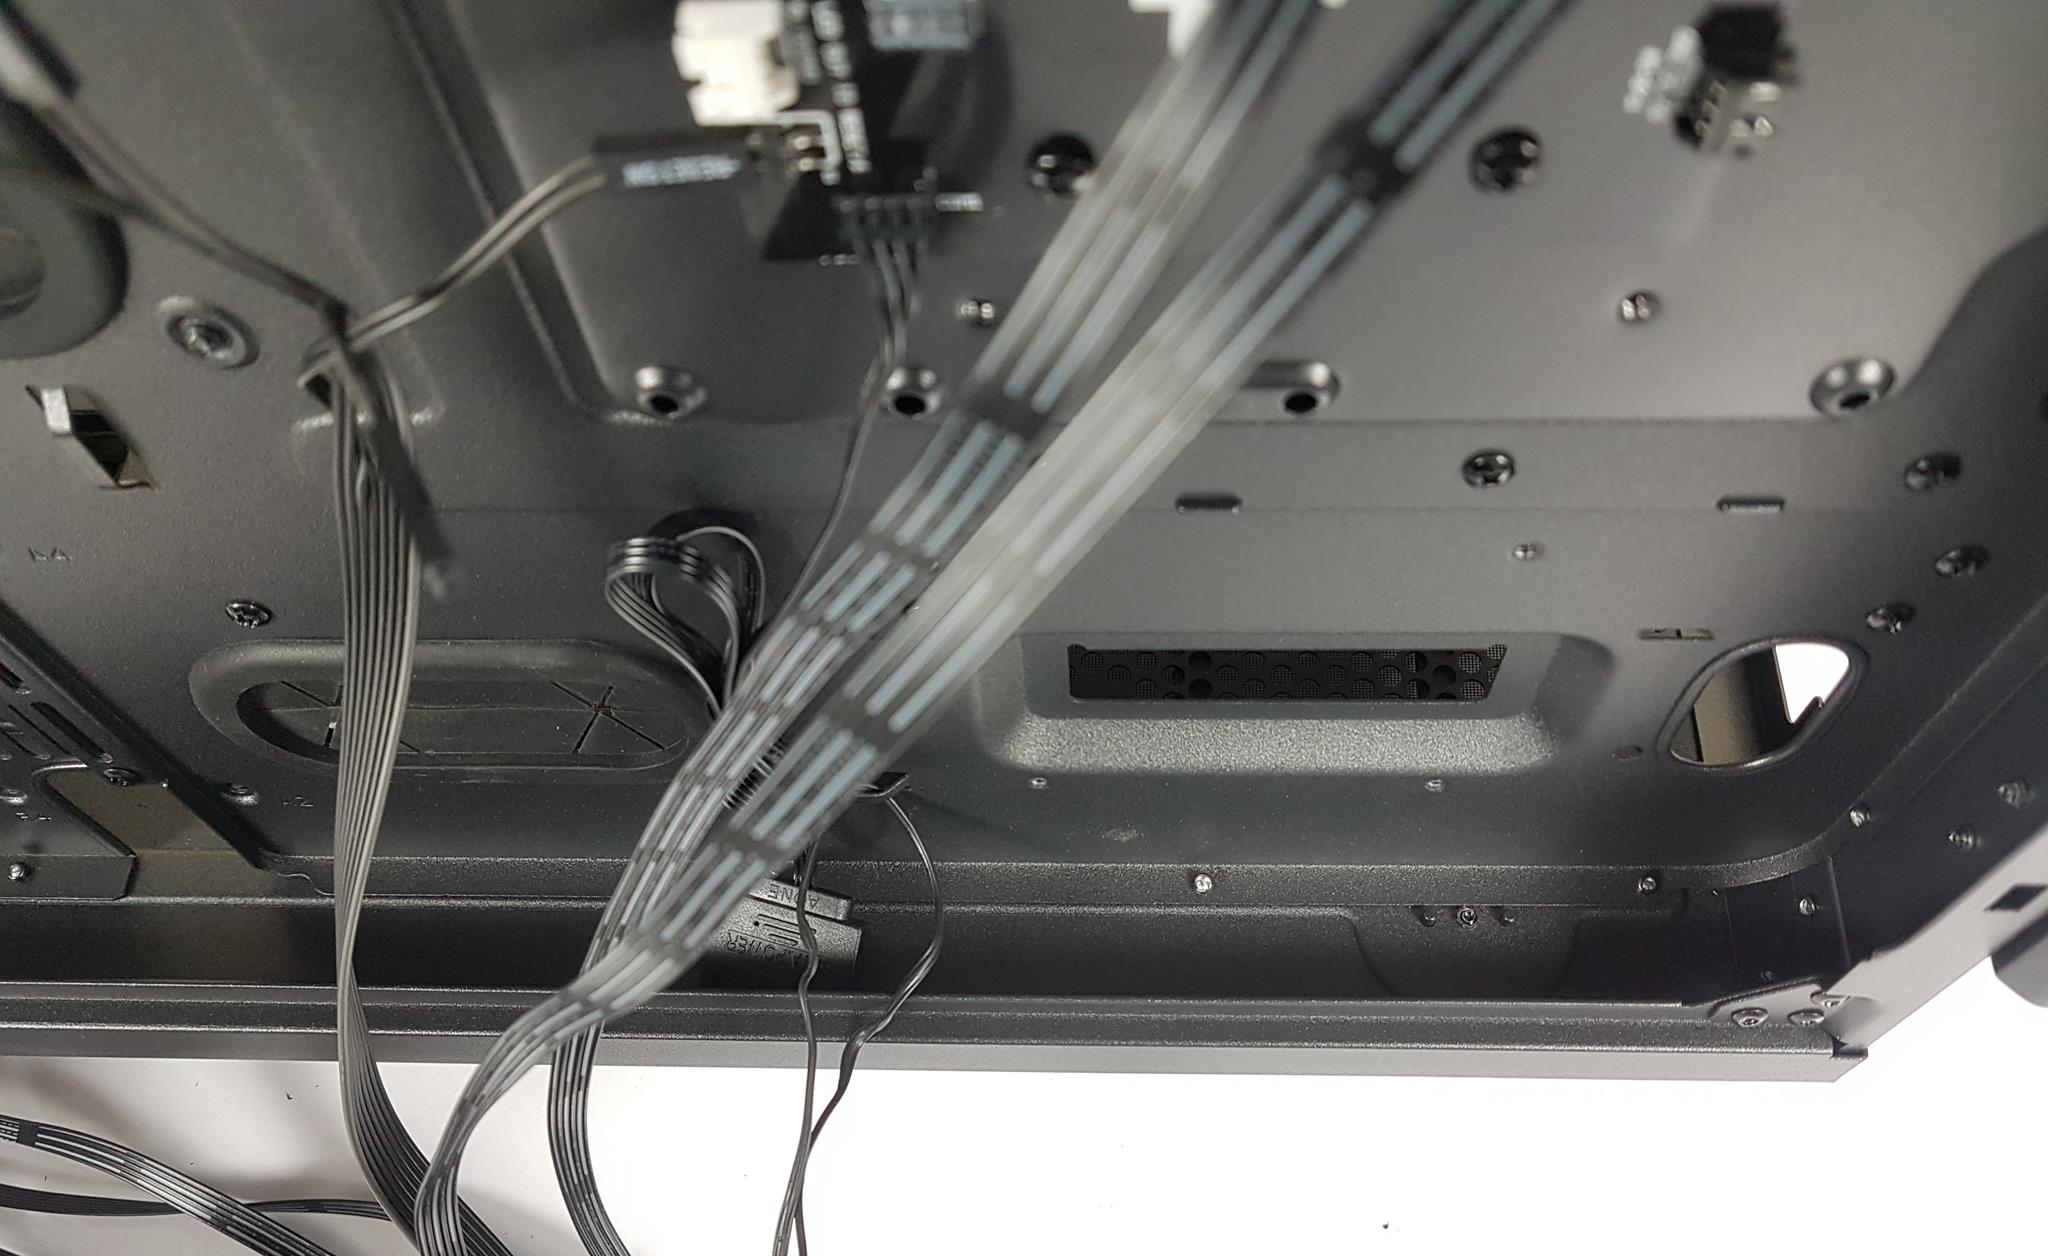
There is ample space for cable management and we have roughly 35mm on the bottom.
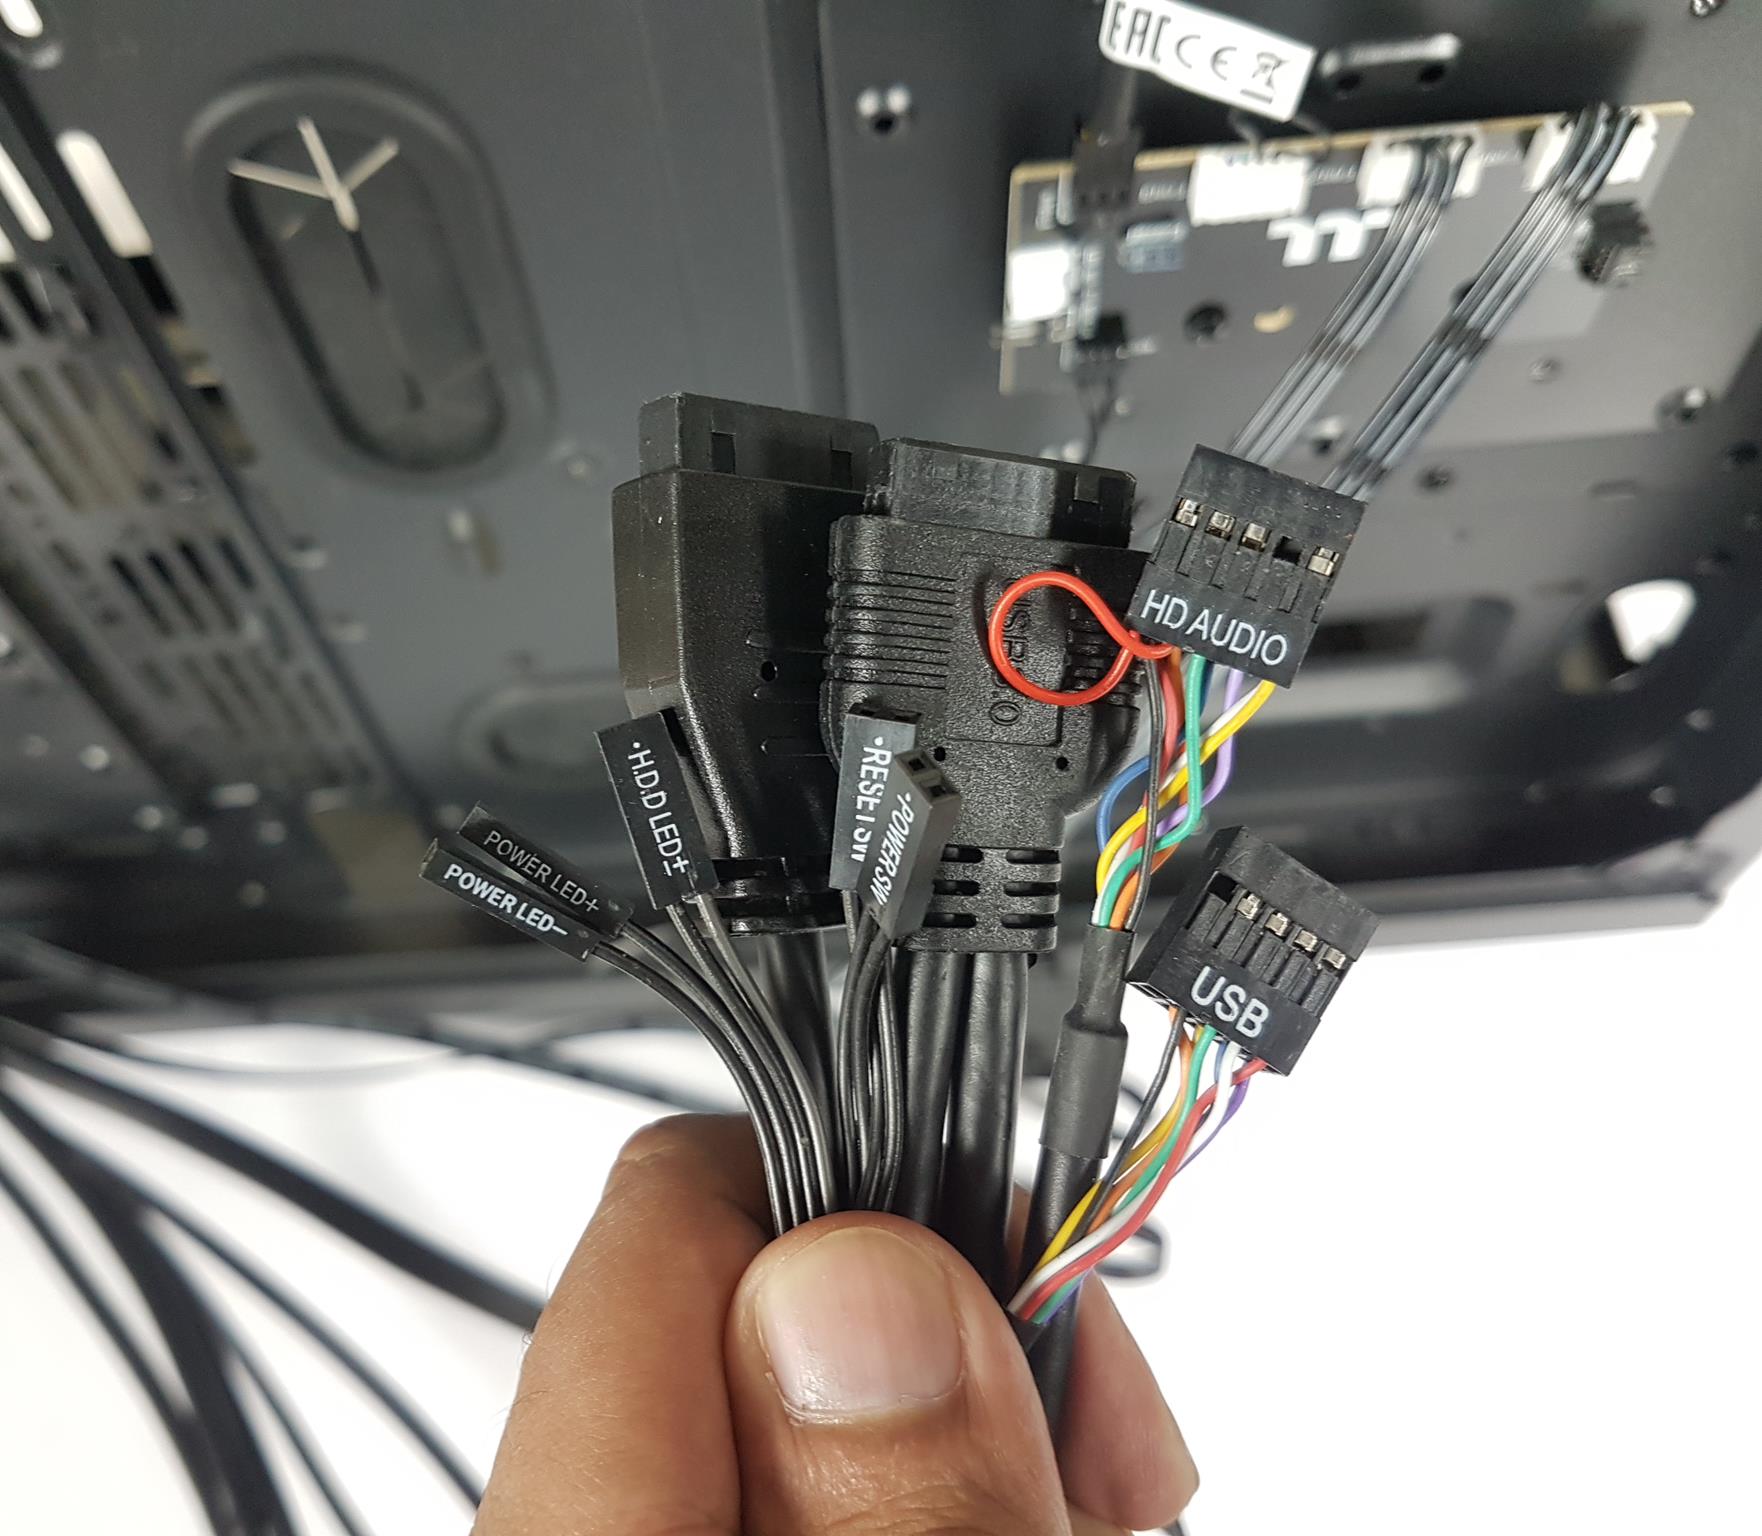
The IO panel cables include:
- USB connector cable for Type-C port
- USB 3.0 connector cable
- USB 2.0 connector cable
- System Panel connector cables
- HD Audio connector cable
Installation
I’ll now showcase how to put together a test build.

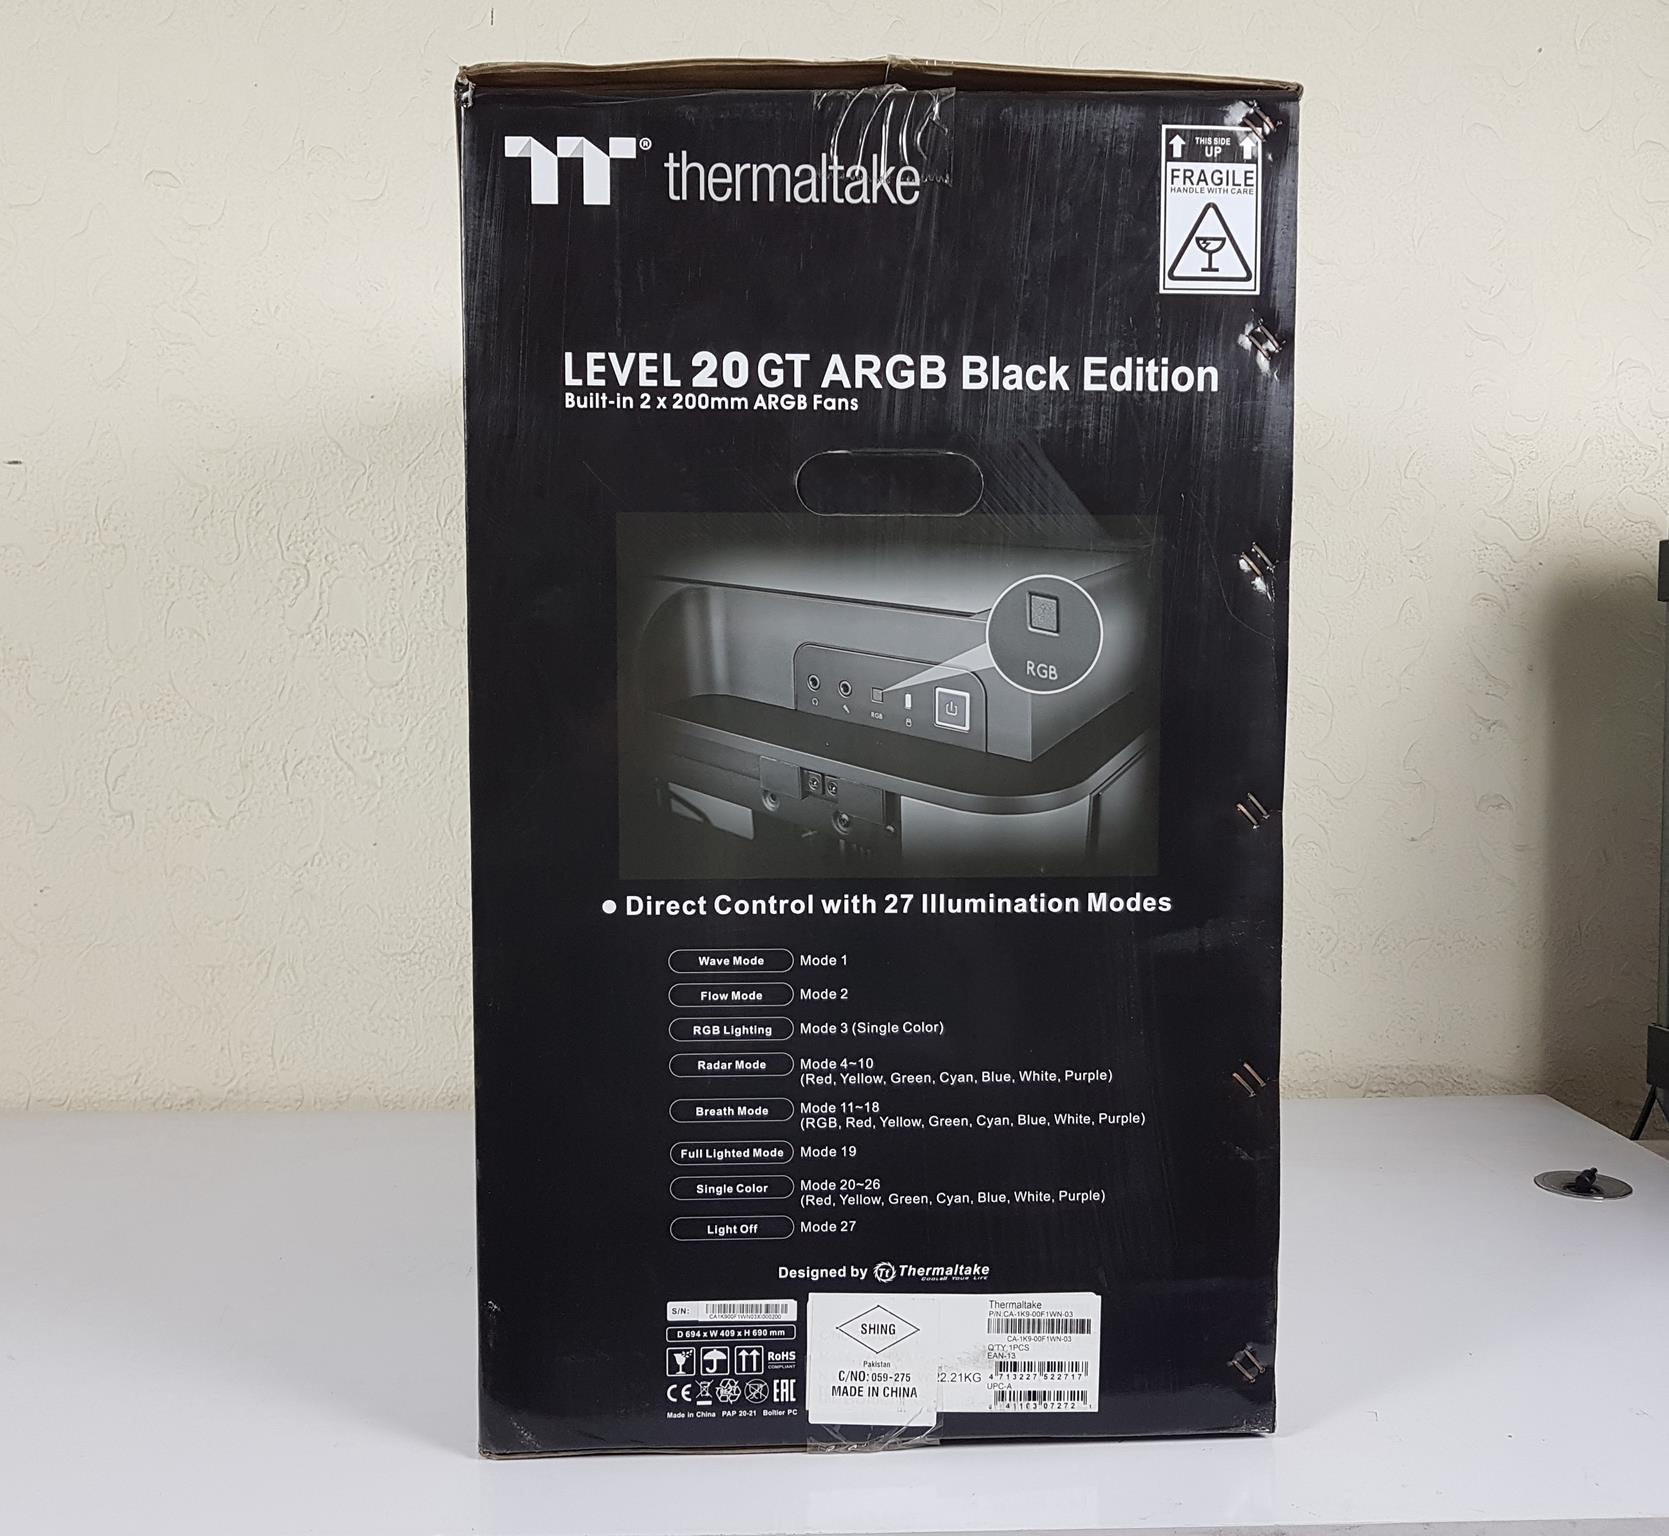
RBG Lighting
Here’s a showcase of the RBG:
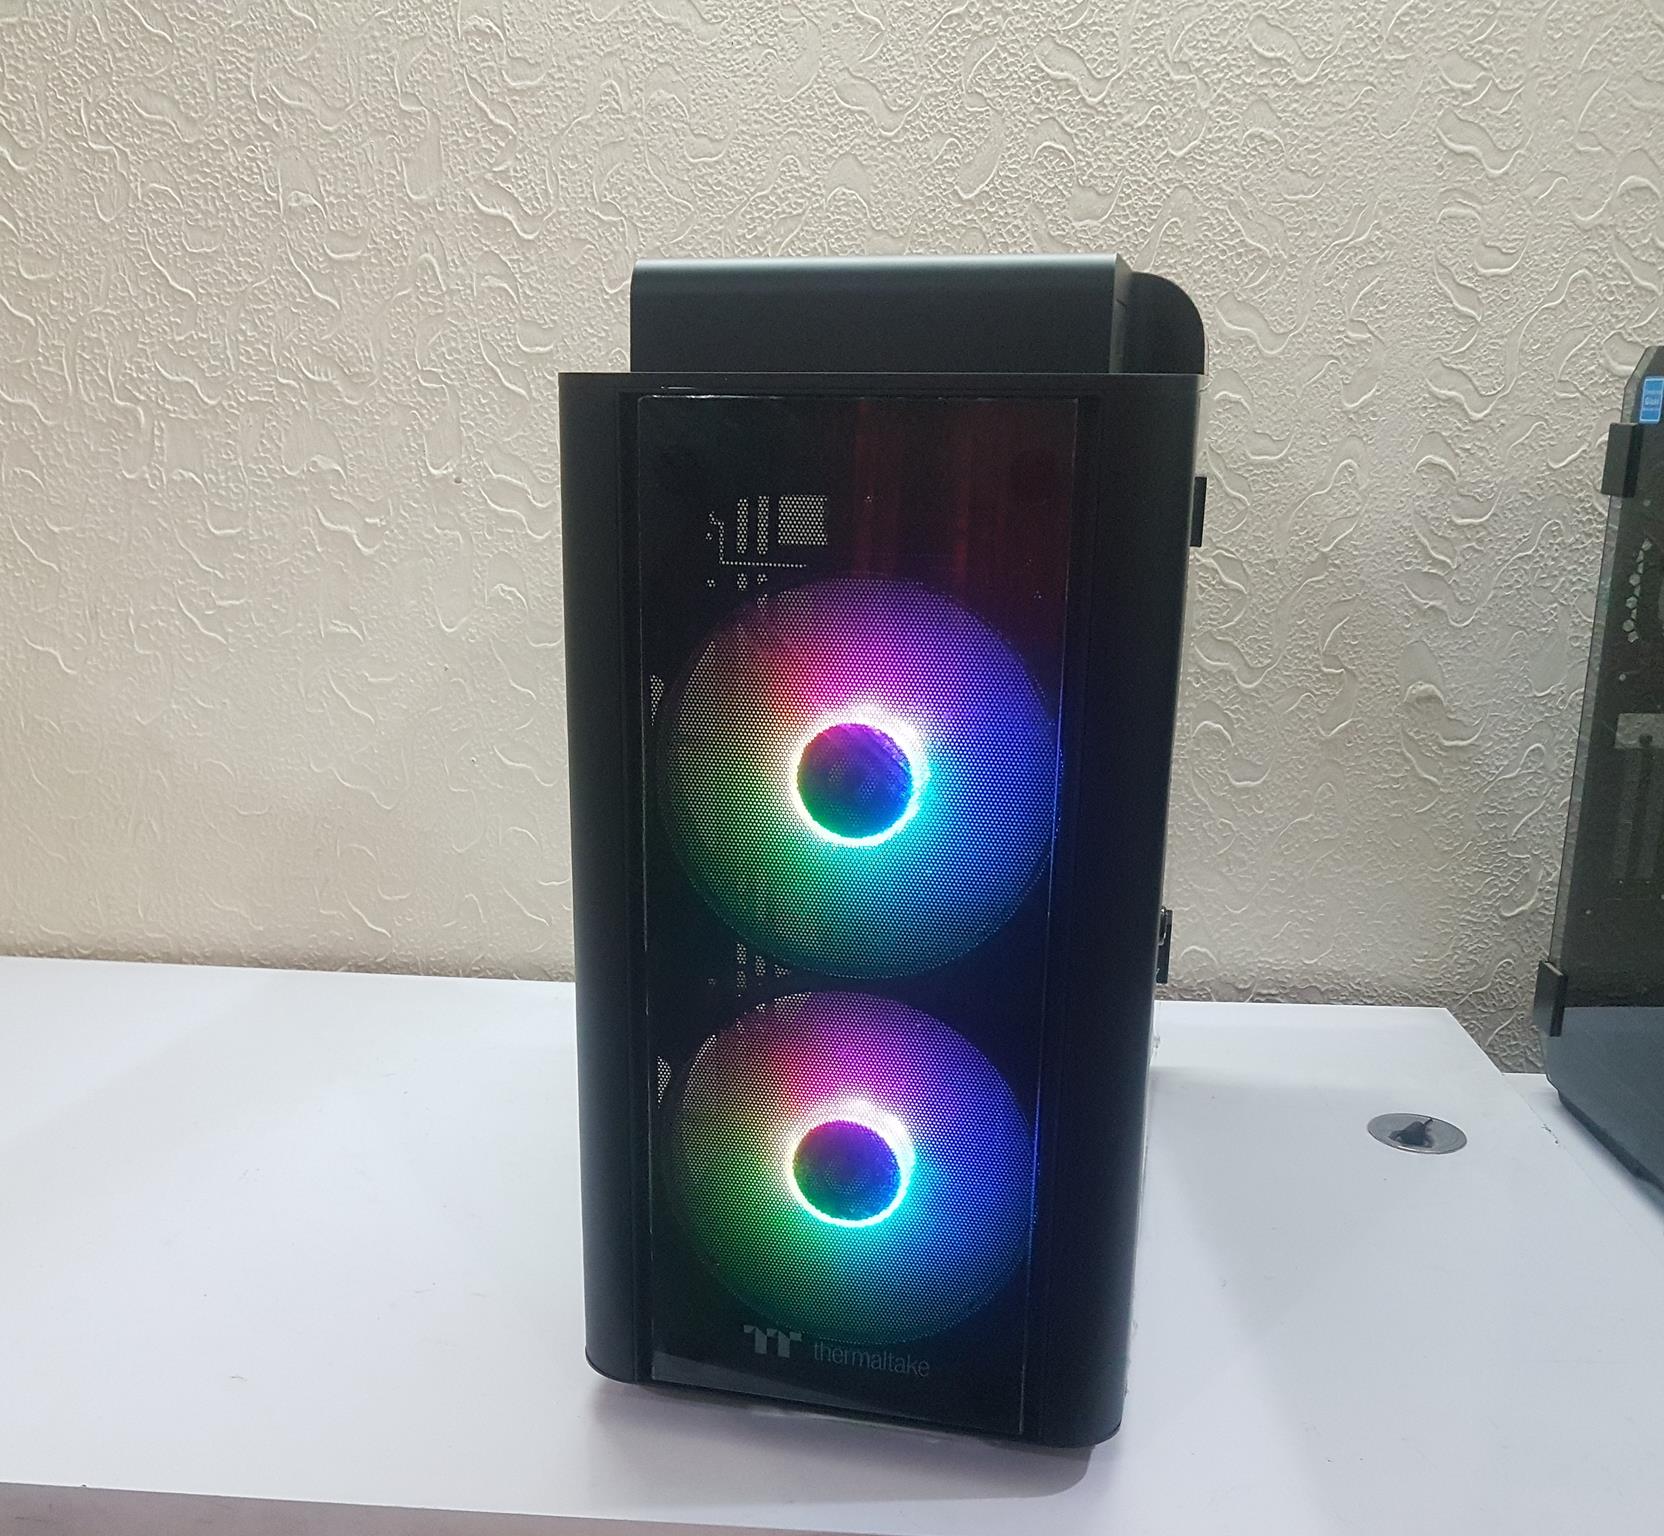
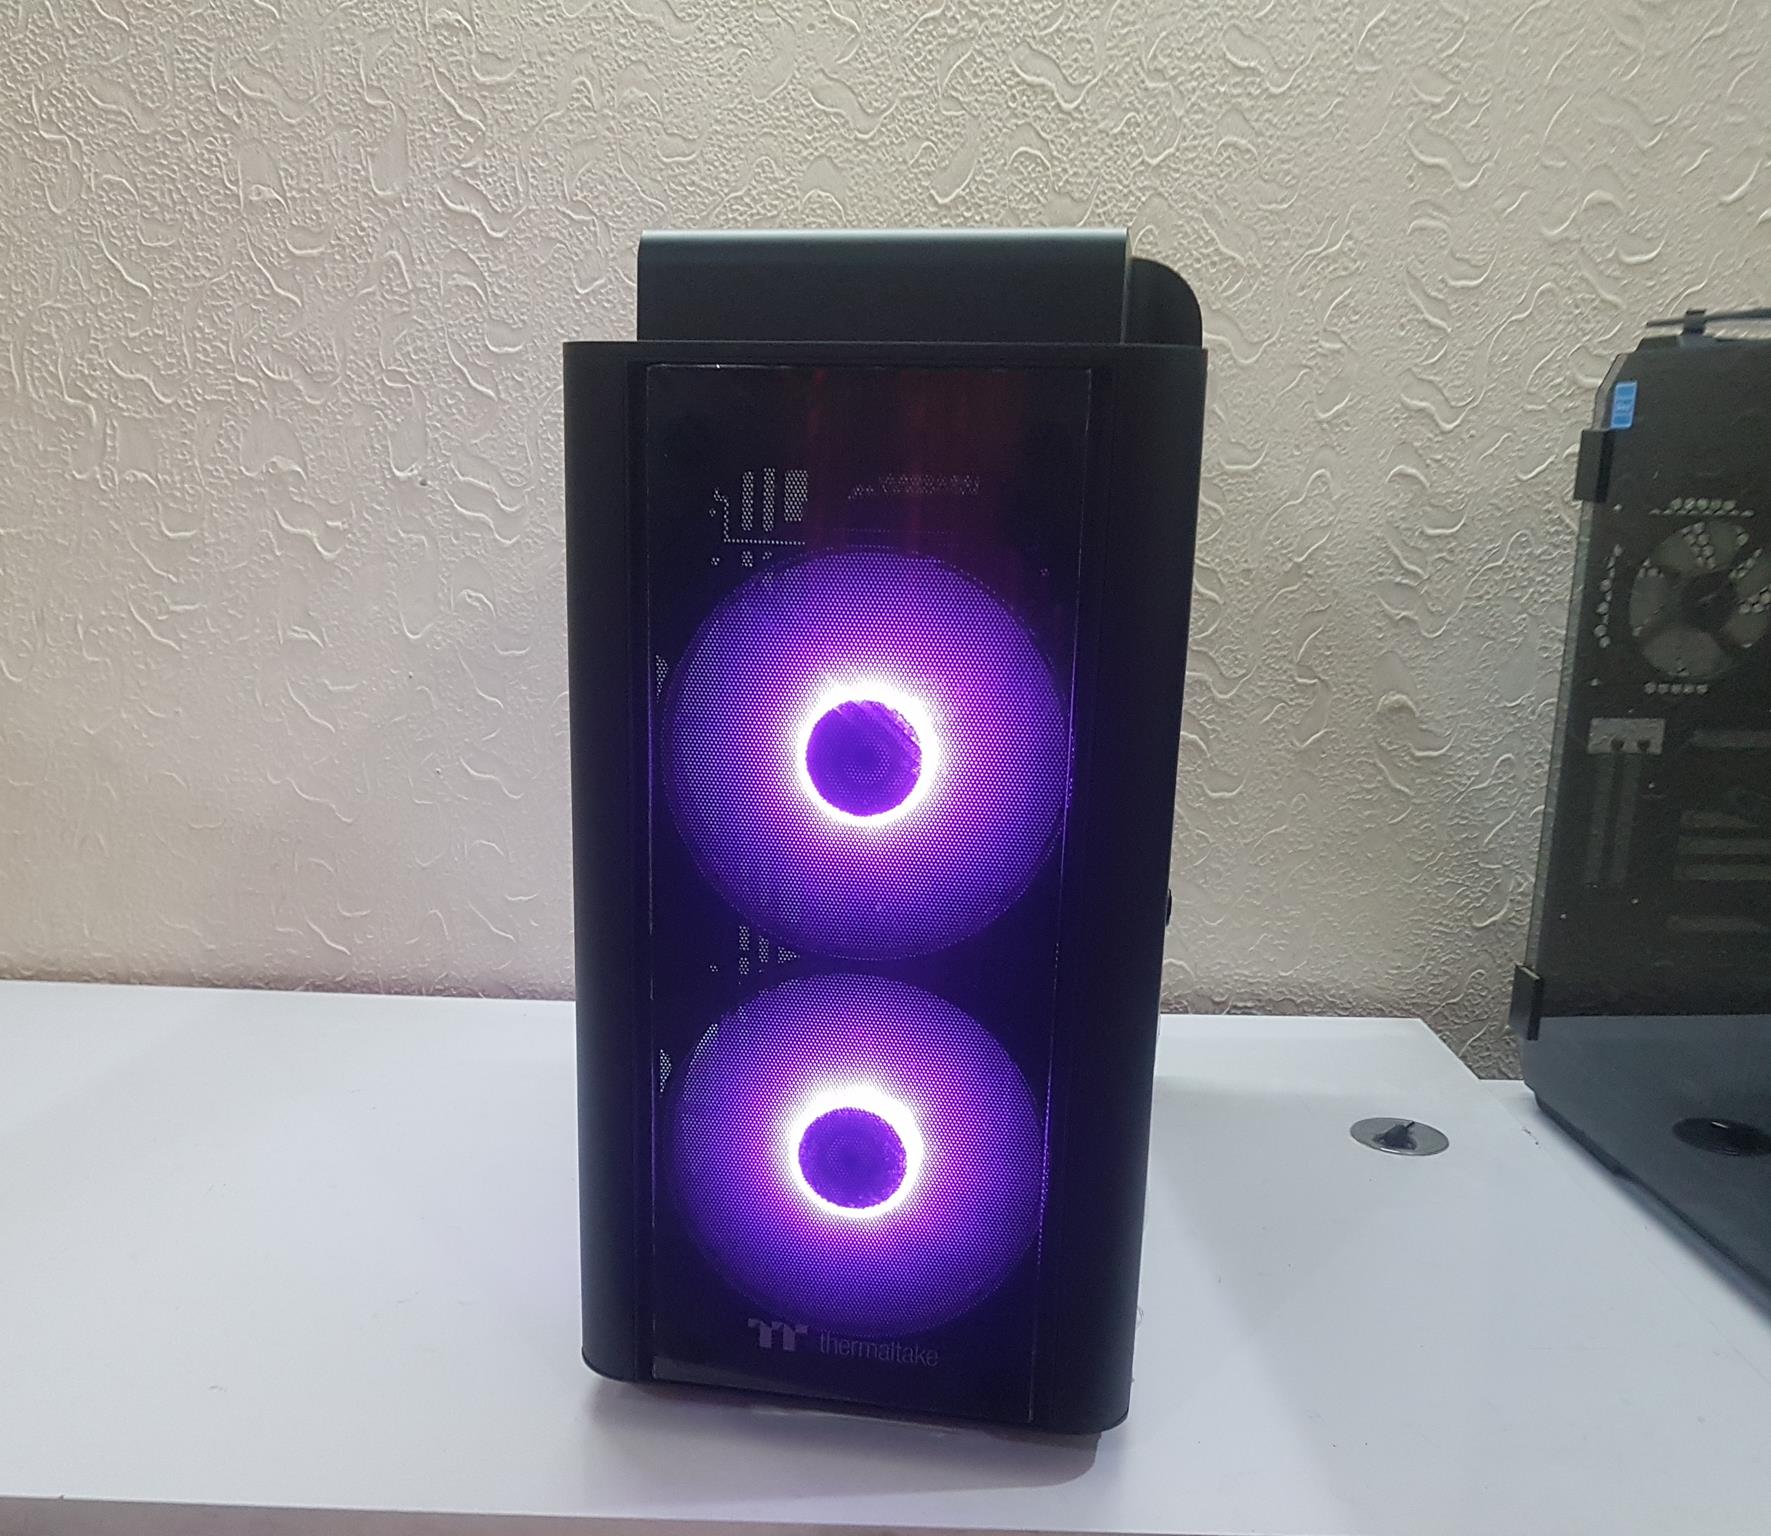

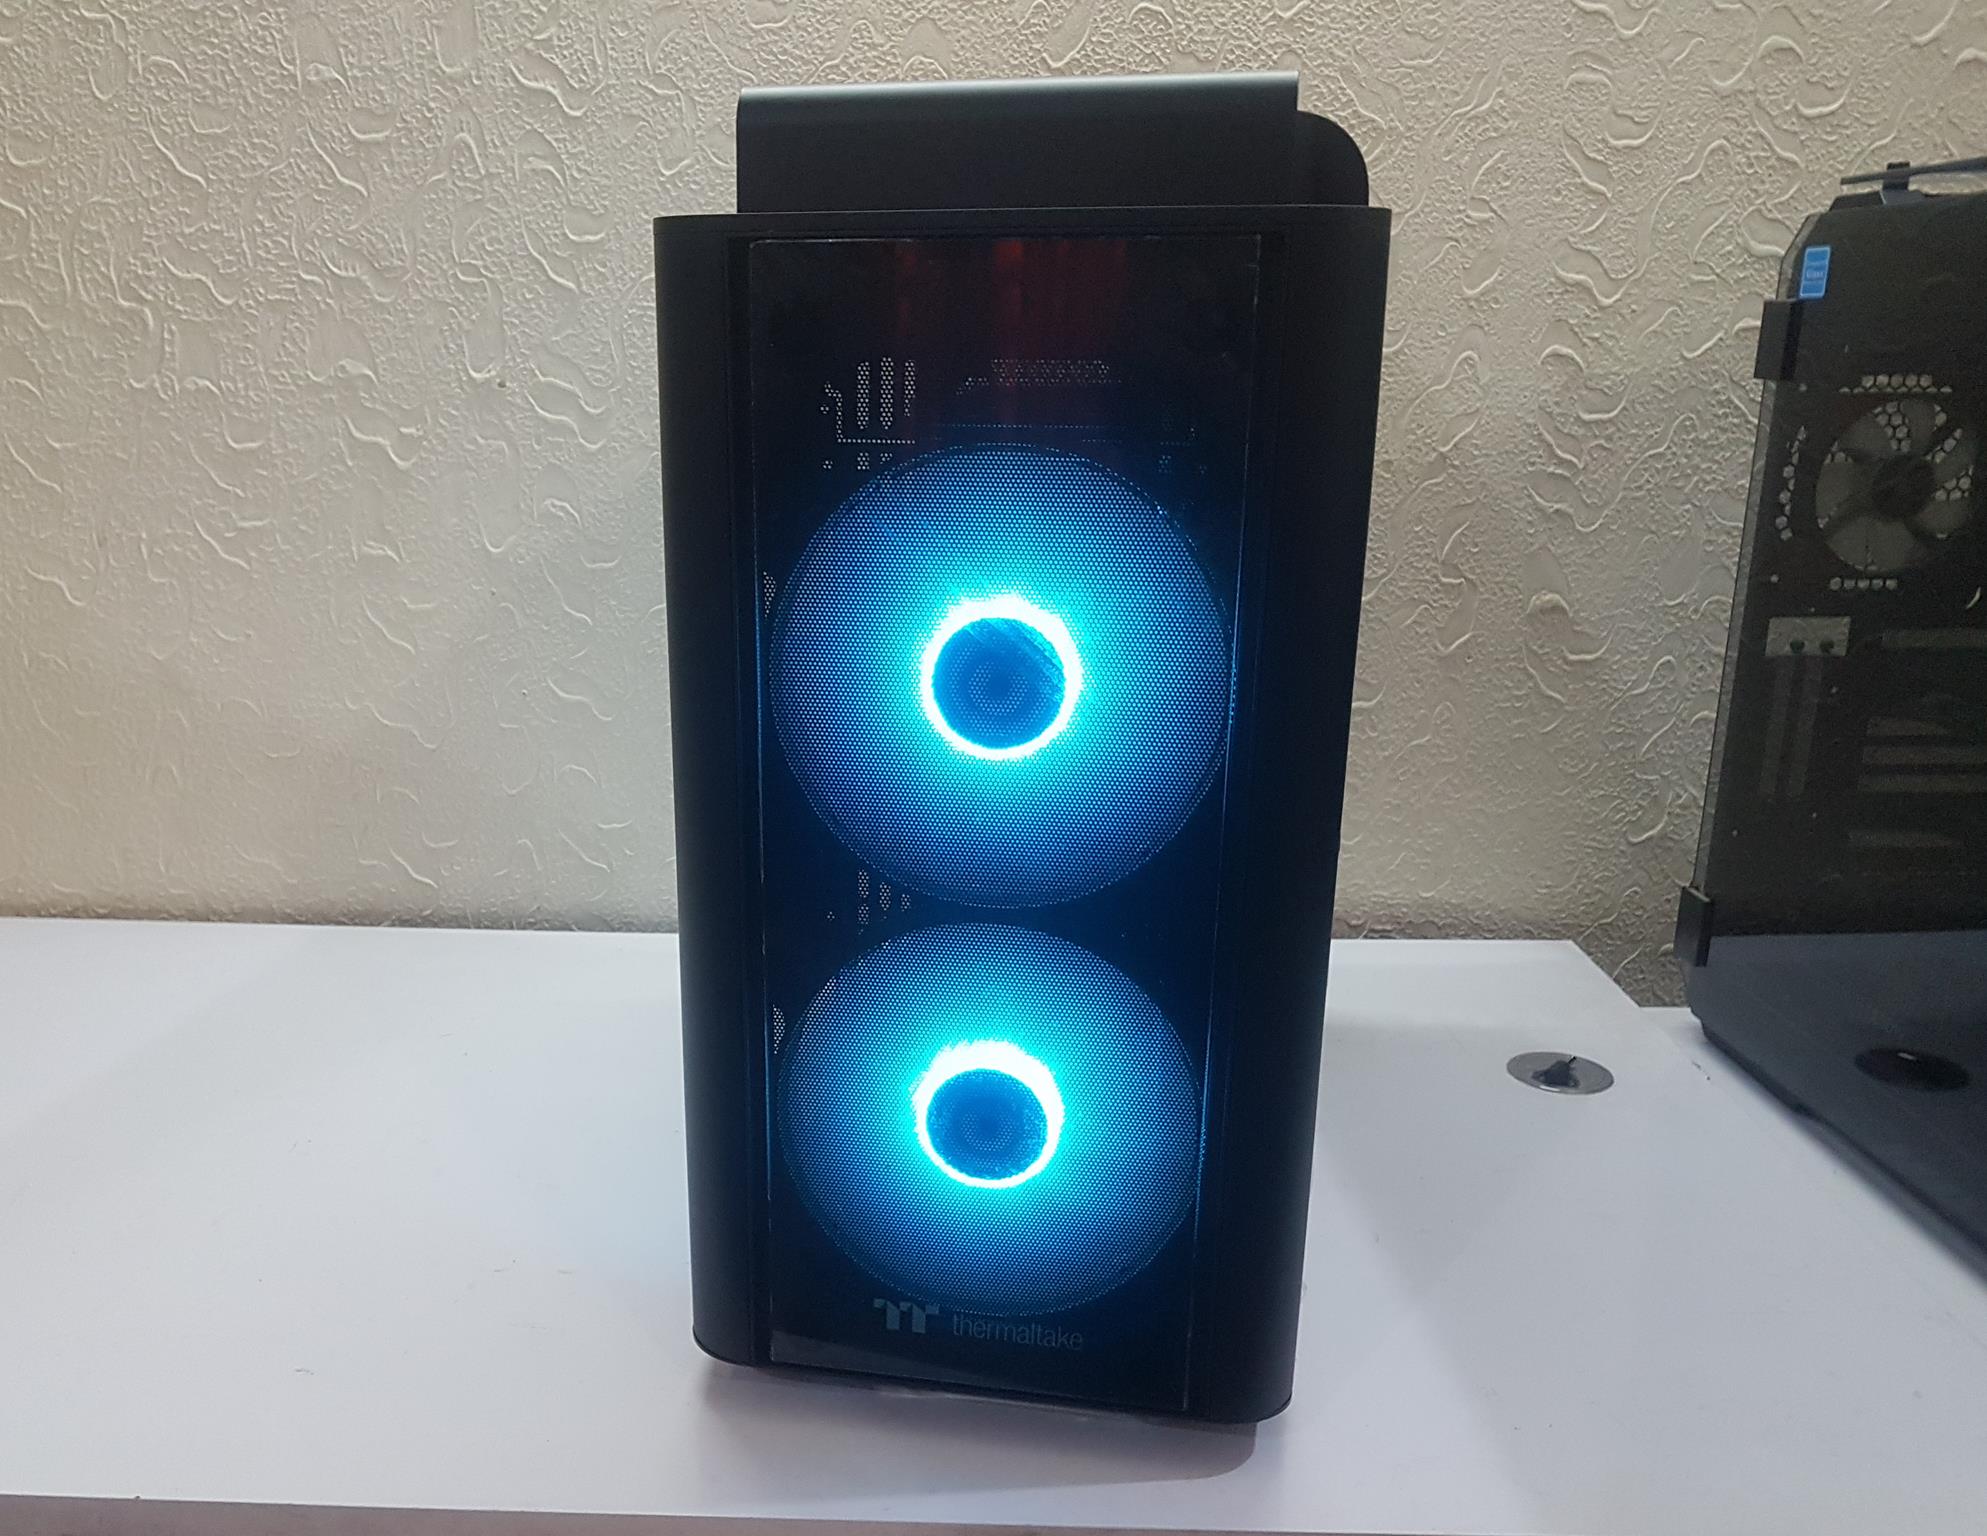
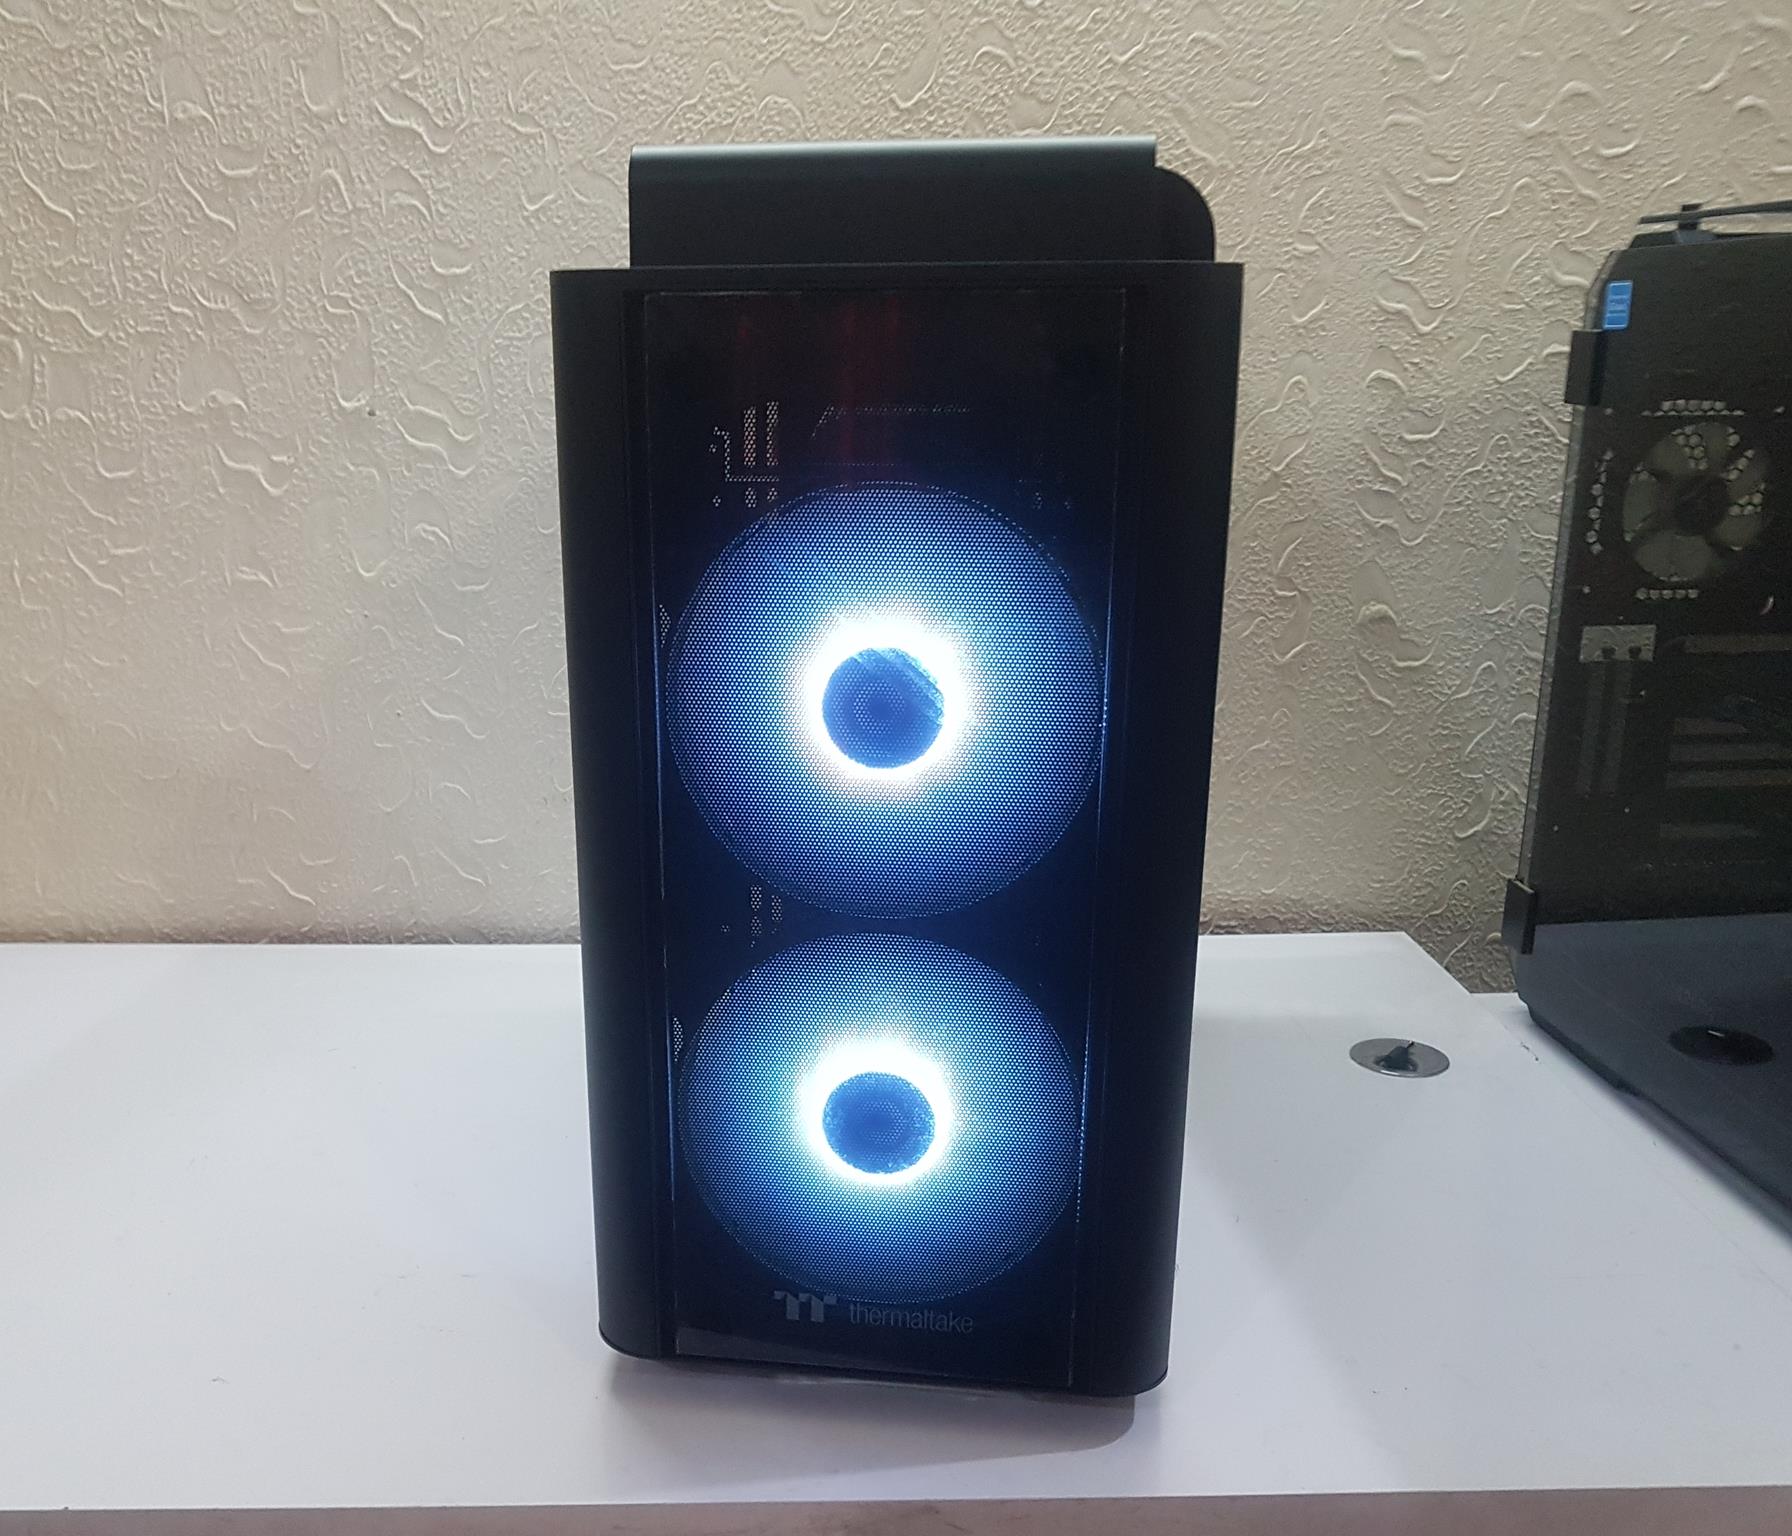
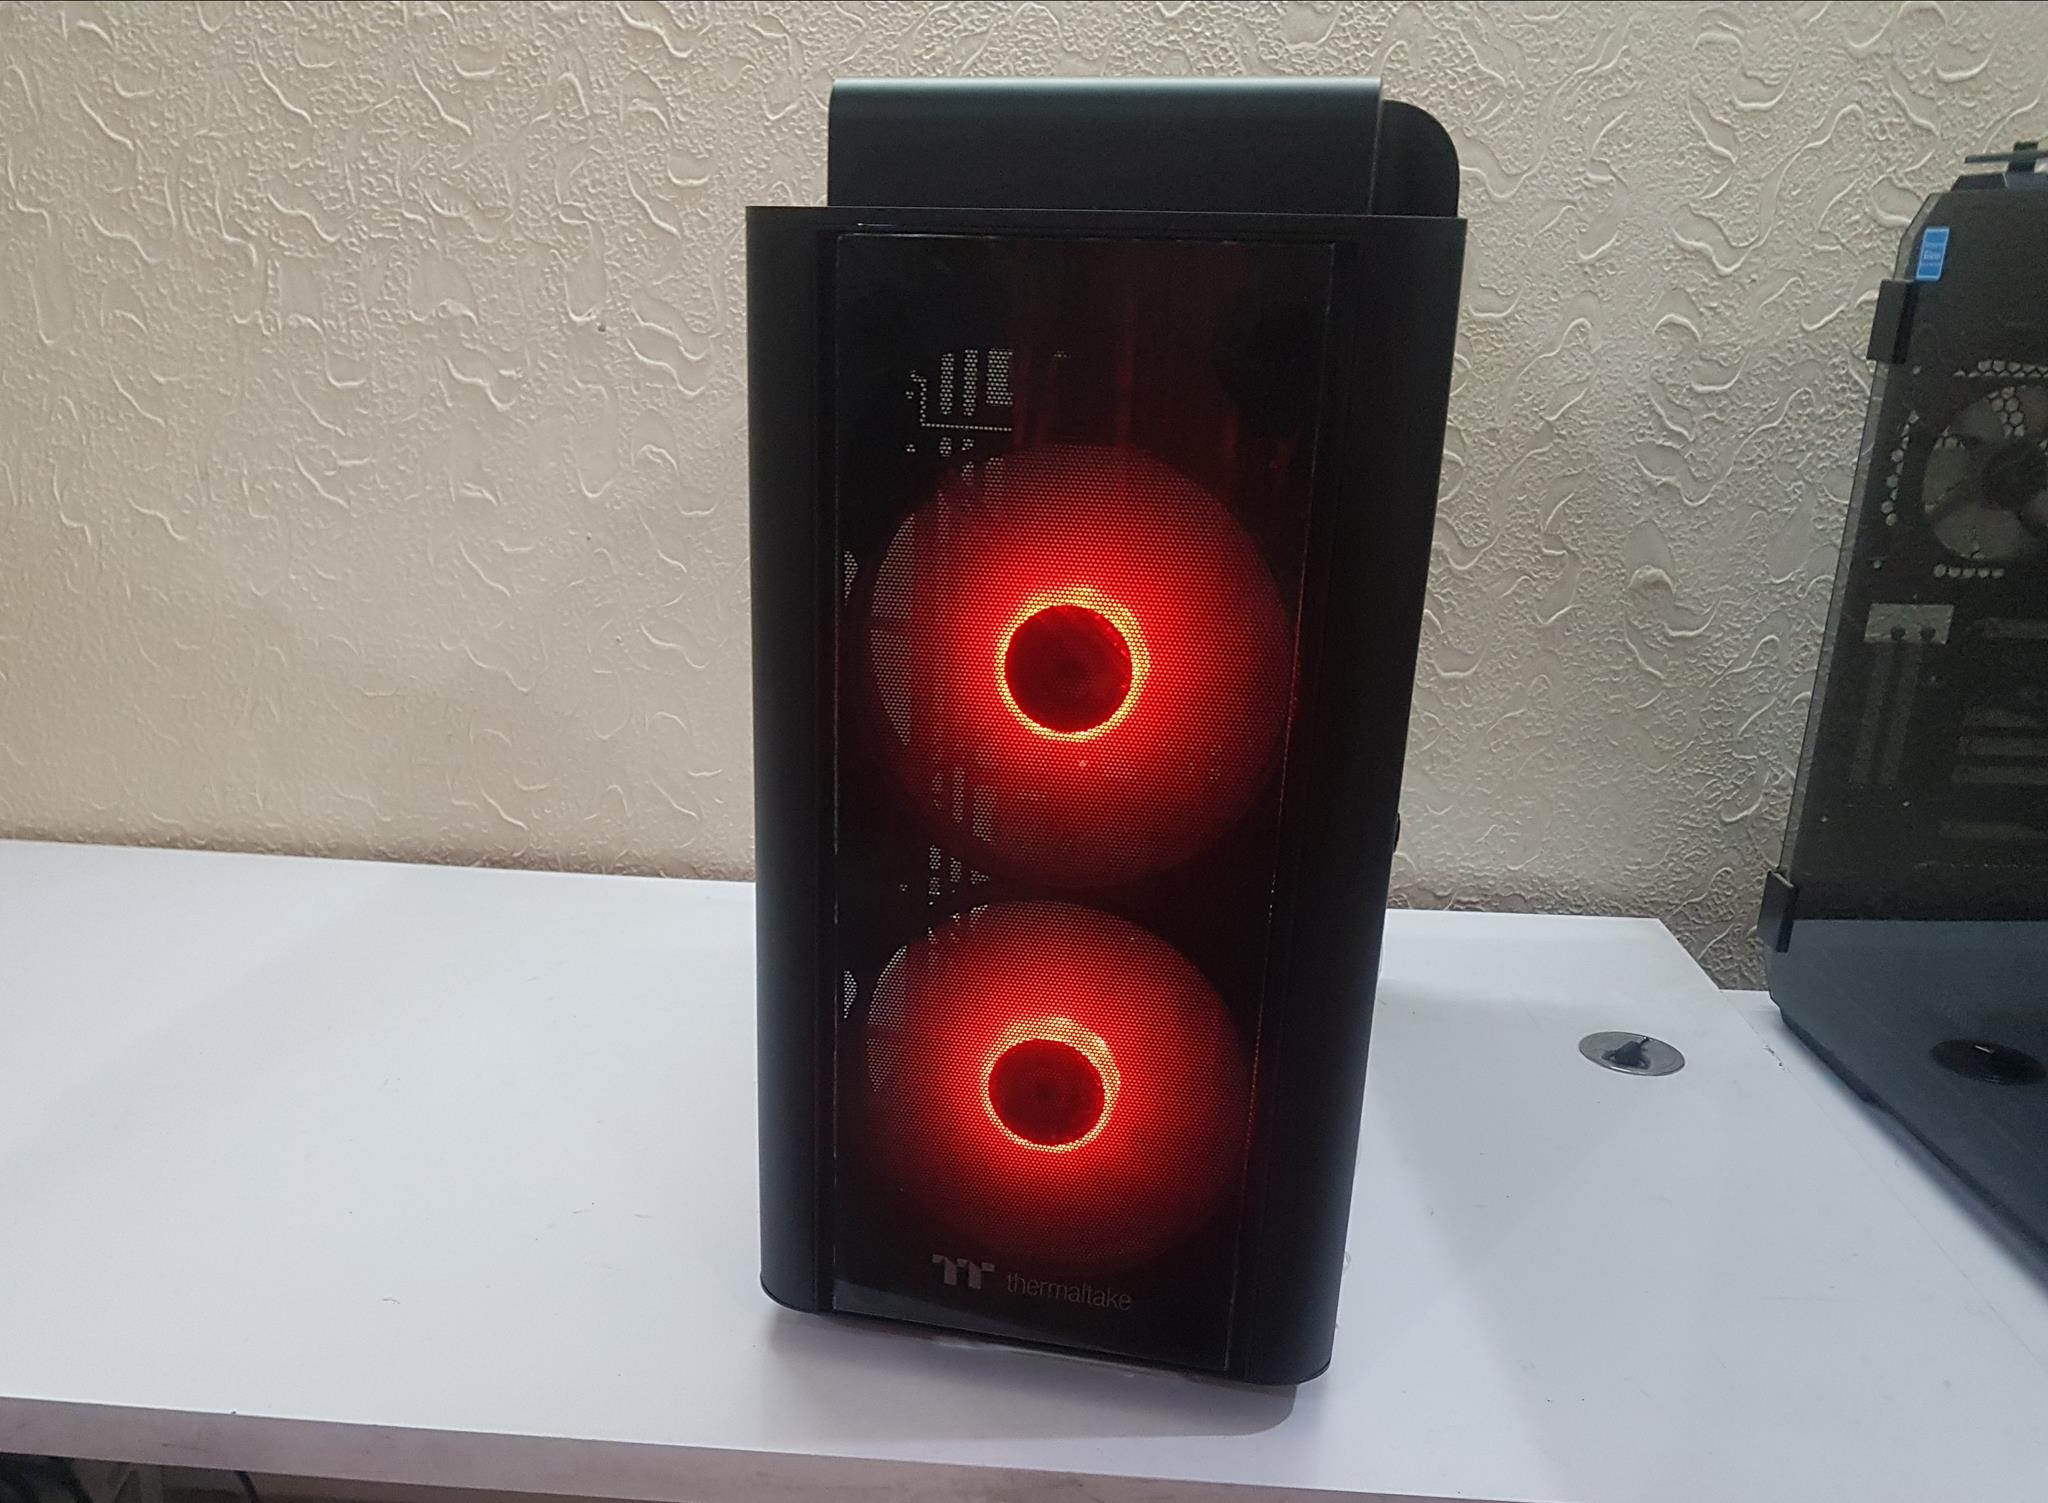
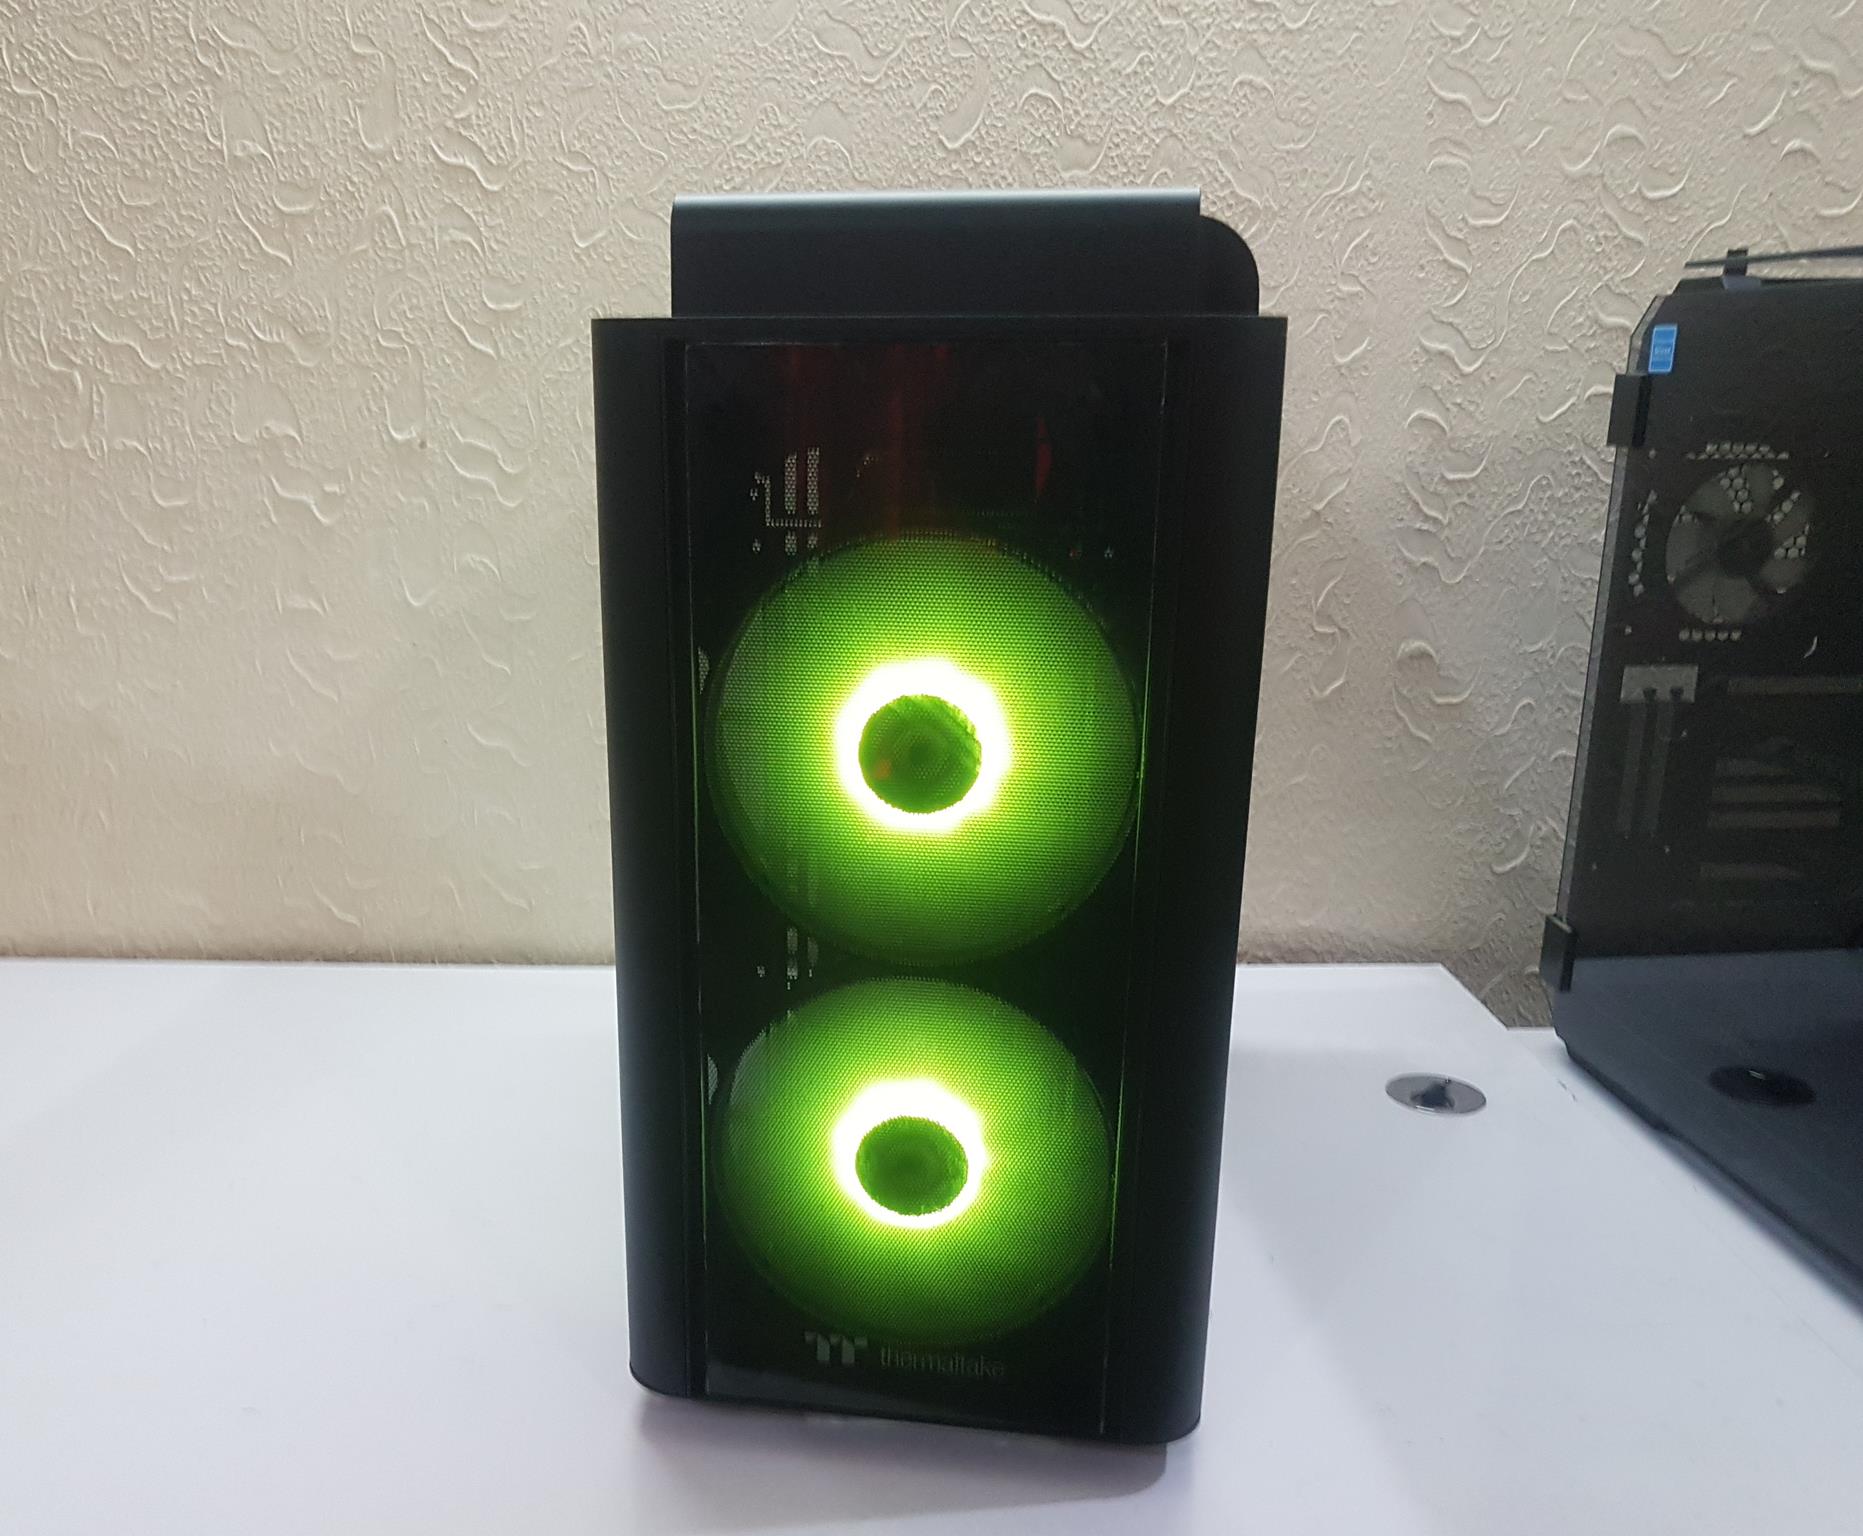
In order to control the lighting effects of the 2x 200mm ARGB fans on the front, we have a controller button located on the top I/O panel. It is pertinent to mention that the lighting can be turned off altogether, which is actually one of the modes now. We have total of 24 illumination modes on these fans:
| Mode | Description |
|---|---|
| Mode 1: Wave Mode | A dynamic light pattern that ebbs and flows across the device. |
| Mode 2: Flow Mode | A smooth, seamless transition of colors that washes over the device. |
| Mode 3: RGB Lighting Single Color | Bathe the device in a single vibrant hue of your choice. |
| Mode 4~10: Radar Mode | Witness a pulsing radar effect sweep across the device, available in a spectrum of colors. |
| Mode 11~18: Breathe Mode | Immerse yourself in the gentle rhythm of the device’s pulsating light, offered in a variety of captivating colors. |
| Mode 19: Full Lighted Mode | Unleash the full brilliance of the device’s illumination. |
| Mode 20~26: Single Color | Choose your favorite shade and let the device glow with singular vibrancy. |
| Mode 27: Light Off | Enjoy the serenity of complete darkness |
Long pressing the RGB button for 3 seconds will transfer the lighting control to the motherboard. The fans will blink twice indicating the transfer of the control. This is vice versa.
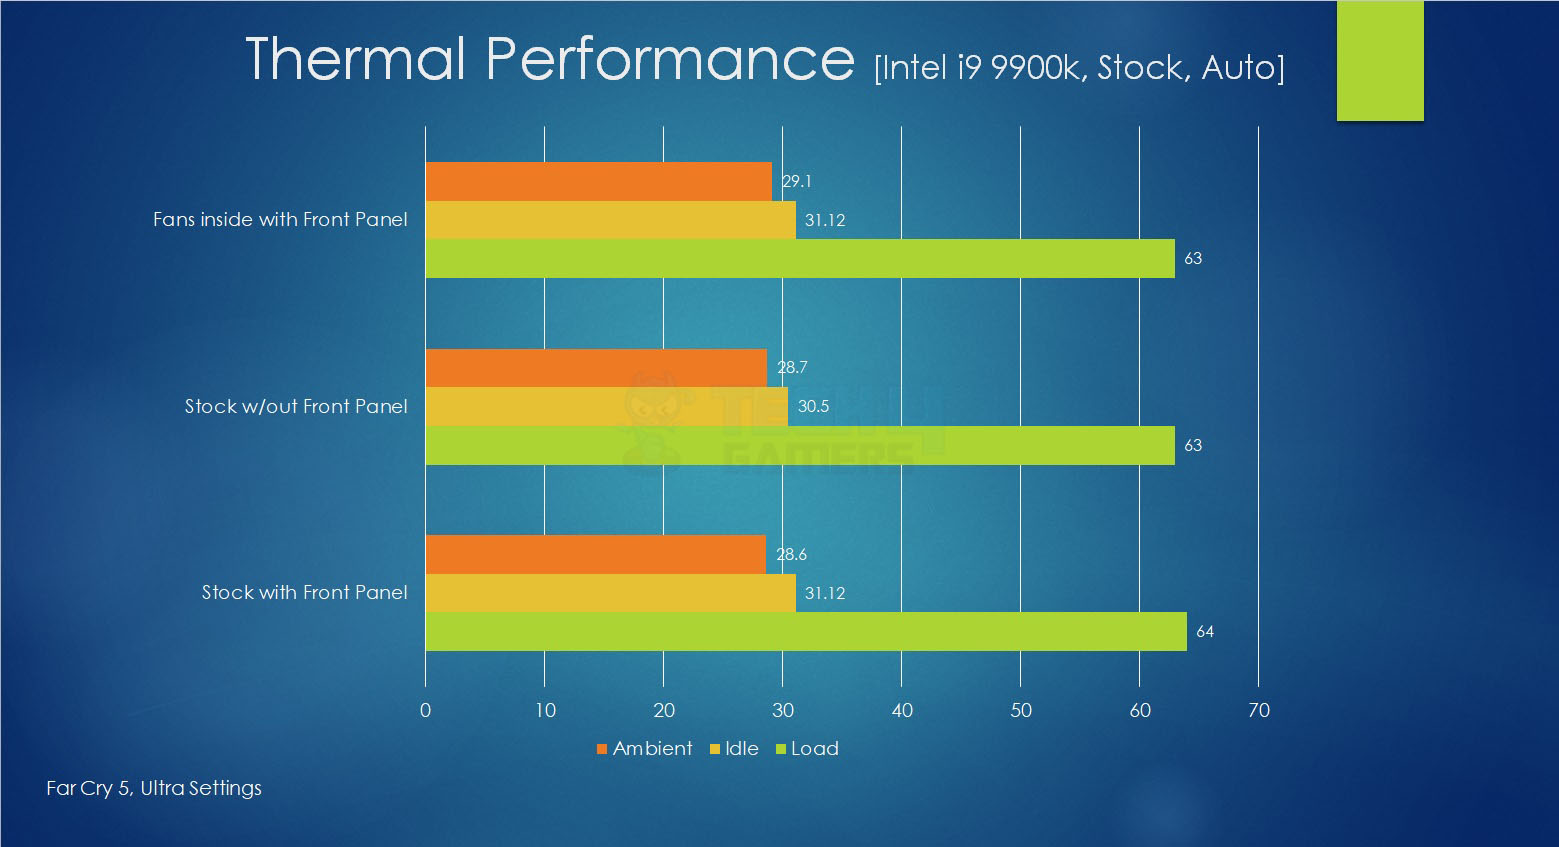
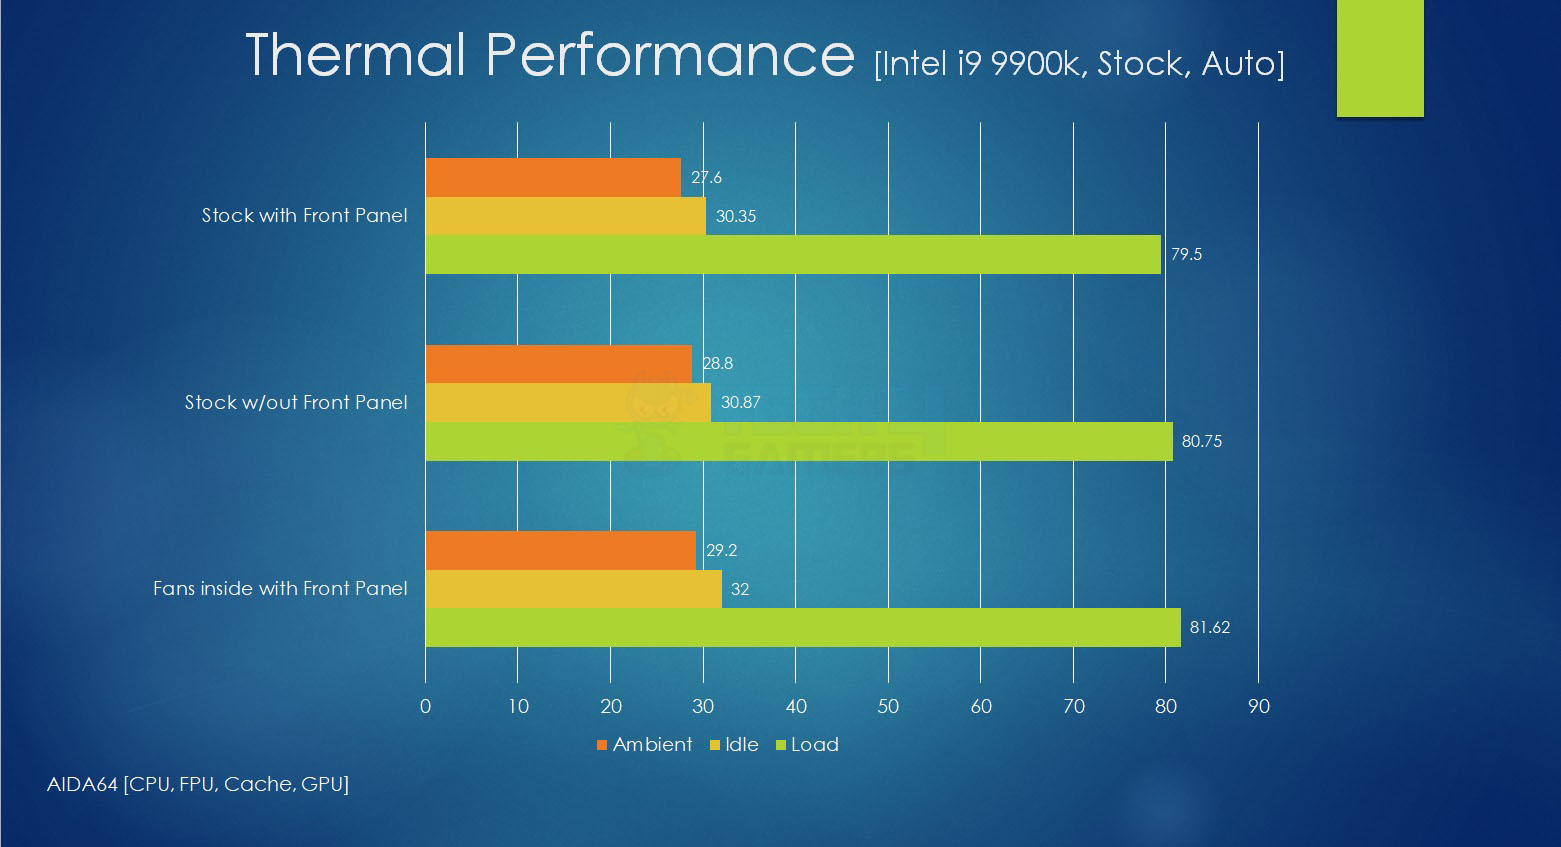
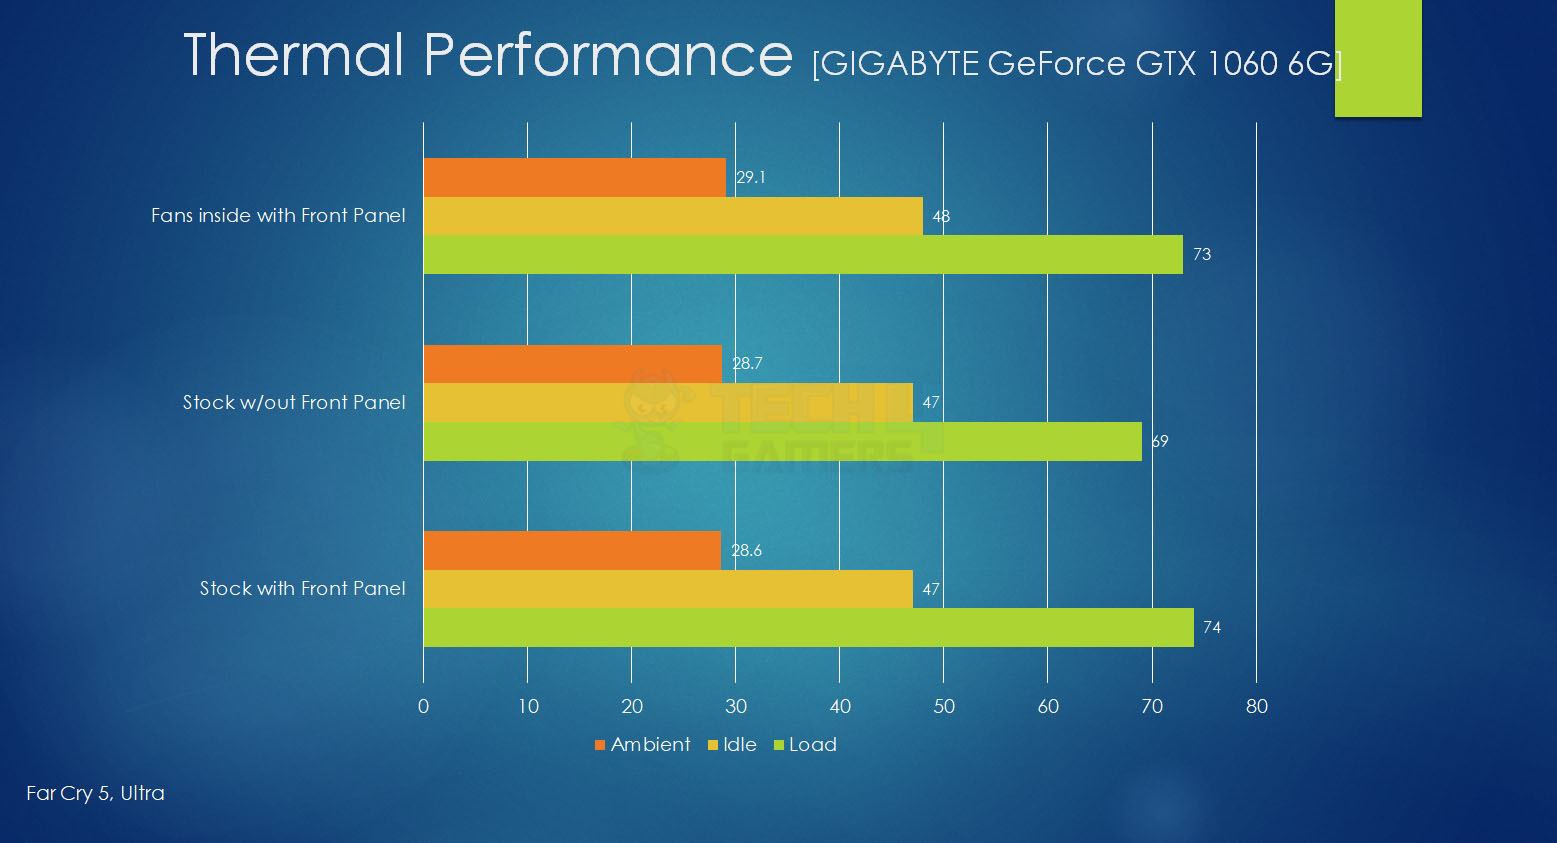
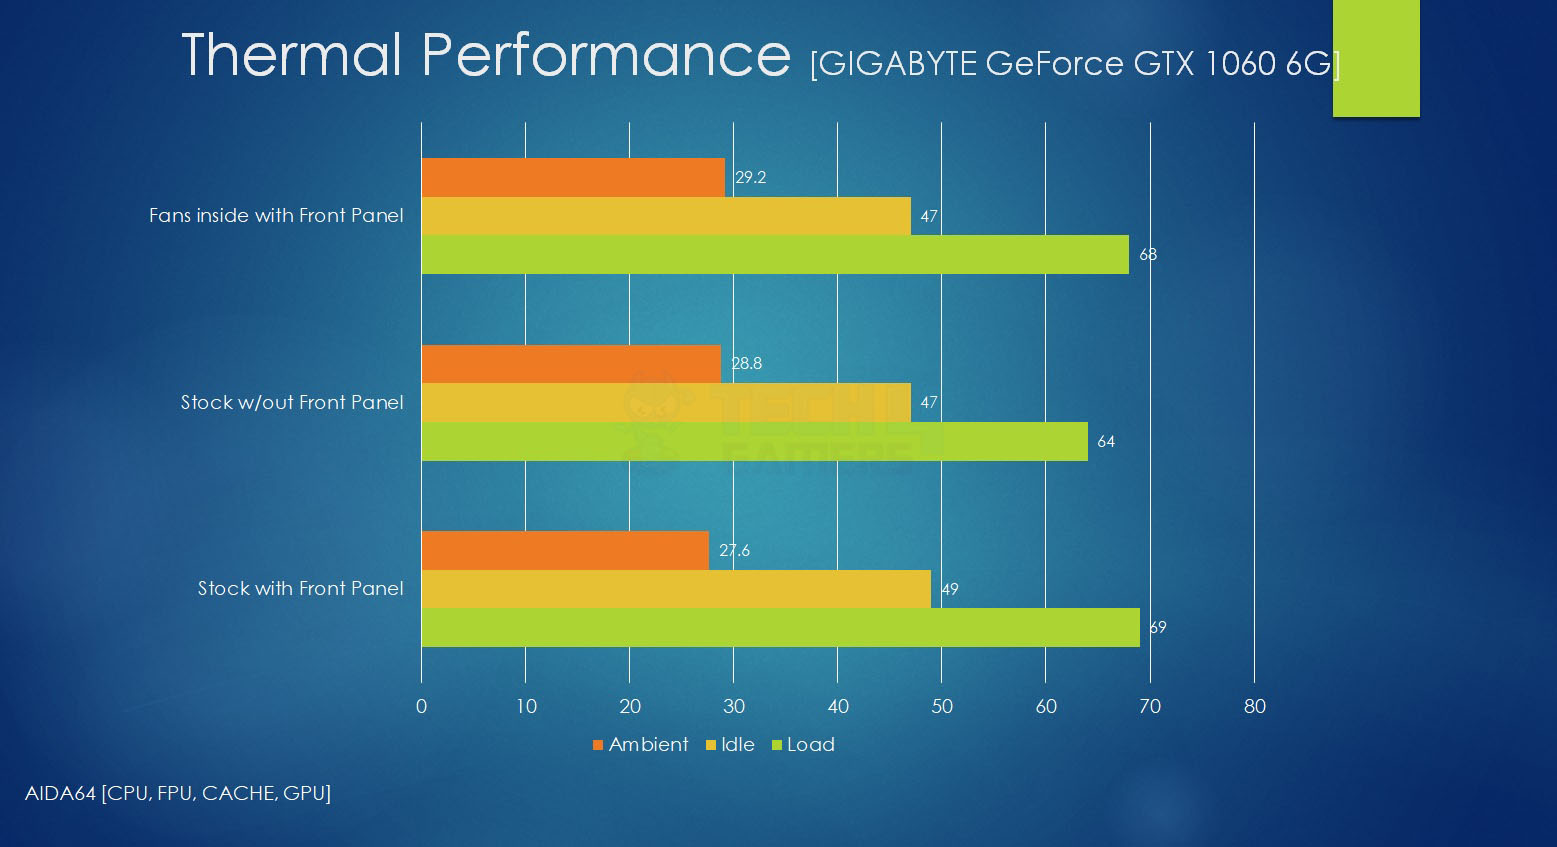
Testing
Next comes the thermal performance testing of the Thermaltake Level 20 GT Review. Following configurations have been tested:
- Stock configuration with front panel installed
- Stock configuration without the front panel
- The 200mm ARGB fans installed on the backside of the front rail with the front panel installed.
Test Setup
The following configuration has been used for the test build:
- Intel i9 9900k
- Asus Strix Z390E Gaming
- GSkill Aegis 8GB DDR4 @ 2800MHz
- Noctua NH-D15 chromax.black
- GIGABYTE GeForce GTX 1060 6G
- Cooler Master MWE 650W
- Lexar 250GB NVMe M.2 SSD
Test Results
Here are the results:
Should You Buy It?
After a complete analysis, would you want to buy it?
Buy It If:
✅ Customization is crucial: The dismantlable modular design and rotational PCIe 8 slots provide ample customization options, making it suitable for users who want to tailor their build to specific preferences.
✅ You’re an RGB lighting enthusiast: If you’re a fan of customizable RGB lighting, the Level 20 GT offers 27 lighting modes for the ARGB fans, catering to users who want to add a vibrant and personalized touch to their setup.
Don’t Buy It If:
❌ You prefer smaller form factors: Users who prefer compact builds or have space constraints might find the full tower size of the Level 20 GT impractical for their specific needs.
❌ You have specific I/O panel requirements: If you have specific requirements for the I/O panel that are not met by the Level 20 GT, such as a need for additional ports or features, alternative cases might be more suitable for your setup.
Conclusion
In conclusion, Thermaltake’s Level 20 GT ARGB Black Edition, launched in celebration of their 20th anniversary, stands out as a feature-rich full tower chassis. With its innovative design, spacious layout, and impressive cooling support, it offers a compelling value proposition at an affordable price. While facing challenges in front air intake and top exhaust, the chassis compensates with its size and ventilation, resulting in acceptable thermal performance. We express gratitude to Thermaltake for the opportunity to review and appreciate the Level 20 GT ARGB Black Edition’s capabilities.
Recent Updates
- January 12, 2024: Few text changes to improve readability.
Thank you! Please share your positive feedback. 🔋
How could we improve this post? Please Help us. 😔
Feedback By:
[Hardware Reviewer & Editor]
Meet Nauman Siddique, a highly experienced computer science graduate with more than 15 years of knowledge in technology. Nauman is an expert in the field known for his deep understanding of computer hardware.
As a tech tester, insightful reviewer, and skilled hardware editor, Nauman carefully breaks down important parts like motherboards, graphics cards, processors, PC cases, CPU coolers, and more.
- 15+ years of PC Building Experience
- 10+ years of first-hand knowledge of technology
- 7+ years of doing in-depth testing of PC Hardware
- A motivated individual with a keen interest in tech testing from multiple angles.
- I majored in Computer Science with a Masters in Marketing
- Previously worked at eXputer, EnosTech, and Appuals.
- Completed Course in Computer Systems Specialization From Illinois Tech
Get In Touch: nauman@tech4gamers.com


