In PC Building Simulator, dust accumulation is a real feature affecting the computer’s performance. As you progress in the game, dust will accumulate on the components inside the computer. This can cause the parts to overheat and malfunction, leading to crashes, freezes, and other problems. Therefore, you must learn how to clean out dust in PC Building Simulator. Meanwhile, check out how often you should clean your PC to avoid performance issues.
Key Takeaways
- Watch for signs of dust accumulation on components to prevent overheating, reduced performance, and other issues that can cause crashes and freeze.
- Compressed Air Can, Soft-Bristled Brush, and Screwdriver are essential tools to clean the dust.
- Proper preparation is key to minimizing the risk of damaging components inside the computer and improving the effectiveness of the cleaning process.
Tools Needed For Cleaning
These are the tools that aided the cleaning process in my case. They are easy to use and work effectively in wiping off the dust. Moreover, avoid these mistakes while building a PC, especially if you are a beginner.
Compressed Air Can
It is a canister filled with compressed air that removes any loose dust or debris from the component, making it easier to clean with a microfiber cloth. The Air Can come in handy when cleaning out dust from the components inside the computer. Use the one specifically designed for cleaning electronics, as it will not damage the components inside the computer. Additionally, find out how you can clean a PC without compressed air.
Soft-Bristled Brush
To get rid of stubborn dust, I used a Soft-Bristled Brush. The gentle bristles won’t scratch or harm the components, making it a safe and effective cleaning tool.
Screwdriver
You might need a Screwdriver if you have to take out any components to reach tricky spots inside the computer. Keep in mind, though, that it’s optional and may not be needed for every cleaning job.
Vacuum
Finally, a Vacuum Cleaner can suck up any remaining dust or debris in your PC case. Vacuuming the PC case will assist in getting rid of any dust or dirt that may have accumulated on the back or bottom, giving it a fresh, clean appearance.
Preparing The PC
Properly preparing for the cleaning process helps minimize the risk of damaging computer components and enhances the overall effectiveness of the cleaning.
Shut Down The Computer
To prepare for cleaning, begin by shutting down the computer completely. I turned off the computer and disconnected it from the power supply to prevent unintentional electrical shocks.
Unplug All Cables And Peripherals
Once the computer was completely shut down and had time to cool down, I unplugged all cables and peripherals, including the power cable, keyboard, mouse, monitor, and other connected devices.
This will ensure that the components inside the computer are easily accessible and reduce the risk of accidentally damaging any cables or peripherals during the cleaning process.
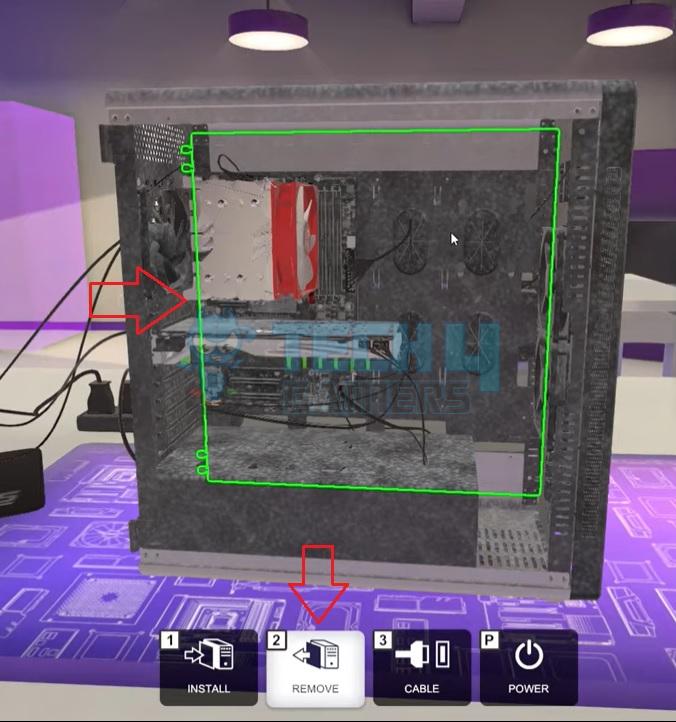
Remove The Side Panel
Next, I removed the side panel of the computer case using the following method:
- Go to the Workshop area in the game > Click on the relevant PC case > Choose Remove.
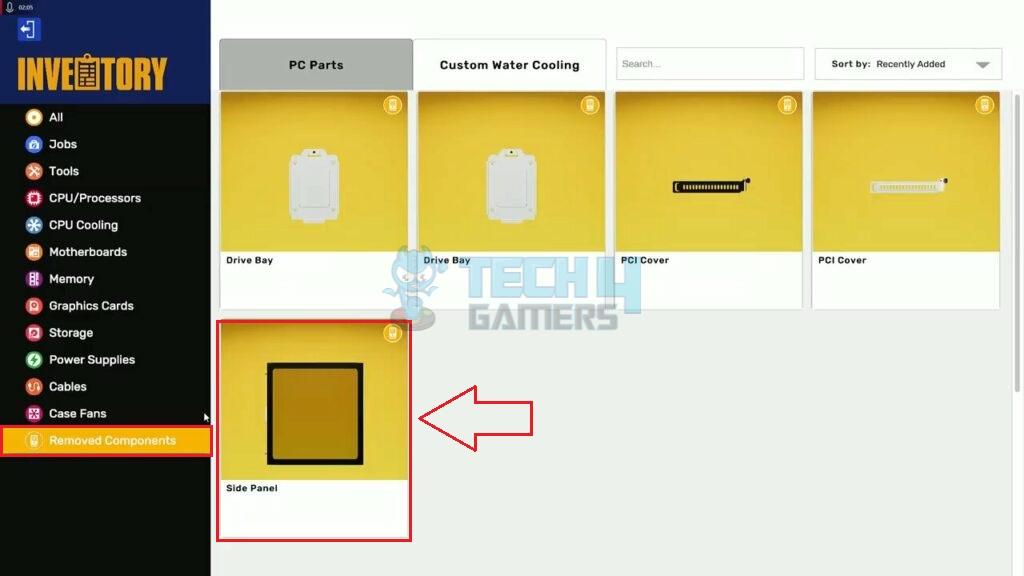
Remove Panel (Image By Tech4Gamers) - Removing the side panel will give you access to the various components in your PC, making it easier to clean them. You can access all the removed components in the Inventory.
Inventory (Image By Tech4Gamers)
Identify Components With Dust
Once the computer is open, identify which components have accumulated dust. In the PC Building Simulator, this can be done by hovering the mouse cursor over each element, and a percentage will indicate the level of dust. Components with a higher dust level will require more attention during cleaning.
Steps For Cleaning Dust Off Your PC
I used this step-by-step guide to clean dust in the PC Building Simulator, and by the end of it, the results and overall look of my PC were pretty satisfying.
With the side panel removed during preparation, start removing and cleaning the various components in your PC:
- Click on the desired component > Press Remove.
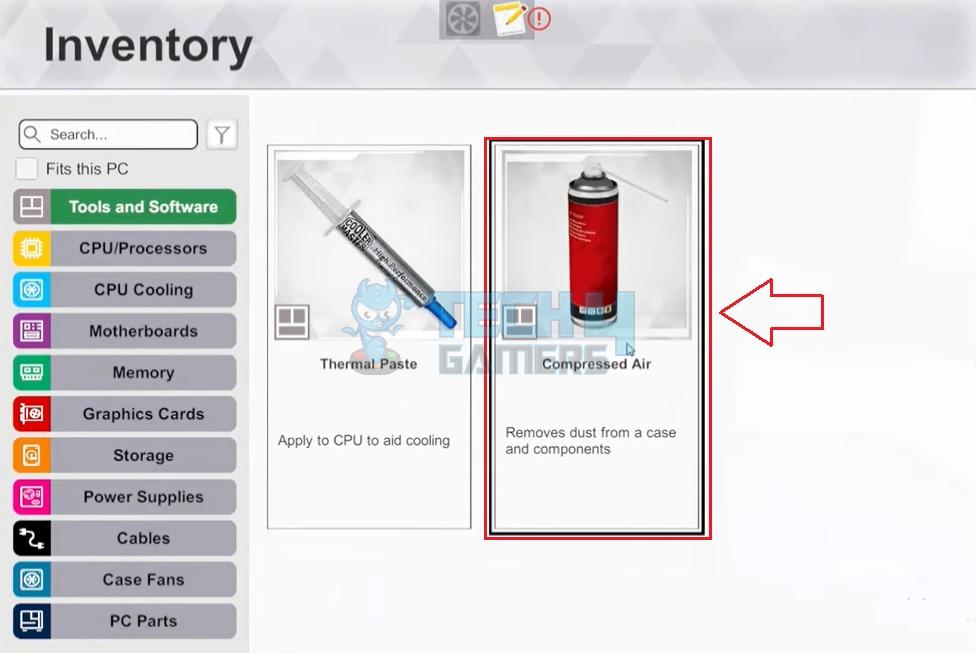
- Select Compressed Air Can from the Tools And Software section > Click on the component you want to clean.
Compressed Air Can (Image By Tech4Gamers) - Point the nozzle at the component while holding the Compressed Air Can upright > Pull the trigger on the Air Can.
- Next, select the Vacuum Cleaner from the same section > Click on the PC case areas you want to clean.
- Use the Vacuum Cleaner to remove dust or debris from the casing.
Signs That Your PC Needs Dusting
By watching for these signs of dust accumulation, you can help ensure your PC continues operating at peak performance.
Loud Or Noisy Fans
A sudden increase in the noise level of your PC’s fans may indicate dust buildup. Dust accumulation on fan blades can reduce efficiency, prompting the fans to spin faster to maintain the same airflow. This leads to heightened noise levels and diminished performance. Besides, know how to clean PC fans with our extensive guide.
Overheating
Accumulated dust can obstruct airflow through your PC’s components, potentially causing overheating, which can, in turn, lead to reduced performance, system failures, and even permanent hardware damage. You need a proper PC case airflow for the system to run smoothly.
Reduced Performance
Dust buildup can also cause your PC’s components to operate less efficiently, reducing performance. This can manifest in various ways, such as slower boot times, longer loading times, and reduced game frame rates.
Visible Dust Accumulation
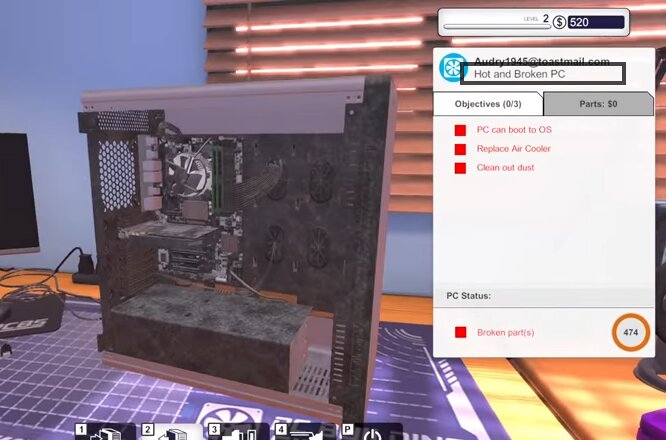
Finally, inspect the interior of your PC to look for visible signs of dust accumulation. This can include dust on your components, fans, and other internal surfaces. In the PC Building Simulator, you can easily open your PC and look inside using the View Interior button.
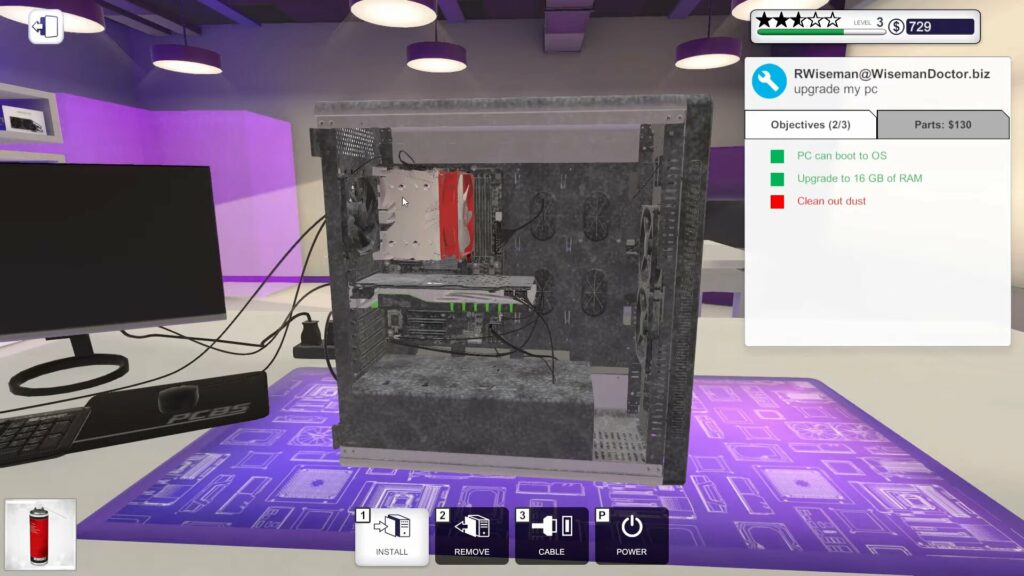
A PC Building Simulator proved to be an excellent way for me to learn to clean my PC safely and risk-free. While the process was easy, I had to be super careful while handling components so as not to damage or scratch them. After cleaning, I put together all the components. Following the same technique on my real-life PC, I visibly noticed a faster performance. Apart from this, I also practiced to perform overclocking in the PC Building Simulator.
Frequently Asked Questions
It depends on several factors, such as the environment in which your PC is located and how often you use it. Generally, cleaning your PC every six months or more frequently if you notice dust buildup is a good idea.
You cannot harm your PC in PC Building Simulator by cleaning dust. However, in real life, exercising caution when cleaning your PC is essential to avoid damaging any components.
It’s possible that cleaning dust out of your PC in the PC Building Simulator could improve its performance if dust buildup causes it to overheat. However, this is not always the case, and many other factors can affect your PC’s speed and performance.
More About PC Building:
- How Much Does It Cost To Build A PC: Gaming & Budget
- How to Ground Yourself When Building A PC [Explained]
- How To Build A White Gaming PC in 2023
- How to Build a Gaming PC In 2023: The Definitive Guide
Thank you! Please share your positive feedback. 🔋
How could we improve this post? Please Help us. 😔
[How To’s & Guides Editor]
Haddi has been in the Gaming and tech Space for over 10 Years Now; he has worked on notable websites like eXputer, Gamepur, Gear Siege, Gearnuke, and plenty more. He is an expert at Games & PC Hardware; you can expect him to solve any problem. People often joke, that if there is any problem anyone can solve, Haddi can solve it faster. Currently, Haddi writes and manages a Team of Experts at Tech4Gamers.
Contact: Haddi@tech4gamers.com


 Threads
![How To Safely Transport A PC [Step By Step]](https://tech4gamers.com/wp-content/uploads/2023/06/How-TO-28-218x150.jpg)

![How To Reset RGB LED Controller? [With Pictures]](https://tech4gamers.com/wp-content/uploads/2023/03/How-To-Reset-RGB-LED-Controller-218x150.jpg)

