


Some programs and tasks, mainly third-party software, require you to disable the Firewall on your computer for them to run. However, turning off this security feature puts your PC at risk of malware or hacking attacks. I tested multiple ways to disable the Firewall, such as via the Command Prompt and the Control Panel.
- Disabling the Firewall may be necessary to allow the installation of some apps and programs.
- Turn it off using the Control Panel, Command Prompt, Group Policy Editor, and more.
- Removing Firewall security can expose your computer to data breaches and malware attacks.
Method Difficulty Rating
Rated: 2/10
Rated: 3/10
Rated: 5/10
Rated: 4/10
Rated: 5/10
Rated: 4/10
Using Control Panel
Here is how to disable the Firewall using the Control Panel:
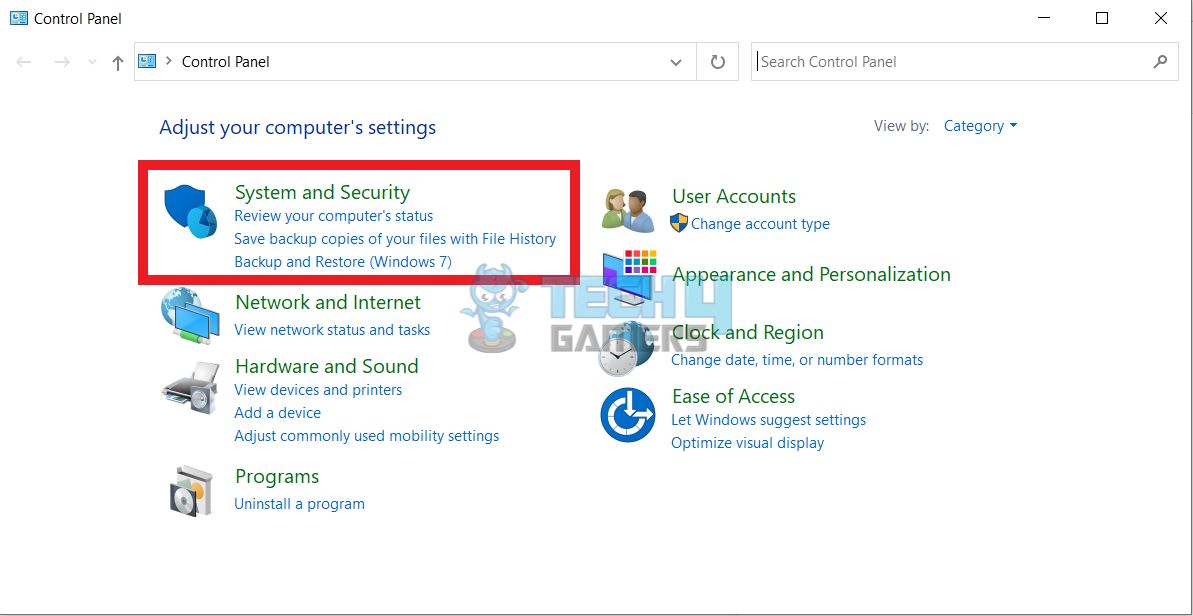
- Open System And Security: Launch Control Panel > System and Security.

System and Security (Image By Tech4Gamers) - Head To Windows Defender: Now, select Windows Defender Firewall. If Windows Defender is not installed, click on Windows Firewall > Turn Windows Defender Firewall On Or Off.
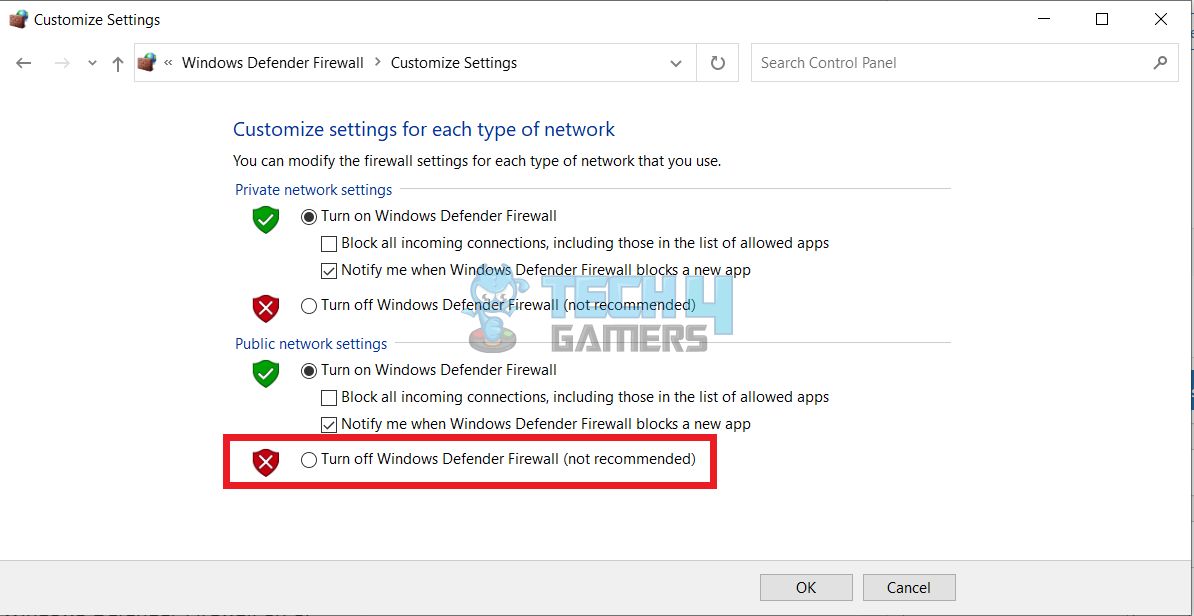
- Disable Defender Firewall: Mark the circle against Turn Off Windows Defender Firewall (Not Recommended) > OK.

Turn Off Windows Defender Firewall (Image By Tech4Gamers)
Using Command Prompt
I ran the designated Command Prompt codes to switch off the Firewall on specific profiles:
- Launch Run Box: Simultaneously, press Windows+R > Type cmd > OK.
- Execute Profile Code: Proceed with the code specific to the chosen profile for which you want to disable Firewall.
Featured Profile Codes Domain netsh advfirewall set domainprofile state off Public netsh advfirewall set publicprofile state off Private netsh advfirewall set privateprofile state off All netsh advfirewall set allprofiles state off
Using Group Policy Editor
Carefully follow each step to avoid messing up any other setting:
- Enter Code In Run: Press the Windows+R for Run box > Enter gpedit.msc > OK.
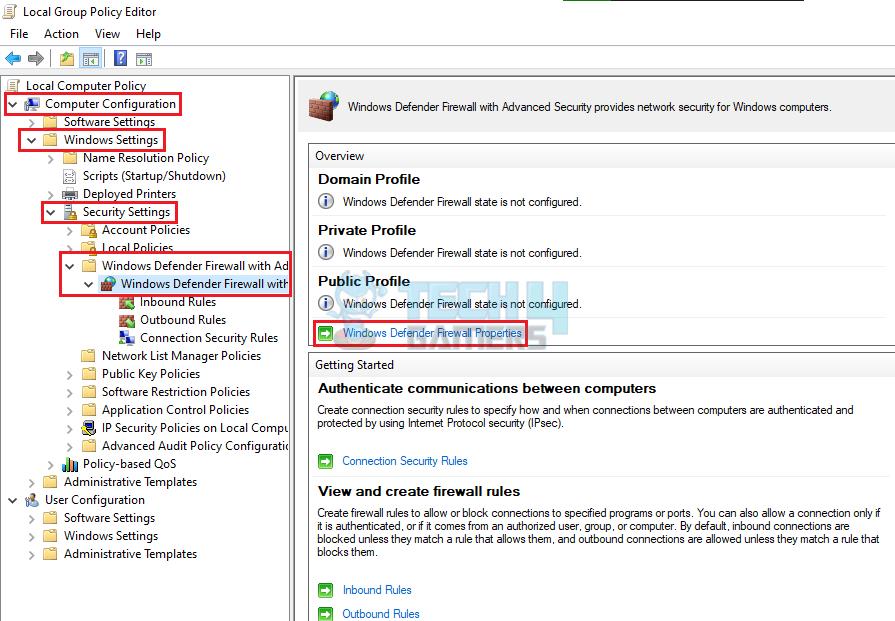
- Navigate To Firewall Security: In Group Policy Editor, navigate to Computer Configuration > Windows Settings > Security Settings > Windows Firewall With Advanced Security > Press Windows Defender Firewall Properties.

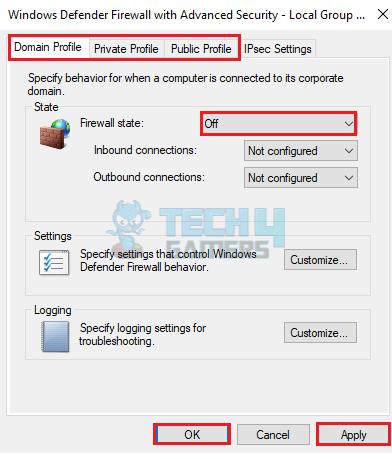
Go To Windows Defender Firewall Security (Image By Tech4Gamers) - Pick Profile: Select the profile for which you want to turn off the Firewall (Domain, Private, Public) > Set the Firewall State to Off > OK.

Remove Firewall For Profile (Image By Tech4Gamers)
Disabling For A Single Program
I resort to this step-by-step process when I want to render the protection ineffective on a certain program:
- Bring Up Quick Link: Press the Windows+X to open the Quick Link menu.
- Find Defender Firewall: Follow Control Panel > System and Security > Windows Defender Firewall.
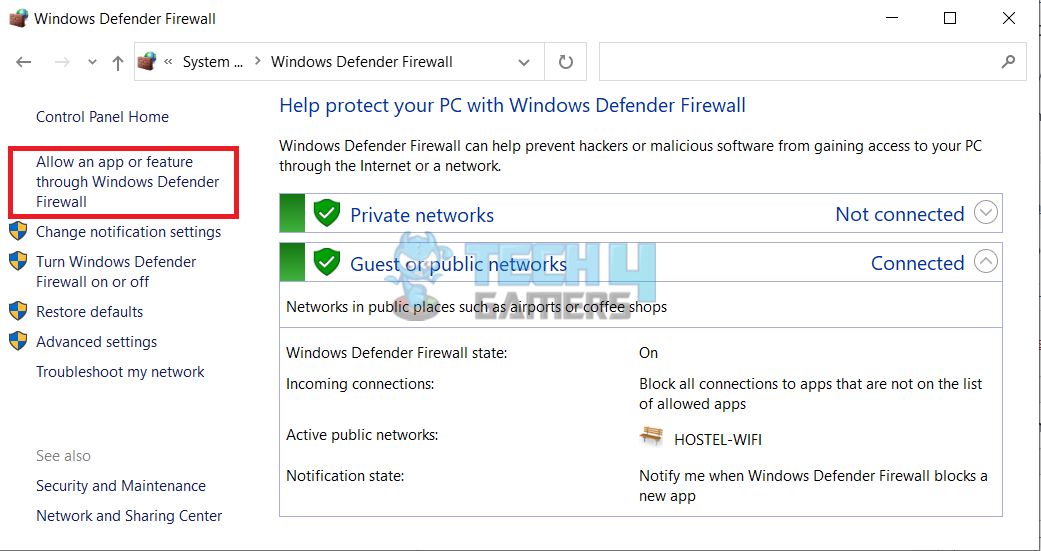
- Access Bypass App Settings: Select Allow A Program Through Windows Defender Firewall in the left pane.

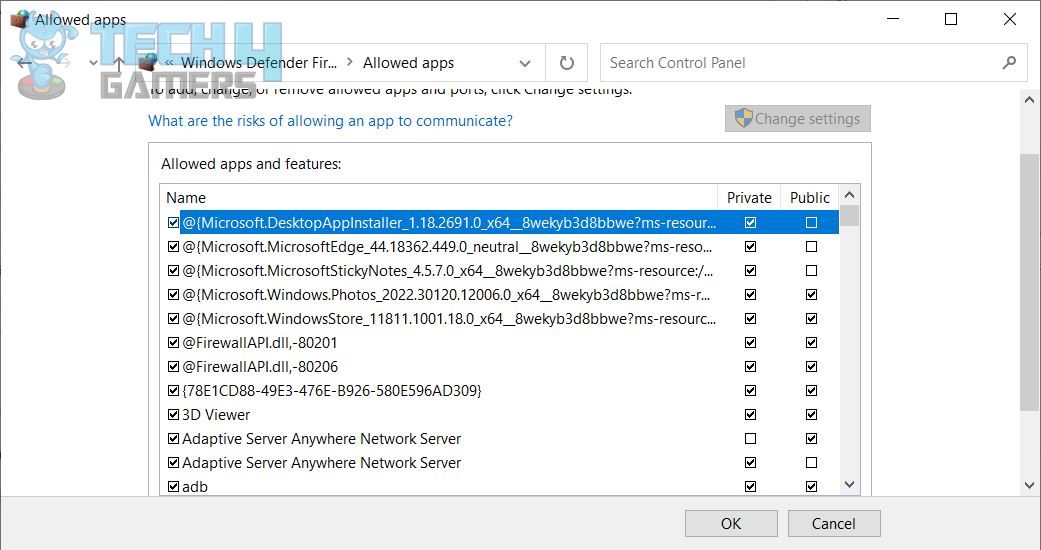
Allow A Program Through Windows Defender Firewall (Image By Tech4Gamers) - Select The App: Hit the Change Settings button > Locate the application you want to let through the Firewall by scrolling down.
- Remove Firewall For App: Mark the box next to the program to allow it through the Private and Public Firewall > OK.

Select The Program You Want To Allow Through The Firewall (Image By Tech4Gamers)
Using Registry Editor
Move ahead with the instructions below for the process to work:
- Access Run: Press the Windows+R to open Run box > Execute regedit > OK.
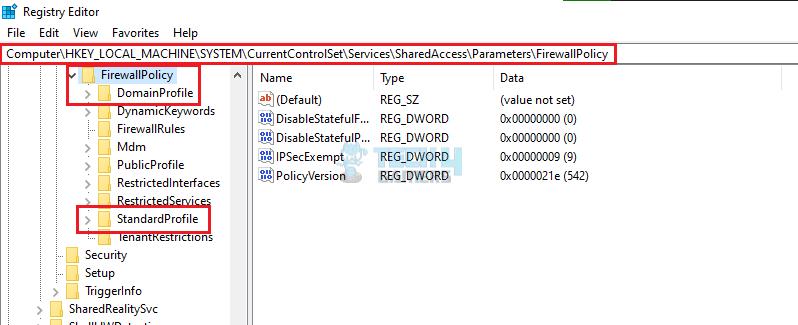
- Search In Registry: In the Registry Editor, navigate to
HKEY_LOCAL_MACHINE\SYSTEM\CurrentControlSet\Services\SharedAccess\Parameters\FirewallPolicy
- Find The Keys: In the FirewallPolicy folder, you will see two keys, DomainProfile and StandardProfile.
-

Find Profile Keys (Image By Tech4Gamers)
-
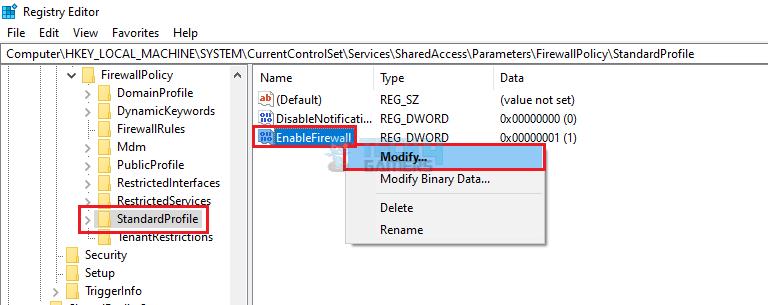
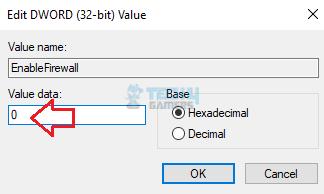
- Modify Value Data: Double-click the key for the profile you want to disable the Firewall for (DomainProfile or StandardProfile) > Right-click on EnableFirewall DWORD > Modify.

Modify DWORD Value (Image By Tech4Gamers) - Turn Off Firewall: Change the Value Data to 0 > OK.

Change Value Data To 0 (Image By Tech4Gamers)
Using Windows PowerShell
Execute the code in PowerShell to make the setting non-operational on certain profiles:
- Go To PowerShell: Push Windows+X to open the Quick Link menu > Windows PowerShell (Admin).
- Execute Code: Use these codes to turn off the Firewall for the desired profile:
Featured Profile Code Domain Set-NetFirewallProfile -Profile Domain -Enabled False Public Set-NetFirewallProfile -Profile Public -Enabled False Private Set-NetFirewallProfile -Profile Private -Enabled False All Set-NetFirewallProfile -Profile Domain,Public,Private -Enabled False - Verify Firewall Status: To verify that the Firewall has been successfully disabled, run the following command > Note the status.
Get-NetFirewallProfile
Pros And Cons Of Disabling Firewall
| Pros | Cons |
|---|---|
| ✅ Allows installation of apps and programs | ❌ Exposes computer to security breaches |
| ✅ May slightly boost system performance | ❌ Allows unauthorized system access |
| ✅ Removes network restrictions | ❌ Fails to protect against malware and virus |
Final Words
I had to disable the Firewall because it restricted software installation via a third-party website. Doing so allowed for a smooth installation. Once completed, I re-enabled it to protect the system against data breaches. Additionally, although the above methods are easy and effective, you should have some knowledge of Windows security protocols to remove the Firewall.
Frequently Asked Questions
Yes, it is possible by allowing the desired program through the Firewall in the Windows Defender Firewall settings and specifying the network location.
Create an inbound rule in the Windows Defender Firewall settings to allow the desired program to go through the Firewall on the specified port or range of ports.
You can do it using the Task Scheduler and the appropriate Command Prompt or PowerShell commands.
Similar PC Guides:
Thank you! Please share your positive feedback. 🔋
How could we improve this post? Please Help us. 😔
[How To’s & Guides Editor]
Haddi has been in the Gaming and tech Space for over 10 Years Now; he has worked on notable websites like eXputer, Gamepur, Gear Siege, Gearnuke, and plenty more. He is an expert at Games & PC Hardware; you can expect him to solve any problem. People often joke, that if there is any problem anyone can solve, Haddi can solve it faster. Currently, Haddi writes and manages a Team of Experts at Tech4Gamers.
Contact: Haddi@tech4gamers.com


