


Domain Name System (DNS) translates the domain names into IP addresses a machine can understand. A DNS cache is a temporary storage area that stores information related to recent DNS searches. So, the next time you search for the same website, your computer will look for the information within the DNS cache rather than making a new request to the DNS server. If you’re facing network connectivity issues, try clearing the DNS cache.
- A DNS cache stores the results of the DNS searches related to websites and servers that you search for.
- Clearing the DNS cache is effective in fixing network connectivity errors and slow loading times on your computer or mobile phone.
- The method of clearing the DNS cache is different for each platform, but you can do it using the Command Prompt on Windows.
Windows
Proceed with this method to erase the DNS cache on a Windows PC:
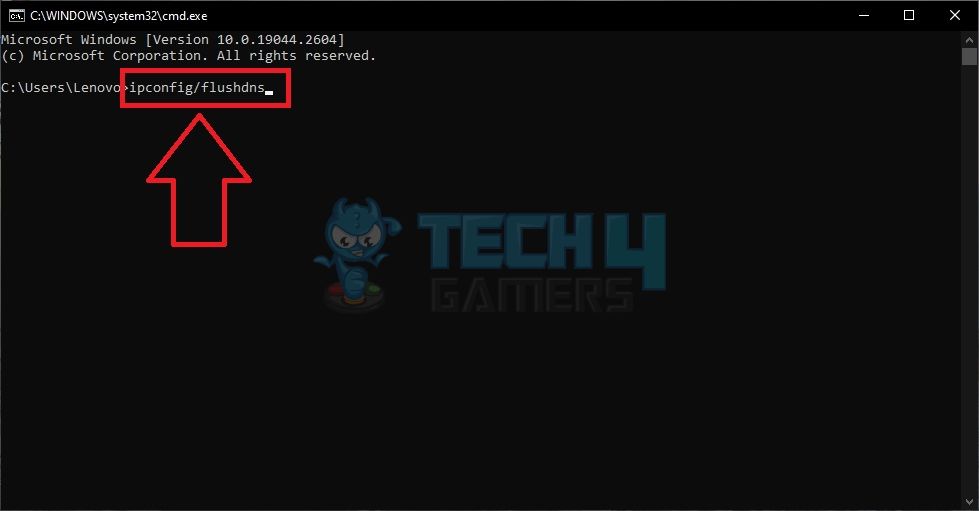
- Open Command Prompt: Type cmd in the Search Bar > Launch the Command Prompt.

Search For Command Prompt (Image By Tech4Gamers) - Run Command: Write and execute the command:
ipconfig/flushdns

Execute DNS Code (Image By Tech4Gamers) - Let It Complete: Wait until the message, Successfully Flushed The DNS Resolver Cache, appears in the window.

MacOS
By following these instructions, you can carry on the process on your Mac:
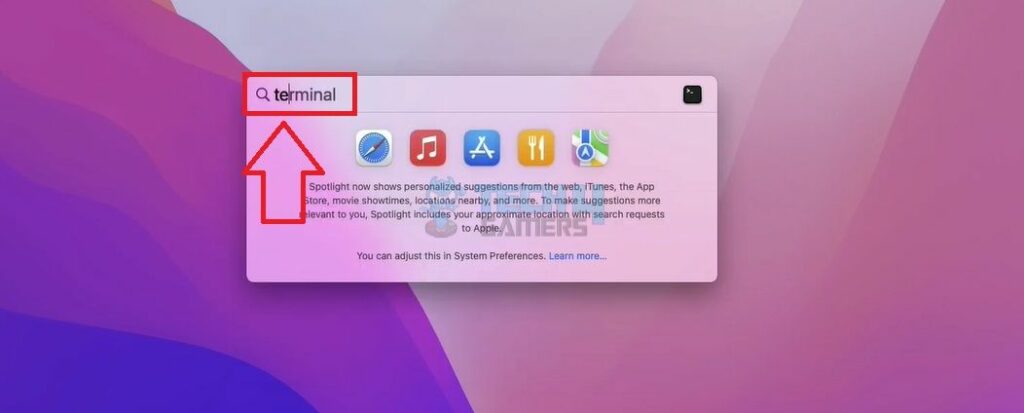
- Launch Terminal: Click the Spotlight icon on the top bar > Search for Terminal > Open it.

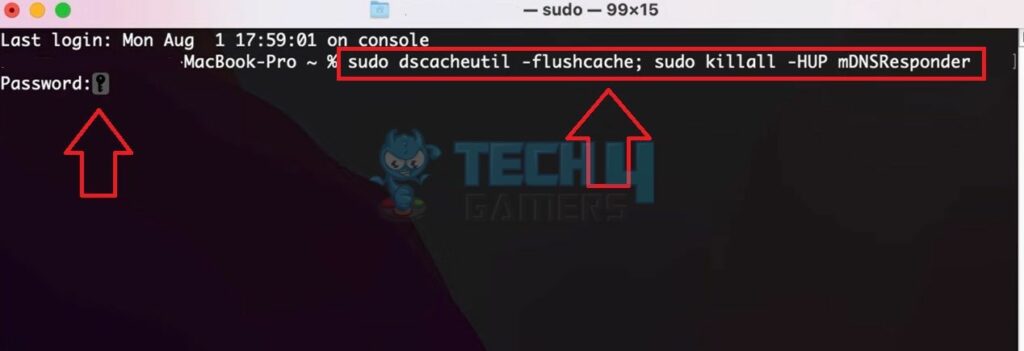
Search For Terminal (Image By Tech4Gamers) - Execute DNS Command: The command to clear the DNS cache in macOS varies with the version. Type the right command based on your macOS > Enter.
OS Version DNS Flush Command Code Tiger lookupd – flushcache Ventura/Monterey/Catalina/Big Sur sudo dscacheutil - flushcache; sudo killall -HUP mDNSResponder Yosemite sudo discoveryutil mdnsflushcache Lion/Mojave/Mountain Lion/Mavericks/Sierra/El Capitan sudo killall -HUP mDNSResponder - Confirm Password: Type your Password > Press Enter.

Enter macOS Code (Image By Tech4Gamers)
Linux
I used the technique below for a quick DNS cache clear on my Linux computer:
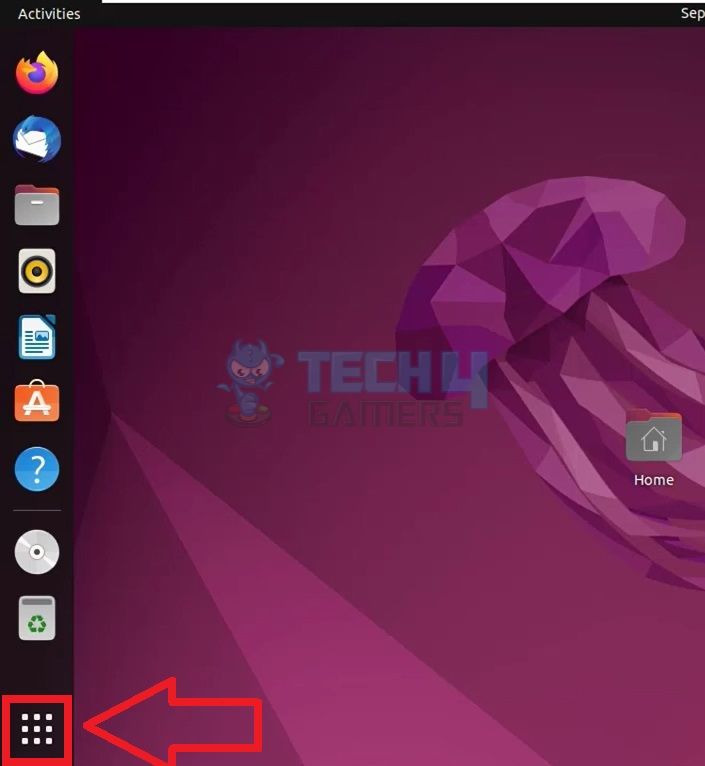
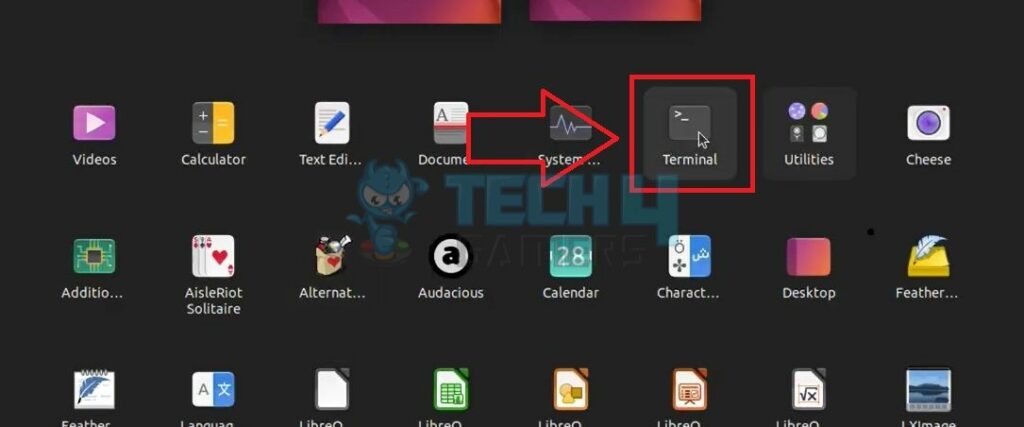
- Access Linux Menu: Click on the Menu symbol on the left sidebar.

Click On Menu Button (Image By Tech4Gamers) - Select Terminal: Navigate to and open Terminal from the app list.

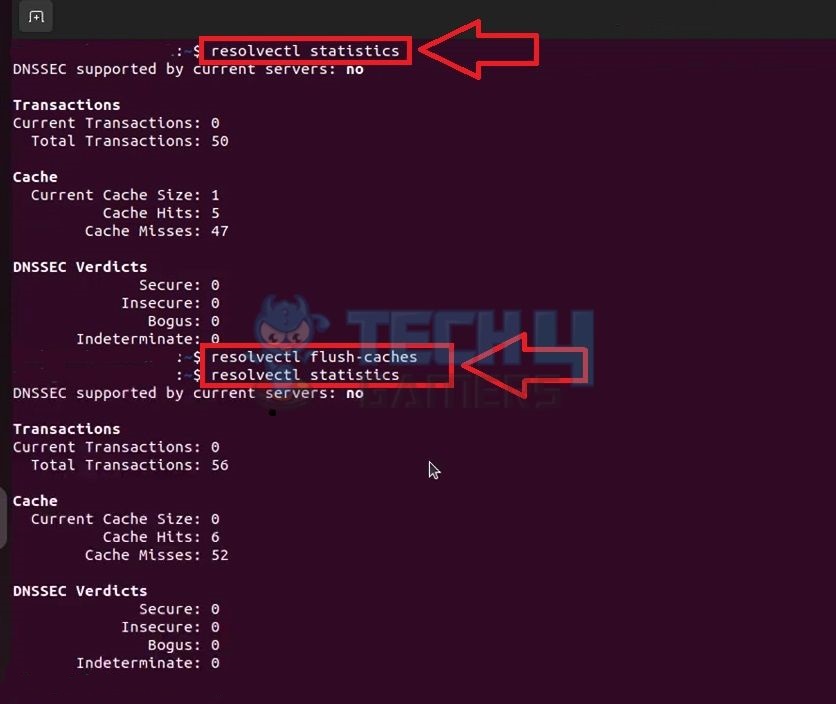
Choose Terminal (Image By Tech4Gamers) - Calculate DNS Size: First, calculate the size of the DNS cache with:
resolvectl statistics
- Flush DNS: Next, execute the command to remove the DNS cache:
resolvectl flush-caches
- Verify New DNS Size: Ensure the process was successful by checking the cache size using the same code in Step 3.

Run Linux Code (Image By Tech4Gamers)
Android
Although these steps were performed on a Samsung interface, the steps for other phone models will be similar:
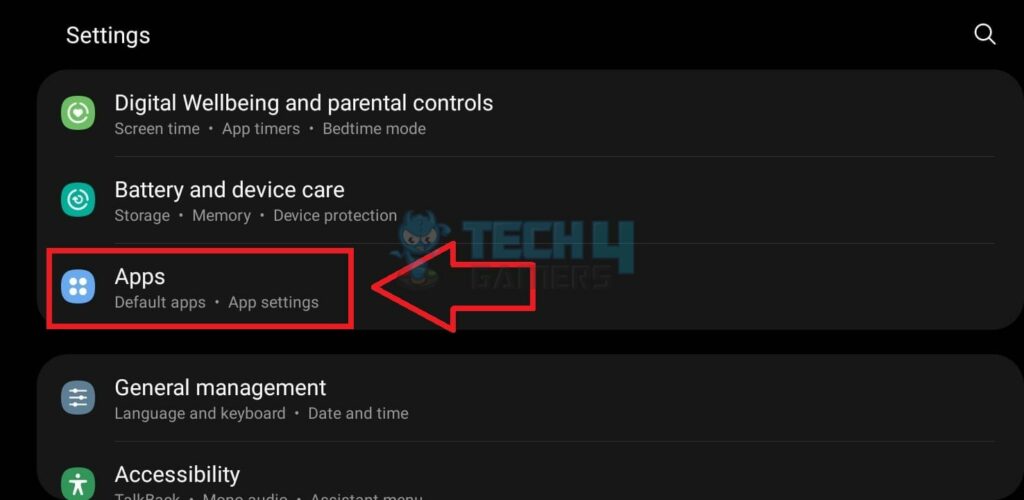
- Get To Apps: Tap the Settings icon on the Main Screen > Apps.

Scroll To Apps (Image By Tech4Gamers) - Select Browser: Find Chrome or any other web browser you use on your phone.
Navigate To And Pick Chrome (Image By Tech4Gamers) - Access Storage: Go to the browser’s Storage.
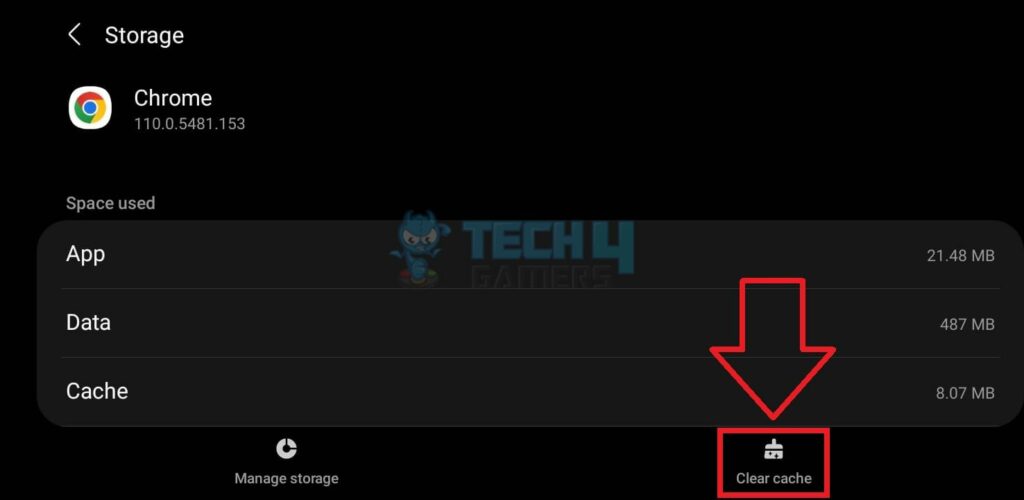
Press Storage (Image By Tech4Gamers) - Erase Cache: Press the Clear Cache button on the bottom panel.
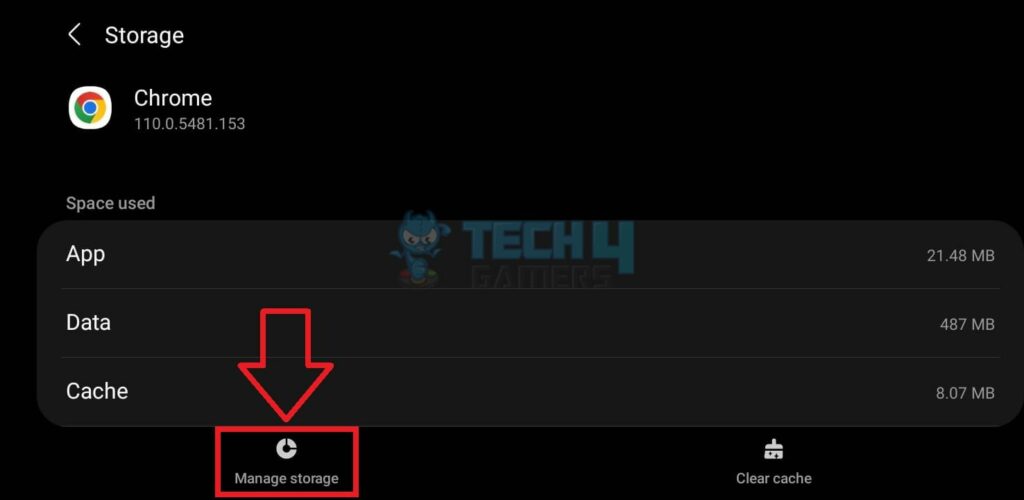
Clear Cache (Image By Tech4Gamers) - Pick Manage Storage: Next, tap Manage Storage to view more options.

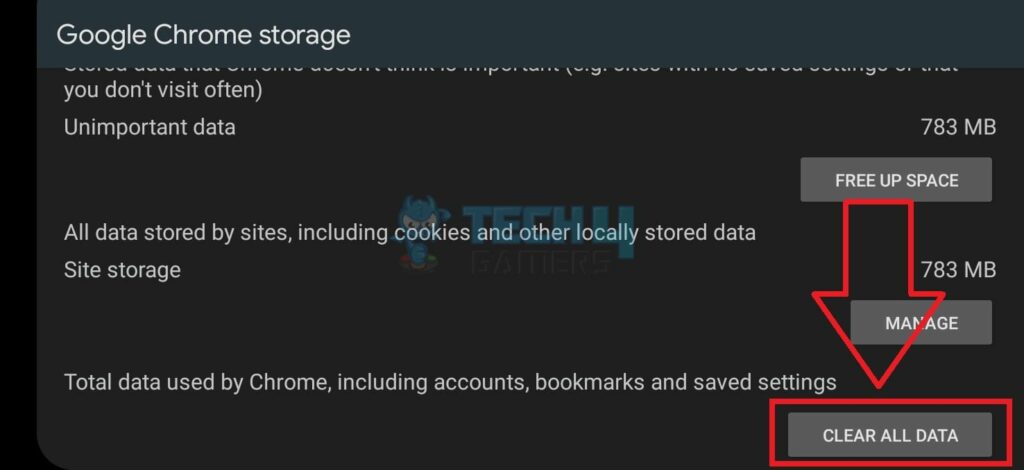
Choose Manage Storage (Image By Tech4Gamers) - Delete Data: Hit the button, Clear All Data.

Clear All Data (Image By Tech4Gamers)


iOS
For an iPhone, here is how you can get rid of the DNS cache:
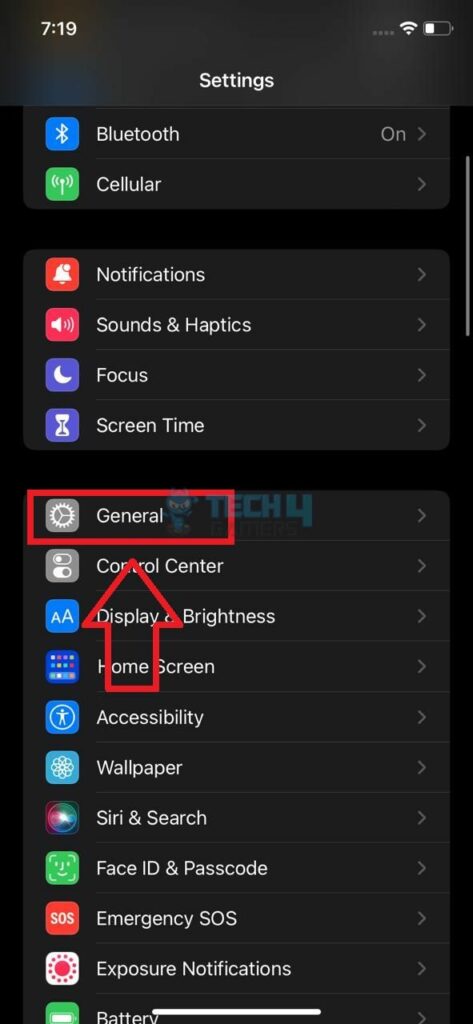
- View General Settings: Head to the Settings > General.

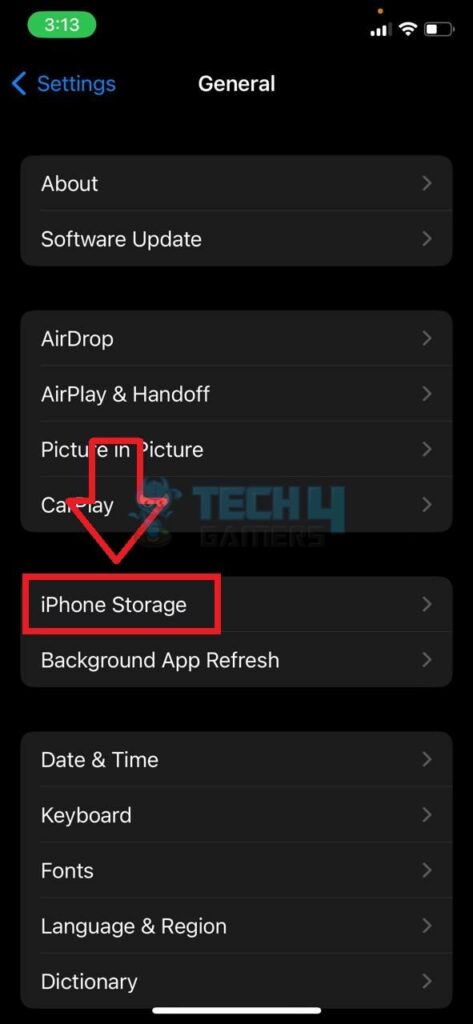
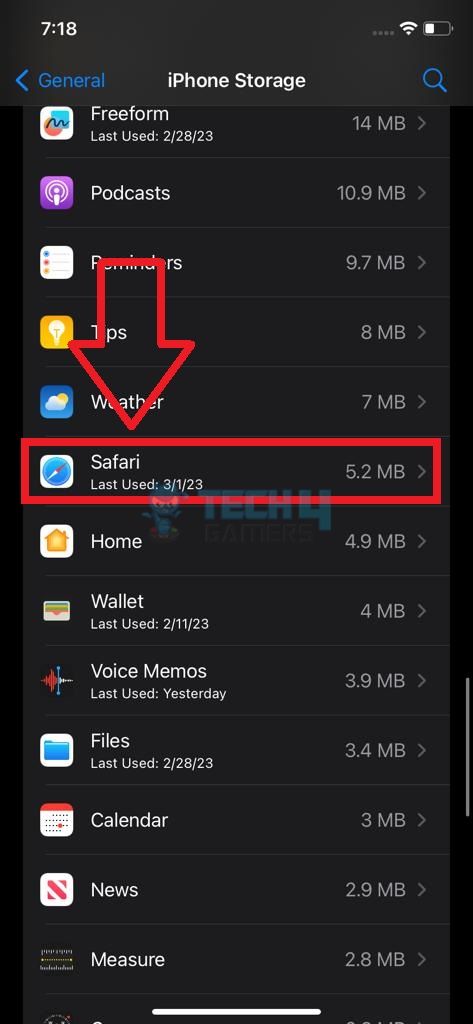
Go To General (Image By Tech4Gamers) - Select Storage: Under General Settings, go to iPhone Storage.

Select iPhone Storage (Image By Tech4Gamers) - Choose The Browser: Tap on Safari or any other browser.
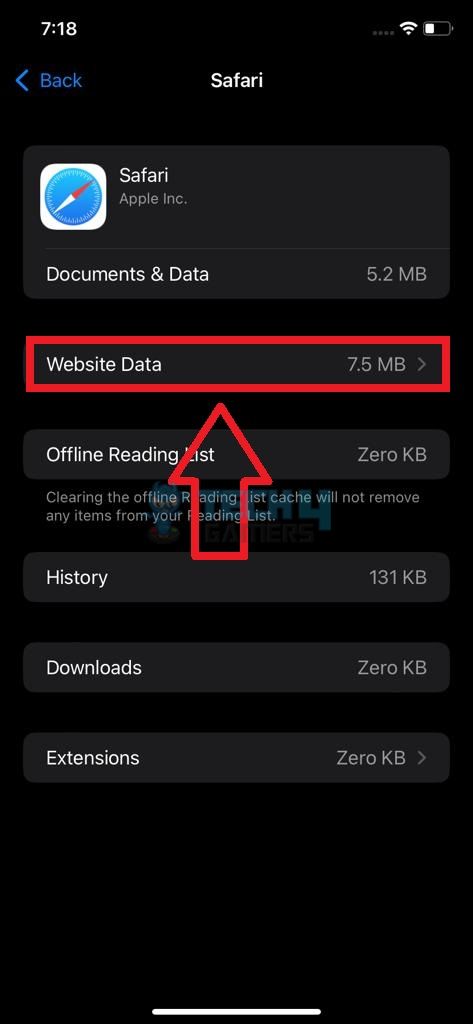
Tap Safari (Image By Tech4Gamers) - Tap Website Data: Click on Website Data to view saved websites and links.

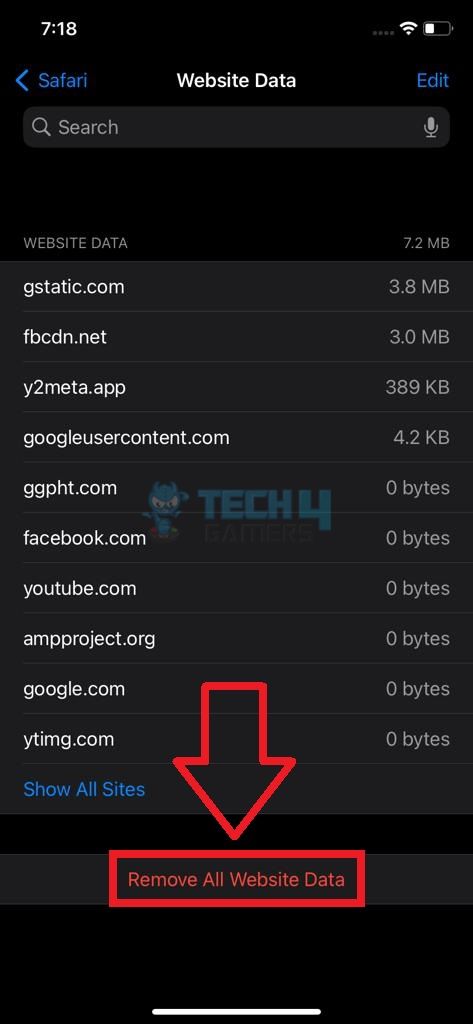
Click On Website Data (Image By Tech4Gamers) - Erase Web Data: Hit Remove All Website Data.

Remove All Website Data (Image By Tech4Gamers)
When Should You Clear DNS Cache?
Sometimes, the data stored in the DNS cache can become corrupt or outdated, leading to problems when accessing a website. It can also cause errors on your computer or increase the loading time. Thus, it becomes necessary to clear the DNS cache to resume the proper operation of your device, for example, when;
- You cannot access or load certain websites on your device.
- It takes too long for the website to load properly.
- You face network connectivity errors on your device.
- You have updated the DNS settings or the Domain Name for your network.
Pros And Cons Of Clearing DNS Cache
| Pros | Cons |
|---|---|
| ✅ Accelerates browsing speed | ❌ Removes locally configured data |
| ✅ Ensures new settings are smoothly applied | ❌ Risk of DNS spoofing |
| ✅ Resolves network connecivity errors | ❌ Slower initial loading |
Final Words
Clearing the DNS cache proved to be an effective solution when websites were taking unusually long to load on my PC. After the procedure, I noticed a significant decrease in the loading time; however, only the initial load took a bit longer since the content had to be fetched again. The subsequent visits to the same sites were smooth and free of errors.
Frequently Asked Questions
Clearing the DNS cache removes old and corrupt data in the DNS to allow quick and easy access to websites and network servers.
Launch “Terminal” and execute the code “resolvectl flush-caches” to erase the DNS cache.
Clear the browser’s data from your phone settings to wipe the DNS cache on your mobile.
More About Clearing Cache:
Thank you! Please share your positive feedback. 🔋
How could we improve this post? Please Help us. 😔
[How To’s & Guides Editor]
Haddi has been in the Gaming and tech Space for over 10 Years Now; he has worked on notable websites like eXputer, Gamepur, Gear Siege, Gearnuke, and plenty more. He is an expert at Games & PC Hardware; you can expect him to solve any problem. People often joke, that if there is any problem anyone can solve, Haddi can solve it faster. Currently, Haddi writes and manages a Team of Experts at Tech4Gamers.
Contact: Haddi@tech4gamers.com


