Threads

You may need to remove McAfee from Windows 11 if you use other antivirus software or to troubleshoot software conflicts. There are multiple ways to proceed with the task, such as via the Settings menu or the Control Panel.
- You can remove McAfee from your computer using Settings, Command Prompt, Control Panel, and more.
- Activate the Super Administrator Account if you cannot delete McAfee using normal admin privileges.
- Alternatively, you can use the MCPR tool by McAfee if other methods do not remove the program from Windows 11.
Methods Difficulty Rating
Rated: 2/10
Rated: 3/10
Rated: 5/10
Rated: 6/10
Rated: 6/10
Rated: 7/10
Enable Super Administrator Account
Before removing McAfee, I enabled the Super Administrator Account on my Windows 11 computer. Activating a Super Administrator account gives you more rights and control over the system and its pre-loaded software/other apps. Here are the complete instructions to activate this mode.
- Open Command Prompt: Launch the Run box with Windows + R > Execute cmd > Command Prompt window should open on your screen.
- Execute Code: Run the code below, then exit Command Prompt.
net user administrator /active:yes
- Sign Out Of Profile: Click on the Windows symbol on the Taskbar > Click on your user profile > Sign Out.
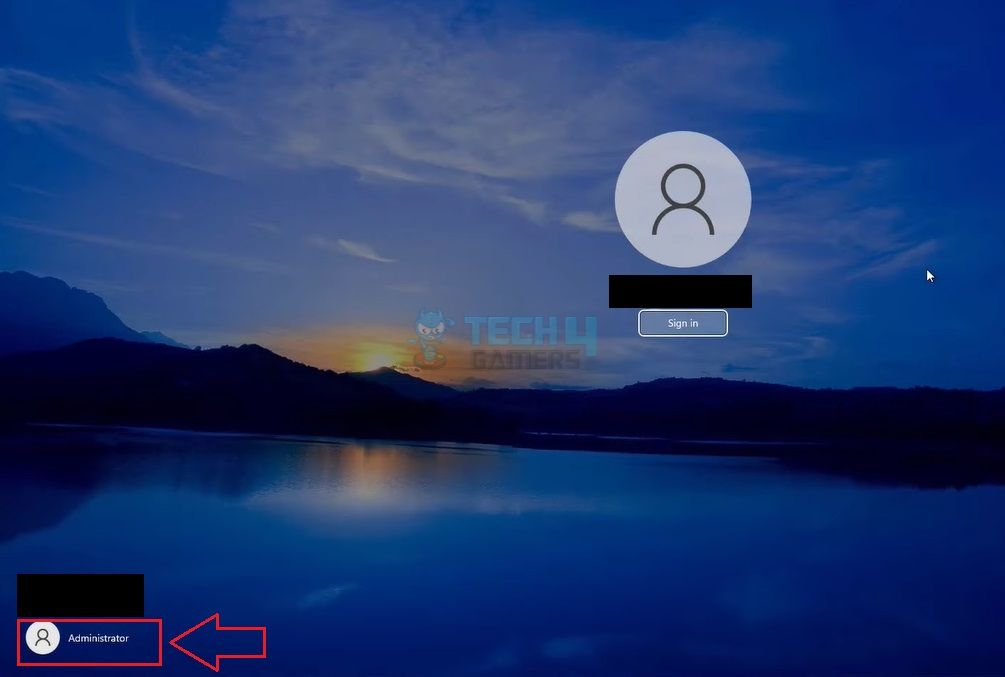
- Access Administrator Account: You should now see the Windows sign-in screen. Pick the Administrator account option at the screen’s bottom-left > Sign in to Windows.

Sign Into Administrator Account (Image By Tech4Gamers)
Using Settings
The conventional method is to use the Windows 11 Settings interface to eliminate McAfee or any other app from your computer, as it gets the job done easily and in no time. These are the steps you need to follow.
- Access Apps List: Select Start menu > Pick Settings > Apps > Apps And Features.
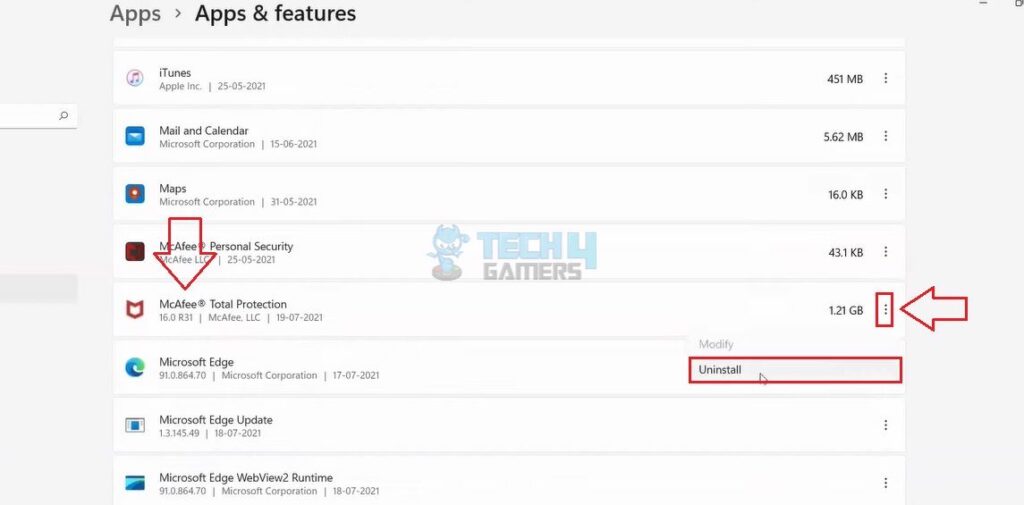
- Uninstall McAfee: Find McAfee in this list > Select the Three Dots in front of it > Uninstall.

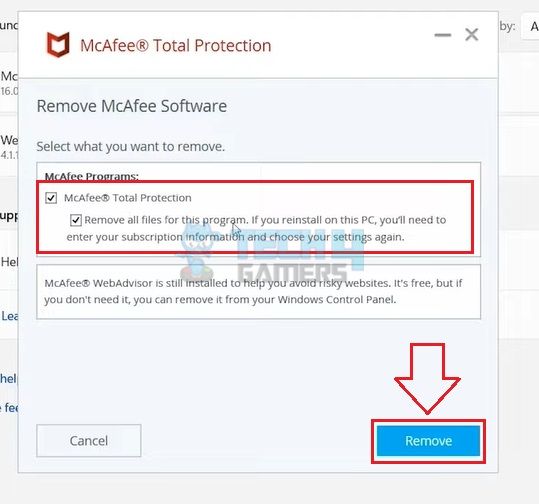
Uninstall McAfee From Settings (Image By Tech4Gamers) - Confirm Removal: Mark the boxes before McAfee and Remove All Files For This Program > Remove.

Confirm Removal (Image By Tech4Gamers)
Using Control Panel
Because the Control Panel is home to many important system settings, like Power and Hardware configurations, I used it to remove this pre-installed program from the system. Use the Control Panel to uninstall McAfee with the instructions below.
- Open Control Panel: Launch the Search > Type Control Panel > Open it from the results.
- Access Uninstall Settings: Under the Programs heading, click on Uninstall A Program.
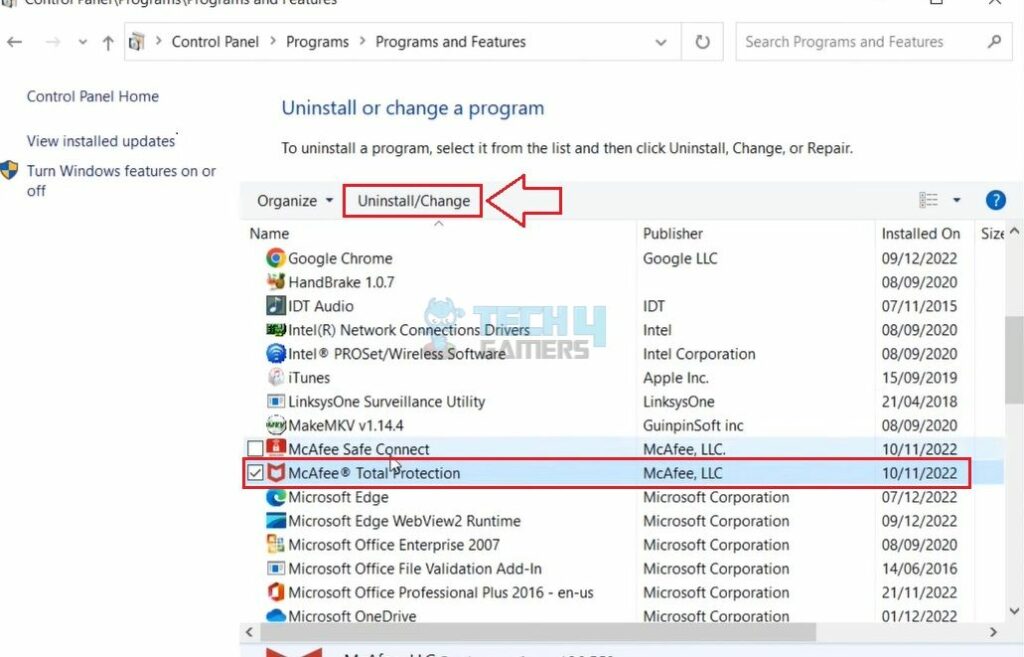
- Uninstall McAfee: Again, highlight McAfee > Press the Uninstall/Change button on the upper pane > Uninstall.

Uninstall McAfee From Control Panel (Image By Tech4Gamers)
Using MCPR Tool
McAfee offers a dedicated McAfee Consumer Product Removal Tool (MCPR) that identifies and gets rid of McAfee and its sub-files on your system. I downloaded and ran this tool and successfully eliminated McAfee and all its related files. Below, you will find the correct way to use the MCPR tool.
- Launch MCPR: Download MCPR on your computer. Once installed, close all the tabs and programs on the system > Launch the MCPR file.
- Finalize Installation: Choose Next > Agree to the terms and conditions > Next > Verify yourself using the CAPTCHA code > Next.
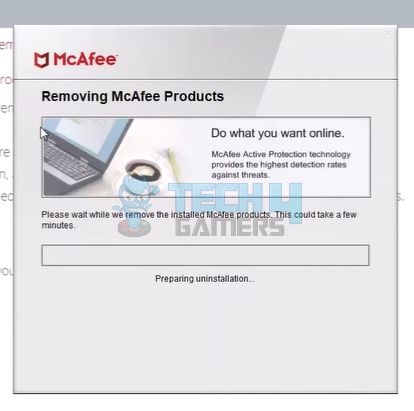
- Wait For McAfee Detection: Let MCPR detect the McAfee software and tools on your computer. The program will start removing McAfee and related tools after identifying them.

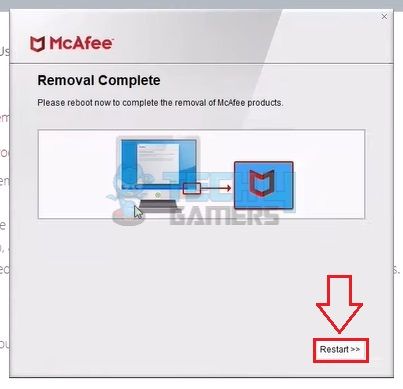
Uninstalling McAfee (Image By Tech4Gamers) - Restart PC: The following window will prompt you to Restart your PC. Do it.

Restart PC (Image By Tech4Gamers)
Using Command Prompt
The Command Prompt lets users interact with the Windows OS through text-based commands. You can enter specific commands to execute the desired process in the system. So, I also ran a few codes in the Command Prompt window to finish this process. However, be careful to type the correct code and carefully execute each step for the process to work.
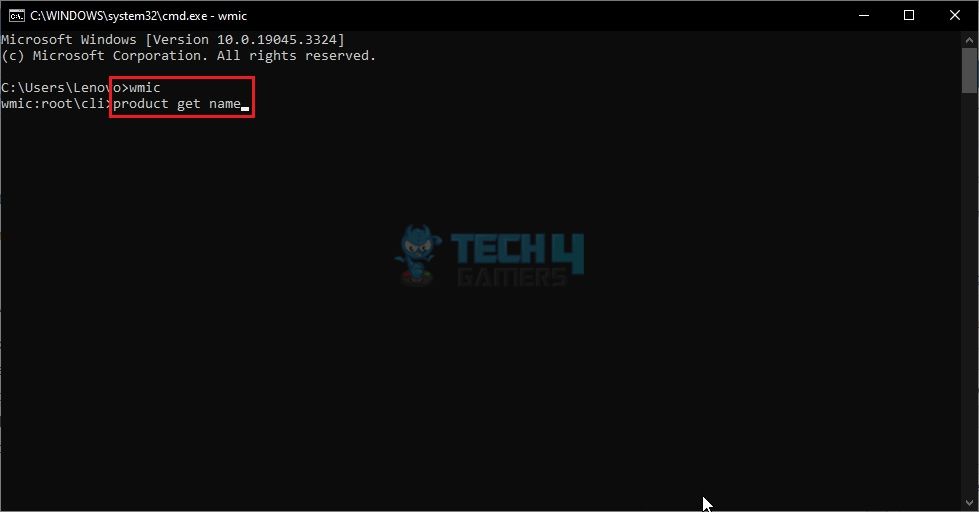
- Run The First Code: Access the Command Prompt > Enter the command wmic.
- Run Second Code: Next, write product get name > Enter.

Enter Code In Command Prompt (Image By Tech4Gamers) - Note McAfee Products: Find McAfee and related products in the list. Jot down their names somewhere.
- Remove McAfee: Now, execute the following code to remove McAfee and its products.
product where name= "PROGRAMNAME" call uninstall.
instance, product where name= “McAfeeAntivirus” call uninstall
Using PowerShell
The Windows PowerShell is also handy for removing McAfee from Windows 11. Similar to the Command Prompt, it requires executing commands to control the system configurations or assign new tasks. This is how you can utilize PowerShell to remove McAfee.
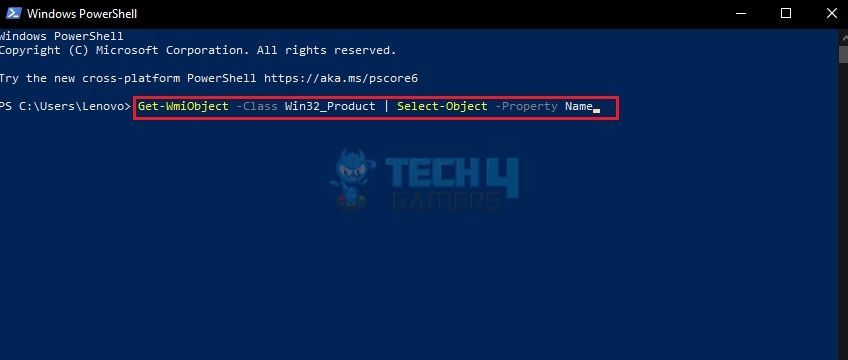
- Launch PowerShell: Search for PowerShell > Open the app > Run the code:
Get-WmiObject -Class Win32_Product | Select-Object -Property Name.

Enter Code In PowerShell (Image By Tech4Gamers) - Note Relevant Names: Notice McAfee and the processes related to it > Note their names > Next, use this code:
$app = Get-WmiObject -Class Win32_Product `
-Filter "Name = 'PRODUCTNAME'
Use Revo Uninstaller
I tested removing the antivirus application with Revo Uninstaller, and it completely deleted traces of McAfee and its sub-files from my Windows 11. It is pretty easy to download and use as well.
Final Words
In conclusion, I wanted to remove McAfee from my Windows since I use another primary antivirus software; hence, McAfee took up unnecessary storage space in the computer’s memory. Per my experience, the MCPR tool is the most effective way of erasing this security software because it identifies and deletes all related sub-files.
Use the Windows 11 Settings, Control Panel, Command Prompt, and PowerShell to delete McAfee and related processes. Use the MCPR tool provided officially by McAfee to remove the program and its processes if the normal uninstallation techniques fail. You can also contact McAfee Support. You can safely remove McAfee as long as your computer is protected by other antivirus software or built-in Windows Defender Firewall protection.Frequently Asked Questions
Related Articles:
- How To Fix Windows 11 Screen Saver Not Working
- How To Fix Spacebar Not Working In Windows 11
- Windows 11 Stuck On Restarting Screen
Thank you! Please share your positive feedback. 🔋
How could we improve this post? Please Help us. 😔
[How To Guides Specialist]
Dayan Shahid is a skilled mechanical engineer passionate about technology. With certifications in various programming languages and subjects ranging from microcontrollers to aerial robotics, Dayan can effortlessly present complex technical topics in an engaging way. His ability to bridge the gap between theory and practical applications sets him apart as he continues to inspire others through their insightful content.