")


Connecting an SSD (Solid State Drive) to your motherboard might seem simple, but there are a few things you should keep in mind to avoid any mishaps. To make sure you get it right, let’s walk through how to connect three different types of SSDs to your motherboard.
- Before starting the installation process, it is essential to back up your important data. Users should ensure that their current system is compatible and has enough space and suitable connectors for installation.
- There are three types of SSDs that we are going to cover; 2.5-inch SATA, M.2 SSD, and M.2 NVMe SSD.
- After connecting your SSD to the motherboard, update your operating system and other software as necessary. This is essential since the most recent upgrades can boost your SSD’s performance.
Method Difficulty Rating
2.5 inch SSD
Rated: 4/10
M.2 SSD
Rated: 4/10
M.2 NVMe SSD
Rated: 5/10
Connect 2.5-inch SATA SSD To A Motherboard
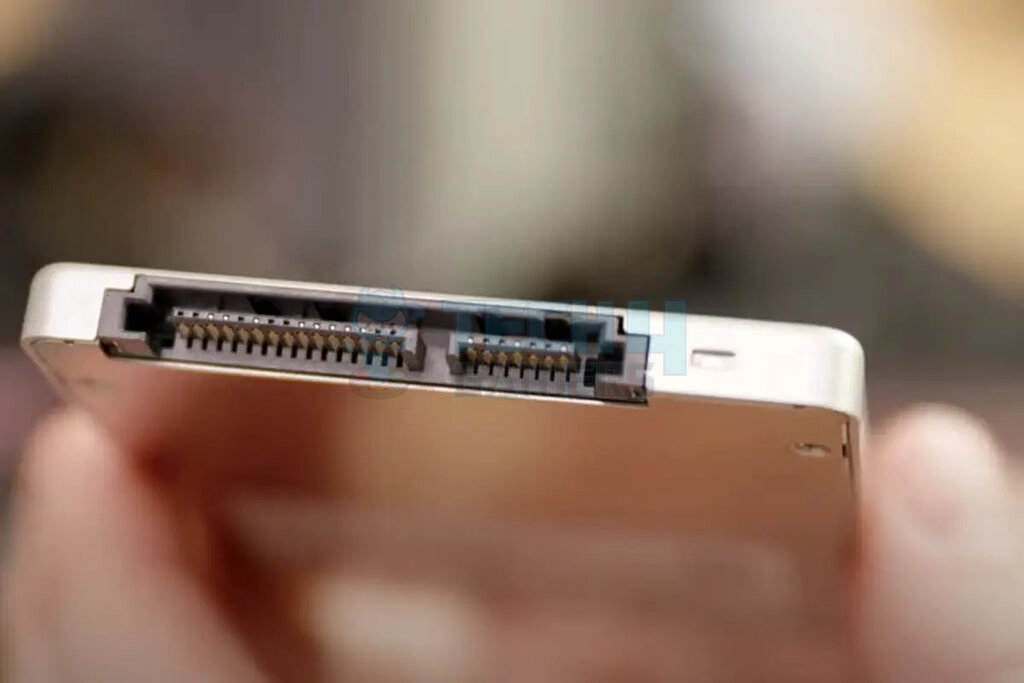
A 2.5-inch SATA SSD is a solid-state drive that uses a SATA (Serial ATA) interface and has a standard 2.5-inch form factor. It connects to your motherboard using a SATA cable, just like a traditional hard disk drive (HDD). Here are the steps on how to do it:
Turn Off Your Computer
Ensure your computer is powered off > disconnected from any power source before proceeding with the installation. Remove the screws securing the computer case > carefully lift off the panel to access the internal components.
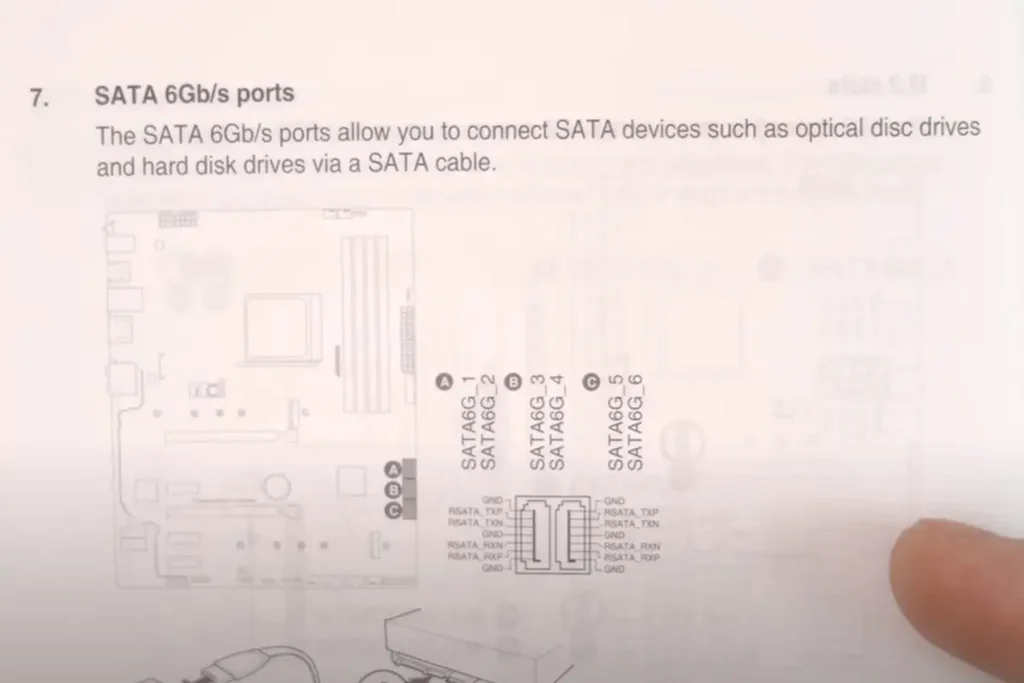
Ports and Required Cables
Identify the SATA ports on the motherboard, usually found along the edges > locate an available slot suitable for a 2.5-inch SSD > You’ll need a SATA data cable and a SATA power cable > The data cable connects to the motherboard, while the power cable comes from the PSU.
Attach Cables To SSD
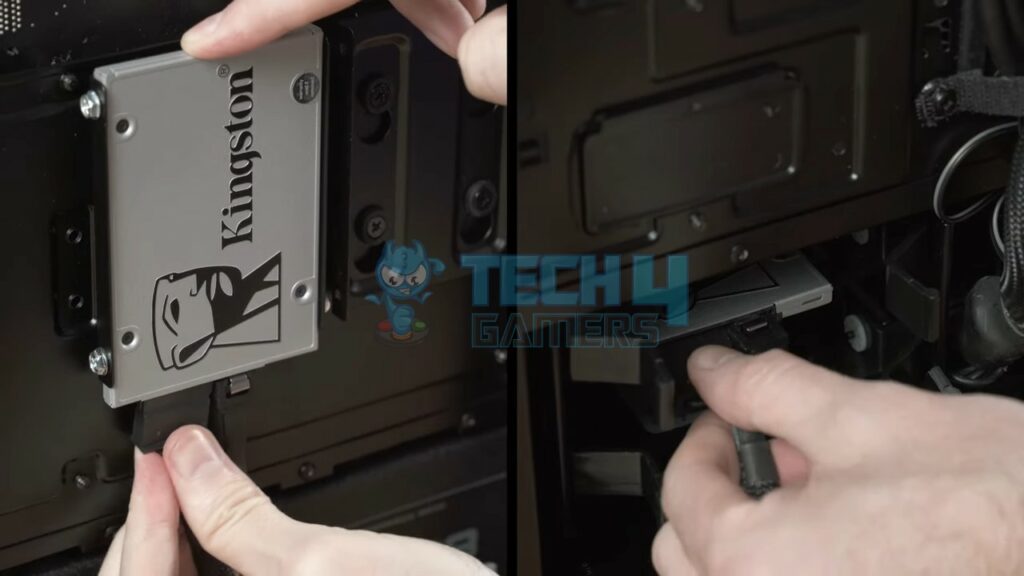
Connect the SATA data cable to the SSD’s interface port and the power cable to the power port.
Connect The 2.5-inch SSD
Plug the SATA data cable into a SATA port on the motherboard, typically SATA-1 for optimal performance > Attach one end of a SATA cable to the SSD’s SATA port > the other end to an available SATA port on the motherboard.
Check That The System Recognizes The SSD
Replace the side panel of the computer case > secure it with the screws removed earlier > Power on the computer > wait for the operating system to boot up > Open the “My Computer” or “This PC” window to check if the SSD is listed among the connected drives > Verify the SSD’s recognition and capacity.
Install The Operating System On The SSD
Enter the BIOS/UEFI settings by pressing the designated key (e.g., F2 or Del) during startup. Navigate to the Storage or Boot Menu > Install the operating system using a bootable USB drive configured with Rufus, if necessary.
Connect M.2 SSD To A Motherboard
M.2 SSDs are ultra-fast, thin storage drives that connect directly to your motherboard. They are widely used Storage devices. To connect an M.2 SSD to a motherboard, follow these steps:
Shut Down Your Computer
Turn off our computer > disconnect from any power source to avoid accidental damage. Locate and unscrew the screws holding the computer’s case.
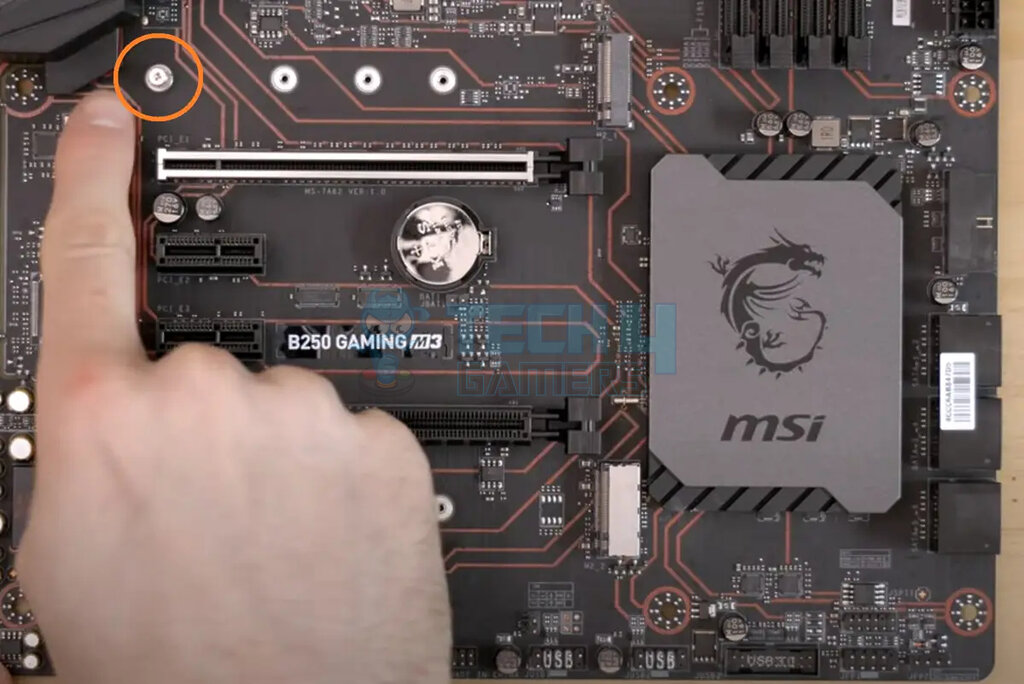
Find the M.2 Mounting System
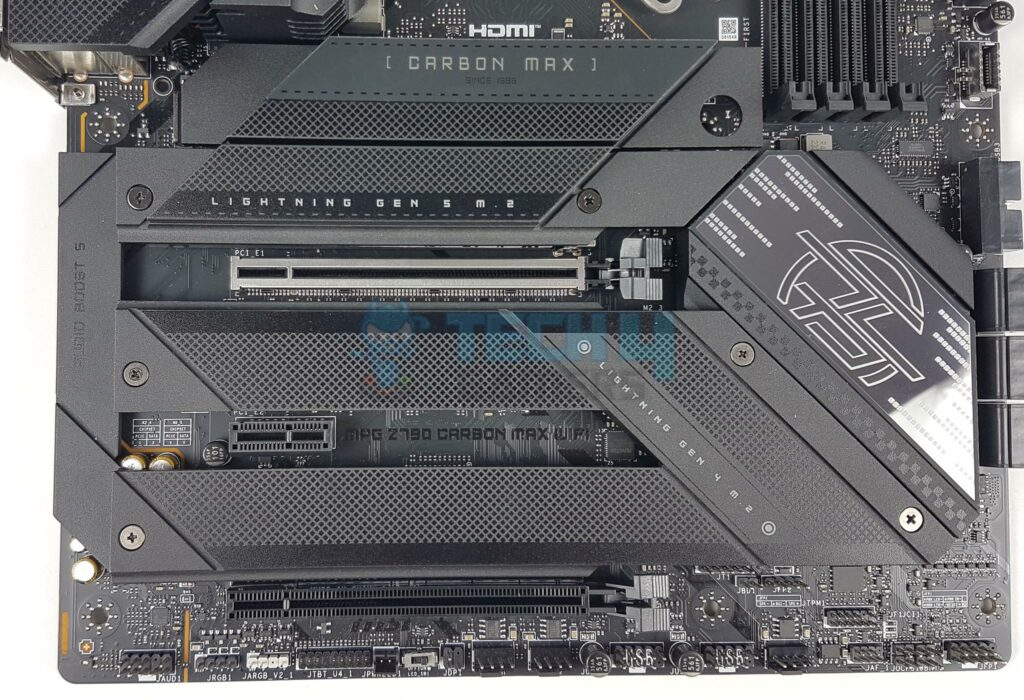
Identify the mounting system, including standoffs and screws, near the M.2 slot > Look for a narrow slot near the PCIe slots on the motherboard. This is the M.2 slot where the SSD will be installed.
Identify the top side
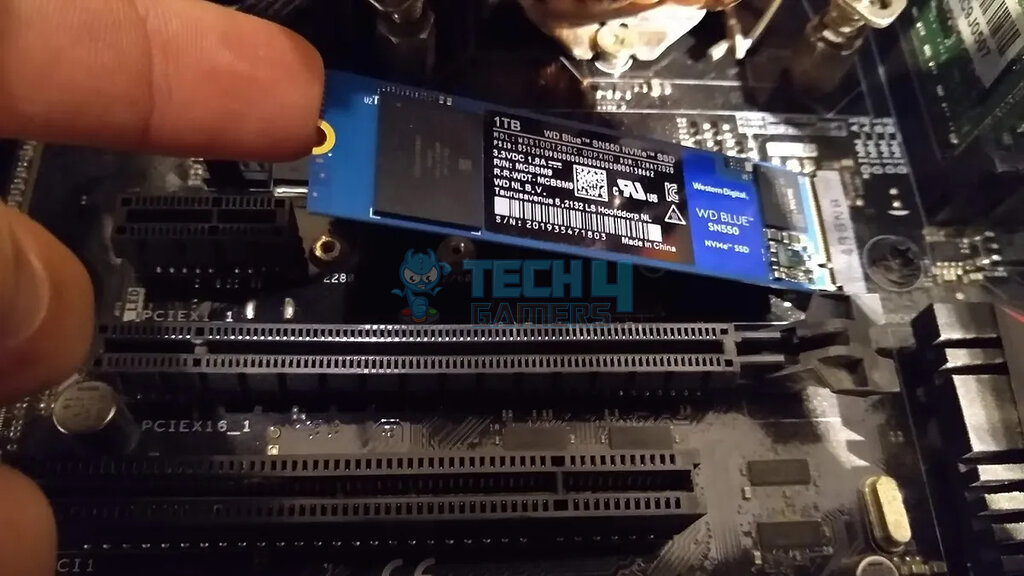
Identify the top of the M.2 SSD by locating the brand label or sticker.

Install The M.2 SSD
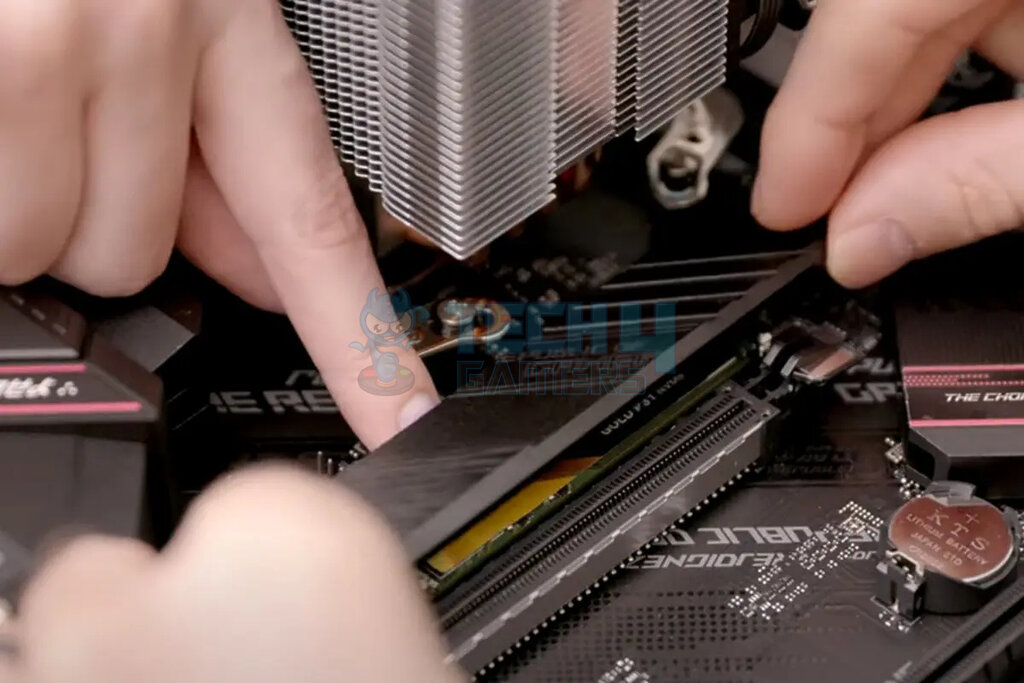
Insert the SSD into the M.2 slot at a 15-degree angle > aligning the contacts and notch. For screw-based systems, secure the SSD with the provided screw and standoff. For shield-based systems, carefully lower the shield over the SSD, ensuring proper alignment.
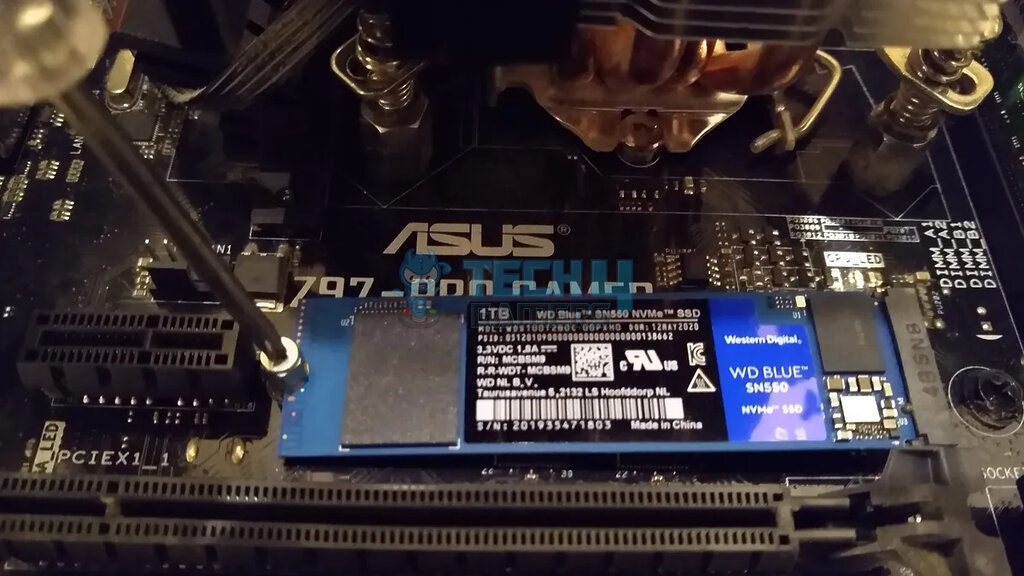
Secure The M.2 SSD
Use the provided screw to secure the M.2 SSD to the motherboard > Screw it into place to ensure the SSD stays securely attached.
Check That The System Recognizes The SSD
Restart your computer > enter the BIOS or UEFI settings by pressing the designated key (e.g., F2 or Del). Navigate to the storage or boot menu to verify if the M.2 SSD is listed as a bootable device > Select the M.2 SSD as the primary boot device if necessary > save your settings.
Connect M.2 NVMe SSD To A Motherboard
M.2 NVMe SSDs are small, thin circuit boards that plug into dedicated motherboard slots, utilizing the high-speed NVMe interface for exceptional performance. Connecting an M.2 NVMe SSD to a motherboard is as simple as these steps:
Verify Compatibility
Check that your motherboard is compatible with your M.2 NVMe SSD > Choose the appropriate M.2 slot on the motherboard if there are multiple slots.

Turn Off The Computer
Before proceeding, shut down your computer > disconnect the power cord to prevent any damage or electrical shock.
Locate M.2 Slot On The Motherboard
Identify the M.2 slot on your motherboard > remove the screw securing the slot to prepare for inserting the M.2 NVMe SSD.
Carefully Insert M.2 NVMe SSD
Hold the M.2 NVMe SSD by the edges to avoid touching any exposed components or connectors > Align the SSD with the M.2 slot on the motherboard > gently insert it, ensuring proper connection with the slot’s connectors.
Secure M.2 NVMe SSD
Once the SSD is fully inserted into the slot, replace the screw to secure it in place, ensuring it stays connected to the motherboard.
Reconnect And Power On
Plug the power cord back into your computer > power it on. The computer should boot up normally, and the M.2 NVMe SSD should be recognized.
Install SSD in BIOS/UEFI Firmware
If your motherboard requires a BIOS or UEFI firmware, update or install to recognize and utilize the M.2 NVMe SSD properly.
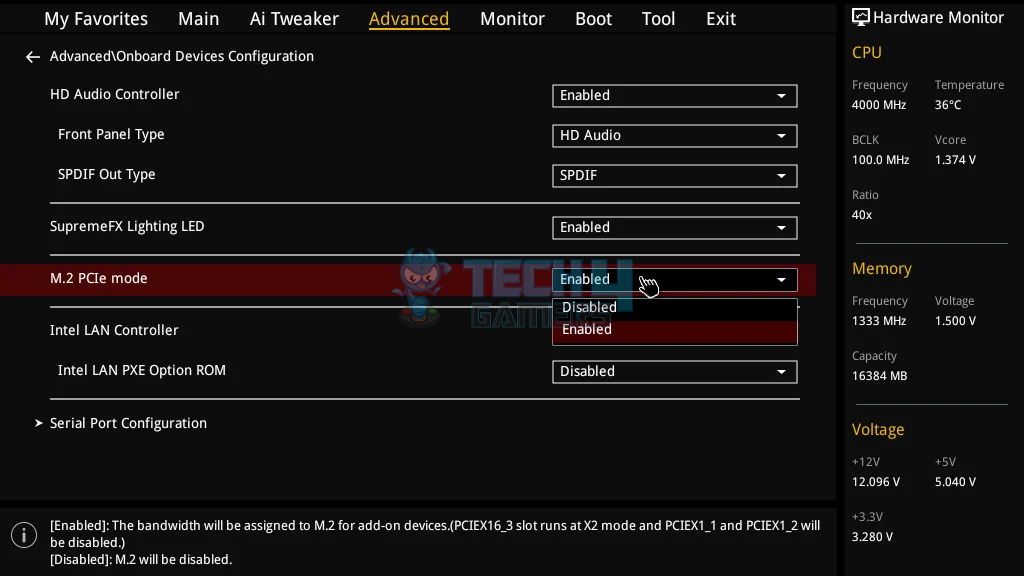
Access your motherboard BIOS (usually by pressing F2 or Delete during boot), > enable M.2 PCIe mode > select M.2 Mode, depending on your motherboard model.
Wrap Up
Connecting SSD to a motherboard is quite easy if one gathers some courage. Connecting an SSD to a motherboard can be daunting for some users who may not be familiar with all the necessary details.
Ok I don’t know where to connect the cable for my ssd on the motherboard send help
— Laken Burnie (@Lakenatorr) March 11, 2017
After selecting the correct type of connection, you should ensure that both the motherboard and the SSD are compatible. You might also need to install SSD drivers or update your BIOS settings. With these simple steps, you can successfully connect an SSD to your motherboard and take advantage of its speed and reliability.
Thank you! Please share your positive feedback. 🔋
How could we improve this post? Please Help us. 😔
[How-To Guides Expert]
Laiba, our tech guru at Tech4Gamers, simplifies and crafts How-To Guides with a Google IT Support Certificate. Beyond tech, she captures the city’s aesthetics through her lens. Join her journey where tech meets creativity!
Get In Touch: Laiba@tech4gamers.com


