


CPU fan error in ASUS motherboards is an issue many people face. It can happen if the fan of your CPU is not connected properly or if there is a fault in your motherboard. The problem can be resolved quickly by rechecking the connection or examining the motherboard for faults.
- The motherboard displays the CPU fan error when it fails to detect any cooling device.
- Fixing the fan error can maximize system stability and prevent component damage, but you might void the warranty of the fan or motherboard while doing hardware fixes.
- The most common reasons behind this error might be an improperly connected CPU fan, low fan RPM, outdated BIOS, or a faulty fan/motherboard.
- You can easily solve this error by ensuring the fan is plugged in proper headers, the fan rpm isn’t too low, or the CPU fan control is disabled.
Methods Difficulty Rating
Rated: 3/10
Rated: 5/10
Rated: 4/10
Rated: 6/10
Rated: 7/10
Disable CPU Fan Control
You can adjust the speed and behaviour of the CPU and case fans using the BIOS fan control. Usually, turning it off gets rid of errors caused by fan problems. The steps to turn off the option are:
- Open Settings: Restart system > Boot into BIOS > Go to Fan settings.
- Disable Control: Click on CPU Fan Speed > Disable it > Save settings > Hit ESC to Exit.

Disable Fab/Reduce Speed – Image By Tech4Gamers
Set RPM
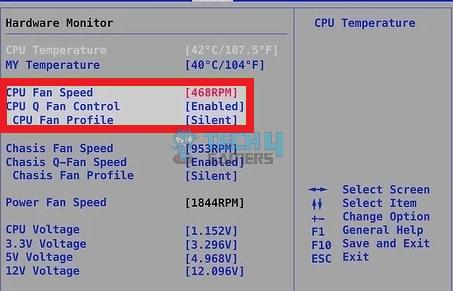
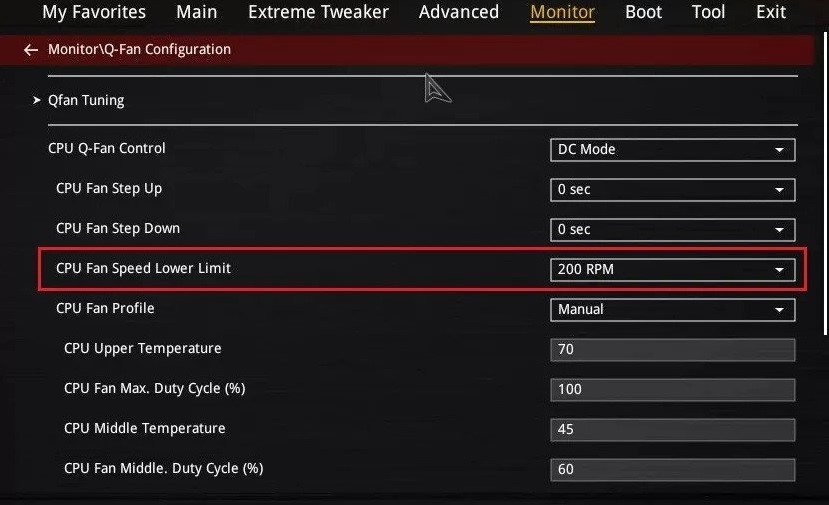
A motherboard may not be able to recognize a CPU fan properly if it has a slow-spinning fan or one that stops spinning entirely at low temperatures because of Q-Fan Control. To resolve the problem, we tried lowering or ignoring the lower speed limit of the CPU Fan in the BIOS settings. To do that:
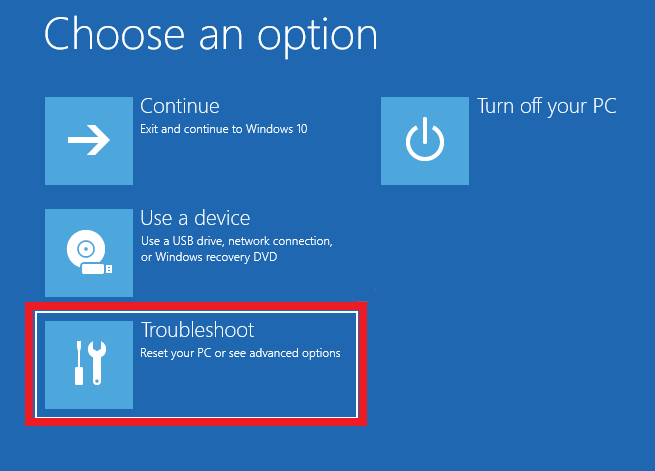
- BIOS Settings: Get into BIOS > Options > Select Troubleshoot.

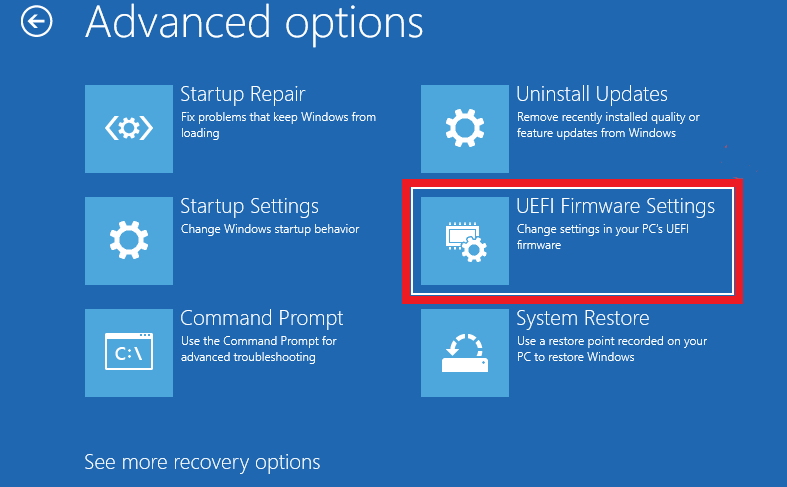
Troubleshoot settings - UEFI: Go to the Advanced Options > Select the UEFI Firmware Settings option.

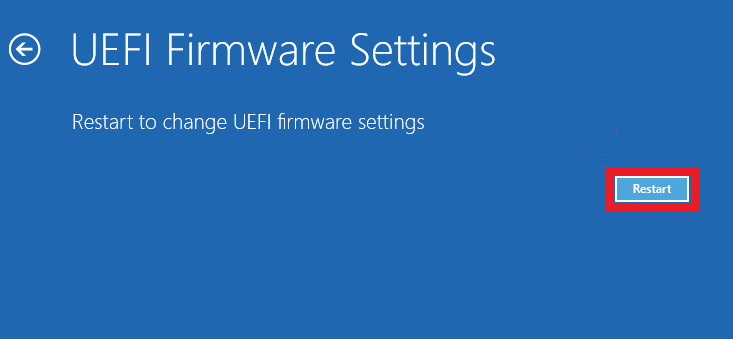
UEFI Firmware Settings - Restart System: Click the Restart button.

Restart the system - Set RPM: After the system restarts > Go to Advanced Mode > Click the Monitor tab > Go to the CPU FAN section > CPU Q-FAN Control option > Enable settings > Set the CPU Fan Speed Low Limit to around 200 RPM.
Tip: You can also choose Ignore if you don’t want to take risks.
Advanced settings menu in BIOS - Restart PC: Save settings > Close the BIOS menu > Reboot your computer.
The CPU Fan speed can also be monitored using any Fan Controller online application.
Change BIOS Settings
You can resolve the error by adjusting a few BIOS settings. You can remove the error by changing your CPU Fan Speed setting from N/A to Ignore. Follow these steps to accomplish that:
- Open Settings: Restart your system > Access BIOS > Hit the F1 key > Press Advanced Settings.

Advanced Options – Image By Tech4Gamers - Speed Setting: Go to Monitor > CPU Fan Speed setting > Change it from N/A to Ignore.
- Save Changes: Press the F10 key > Select OK to save your changes.

The computer will restart; you should have no trouble booting into Windows.
Connect The CPU Fan Properly
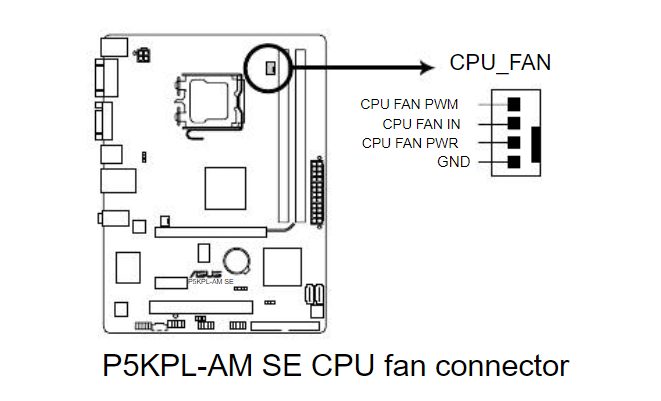
As far as we have experienced, the most frequent cause of this error is a fan not being connected to the motherboard’s CPU_FAN header or misconnected.
This implies that the fan of the CPU cooler has been connected to a different fan header, for example, the header named CHA_FAN or SYS_FAN, or if there isn’t a fan attached to the header of CPU FAN at all, you will receive this error. To make sure your CPU Fan is connected to its proper place:
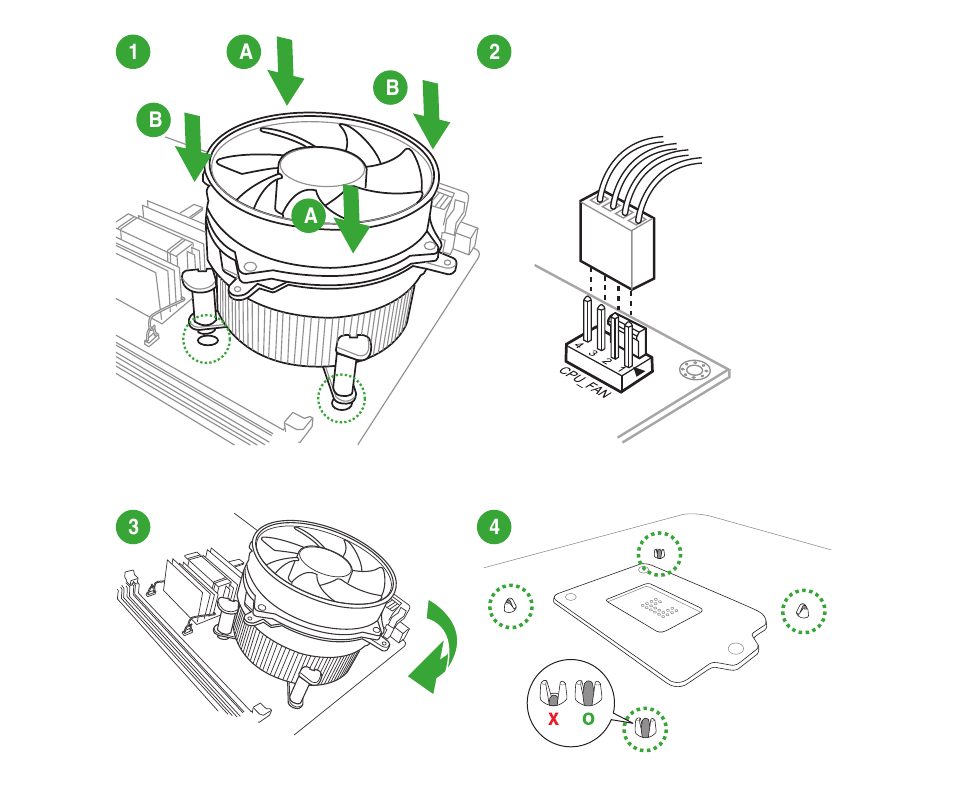
Apply a small amount of thermal paste onto the center then place the fan right above the mounting holes and then secure it with screws. Don’t oversight screws otherwise it can damage the motherboard or the cooler.
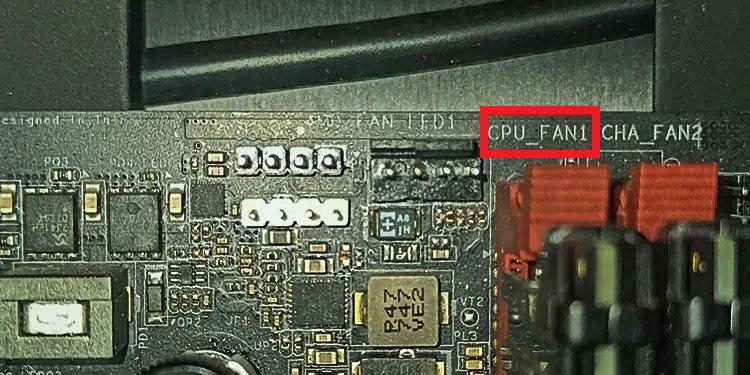
Check the CPU Fan connected on the CPU_FAN header instead of CHA_FAN. That’s the correct pin to plug in the cooler.
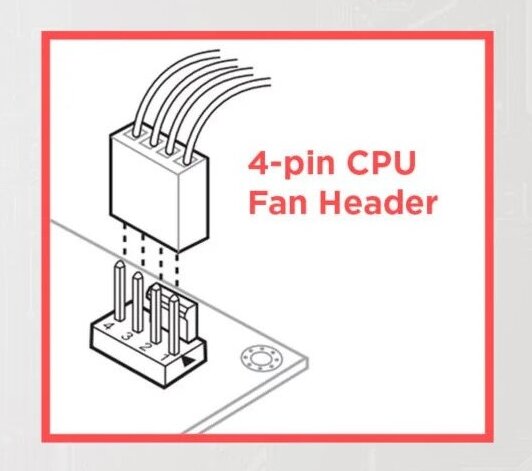
Connect pins to their corresponding locations. You can connect a 3-pin plug to a 4-pin connector, but the PWM support will be disabled.
The location of the CPU_FAN header on the motherboard might vary, but it is commonly located at the top right corner near the CPU’s socket. Refer to your motherboard’s manual to locate the CPU_FAN Header.
Turn on the computer to see if the fans are spinning and check for the error. If the error is still visible, try the other fixes listed below.
Connect The AIO Pump Properly
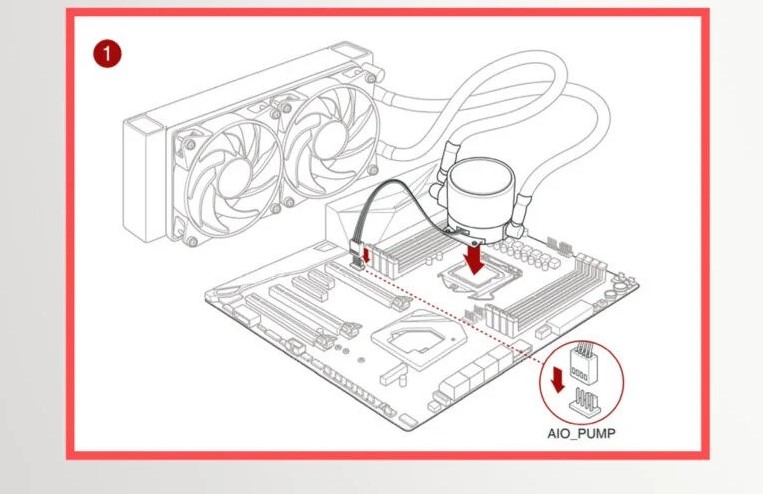
If you intend to use an AIO liquid cooler to cool your CPU rather than an air cooler, you must correctly connect the AIO pump to the motherboard. Maintaining a constant liquid flow on the cold plate is crucial for pumps. So, if you are using one, plug it into your AIO pump header properly:
Connect the AIO pump to the AIO header.
Connect the AIO Radiator Fans to CPU_FAN and CPU-OPT.
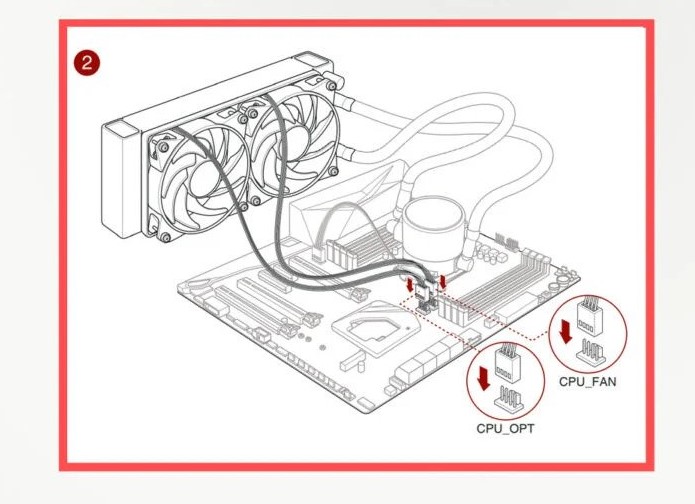
You can connect it to the SYS_FAN or CHA_FAN header if you don’t have a pump header.
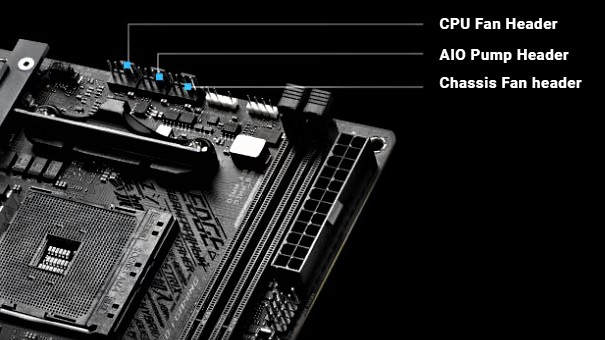
Sometimes, the system still gives the CPU Fan error in ASUS if you connect the AIO Pump in the AIO header. In that case, connect another fan, for example, a case fan, to the header CPU_FAN so that the motherboard recognizes the presence of a fan.
Check out our AIO and the Air Cooler comparison regarding the AIO pump. And if your AIO cooler is getting old, you might want to consider replacing it.
Final Words
The CPU Fan Error problem shouldn’t be too challenging to diagnose. The error is fixable if the motherboard’s BIOS is up to date. You might need some tweaking to fix the error. The Reddit community is also talking about simple hacks to resolve the issue:
CPU fan error at boot up, how can I fix this?
byu/Johnzx07 inASUS
If none of the above suggestions worked to fix the problem, it might be the case or rare occasions that the CPU cooler is Dead On Arrival (DOA). In that case, you must speak with the vendor and request an RMA (Return Merchandise Authorization) or contact ASUS Support.
If you face problems with other fans, check out our guide on fixing the case fan not spinning.
Frequently Asked Questions
CPU Fan error indicates the motherboard can’t detect a cooling device due to improper connection, outdated BIOS, low fan RPM, or internal fan faults.
Properly connect the fan to the correct headers. Confirm the fan isn’t restricted to low RPM. Tweak some BIOS settings.
Check your BIOS version for confirmation by booting into your system and accessing BIOS settings. Go to Advanced Mode to find the BIOS information.
Related Articles:
- Answered: How Long Does An AIO Liquid Cooler Last?
- How To Install A Liquid CPU Cooler? [Step By Step]
- How To Fix CPU Fan Speed Error Detected? [4 Methods]
- How To Lower GPU Temperature
- How To Fix AIO CPU Fan Not Working
Thank you! Please share your positive feedback. 🔋
How could we improve this post? Please Help us. 😔
[How To’s & Guides Editor]
Haddi has been in the Gaming and tech Space for over 10 Years Now; he has worked on notable websites like eXputer, Gamepur, Gear Siege, Gearnuke, and plenty more. He is an expert at Games & PC Hardware; you can expect him to solve any problem. People often joke, that if there is any problem anyone can solve, Haddi can solve it faster. Currently, Haddi writes and manages a Team of Experts at Tech4Gamers.
Contact: Haddi@tech4gamers.com


