


Playing Roblox in Virtual Reality (VR) with a headset requires a PC, as the game is not officially compatible with independent hardware like Quest 2. It doesn’t have a dedicated VR app to launch the game in Virtual Reality. Instead, the Roblox desktop app will only launch the game when it detects a VR headset plugged into the PC. However, I found some effective workarounds on how to play Roblox on Oculus Quest 2 without a PC.
- Use cloud gaming services like PlutoSphere to run Roblox on Quest 2 without a PC.
- Apps like Virtual Desktop or ALVR allow you to proceed with the gameplay.
- Roblox has been integrated into Meta Quest 2, so resort to these workarounds only if the official app is not working for you.
Method Difficulty Rating
Cloud Gaming
Rated: 8/10
Virtual Desktop
Rated: 7/10
ALVR
Rated: 5/10
Using Cloud Gaming
Set Up Virtual Desktop
Here is how you need to proceed:
- Sign In To Account: Launch the browser on your Oculus Quest 2 > Head to PlutoSphere homepage > Sign up if you haven’t already > Enter.
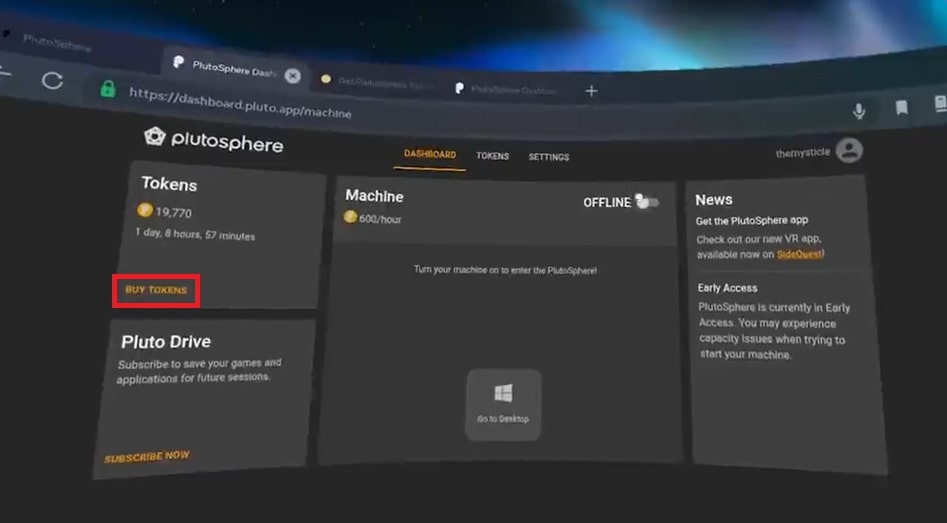
- Get To Plutosphere: Log in to the Plutosphere account > Tokens > Click Buy Tokens to buy some tokens for the game.

Buy Tokens (Image By YouTube – The Mysticle) - Buy Tokens: You need 600 tokens for one usage hour, which costs $1.99. I recommend buying the cheapest package of tokens if you are trying this method for the first time to avoid losing money if the technique doesn’t work for you

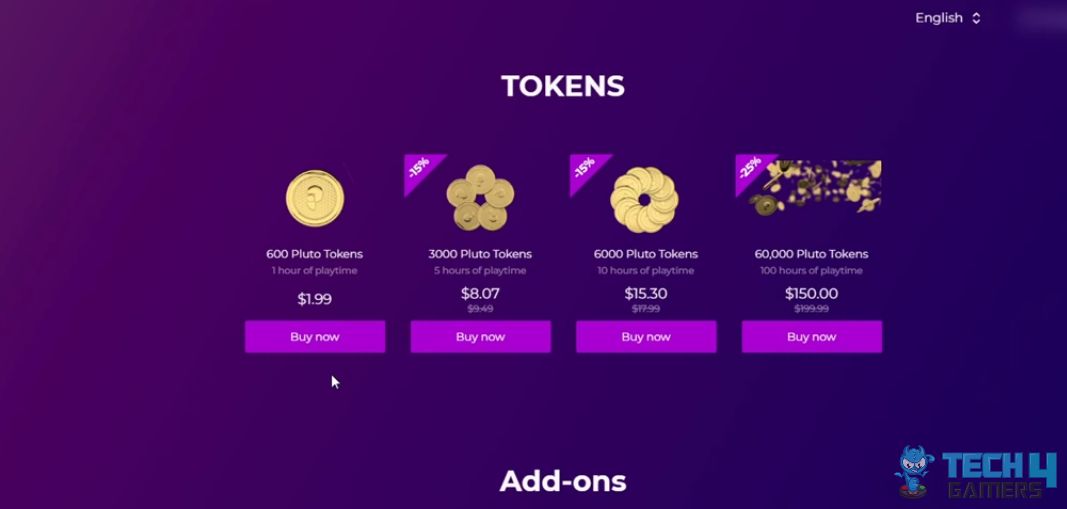
Tokens Prices (Image By Tech4Gamers) - Turn On Machine: Turn on the machine by clicking the toggle button on the Machine tab.
- Continue To Desktop: Choose Go to Desktop > Start > Click the Desktop icon > Continue.

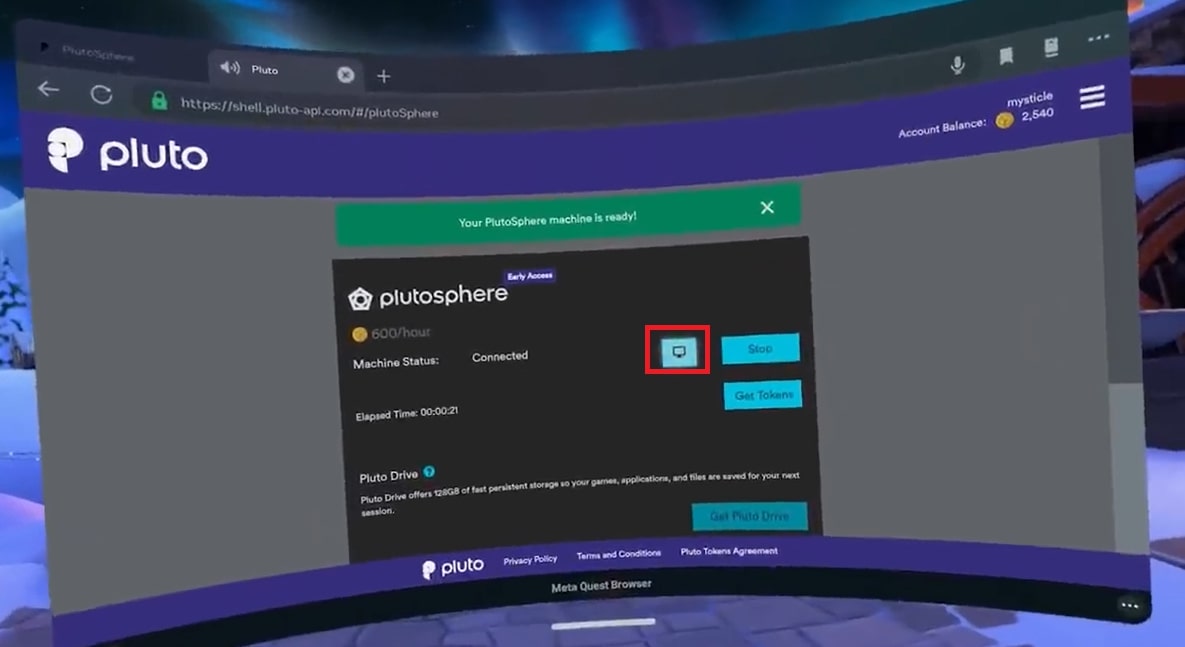
Go to Desktop (Image By Youtube – The Mysticle) - Complete Installation: Open your web browser on Quest 2 > Search for Virtual Desktop > Download Virtual Desktop Streamer for Windows > Follow the installation wizard’s steps to install the application on your Plutosphere machine.
- Log In: Launch Virtual Desktop Streamer > Sign in to your account.
Download Roblox Launcher
The next step is to download the Roblox launcher:
- Log In To Steam: Connect your Plutosphere machine > Sign in to Steam.
- Handle Error: If you see an error message stating that your VR set isn’t ready or connected, press the Settings button on your controller > Exit SteamVR.
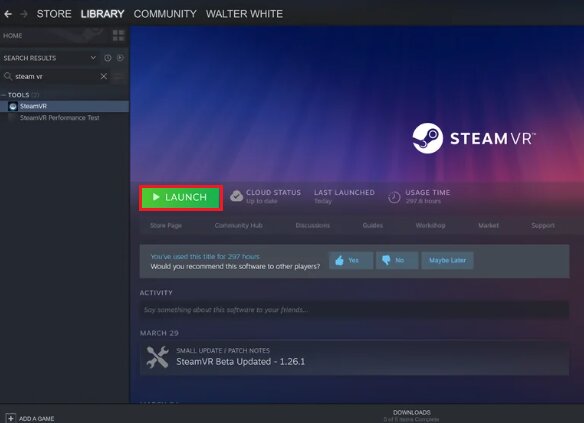
- Open SteamVR: Select Launch SteamVR to open the Virtual Reality environment.

Launch SteamVR (Image By Reddit) - Get Roblox: Launch your internet browser > Go to Roblox website > Choose a game in the Library > Download and Install Roblox.
- Switch To VR: Install the Roblox Launcher on your Plutosphere > Open it > Hit Play > Pick Switch to VR in the Virtual Desktop application.
Using Virtual Desktop
Virtual Desktop is another app that is used for this process. You just need to set up your PC once, and after that, you can play wirelessly on your Quest 2. To do that:
- Download On PC: Download Virtual Desktop and Steam on your computer.
- Search Roblox Game: Launch Steam > VR > Open your PC’s browser > Head to Roblox > Search for any game > Play.
- Launch Virtual Desktop: Search for the desired game > Launch Virtual Desktop on your PC.
- Get To Apps: Put on your headset > Open the Apps library.
- Open App: Open the Virtual Desktop app, which should connect to your PC. If it doesn’t, ensure you have the same internet connection.

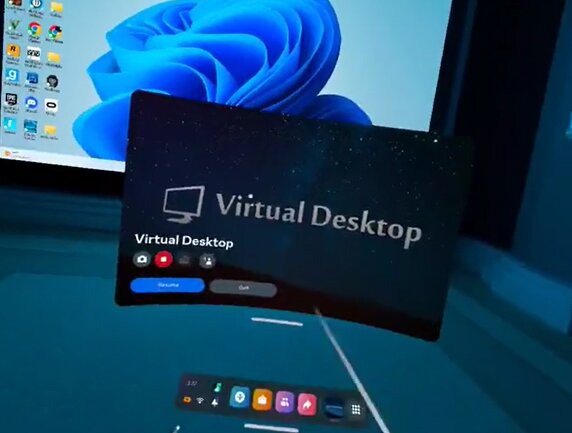
Virtual Desktop On VR (Image By TikTok – dispaly_vr) - Launch SteamVR: Once connected, press Menu on the left controller > Launch SteamVR > Hit Menu again > Desktops > Play.
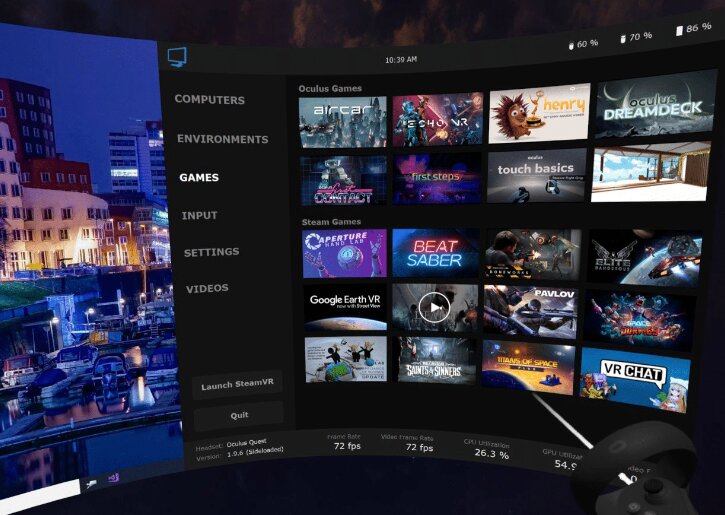
- View Games: Press the Oculus button on the left controller, which will take you to the game in VR.

Games In VR (Image By UploadVR)
Using ALVR
ALVR functions similarly to Virtual Desktop, enabling wireless streaming of VR games from your PC to Oculus Quest 2 via SteamVR. Although this method necessitates an initial setup on a PC, you can subsequently enjoy playing Roblox wirelessly on your Quest 2. For an optimal gaming experience, I advise using a 5GHz router. These are the steps you should go ahead with.
- Install The Apps: Install Oculus VR alongside Steam, Steam VR, and SideQuest on your PC.
- Access Link: Open your browser and head over to this link:
https://github.com/polygraphene/ALVR/releases/tag/v2.3.1/
- Download ALVR Versions: This will take you to the most recent version of ALVR software > Download the files named as follows:
alvr_client_ocolus_quest.apk
ALVR_Installer_v15.1.2.exe
alvr serverwindows.zip
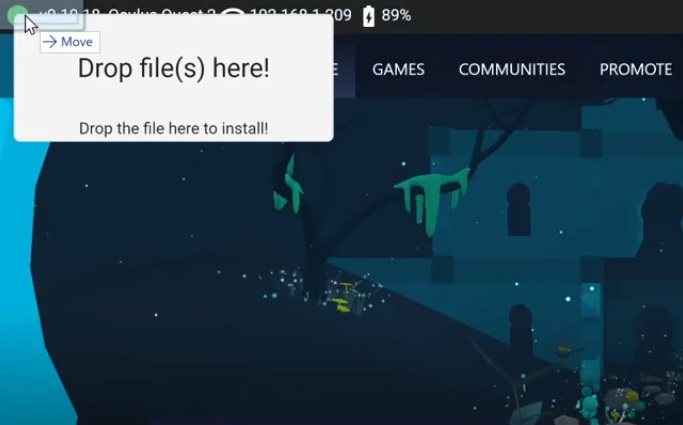
- Start Installation: Install ALVR_Installer_v15.1.2.exe > Launch SideQuest > Plug in a headset to your PC > Drag and Drop the alvr_client_ocolus_quest.apk file into SideQuest to start the installation.

Drag and Drop (Image By Youtube – VR Lad) - Extract File: Extract the alvr serverwindows.zip folder. You’ll be able to see the ALVR launcher inside the folder and its shortcut on your desktop.
- Open ALVR: On your Quest 2, open Apps > Unknown Sources > Launch ALVR.
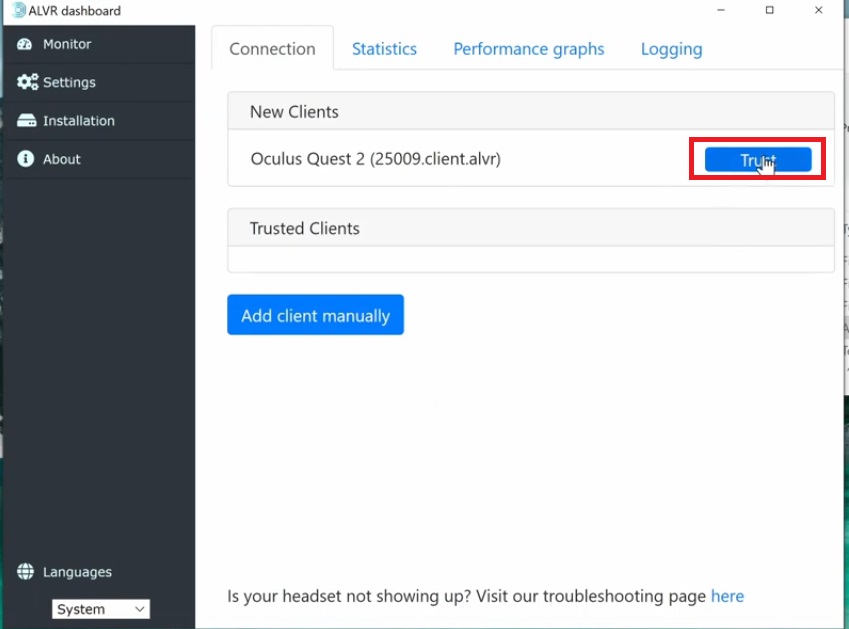
- Configure On PC: Launch the ALVR app on your PC > Next > Click Trust, and it will launch Steam VR on your headset.

Click Trust (Image By Youtube – VR Lad) - View ALVR On Quest 2: Close everything on your PC and leave only ALVR open on your Quest 2.
- Download Roblox: Open the browser on your PC > Head to Roblox > Search for a game > Open ALVR on your PC > Play > Download and Install Roblox.
Wrap Up
At the time of writing, Roblox was not officially available on the Oculus Quest 2. Therefore, players had to resort to the workarounds discussed above. By 2023, Meta rolled out Roblox on their official store, creating ease for their users.
If you can’t get the app via Meta Store, the above methods should help. However, I found them time-consuming and somewhat difficult to proceed with.
Similar Guides:
- How To Play Steam Games On Nvidia Shield Via Steam Link
- How To Play Roblox On A School Computer
- How To Use Discord On PS4 Without PC [2024]
- How To Accept Friend Request In Roblox On Xbox One?
- 4 Ways To Stream Xbox On Discord?
Thank you! Please share your positive feedback. 🔋
How could we improve this post? Please Help us. 😔
[How To’s & Guides Editor]
Haddi has been in the Gaming and tech Space for over 10 Years Now; he has worked on notable websites like eXputer, Gamepur, Gear Siege, Gearnuke, and plenty more. He is an expert at Games & PC Hardware; you can expect him to solve any problem. People often joke, that if there is any problem anyone can solve, Haddi can solve it faster. Currently, Haddi writes and manages a Team of Experts at Tech4Gamers.
Contact: Haddi@tech4gamers.com


