


The HDMI (High-Definition Multimedia Interface) port, which enables users to connect their PCs to high-definition displays, has become an essential component of modern computing. But there can be times when the HDMI port is not working on the PC, which can be caused due to different reasons.
- HDMI ports sometimes malfunction due to outdated or incompatible drivers, a faulty HDMI cable, or the HDMI port of a computer with damaged or bent pins.
- Try updating or rolling back to a compatible version of drivers, examine hardware and cables for any damages, and replace the faulty one or set display settings to the correct configuration.
- HDMI plays a crucial part in the computing world, and for audio-video connections, it connects almost any display device.
Method Difficulty Rating
Rated: 7/10
Rated: 9/10
Rated: 9/10
Rated: 9/10
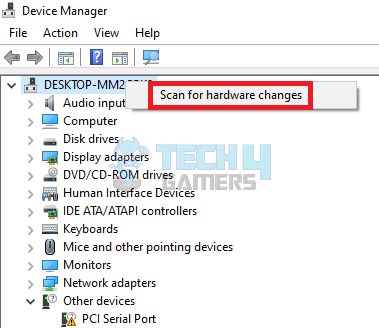
Scan For Hardware Changes
You can do a manual scan to look for the devices you have recently plugged into your system by checking for hardware changes. You can also reinstall display adapters as per users online. Here is how to scan for hardware changes:
- Remove Glitches: Go to Device Manager > Open the Action tab > select Scan for Hardware Changes > If the Monitors section has the device you are using for display, restart your PC first to make it work again and remove any temporary glitches.

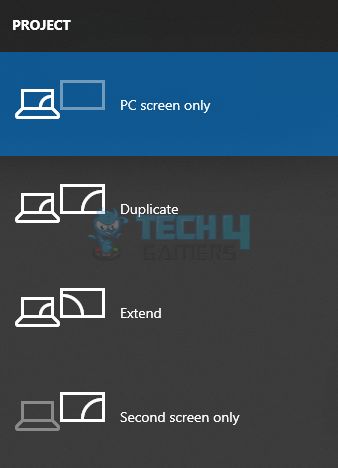
Scan for Hardware Changes – Image Credits (Tech4Gamers) - Modify Display Settings: Press Windows+P to start, and you’ll have several options > Start selecting options one by one until a picture displays.

Display Changer – Image Credits (Tech4Gamers)
Update GPU And Motherboard Drivers
Some monitors may only properly show content if you have an updated GPU driver. Updated GPU drivers can help prevent HDMI malfunctioning. First and foremost, download the latest updates of NVIDIA GeForce Experience or AMD’s drivers from their official site and install them.
The second alternative is a manual update of the drivers. Taking this step worked for us and also for users on the Microsoft forum. Here is how to do so:
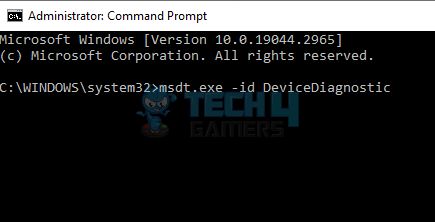
- Access Command Prompt: Open Device Manager > Hardware and Devices Troubleshooter > Type CMD into the search field by hitting the Windows key.
- Enter Command: Type msdt.exe -id DeviceDiagnostic in the command prompt and hit Enter.

Command Prompt – Image Credits (Tech4Gamers) - Repair PC: Check on the Apply repairs automatically under the Advanced tab > Once the troubleshooter finishes repairing, click Next and proceed > Restart PC and check HDMI.
Uninstall The Graphics Driver
Damaged graphics drivers can disrupt the communication between the operating system and the graphics hardware, potentially leading to various issues, including the HDMI port not working.
Additionally, outdated or incompatible graphics drivers can exacerbate these issues, further impairing the functionality of the HDMI port. Uninstalling the graphics drivers solved the issue for us. Here is how to do so:
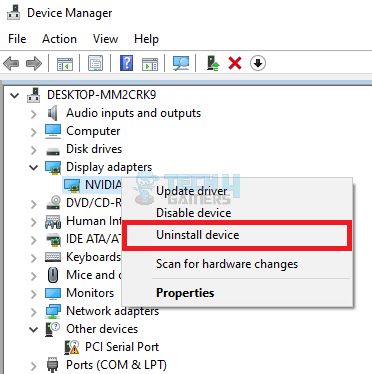
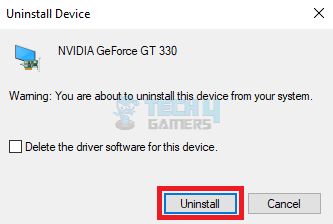
- Uninstall Driver: Launch Device Manager > Display Adapter > In the menu, look for your graphics and right-click on it > Select Uninstall Device.

Display Apapter Unstall Driver – Image Credits (Tech4Gamers) 
Uninstall Display Driver – Image Credits (Tech4Gamers)
Run Windows In Safe Mode
When Windows is started in safe mode, all settings and apps are forced to operate at their default settings. The safe mode could fix any corrupted data about the HDMI controllers. Taking this step solved the issue for us. Here’s how to run Windows in safe mode:
- Access Boot Tab: Go to the command prompt through the Windows start menu > Enter msconfig command in it > Now go to the Boot tab and its settings > Untick the Safe Mode checkbox from the menu that appears.

System Configuration Tab – Image Credits (Tech4Gamers) - Check HDMI: Once Windows restarts in safe mode, test if your external device is correctly identified. Try replugging the HDMI cable to make it work on a PC.

Remove Recently Installed Software
This fix might be effective if the HDMI port does not appear in your Device Manager. Recently installed software can sometimes cause compatibility problems and connection issues. These instructions will help you delete recent installations:
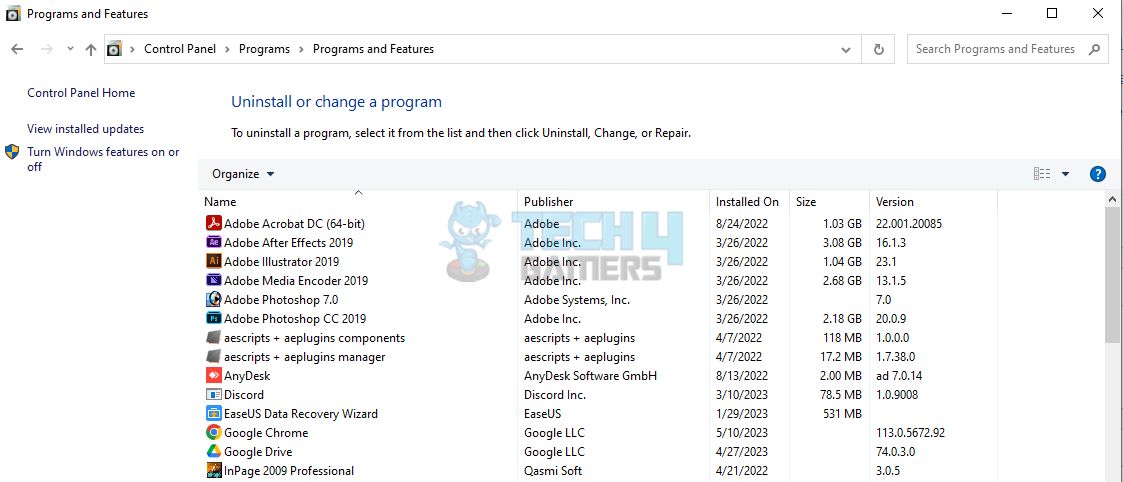
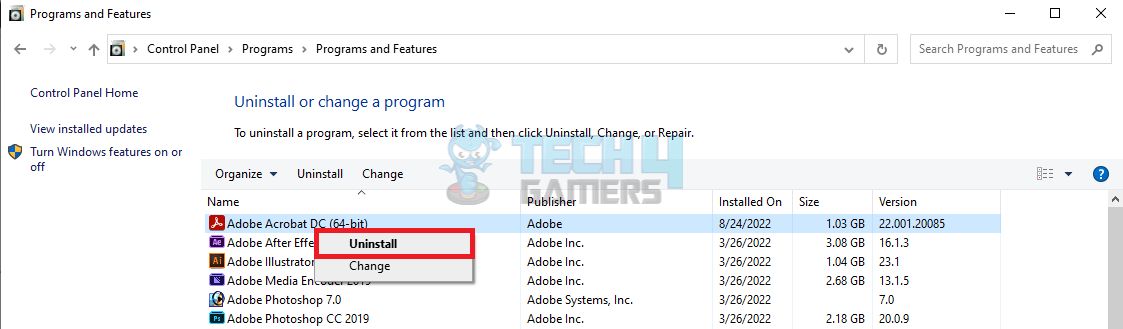
- Uninstall Program: Access your PC’s Control Panel > Jump to Uninstall a program > Look for the software you recently installed > Click the Uninstall option on it > Do the same for all new installations unless the HDMI port starts working.
Run System Restore
The system restores option enables you to return to some of the old efficient configuration settings without losing files which might as well make the HDMI port work.
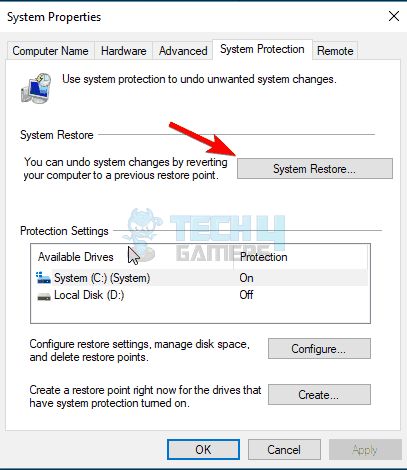
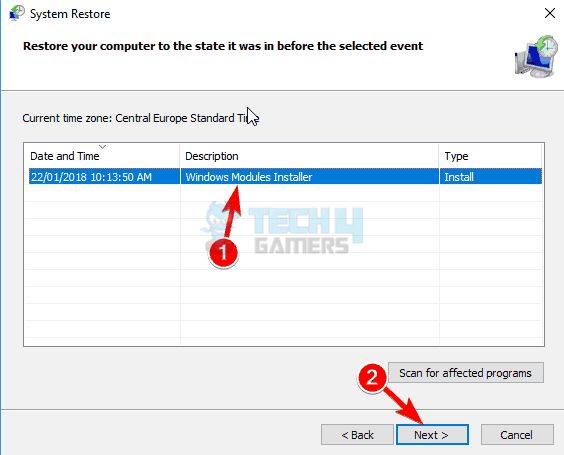
- System Restore: Type restore into the Windows search box > Create a restore point > It will then display the System Properties panel > Select System Restore from the menu.

System Restore Option – Image Credits (Tech4Gamers) - Select Preferred Restore Point: Click Next once the System Restore window has opened > Select Show additional restore points if they are available > From the menu, choose the preferred restore point, then click Next > Follow on-screen steps.

Restore Points – Image Credits (Tech4Gamers)
Conclusion
We have learned that the HDMI port will only work if the cable or its head is fixed, the PC’s drivers are updated, or any compatibility issues. Try not to give in to frustration if an HDMI port on your PC isn’t working. Users all around tend to hate it when their HDMI port does not function.
Ps4 hdmi port not working pisses me off so much
— Swavey (@_RealJoshEvans) May 22, 2020
When on Reddit I saw a person mention a method to fix this issue which we ourselves tested and confirmed to work.
Comment
byu/nordkapare from discussion
intechsupport
In case the HDMI on the motherboard is not working, you’ll need to try different methods.
Common Questions Answered
Plug one end of the HDMI cable into a display device available for HDMI connections. Please write down the HDMI input that it is linked to. The other end of the wire should be plugged into the HDMI out port on your PC, but if you have an adapter for connection, plug the cable into it and adapter to your PC.
A faulty hardware, outdated or incompatible driver, PC version, or wrong configuration can be stressful. You can also experience problems with the video or audio output if your computer or HDMI device boots incorrectly and generates an error. Try restarting your PC and reconnecting HDMI devices.
The standard connection interface for audio video is an HDMI connector. You can send almost any video and audio signal to any display device using HDMI.
Also Read
- Intel Wireless AC 9462 Not Working
- MSI Command Center Not Working
- How To Fix Nvidia Container High Disk Usage
- Best Gaming PC Under $1000 In 2023
Thank you! Please share your positive feedback. 🔋
How could we improve this post? Please Help us. 😔
[How To’s & Guides Editor]
Haddi has been in the Gaming and tech Space for over 10 Years Now; he has worked on notable websites like eXputer, Gamepur, Gear Siege, Gearnuke, and plenty more. He is an expert at Games & PC Hardware; you can expect him to solve any problem. People often joke, that if there is any problem anyone can solve, Haddi can solve it faster. Currently, Haddi writes and manages a Team of Experts at Tech4Gamers.
Contact: Haddi@tech4gamers.com


