


NVIDIA Container is a background process designed by NVIDIA for running GPU-accelerated applications. The NVIDIA Container toolkit enables running GPU-accelerated applications in containers, utilizing Docker images as the base environment. However, large Docker images used by applications can consume significant disk space. Other causes of NVIDIA Container’s high disk usage include outdated or corrupt drivers, large datasets, and background gaming processes.
- The NVIDIA Container using high disk usage error means you have used all the available memory on your computer.
- It may occur due to outdated drivers, malware, and corrupt GeForce Experience files.
- Fix this by updating the NVIDIA graphics driver, restarting NVIDIA Services, and uninstalling GeForce Experience.
- Power cycle the PC, reinstall/update NVIDIA graphics drivers, and scan for malware and viruses before proceeding with other fixes.
Method Difficulty Rating
Uninstall GeForce Experience
Rated: 2/10
Disable NVIDIA Telemetry
Rated: 2/10
Turn Off Features
Rated: 3/10
Uninstalling GeForce Experience
A faulty or corrupt data within the GeForce Experience application can also temper with the NVIDIA sub-process, like NVIDIA Container. To solve this, you can uninstall the GeForce Experience and inspect the disk usage.
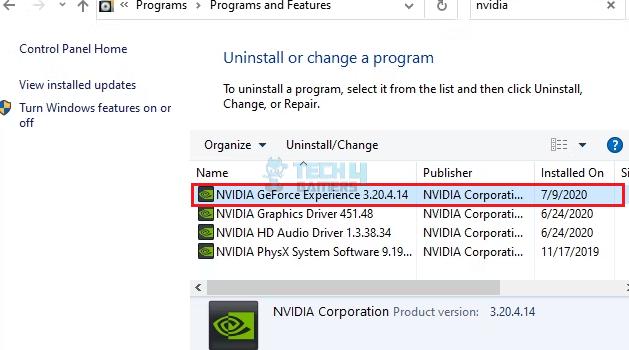
- Enter Run Code: Open the Run prompt with Windows + R > Type appwiz. cpl > Enter.
- Uninstall GeForce: In Programs and Features, click on the NVIDIA GeForce Experience > Uninstall.

Remove NVIDIA GeForce Experience (Image By Tech4Gamers) - Reboot PC: After the uninstallation, restart your computer.
The same fix was mentioned in NVIDIA Forums when NVIDIA Container was causing 100% disk usage on a user’s PC.
Disabling NVIDIA Telemetry Service
NVIDIA Telemetry Service is responsible for sending bugs and crash reports to NVIDIA’s official server. This error can be fixed by disabling this service as it resolves corrupt data or glitches in its operation. Additionally, this simple technique eliminated the issue on my end and for users on Ten Forums.
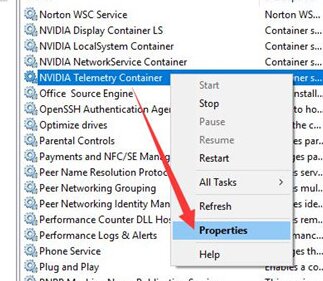
- Open Services: In the Run prompt, execute services. msc.
- Get To Properties: Scroll down to NVIDIA Telemetry Container service > Right click > Properties.

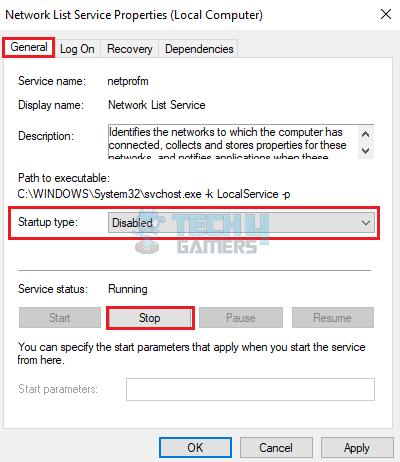
View NVIDIA Telemetry Properties (Image By Driver Talent) - Stop Service: Press the Stop button > Set the Startup Type to Disabled > Apply > OK.

Stop Telemetry Service (Image By Tech4Gamers)
Disable In-Game Overlay And Instant Replay
The in-game overlay feature from NVIDIA GeForce Experience helps record game plays and access GPU internals without minimizing the game. Moreover, NVIDIA GeForce Experience Instant Replay allows you to instantly record a clip of your gameplay by pressing a shortcut key.
While these features are enabled by default, they may add extra load to your computer if you’re using a low-end PC. Therefore, disable the extra features to avoid maximum disk usage.
- Launch GeForce: Open GeForce Experience from the search menu.
- Access Settings: Press the gear icon in the top-right corner > Head to the General section.
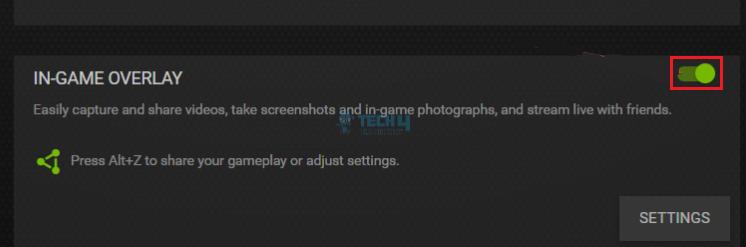
- Disable Overlay: Turn off In-Game Overlay via the toggle button.

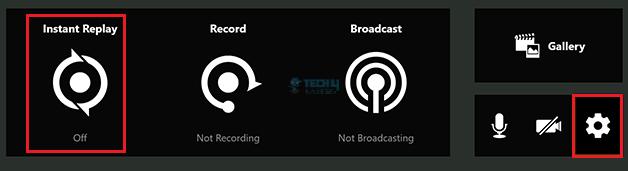
Turn Off In-Game Overlay (Image By Tech4Gamers) - Turn Off Instant Replay: Return to General > Instant Replay > Turn Off.

Turn Off Instant Replay (Image By Tech4Gamers)
Final Thoughts
The error was common among NVIDIA users as I encountered complaints on multiple online forums, like NVIDIA Forums and Reddit, where they mentioned experiencing the same problem.
‘nVidia Container’ causing mad hard drive usage.
byu/nakquada innvidia
NVIDIA addressed the concern and the developers fixed this bug in the newer update, Version 471.96. While the problem is officially resolved, it might rarely come up for some users. In that case, the above solutions should work to fix the NVIDIA Container’s high disk usage.
NVIDIA Container is a process mainly used in GPU-accelerated applications, so it shouldn’t be disabled unless it’s causing an issue. Yes, NVIDIA containers can also cause high CPU usage, and some of the methods above can help you fix the issue. GeForce features like Instant Replay, Game Recording, and sharing snippets can put extra pressure on the CPU. Frequently Asked Questions
Thank you! Please share your positive feedback. 🔋
How could we improve this post? Please Help us. 😔
[Errors Troubleshooting Expert]
Arsalan Shakil (aka GuyThatDoesEverything on YouTube) is a PC Tech Enthusiast and Electronic Geek. With over 10+ years of experience in Electronics, he then decided to explore Software Engineering to design embedded products and automate existing hardware solutions.
When he started tearing down old cameras to understand how they worked, he was shocked (literally, when he got zapped by a flash discharge capacitor), giving him the power (debatable) to fall in love with videography/photography. He also started making some fun videos that later became YouTube tech reviews.
Skills:
- 10+ years of experience in Electronics design, embedded solutions, and prototyping
- Majored in Software Engineering
- Research paper publication in IEEE for Embedded Military Uniform & LoRa WAN wireless technology
- Specialized in IoT Solutions
- PC Enthusiast & PC Modder
In his local region, he’s known to expose cheap PSU brands, often claiming fake certification or false claims on the box. He’s a true nerd and needed some friends in his life. Then he met some guys who work at Tech4Gamers, and they also came out to be equal nerds who suggested he join Tech4Gamers as a Hardware Expert.


