")


Have you been facing the ‘Computer turns on, but no signal to monitor’ issue? Don’t worry. I’m well aware of how frustrating and annoying this issue can be. Therefore, learning about the possible reason behind this issue and the fixes you can try at home to eliminate it is essential.
Hardware issues often stem from poor cable connections, like improperly connected HDMI cables between the PC tower and monitor. Faulty monitors or GPU issues can also lead to display problems. Software-related causes include outdated display drivers, disruptive BIOS settings, resolution misconfigurations, and minor glitches.
- The monitor may not be getting a signal due to either hardware or software issues.
- The problem can be fixed by testing the monitor, updating drivers, testing display adaptors, changing the screen resolution, or resetting the BIOS settings.
- If the problem is bigger than what you anticipated, use a professional’s help.
The screen will be stuck like given below:
Method Difficulty Rating
Rated: 3/10
Rated: 6/10
Rated: 6/10
Rated: 7/10
Rated: 9/10
- Restarting your PC.
- Trying another HDMI Cable.
- Make sure to reconnect all the cables to their respective slots.
Testing Another Displaying Device
If you have any doubts regarding your monitor being the culprit. You can test any other displaying devices. Don’t worry; you don’t have to go out of your way to buy a whole new monitor for that. You can use your TV as a display device by simply plugging in the other end of the HDMI instead of the monitor.
Change The Screen Resolution
You may have accidentally set a resolution way higher than what your monitor supports, which might cause it not to turn on. Different users used this method on Microsoft Answers Forum as well. These are the steps to lower the resolution configuration on Windows 11:
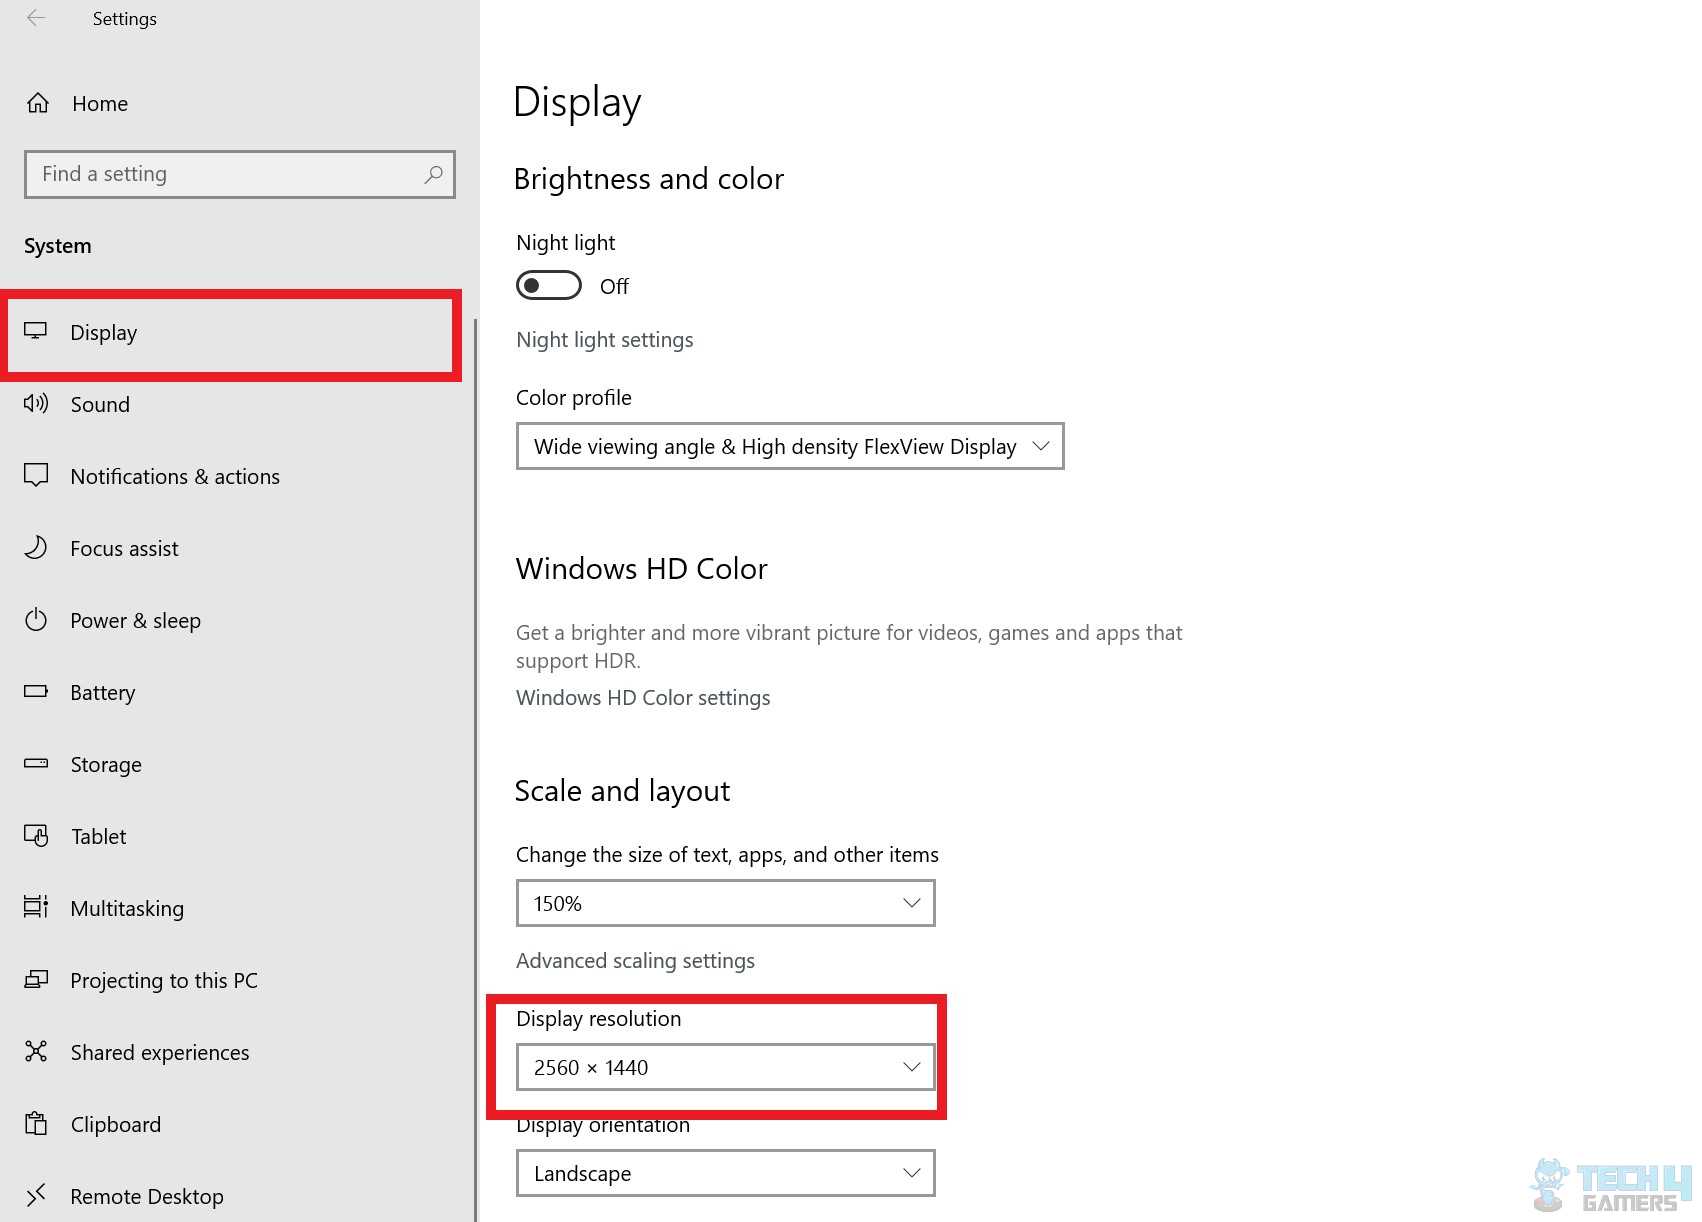
- Go to Display: Open the ‘Settings’ app > Click on the ‘System’ tab > Click on the ‘Display’ tab.

Lower your screen resolution. Image credits: (Tech4gamers) - Display Resolution: Look for ‘Display Resolution’ > choose a lower resolution configuration for your monitor.
Update Drivers
Updating drivers is essential to keep your PC running smoothly. Therefore, you should know how to update drivers. In this case, you must learn how to update the display adaptor or GPU drivers as users discussed this on the forum windows 10. You must follow these steps to update display adaptor drivers through the device manager:
- Device Adapters: Open the ‘Device Manager’ > Click on ‘Device Adapters.’
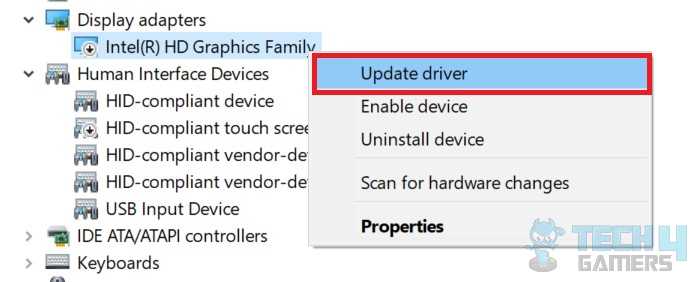
- Update Driver: Right-click on the display adaptor that you are using > Click on ‘Update Driver.’

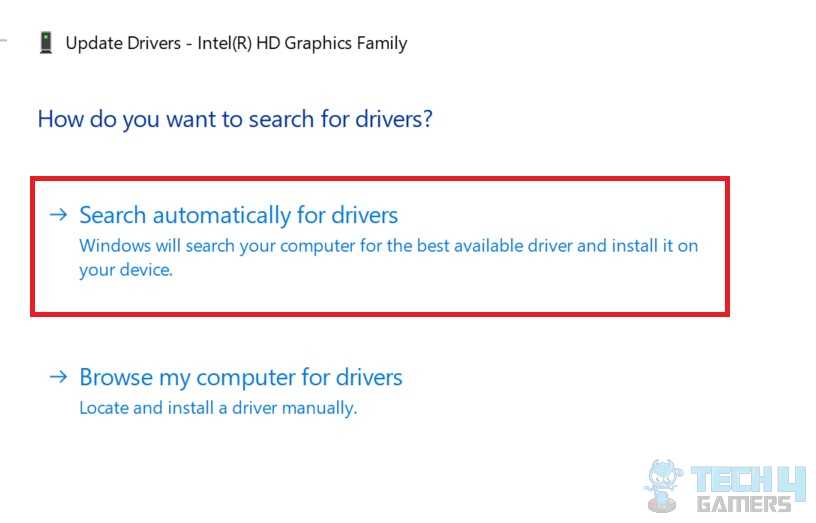
Click on ‘Update Driver.’ Image credits: (Tech4gamers) - Search automatically for drivers: Click on ‘Search automatically for drivers’ in the newly opened window.

Click on ‘Search automatically for drivers.’ Image credits: (Tech4gamers)
Your PC will automatically search for any driver updates, if any.
Try Another GPU
Many processors come along with integrated GPUs. Therefore, if you are worried that the other GPU installed separately on your PC is not working, you can try switching to the integrated GPU on the CPU. On the Windows 10 Forum, users were discussing this very solution and how this can get around the issue and solve it. You can follow the given steps to switch to the integrated GPU:
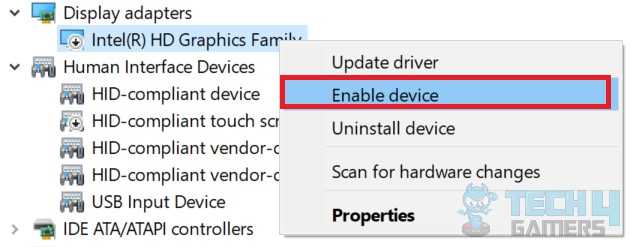
- Display Adapters: Open the ‘Device Manager’ on your PC > Look for the ‘Display Adapters’ and click on it.
- Right-click and Enable: Right-click on the GPU with your CPU’s name on it > Click on ‘Enable device’ in the drop-down list.

Click on ‘Enable Device.’ Image credits: (Tech4gamers)
If the integrated GPU seems to be working perfectly fine, the problem may be with the GPU you used initially.
Reset BIOS Settings
Any settings of BIOS that are keeping your monitor from displaying can be reset back to default. You can try the CMOS battery picking-out method to reset your BIOS settings. Resetting BIOS being a possible solution for many users on ASRock Forum was the go-ahead signal for me as well. Here are the steps to reset BIOS using a CMOS battery:
- Shut Down: Shut down your PC > Make sure the power outlet is switched off too.
- Open PC: Open your PC case after a while (make sure no current is flowing).
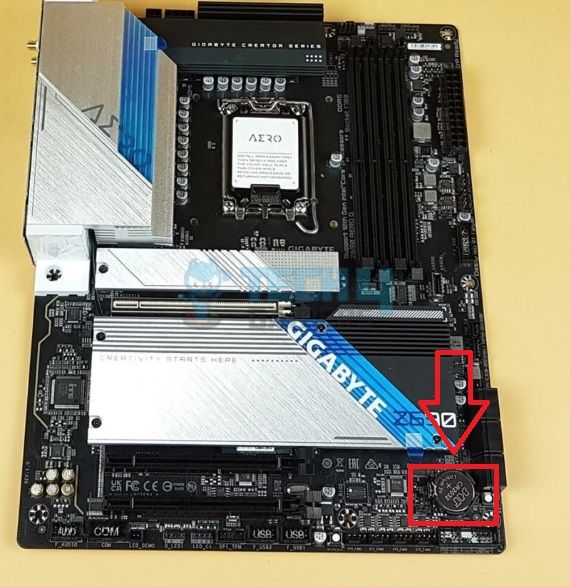
- CMOS battery: Look for a CMOS battery attached to your motherboard > It is usually close to the PCI/PCIe slots. However, the location of the CMOS battery may differ among motherboards.

CMOS battery on the motherboard. Image Credits (Tech4Gamers) - Take Battery Out: Carefully pick the CMOS battery out > let at least 5 minutes pass > You may press the power button on the PC case for 10 seconds to drain the excess power.
- Put Battery Back: Put the CMOS battery back in place while ensuring its smaller side faces down.
Your BIOS settings will automatically reset once you’ve returned the CMOS battery. You can reattach the PC case cover and restart it.
Final Thoughts
These are all the fixes that I recommend you try to fix the ‘computer turns on but no signal to monitor’ issue. Hopefully, trying out another displaying device, updating drivers, checking GPU, or resetting the BIOS settings will help eliminate your issue.
If none of the fixes work for you, you can try heading to a professional who can look at your computer and conduct a deeper analysis and diagnosis. You will be informed of the real reason behind the issue and will be told the fix it accordingly.
In newer computers, finding a VGA cable slot may be difficult. However, you can check both via VGA cable if your PC and monitor are older. Frequently Asked Questions
Relevant Guides:
- How To Remove GPU From The Motherboard
- HDMI Port Not Working On PC [10 Fixes]
- Intel Wireless AC 9462 Not Working
- MSI Command Center Not Working
- How To Fix Nvidia Container High Disk Usage
Thank you! Please share your positive feedback. 🔋
How could we improve this post? Please Help us. 😔
[Errors Troubleshooting Expert]
Arsalan Shakil (aka GuyThatDoesEverything on YouTube) is a PC Tech Enthusiast and Electronic Geek. With over 10+ years of experience in Electronics, he then decided to explore Software Engineering to design embedded products and automate existing hardware solutions.
When he started tearing down old cameras to understand how they worked, he was shocked (literally, when he got zapped by a flash discharge capacitor), giving him the power (debatable) to fall in love with videography/photography. He also started making some fun videos that later became YouTube tech reviews.
Skills:
- 10+ years of experience in Electronics design, embedded solutions, and prototyping
- Majored in Software Engineering
- Research paper publication in IEEE for Embedded Military Uniform & LoRa WAN wireless technology
- Specialized in IoT Solutions
- PC Enthusiast & PC Modder
In his local region, he’s known to expose cheap PSU brands, often claiming fake certification or false claims on the box. He’s a true nerd and needed some friends in his life. Then he met some guys who work at Tech4Gamers, and they also came out to be equal nerds who suggested he join Tech4Gamers as a Hardware Expert.


