")


DRAM light is placed on a computer’s motherboard near the RAM slots. There can be several reasons why the DRAM light may light up on the motherboard, like improper seating of RAM, incompatible RAM modules, faulty motherboard components, such as RAM slots or capacitors, or insufficient power supply. Depending on the issue and the motherboard model, it can be static or blink continuously. It only goes off once the trouble has been entirely resolved.
- The DRAM light comes on whenever there is trouble with the RAM.
- It may light up due to incompatible RAM, incorrect placement of RAM or CPU, or incorrect BIOS settings.
- You can solve the problem by cleaning the RAM module and the slots, updating the BIOS, or reconnecting the MOBO cables.
Method Difficulty Rating
Placement
Rated: 3/10
Connections
Rated: 3/10
Update BIOS
Rated: 4/10
Clear CMOS
Rated: 3/10
Ensure Correct Placement Of RAM Modules
The first troubleshooting step that I follow is to verify that you have correctly inserted the RAM module into its slot. When building a new PC, or if your PC experiences external pressure, it’s possible for the RAM to become displaced from its slot.
- Clean the RAM module and slot: Gently pull the RAM module out of its slot > Softly blow over both the RAM module and the slot on the motherboard to remove any dust or dirt.

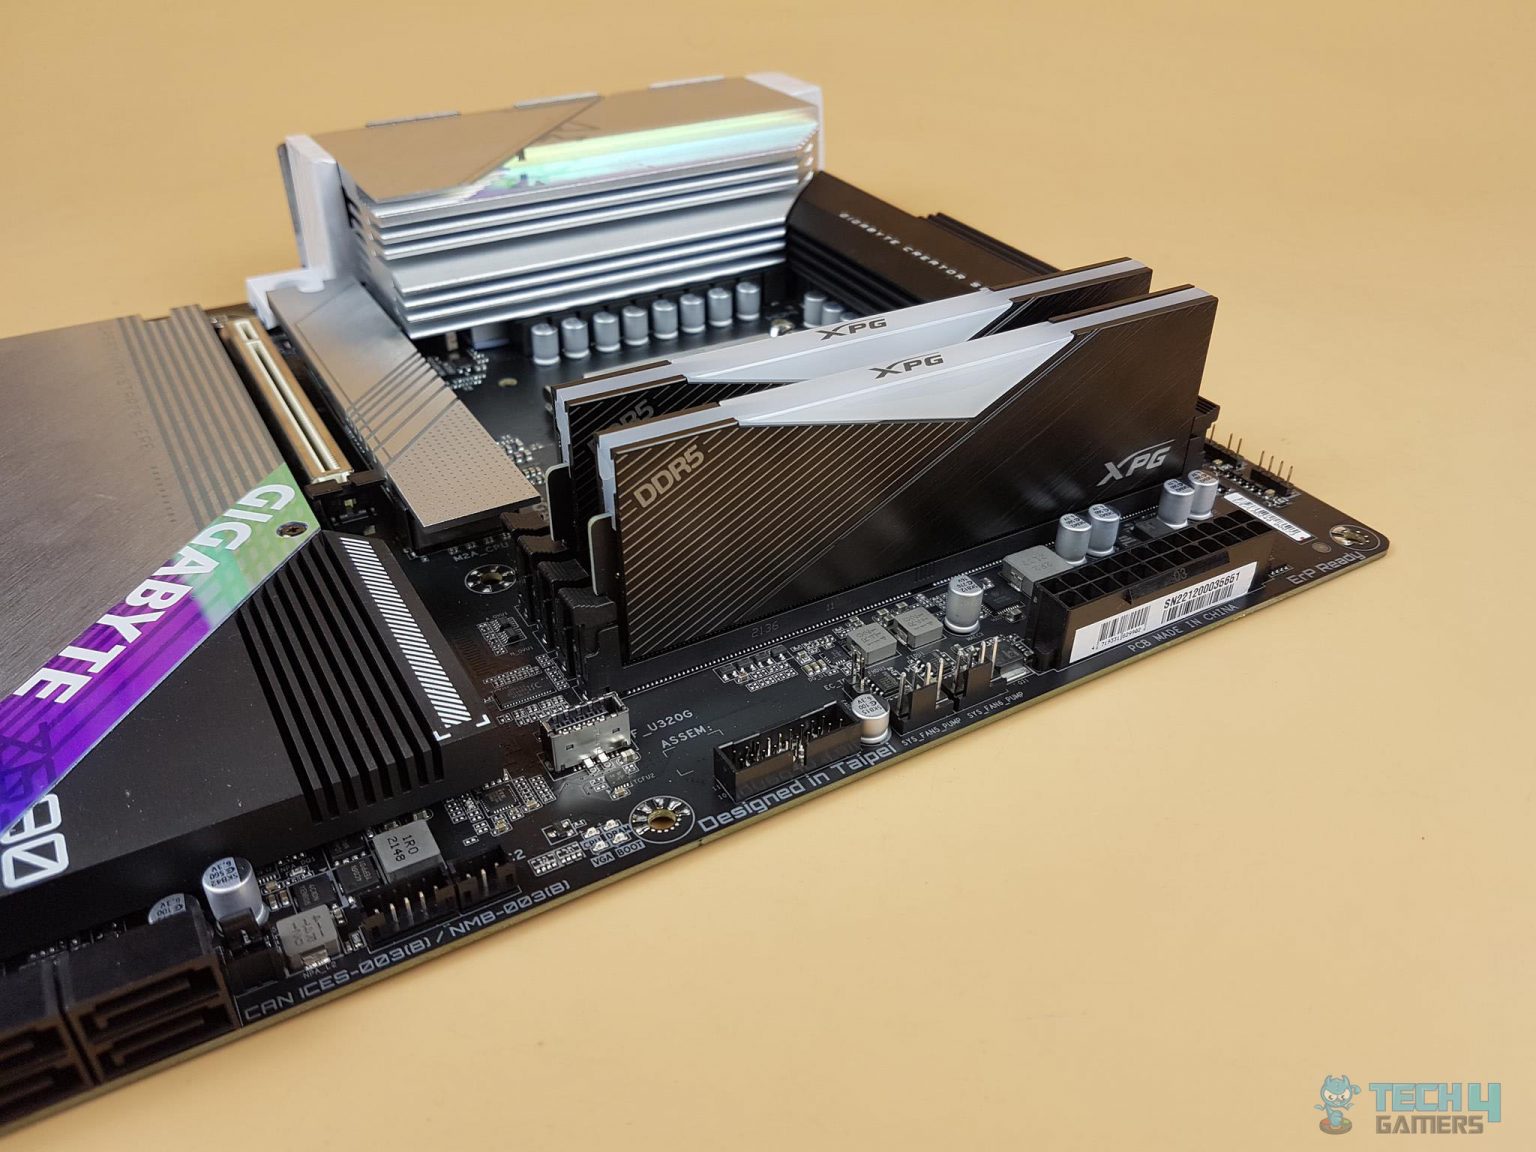
RAM on the motherboard – Image Credits (Tech4Gamers) - Reinsert the RAM module: Check both the RAM module and the slot for signs of damage, such as bent pins or debris > Carefully place the RAM module back into its dedicated slot on the motherboard.
- Test the system: Press down on the RAM module until you hear it click into place > Power on the computer and check if the issue persists.
Check Power Connections
It can happen that your RAM is not getting enough power and it is making this light appear in front of you. That can happen for many reasons such as worn-out cables, insufficient power or partially connected cables.
I always double-check the power connections carefully, as hardware issues often stem from improper power connections and to do so follow the steps:
- Disconnect power cables: Power off the computer > Unplug the power cables connected, including the main power cable from the power supply unit (PSU) to the wall outlet.
- Locate power connections: Remove the side panel of the computer case > Identify the power cables connected to the motherboard and the RAM modules. These are typically located near the edges of the motherboard.
- Check PSU cables: Check each power cable > ensure it is firmly connected to its corresponding socket > Make sure there are no loose connections. Trace the cables from the PSU to the motherboard and RAM modules. Ensure they are attached to the appropriate ports on the motherboard.
- Reconnect power cables: If any connections are loose, reconnect them to their sockets on the motherboard and RAM modules.
- Plug in and power on: Once all connections are checked, close the computer case > Plug the main power cable back > Power on the computer to see if the issue persists.
Update Your BIOS
DRAM light can an also be an indication of outdated BIOS. Updating the BIOS to the latest version on the motherboard is my go to method, especially when dealing with DRAM issues. The updates solve the persistent issues the older versions face, preventing the DRAM light from turning on.
Lenovo
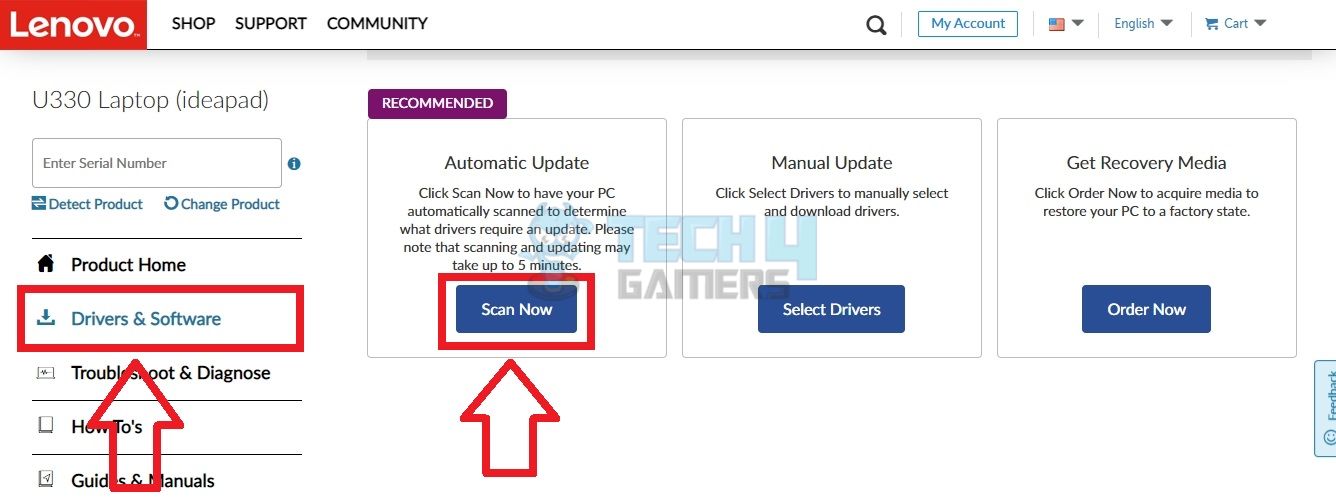
- Lenovo Website: Head to the official Lenovo website and search for your product. Choose the “Drivers and Software” > Locate the “Automatic Update” box > hit “Scan Now.”

Scan Now – Image Credits (Tech4Gamers) - Download: “Agree” to the Terms and Conditions > press “Continue” >“Download” Lenovo Service Bridge.
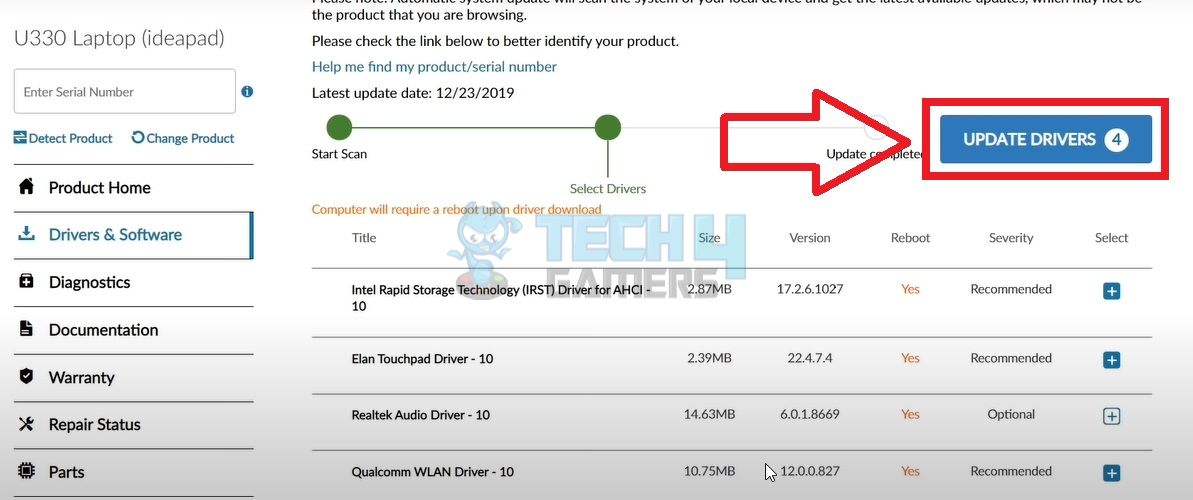
- Update Drivers: Choose a suitable disk to install the application > “Install” the system update file. Let the process complete > “Select Drivers” > Hit the “Update Drivers” box.

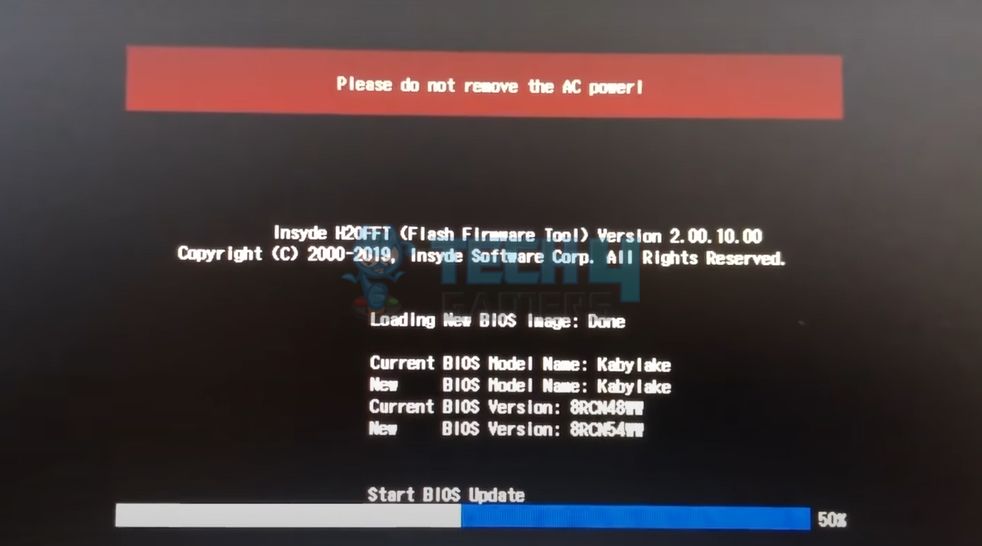
Update Drivers – Image Credits (Tech4Gamers) - Download and Install: Select “Install Now” > Open the application > Click on “Next”. Pick the “BIOS Update” available > “Next” > “Download” > “OK” > “Accept” the agreement > choose “Next.”
- Complete Process: Finally, press the “Install” option > “Finish” once the process is complete. You will see the message, “1 Package Was Successfully Downloaded and Installed” > Click “OK.”

Updating BIOS – Image Credits (Tech4Gamers)
ASUS
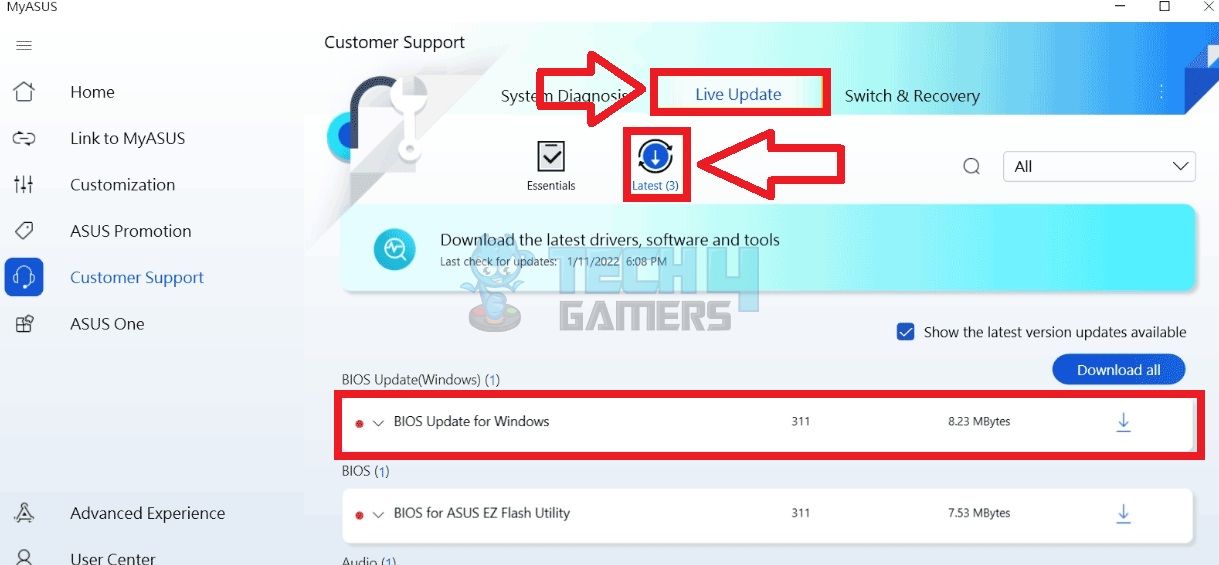
- MyASUS App: Launch the “MyASUS” application > Select the “Headset” icon to access the “Customer Support” page > “Live Updates” > click on “Latest”. You will see a “BIOS Update for Windows” file > Download it > “Confirm.”

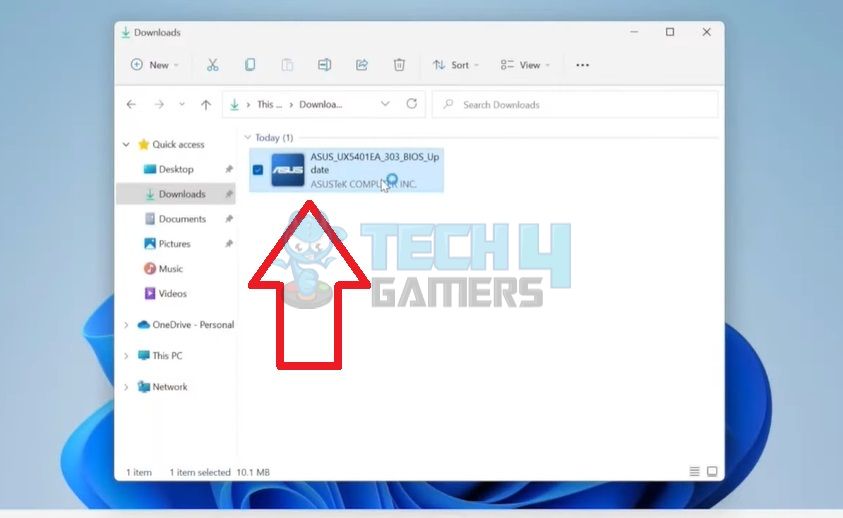
Live Updates – Image Credits (Tech4Gamers) - Save file: Choose the disk to save the file > Press “OK” > Open the BIOS Utility File.

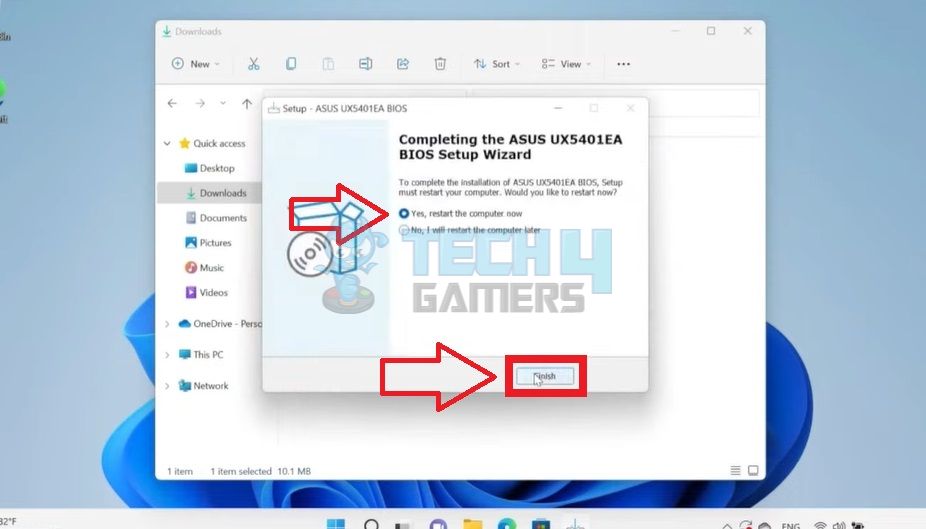
BIOS Utility File – Image Credits (Tech4Gamers) - Follow Process: Choose “Yes” > Click “OK” > Select “Next.” Tick the “Install” box > Click “Next” > Hit “Install” > “OK” > Choose “Yes, Restart Computer Now” > Press “Finish.”

Restart Computer – Image Credits (Tech4Gamers) - Finish: The PC will now restart into the BIOS mode. Select “Yes.” The BIOS update will be initiated.
Dell
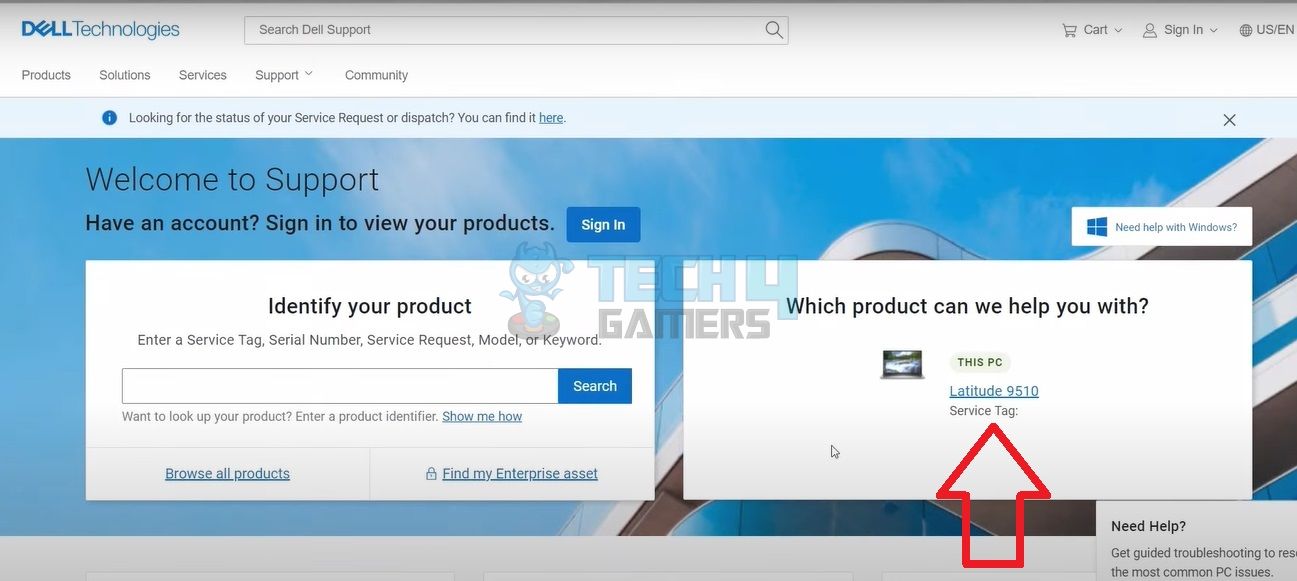
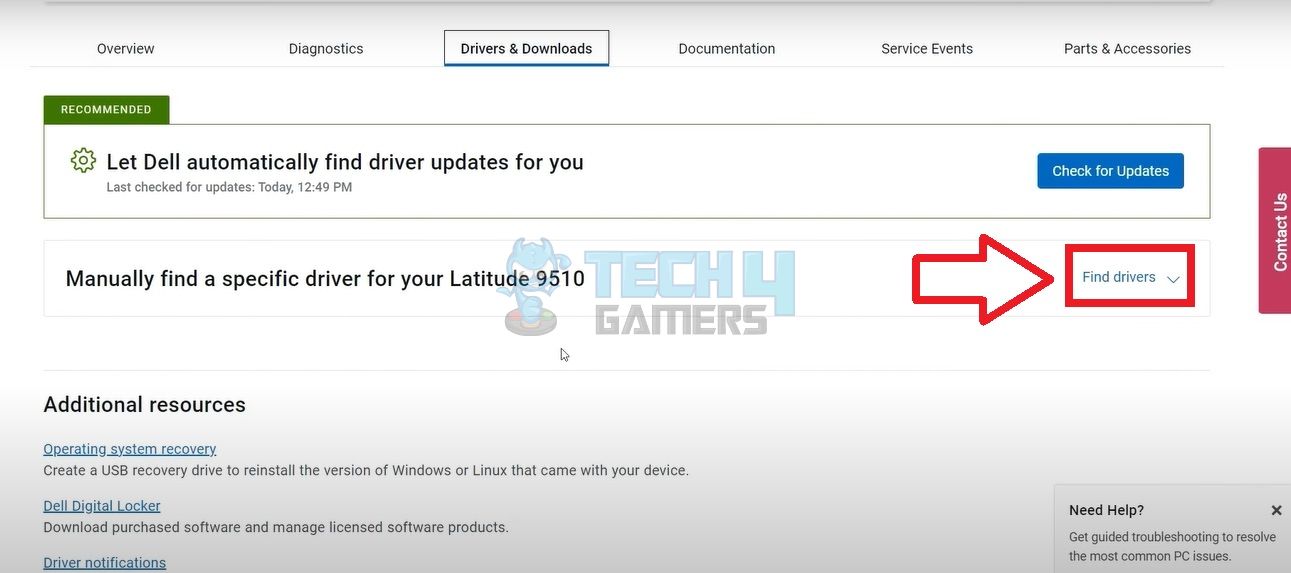
- Support Assistant: Open the Dell Support page on your browser. Use the “Support Assistant” to look up your computer model. Select the detected results.

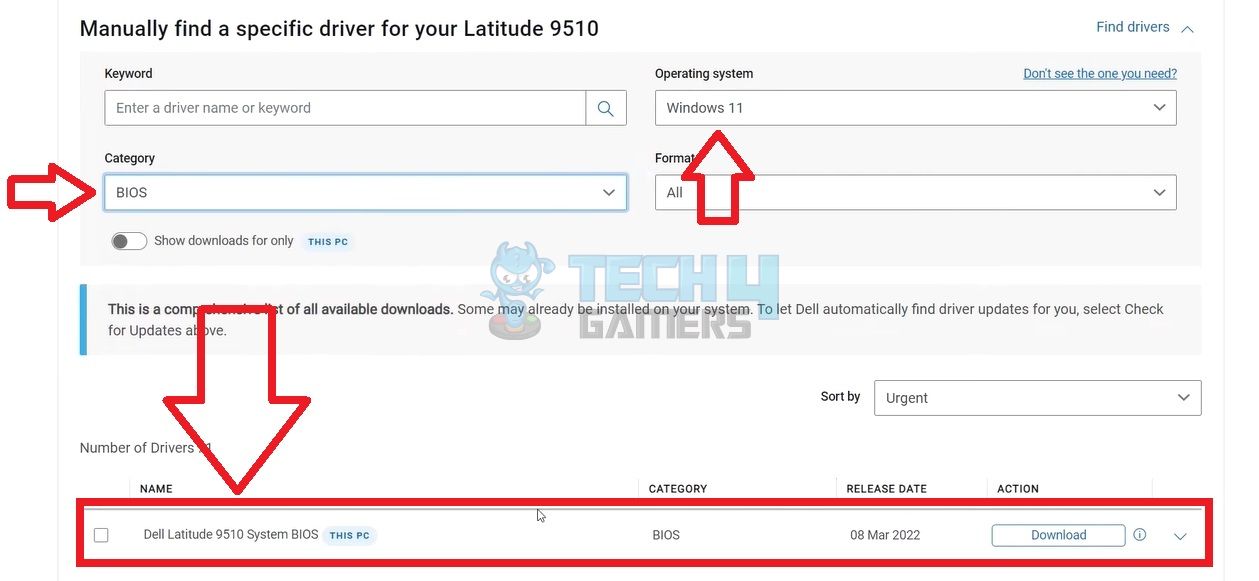
Detected Model – Image Credits (Tech4Gamers) - Find Drivers: Go to the “Drivers and Downloads” tab > “Find Drivers.”

Find Drivers – Image Credits (Tech4Gamers) - Download File: Select your “Operating System” > choose “BIOS” from the category > Download the latest update file shown.

Download File – Image Credits (Tech4Gamers) - Update: “After installation, launch and grant permission by selecting ‘Yes’ > press ‘Update.’ It will start with ‘Loading Firmware Data.’
HP
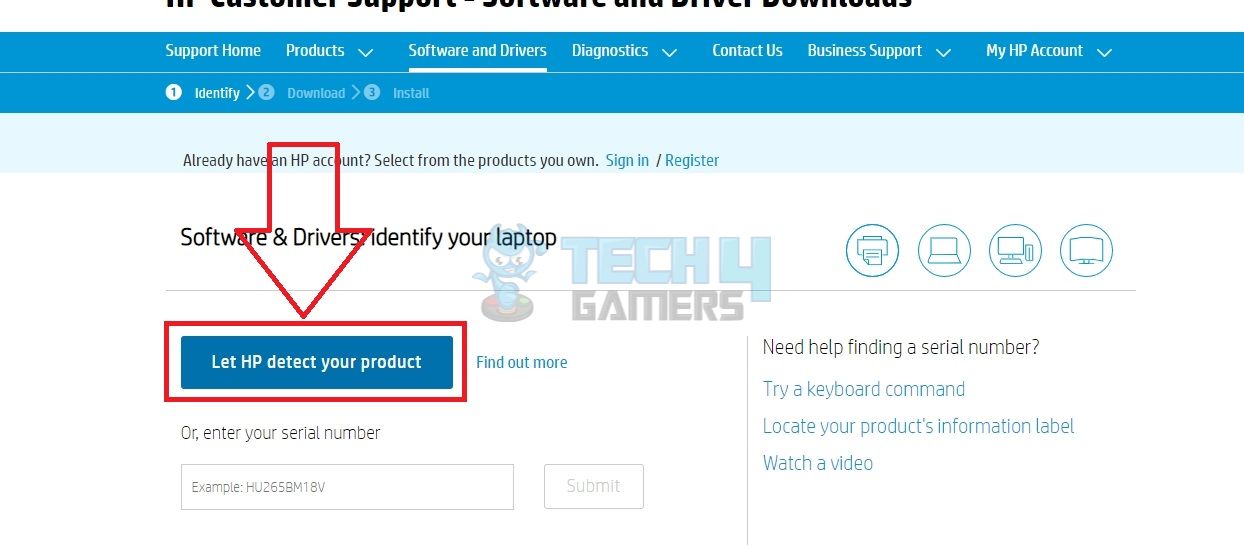
- Open Support: Open HP Support. Select your product. Now, “Let HP Detect Your Product.”

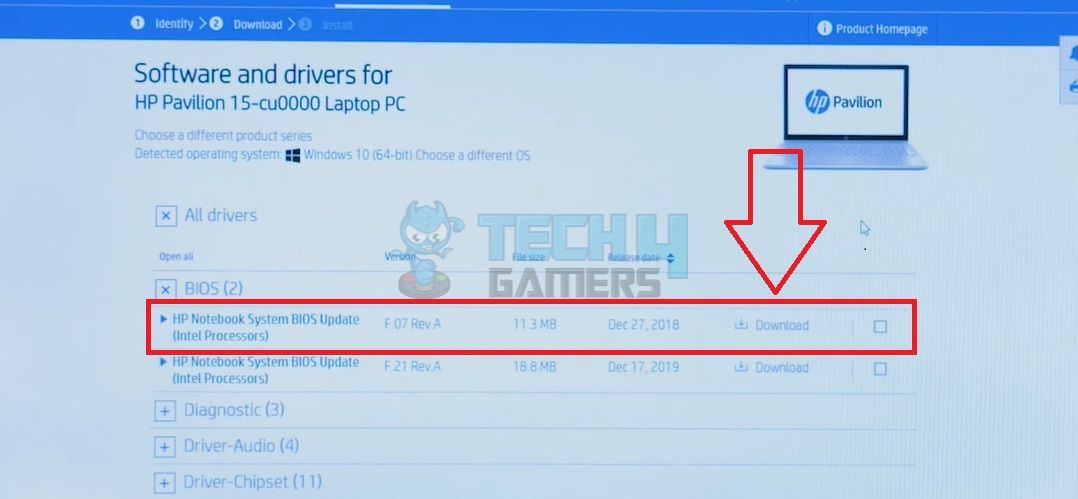
Let HP Detect – Image Credits (Tech4Gamers) - Download file: Once you see the update files, download the most recent one.

Download BIOS File – Image Credits (Tech4Gamers) - Grant Permission: Open the installation. Grant permission with “Yes” > Select “Next” > Agree to terms and “Next” > Again, click “Next” > Check “Update” > choose “Next.”
- Restart: A dialogue box says, “The BIOS File Was Prepared Successfully.” Hit the blue “Restart Now” button > Choose “Apply Update Now.”
Clear CMOS
The issue can be solved by shutting off their PC and clearing the CMOS. I’ve noticed that this process offers several benefits, such as resetting the BIOS, resolving hardware connectivity issues, and addressing booting problems. The DRAM light issue could potentially be related to any of these factors.
- Shutdown PC: Shut down your PC > disconnect the power source > Now, access the RAM module by opening the computer case.
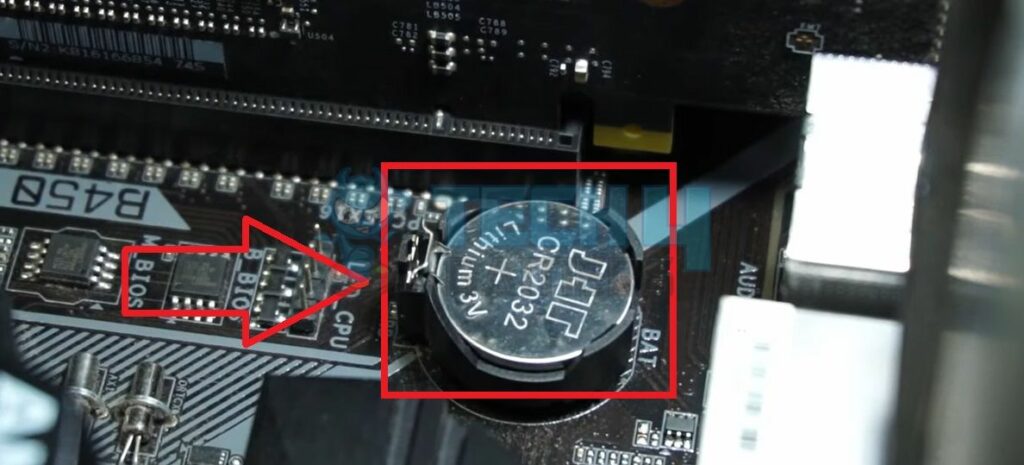
- Clear CMOS: Pull out the RAM module from its dedicated slot on the motherboard. Locate the silver, coin-shaped battery on your motherboard.

CMOS Battery On Motherboard - Turn on PC: Next, firmly insert the RAM module in its slot, assemble the computer case > turn on your PC. Inspect if the DRAM light is fixed.
Different Colors Of DRAM Light And Their Meaning
The DRAM light may light up in different colors because each color indicates a specific issue with the RAM.
- Green: Everything is perfect with the RAM, and you do not have to worry about any issues.
- Yellow: It indicates the initialization of the RAM and will go off once the process is complete.
- Red: A red light on the motherboard means something is wrong with the RAM; you should attend to it urgently. Look for RAM placement problems or faulty modules or slots.
- Orange: It means that the RAM is currently not in use. Specific fixes are mentioned in our guide to help you solve the orange light on the motherboard.
- White: It signs that the system is currently using the RAM.
Final Words
DRAM light on motherboard, which is often seen turning on due to RAM issues, have turned out to be frustrating for users who reported on multiple forums like X and ASUS forum as PC might not even boot due to this issue. Sometimes, despite correctly seating the RAM in a new PC build, users on Reddit have reported facing this problem.
New motherboard, new ram, still have DRAM yellow light on motherboard?? Any ideas? pic.twitter.com/zwQEGJlLtj
— EDEN🦉 (@EDEN_FPS) July 10, 2022
Anyone know what the problem is? The dram light is on and im not sure whats wrong. This is my first pc build and im trying to get it to boot. I made sure the ram was all the way in aswell. My mother board is the MSI B550 Tomahawk if that helps.
byu/Aboby516 inMSI_Gaming
The main solution for this DRAM issue is reseating the RAM, focusing on checking the connections. When assembling a new PC, ensure all connections are properly made and that the RAM sticks are securely seated.
Frequently Asked Questions
Improper RAM module insertion, outdated BIOS, and incompatibility between the RAM module and motherboard are some reasons why the light may come on.
Try reinserting the RAM module, updating BIOS, or performing a memory test to resolve the error.
Unfortunately, it is not possible to disable the DRAM light on a motherboard since it prompts you to take timely actions to fix RAM issues.
Related Articles:
- How To Test Motherboard Without CPU
- How To Remove GPU From The Motherboard.
- How to Vertical Mount Your GPU
- How To Turn Off Overclocking
- How to Replace GPU fans
Thank you! Please share your positive feedback. 🔋
How could we improve this post? Please Help us. 😔
[How-To Guides Expert]
Laiba, our tech guru at Tech4Gamers, simplifies and crafts How-To Guides with a Google IT Support Certificate. Beyond tech, she captures the city’s aesthetics through her lens. Join her journey where tech meets creativity!
Get In Touch: Laiba@tech4gamers.com


