 Threads
Best 360mm AIO?
Review Summary
Cooler Master has brought a feature-rich liquid cooling solution set at the right price with an extensive warranty period. The performance of this cooler is competitive, and this makes this cooler an attractive proposition, creating a true value for your buck.
Hours Tested: 5

Overall
-
Build Quality - 9/10
9/10
-
Design - 9/10
9/10
-
Performance - 9/10
9/10
-
Features - 9/10
9/10
-
Value - 9/10
9/10
Pros
- Comparable Thermal Performance
- Dual Loop RGB Lighting
- Dual Chamber Pump Design
- FLUX 120x25mm Fans
- Extensive AMD sockets support
- Intel LGA1700 socket support
- 2nd Gen RGB Controller
- MasterPlus+ Software
- Easy Installation
- Warranty
- Price
Cons
- None


This article looks at a premium cooling solution from Cooler Master in their Master Liquid series of liquid coolers. This time, it is the ML PL360 FLUX AIO cooler. This cooler features a low-profile dual-chamber pump design. As the name indicates, this cooler has a 360mm radiator. Cooler Master is using redesigned Flux series fans with this cooler. These fans and the pump housing feature digital RGB backlighting. Cooler Master has provided a second-generation ARGB controller with this cooler using the same MasterPlus+ software for customization. This cooler is compatible with Intel LGA 115x/1200/1700/20xx sockets and AMD AM5/4/3+/3/2+/2 and FM2+/2/1 and TR4 sockets. Salient features include:
- Premium Dual Chamber Pump
- Fine-Tuned Performance Ratio
- Superior Heat Exchange
- Low Profile Radiator
- Redesigned Flux Series Fan
- Dual Loop ARGB Pump
Key Takeaways
- The Cooler Master’s PL360 FLUX Liquid Cooler is a premium cooling solution that offers efficient heat dissipation. Its simplified cable management adds to its appeal.
- The PL360 FLUX’s 360mm radiator caters to users with higher thermal demands, and the simplified cable management streamlines the installation process for those who appreciate the convenience.
- If you have space constraints or seek a more straightforward cooling solution, alternatives with smaller radiators may be preferable.
- Why you can trust Tech4Gamers: Our reviews are based on dedicated hands-on testing by our team of experienced hardware experts. Find out more about how we test.
Related Read: Cooler Master MasterLiquid Lite ML240L Review
Let’s take a look at the specifications of the Cooler Master MASTERLIQUID PL360 FLUX:
| Product Name | Cooler Master MASTERLIQUID PL360 FLUX |
|---|---|
| Exterior Color | Black |
| CPU Socket | LGA1700, LGA1200, LGA2066, LGA2011-v3, LGA2011, LGA1151, LGA1150, LGA1155, LGA1156, AM5, AM4, AM3+, AM3, AM2+, AM2, FM2+, FM2, FM1, TR4 |
| Radiator Material | Aluminum |
| Radiator Dimensions | 394 x 119.6 x 27.2 mm / 15.5 x 4.7 x 1.07 inch |
| Pump Dimensions | 89 x 75 x 40 mm / 3.5 x 2.95 x 1.57 inch |
| Pump MTTF | >210,000 Hours |
| Pump Noise Level | 15 dBA (Max) |
| Pump Connector | 4-Pin |
| Pump Rated Voltage | 12 VDC |
| Pump Power Consumption | 6W |
| Fan Dimensions (L x W x H) |
120 x 120 x 25 mm / 4.7 x 4.7 x 1 inch |
| Fan Quantity | 3 PCS |
| Fan LED Type | Addressable Gen 2 RGB |
| Fan Speed | 0-2300 RPM ± 10% |
| Fan Airflow | 72.37 CFM (Max) |
| Fan Noise Level | 32 dBA (Max) |
| Fan Pressure | 2.96 mmH₂O (Max) |
| Fan Bearing Type | Oli Reflow Bearing System (ORBS) |
| Fan Life Expectancy | >160,000 Hours |
| Fan Power Connector | 4-Pin (PWM) |
| Fan Rated Voltage | 12 VDC |
| Fan Rated Current | 0.15A |
| Fan Safety Current | 0.3A |
| RAM Clearance | N/A |
| Warranty | 5 years |
| Series | MasterLiquid Pro |
| Cooler Type | Liquid Cooler |
| Radiator Size | 360 |
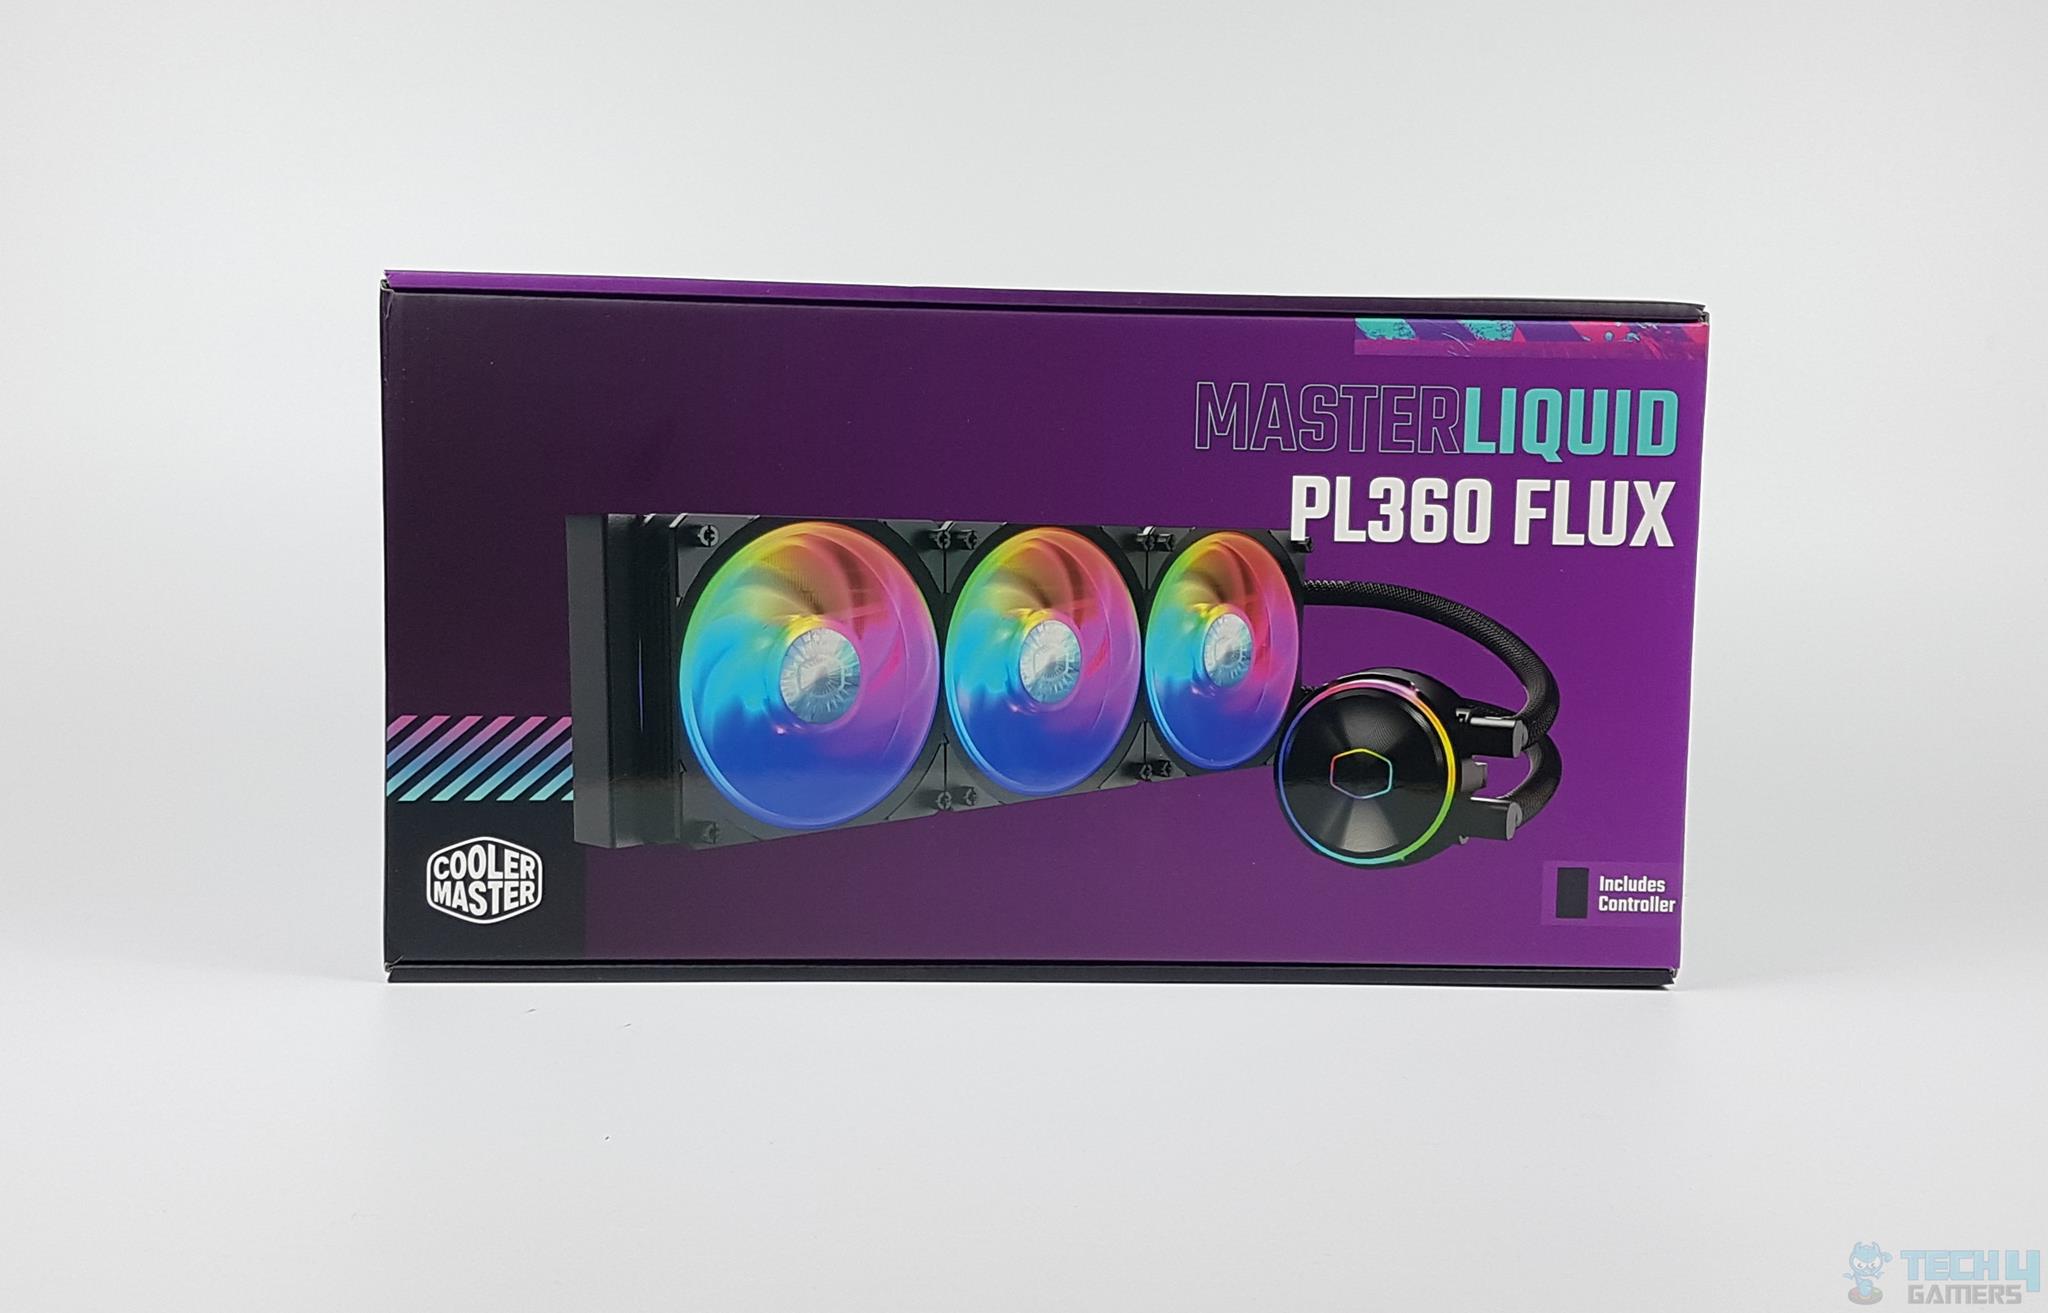
Packaging Box
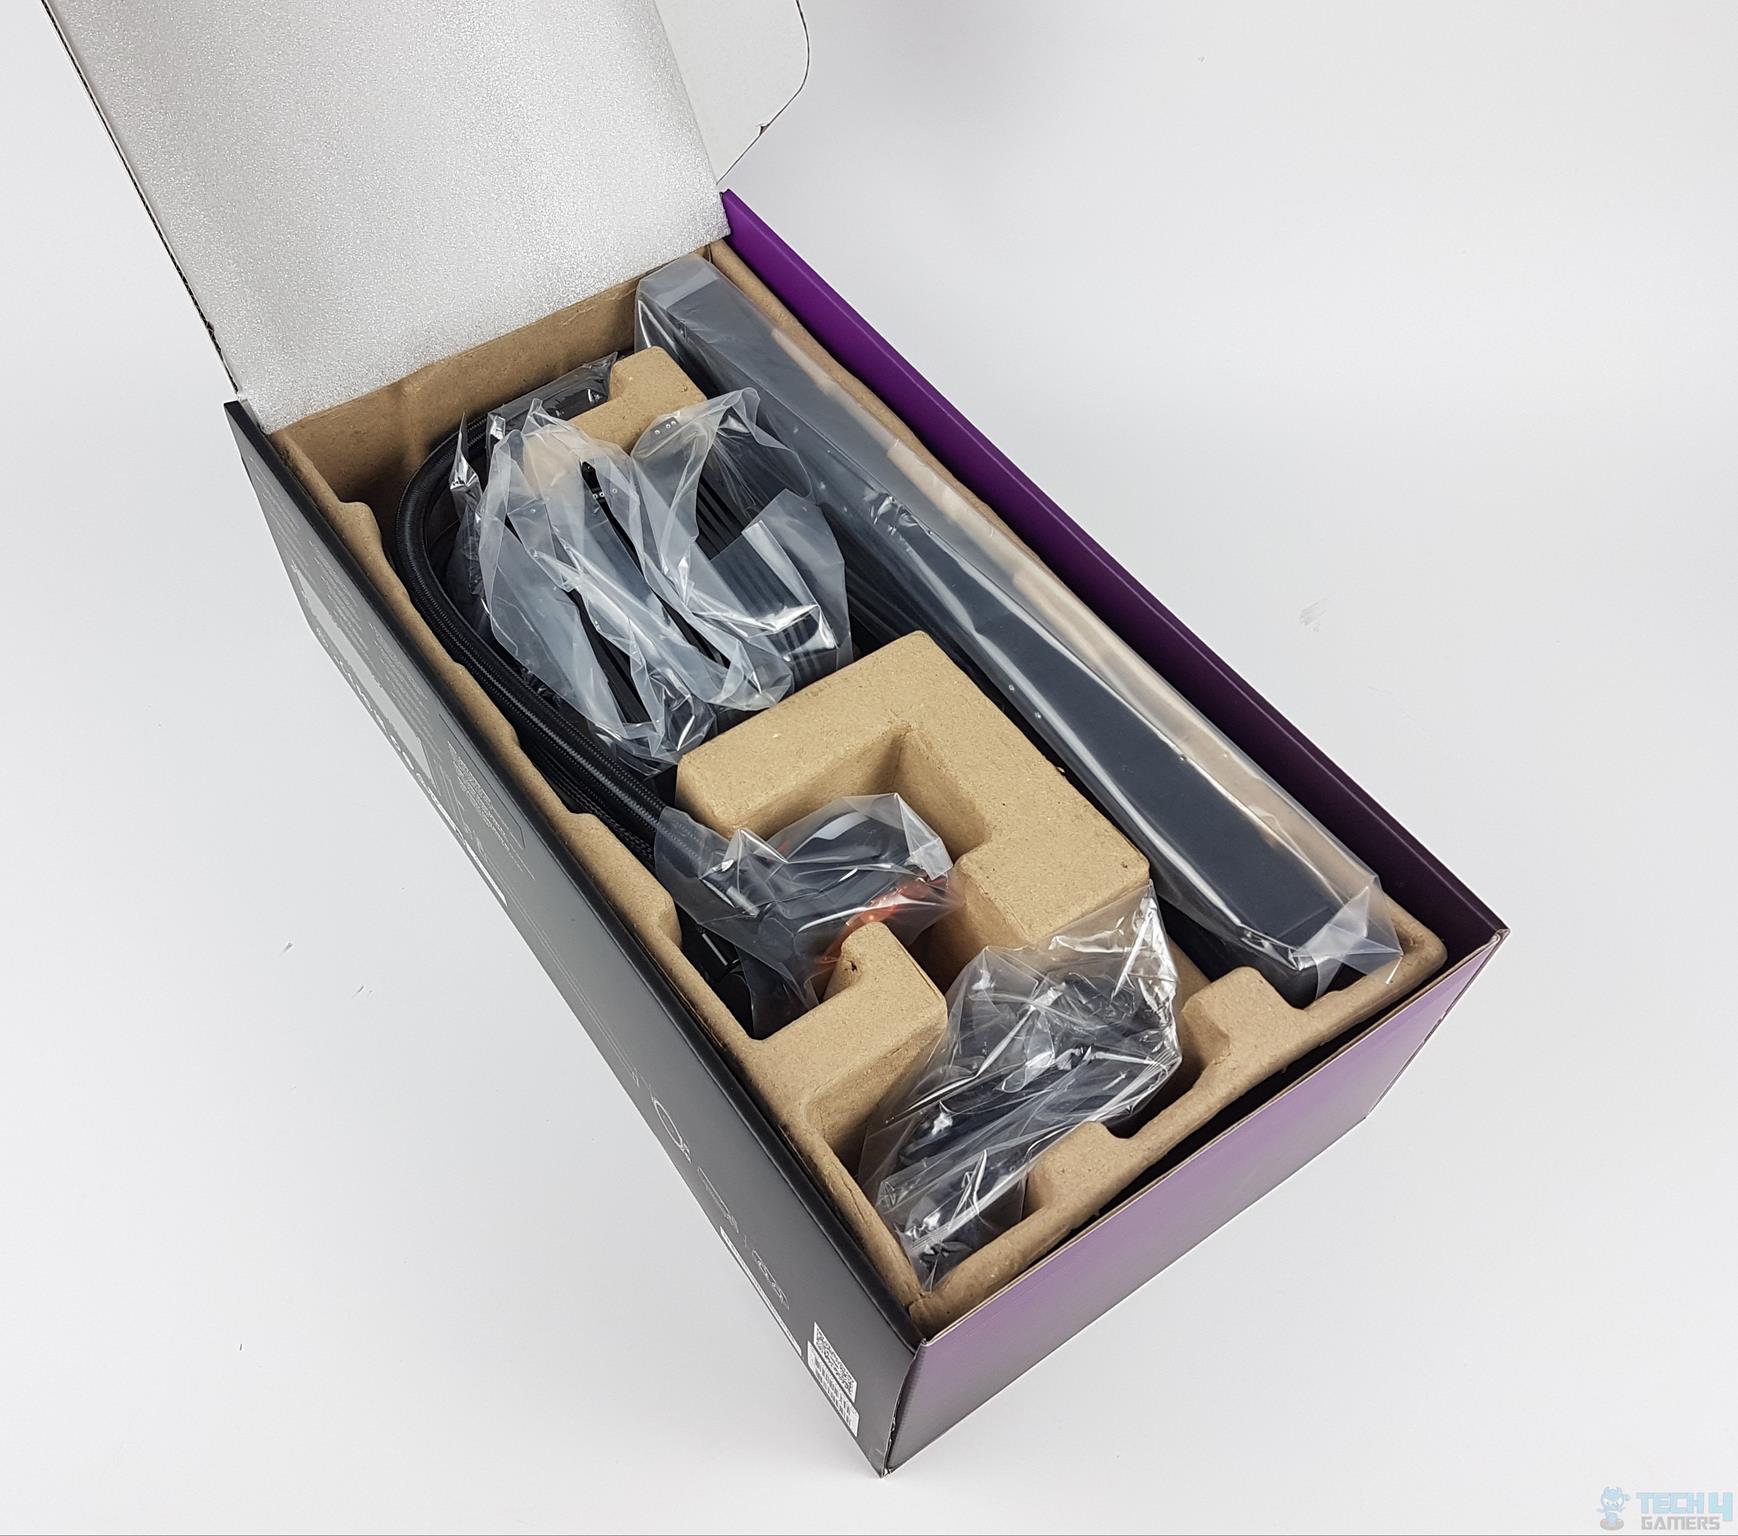
Accessories
Let’s see what is provided in the accessories department:
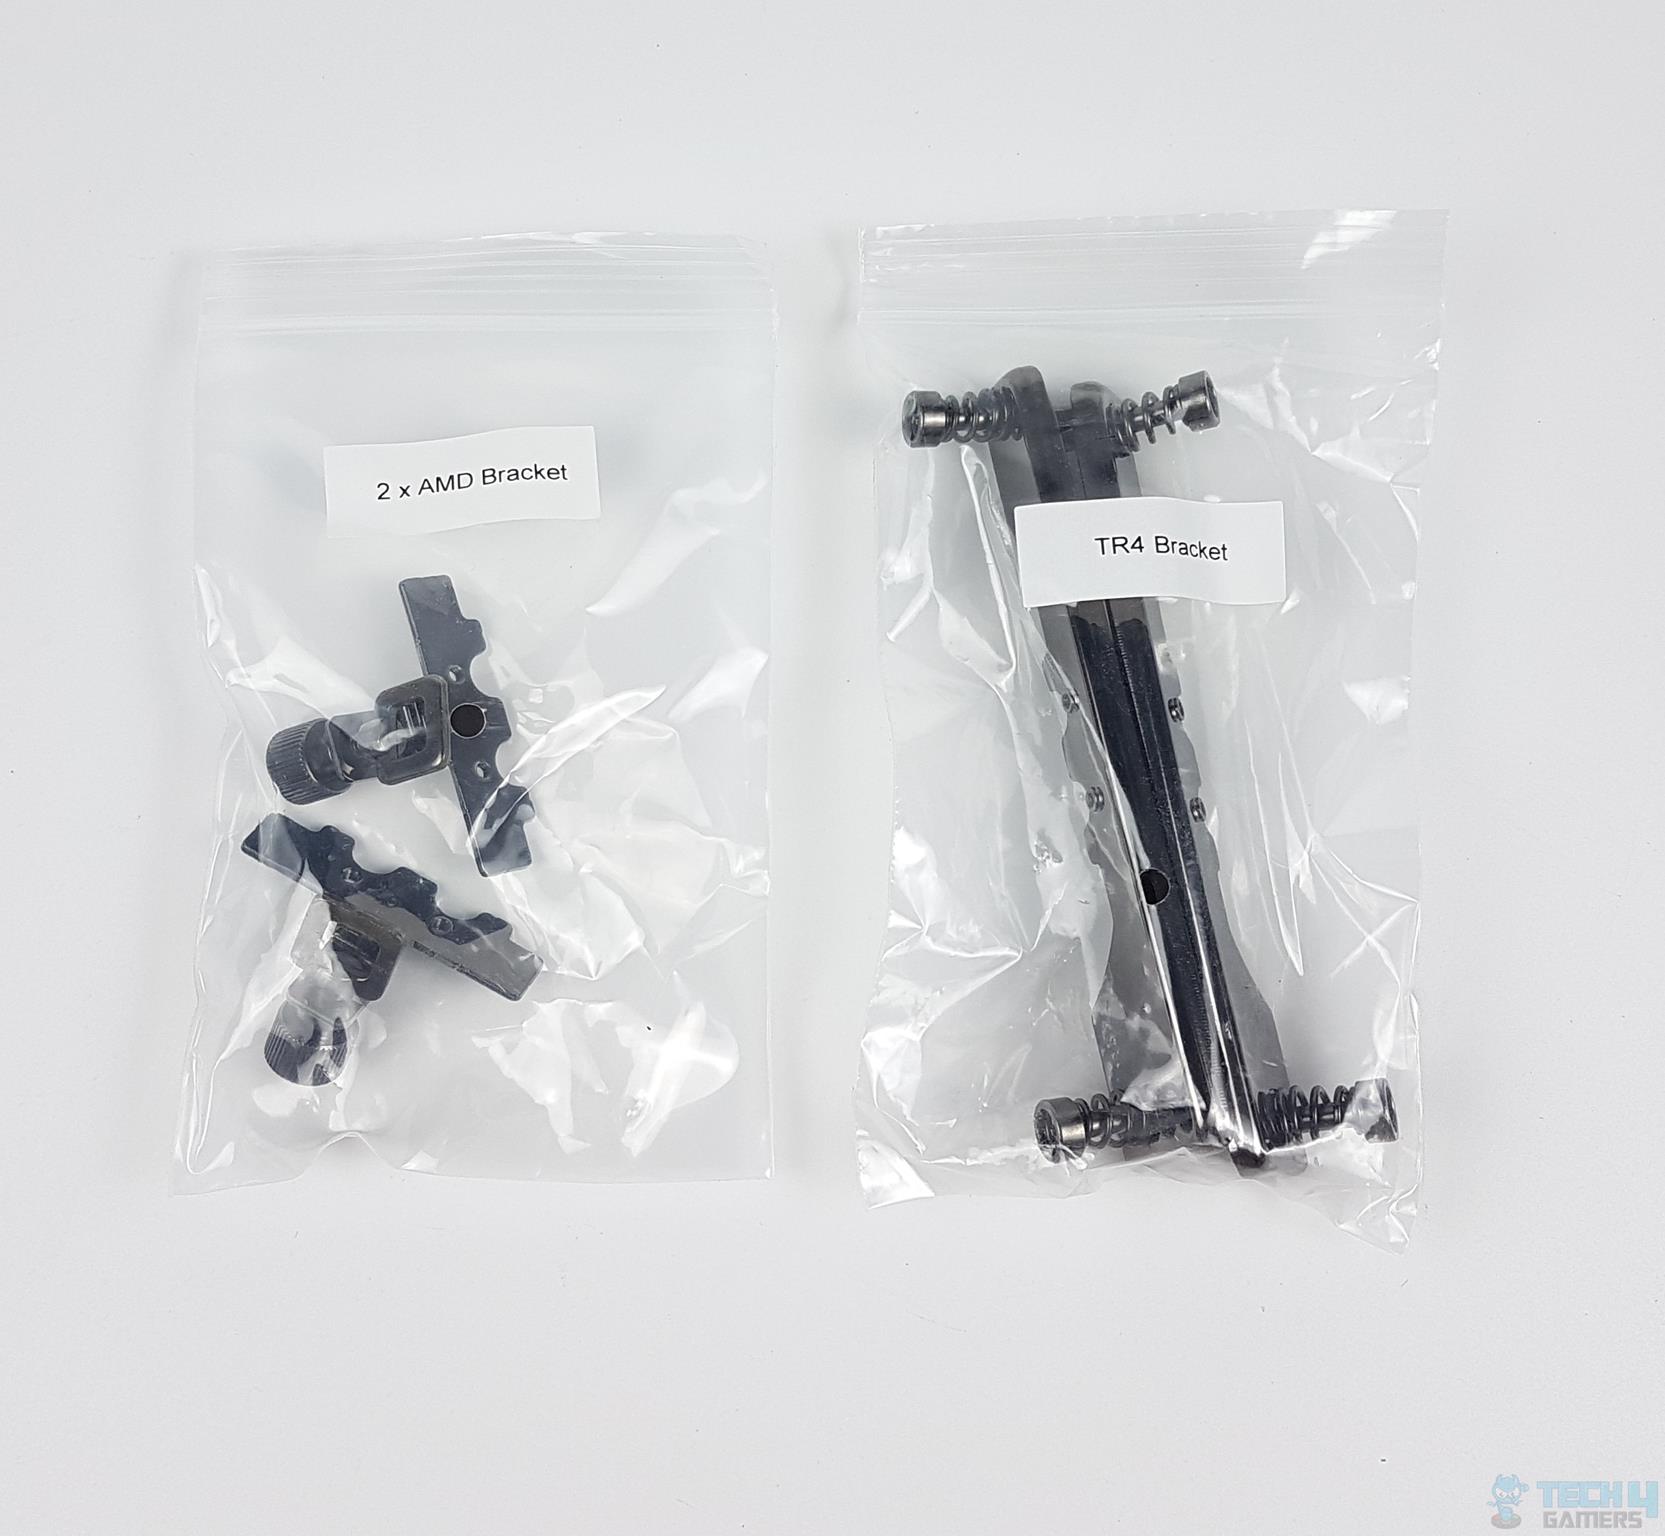
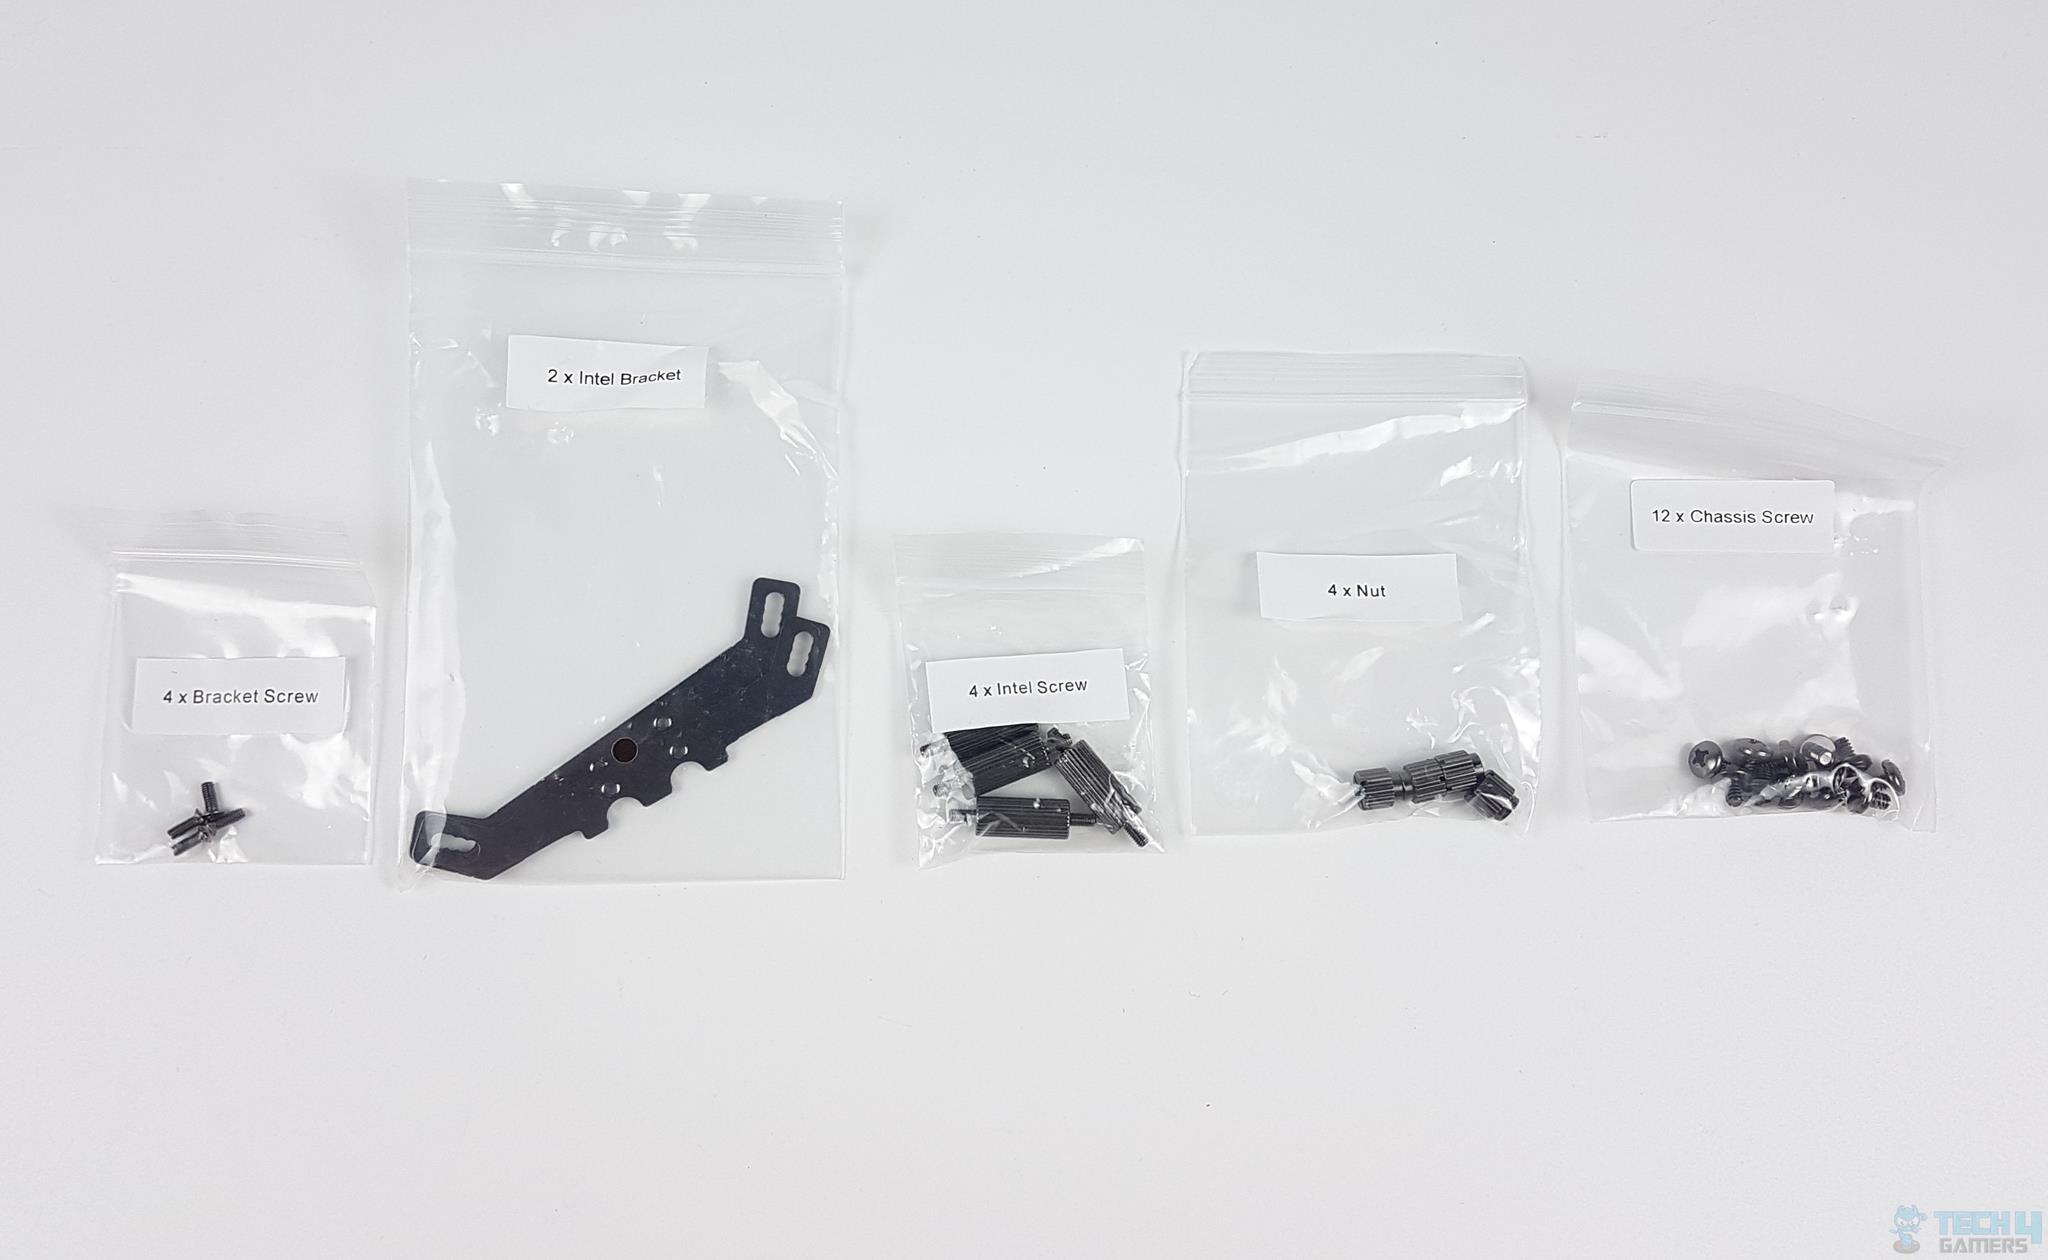
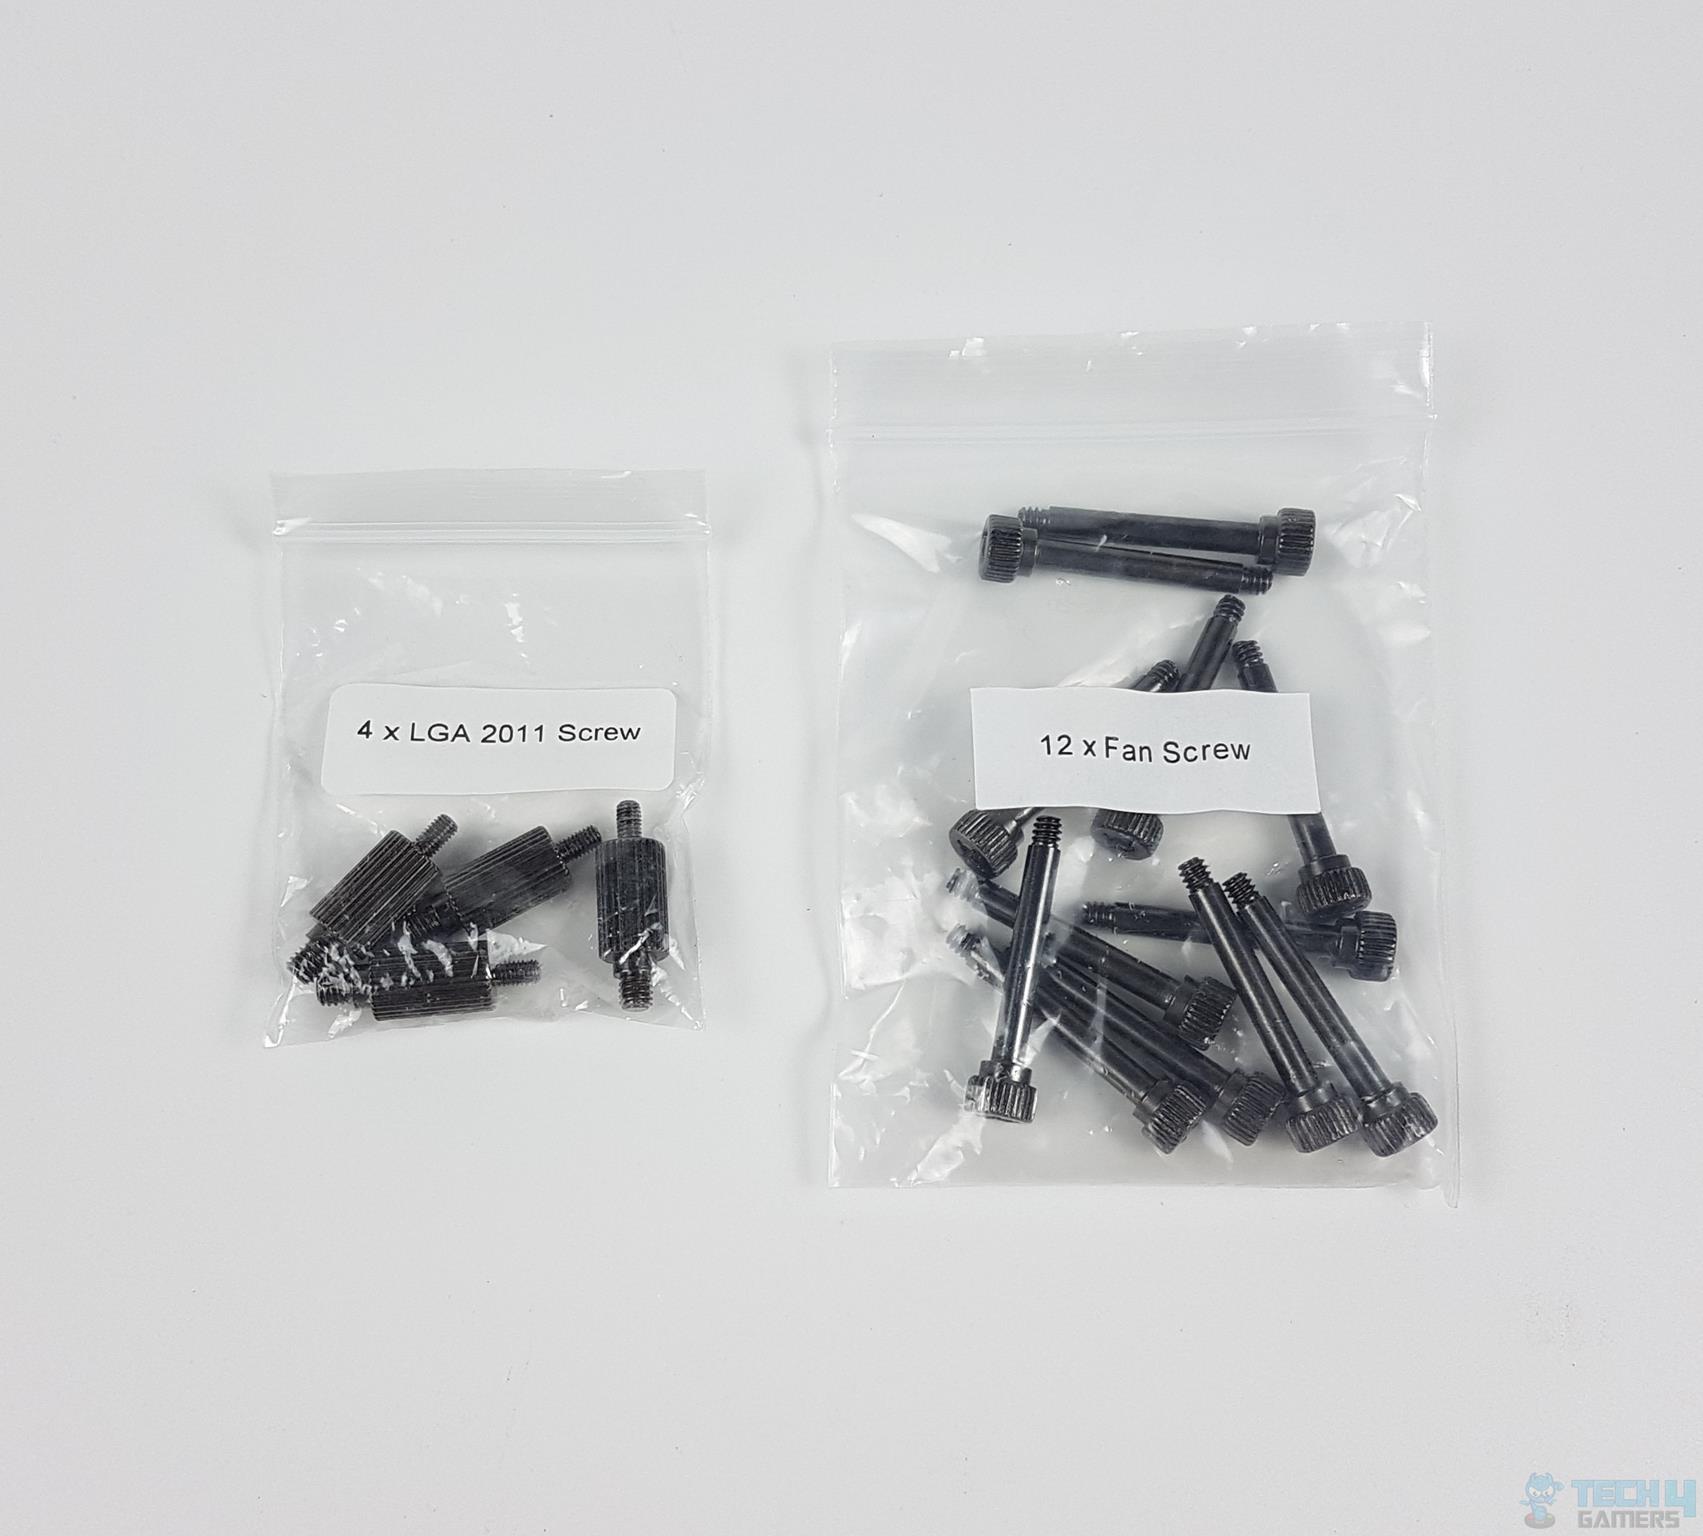
There is a second-generation ARGB controller and related accessories, which we will cover later in this article.
Design
Let’s start.
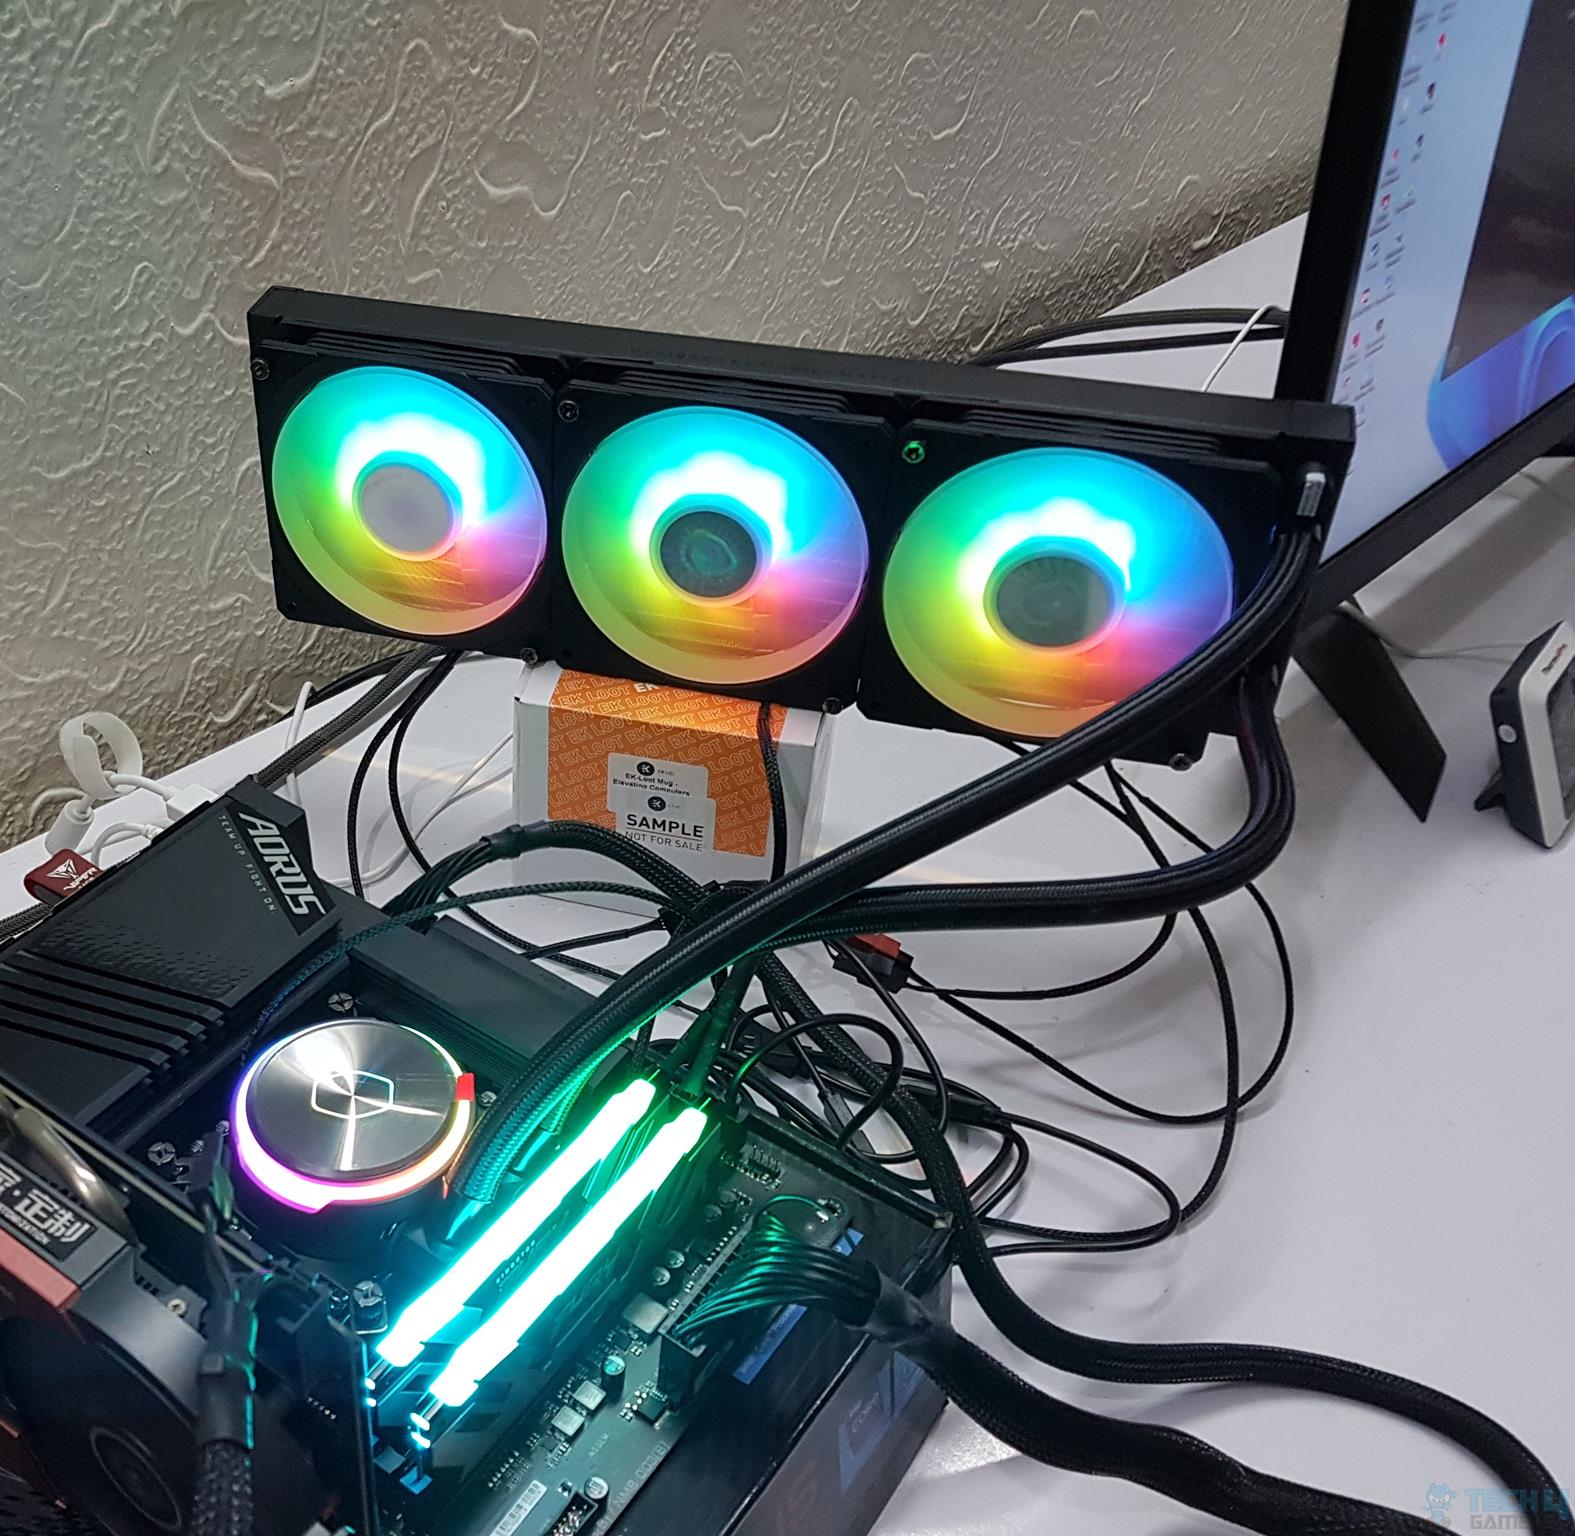
Radiator
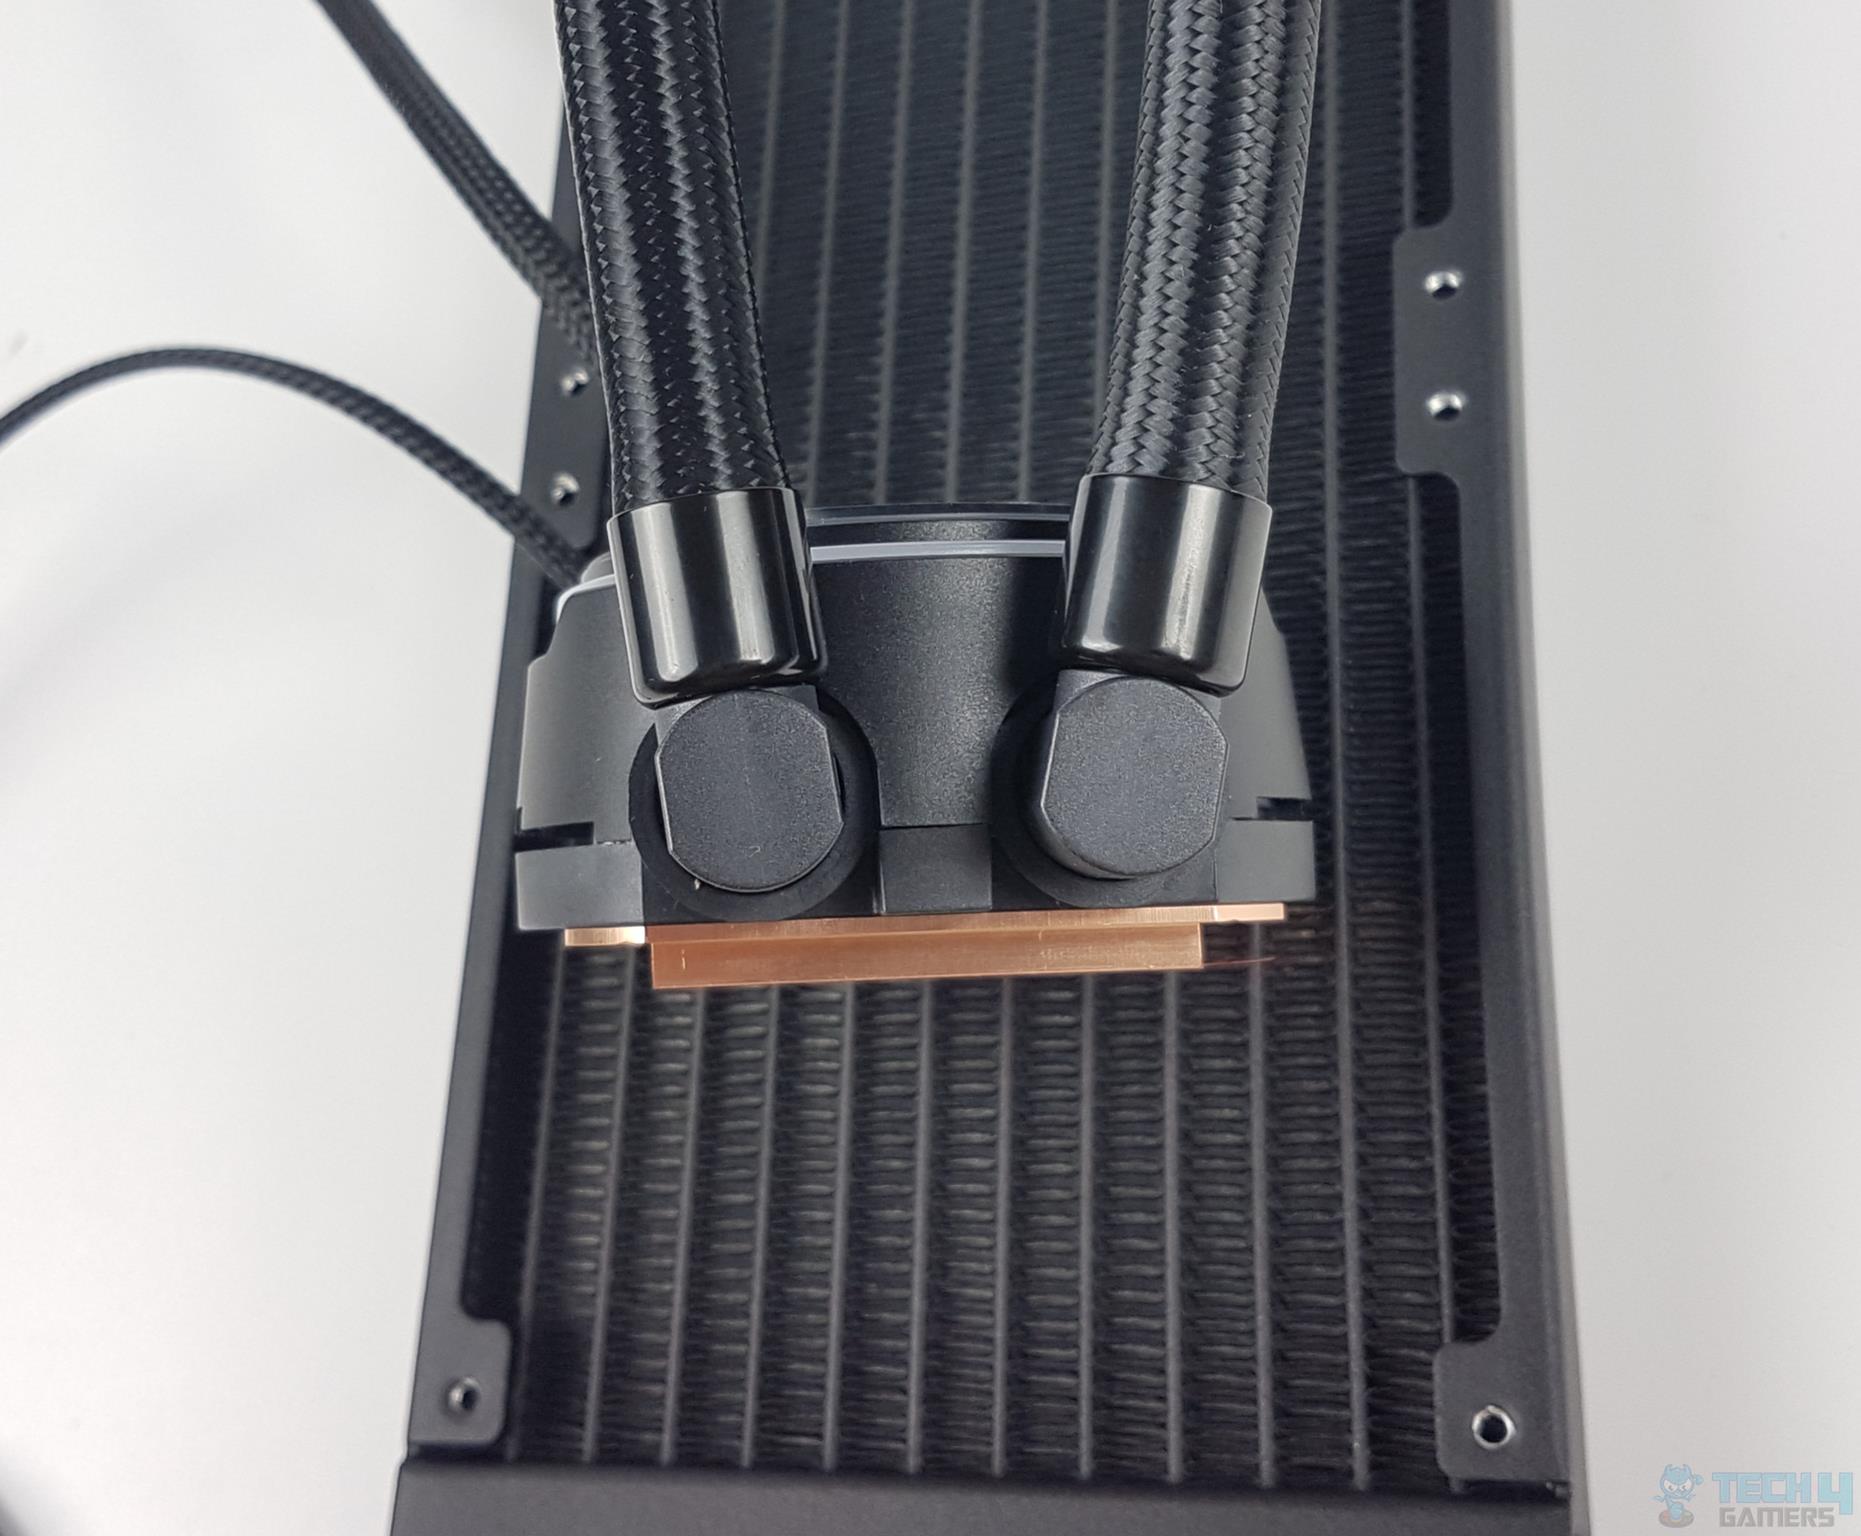
This unit has an aluminum-made radiator. The complete assembly is in the black color coating. The dimension of this radiator is 394×119.6×27.2mm. This is a slim design in length and width, though 27.2mm is almost a standard height. This radiator has almost the same dimensions as we saw on the ML360R RGB cooler.
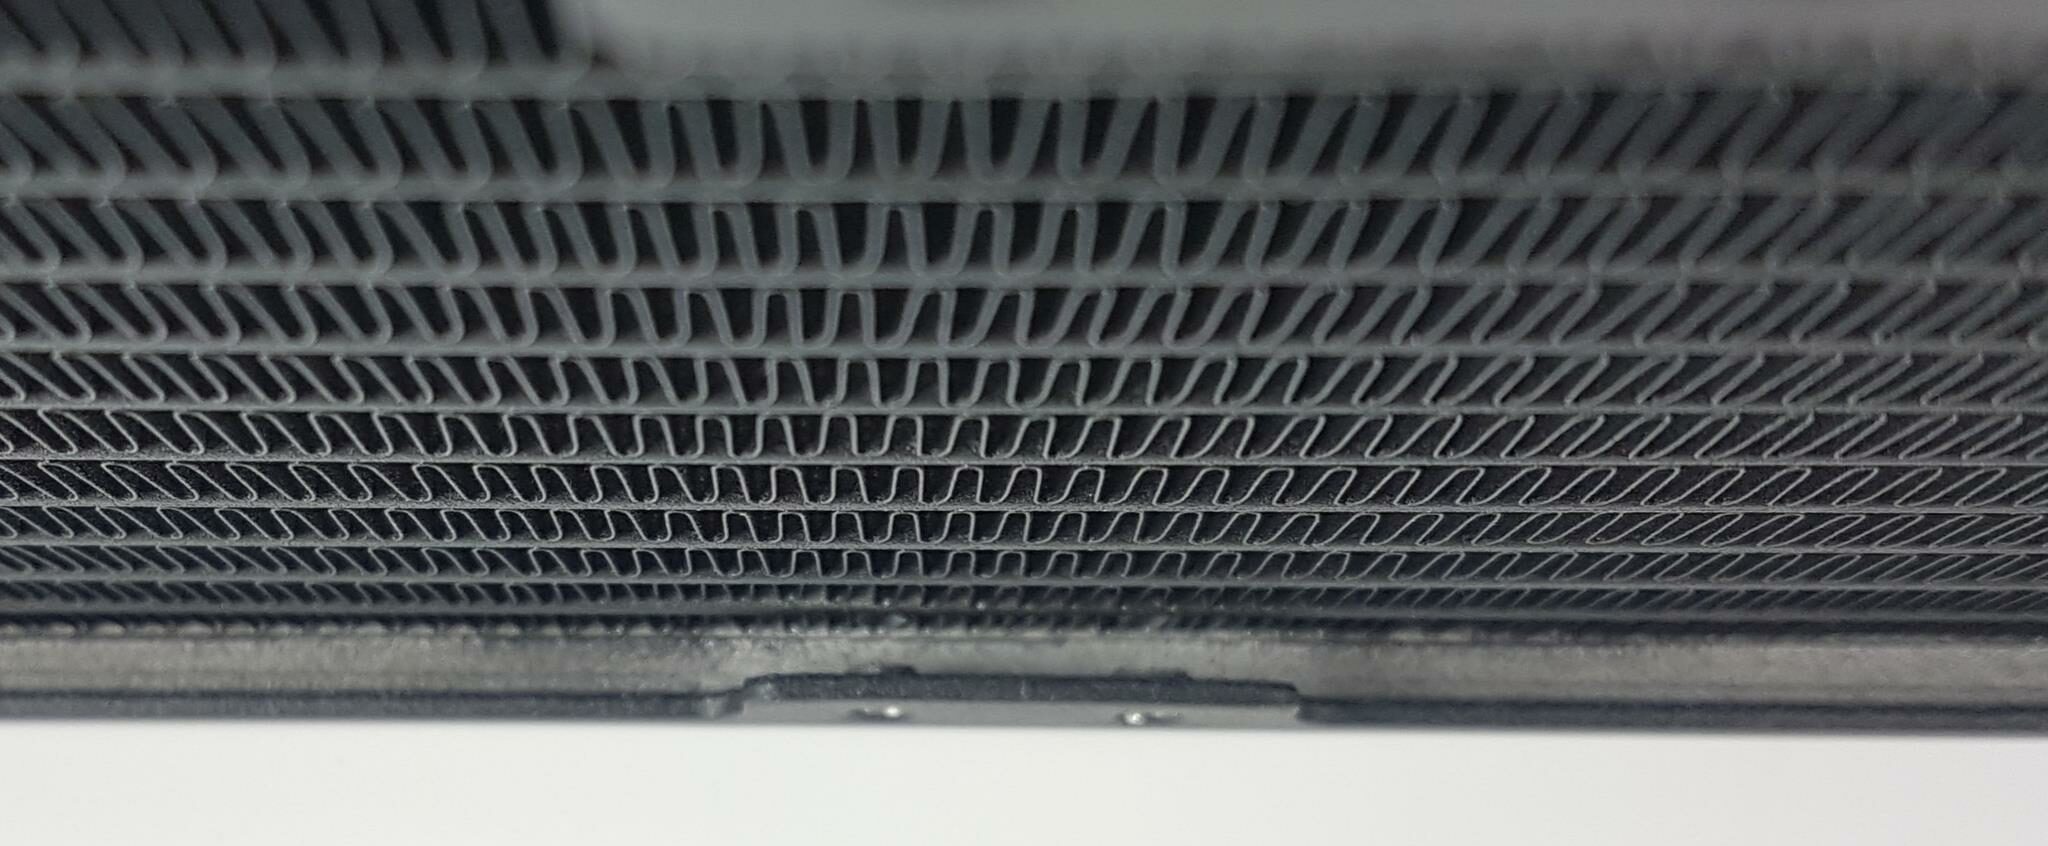
Installing 25mm thick fans would give a total of 55mm height to this unit, including the bulkheads of the screws. This radiator has an FPI count of 20 with 12 channels for the coolant flow. Cooler Master has done a nice job in fin stacking, as we found no bent or broken fins. The far end has a rectangular design with no round edges. We can see a label here showing this unit’s part number.
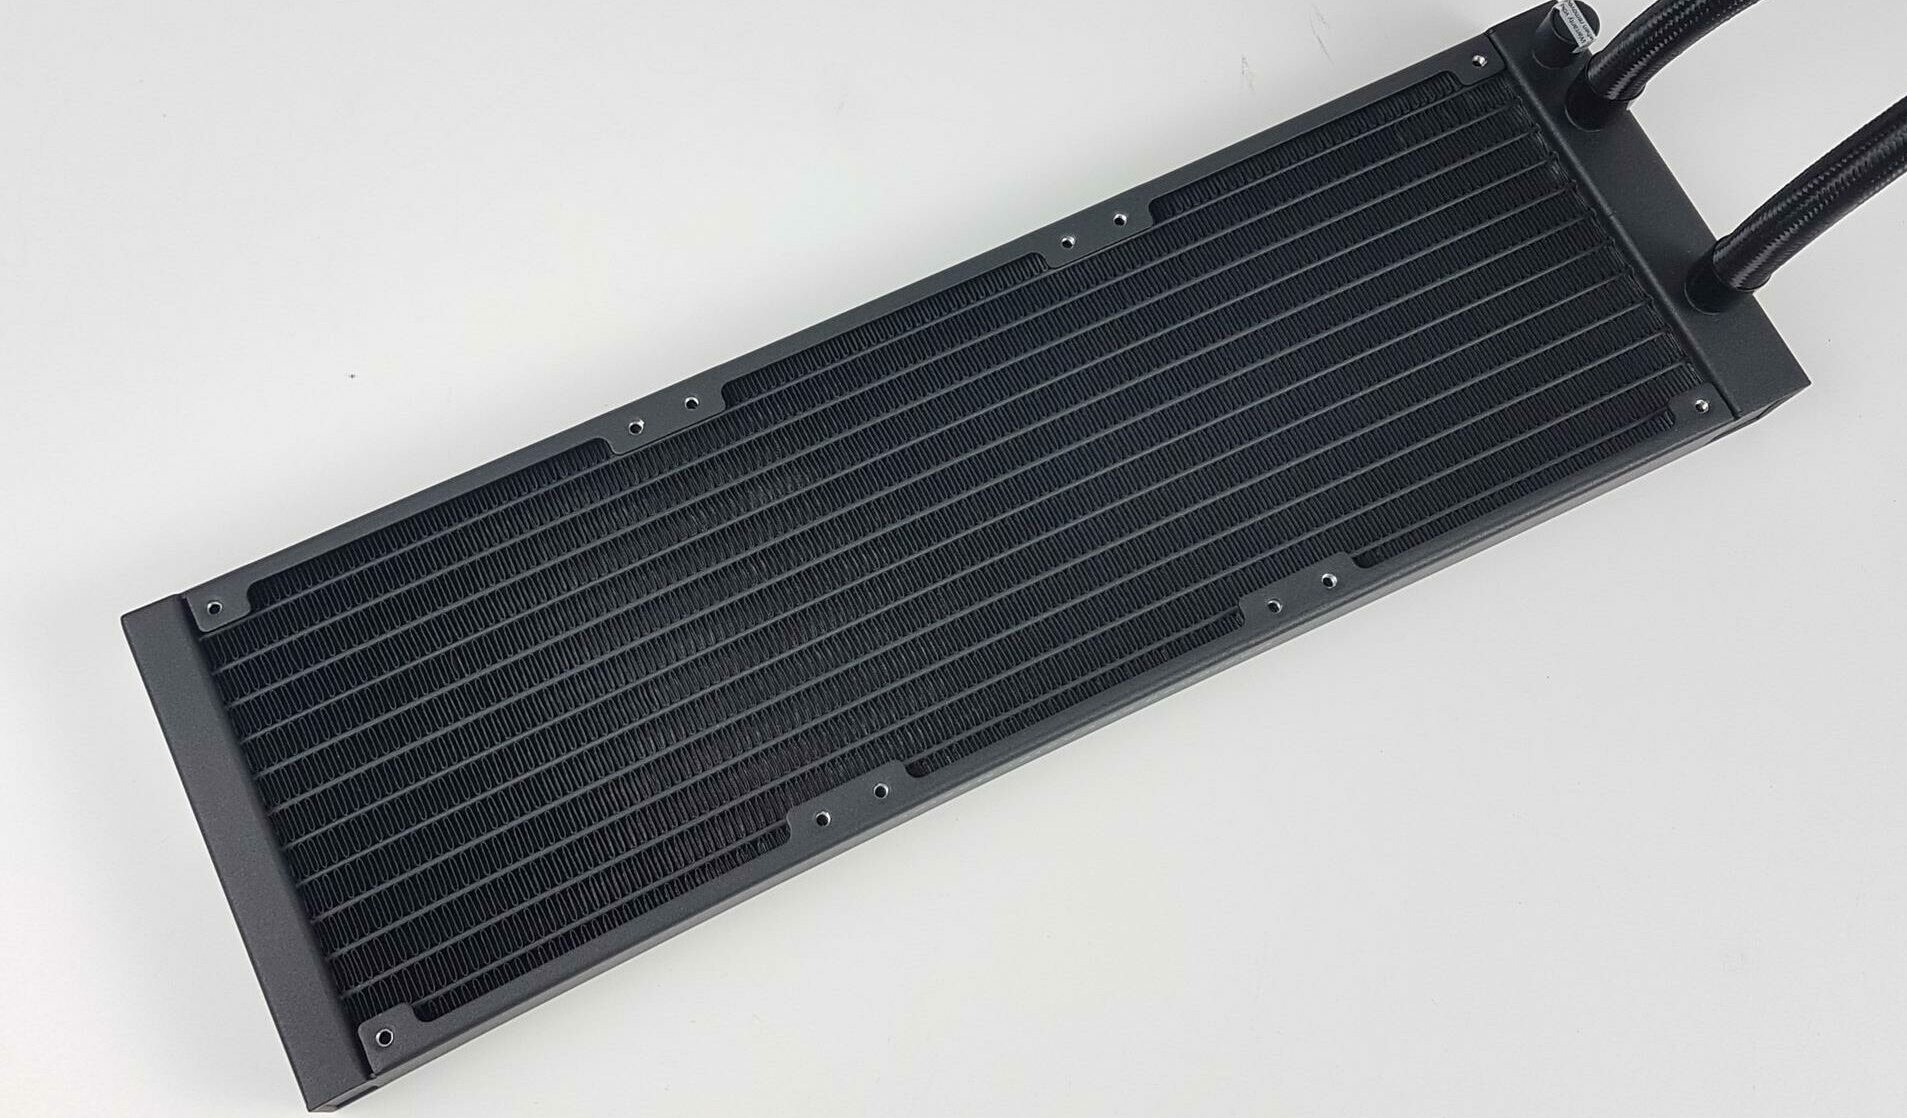

The finish on the housing seems a bit sandblasted. We can see the text “Designed by Cooler Master” on both sides of the main frame. There is no plating under the mounting holes side of the main frame. This plating protects the fins from damage due to excessive torquing of screws. We can see a certain gap between the actual fin stack and the main housing, implying that the fin stack may have a 21 or 22-mm thickness.

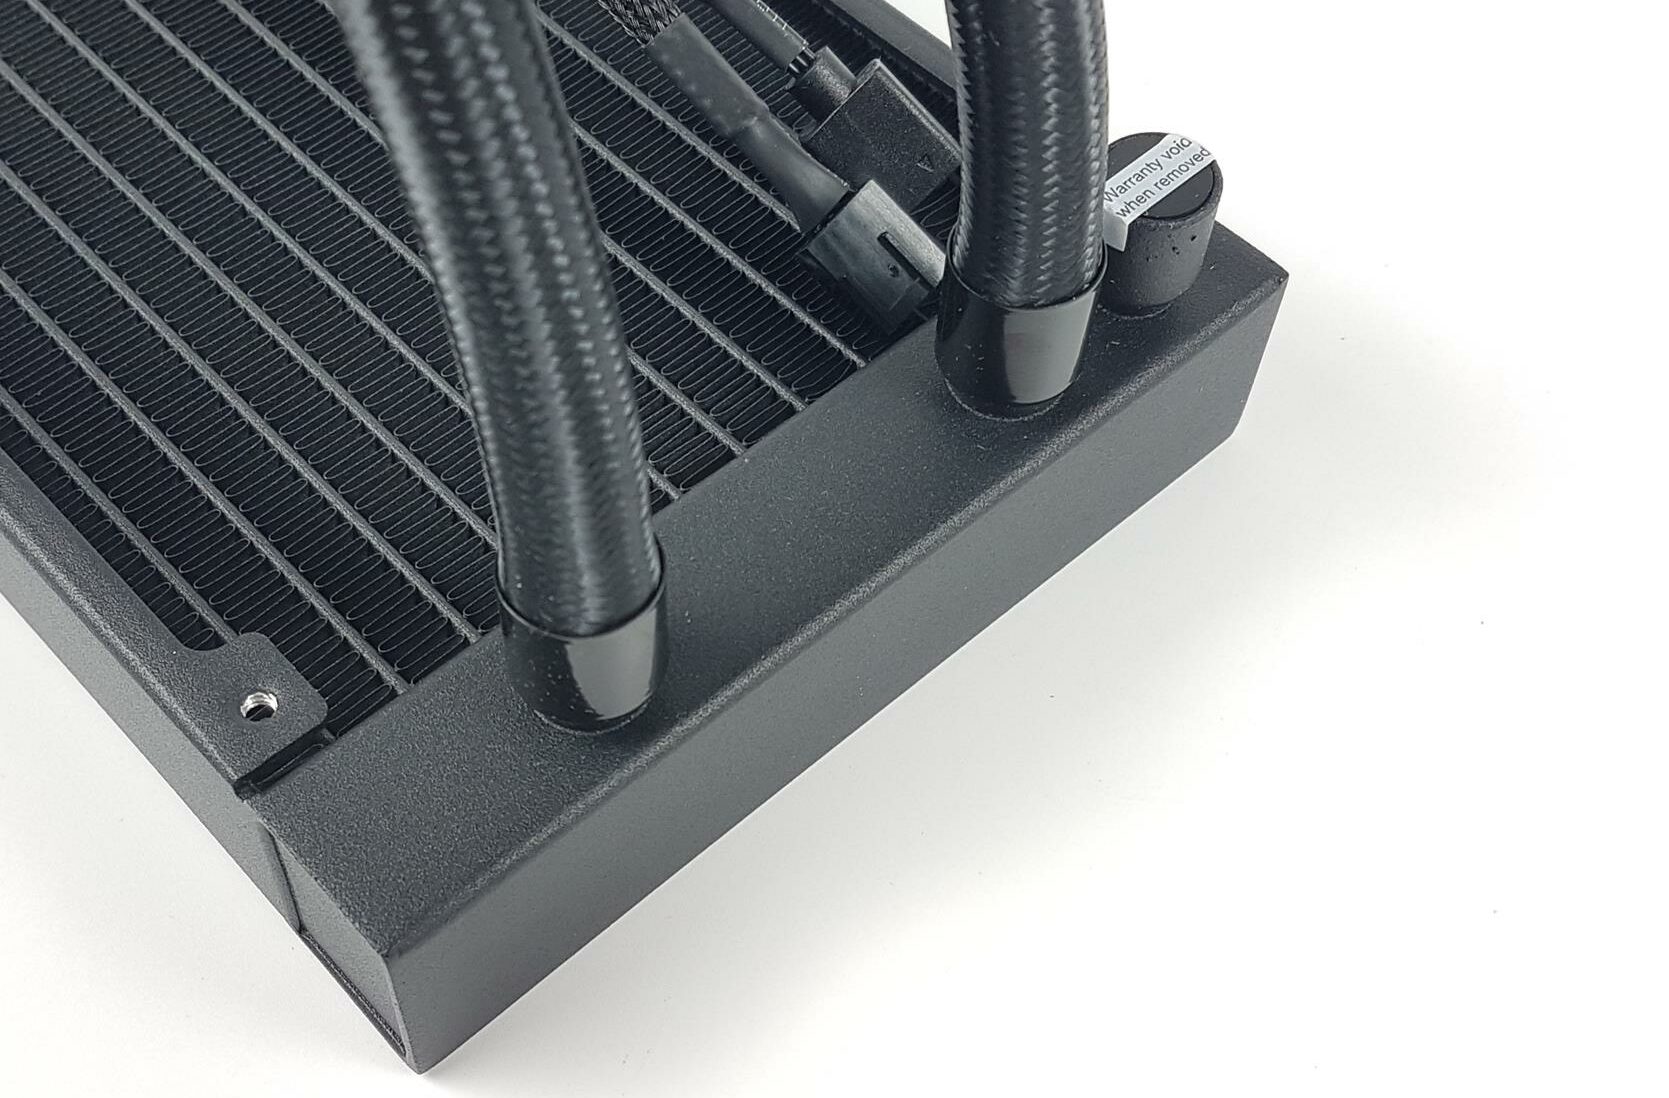
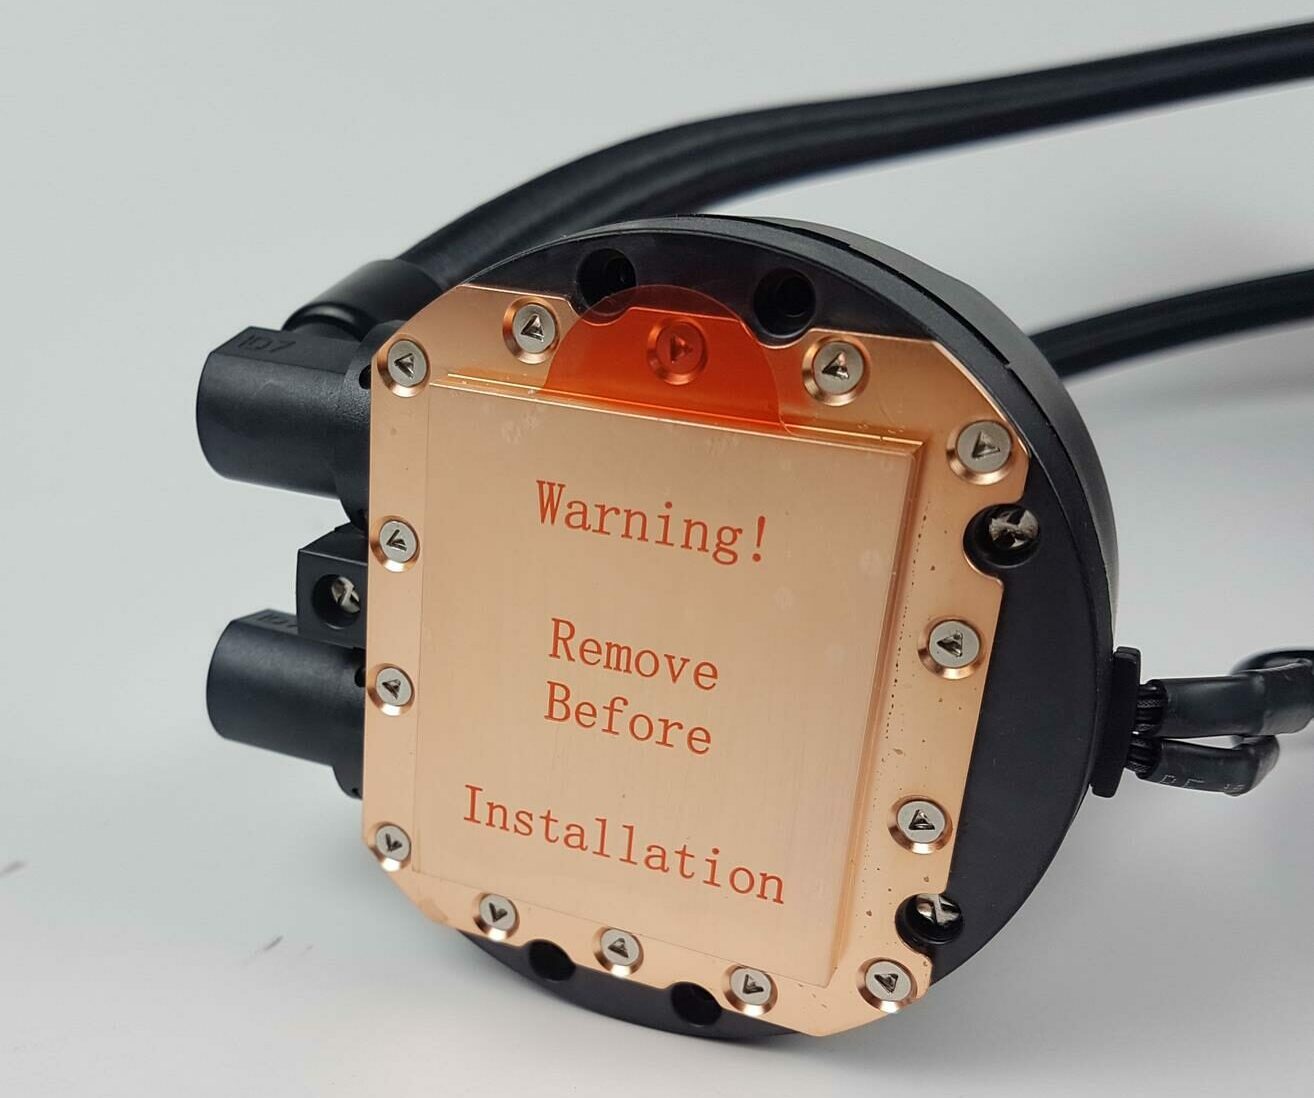
Clamps are hiding the connection between the tubes and fittings. There is what seems to be a cover on another port here. It has a warranty void sticker pasted over it. This port is probably reserved for factory use only, as opening it at home may lose the vacuum pressure of this unit.
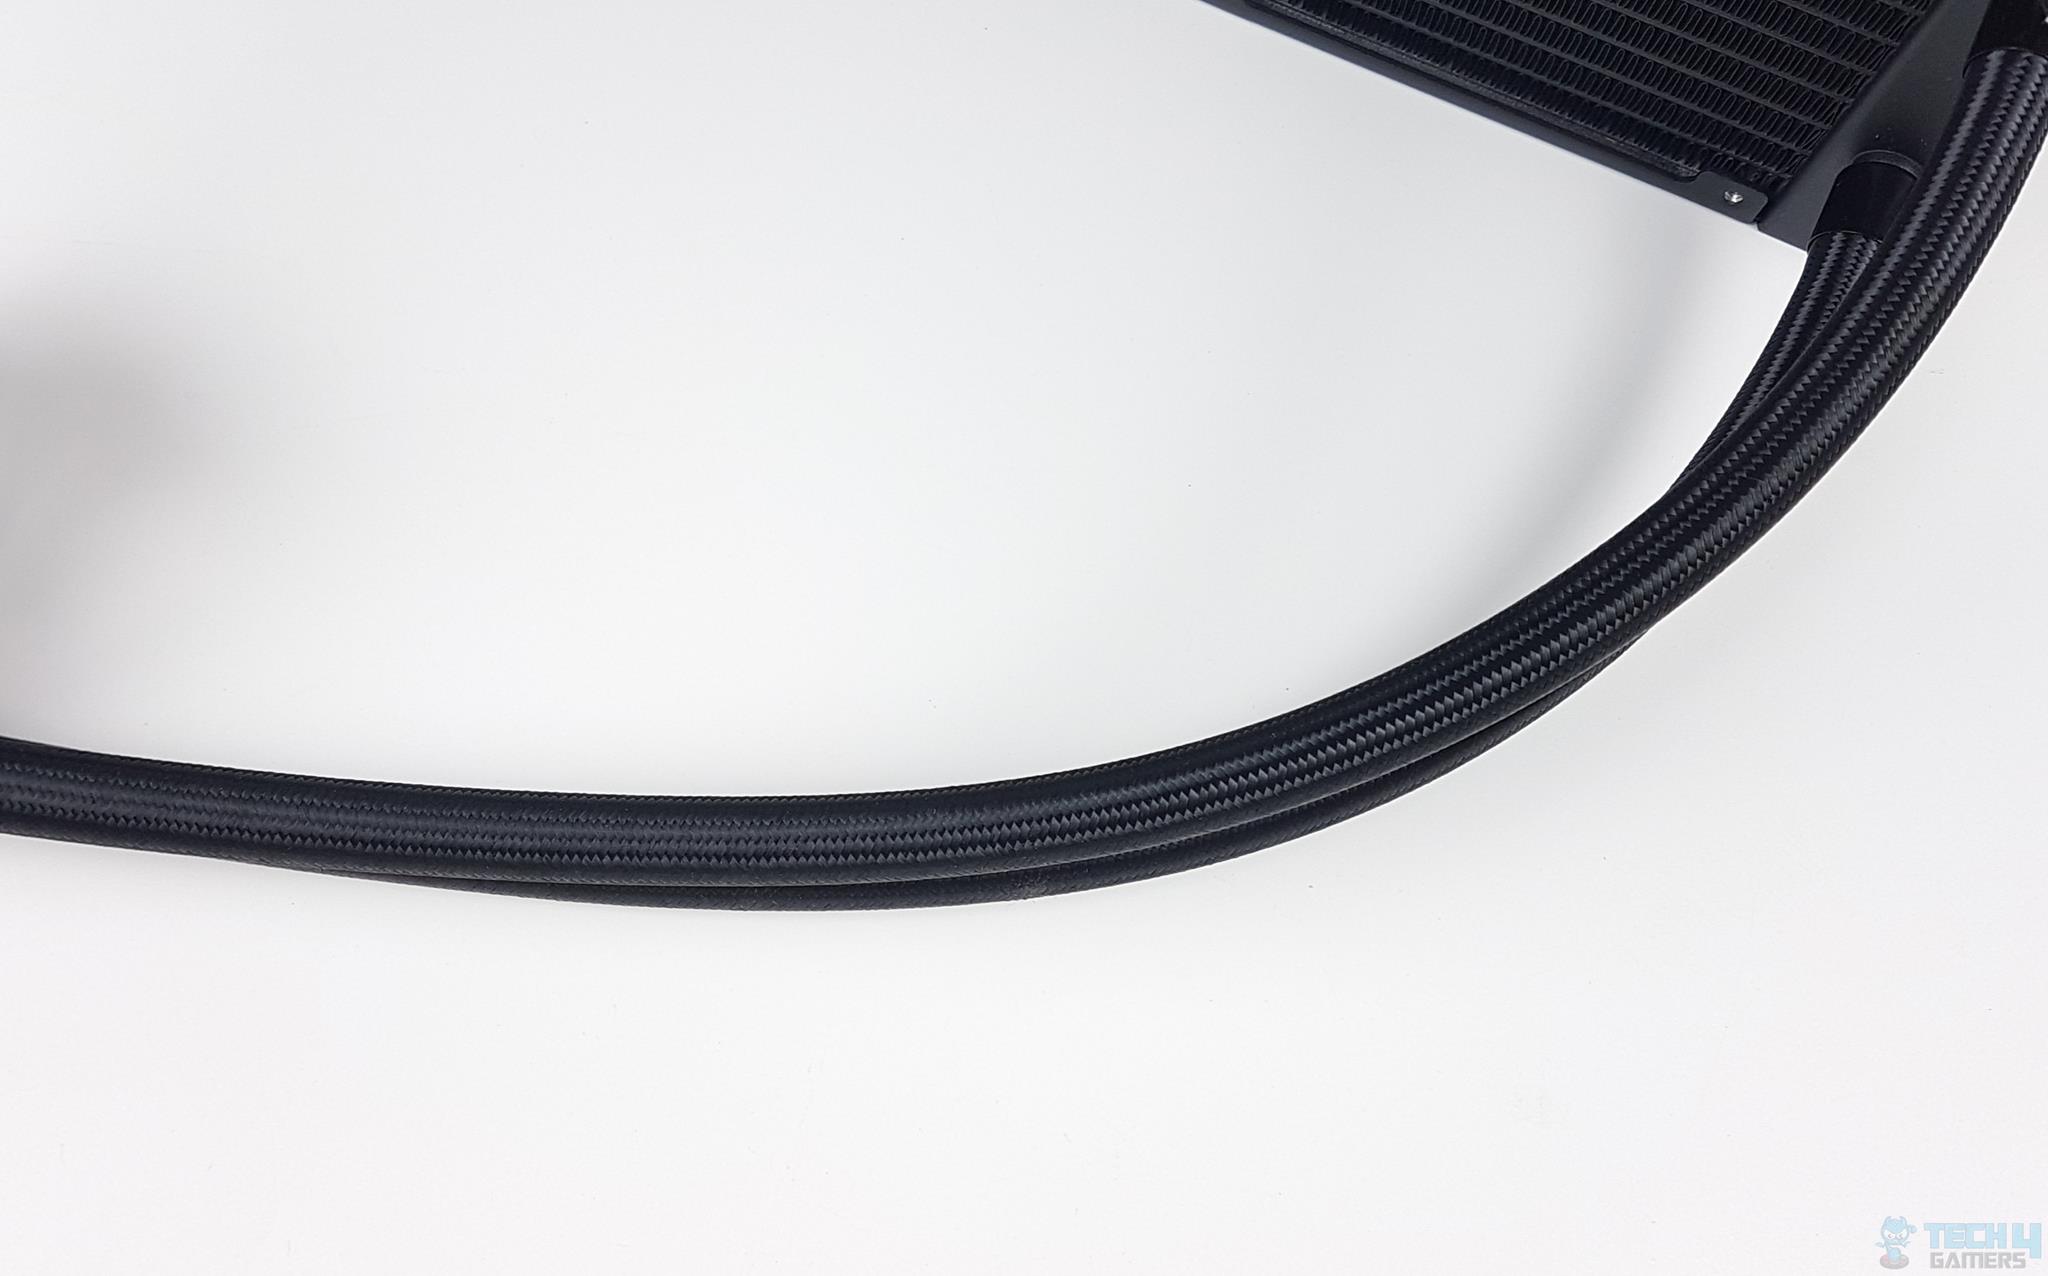
Cooler Master uses rubber tubes on this cooler, which run approximately 400mm long from end to end. These tubes have a nice nylon mesh sleeve over them for aesthetic purposes.
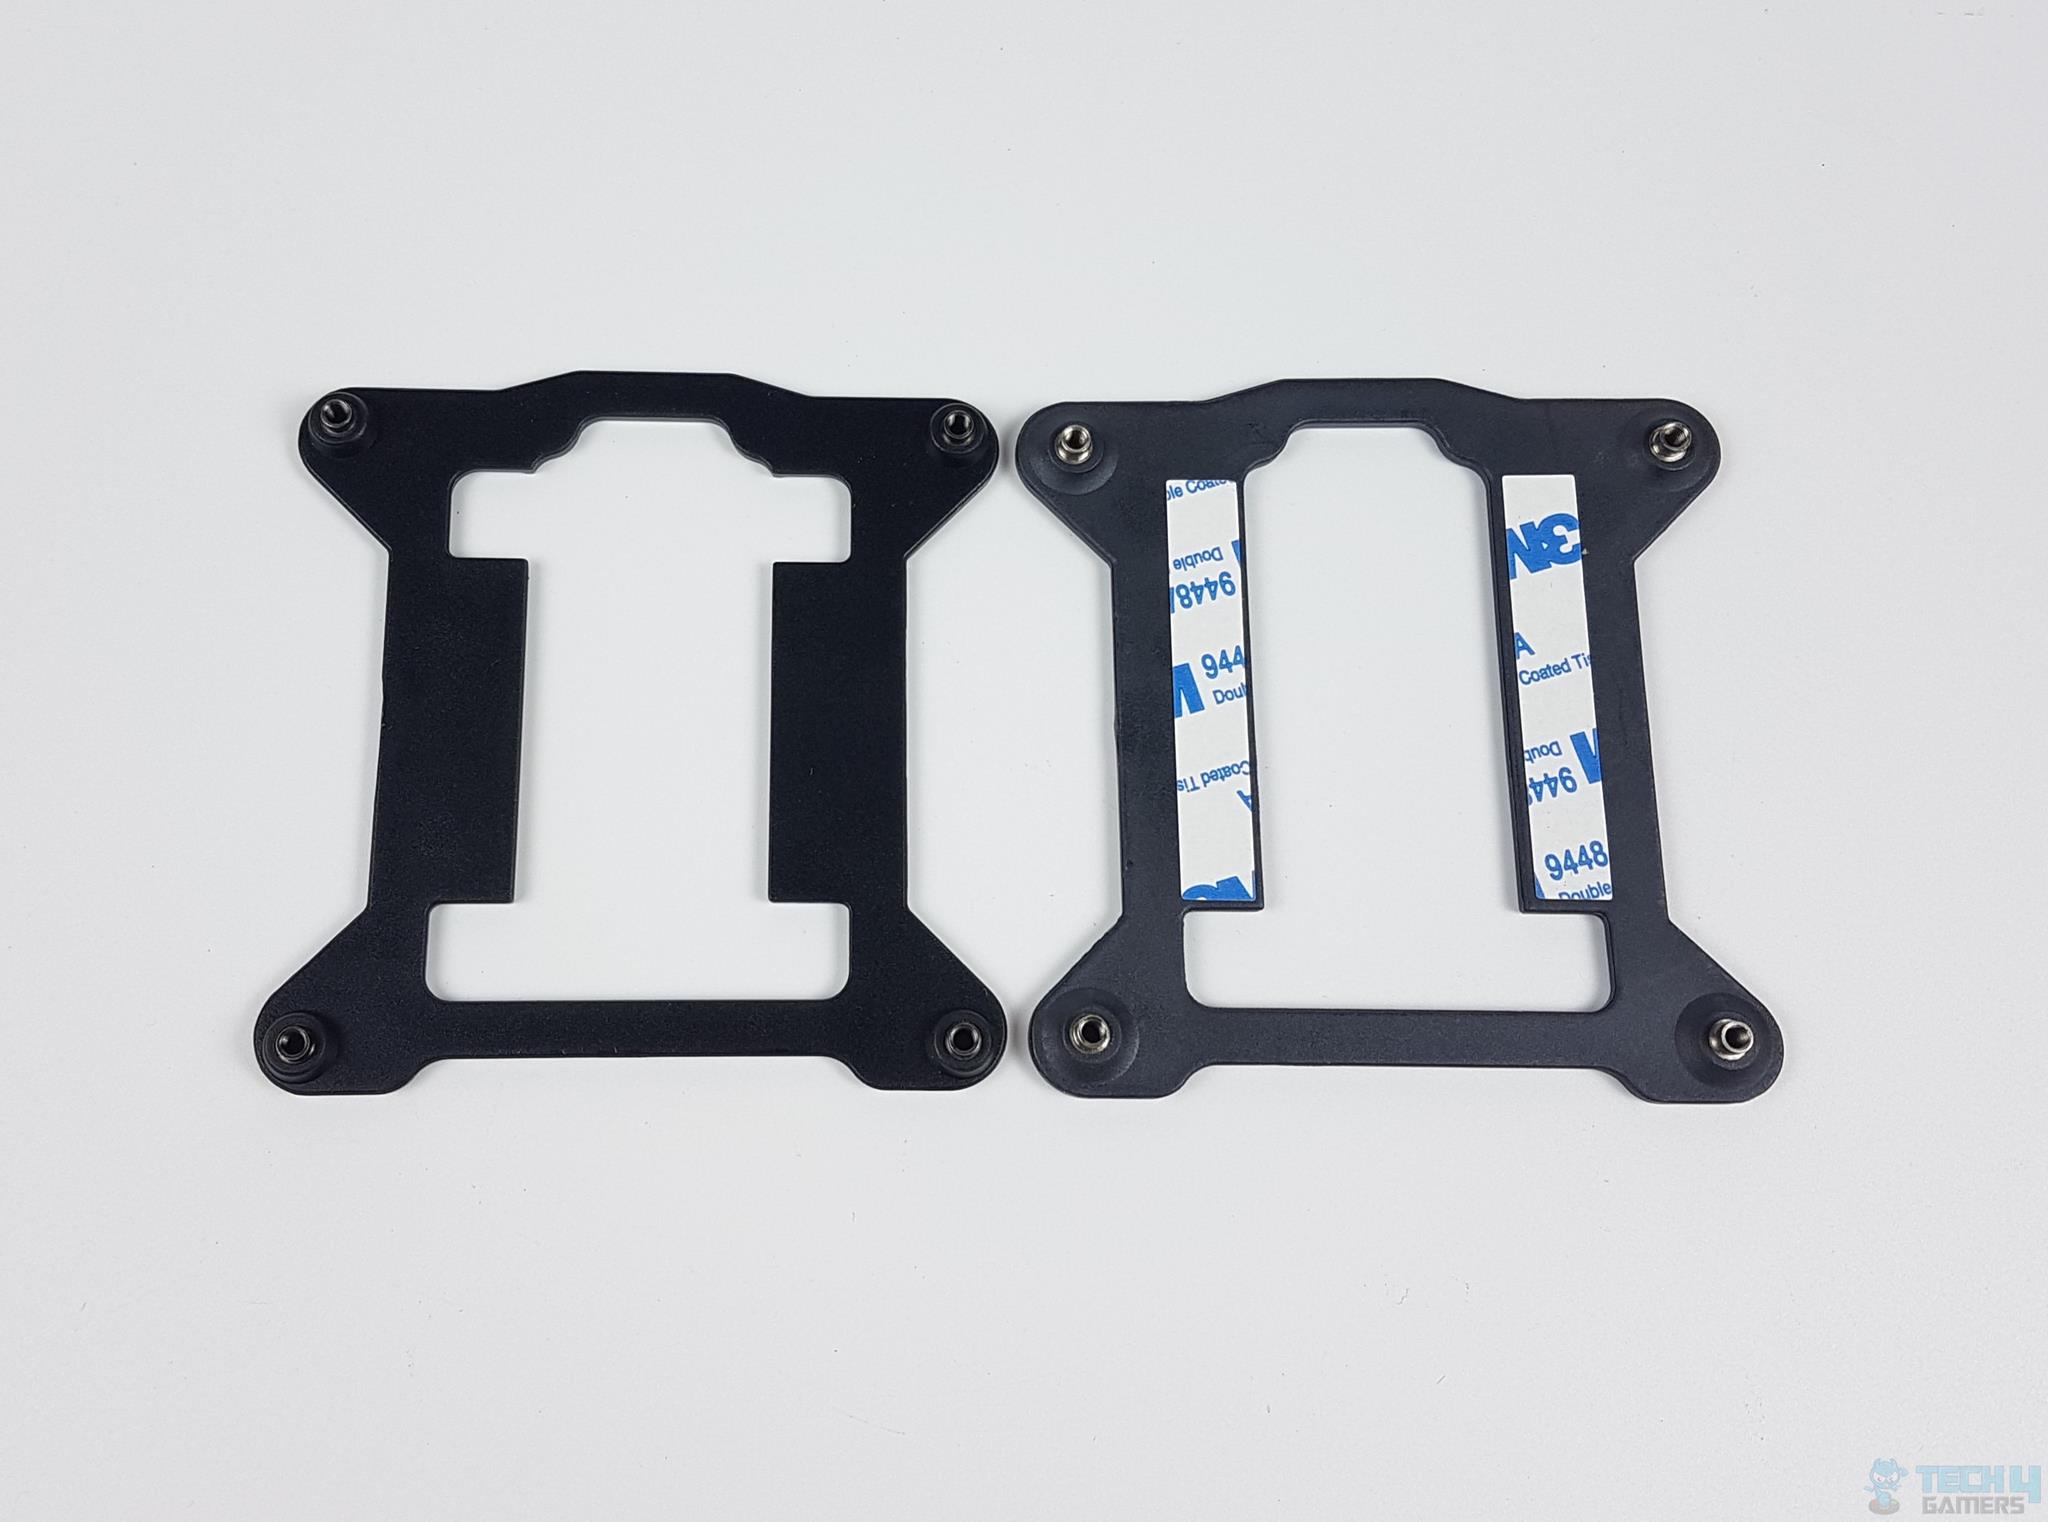
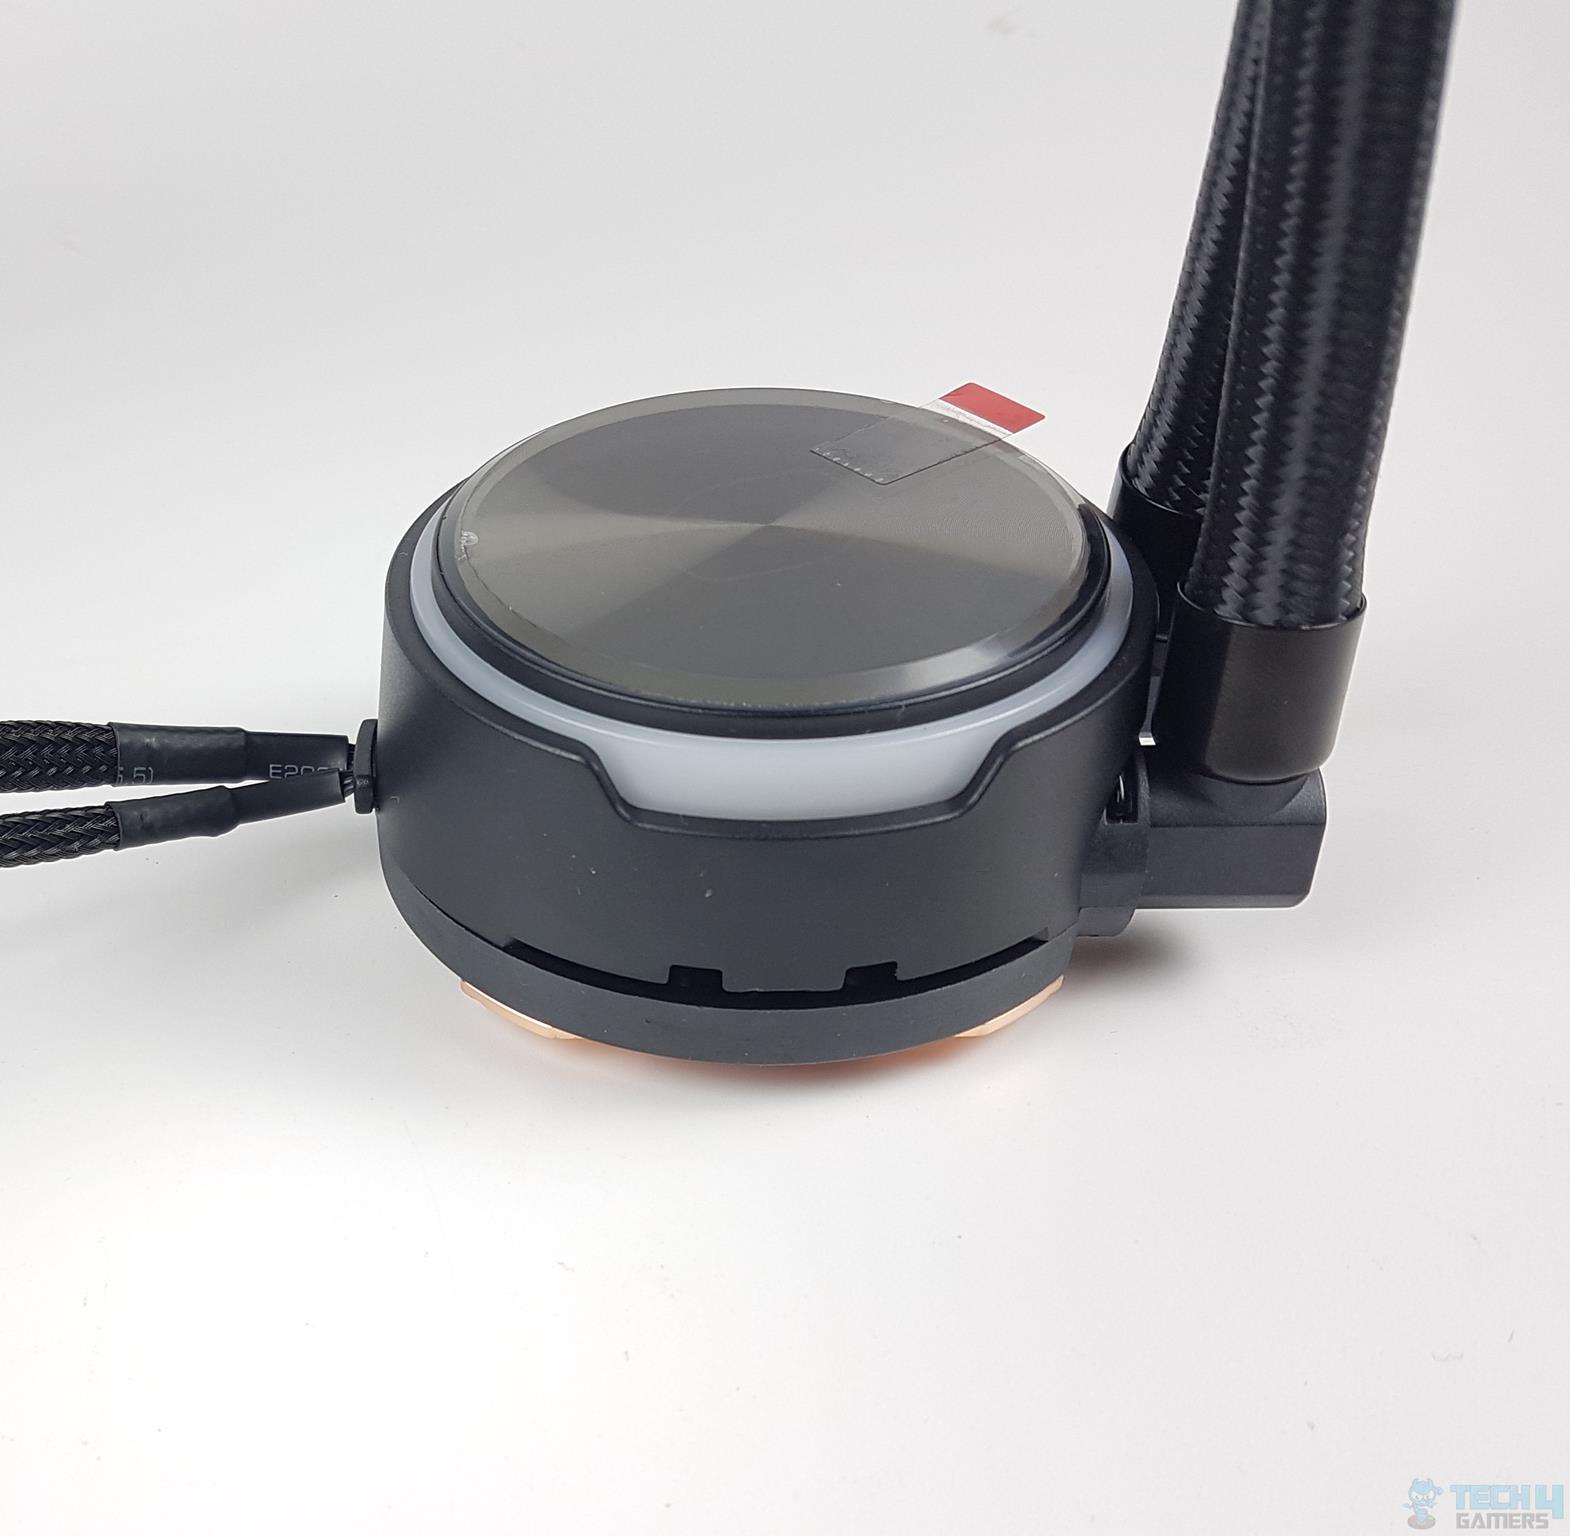
Pump Housing Block
Cooler Master uses a new dual-chamber design on the pump housing, making it even more low-profile than the predecessors without comprising efficient coolant flow. The main purpose of the dual chamber is to isolate the flow of heated coolant from the normal coolant. The dimension of this unit is 89x75x40mm. We can see that this unit has more length and width compared to the ML360R RGB, but it has less height of 40mm compared to 52.7mm. This increase in length and width could impact the clearance for the first DIMM slot.
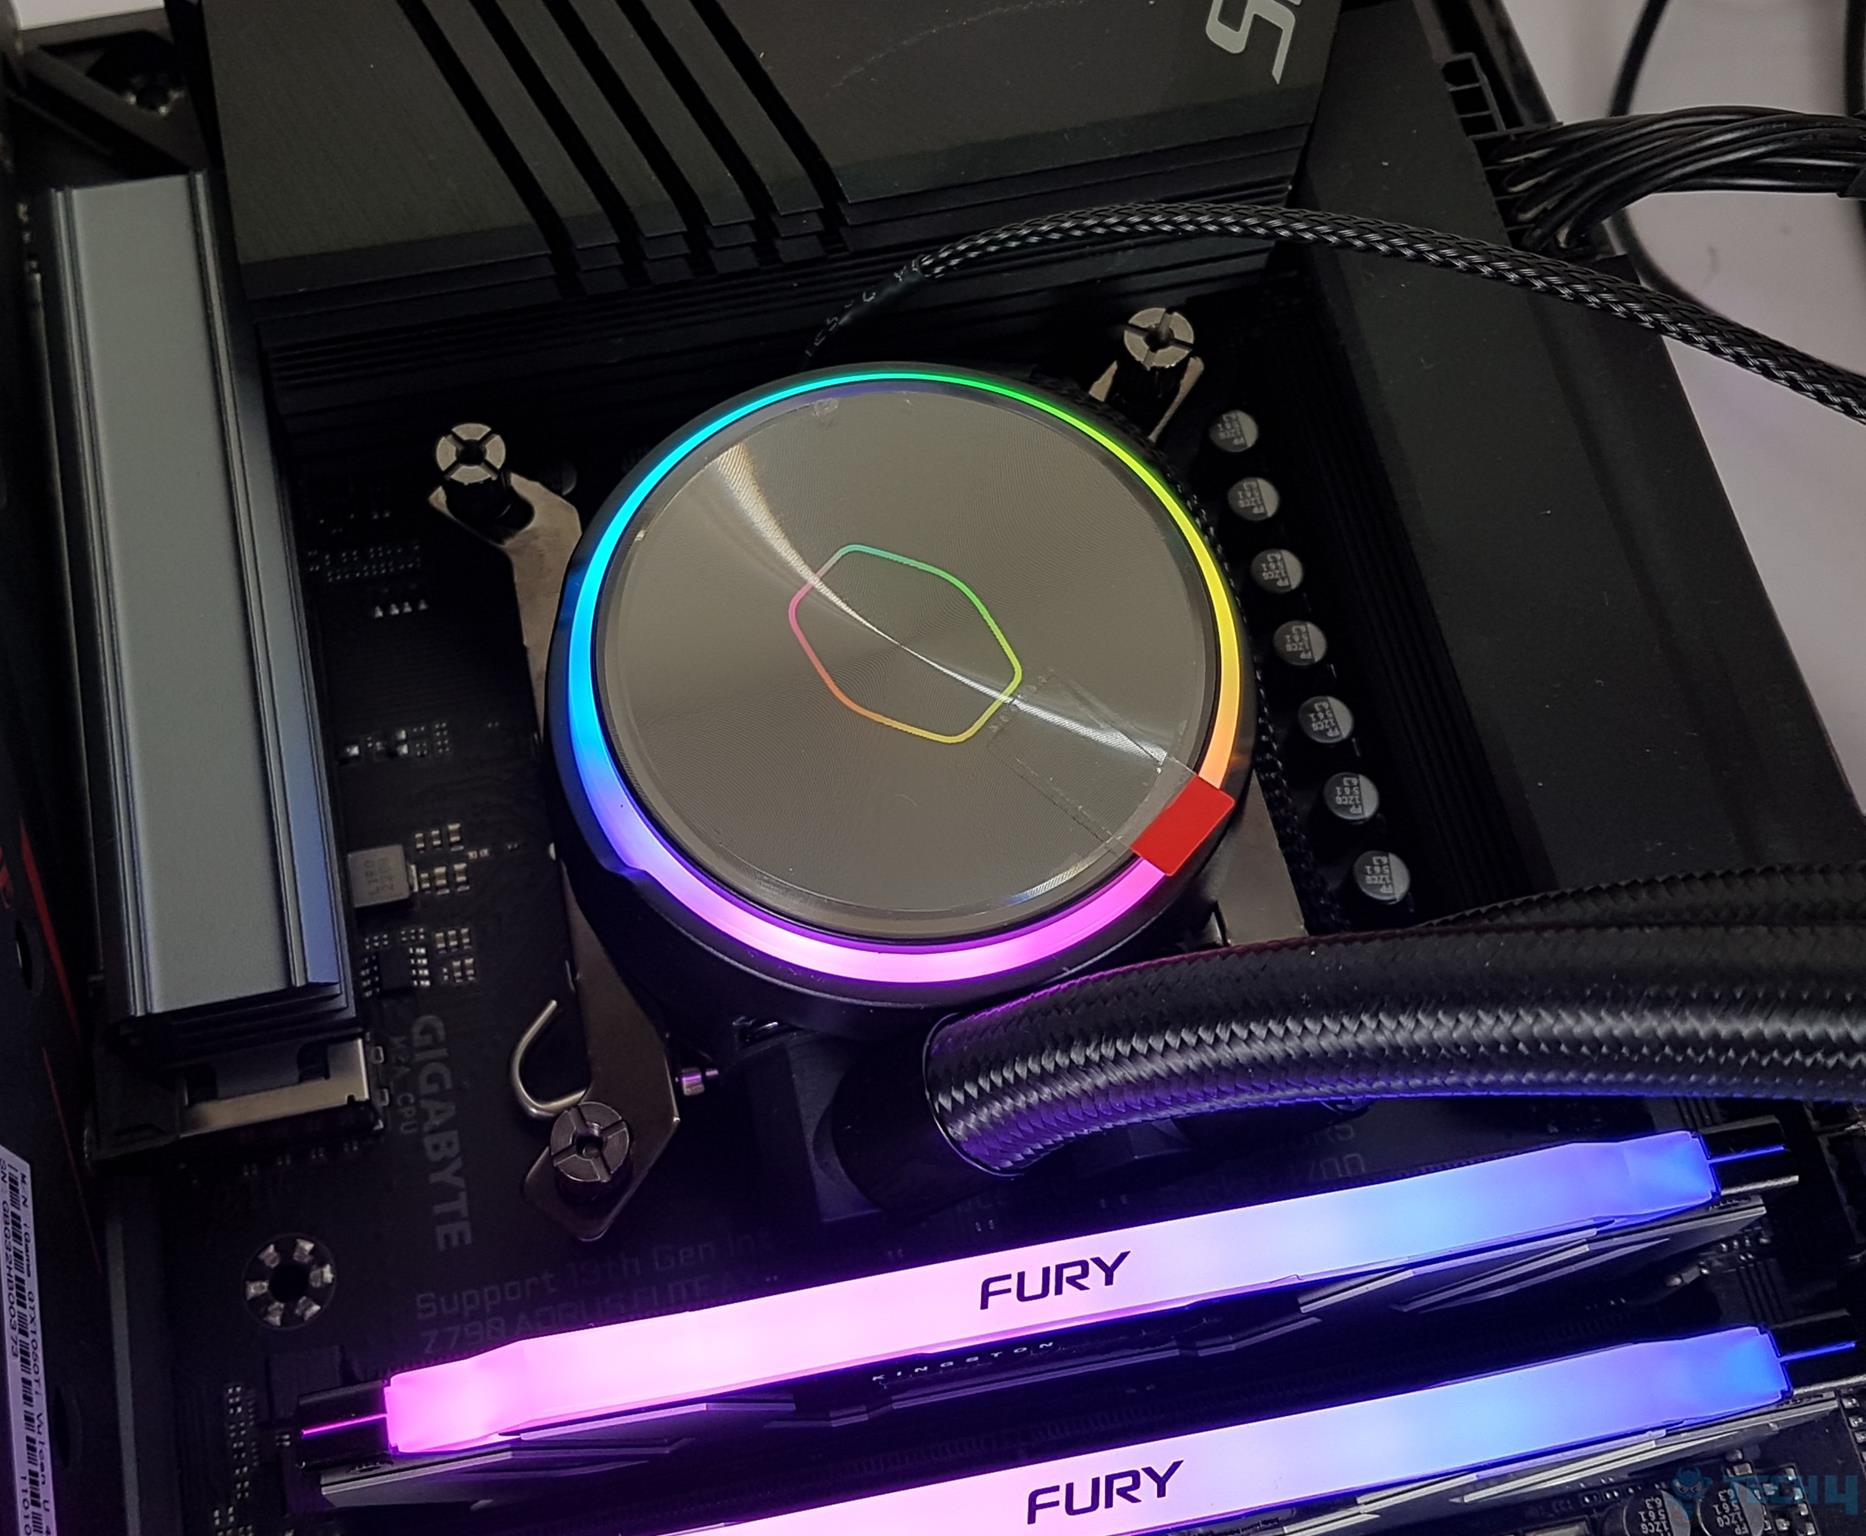
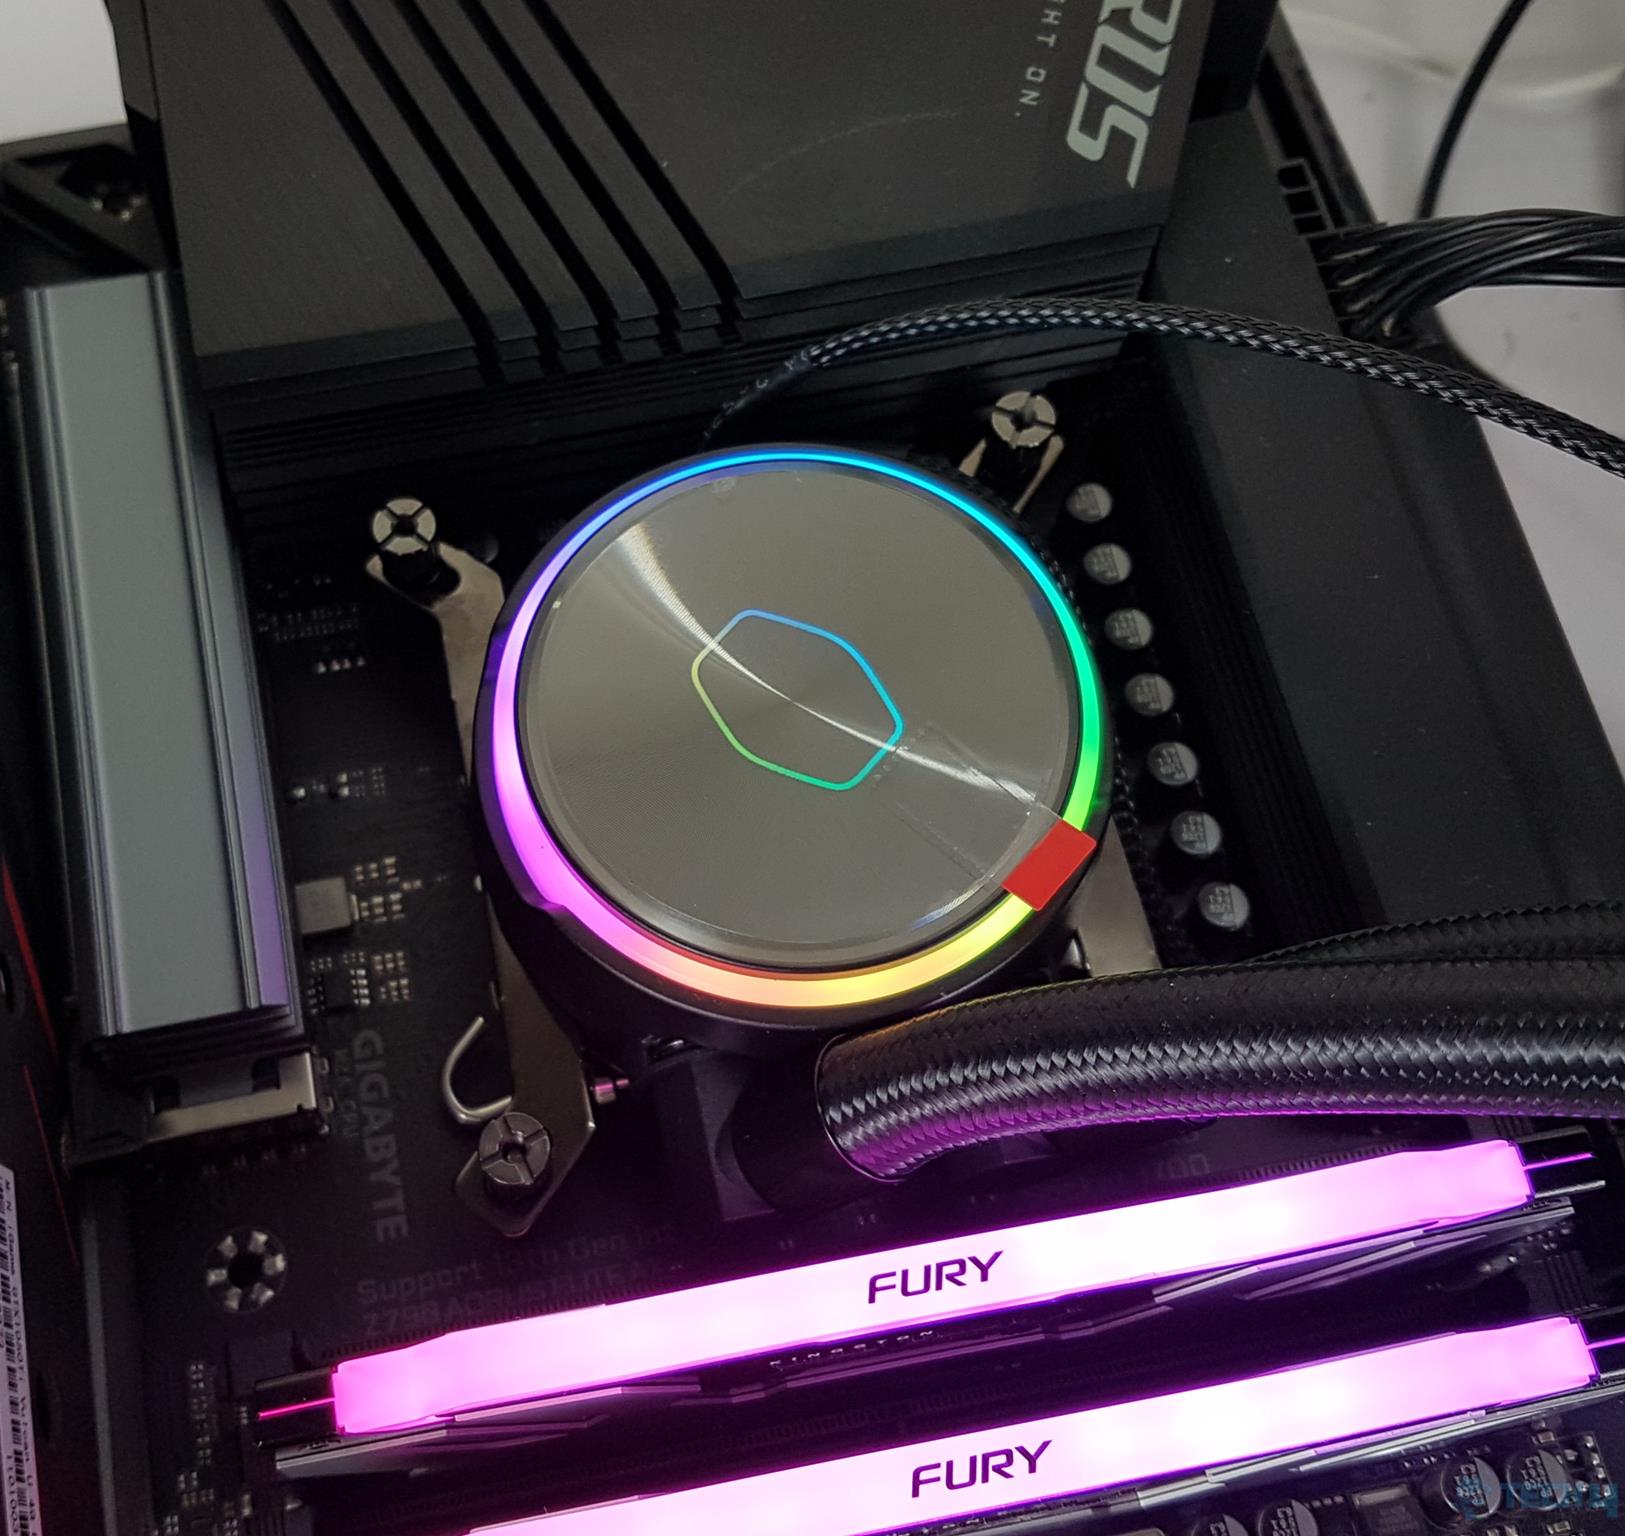
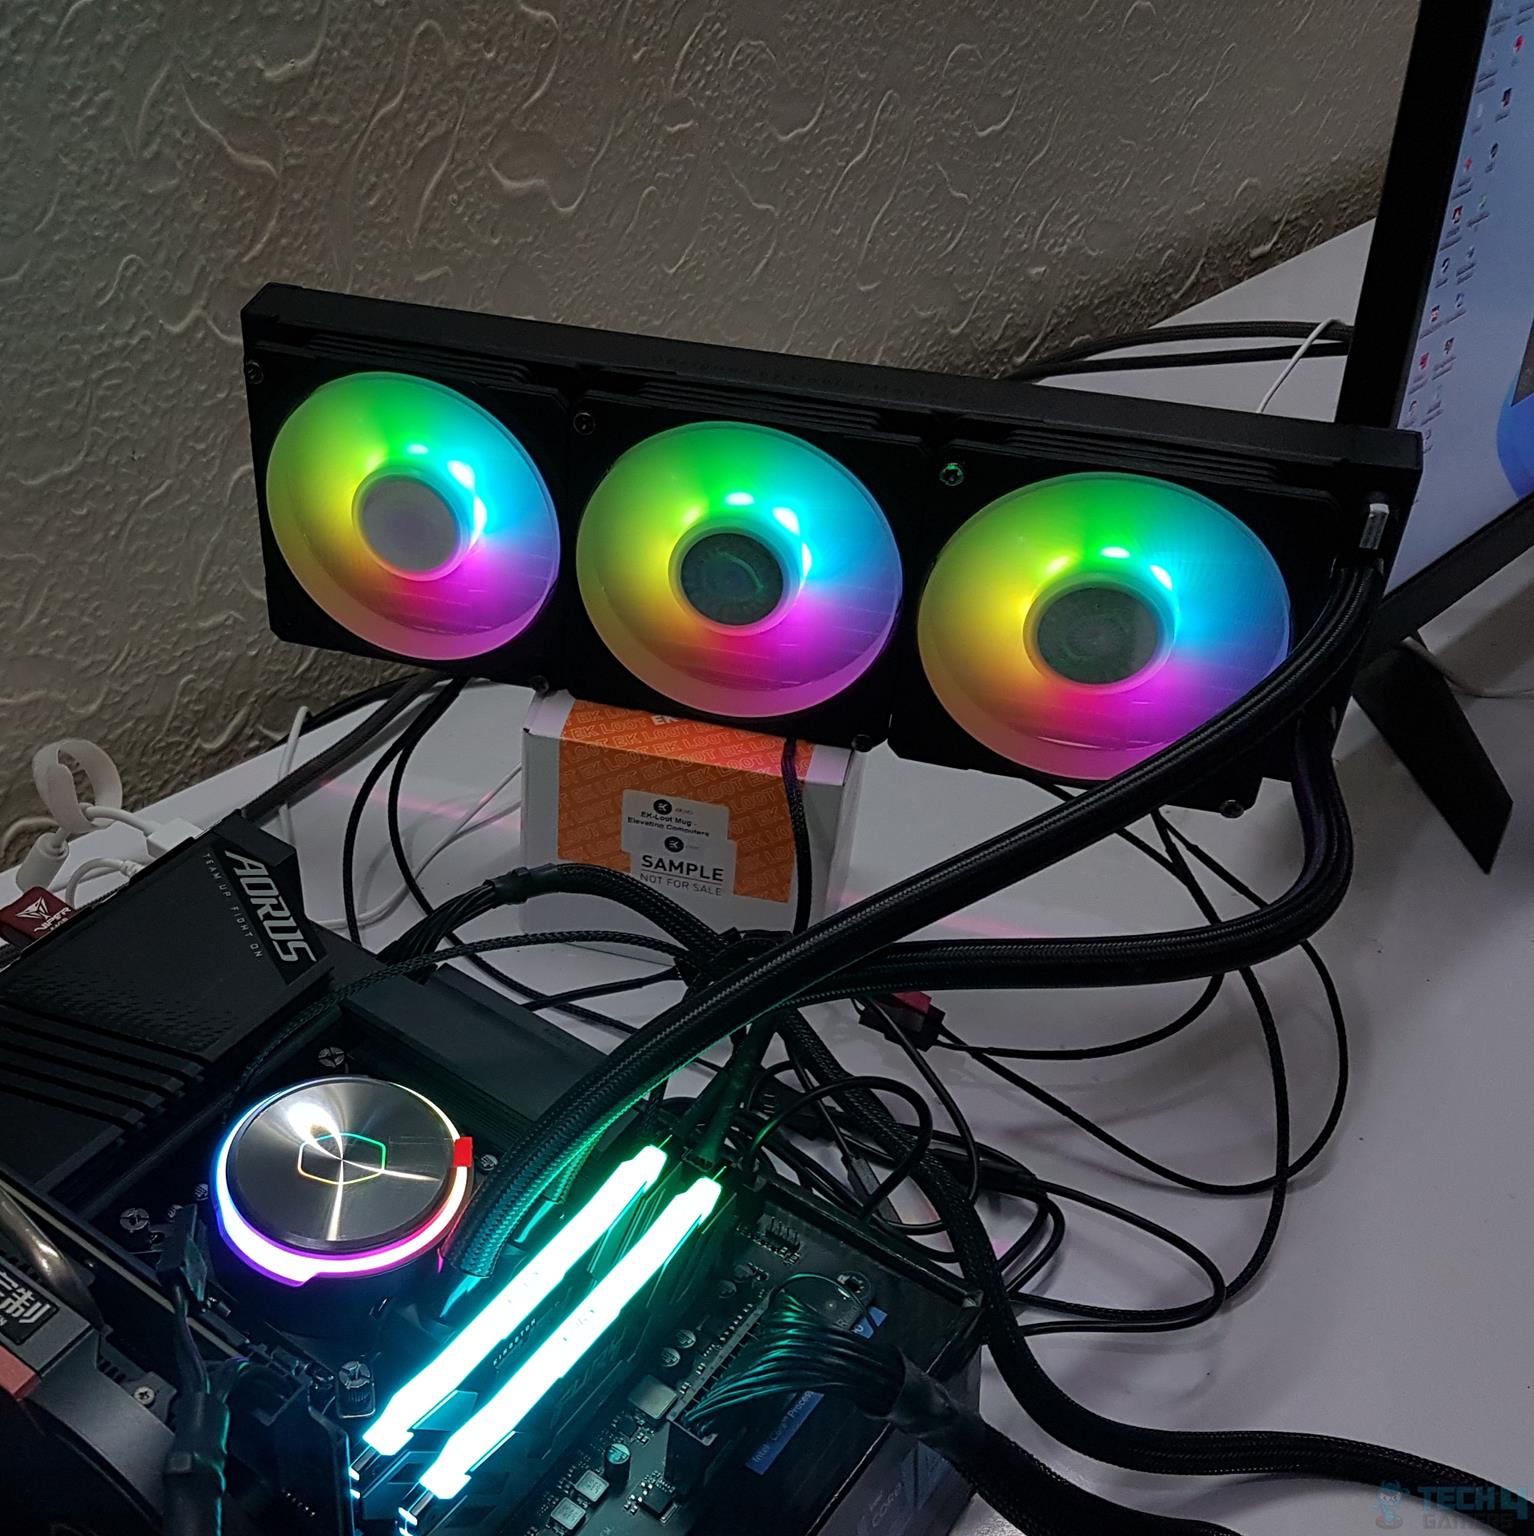
There is a brushed aluminum pump top that has an RGB backlit Cooler Master logo in the center. We can see a thick frosted diffuser running on all sides, forming a loop for lighting effects. This makes it a dual loop or dual zone RGB backlit design. We can also see that the fittings are quite extended towards the exterior compared to the standard design of AIOs.
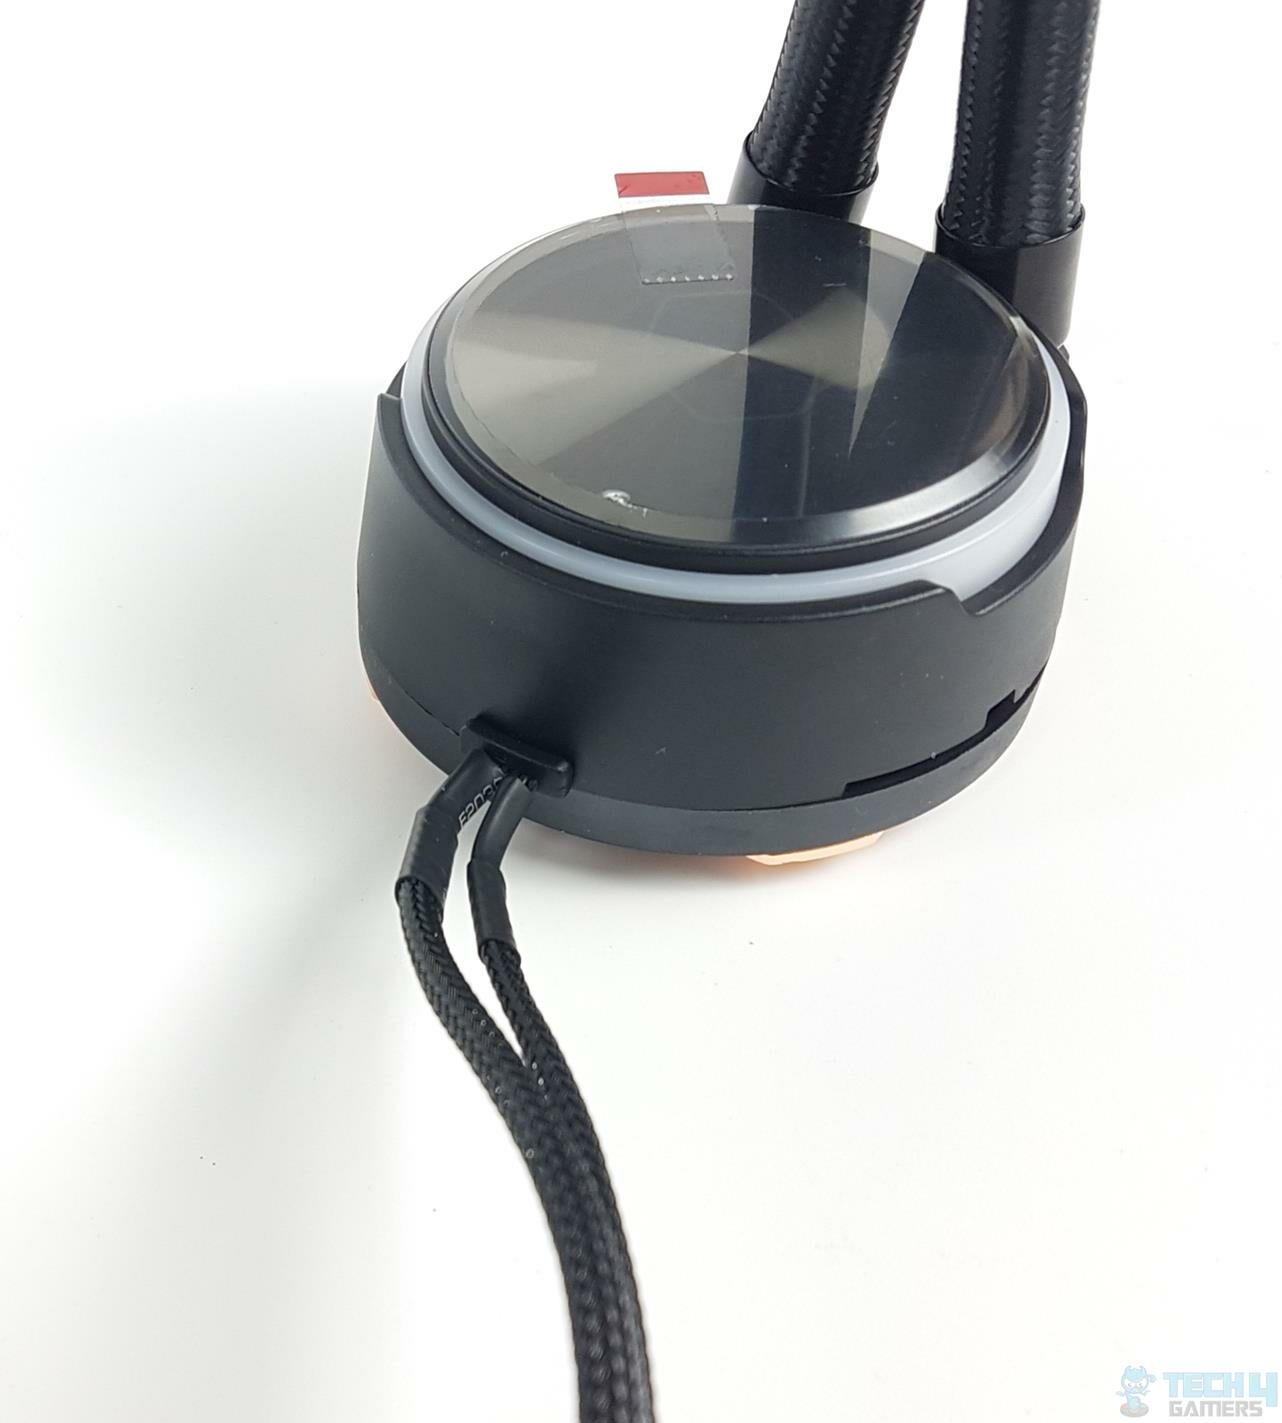
The picture below shows a side view of the pump housing. Two main cutouts give more exposure to the diffuser for some brilliant lighting effects. There is a cut-to-size inset towards the bottom side of the housing. This is where the mounting bracket is inserted into the housing.
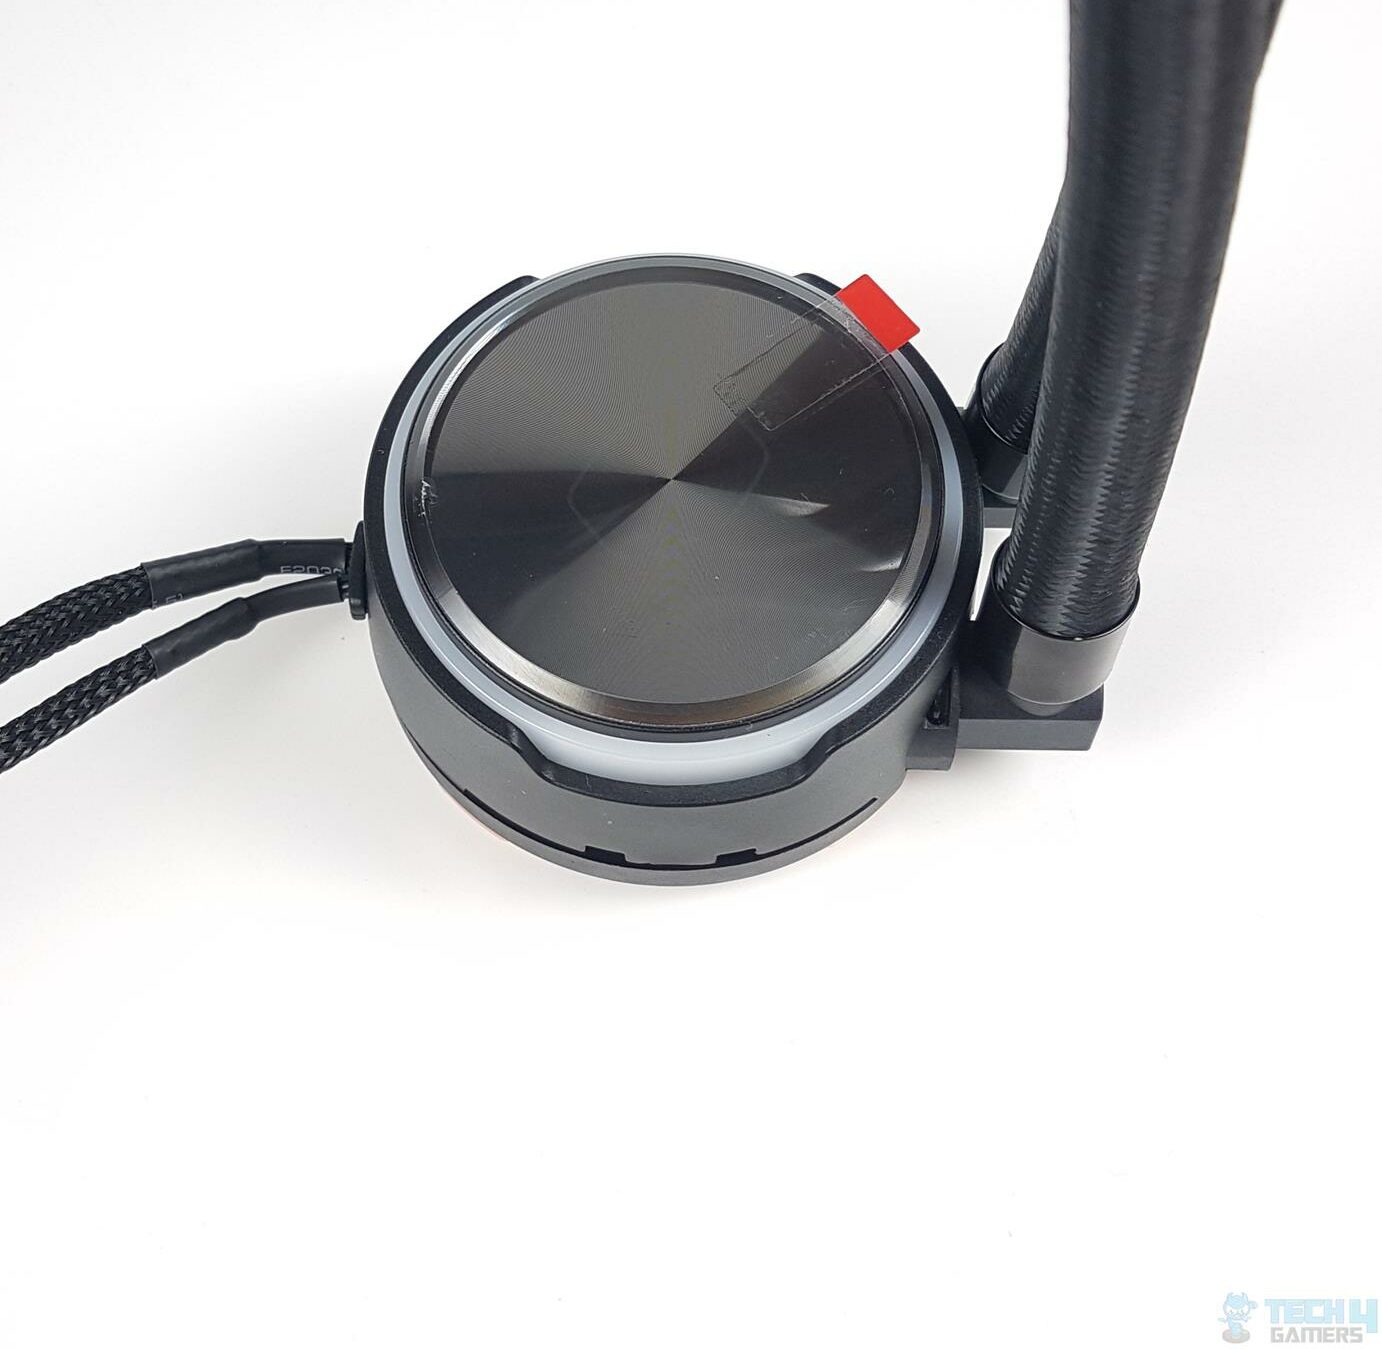
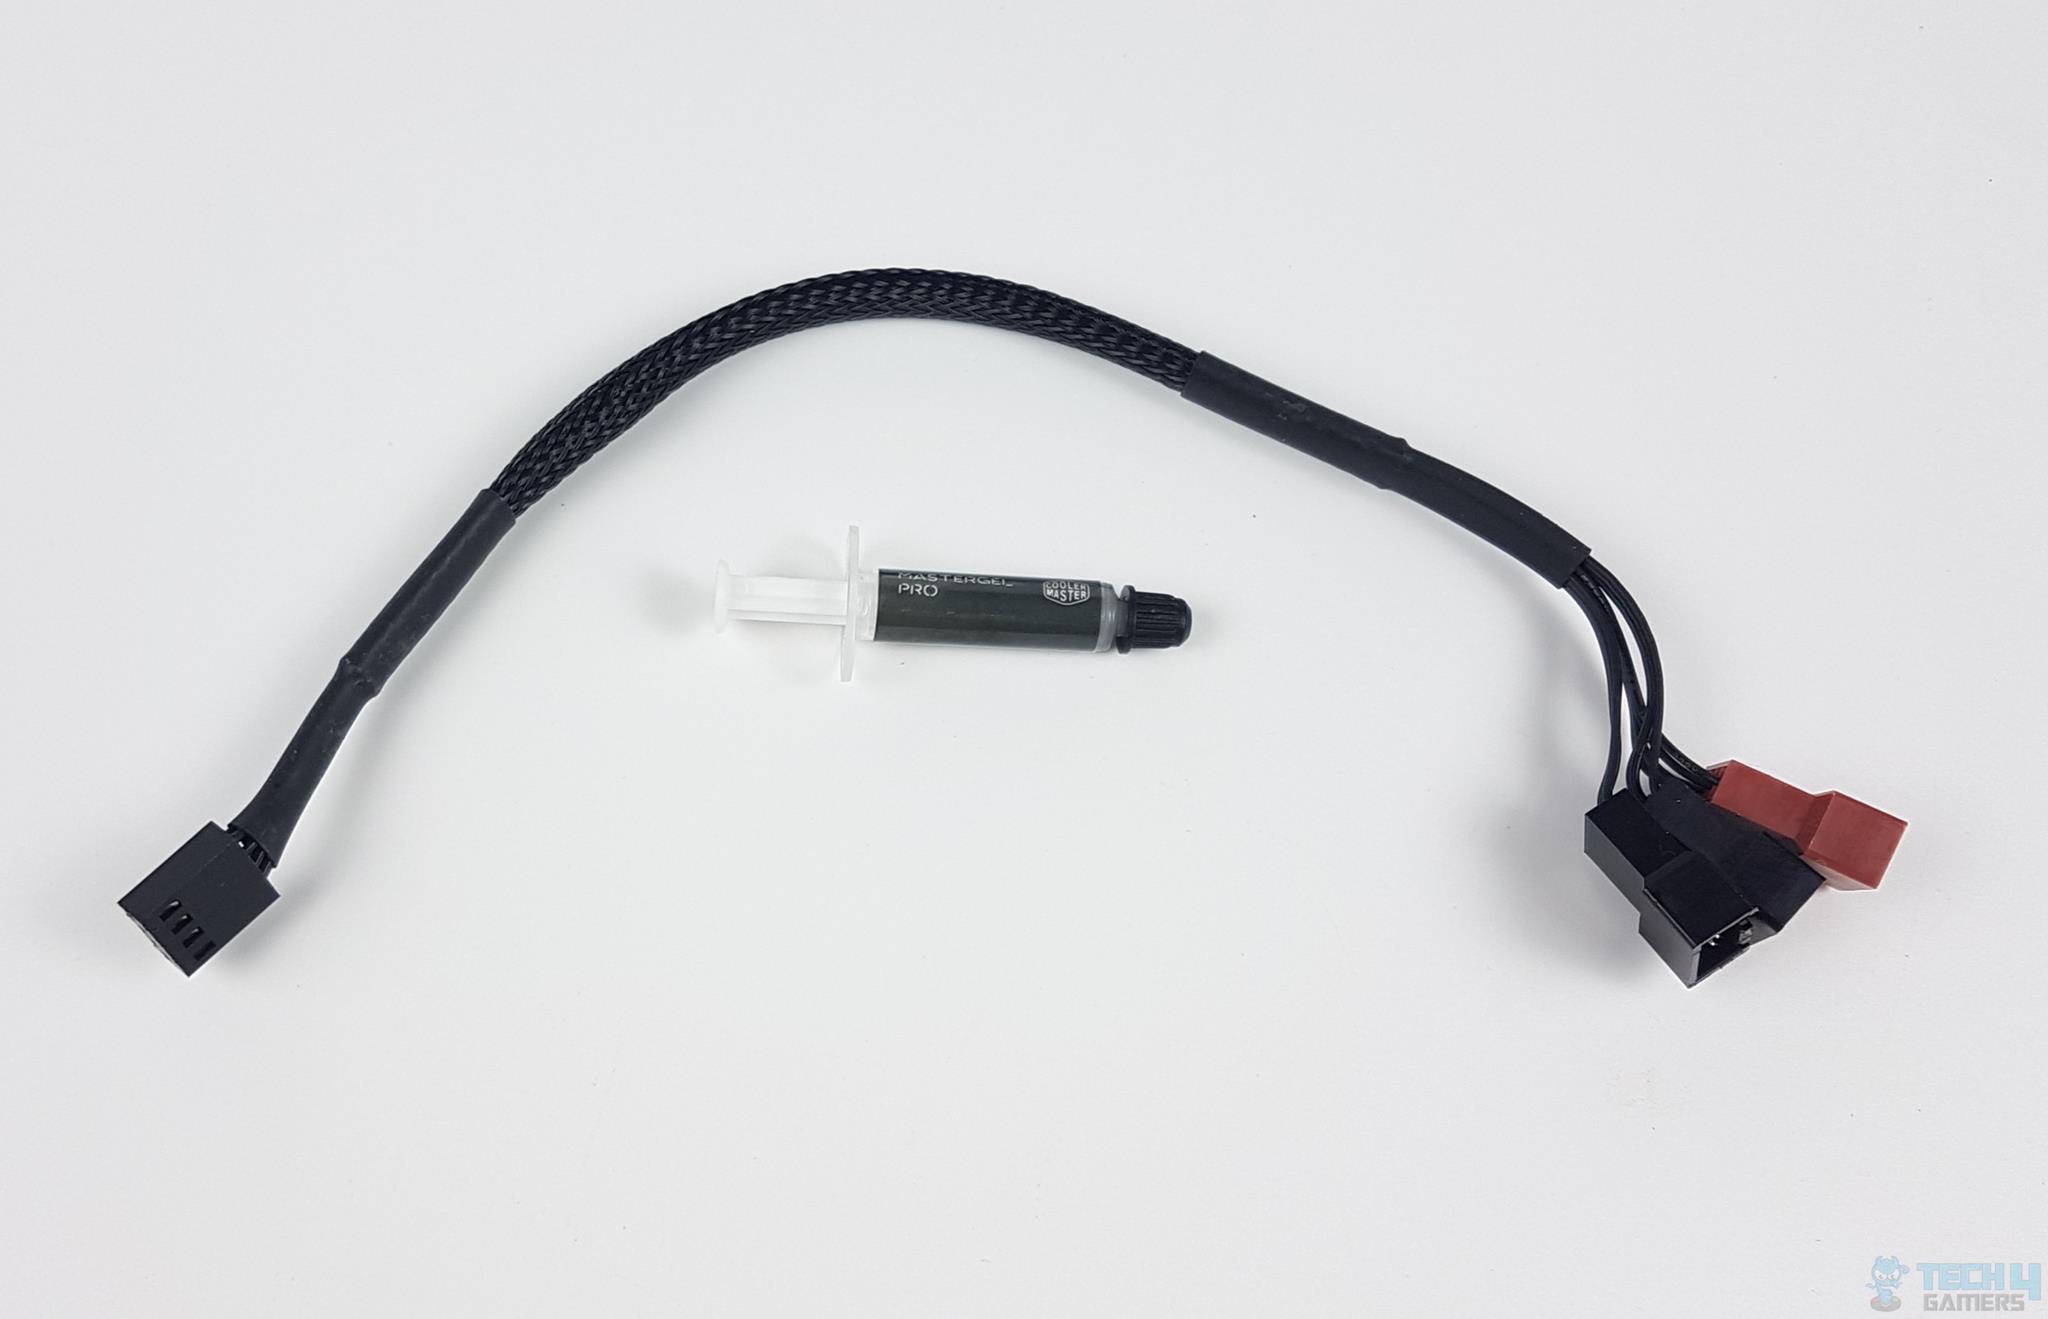
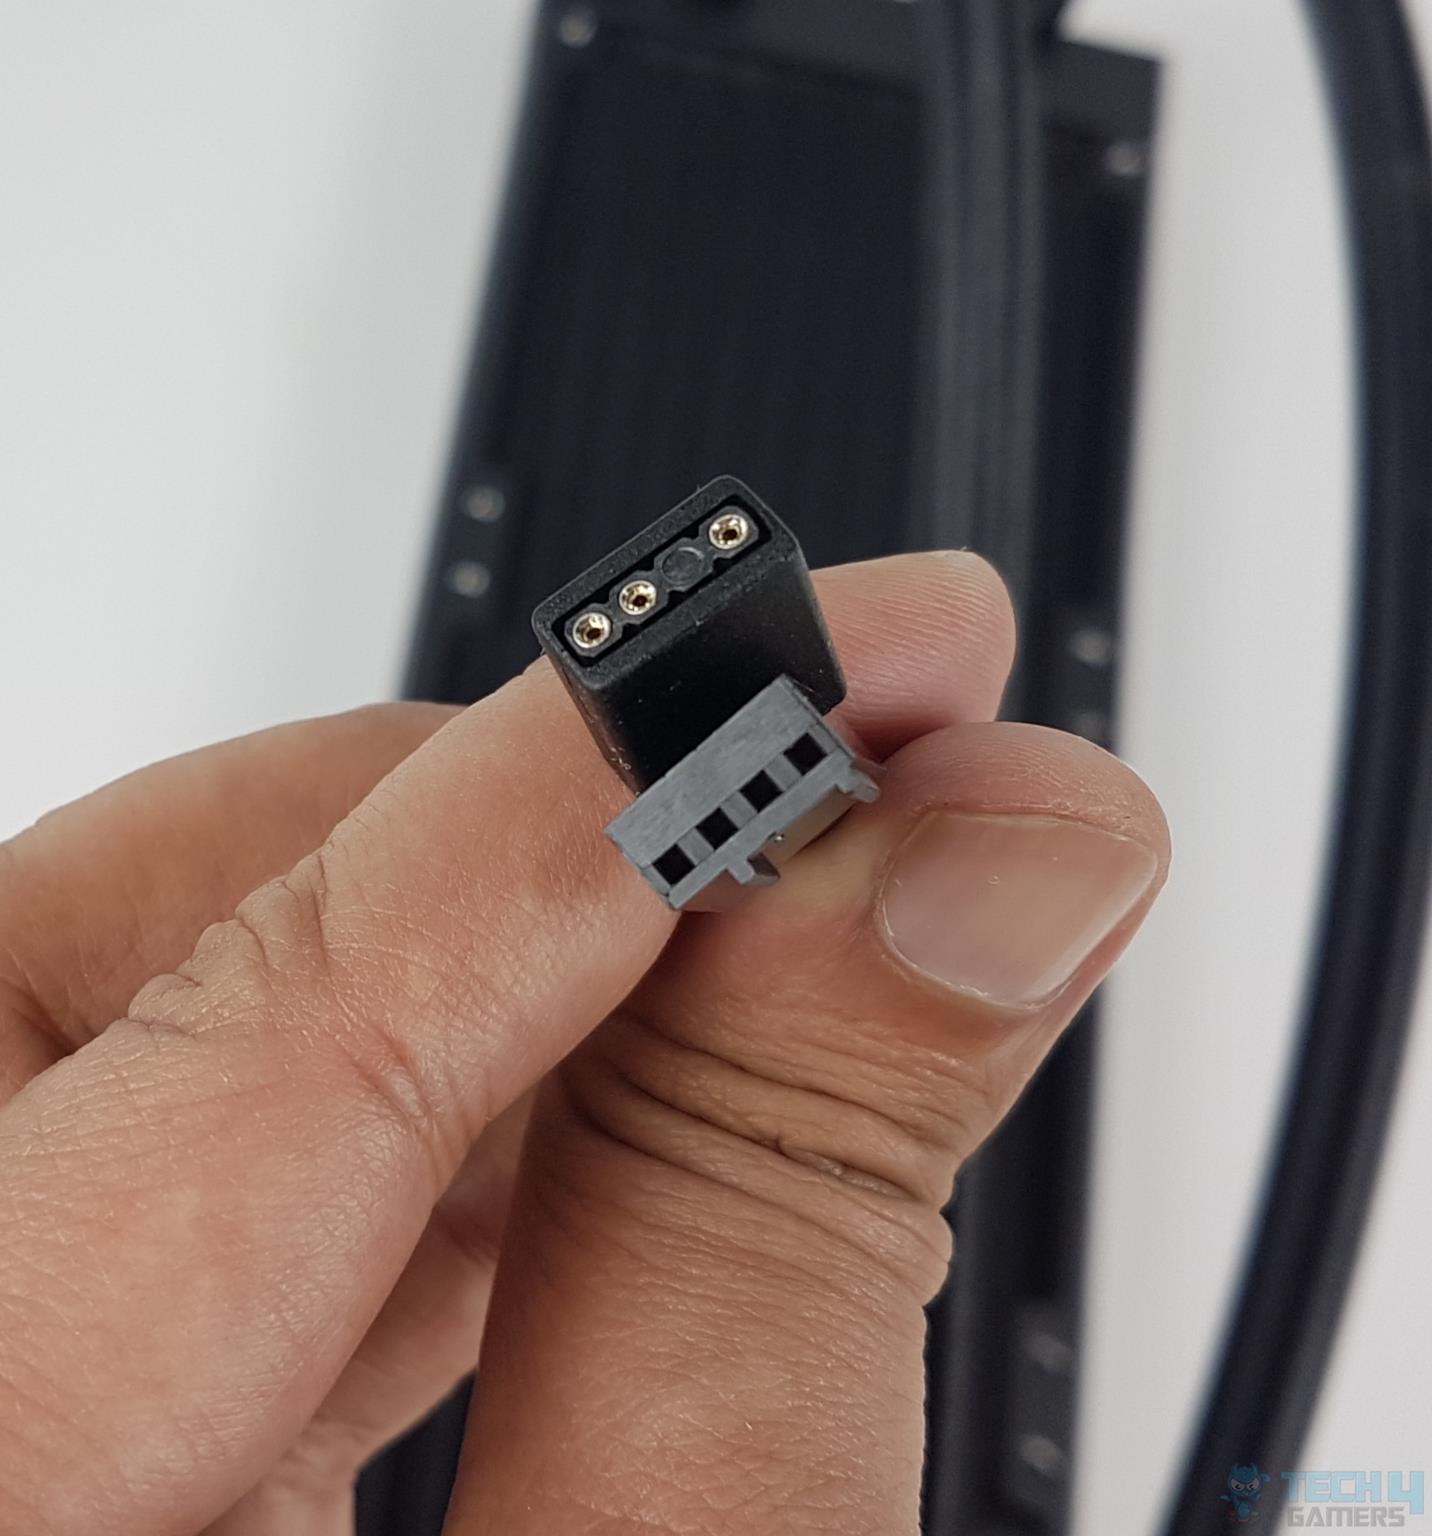
Two cables are coming out of the front side of the block. In my opinion, they should still be implemented towards the rear of this housing. One cable powers the pump’s motor and has a 4-pin PWM connector, whereas the other cable powers the RGB LEDs and has a standard 3-pin, 5V RGB connector. It is good to see that Cooler Master is sticking with standard connectors instead of using proprietary connectors.
The tubes and fittings are installed at a 90° angle. The tubing can be rotated on the left or right side as required. The pump on this unit has an MTTF of 210,000 hours. It is rated for 12VDC drawing 6W (not sure if that includes the digital RGB LEDs). Its maximum noise level is 15 dB(A). A high-speed motor in this cooler uses a ceramic bearing impeller to force balanced water flow to and from the radiator for ultimate heat exchange efficiency.
The following picture shows the RGB lighting effects on the pump housing.

Cooler Fans
There is a protective cover on the copper base. Don’t forget to peel it off before installing the unit. The base measures roughly 46x40mm. Cooler Master mentioned using precision-engineered ultra-thin spaded fins to maximize microchannels for better heat spot coverage. The enlarged copper surface area with optimized base thickness further accelerates heat transfer.
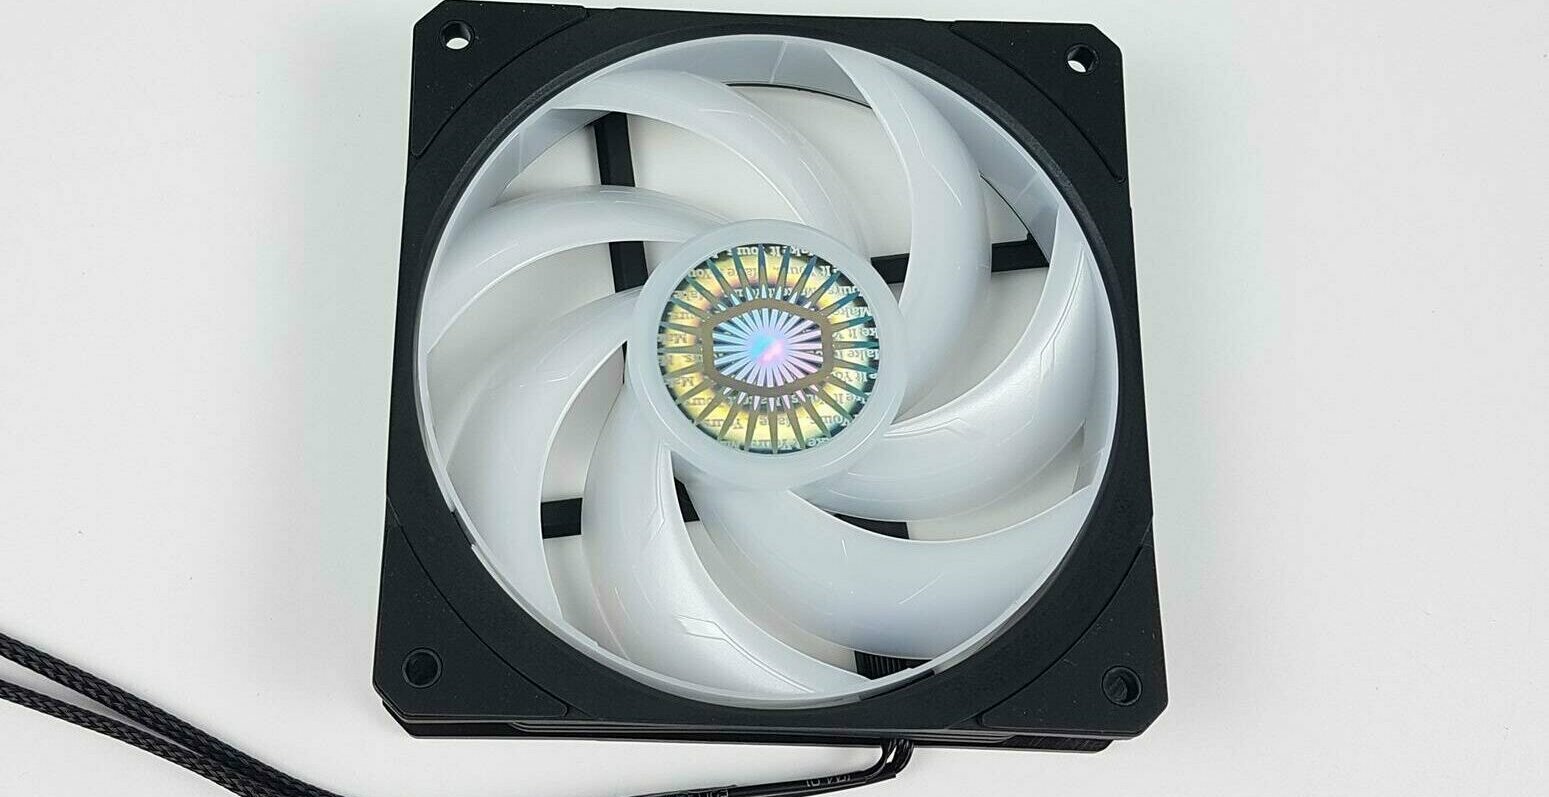
Cooler Master has provided customized sickle-flow fans with this cooler named Flux Fans (as per my understanding,, no Flux series fans are listed on their website). Each fan has 7 blades that are connected to a ring. The complete ring rotates along with the blades (interconnecting blades). According to Cooler Master, the strengthened structure provides stability for steady, high-speed operation. Angled inner fan frame rim boosts air intake, with the frame gap generating increased air pressure for improved cooling.
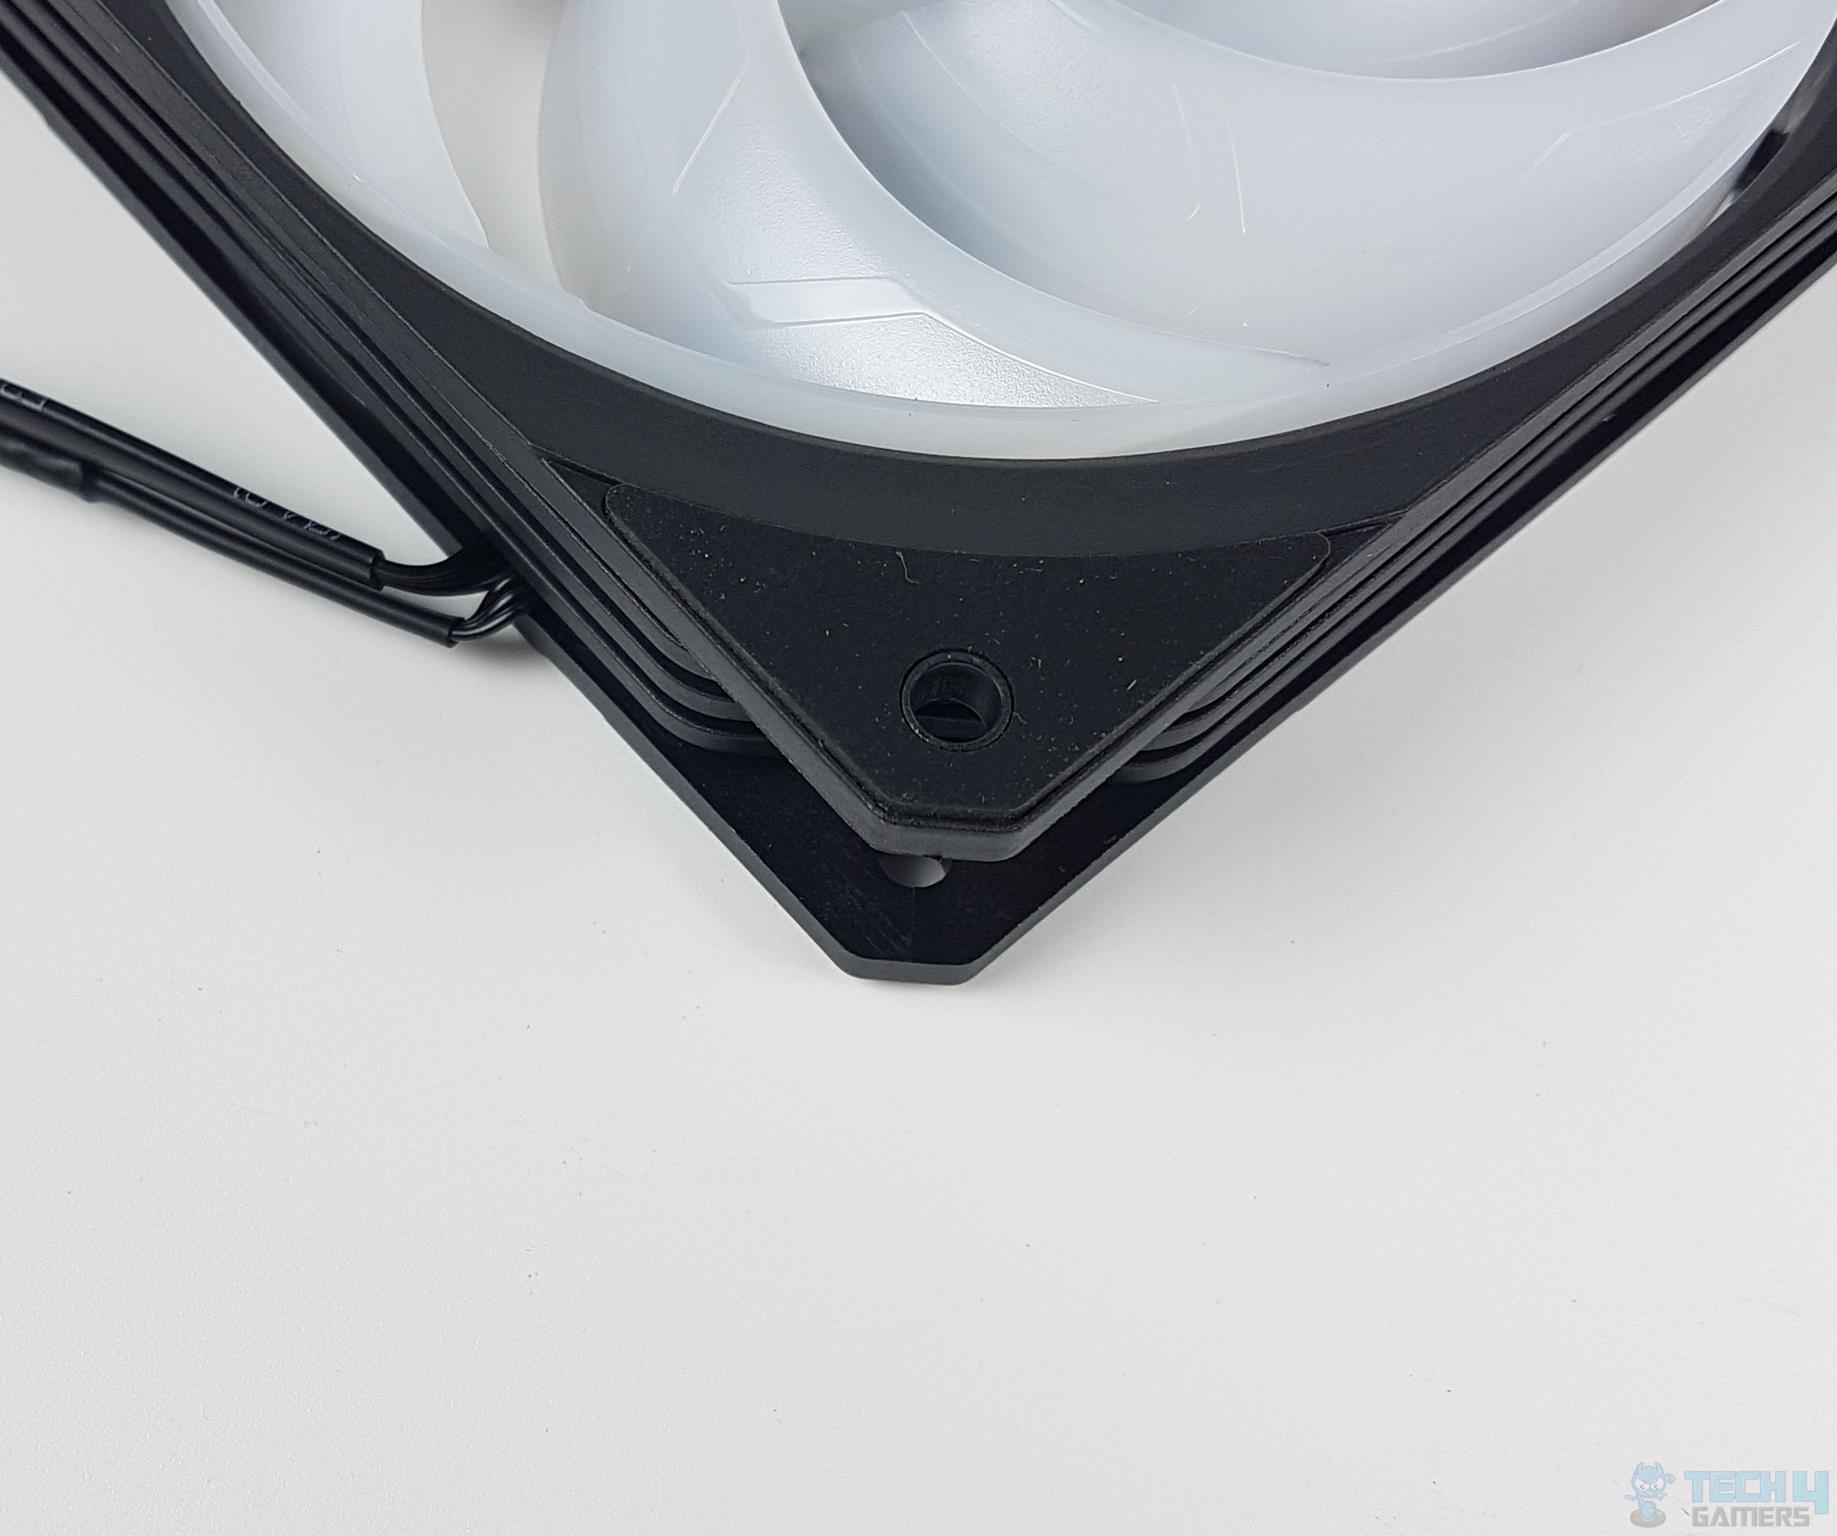
Inter-connecting air balance fan blades increased sturdiness and stability, operating steadily at high speed. The angled inner rim of the fan frame increases the intake of air. At the same time gap between the frame and the blades creates greater air pressure. The center has a large diameter hub as it houses digital RGB LEDs, which the Cooler Master names Generation 2 RGB. Each mounting corner has a cut-to-size anti-vibration pad, which is black.
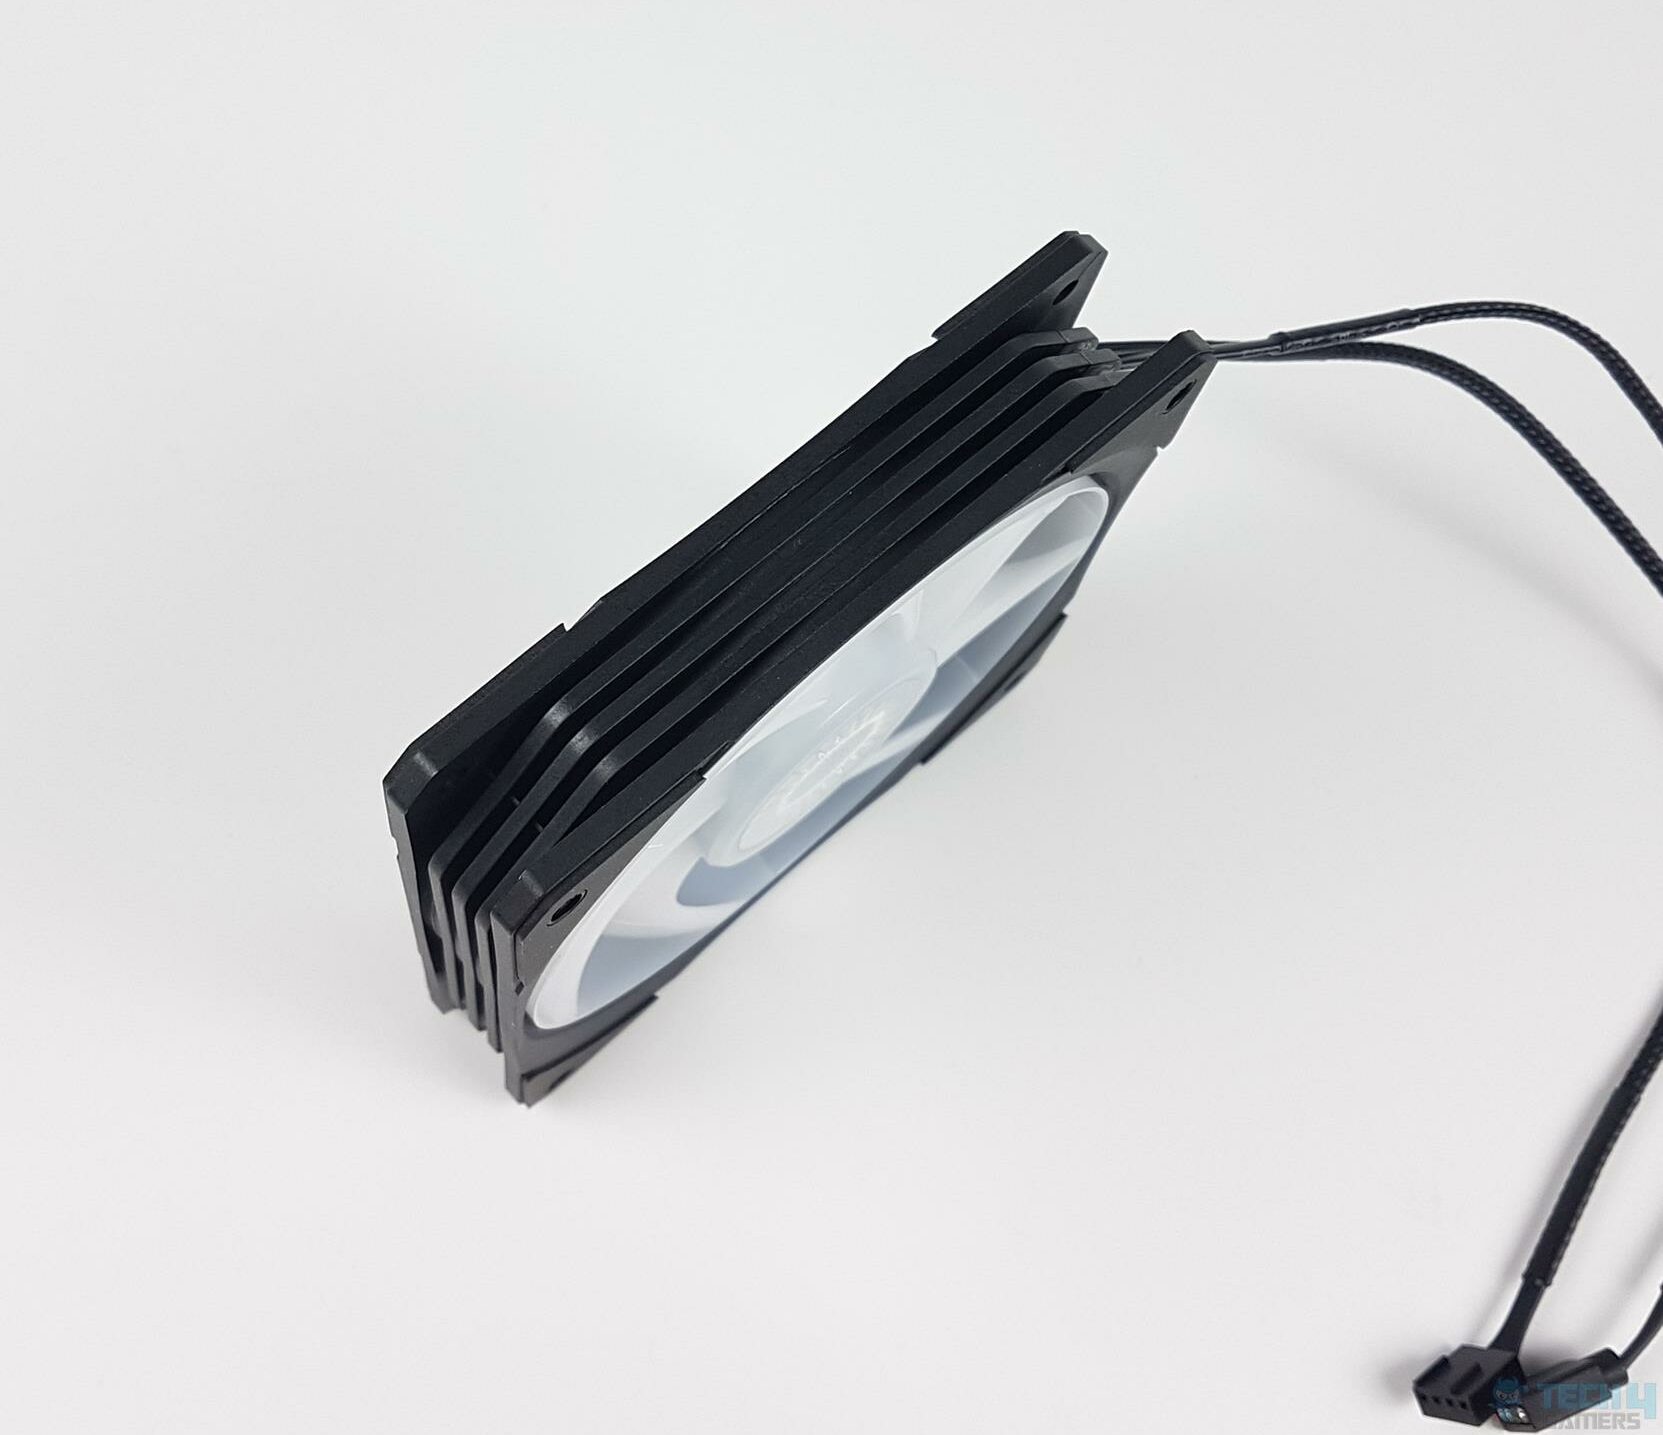
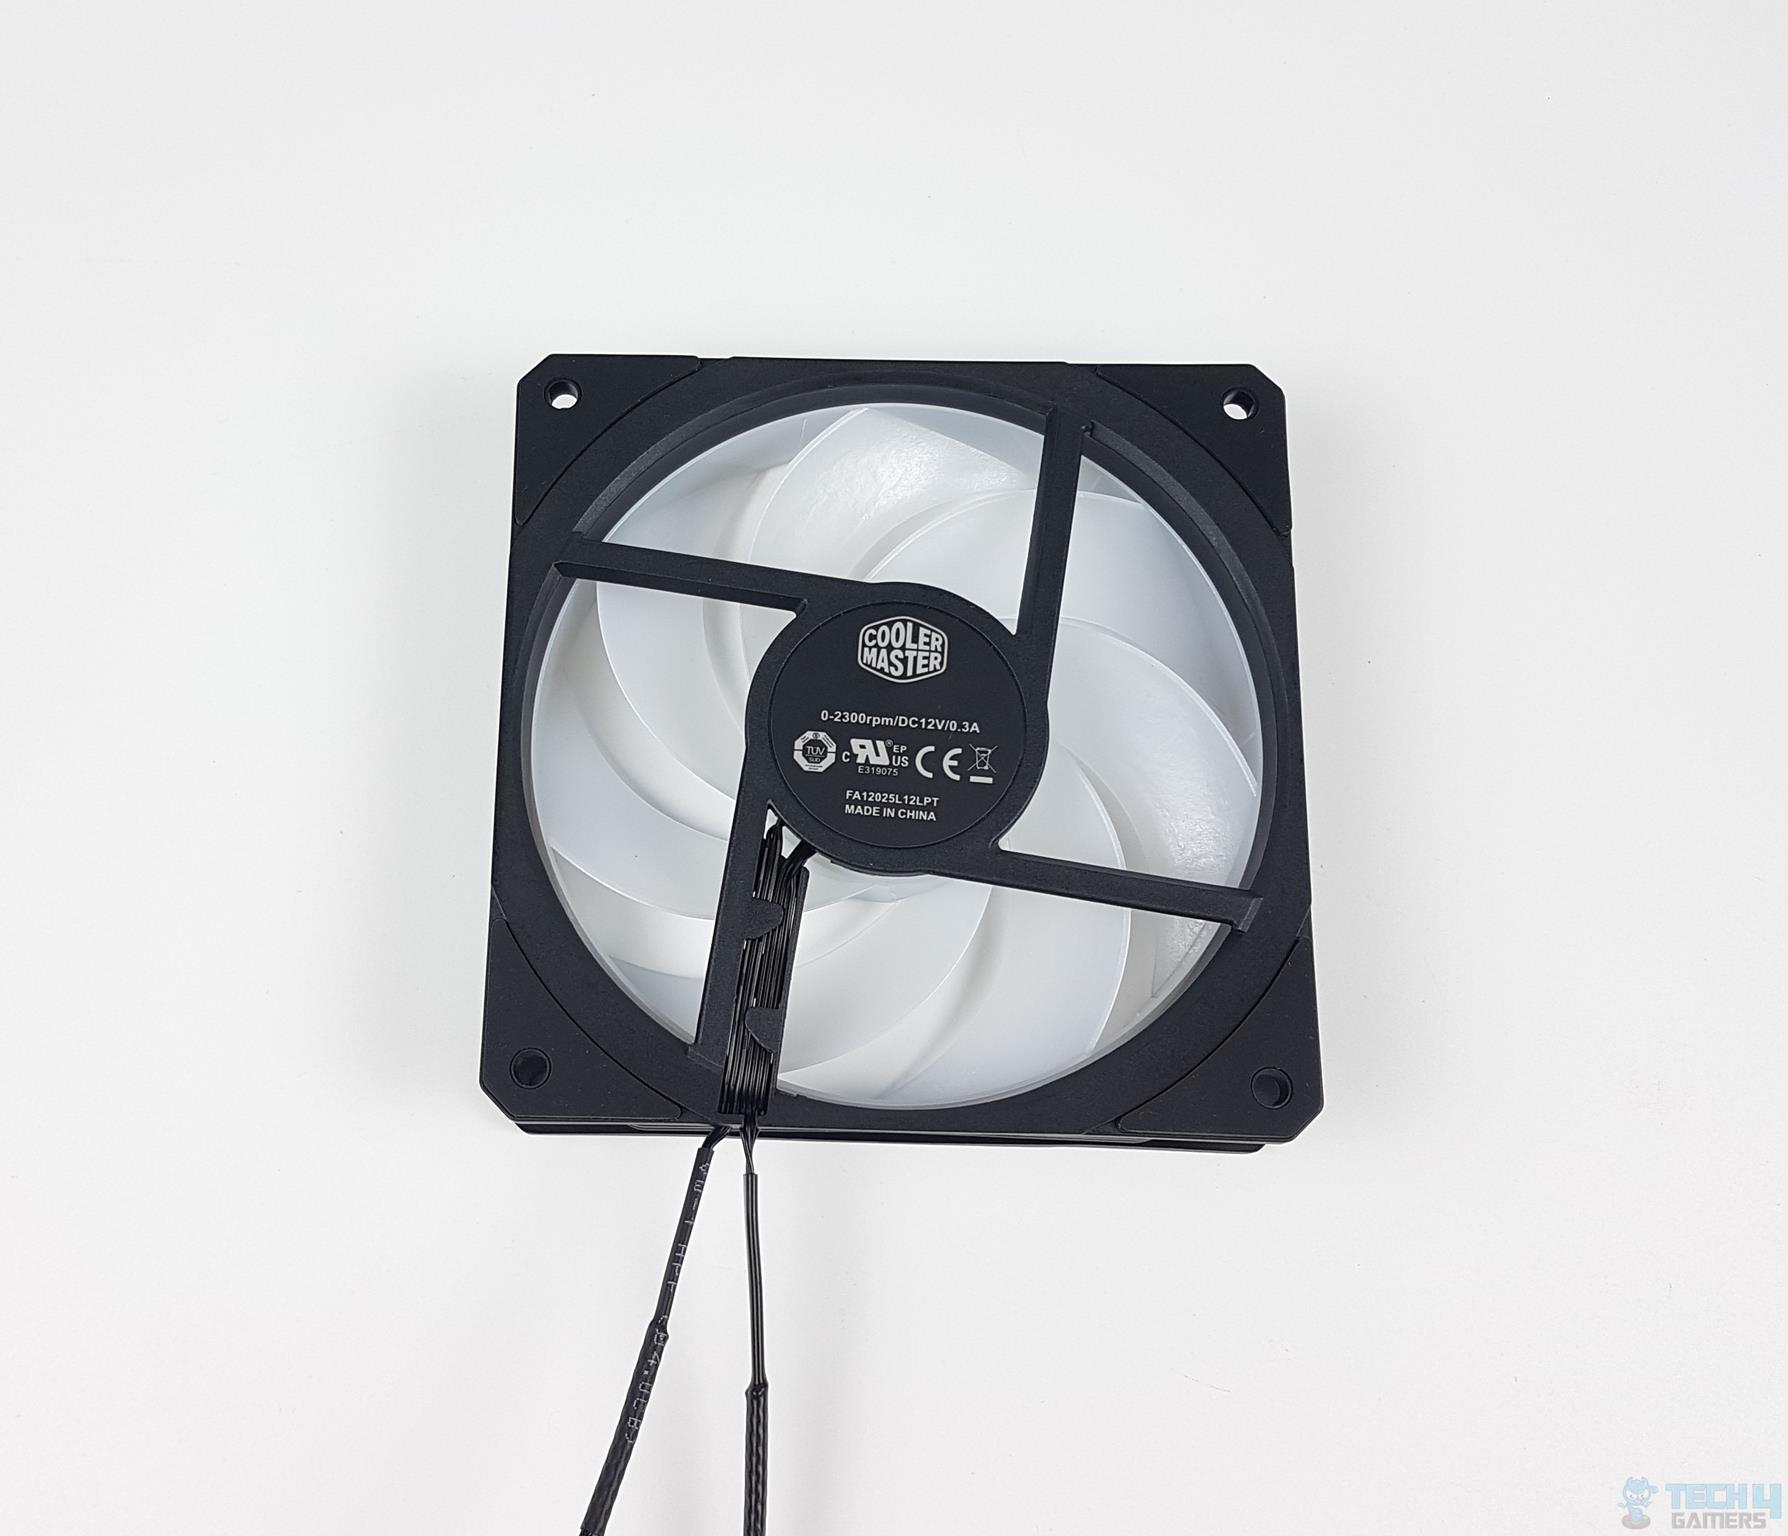
The frame design is the same as we have seen in the MasterFan series. There are 4-arms on the backside, with one arm having an adjacent inset arm catching the wires from the hub and going towards the frame. These fans are rated for 0 to 2300 RPM, taking 0.3A at 12VDC. These fans are made in China.
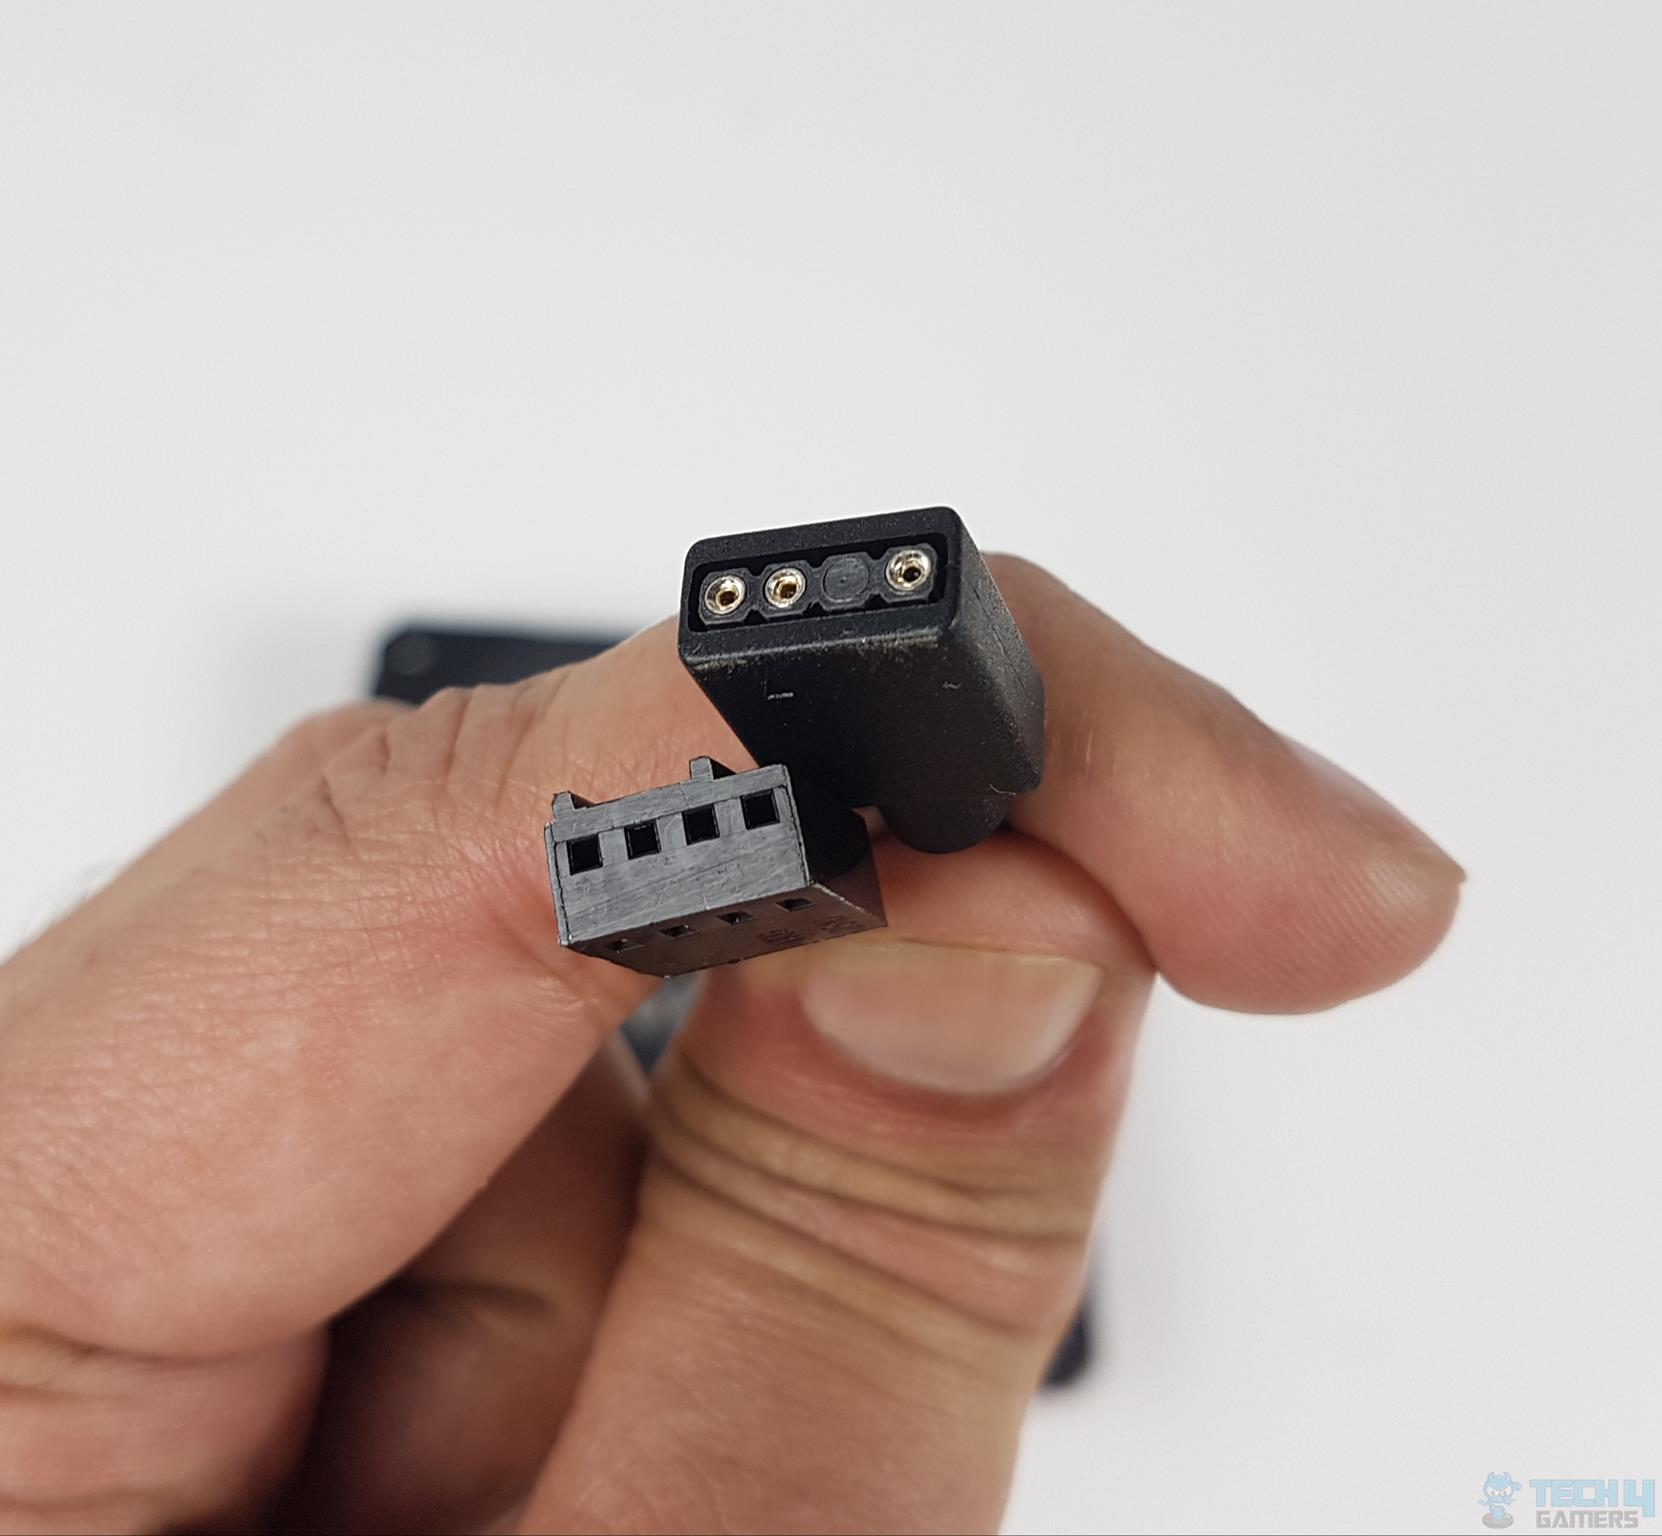
Each fan has two cables coming out of the frame. One cable powers the fans’ motor and has a 4-pin PWM connector, whereas the other cable powers the digital RGB LEDs and has a standard 3-pin, 5V RGB connector. Here are the salient specifications of these fans:
| Dimension | 120x120x25mm |
| LED Type | Addressable 2nd Generation RGB |
| Speed (RPM) | 0 ~ 2300 ±10% |
| Airflow (Max) | 72.37 CFM |
| Pressure (Max) | 2.96 mmH2O |
| Bearing | Oil Reflow Bearing System |
| Life Expectancy | 160,000 hours |
| Noise Level | 32 dB(A) |
| Power Connector | 4-Pin PWM |
| Rated Voltage | 12VDC |
| Rated Current | 0.15A |
| Safety Current | 0.3A |
Installation
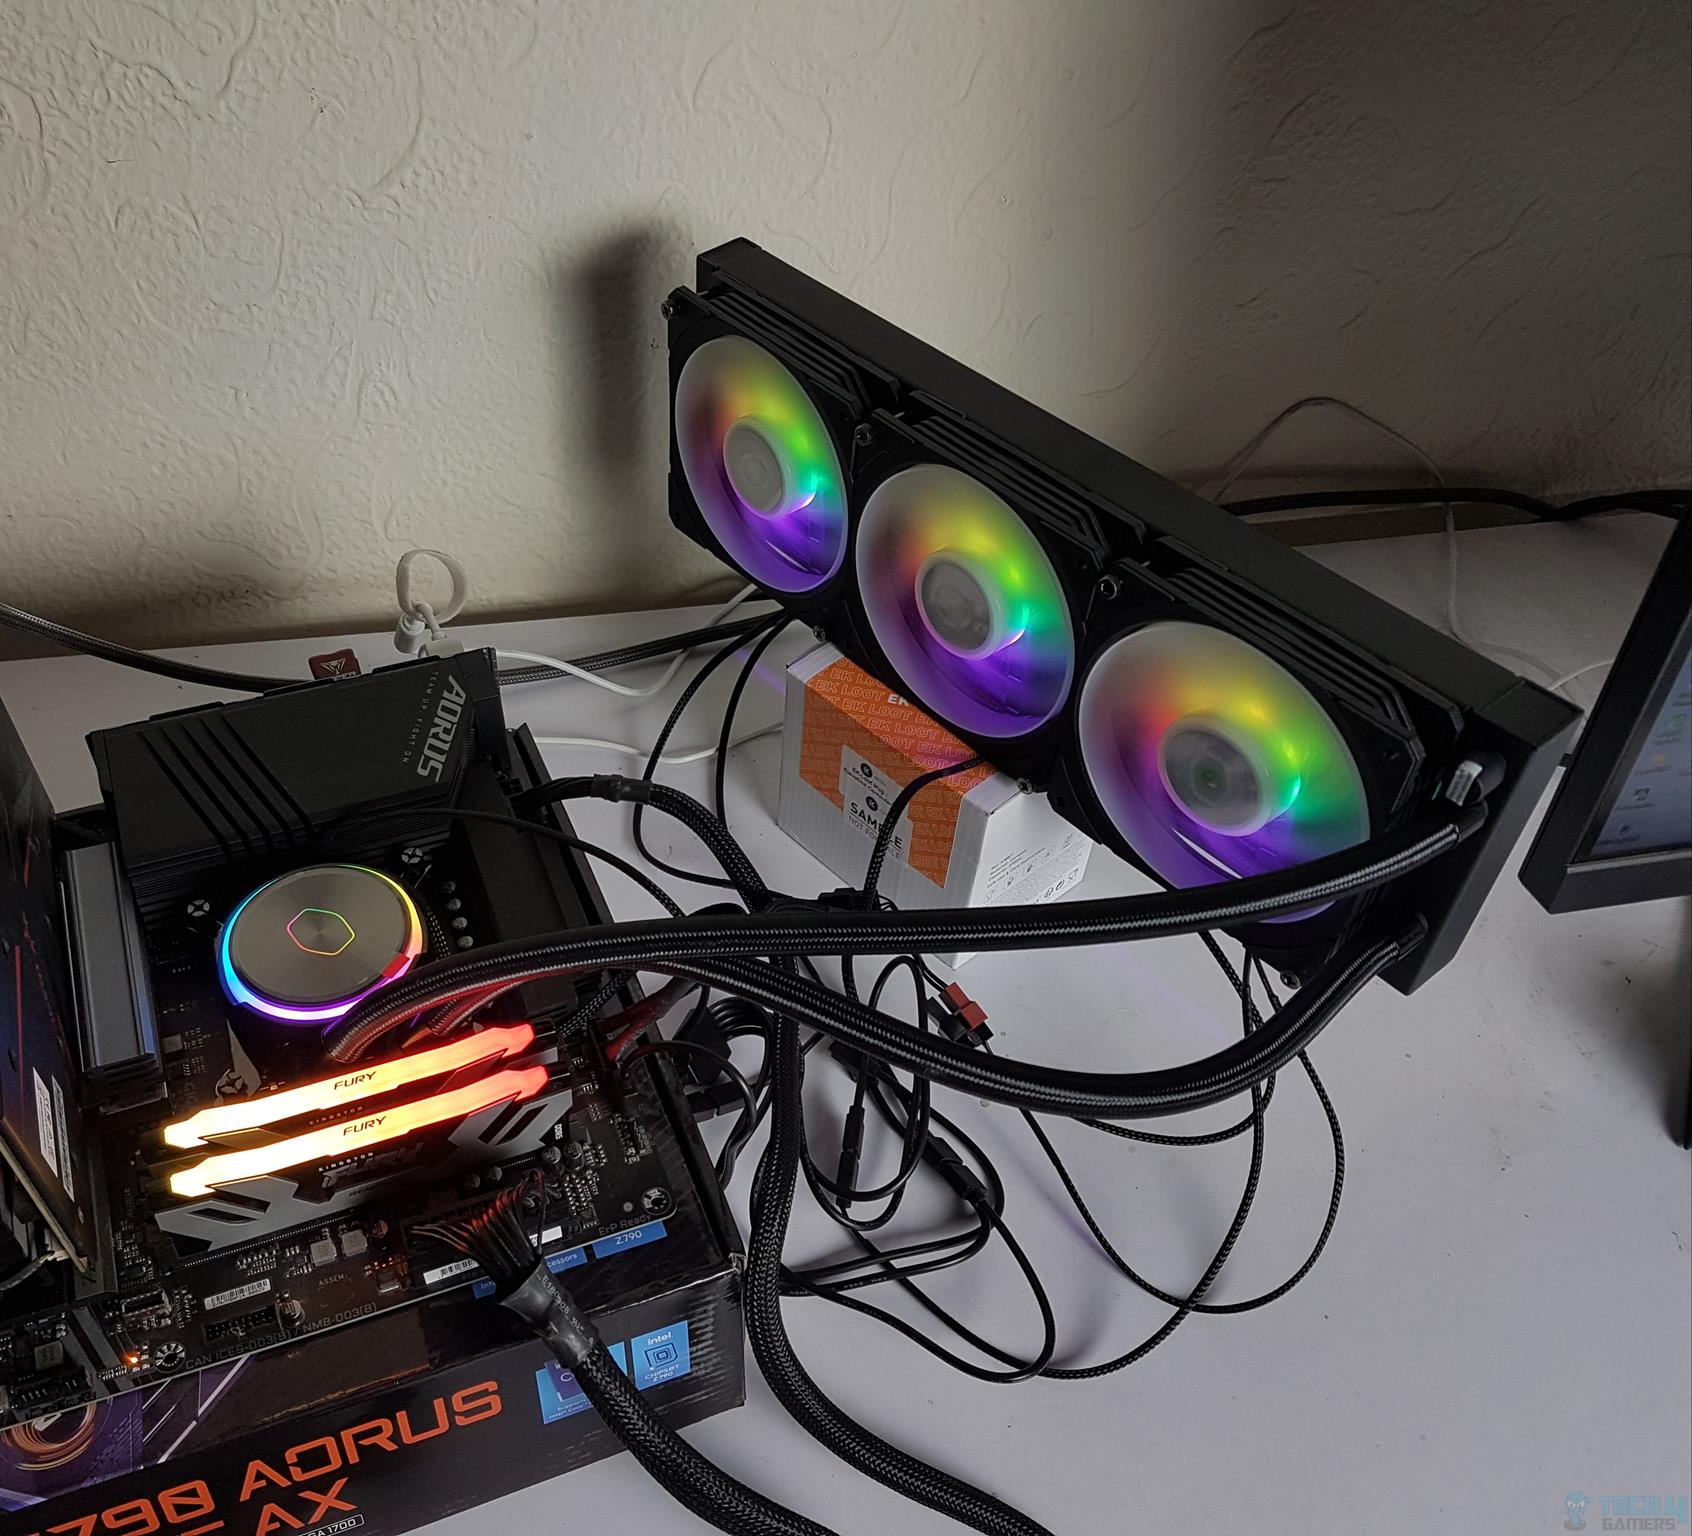
This cooler was tested on the Intel platform using Intel i7 13700k over GIGABYTE Z790 AORUS ELITE AX.
Clearance
This cooler has a dimension of 394 x 119.6 x 27.2mm without fans. With fans, this size is 394 x 119.6 x 55mm. We did not observe any clearance issues with this cooler. You must check that your PC Case has clearance for this size radiator. The tube side may hinder the first DIMM slot.
RGB Controller
When we tested the ML360R RGB, our contention with the RGB controller was that it had too many cables to deal with, which made the installation and troubleshooting quite trivial.
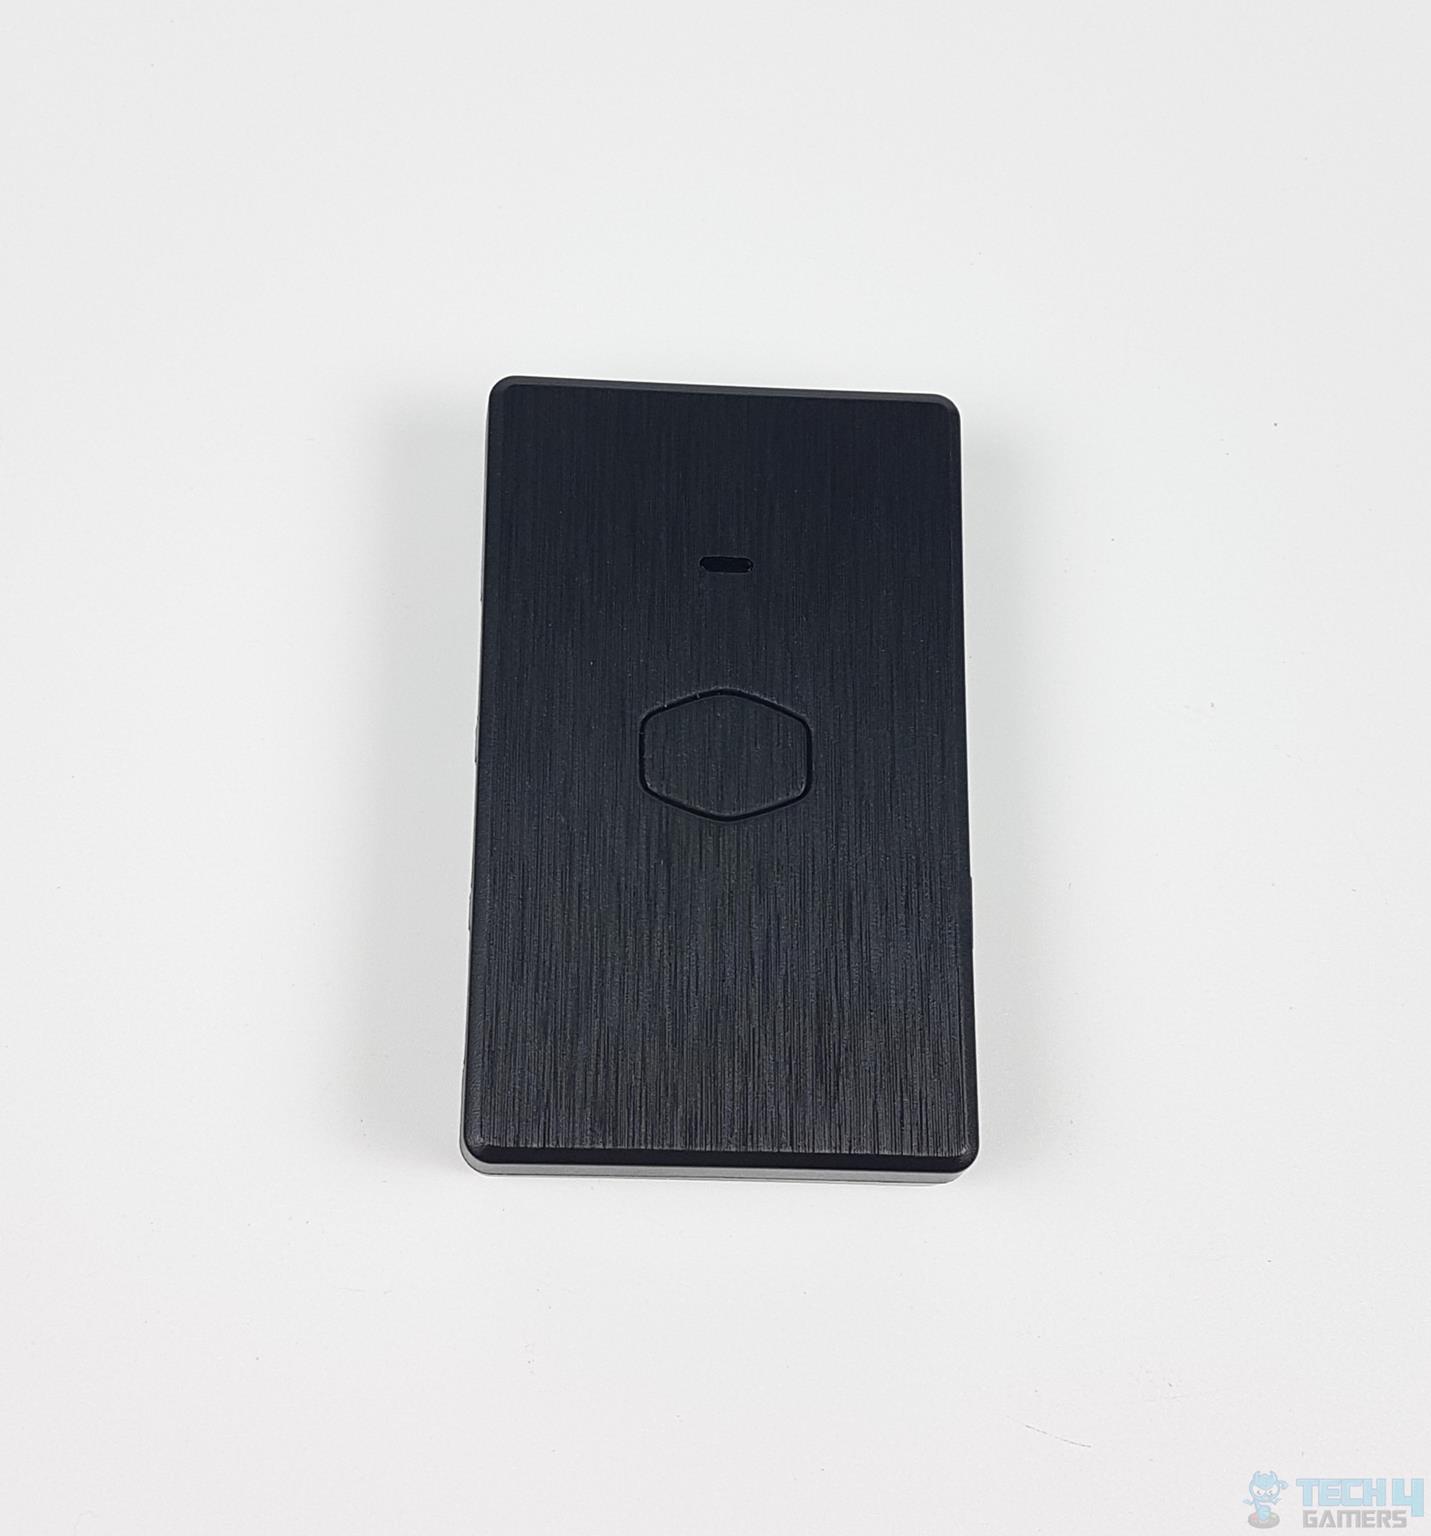
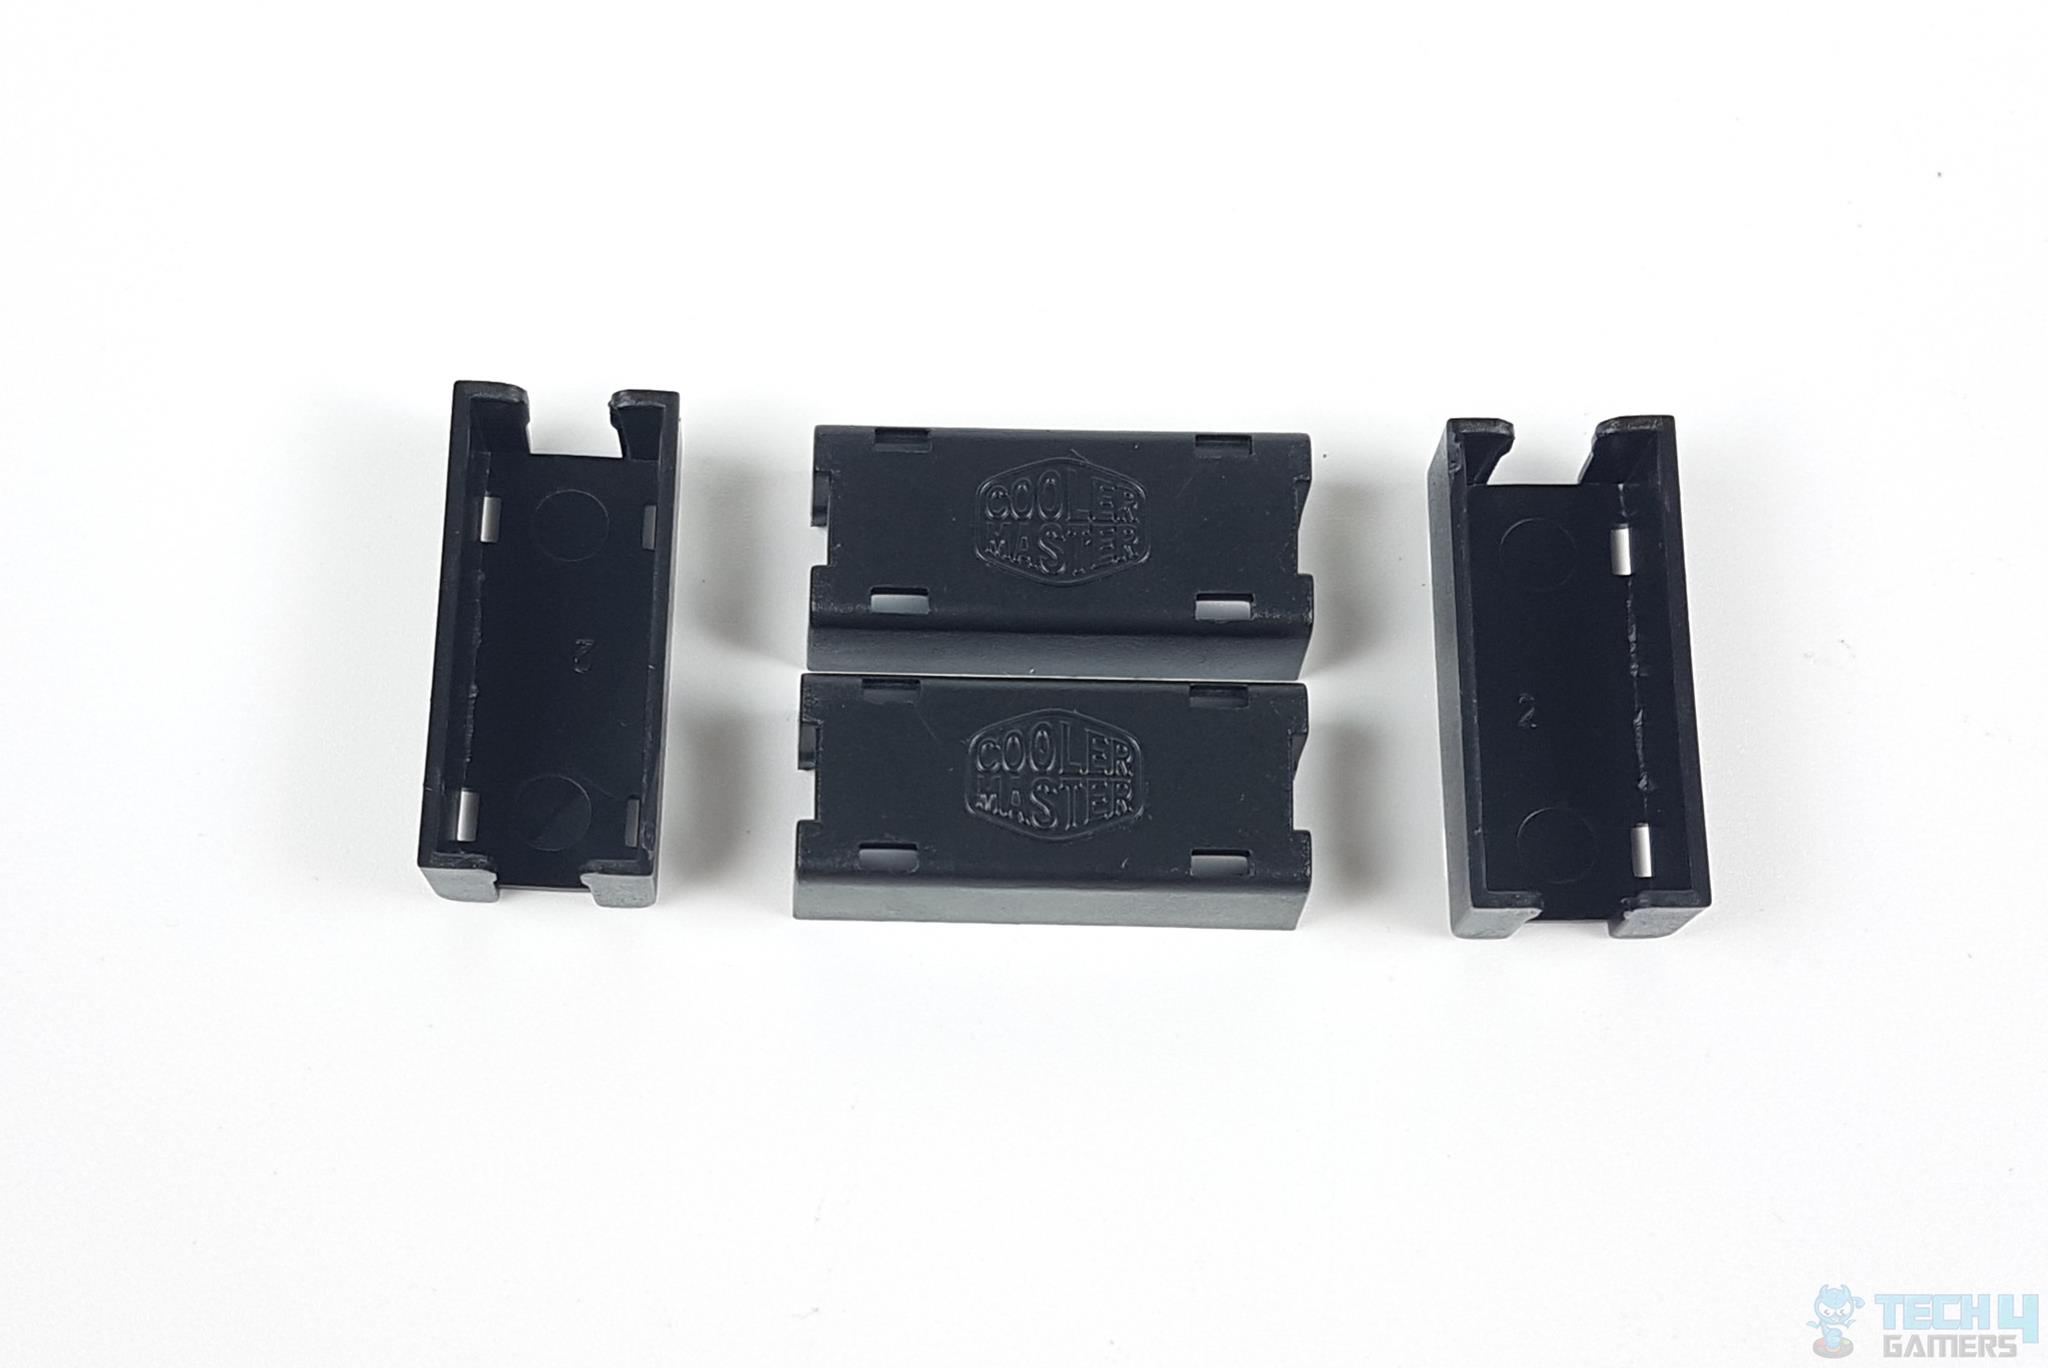
Cooler Master provided an Addressable Second Generation RGB Controller with this cooler, and we immediately noticed that we had a few cables to deal with this controller. So, the job is done well, Cooler Master. The controller is made of a plastic material. It has a Cooler Master logo in the center on the front side.
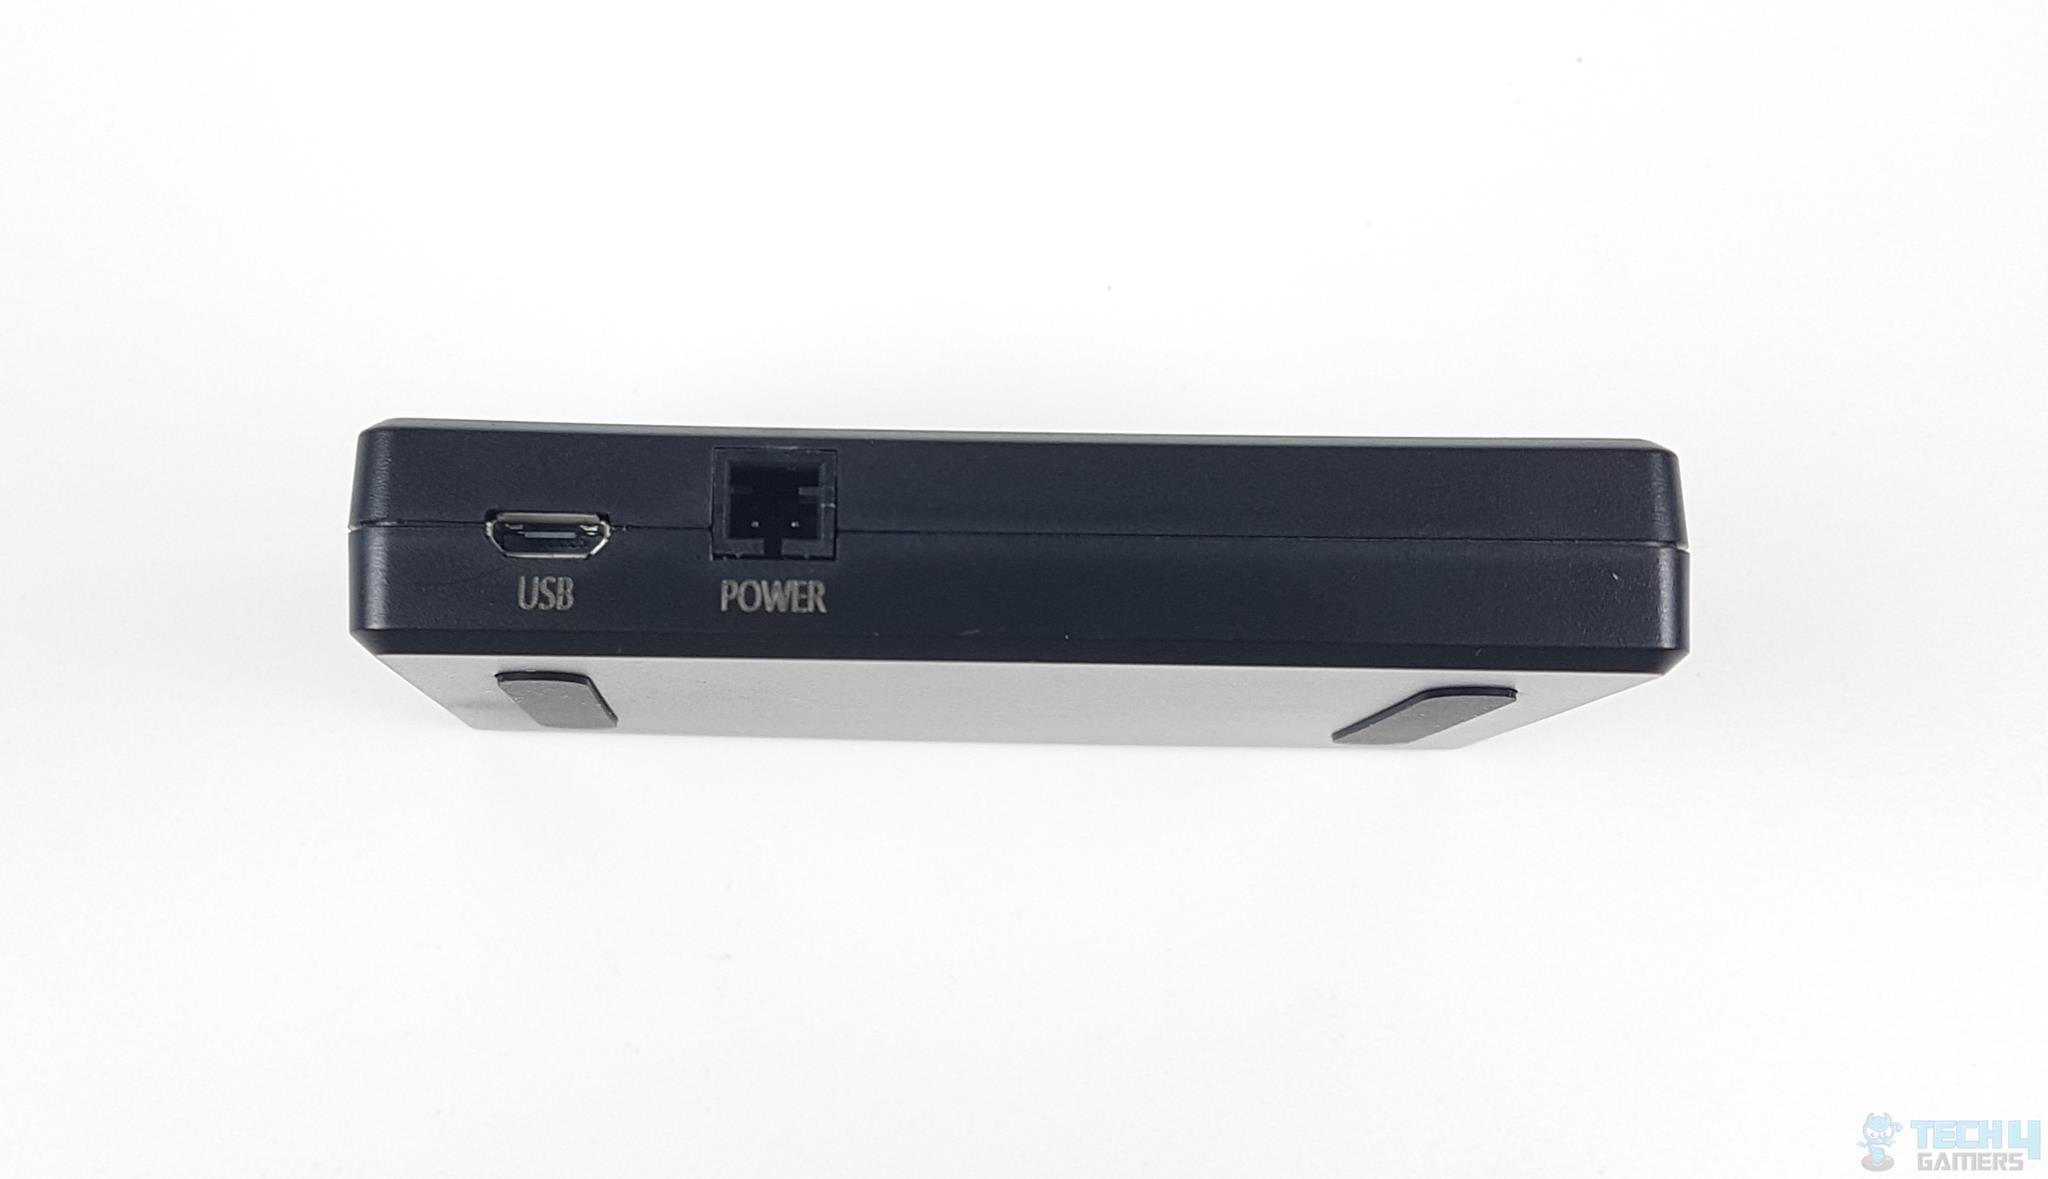
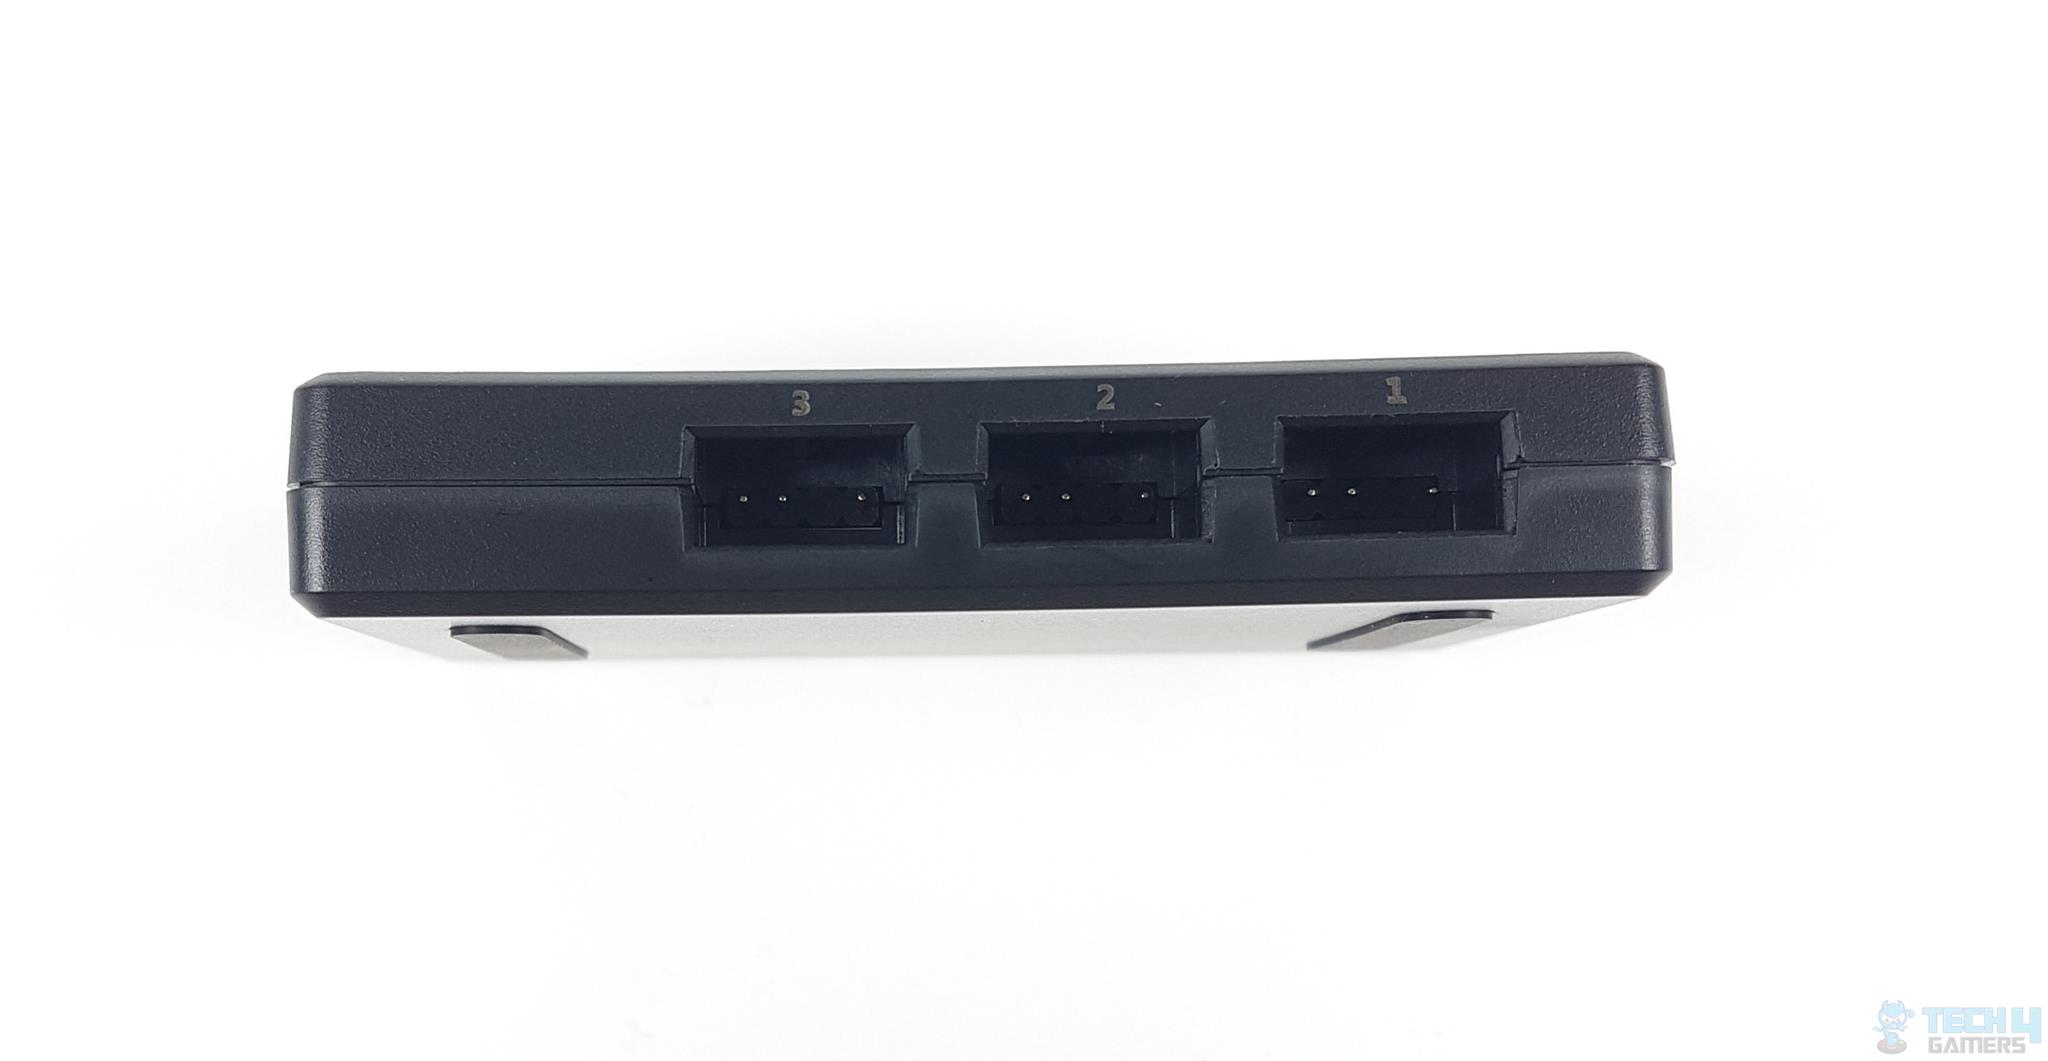
There are two ports on one side of this controller. One is a micro USB port, and the other is a 2-pin power input header. The opposite end of the controller has three ports labeled 1, 2, and 3. These are 3-pin RGB ports to which standard RGB and Addressable Second Generation RGB connectors can be attached.
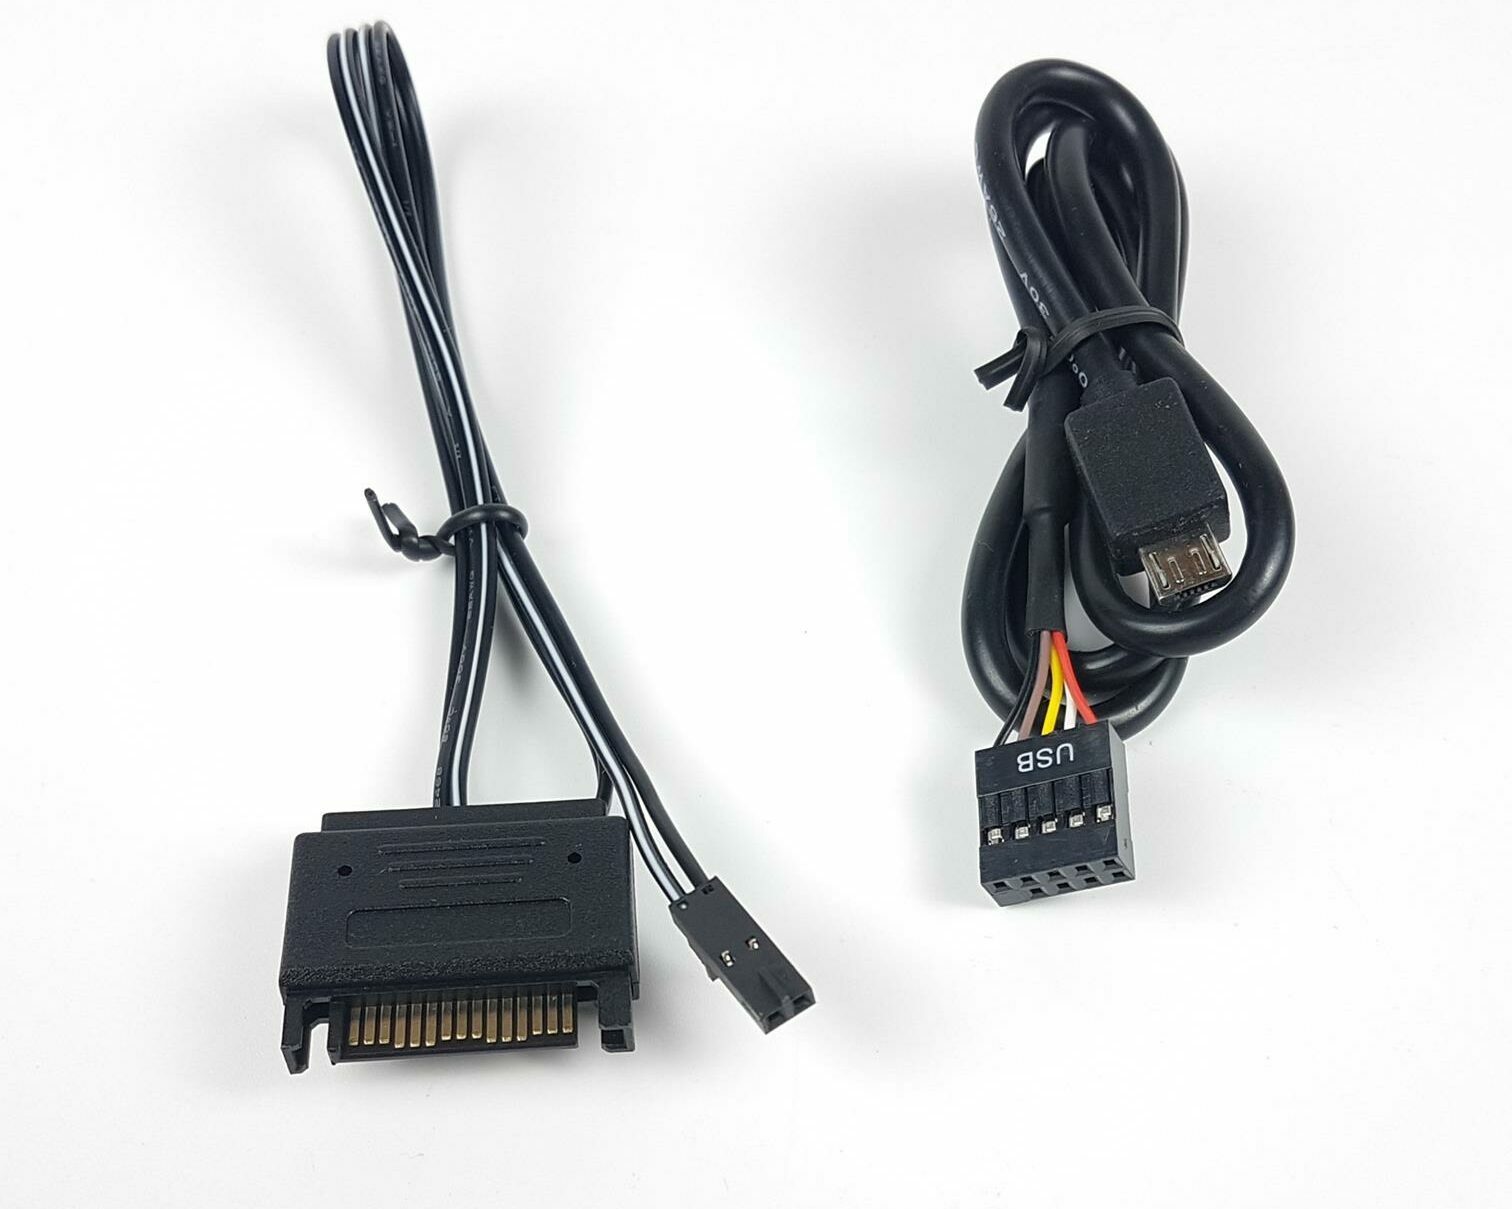
Cooler Master has provided a SATA cable with the controller. One end of this cable is a 2-pin connector connected to the controller, and the other has a SATA connector. There is a USB cable as well. One end of this cable has a micro USB connector, and the other end has a 9-pin USB 2.0 connector. One USB 2.0 9-pin header would be needed on the motherboard.
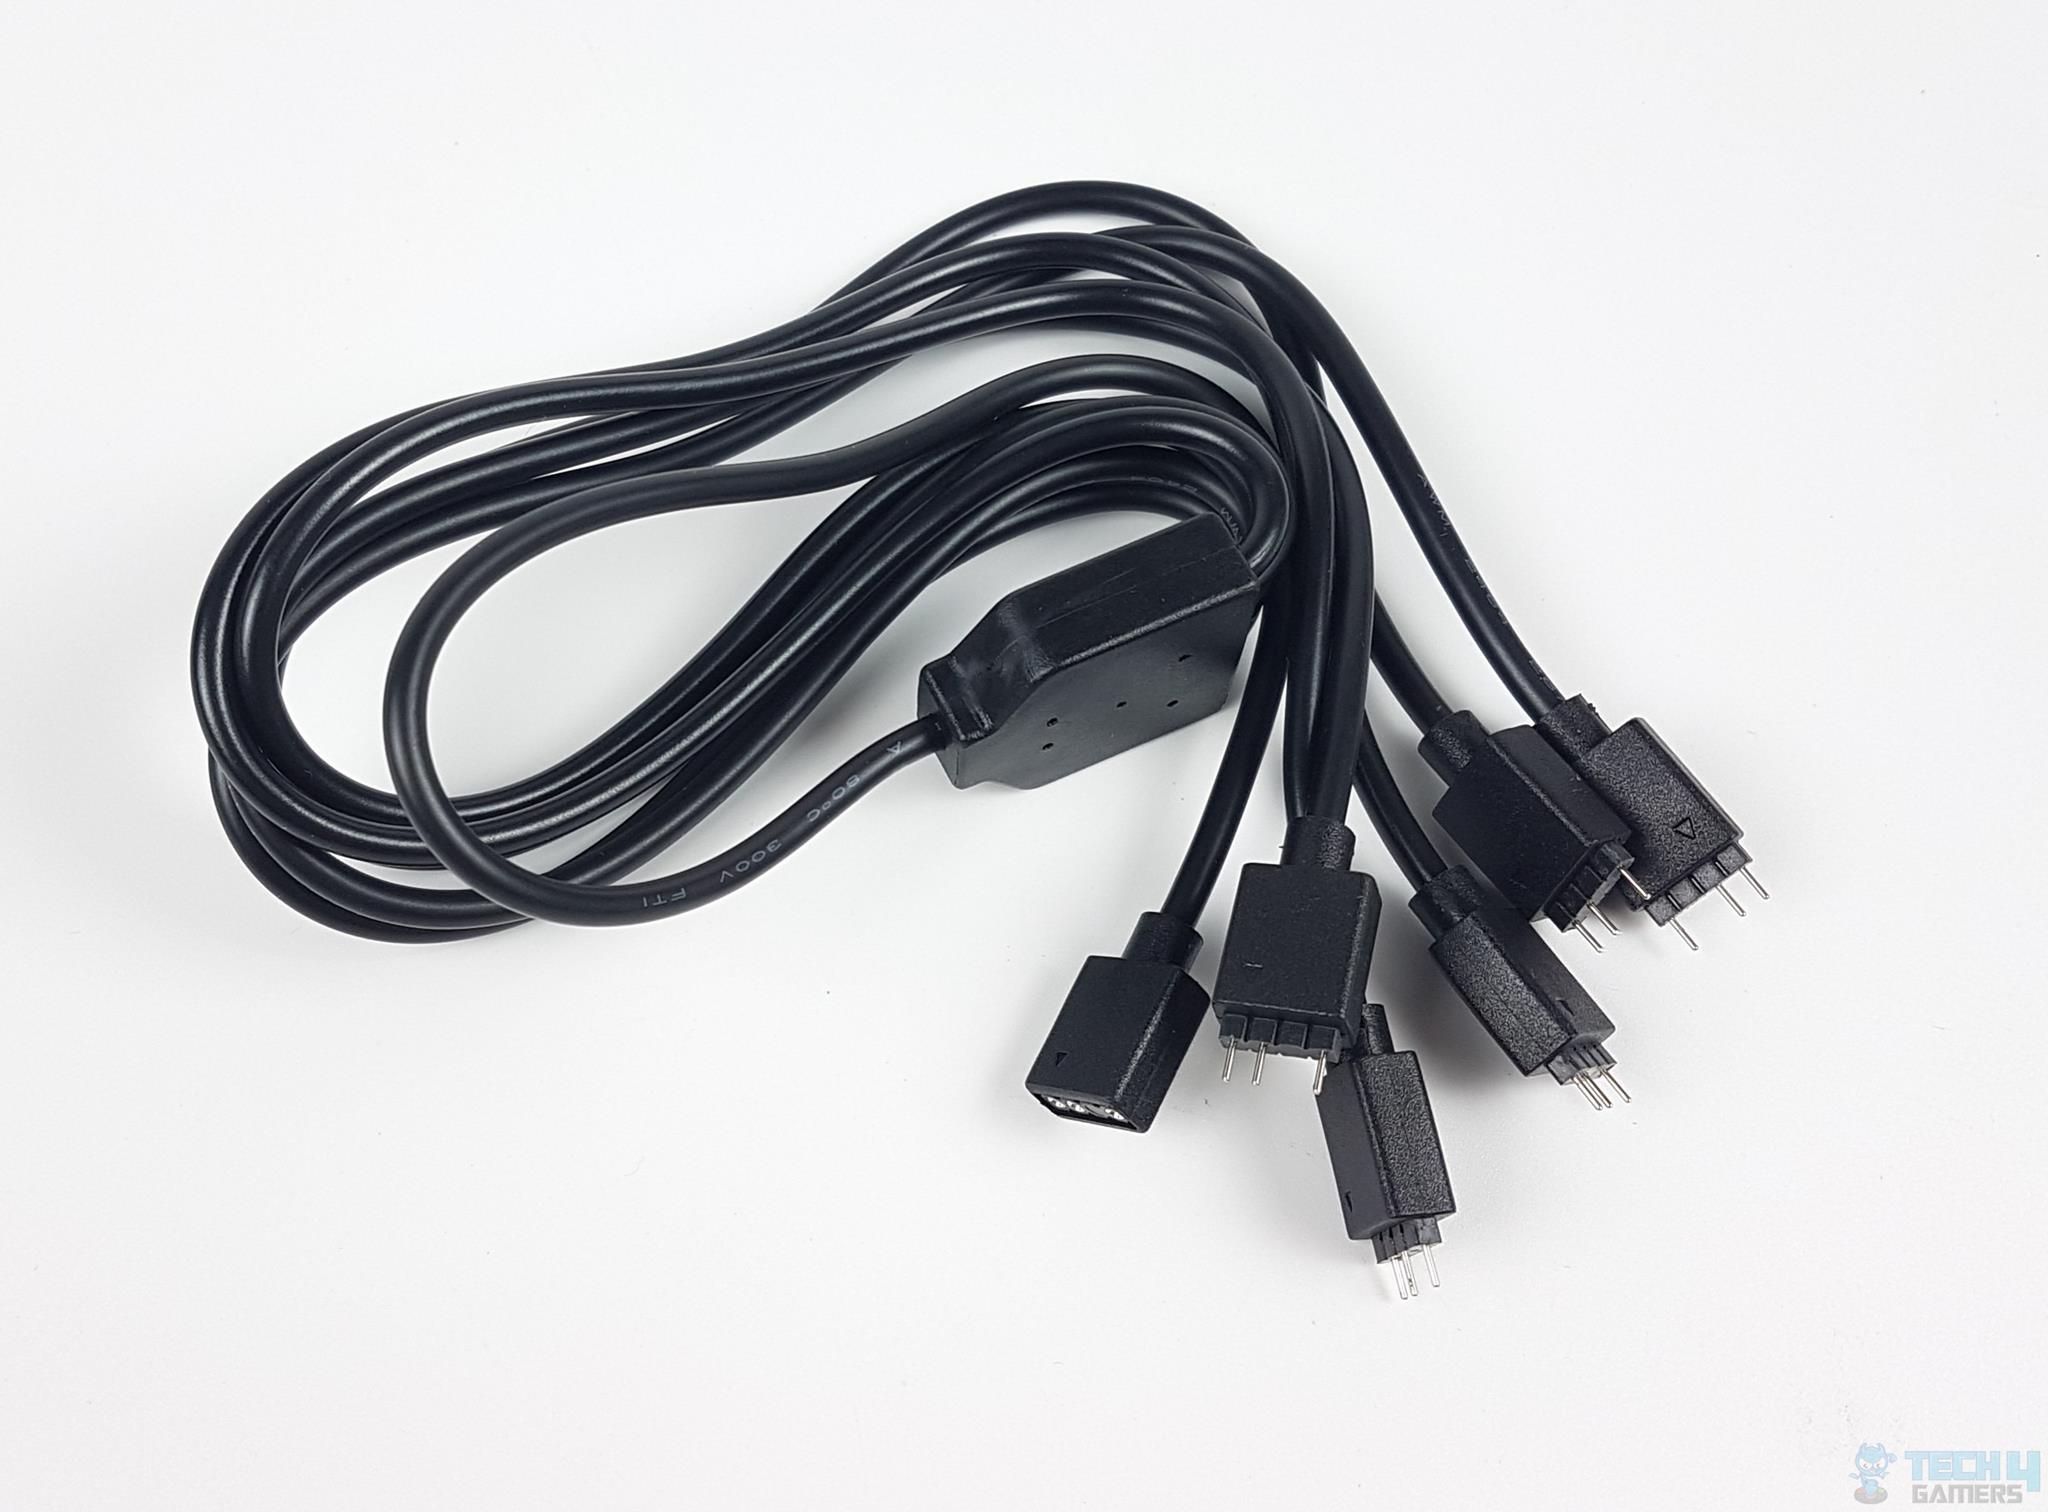
Cooler Master has provided another important cable with this cooler. It is a 5-Way RGB splitter cable. 5 cables are having standard 3-pin, 5V RGB connectors (male). The other end of this cable has a single cable with a standard 3-pin, 5V RGB female connector. The fans and the pump housing have standard 5V, 3-pin female connectors; hence, we see the same type of connectors on this splitter cable.
You can daisy-chain the fans and pump and connect a single cable to the controller or fans and pump separately to the controller. After booting in the operating system, download and install MasterPlus+ software from the Cooler Master website and customize the lighting effects. You can read more about the Addressable Gen 2 RGB Controller on the Cooler Master website by clicking here.
Cooler Master has provided covers placed over the cables interconnecting connectors to ensure the connection does not break.
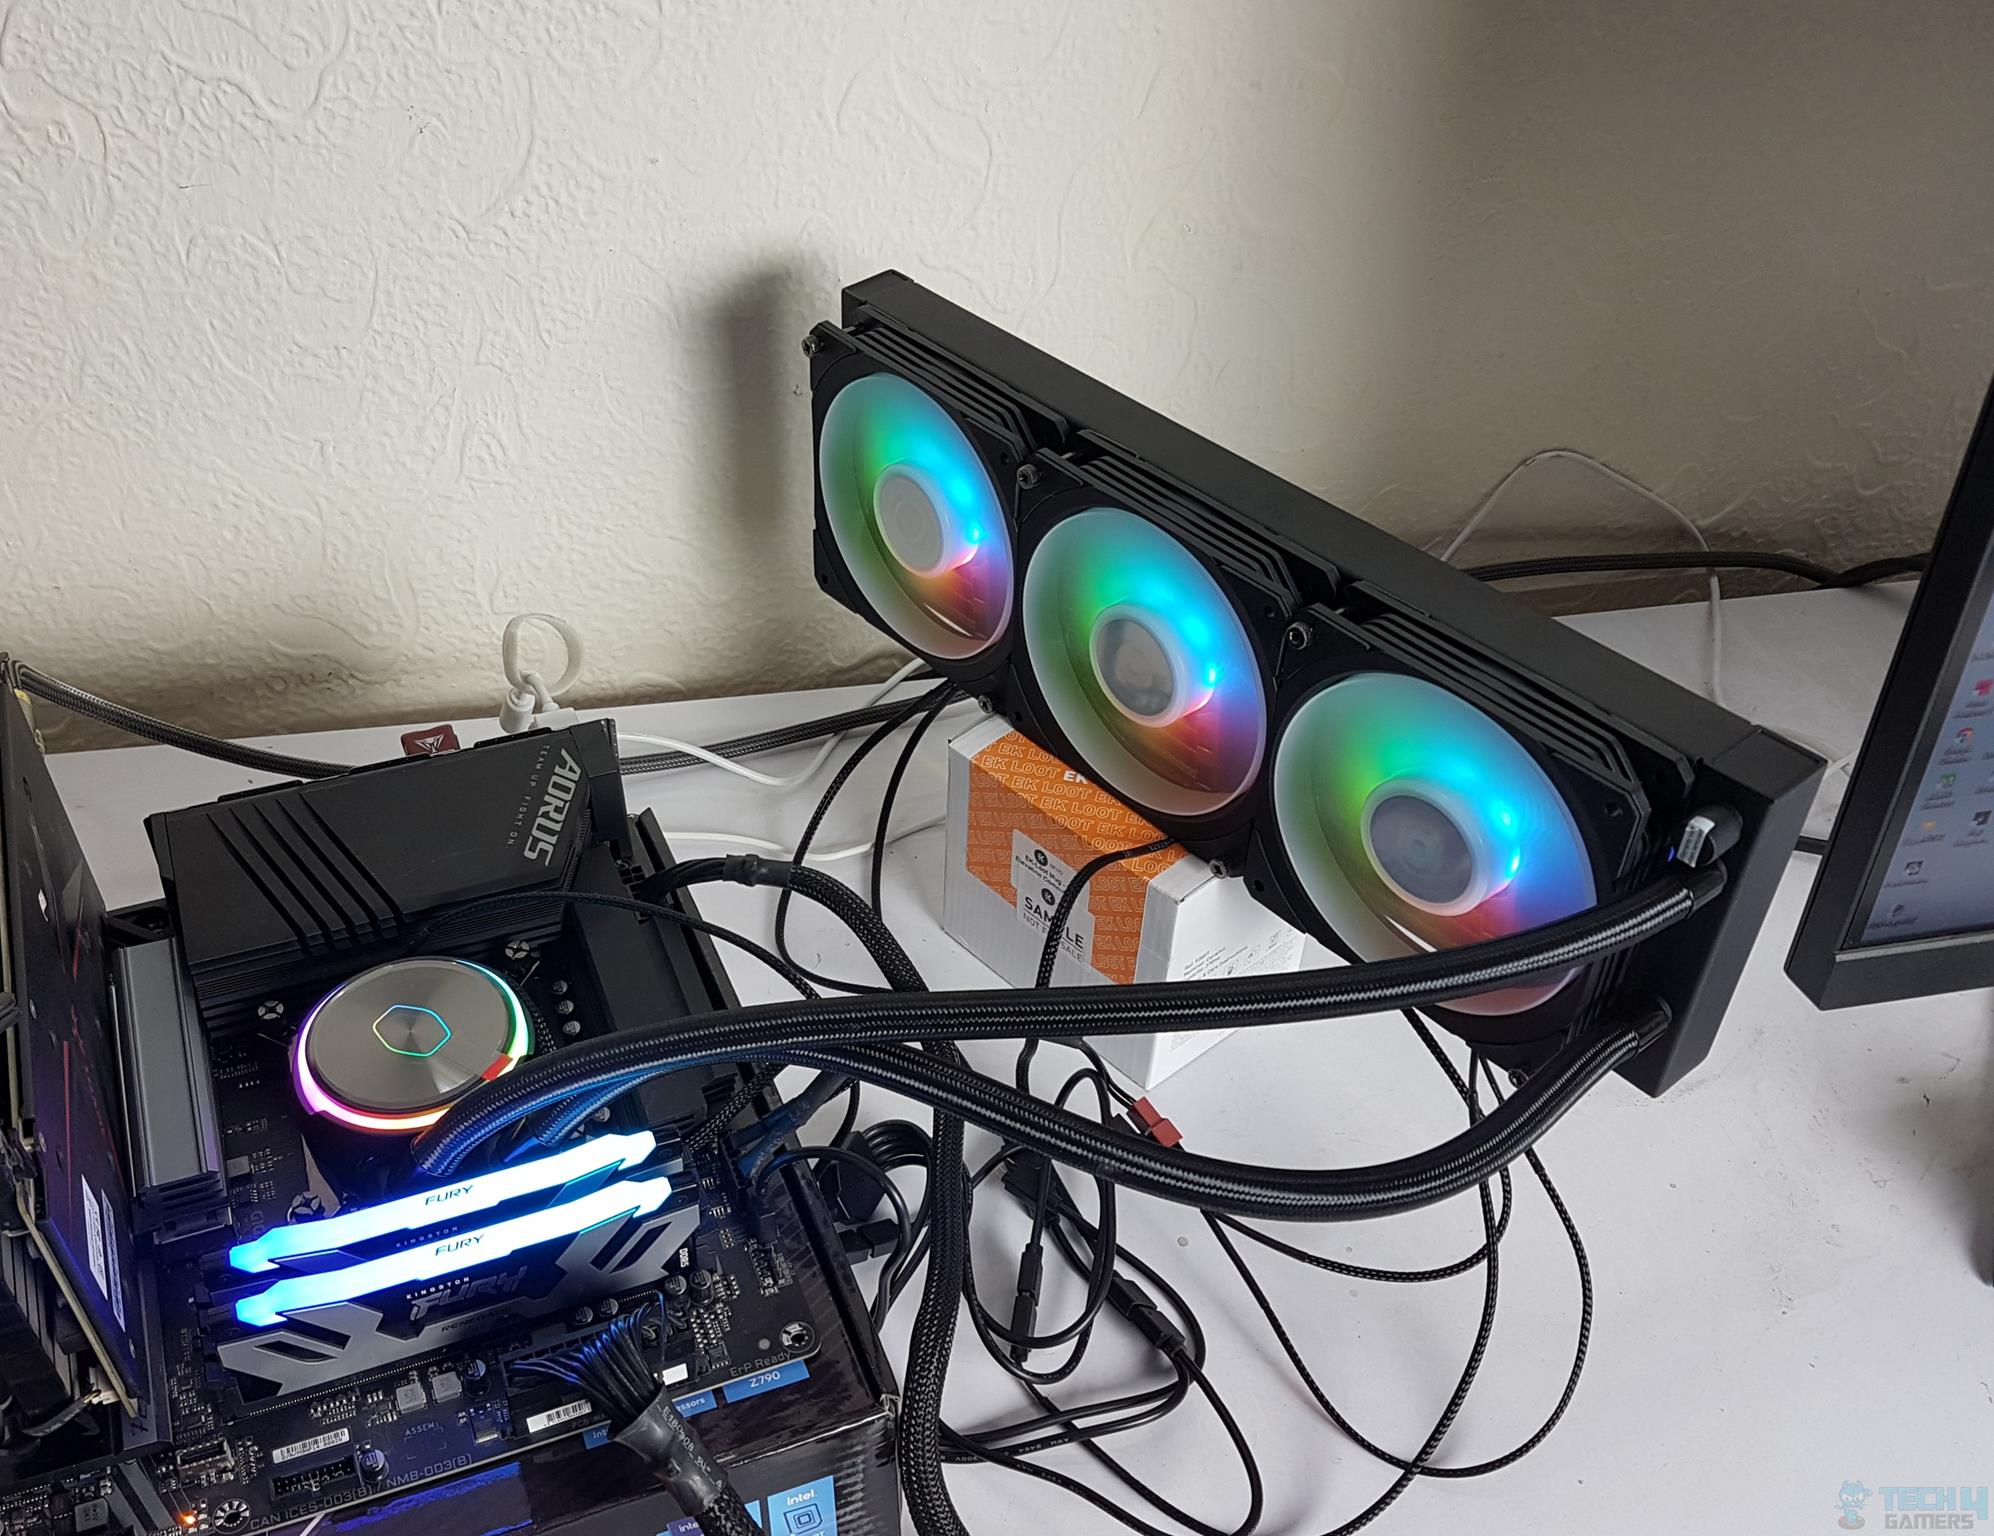
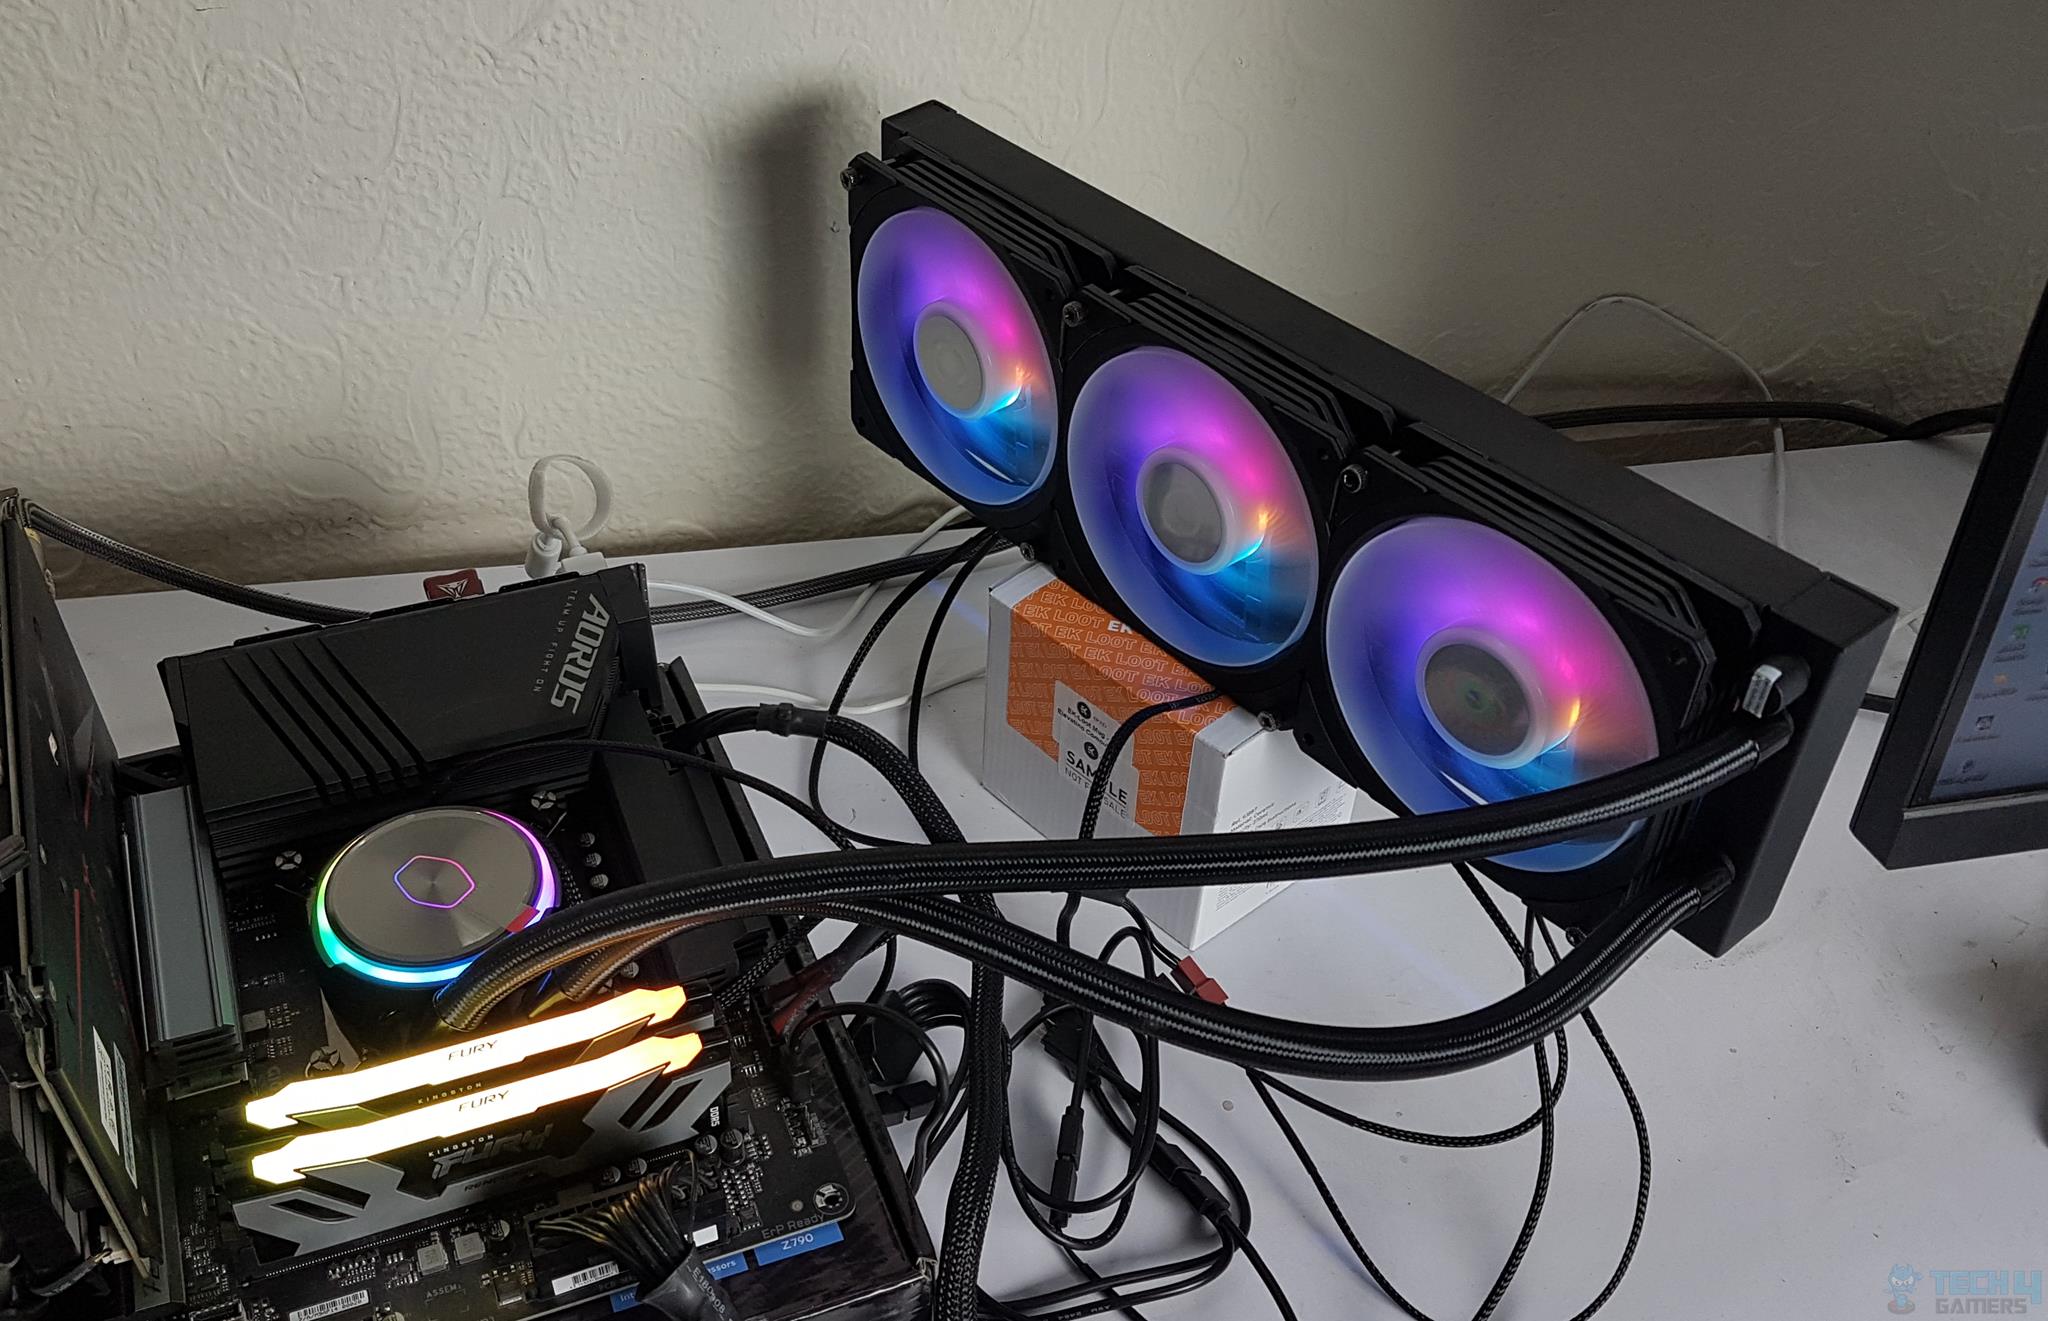
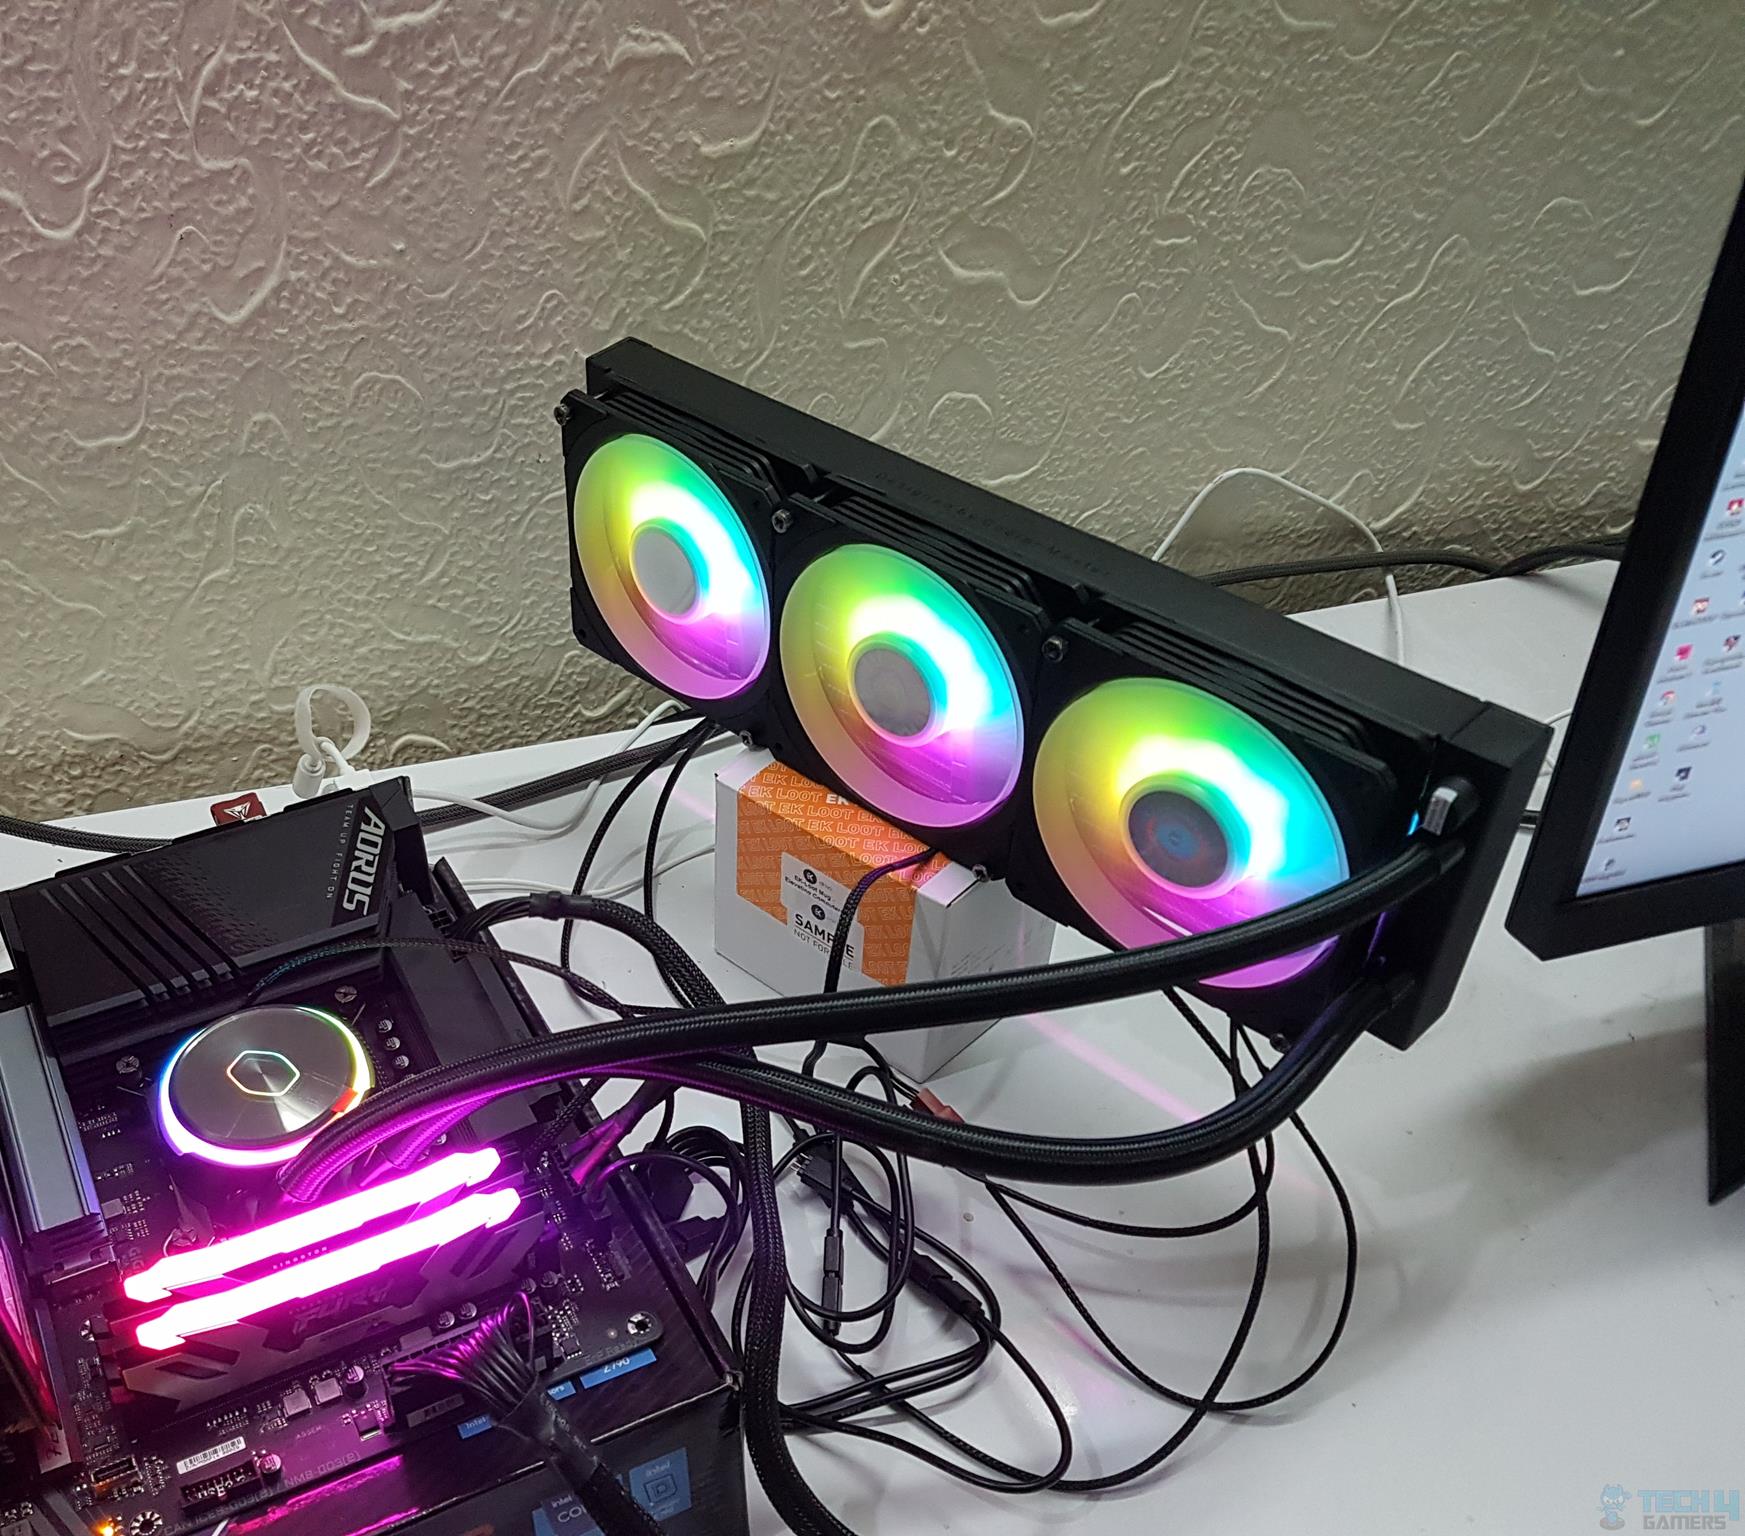
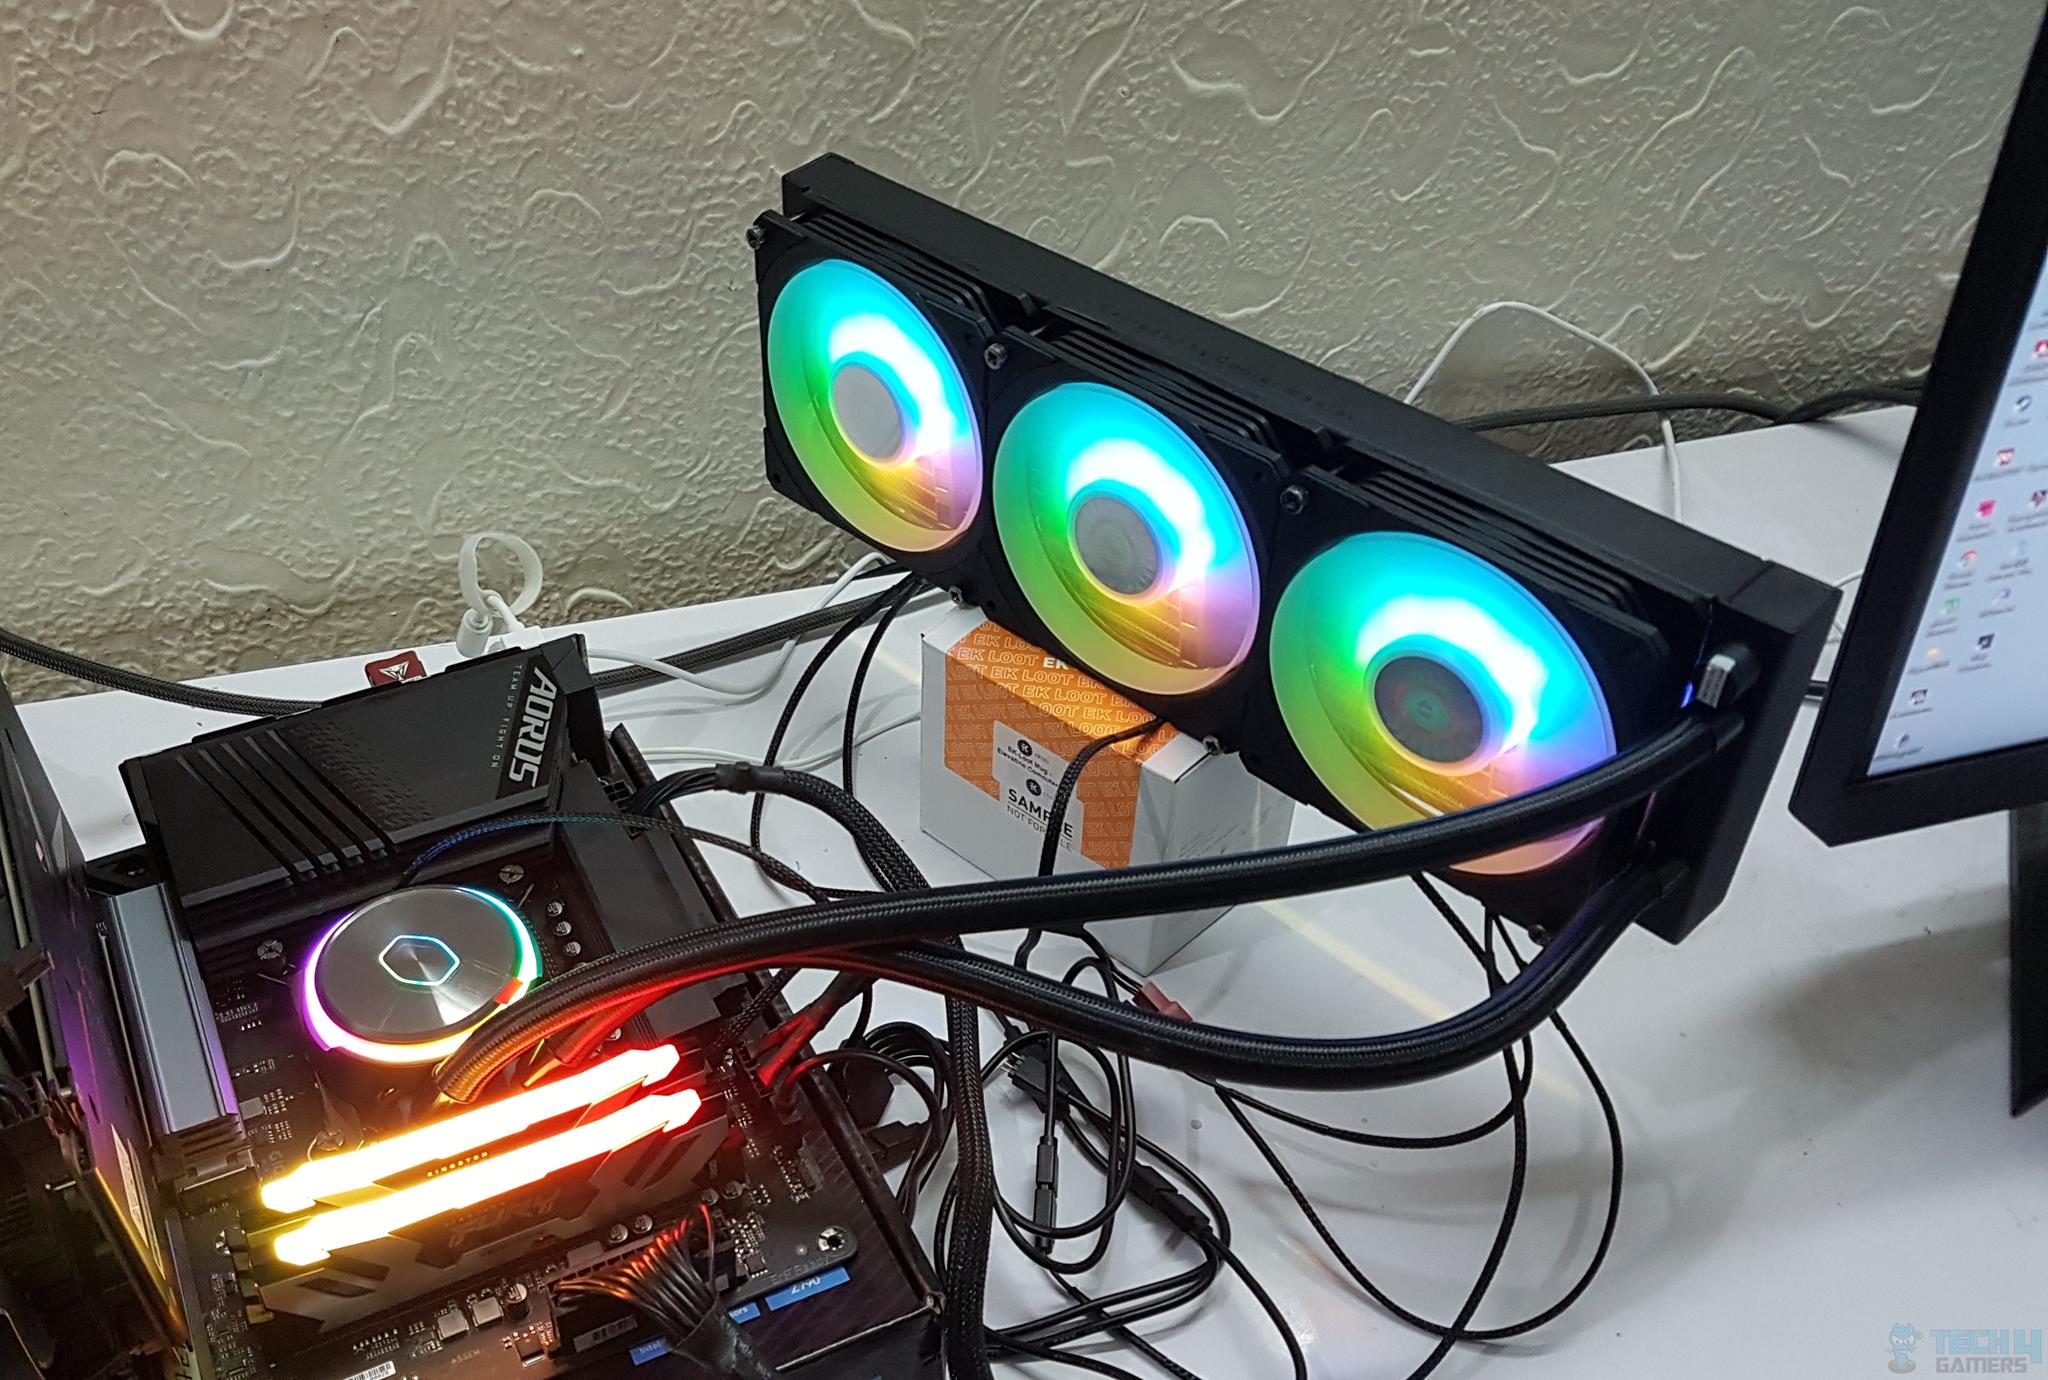
RGB Lighting
Since this cooler uses standard RGB connectors, the users can connect the daisy-chained setup to the supported motherboard or use the Cooler Master’s RGB Controller. We have used the GIGABYTE RGB FUSION 2.0 app to control the lighting and found it works like a charm. Below are some pictures.
Thermal Testing
We have used the below-mentioned configuration for this testing:
- Intel i7-13700K
- GIGABYTE Z790 AORUS ELITE AX
- T-Force Delta RGB DDR5 32GB 6000 MT/s CAS 30
- GIGABYTE GeForce RTX 3060 VISION OC [For Display]
- Sabrent Rocket 4 Plus 2TB NVMe SSD
- be quiet! Straight Power 11 850W Platinum PSU
- Thermaltake Core P6 TG Snow Edition converted into an open-frame layout
Here is the settings table for testing:
| P-Cores Clock (MHz) | Auto [5300 All Cores] |
| E-Cores Clock (MHz) | Auto [4200 All Cores] |
| Voltage (V) | Auto [Ranged between 1.27 to 1.30V] |
| C-States | Disabled |
| Speed Step | Disabled |
| Thermal Paste | [CORSAIR XTM70] |
| Thermal Paste Application | Pre-Applied Thermal Paste |
| Test Run Time | 30 minutes |
| Idle Time | 10 minutes |
| Fan Speed | 100% PWM Duty Cycle |
| Pump Speed | Full speed |
| Header | CPU_Fan Header, USB 2.0 Header |
| Stress Software | CINEBENCH R23.2 |
| Monitoring Software | HWInfo64 |
Before diving into the results, note the challenges AMD AM5 and Intel Alder Lake S CPUs pose. Both aim for max clock speeds, hitting immediate thermal limits. Testing CPU coolers has shifted to sustaining specific clocks under load, not just traditional thermal comparisons. We report absolute temperatures in an open-air bench at 30°C to 31°C ambient. Keep in mind actual chassis temperatures may differ.
Let’s take a look at the results.
Results
This test was done using Intel’s default settings with power limits imposed. The CPU drew roughly 225W power, which is a 220W domain result.
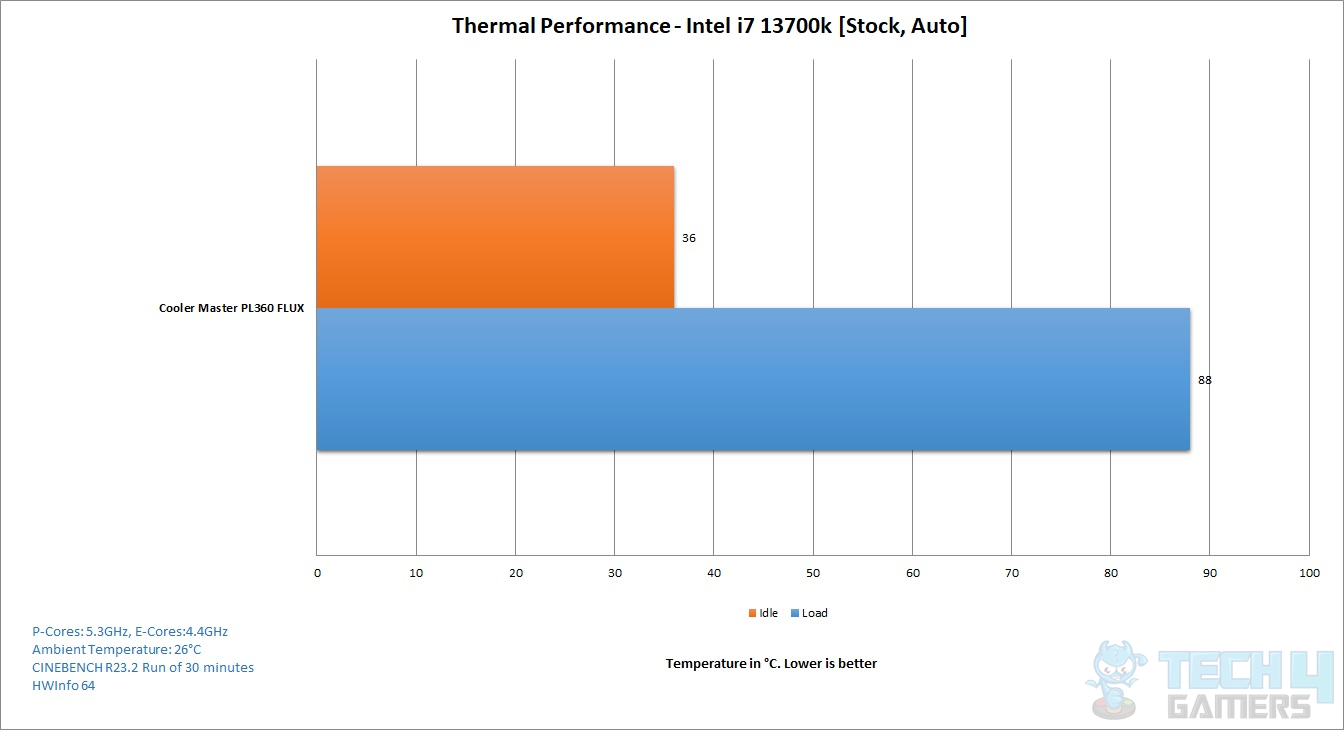
The maximum temperature under heavy workload was 88°C. There is no other cooler in the graph due to different thermal pastes used for testing since we have used supplied thermal paste. Usually, we use Noctua NT-H1 thermal paste. This cooler’s performance is nice, maintaining 88°C under synthetic multi-core heavy load.
Noise
Per our sound meter, these fans made 53 dB(A) sound output at an ambient sound level of 33dB(A).
Should You Buy It?
Buy It If:
✅ You demand High-performance cooling: If you’re an enthusiast or gamer pushing your system to the limits, this liquid cooler with a 360mm radiator offers efficient heat dissipation, making it suitable for overclocked CPUs or demanding workloads.
✅ You prefer Low noise levels: For users who prioritize a quiet computing environment, the Cooler Master MASTERLIQUID PL360 FLUX features a noise-reducing pump design and high-quality fans, ensuring effective cooling without significantly increasing system noise.
✅ You value sleek aesthetics: If your setup emphasizes aesthetics, the cooler’s RGB lighting, sleek design, and customizable colors make it an attractive addition. It keeps temperatures in check and adds a visually appealing touch to your system.
Don’t Buy It If:
❌ You have limited space: If your PC case has limited space for a larger cooling solution, the 360mm radiator might be overkill. Ensure your case can accommodate this cooler without causing installation or fitment issues.
❌ You operate a Low-Power system: For users with low-power systems or those not engaging in resource-intensive tasks, investing in a high-performance liquid cooler like the PL360 FLUX might be unnecessary. A simpler air-cooling solution could suffice.
❌ You are Budget-Conscious: If you’re on a tight budget and don’t require the advanced cooling capabilities or aesthetic enhancements this liquid cooler offers, more budget-friendly air cooling options provide sufficient cooling for standard usage without the added cost.
Conclusion
Having experienced Cooler Master’s PL360 FLUX liquid cooler firsthand, the 360mm version proves its mettle with premium performance, boasting a dual-chamber pump design and a low-profile aluminum radiator with a dense fin stack.
The cooler, compatible with Intel and AMD sockets, comes with all essential mounting hardware, featuring a dual-loop ARGB pump, Flux Series fan, and RGB backlighting on the pump housing. The dual-chamber design maximizes coolant flow, while precision-engineered spaded fins and an enlarged copper base enhance heat transfer.
Three Flux series 120mm fans with addressable Second Gen RGB lighting ensure reliable, high-speed operation and increased air pressure for superior cooling. For a simplified cable management experience, Cooler Master streamlines the Addressable RGB 2nd Gen controller setup, powered by SATA and connected via micro USB to the motherboard’s USB 2.0 header. Access controls for fans, pumps, and RGB through the MasterPlus+ software.
Installation on the Intel LGA1700 socket is straightforward, requiring just 11 items. Priced at USD 169 with a 5-year warranty, the PL360 FLUX impressively balances cost, features, and performance. Its allure is further heightened by captivating digital RGB lighting effects, making it stand out, particularly on new platforms where traditional testing approaches face challenges.
Recent Updates
- January 14, 2024: A few text changes to improve readability. Also added image galleries.
Thank you! Please share your positive feedback. 🔋
How could we improve this post? Please Help us. 😔
[Hardware Reviewer & Editor]
Meet Nauman Siddique, a highly experienced computer science graduate with more than 15 years of knowledge in technology. Nauman is an expert in the field known for his deep understanding of computer hardware.
As a tech tester, insightful reviewer, and skilled hardware editor, Nauman carefully breaks down important parts like motherboards, graphics cards, processors, PC cases, CPU coolers, and more.
- 15+ years of PC Building Experience
- 10+ years of first-hand knowledge of technology
- 7+ years of doing in-depth testing of PC Hardware
- A motivated individual with a keen interest in tech testing from multiple angles.
- I majored in Computer Science with a Masters in Marketing
- Previously worked at eXputer, EnosTech, and Appuals.
- Completed Course in Computer Systems Specialization From Illinois Tech
Get In Touch: nauman@tech4gamers.com


