 Threads
Best Value Air Cooler?
Review Summary
The Cooler Master MasterAir MA620P impresses with its dual tower design, RGB customization, and reasonable pricing, making it a solid choice for users seeking a balance between performance and aesthetics. Ideal for mid-level overclocking and lower TDP chips, it may not suit compact builds or extreme overclocking enthusiasts. Overall, the MA620P stands out as a value-packed cooling solution, offering a commendable blend of functionality and visual appeal.

Overall
-
Performance - 8/10
8/10
-
Value - 9/10
9/10
-
Features - 8.5/10
8.5/10
-
Build Quality - 9/10
9/10
Pros
- Performance
- RGB customization
- Value for money
- Dual tower design
- Good compatibility
Cons
- Can have clearance issues
- Tricky installation
- Not meant for overclocking


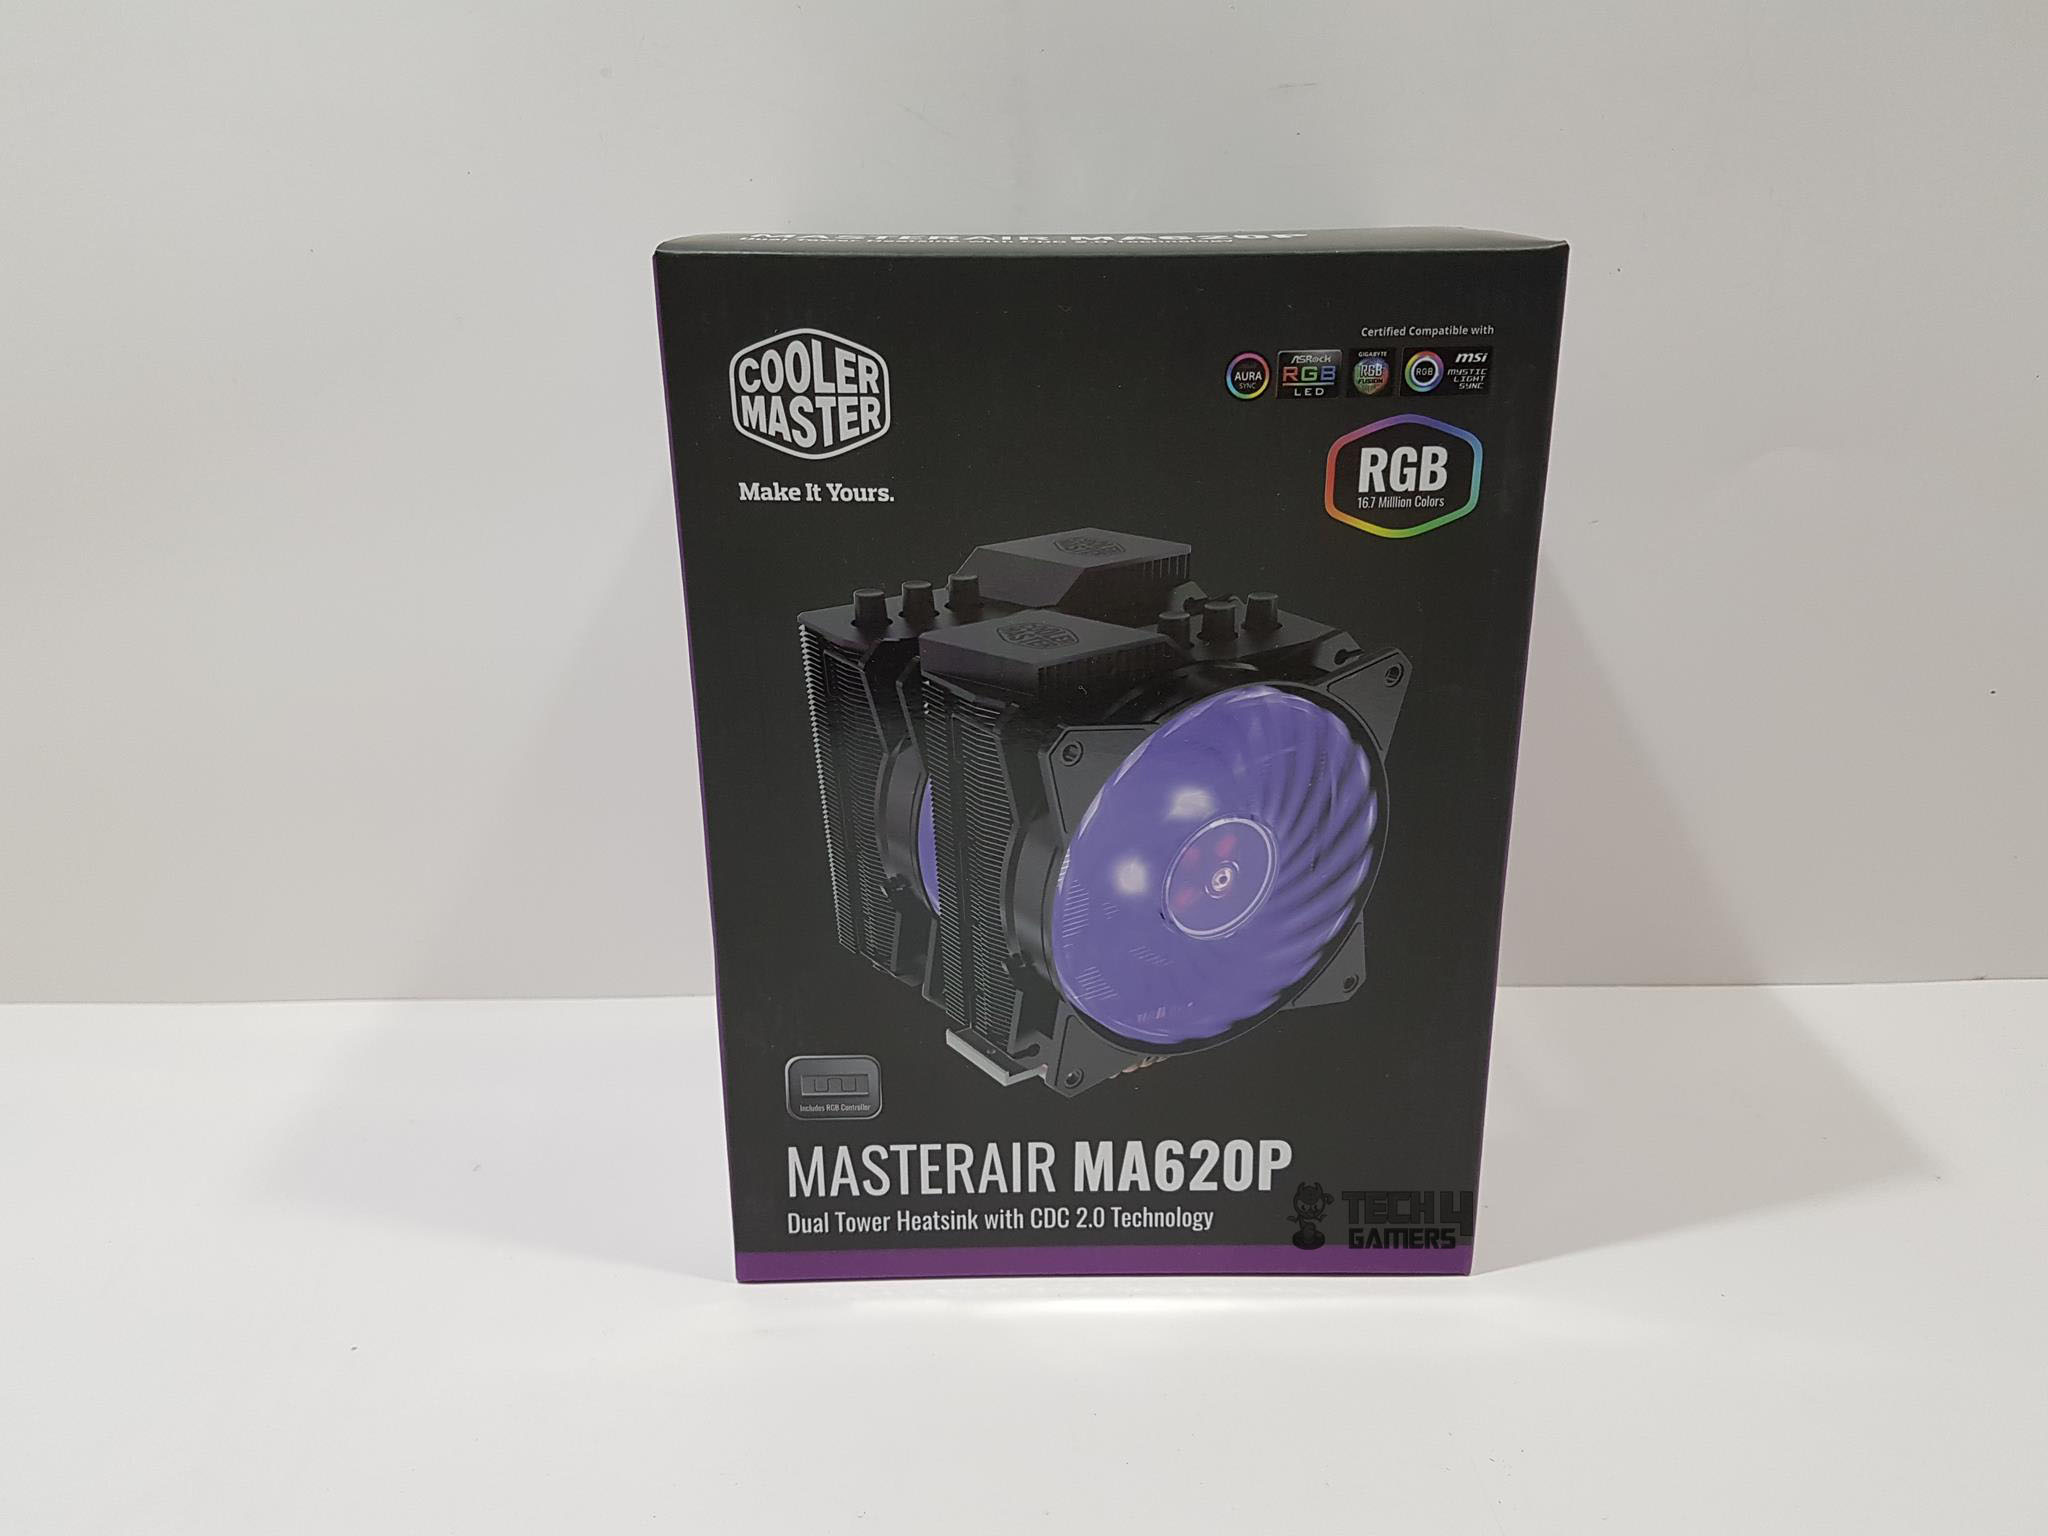
Cooler Master has sent for Cooler Master MA620P Review. This is a dual tower configuration in 120mm sizing. The cooler comes with two MF 120mm RGB fans featuring 16.7M colors and 6 lighting modes. They are fully compatible with the leading motherboard manufacturers’ onboard lighting solutions.
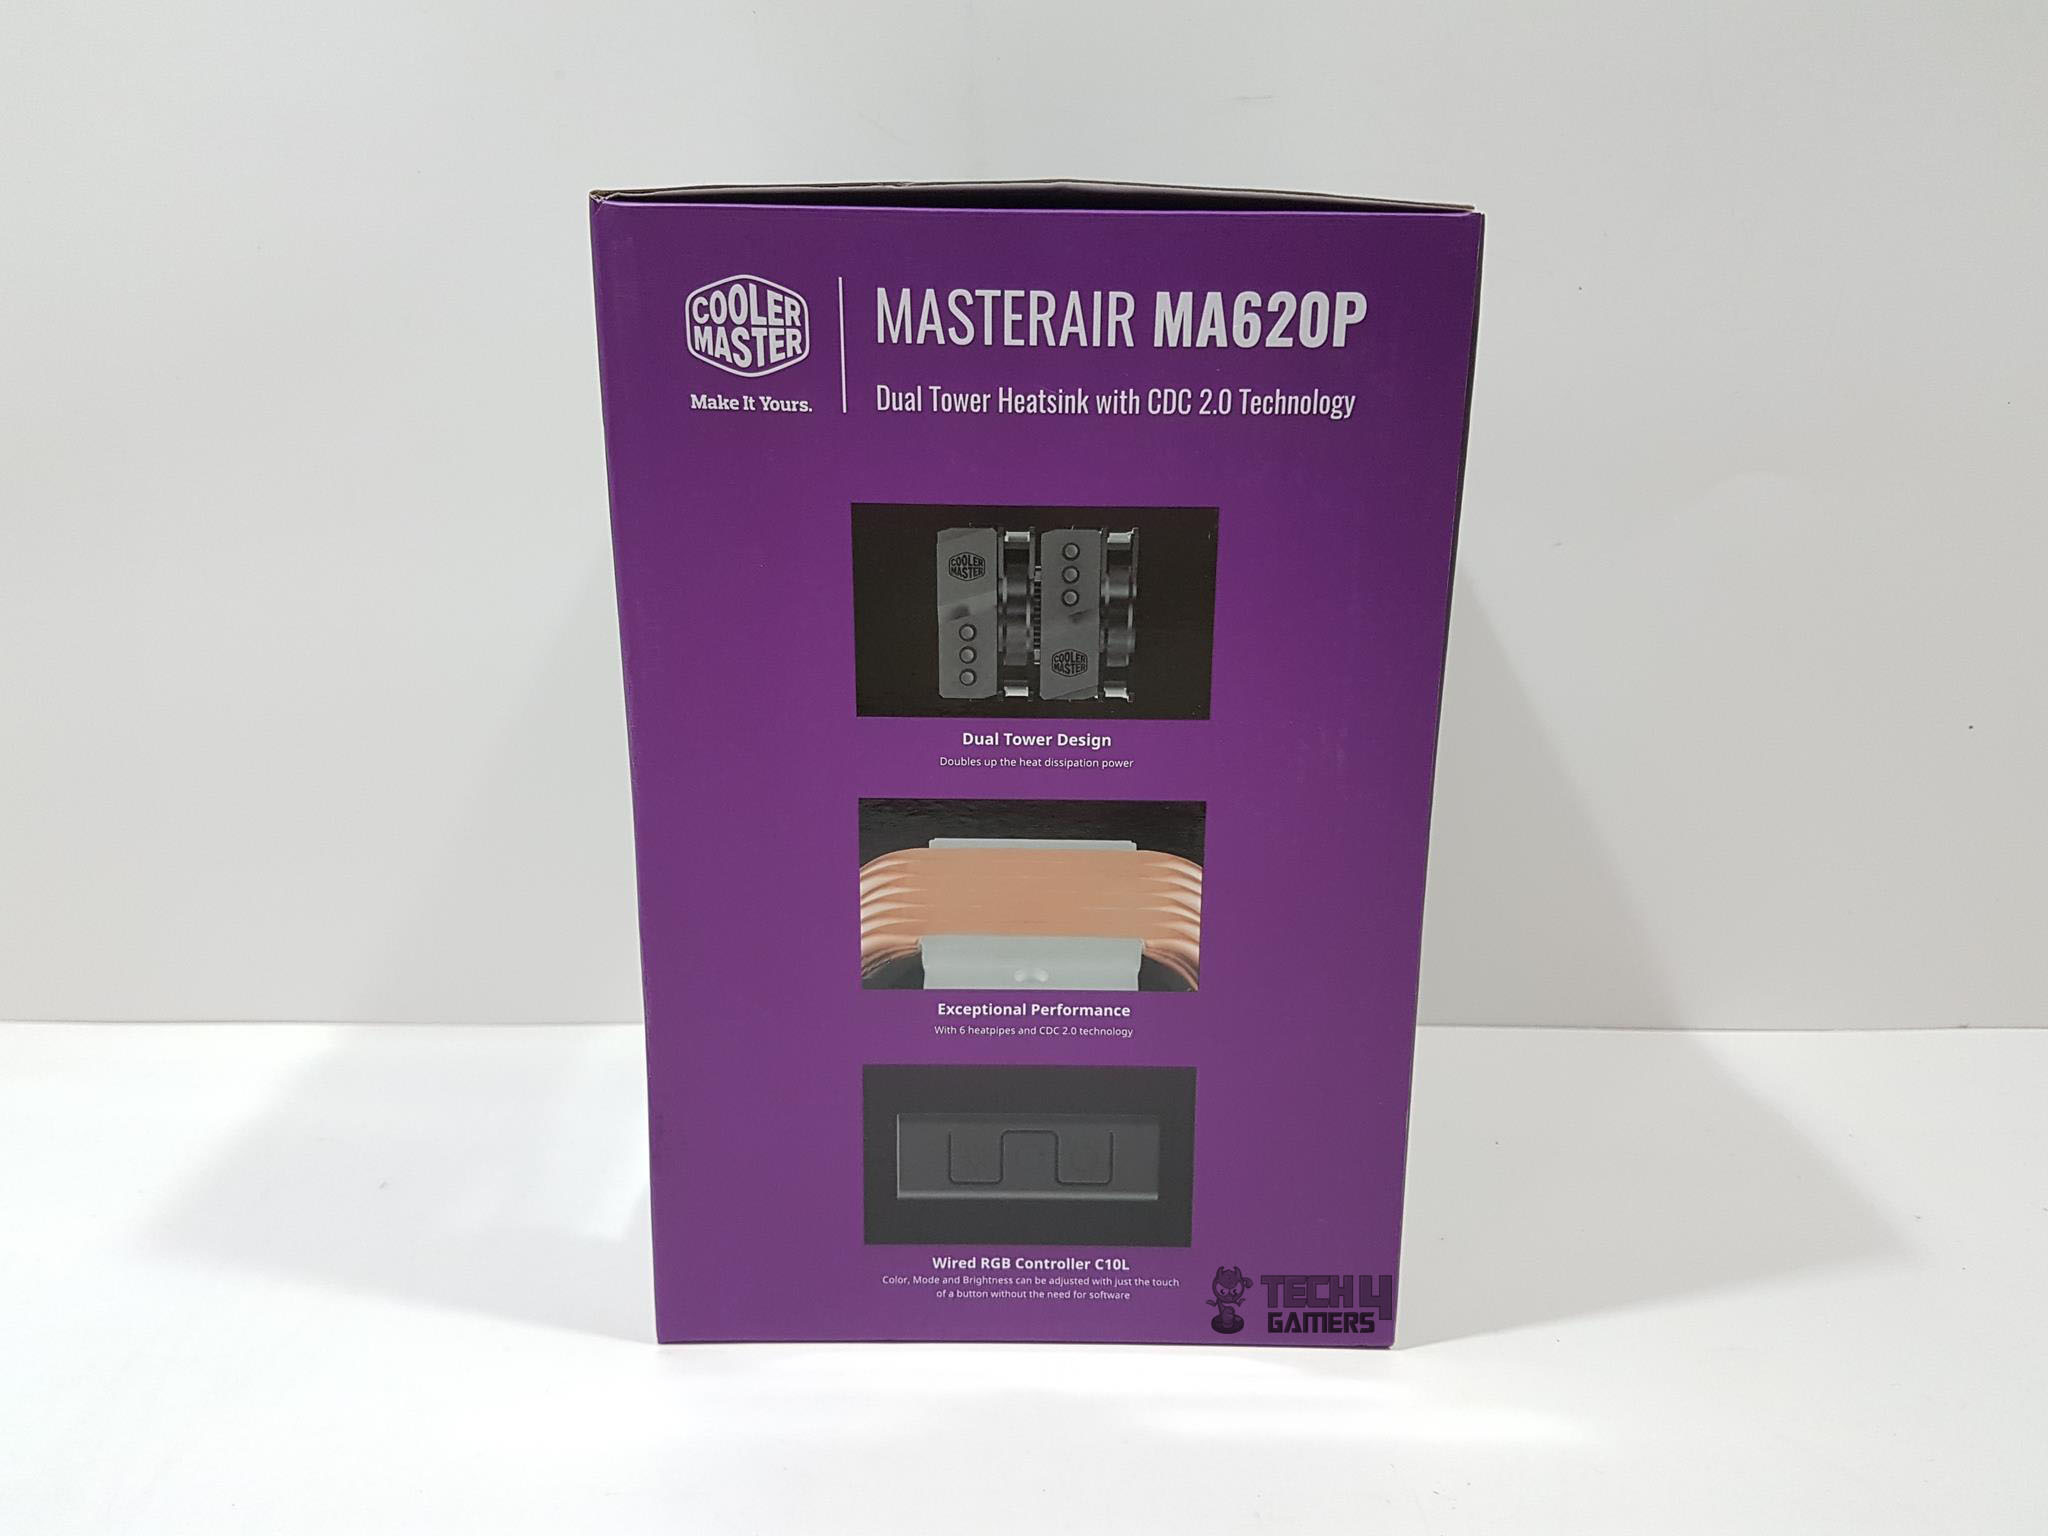
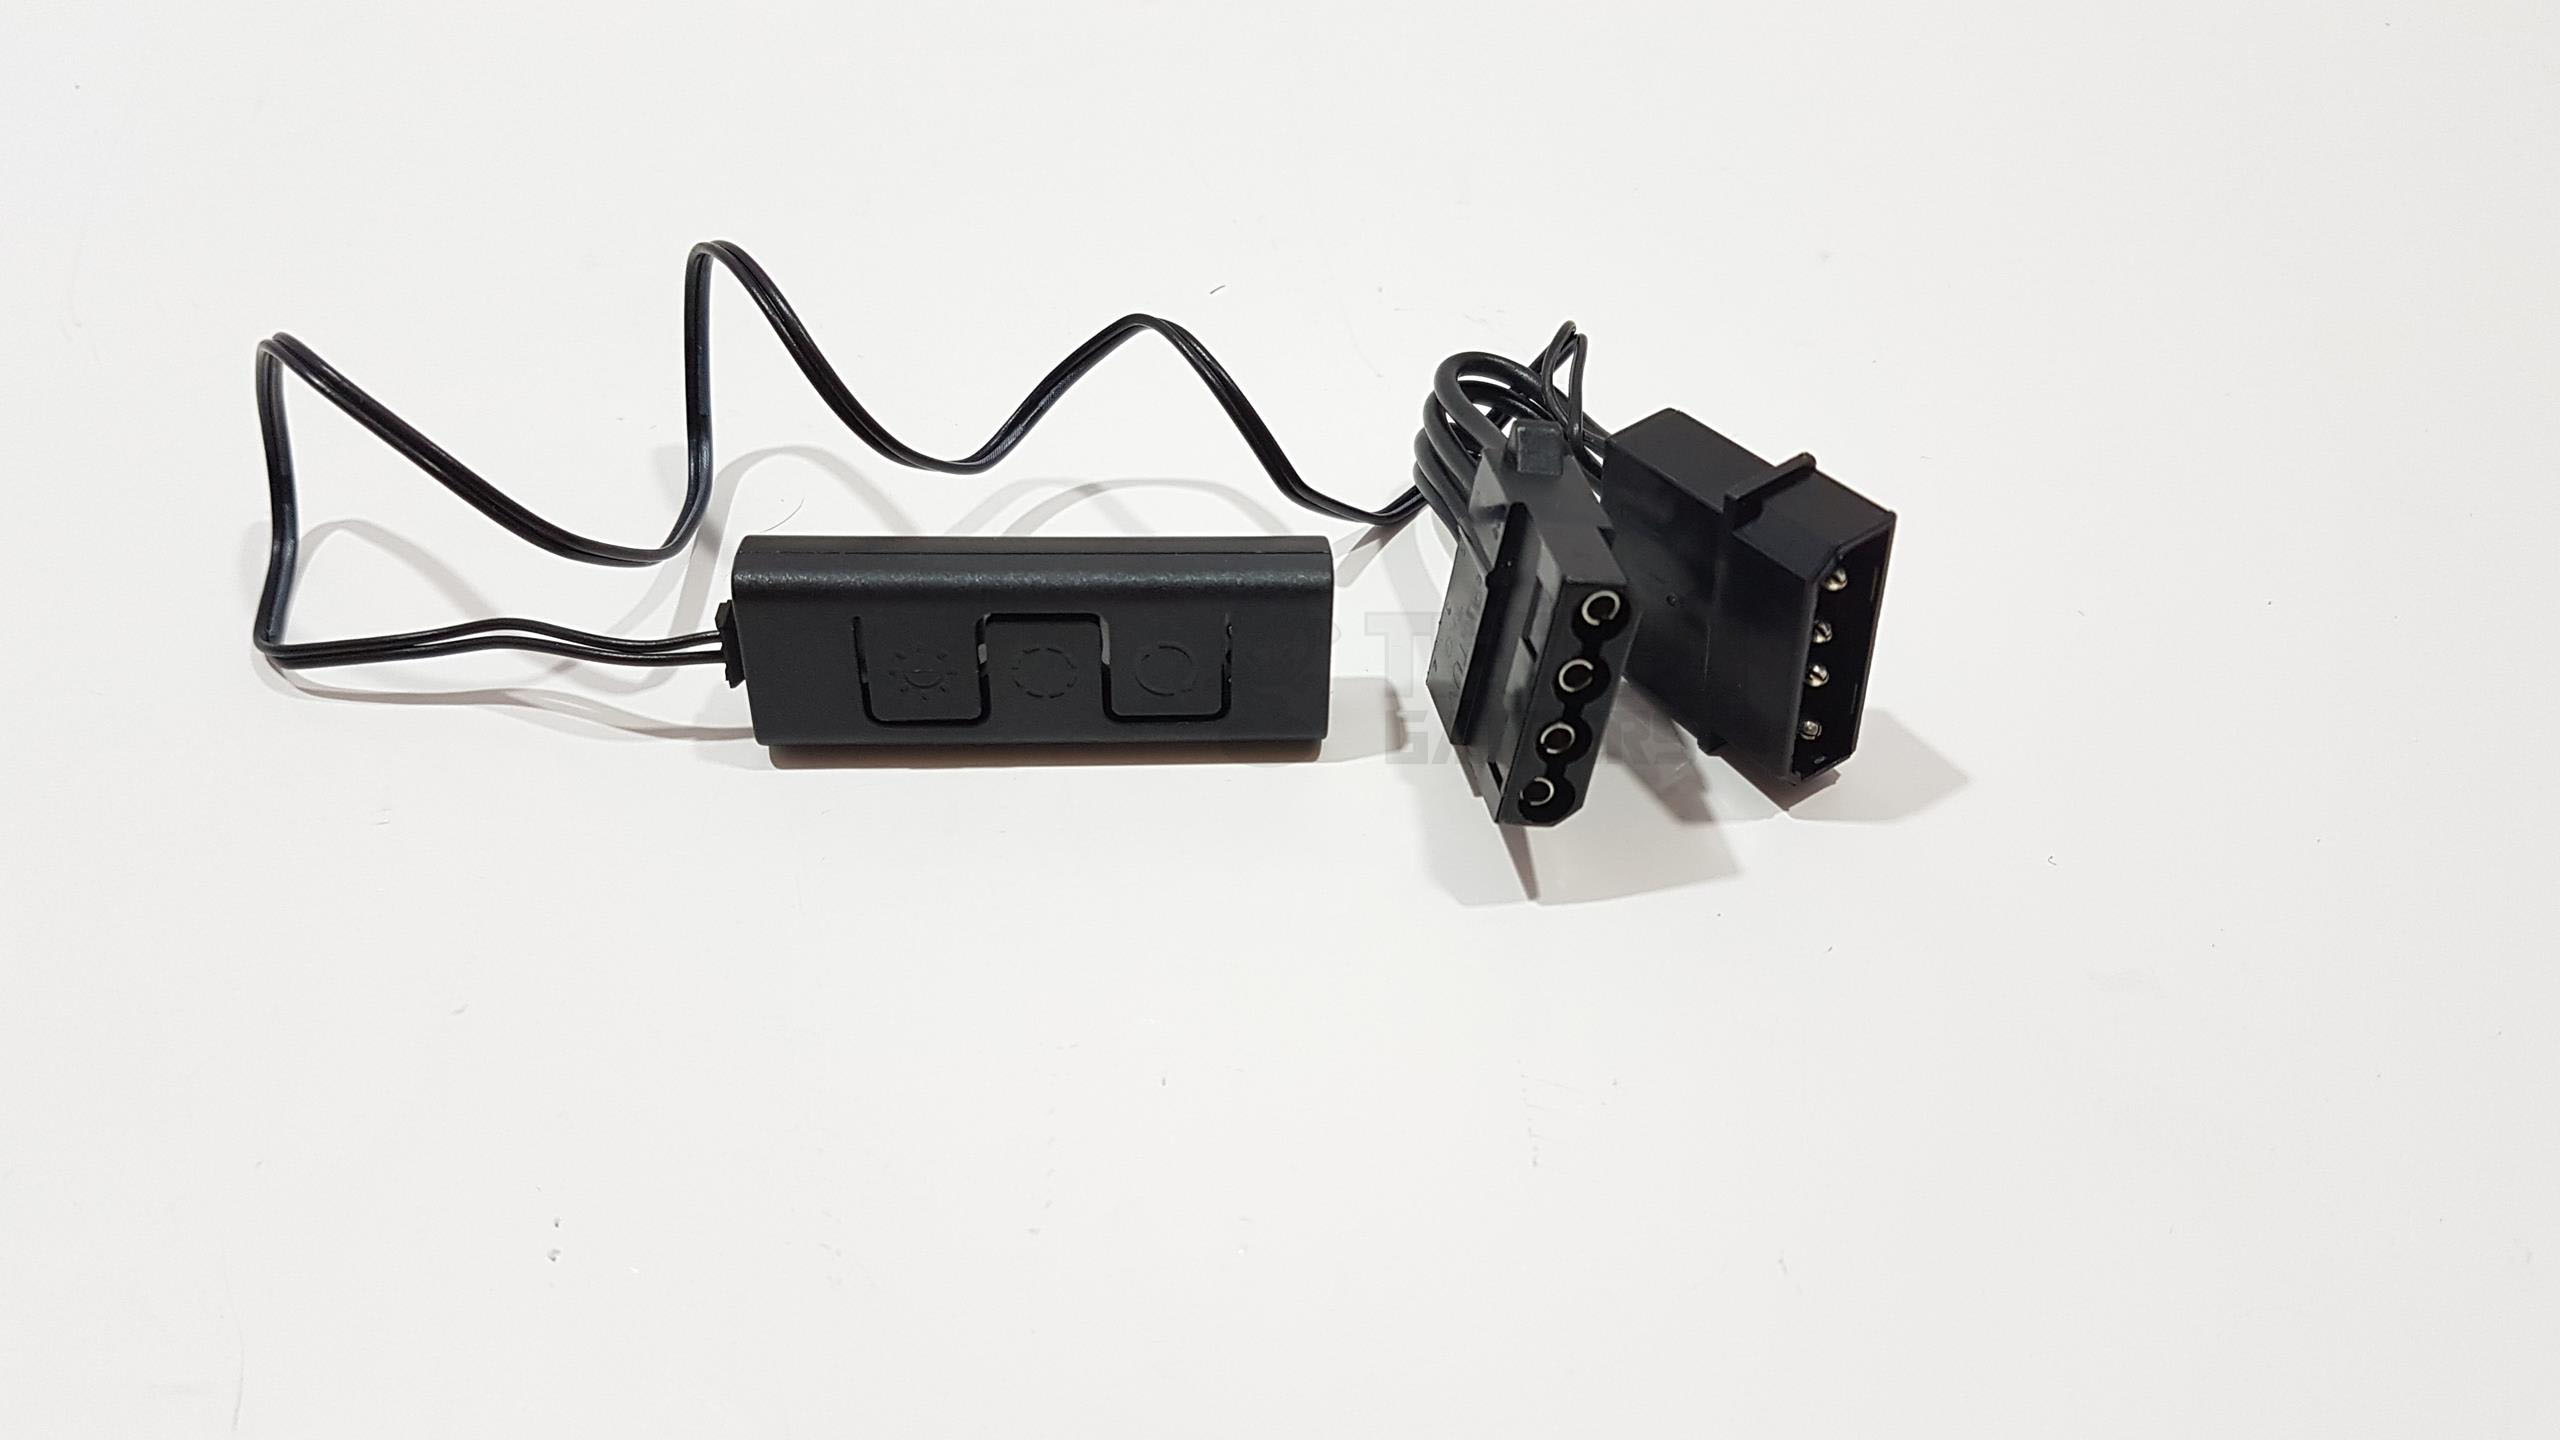
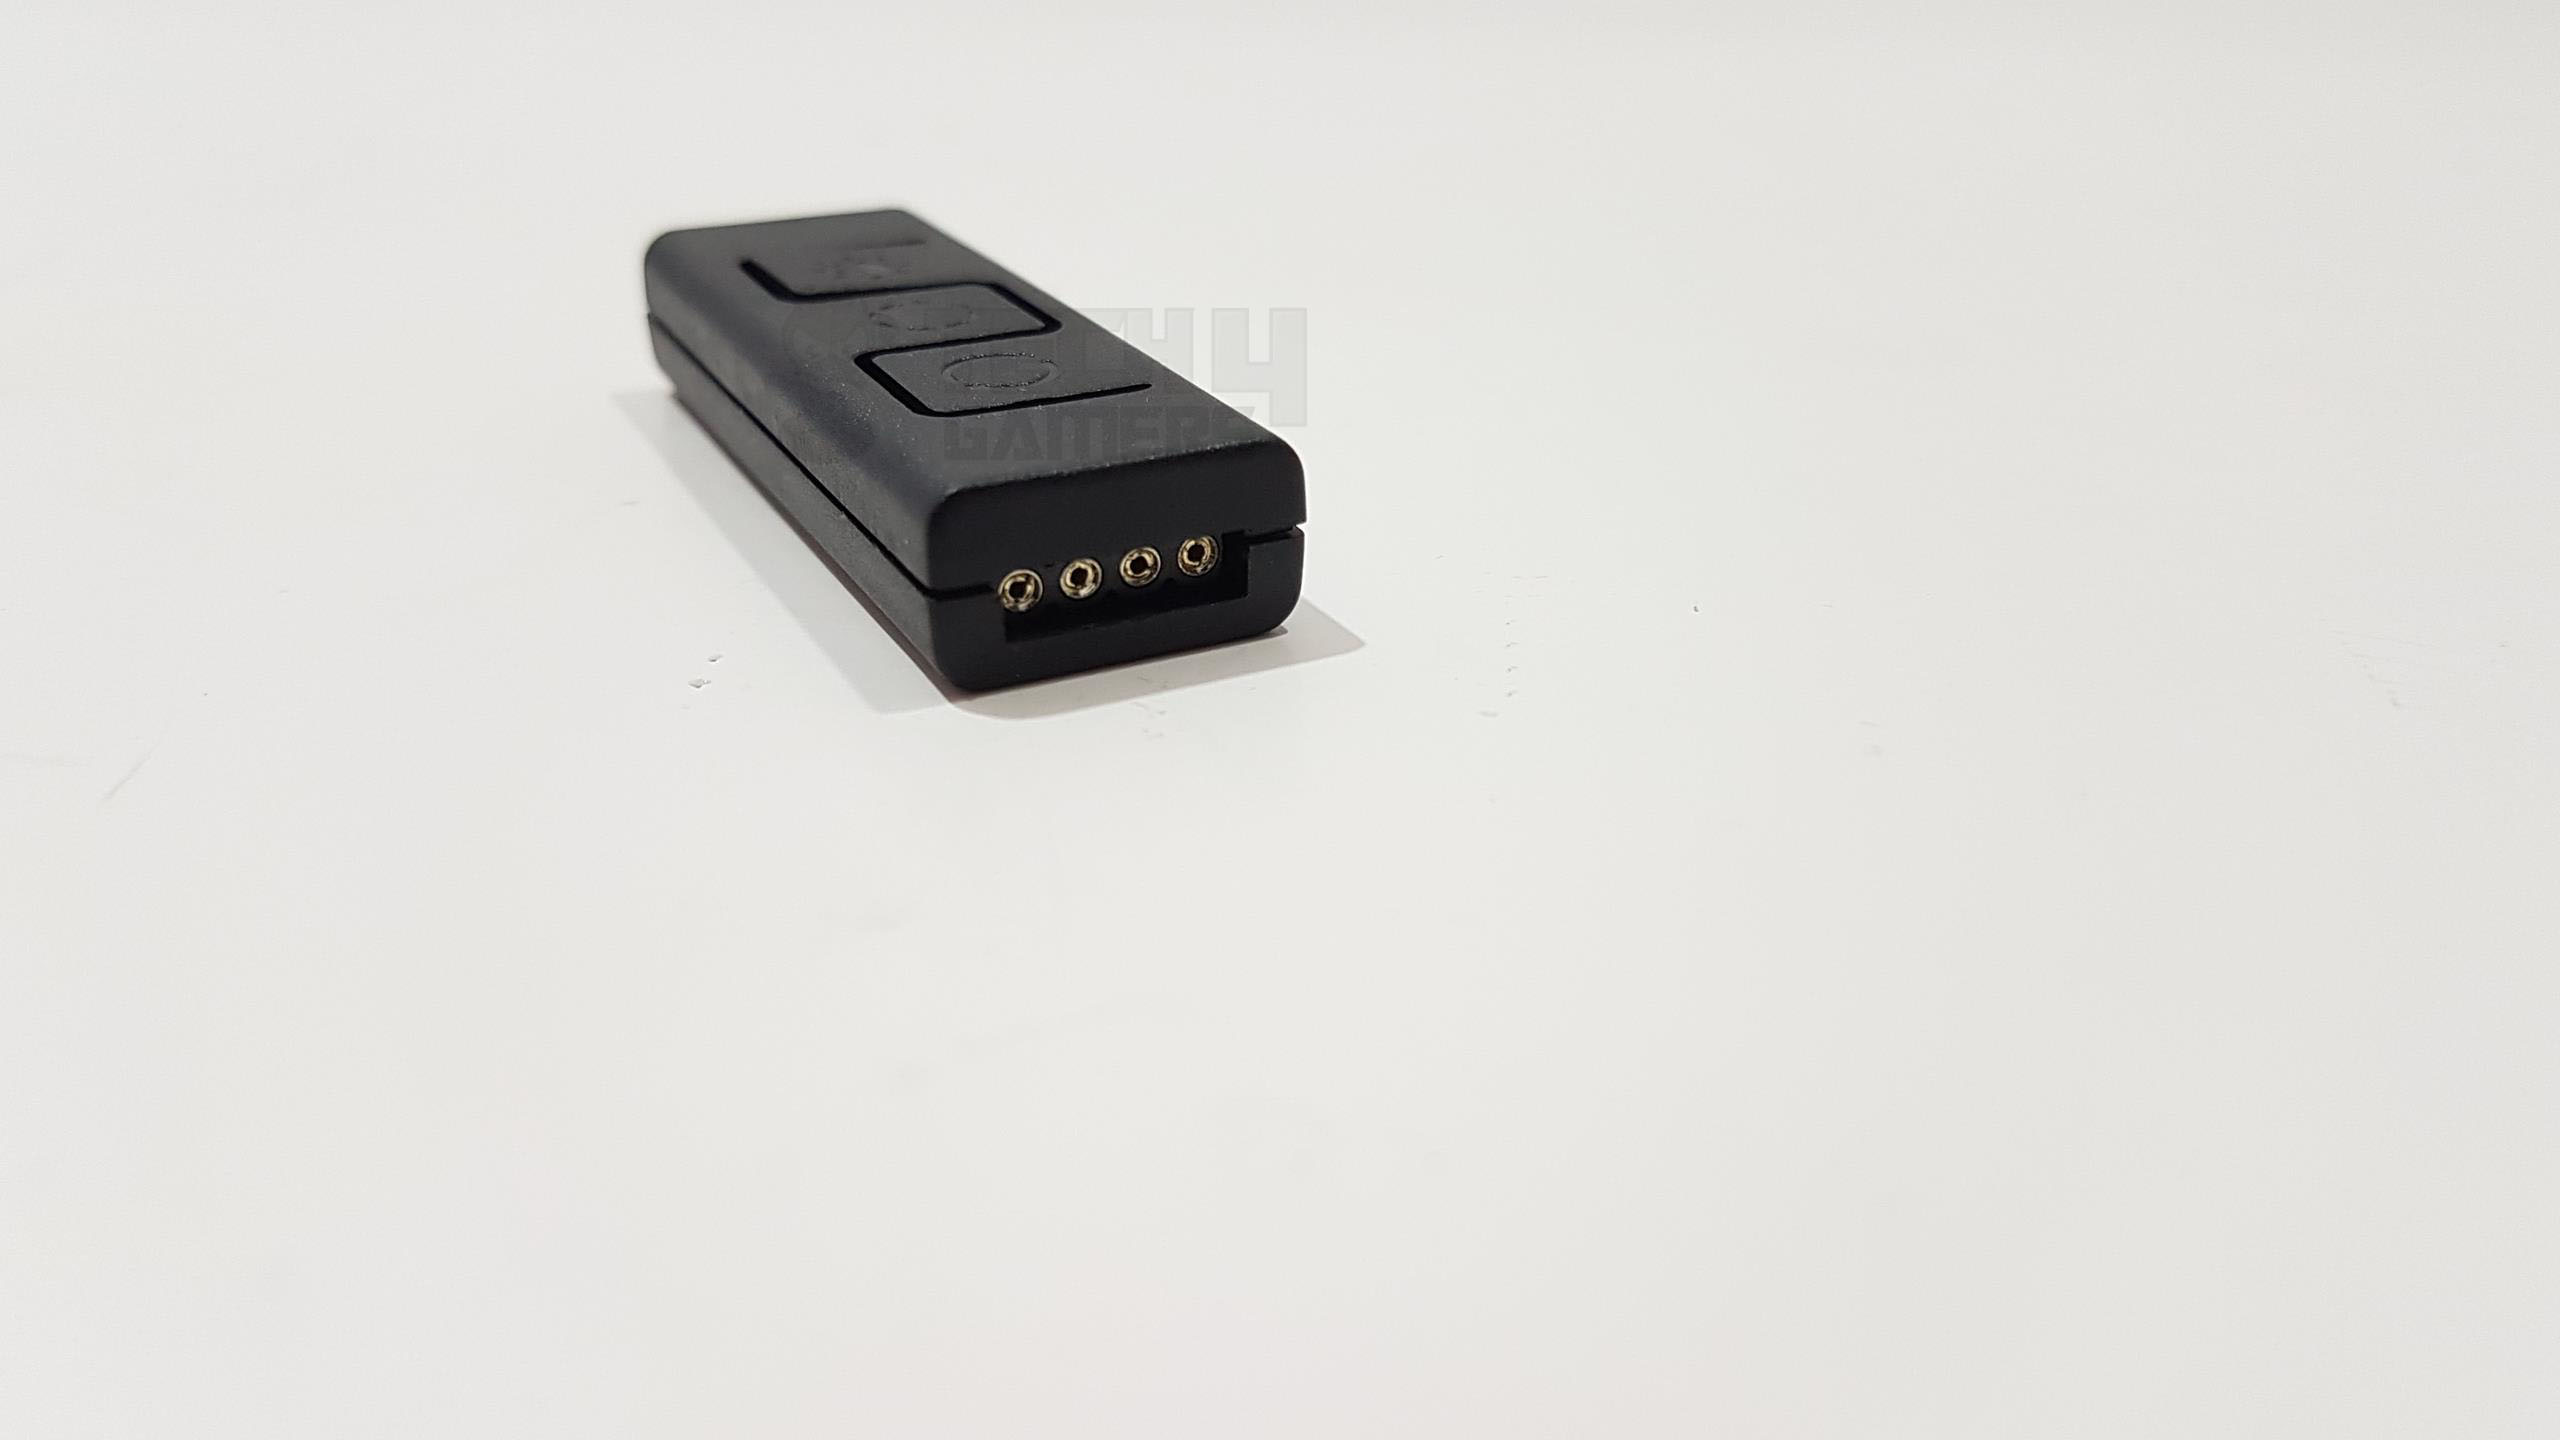
Cooler Master was thoughtful enough to include a dedicated lighting controller that would allow the users who don’t have lighting headers on their motherboards to use the full RGB lighting functionality on these fans. The cooler has a provision for an additional 120mm fan for 3 fans configuration should a user want that much of a cooling power. This cooler comes in two versions; one is a simple MA620P which we are reviewing and the other one is TUF edition for Asus TUF motherboards under Gaming Alliance.
Key Takeaways
- The Cooler Master MasterAir MA620P is good for budget-oriented users seeking effective cooling for medium overclocking, especially with processors like the Intel i7 6850k (140W TDP) or lower TDP chips.
- This cooler may not be suitable for users seeking a compact solution or those who prioritize ultra-silent cooling setups due to its size and noise level.
- Stand-out features of the Cooler Master MasterAir MA620P include its impressive price, dual tower design, Continuous Direct Contact 2.0 technology for efficient heat dissipation, bundled RGB LED fans and controller, and compatibility with various motherboard RGB lighting systems.
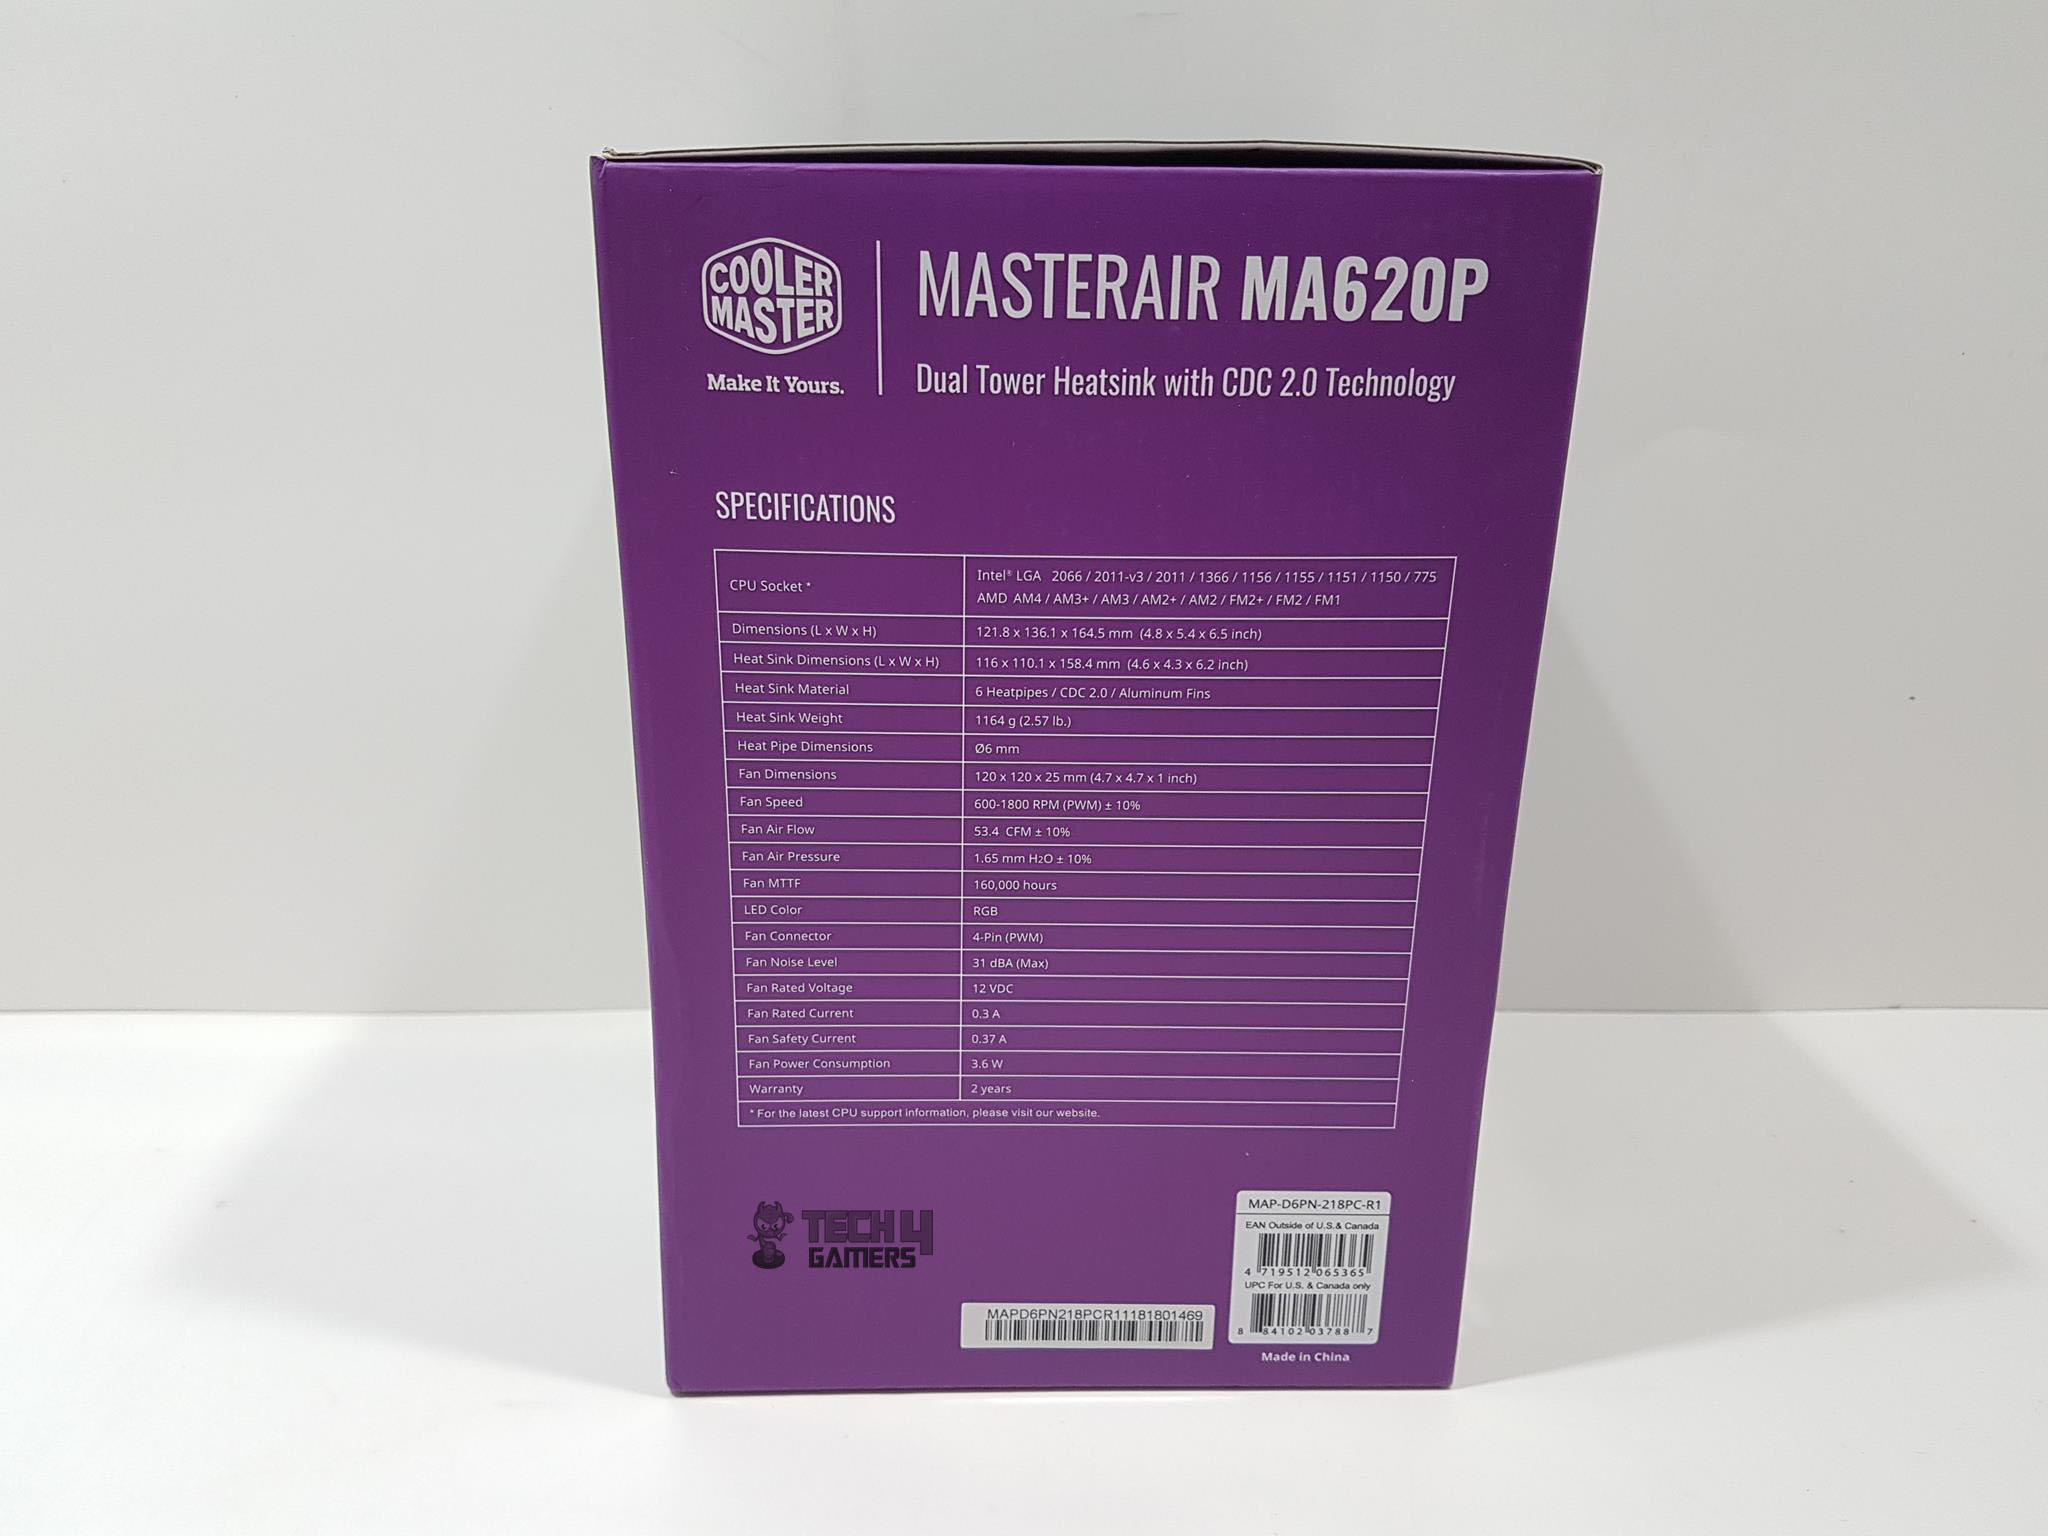
Let’s start with the cooler specifications.

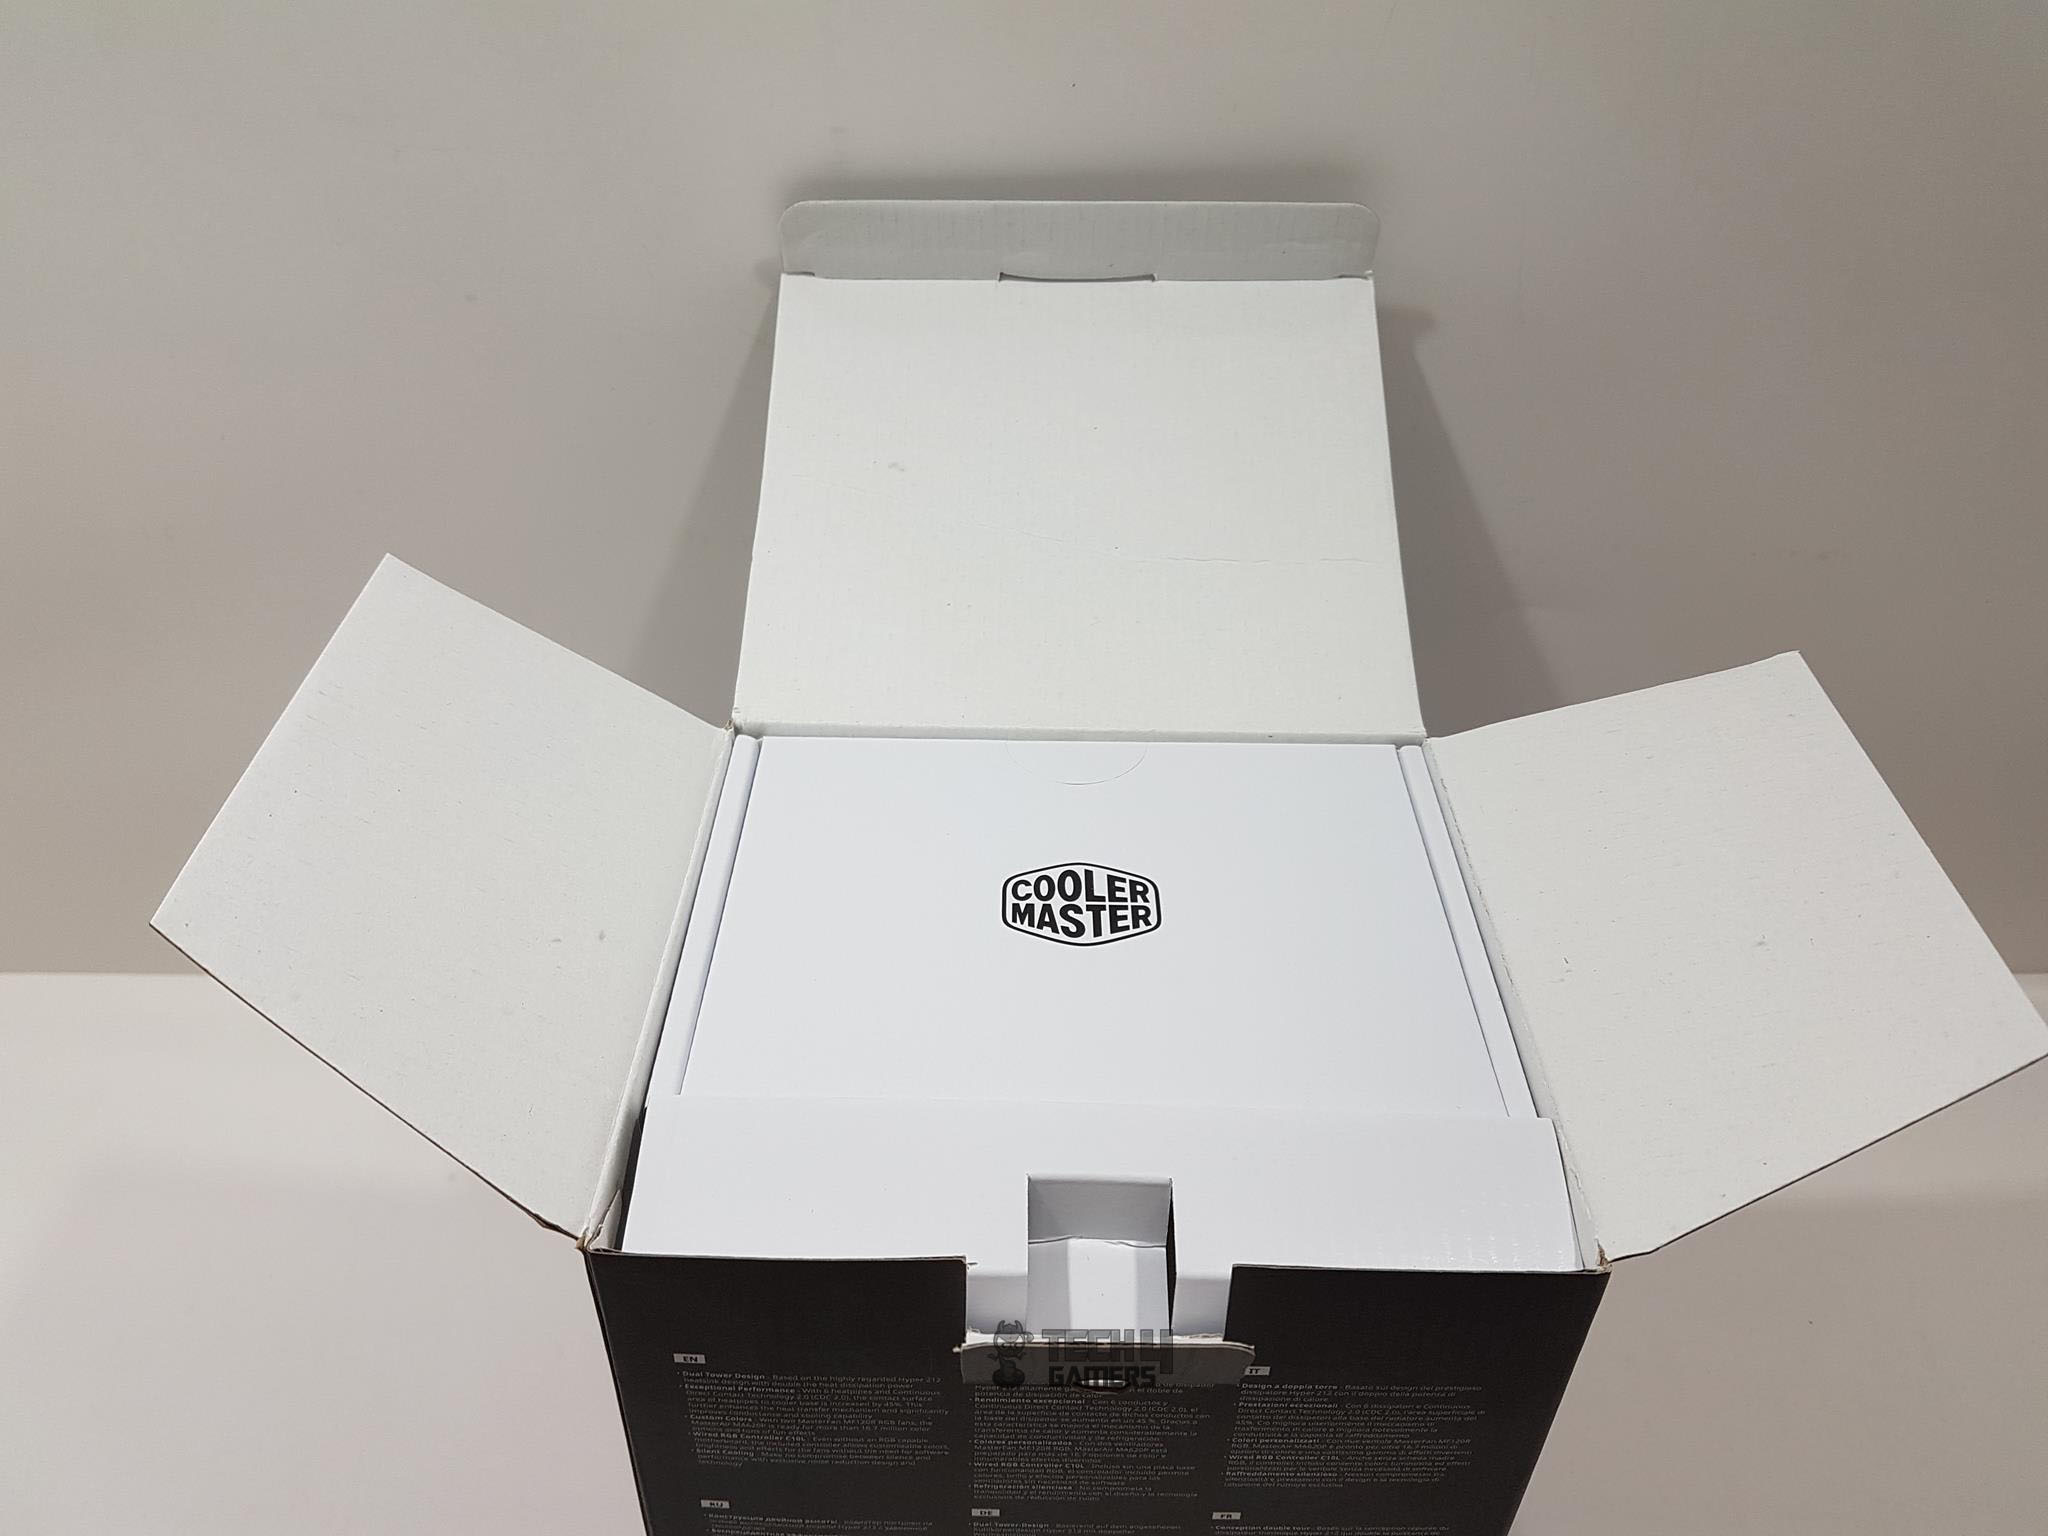
Packaging
The cooler is shipped in a cardboard box in MasterAir category styling of purple and black colors which does look good in person.


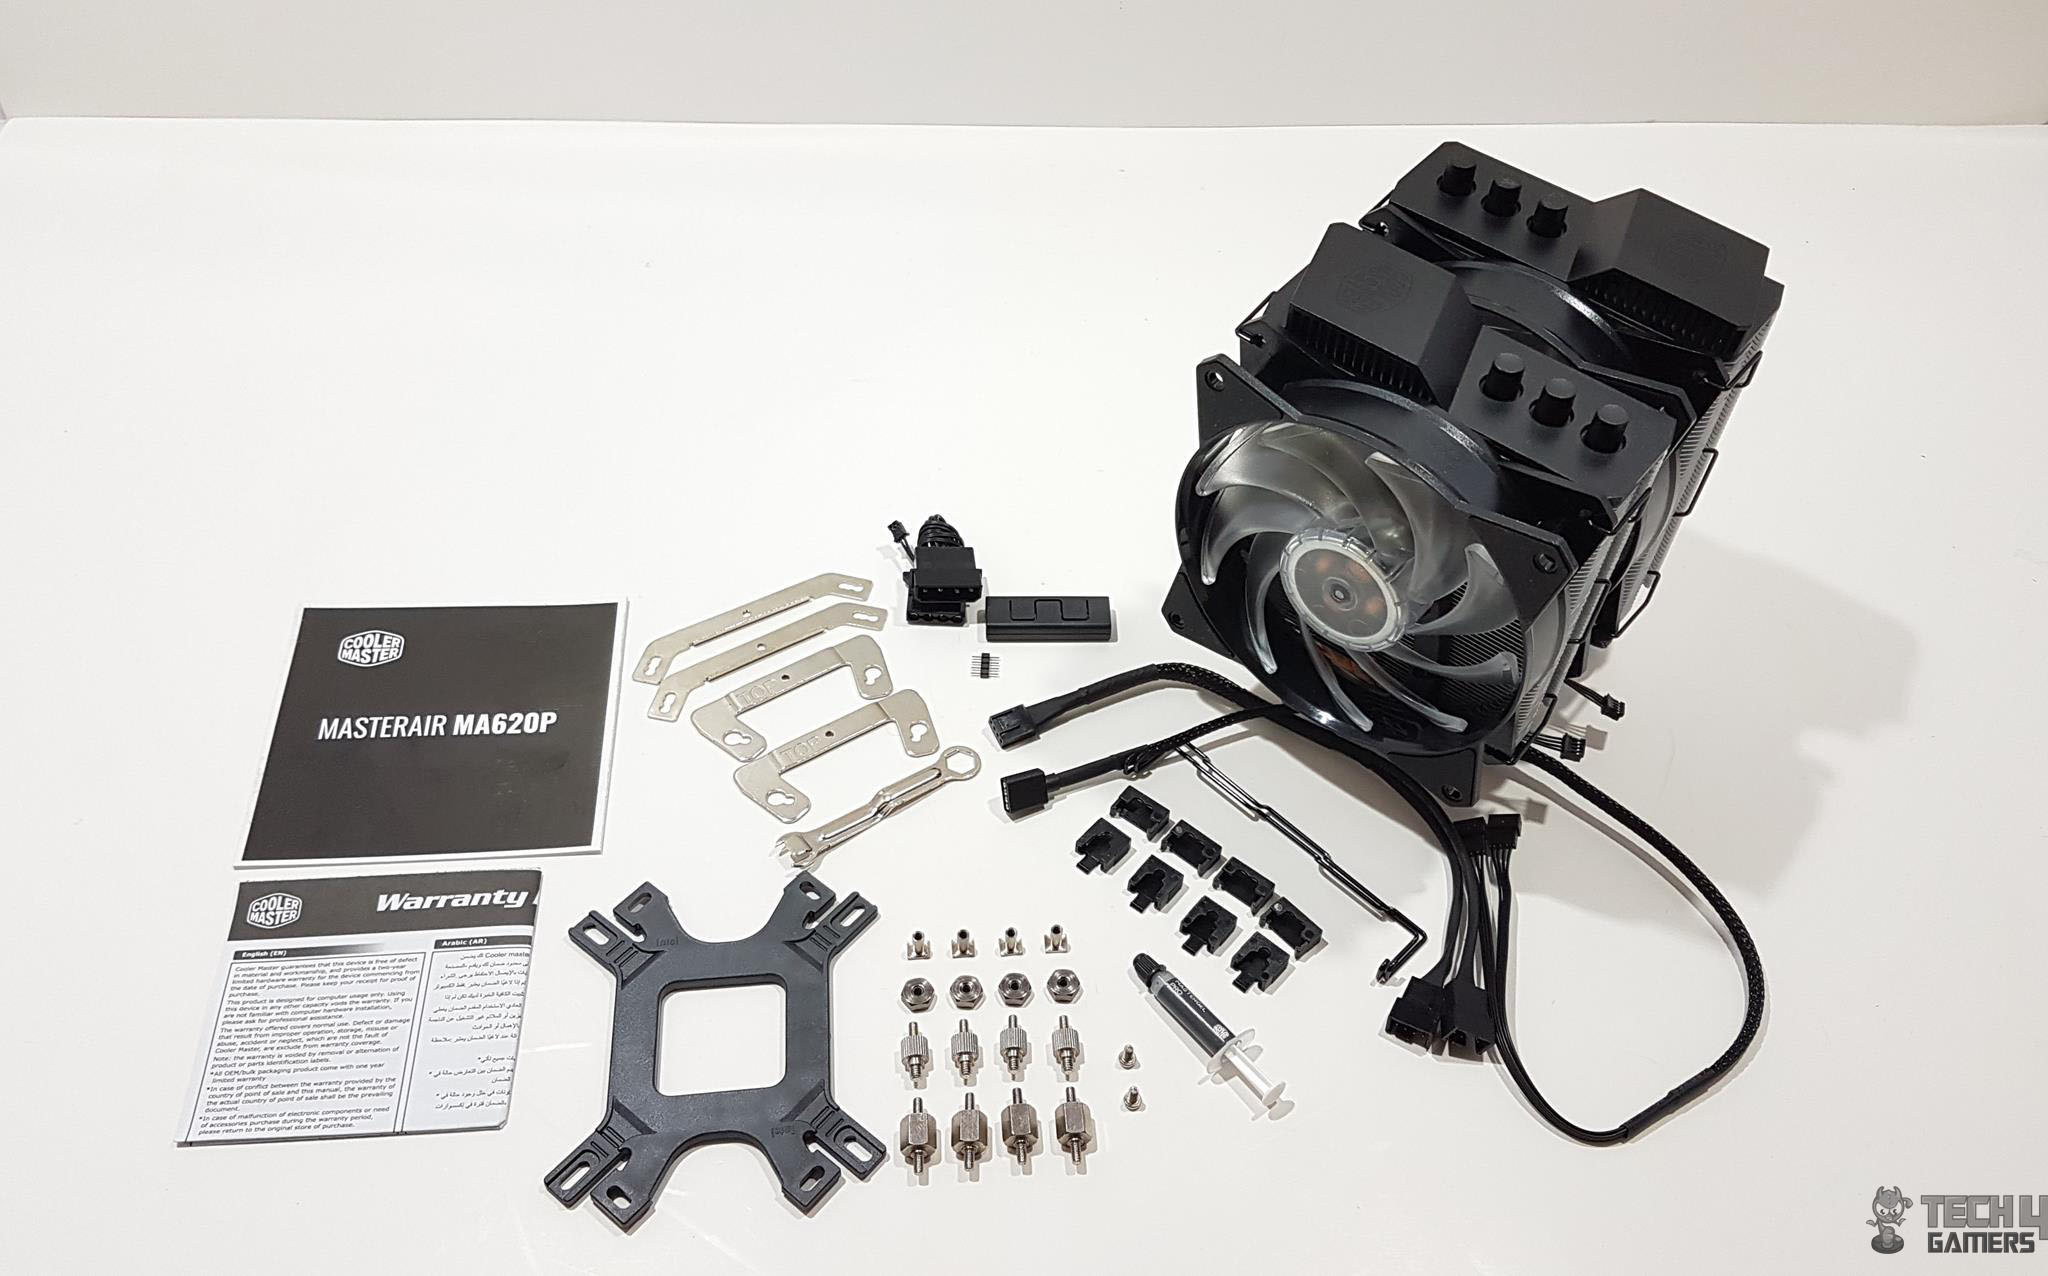
Accessories
Other than the cooler itself, we get a handful of accessories.

Design
It is time to dig into the design of the cooler. The dimension of the cooler is 136.1×121.8×164.5mm. The height of the cooler with both fans is 164.5mm. The dimension of the heatsink is 116×110.1×164.5mm. Heatsink alone weighs 850gm. Both RGB fans come pre-installed on the heatsink using black powder coated metal clips.
Heatsink
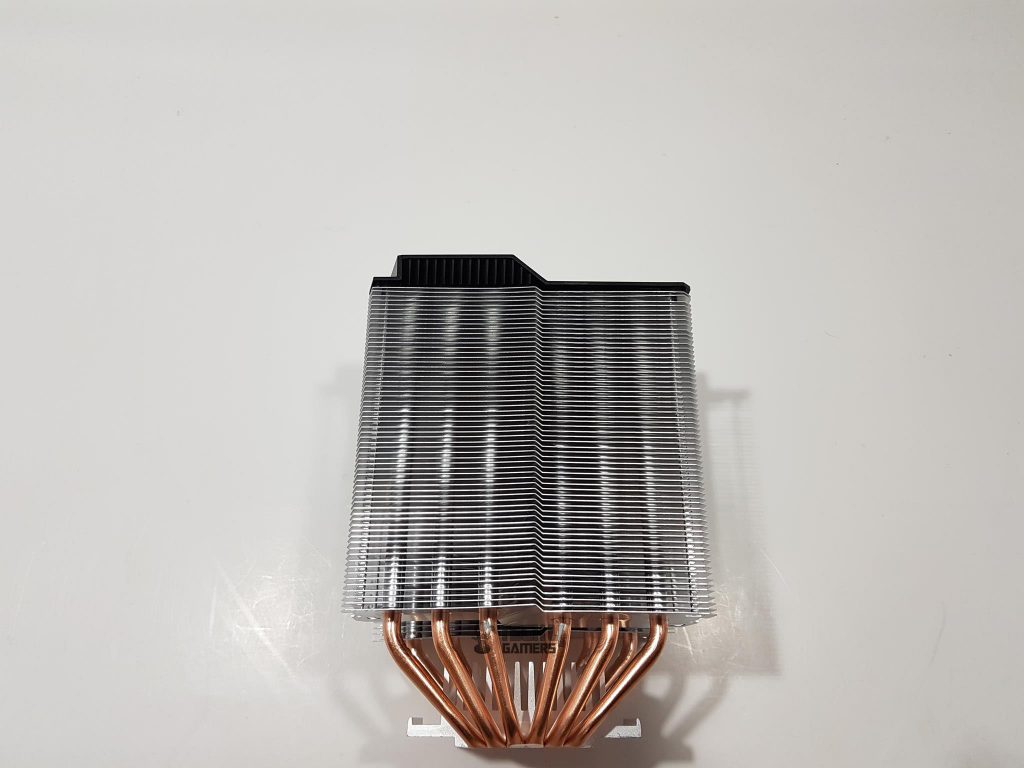
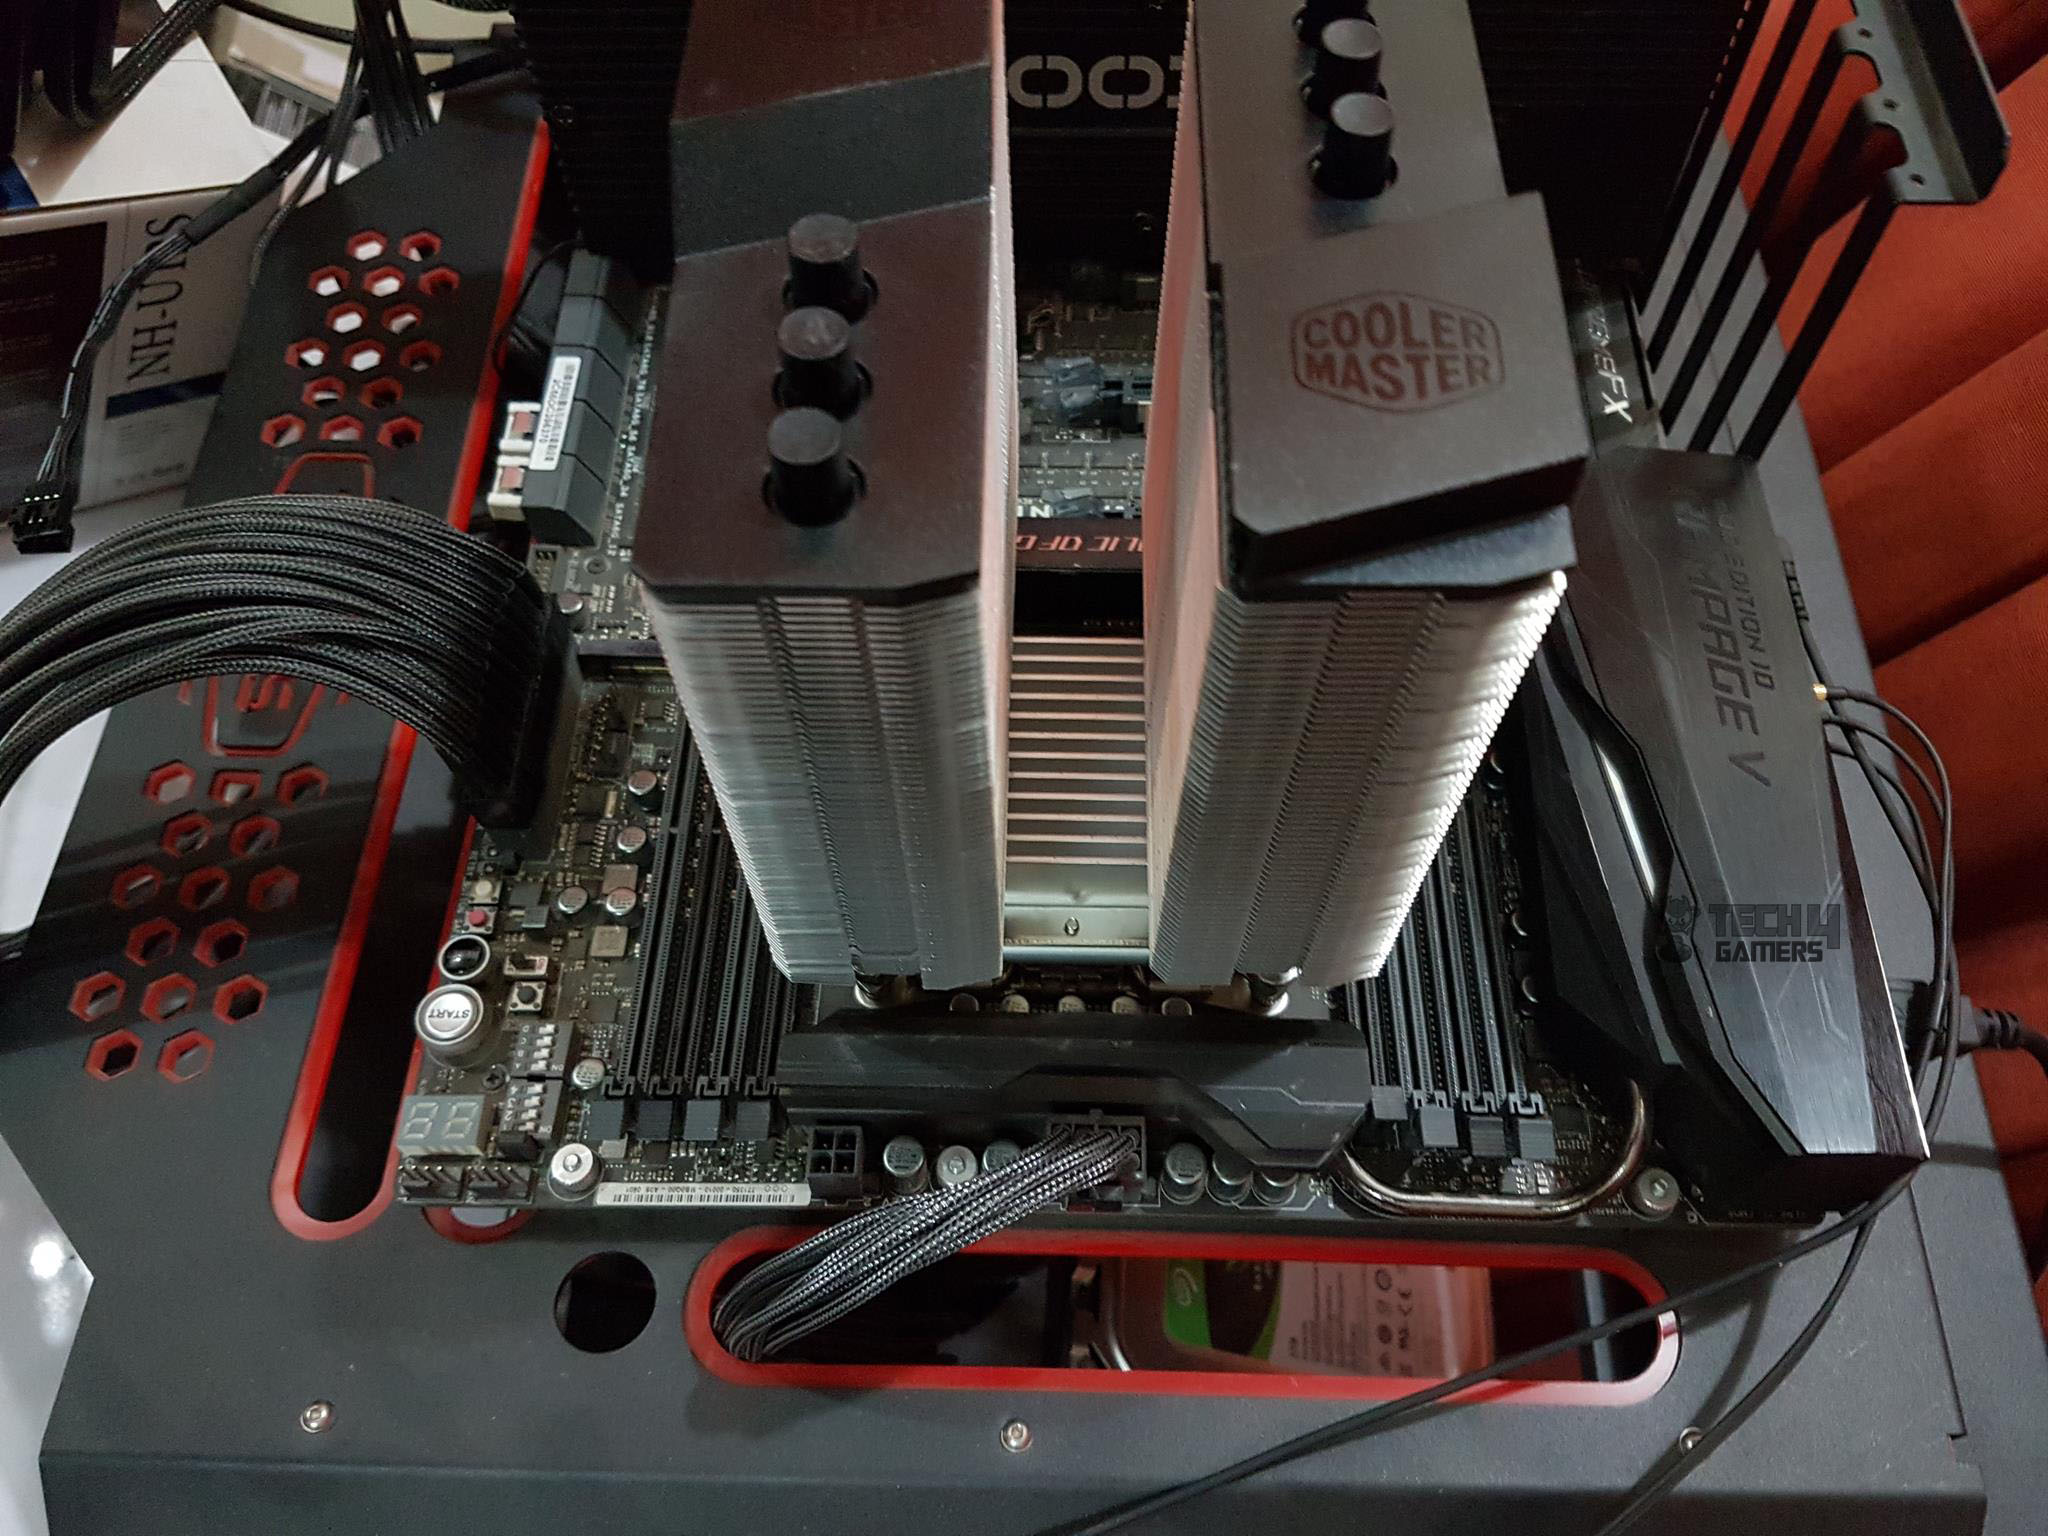
Both towers have an identical layout, with 40mm wide heatsinks and a stepped fin design with two distinct levels (this is more for aesthetic appeal than performance). There are 64 aluminum fins on each tower stacked in a dense manner. The dimension of a tower without the top plastic cover is 110x109mm. With top plastic cover, the height is 124mm. Please note that these are the dimensions of the heatsink with aluminum fins only excluding the base and heat pipes.
Speaking of the heat pipes, maintain equal spacing. Notably, there’s a seamless assembly within the heatsink, avoiding joints on the front or back, resulting in a cleaner overall appearance.
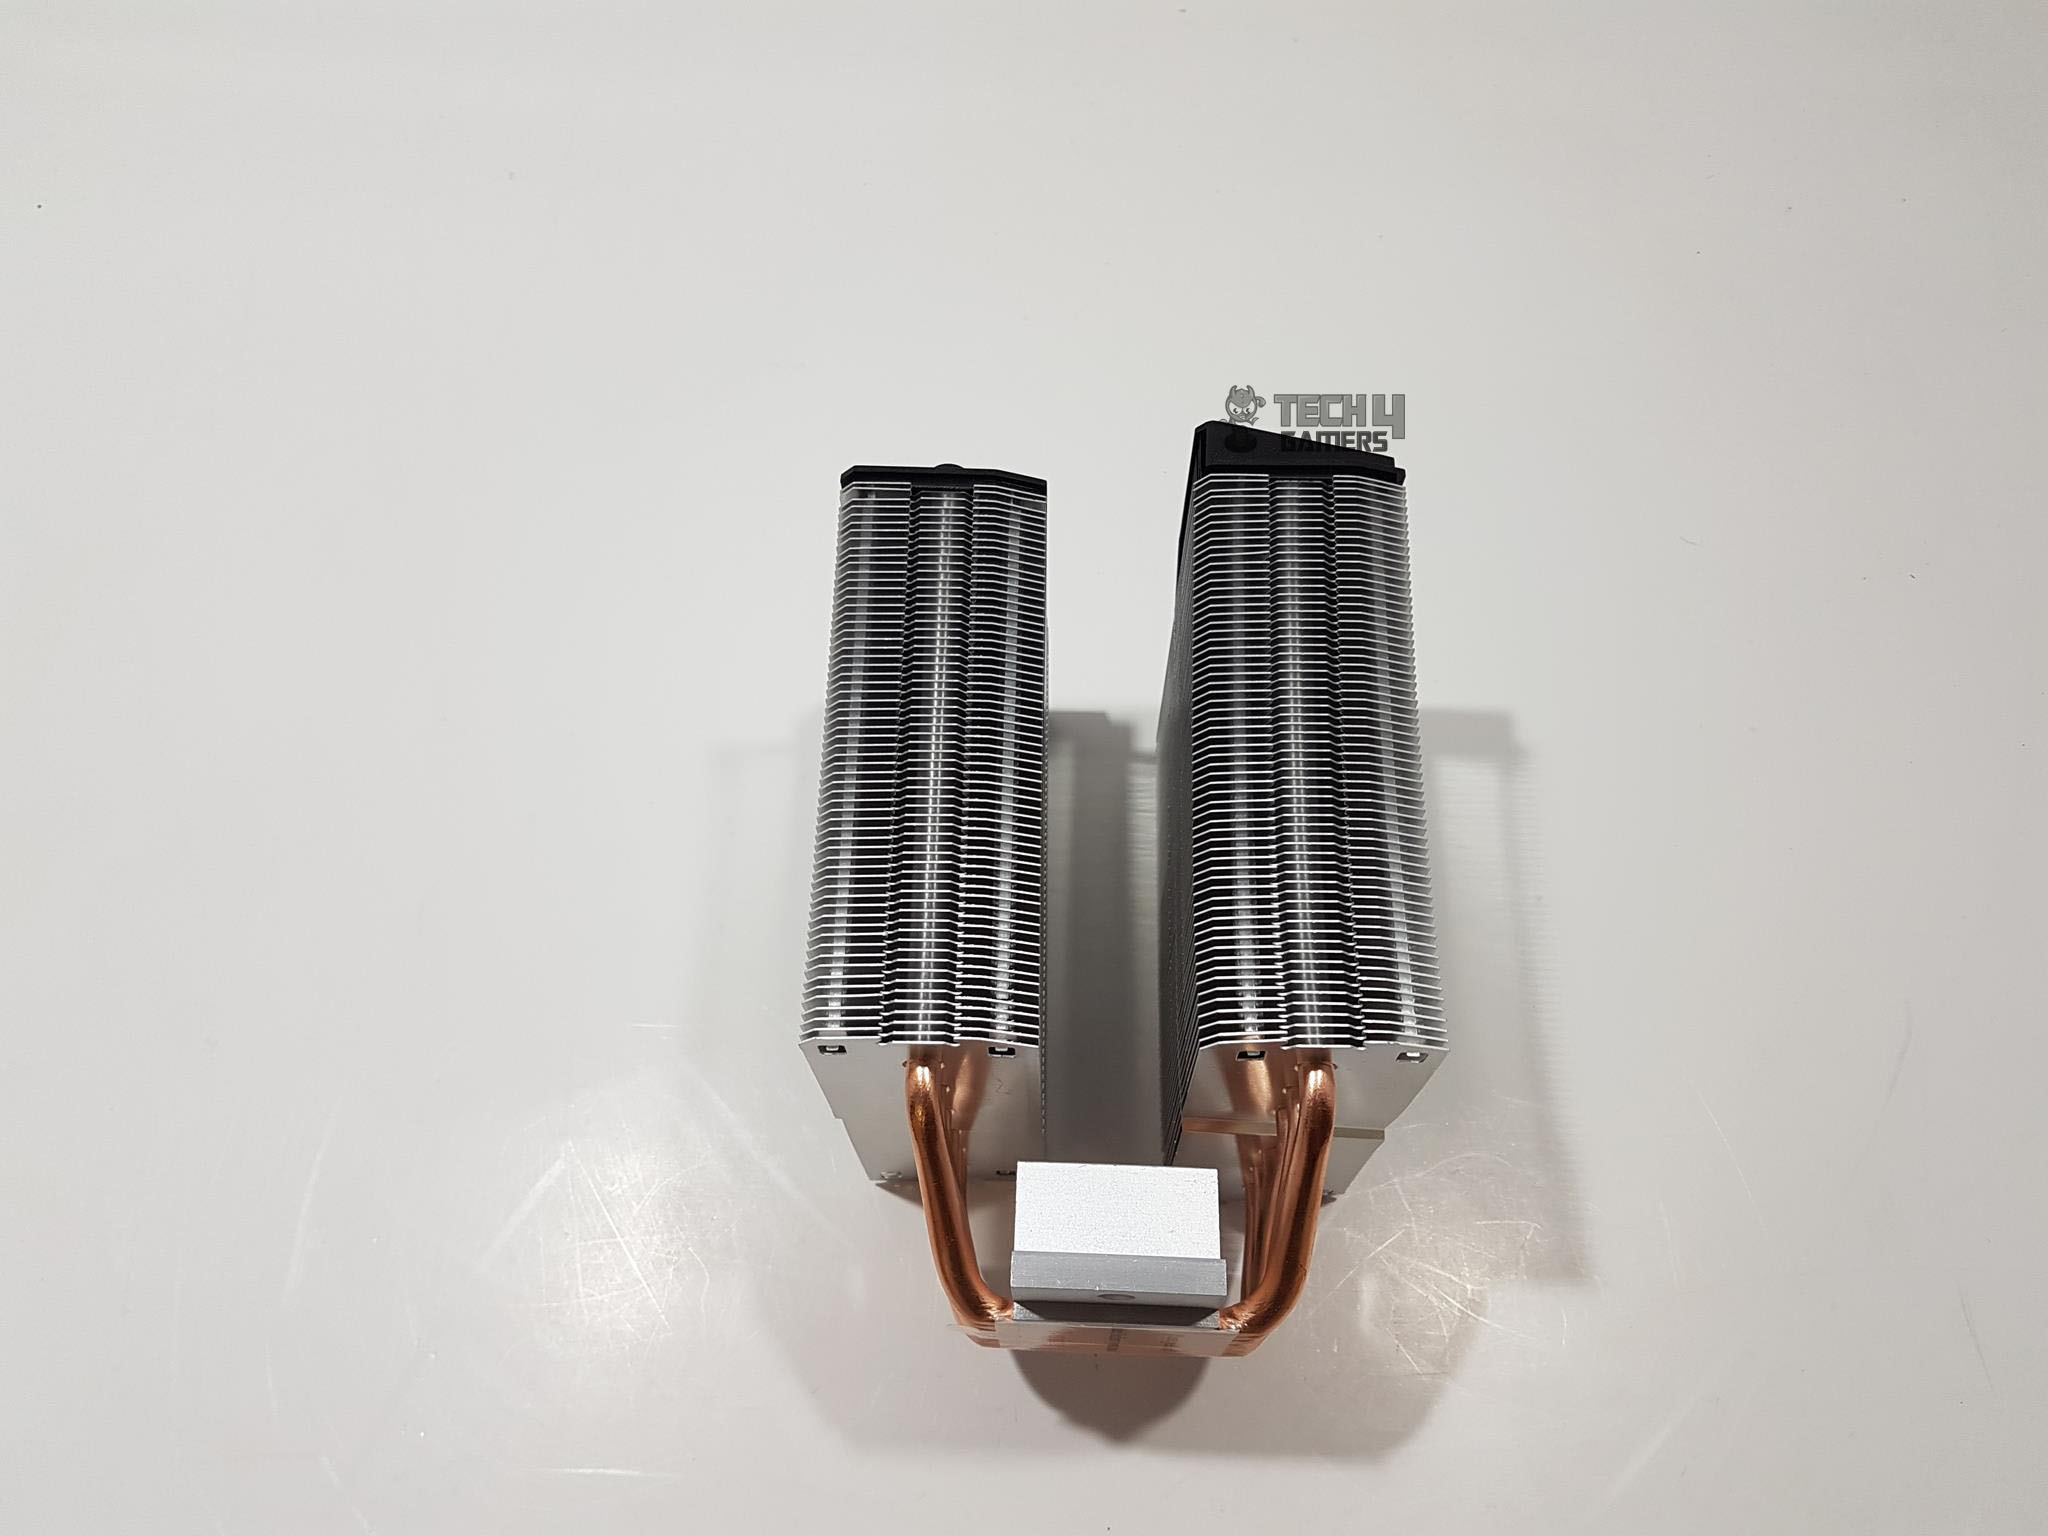
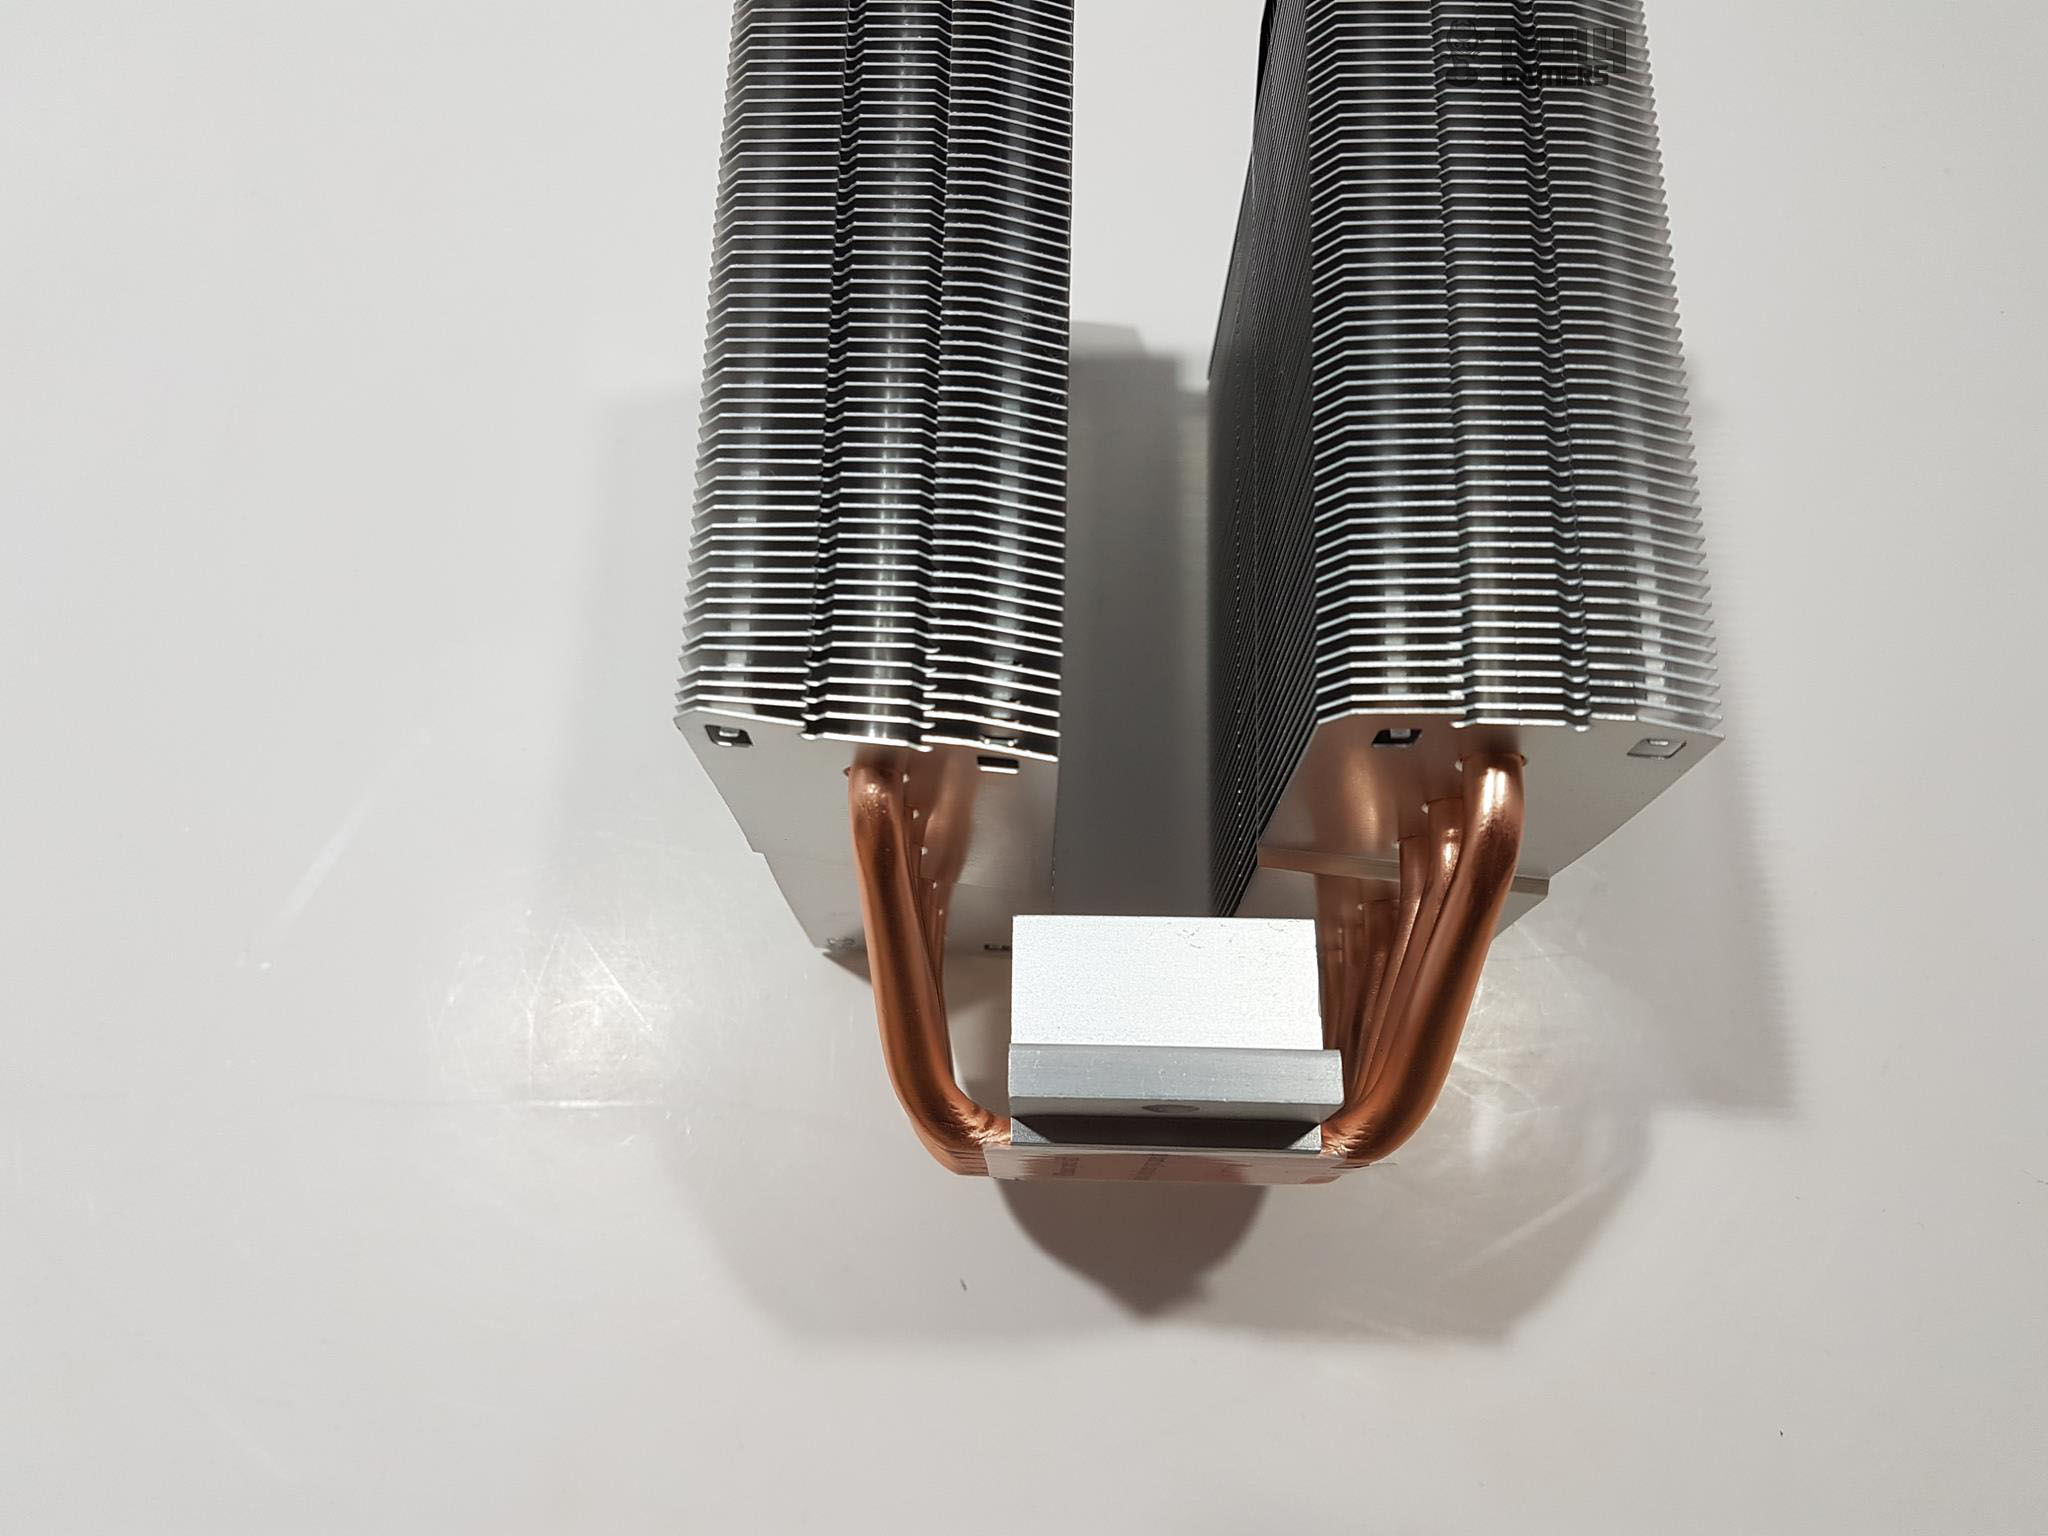
Examining the side view reveals a 27mm gap between the towers. This design choice contributes to a sleek and tidy cooler presentation. The left and right sides of the tower are identical. The center is recessed which is for the reason to catch the hooks of the fan mounting clips from either side. The inside portion of the heatsink jointing the fins can be seen clearly from here. Looking at the top, there is a black color plastic cover on each tower.
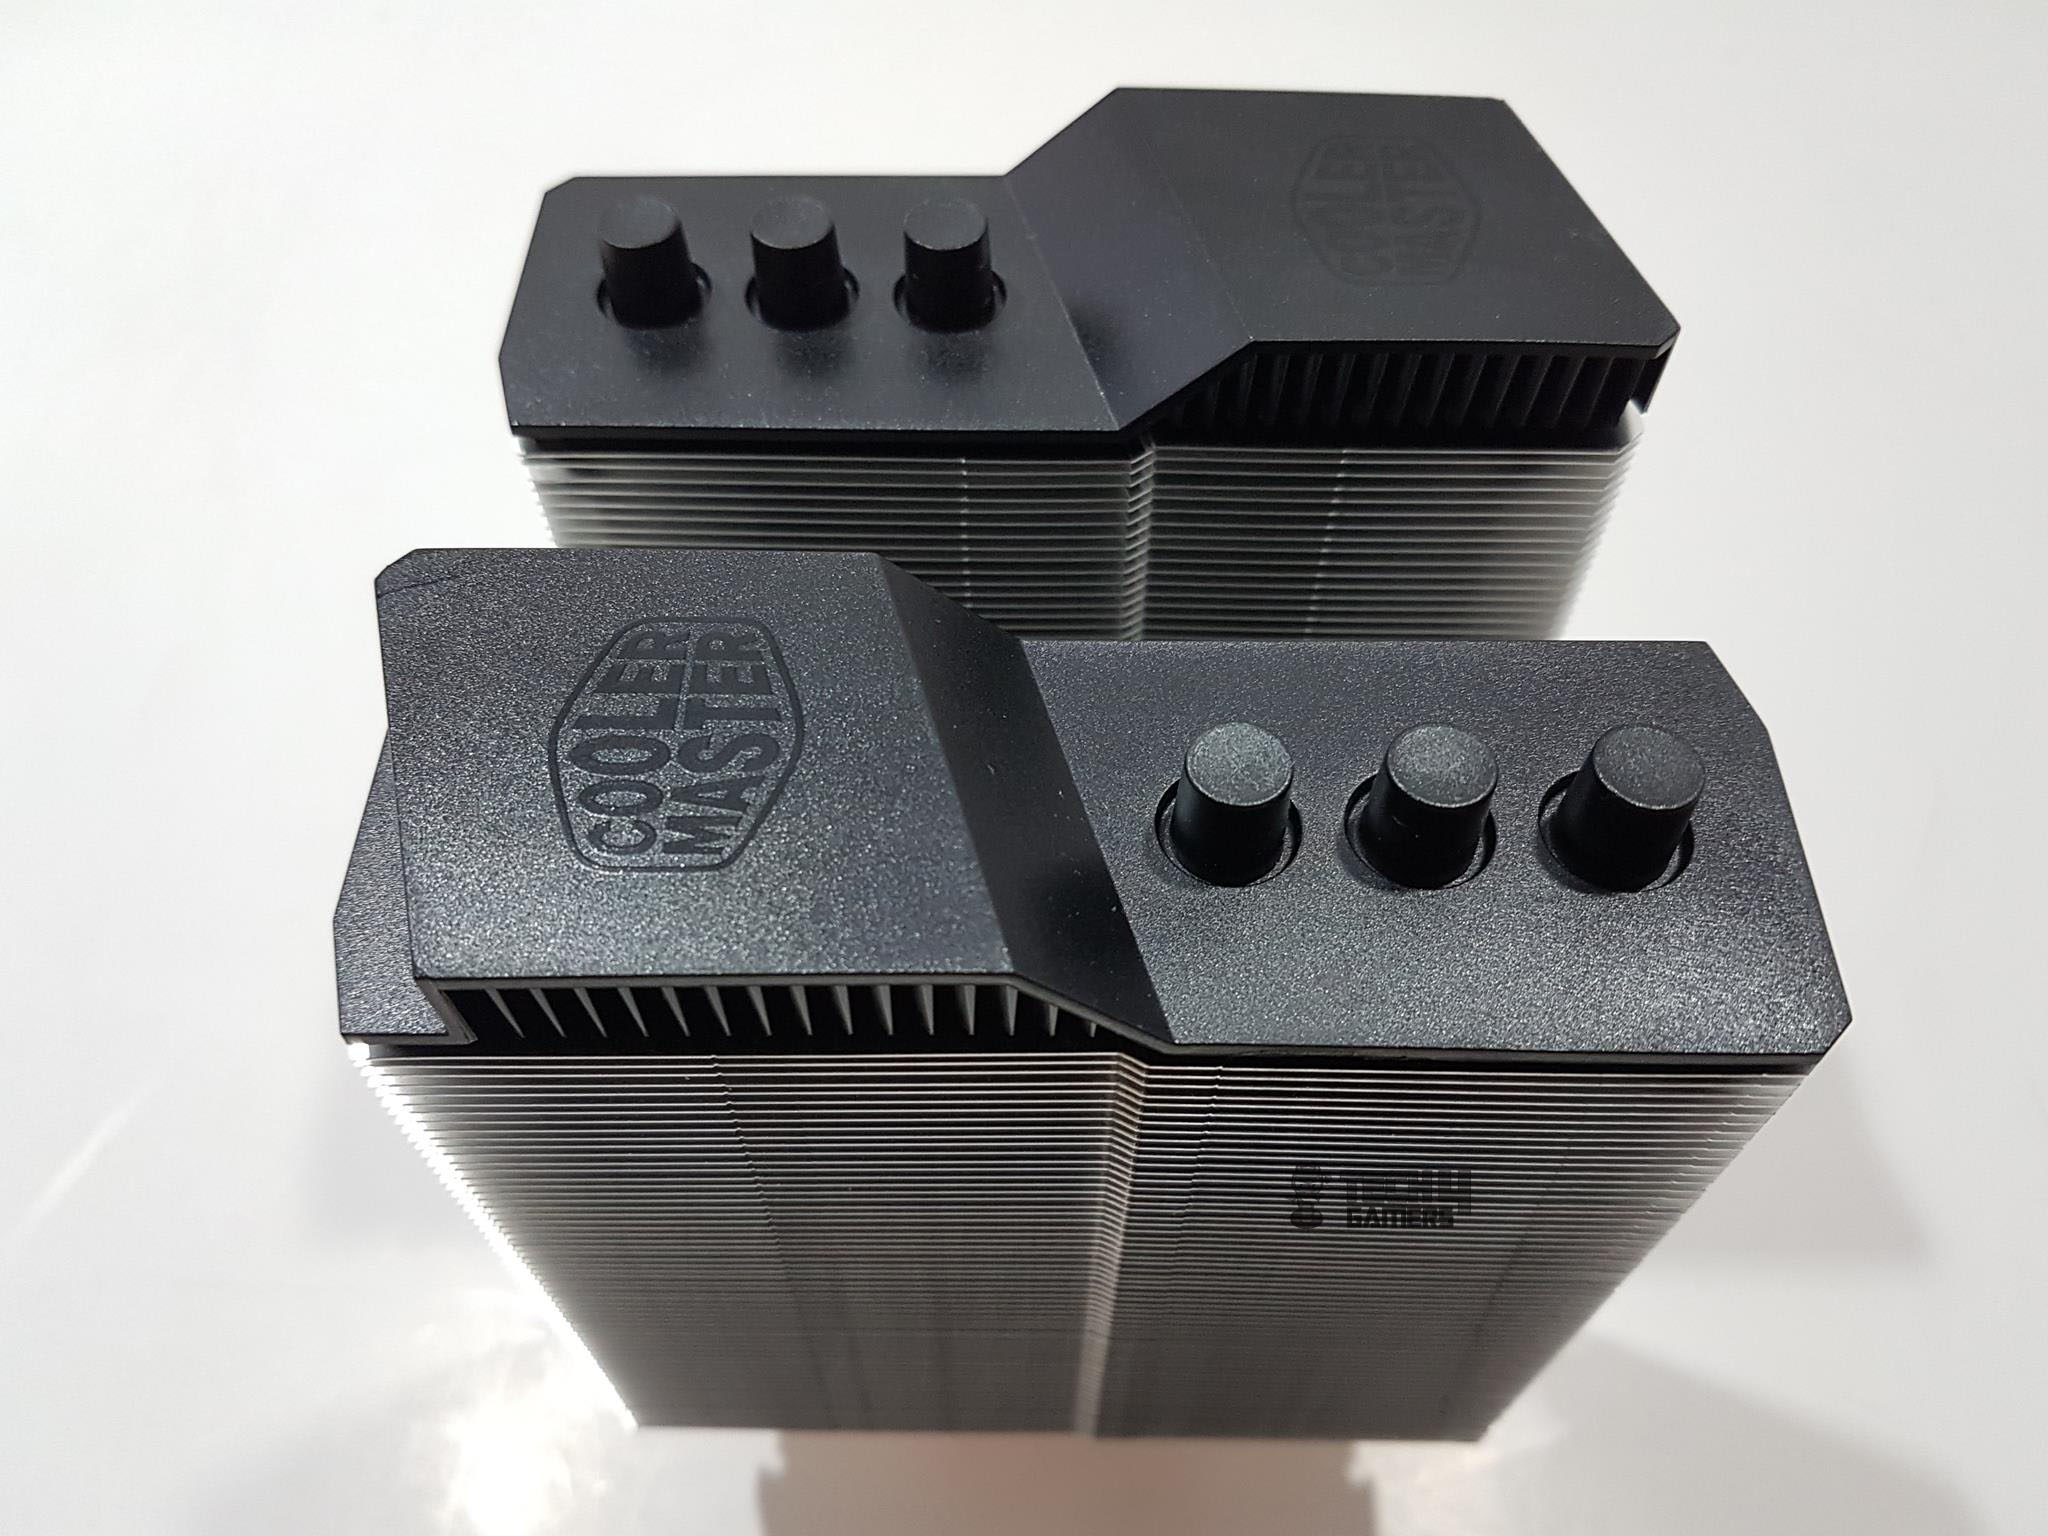
Looking at the top, there is a black color plastic cover on each tower. It is in an angular shape with one side having raised surface than the other side. The recessed side has 3 circular caps covering the top of the 3 heat pipes. The raised surface side has vents underneath it. This is likely for airflow purpose if not for any other use. The overall design is symmetrical and the raised surface has Cooler Master brand logo on it.
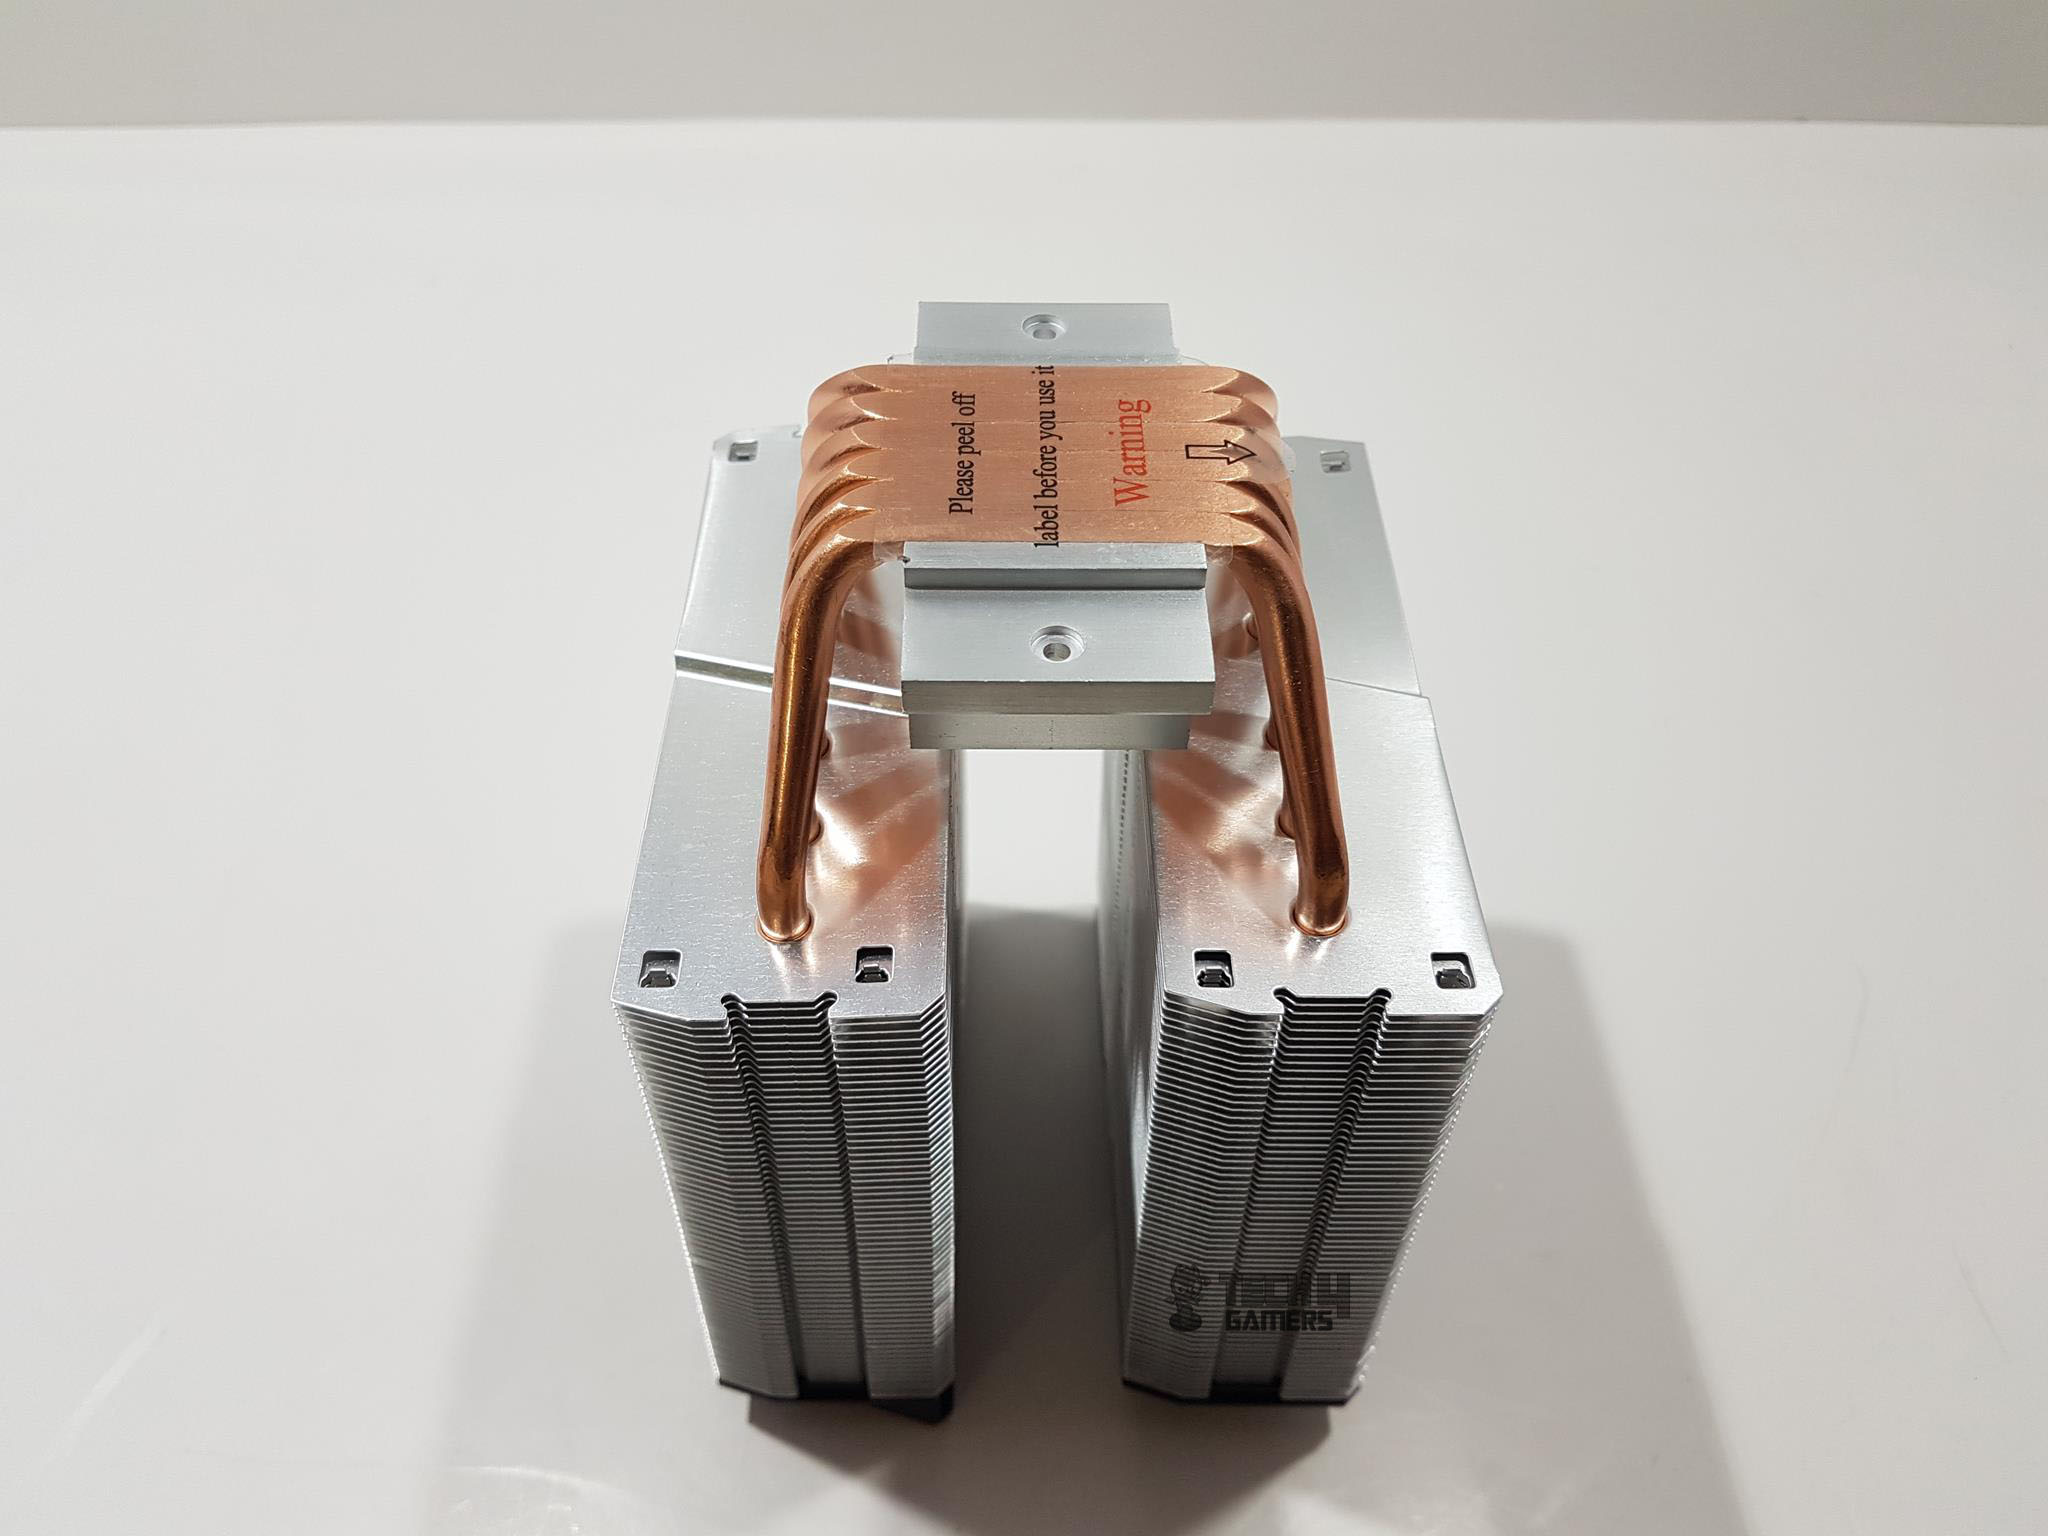
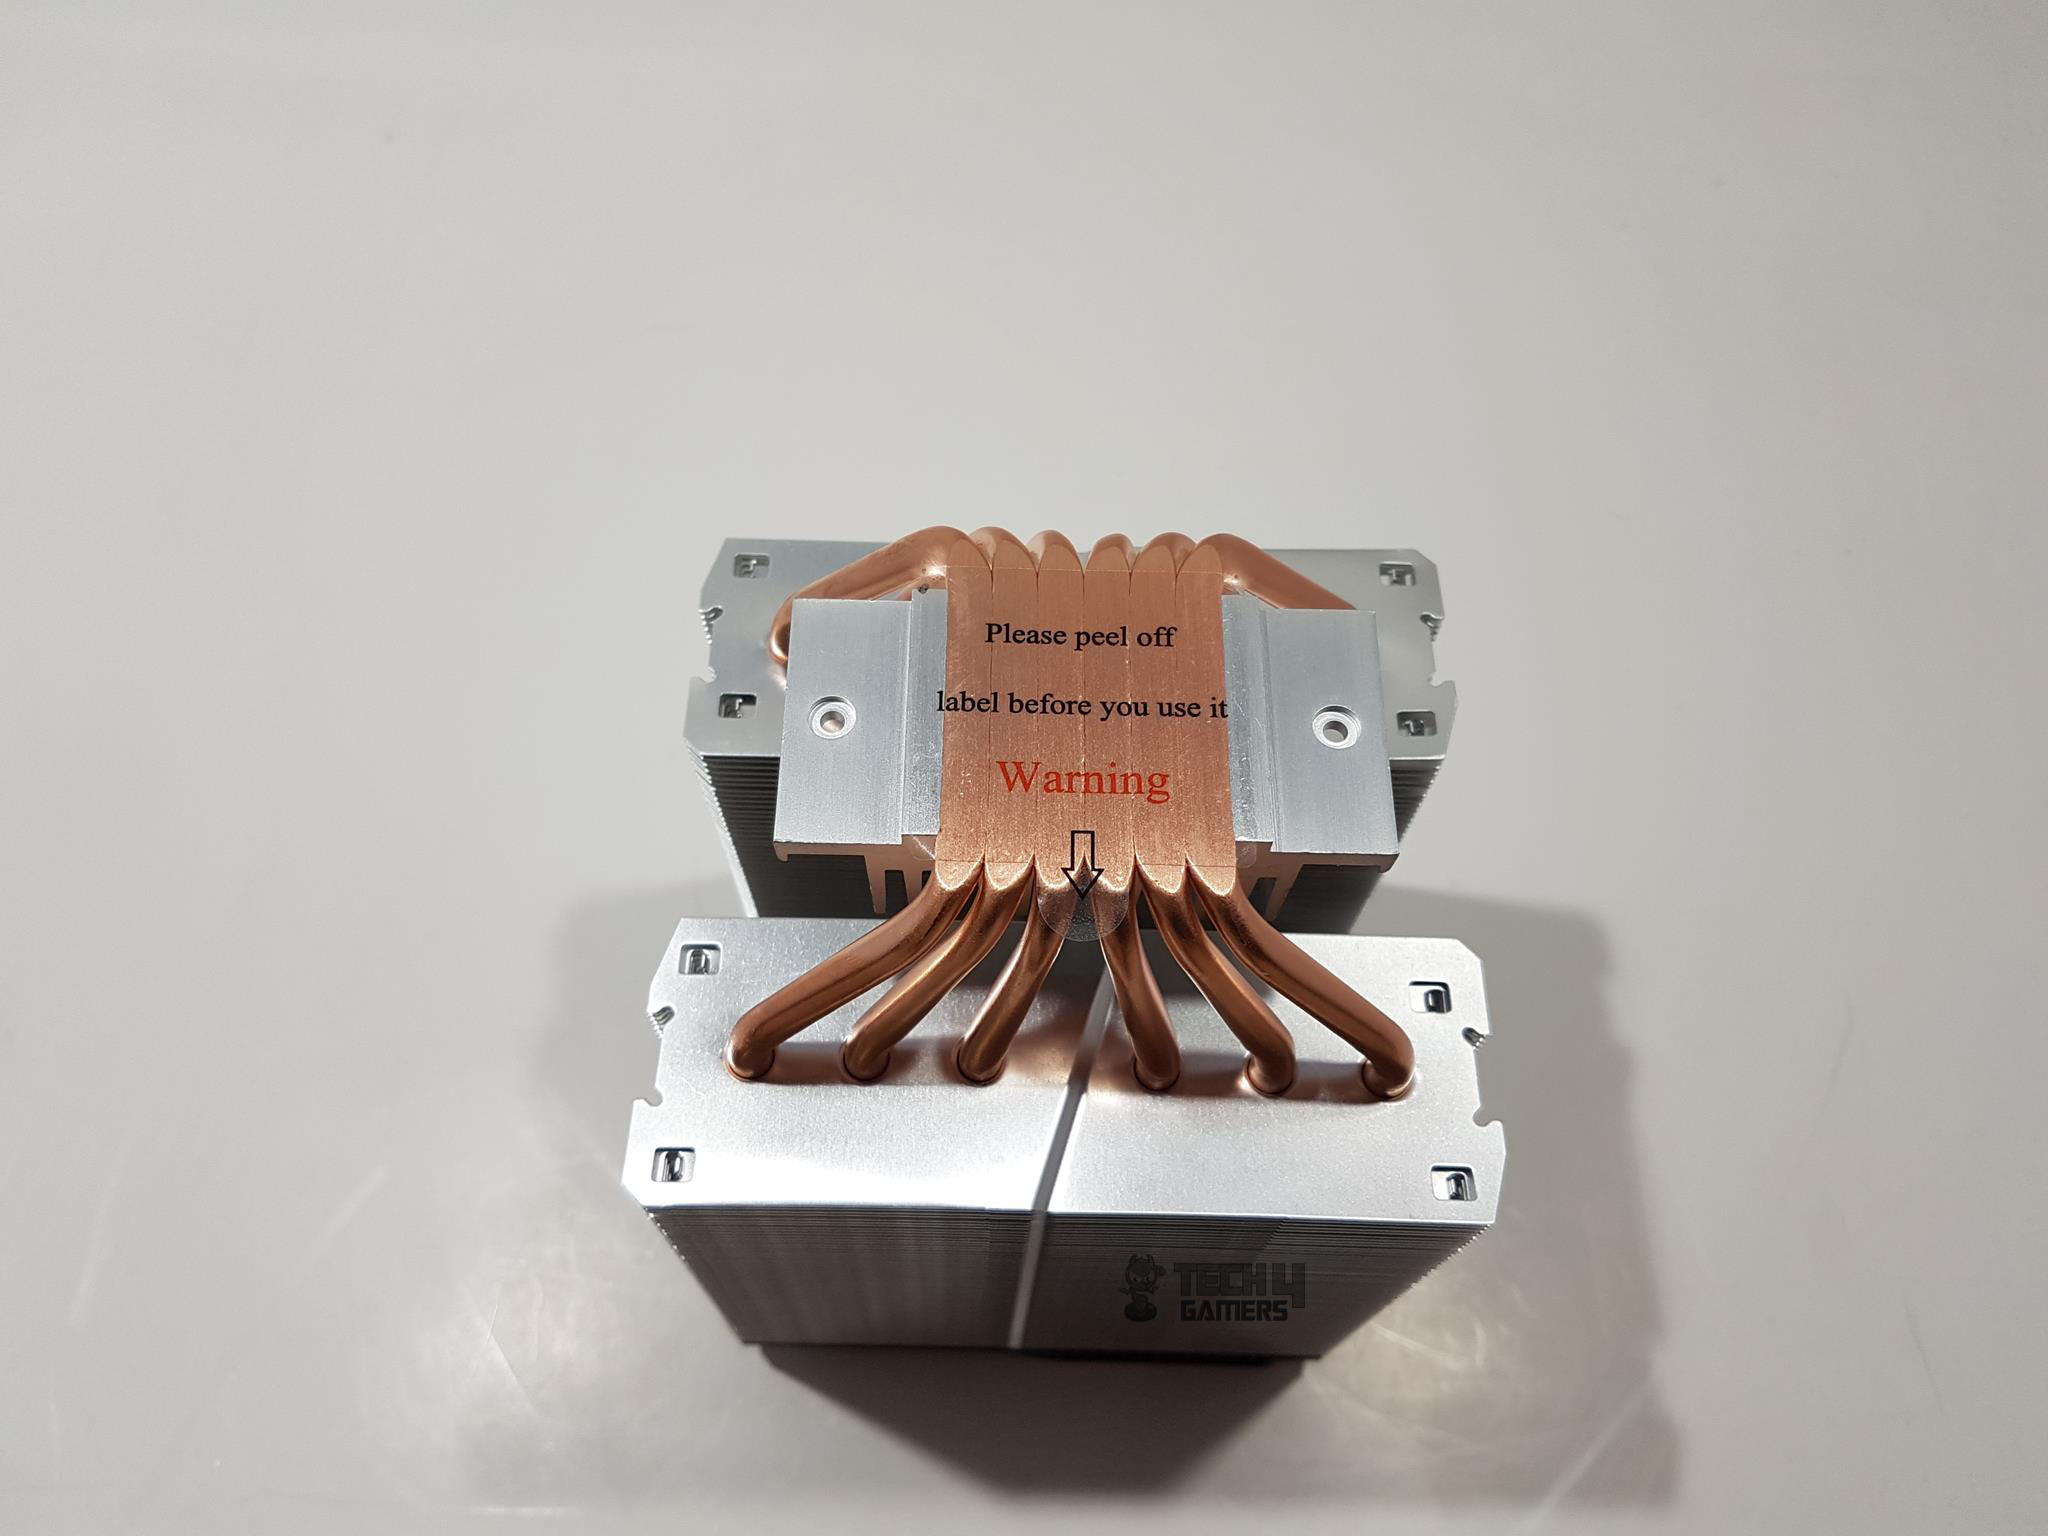
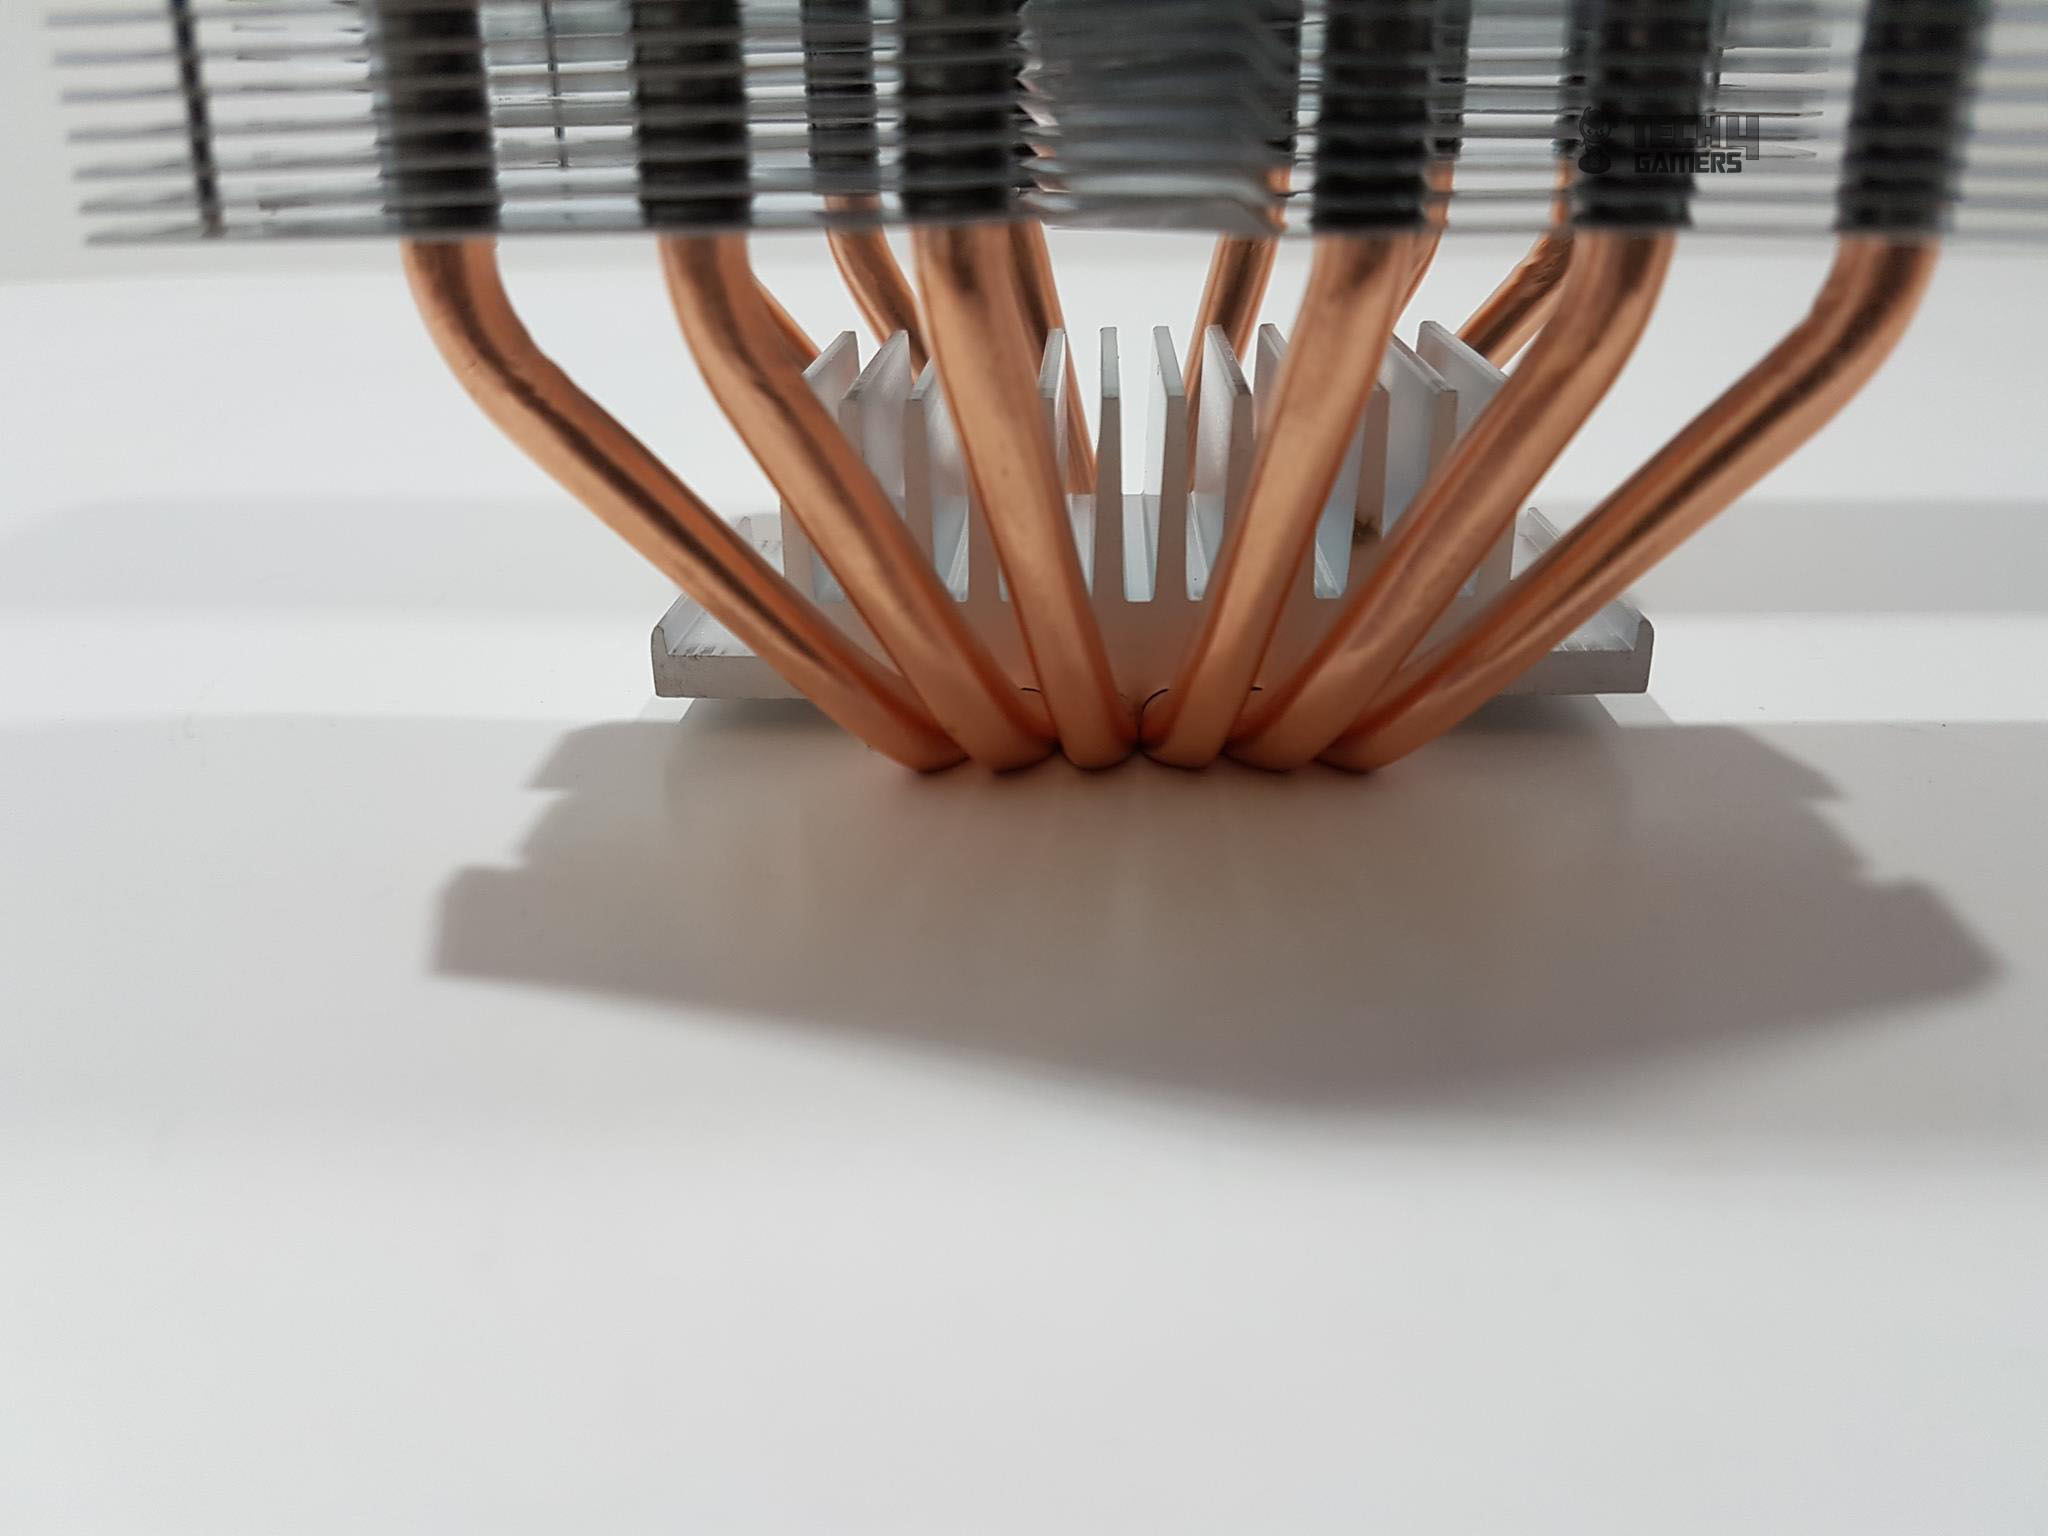
Looking at the base, there is an aluminum plate which also acts as a heatsink for it has 10 fins on its upper side. This plate has a dimension of 76.4×37.6mm. It’s both ends have a mounting hole in the center on to which the Intel/AMD mounting brackets are installed. We see total 6 heat pipes on each side. They are copper based and have a thickness of 6mm each.
3 heat pipes are going in the left side of the heatsink and 3 in the right side with equal distance to ensure the maximum coverage of the surface area for effective heat dissipation. This cooler is using the Continuous Direct Contact 2.0 technology. In CDC the copper heat pipes make a direct contact with the heat source which in our case is the CPU. This technique eliminates the copper base which is a more common solution in the coolers.
The copper base makes contact with the heat source and heat pipes make contact with the copper base but in CDC the heat pipes make a direct contact. Also, note that this direct contact method is based on a continuous approach. In Continuous DC, there is no gap between the heat pipes at the point of contact with the heat source. In a Non-Continuous DC, there is a gap between the heat pipes at the point of contact with the heat source.
This gap is usually filled with a copper base. We can expect better thermal heat transfer in Continuous DC than in Non-Continuous DC. There is a transparent warning sticker pasted on the base cautioning the user to remove it before installing the cooler. The dimension of the contact surface on the base is 35x35mm.
Fans
Now that we have taken a look at the heatsink design, let’s have a look at the fans as well. The Cooler Master ma620p review has bundled two MF120R RGB fans with this cooler.
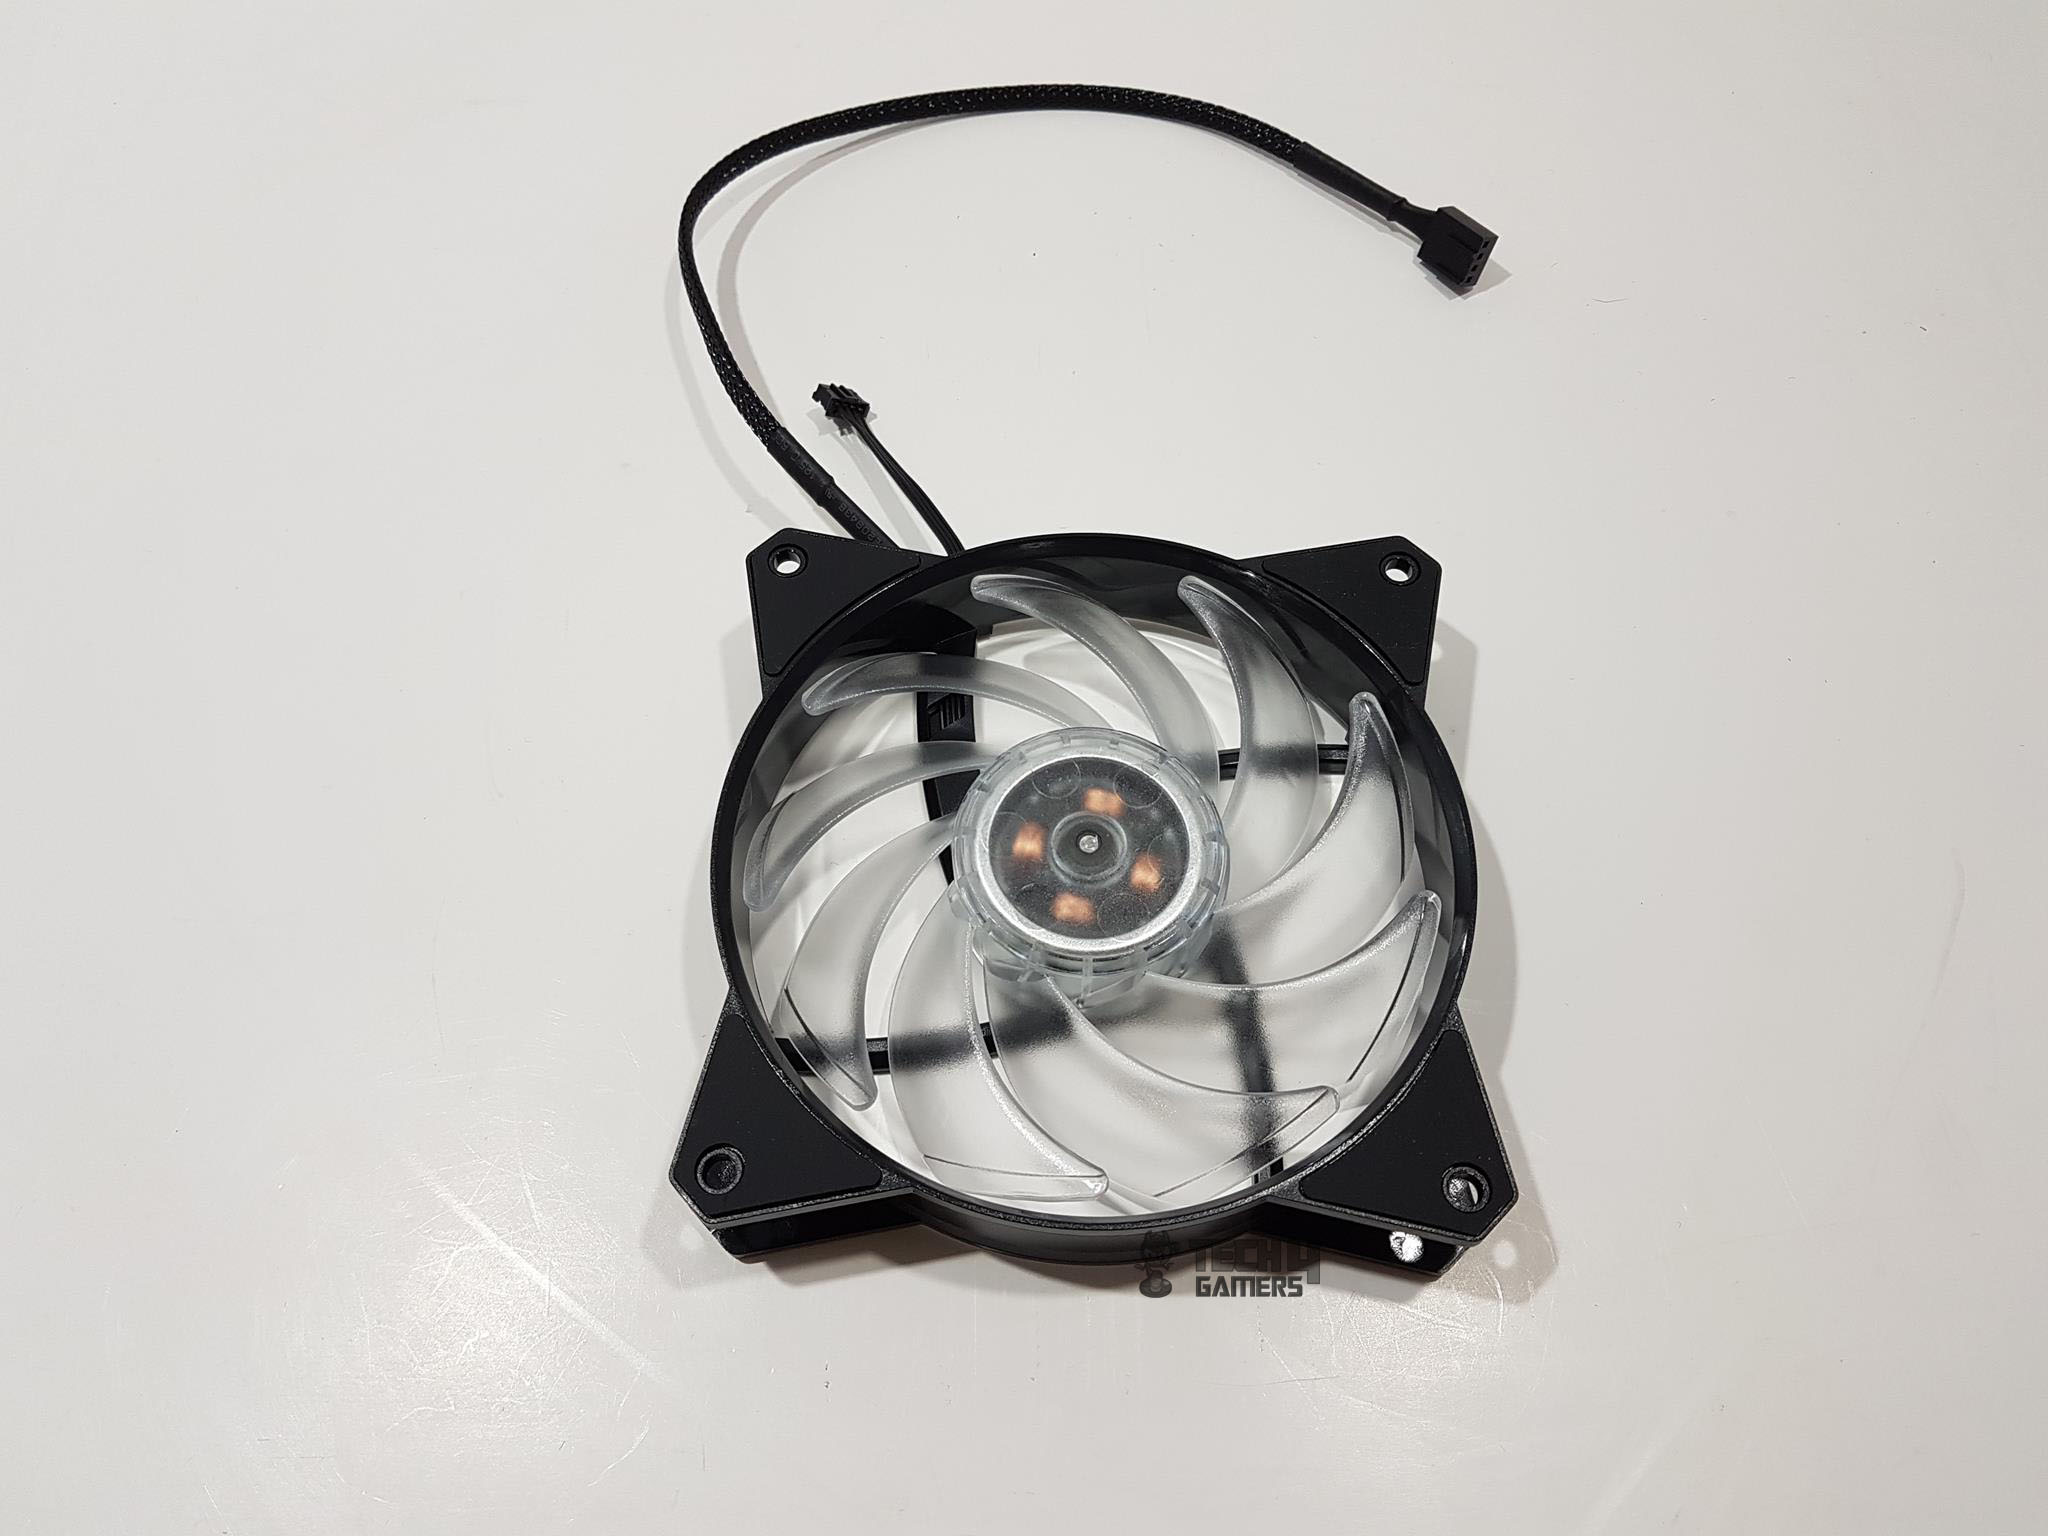
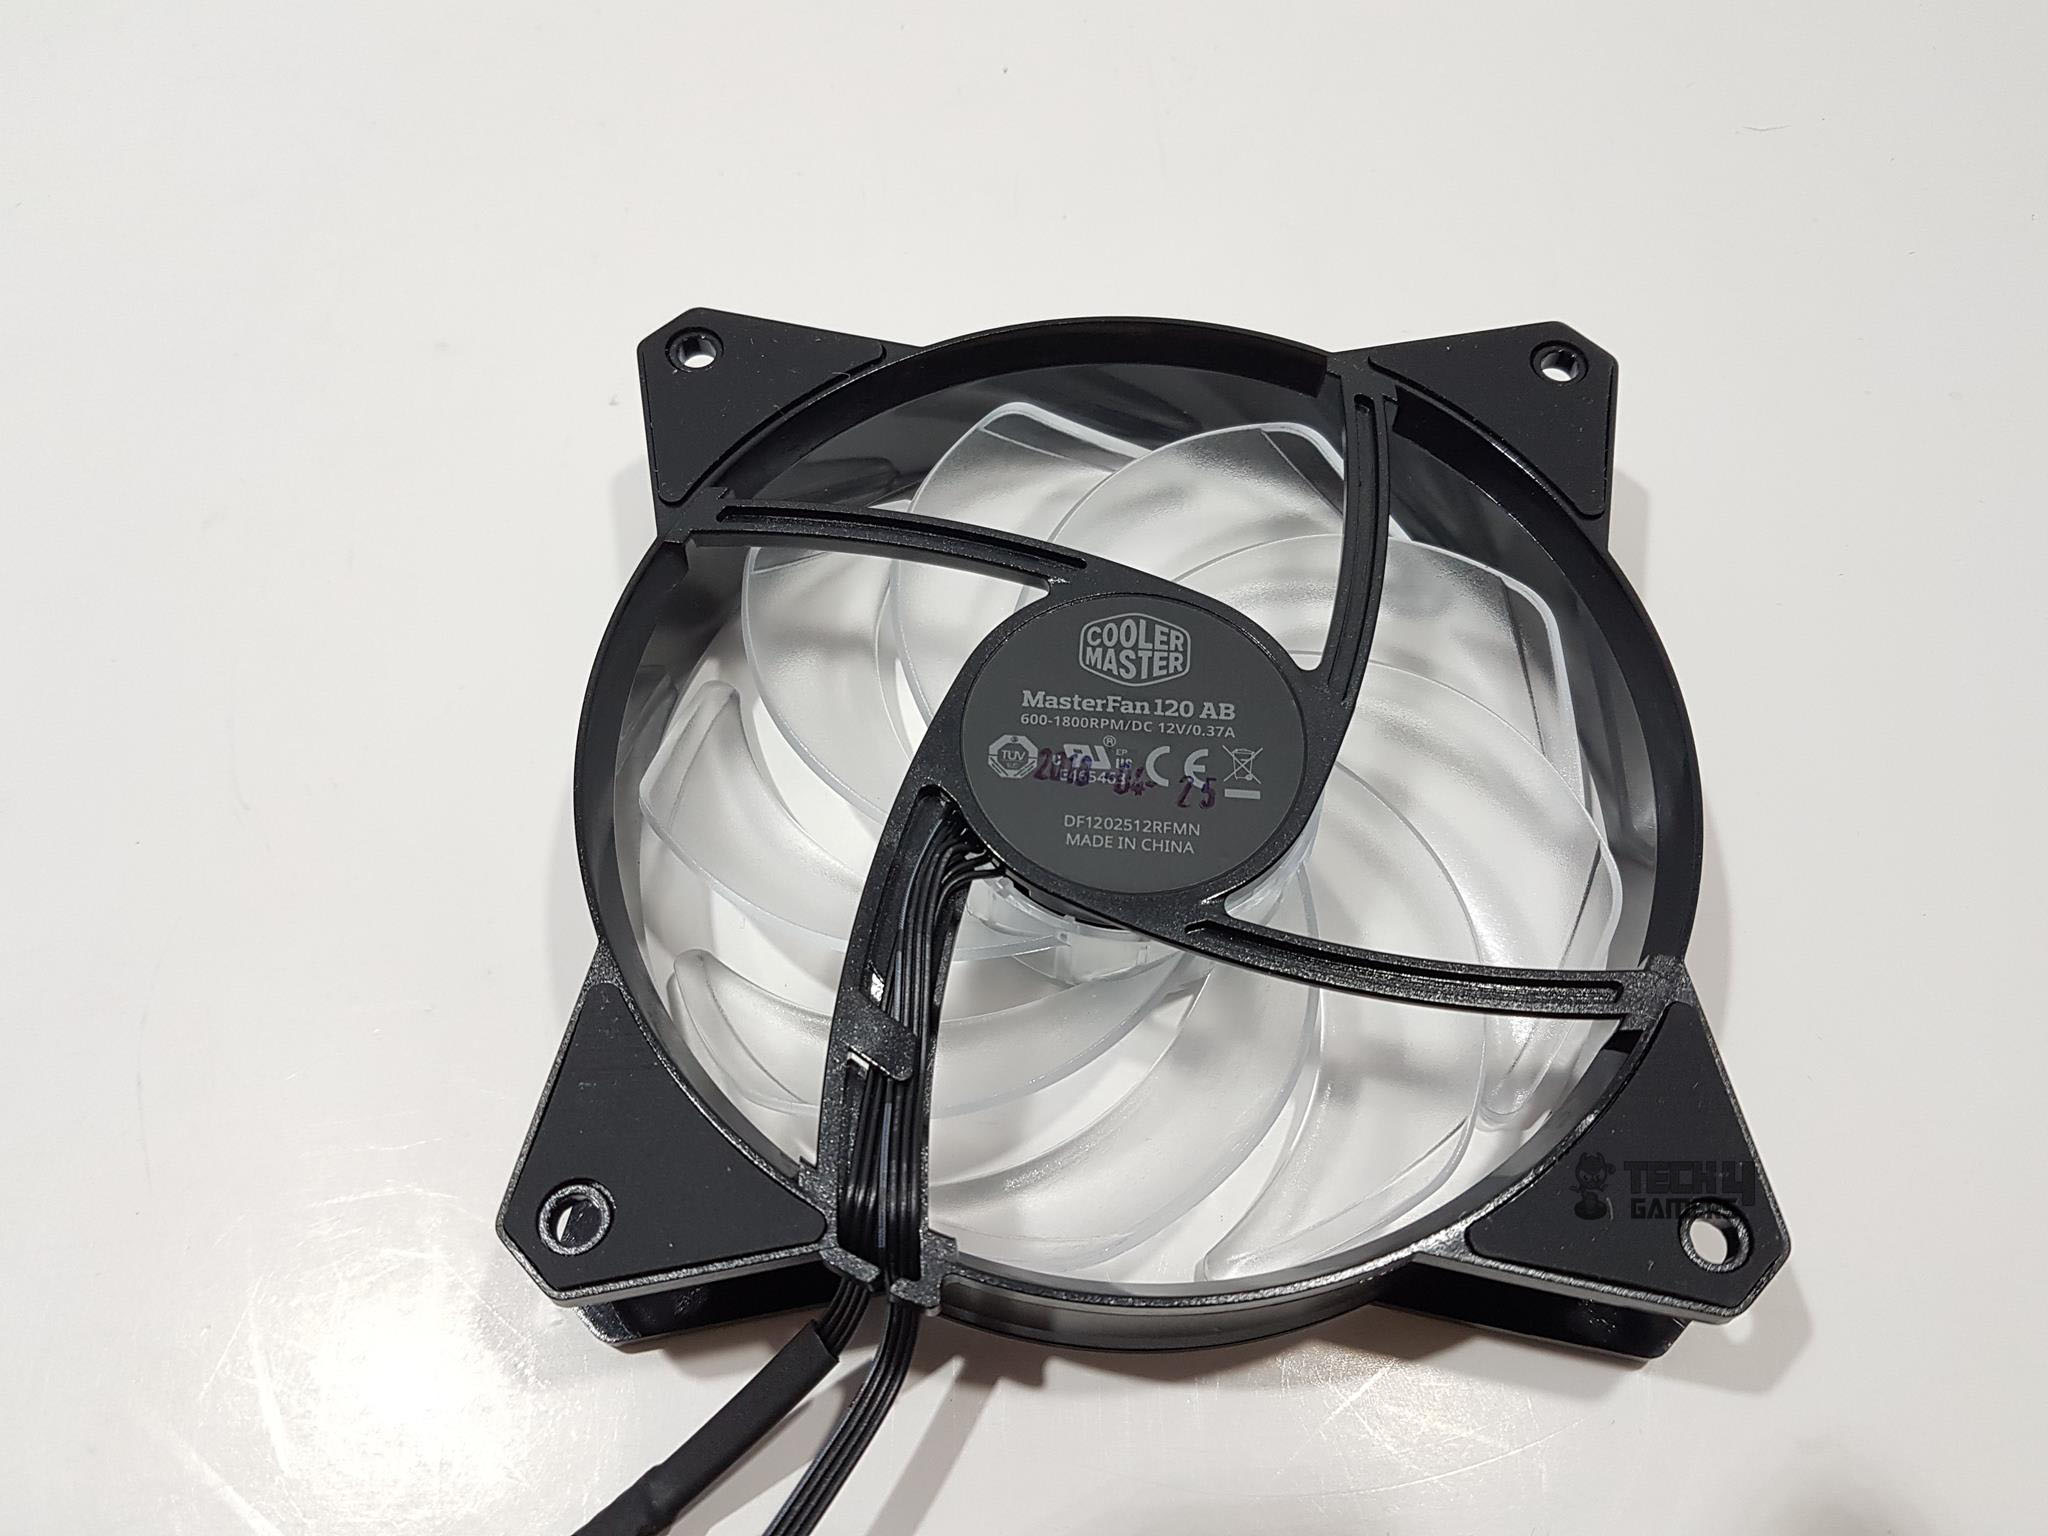
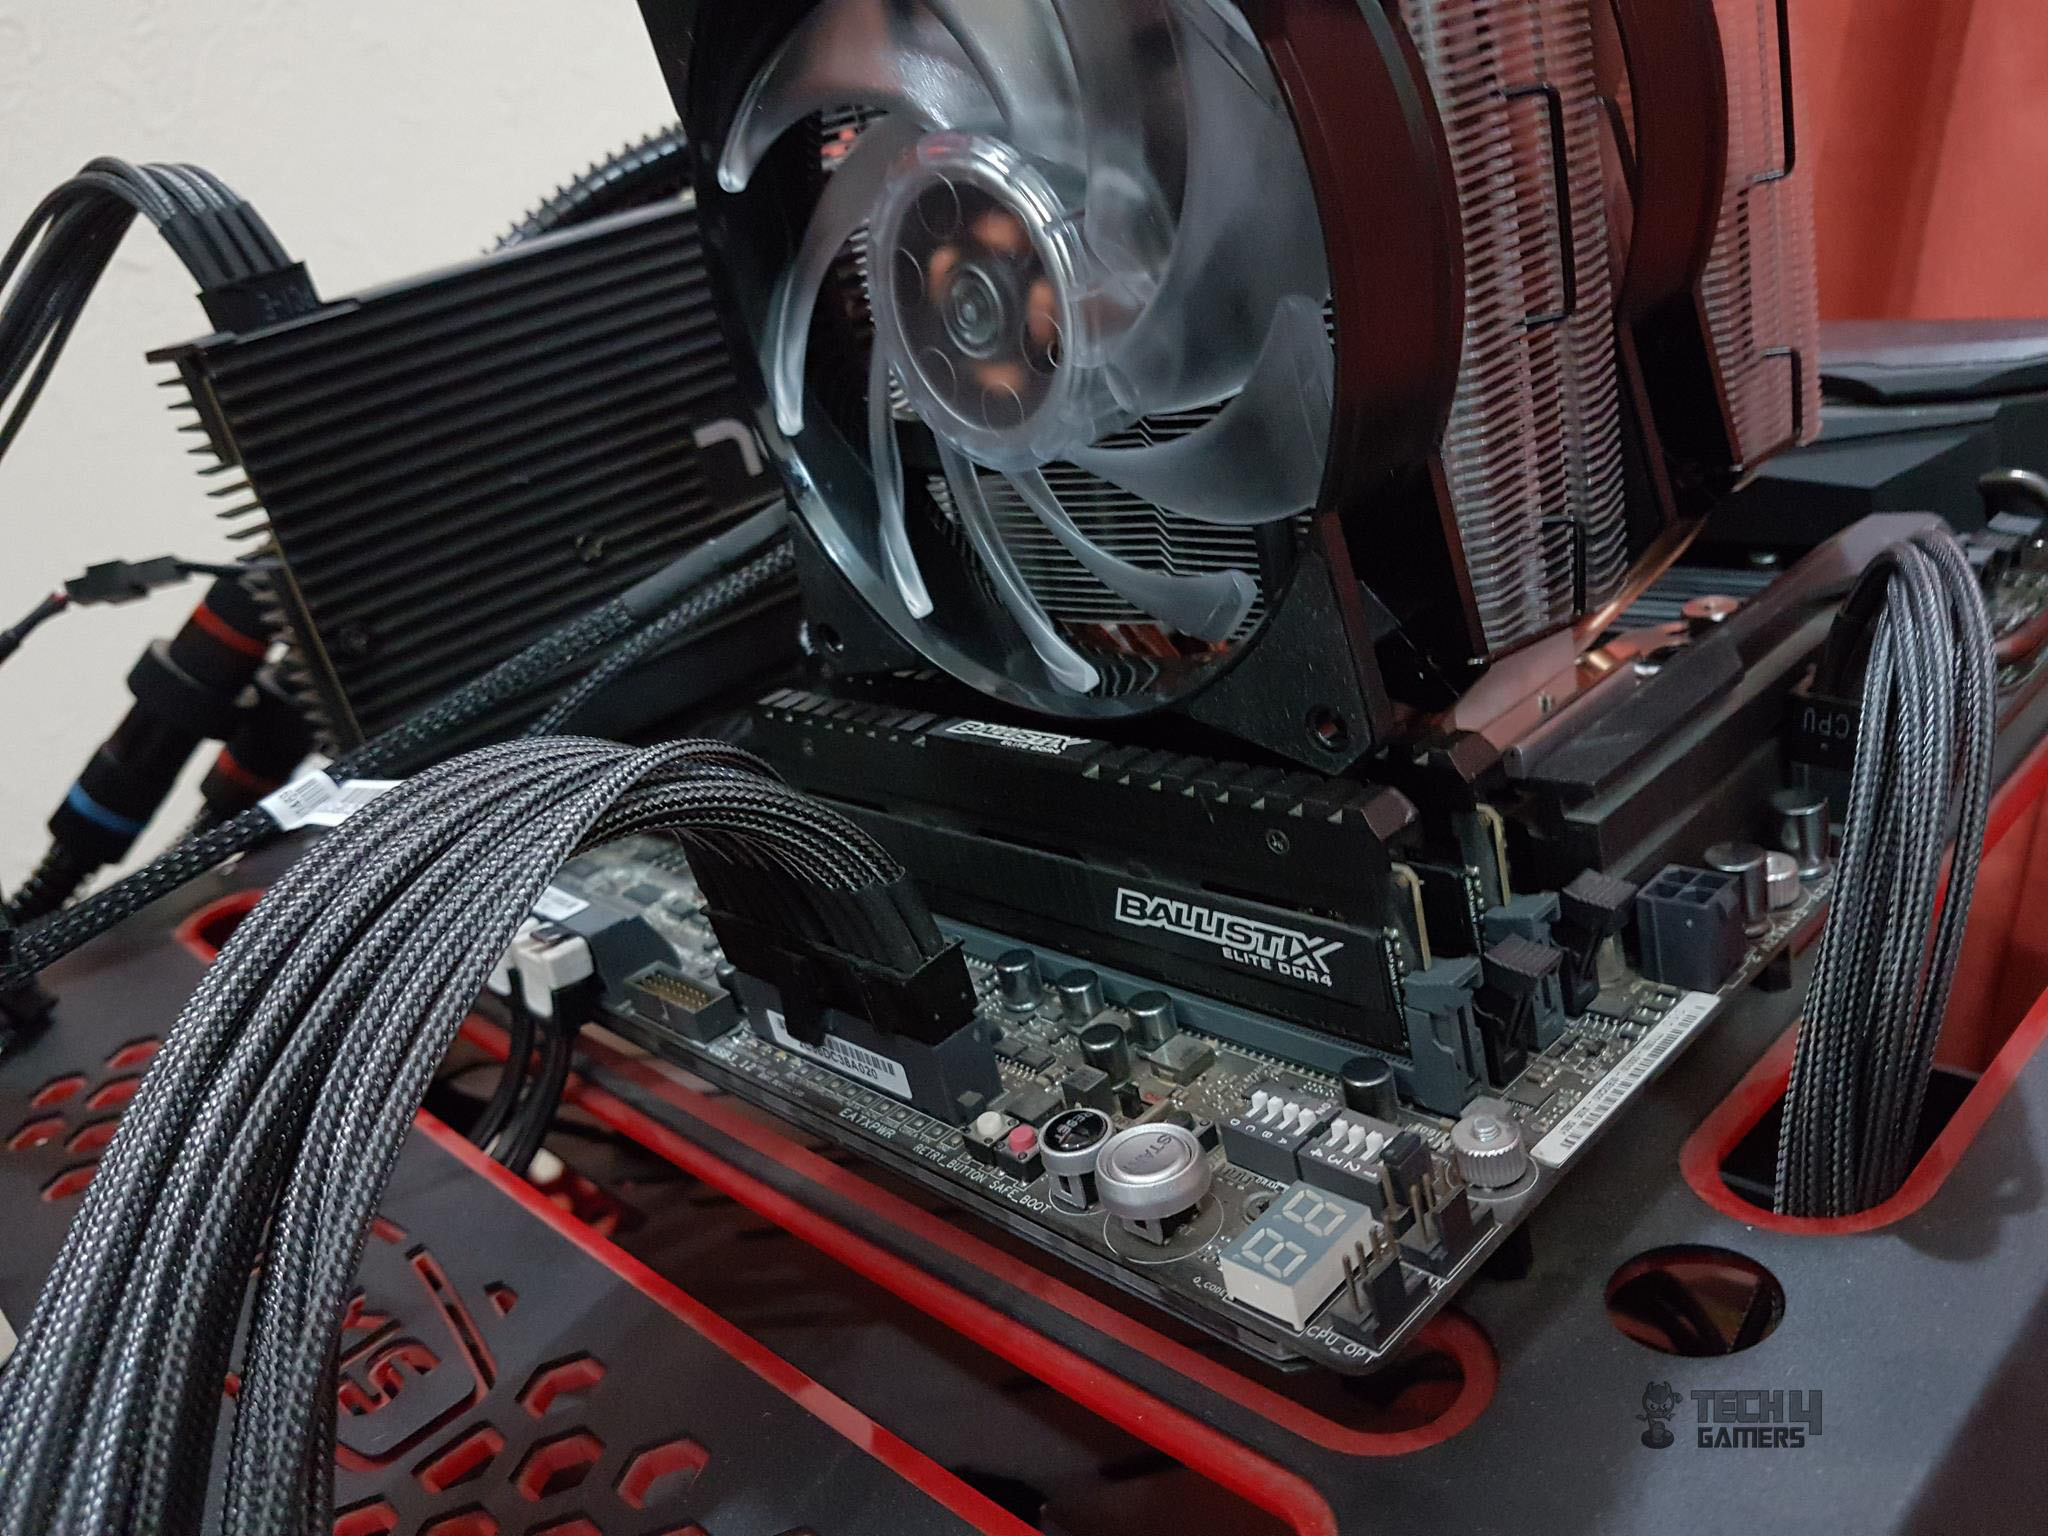
This fan boasts 9 see-through impellers, each with a raised trailing edge. The hub, also transparent, houses vibrant RGB LEDs. Its circular frame features a trapezoid-shaped layout with four mounting hubs, each sporting symmetrical anti-vibration rubber pads. On the back, a 4-arm assembly includes a widened arm for cable routing. Two flat cables emerge from the hub, adorned with a dark gray sticker carrying the Cooler Master logo and the label “MasterFan 120 AB,” denoting the Air Balance version.
There are two cables coming out from the fans. One is the 4-pin power connector having a length of 291mm approximately and the other is 4-pin RGB LED cable having a length of 53mm approximately. The reason why the length of the LED cable is much less than what usually is, is that the cooler has bundled a Y-LED Splitter cable having a length of 467mm which is enough to reach either the bundled controller or to the motherboard’s RGB Lighting header. There is a fan Y-splitter cable having a length of 227mm approximately.Following are the fan specifications:
| Dimensions | 120x120x25mm |
| Speed | 600~1800 RPM ±10% |
| Airflow | 53.4 CFM ± 10% |
| Air Pressure | 1.65mmH₂O ±10% |
| Noise Level | 31 dBA |
| Voltage | 12VDC at 0.30A |
| Safety Current rating | 0.37A |
| Power Consumption | 3.6W |
| MTTF | 160,000hrs |
RGB
Following lighting modes are available using the bundled controller:
- Static
- Stars
- Cycle
- Breathing
- Cycle Breathing
- Mirage
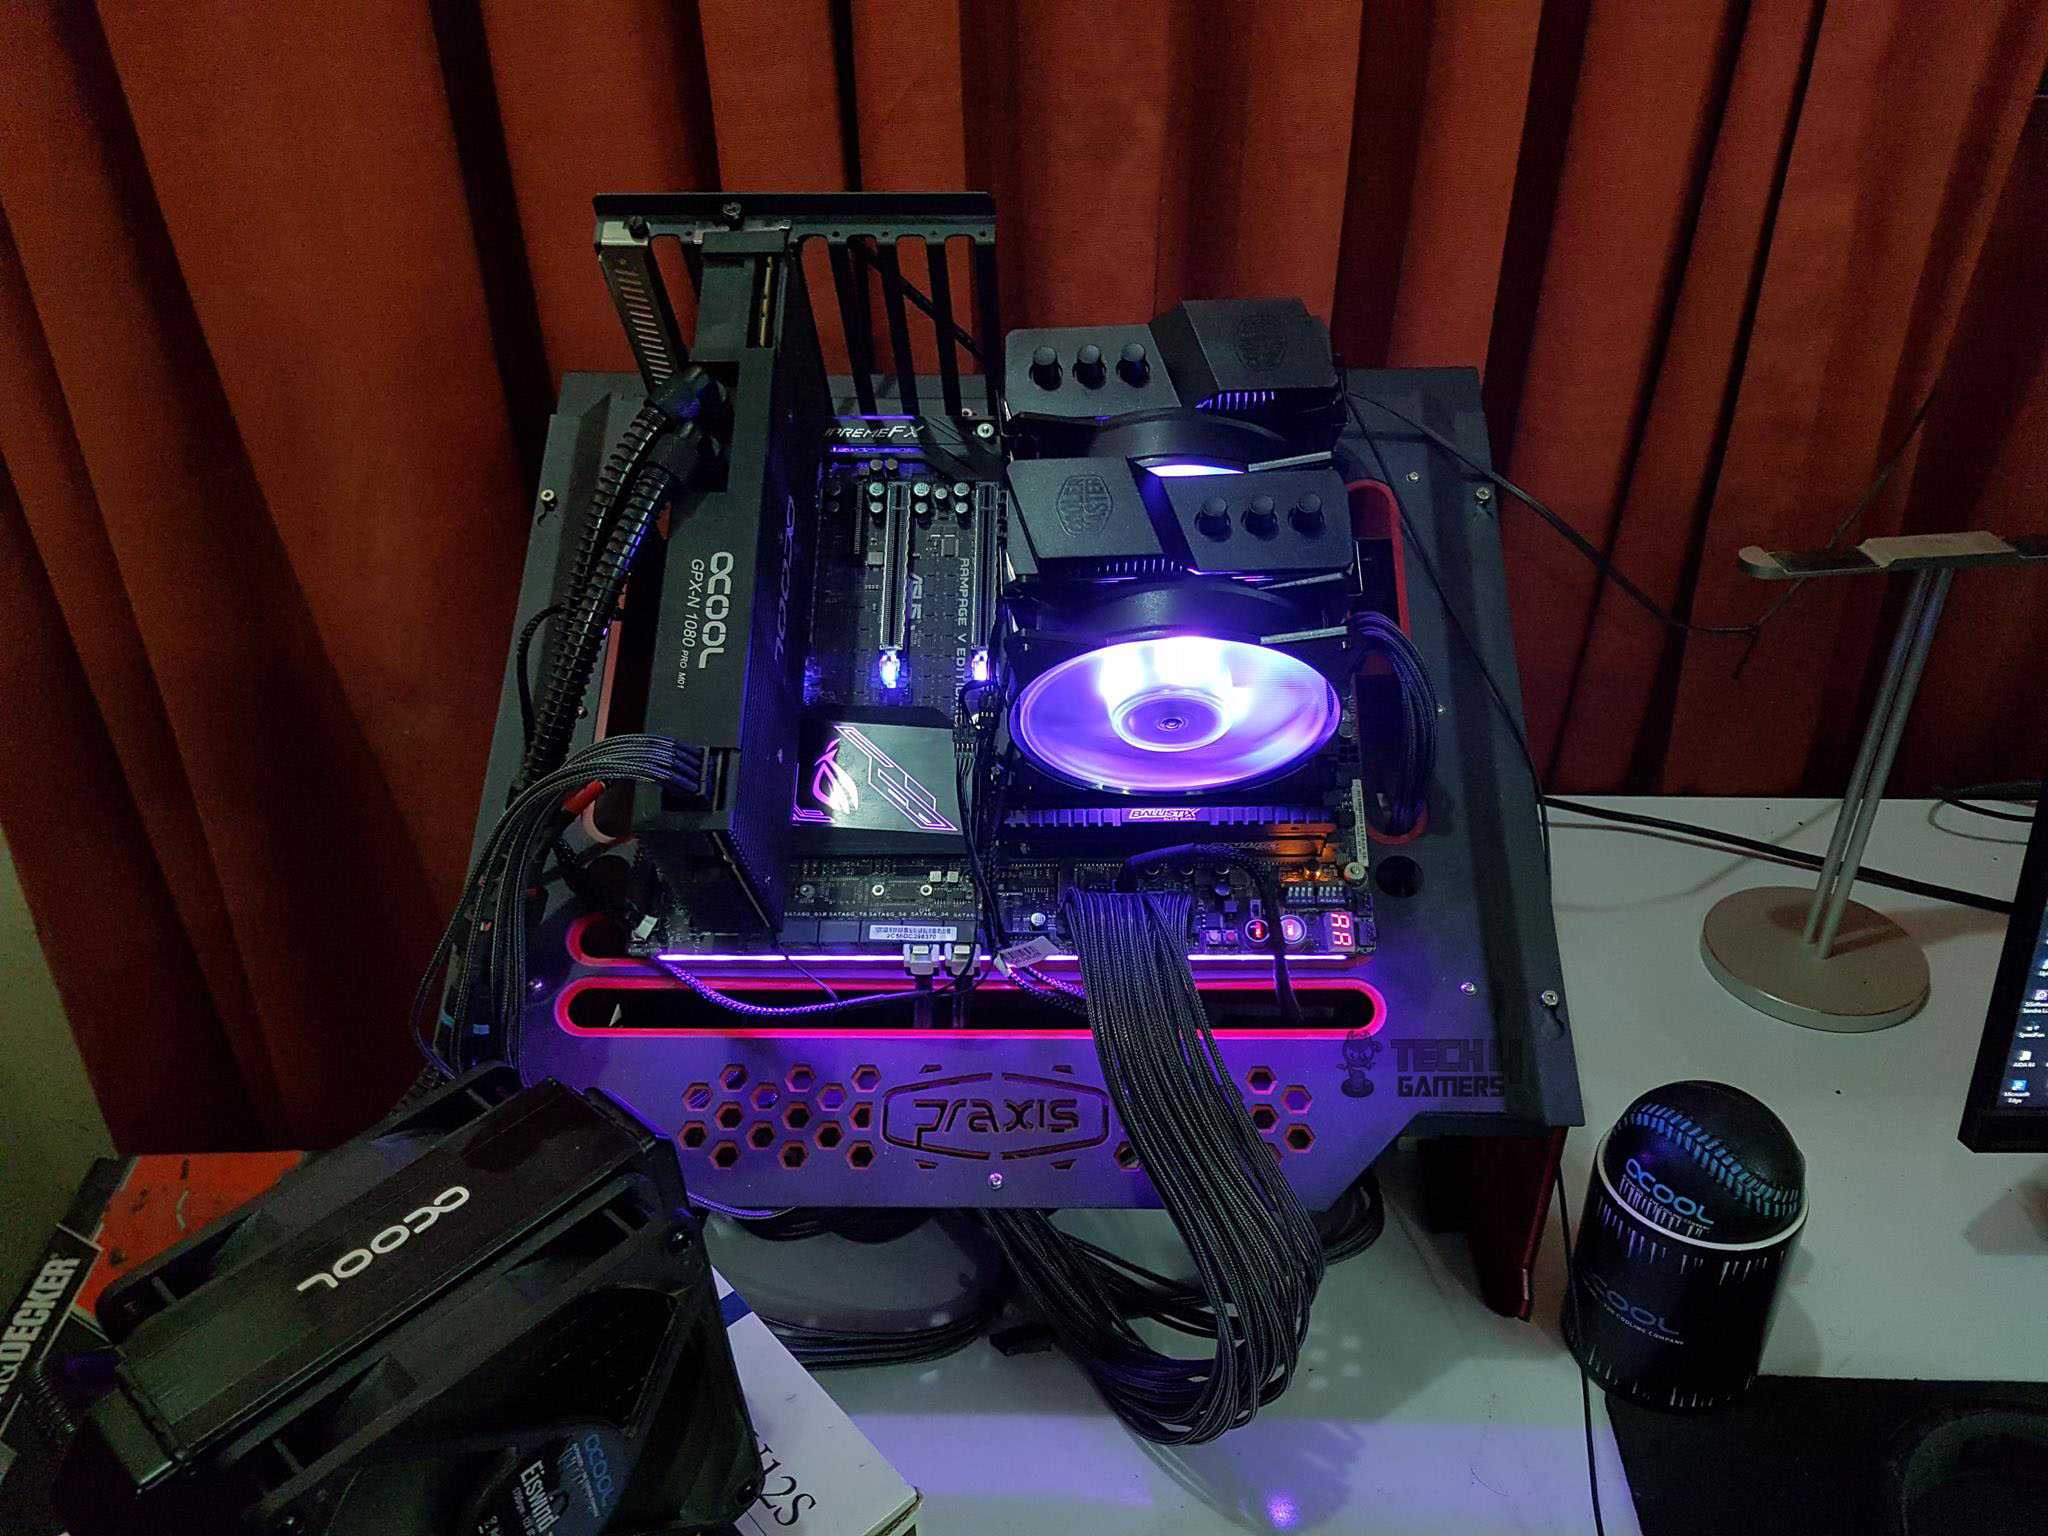
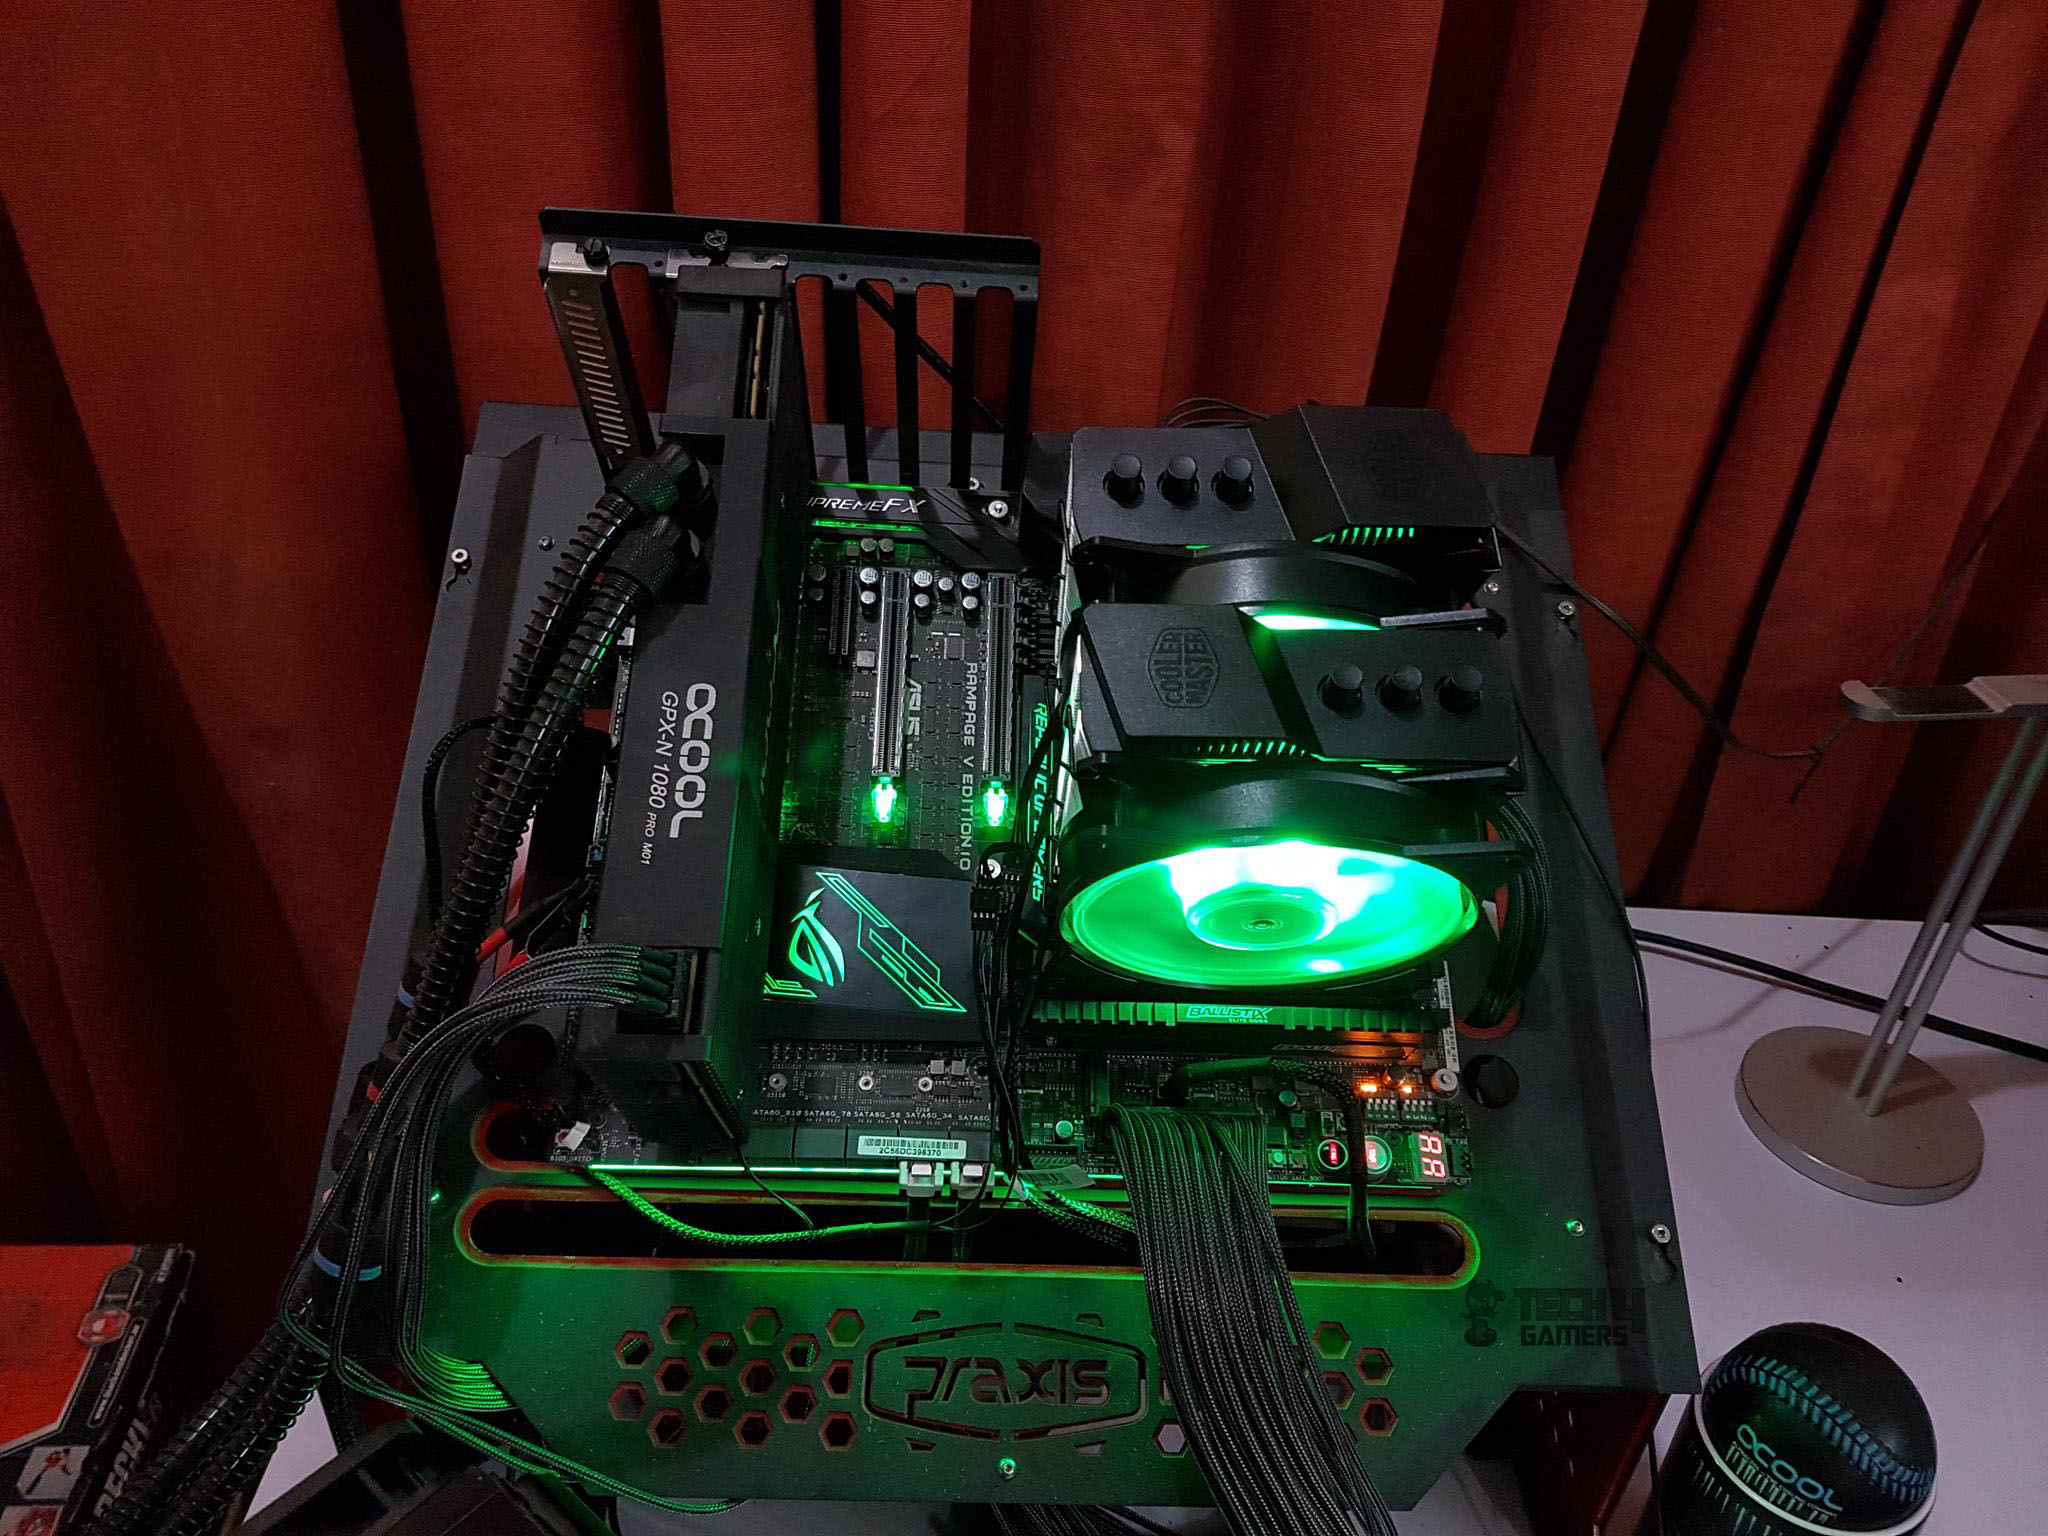
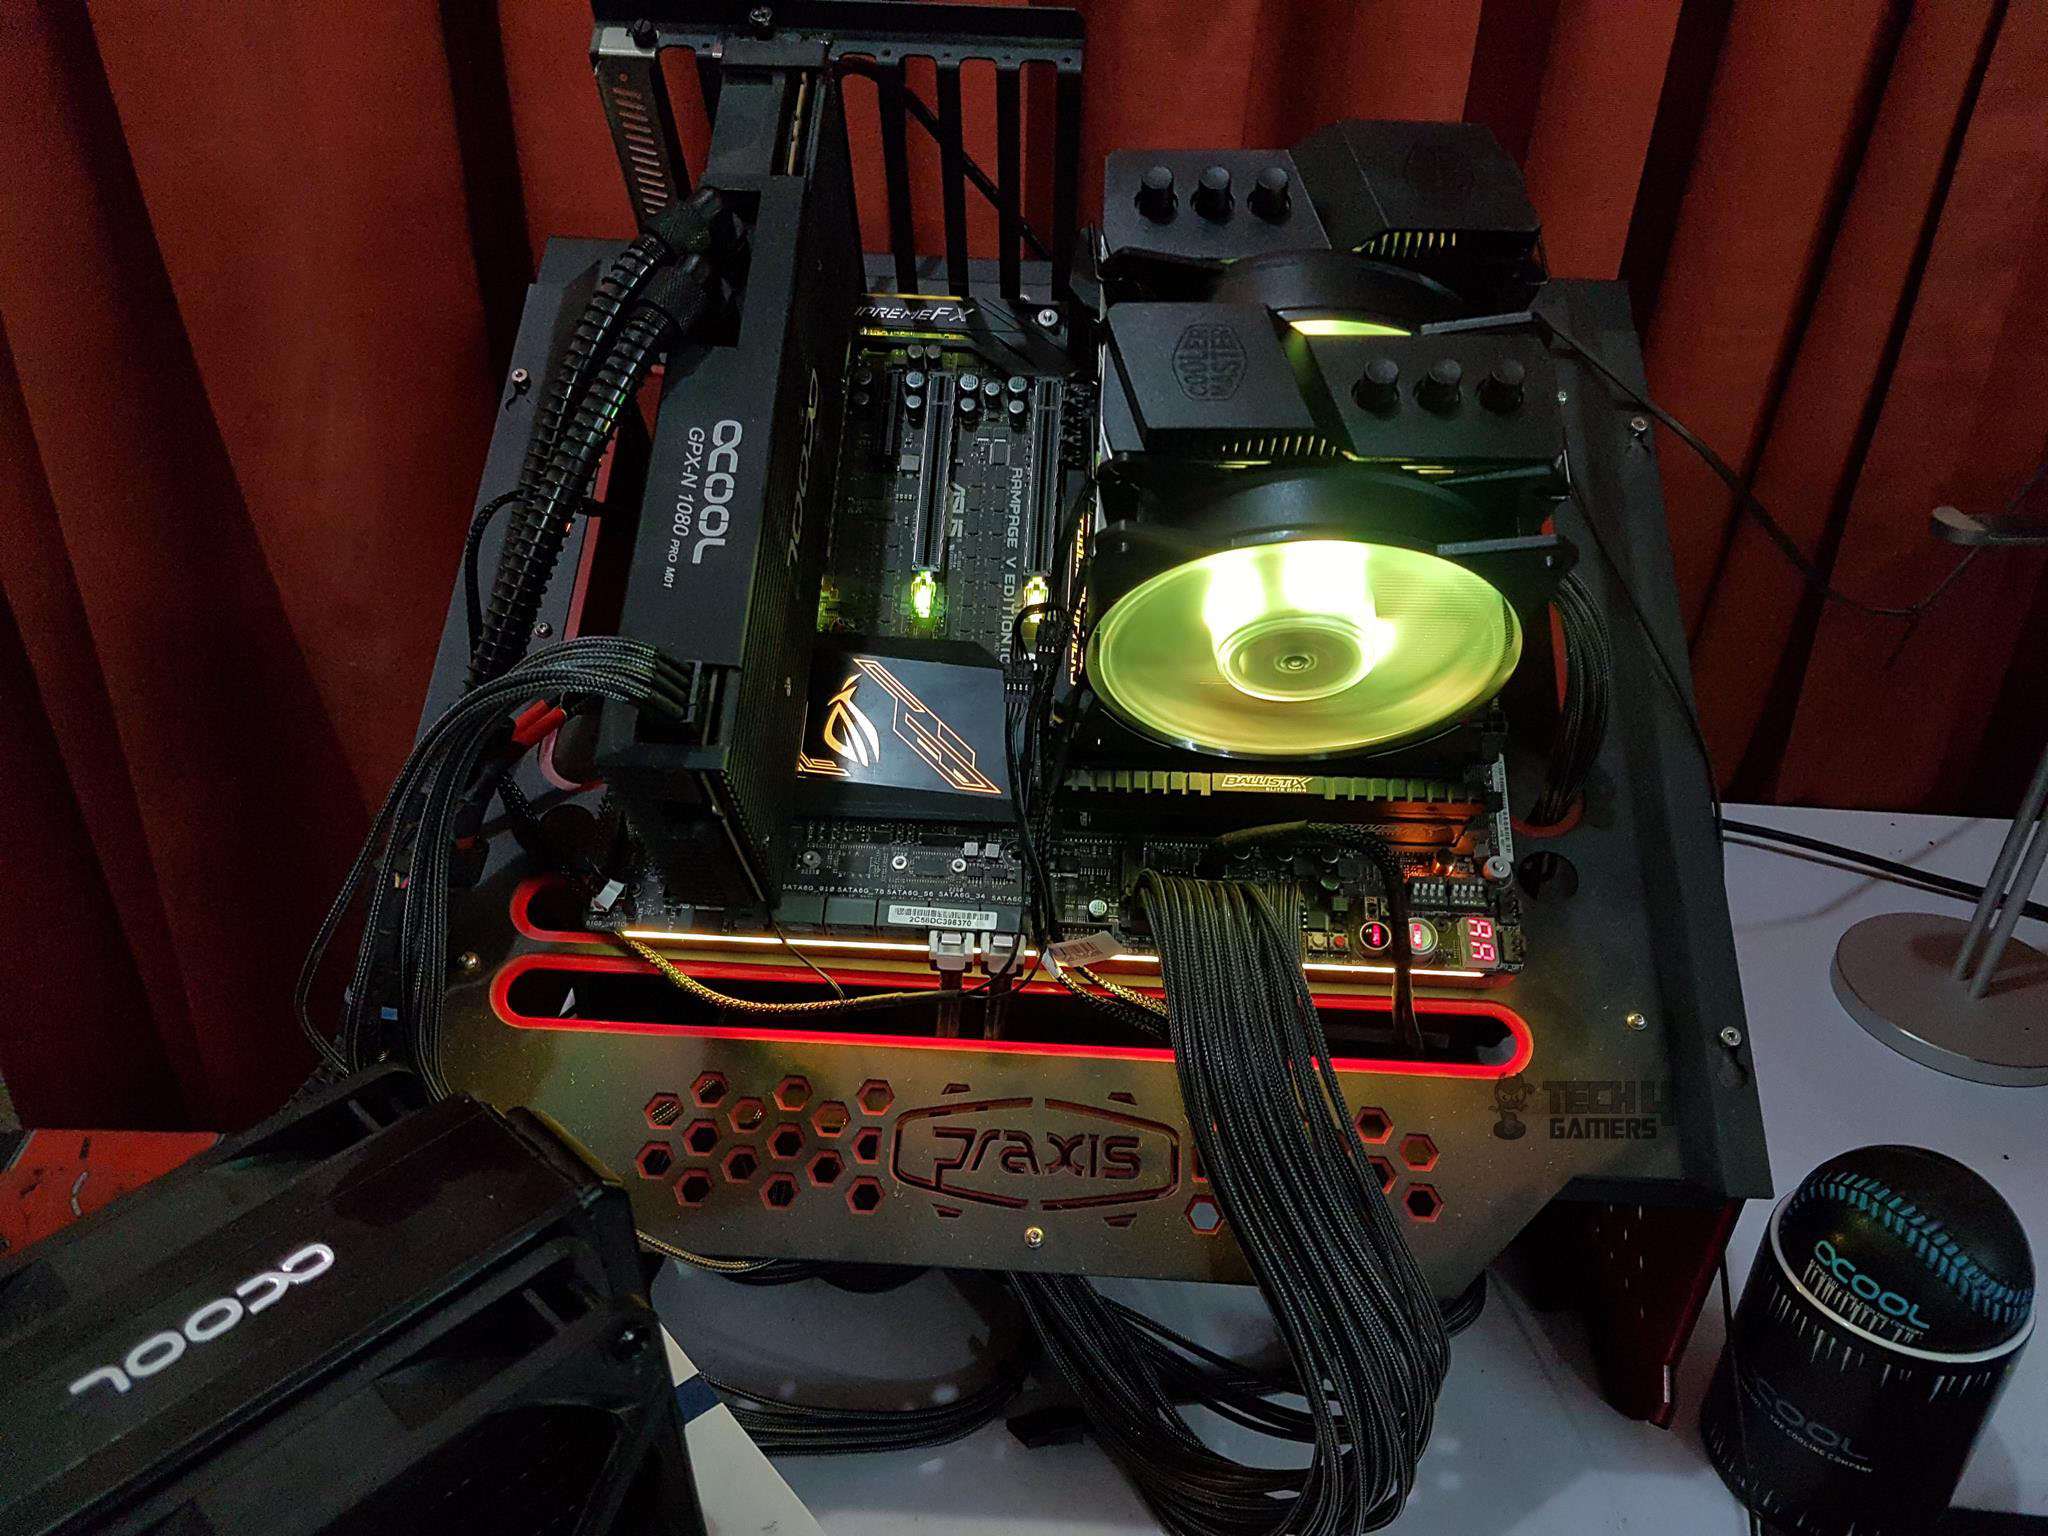
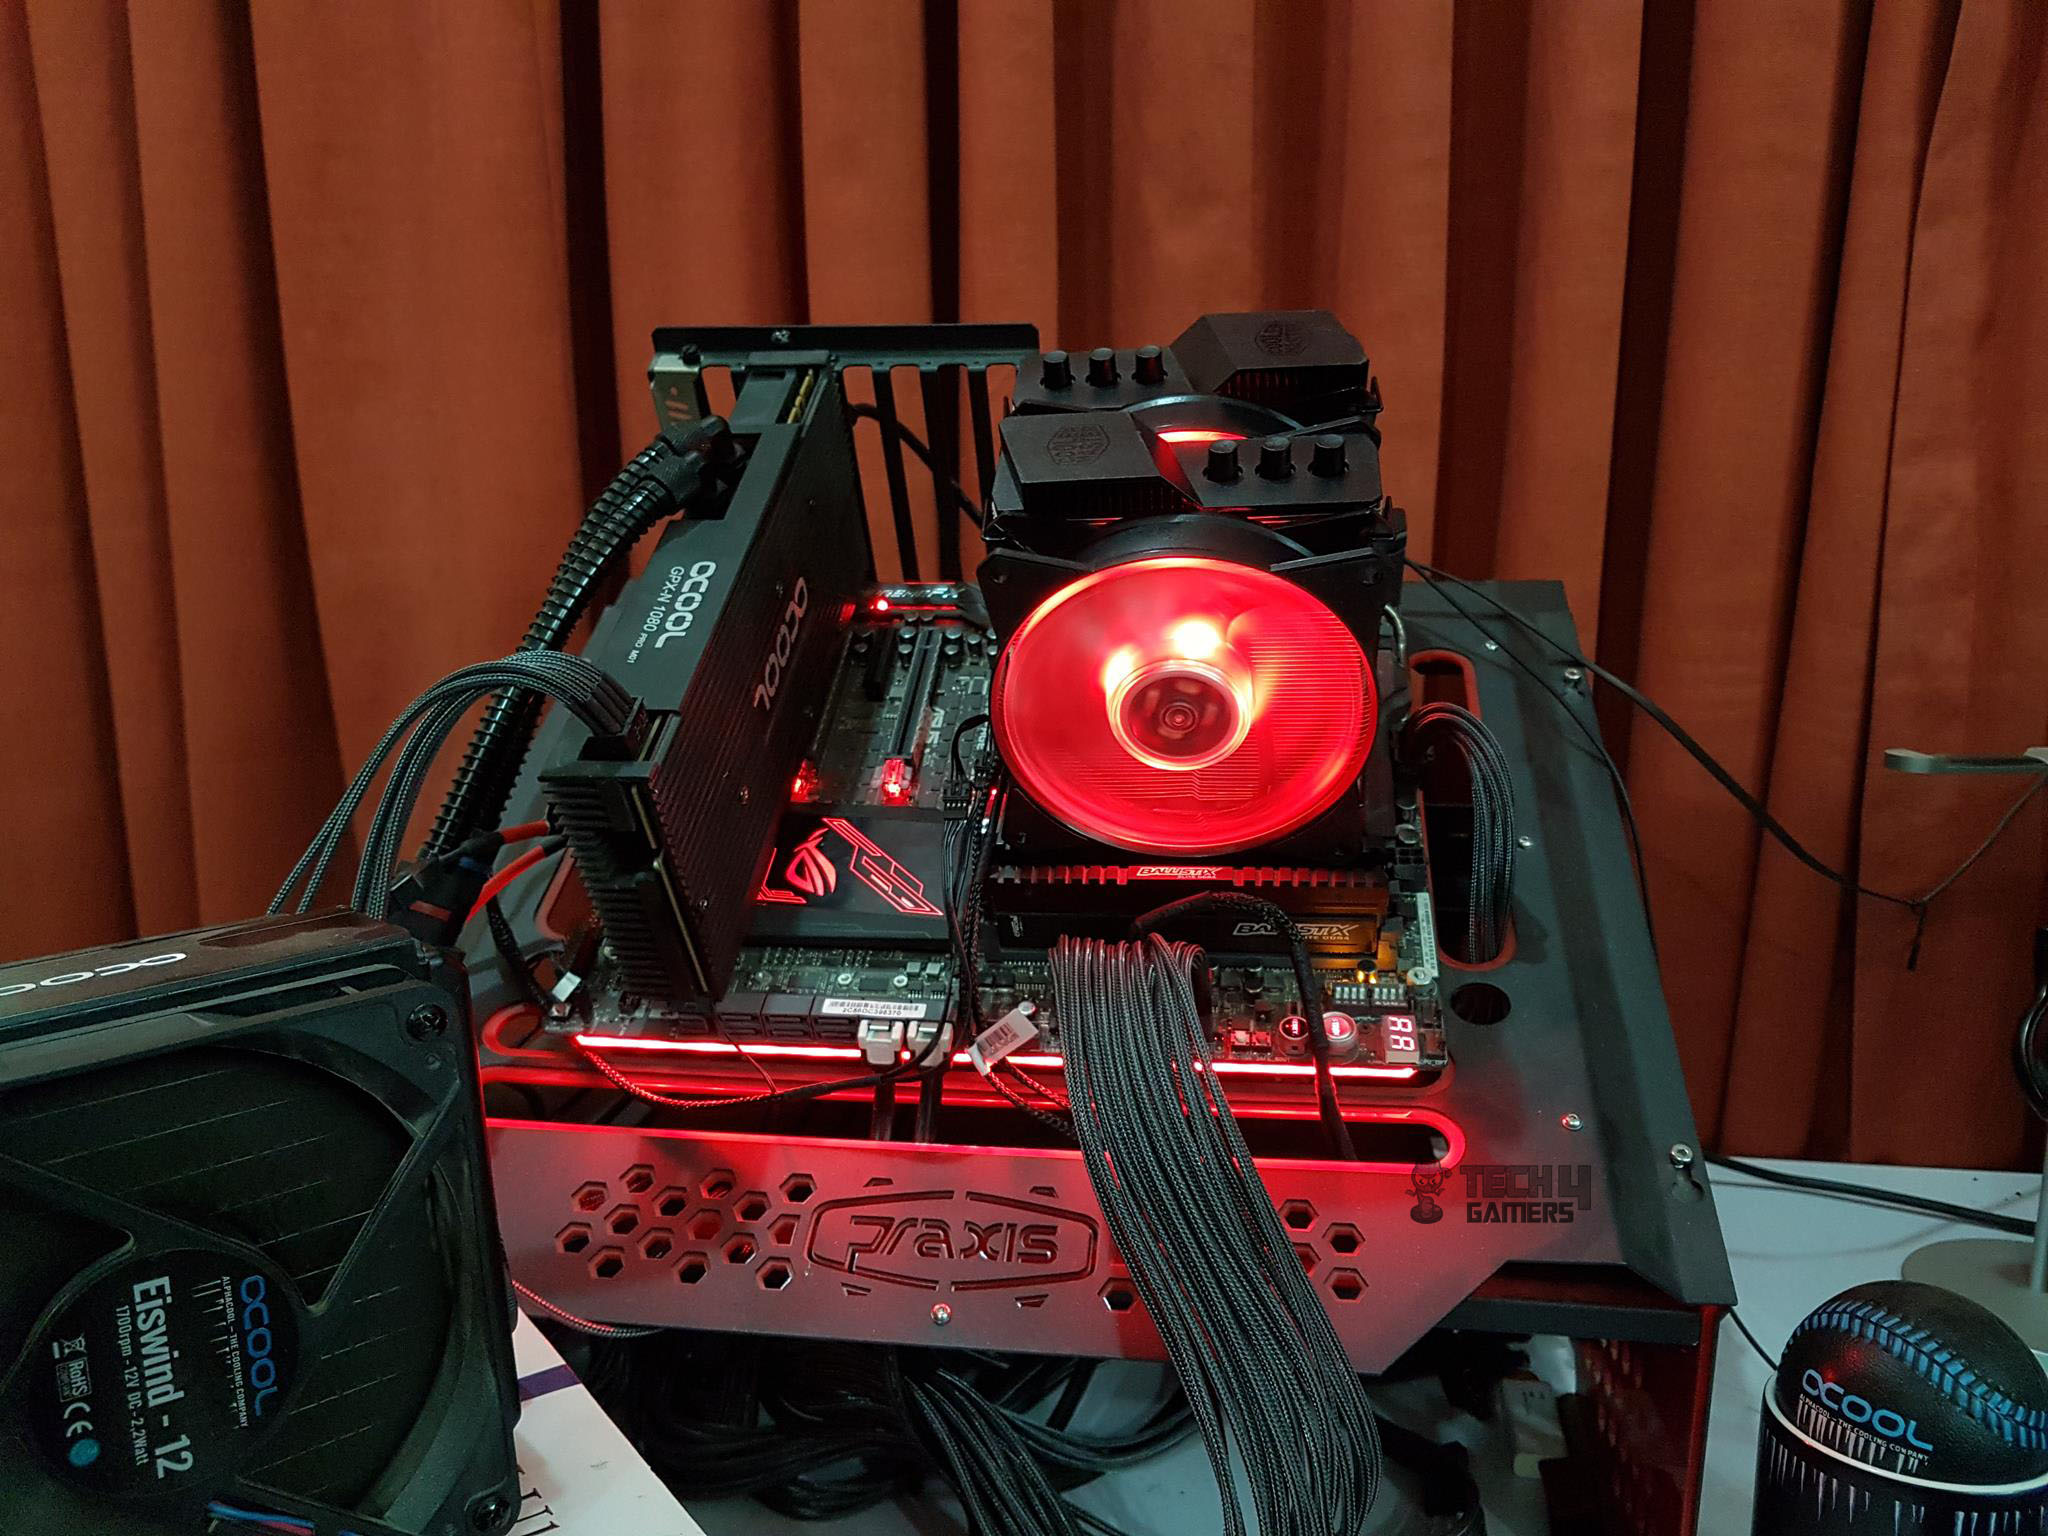
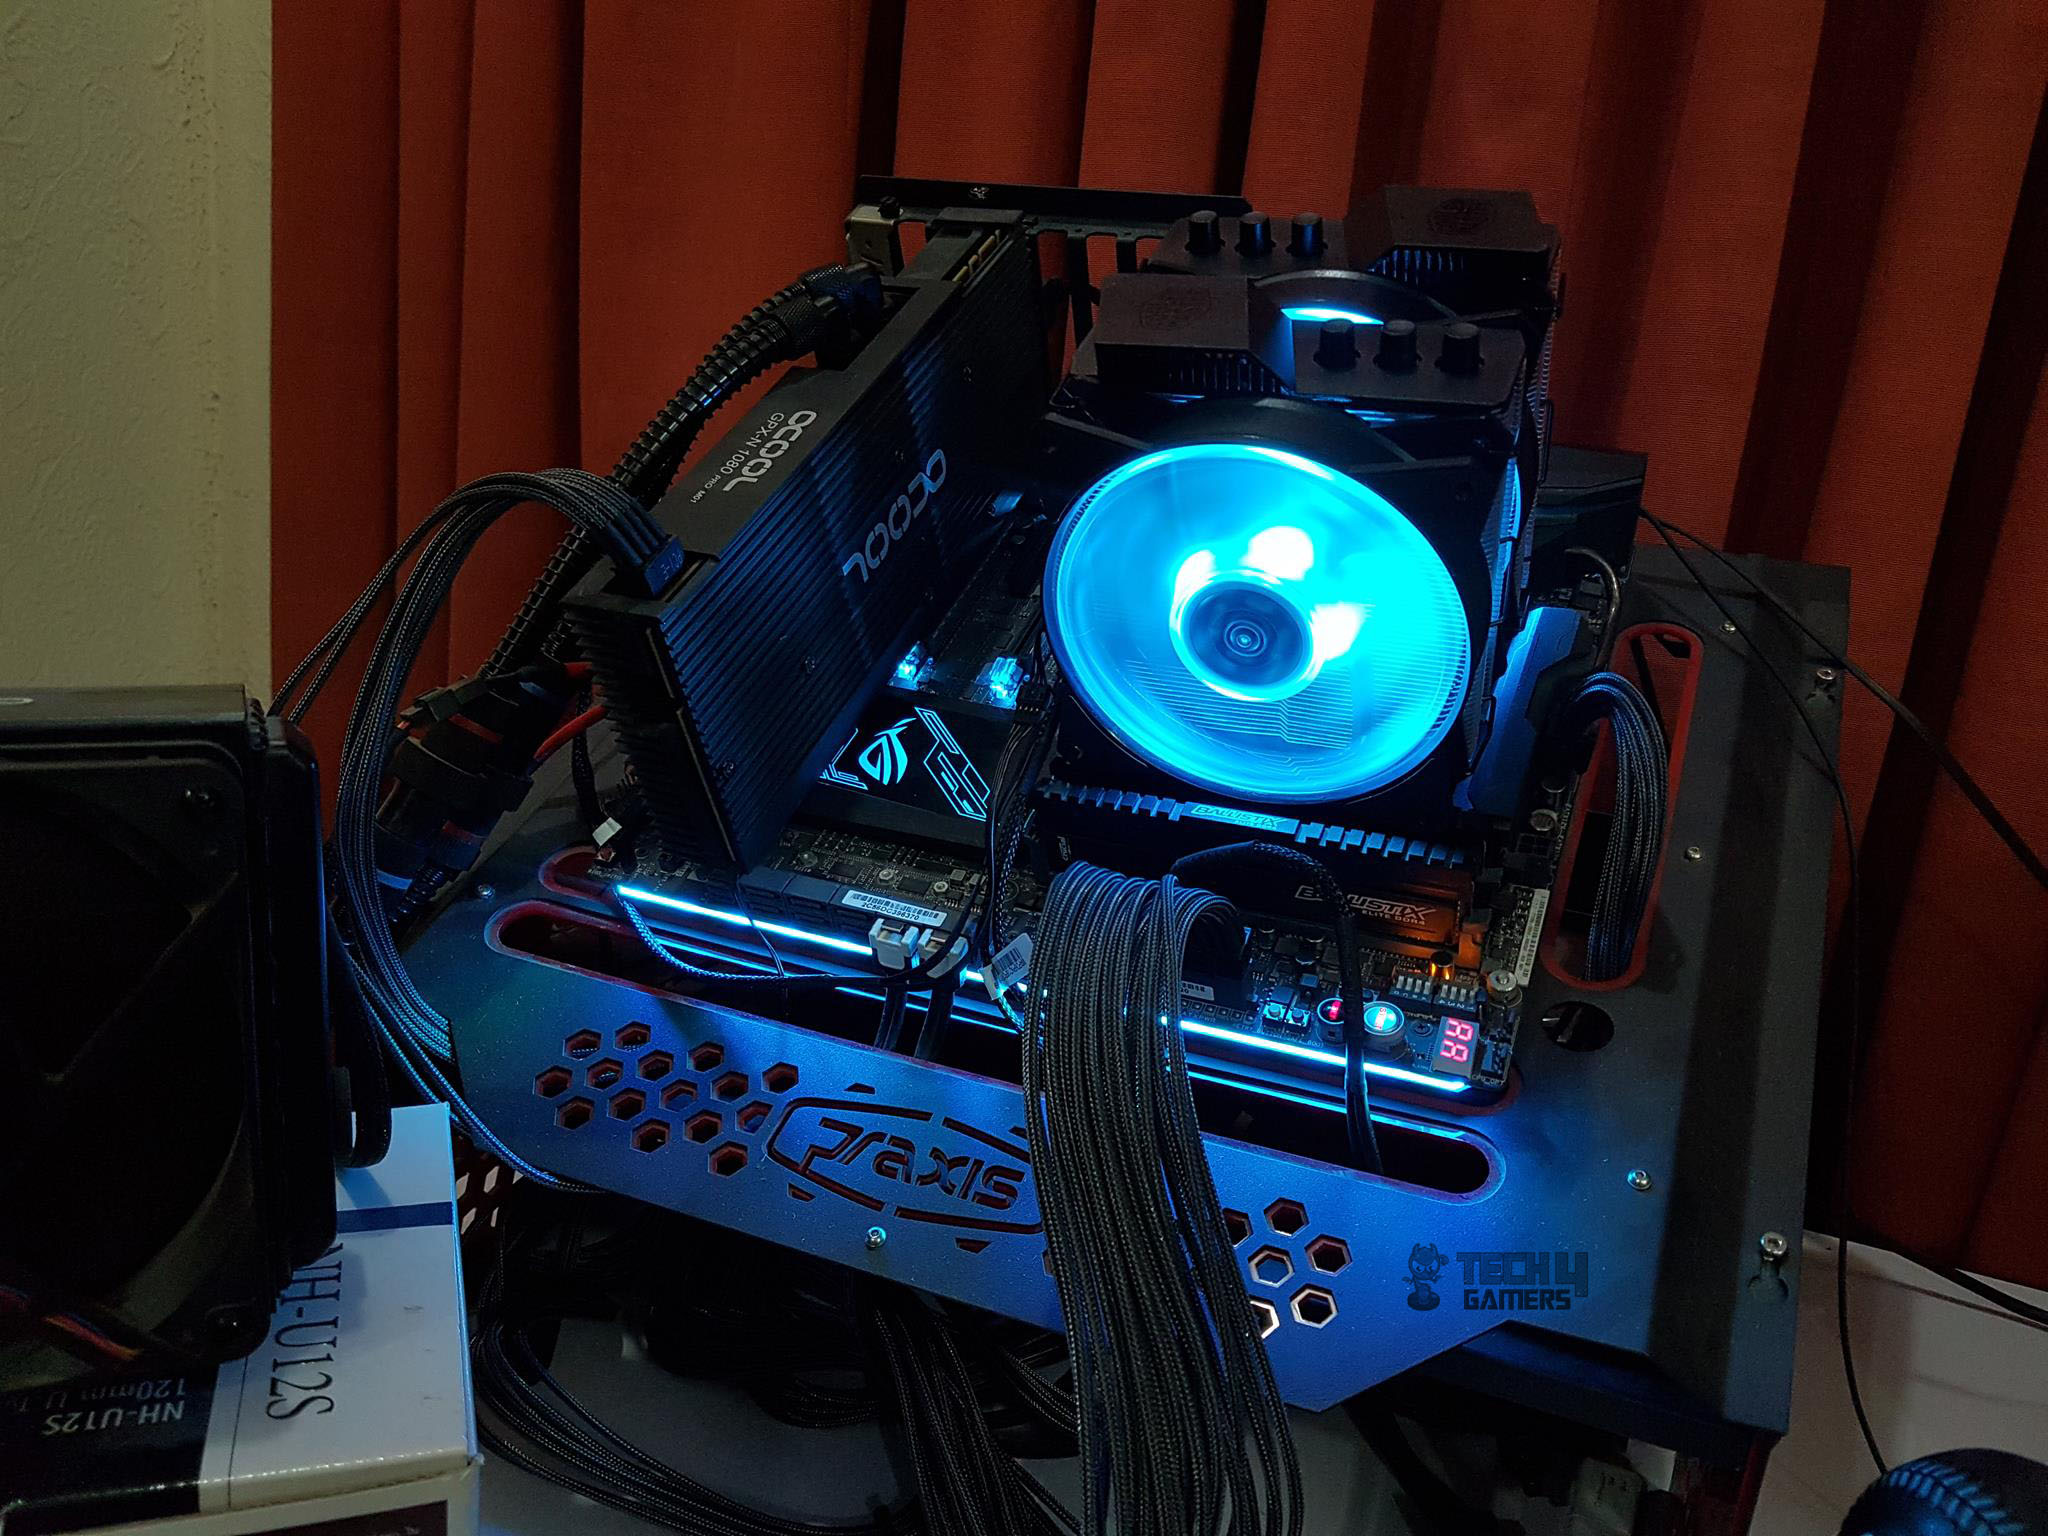
The lighting effects are right on the money and I love the colors. It is not overly done and has even lighting for smooth and better visuals. Users can customize the looks as per the build’s color theme though personally, the purple color looks that good in person on this cooler. The brightness of the lighting can be controlled as well in 4 steps. Here are some pictures:
Installation
Installing this cooler, especially on the Asus Rampage V Edition 10 (LGA 2011-v3), can be tricky. I’d recommend taking out the RAM and installing the cooler outside the chassis for easier access. The provided wrench is small and not very convenient to use, especially when space is limited. Its straight design makes it harder to use with taller I/O shrouds or VRM covers. Plus, the hex nuts, only about 3mm tall, add to the complexity. I had to remove all the RAM modules and the graphics card on this motherboard to manage it.
The Republic of Gamers LED plate sits very close to the CPU Socket which makes it difficult to install the cooler. Even this is only with this motherboard, the overall installation mechanism needs a redesign for the users’ convenience. Even on the LGA-1151, you should install this cooler outside of the chassis and without any RAM.
Below are the installation guides for Intel LGA 2011-V3 and LGA-1151 (300 generation):
LGA2011-V3
Following are the steps for this socket installation:
- Install the LGA-2011 screws on the mounting holes around the CPU Socket
- Install the Intel mounting brackets on to the Cooler’s base using two small screws. Make sure that brackets are pointing outwards. Consult the manual before installation.
- Take off the warning sticker from the base of the cooler.
- Apply thermal paste on the CPU Surface.
- Place the cooler on the CPU by aligning the holes on the mounting brackets’ heads with the screw.
- Secure the cooler by using the hex nuts. Hand tight them till no further possible and go diagonally for even pressure.
- Use the supplied spanner/wrench to fully tighten the hex nuts. Patience is a virtue!
- Connect the 4-pin PWM cable to the CPU fan header or any of your desire fan header.
- Connect the 4-pin LED cable to the controller or RGB header on the motherboard. Make sure to match the small arrow symbols on the same side. Arrow side is the 12VDC.
- This would complete the installation.
LGA1151
Following are the steps for this socket installation:
- We have to prepare the backplate for this socket. The included backplate has one side for AMD and the other for Intel. Markings are printed on these sides for reference. For Intel, make sure the side with printed AMD is facing the motherboard’s backside.
- Each corner of the Intel arms on the backplate has a large cutout with three markings. The middle area is for the Intel LGA115x. Pass the standoff through the middle of these cutouts. Don’t worry about the exact location of the standoff at this moment.
- Use the clips to slide them inside on each Intel arms. This would secure the standoffs where you would want them to be. Now, pull the standoffs to the exterior most as this would set them to be used on this socket.
- Now, place the backplate on the backside of the motherboard such as the standoffs go through the mounting holes around the socket.
- Install the 4x Intel/AMD screws on the standoff. Hand tight them. The backplate will have a flex giving the impression that it is not mounted properly. This is expected behavior as it will be firmly secured once the cooler is installed so don’t worry.
- Install the Intel mounting brackets on to the Cooler’s base using two small screws. Make sure that brackets are pointing outwards. Consult the manual before installation.
- Apply the thermal paste on the CPU surface.
- Take off the warning sticker from the base of the cooler.
- Place the cooler on the CPU by aligning the holes on the mounting brackets’ heads with the screw.
- Secure the cooler by using the hex nuts. Hand tight them till no further possible and go diagonally for even pressure.
- Use the supplied spanner/wrench to fully tighten the hex nuts. Patience is a virtue!
- Connect the 4-pin PWM cable to the CPU fan header or any of your desire fan header.
- Connect the 4-pin LED cable to the controller or RGB header on the motherboard. Make sure to match the small arrow symbols on the same side. Arrow side is the 12VDC.
- This would complete the installation.
Clearance
Let’s talk about clearance.

Performance Tests
The following test bench was used for testing this cooler:
- Asus Rampage V Edition 10
- Intel Core i7 6850k
- Crucial Ballistix Elite 4x4GB @ 3000MHz
- Nvidia GTX 1080 FE with Alphacool Eiswolf GPX Pro
- Samsung 840 EVO 250GB SSD
- WD Black 6TB
- Corsair AX1200i
- PrimoChill Praxis WetBench
The following software was used for the testing and monitoring.
- Asus Real Bench v 2.44
- Real Temp GT v 3.70
The thermal paste being used on the test bench is the Noctua NT-H1 thermal paste. The use of a same thermal paste for all coolers will ensure the standardization and mitigate any performance benefit that may come using the supplied thermal paste. Delta temperatures are reported on the graphs. The cooler is tested on stock clocks i.e 3.6GHz using 1.136V manual VCore.
Testing Methodology
The Asus RealBench 2.44 is used to stress test the cooler’s performance. Each run was of 60 minutes. Each run of the test was of 15 minutes followed by 15 minutes break to let the system cool down. Fans were set to run at their 100% RPM. CPU is overclocked to 4.3GHz with 1.350V manual Vcore. Three test runs are made. Average of each test run is calculated.
The max temps on each core are summed up and divided by the core count to give the average figure. The max average of three tests is used for reporting. Delta temp are calculated by subtracting the ambient temp from the max average temp.
Let’s take a look at the results.
Thermal Performance (3.6GHz)
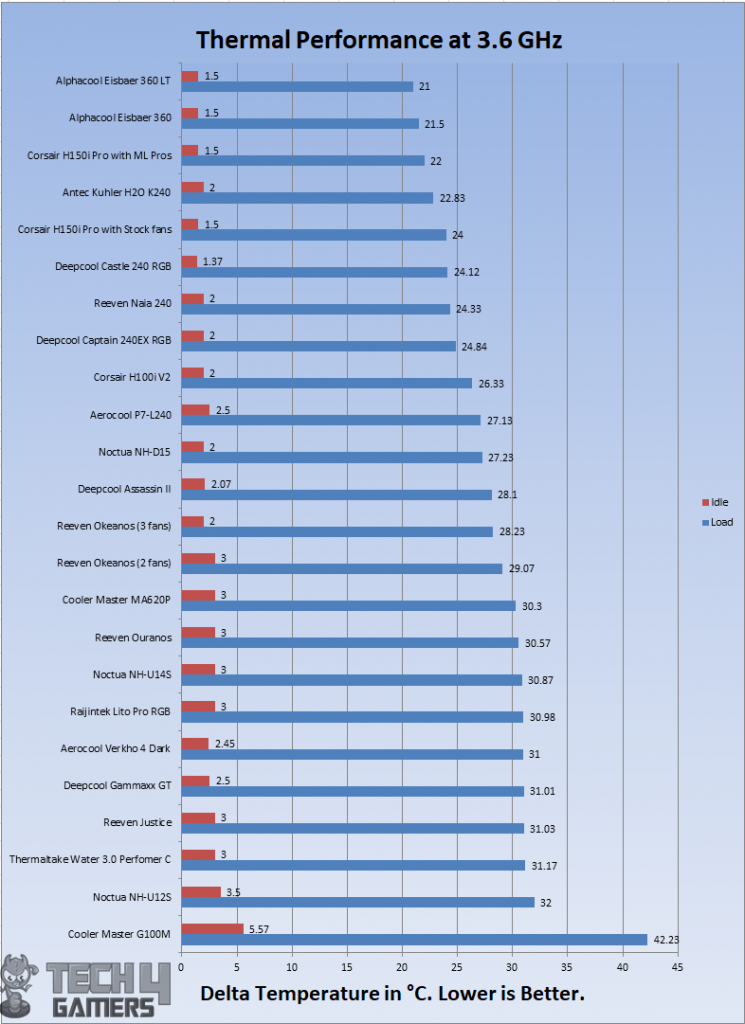
On stock clocks i.e 3.6GHz at 1.13V, the cooler was idling at 3°C. Under stress test, the cooler was doing delta 30.3°C. There is a marginal difference between this cooler and Reeven’s Okeanos which is also a dual tower.
Thermal Performance (4.3GHz)
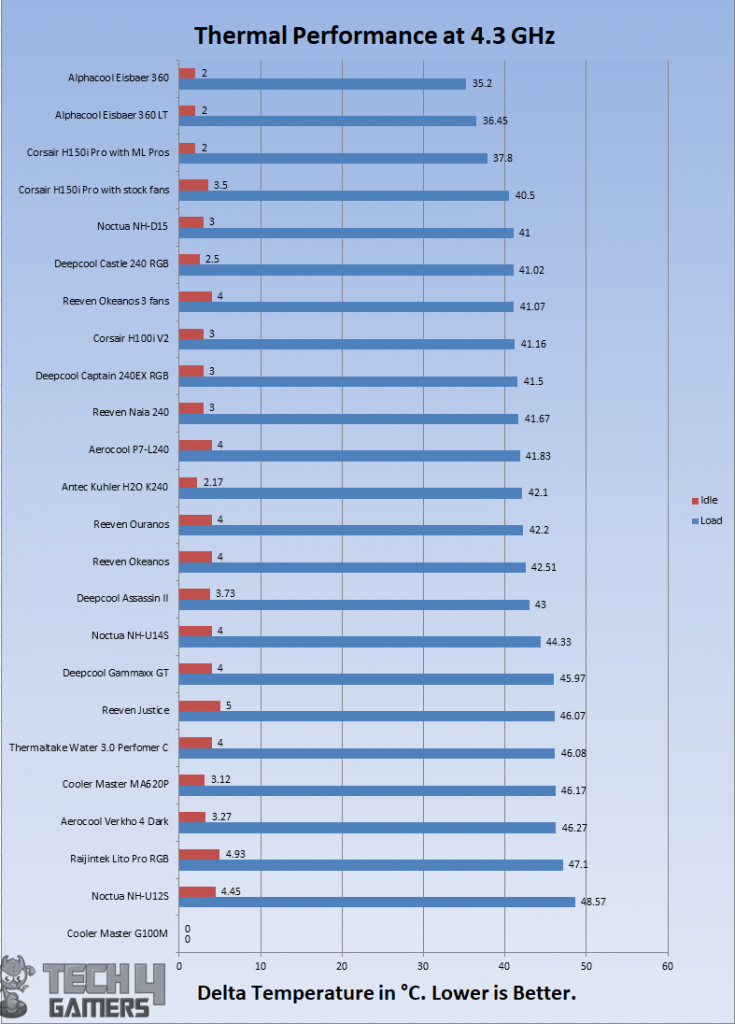
With overclocked chip at 4.3GHz using 1.350V, the cooler could not keep it up as temperatures were in the upper limit of the 80s. The chip was idling at 3.12°C and under load, it was doing 46.17°C. I was expecting it to perform better than this.
Noise
I could not measure the sound level of the unit as the summer season here is at peak and ceiling fan plus the noise coming out of the room would invalidate the actual sound level. Based on my experience with the fans and coolers testing so far, the fans were audible but not teasing at all.
Should You Buy It?
So, is this the right cooler for you or not?
Buy It If
You Crave Performance and Aesthetic: If you seek a cooling solution that merges top-notch performance with striking aesthetics, the MasterAir MA620P with its dual tower design and vivid RGB lighting might be your ideal choice.
RGB Customization Matters: For users without RGB headers on their motherboards, the dedicated RGB controller bundled with this cooler allows easy customization, syncing seamlessly with various motherboard RGB software, offering six predefined modes for vibrant lighting.
You Want Value-Packed Cooling: Considering its price range and performance, this cooler offers a solid value proposition, particularly for mid-level overclocking and handling lower TDP chips effectively, making it a suitable option for those aiming for efficient cooling without breaking the bank.
Don’t Buy It If
You Have Space Constraints: Due to its larger dimensions and dual-tower design, this cooler might not be suitable for smaller cases or setups with limited space. Its height, especially with both fans, might pose a fitment issue in compact builds.
You Require Extreme Overclocking: If you’re looking for a cooling solution capable of handling heavy overclocking, especially for high TDP chips, the MasterAir MA620P’s capacity might fall short for your requirements.
Warranty Is A Concern: While Cooler Master offers a two-year warranty, the absence of warranty coverage from the seller could be a concern for some users, potentially impacting long-term reliability or support expectations.
Final Thoughts
The Cooler Master MasterAir MA620P tops their cooling lineup, replacing the MA610P. Its dual tower U-shaped design boasts two MF120 R AB fans, enhancing both performance and aesthetics. Each tower sports 64 aluminum fins, with six 6mm copper heat pipes ensuring maximum heat dissipation. Cooler Master smartly integrates the fans’ mounting clips within the towers for a sleek appearance. The included RGB LED fans and splitter cables make for versatile customization, compatible with various motherboard RGB systems.
In my tests with an Intel i7 6850k (140W TDP), the MA620P handled medium overclocking well. Considering its price compared to competitors like the Thermaltake Riing Silent Pro, Cooler Master’s offering packs better value, especially with its RGB features. Note that despite offering a two-year warranty, note that Shing does not provide coverage for these coolers.
I am thankful to the Cooler Master for giving the opportunity to review their MasterAir MA620P.
Recent Updates
- October 21, 2023: Few text changes to improve readability. Also added image galleries.
Thank you! Please share your positive feedback. 🔋
How could we improve this post? Please Help us. 😔
[Hardware Reviewer & Editor]
Meet Nauman Siddique, a highly experienced computer science graduate with more than 15 years of knowledge in technology. Nauman is an expert in the field known for his deep understanding of computer hardware.
As a tech tester, insightful reviewer, and skilled hardware editor, Nauman carefully breaks down important parts like motherboards, graphics cards, processors, PC cases, CPU coolers, and more.
- 15+ years of PC Building Experience
- 10+ years of first-hand knowledge of technology
- 7+ years of doing in-depth testing of PC Hardware
- A motivated individual with a keen interest in tech testing from multiple angles.
- I majored in Computer Science with a Masters in Marketing
- Previously worked at eXputer, EnosTech, and Appuals.
- Completed Course in Computer Systems Specialization From Illinois Tech
Get In Touch: nauman@tech4gamers.com


