 Threads
Worth It?
Review Summary
LANCOOL 217 INF is one heck of a design offering almost all features that you could of ask while providing ample space to work around with modularity and flexibility being its hallmark. It is hard to summarize such a powerful design in few words. This case has my praise and comes highly recommended.
Hours Tested: 14

Overall
-
Design - 9/10
9/10
-
Build Quality - 9/10
9/10
-
Features - 9.5/10
9.5/10
-
Cooling Provision - 8.5/10
8.5/10
-
Storage Provision - 8/10
8/10
Pros
- Excellent Airflow
- Infinity-Mirror Design
- 2x 170mm ARGB High Airflow Fans
- 1x 140mm ARGB High Airflow Fan
- 4mm Tinted Glass Panel
- Backplug Motherboard Support
- Vertical Mount of PCIe Bracket
- Flexible PSU Shroud
- Up to 360mm radiator on top
- Dual PSU Mount
- Two Drive Cages
- Two Drive Brackets
- Dual IO Panel Mount
- Total 9x Fan mounts
- USB 3.2 G20 Type-C Port
- Removable Fan Bracket
- Rail Mount System for fans/radiator
- GPU Support Bracket
- Price
Cons
- Storage restriction
- Proprietary connectors on fans
- Glass Panel should be clear in my opinion


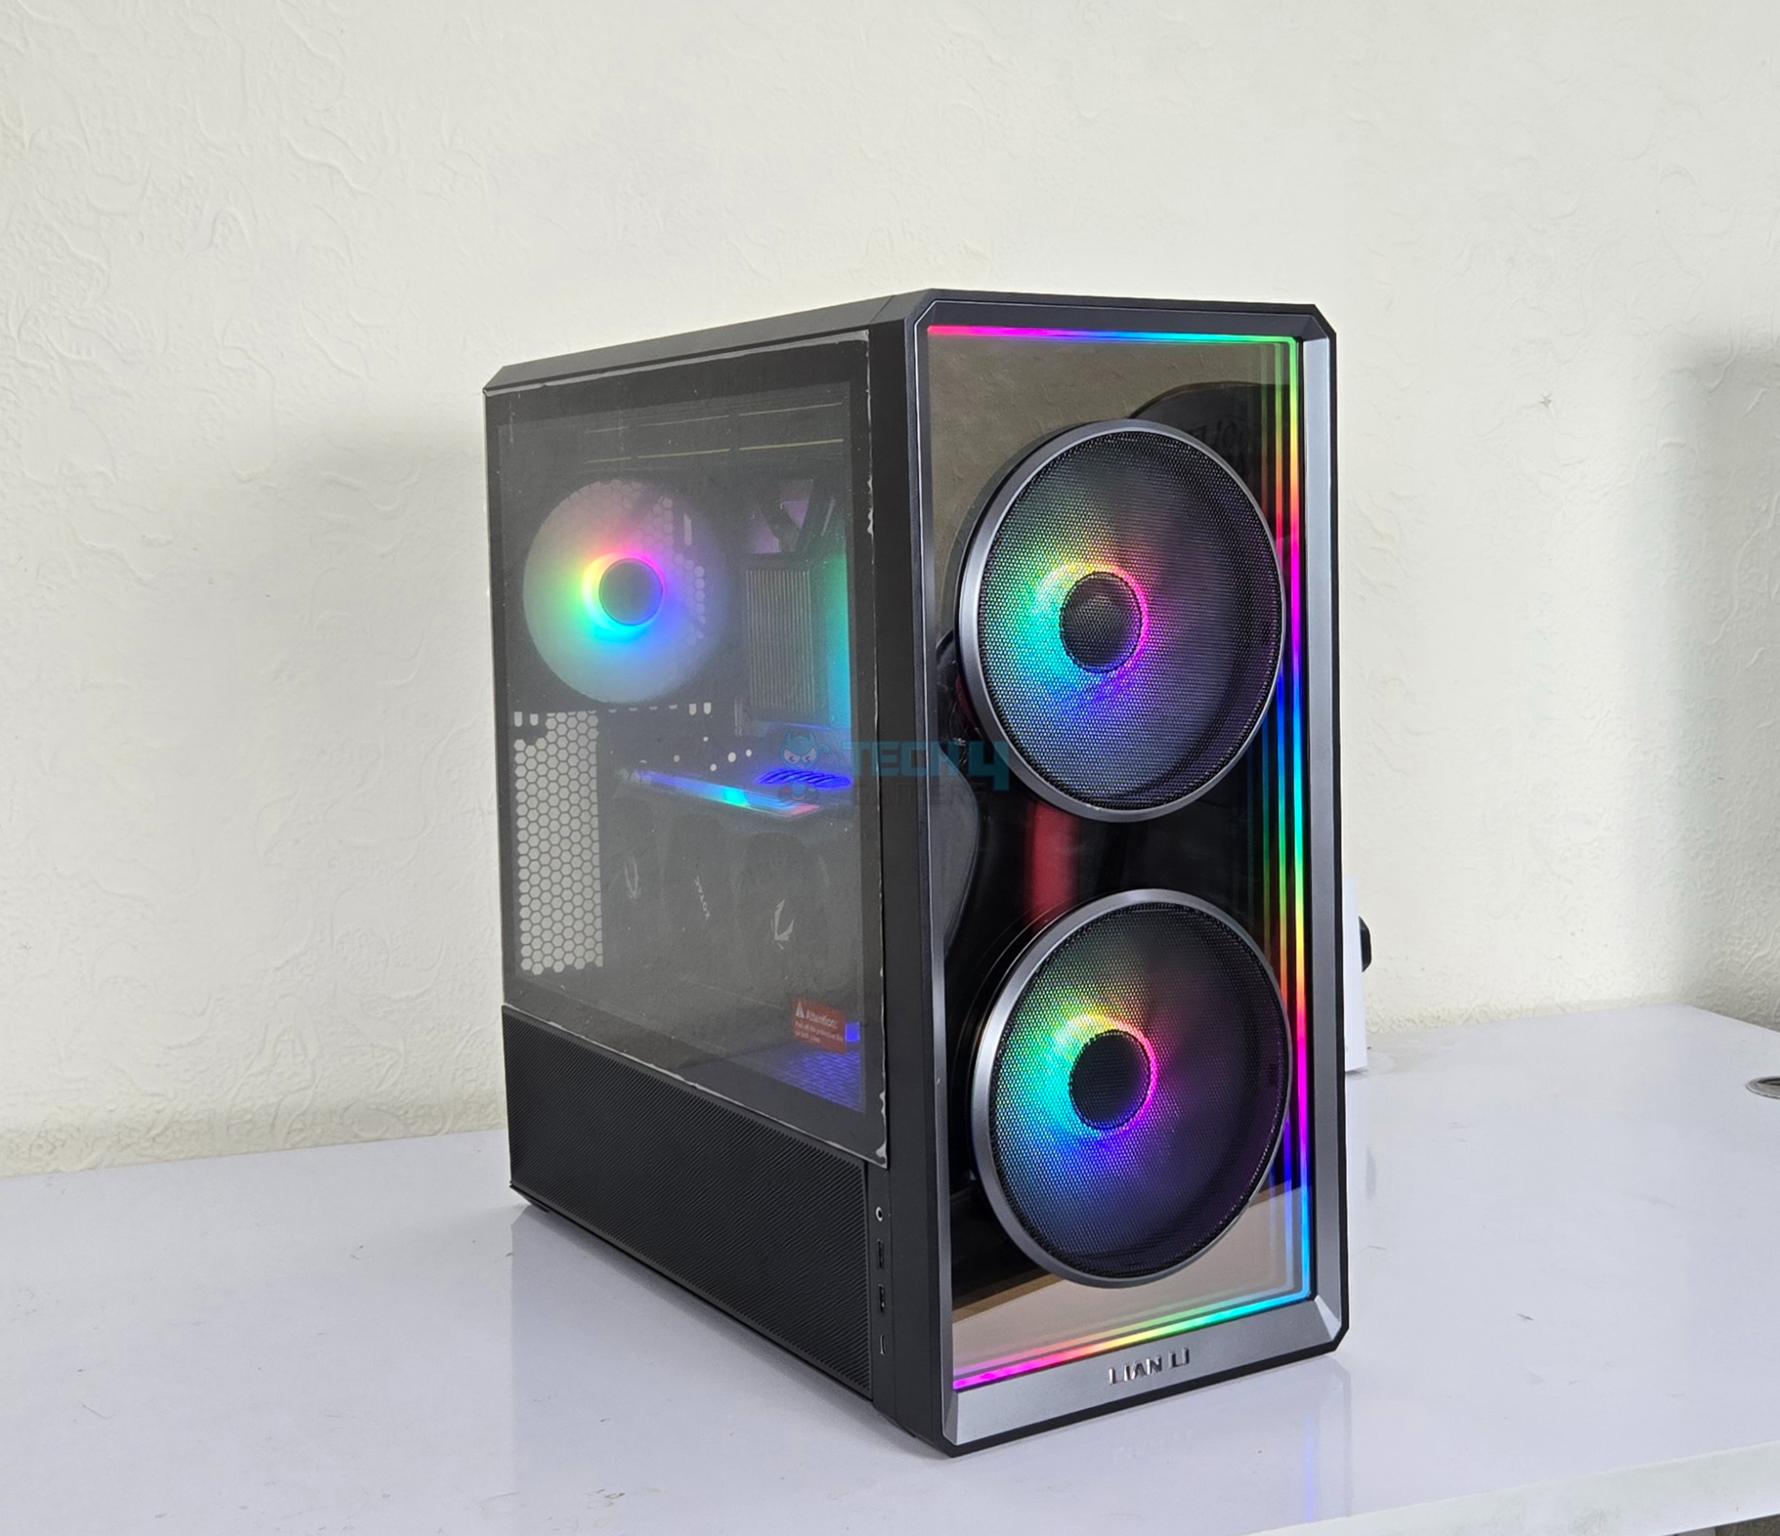
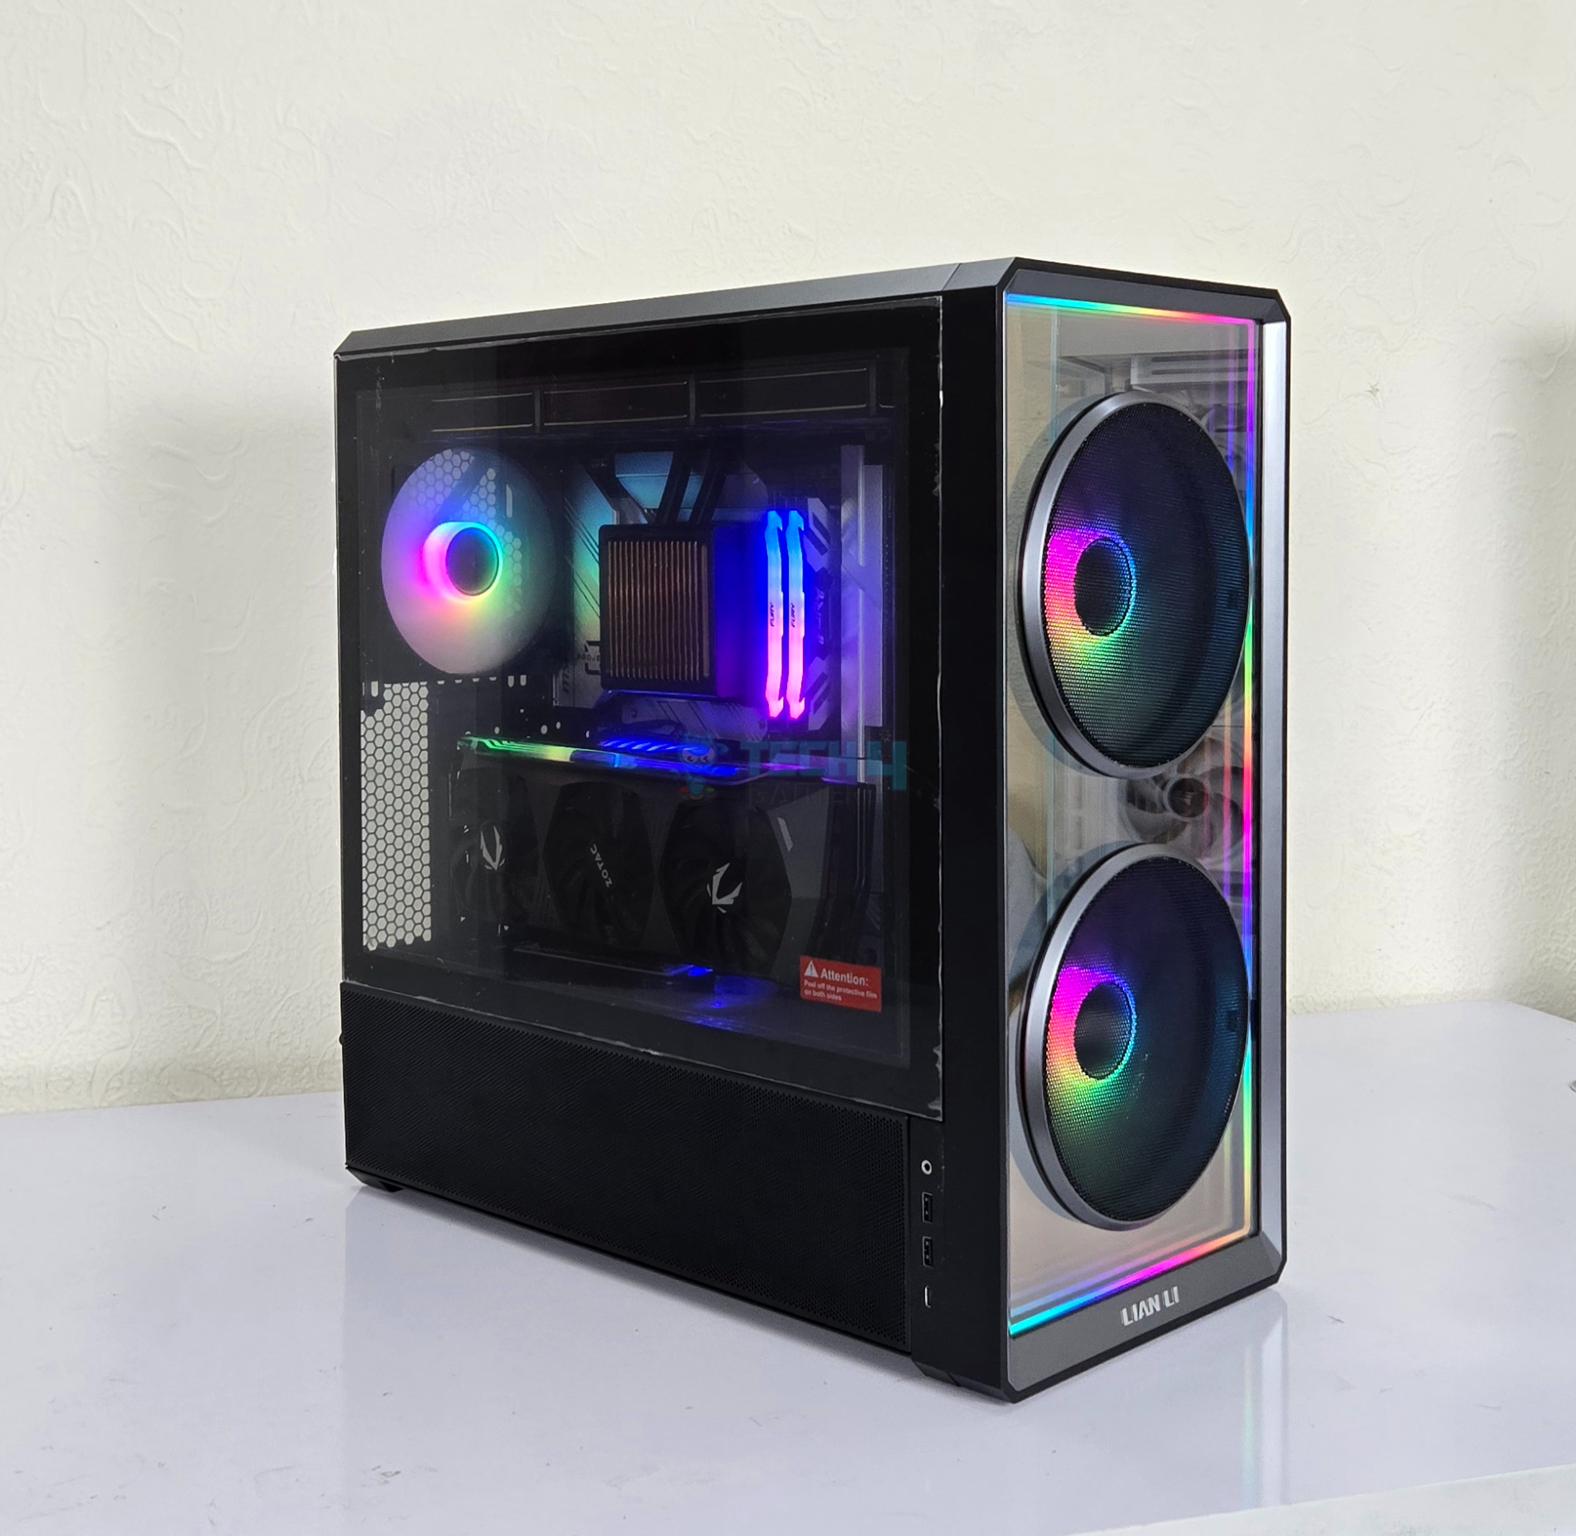
Lian Li needs no introduction and on the same grounds, LANCOOL needs no introduction. The PC Cases under LANCOOL category are ever popular among users alike O11 and later series. Lian Li has launched LANCOOL 217 INF recently. This case is available in white and black color options. The exterior of the case makes it different from the regular LANCOOL 217 with some key features that I would highlight in this article:
- It is a mid-tower design.
- Focus is on high airflow with same versatility.
- The tempered glass front panel features a stunning and vivid infinity-mirror design.
- Dual 170 mm front fans on the front generating ton of airflow.
- 140 mm rear fan delivering efficient system cooling.
- This case comes equipped with wireless fan and ARGB lighting control through L-Connect 3 in addition to regular I/O buttons and/or motherboard sync. Controller is not provided.
- The case supports back-connect motherboards.
- This case is PPLP S-Class Thermal Performance certified.
I have tested black variant which has MSRP of USD 124.99. The white variant comes in at USD 129.99.
The salient specifications are:
| Dimension | 482x238x503mm |
| Motherboard Form Factor |
|
| Storage Drive Mount |
|
| Expansion Slot | 7x |
| GPU Support | Up to 380mm Length |
| CPU Cooler Support | Up to 180mm |
| PSU Support |
|
| Fan Size Support |
|
| Radiator Size Support | Top: Up to 360mm |
Packaging And Unboxing
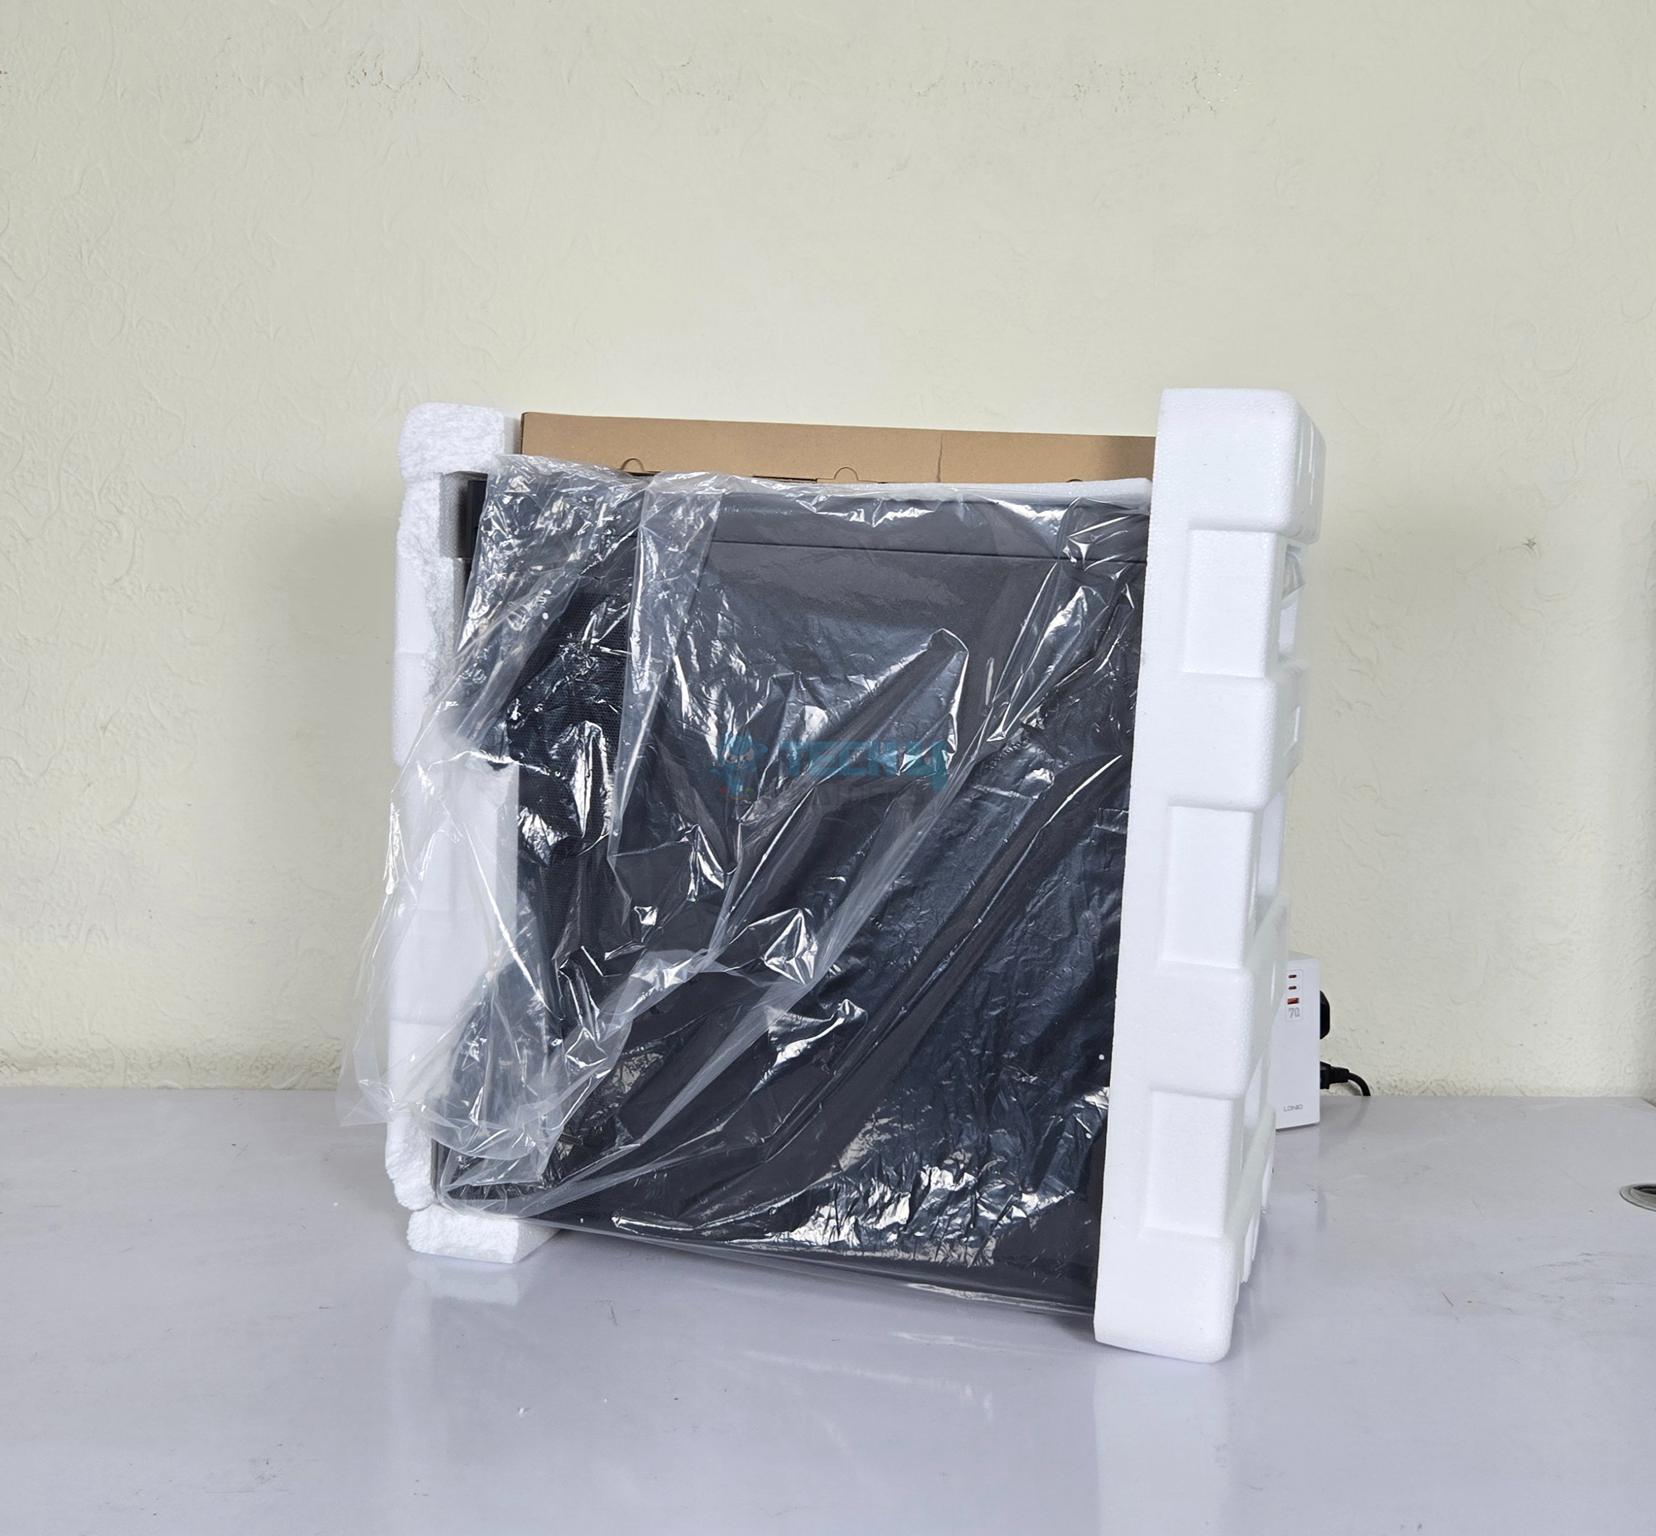
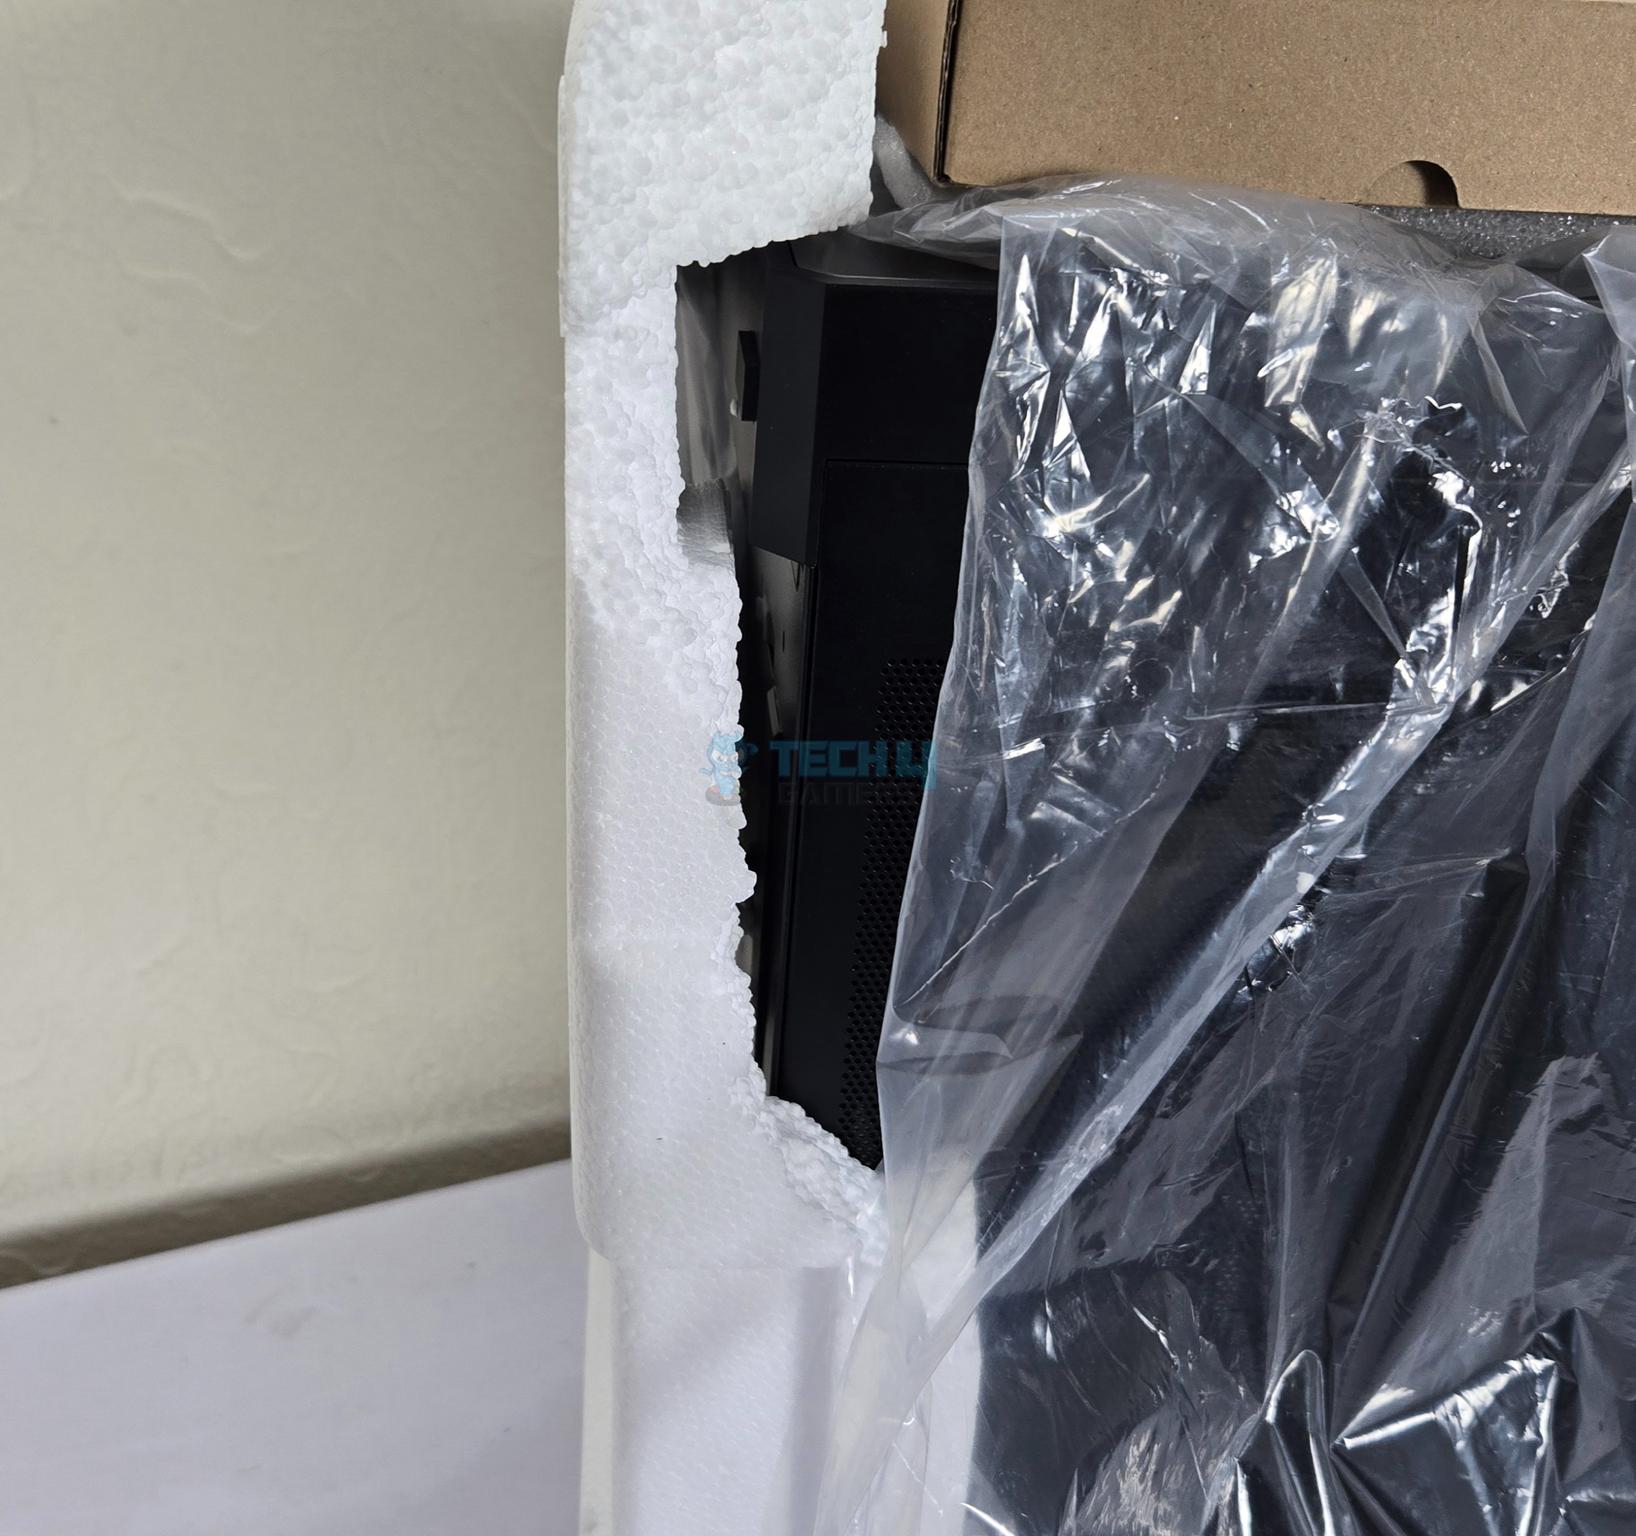
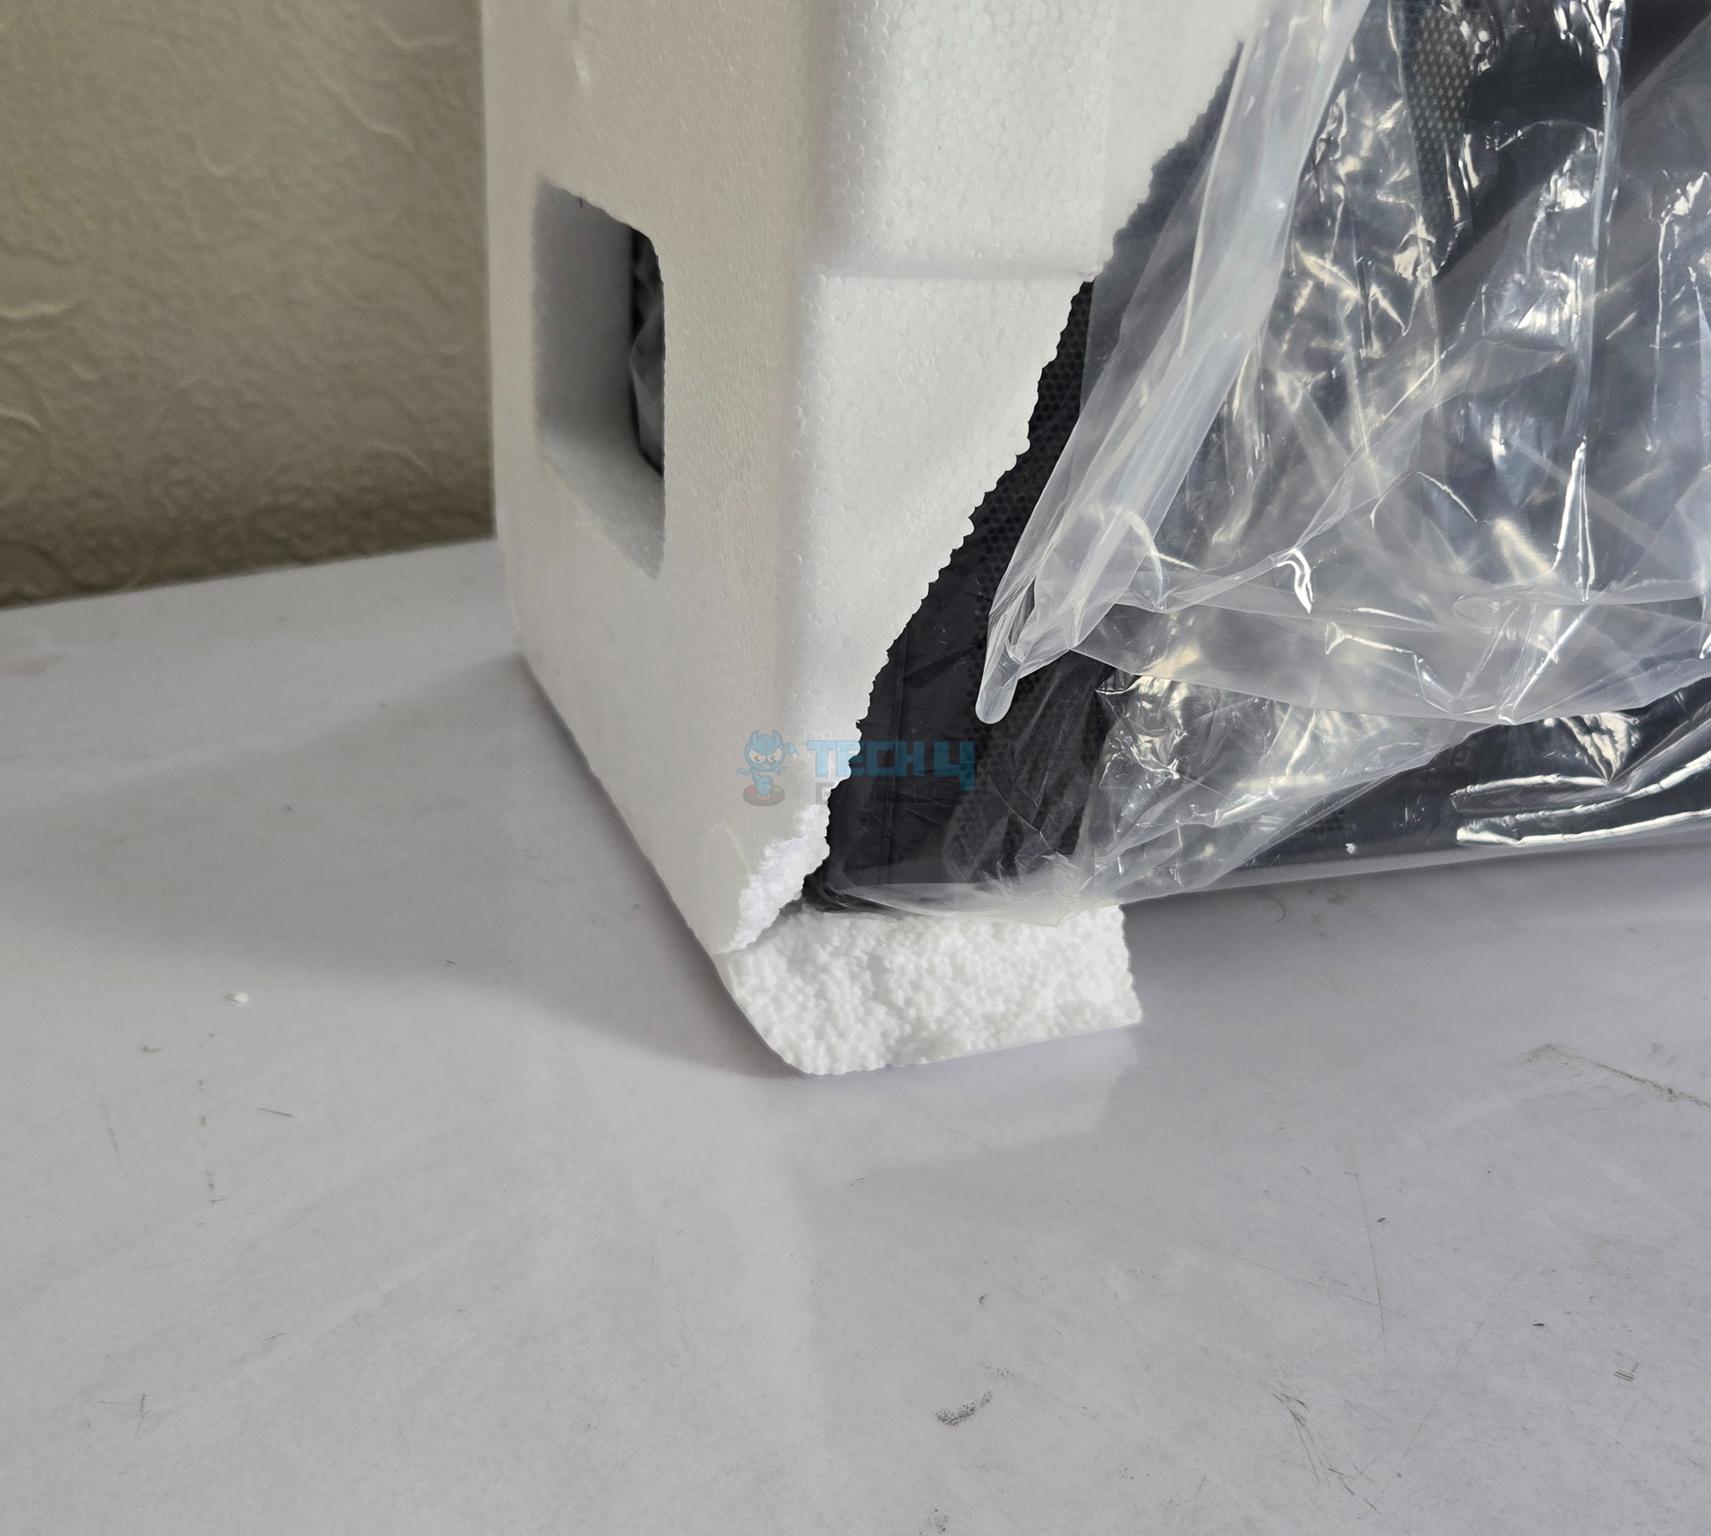
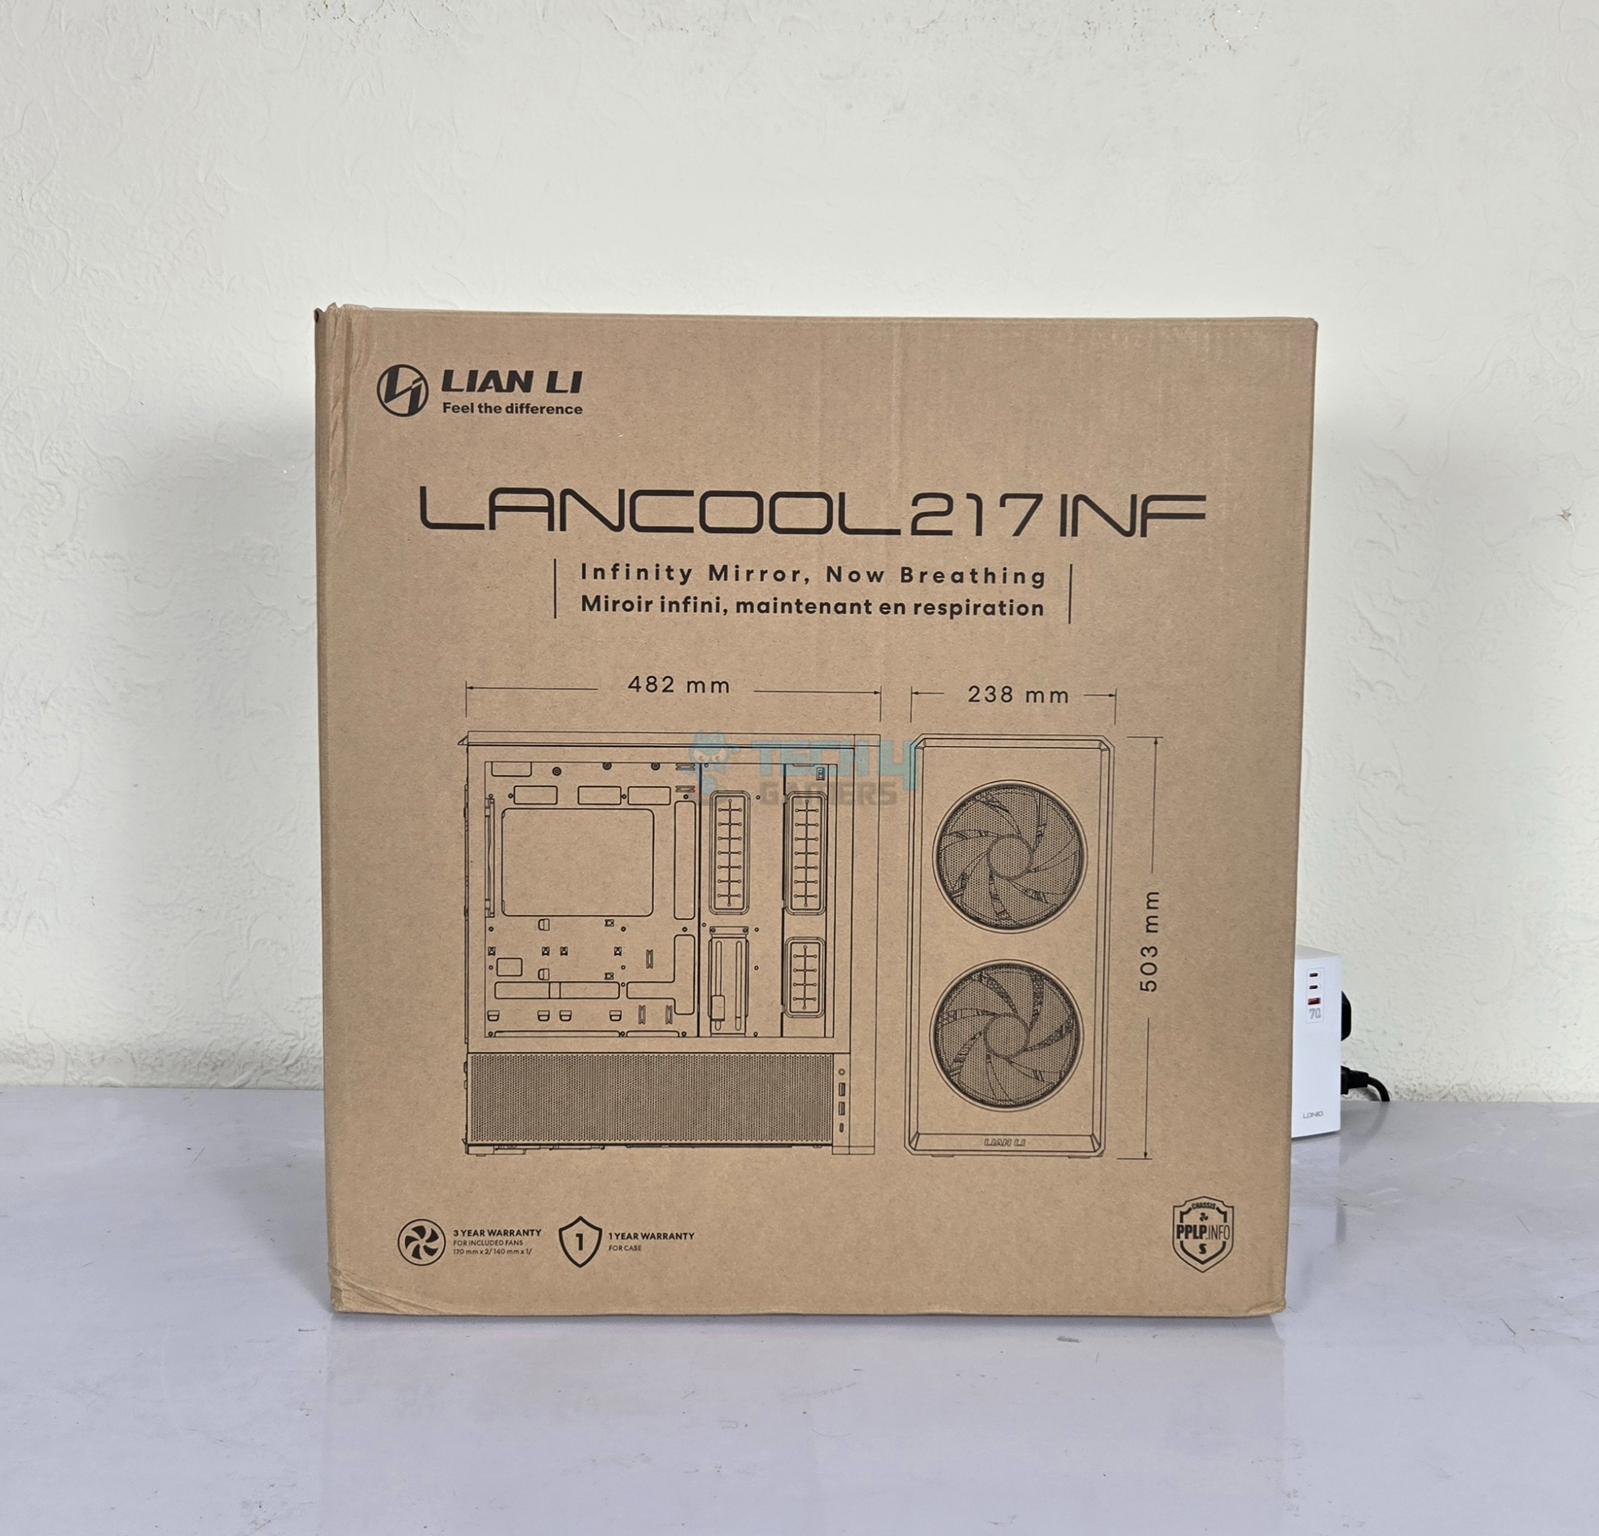
The case is shipped inside a standard brown colored cardboard box. This box shows salient features and specifications of the case along with picture. Two Styrofoam pads encapsulate the case. However, in our case, these pads come broken from several places. They still did the job fine since the case was delivered fully intact.
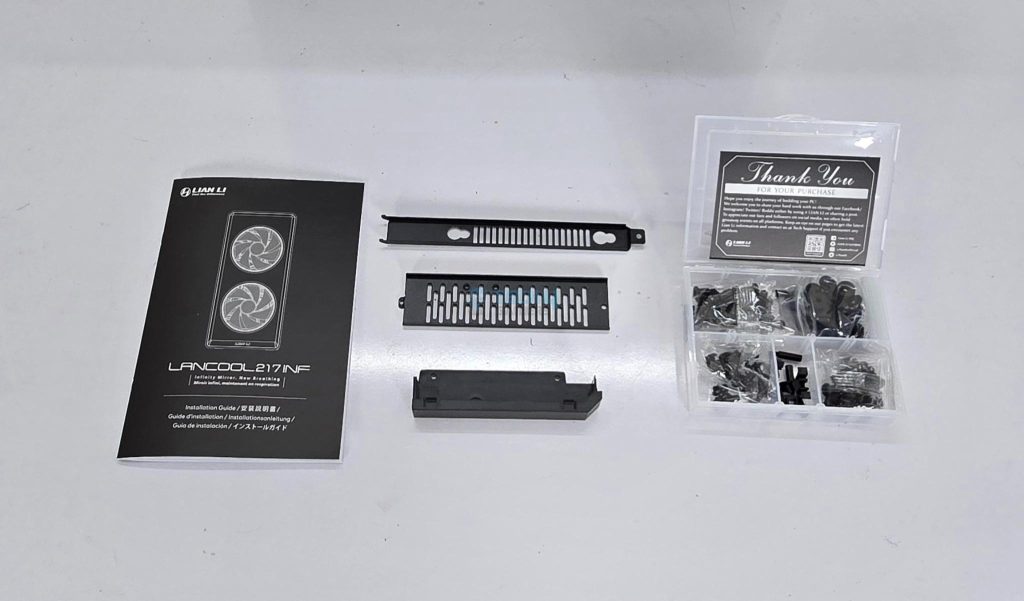
A separate brown color box is placed on top that has the necessary brackets and the accessory container inside. The following are provided with the case:
- 1x Installation Guide
- Zip-Ties
- Motherboard Tray Stand-off Screws
- Storage drive screws Screws
- PSU Screws
- Long Standoff Screws for GPU Vertical Bracket
- Non-function IO bracket for filling
- PSU Shroud Bracket for fan
- PSU Shroud Cover for graphics card bracket mounting
Design
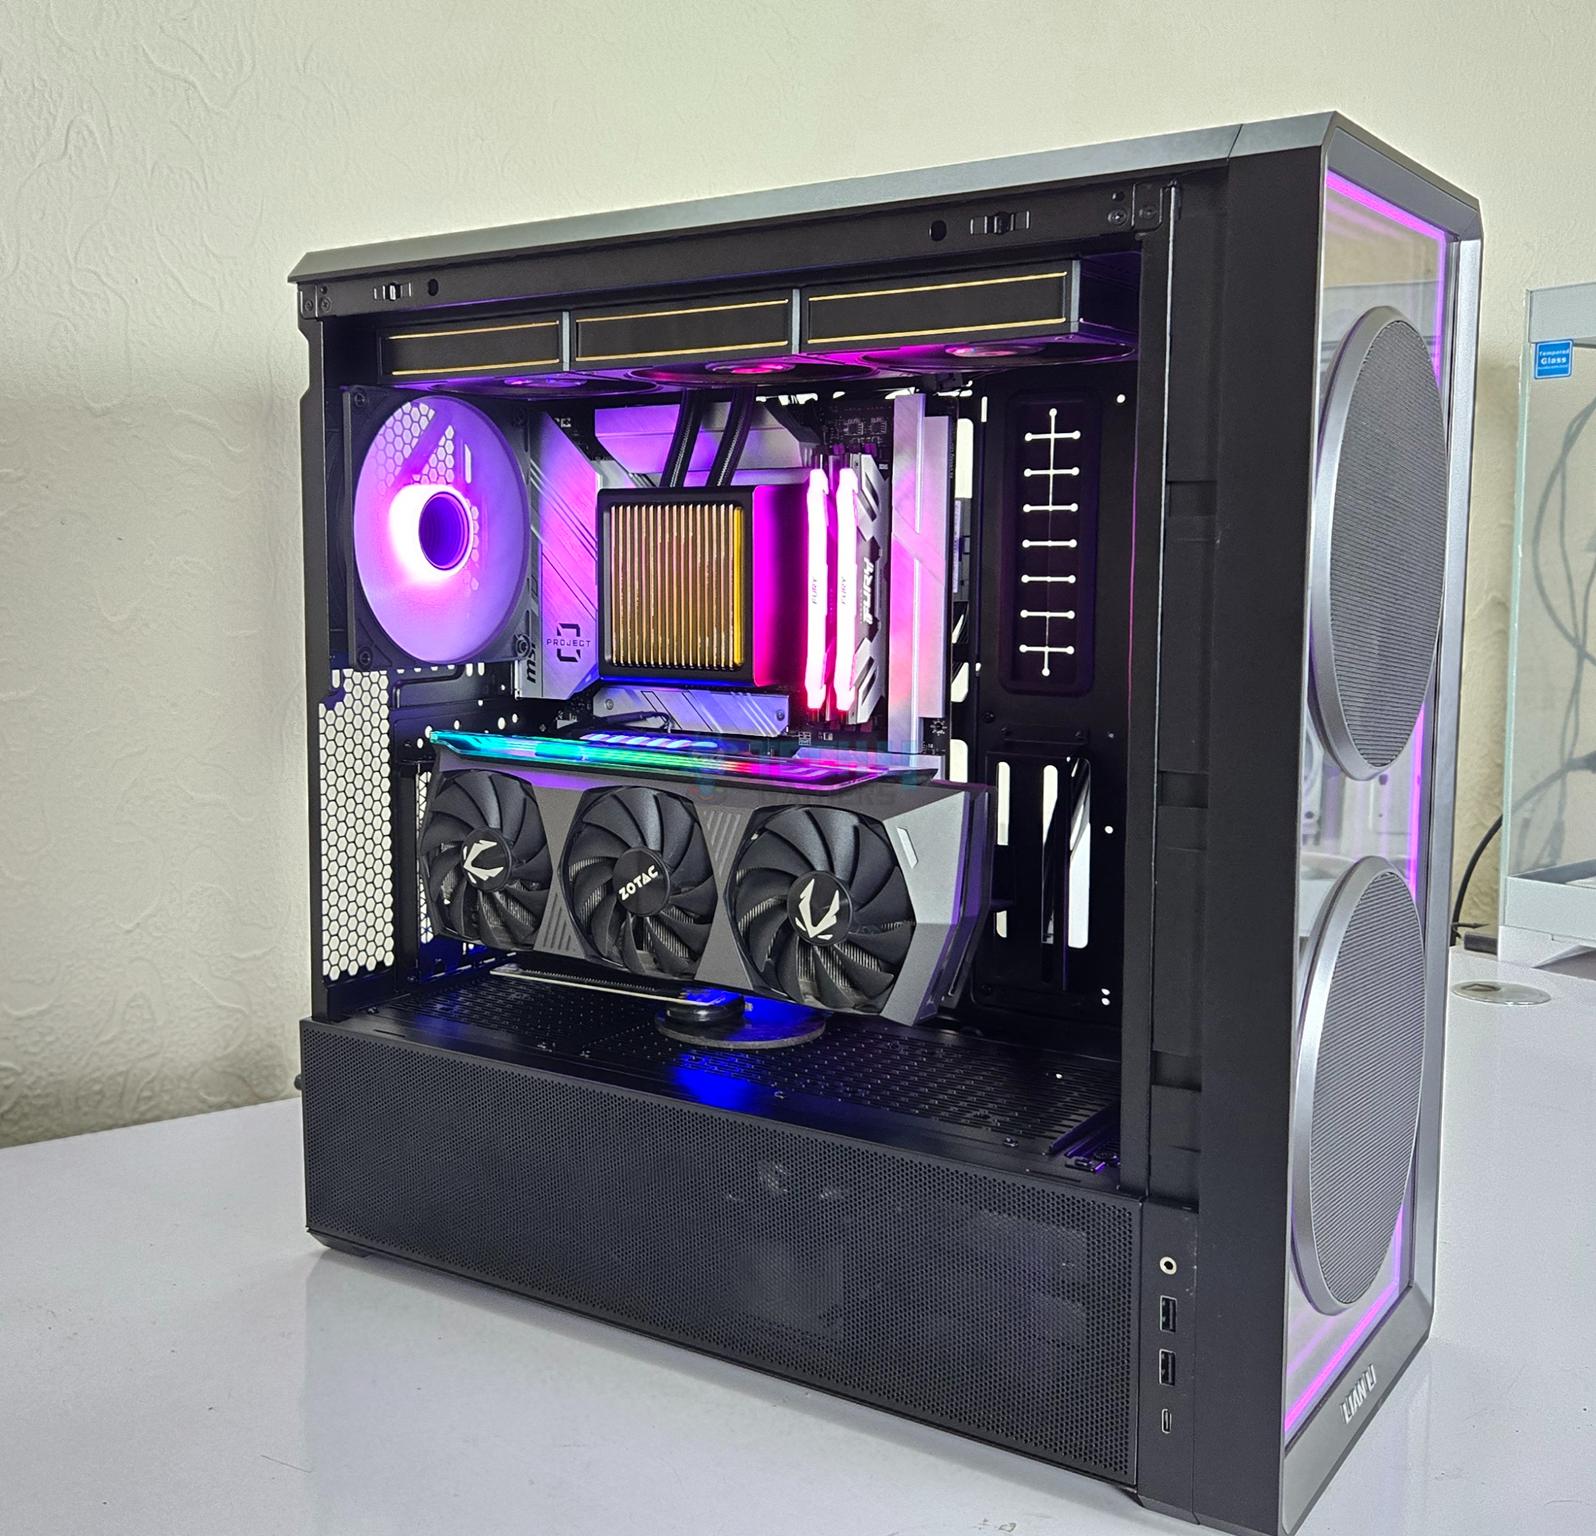
LANCOOL 217 INF is a futuristic design with elegance, versatility, modularity incorporated into its design philosophy. This is backed by infinity-mirror design with tempered glass on the front and Fan/IO hub with wireless control. It is made of SPCC material with 4mm tempered glass. The case supports the back connect motherboards and despite being mid-tower, it is quite spacious.
LANCOOL 217 INF Vs LANCOOL 217
Before we proceed further, let’s take a succinct view of the key differences between the two LANCOOL 217 cases.
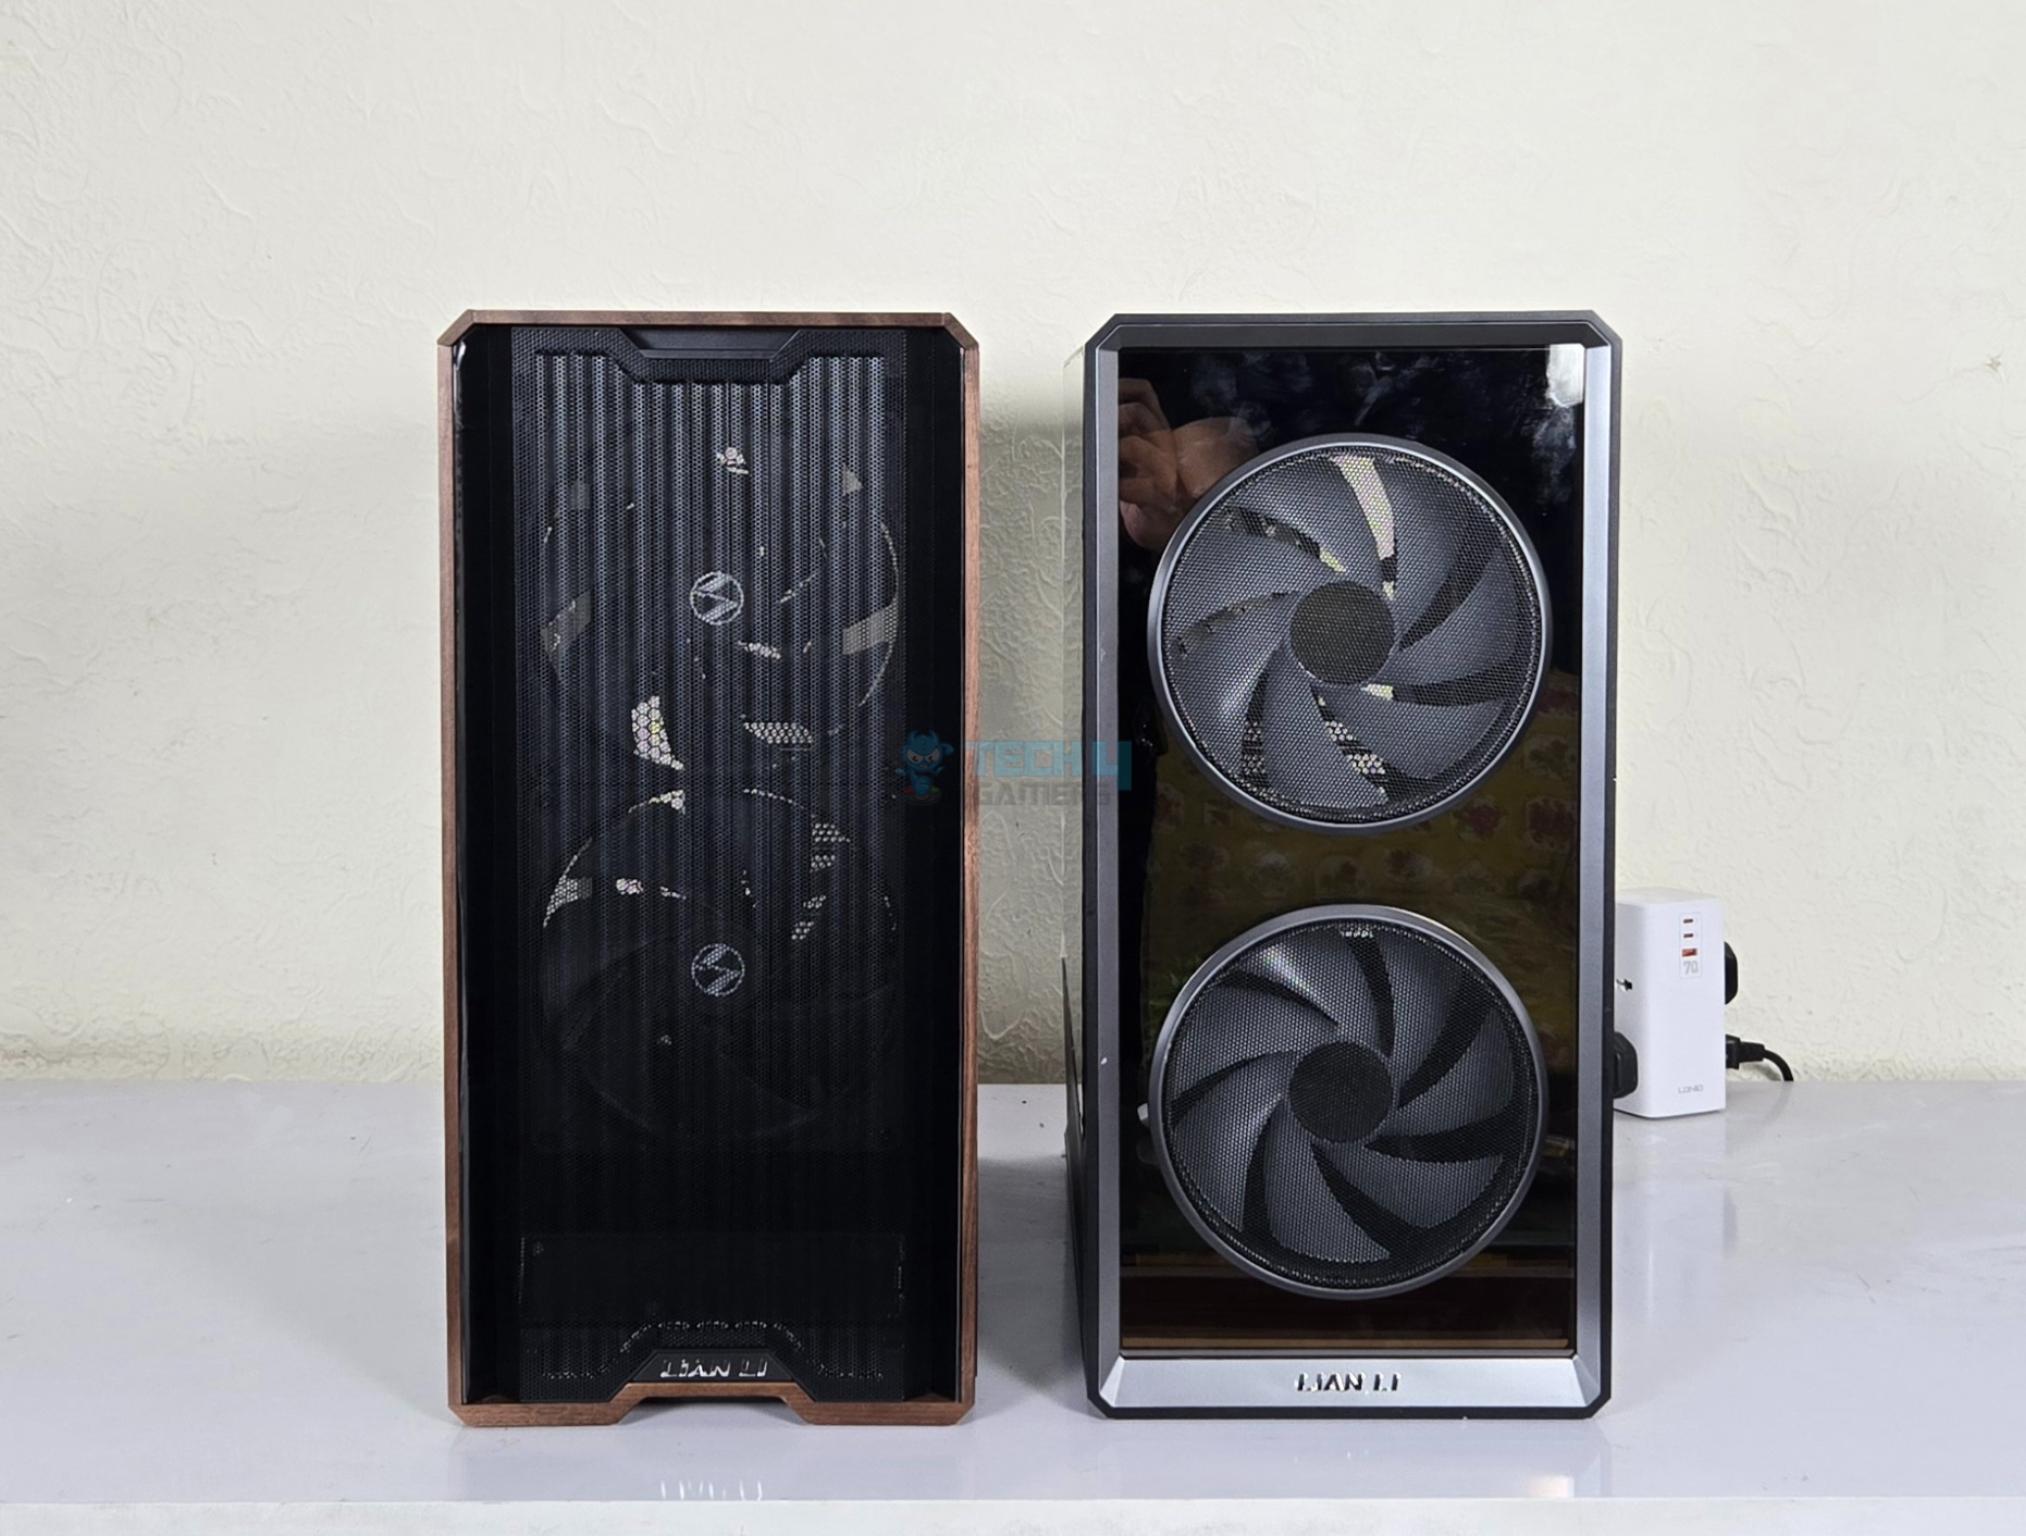
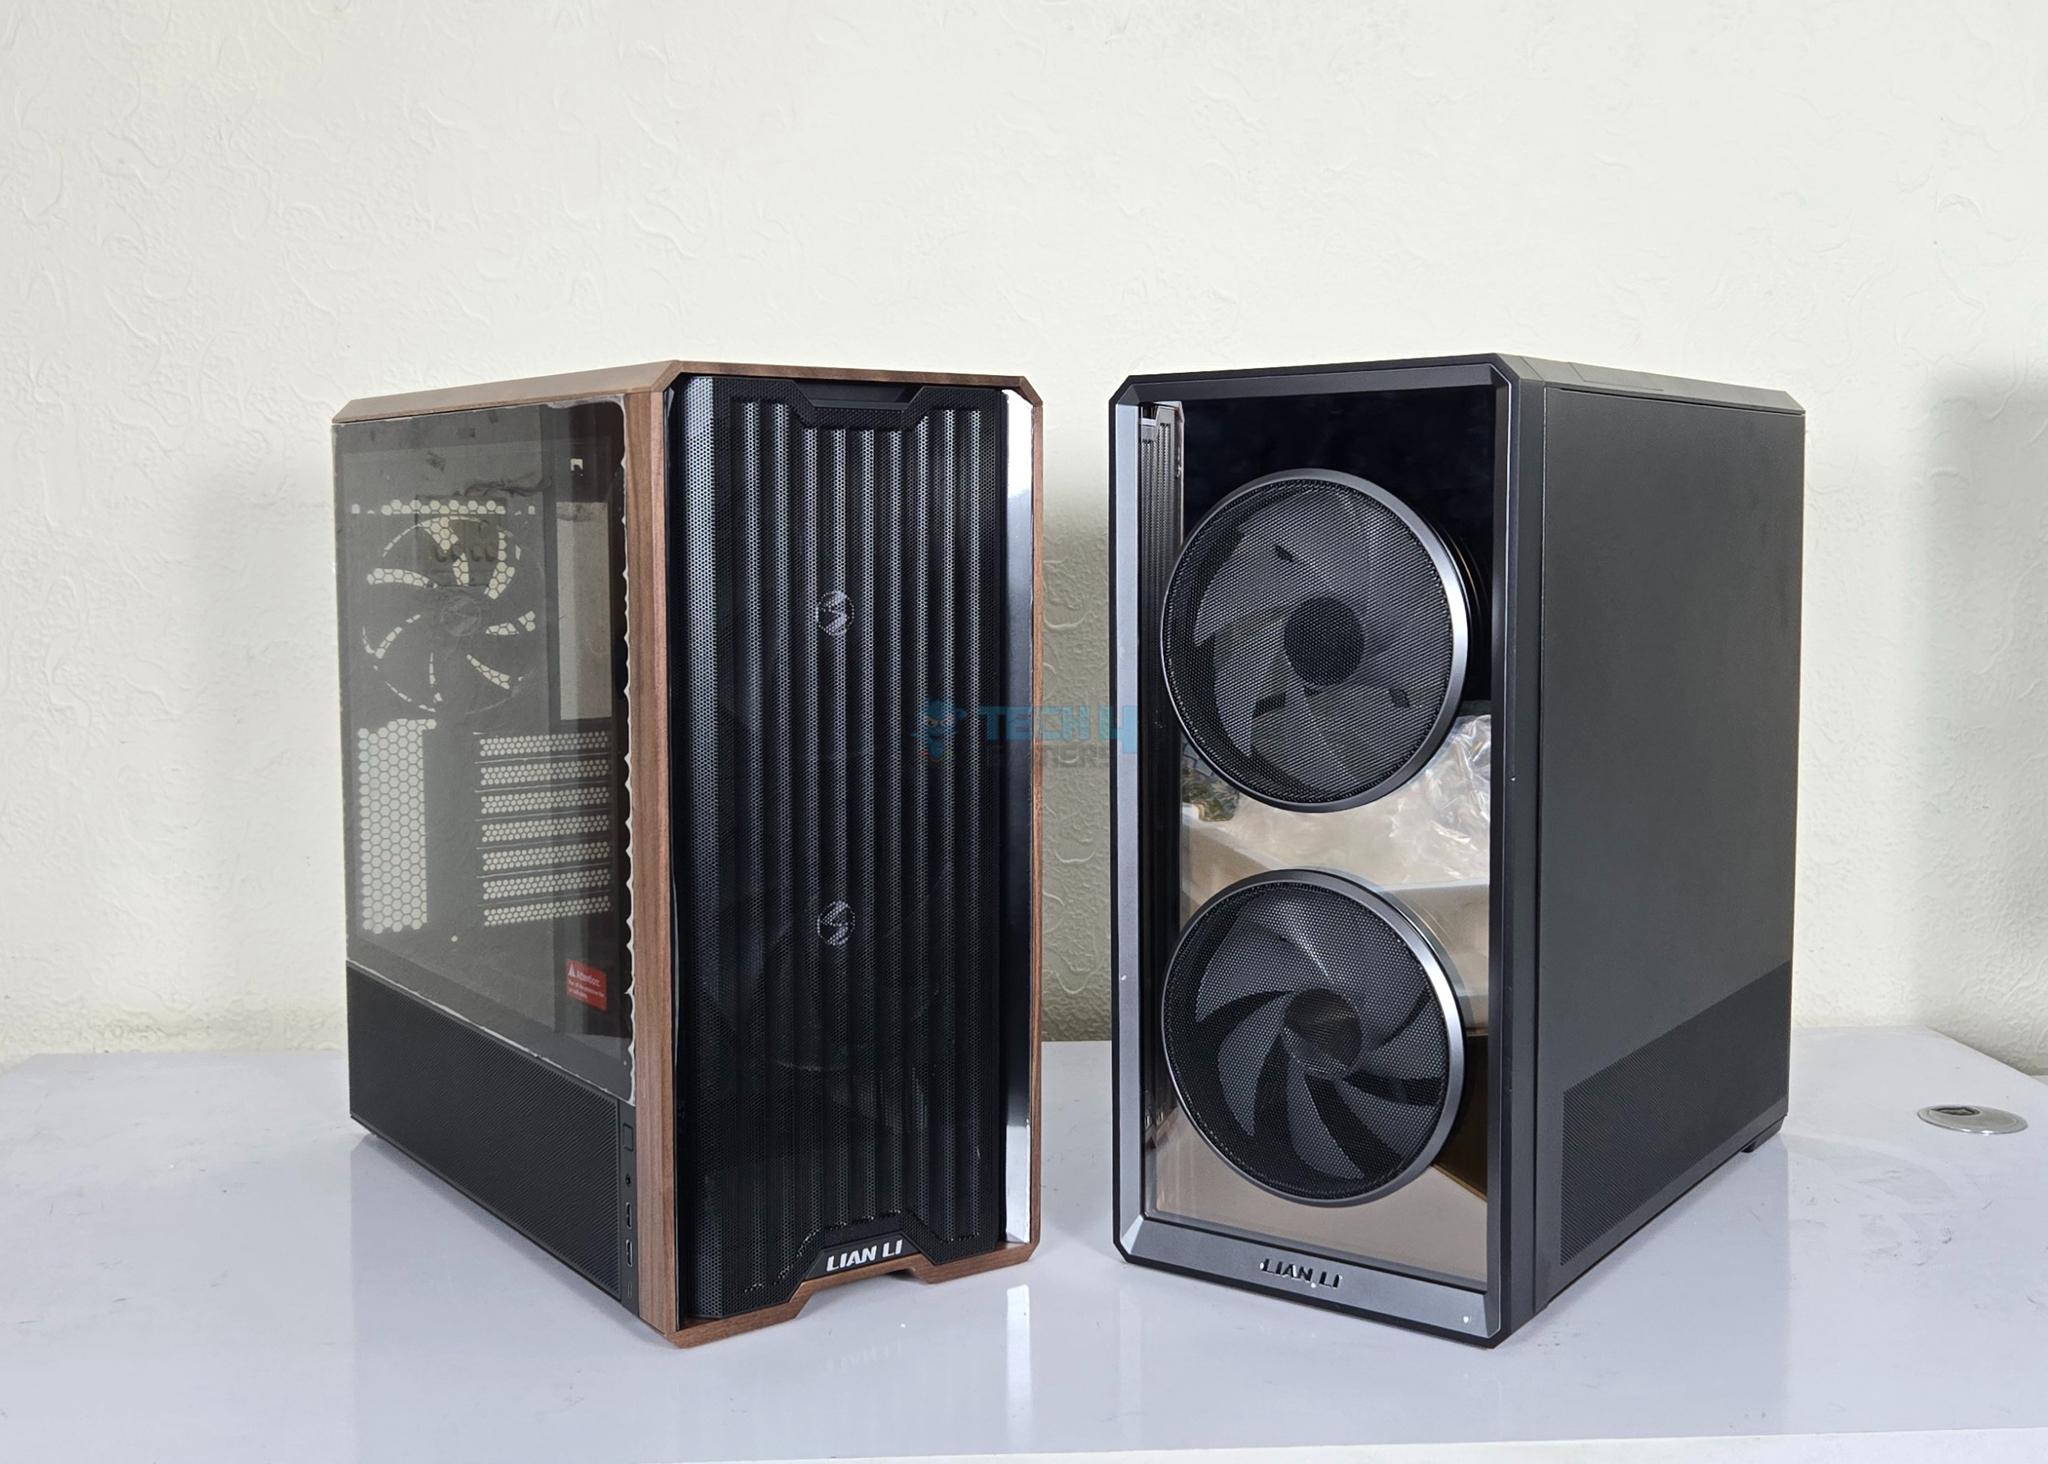
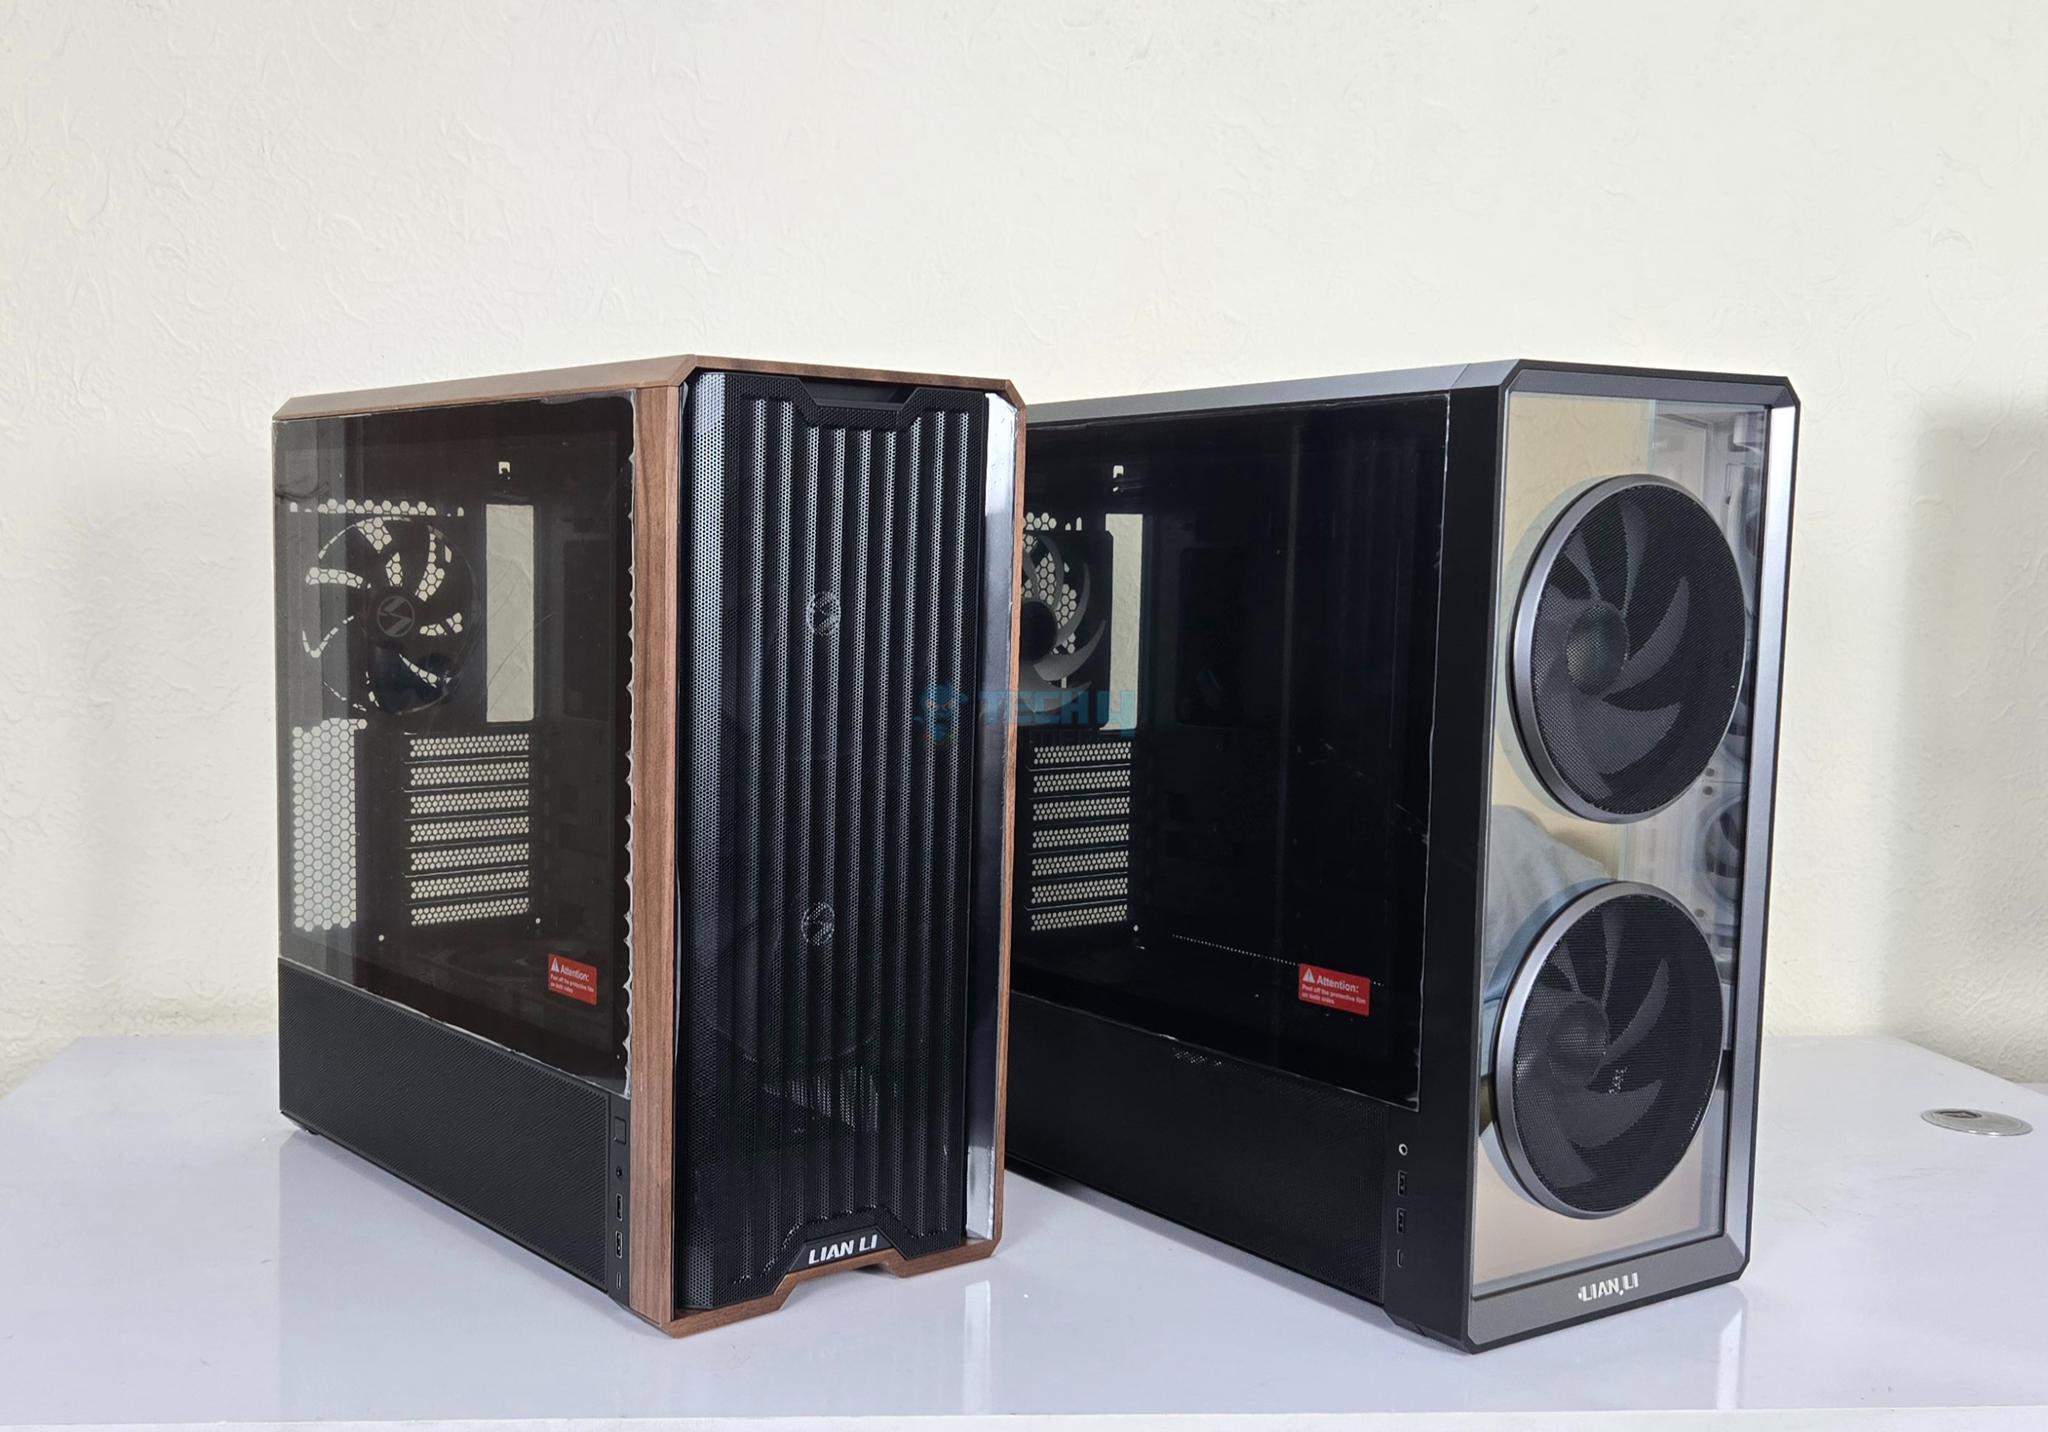
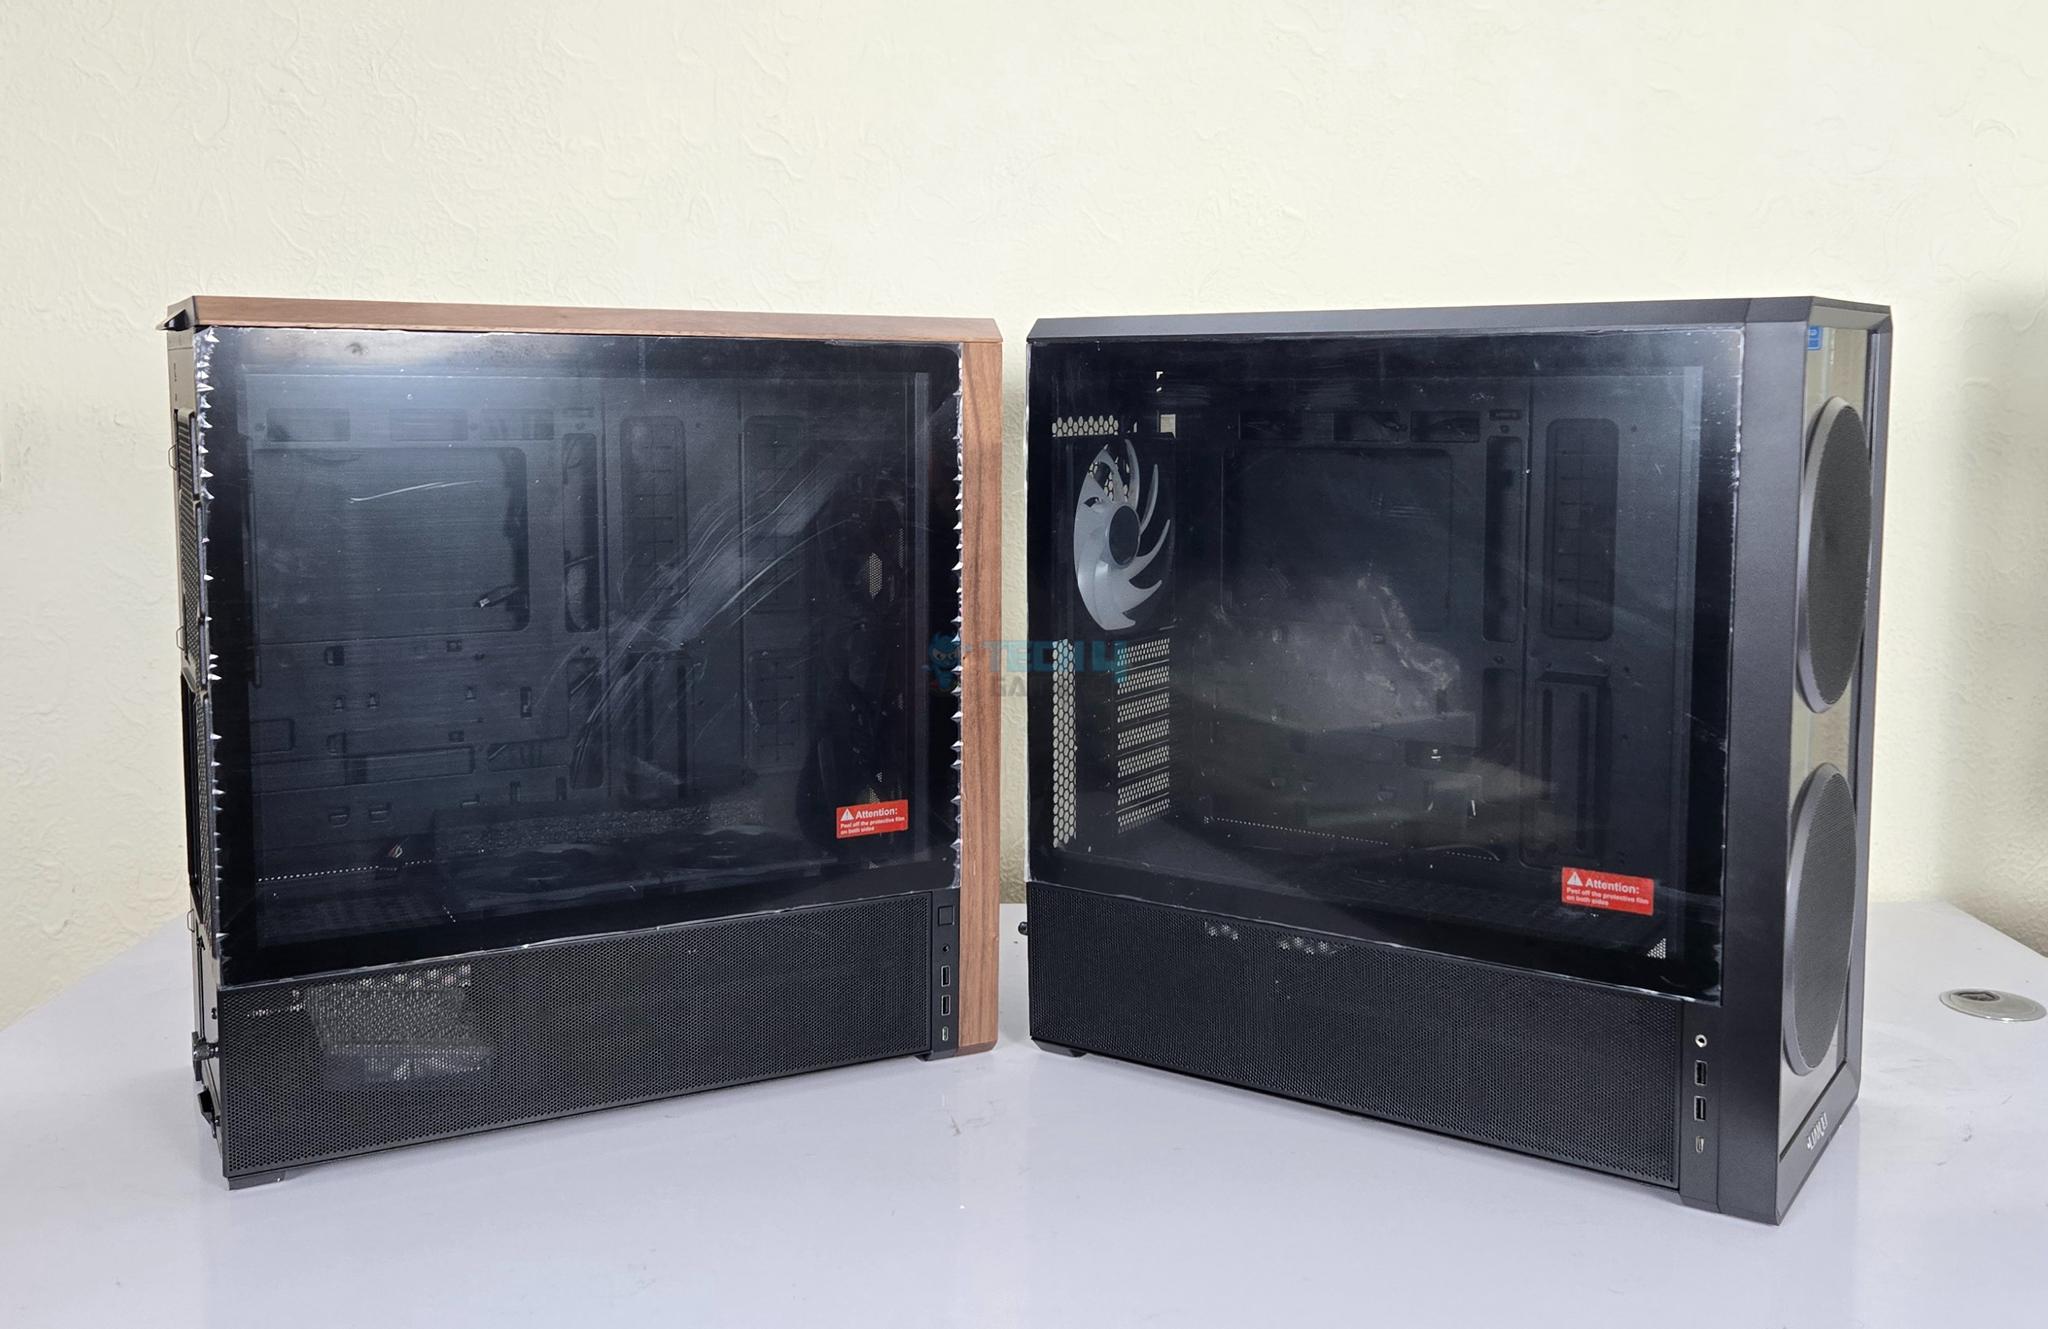
The main differences are:
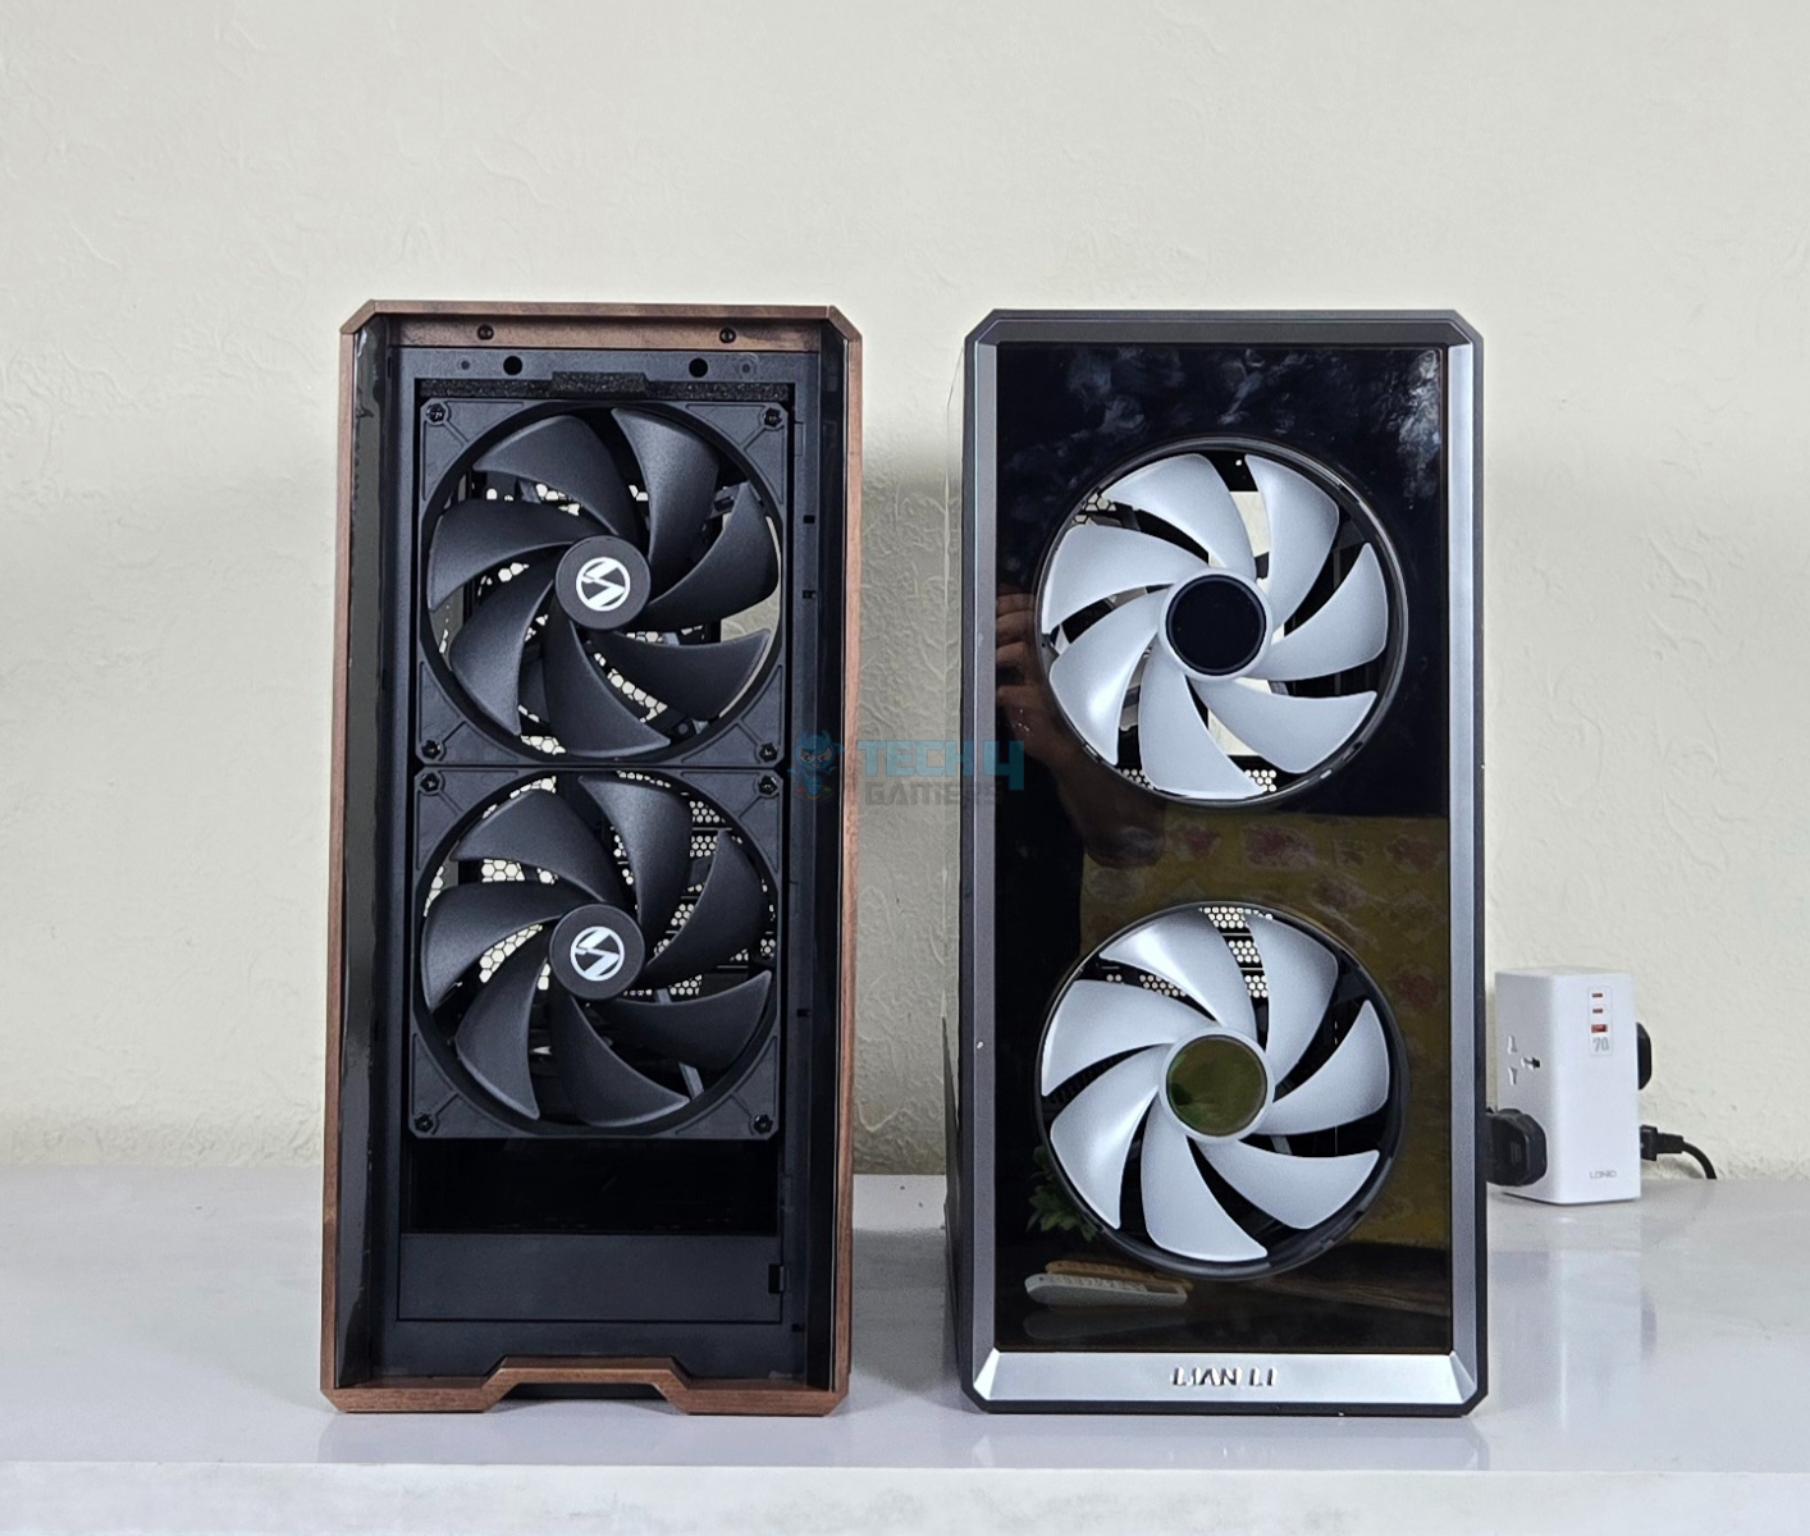
- Perforated Mesh on regular LANCOOL 217 compared to TG panel with infinity mirror.
- Non-RGB 170mm fans on regular LANCOOL 217 compared to ARGB 170mm fans on INF variant.
- Wooden texture on regular LANCOOL 217.
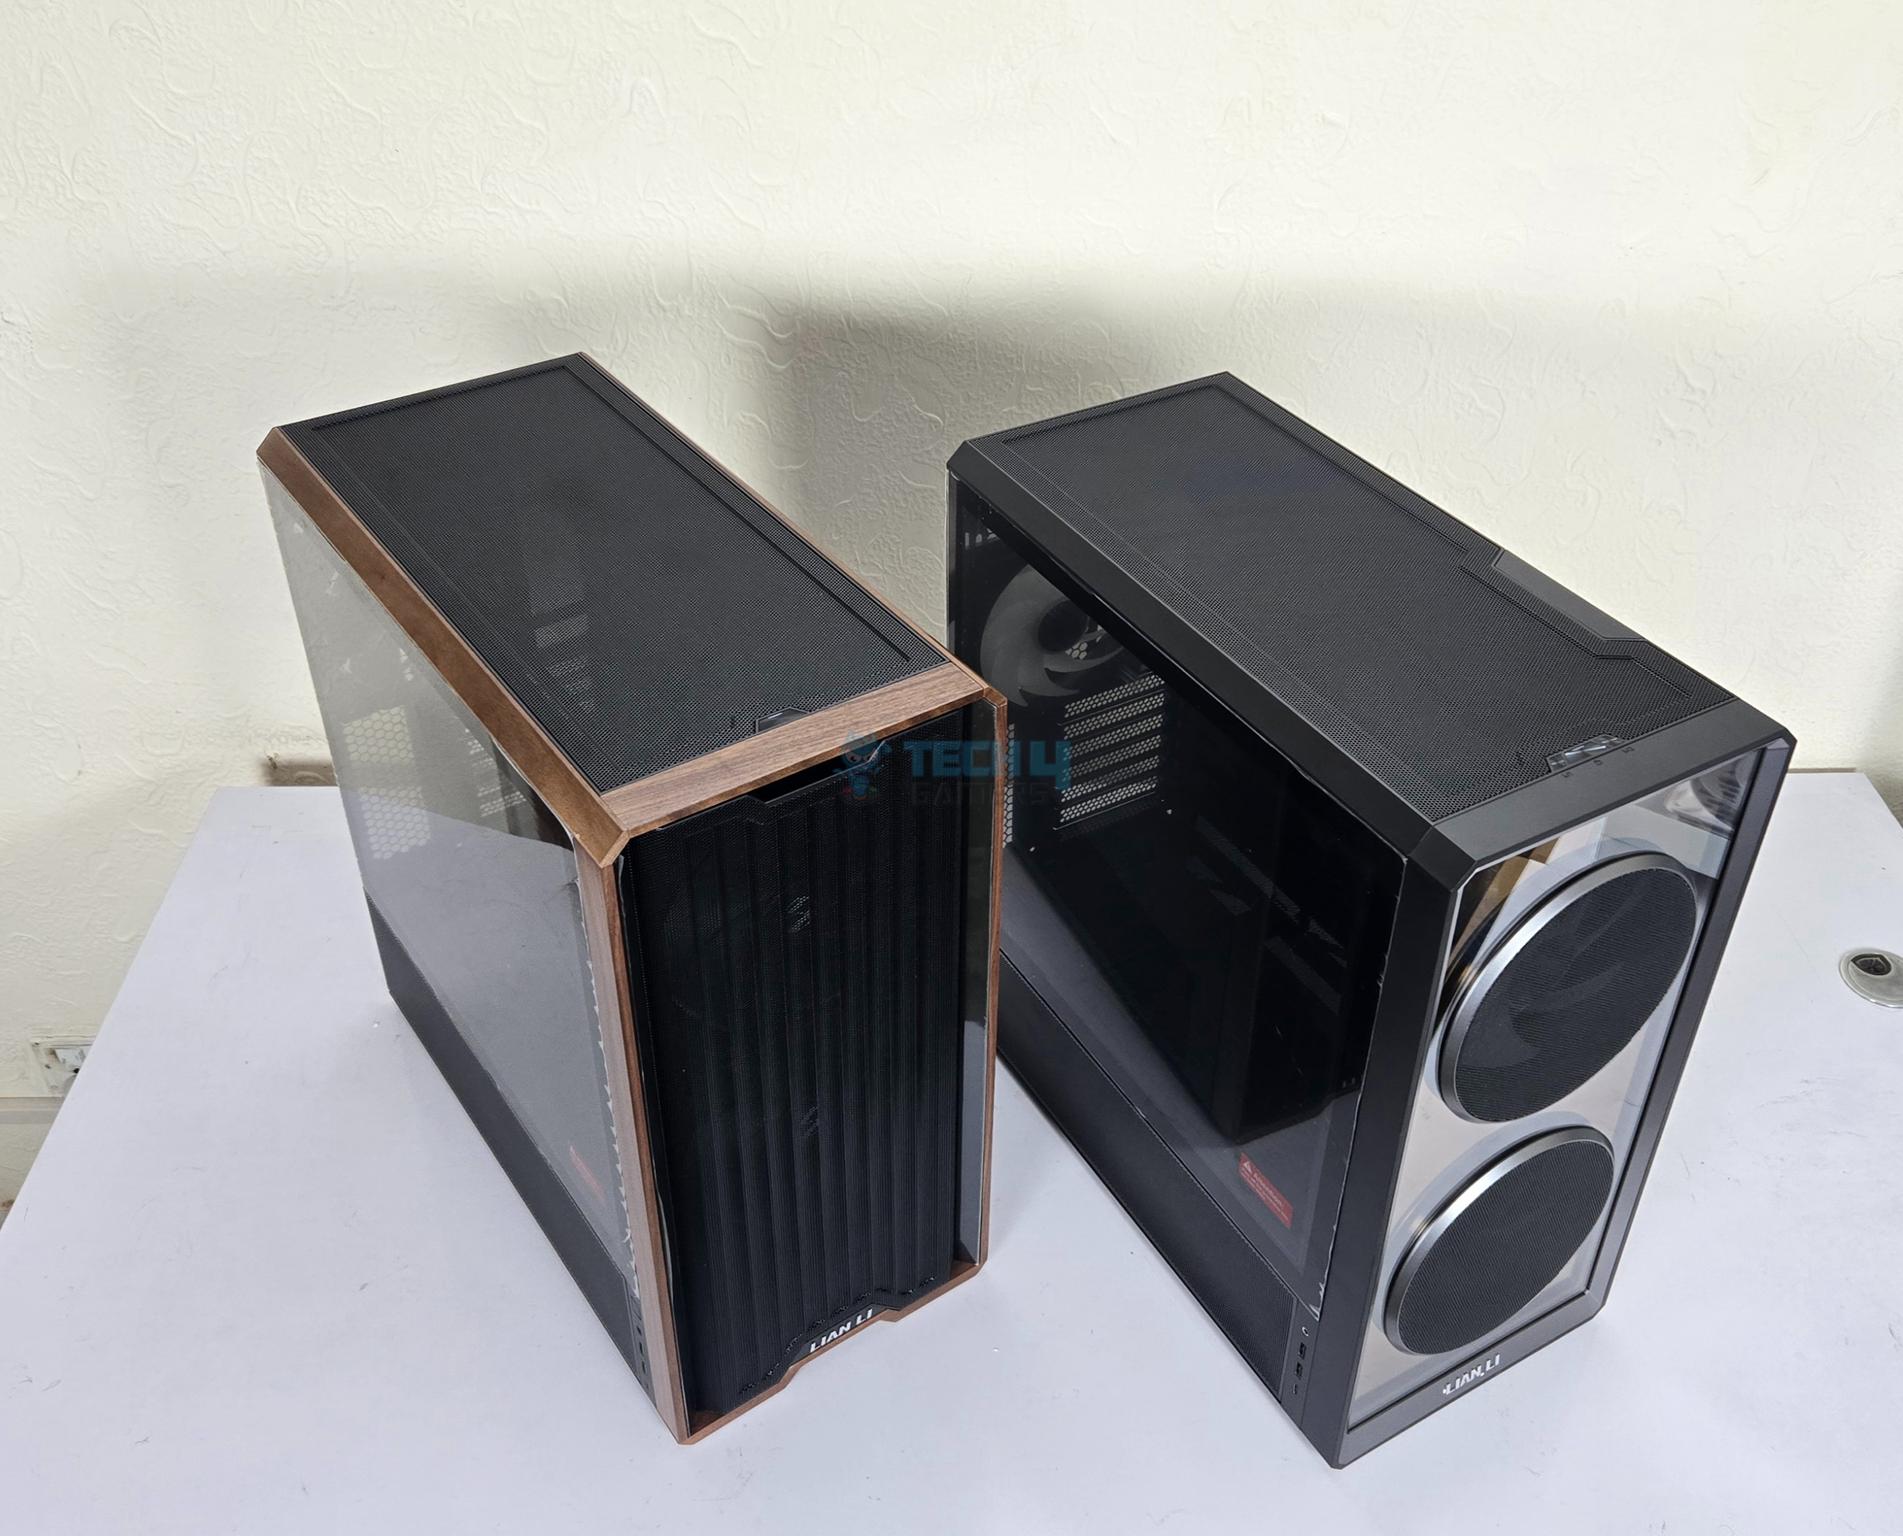
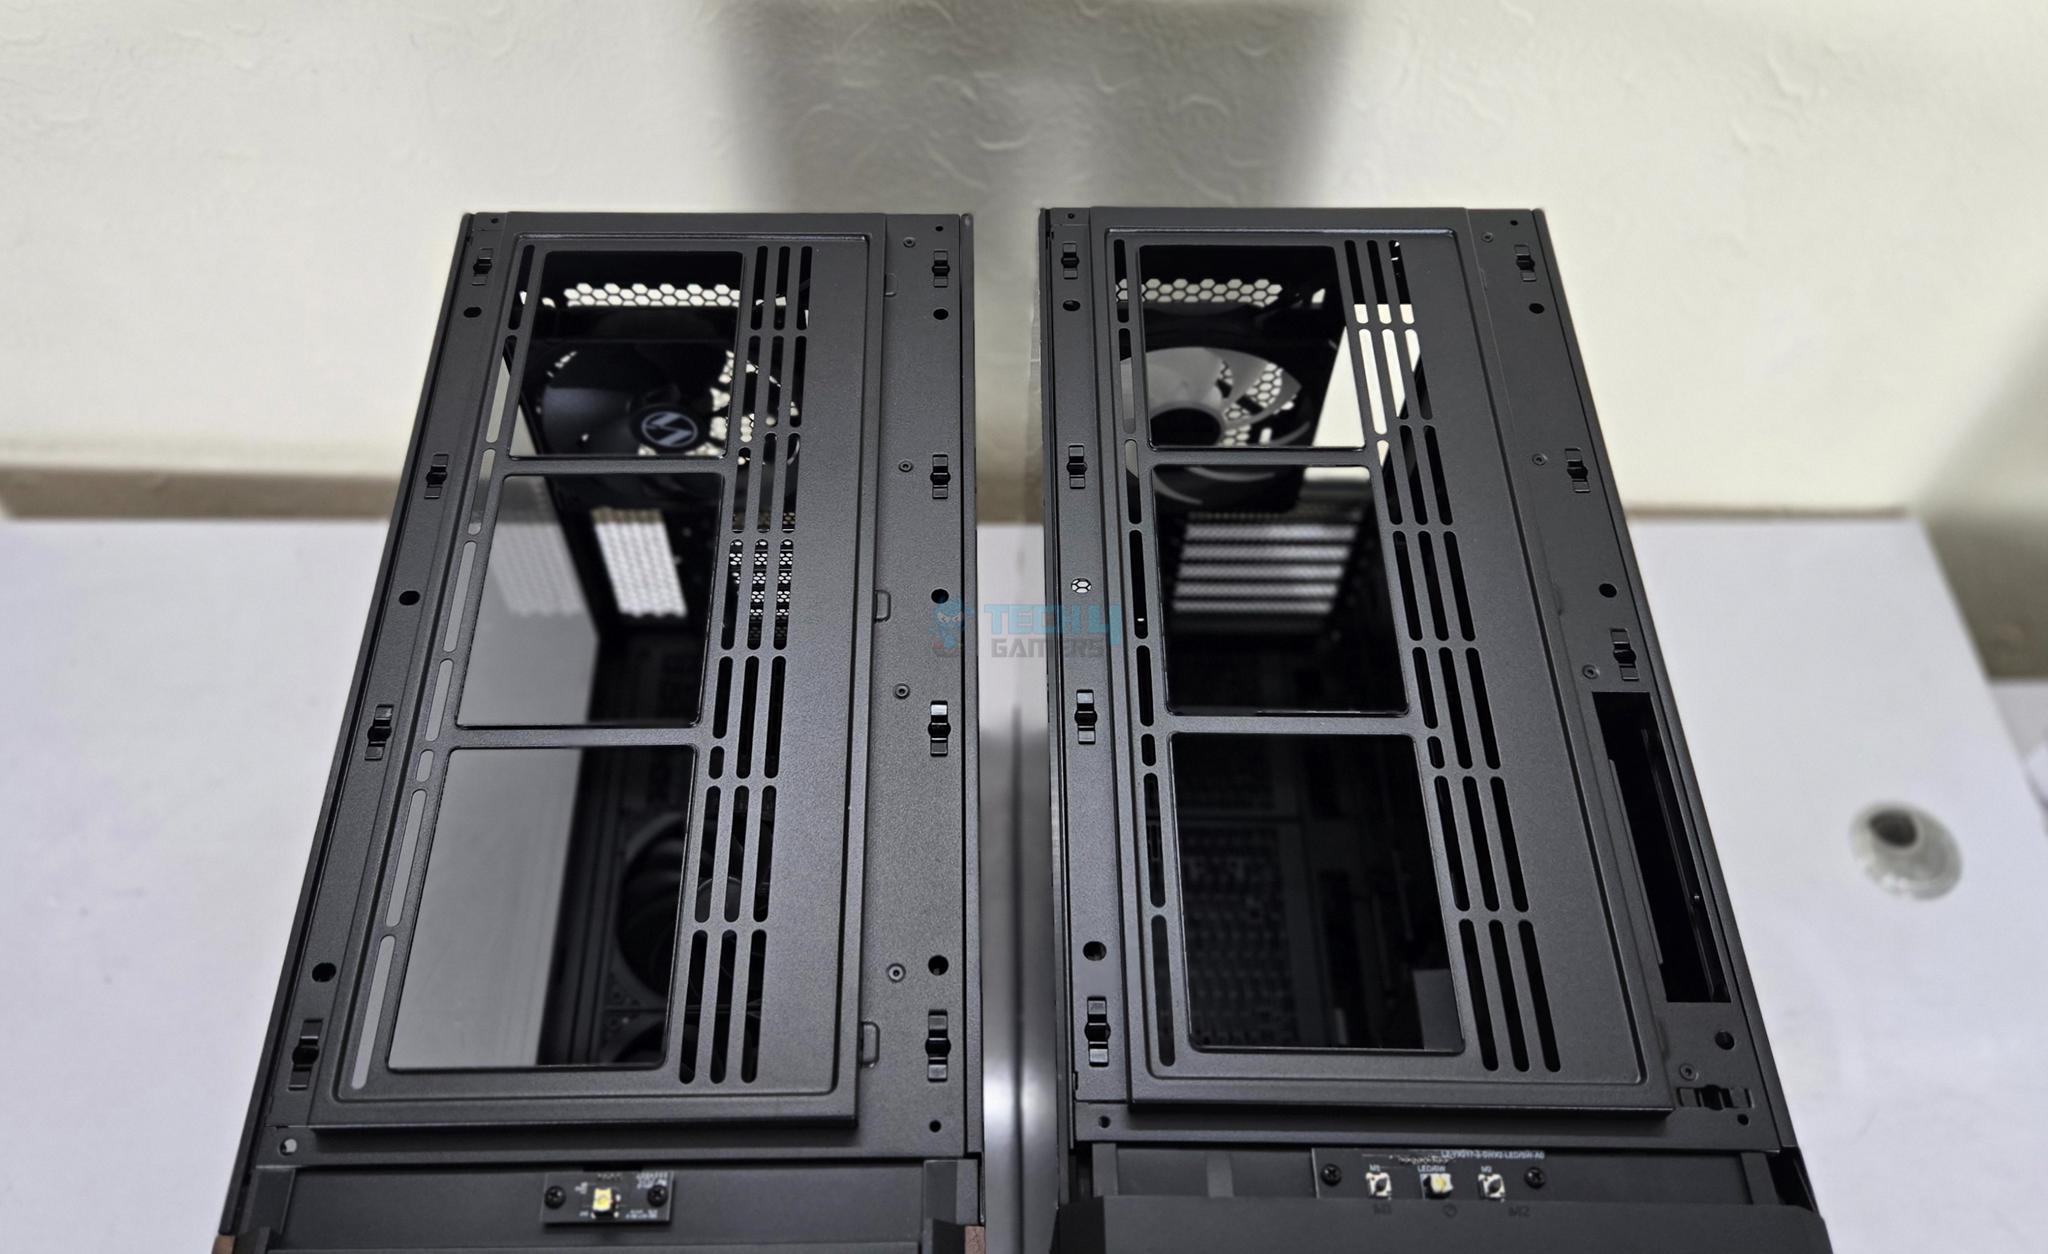
- Top of the both cases is identical except that INF variant has a position where IO panel can be installed on side.
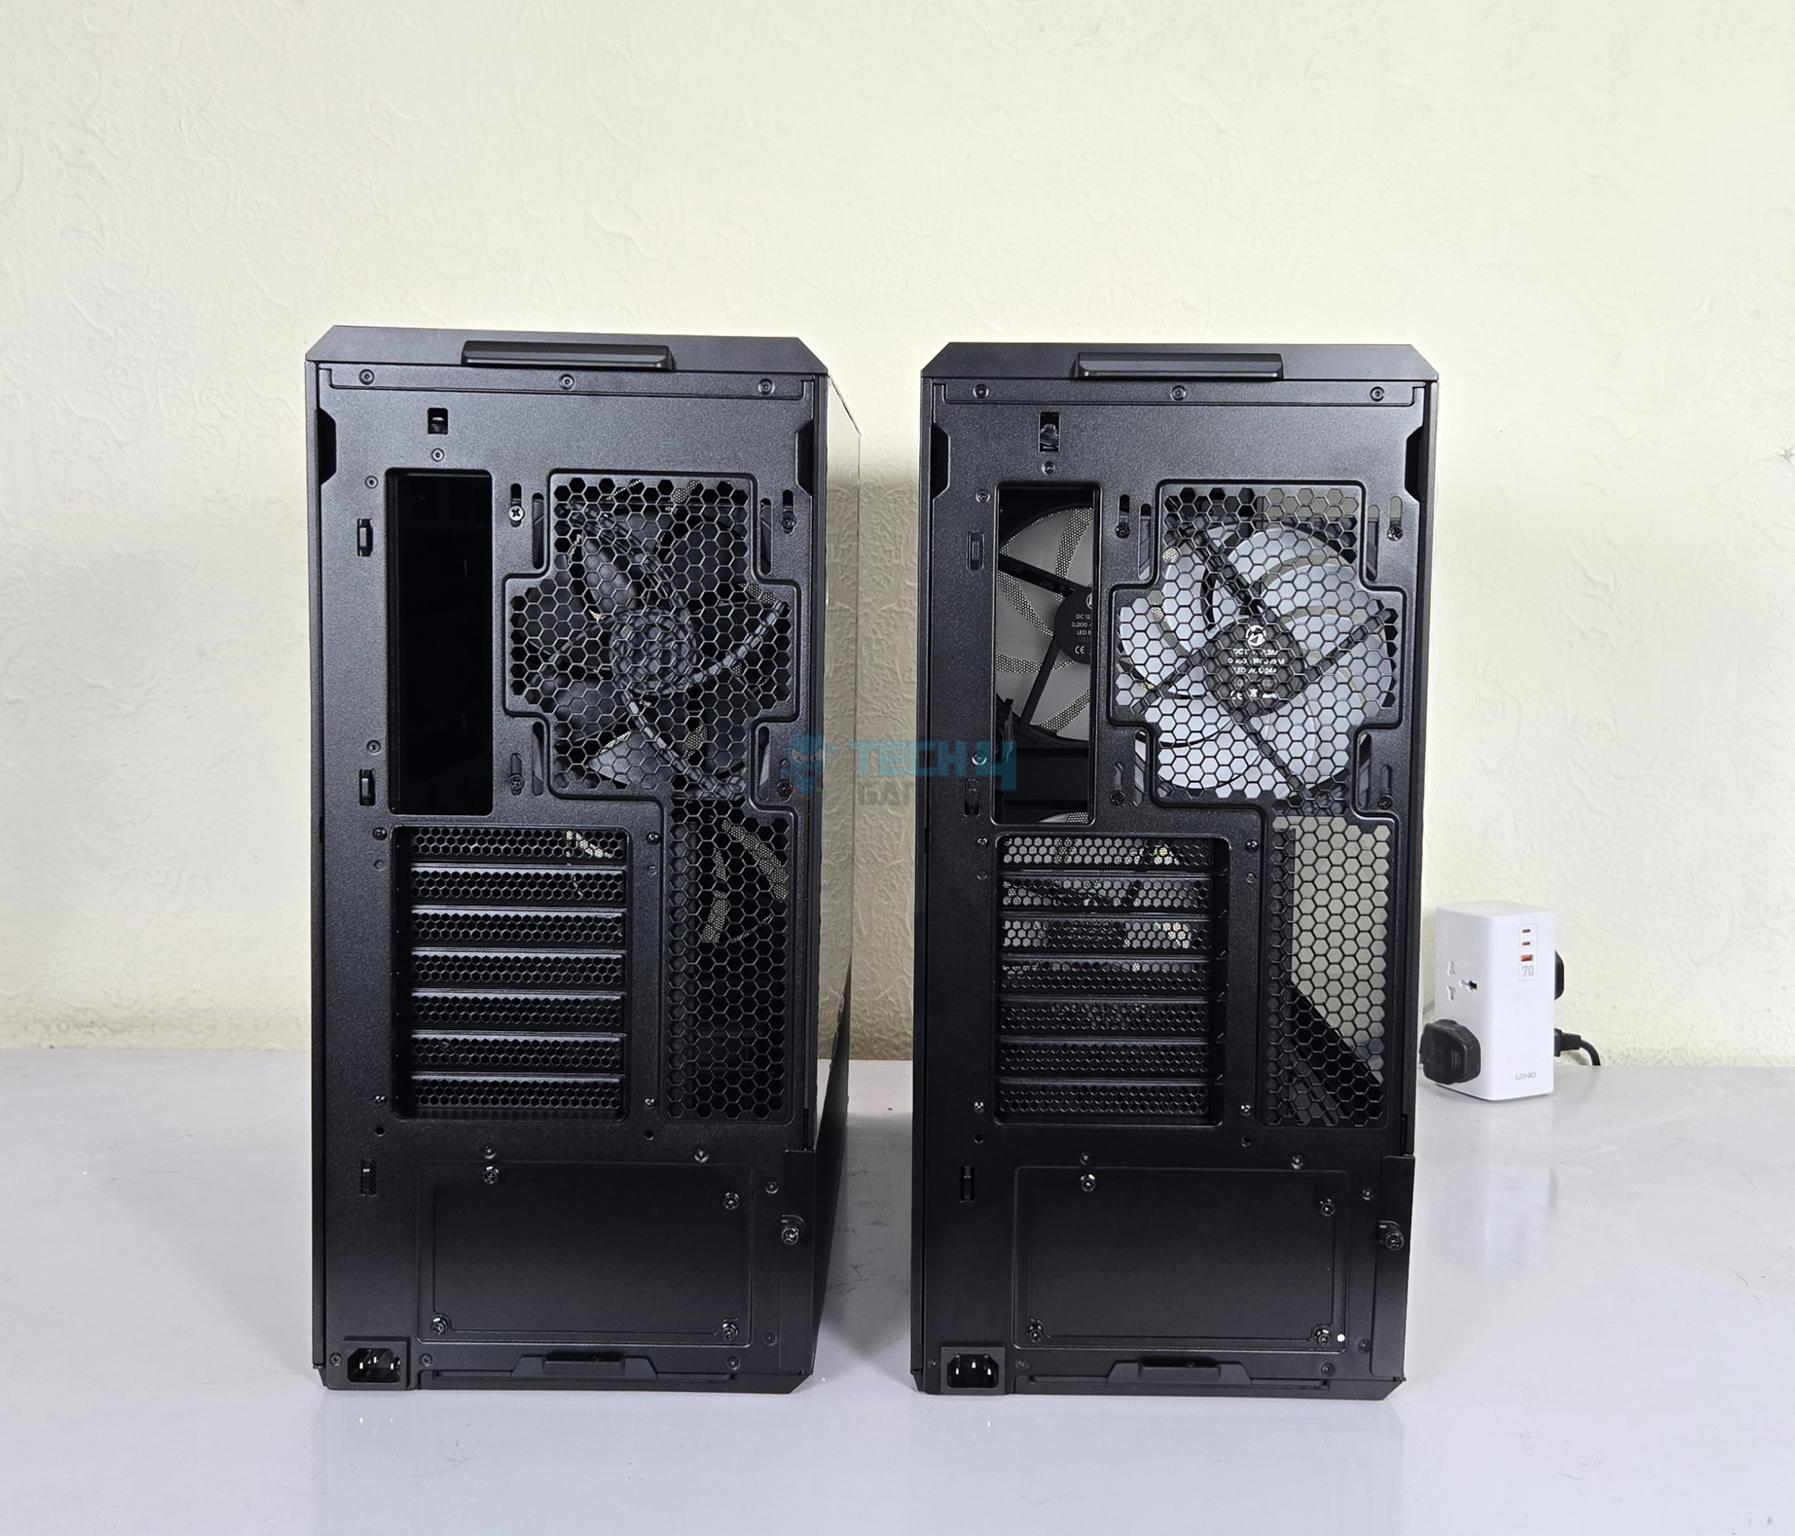
- No difference on rear.
- No difference on the glass panel side.
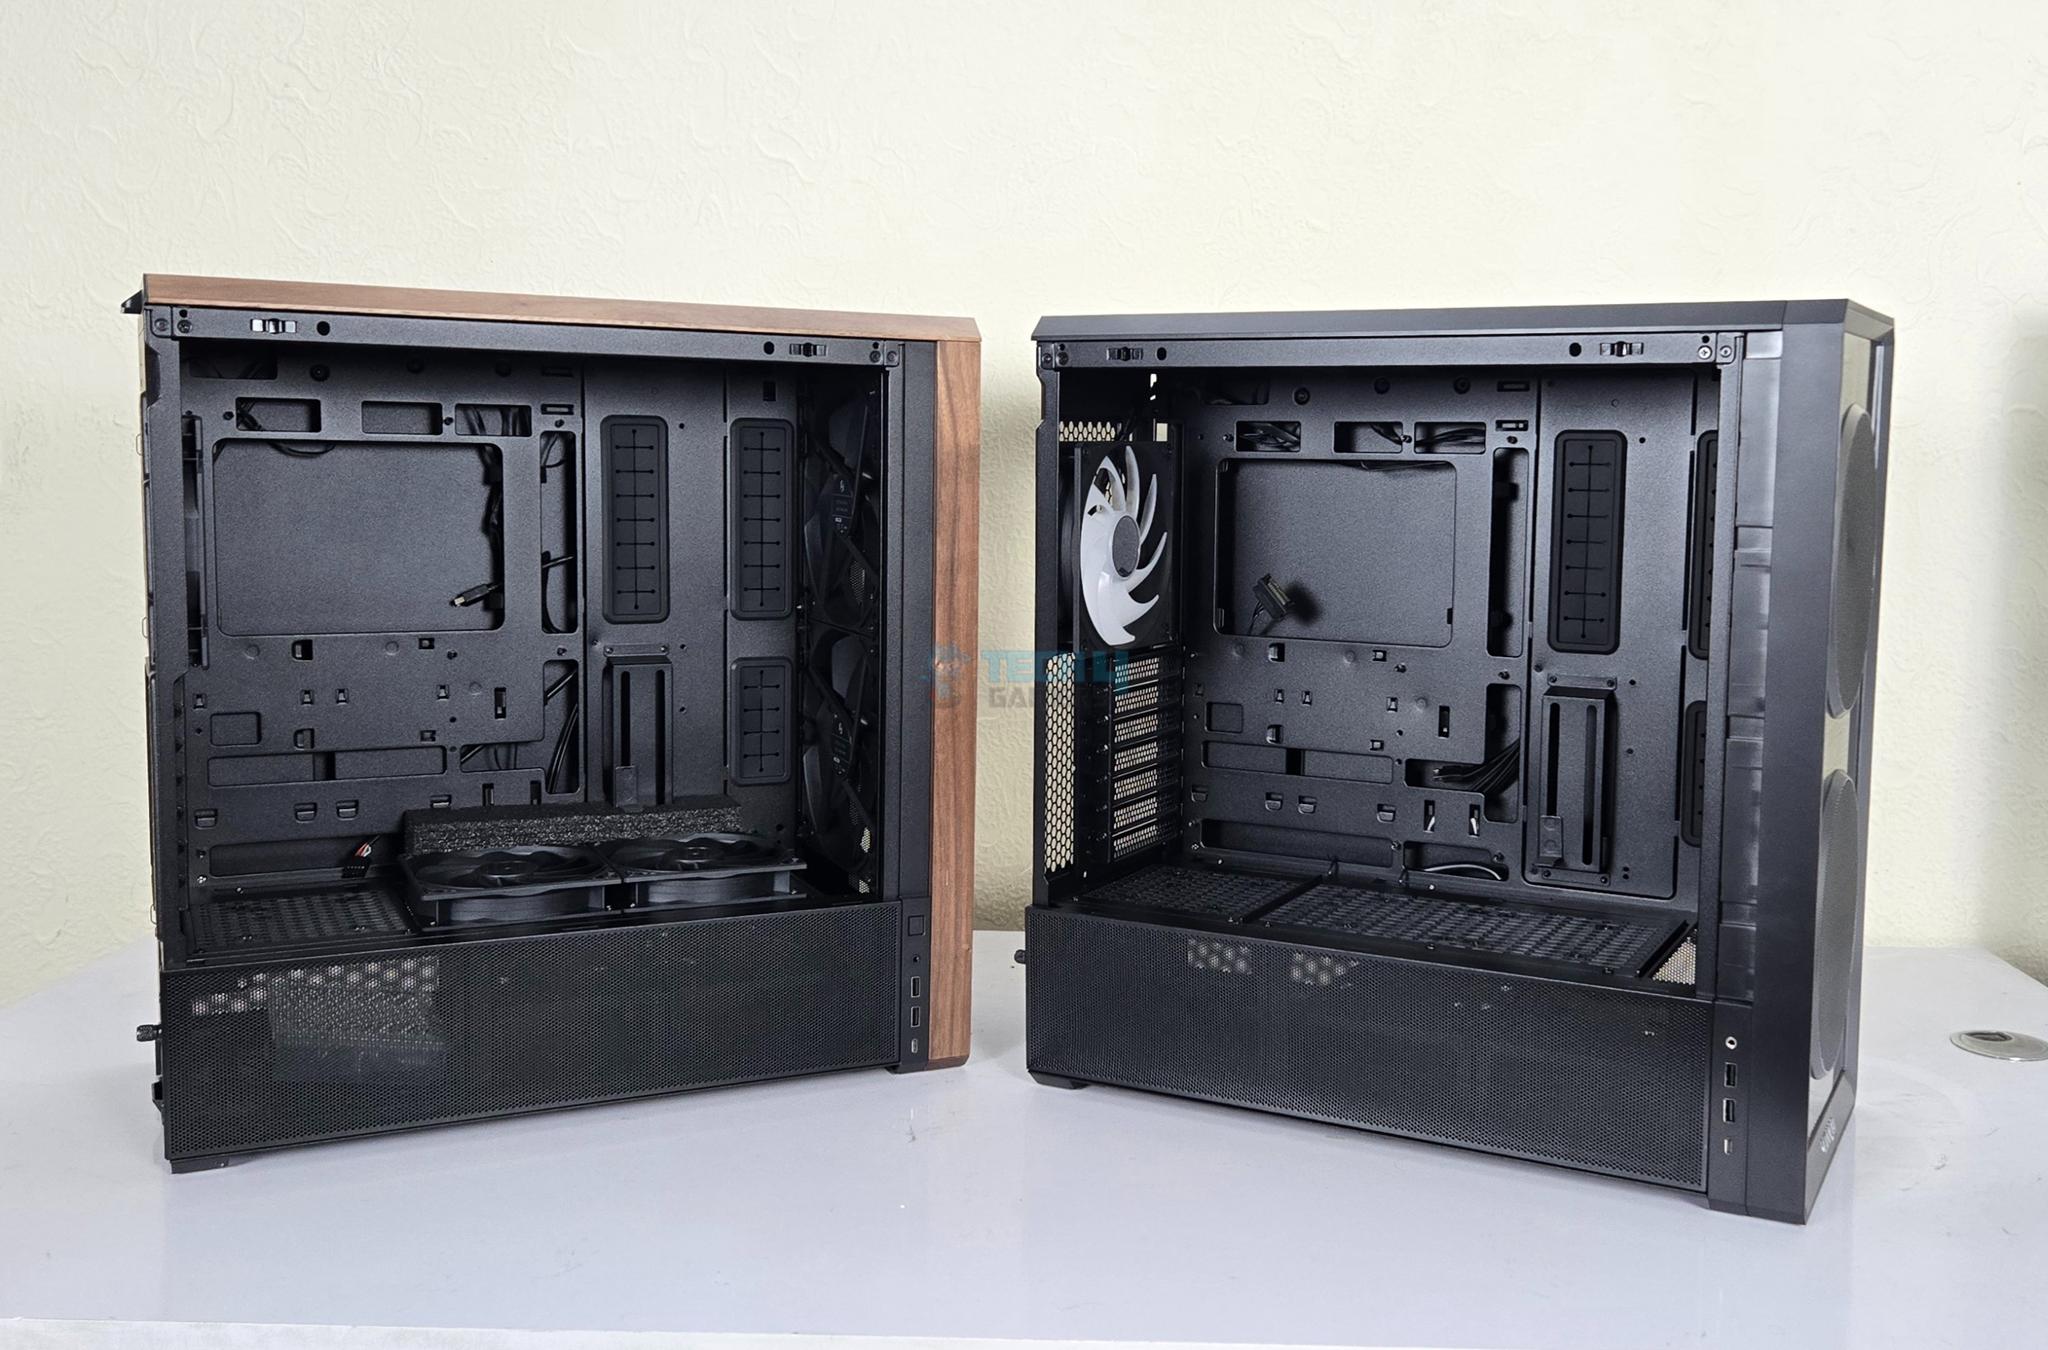
- Similar inner layout except that regular 217 comes with two 120mm inverse fans installed on PSU Shroud.
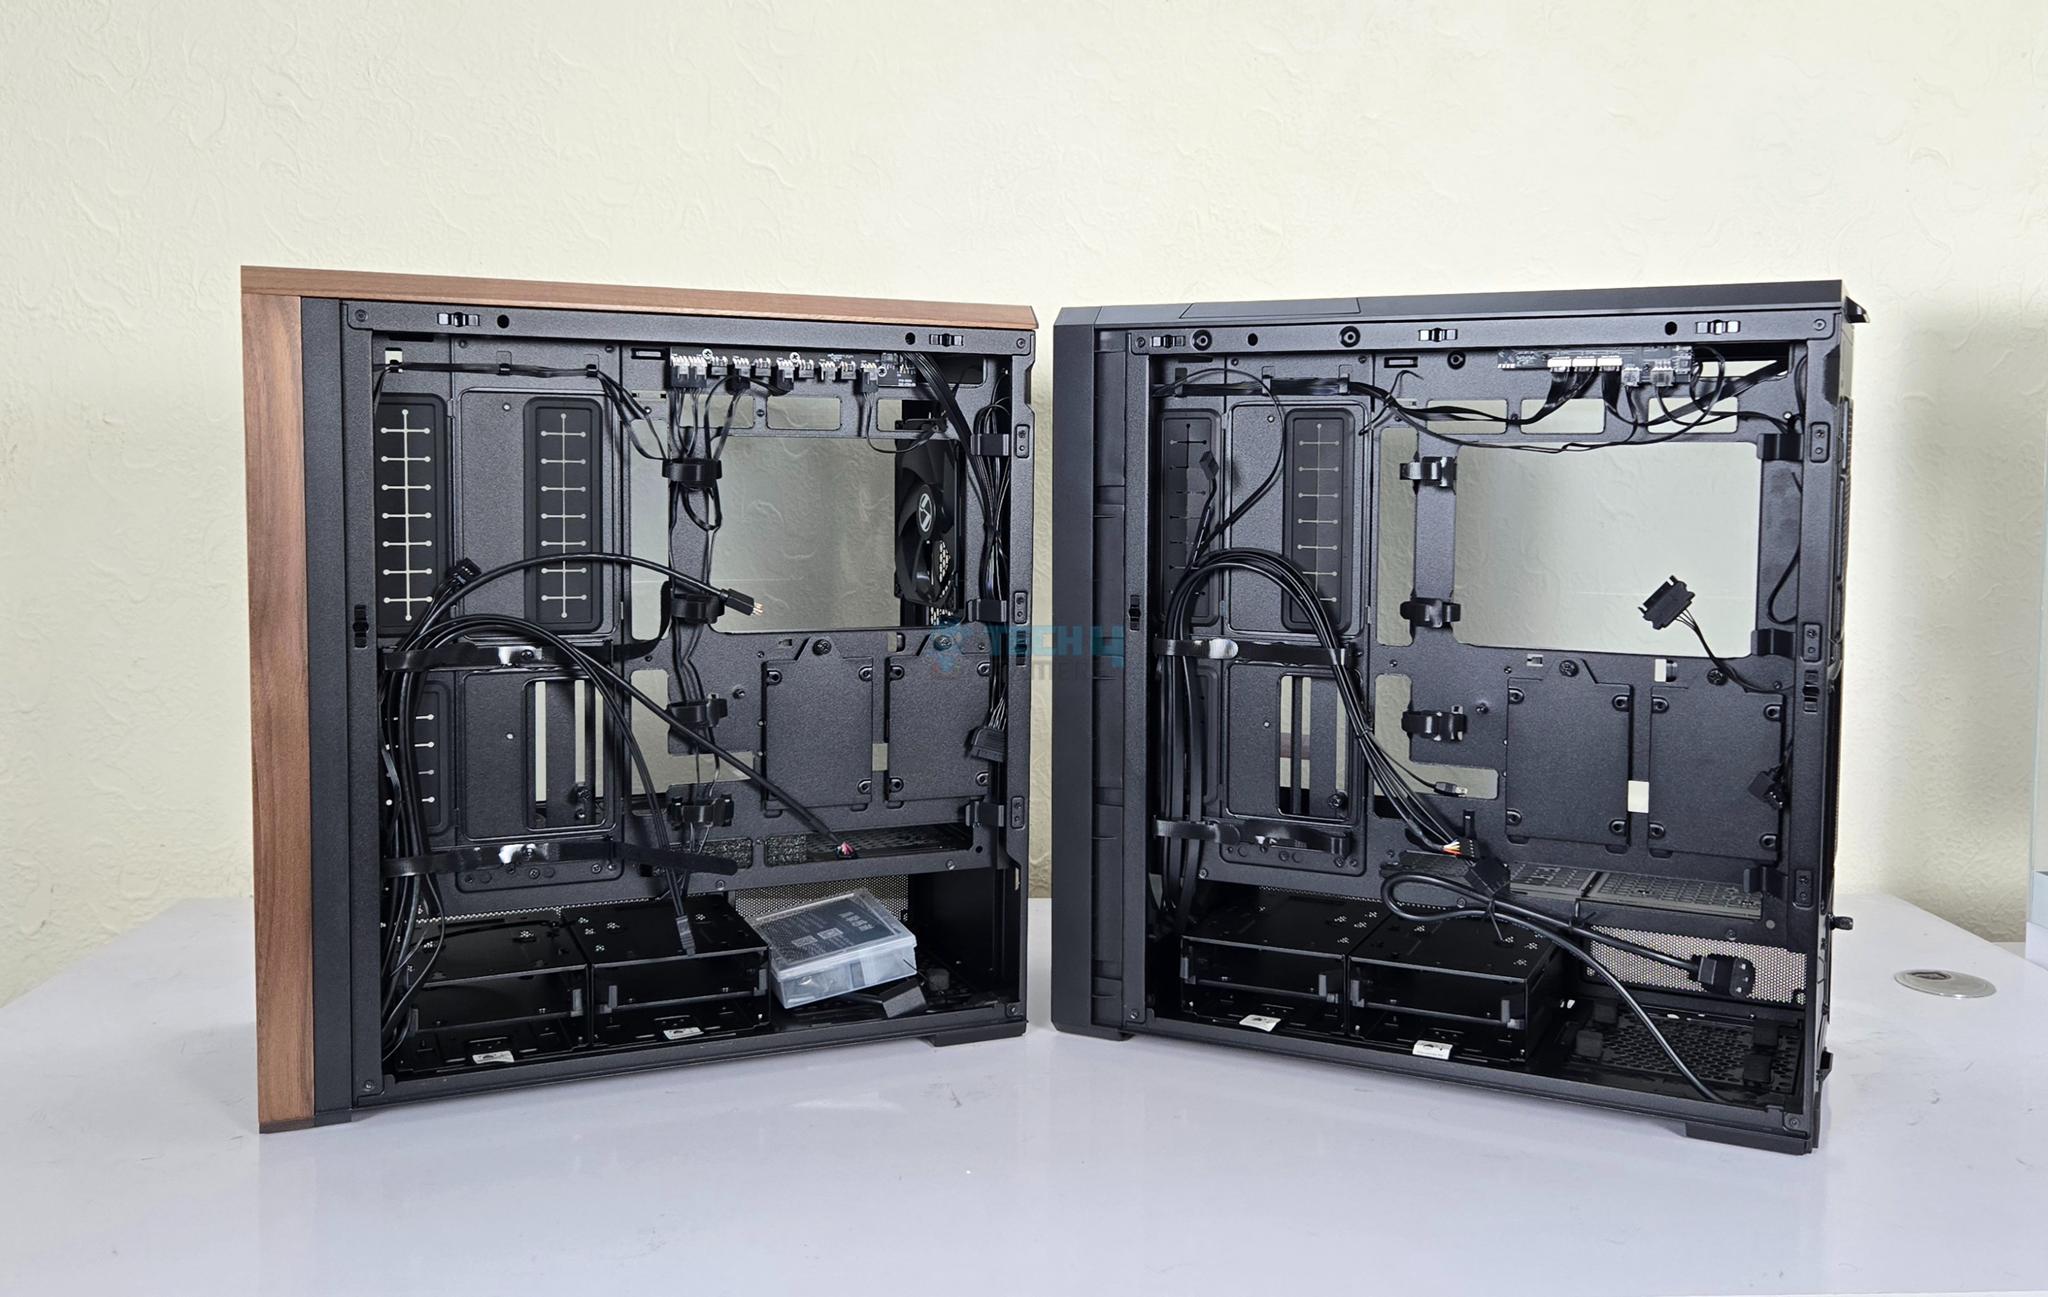
- No difference on the backside except that 217 INF has wireless fan hub unlike the regular 217.
- Regular LANCOOL 217 has a single power button on top whereas the INF variant has two lighting control zone buttons in addition as well.
Let’s start taking a closer look from Inside and Outside views being our major categories.
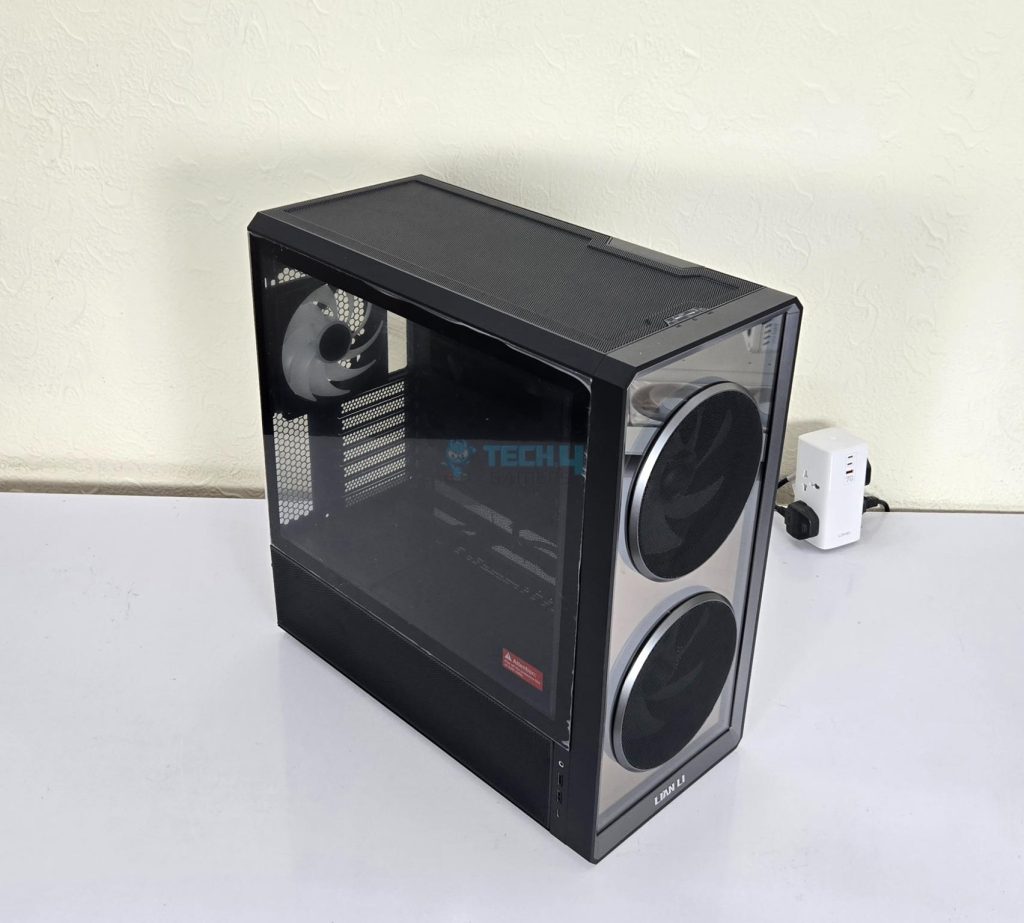
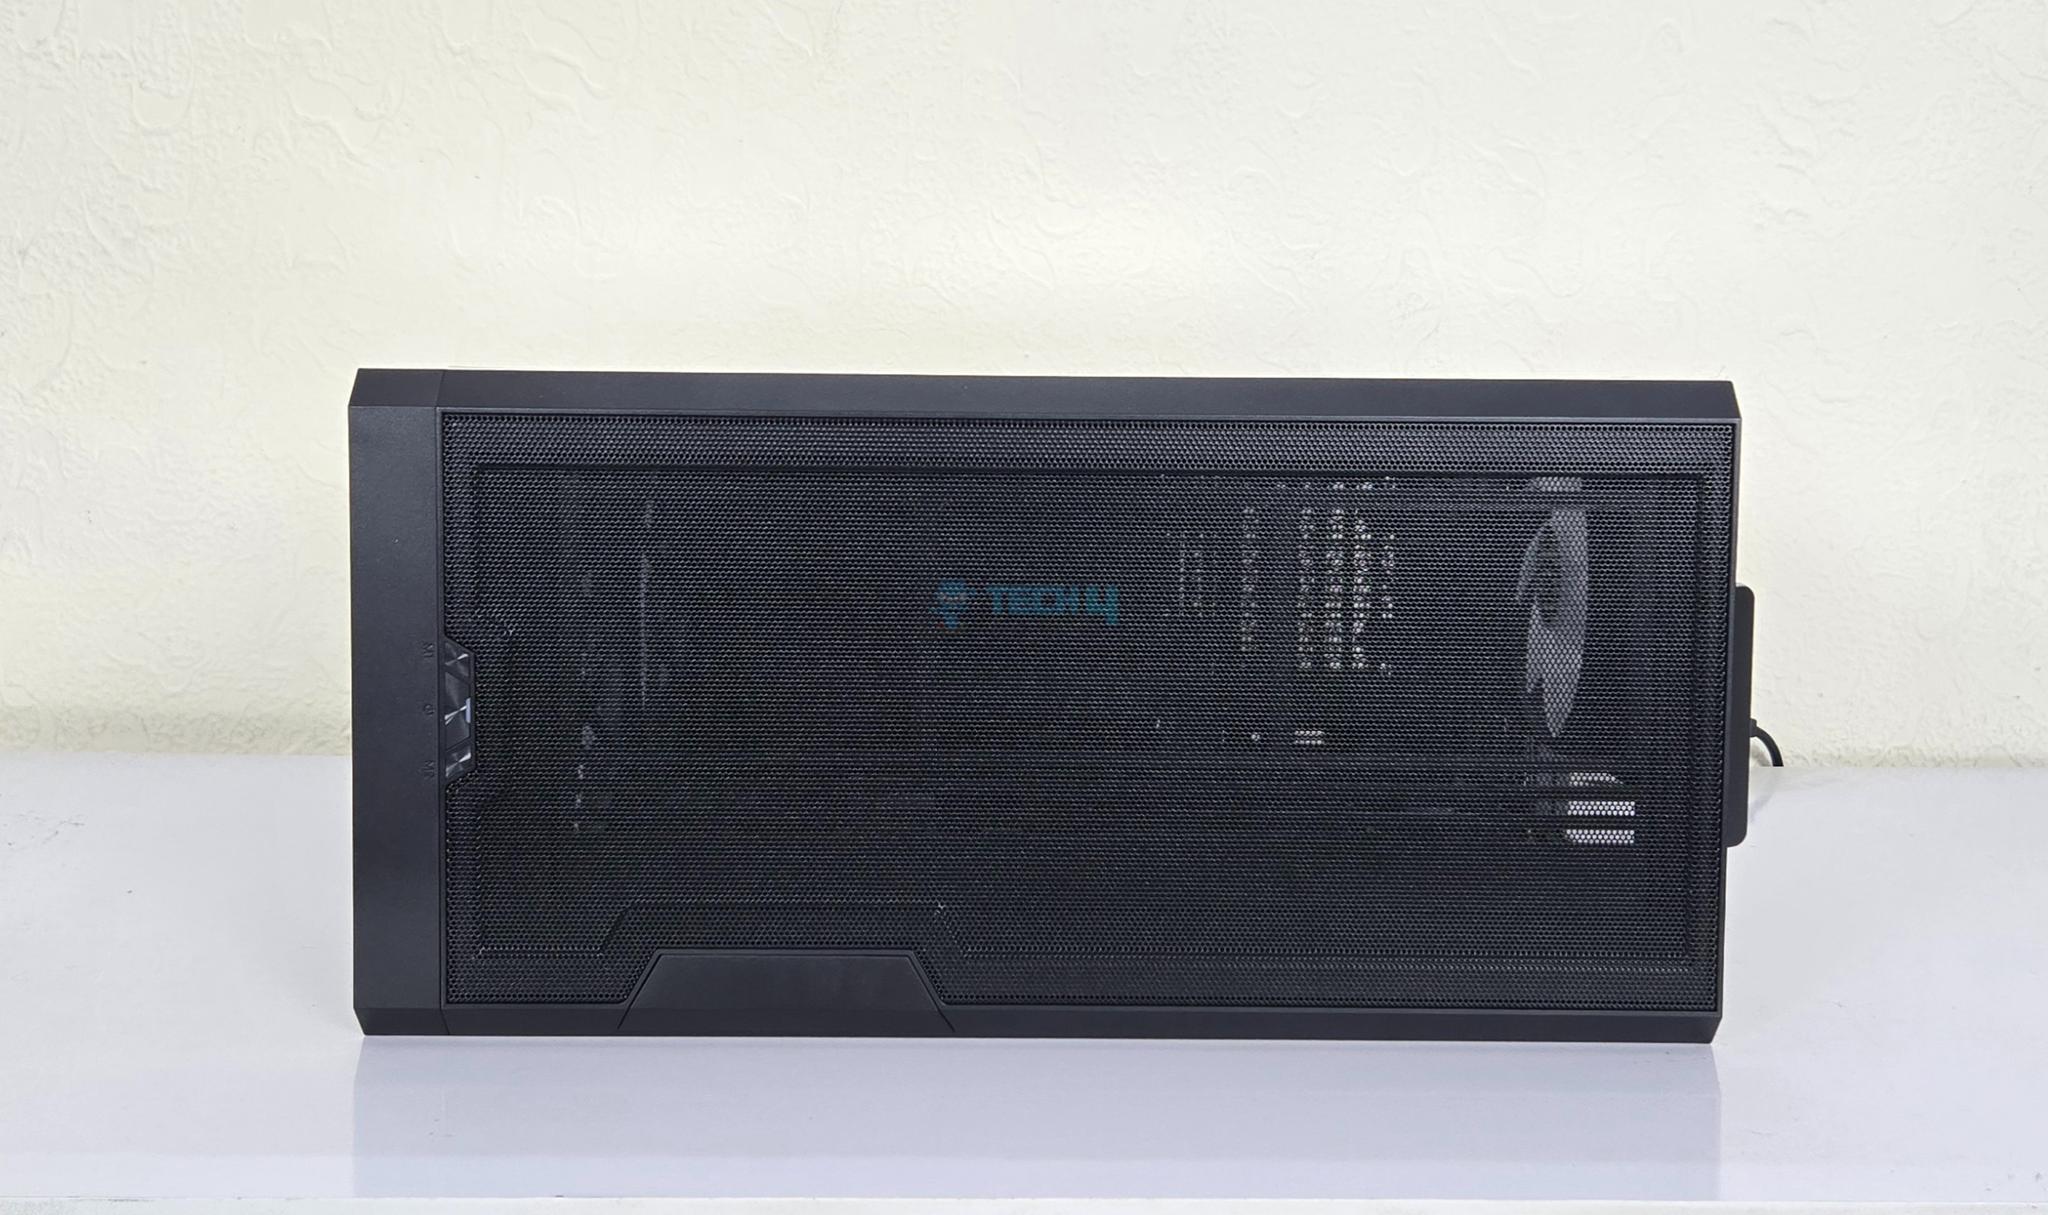
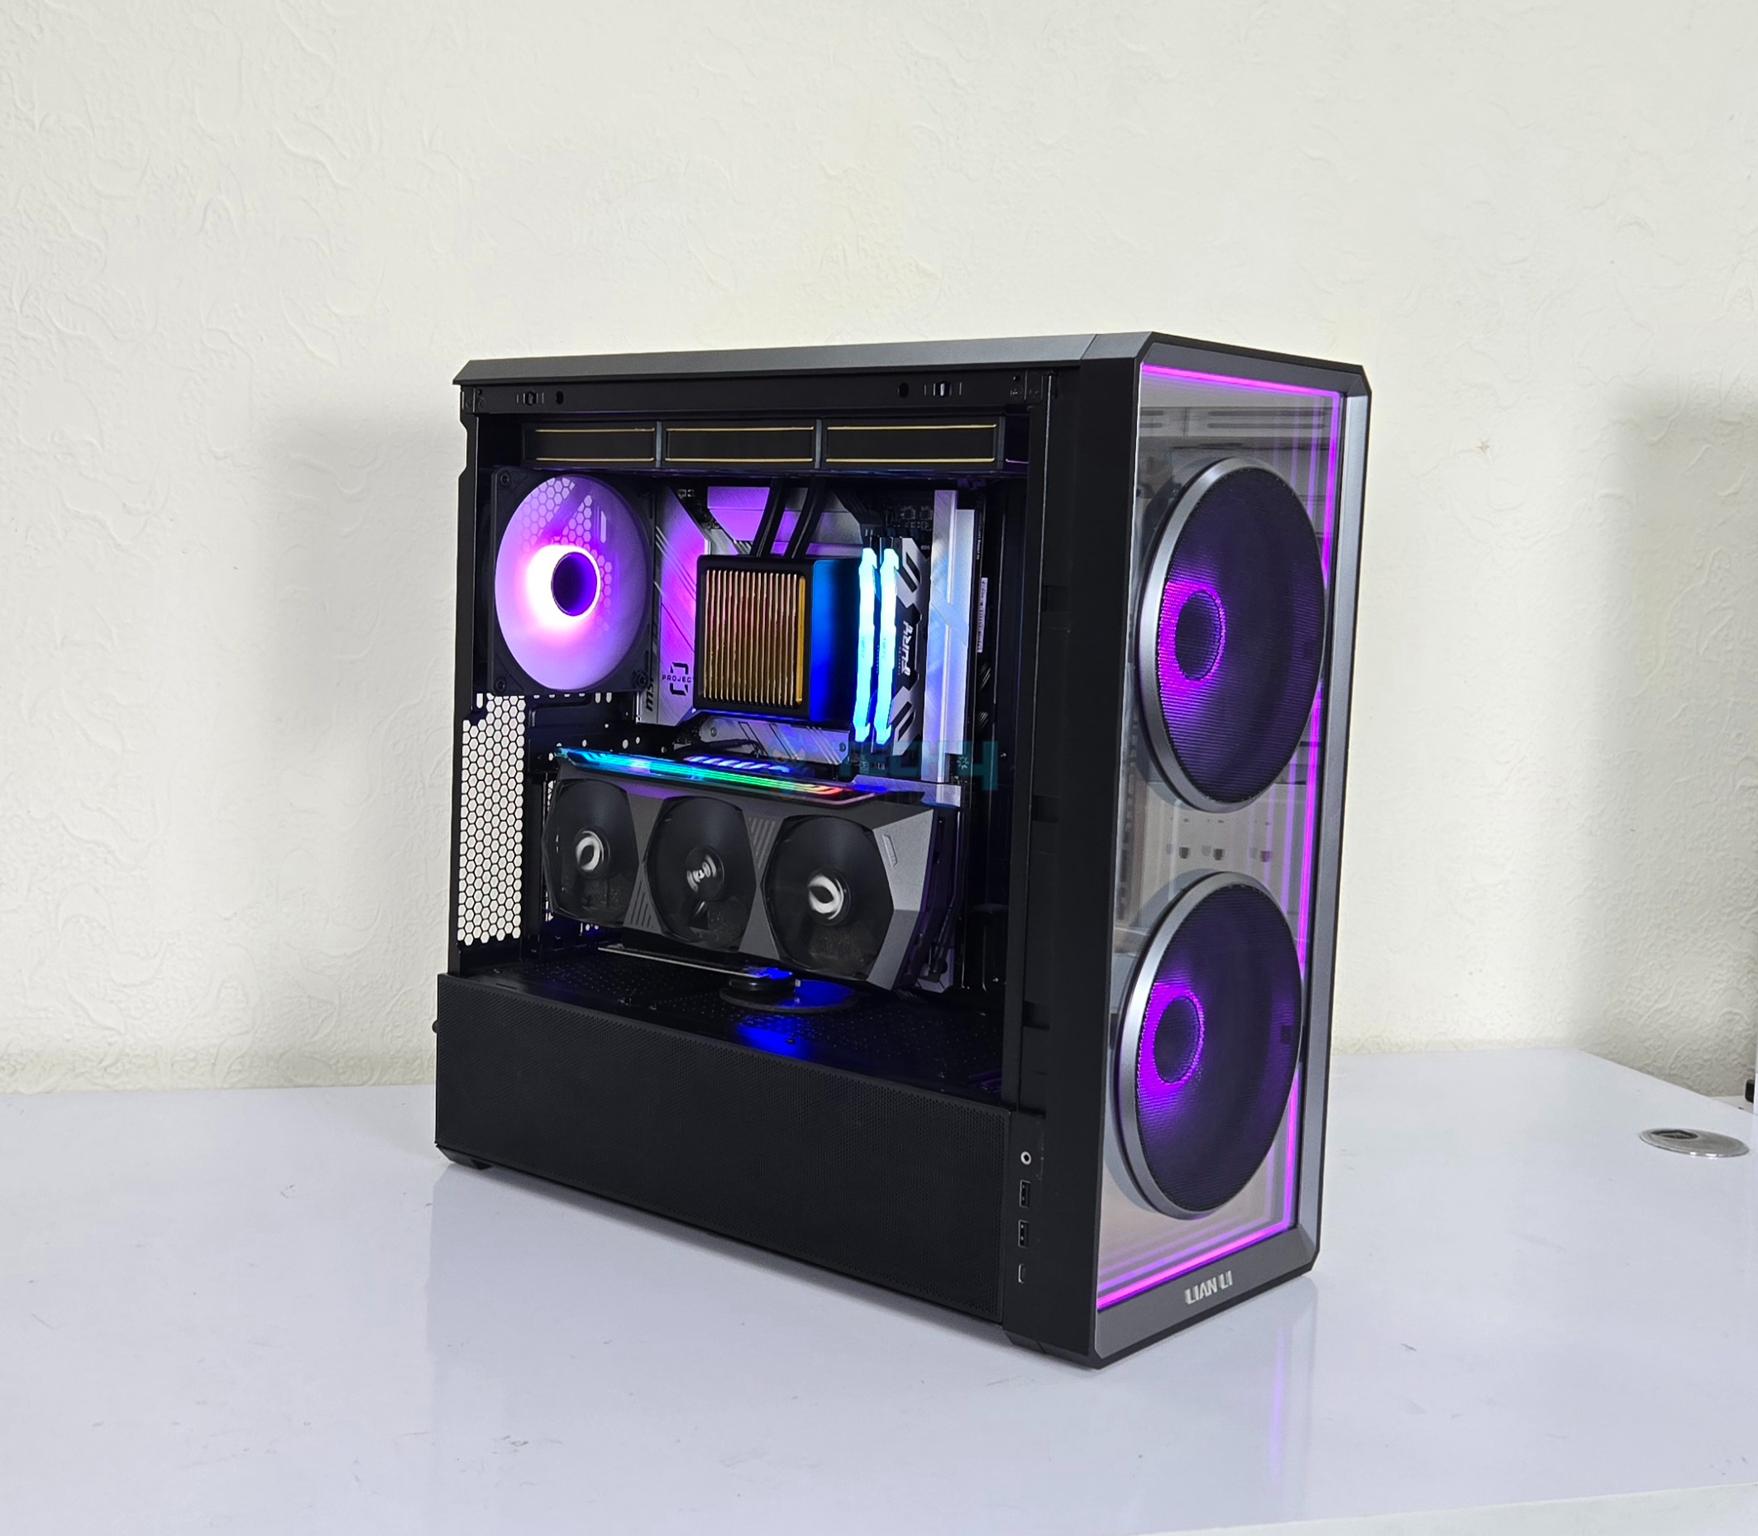
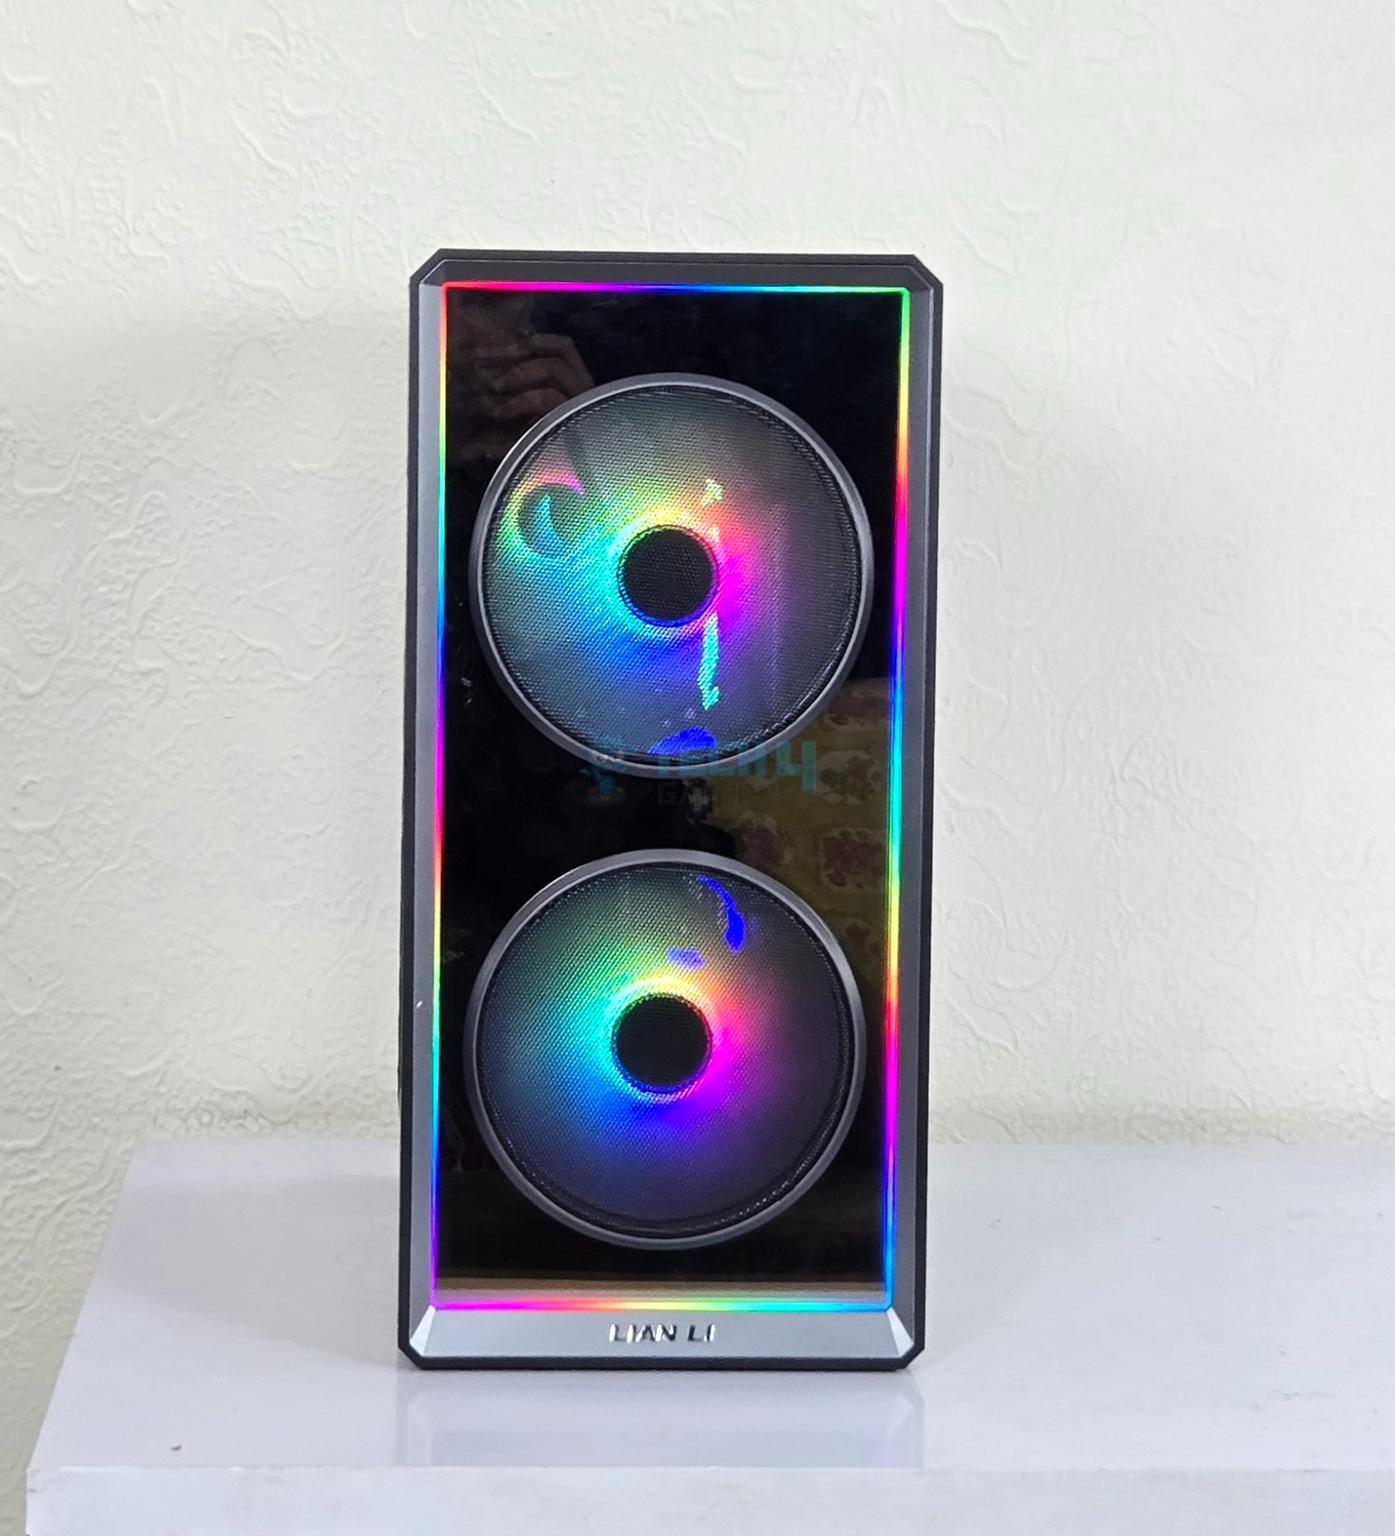
Front Panel
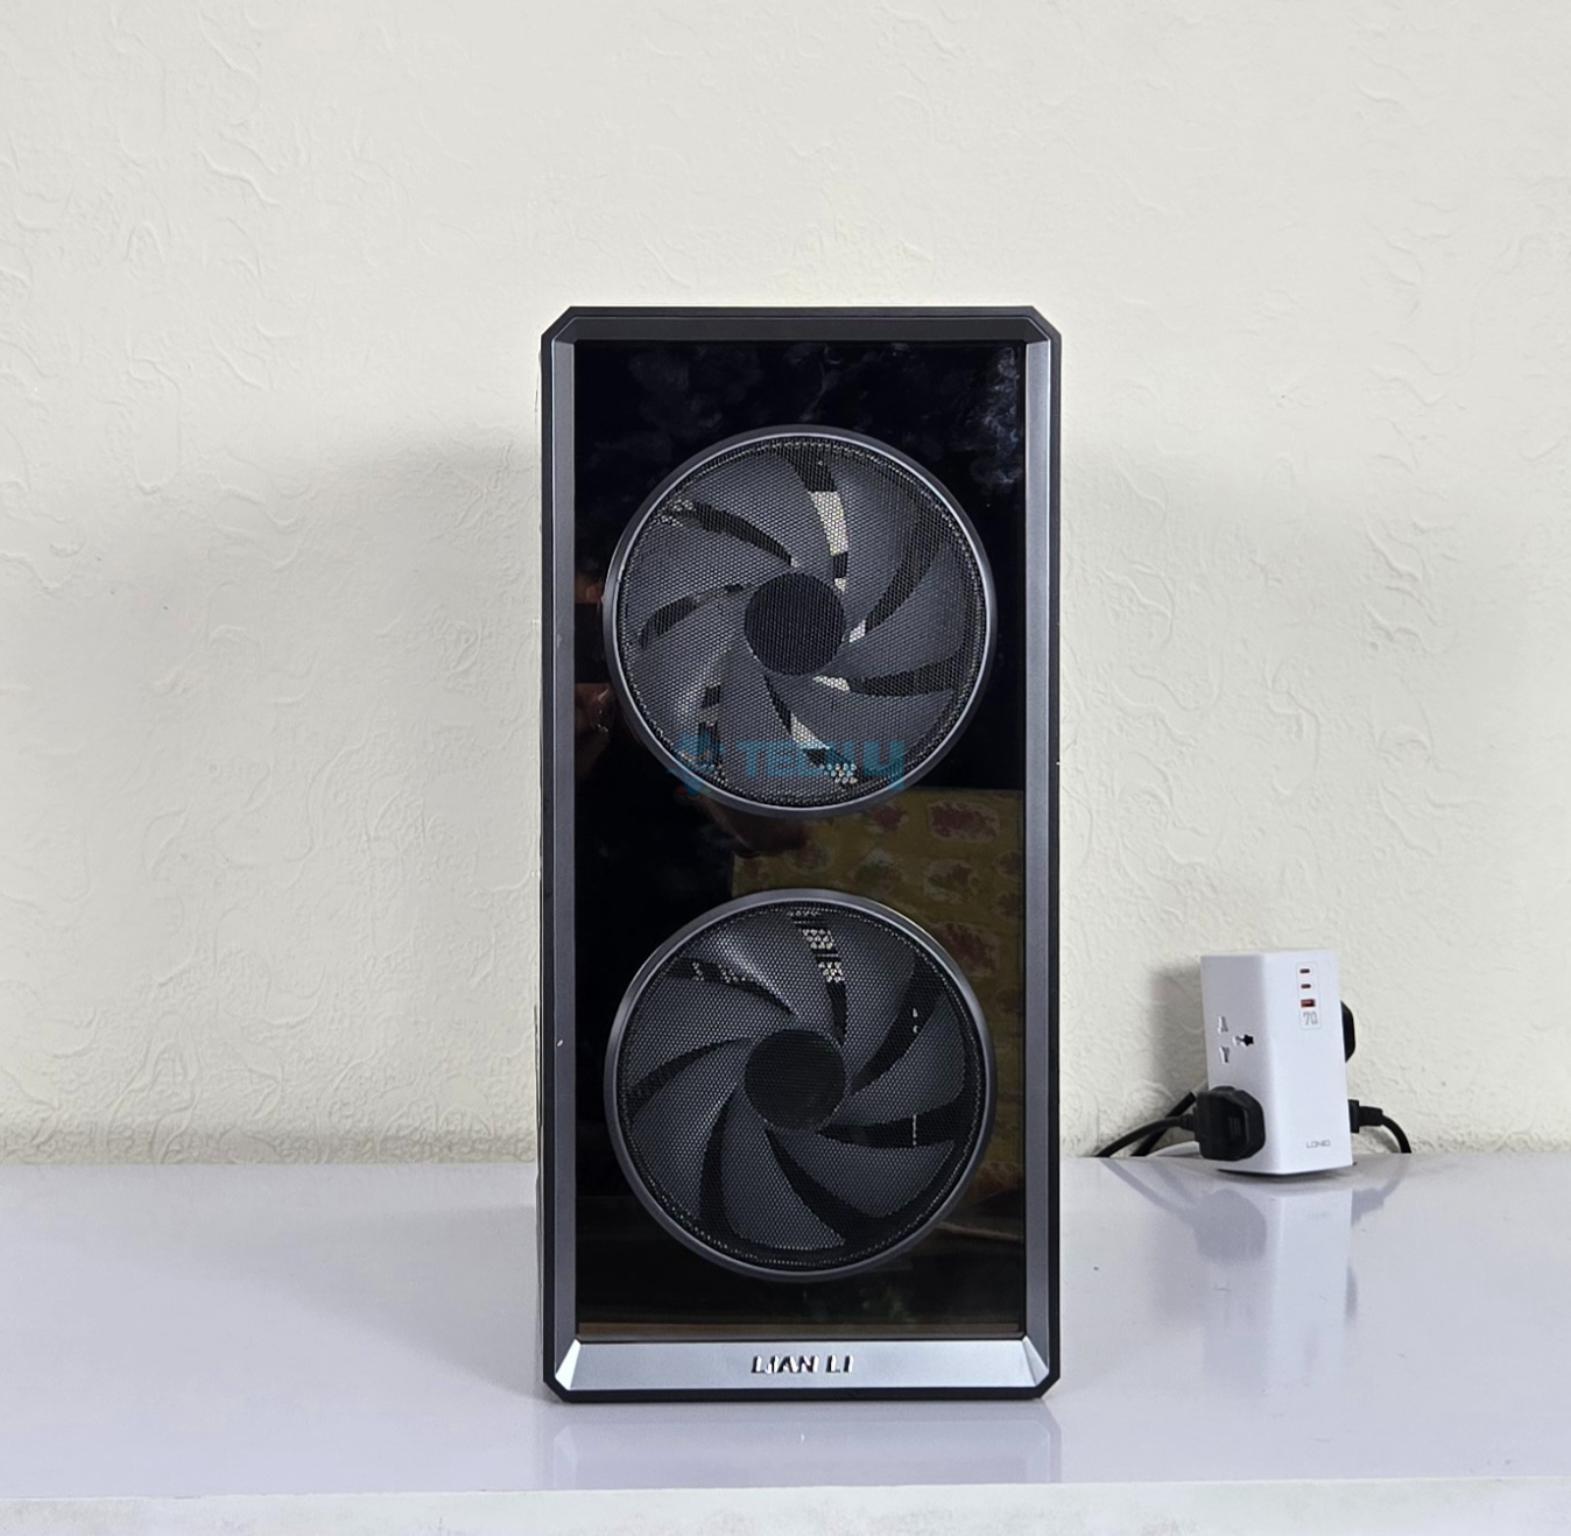
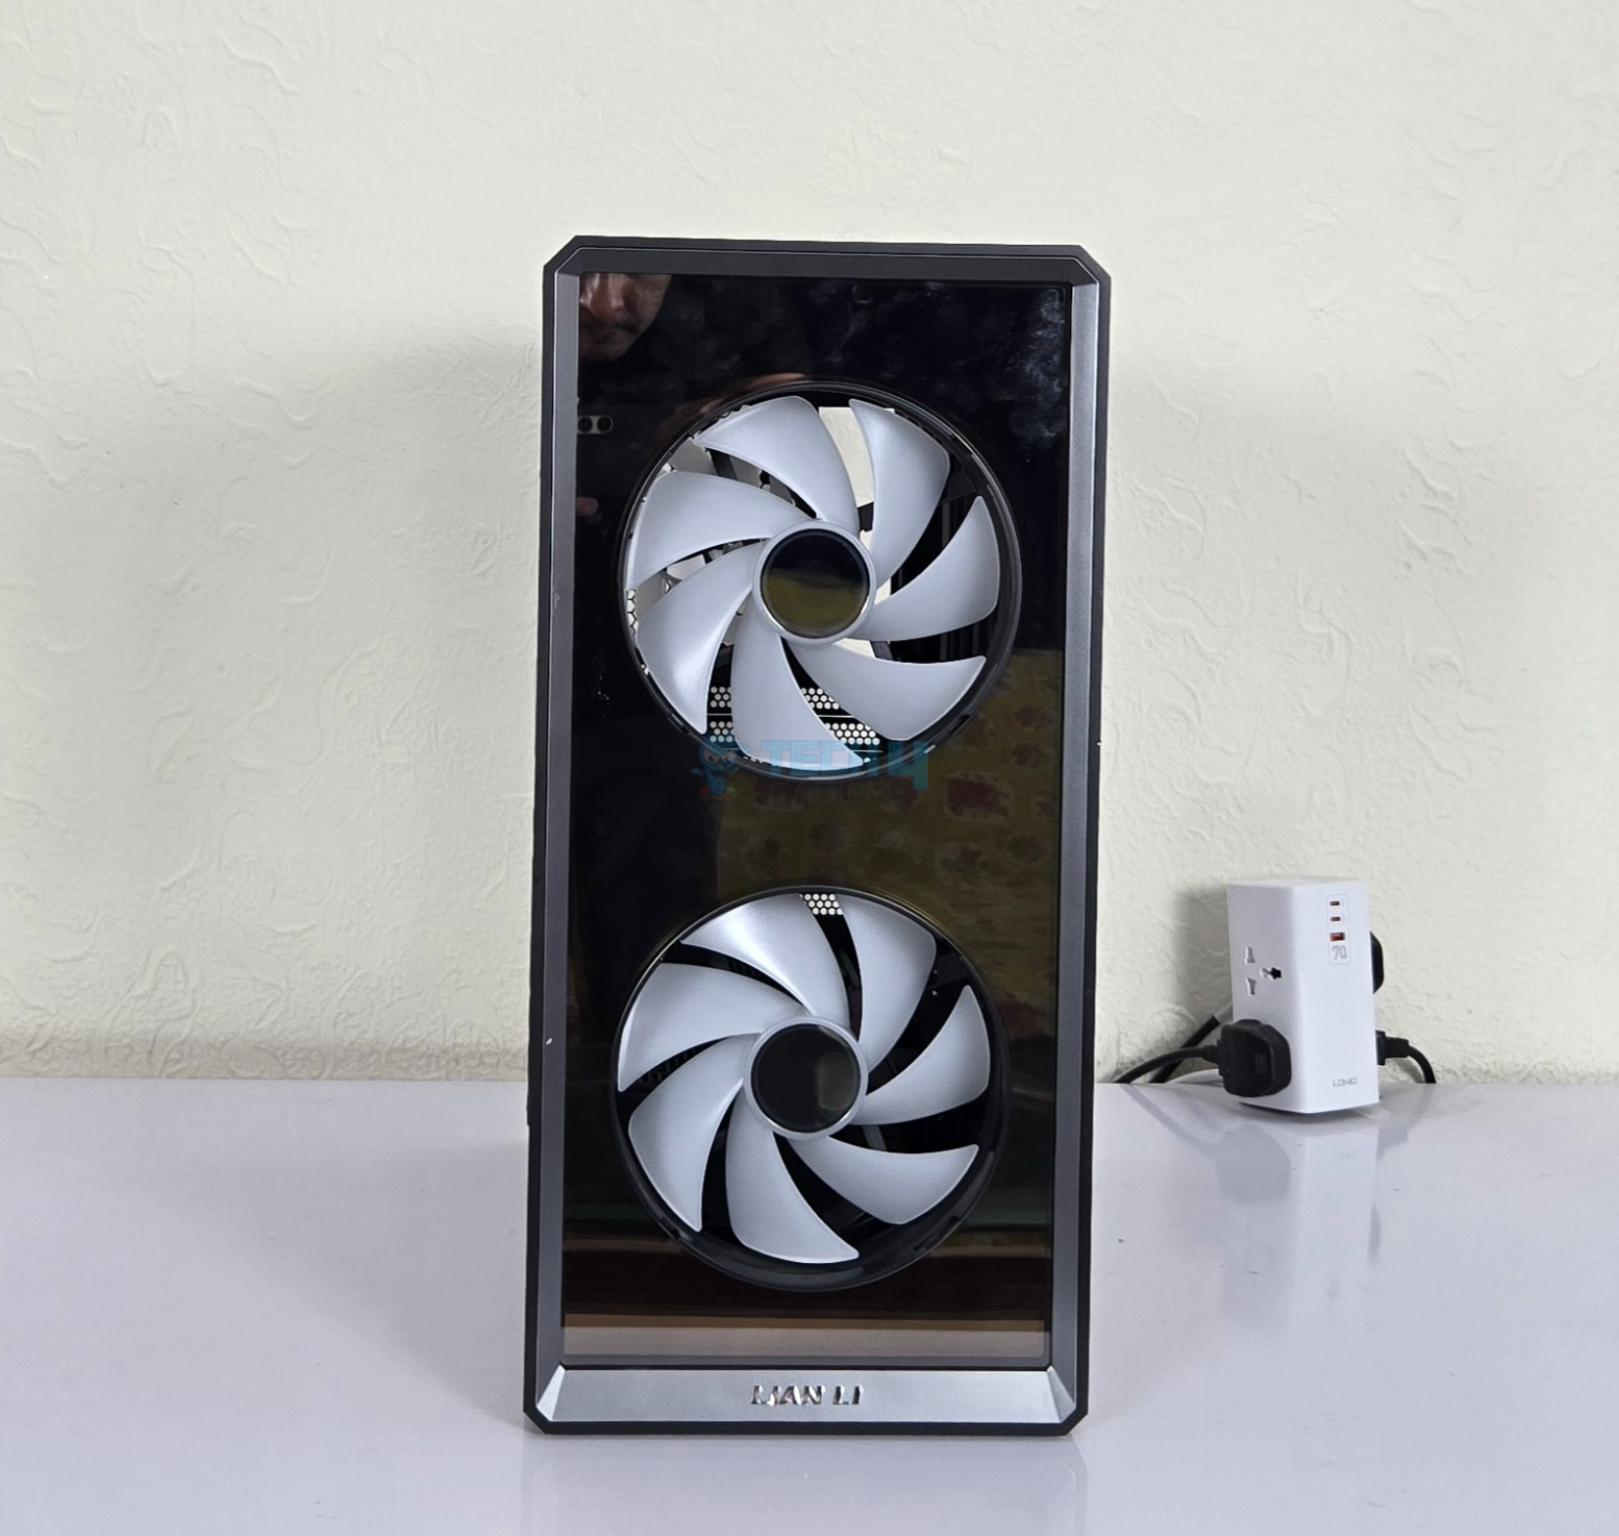
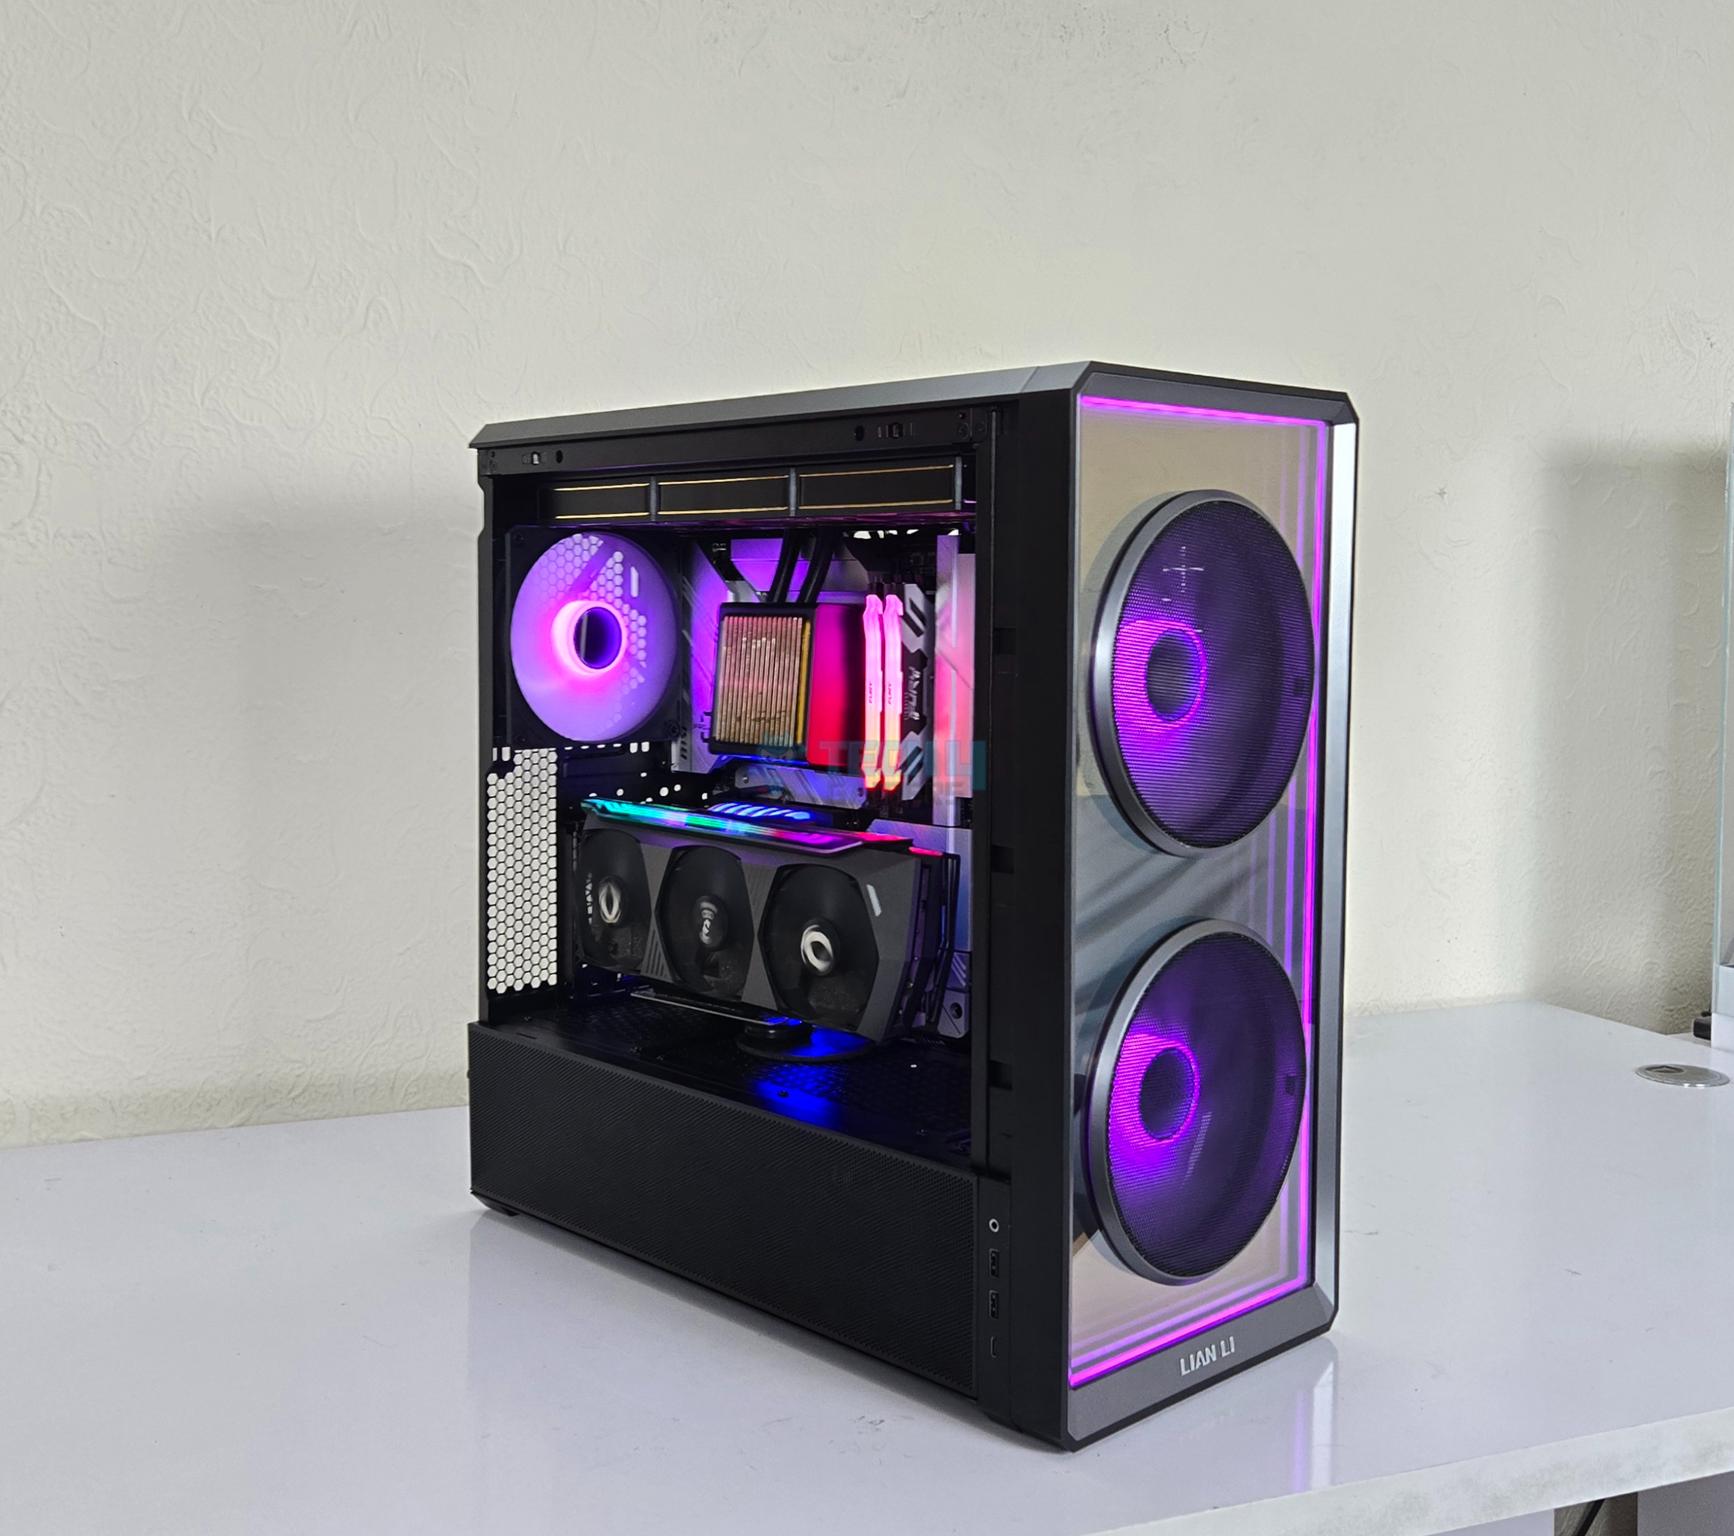
The LANCOOL 217 INF comes equipped with a reflective front panel that has infinity-mirror design. This is non-perforated design and before you think that it could impeded the airflow, this is not the case here. You can see two mesh style covers (although this look reminds me of stereo speakers! Pun intended) over the two 170mm ARGB fans.
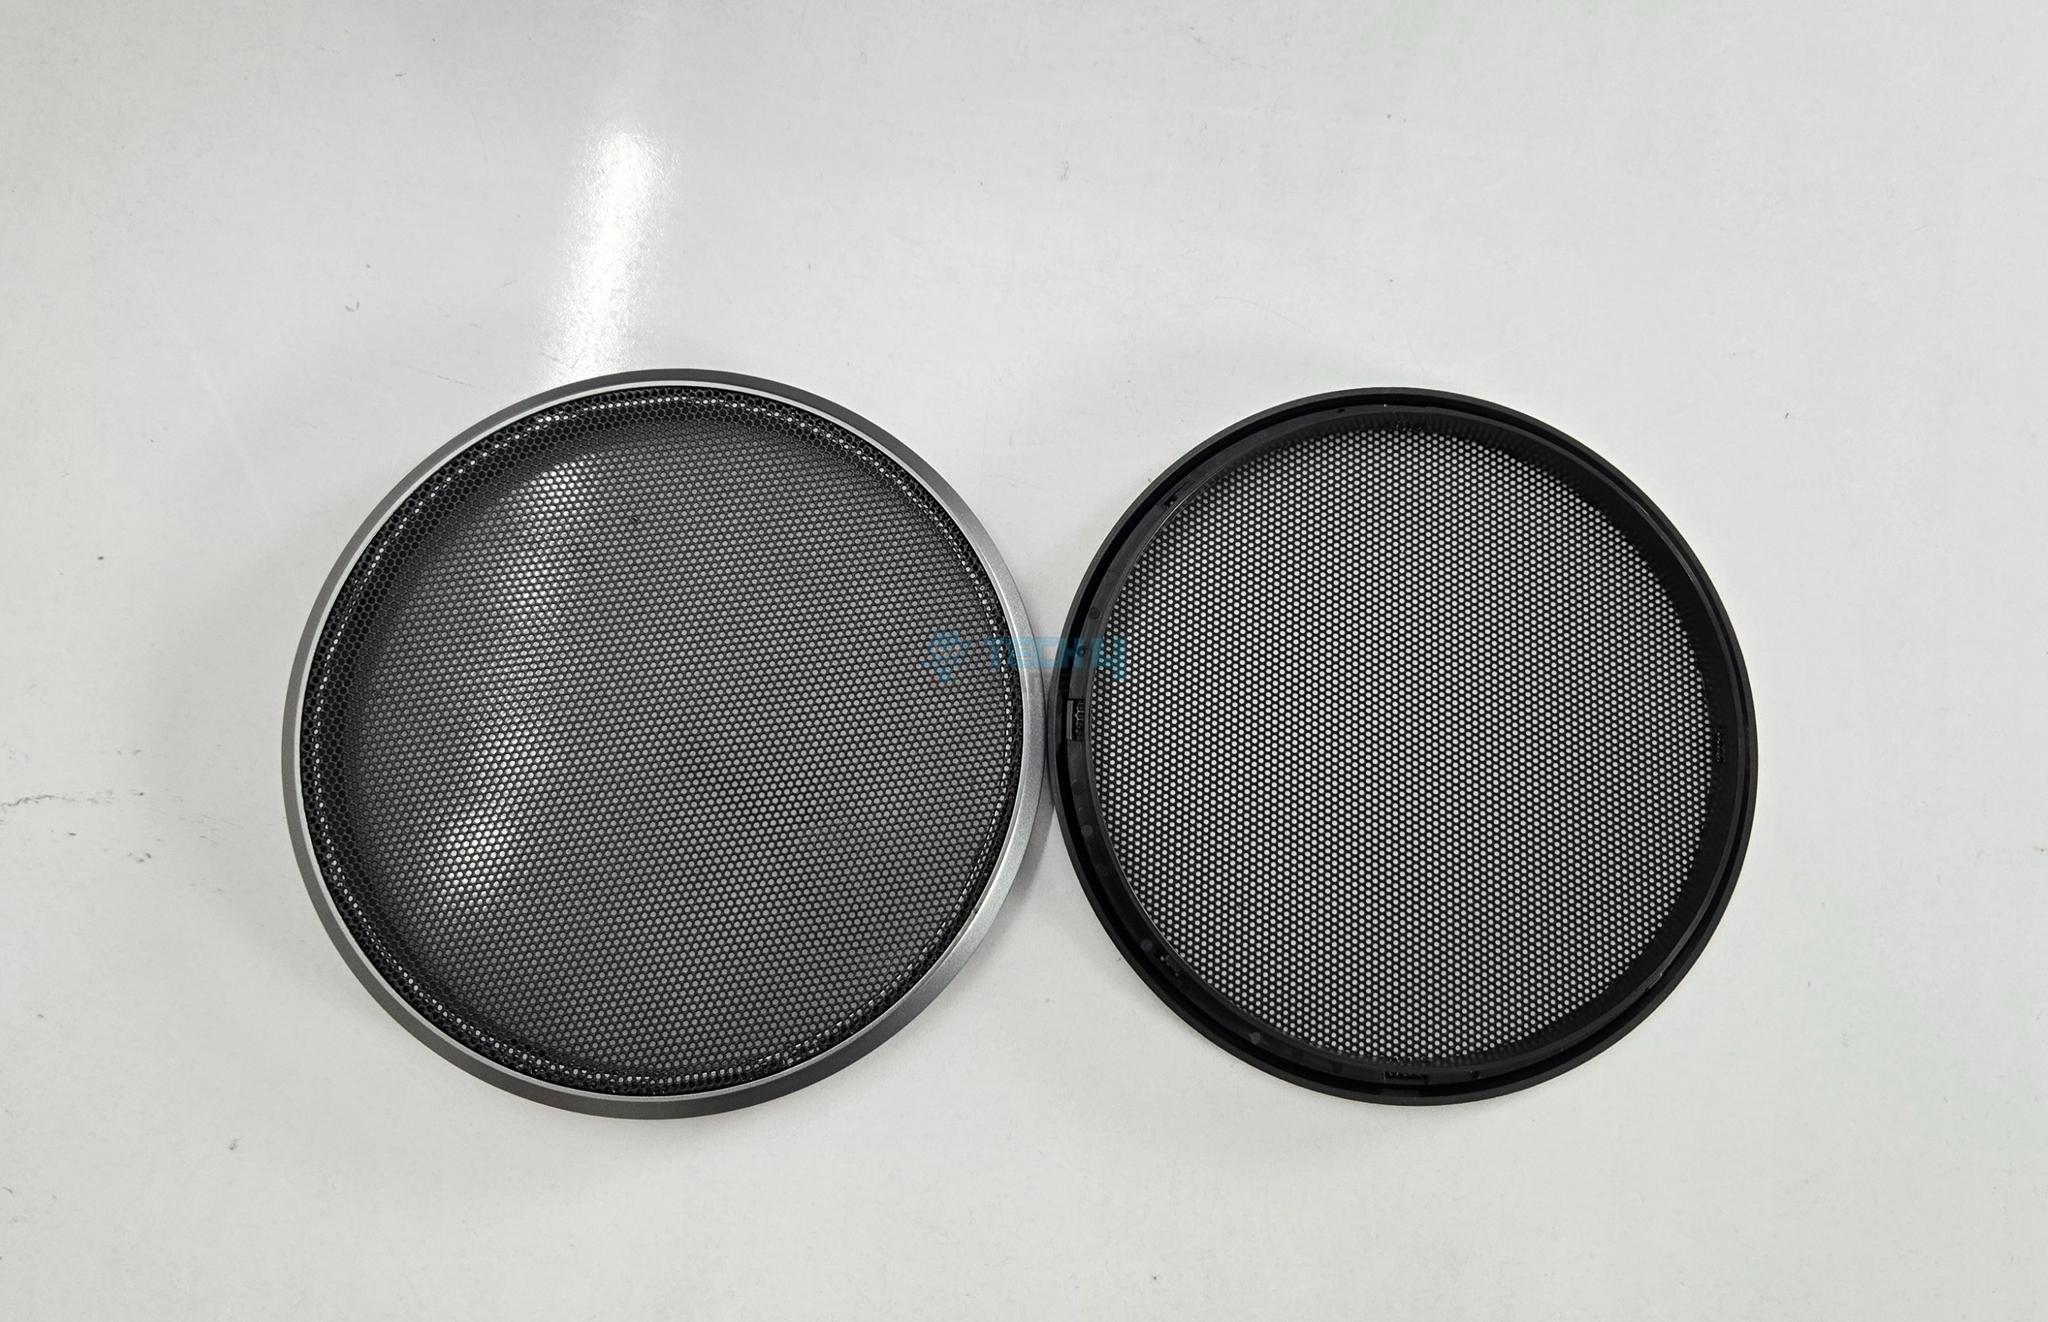
This design ensures maximum airflow generation from the front so that key components of the build can breathe. Removing and installing these mesh covers is so simple and convenient that it actually surprised me. Lian Li branding at the base adds the missing touch to premium look and feel of the case.

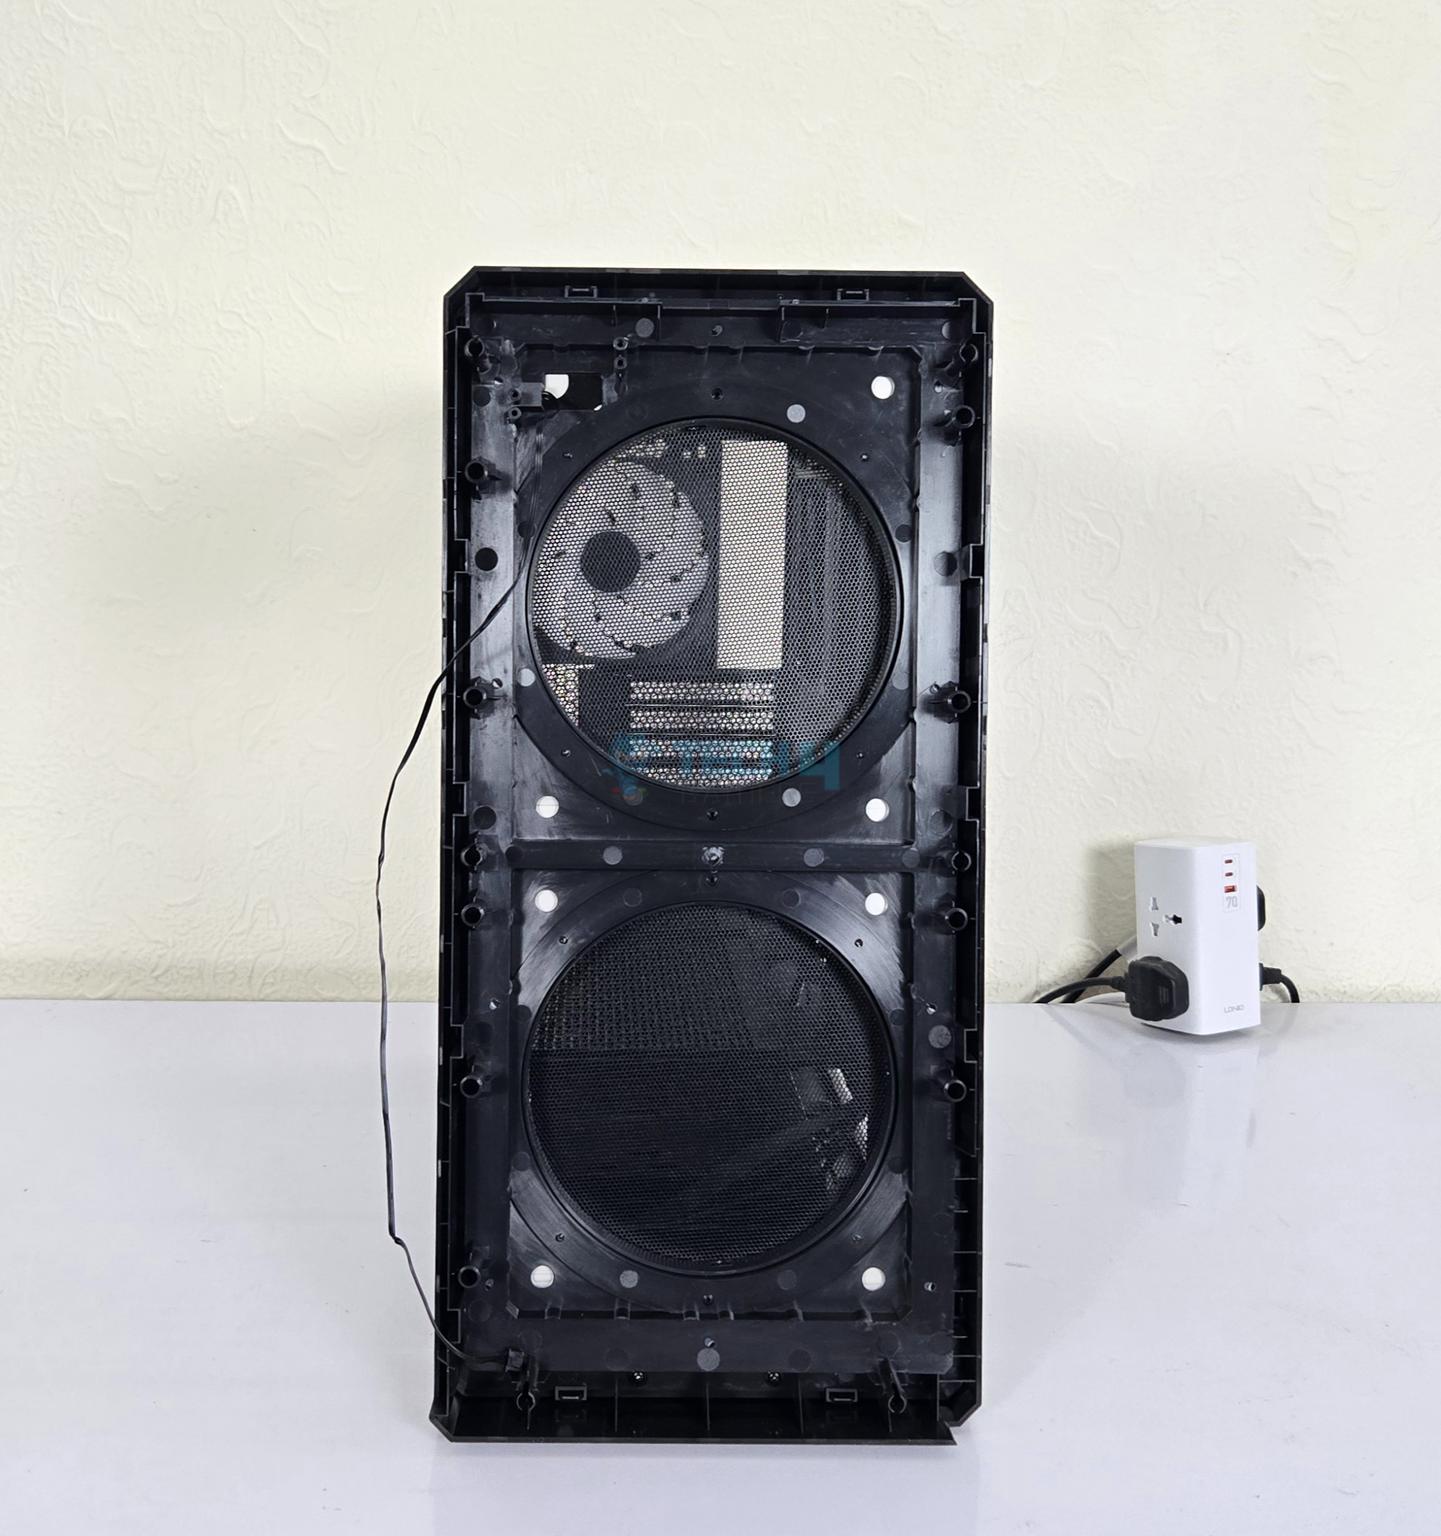
You can pop the front panel easily which is another wise design. You need to be careful since the cable from the panel goes through the side frame of the case towards the fan hub. The power and ARGB control buttons are on the front panel’s top.
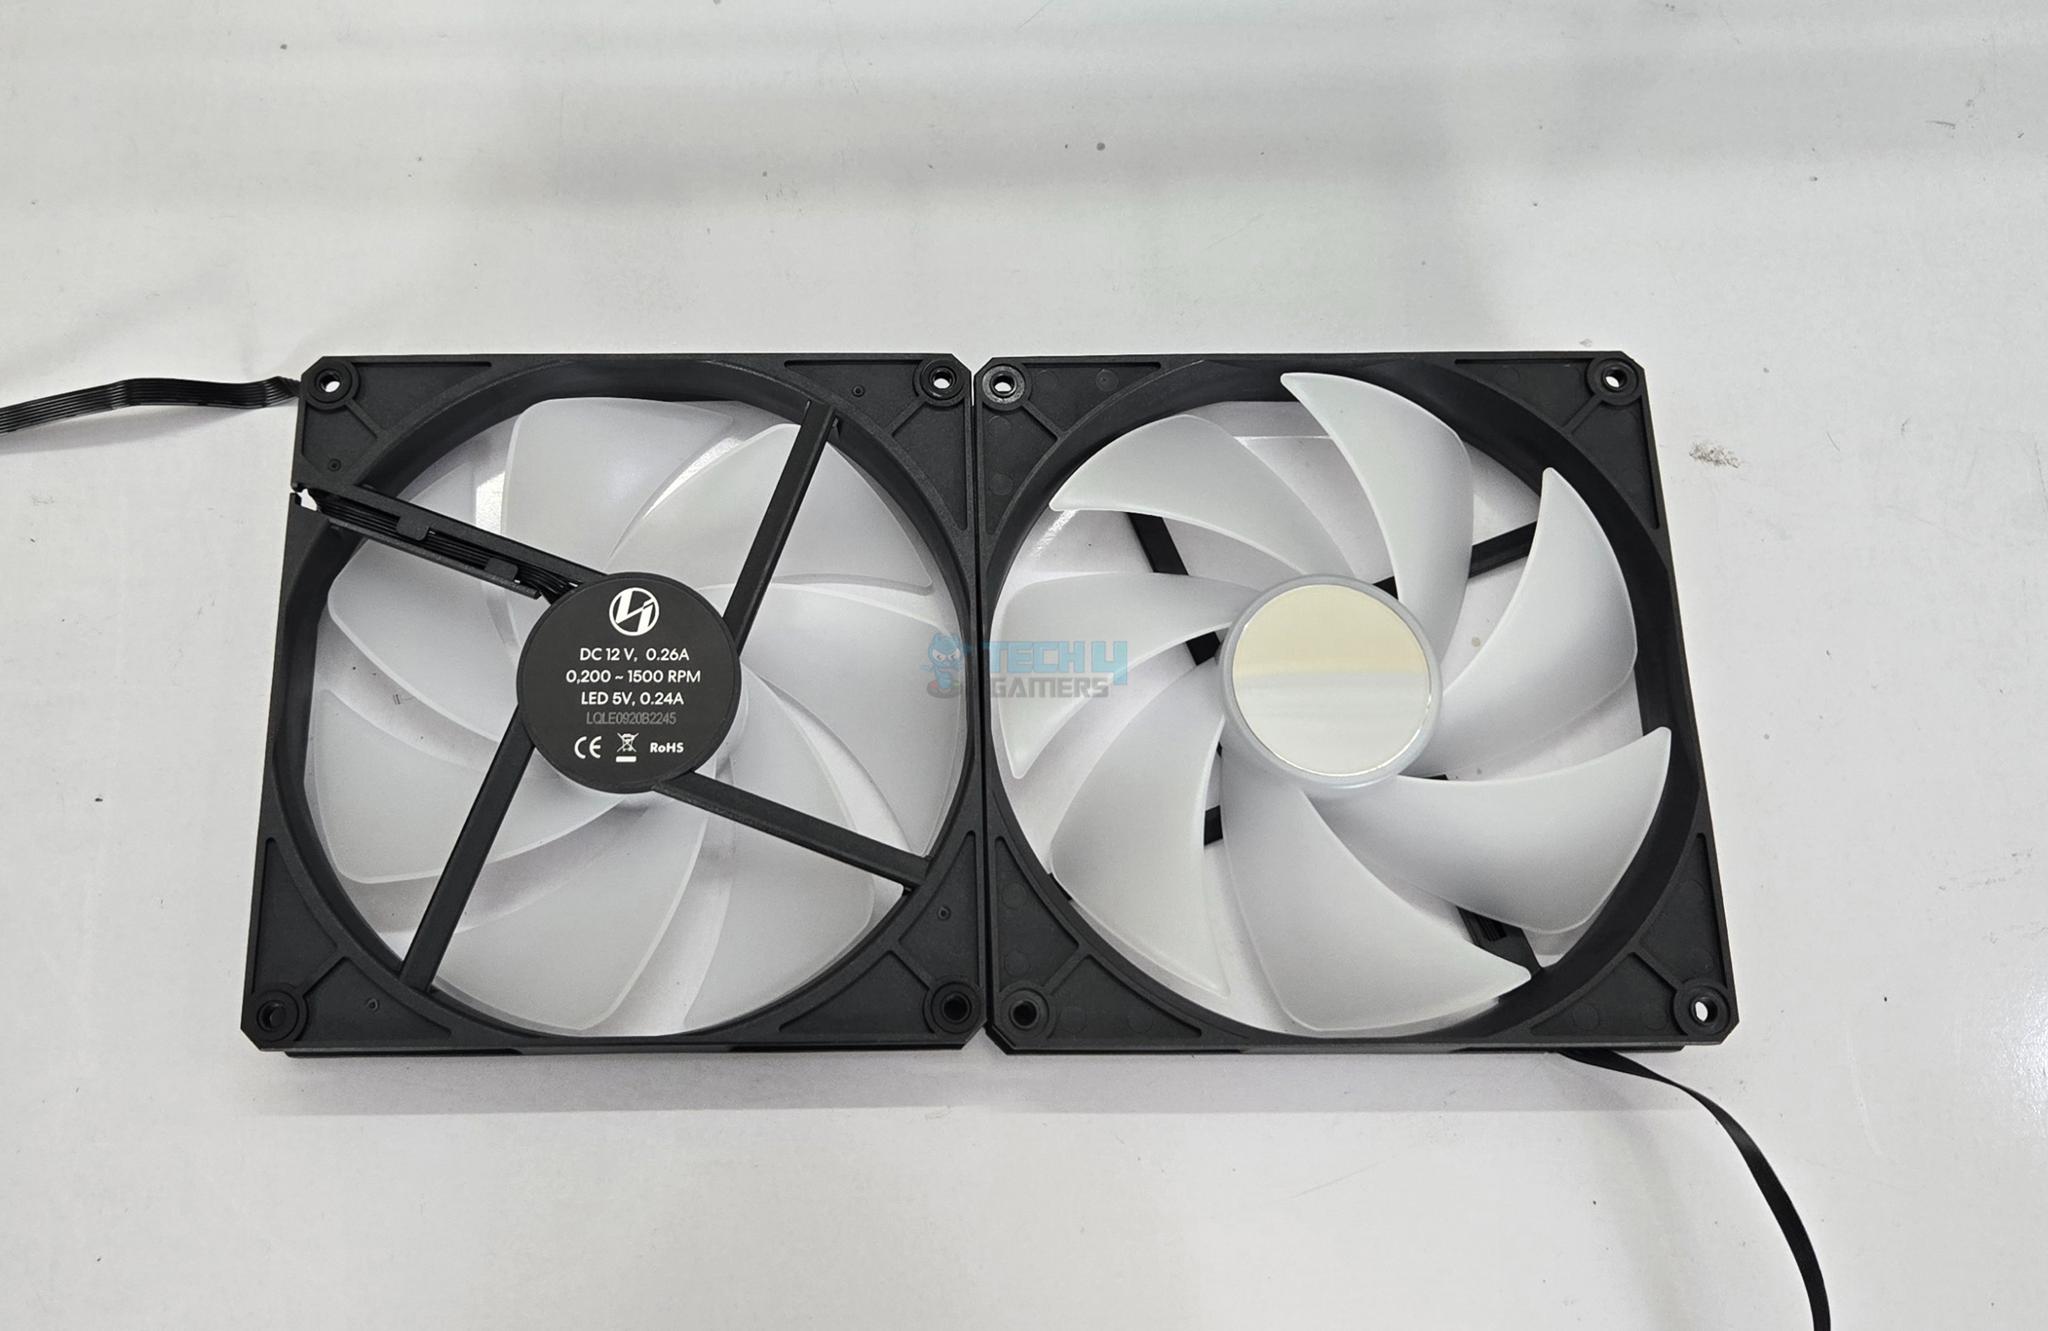

I have removed the 170mm fans from the front side. The two 170mm fans are ARGB and they used fluid dynamic bearings. They are capable of generating airflow up to 151.63 CFM at 12VDC. Their speed rating is 200 to 1500 RPM. They take 0.26A at 12VDC. The air pressure rating is 3.32mmH₂O with noise level rating of 35 dBA. These fans use proprietary connectors.
You can’t install any other fan like 120mm/140mm on the front. In my opinion, Lian Li should have designed it so that these 170mm fans could use the 140mm fan mount providing flexibility to the users to install any other fan of their choice.
If you are careful enough to look closely in above pictures. You could see that front IO panel is also removed in one picture.
IO Panel
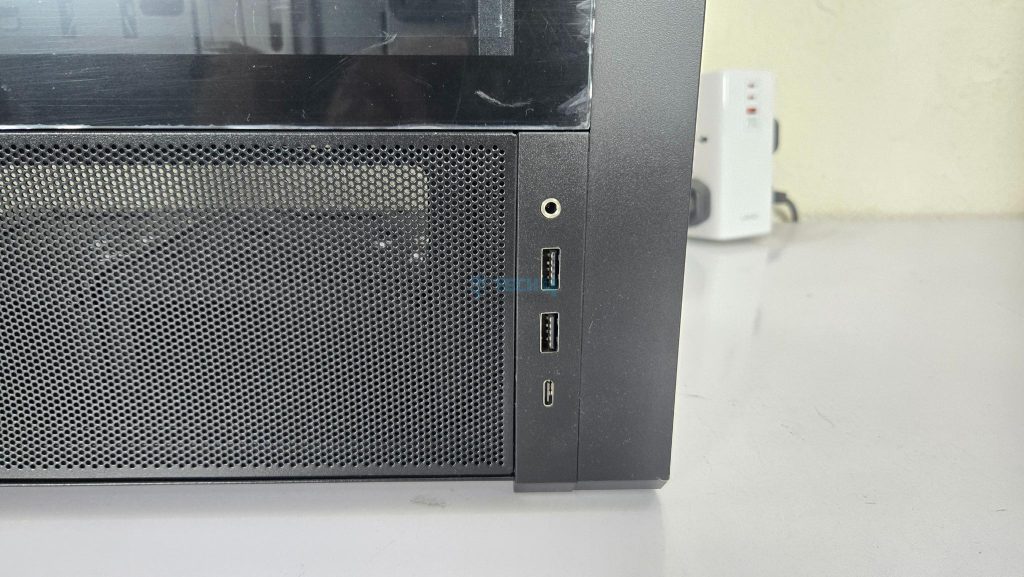
The IO ports include:
- 2x USB3.0 Type-A Ports
- 1x USB3.2 G20 Type-C Port
- 1x Hybrid Audio Port
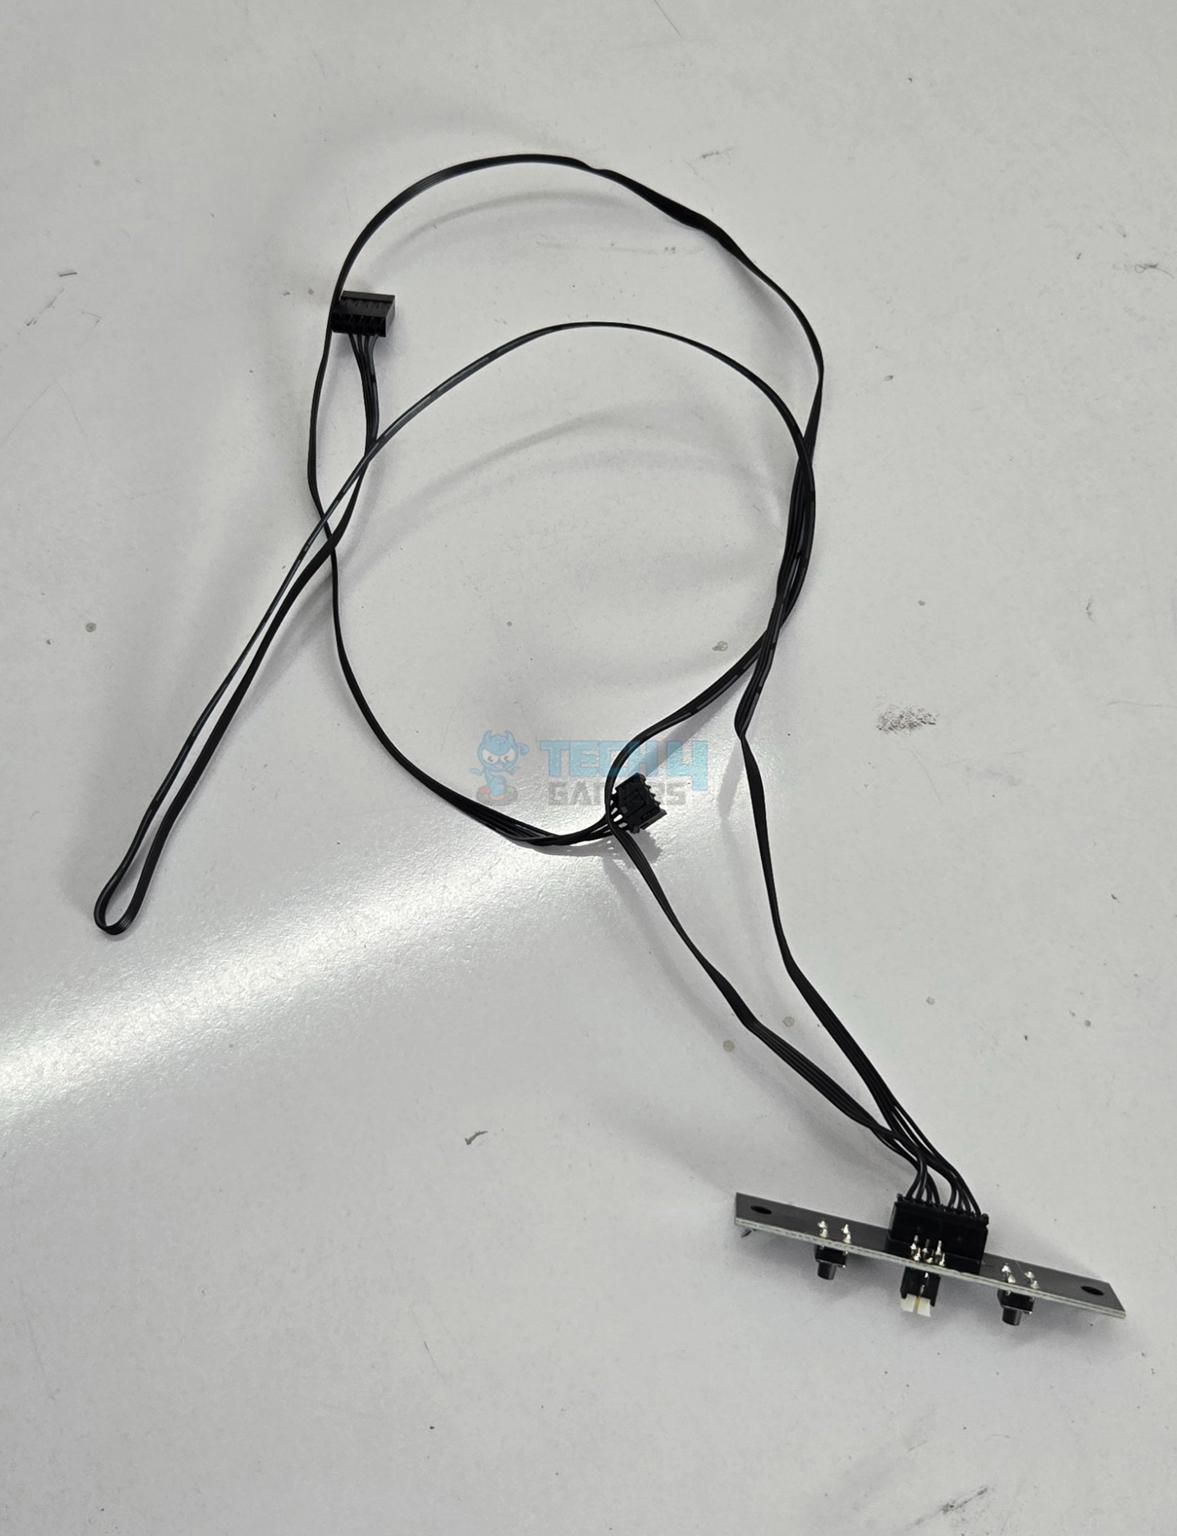
The power buttons are on a separate PCB located on the top of the front panel.
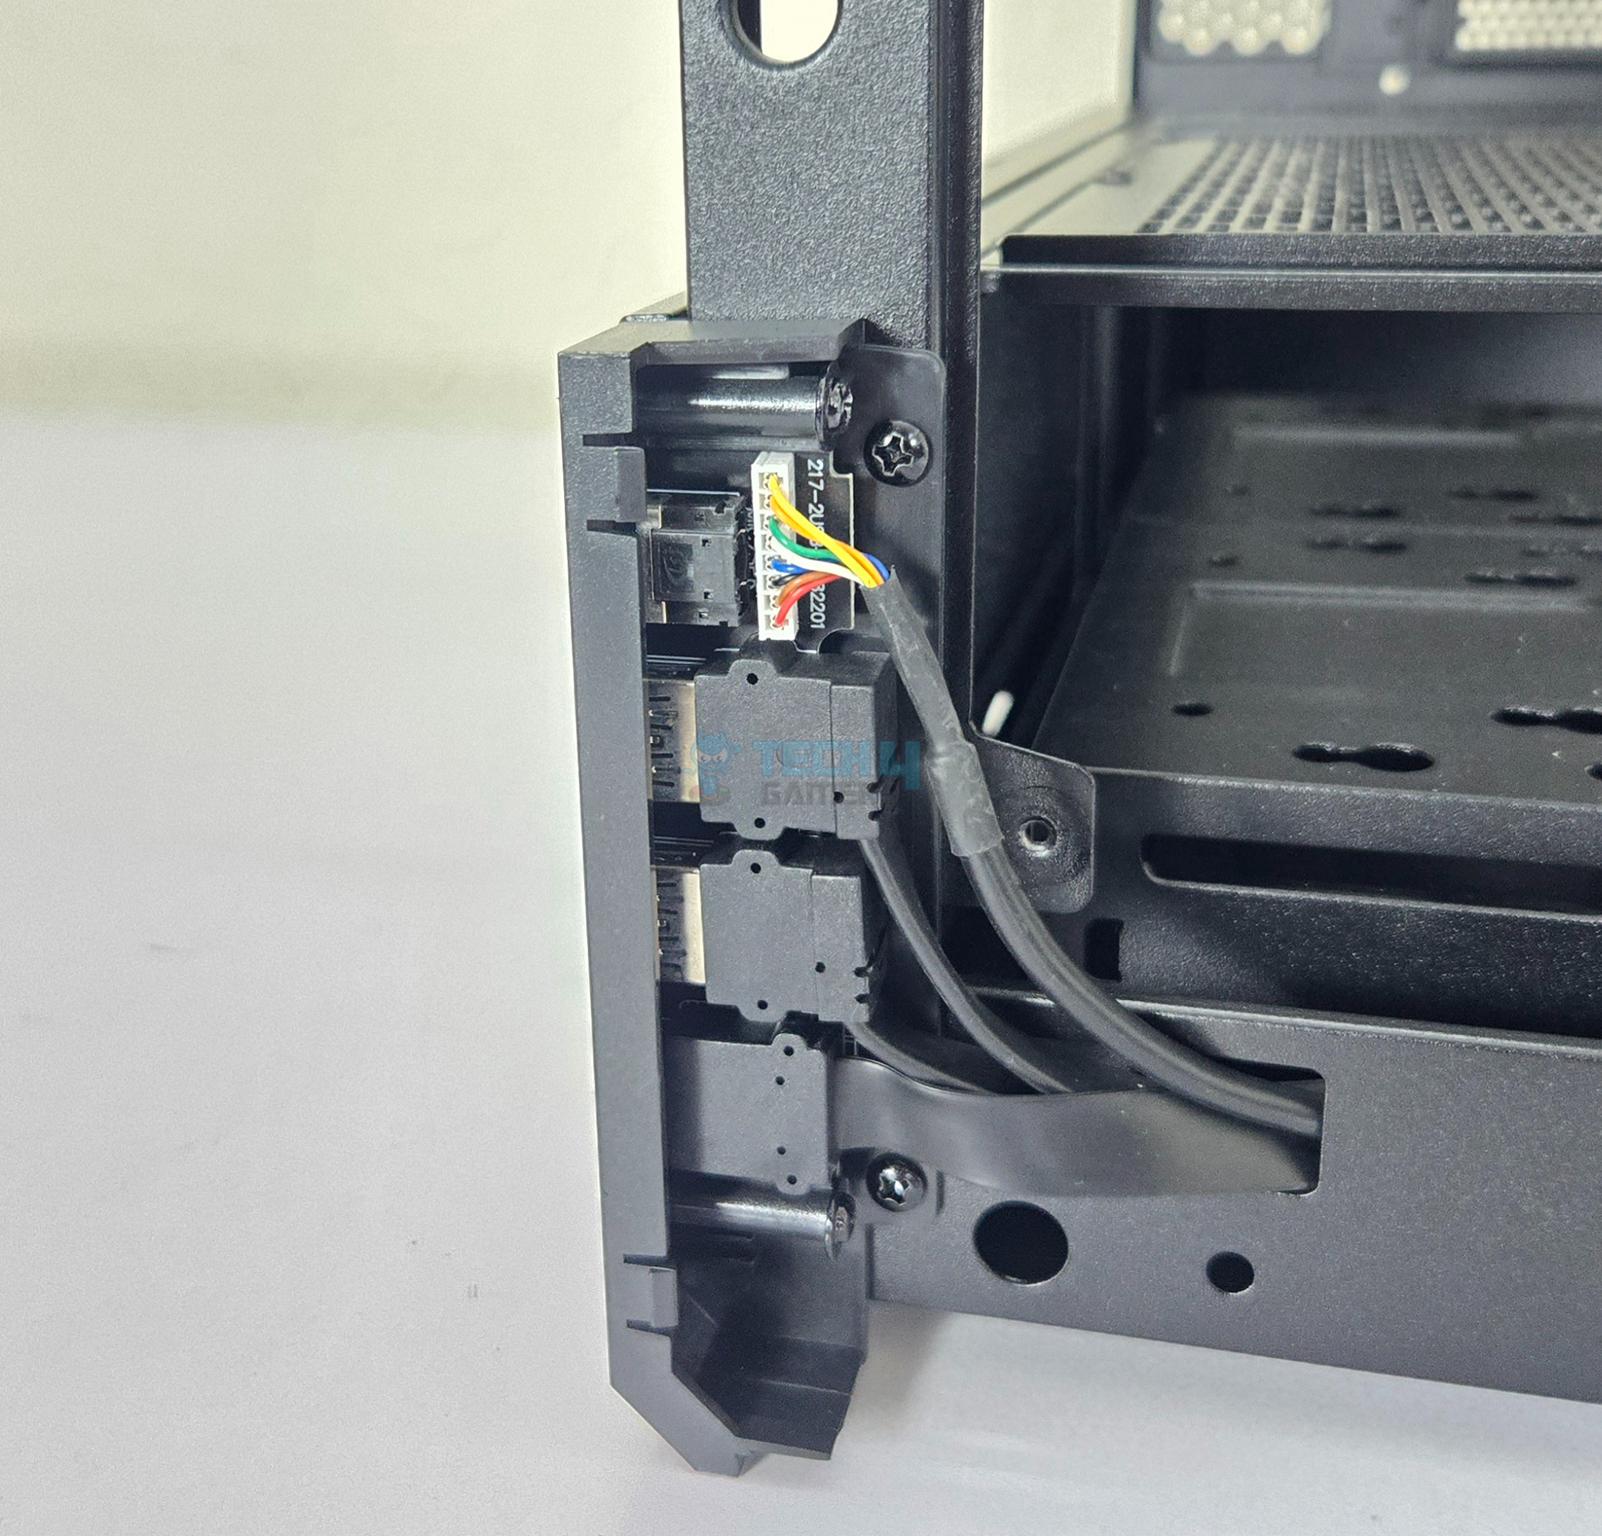
You can remove the IO panel by undoing two screws. Complete panel with cables is removable. If you decide to remove the IO panel from default position, you can fill that space using non-functional bracket provided in the accessory box.
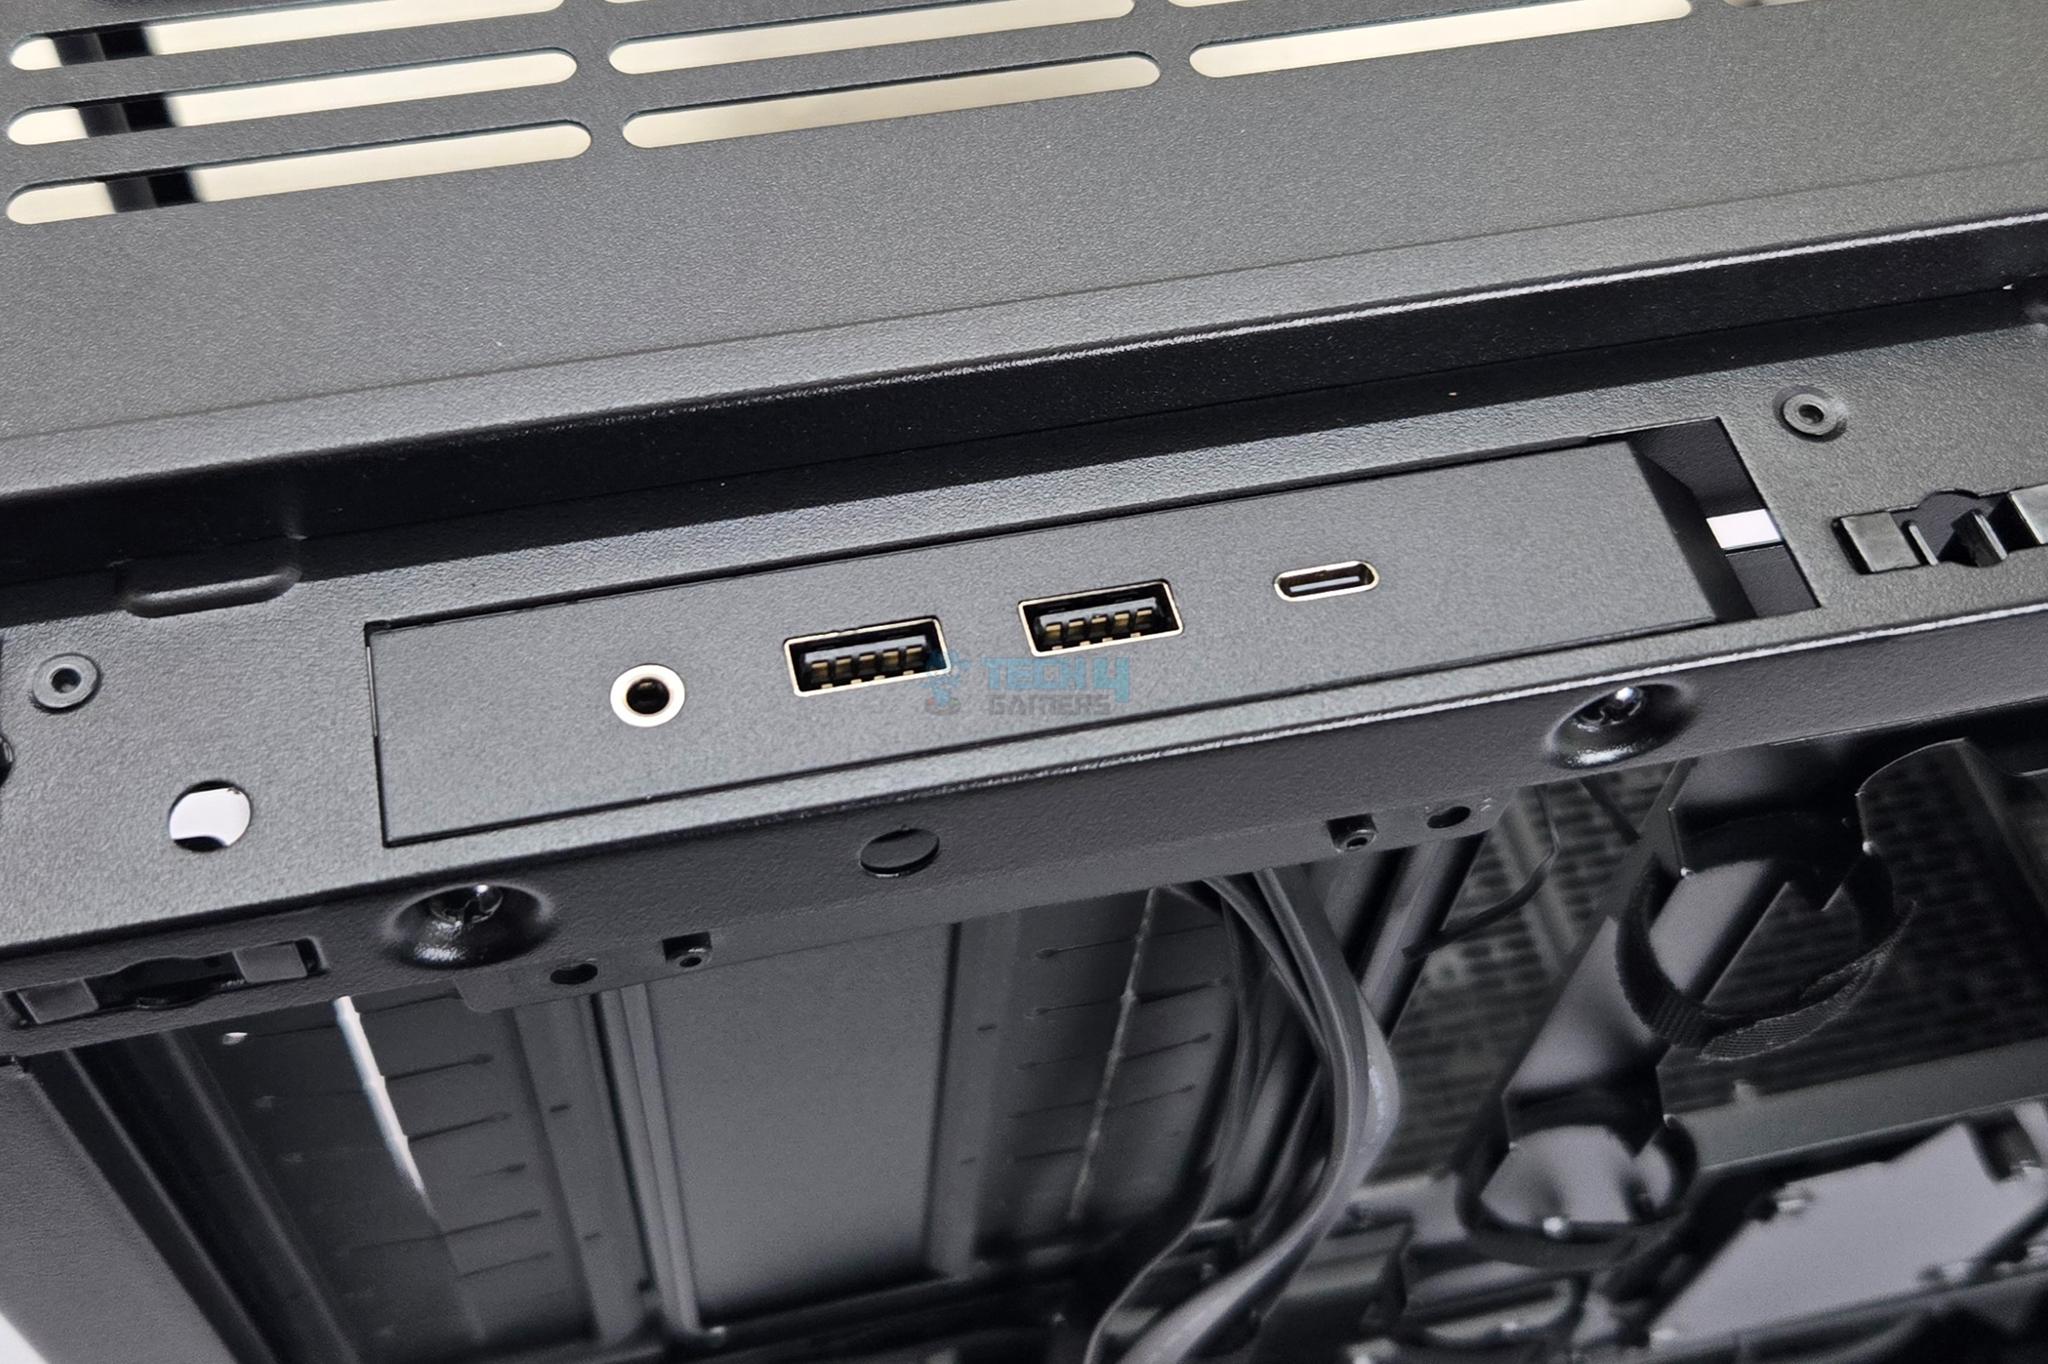
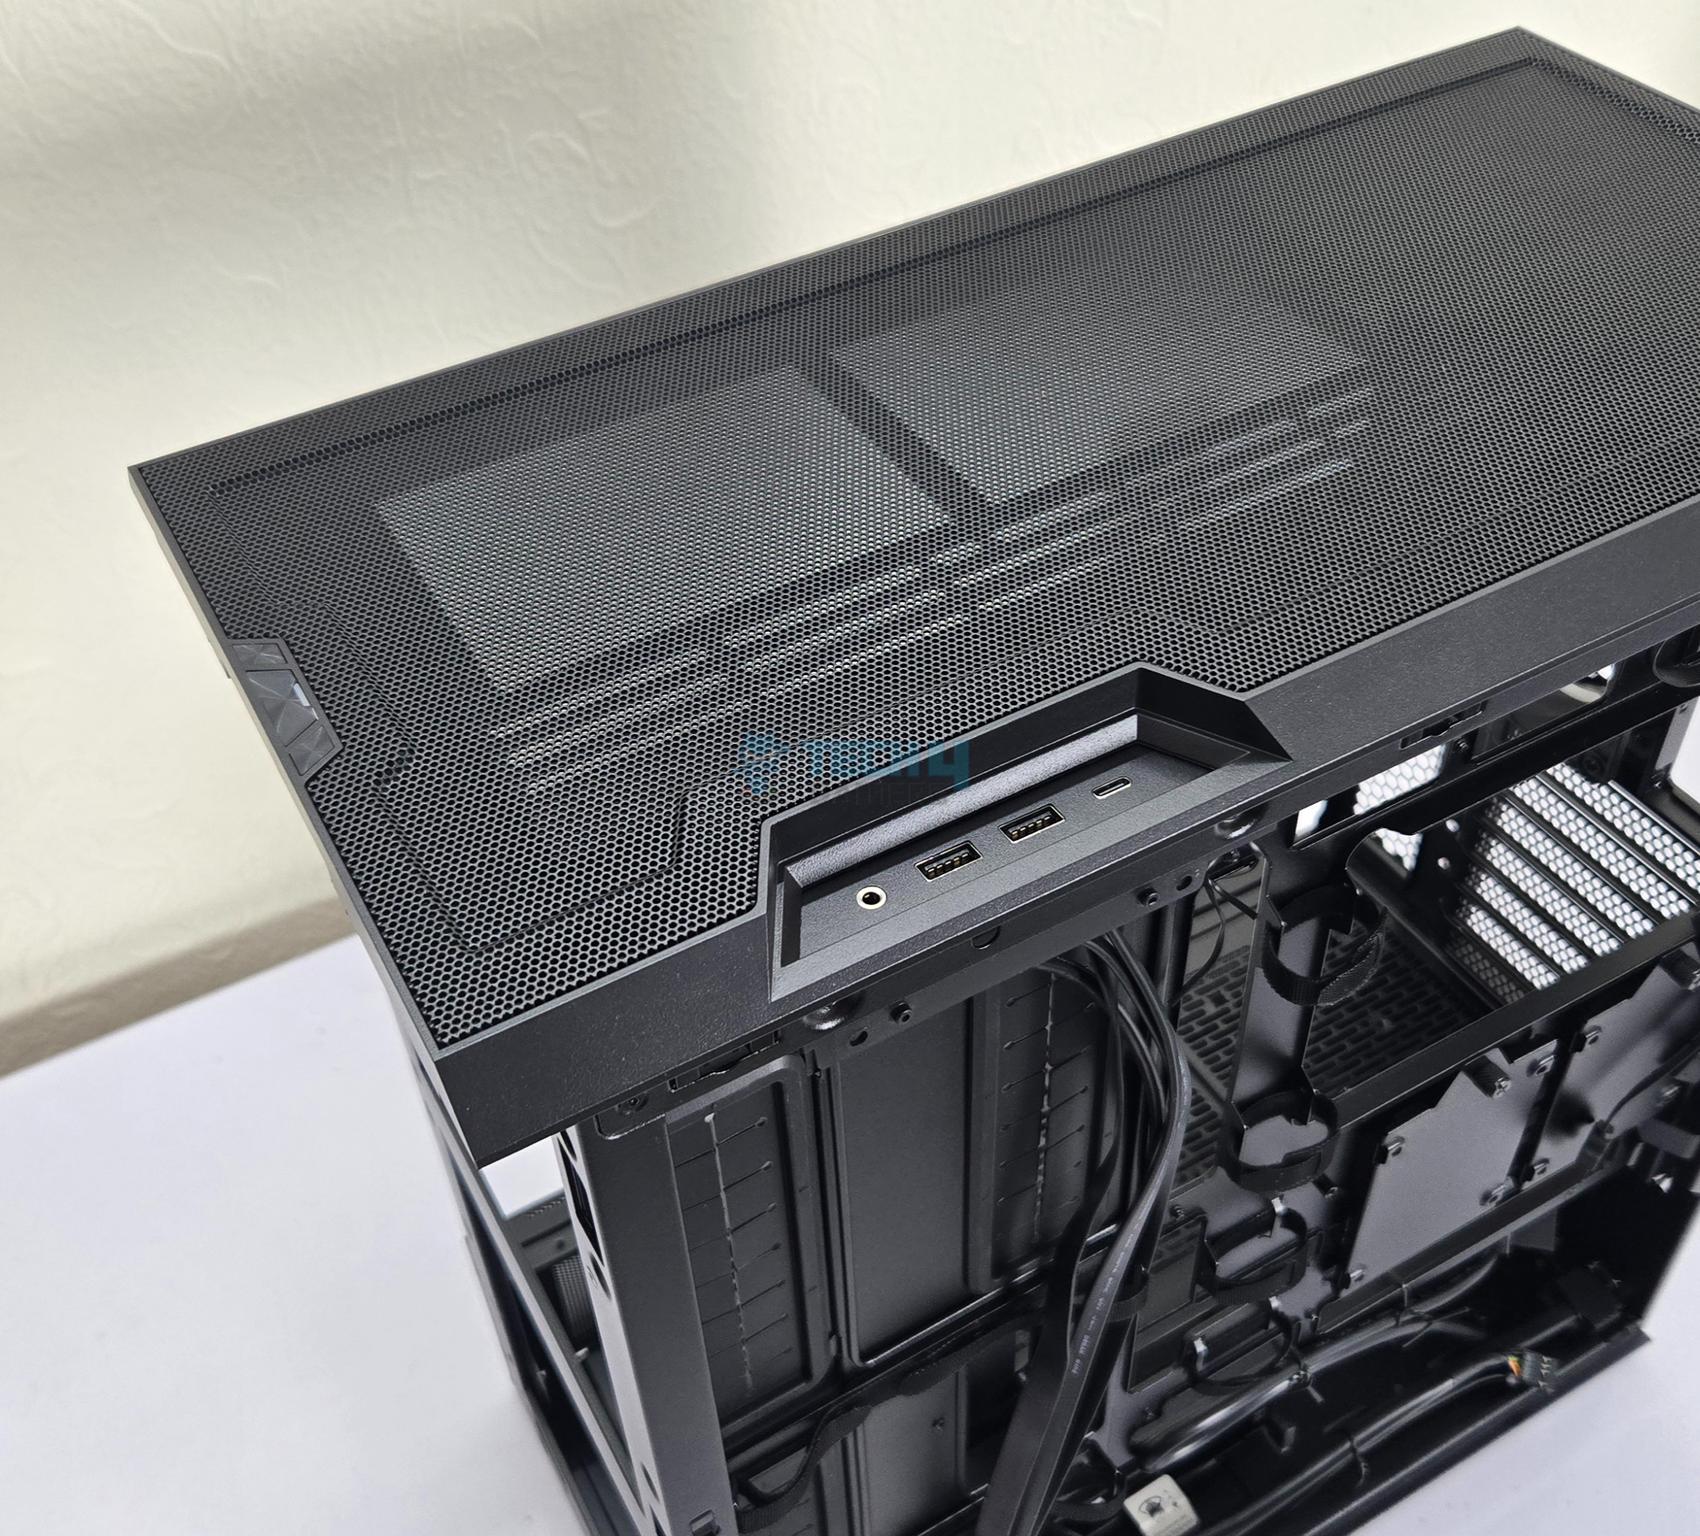
The top side of the case has a cutout on the side where the IO panel can be installed as well. Installation is simple. The cables management is bit different in both scenarios but the excellent cable management provision on the backside covers it conveniently.
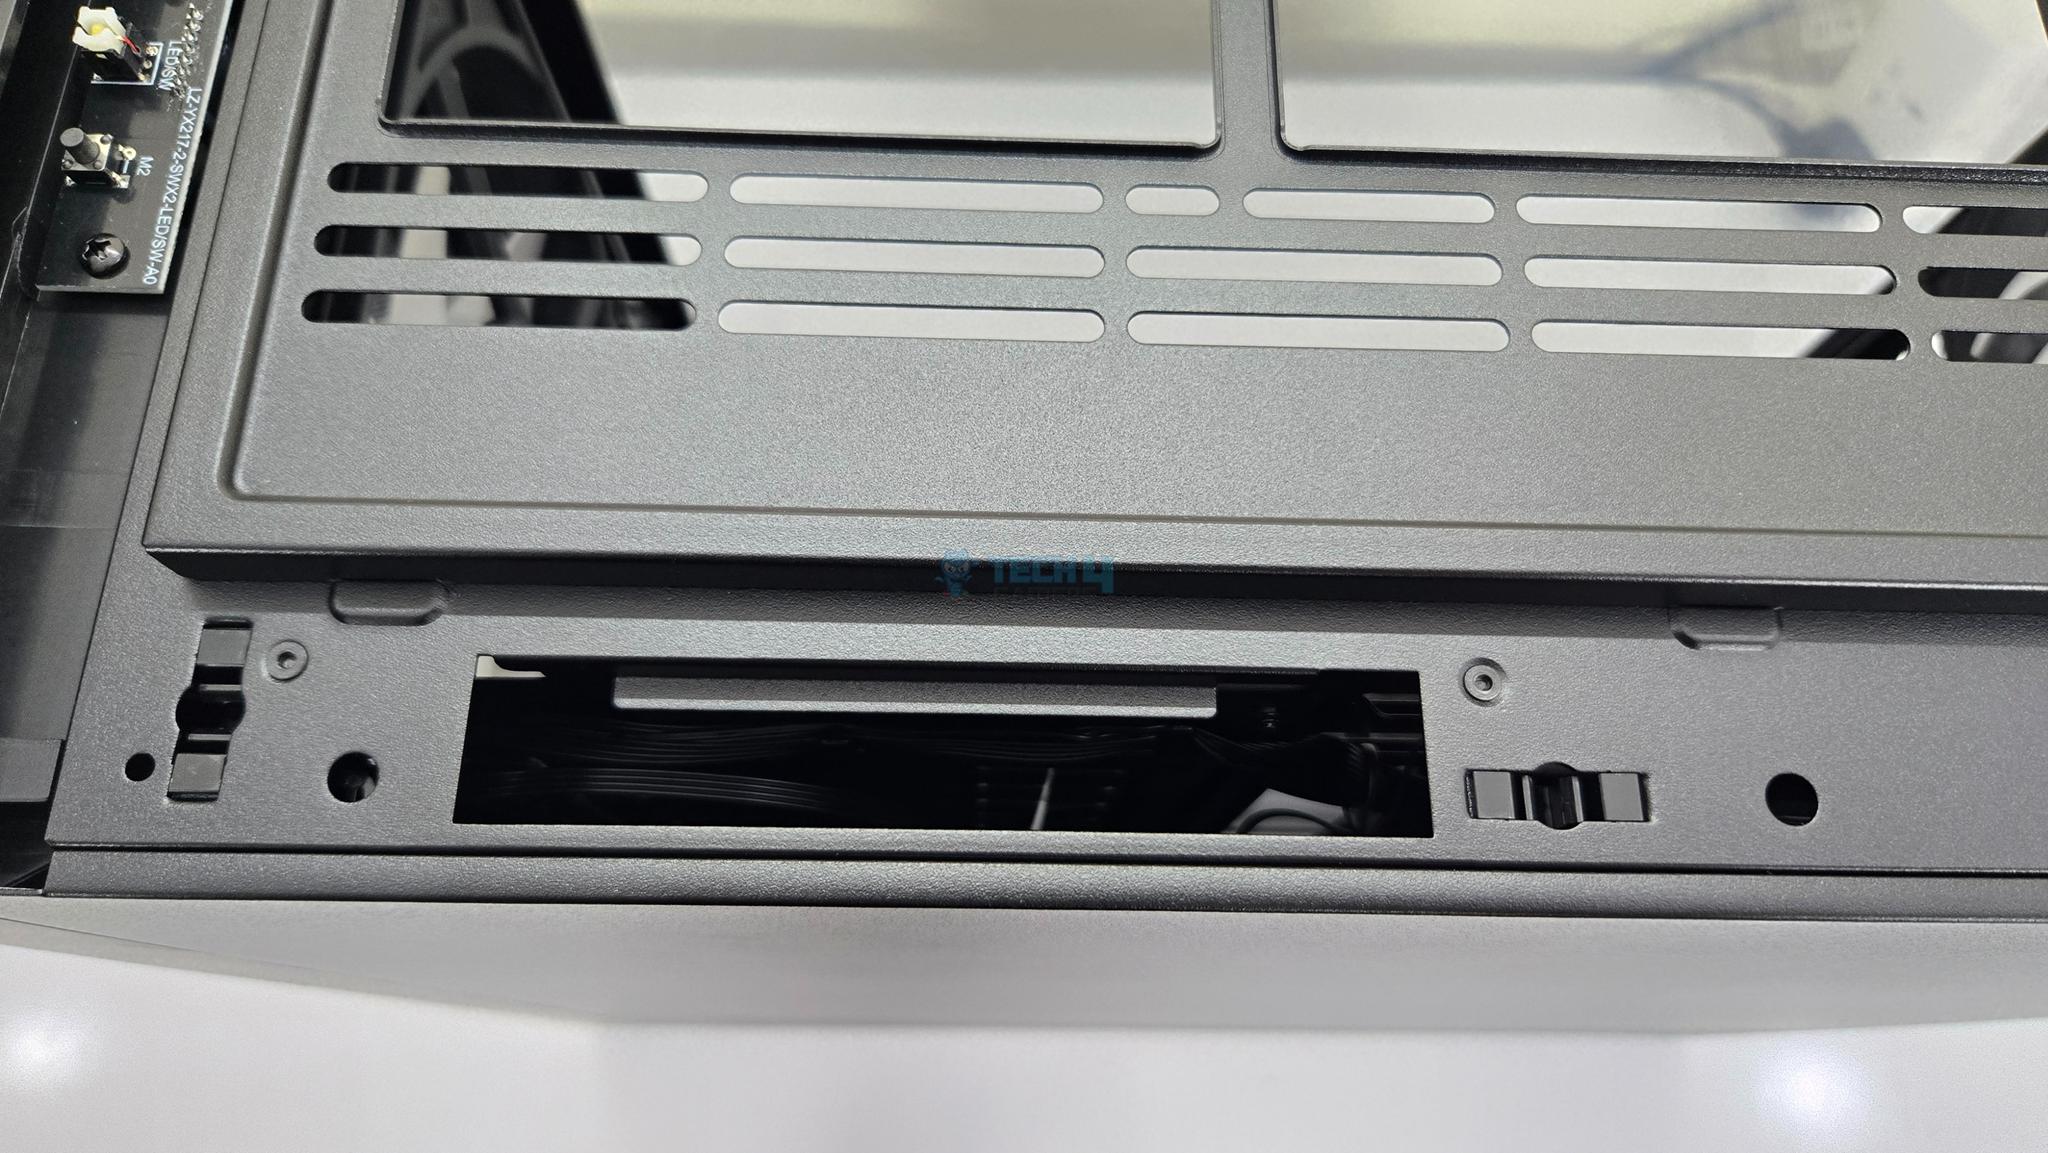
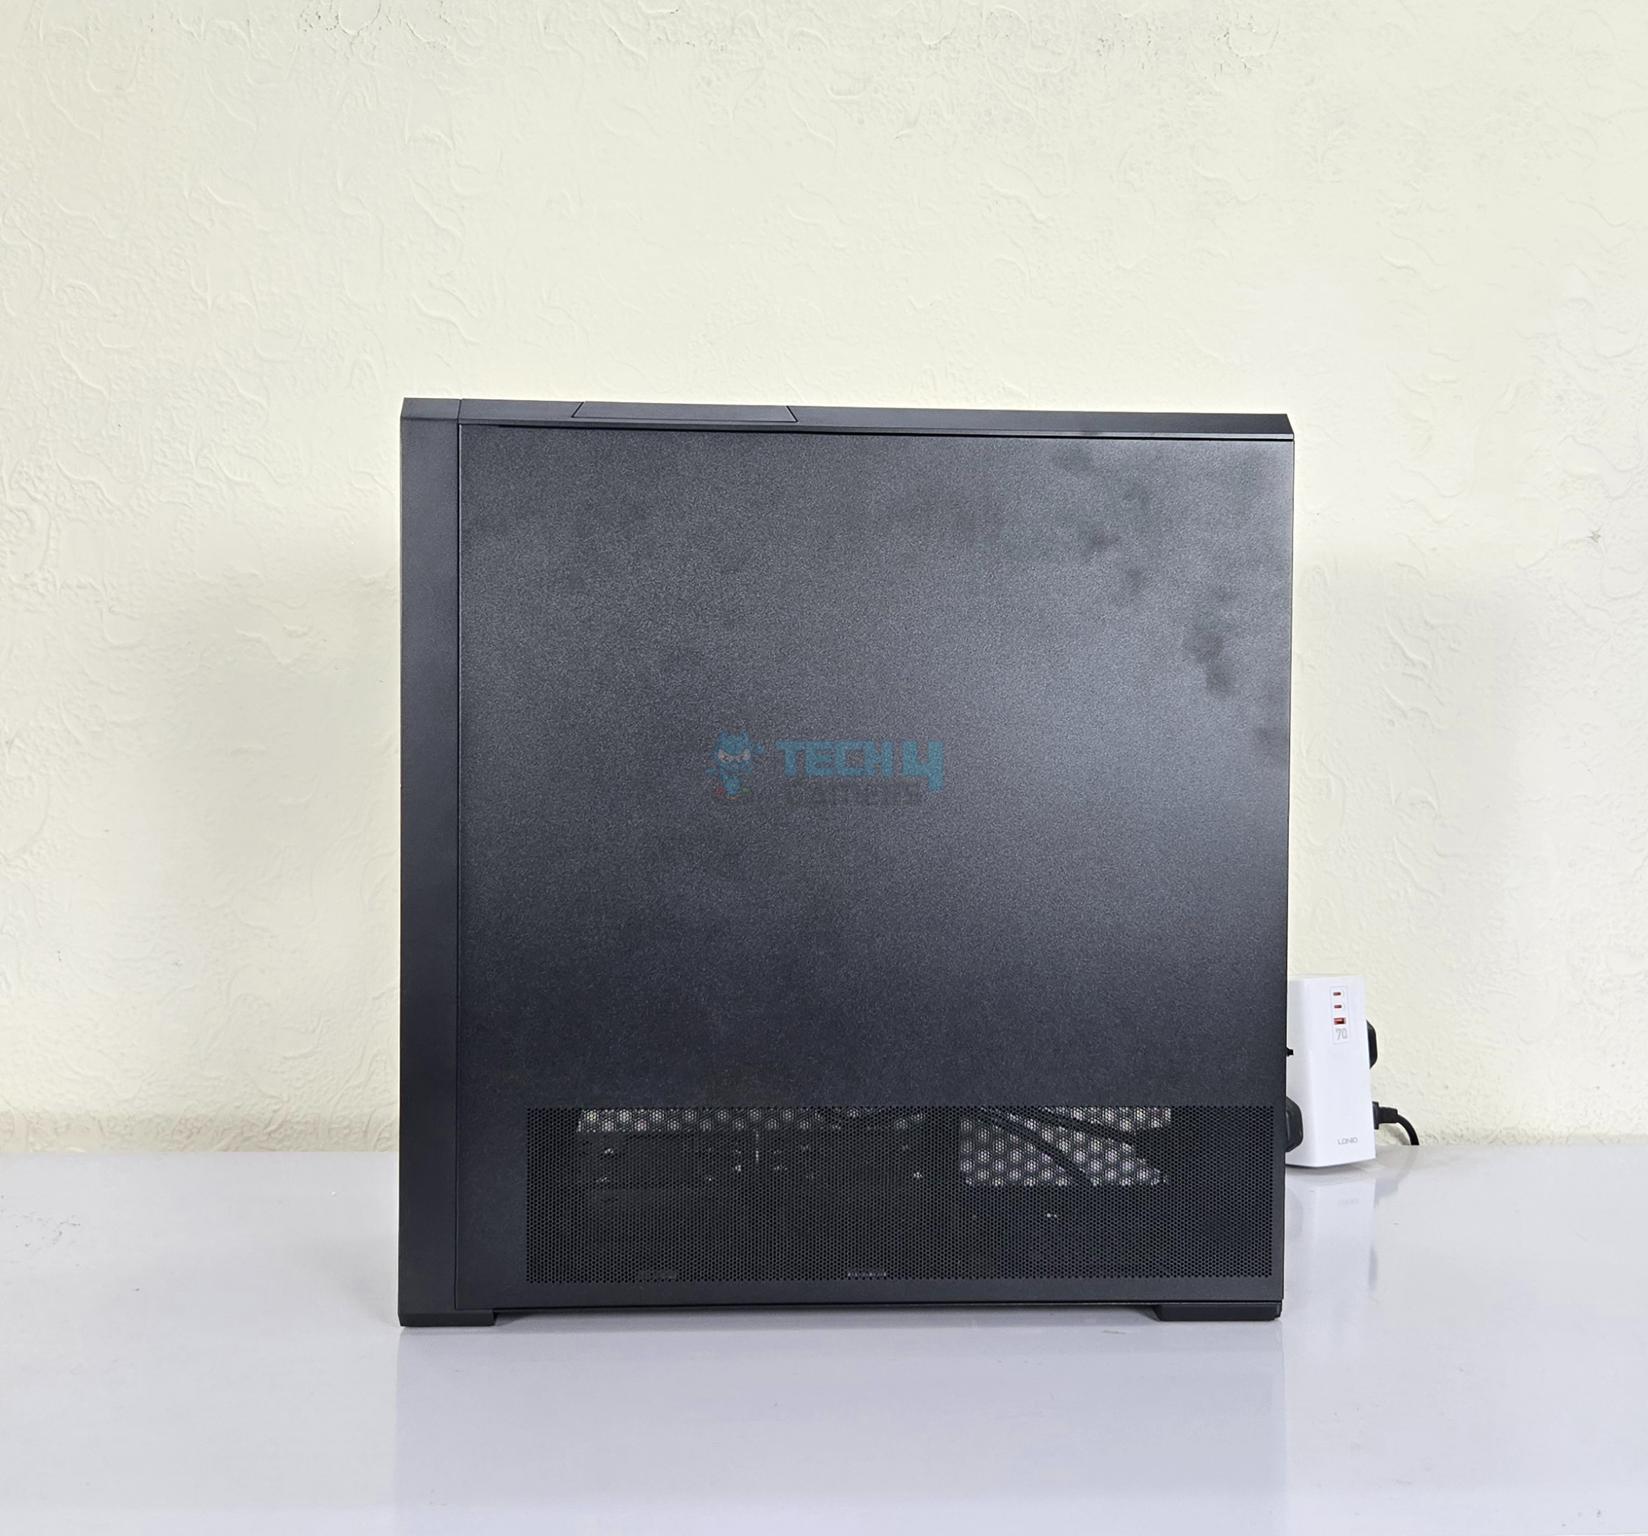
Top Panel
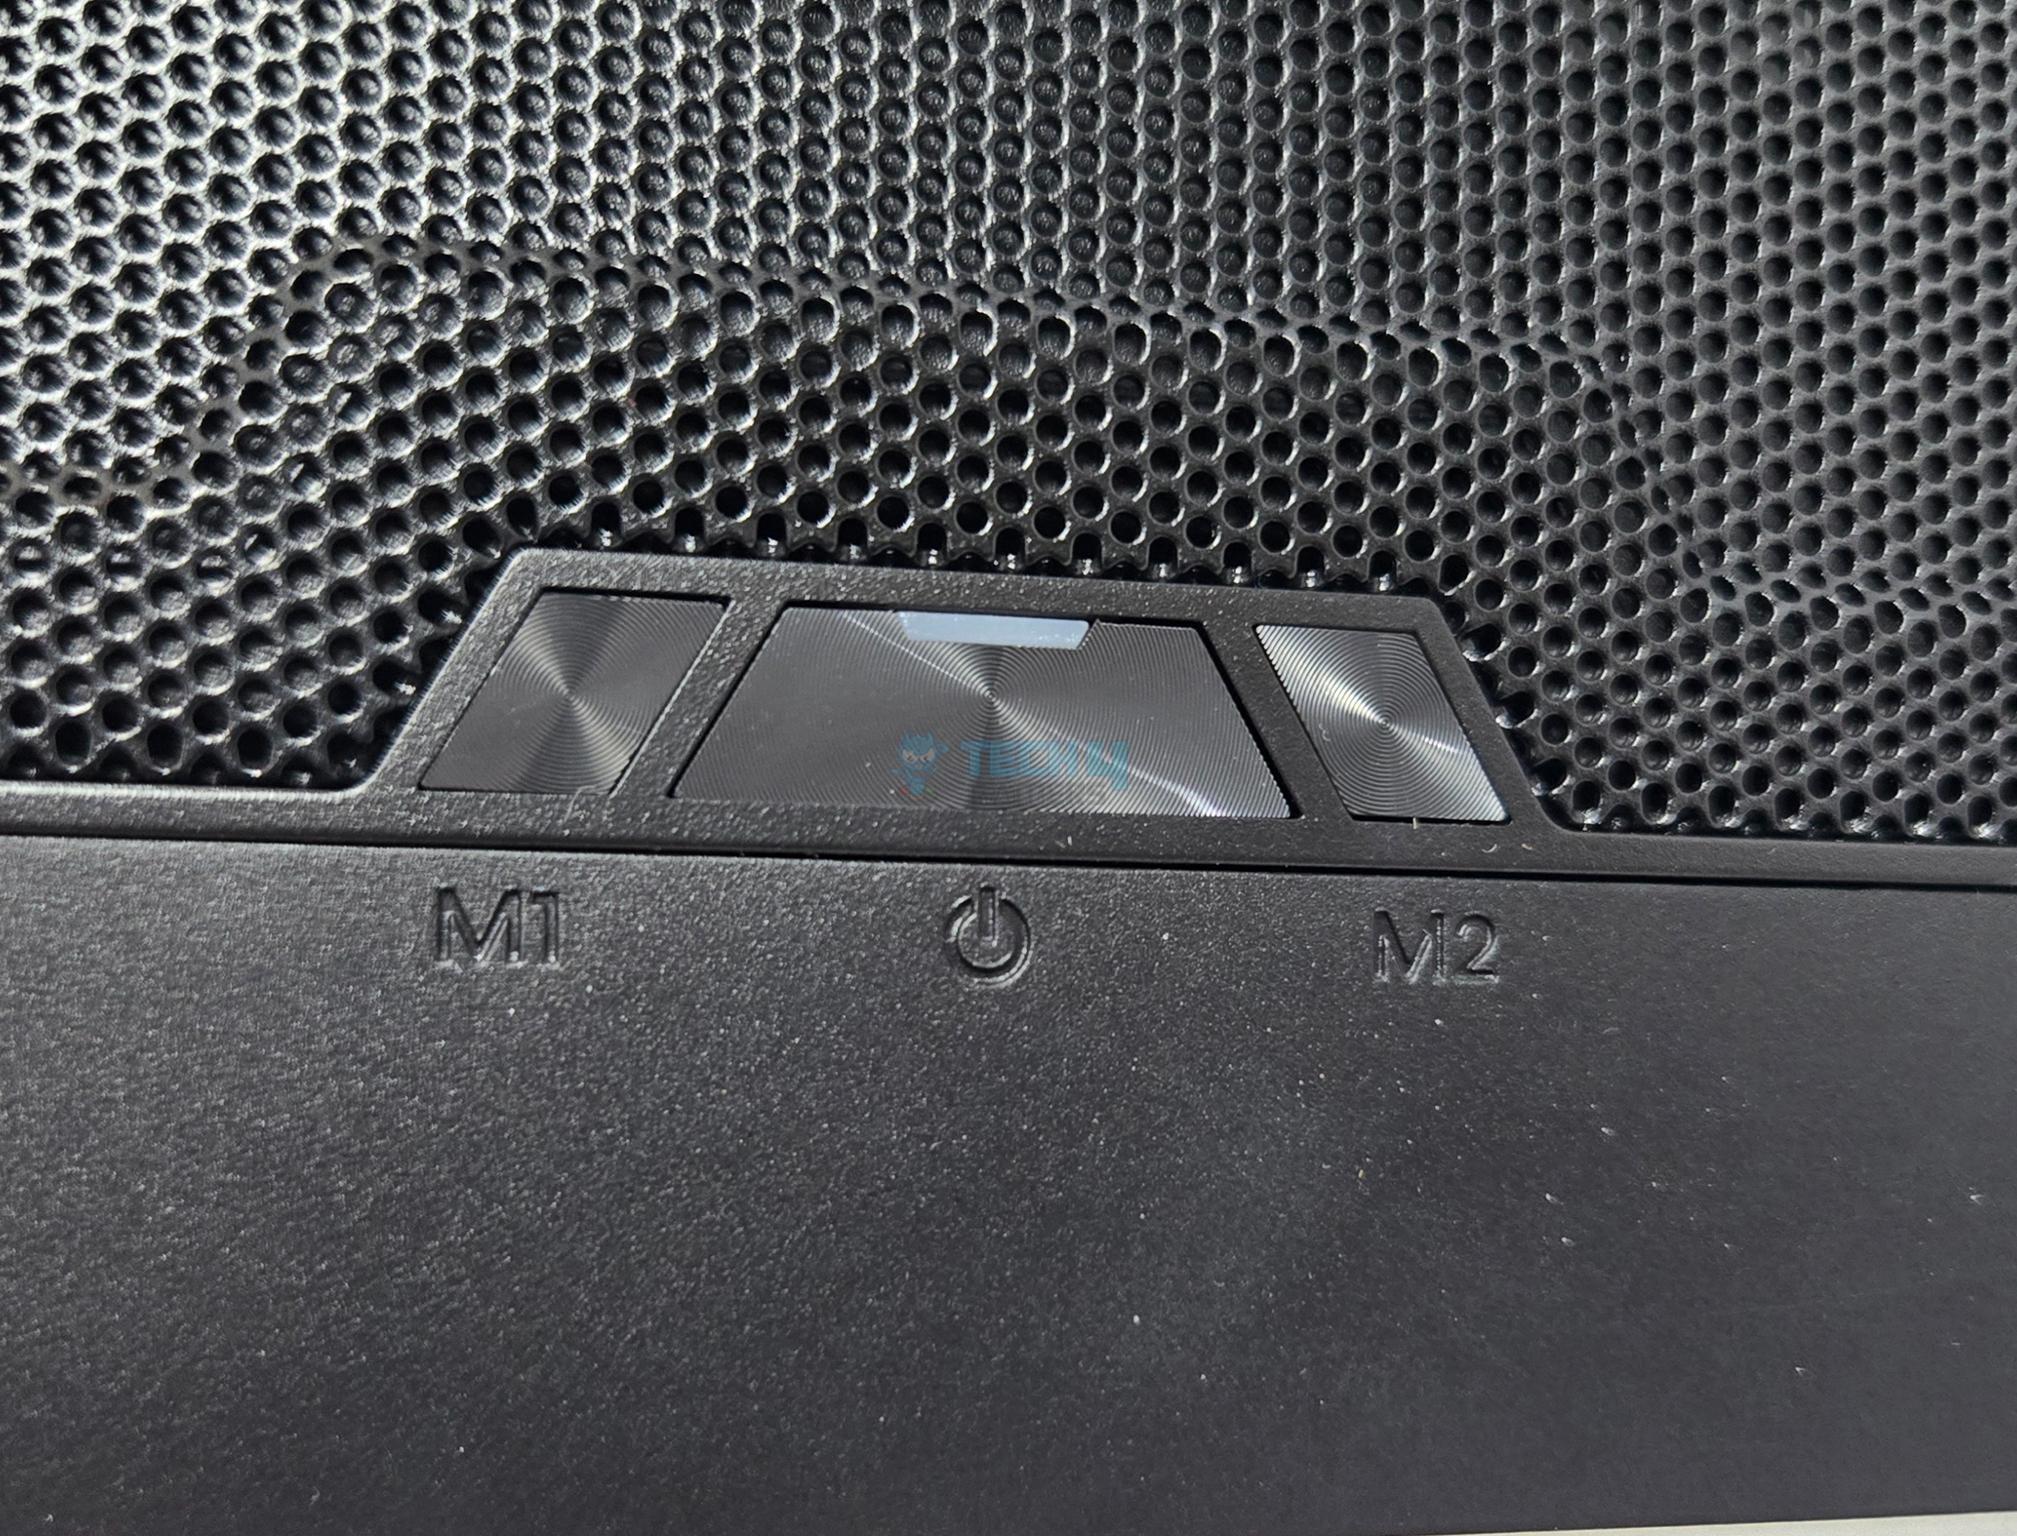
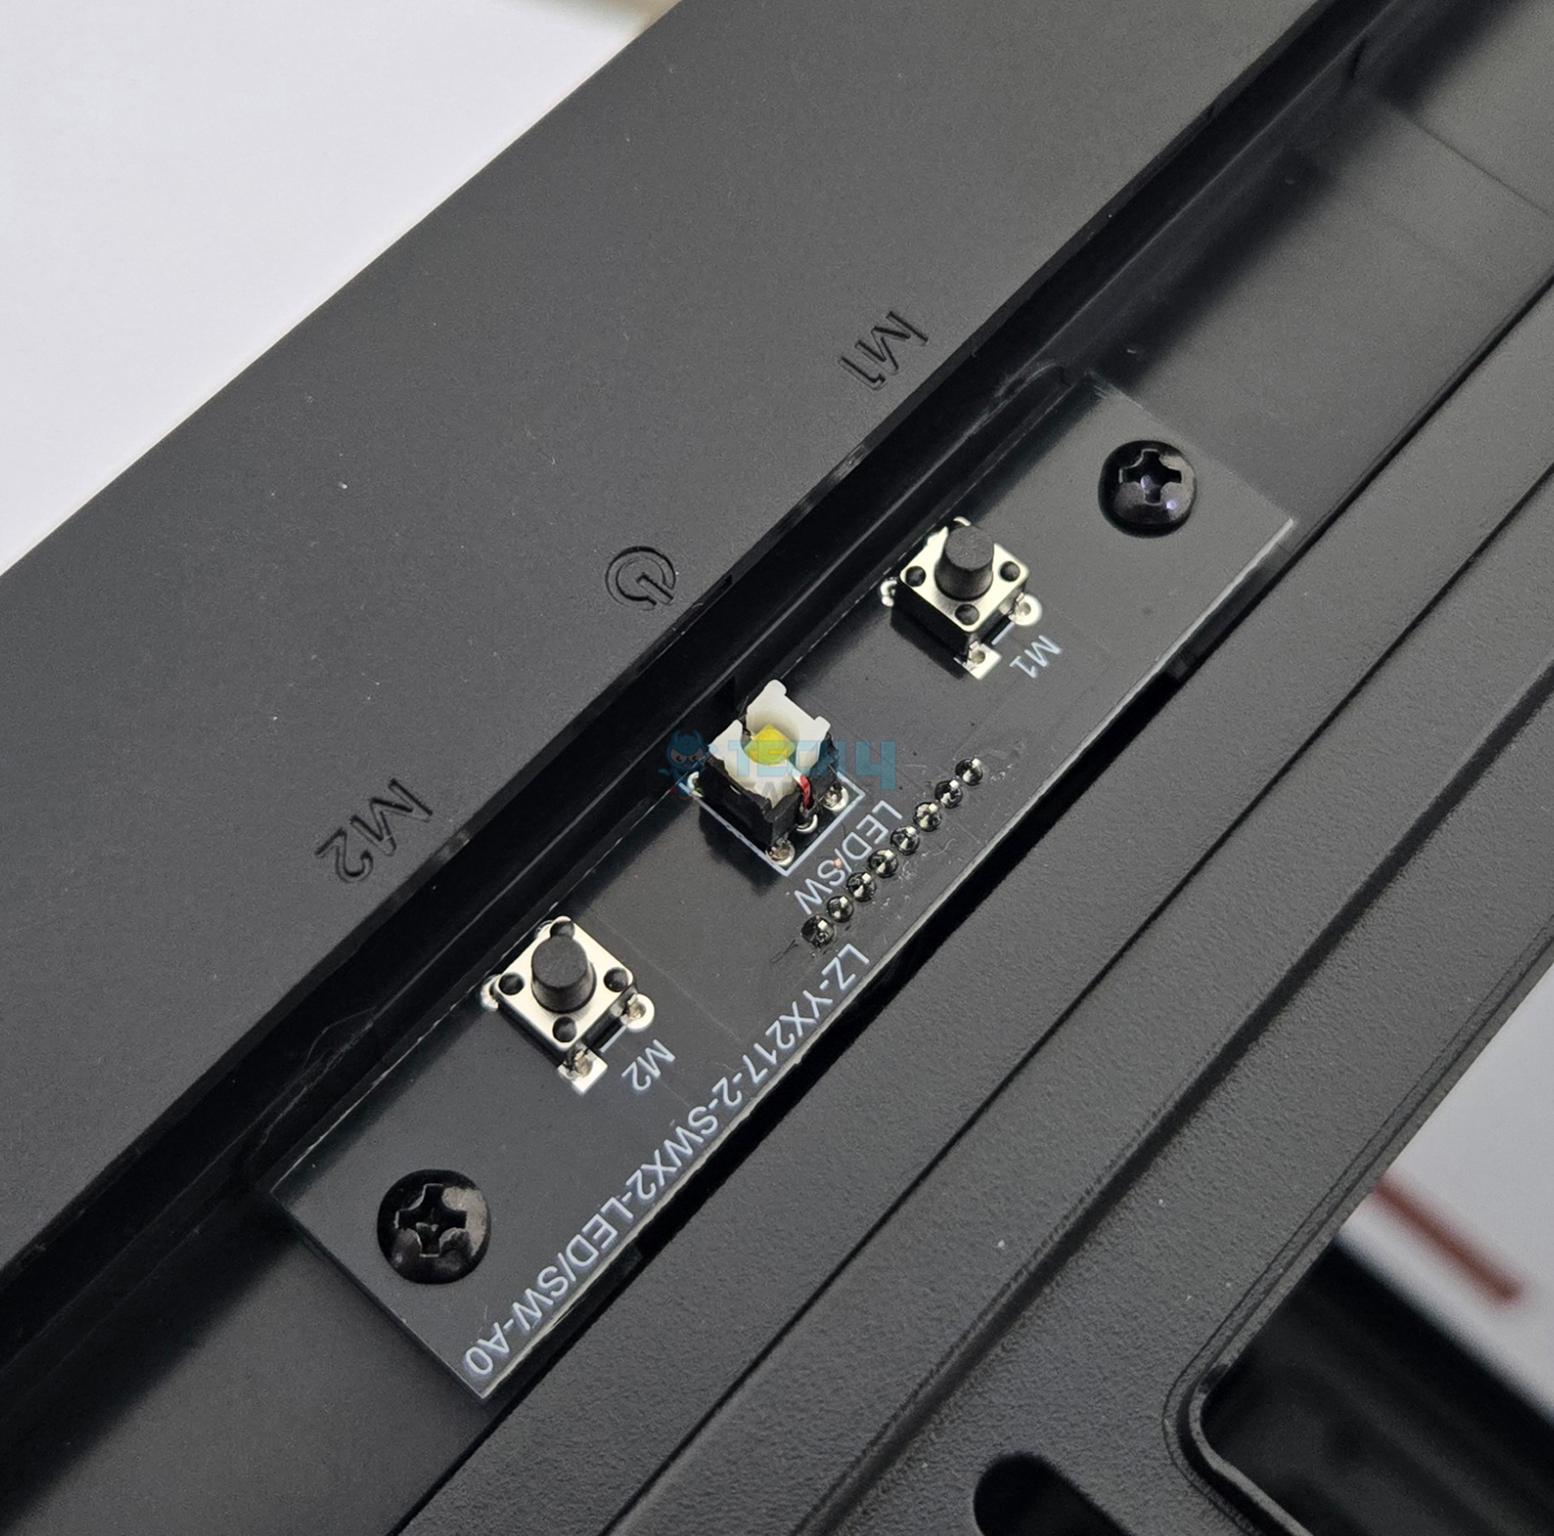
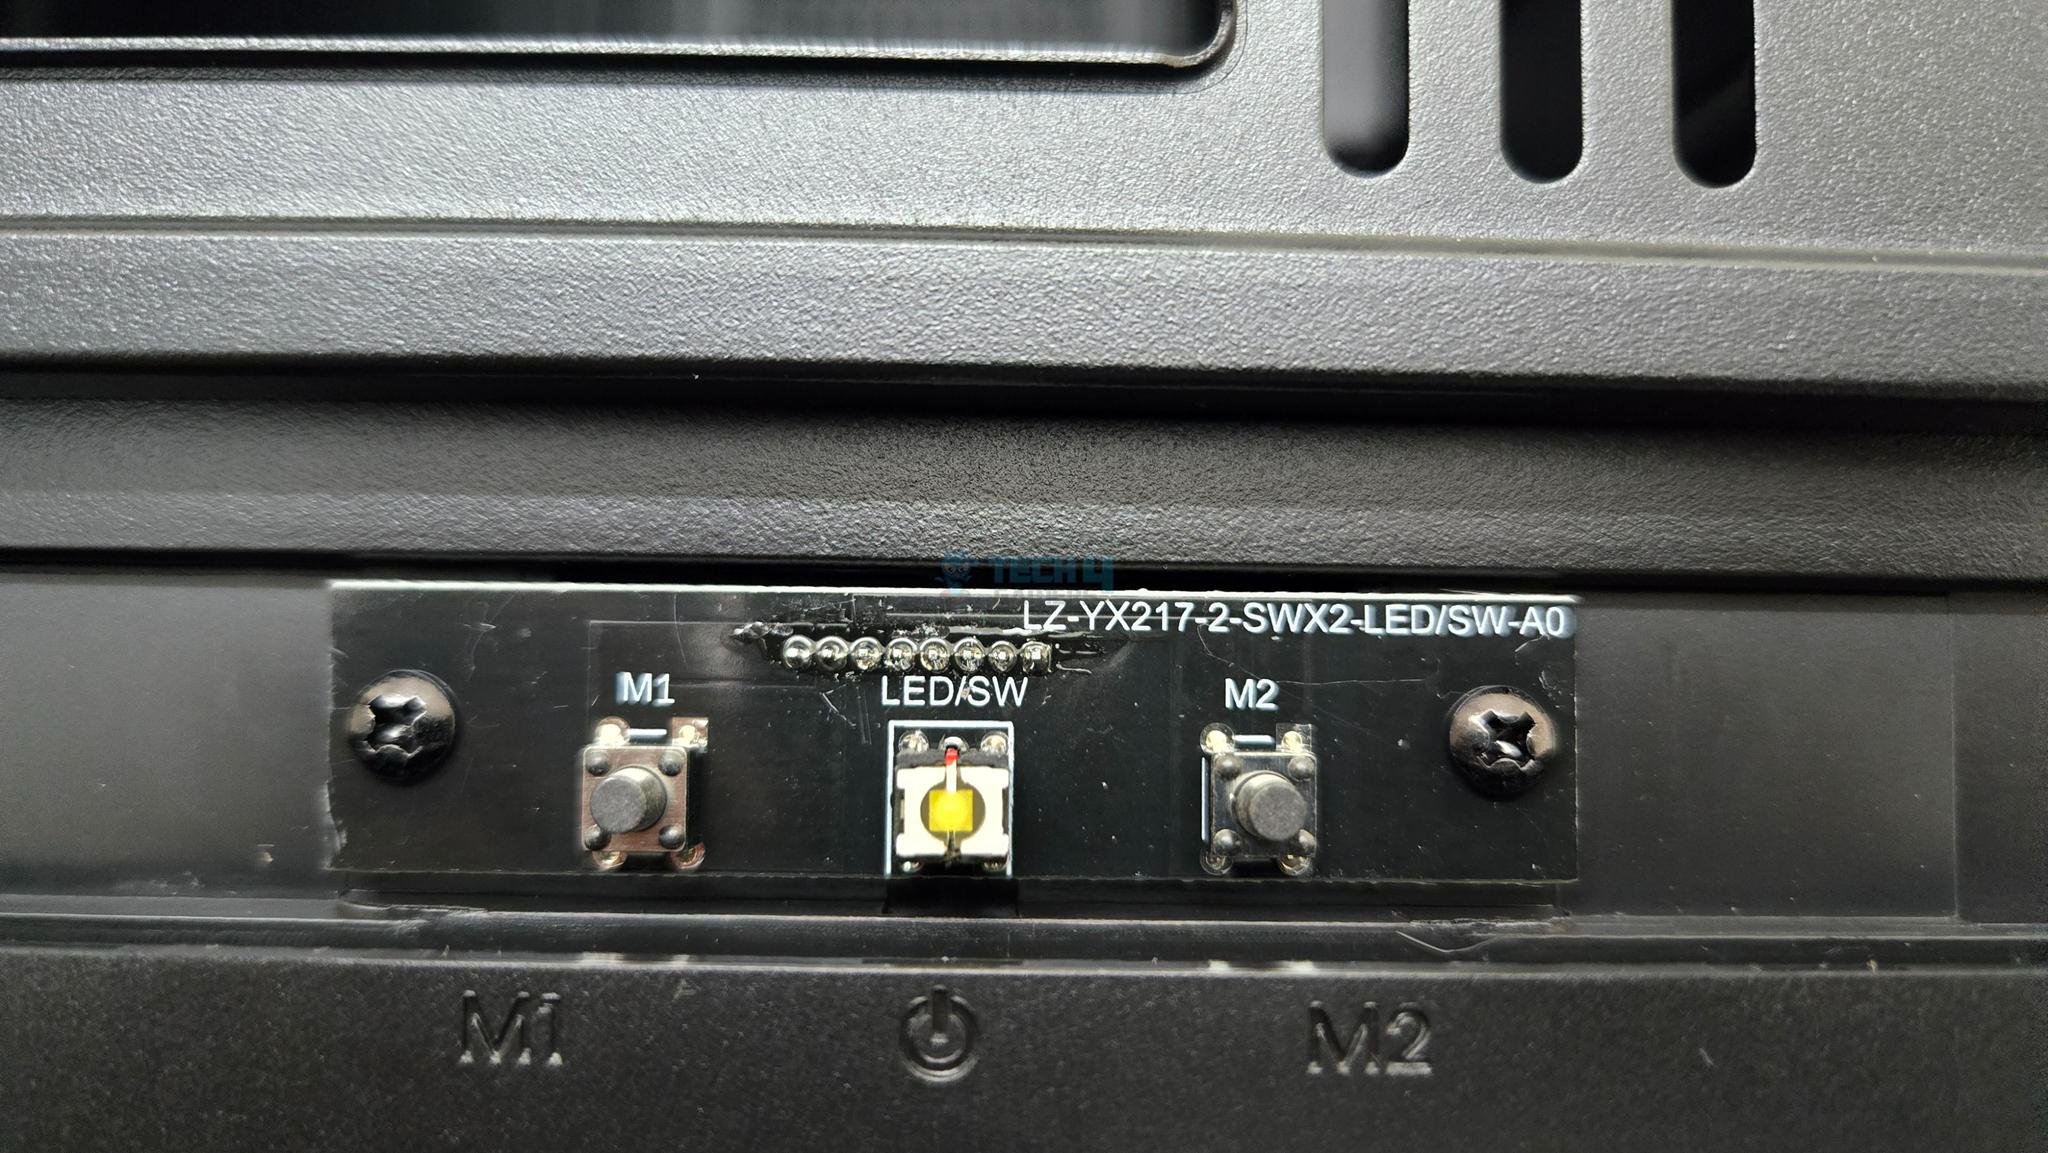
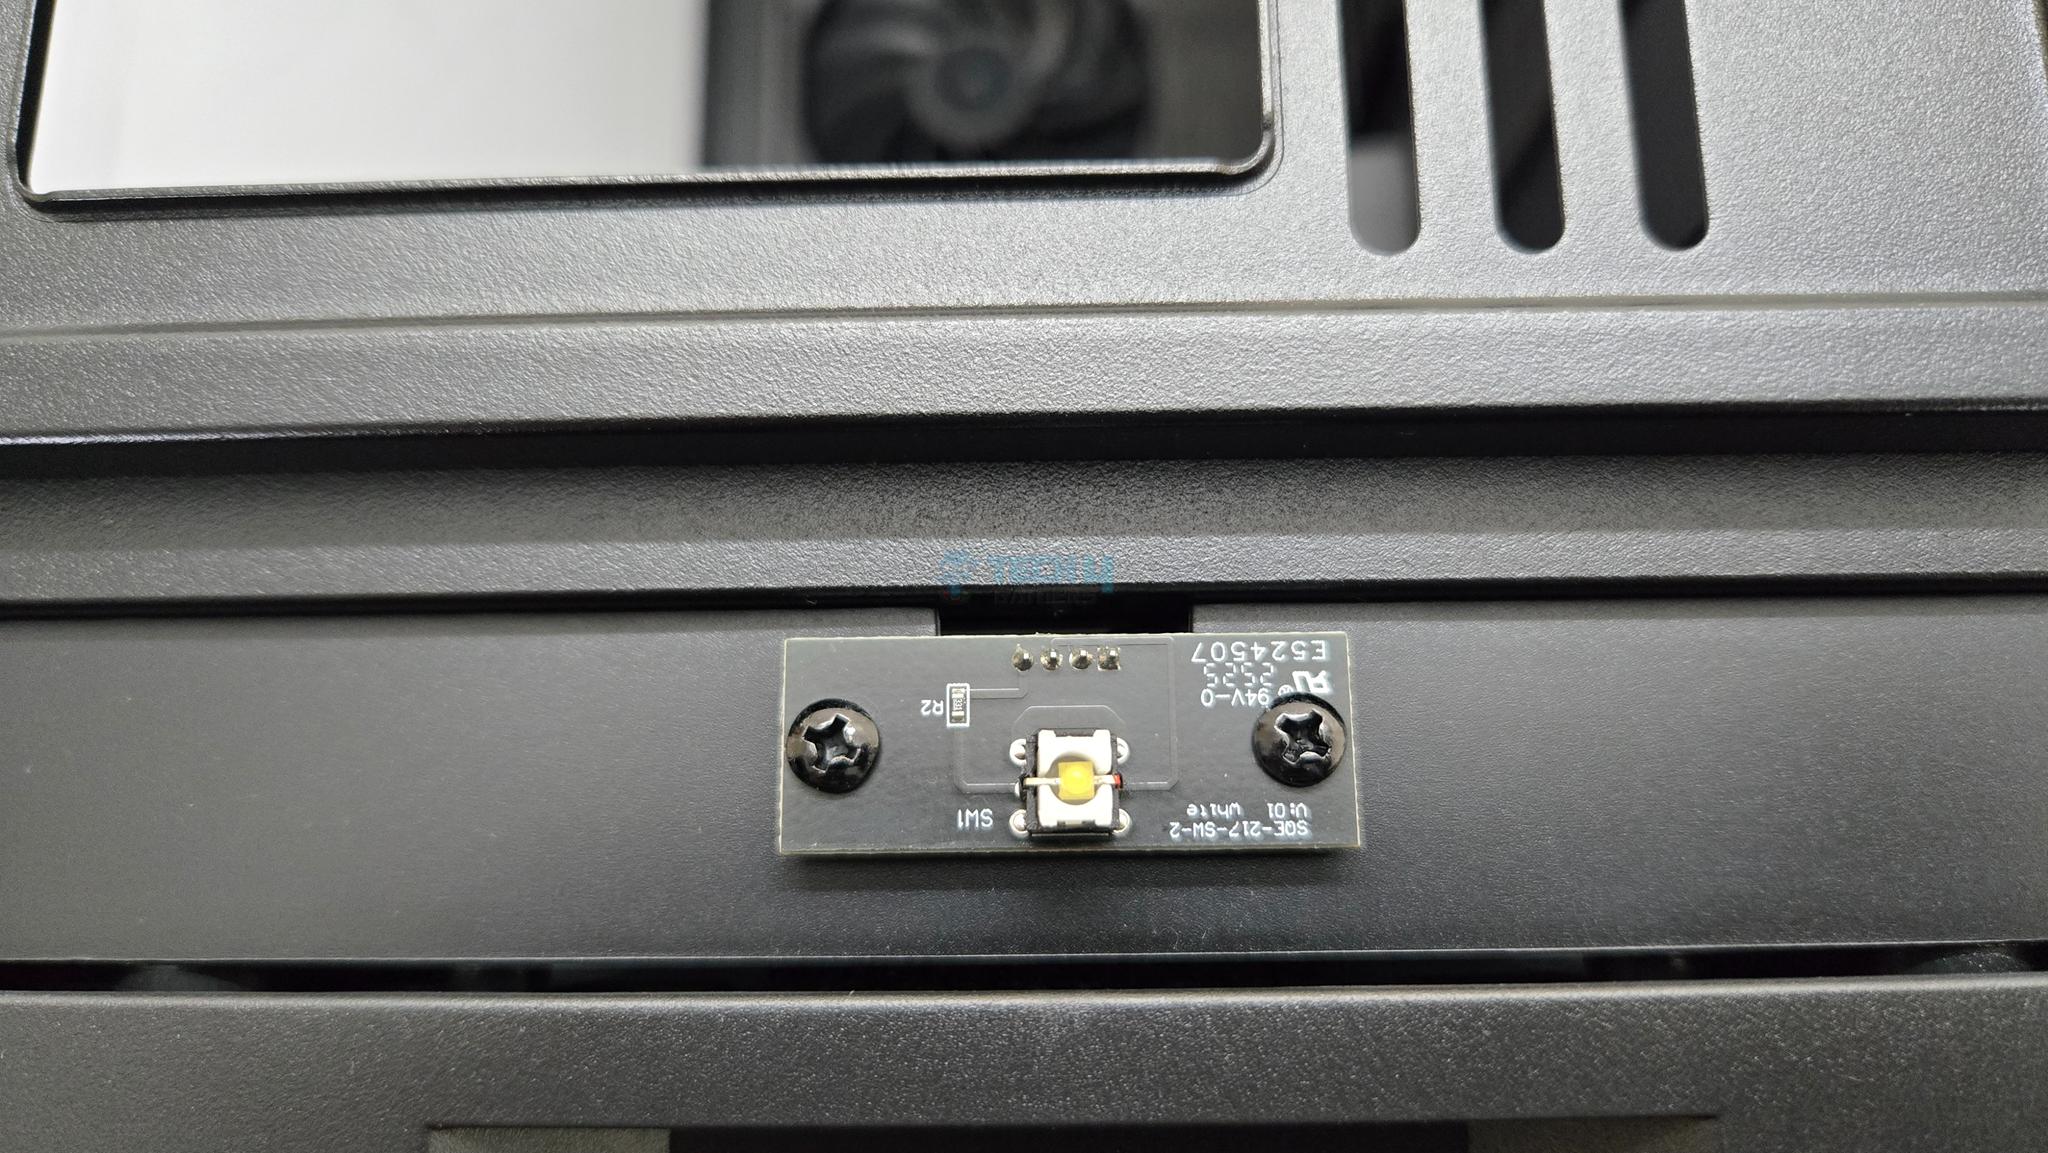
The top panel has a tool-less mesh cover with handle towards rear. The front side has three buttons. The central button is a power button whereas the M1 and M2 buttons are dedicated to the infinity-mirror ARGB lighting effects and pre-installed fans ARGB lighting effects respectively. The clicking of power button is not smooth.
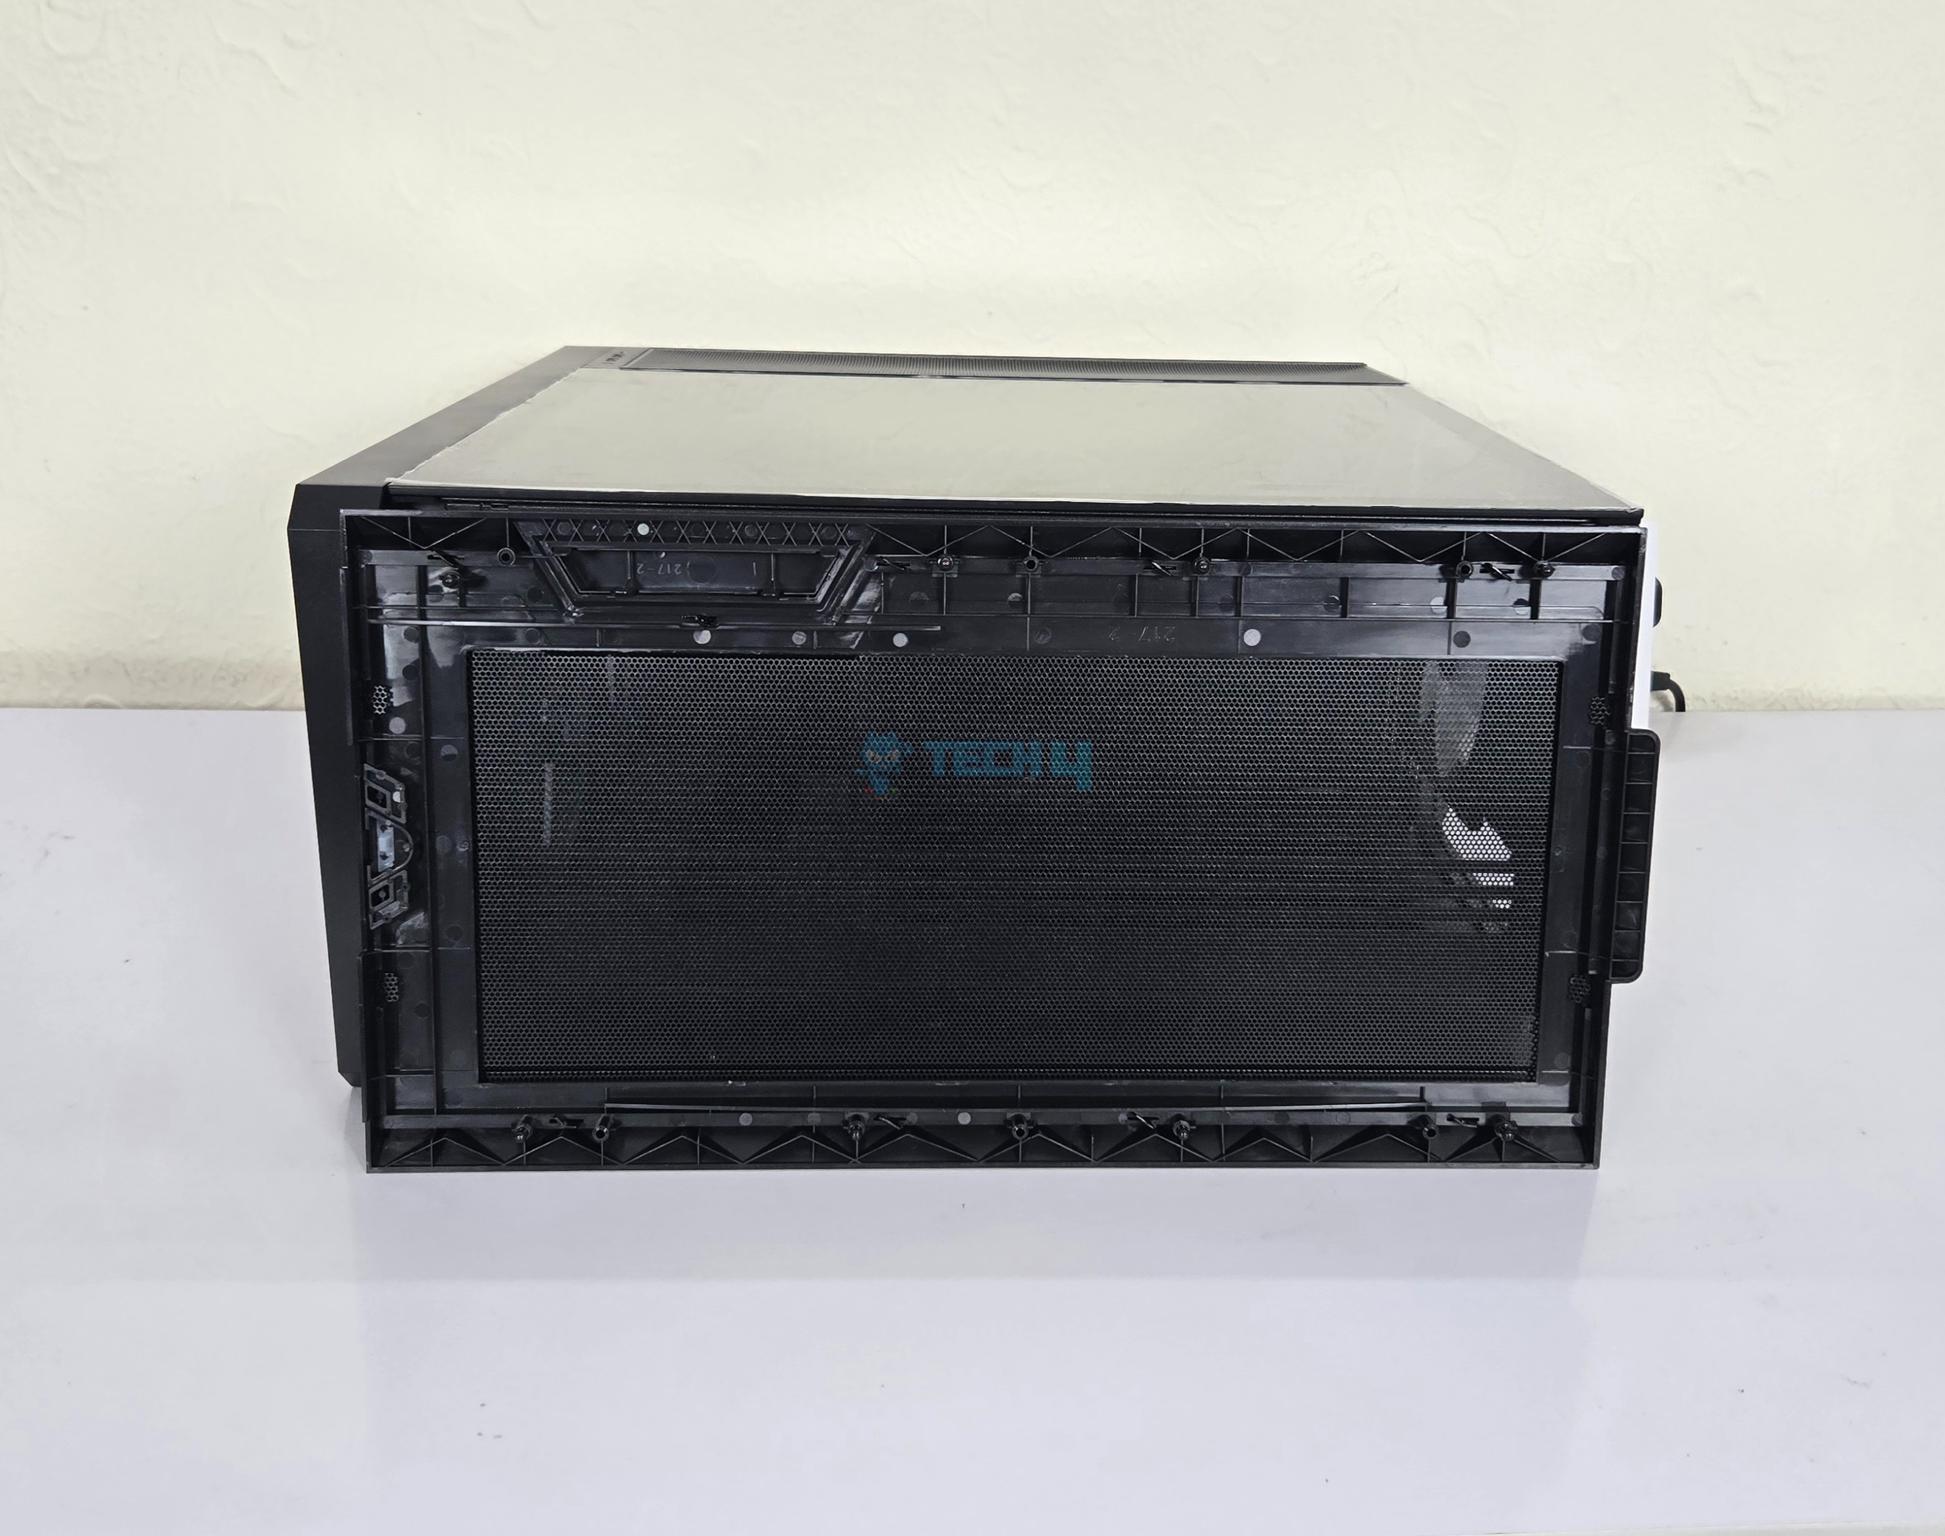
The top panel is mesh and it seems like this mesh is also a dust filter since I don’t see any other filter under the panel.
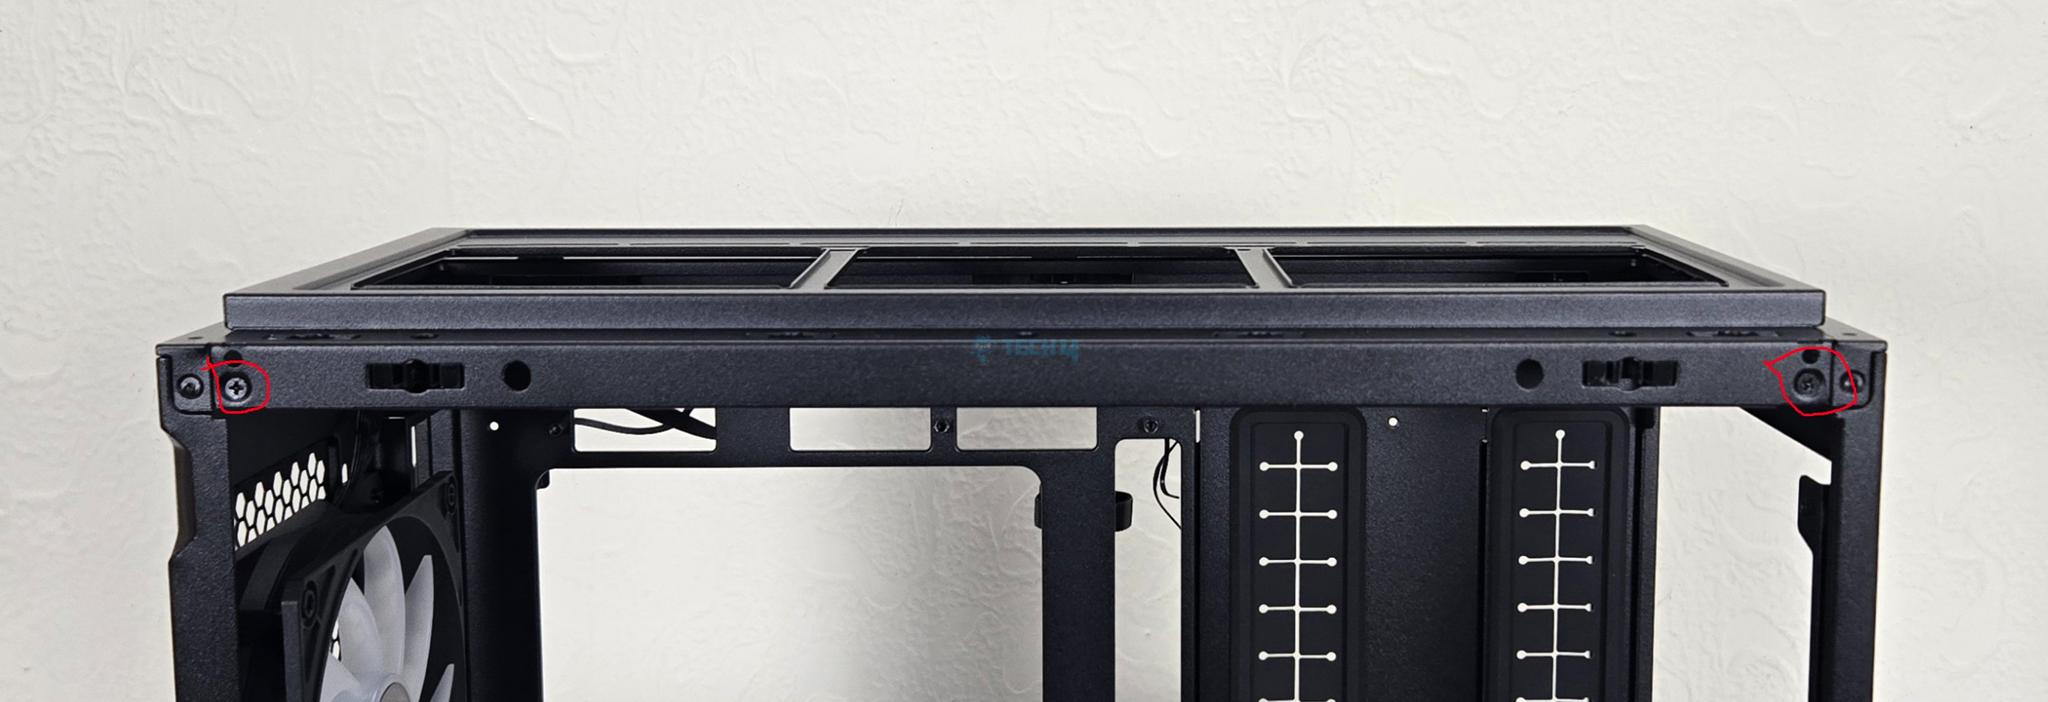
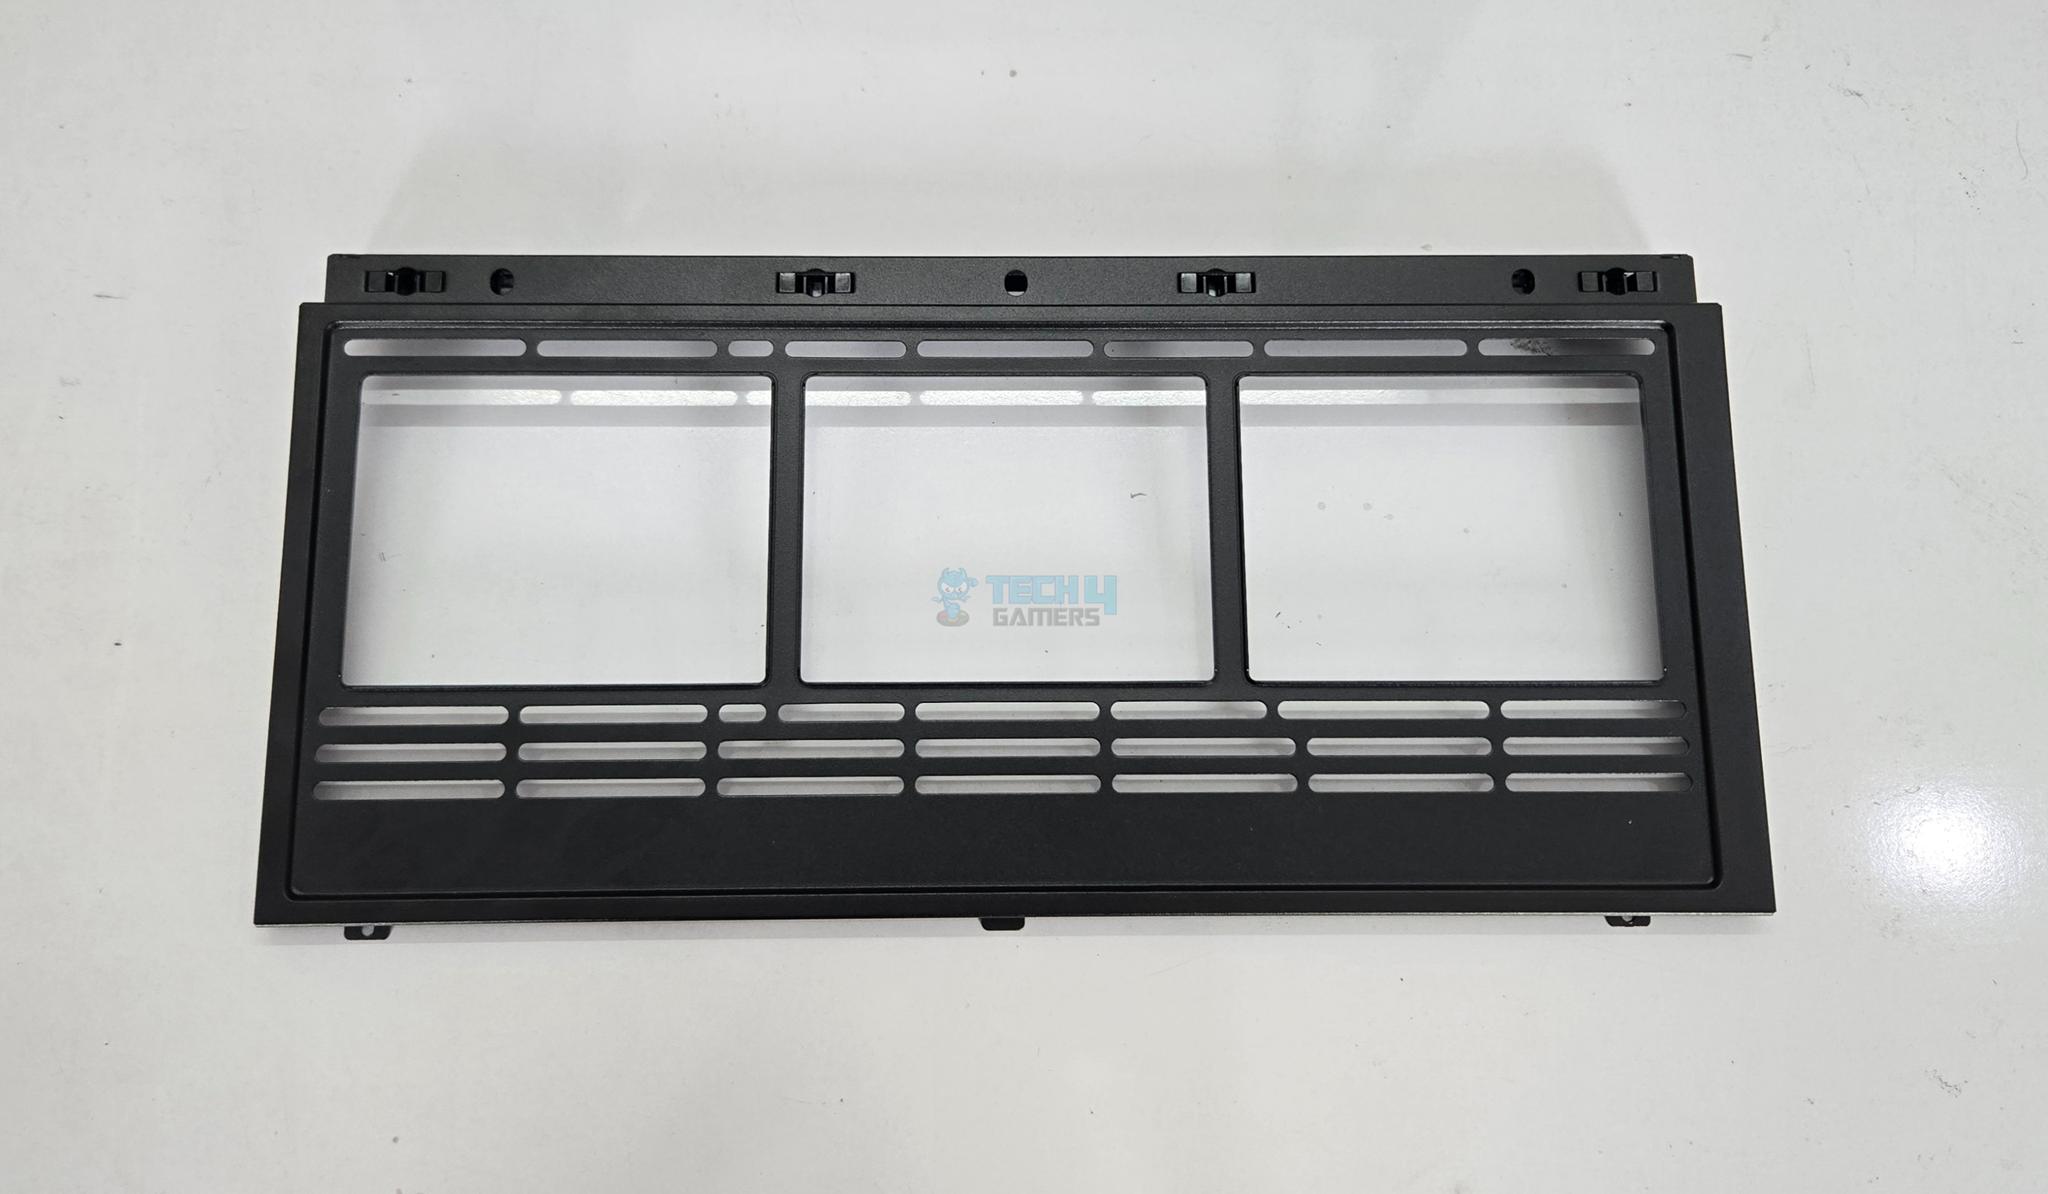
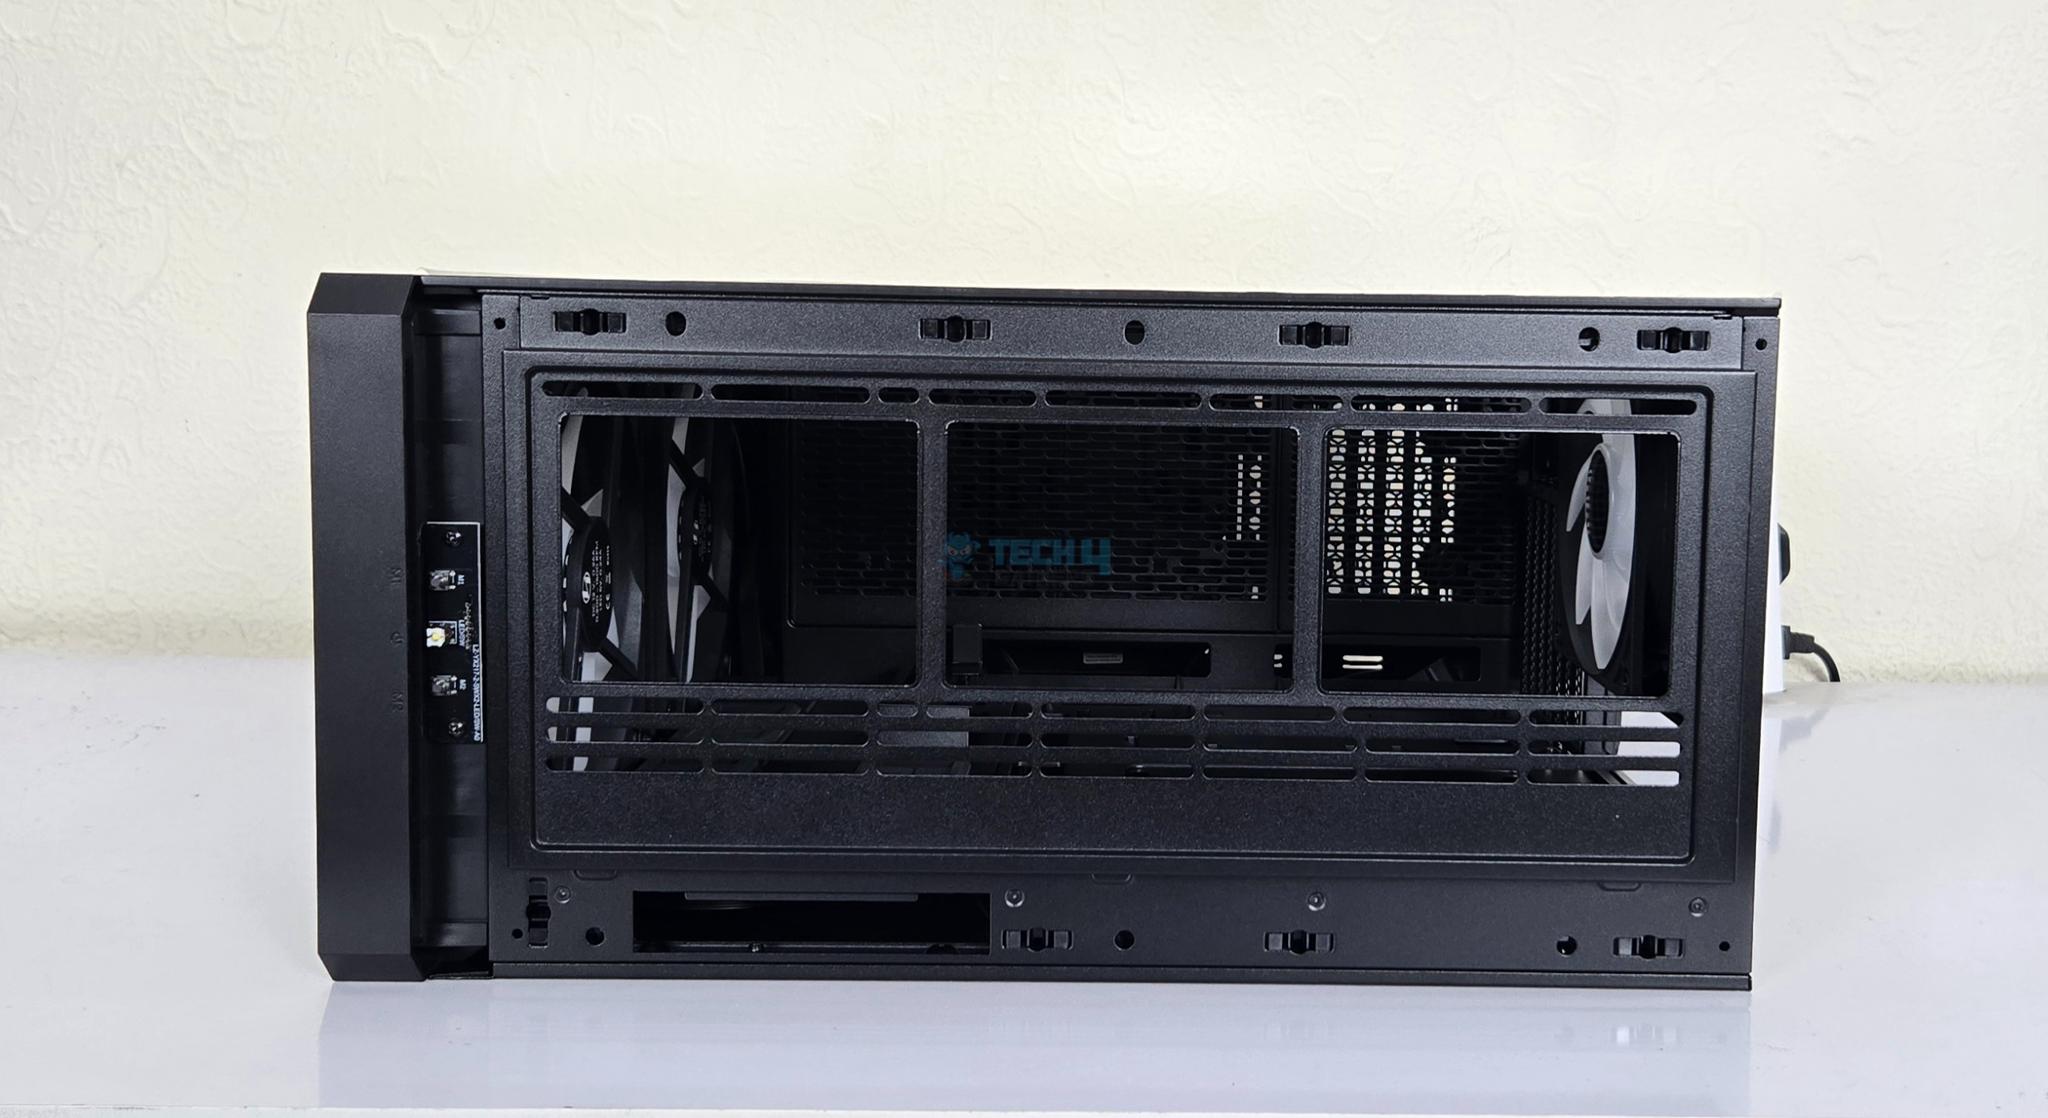
The fan bracket is removable. However, to release it, you need to have access on the glass side of the case. This is how I have seen in cases from Fractal Design, Phanteks, and be quiet!. The bracket has rail design for fan mount. You can install:
- 3x 120mm or 2x 140mm fans
- 120mm/140mm/240mm/280mm/360mm radiator
Removal of almost entire top gives plenty of room to the user for convenient installation.
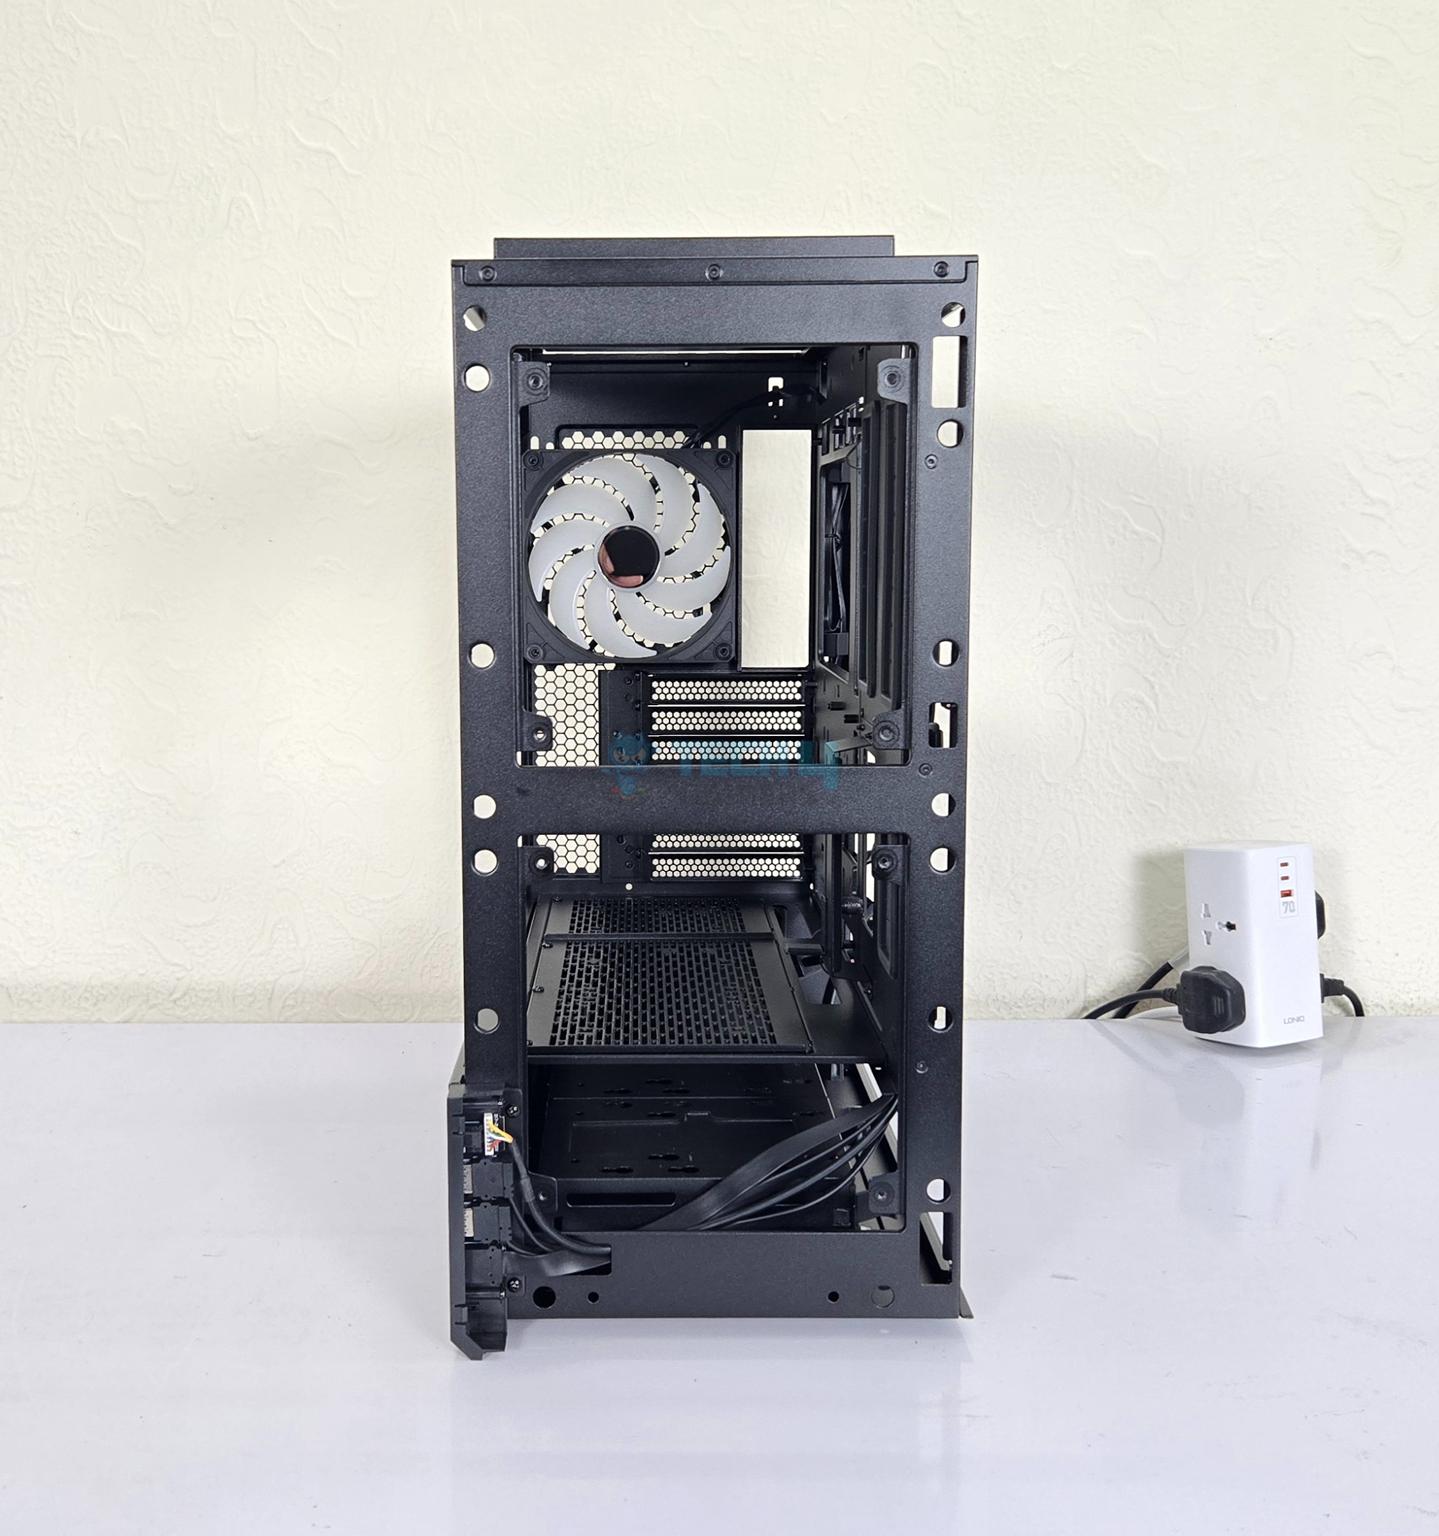
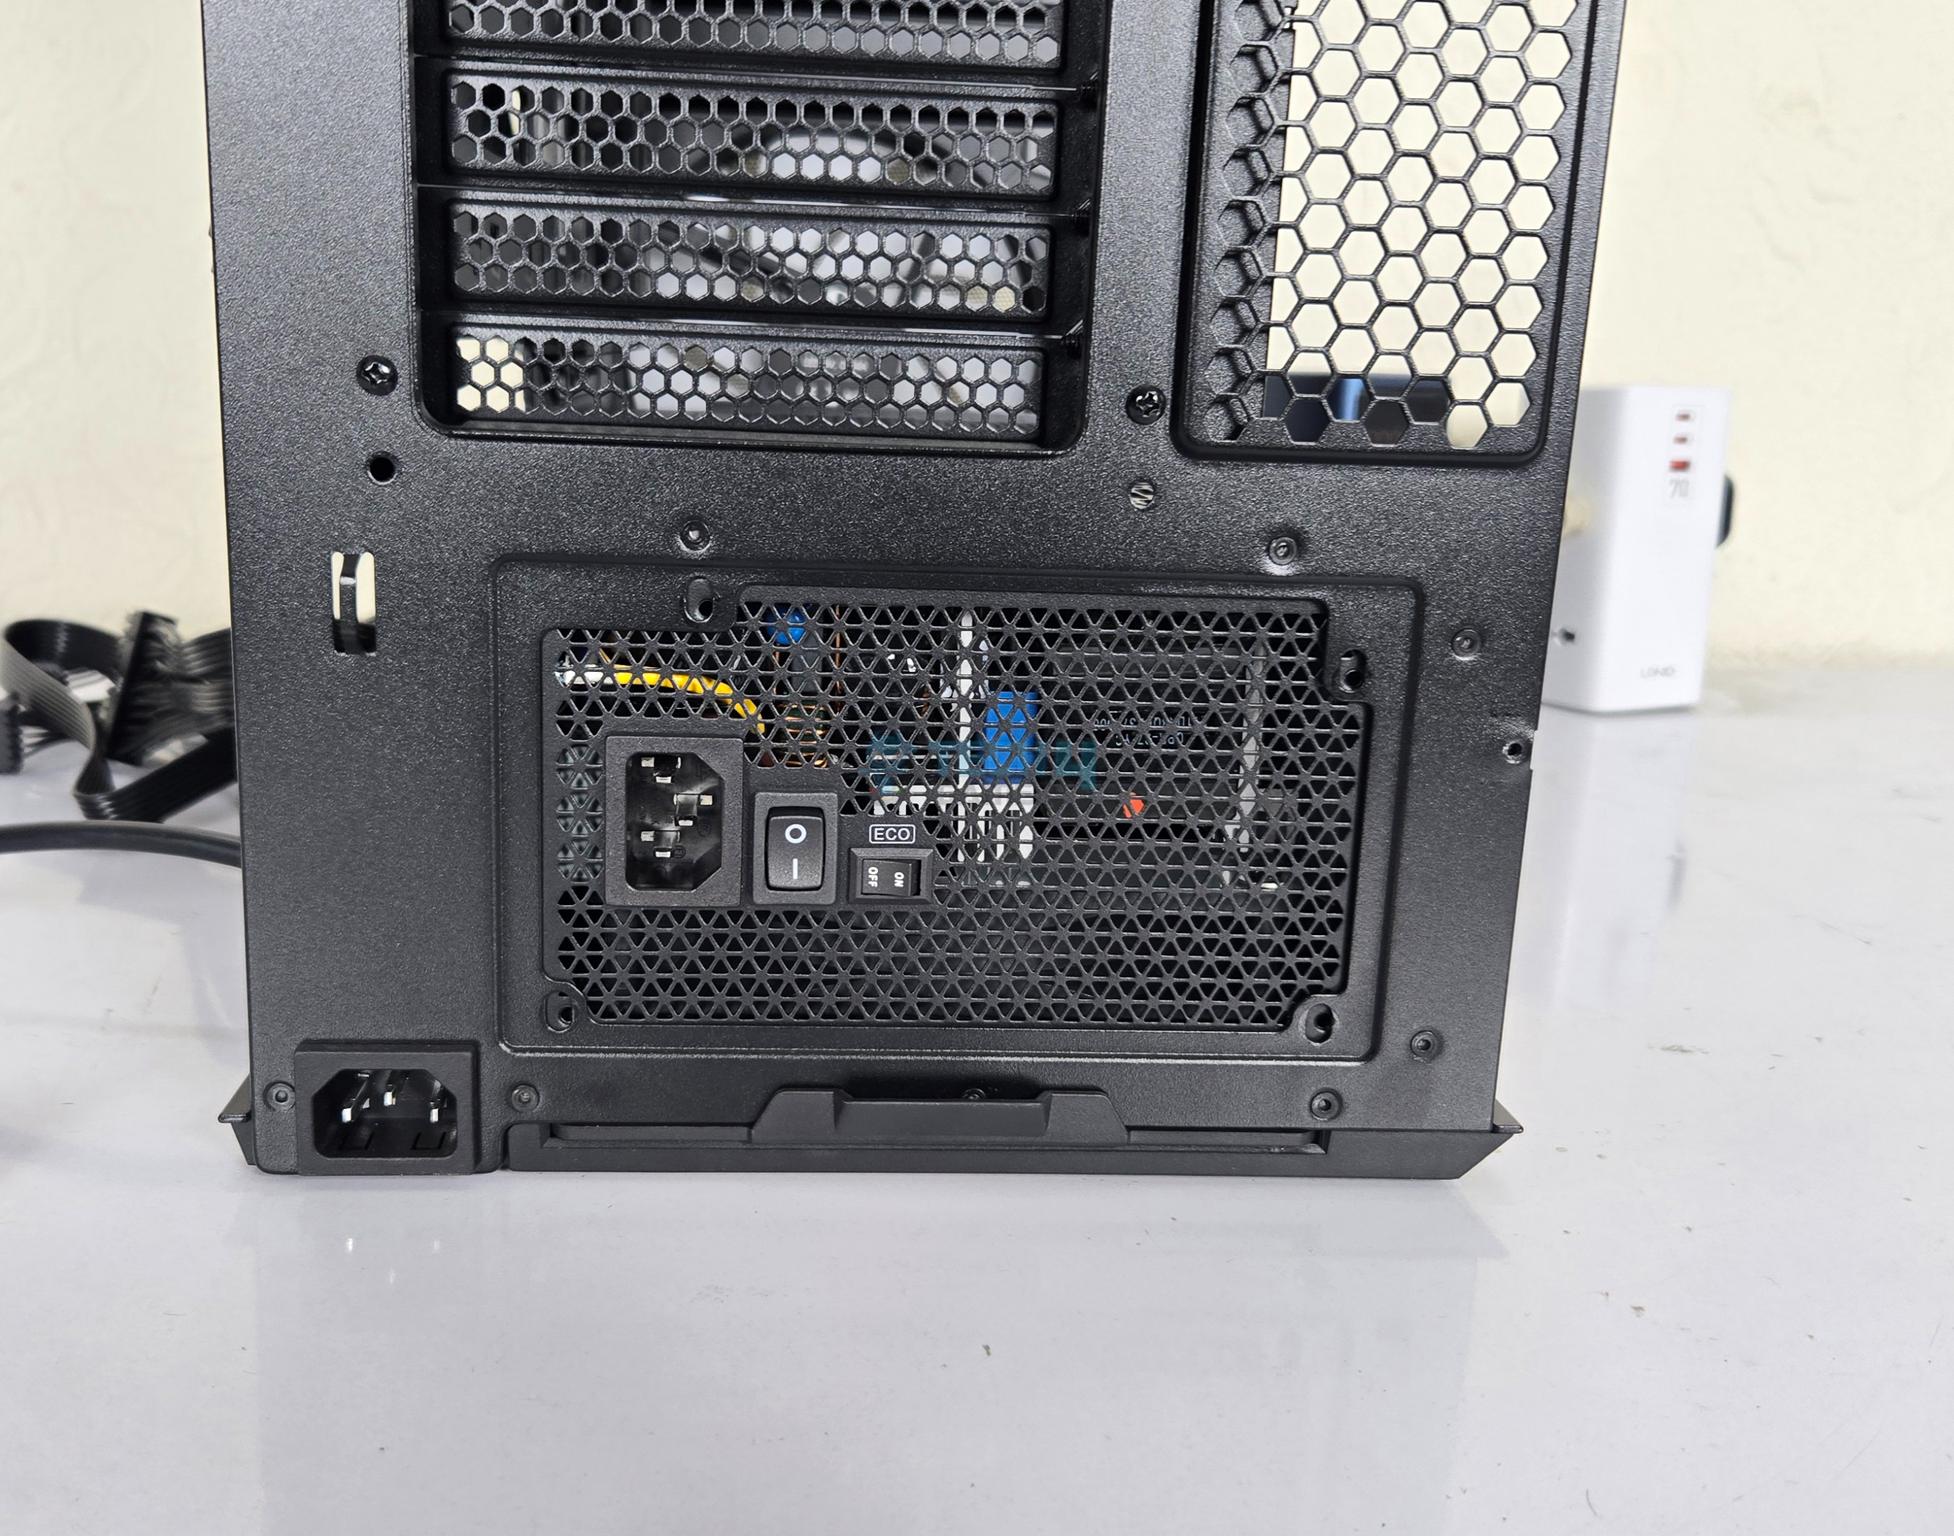
Rear Panel
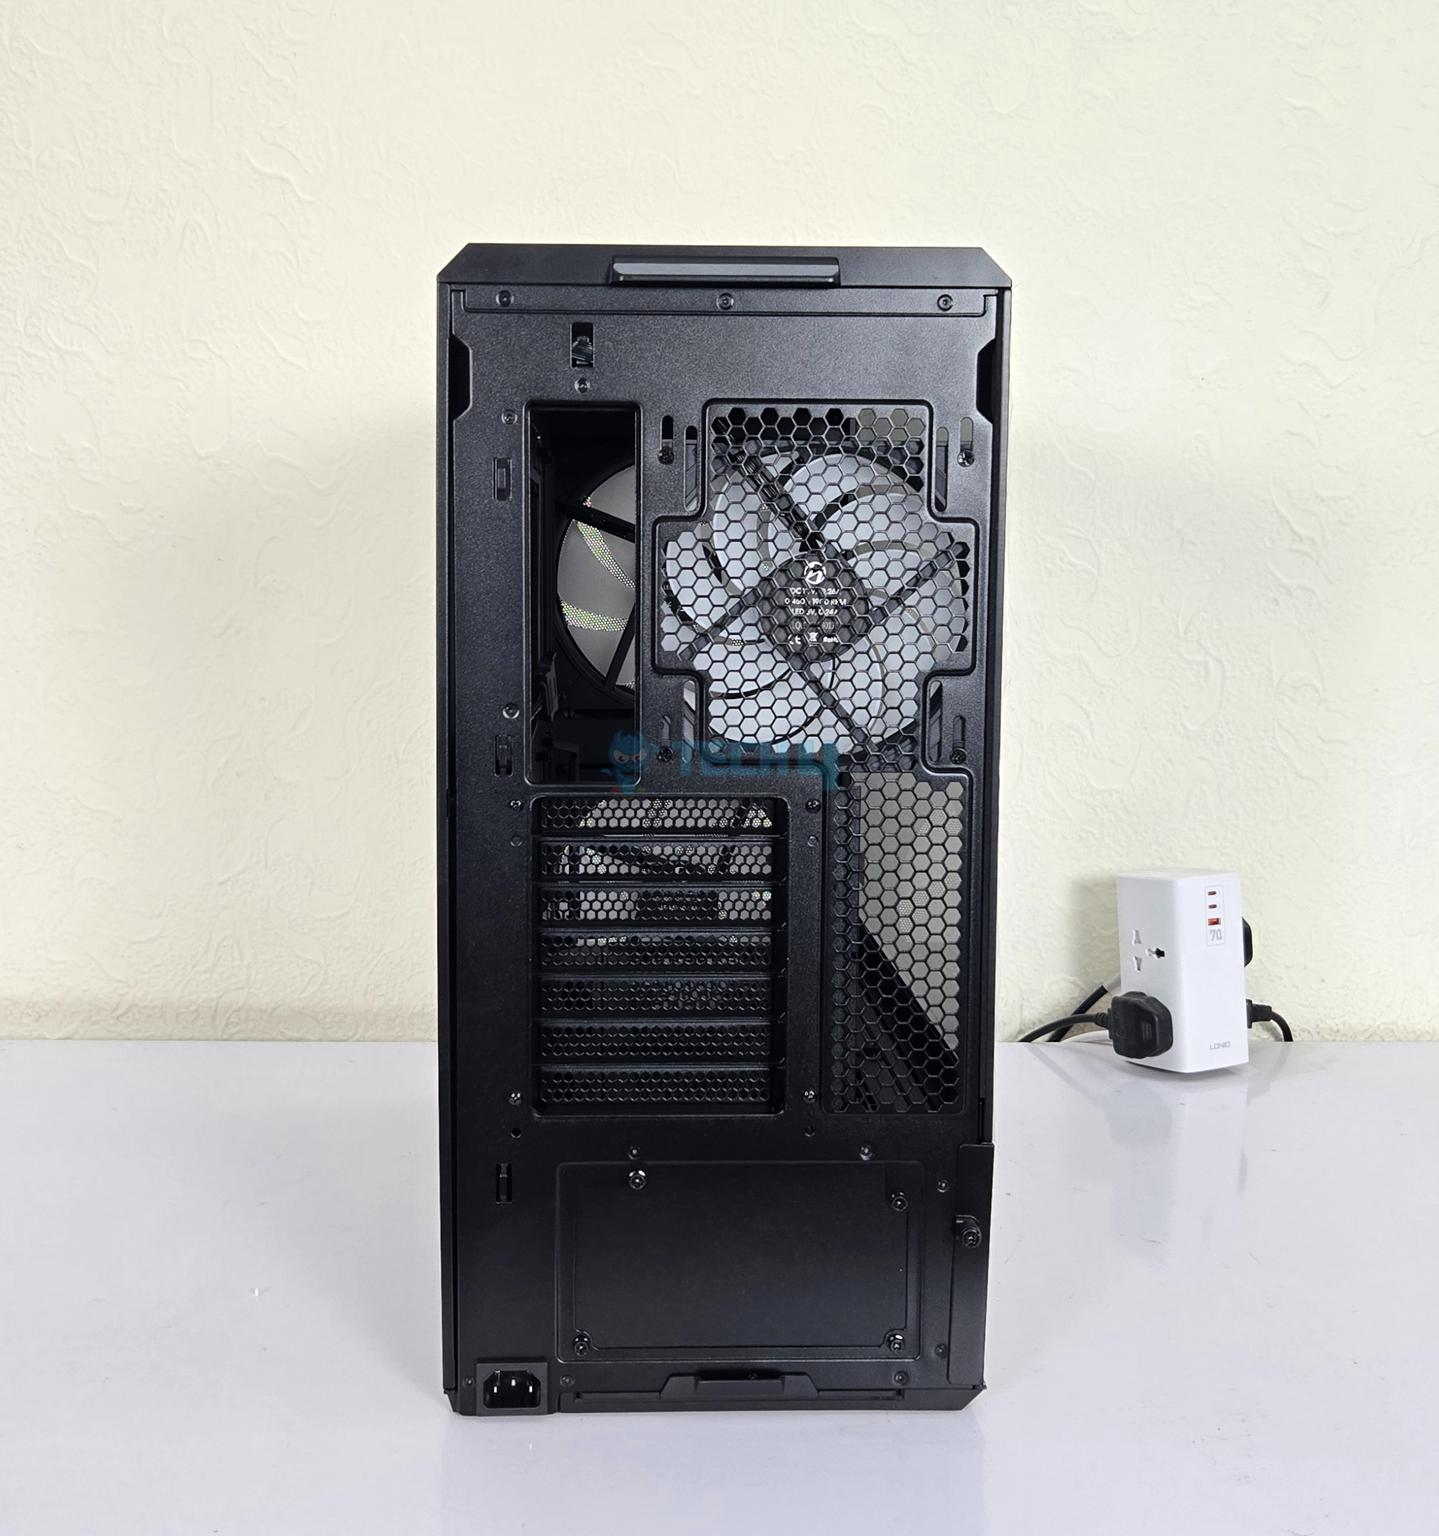
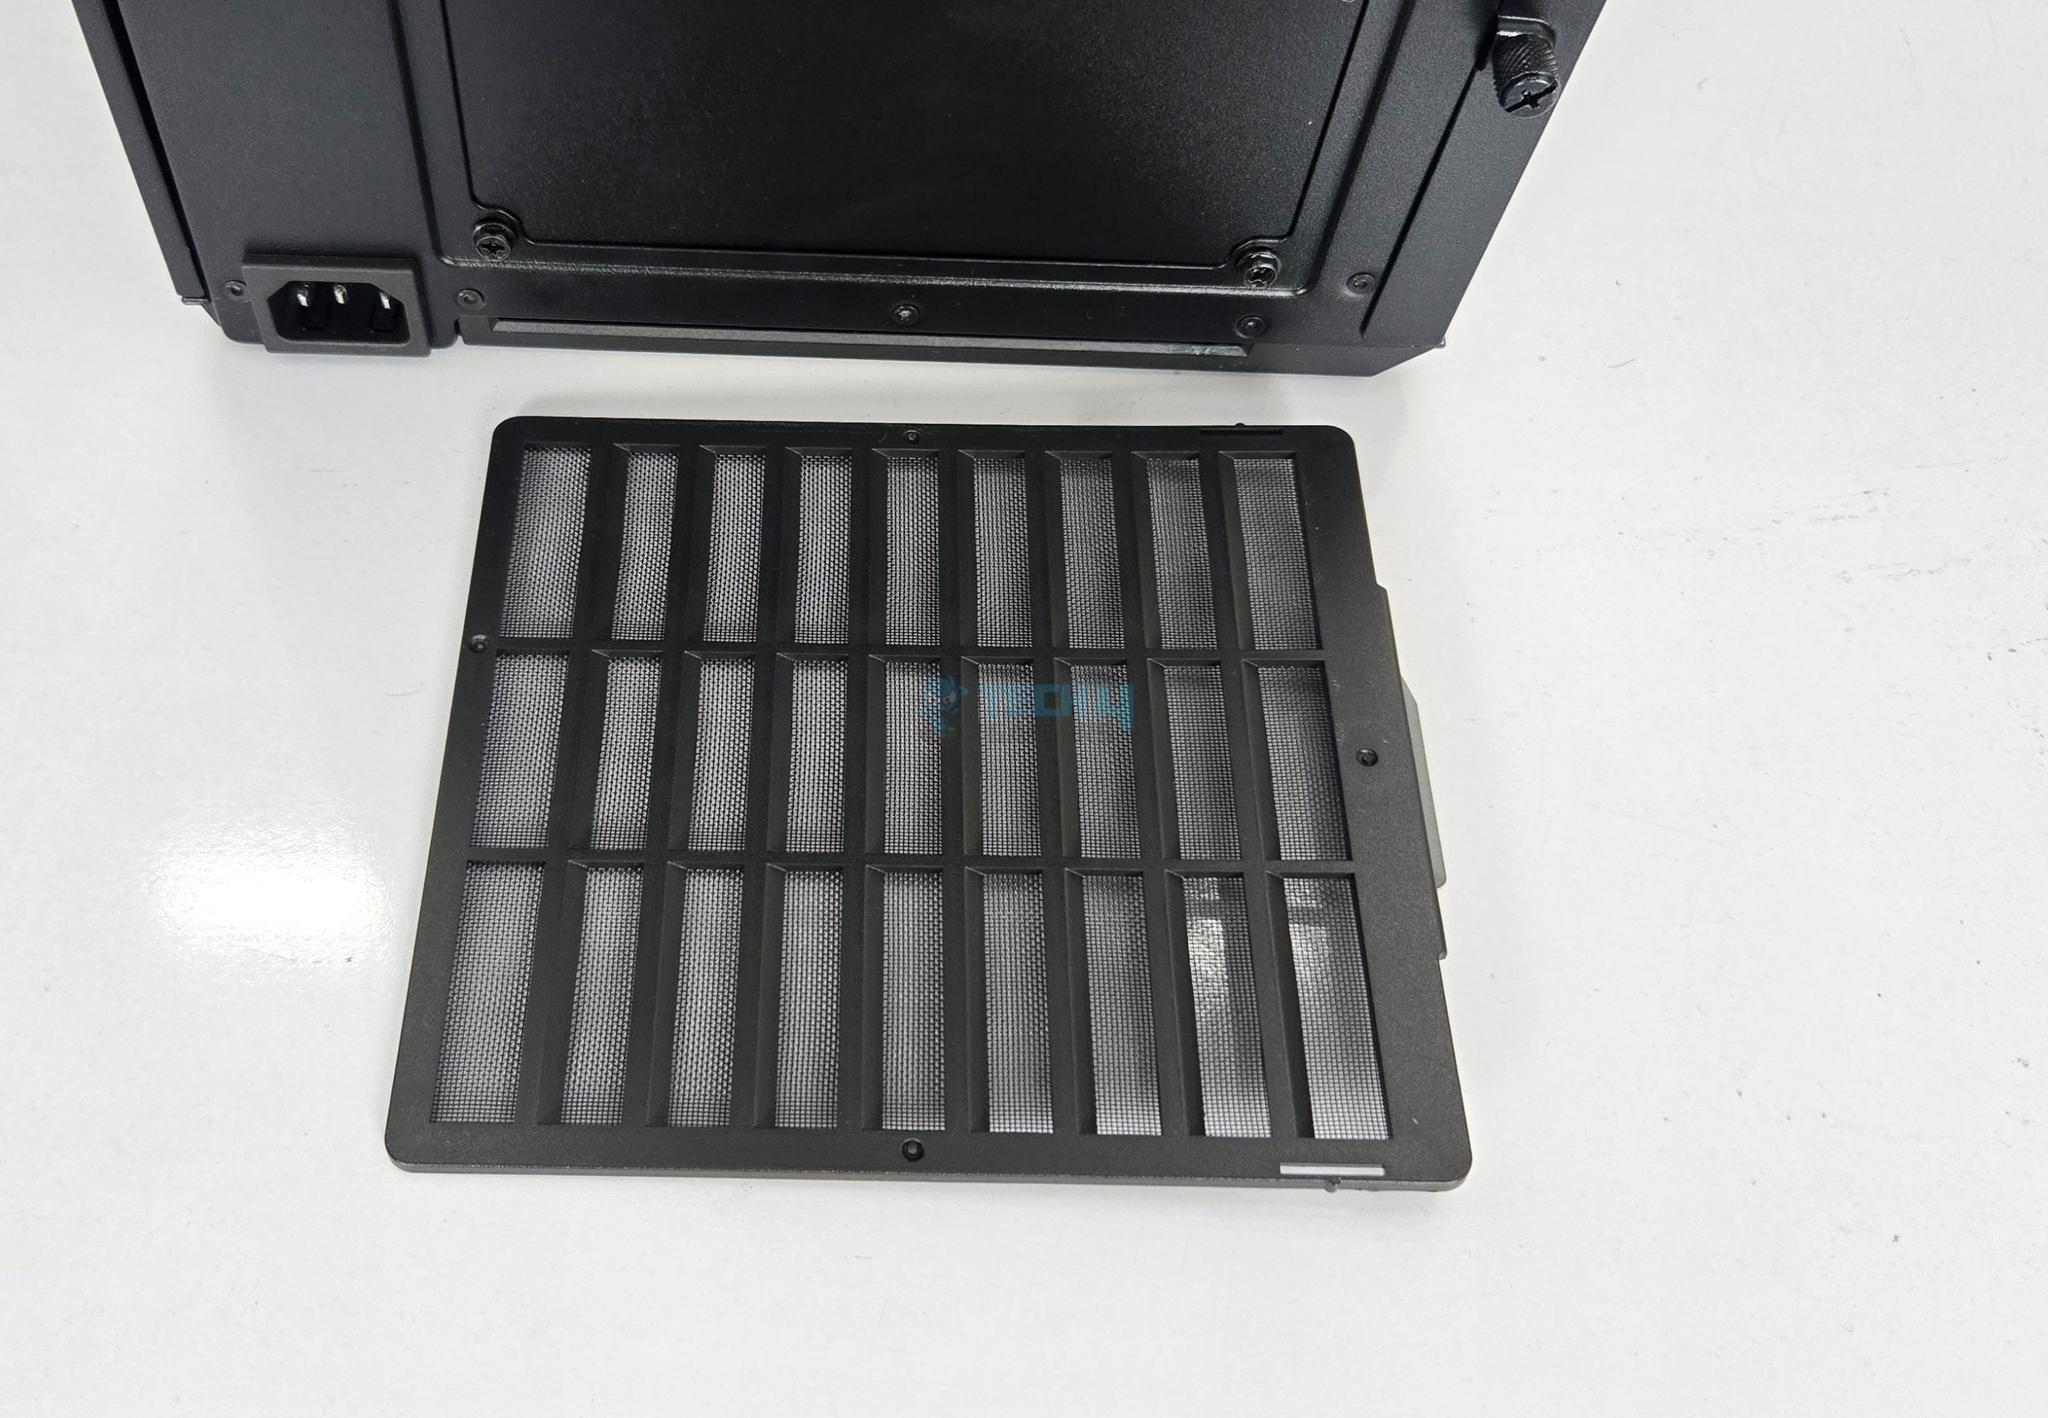
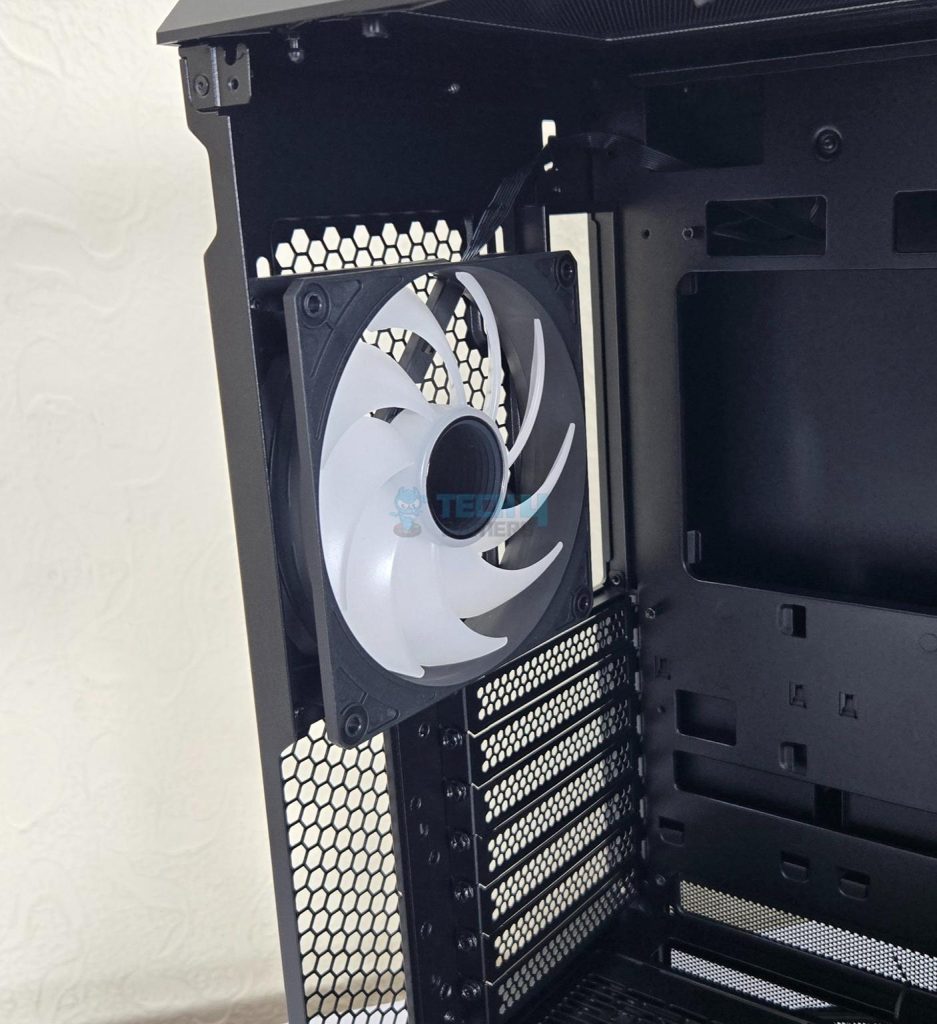
The rear of the case has a standard layout. Up top, you can see a cutout where the rear IO panel of the motherboard sit in. On its right is a rail mount for the 120mm/140mm fan. 1x 140mm fan comes pre-installed. The case has 7x PCIe slots.
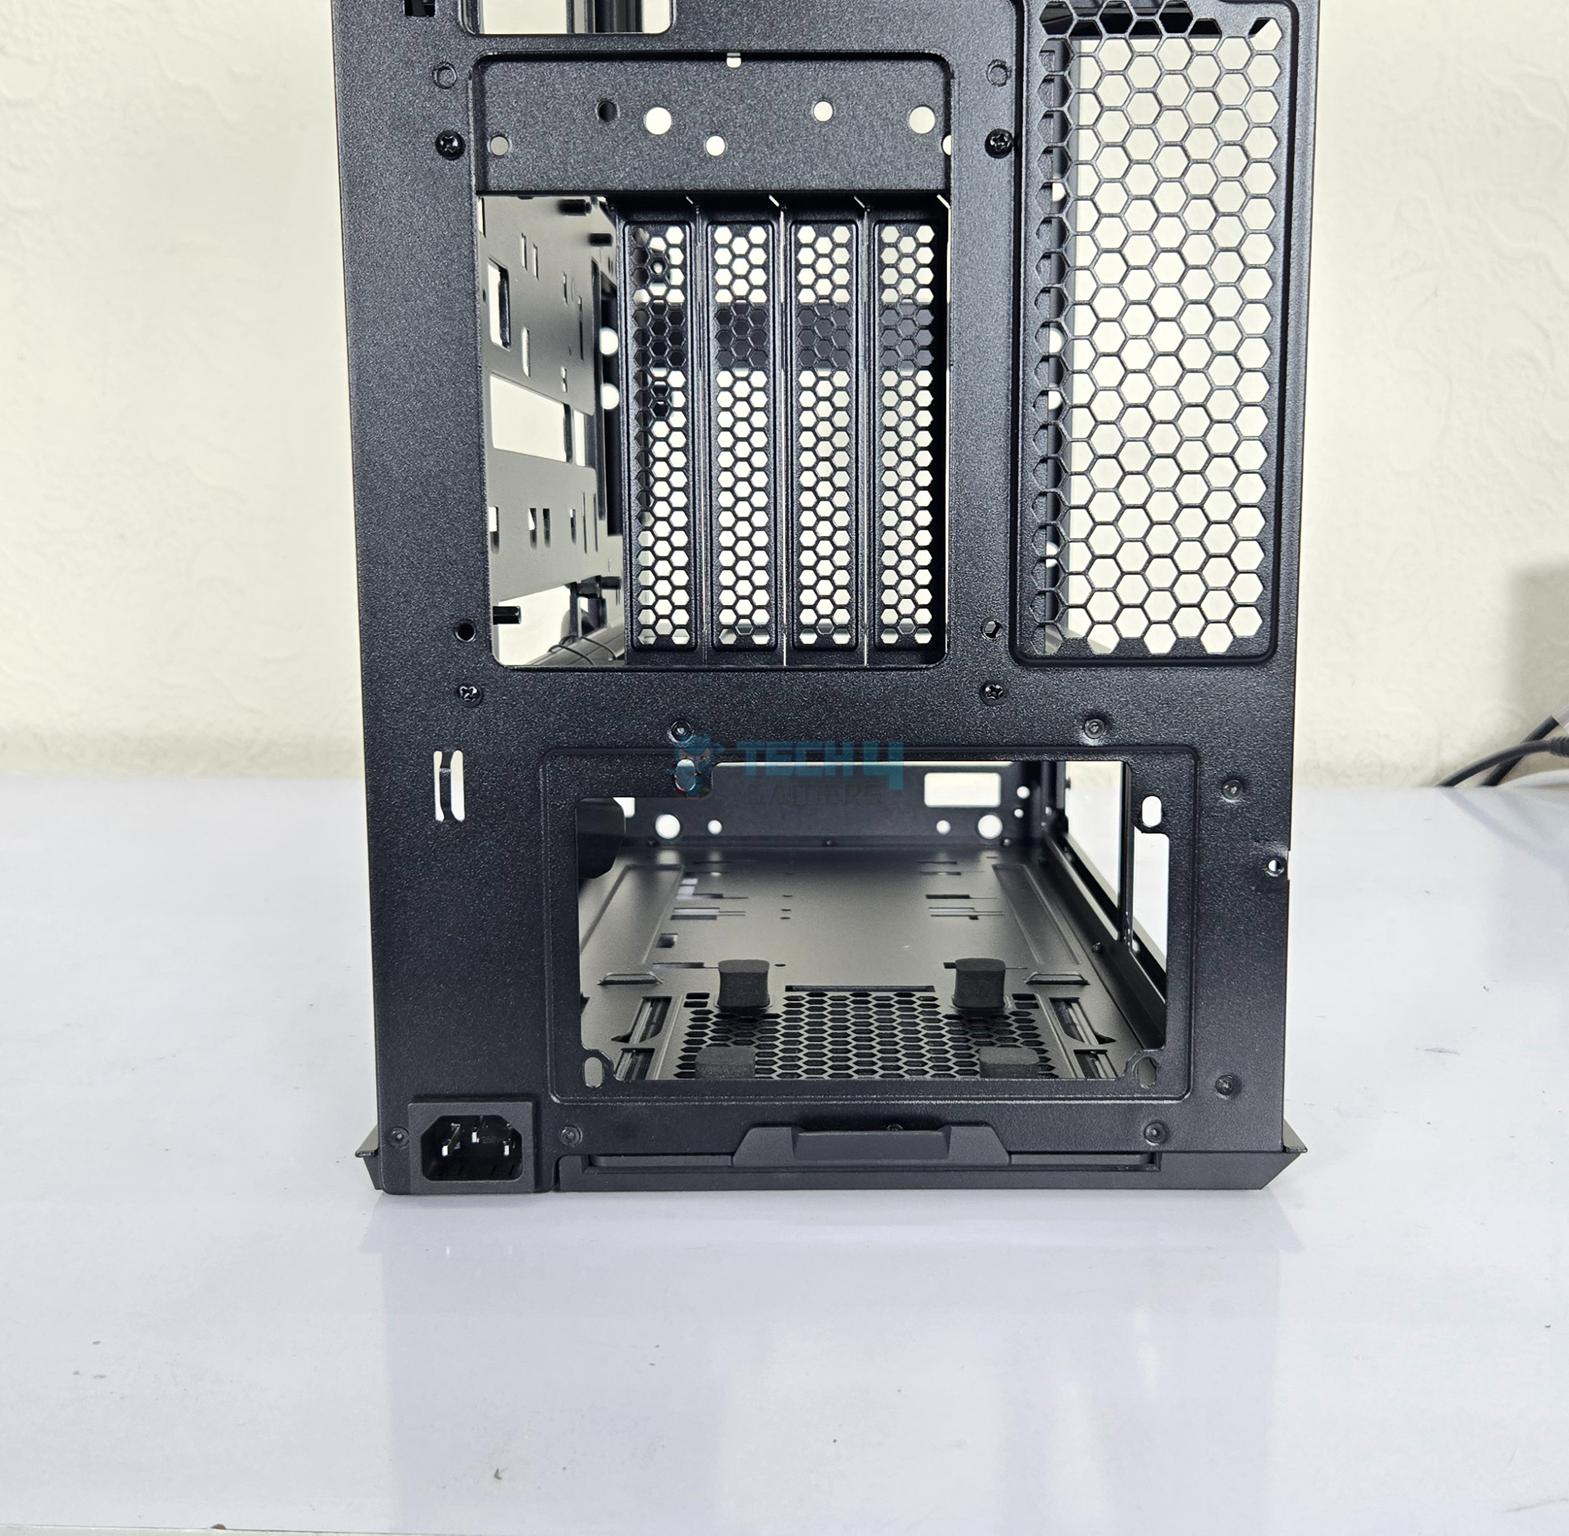
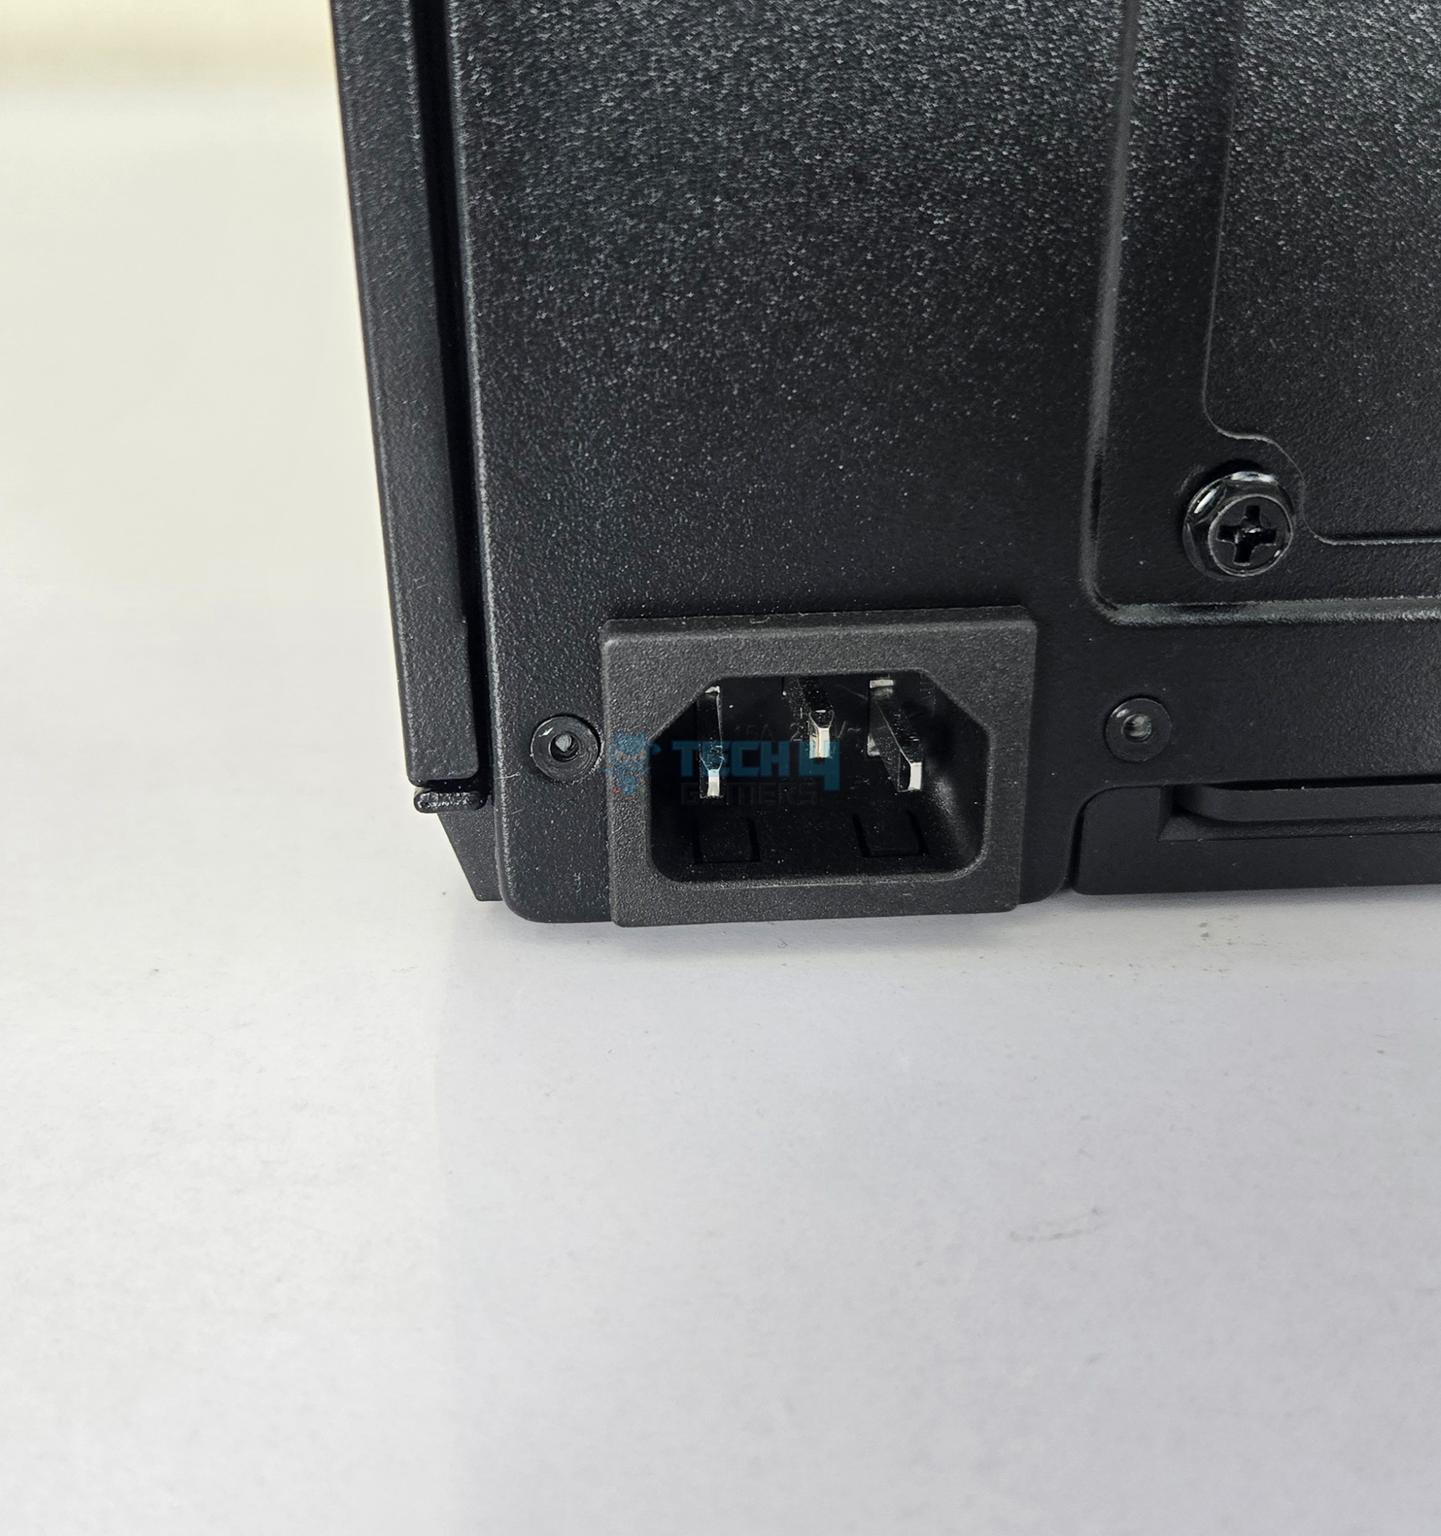
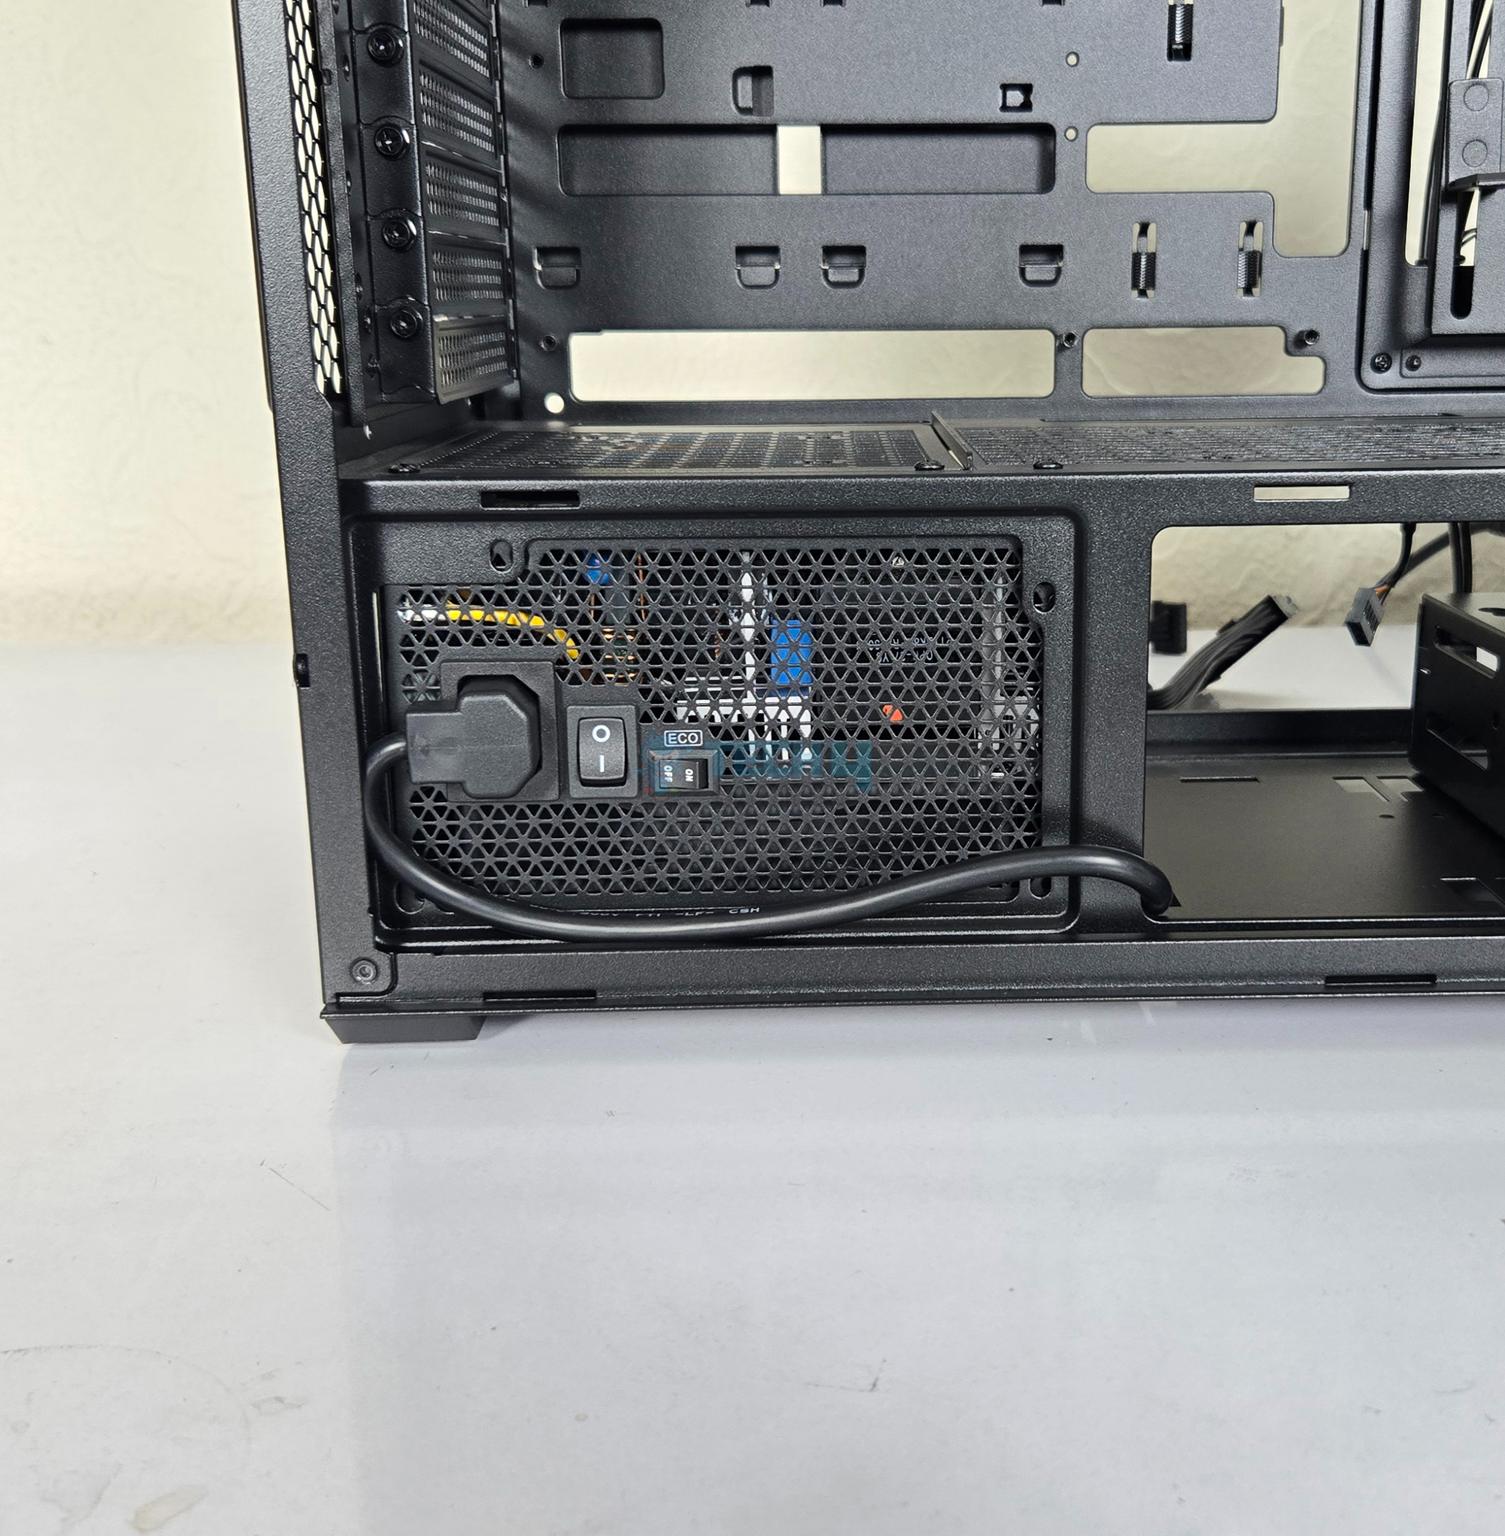
The bottom has a mount for standard ATX PSU. However, it has a solid cover and you can see a power port on the base as well. This is provided since you can install PSU in this case in two direction. One is standard and the other is rotated. You will know this better in our Installation section. The PSU area has a dust filter underneath which can be taken out from rear which is not a convenient location to access this flter.
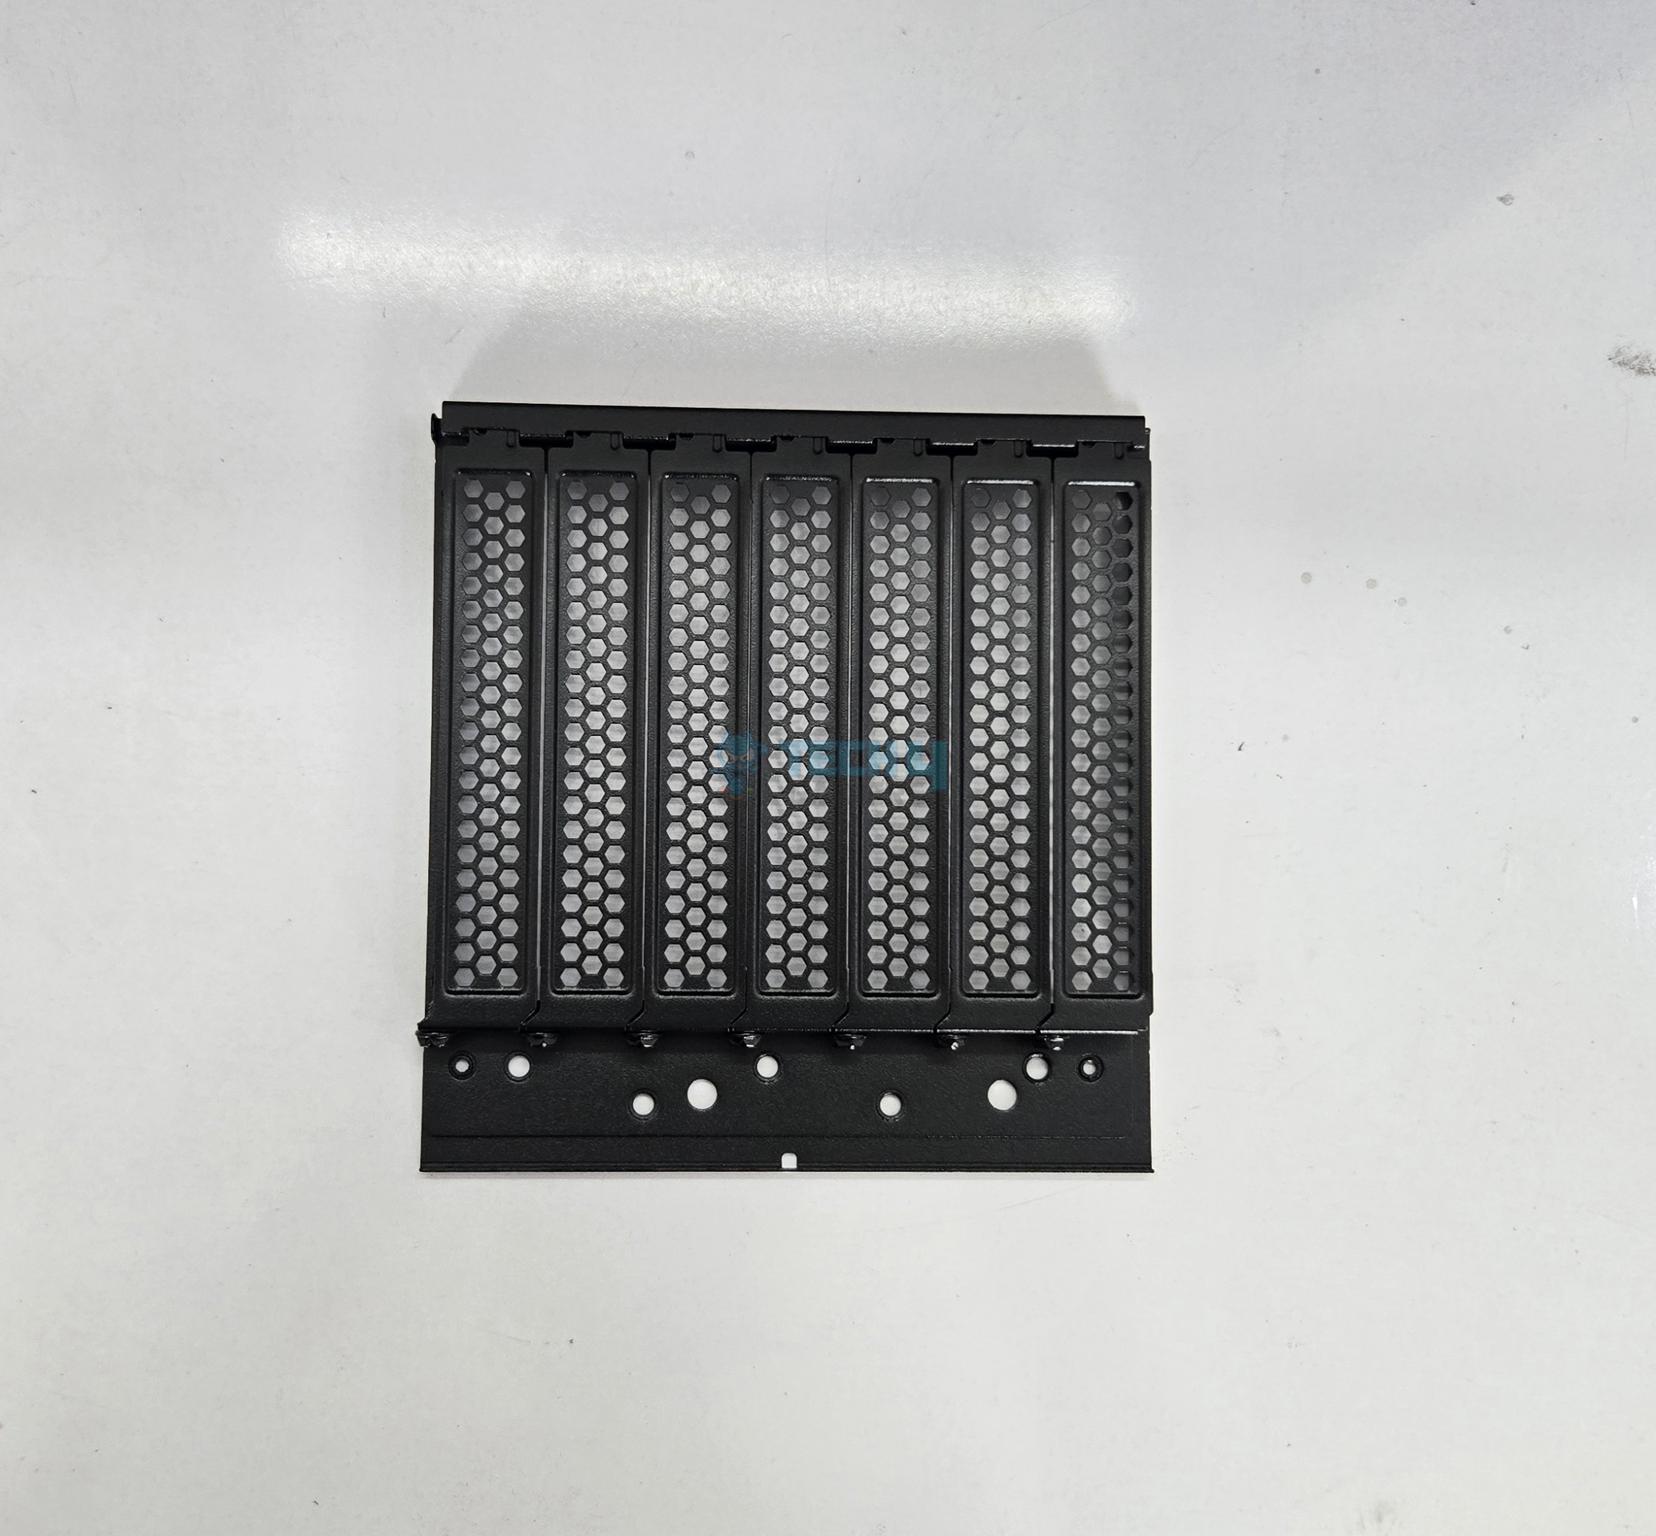
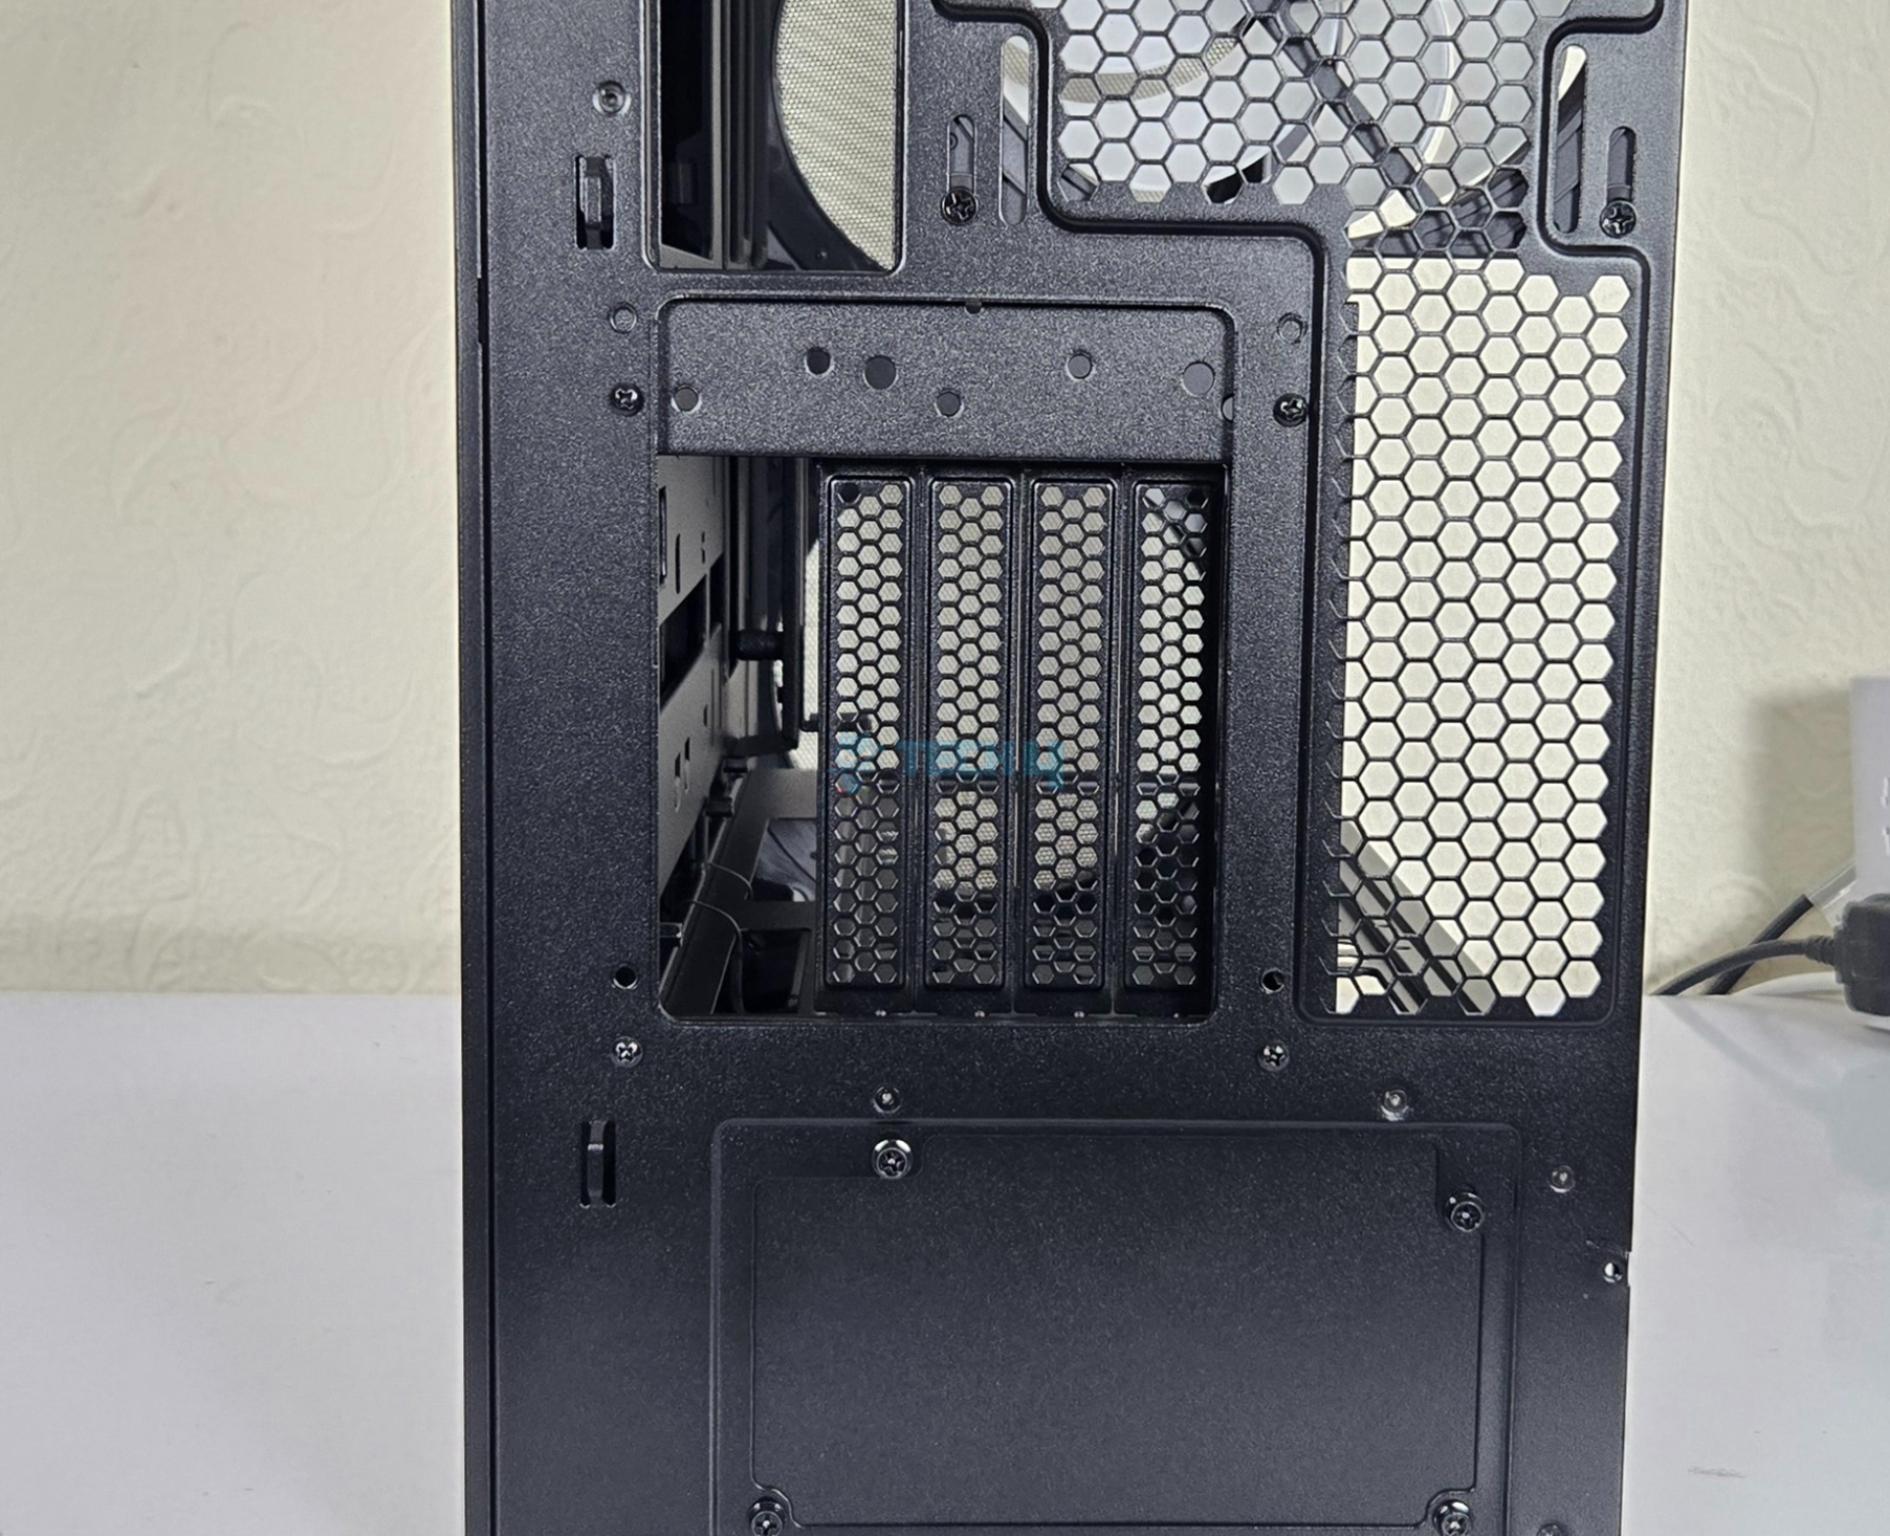
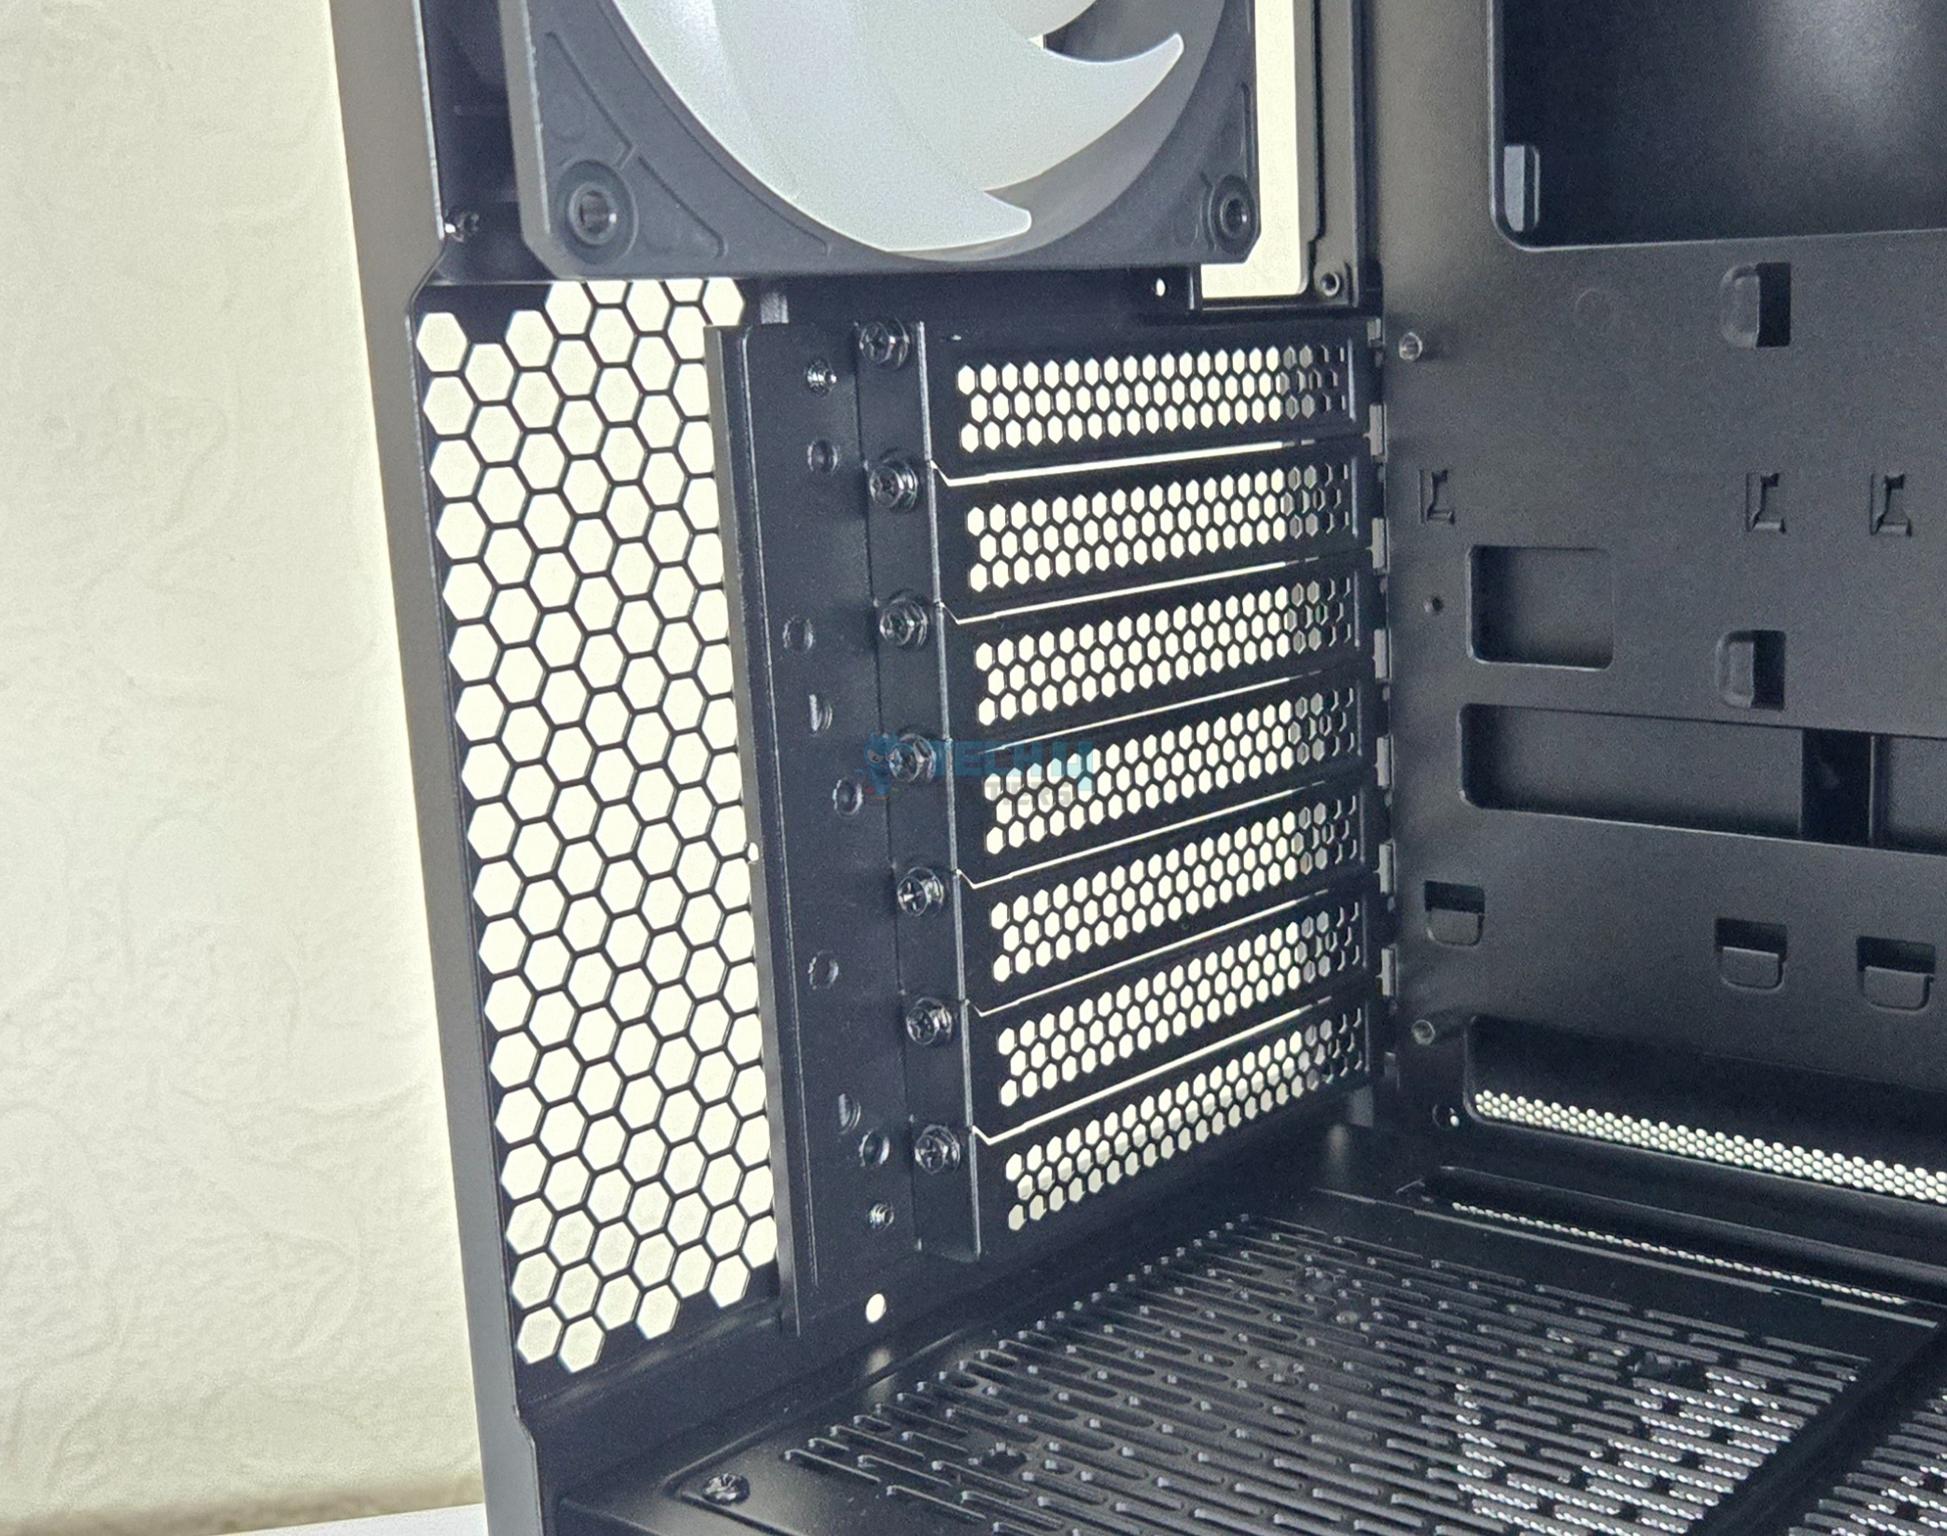
The mid-section has a PCIe bracket which is removable and rotatable. It has 7x expansion slots with reusable vented covers. On a closer look, you can see that screws of these overs are on the inside of the case not outside. Four screws are used to install the bracket. Lian Li has advised to remove the first two slot covers when setting this bracket in vertical layout for better clearance from the motherboard.
Bottom View
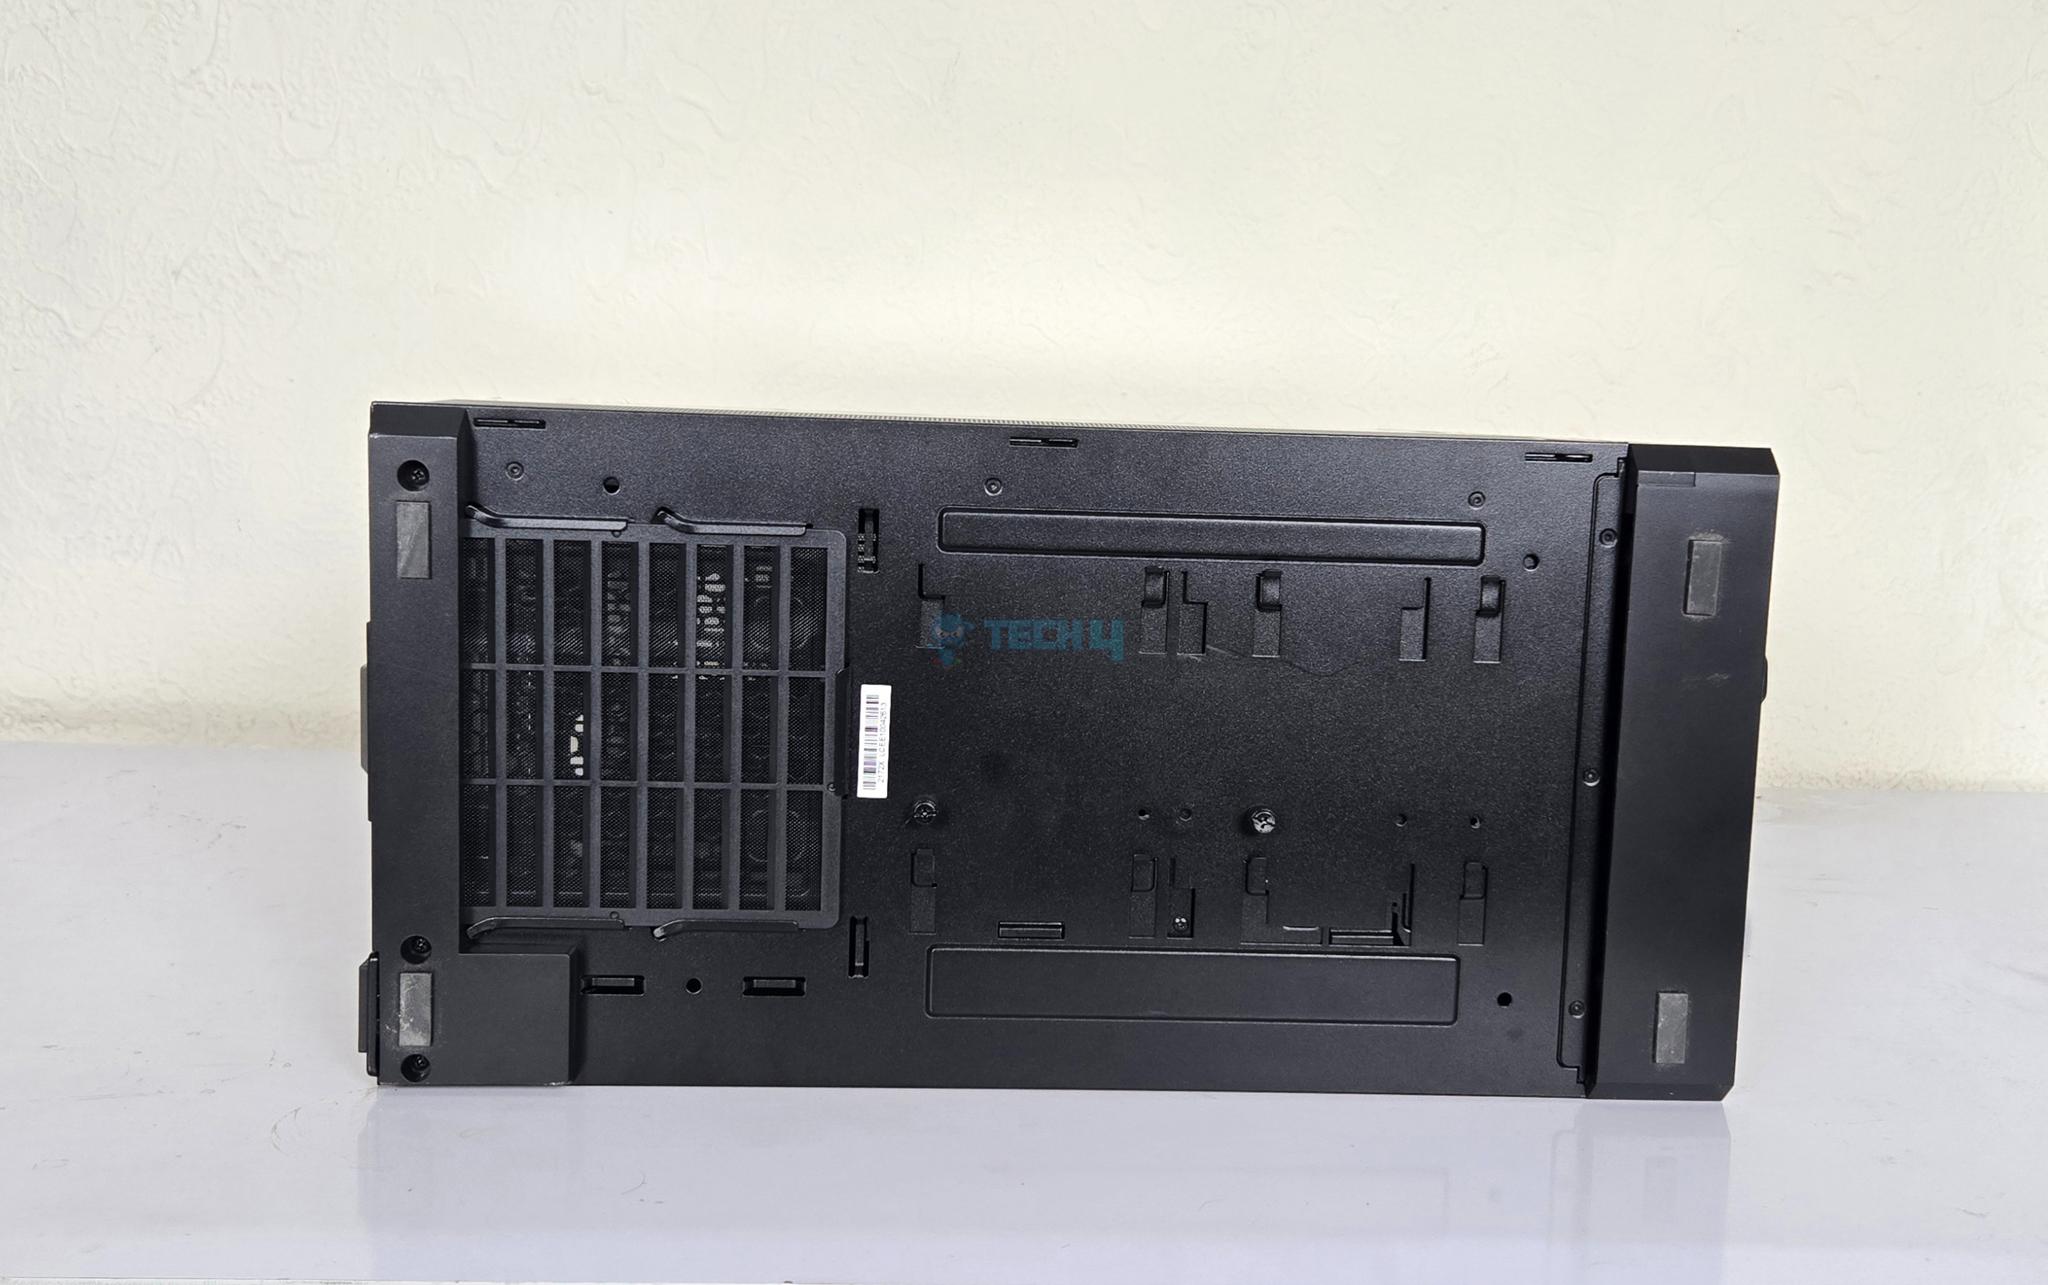
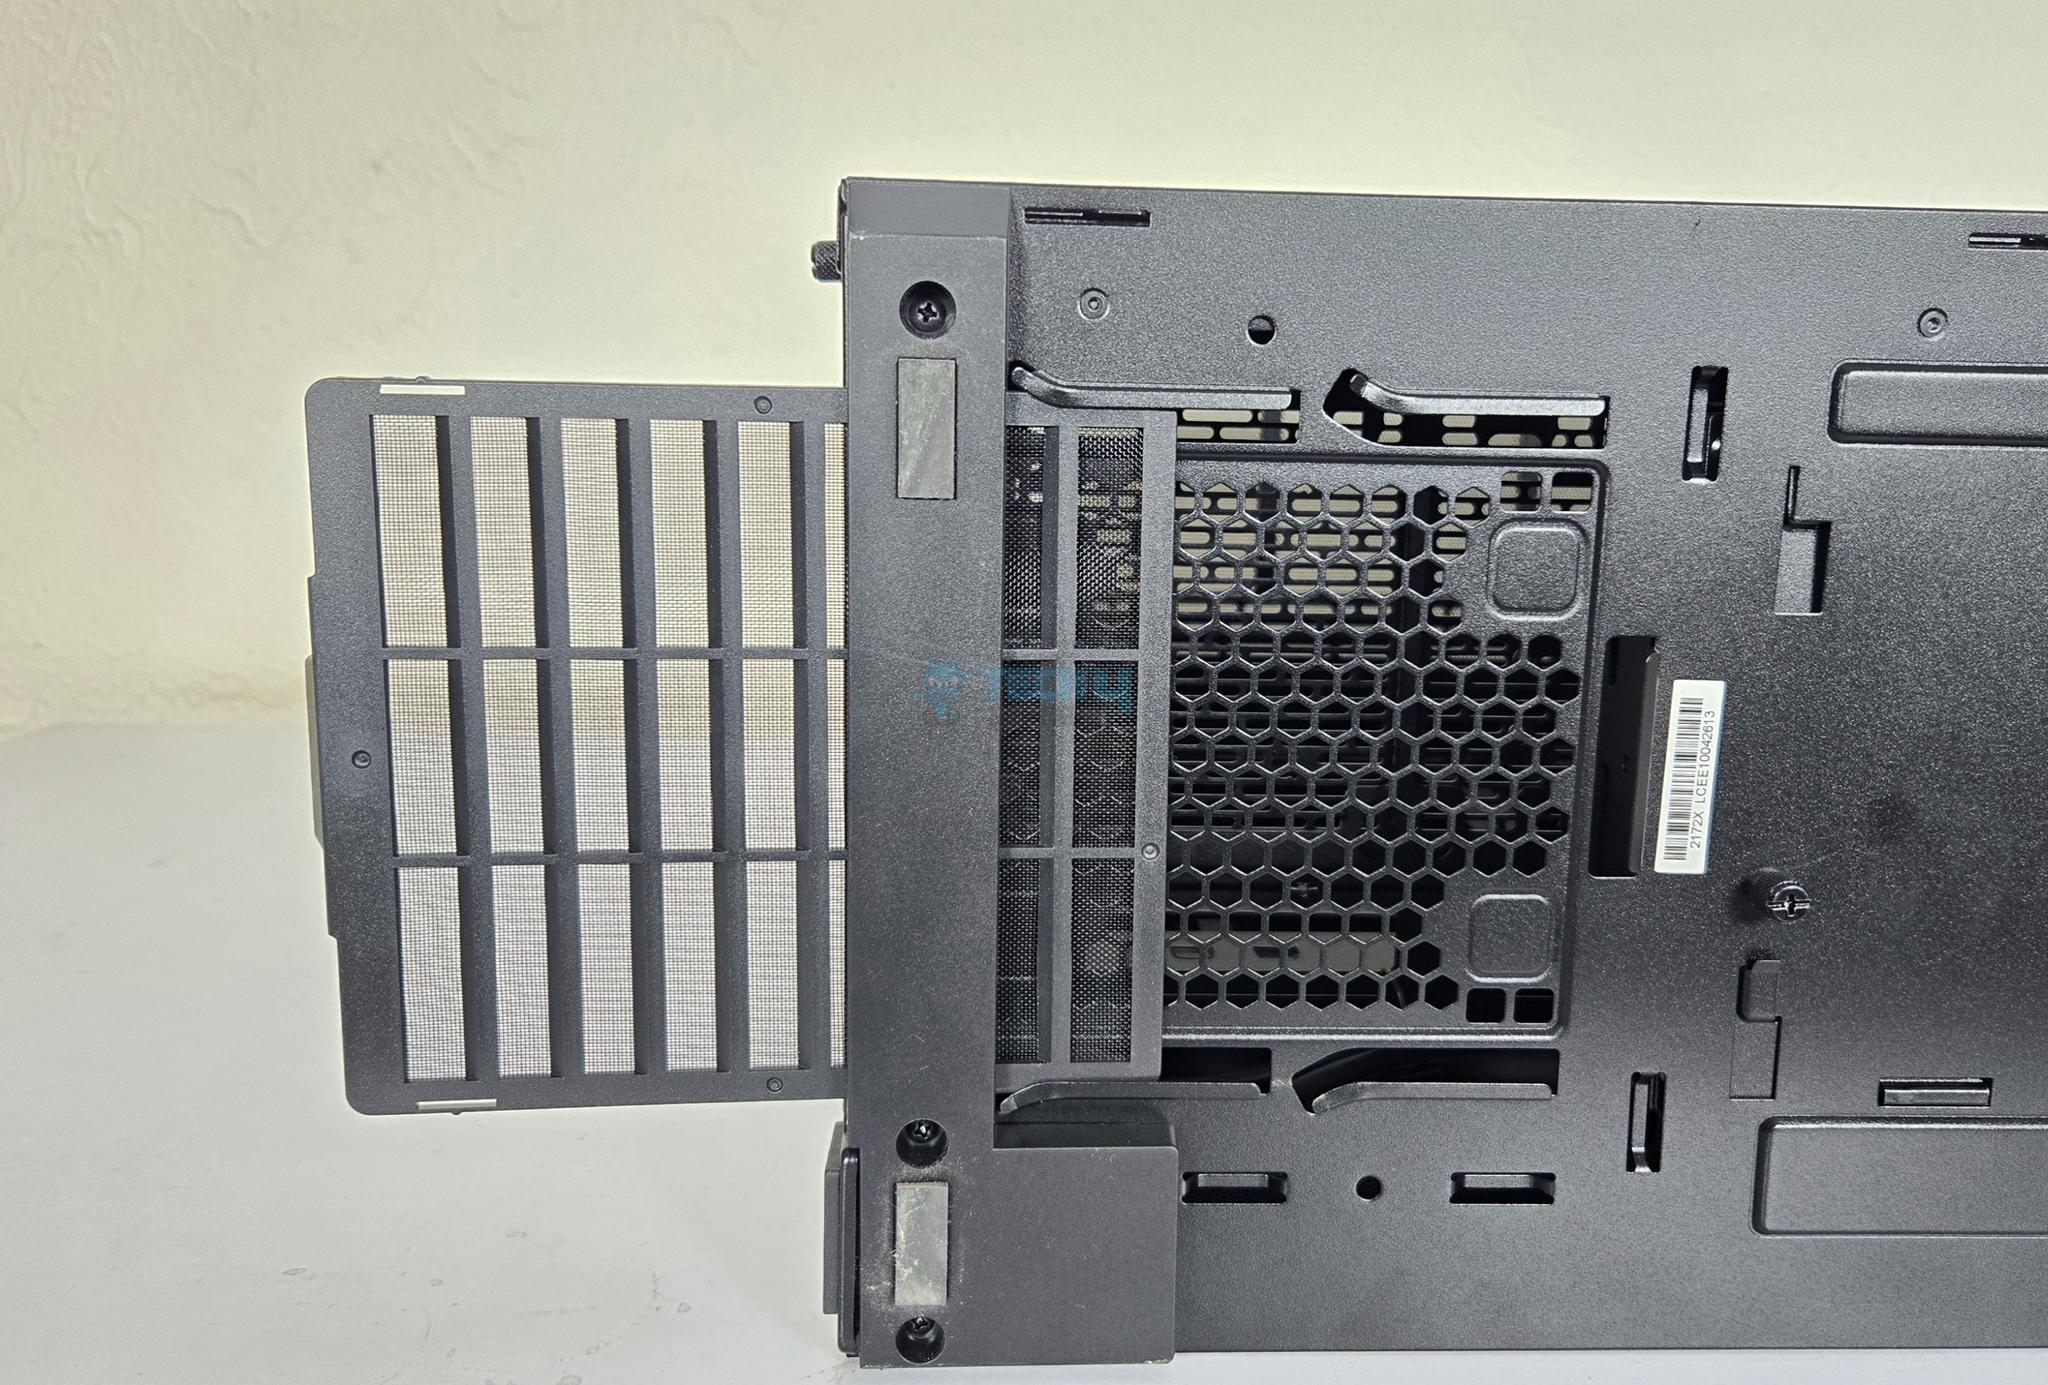
The bottom side of the case has a non-magnetic dust filter over the PSU bay. You can see channels indicating that storage cage can be installed in two places. Also, you can see two thumb screws. You would need to remove these to remove or install the drive cages. Hence plan your build in advance otherwise you will need to tilt over the case to access this area.
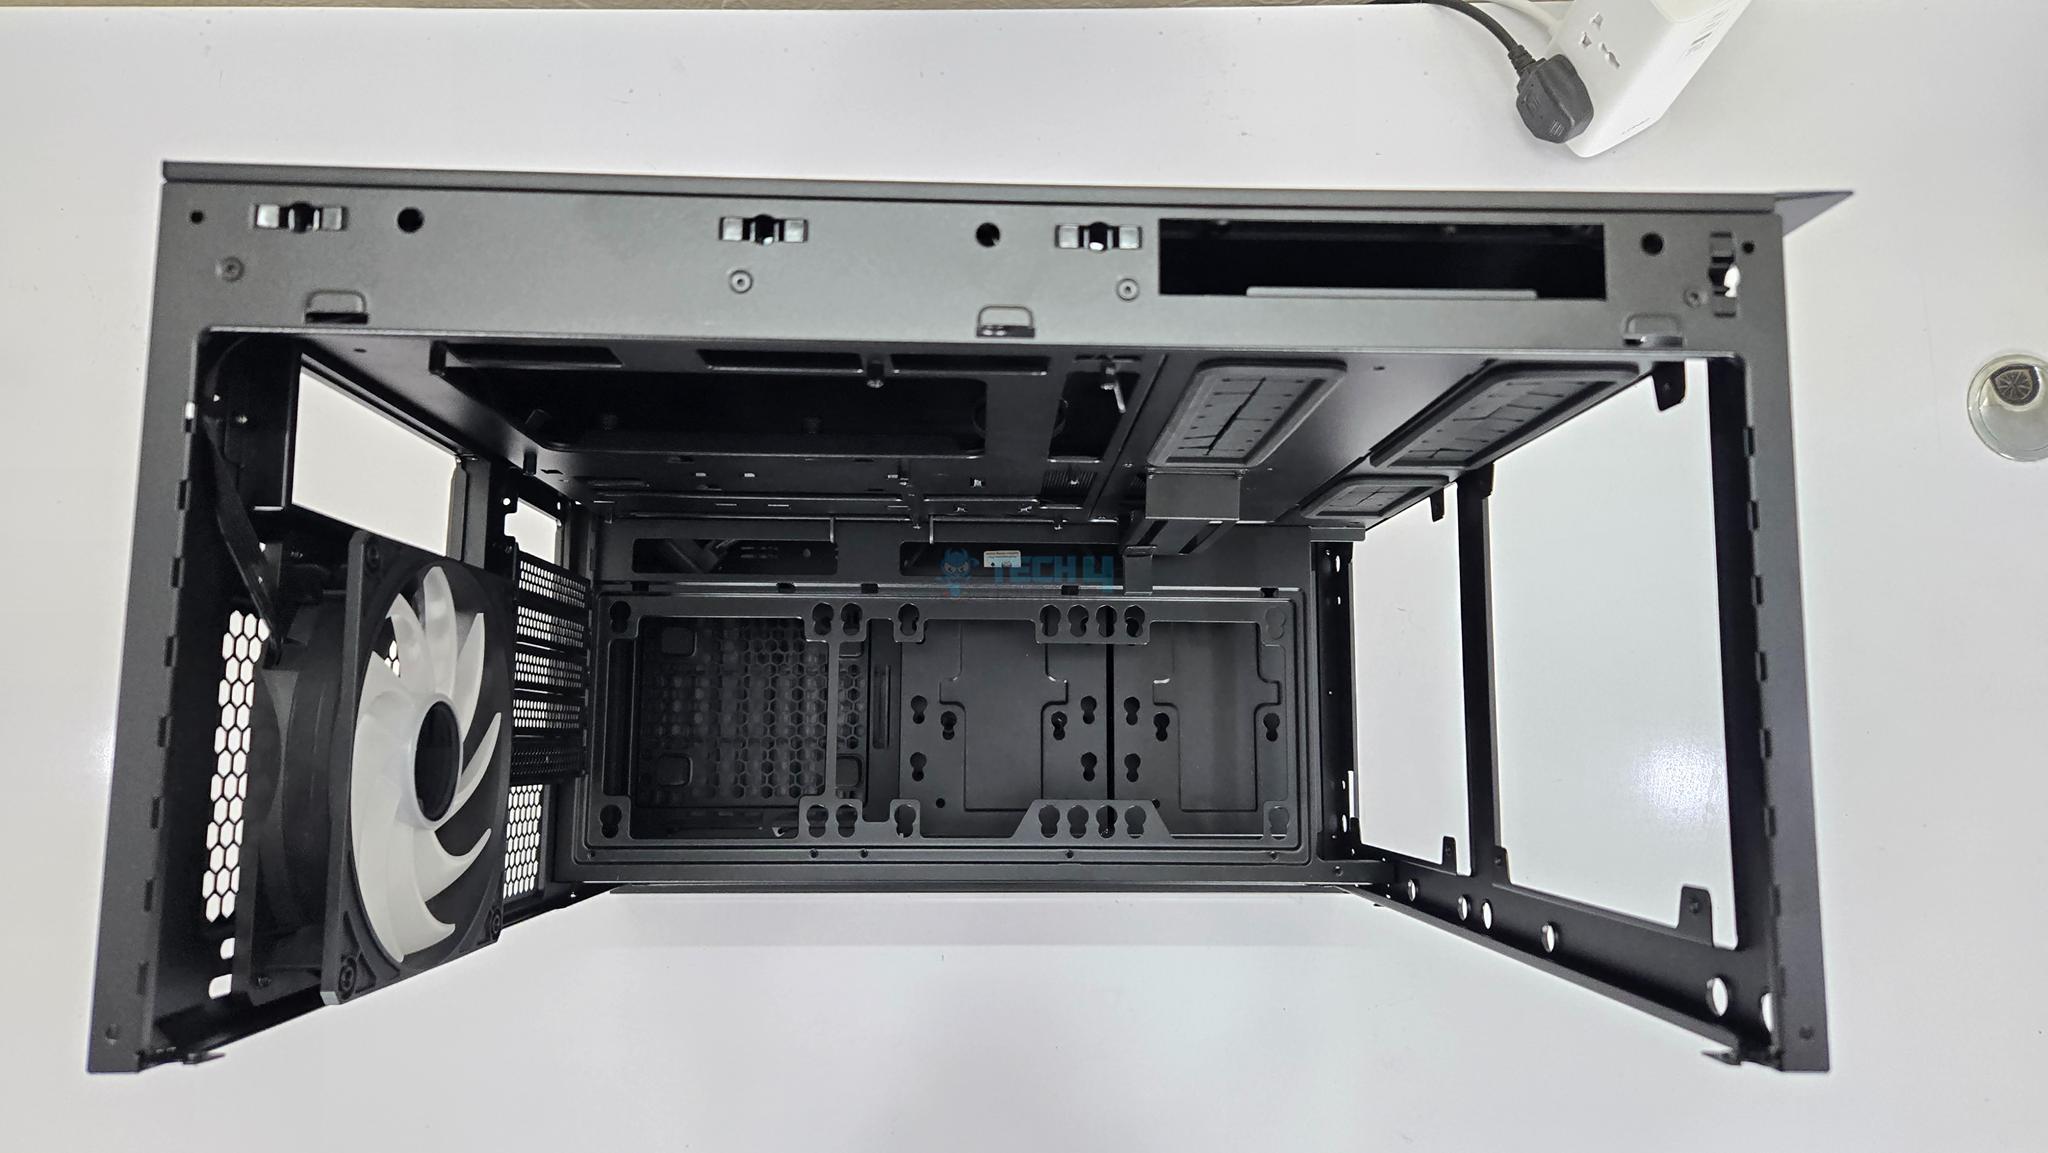
Internal Design
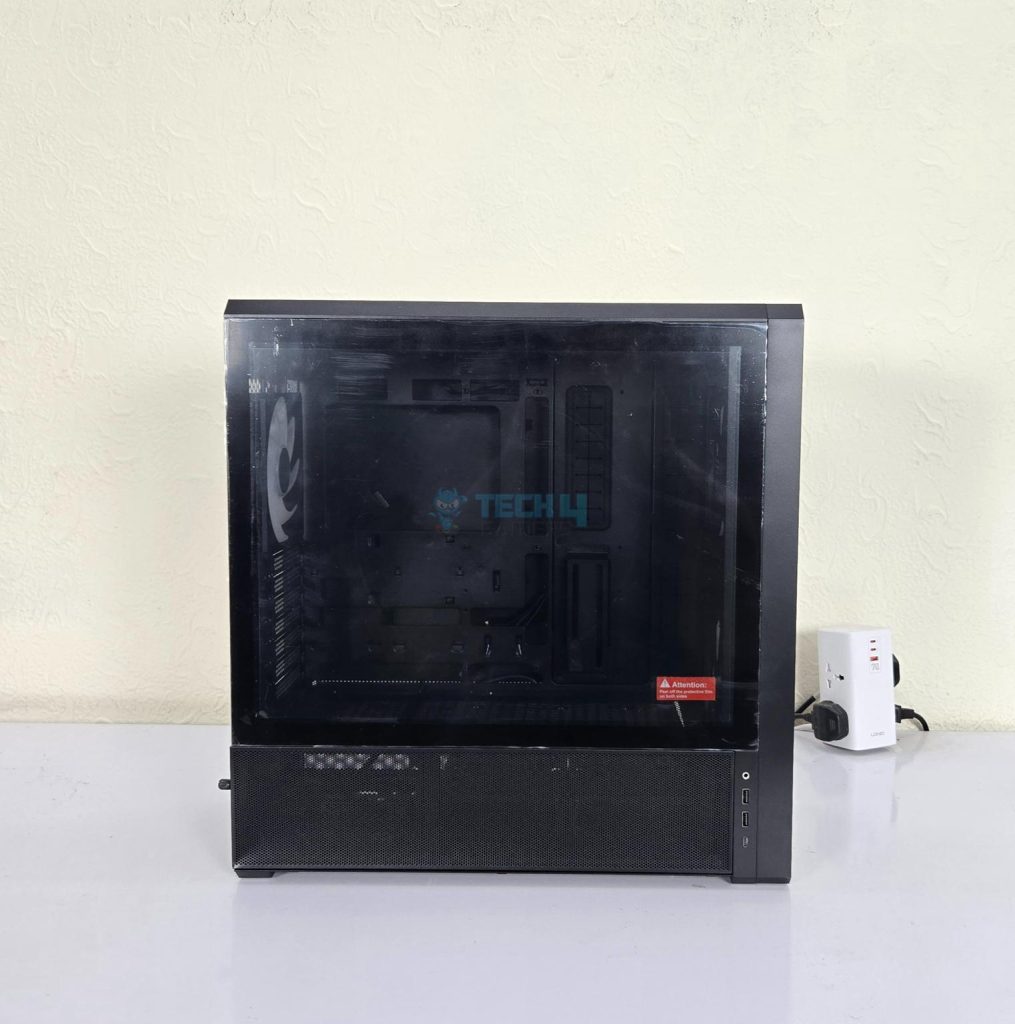
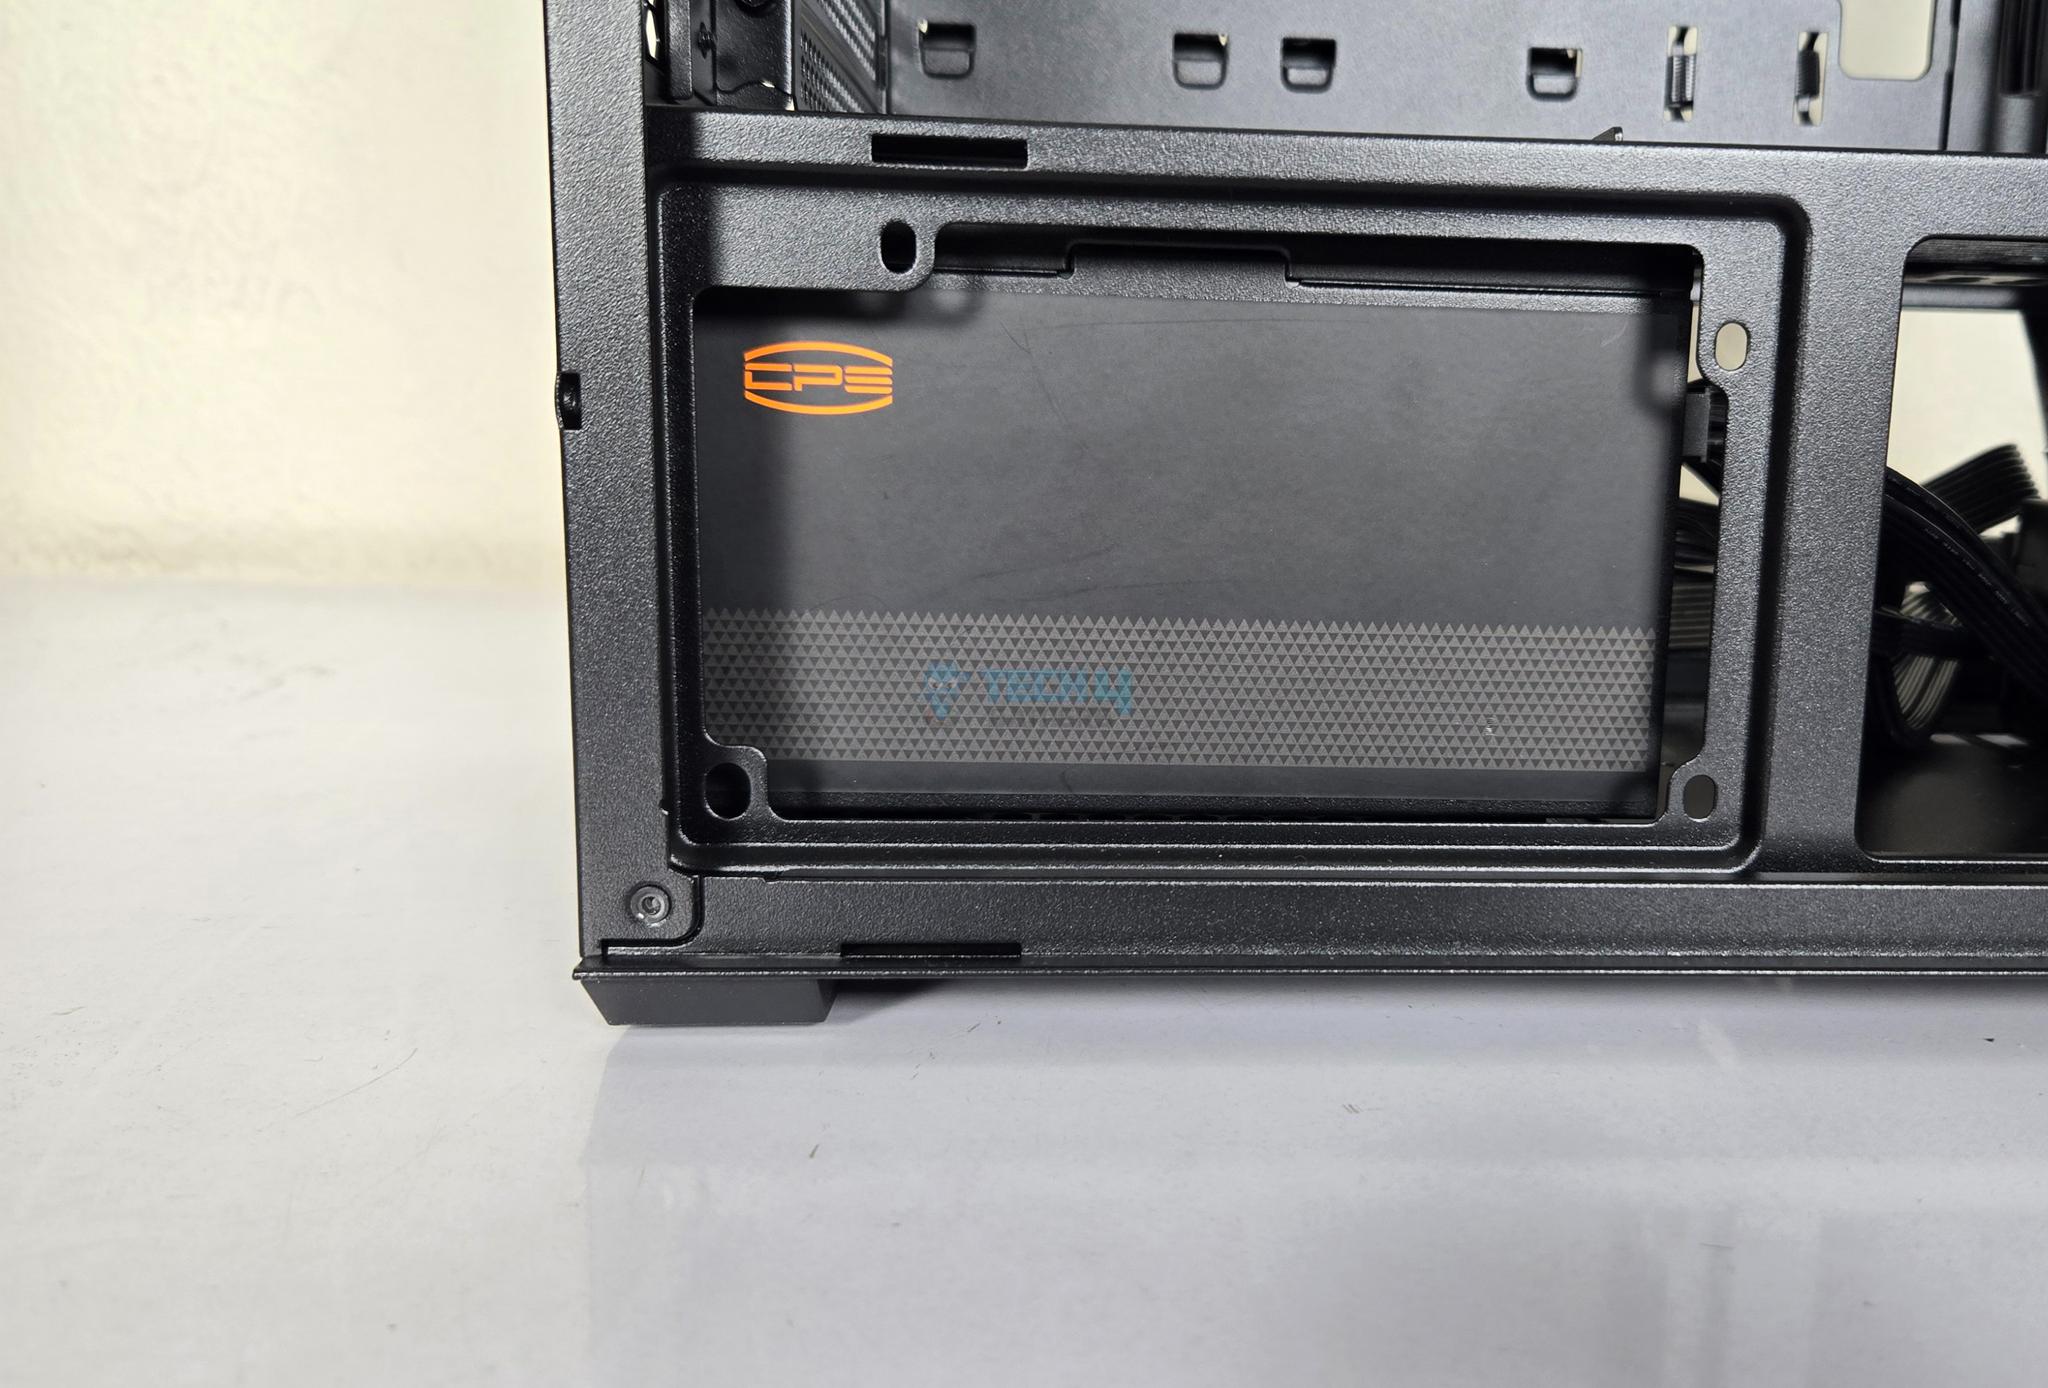
Lian Li has used a 4mm tinted tempered glass on the side of this case. It is a tool-less design which is a wise implementation. The bottom section or chamber has a perforated mesh cover which is removable. The IO panel is installed towards the front of this mesh cover. Lian Li has provided dual access to the second chamber.
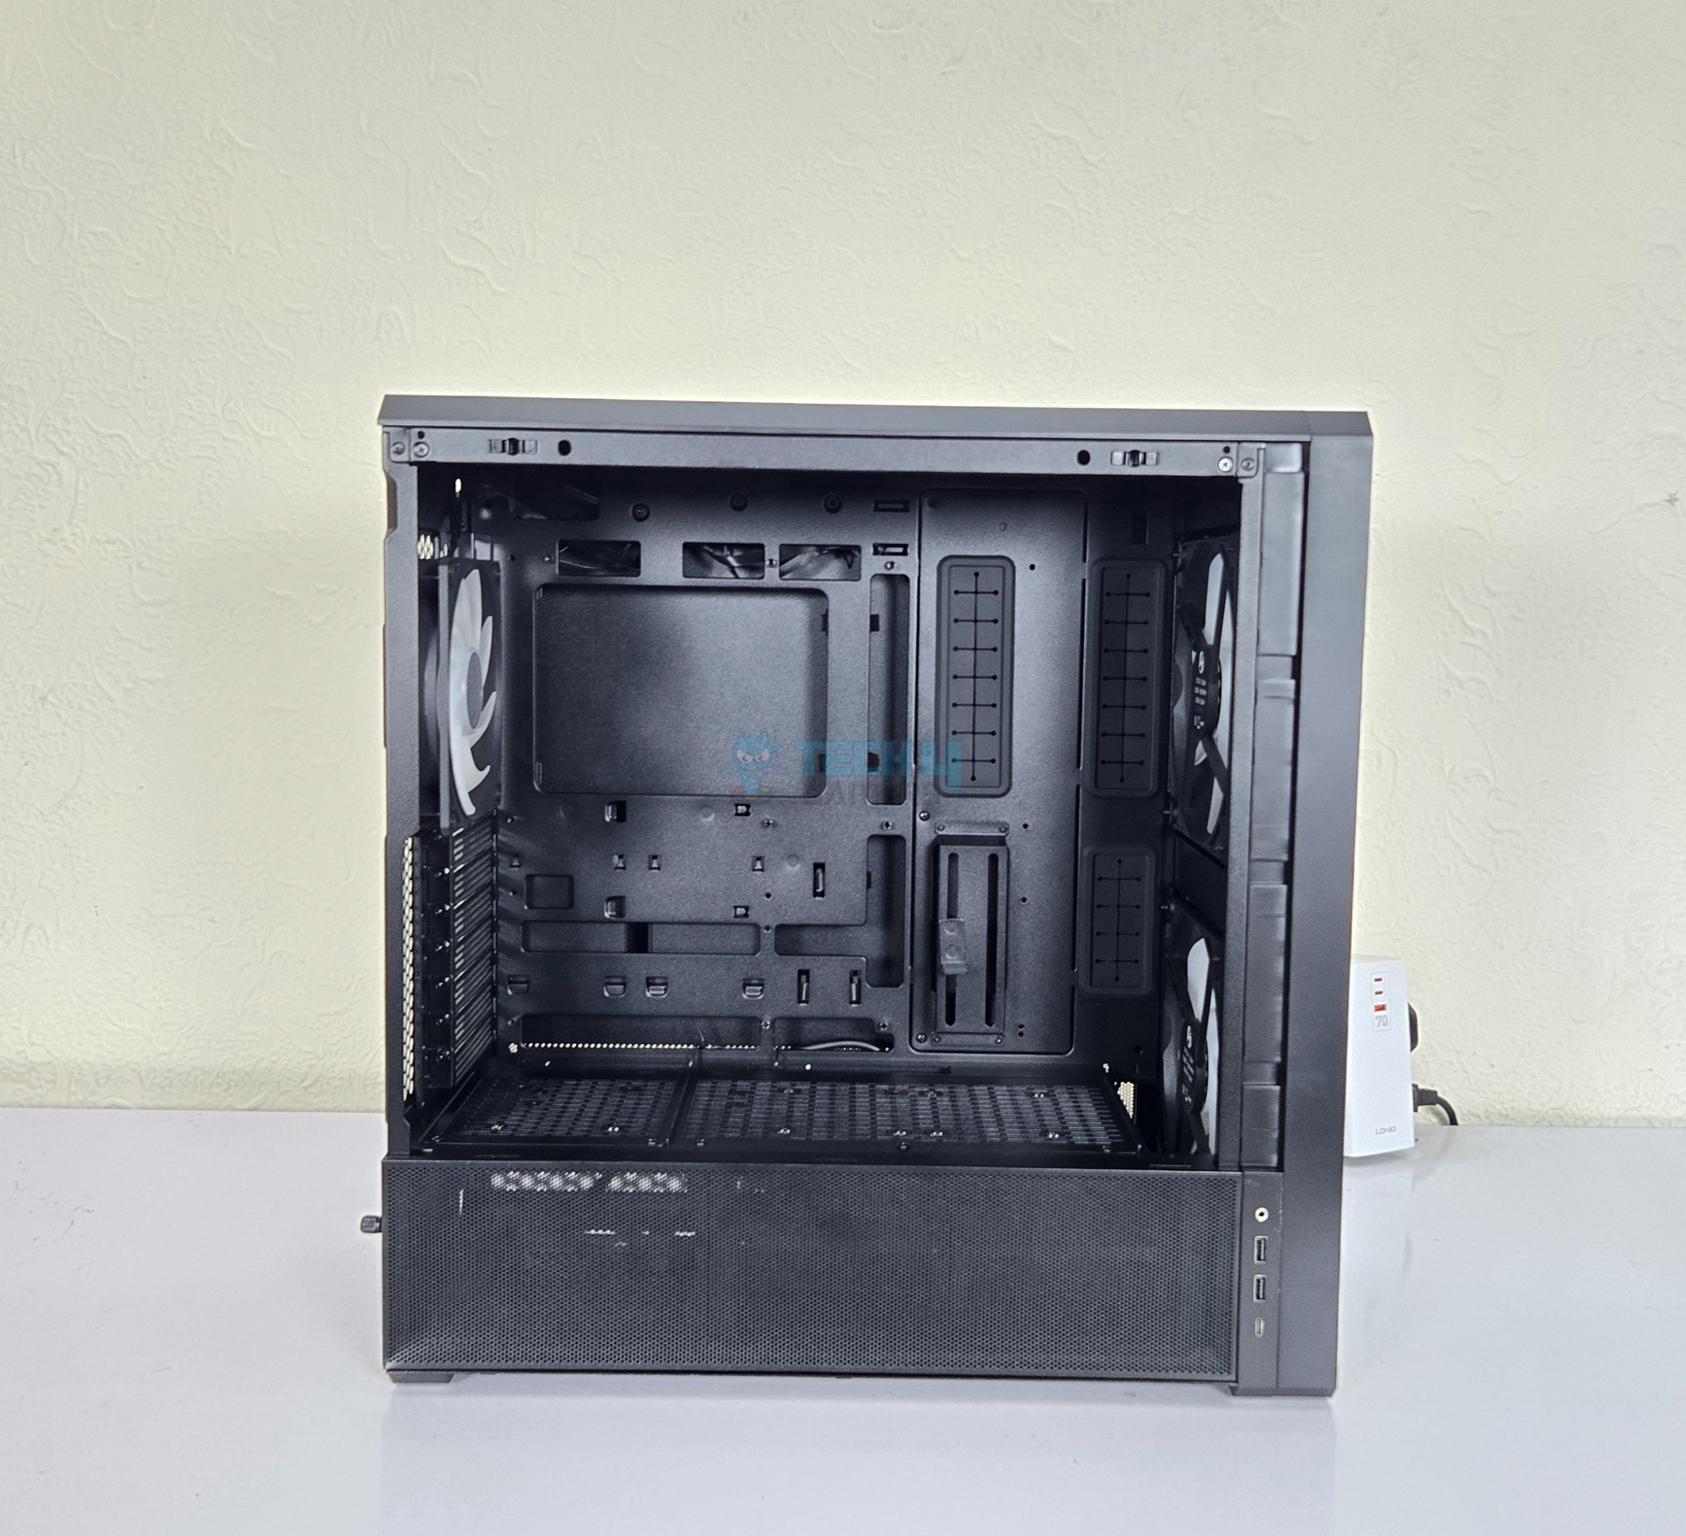
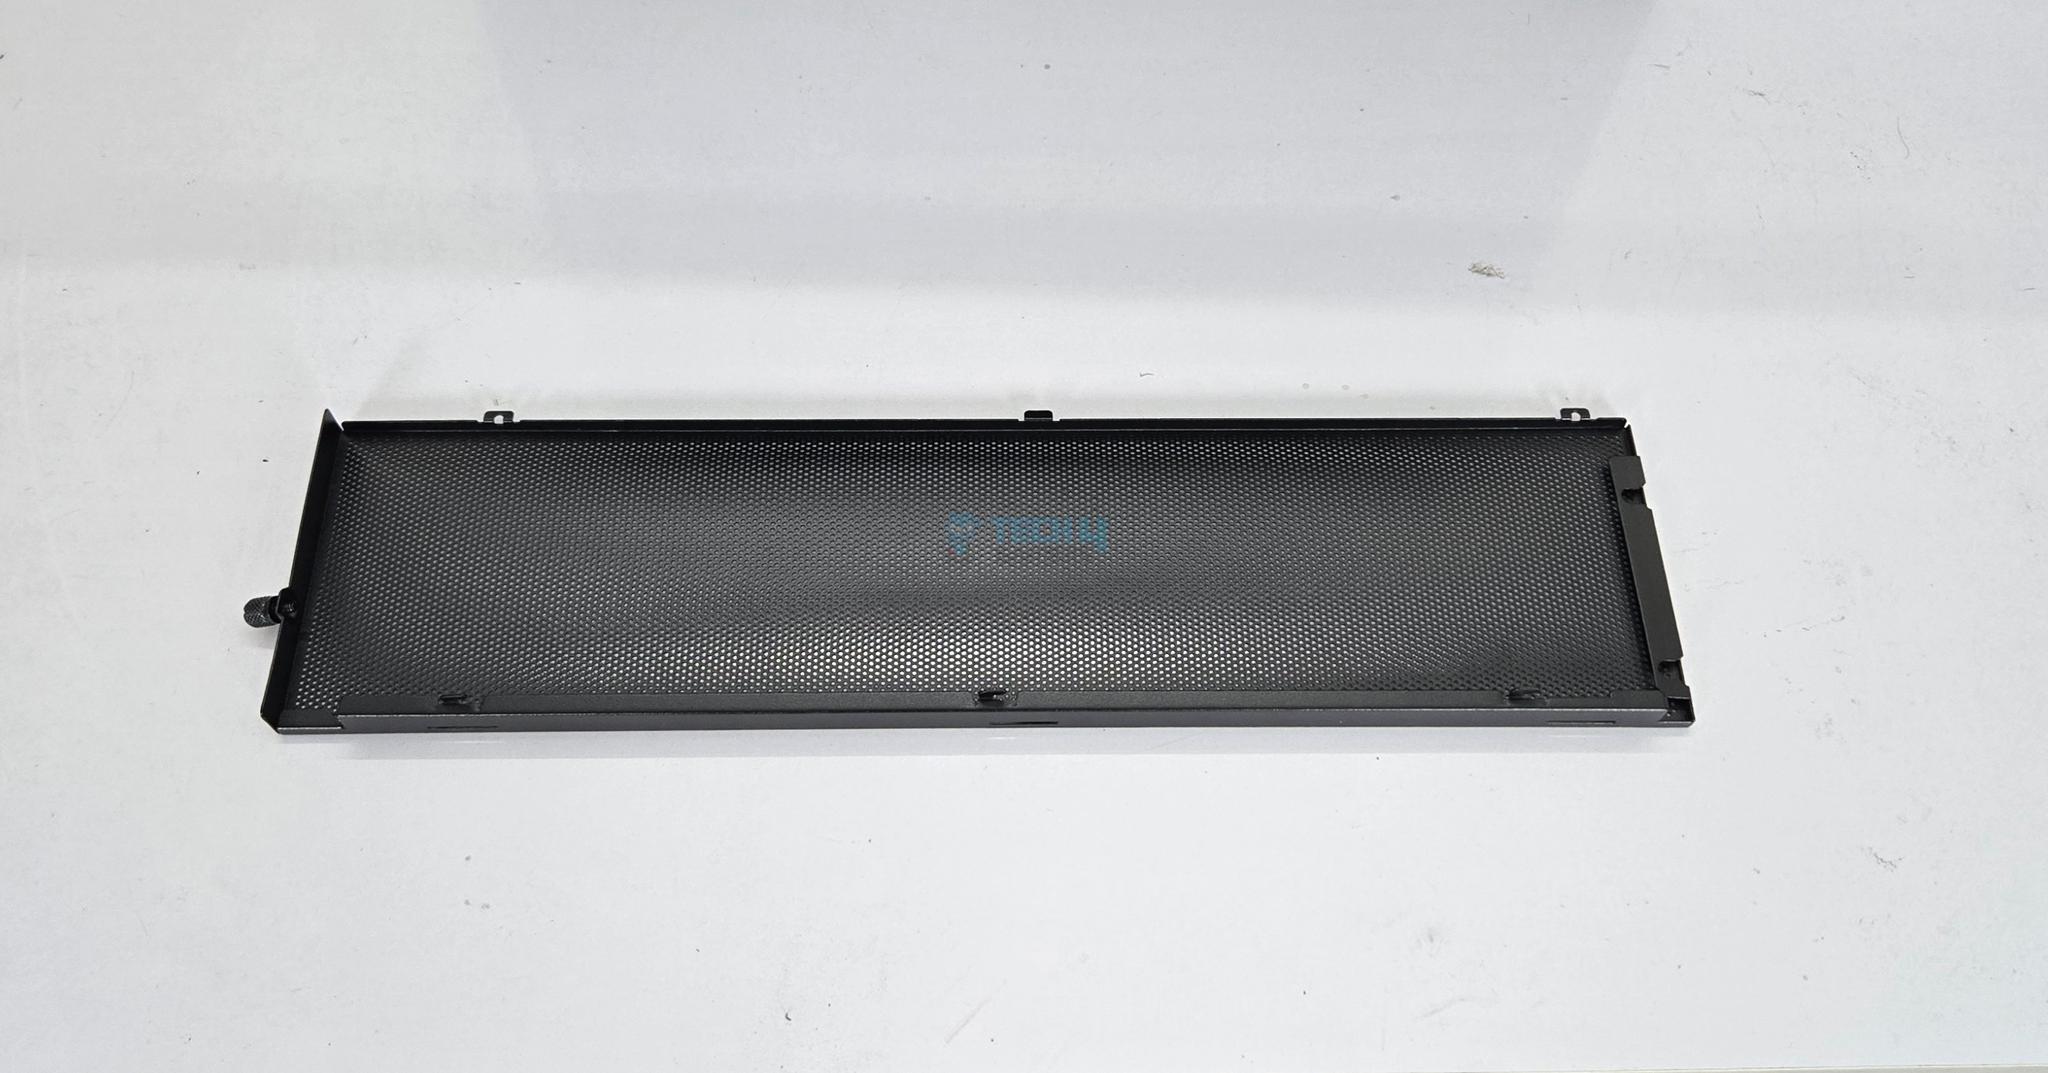
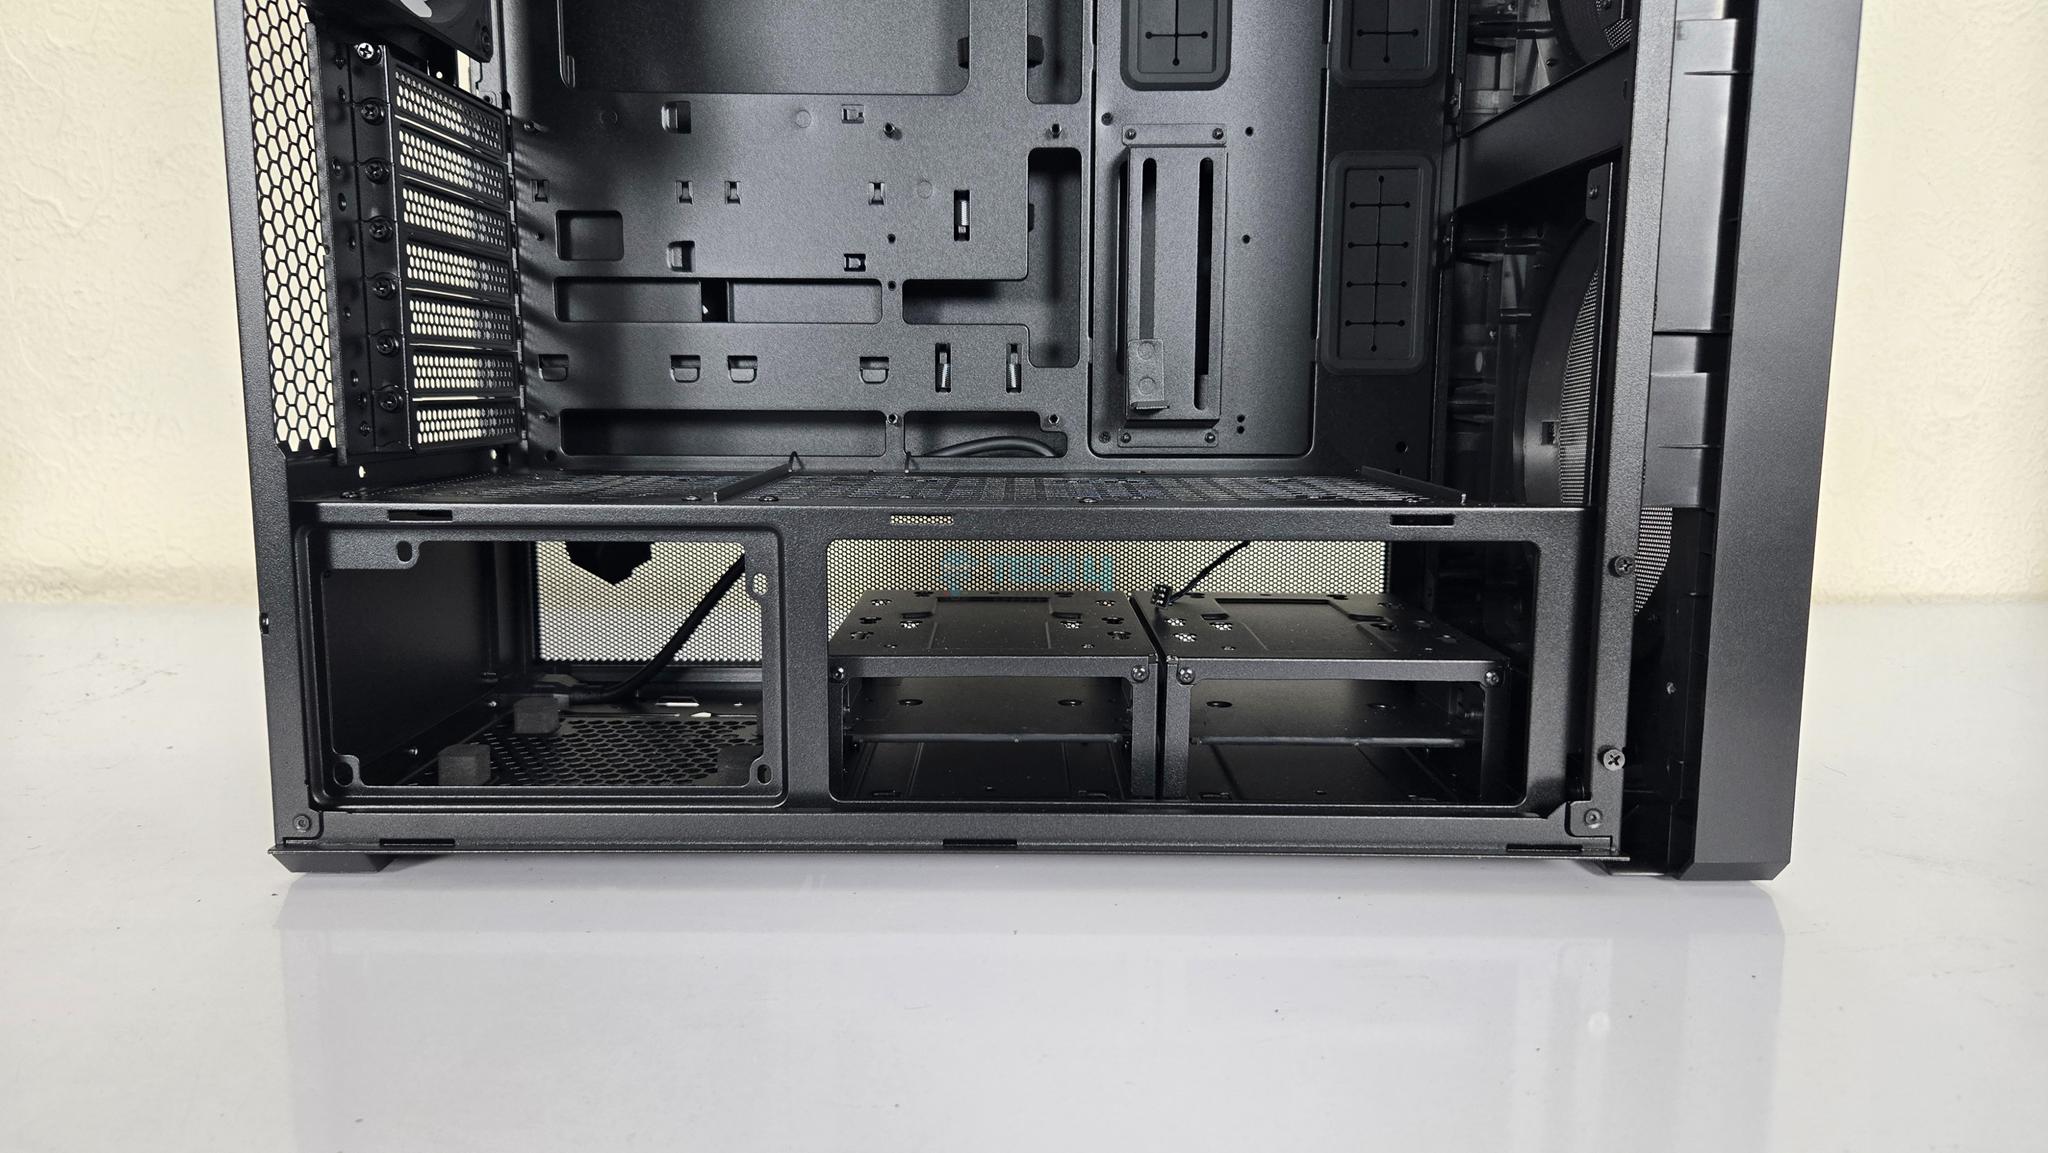
Despite being a mid-tower, Lian Li has designed this case to provide spacious layout for a convenient build regardless of the components. The mesh cover on the lower chamber is secured using a thumb screw on the rear. Removing it would show the PSU bay and HDD drive cages on the base.
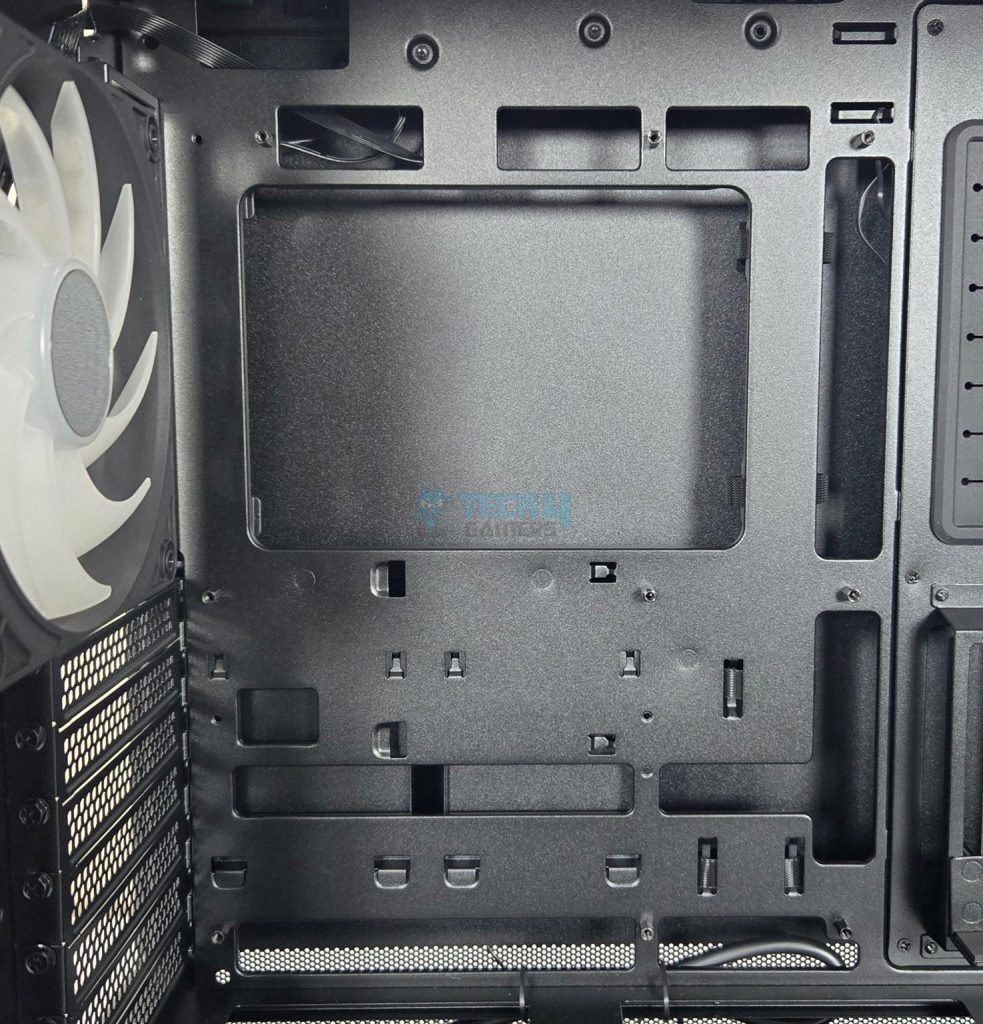
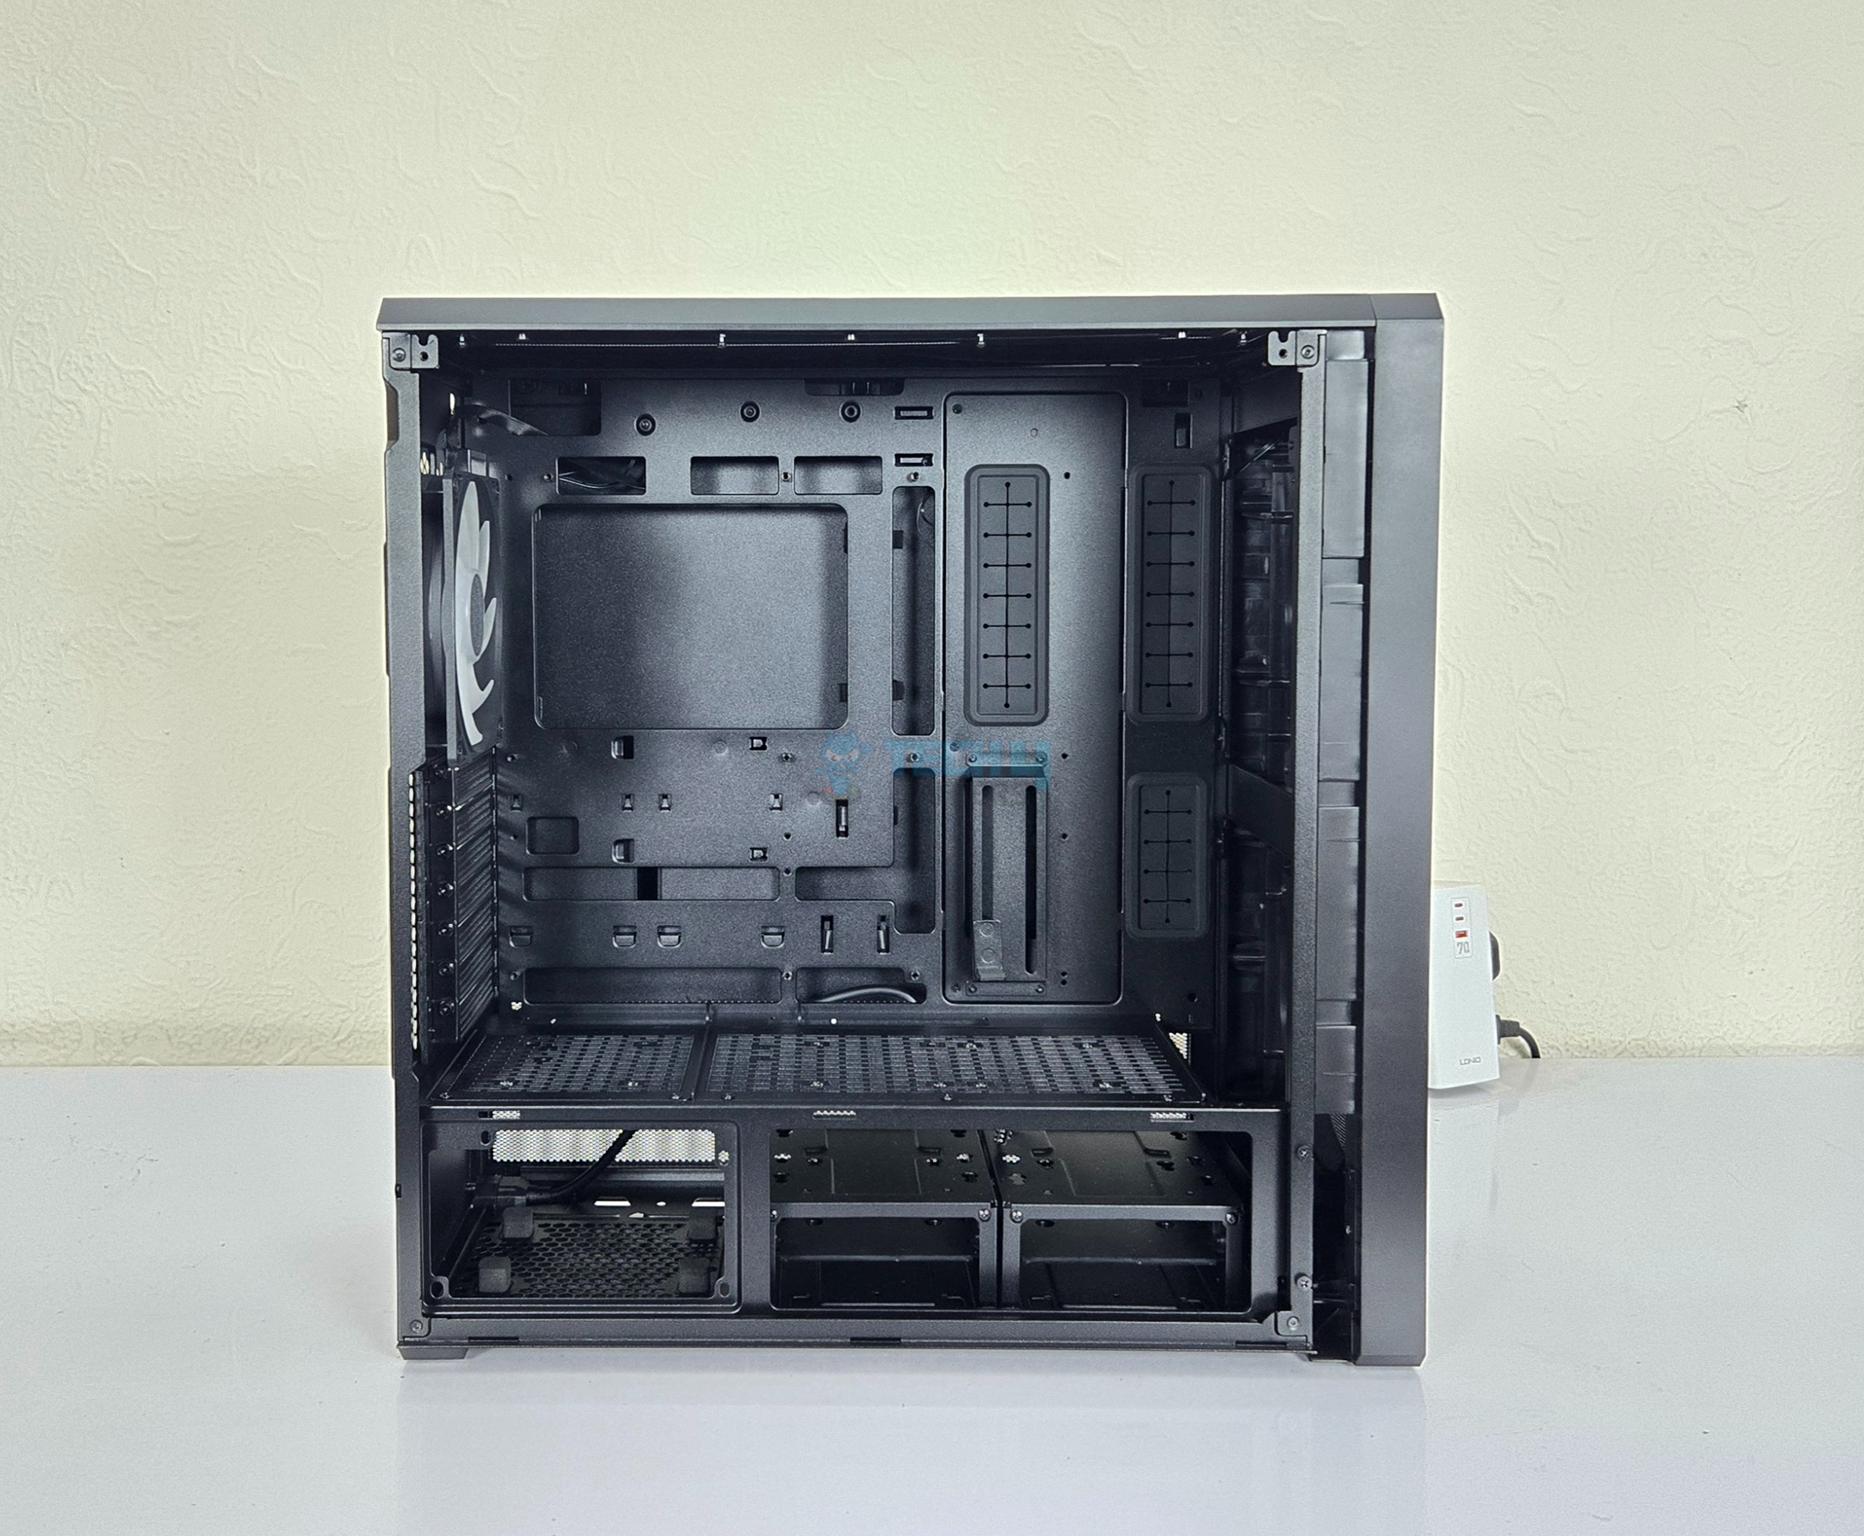
The motherboard tray is solid built. It comes with 9x standoff screws. The cutout pattern clearly indicates that this case can house a back connect motherboard in ATX and mATX form factor. This is another plus for this case.
The top displacement is also excellent and installing a 360mm liquid cooler up top would still give you enough room to work with the top connectivity on the motherboard.
The side of the main motherboard tray has two columns of cutouts with rubber grommets. This is where the cables are routed towards the motherboard. The lower area on the first column has a vertical support for the graphics card with height adjustment.
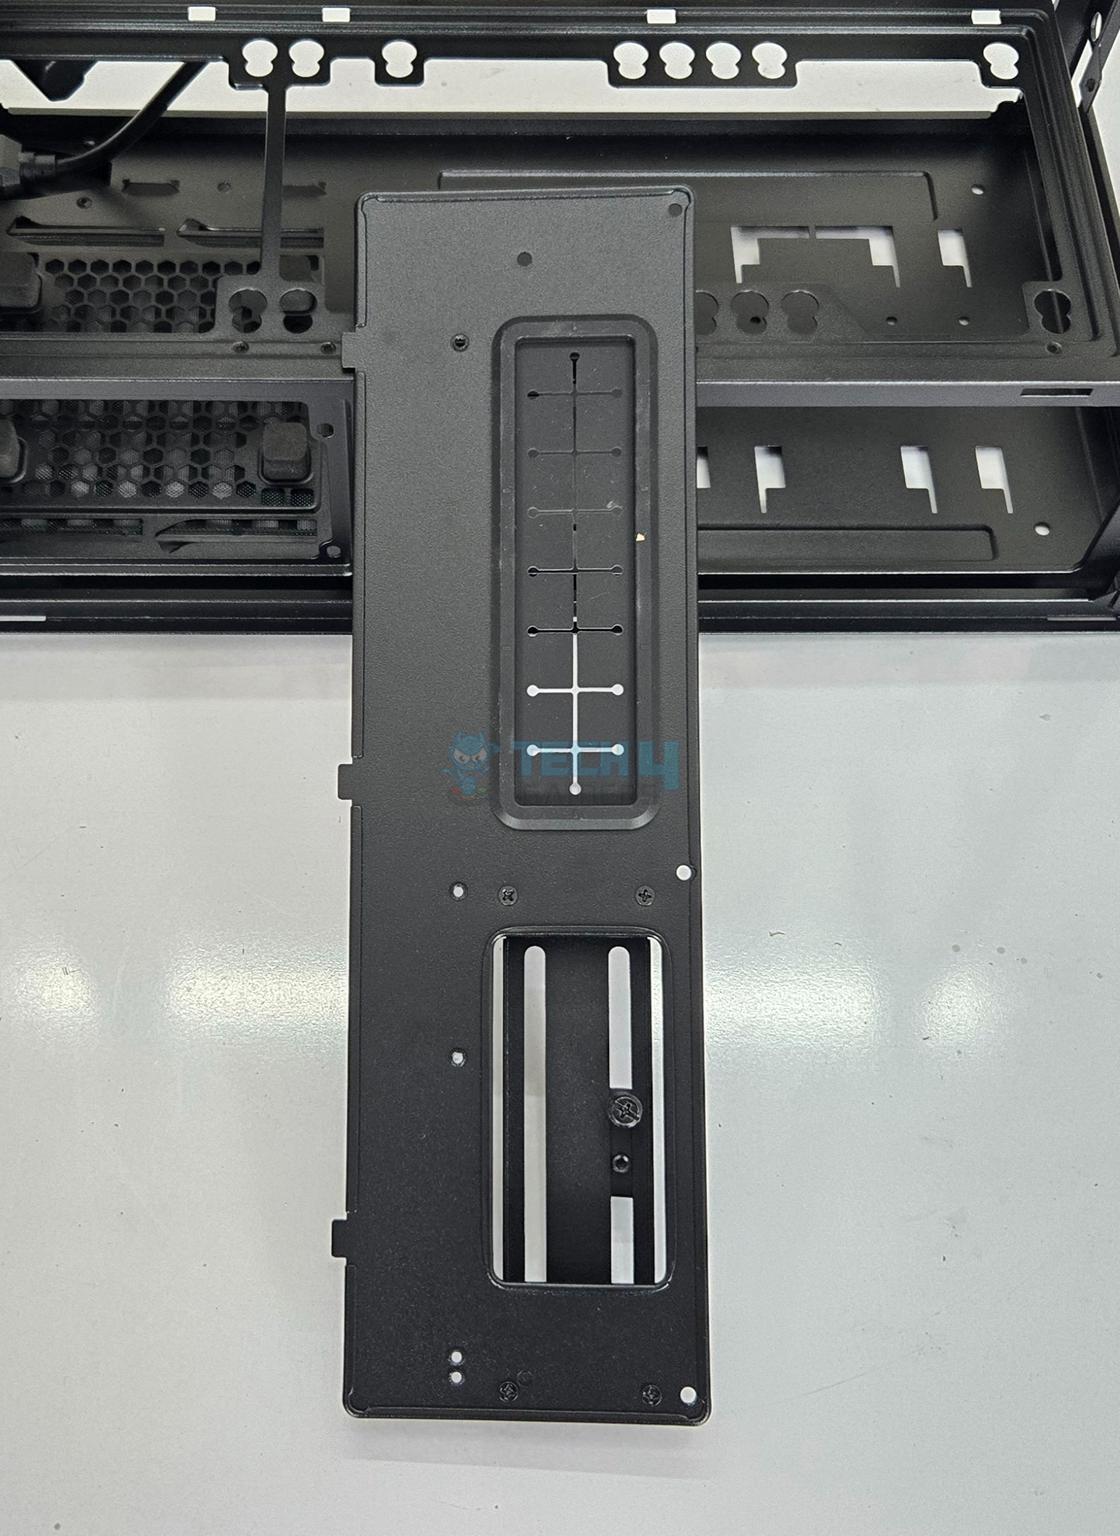
The first column is removable to make room for SSI-EEB motherboard for which the last column will provide cable routing. Lian Li has been paying attention to the minute details. The PCIe support bracket can be completely removed as well if so required.
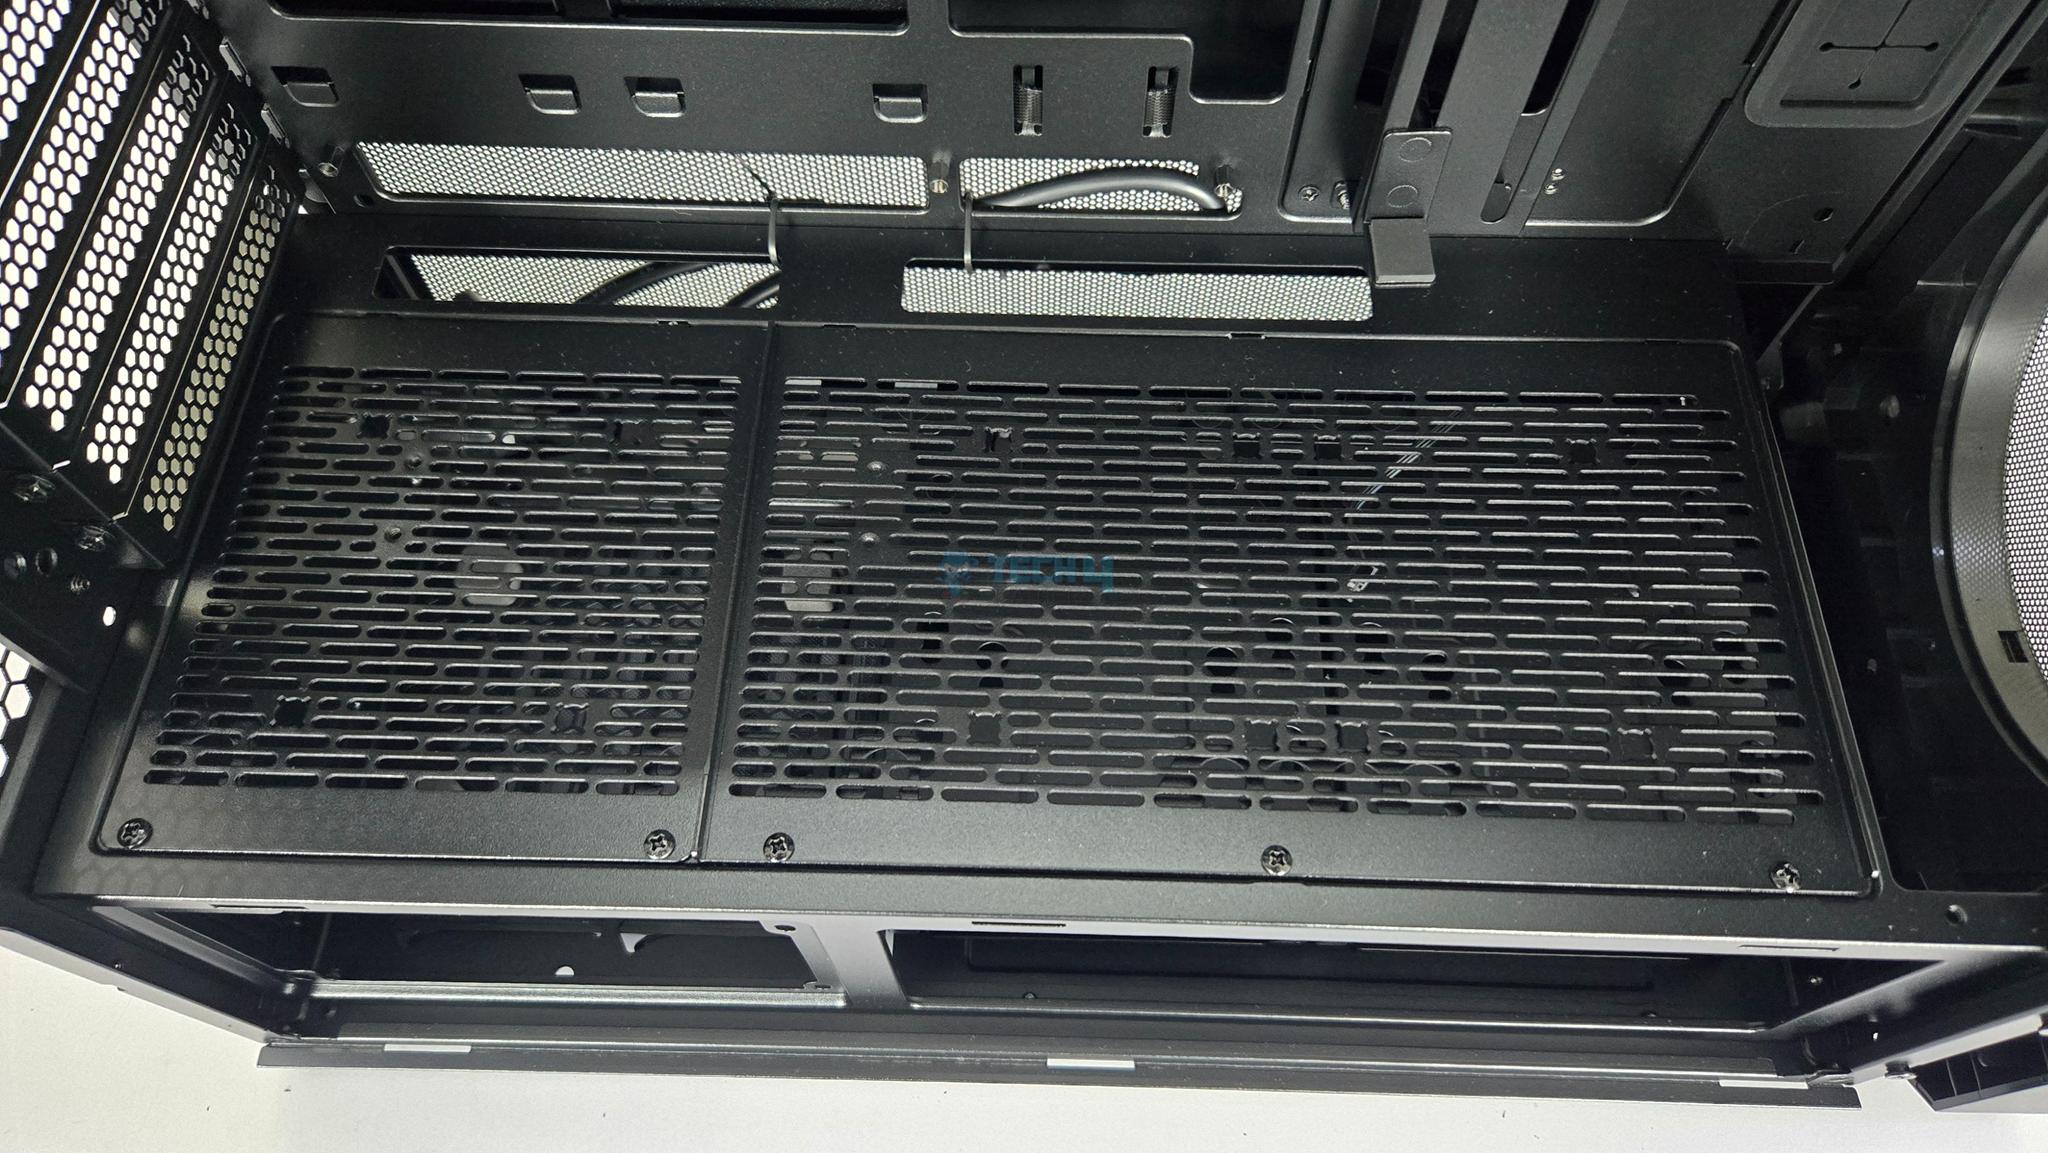
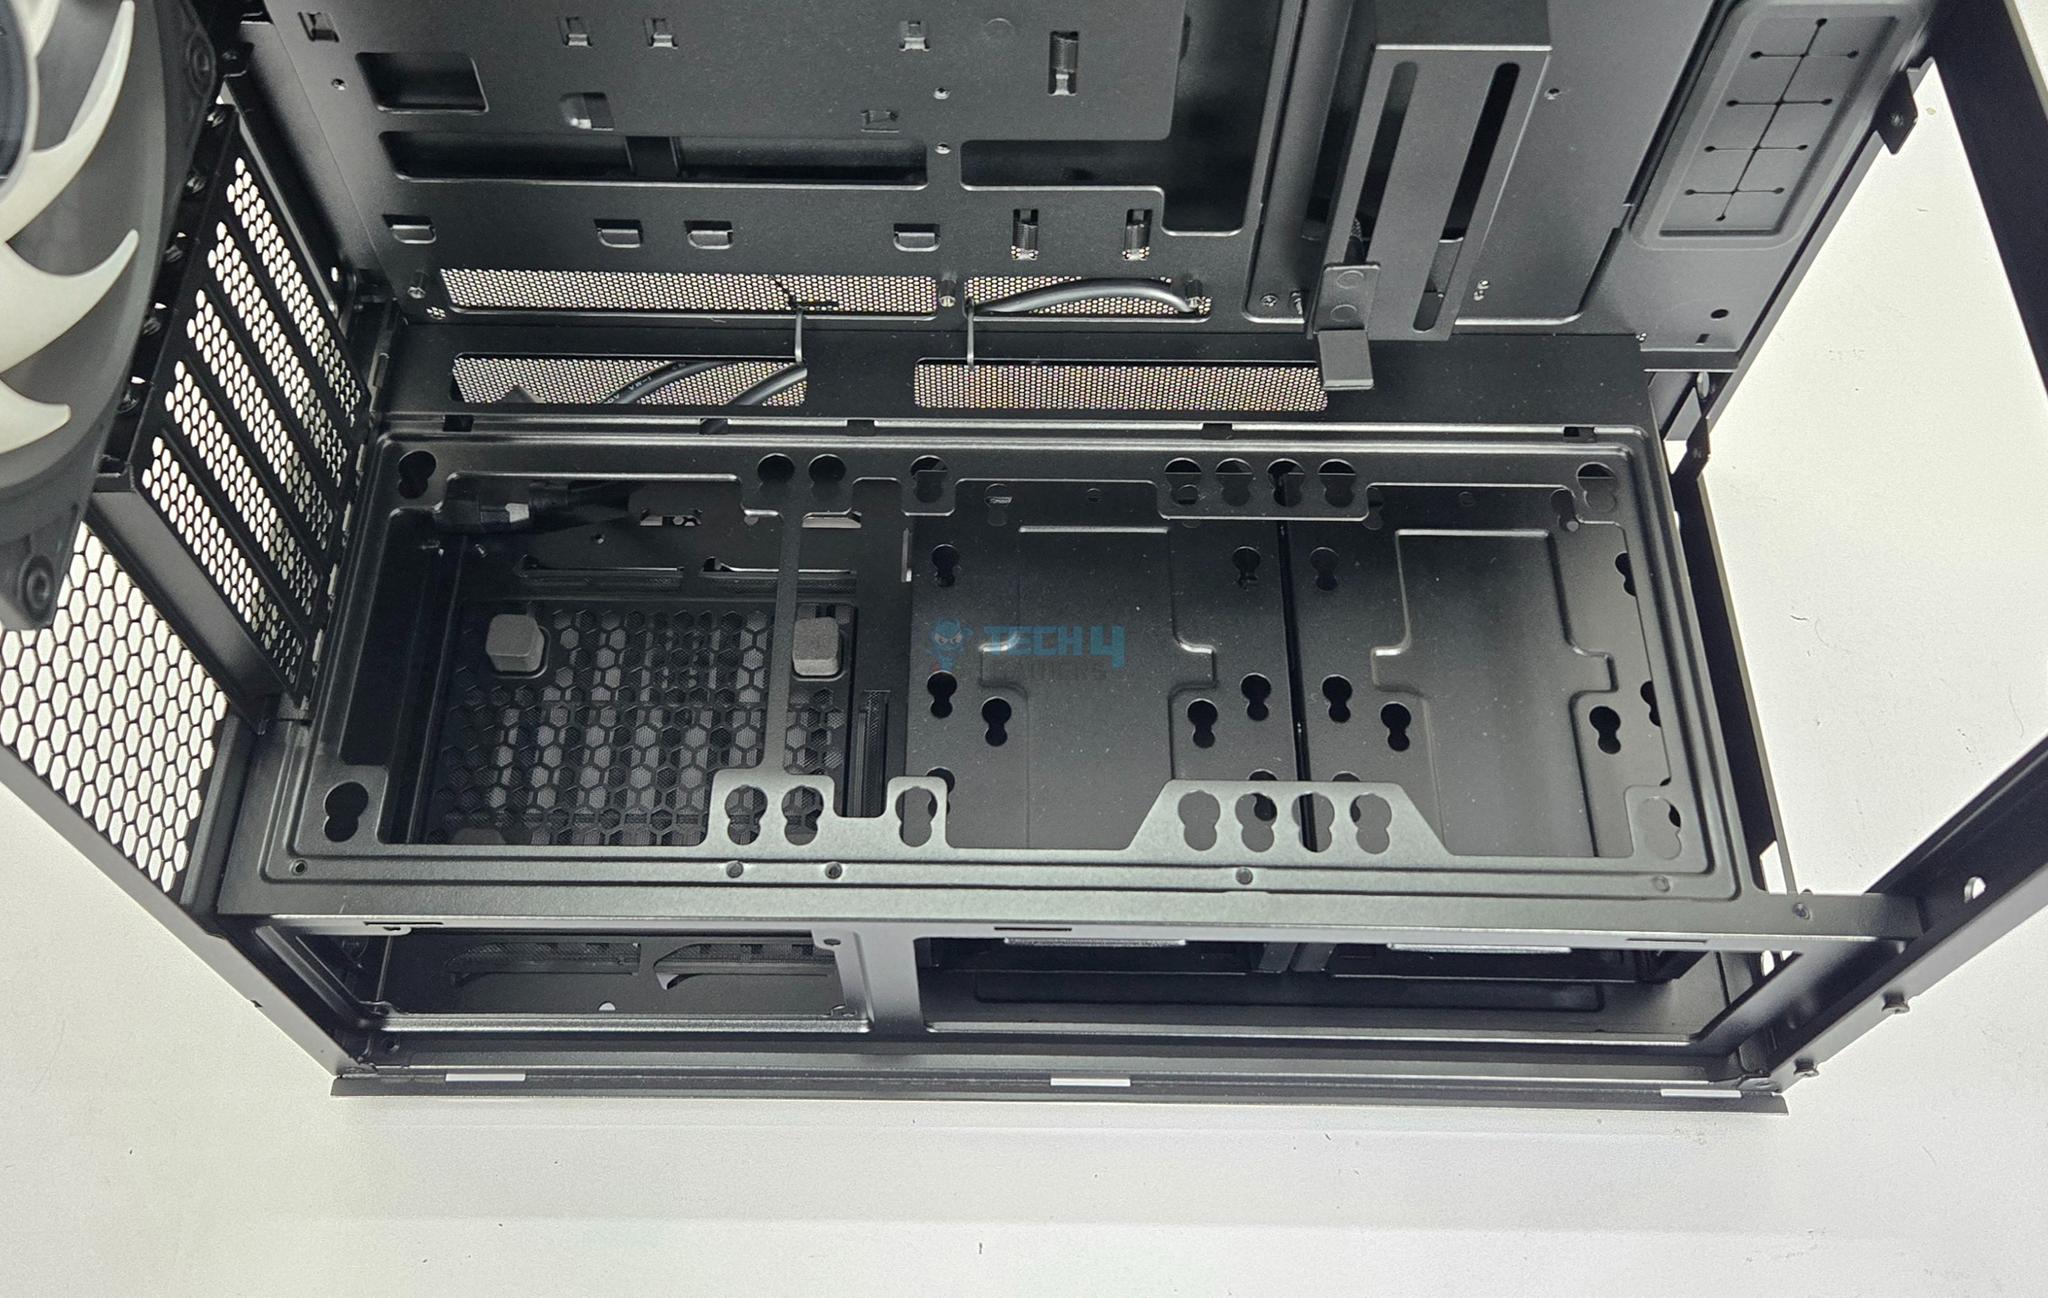
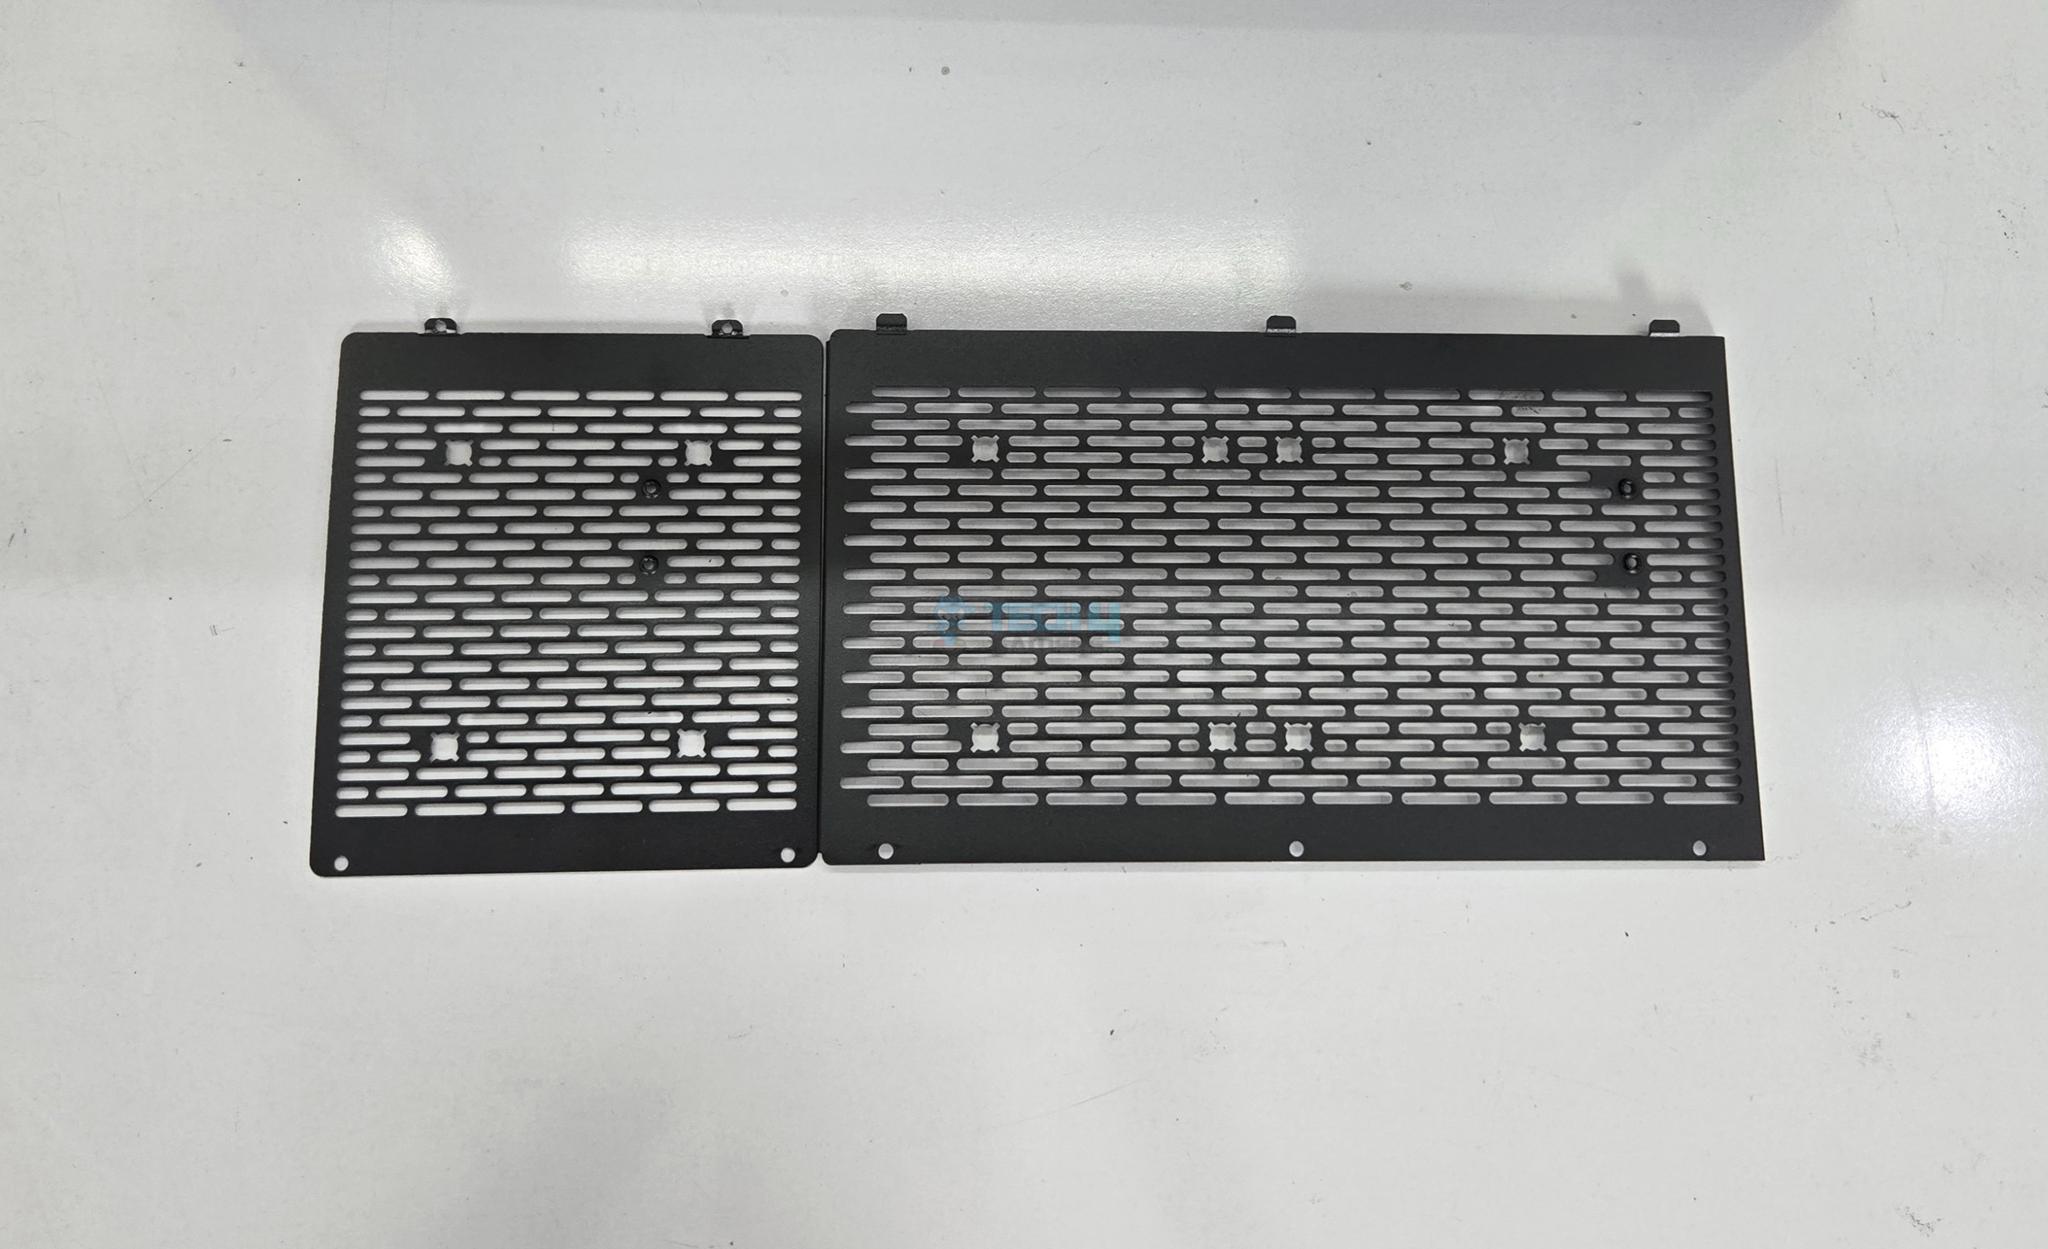
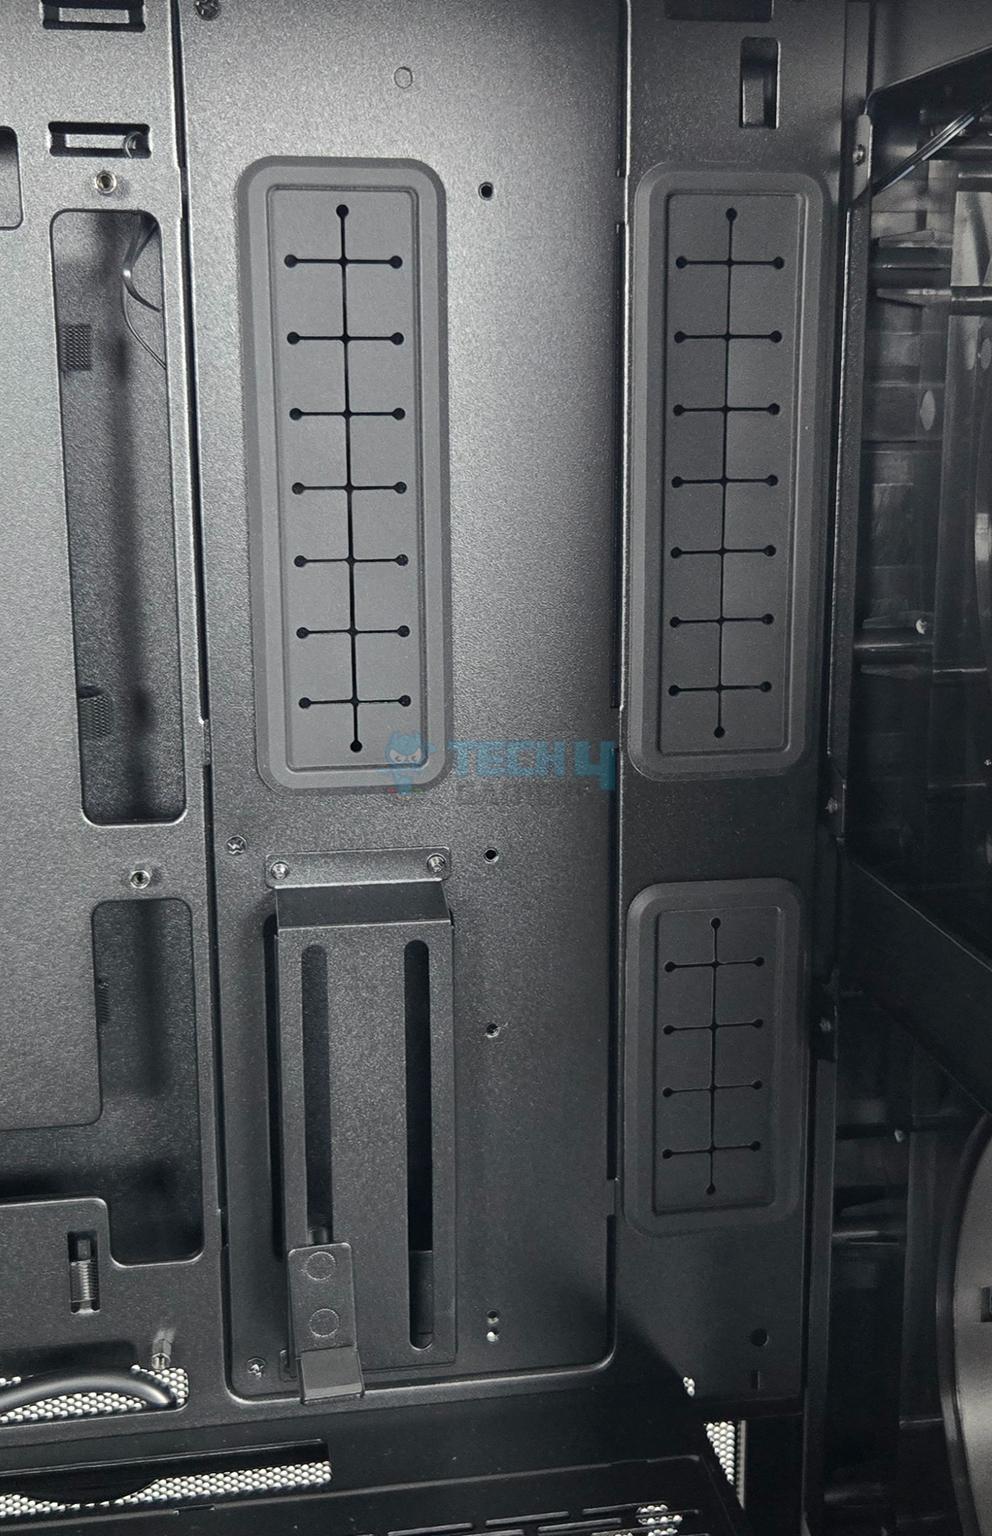
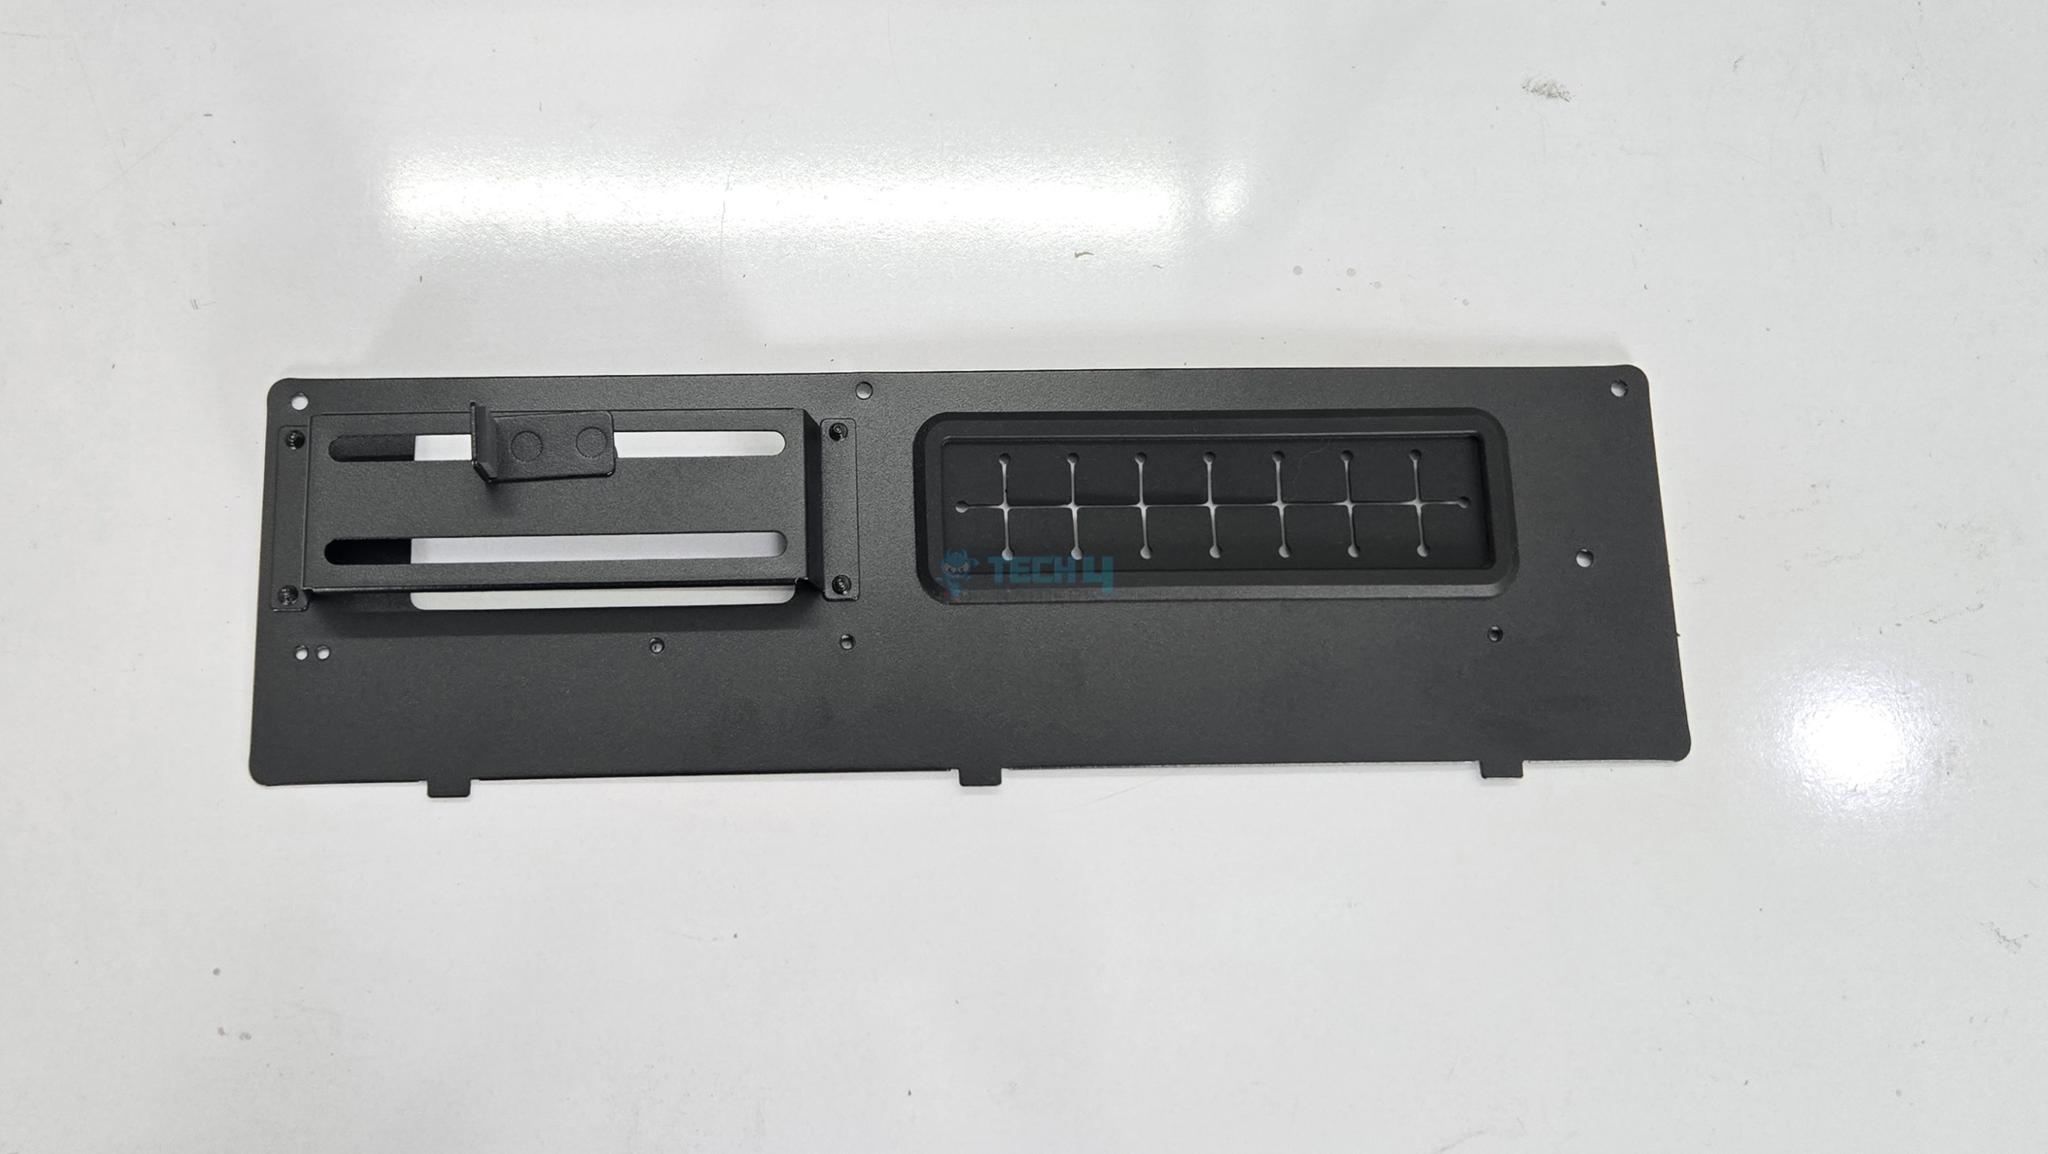
PSU shroud or cover is different on this case. It is a two part design. The first part is of 120mm size almost and secured using latches and screws. The second part is secured using three screws and latches. You can remove both covers.
You can install up to 3x 120mm fans on top of this shroud or 3x 2.5” drives. Also, you can install 2x 120mm fans under the shroud on the longest cover side.
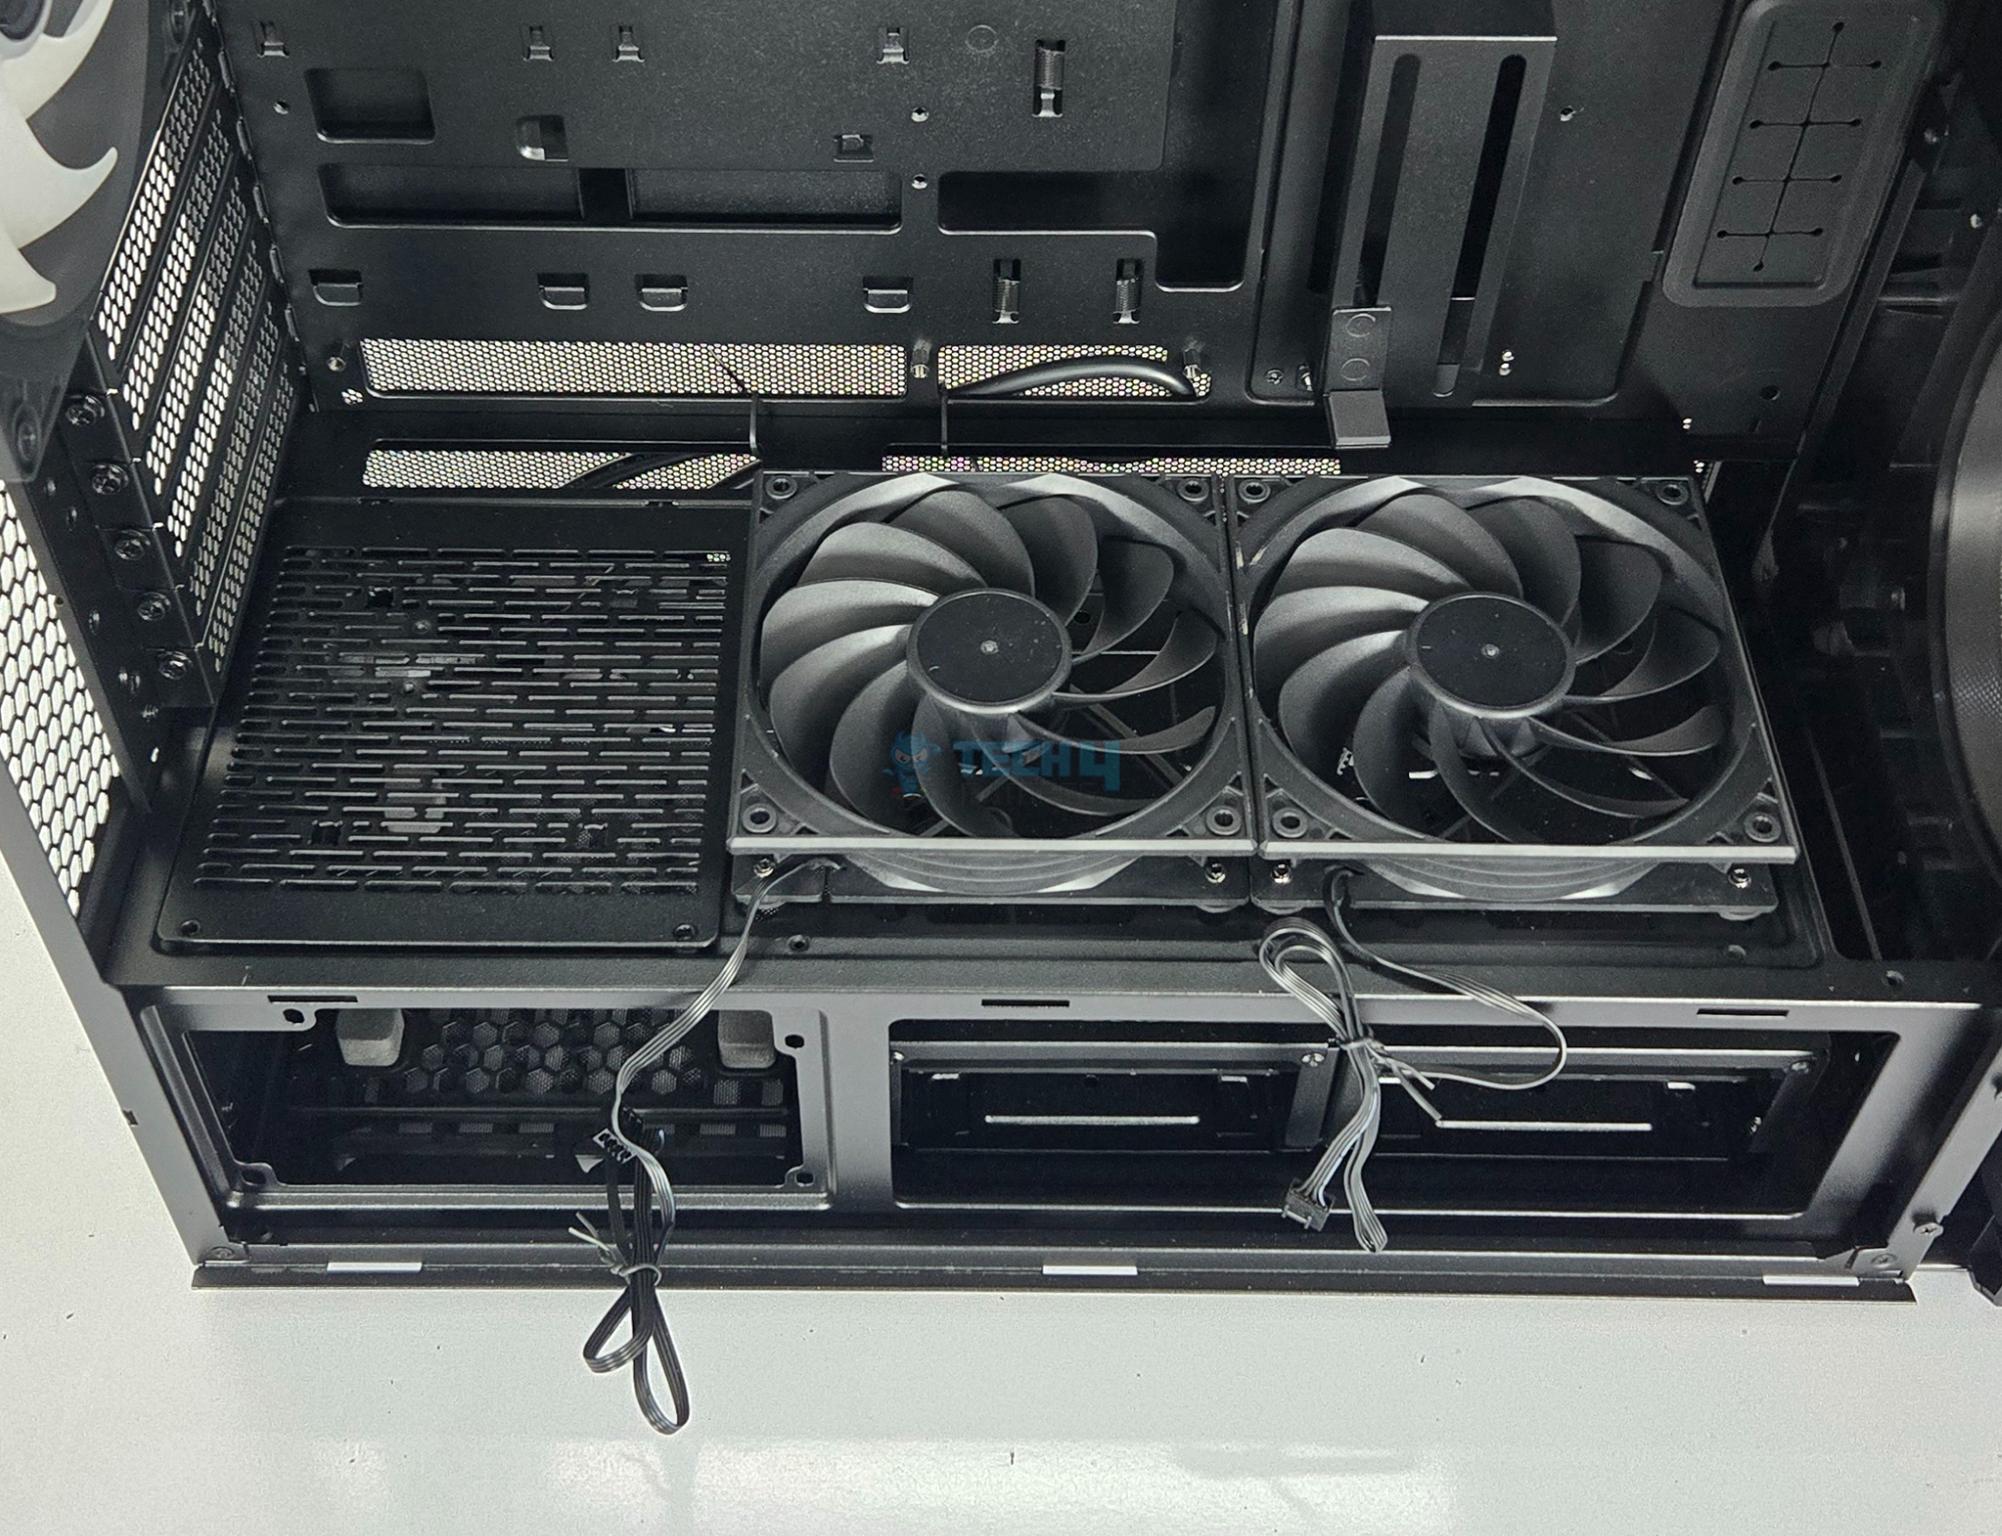
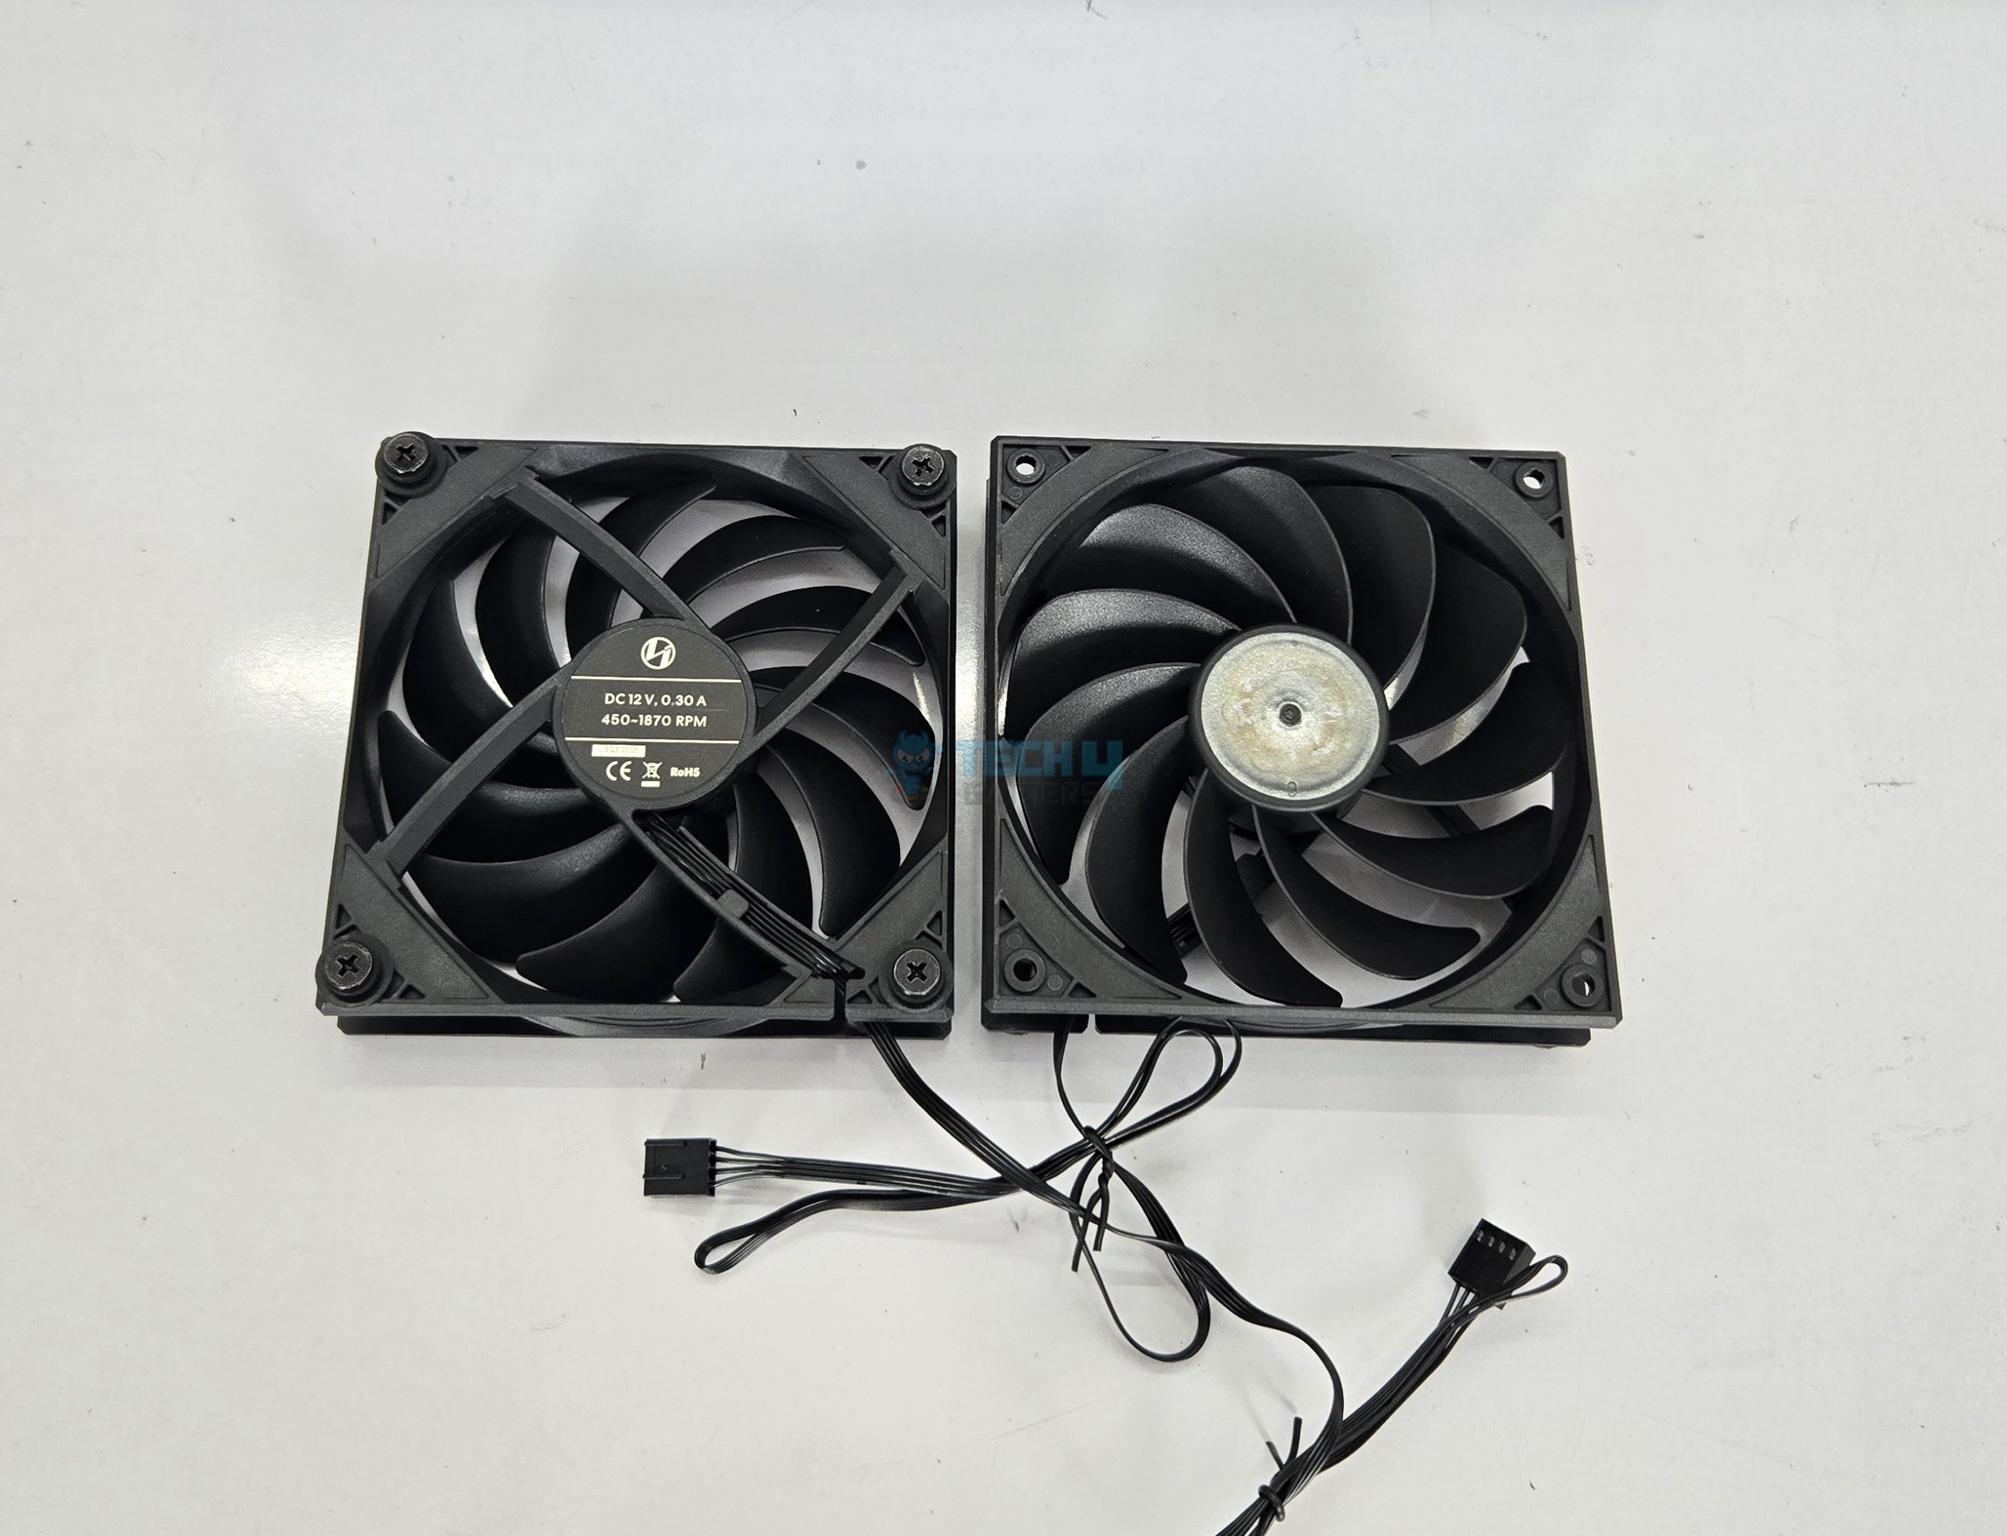
Lian Li has sent us two reverse blade fans so that we can test the thermal performance of this case using these fans as well. Providing these two fans would make up for the lack of fans compared to regular LANCOOL 217 that comes with these fans by default.
A 140mm ARGB fan comes pre-installed on the rear. It is rated for 450 to 1900 RPM generating 118.53 CFM airflow with an air pressure of 3.32mmH₂O at 12VDC. Its power rating is 0.26A at 12VDC. Its sound rating is 33.8dB(A).
You can install the PCIe bracket in horizontal as well as vertical layout. However, rise cable is not provided with the case. Lian Li has included a standoff screw for the riser cable bracket.
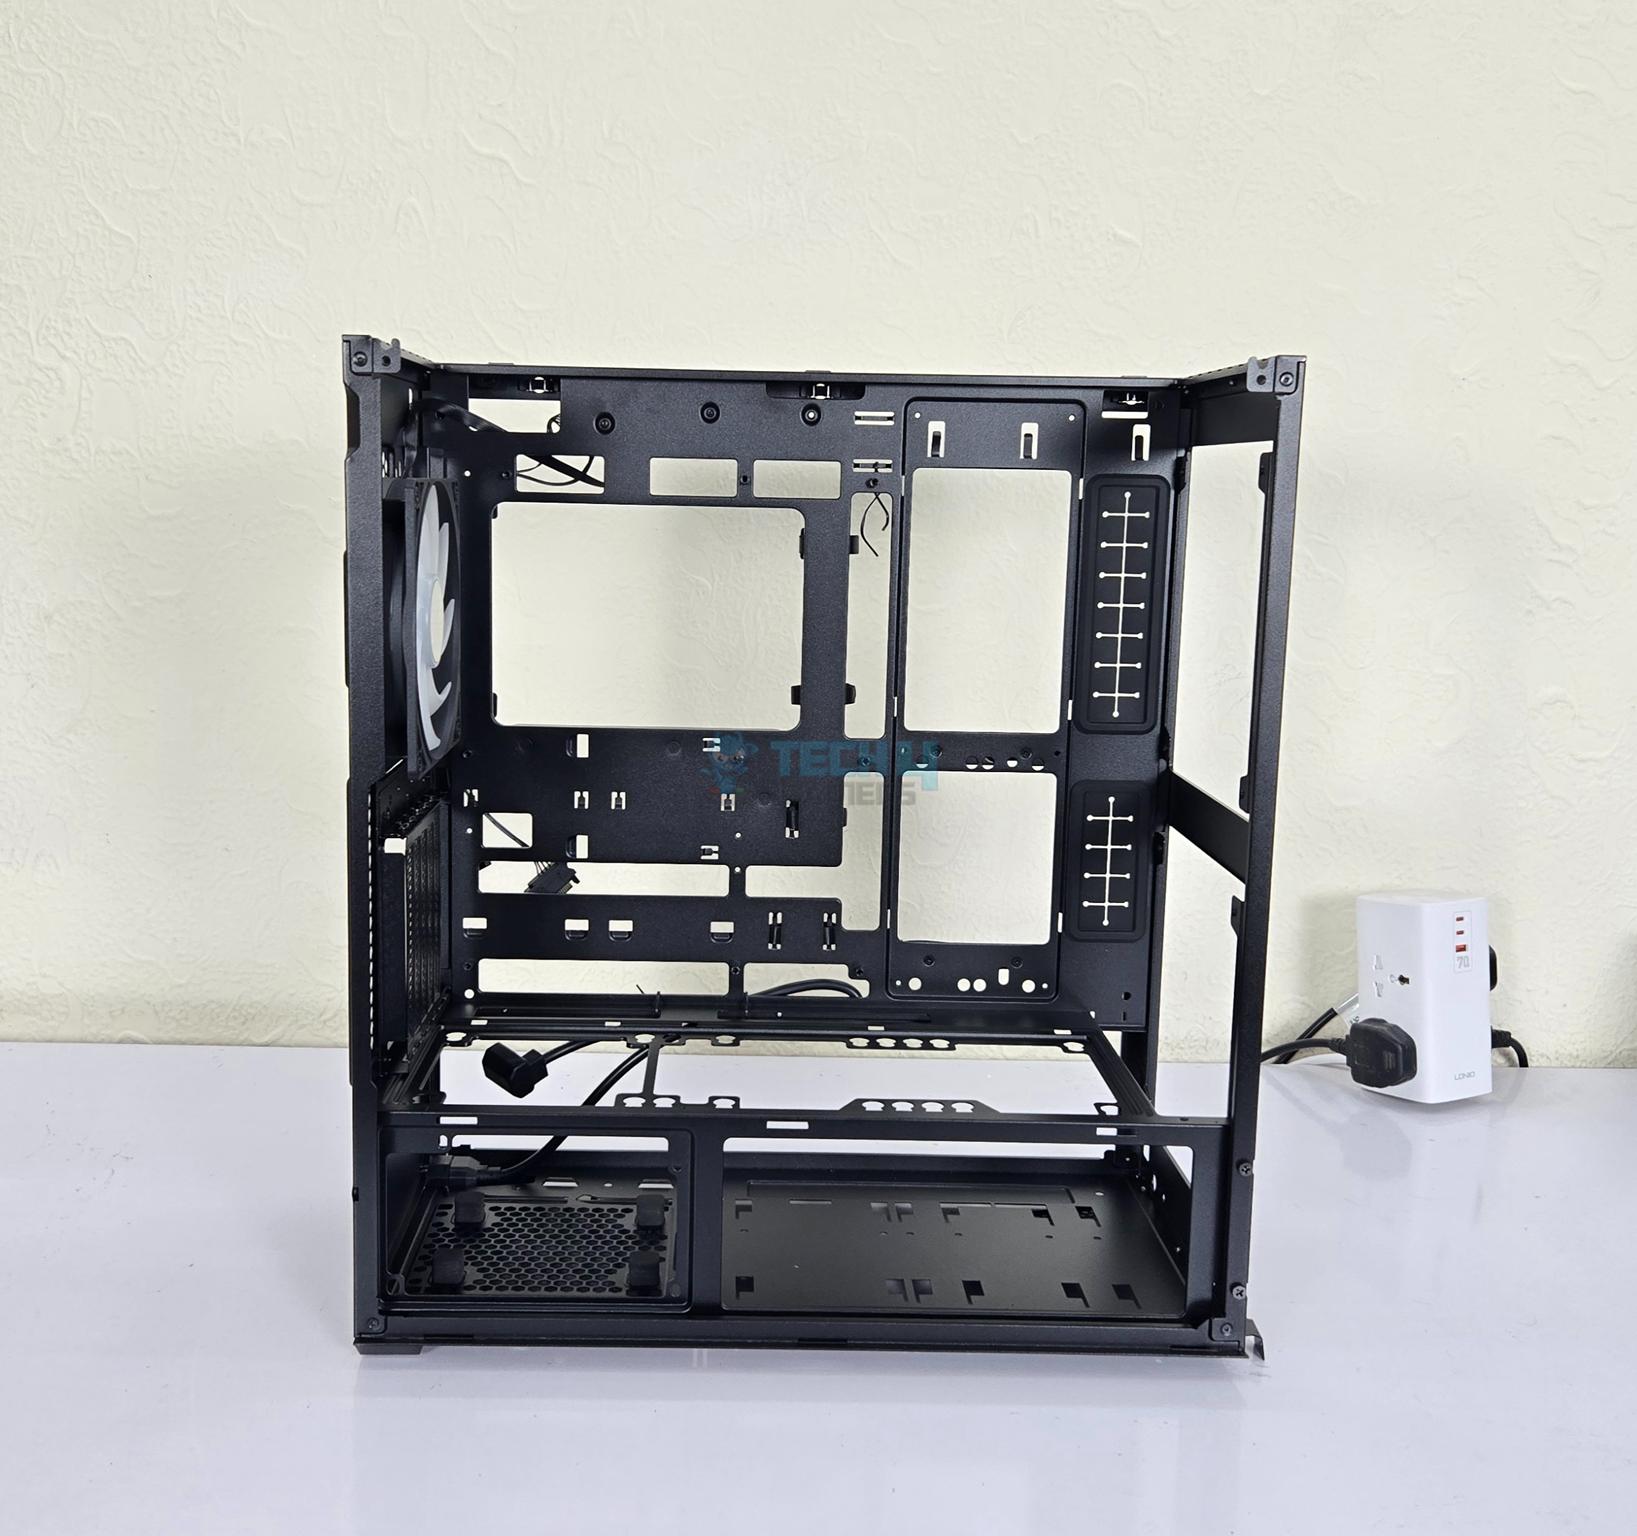
A tear down look of the LANCOOL 217 INF.
Clearances
While we are at it, let’s talk about the clearance:
- The maximum CPU Cooler height is 180mm.
- The maximum length of a graphics card is 380mm.
- The maximum length of a PSU is under 200mm in standard layout.
- The maximum length of a PSU is under 180mm in rotated layout.
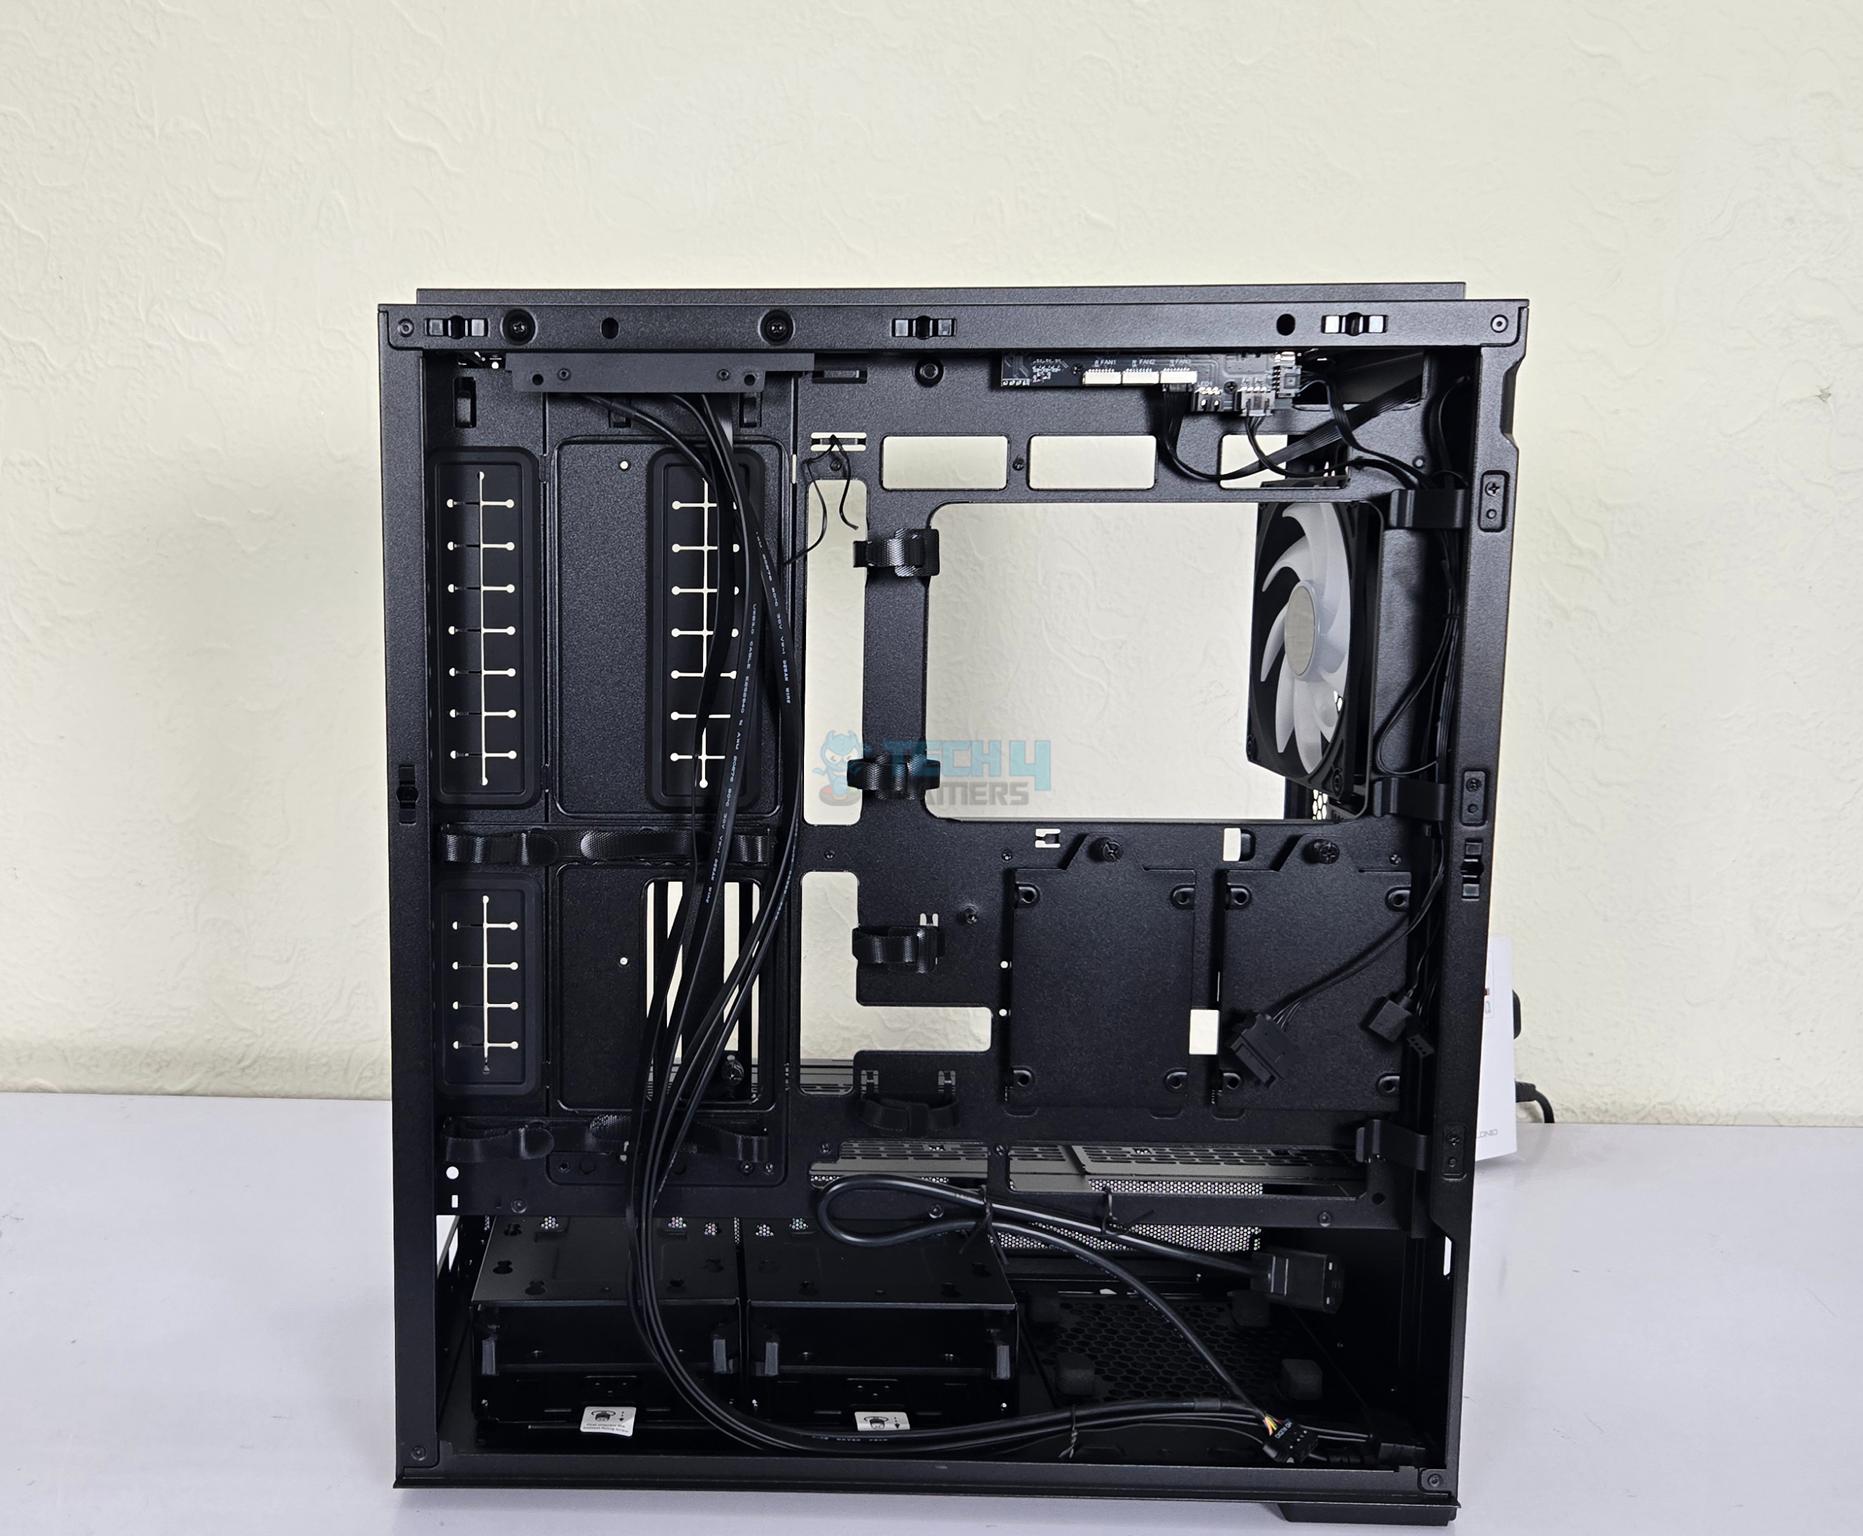
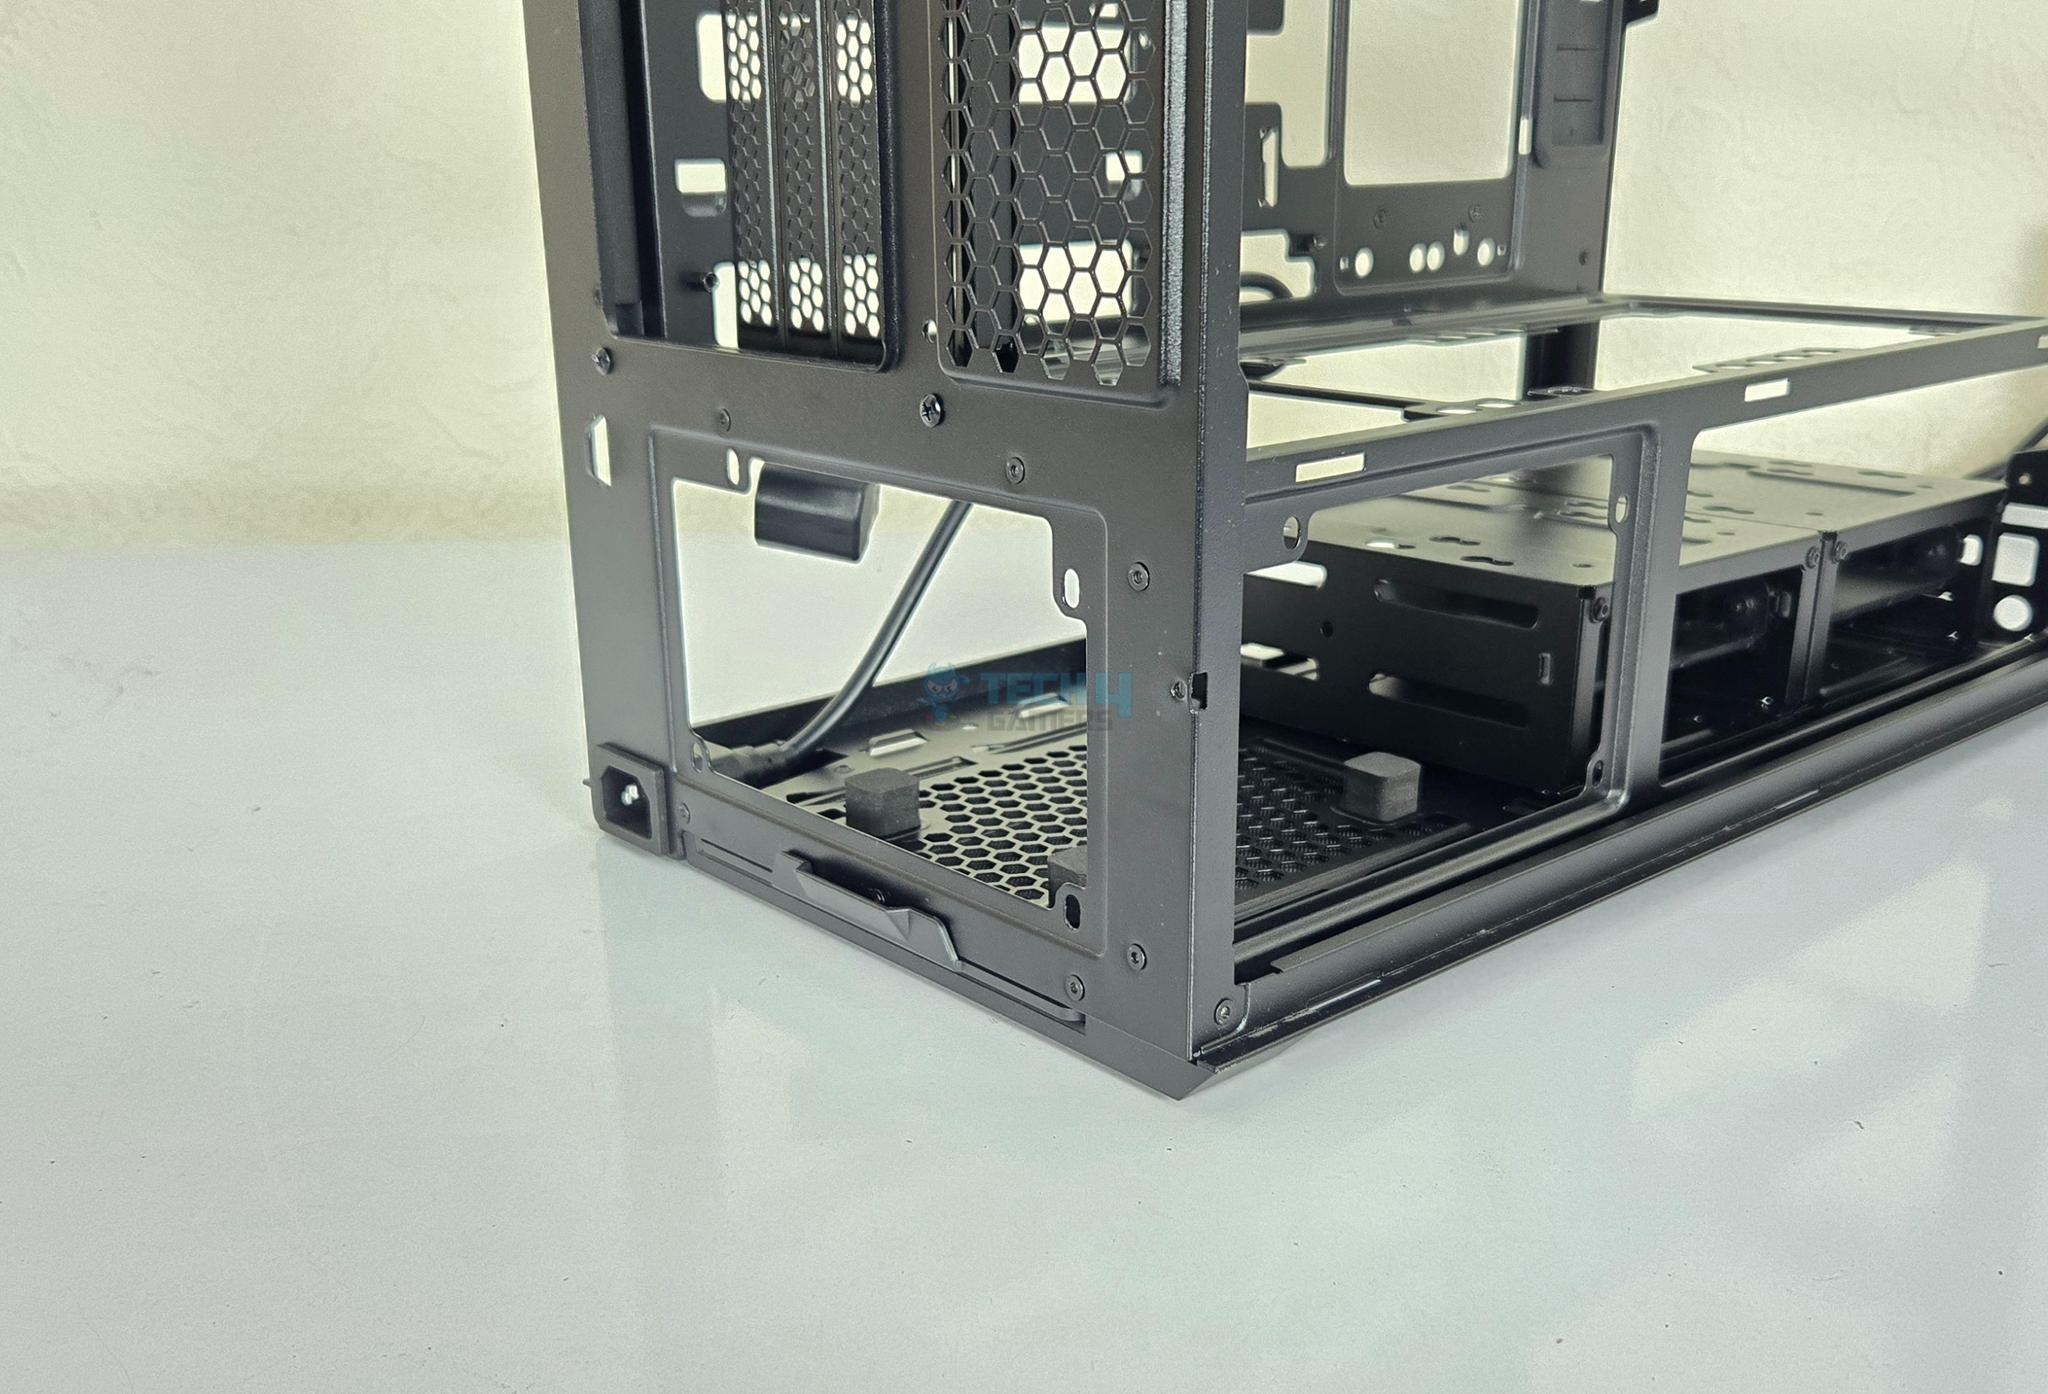
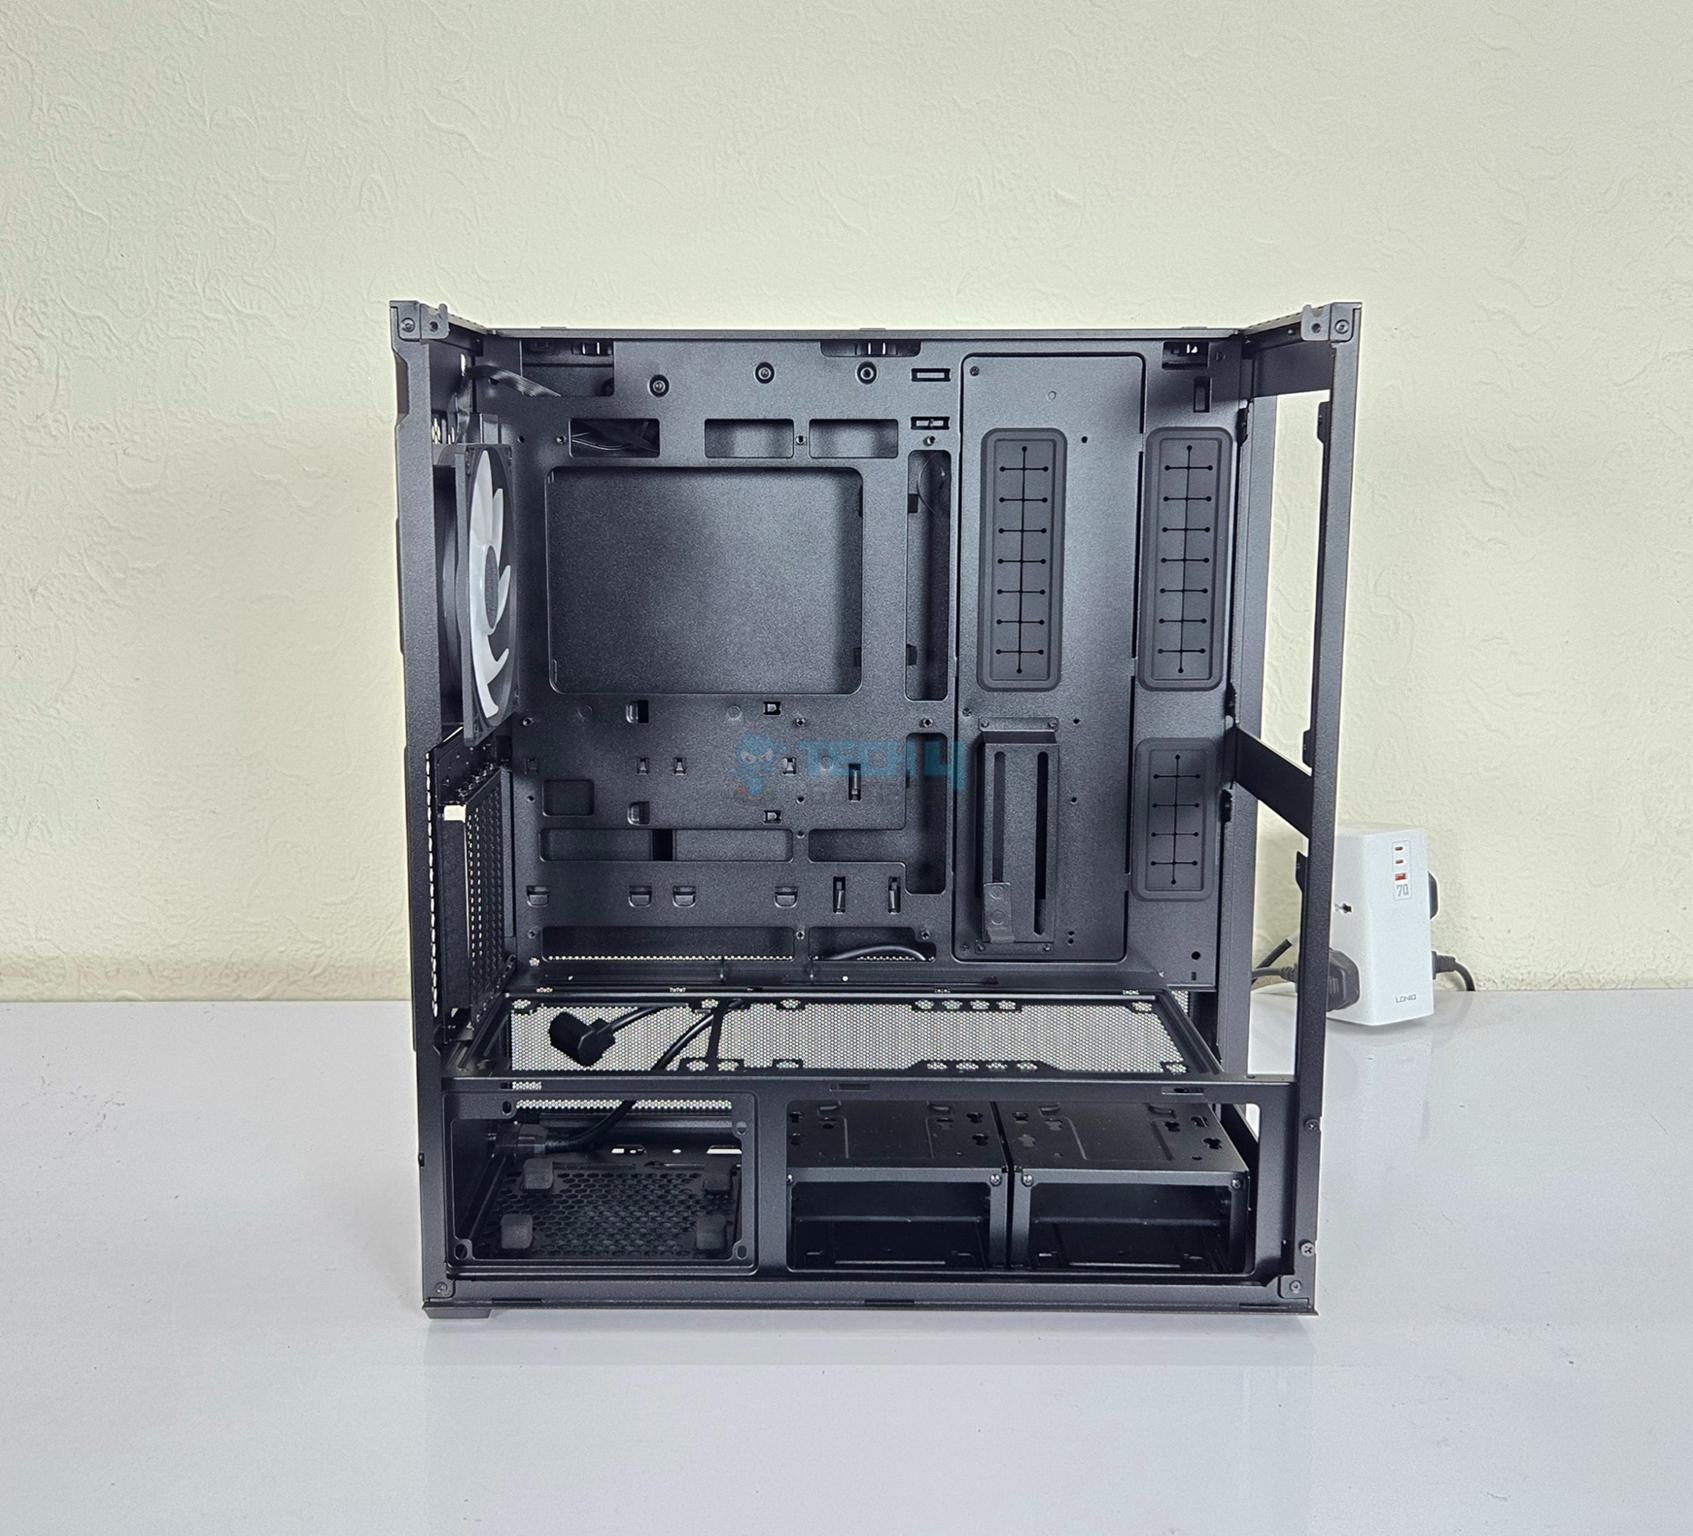
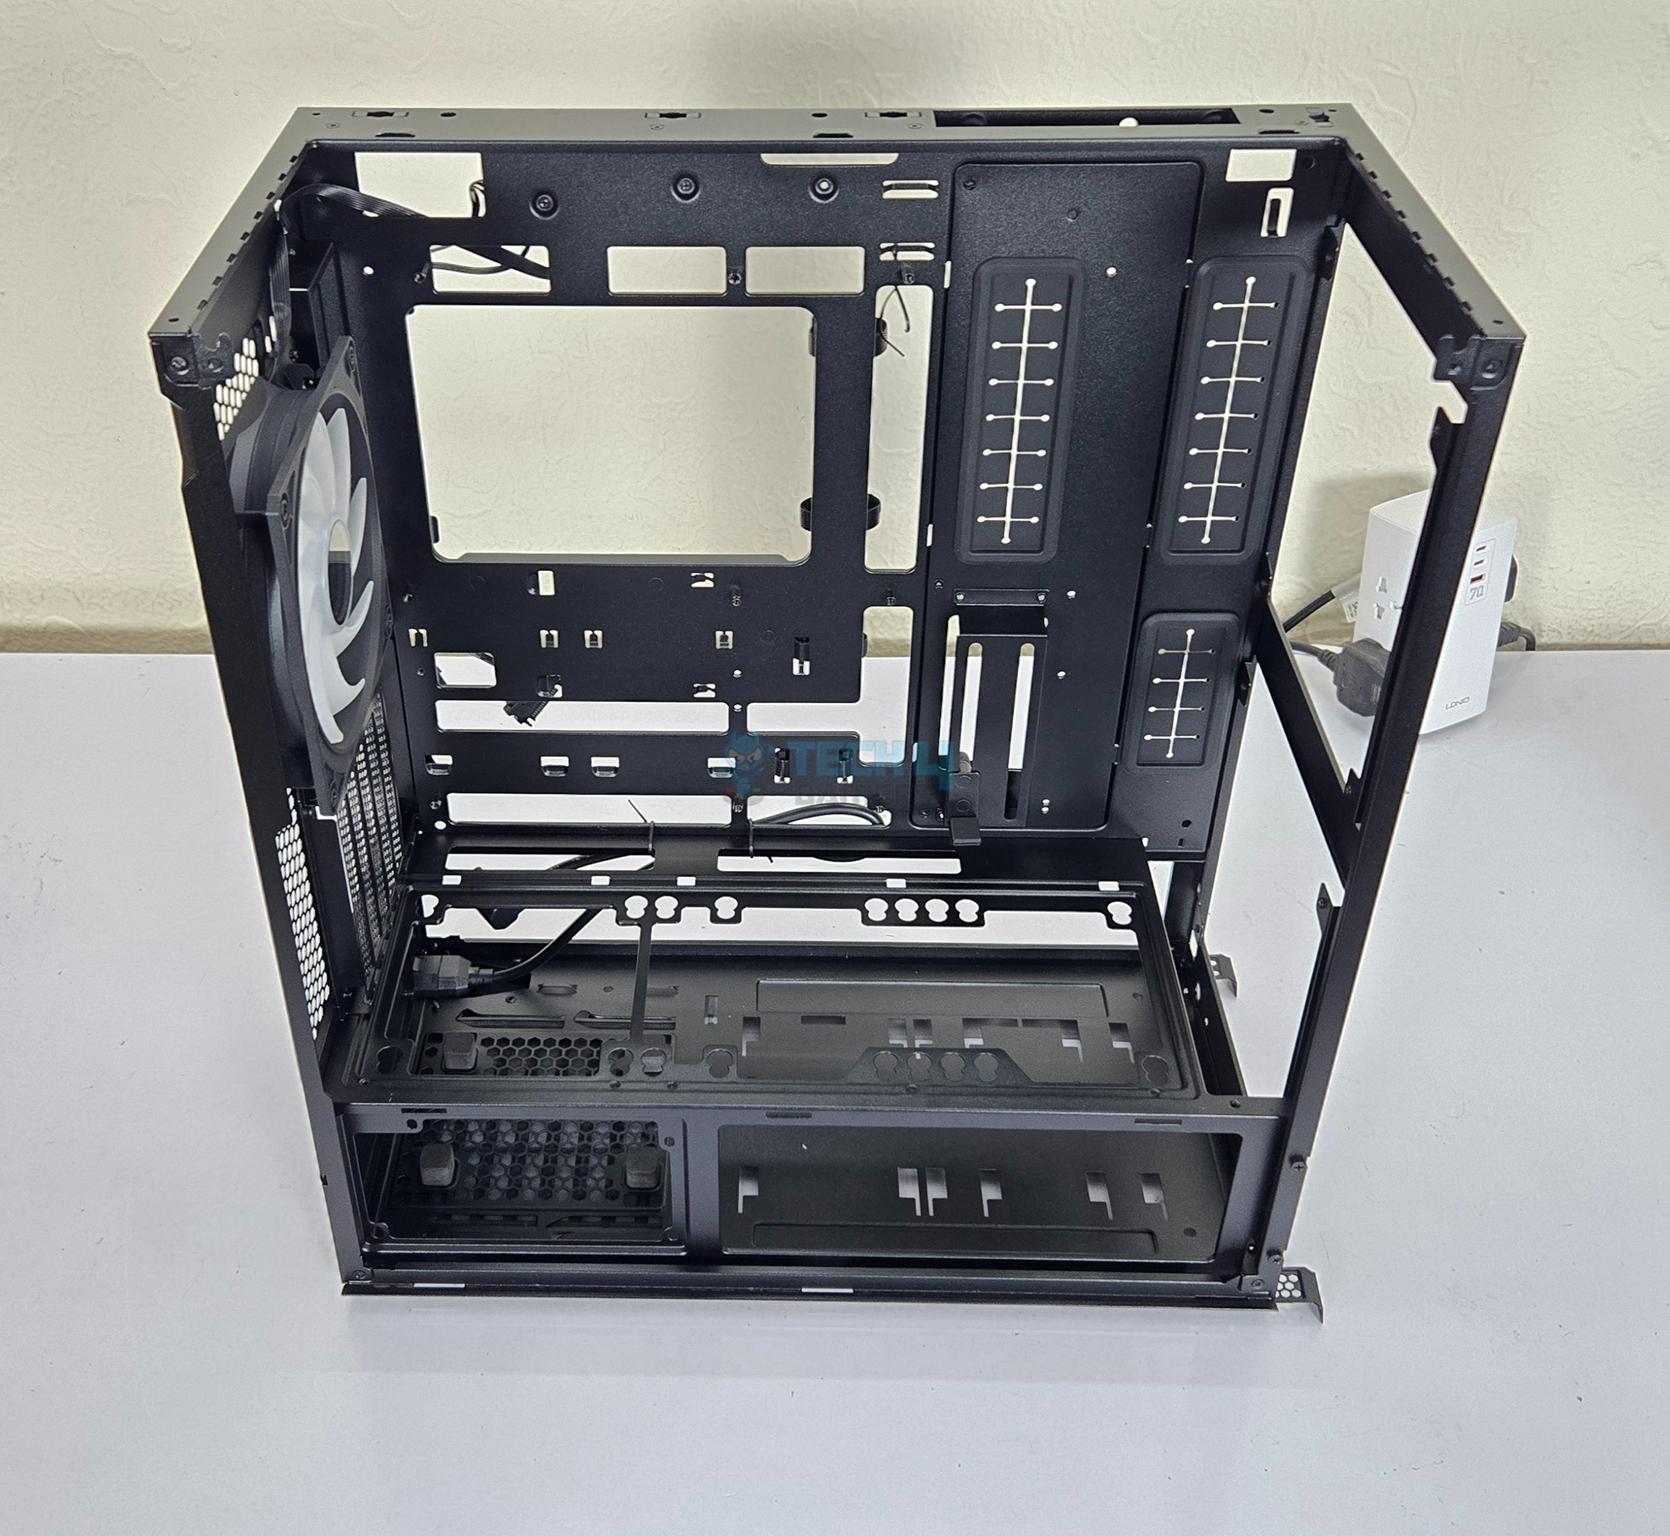
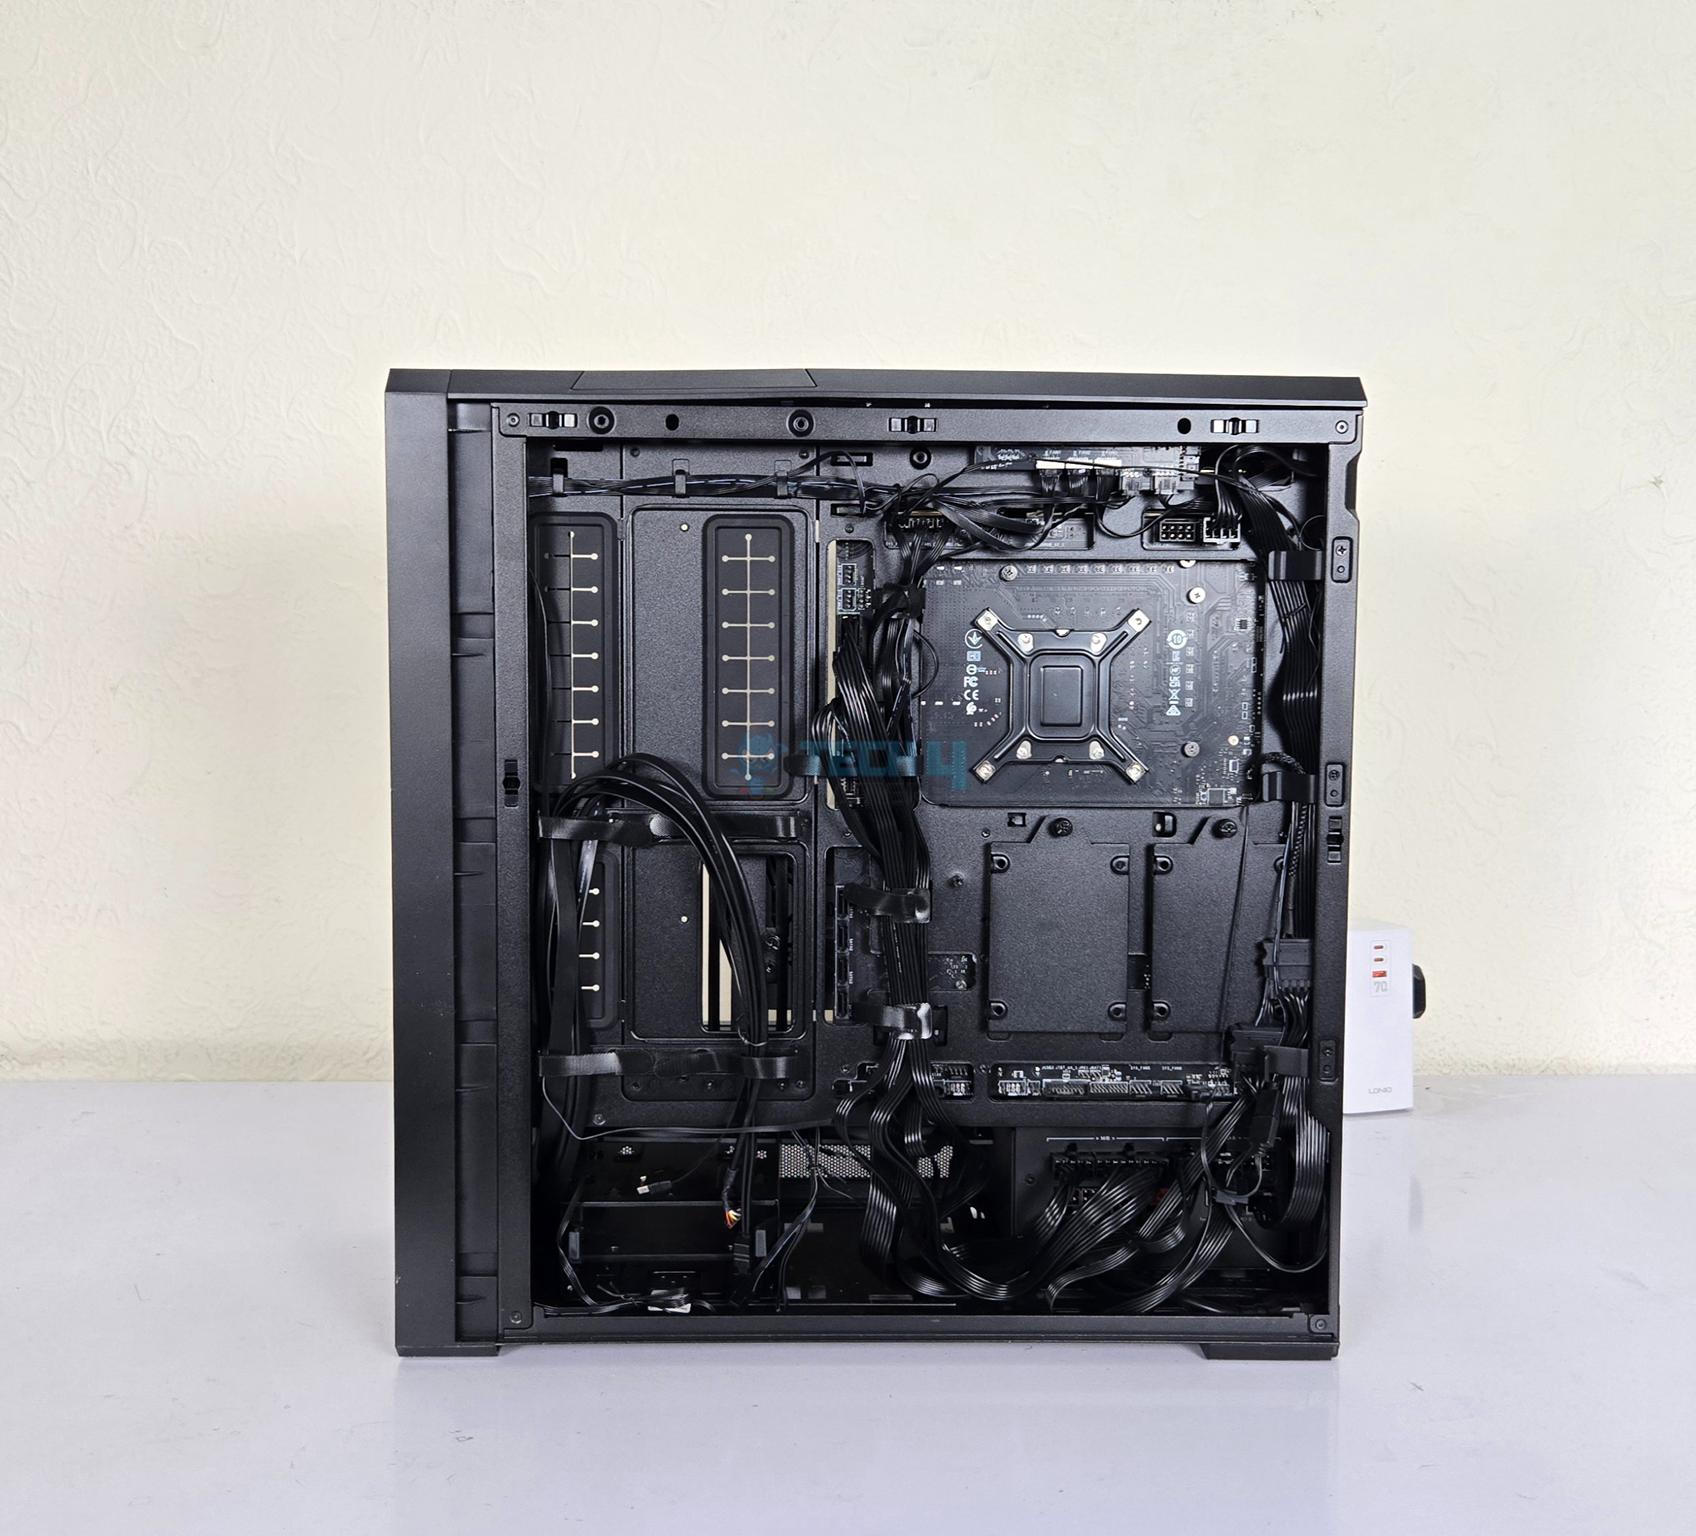
Backside Design
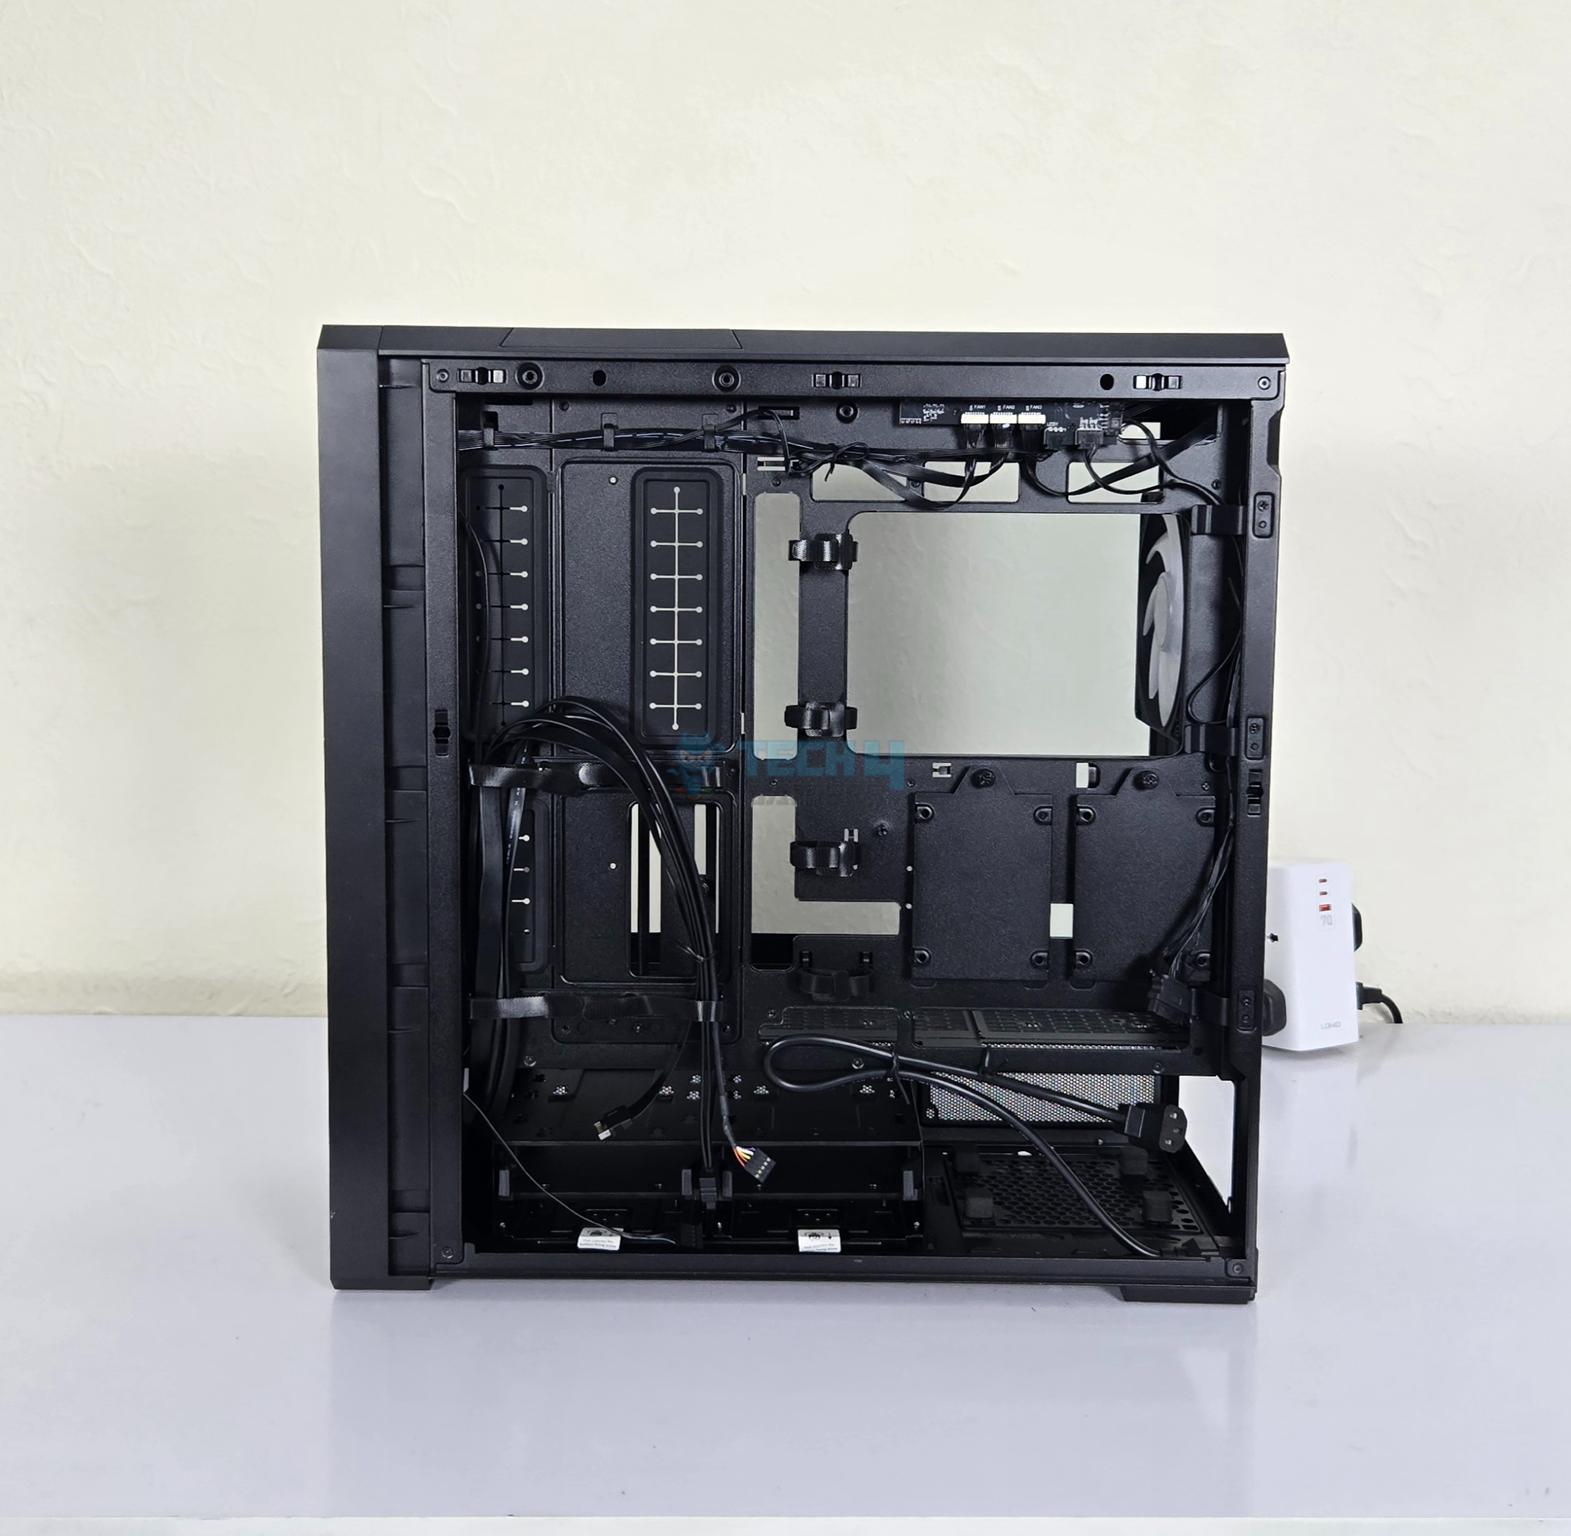
The backside panel is made of steel material and has perforated mesh on the base covering the lower chamber to provide airflow. It is also tool-less design. The main area has ample space for the cable management and Lian Li has provided cable ties, catchers, and tabs on key areas to do a neat and clean cable management.
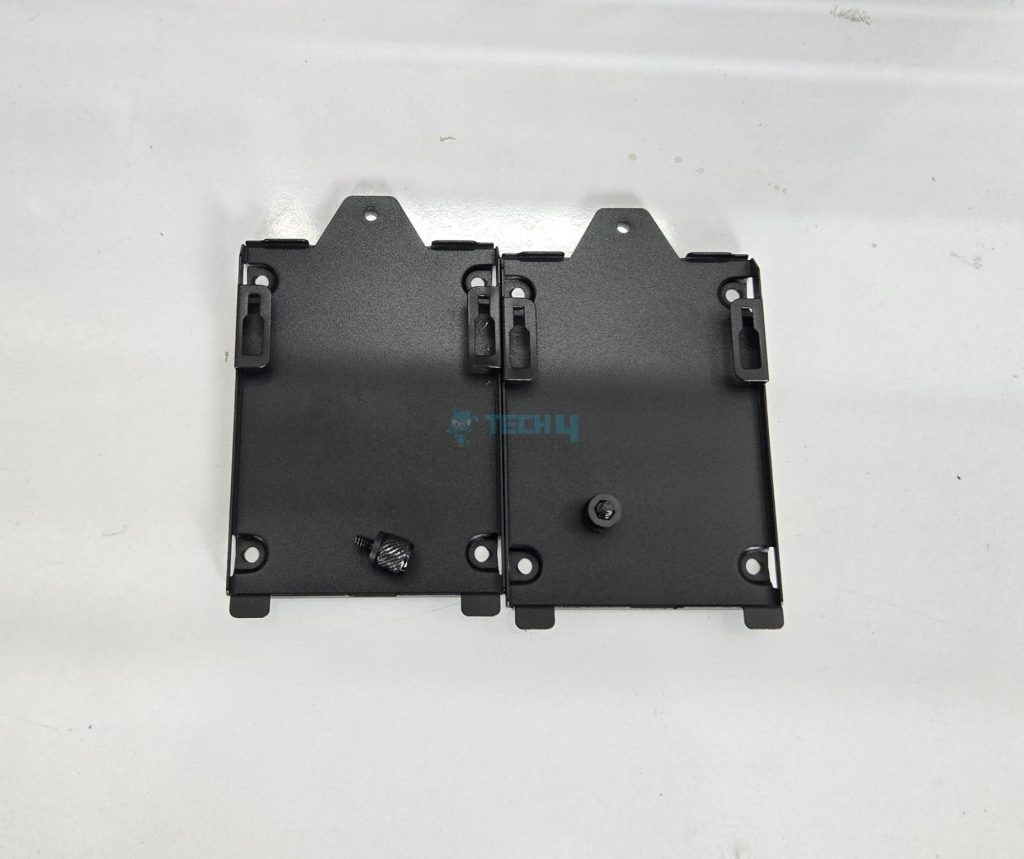
You can see two bracket on the backside of the motherboard tray. These are for 2.5” drives. However, there is a catch. If you are installing a back connect motherboard, then you will have to remove one bracket.
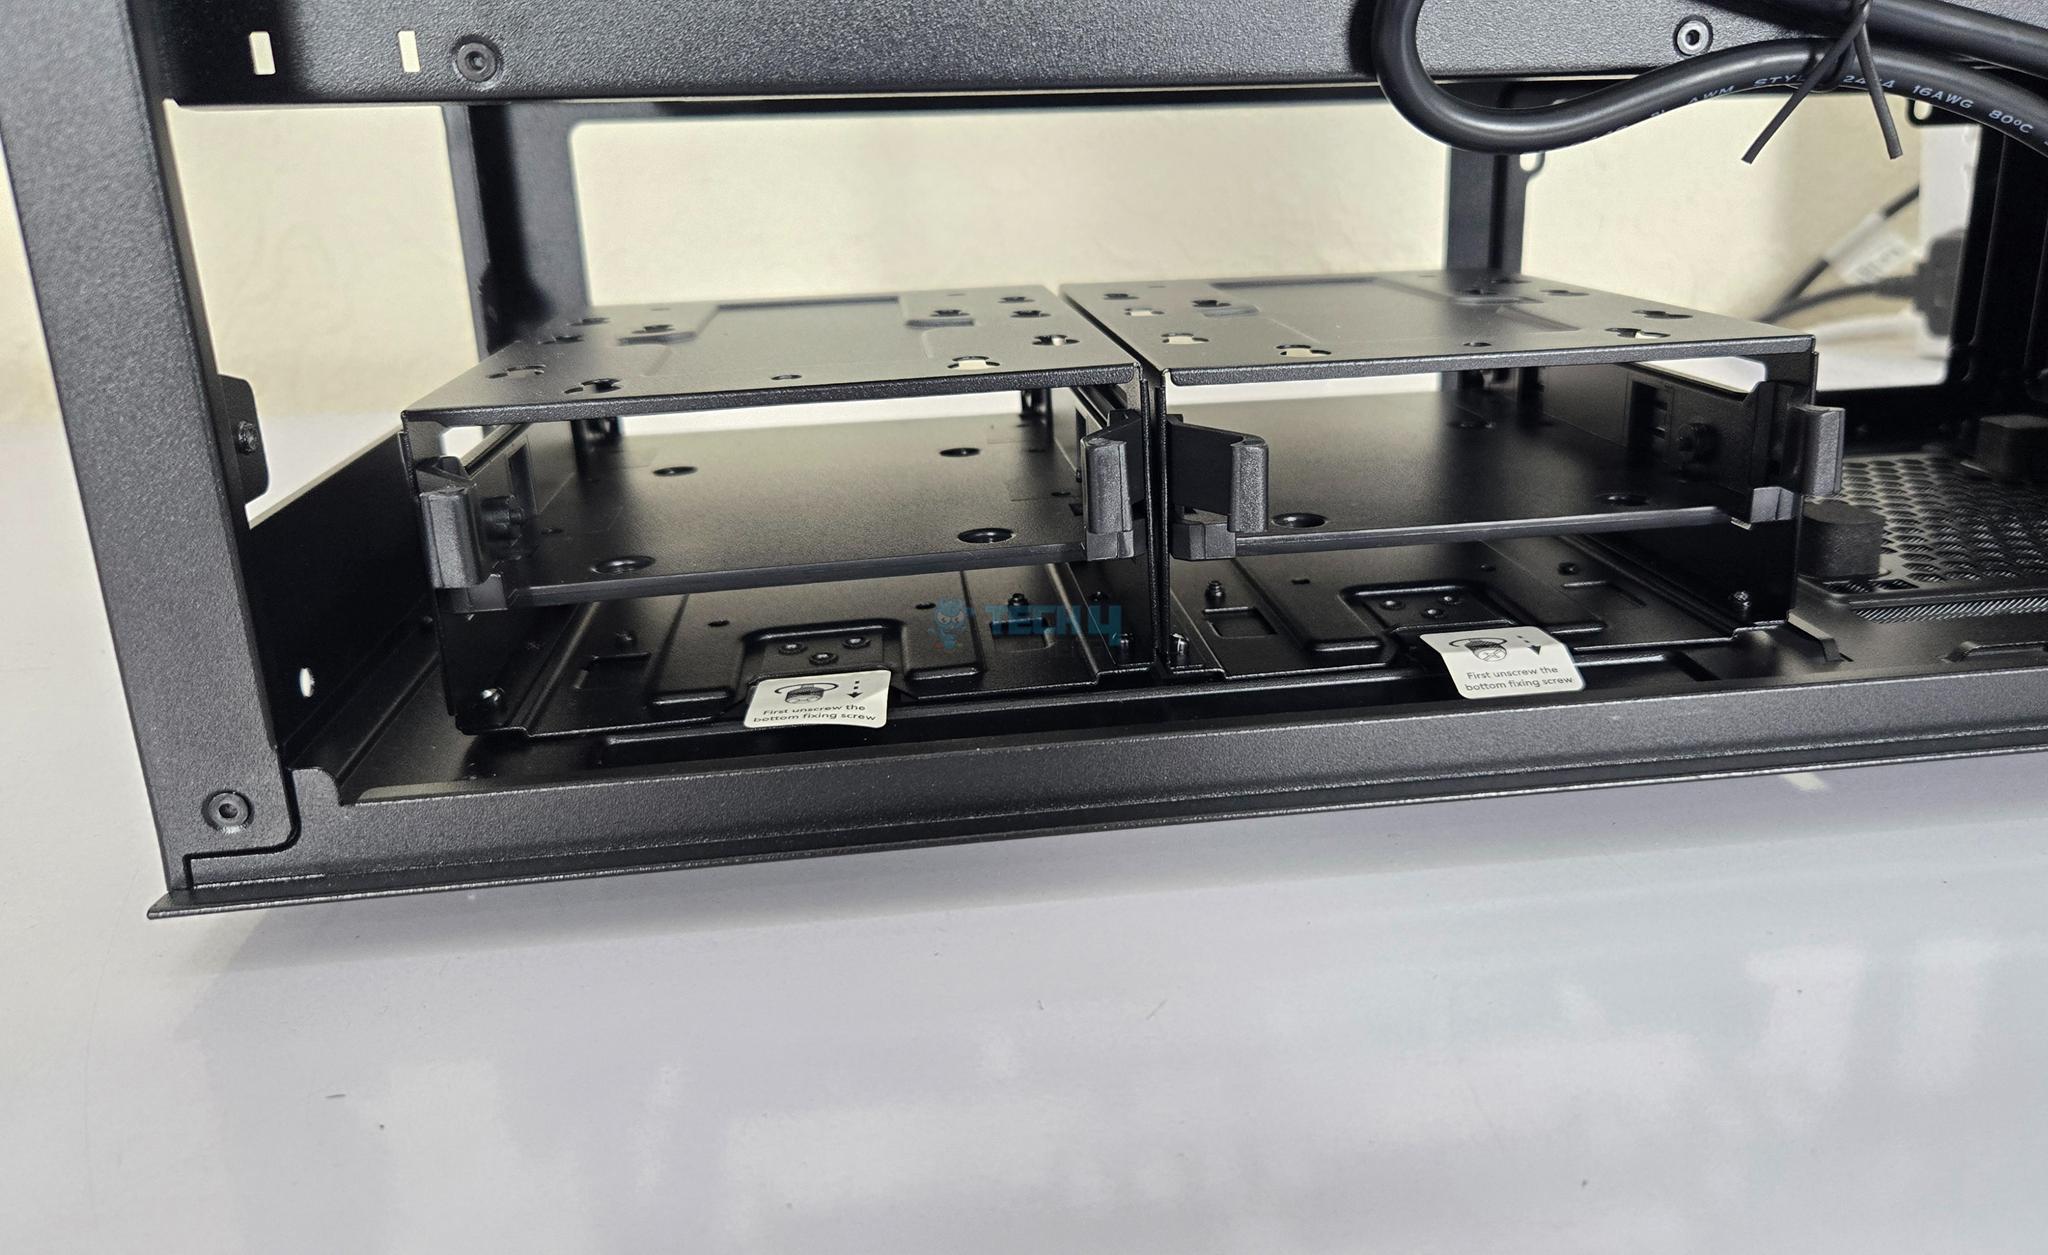
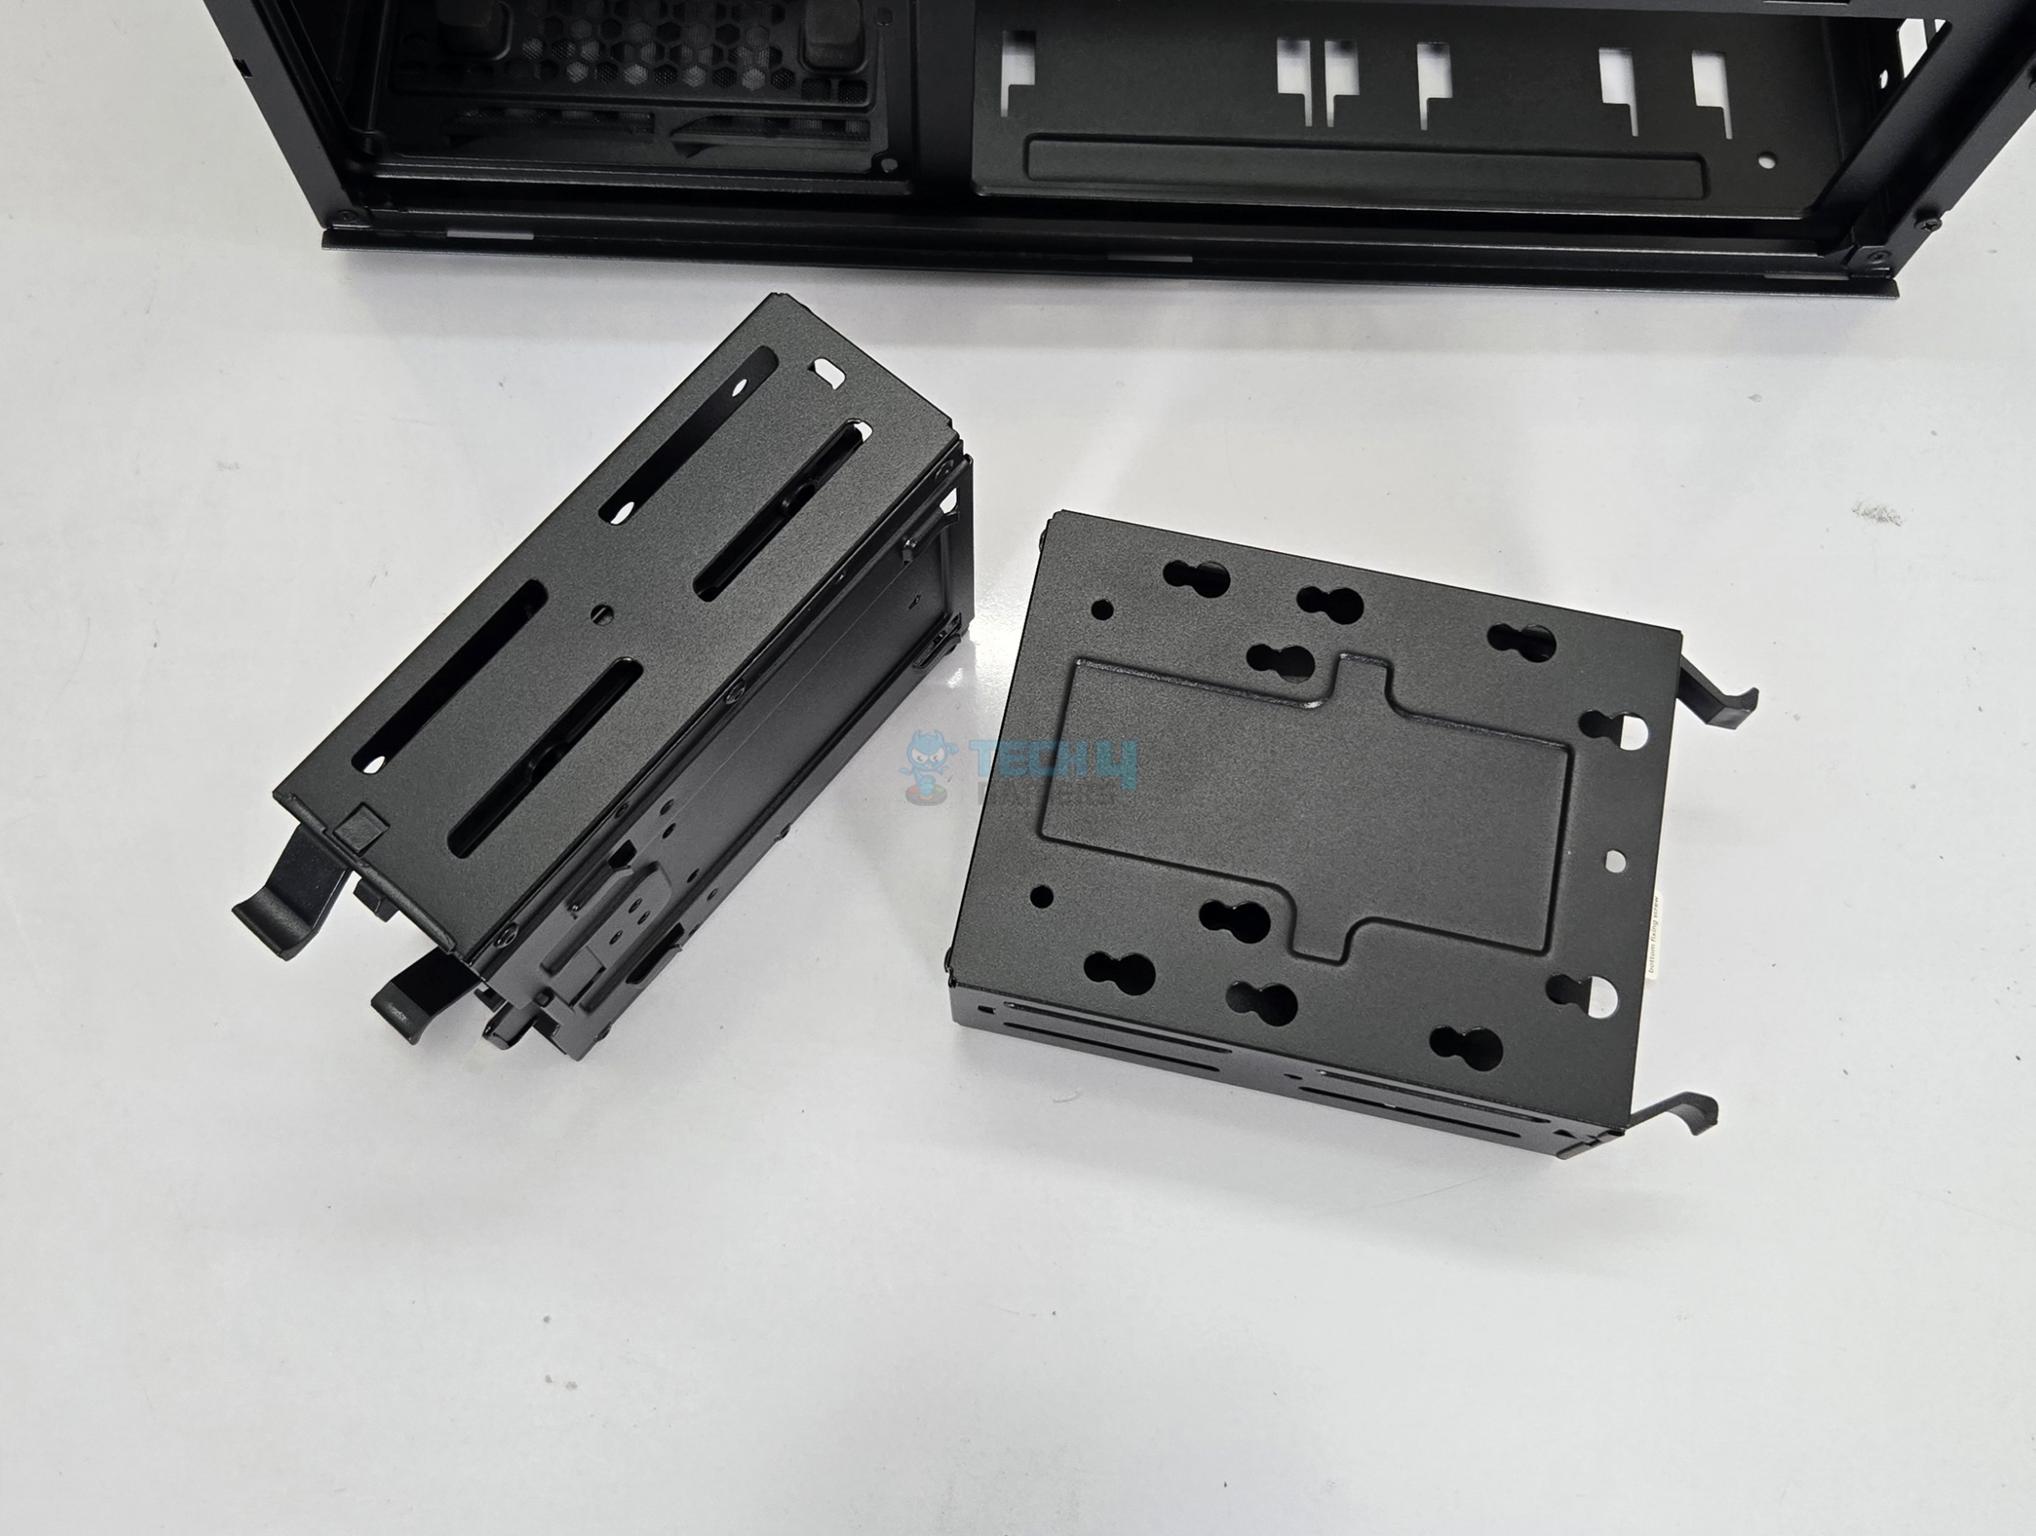
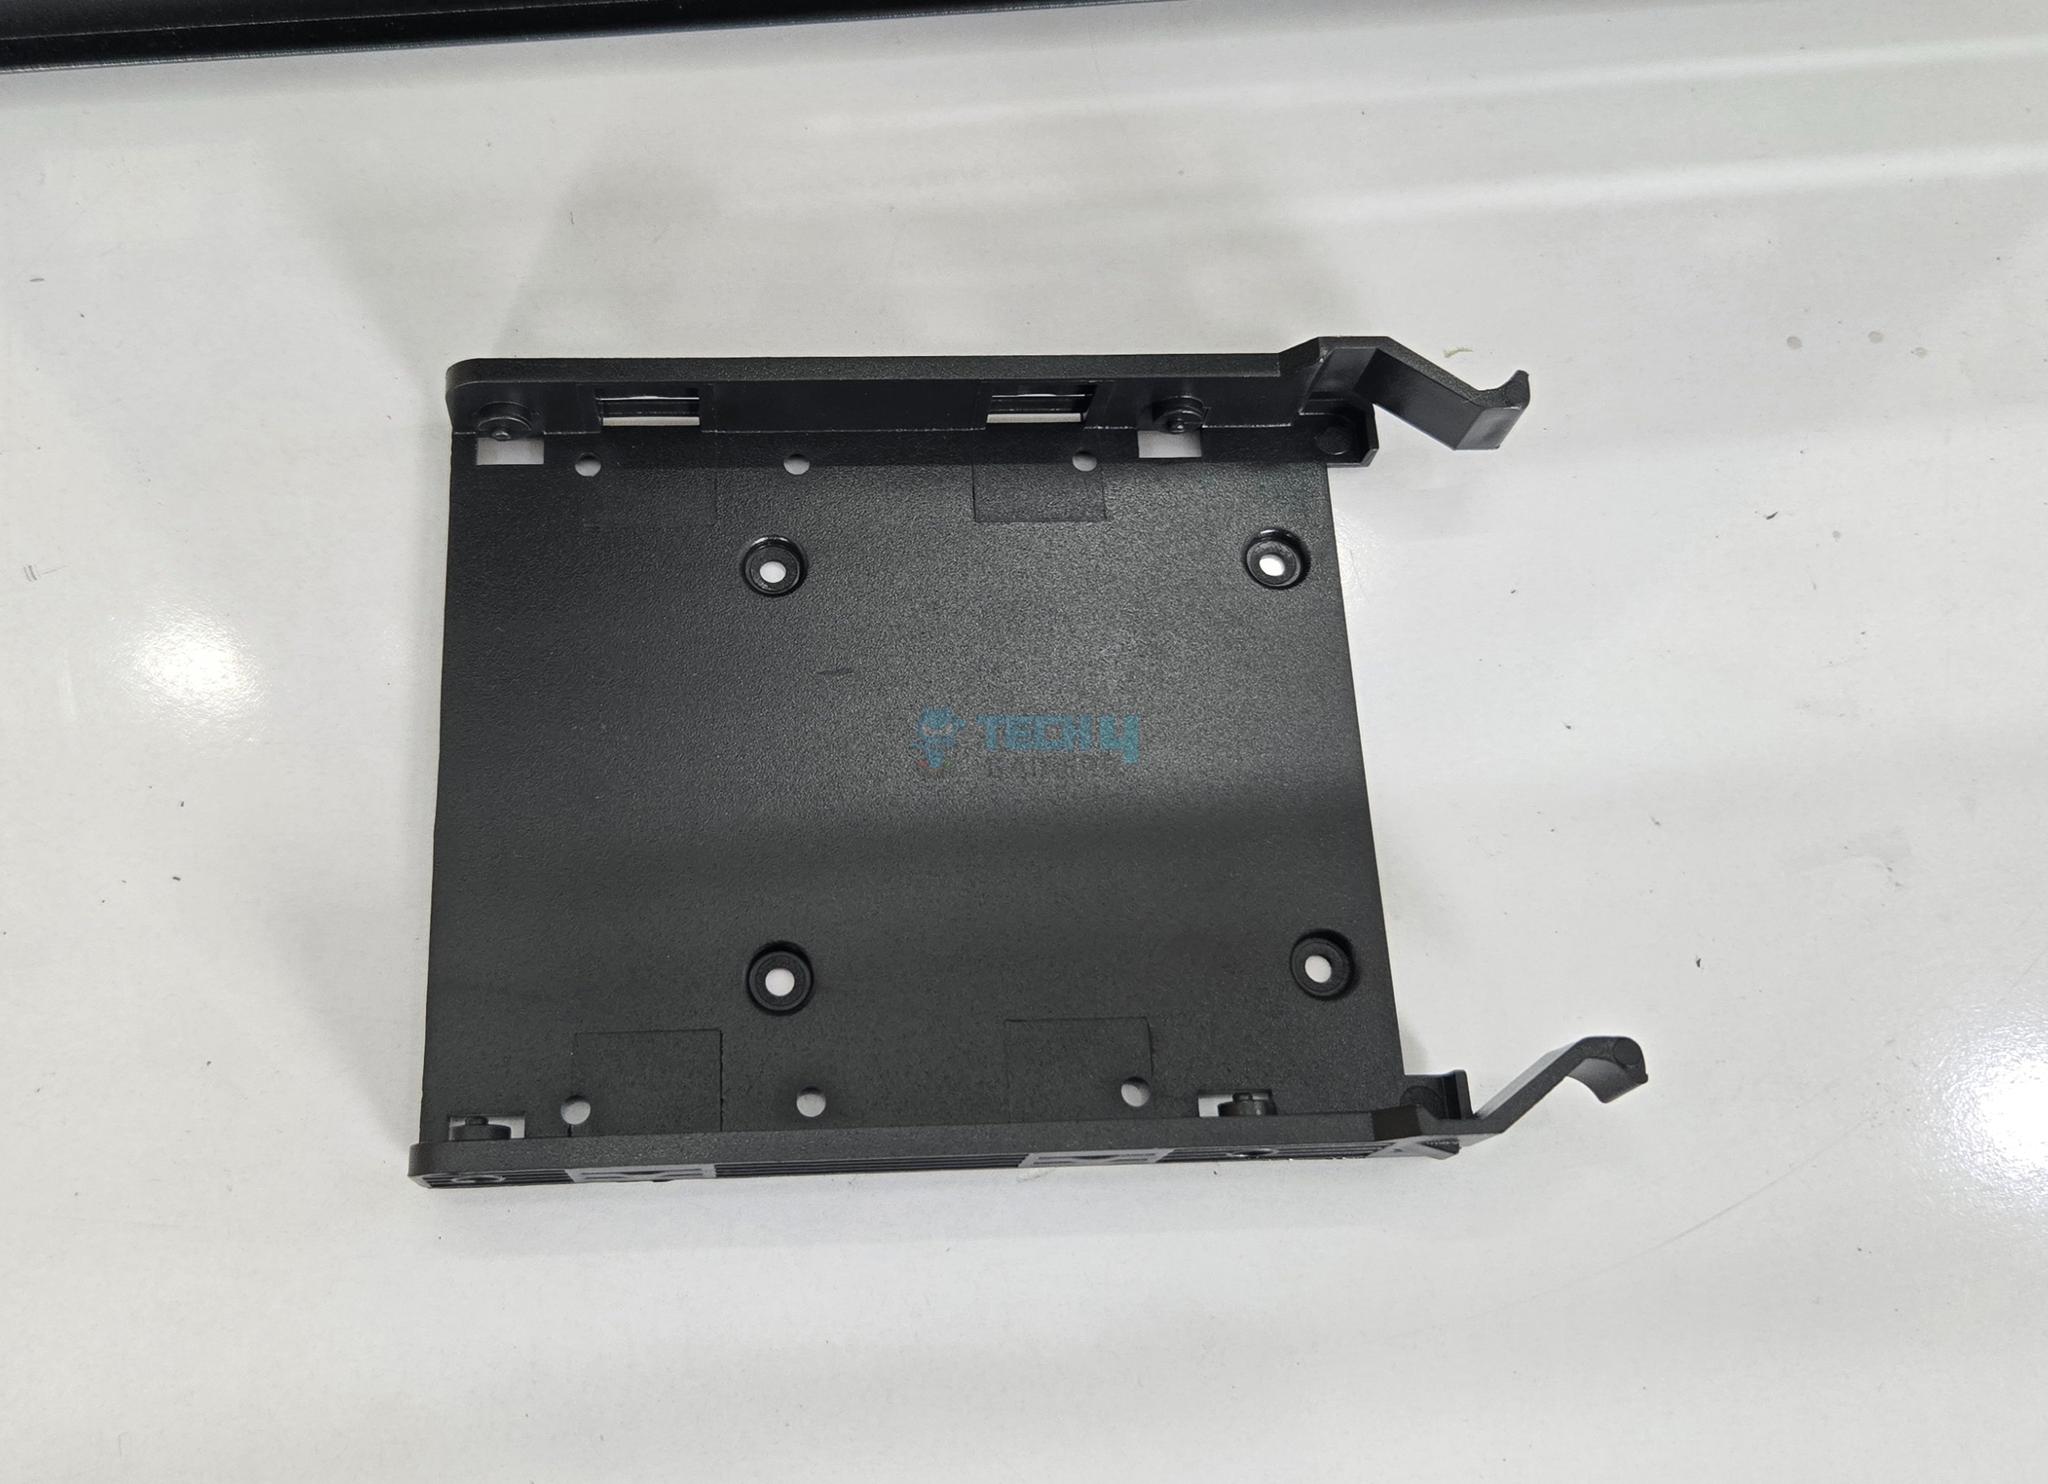
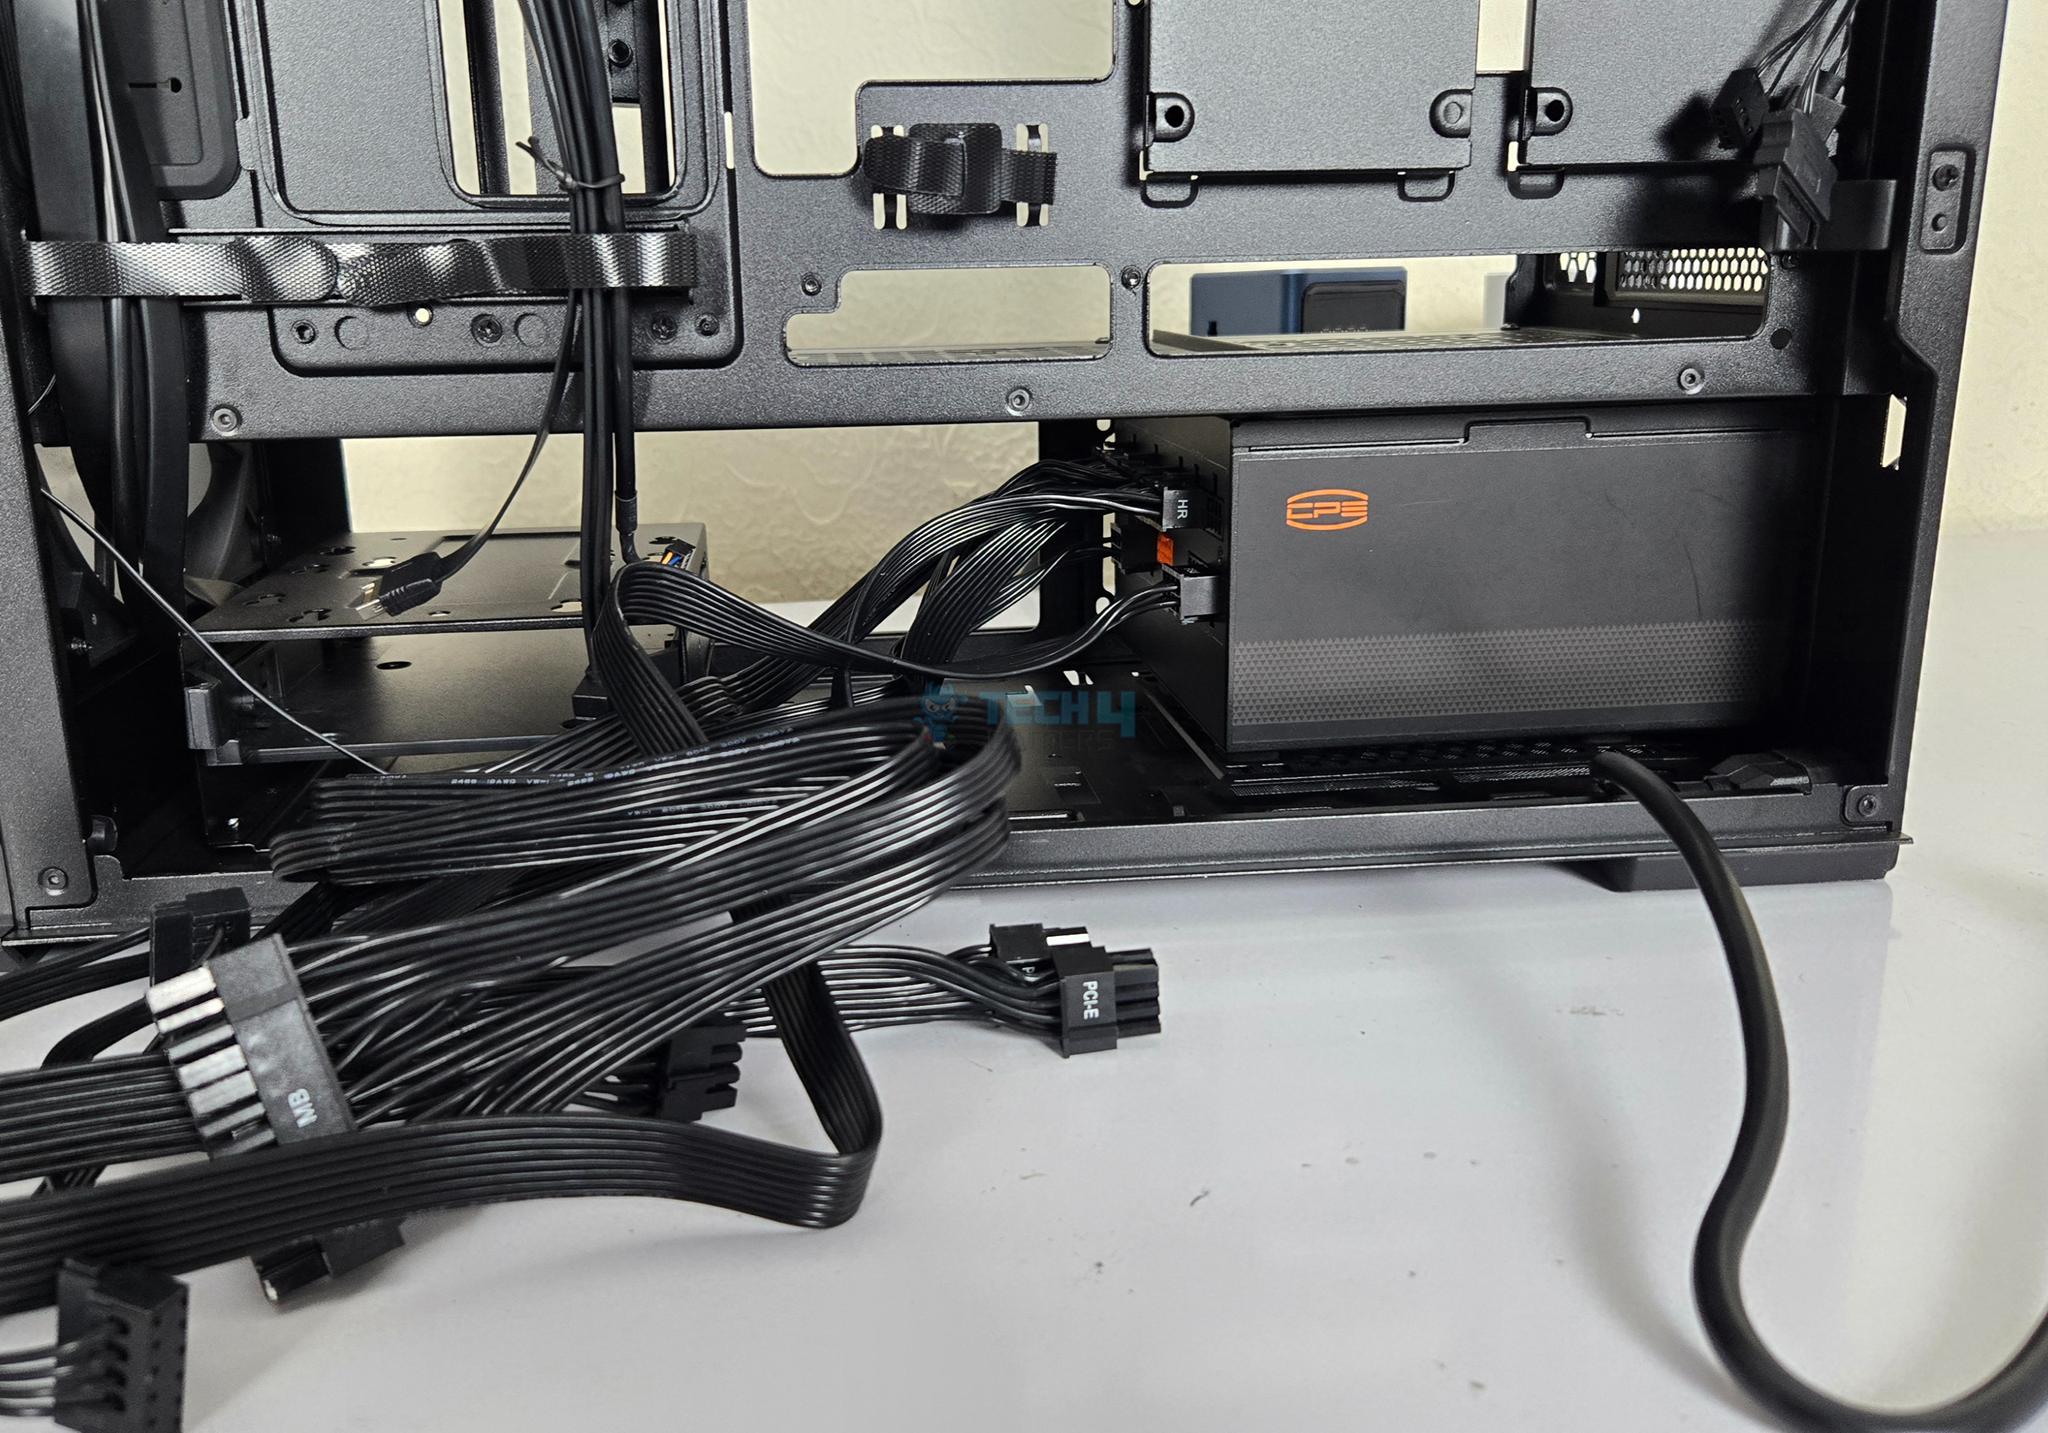
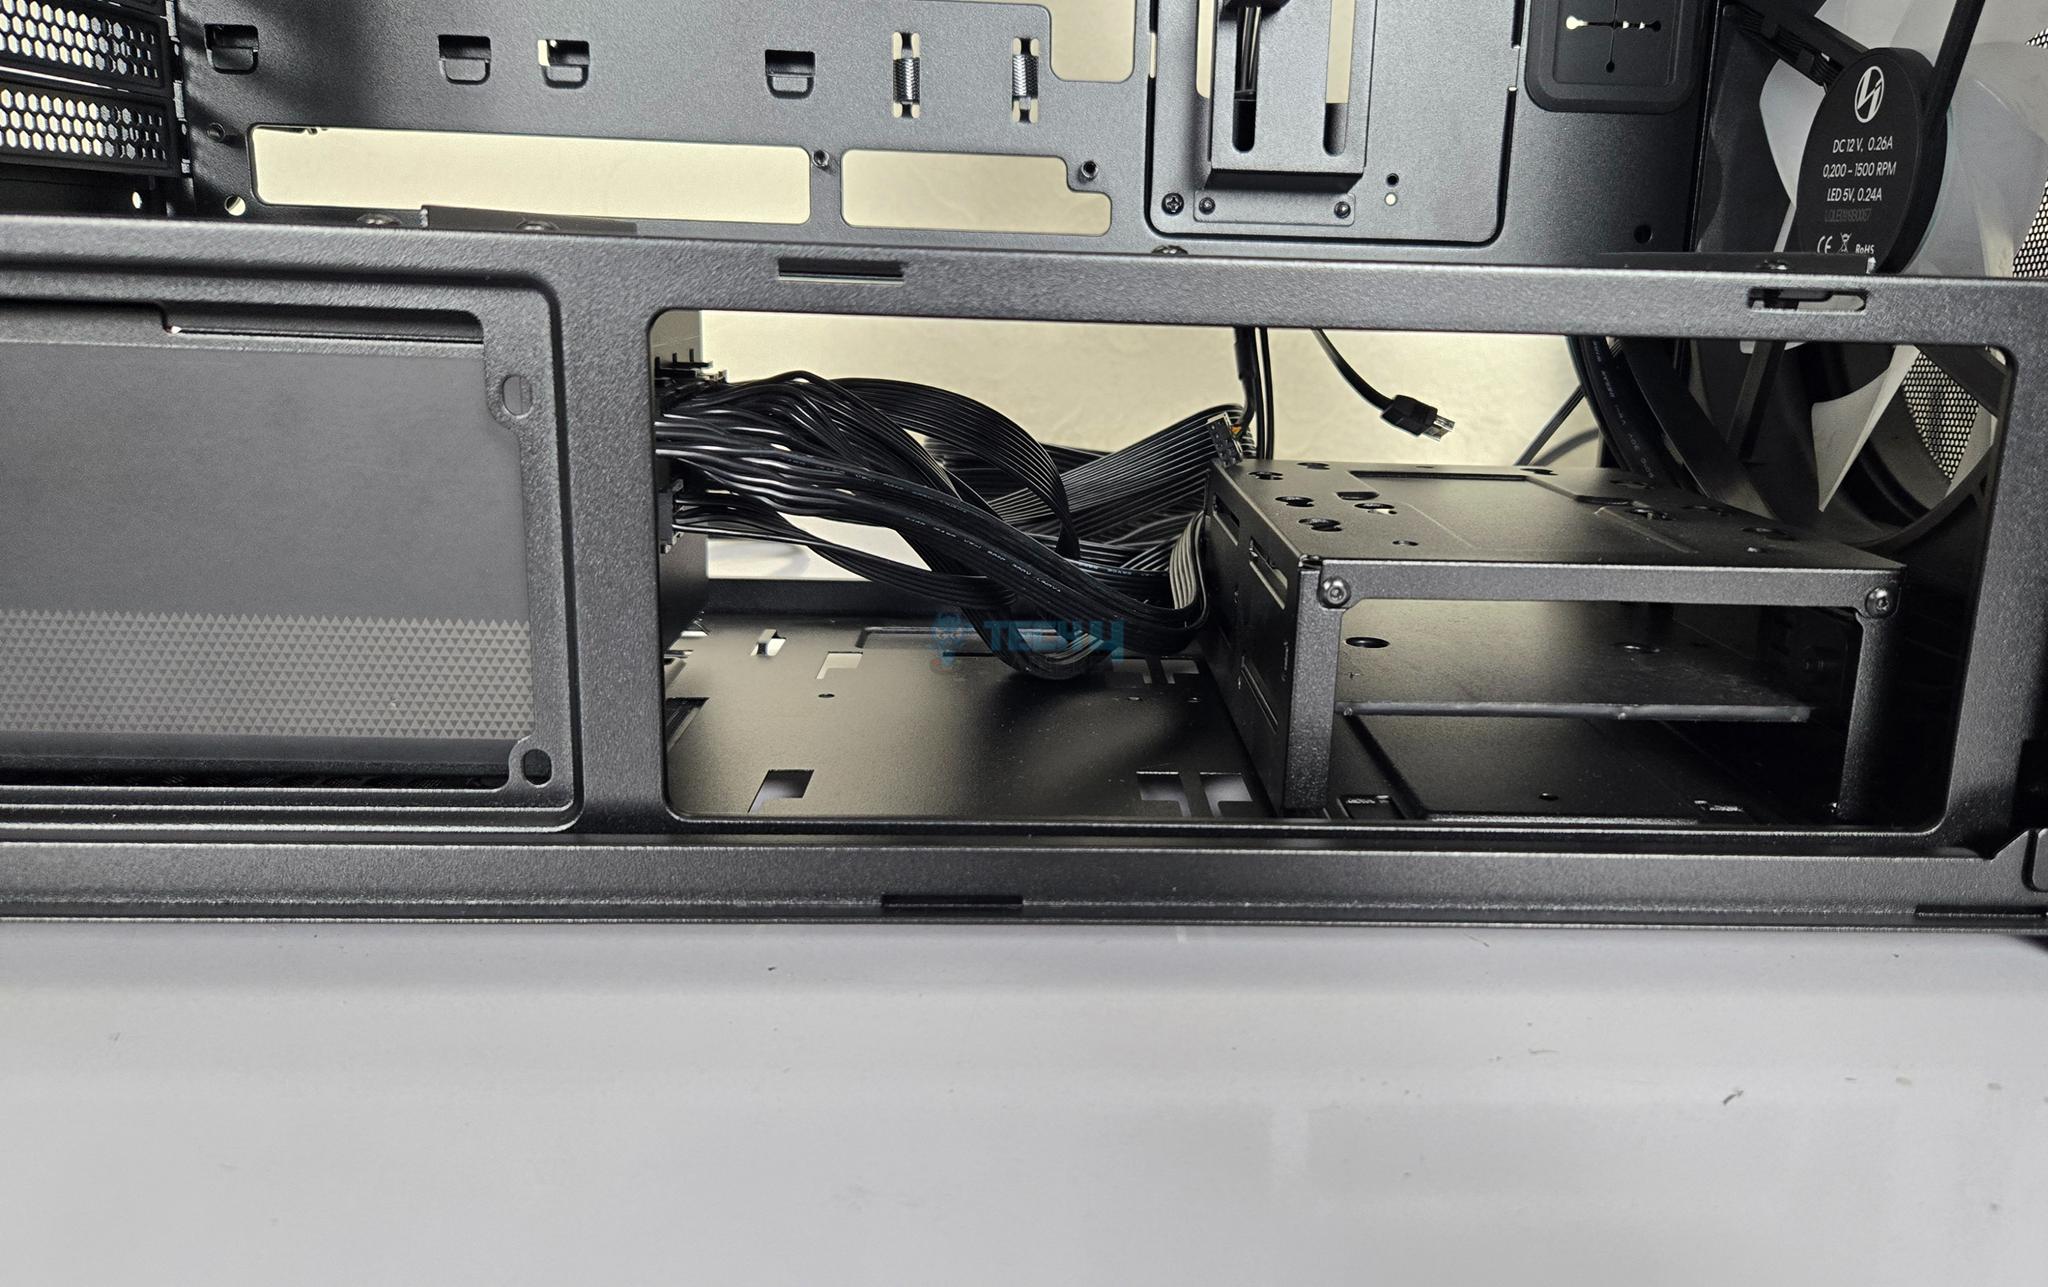
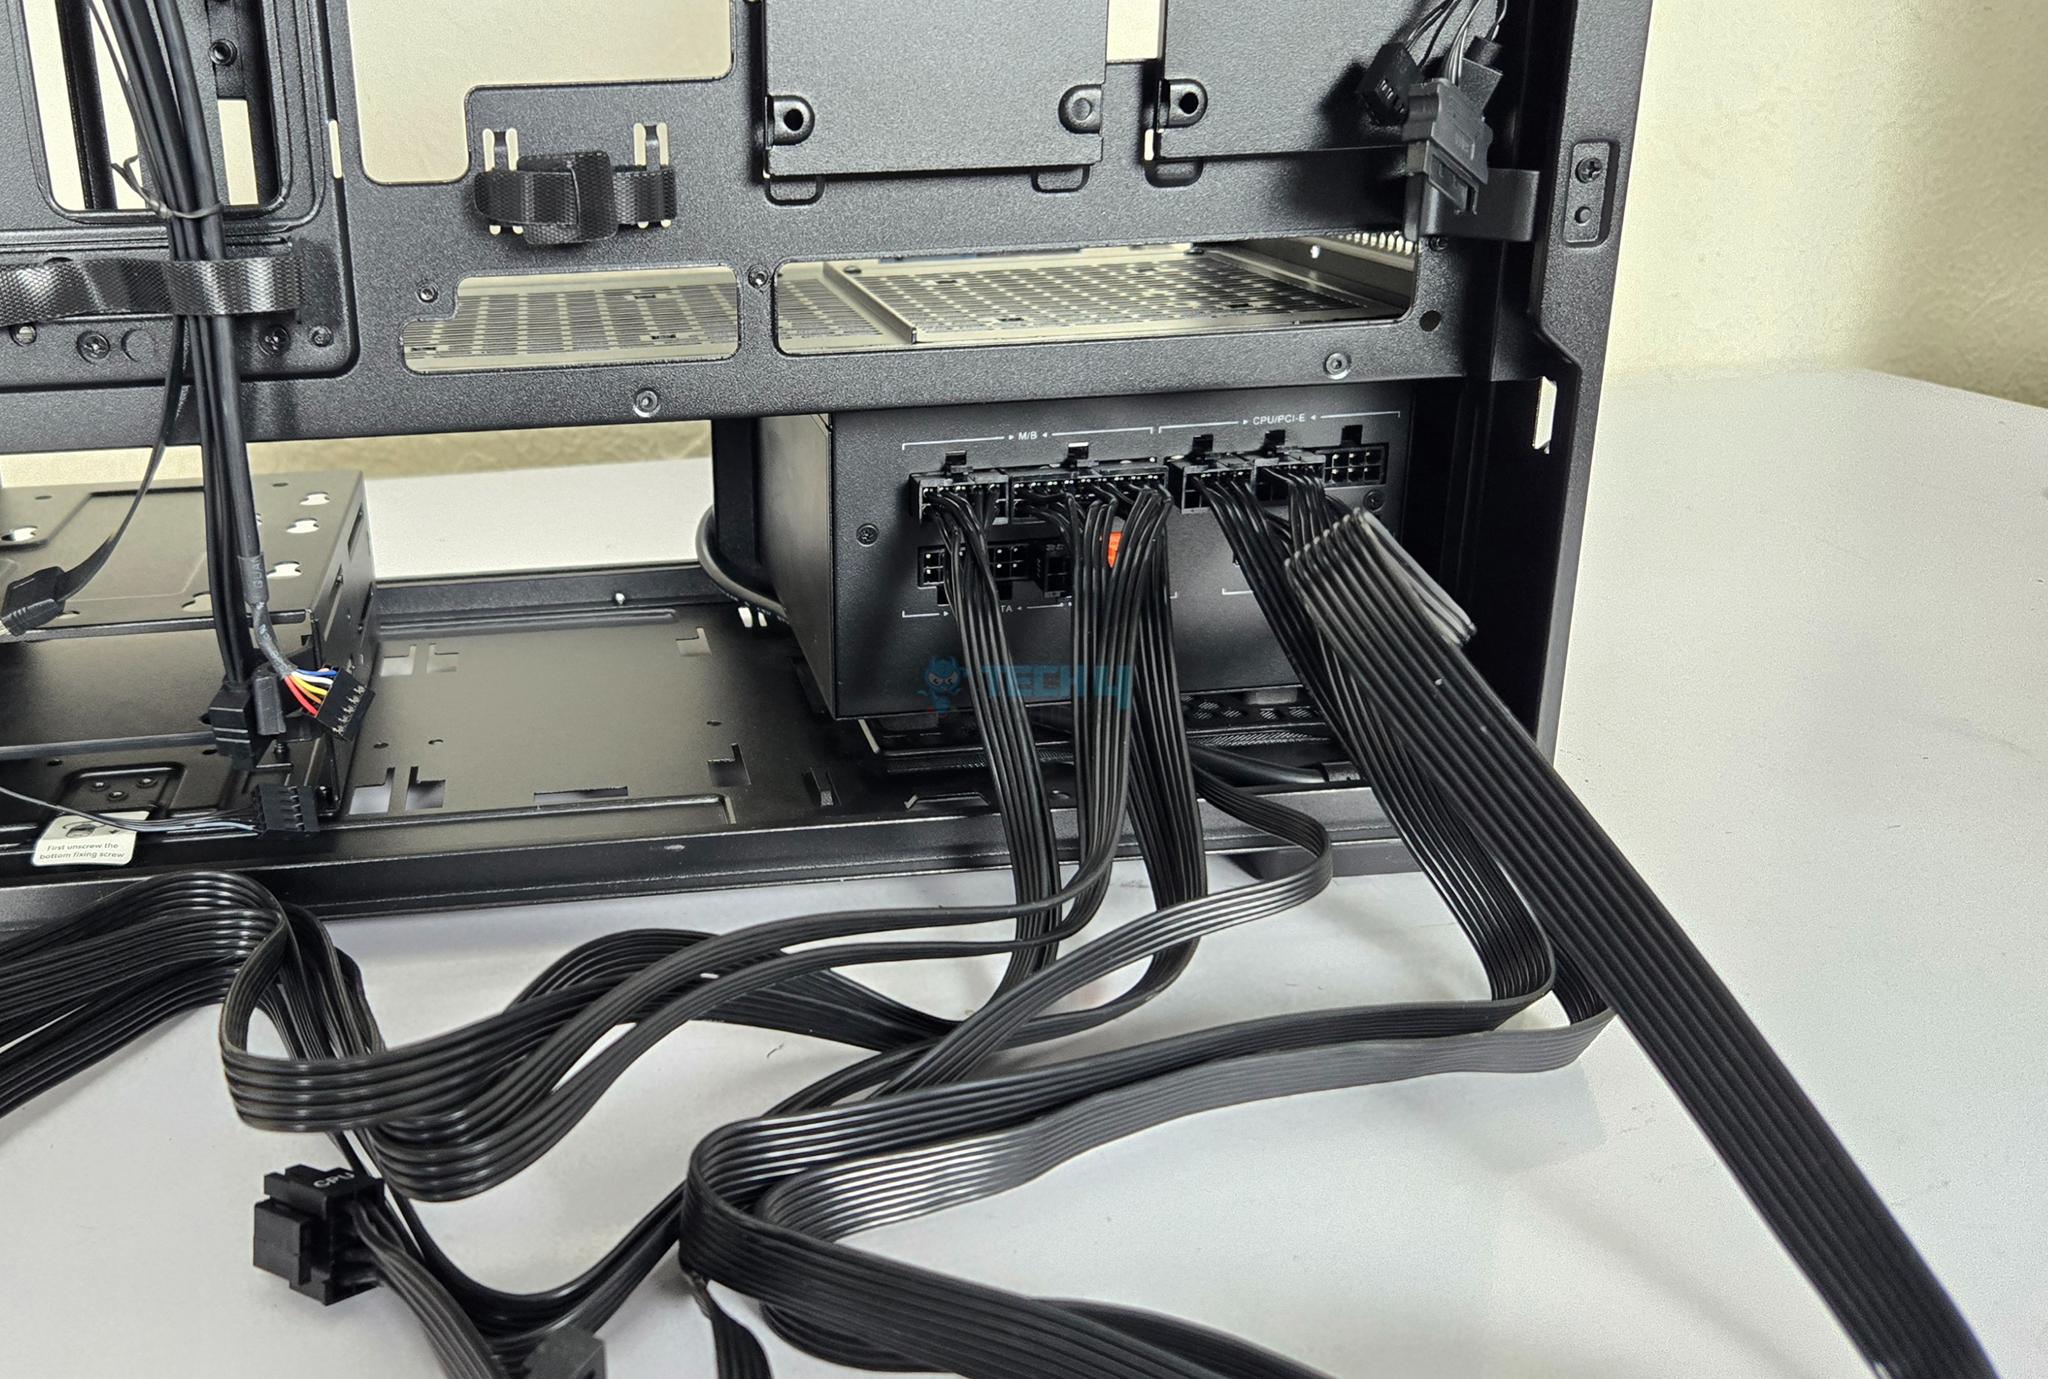
Lian Li has installed two drive cages each having a single slid or caddy. You can install 1x 2.5” and 1x 3.5” drives in each cage making a total count of 4x drives. However, the space between the PSU area and the drive cages is so narrow that you are required to remove at-least one drive cage in case PSU is installed in standard layout. This reduces the number of storage drive by design.
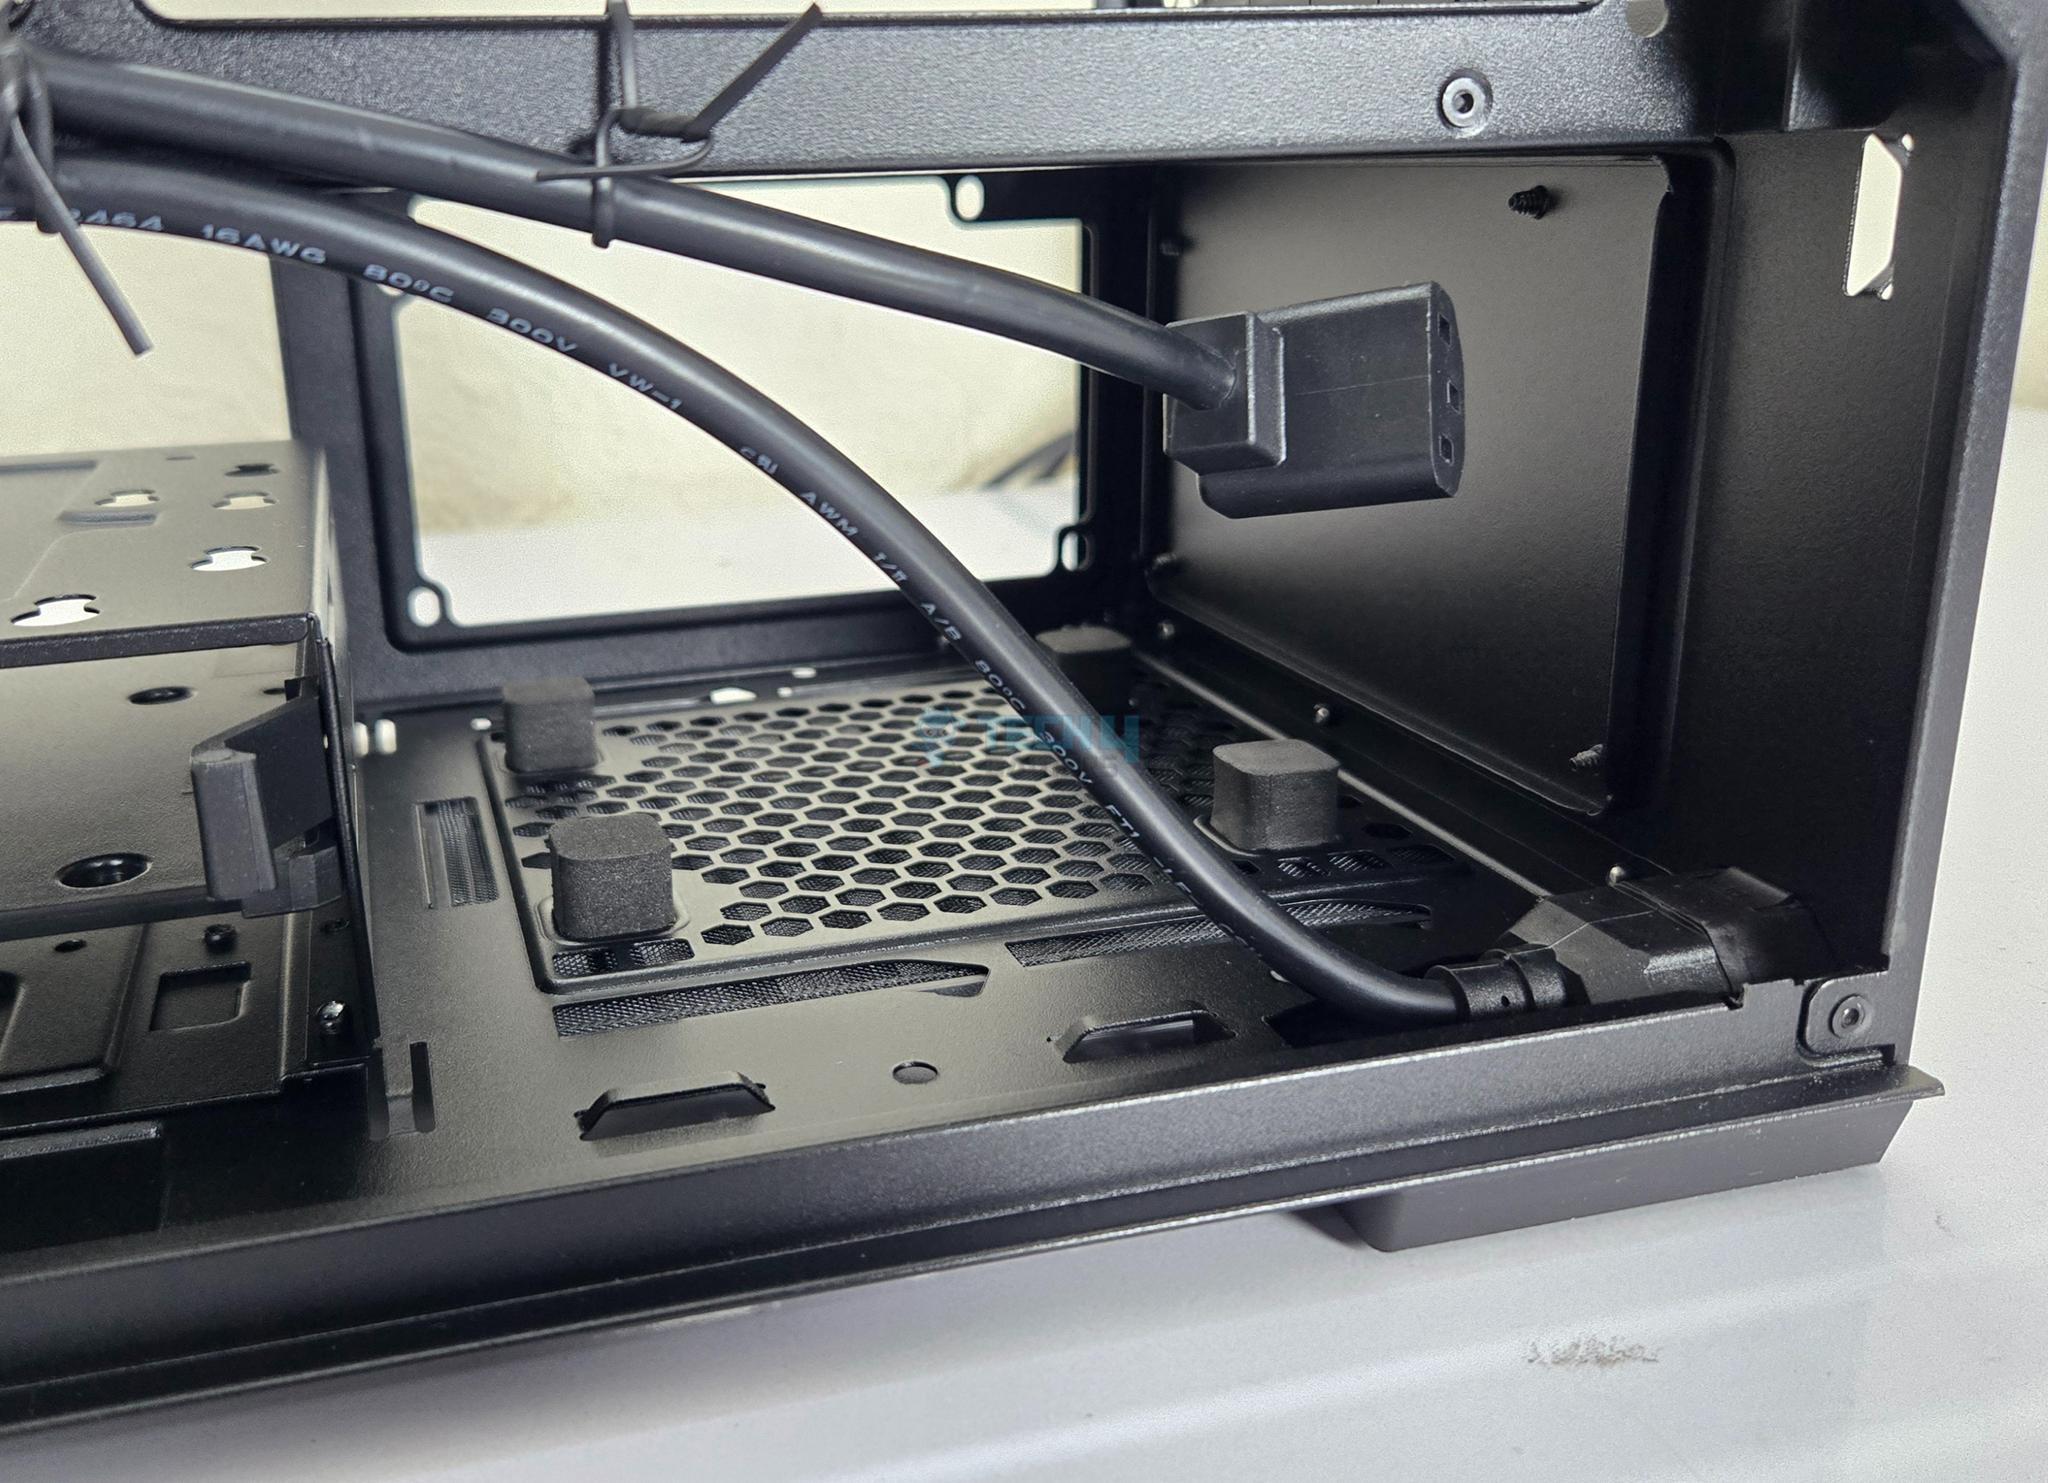
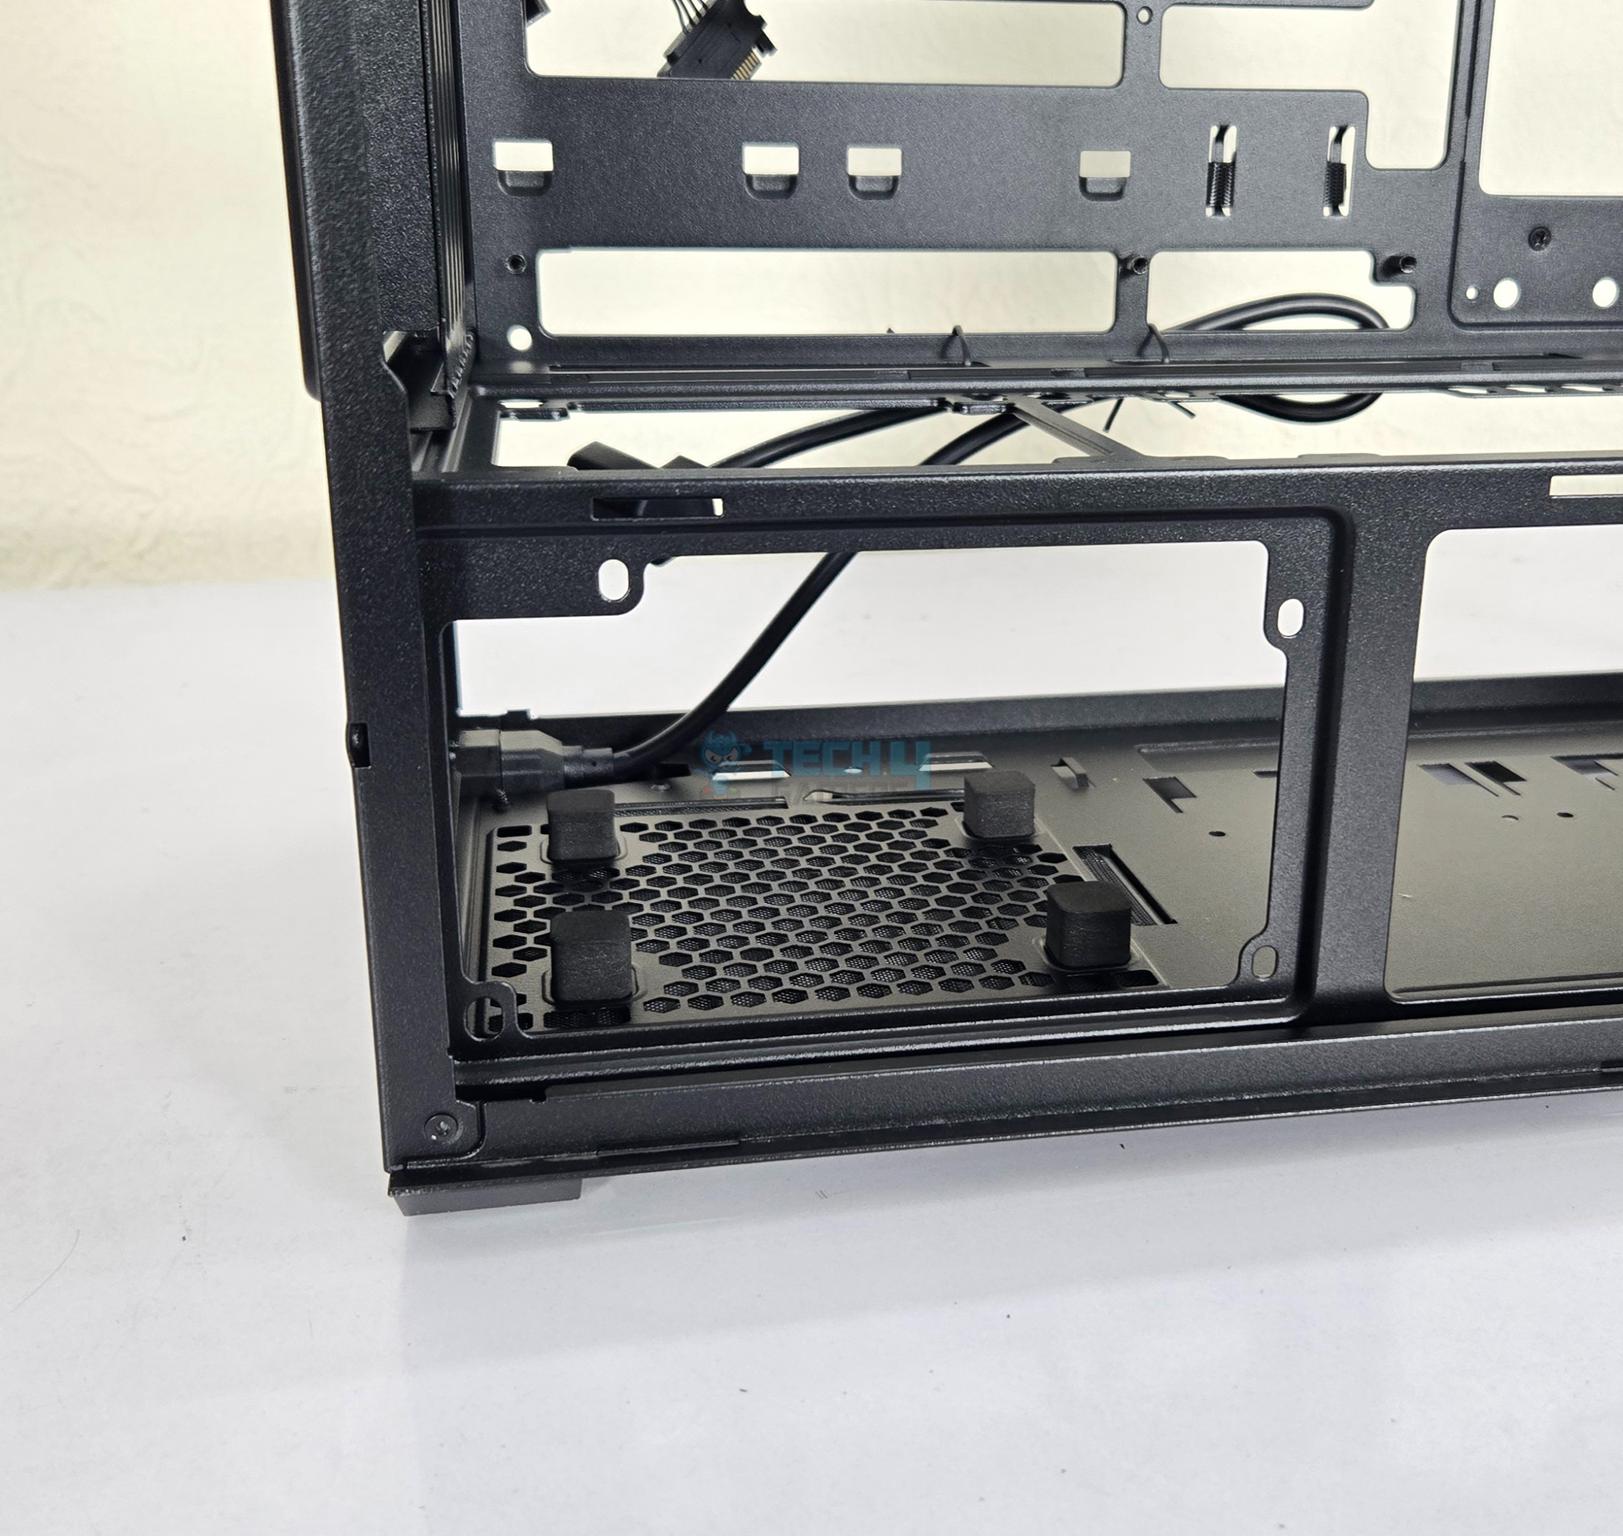
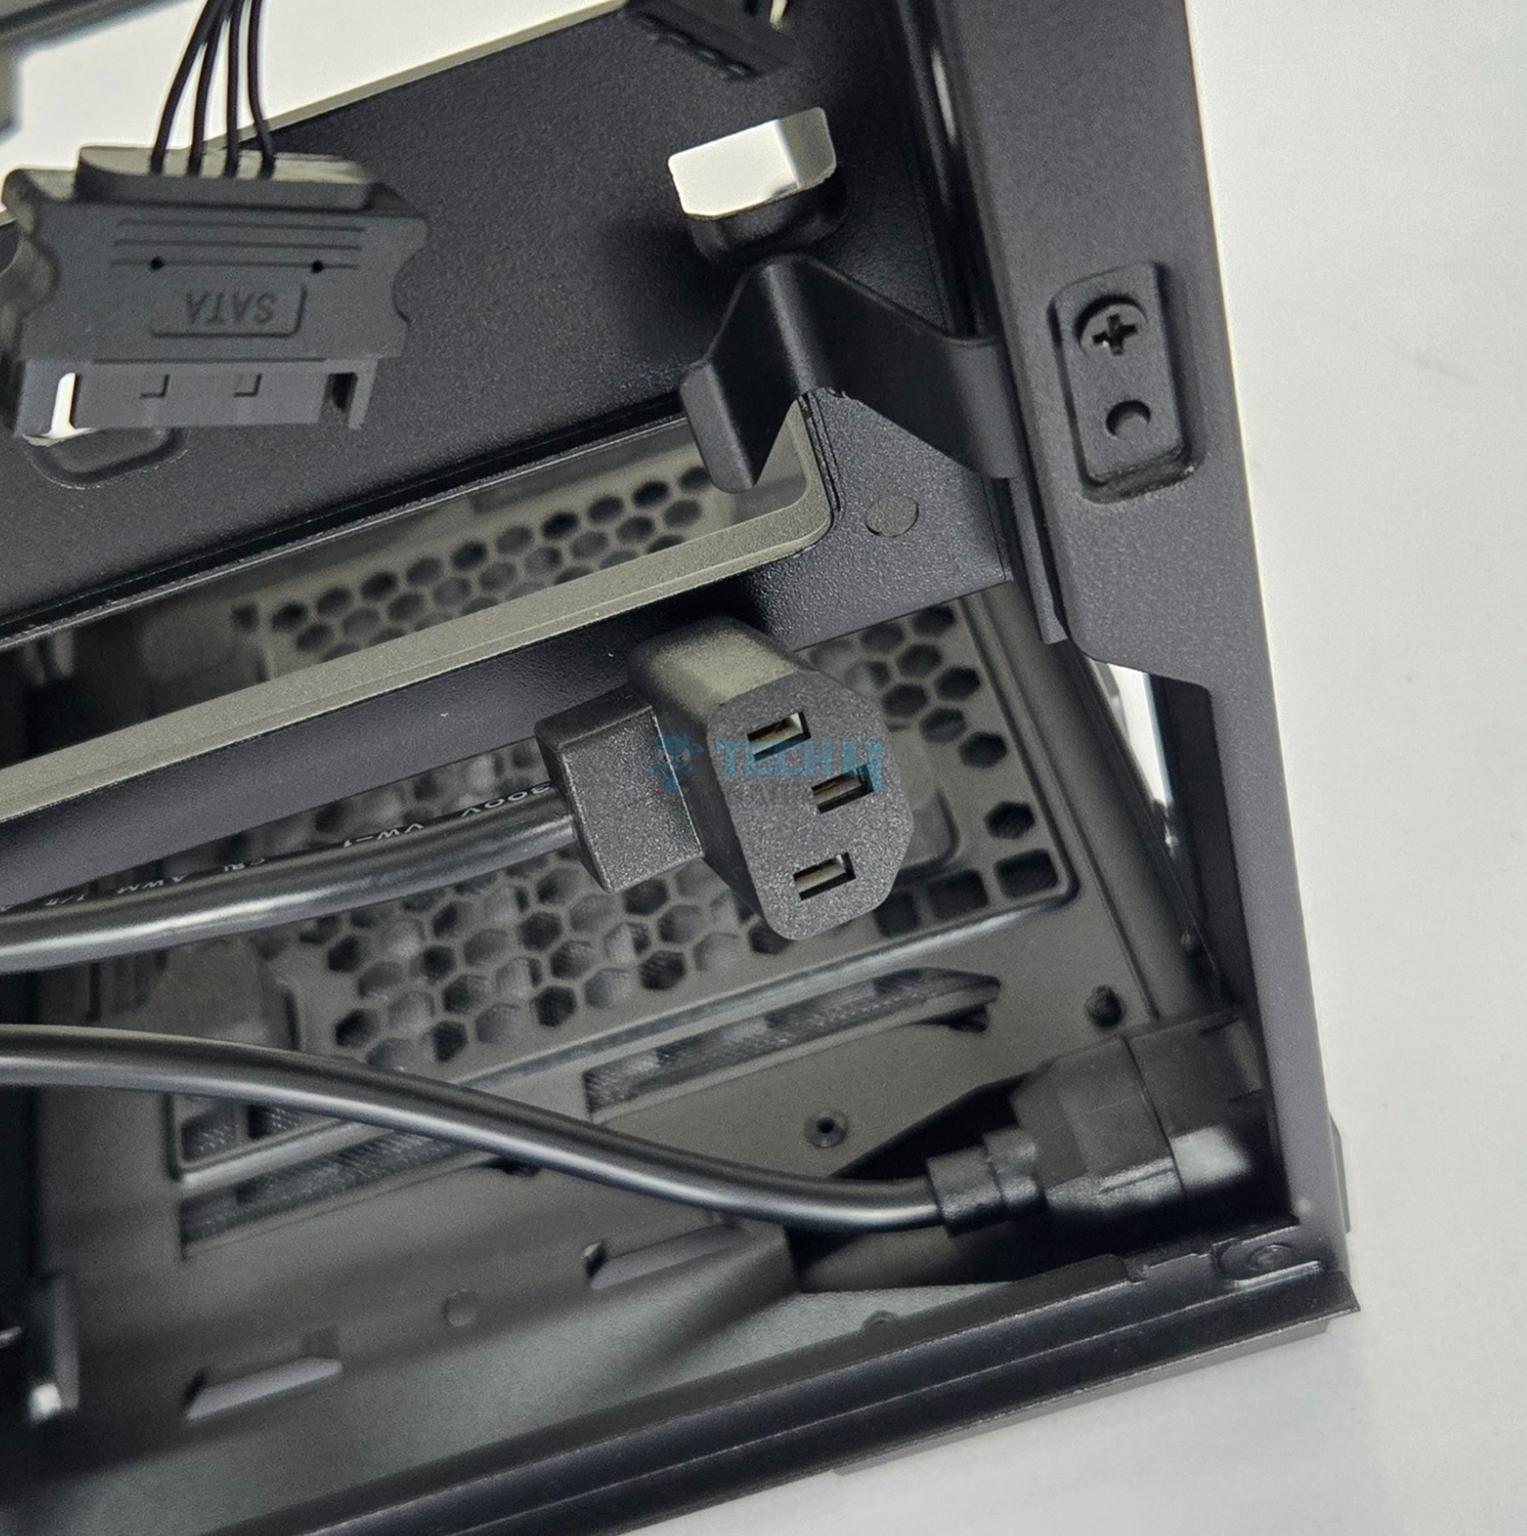
You can see 4 raised legs with rubber pads in the PSU bay. This height is actually needed so that you can route the power cord (visible in the picture) under the PSU. You can also see limited space between the PSU bay and the HDD cage. In case you are wondering why this power cord then it is because you can install PSU in either of two layouts. One with connector side facing the drive cage and the other in which connector side faces the side panel. The later would be handy for the back connect motherboard.
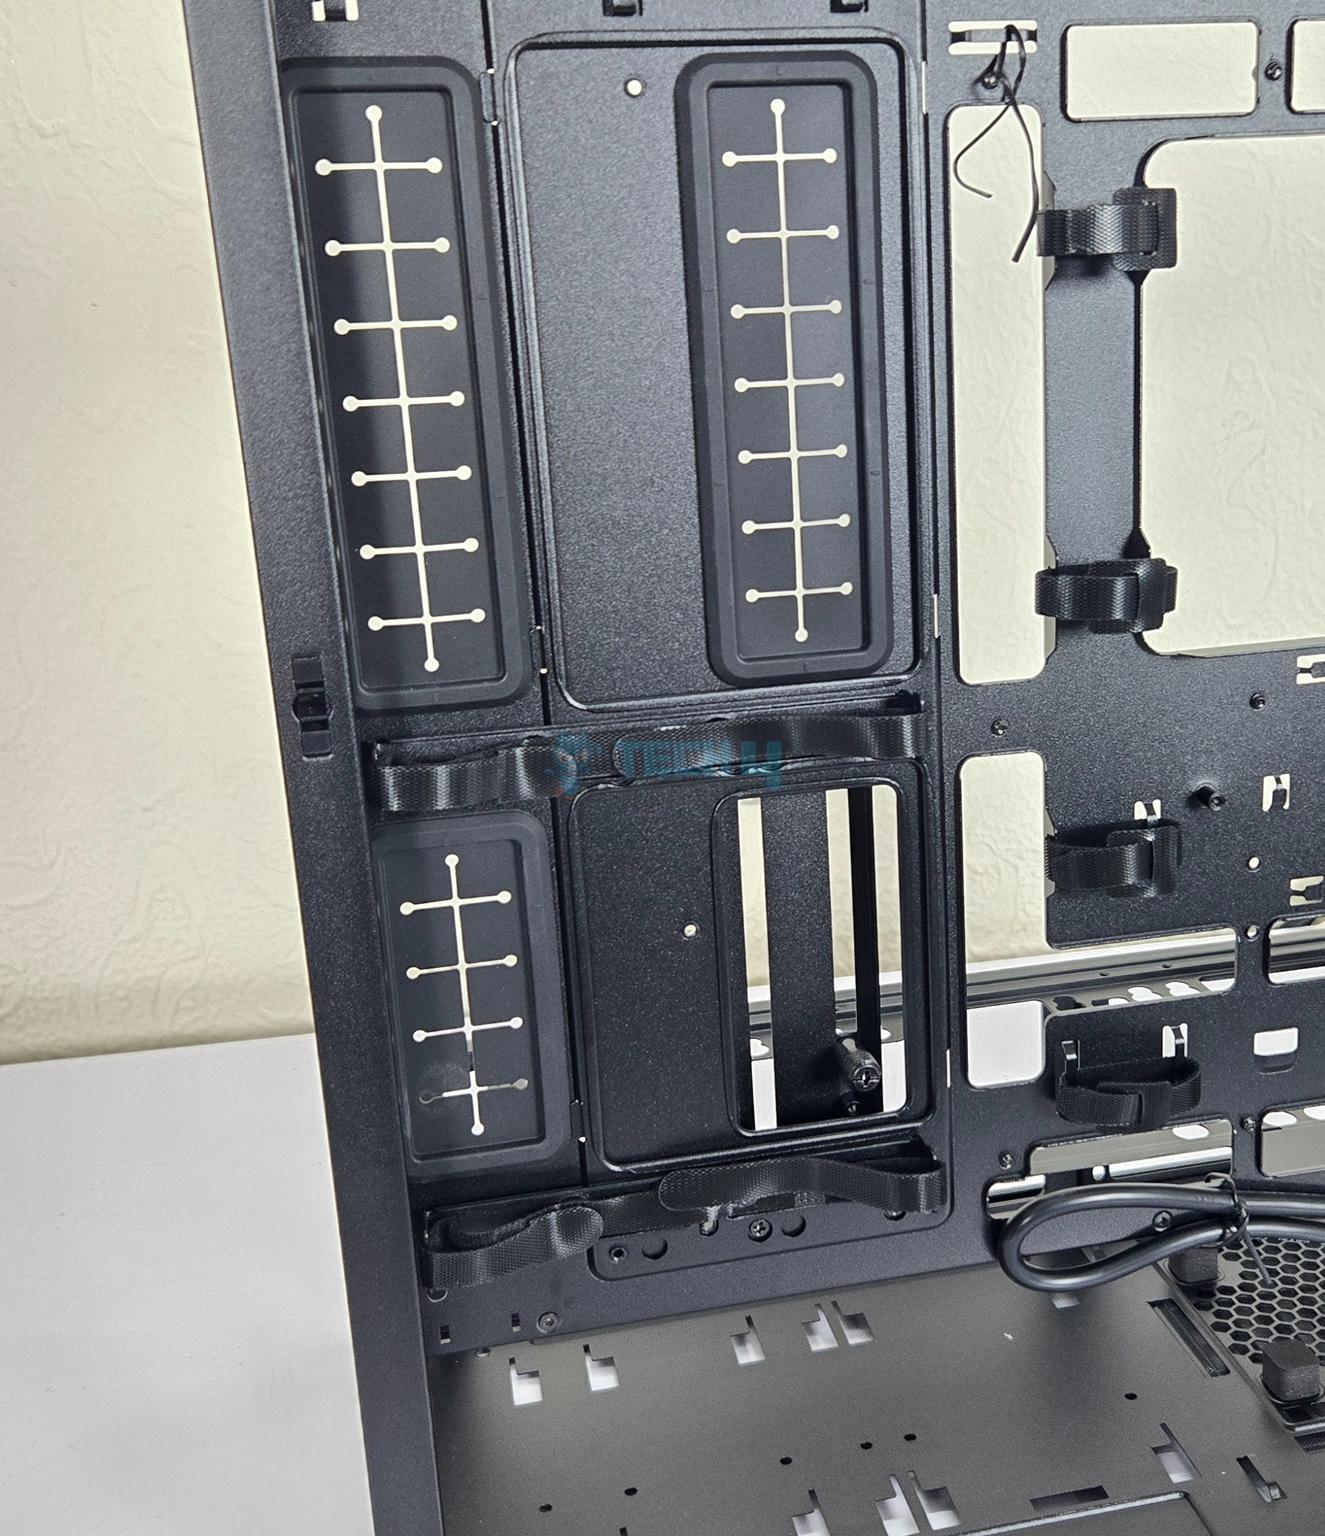
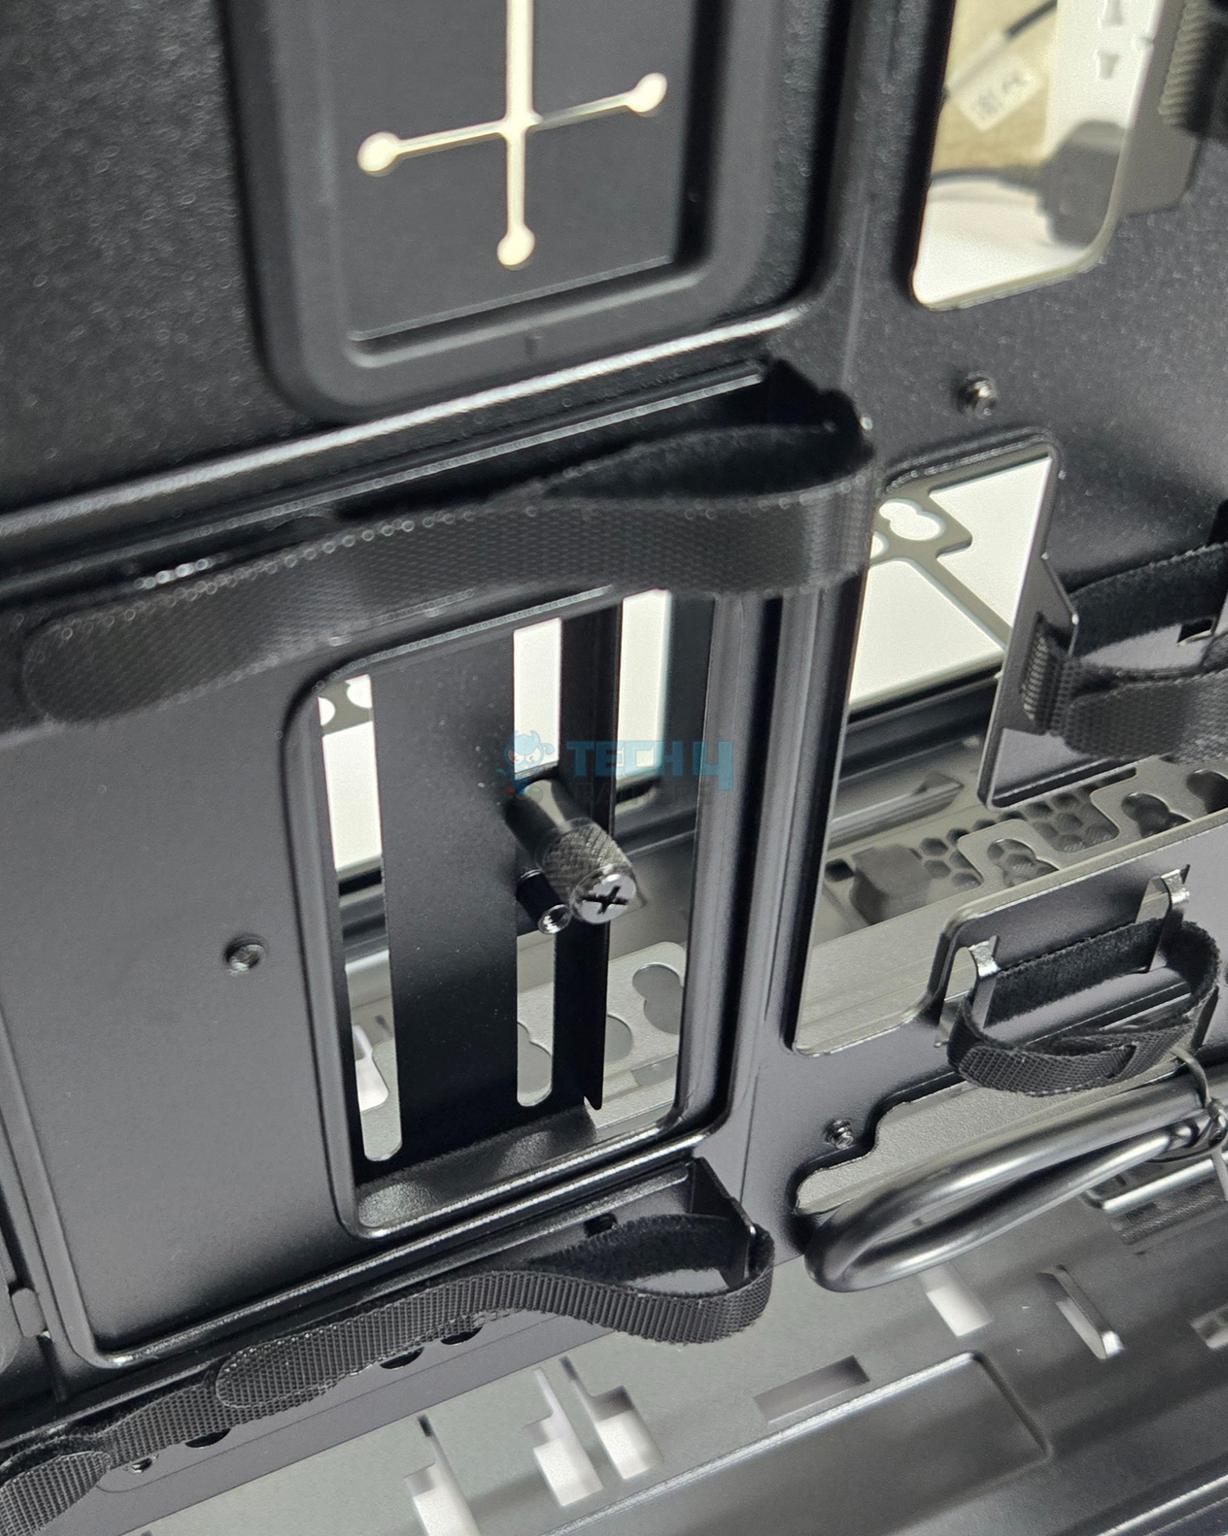
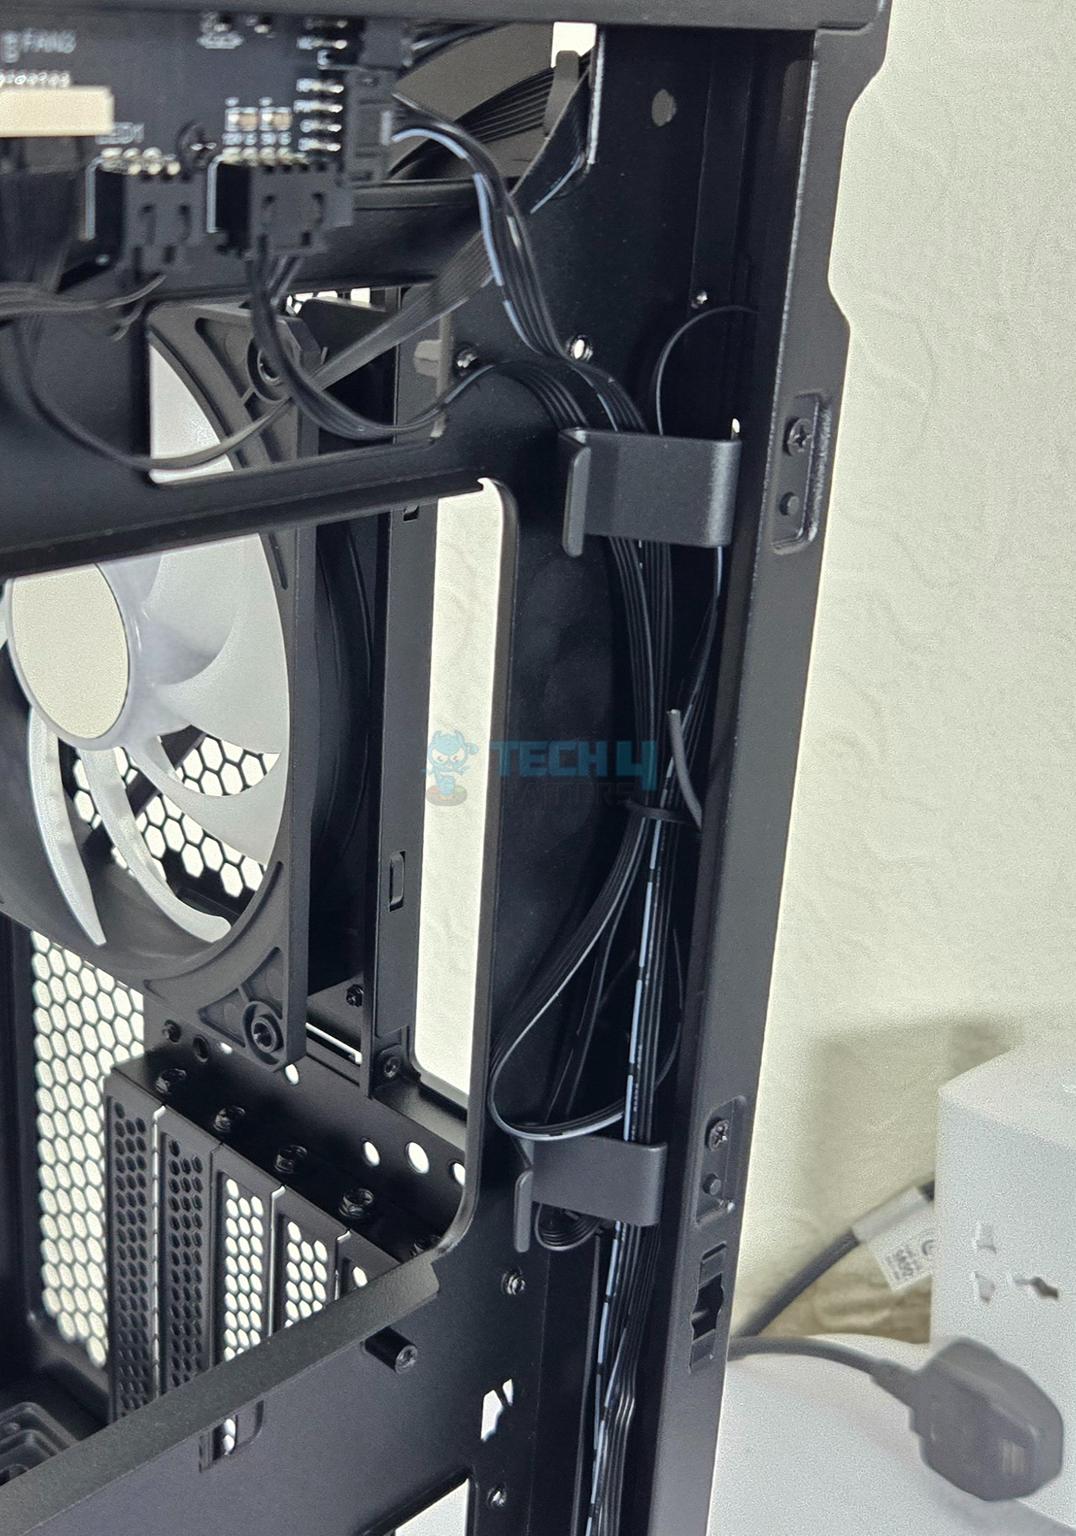
Lian Li has provided hook and loop or Velcro strips and catching tabs for the cable management. The GPU support bracket has a thumb screw. You need to lose this to adjust the height of the graphics card. This is a trivial design since you will need to remove both side panels to work on this aspect.
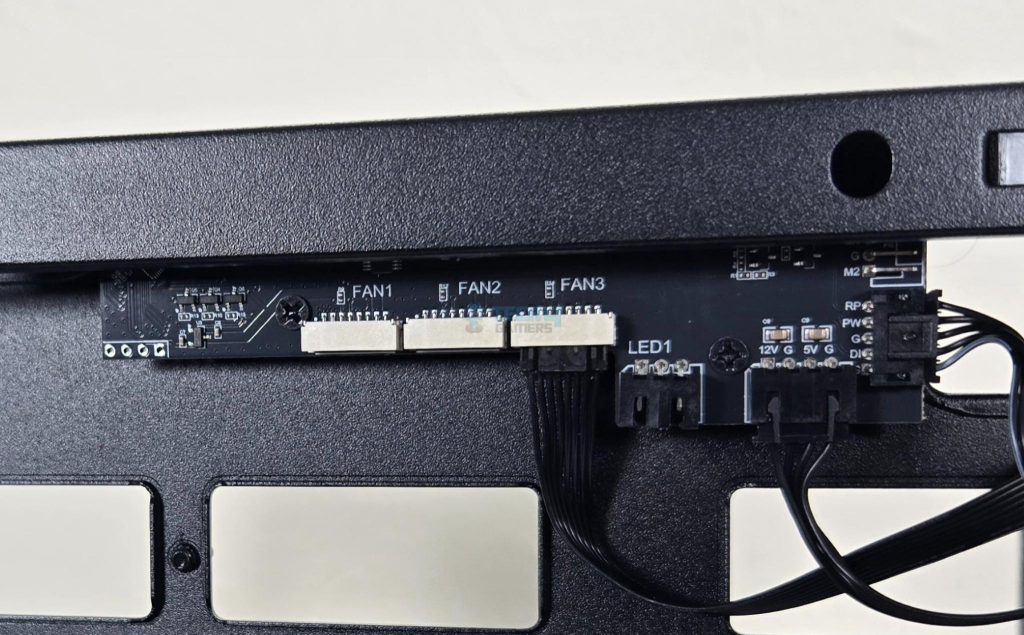
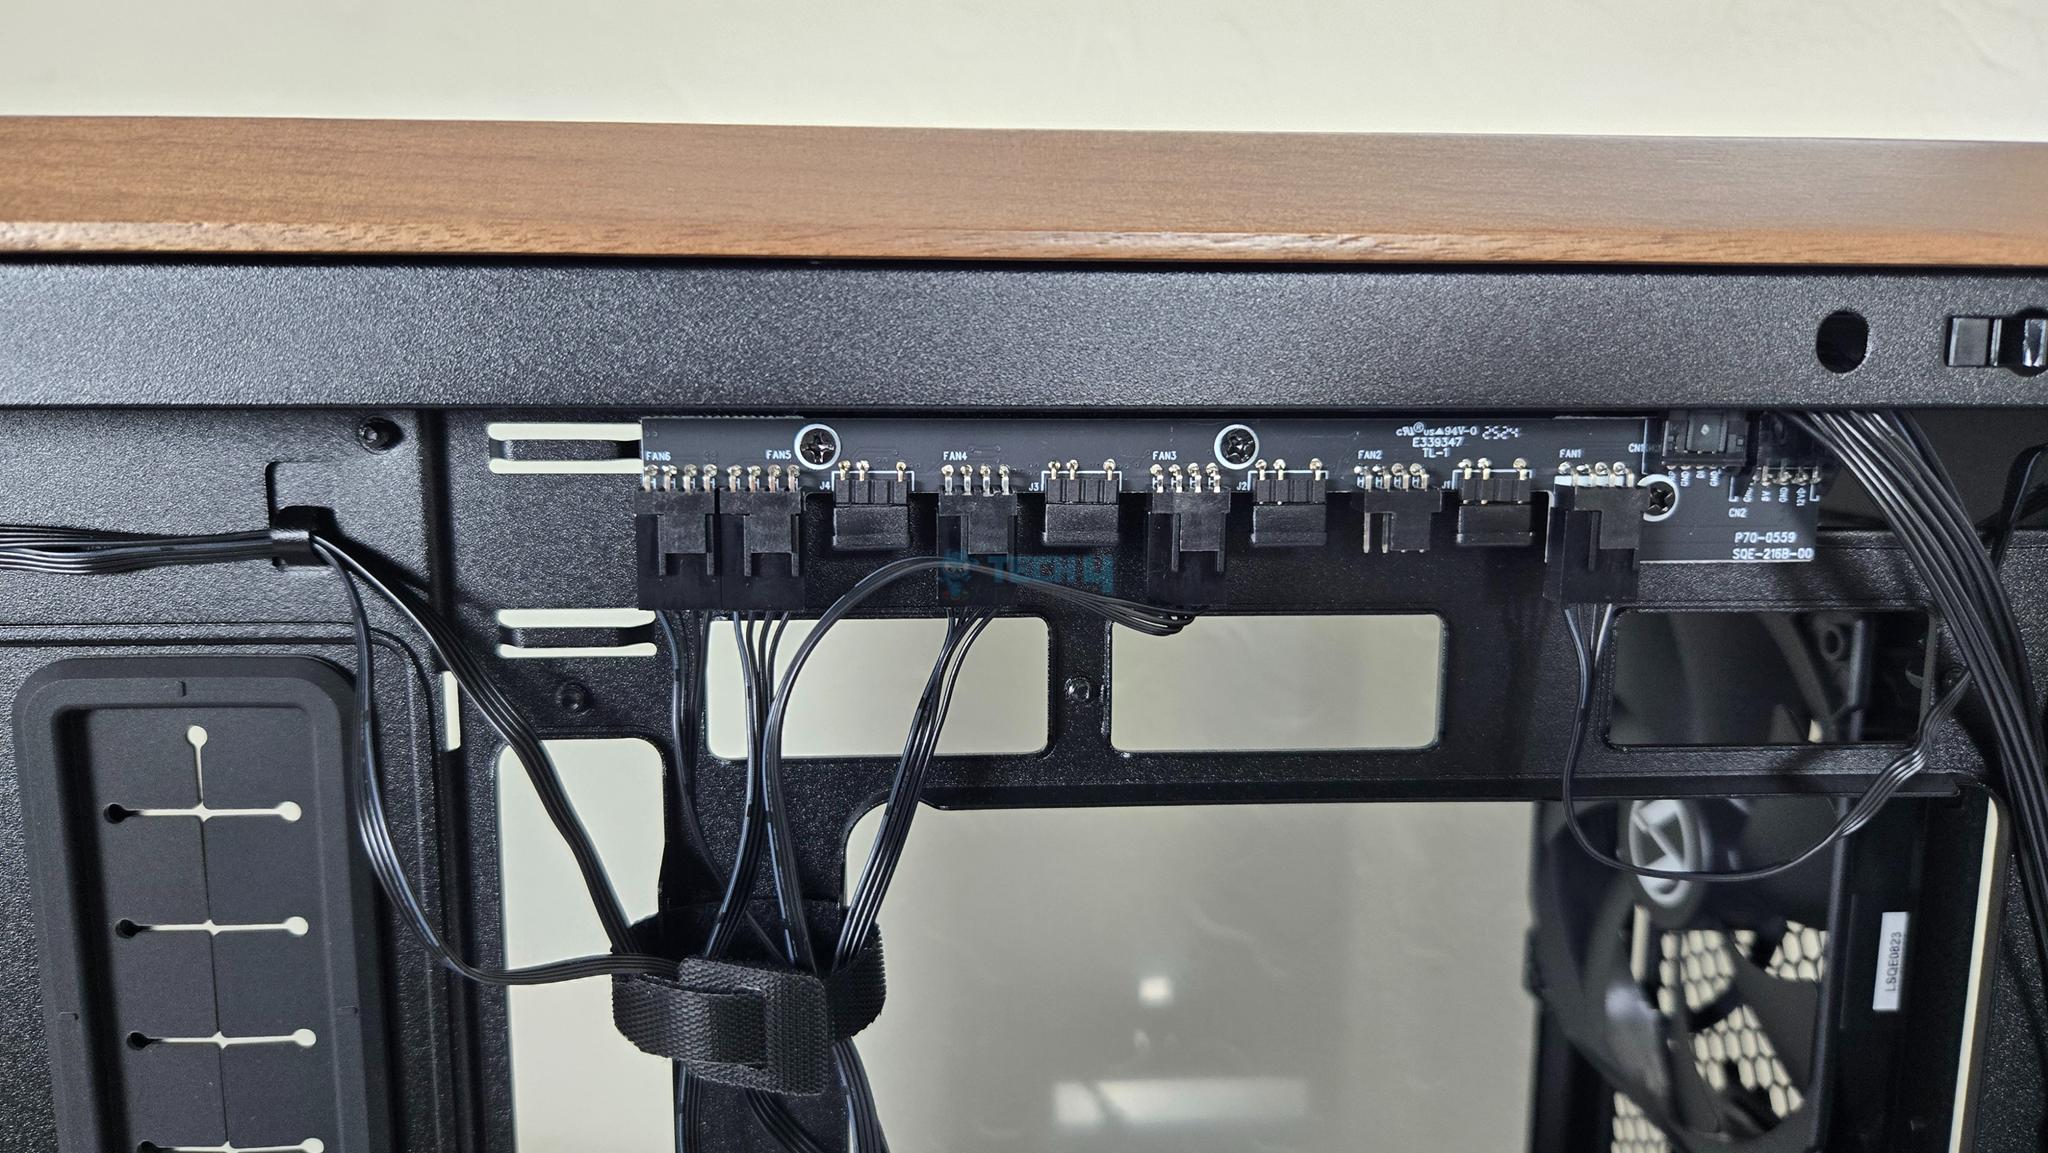
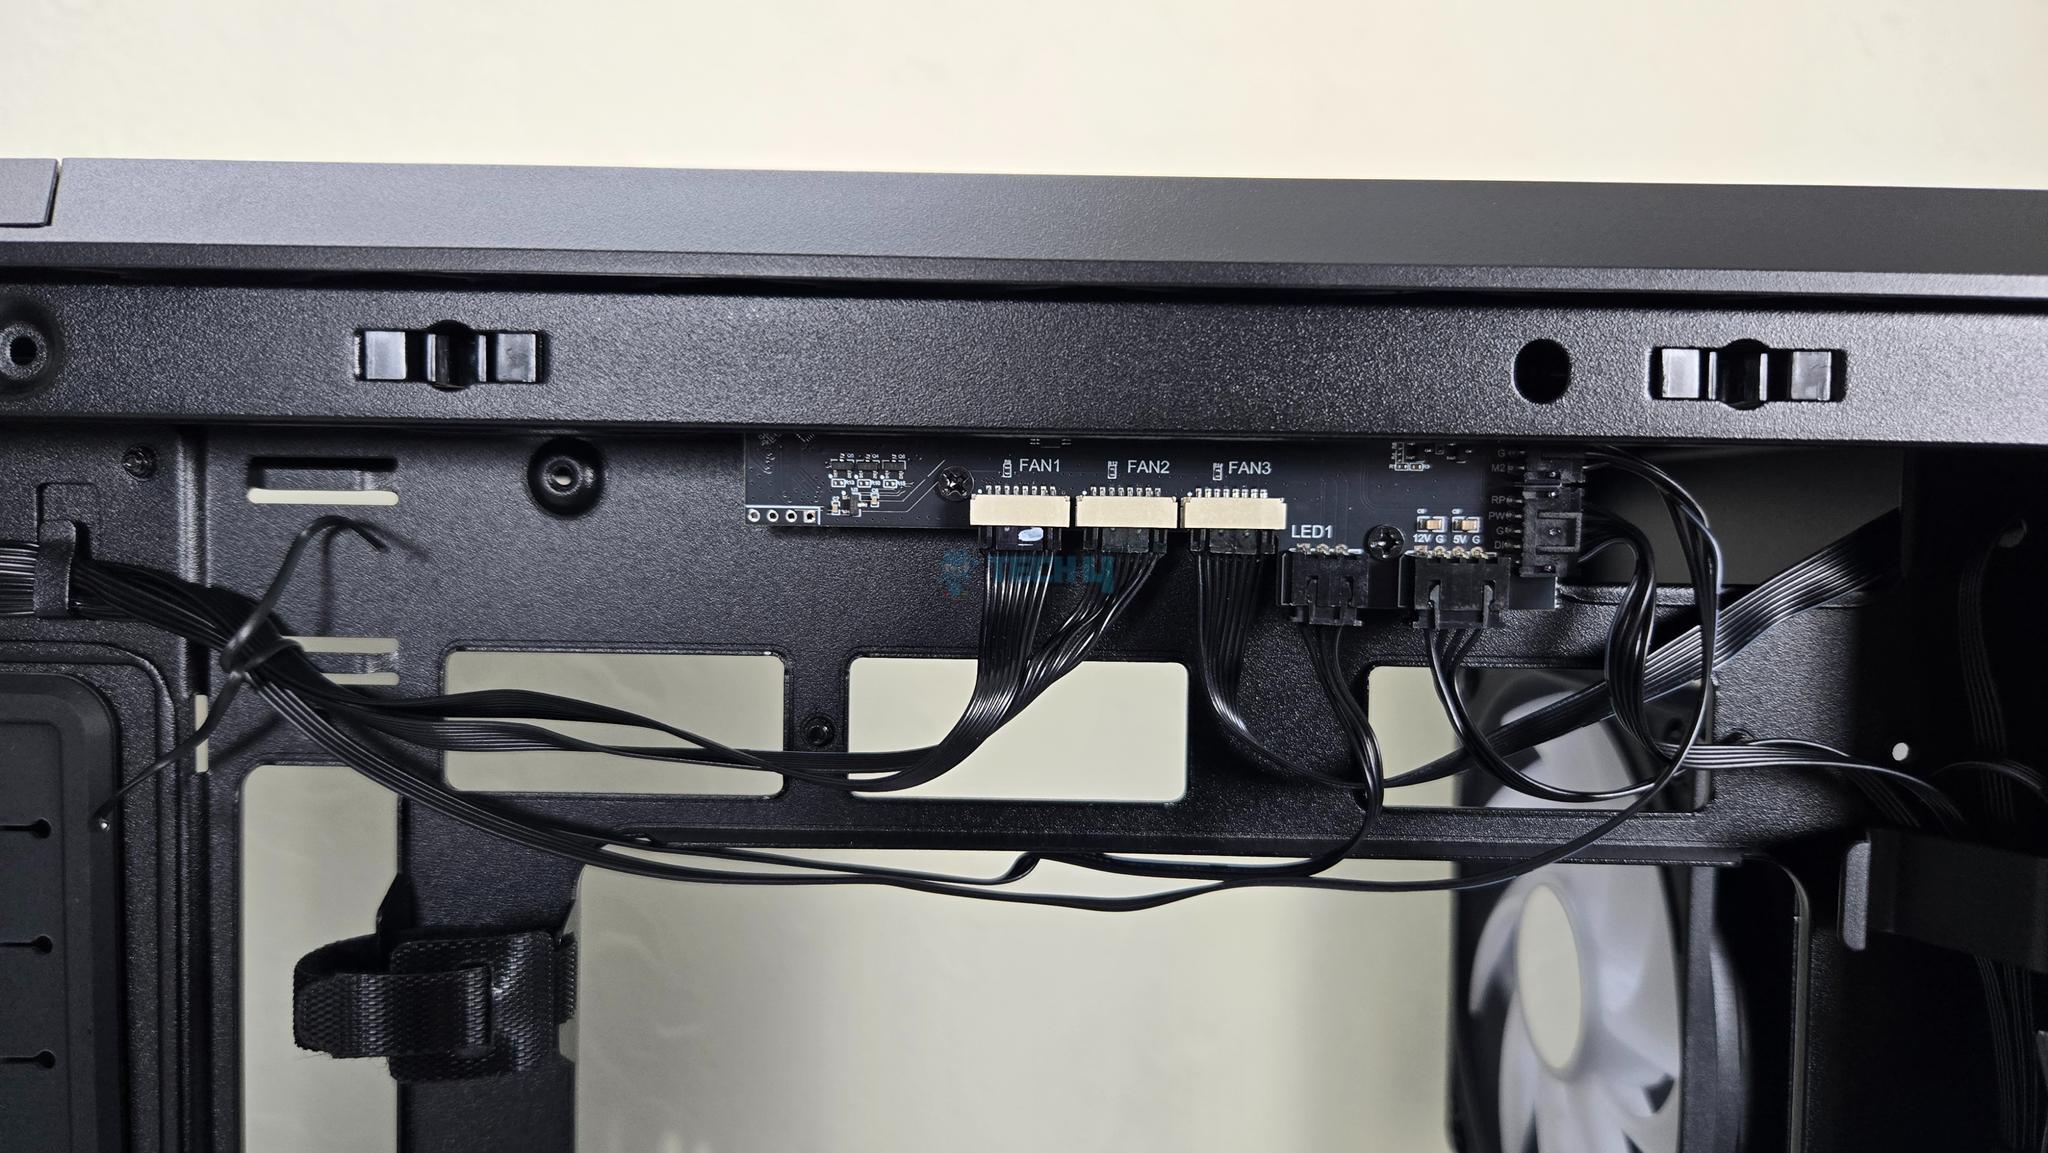
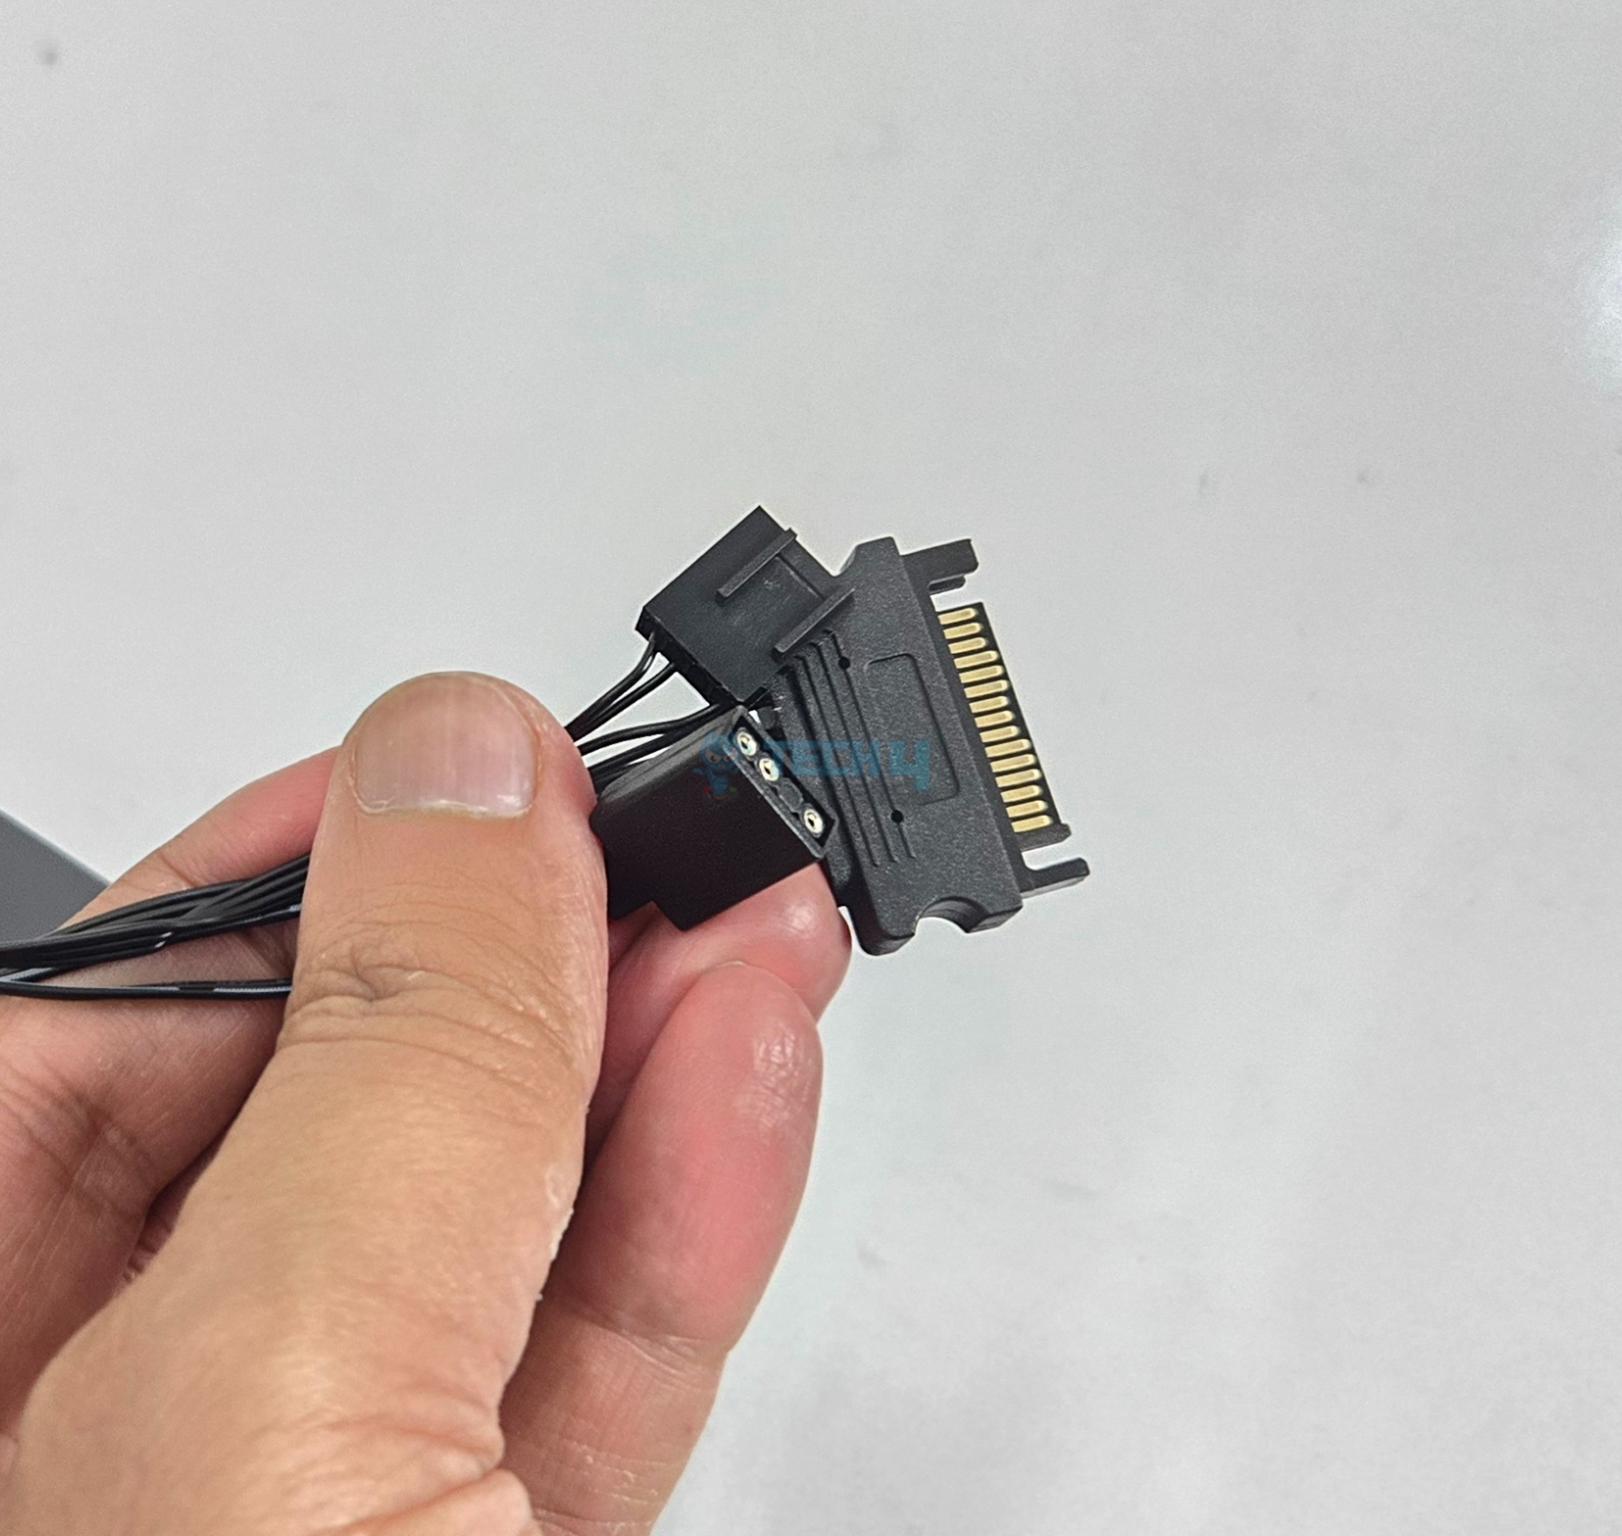
Lian Li has installed a fan hub with wireless connectivity as well as wired connectivity. It has integrated wireless receiver but no controller. For wireless connectivity via L3-Connect. It has only 3 ports and all are used for the pre-installed fans. Also, the wireless controller is not installed. You need to buy that separately. But they have provided cables to connect the hub to the motherboard. You can control the ARGB lighting effect either using the M1 and M2 buttons or transferring the control to the motherboard to sync all components. It is SATA powered.
![]()
A teared backside view of the LANCOOL 217 INF.
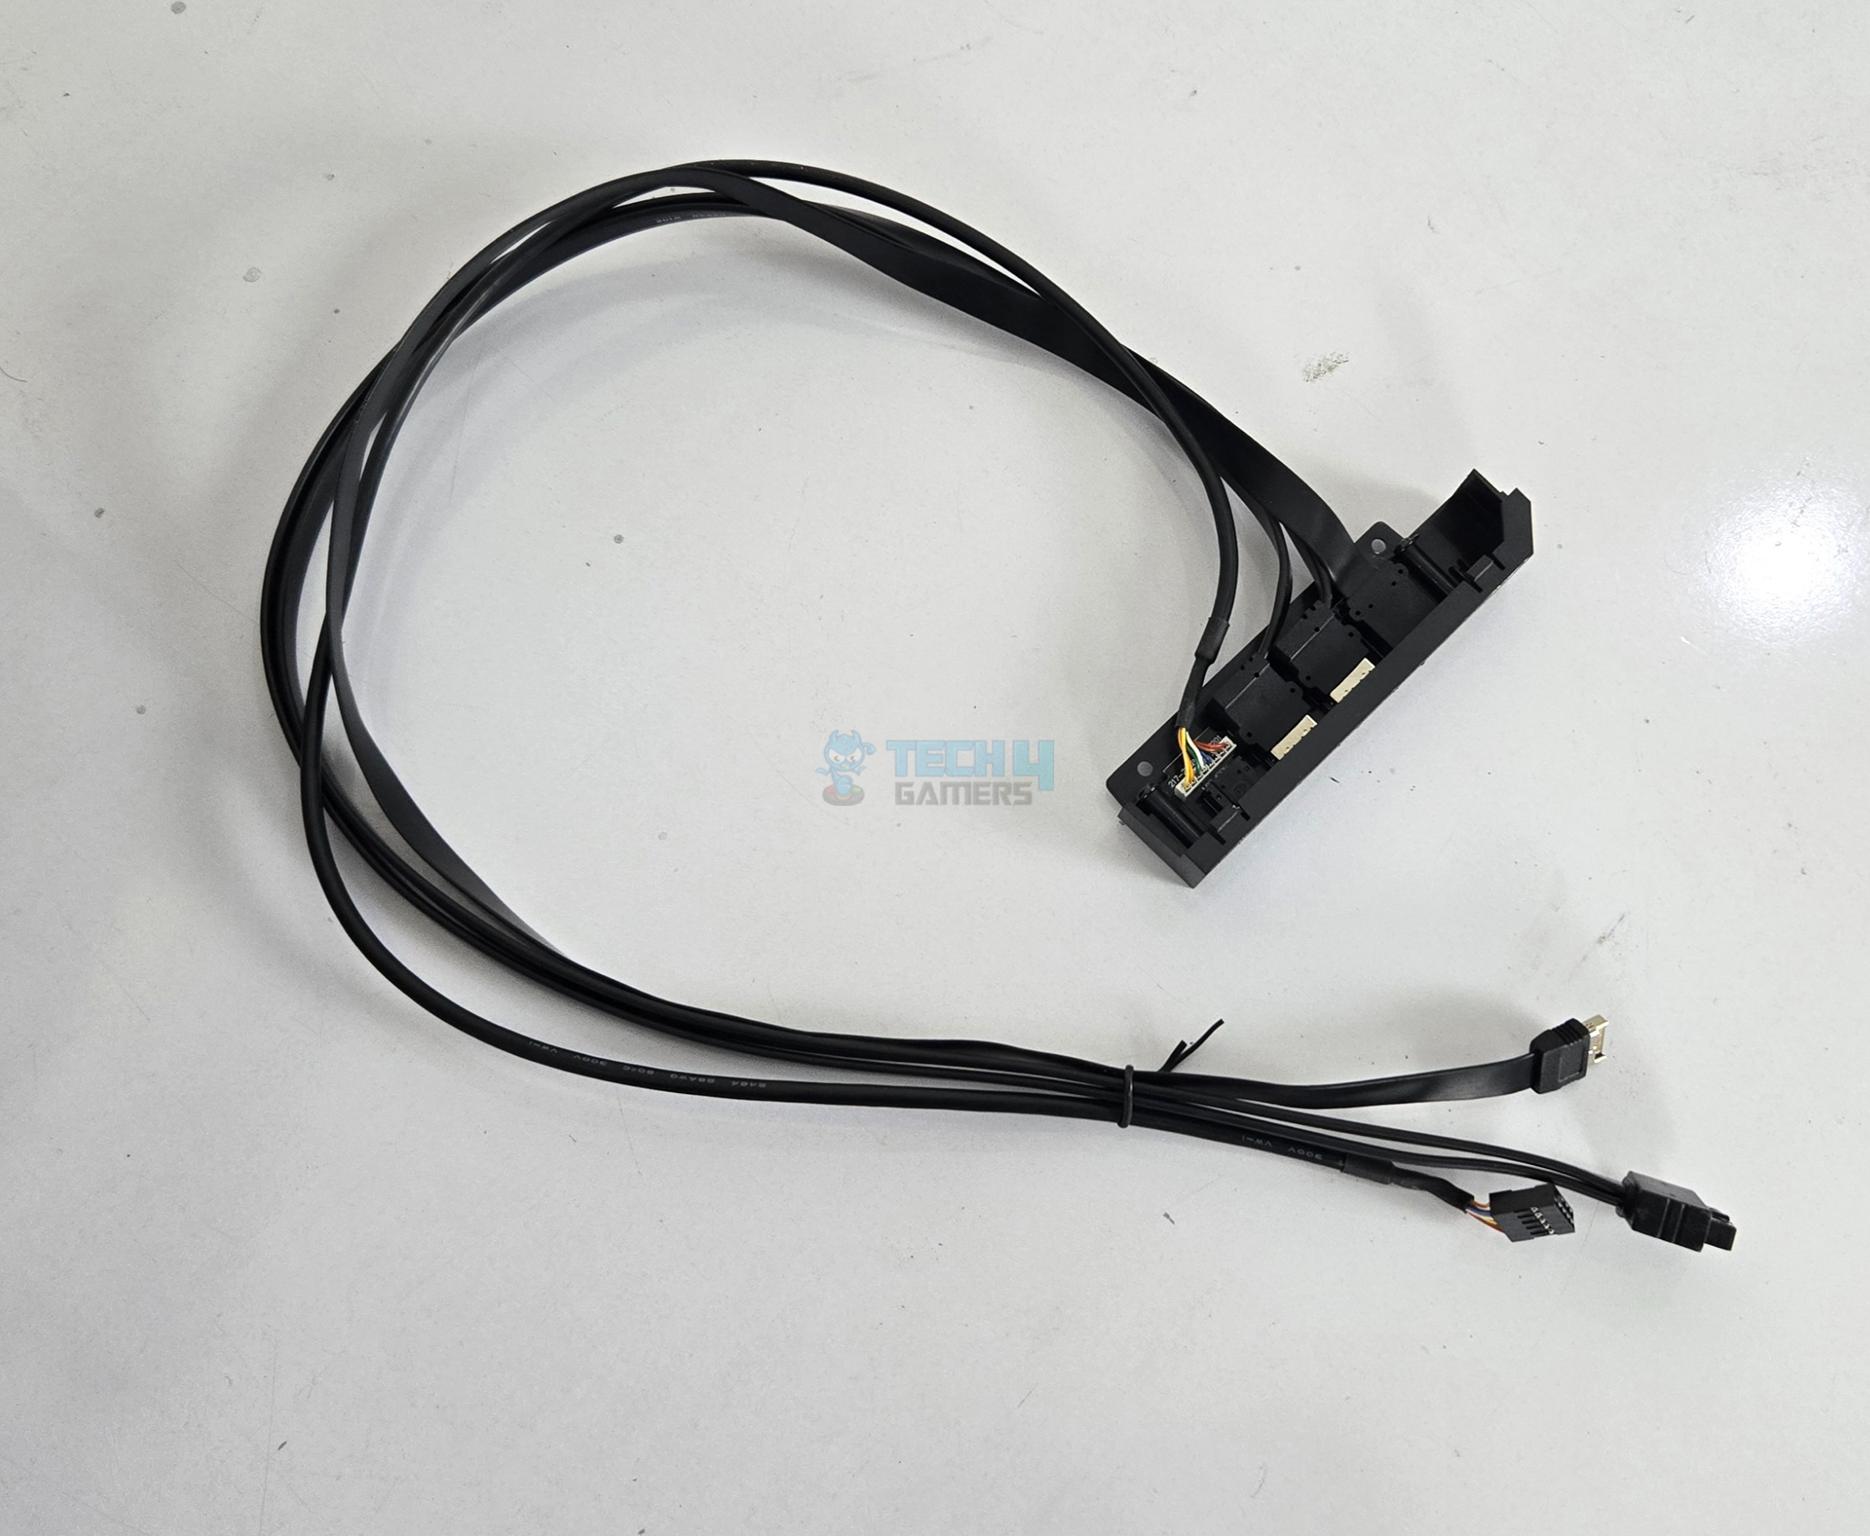
IO Cables
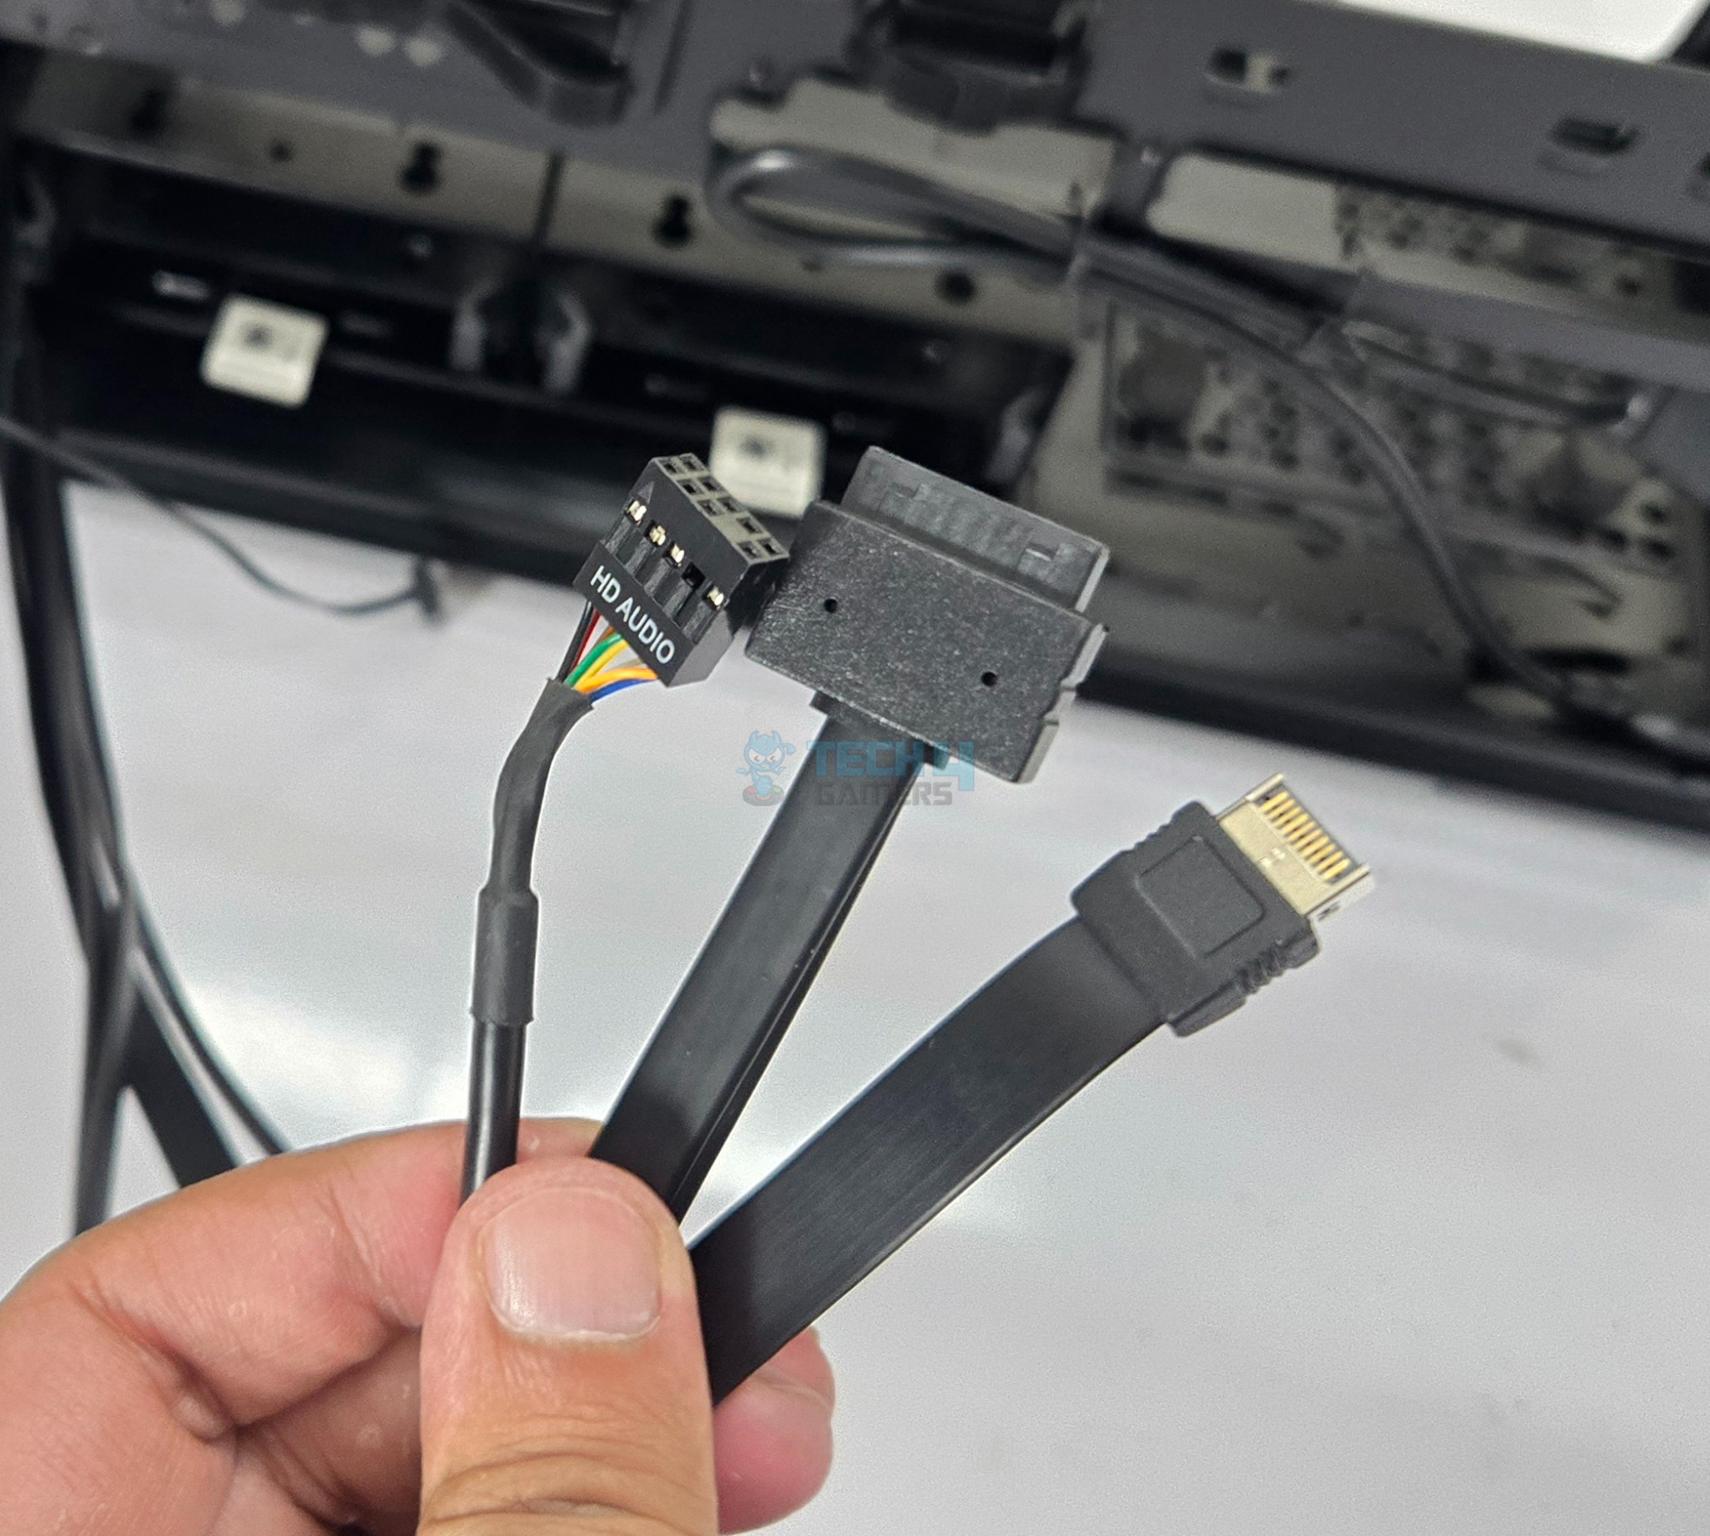
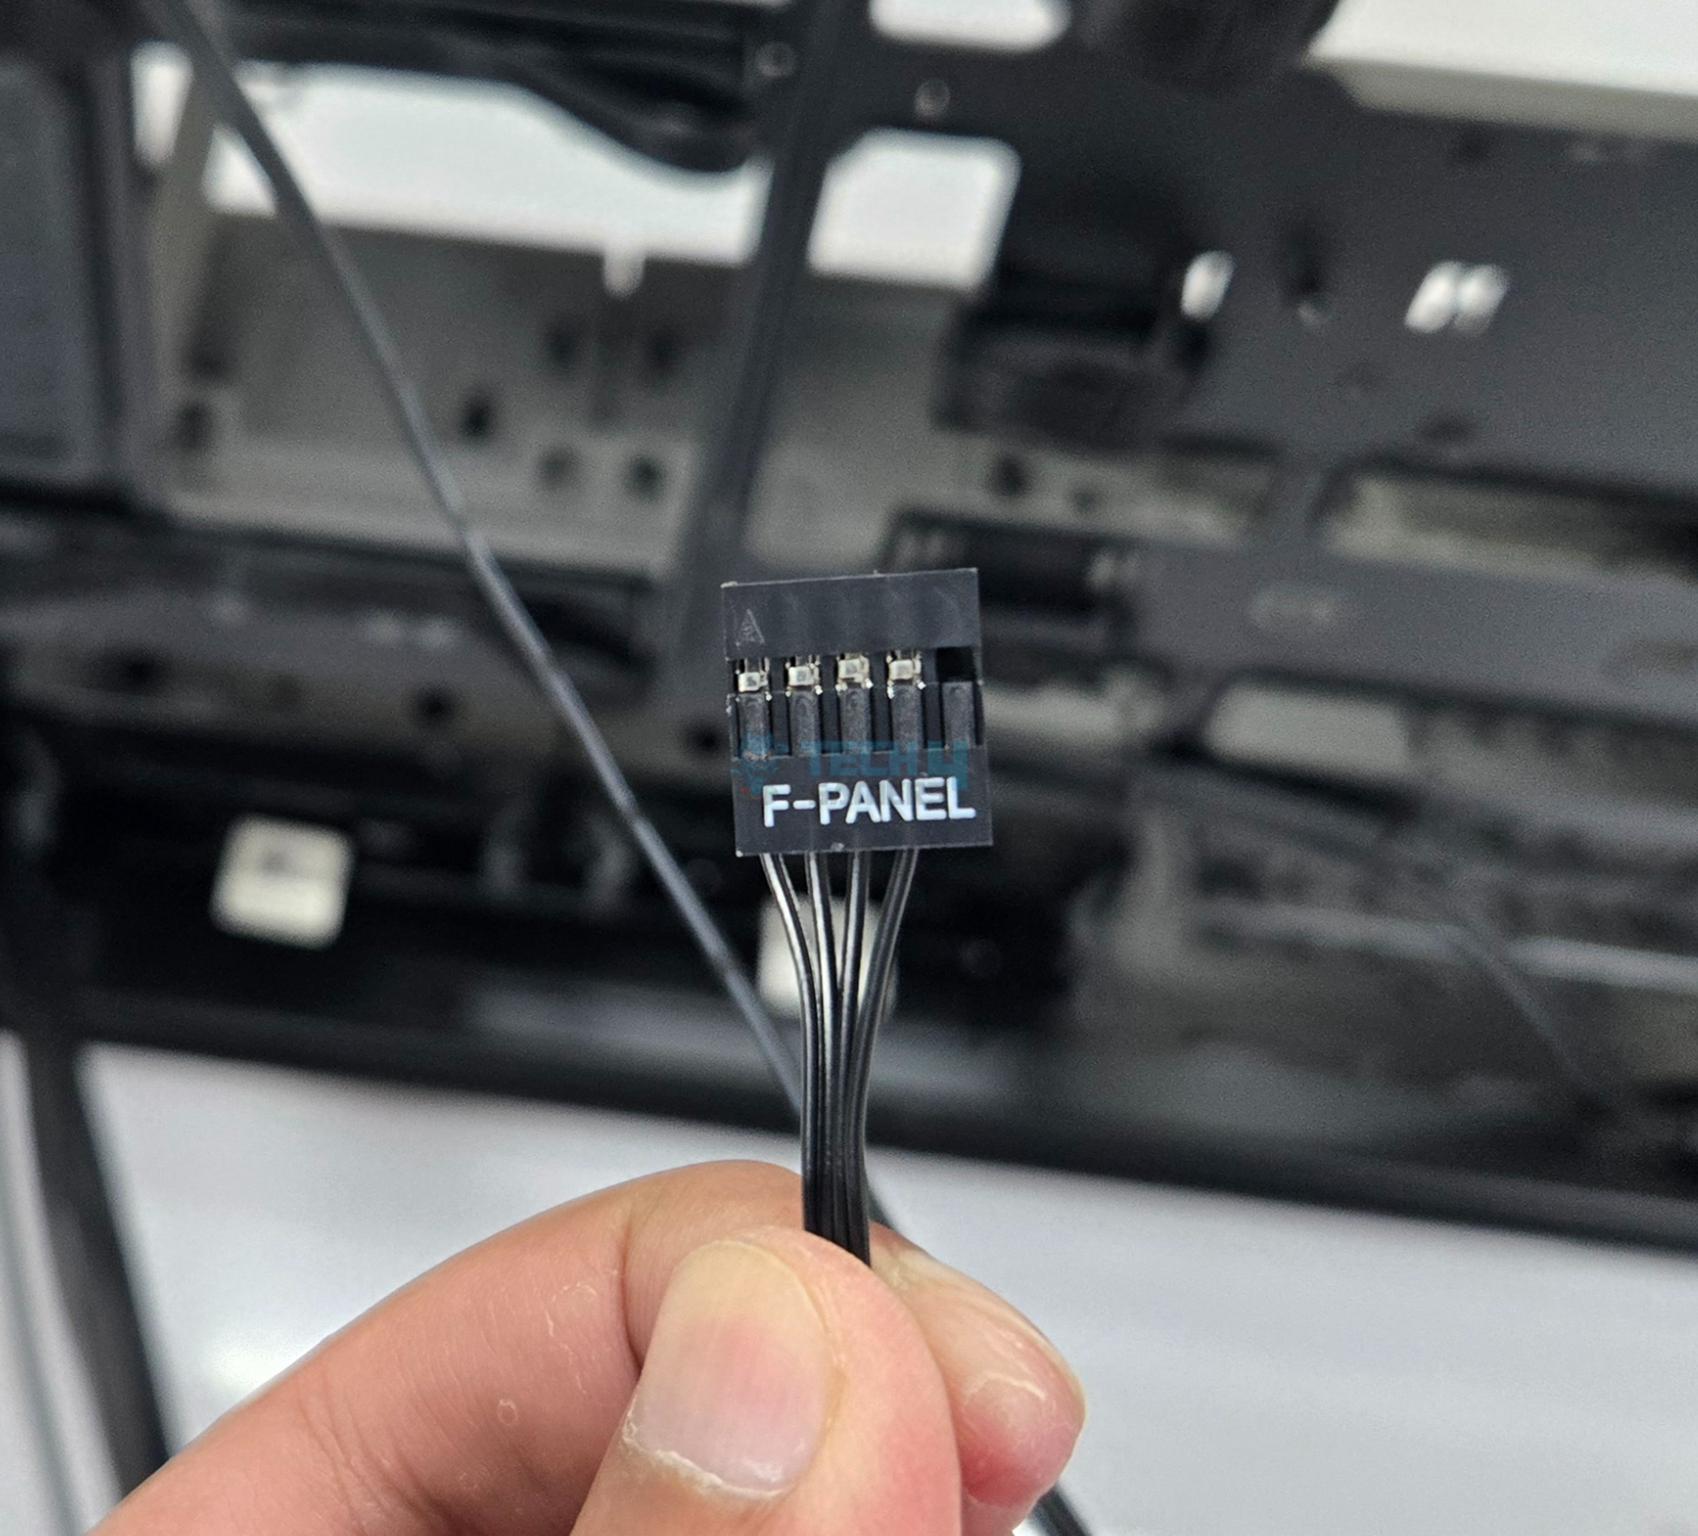
The following are provided:
- 1x Front Panel Connector
- 1x USB Type-E 3.2 Connector
- 1x USB 3.0 Connector
- 1x HD Audio Connector
- 1x Power Plug
- 1x SATA Connector
- 4-pin Connectors for the fans
- 3-pin ARGB Connector for the fans
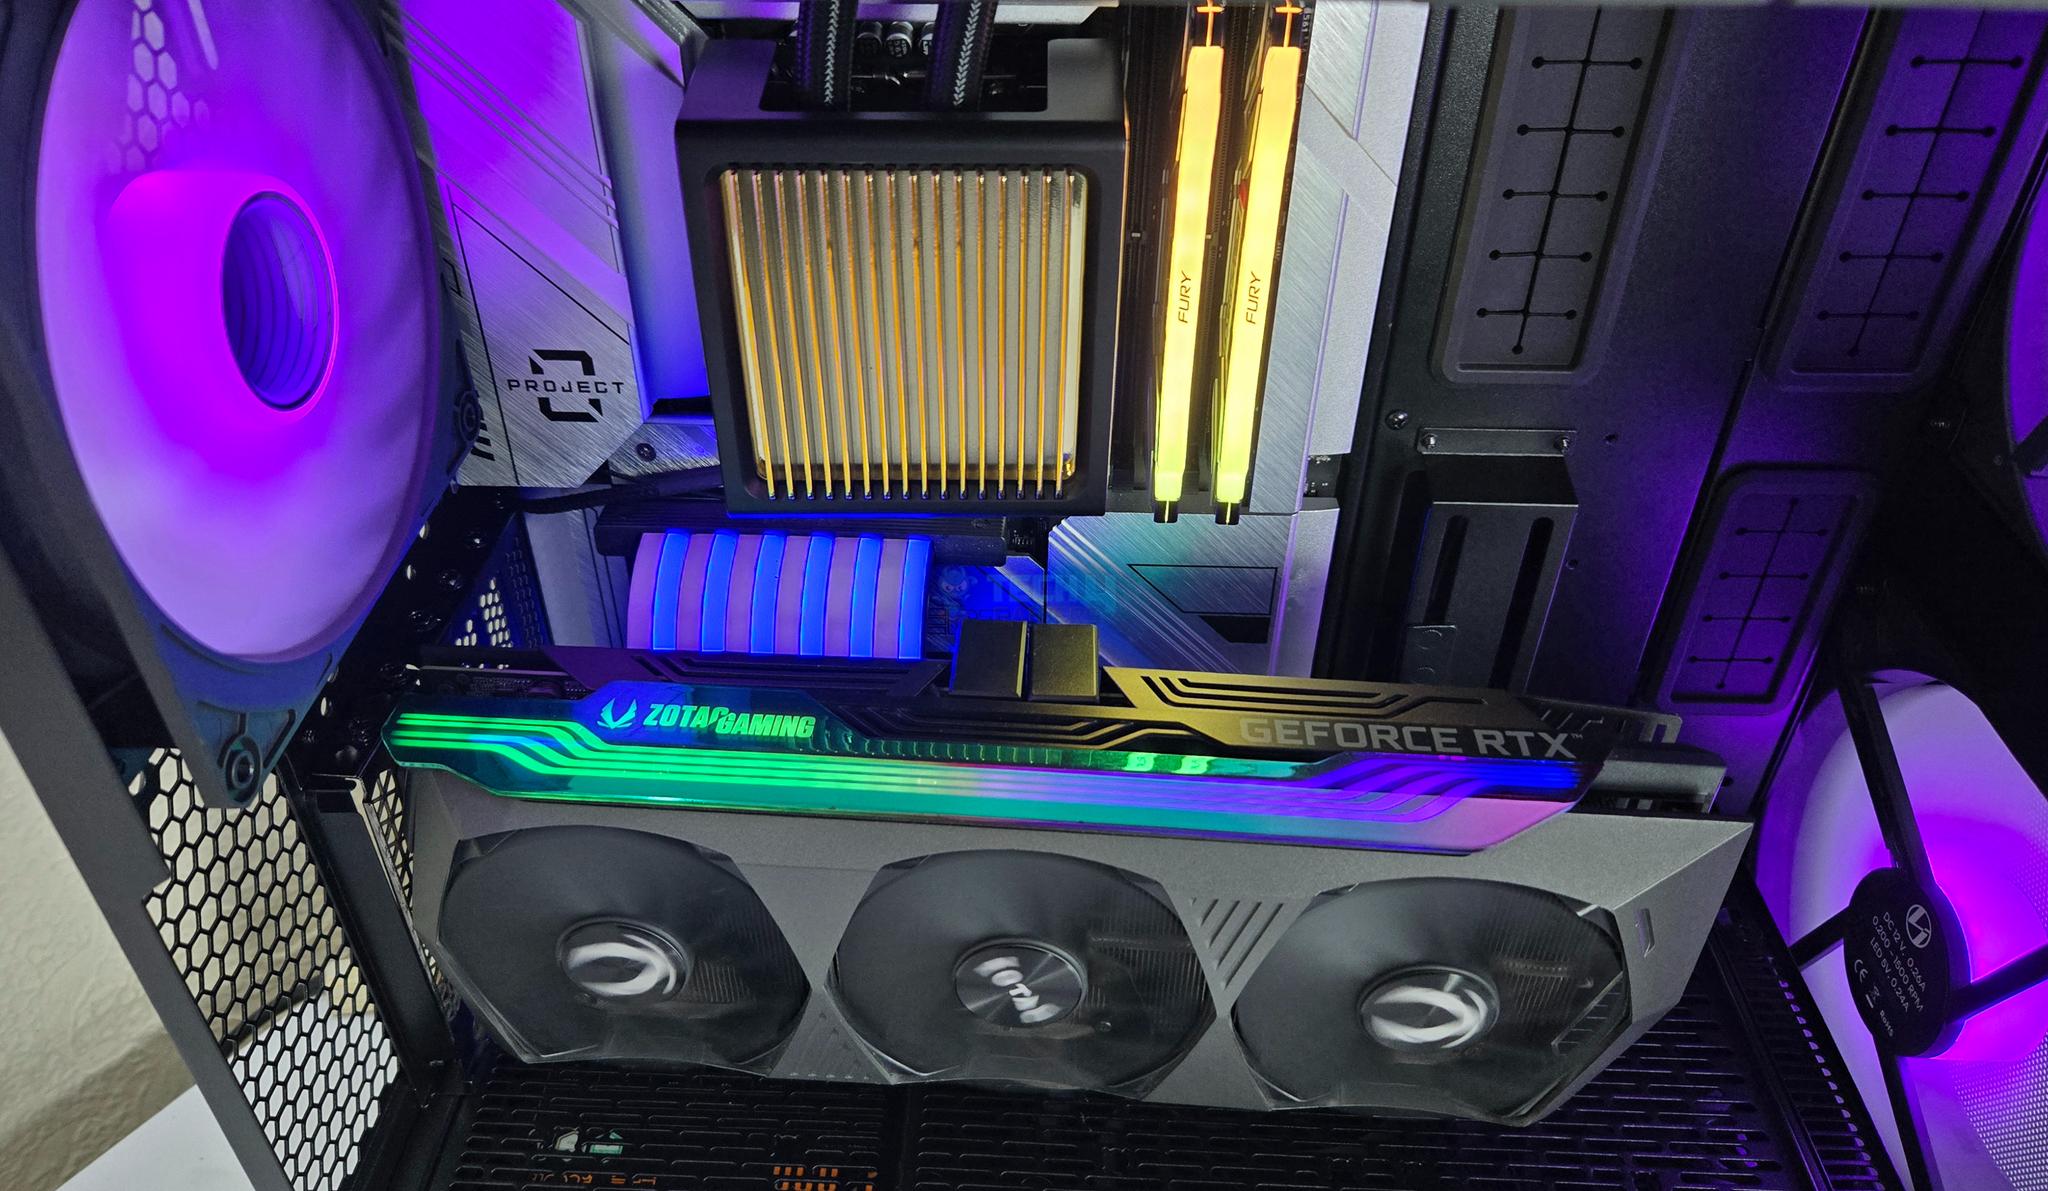
Test Build and Experience
I have used following configuration for testing of this case:
- Intel Core i7 13700k [Auto, Stock]
- MSI Z790 PZ
- ID Cooling DX360
- Kingston Fury Renegade RGB 32GB DDR5 7200MHz CL34 Kit
- Zotac RTX 3070Ti/ASRock Radeon RX7600 PG OC 8G
- Sabrent Rocket 1TB NVMe SSD [OS]
- CPS YN1000W PSU
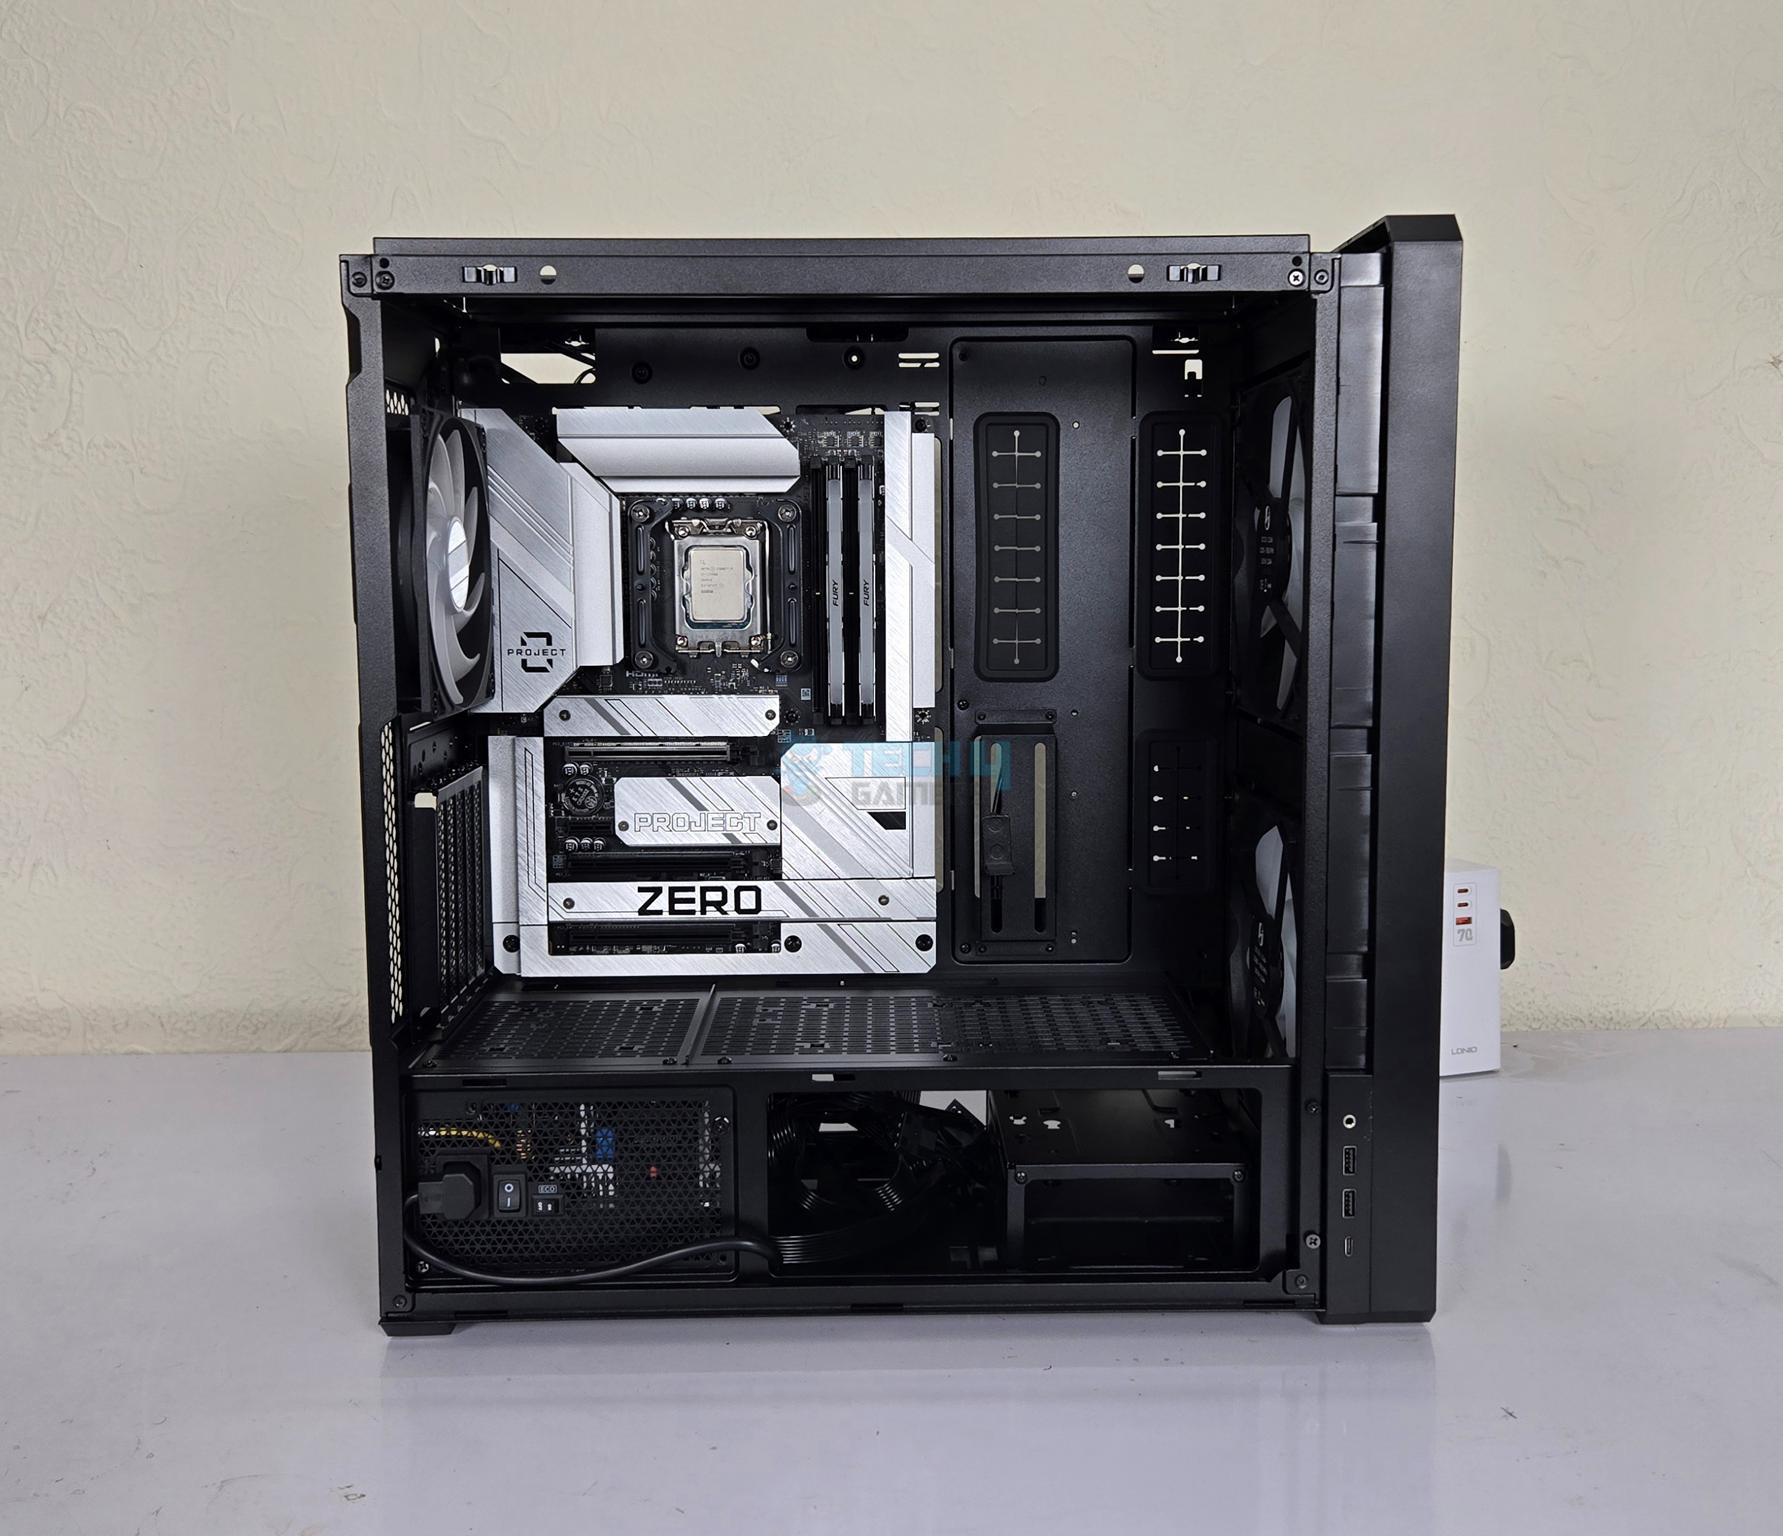
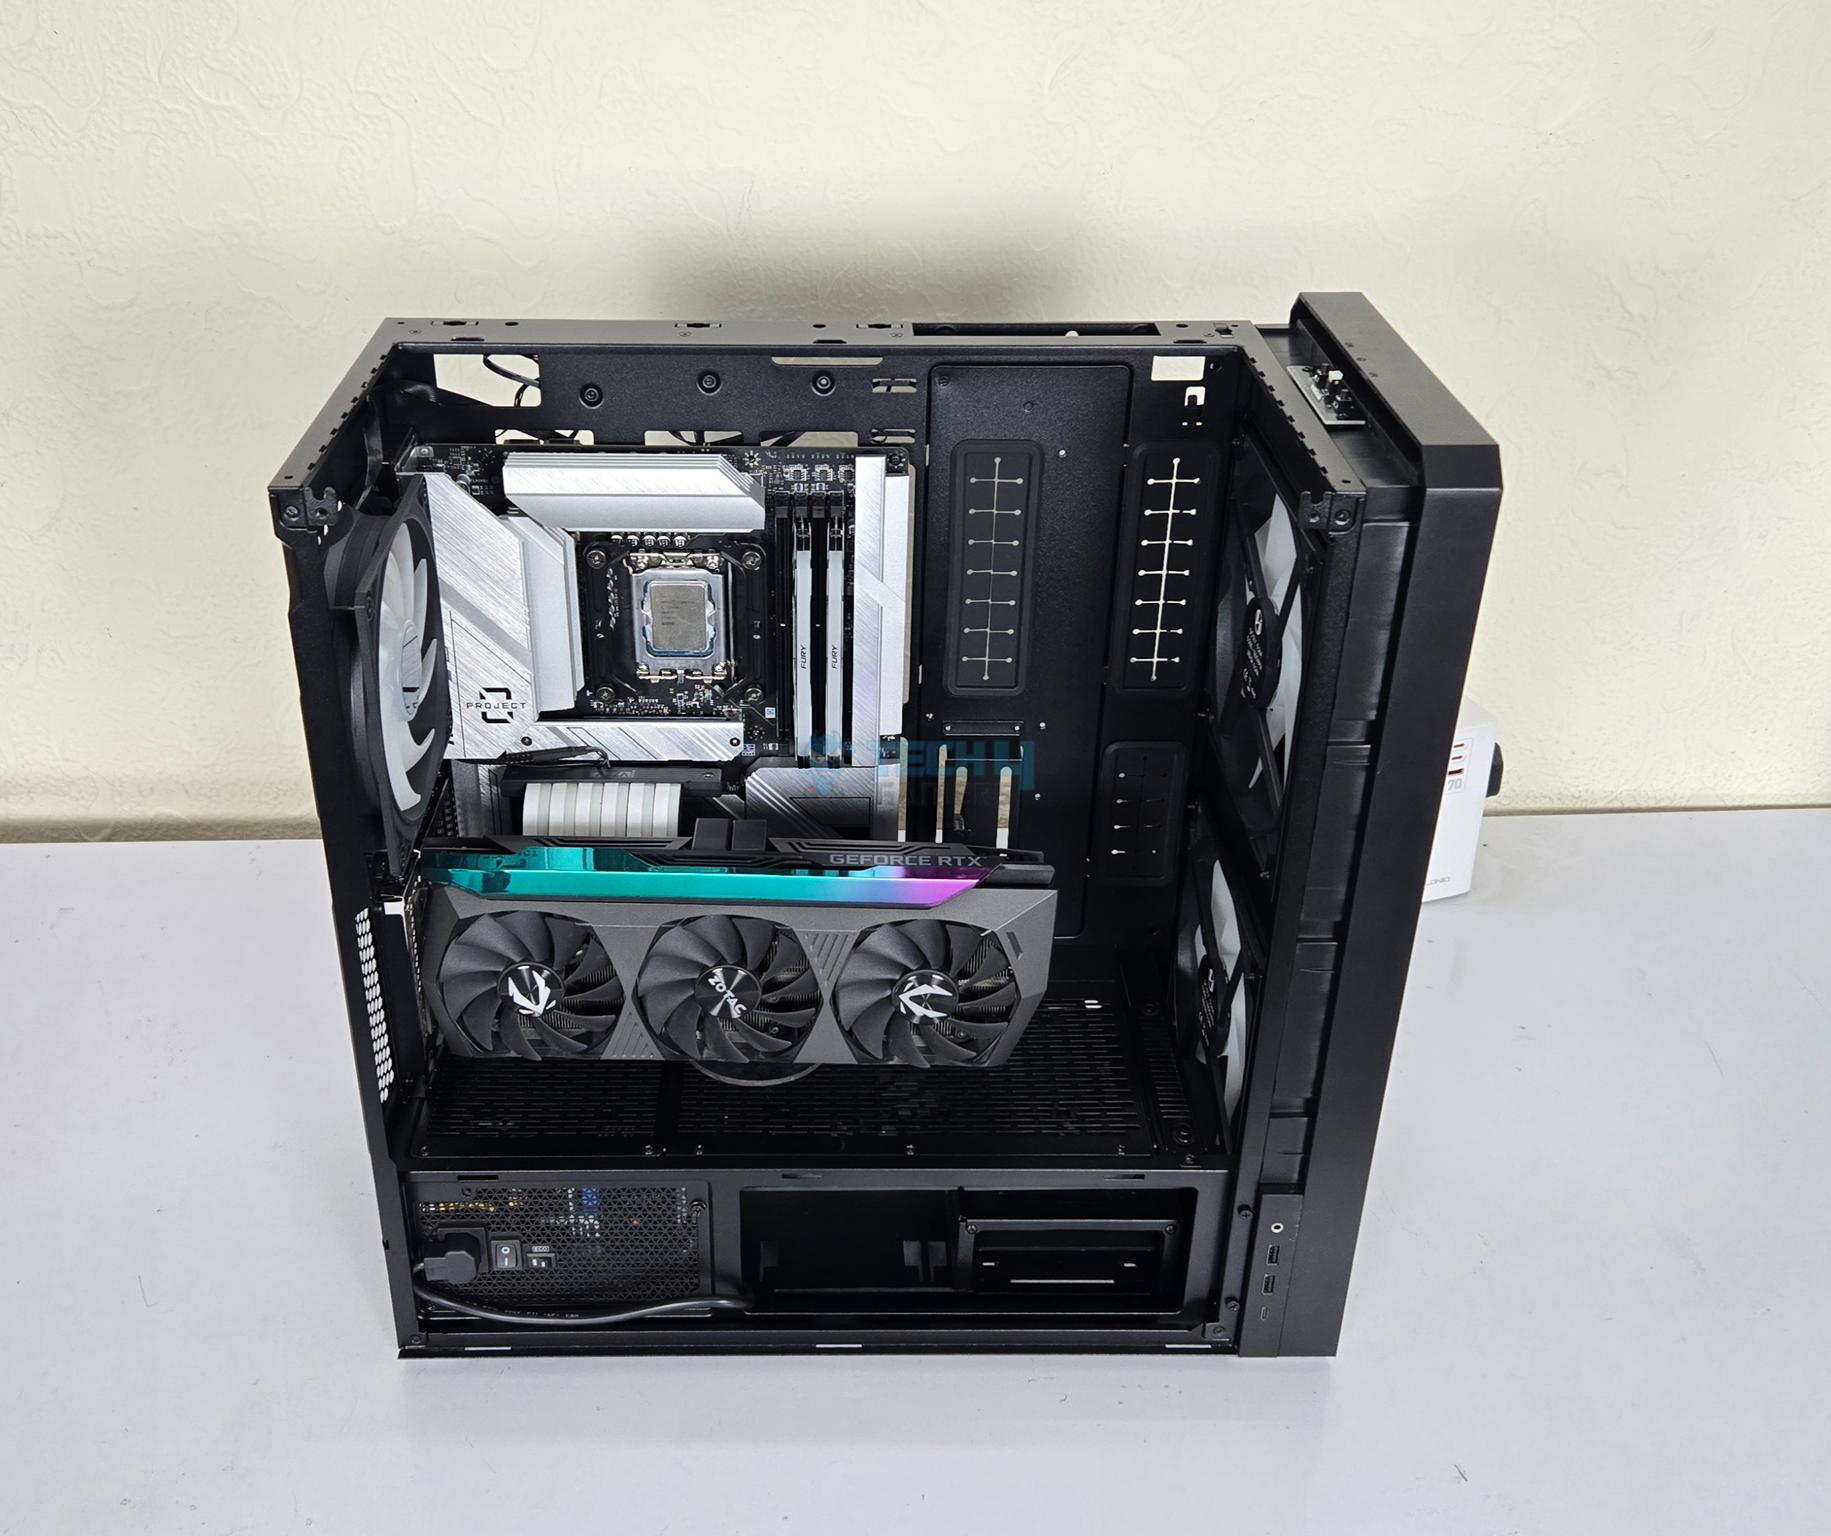
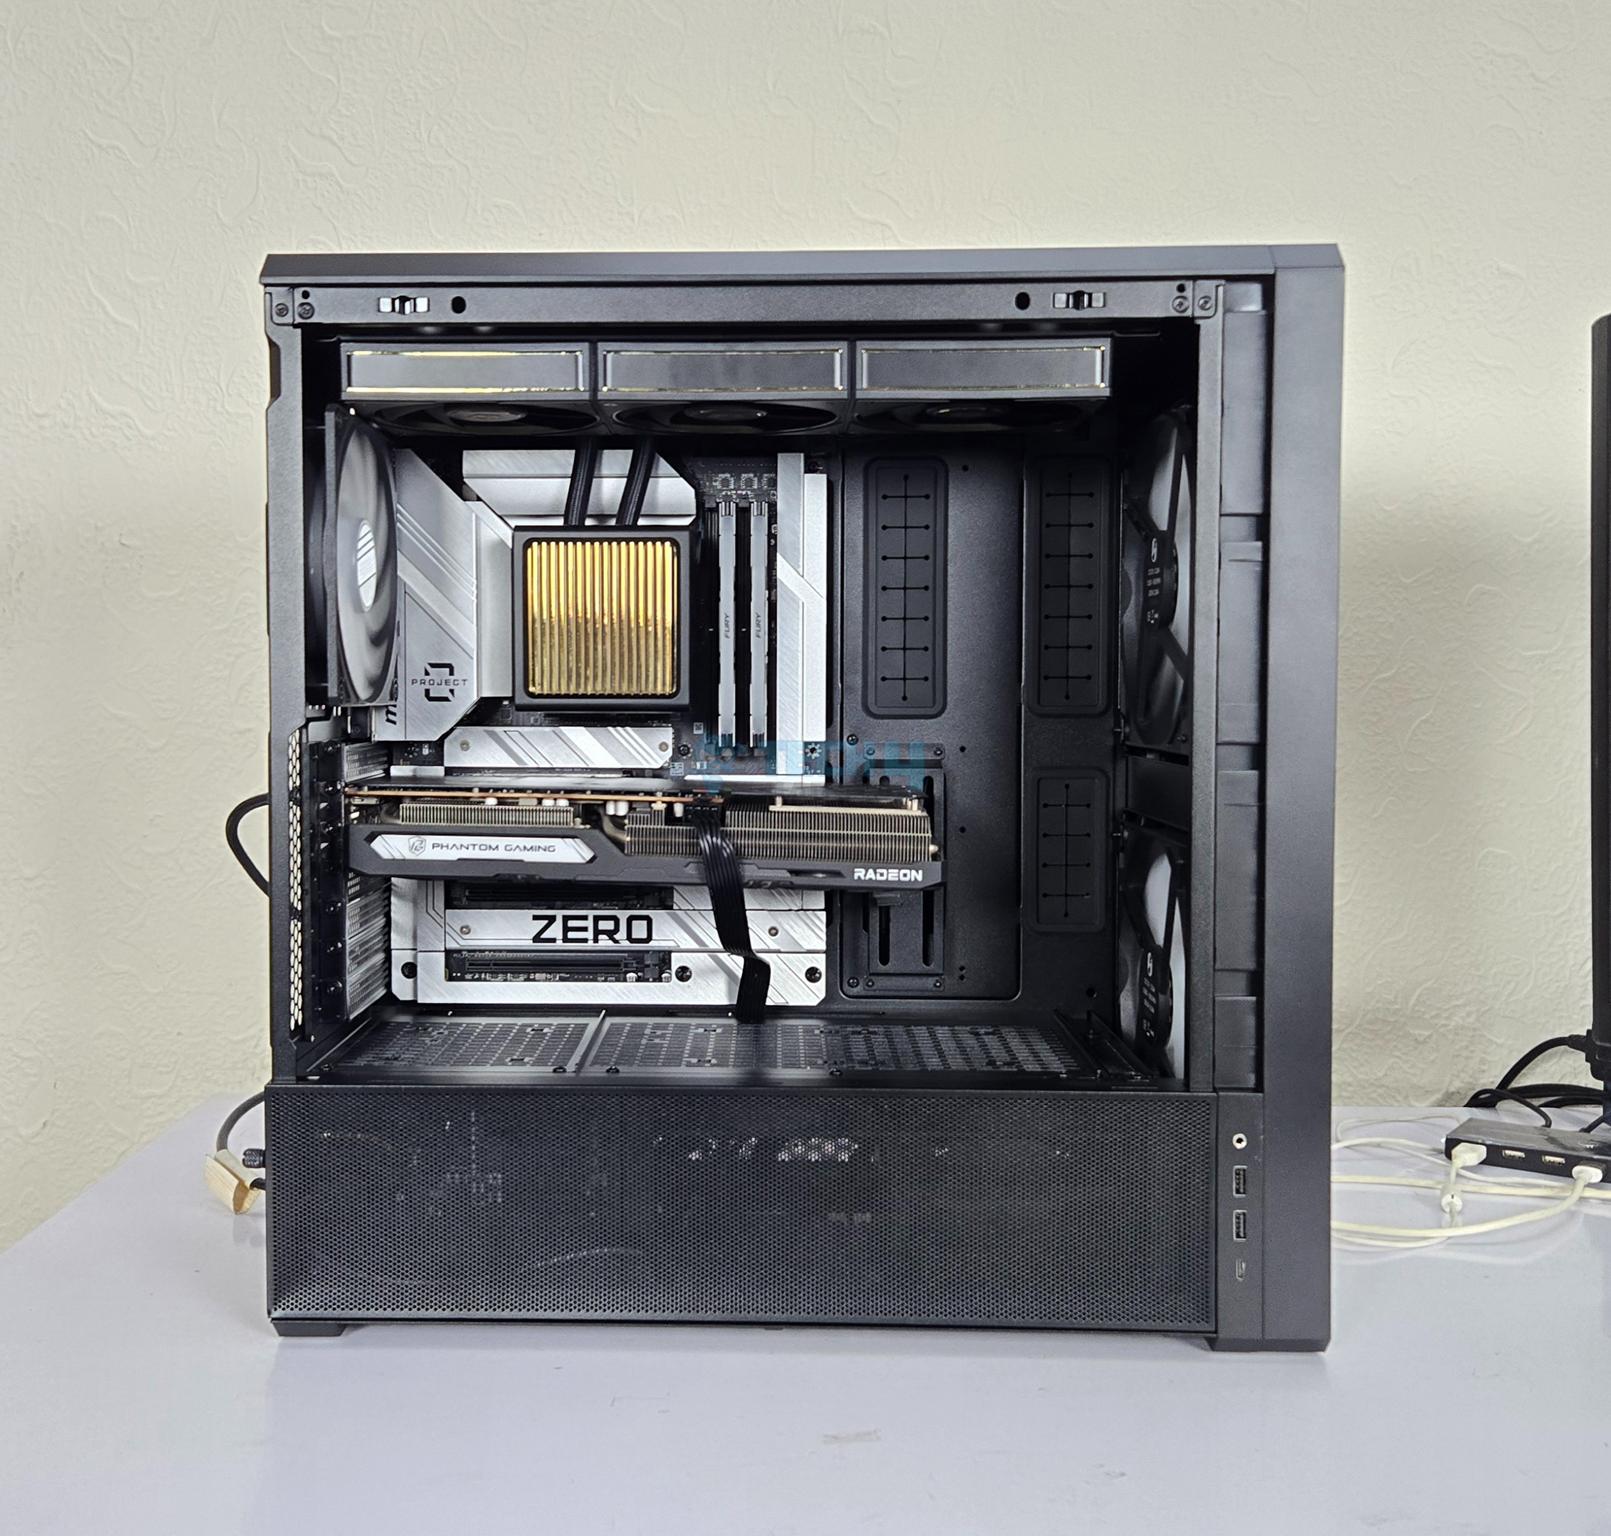
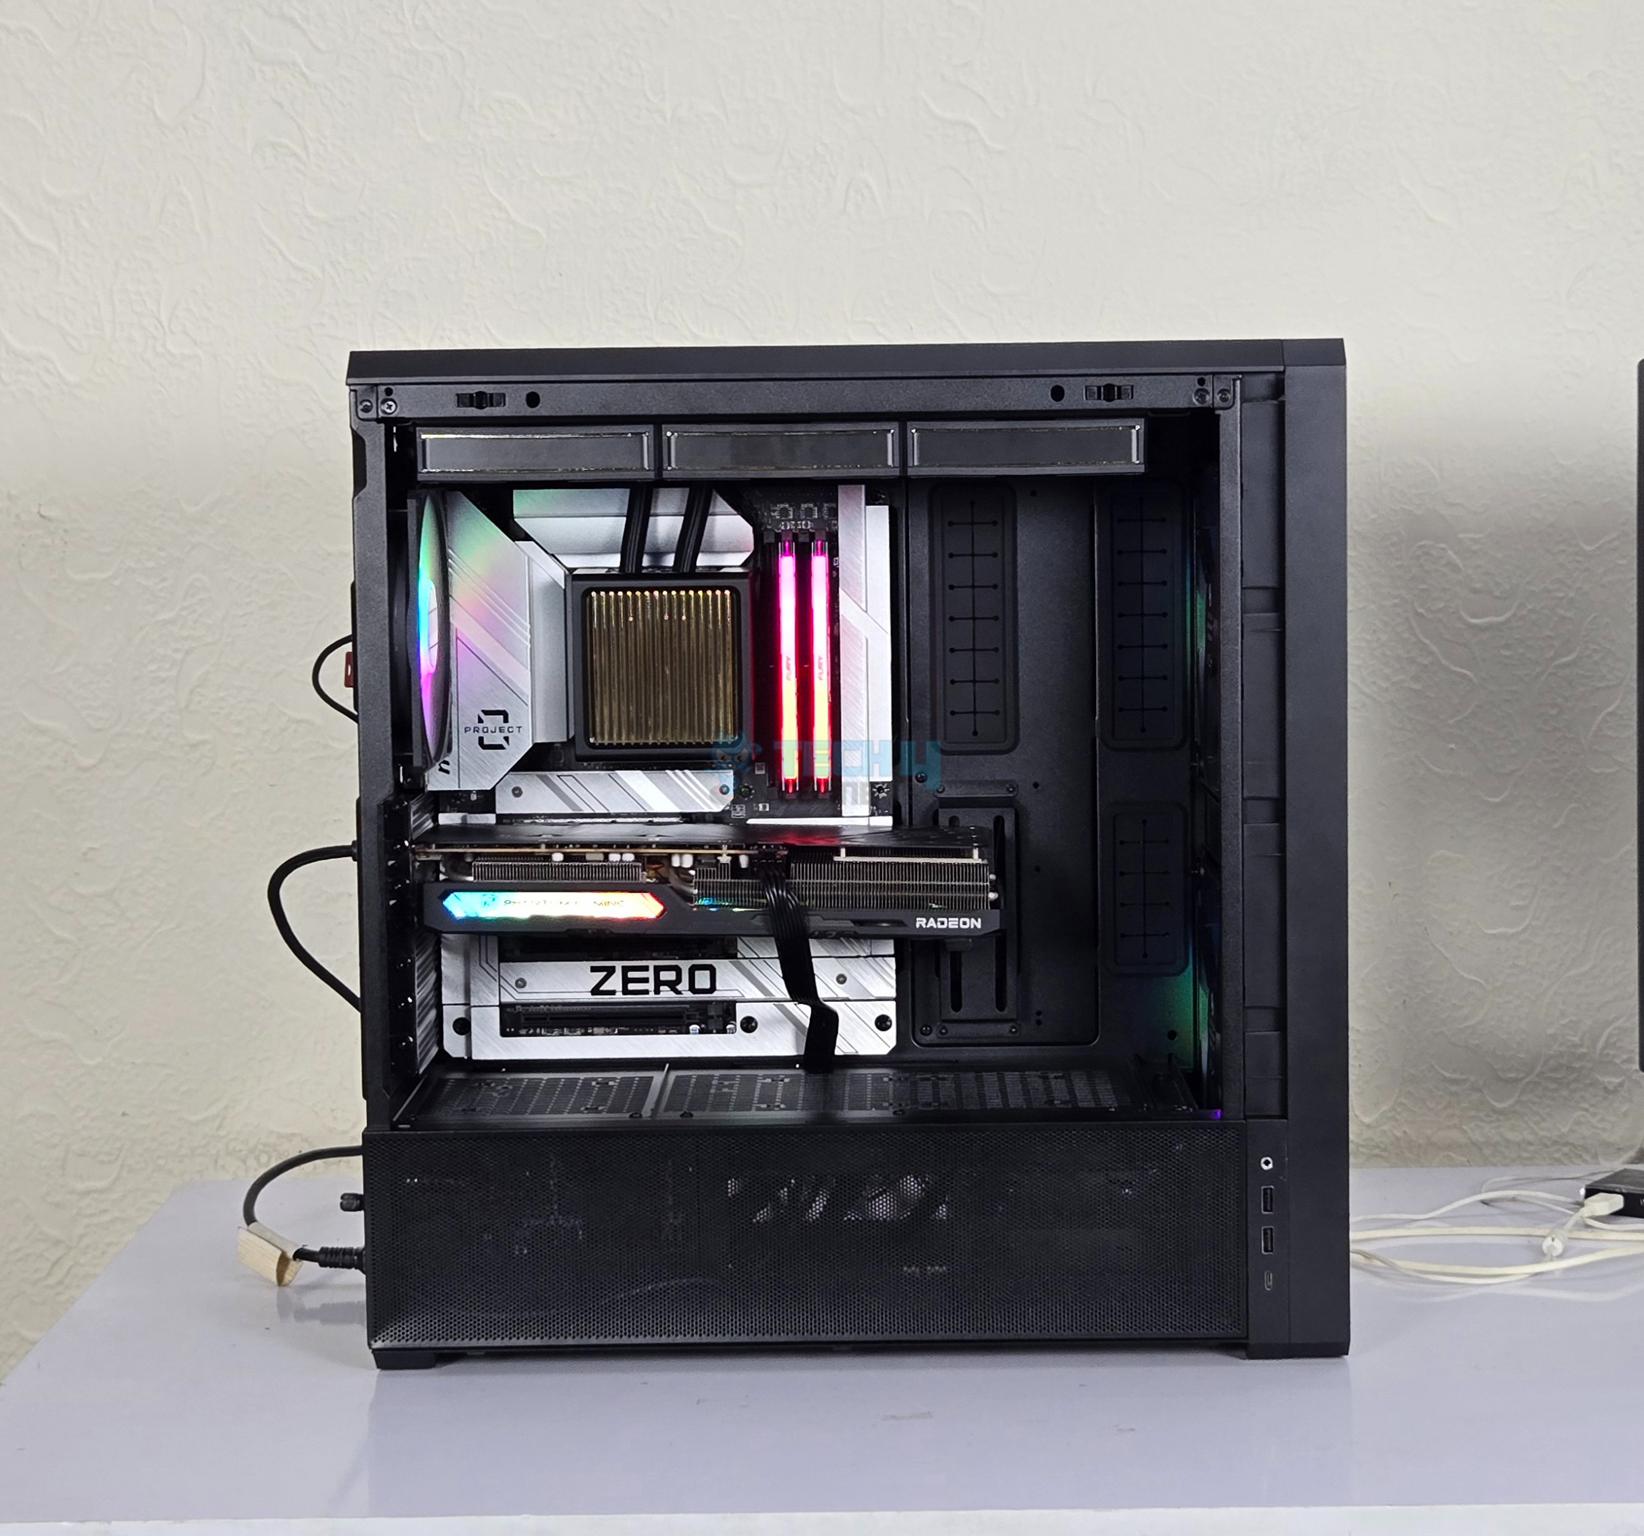
I started the build with motherboard’s installation. Since I have used a back connect motherboard, cables connectivity is not a concern on the front side. Then I set up the graphics card in vertical layout. However, this graphics card did not provide display so I switched it with the RX 7600 card. The cooler’s installation was smooth as well.
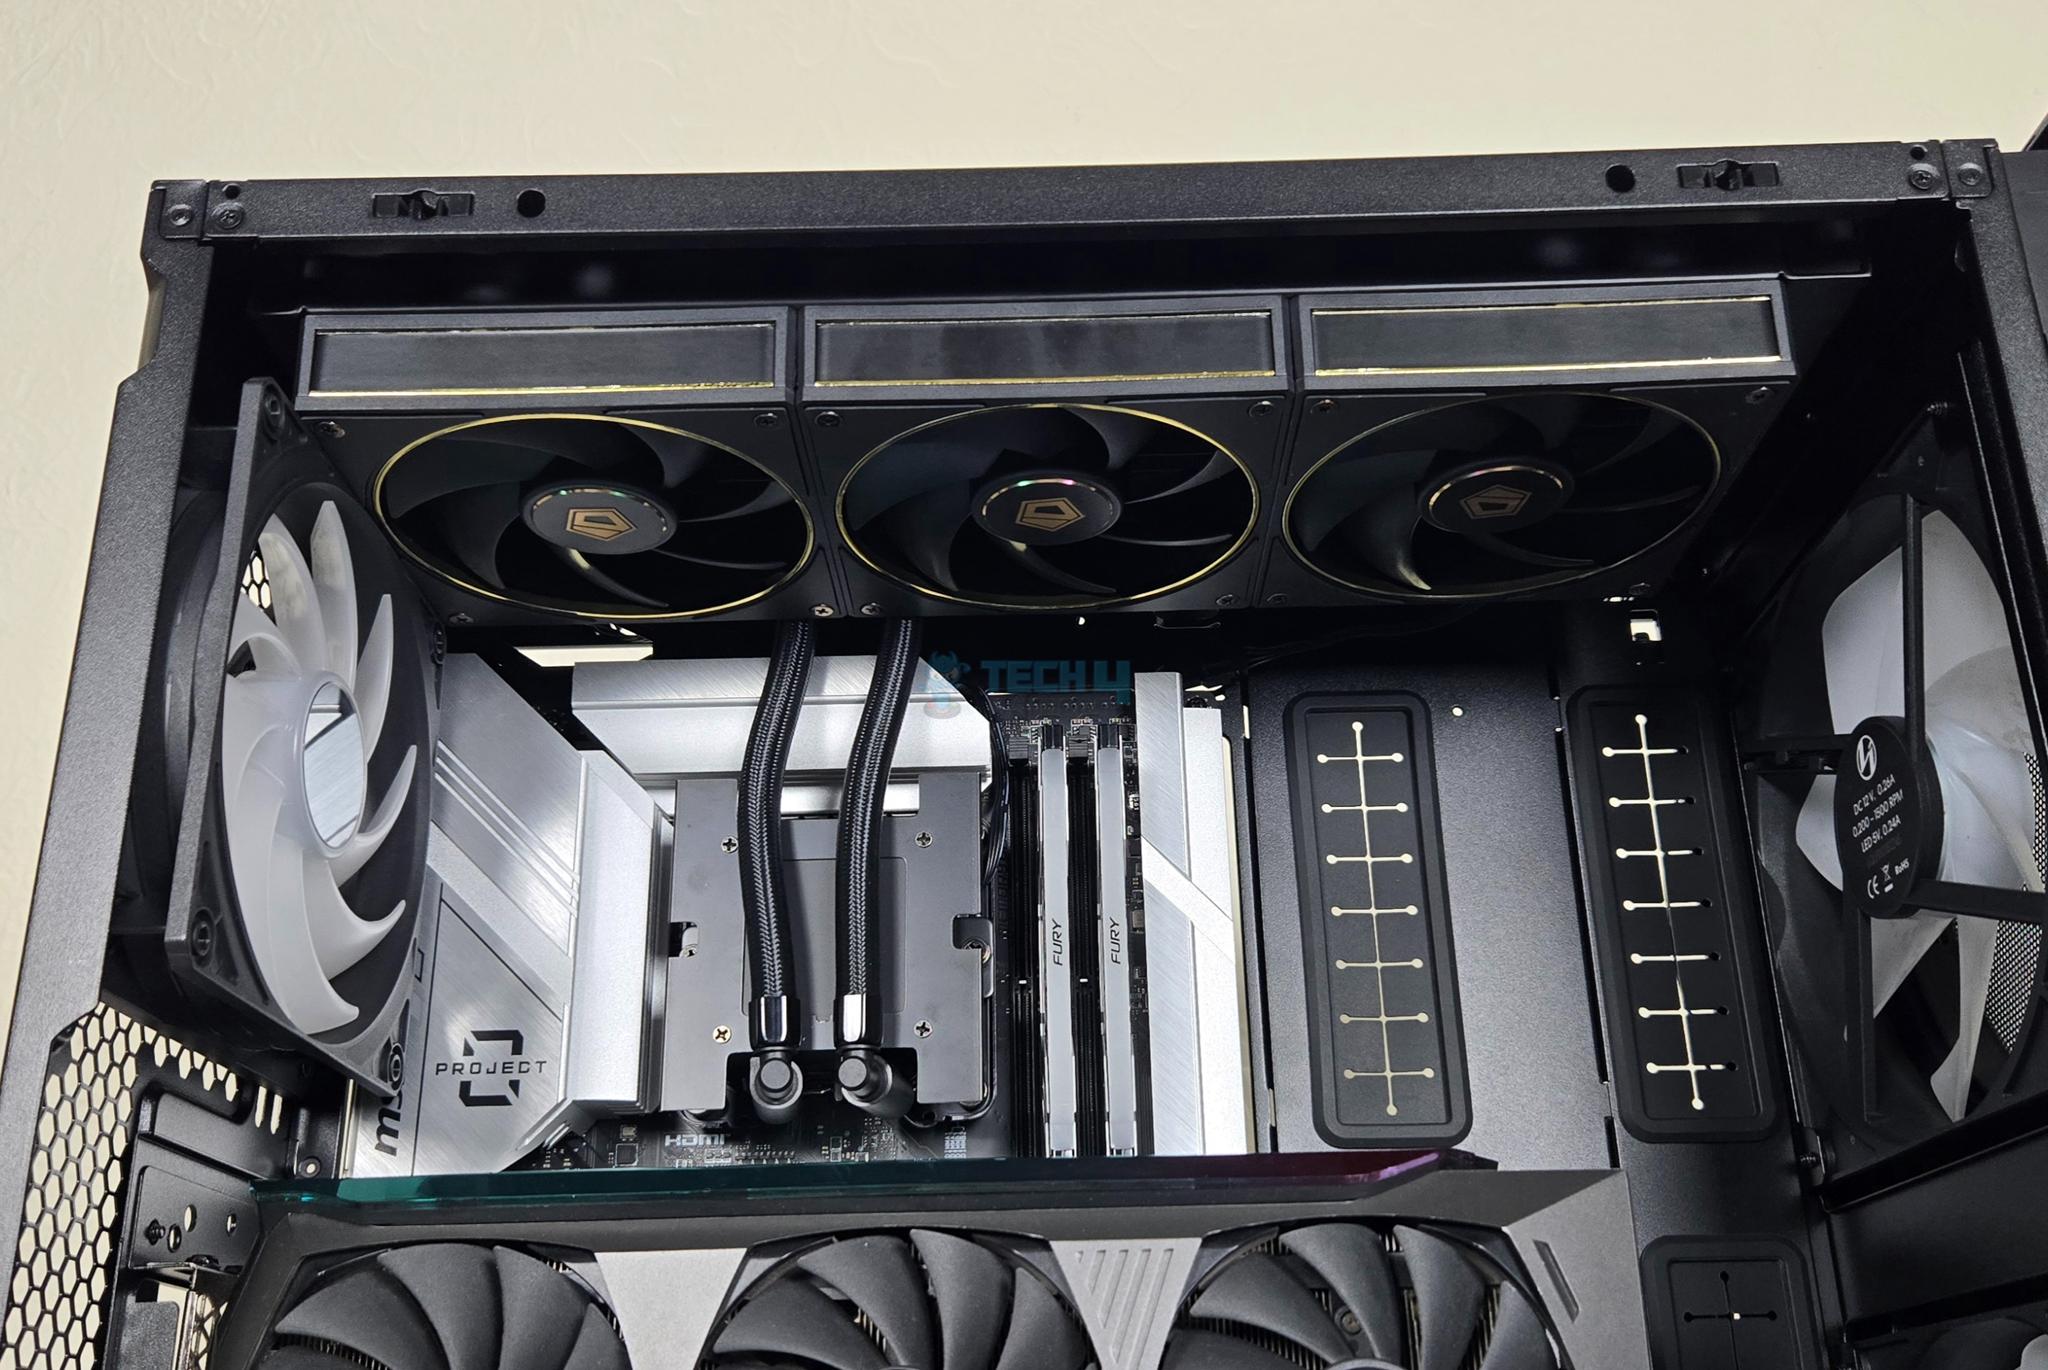
CPU and RAM were installed outside of the case. The cooler’s backplate was easily fit in this case from the back of the motherboard tray’s CPU cutout. The radiator placement over the top was a comfort fit as well. You can see in one picture that there is still ample space available in this case with this simple build. The cable management was easy as well.
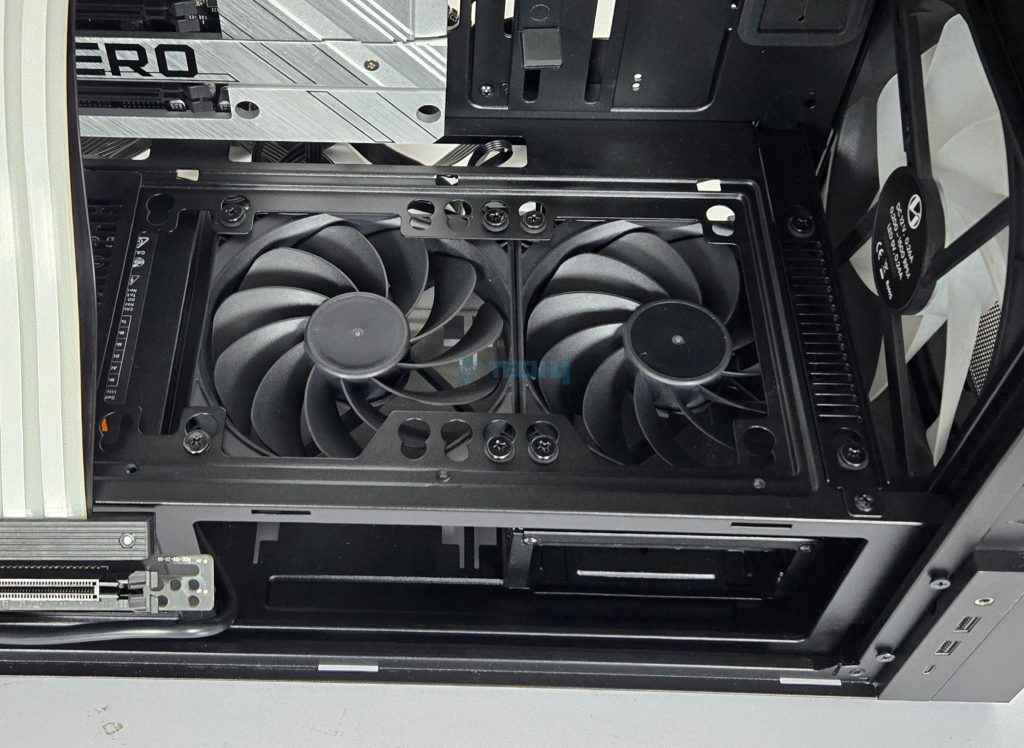
I installed the PSU Shroud Cover bracket for the fan and install both separately provided reverse blade fans under the PSU shroud for neat and clean outlook.
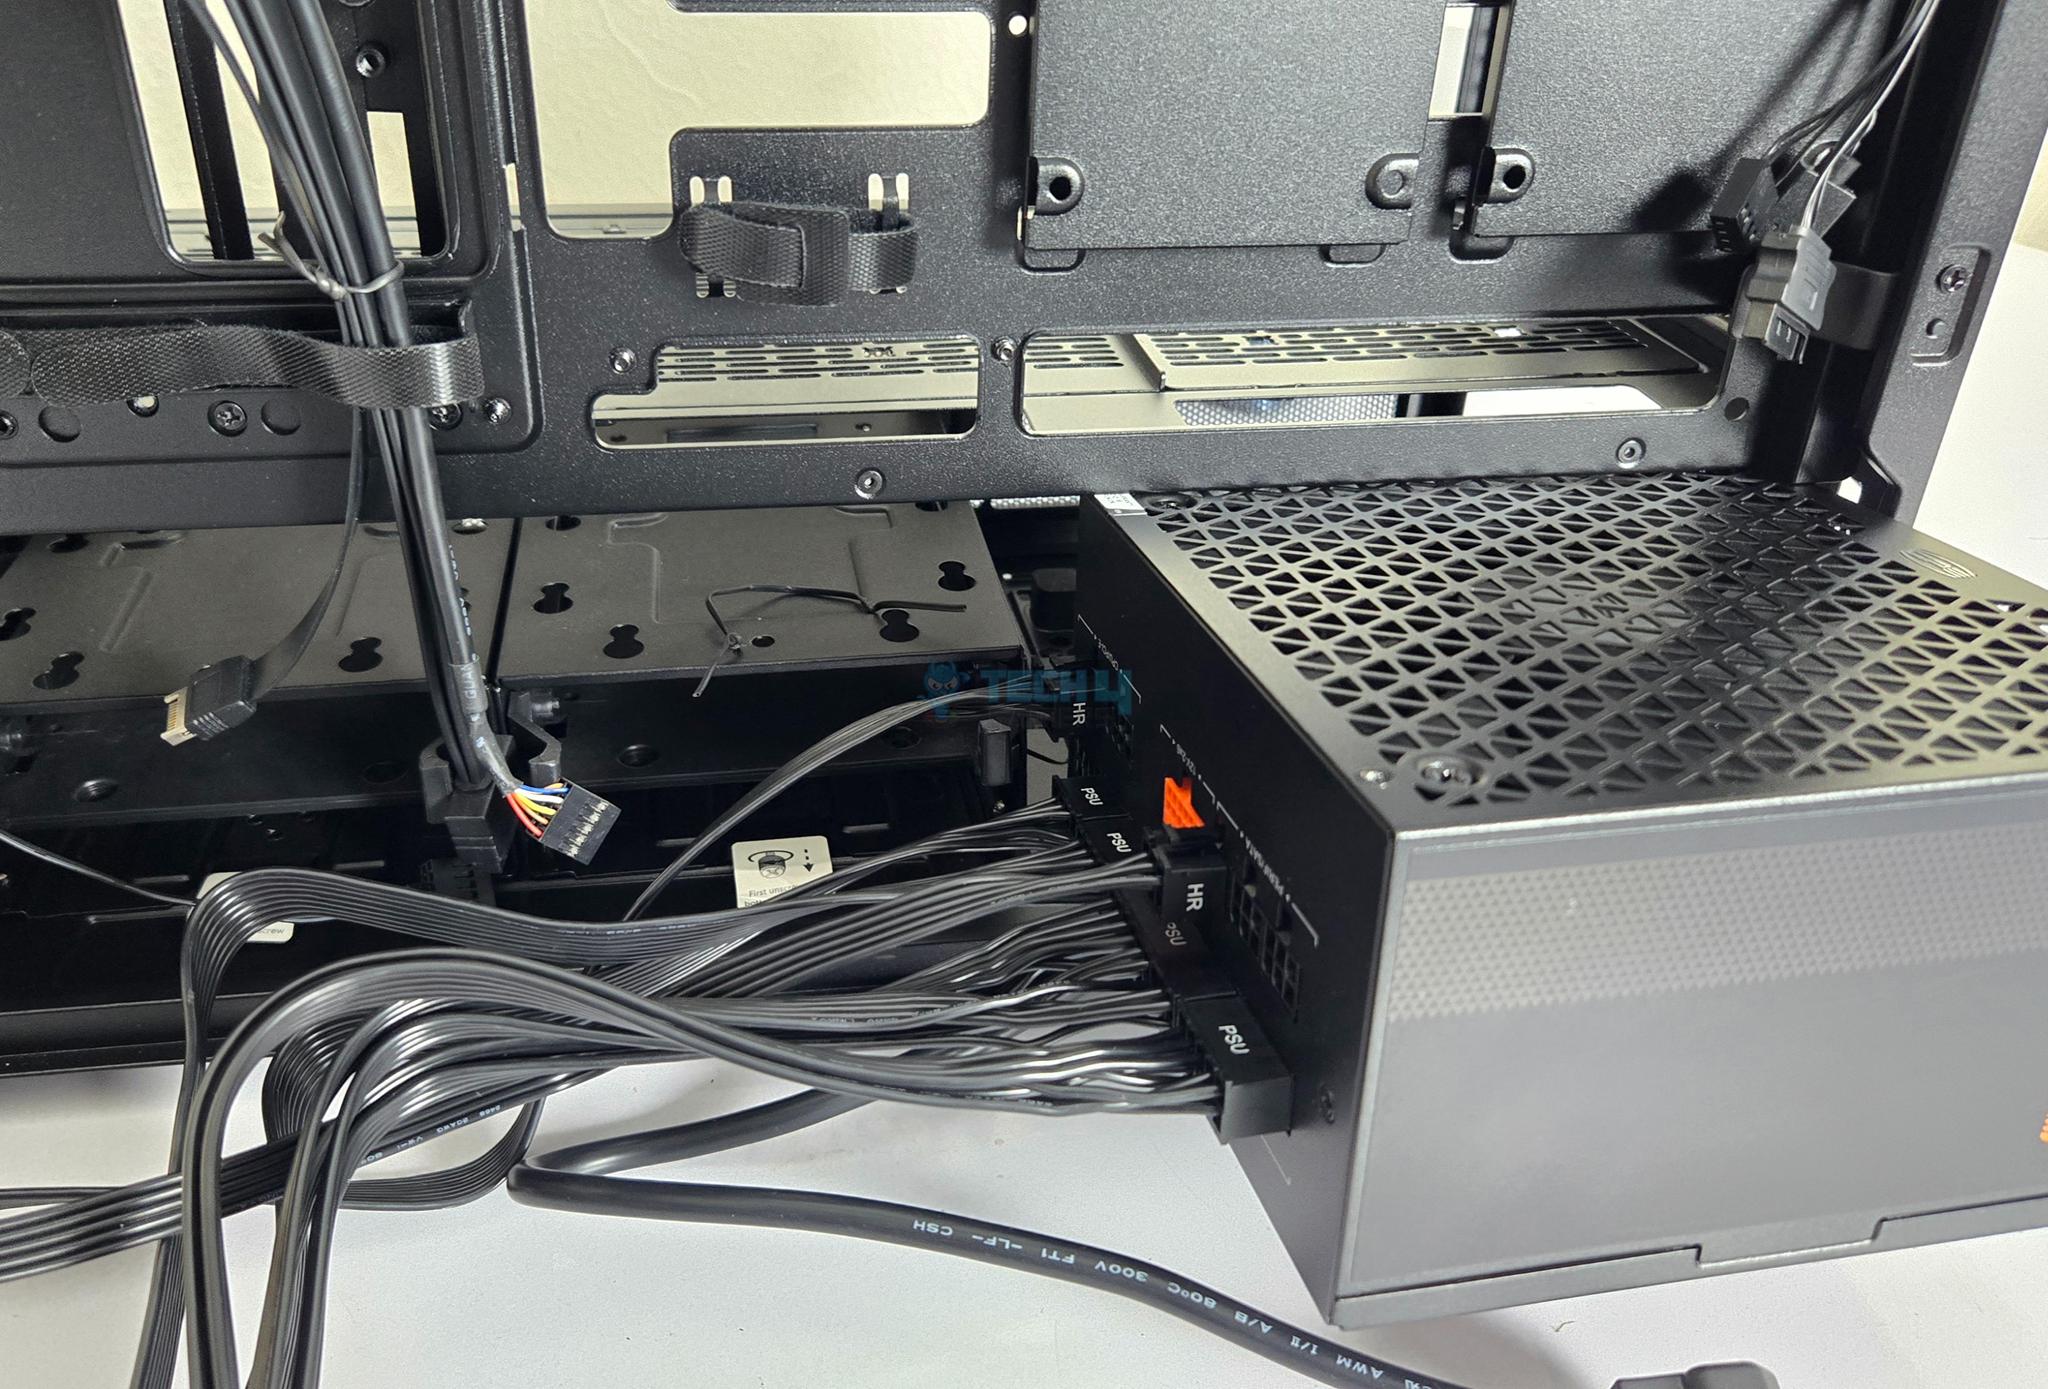
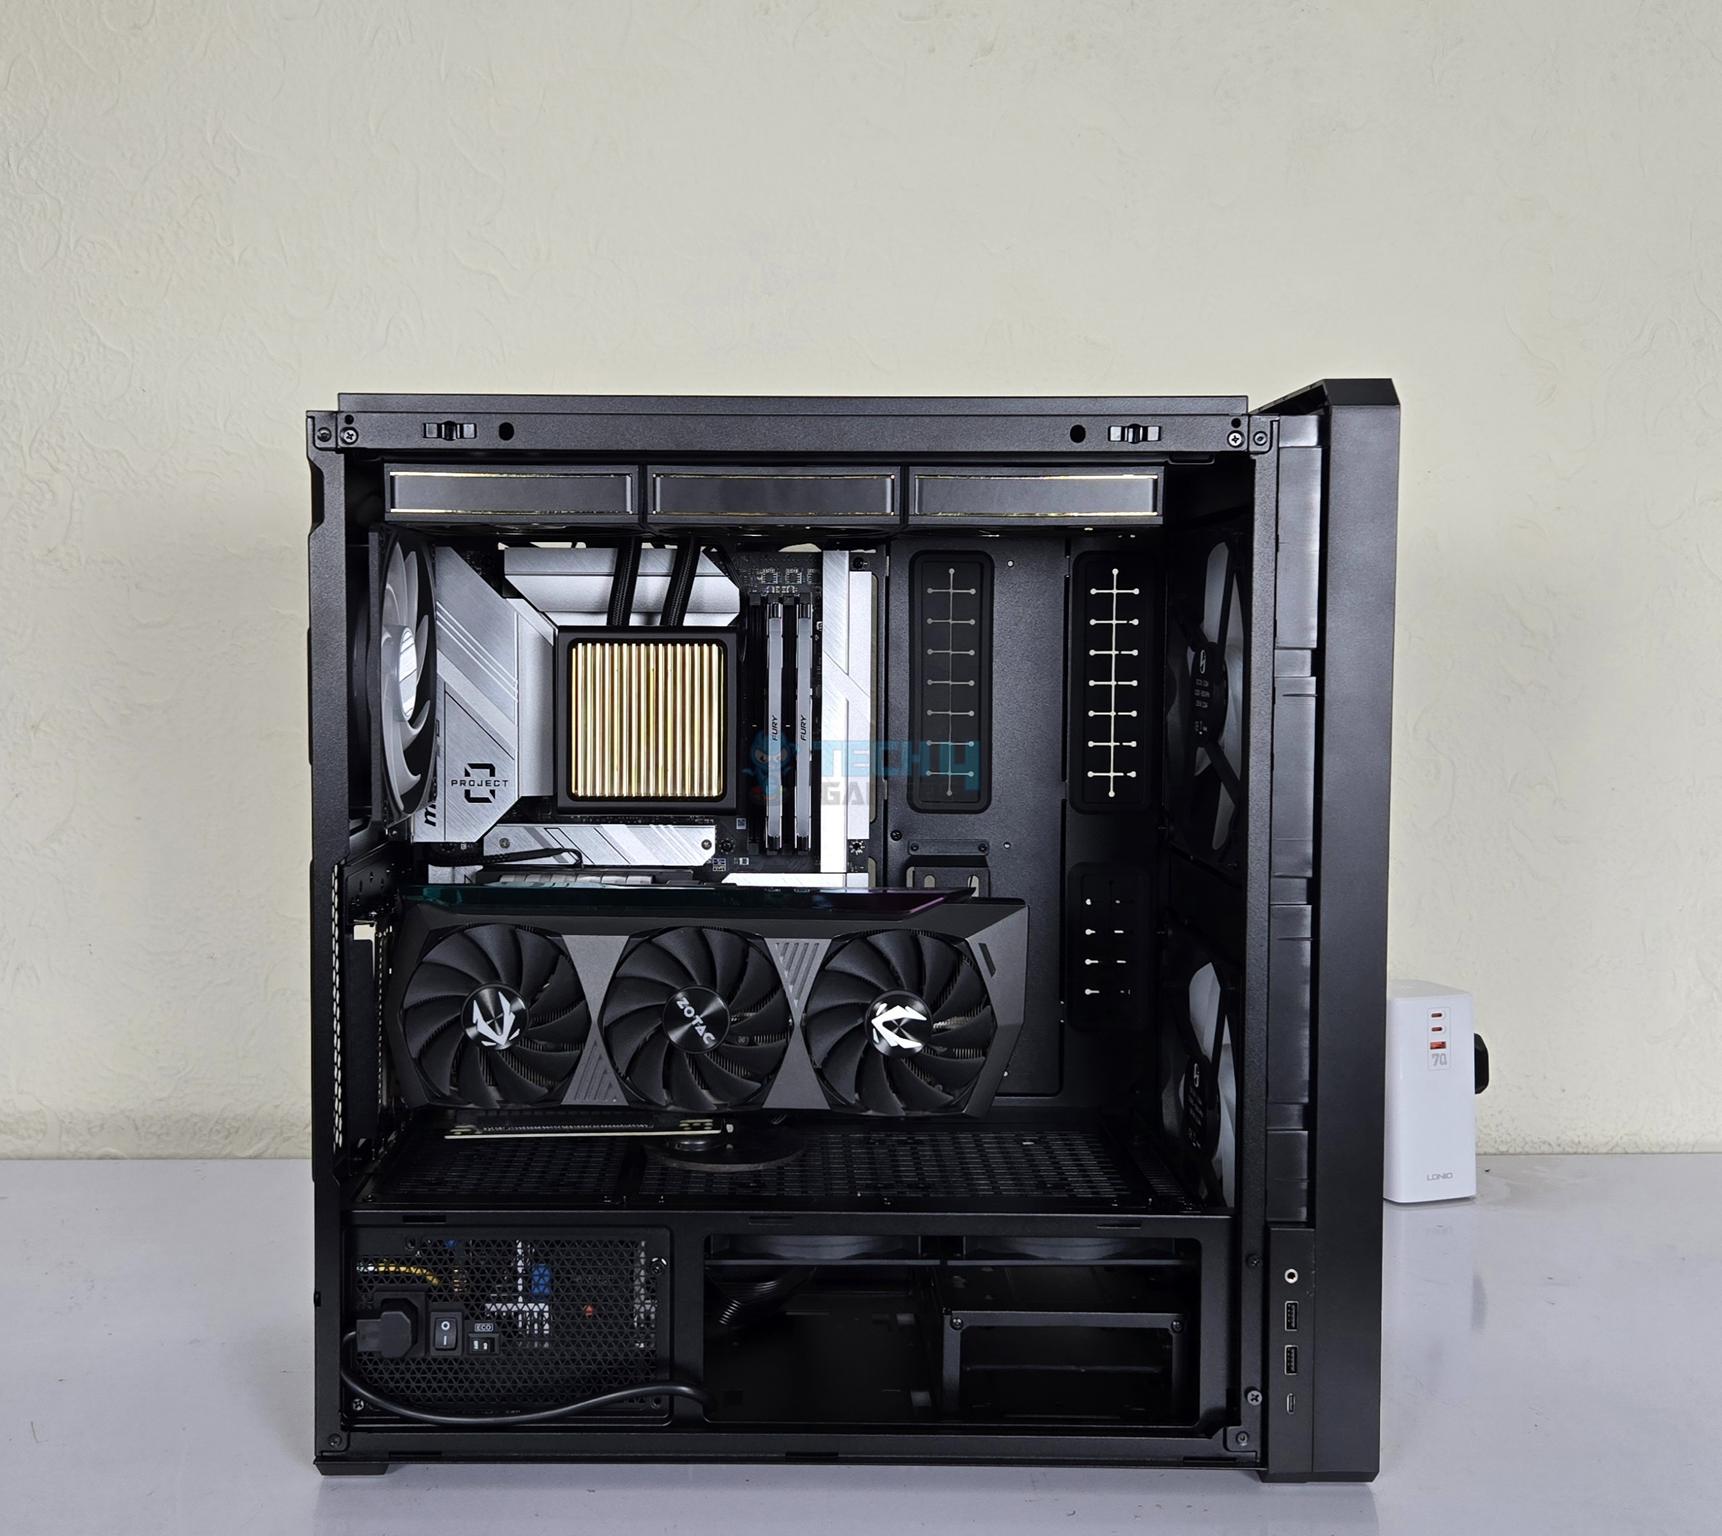
The purpose of these pictures is to show you that there is no space available to place the cables if installing the PSU in standard layout. You either have to remove one drive cage or carefully place the cables over the drive cages. In this standard layout, you don’t need to use the power cord.
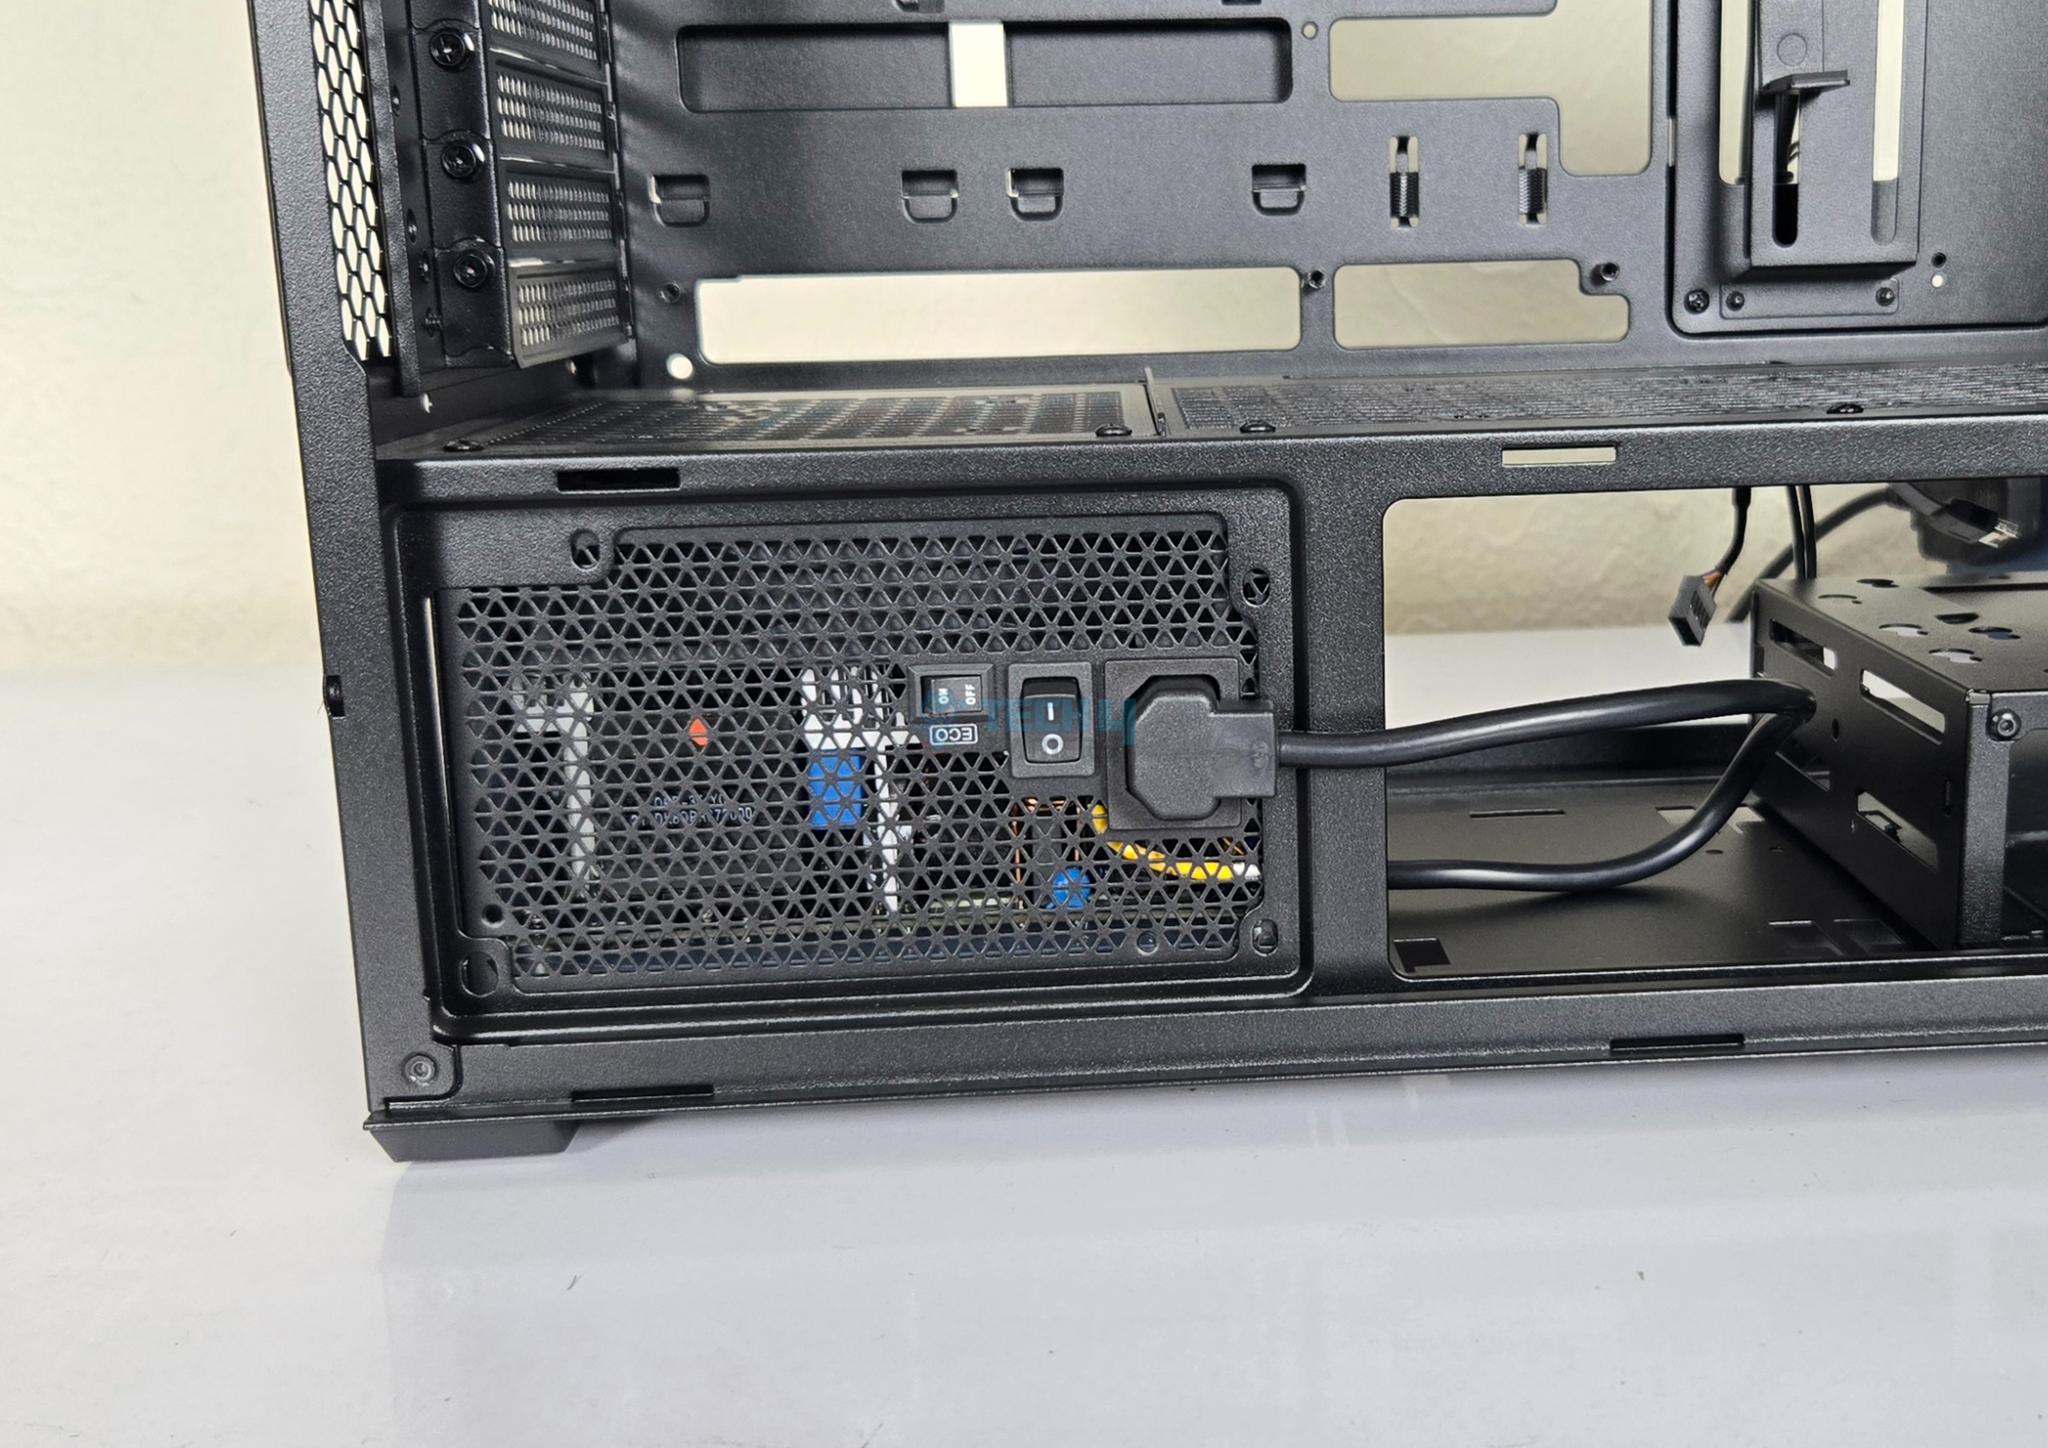
Now, I am showing PSU installed in rotated direction with connector side facing the side panel of the case. I was able to install the PSU with fan side down and still connect the power plug to the PSU without any issue. Don’t forget to power the PSU on for this configuration.
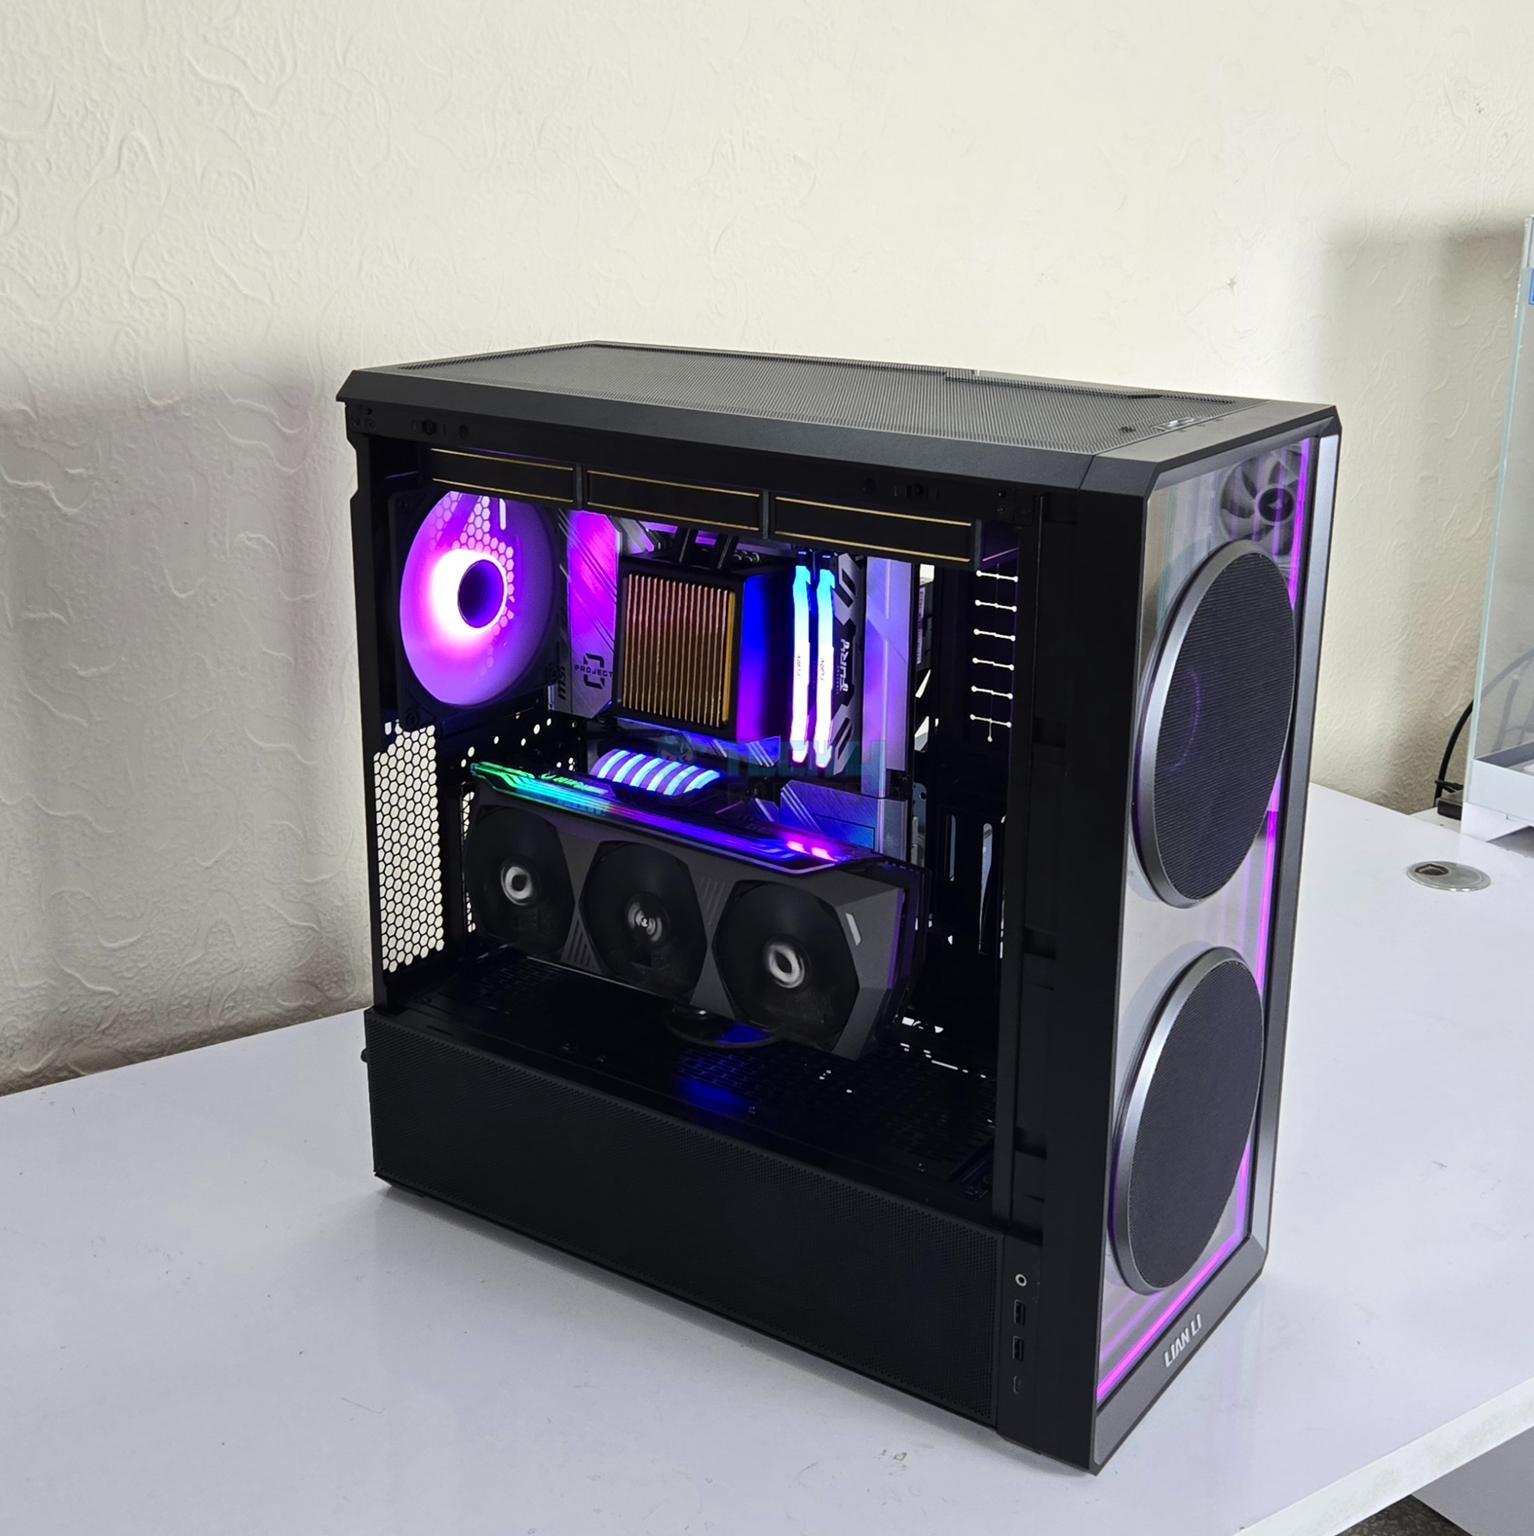
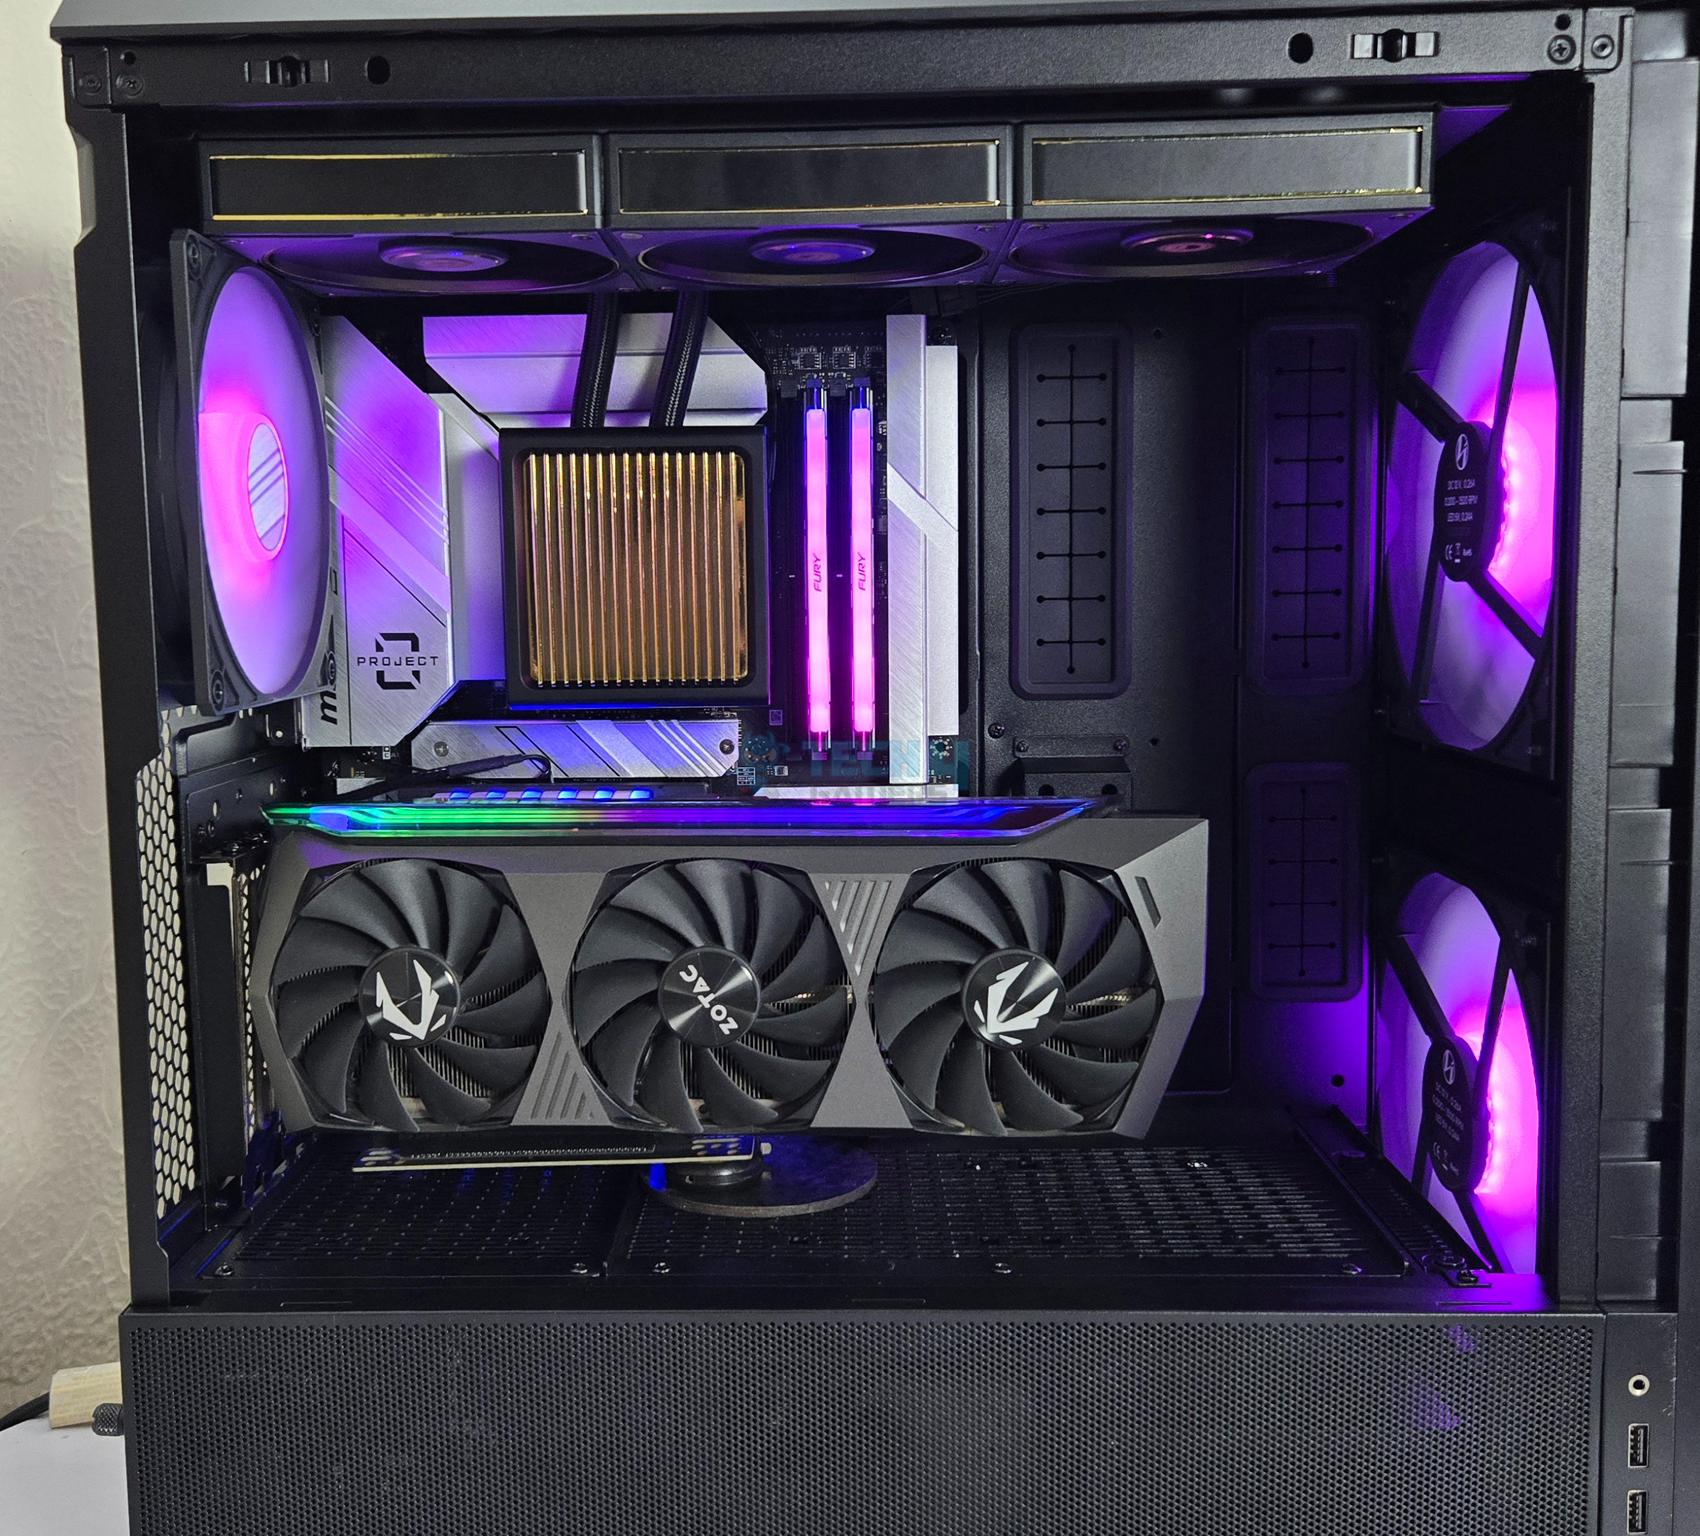
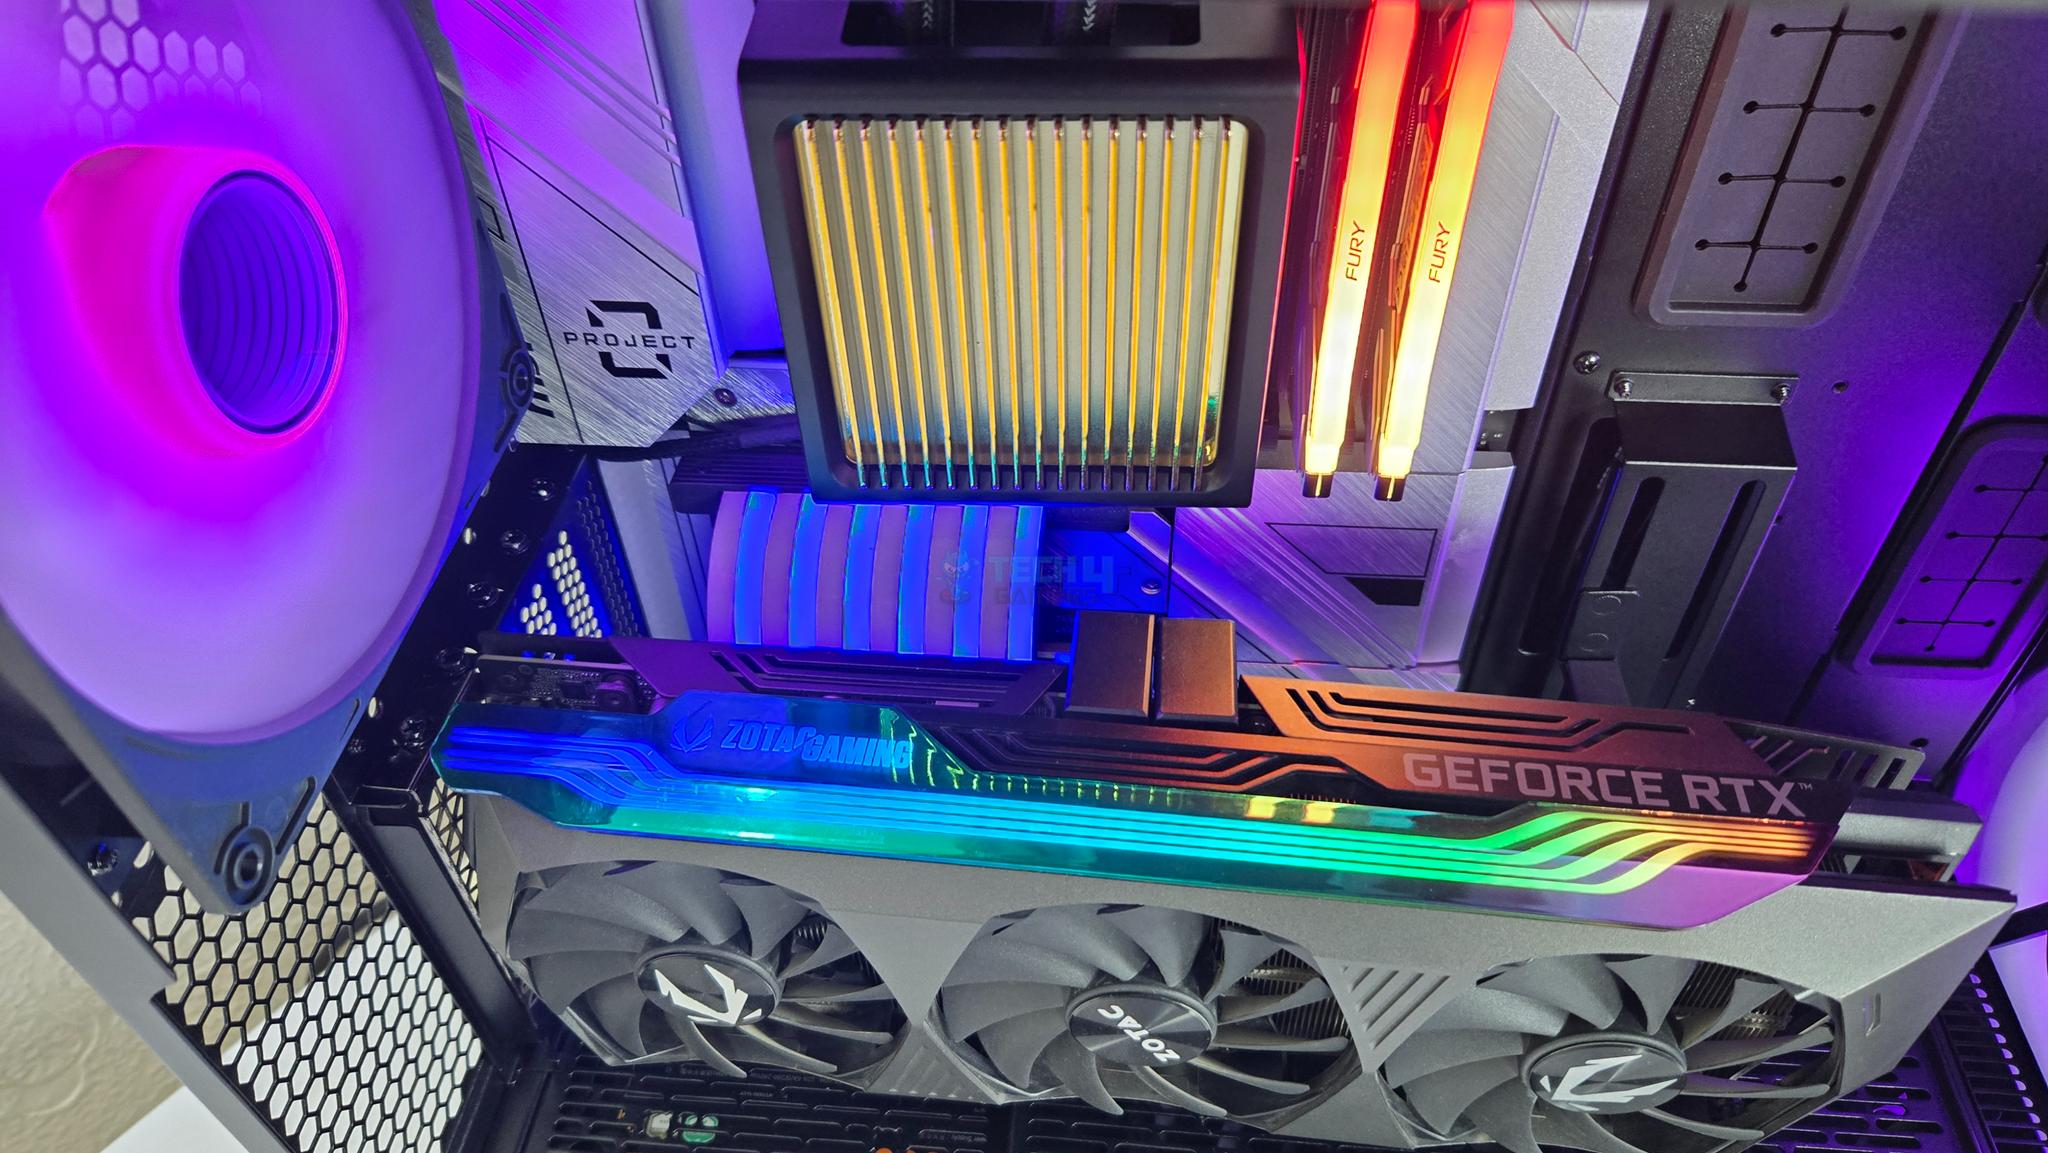

The above are a few pictures of the test build in action.
Thermal Testing
The thermal testing was done with an ambient temperature of 22ᵒC and I have used Cinebench R23.2 CPU Multi-Core and Unigine Superposition 1080P Extreme tests together to stress the CPU and graphics card at a time.
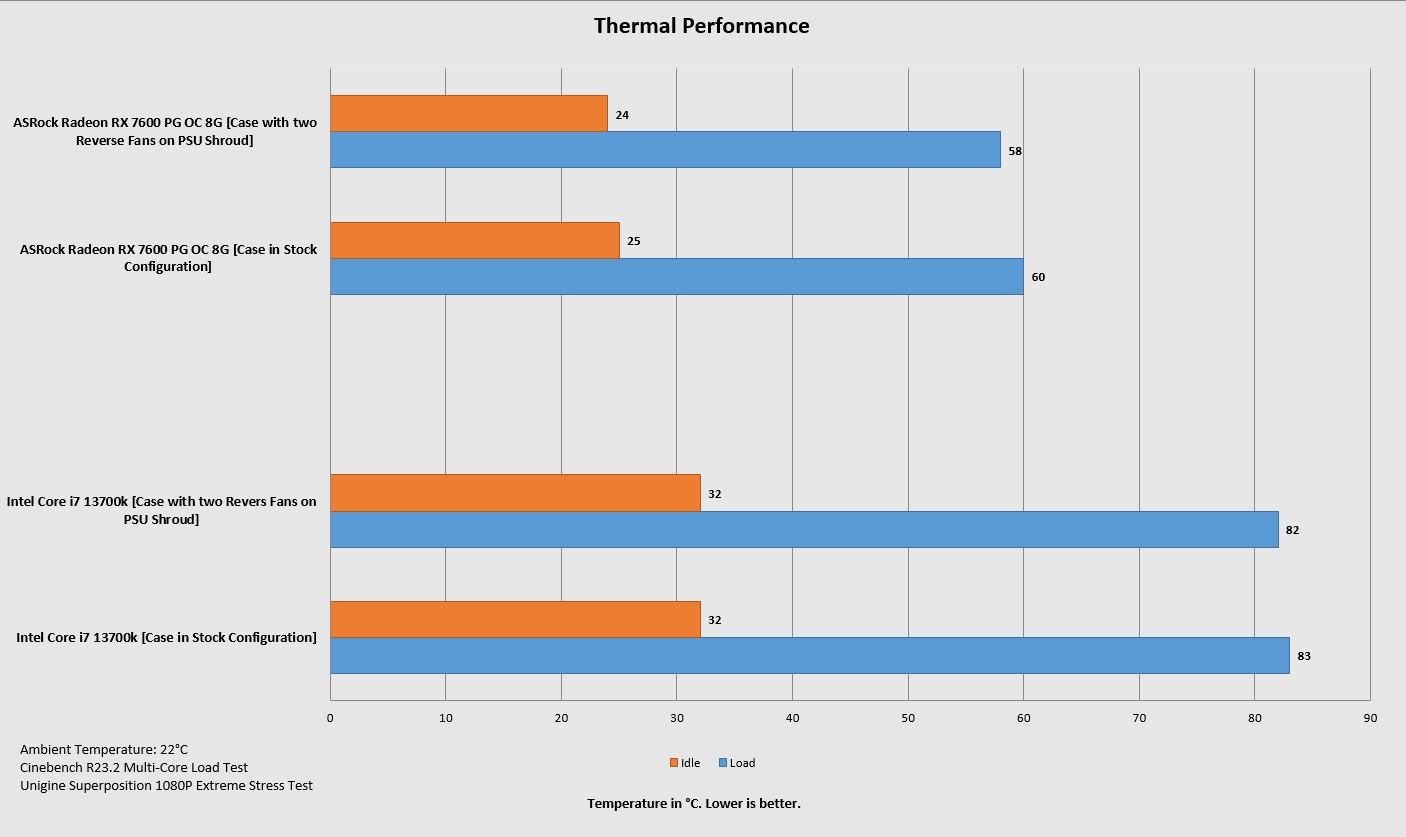
The LANCOOL 217 INF has a fantastic airflow even without reverse blade fans on the PSU shroud as is evident by the thermal performance.
Should You Buy It?
Buy It If:
✅If you need a good spec case: The Lian Li LANCOOL 217 INF is a feature rich PC Case with dual mount for PSU and IO bracket, 170mm and 140mm pre-installed fans, back-connect motherboard support and infinity-mirror design and much more.
✅Looking for an airflow case: This case has excellent airflow thanks to two mighty 170mm ARGB fans on the front and possibility to add three 120mm fans on the PSU shroud.
✅Wireless Connectivity: If you are in Lian Li ecosystem then wireless receiver in the installed fan hub makes it an idea choice to control the elements wirelessly using L3 Connect though you need to buy a controller.
✅If you need a best value case: Coming in at USD 124.99 and given the excellent features and impressive thermal performance, the LANCOOL 217 INF is your best value PC Case on the market.
Don’t Buy It If:
❌If you already have a good spec case: If you are using a PC Case that is serving you well, you may skip this case.
❌If you need serious water cooling: This case does not support radiator on the front which may be lacking for serious custom loop users.
Final Words
The best I can describe LANCOOL 217 INF in short summary is like describing an ocean in lake view. This case is feature rich design and Lian Li has left no corner uncovered. It is a mid-tower designed around maximum ventilation for good airflow. Lian Li has featured a closed front with infinity-mirror design and provides two 170mm ARGB fans with mesh covers to provide excellent airflow.
The motherboard support goes up to SSI-EEB (330mm) and this case also supports the backplug motherboard in ATX and mATX form factor. The case provides spacious layout for your build and its removable PCIe bracket can be installed vertically (riser cable not included) or horizontally.
The cooling provision is:
- 3x 120mm or 2x 140mm fans on top
- 1x 120mm or 140mm fan on rear [140mm ARGB Fan Pre-Installed]
- 2x 170mm fans on front [Pre-installed]
- Up to 3x 120mm fans on the PSU Shroud [Optiona]
- Up to a 360mm radiator on the top
This case can house 1x 2.5” and 1x 3.5” drives in one drive cage and comes with two such cages. In addition, you can install 2x 2.5” drives on the back of the motherboard tray and up to 2x 2.5” drives on the PSU shroud.
You can only use one bracket on the back of motherboard tray if using back-plug motherboard. You have to remove one drive cage with PSU being installed in standard layout. Speaking of which, you can install PSU in either of two directions. Similarly, you can install IO bracket on the side (default) or on the top.
You can install a CPU air cooler of maximum 180mm height, a graphics card of maximum 380mm length and ATX PSU under 180/200mm length. Doing a build in this case is a wonderful experience and I did not observe any issue to report.
Thank you! Please share your positive feedback. 🔋
How could we improve this post? Please Help us. 😔
[Hardware Reviewer & Editor]
Meet Nauman Siddique, a highly experienced computer science graduate with more than 15 years of knowledge in technology. Nauman is an expert in the field known for his deep understanding of computer hardware.
As a tech tester, insightful reviewer, and skilled hardware editor, Nauman carefully breaks down important parts like motherboards, graphics cards, processors, PC cases, CPU coolers, and more.
- 15+ years of PC Building Experience
- 10+ years of first-hand knowledge of technology
- 7+ years of doing in-depth testing of PC Hardware
- A motivated individual with a keen interest in tech testing from multiple angles.
- I majored in Computer Science with a Masters in Marketing
- Previously worked at eXputer, EnosTech, and Appuals.
- Completed Course in Computer Systems Specialization From Illinois Tech
Get In Touch: nauman@tech4gamers.com


