Windows 11 crackling audio can adversely affect your multimedia experience. Multiple causes can lead to lousy audio on your computer, such as incorrect audio-related settings, audio enhancement malfunctioning, outdated or corrupt audio drivers, incorrect audio output format, and signal interferences.
- Some reasons for this problem are outdated drivers/OS, incorrect audio configurations, and damaged hardware.
- Updating/reinstalling the audio drivers, disabling audio enhancements, and switching the audio format are some fixes for this error.
- Resetting the PC is the last attempt at solving this persisting problem.
Method Difficulty Rating
Rated: 2/10
Rated: 4/10
Rated: 2/10
Rated: 3/10
Rated: 5/10
Turn Off Audio Enhancements
Although the Audio Enhancement feature is added to make the sound experience more appealing, it may sometimes cause poor or crackling audio. I disabled this feature and restarted the computer, which resolved the issue. Additionally, the same method was proposed by an HP agent in the HP Support Community.
Disable the audio enhancement feature with the instructions below:
- Launch Sound Settings: Go to PC Settings > System > Sound.
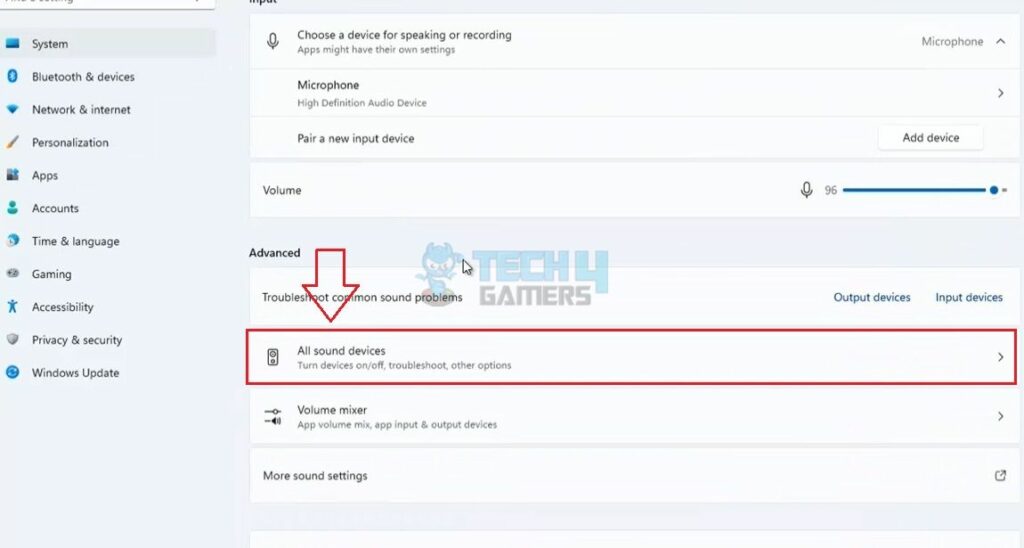
- Navigate To Sound Devices: Scroll to the Advanced section > Select All Sound Devices.

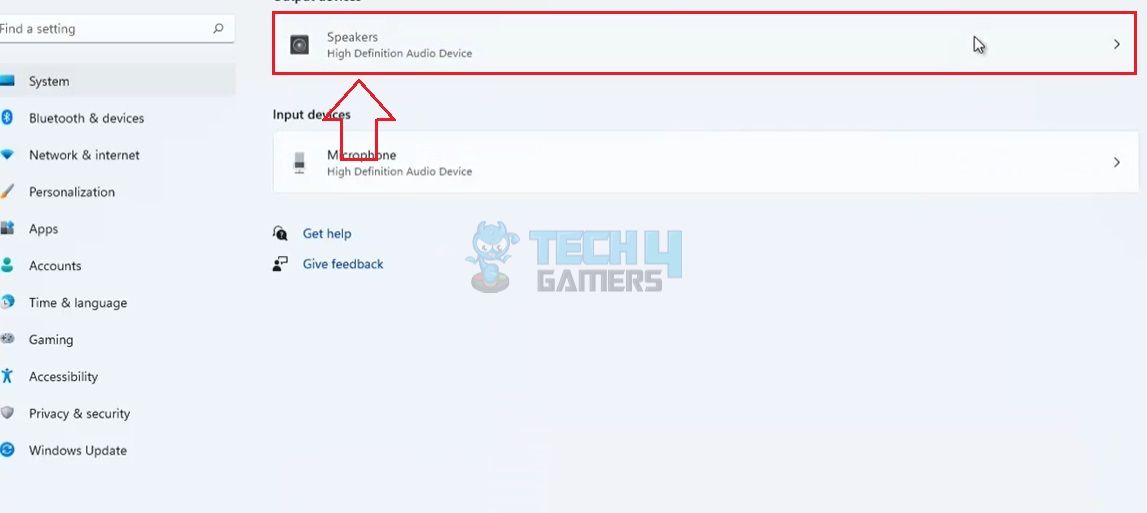
All Sound Devices (Image By Tech4Gamers) - Choose Output Device: In my case, the currently used audio output device was the Speakers.

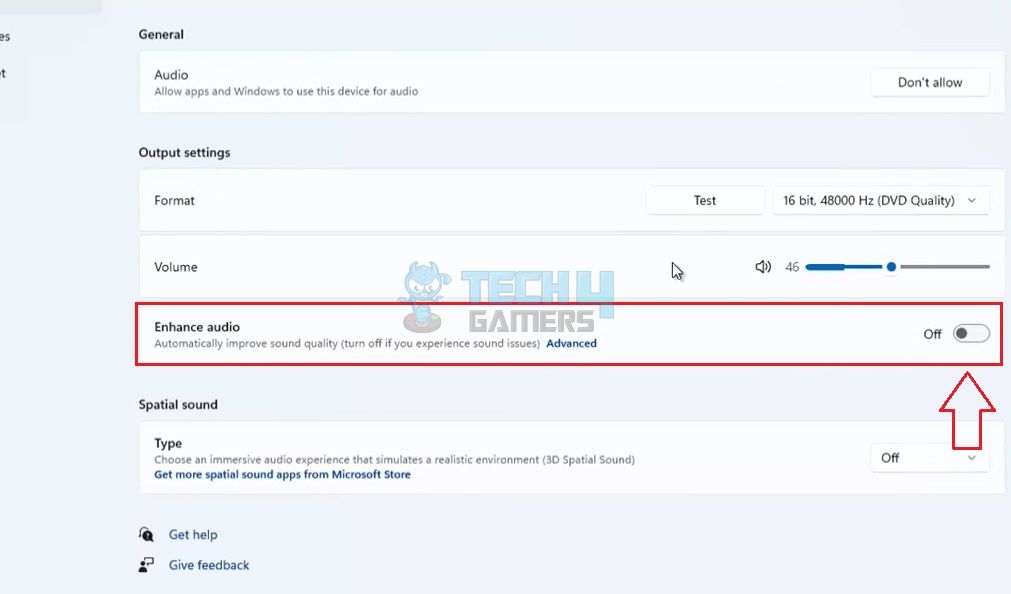
Speakers (Image By Tech4Gamers) - Turn Off Toggle: Disable the Enhance Audio feature via the toggle bar.

Disable Enhance Audio (Image By Tech4Gamers)
Increase Audio Quality
Lower audio quality settings are also why the audio may be distorted or unclear on your device. On the other hand, the audio configuration should match the capability of your audio output device. I changed it to 24-bit, 44100 Hz (Studio Quality) on my Speaker.
Follow the steps below to adjust the sound output:
- Get To Sound Settings: Open Control Panel > Hardware And Sound > Sound.
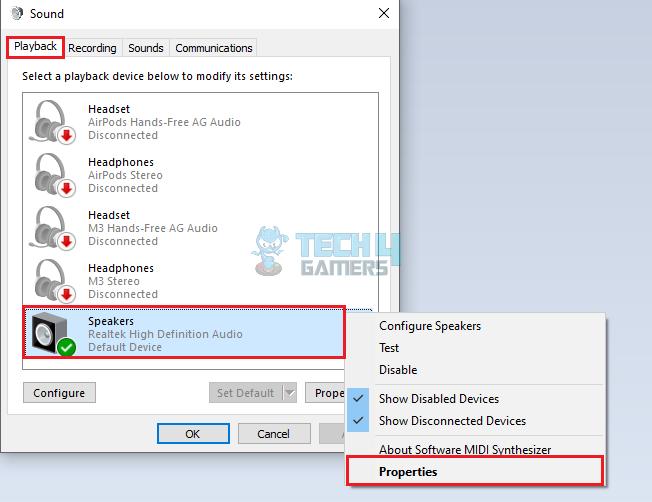
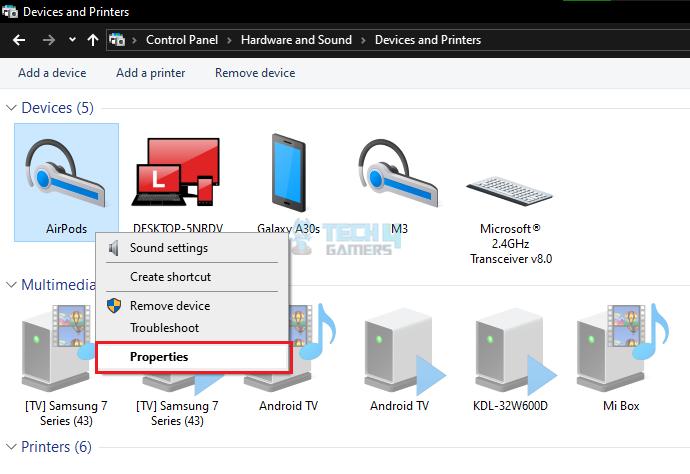
- Open Device Properties: Right-click on the connected audio device > Properties.

Select Properties (Image By Tech4Gamers) - Choose Audio Format: Open the Advanced tab > In the Default Format box, set 24-bit, 44100 Hz (Studio Quality) > Test > Apply > OK.

Apply New Format (Image By Tech4Gamers)
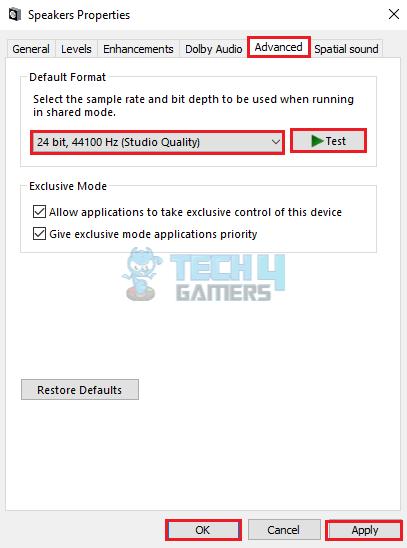
When researching the problem, I noticed that different formats worked for different users, as seen in the comments of a YouTube video. Hence, test multiple formats from the drop-down menu and check which fits your device best.
Turn Off Handsfree Telephony
The Handsfree Telephony feature lets me make or receive calls without picking up the device, allowing me to give commands to the computer (if supported). Consequently, use this solution if you are using a headset or handsfree to receive the audio output from the computer.
Disable this option to prevent any interruption in the audio output:
- Head To Properties: Go to Control Panel > Hardware And Sound > Devices And Printers > Find your device and right-click on it > Properties.

Device Properties (Image By Tech4Gamers) - Disable Handsfree Telephony: Open the Services section > Remove the tick from Handsfree Telephony > Apply.

Disable Handsfree Telephony (Image By Tech4Gamers)
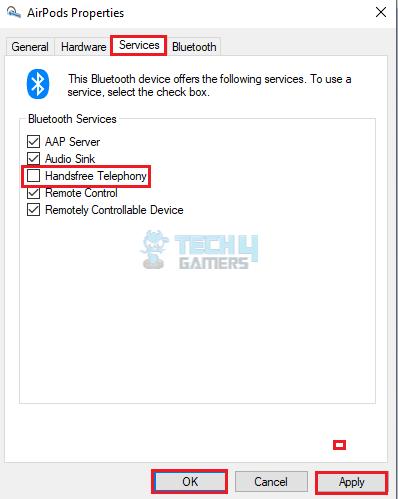
Several people voted this fix as helpful when suggested by a user on the Microsoft Community.
Restart Windows Audio Service
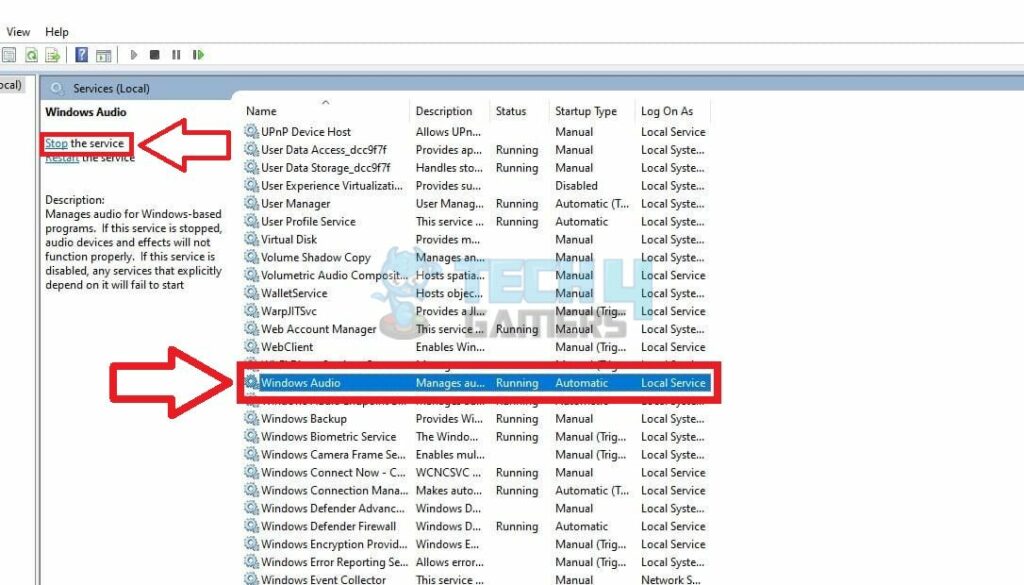
Furthermore, restarting the Windows Audio Service is another method that got me out of the trouble. It looks after the audio playback on the connected devices or the speakers; thus, restarting it can eliminate corrupt or faulty data.
Perform the fix quickly using these steps:
- Execute Run Command: Access the Run box with the Windows+R keys > Search services.msc.
- Select Windows Audio: Find Windows Audio Service and click on it.
- Modify Startup Type: Verify that the Startup Type is set to Automatic.

Automatic Startup (Image By Tech4Gamers) - Restart Audio Service: Return to the Services screen > Highlight the Windows Audio service > Press Restart at the top left edge of this screen.

Windows Audio Service (Image By Tech4Gamers)

Change Process Power Management
While putting your computer into power-saving mode saves battery, it may create other problems, such as the audio crackling/popping. To fix this, I got the computer out of power-saving mode and configured the settings to put it in high-performance mode. Once done, I tested the audio, and it was smoother this time. The solution also proved helpful for more than one user on the Tom’s Hardware Forum.
Use the following instructions to configure Power Management:
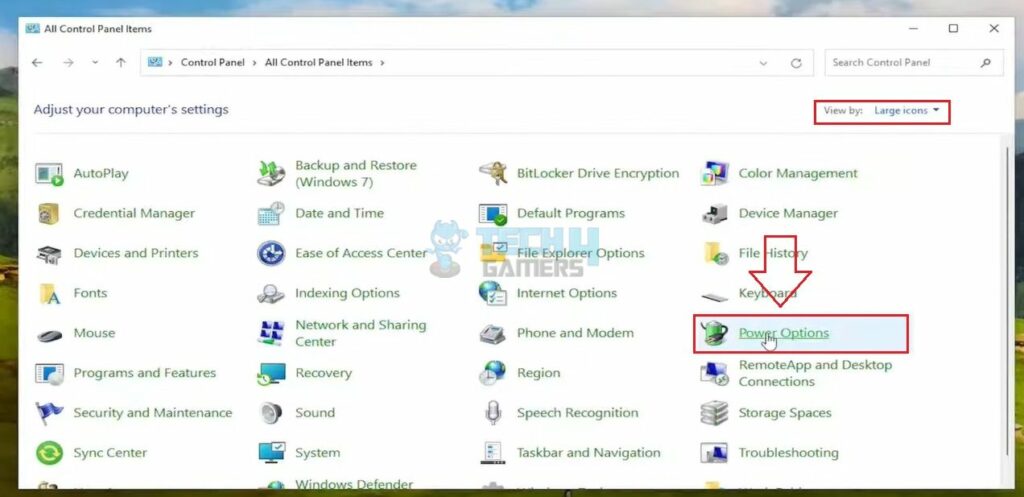
- Go To Power Options: Launch the Control Panel > Click the drop-down beside View By: > Pick Large Icons > Power Options.

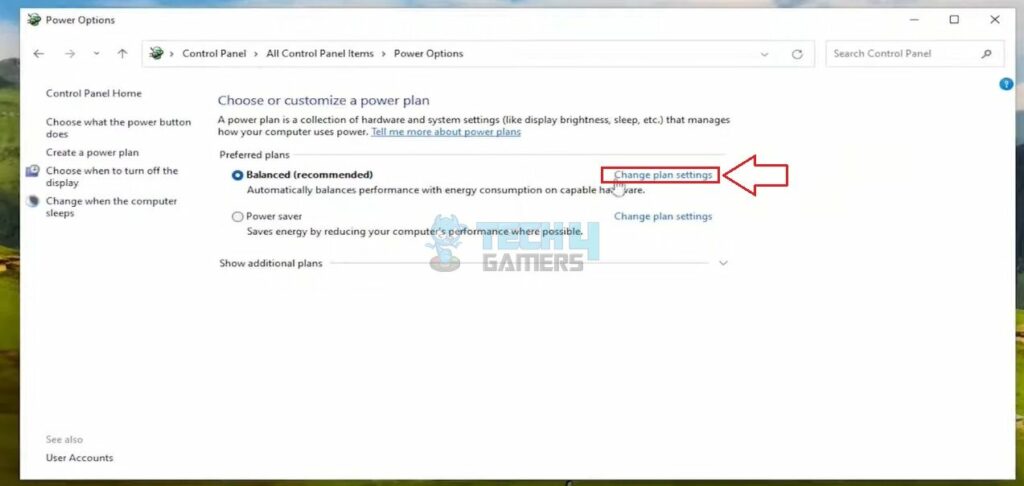
Power Options (Image By Tech4Gamers) - Access Plan Settings: Click the blue button, Change Plan Settings, in front of Balanced (Recommended).

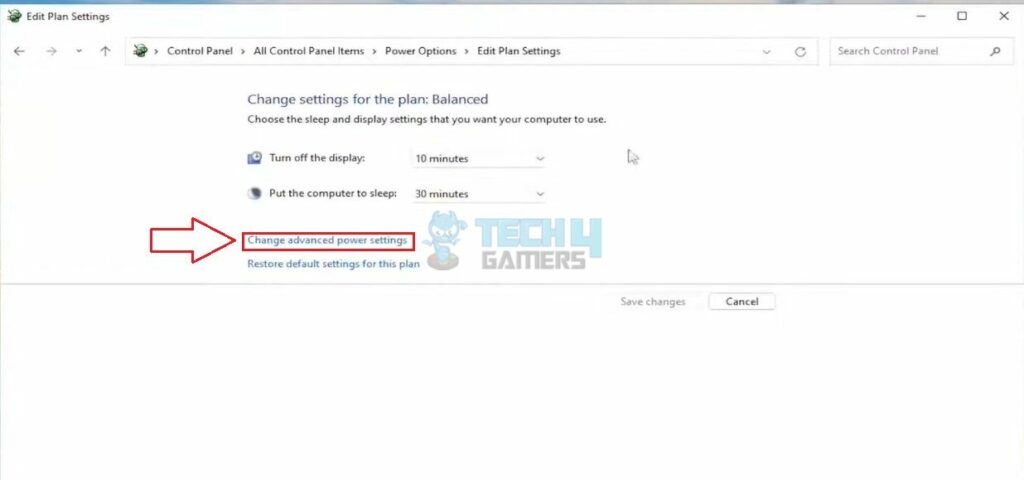
Change Plan Settings (Image By Tech4Gamers) - Pick Advanced Settings: Select Change Advanced Power Settings.

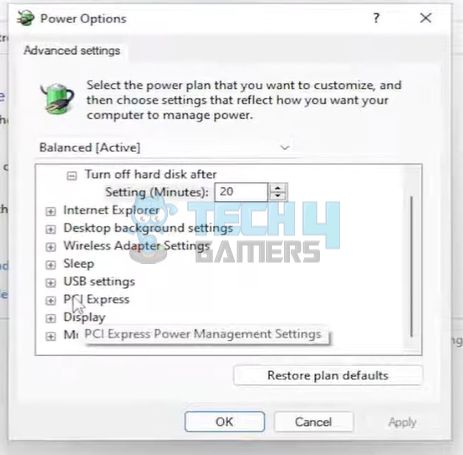
Change Advanced Power Settings (Image By Tech4Gamers) - Expand Power Management Settings: If you see the option Process Power Management, expand it by clicking on the + sign before it.

Process Power Management (Image By Tech4Gamers) - Change Processor States: Choose the Minimum Processor State to 100 for the On Battery and Plugged In states > Apply > OK.
Wrap Up
If the audio crackling issue only happens when you connect external audio devices, the problem may persist within the hardware. Try connecting another set of speakers or a headset to the computer and check if the audio output is fine. If yes, the previous audio hardware may be faulty, and you might have to replace it.
Moreover, multiple users tweeted that they encountered audio issues after updating their PC to Windows 11.
installed windows 11 and spent the last two hours troubleshooting audio issues :/
— Matthew Nguyen (@heymattnguyen) December 17, 2022
However, in July 2023, Microsoft released an update patch, KB5028254, to resolve audio problems, among other bugs. Other than that, there has been no official response to this widely-faced trouble.
Microsoft has released the KB5028254 preview update for Windows 11 22H2 with fixes for 27 issues, including ones affecting VPN network performance and audio/display devices.https://t.co/XzNsR78Gx4
— BleepingComputer (@BleepinComputer) July 26, 2023
Lastly, try contacting Microsoft Support if the above methods fail to fix the Windows 11 crackling audio. Alternatively, you can take your computer to a technician and let them inspect the cause.
Frequently Asked Questions
Incorrect audio configurations, lower sound quality, and faulty audio output devices are some reasons why the audio may crackle.
You can update the audio drivers, fix audio-related settings, and update your Windows to resolve the problem.
Keep the audio drivers and Windows up-to-date, regularly scan your PC, and use good-quality audio hardware.
Fixes For Other Windows Issues:
- Windows 11: Computer Won’t Wake Up From Sleep [SOLVED]
- How To Solve Windows Security Certificate Error
- How To Fix Shift F10 Not Working In Windows 11
- How To Disable Rounded Corners In Windows 11?
- How To Fix Device Settings Not Migrated On Windows 11?
- How To Turn Off Caps Lock Notification On Windows 11?
Thank you! Please share your positive feedback. 🔋
How could we improve this post? Please Help us. 😔
[How To Guides Specialist]
Dayan Shahid is a skilled mechanical engineer passionate about technology. With certifications in various programming languages and subjects ranging from microcontrollers to aerial robotics, Dayan can effortlessly present complex technical topics in an engaging way. His ability to bridge the gap between theory and practical applications sets him apart as he continues to inspire others through their insightful content.