


There are various reasons why your Windows 11 computer might not wake up from sleep mode, like problems with the graphics card, corrupt system files, incorrect power management configurations, or insufficient power supply. However, I tested many solutions that eliminated the trouble on my computer.
- Common symptoms of the problem include a black screen, an unresponsive computer, fans and lights on but a blank screen, and the computer is stuck in sleep mode.
- This issue does not pop up that often among users.
- Troubleshooting tips include checking for hardware and software issues, adjusting power settings, changing sleep mode settings, and updating BIOS or firmware.
- Refer to Microsoft Support or take your PC to a technician if the problem persists.
Method Difficulty Rating
Rated: 6/10
Rated: 7/10
Rated: 6/10
Rated: 8/10
Adjust Power Settings
When a computer is in sleep mode, it saves power by turning off the display and reducing the power usage of components. I turned off sleep mode in the Control Panel and got back to normal functioning. This step was also working for the users on the Microsoft Forum. Take the steps mentioned below to resolve the issue.
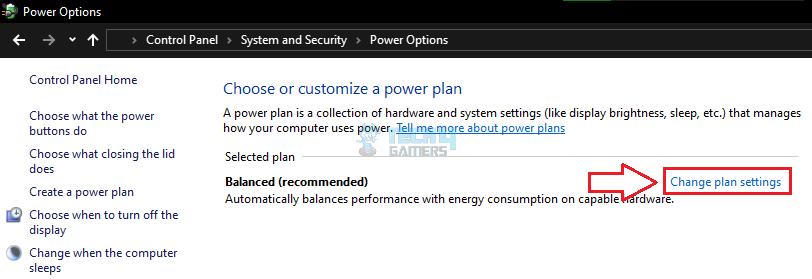
- Access Power Settings: Open the Control Panel or Settings app > Power Options > Active Power Plan > Change Plan Settings.

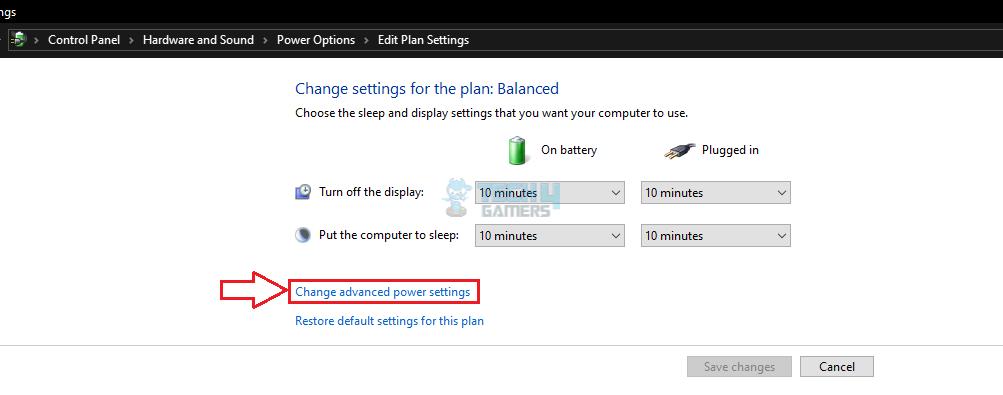
Change Plan Settings (Image By Tech4Gamers) - Change Power Settings: Ensure the Put The Computer To Sleep option is set to the desired time or Never > Advanced Power Settings.

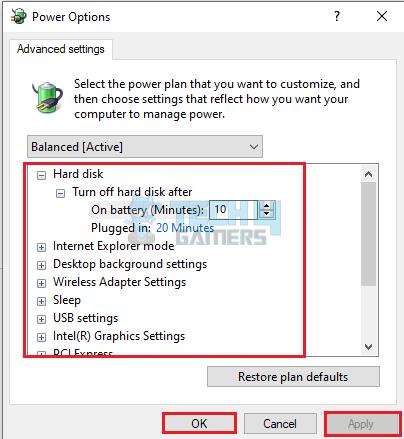
Change Advanced Power Settings (Image By Tech4Gamers) - Double-Check Component Settings: Adjust the settings for components such as hard disk and processor > Apply > OK.

Change Additional Power Settings (Image By Tech4Gamers)
Change Sleep Mode Settings
Changing the sleep mode settings is a troubleshooting tip that can help solve issues when a computer doesn’t wake up from sleep mode in Windows 11. I modified the settings to ensure that my PC only goes to sleep after a particular period of inactivity. Users on 10 forums claimed that this step was of use to them. Also, taking this step solved the issue for us, you can take the following steps to do so:
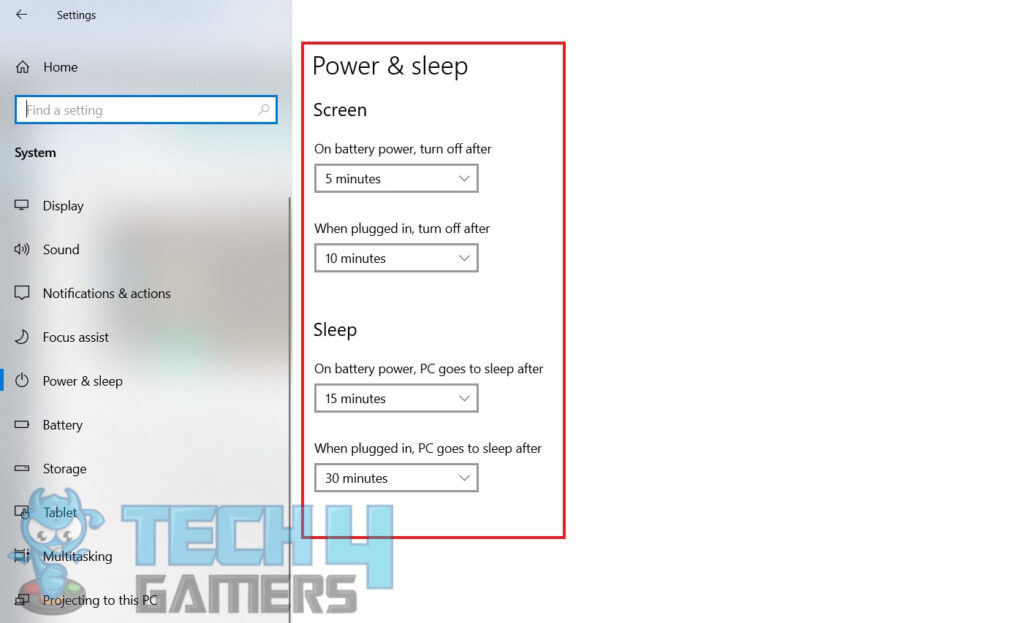
- Access Sleep Menu: Go to Settings > System > Power & Sleep.
- Adjust Sleep Settings: Under the Sleep section, adjust the settings to your preferred sleep mode.

Adjust The Sleep Settings (Image By Tech4Gamers) - Change Advanced Sleep Settings: Select Additional Power Settings from the Related Options. Here, you can customize the advanced power settings, including the sleep mode options such as hybrid sleep, hibernate, and sleep after.
- Save Changes And Exit: Click Save Changes > Exit the Control Panel.
Hibernation mode is a power-saving setting that shuts down your computer after saving its present state to the hard drive. Disabling it can prevent the computer from getting stuck in this state and not waking up from sleep mode. This is how you can move ahead. Checking the event log is an advanced troubleshooting technique that can help identify the cause of the issue. It lets you analyze the recent system events and if a problem is present in any of them. If found, resolve the problem to return uninterrupted PC performance. Taking this step was of great help to us at Tech4Gamers and other users online. Take the following steps to solve the issue: While this can be a technical error, the above methods effectively resolved it in no time. I highly recommend using the basic fixes like running a System Diagnostics or disabling hibernation mode before moving into the more time-consuming ones. I came across threads on Reddit detailing the issue that may be of some use to you. PC won’t wake up from sleep. Windows 11 and have tried a couple trouble shoots already. Remember to always back up important files before attempting advanced troubleshooting techniques, and if in doubt, seek professional help to avoid further damage or data loss. If the issue occurs intermittently, it may be related to power settings, driver conflicts, or other software-related factors. Try disabling unnecessary programs or updating drivers to see if the issue persists. You can take several steps to prevent this issue from occurring in the future, including updating drivers, keeping your computer and software up-to-date, and avoiding software conflicts by uninstalling unnecessary programs. More Windows 11 Errors: Thank you! Please share your positive feedback. 🔋 How could we improve this post? Please Help us. 😔 [Errors Troubleshooting Expert] Arsalan Shakil (aka GuyThatDoesEverything on YouTube) is a PC Tech Enthusiast and Electronic Geek. With over 10+ years of experience in Electronics, he then decided to explore Software Engineering to design embedded products and automate existing hardware solutions. When he started tearing down old cameras to understand how they worked, he was shocked (literally, when he got zapped by a flash discharge capacitor), giving him the power (debatable) to fall in love with videography/photography. He also started making some fun videos that later became YouTube tech reviews. Skills: In his local region, he’s known to expose cheap PSU brands, often claiming fake certification or false claims on the box. He’s a true nerd and needed some friends in his life. Then he met some guys who work at Tech4Gamers, and they also came out to be equal nerds who suggested he join Tech4Gamers as a Hardware Expert.
Disable Hibernation Mode

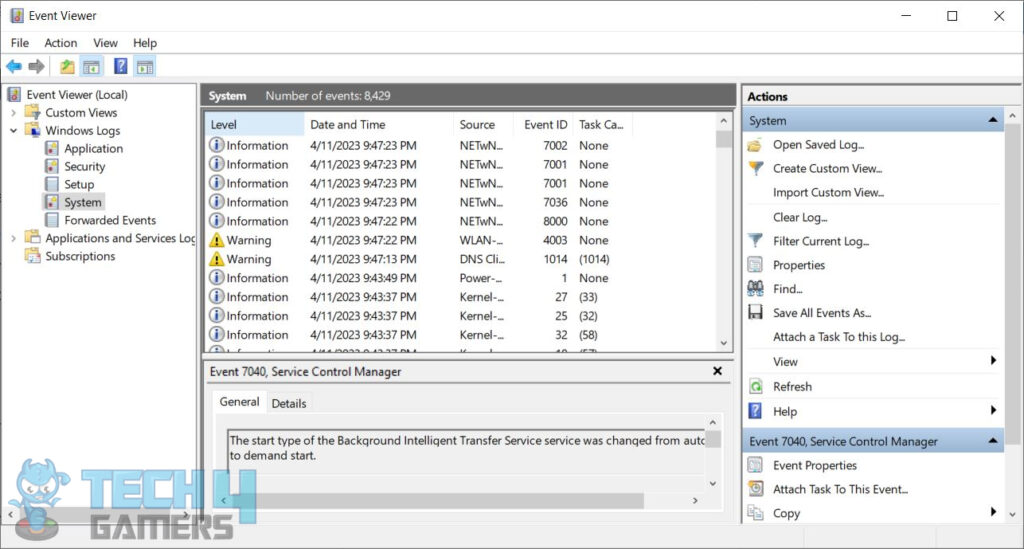
Check The Event Log
Final Words
byu/Stumpy-Wumpy inbuildapcFAQs
![]()


