


The “User profile cannot be loaded” is a frustrating issue that holds you up at the log-in screen of your PC. This prevents users from accessing their profiles, preventing them from accessing their files and data. Corrupt profile settings or system files are the primary cause of this error. Fortunately, the methods we have covered below will solve this issue.
- Corrupt files, user profile service malfunction, or anti-virus corruption are the main culprits for this error.
- The corrupt files are causing the “User Profile cannot be loaded” error to spread rapidly among Windows Users.
- You can try a handful of methods to solve this issue, which include utilizing System Restore, creating a new user account, or running the SFC Scan.
- Although this error is not harmful, we observed it to cause disturbances and inconveniences during use by locking you out of your system.
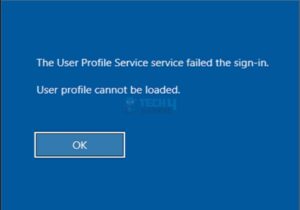
The error is displayed as follows:
Method Difficulty Rating
Rated: 7/10
Rated: 7/10
Rated: 6/10
Rated: 8/10
SFC Scan
SFC Scan, or System File Checker, is a Windows utility that detects and repairs corrupted system files. Its purpose is to restore system stability by verifying the integrity of critical system files and replacing any damaged ones. SFC Scan has been invaluable when faced with log-in issues on Windows profiles.
A handful of system files can cause this error to occur when corrupted. Hence, SFC Scan will check and repair all the corrupted system files. We have personally tested this command ourselves, and it worked for us. Follow the steps below:
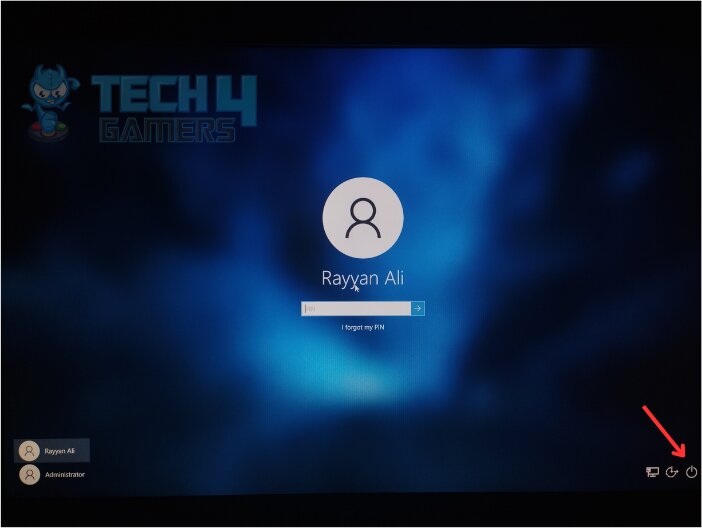
- Booting into Advanced Startup: Press the Power button on the bottom-right > Hold the Shift key > click Restart.

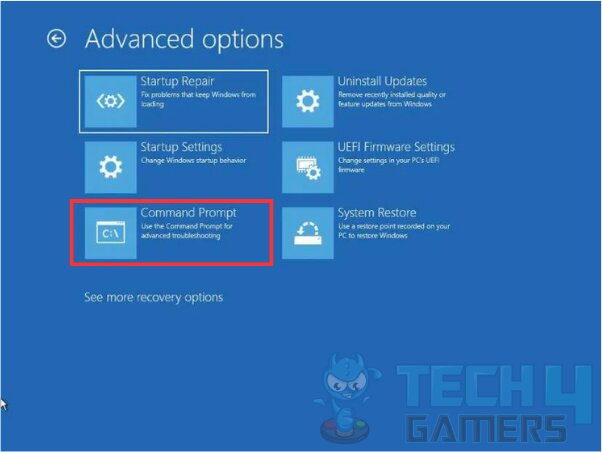
Power Button On Log-in – Image Credits [Tech4gamers] - Opening Command Prompt: Click Troubleshoot > Go to Advanced Options > Click Command Prompt.

Command Prompt – Image Credits [Tech4gamers] - Running SFC Scan Command: Type sfc /scannow > Hit Enter
New User Account
- Accessing Advanced Startup: Click the Power button on the log-in page > Click Restart while holding the Shift key.

Power Button On Log-in – Image Credits [Tech4gamers] - Opening Command Prompt: Click Troubleshoot > Go to Advanced Options > Click Command Prompt.

Command Prompt – Image Credits [Tech4gamers] - Making a New User: Type “net user /add username password” > Replace username and password with new input.
- Enabling Admin Rights: Type “net localgroup administrators username /add” > Replace username with the new input.
System Restore
A System Restore point is a previously saved state of Windows. The System Restore feature allows the user to roll back the Windows version to an older state and restore old settings and configurations where the system was functional. As a result, you can eliminate minor glitches or errors, including the “User Profile Cannot Be Loaded” error.
We can confirm this is an excellent method for resolving this error, and we have also seen users on Acer Community solving this error after performing a system restore without losing their data. Carry out this method successfully by following the steps below:
- Loading Advanced Startup: Click the Power button > Press and Hold the Shift key > Click on Restart.
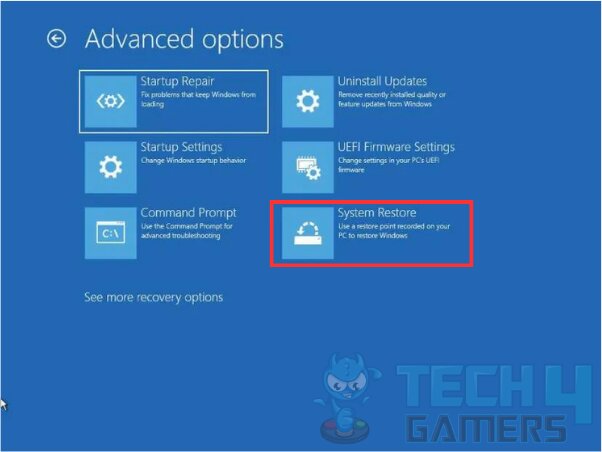
Power Button On Log-in – Image Credits [Tech4gamers] - Navigating to System Restore: Click Troubleshoot > Go to Advanced Options > Click System Restore.

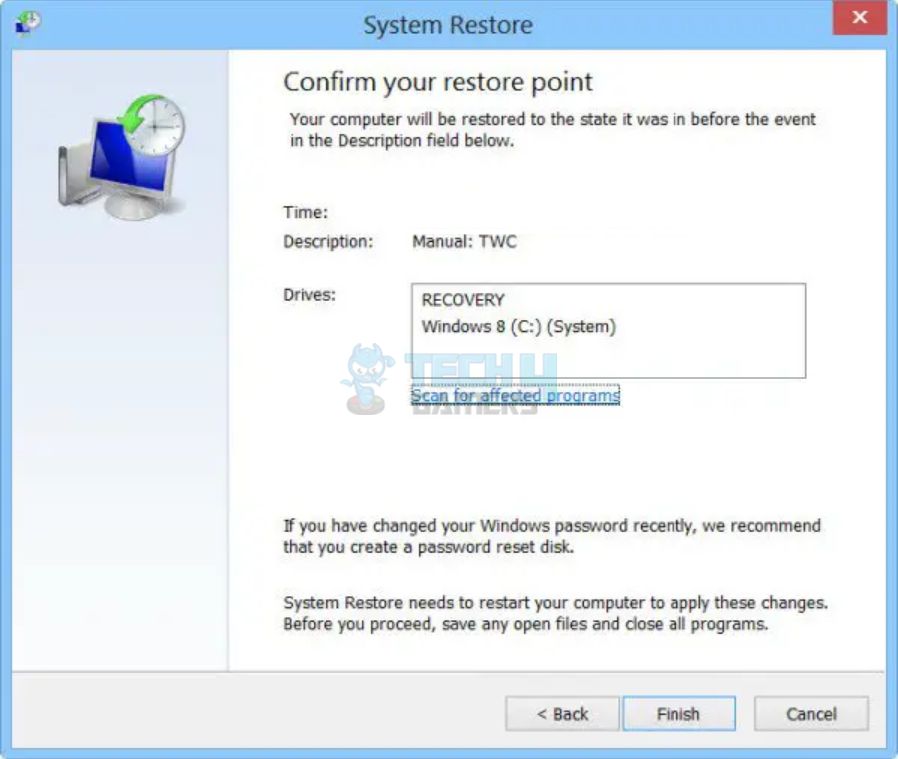
System Restore – Image Credits [Tech4gamers] - Running System Restore: Choose the latest restore point > Click Next > Click on Finish.

Choosing System Restore Point – Image Credits [Tech4gamers] Warning: If your PC doesn’t have a previously saved restore point, you will not be able to roll back the Windows.
Replace NTUSER.DAT
NTUSER.DAT file stores all the data related to a user profile, including personalization settings, data, etc. Each user has a different NTUSER.dat file, including the default profiles. In case of corruption, this file can cause a log-in issue. When locked out of a user profile, one method involves replacing the NTUSER.DAT file associated with the locked profile.
We’ve checked out this solution, which works like a charm for fixing the error. And guess what? During our research across TenForums, we also examined users who have successfully utilized this method to regain access to locked-out profiles. Here’s how you can replace the NTUSER.DAT file:
- Opening Windows File Explorer: Press Win + E.
- Showing Hidden Items: Click View at the top > Tick Hidden items.
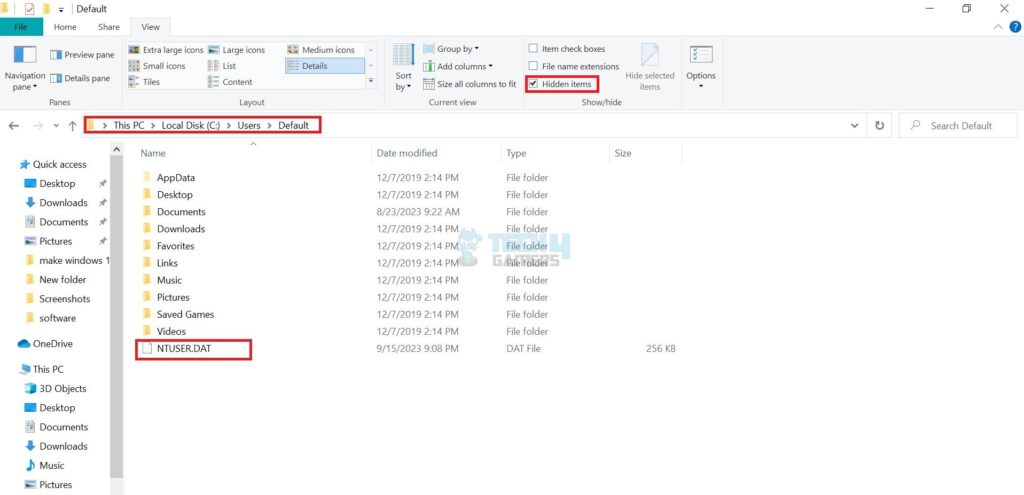
- Navigating to the Default Profile Folder: Open your Windows Disk Drive > Go to Users > Open Default.

Default NTUSER.DAT File – Image Credits [Tech4gamers] - Renaming Old File: Right-click on NTUSER.DAT file > Click on Rename > Rename it to NTUSER.DAT.OLD.

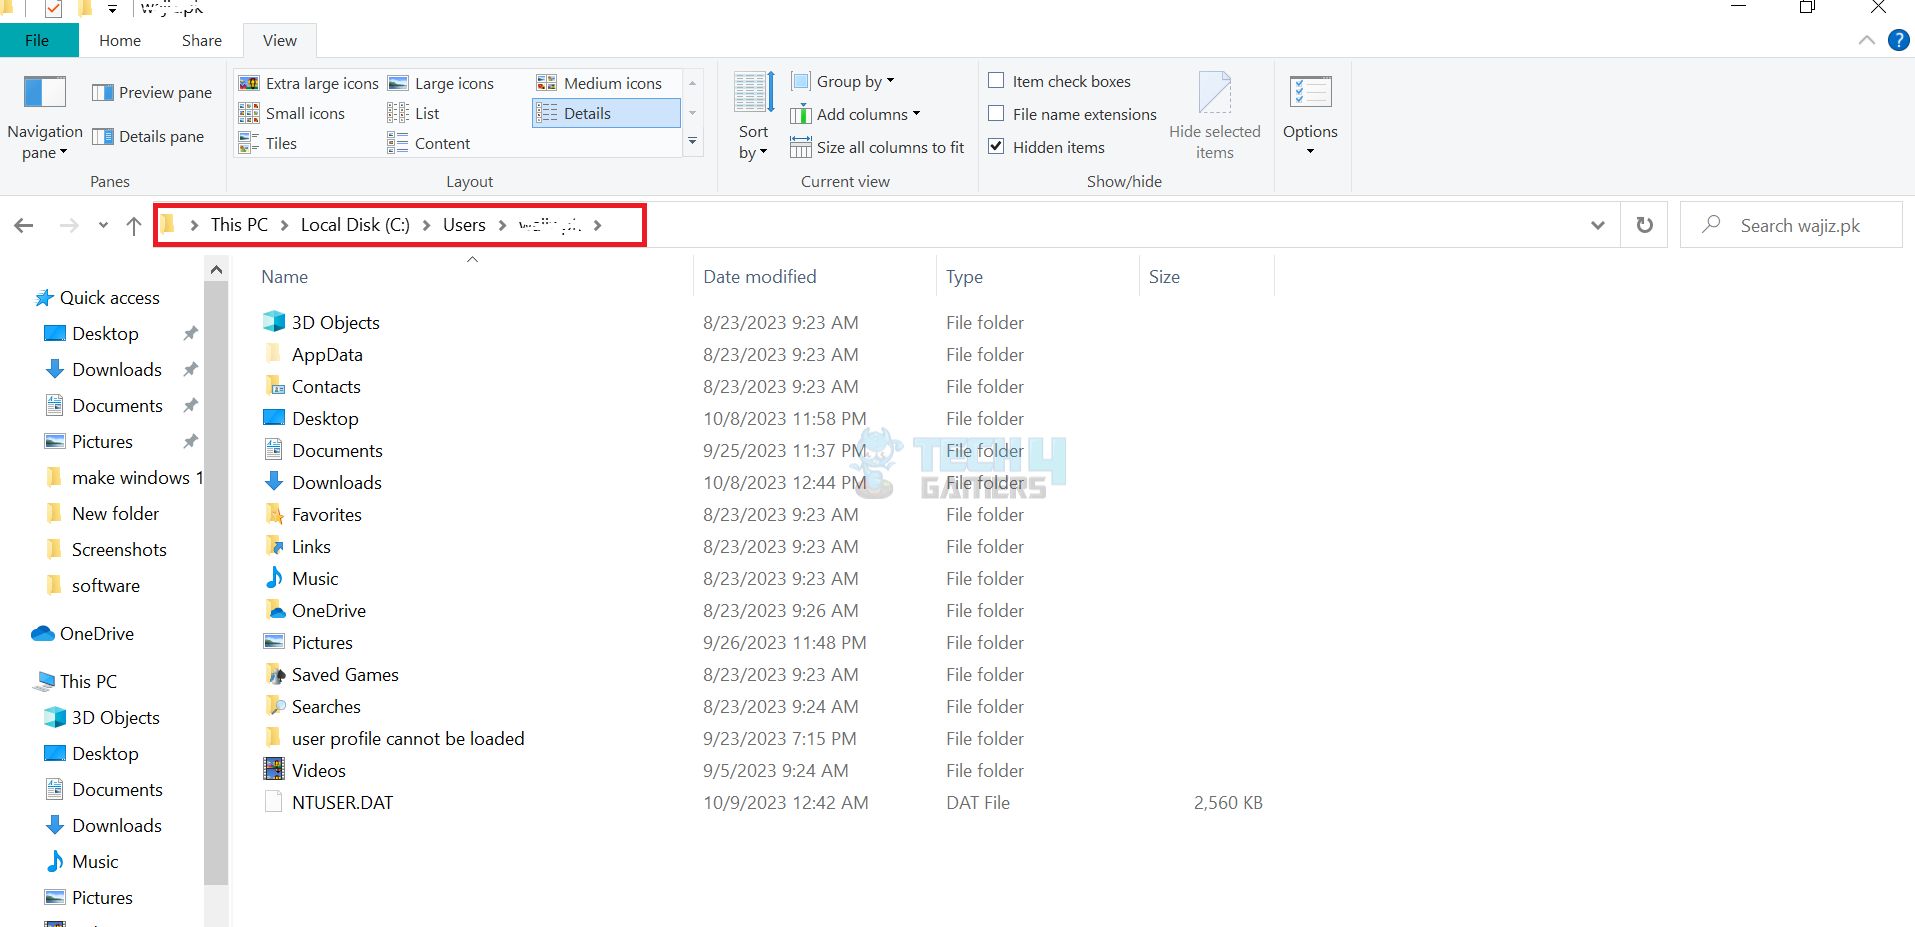
New NTUSER.DAT File – Image Credits [Tech4gamers] - Replacing New File: Return to Users Folder > Open your local user folder > Copy NTUSER.DAT file > Paste into Default Folder.
- Reboot: Reboot your system.
Final Thoughts:
So, recapping the blog, corrupt files, and failure of the User Profile Service are the major causes for the User Profile Cannot Be Loaded error. As per our research, this error seems to be increasing rapidly. We observed several users report this issue on X as well.
Rebooted my PC after updating my virus definitions,when I log on it says "The User Profile Service service failed the logon. User profile cannot be loaded." I essentially cannot log on,does anyone know how this can be fixed/where I can go to get it fixed?I'm beginning to panic
— Fiftee The G🔴⚪ner (@TeeMaIzzy) December 11, 2018
Remember that the causes can vary from corrupted user profiles to system updates, so trying different methods might be necessary. Although Microsoft has not provided an official statement regarding this issue, the methods mentioned above will be sufficient to solve the problem.
Relevant Articles:
- How To Fix Windows Update Error 0xc1900223?
- How To Fix Windows 10 “Diagnosing Your PC” Error
- Windows 11: Computer Won’t Wake Up From Sleep [SOLVED]
- How To Fix Shift F10 Not Working In Windows 11
Thank you! Please share your positive feedback. 🔋
How could we improve this post? Please Help us. 😔
[How To’s & Guides Editor]
Haddi has been in the Gaming and tech Space for over 10 Years Now; he has worked on notable websites like eXputer, Gamepur, Gear Siege, Gearnuke, and plenty more. He is an expert at Games & PC Hardware; you can expect him to solve any problem. People often joke, that if there is any problem anyone can solve, Haddi can solve it faster. Currently, Haddi writes and manages a Team of Experts at Tech4Gamers.
Contact: Haddi@tech4gamers.com


